Daily Archives: August 14, 2012

Some of the pipes I have carved over the years


I thought I would post some pictures of the pipes I have carved over the years. Some are better than others and many are no longer in my collection as I have given them to friends. I post them here on the blog to show some of the possibilities with finishes – smooth, rusticated and semi rusticated – and with various stains and also as naturals.

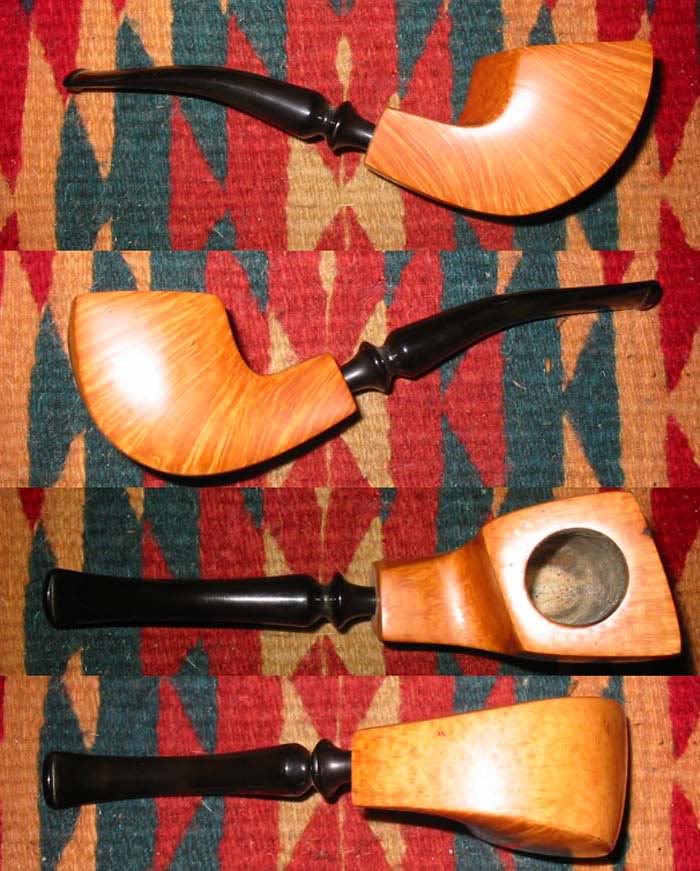
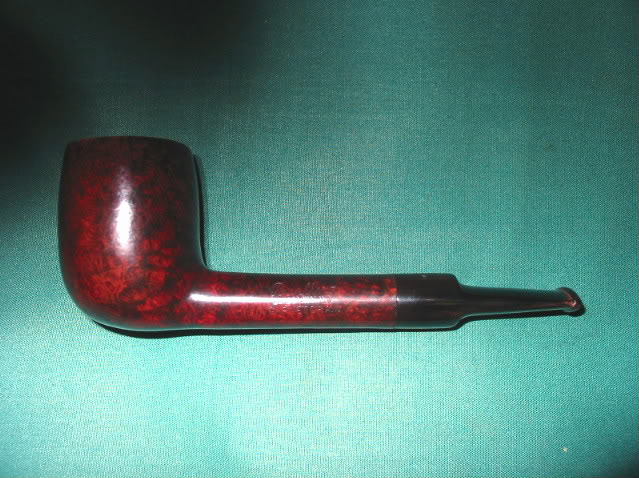
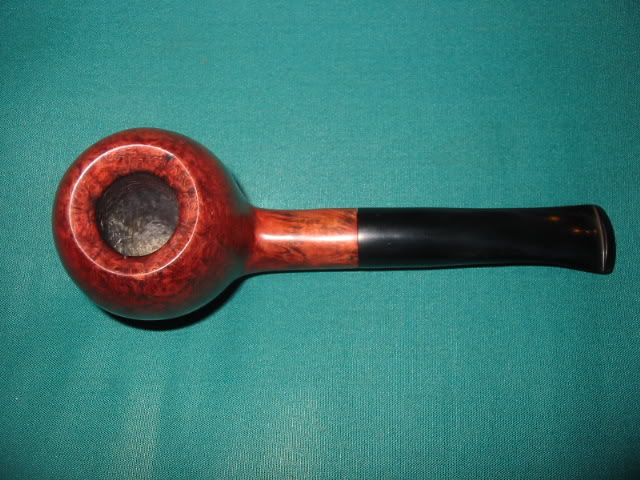
Pipe #1 (only in terms of pictures not in terms of creation). A quarter bent ball or apple with a chamfered rim. The stains include a black under stain and a medium brown over stain.ImageImage

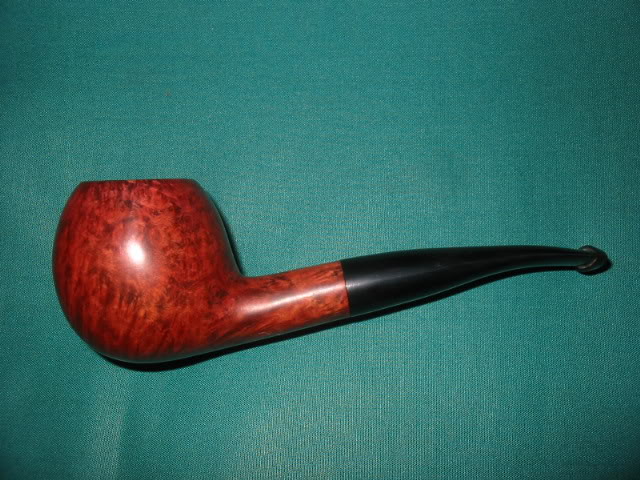
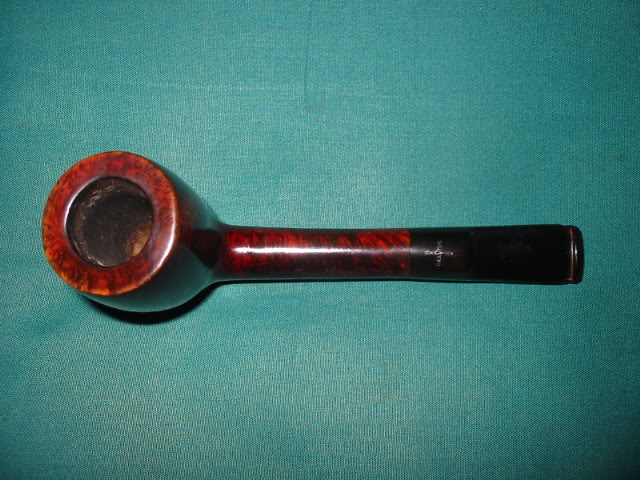
Pipe #2 – A ¼ bent tadpole. This is a great smoker and very light weight. The stains are a contrast of reds and browns.

ImageImage

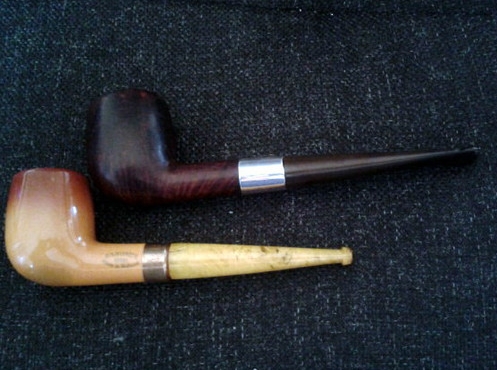
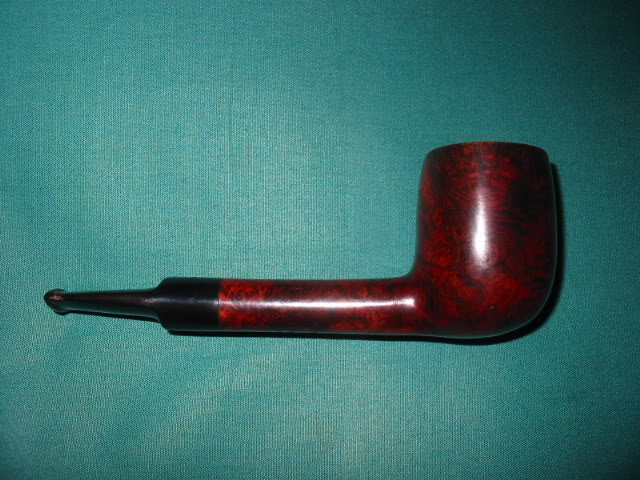
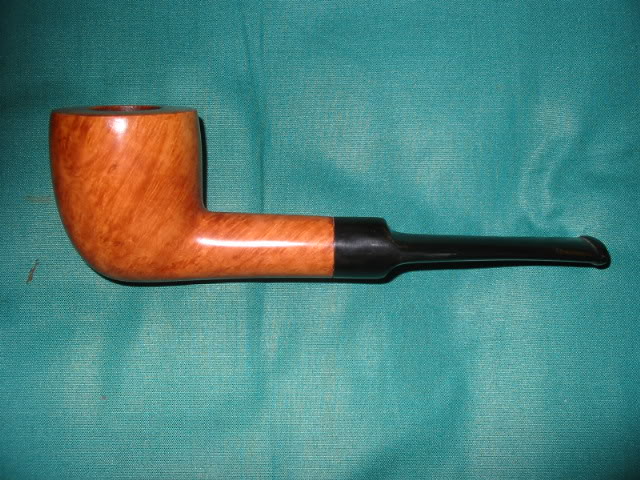
Pipe #3 – A saddle stem Dublin with a Medium Brown stain

Image

Pipe #4 – a ¼ bent Tomato. This one is rusticated to look like old leather. The undercoat is black stain then it is buffed and given a top coat of Medium Brown stain.Image

Pipe #5 – A semi rusticated apple. The bottom of this pipe is plateau briar and the rustication carries that theme upward to mid bowl. The rustication has a black understain and a medium Brown top coat. The smooth portion is medium brown. Image

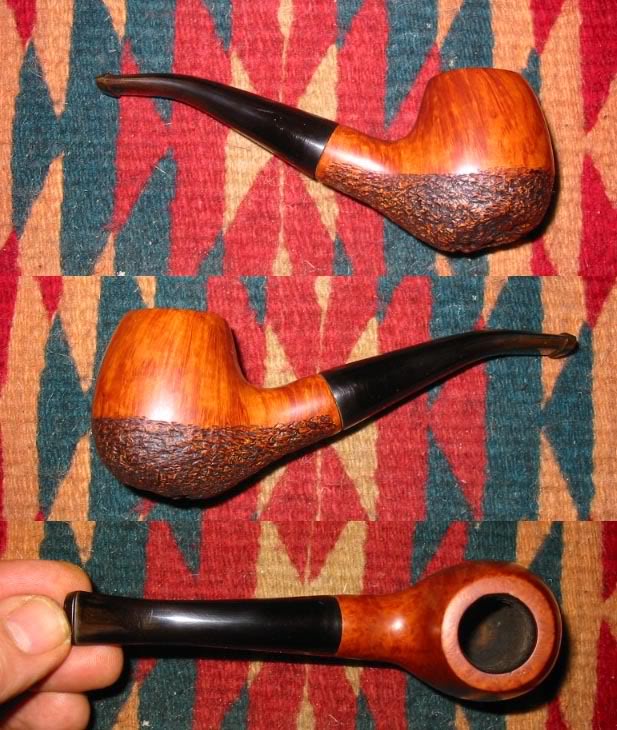
Pipe #6 – A Canadian with a leaf pattern carved over a flaw in the briar. The stain is a Medium Brown.Image

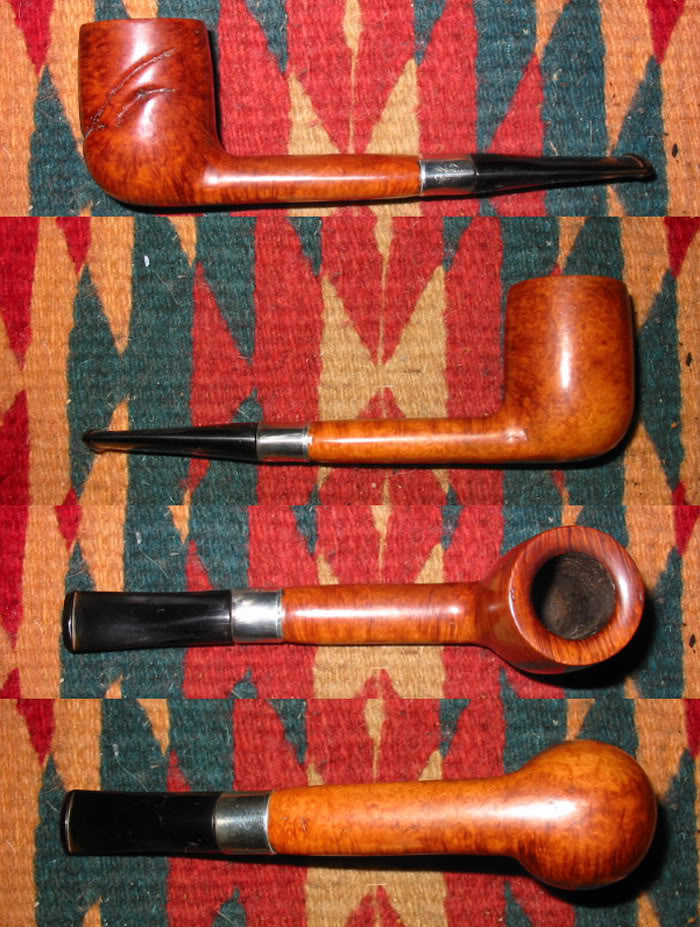
Pipe #7 –a bent Dublin. On this one I used a medium brown stain. I had Stephen Downie help me with the shank extension and work on this one. Image

Pipe #8 – Volcano shape with plateau on the bottom. This one has a black understain to highlight the beautiful grain and then a medium Brown overstain. The stem is a modified saddle.ImageImage

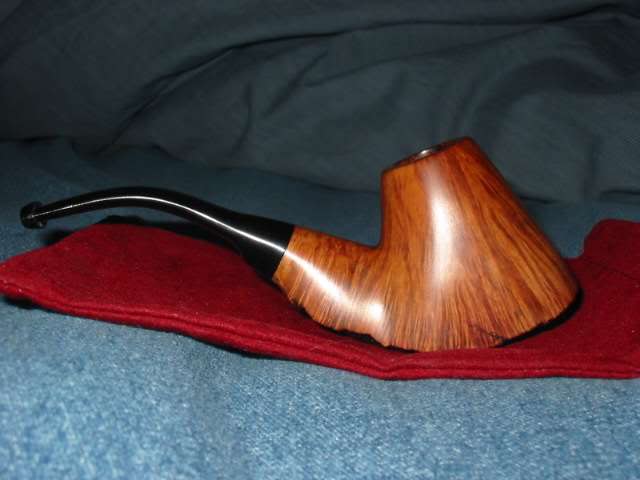
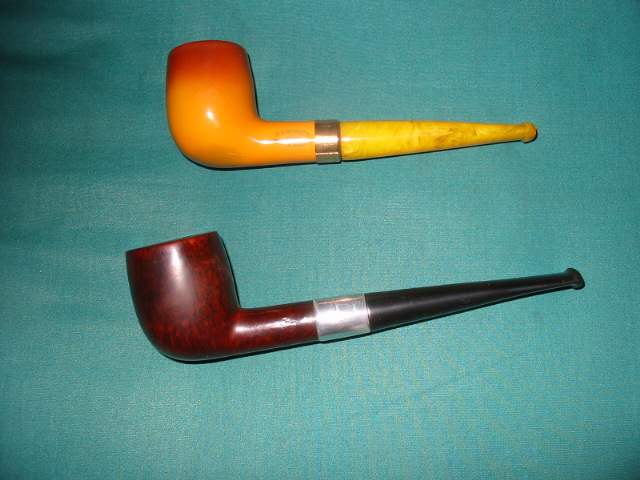
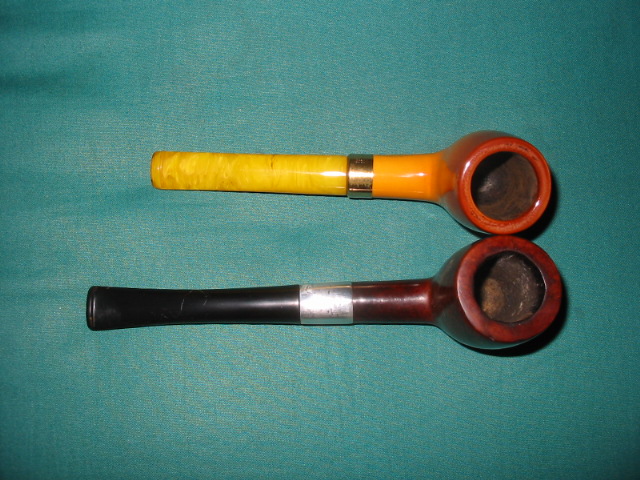
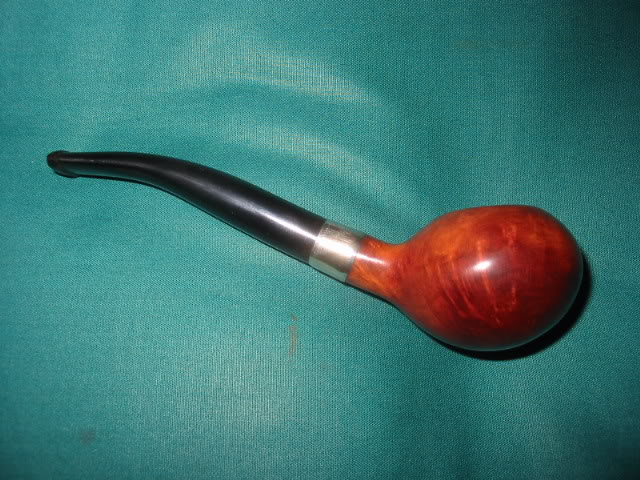
Pipe #9 – ¼ bent egg. This one is stained with a black understain and then a tan overstain. The grain is very interesting on it.Image

Pipe #10 is a natural Dublin with no stain. Many coats of carnauba wax were applied. The band is a brass pressure fitting that I shaped to give it character. Image

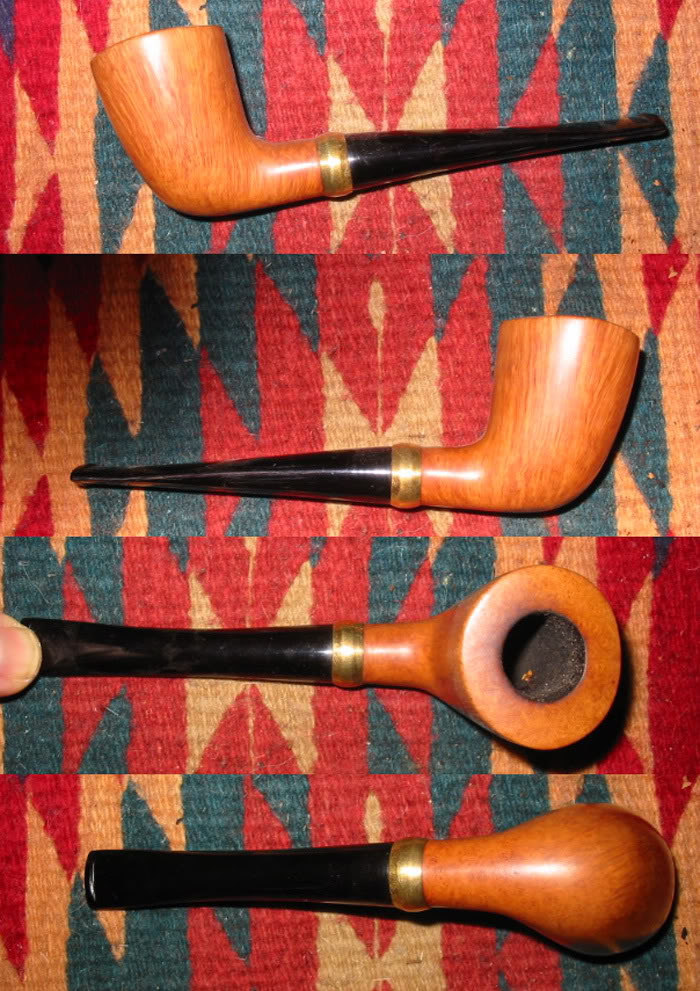
Pipe #11 is a poker with a mix of rustication and smooth. It was stained with a medium brown stain. And waxed with carnauba. Image

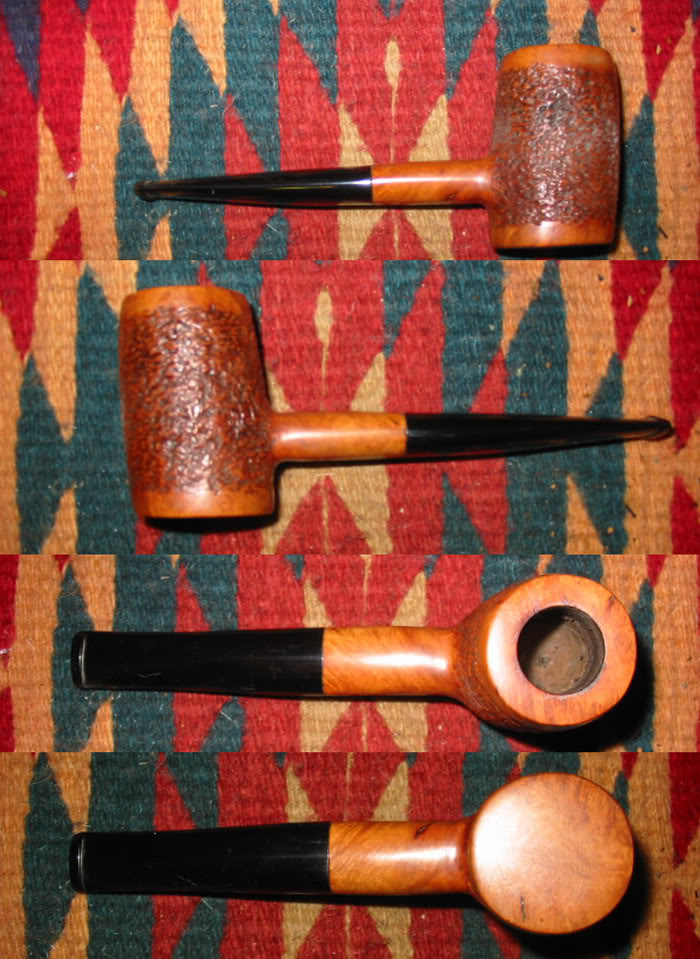
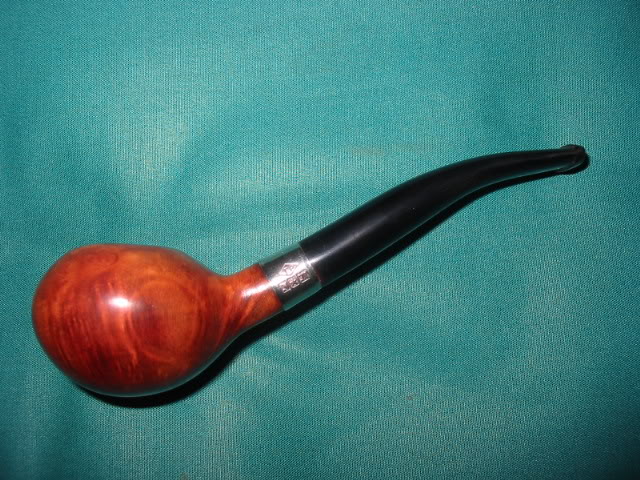
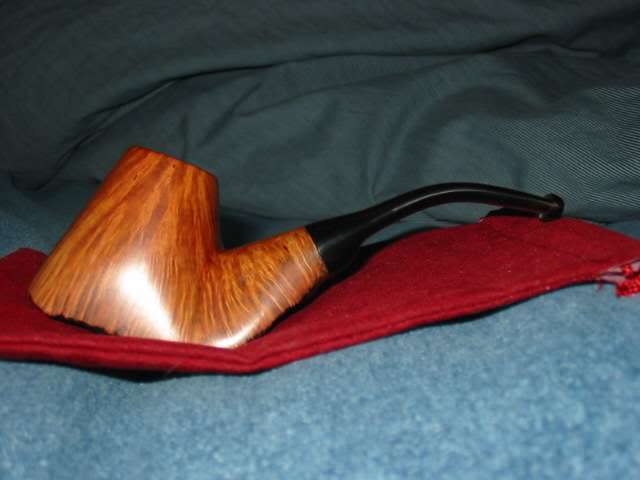
Pipe #12 is a fanciful freehand that I did to highlight the amazing grain that flows along the pattern. This one is also natural in terms of finish – no stains were used. Just wax.Image

Reclaimed – an Old Baronite Ceramic and an Old Briar


Blog by Steve Laug

When I saw this pair of old pipes on EBay I was intrigued enough to put in a bid. I did not bid high as I was intrigued not captured by them. As I looked at them the upper pipe had some interesting possibilities in grain and the shape of the stem and angles looked old to me. The bottom pipe fooled me a bit – when I first looked I thought it might be a meerschaum with an amber stem. But after bidding and a bit more digging on the internet I found that it was a double walled ceramic pipe and the stem appeared to be Bakelite. I found out that I had bought these pipes when I got home from work that evening. They would arrive soon and I would have the pleasure of working on them.Image

When they arrived I took time to look them each over to get a feel for what needed to be done to bring them back to service. Looking over the briar pipe first I could see that it is old. The stem style and the orific button point to an older pipe. The silver band has no hallmarks or stamping so it is no help in identifying the pipe’s brand or age. The stamping on the shank is too faint to see even with a bright light and a jeweler’s loupe for magnification. The bowl was thickly caked and much of the tars of the tobacco were built up on the rim. It appeared that the rim was not damaged with char or denting. The finish, as can be seen in the photo below as very dirty and darkened with oils from the hands on the sides of the bowl. The stem had deep tooth marks and much chatter from teeth along top and bottom from the button up about a ½ inch.

The second pipe was a double walled ceramic pipe. It was stamped Baronite Made in Holland. The outer surface of the bowl was dirty and darkened with what appeared to be grease. The band on it appeared to be a golden colour under the dirt. The stem was in pretty good shape but the cork seal on the tenon was dry and thus loose in the shank. The inside of the bowl was caked and black. The shank was also black and dirty. I shined a light into the shank and could see the gap between the walls of the inner and outer bowl. This area was in need of a thorough washing.

On the briar pipe I cleaned and reamed the bowl. The shank was a mess and full of grime and grit. It took many pipe cleaners, a shank brush and isopropyl alcohol before it was clean and the pipe cleaners came out white. The deep tooth marks on the stem were lifted with my heat gun and then sanded smooth. I used 240 grit sandpaper, 400 and 600 grit wet dry sandpaper and then finished the work on the stem with micromesh pads from 1500-6000. While I worked on the stem I had put the bowl in the alcohol bath to soak and hopefully remove the darkened and soild finish. When I took it out of the bath and dried it, I sanded the bowl and restained it with a medium brown aniline stain. I put the stem back on it and then buffed it with White Diamond and polished it with carnauba wax

On the Baronite Ceramic pipe I did a bit of seeking advice and found out that I could flush out the bowl with hot water. I did this at my sink with the water running through the bowl and out the shank. I repeated it the other direction as well. Several times I filled the bowl and shank and shook it to help the water scour between the inner and outer bowl. After about five minutes of this the water came out clear and the pipe smelled clean again. I decided to do the same process with isopropyl alcohol as well and ran it through the pipe both directions for a final cleaning. I used repeated applications of Vaseline on the cork seal on the tenon to soften it and expand it again. Once that was done the stem fit snuggly to the shank. I cleaned the stem with isopropyl alcohol and pipe cleaners and a shank brush to get the dark areas out of the inside of the stem near the button. Once the stem was done I put it on the pipe and buffed the entirety with carnauba wax. The series of photos below show the finished look of the two pipes.ImageImageImage

Refurb – Barling Garnet Grain Lovat


One of the classic shapes that I refurbished lately was this little Barling Lovat. It is stamped Barling in script (Post Trans I believe) then London England in block text under that and a third line – Garnet Grain. The bottom of the shank is stamped with the four digit shape number – 4189. The classic lines of this little pipe, to me show what Barling could do with these shapes. The reddish stain on the Garnet Grain pipes is one of the attractive features of this line of Barlings.

This one came to me in a lot of pipes I picked up along the way and it had obviously been sitting for a long time. The bowl had cobwebs deep inside and a musty smell to it. There was a crumbling cake though it was not thick, just soft. I reamed the bowl and cleaned out the bowl and shank with the usual pile of pipe cleaners and a shank brush with lots of Isopropyl alcohol. The outside of the bowl was spattered with white paint all around and some especially ground in along the shank so I scrubbed it with an alcohol cloth and put it in the alcohol bath.

While the bowl was soaking I worked on the stem. It had tooth chatter and a few light tooth marks that needed to be lifted and sanded out. The stem was badly oxidized and also smelled musty like the bowl. I scrubbed the interior with a lot of pipe cleaners and alcohol until they came out clean. I then tacked the bite marks and chatter with 240 grit sandpaper to smooth them out and followed that with 400 and 600 grit wet dry sandpaper and water. I finished sanding the stem with my usual regimen of micromesh pads from 1500-6000 grit. Each progressively higher  grit polished the stem more. I then took it to the buffer and buffed it with Tripoli and White Diamond being careful around the area that it meets the shank. I would give it a more thorough buffing and polishing with carnauba wax once I put it back on the finished bowl.

After I finished the stem I took the bowl out of the bath and dried it off. I sanded it with micromesh 2400 to 6000 grit to polish and remove any scratching and then restained it with an oxblood aniline stain that matched the colour that it had before. Once dry I put the stem on it and took it to the buffer and gave it a light buff with White Diamond and then multiple coats of carnauba wax. It is a perfect sized little Lovat in my opinion and spots a classic shape and look. Here are some pictures of the pipe after cleaning. I forgot to take pictures before I started cleaning it. Sometimes I get into a space and just work at them before I suddenly stop and remember that I did not take photos before starting.ImageImageImage