Blog by Anthony Cook
I had never smoked a metal pipe before, but I was curious. I liked the idea of interchangeable bowls, especially when dealing with stronger and “ghostlier” blends (I’m looking at you, Lakelands). So, when this Falcon #4 showed up on eBay I put in a low bid that luckily turned out to be the winning one. I knew from the seller’s photos that the pipe was going to need a bit of work to get it into shape, but I was still in for a few surprises.
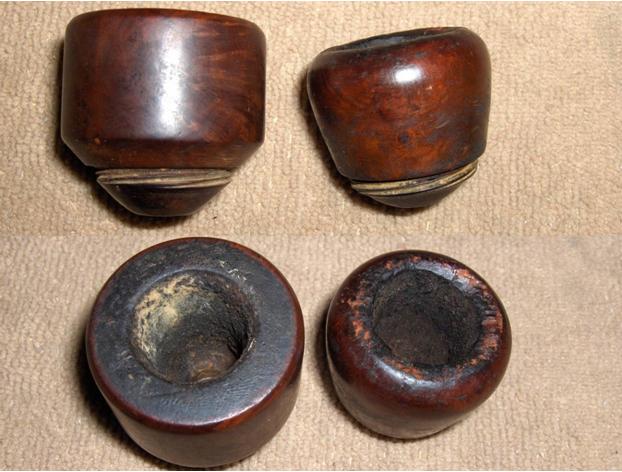
When it arrived, I could see that the aluminum frame was in good shape. There were several small dents and scratches, but nothing that would affect the smoking qualities of the pipe. The nylon stem (or, “bit” in Falconese), however, must have really suited someone’s taste because had been chewed so badly that it was crushed and the airway was almost completely closed. The larger, pot-shaped bowl was in fair condition with some tar build-up and a few scratches on the rim, but the smaller Dublin/apple-shaped bowl was charred and almost beaten to death around the rim. Luckily, the threads on both bowls were still in good shape and they would screw tightly to the frame.
Here are a few photos of the pipe as it was when it arrived:
 The first order of business was to remove the stem, since there was no way that it would work in its condition. Thankfully, Al (upshallfan) offered to send me another one that was in better shape. Removing a Falcon stem is easier said than done though. They’re intended to be a permanent part of the pipe.
I turned to the forums in the hope of finding someone who had done it before and had developed a reliable removal method. I received several suggestions and tried them all with no luck. In desperation, I decided to try to heat the stem in boiling water. I knew from past experience that nylon would blister and burn all too easily when exposed to high heat, but I thought that this method might heat the stem slowly and gently enough to avoid that risk. Surprisingly, it worked like a charm! After about 20 minutes of submerging the stem in boiling water, not only was I able to remove the stem, but the aluminum smoke tube came out as well. That would make cleaning and polishing the frame much easier. After soaking the frame in alcohol for about 30 minutes, I cleaned out the interior. Without a doubt, this was the easiest cleanup job that I have ever done on a pipe. That’s not to say that it wasn’t dirty. This was obviously a well smoked pipe, but the grime came away easily from the nonporous aluminum. It took only three pipe cleaners (two for the airway and another folded one to scrub the cup) and an old toothbrush (for the threads) to completely clean the frame.
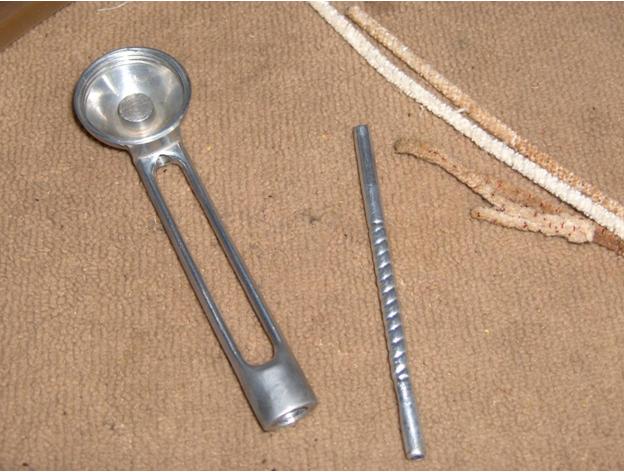 The bowls were next on my to-do list. I reamed them both back to bare wood so that I could see what I was dealing with, and then I placed them in a jar of isopropyl alcohol to soften the build up on the rim and strip the finish. An hour or so later, I removed them and used a soft cloth to scrub away the remaining finish and grime.
I set up my topping surface to sand out the scratches on the rim of the larger bowl and level the uneven rim of the smaller one. I lightly topped the larger bowl first with 220-grit paper, and then with 320-grit until the scratches were gone. I started to top the smaller on the smaller one, but the condition of the rim was so bad that chunks of it began to fall out as I worked. I could see that was going to be a losing battle and decided that if I couldn’t beat ‘em, I’d join ‘em.
I used a Dremel with a sanding drum to bevel the inner rim of the smaller bowl back as far as the deepest gouge. I was only doing some rough shaping at that point to create the general depth and angle of the bevel. Then, I used 220-grit and 320-grit paper to clean things up and further refine the shape. After that, I lightly sanded the surface of both bowls with 220-grit and 320-grit paper to remove most of the scratches and dings.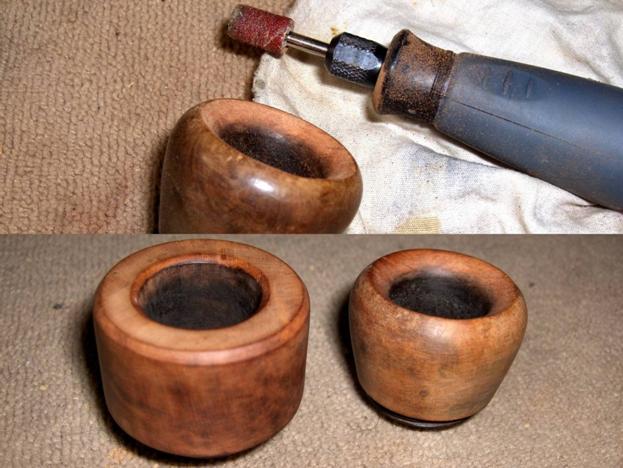 Once the heavy lifting was complete on the bowl cosmetics, I turned my attention back to the stem. The stem that Al had sent me was in much better shape than the original, but it was still badly chewed. It also wouldn’t pass a cleaner, which seems to be an issue with Falcon pipes in general. They make thinner cleaners specifically for Falcons, but I don’t like the idea of having to buy something else just to overcome a design flaw. So, I decided to try an experiment to see if I couldn’t open up the airway and remove much of the chatter all in one shot.
I had noticed earlier that the boiling water had not only loosened the original stem, but it also appeared to raise the dents to some degree. It wasn’t enough to save it, but I found it surprising all the same since I’d had no luck lifting dents in nylon with heat previously. I thought I’d try it again with the replacement stem. I rigged up a simple suspension mechanism with some string, a hex nut, and a wooden spoon, and then put the stem into a pot of boiling water. After nearly about 40 minutes of being submerged, there was some slight improvement but not enough to make much difference. So, I called an end to the experiment and decided that the method wasn’t worth the effort. I have a suspicion that there was some harm done to the stem with this method however, and I’ll talk more on that later. The constriction in the airway extended about ¼” behind the button. So, I decided to drill the airway out from the slot end. The airway was so tight that I had to start cutting through with a 3/64” bit and work my way up to a 3/32” bit. I tested the draw and it was good, and then I tested with a cleaner and it would pass, but it still needed a bit of force to get through the tight area. The stem wouldn’t take a larger bit, however, and I had to be satisfied with what I had. I finished up the work on the airway by cleaning up the slot and giving it a slight funnel with some sandpaper, needle files, and sanding needles.
In the photo below, you can see one of the drill bits chucked into a Dremel, but I never actually used the motor. That would likely have been a disaster. Instead, I used the Dremel to stabilize the bit while I turned the stem over it. The mechanics of the stem had been addressed and it was time to start working on the cosmetics. I used a course, flat needle file to score the surface of the stem, applied black CA glue to the indentations, and sanded it back with 220-grit paper once it was dry. Then, I began to rebuild the button. I wrapped clear tape around the area behind the button to create a sharp edge and applied more CA to the button to build up the surface. I used 220-grit paper to sand the CA back and start shaping the button after it had completely dried. When the shape was vaguely buttonish, I began to clean the edges and remove more chatter from the stem, first with 320-grit, and then with 400-grit paper.
 I lightly sanded the entire surface of the stem with 600-grit and 1200-grit paper to smooth it out and remove the seams and molding artifacts from the sides. Then, I polished the stem with Micro-Mesh pads 1500-grit through 12000-grit and used a drop of mineral oil to lubricate the stem between every three grits.
Remember when I mentioned something about the heat of the boiling water doing harm to the stem? This is where that comes into play. I had noticed that the stem felt different under the paper as I was sanding it. The higher the grit, the more noticeable it became. The surface felt normal to the touch, but it kind of grabbed at the sandpaper and pads and gave some resistance as they slid across, almost like it was gummy. It was unlike any nylon stem that I had ever worked with before and I believe that submerging it in boiling water changed the surface in some way. I’m just making a guess, of course, but in the end I wasn’t able to achieve the level of glossy shine that I had with previous nylon stems and I doubt that I’ll be trying the boiling method again. You can see the finished stem in the photo below.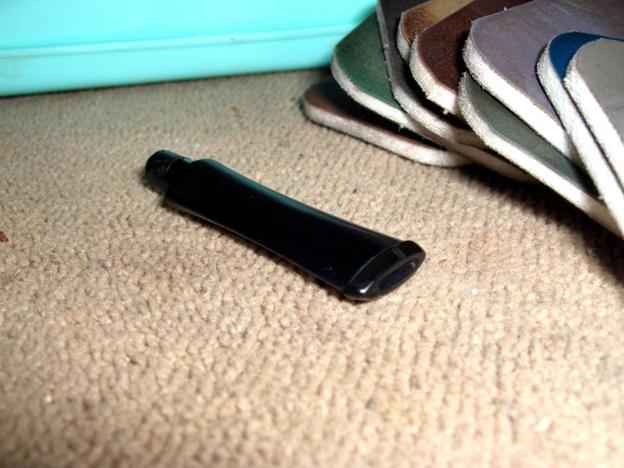 The stem was out of the way. So, it was time to get back to the bowls and start wrapping this pipe up. I wanted each bowl to have a slightly different color. So, I used a heat gun to heat the briar and open the grain, and then applied a 3:1 mix of isopropyl alcohol and Fiebing’s dark brown dye to the larger bowl and the same ratio with mahogany dye to the smaller bowl. After hand buffing with a soft cloth and sanding the surface of both bowls with 400-grit and 600-grit paper to remove most of the dye except for what was in the grain, I gave the larger bowl a medium brown stain and the smaller one an oxblood stain using the same ratio of stain to thinner as before. Then, I hand buffed again and sanded each bowl with 1200-grit and gave them both a light Tripoli buff. Both bowls received one final stain; buckskin for the larger one and British tan for the smaller. They were hand buffed again to remove the excess stain, and then polished with Micro-Mesh pads 3200-grit to 12000-grit.
Before reassembling the pipe, I polished the frame with Semichrome polish and buffed the stem and bowls with White Diamond compound on the buffer. I put everything back together (it went easily) and applied several coats of carnauba wax with the buffer. Finally, I applied a bowl coating to both bowls to give them some protection until they could build a little cake. You can see the completed pipe in the photos below.


 And here are a couple of shots of the other bowl…
 I’m still not happy with the stem on this one and I’m sure that I’ll be replacing it sometime in the future when there aren’t other pipes that need attention. For now, though, it serves its purpose well. I’ll admit that I was a little skeptical of the metal pipe concept, but this pipe smokes wonderfully and I can see many more Falcon bowls and a few more metal pipes in my future. Thanks for checking it out!

Pingback: Invasion of the Viking – The Pipe Medic
Sweet refurb!
LikeLike
Nice job Anthony. You really brought it up to shine in the stem and colors on the bowls. Very nice indeed!
LikeLike
Thank you, John!
LikeLike
Great work on that Anthony. The bevel on the rim is amazing. I always do that by hand now I have to try it with my Dremel and see what I can do. Well done.
LikeLike
Thanks, Steve. I usually do that type of work by hand too. That bowl was an extreme case though and there was a lot of material to be removed. The Dremel just made things go a little faster.
LikeLike
Beware using products that contain Ammonia (such as simichrome) for polishing aluminum stems of pipes! Look up “Old Man Things” tragic story if you read this.
LikeLiked by 1 person
I should add that other polishes may not contain ammonia, but other harmful chemicals. I used Nigrin metal polish on my falcon. It contains C10-C13 aliphatic hydrocarbons and ethanolamine. Less bad, but cleaning with hot soapy water, isopropyl alcohol and letting it sit for a week are recommended!
(I am by no means an expert and would love someone’s qualified input on this/to be corrected)
LikeLike