Blog by Steve Laug
I have had the last Dunhill from Farida’s Dad’s estate sitting on a cupboard behind my desk and every time I sit down I look at it and think that I need to finish it up. I sold the rest of the estate and purchased this one myself so that I could have some time to work on it. Yes you are right, read between the lines – I wanted to put off working on it. Well, this morning I sat down at the desk and posted a couple of blogs and then turned and there it was looking at me. I decided then and there to pick it up and do the work to finish this estate.
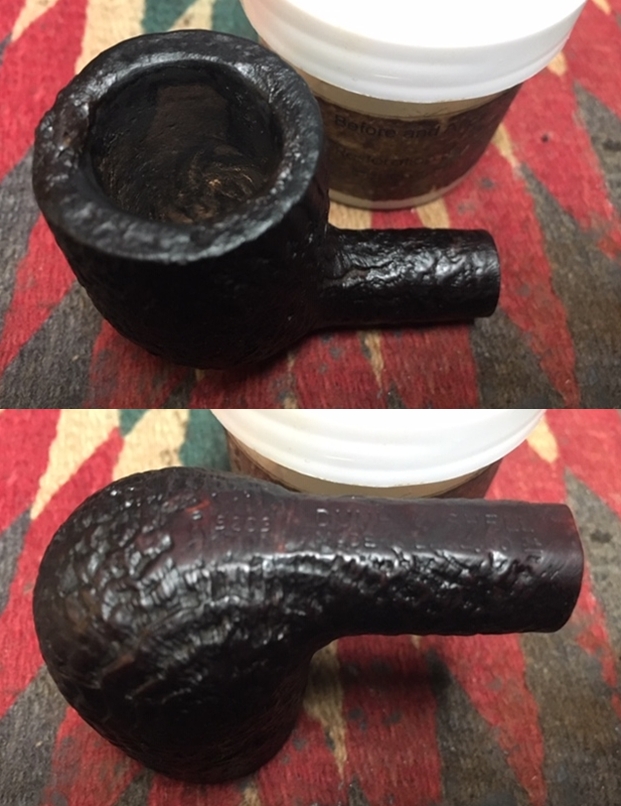
The pipe came from the estate of an elderly gentleman here in Vancouver. I met with his daughter Farida over a year ago and we looked at his pipes and talked about them then. Over the Christmas 2017 holiday she brought them by for me to work on, restore and then sell for her. There are 10 pipes in all – 7 Dunhills (one of them, a Shell Bulldog, has a burned out bowl), 2 Charatan Makes, and a Savinelli Autograph. This is the last of the lot – a lone Dunhill Billiard with a saddle stem. His pipes are worn and dirty and for some folks they have a lot of damage and wear that reduce their value. To me each one tells a story. I only wish they could speak and talk about the travels they have had with Farida’s Dad. The first photo shows the underside of the shank and its virtual illegibility under the tars and filth on the finish.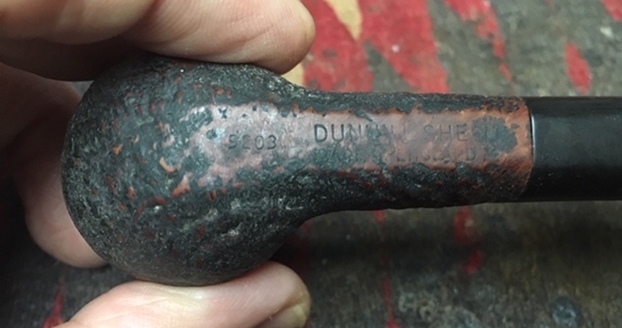 You can see from the above photo the challenge that the pipe I am working on today will be. The stamping identifies it as a Dunhill Shell Billiard with a saddle stem. It is stamped on the underside of the heel and shank on a smooth flat area. On the heel is the shape number, a 4 digit number – 5203. I looked on Pipephil to get the lowdown on the shape number (http://www.pipephil.eu/logos/en/dunhill/shapes.html). I quote that below:
Dunhill pipes are stamped with a four digit code.
Digit 1: (from 1 to 6) denotes the size of the pipe (the group).
Digit 2: denotes the style of the mouthpiece (0,1=tapered, 2=saddle)
Digit 3 and 4: denote the generic pipe shape (in yellow in the chart on top)
Example: 5102 — (5 = size | 1 = tapered stem | 02 = Bent)
When 5 digits occur, the meaning of the 4 first remain the same
The one I am working on, 5203, is thus a SIZE 5 (Group 5), saddle stem (2) billiard (03) shaped pipe. The rest of the stamping is DUNHILL SHELL over MADE IN ENGLAND with the underlined superscript 34 after the D in ENGLAND. The number 34 tells me the date the pipe was made 1994.
My work on each of these pipes has already caused a lot of discussion on the Facebook Tobacco Pipe Restorers Group. The ongoing debate of Restoration vs. Preservation has filled a lot of ongoing airtime on the group. I do not care to relive or recount that as I am only following the directives of the daughter of the original deceased pipeman. She wanted them restored to usable condition so others can carry on her father’s love of these pipes. She is quite happy with the finished results and others of his pipes are now all over the world being enjoyed by the next generation of pipemen.
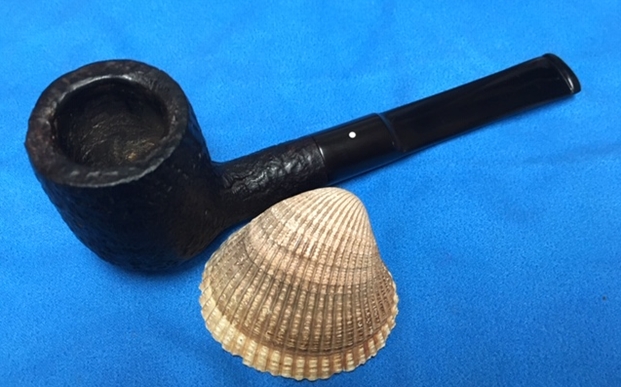
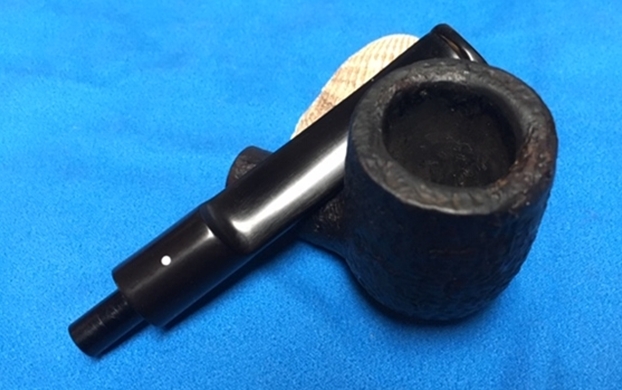
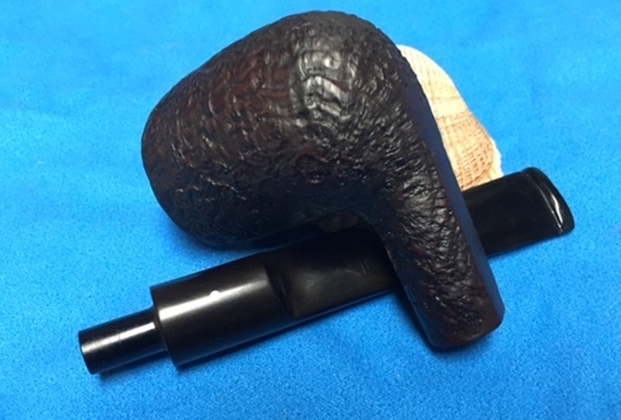
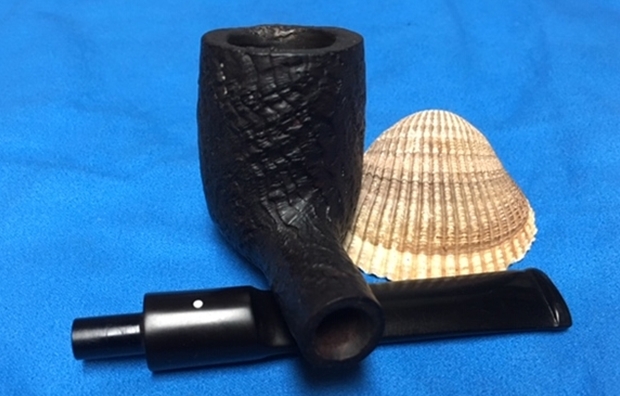
When first looked at the pipe here is what I saw. The bowl was thickly caked and the cake had flowed over onto the sandblast finish on the rim top forming hard lava that made the top uneven. There was a serious burn mark on the front edge of the bowl causing the rim to have a dip in the surface. It was hard to know if there was damage to the inner edge of the rim and I would not know until I removed some of the grime. The outer edge looked far very good all around the bowl except for the front. The finish was invisible under the thick coat of oils and grime that covered the bowl and shank. In fact at this point I had no idea what the stamping looked like because it was covered. I have wondered as I cleaned the other pipes in this lot if the oily build up was just a part of the life lived in the Antarctic. The stem was oxidized and very dirty. There was a thick sticky, oily substance on the surface of the stem and a calcification that I could scrape with my fingernail. There were tooth marks and chatter on both sides in front of the button as well as damage to the edges of the button. I took photos of the rest of the pipe to show what it looked like before I started the cleanup work.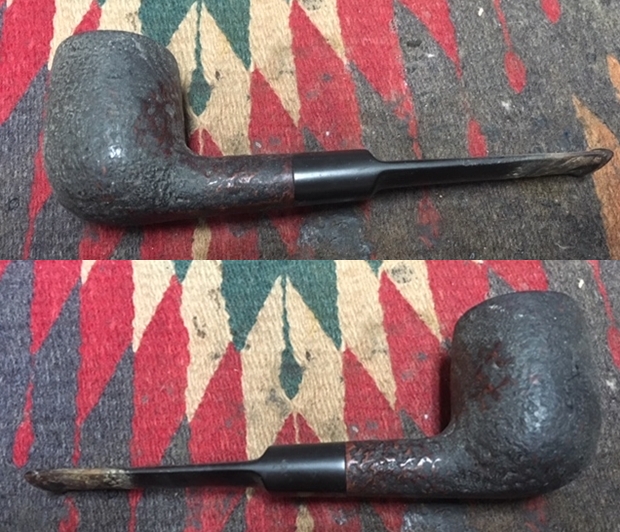
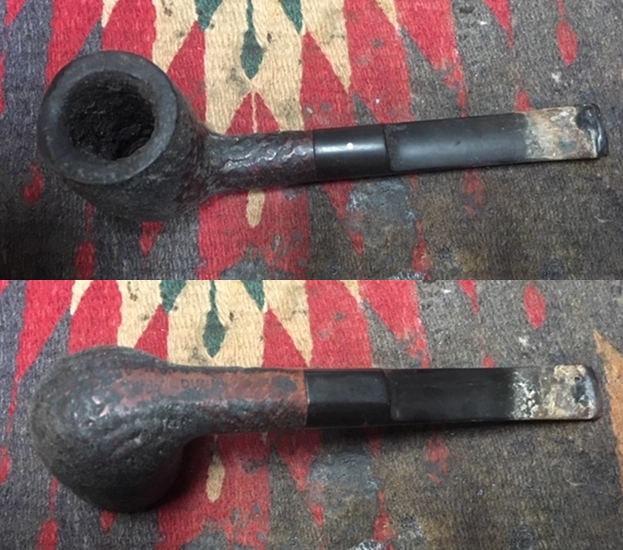 I took close up photos of the bowl and rim top as well as the stem. You can see the condition of the rim top and bowl in the first two photos. The damage to the rim top and the front outer edge is very visible even under the grime and lava. The inner edge looks like it has some damage on the backside. I won’t really know the full story until I remove the thick lava overflow on the surface. The stem had tooth chatter and some deep bite marks on the top and the underside of the stem just ahead of the button. The button itself also showed wear and damage.
 It has been a while since I have worked on the pipes that belonged to Farida’s Dad. I thought it might be helpful to remind us all of the background story of these pipes. Here is the material that I quoted in previous blogs. I have included both the written material and the photo that Farida included of her Dad. Here is what she wrote:
My dad, John Barber, loved his pipes. He was a huge fan of Dunhill and his favourite smoke was St. Bruno. No one ever complained of the smell of St. Bruno, we all loved it. I see the bowls and they’re large because he had big hands. When he was finished with his couple of puffs, he would grasp the bowl in the palm of his hand, holding the warmth as the embers faded. The rough bowled pipes were for daytime and especially if he was fixing something. The smooth bowled pipes were for an evening with a glass of brandy and a good movie. In his 20s, he was an adventurer travelling the world on ships as their radio operator. He spent a year in the Antarctic, a year in the Arctic and stopped in most ports in all the other continents. He immigrated to Canada in the mid-fifties, working on the BC Ferries earning money to pay for his education. He graduated from UBC as an engineer and spent the rest of his working life as a consultant, mostly to the mining companies. Whatever he was doing though, his pipe was always close by.
She sent this photo of him with his sled dogs in the Antarctic sometime in 1953-1954. It is a fascinating photo showing him with a pipe in his mouth. He is happily rough housing with his dogs. A true pipeman, he seems oblivious to the cold. Thank Farida for sending the photo and the story of your Dad. I find that it explains a lot about their condition and gives me a sense of your Dad. If your Dad was rarely without a pipe I can certainly tell which pipes were his favourites. In fact the condition of the billiard I am working on now makes me wonder if it is not the one in his mouth in the photo below. As I looked back over all of her Dad’s pipes that I have restored each of them had rim damage and some had deeply burned gouges in the rim tops. The bowls seemed to have been reamed not too long ago because they did not show the amount of cake I would have expected. The stems were all covered with deep tooth marks and chatter and were oxidized and dirty. The internals of the mortise, the airway in the shank and stem were filled with tars and oils. These were nice looking pipes when her Dad bought them and they would be nice looking once more when I finished.
Here are the links to the previous seven blogs that I wrote on the rest of the finished pipes. The first was a Dunhill Shell oval shank pot (https://rebornpipes.com/2018/02/04/restoring-a-1983-dunhill-shell-41009-oval-shank-pot/). The second was a Dunhill Classic Series Shell Billiard (https://rebornpipes.com/2018/02/08/faridas-dads-pipes-2-restoring-a-1990-lbs-classic-series-dunhill-shell-billiard/). The third pipe was a Savinelli Autograph (https://rebornpipes.com/2018/02/15/faridas-dads-pipes-3-restoring-a-savinelli-autograph-4/).The fourth pipe was a Dunhill Red Bark Pot that was in rough shape (https://rebornpipes.com/2018/03/10/faridas-dads-pipes-4-restoring-a-dunhill-red-bark-pot-43061/). The fifth pipe was a Dunhill Root Briar Bent Billiard (https://rebornpipes.com/2018/07/07/faridas-dads-pipes-5-restoring-a-dunhill-root-briar-56-bent-billiard/). The sixth pipe was a Charatan’s Make Distinction https://rebornpipes.com/2018/08/22/faridas-dads-pipes-6-restoring-a-charatan-make-distinction/. The seventh pipe was a Charatan’s Make Belvedere https://rebornpipes.com/2018/12/05/faridas-dads-pipes-7-restoring-a-charatans-make-belvedere-48dc-pot/.
Like most work the refurbisher does, this walks a fine line between restoration and preservation. The deciding feature for me regarding this pipe was the wishes of the family. They wanted the pipe to be cleaned and smoked by someone who could carry on the pipe man’s legacy of their Dad. None of them was interested in the pipes for themselves. They had no desire to keep them and memorialize their Dad and Grandad in that manner. I understand that to work on this pipe the way they wanted meant changing the current state of the pipe to bring it back closer to the way it was when their Dad bought it.
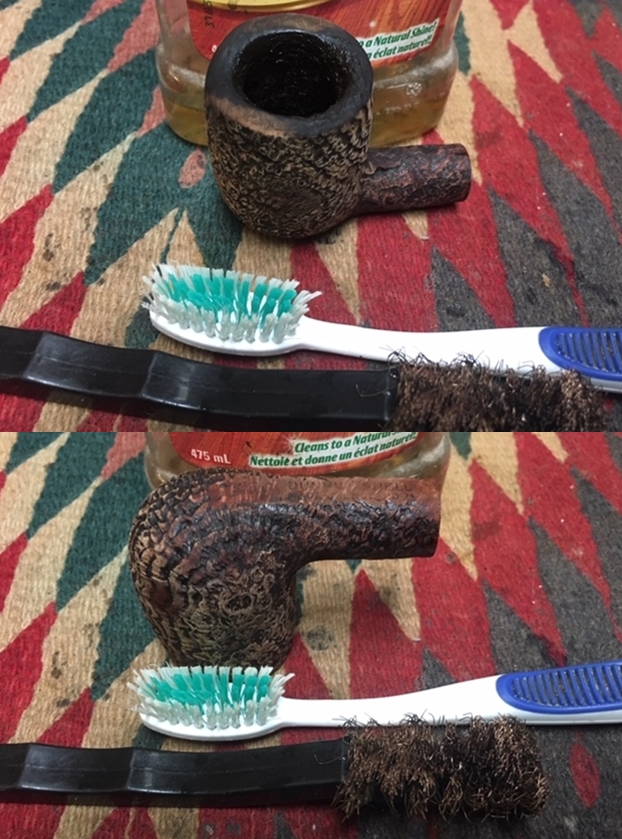
I decided to change things up a bit in the routine on this one. Holding it in my hand to ream and clean was a dirty prospect so I decided to scrub the thick grime off the exterior of the bowl and shank. The grit was deep in the sandblast finish rendering the pipe almost smooth. I scrubbed it with a tooth brush, a brass bristle wire brush and Murphy’s Oil Soap. I worked hard to get the grime out the grooves and crevices of the blast. I also worked on the rim top to remove the tars and oils that had formed a hard lava coat on the rim top. I worked on the burn damage as well on the front top and edge of the bowl. I rinsed the bowl under running water to remove the debris from the scrubbing.
 I reamed the bowl with a PipNet reamer. I used two of the four cutting heads to clean out the cake. The bowl was thickly caked I started with the smaller of the two and worked my way up to the second which was about the same size as the bowl. I cleaned the remnants with a Savinelli Fitsall Pipe Knife and scraped it back to bare briar. I finished by sanding the inside of the bowl with a dowel wrapped in sandpaper. I scraped the top of the rim with the edge of the Savinelli Fitsall Pipe Knife to remove the lava.
 I decided to start with the rebuilding of the rim top the bowl. I wiped the rim top down with isopropyl alcohol on a cotton pad to clean off the damaged areas on the front edge and on the rear inner edge. On the damaged front edge I started by laying down a coat of clear super glue on the gouged out burned area. On top of that I layered some briar dust with a dental spatula. I repeated the process of layer until the damaged area was level with the rest of the rim top. I used the brass bristle wire brush to texture the surface of the rim top over the repaired area to match the rest of the rim. I did the same layering process on the inner edge at the back of the bowl. When I had finished the rebuild I textured that area with the wire brush as well. The photos tell the story of the process.
 I worked over the inner edge of the rim with a folded piece of sandpaper to smooth it out and bring the damaged edges into round. The rim top was beginning to look normal. It would take a bit more texturing but it was looking a lot better.
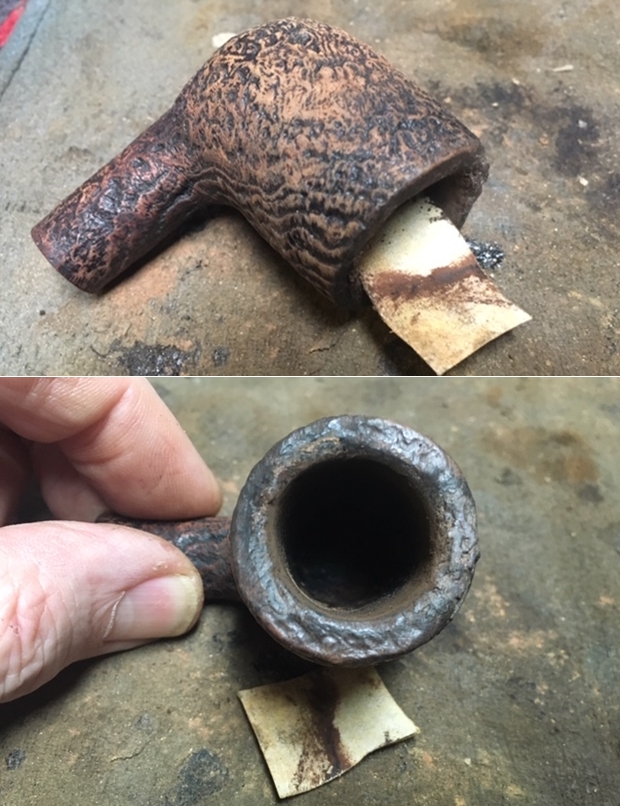 With the externals clean it was time to clean out the mortise and shank and airway into the bowl and the airway in the stem with alcohol, cotton swabs and pipe cleaners. I scraped the mortise with a dental spatula and a pen knife to loosen the tars before cleaning. I worked on the bowl and stem until the insides were clean.
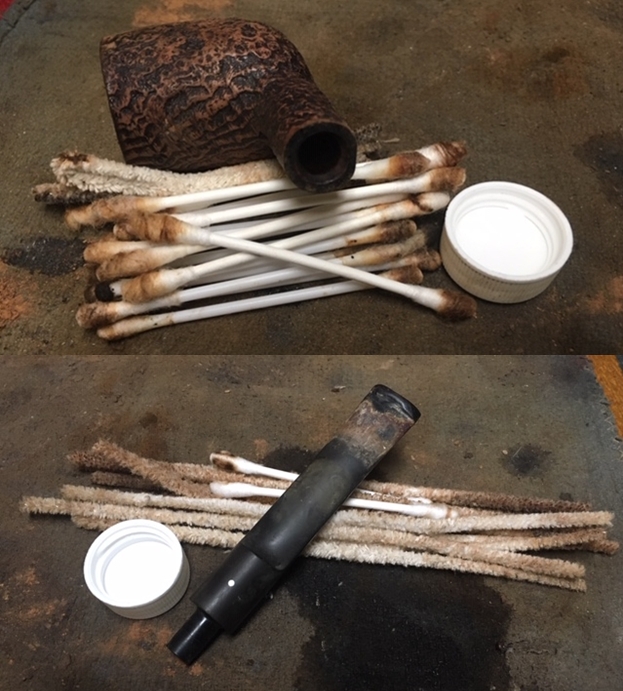 I used a needle file to sharpen the edges of the button on both sides of the stem. I sanded the “crud” off the stem and the tooth marks out of the topside of the stem. The underside would take a bit more work so I spent a lot more time cleaning out the large tooth mark on the stem near the button with sandpaper and alcohol and cotton swabs.
 It took some work to clean out the damaged area on the underside of the stem. Once I had it clear of debris I wiped it down with alcohol. I filled in the deep tooth mark on the underside and the small tooth mark and rebuilt the button on the topside using clear super glue. I set the stem aside to let the repairs cure.
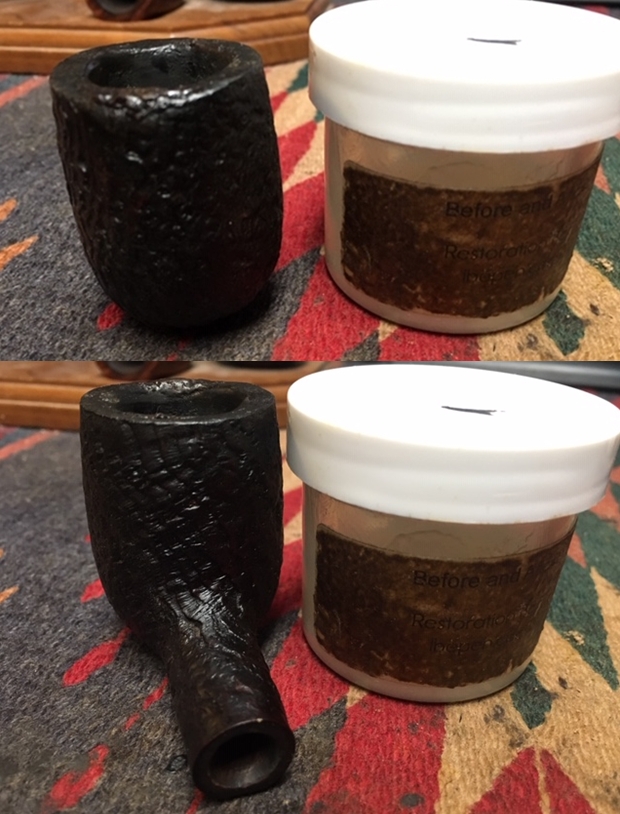
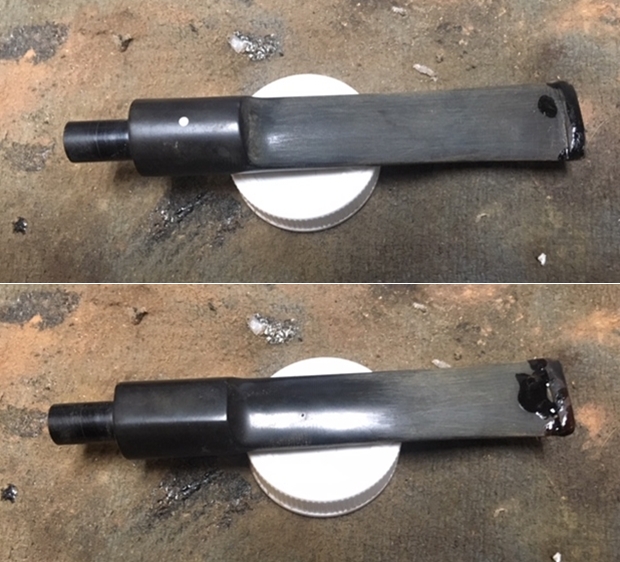 I decided to stain the bowl with a dark brown stain. It would go over the black stain that was in the grooves of the sandblast. Once it had set I would wipe off the excess stain and buff the bowl and rim to get the finish I wanted. The photos tell the story. I applied the stain and flamed it with a lighter to set it in the grain. I repeated the process until I was happy with the coverage.
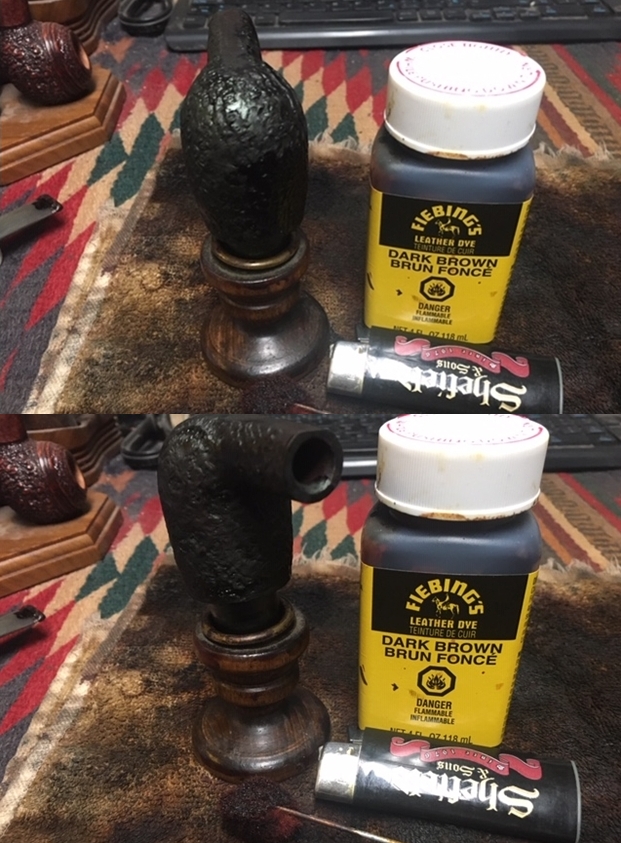 Once the stain had cured I wiped the bowl down with isopropyl alcohol on cotton pads to make it more transparent. I wanted to be able to see the contrast between the dark brown and the black in the crevices of the finish.
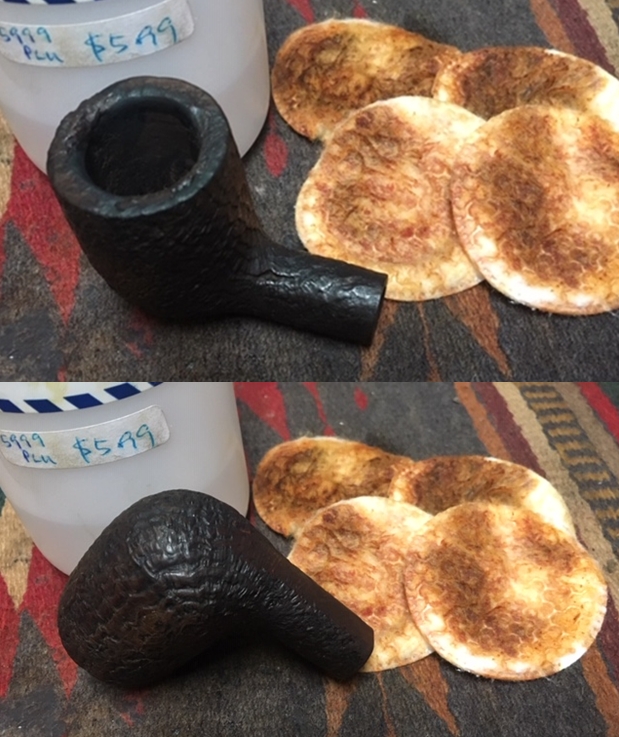 I rubbed down the briar with Before & After Restoration Balm. I worked it into the nooks and crannies of the sandblast finish to clean, enliven and protect the new finish. It also evened out the stain coat and gave the stain a dimensional feel. I let the balm sit for a little wall and then buffed it with a horsehair shoe brush. I buffed the bowl with a cotton cloth to raise the shine.
 I set the bowl aside and turned my attention to the stem. I sanded out the repairs on the stem surface on both sides with 220 grit sandpaper to blend them into the surface of the vulcanite.
 I polished the stem with micromesh sanding pads – wet sanding with 1500-2400 grit micromesh sanding pads and dry sanding it with 3200-12000 grit pads. I rubbed the stem down with Obsidian Oil after each pad. I polished it with Before & After Pipe Polish – both Fine and Extra Fine and buffed it into the vulcanite with a cotton pad. When I finished I gave it a final rub down with the oil and set it aside to dry.
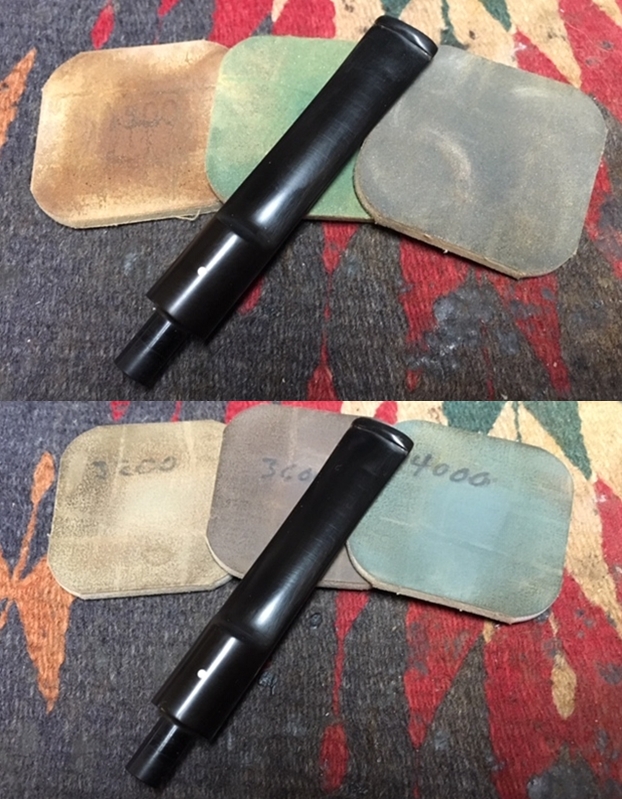
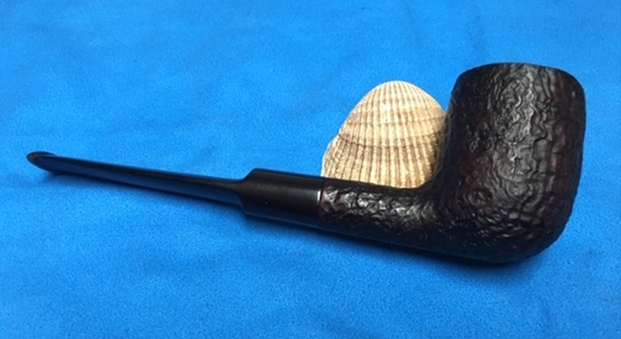
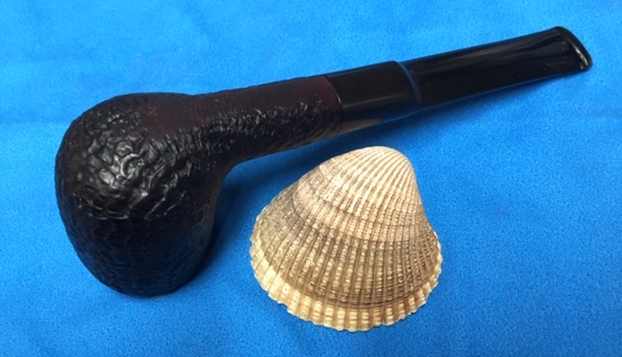
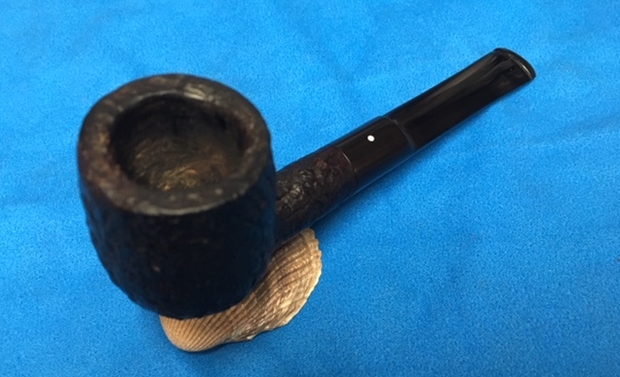
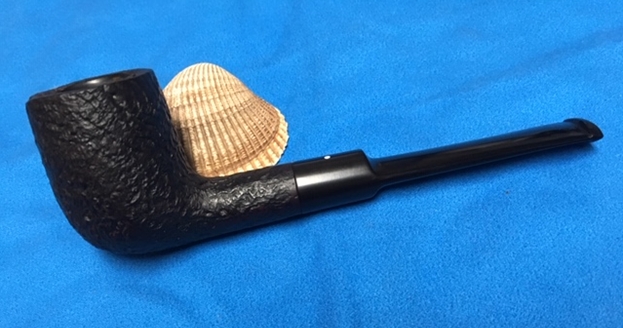
 With the stem polished I put it back on the pipe and lightly buffed the bowl with Blue Diamond. I did not want to get the buffing compound in the sandblast finish. I buffed the stem with a more aggressive buff of Blue Diamond. I hand rubbed the bowl several coats of Conservator’s Wax and the stem several coats of carnauba wax and buffed the pipe with a clean buffing pad to raise the shine. I hand buffed it with a microfiber cloth to deepen the shine. The pipe polished up pretty nicely. The finished pipe is shown in the photos below. This is the last of Farida’s Dad’s pipes that I am restoring from his collection. I am looking forward to hearing what Farida thinks once she sees the finished pipe on the blog. This Dunhill Shell 5203 Billiard will soon be on the rebornpipes store if you want to add it to your rack. The dimensions are Length: 6 inches, Height: 1 7/8 inches, Outside diameter of the bowl: 1 1/4 inches, Chamber diameter: 3/4 inches. Thanks for walking through the restoration with me as I worked over the last of her Dad’s pipes. With the completion of this one I have finished this estate. Thanks for walking through the restoration and reclamation of this lot of pipes. It has been an interesting journey for me and a continuance of my education. Cheers