Blog by Dal Stanton
As things go, the next pipe on my worktable should have been the previous pipe on the worktable except that I got the two Lincoln Real Sand Blasted Billiards mixed up! The first Lincoln, that was just completed turned out great (Releasing a Work Horse Billiard – A Lincoln London Style Real Sandblasted Briar), but I mistakenly thought it was the Lincoln that Byron had commissioned, but it wasn’t. I discovered after completing the London Style, that Byron had commissioned the slightly smaller Lincoln London Made, not the Lincoln London Style which is now available in The Pipe Steward Store – a very attractive Blasted Billiard!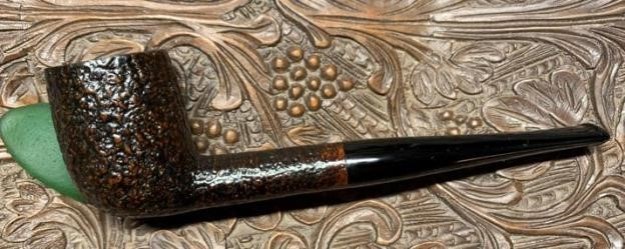 The Lincoln London Made now correctly on the worktable affords me another opportunity to stroll down memory lane. My wife and I were at the Bulgarian coastal city of Burgas on the Black Sea in May of 2017 strolling on the main walking street. We visited a second-hand store that had always provided some nice pipes waiting for me to come by and bring home. I acquired both Lincolns at the same shop in Burgas but on different trips.
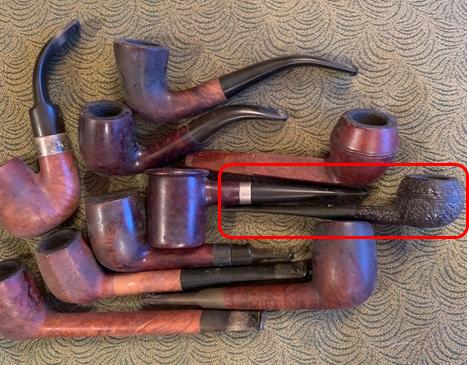
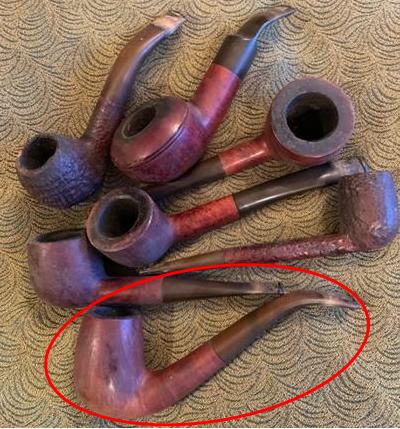
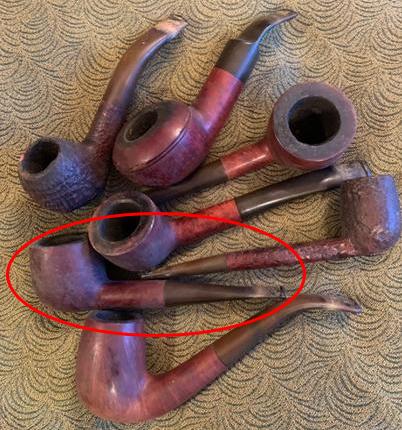
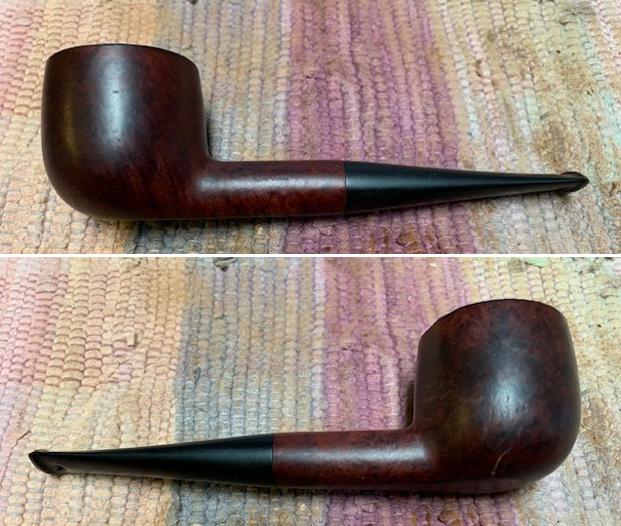
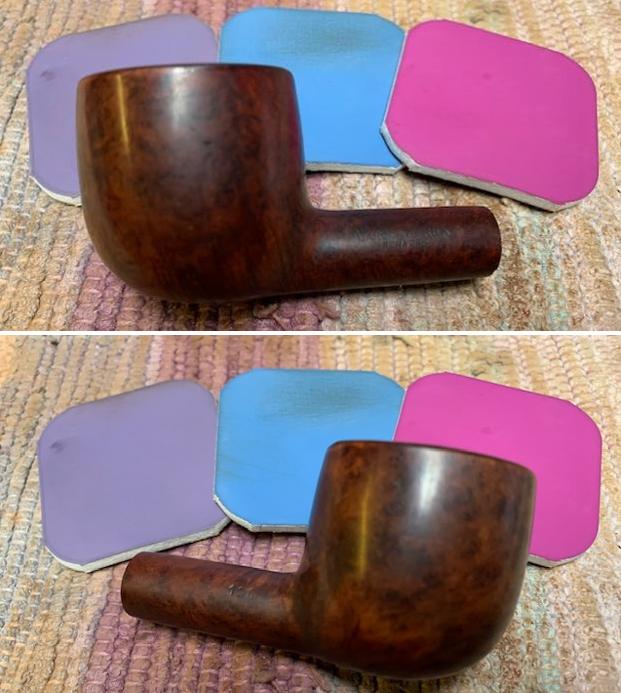
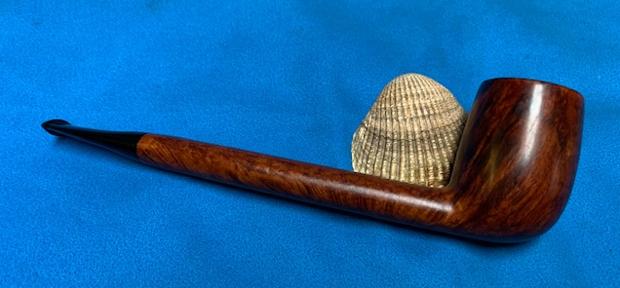
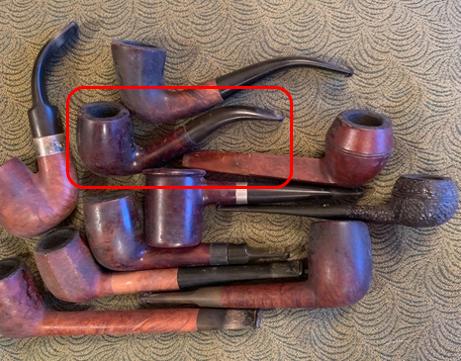
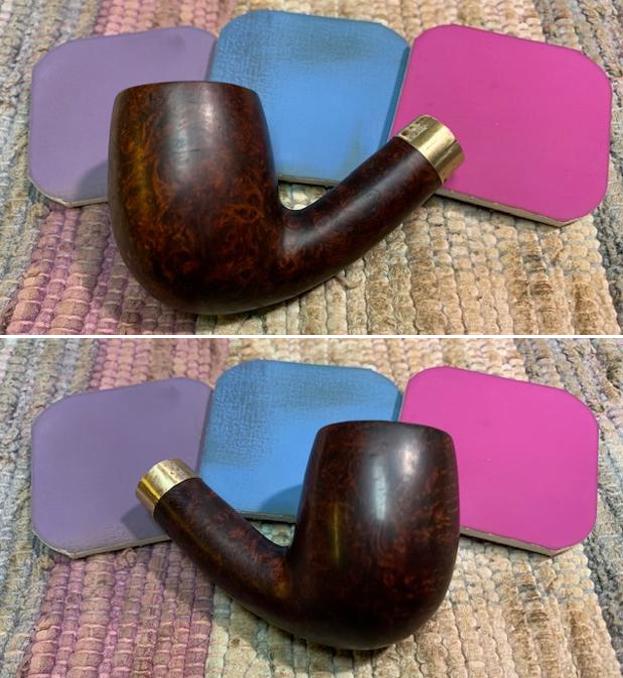
  When I came into the shop on this occasion, I was met with the contents of the copper pot – several pipes competing for my attention! After going through the various pipes in the copper pot, I settled on 5 pipes. After talking with the shop vendor and coming to agreement, we both were happy. After bringing the newly acquired pipes home to Sofia, the 5 were placed in the For “Pipe Dreamers” Only! collection where pipe men and women can commission pipes whispering their names. I believe that 3 of the 5 pictured have already found homes with new stewards. The Lincoln London Made is top center in the picture below between the BC Panel and the Lindbergh Select Poker. This straight Blasted Billiard got Byron’s attention in the ‘Dreamers Collection’ and he reached out to me asking about commissioning the Lincoln along with a few other pipes that were whispering his name.
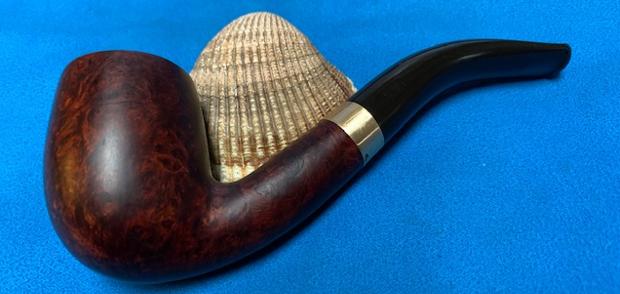
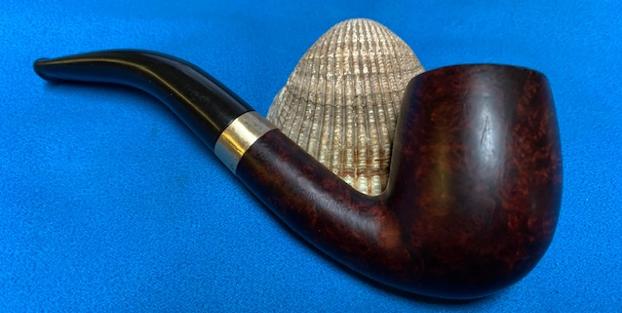
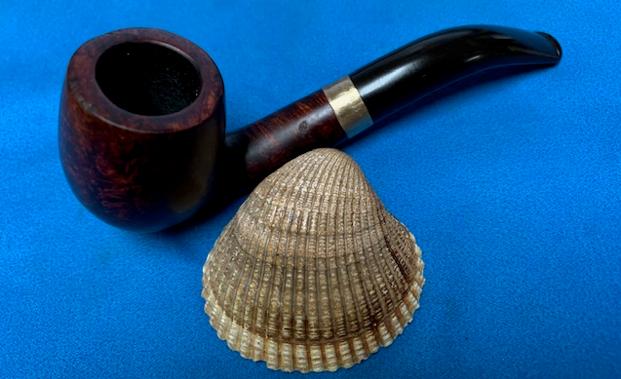
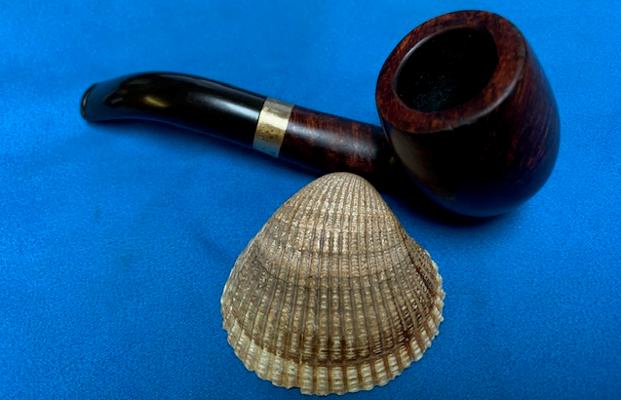
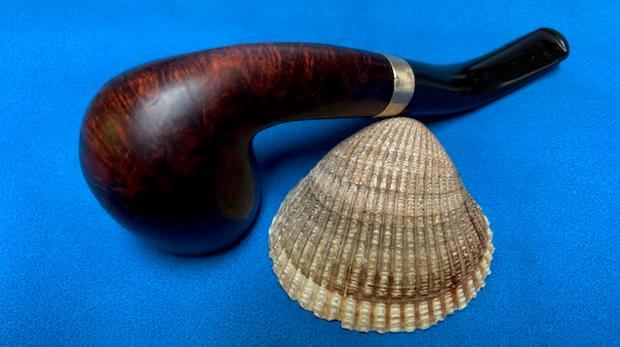
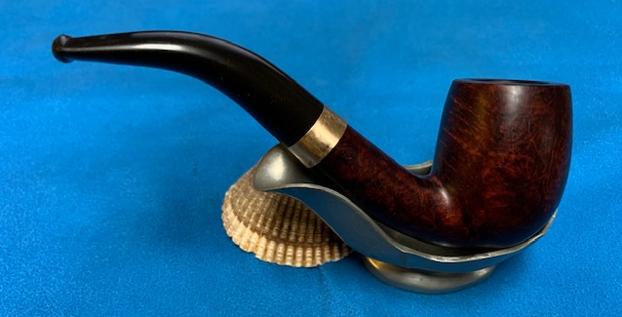
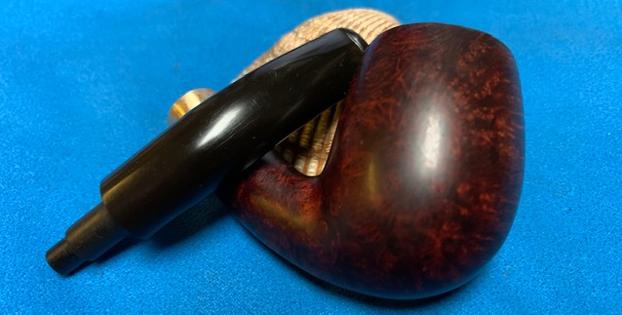
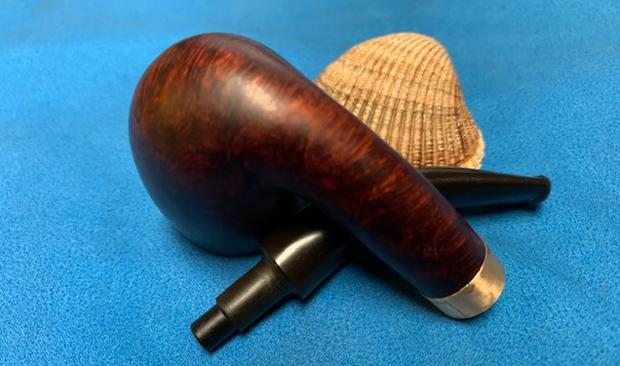
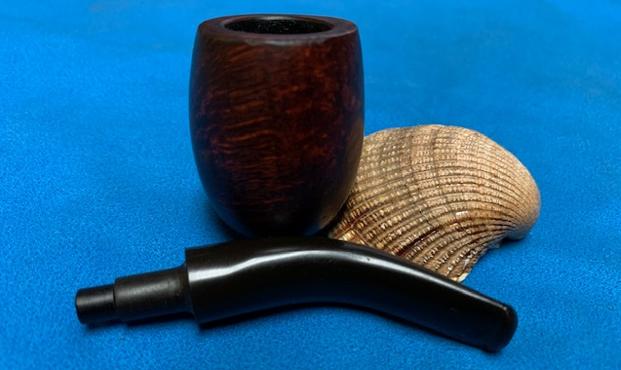
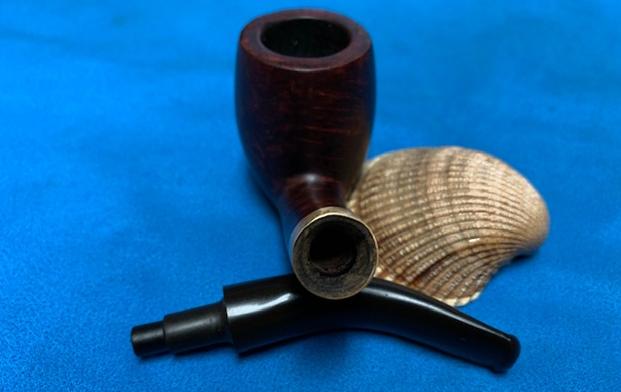
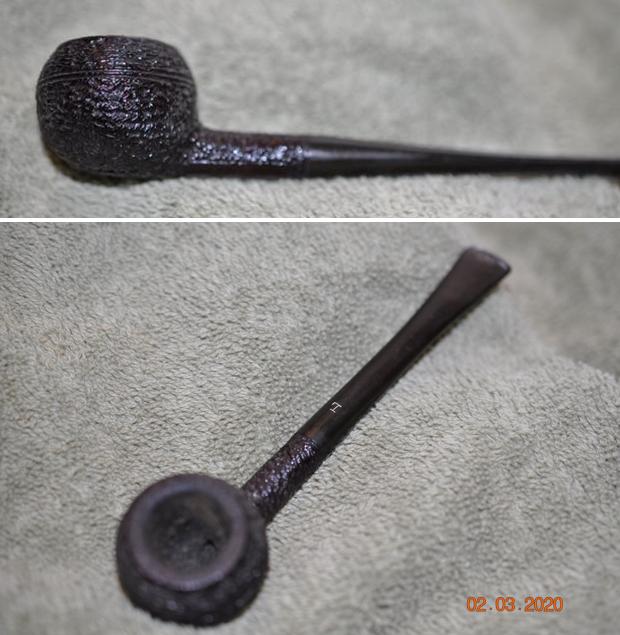
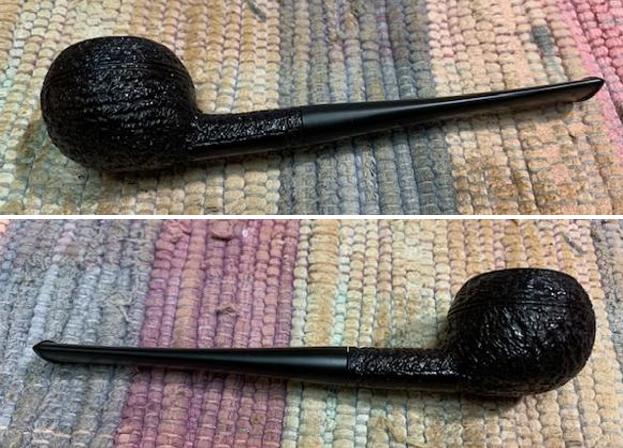
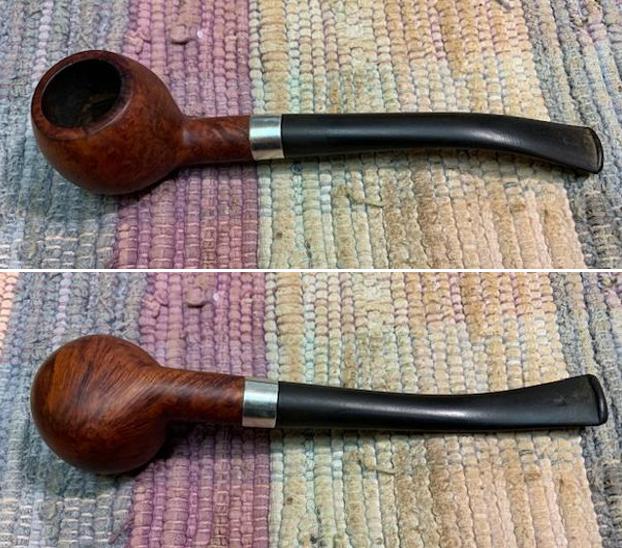
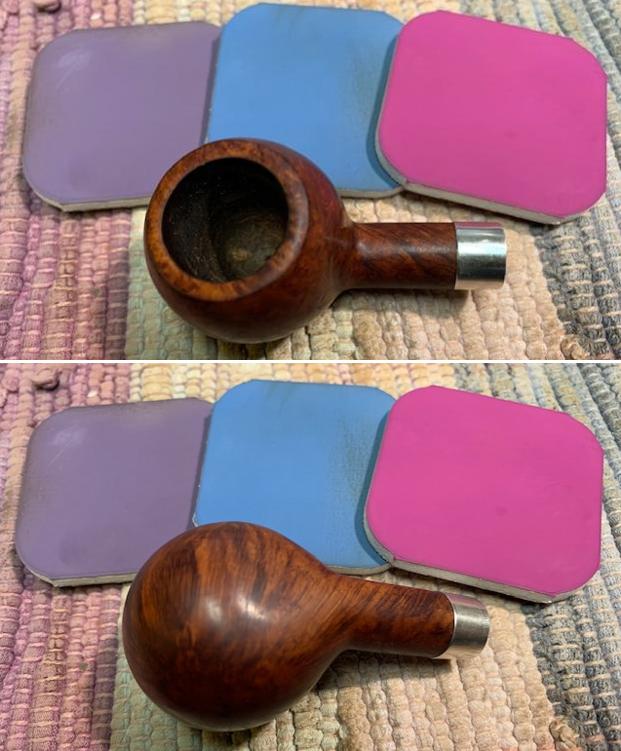
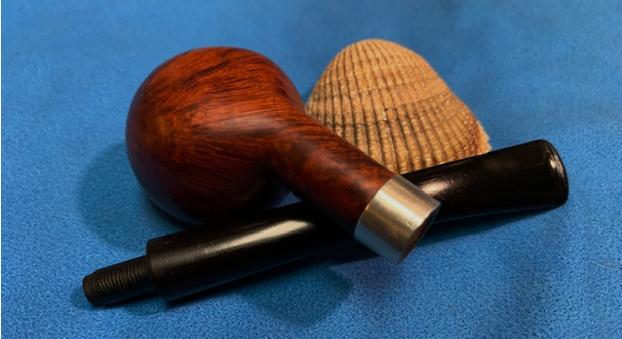
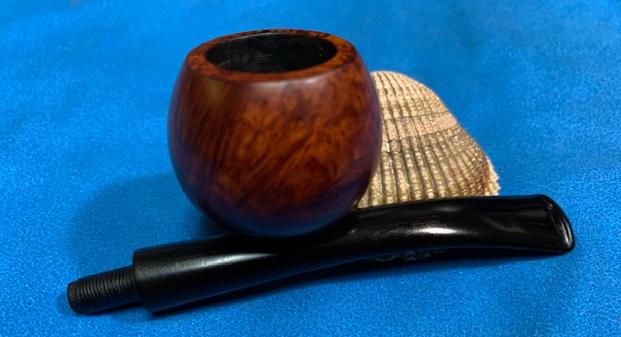
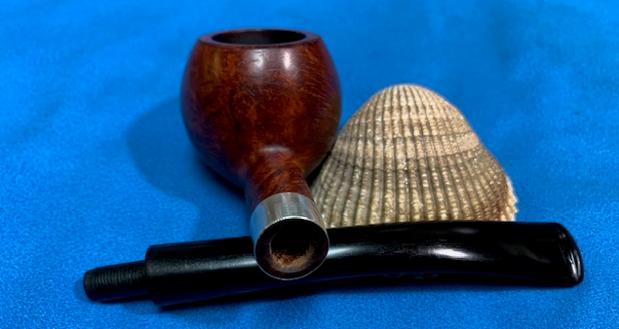
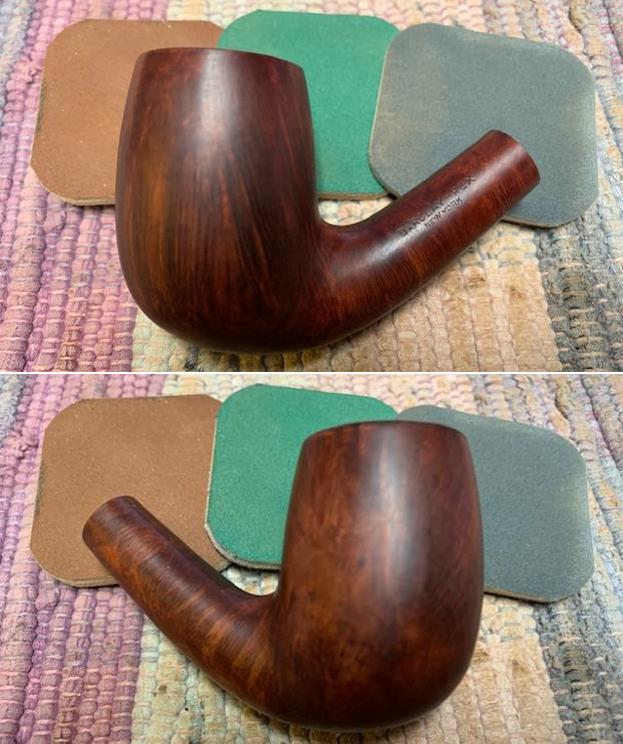
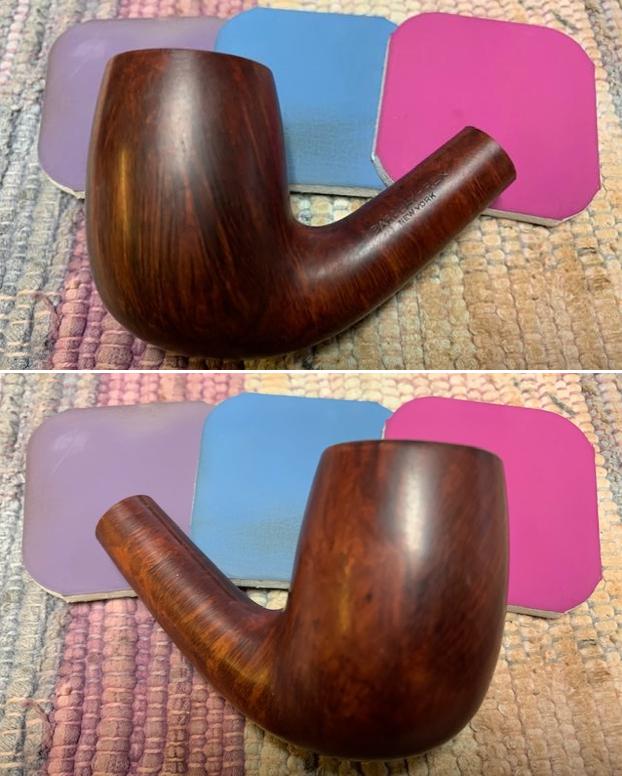
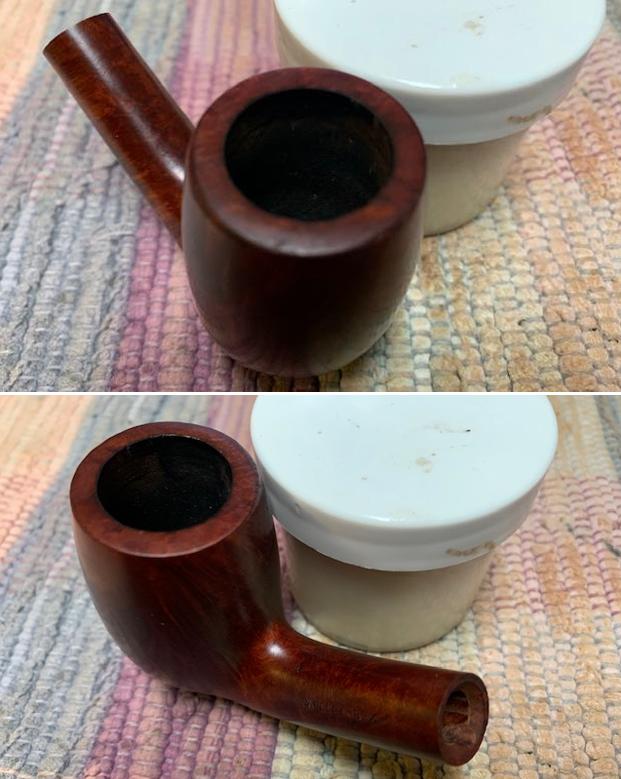
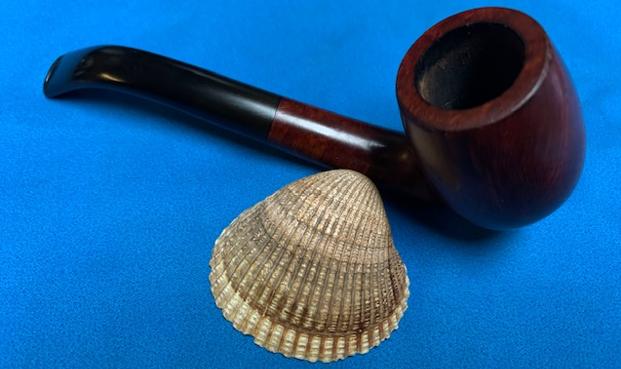
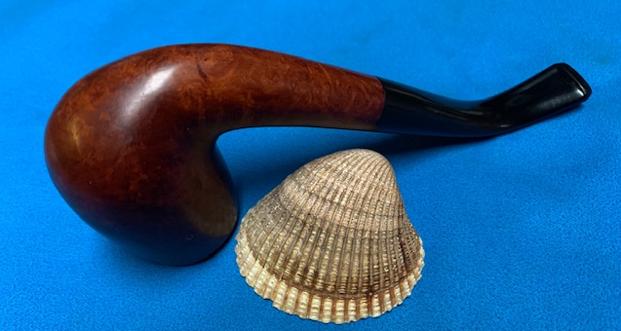
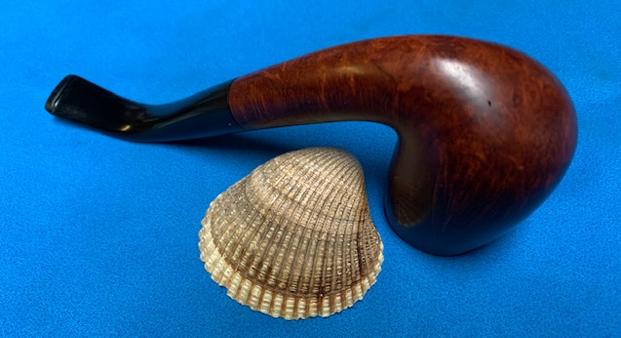
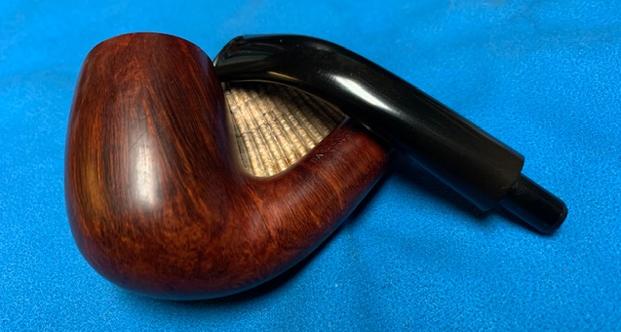
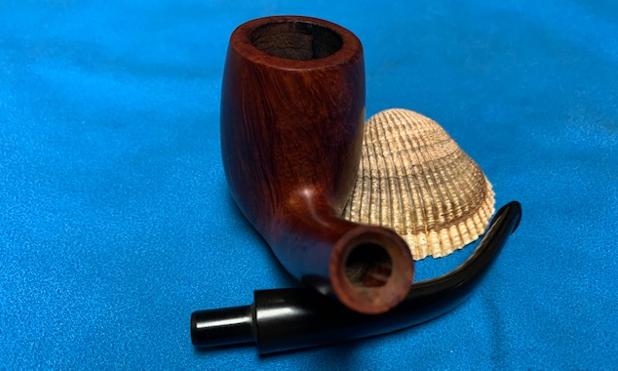
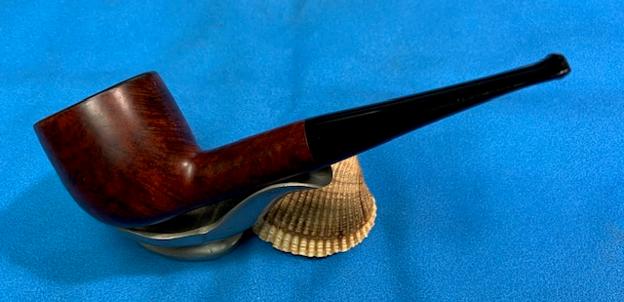
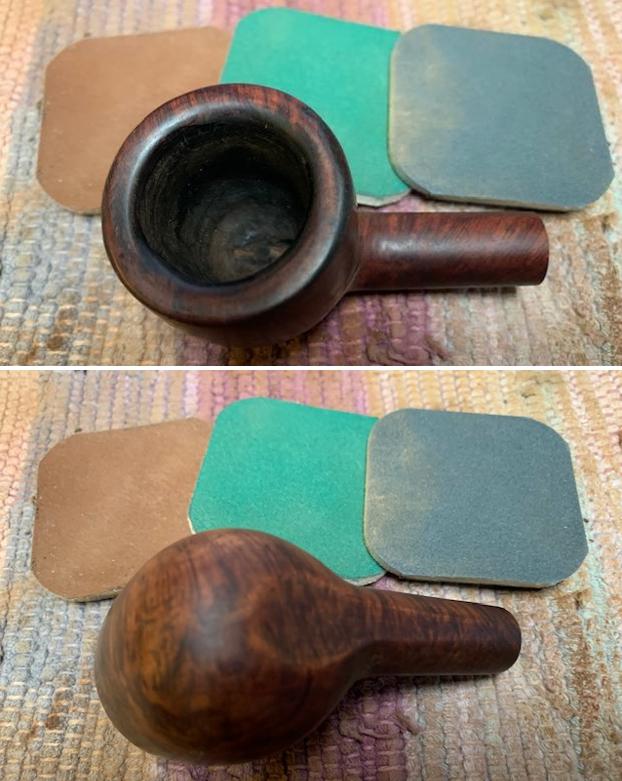
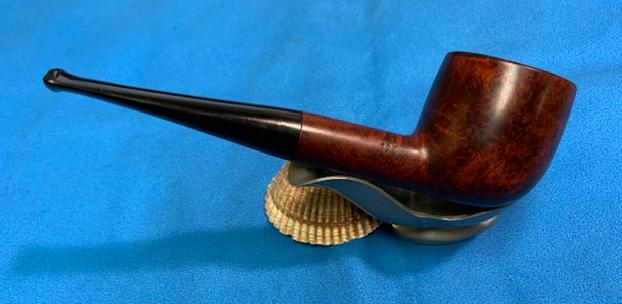
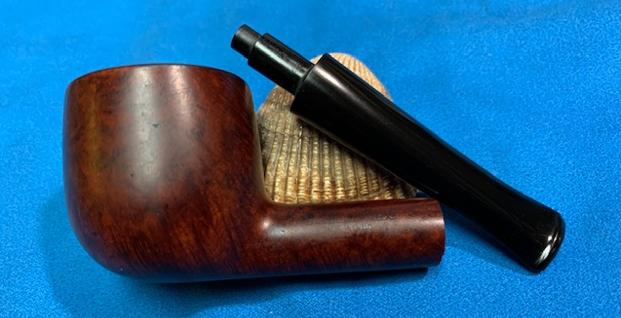
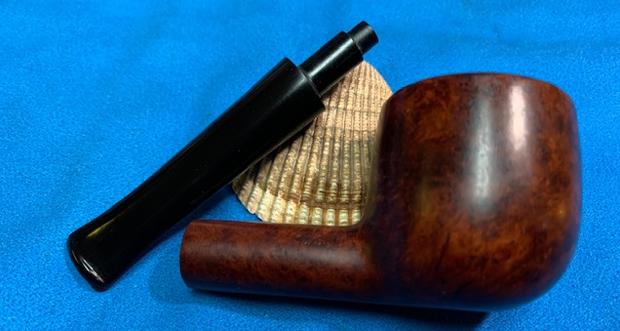
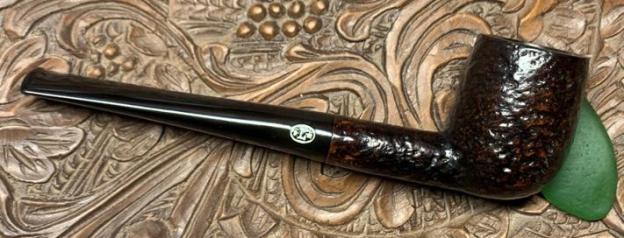
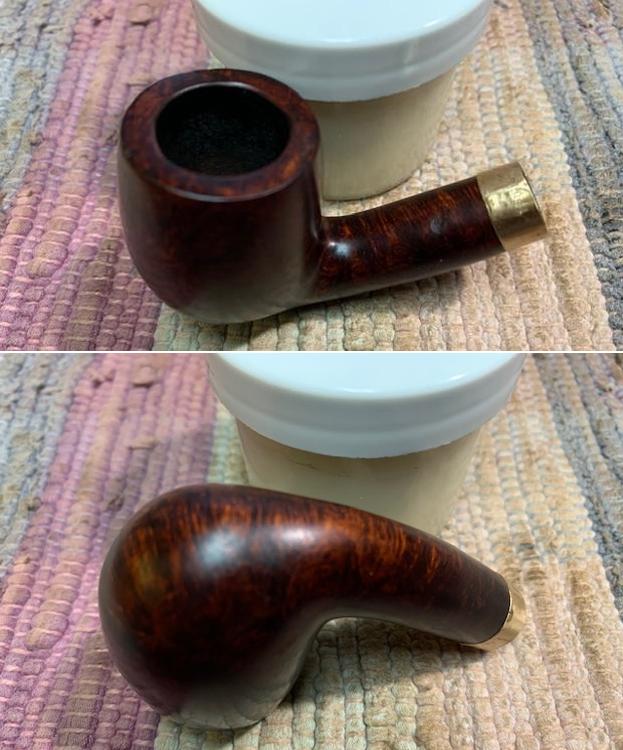
 When communicating with potential commissioners of pipes, I like to ask questions to find out more about their lives and how they found out about The Pipe Steward. I was surprised to find out again how small the pipe world is at times. Byron is a friend of my newest daughter-in-law’s father! Last year Katie married my son, Josiah, and they are living in St. Louis. Before they tied the knot, Katie desired to give her father a special gift and commissioned a pipe for him. Her Dad, Kevin, lives in the chocolate capital of the USA – Hershey, PA. That pipe turned out well (See: My Future Daughter-in-Law Commissions a Sculpted Bent Billiard as a Gift for Her Father) and with Byron’s inquiry, I discovered that my new in-law relationship was talking up The Pipe Steward. Thanks, Kevin! Pictures of the classic Blasted Billiard that got Byron’s attention follow:


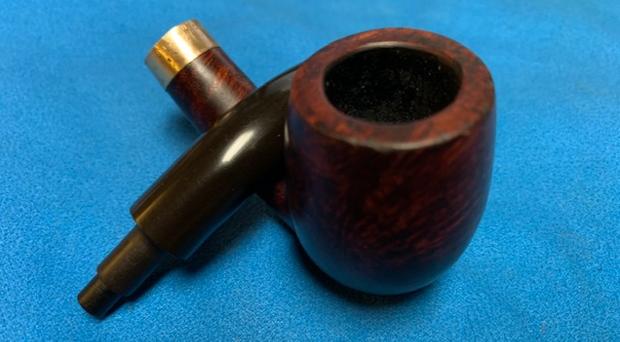
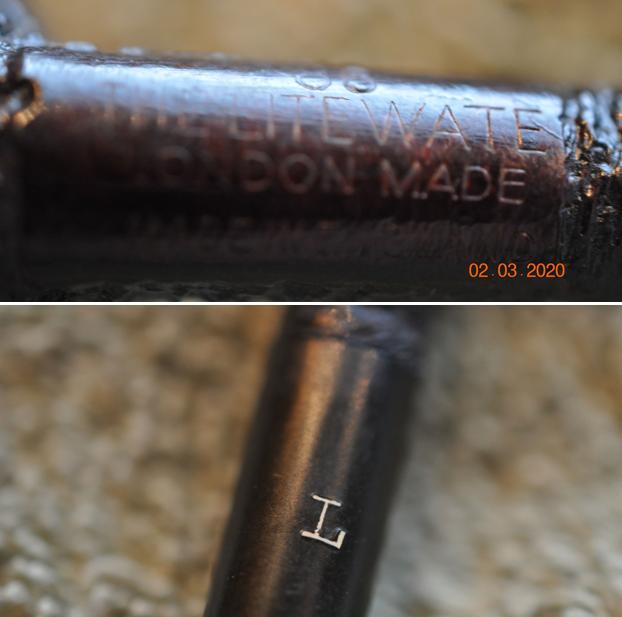
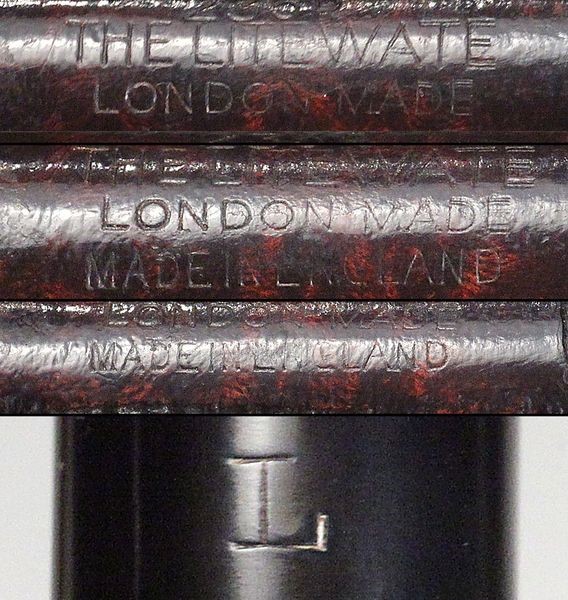
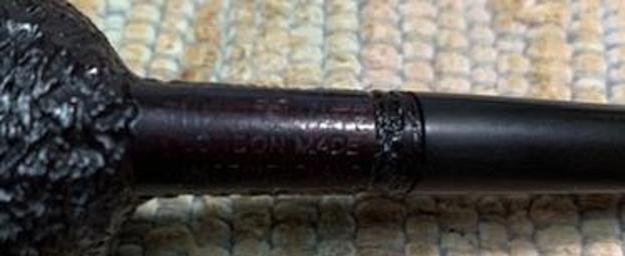
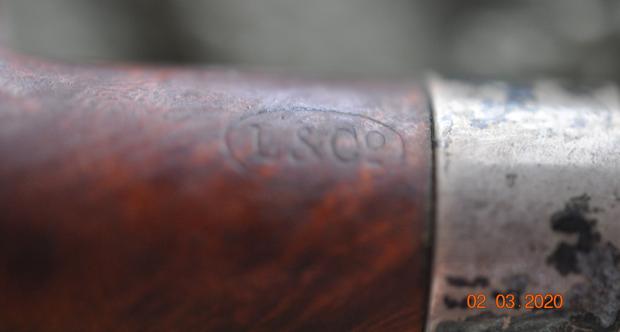
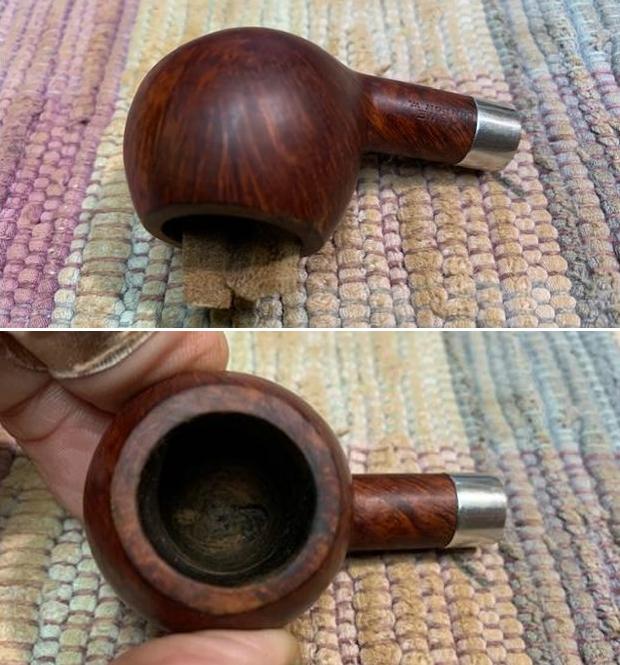
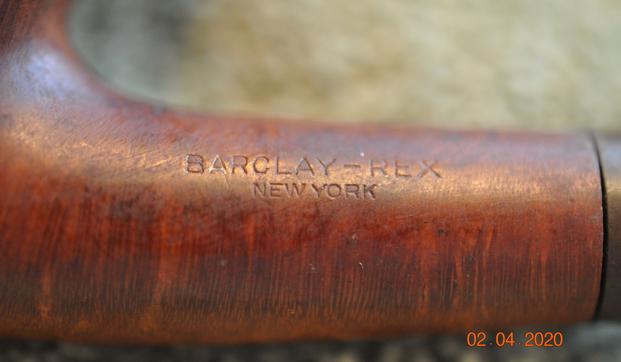
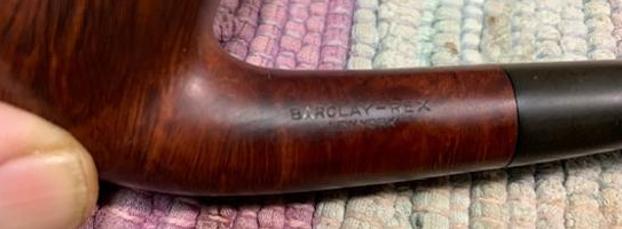
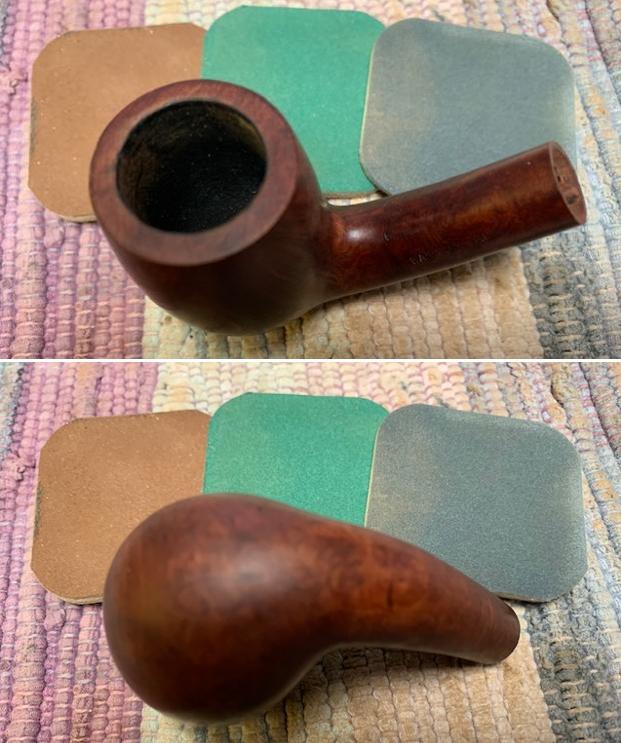
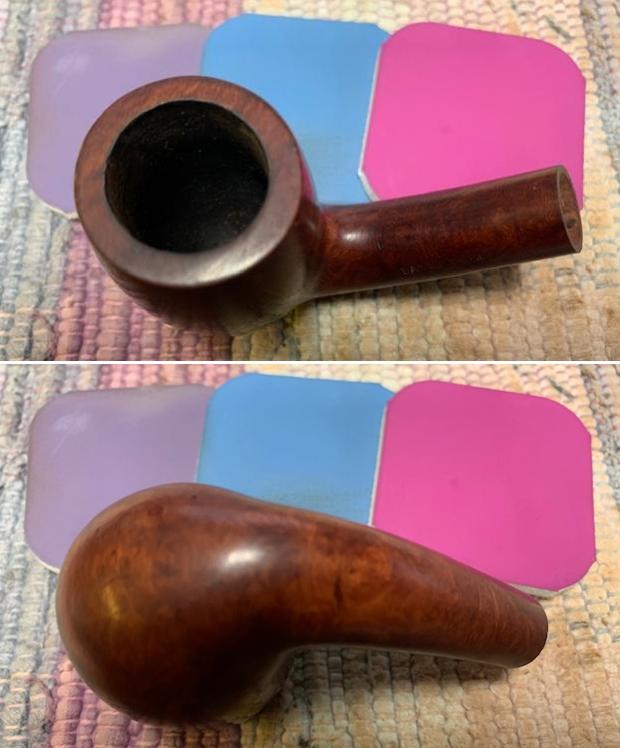
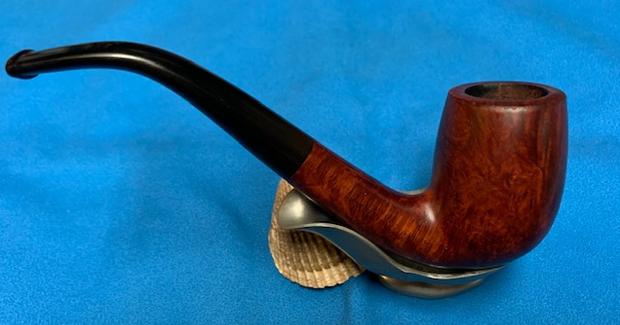
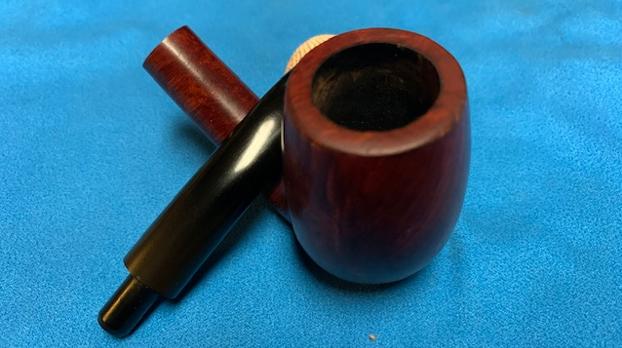
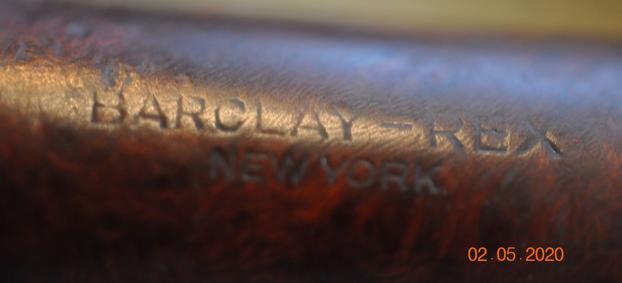
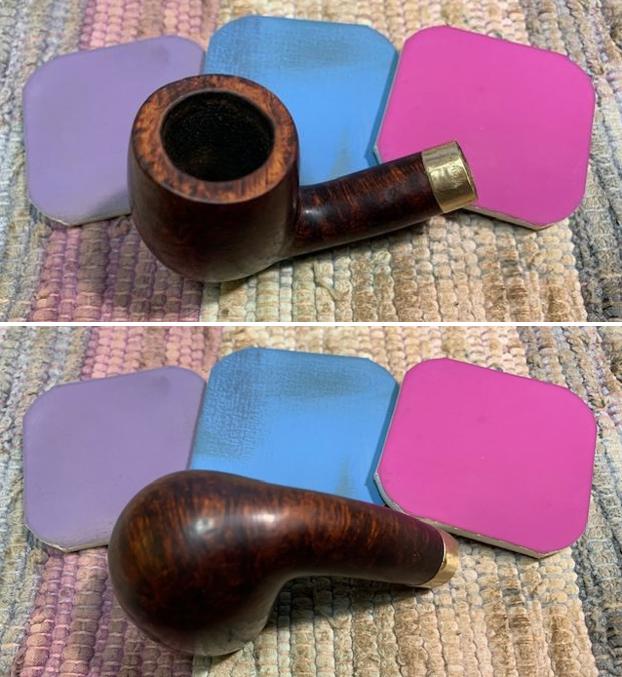
 The nomenclature is stamped on the heel’s smooth briar panel. Stamped is, LINCOLN over LONDON MADE. To the right of this is stamped, REAL SANDBLASTED [over] BRIAR.
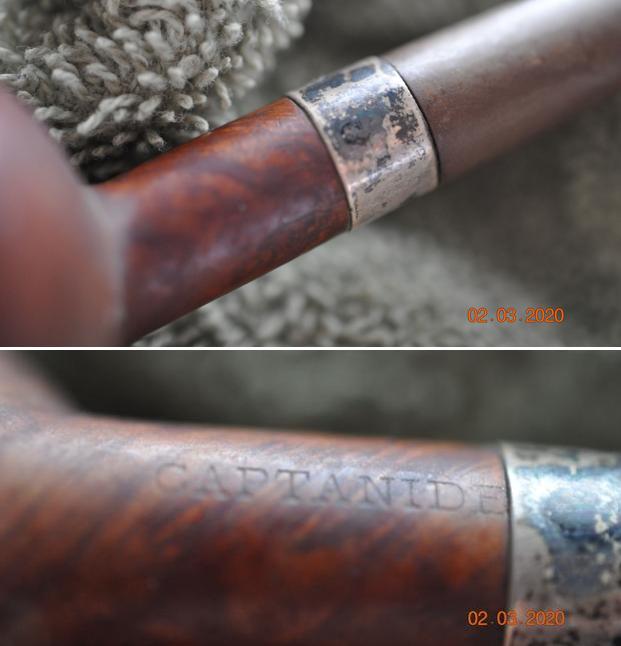
 The Lincoln logo is stamped on the right side of the stem (the normal being on the left side) with an encircled *L* (star-‘L’-star).
 This was the case also with the Lincoln London Style that I just completed. I discovered a few other Lincoln pipes listed for sale here and there on the internet and discovered that this is characteristic of all the Lincoln stems.
The inconclusive information about the origins of the Lincoln name can be seen in the write up of the Lincoln London Style (LINK). The only UK country of manufacturing Lincoln leads I found were in Wilczak & Colwell’s ‘Who Made That Pipe?’ where these names were referenced: W. H. Carrington, Sasieni, Higgs Bros (Lincoln IMP). In the previous research none of these leads resulted in a substantive identification.
One additional piece of anecdotal information I found is a description of a Lincoln for sale in Smoking Pipes.com showcasing a Lincoln London Made Sandblasted Billiard:
A nice, classic Billiard can be a work horse of a pipe. This Lincoln (most likely named after the town in England) should prove a good smoker when the time allows. – Adam Davidson
 I found that Lincoln is a city in Lincolnshire and is described in this way (See: LINK):
Lincoln is a city in the English East Midlands. It’s known for the medieval Lincoln Cathedral, with early printed books in a Wren-designed library. Lincoln Castle houses a Victorian prison and a copy of the Magna Carta. The Museum of Lincolnshire Life has social history exhibits in Victorian barracks. The Collection is a museum displaying local archaeology. Nearby, the Usher Gallery has works by Turner and Lowry.
I enjoyed reading an article about Lincoln on Traveler.com entitled, ‘Lincoln, England: The unlikely English city that the Romans and Vikings prized’. I found all this information interesting, but no closer to knowing why a pipe nomenclature would enshrine the name of this historic, English city.
What I concluded previously with the research of the first Lincoln was that the information is scattered regarding a concrete understanding of the company origin of the Lincoln on my worktable. What is consistently understood is that the only examples of Lincolns are classic blasted Billiards. They consistently present the Lincoln stem logo on the right side of the stem and they are stamped ‘London Style’ or ‘London Made’. The feel of the Lincoln pipes would not surprise me if they were produced in the 1960s, but this is only a guess.
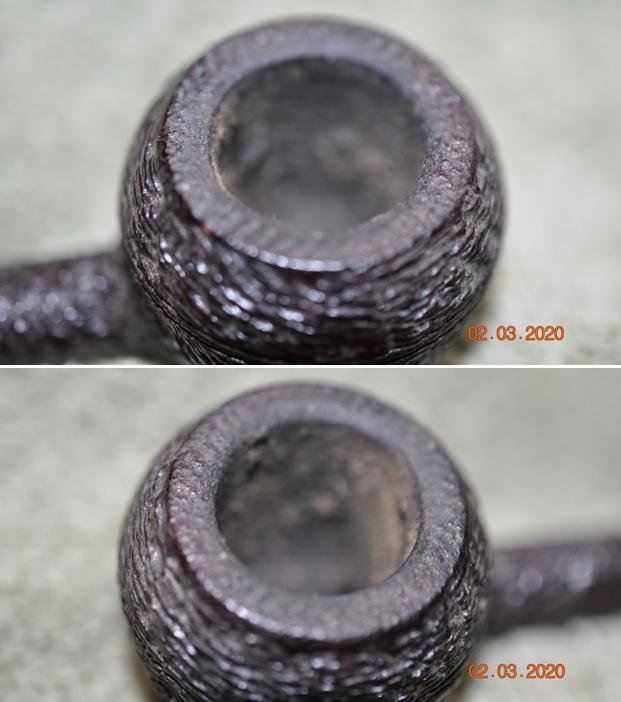
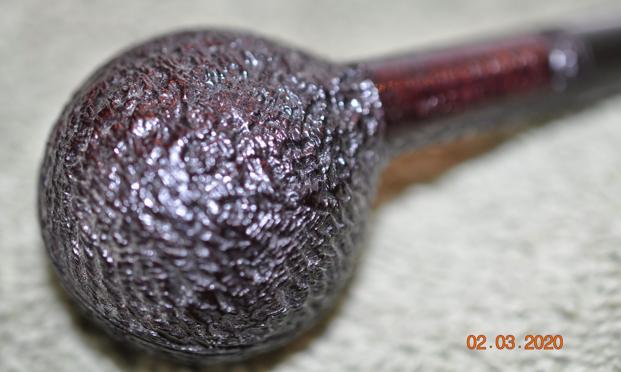
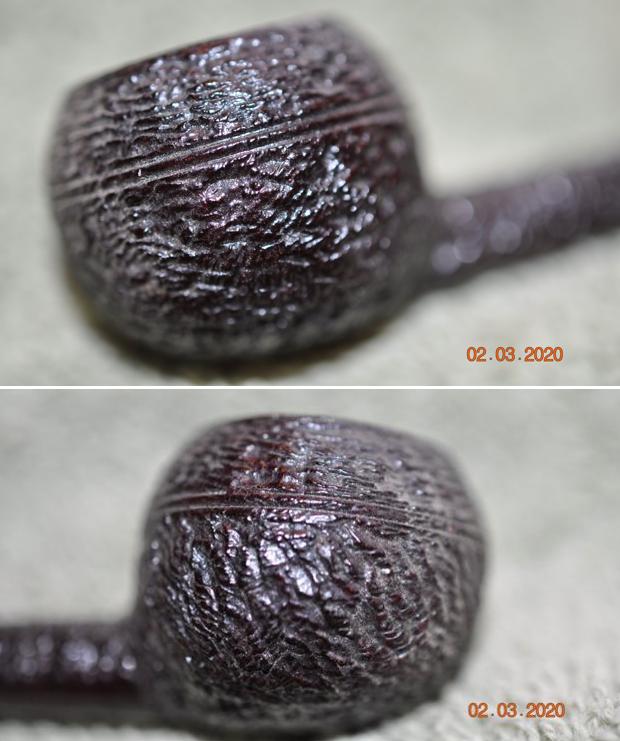
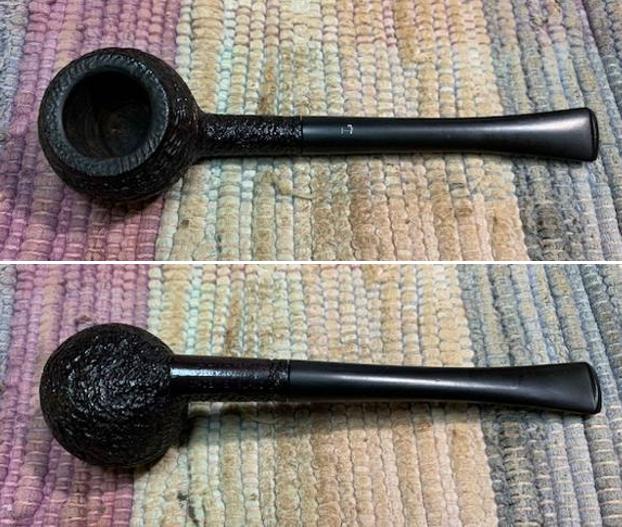
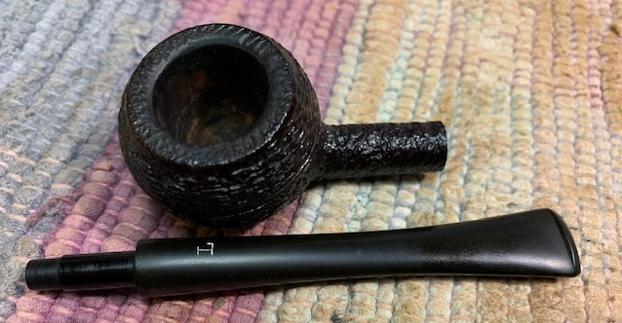
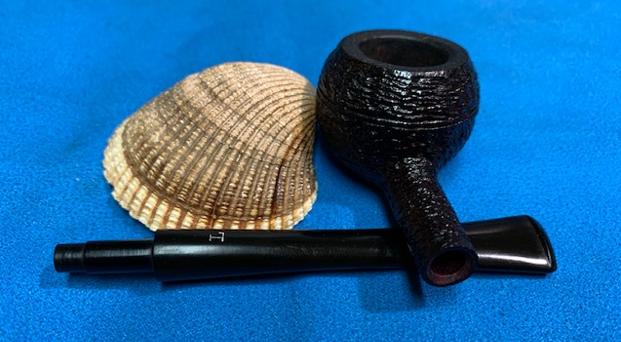
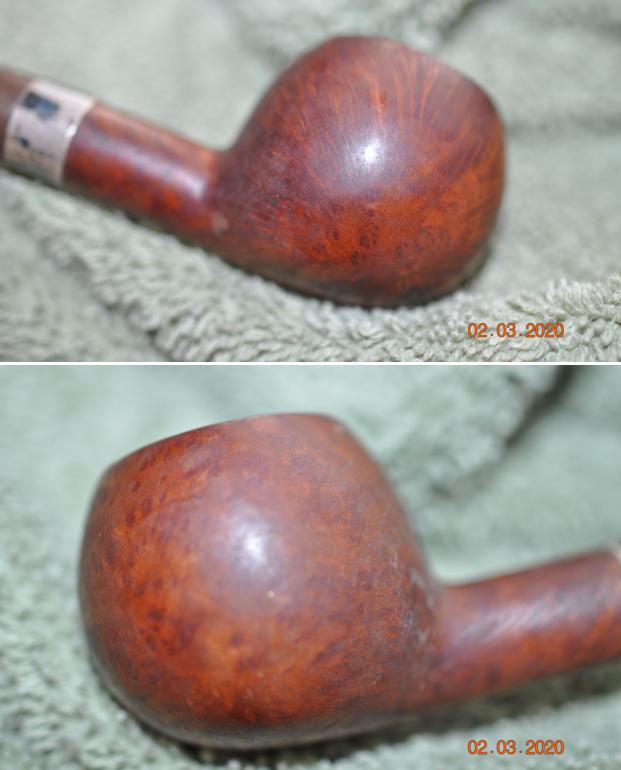
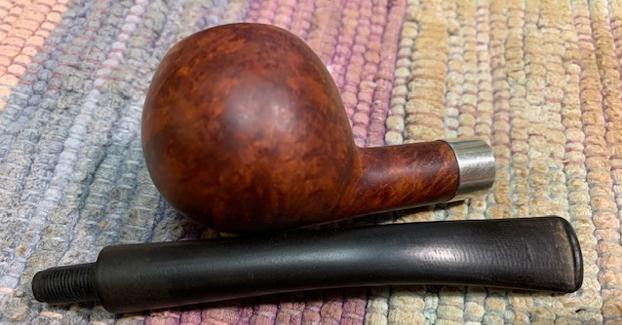
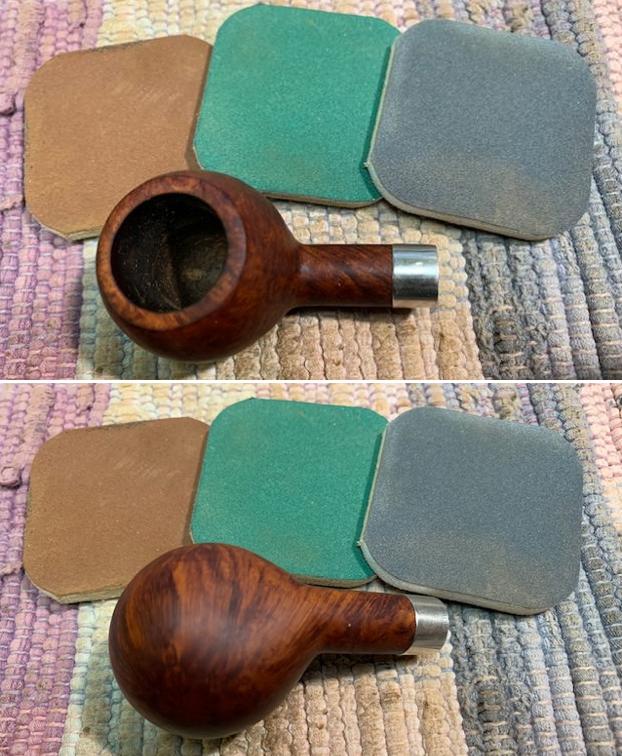
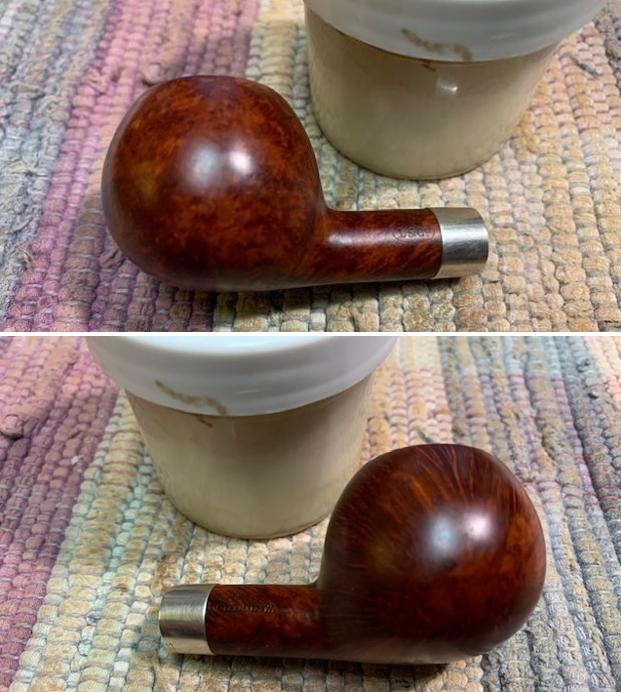
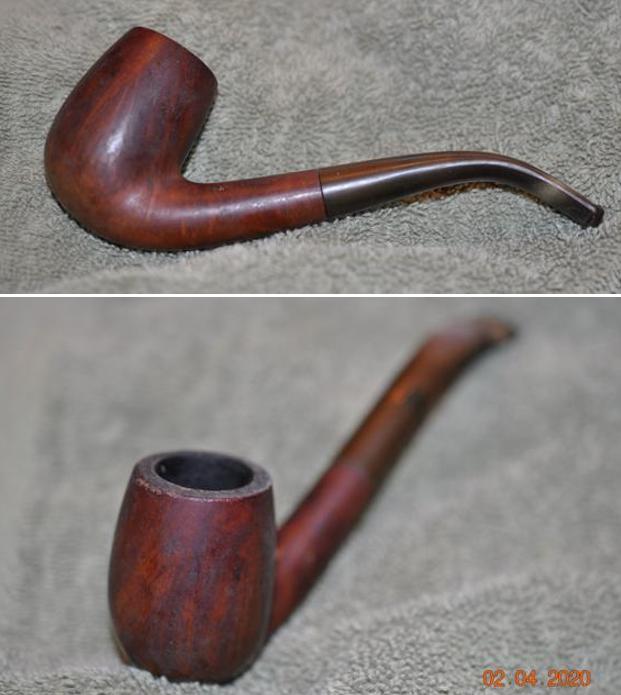
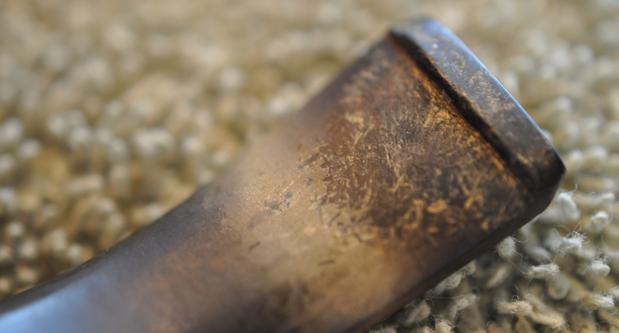
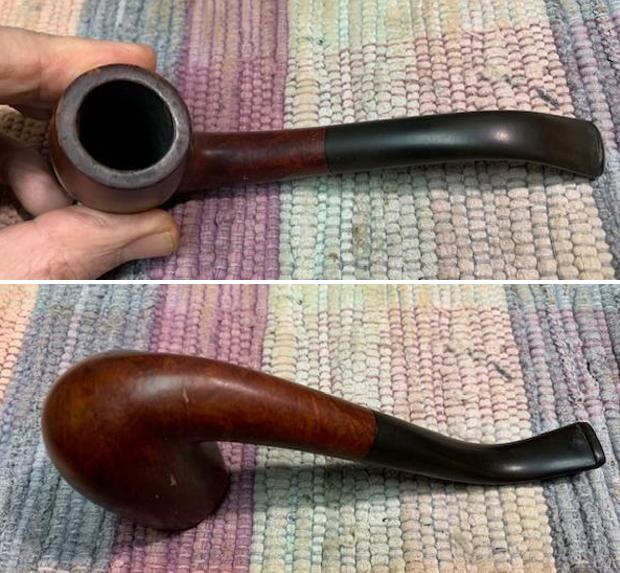
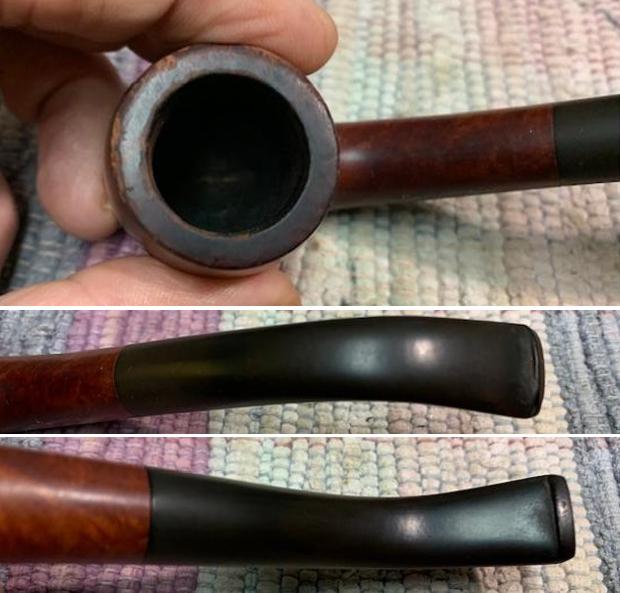
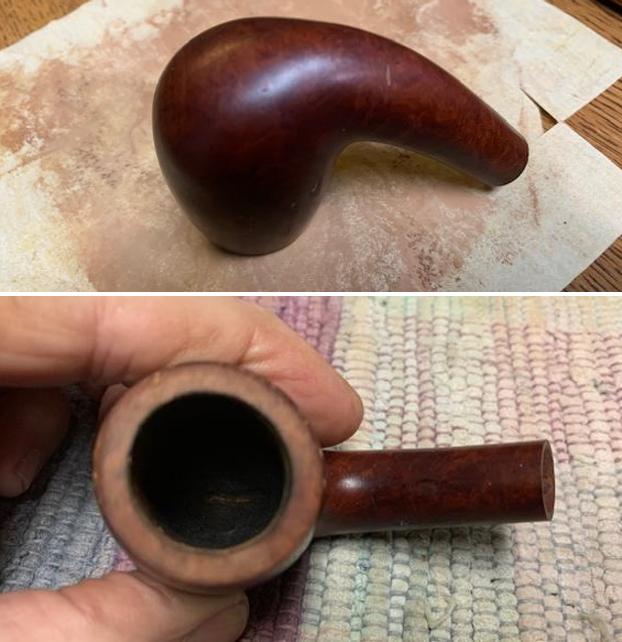
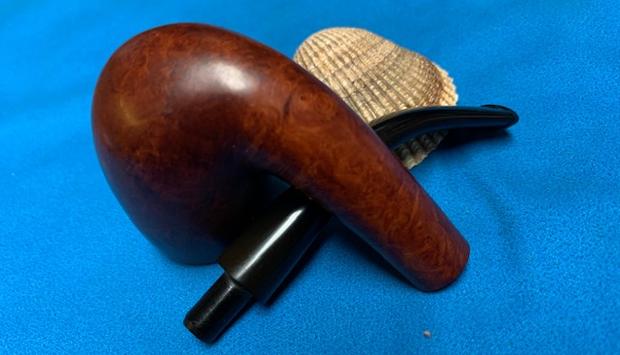
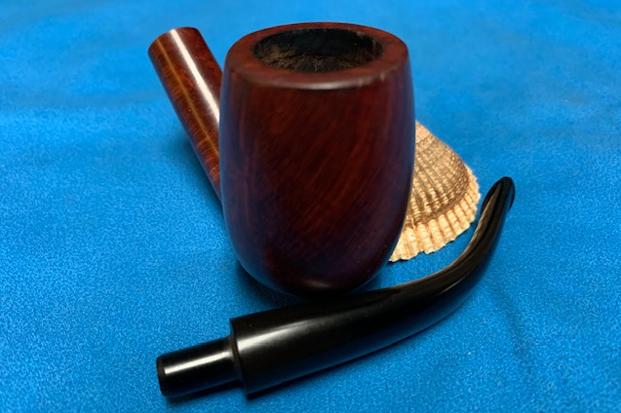
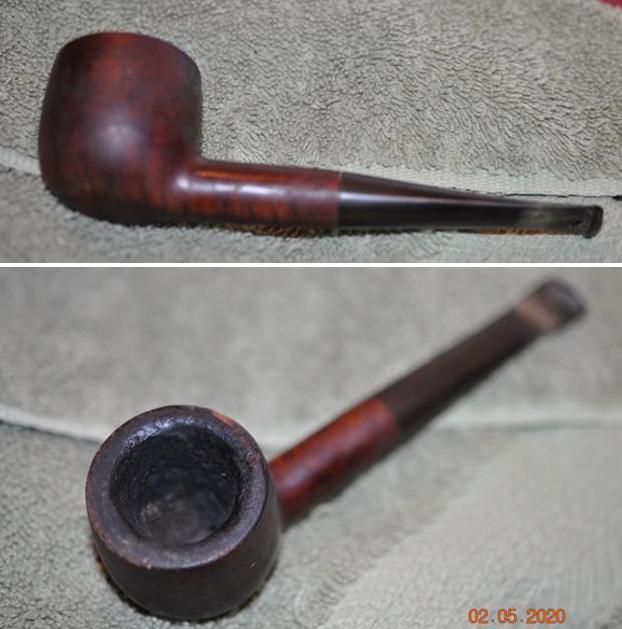
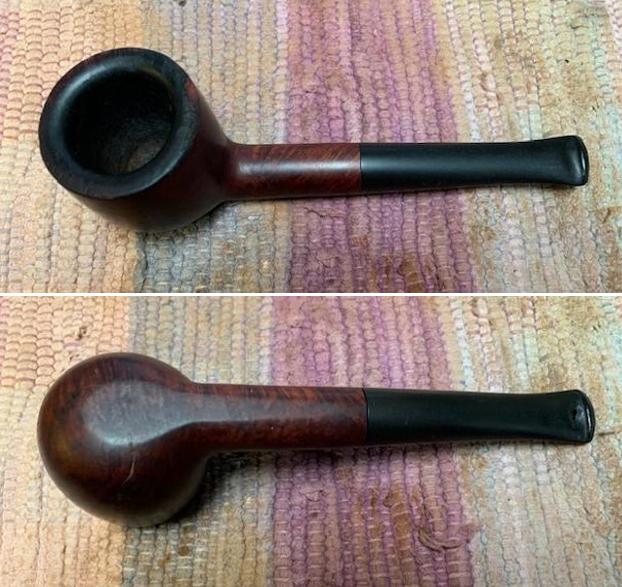
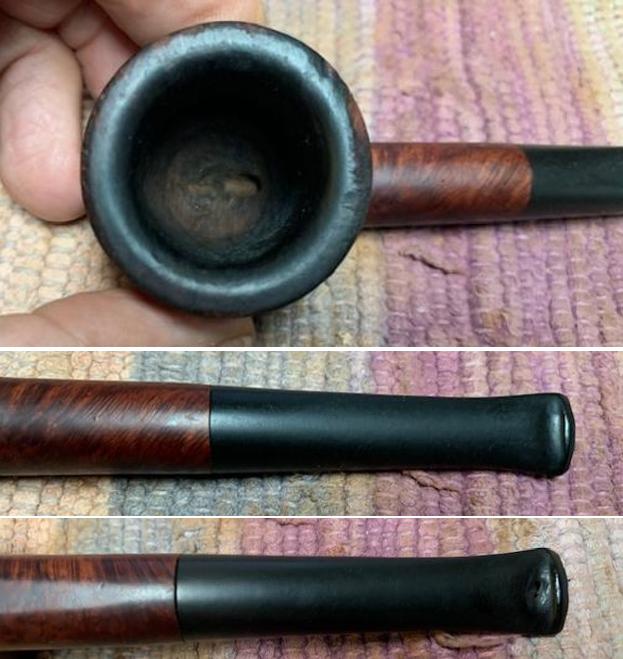
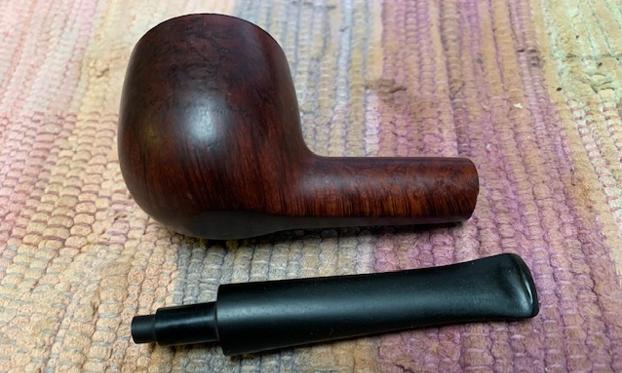
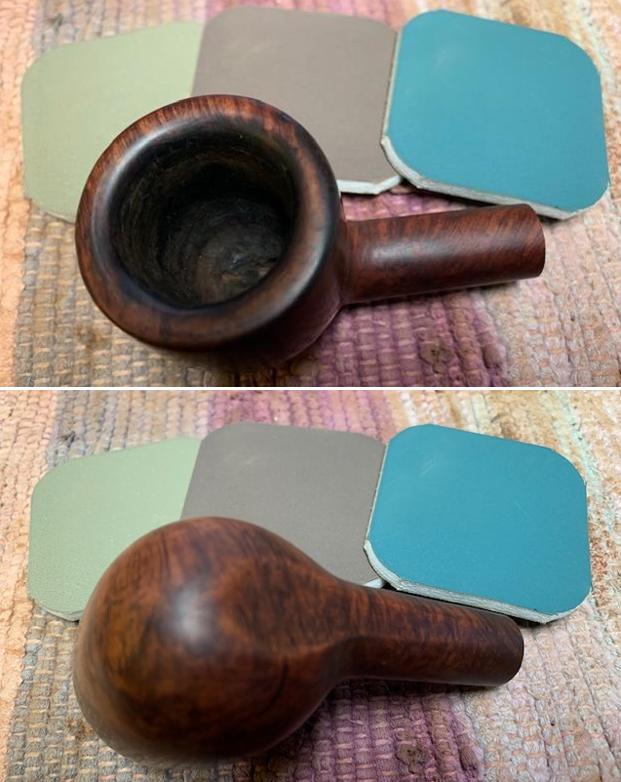
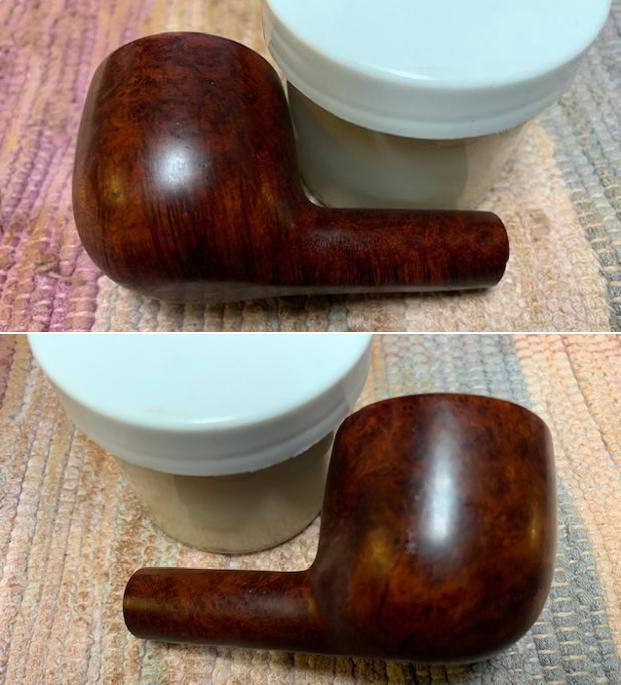
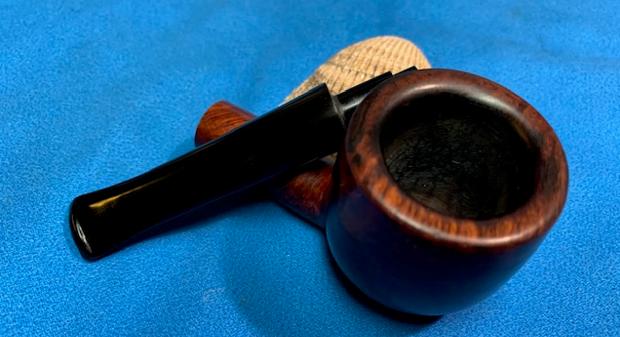
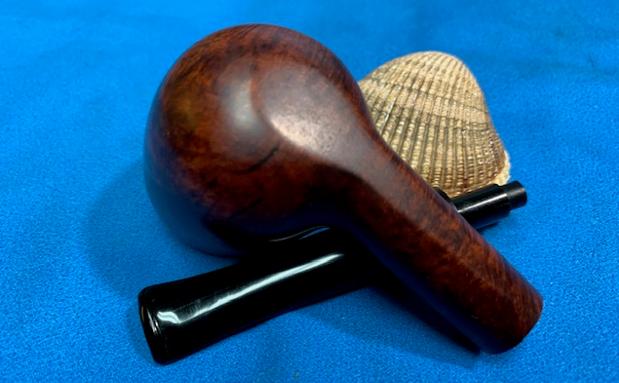
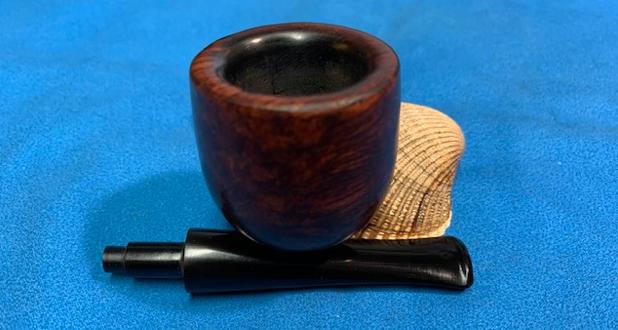
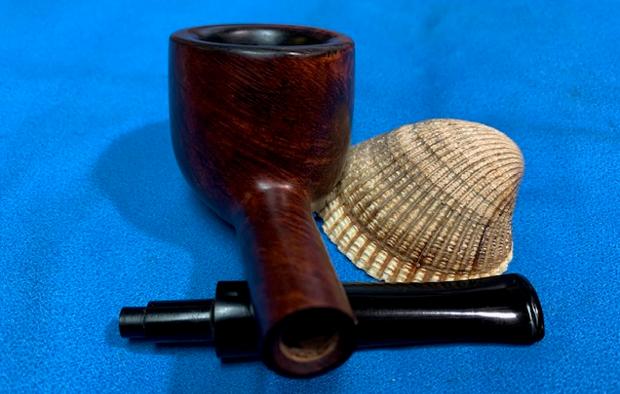
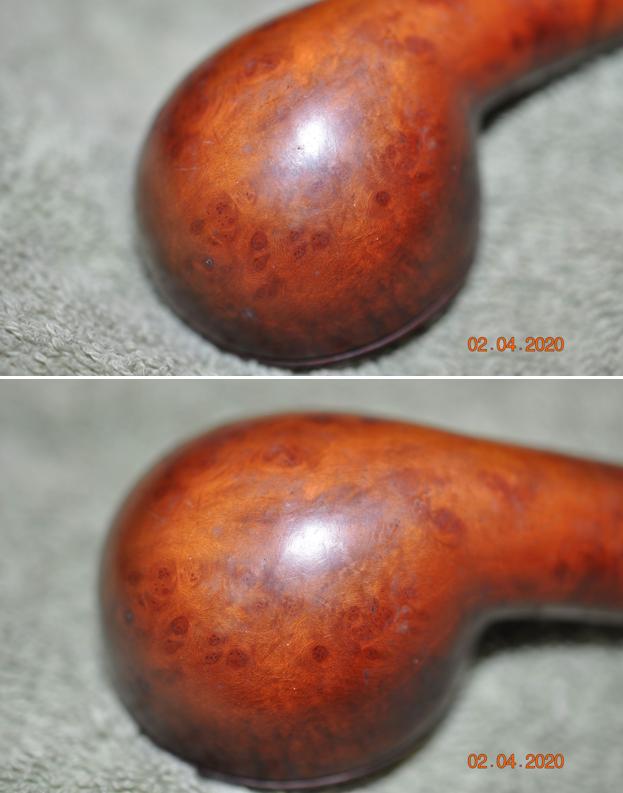
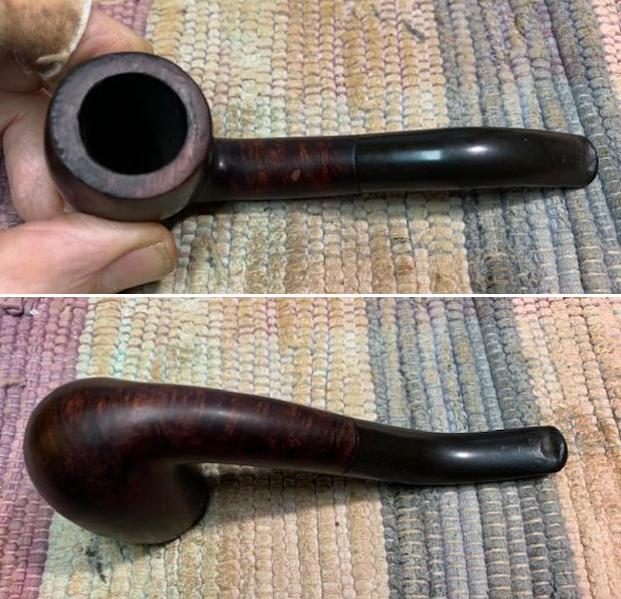
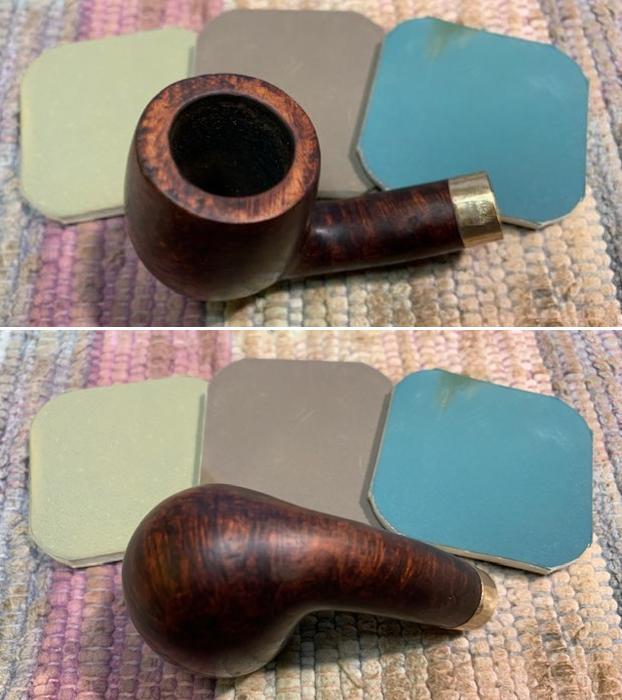
Looking now more specifically at the blasted Billiard on the table – it is clear why Byron commissioned this pipe – the add above describes well the pipe as a “work horse of a pipe”. Billiards are the heavy lifters of pipes in the pipe world, no doubt. The Lincoln London made has extremely thick cake in the chamber to the extent that it’s almost closed. Clearing the cake build up will allow me to inspect the chamber for heating damage. Clearing the carbon cake also allows the briar to have a fresh start. The rim is worn, and the blasted finish is almost gone leaving a flat, dull looking rim. The blasted surface on this Lincoln London Made is less distinct and more subtle. The stummel surface needs cleaning from the grime collected over the years. The stem has some oxidation, and the bit has tooth chatter and some compressions.
To begin with the restoration of the Lincoln London Made, the stem’s airway is cleaned with pipe cleaners wetted with isopropyl 99%. It took a good bit of effort! The stem has moderate oxidation and I continue to test the new (to me) www.Briarville.com, ‘Pipe Stem Oxidation Remover’ which I found out about on a FB group.
 The stem is placed in the bottle and it left for several hours.
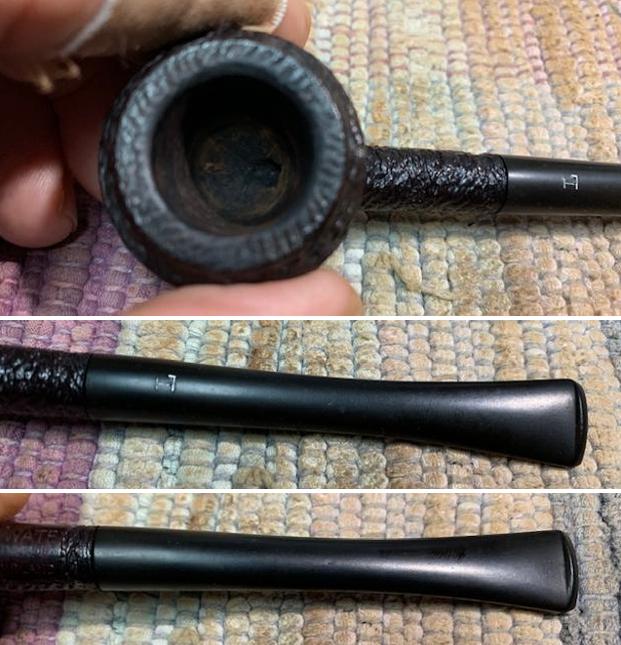
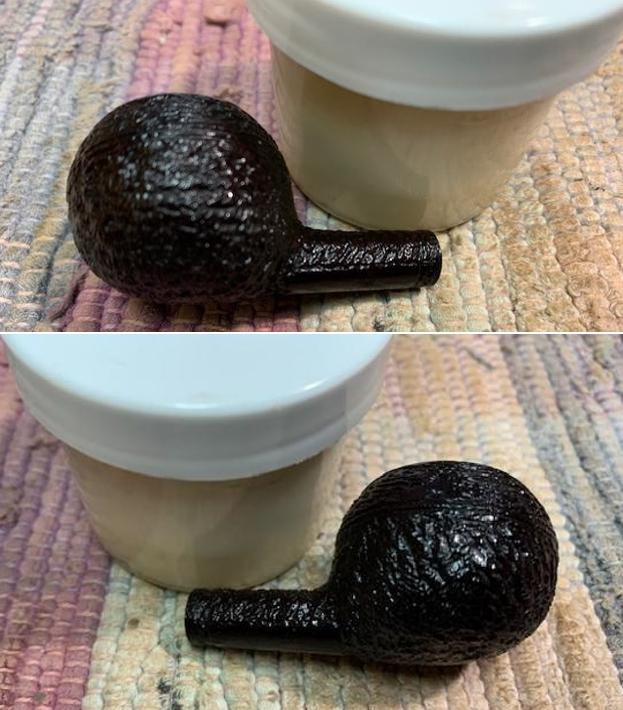
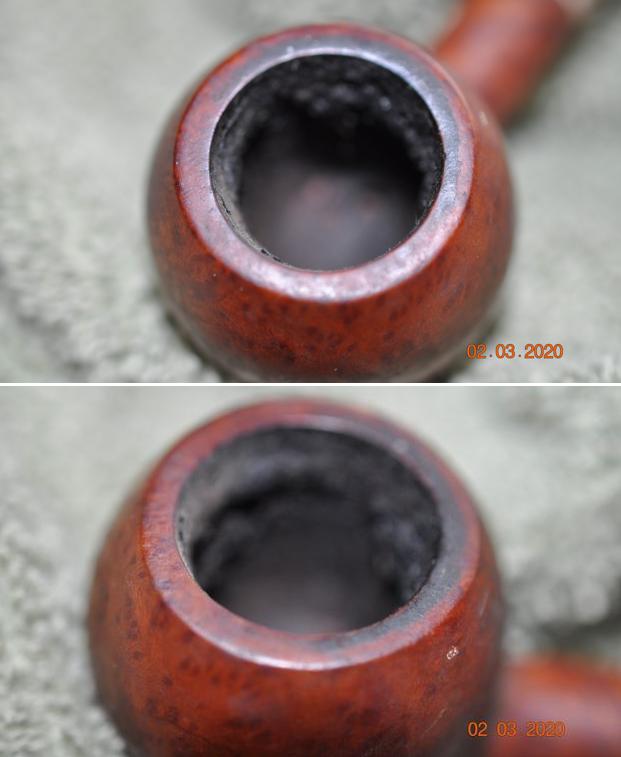
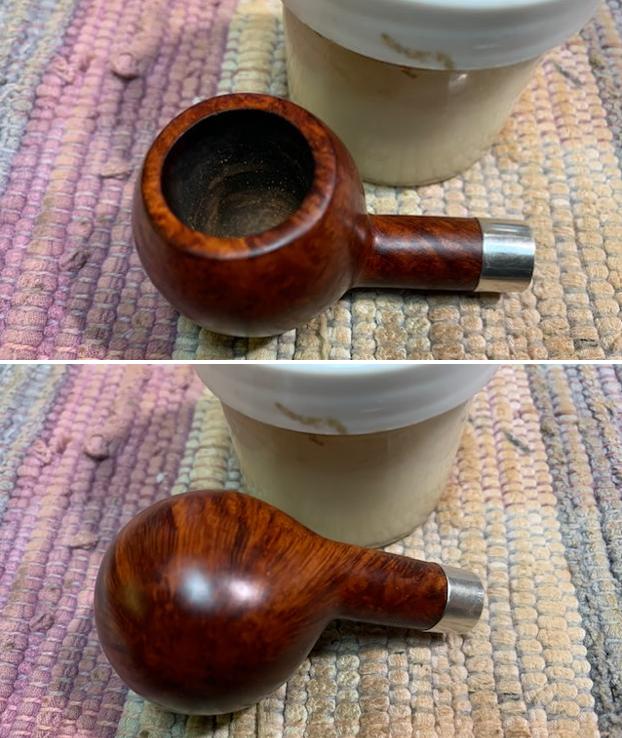
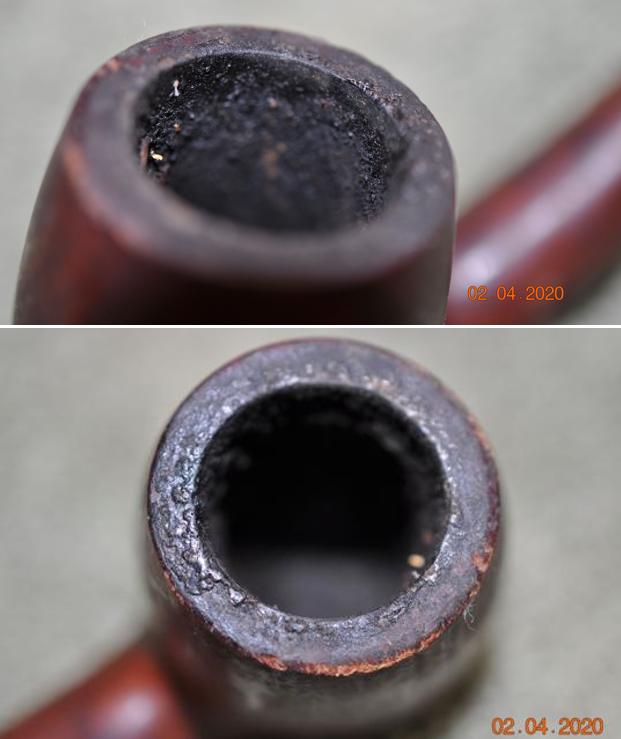
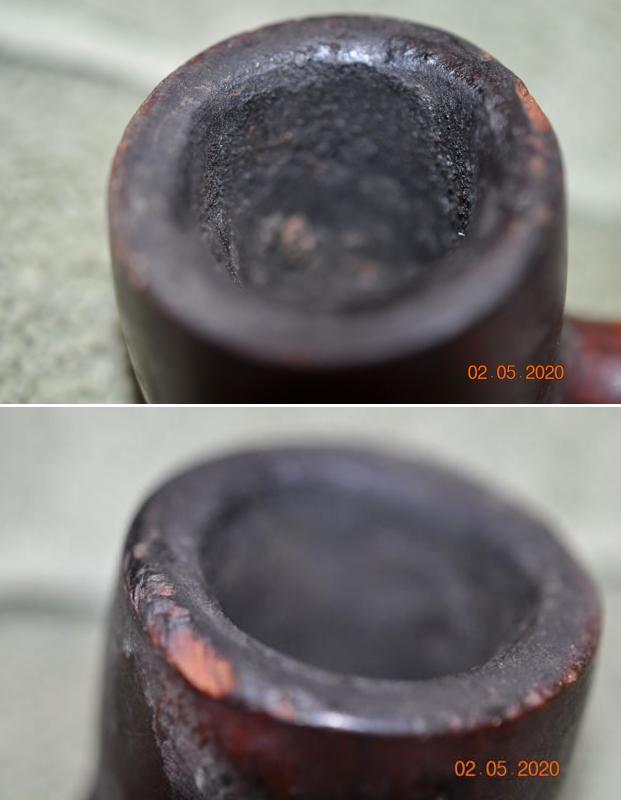
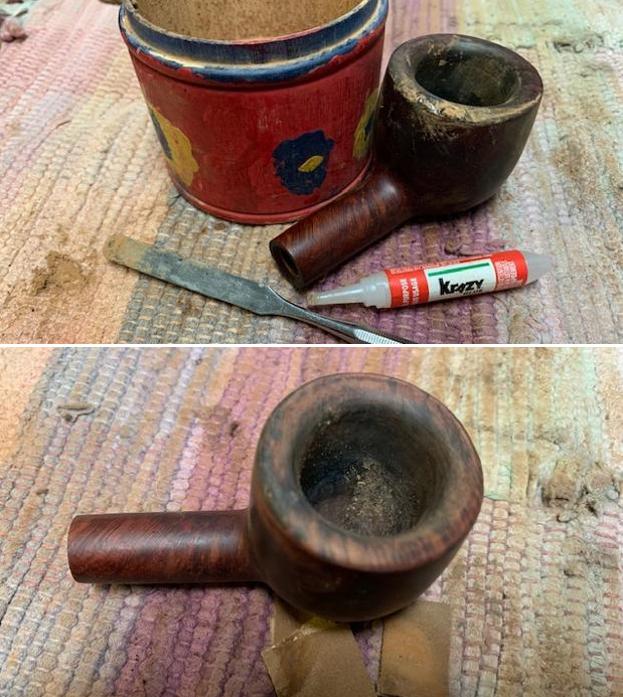
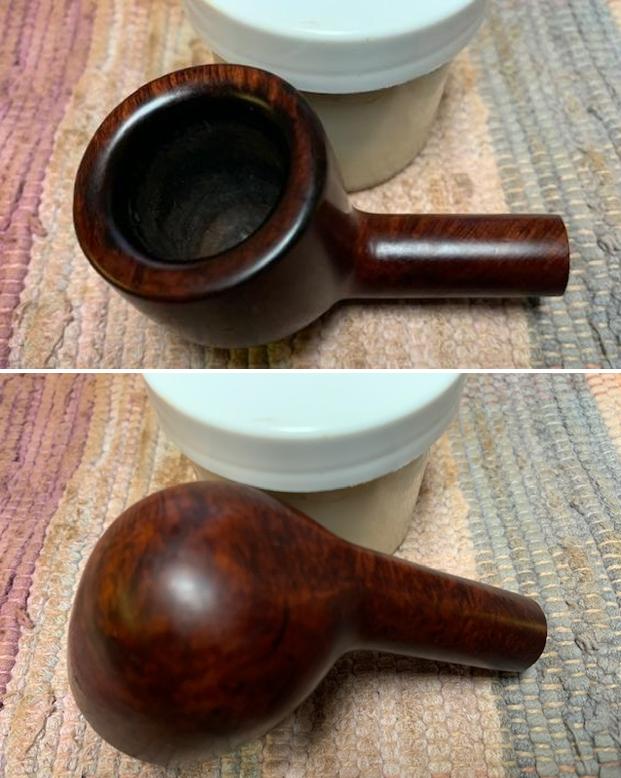
 While the stem is in the deoxidizer soak, work begins on the stummel. The cake is thick and hard. The picture below shows how the buildup closes toward the floor of the chamber. The rim also shows some crusting of the lava overflow.
 The smaller chamber accommodates only one blade head of the Pipnet Reaming Kit. Because of the amount of cake that was remaining after the smaller blade head did its job and the next larger blade would only cut about a quarter down the chamber, I pulled out my antique Kleen Reem Tool which can expand incrementally and could navigate the chamber nicely. I landed the Kleen Reem Tool at a Flea Market my wife and I happened upon in Kentucky a few years back when we were traveling. Cleaning the chamber continued with the Savinelli Fitsall Tool and then sanding with 240 paper wrapped around a Sharpie Pen.
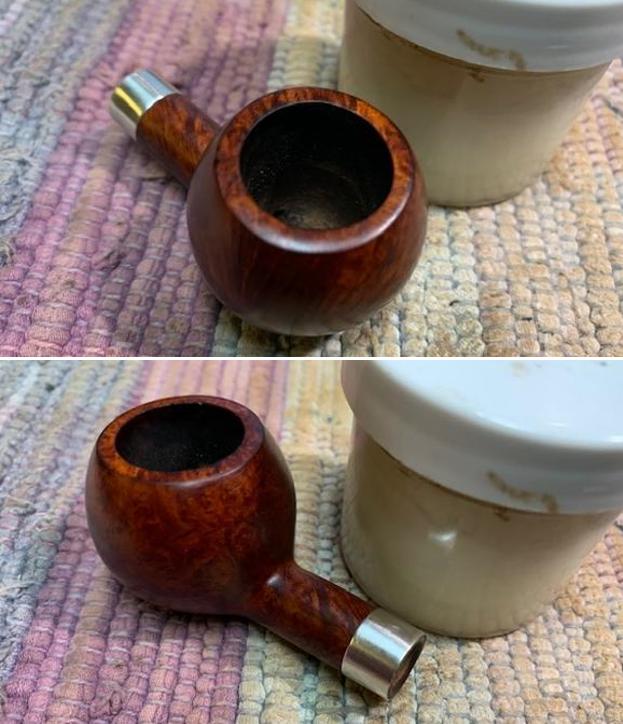
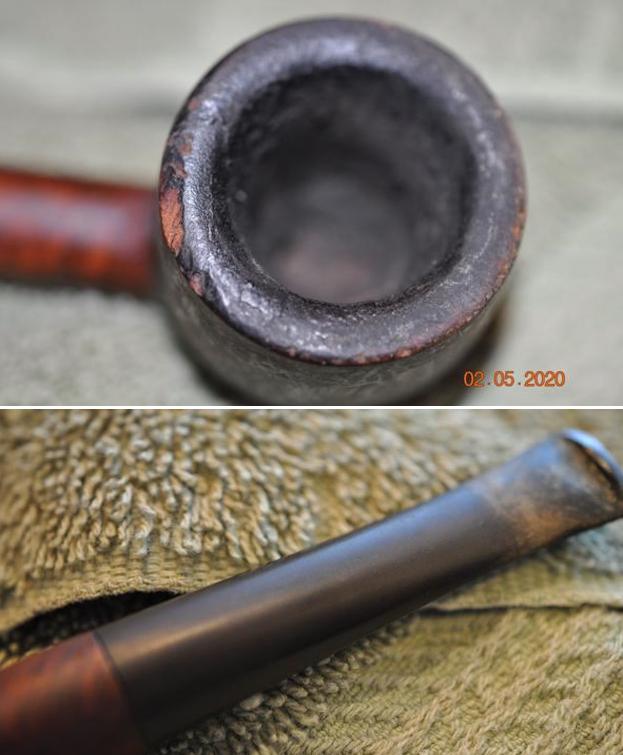
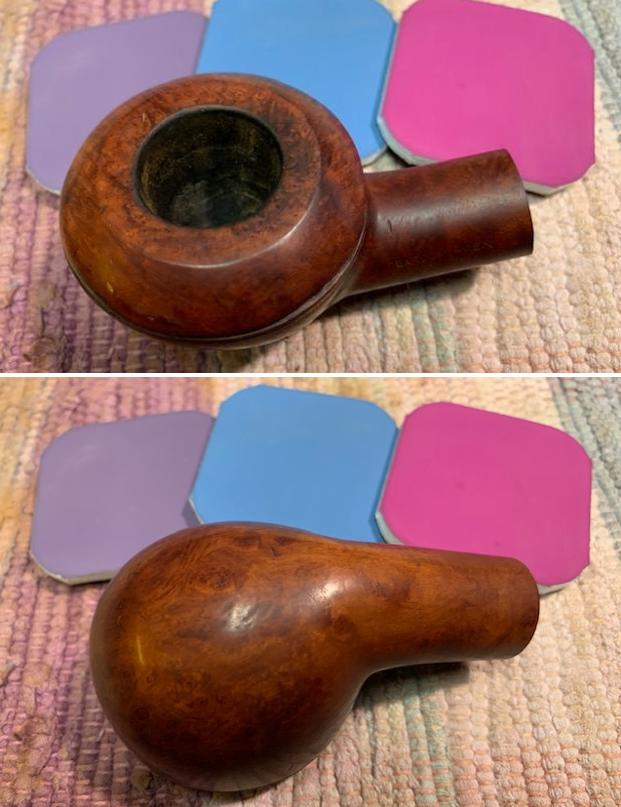
 After wiping the chamber with a cotton pad, I was glad to see that the briar was healthy – no burning or heating issues.
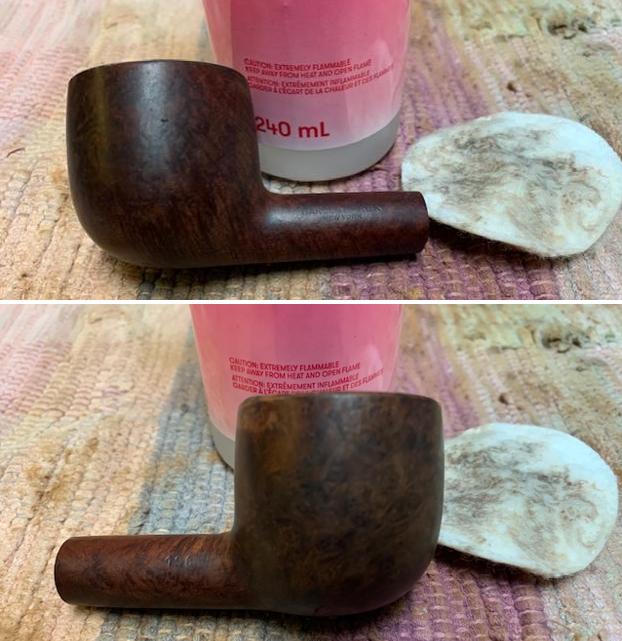
 Turning next to the external blasted surface, undiluted Murphy’s Oil Soap is used with a cotton pad to scrub the briar surface. A brass bristled brush also helps to clean the rim surface.
 The stummel is then taken to the sink where the cleaning continues using shank brushes and anti-oil dishwashing soap. The shank brushes are used to scrub the internals of the pipe using warm to hottish water. After thoroughly rinsing, the stummel is back on the worktable.
 After the sink cleaning, the cleaning of the internals is continued using pipe cleaners and cotton buds wetted in isopropyl 99%. The small dental spoon is used also to scrape tars and oils off the mortise walls. It takes quite a bit of work and the buds start to lighten. I stop for now and will continue the internal cleaning later with a kosher salt and alcohol soak through the night.
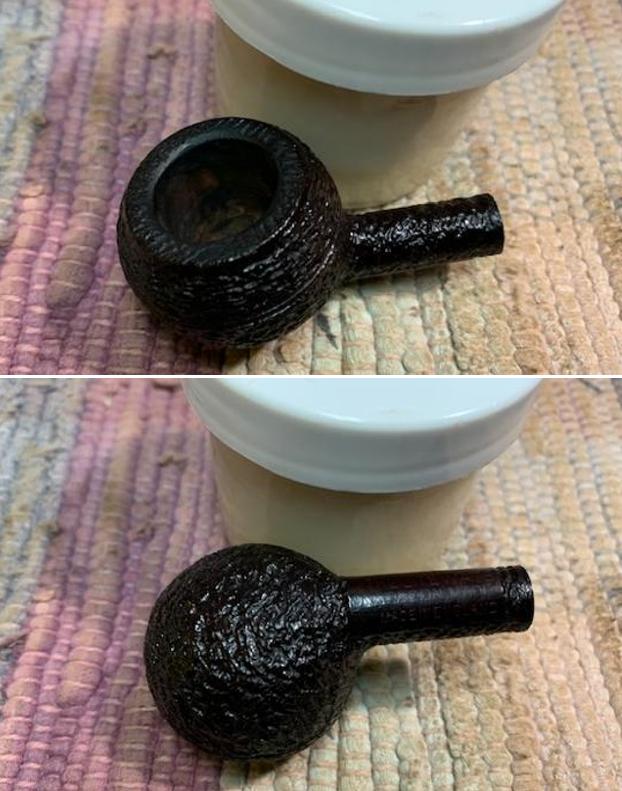
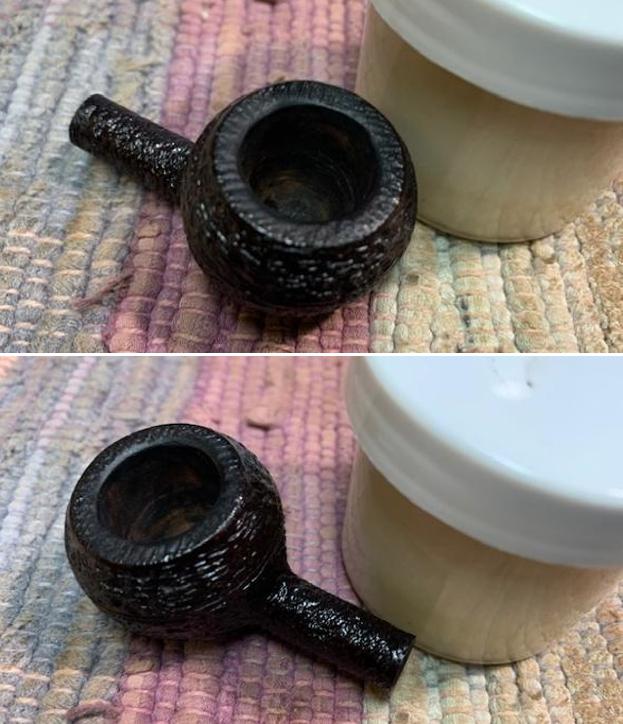
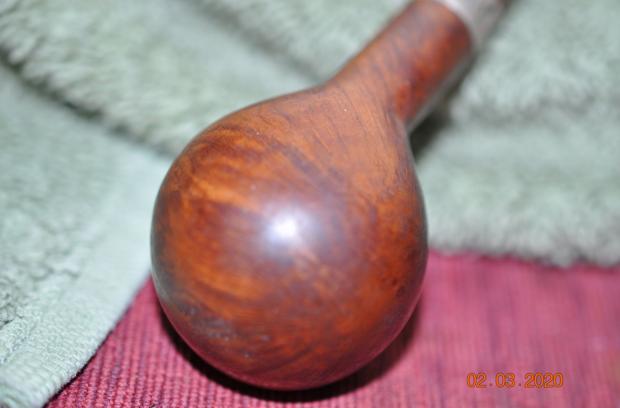
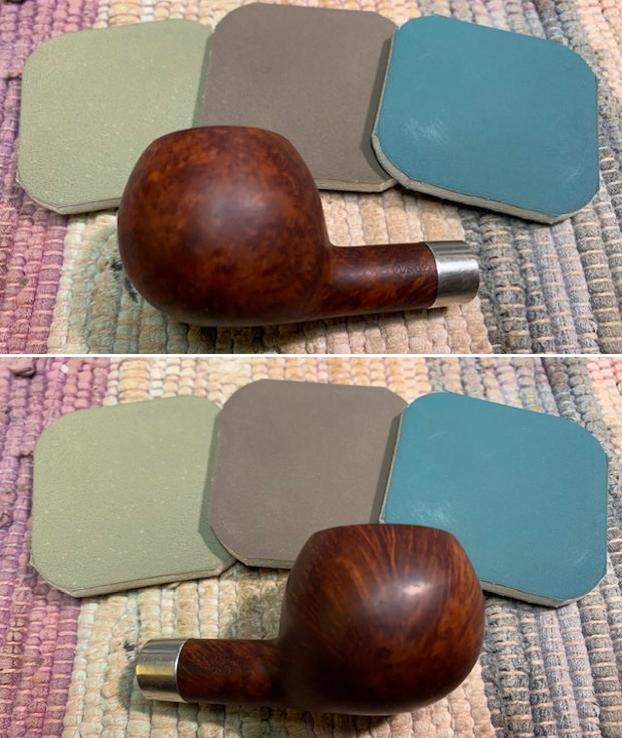
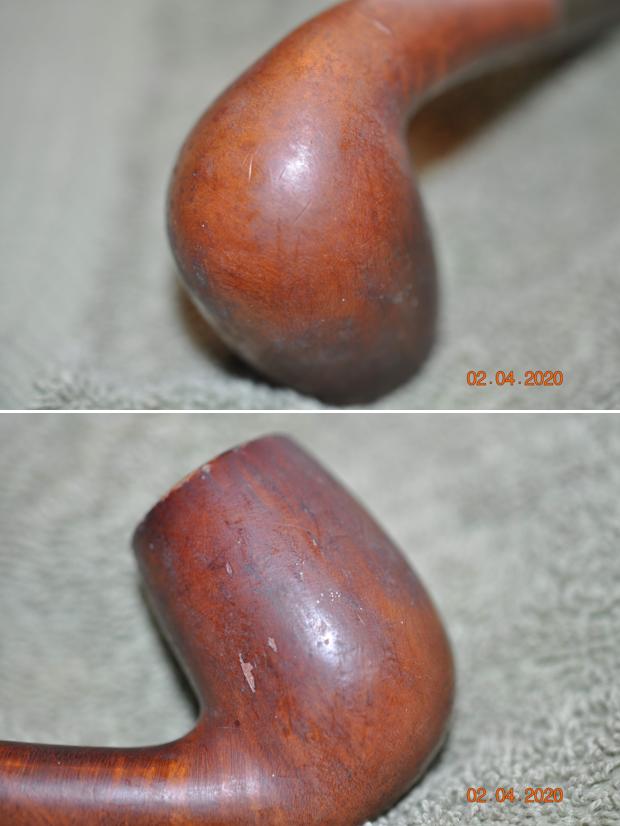
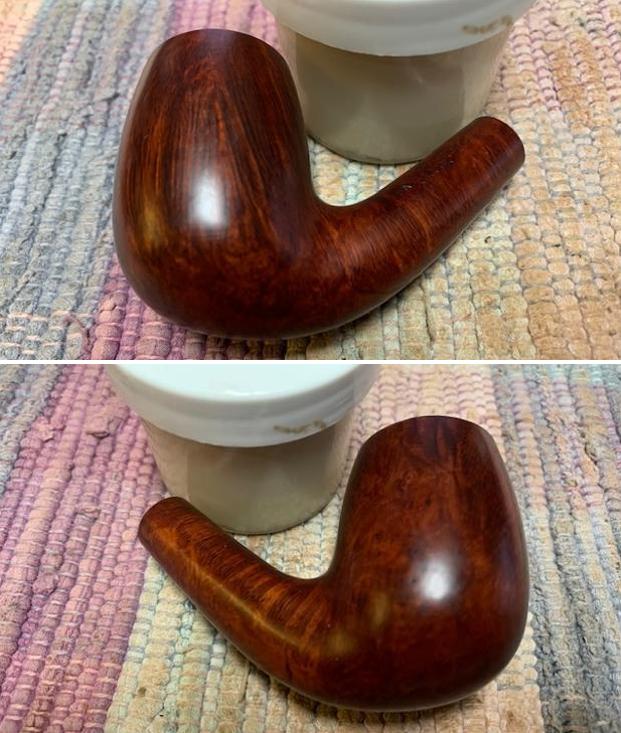
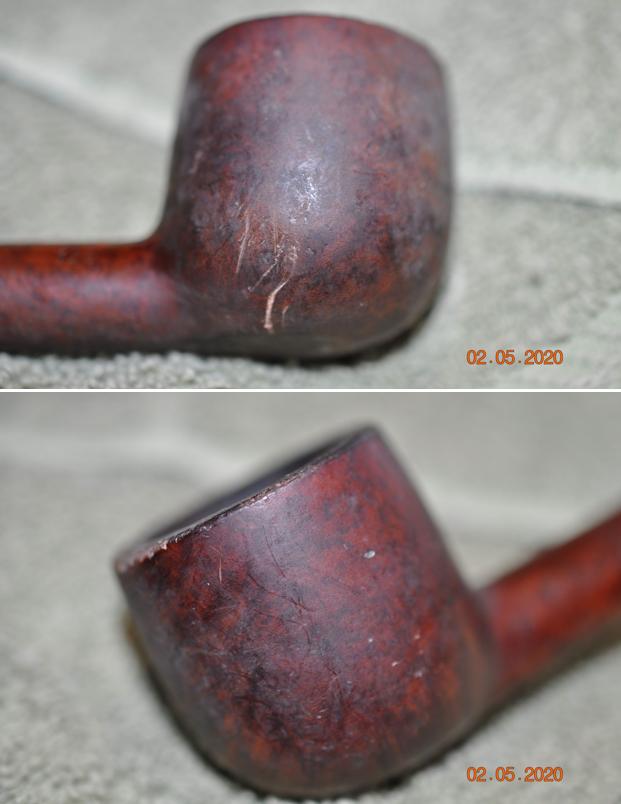
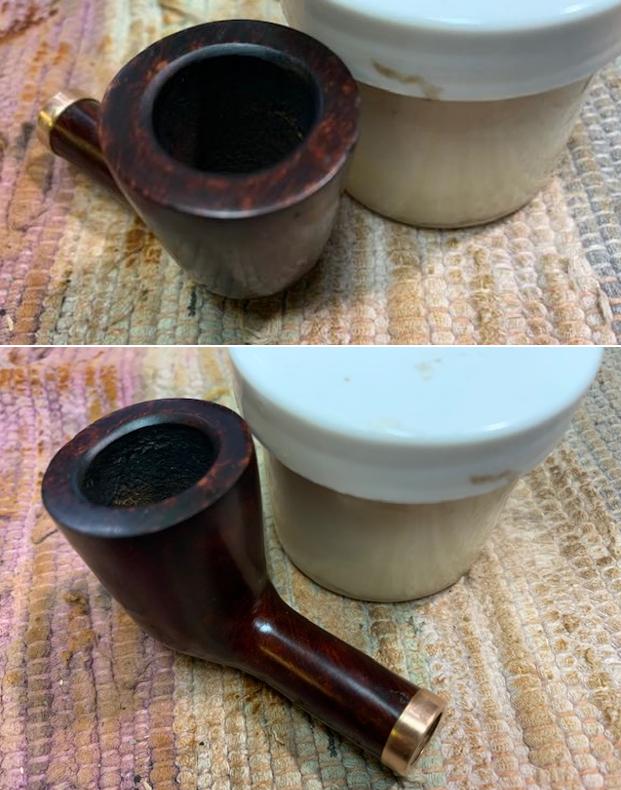
  With the main cleaning completed, a closer look at the stummel shows that the finish on the Lincoln is well nonexistent. Like the Lincoln London Style before it, the rim is devoid of finish and is worn down so that there is almost no blasted texture remaining. The out rim edge is also worn and chipped at a few places. An inspection of the blasted stummel surface reveals blotched finish remaining but basically a dull presentation. The following pictures show what I’m seeing.


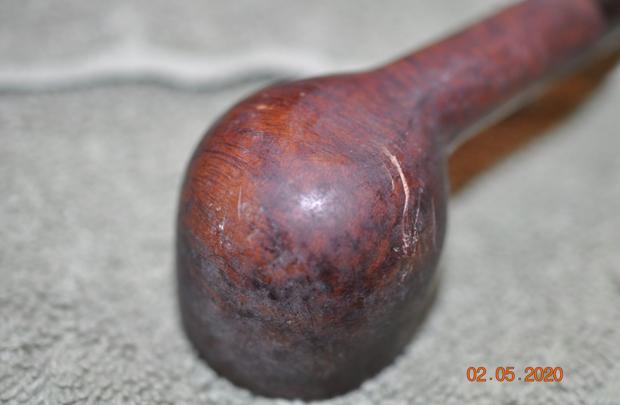
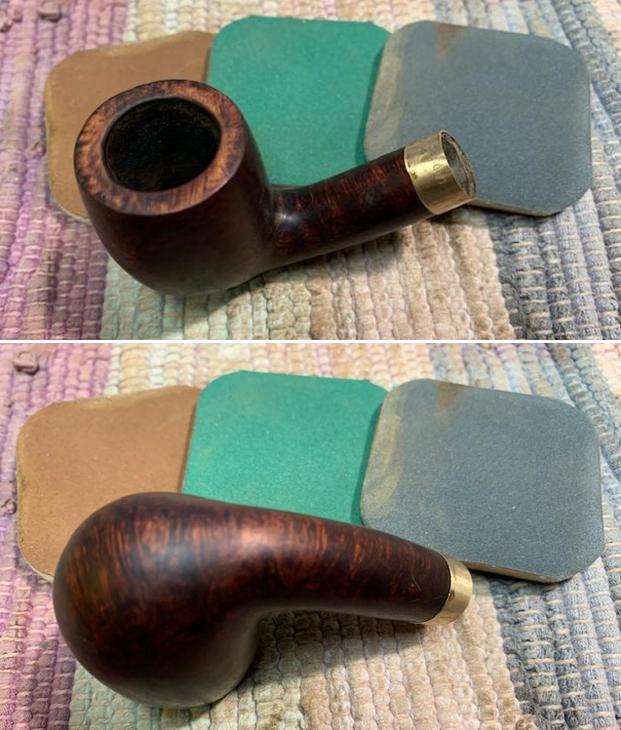
 Looking at the rim, without doubt the rim is worn and in need of refreshing. As with the Lincoln London Style, the challenge with the rim is solved by topping the rim to refresh the lines. Then, to restore the blasted surface on the rim, burrs will be used to rusticate the surface to emulate the blasted surface.
 Starting with the rim, the chopping board is used as a topping board. After placing 240 grade paper on the board, the stummel is inverted and rotated on the paper. The progress is checked often to make sure the plane of the rim is flat and not dipping. After taking a start picture, the progress is shown in the following pictures.

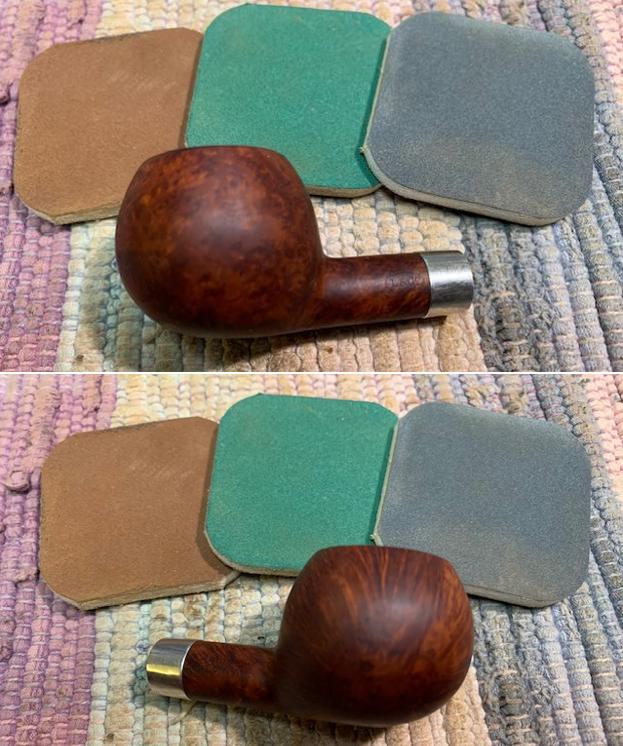
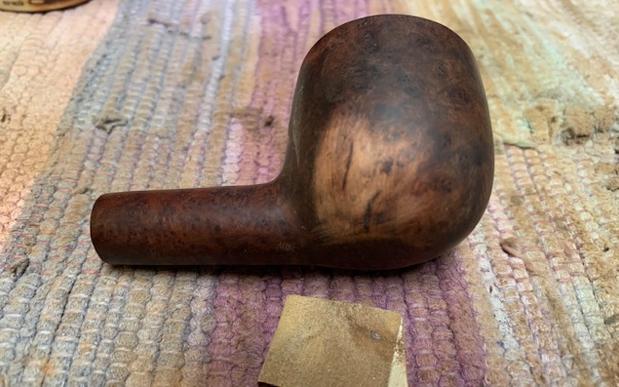
 I have come to the place where I will stop topping. There are still a few dips in the rim on the outer edge at the 5:30 and 7 o’clock positions. I’m not concerned about these because the one at 7 o’clock is a natural indentation from the blasted grain pattern. The process of roughing the rim surface should help to blend the other issues.
 Next, the rim surface is roughed up with burrs mounted on the rotary tool to emulate a blasted surface. I start with a round burr which I randomly touch on the surface.
 The results look good. A random order is taking shape.
 Next a cylindrical burr is used to ‘dance’ on the rim surface and inscribe cuts randomly but orderly over the work of the round burr.
 Again, I like the results. I’m careful to keep the burr action very conservative. I don’t want to dig a hole and go too deep or chew off the edge of the rim inadvertently.
 The next step is to freshen the entire stummel with a new dye. A cotton pad wetted with alcohol is used to wipe the surface to remove the vestiges of the old dye and to prepare for the new dye. The color of the dye, as with the Lincoln London Style I restored previously, is a very dark hue – the residue on the pad has a strong black angle to it.
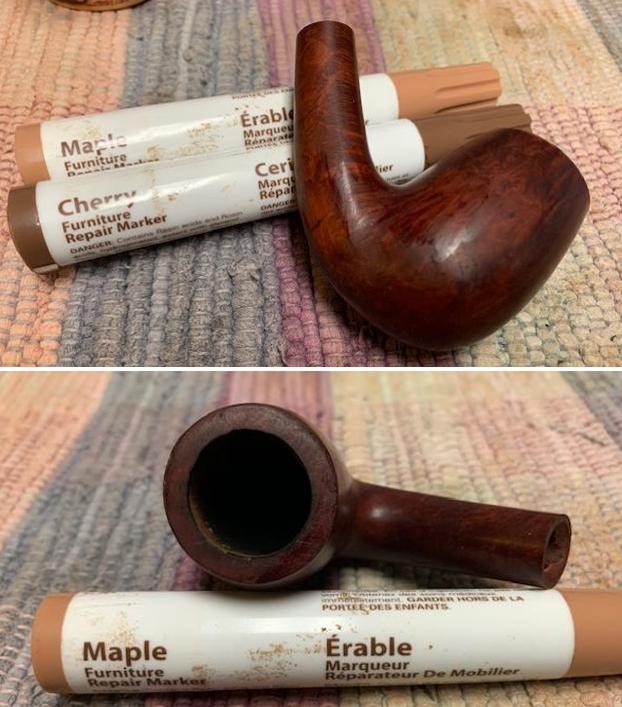
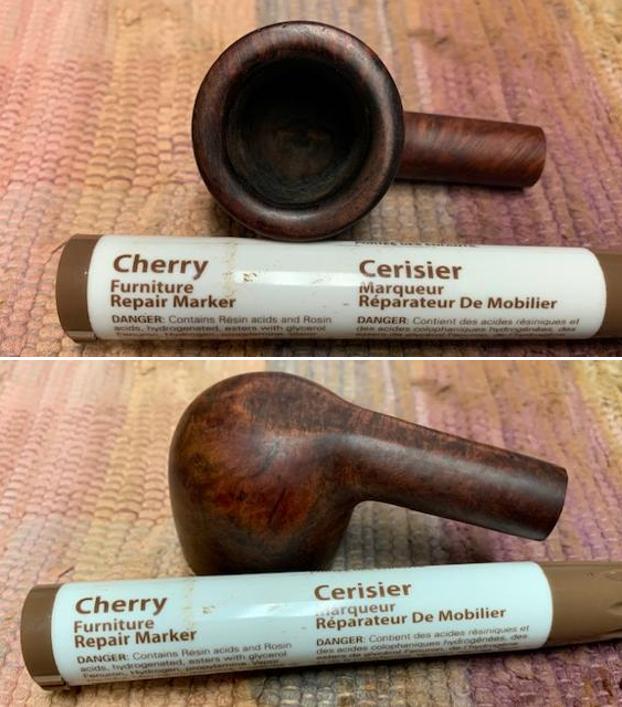
  I liked the results of the last Lincoln of applying a mixture of Fiebing’s Dark Brown Leather Dye with Black also mixed in. One difference this time around with the Lincoln London made is that I will pre-dye the bare rim first using a walnut-colored dye stick. I do this to first ‘even up’ the rim coloring so that the whole dye application will be more balanced.
 Next, after assembling all the dying components on the worktable, a small amount of Fiebing’s Dark Brown Leather Dye is mixed with Fiebing’s Black in a small glass. Then, using a hot air gun, the stummel is warmed to heat the briar so that it expands and is more receptive to the dye.
 Using a folded pipe cleaner, the dye mixture is painted onto the stummel blasted surface a section at a time and flamed using the lit candle. As aniline dyes, the alcohol immediately combusts for a couple seconds and the dye pigment is left in the briar grain.
  After going over the stummel painting and flaming the dye, the newly dyed stummel is put aside for several hours allowing the dye to settle. This ‘pause’ period seems to help the dye to be absorbed into the wood better and later not come off as easily through leaching.
 With the stummel resting, the stem is up next. It has been soaking in the Briarville.com Pipe Stem Oxidation Remover for several hours. I’ve been trying out this new (to me) product and so far, it’s been working well. After the stem started soaking, I remembered that the Lincoln stem logo was in decent shape. It will be interesting to see if the Oxidation Remover has adverse impact on the logo. We’ll see. After fishing out the stem, it is first rubbed with a dry cotton pad to remove the raised oxidation on the stem. I then wet another cotton pad with alcohol and scrub the stem more. Again, I’m pleased with the results. The stem seems to be clear of oxidation.
 Unfortunately, the logo deteriorated some. The logo impression, though, appears deep enough to receive fresh acrylic paint to sharpen it. This we’ll do later.
 To help condition the vulcanite stem, paraffin oil is applied and worked in. The stem is then set aside to absorb the oil.
 With the day closing, the internal cleaning is continued on the stummel with a kosher salt and alcohol soak. The first step is to fashion a cotton wick using a cotton ball. The cotton ball is pulled and twisted to form the wick which is inserted into the mortise to help draw the tars and oils out of the briar.
 A stiff wire that I took from a regular closet hanger, is used to guide the end of the cotton wick down the mortise to the draft hole. The bowl is then filled with kosher salt which does not leave an aftertaste. After the stummel is placed in the egg carton to keep it stable and to angle the stummel so that the top of the bowl and the end of the shank are roughly level. Using a large eye dropper, isopropyl 99% then fills the bowl until it surfaces over the salt. I wait about 10 minutes to top off the alcohol after it has been absorbed into the stummel.
 The stummel is then put aside to soak through the night.
 The next morning soiling is evident in both the salt and the wick indicating the process of drawing the oils and tars from the briar through the several hours of soaking. The expended salt and wick are tossed in the waste, the bowl is wiped with paper towel and I blow through the mortise to dislodge any remaining salt crystals.
 To make sure all the residue is cleaned up, a few pipe cleaners and cotton buds are used to finish the internal cleaning. A whiff of the chamber reveals a very pleasing fresh aroma – no ghosting of odors.
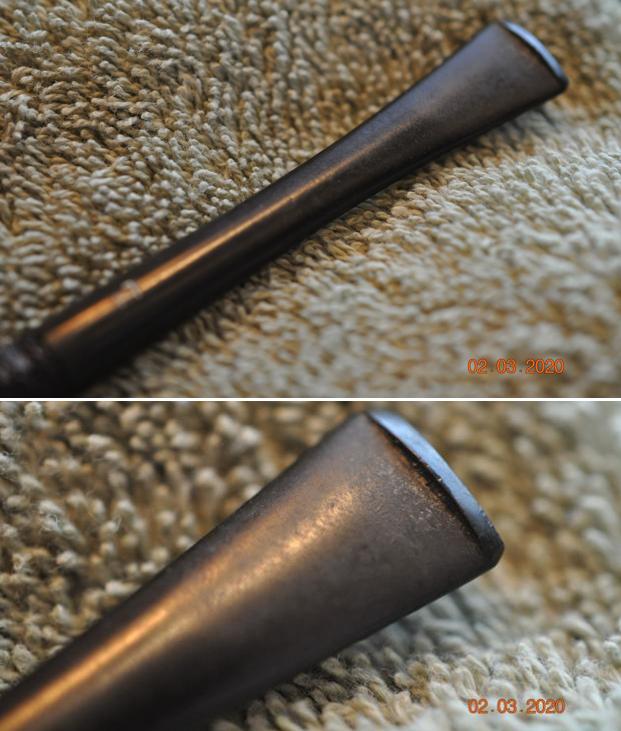
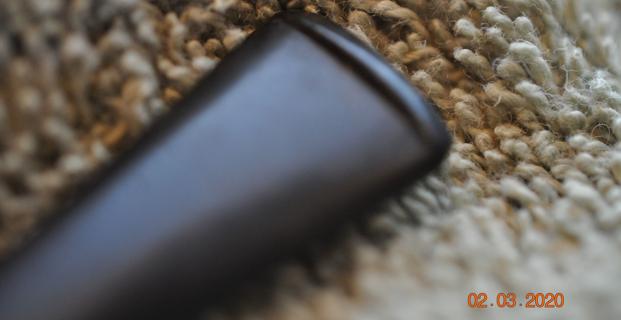
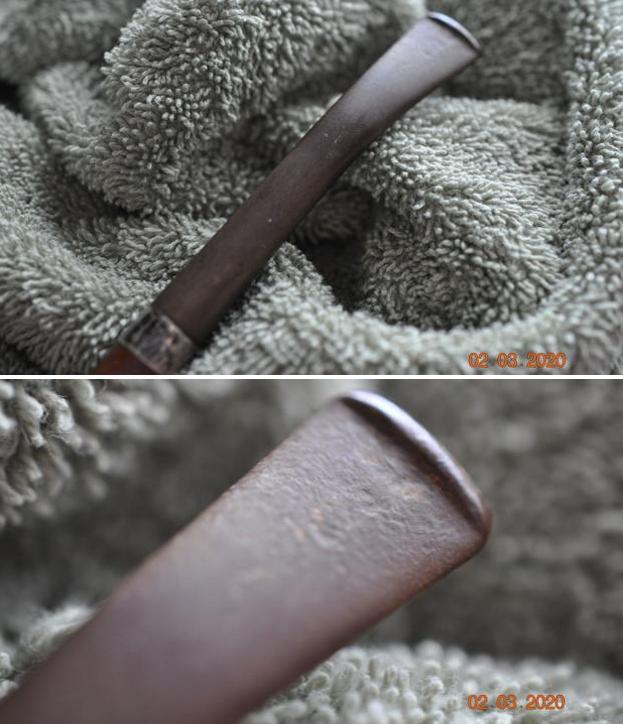
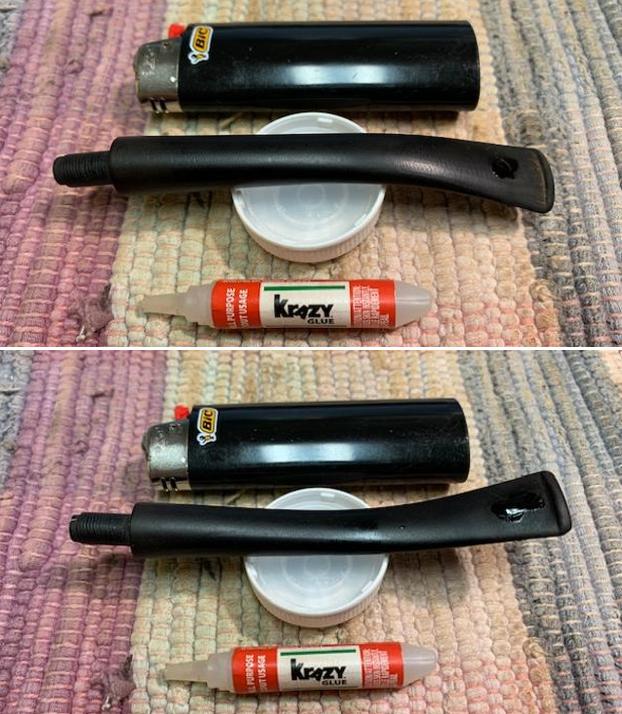
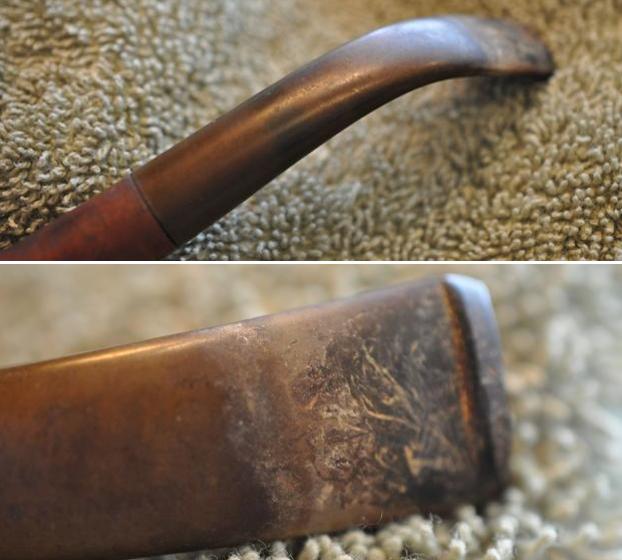
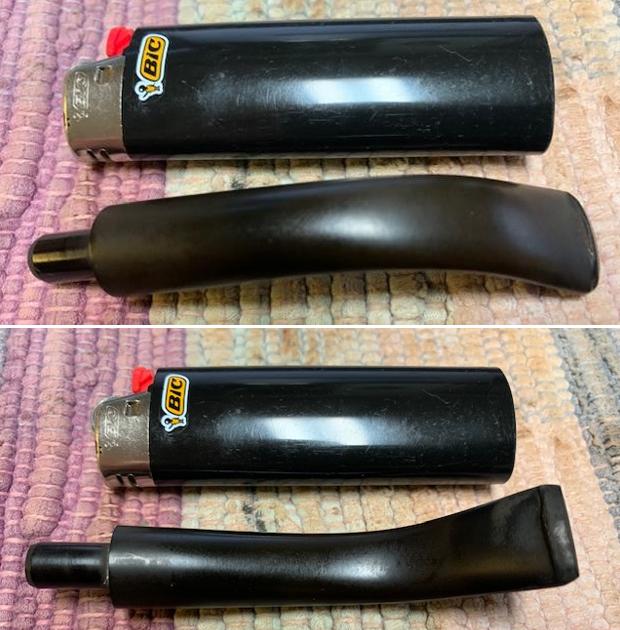
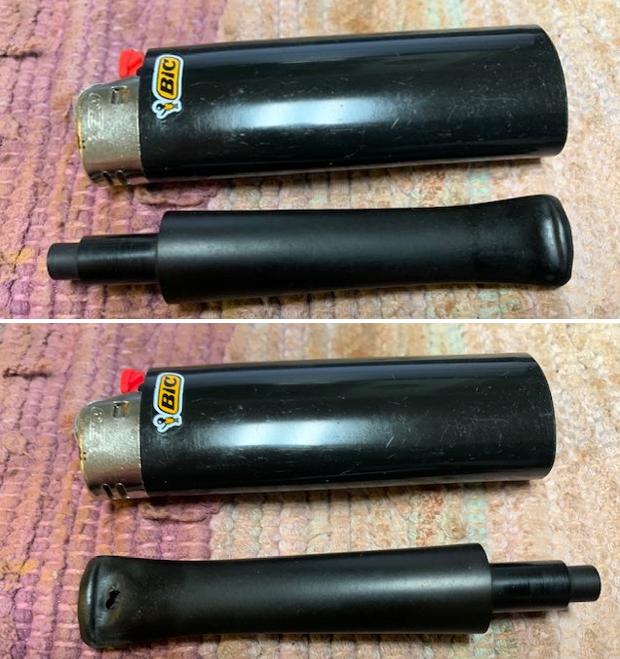
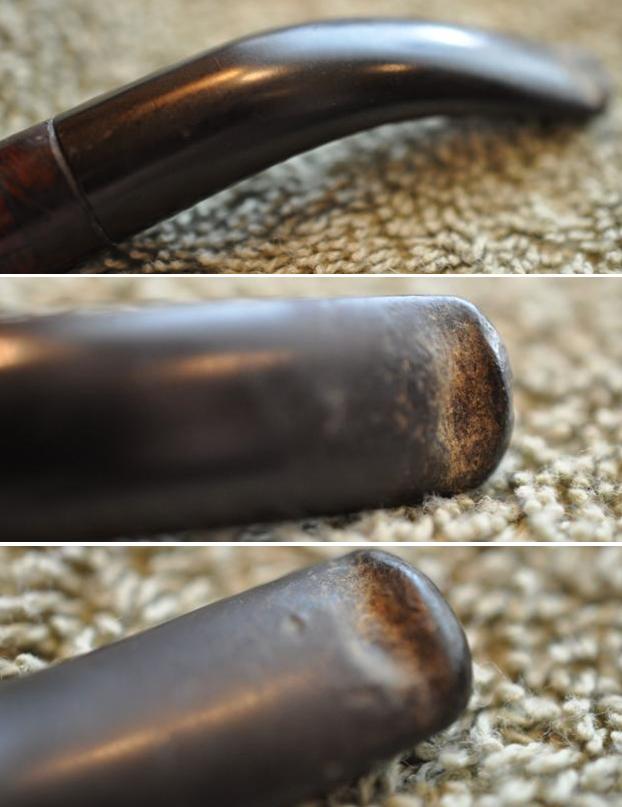
 Before working on ‘unwrapping’ the newly dyed stummel that has been ‘resting’ through the night, I continue to bring the stem up to speed. The soak in Briarville.com’s, ‘Pipe Stem Oxidation Remover’ has done a good job it seems by what I can see now. The upper and lower bit have tooth chatter and bite compressions which need addressing. To minimize the chatter and compressions so that a minimal amount of sanding is necessary, I use the heating method. I paint the bit with the flame of a Bic lighter which heats the vulcanite rubber compound and expands it to reclaim its original condition – or closer to it. The comparison pictures of before and after show the results after painting the upper and lower bit several times. The upper bit should need only sanding, but the lower bit, though much better than before the heating, will need a patch to fill the compression.
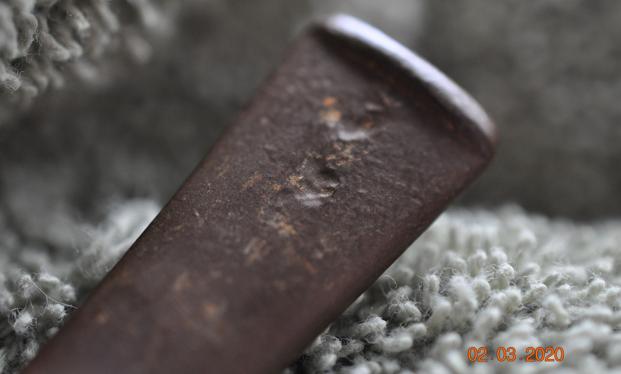
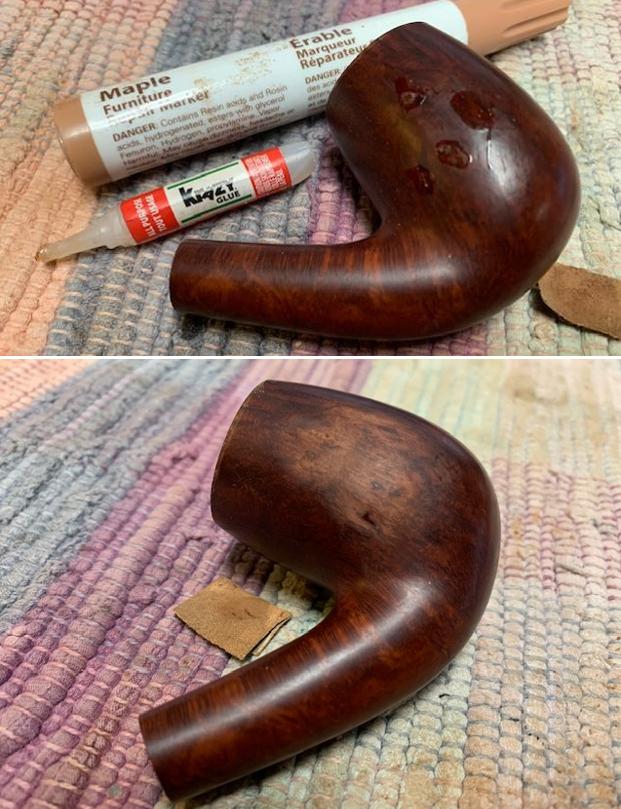
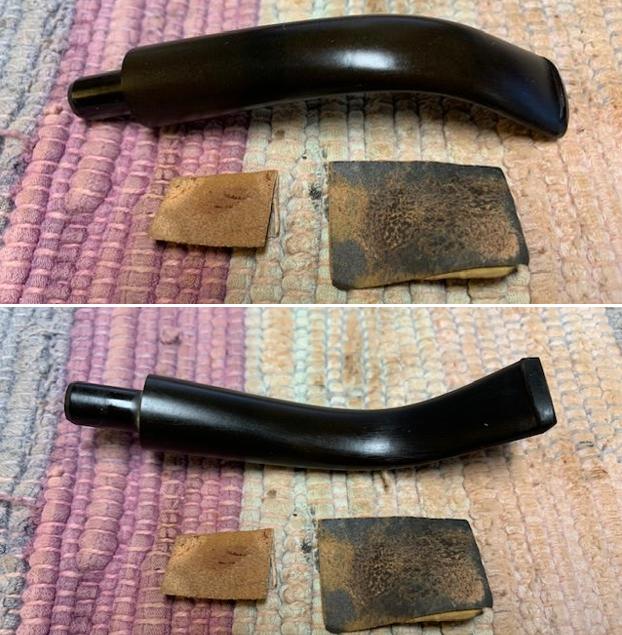
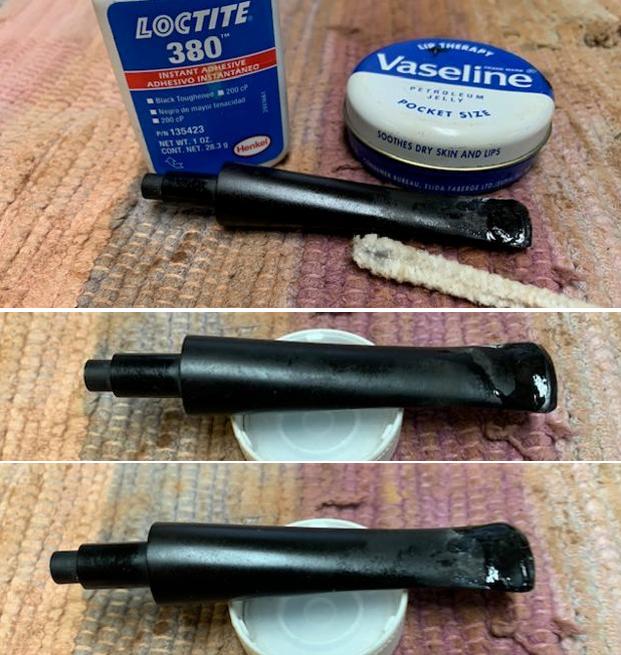
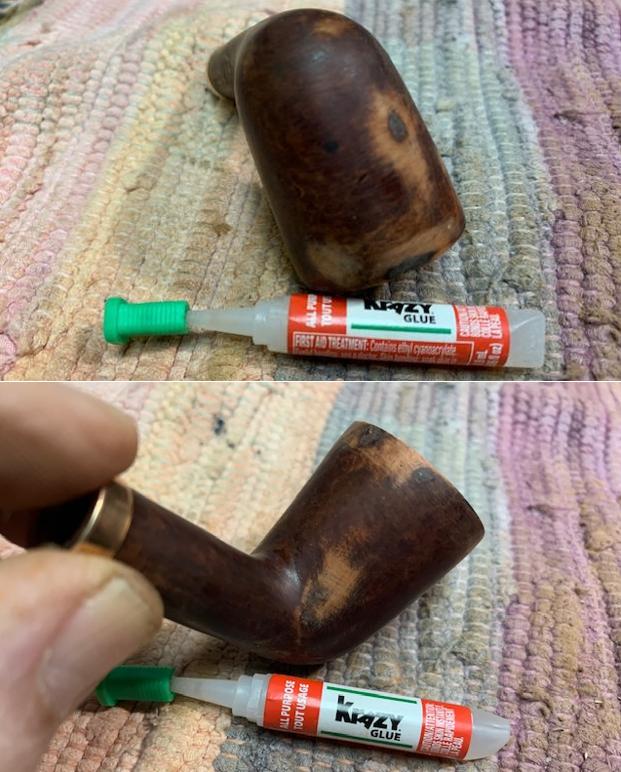
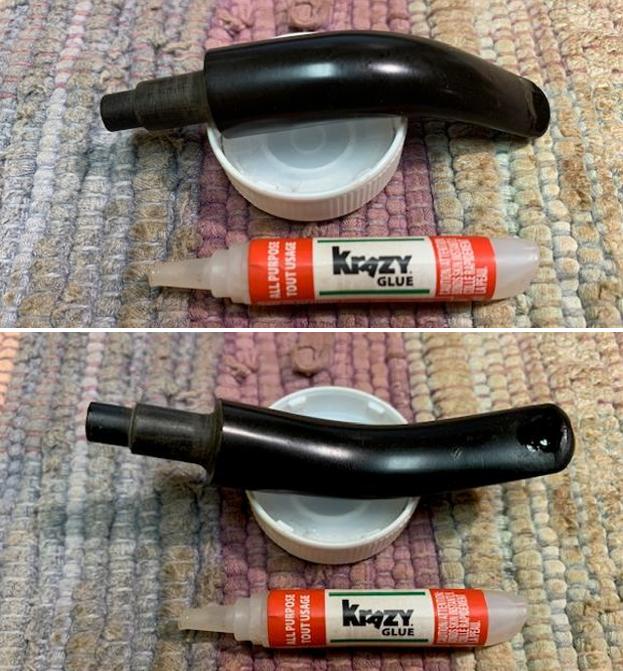
 To patch the lower bit compression, medium black CA glue is spot dropped filling the indentation. After applying the CA glue, the stem is put aside allowing the glue to cure.
 Turning now to the flamed stummel which has rested through the night, its time to unwrap the crusted dye shell. After mounting a felt buffing wheel to the rotary tool and setting the speed at about 30% full power, the coarser Red Tripoli compound is applied to the crusted blasted surface. The felt wheel is purged often with the edge of the metal rotary tool tightening wrench to keep it softer and to clear the flamed dye that collects during the unwrapping process.
 Following the application of Tripoli compound with the felt wheel, the bowl is wiped with a cotton pad wetted with alcohol. This is done to remove excess dye from the rough blasted surface.
 Next, Tripoli compound is applied a second time to the surface using a cotton cloth buffing wheel with the speed increased to about 50% full power. This further sharpens the dyed blasted surface, and the cotton cloth wheel is able to reach the surface area that was not as accessible to the firmer felt wheel.
 Again, after the use with the cotton cloth wheel, the bowl is wiped with alcohol and more excess dye is removed. At this point, the next step is to apply Blue Diamond compound.
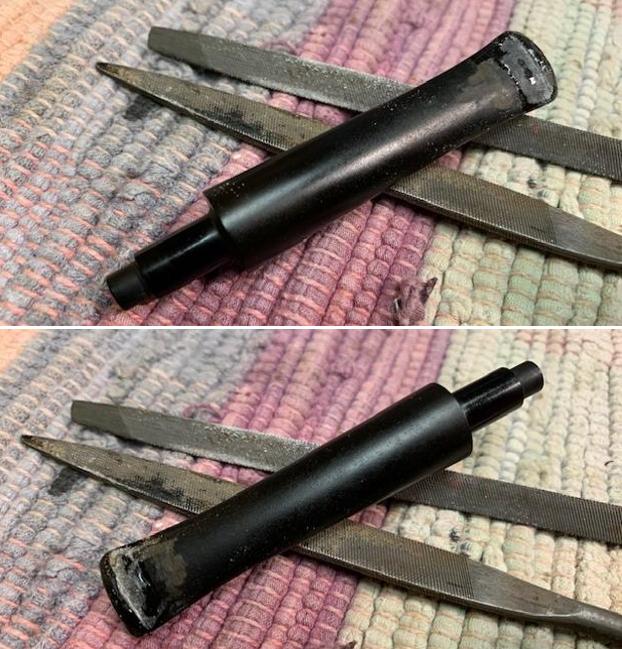
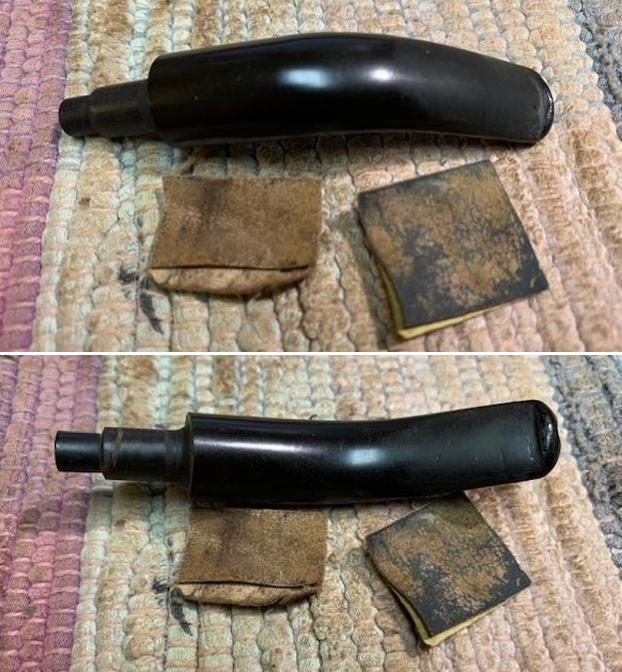
  With the stummel waiting, I continue with the stem to catch it up. The black CA glue has cured on the lower bit and the excess patch material is removed using a flat needle file. With the file, the upper and lower button lips are also refreshed.
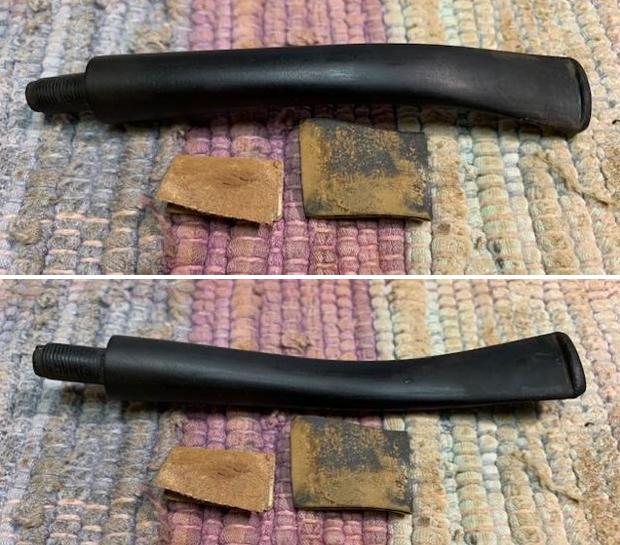
 Next, 240 sanding paper is used to sand the remaining excess patch material on the lower bit as well as to remove the remaining residual tooth chatter.
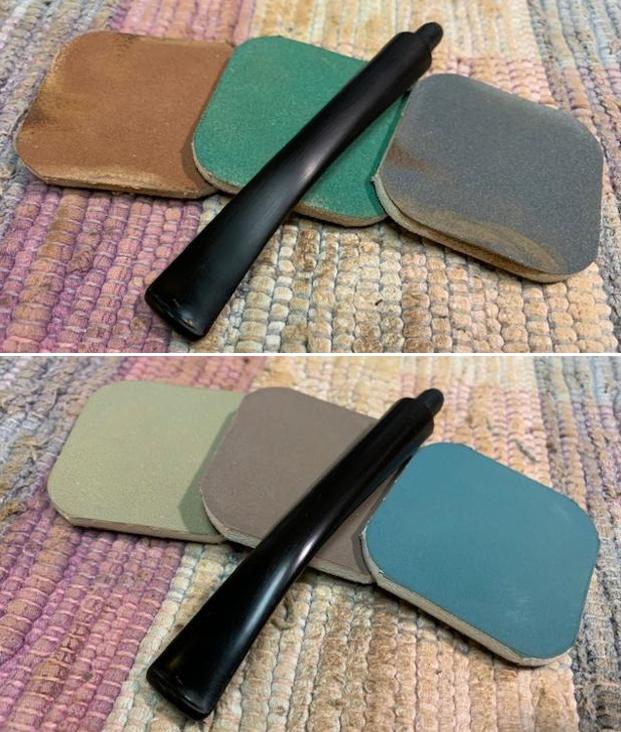
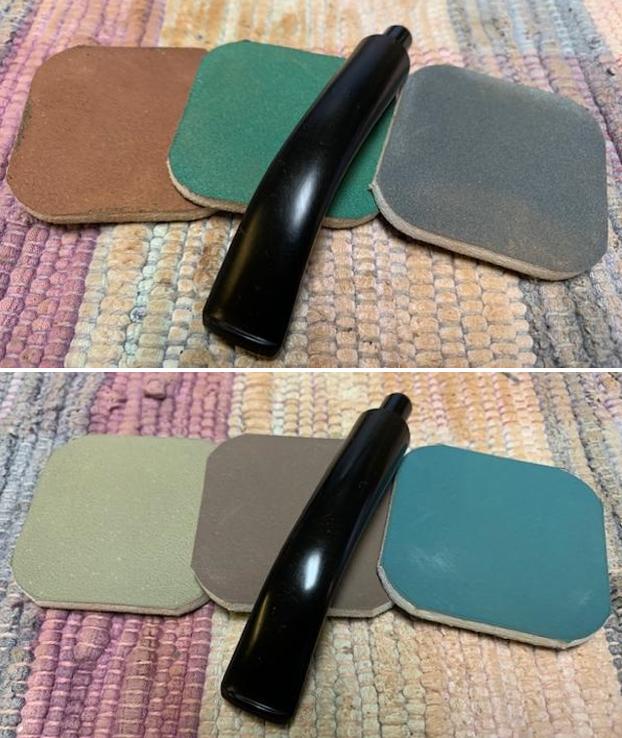
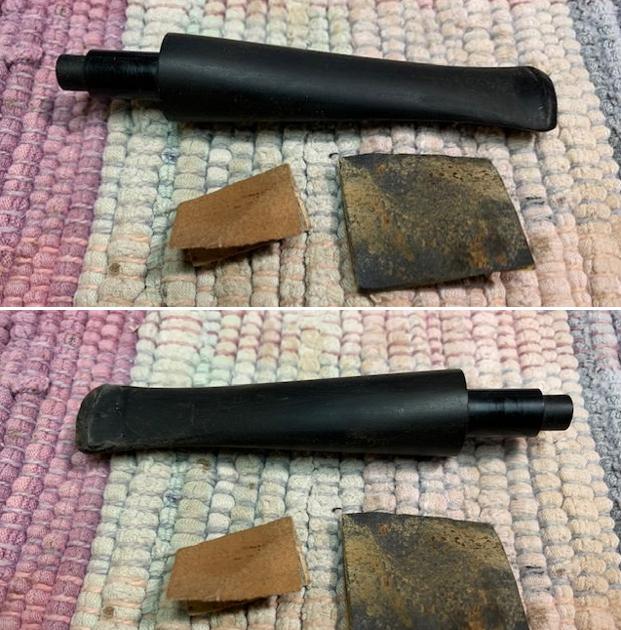
Sanding with 240 paper is expanded to the entire stem, careful to guard the stem logo. The stem is reunited with the stummel during this sanding with the plastic disk wedged between. The disk guards the shouldering of the stem facing of the stem. Next, using 600 grade paper the stem is wet sanded. This is followed by applying 0000 grade steel wool.
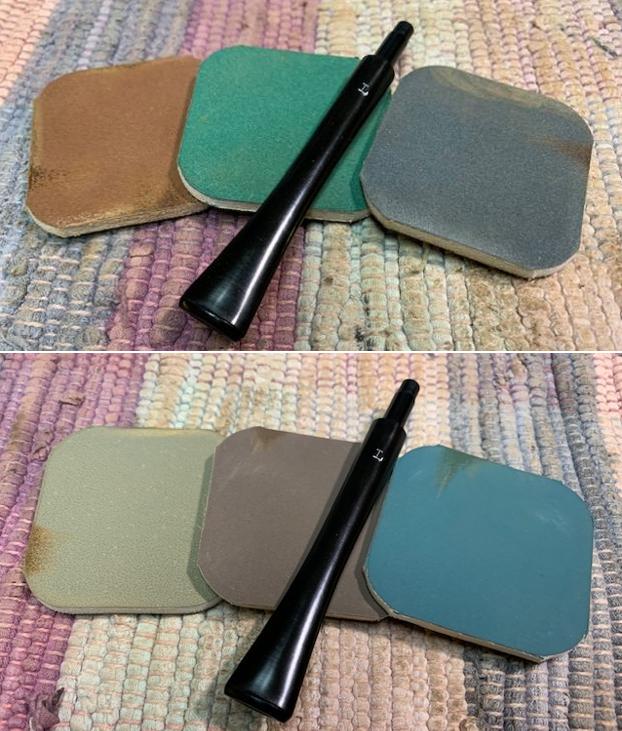
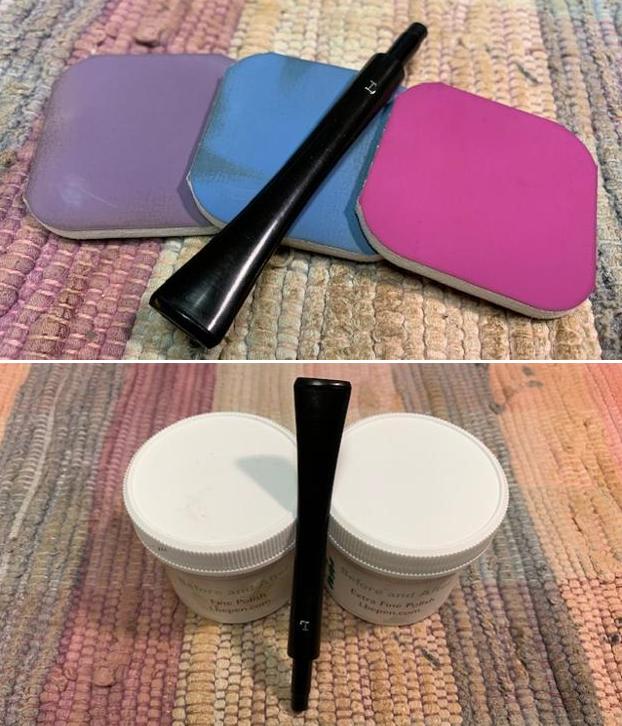
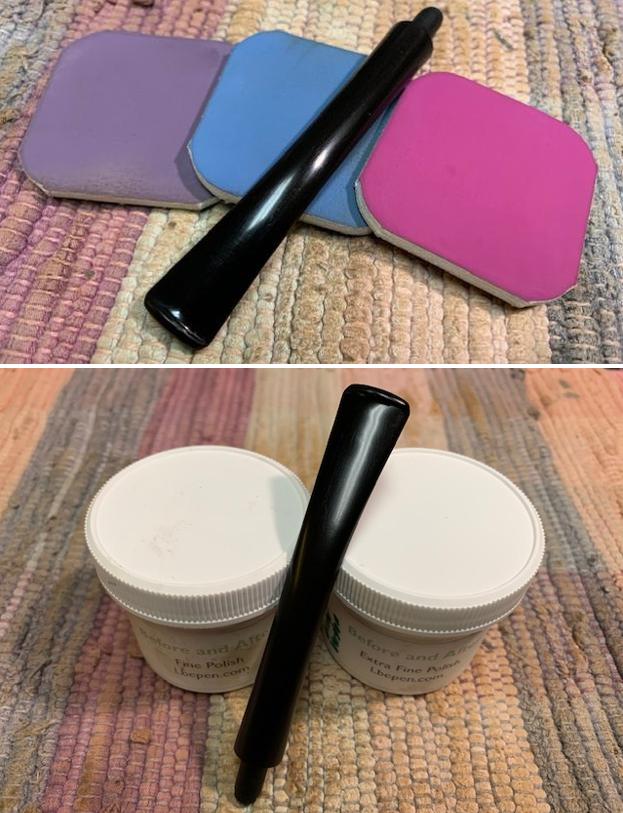
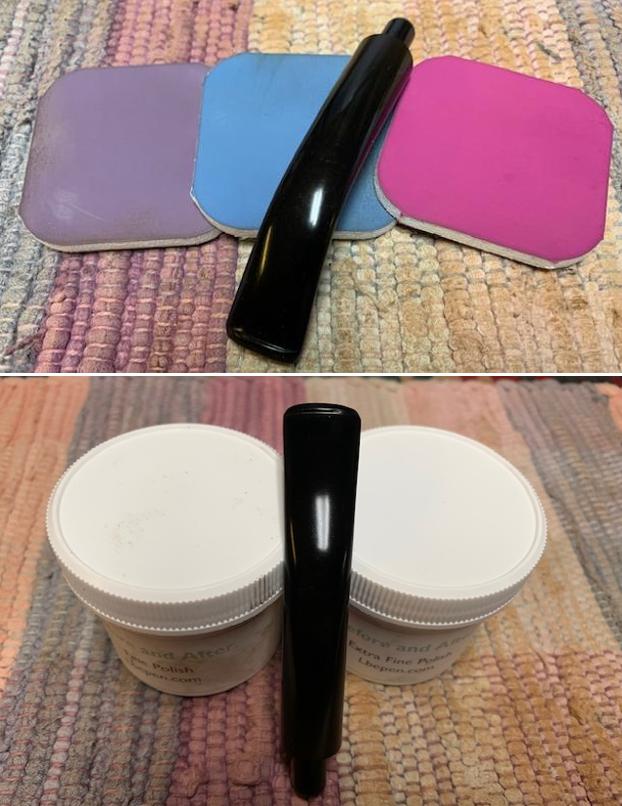
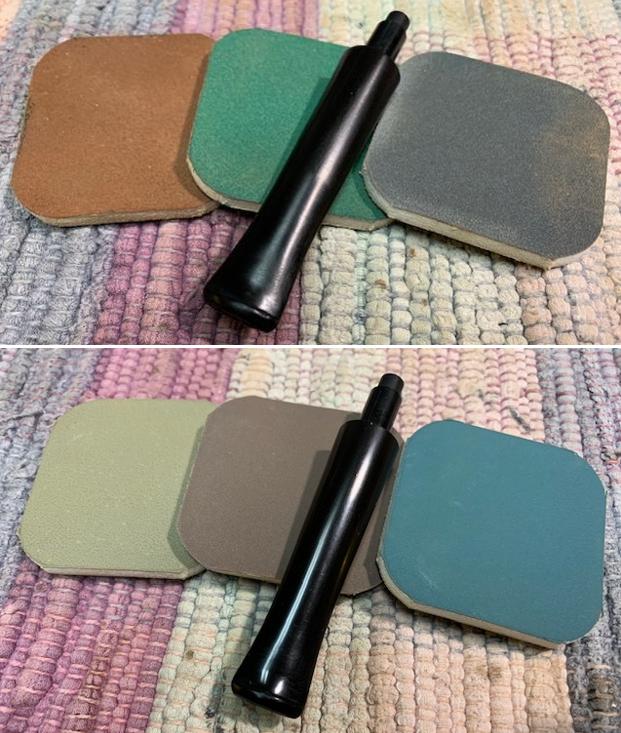
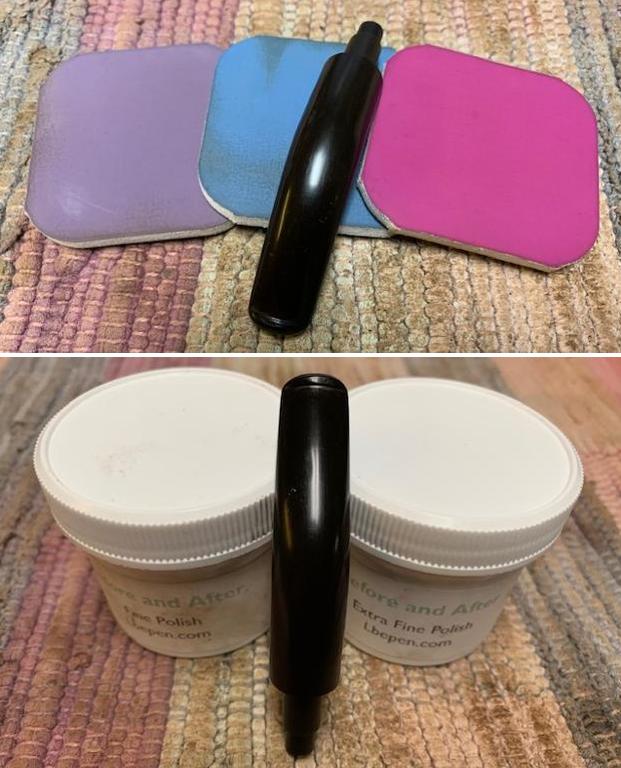
 The full regimen of micromesh pads is applied next starting with wet sanding using pads 1500 to 2400. This is followed by dry sanding with pads 3200 to 4000 and 6000 to 12000. Between each set of 3 pads Obsidian Oil is applied to condition the vulcanite and to guard against oxidation.
 The stem has caught up with the stummel. After reuniting the Lincoln stem and blasted stummel, another cotton cloth buffing wheel is mounted on the rotary tool with the speed set at about 40% full power. Blue Diamond is then applied to the pipe – stem and stummel.
 Following the application of Blue Diamond compound, a felt cloth is used to wipe down/buff the pipe to remove compound dust before the application of wax.
 Before applying the wax, the circled star-L-star stem logo needs refreshing. All the paint has left the imprint and the good news is the imprint looks to be sufficiently distinct to hold new acrylic paint. This was not the case with the Lincoln London Style that was last on the worktable.
 To begin, white acrylic paint is put over the entire stem logo.
 My practice is to then daub the wet paint with a cotton pad. The result of this is that the excess paint is absorbed, and the paint dries almost immediately.
 A toothpick is then employed to clear the excess paint over the logo. This is done by lightly scraping over the logo with the side edge of the toothpick. The toothpick scrapes away the paint that is above the impression of the logo and this sharpens the logo image. I have had times when the fresh paint is peeled up and pulled out of the impression and then needed another application of paint. This logo did this once with a small portion of the upper ‘L’. After using the side of the toothpick, the point of the toothpick is then carefully used to scrape off excess paint that was too close to the imprint channels to come off with the side of the toothpick. This takes a bit of patience. To finish, the cotton pad is run over the logo with some pressure like it is being sanded – a very gentle abrasive. This helps to sharpen the logo even more. The refreshed logo looks good.
 With the Lincoln stem stamping refreshed, another cotton cloth buffing wheel is mounted on the rotary tool maintaining the same speed of 40%. Carnauba wax is then applied to the pipe. When completed, the pipe is given a rigorous hand buffing to raise the shine and to disperse excess wax on the blasted surface.
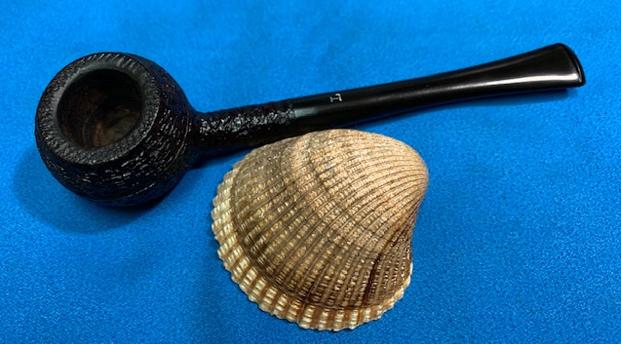
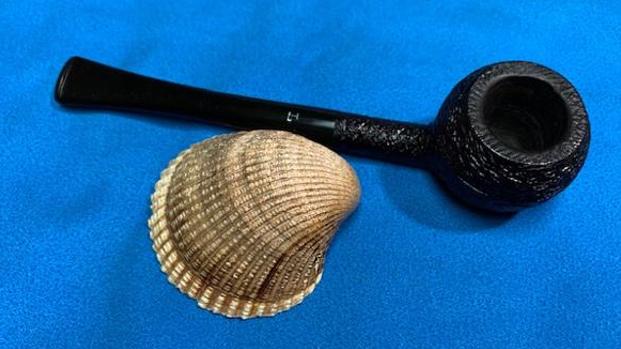
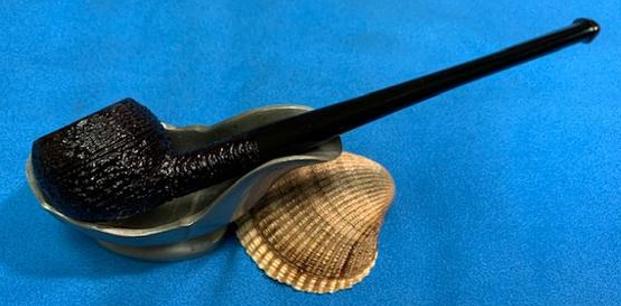
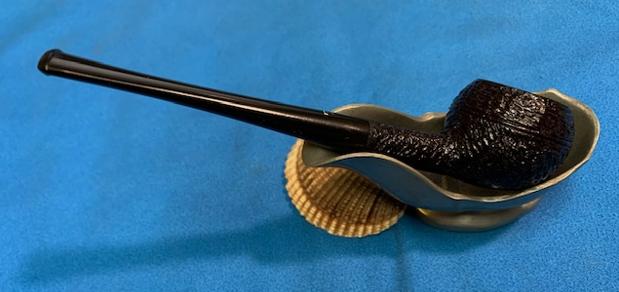
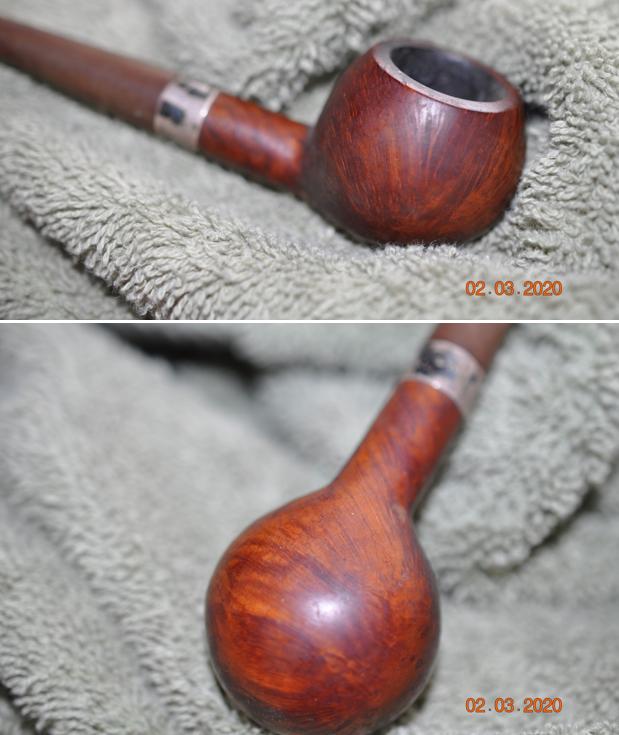
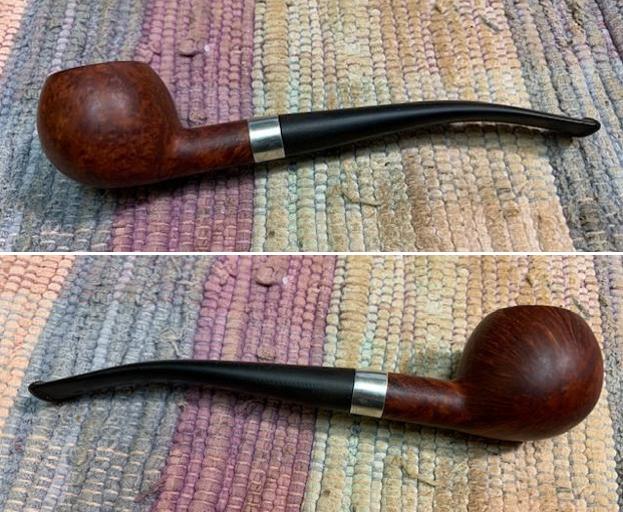
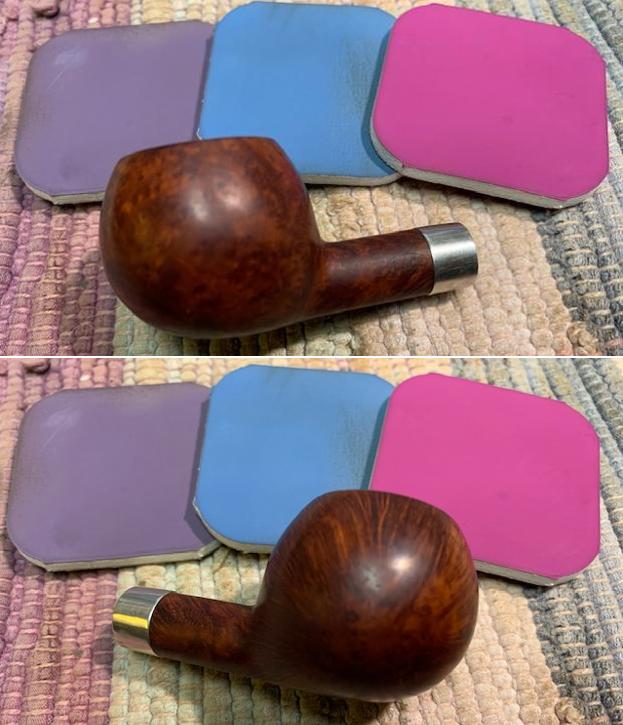
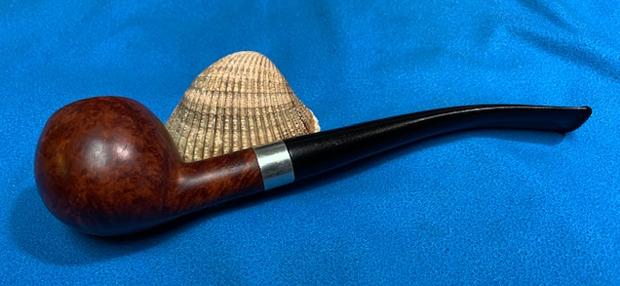
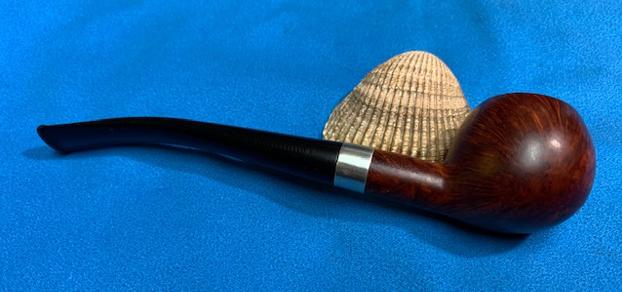
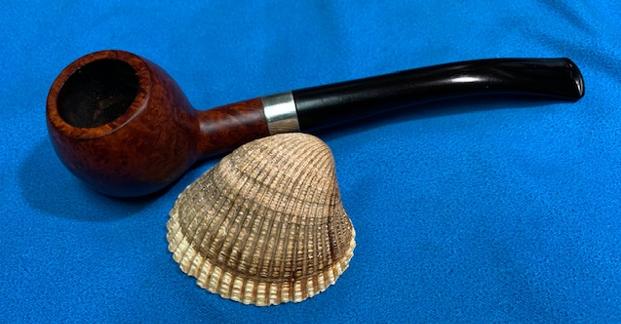
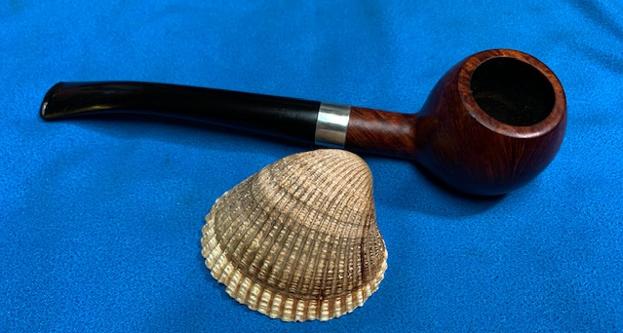
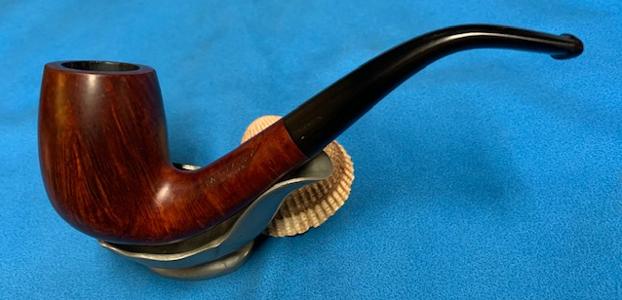
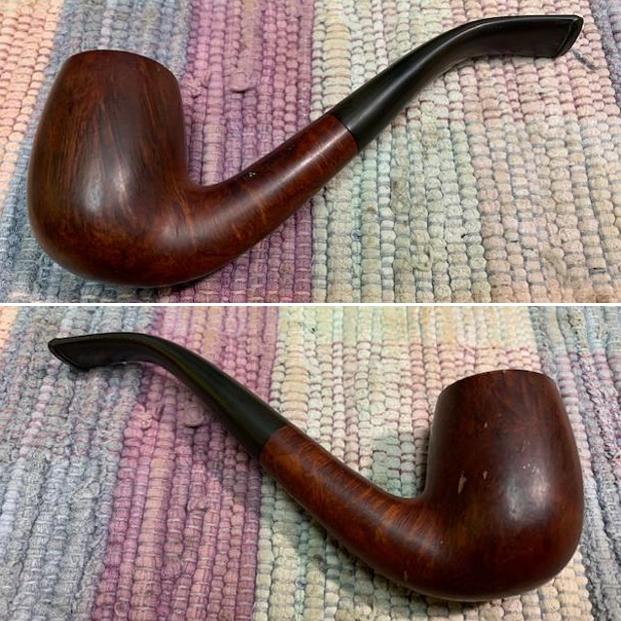
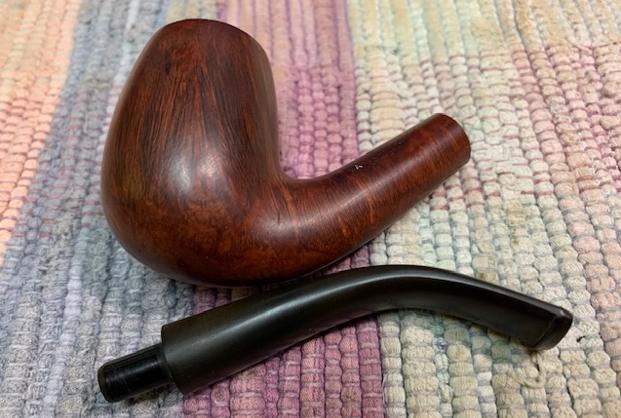
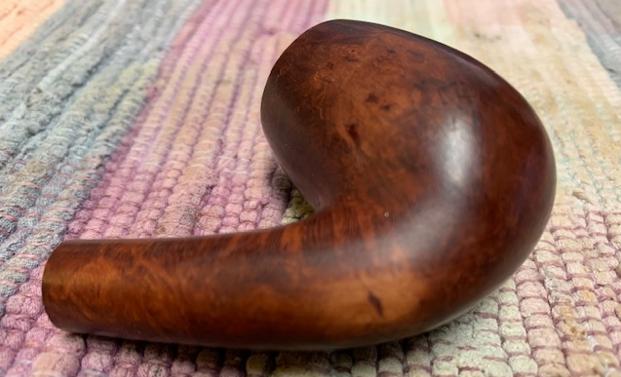
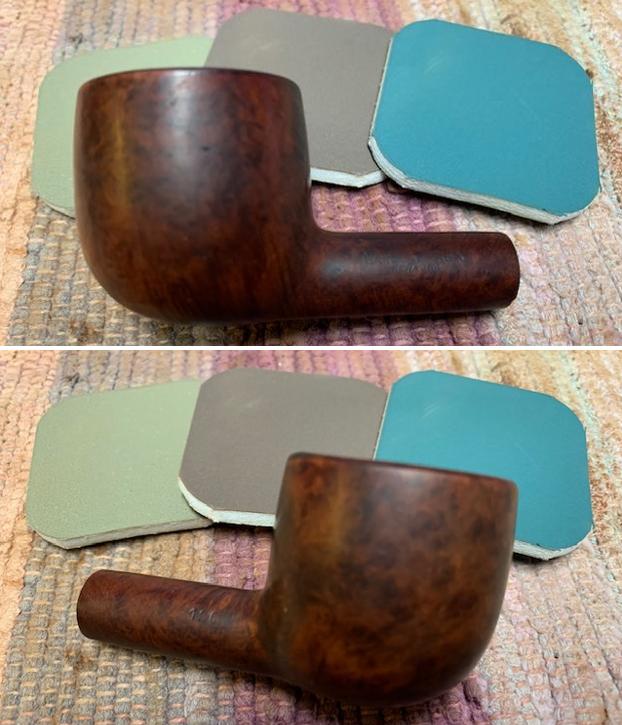
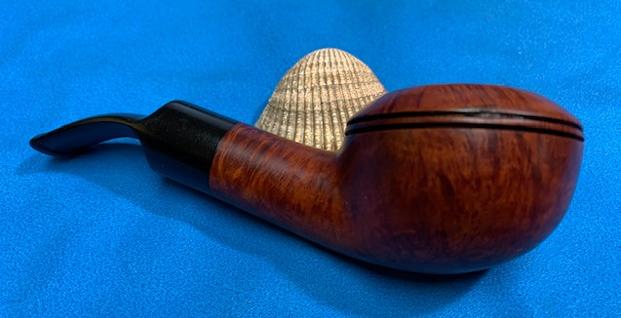
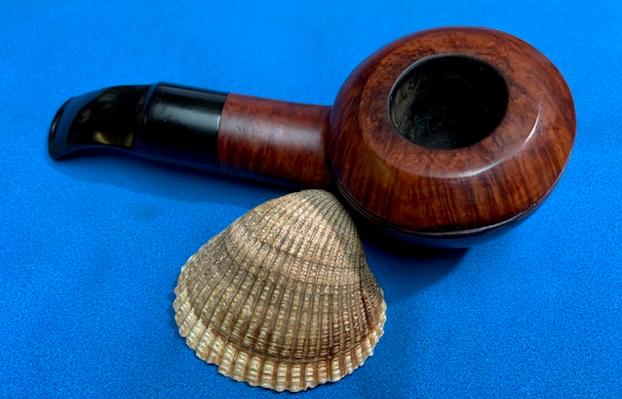
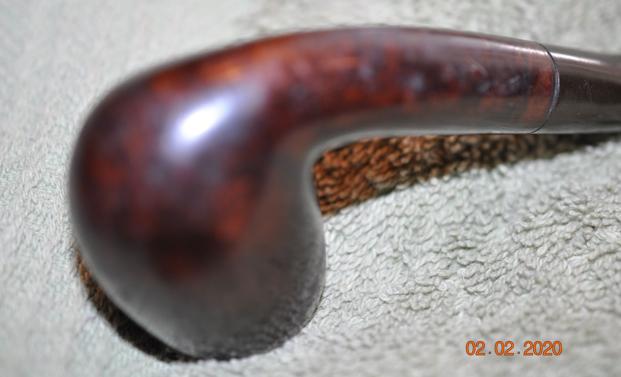
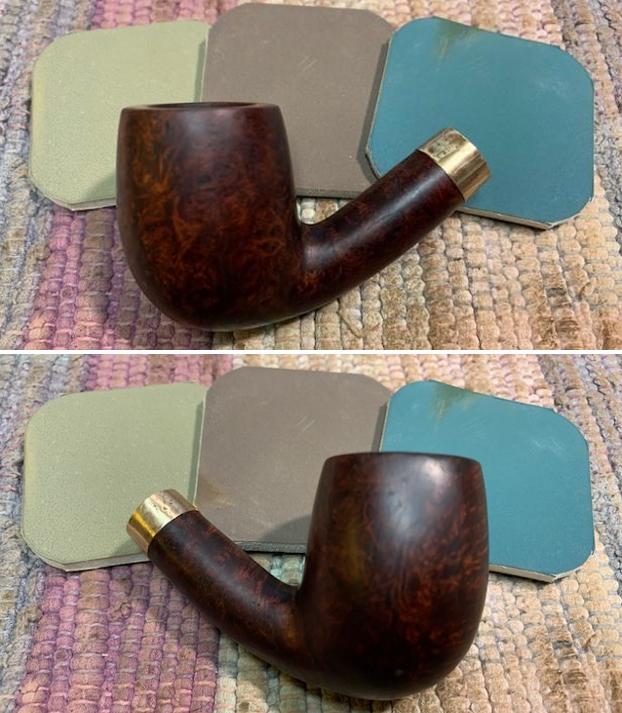
 This second ‘work horse’ Billiard came out well. The blasted surface has the textured flecking in the color to give it an eye appeal along with the touch. The rim’s repair came out nicely emulating a refreshed blasted surface. Byron commissioned the Lincoln London Made Real Sandblasted Briar and will have the first opportunity to claim him in The Pipe Steward Store benefiting the Daughters of Bulgaria. Thanks for joining me!


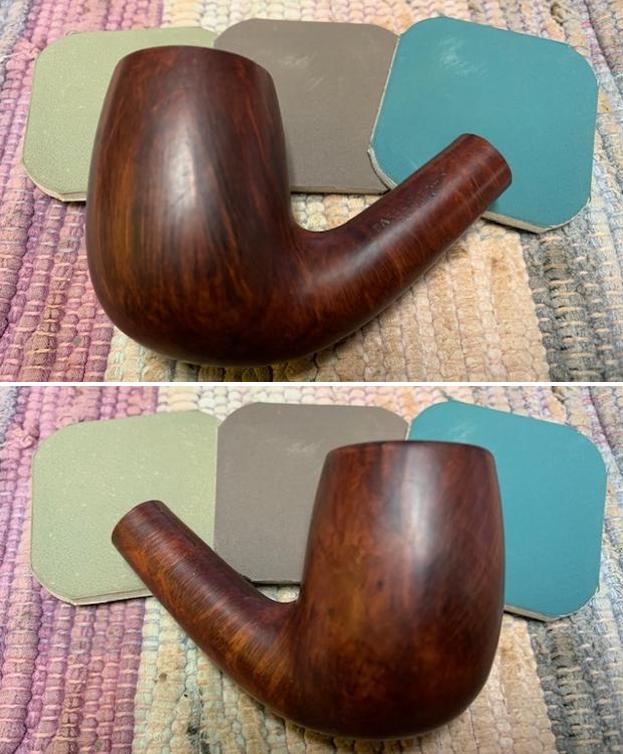
 I have finished restoring all of the Barclay-Rex pipes in the collection of pipes that we purchased from the older gentleman. He sent me the photos and I was amazed at what I saw. You have seen many of the pipes that he had. These included Dunhill, BBB, Orlik, Barclay Rex, a cased Ben Wade, an H. Simmons all briar, Hardcastles and some Meerschaums. There were also some assorted others that I will get to in the days ahead. It was a great collection.
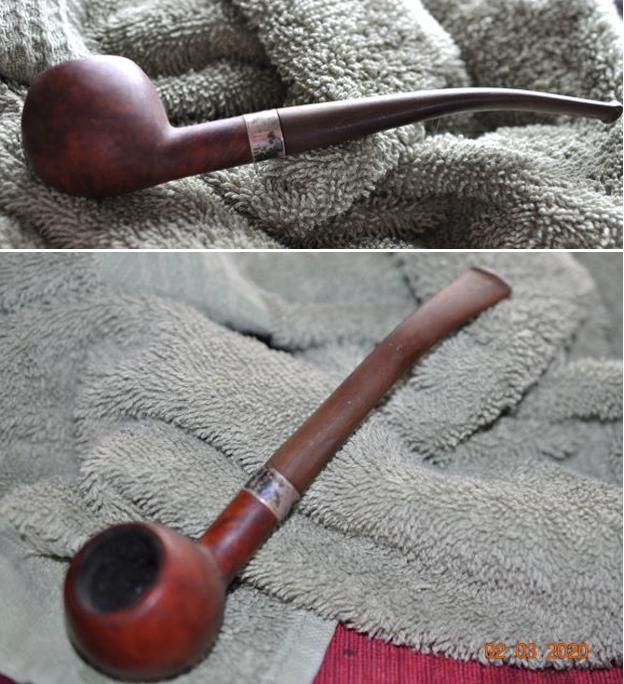
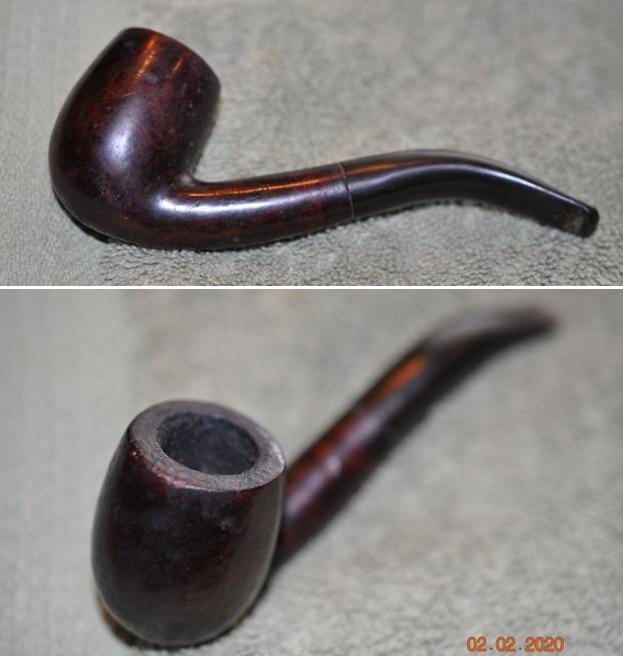 Jeff took photos of the bowl, rim top to show the thickness of the cake in the bowl and the thick lava on the rim top. The rim top and both inner and outer edges looked good. But if there are issues it will become clearer after the clean up. He took photos of the top and underside of the vulcanite stem showing the oxidation, calcification, tooth marks, chatter and wear on the stem and button.
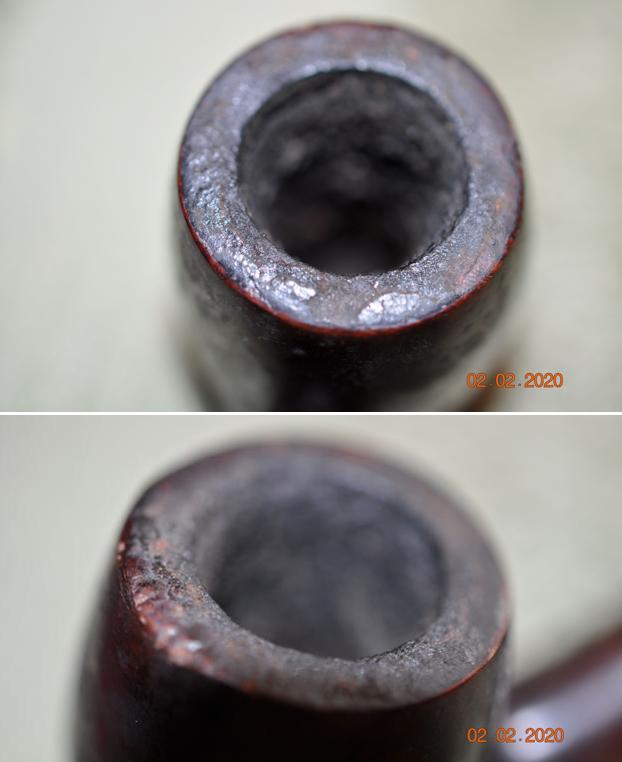
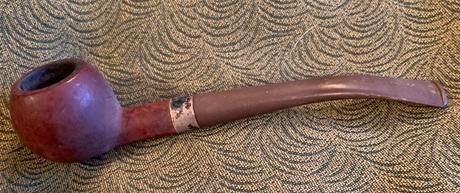
 Jeff took photos of the sides and heel of the bowl to show the condition of the briar. You can see the beautiful shape of the bowl even through the dirt and debris of many years.
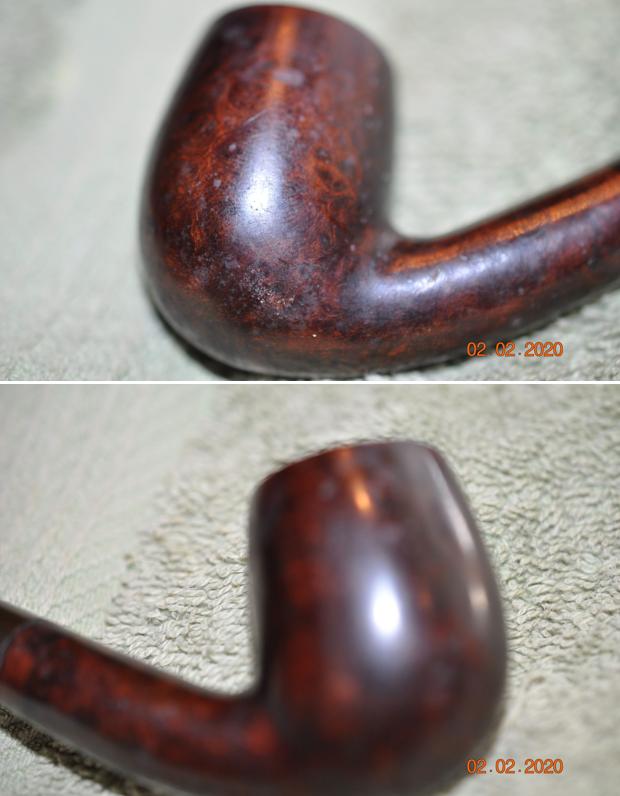
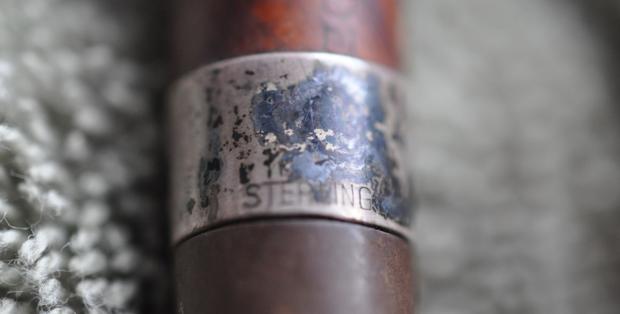
 Jeff took a photo of the stamping on the left side of the shank to capture that it is faint but readable.
 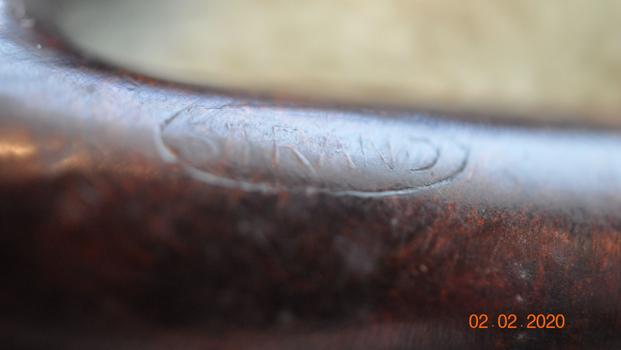 As is my habit I turned to Pipephil’s site but there was no information on the brand that I could find there in the several spots that I looked at.
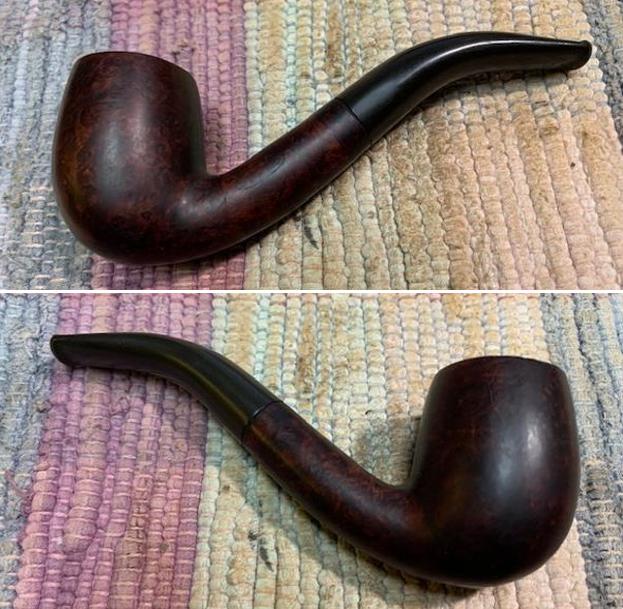
 I took some close up photos of the rim top and the stem surface. The top and inner and outer edge of the rim look very good. There was light damage on the inner edge of the bowl. The stem was older Hard Rubber and had deep tooth marks just ahead of the button.
 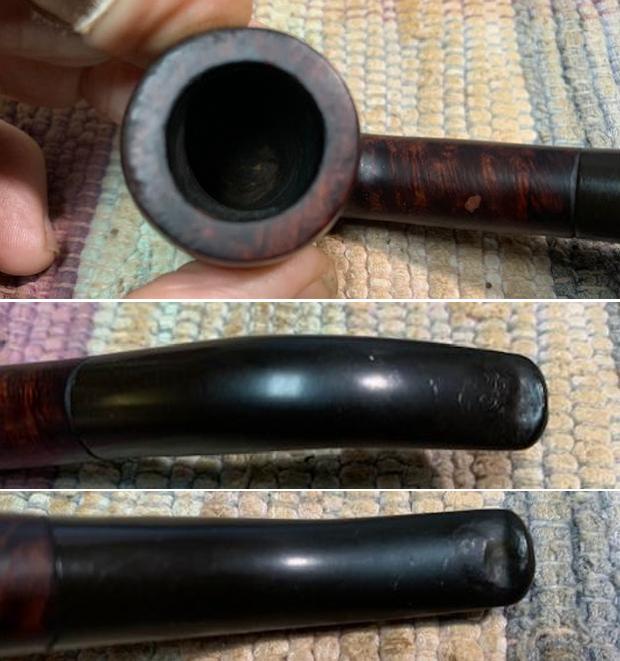 I took a picture of the stamping on the left side of the shank and it was faint but readable as noted above.
 I removed the stem from the shank and took a photo of the parts of the pipe.
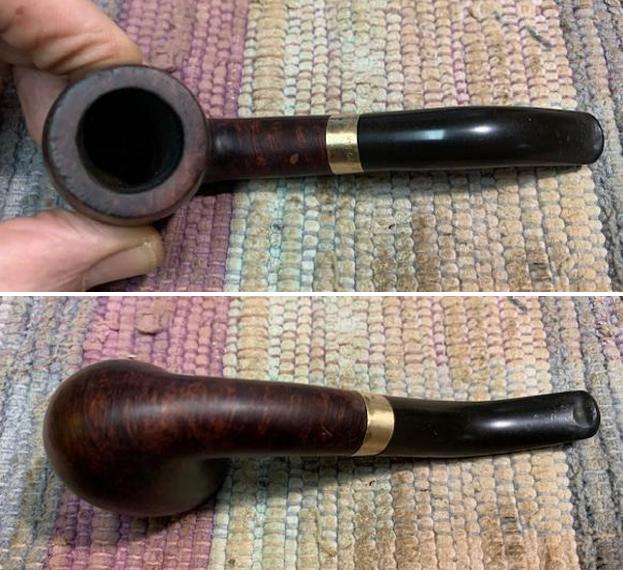
 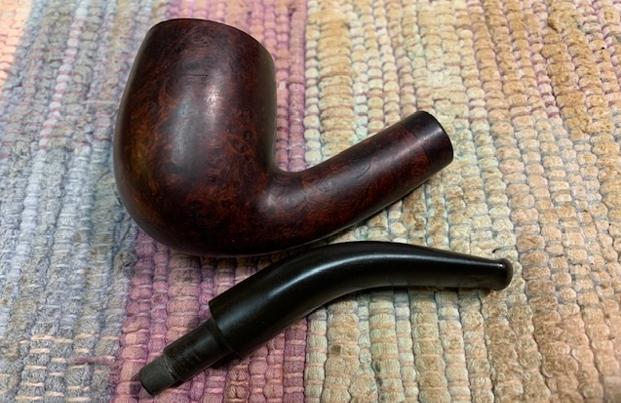 I started my work on the pipe by examining the shank end. There is a clear demarcation on the shank end that tells me that the pipe originally had a band. I examined the shank end and externals and there was no cracking so the band had to have been ornamental. With the age of the pipe estimated to the 1930s or 1940s I was pretty sure that the band would have been a standard decoration. I went through my bands and found a nice 14K gold band that would work well. It was deeper than I needed so I would need to reduce that to get a fit like the previous band. I heated the band with a lighter and pressed it onto the shank to get a fit that covered the line left on the shank.
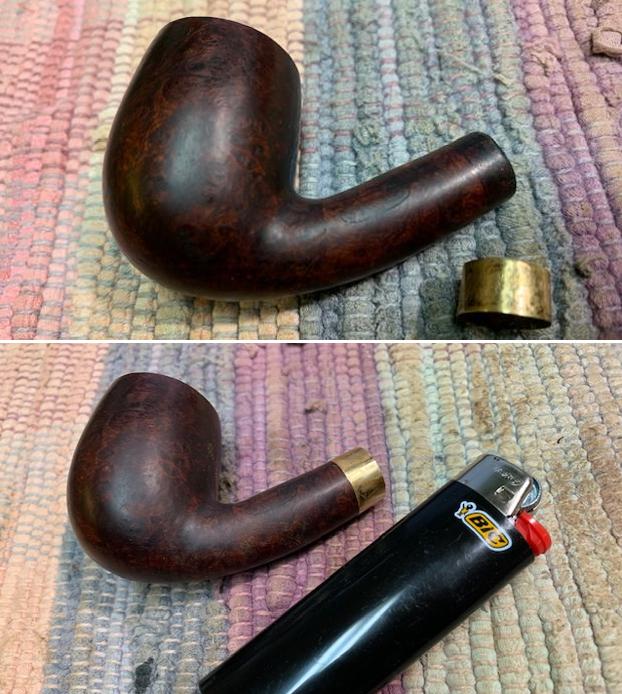 I took a photo of the band on the shank to show the extra band depth that I would need to remove before the fit was proper. I used a topping board and 220 grit sandpaper to carefully remove the excess band depth. I cleaned up the sharp edge with micromesh sanding pads. I was careful to not damage the stamping on the band. Once I finished I was pretty happy with the fit.
 I sanded the tenon a little to get a snug fit in the shank and put the stem in place. I took photos of the pipe with the new band. Lots of polishing to do on all the parts but it looked good.
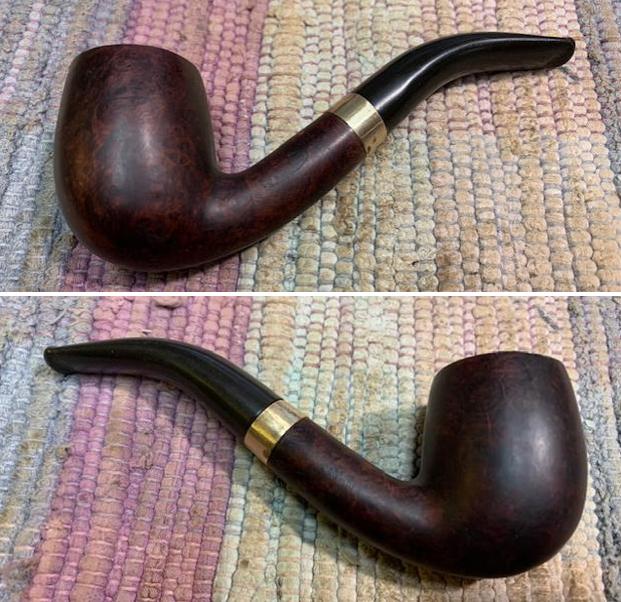
 I used a folded piece of 220 grit sandpaper to smooth out the damage on the rim edge and clean up the marks on the rim top.
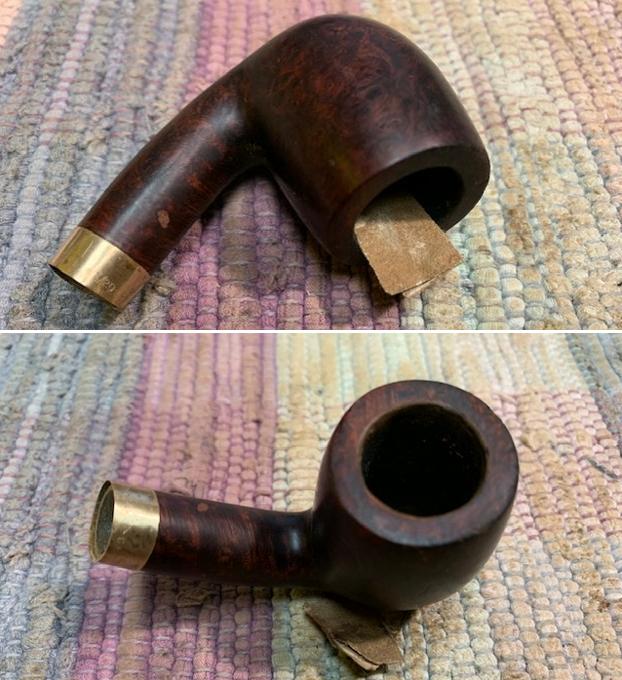 I polished the briar with micromesh sanding pads – dry sanding with 1500-12000 grit pads. I wiped the briar down after each grit with a damp cloth. The grain began to really stand out.
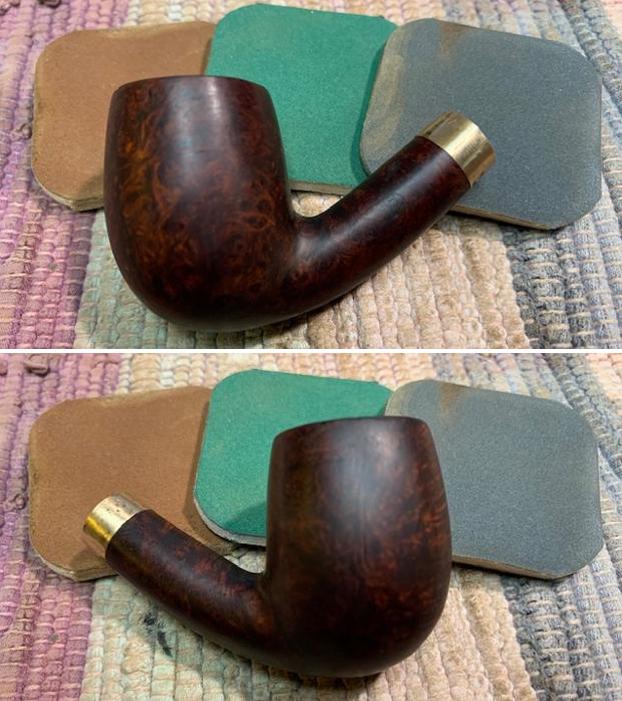
 I worked some Before & After Restoration Balm into the surface of the bowl and shank with my fingertips to clean, enliven and protect the briar. I let the balm sit for 15 minutes and then buffed with a cotton cloth to raise the shine. I polished the band with a jeweler’s cloth. The photos show the bowl at this point in the restoration process.
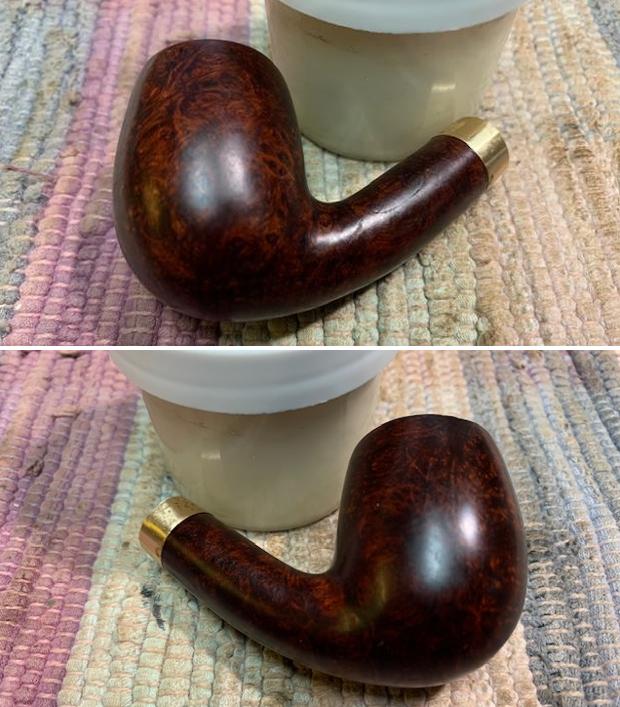
 I set the bowl aside and turned my attention to the stem. I “painted” it with the flame of a Bic lighter to lift the tooth dents in the vulcanite on both sides. I raised them significantly but I am very careful with burning older hard rubber. It is easy to char the rubber then you have more issues to deal with! When I had finished I filled in the remaining dents with clear CA glue. Once it cured I sanded it with a folded piece of 220 grit sandpaper to blend them in the rest of the stem surface. I started polishing the stem with 400 grit wet dry sandpaper.
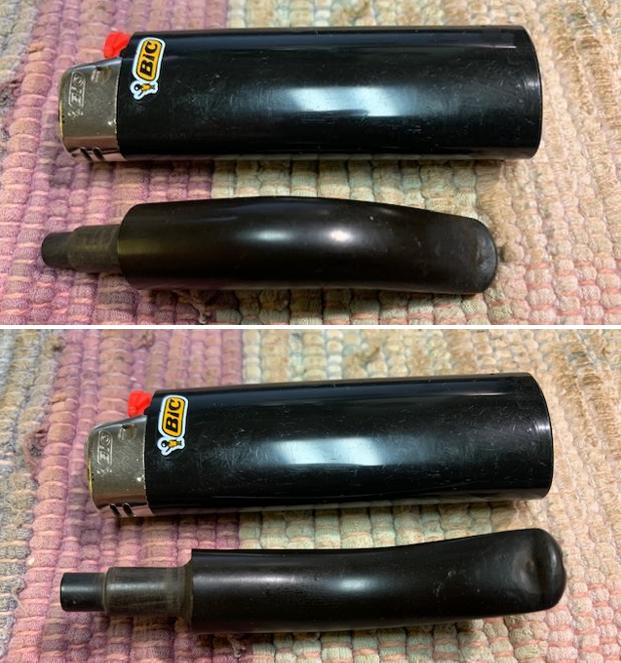
 I polished the stem with micromesh sanding pads – dry sanding with 1500-12000 grit sanding pads. I wiped it down after each sanding pad with Obsidian Oil. I polished it with Before & After Pipe Stem Polish – both Fine and Extra Fine. I gave it a final coat of Obsidian Oil.
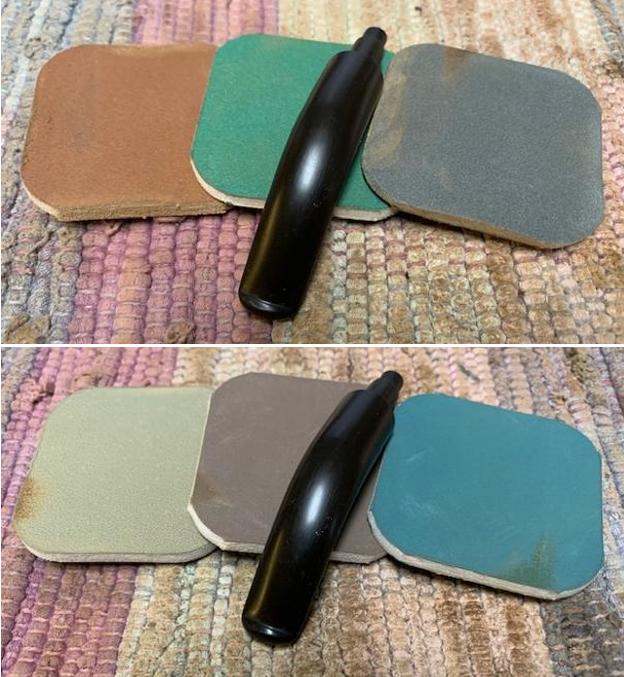
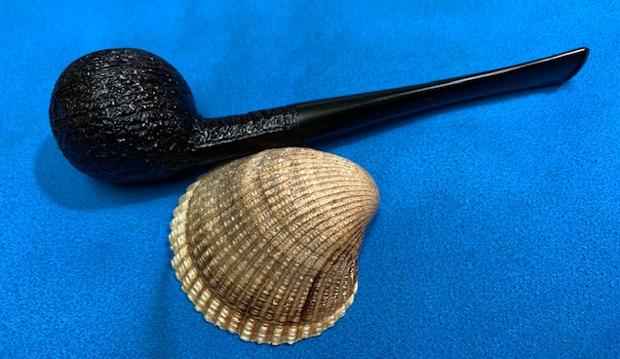
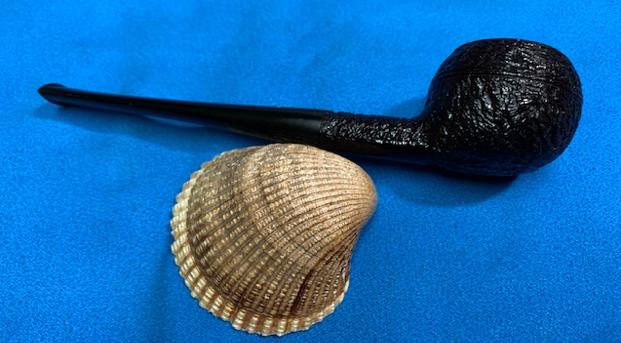
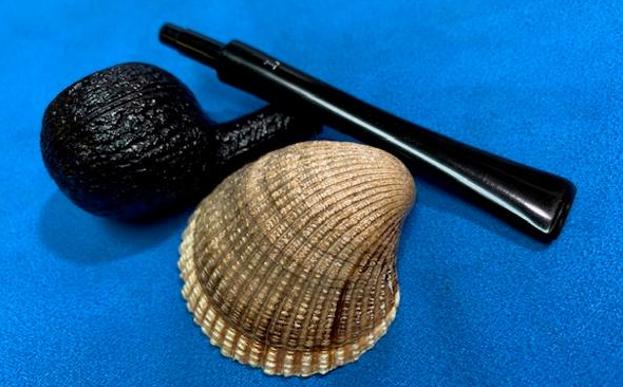
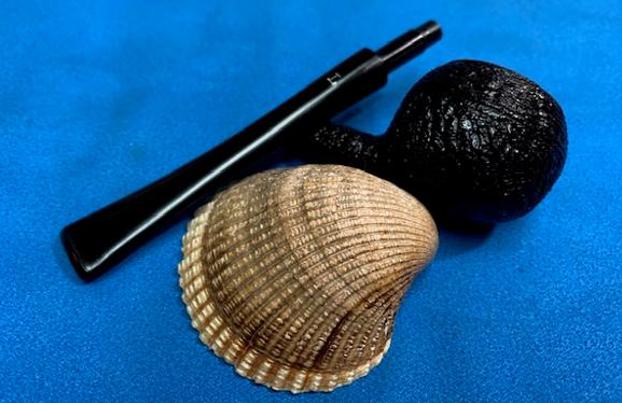
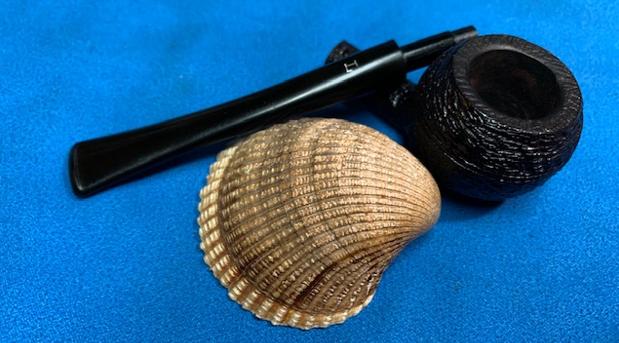
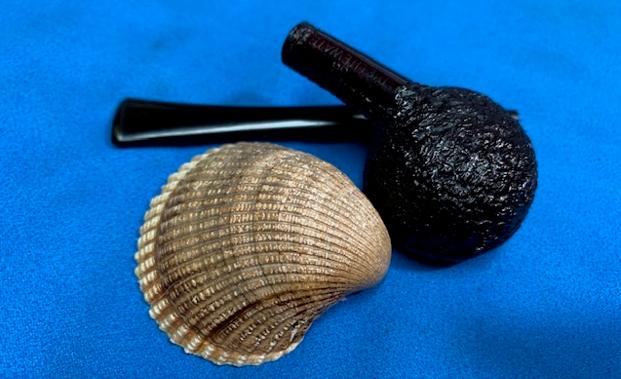
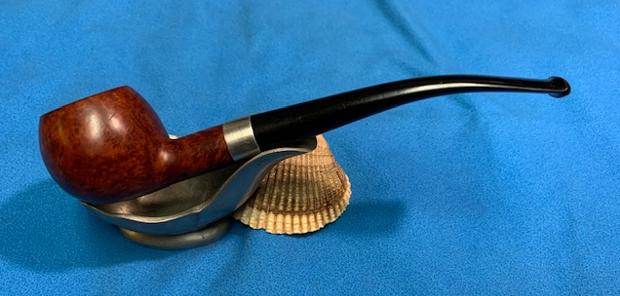
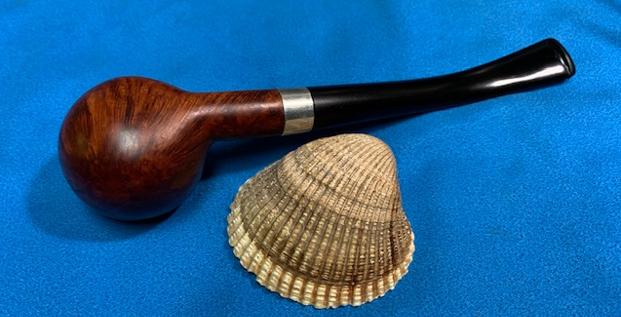
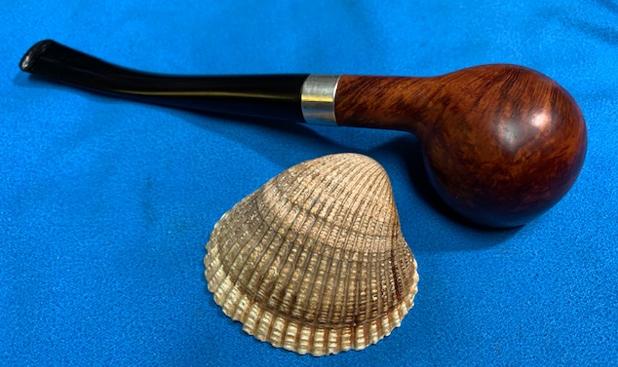
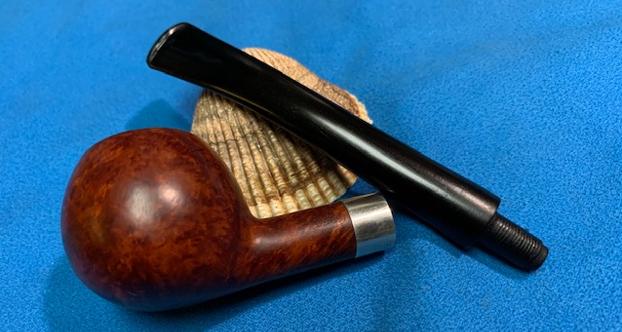
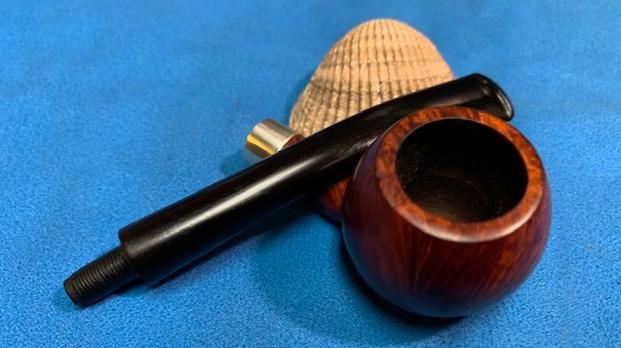
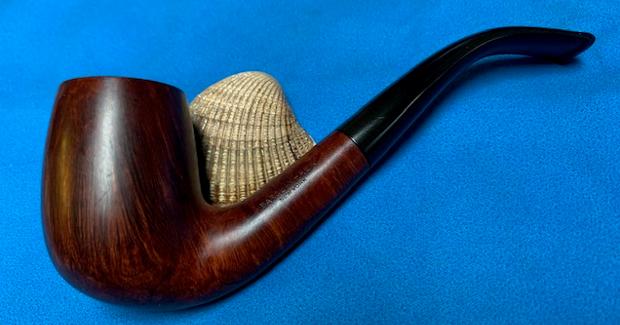
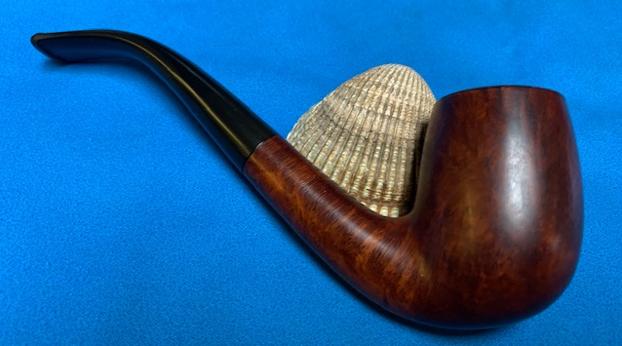
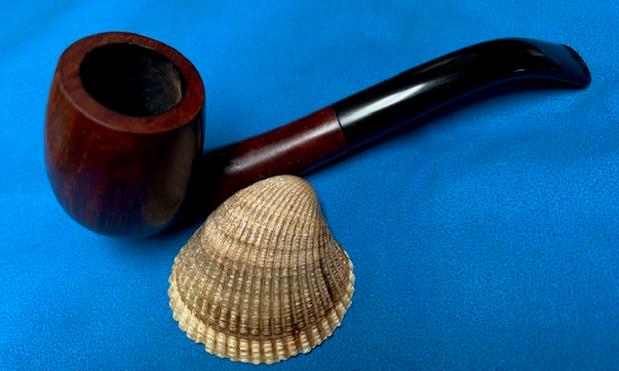
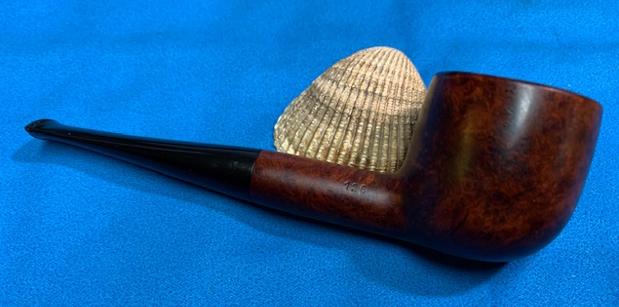
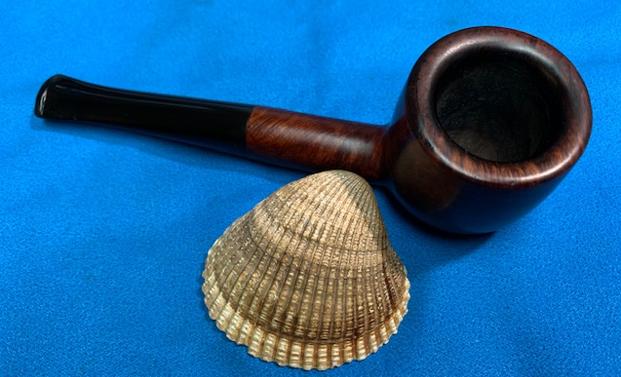
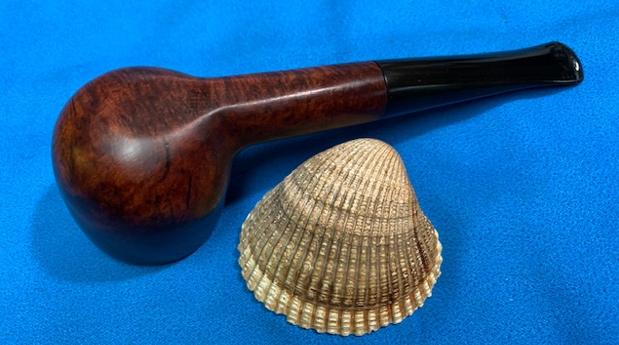
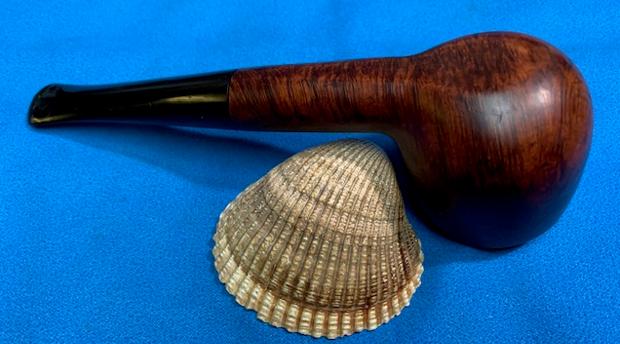
 With the bowl and the stem finished I put the beautiful French Made Comoy’s Strand Bent Billiard back together and buffed it on the wheel using Blue Diamond to give it a shine. I gave the bowl and the stem multiple coats of carnauba wax on the wheel. I buffed it with a clean buffing pad to raise the shine. I hand buffed it with a microfiber cloth to deepen the shine. It really is a great looking sandblast. The dimensions of the pipe are – Length: 5 inches, Height: 1 ¾ inch, Outside diameter of the bowl: 1 inches, Chamber diameter: ¾ of an inch. The weight of this large pipe is 1.13 ounces /32 grams. This Strand Bent Billiard is another great find in this collection. I try to use the same prop with the pipes I photograph to give a sense of size and proportion of the pipe. You can see from the dimensions given above this is a petite pipe that makes this small shell seem quite large. It is much more beautiful in person than these photos can capture. I will be putting it on the rebornpipes store soon. If you would like to add it to your collection let me know. This is another pipe that has the possibility of transporting the pipe man or woman back to a slower paced time in history where you can enjoy a respite. Thanks for walking through the restoration with me.