Tag Archives: super glue

Restemming and Restoring a Frasorteret Freehand


by Steve Laug

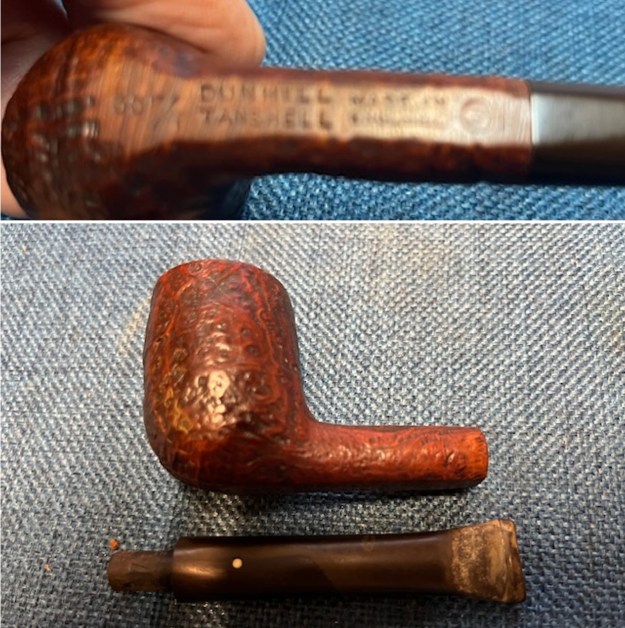
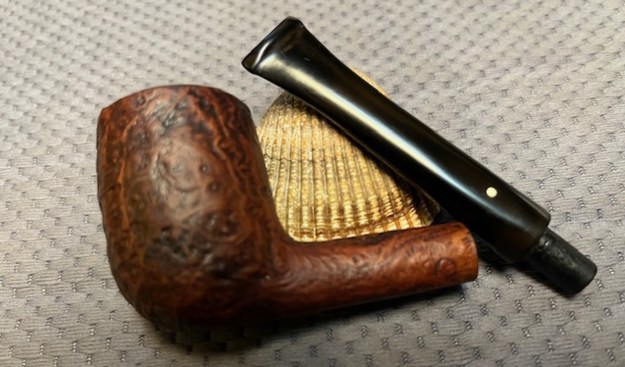
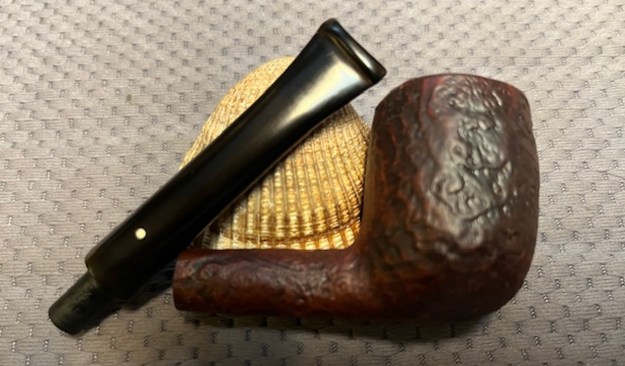
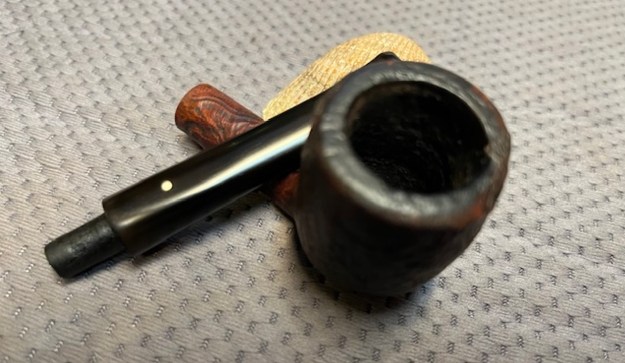
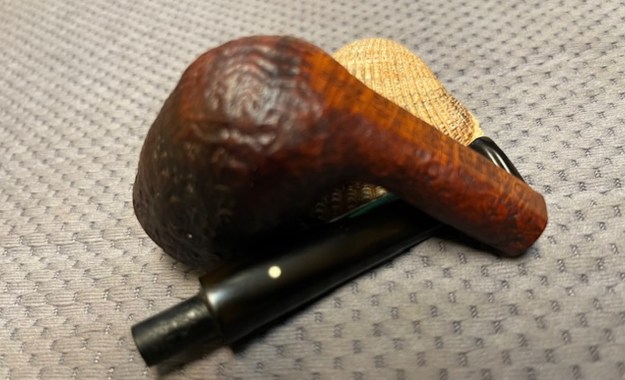
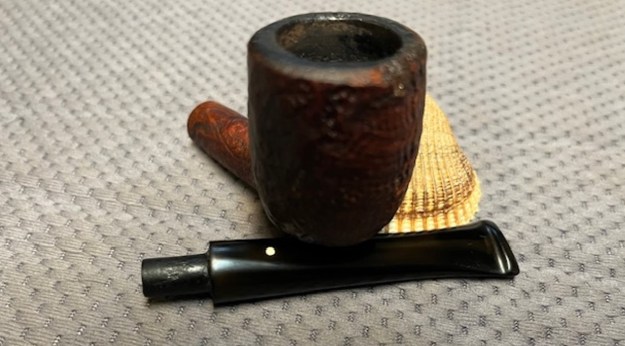
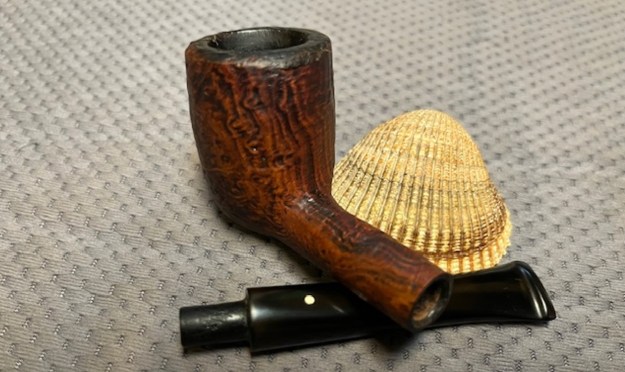
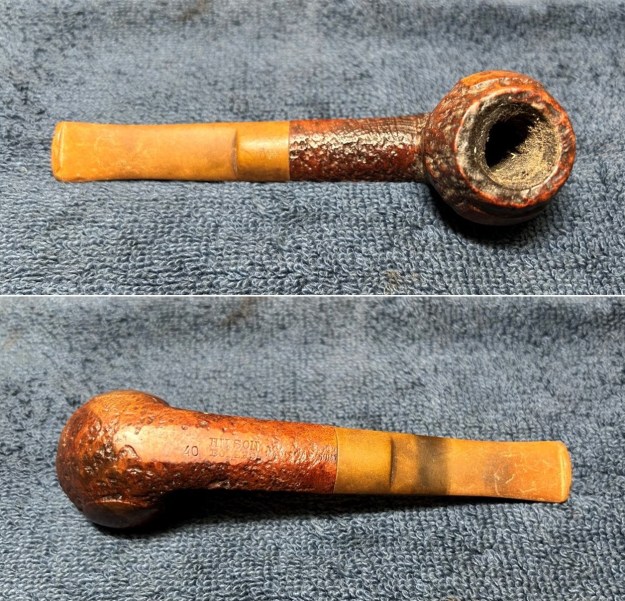
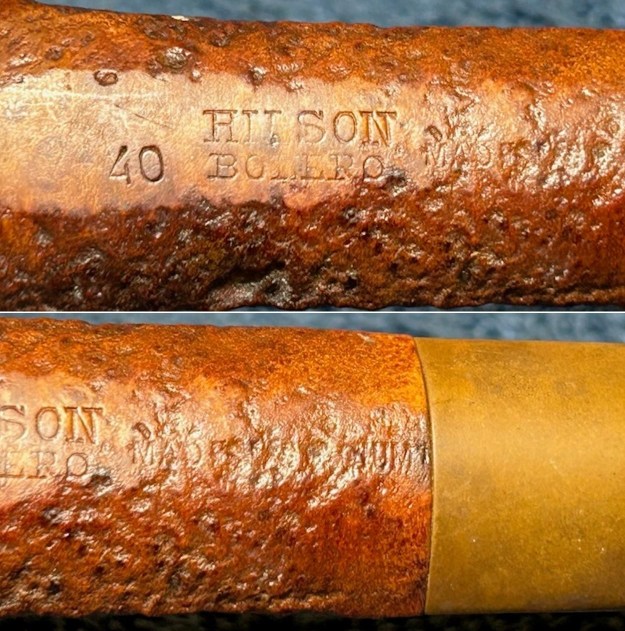
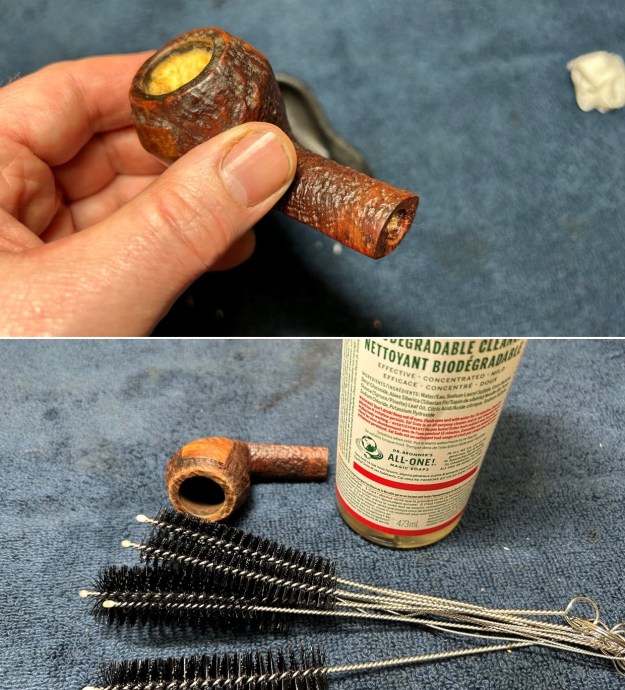
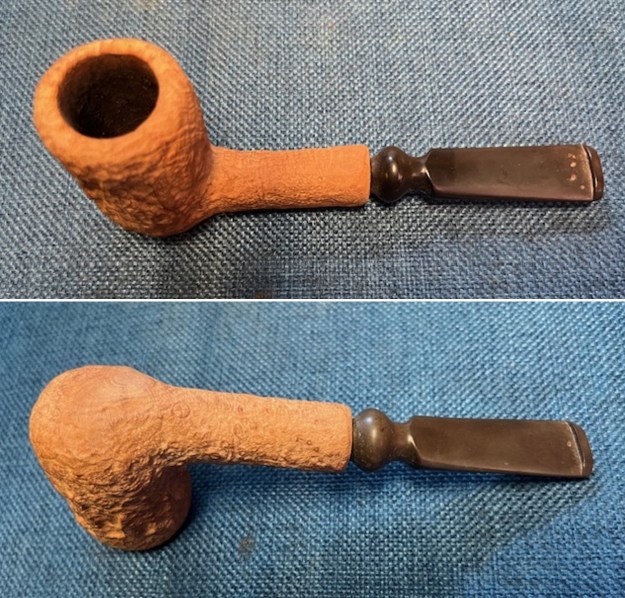
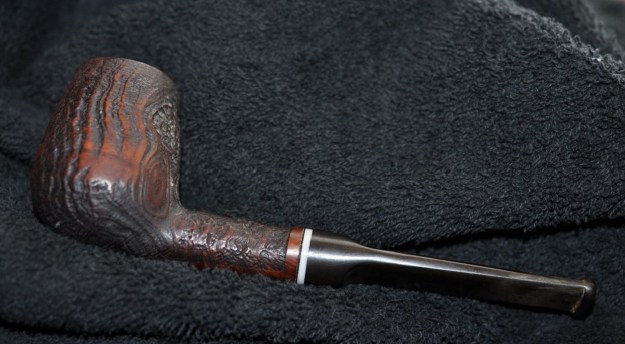
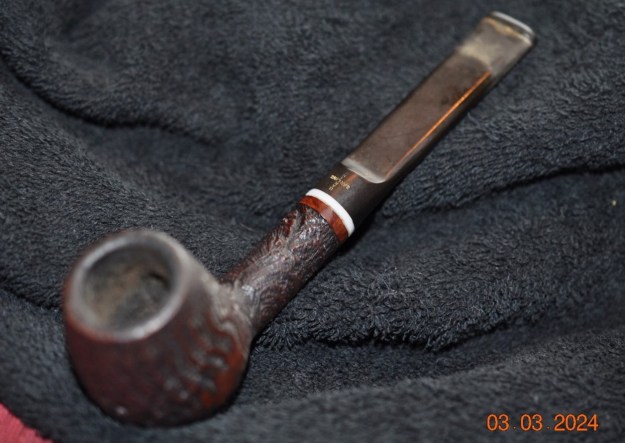
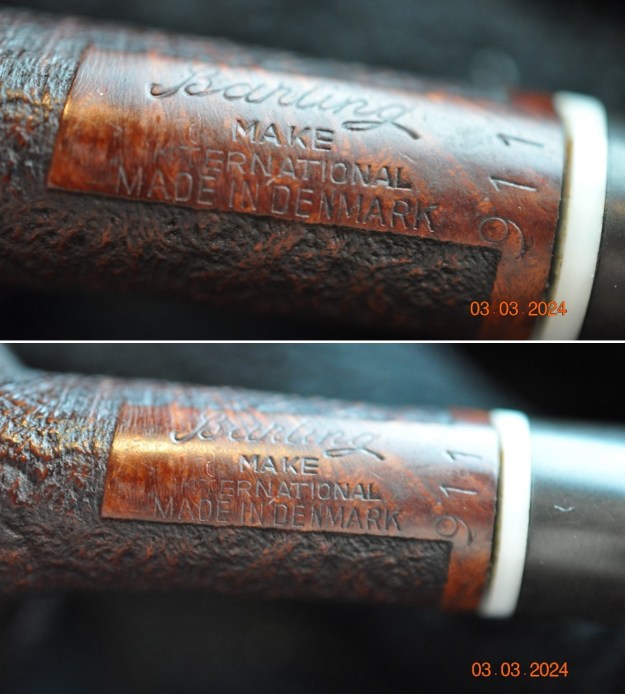
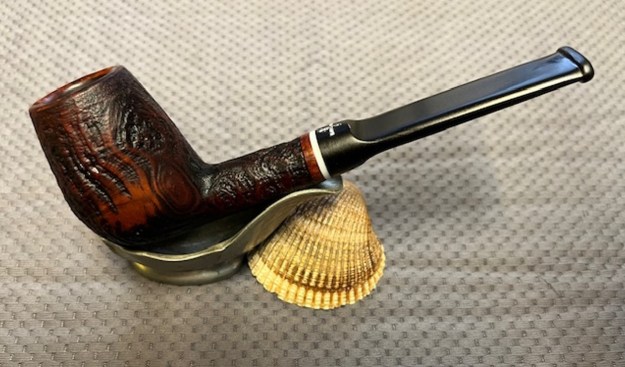
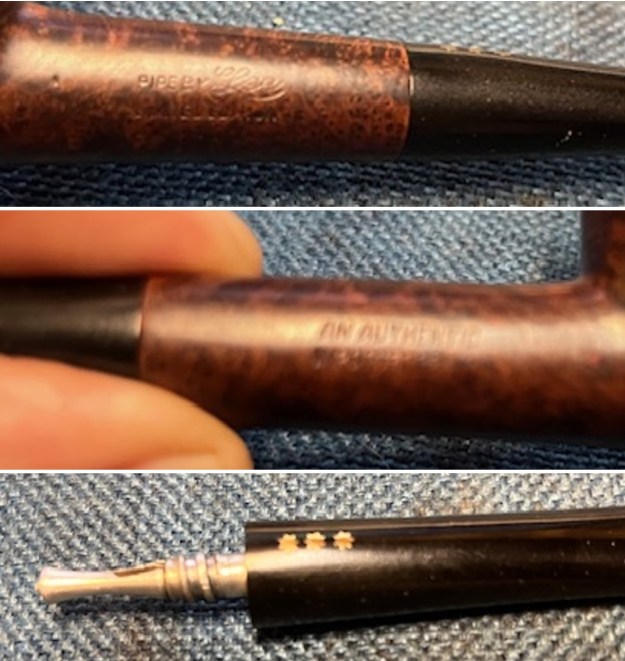
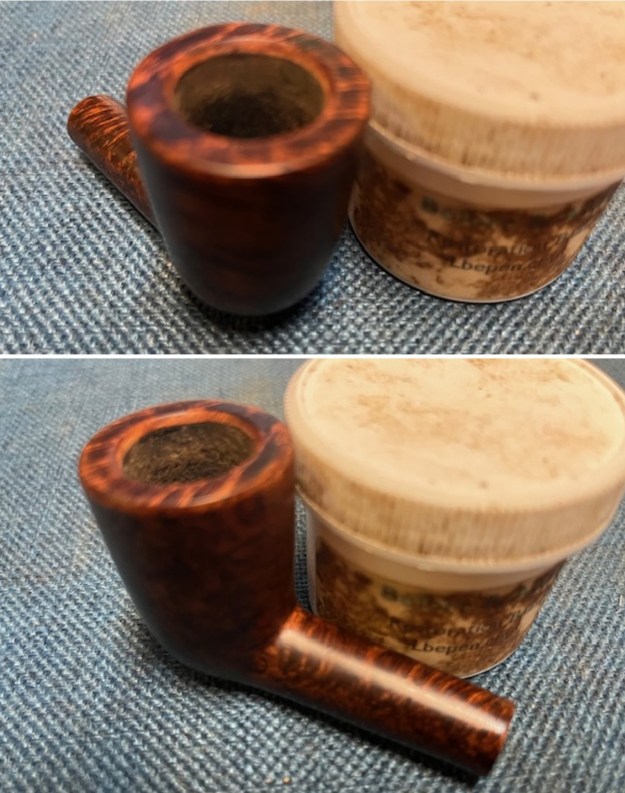
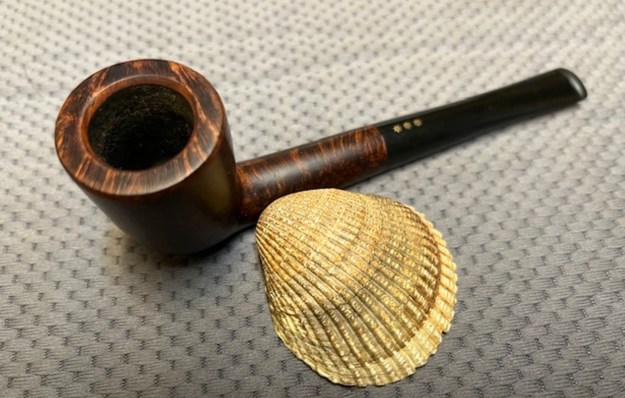
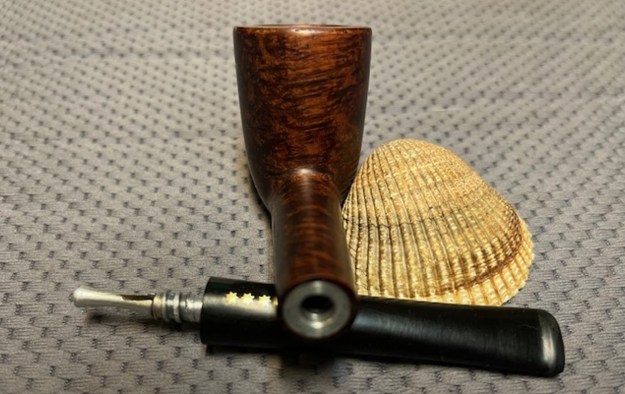
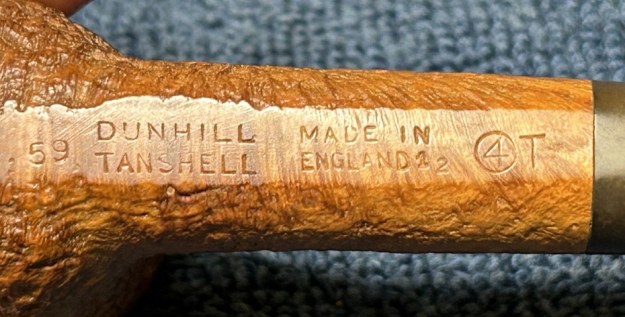
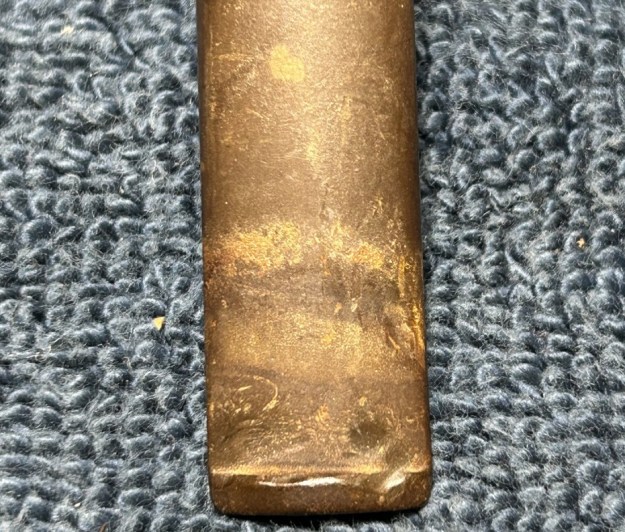
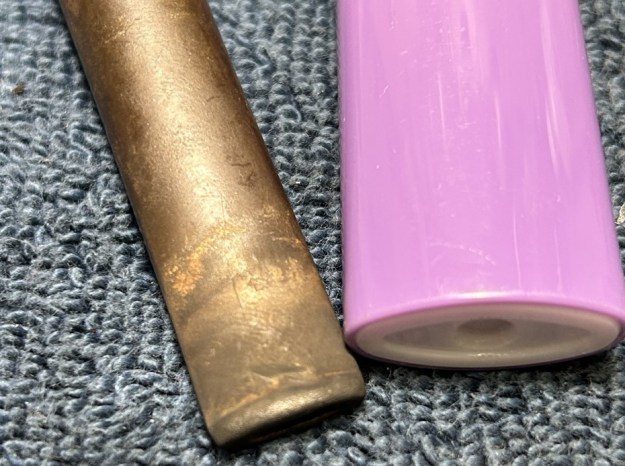
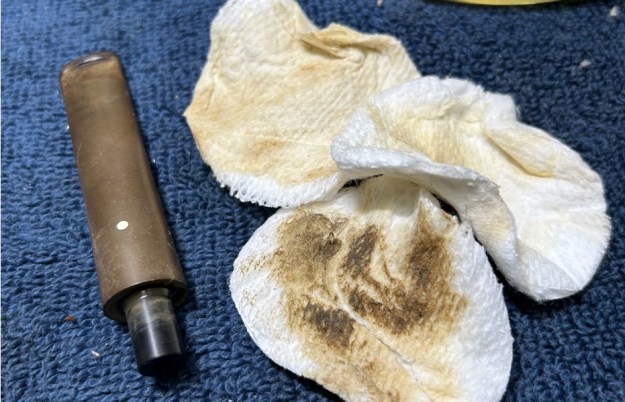
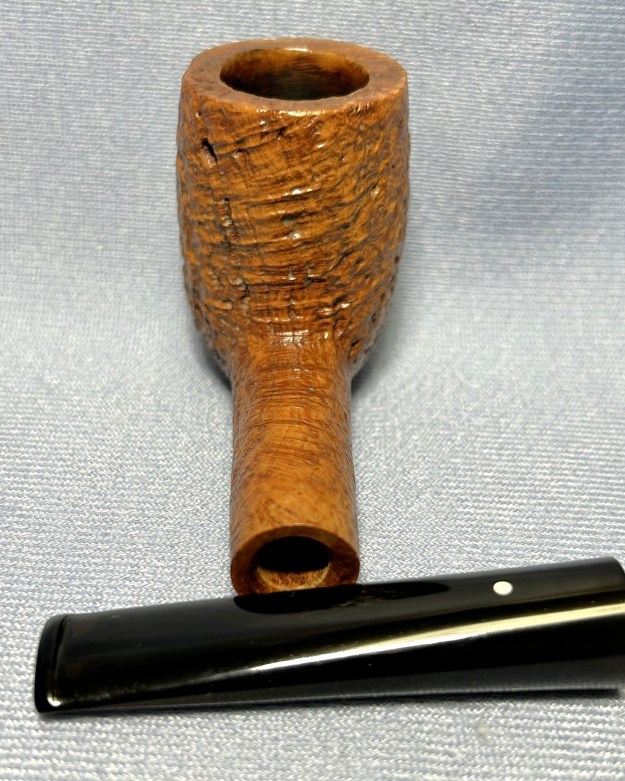
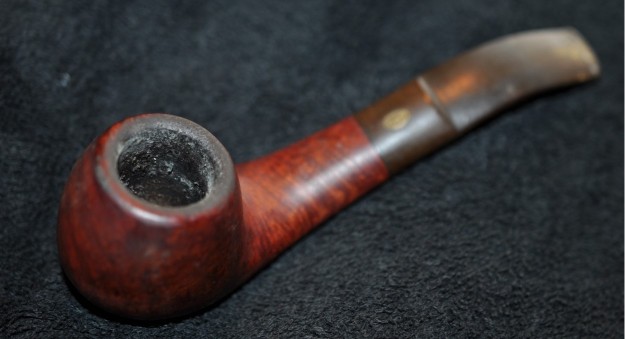
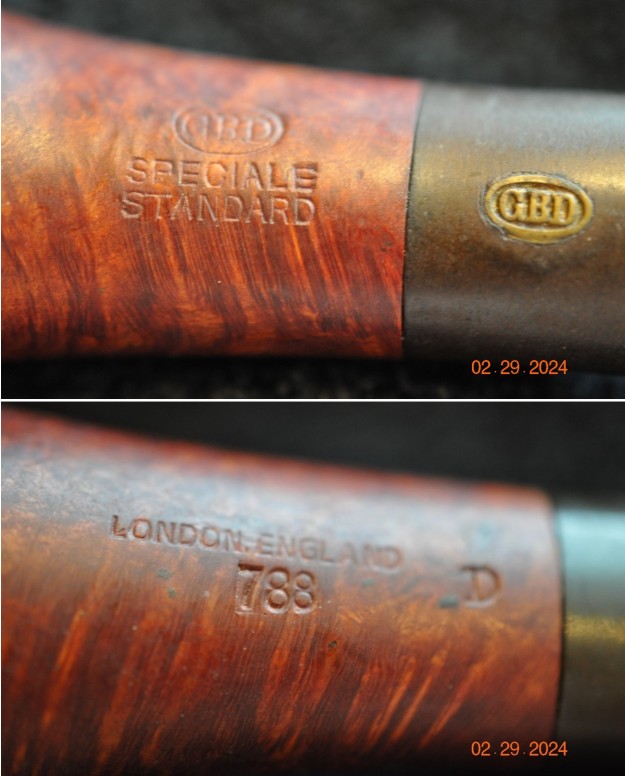
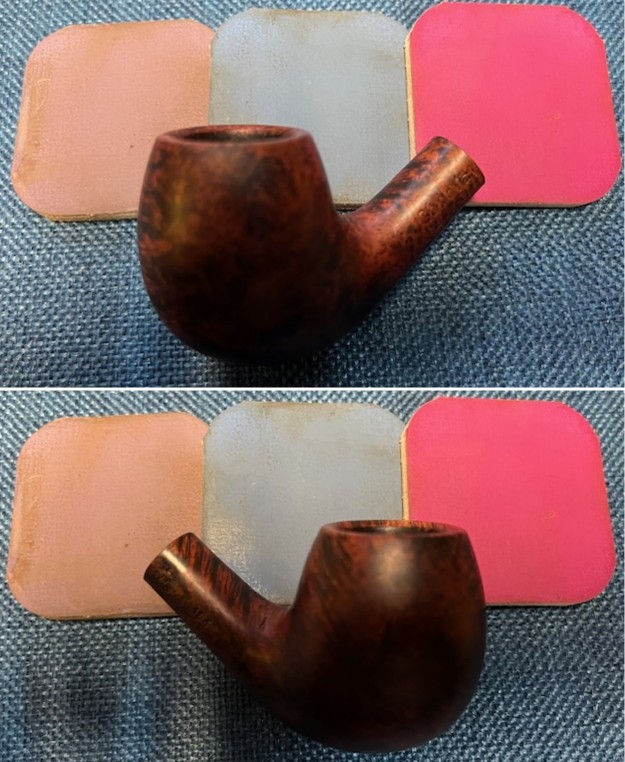
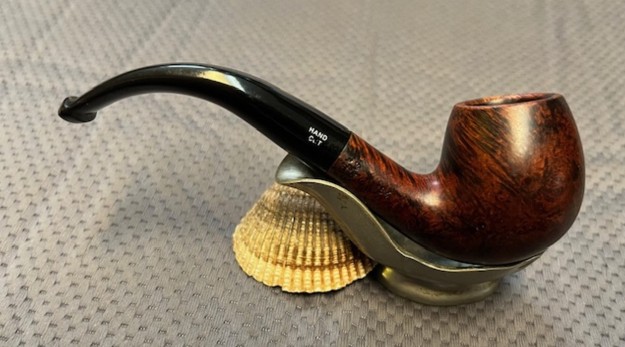
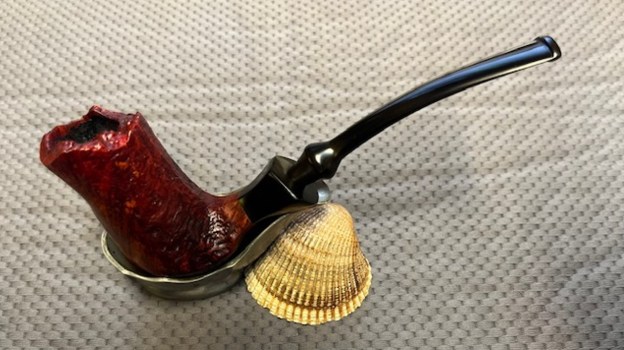
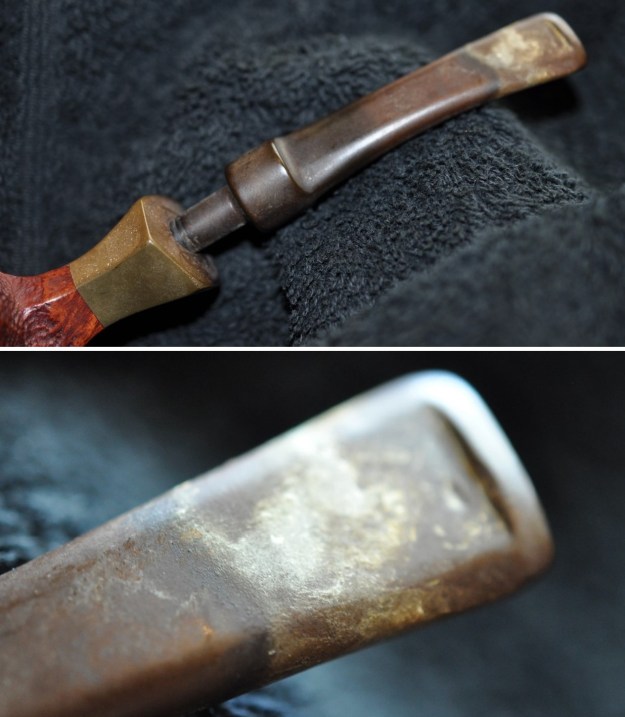
This interesting Freehand with both smooth and sandblast finishes came to us from an estate we purchase from Santa Cruz, California USA on 05/28/2024. It is a unique looking pipe that took some work to figure out the stamping. With some digging and comparing we knew that the stamping on the underside of the shank just ahead of the vulcanite shank extension read Frasorteret [over] Hand Made [over] In [over] Denmark. You might well ask why we had to figure it out. That is simple in the half of the name line was cut off by the shank extension. The pipe has a flat bottom so it is a bit of a sitter. The finish is dirty with dust and oils in the sand blast portions on the bowl sides. The smooth portions are also dirty with oils and dirty ground into the finish. The plateau rim top has some darkening toward the back of the bowl as well as thick lava filling it the grooves in the finish. The bowl has a moderate cake. The vulcanite shank extension is oxidized and also dirty. The stem is actually a poor replacement that is a saddle stem for a straight shank. The pipe would have originally had a fancy freehand style military style stick stem that sat in the extension. It will need to be replaced. Jeff took some photos of the pipe before he started his work on it. 
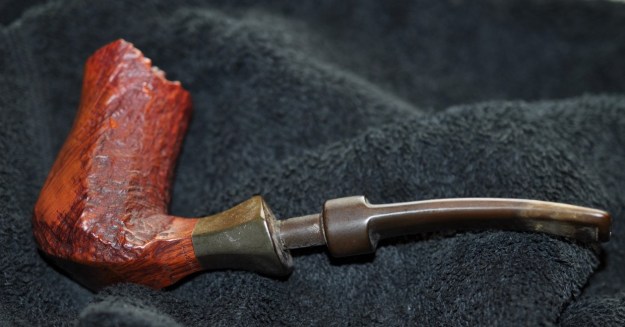
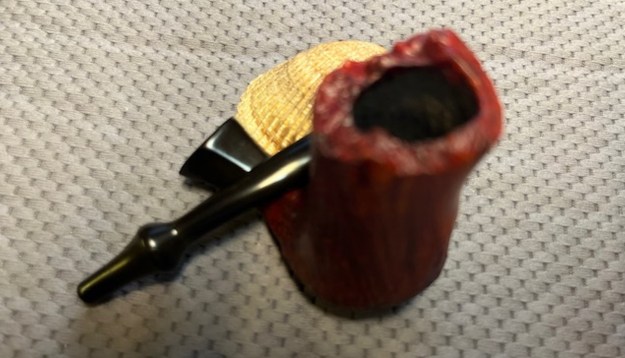
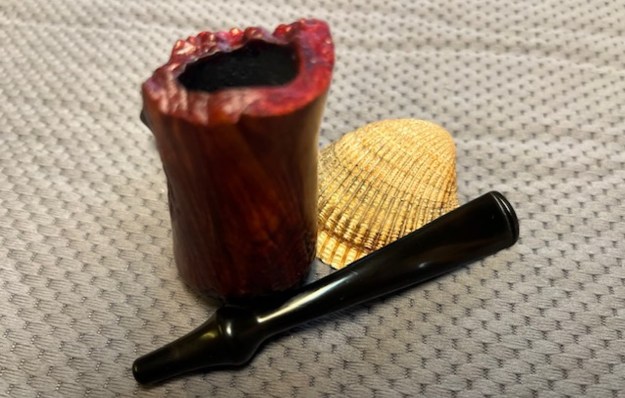
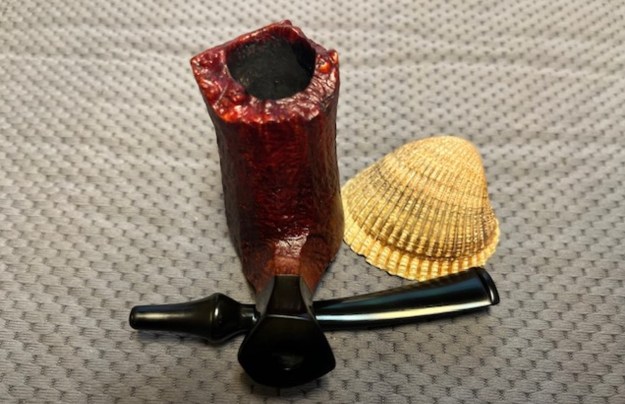
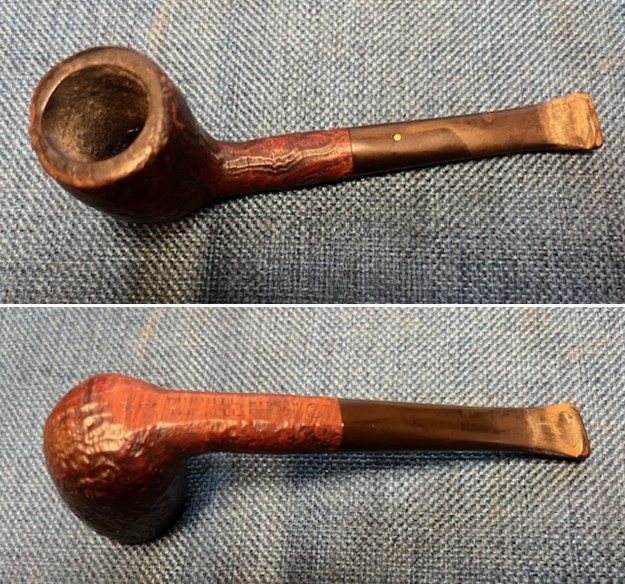
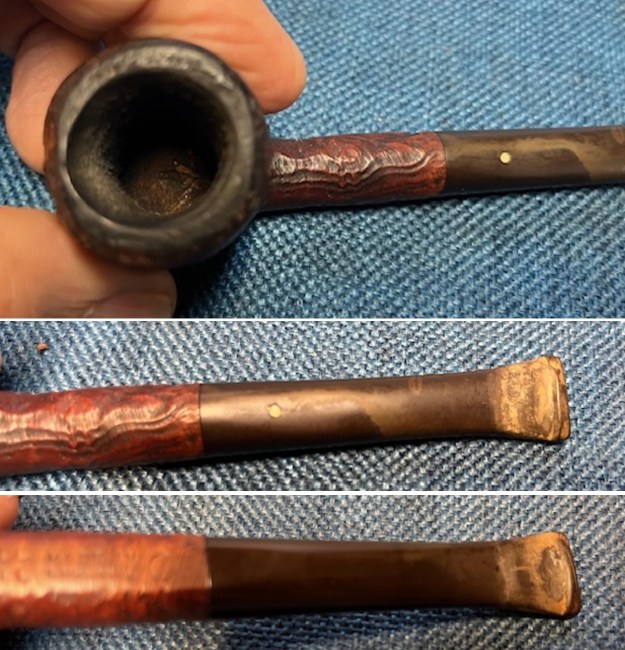
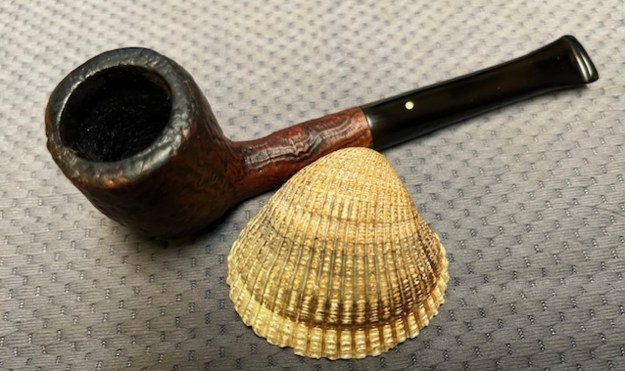
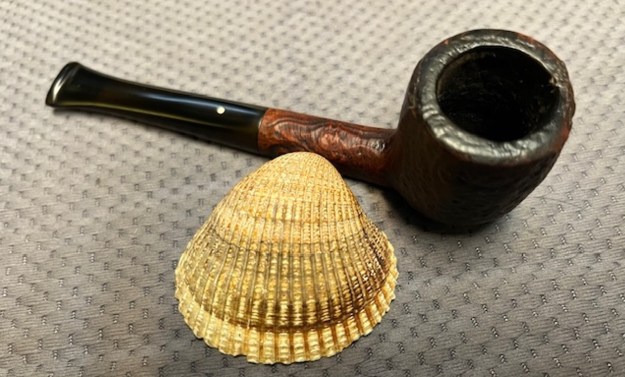
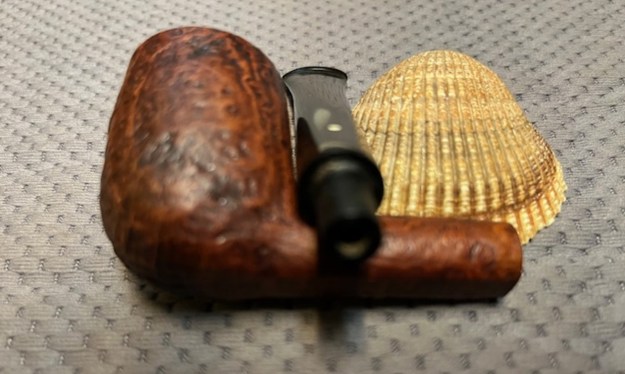
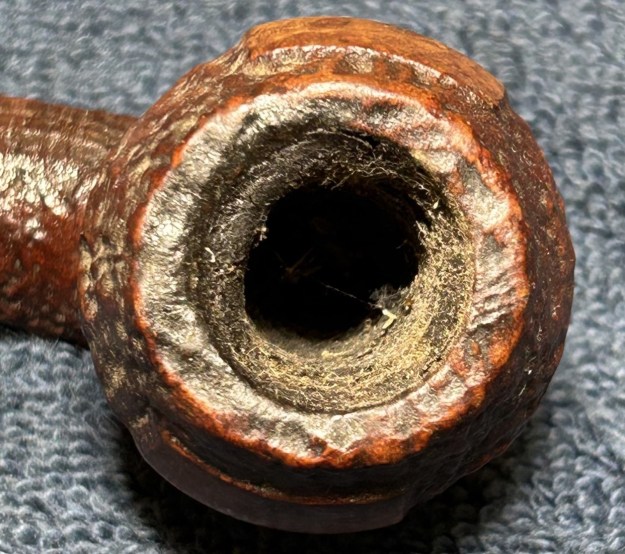
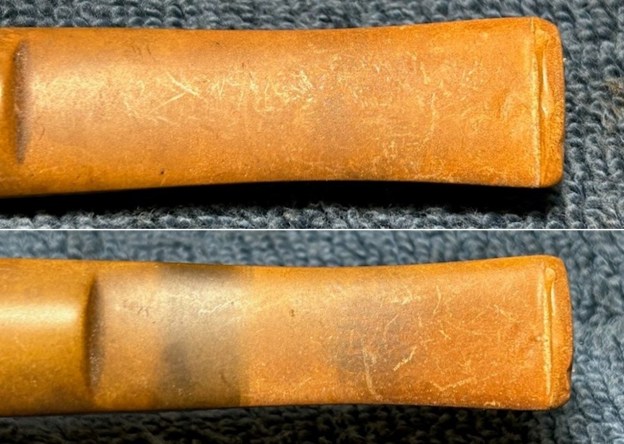
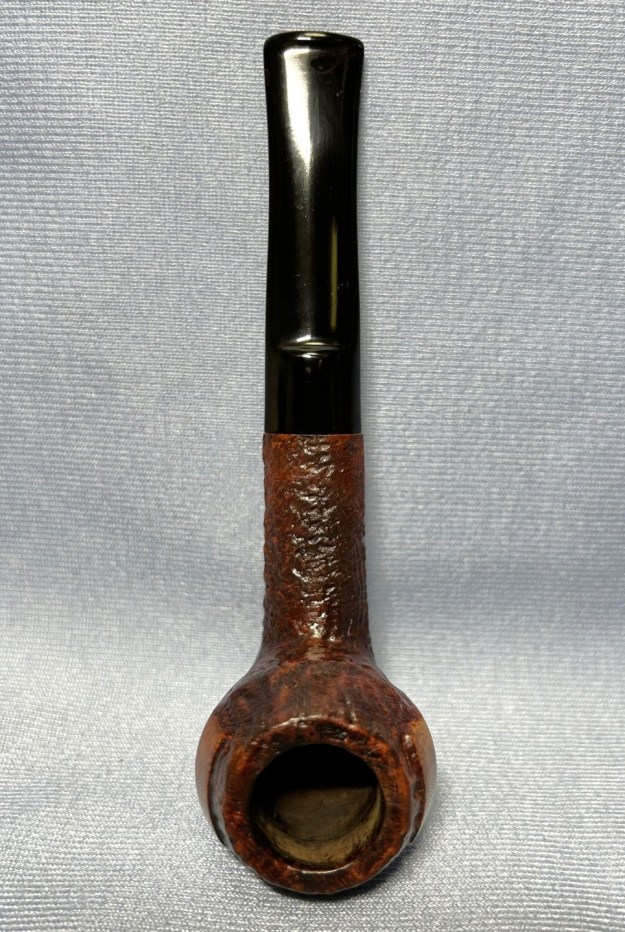
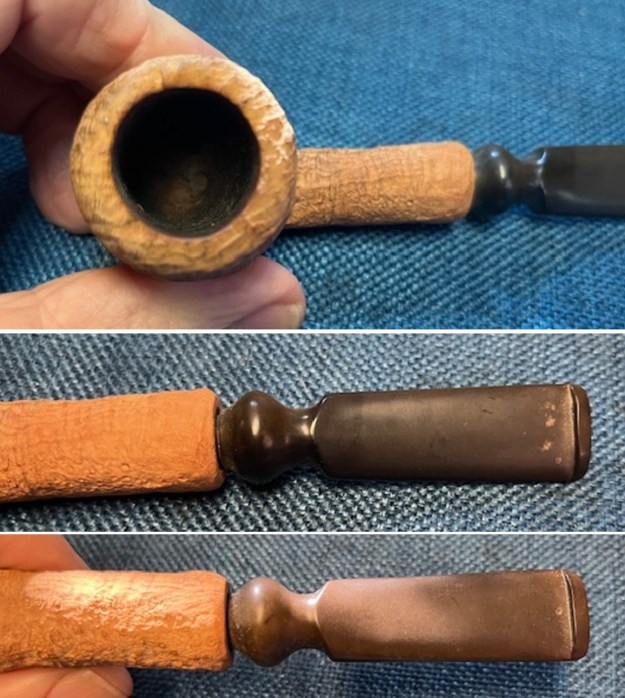
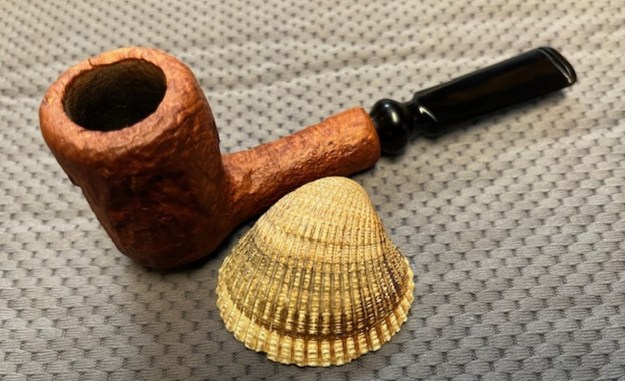
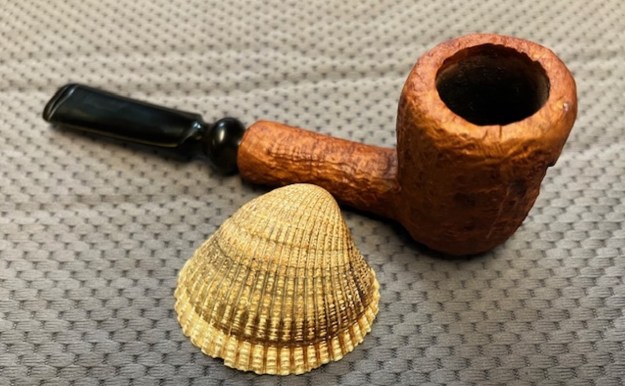
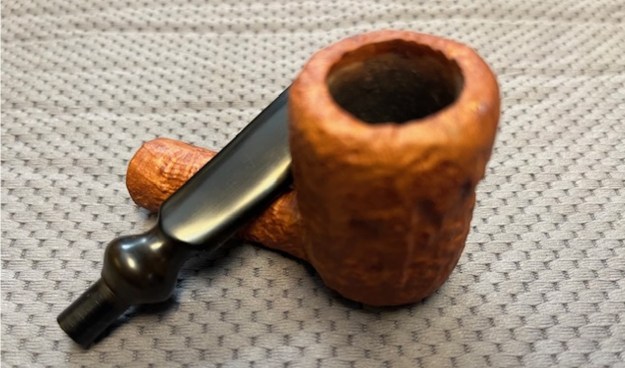
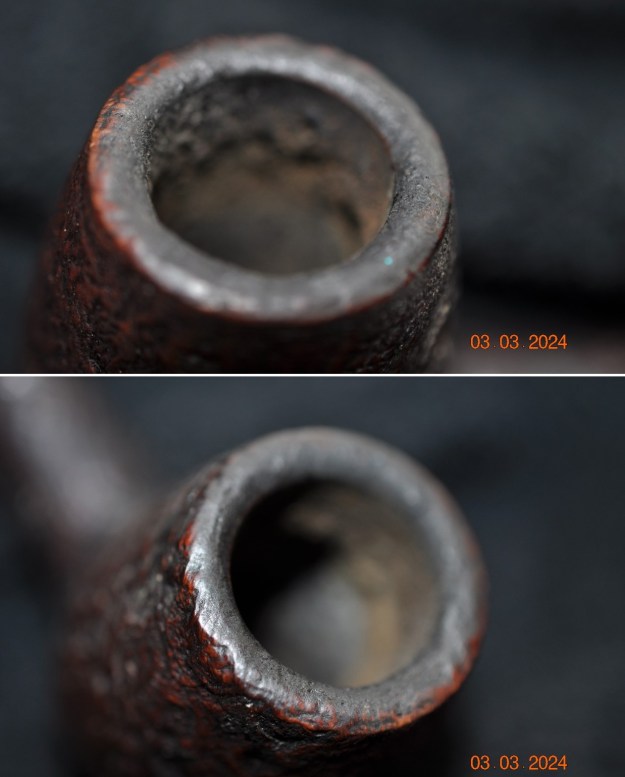
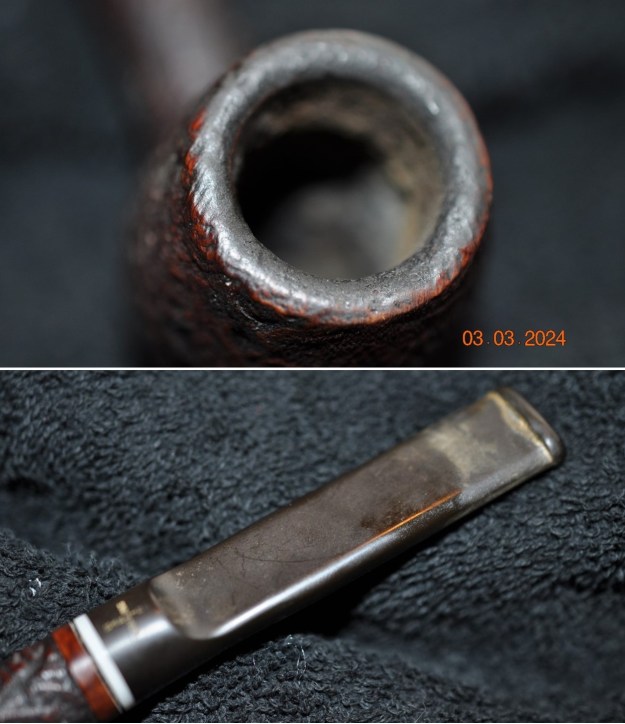
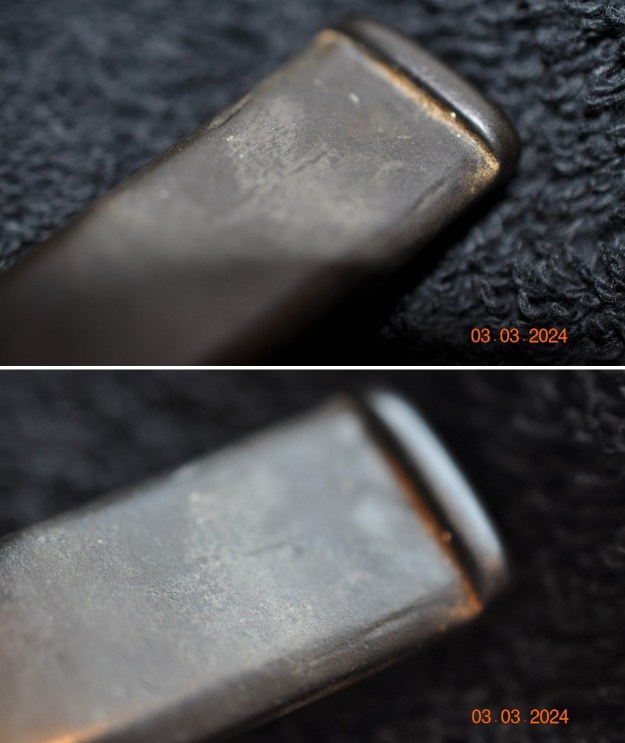
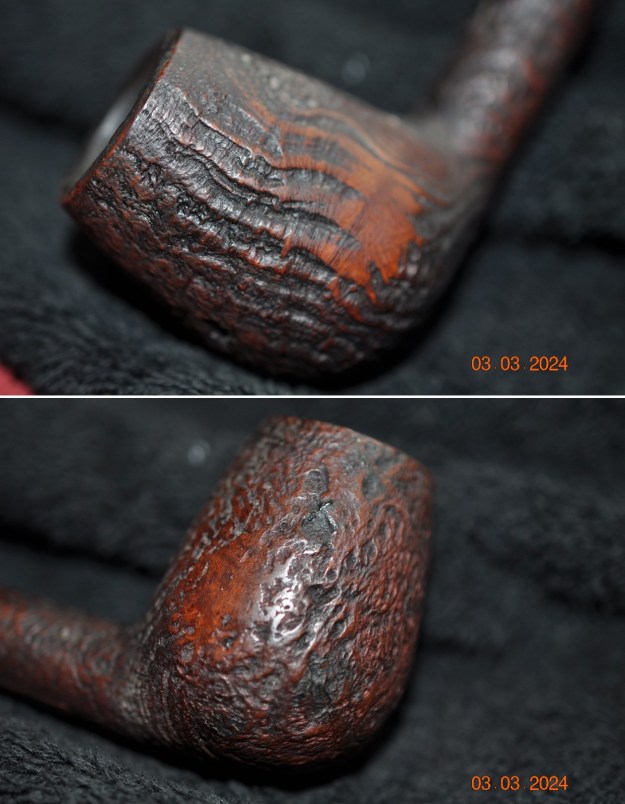
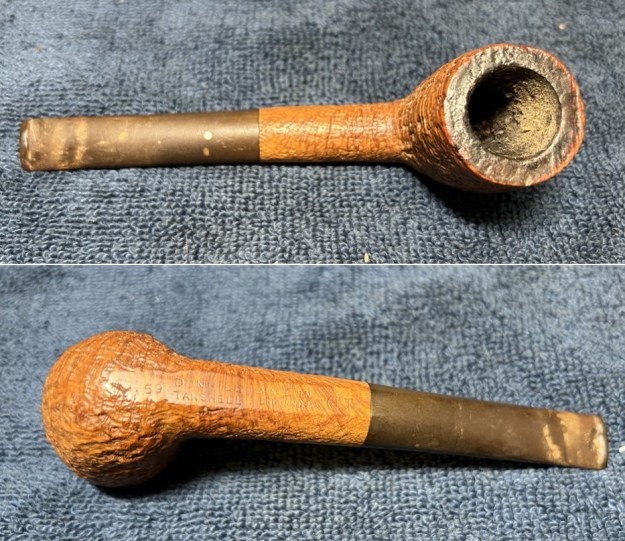
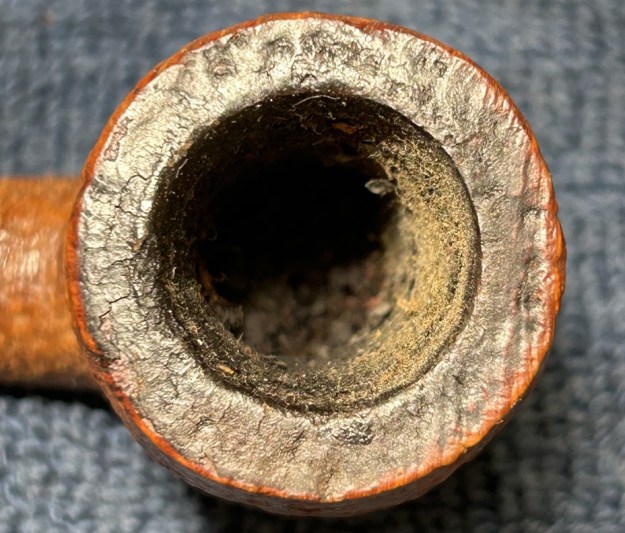
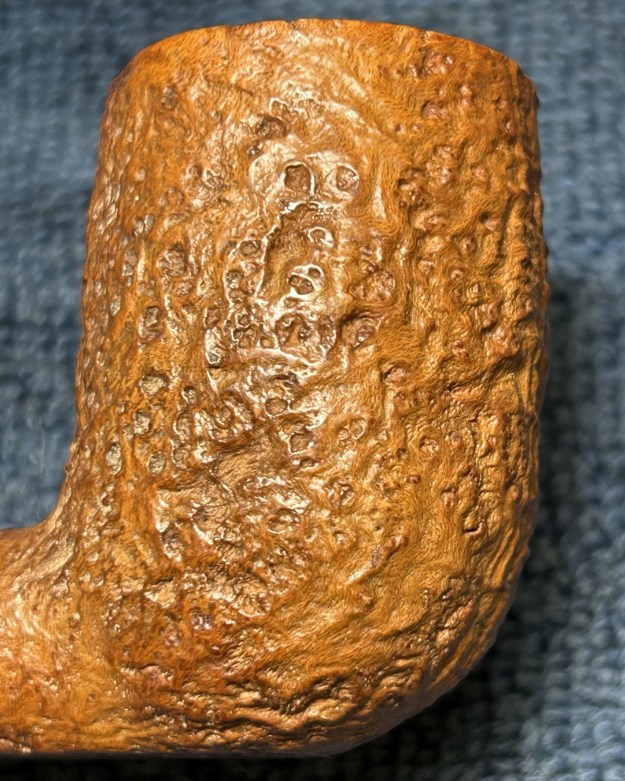
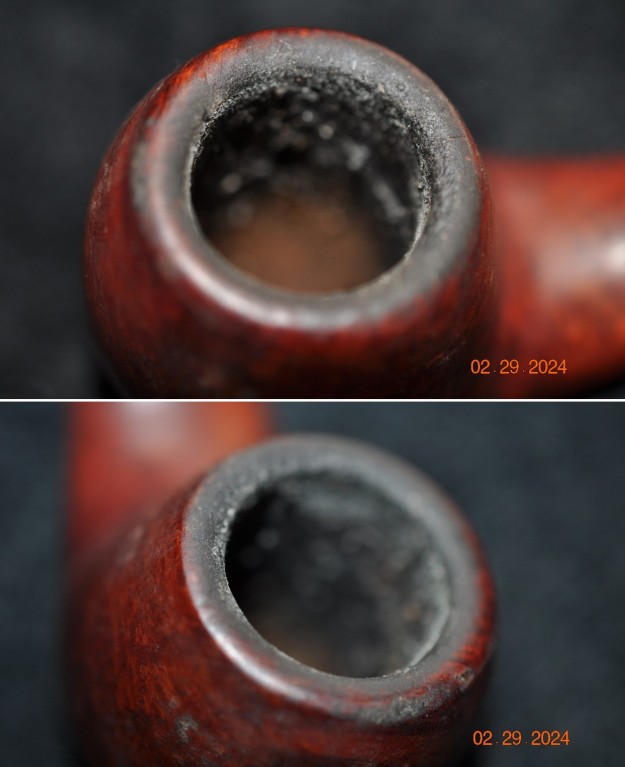
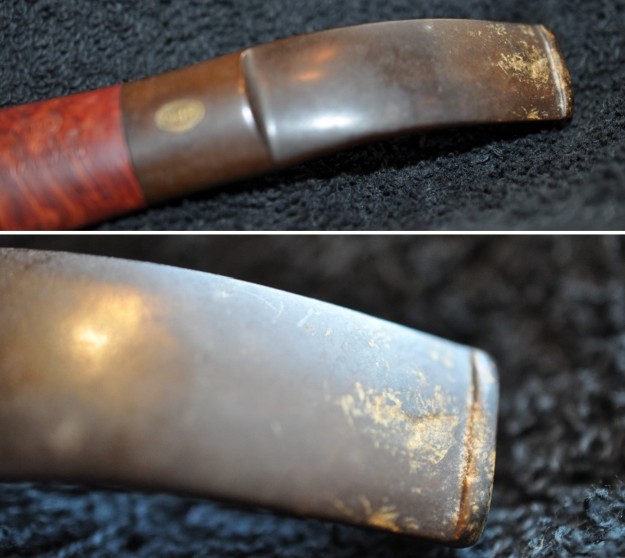
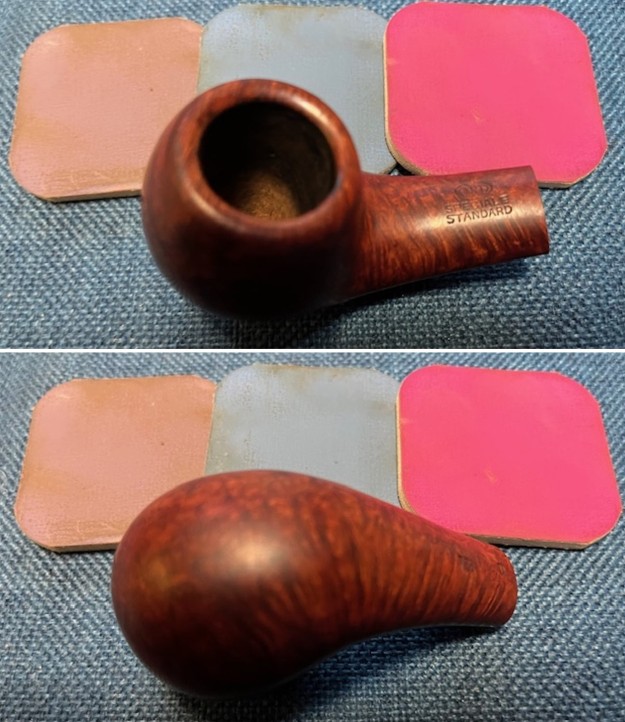
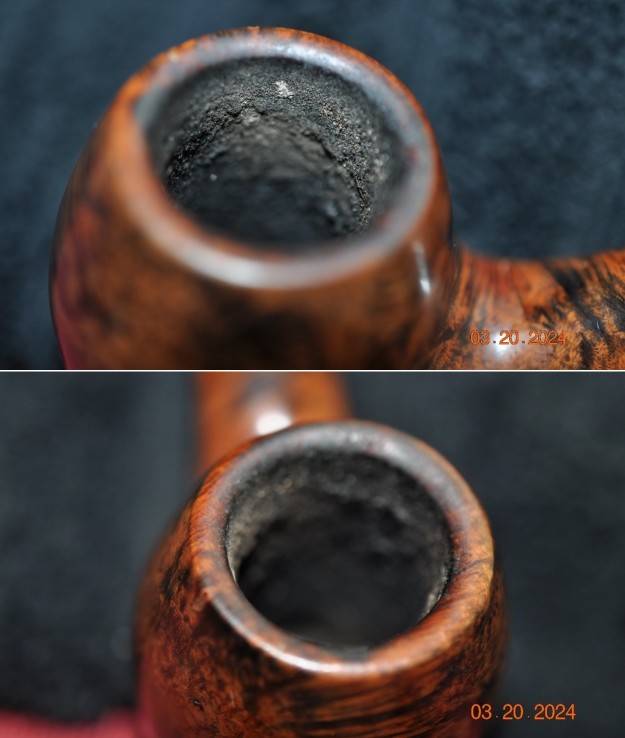
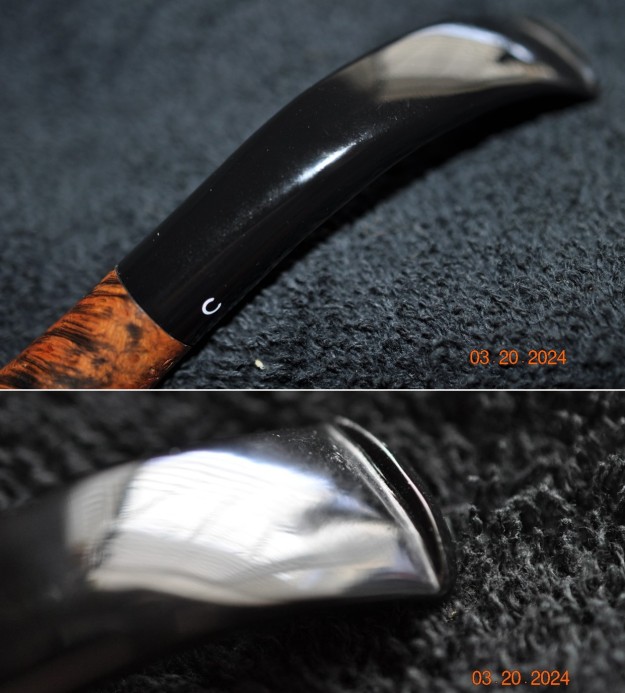
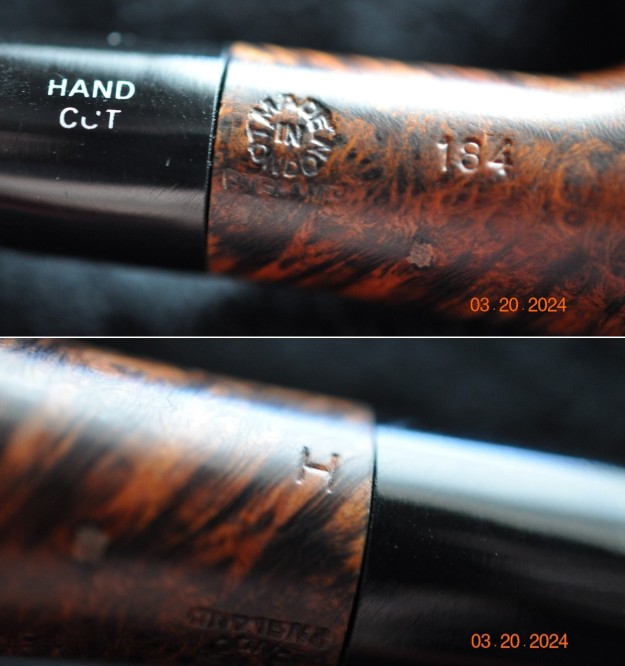
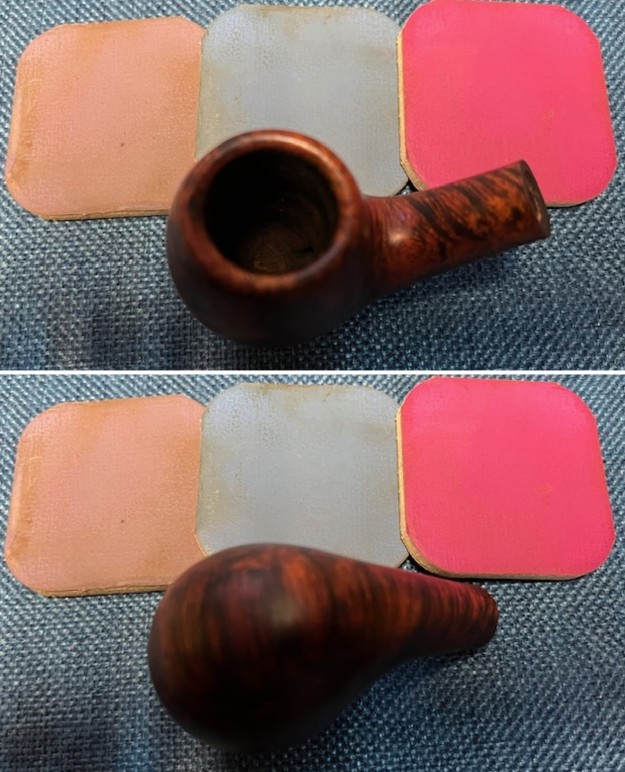
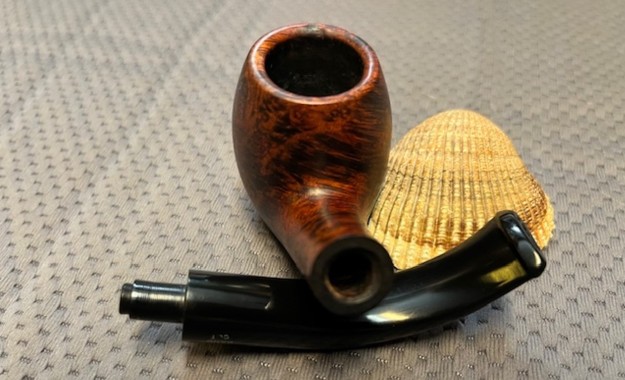
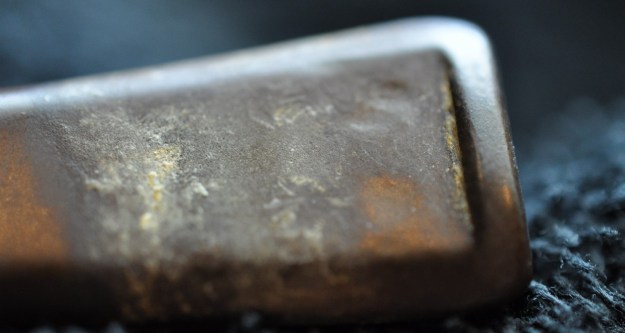
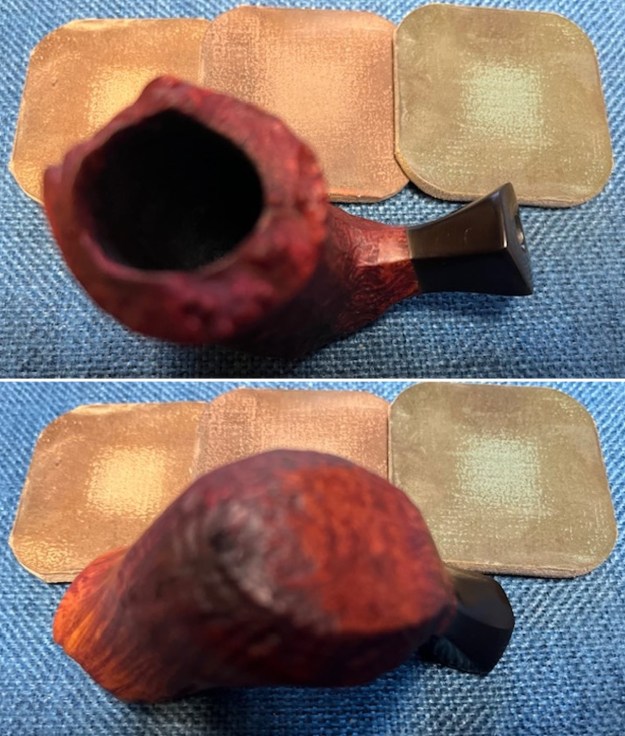
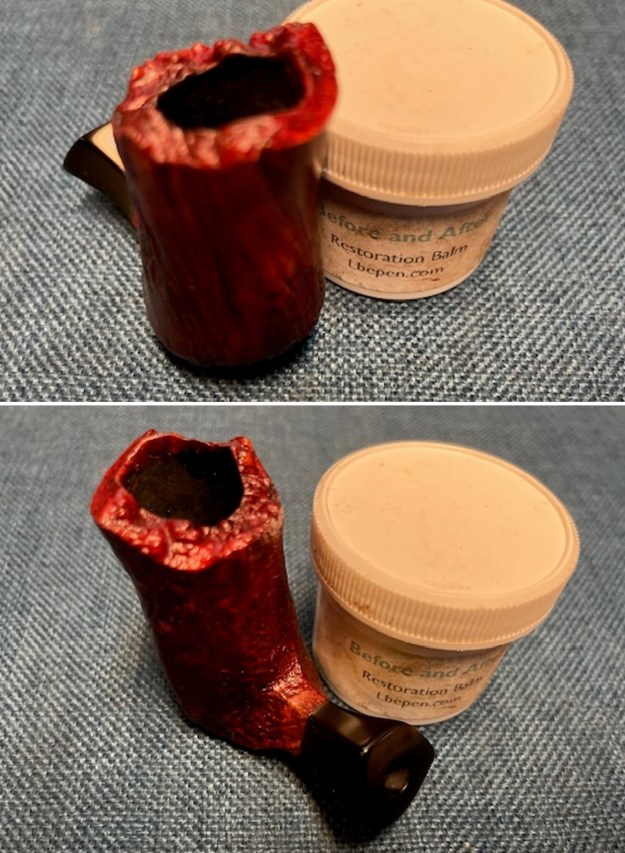
He took photos of the rim top to show the moderate cake in the bowl and the thick lava coat and debris in the plateau finish on the backside of the rim top. You can see that it basically fills in the grooves of the finish. He took photos of the stem to show the oxidation and calcification on it but at some level it does not matter as it will be replaced. 
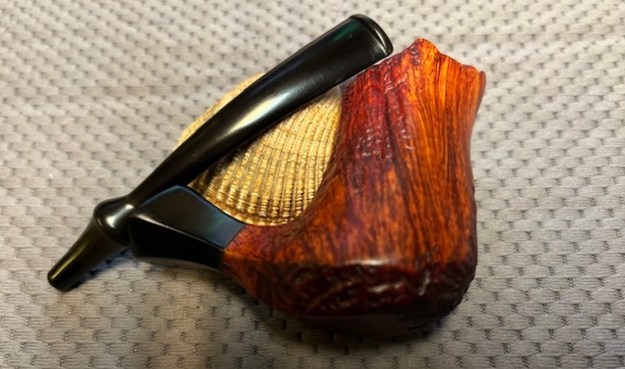
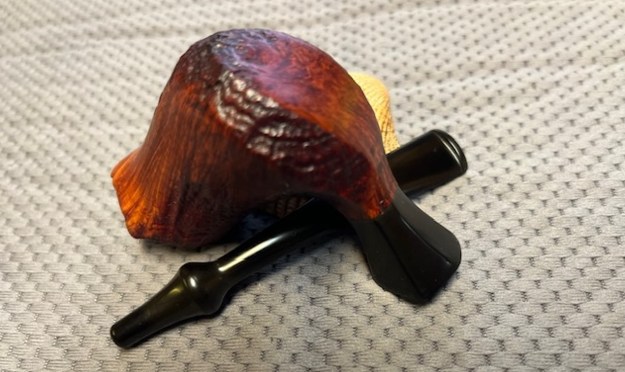
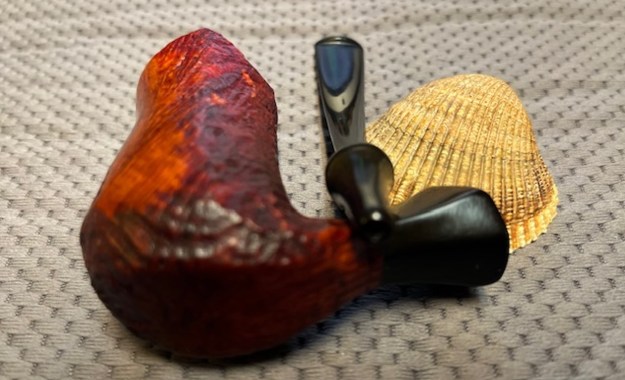
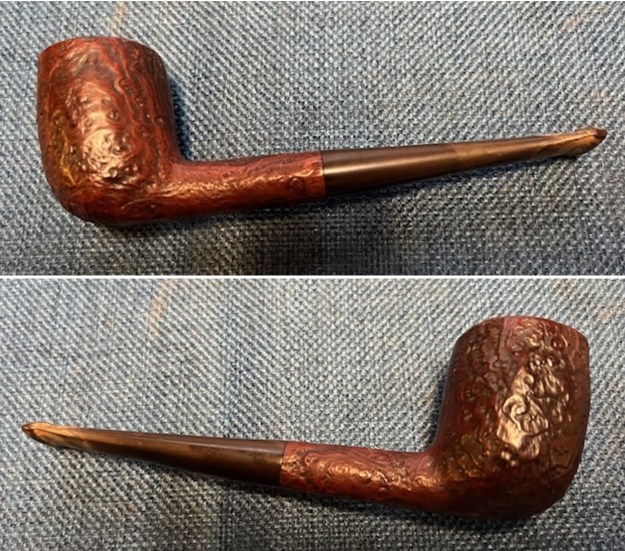
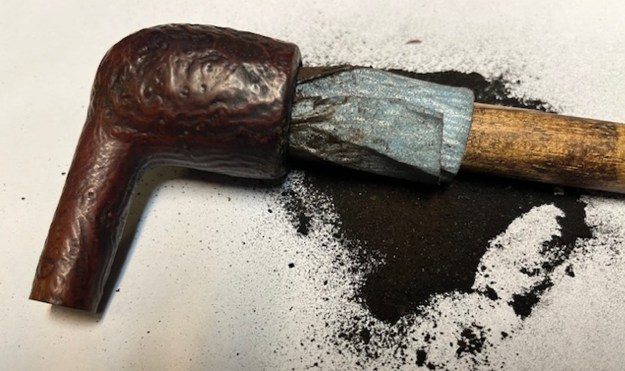
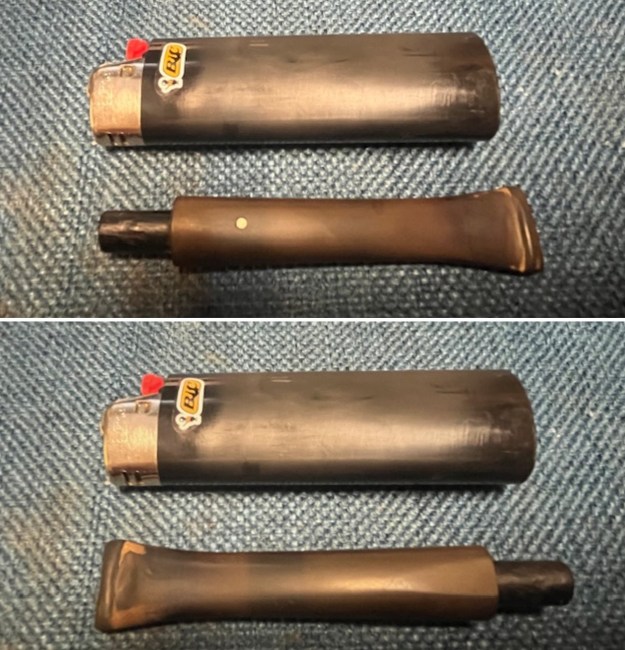
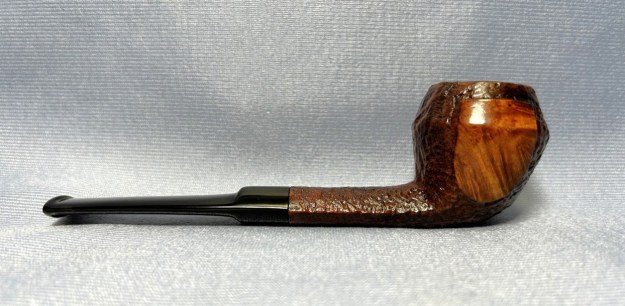
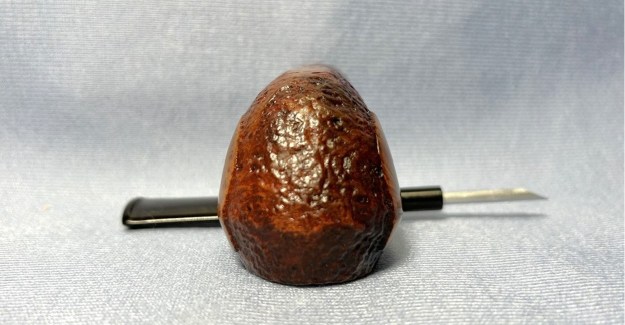
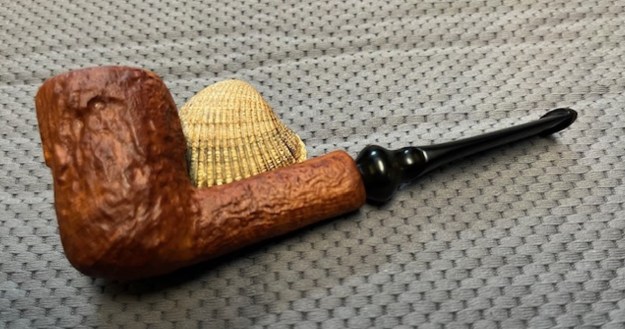
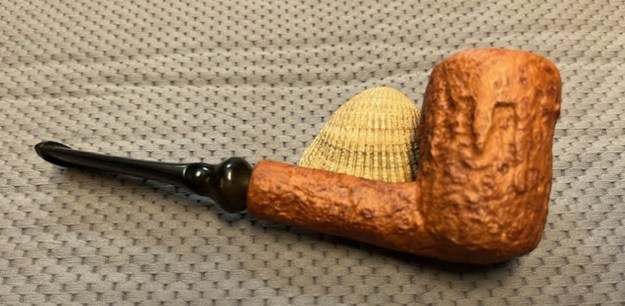
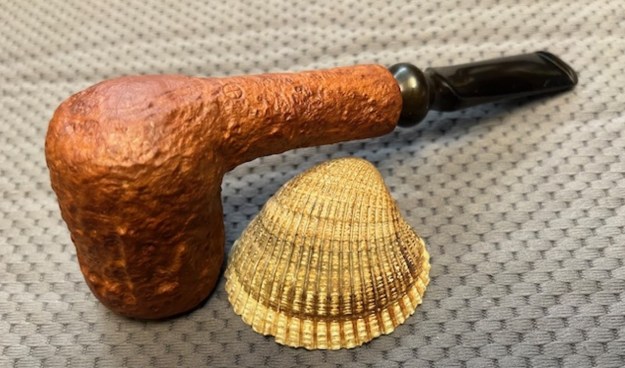
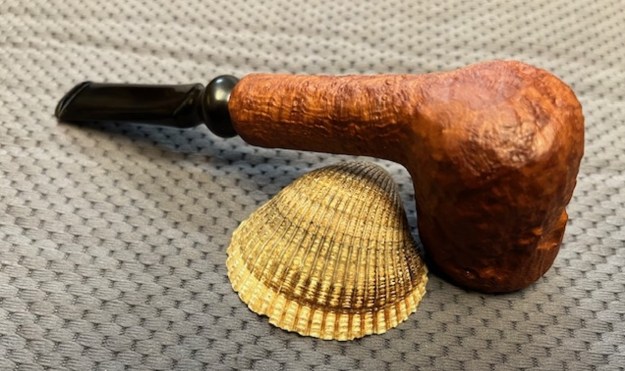
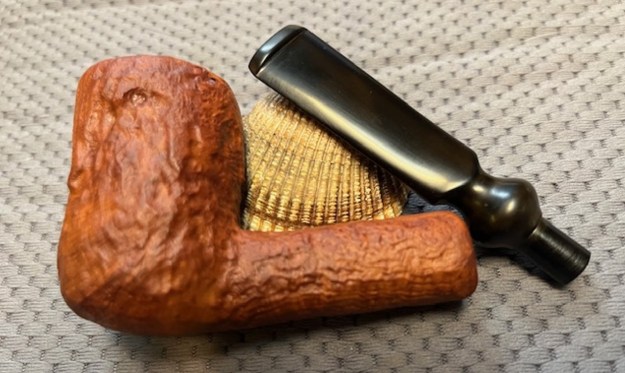
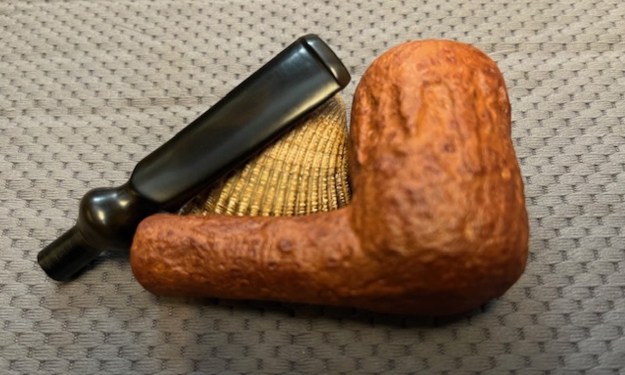
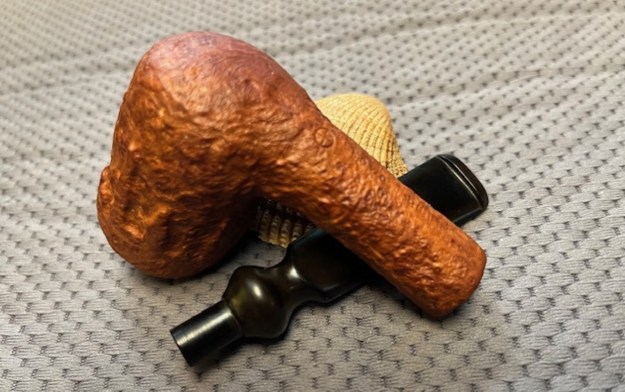
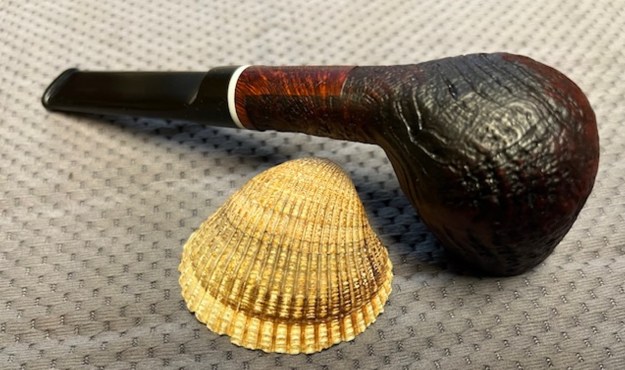
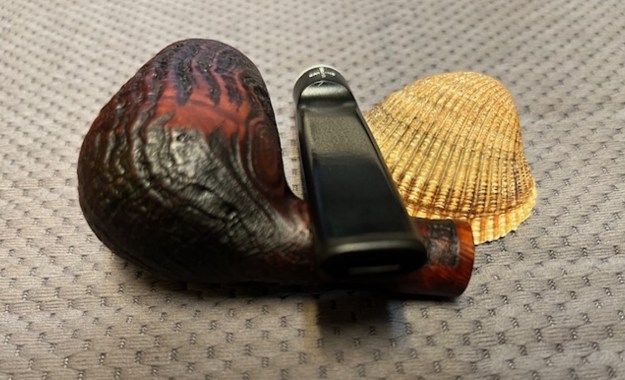
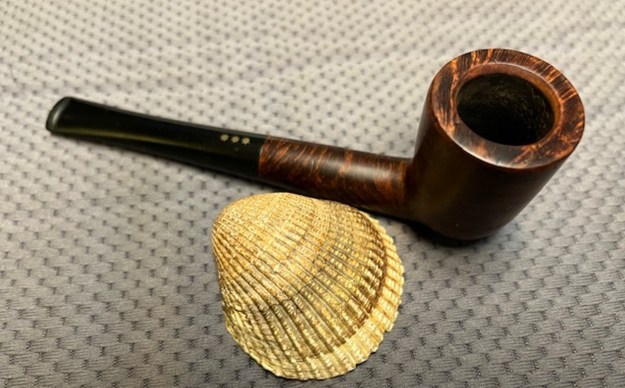
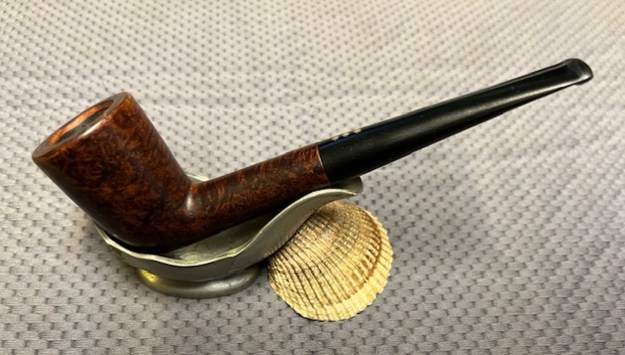
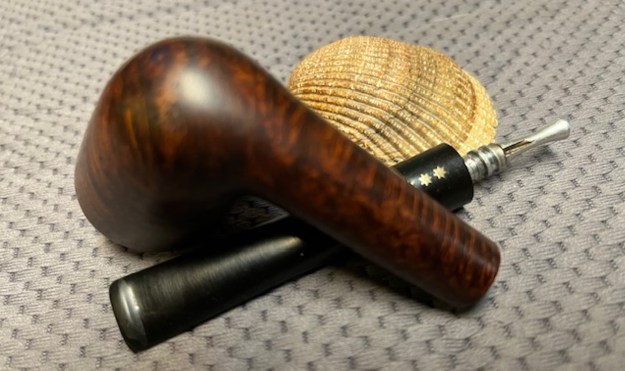
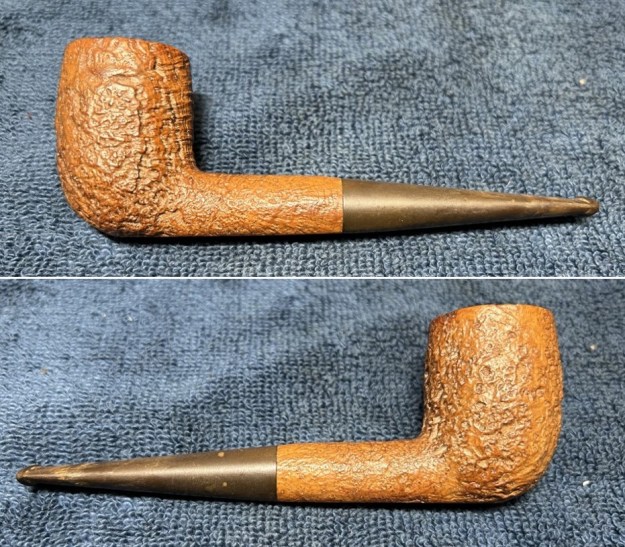
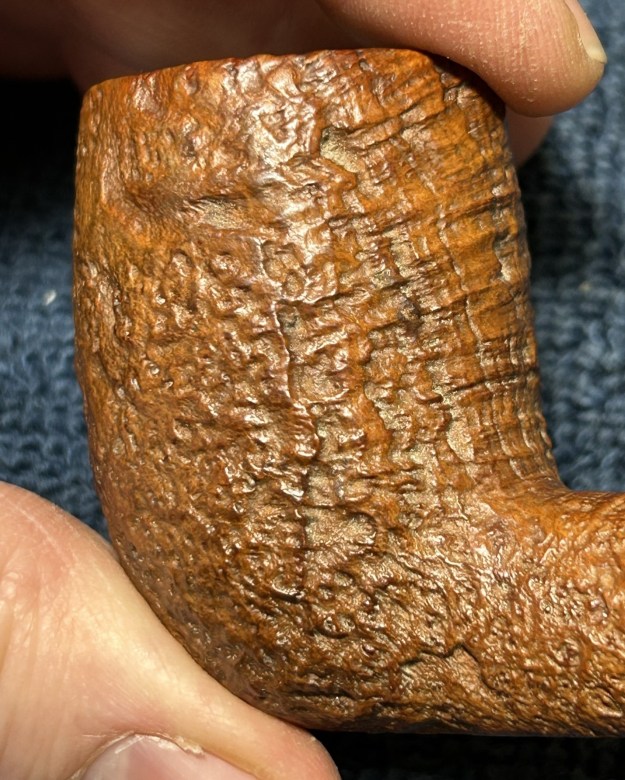
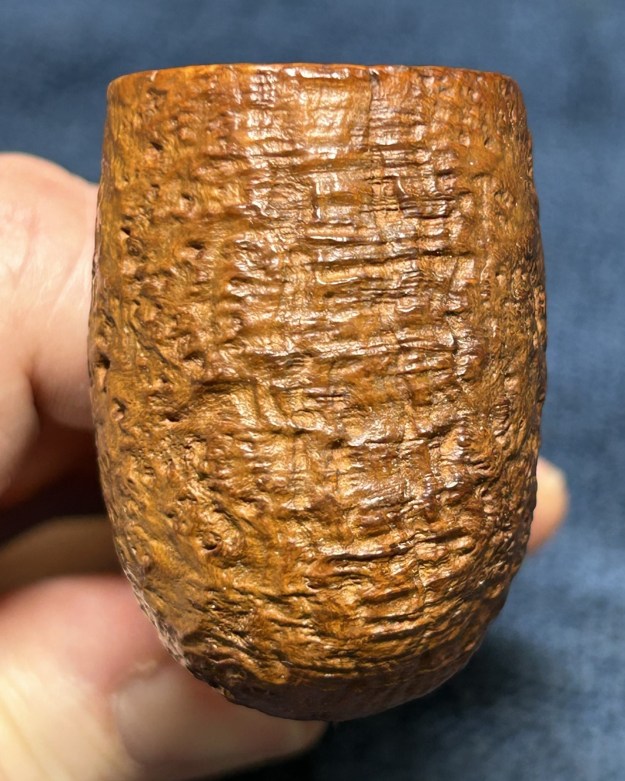
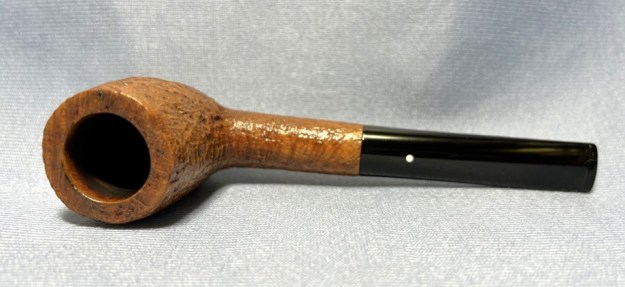
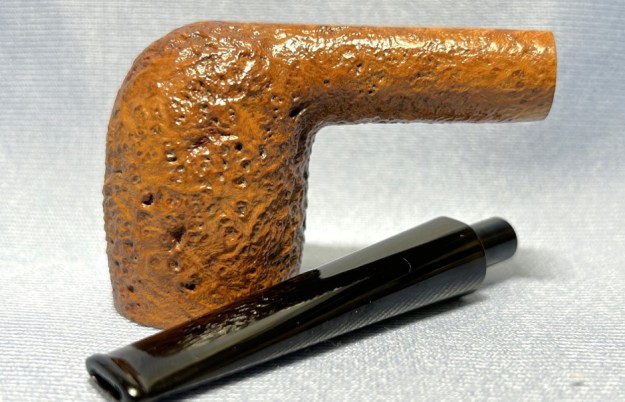
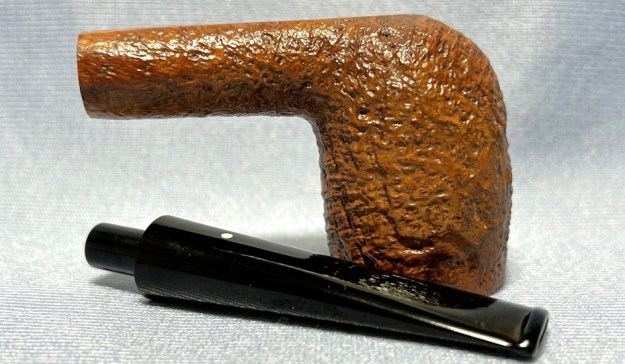
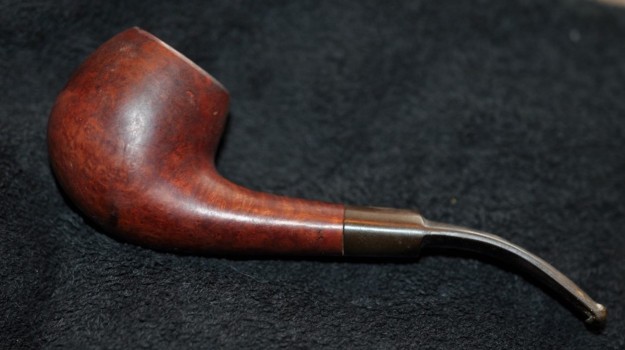
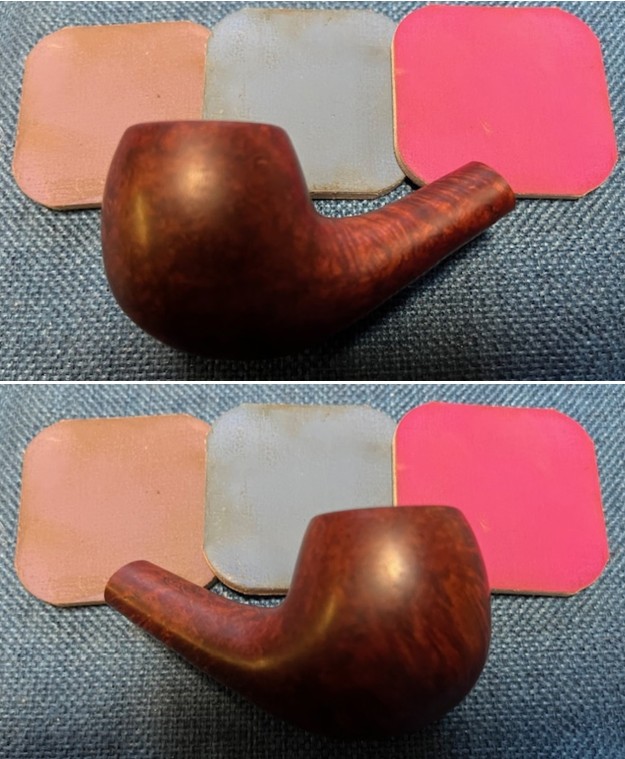
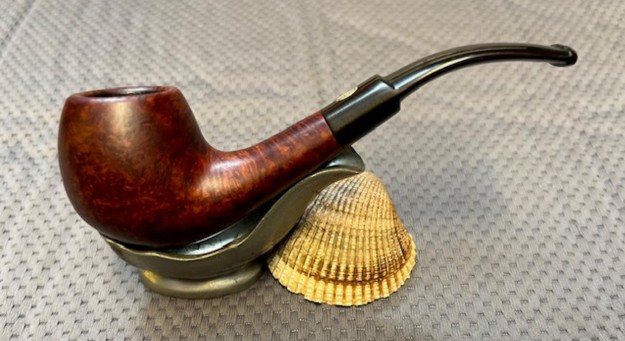
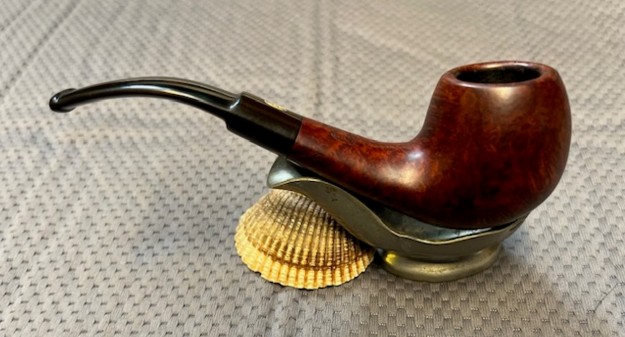
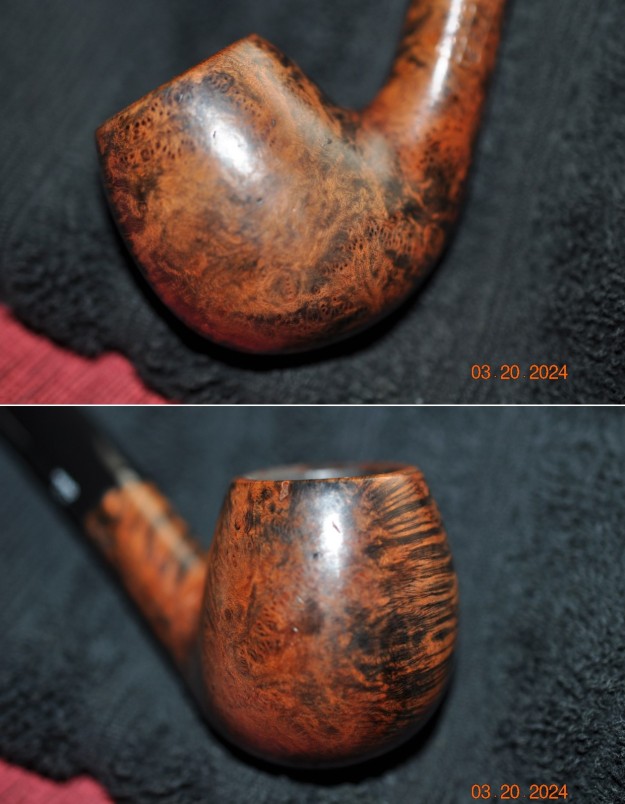
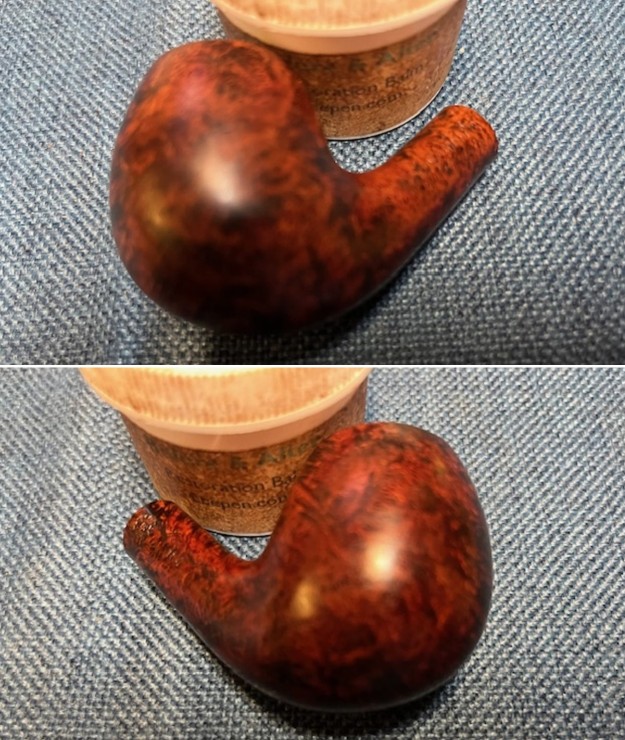
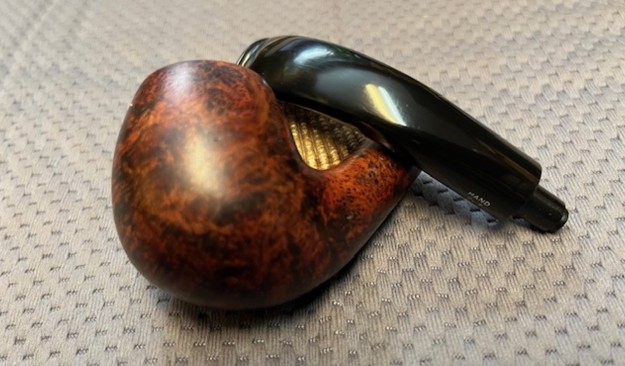
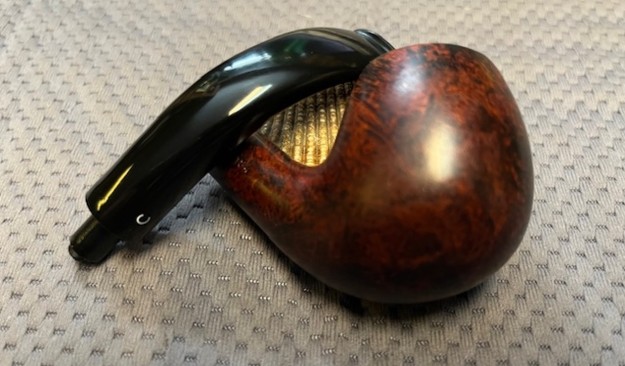
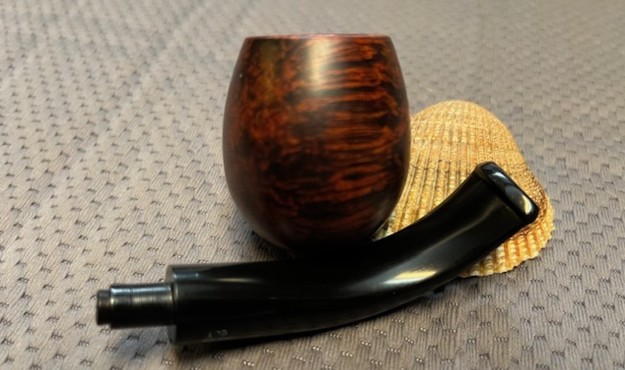
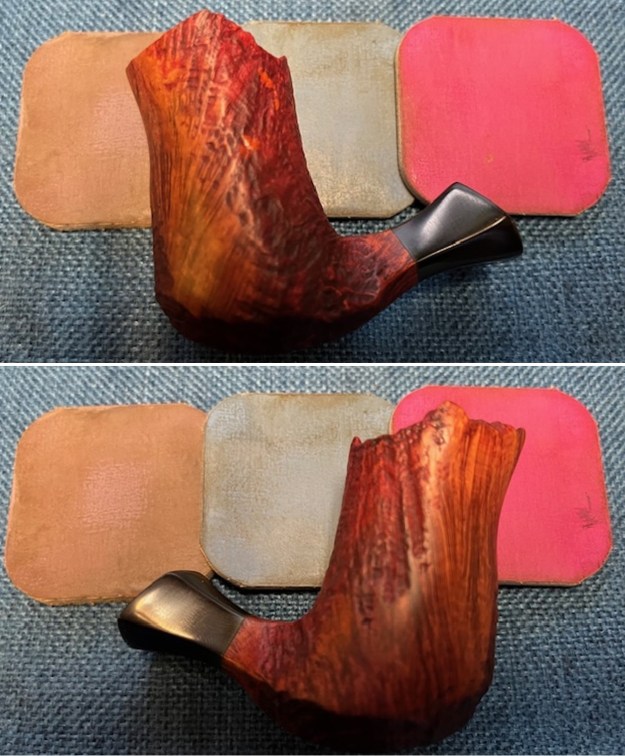
Jeff took one photo of the right side of the bowl to give a sense of the finish on the bowl sides. There are no other photos at this point.
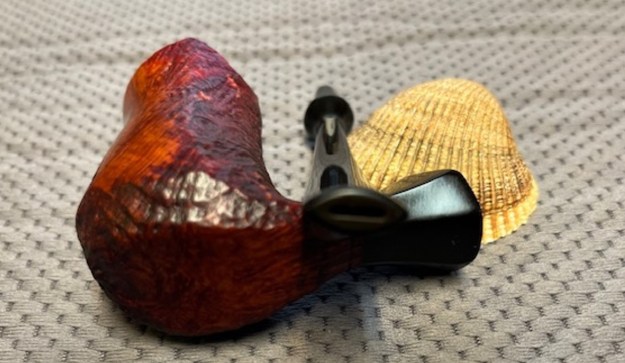
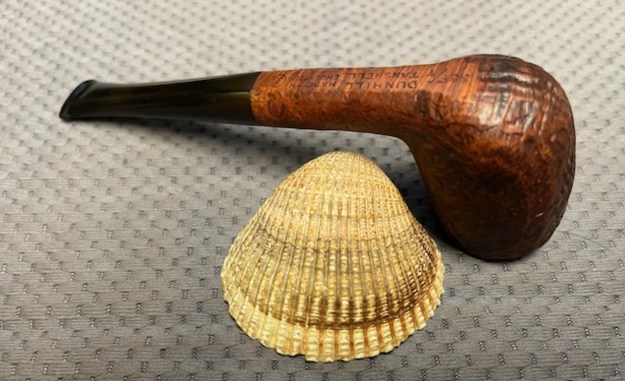
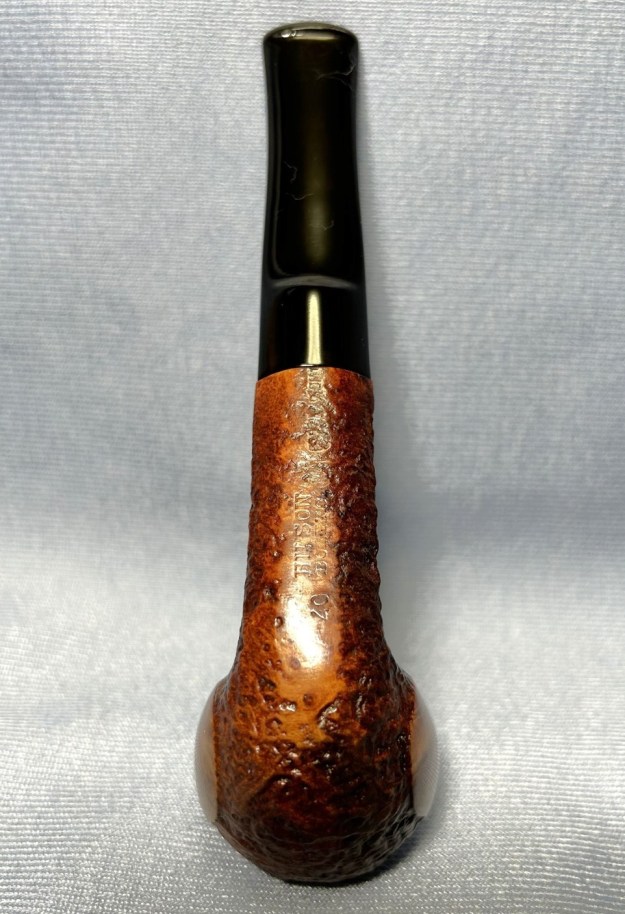
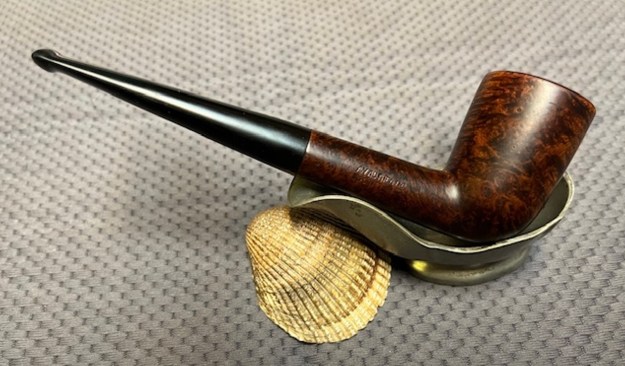
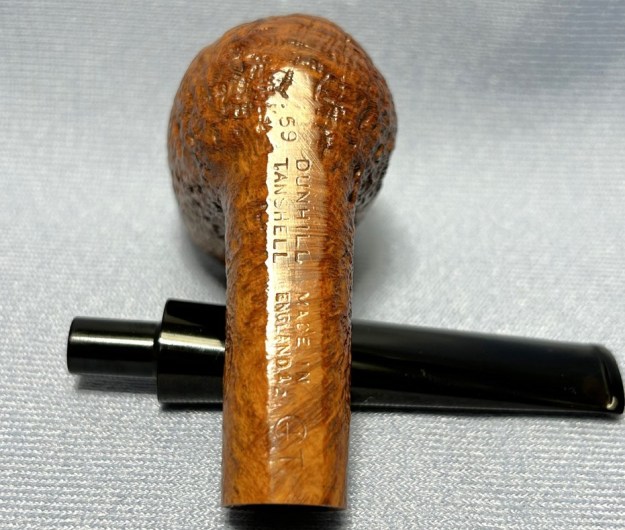
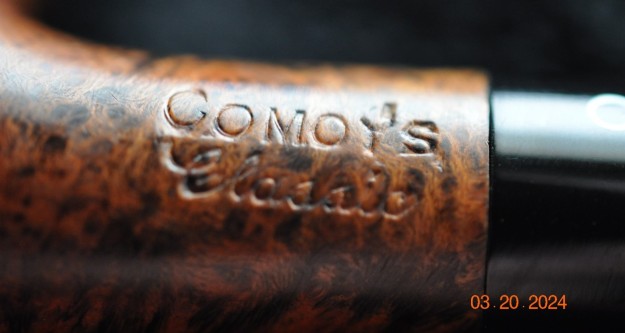
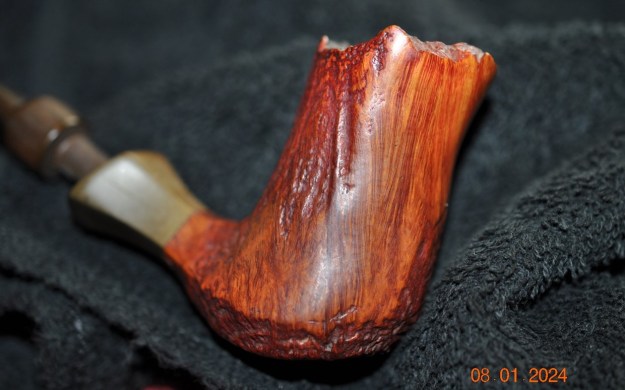
He captured the stamping as best as possible on the underside of the shank next to the vulcanite shank extension. It reads as noted above.
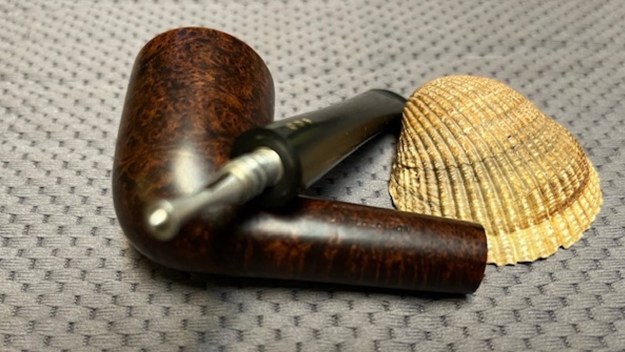
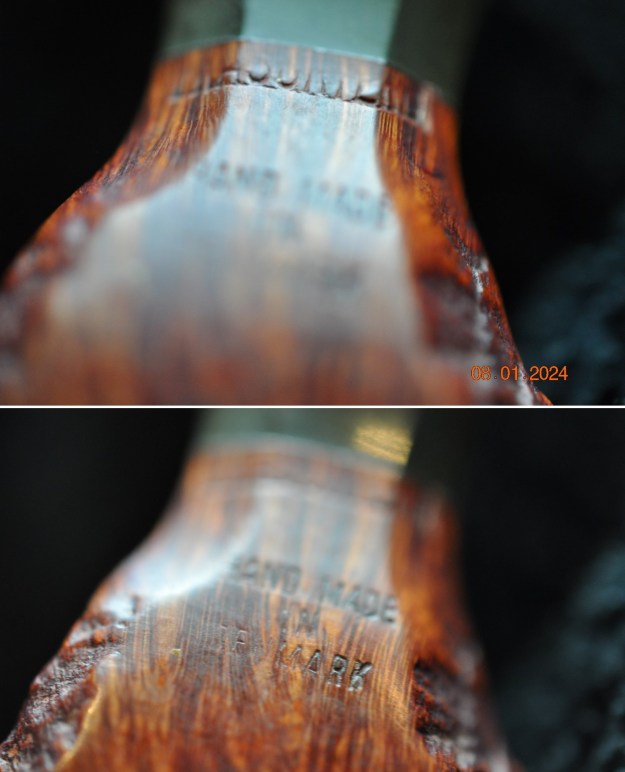
It seemed to me that Frasorteret pipes came from the creative carving of Preben Holm so I wanted to confirm that memory. When you get a certain age memory can fool you! I turned first to Pipephil’s site (http://www.pipephil.eu/logos/en/logo-f4.html). It tied the line to Preben Holm but there was not too much more information at this point.I turned to Pipedia (https://pipedia.org/wiki/Frasorteret) to gather further information. There the information was scant but none the less made the connection to Preben Holm very clear. Here is the information.

The Frasorteret line of pipes were made by Preben Holm and were nearly identical to his normal line of pipes but for fills and pits and the like. The pipes were stamped Frasorteret Made in Denmark.

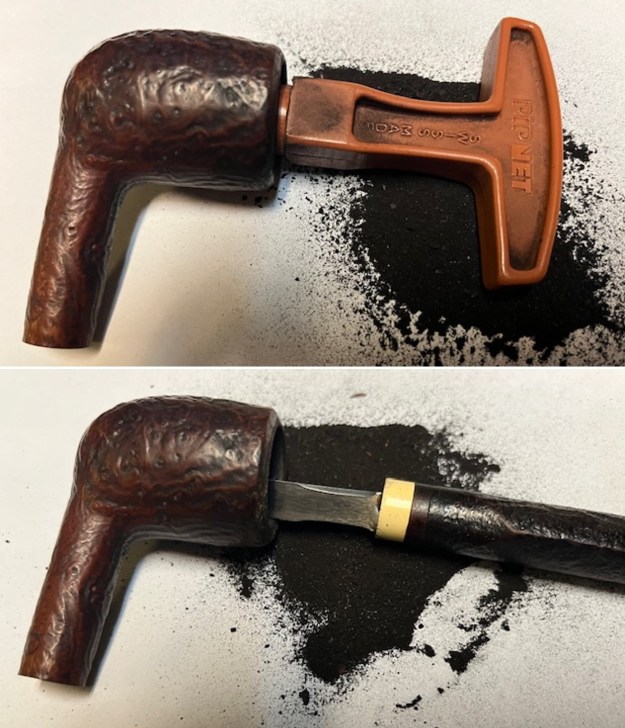
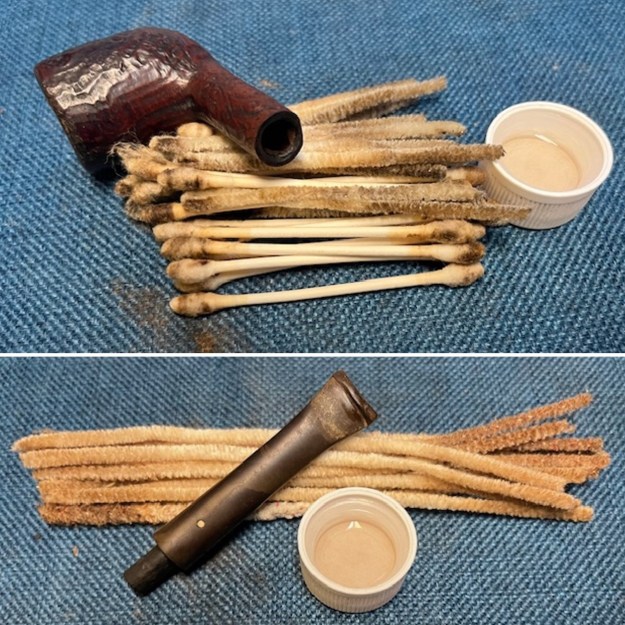
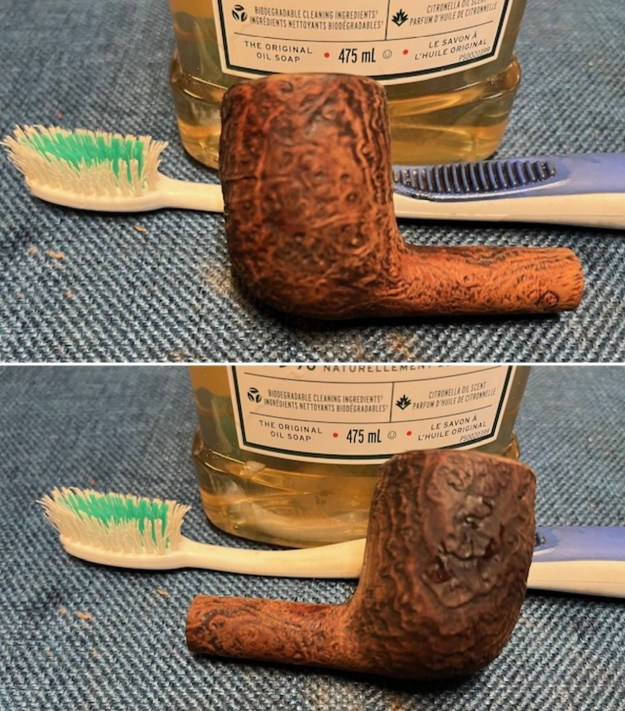
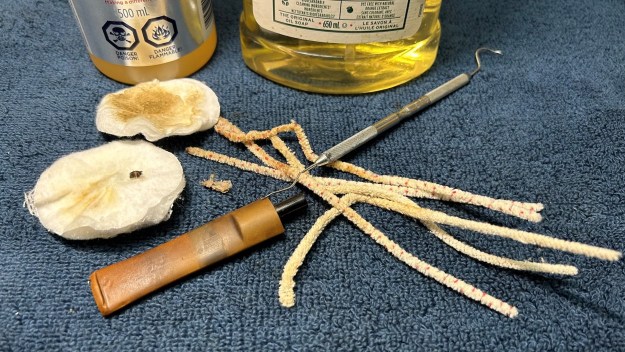
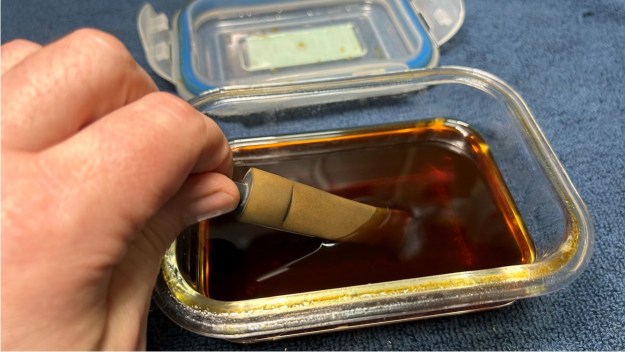
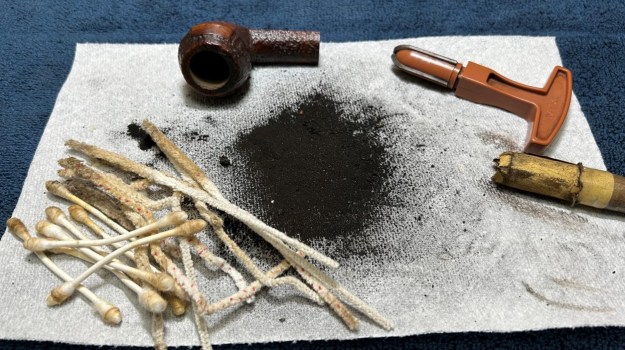
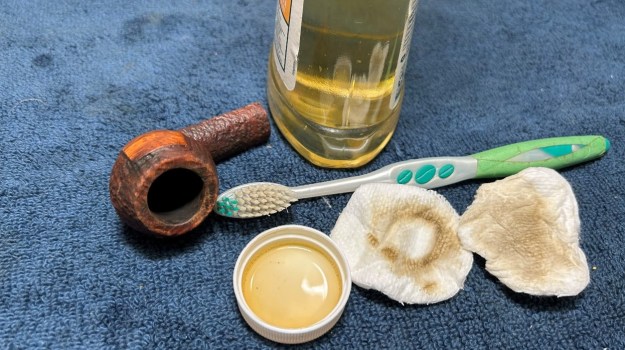
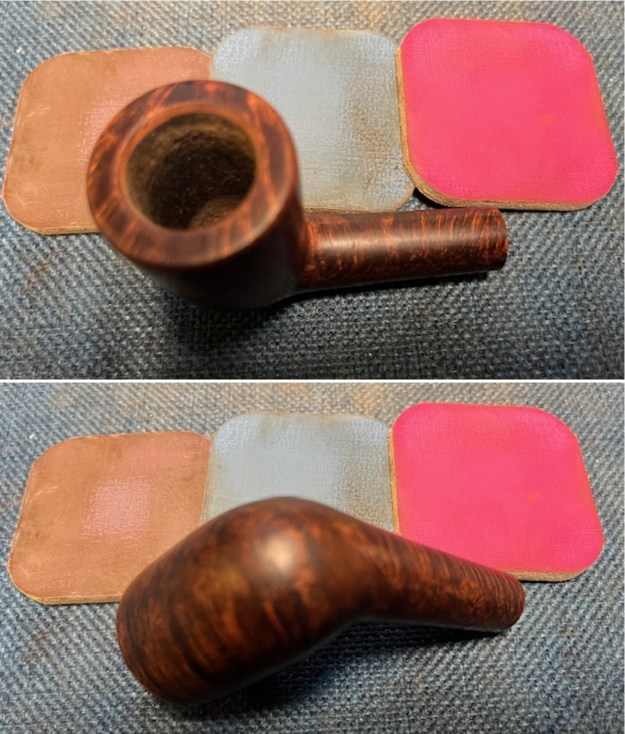
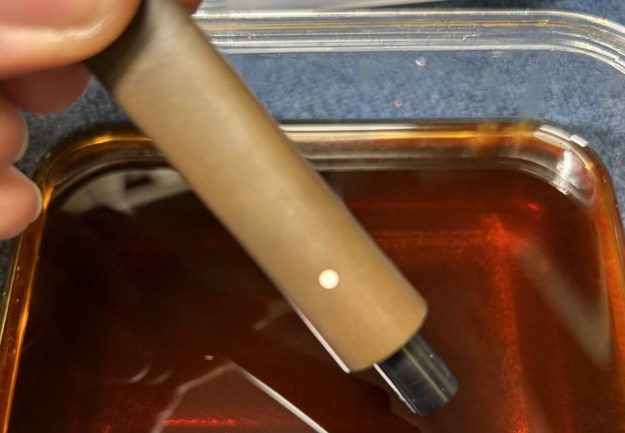
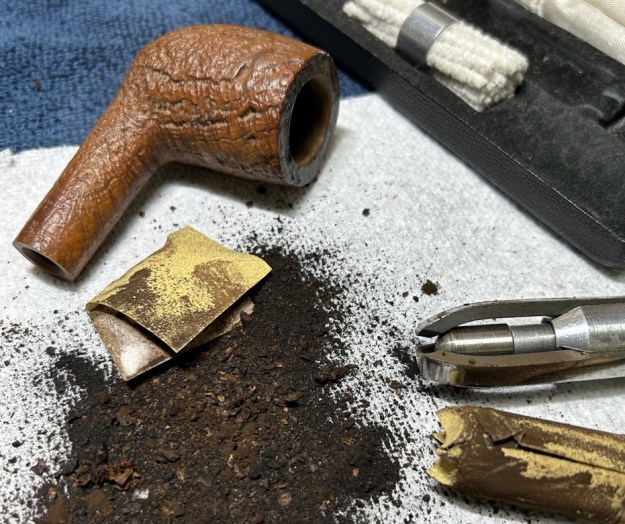
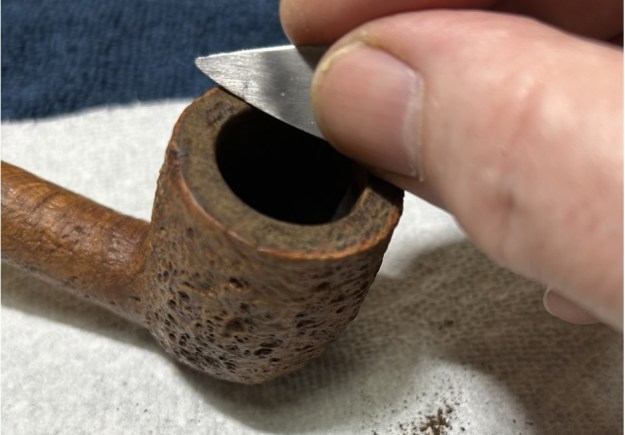
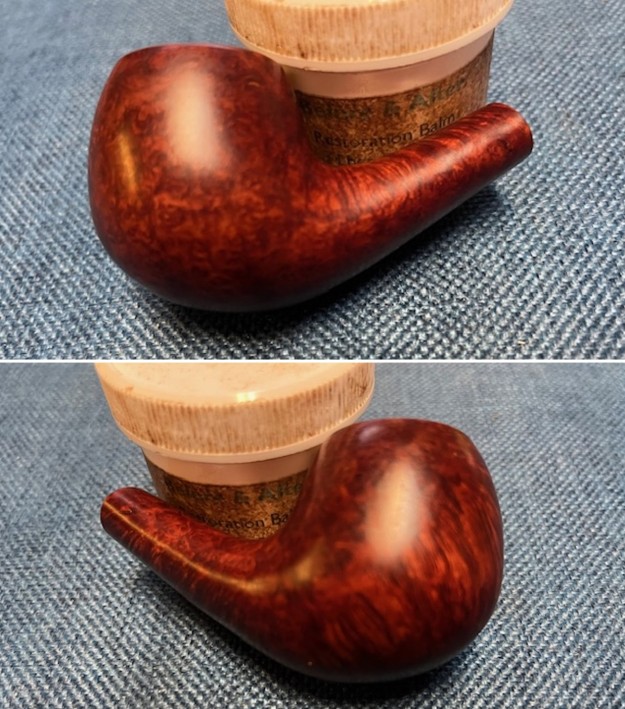
Now I had the background I needed. I was ready to start working on this pipe. As usual, Jeff had thoroughly cleaned up the pipe. I probably don’t say enough about how much I appreciate him doing the hard clean up work before I even get the pipes. He does an amazing job. He had reamed the pipe with a PipNet pipe reamer back to bare briar and removed the remnants of the cake with a Savinelli Fitsall Pipe Knife. He used a small blade to pick out the thick lava on the rim top. He scrubbed the bowl with undiluted Murphy’s Oil Soap and a tooth brush. He rinsed it under running warm water to remove the soap and grime. He cleaned out the inside of the shank and the airway in the stem with alcohol, cotton swabs, pipe cleaners and shank brushes. He soaked the stem in Briarville’s Pipe Stem Deoxidizer and rinsed it off with warm water. I took photos of the pipe and the stem that came with it before I started my part of the restoration work. Preben’s Holm’s magic is very visible in the shaping of the pipe. 
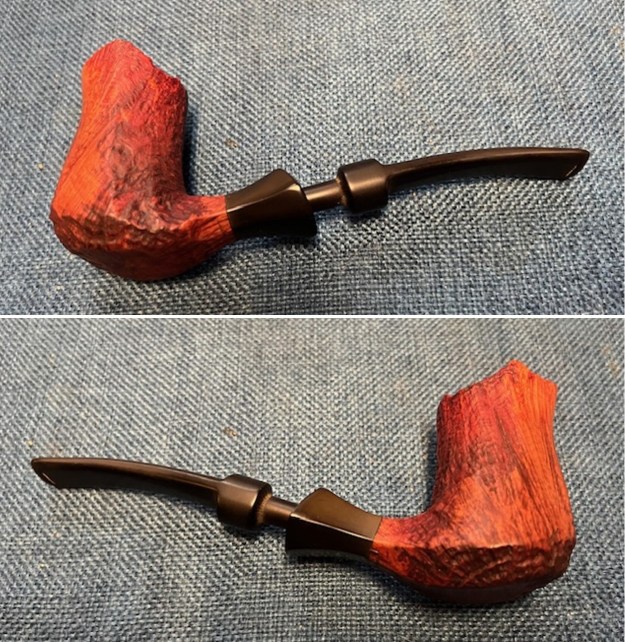
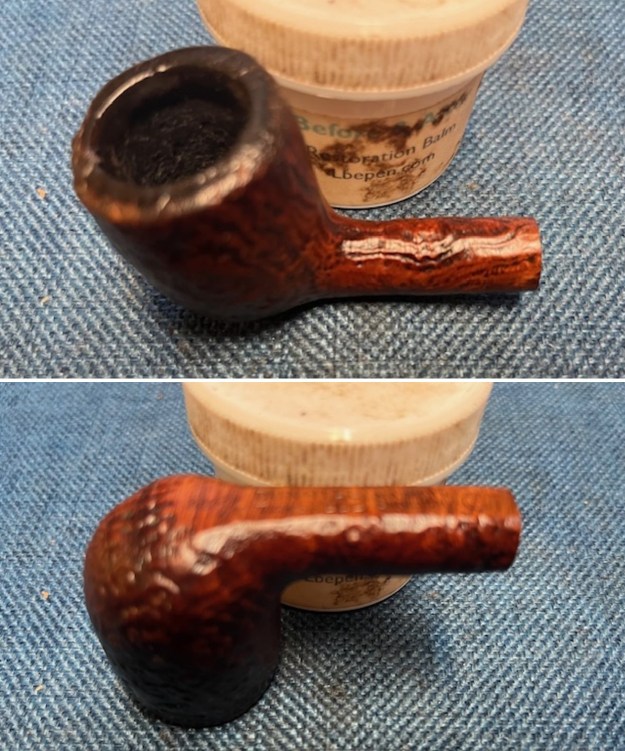
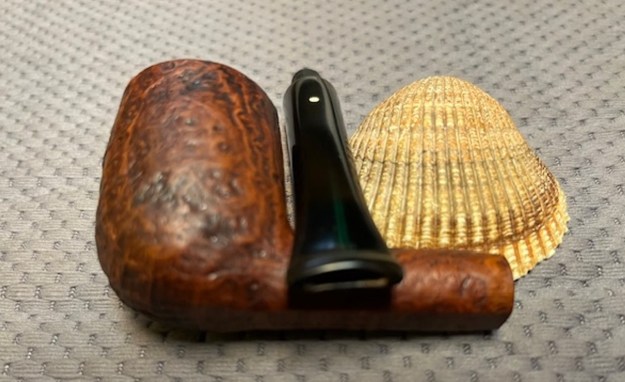
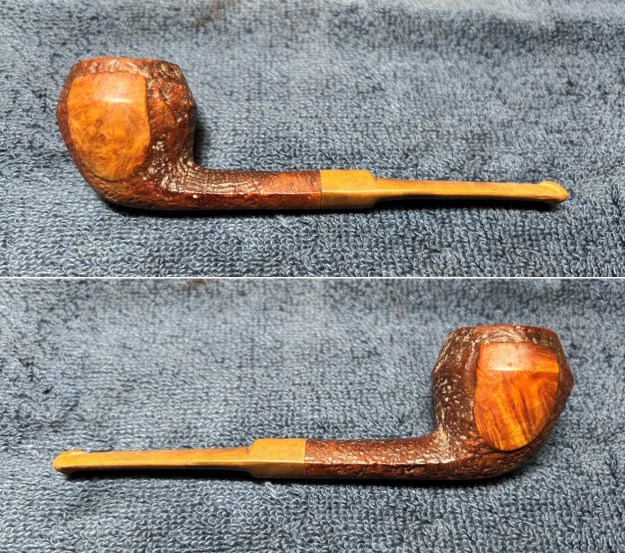
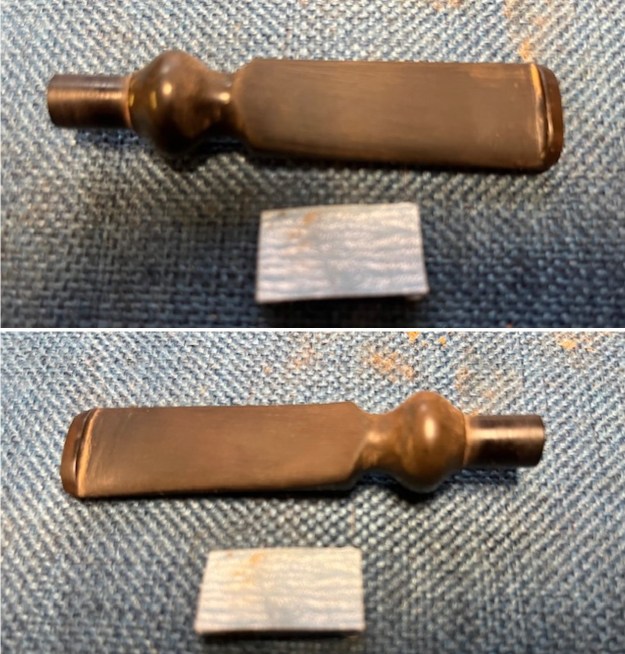
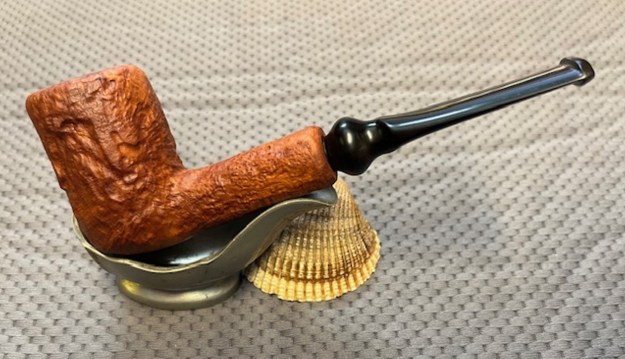
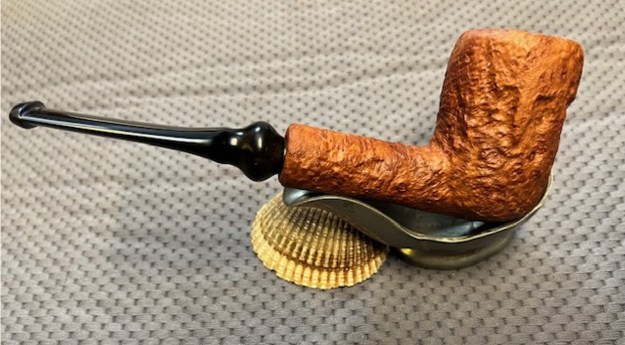
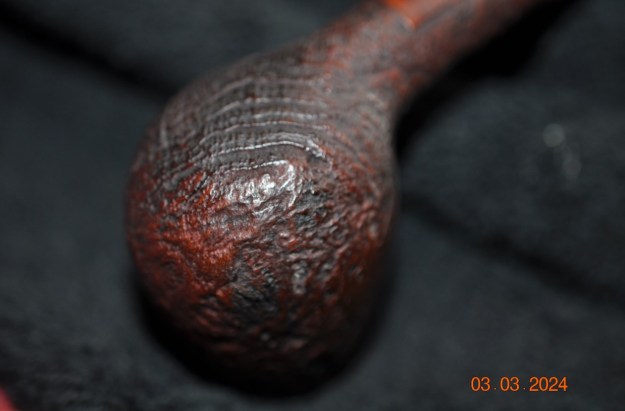
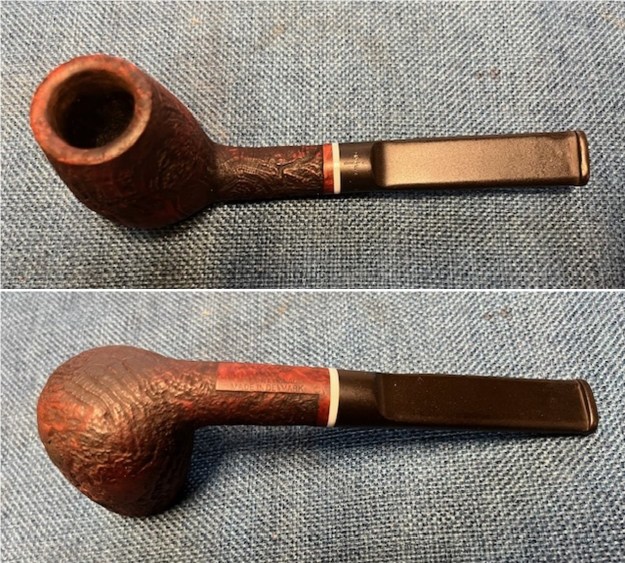
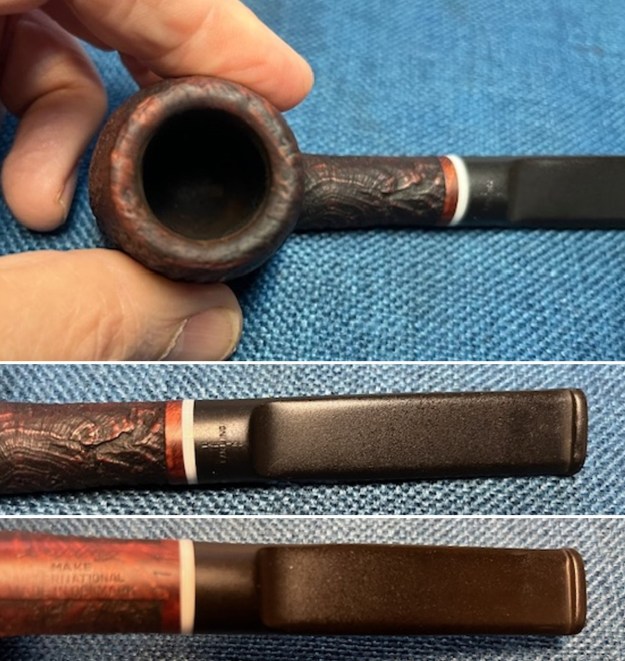
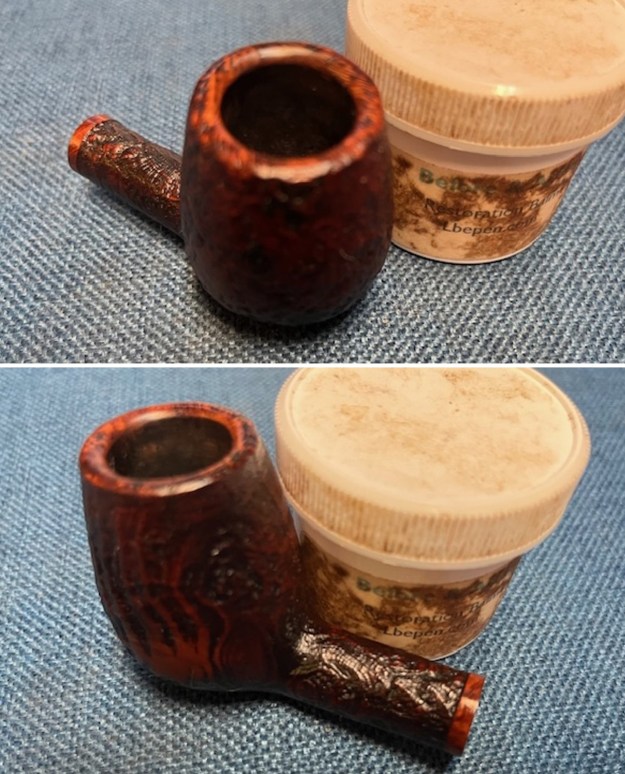
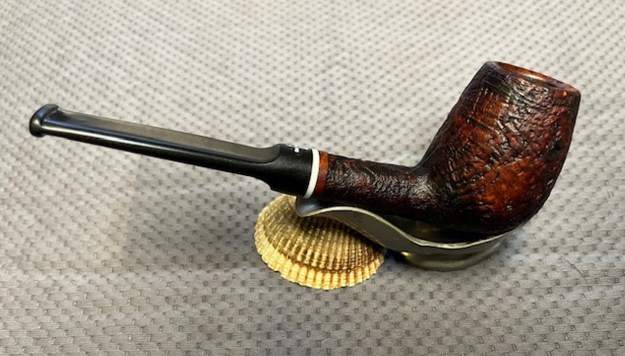
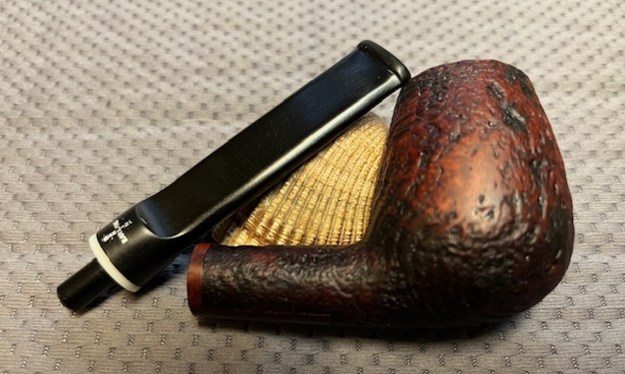
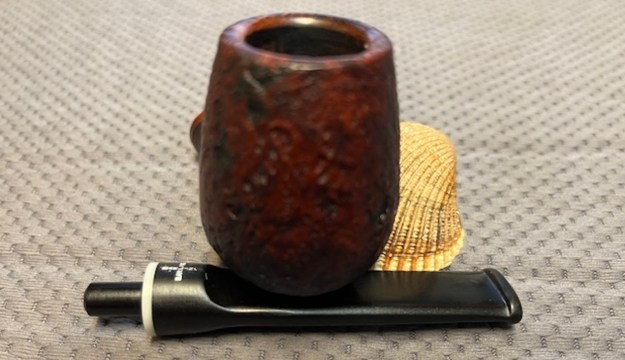
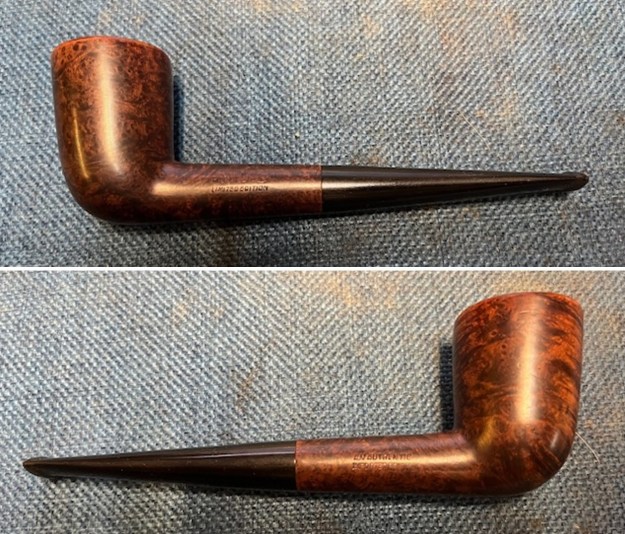
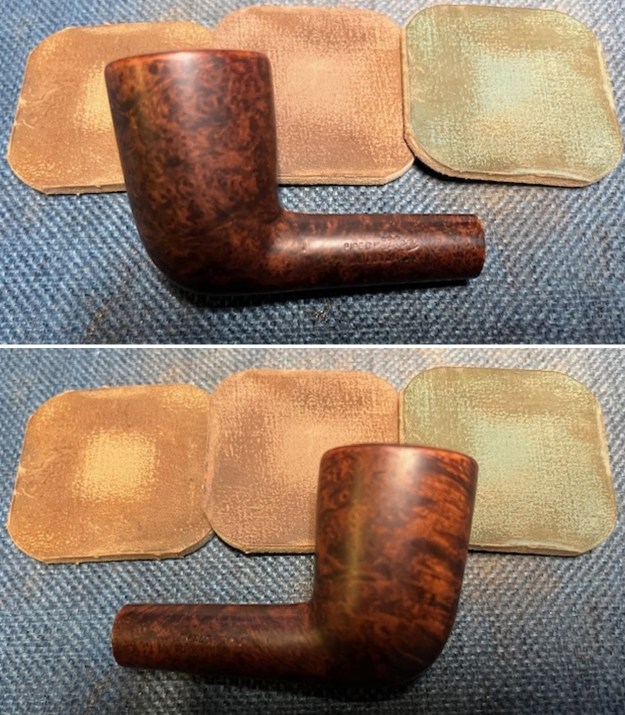
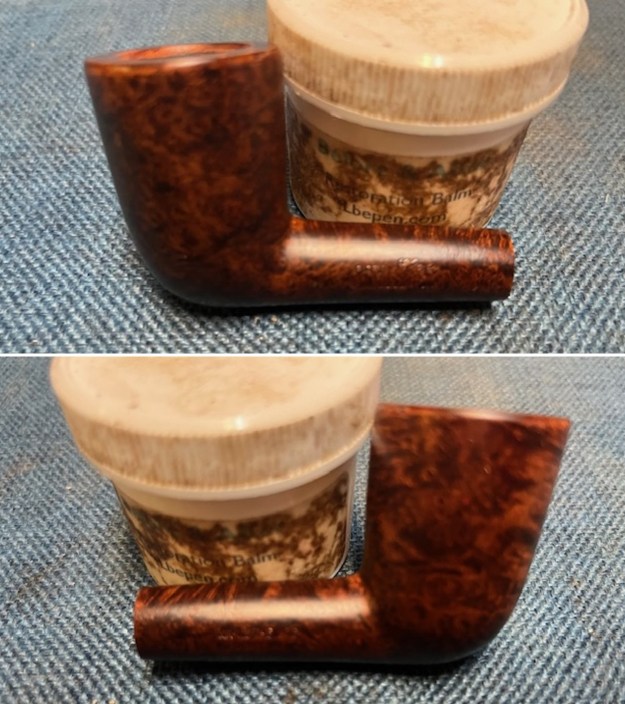
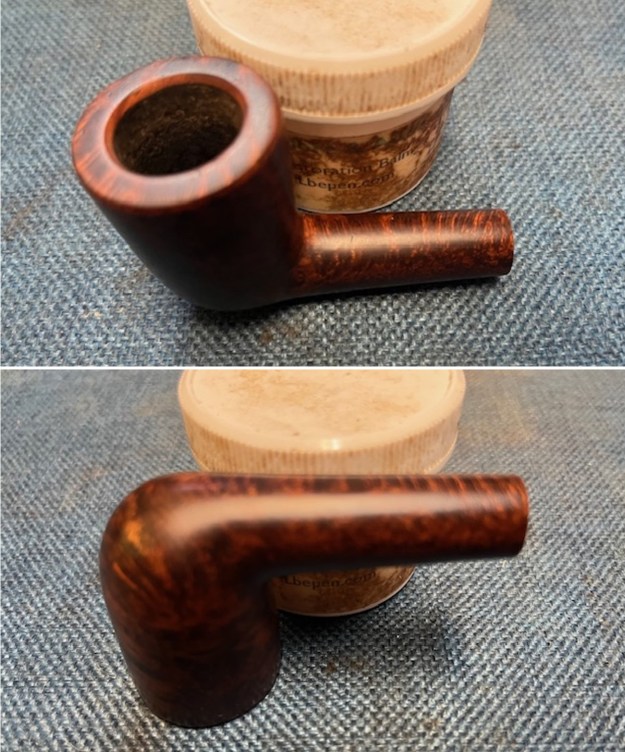
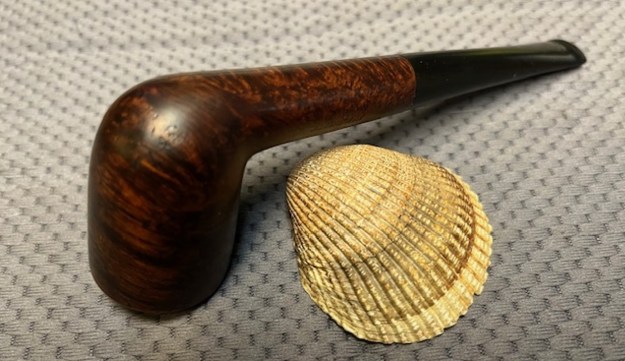
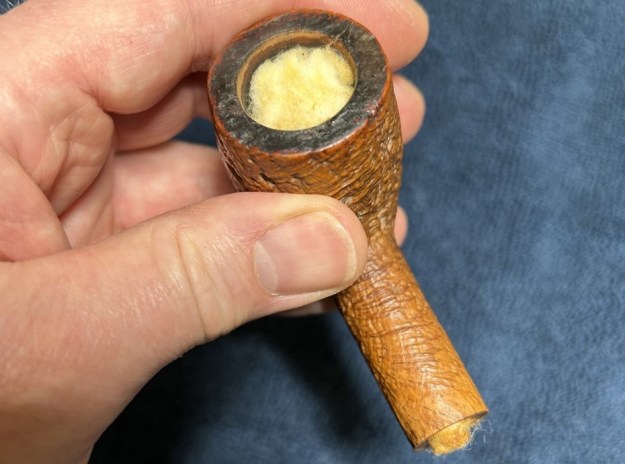
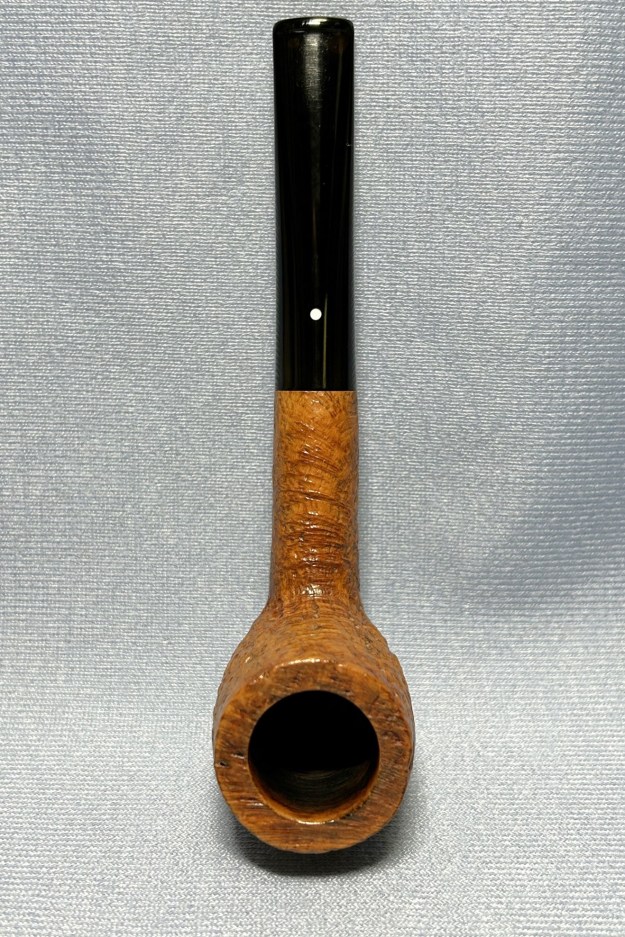
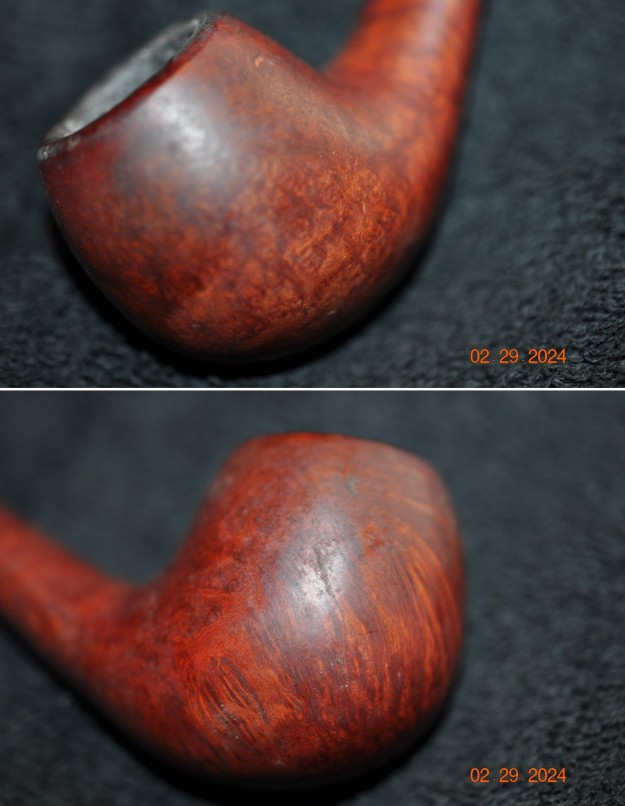
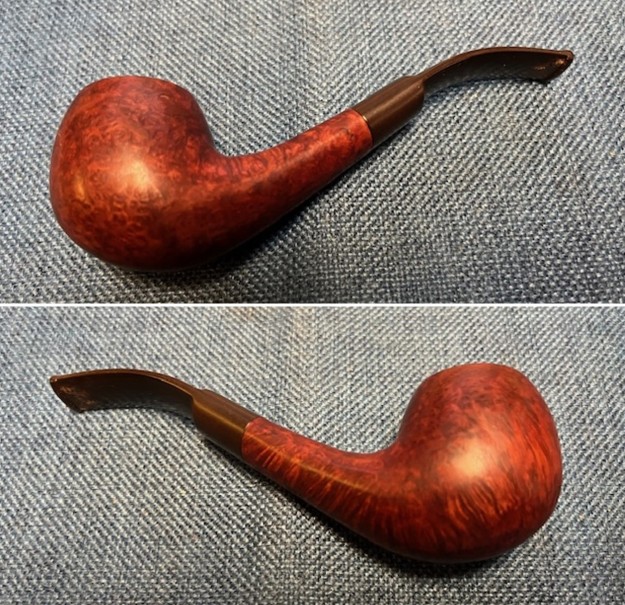
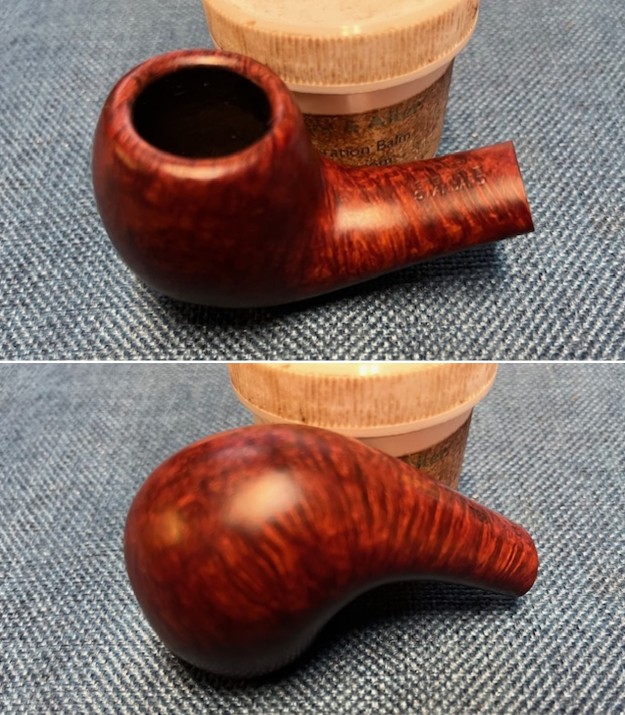
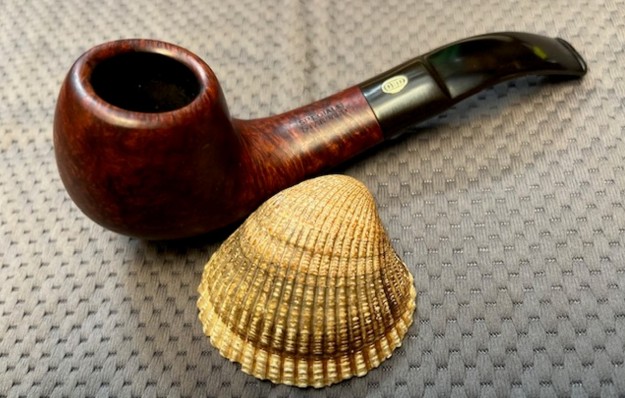
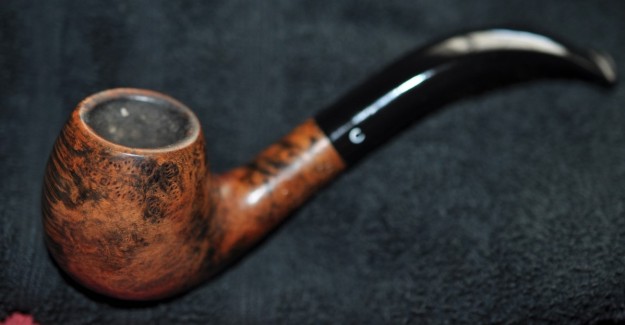
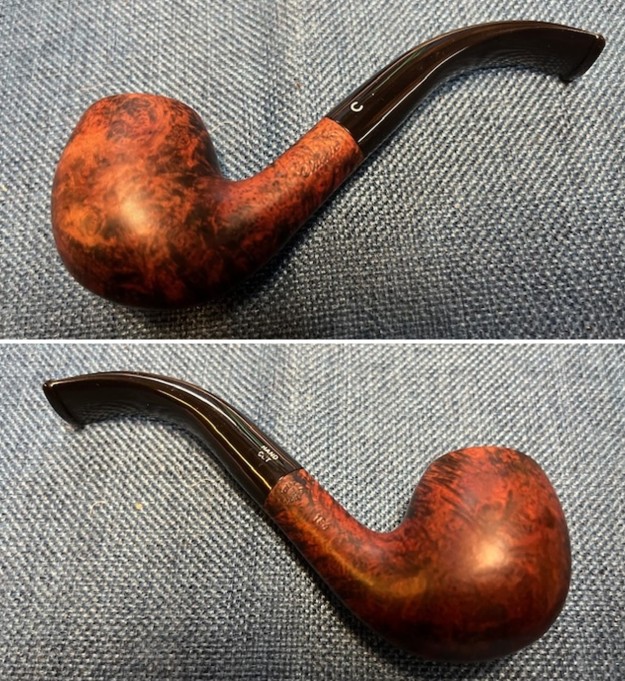
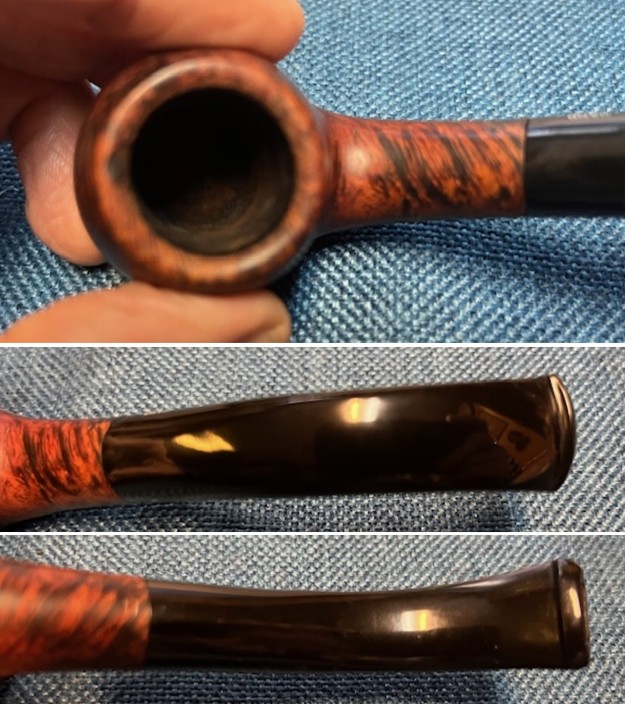
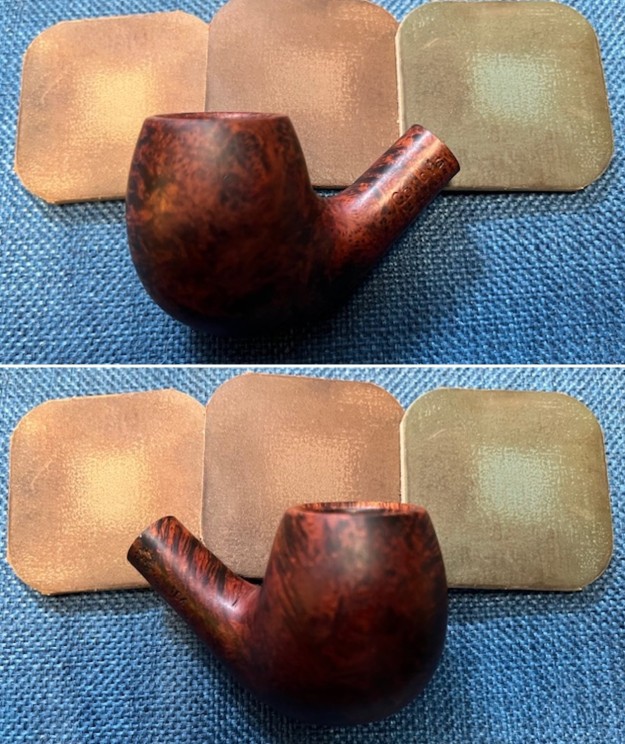
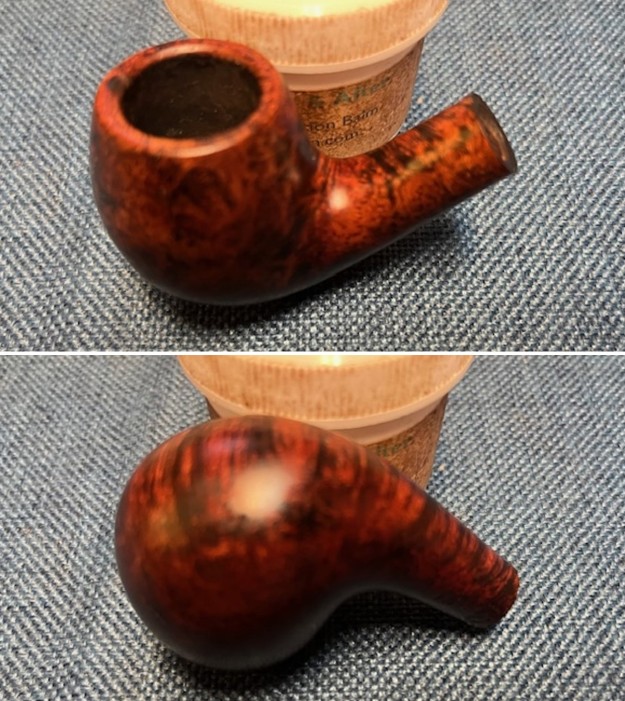
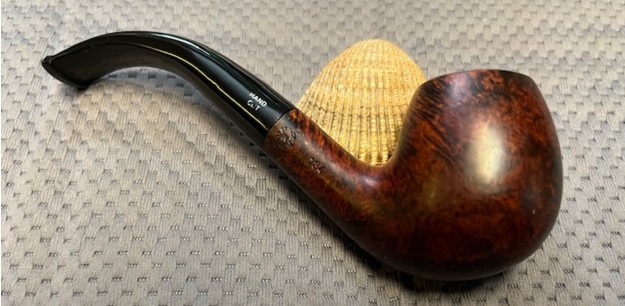
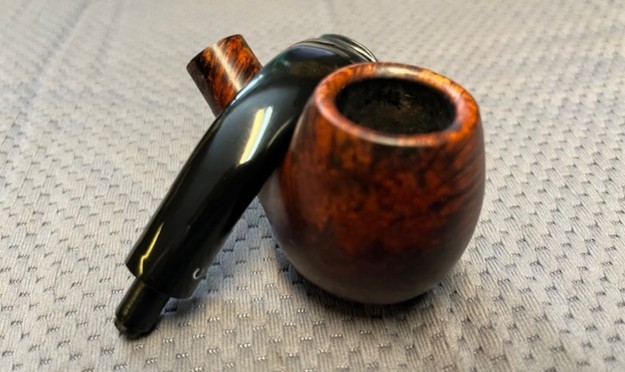
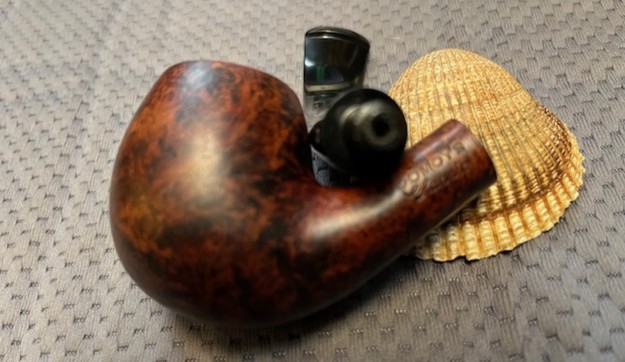
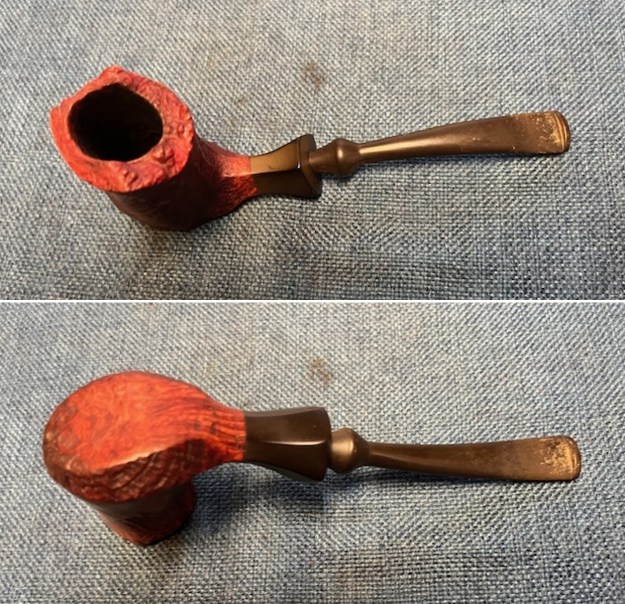
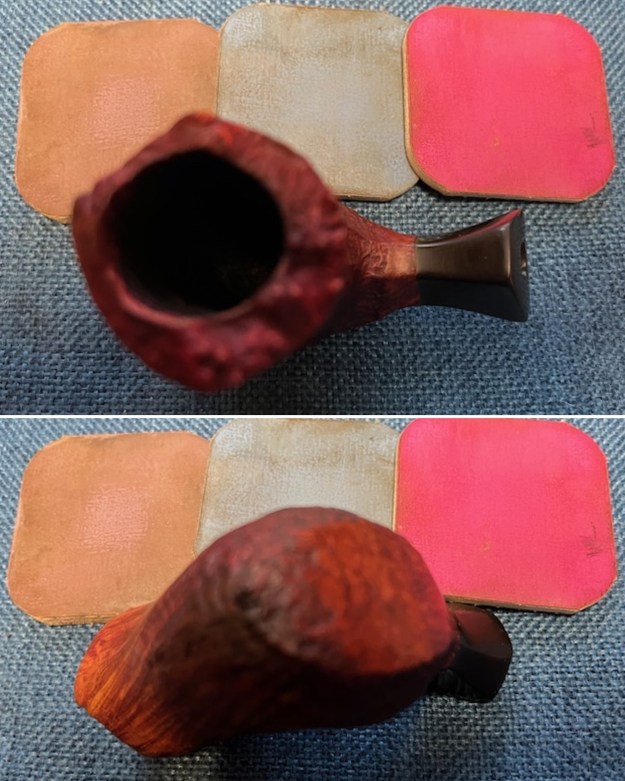
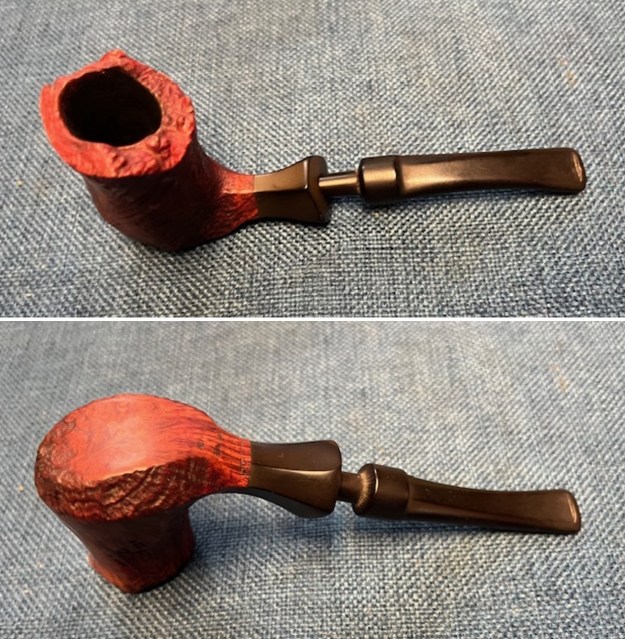
I took photos of the bowl and rim top to show the clean condition. The bowl walls look very good. The replacement stem looks very clean and will be a good addition to my can of stem options. 
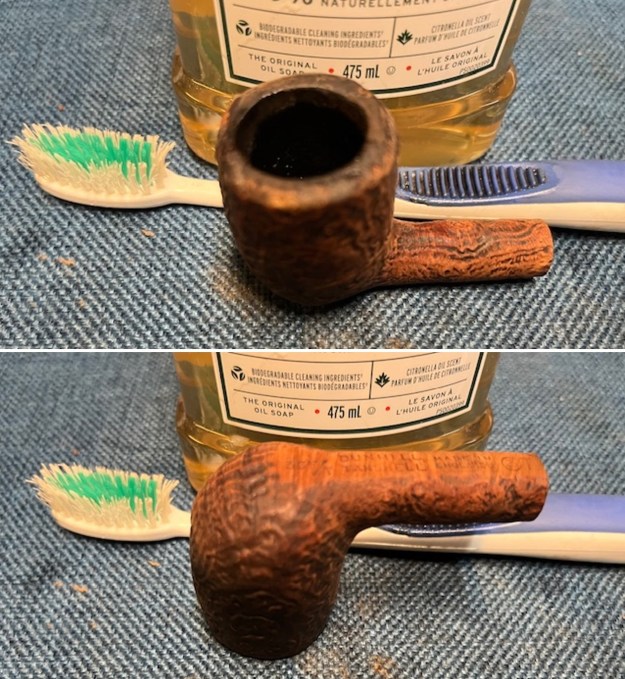
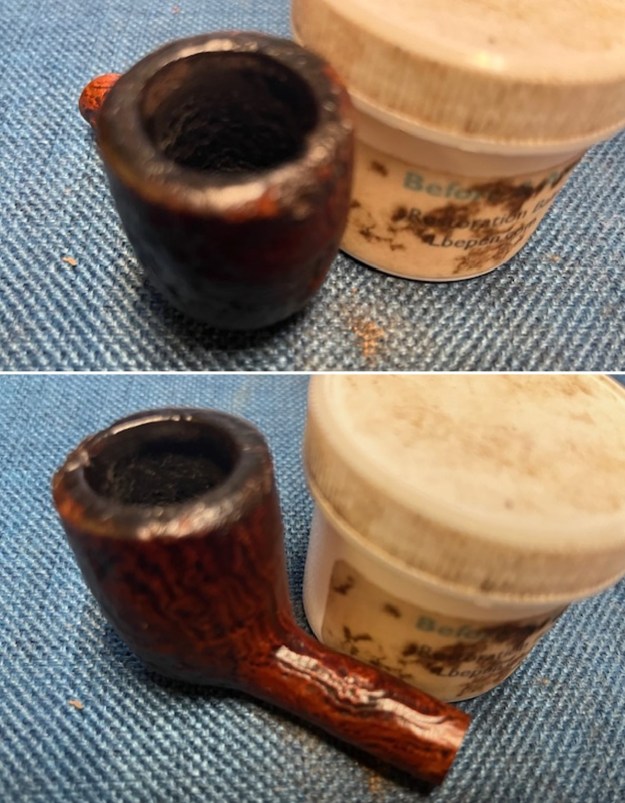
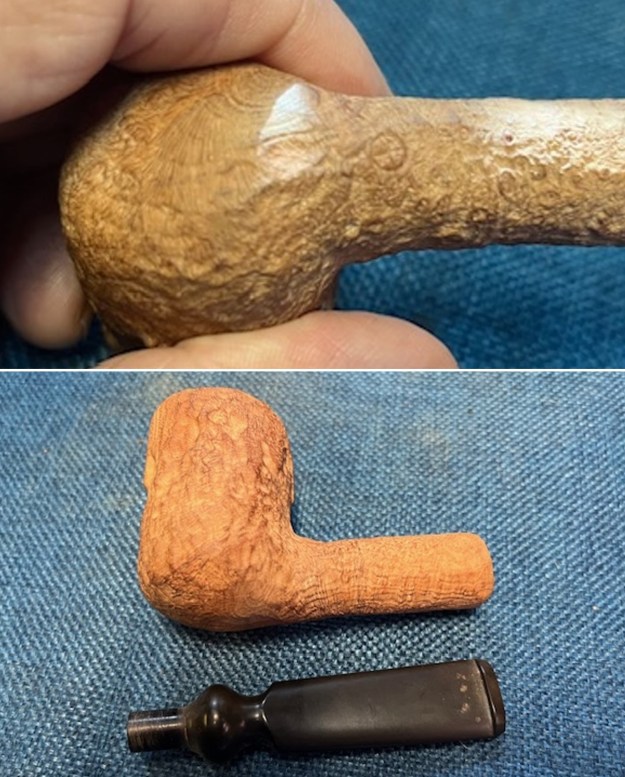
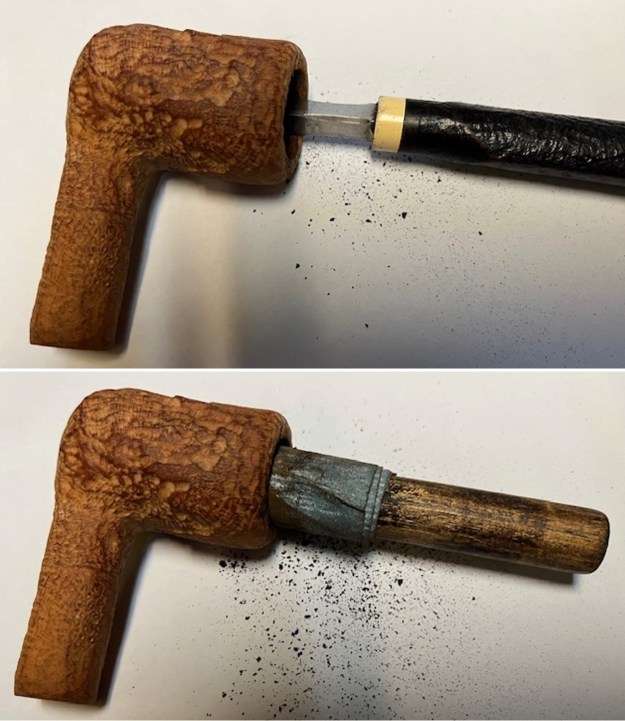
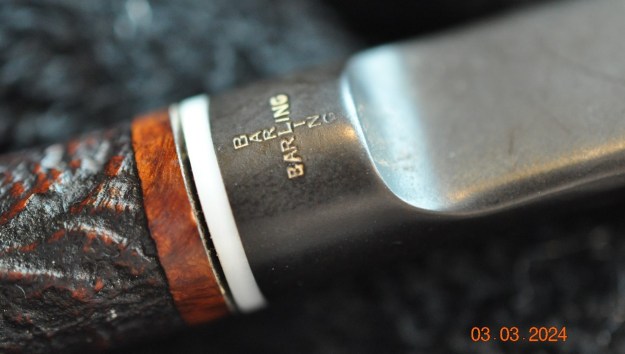
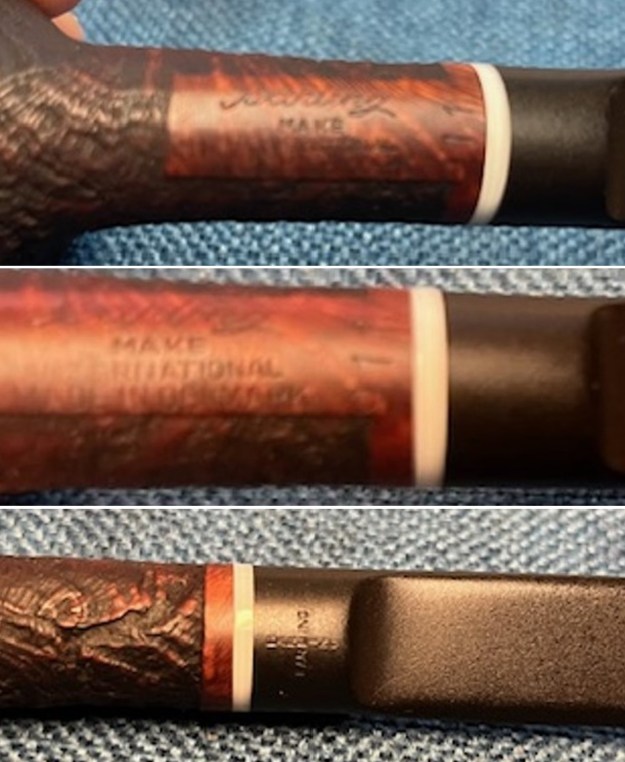
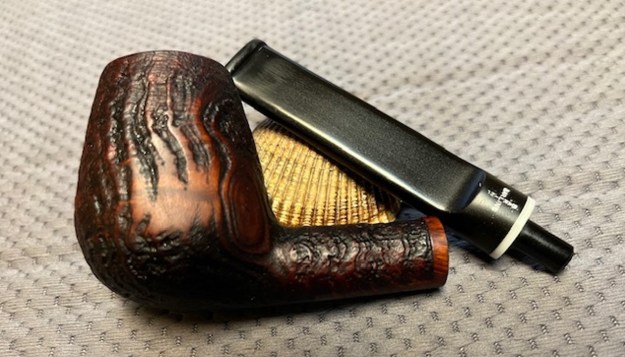
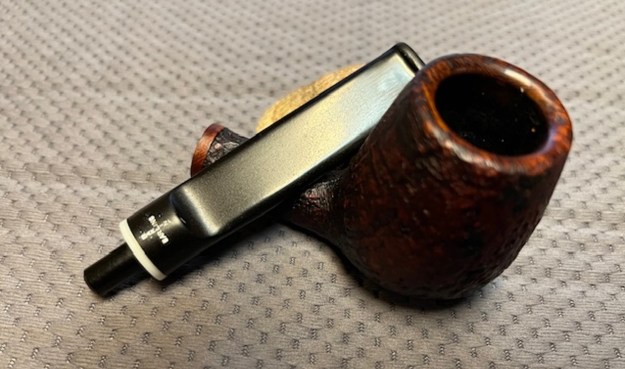
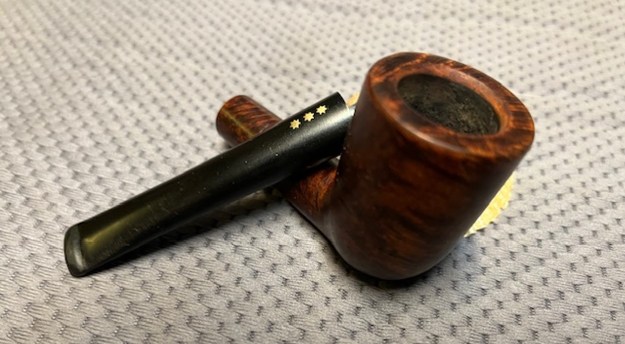
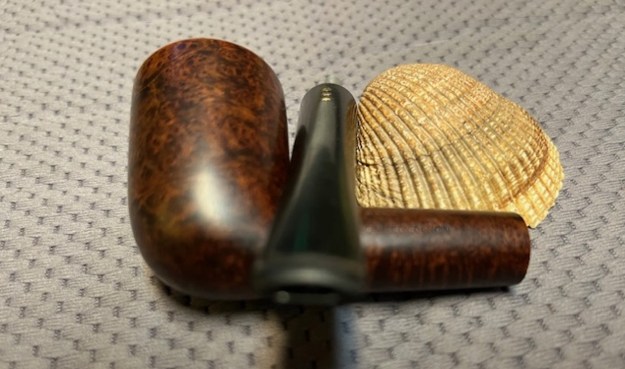
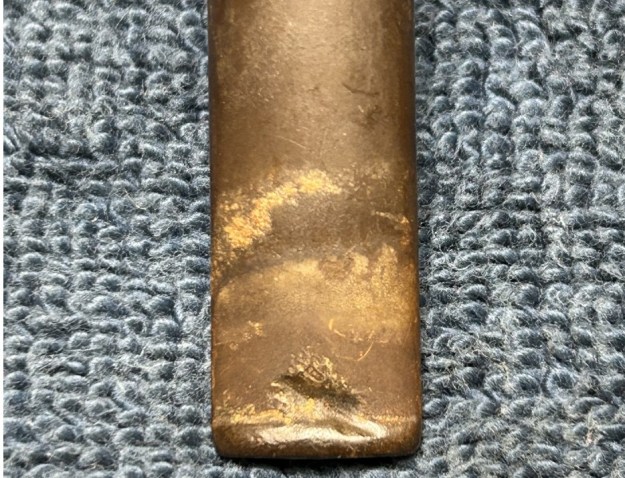
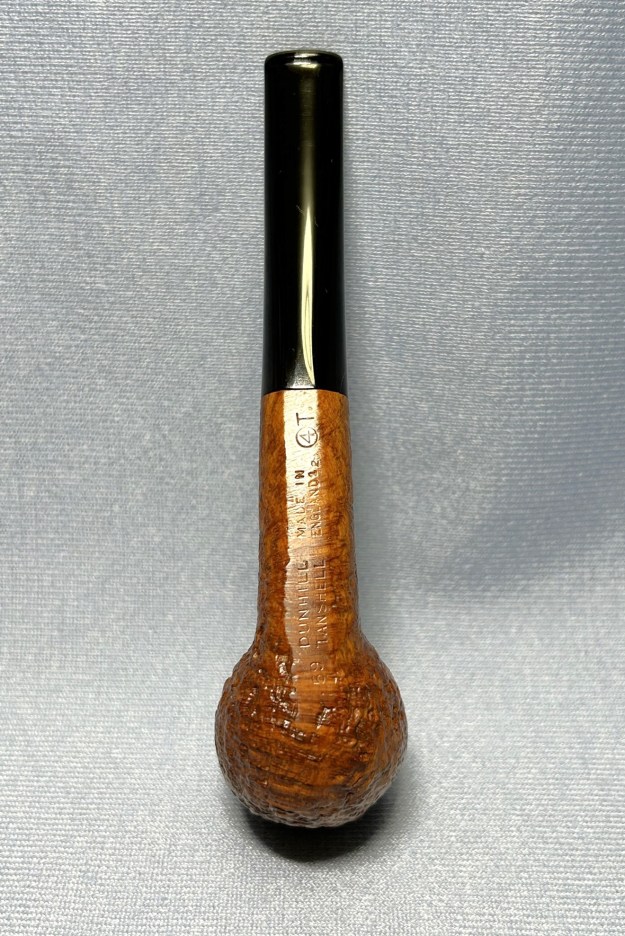
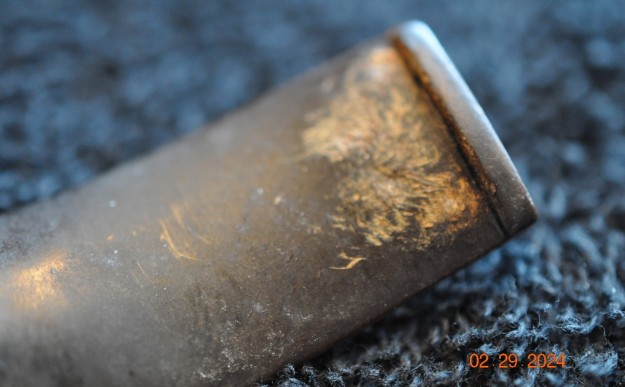
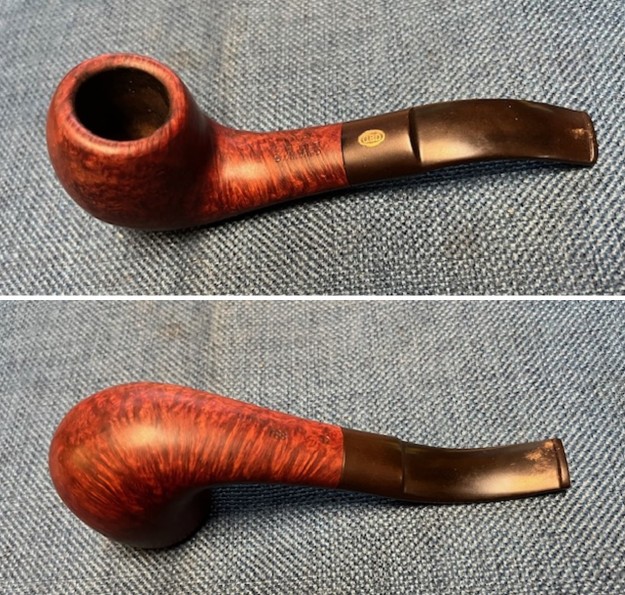
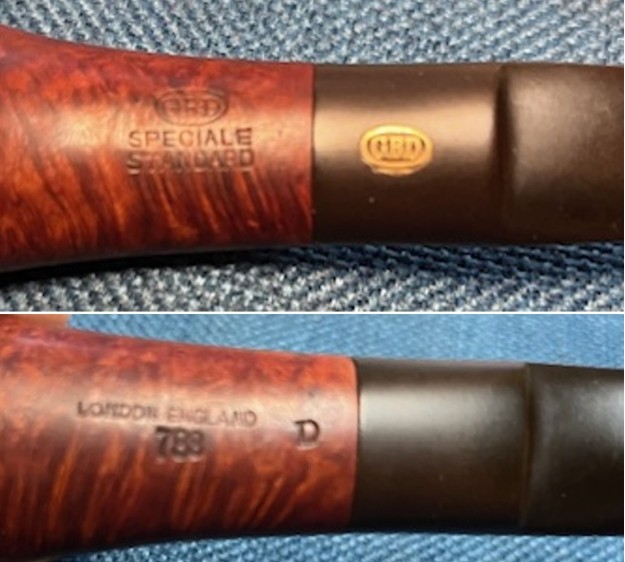
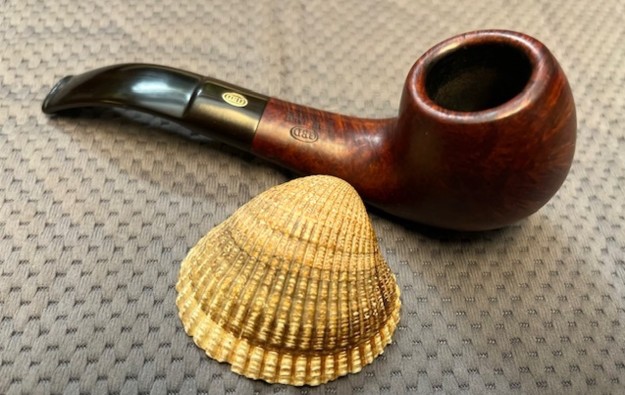
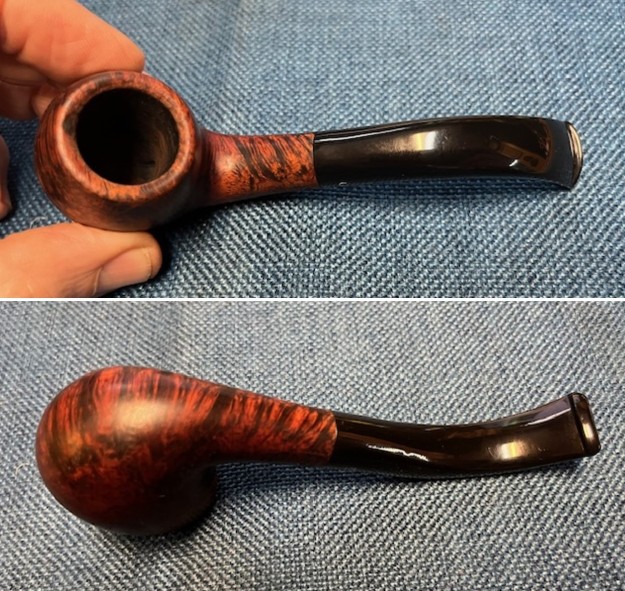
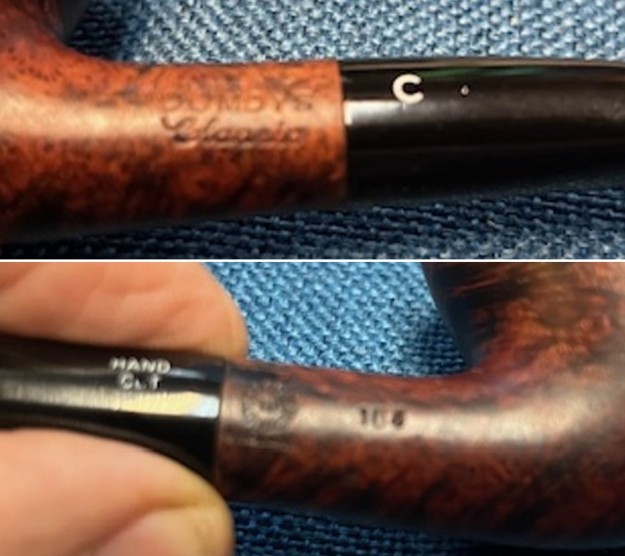
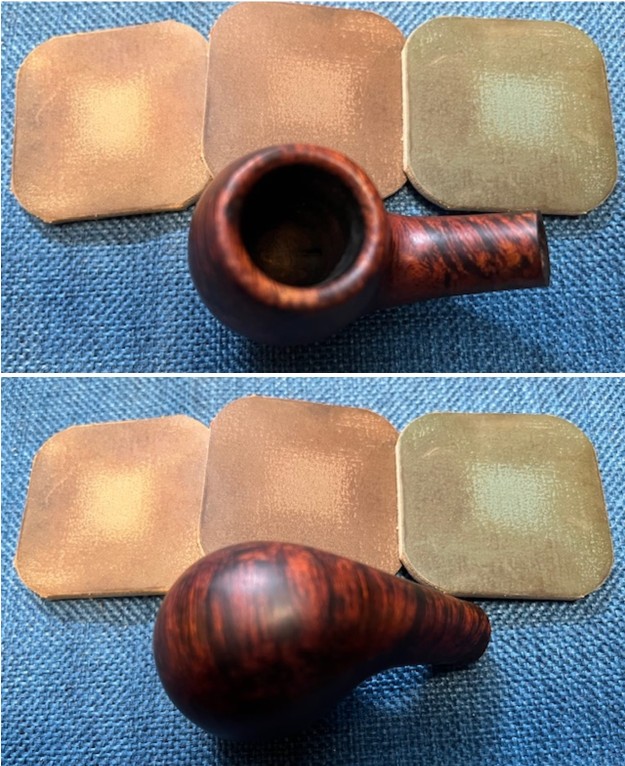
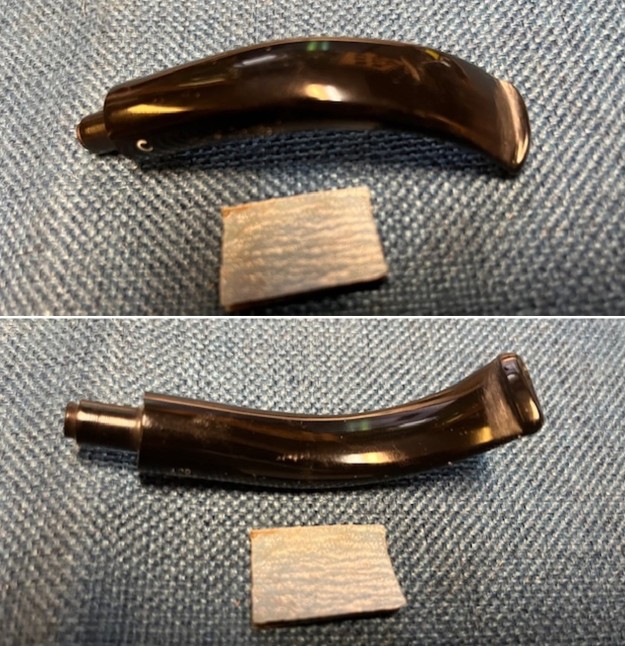
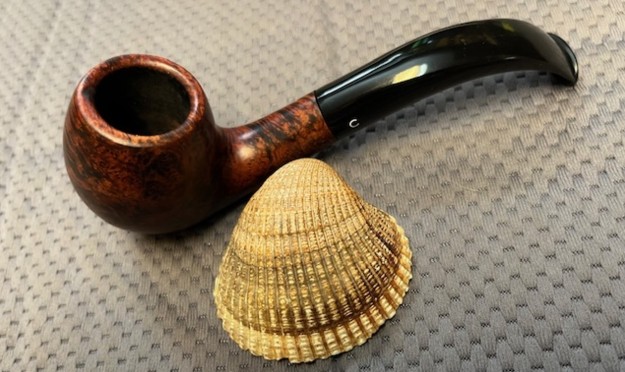
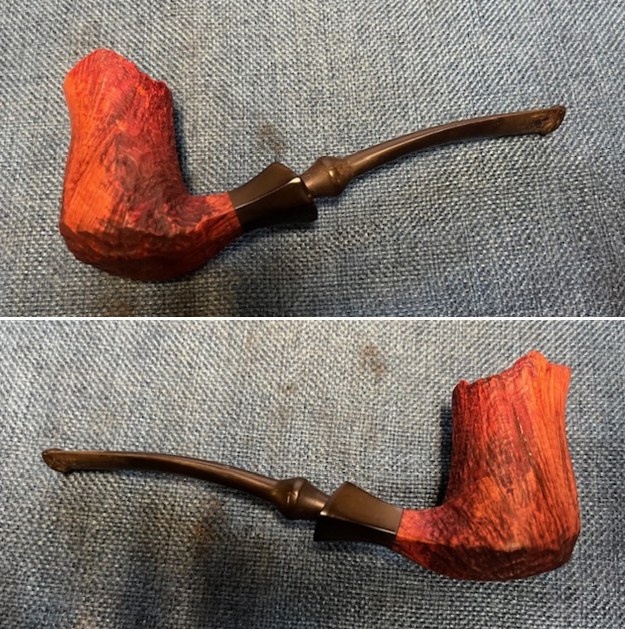
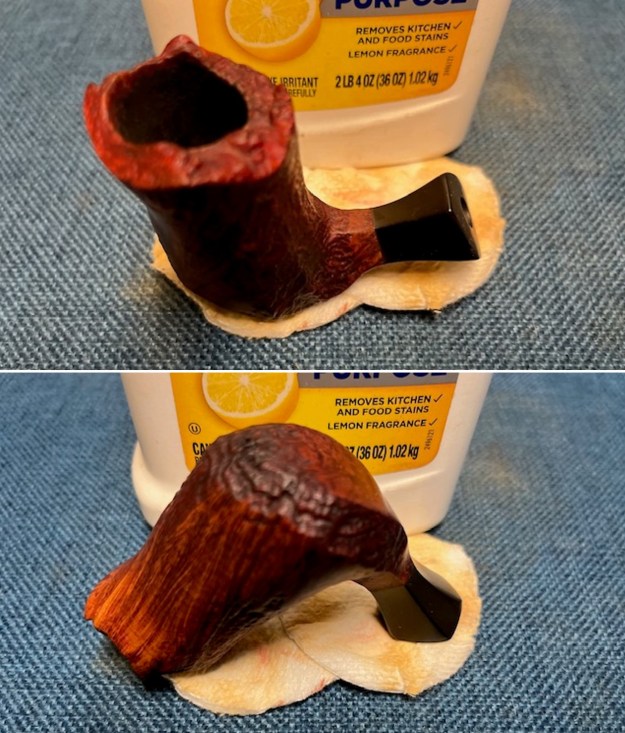
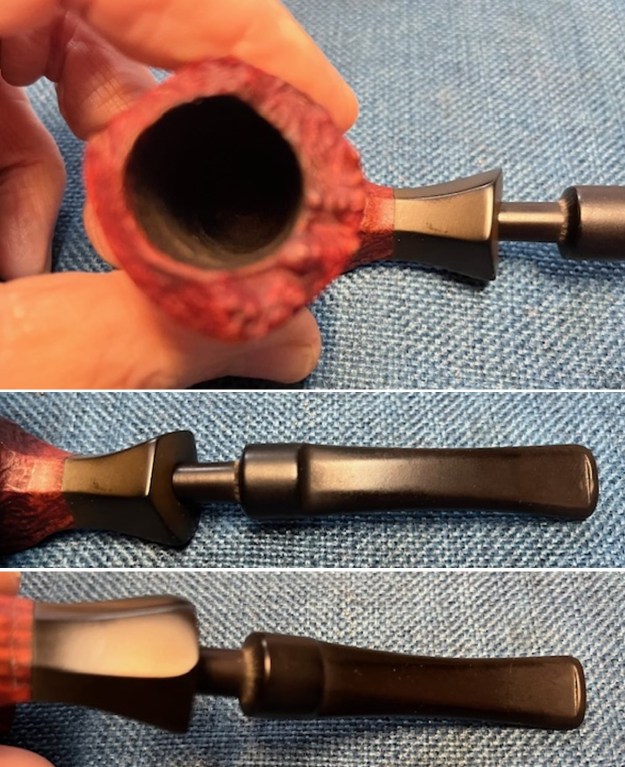
I tried to capture the stamping on the shank underside. It is a bit blurry but it is still very readable and clear as noted above. I took a photo of the pipe with the replacement stem removed. It really makes it clear to me that it is a replacement.
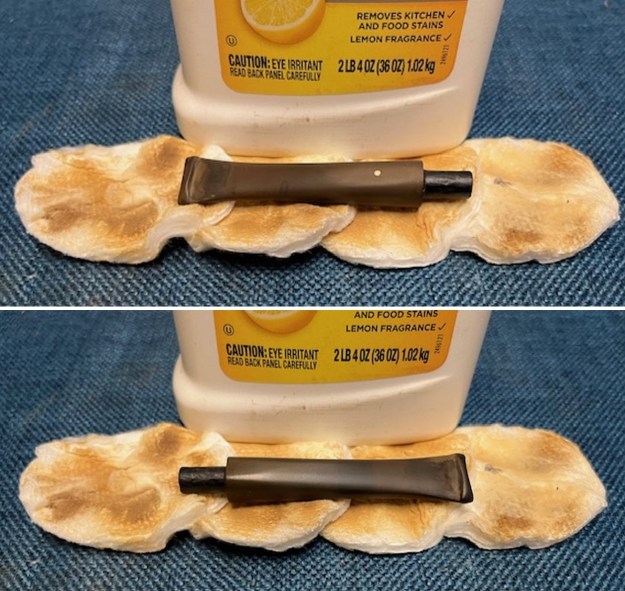
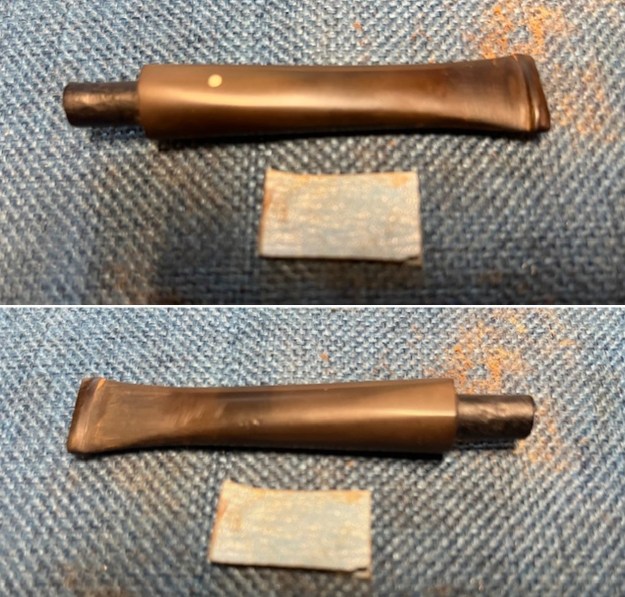
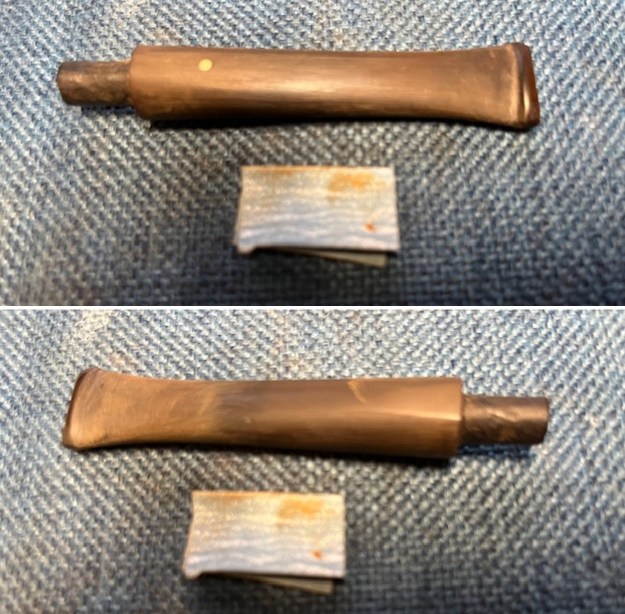
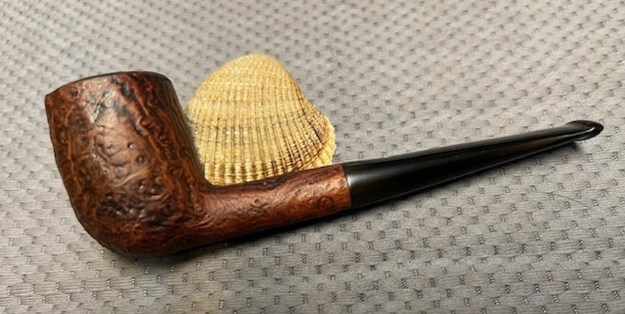
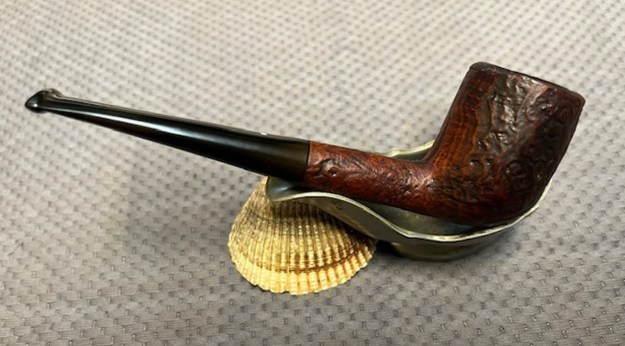
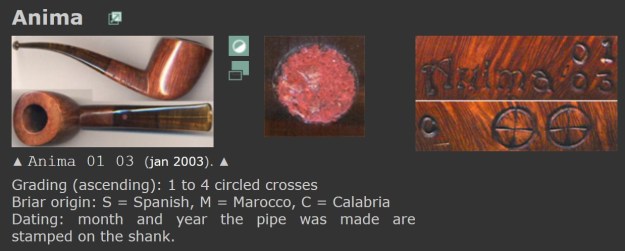
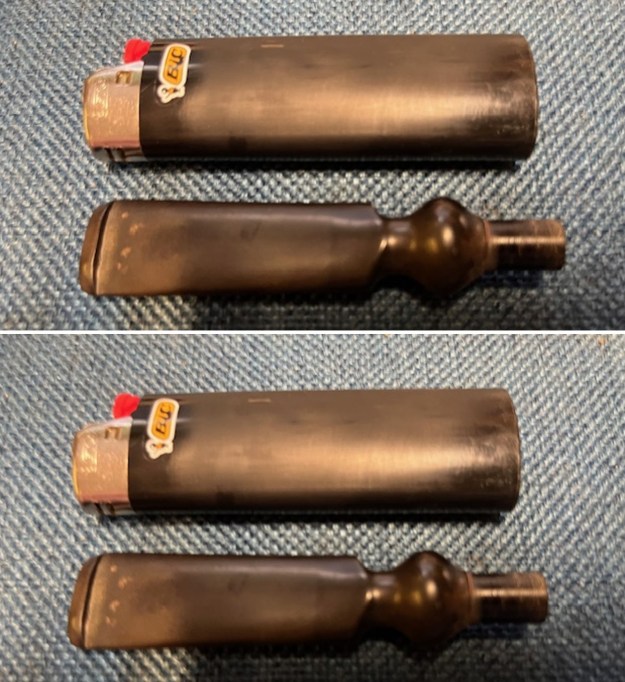
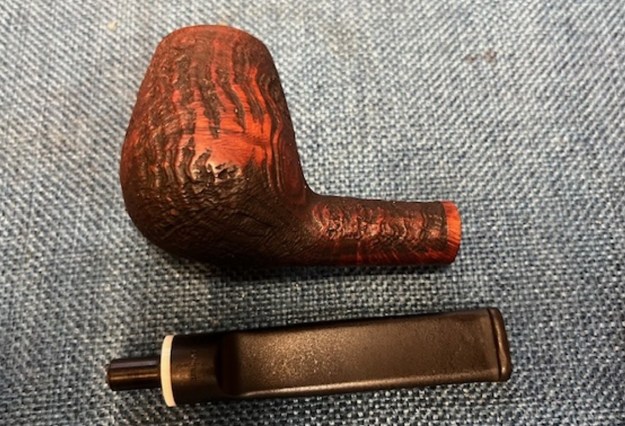
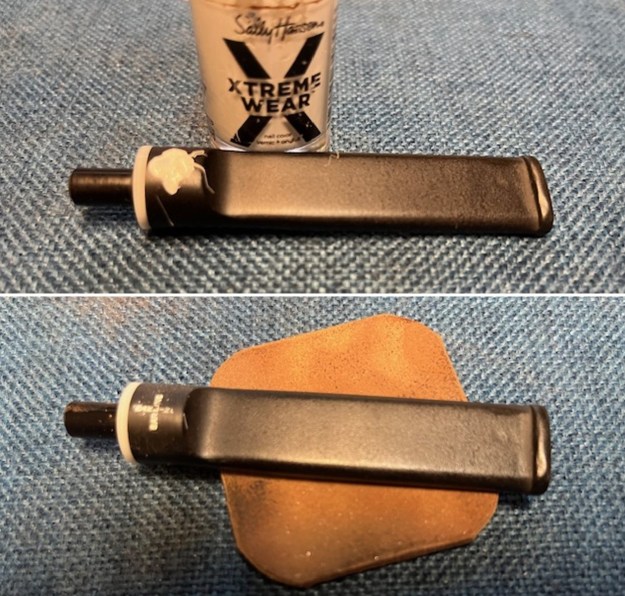
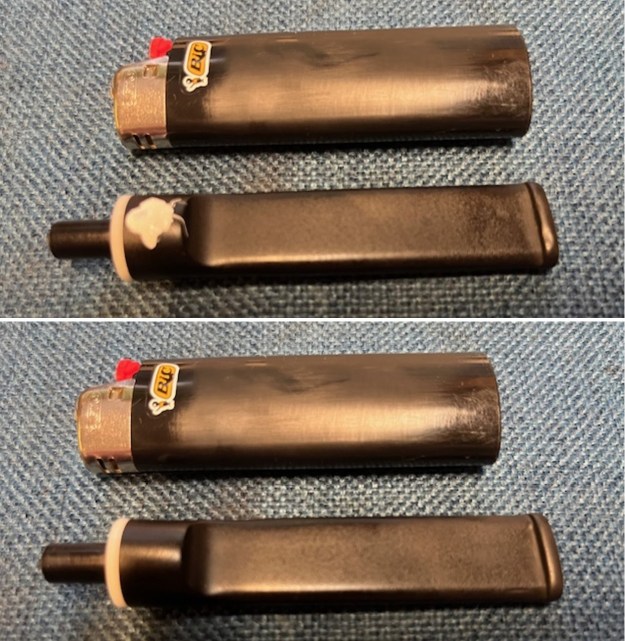
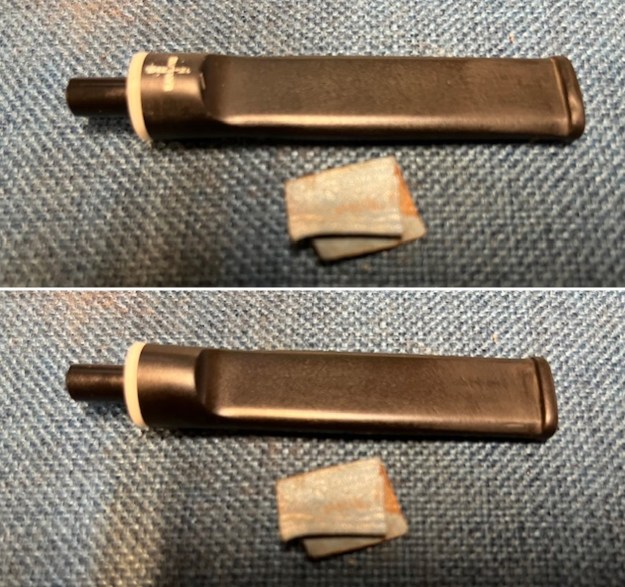
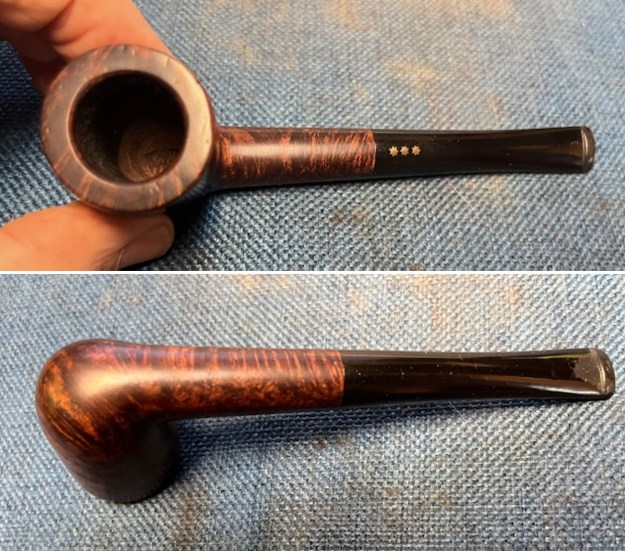
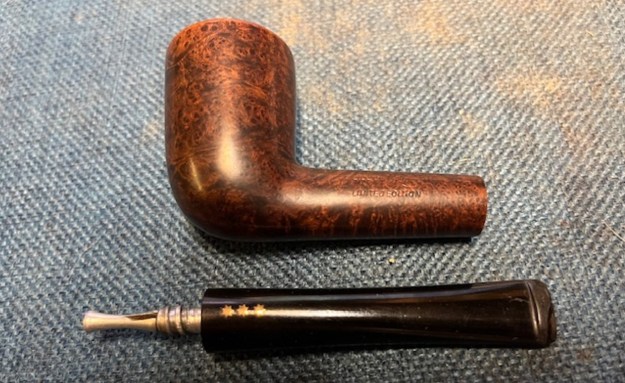
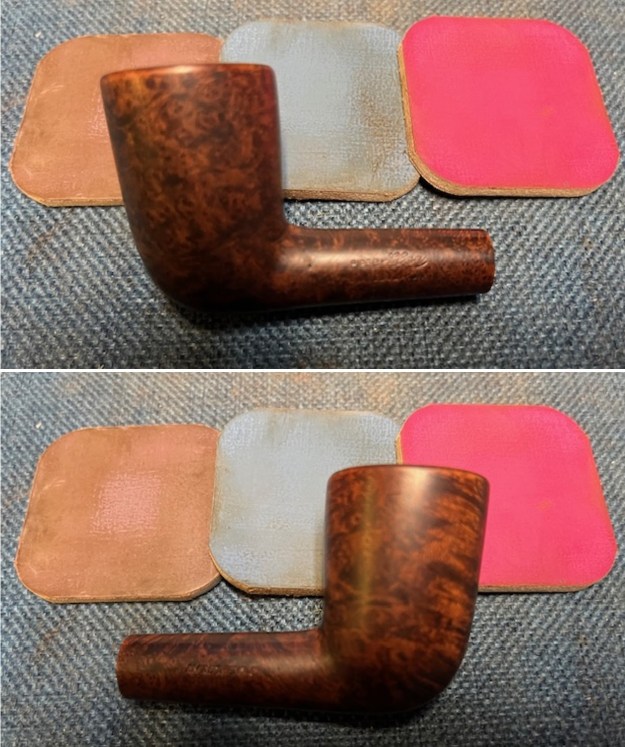
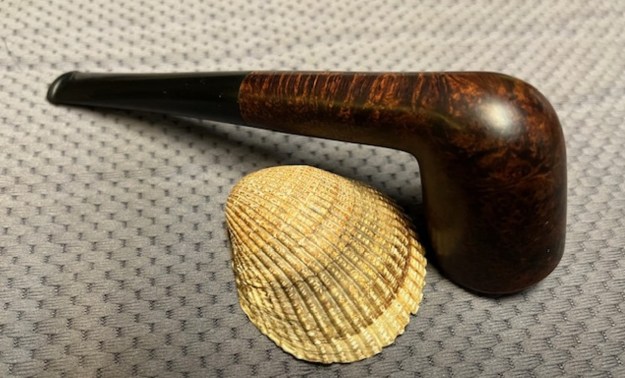
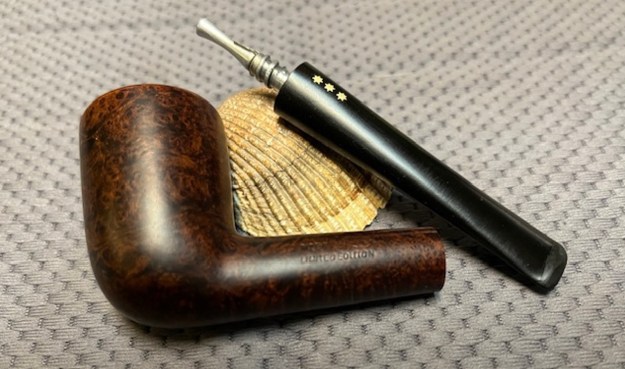
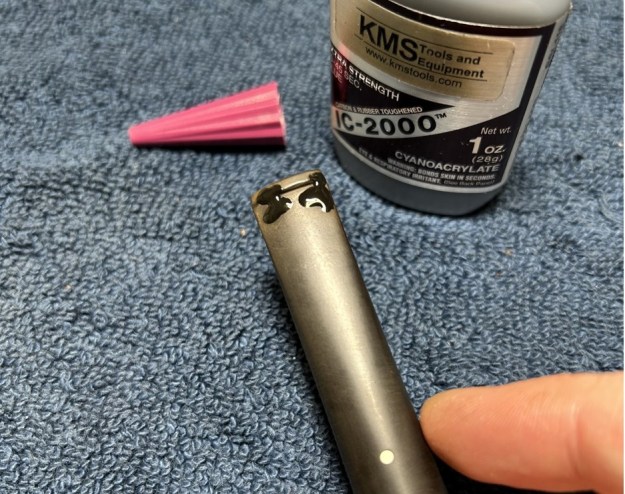
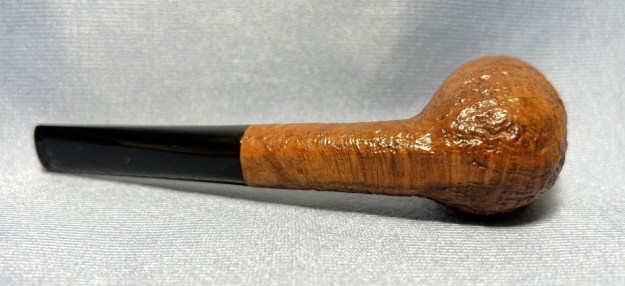
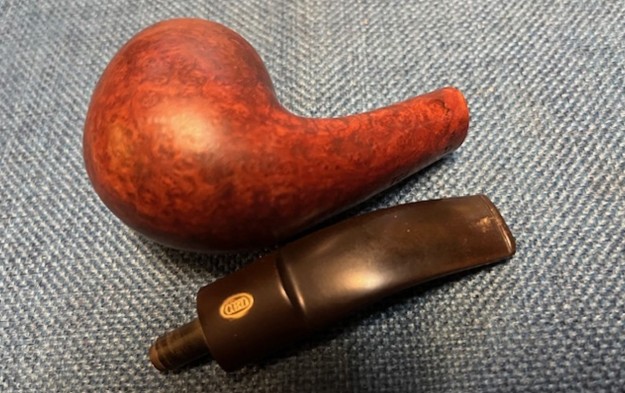
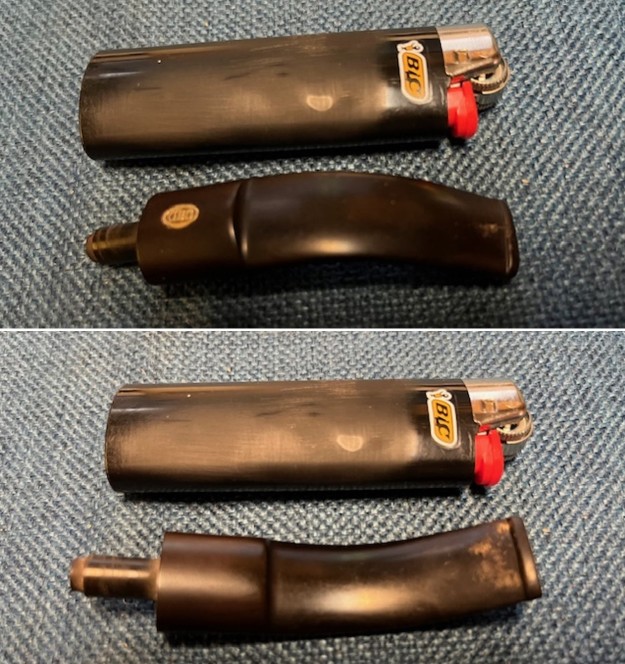
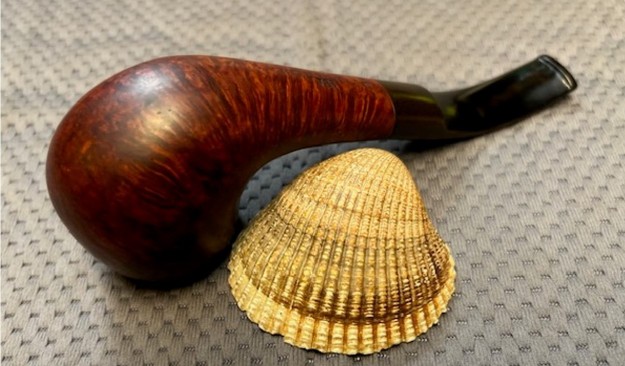
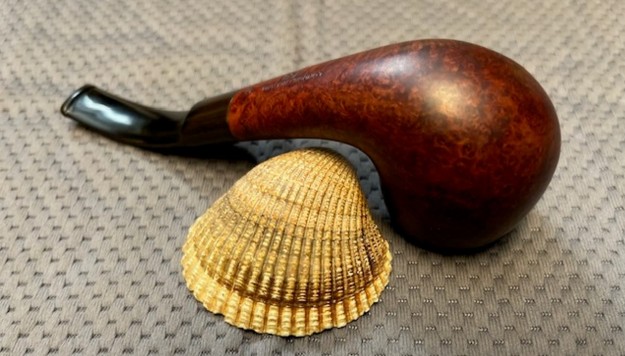
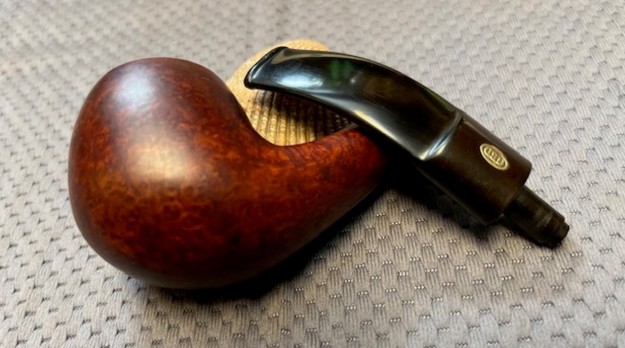
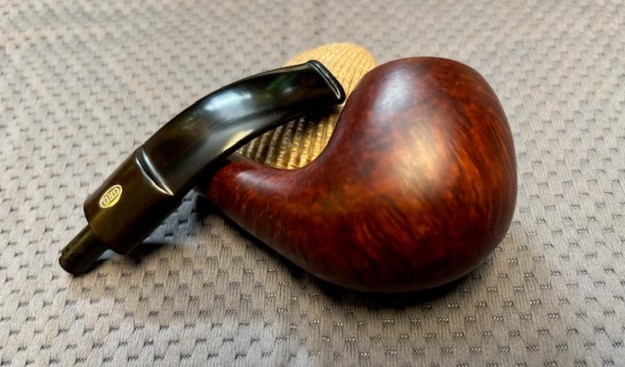
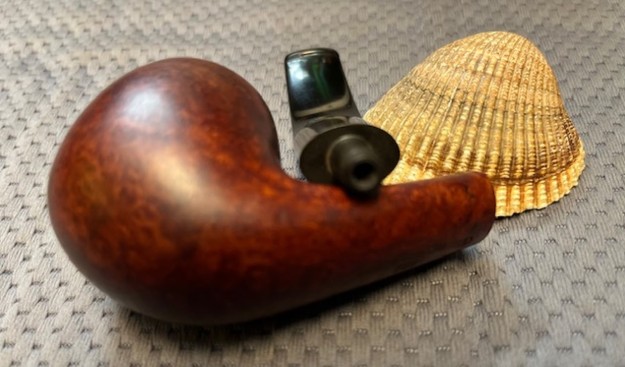
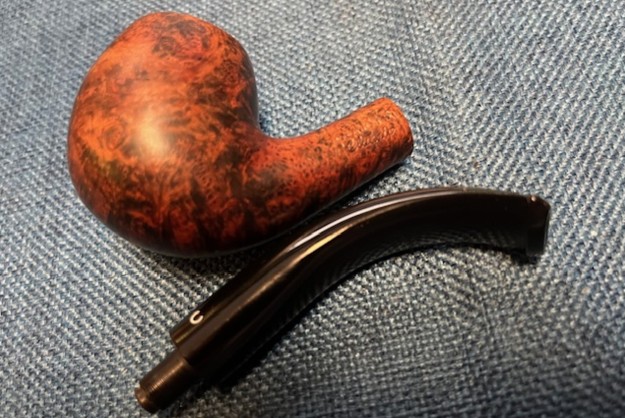
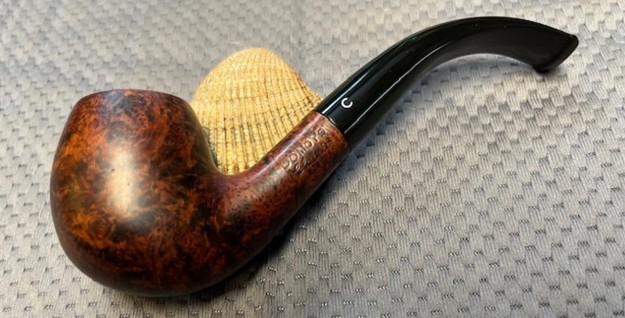
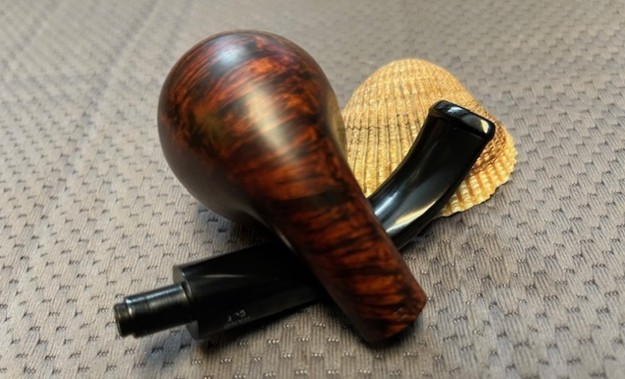
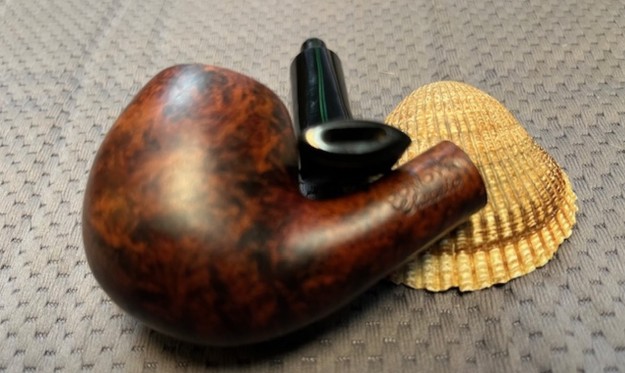
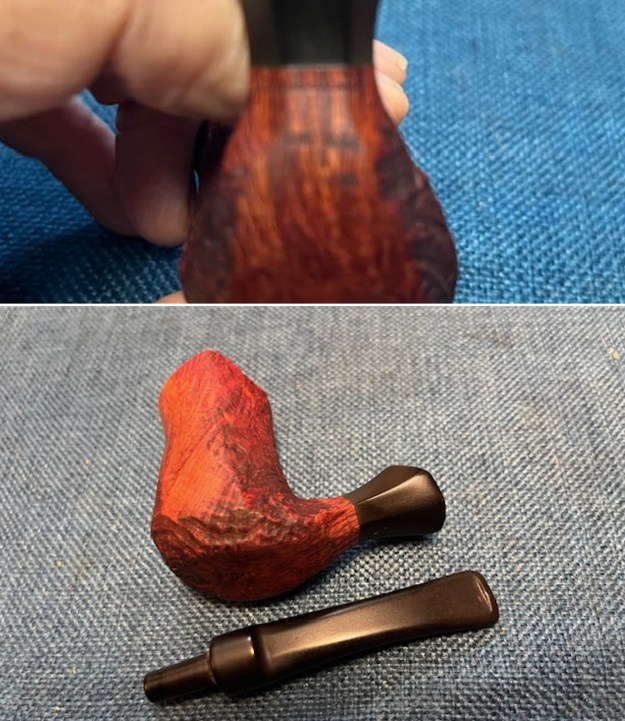
The pipe was ready for me to work on but I decided first to go through my stems. I went through both vulcanite and acrylic stems which may sound easy but I have several hundred stems to sort through. I was looking for something that flowed with the delicate shape of the bowl and shank and was simply weightless looking. I found what I was looking for and took a photo of it with the stem I found. I like the looks of the new choice. 
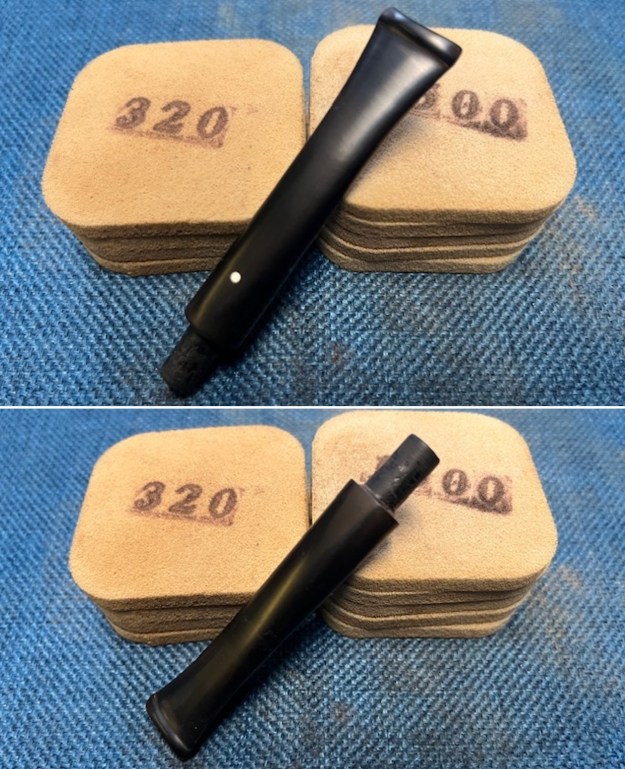
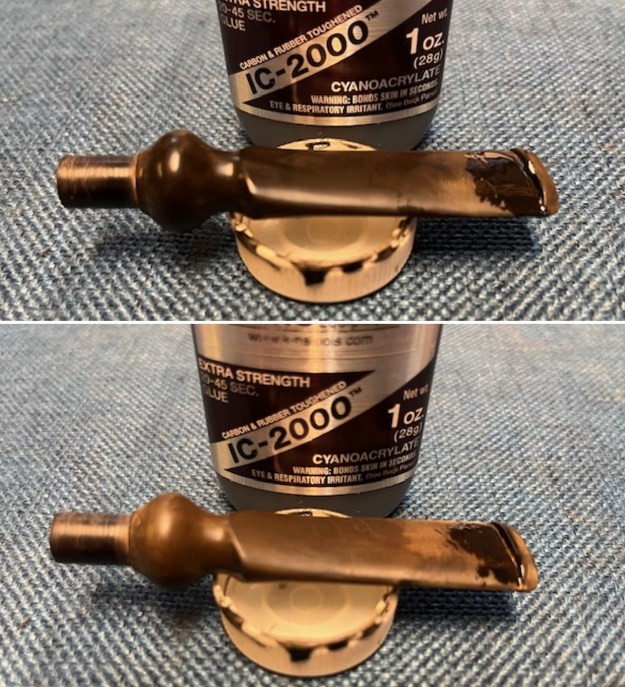
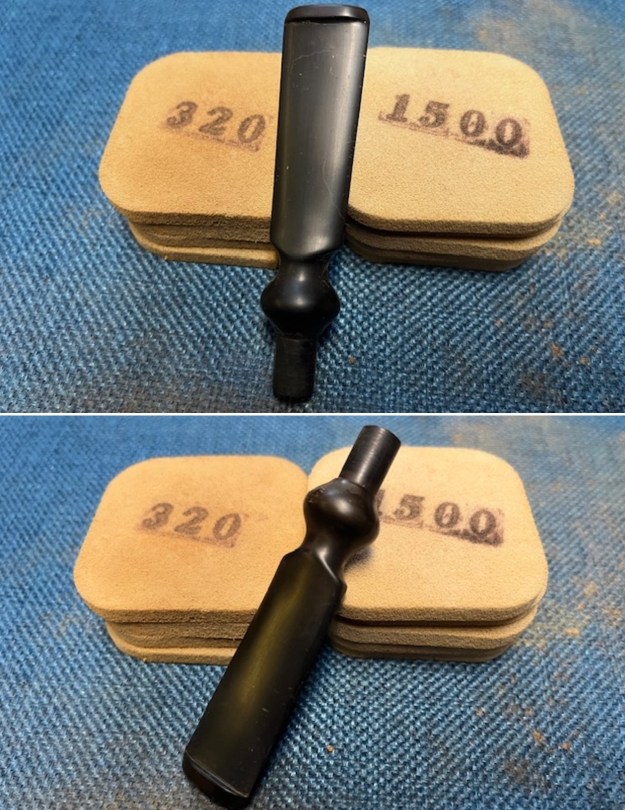
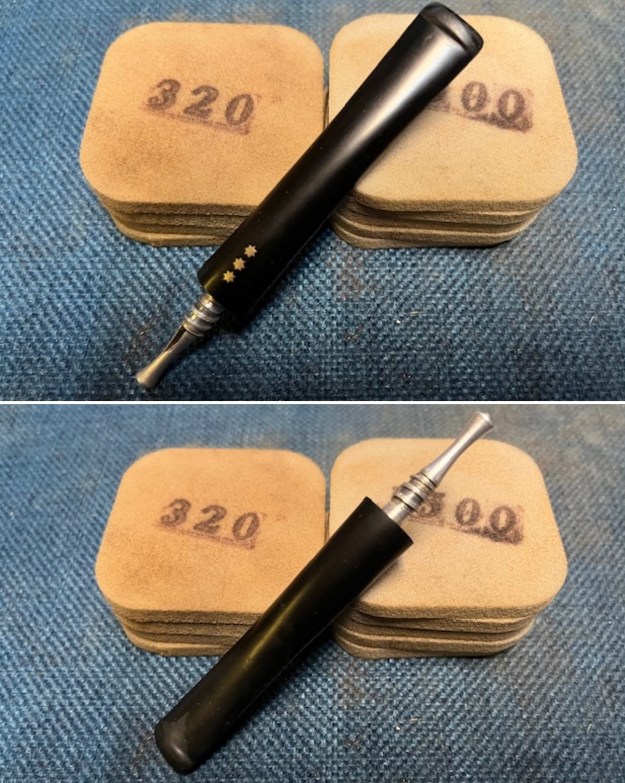
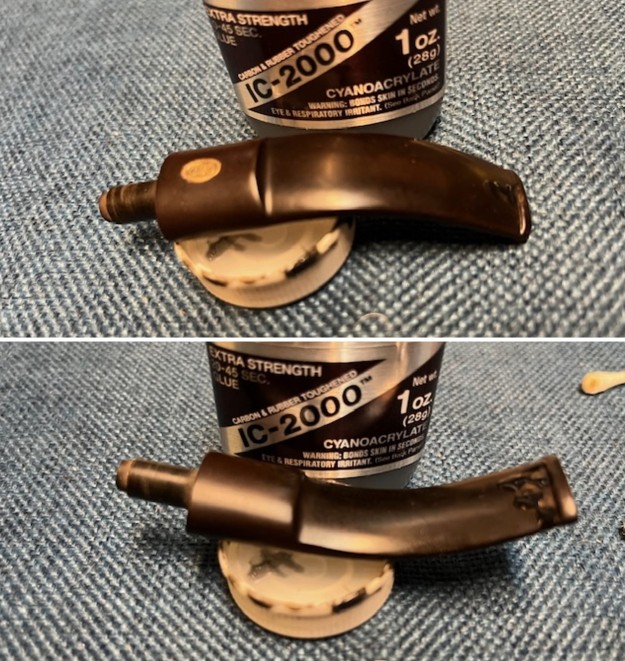
What to do next? I figured I might as well continue working on the stem since I had already started. I sanded out the tooth chatter on the stem end and worked on the oxidation with a folded piece of 220 grit sandpaper.
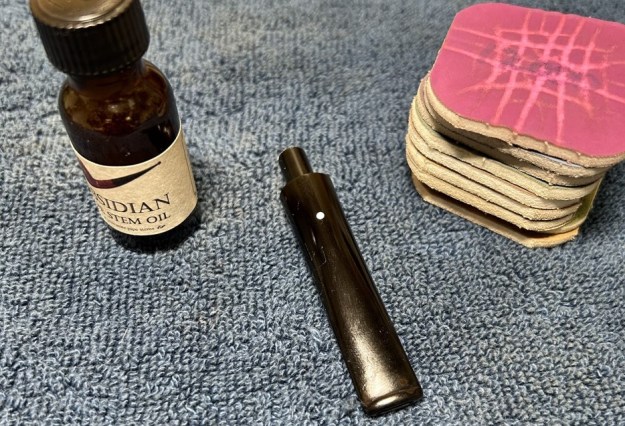
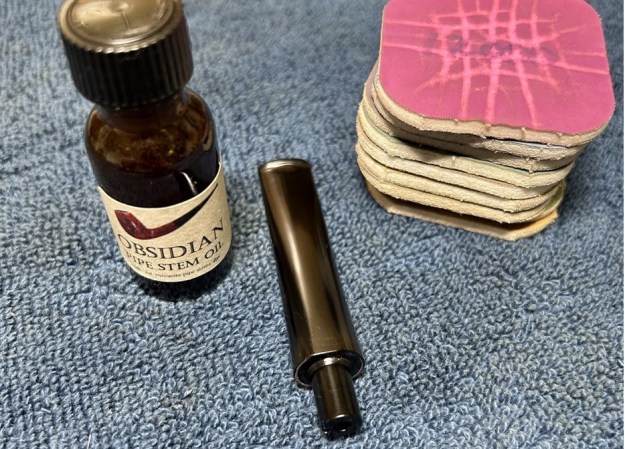
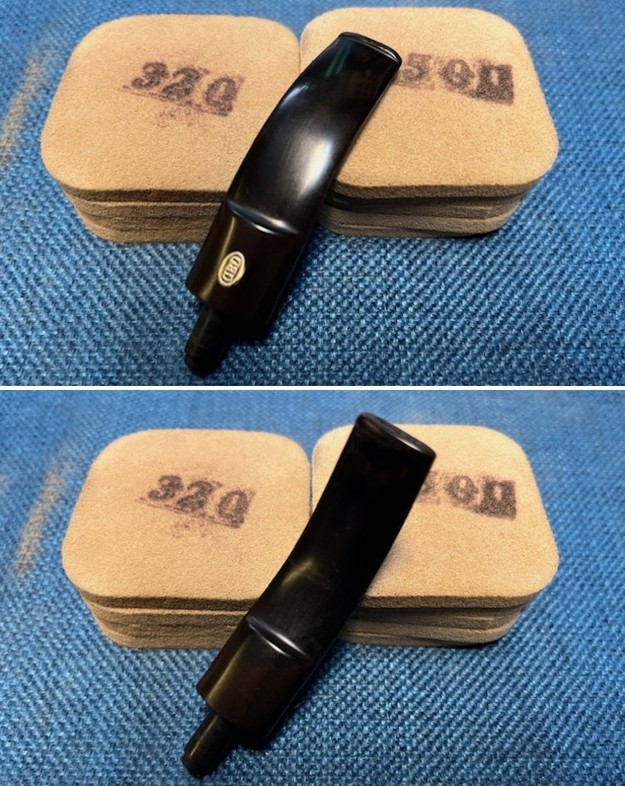
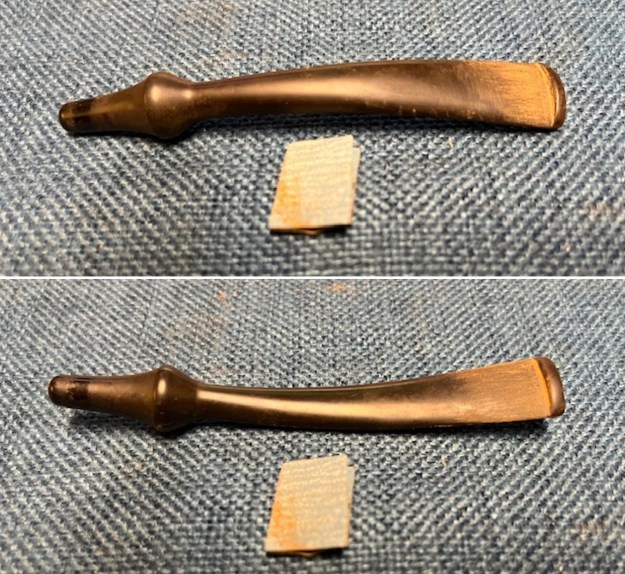
I sanded the stem with 2×2 sanding pads – 320-3500 to start the polishing process and further remove the oxidation and marks. I wiped the stem down after each sanding pad with Obsidian Oil. It was beginning to look very good.
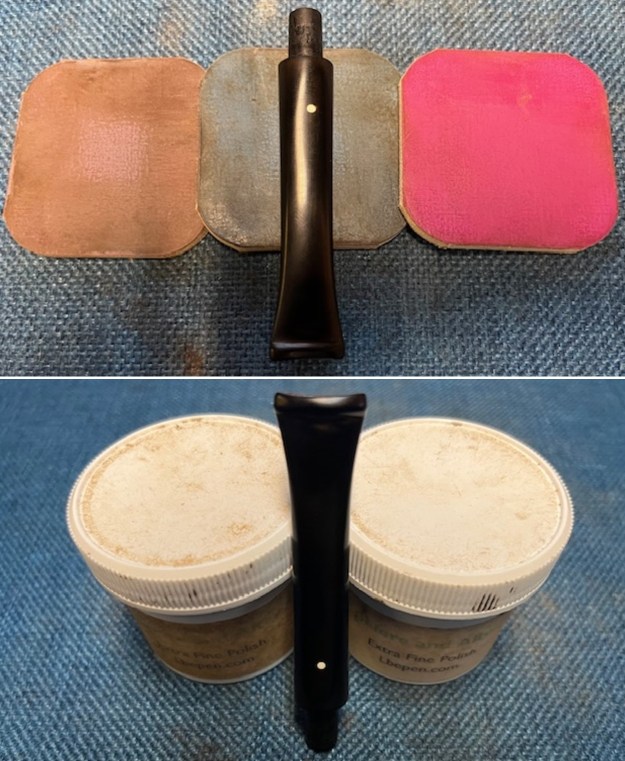
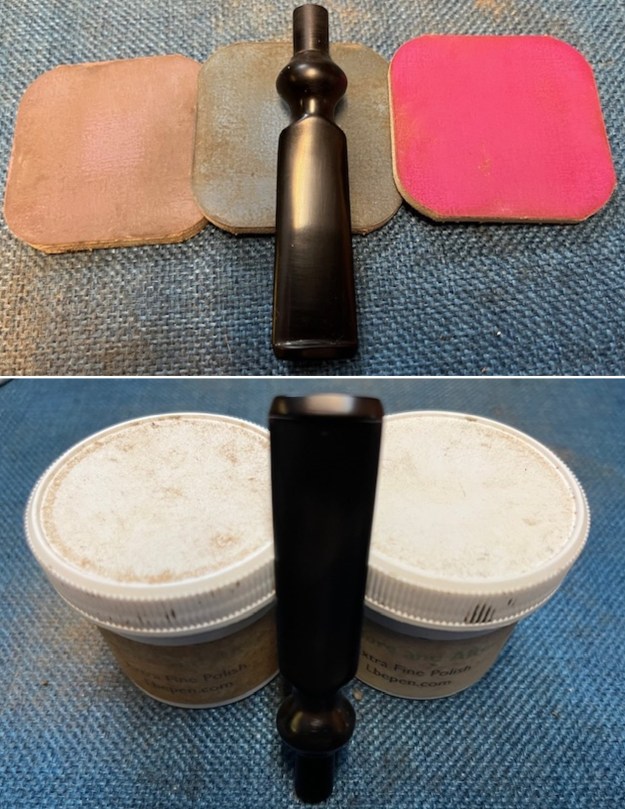
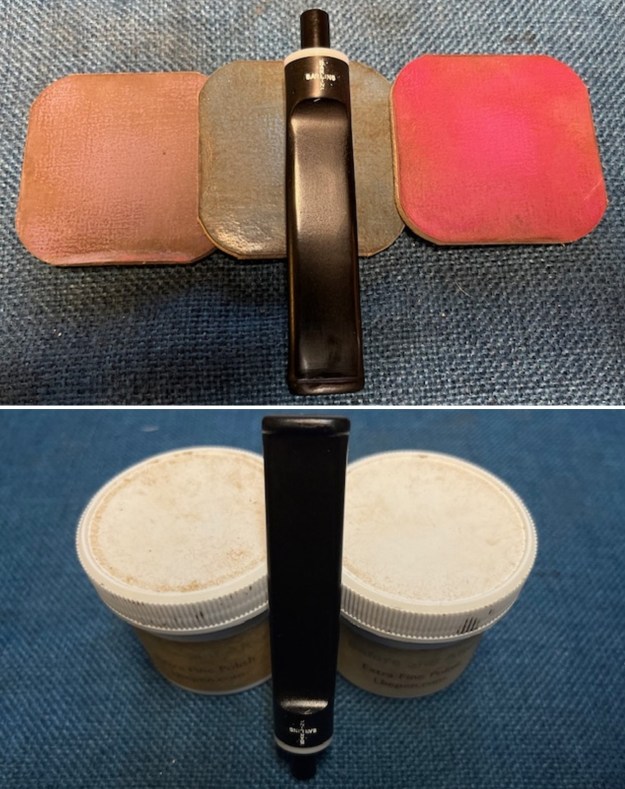
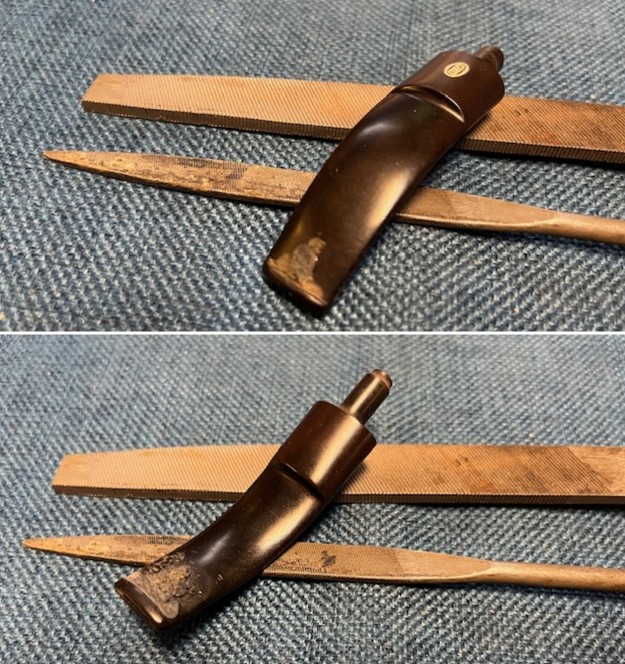
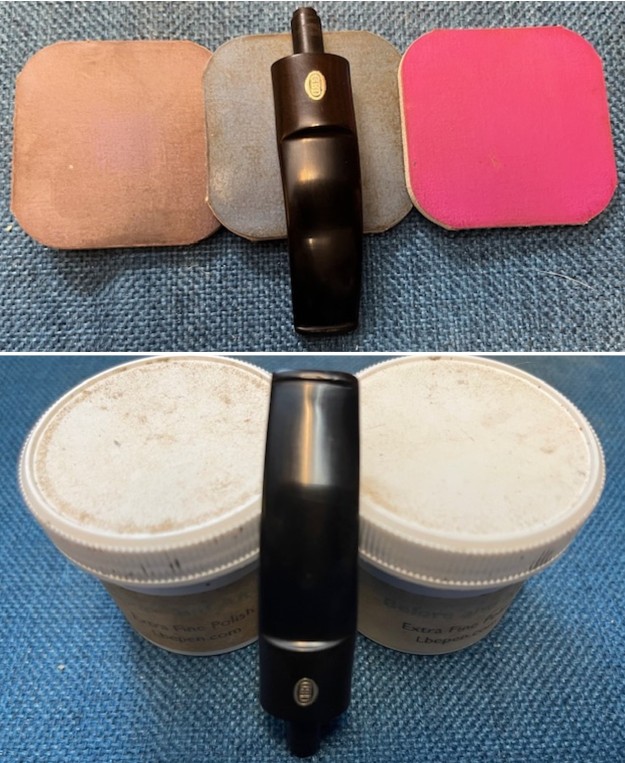
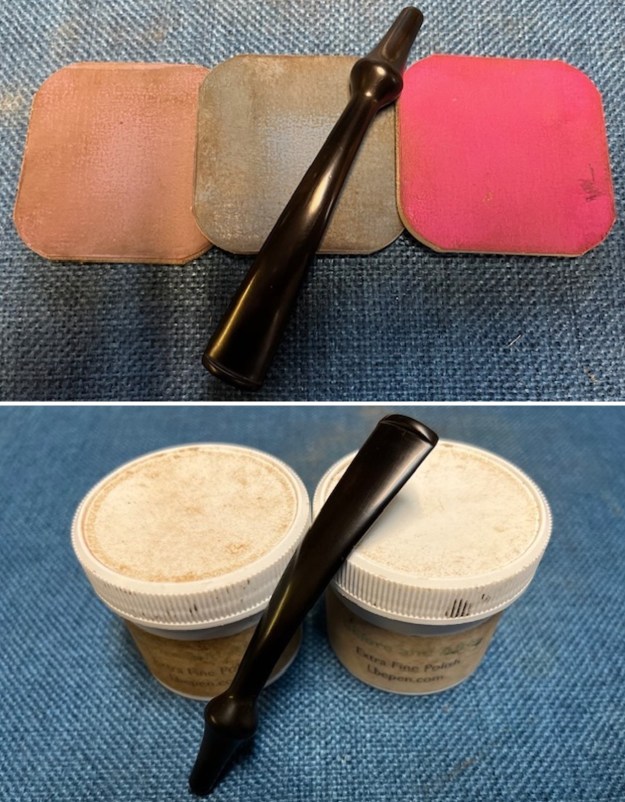
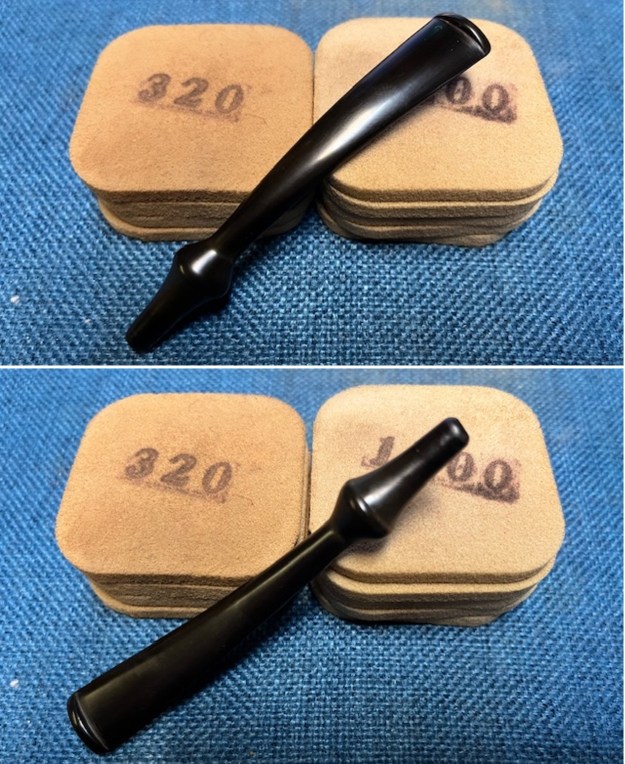
I love watching the shine develop on the vulcanite as I polish it with micromesh sanding pads – dry sanding with 1500-12000 grit pads. I wiped it down after each pad with Obsidian Oil. I finished this part of the polishing by using Marks Hoover’s Before & After Pipe Stem Polish – both Fine and Extra Fine. I wiped it off with a soft cloth and gave the stem another coat of Obsidian Oil. 
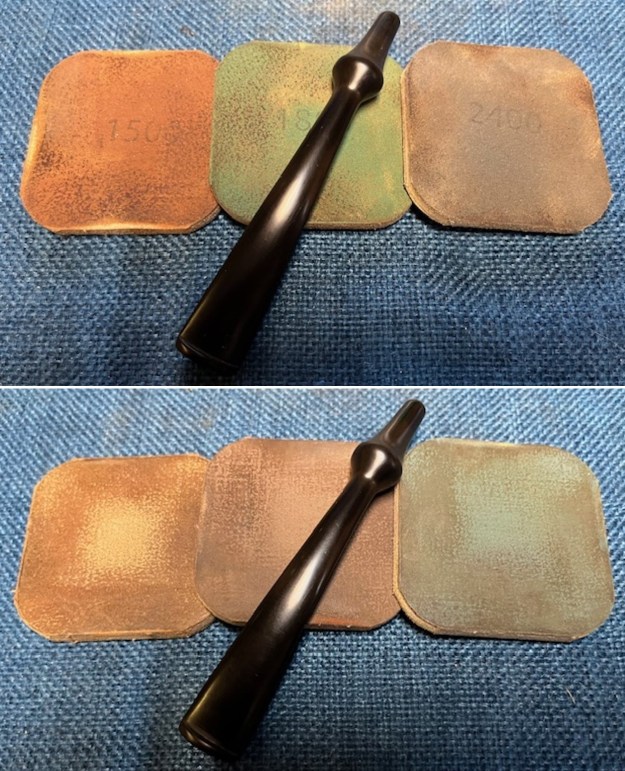
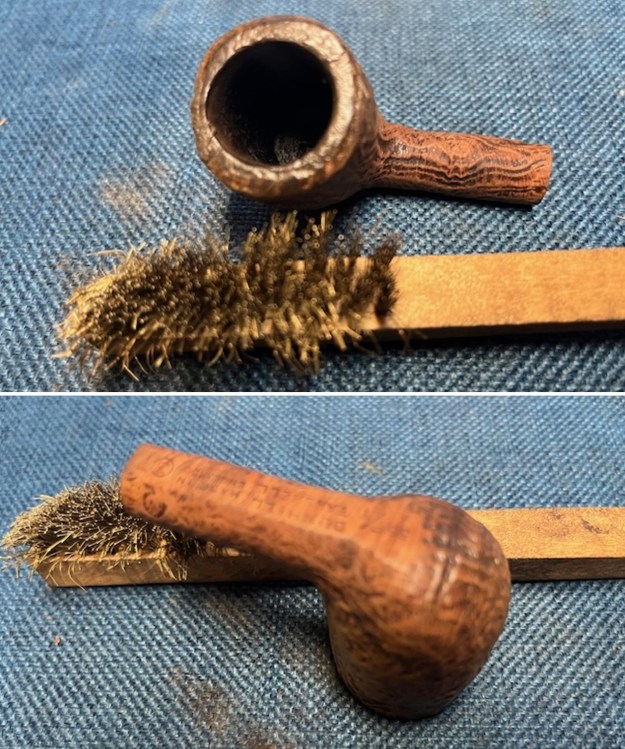
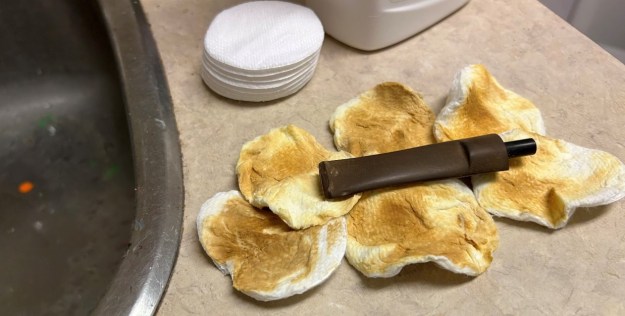
I set the stem aside and turned my attention to the bowl. I used some Soft Scrub to work on the oxidation on the vulcanite shank extension. I did a lot of scrubbing on it and the oxidation came off the vulcanite and it looked much better. 
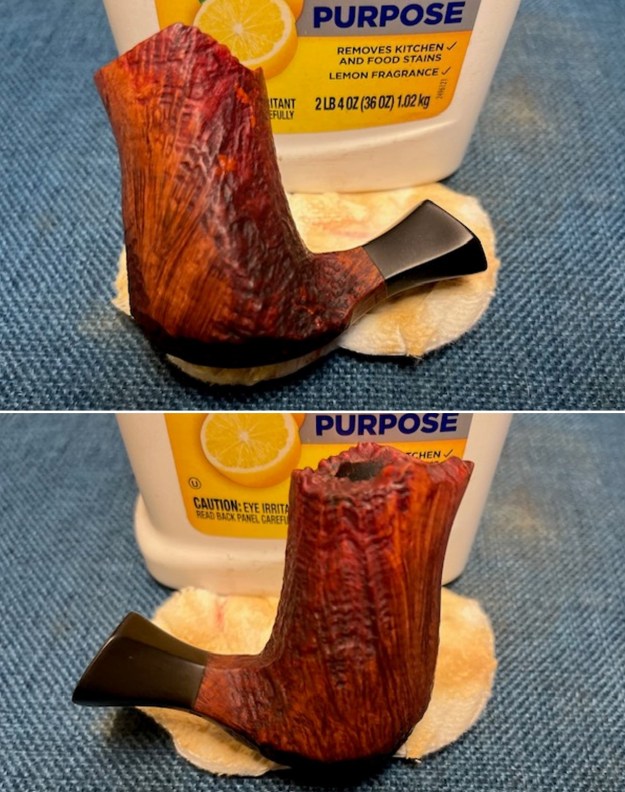
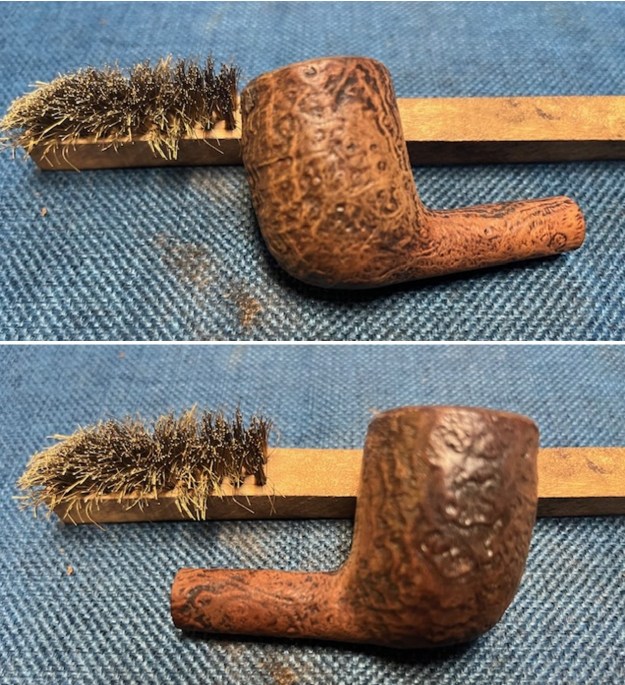
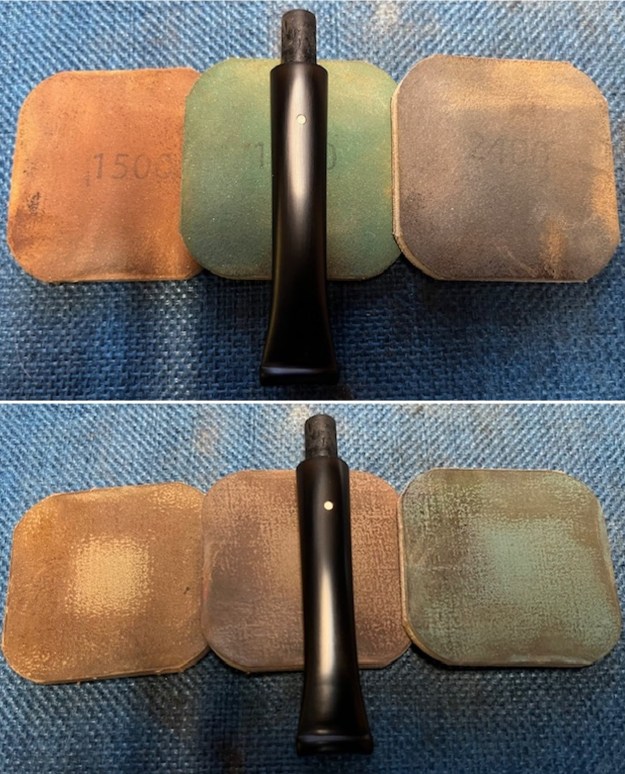
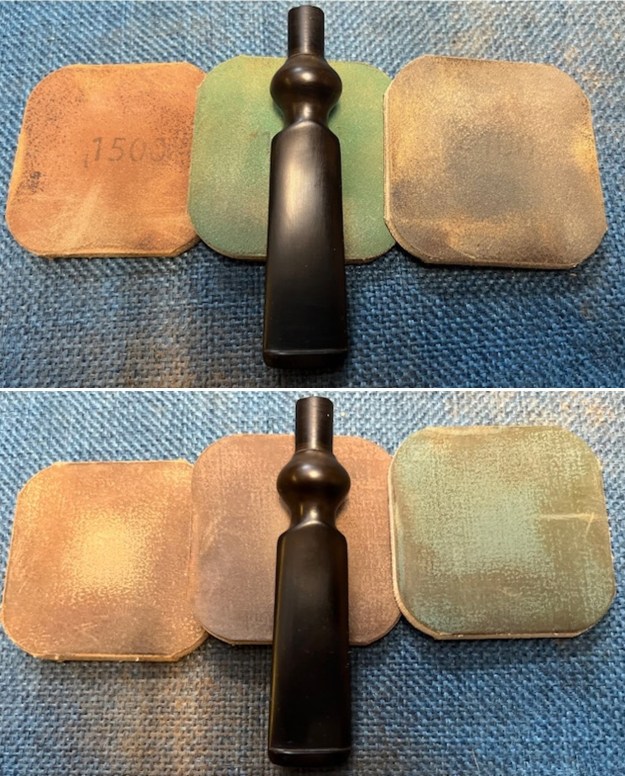
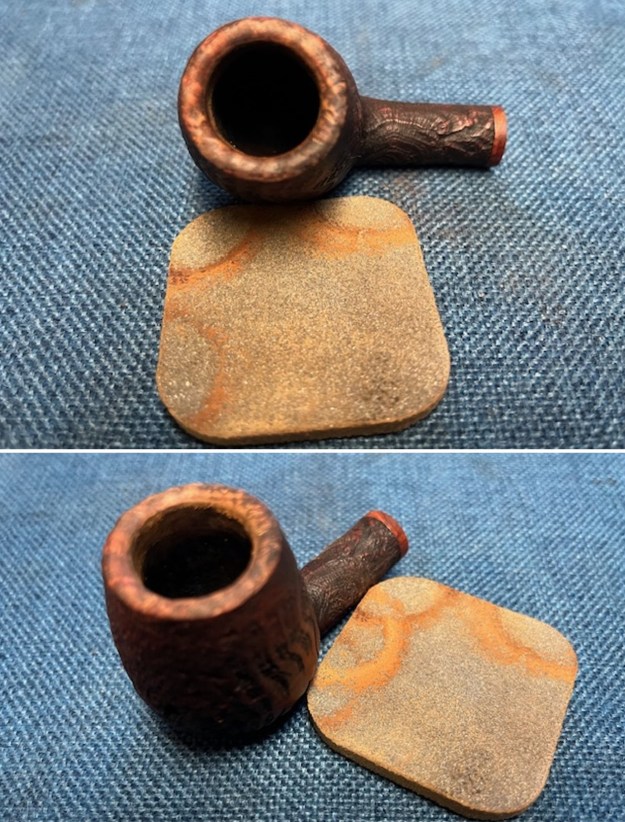
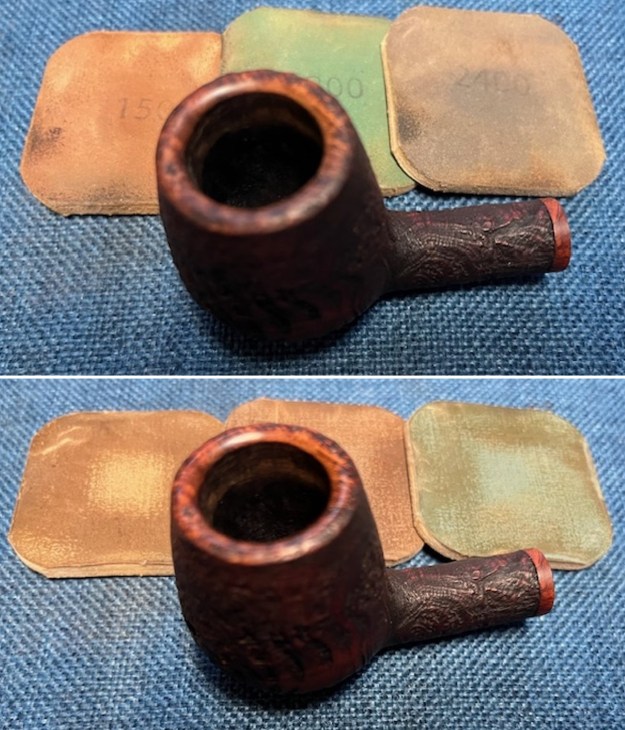
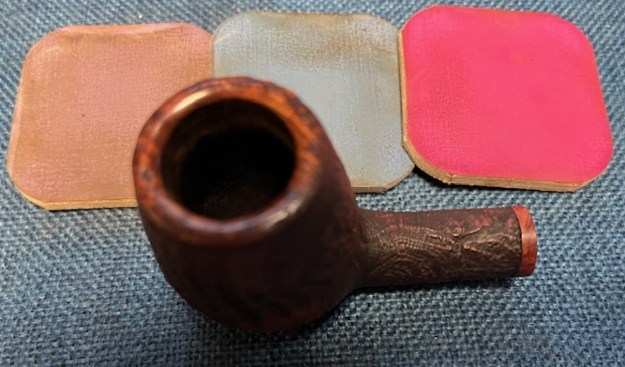
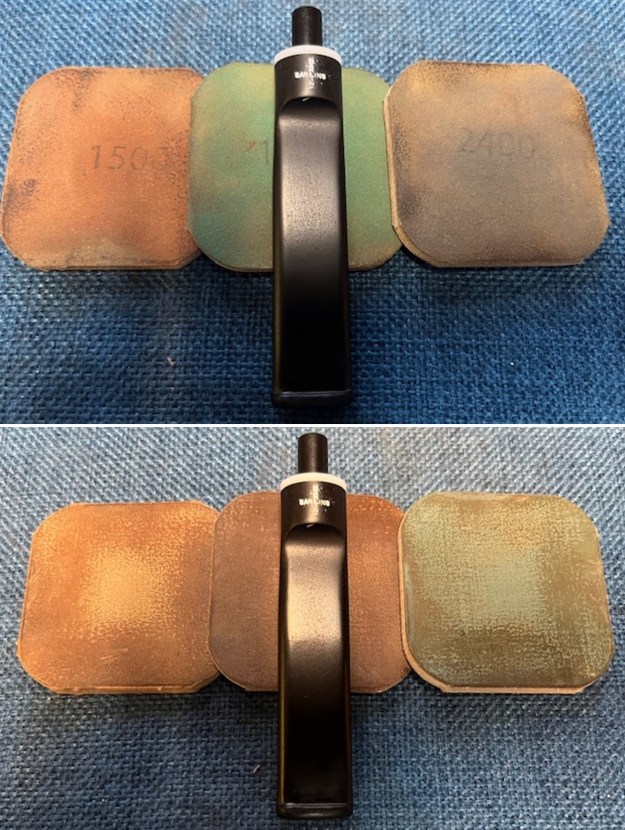
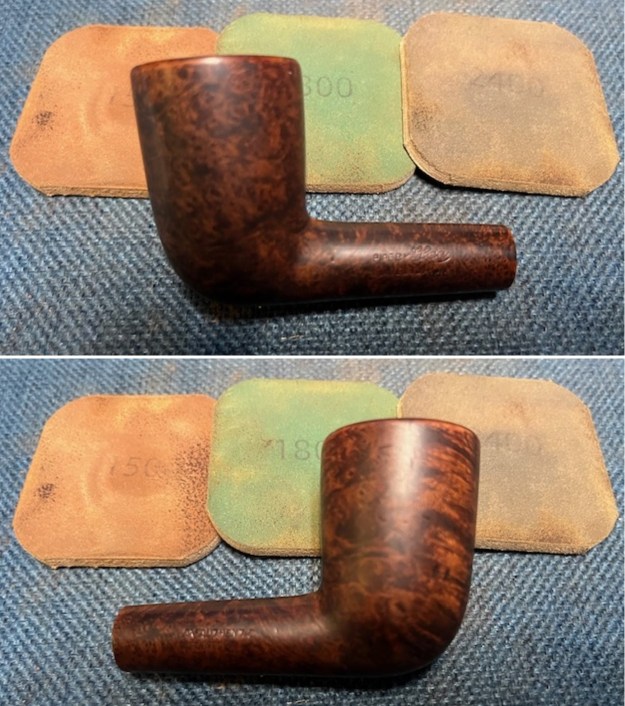
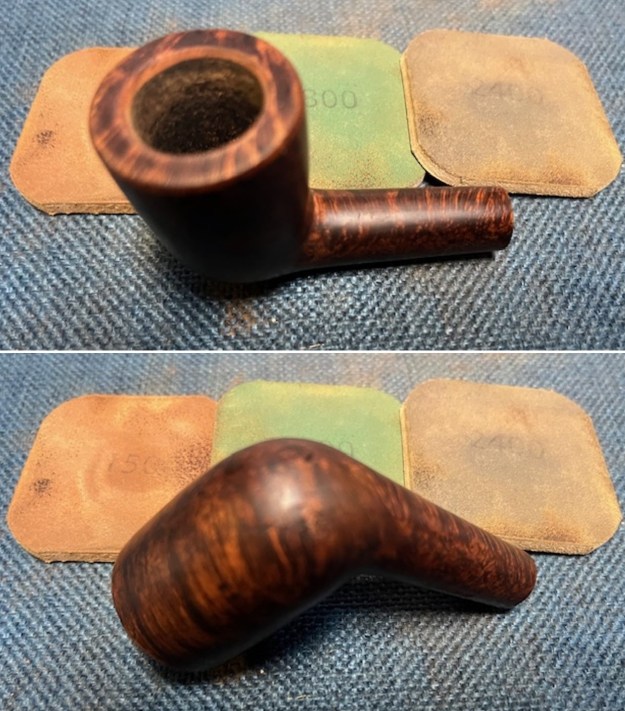
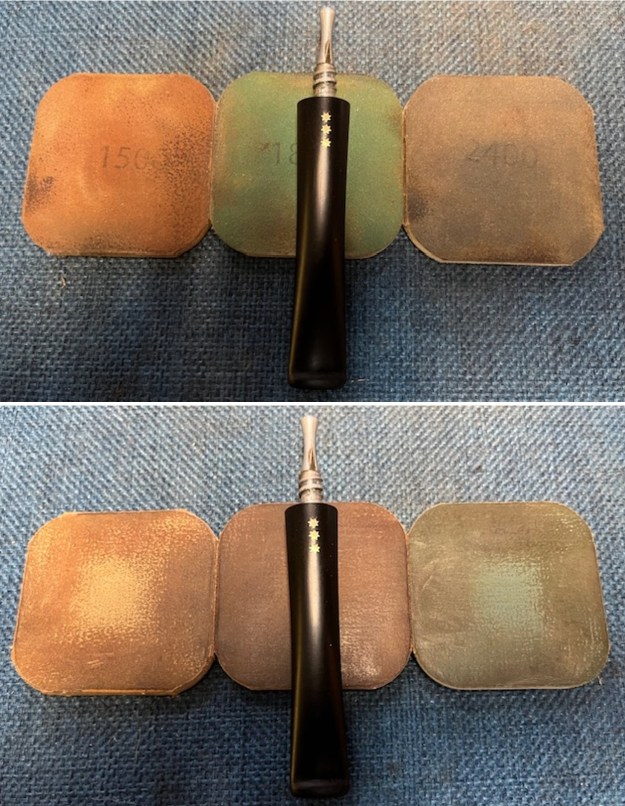
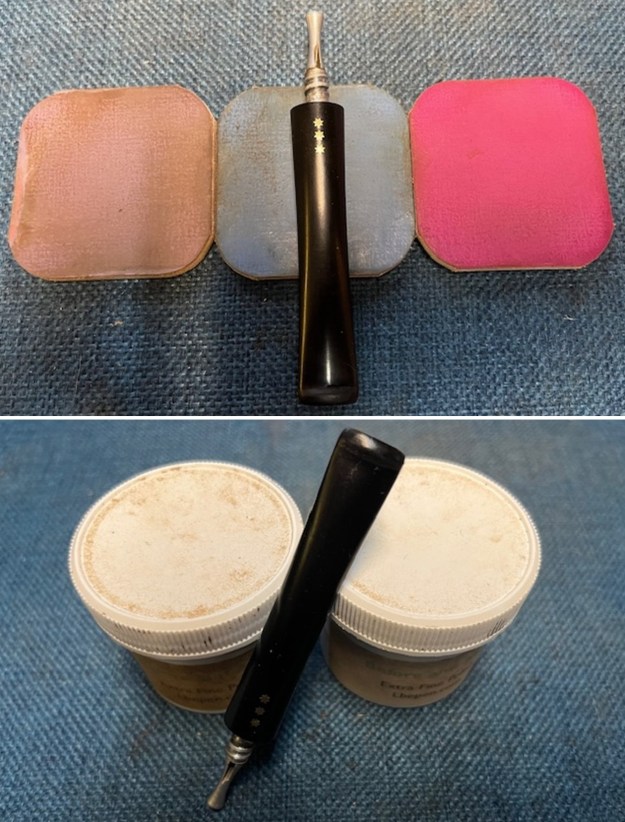
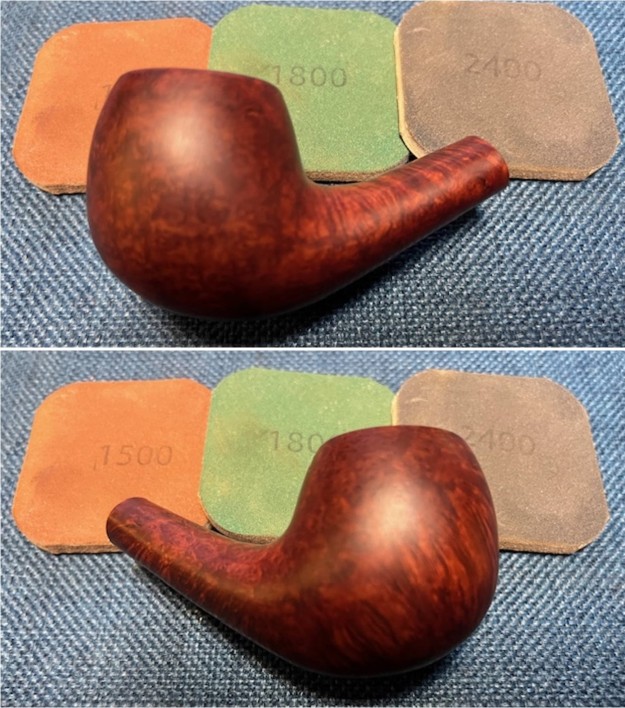
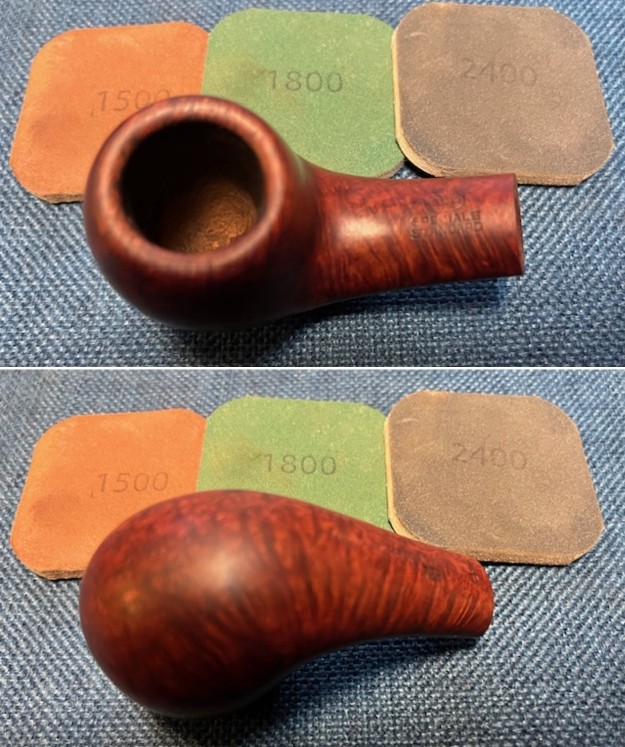
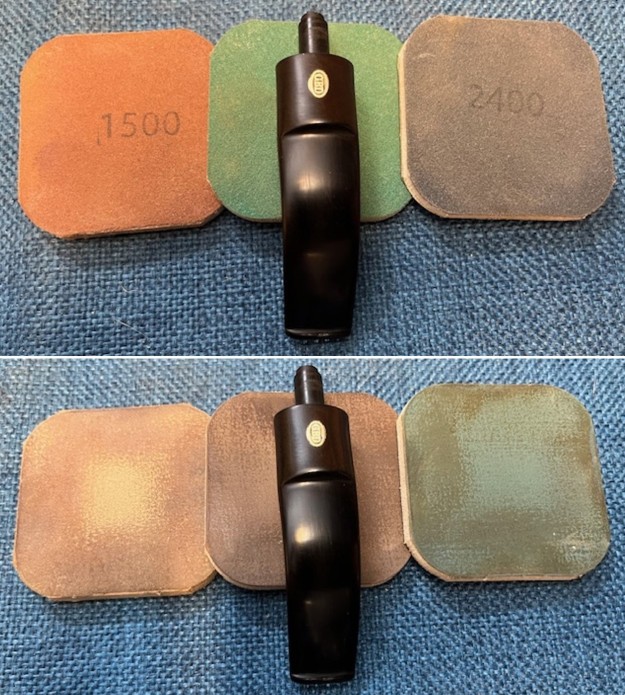
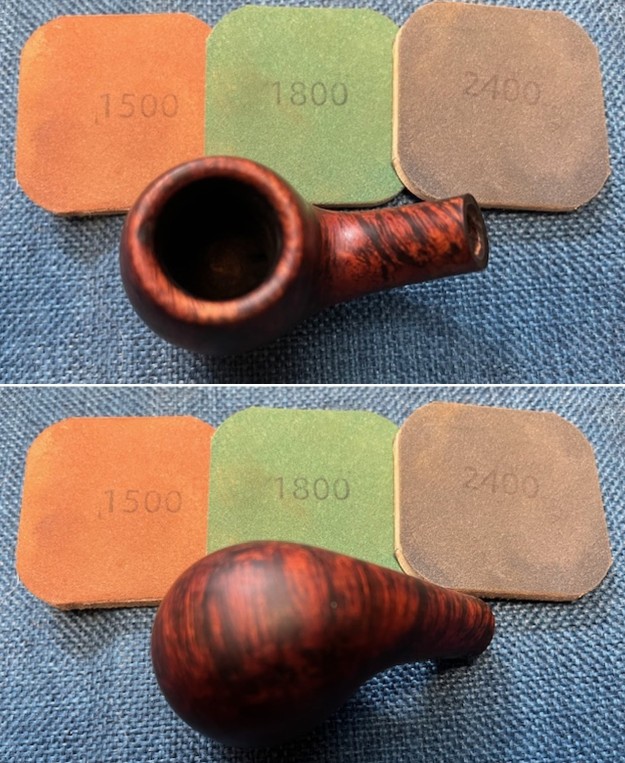
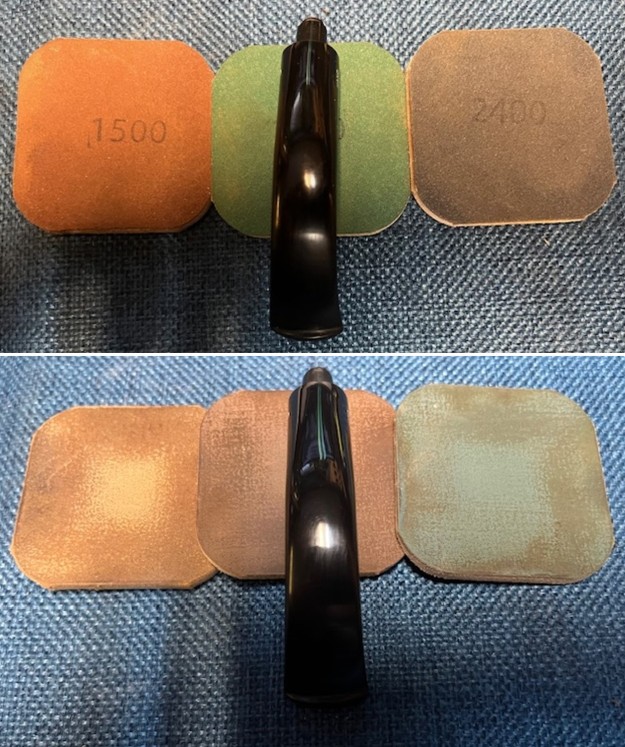
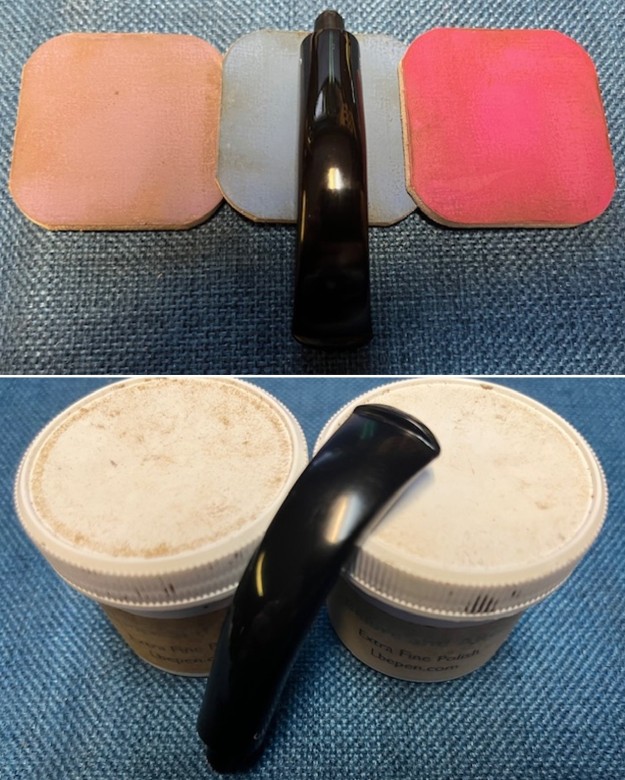
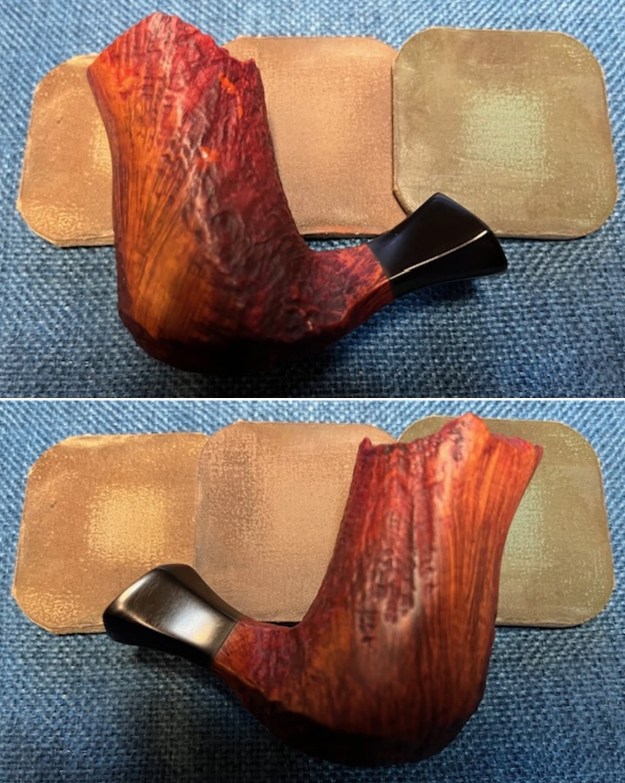
I polished the smooth portions of the briar and the vulcanite shank extension with micromesh sanding pads – dry sanding with 1500-12000 grit sanding pads. I wiped the bowl down with a damp cloth after each pad. I wiped the shank extension down with Obsidian Oil. I take photos of the three groups of pads for my own viewing primarily as I am looking for progress in polishing. Once again, by the end of the process it looked quite good. 
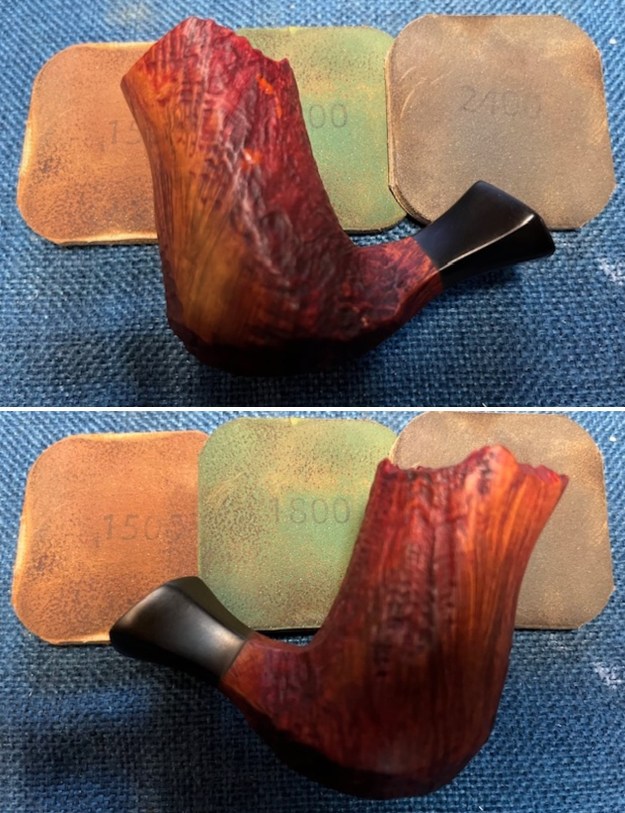
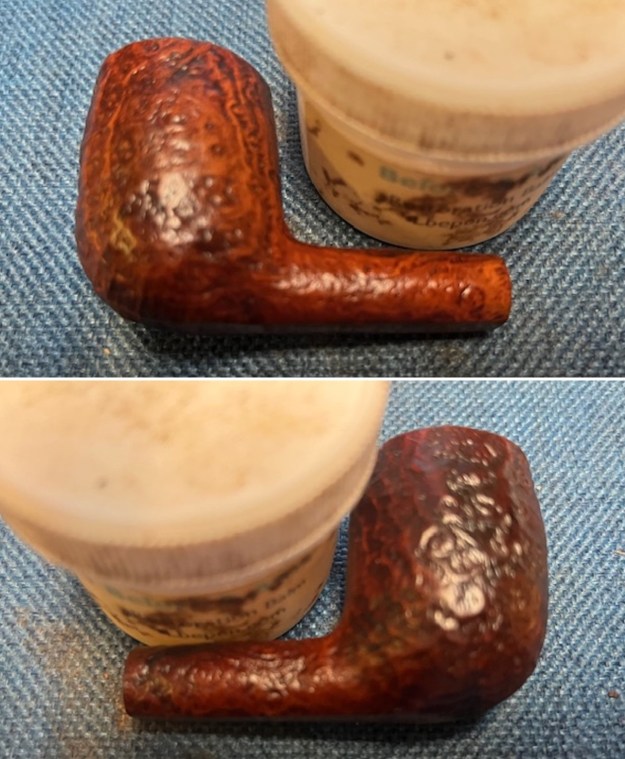
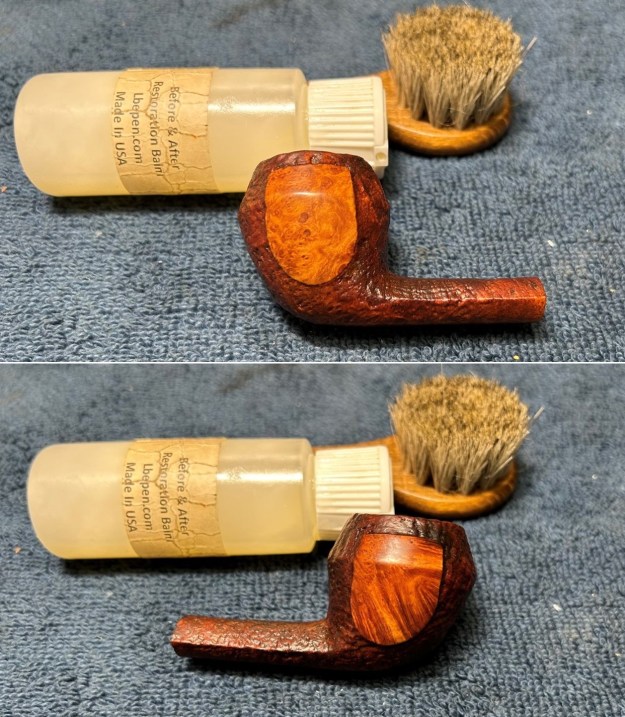
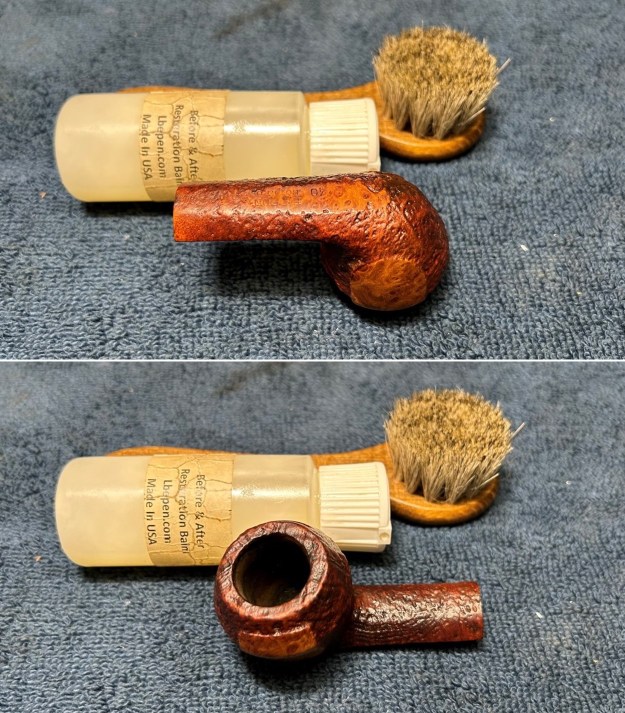
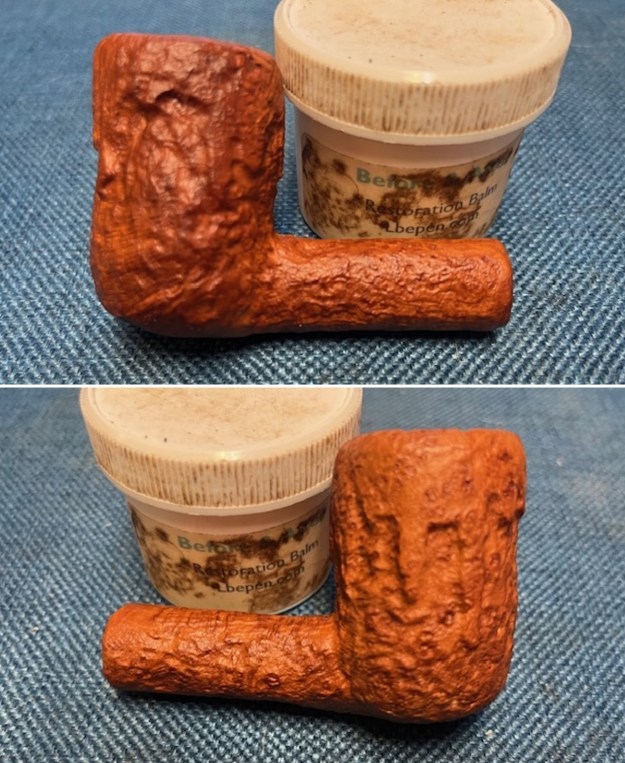
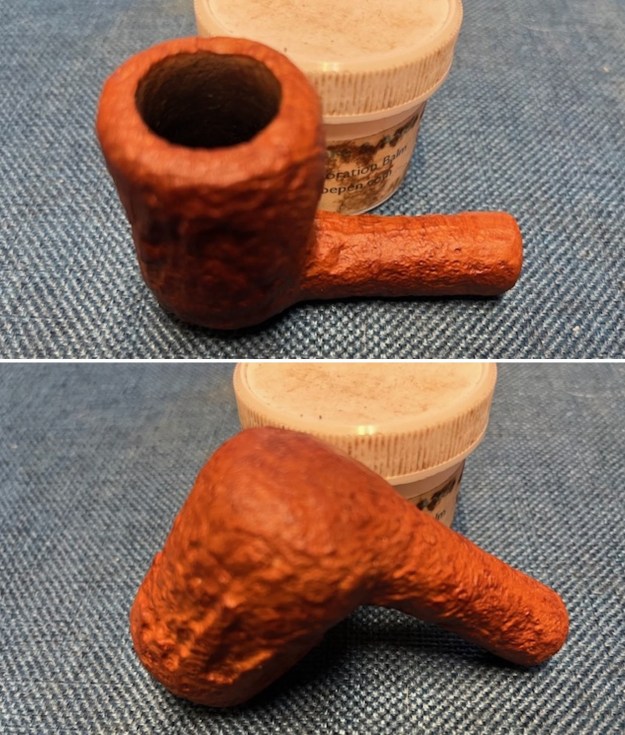
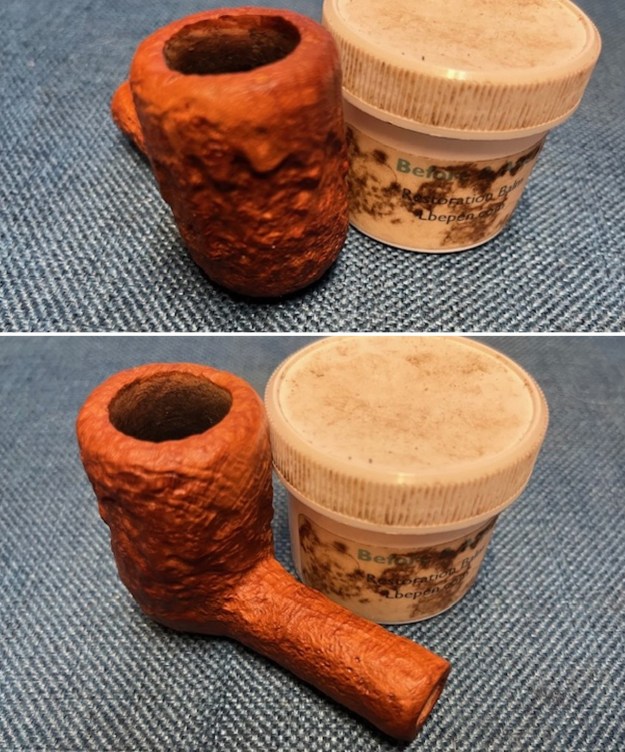
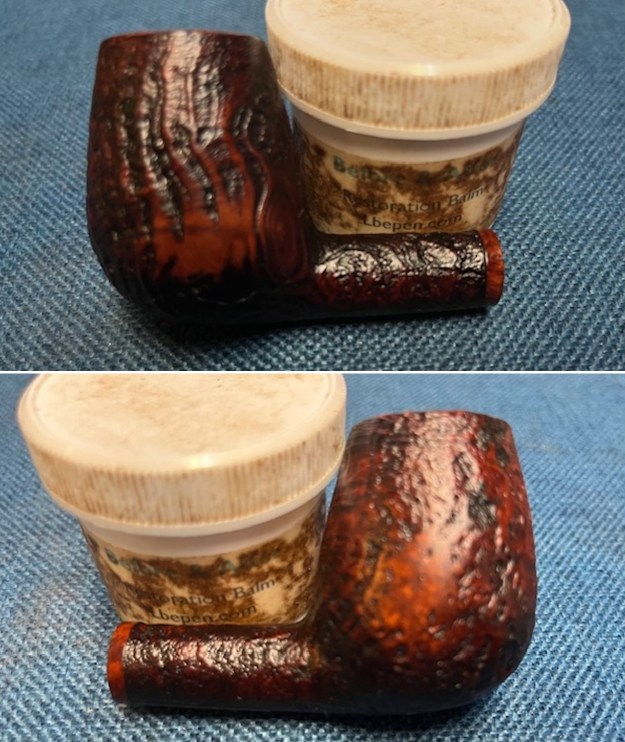
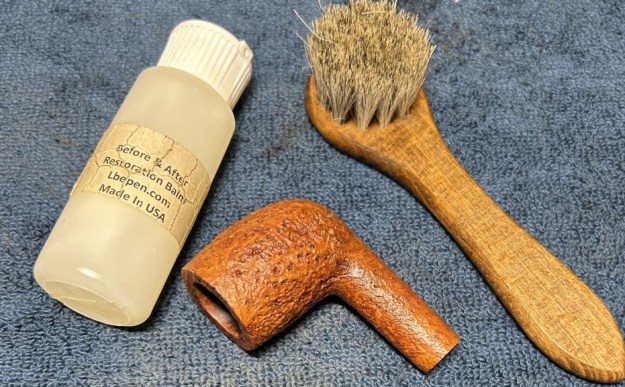
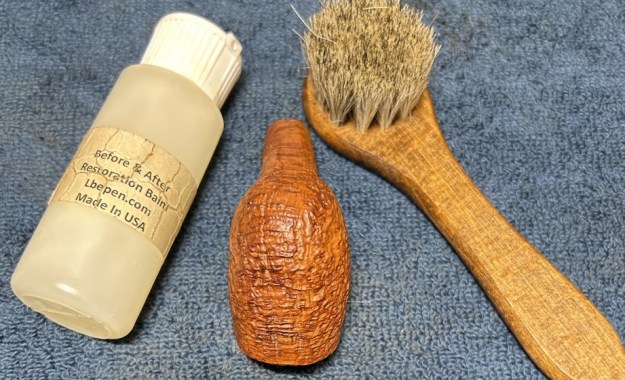
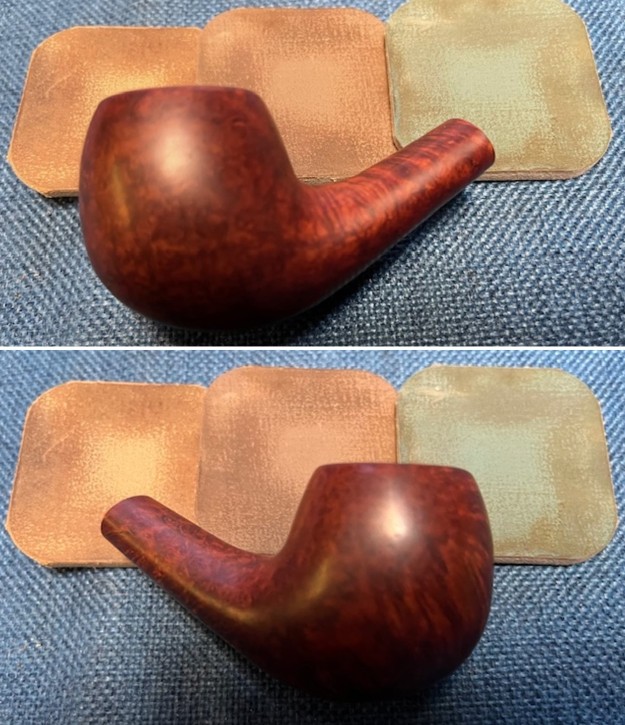
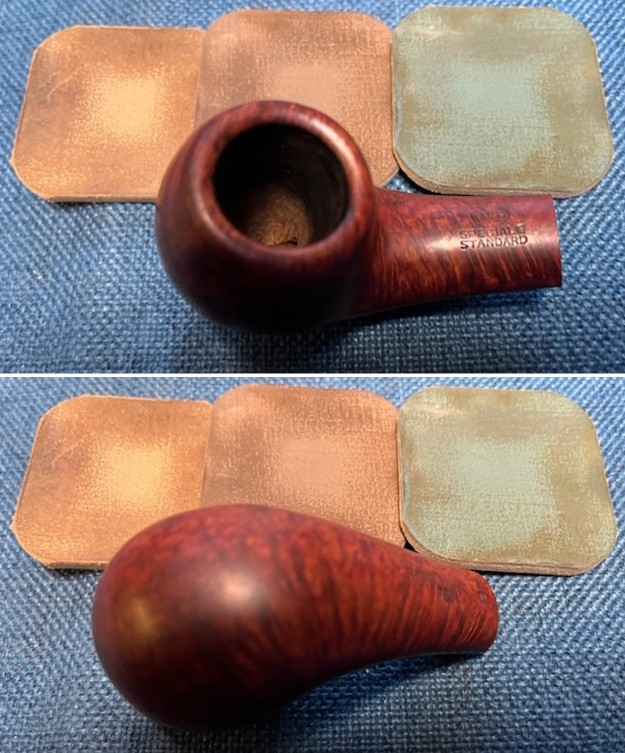
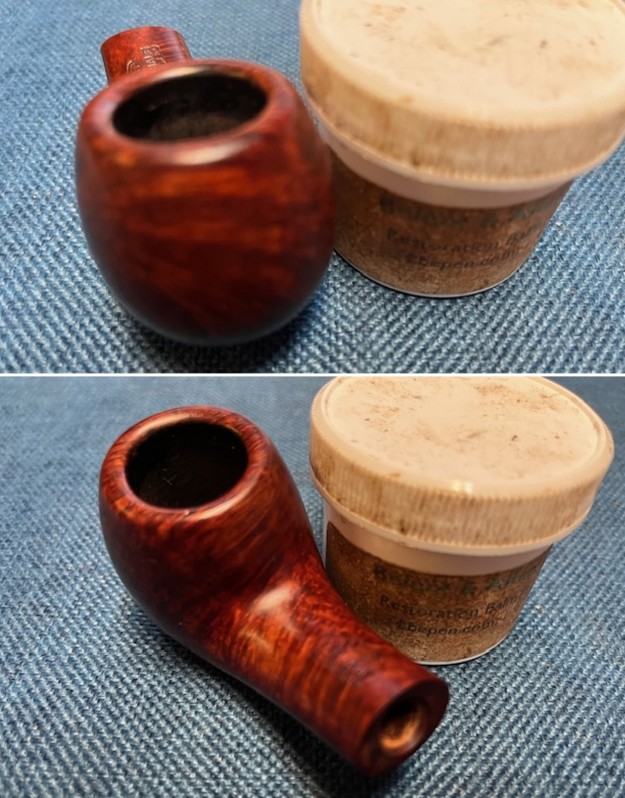
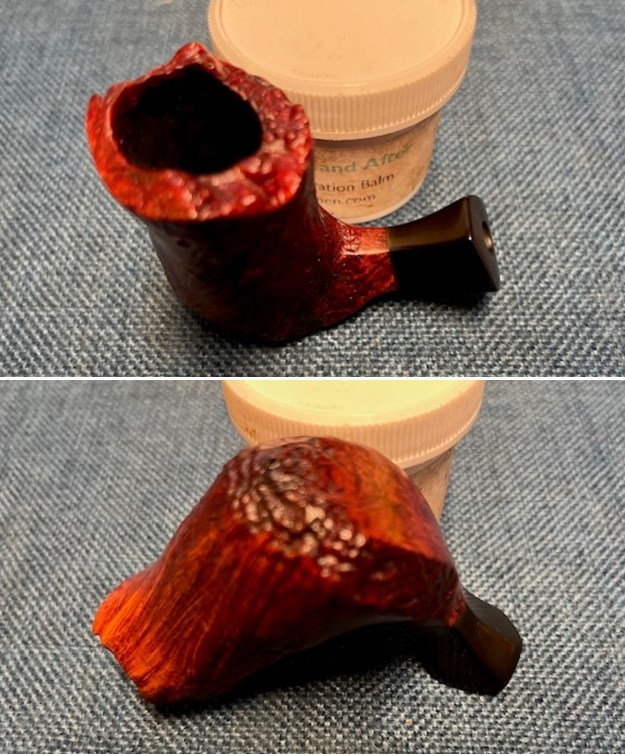
I rubbed the bowl and shank down with Before & After Restoration Balm. I worked it into the surface of the bowl sides and shank with my fingertips. I worked it into the plateau finish with a shoe brush. It works to clean, enliven and protect the briar. I let the balm sit for 15 minutes and buffed with a cotton cloth to raise the shine. The grain came alive. 
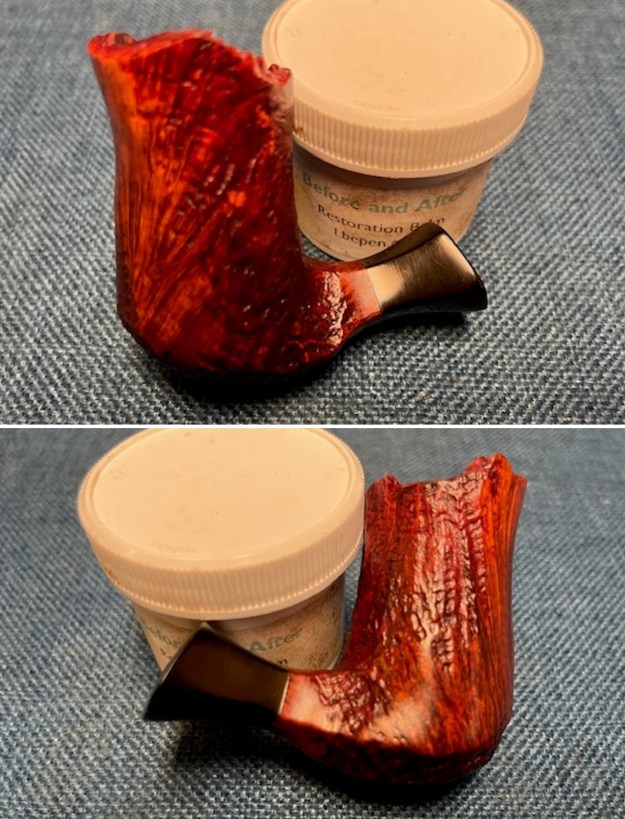
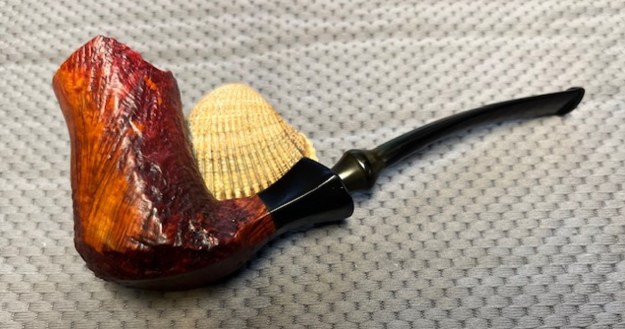
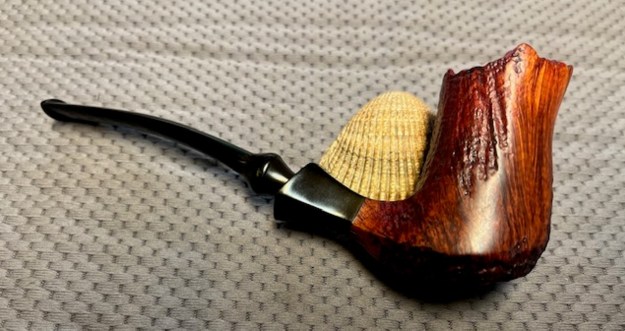
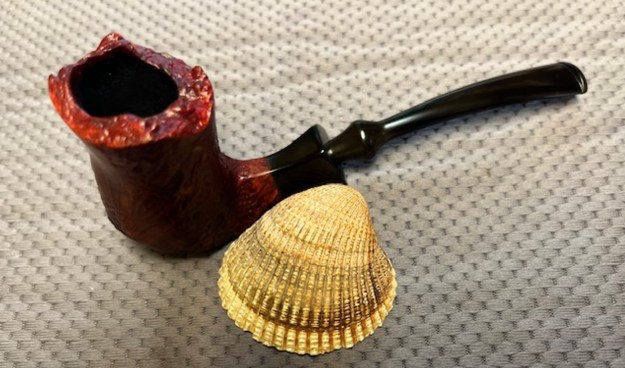
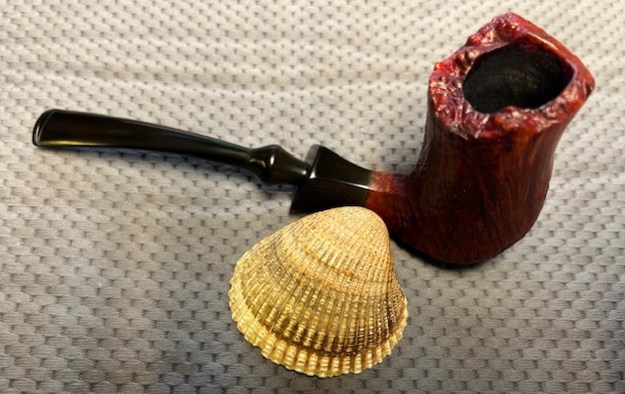
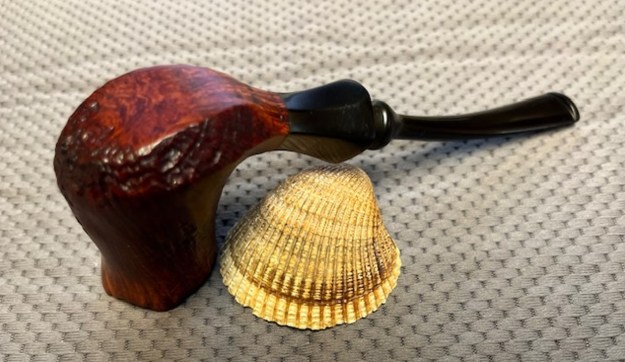
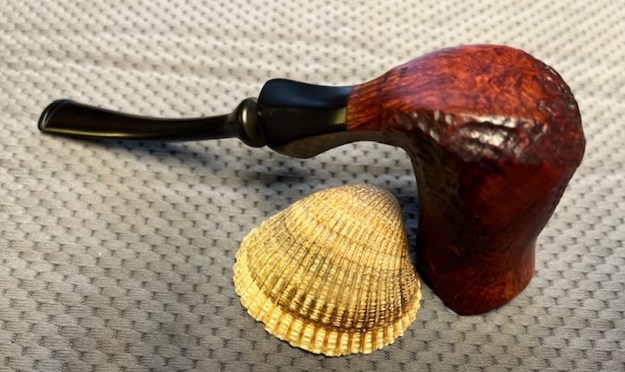
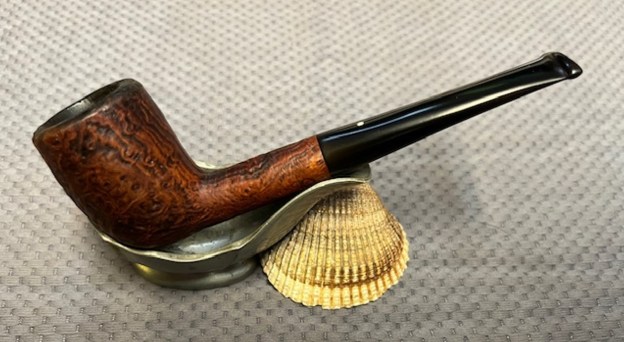
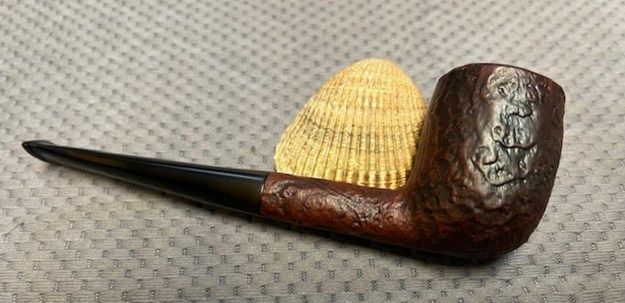
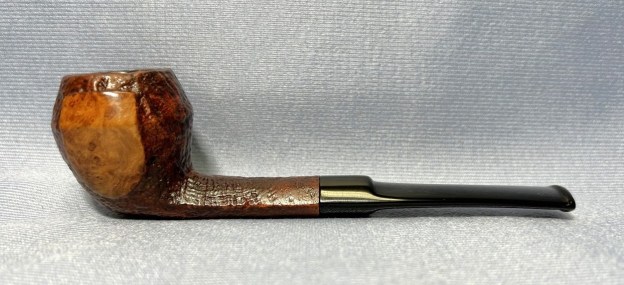
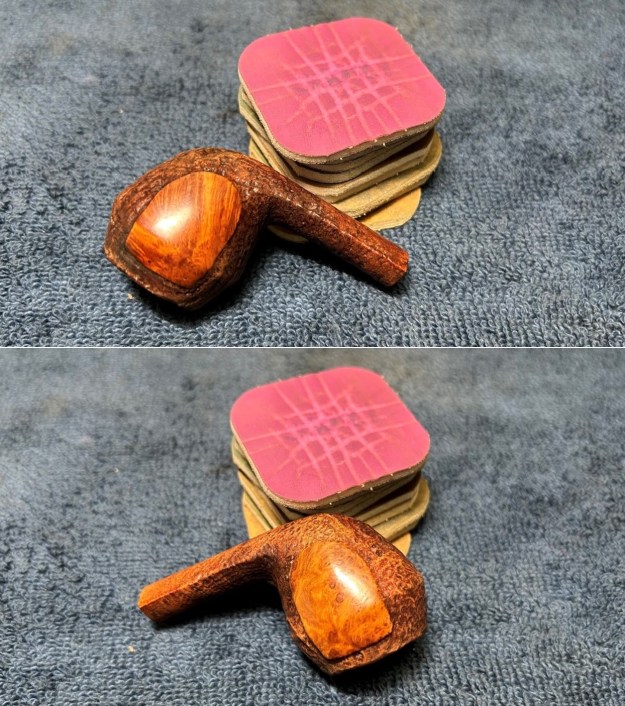
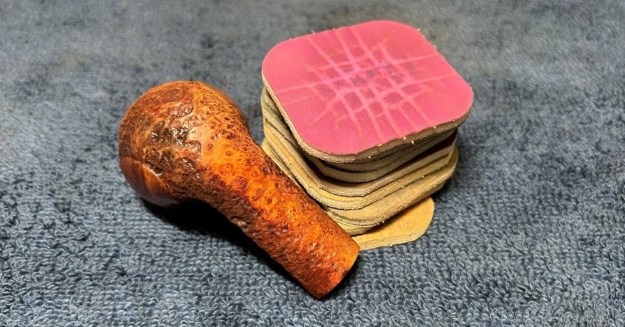
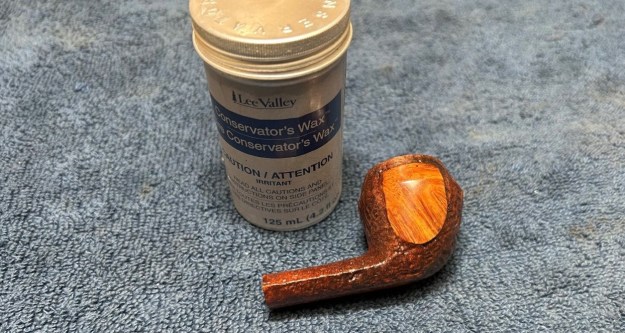
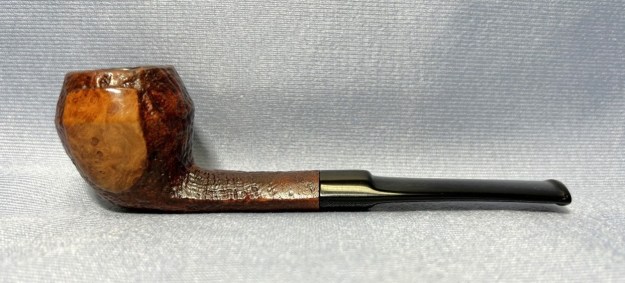
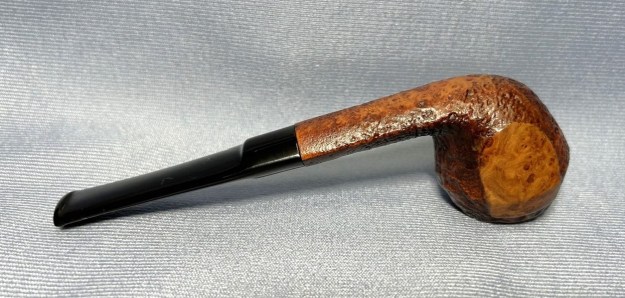
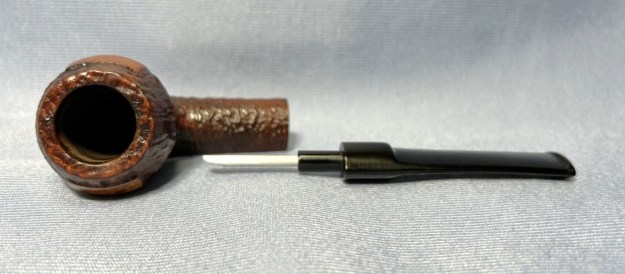
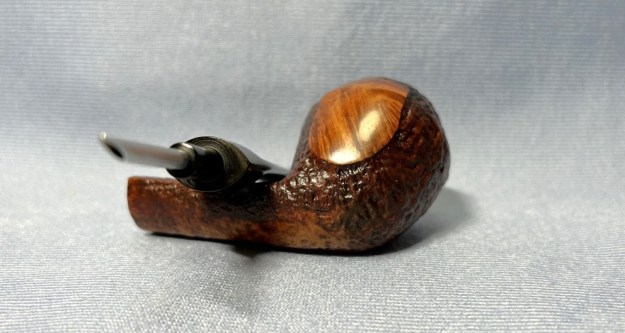
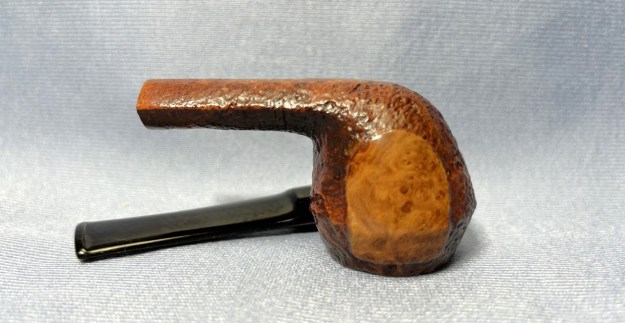
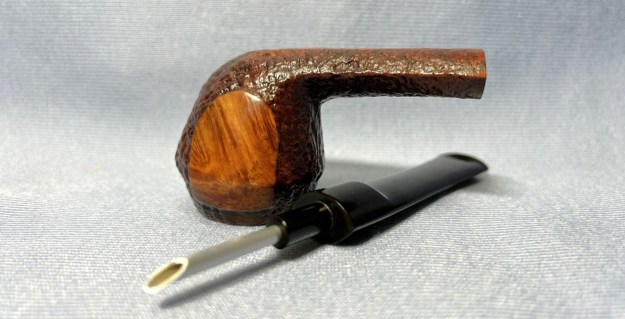
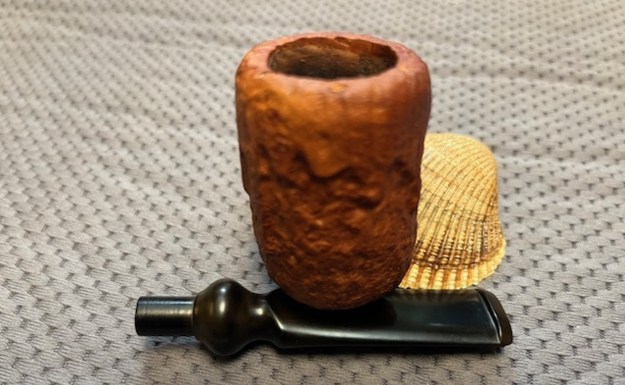
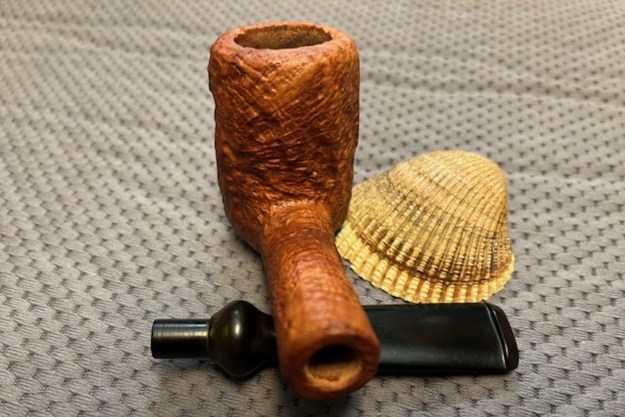
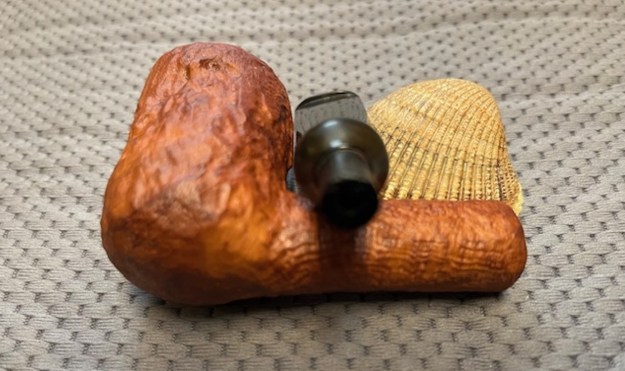
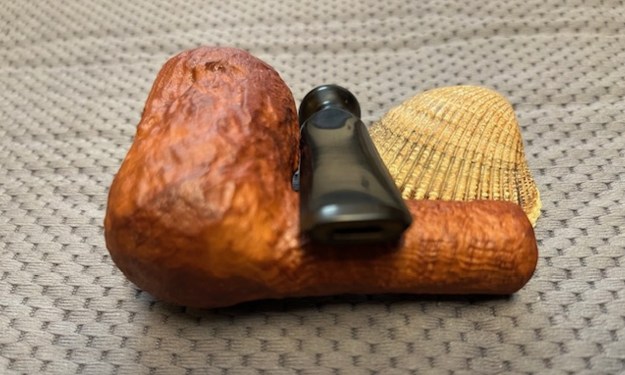
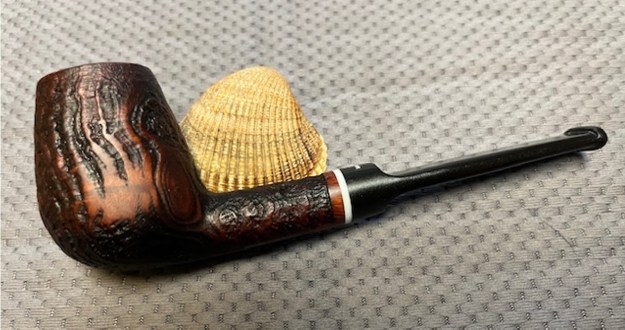
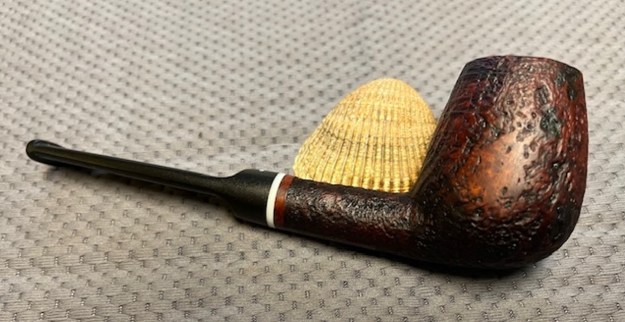
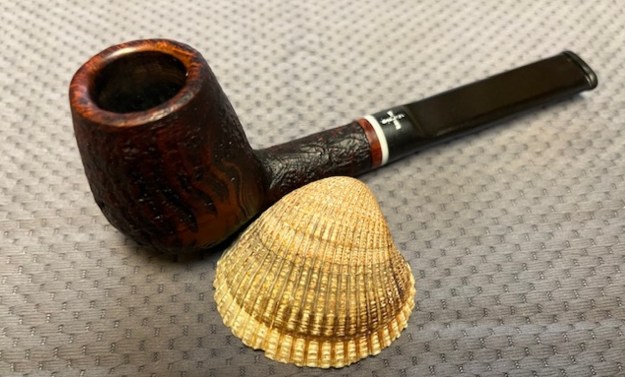
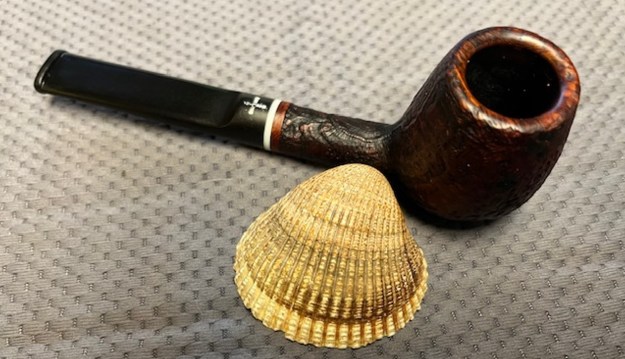
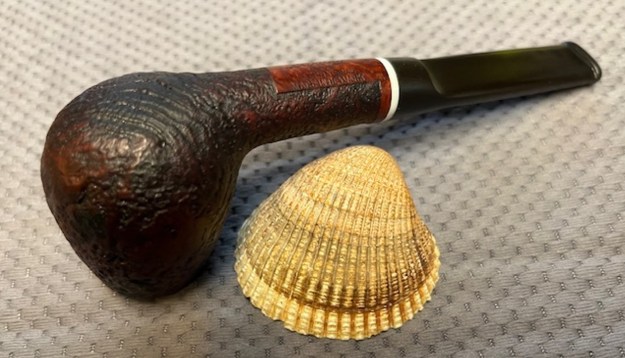
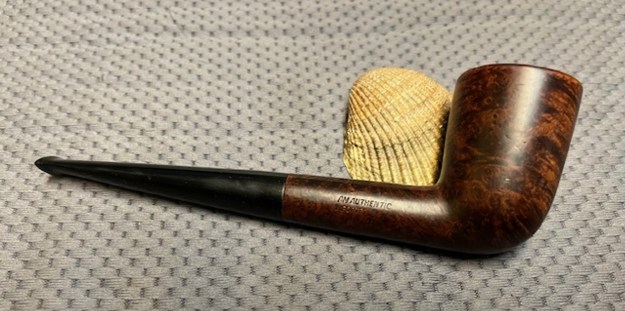
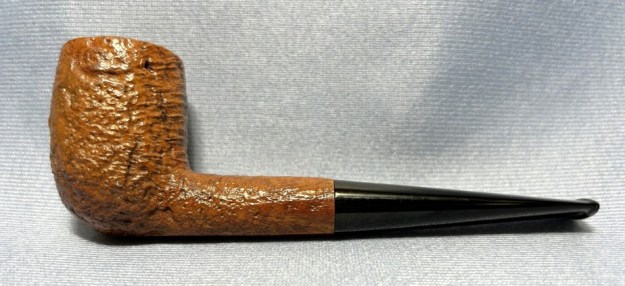
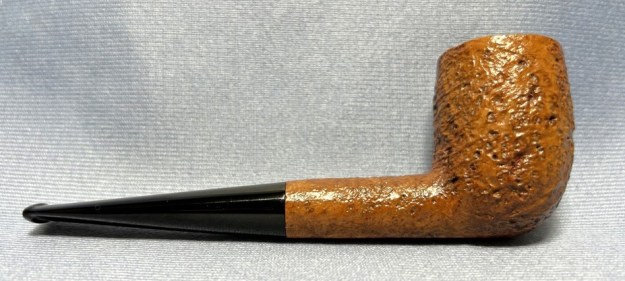
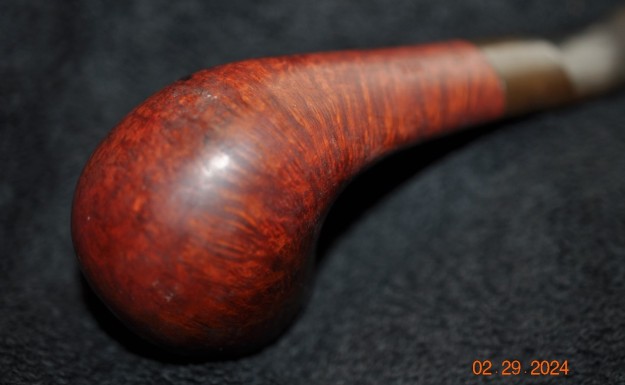
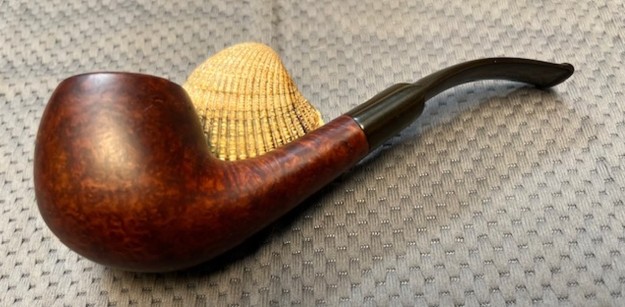
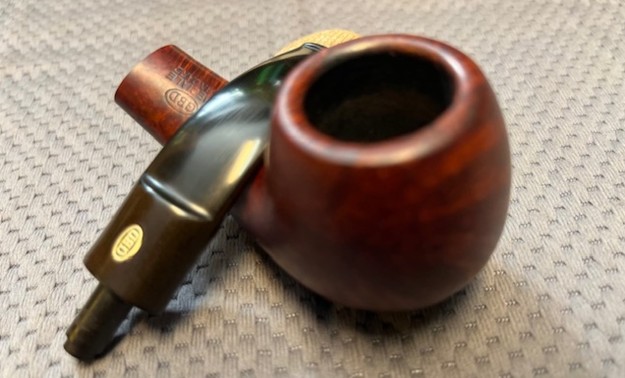
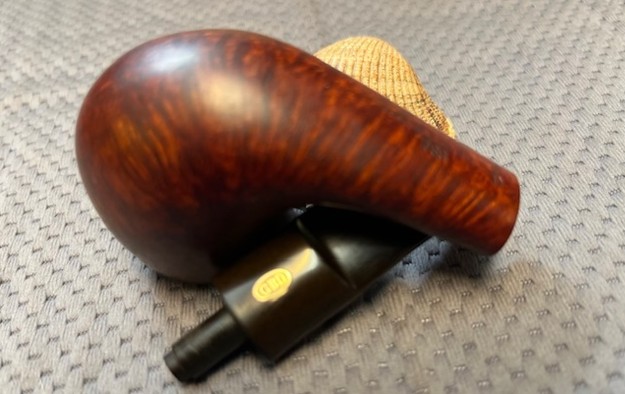
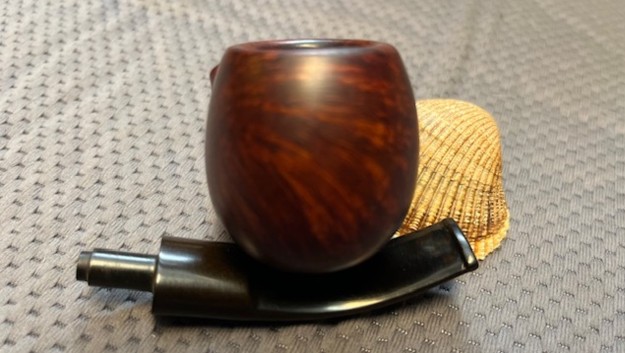
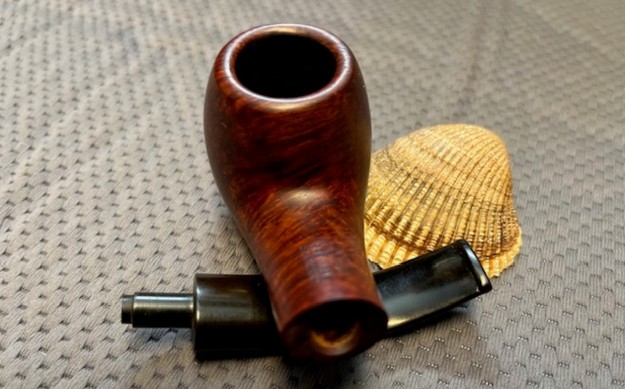
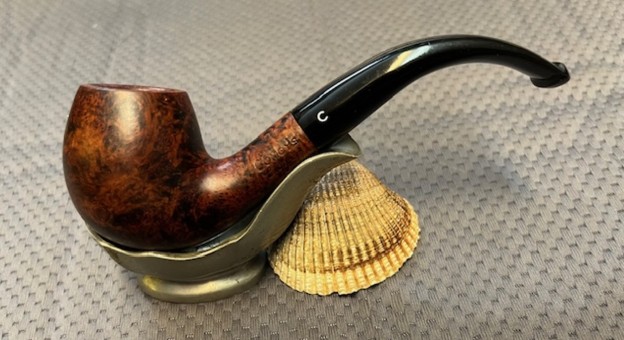
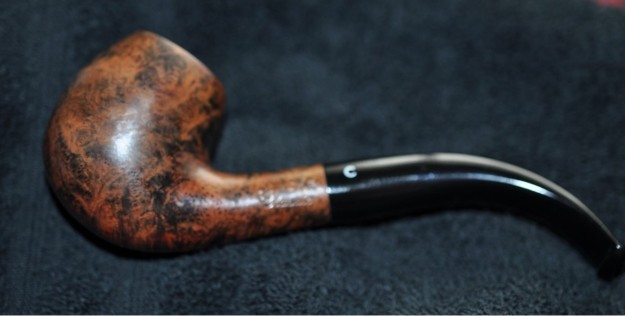
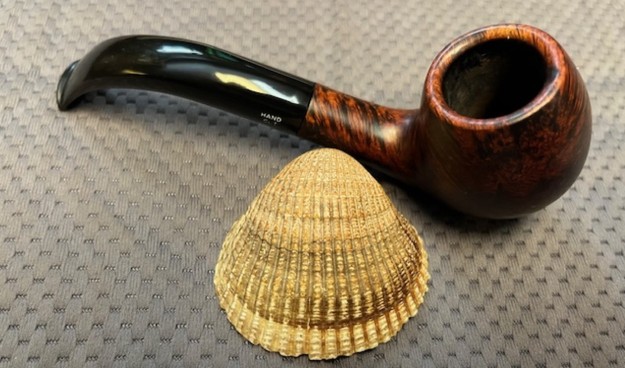
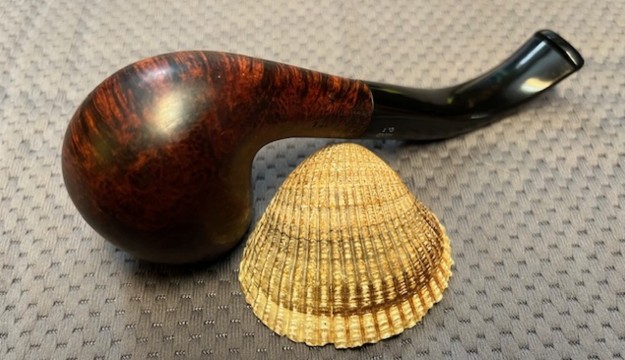
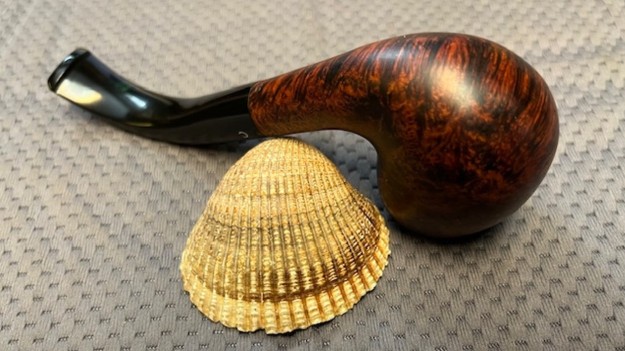
This newly restemmed Frasorteret Hand Made in Denmark Freehand is a great looking pipe with some interesting shaping around the sides of the bowl and vulcanite shank extension. You can easily see the handiwork of Preben Holm in the shaping of the pipe. The beautiful grain around the smooth portions and sandblast on the other portions of the bowl is quite stunning and works well with both the shape and the polished vulcanite shank extension and the military stick mount stem. I put the new stem back on the bowl and carefully buffed the pipe with Blue Diamond on the buffing wheel using a light touch on the briar. I gave the bowl and the stem multiple coats of carnauba wax on the wheel and followed by buffing the pipe with a clean buffing pad. I hand buffed the pipe with a microfiber cloth to deepen the shine. The finished Preben Holm Hand Made Frasortert Freehand fits nicely in the hand and feels great. Give the finished pipe a look in the photos below. The dimensions of the pipe are Length: 6 inches, Height: 2 ¼ inches, Outside diameter of the bowl: 1 ¼ inches, Chamber diameter: 7/8 of an inch. The weight of the pipe is 42 grams/1.52 ounces. I will be putting it on the rebornpipes store in the Danish Pipemakers Section shortly. If you wish to add this interesting pipe to your rack it is a great addition. Send me a message or an email. Thanks for reading this blog and my reflections on the pipe while I worked on it. I appreciate your support and time!

New Life for an old Estate 1966 Dunhill Tanshell 35 FT Billiard


by Steve Laug

The next pipe on the table is one that came to us from the group of pipes that Jeff and I purchased from a fellow selling an estate collection in Long Island, New York, USA on 04/16/2024. It is another Dunhill sandblast that is in good condition. It is stamped on a smooth panel on the underside of the shank with the shape number 35F/T followed by Dunhill [over] Tanshell. Next to that it is stamped Made in [over] England by the date number 6. After that it is stamped with a  3 in a circle [followed by] T for Tanshell. The stamping is clear and readable as noted above. The pipe has a mix of brown stains on a sandblast finish and some amazing grain that the shape follows well. The finish was dusty and oily around the nooks and crannies of the sandblast but otherwise fairly clean. There was some wear on the rim top and the front outer edge of the bowl where it had been knocked. The bowl had a thick cake and there was lava on the sandblasted rim top or edges. The taper stem was oxidized, calcified, dirty and had scratches, tooth marks and chatter ahead of the button. I took photos of the pipe to show what it looked like before I started working on it. I took photos of the bowl and rim top to show their condition and of the stem to show the condition of both sides of the stem.The stamping on the underside of the shank is shown in the photo below. It looks very good and faint but readable. It reads as noted and explained above. I captured the detail in the photos below. I removed the stem and took a photo to give a sense of what the pipe looked like.One of the first things I like to do is to unpack the stamping and understand each element in it. I turned to Pipephil helpful site (http://pipephil.eu/logos/en/dunhill/tanshell1.html). The stamping is interpreted as follows: The number 35 is the shape number for a Billiard. The F/T signifies a Fish Tail stem. The Tanshell stamp refers to the finish which is corroborated the T at the end of the stamping. The size of the pipe 3 in a circle is a Group 3. The 6 following the D of England gives the date the pipe. Pipephil also has some helpful dating keys on the site that are basically flow charts that you can walk through to date your pipe (http://pipephil.eu/logos/en/dunhill/cledat-en1.html). I turned to Part 1 of the Dating Key and followed the chart. This pipe has a 6 following the D in England. It is the same size as the D so that took me to the section on the chart below (column one) which instructed me that the pipe could be dated as being made posterior to 1954. I followed the link following the “Your pipe is posterior to 1954. Narrow down your dating”. That took me to Page 2 of the dating key (http://pipephil.eu/logos/en/dunhill/cledat-en1a.html).   The third column (suffix 5…9) led me to the section with a 6 after the D in England that is the same size as the D. There was a directive for dating the pipe spelled out as follows: 1960 + suffix which gives the pipe a date of 1966.I then turned to Pipedia’s section on Dunhill Root Briar to get a bit of background on the Dunhill finishes (https://pipedia.org/wiki/Dunhill#Root_Briar). I quote:

Tanshell

The first lot was distributed in 1952 (usually made using Sardinian briar). The prototype was called “Root Shell “, produced in 1951. The Tanshell is a light tan sandblast. Sardinian briar was used for this sandblast. There is a distinct contrast in the sandblasts using Sardinian as opposed to Algerian briar. The Sardinian is much denser and much harder. The resulting pattern, when blasted, is far more even and regular both in terms of the surface texture and the finish.

The TanShell was Dunhill’s fourth finish and its first major post-war line addition. Introduced in 1951/1952 the TanShell was a naturally stained sandblasted pipe made exclusively from Sardinian briar through the 1960s. The TanShell apparently was not simply a light stained Shell but rather was also the product of “certain processes [unrevealed] not previously employed.” Initially, it appears that the pipe was to be named the Root Shell and a stamp to that effect was ordered and received by Dunhill in May 1951. Ultimately, however, the name TanShell was settled upon but the stamp for the TanShell name was not received by Dunhill until the beginning of December. Thus while the Tanshell was in production in 1951 it appears that most if not all TanShells made in that year did not enter into retail distribution until 1952 and were given a 1952 date code. Loring, J. C., The Dunhill Briar Pipe, The Patent Years and After (self-published, Chicago, 1998).

I have also included a chart from the site from Dunhill spelling out the Standard Pipe Finishes and giving short information and a timeline. I turned to work on the pipe itself. I reamed the bowl with a PipNet reamer using the second cutting head. I took the cake back to bare briar. I cleaned up the reaming with a Savinelli Fitsall Pipe Knife and then sanded the bowl walls with a piece of dowel wrapped with 220 grit sandpaper. The bowl looked very good at this point there were no burn marks and only light checking on the walls. I cleaned out the inside of the shank, mortise and airway in the shank and the stem with alcohol, cotton swabs and pipe cleaners to remove the tars and oils in them both. I used a lot of both pipe cleaners and cotton swabs to clean them as they were both very dirty.Before I scrubbed the externals of the bowl I decided to smooth out some of the roughness on the front and the back side of the outer edge. I cleaned up the outer edge with a brass bristle wire brush. I put a few drops of clear CA glue in the roughest areas of the damaged edges on the front and the back and added some briar dust to the finish. My goal was not to rebuild the edges but to rather smooth out the damage and remove the torn and rough edges. I worked it over again with a wire brush to knock of the excess. I would do some more of that after I cleaned the exterior. I scrubbed the surface of the briar with undiluted Murphy’s Oil Soap and a tooth brush. I worked over the rim top and the damaged areas on the front and back of the bowl. I rinsed off the bowl with warm running water to remove the grime. Once it was finished it looked much better. I worked over the surface of the bowl and the rim top with the brass bristle wire brush once again. That included the rim top and the sides of the bowl and shank. It looked much better at this point. At this point I rubbed the briar down with Before & After Restoration Balm. I worked it into the briar with my fingertips and a horsehair shoe brush to work it into the nooks and crannies of the sandblast finish. The product works to clean, enliven and preserve the briar. I let it sit for 10 minutes then I buffed it with a cotton cloth to deepen the shine. The briar really comes alive with the balm. I set the bowl aside and turned my attention to the stem. I scrubbed the oxidation, calcification and debris off the surface of the vulcanite with Soft Scrub on cotton pads. It looked much better once it was finished. I sanded out the majority of the tooth marks with 220 grit sandpaper. I filled in the light tooth marks that remained with black CA glue. I set the stem aside to let the repairs cure. Once they cured I sanded them smooth with 220 grit sandpaper. I started the polishing process with 320-3500 grit sanding pads. I wiped it down after each sanding pad with a cloth impregnated with Obsidian Oil. I let it soak in.I polished the stem with micromesh sanding pads – dry sanding with 1500-12000 grit pads. Once again I wiped it down between each pad with Obsidian Oil. I further polished it with Before and After Stem Polish – both Fine and Extra Fine. It looked very good. This 1966 Dunhill Tanshell 35F/T Group 3 Billiard with a Taper Stem has a beautiful, unique Dunhill Sandblast finish that was deep and craggy but now slightly worn. The reddish brown finish highlights some great grain around the bowl and shank. It has some great rugged sandblast that Dunhill specialized in making. The outer edges are a bit worn but I have chosen to leave them as part of the pipe’s story. The polished black vulcanite taper stem adds to the mix. I put the stem back on the bowl and buffed the pipe with Blue Diamond on the buffing wheel being careful to not buff the stamping. I gave the bowl multiple coats of Conservator’s Wax and the stem multiple coats of carnauba wax on the buffing wheel and followed that by buffing it with a clean buffing pad. I hand buffed the pipe with a microfiber cloth to deepen the shine. The finished Dunhill Tanshell 35F/T Billiard is quite nice and feels great in the hand. Give the finished pipe a look in the photos below. The dimensions of the pipe are Length: 5 inches, Height: 1 ½ inches, Outside diameter of the bowl: 1 1/8 inch, Chamber diameter: ¾ of an inch. The weight of the pipe is .95 ounces/27 grams. Thanks for walking through the restoration with me as I worked over another beautiful pipe. If you are interested in adding it to your collection I will be adding it to the British Pipe Makers Section of the rebornpipes store. Thanks for your time.

Having Some Fun with a Hilson Bolero Bulldog


by Kenneth Lieblich

Greetings, one and all! It’s been a little while since my last blog post, but, to my chagrin, life intervened in some challenging ways. Now I’m back with a nifty pipe that put a smile on my face and I’m sure it’ll do the same for you. It’s a charming, whimsical Hilson Bolero 40, partially sandblasted straight bulldog. Normally, when I think of Hilson, my mind meanders to resin (or ‘pipenite’, as they called it) stylings from the Fantasia line – but not today! This is a pure briar pipe, with a lovely vulcanite stem. I acquired it in a lot from FB Marketplace, but I don’t know the pipe’s individual history. It certainly was a favourite smoker for the fellow who previously had it. It showed all the hallmarks of a much-loved pipe.

What do the markings say? The underside of the shank shows, first, the shape number, 40, and to the right, Hilson [over] Bolero. Again, to the right of that are the words Made in Belgium. There are no other markings to mention.Let’s check Pipedia to see what they have to say about the Hilson brand:

Jean-Claude Hillen (other sources: Jean-Paul) founded a trading company in the City of Bree in 1846. He soon turned his main interest on pipes and other tobacco related goods. Particularly in the 1960’s and still throughout the 1970’s the brand Hilson of Broers Hillen B.V. (Hillen Bros. Co.) was quite successful in many European countries. They produced large numbers of machine-made pipes covering the whole range of shapes and finishes. The pipes were well respected for good quality and craftsmanship at very moderate prices. Rarely seen there are also nice freehands from this era stamped MASTRO and signed by A.M. Sanoul, who is otherwise completely unknown as a pipemaker. All the same, in 1980 Hillen faced major financial problems. At this time there was only a second manufacturer of briars pipes in the Benelux countries, the Elbert Gubbels & Zonen B.V. in the Netherlands. The Belgian competitor being in trouble, Gubbels used the favour of the hour and bought up the company. The reason is plausible: in some countries, particularly in Germany, Hilson held larger market shares than Gubbels’ mainstay brand Big Ben. The Hillen plant in Bree was closed down shortly after and ever since then Hilson pipes are manufactured in Roermond, NL.Likewise, there is a bit more to be found from our friends over at Pipephil:

In 1846 a German named Jean Knödgen started to produce clay pipe in Belgium. In the late 19th century Jean Hillen who married into the Knödgen family took over the company and changed the firm in order to manufacture briar pipe. Jean Hillen had 2 sons: Jos Hillen was responsible for sales and Albert Hillen was responsible for the production. After WWII Albert founded the HILSON brand (Hillen and Son) and exported his pipes all over the world. In 1980 after having gone bankrupt, the Belgian brand from Bree (Limburg) was taken over by the Royal Dutch Pipe Factory.It’s also worth noting that I’ve seen several posts over at the PipeMagazine forums that state that the older (and better) Hilsons are marked “Made in Belgium”, as this one is.

The pipe is in very nice shape and was well-loved. The stem had some tooth scratches and dents, plus it was coated with a lot of oxidation – a LOT. There were no significant issues with the stummel, although it did have a bit of lava on the rim and the bowl was choked with cake. I started out by cleaning the inside of the stem with 99% isopropyl alcohol and some pipe cleaners. It was dirty, but not too bad. I also wiped the stem with some Murphy’s on some cotton rounds. As you can see, the stem was pretty filthy.This was going to take some work, so I went to the sink and scrubbed the stem with some cleanser on a few cotton pads. The photos testify to the icky oxidation that came off.After that, the stem went for a dip in the stem oxidation remover. I let it sit overnight, to allow all the oxidation to rise to the surface of the stem. The next day, I cleaned up the stem again with more cleanser on some cotton pads. This took some serious scrubbing, but, in the end, worked very nicely.Once complete, I filled the tooth marks with my carbon and rubber enhanced cyanoacrylate adhesive. Once cured, I took down the excess with my needle files. After that, I took my nine Micromesh pads and sanded the whole stem until it was shining like new. I also used my pipe stem oil in between the pads (from 3600 on) to bring out some extra lustre.This pipe comes with an innertube, so I cleaned that too. I used rubbing alcohol to remove all the tars and oils of the past, then scrubbed with some 0000 steel wool to make the tube shine.Onto the stummel. In order to clean out the massive amount of cake in the bowl, I used the Pipnet reamer and followed that up with a piece of sandpaper taped to a wooden dowel. I sanded down the cake until I hit the briar walls, so that I could inspect them for potential damage. Everything looked good on the inside, which is great. I proceeded to clean out the inside of the shank with 99% isopropyl alcohol and pipe cleaners and cotton swabs. It was surprisingly dirty in there! But I got it clean in the end.When that was done, I set up to de-ghost the pipe. I put some cotton balls into the bowl and the shank and soaked them with 99% isopropyl alcohol. I let that sit overnight so that any remaining smells and/or filth would leach out into the cotton. I also scrubbed the insides with some soap and tube brushes. It was beautifully clean after that!The stummel was in very nice shape, although the rim did have some lava on it, as previously mentioned. I soaked the rim in some Murphy’s to loosen this up, then used more Murphy’s to clean the whole stummel. This removed any external dirt and oils, and it was much improved.Most of the pipe was sandblasted, but there were three areas of smooth briar: the two shield-shaped patches on the sides of the bowl, and the underside of the shank where the markings were. On those smooth areas, I sanded down with the Micromesh pads to make it beautiful. I then took my restoration balm, rubbed it in the wood with a horsehair brush and let it sit for about 20 minutes. This balm is fantastic stuff and does wonderful things to nourish the wood. After letting it sit, I used a microfibre cloth and buffed it. Off to the bench polisher to put the final touches on this pipe. I first gave the smooth sections (only) a thorough (but light-handed) going-over with White Diamond compound. Following that, several coats of conservator’s wax created a beautiful, glossy seal on the pipe.All done! This Hilson Bolero 40 straight bulldog looks fantastic and is ready to be enjoyed again by the next owner. It promises to be a great smoker and conversation piece. I am pleased to announce that this pipe is for sale! If you are interested in acquiring it for your collection, please have a look in the “Various” section of the store here on Steve’s website. You can also email me directly at kenneth@knightsofthepipe.com. The approximate dimensions of the pipe are as follows: length 5⅔ in. (145 mm); height 1⅝ in. (41 mm); bowl diameter 1½ in. (37 mm); chamber diameter ¾ in. (18 mm). The weight of the pipe is 1⅛ oz. (35 g). I hope you enjoyed reading the story of this pipe’s restoration as much as I did restoring it. If you are interested in more of my work, please follow me here on Steve’s website or send me an email. Thank you very much for reading and, as always, I welcome and encourage your comments.

Cleaning up a Brian McNulty Anima Wax Drip Sandblast Billiard


By Steve Laug

This is another of the four pipes that Sonny in Salmon Arm, BC sent to me for refurbishing. He put them in the mail and I received them on Monday this week. I took a photo of the box of four pipes once I unwrapped them. There were 4 interesting and very unique pipes – a Vauen Solitaire 148 Freehand Filter Pipe that is huge, an older cased meerschaum with an overclocked stem, a Dunhill Wanghee Sandblast Dublin with a Bamboo shank and short saddle stem and finally an Anima wax drip sand blast Billiard carved by Brian McNulty. All needed varying degrees of restoration. I chose to work on the Brian McNulty Anima Wax Drip Sandblast Billiard next. It is faintly stamped on the underside of the bowl with a single cross in a circle or what is known as a Medicine Circle. There were other faint stamps on the shank and heel of the bowl but they were not readable even with a lens. My guess is that they read Anima and possibly the date the pipe was made. There is a wax drip finish around the rim top and down the sides of the bowl. The wax drip and the bowl have a sandblast finish was dirty but had some nice grain showing through the blast. The bowl was quite clean and if it had been smoked at all it was minimal as there was no real darkening on the lower half. The precast freehand style stem was oxidized and there were tooth marks and chatter ahead of the button. I took these photos before I started my work on the pipe. I took a photo of the rim top and bowl to show the condition of both of them. There is a light cake in the bowl and it is clean. The rim top is very clean with a light sandblast. There is no damage on the top or the inner edge. The photos of the stem show the oxidation and tooth marks/chatter on both sides ahead of the button.I took photos of the stamping on the underside of the bowl and shank. The stamping was faint and hard to read as noted above. You can see the Medicine Circle (single one) stamped near the bowl shank transition in the photo below. I removed the stem from the shank and took a photo to show the beauty of the pipe.Before I started my clean up work on the pipe I turned to my usual sources to see what I could learn about the brand. I turned first to PipePhil’s site (http://pipephil.eu/logos/en/logo-a6.html). I did a screen capture of the section on Anima Pipes. From that I reexamined the underside of the bowl and shank to see fi I could clarify some of the faint stamps. There was a small C on the shank that tells me the briar is from Calabria. It also seems to bear a 04 03 stamp that tells me that the pipe was made in April of 2003 from the information below. That was information that I did not have until I read this on PipePhil.The site also had a small photo of Brian McNulty. The side bar identified him as the artisan that made the pipes. It also noted that the dot inlaid in the stem is of red clay (Catlinite) used by Indians for their pipes. The clay is the soul (Anima) of the pipe.

Sonny had told me that Brian is a Cherokee and all of this information was quite interesting to note.

From there I turned to Pipedia (https://pipedia.org/wiki/Anima_Pipes). Generally, I find more information on the site that fills in the blanks a bit for me on the maker and the company. That was the case this time as well. I am including the information below.

Anima Pipes are all handmade in the USA by carver Brian McNulty utilizing the highest quality, well aged briar from many regions to bring out the free flowing forms which lie in each ebacheon. Cut to maximize the beautiful grain of the wood, these pipes provide a beautiful aesthetic and a cool and satisfying smoke to all whom have had the pleasure of packing up and lighting one of these “smokable works of art” which is undeniably Anima. With a basis in traditional styling, accentuated by artistic expression, these extremely fine smoking articles each come with an exact matching tamper to compliment each pipe. Carver Brian McNulty’s sharp eye and flair for form, symmetry, sleek lines, fine attention to detail, and uniquely inspired shapes coupled with “soul” within the craftsmanship are what set Anima pipes apart from many others. Know that smoking an Anima pipe will provide you with a dry and satisfying smoke every time as you view a truly one-of-a-kind work of art!  You might also enjoy listening to Brian Levine’s interview of Brian McNulty on the Pipes Magazine Radio Show

I turned to work on the pipe itself. I reamed the cake with a Savinelli Fitsall Pipe Knife. I sanded the walls of the bowl with a piece of 220 grit sandpaper wrapped around a piece of dowel. The walls of the bowl are undamaged and smooth.

I scrubbed internals of the shank and airway in both the shank and the stem with alcohol, pipe cleaners and cotton swabs. The pipe began to look much better. To remove the grime from the sandblast ridges and valleys I scrubbed the surface with undiluted Murphy’s Oil Soap and a tooth brush. I rinsed the briar with warm water to remove the soap and debris. I dried it off with a soft towel. I rubbed the briar down with Before & After Restoration Balm. I worked it into the briar with my fingertips and a shoe brush. The product works to clean, enliven and preserve the briar. I let it sit for 10 minutes then I buffed it with a cotton cloth to deepen the shine. The briar comes alive with the balm. I set the bowl aside and turned to address the tooth marks and chatter in the stem surface. I “painted” the tooth marks on the stem with the flame of a Bic lighter. I was able to lift the tooth marks significantly. I filled in what remained with black rubberized CA glue. Once the repairs had cured I sanded them with 220 grit sandpaper to blend them into the surface of the stem. I sanded the stem surface with 320-3500 grit sanding pads. I dry sanded with each pad and wiped the stem down after each pad with an Obsidian Oil impregnated cloth.I polished the vulcanite with micromesh sanding pads – 1500-12000 grit pads. I wiped it down with Obsidian Oil after each sanding pad. I used Before & After Pipe Polish – both Fine and Extra Fine to further polish the stem. Once I finished with the 2003 Brian McNulty Anima Wax Drip Sandblast Billiard I put the stem back on the shank and carefully buffed the pipe with Blue Diamond polish using a lightly loaded pad and a soft touch. I wanted the shine but not the grit filling in the crevices of the sandblast bowl. I buffed it lightly with Blue Diamond so as not to get it in the grooves and crevices of the blast. I gave the bowl and stem multiple coats of carnauba wax. I buffed the pipe with a clean buffing pad and hand buffed it with a microfiber cloth. The finished pipe is shown in the photos below. It is a great piece of pipe history and looks better than when I began the process. The dimensions of the pipe are Length: 5 ¾ inches, Height: 2 inches, Outer Bowl Diameter: 1 ¼ inches, Chamber Diameter: ¾ of an inch. The weight of the pipe is 1.45 ounces/ 41grams. One more of Sonny’s pipes to work on before I send them all back to him. Thanks for reading this blog and my reflections on the pipe while I working on it. As always, I encourage your questions and comments as you read the blog. Thanks to each of you who are reading this blog. Remember we are not pipe owners; we are pipemen and women who hold our pipes in trust until they pass on into the trust of those who follow us.

Restoring a Danish Made Barling Make International 911 Brandy


by Steve Laug

The next pipe on the work table is a pipe that we picked up from an eBay seller in Jordan, Minnesota, USA on 01/22/2024. This one was a nice looking sandblast Brandy that has a classic Barling look. It is stamped on the underside of the shank and reads Barling in script [over] Make [over] International [over] Made in Denmark. On the shank end at the joint of the stem it is stamped with the shape number 911. On the top of the saddle stem it is stamped with the Barling cross logo. It has some smooth panels mid bowl on the left and right side. The sandblast around the bowl shows some nice grain patterns. There was lot of grime and oils ground into the finish around the bowl and the shank. The pipe was dirty but the contrasting dark and medium brown stains highlighted the grain of the briar. There was a thick cake in the bowl. The rim top had a thick coat of lava overflowing from the bowl. The edges looked good but a clean up would tell the story. The rim top was crowned. The stem is a vulcanite saddle shape that has the Barling cross on the top of the saddle. It was oxidized, calcified and had some tooth chatter and tooth marks on the top and underside ahead of the button. The pipe showed a lot of promise but it was a mess. Jeff took pictures of the pipe before he did his clean up work. He took photos of the rim top and bowl as well as the stem surfaces to show the condition of the well smoked pipe. You can see the cake in the bowl and the lava on the inner edge and rim top. The outer edge of the bowl is in good condition. It appears to have a nicely rounded crown on the rim top. The stem was lightly oxidized, calcified and had scratches, tooth chatter and marks on both sides ahead of the button. Jeff took some photos of the sides and heel of the bowl to give a sense of the sandblast finish and the grain around the bowl. It should clean up very well. He captured the stamping on the sides of the shank and stem. It reads as noted above and is clear and readable. He also took photos of the Barling cross on the top of the saddle stem. The stem also has a white acrylic spacer that fits between the shank end and the stem face. I like to do background research on the pipes I am working on. I did a quick search on the rebornpipes blog and found a blog written by Paresh that gives some great background information (https://rebornpipes.com/2019/09/16/a-fresh-lease-on-life-for-a-barling-t-v-f-911-made-in-denmark/). I quote from it below:

I had previously worked on a couple of Barling pipes from my inherited pipe collection; here are the links to both the write up,  https://rebornpipes.com/2019/03/26/a-simple-restoration-of-an-early-transition-era-barling-2639/, https://rebornpipes.com/2018/12/10/decking-out-my-grandfathers-battered-pre-transition-barling-1354/   and had researched this brand then. To refresh my memory, I revisited the write ups and also pipedia.org. Here is an interesting excerpt from pipedia.org (https://pipedia.org/wiki/Barling)

In the late 1970’s production of Barling pipes was shifted to Denmark where Eric Nording manufactured Barling pipes for Imperial. There may have been other factories, but as of this writing, none has been identified. Nording stated that he made approximately 100.000 pipes for Imperial.

Despite these attempts to diversify the line, Barling lost its market. These pipes just weren’t equivalent to the family era pipes. Finally, Imperial decided to close down the Barling operations entirely by 1980.

Paresh discerned from the above information that the pipe currently on his work table is from the period between late 1970’s to 1980 and most likely carved by master craftsman Eric Nording!! For me the fascinating thing is that the pipe I am working on is from the same master and the same carver.

Now it was time to look at it up close and personal. Jeff had removed the cake and the lava on the rim top. He had reamed the bowl with a PipNet Pipe Reamer and cleaned up the remnants with a Savinelli Fitsall Pipe Knife. He took the cake back to bare briar so we could check the walls for damage. He scrubbed the exterior of the bowl with Murphy’s Oil Soap and a tooth brush to remove the grime on the bowl and rim and was able to remove the lava and dirt. He cleaned out the interior of the bowl and shank with shank brushes, pipe cleaners, cotton swabs and alcohol until they came out clean. He cleaned the stem with Soft Scrub to remove the grime on the exterior. He cleaned out the airway with alcohol, cotton swabs and pipe cleaners. I took some photos of the pipe before I started my work on it today. I took a close up photo of the cleaned up rim top. The rim top and the inner edge look good. The bowl is clean and the walls are undamaged. The stem looks good with some tooth chatter and marks along the top and underside ahead of the button. The Barling Cross is faded with the cleaning.I took a photo of the stamping on the shank side. It is clear and readable as noted above. I took the stem off the pipe and took a photo. The thick shank billiard is an attractive looking pipe with nice lines. The taper stem shows tooth damage on the top and undersides of the stem. I started my work on the pipe by working over the rim top and the bowl and shank with a 320 grit sanding pad. I wiped the bowl down after sanding pad. The rim top began to take on a shine.I polished the rim top with micromesh sanding pads – dry sanding with 1500-12000 grit pads. I wiped the rim top down after each sanding pad with a damp cloth. It really took on a shine. I rubbed the bowl down with Before & After Restoration Balm. I worked it into the surface of the briar with my fingertips where it works to clean, restore and preserve the briar. I let it do its magic for 15 minutes then buffed it off with a cotton cloth. The pipe looks incredibly good at this point in the process. I set aside the bowl and turned my attention to the stem. I touched up the stamping on the topside of the saddle stem with white acrylic fingernail polish. I pointed it on with the applicator and scraped off the excess and lightly sanded it with a 1500 grit micromesh pad.I “painted” the surface of the stem with the flame of a lighter. I was able to raise all of the tooth marks. I sanded out the light remnants that remained with a folded piece of 220 grit sandpaper. Once finished I wiped it down with an Obsidian Oil impregnated cloth. It looked much better. I continued to polish the stem with micromesh sanding pads – wet sanding with 1500-12000 grit sanding pads. I wiped it down after each sanding pad with Obsidian Oil. I polished it further with Before & After Stem Polish – both Fine and Extra Fine. I gave it a final coat of Obsidian Oil and set it aside to absorb the oil. I am excited to finish this Made in Denmark Barling Make International 911 Brandy made by Eric Nording. I put the pipe back together and buffed it with Blue Diamond on the buffing wheel. I gave the bowl multiple coats of Conservator’s Wax and the stem multiple coats of carnauba wax. I buffed the pipe with a clean buffing pad to raise the shine and then by hand with a microfibre cloth to deepen it. It is fun to see what the polished bowl looks like with beautiful sandblast grain all around the bowl and shank and the smooth well grained crowned rim top. The polished grain on the pipe looks great with the black hard rubber stem. This Danish Barling Make International 911 Brandy is great looking and the pipe feels great in my hand. It is light and well balanced. Have a look at it with the photos below. The dimensions are Length: 6 inches, Height: 2 inches, Outside diameter of the bowl: 1 inch, Chamber diameter: ¾ of an inch. The weight of the pipe is 44 grams/1.55 ounces. It turned out to be a beautiful pipe. I will soon be putting it on the rebornpipes store in the Danish Pipemakers Section. If you are interested in adding it to your collection let me know. Remember we are the next in a long line of pipe men and women who will carry on the trust of our pipes until we pass them on to the next trustee. Thanks for your time reading this blog.

Reworking another newly acquired trade, a Pipe by Lee Limited Edition Dublin


Blog by Steve Laug

A month or so ago I received an email from a fellow in Japan who had some pipes he wanted to sell. He sent me a few and one of them was this interesting smooth finish Dublin. The pipe was clearly stamped on the left side and read Pipes by Lee [over] Limited Edition. On the right side it was stamped An Authentic [over] Imported Briar. The stamping was clear and readable. The bowl has been reamed and the pipe cleaned. The shank is very clean inside and the pipe smelled very clean. It was so clean that I don’t think the pipe had been smoked since the fellow in Japan picked it up. The rim top was clean though there was some scratches on the rim top and the inside edge of the rim showed damage on the right side. There was no damage to the outer edges. The pipe had been given a shiny top coat. The stem looked good. It was polished and there appeared to be a repair on the underside ahead of the button. There was probably a bite through that had been repaired and it was very well done. Overall, I am happy with it but I will need to remove the shiny varnish coat. I will need to polish the repair on the underside of the stem to bring the shine out. I took photos of the pipe before I started my work on it.   I took a photo of the rim top to show the condition of the bowl and the top. You can see clean bowl and marks on the rim top. The inner edge is slightly out of round. The stem looks very good with no tooth damage and no oxidation on the surface of the vulcanite. The repair on the underside of the stem is visible but is solid and very hard. It looks like an epoxy putty repair.I took photos to show the stamping on the sides of the shank. It is clear and readable as noted above. I took a photo of the stinger apparatus in the stem and the three gold stars on the top of the taper. I took the stem off and took a photo of the pipe to show its condition. I remembered that Aaron Henson had written about the restoration of a Pipes By Lee 3 Star Rhodesian he had restored in the past so I turned there first to read about it. I am including the link to the blog if you wish to check it out on your own. (https://rebornpipes.wordpress.com/wp-admin/post.php?post=37004&action=edit&classic-editor).

Aaron had included pic of the flyer to the left that gives a sense of the hierarchy of the brand. I know that even though the flyer says it goes up to 5 stars I have seen 7 star pipes in the past.

I reread Aaron’s blog and when I finished I turned to Pipedia for any additional information but did not find anything new. I have included the link in case some of you might want to check it out (https://pipedia.org/wiki/Lee).

I checked also on Pipephil’s site (http://pipephil.eu/logos/en/logo-l3.html). I have included a screen capture of the material below. I also included the information from the sidebar below the screen capture. It is helpful information.This brand was distributed by Stewart-Allen Co, Inc. NY. Grading (ascending): 1 to 5 stars. Early pipes have seven pointed brass stars, middle run have five points and later pipes are stamped with coloured gold stars. Lee seconds: Briar Lee , Gold Coast.

Now I had a pretty good idea of how the pipe was stamped and made. With that information I turned to work on the pipe itself. I started my work on the pipe by cleaning up the inner edge of the rim. I used a folded piece of 220 grit sandpaper to smooth out the damage on the front left side. I gave the edge a slight bevel to minimize the damage. It looked much better when finished. I polished the briar with micromesh sanding pads to remove the uneven coat of varnish or shellac on the briar. I used 1500-12000 grit sanding pads and wiped the bowl down with a damp cloth after each sanding pad. I worked some Before & After Restoration Balm into the finish of the bowl, rim top and shank with my fingertips. The product works to clean, enliven and protect the briar. I find that the balm really makes the briar come alive again. The contrasts in the layers of stain really made the grain stand out. I let the balm sit for 15 minutes and then buffed with a cotton cloth to raise the shine. The bowl really looks good at this point. I set the bowl aside and turned my attention to the stem. The stem looked quite good but as I noted above there was a rather large repair on the underside of the stem near the button. My guess is that there was a bite through that was repaired. The repair looked quite good and was solid. It looks like a two-part epoxy repair. It is solid and slightly lighter in colour than the stem. I sanded the repaired with 320-3500 grit sanding pads to polish that area. I wiped it down with a damp cloth after each pad. I applied some black CA glue to the top of the repair to darken it and in doing so found another repair on the topside – a hairline crack in the surface of the stem ahead of the button. I covered that with black CA glue at the same time. Once that cured I sanded it smooth with 220 grit sandpaper. I polished the stem with micromesh sanding pads -dry sanding with 1500-12000 grit pads. I wiped the stem down after each pad with Obsidian Oil. I finished this stage in the polishing with Before & After Fine and Extra Fine Polishing Compound to protect and deepen the shine. The repairs were less visible but still present. With the bowl and the stem finished I put the Lee Limited Edition 3 Star Dublin back together and buffed it on the wheel using Blue Diamond to give it a shine. I gave the bowl and the stem multiple coats of carnauba wax on the wheel. I buffed it with a clean buffing pad to raise the shine. I hand buffed it with a microfiber cloth to deepen the shine. It really is a great looking pipe. The dimensions of the pipe are – Length: 5 ½ inches, Height: 1 ¾ inches, Outside diameter of the bowl: 1 ¼ inches, Chamber diameter: ¾ of an inch. The weight of this pipe is 1.02 ounces /29 grams. This Pipes by Lee Limited Edition 3 Star Dublin is another great looking pipe. It is much more beautiful in person than these photos can capture. The repairs on the stem are solid and the pipe will be a great deal for someone. I will be putting it on the rebornpipes store in the American (US) Pipemakers Section soon. If you would like to add it to your collection let me know. This is another pipe that has the possibility of transporting the pipe man or woman back to a slower paced time in history where you can enjoy a respite. Thanks for walking through the restoration with me.

Bringing a Dunhill Tanshell 59 Billiard Back to Its Best


By Kenneth Lieblich

Dunhill is a name that inspires awe and warms the cockles of the hearts of many pipe smokers worldwide. Today, I am pleased to show the restoration of a wonderful tanshell briar. I acquired it in an auction last year. Other than that, I don’t know much of its provenance. Its colour and cragginess are very handsome, and I have no doubt that it was a much-loved pipe. I instinctively have a certain reverence for Dunhill pipes, and I am especially keen to restore this one so that the next pipe smoker can enjoy it. As I mentioned, this is a Dunhill Tanshell and the markings confirm this. It is a beautiful, classic billiard shape. Pleasingly, those markings are very clear and well-cut on the bottom of the shank. On the left-hand side is the model number, 59. Immediately to the right of this is Dunhill [over] Tanshell. Then, to the right of that, is Made in [over] England12. To the right of that is an encircled 4, followed by a T. Finally, the stem, of course, has the iconic white spot of Alfred Dunhill’s company. Here is a photo of Alfred, followed by the markings. Let’s have a closer look at what all of these markings mean. The model number 59 is one of the classic Dunhill shapes – that number first appeared all the way back in 1928. The page on Pipedia about Dunhill shapes says this:

The original skus/model numbers from the 1920’s until the early 1970’s stood for very specific shapes and bowls. For example, the codes 31, 34, 59, 111, 113, 117, 196, LB, LBS… were all different types of Billiard shaped pipes and there were about 50(!), such codes for the Billiard shape alone.Let’s have a closer look at what all of these markings mean. The model number 59 is one of the classic Dunhill shapes – that number first appeared all the way back in 1928. The page on Pipedia about Dunhill shapes says this:

The original skus/model numbers from the 1920’s until the early 1970’s stood for very specific shapes and bowls. For example, the codes 31, 34, 59, 111, 113, 117, 196, LB, LBS… were all different types of Billiard shaped pipes and there were about 50(!), such codes for the Billiard shape alone.Furthermore, John Loring’s fine book, The Dunhill Briar Pipe: The Patent Years and After, says this about the Tanshell:

The TanShell was Dunhill’s fourth finish and its first major post-war line addition. Introduced in 1951/1952 the TanShell was a naturally stained sandblasted pipe made exclusively from Sardinian briar through the 1960s. The TanShell apparently was not simply a light stained Shell but rather was also the product of “certain processes [unrevealed] not previously employed.” Initially, it appears that the pipe was to be named the Root Shell and a stamp to that effect was ordered and received by Dunhill in May 1951. Ultimately, however, the name TanShell was settled upon but the stamp for the TanShell name was not received by Dunhill until the beginning of December. Thus while the Tanshell was in production in 1951 it appears that most if not all TanShells made in that year did not enter into retail distribution until 1952 and were given a 1952 date code.The markings Made in [over] England12 give us an indication of when this pipe was manufactured. The number is the date suffix and provides us the information we need to figure out the date. I already knew the answer, but allow me to walk you through the process. I went to Pipephil’s Dunhill Dating Key (which you can find here) and I have reproduced (below) the two charts they use to date Dunhills. In the first image below, we are asked if our pipe has a date suffix. It does, so we follow the arrow and the chart asks if our pipe has a patent number. It does not, so we proceed. Then we are asked if our pipe reads Dunhill [over] London – again, it does not. As a result, we know that our pipe dates from after 1954.On to the second chart – and it is much more straightforward. The chart asks for the digits in our date suffix. In our case, it is 1 and an offset 2, so we know that the date of our pipe is the result of simple addition: 1960 + 1 = 1961 and the 2 identifies the date of sale for the Dunhill guarantee. Now we know that the year of manufacture is 1961! (thanks for the help Al). Is this your birth year? If so, have I got a pipe for you!Next, the encircled 4 and the capital T. This tells us about the size and finish of the pipe. Pipedia says:

The encircled group number indicates the size of the bowl (1, for example, is the smaller bowl). It is usually followed by a letter corresponding to the pipe finish. This number/letter code has been introduced about 1950 and was discontinued about 1976 replaced by a 4 or 5 digits code. They were reintroduced in March 2012, but only for commemorative versions.

In this case, the 4 indicates a medium/large size bowl and the T naturally refers to Tanshell.Finally, the white spot. Have you ever wondered about it? Well, very briefly, here is the origin of the famous white spot (from Pipedia):

In 1912, the famous white spot was introduced for very practical concerns. With straight pipes, customers had trouble knowing which way to insert the handmade vulcanite mouthpieces. So Alfred Dunhill ordered white spots to be placed on the upper side of the stem. This very practical solution would become a definitive trademark of Dunhill pipes. The “white spot” soon became known as a symbol of quality.

Now let’s get on with restoring this beautiful pipe!

This pipe was in generally good condition – nothing outstanding and no significant damage. As you can see, the stem had the usual wear-and-tear – some scratches, tooth dents, etc. There was some calcification, but not much oxidation. Meanwhile, the stummel was in lovely condition, but a bit dirty. The shank was dark and the bowl had lots of cake and lava. The sandblast looked rich and beautiful. I began by making an attempt at lifting some of those tooth marks. I “painted” the stem with the flame of a lighter – this can sometimes raise the vulcanite back into place. There was definitely progress, but I would need to repair the more significant dents.I wiped the stem with oil soap on some cotton pads. There was calcification there and I needed to remove it. Meanwhile, the stem was pretty dirty inside. I cleaned out the inside with various pipe cleaners and 99% isopropyl alcohol. There was quite a pile afterwards. I then wiped down the stem with cleanser to remove some surface oxidation. Once this process was done, the stem went for an overnight soak in the oxidation remover. As the name suggests, this liquid removes oxidation, but, more than anything, it helps draw oxidation to the surface of the vulcanite. This allows me to clean the oxidation off in a couple of ways: both by applying a mild abrasive cleaner to the surface, then by sanding the stem. The following day, I cleaned all of the de-oxidizing mess off with alcohol, pipe cleaners, et cetera. The oxidation had migrated to the surface and would be fairly straightforward to remove. I scrubbed with the cleanser again on some cotton pads to remove the leftover oxidation.Next step was to address the remaining tooth marks. I filled those dents with some black cyanoacrylate adhesive that is infused with carbon and rubber. This makes a better repair than regular CA glue, as it more closely mimics the original material. When the adhesive was cured, I used my needle files to remove the excess and bring it down to the level of the vulcanite.Then I used a set of nine Micromesh pads (1,500 through 12,000 grit) which gradually erased the ravages of time and brought out the stem’s lovely black lustre. For the last five pads, I also lightly coated the stem with Obsidian Pipe Stem Oil in between each scrubbing. At last, I set the finished stem aside. Off to work on the stummel! The outside looked very well cared-for. No notable damage and the blast maintained its great appeal. Alas, the rim had plenty of lava, but first things first. The bowl needed a thorough reaming, so I used the KleenReem to scrape off the built-up cake and I followed that with 220-grit sandpaper taped to a dowel to eliminate as much as possible. Generally, I prefer to sand the chamber down to bare briar. When restoring, it is important to ensure that there is no damage to the briar in the bowl, under the cake. I was pleased to see that the walls were sound.Next up, I needed to clean the shank and bowl thoroughly. I proceeded to use Q-tips, pipe cleaners, and 99% isopropyl alcohol. Holy moly – this was a dirtier pipe than I had initially anticipated. There was quite a pile of Q-tips and pipe cleaners left behind.Then, to further clean the inside of the pipe, I opted to “de-ghost” the pipe. I put some cotton balls in the bowl and in the shank, and then saturated them with 99% isopropyl alcohol. I let that sit overnight to exorcize any evil spirits (i.e. bad smells and oils) from the old pipe.Time to deal with that rim. I gently scraped as much debris as I could with a piece of machine metal. However, given the craggy blast, that only worked so well. I moved on to cotton rounds and some oil soap to clean the outside of the stummel and a toothbrush with oil soap for the lava on the rim of the pipe. This worked a treat. I followed that up by cleaning the insides with some Castile soap and tube brushes. At this point, I rubbed some Before & After Restoration Balm into the briar and left it to sit for 15 minutes or so. I brushed it with a horsehair brush and buffed it with a microfibre cloth. The balm does wonderful things to the wood, and I really like the sheen on the sandblast. Then it was off for a trip to the bench polisher. A few coats of conservator’s wax (from Lee Valley) were just what this pipe needed. Boy – that wax really makes this pipe pop! The lovely shine made the wood look absolutely beautiful. The sandblast looks fantastic and is ready to be enjoyed again by the next owner.

I thoroughly enjoyed bringing this Dunhill Tanshell 59 Billiard back to life and I am pleased to announce that this pipe is for sale! If you are interested in acquiring it for your collection, please have a look in the “British” pipe section of the store here on Steve’s website. You can also email me directly at kenneth@knightsofthepipe.com. The approximate dimensions of the Dunhill are as follows: length 5⅜ in. (137 mm); height 1⅞ in. (46 mm); bowl diameter 1¼ in. (33 mm); chamber diameter ⅔ in. (18 mm). The weight of the pipe is 1¼ oz. (36 g). I hope you enjoyed reading the story of this restoration as much as I enjoyed restoring it. If you are interested in more of my work, please follow me here on Steve’s website or send me an email. Thank you very much for reading and, as always, I welcome and encourage your comments.

Restoring a Gorgeous Danish Freehand Canted Egg


by Kenneth Lieblich

Wow – this is one breathtaking pipe. I acquired this beauty from a kind lady in the Vancouver area who sold me her late husband’s pipes. He had good and modest taste, and I immediately took a liking to this pipe. The combination of smooth and sandblasted briar is very attractive and the blast itself is really craggy and wonderful. The restoration was good fun too. This is a Royal Guard 535M freehand canted egg – or, at least, that’s what I’m going to call it. I learned from previous research that “Royal Guard” is a Stanwell sub-brand (in this case). I believe there was also a full Stanwell line called Royal Guard too, but that’s a topic for another time. It’s all a bit confusing, but this pipe is definitely of the sub-brand variety. As is typical of Stanwell sub-brands, the quality is immaculate and it’s not at all obvious why this wasn’t a full-blown Stanwell. This canted egg is a very attractive shape and it really makes an impression. It has beautiful, partially-sandblasted briar from the bowl and down the shank to the vulcanite shank extension. It also has a lovely flared push stem. The underside of the shank reads 535M [over] Royal Guard [over] Made in Denmark and, on the stem, the letters RG, indicating the Royal Guard make. Both Pipedia and Pipephil list Royal Guard as being a Stanwell sub-brand or second (and not much else), as per the photo below.I did some searching for that “535M” shape number, but came up empty. Stanwell does not have a 535 shape number. Sometimes a digit can be added to a shape number, but the Stanwell 35 shape does not correspond to this pipe at all. I learned that some of the Stanwell sub-brands used the Stanwell shape numbers and some used their own. Apparently, Royal Guard uses their own. Meanwhile, Pipedia has a good amount of information on the Stanwell brand and its history. I certainly recommend looking it over: https://pipedia.org/wiki/Stanwell.

Anyway, this really is a good-looking pipe. No major issues to resolve – just a few minor ones. The stem was a bit dirty, and had some small dents. There was also some oxidation on the vulcanite. The rim on the stummel was a bit blackened, but not seriously. The insides were dirty and would need some work to clean out. The stem was first on my list. I wiped down the outside of the stem with oil soap on some cotton pads. I also took a BIC lighter and ‘painted’ the stem with its flame in order to lift the bite marks and dents. This worked reasonably well, but I would still need to sort out the dents. Then, I cleaned out the insides of the stem with pipe cleaners and isopropyl alcohol. Once this process was done, I used some cleanser and cotton pads to wipe down the stem before throwing it in the oxidation remover overnight. The following day, I cleaned all of the de-oxidizing mess and again scrubbed with the cleanser on some cotton pads to remove the leftover oxidation. This worked well. I used some nail polish to restore the letters “RG” on the stem. I painted the area carefully and let it fully set before proceeding.Before I moved on to the Micromesh pads, I built up the dents on the stem with black, carbon-and-rubber-infused cyanoacrylate adhesive and let them fully cure.I sanded the adhesive down with my needle files to meld seamlessly into the stem. I then used all nine Micromesh pads (1,500 through 12,000 grit) to bring out the lovely black lustre on the stem. I also used pipe stem oil in between each pad scrubbing (from 3600 on up). I then proceeded to clean out the insides of the shank with cotton swabs, pipe cleaners, and isopropyl alcohol. There was some filth inside this stummel, but it wasn’t too bad. I followed that up by cleaning the insides with some dish soap and tube brushes.I decided to de-ghost the pipe, so I thrust cotton balls into the bowl and the shank and saturated them with 99% isopropyl alcohol. I let the stummel sit overnight. This caused any remaining oils, tars and smells to leach out into the cotton. The bowl was nice and clean after this.At this point, I turned my attention to the vulcanite shank extension. This, like the stem, needed to be cleaned and deoxidized. However, I did not want to soak the whole shank in the deox fluid. Similarly, I couldn’t risk getting any of the powerful cleanser on the beautiful briar. So, I took some clear hockey tape and carefully, precisely masked the briar with it, as protection. I then proceeded to clean the vulcanite safely with the cleanser. I’m glad I did – boy, was it dirty!I then moved on to cleaning the outside of the stummel with oil soap, some cotton pads, and a toothbrush. That removed any latent dirt hidden in the lovely recesses of the sandblast.As I mentioned earlier, there were some very minor burn marks on the rim of the stummel that also needed to be addressed. Fortunately, I was able to resolve this by gently sanding the interior rim edge to remove any remnants that remained. This worked perfectly and didn’t affect the pipe at all. Since this was a partial sandblast, I only needed to use the Micromesh pads on the smooth sections near the rim and shank. Of course, I also sanded the vulcanite shank extension and, like the stem, I used pipe stem oil on it. A light application of Before & After Restoration Balm brought out the best in the stummel. The balm does wonderful things to the wood and really emphasizes how beautiful this pipe is. I’m going to be sorry to see it go.


I took the pipe to my bench polisher and gave it a thorough going-over with my buffing compound and carnauba wax. This pipe was a delight from the start and its beauty only increased through the restoration process. This Royal Guard 535M freehand canted egg is elegant, light, and incredibly comfortable to hold. Finally, I am pleased to announce that this pipe is for sale! If you are interested in acquiring it for your collection, please have a look in the ‘Danish’ pipe section of the store here on Steve’s website. You can also email me directly at kenneth@knightsofthepipe.com. The approximate dimensions of the pipe are as follows: length 5½ in. (142 mm); height 2⅛ in. (54 mm); bowl diameter 1½ in. (39 mm); chamber diameter ¾ in. (19 mm). The weight of the pipe is 1⅜ oz. (41 g). I hope you enjoyed reading the story of this restoration as much as I enjoyed restoring it. If you are interested in more of my work, please follow me here on Steve’s website or send me an email. Thank you very much for reading and, as always, I welcome and encourage your comments.

New Life for a GBD Speciale Standard London England 788 D Bent Apple


By Steve Laug

The next pipe on the worktable is an English made oval shank bent Apple with a classic brown finish. It is a combination reddish brown stains. The pipe came to us from a lot that we bought from a Facebook auction from Beach Lake, Pennsylvania, USA on 01/29/2024. The pipe is very dirty with a thick cake in the bowl and lava on the rim top. The rim edge looks good but it was hard to know what was under the lava coat on the top and edges. It is stamped on the top and the underside of the shank. On the topside it reads GBD in an oval [over] Speciale [over] Standard. On the underside it is stamped London, England [over] the shape number 788 followed by the letter D. The finish was dusty and there were oils and grime ground into the finish around the sides of the bowl. The stem is a vulcanite saddle stem with grime on the surface and tooth chatter and deep marks ahead of the button on both sides. There is an inlaid GBD oval medallion on the top of the saddle stem. Jeff took some photos of the pipe before he started his cleanup work. Jeff took a photo of the bowl and rim top to show the condition of the pipe. There was a thick cake in the bowl and a build up of lava on the smooth rim top. It is also built up on the inner edge of the bowl. The stem photos show the grime and the deep tooth marks on both sides ahead of the button. He took photos of the sides and the heel of the bowl to show the finish on the pipe. It is a unique stain on it that really shows the grain around the bowl sides. He took two photos to capture the stamping on the sides of the shank. It is clear and readable as noted aboveI turned to PipePhil’s site (http://www.pipephil.eu/logos/en/logo-gbd.html) to see what I could find. The site had nothing particular on the GBD Speciale Standard line of pipes.

I then turned to Pipedia (https://pipedia.org/wiki/GBD) to see if there was info the brand. It is a great read in terms of history but there was nothing giving details on a GBD Xtra Straight Grain.

The claims after the 1st World War demanded further distinctions. First of all was the London Made, which became the Standard London Made, followed by the New Era– in 1931 the top model asking 12½ Shilling. The Pedigree, although sketched around 1926, was not produced until the later 1930s. The New Standard was introduced in order to give the popular Standard of the 20s a higher rank in value. The Prehistoric, a deeply sandblasted black pipe, that still carried the small GBD Xtra stamp, was entirely new and unusual.

The French GBDs more or less followed the same developments, although Xtra and Speciale very longly used there. In the late 1920s a GBD with a metal filter system was introduced under the name Extra Dry. Also, from Paris came another important new feature: the introduction of the inserted metal plate with the GBD initials on the stems. That insert added a further “touch of class” to the pipes and in London it was attached immediately.

From that small note I knew that I was working on a post WW1 Pipe that carried the GBD Speciale Standard stamp.

I then followed a link at the end of the article to another article on Pipedia about model information (https://pipedia.org/wiki/GBD_Model_Information). There I found a note to the Speciale stamp that stated Production in France.

Further on in the thread on the Speciale pipe I found this response by snagstangl that reads as follows:

I was re reading a Jacques Cole article concerning GBDs titled “Story of a Pipe Brand” it had this to say about this topic:

“We have seen that early Briar GBDs were made in only one, later two qualities and the need to mark the difference did not arise. There were few finishes but towards the end of the 19th century demand was changing, for instance the UK had a “penchant” for the darker finishes. Qualities were therefore sub-divided and we see the introduction of the GBD XTRA (note the spelling). The GBD Speciales were as the name implied, special models, finishes and fittings. GBD XTRAs were the cream, being mostly straight grains. The “ordinary* quality was simply
stamped GBD. Demand after the First World War called for further identification starting with GBD ‘London Made* which became ‘Standard London Made*, followed by GBD “New Era’, top of the range in 1931 at 12/6d! GBD ‘Pedigree’, although first thought of around 1926, was well established in the late 1930s. GBD “New Standard’ was created to give a boost to the “Standards’ of the 1920s and a newly introduced sandblast was called GBD ‘Prehistoric’, still bearing a small GBD ‘Xtra* stamp. French made GBDs followed more or less the same ideas, still however using ‘Xtra’ and ‘Speciale’ while in the late ’20s a metal system GBD was introduced under the name GBD ‘Extra Dry*. The 1920s also saw an important development with the introduction of the metal GBD inlay on mouthpieces which gave the pipes that extra ‘touch of class’. This inlay has been used on GBDs for nearly 60 years.”

That was followed by a response from osiris01:

I started with either this text or one using it as source and it does explain well the reason for creating, first the Xtras and Speciales, and later, the other graded lines like New Era, Pedigree etc. The problem is that the Xtra and Speciale were discontinued in 1937/8 (Pipedia et al) because the new lines provided a more refined grading system. And yet, the Xtra was listed in the catalogs until 1950.

My guess is that the French factory continued with the Xtra, for a reason unknown to me. The only evidence I have of this is a badly translated sentence from Pipedia that describes the process of creating additional lines. It reads “The French GBDs more or less followed the same developments, although Xtra and Speciale very longly used there.” What ‘Longly used there’ means I don’t know, but somewhere was still making them, and if you translate ‘longly’ as ‘longer’, it does imply that they continued making them for a longer period. It’s a far from perfect explanation but, as I said, they were still being made somewhere and it does imply that the French factory were responsible. However, they were different to the Xtras made in the 20s/30s since the later ones had a chamfered rim, different stems etc.

However, reading you text again, I wonder if the it is hinting at a COM. “Demand after the First World War called for further identification starting with GBD ‘London Made* which became ‘Standard London Made*,”. It doesn’t say that a COM was not used before then (that would be too easy), but you wouldn’t stamp a pipe “Xtra, London Made, London Made” or similar.

I just don’t have enough evidence, reference points, old models to compare against etc. Even describing it as an educated guess is still stretching it a bit. The best guess, perhaps.

However, what I do know is that the 1930s Xtras were fitted with a specific stem with an unusual button called the ‘curved wafer tip of comfort’ (just rolls off the tongue). The following images shows the detail from a 1938 catalogue and the button on my pipe, and to my eye, they are the same. Not in any way conclusive, but it’s the best I’ve been able to come up with.

Now I knew that I was dealing with a French made GBD Speciale Standard created in the 1950s.

Jeff reamed it with a PipNet pipe reamer and cleaned up the reaming with a Savinelli Fitsall Pipe Knife. He scrubbed out the internals of the shank and stem with alcohol, pipe cleaners and cotton swabs until the pipe was clean. He scrubbed the exterior of the bowl with Murphy’s Oil Soap and a tooth brush to remove the grime and grit on the briar and the lava on the rim top. The finish on the bowl looked really good when I got it. The rim top and edges looked very good. He soaked the twin bore stem in Briarville’s Pipe Stem Deoxidizer bath to remove the oxidation. The stem looked better and the deep tooth marks and chatter on the surface were also visible. When the pipe arrived here in Vancouver for the second stop of its restoration tour it looked much better than when he found it. I took photos of the pipe before I started my work on it.  I took photos of the condition of the rim top and stem before I started working. The rim top looks very good and the bowl is spotless. The stem is much better but still shows some oxidation and tooth chatter and deep marks on both sides near the button. I took photos of the stamping on the sides of the shank. The stamping was clear and readable as noted above. I took the bowl and stem apart and took a photo of the pipe to show the look of the pipe. Now it was my turn to work on the pipe. The bowl was in very good condition so I polished the briar with micromesh sanding pads – dry sanding with 1500-12000 grit pads. I wiped the bowl down after each pad with a damp cloth to remove the sanding dust. I worked some Before & After Restoration Balm into the finish of the bowl, rim top and shank with my fingertips to clean, enliven and protect it. I find that the balm really makes the briar come alive again. The contrasts in the layers of stain really made the grain stand out. I let the balm sit for 15 minutes and then buffed with a cotton cloth to raise the shine. The bowl really looks good at this point. I set aside the bowl and turned my attention to the stem. I “painted” the tooth marks on the surface of the stem and was able to lift them partially. I cleaned out the tooth marks with alcohol and q-tip then filled in the ones that remained with some rubberized, black CA glue. Once the glue cured I flattened out the repairs and recut the button edge with small files to start the process of blending them into the surface of the vulcanite. I sanded the stem with 320-3500 grit sanding pads to further blend in the repairs. I wiped the stem down after each pad with an Obsidian Oil saturated cloth to remove the grime and protect the stem. I polished the stem with micromesh sanding pads – wet sanding it with 1500-12000 grit pads. I polished it further with Before & After Pipe Stem Polish – both fine and extra fine. I wiped it down again with some Obsidian Oil and let it sit and dry. I always look forward to the moment when all the pieces are put back together. The pipe makes a final trip to the buffing wheel and is met first with Blue Diamond polish on the buffing wheel. That is followed by multiple coats of carnauba wax over the whole pipe. Then I do a step that not everyone does but I learned from one of the old pipe men who no longer with us, I buff the pipe with a clean buffing pad to raise the shine. Finish my buffing by hand with a microfiber cloth to deepen the shine. It is fun to see what the polished bowl looks like with black vulcanite stem. This richly stained GBD Speciale Standard 788 Bent Apple is light weight and ready for you to load up a tobacco of preference and enjoy. Have a look at it in the photos below. The dimensions are Length: 5 ½ inches, Height: 1 ½ inches, Outside diameter of the bowl: 1 ¼ inches, Chamber diameter: ¾ of an inch. The weight of the pipe is 48 grams/1.69 ounces. This is one that will go on the British Pipemakers Section of the rebornpipes online store shortly. Let me know if you are interested in adding it to your rack. Thanks to each of you who are reading this blog. Remember we are not pipe owners; we are pipemen and women who hold our pipes in trust until they pass on into the trust of the next generation.

A Nice Break after a few complicated ones – a Comoy’s Classic 184 Bent Globe


Blog by Steve Laug

The next pipe on the worktable is an English made Bent Globe with a classic brown finish. It is a combination dark and medium brown stains. The pipe came to us from a lot that we bought from an estate in Spring Branch, Texas, USA on 02/29/2024. The pipe is very dirty with a thick cake in the bowl and lava on the rim top. The rim edge looks good but it was hard to know what was under the lava coat on the top and edges. It is stamped on the sides of the shank. On the left side it reads Comoy’s [over] Classic. On the right side it is stamped with the shape number 184. Next to the shank/stem junction it has a circular COM stamp that reads Made London in a circle around “In” in the centre [over] England. The finish was dusty and there were oils and grime ground into the finish around the sides of the bowl. The stem is acrylic with grime on the surface and tooth chatter and marks ahead of the button on both sides. The is a single stamped C on the left side of the taper stem. Jeff took some photos of the pipe before he started his cleanup work. Jeff took a photo of the bowl and rim top to show the condition of the pipe. There was a thick cake in the bowl and a build up of lava on the smooth rim top. It is also built up on the inner edge of the bowl. The stem photos show the grime and light tooth marks on both sides ahead of the button. He took photos of the sides and the heel of the bowl to show the finish on the pipe. It is a unique stain on it that really shows the grain around the bowl sides. He took two photos to capture the stamping on the sides of the shank. It is clear and readable as noted above. I looked on both Pipedia and Pipephil’s sites for information on the Comoy’s Classic Line. Neither site had any information about that particular stamping. The name stamp obviously remains a bit of a mystery. The COM stamp on the shank was a Comoy’s style stamp as noted above. I would need to move ahead and do some work on the shape number to see if what I could learn of that.

I turned to Pipedia’s Comoy’s shape chart and sure enough the 184 shape was a Comoy’s shape. I have included the link (https://pipedia.org/wiki/Comoy%27s_Shape_Number_Chart). I did a screen capture of the section on the 184 shape. The shape is a Medium sized half bent pipe that was called a GLOBE.I now knew that the pipe I was working on was made by Comoy’s (thanks to the shape number and the COM stamp on the shank). It was a beauty for sure and one that would only become more beautiful as it was restored.

I really enjoy working on classic shaped pipes so I was glad to be working on this one. Jeff had reamed it with a PipNet pipe reamer and cleaned up the reaming with a Savinelli Fitsall Pipe Knife. He scrubbed out the internals with alcohol, pipe cleaners and cotton swabs until the pipe was clean. He scrubbed the exterior of the bowl with Murphy’s Oil Soap and a tooth brush to remove the grime and grit on the briar and the lava on the rim top. The finish looks better but there is still some darkening on the rim top and edges of the bowl. Jeff scrubbed the stem with Soft Scrub and soaked it in Before & After Deoxidizer to remove the oxidation on the vulcanite. When the pipe arrived here in Vancouver for the second stop of its restoration tour it looked a lot better. I took photos before I started my part of the work. I took some close up photos of the rim top and the condition of the bowl. I also took photos of the top and the underside of the stem.I took photos of the stamping on the top and underside of the shank to show the condition after the cleanup. This stamping is clearer than the photos show. I removed the stem from the shank and took a photo of the parts of the pipe to show the overall look of the pipe. I polished the briar with micromesh sanding pads – dry sanding with 1500-12000 grit pads. I wiped the bowl down after each pad with a damp cloth to remove the sanding dust. I rubbed the bowl down with Before & After Restoration Balm.  I worked it into the finish of the bowl, rim top and shank with my fingertips to clean, enliven and protect it. I find that the balm really makes the briar come alive again. The contrasts in the layers of stain made the grain stand out. I let the balm sit for 15 minutes and then buffed with a cotton cloth to raise the shine. I set aside the bowl and turned my attention to the stem. I sanded out the bite marks on both sides ahead of the button with a folded piece of 220 grit sandpaper remove the damage.I polished the stem with micromesh sanding pads – dry sanding with 1500-12000 grit sanding pads. I wiped it down after each sanding pad with a cloth containing some Obsidian Oil. I finished polishing it with Before & After Pipe Stem Polish – both Fine and Extra Fine and buffed it off with a cotton cloth. This Comoy’s Classic Made in London 184 Bent Globe is a great looking pipe now that it has been restored. The shape is elegant and flowing with a taper acrylic stem. I put the stem on the bowl and carefully buffed the pipe with Blue Diamond on the buffing wheel using a light touch on the briar. I gave the bowl and the stem multiple coats of carnauba wax on the buffing wheel and followed that by buffing the entire pipe with a clean buffing pad. I hand buffed the pipe with a microfiber cloth to deepen the shine. The finished Comoy’s Classic 184 Bent Globe fits nicely in the hand and feels great. Give the finished pipe a look in the photos below. The dimensions of the pipe are Length: 5 inches, Height: 1 ¾ inches, Outside diameter of the bowl: 1 inch, Chamber diameter: ¾ of an inch. The weight of the pipe is 1.45 ounces/41 grams. I will be putting it on the British Pipe Makers Section of the rebornpipes store shortly. If you are interested in adding this pipe to your collection send me a message or an email. Thanks for reading this blog and my reflections on the pipe while I worked on it.