Blog by Steve Laug
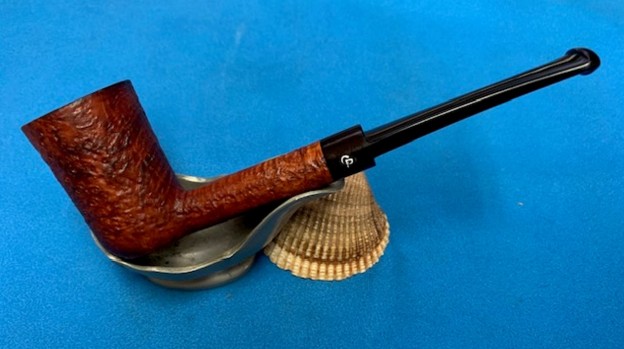
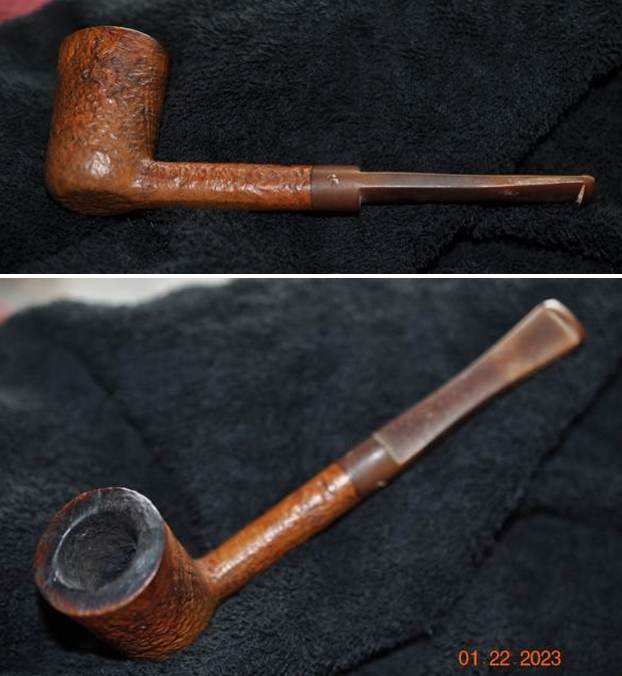
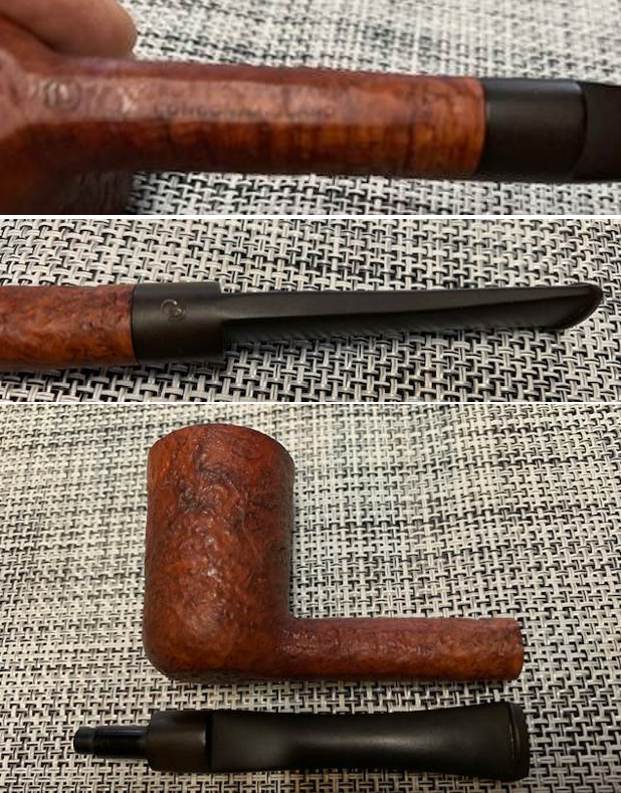
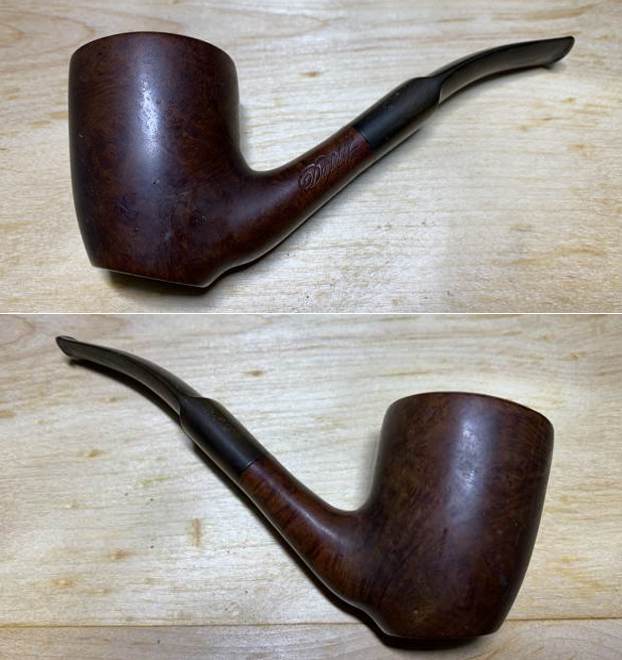
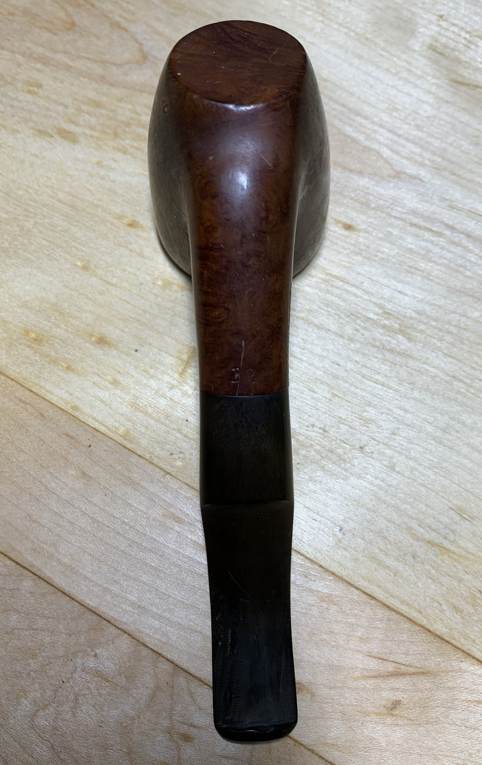
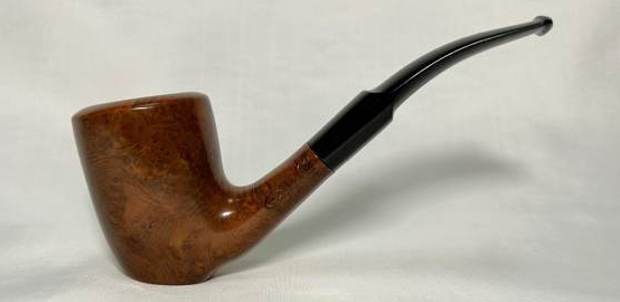
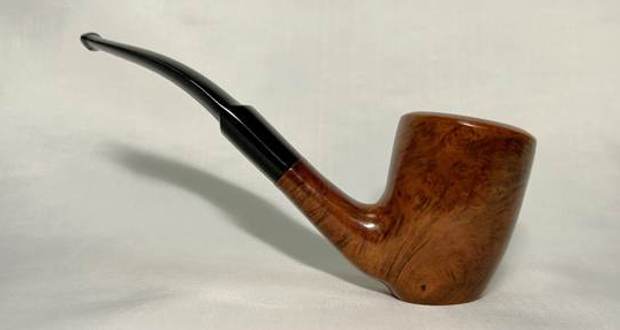
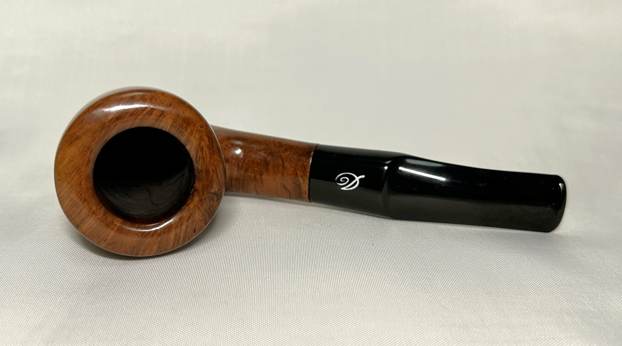
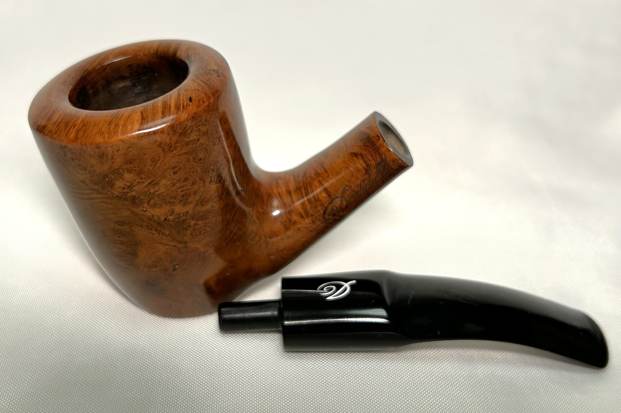
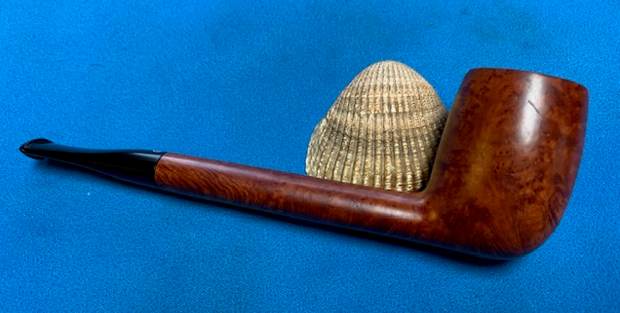
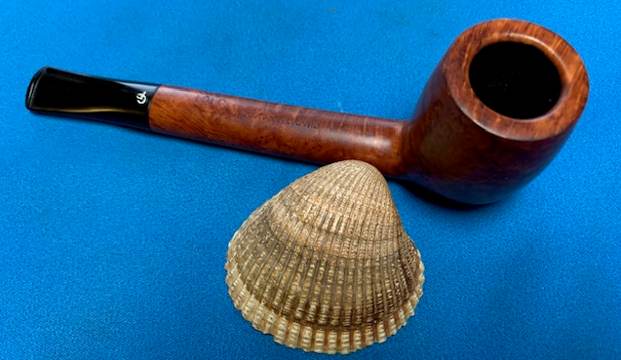
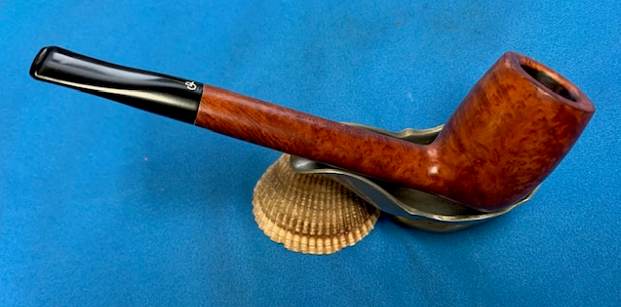
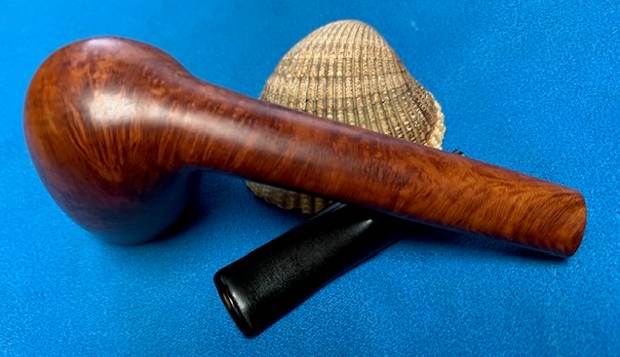
The next pipe on the table is a nice looking smooth Canadian with a vulcanite taper stem. We picked it up on 09/18/2020 from a seller in Los Angeles, California, USA. The stamping on the topside of the shank read Charatan’s Make [over] London England [over] Special. That is followed by the stamping of the shape number 0104. The black vulcanite taper stem stamped with a CP on the topside. The pipe has a medium brown finish that shows the grain on the bowl sides and shank. It is light weight and comfortable pipe to hold. Jeff sent me the following photos of the pipe to show the condition it was in before he worked on it. This is what I saw when I looked over the pipe.
- The finish had thick grime ground into briar around the sides. The stain is dull and the grain patterns though visible under the grime are obscured around the bowl sides and shank. There are oil stains from the previous smokers hands around the sides of the bowl.
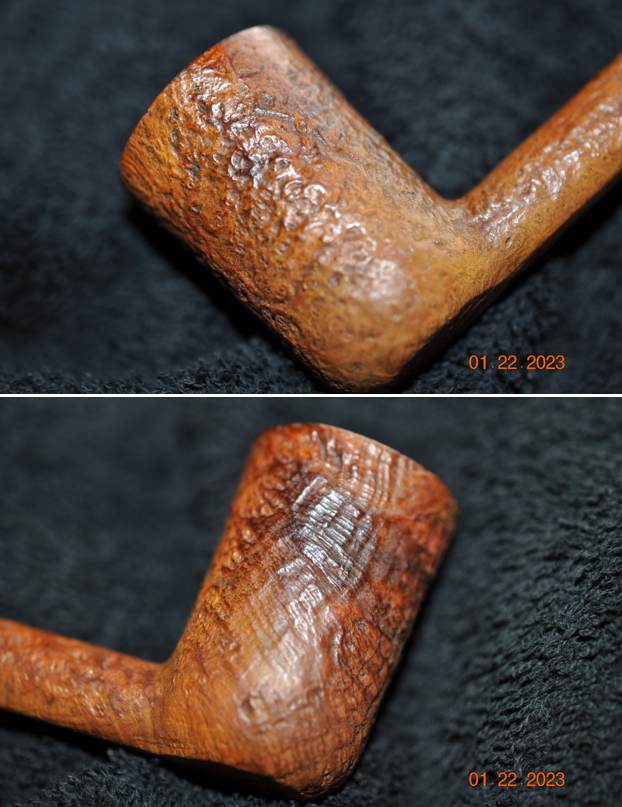
- The rim top was very dirty with a heavy lava coat on it. It is heavier on the back side. The inner edge of the bowl is hard to see under the thick build up of cake that has overflown the bowl top.
- There was a thick cake in the bowl. The bowl itself was very dark and dirty. Once the bowl was cleaned up we could confirm the condition of the bowl walls.
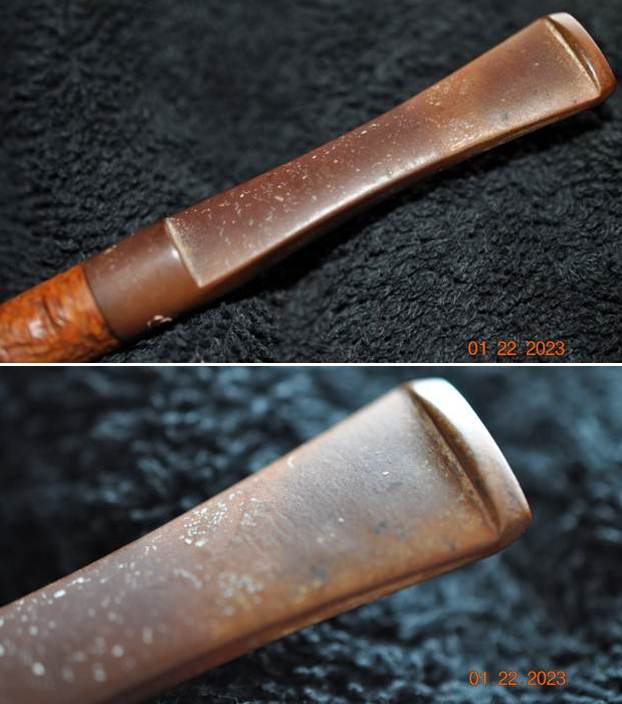
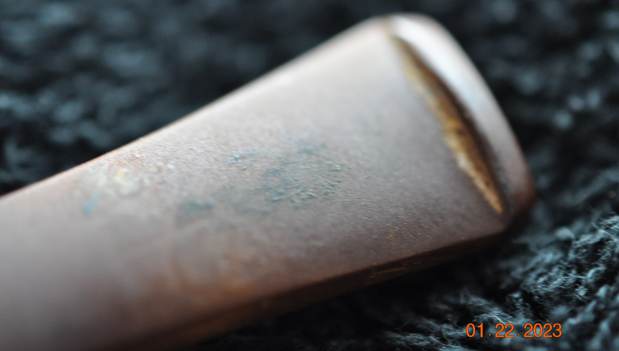
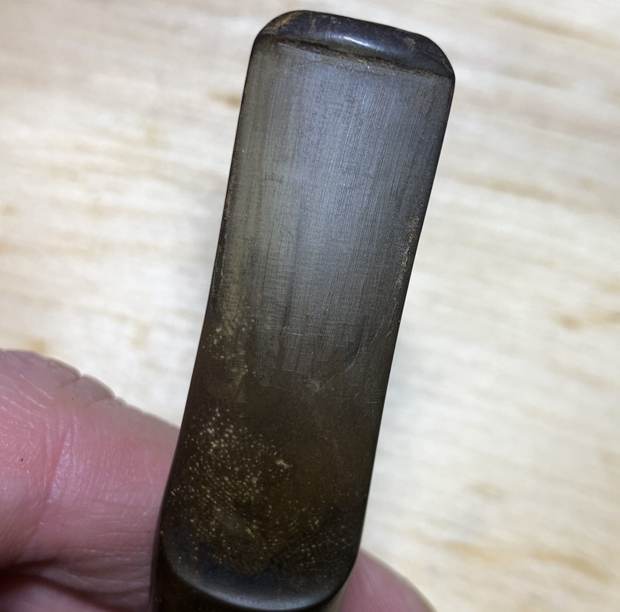
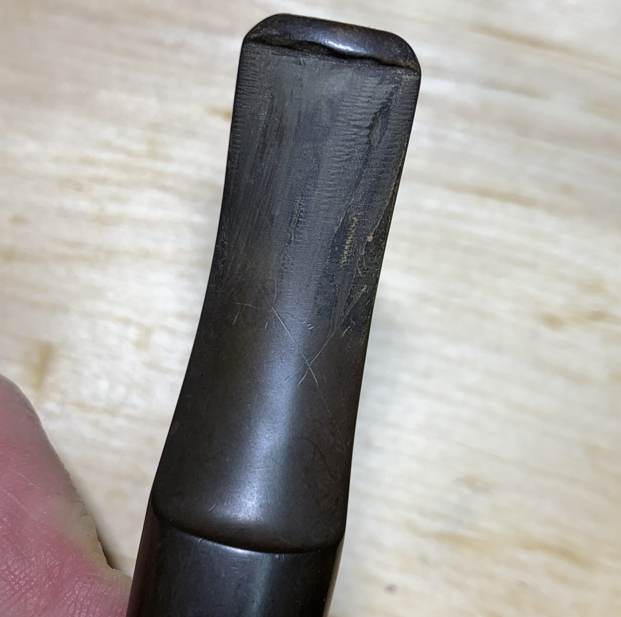
- The vulcanite stem was filthy, oxidized, calcified and had tooth marks and chatter on both sides and on the button surface.
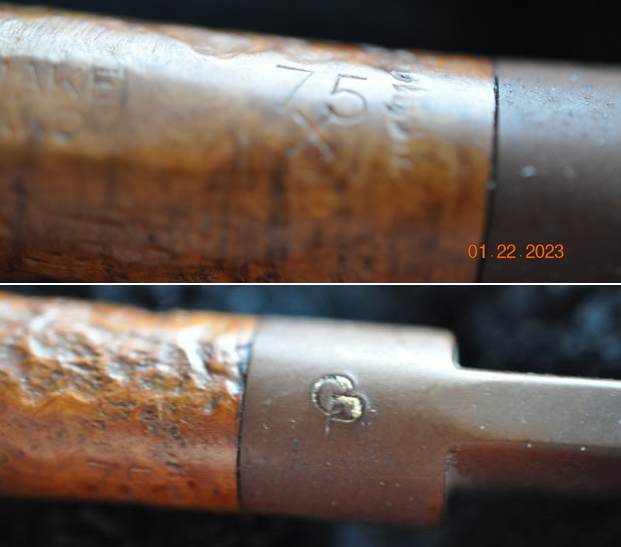
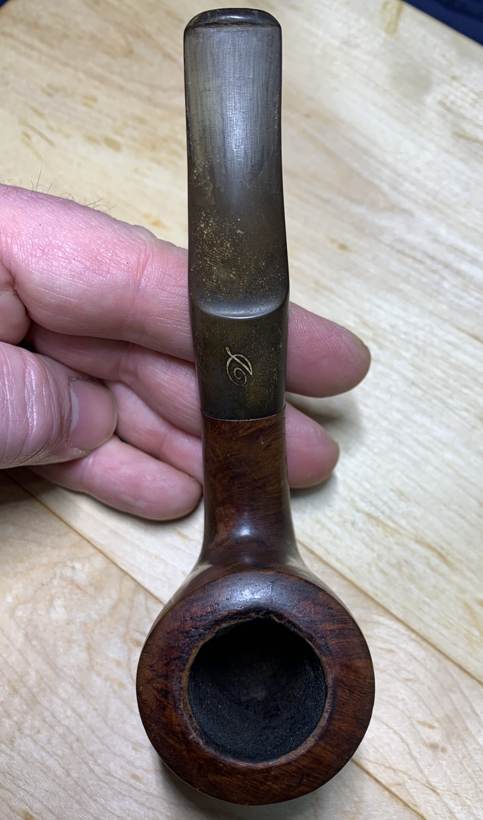
- There is a Charatan CP logo stamped on the topside of the stem. It is faint but readable.
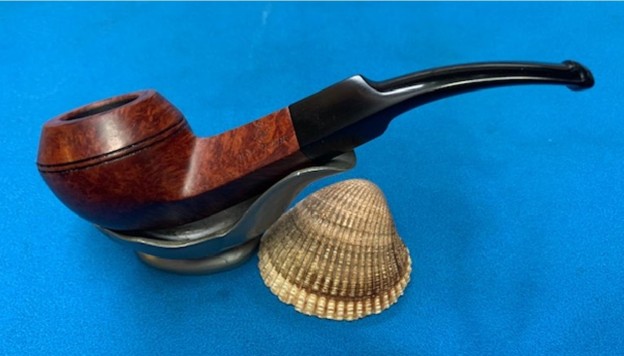
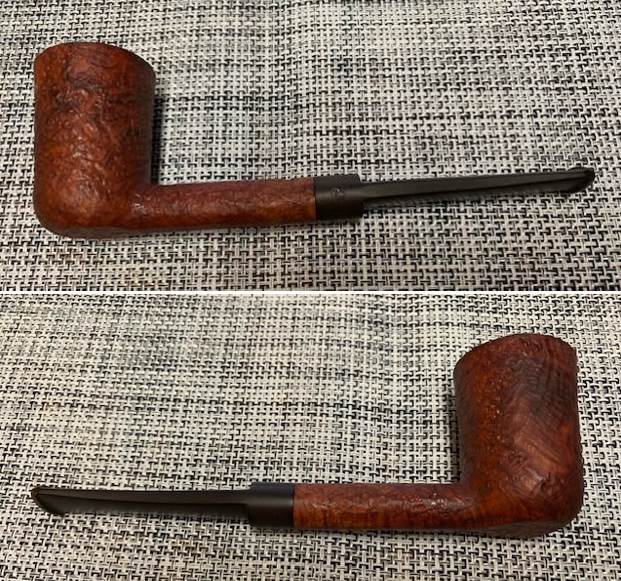
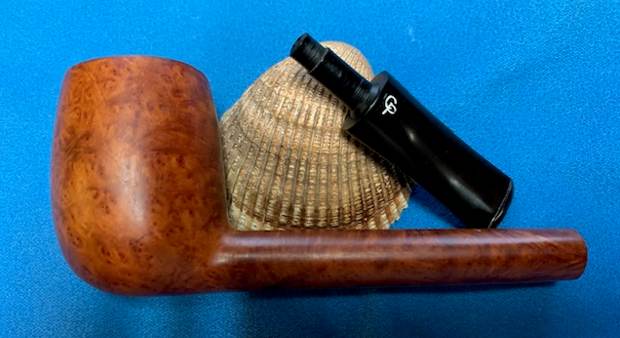
To summarize what I saw – this Charatan’s Make Special 0104 Canadian is a well made pipe. The bowl and stem are very dirty which says to me that the pipe was once again someone’s favourite pipe. The look and feel of the pipe in the hand is great. It should clean up very well. Here are photos of the pipe taken before Jeff started the clean up. 
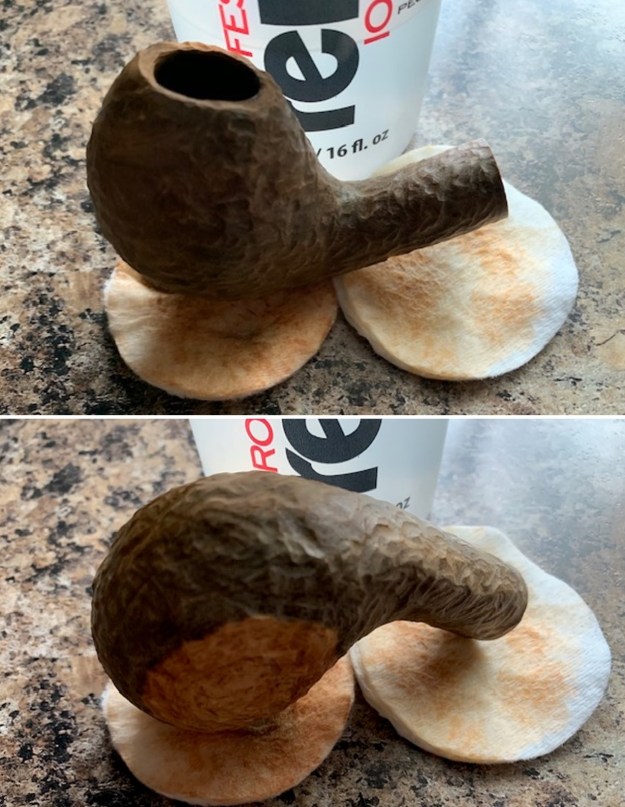
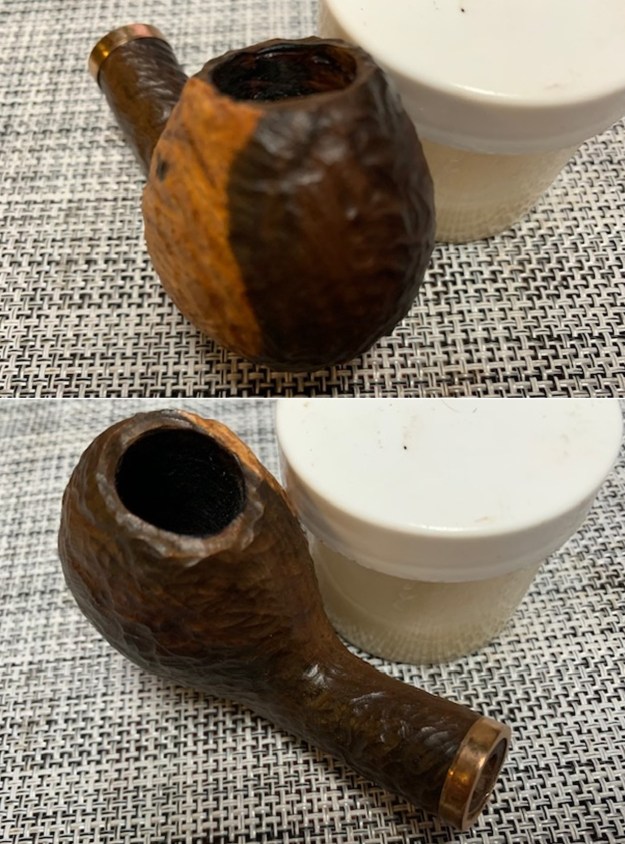
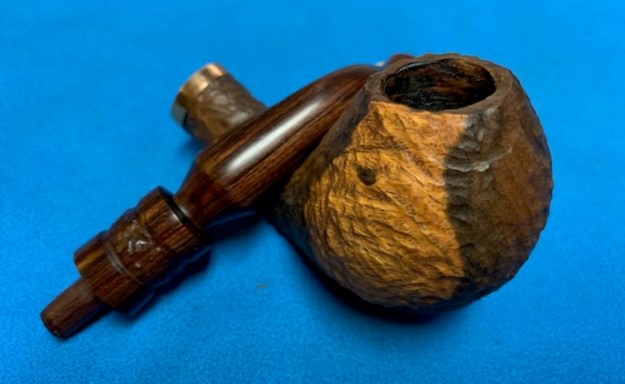
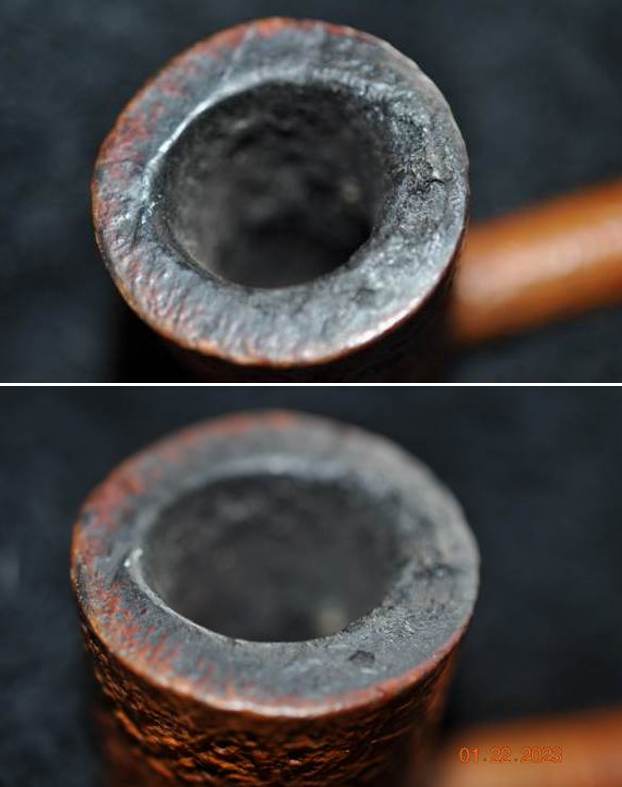
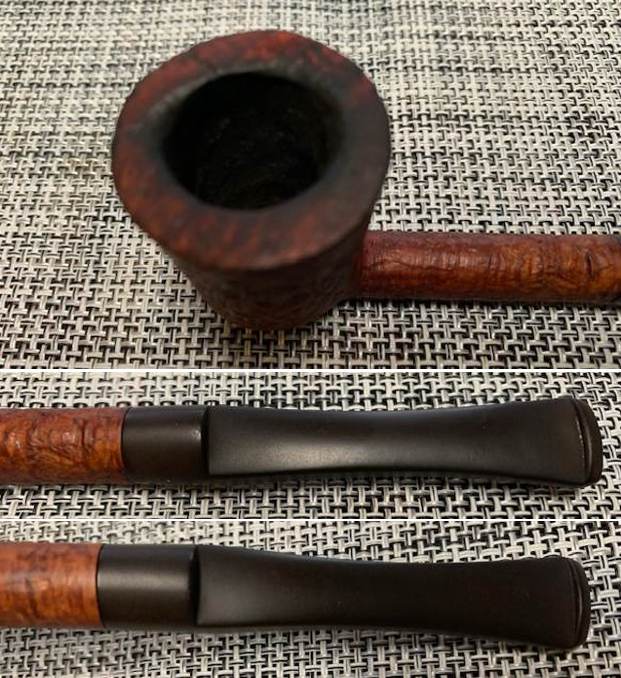
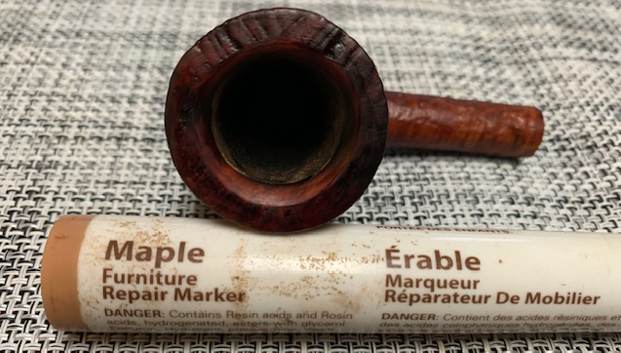
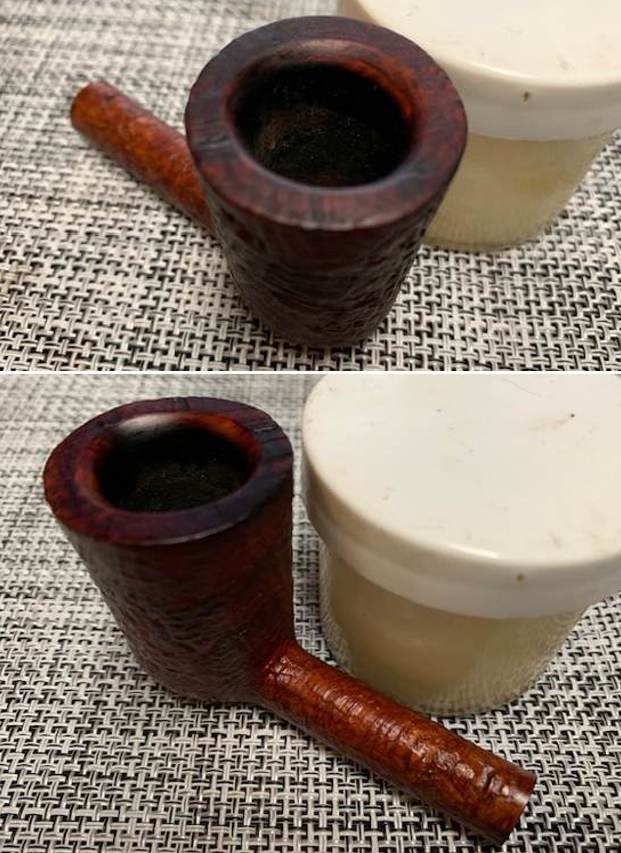
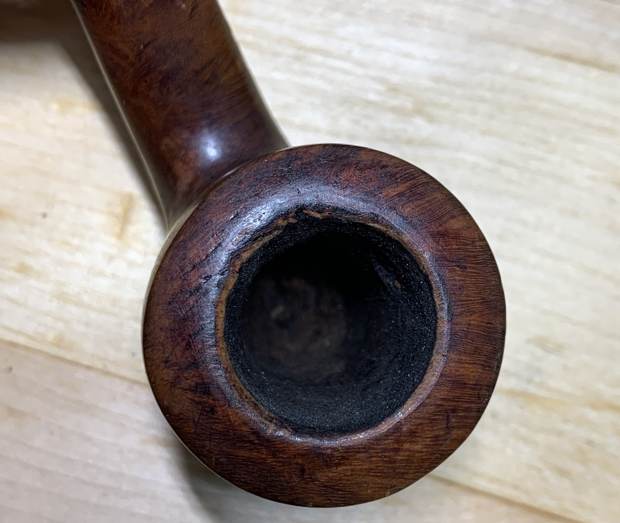
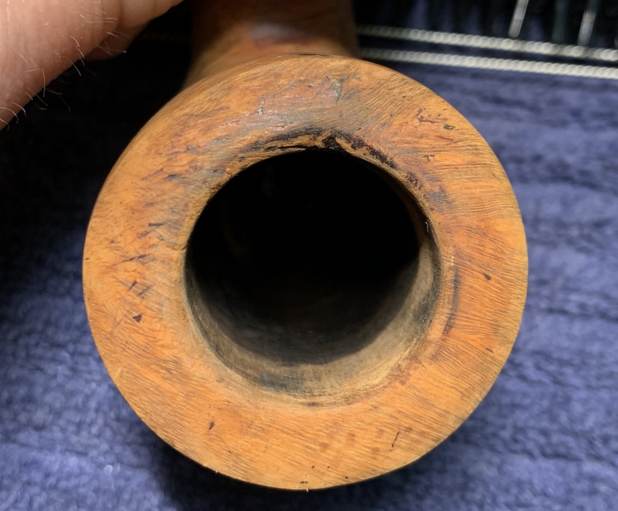
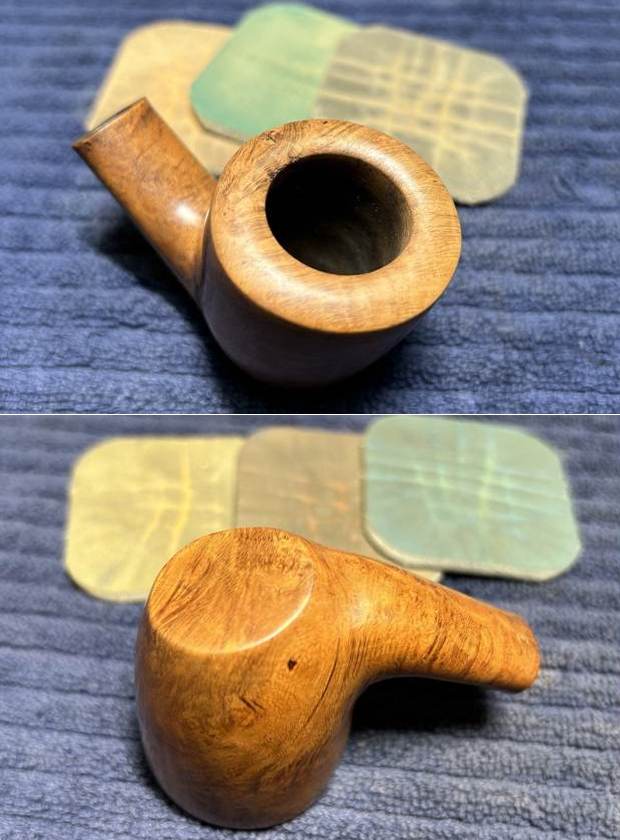
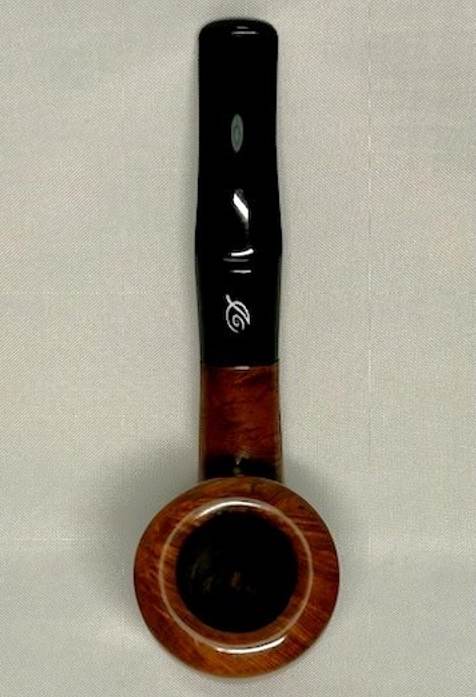
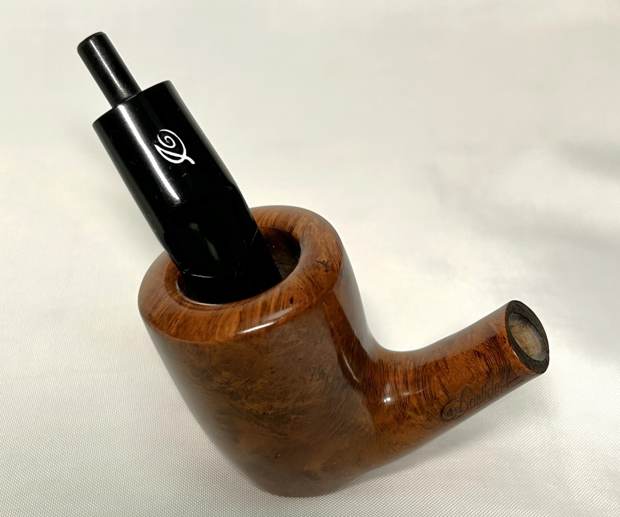
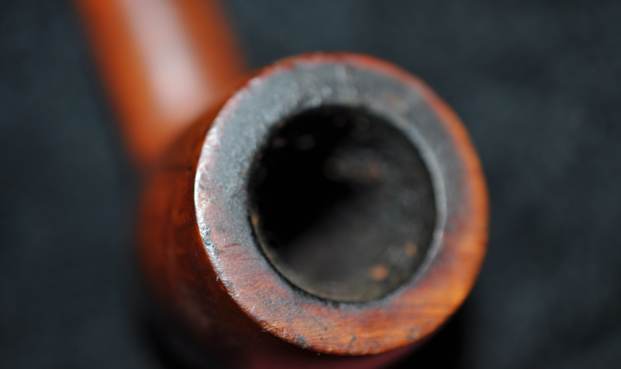
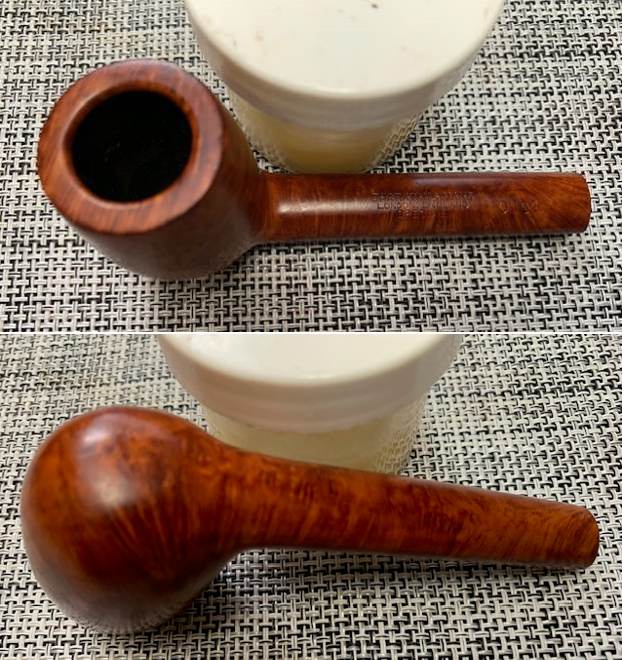
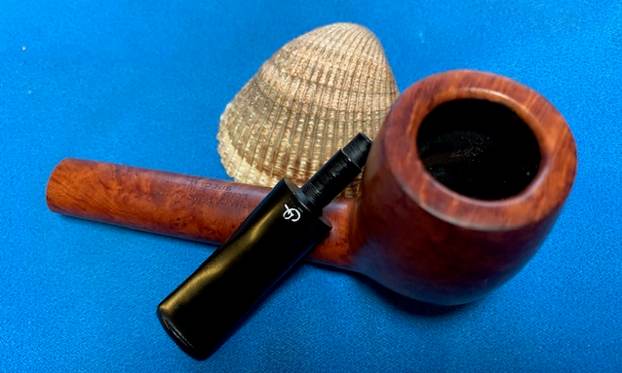
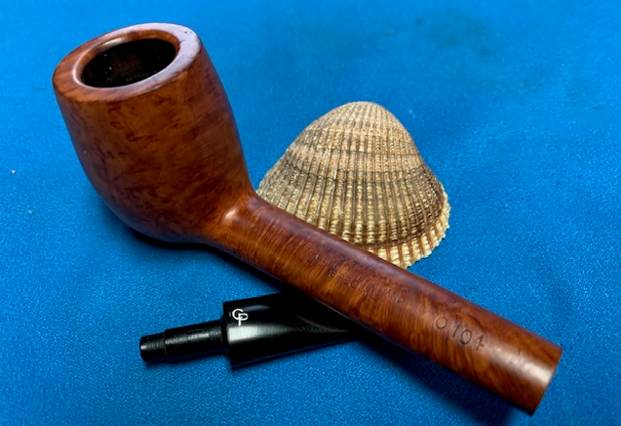
 Jeff took close up photos so that I could have a clearer picture of the condition of the bowl, rim edges and top. The rim top photos confirm my assessment above. The cake in the bowl is thick – covering the walls of the bowl. The rim top has thick lava coat overflowing and covering the inner edge. It is heavier toward the back of the bowl. It is hard to know the condition of the inner edge in this condition. There appeared to be some damage on the top and inner edge toward the back but I would not know for sure until it was reamed. This is what I look for when assessing a pipe. I look forward to viewing it in person after the clean up work.
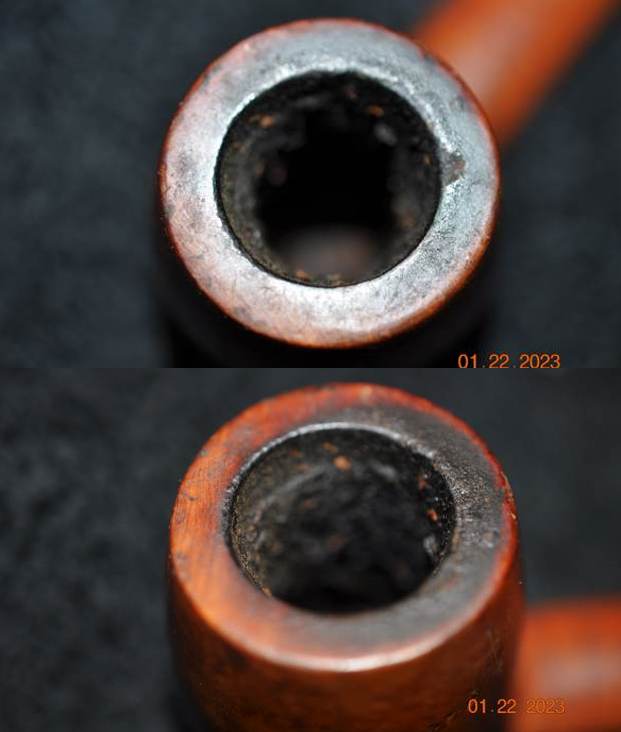
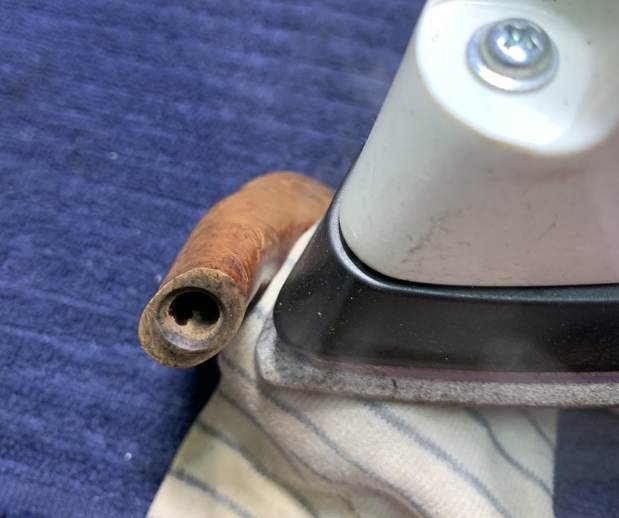
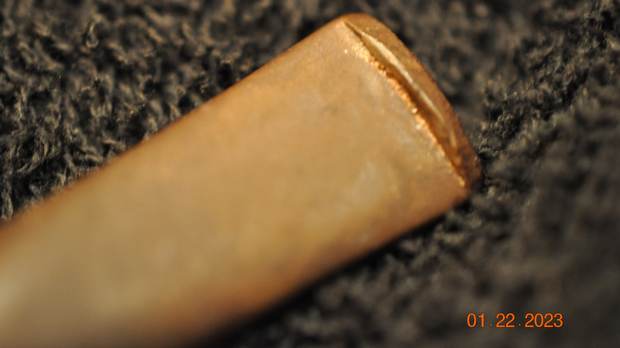
 The vulcanite taper stem is dirty, oxidized and calcified. There are light tooth marks and chatter on both sides ahead of the button and on the button surface itself.
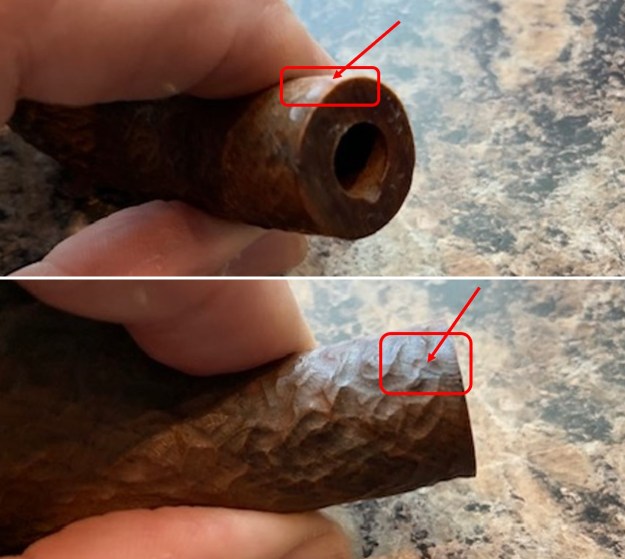
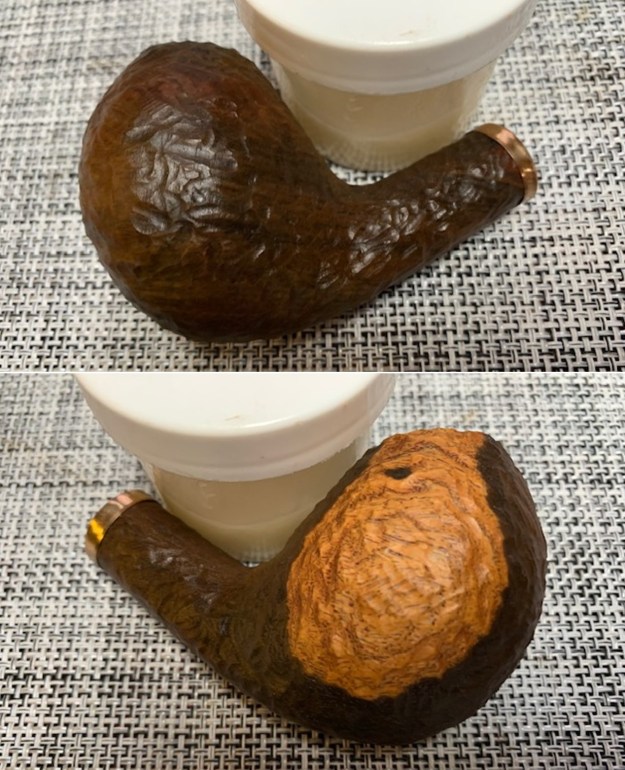
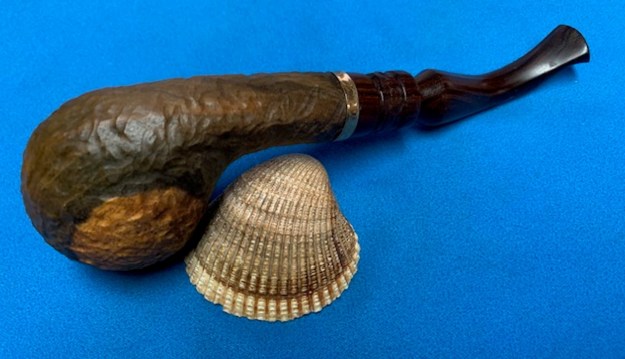
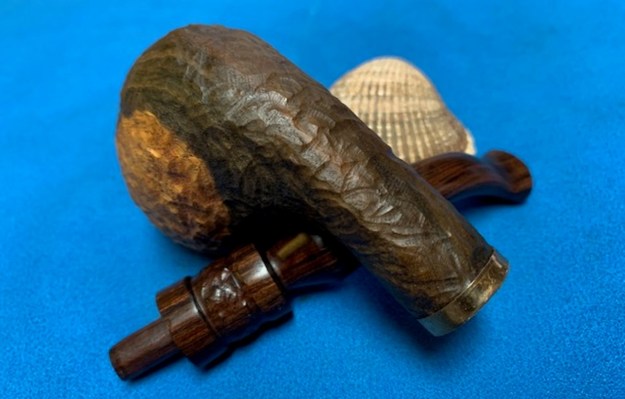
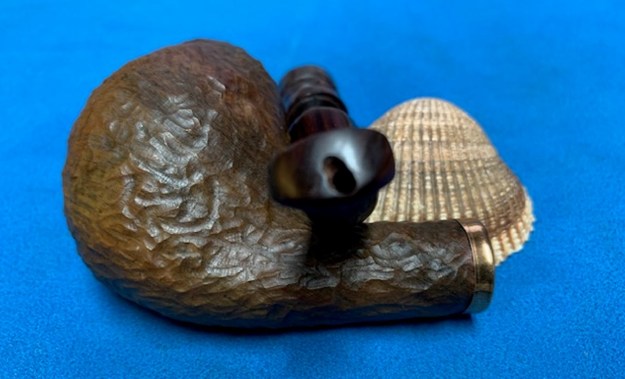
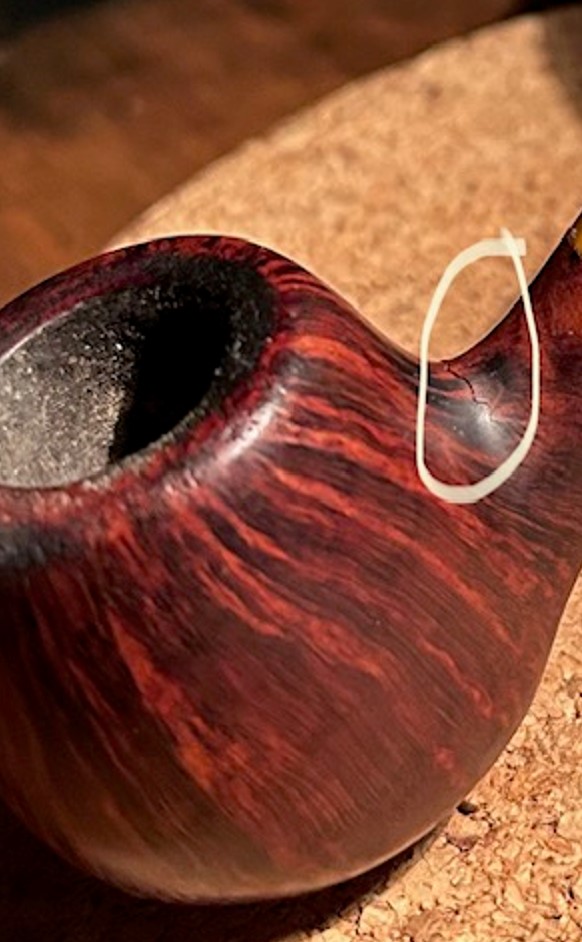
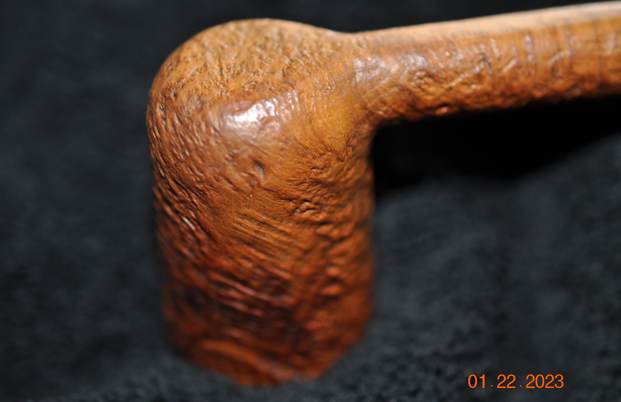
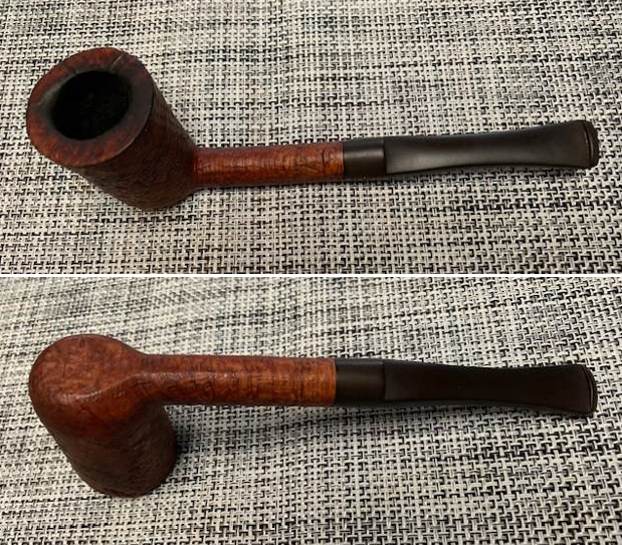
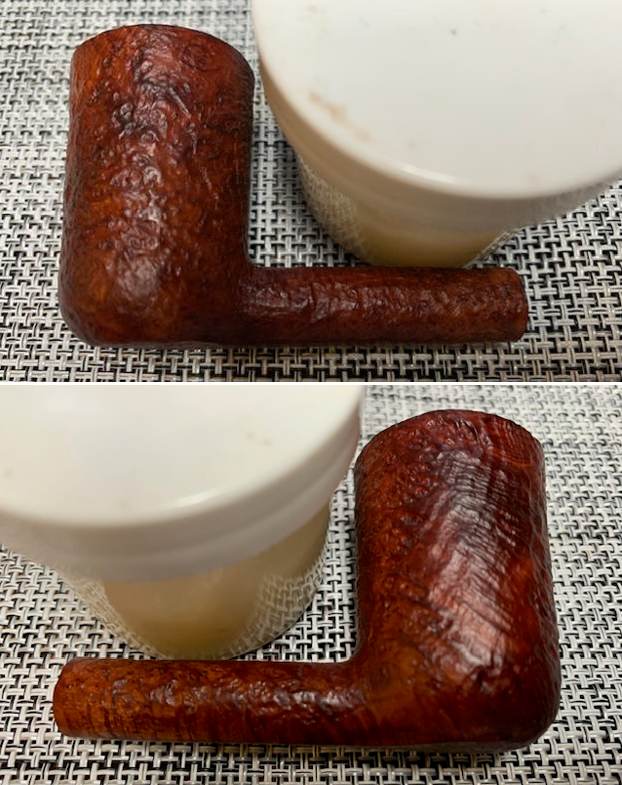
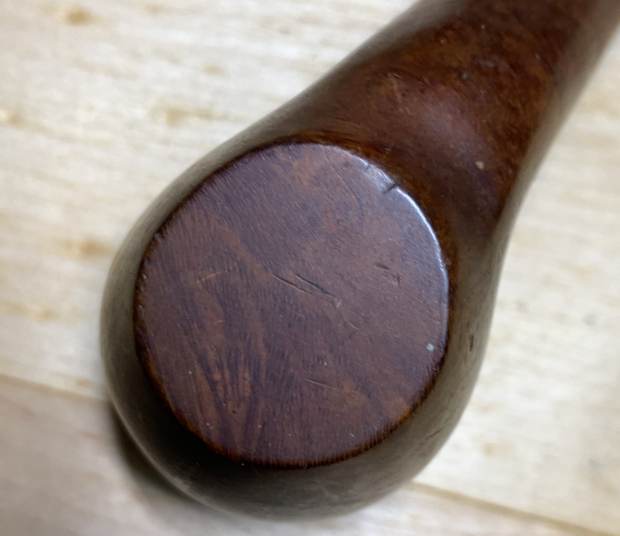
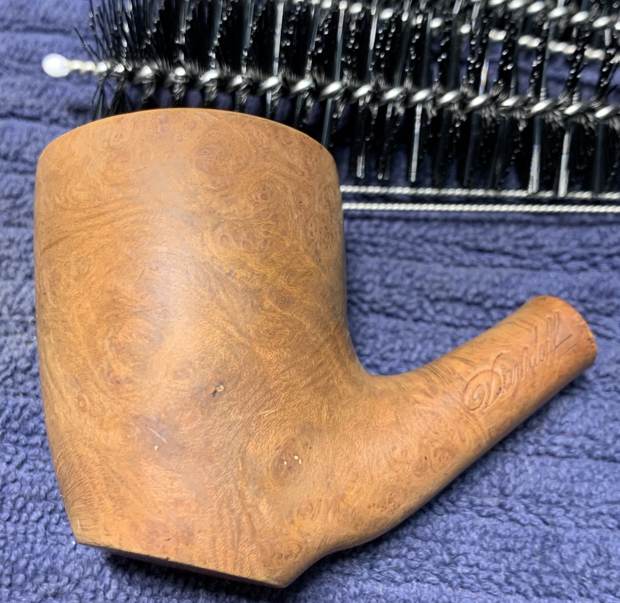
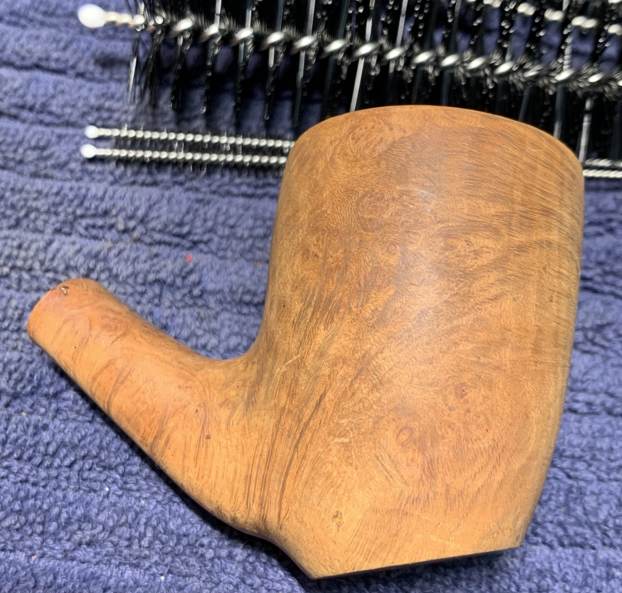
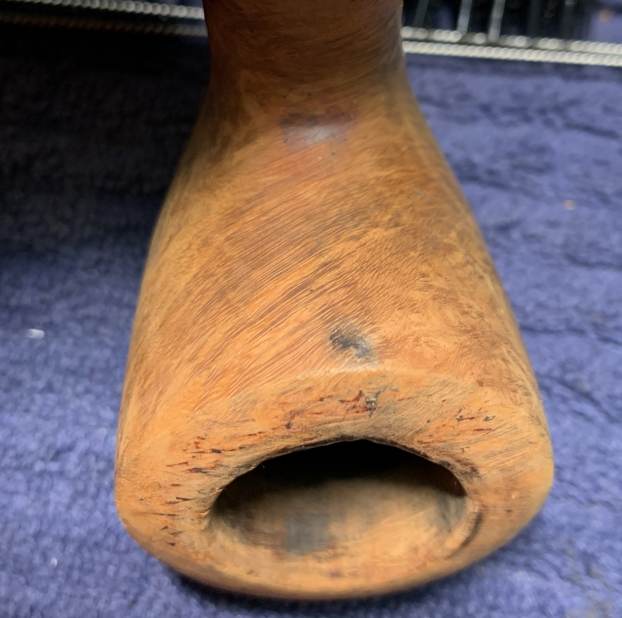
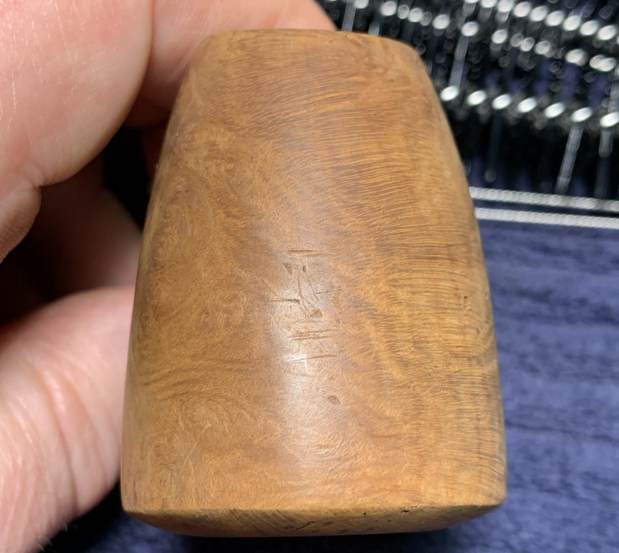
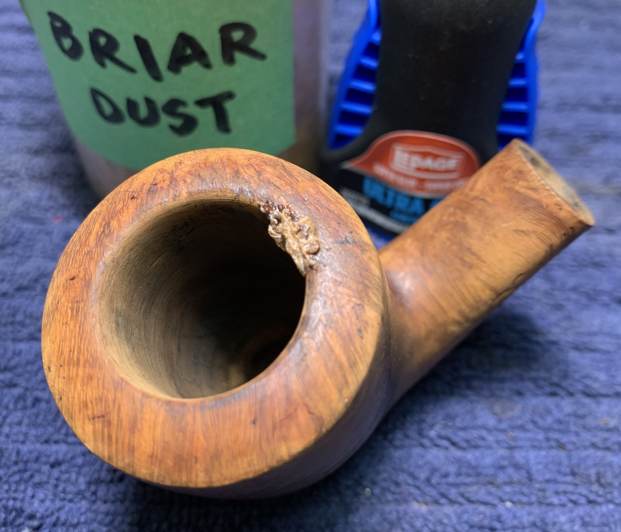
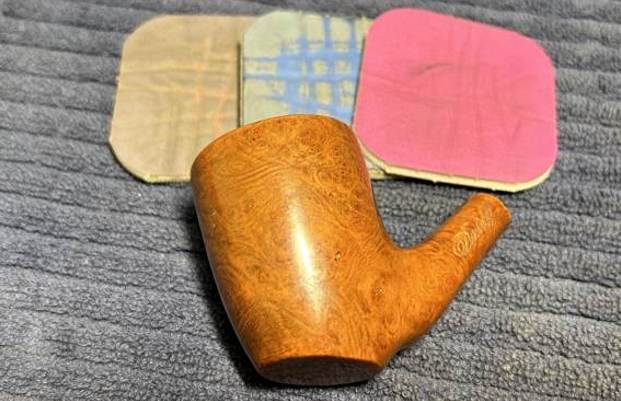
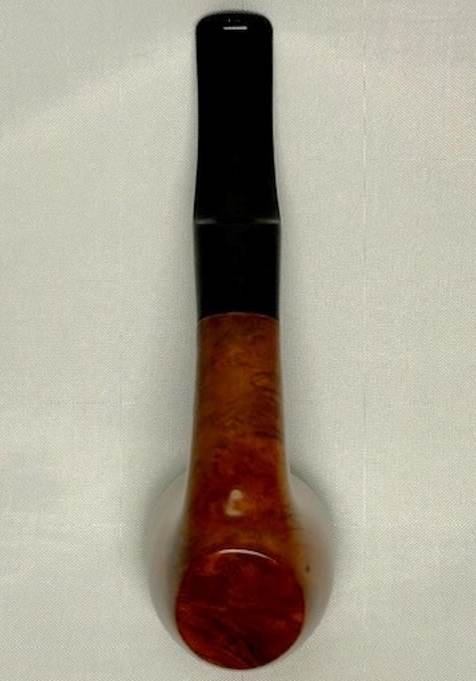
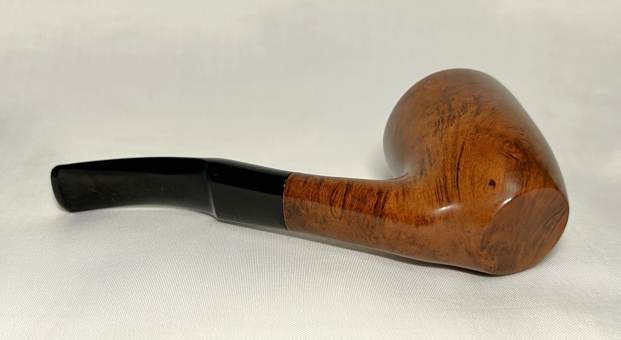
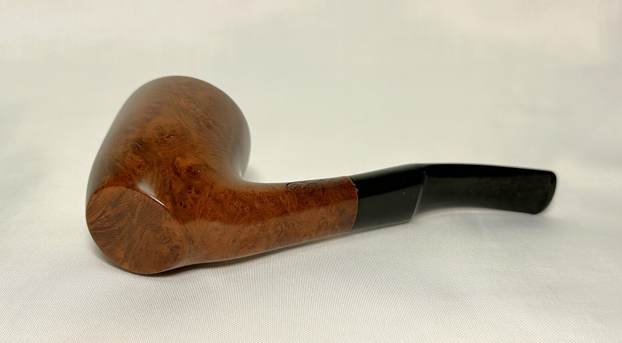
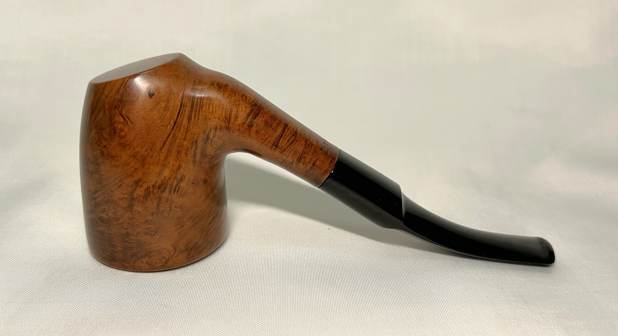
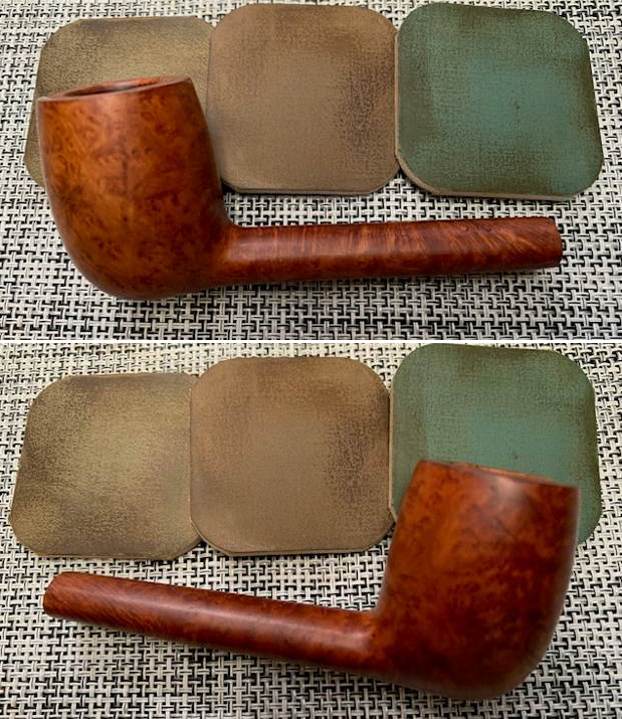
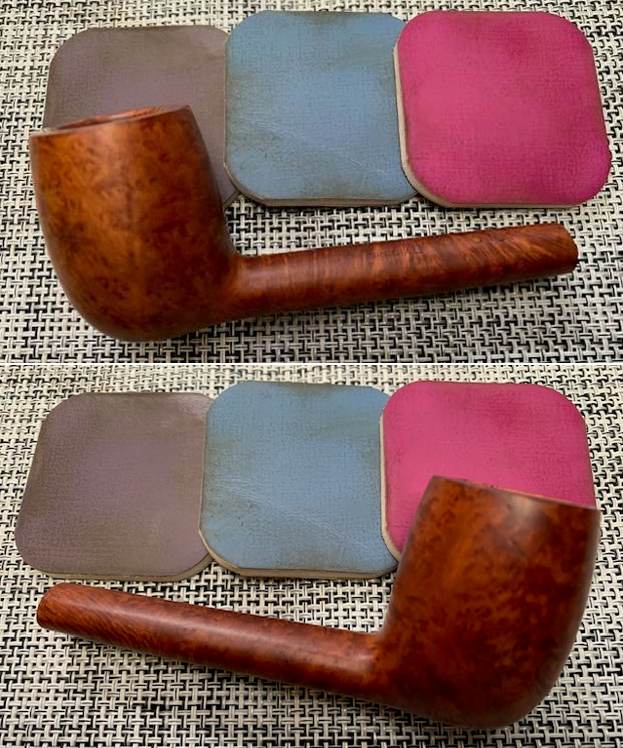
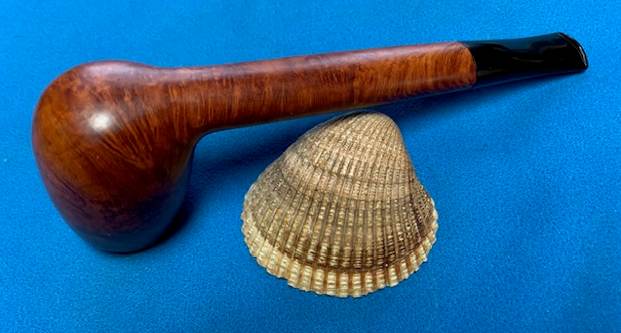
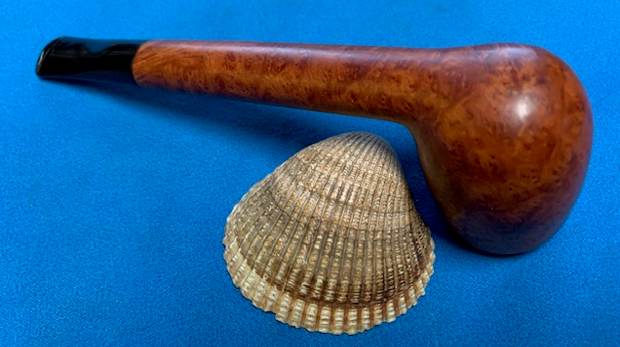
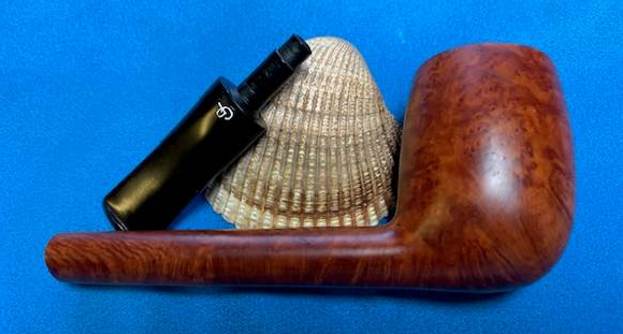
 Instead of telling you what I see in the next photos of the sides of the bowl and the heel I want to hear from you. Tell me what you see? What does the finish look like to you? Are there any visible problems or issues that stand out to you? Are there cracks or scratches in smooth finish of the bowl? Are there visible flaws or fissures in the briar? What does the finish look like? Is there a pattern to it? Any visible issues on the heel of the bowl? These questions should help you to see what I am looking for when I see these photos.
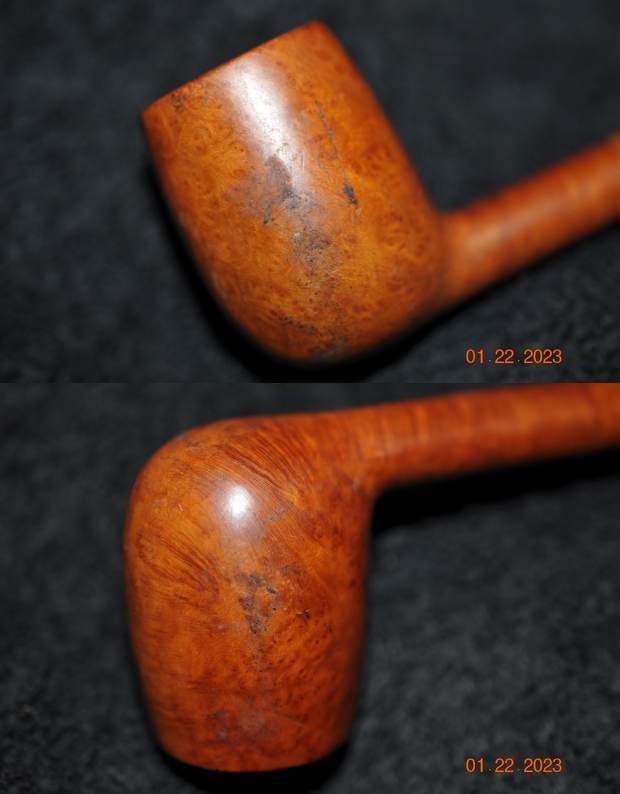
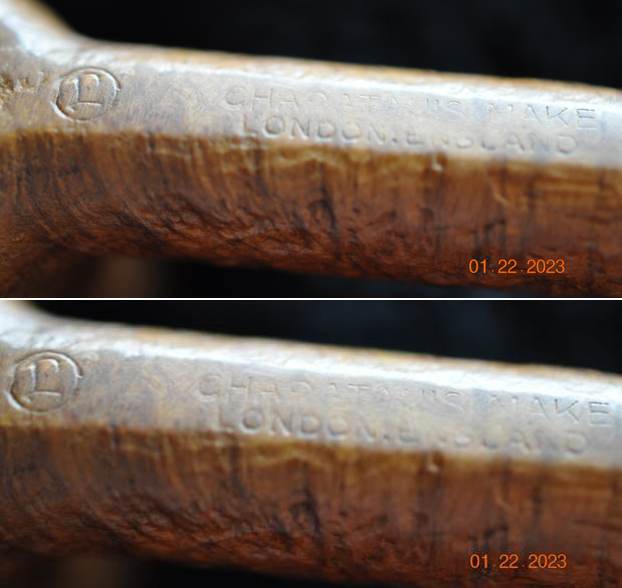
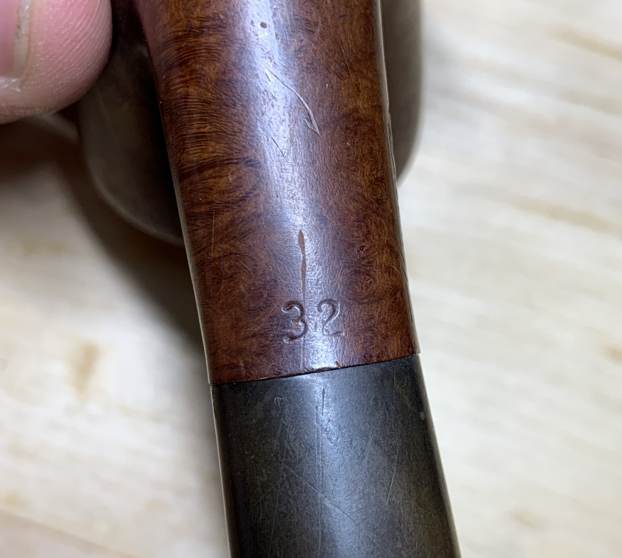
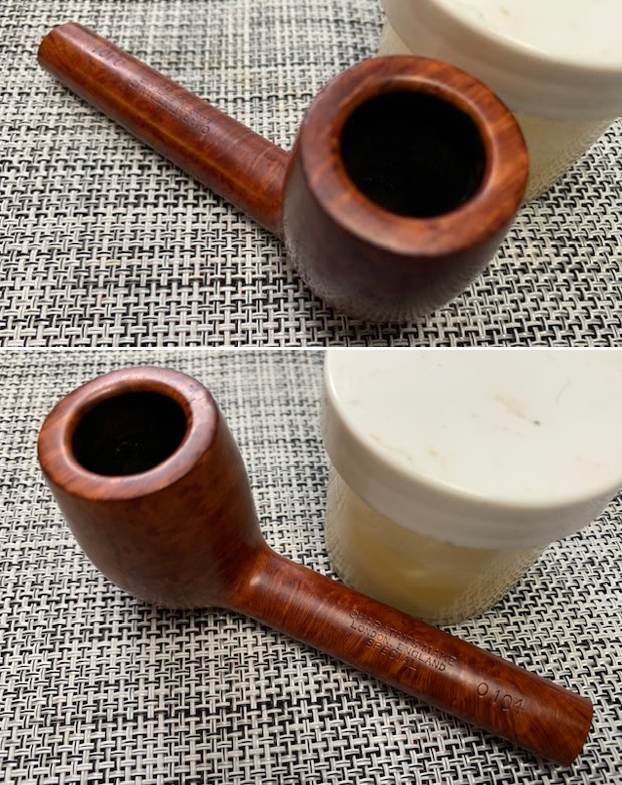
 He took photos of the stamping on the topside of the shank. It is stamped as noted above. The vulcanite stem shows a CP stamp on the topside. What stands out for you in the photos of the stamping? What do you look for in the stamping? It is dirty but what do you see underneath the grime on the surface of the briar?
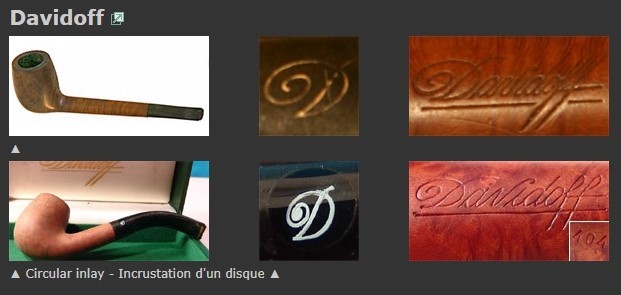
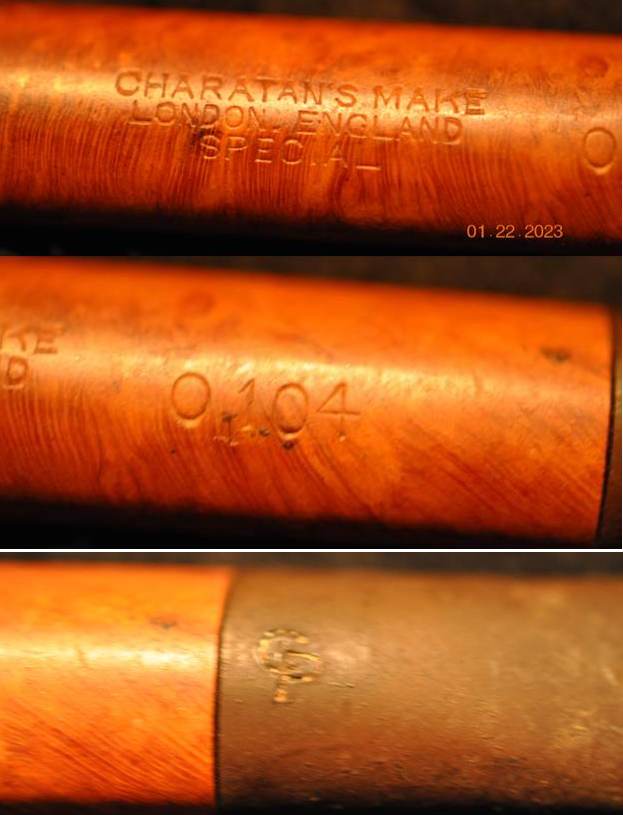 I turned to Pipephil to get a quick overview on the brand to refresh me in a quick overview of the history of the Charatan’s Make Brand (http://www.pipephil.eu/logos/en/logo-charatan.html). I did a screen capture of the section on the Charatan’s Make London England Special. I have included it below.
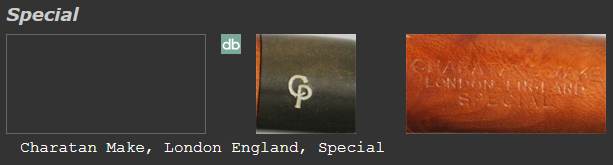 I quote a pertinent summary of the information I found there.
Short history of the brand. Brand founded in 1863 by Frederik Charatan. When his father retired in 1910, Reuben Charatan took over the family business. All the pipes were handmade until 1973. The brand name has been overtaken by Dunhill in 1978 and sold in 1988 to James B. Russell Inc. (NJ, USA). During the period 1988-2002 Charatans were crafted by Butz Choquin in St Claude (France). Dunhill re-purchased Charatan brand name in 2002 and Colin Fromm (Invicta Briars, Castleford) follows up on freehand production.
I turned to Pipedia to the specific section on Dating Charatans to fill in more of the gaps (https://pipedia.org/wiki/Dating_of_Charatans). I was hoping to be able to solidify the time period that the pipe was made. In reading through the material I am pretty confident that the pipe is a Second Era Pipe. I have included the section from the article that helped me arrive at this conclusion.
Identification of a second era pipe (Rueben’s era, 1910-1960)
Pipes belonging to this period are rare, however is it possible to come across one. They can be distinguished from a pipe of the first era mainly because their larger size.
Their characteristics are similar to the ones of the previous era.
1) Pipes can be larger, up to the dimension of a Dunhill group 5
2) The mouthpiece is tapered or saddle.
3) No double comfort
4) the CP logo is engraved so that the C enters the P
5) Absence of £ on the pipe shank (note that from 1955 all the pipe imported in the USA by Lane has it, however that stamping is not synonymous of the Lane era).
6) Absence of the letter X on the shape code engraved on the shank (for ex. 2502 and not 2502X)
7) Absence of letters DC after the shape number (for ex. 2502 and not 2505DC)
8) Absence of the engraving “MADE BY HAND” on the shank (introduced for the first time in 1958)
9) Presence of the writing “CHARATAN’S MAKE LONDON ENGLAND” on 2 lines
10) The CP logo is finer than in following eras
In this period the Underboar series was introduced too. It was a line of pipes made from 1920 to 1930 (approx.) with its own catalogue, its own brand and logo, and a peculiar ‘metal stinger’ device in the shank in order to, according to the company, produce a cooler and drier smoke.
An excellent article, Dating of Charatans has been translated for Pipedia by Mathias Acciai. This study by Fabio Ferrara of Monterubbiano – Italy is based on more than 2000 old Charatan pipes he studied from the “Basciano stock” purchased by Mario Lubinski – Fermo. This fantastic addition to the Charatan knowledge base is now in English here on Pipedia.
The first step on dating a Charatan is to carefully look to some details:
- a) Shape of the mouthpiece
- b) marking on the mouthpiece
- c) engraving on the shank
- d) shape and position of shank engraving/writing
This is because you can make the following conclusions:
a) From 1863 to 1960 the mouthpieces have a normal shape, saddle or tapered. From 1961 they use the ‘Double Comfort’ style still used today. By the way there are some saddle bits (without the double comfort) used in pipes that date after 1960 but these models are always characterized by a X (in the place of the DC) engraved after the shape number on the shank. This means that if a pipe has a tapered mouthpiece instead of a double comfort one, it is definitely a pre-Lane pipe before 1960. While if a pipe has a normal saddle bit stem, it could belong to every era. Nevertheless the pipe is pre 1961 if the shape code does not include an X, and is a pipe from after 1960 if the X is engraved. Finally any pipe with the double comfort stem is definitely after 1960.
b) The CP logo on the stem is stamped in a different shape according the era it was used. Some differences are less obvious than others, however the glaring differences are detectable in 4 phases. The CP till the 1960 is very fine, the C penetrates the P.
From 1961 to 1977 the CP logo is more pronounced and the C penetrates the P.
From 1980 (approx.) the C does not penetrate the P any more, even though the two letters are joined. The CP of Dunhill era has a different shape than the one of the French Russell era.
c) Pipes that belong to eras till the 1960 have the engraving ‘CHARATAN’S MAKE LONDON ENGLAND’ in two lines, the shape code is composed by numbers only. The X and the DC appear only on pipes after 1960.
The engraving ‘MADE BY HAND (in caps) -IN-City of London’ in three lines identifies pipes made between 1965 and 1966. The engraving in script font ‘Made by Hand -In-City of London’ on three lines identifies pipes made between 1966 and 1979. The circled £ (Lane) characterizes pipes produced from 1955 to 1980 (approx.)
d) engravings are different in both size and shape, depending on eras.
The pipe on my table is one made by Charatan before 1955 when the Lane “L” stamp was put on the pipe. The stamping on the pipe also identifies it as pre-1960 as does the number stamp of the shape. The CP stamp is fine with the C penetrating the P on the stem stamp which also identifies it to this era. So all things considered, I believe the pipe is made at least before 1955. It is an old timer.
I am sure many of you will shake your head and ask maybe even out loud, “Why is he including this again?” However, please remember that the point of these blogs is not to wow your with the work or make you shake your heads but I want you to know the details of the work we do so you can do your own. Back in 2020 Jeff wrote a blog about his cleaning process. I am including a link to that now so you can see what I mean about his process. Do not skip it! Give it a read (https://rebornpipes.com/2020/01/20/got-a-filthy-estate-pipe-that-you-need-to-clean/). Here is the introduction to that blog and it is very true even to this day.
Several have asked about Jeff’s cleaning regimen as I generally summarize it in the blogs that I post rather than give a detailed procedure. I have had the question asked enough that I asked Jeff to put together this blog so that you can get a clear picture of the process he uses. Like everything else in our hobby, people have different methods they swear by. Some may question the method and that is fine. But it works very well for us and has for many years. Some of his steps may surprise you but I know that when I get the pipes from him for my part of the restoration they are impeccably clean and sanitized. I have come to appreciate the thoroughness of the process he has developed because I really like working on clean pipe!
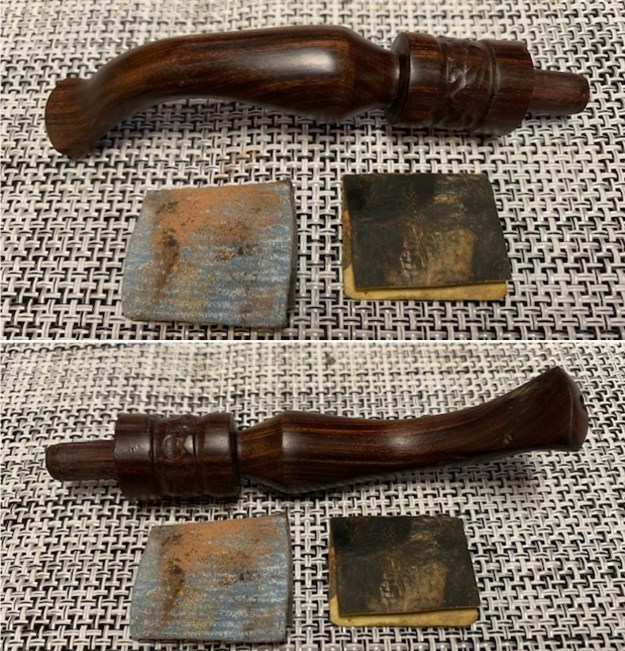
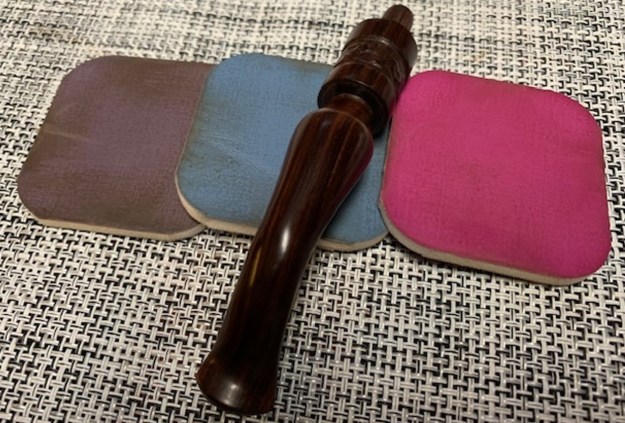
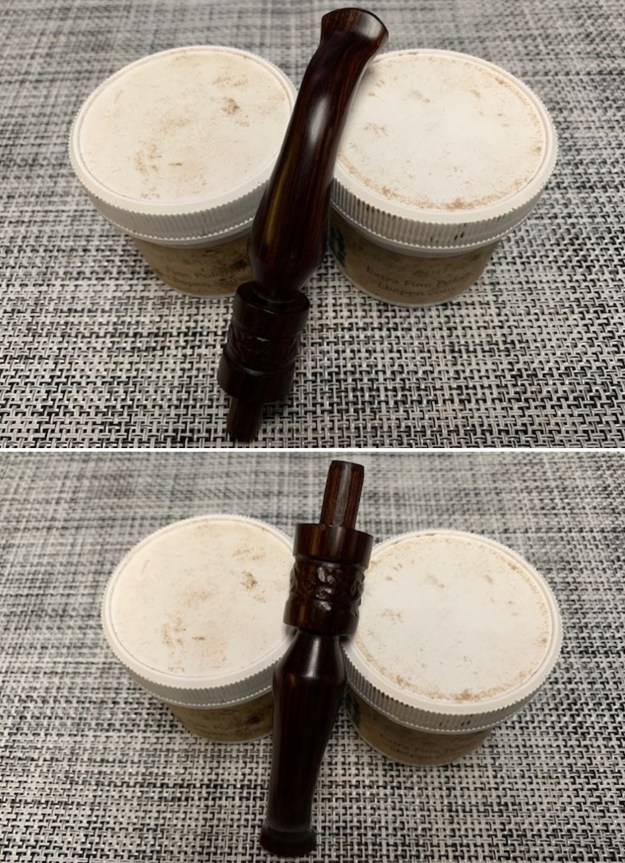
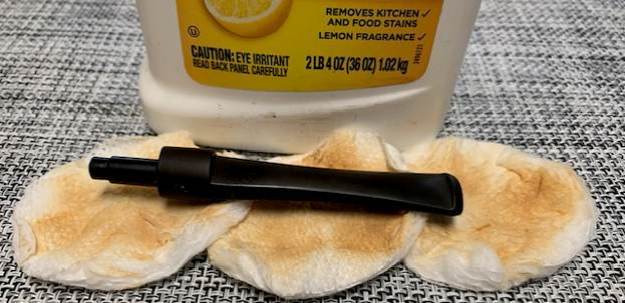
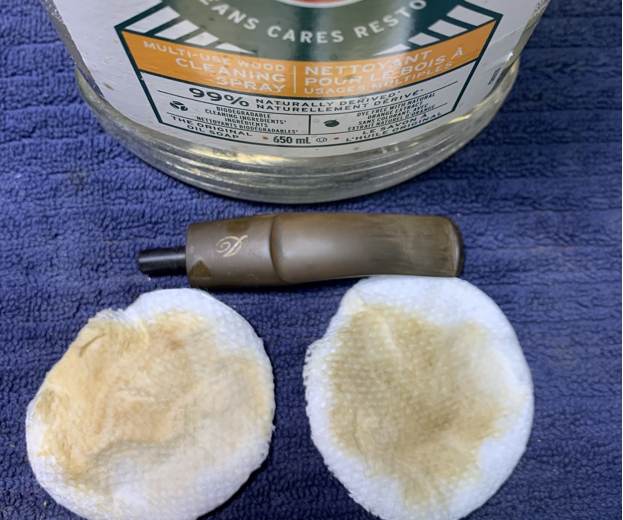
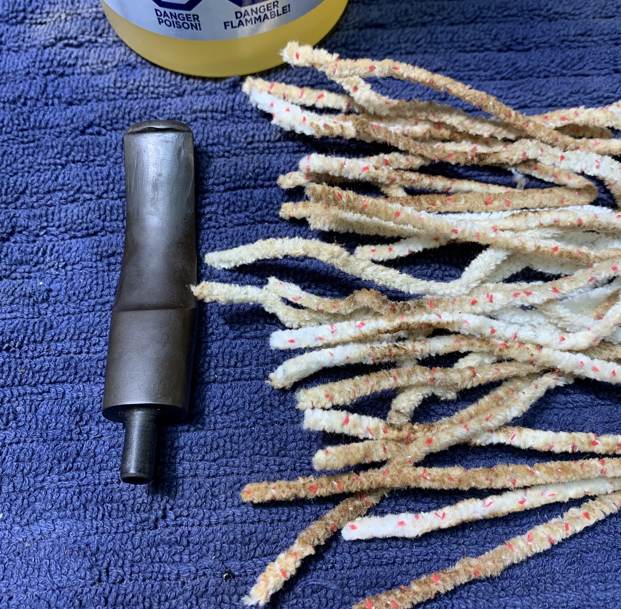
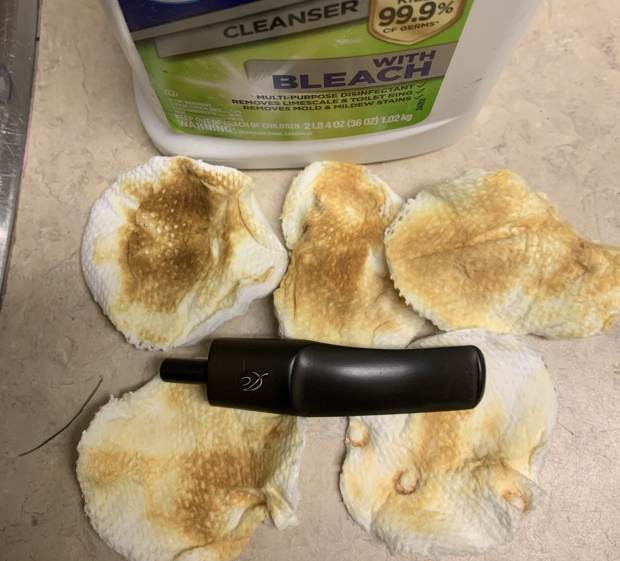
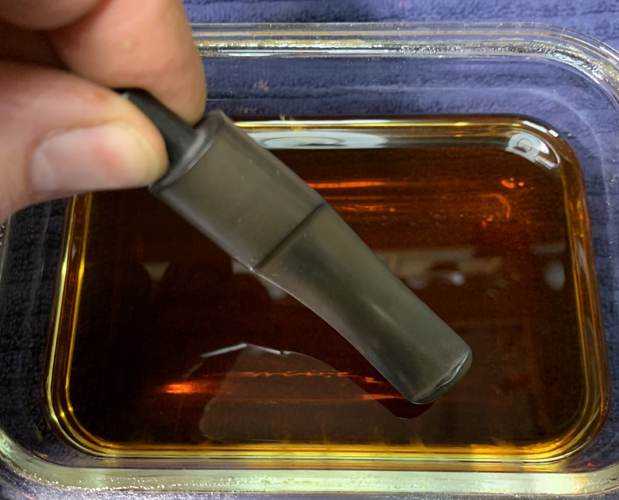
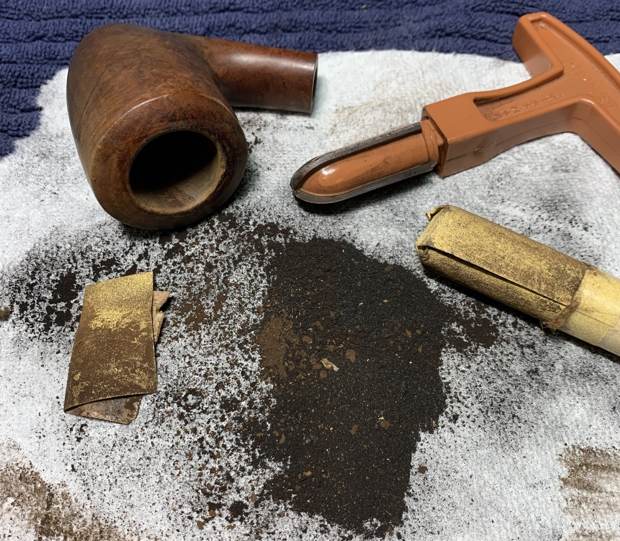
For the benefit of some of you who may be unfamiliar with some of the products he uses I have included photos of three of the items that Jeff mentions in his list. This will make it easier for recognition. These three are definitely North American Products so you will need to find suitable replacements or order these directly on Amazon. The makeup pads are fairly universal as we were able to pick some up in India when we were with Paresh and his family.
In the blog itself he breaks his process down into two parts – cleaning the stem and cleaning the bowl. Each one has a large number of steps that he methodically does every time. I know because I have watched him do the work and I have seen the pipes after his work on them. He followed this process step by step and when the pipe got to me it was spotlessly clean and ready for my work. The inside of the stem, shank and bowl were clean and to me that is an amazing gift as it means that my work on this end is with a clean pipe! I cannot tell you how much difference that makes for my work.
- The finish is clean and the oils and grime in the finish shows the beautiful grain around the sides. The medium brown stain highlights the grain.
- The rim top was clean but there were still damage on the top and the inner edge of the bowl. It is clean and with a little work will look very good.
- There cake in the bowl has been removed and the bowl is very clean. The walls of the bowl are smooth and appear to be undamaged and show no checking or burn damage.
- The vulcanite stem looks better though the tooth marks and chatter on both sides are visible as they are on the button surface.
- The Charatan CP logo stamped on the topside of the stem looks very clean but is faint and readable.
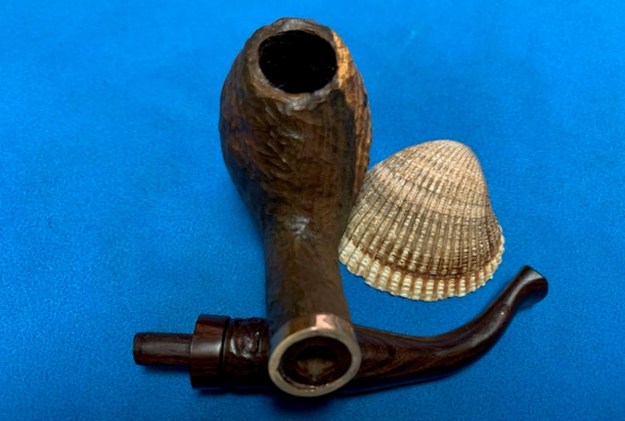
Hopefully the steps above show you both what I look for when I go over the pipe when I bring it to the work table and also what I see when I look at the pipe in my hands. They also clearly spell out a restoration plan in short form. My work is clear and addressing it will be the next steps. I took photos of the whole pipe to give you a picture of what I see when I have it on the table. This is important to me in that it also shows that there was no damage done during the clean up work or the transit of the pipe from Idaho to here in Vancouver.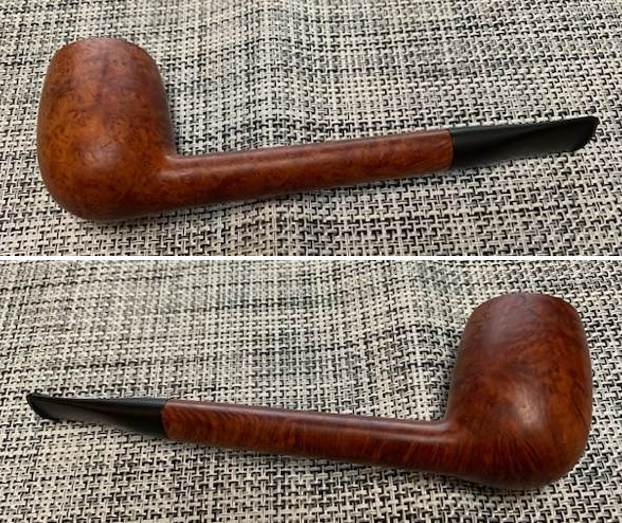
 I carefully went over the bowl and rim top to get a sense of what is happening there. In this case once the rim top and edges were cleaned the damage on the rim top very evident. The inner edge had damage on the right, front and back side as well as on the top. I also went over the stem carefully. The fit of the stem is snug and the transitions are smooth. There were some tooth marks and chatter on the surface of the stem and the button on the underside. The vulcanite stem surface was clean and looked better. I took photos of the rim top and stem sides to show as best as I can what I see when I look at them.
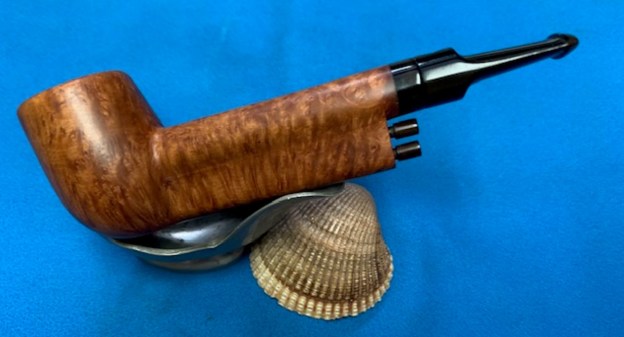
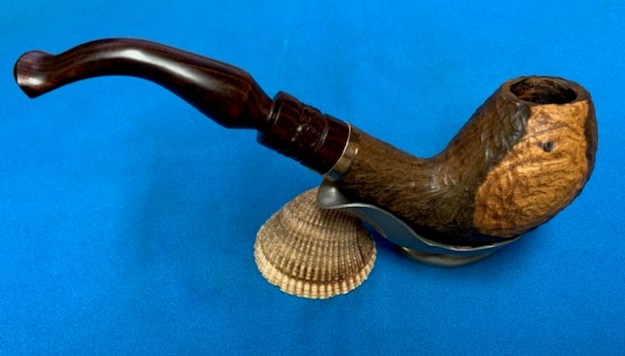
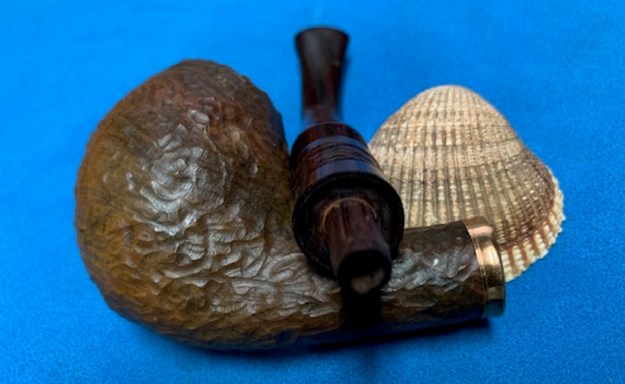
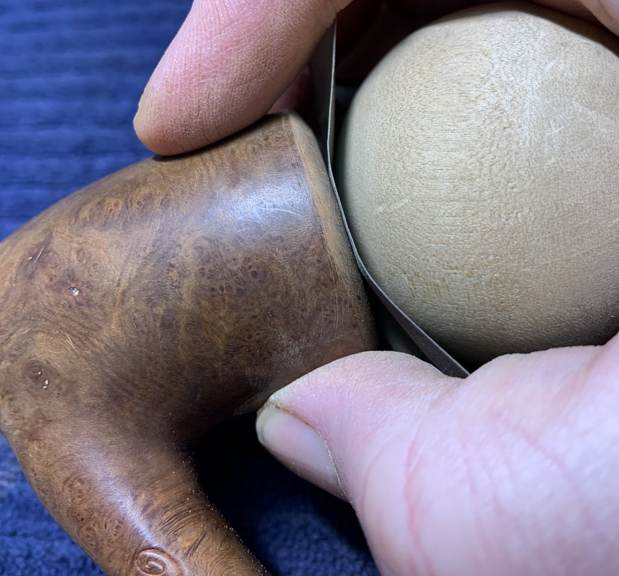
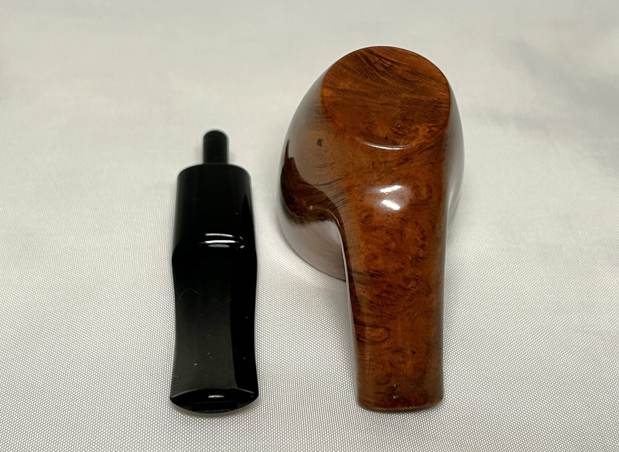
 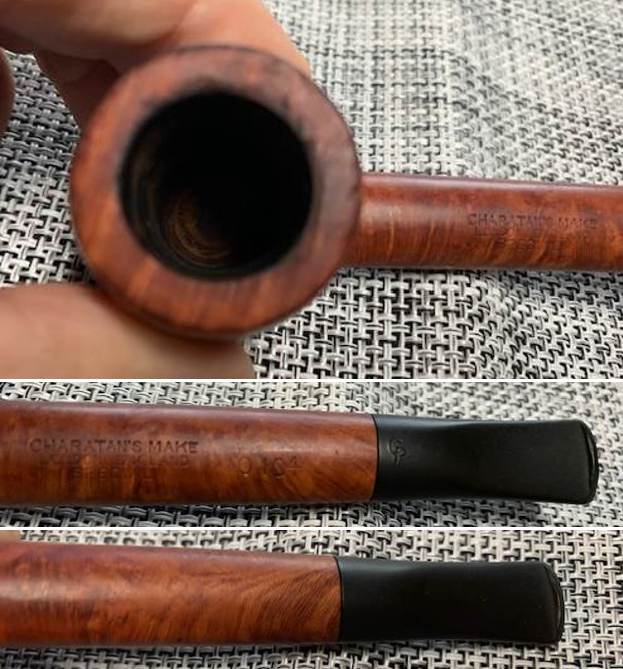 I always check to make sure that the clean up work did not damage the stamping on the shank sides in any way. It is in excellent condition and is very clear and readable. I love just looking at the lay of the pipe and the proportion of the hand made pipes. I took the pipe apart to get a sense of what was in the mind of the pipe maker when he crafted the pipe. The photo shows its beauty in flow and shape.
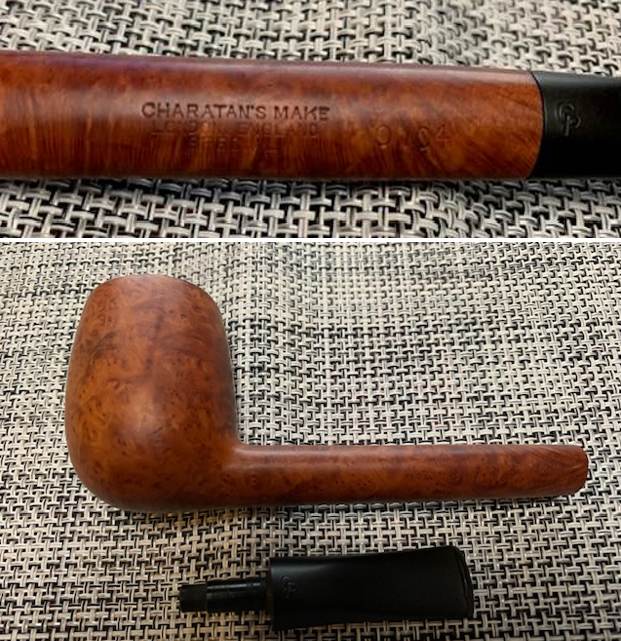 I started working on this pipe by turning to the bowl. I chose to deal with the damage on the inner edge and top of the rim. I used a piece of 220 grit sandpaper to remove the darkening on the inner edge and the damage on the top. I gave the rim a slight bevel to minimize the damage. It took a little work but I was able to remove the damage. It looks much better after I worked it over.
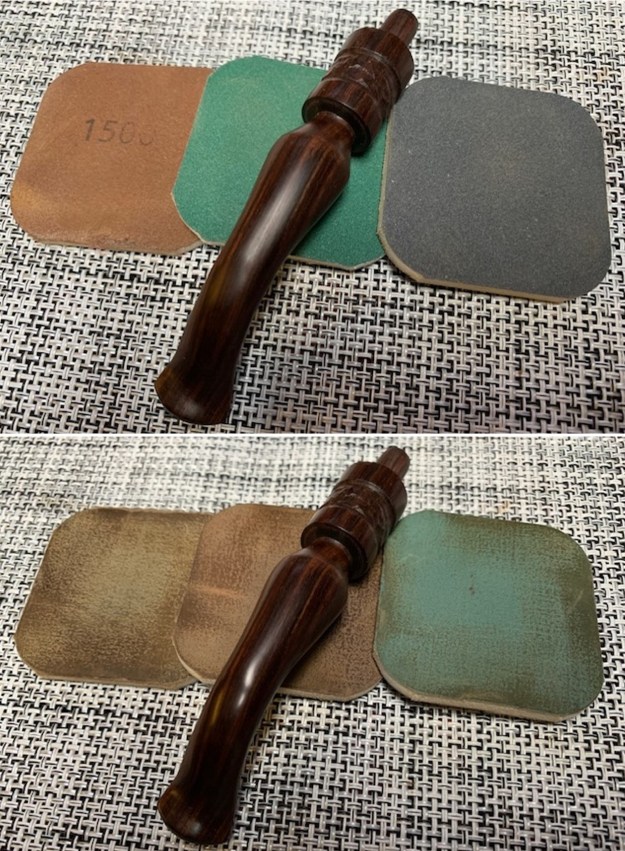
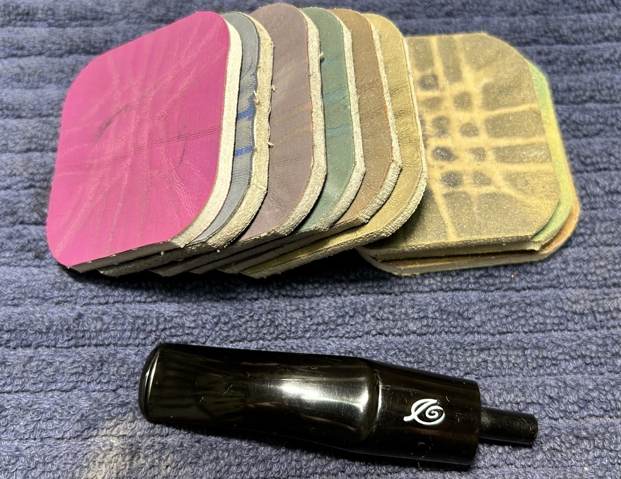
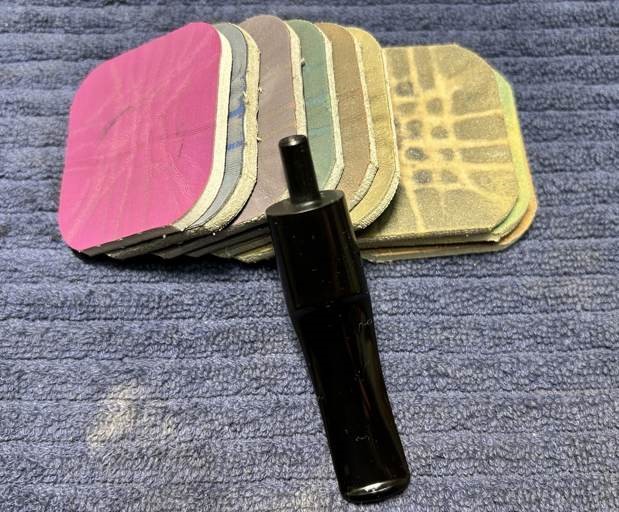
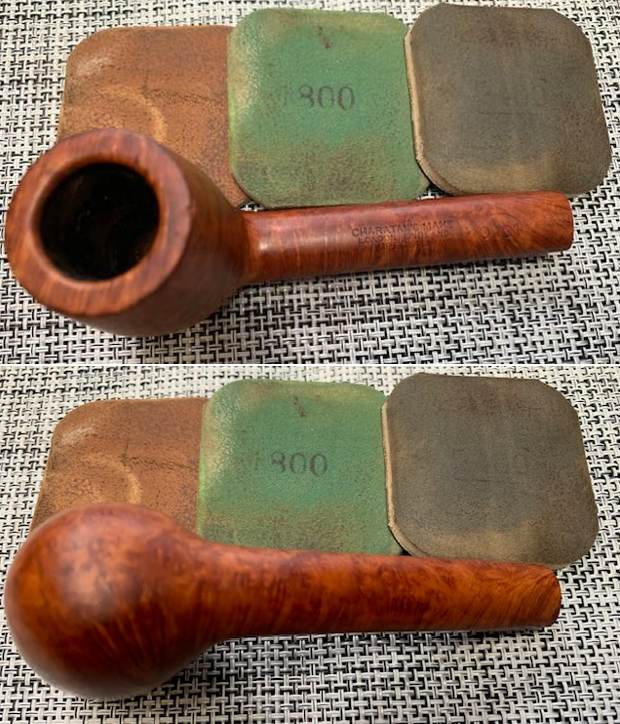
 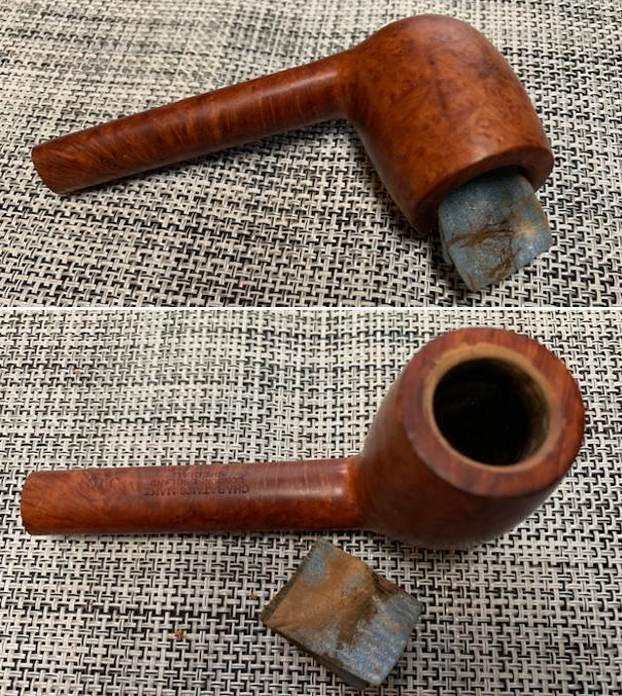 I polished the briar with micromesh sanding pads. I choose to dry sand the briar rather than wet sand it. Again it is a matter of personal preference. I prefer to use the pads dry and find they work very well on the briar. I sand with each pad (9 in total) and group them by threes for ease of reference. I wipe the bowl down after each pad with a damp cloth to remove the sanding debris and check the briar. I love seeing the developing shine on the briar as I move through the pads which is why I include so many photos of this step.
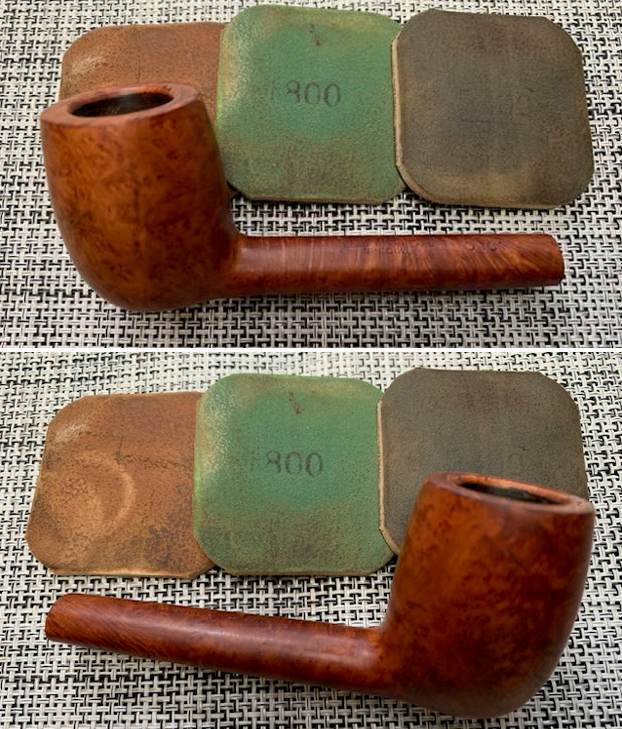

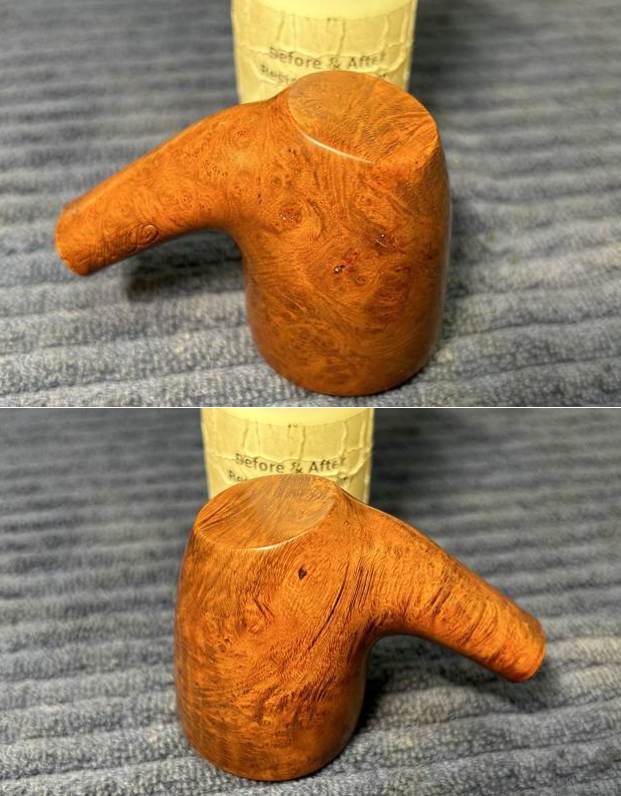
 I rubbed down the bowl and shank with Before & After Restoration Balm. It is a paste/balm that is rubbed into the surface of the briar. The product works to deep clean the finish, enliven and protect the briar. I worked it into the briar with my finger tips. I let it sit for 10 minutes then wiped it off with a soft cloth then buffed it with a cotton cloth. The briar really began to have a deep shine in the briar and the grain shines through. The photos I took of the bowl at this point mark the progress in the restoration. It is a gorgeous pipe.
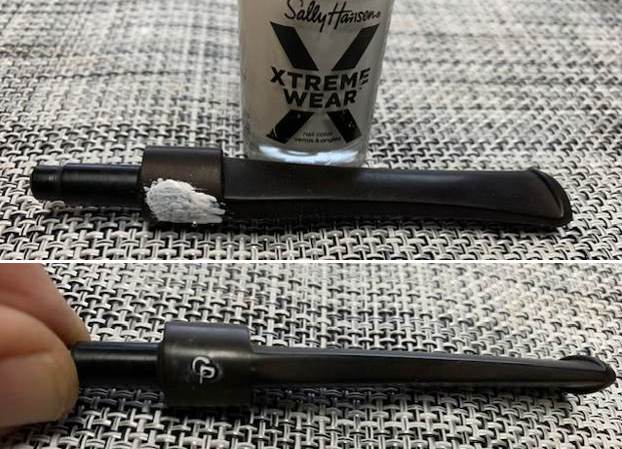
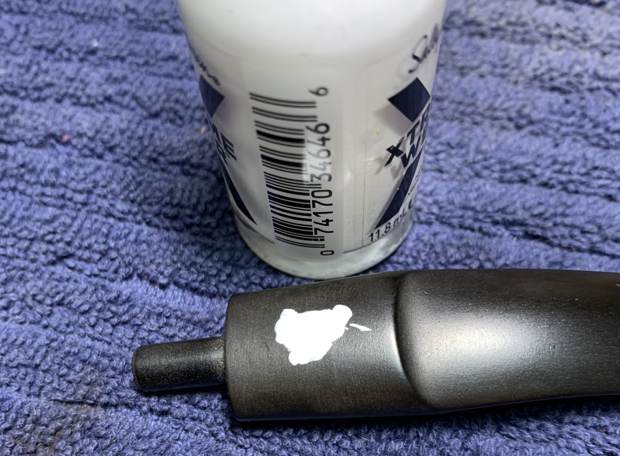
 I set the bowl aside and turned to the stem. It was in great condition and the tooth marks and chatter were shallow enough that they would disappear in the polishing with micromesh and buffing. I started by touching up the faint CP stamping on the top and underside of the stem with White Acrylic Fingernail Polish. I put it on the stamp and an scraped off the excess with a pen knife and a worn 1500 micromesh sanding pad. It looked very good once finished.
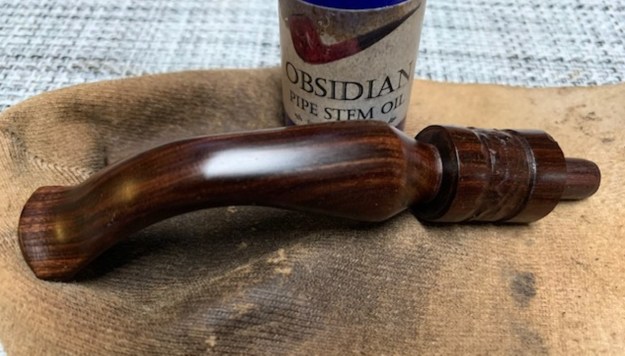
  I polished the stem with micromesh sanding pads – 1500-12000 grit sanding pads and water to wet sand the stem. I wiped it down after each sanding pad with Obsidian Oil on a cotton rag after each sanding pads. I know that many say Obsidian Oil does nothing for acrylic stems, but I find it does two things – first it gives some protection to the stem from buildup and second it give the sanding pads bite in the polishing process.
 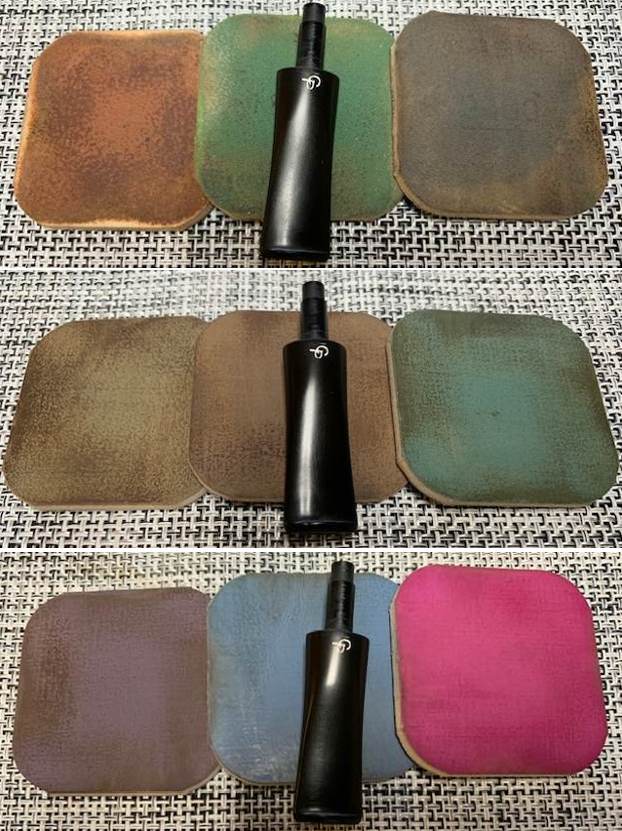 After finishing with the micromesh pads I rub the stem down with Before & After Fine and Extra Fine stem polish as it seems to really remove the fine scratches in the vulcanite. I rub the Fine Polish on the stem and wipe it off with a paper towel and then repeat the process with the Extra Fine polish. I finish the polishing of the stem down with a final coat of Obsidian Oil and set the stem aside to let the oil absorb. This process gives the stem a shine and also a bit of protection.
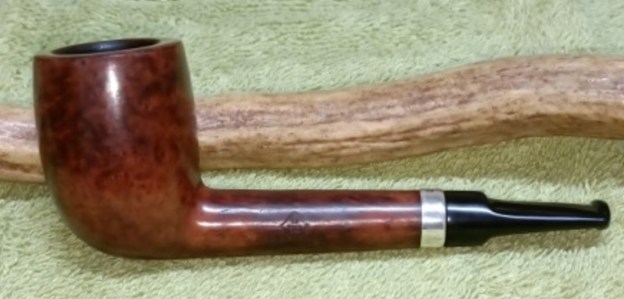
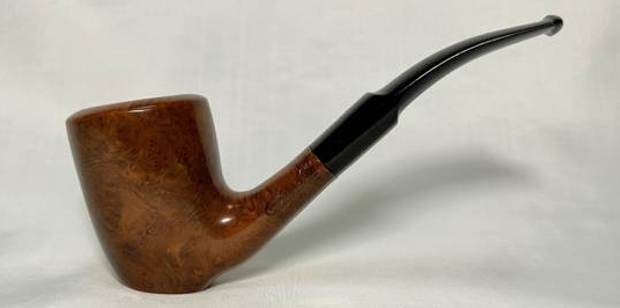
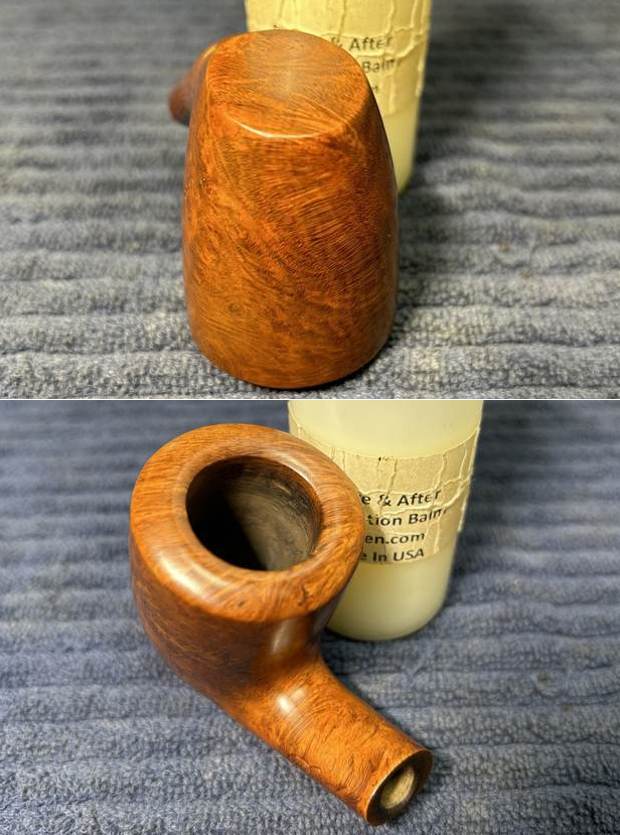
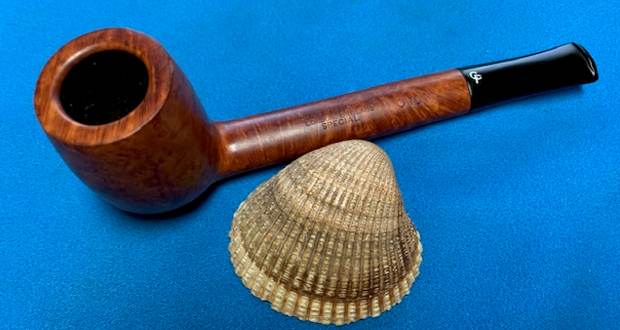
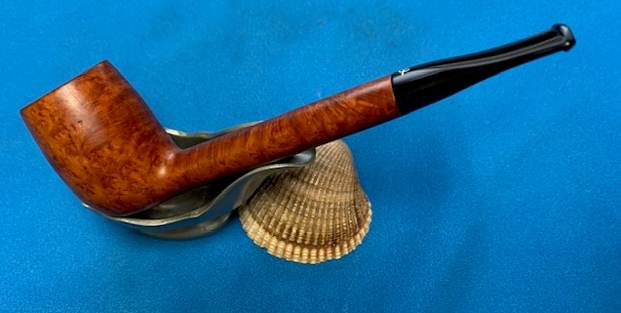
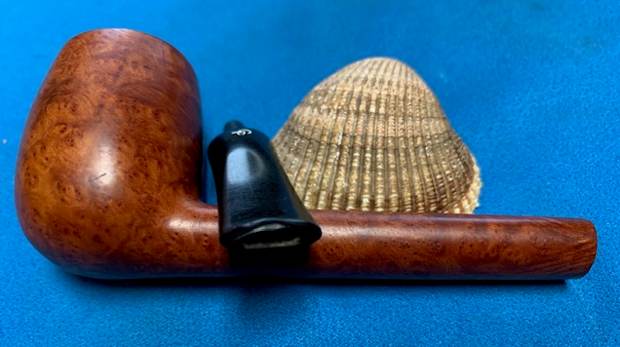
 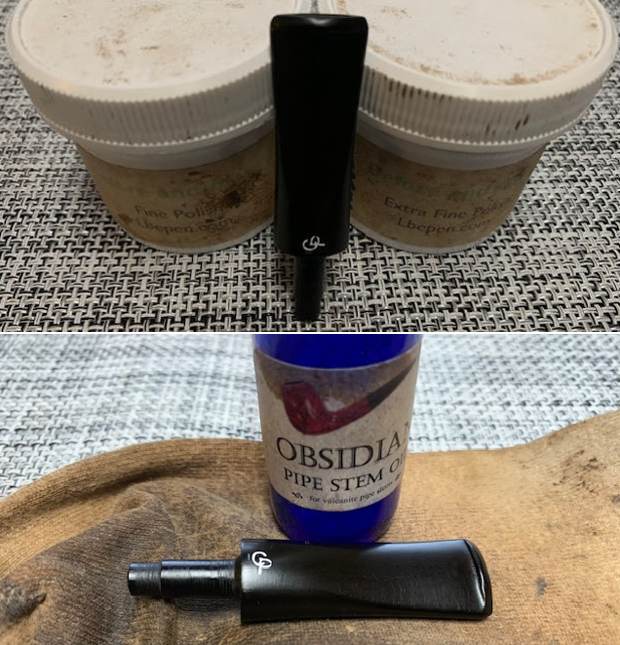 The final steps in my process involve using the buffer. I buffed the bowl and stem with Blue Diamond to polish out the light scratches in the briar and the vulcanite. I gave the bowl and the stem multiple coats of carnauba wax. I have found that I can get a deeper shine if I follow up the wax buff with a buff with a clean buffing pad. It works to raise the shine and then I hand buff with a microfiber cloth to deepen the shine. It is always fun for me to see what the polished bowl looks like with the polished stem. It really is a nice pipe. The smooth finish around the bowl sides and shank looks great. The oval vulcanite taper stem works well with the pipe. The Charatan’s Make London England Special Canadian feels great in my hand. It is a well balanced pipe. Have a look at it with the photos below. The dimensions are Length: 5 ¾ inches, Height: 1 ¾ inches, Outside diameter of the bowl: 1 ¼ inches, Chamber diameter: ¾ of an inch. The weight of the pipe is 1.13 ounces/32 grams. It is a beautiful pipe that I will soon be adding to the rebornpipes store in the British Pipemakers Section. If you would like to add it to your collection let me know. It should be a great smoking pipe.
As always I encourage your questions and comments as you read the blog. Thanks to each of you who are reading this blog. Remember we are not pipe owners; we are pipe men and women who hold our pipes in trust until they pass on into the trust of those who follow us.


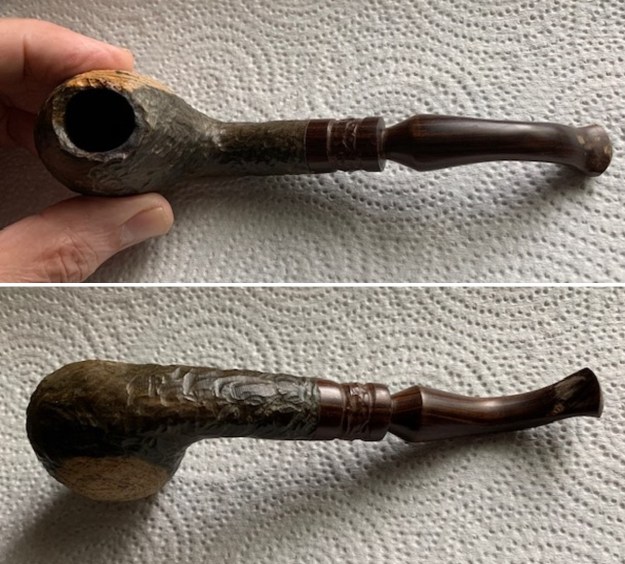
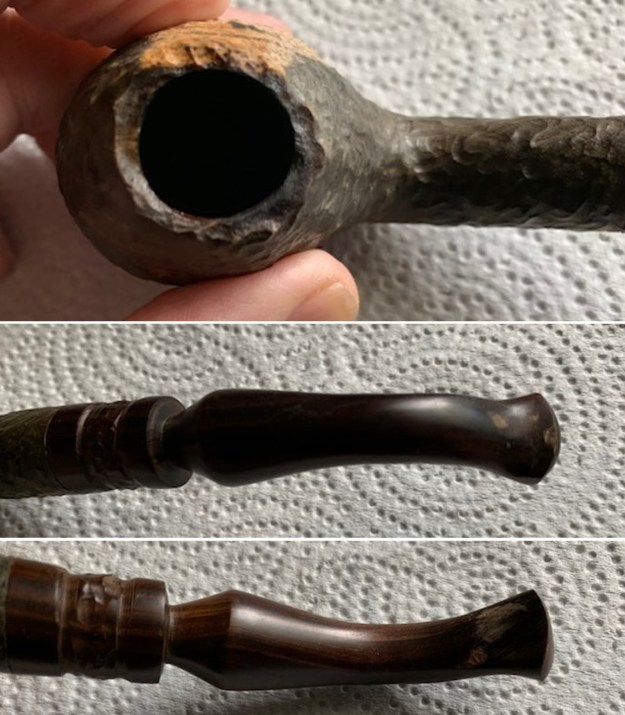
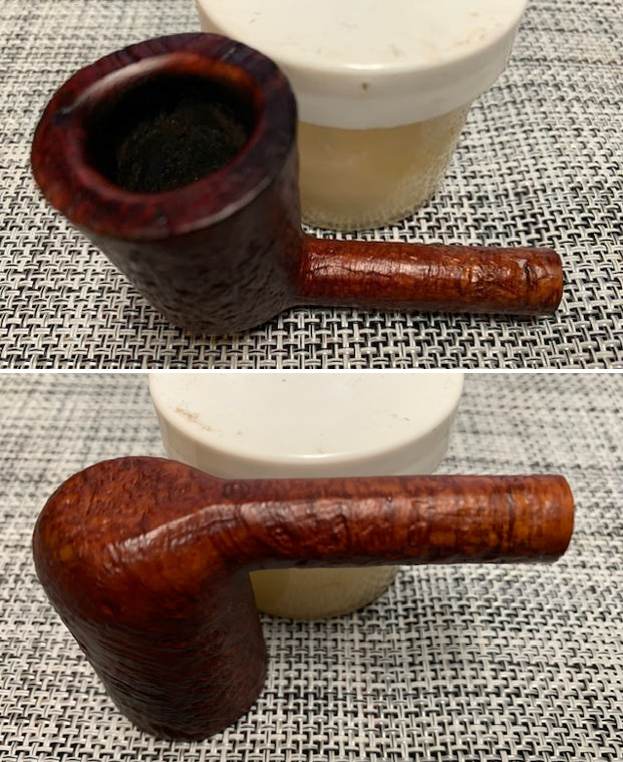
 I took photos of the rim top and stem. You can see the cake in the bowl and the darkening on the rim top and on the back inner edge of the bowl. The stem had some tooth marks and chatter on both sides ahead of the button. It was oxidized and there was some calcification on the surface.
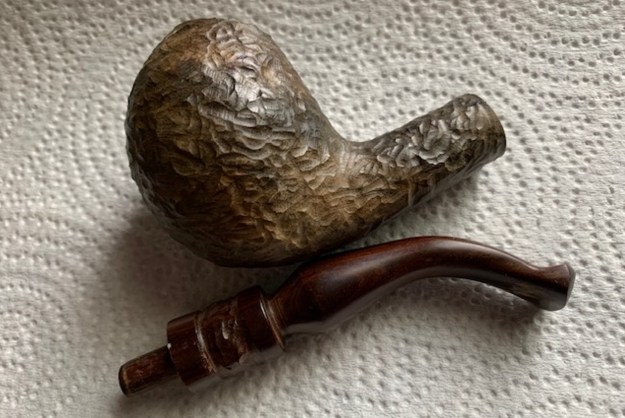
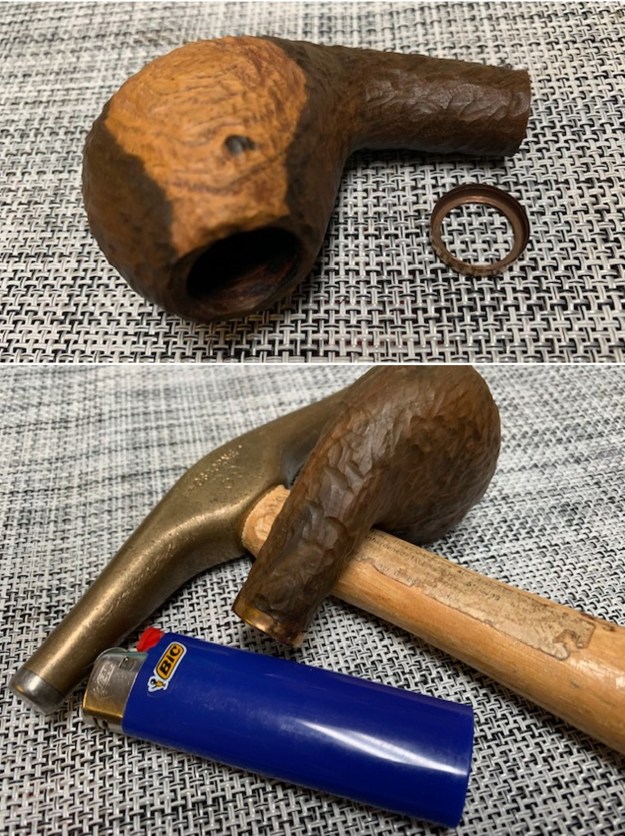
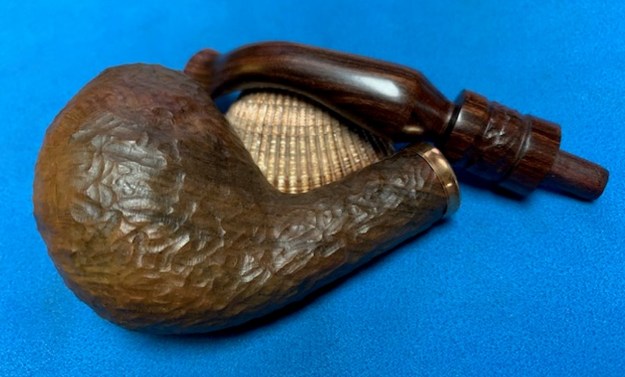
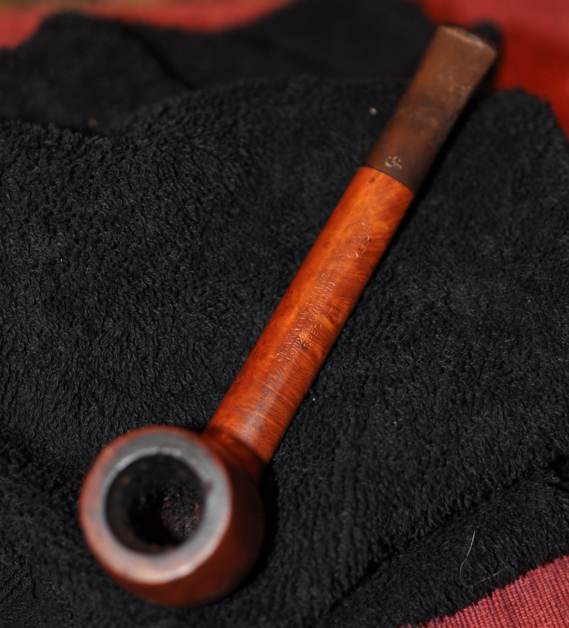
  I took a photo of the stamping on the heel of the bowl. It is clear and readable as noted above. I also removed the stem from the shank and took a photo of the part to give a sense of the flow of the pipe. It is truly a unique pipe and the grain shows well in the photo.
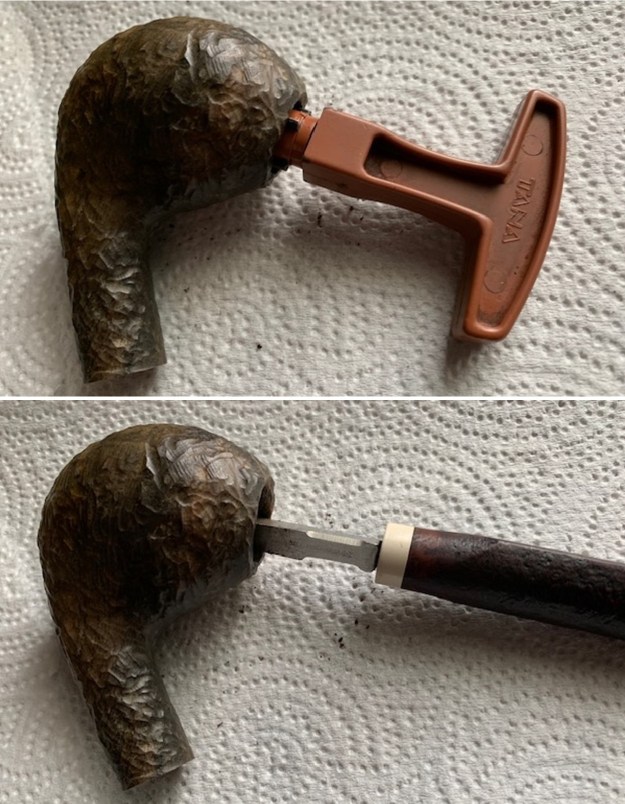
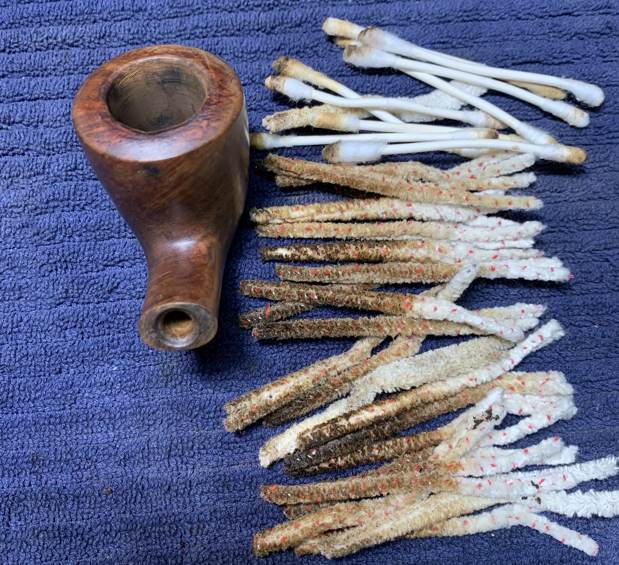
 The bowl is quite small so I scraped it out with a Savinelli Fitsall Pipe Knife to remove the cake. I sanded the bowl walls with 220 grit sandpaper wrapped around my finger. I took the cake back to smooth bowl walls.
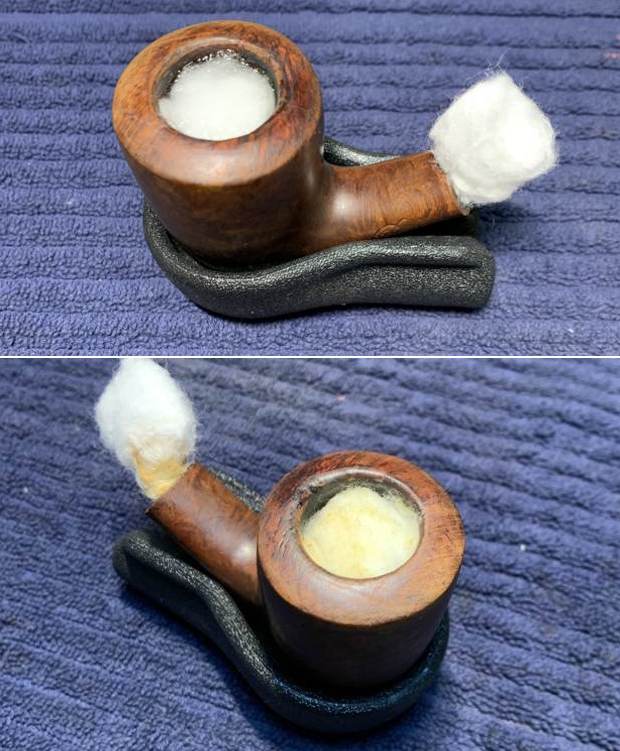
  I cleaned out the mortise and the airway in the shank and the stem with alcohol, pipe cleaners and cotton swabs. It was quite dirty but once cleaned smelled better.
 I worked on the darkening on the back inner edge of the rim top and on the top itself. I was able to sand it out with 220 grit sandpaper and give it a slight inward bevel.
  I scrubbed the exterior of the bowl and shank with undiluted Murphy’s Oil Soap and a tooth brush. I rinsed it off with warm running water to remove the grime and debris in the finish of the rustication and on the smooth portions. I worked over the sanded rim top at the same time.
 I polished the smooth portions of the bowl with micromesh sanding pads – dry sanding with 1500-12000 grit sanding pads. I wiped the bowl down after each sanding pad with a damp cloth to remove the sanding debris. The bowl began to take on a rich glow.


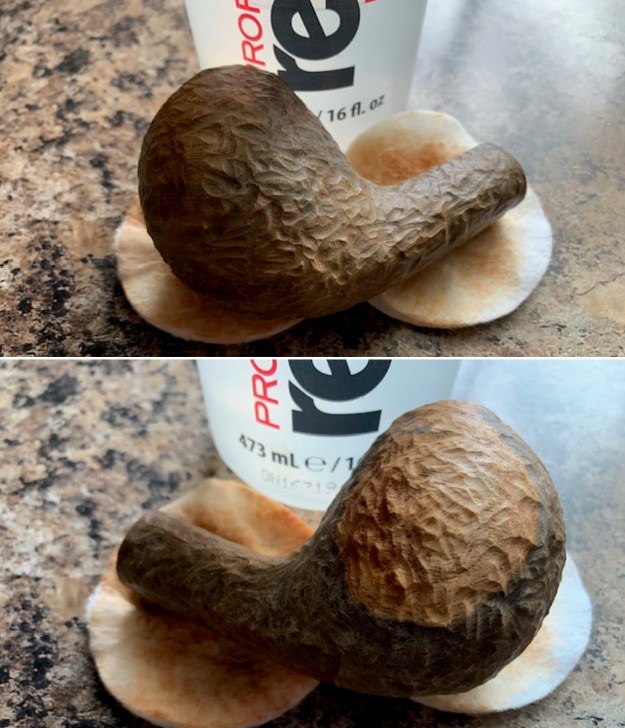
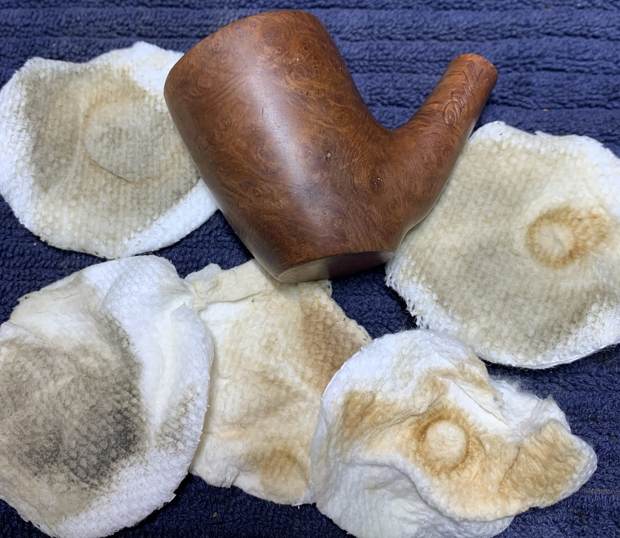
 I rubbed down the bowl and shank with Before & After Restoration Balm. It is a paste/balm that is rubbed into the surface of the bowl and shank. The product works to deep clean the finish, enliven and protect the wood. I worked it into the surface with my finger tips. I let it sit for 10 minutes then wiped it off with a soft cloth then buffed it with a cotton cloth. The bowl really began to have a deep shine and the grain shines through. The photos I took of the bowl at this point mark the progress in the restoration. It is a gorgeous pipe.

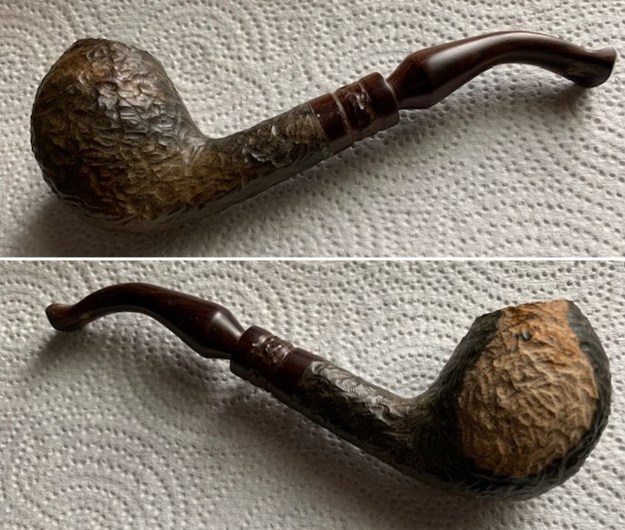
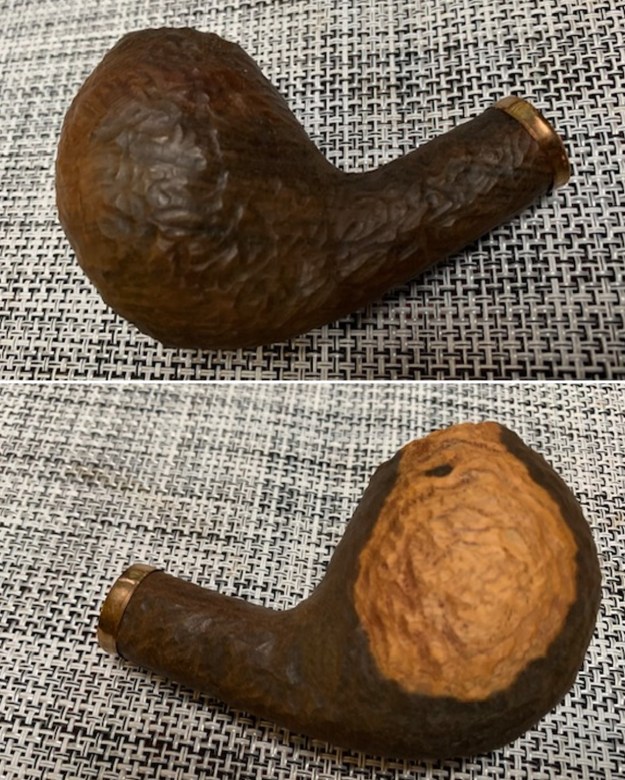
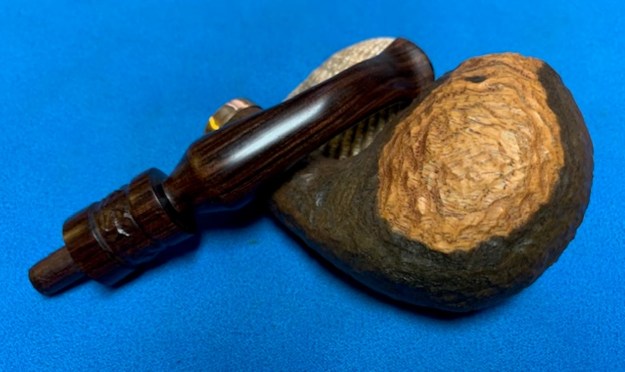
 I took photos of the grain on the rim top and around the bowl and shank to get a clear picture of the wood that was used. The small straight birdseye style pattern on the rim top reminds me of the pattern in Bamboo. The flow of the grain around the bowl sides and the shank sides looks also a lot like Bamboo. The shank end also shows the same birdseye pattern as the rim top.


 I set the bowl aside at this point and turned my attention to the stem. I cleaned up the deep tooth marks and filled them in with black CA glue. I used a small file to flatten the repairs to the stem. I sanded repairs on the button surface and on both sides of the stem ahead of the button with 220 grit sandpaper. I also sanded the rest of the stem to remove the oxidation that was present. I started polishing the stem with 600 grit wet dry sandpaper.

 I polished the stem with micromesh sanding pads – 1500-12000 grit sanding pads and water to wet sand the stem. I wiped it down after each sanding pad with Obsidian Oil on a cotton rag after each sanding pads. I know that many say Obsidian Oil does nothing for acrylic stems, but I find it does two things – first it gives some protection to the stem from buildup and second it give the sanding pads bite in the polishing process.
  I have found that Before & After Fine and Extra Fine stem polish works well to remove the fine scratches in the vulcanite. I rub the Fine Polish on the stem and wipe it off with a paper towel and then repeat the process with the Extra Fine polish. I finish the polishing of the stem down with a final coat of Obsidian Oil and set the stem aside to let the oil absorb. This process gives the stem a shine and also a bit of protection.
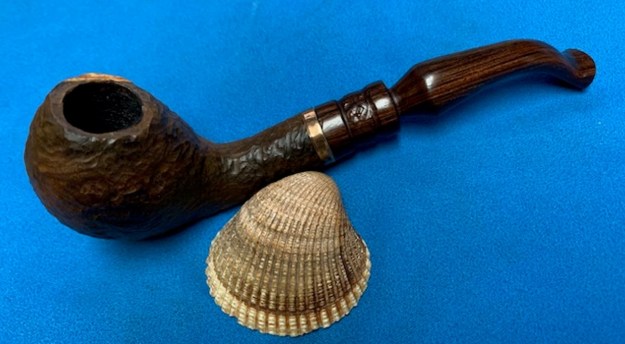
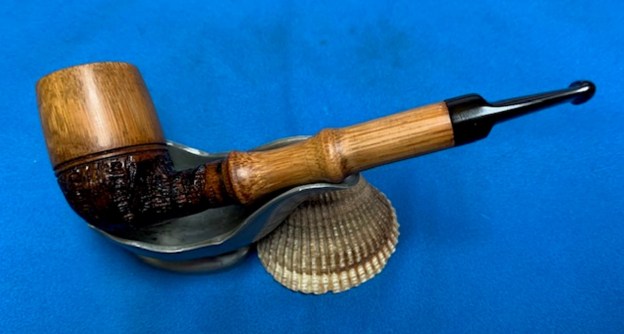
  The final steps in my process involve using the buffer. I buffed the bowl and stem with Blue Diamond to polish out the light scratches in the wood and the remaining surface oxidation in the stem. I gave the bowl and the stem multiple coats of carnauba wax. I have found that I can get a deeper shine if I follow up the wax buff with a buff with a clean buffing pad. It works to raise the shine and then I hand buff with a microfiber cloth to deepen the shine. It is always fun for me to see what the polished bowl looks like with the polished stem. It turned out to be a nice pipe. The interesting tight grain around the bowl sides and shank looks great. The vulcanite saddle stem polished very well and looks good with the bowl. The UNX UNT Quality Pipe Bamboo Lovat feels great in my hand. It is a well-balanced pipe. Have a look at it with the photos below. The dimensions are Length: 5 ½ inches, Height: 1 ¾ inches, Outside diameter of the bowl: 1 inch, Chamber diameter: 5/8 of an inch. The weight of the pipe is .74 ounces/21 grams. It is a very unique pipe and no information can be found on the stamping. Once again can any of you help me out with some identification advice on this one? It would be much appreciated. Thank you.