Tag Archives: Savinelli Silver pipes

Cleaning Up a Nice Looking Savinelli Silver 621 Bent Dublin with an acrylic 9MM Filter Stem


Blog by Steve Laug

The silver came as a trade from Japan on 01/12/23… Bret Gross

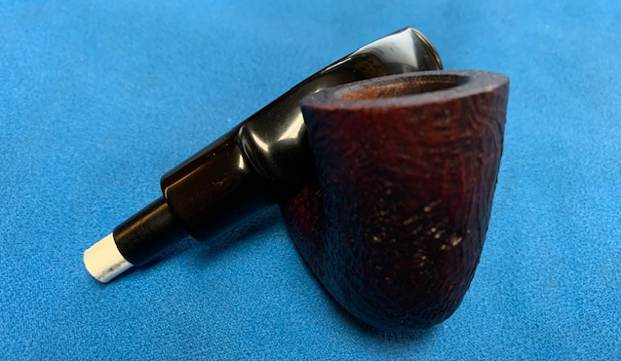
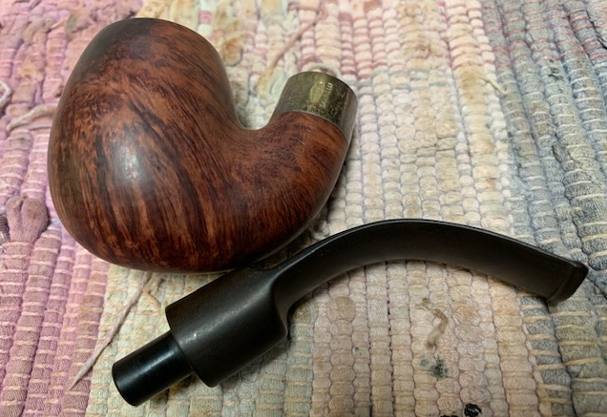
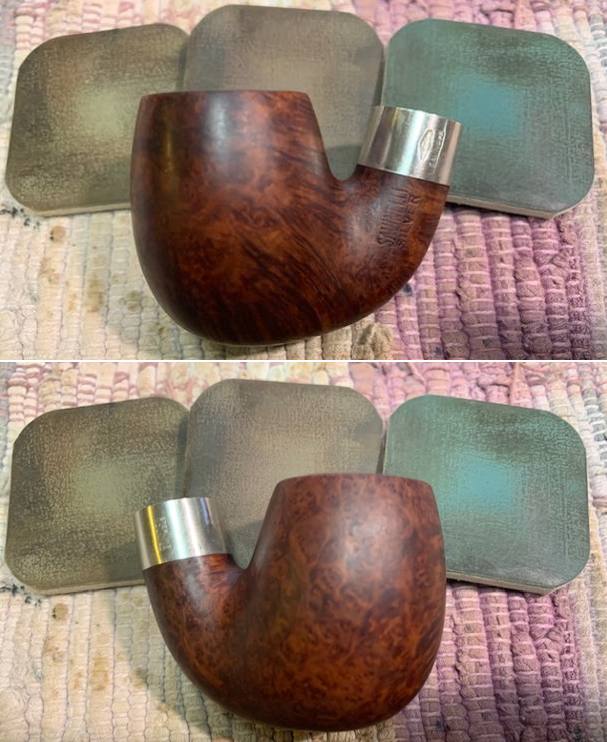
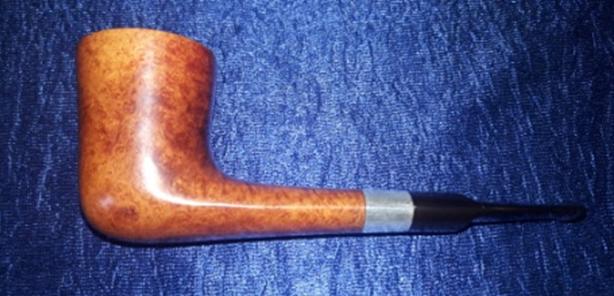
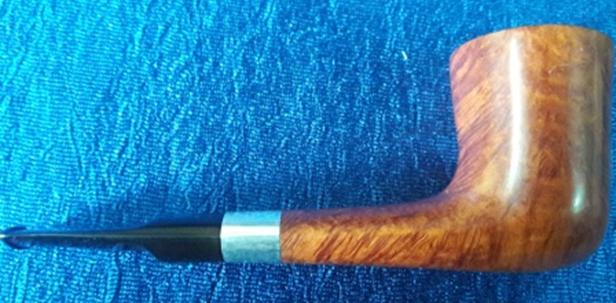
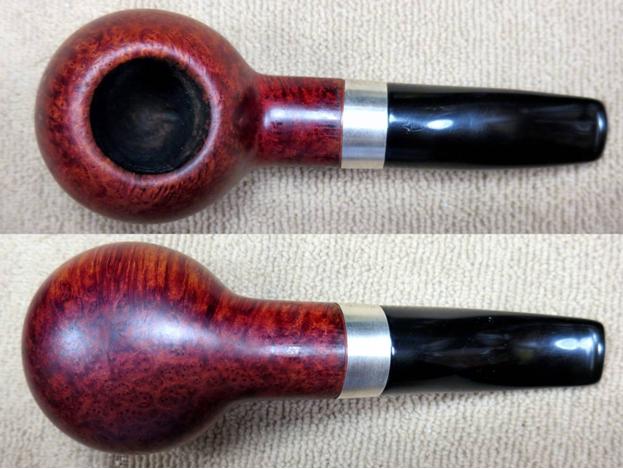
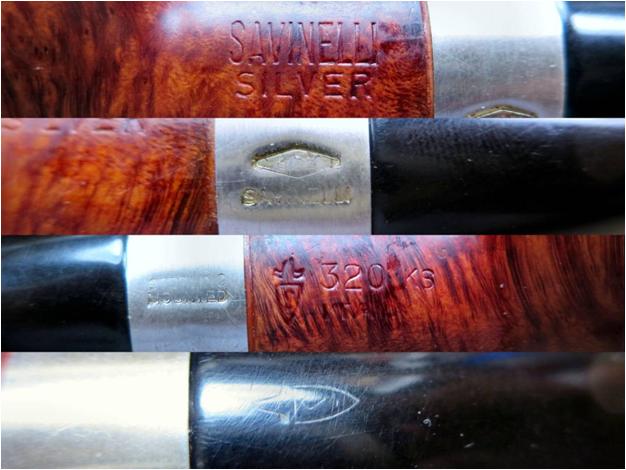
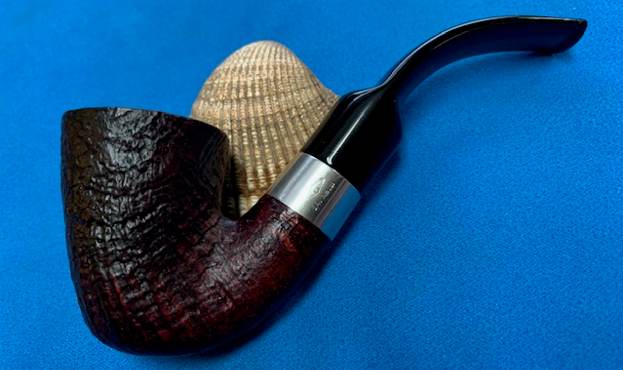
The next pipe I chose to work on was a newer one in my box of pipes to restore. We took it in on a trade for some pipes we had to sell. It is a great sandblast that really shows the grain around the sides and shank. It is stamped Savinelli [over] Silver on a smooth panel on the underside of the shank. That is followed by a Savinelli S shield followed by the shape number 621 [over] Italy. There was a Sterling Silver band on the shank that was stamped with a flattened triangle reading 925 [over] Savinelli. On the right side of the band it is stamped Sterling Mounted. The bowl had been cleaned and reamed by the fellow we received it from. The rim top looked very good with some slight darkening on the back and on the beveled inner edge of the bowl. The acrylic saddle stem was made to hold a 9MM filter and was in great condition. The stem was free of tooth marks or chatter both sides and the button. Jeff took some photos of the pipe before he did his clean up work. 
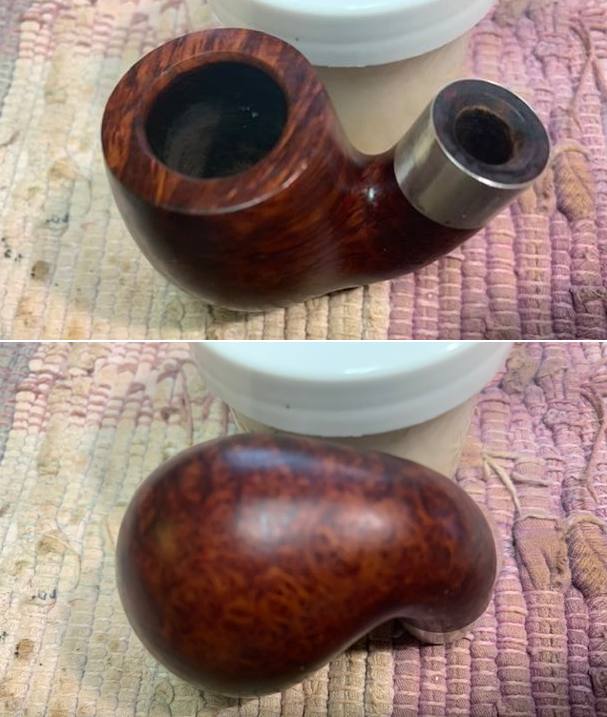
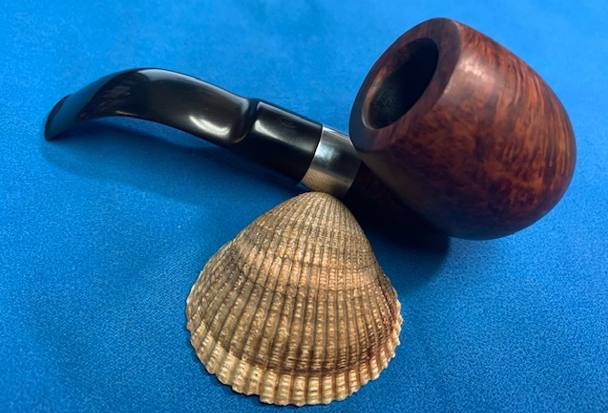
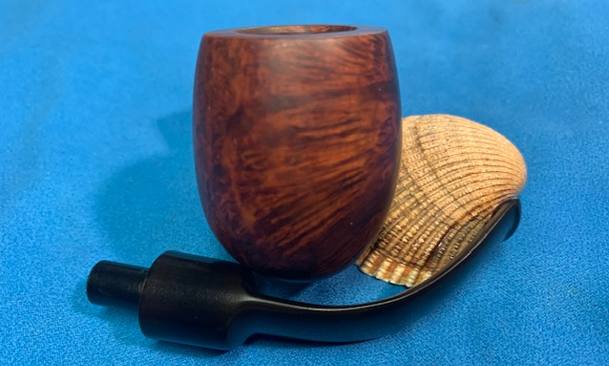
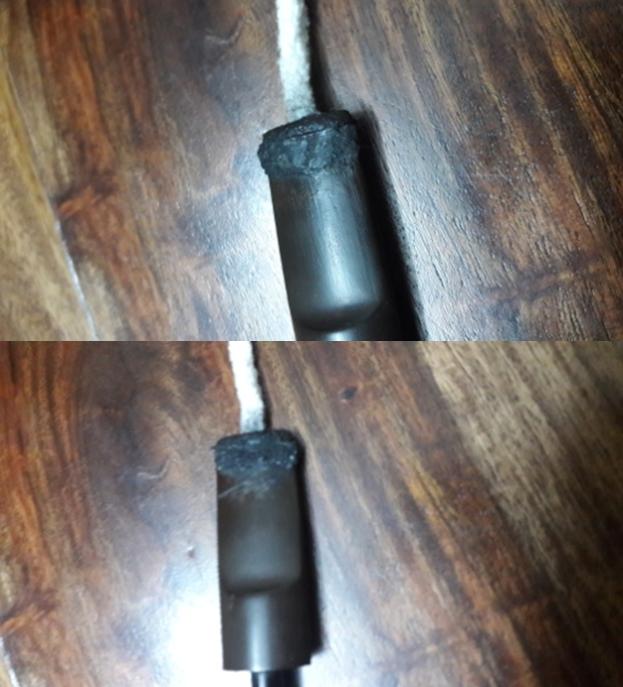
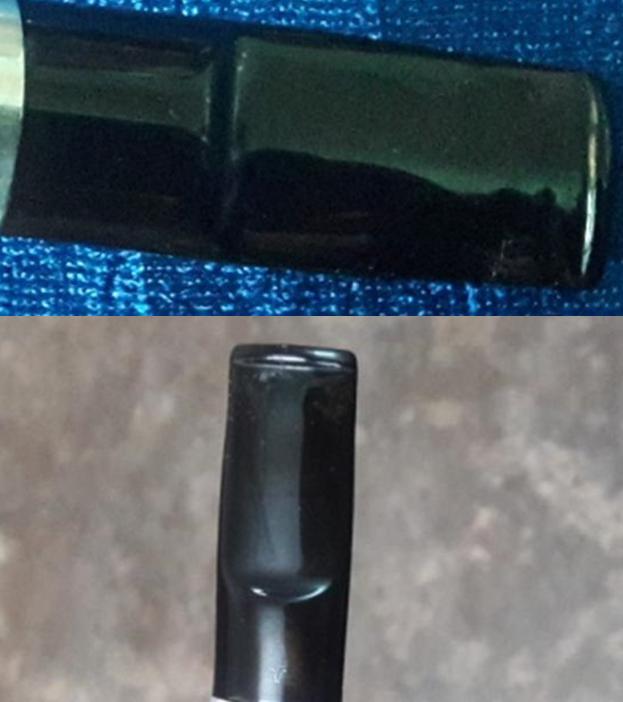
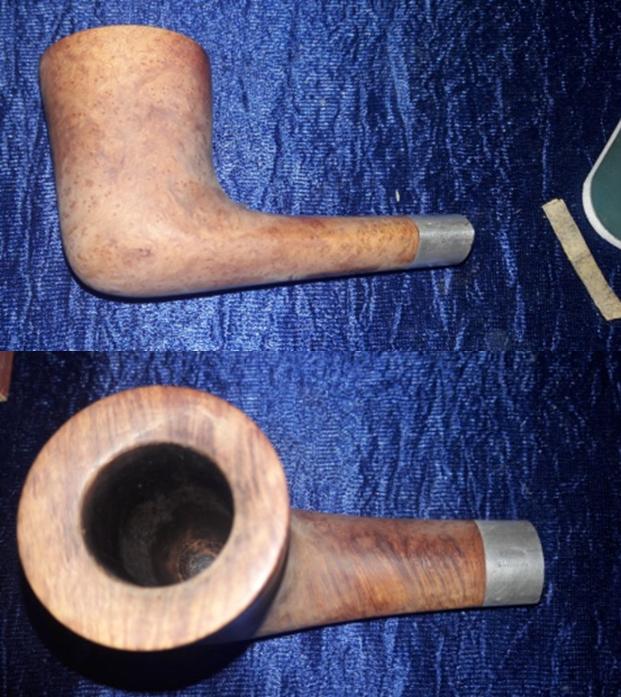
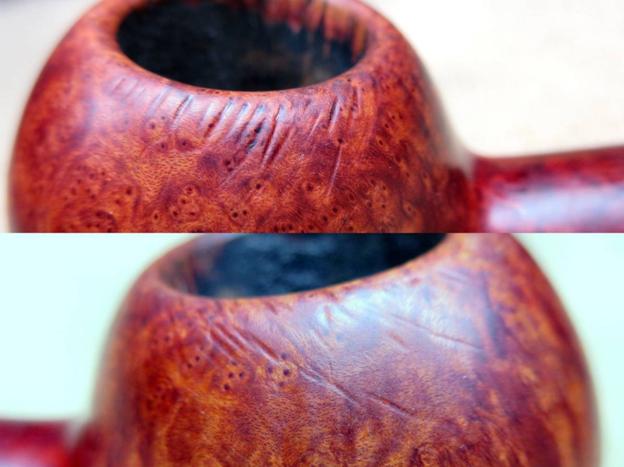
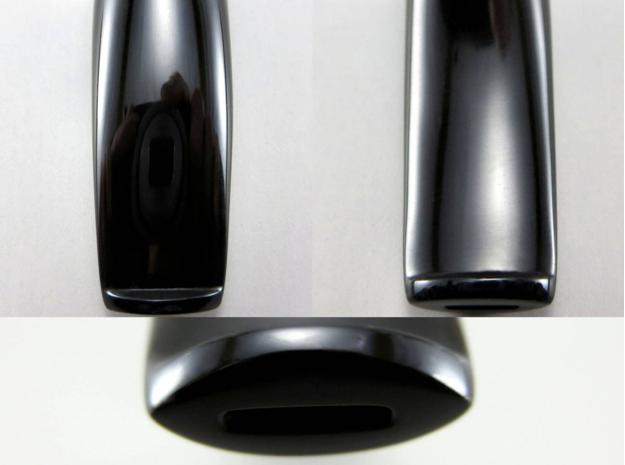
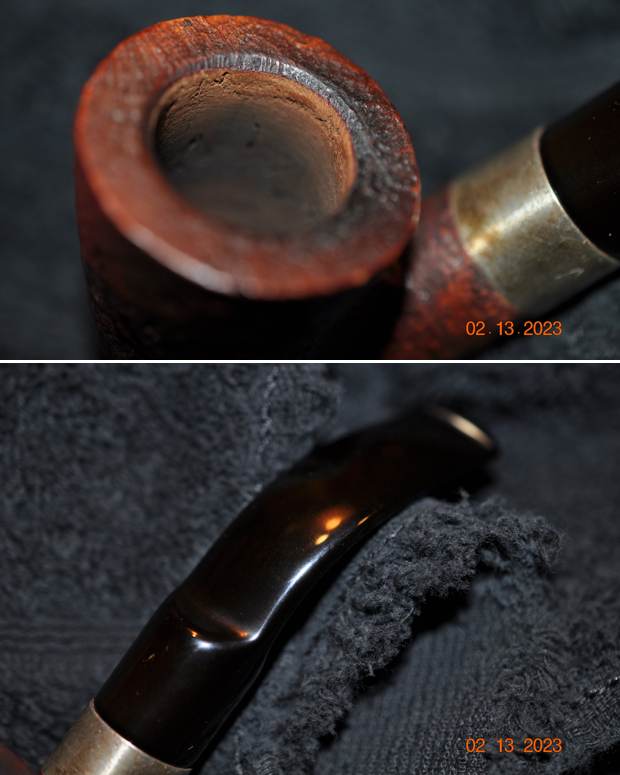
He took some photos of the bowl and the rim top to show the remnants of the cake left behind when it was reamed and the darkening on the rim top and beveled edge on the back of the bowl. The stem photos show the condition of the stem surface and confirm the description given above. It was in excellent condition. There was a slight trough along the underside edge of the button that showed up in the photos he took that will need to be dealt with. 
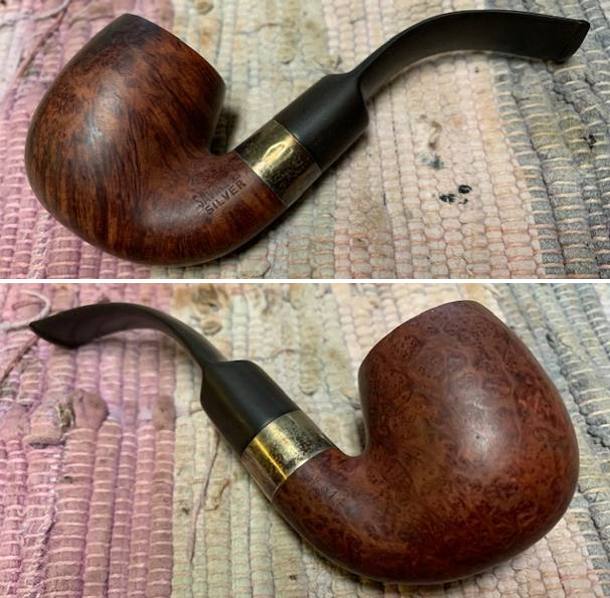
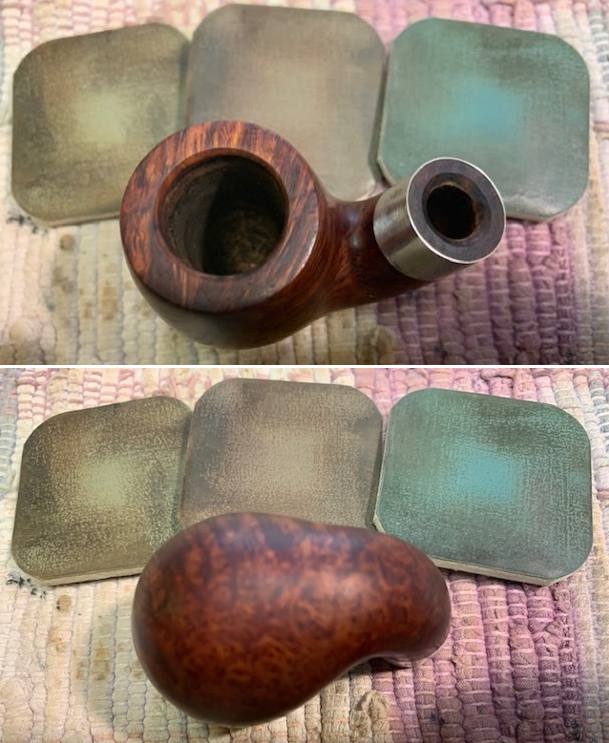
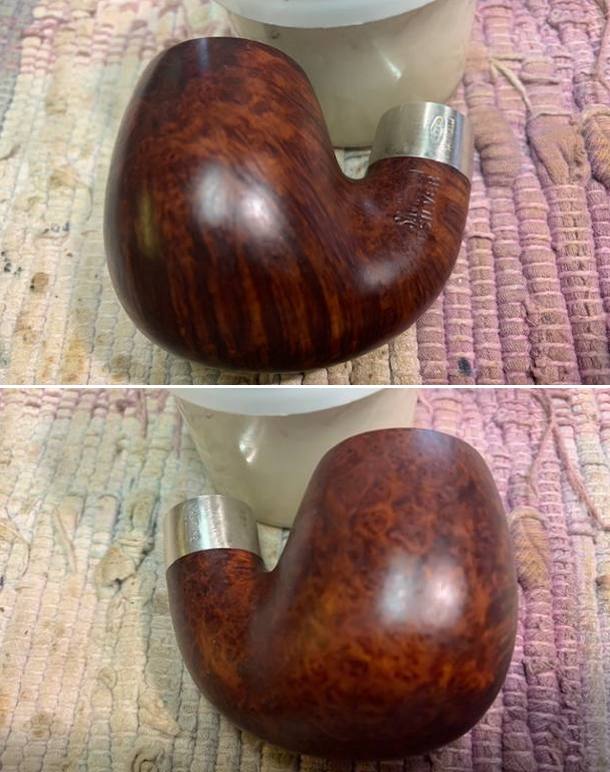
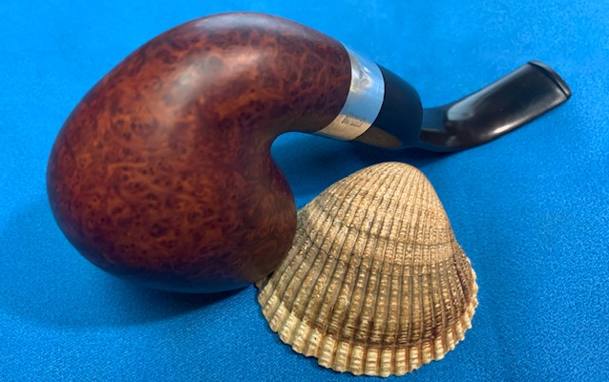
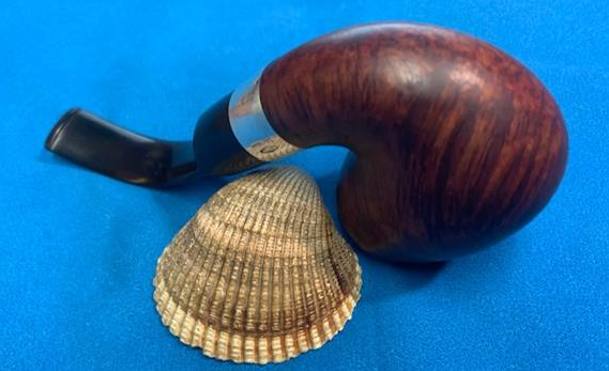
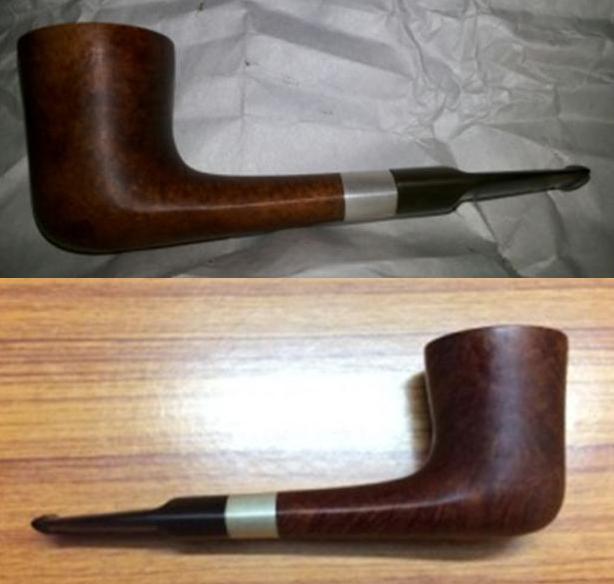
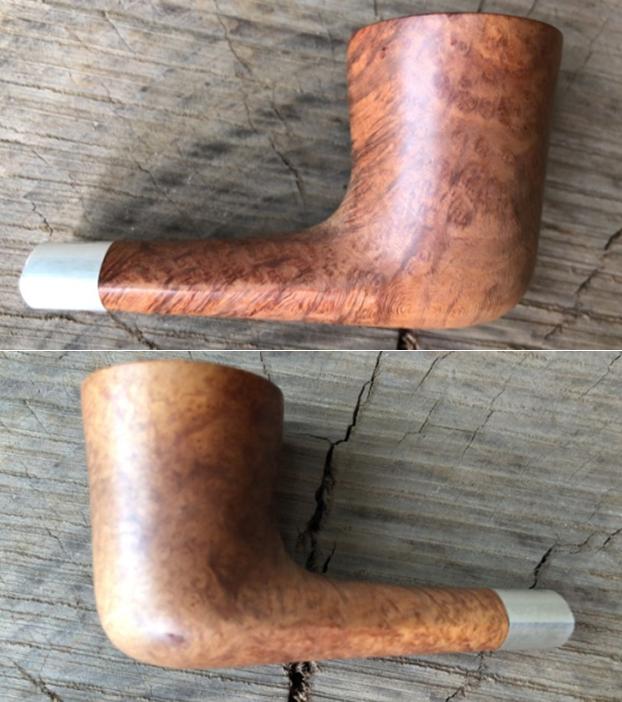
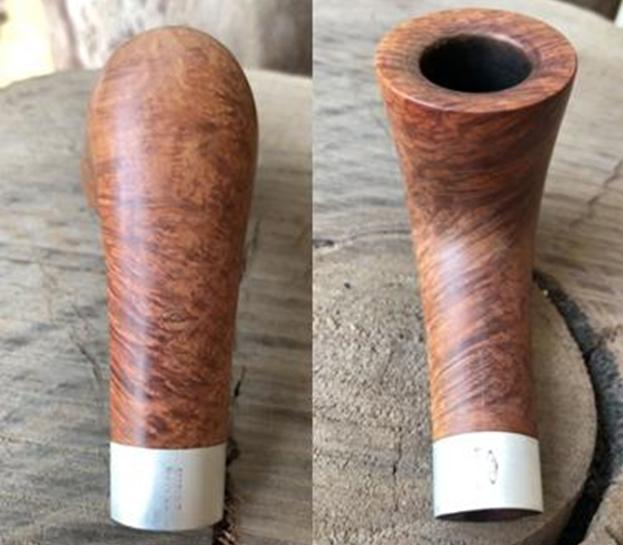
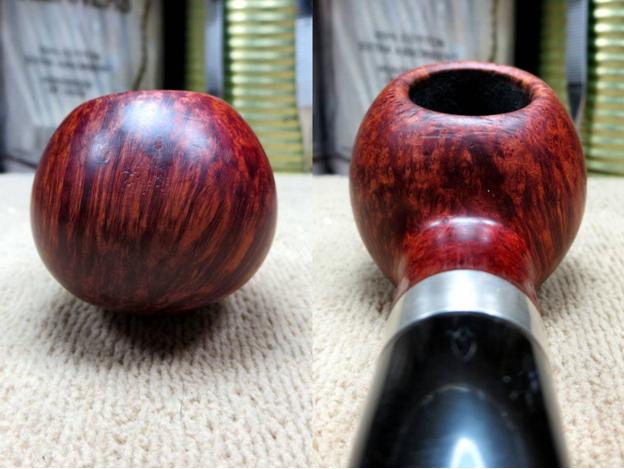
He took photos of the sides and heel of the bowl to show the patterns in the sandblast on the briar. It really shows the grain through the finish. 
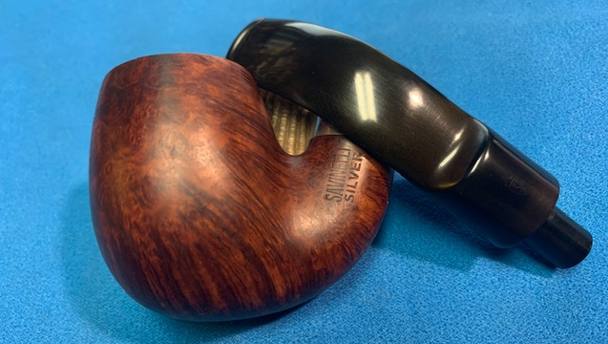
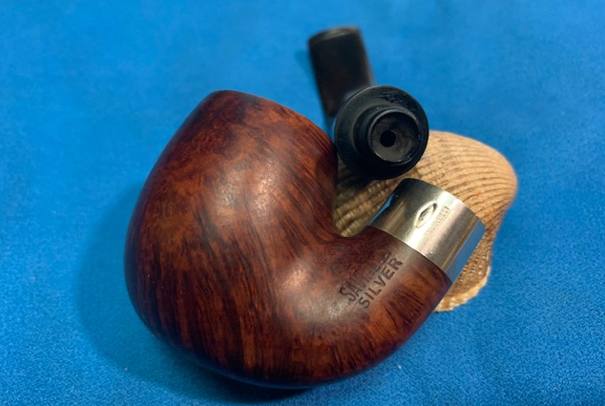
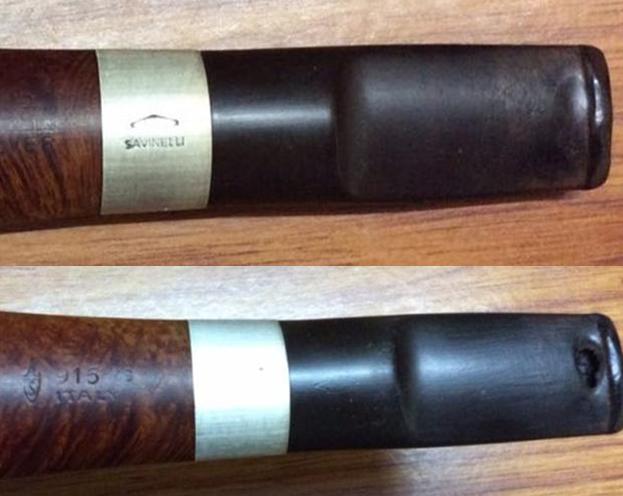
He took photos of the stamping on the smooth panel on the underside of the shank to capture what was stamped there. It is clear and readable as noted above. He also took  a photos of the stamping on the silver band. 
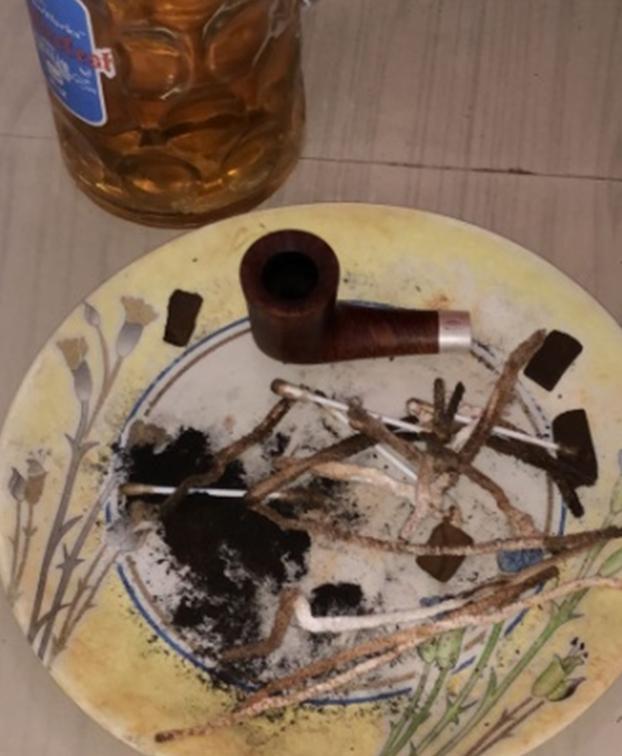
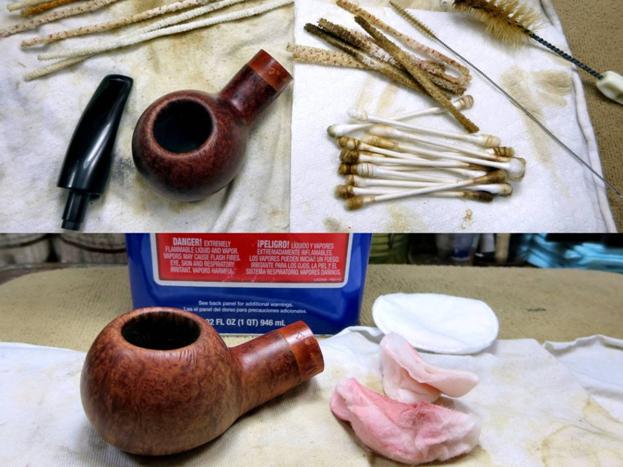
Jeff had done a great clean up of the pipe. He had cleaned up the reaming with a PipNet reamer and took the remaining cake back to bare briar. He cleaned up the remnants with a Savinelli Fitsall Pipe Knife. He scrubbed internals of the shank and stem with alcohol, cotton swabs and pipe cleaners. He cleaned the exterior of the pipe with undiluted Murphy’s Oil Soap and a tooth brush was able to remove the darkening on the rim top and beveled edge. He scrubbed the stem with Soft Scrub to remove the debris that had accumulated on it. The stem was soaked in Briarville’s Pipe Stem Deoxidizer and then rinsed clean. The pipe looked clean and ready for the next step in the process. Here are some photos of it when I brought it to the table. 
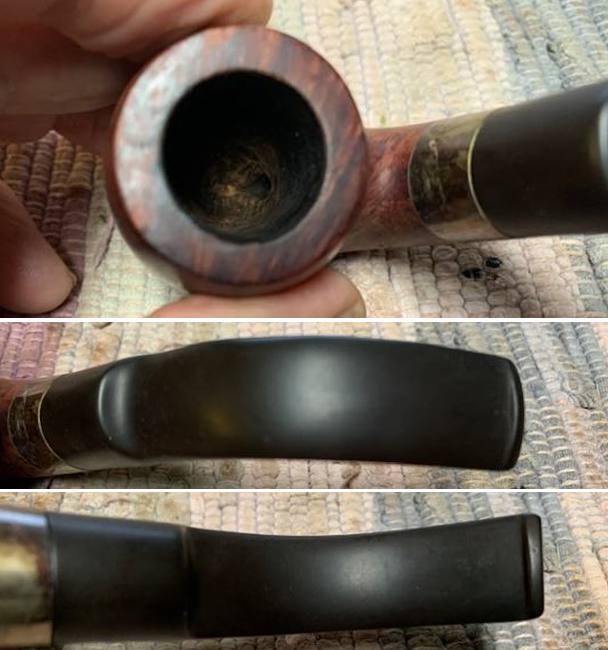
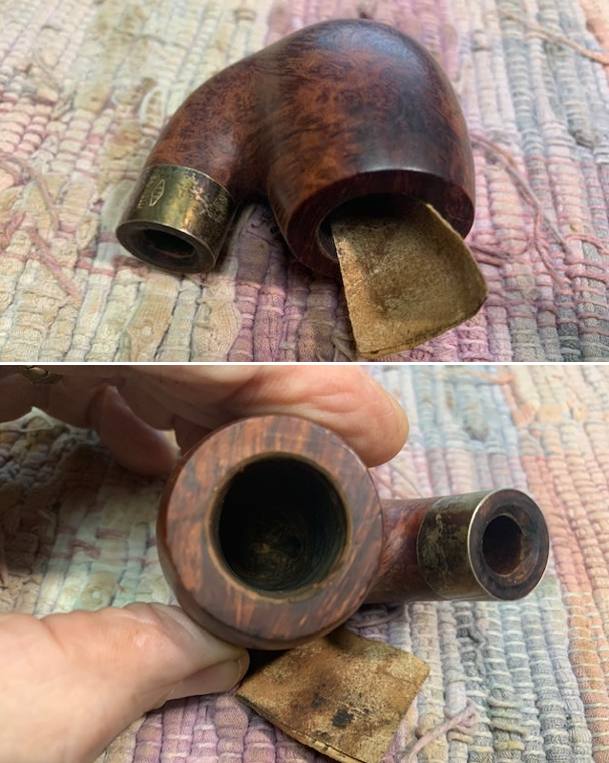
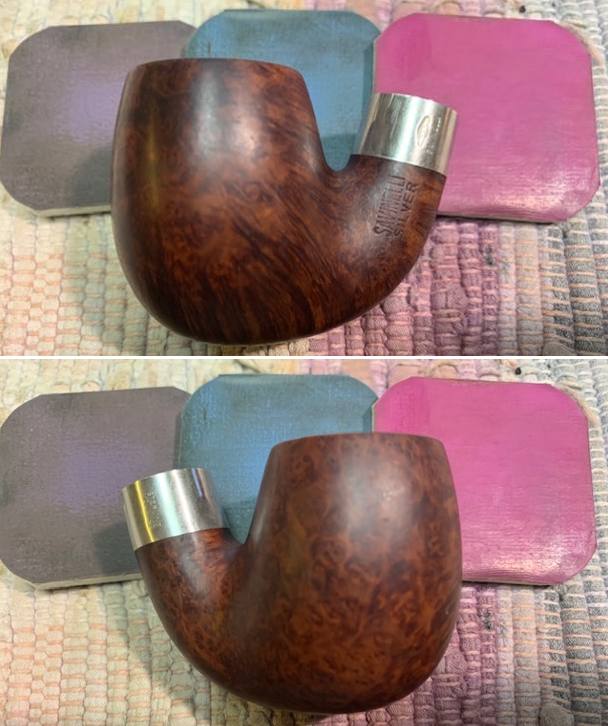
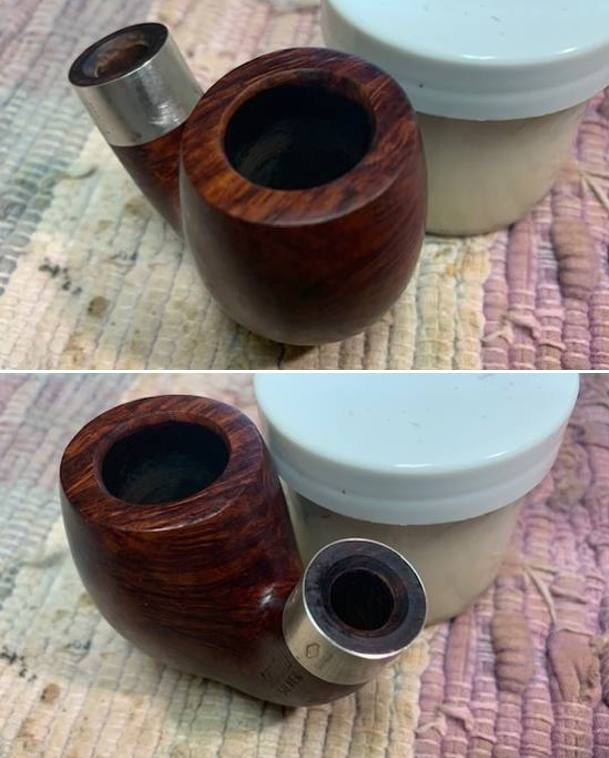
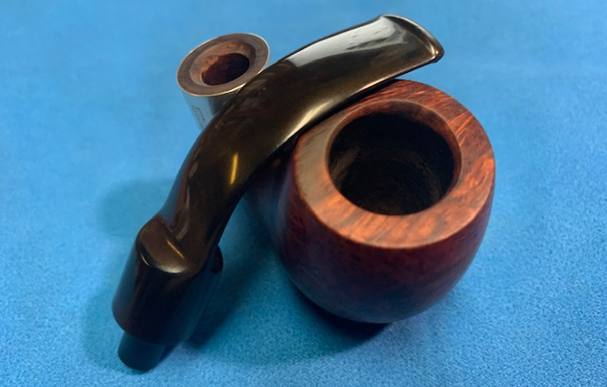
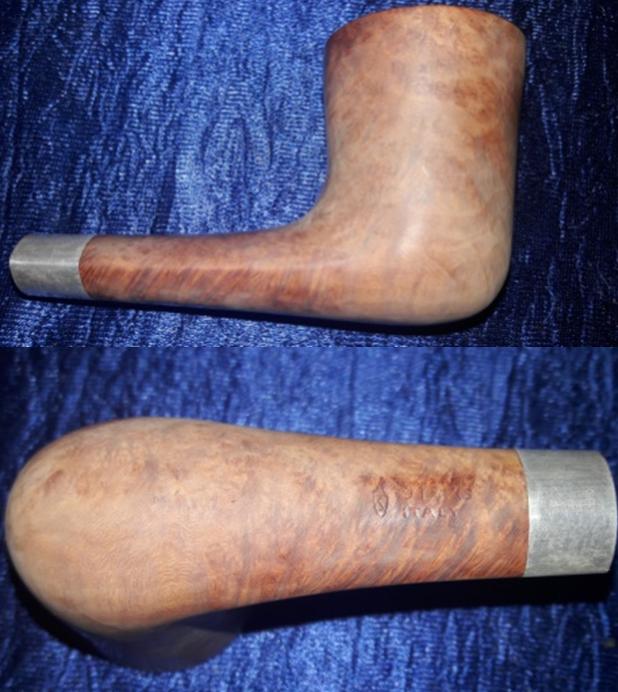
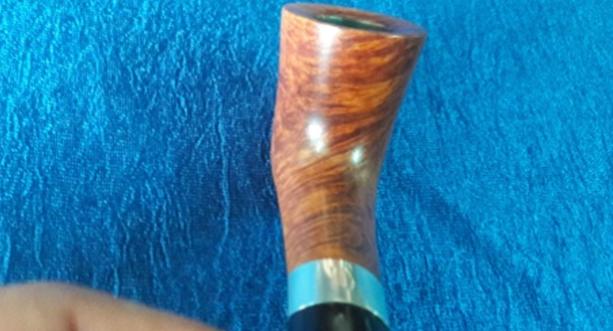
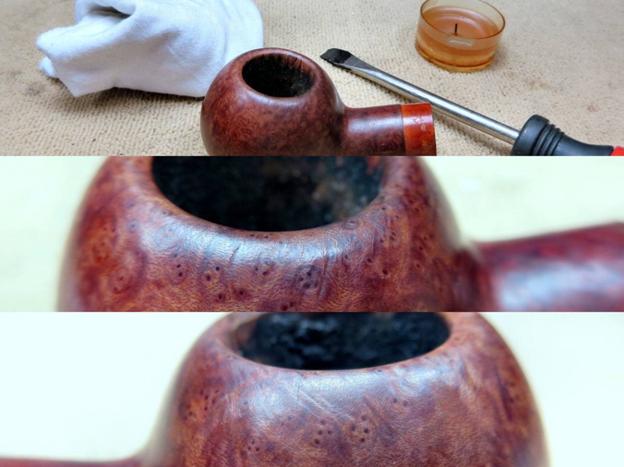
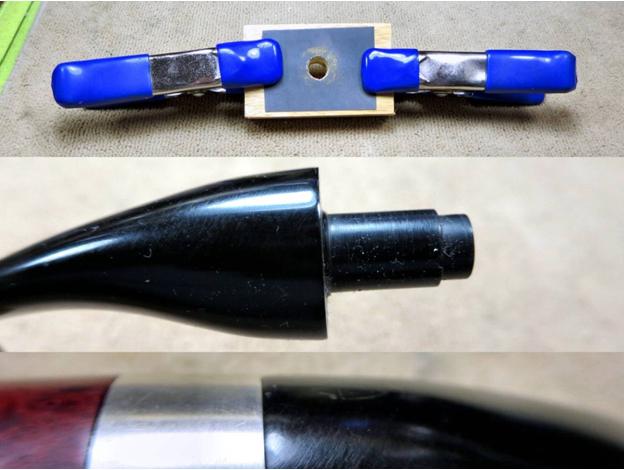
I took photos of the rim top and the top and underside of the stem. You can see the clean bowl and rim top. The stem looks very good.
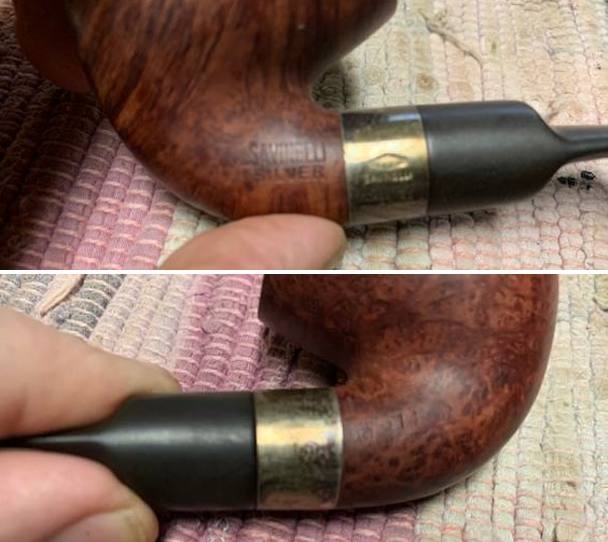
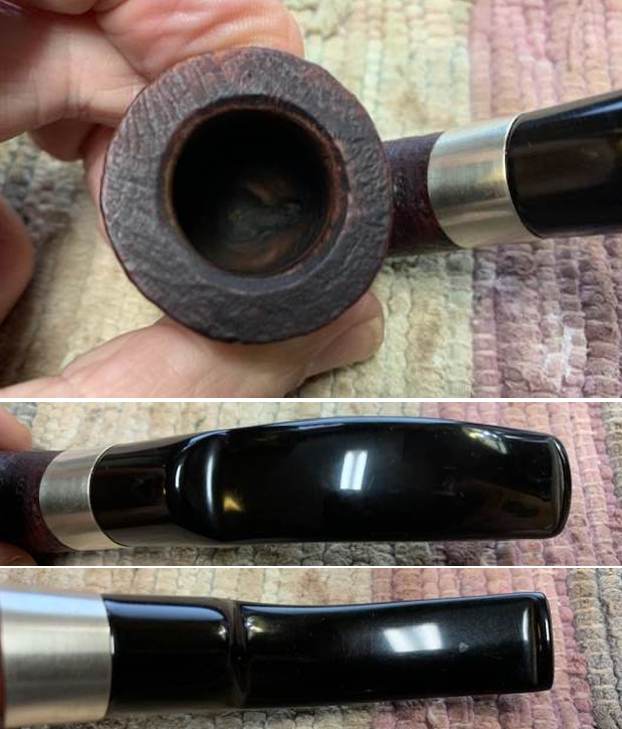
The next photo shows the stamping on a smooth panel on the underside of the shank. It is clear and readable as noted above. You can also see the stamping on the silver band.
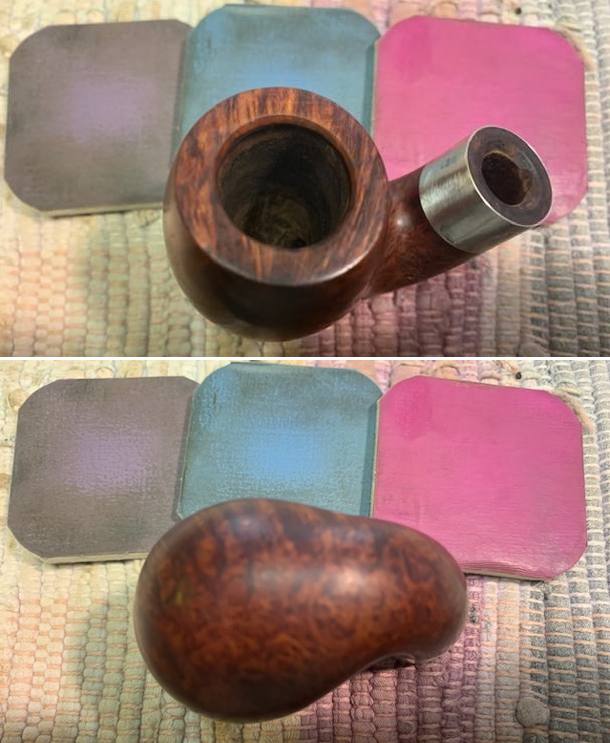
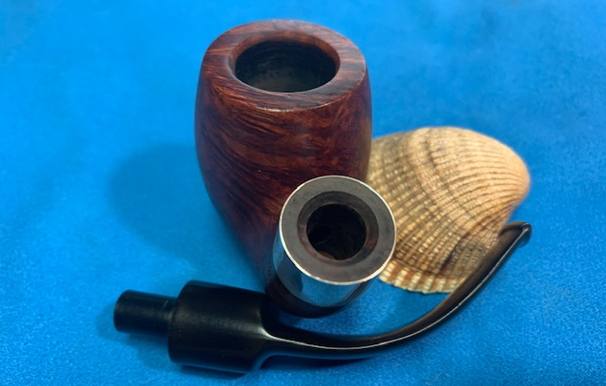
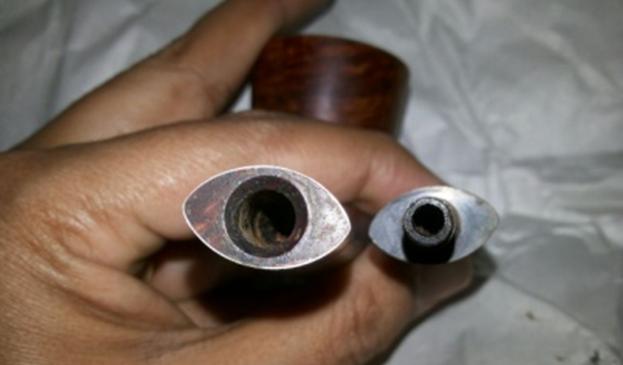
I removed the stem from the shank and took a photo of the parts to give a sense of the overall look of the pipe. It is really a nicely looking pipe that will look great once it is cleaned up. (Note the 9MM filter tenon in the photo below.)
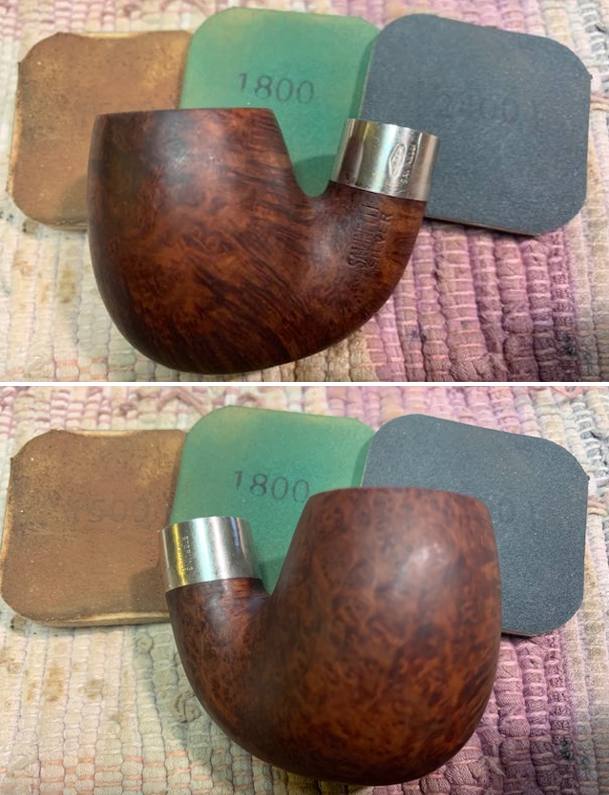
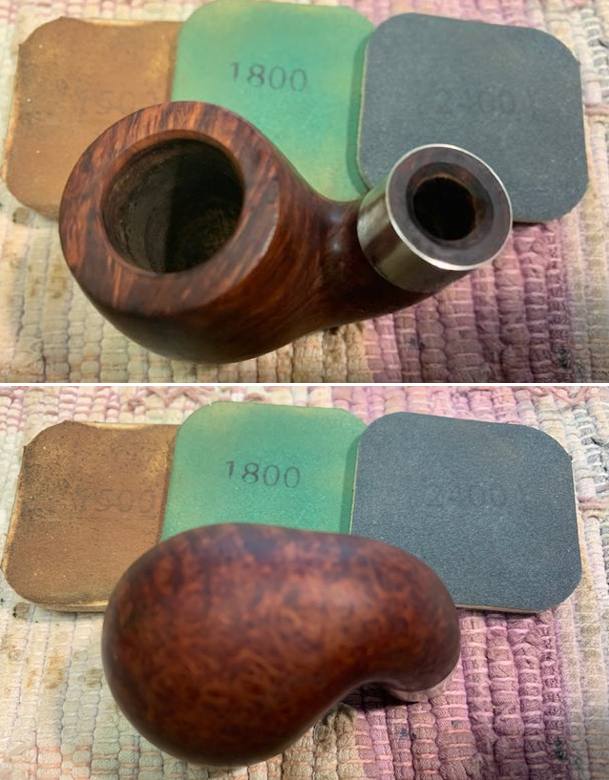
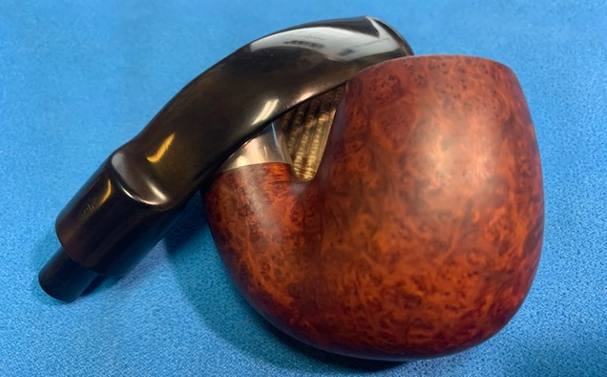
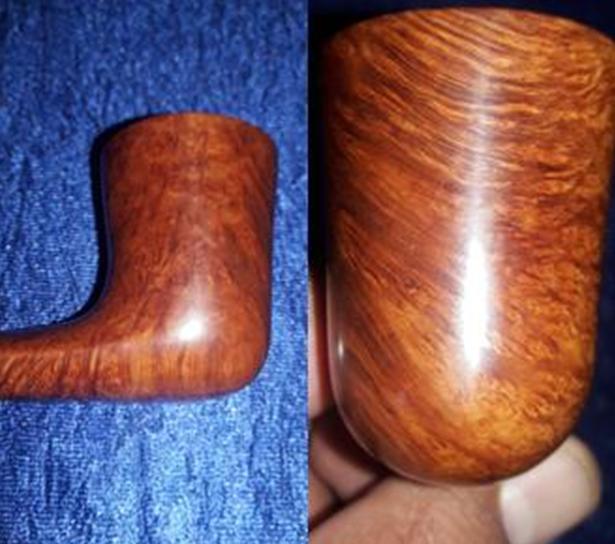
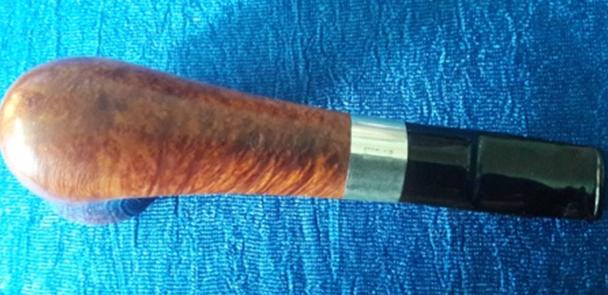
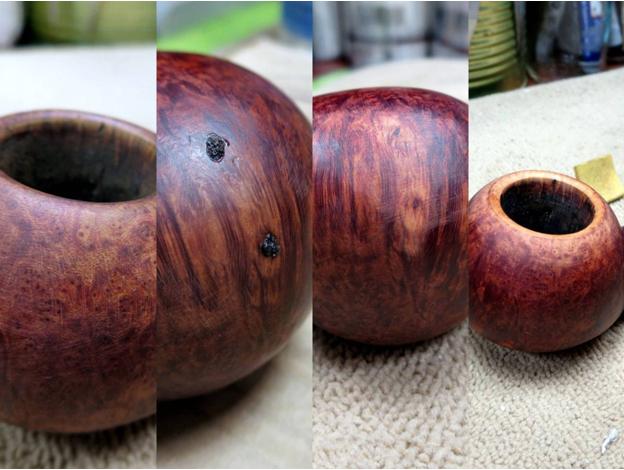
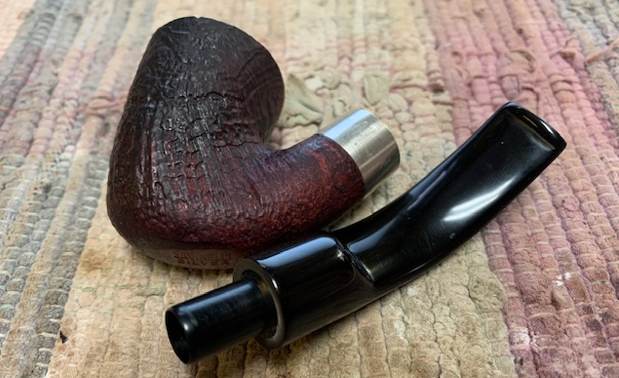
The bowl was in great condition so started my work by rubbing it down with Before & After Restoration Balm to deep clean the nooks and crannies of the sandblast finish, enliven and protect the briar. I hand rubbed it with my fingers and into the finish with a horsehair shoe brush. I let it sit for 10 minutes to let it do its work. I wiped it off with a soft cloth. I buffed the bowl with a cotton cloth. It really began to have a deep shine in the briar. I took some photos of the bowl at this point to mark the progress in the restoration. 
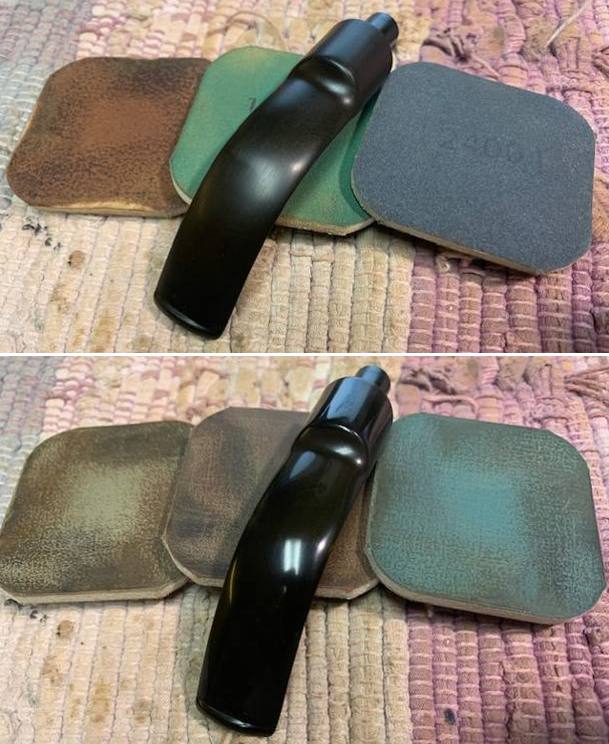
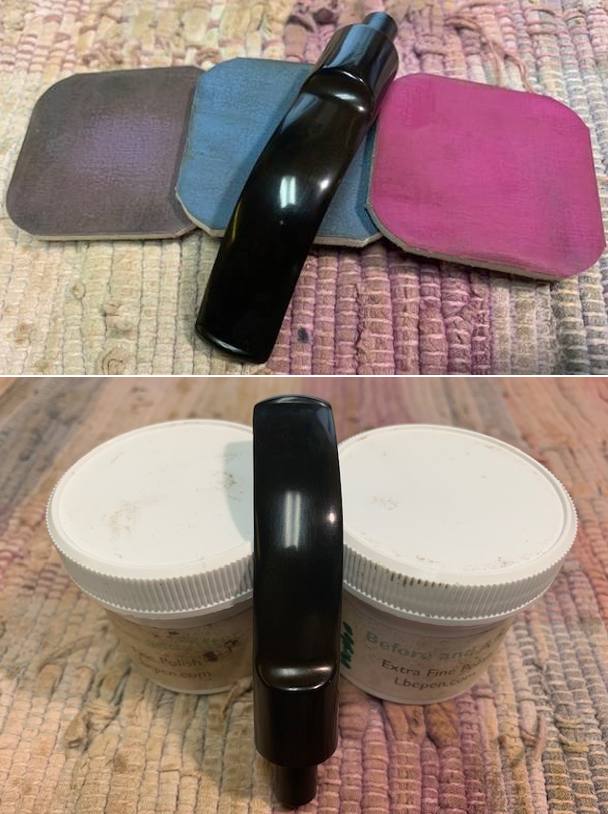
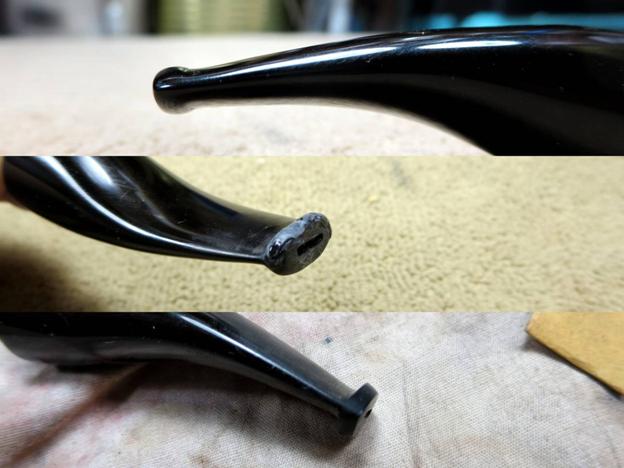
I set the bowl aside and turned my attention to the stem. I worked on the slight dip in the acrylic ahead of the button on the underside of the stem with 220 grit sandpaper to smooth it out and level it. Once it was smooth I polished it with 600 grit wet dry sandpaper.
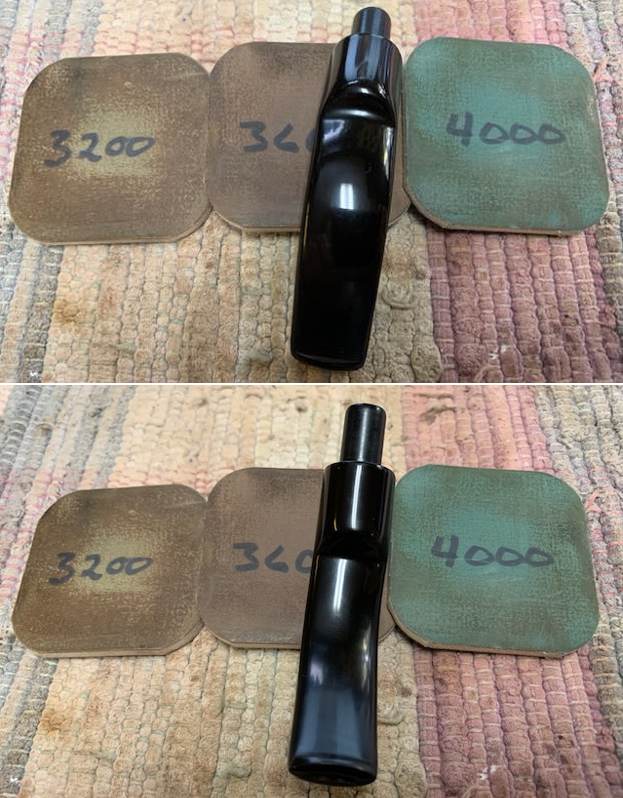
I polished the stem on both sides using micromesh sanding pads. I dry sanded the stem with the 1500-12000 grit pads, then wiped it down with a cloth impregnated with Obsidian Oil. I finished polishing it with Before & After stem polish – both Fine and Extra Fine. I gave it a final coat of Obsidian Oil and set it aside to dry. 
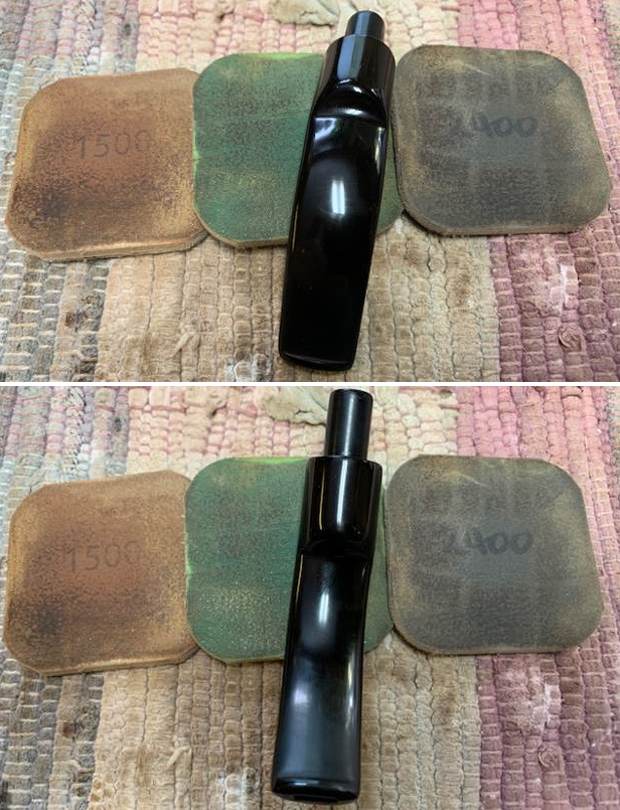
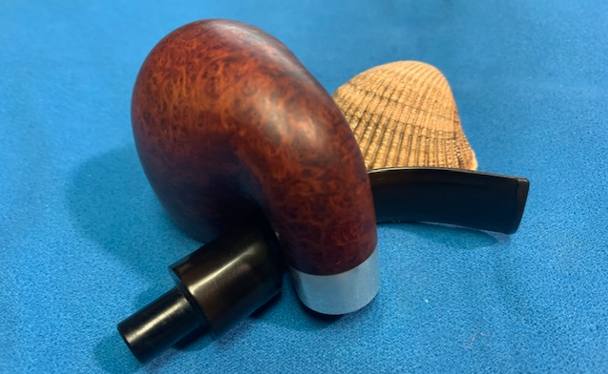
I fit a new charcoal 9MM filter in the tenon of the stem and took photos.
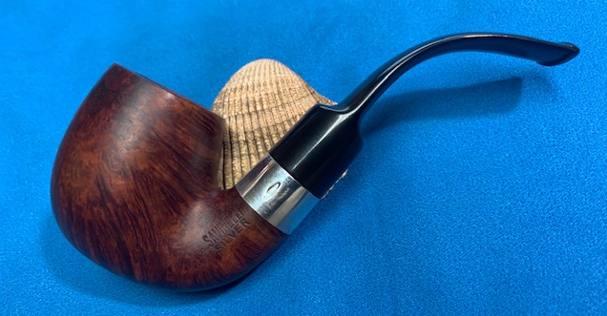
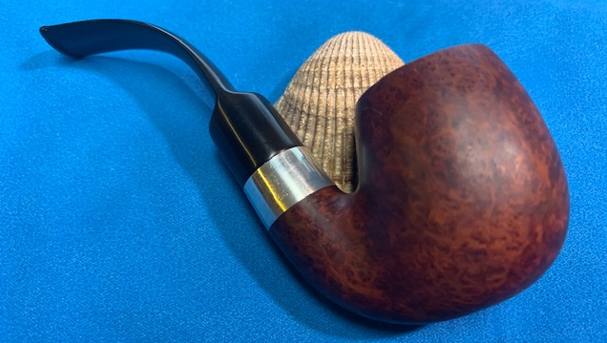
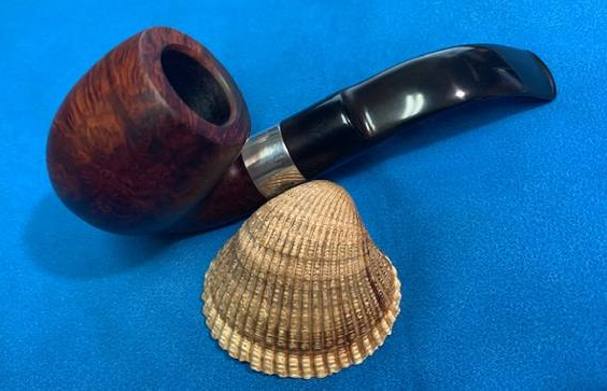
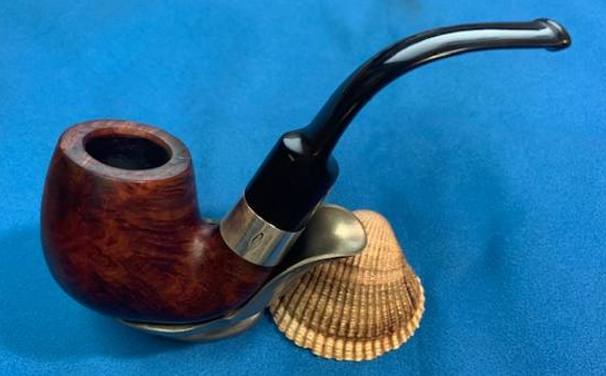
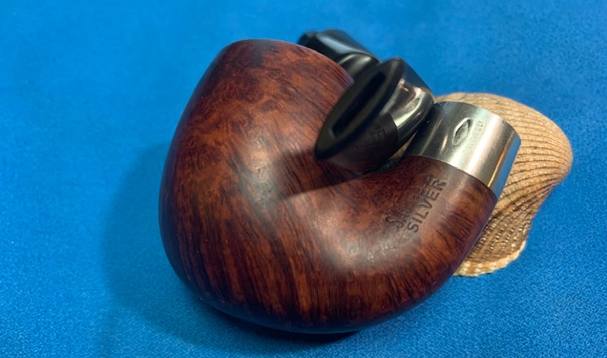
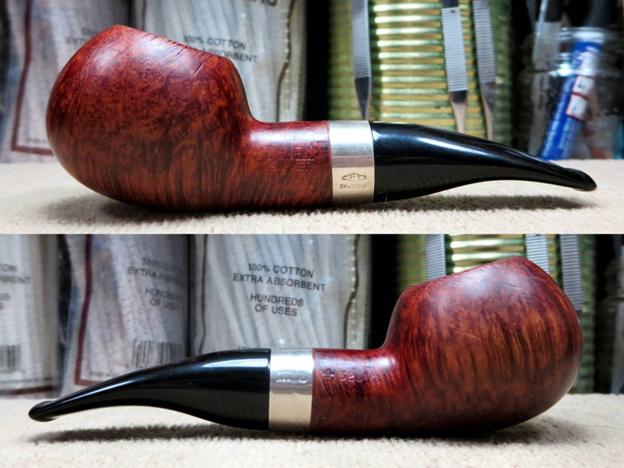
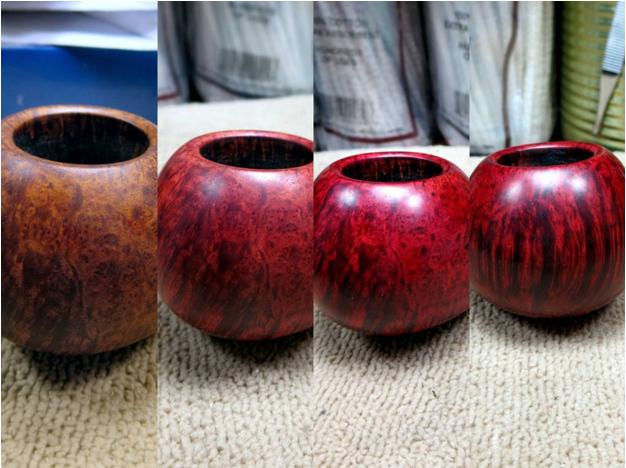
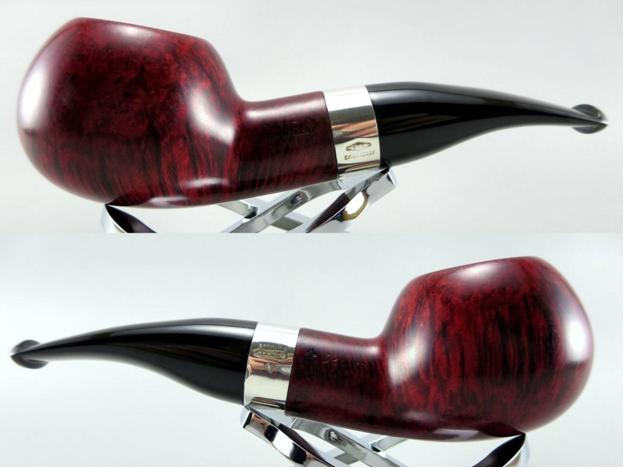
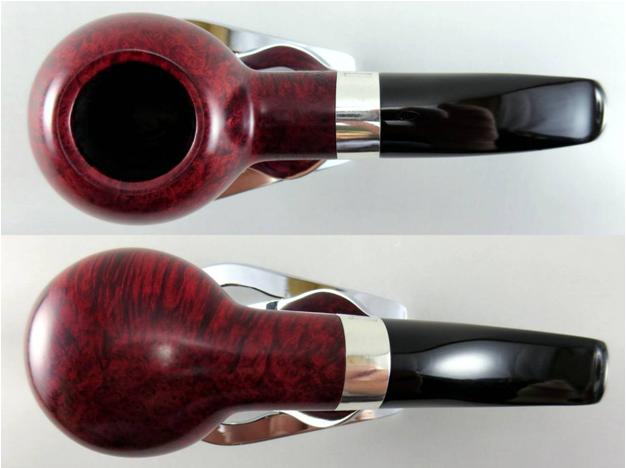
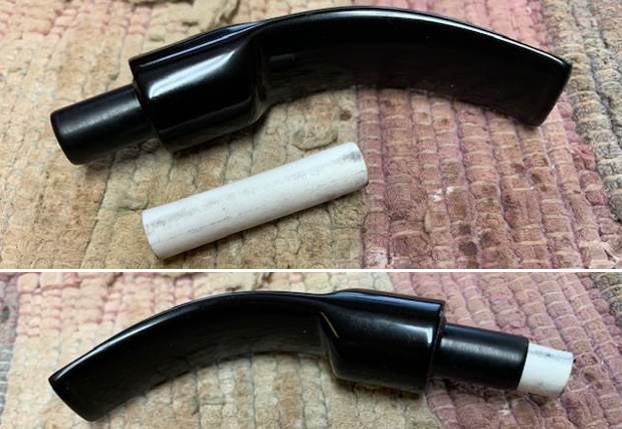
This is another pipe I am excited to finish. It is a Savinelli Silver 6211 Bent Filter Stem Dublin. I put the pipe back together and buffed it lightly with Blue Diamond on the buffing wheel. I gave the bowl and the stem multiple coats of carnauba wax. I buffed the pipe with a clean buffing pad to raise the shine and hand buffed it with microfiber cloth to deepen the shine. It is fun to see what the polished bowl looks like with the polished acrylic stem. It really was a beautiful pipe. The sandblast finish surface show the grain shining through the rich browns/black stain on smooth portions of the finish of this Savinelli Silver Bent Dublin. It is nice looking and the pipe feels great in my hand. It is light and well balanced. Have a look at it with the photos below. The dimensions are Length: 5 inches, Height: 2 ¾ inches, Outside diameter of the bowl: 1 ¼ inches, Chamber diameter: 7/8 of an inch. The weight of the pipe is 1.27 ounces/37 grams. It is a beautiful pipe and one that I will be putting on the rebornpipes store in the Italian Pipe Maker section. Thanks to each of you who are reading this blog. Remember we are not pipe owners; we are pipemen and women who hold our pipes in trust until they pass on into the trust of those who follow us.

Restoring a Lovely Savinelli Silver 614 Bent Billiard


Blog by Steve Laug

The next pipe I chose to work on was from my box of pipes to restore. Neither Jeff nor I remember where or when we purchased it. Jeff started taking photos of the pipes he worked on in 2016 so we are pretty certain this one came to us before that time. It has some great grain around the sides and shank. It is stamped Savinelli [over] Silver on the on the left side of the shank. On the right side it is stamped with a Savinelli S shield followed by the shape number 614 [over] Italy. It had been cleaned and reamed somewhere along the way by either Jeff or me. I honestly don’t remember when or where we got this pipe. There was a Sterling Silver band on the shank that was stamped with a flattened triangle reading 925 [over] Savinelli. On the right side of the band it is stamped Sterling Mounted. The rim top looked very good and the inner edge of the bowl was slightly out of round. The vulcanite saddle stem was in good condition with light oxidation and light tooth chatter on the top and underside ahead of the button. I took some photos of the bowl to give a sense of the condition of this nice little billiard. The rim top had cleaned up very well with some slight damage to the left side of the inner edge of the bowl. There were nicks in the rim top. The Sterling Silver band was tarnished and worn looking but should clean up very well. The stem surface looked very good with no tooth marks or chatter. There was some light oxidation on the stem.I took photos of the stamping on the sides of the shank and the band on the shank. It is clear and readable as noted above.I removed the stem and took a photo of the pipe to give a sense of the whole. The saddle stem is made of vulcanite. I started my work on the pipe by addressing the damage to the rim top and inner edge of the bowl. I used a folded piece of 220 grit sandpaper to give the edge a slight bevel and minimize the damage on the rim edge. I lightly sanded the rim top with the sandpaper to remove the damaged areas and smooth out the nicks and scratches.I polished the tarnished silver on the band with a jeweler’s cloth to remove the tarnish. The cloth is impregnated with a product that removes tarnish and protects the surface of the Sterling Silver from further tarnishing.I polished the bowl sides and shank with micromesh sanding pads – dry sanding with 1500-12000 grit pads and wiping it down after each pad with Obsidian Oil. I polished it with Before & After Pipe Stem Polish – Fine and Extra Fine. I gave it another coat of Obsidian Oil and set it aside. I rubbed the bowl and shank down with Before & After Restoration Balm. I worked it into the surface of the bowl sides and shank with my fingertips. The product works to clean, enliven and protect the briar. I let the balm sit for 10 minutes and then buffed with a cotton cloth to raise the shine.  I polished the vulcanite stem with micromesh sanding pads – 1500-12000 grit pads. I wiped it down with Obsidian Oil after each sanding pad. I used Before & After Pipe Polish – both Fine and Extra Fine to further polish the stem. I gave it a final rubdown with Obsidian Oil to further protect it and let it dry. There was a faint logo – S shield – on the top of the saddle portion of the stem. This Savinelli Silver 614 Bent Billiard with a Sterling Silver Band and a vulcanite saddle stem. It is a great looking pipe now that it has been restored. I put the stem back on the bowl and carefully buffed the pipe with Blue Diamond on the buffing wheel using a light touch on the briar. I gave the bowl and the stem multiple coats of carnauba wax on the buffing wheel and followed that by buffing the entire pipe with a clean buffing pad. I hand buffed the pipe with a microfiber cloth to deepen the shine. The finished Savinelli Silver Bent Billiard fits nicely in the hand and feels great. Give the finished pipe a look in the photos below. The dimensions of the pipe are Length: 5 inches, Height: 2 inches, Outside diameter of the bowl: 1 ¼ inches, Chamber diameter: ¾ of an inch. The weight of the pipe is 1.83 ounces/52 grams. I will be adding this pipe to the rebornpipes store shortly in the Italian Pipe Makers section. If you are interested in adding this pipe to your collection send me a message or an email. Thanks for reading this blog and my reflections on the pipe while I worked on it. There are many more to come!

Stem Repair on a Savinelli Silver


Blog by Paresh Deshpande

I have been simultaneously working on the stem repair of CHACOM PANACHE #44 (https://rebornpipes.com/2018/08/26/chacom-panache-44/) and this SAVINELLI SILVER. Both the pipes had similar damage to their stems; a gaping hole in the stem exposing airway of the stem. As stated in my write up on the former, I had primarily purchased these pipes to gain hands down experience in major stem repairs and stem reconstruction. That both these pipes were beautiful was an added bonus!!!!!

This fancy Dublin Sav has beautiful mixed grain on the right side of the bowl while the left side has lovely birdseye grain. The front and back of the bowl, lower and upper surface of the shank has nicely packed cross grains. A sterling silver band adorns this Sav and is stamped on the upper surface with “925” in an elongated hexagon over “SAVINELLI”. On the lower surface, this band is stamped as “STERLING” over “MOUNTED”. All stampings are in block capital letters. On top of the oval shank, towards the shank end, it bears the stamp “SAVINELLI” over “SILVER” while at the bottom, it is stamped with Savinelli shield, followed by “915”, followed by size “KS” over “ITALY” in block capital letters. The saddle stem bears the Sav Shield logo on top of the saddle. History of Savinelli pipes is very well documented on pipedia.com, however, due to a very large line up, frequent changes to models, shapes and finishes, I came to a halt when I tried to date this Savinelli. I earnestly request all the knowledgeable veterans of pipe world to share any bits and pieces of information on this pipe.

INITIAL VISUAL INSPECTION

The stummel is covered in oils and tars giving a dull and lifeless appearance to the pipe. There is no heavy build up of cake in the chamber and also overflow of lava on the rim top. However, a slight darkening is seen on the right side of the rim. Some scratches are also seen on the rim top which will need to be addressed. It is the stem which has the maximum damage. A large hole can be seen on the upper surface of the stem near the button end, exposing that portion of the airway. There are two deep bite marks on the upper surface of the stem. The button on both surfaces of the stem has been chewed and will need to be reconstructed.The mortise shows some accumulation of previously smoked tobacco oils and tars, but it is nothing as compared to some pipes which I have seen.The airway is not clogged and will only require minor cleaning.

THE PROCESS

Since I had worked on the stem of the CHACOM simultaneously with that of this Sav, the process and difficulties were the same. I would request those interested in knowing the travesties I encountered and overcoming these, to please read the write up on the stem repair of CHACOM PANACHE #44 (https://rebornpipes.com/2018/08/26/chacom-panache-44/). Here are the progressive pictures of the restoration process. Having finished the stem repair (some imperfections are seen, but cannot be discerned in person), I turn my attention to the stummel. I reamed out the chamber using a Kleen Reem pipe reamer and fabricated knife. I removed the complete cake from the chamber. I further sanded down the walls of the chamber with a 220 grit sand paper to smooth the walls and took the cake back down to the bare briar. I gently scraped out the little overflow of lava from the rim top.I cleaned out the internals of the shank with pipe cleaners and cue tips dipped in isopropyl alcohol. I wiped the inside of the chamber with cotton swabs dipped in alcohol. There was very little amount of cake and the shank was pretty clean too. It appears that though the pipe was well smoked as is apparent from the stem condition, it was well cared for.I cleaned the stummel with undiluted Murphy’s oil soap and a tooth brush. I washed the stummel under running water and dried it using paper towels and soft absorbent cotton cloth. Once the stummel had dried, I felt that the bowl was still appearing dull and lackluster. The grains, though visible, needed to be highlighted. To achieve the desired results, I sanded the stummel with micromesh pads, wet sanding with 1500 to 2400 grit pads and dry sanding with 3200 to 12000 grit pads. The rim top was also sanded down with micromesh pads to remove/ reduce the darkened areas. I wiped the bowl with a moist soft cotton cloth to remove the sanding dust after each pad. The stummel now looks beautiful with the grains on full display. I finished the bowl by rubbing “Before and After Restoration Balm” with my hands and polished it with a soft cotton cloth. The bowl now appears to be alive and the grains pop out and are on display to be enjoyed. This pipe, along with the CHACOM, will always find a place of pride in my collection for being first major stem repair project. The finished pipe is shown below.

Silver Linings: Restoring a Savinelli Silver 320KS


Blog by Anthony Cook

A friend from the Pipe Smoker Unlimited forum recently gifted me a batch of pipes that need a little TLC. In exchange, I offered to do some repair and restoration work on a couple of their own pipes. Believe me when I say that I received the better end of that deal. So, I wanted to go the extra mile on these if I could.

The first of my friend’s pipes that I chose to work on was this Savinelli Silver 320KS. I love the shape of the 320. When I hear “Savinelli,” this is the shape that I think of. Unfortunately, somebody had gotten to this one before me and it wasn’t better for it.

The initial request was just to repair the deep scratches that ran all the way around the rim. However, as I looked the pipe over, I could see that it had a few additional issues. The bowl rim was uneven and looked like it had been heavily buffed. The pipe should have had a deep, cherry red stain from the factory, but this one appeared to have been partially stripped and the stain was uneven and closer to the color of red clay. The silver shank band was loose and it had a couple of small dents on the right side. Finally, the shoulders of the stem face had been rounded with a buffer, which created a thin trench all the way around the stem where it met the band.

Oh, there was one more thing, but for reasons that I can’t explain, I hadn’t noticed it yet. I’m sure that you’ll see it in these photos of the pipe as it was on arrival.Astrid1

Astrid2

Astrid3 Nomenclature and logo details (notice the “trench” on the stem next to the band):Astrid4 This 320 appeared to be pretty clean, but there’s no such thing as a pipe that’s too clean. So, I gave the internals of the stem and stummel a bit of a scrub with isopropyl alcohol, pipe cleaners, cotton swabs, a shank brush, and a percolator cleaner (the fat brush in the upper right). I’m glad that I did. As you can see below, there was still grime to be removed. After that, I gave the surface of the stummel a scrub with acetone on cotton pads to remove the old, spotty finish.Astrid5 I took a few photos of the rim damage, and after seeing them enlarged a few hundred times on the big screen, I noticed that the edges of the marks were rounded. That seemed to indicate that they were more like dents than scratches.Astrid6 So, I decided to see what a little bit of steam would do for them. I used a tea candle to heat the end of a flat-head screwdriver. Then, I placed a wet cloth over the dents and pressed it into the cloth. The steam worked well on the marks, although I had to repeat the process several times to lift the deeper ones. After I had worked my way all the way around the bowl, the rim was in much better shape. It would still need some sanding, but not nearly as much as it would have taken before to get it smooth.Astrid7 I sanded out the remaining dents with 220-grit paper before addressing a couple of small pits that were possibly missing fills on the bottom front of the stummel. I refilled them with a mixture of briar dust and CA, and then sanded them out with 220-grit as well. Three more fills were present on the front of the bowl, but they looked like they were in good shape and I had confidence that they would blend in with the final stain.
Next, I topped the bowl to level it out and chamfered the inner rim to match the original, factory shape with 220-grit paper. Then, I started cleaning up some of the light scratches and blemishes on the stummel with 320-grit.Astrid8 I then heated the stummel to open the grain and prep it for the first stain. I applied a mahogany stain thinned 3:1 with isopropyl alcohol. Mahogany is a nice dark color that gives contrast to the grain and it would play well with the red tones that would come later. After flaming the stain, I hand-buffed it with a soft cloth to remove the excess, and then wet sanded the stummel with 400-grit to remove most of the stain except for what had set into the soft grain.

To start bringing in those red tones I mentioned, I applied a 50/50 oxblood and medium brown stain thinned to the same ratio as the previous application. I again flamed and hand-buffed before lightly wet sanding with 600-grit and 1200-grit paper, and then polishing with Micro-Mesh pads 1500-2400.

I applied a third stain, red this time, and hand-buffed before giving the pipe a Tripoli buff on the buffing wheel. Then, I polished with Micro-Mesh pads 3200-4000. At that point, I didn’t like how bright the red was. So, I decided to darken it up with a thin stain wash. I can’t tell you the exact mix, because I just eyeballed it until it was what I wanted. I can say that it was at least 50% red mixed with a small amount of oxblood for richness and an even smaller amount of dark brown to darken it. I thinned it until it was about the same color density as Kool-Aid and applied it with cotton swab. After that, I hand-buffed the excess off and continued polishing with the remaining grits of Micro-Mesh pads.Astrid9 That finished up the work on the stummel. So, I thought I’d try to do something about those rounded shoulders on the stem face. In a scrap piece of wood, I drilled a hole large enough to easily accommodate the tenon. Then, I clamped a strip of sandpaper over the block and cut a matching hole with an X-Acto knife. I inserted the tenon into the hole and rotated it while applying firm but gentle pressure to keep the plane level. I started removing material with 220-grit and worked up to 600-grit. All in all, I probably removed 1/16 of an inch or less from the end of the stem. It wasn’t enough to completely correct the problem, but it did make it a great deal less obvious. The shoulders were nice and sharp again and I didn’t compromise the flow of the joint by creating a “step” down to a smaller diameter stem. You can see for yourself in the photos below.Astrid10 To be honest, I thought I was done at that point. It wasn’t until the pipe was reassembled and I was preparing to give it the final buff and wax that I noticed the glaring damage that I’m sure you’ve already seen. For the life of me I can’t figure out how it had escaped my attention, especially since I had just done work on the stem, but the button had been severely worn away by overbuffing. There was barely a button left at all. Of course, that wouldn’t do at all. So, after getting permission from the pipe’s owner to do some extra work, I began to create a new button.

I used 220-grit paper to rough up the surface of the damaged button and also a bit of the surrounding area. Next, I applied thin layers of black CA glue to the button to build it up. I lightly sanded between each layer with 220-grit to roughen them and ensure that the next layer had a good surface to cling to. Once the mound of CA was slightly higher than I wanted the button to be, I used 220-grit paper to start shaping the button, needle files and sanding files to carve a sharp edge at the back, and 320-grit paper to refine the shape.Astrid11 I continued to refine the shape and smooth the surface through 400, 600, and 1200-grit paper. Then I polished the button and the rest of the stem with the full range of Micro-Mesh pads and applied a drop of Obsidian oil to wrap up the stem work.

Before reassembling the pipe, I tried to lift the dents in the silver band by placing it over a wooden dowel, pressing firmly, and rotating it from side to side. My attempt was mostly in vain though. I was able to lift them slightly, mostly the one at the edge, but stopped when I began to worry about raising the stamping or tearing the band. I polished the band with Semichrome polish and placed it back on the shank with a small drop of CA to fix the looseness.

Finally, I put the pipe back together and buffed it with White Diamond on the buffing wheel. After buffing again with a clean wheel to remove any excess compound, I gave the pipe several coats of carnauba wax to complete the work on the pipe. The end results can be seen in the photos below.Astrid12

Astrid13

Astrid14

Astrid15 I think the lines of a 320 are iconic and it is a fine example of the author shape. I’m glad that I was able to restore this one to at least a bit of its former glory and get it back into rotation. Thanks for looking!