Blog by Steve Laug
 Jeff and I often purchase pipe bowl/stummels of brands that we like and want to restore. These have included a lot of different bowls. If you have followed us for long you know that some of these have included Peterson’s, Dunhill’s, and a wide range of Danish and English pipes. Awhile ago Jeff and I were sorting through the bowls in our collection and pulled out eight Peterson’s bowls that were dirty and stemless. A friend referred us to a contact named Silas Walls, of Walls Pipe Repair in Wallace, Idaho, USA as he seems to have a good supply of original Peterson’s stems. Our friend has had him fit stems for some of his Petes and was very happy with the work. We made contact with him and sent him eight bowls for restemming.
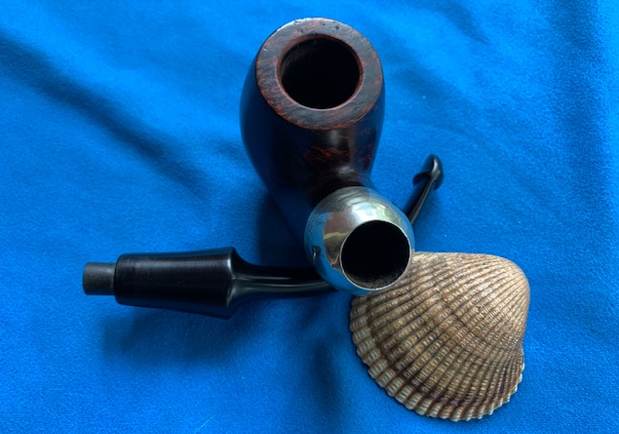
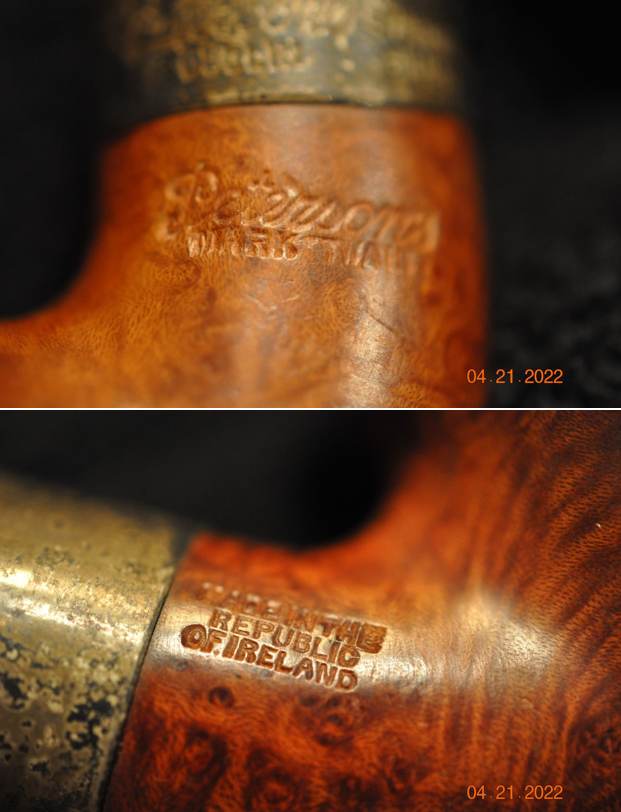
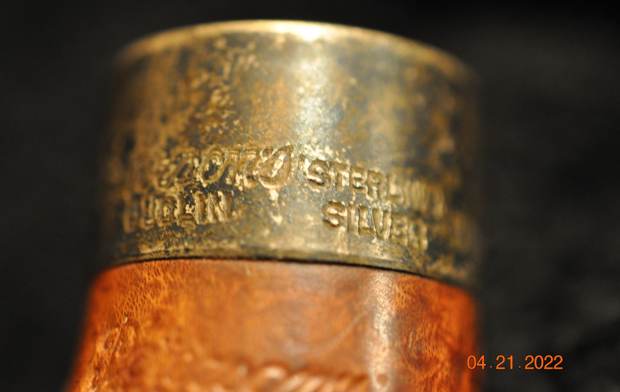
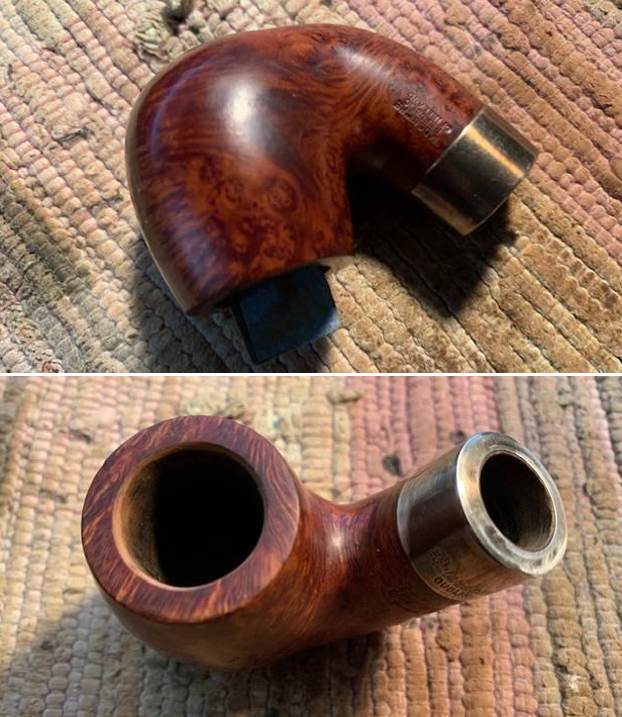
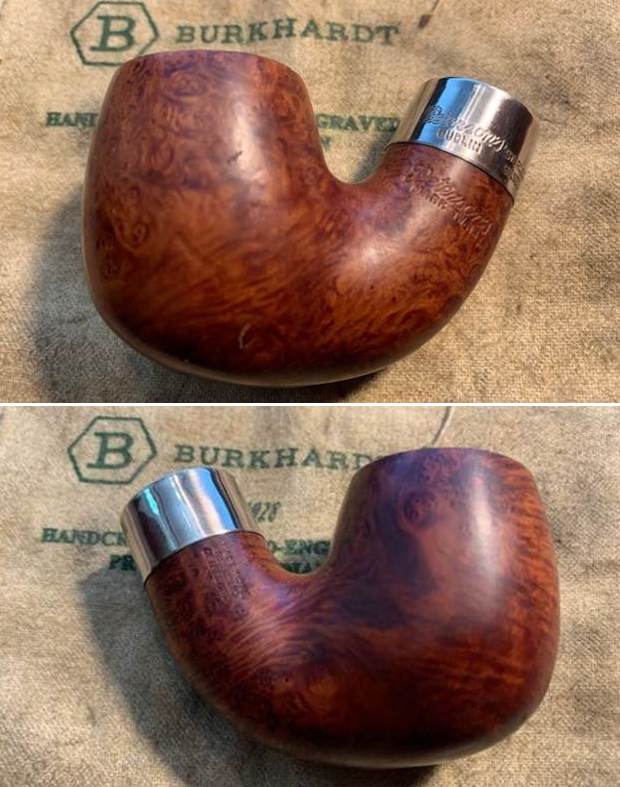
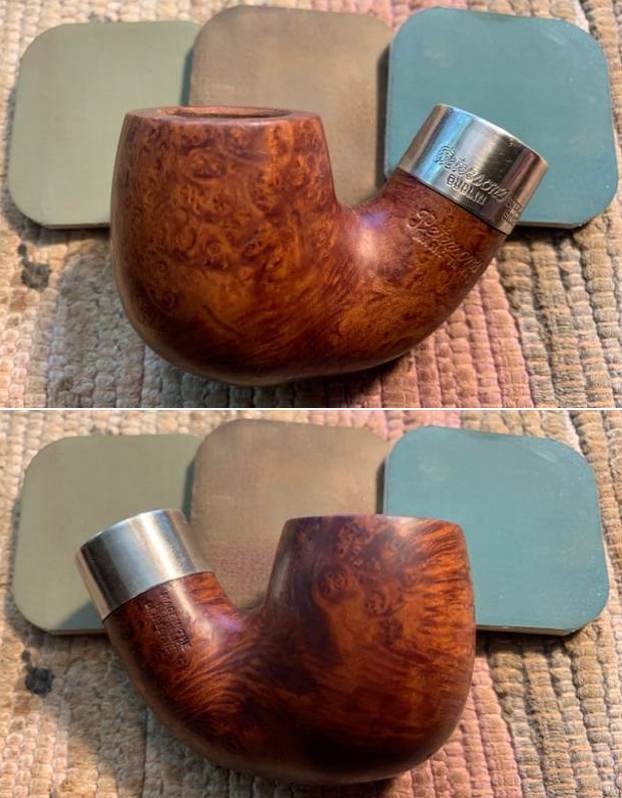
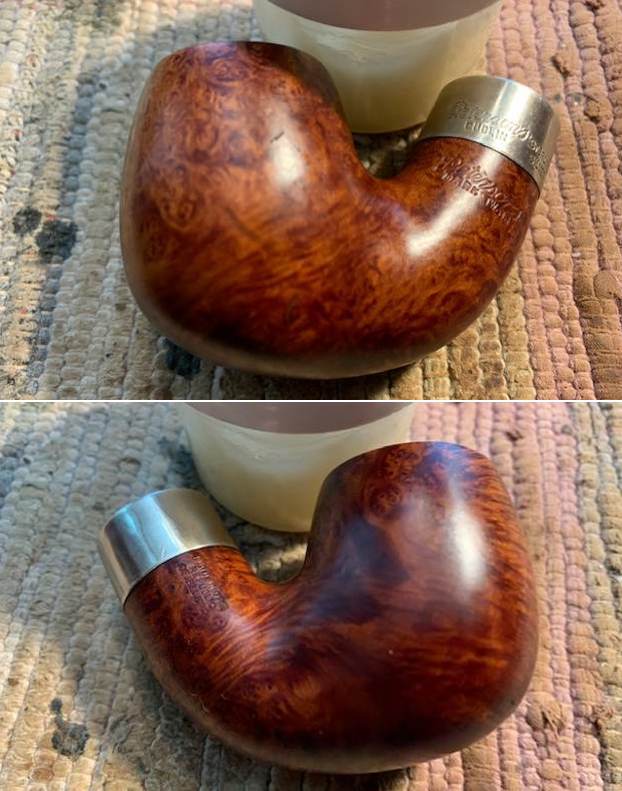
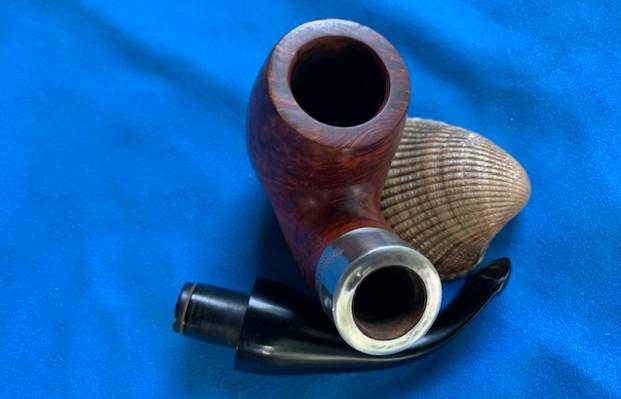
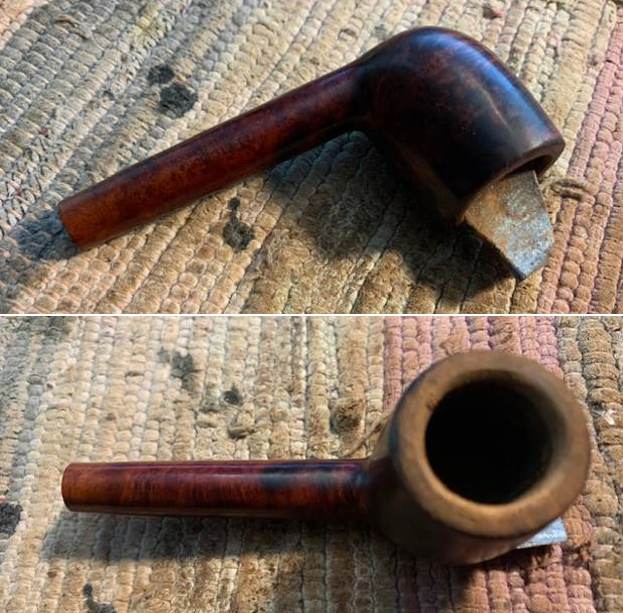
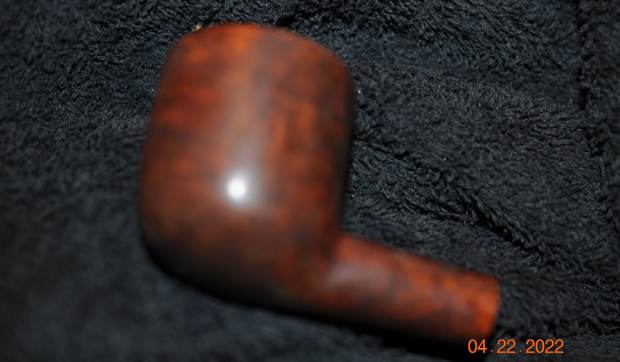
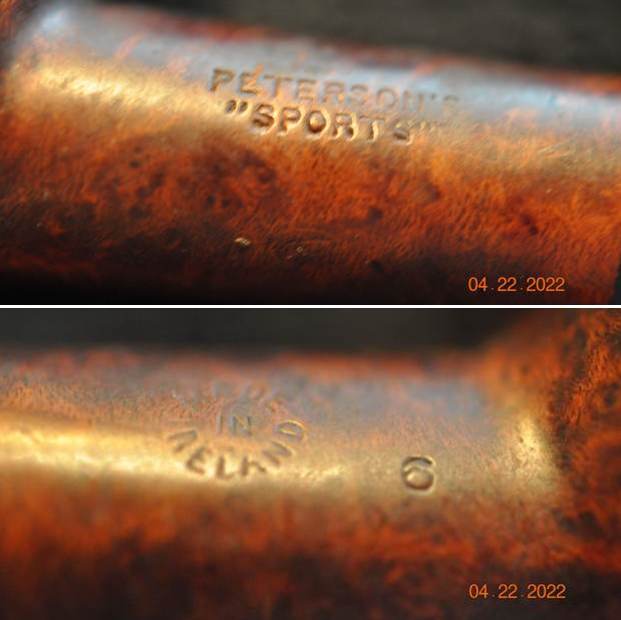
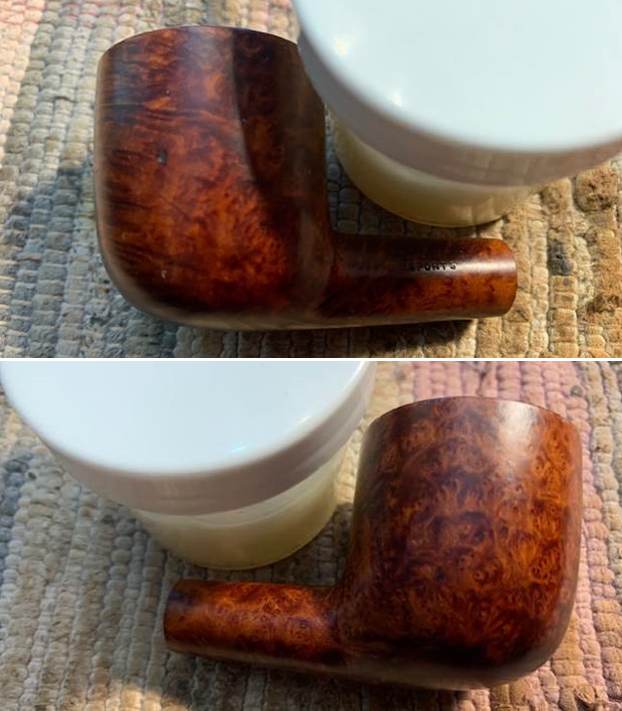
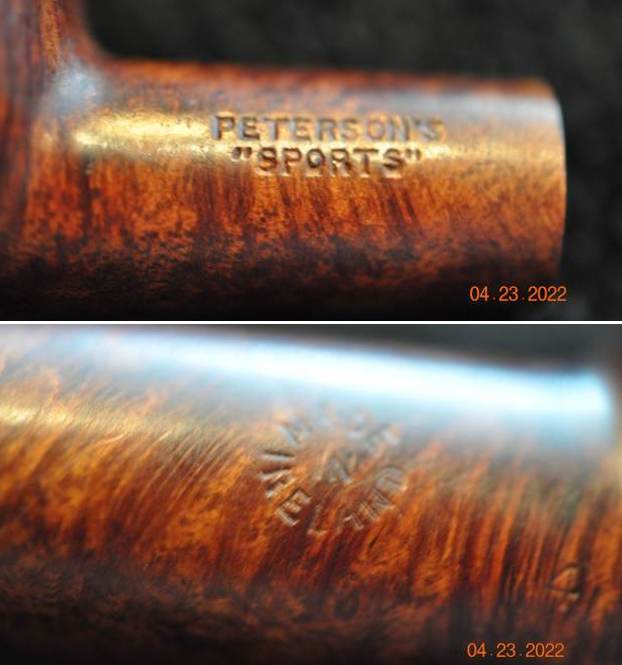
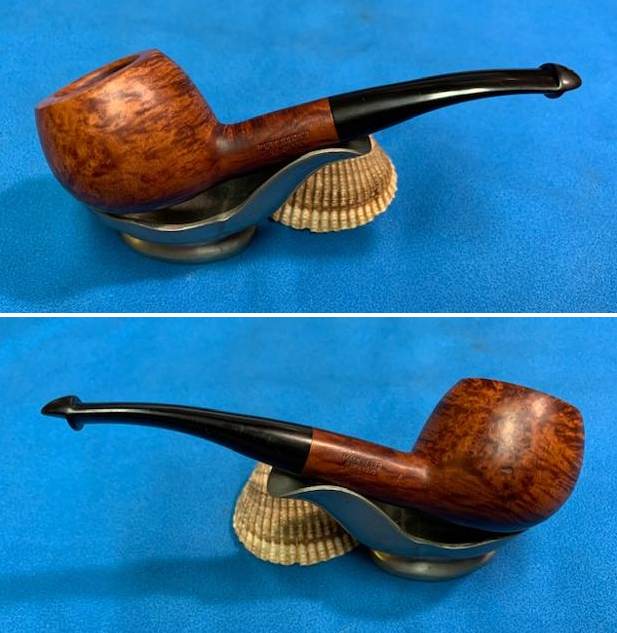
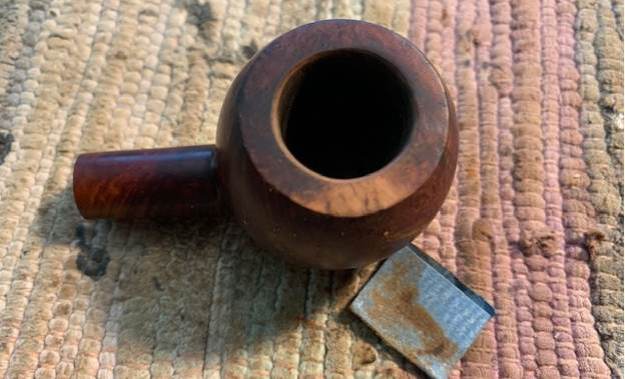
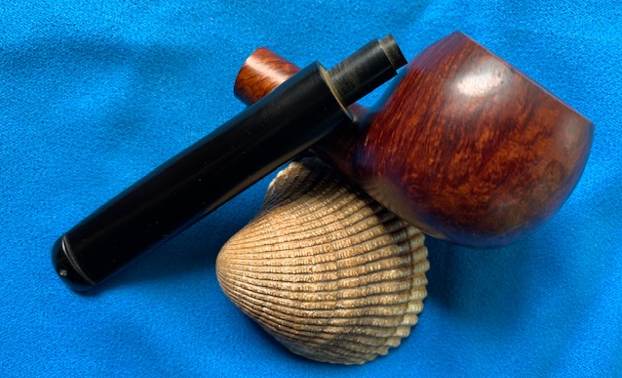
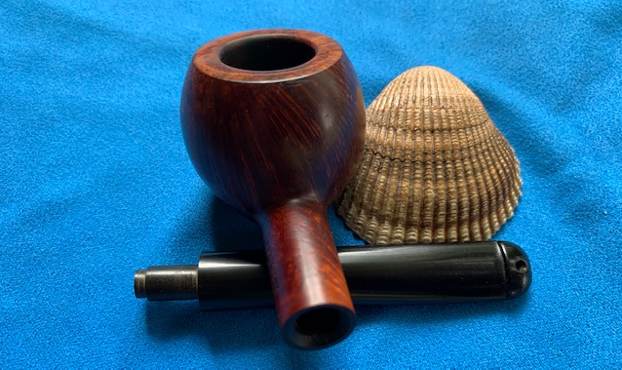
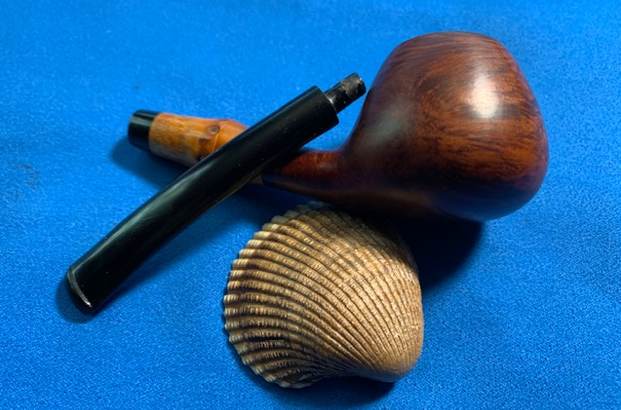
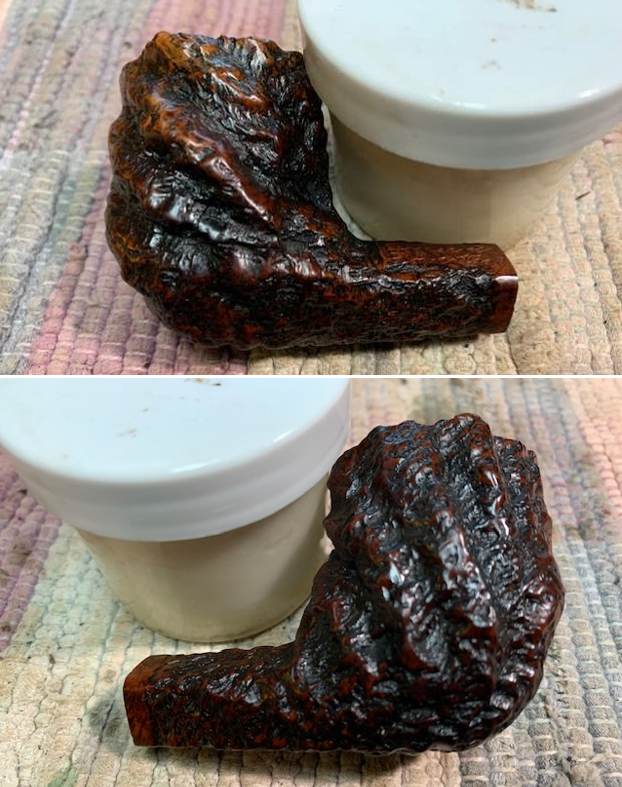
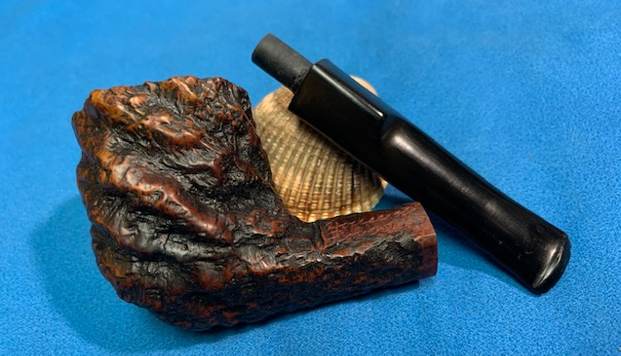
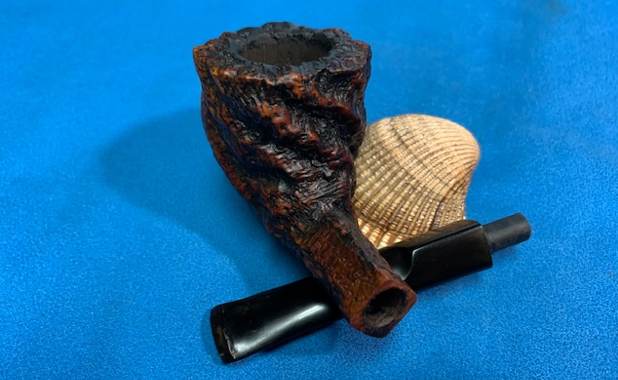
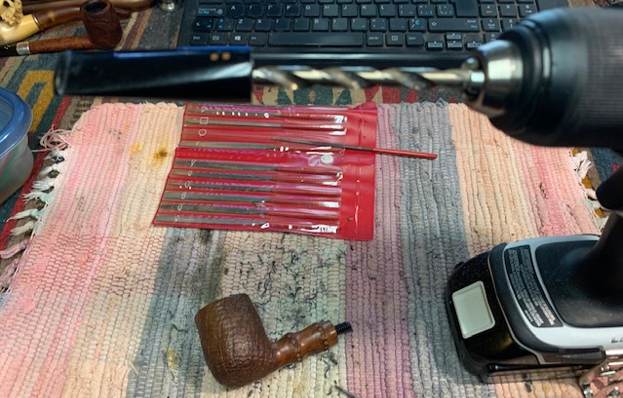
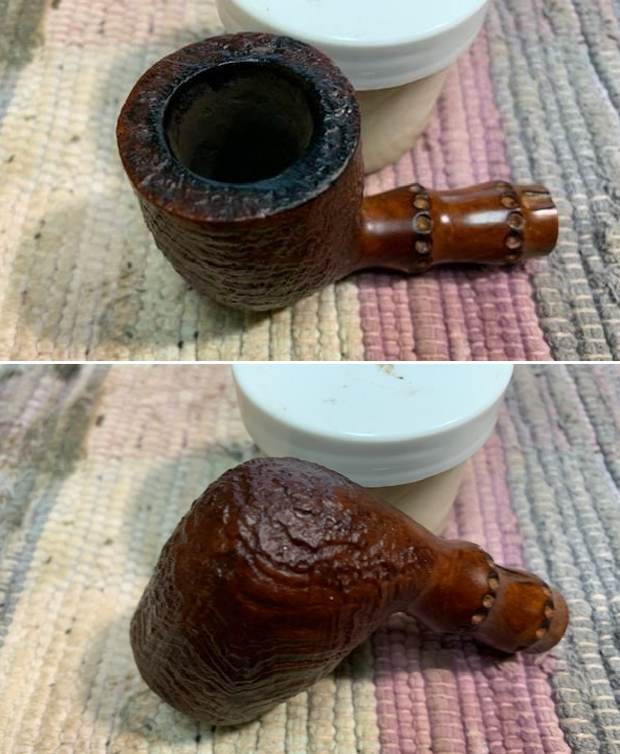
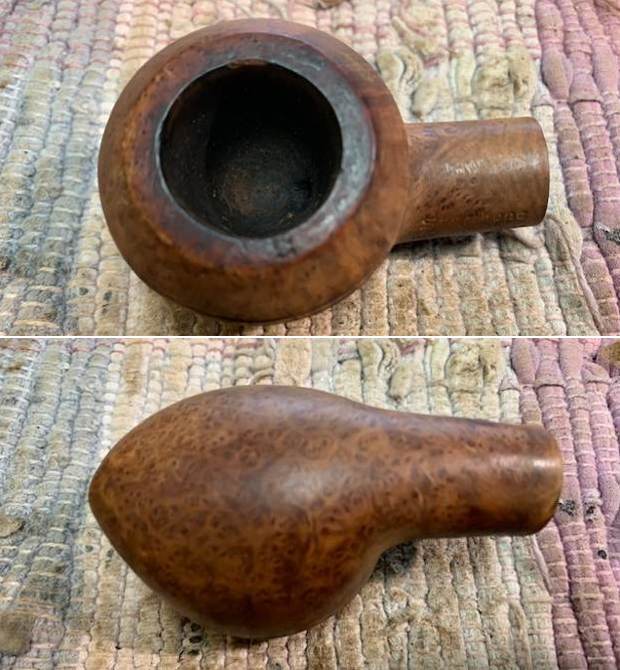
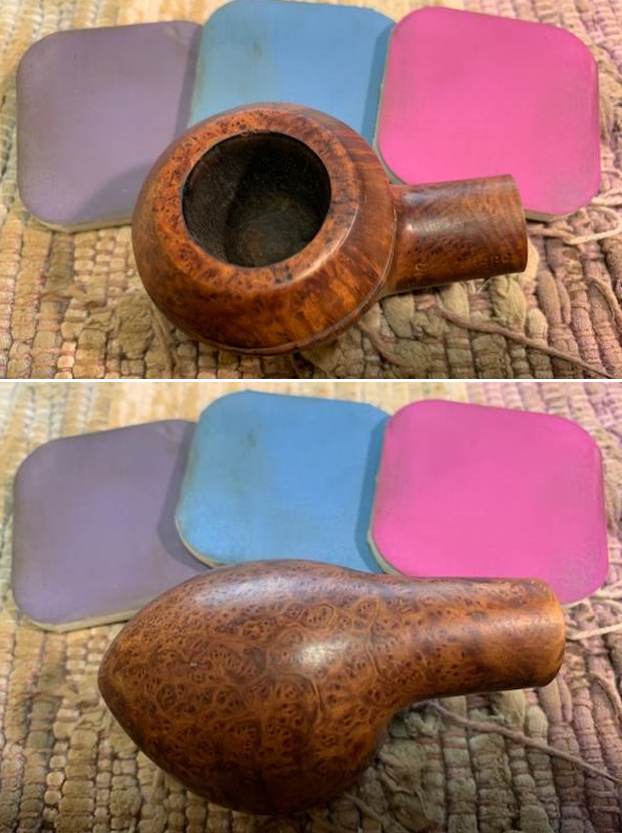
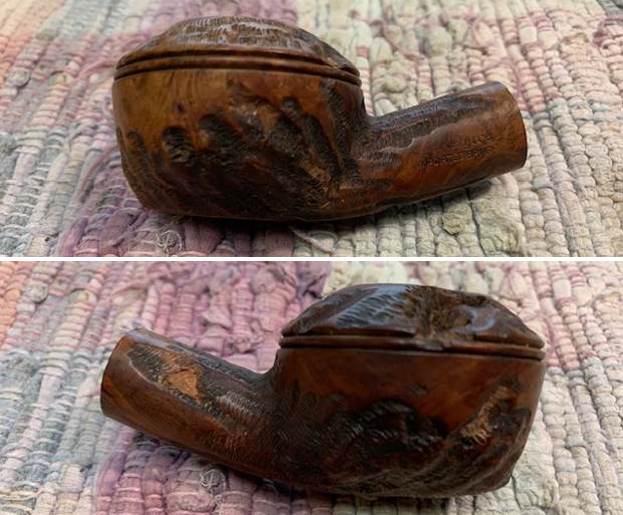
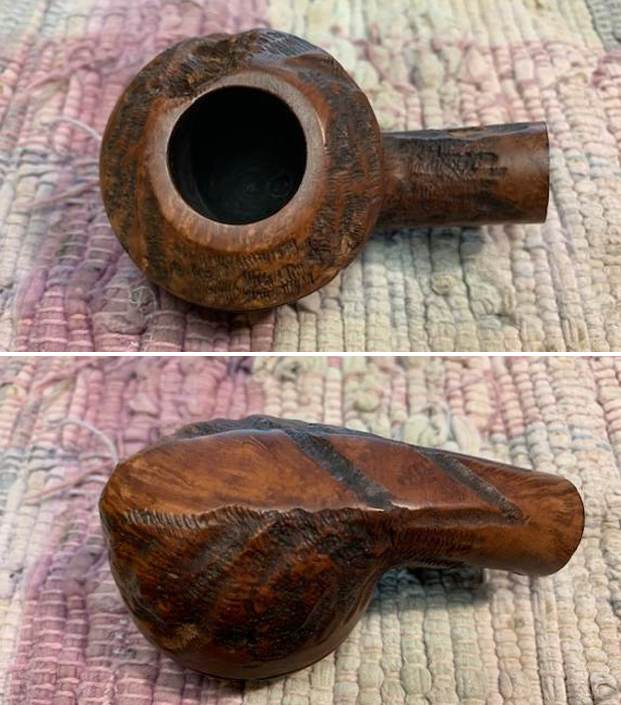
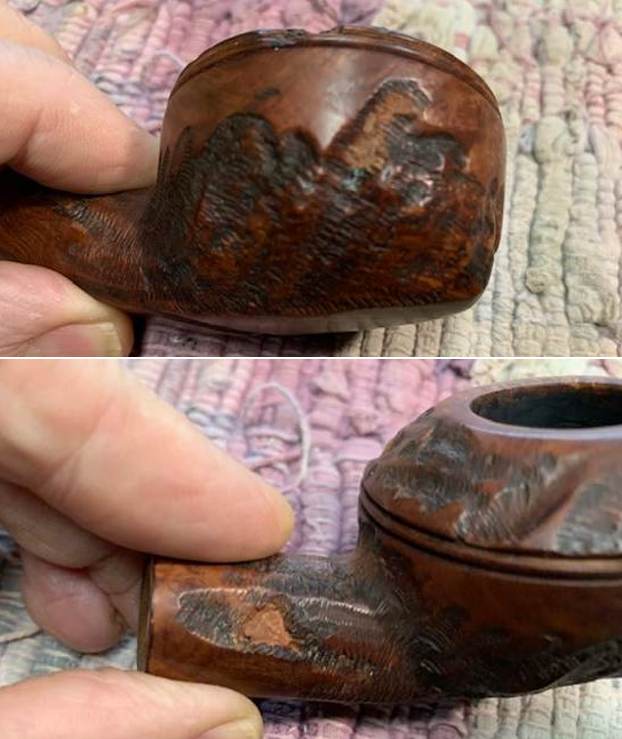
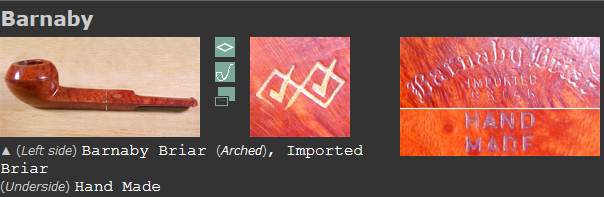
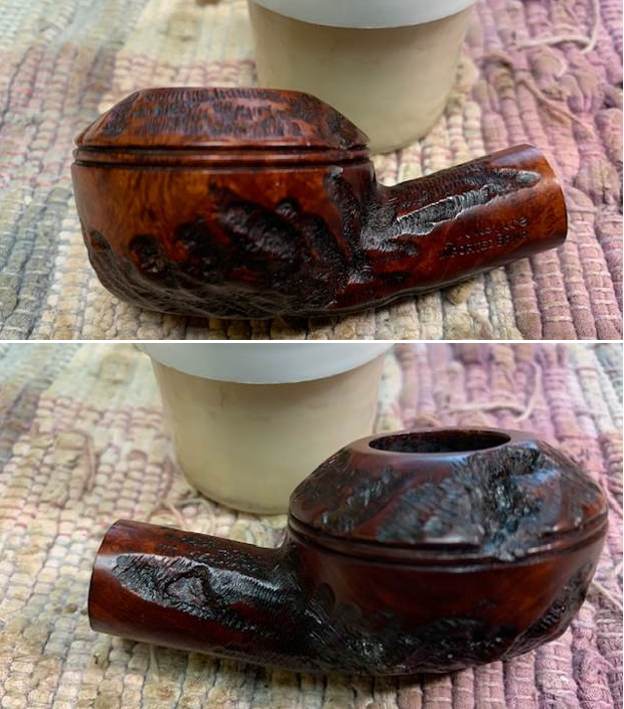
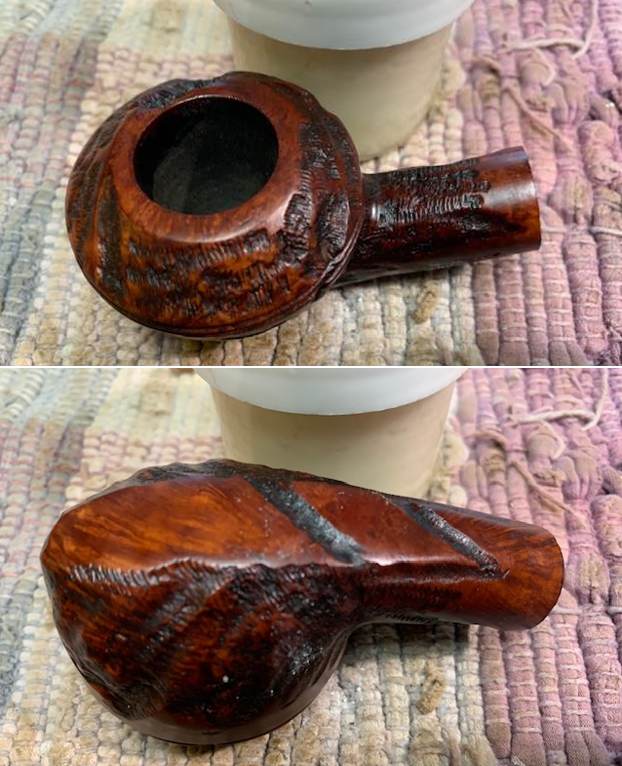
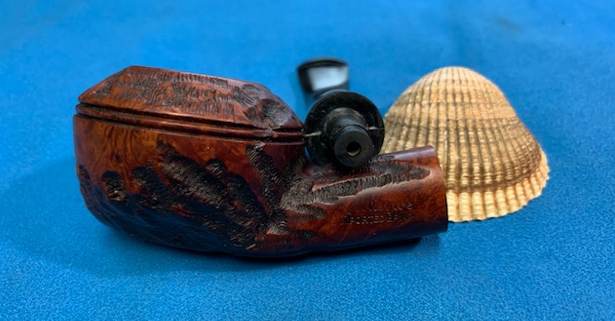
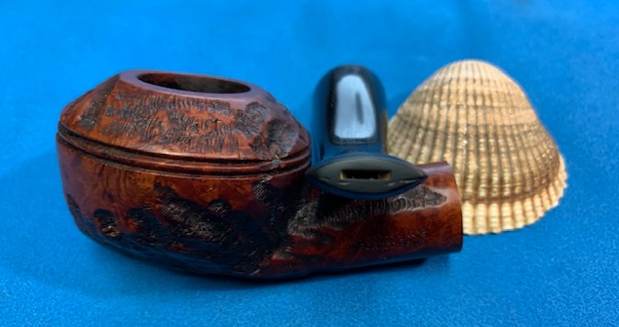
In the photo above I show the 8 restemmed pipes. I have marked the 4 I have worked on already with a red X). This fifth one that we cleaned up before mailing them out was a bowl that we purchased on 08/31/2019 from an auction Nyack, New York, USA. It is stamped on the left side of the shank and reads Peterson’s [arched over] System [over] 0. On the right side of the shank there is a number 308 stamped next to the bowl shank junction followed. On the underside of the shank it is stamped Made In Ireland in two lines. The ferrule is stamped K&P [over] faux hallmarks (a clover leaf, an Irish wolfhound laying down and a tower. Under that it reads Peterson [over] Dublin. The bowl was dirty with lava on the rim top and a moderate cake in the bowl. The nickel ferrule was quite dirty and worn with some small dents in the surface. Jeff took photos of the bowl before he did his cleanup work in preparation for sending them to Walls Pipe Repair for their new stem.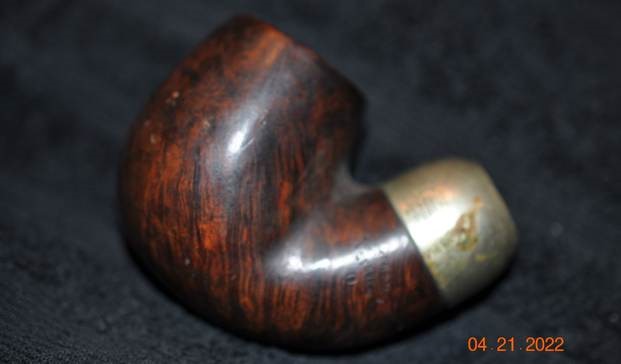
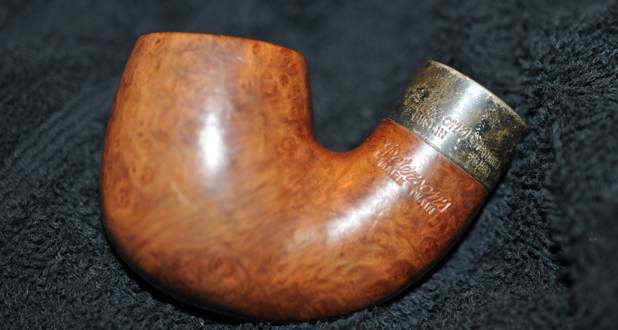
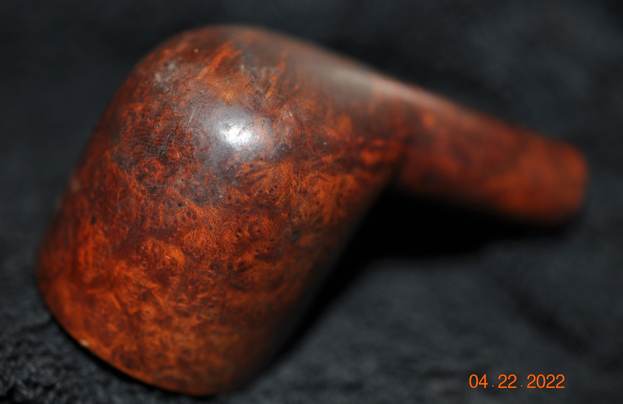
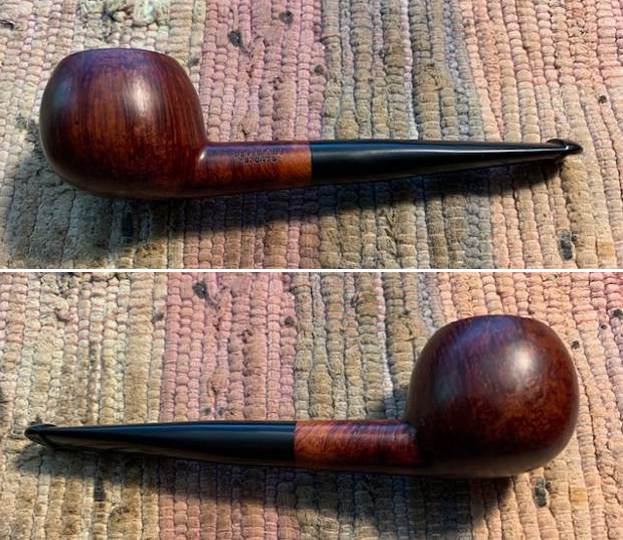
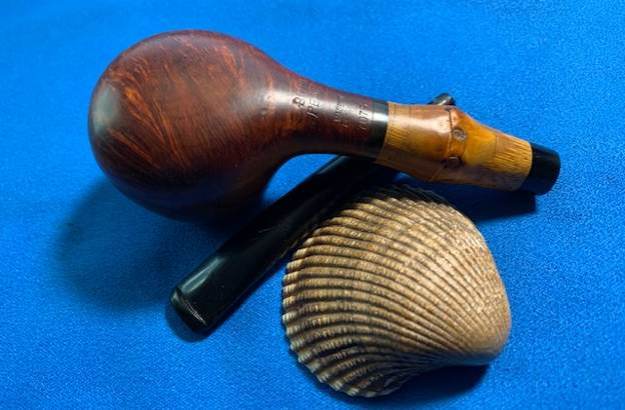
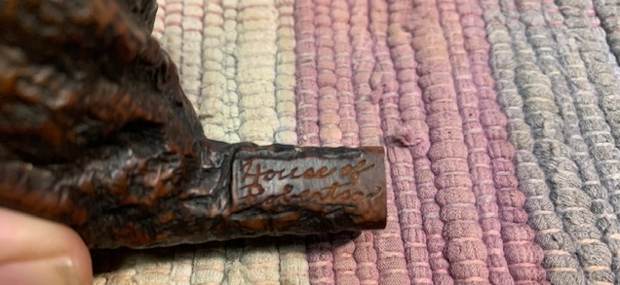
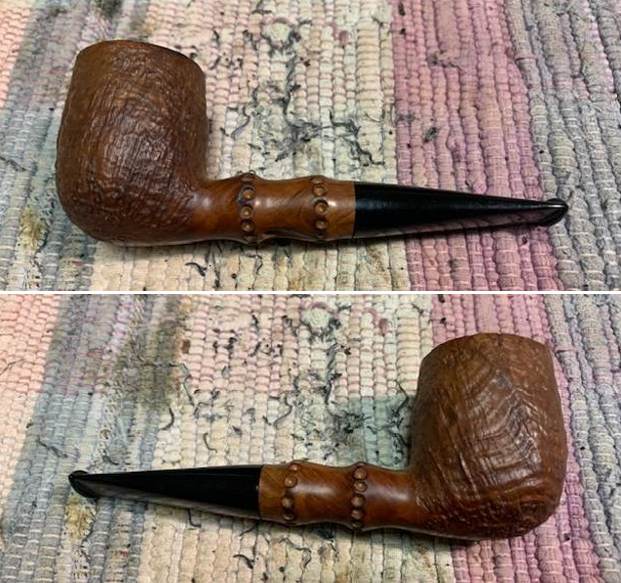
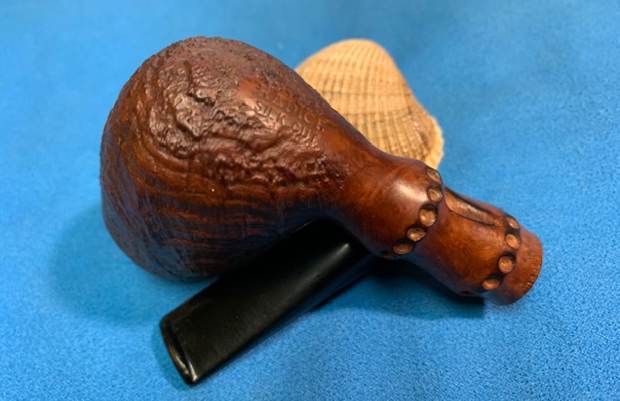
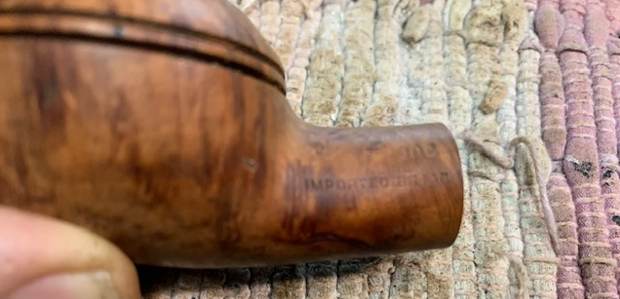
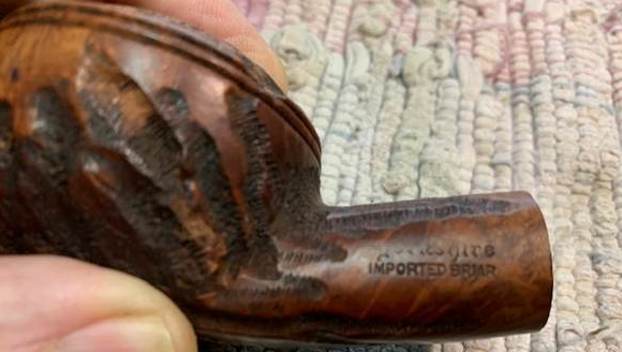
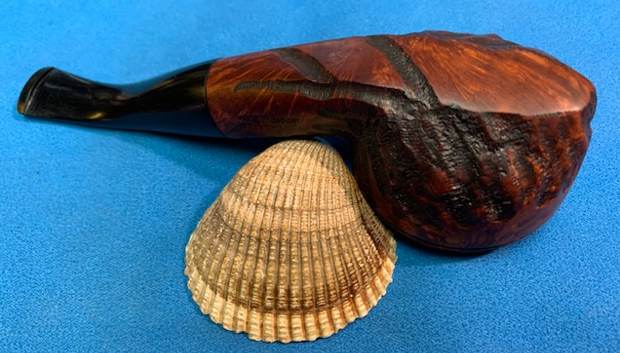
 Jeff took photos of the stamping on the sides of the shank. It is clear and readable as noted above. There is also some great grain around the bowl and shank.
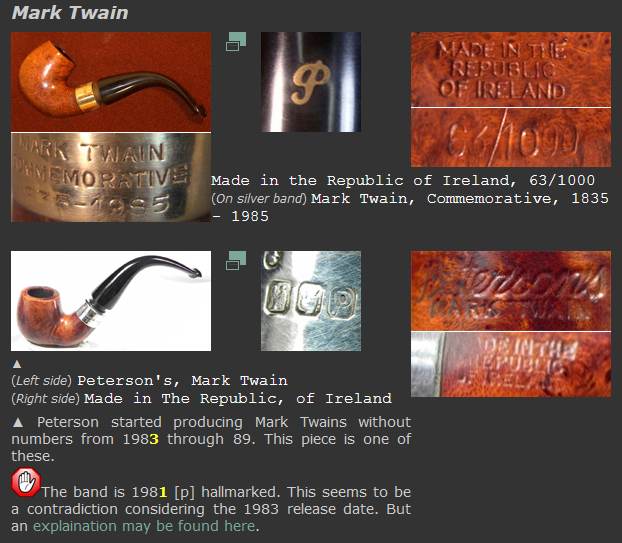
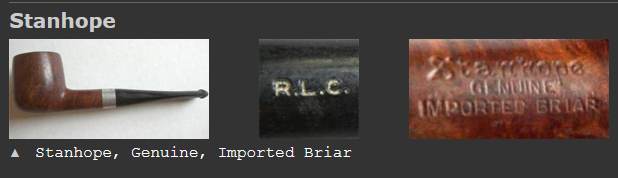
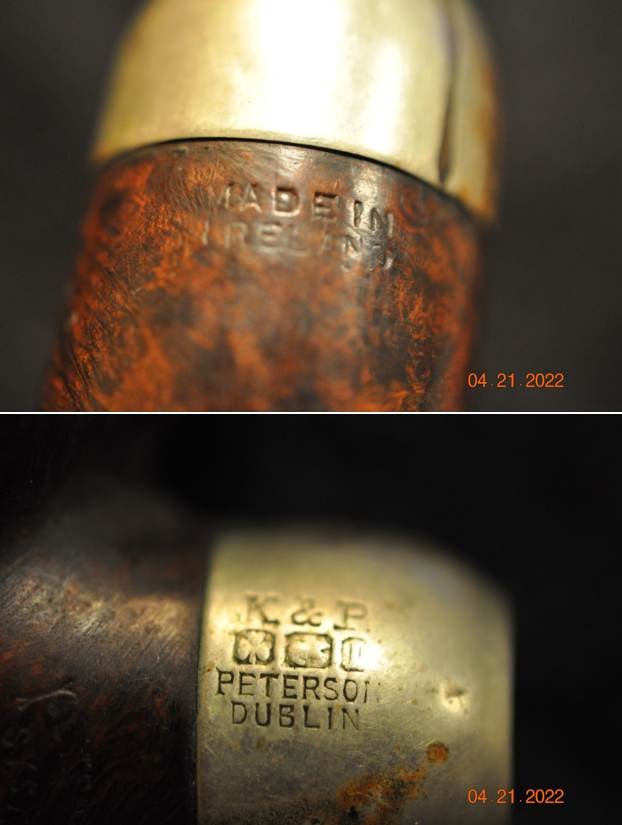 I turned to Pipedia (https://pipedia.org/wiki/Peterson) and read through the article there. I found an interesting note in the middle of the page. I quote the pertinent section below and have highlights some important information in red below.
As usual when trying to get accurate facts in regard to Peterson history, something will jump up and get in the way. They are missing many of their records. The following is the best that we can do for a guide to the myriad markings during the period 1922 – 1949. Prior to 1920 it was rare for a country of origin to be stamped on the pipe, just Peterson’s Dublin on the band. After 1921/22, if it is stamped “MADE IN IRELAND” and the “Made in” is stacked over “Ireland” or “MADE IN EIRE” or several other forms, it was made between 1922 and 1938. A considerable number of Peterson pipes were stamped “Irish Free State”. From about 1930 to 1949, most of the pipes (those which were stamped) were stamped “Made in Ireland”.” If the stamp reads “MADE IN IRELAND” in a circle, the pipe was made between 1939 and 1948. These are all “pre-republic” pipes. I can tell you that the mark “Irish Free State” was adopted in 1922;and replaced by “Eire” in 1937 and then by “Republic of Ireland” in 1949.
I turned to “The Peterson Pipe” by Mark Irwin and Gary Malmberg to get some background on the Peterson’s System 0 Made in Ireland stamp. On page 126 it had the following information.
The stamp reads IRISH over FREE STATE, in small letters, usually perpendicular to the line of the shank, very close to and parallel to the seam where the shank meets the mouth piece. On banded pipe, this often hidden under the band itself. At the same time, they issued a smaller number of pipes stamped MADE IN over IRELAND. Today’s collector may encounter specimens of these with mountings hallmarked for every year from 1922-1937.
On page 301 of the above book I found a listing on System pipes that referred to the 0 stamp. I quote:
System Pipes (1937-59) The 1937 catalog only slightly changed the grading hierarchy for System pipes. The De Luxe model, described as “the finished possible quality obtainable” would be assigned no grading subscript, but neither would the First Quality. Below these were 0 Grade, 2nd Grade and 3rd Grade, all stamped with numbers and PETERSON’S over SYSTEM or PETERSON’S over DUBLIN. Grades 0 and 2nd were fitted with sterling mounts, 3rd grade with nickel. Each of these grades were sometimes stamped below and sometimes to the right of the model name. Sometimes these numbers were circled, sometimes not. The location of the number and whether it was circled or not was rather random from the onset of its use until discontinued in 1959, and by itself only indicates that a given pipe was made between ’37 and ’59.
On page 302 there was a listing on the nickel mounted markings. I quote:
Nickel-Mount Markings. Often called faux hallmarks or faux marks by Peterson collectors, this set of three little images of a shamrock, an Irish wolfhound and a round tower appear within rectangular shapes as decorations on nickel mountings. Very early nickel mounts (1891-c. 1920) had no such decorations, only the same stamps used on sterling but without the hallmarks. As a stamp, the set of decorations began to appear at the beginning of the Irish Free State era, sometimes alone but often under K&P and over block lettered PETERSON over DUBLIN, although the three emblems appeared on K&P’s Irish Carving Shamrocks pipes since 1896. The stamp was used until about 1963, when hand soldered nickel bands and ferrules were replaced by pressed ferrules and premade bands…The shamrock is the emblem of Ireland; the Irish wolfhound has long been used for both hunting and protection, and is an emblem of strength; the round tower a symbol of Ireland’s early religious power. These decorations were stamped at the factory on non-sterling mounts only, and the assay office has nothing to do with…
The information was very helpful. I have highlighted the pertinent reference to regarding the stamping, the shape 0 number and the faux hallmarks above. I knew that I was dealing with a Pre-Republic period pipes stamped Made in Ireland made between 1922-1938.
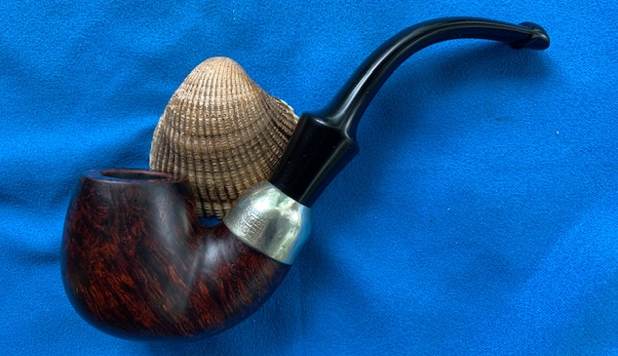
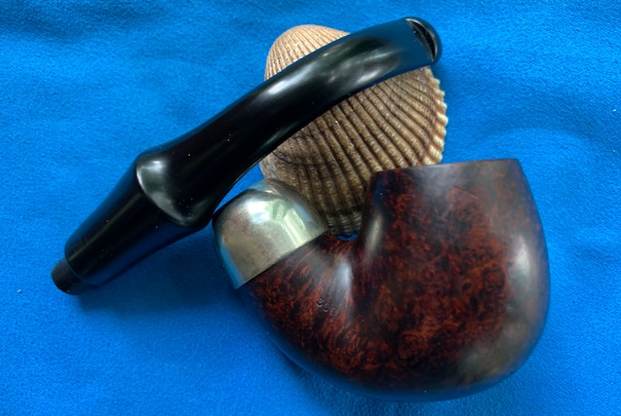
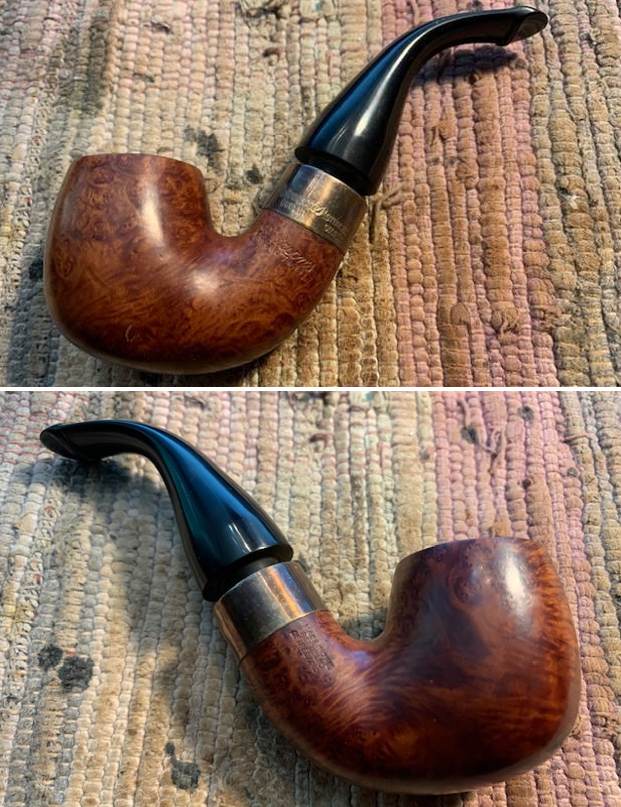
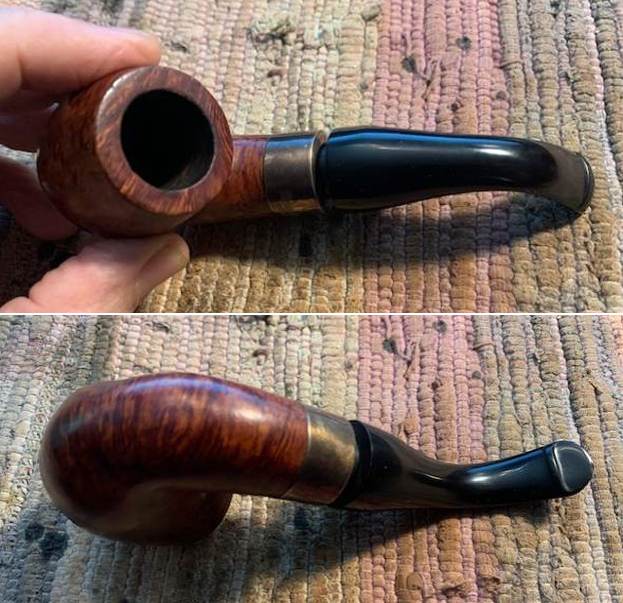
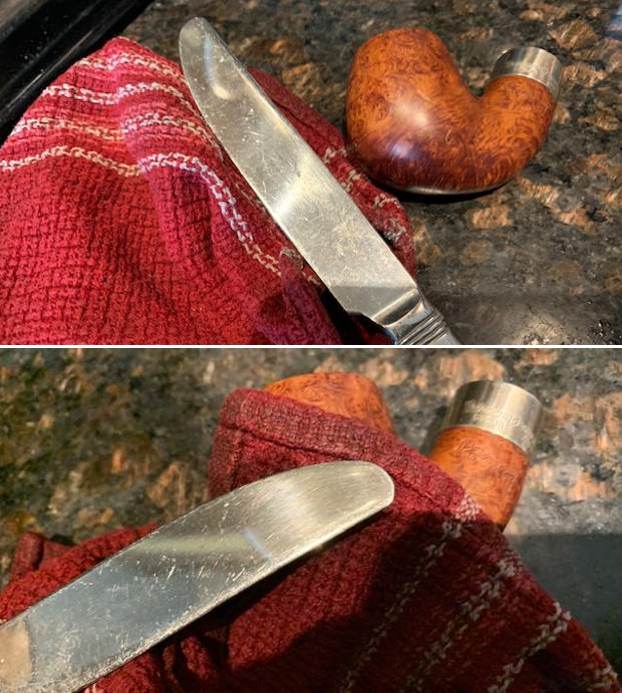
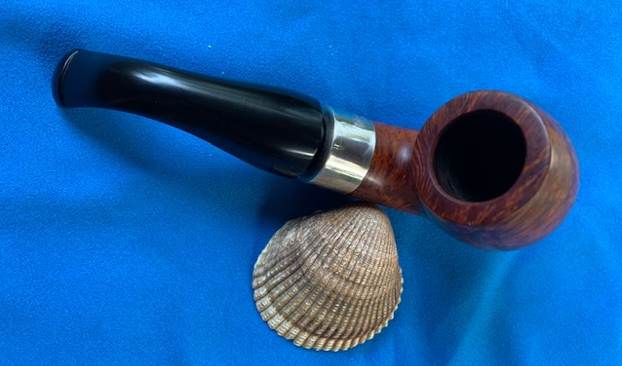
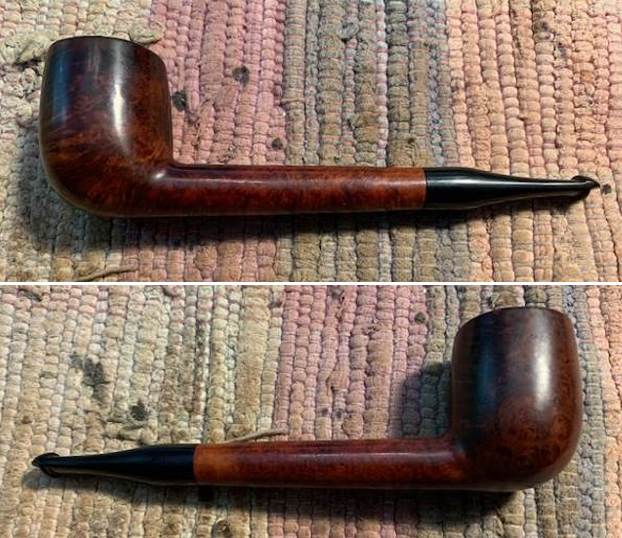
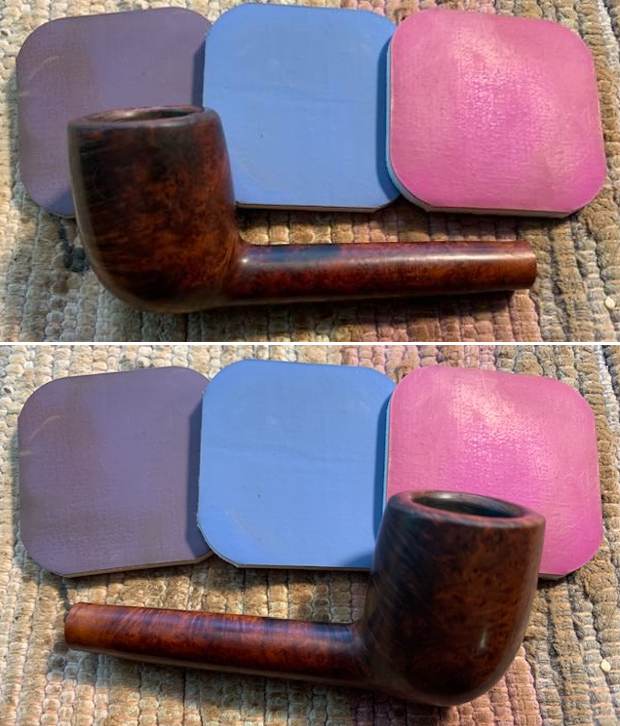
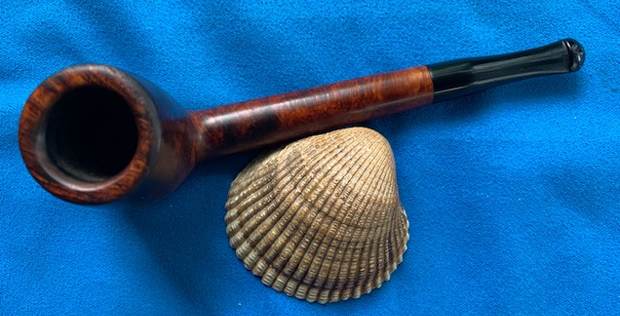
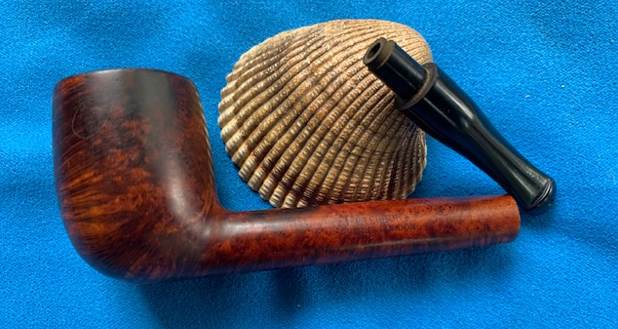
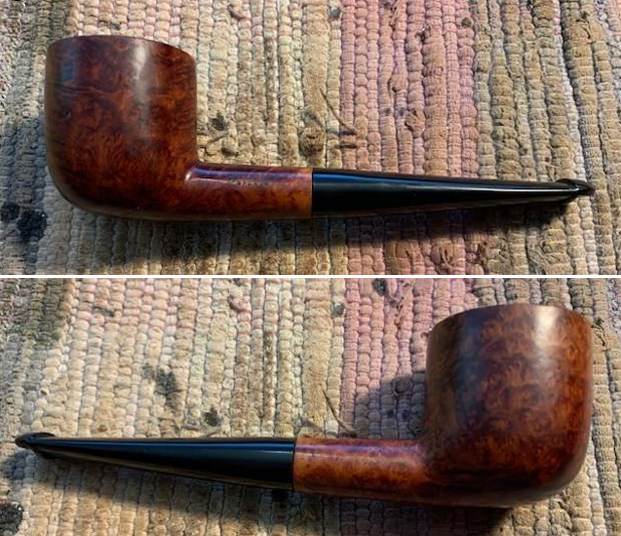
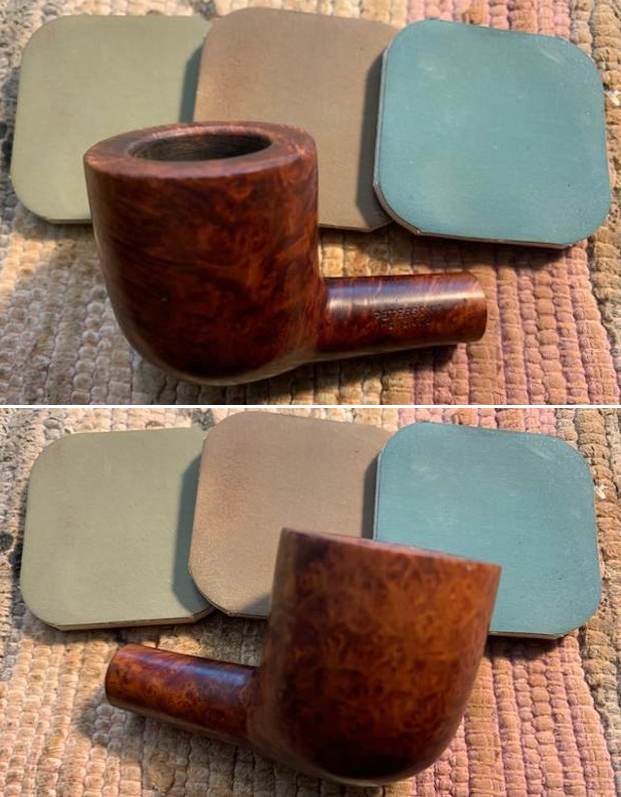
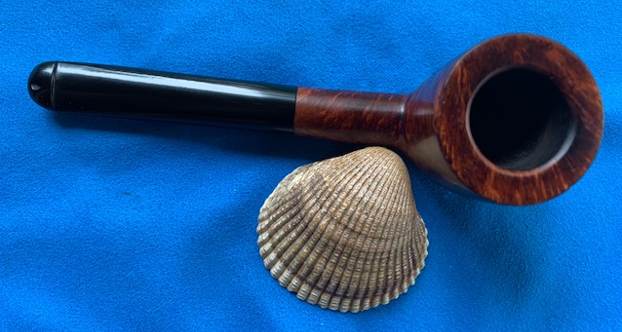
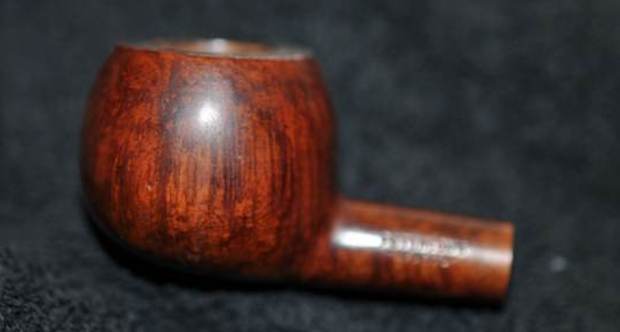
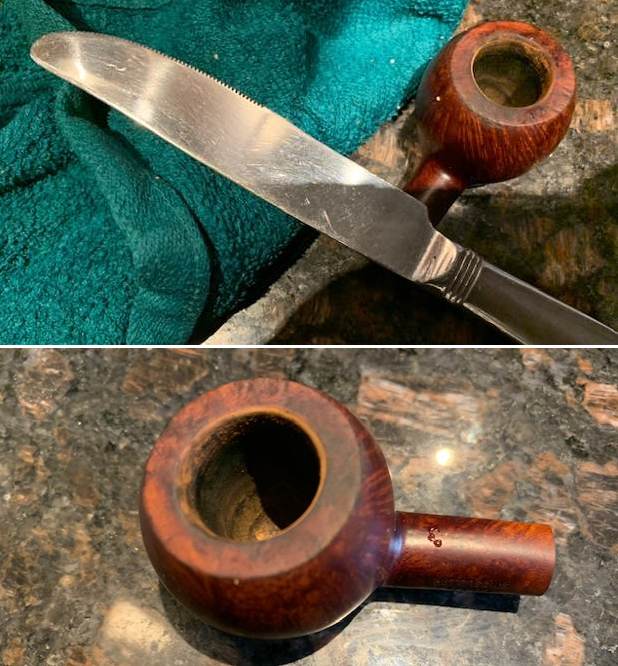
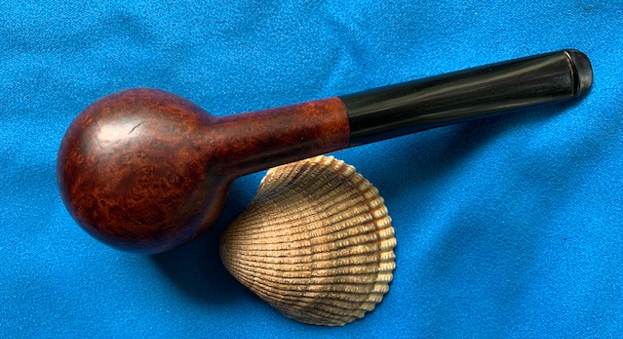
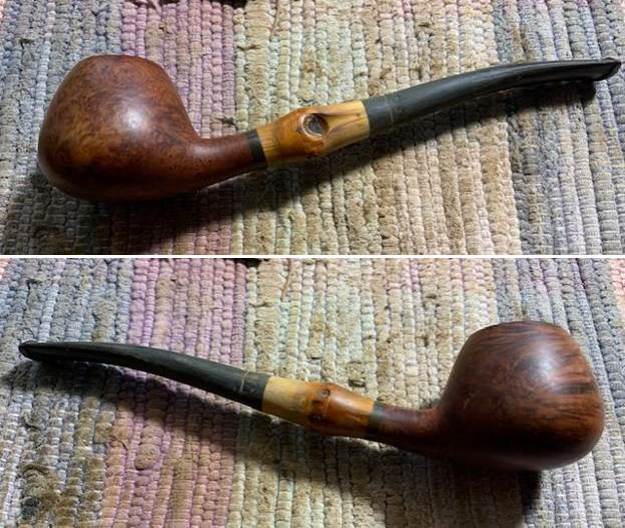
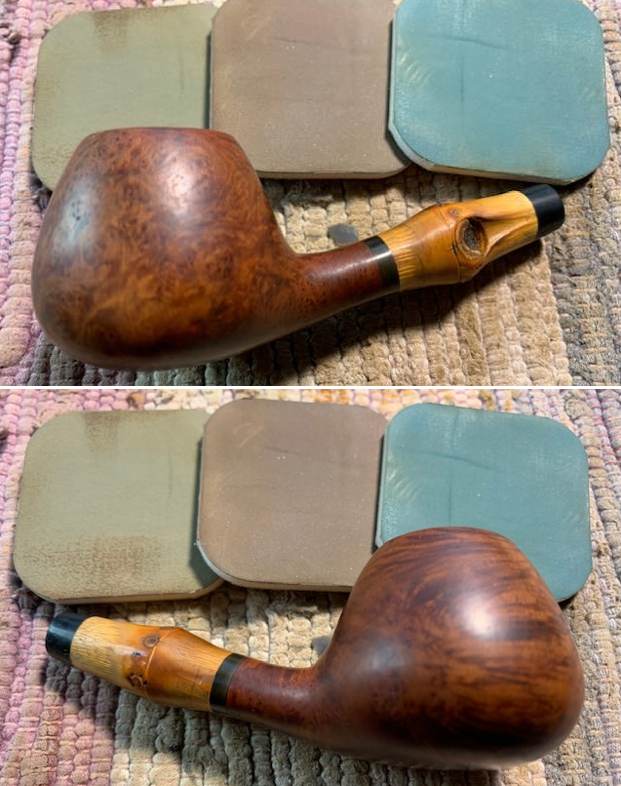
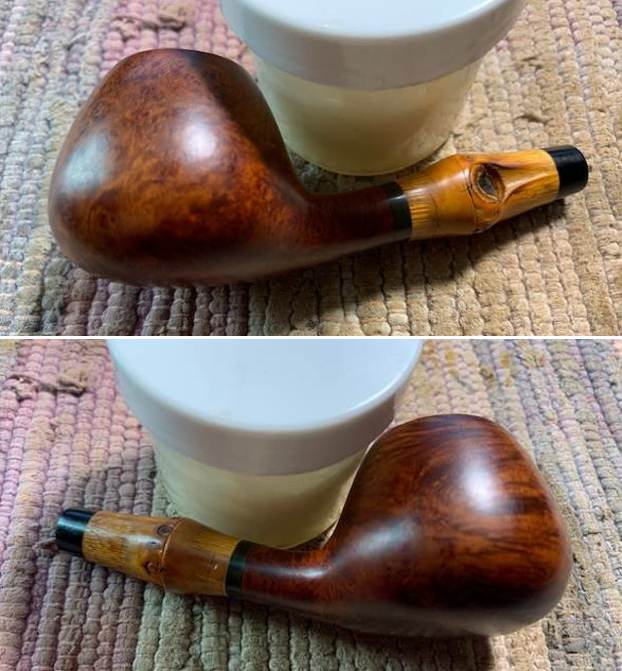
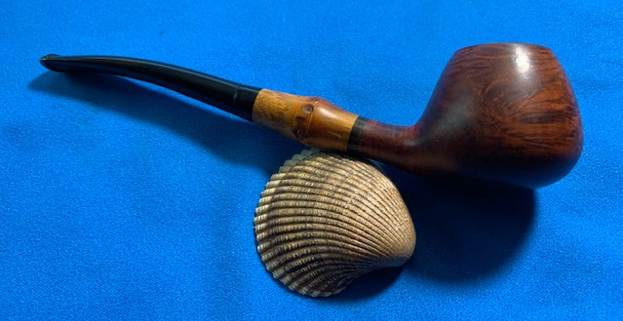
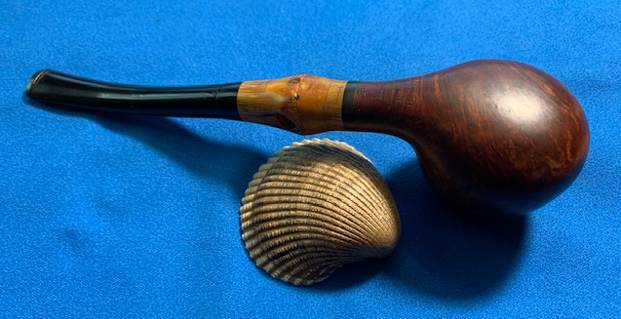
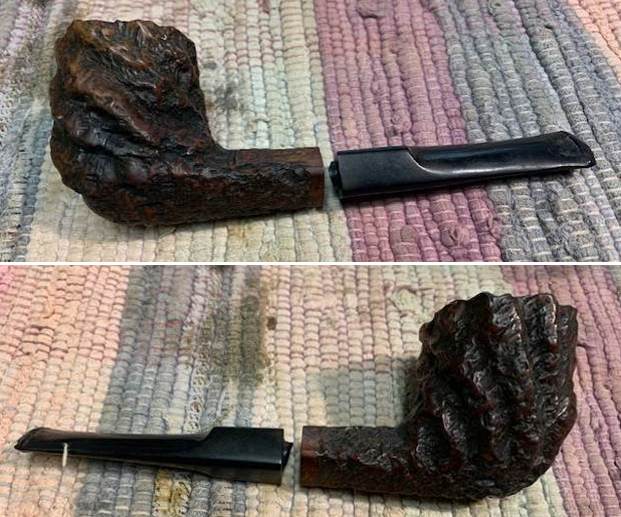
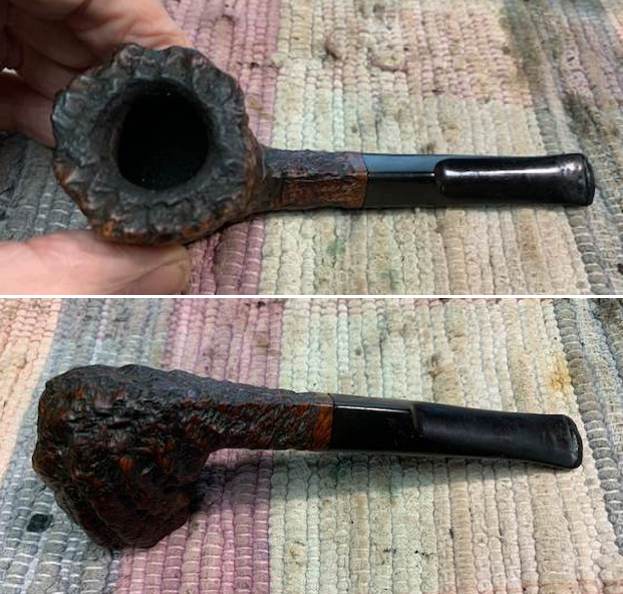
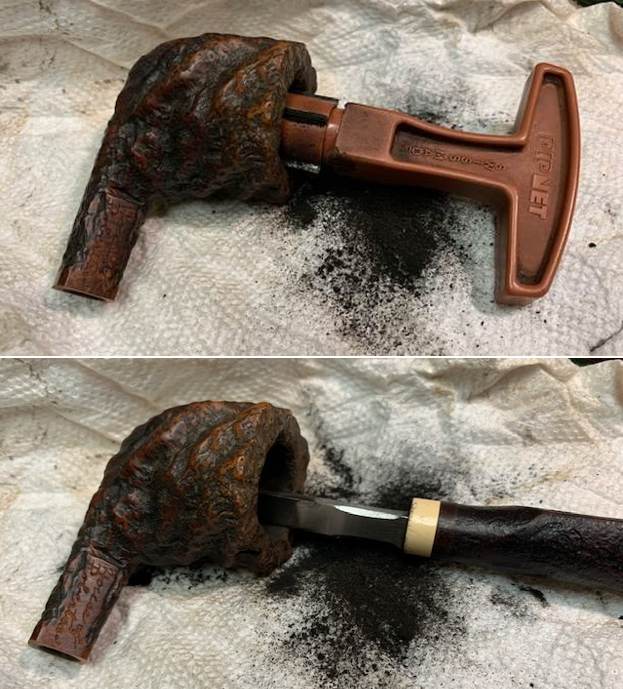
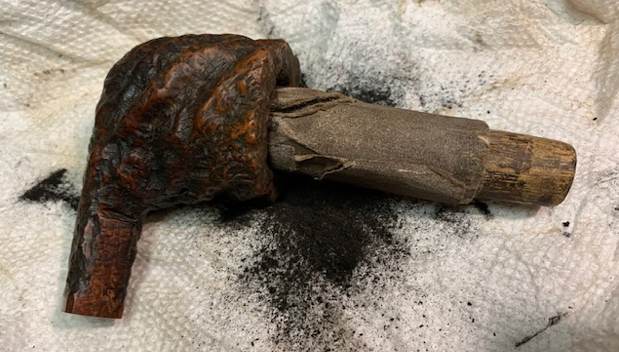
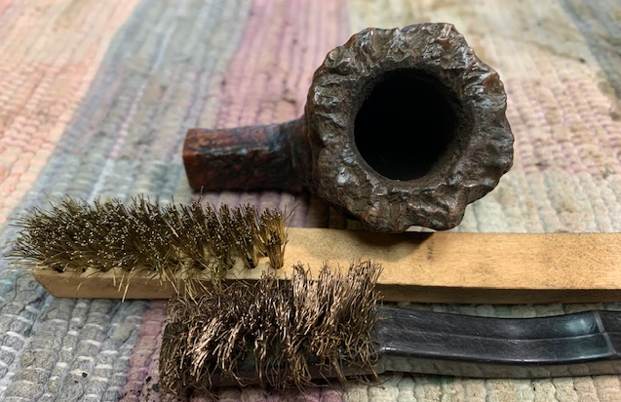
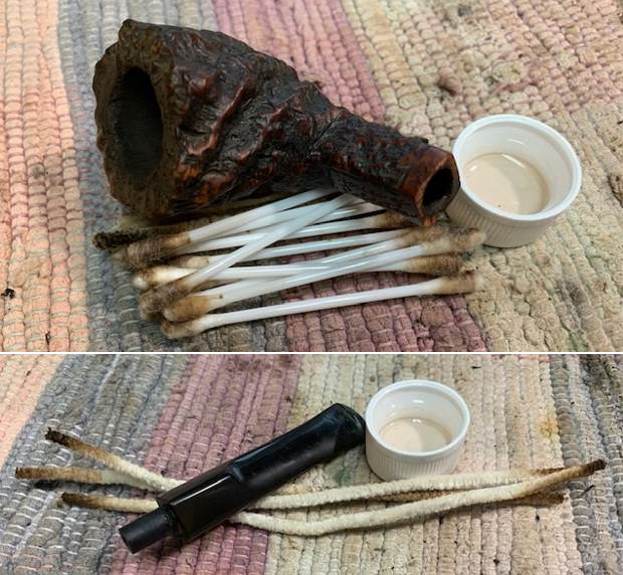
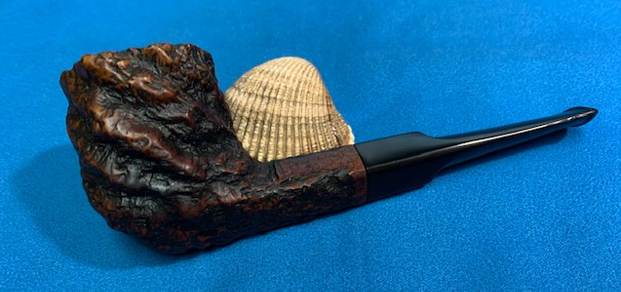
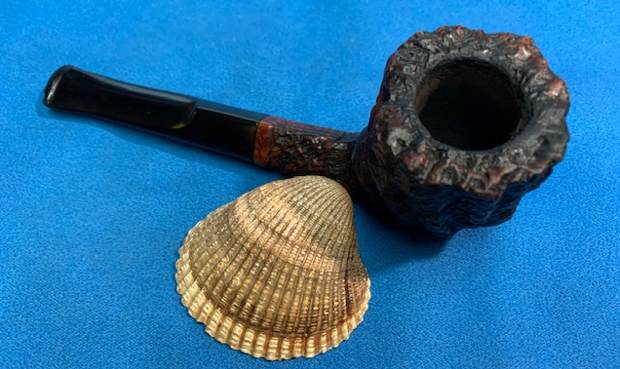
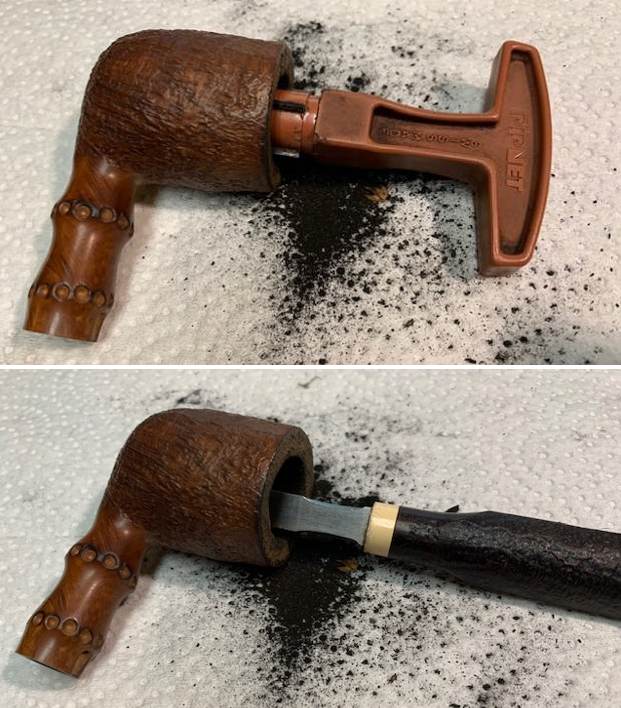
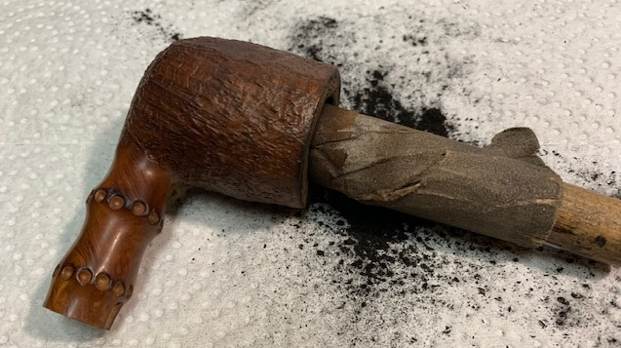
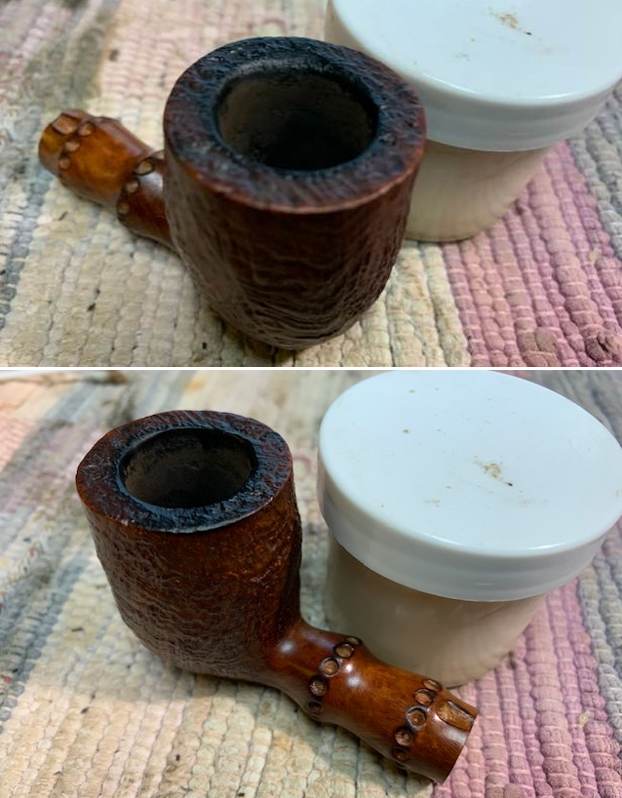
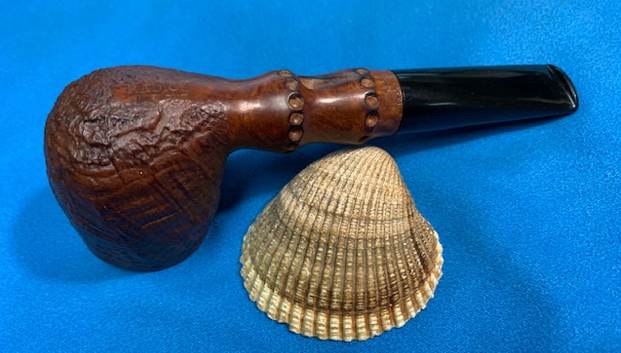
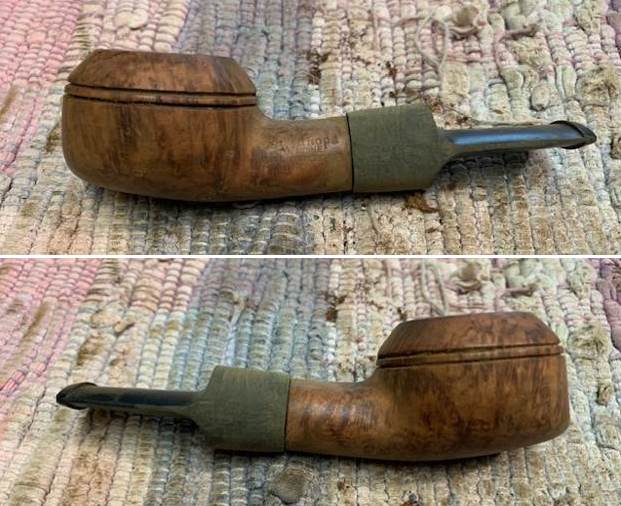
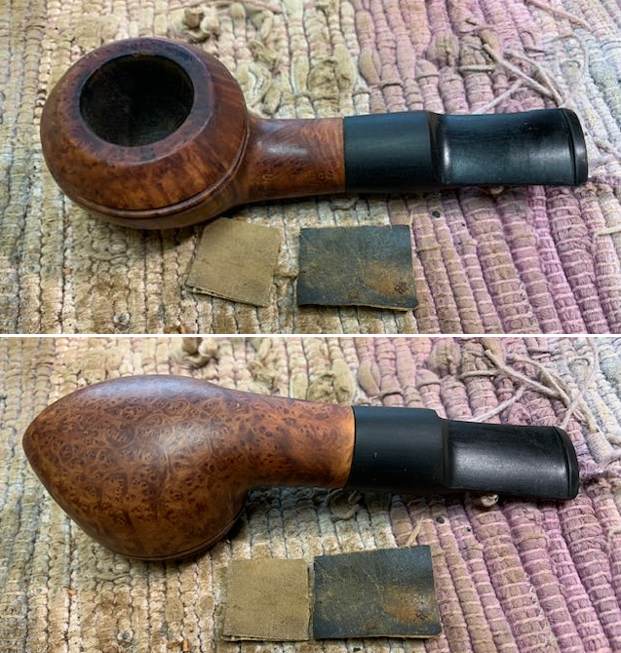
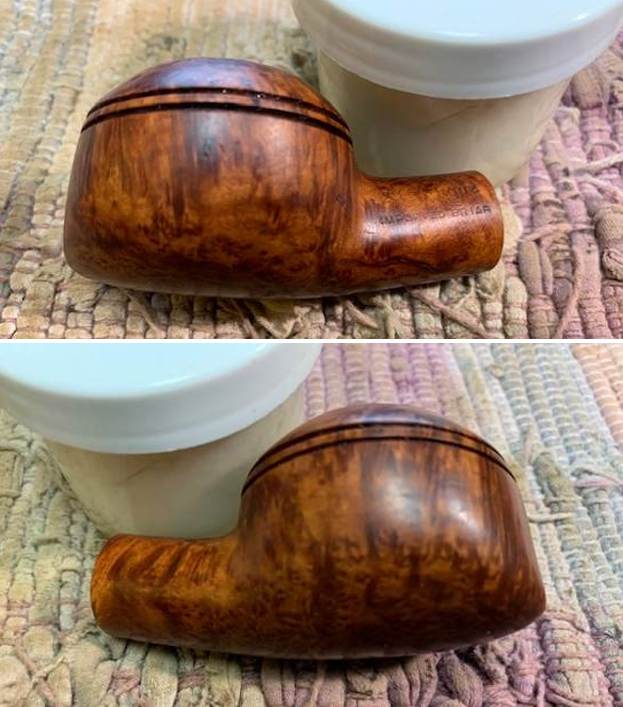
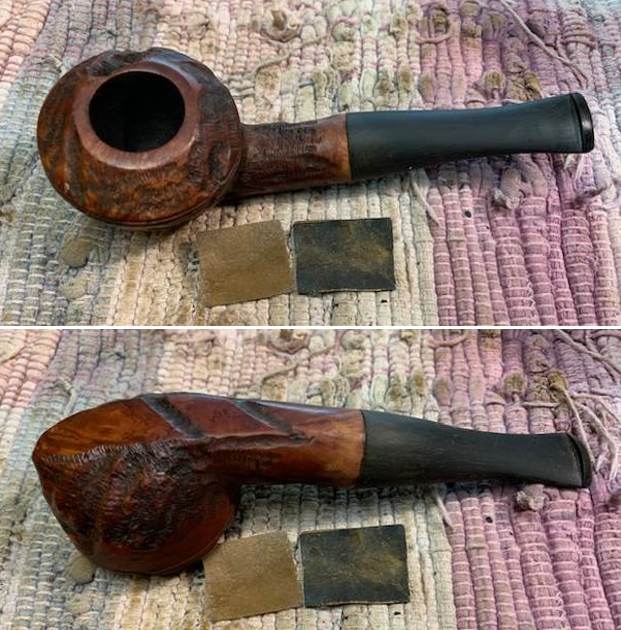
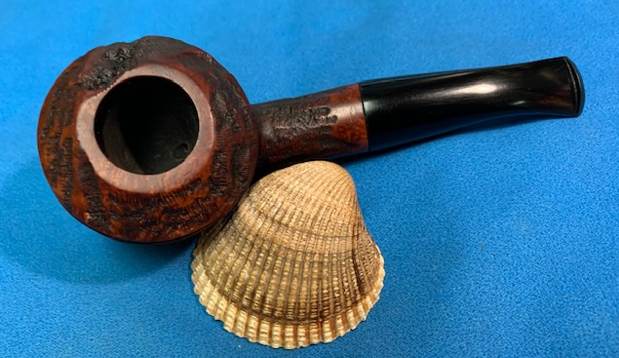
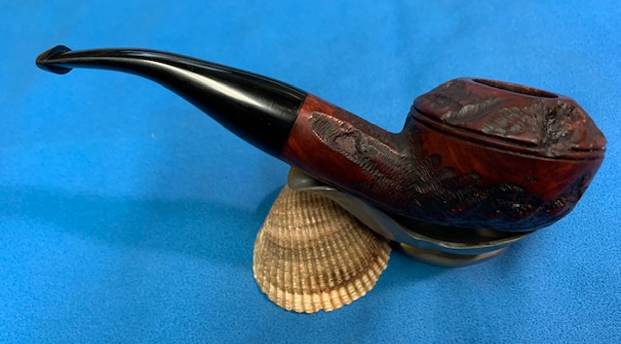
Now it was time to work on the pipe. Jeff had done a great job cleaning up the pipe as usual. He reamed the pipe with a PipNet reamer and cut back the cake back to the bare briar. He cleaned up the walls with a Savinelli Fitsall Pipe Knife. He scrubbed the interior of the bowl and shank with pipe cleaners, cotton swabs and alcohol to remove the tars and oils. He scrubbed the exterior of the pipe with Murphy’s Oil Soap and a tooth brush to remove the grime from the finish. He worked on the rim top lava and darkening with the soap and tooth brush. When the pipes came back to Jeff with their new stems they looked great. When the pipe arrived here this week I took photos of it with its stem so you can see what I see. 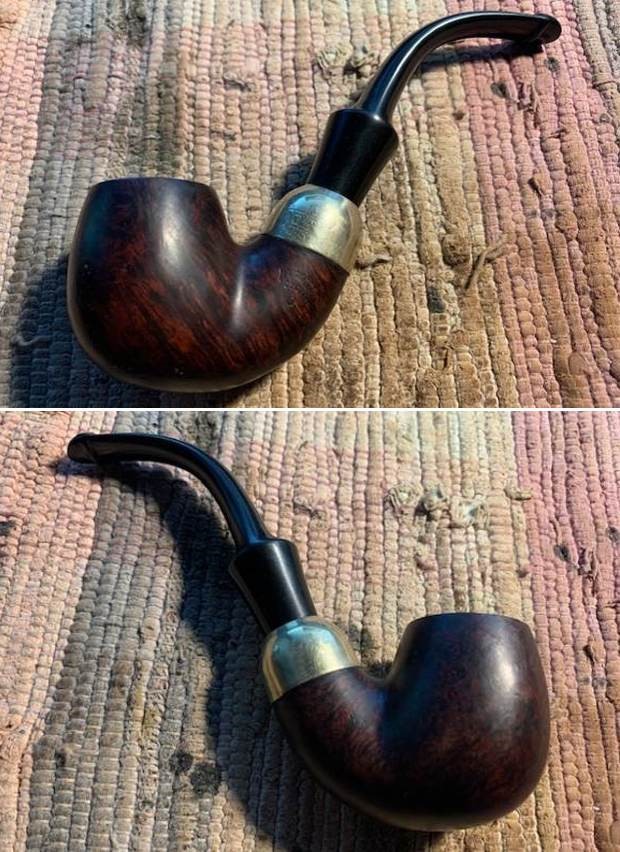
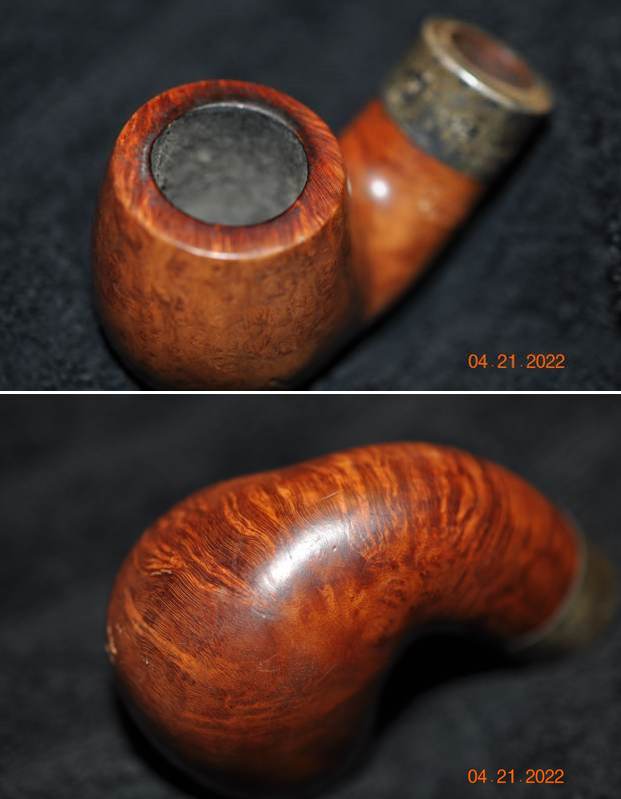
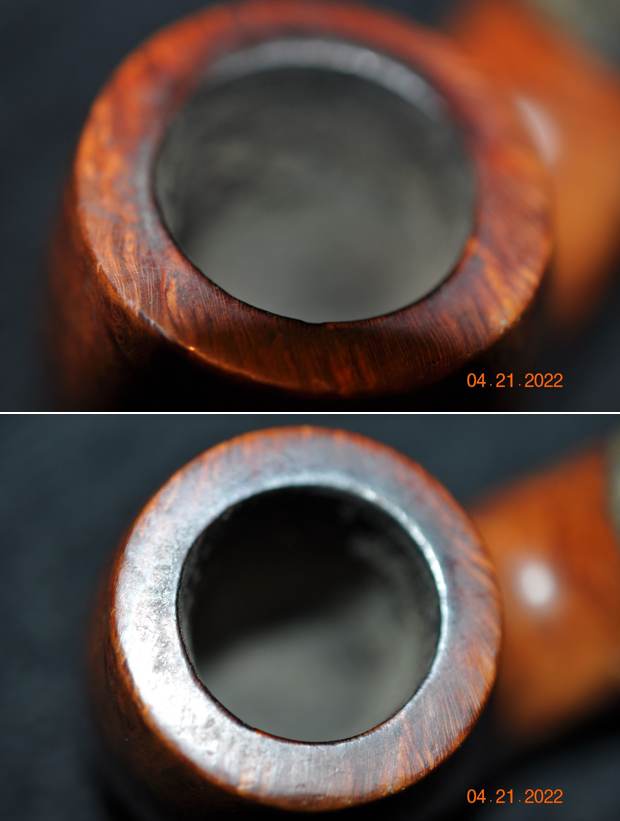
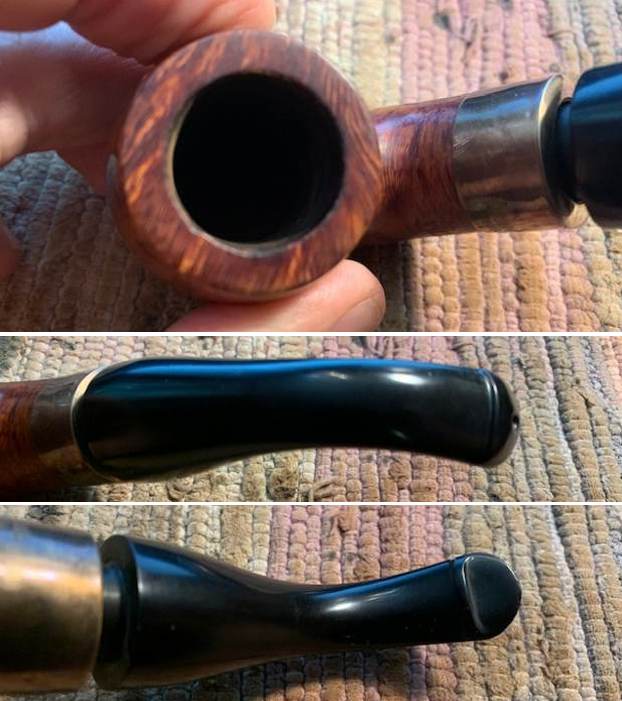
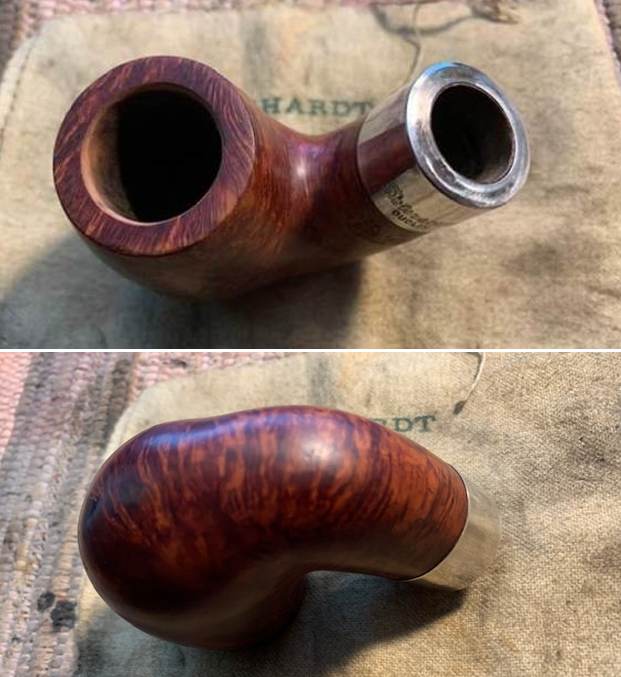
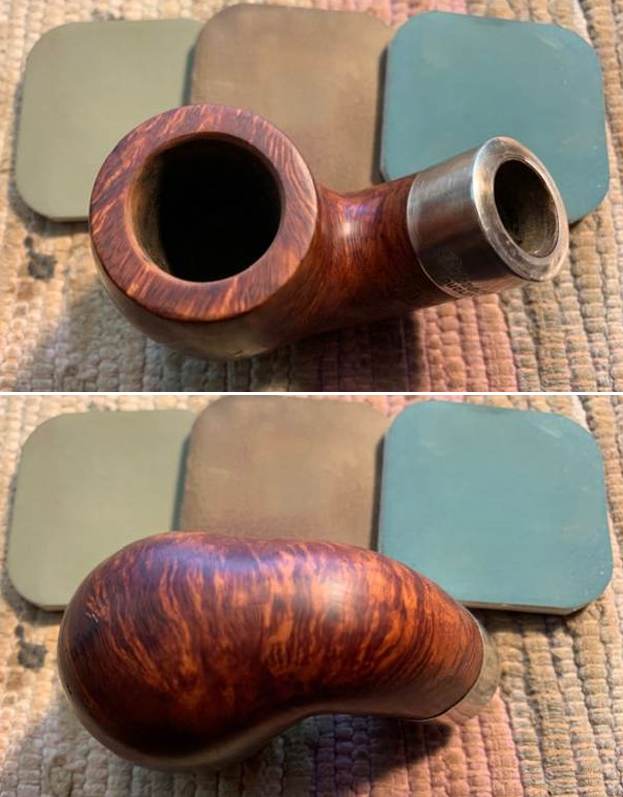
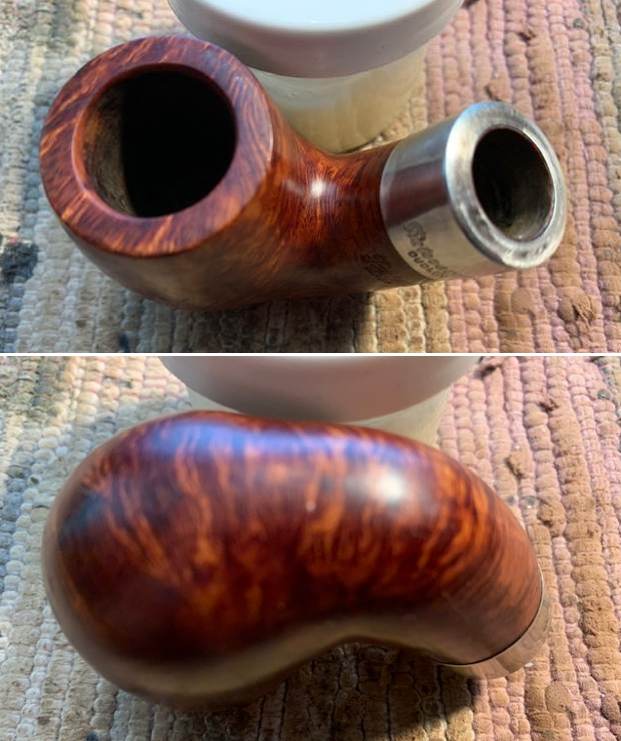
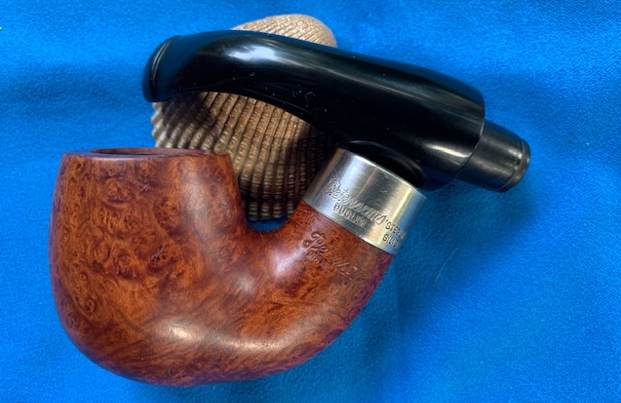
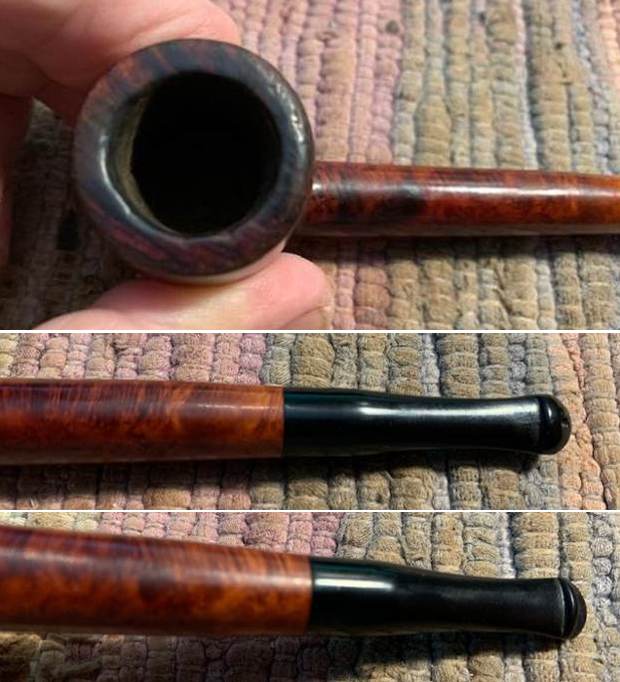
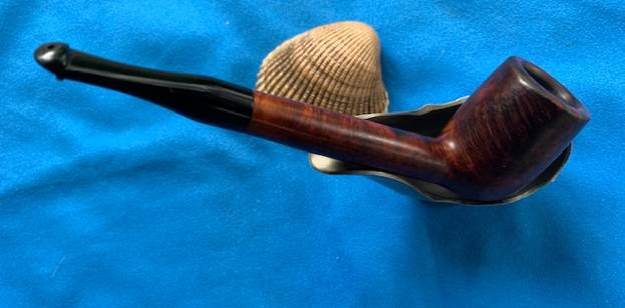
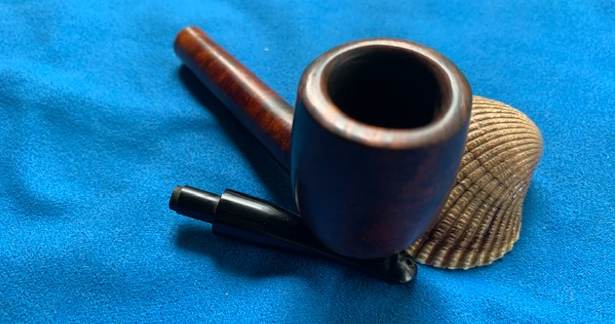
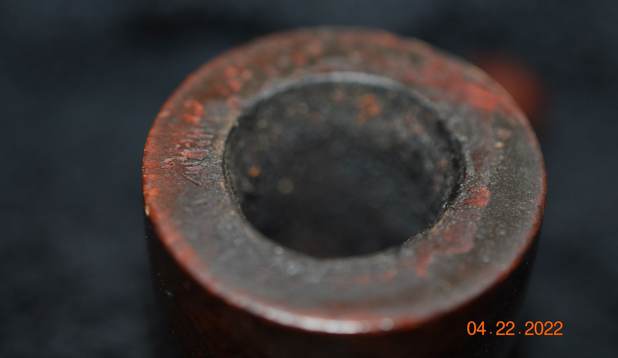
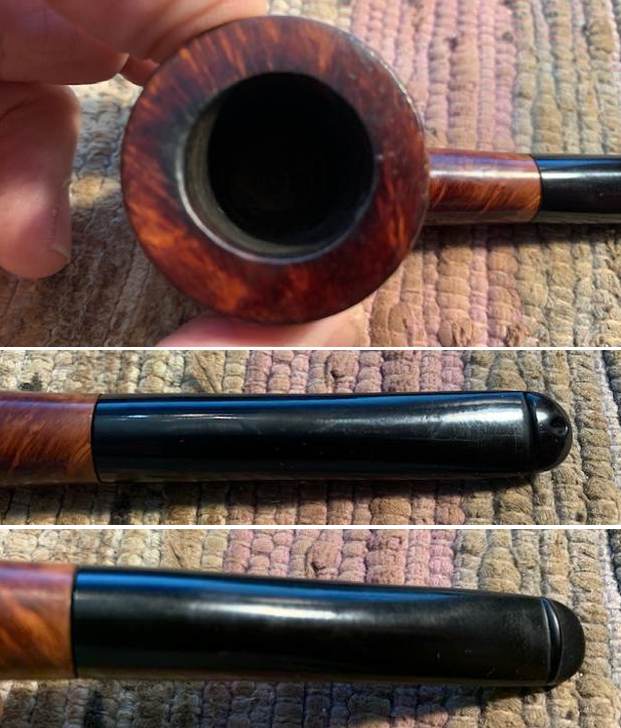
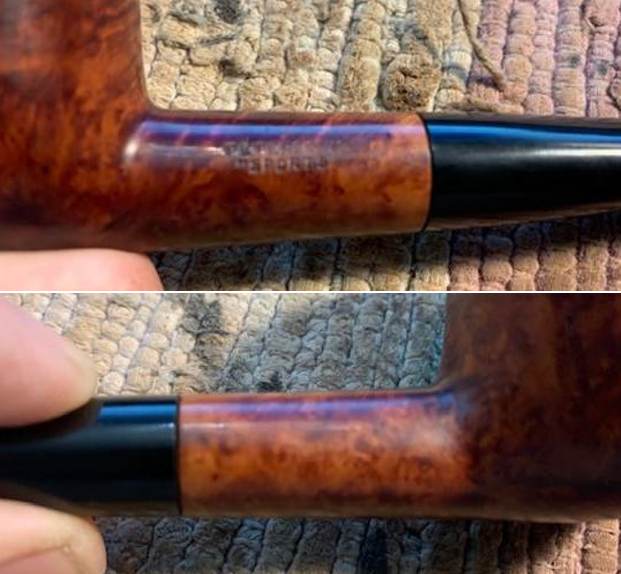
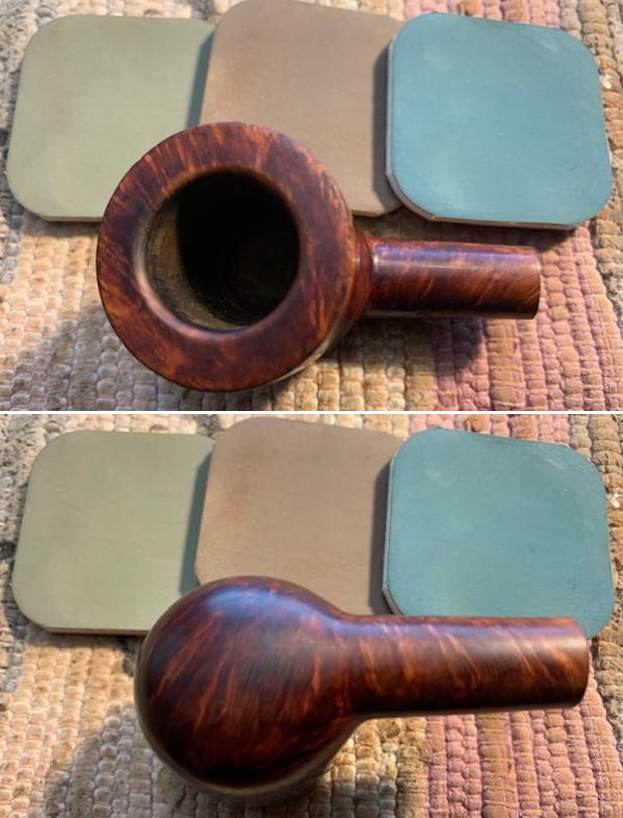
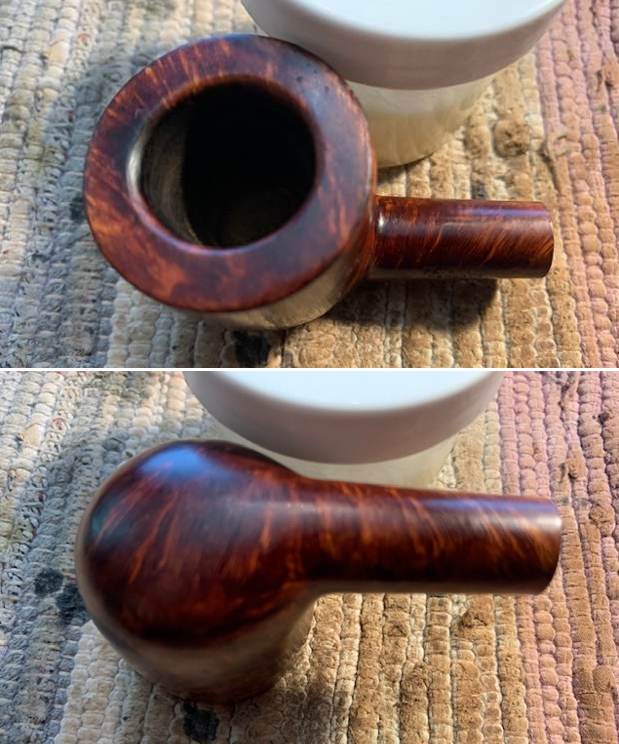
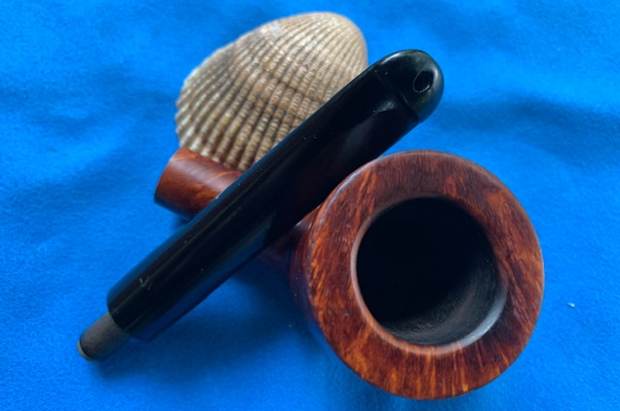
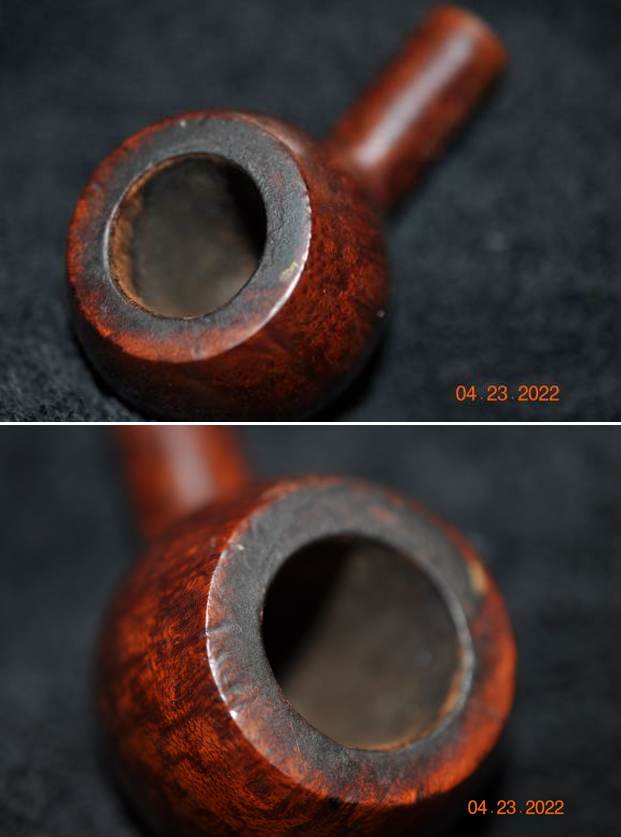
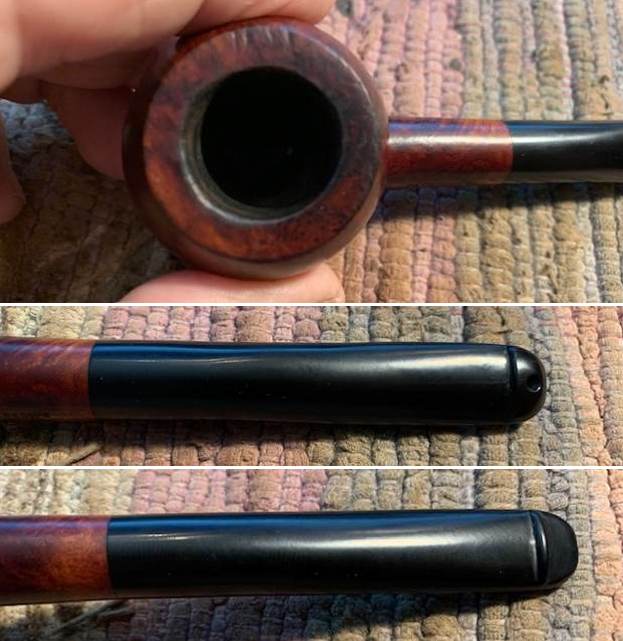
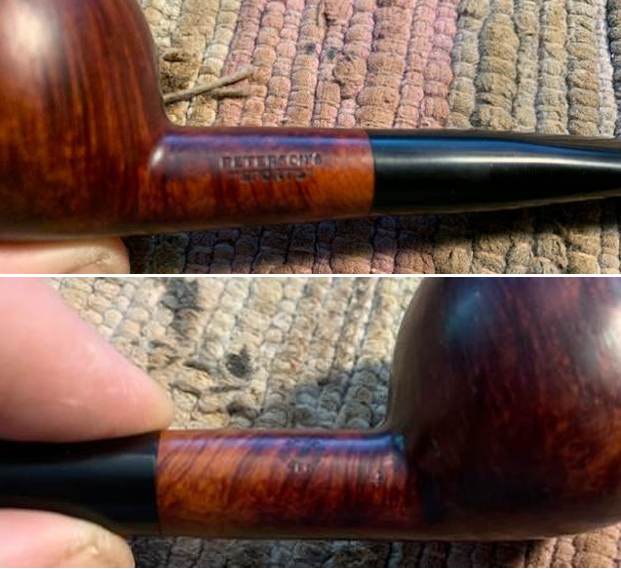
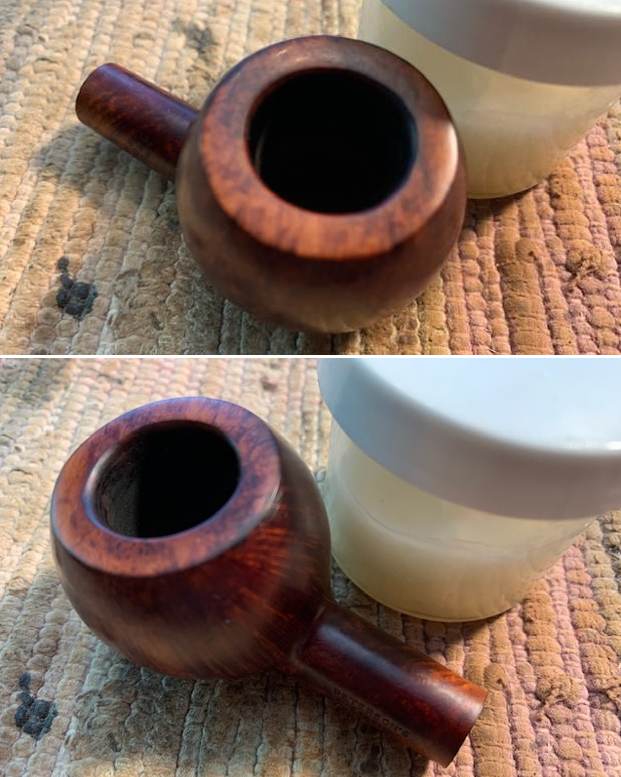
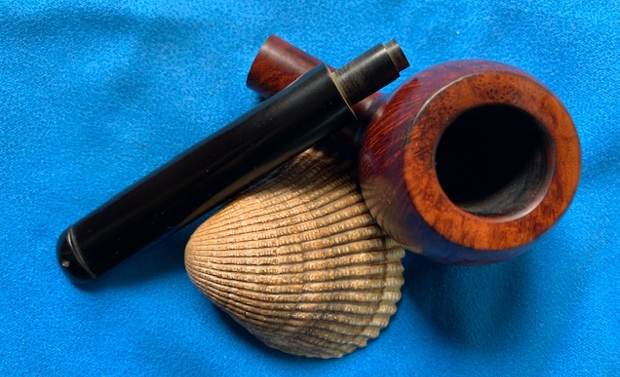
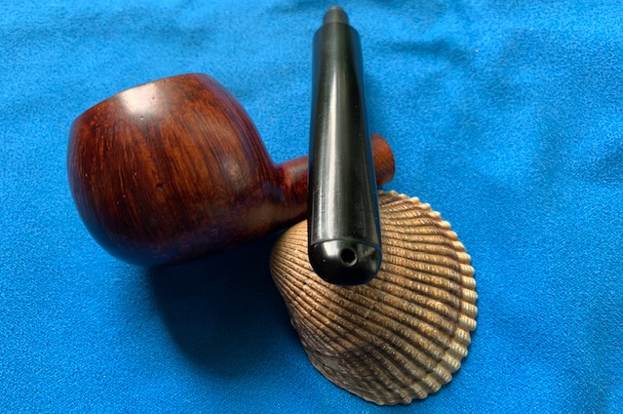
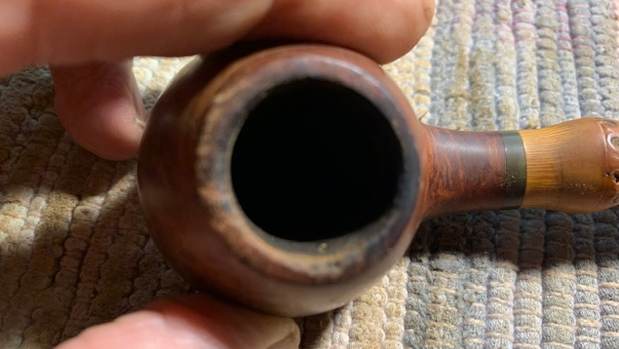
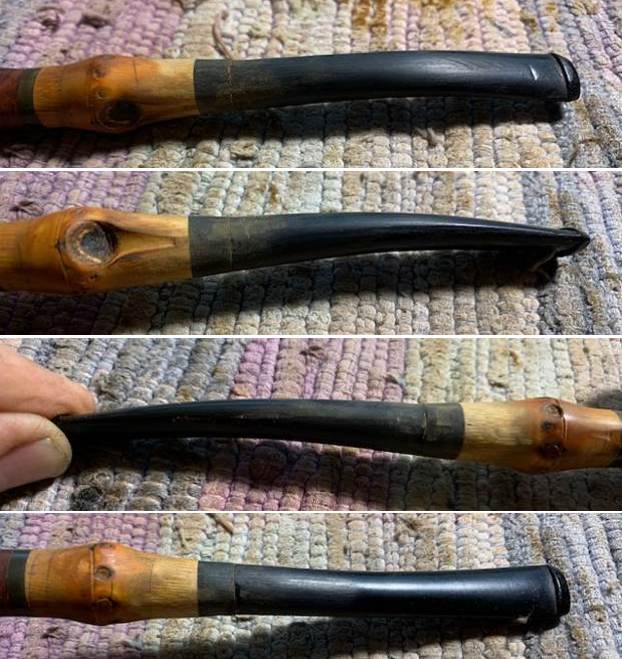
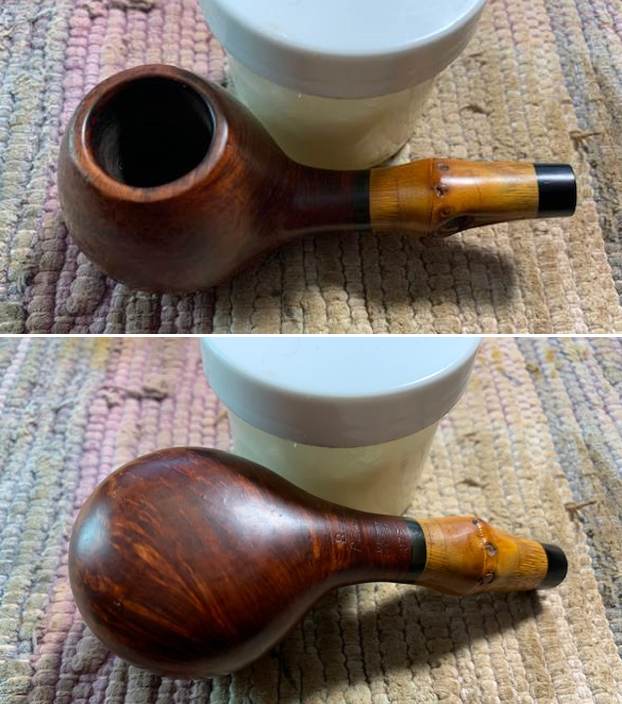
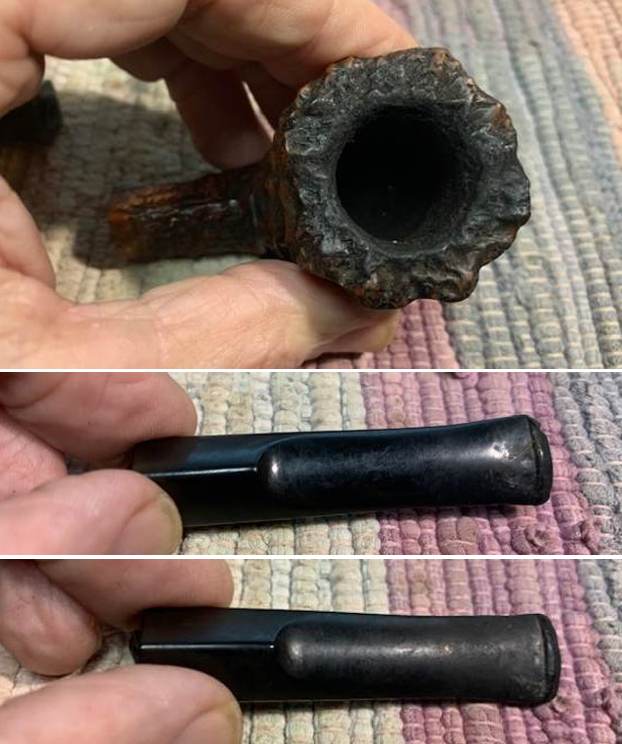
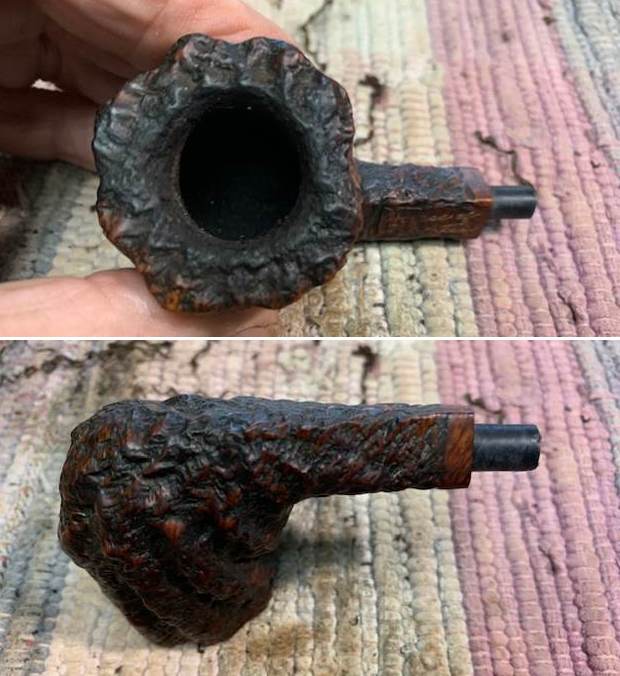
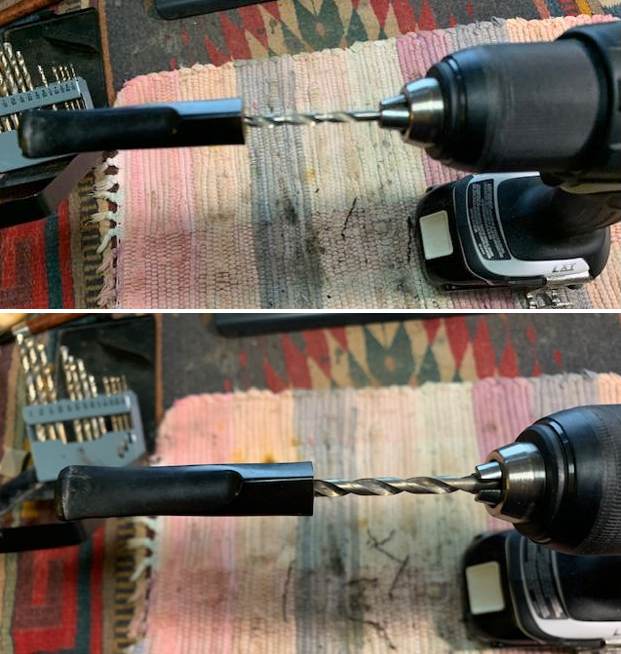
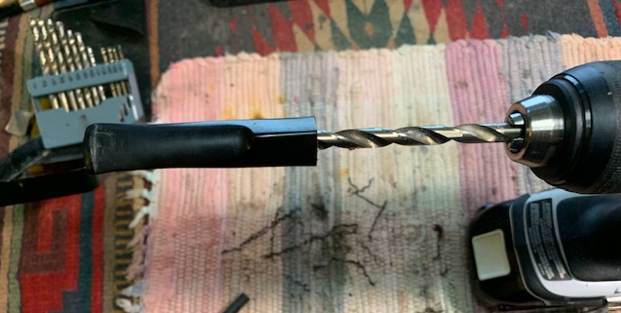
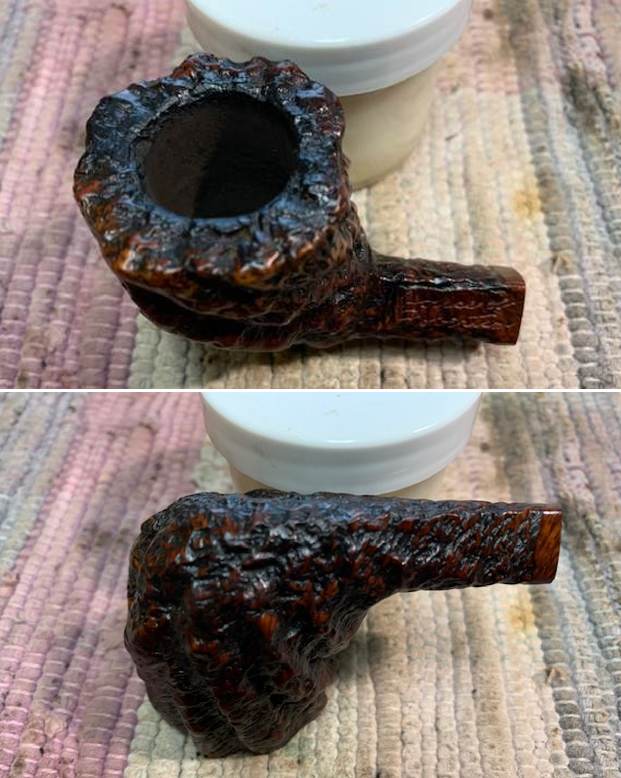
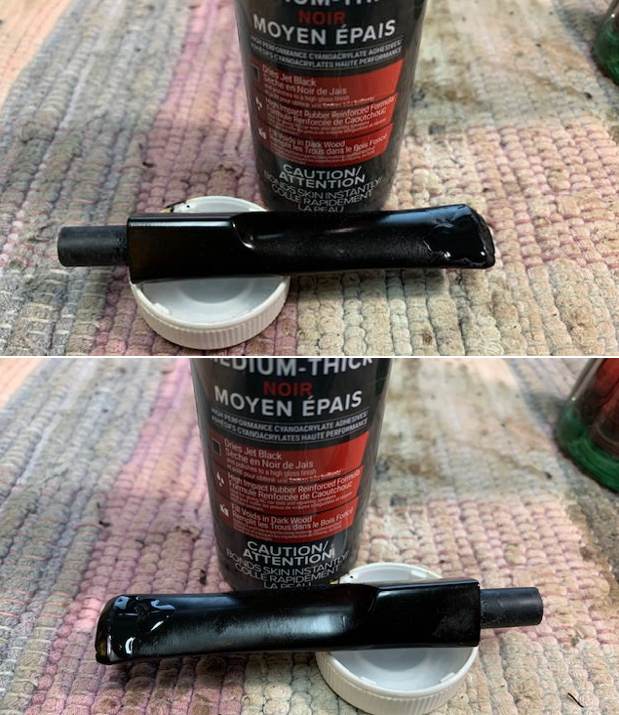
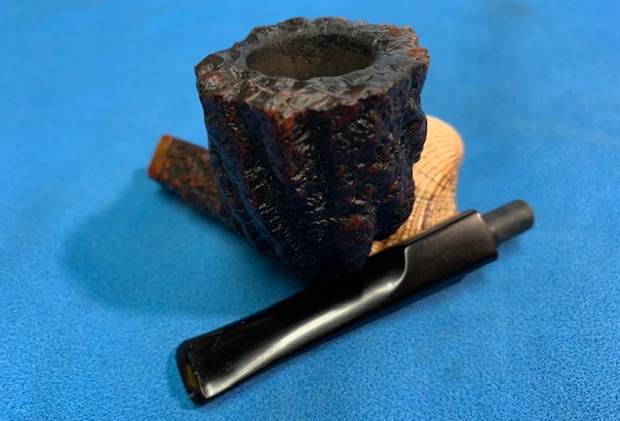
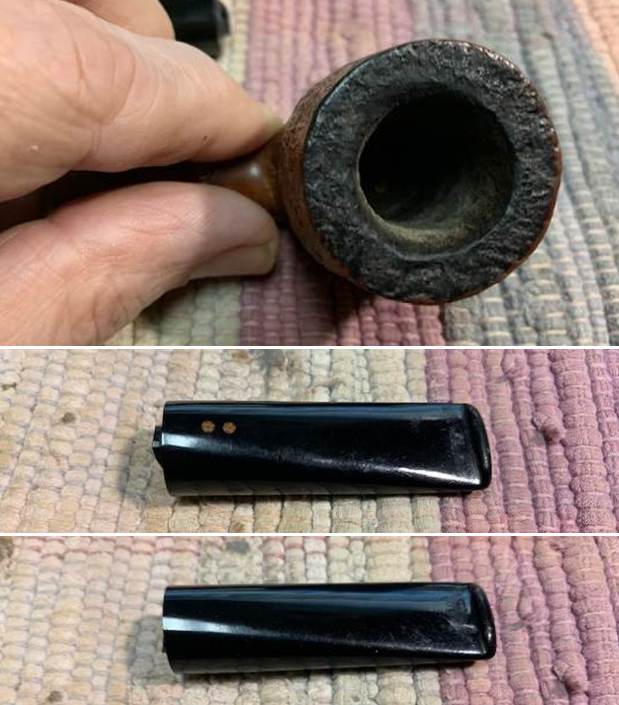
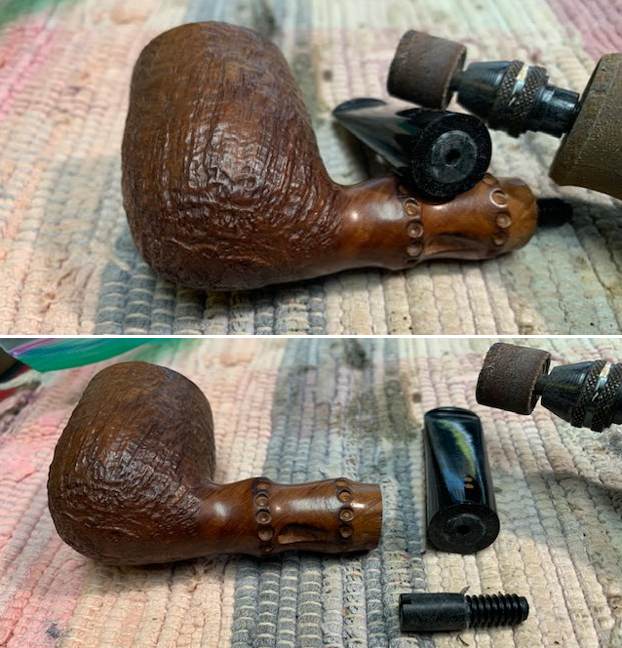
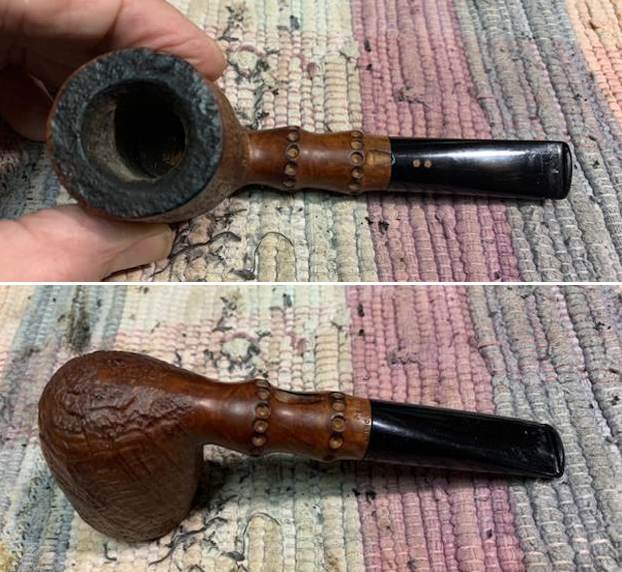
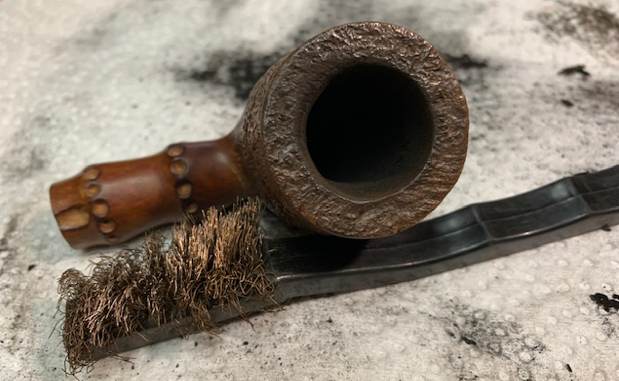
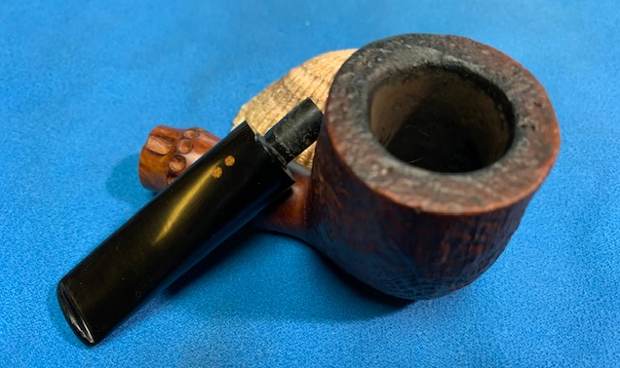
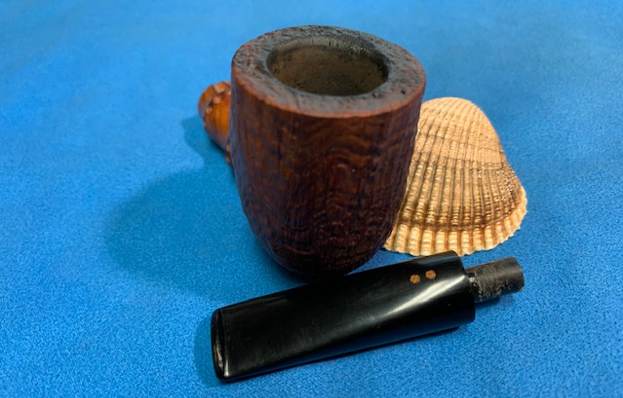
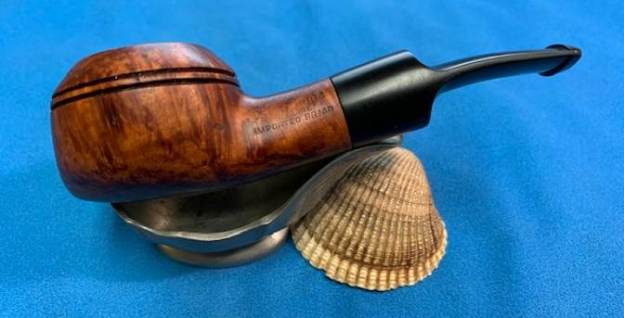
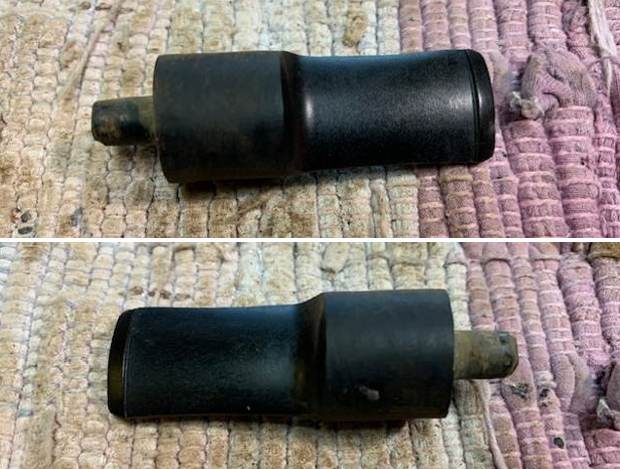
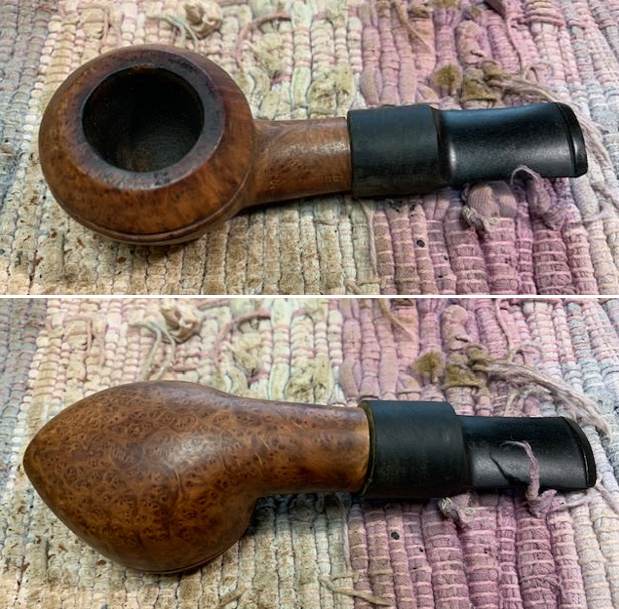
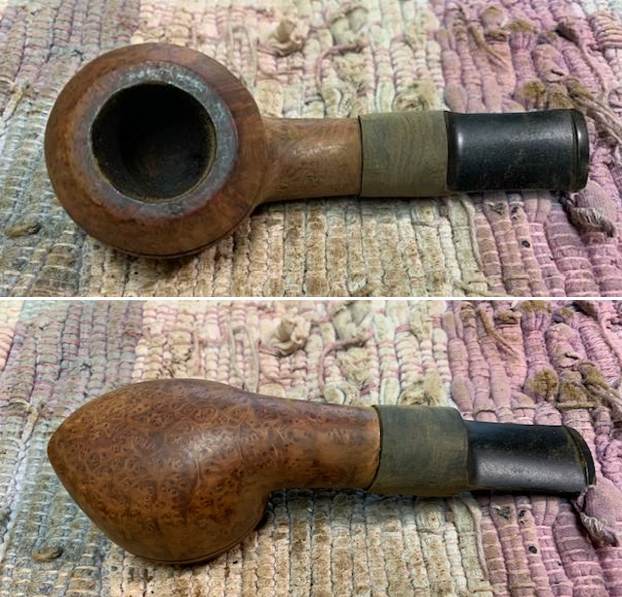
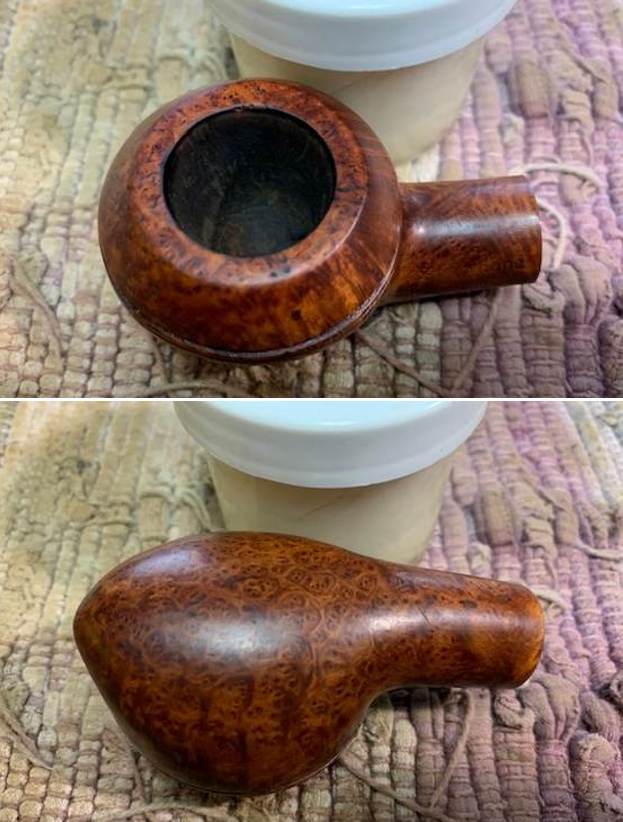
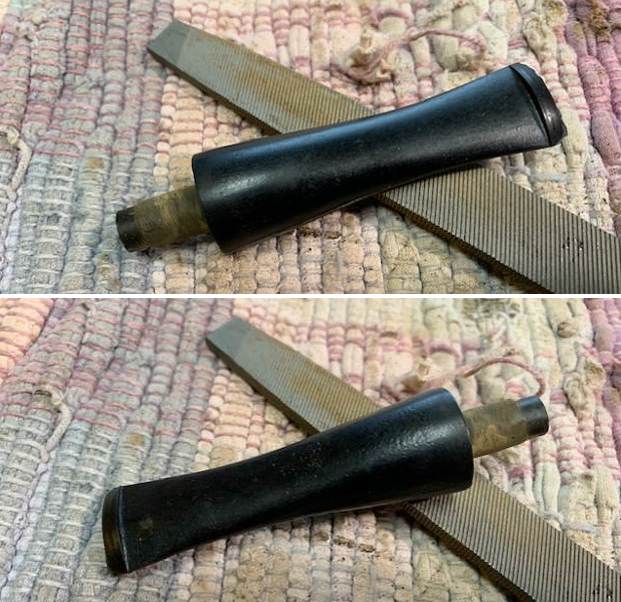
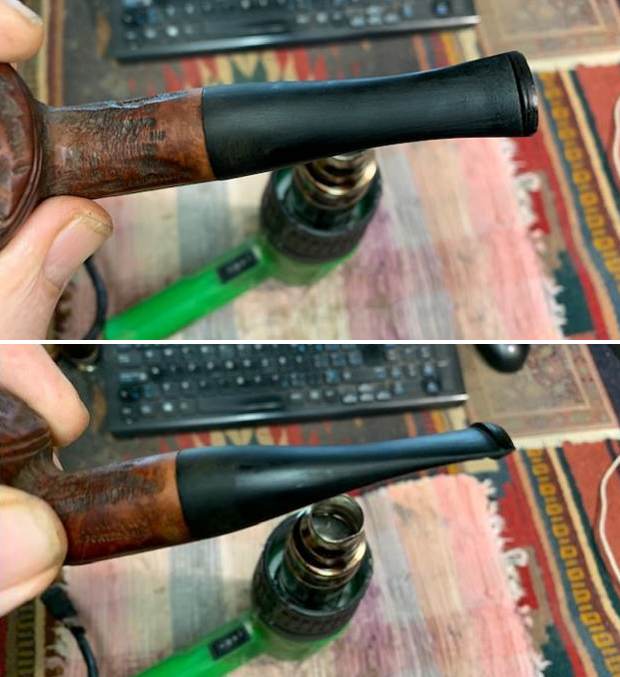
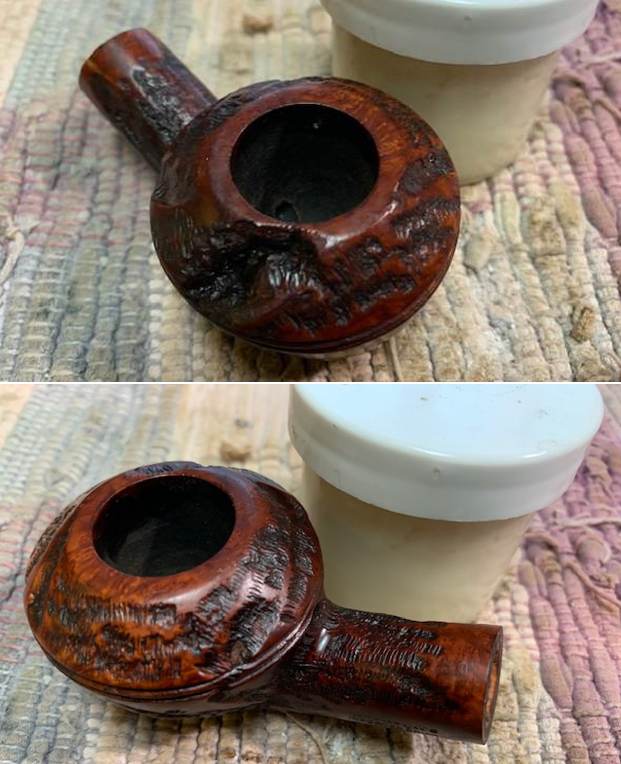
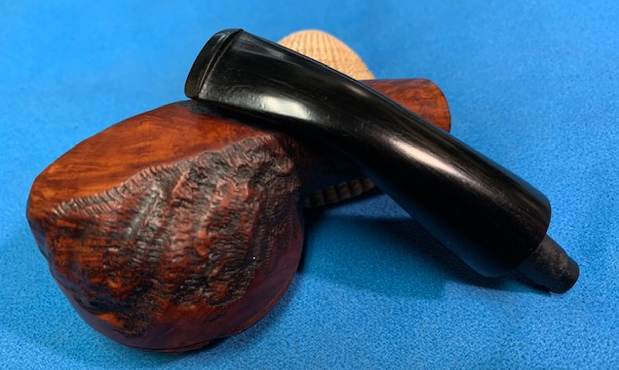
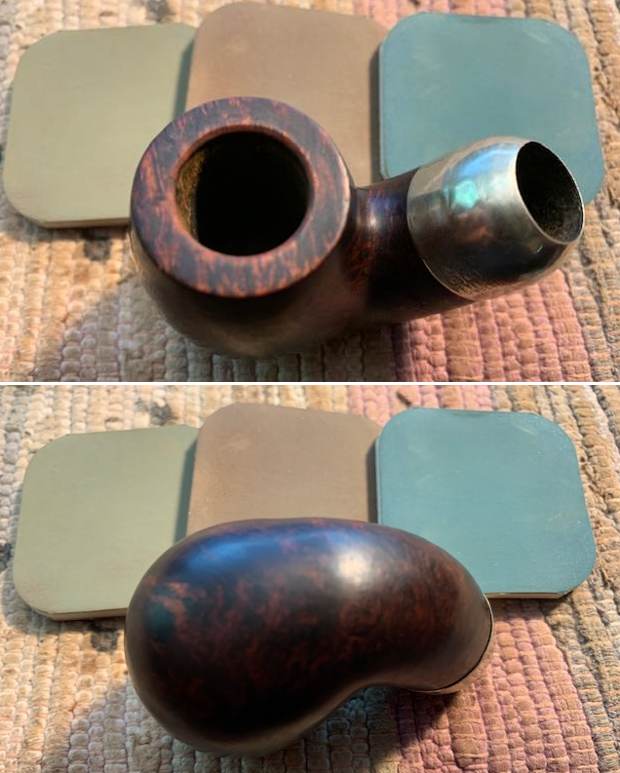
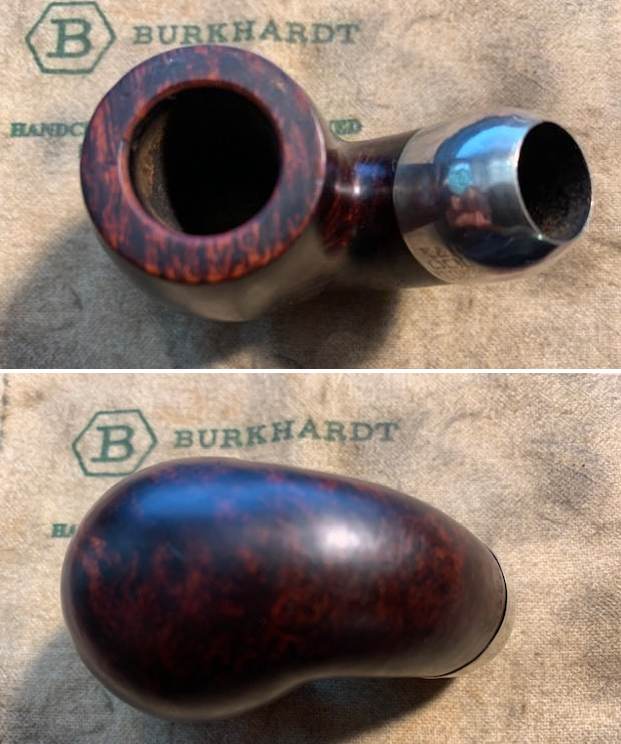
 I took some close up photos of the rim top and also of the stem surface. I wanted to show how well it had cleaned up. The rim top had some scratches and marks on the top and some darkening and nicks around the inner edge. It should clean up really well. I also took close up photos of the new stem to show how well it is made! Thanks to Walls Pipe Repair!!
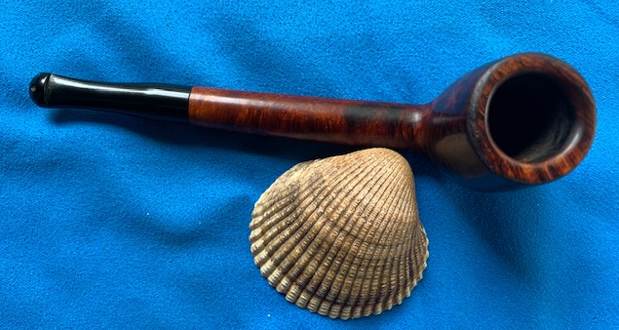
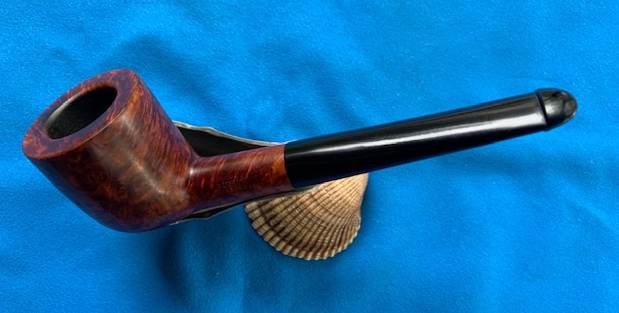
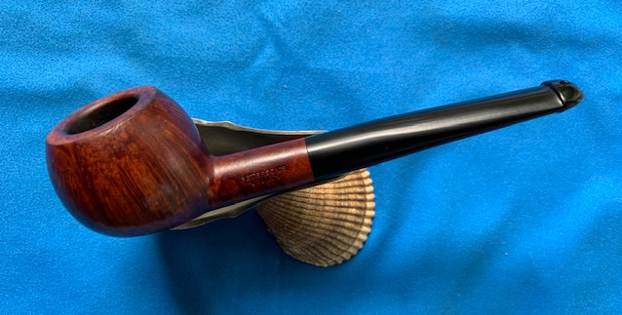
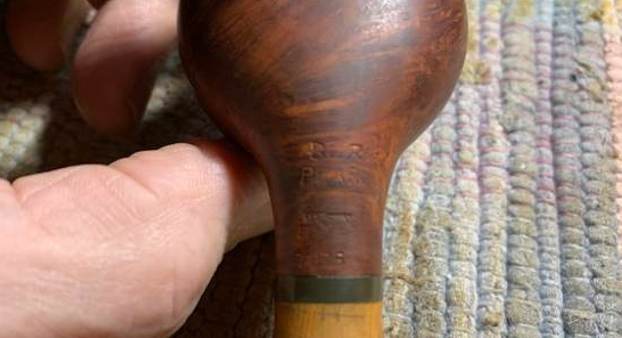
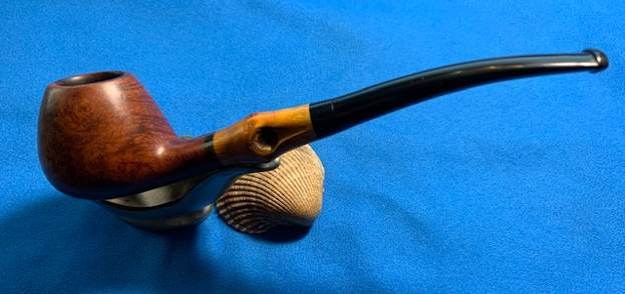
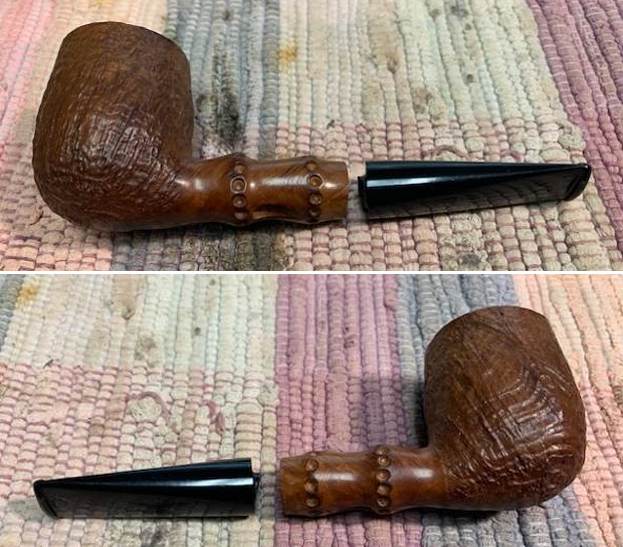
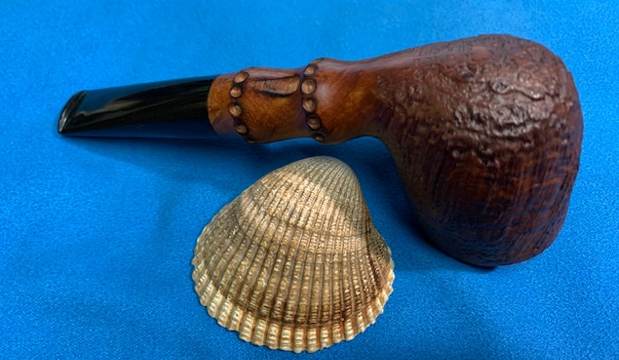
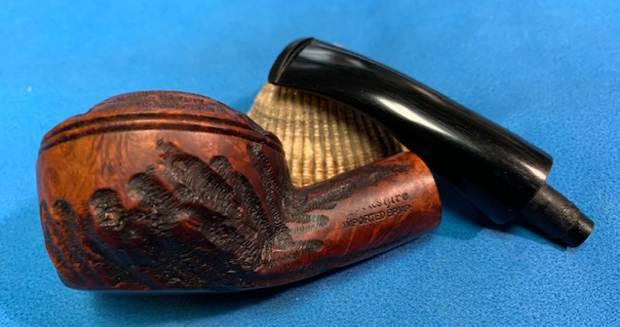
 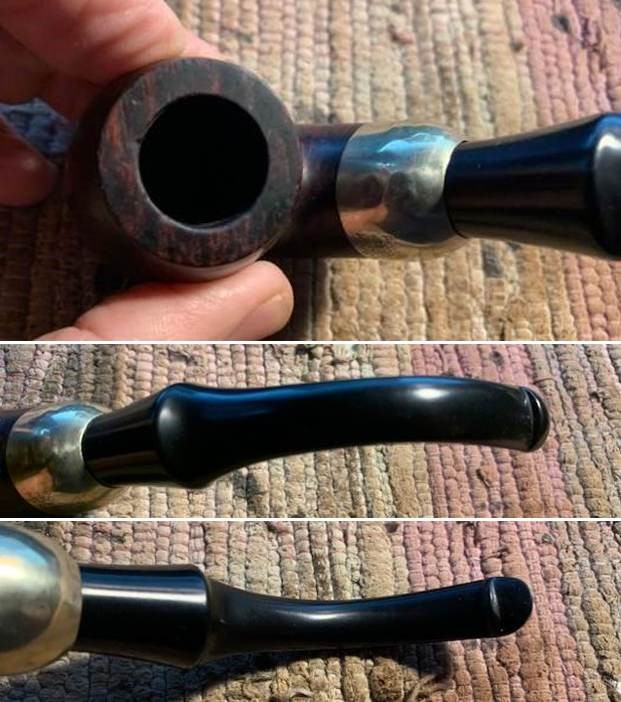 I took photos of the stamping on the sides of the shank. You can see that it is stamped as noted above. It is clear and readable.
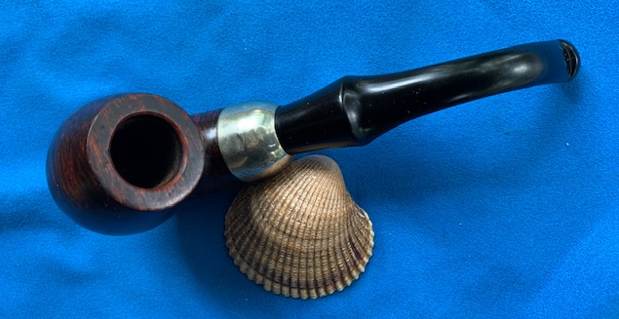
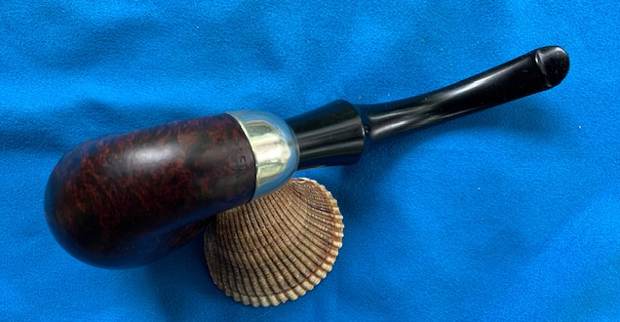
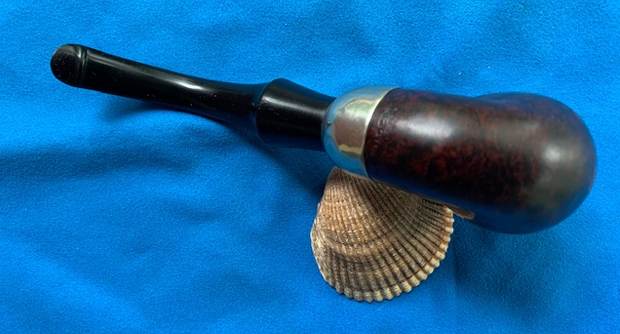
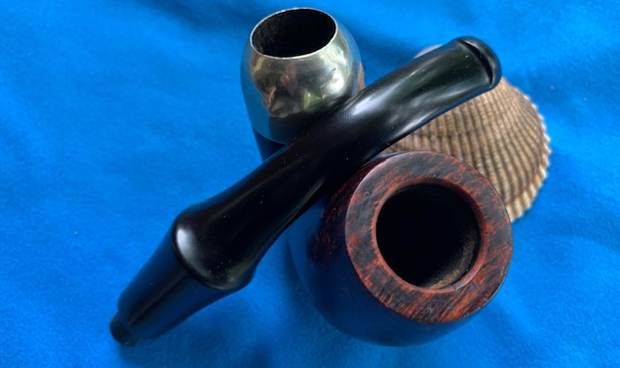
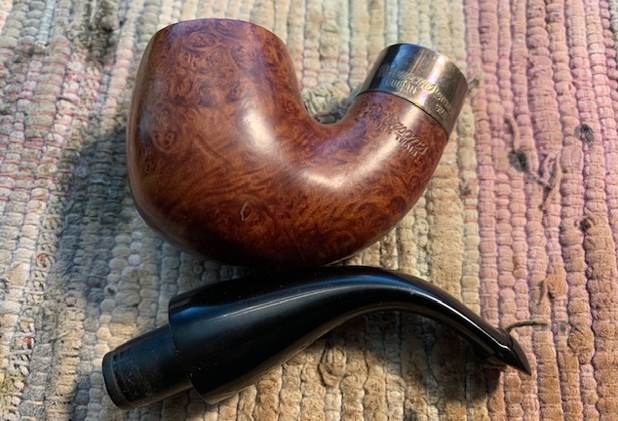
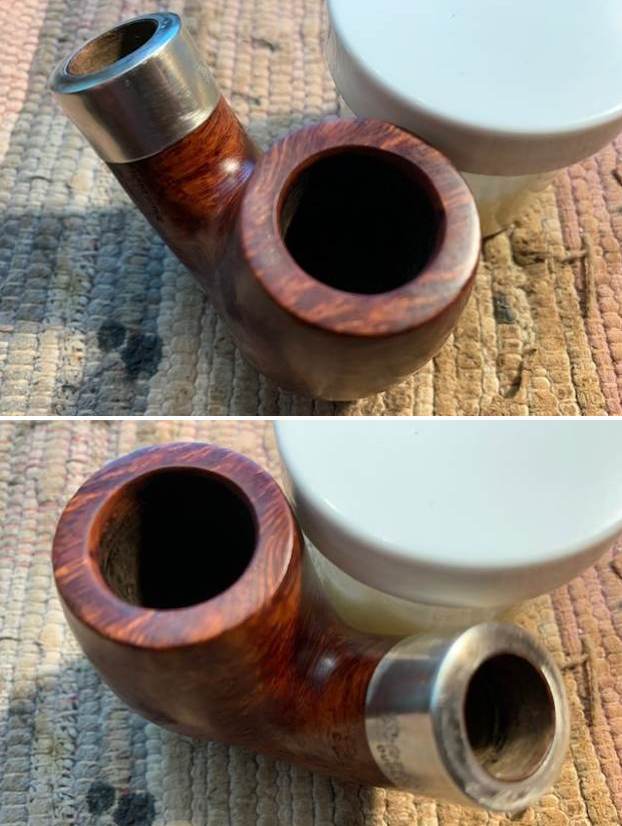
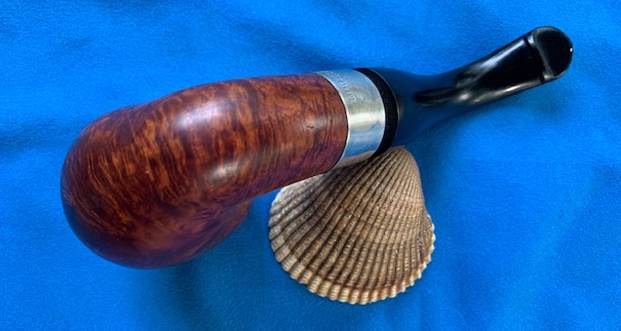
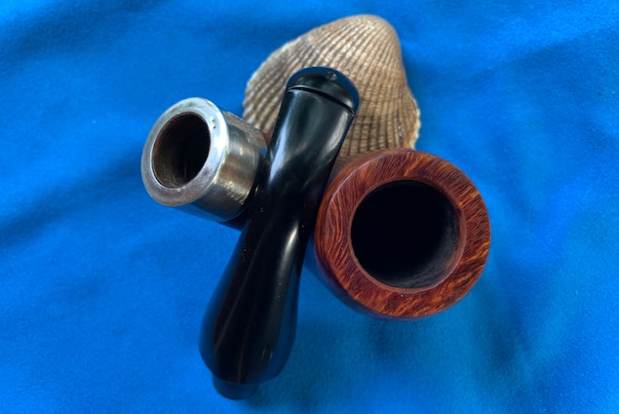
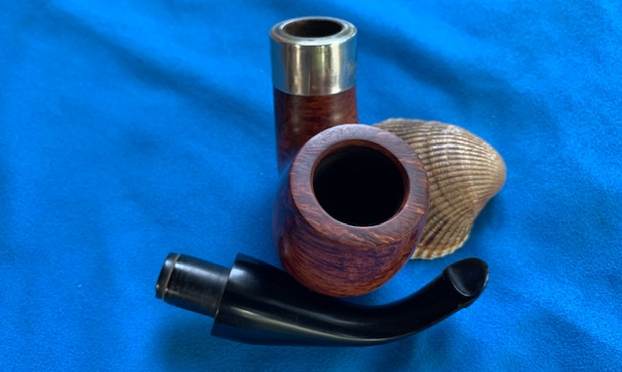
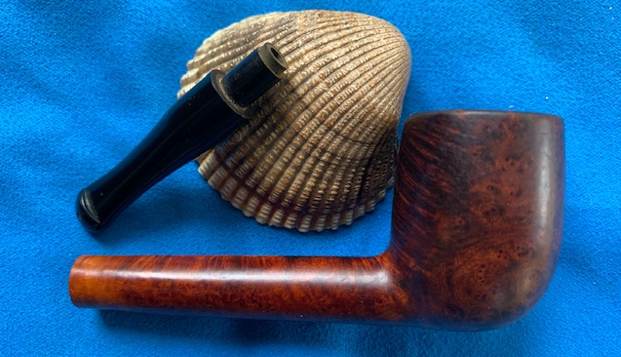
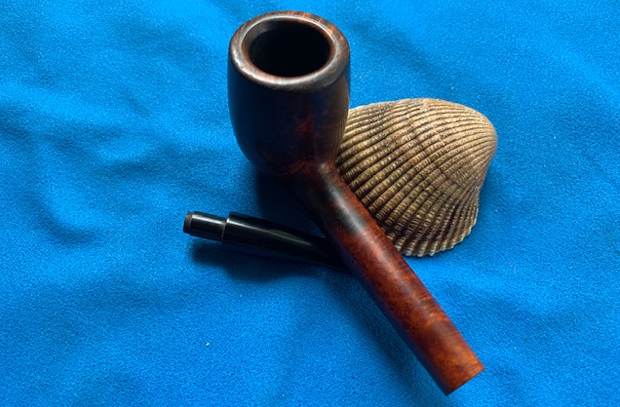
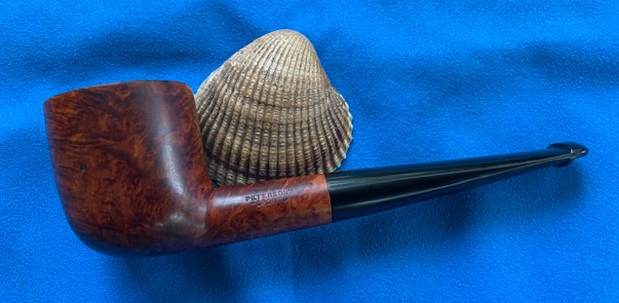
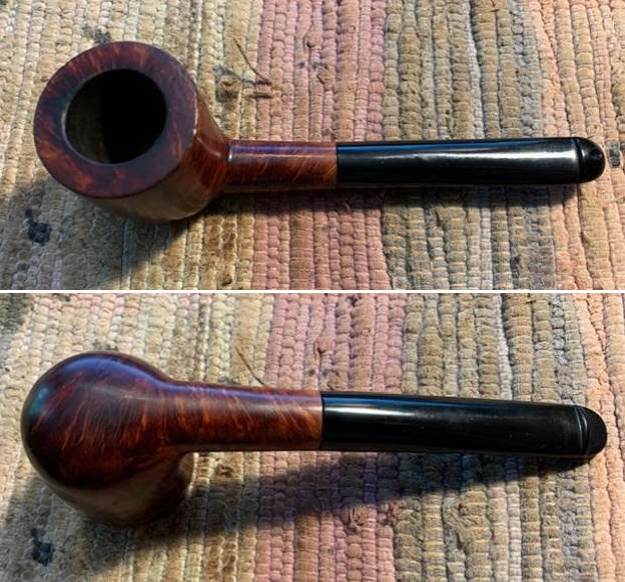
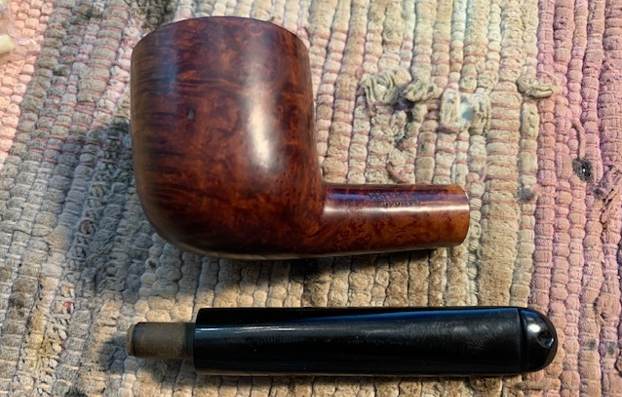
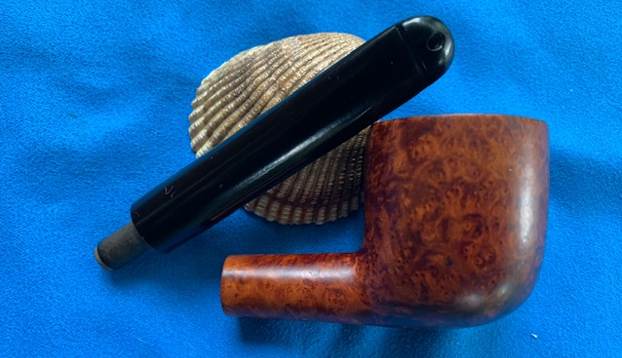
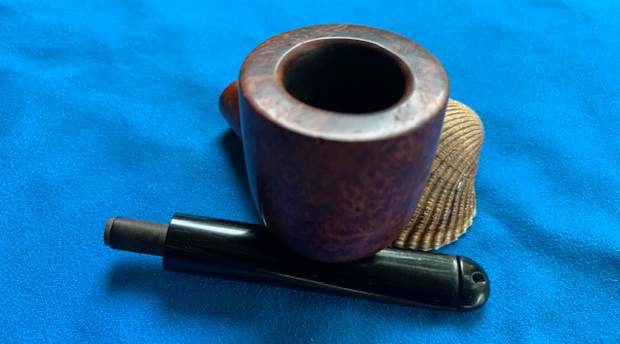
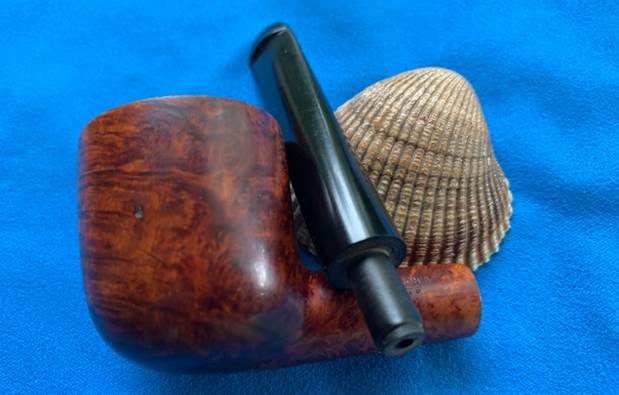
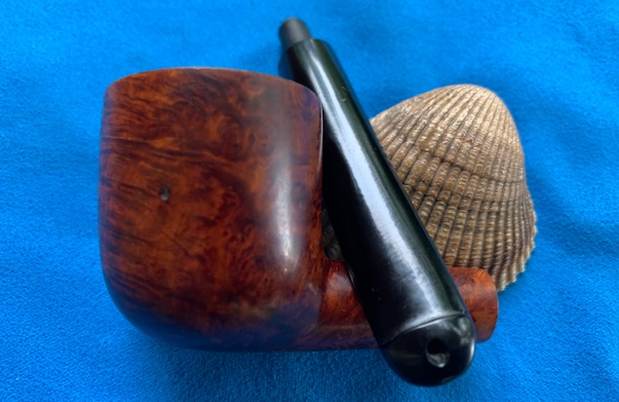
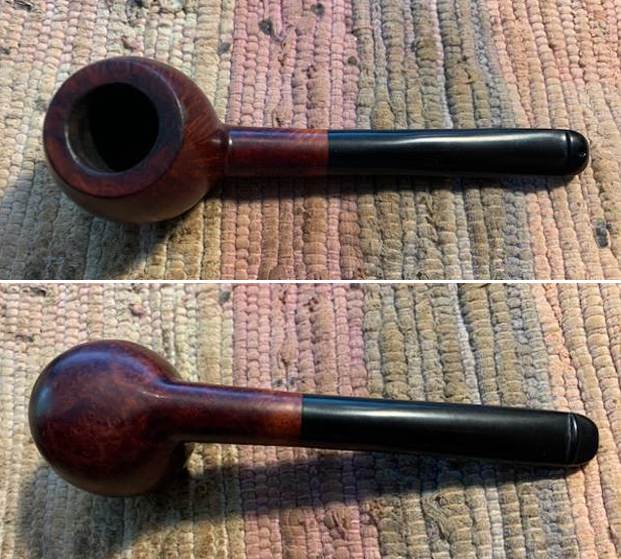
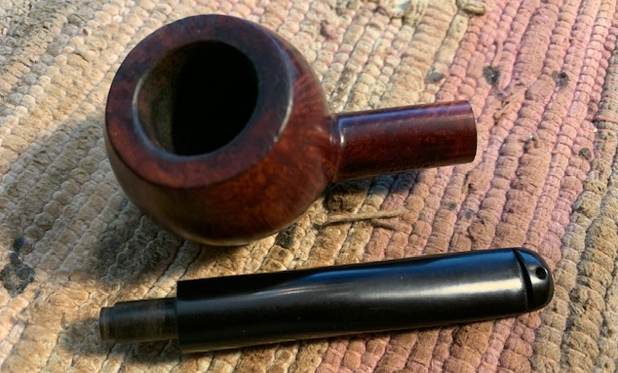
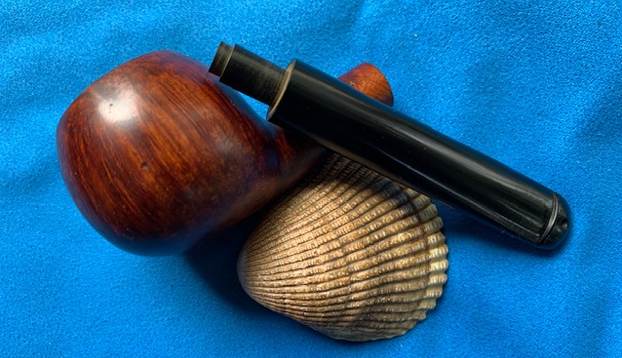
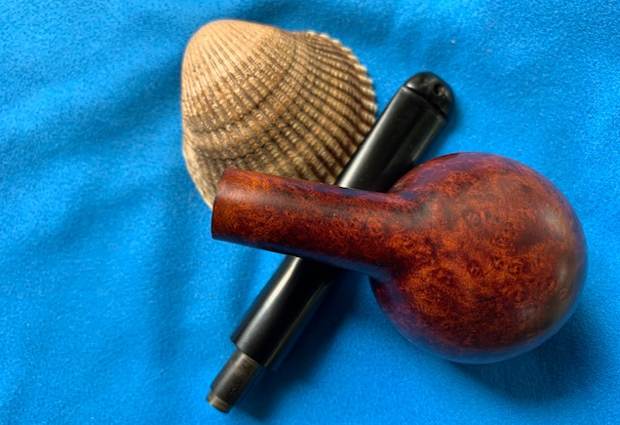
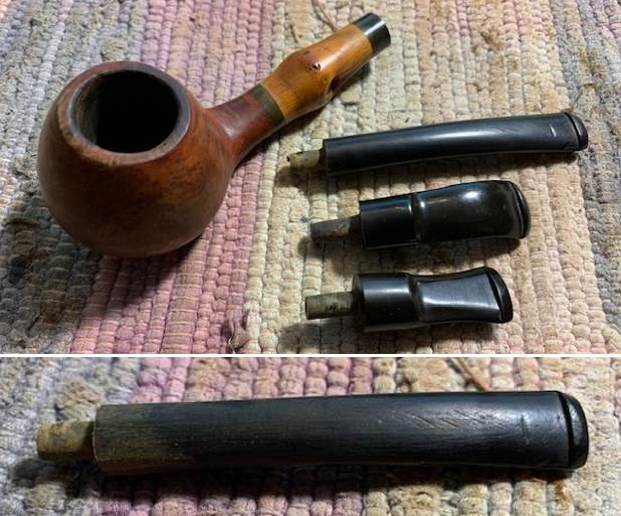
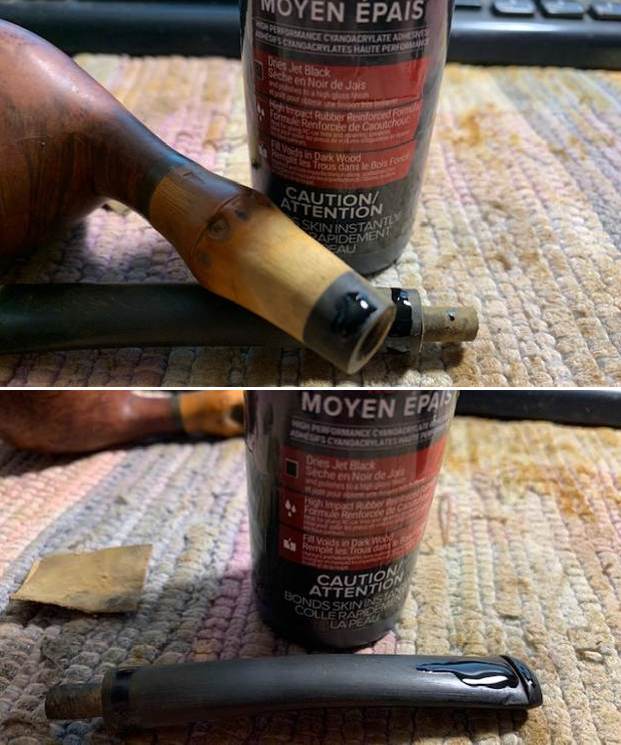
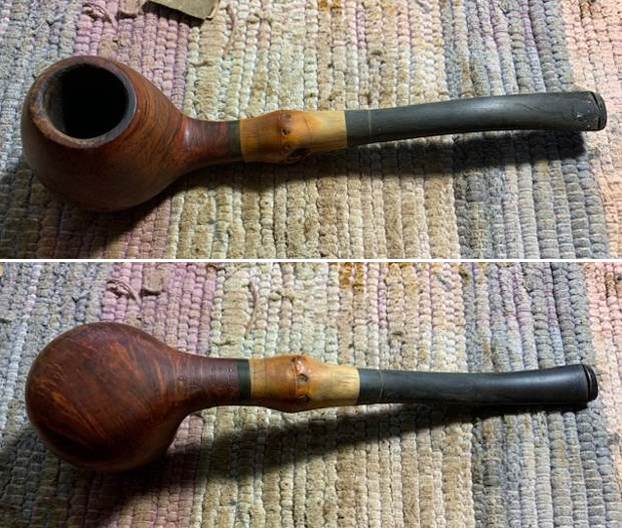
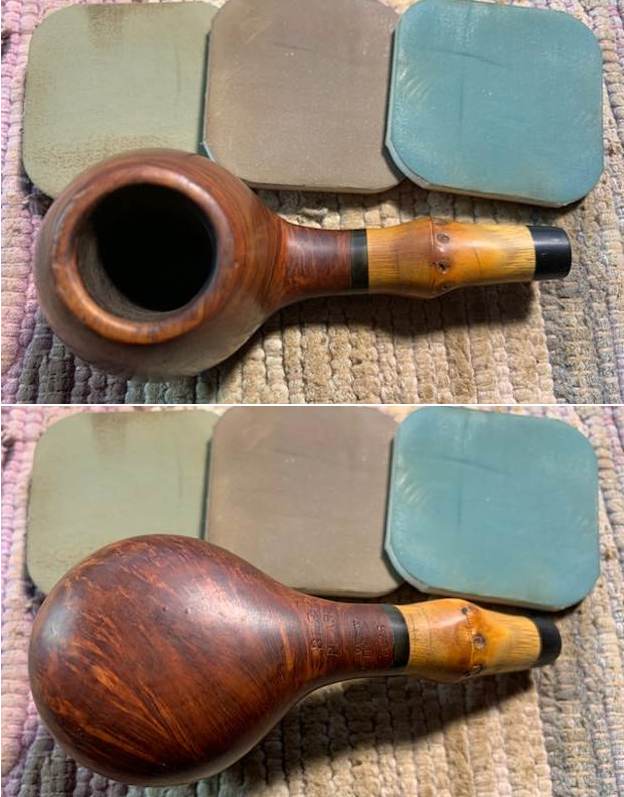
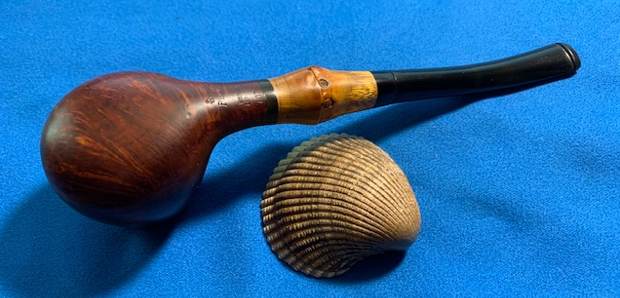
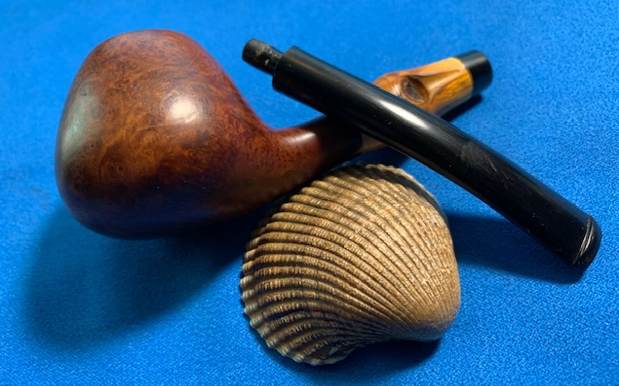
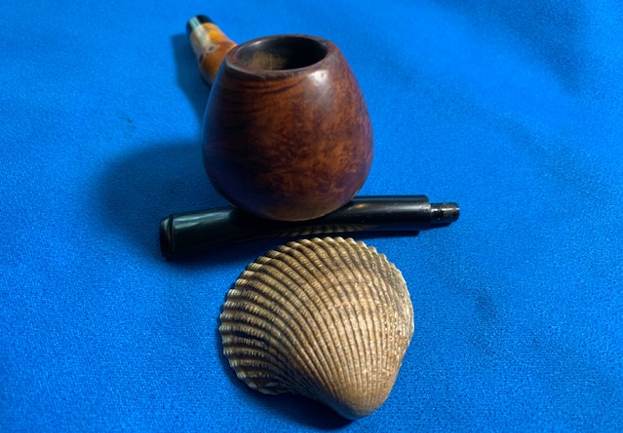
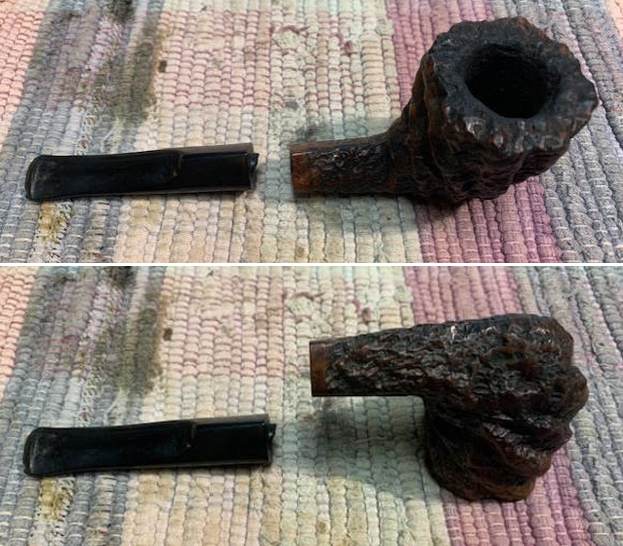
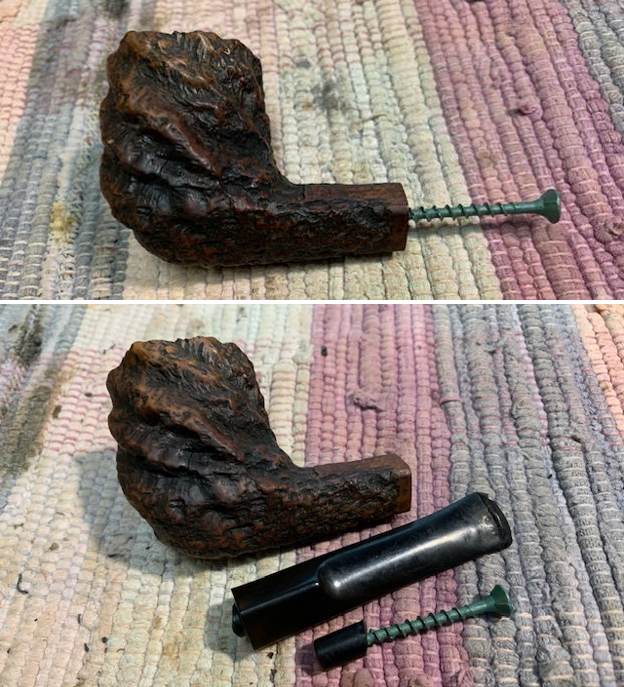
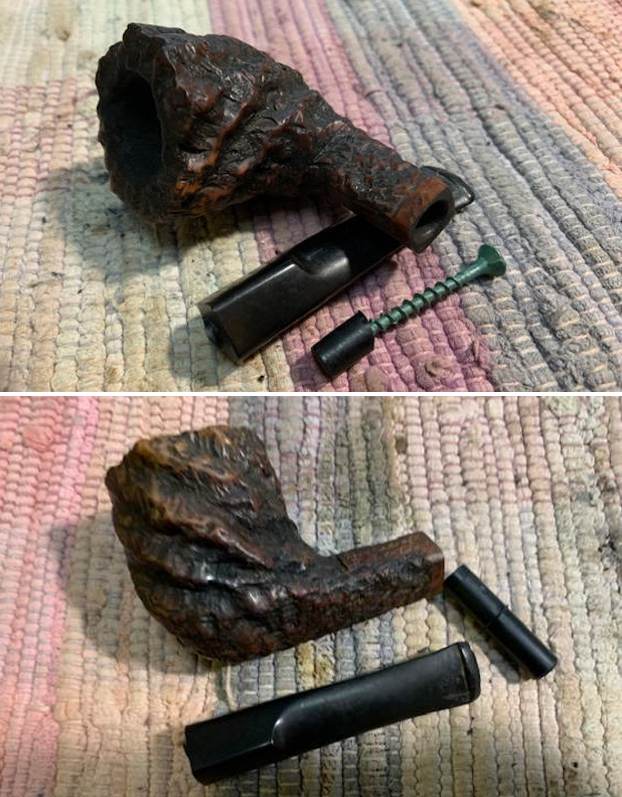
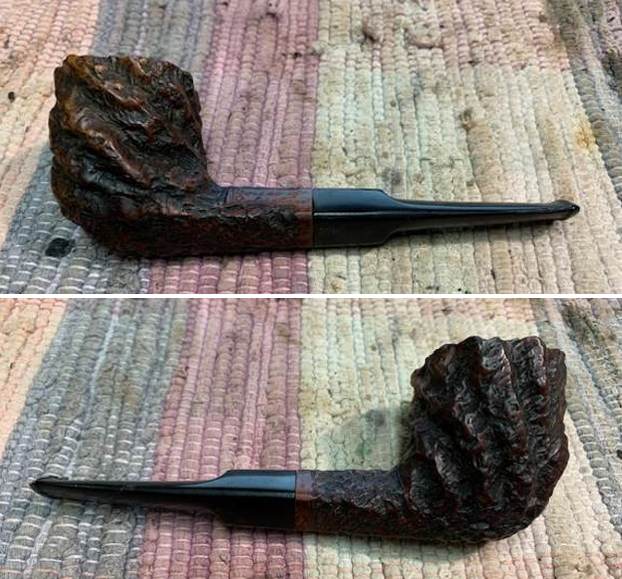
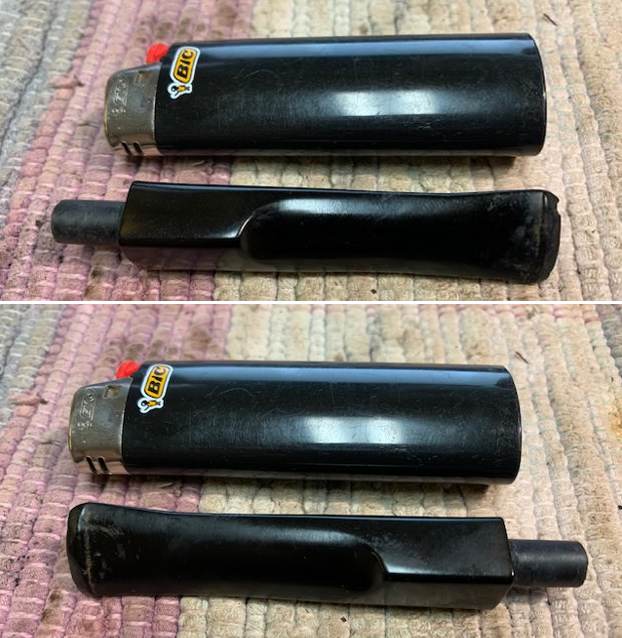
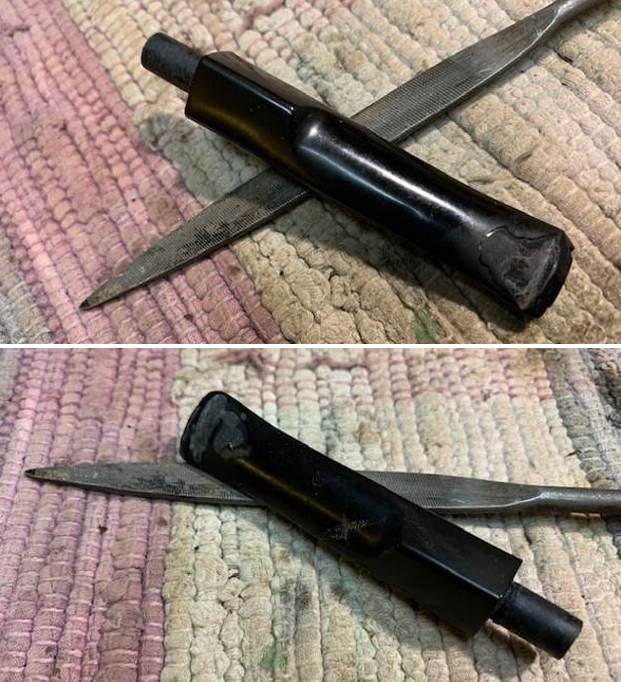
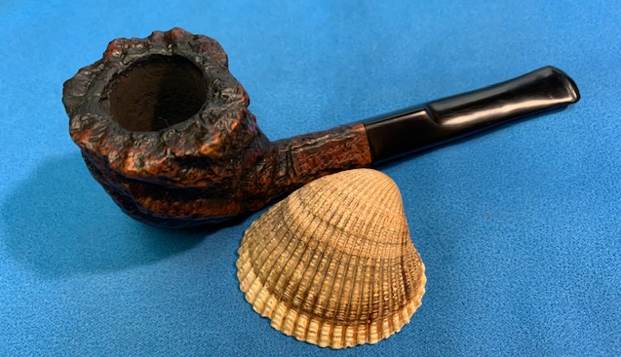
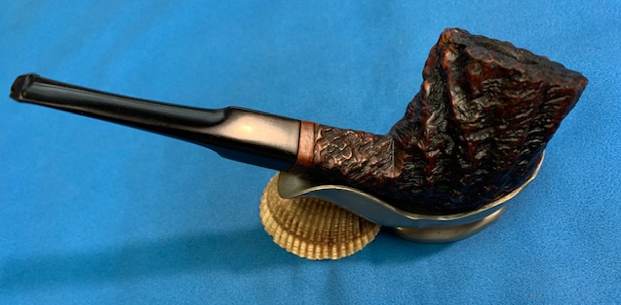
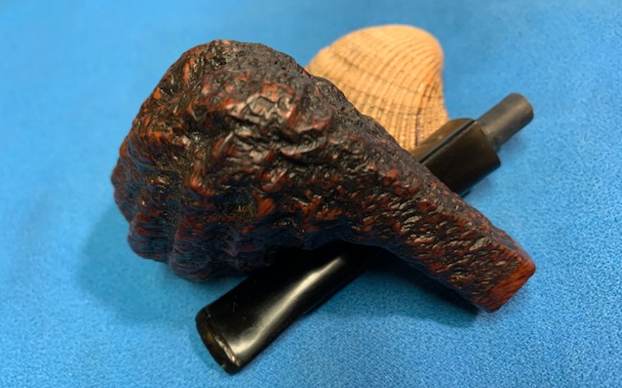
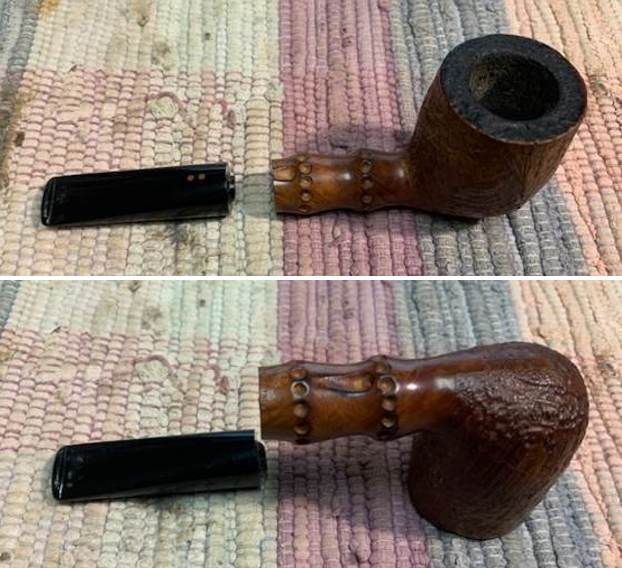
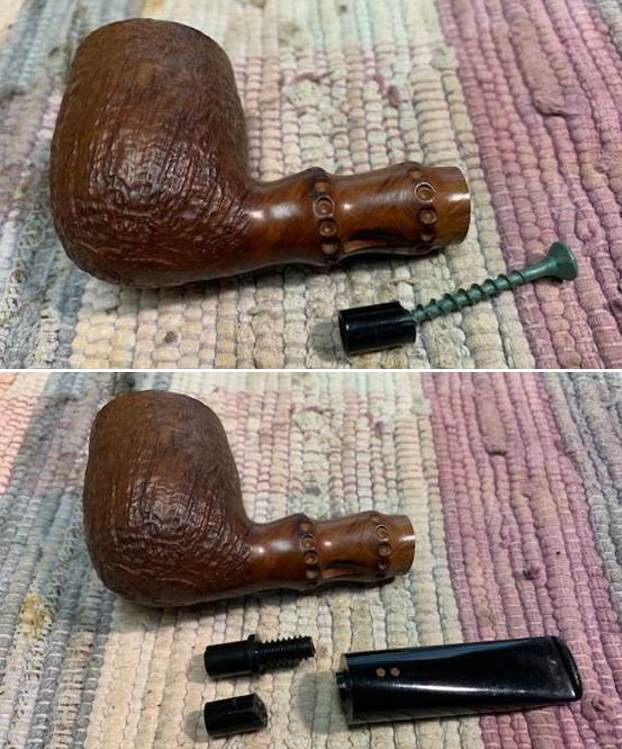
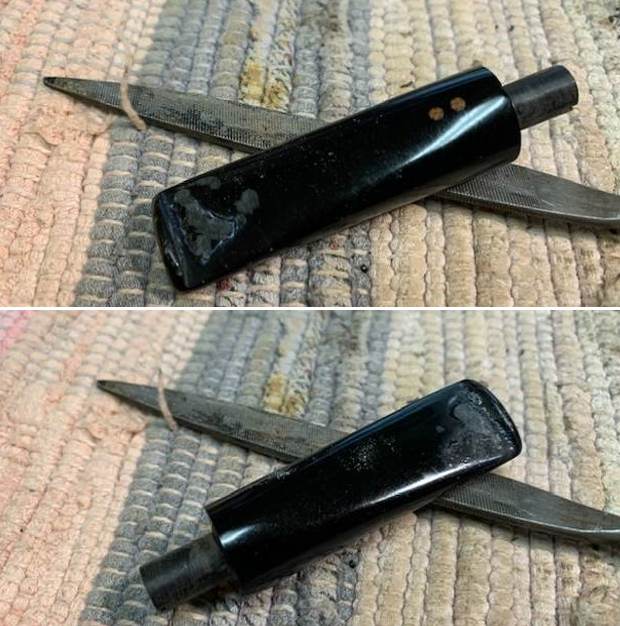
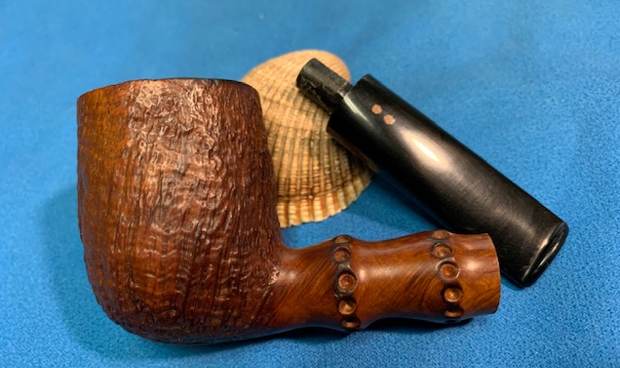
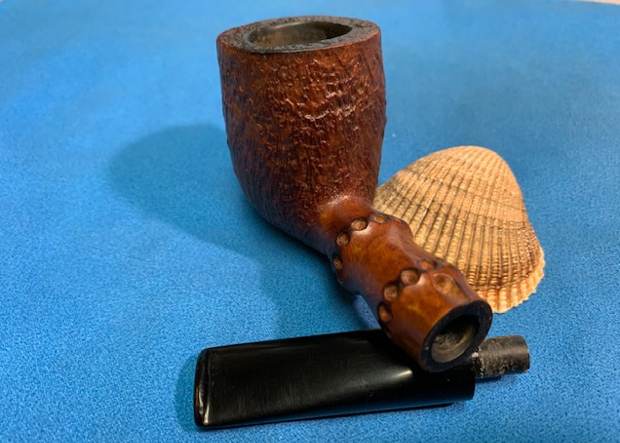
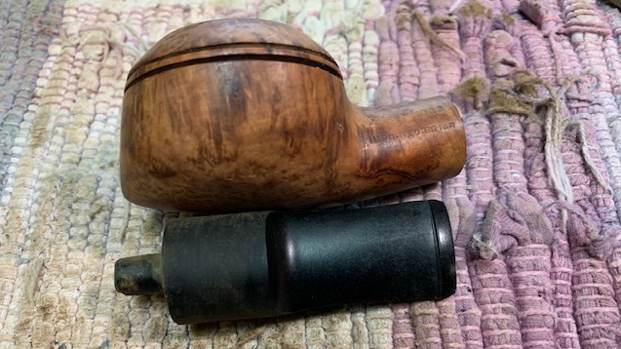
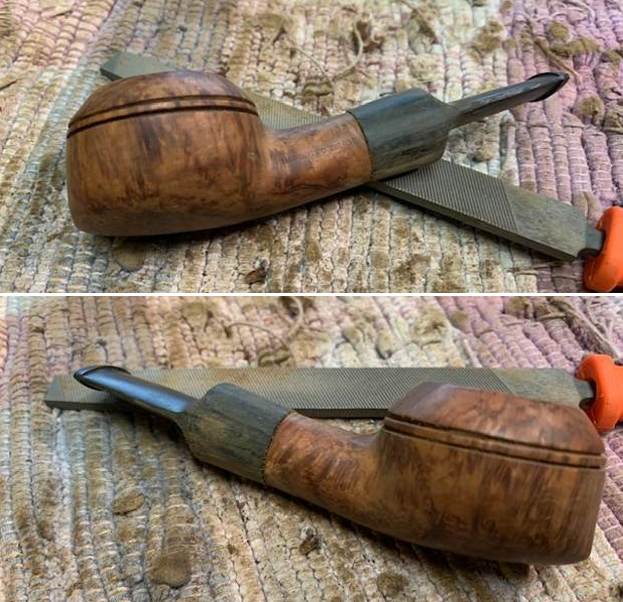
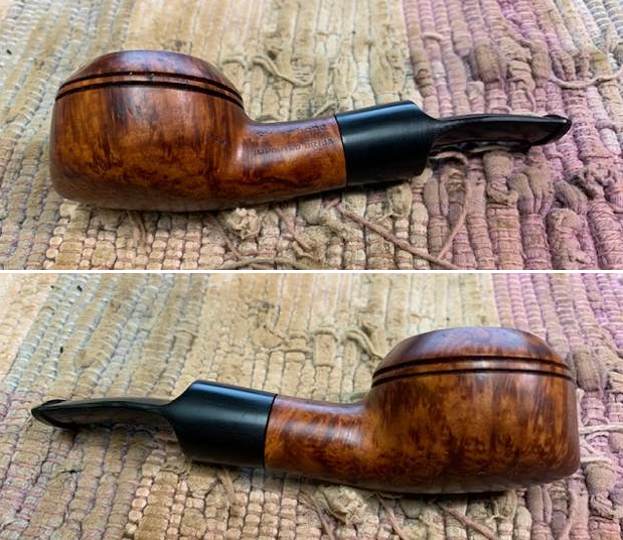
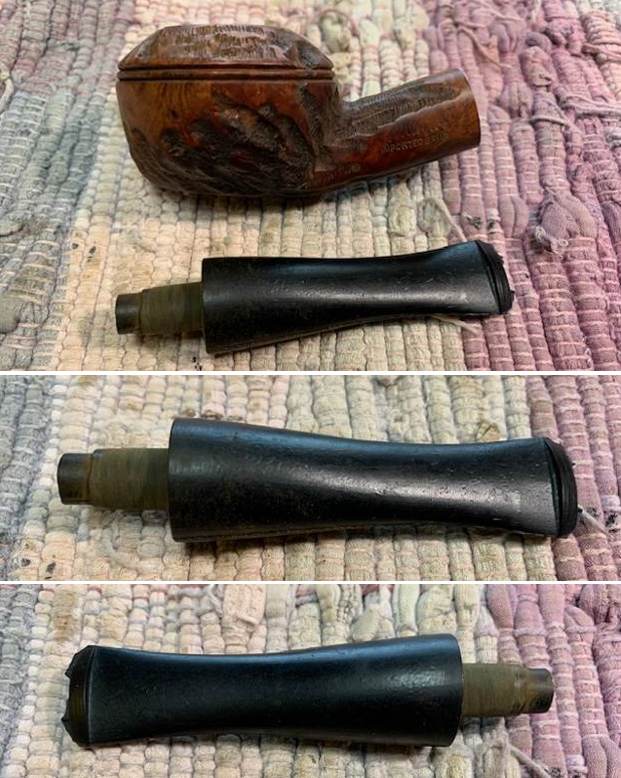
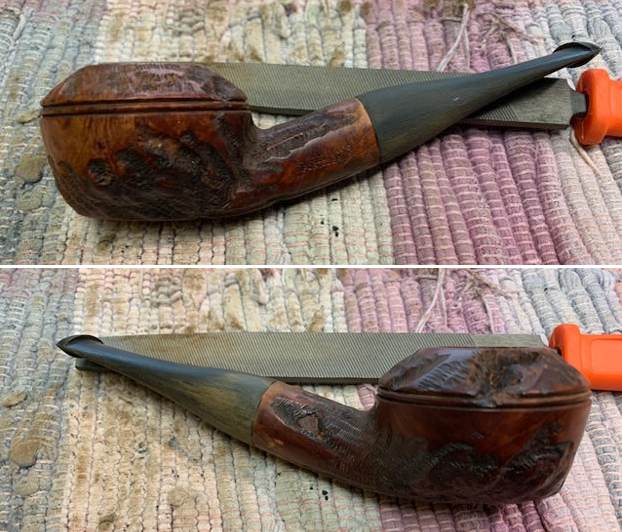
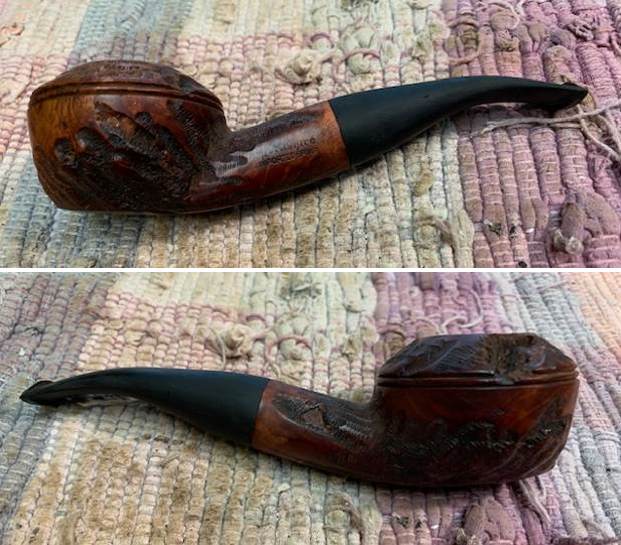
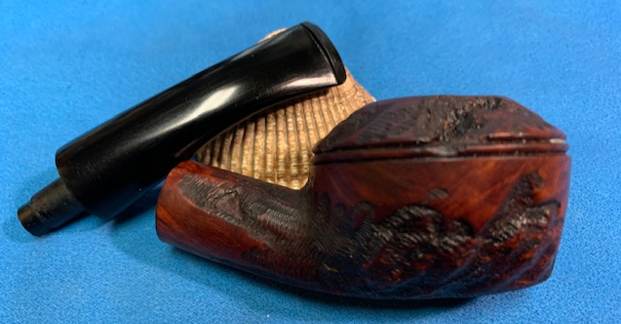
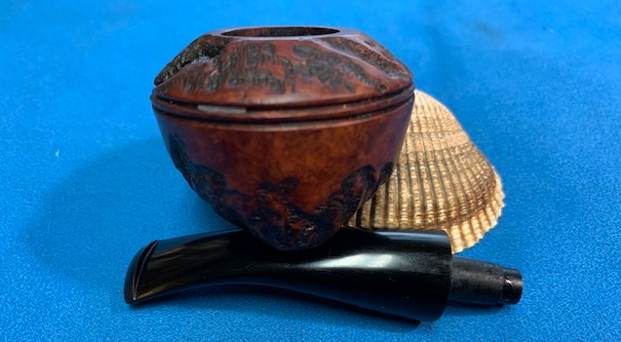
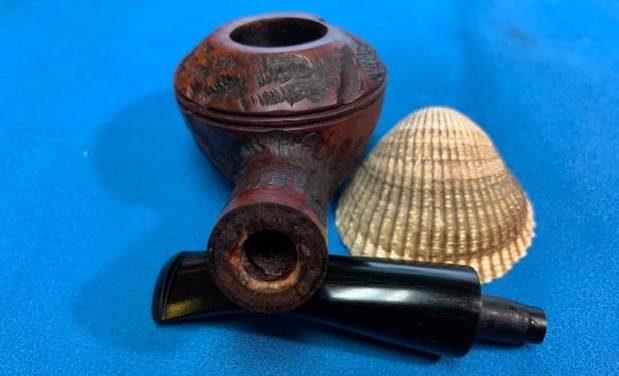
 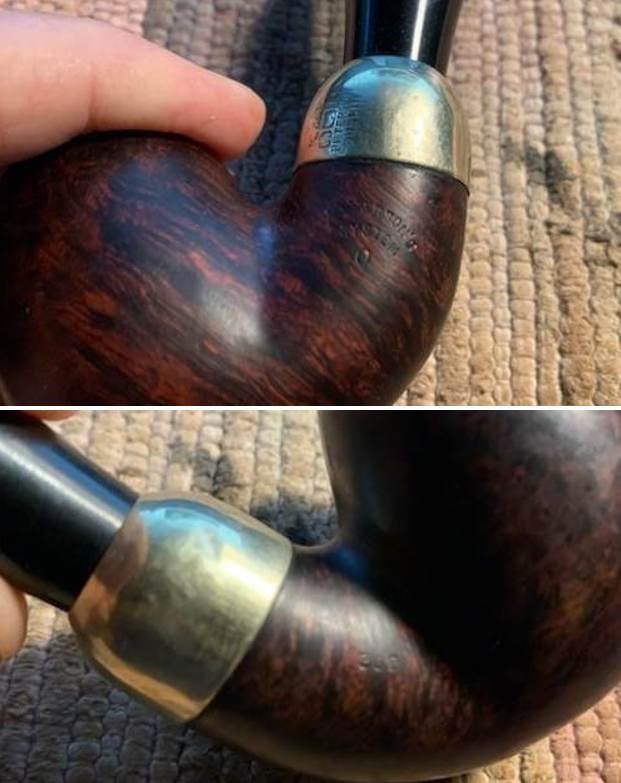 I removed the stem and took a photo of the pipe to have a look at the parts and overall look. The new stem looked really good with the bowl.
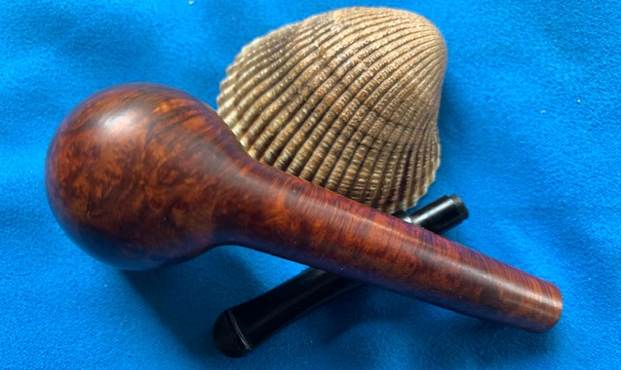
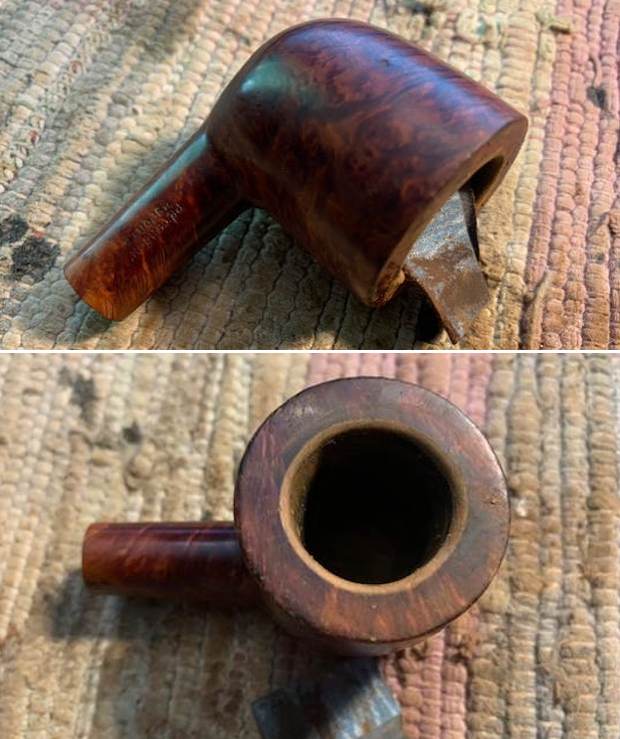
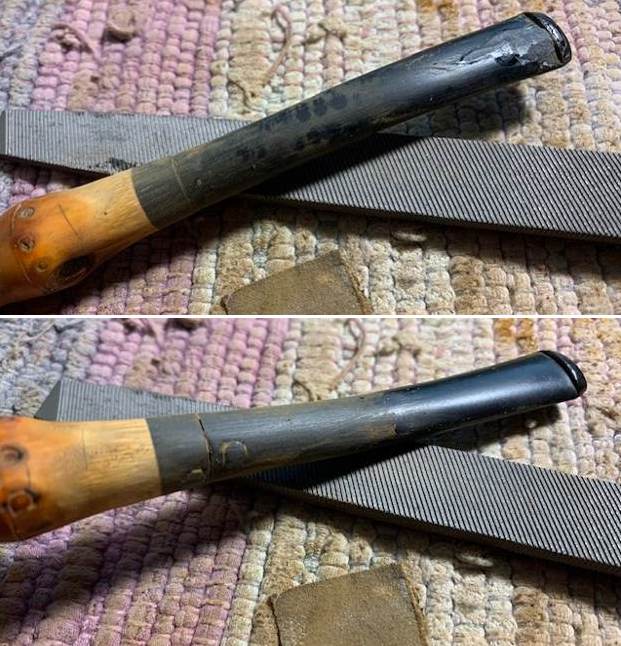
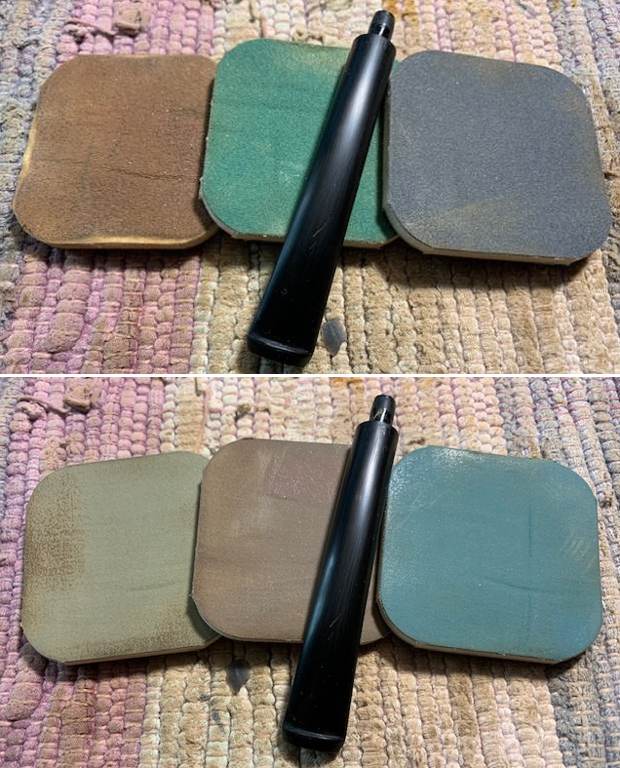
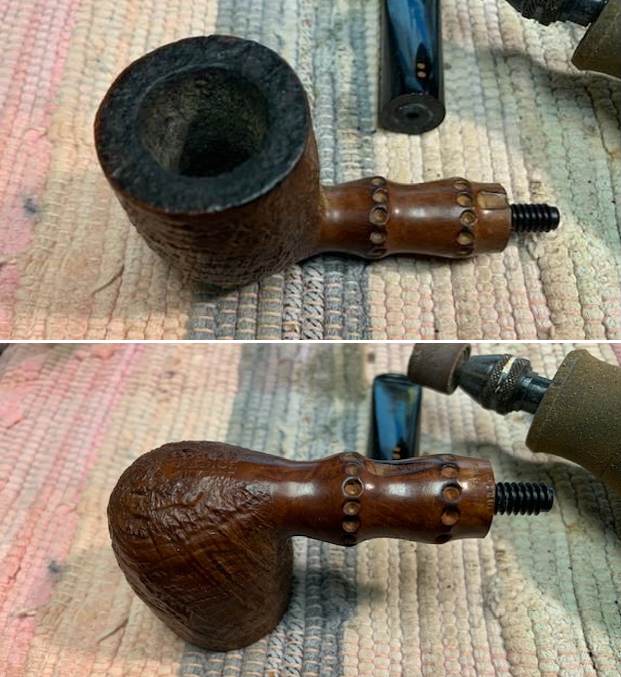
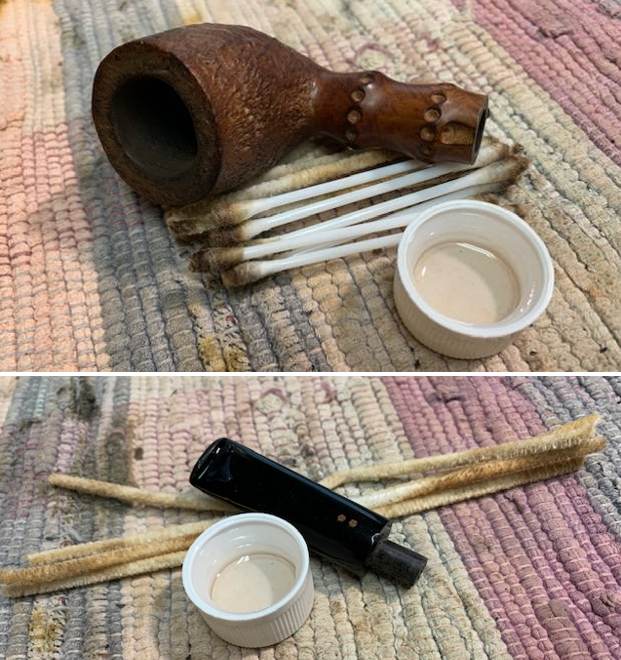
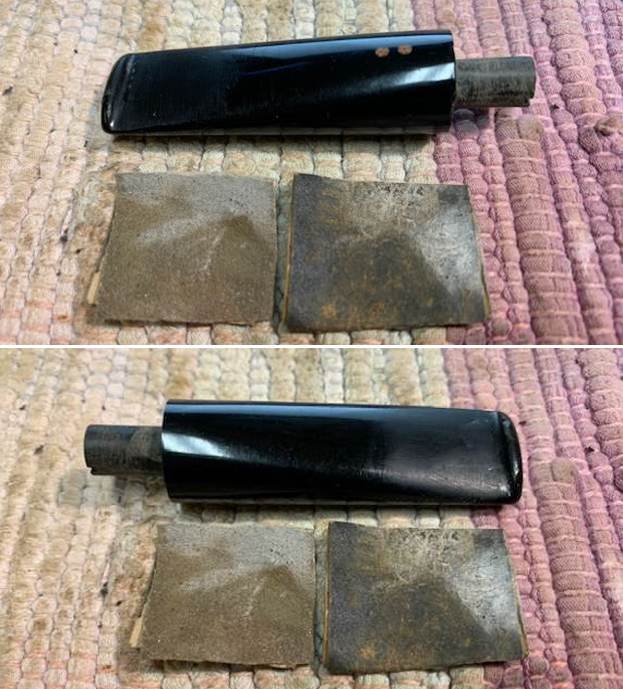
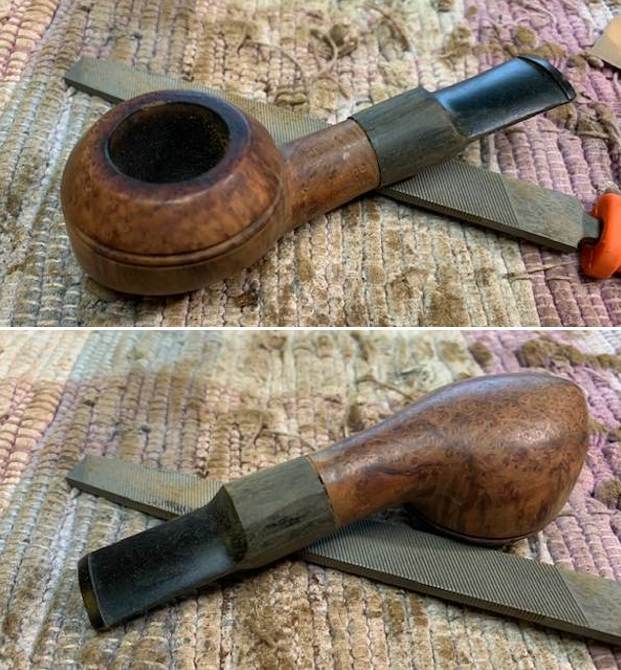
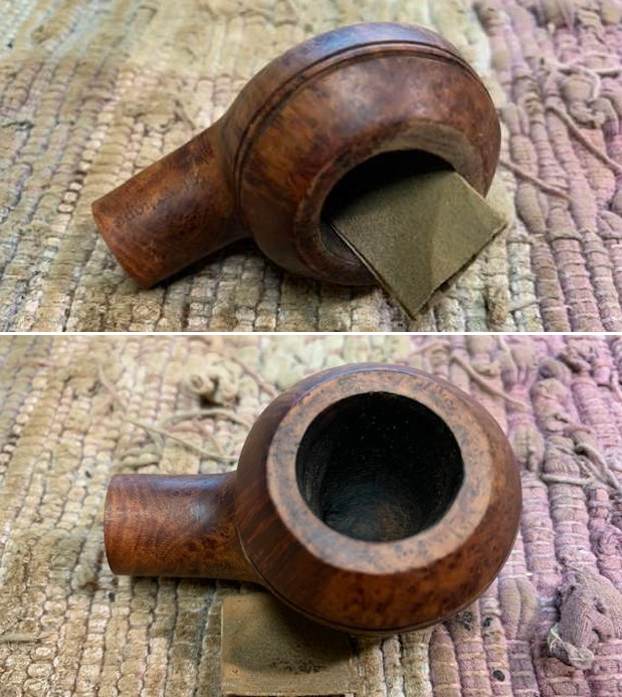
  Since the stem was in perfect condition and would not need work I set it aside and turned to work on the bowl. I decided to address the damage to the inner edge of the bowl and the rim top first. I used a folded piece of 220 grit sandpaper to give the inner edge of the bowl a slight bevel to minimize the darkening and damage and blend it into the surrounding briar.
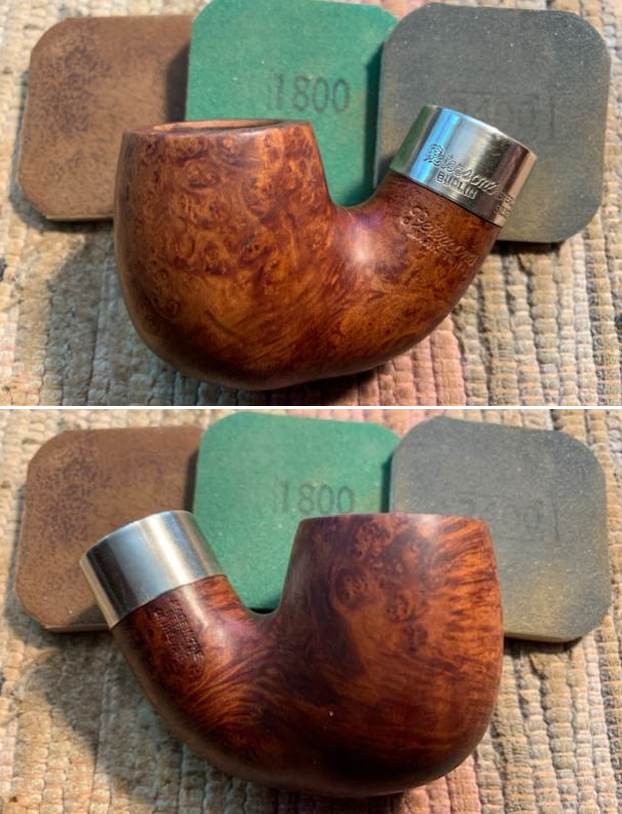
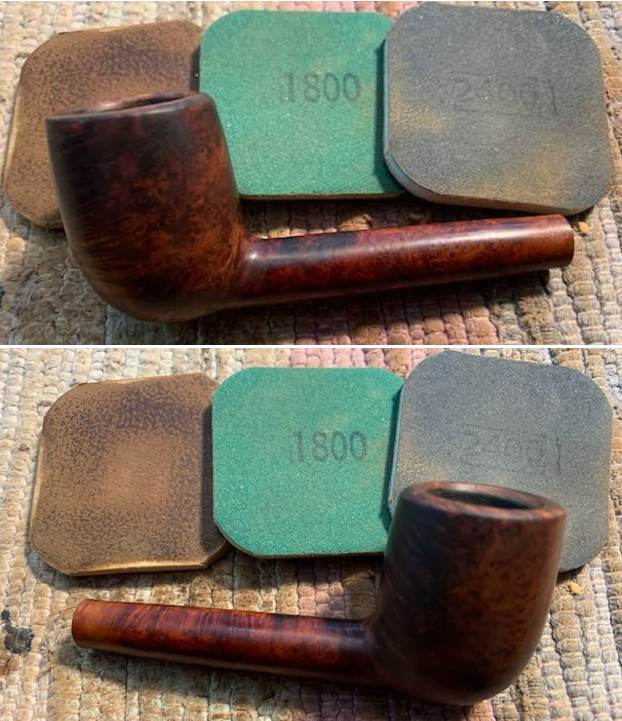
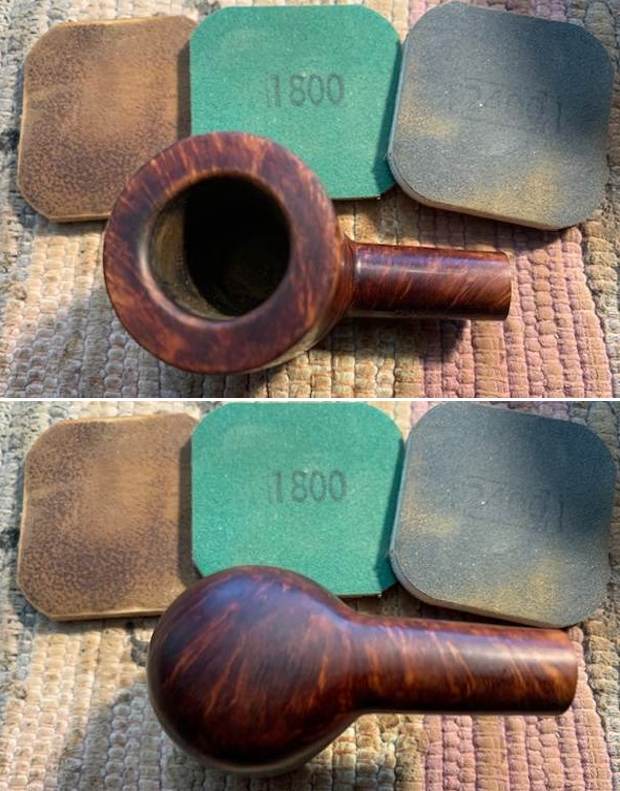
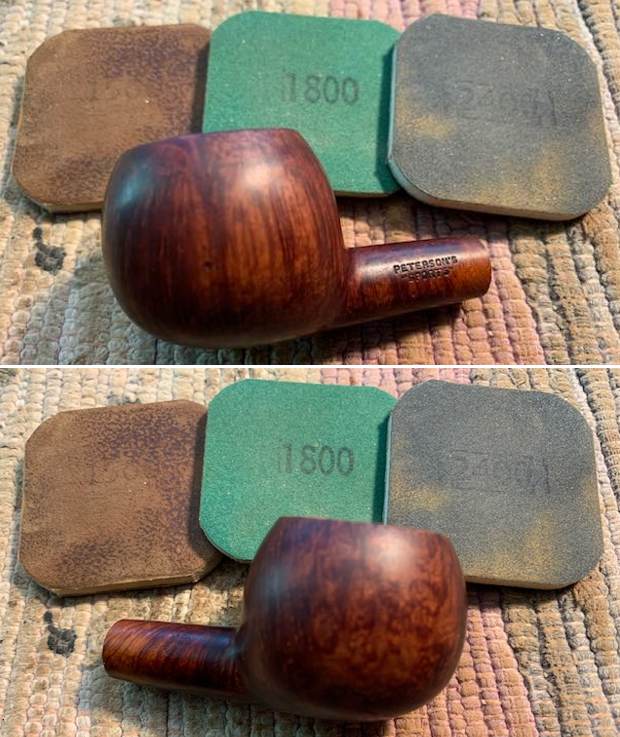
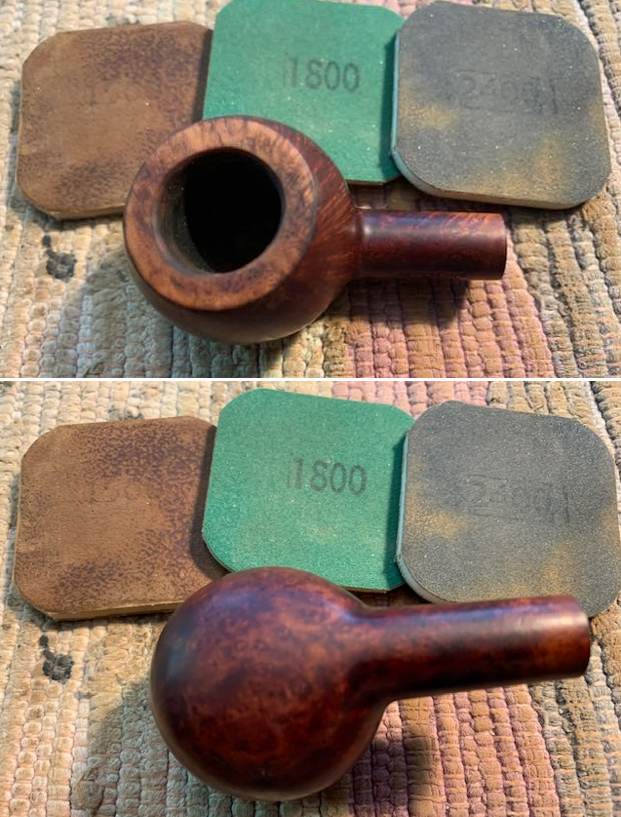
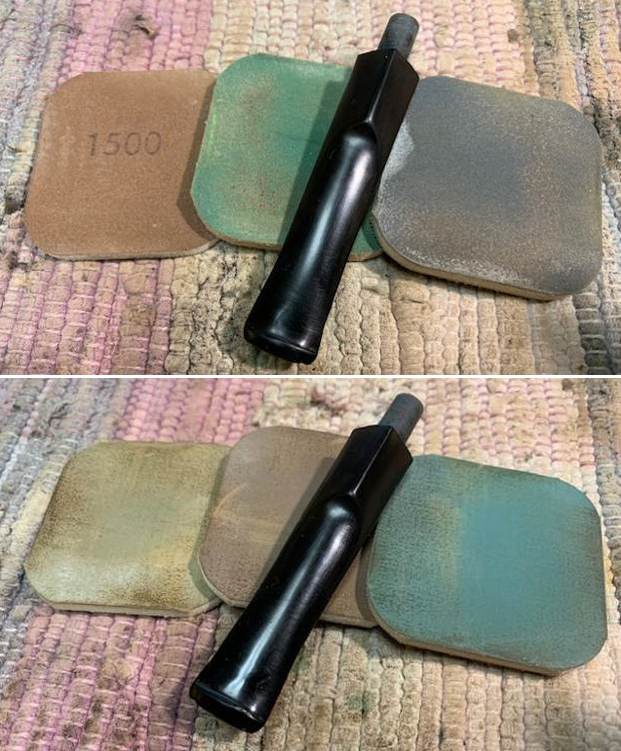
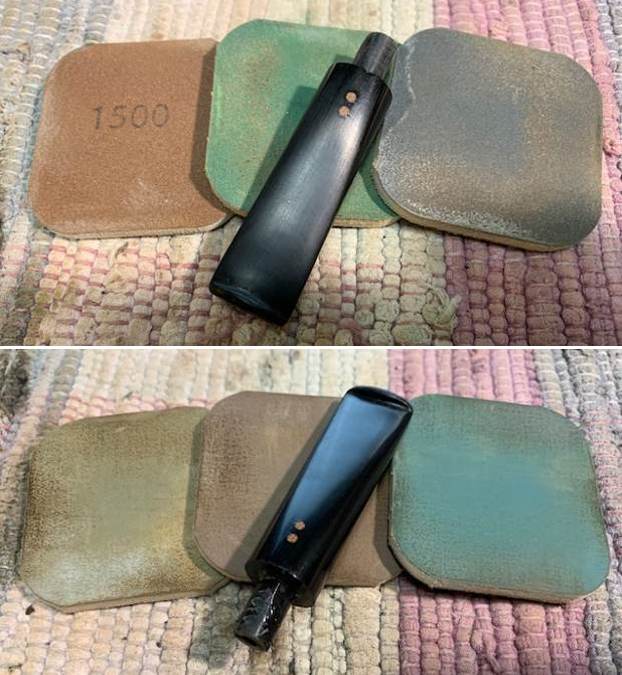
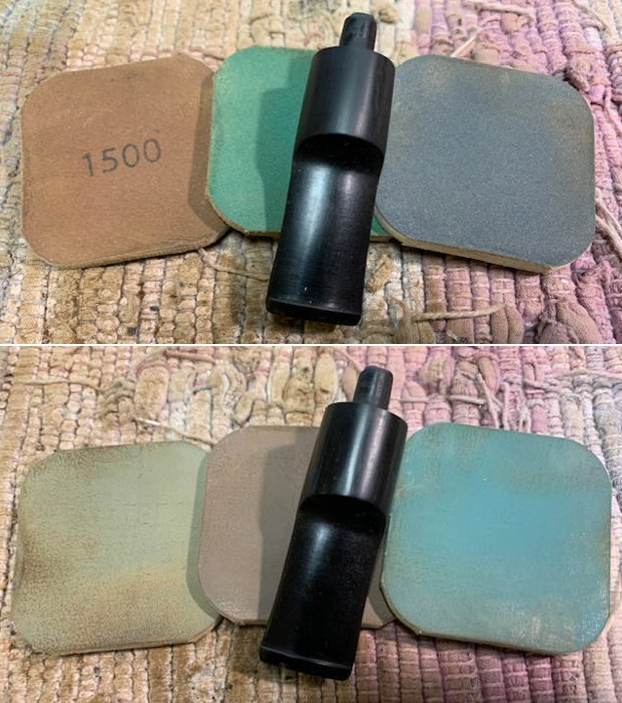
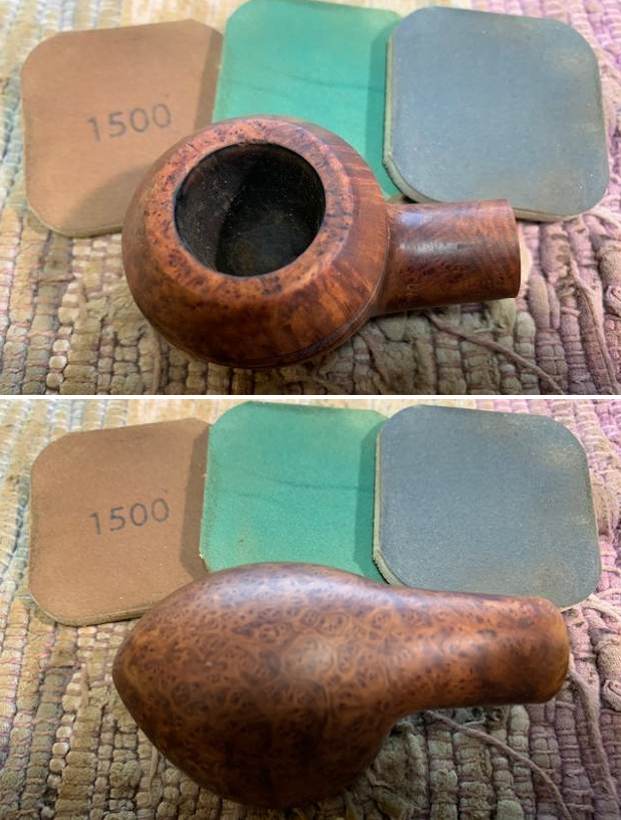
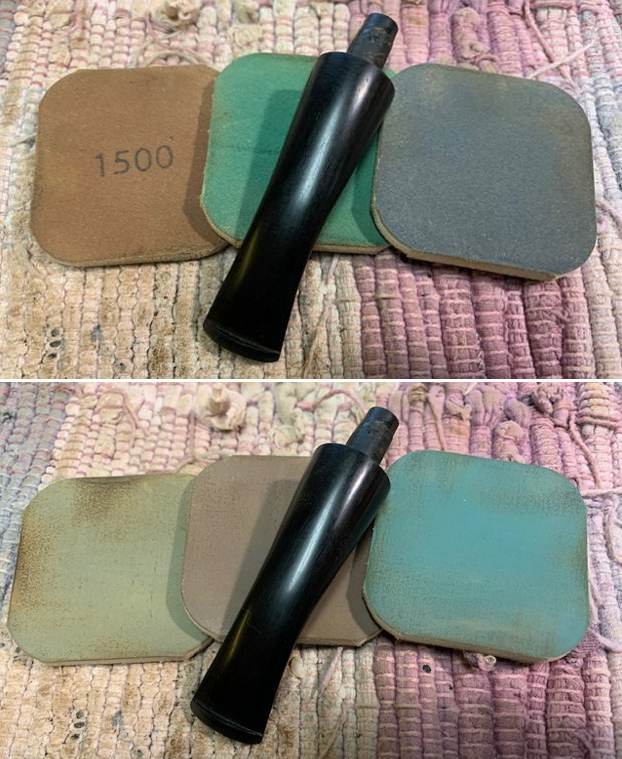
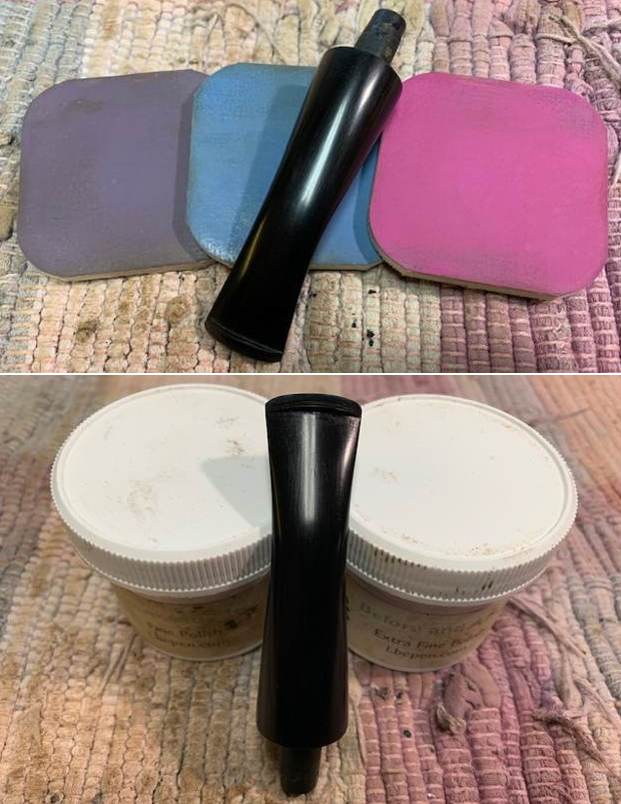
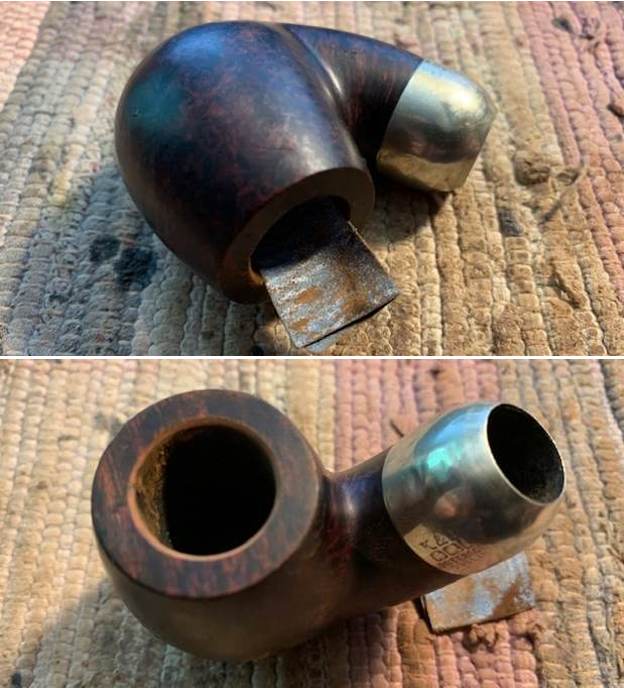 I polished the briar with micromesh sanding pads – dry sanding with 1500-12000 grit sanding pads. I wiped the bowl down with a damp cloth after each sanding pad.


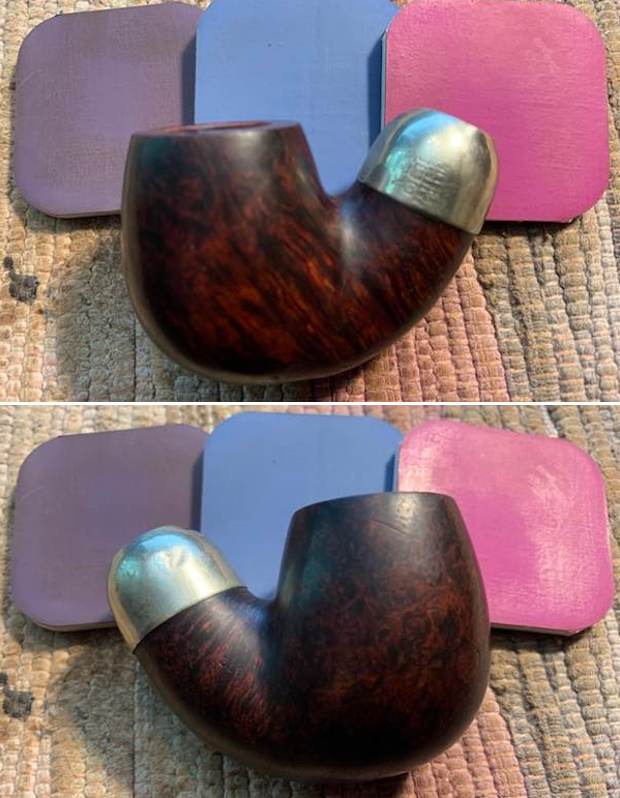
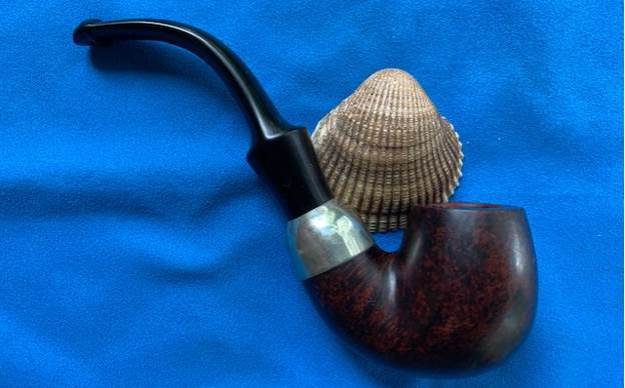
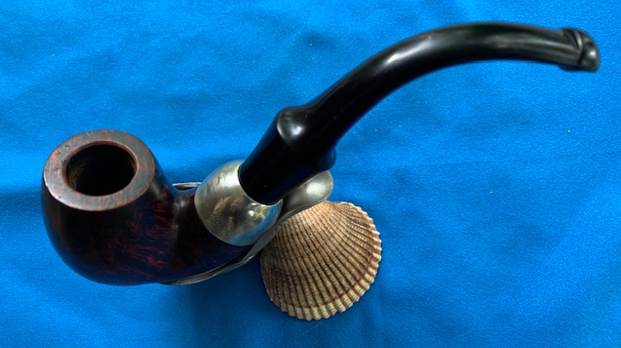
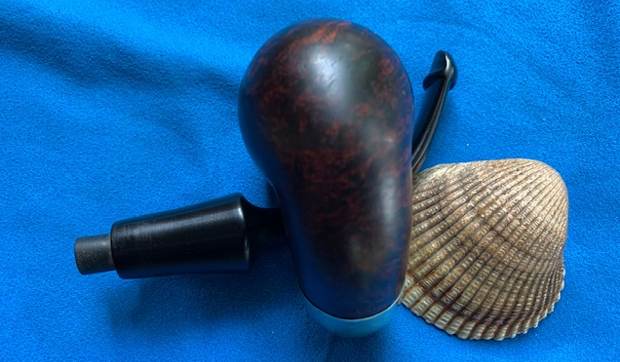
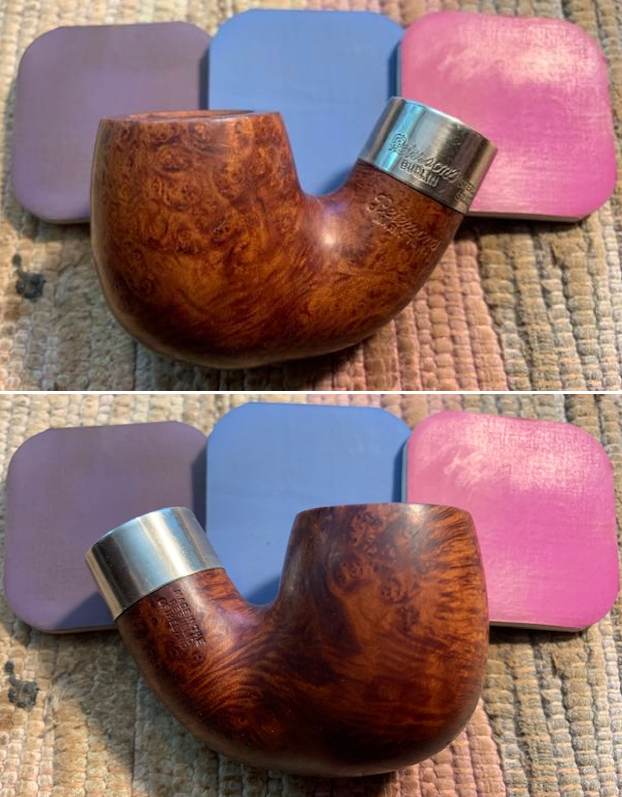
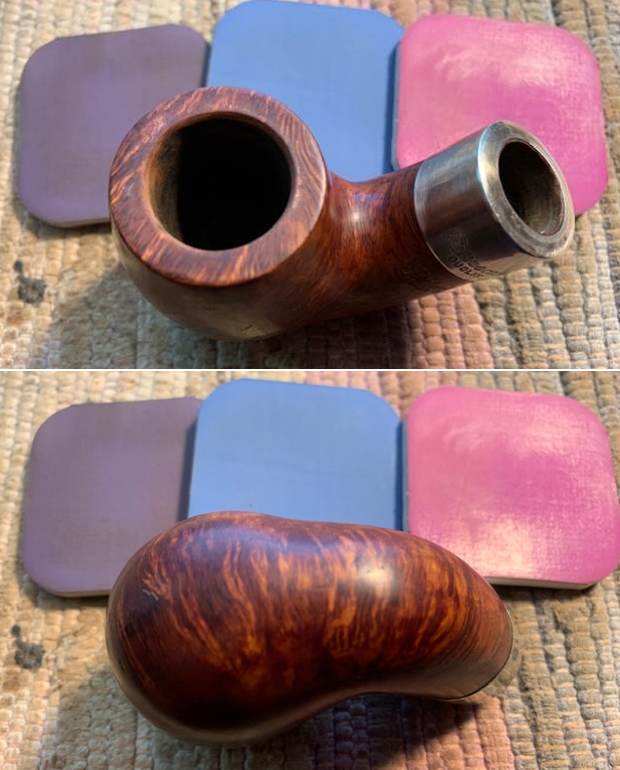
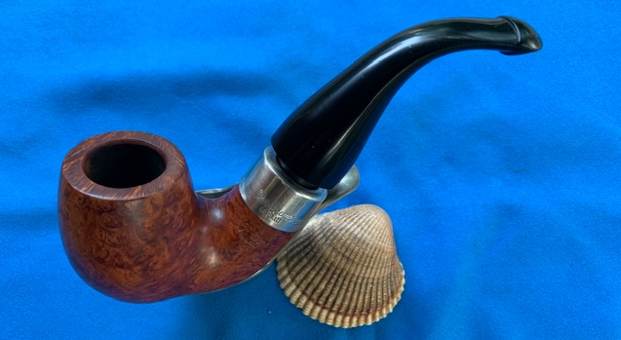
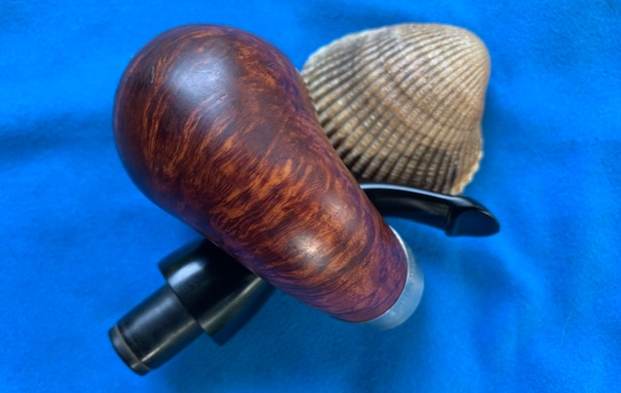
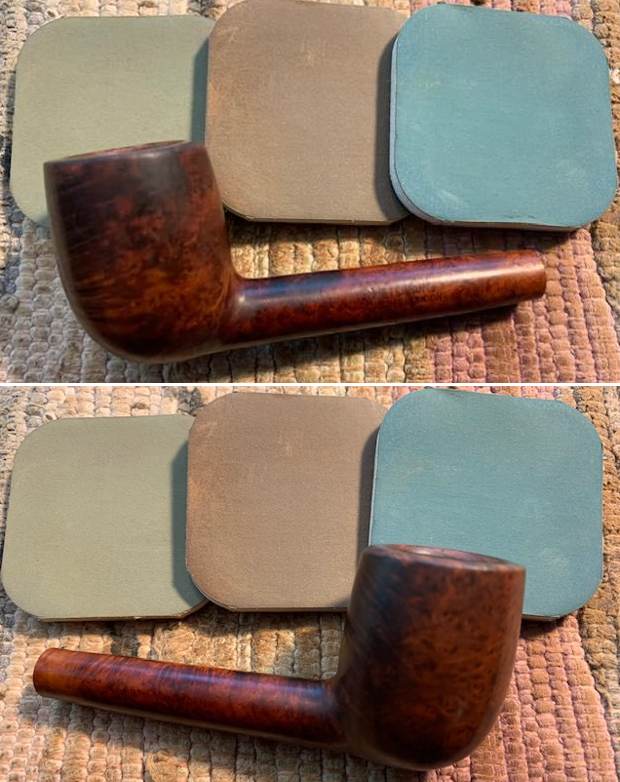
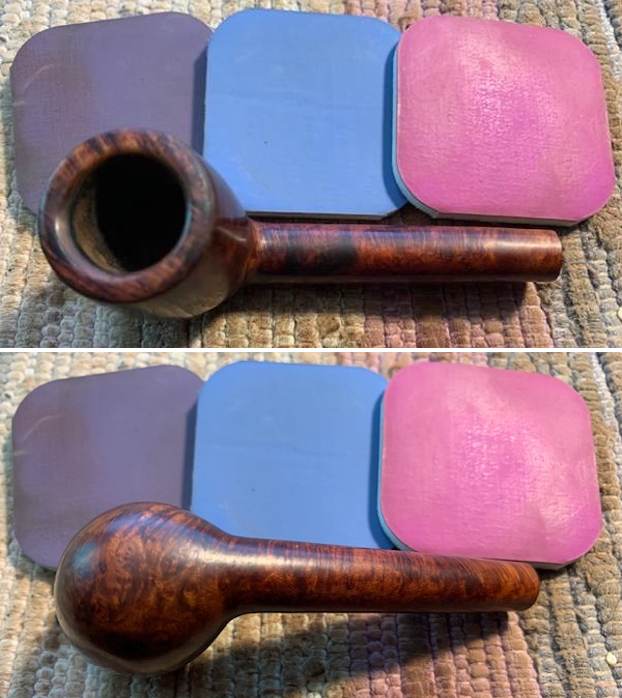
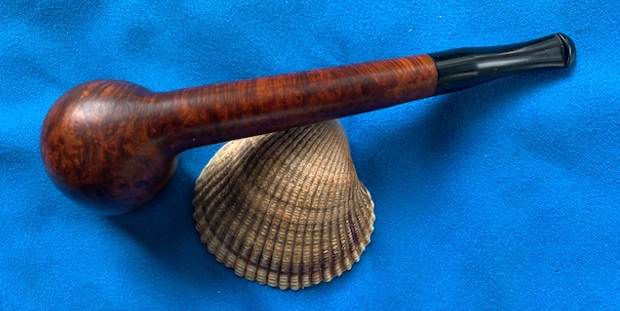
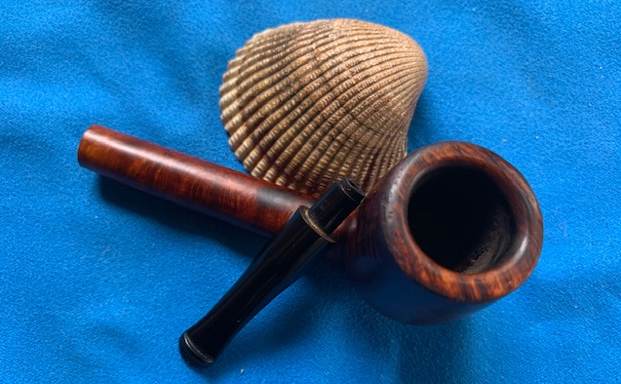
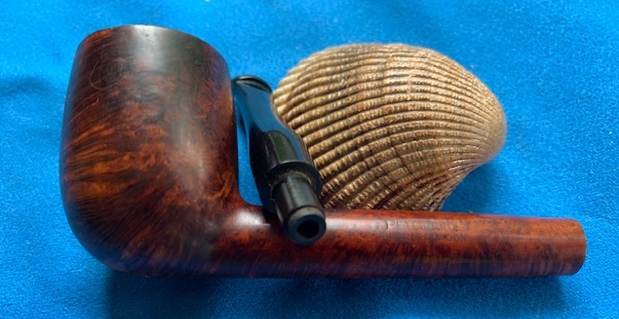
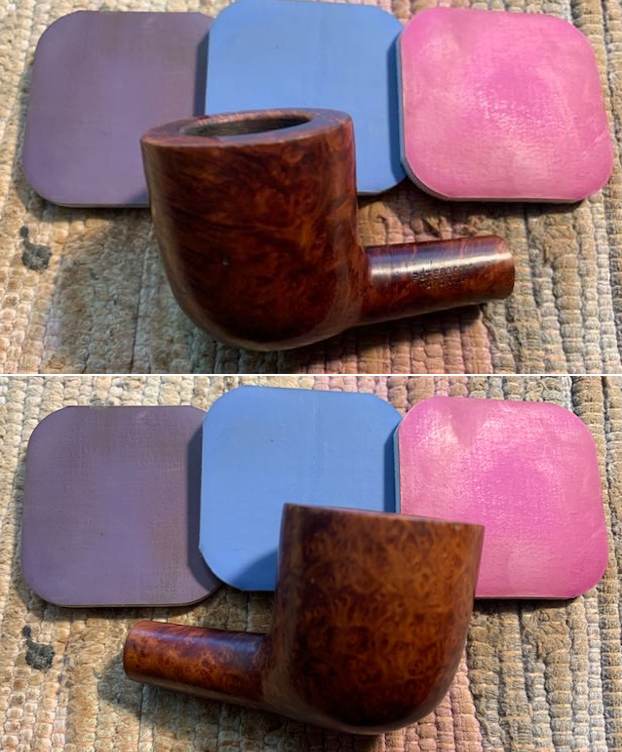
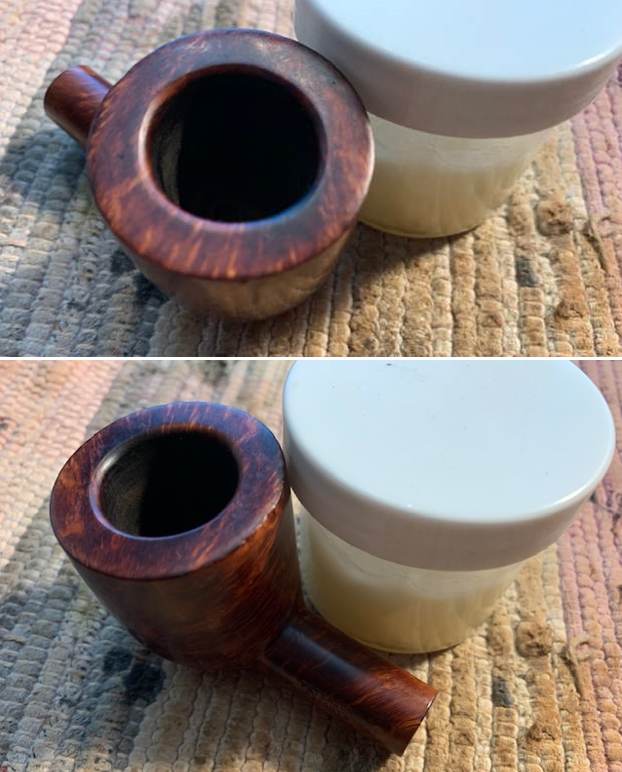
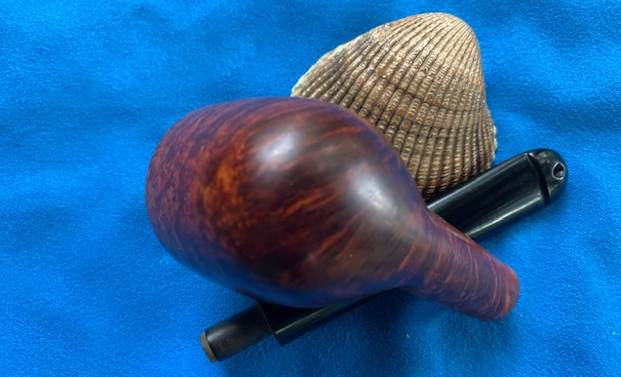
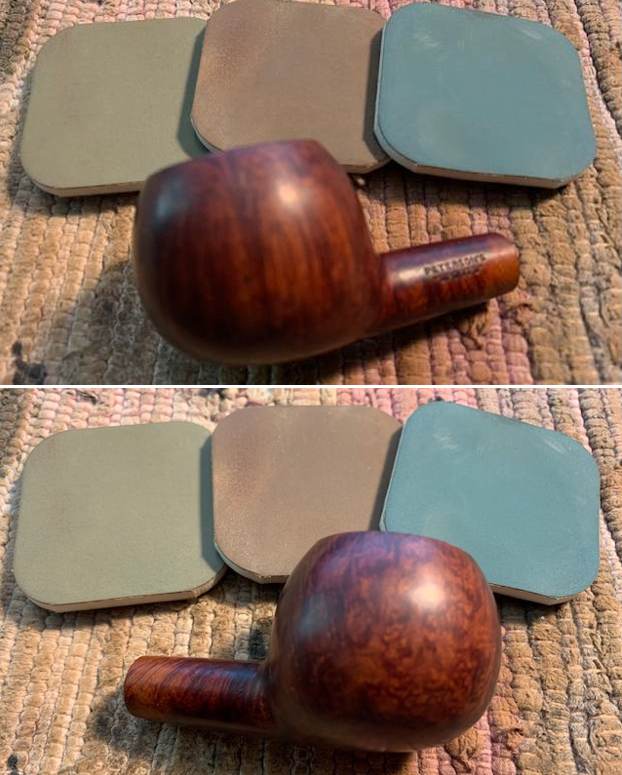
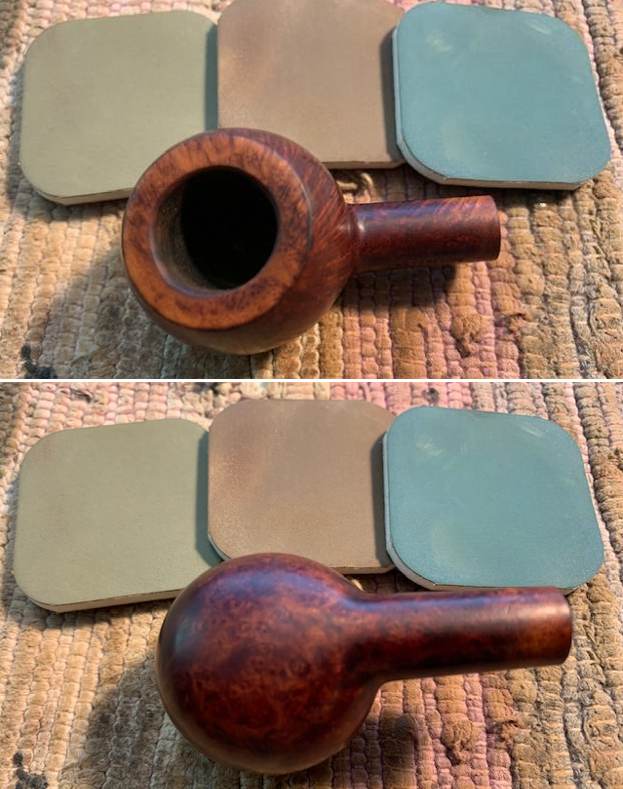
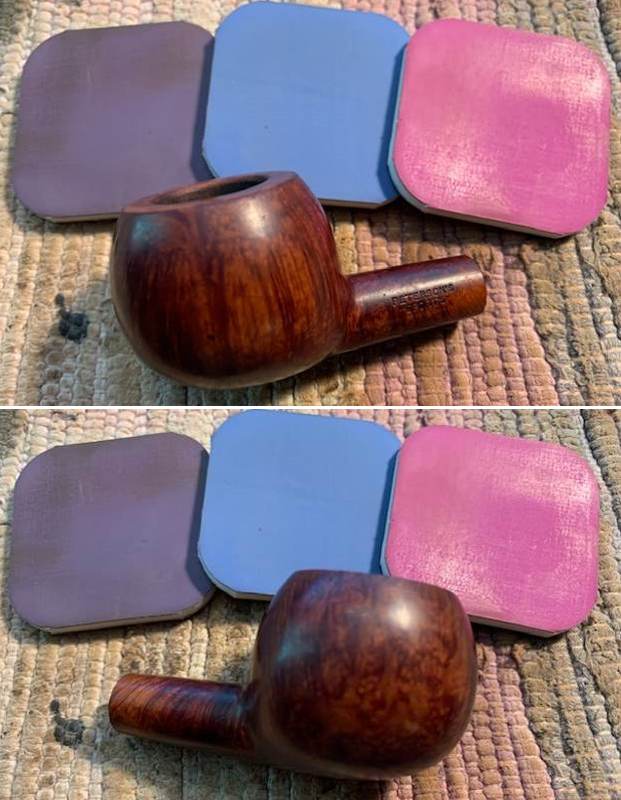
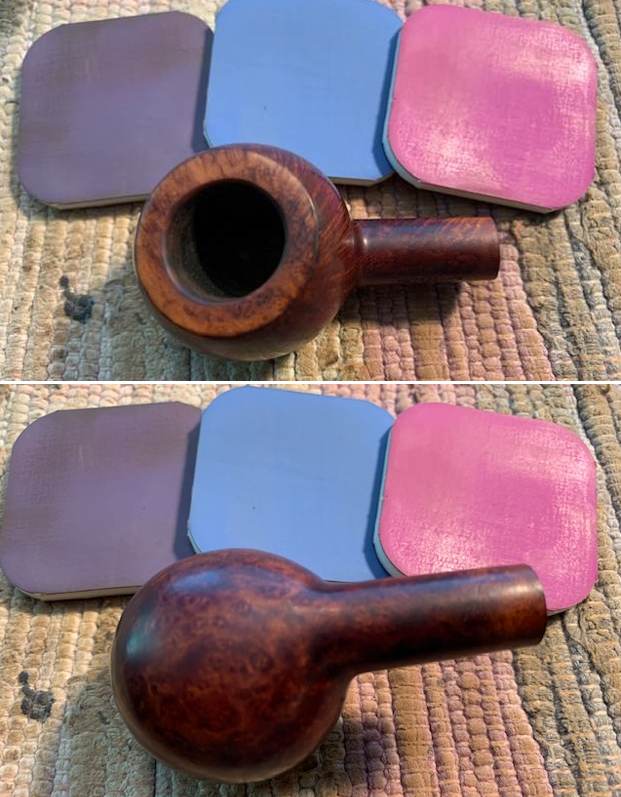
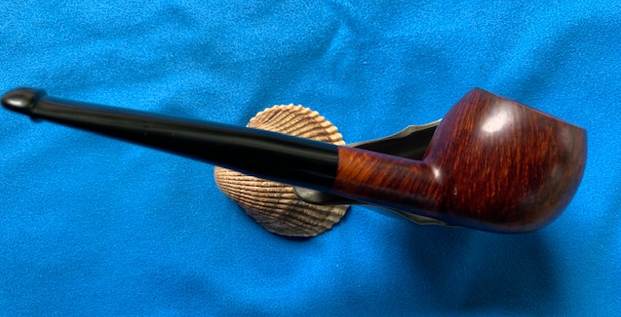
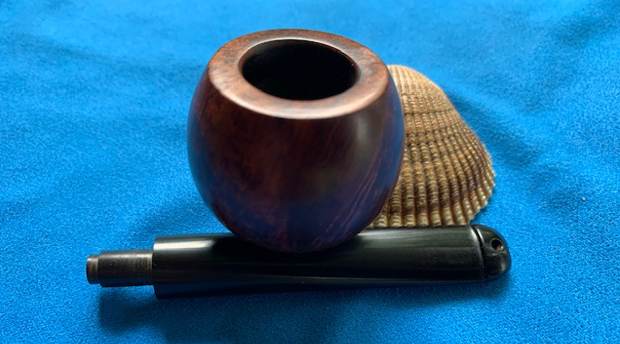
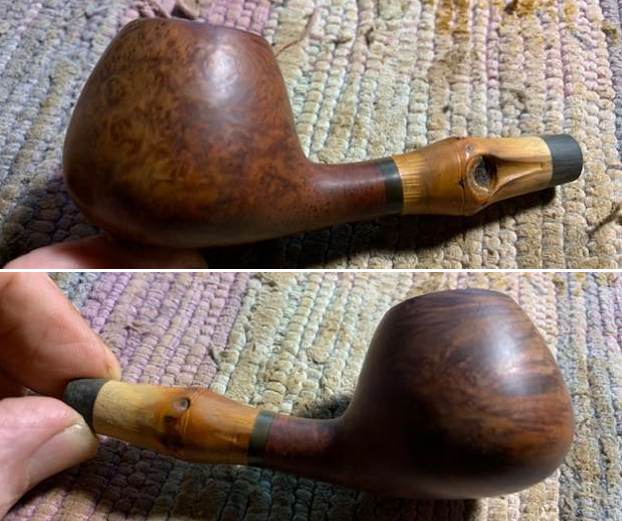
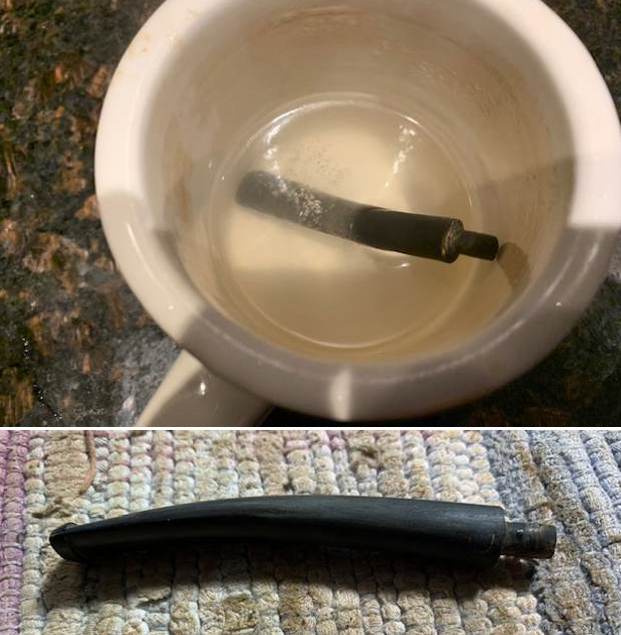
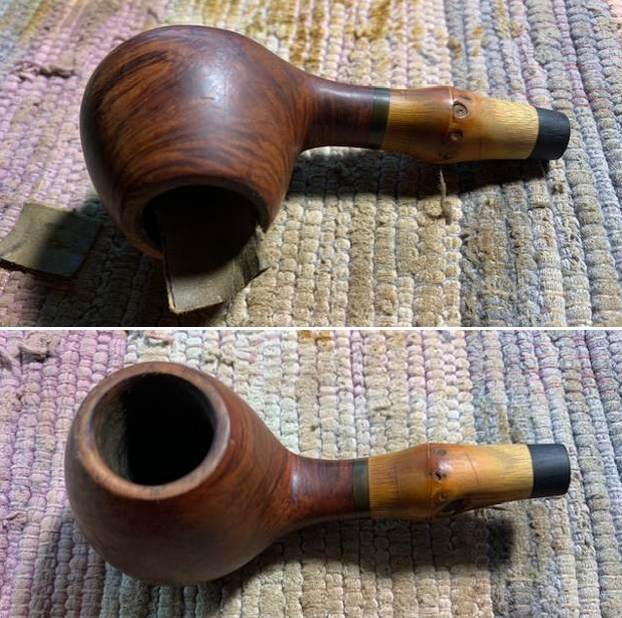
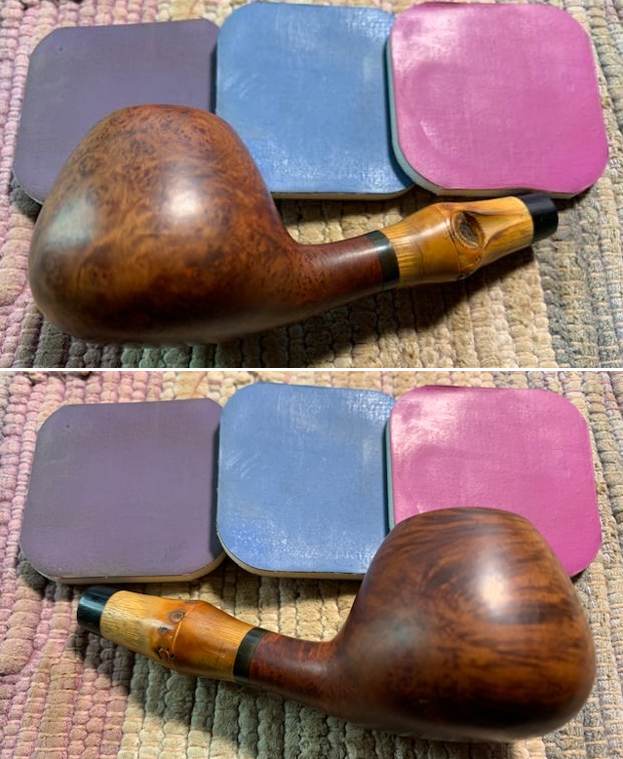
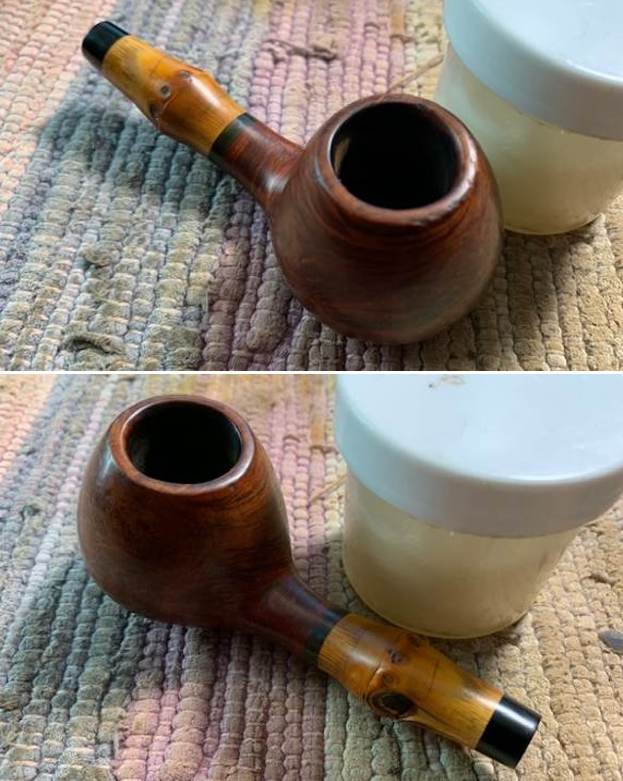
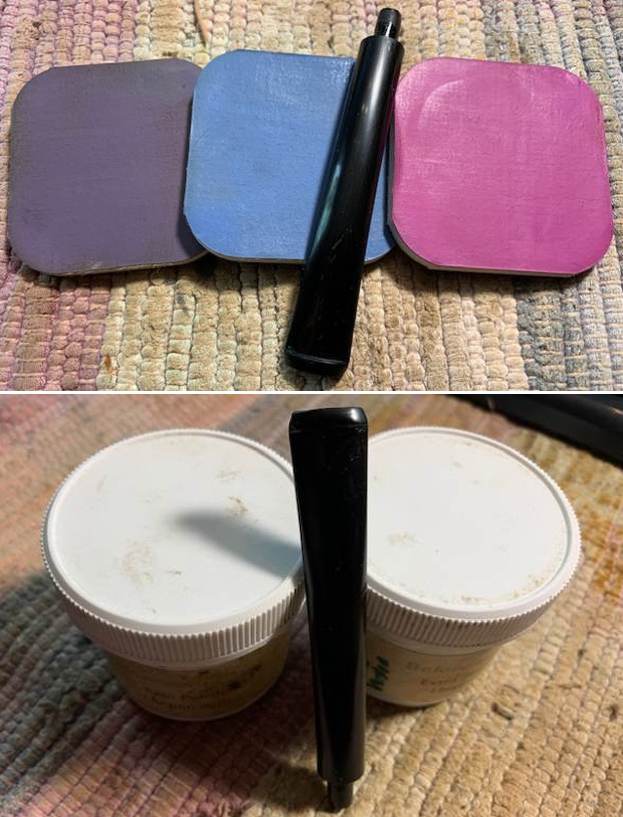
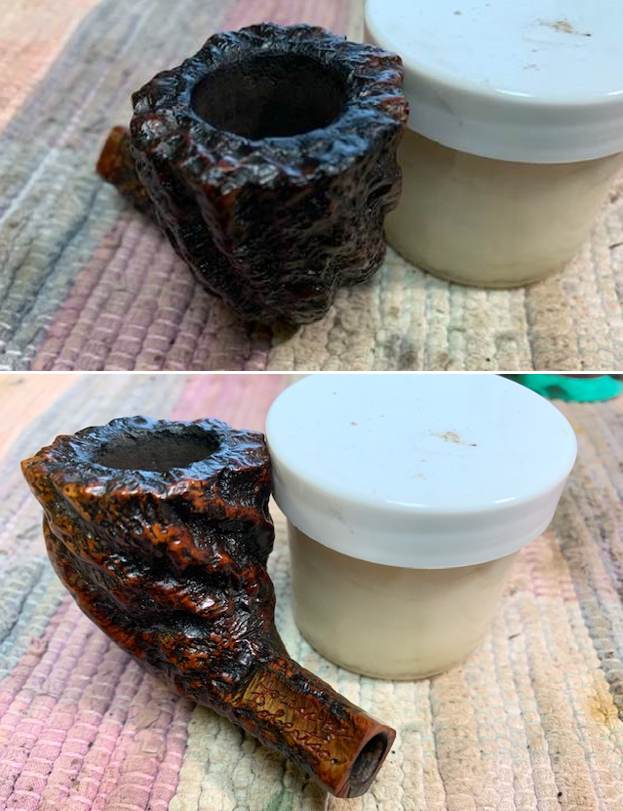
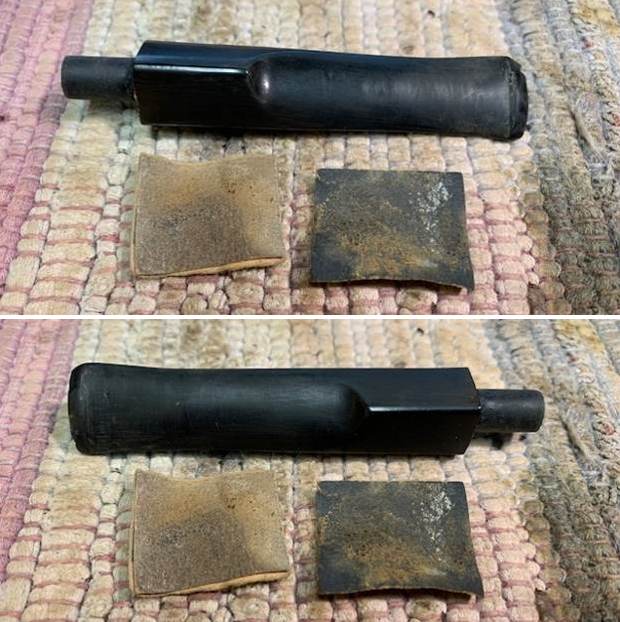
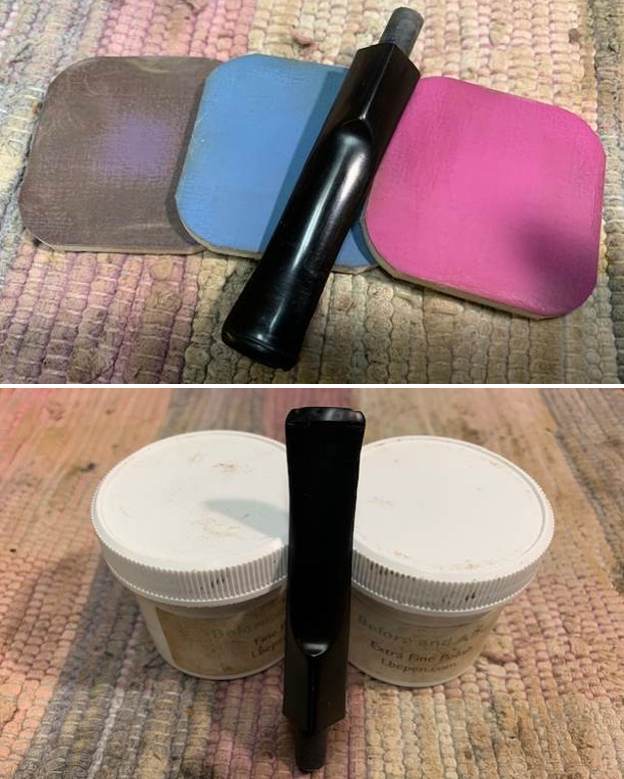
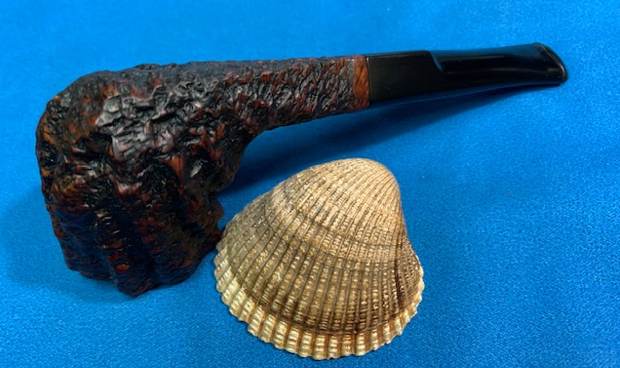
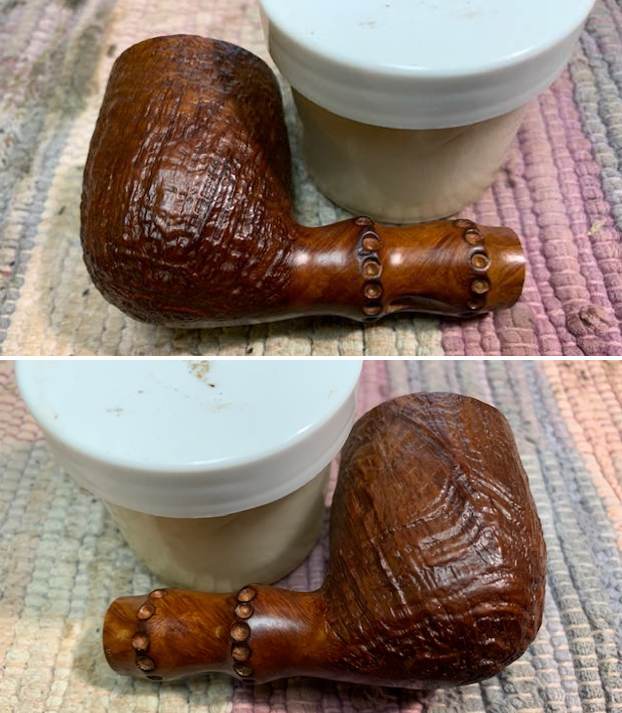
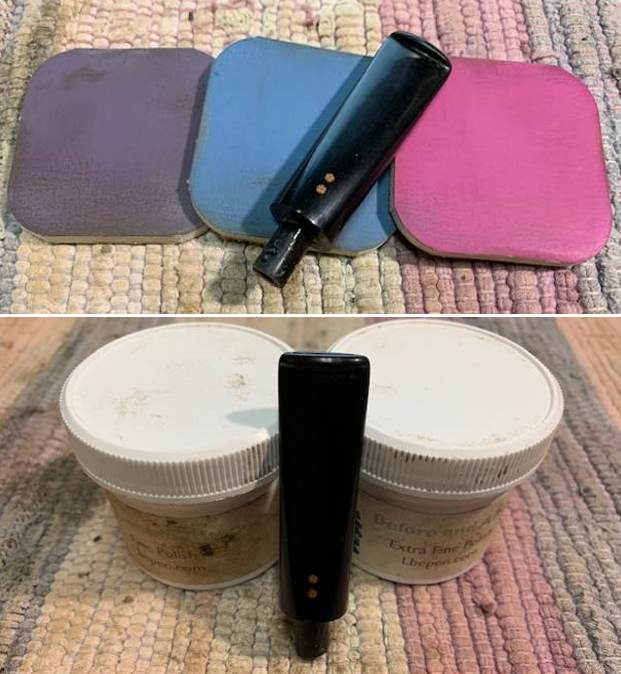
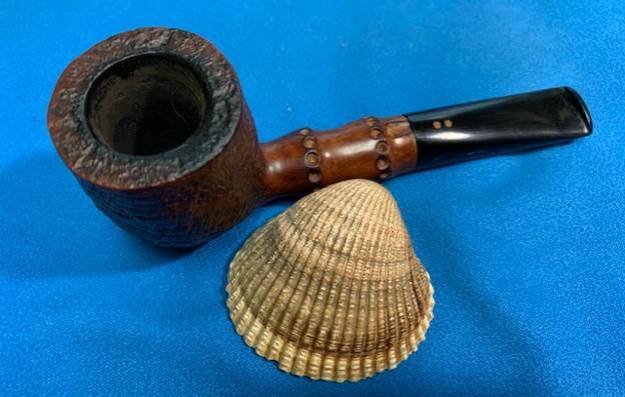
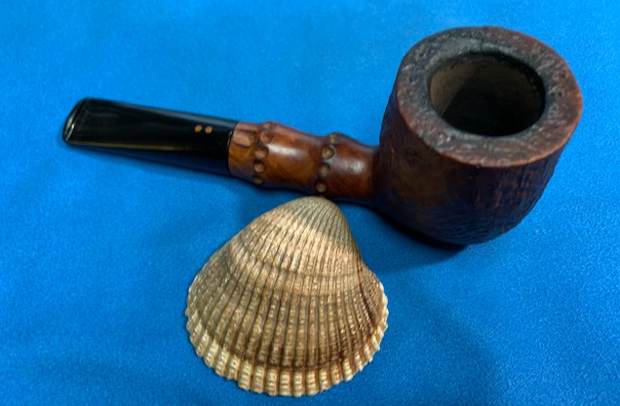
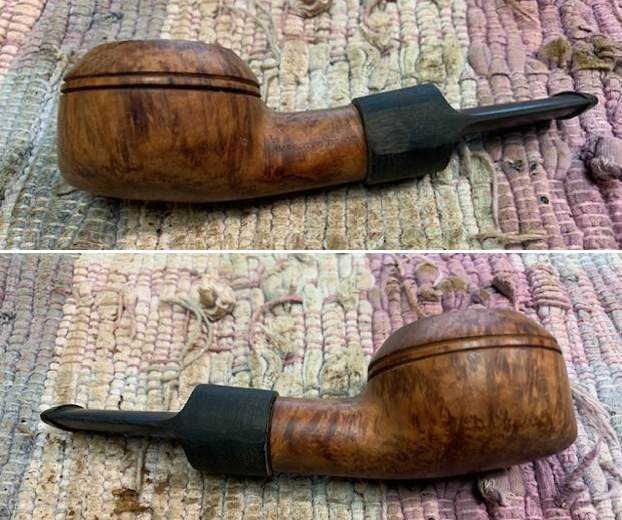
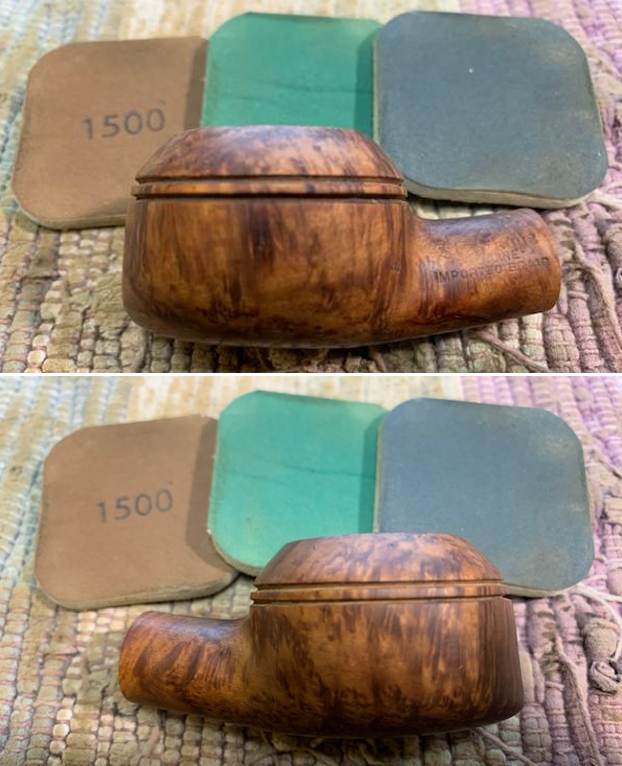
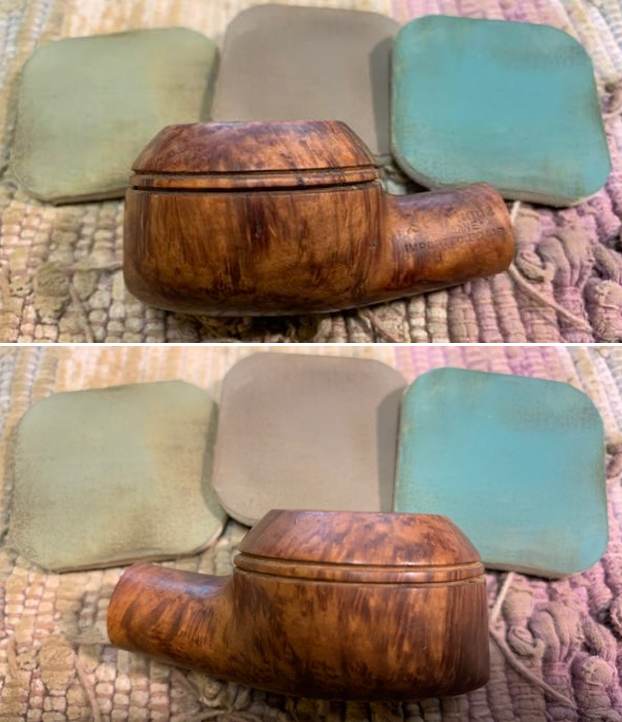
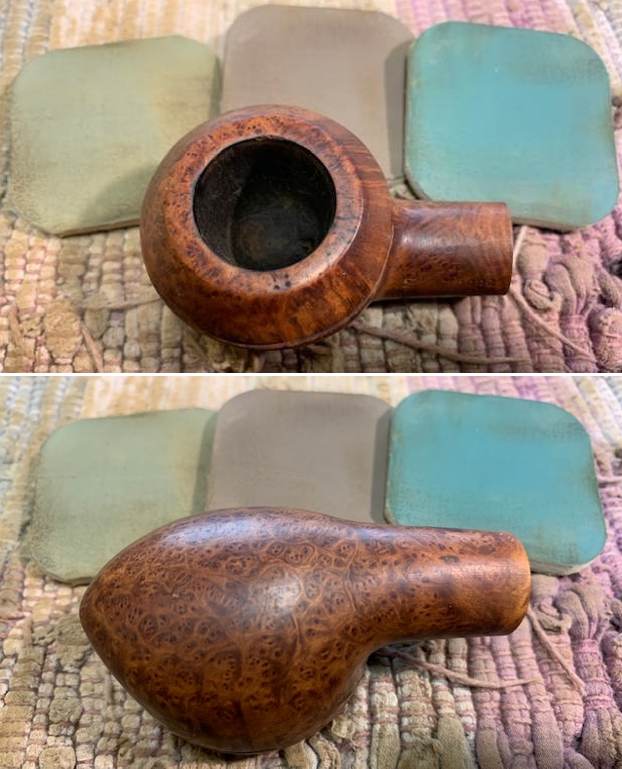
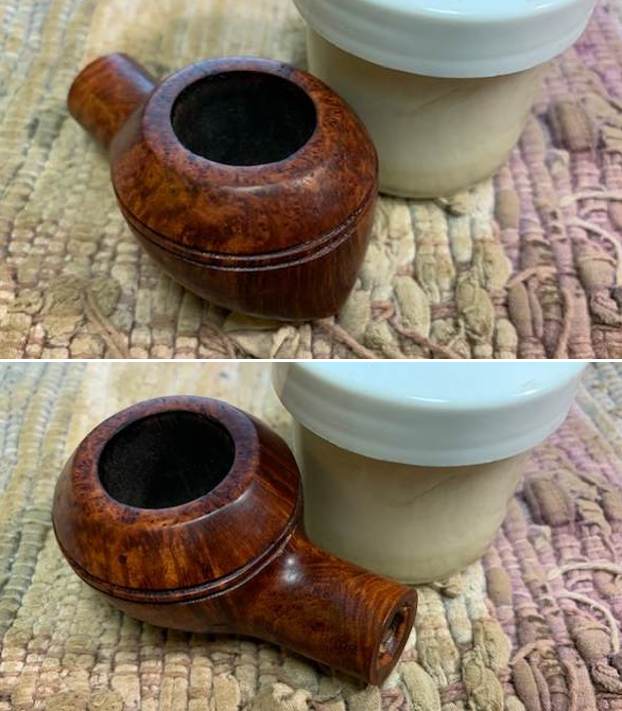
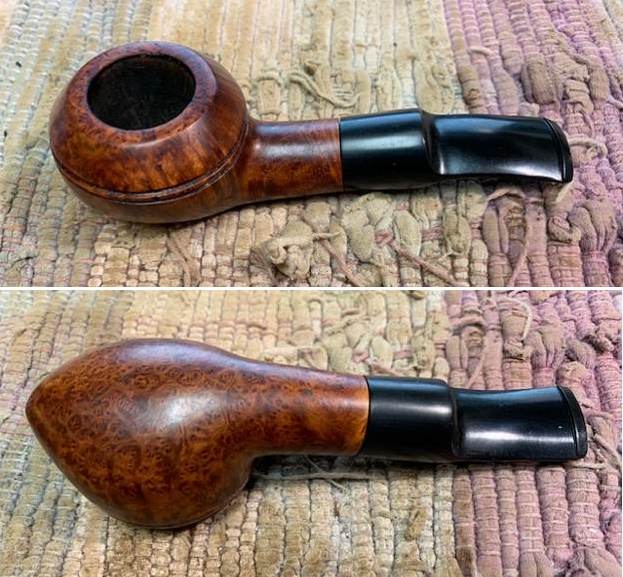
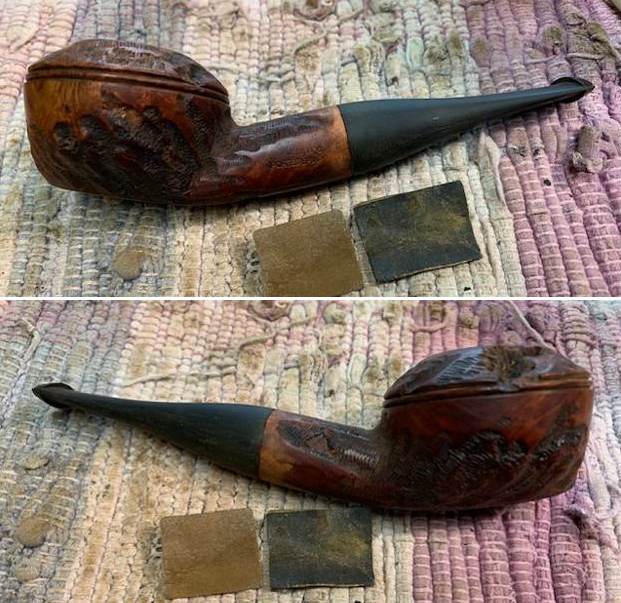
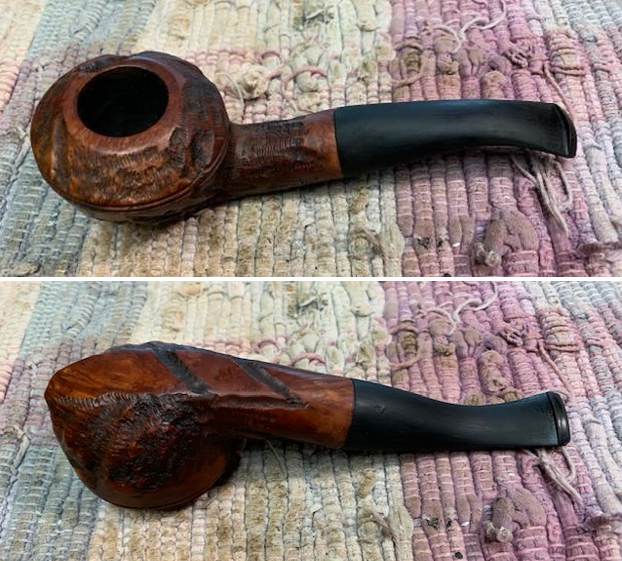
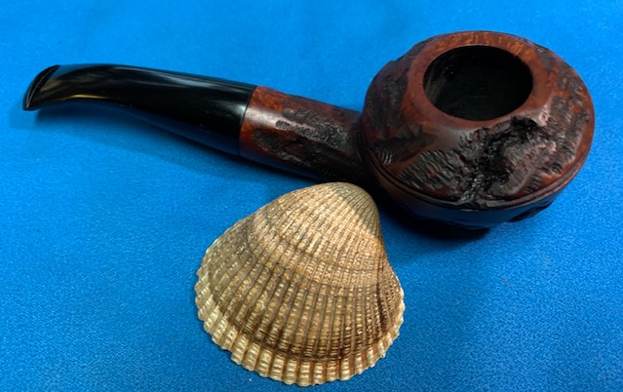
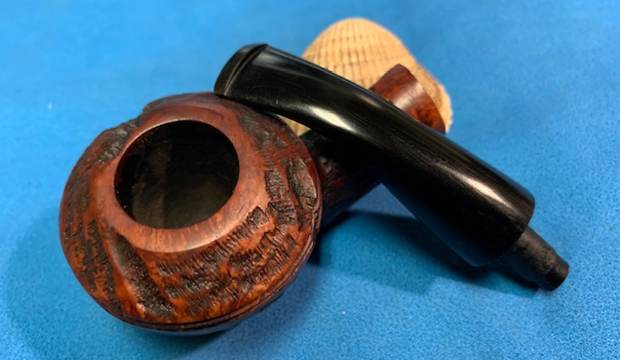
 The polishing of the rim top brought the rim top colour to match the rest of the bowl. I did not need to stain the rim at all. I worked some Before & After Restoration Balm into the surface of the briar with my fingertips to clean, enliven and protect the briar. I let the balm sit for 15 minutes and then buffed with a cotton cloth to raise the shine. The photos show the bowl at this point in the restoration process.
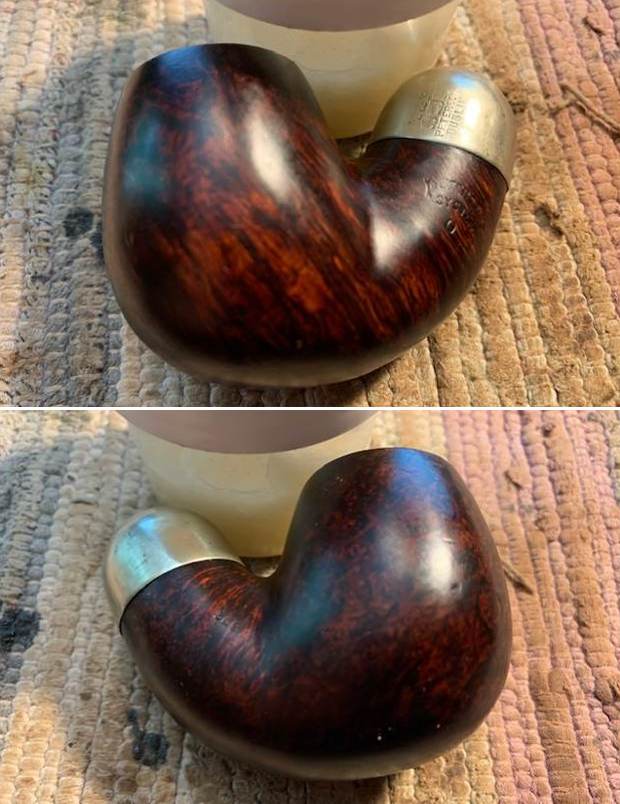
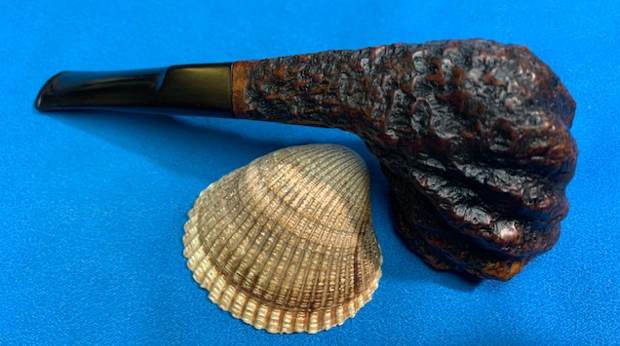
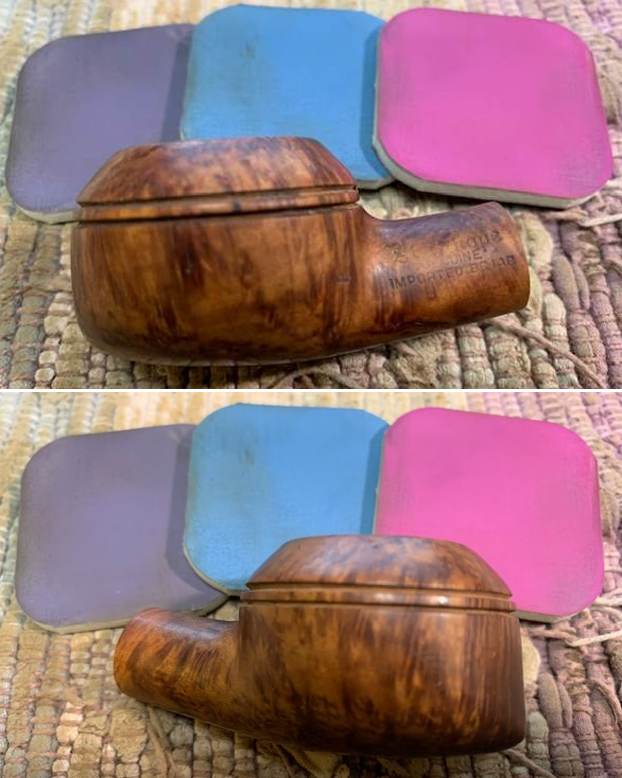
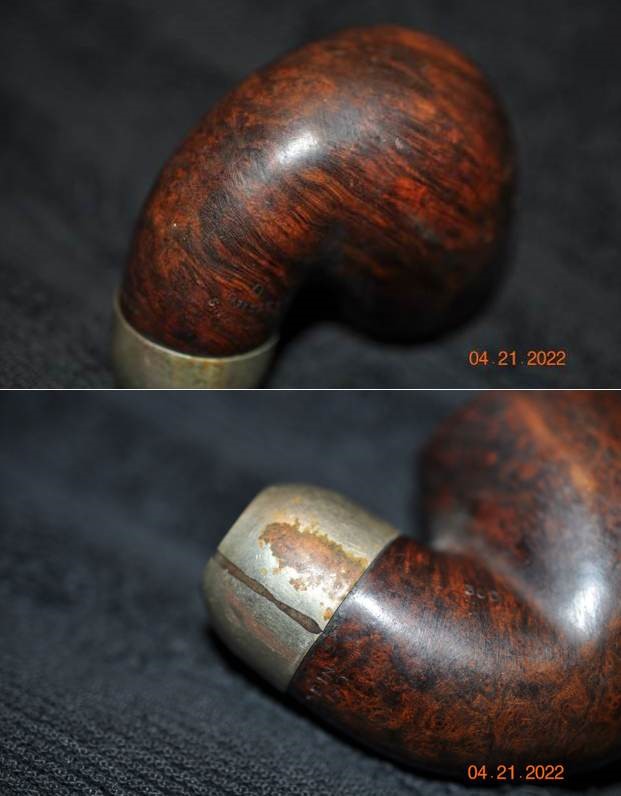
 I polished the nickel domed ferrule with a jeweler’s cloth to raise the shine and give it some pop. It looked much better after the polishing.
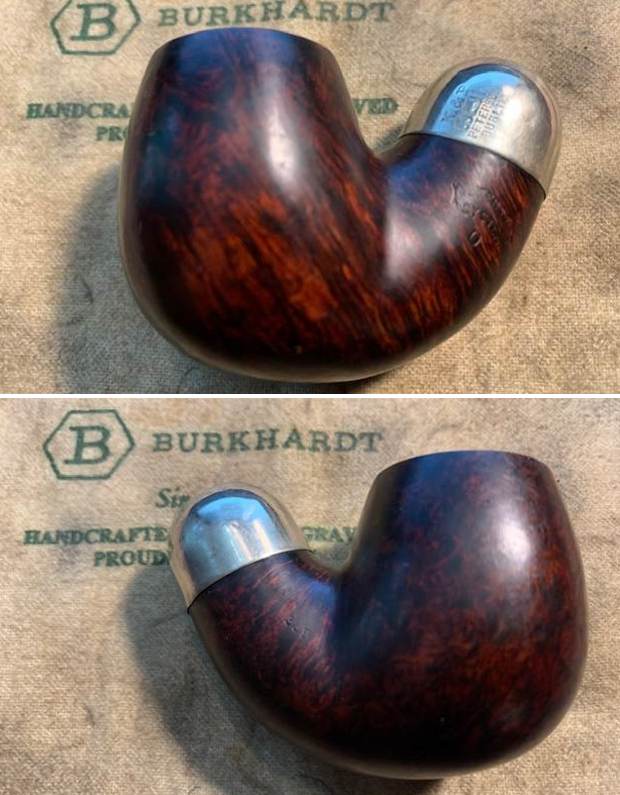
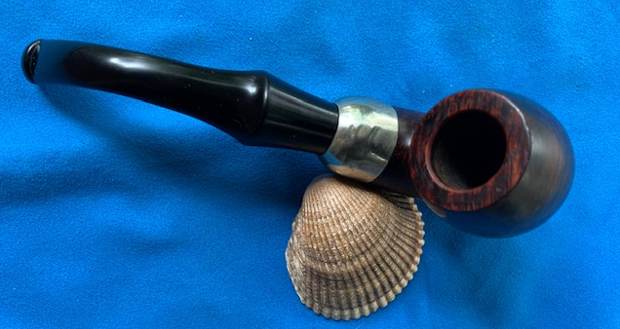
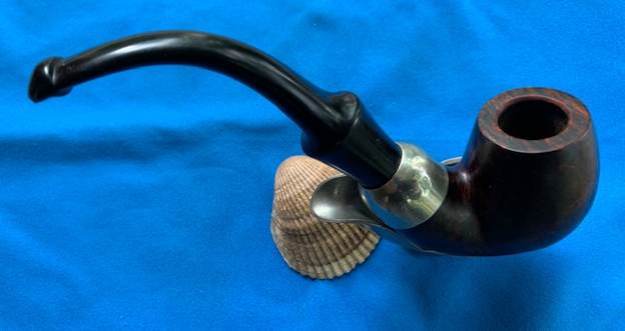
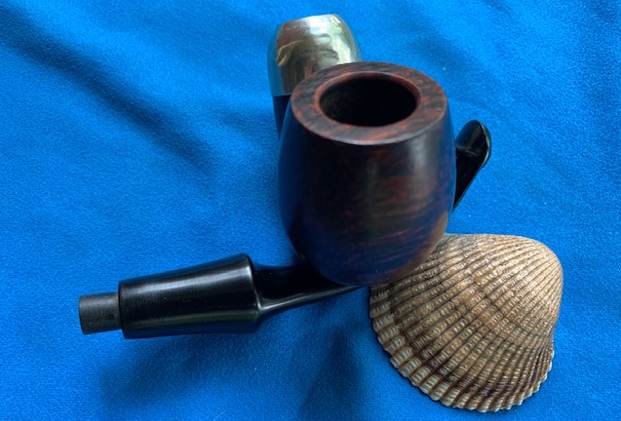
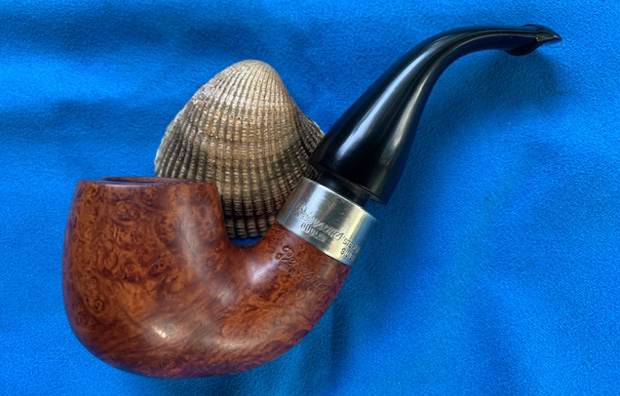
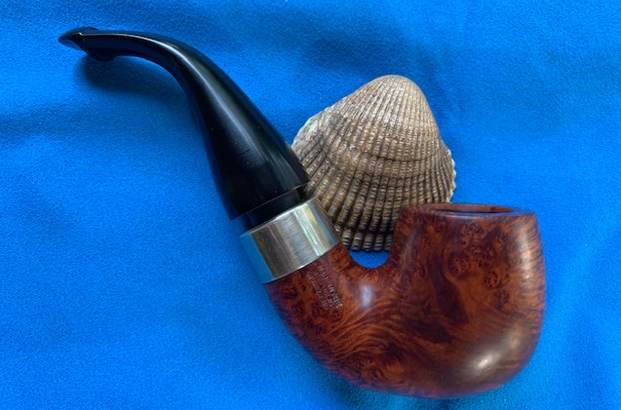
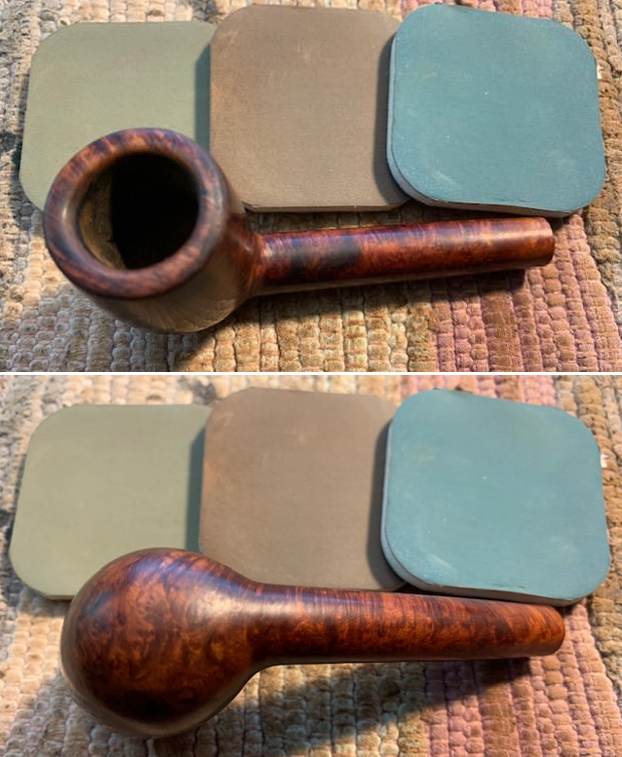
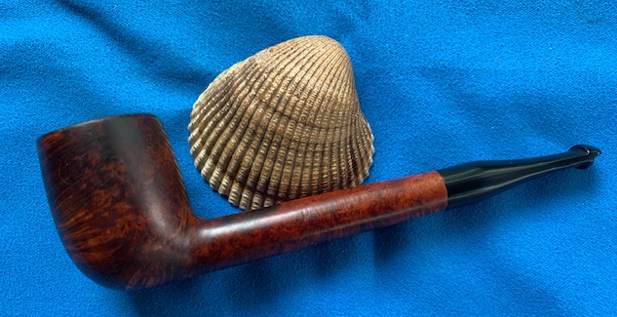
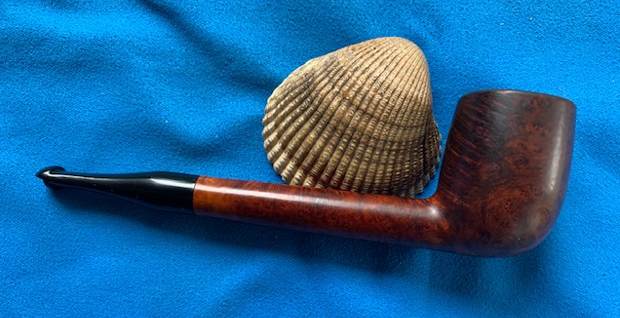
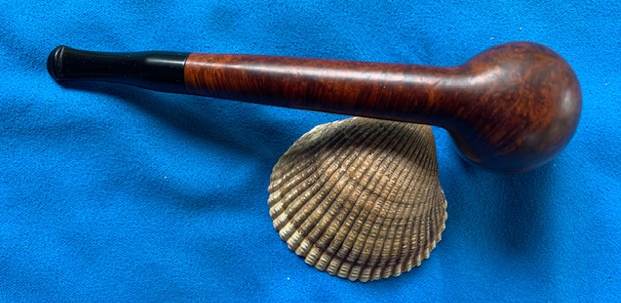
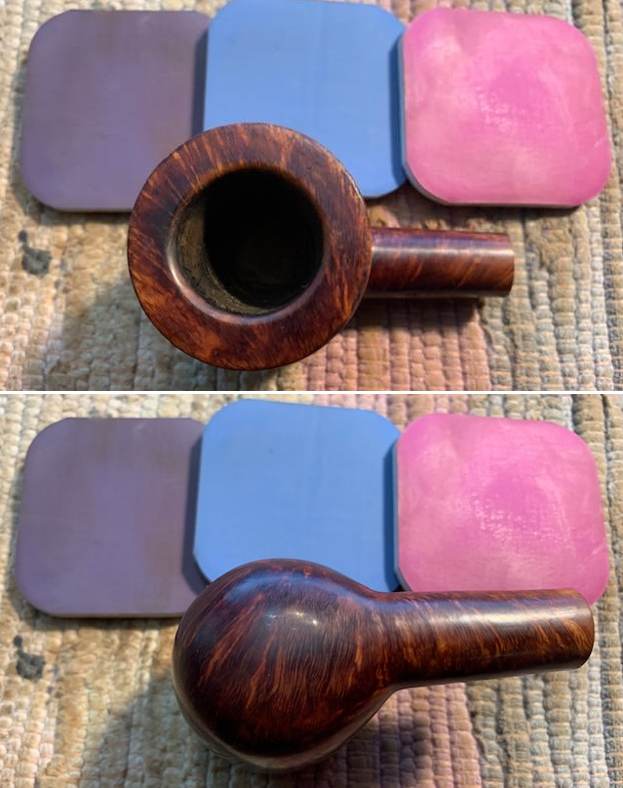
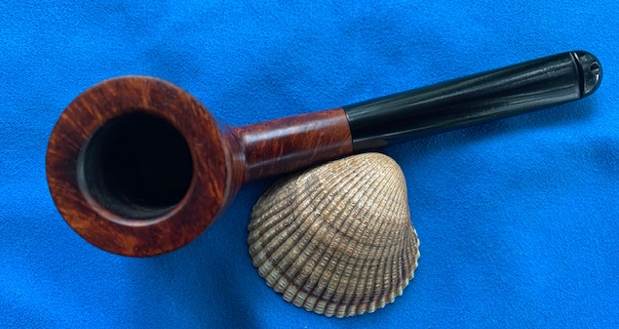
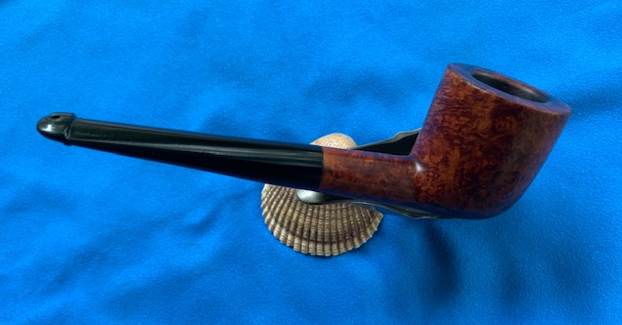
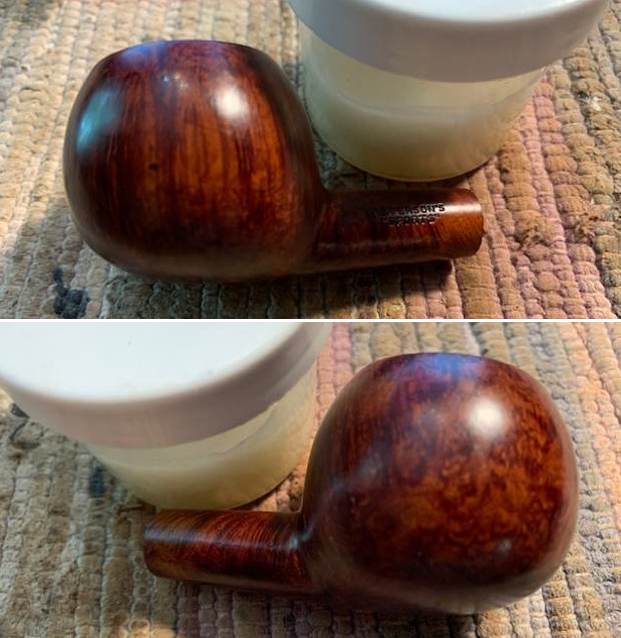
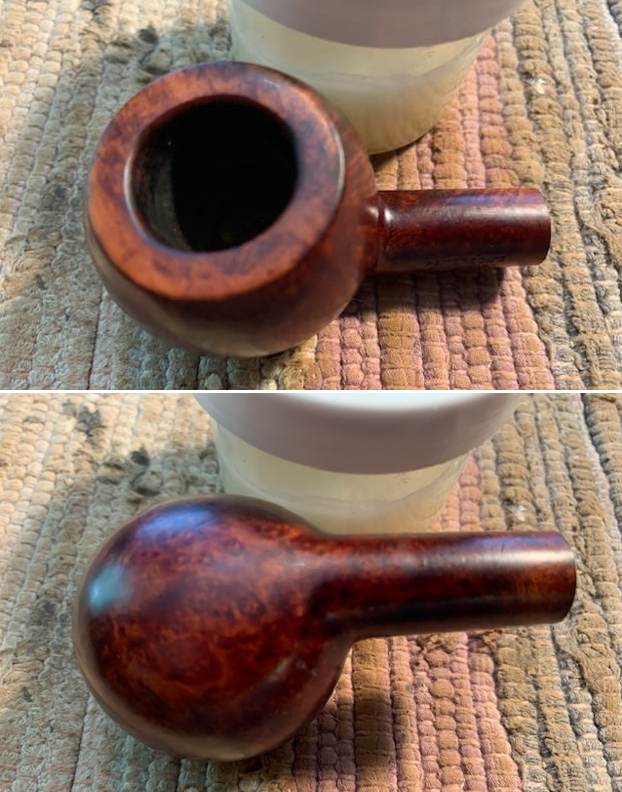
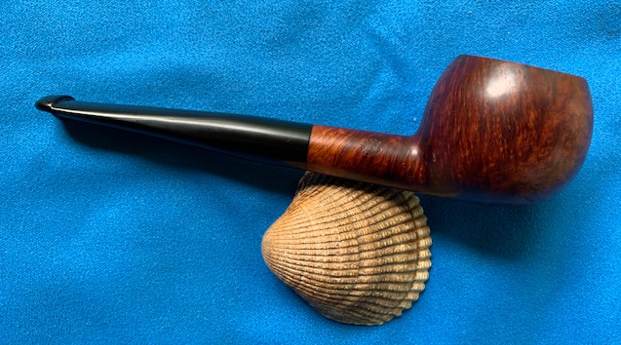
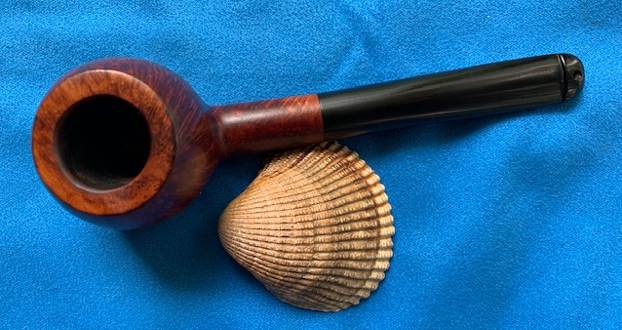
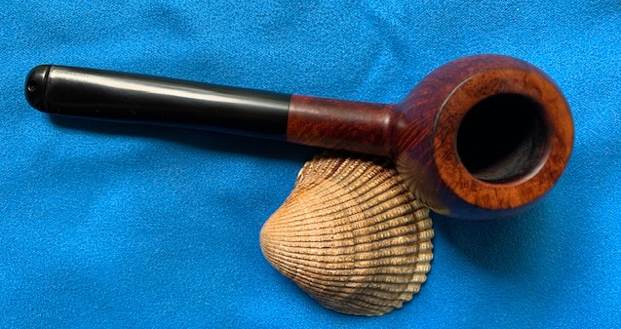
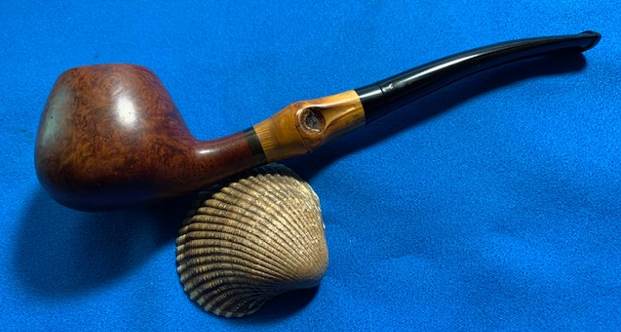
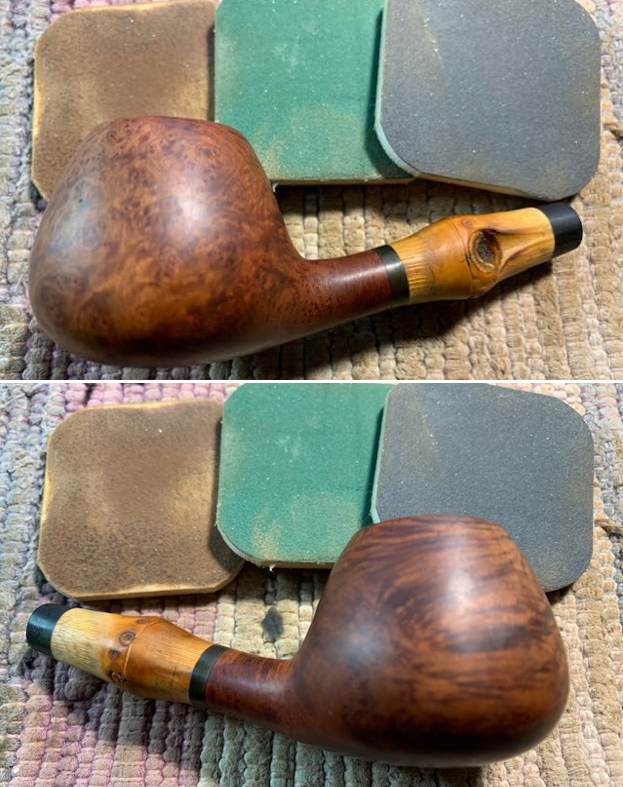
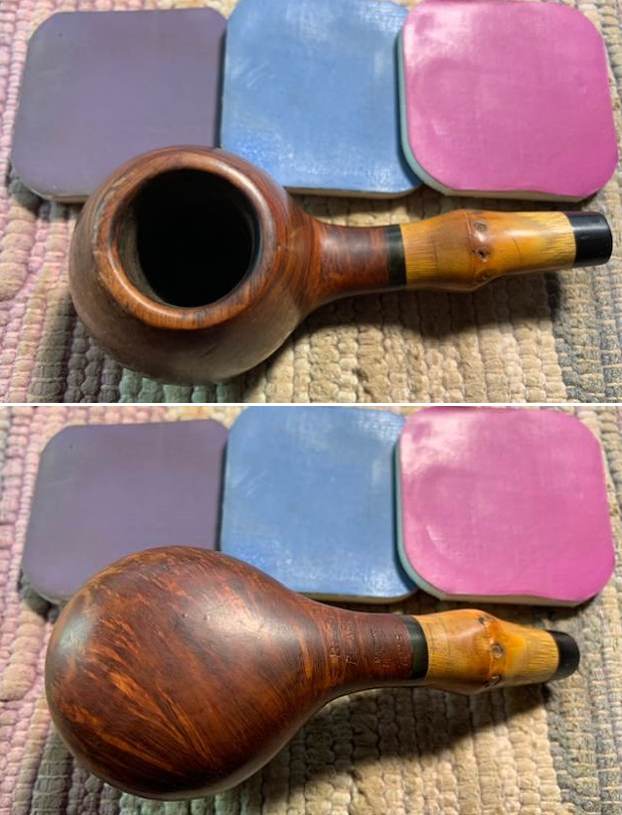
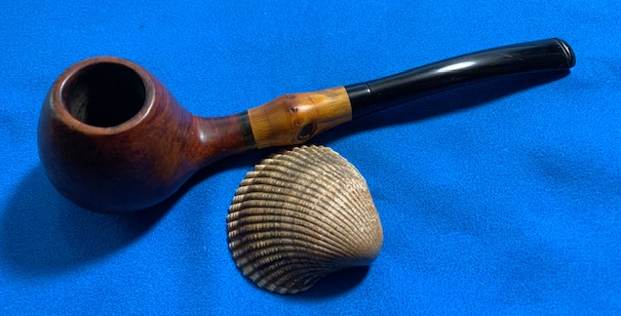
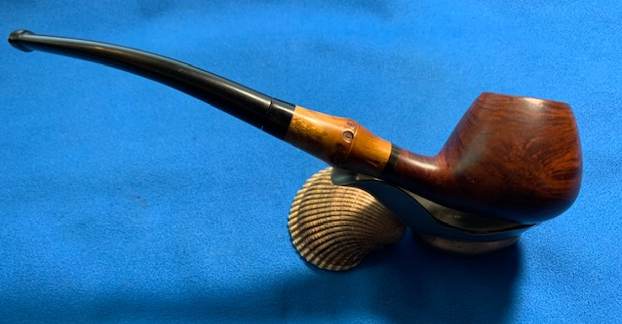
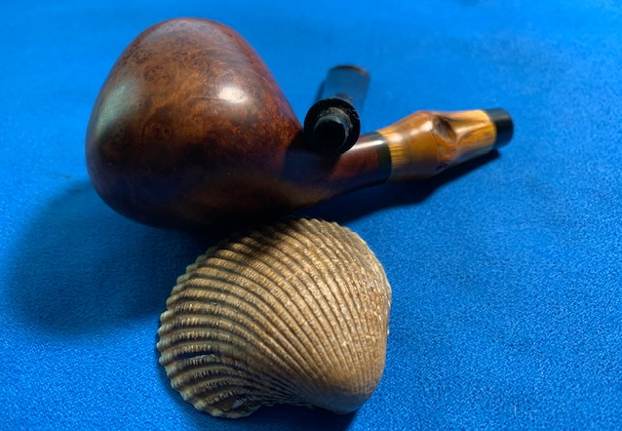
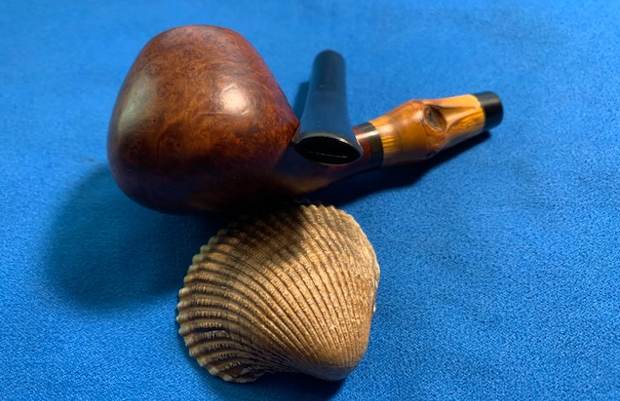
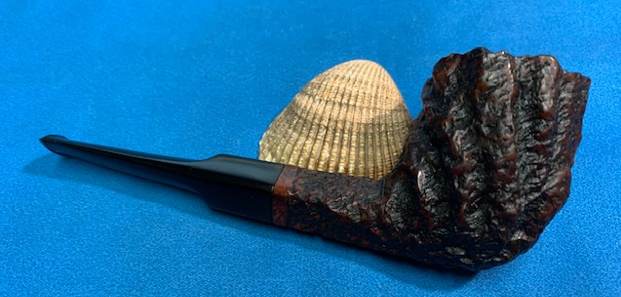
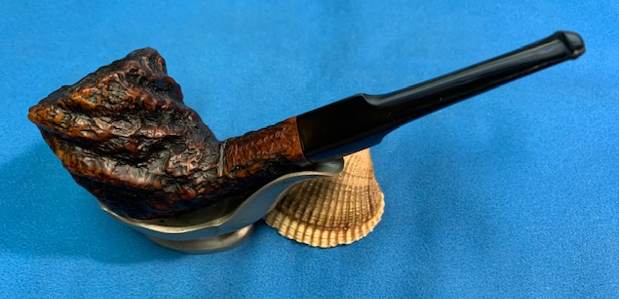
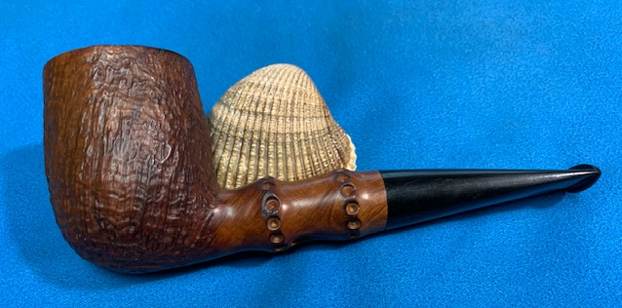
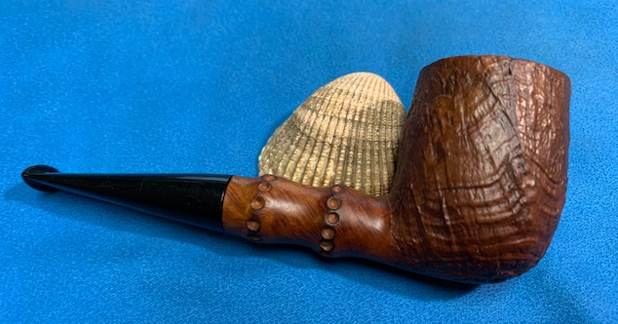
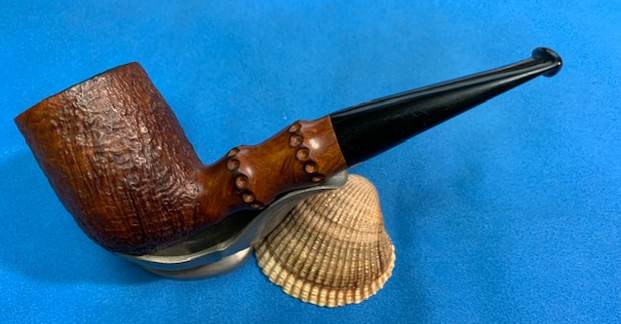
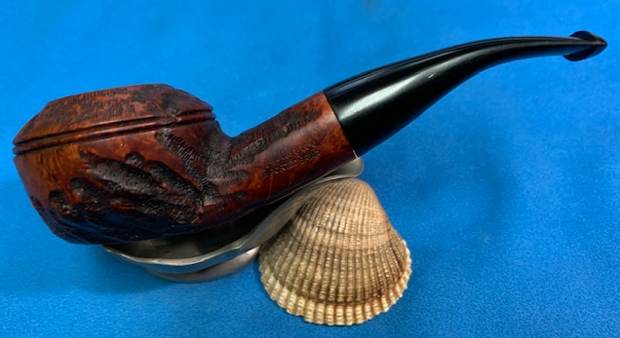
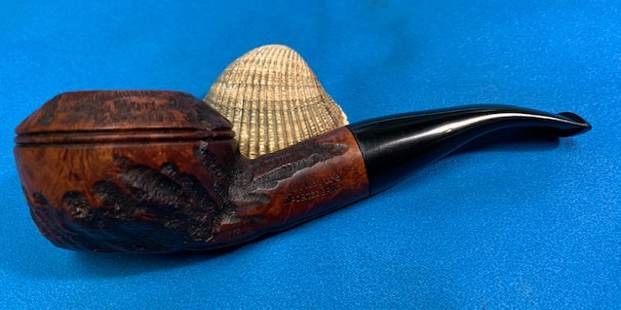
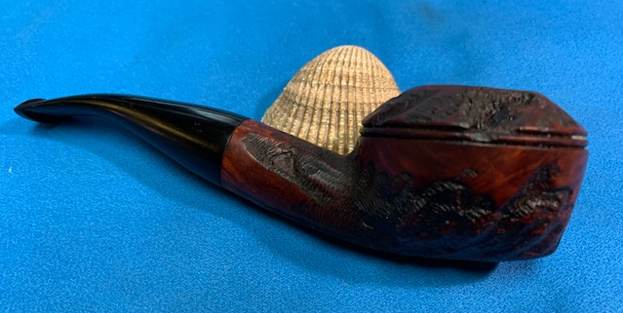
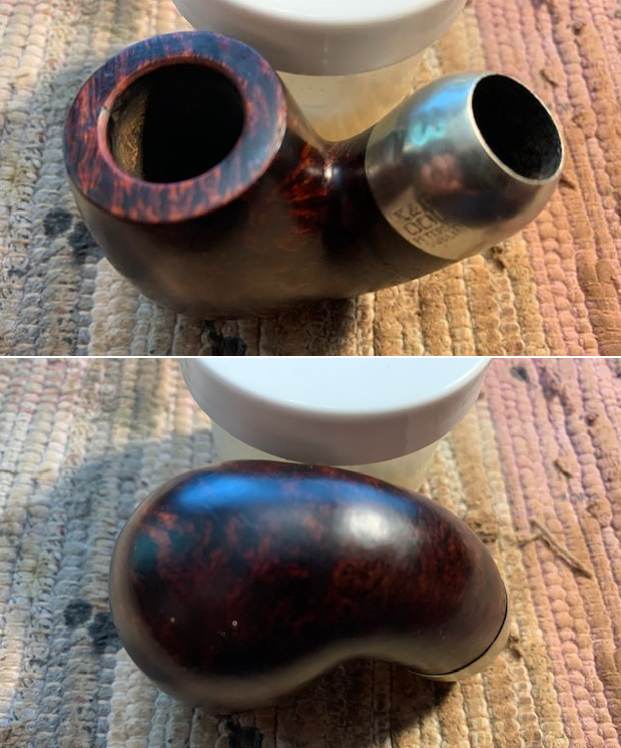
 Since the stem was in such new condition the pipe was basically finished. I am excited to put the final touches on this newly restemmed Pre-Republic, Made in Ireland Peterson’s System 0 Bent. I put the pipe back together and buffed it with Blue Diamond on the buffing wheel. I gave the bowl and the stem multiple coats of carnauba wax. I hand buffed the pipe with a clean buffing pad to raise the shine. It is fun to see what the polished bowl looks like with beautiful mixed grain all around it. Added to that the polished black vulcanite stem combined with the bowl and made a stunning pipe. This smooth Classic Older Peterson’s System 0 Bent is great looking and the pipe feels great in my hand. It is light and well balanced. Have a look at it with the photos below. The dimensions are Length: 5 ½ inches, Height: 1 ¾ inches, Outside diameter of the bowl: 1 ¼ inches, Chamber diameter: ¾ of an inch. The weight of the pipe is 68 grams/2.40 ounces. It is a beautiful pipe that I will soon be putting on the rebornpipes store in the Irish Pipe Makers section. If you are interested in adding it to your collection send me an email or a message. Thanks for walking through the restoration with me as I worked over this pipe. Thanks to each of you who are reading this blog.