Blog by Dal Stanton
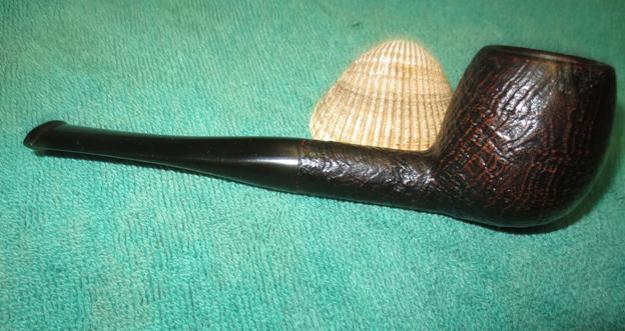
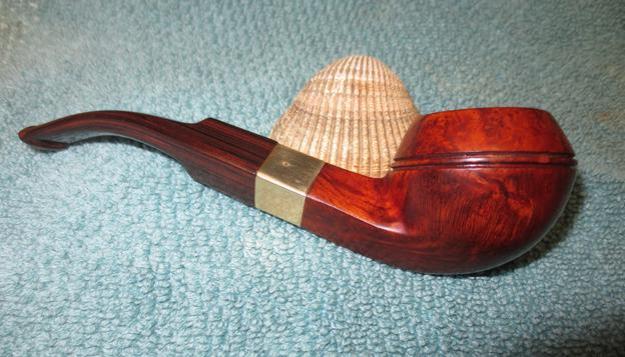
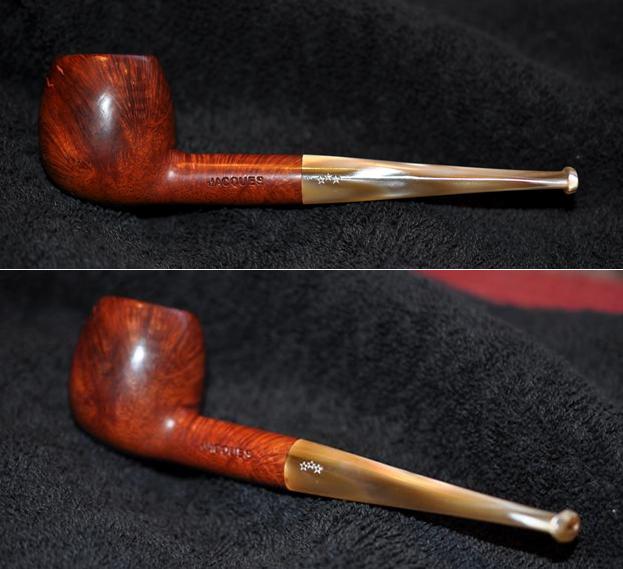
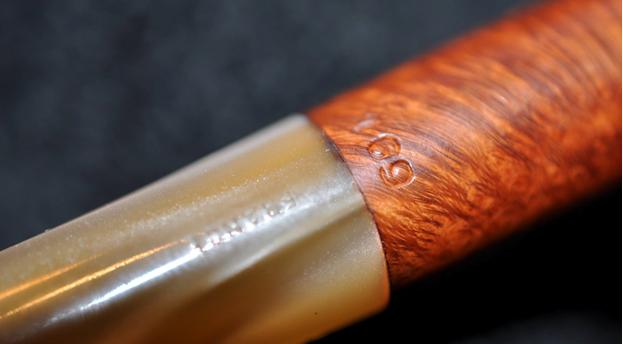
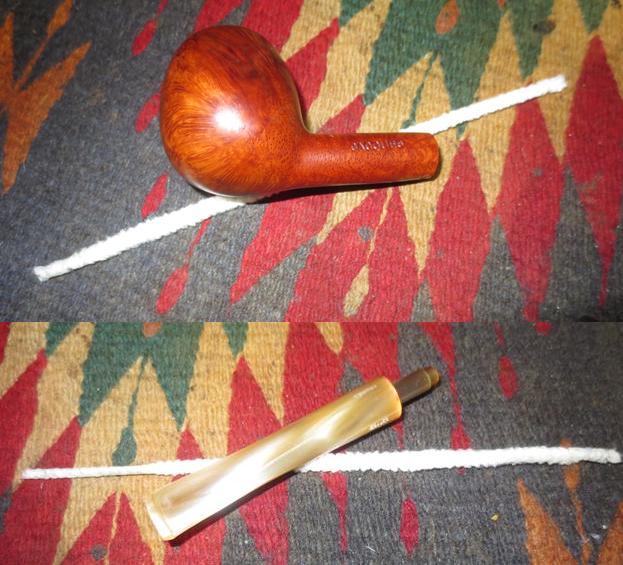
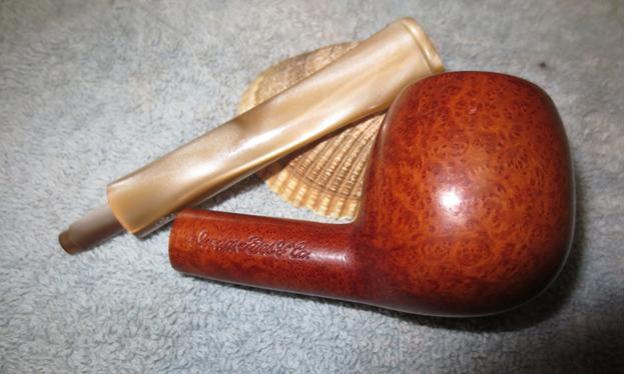
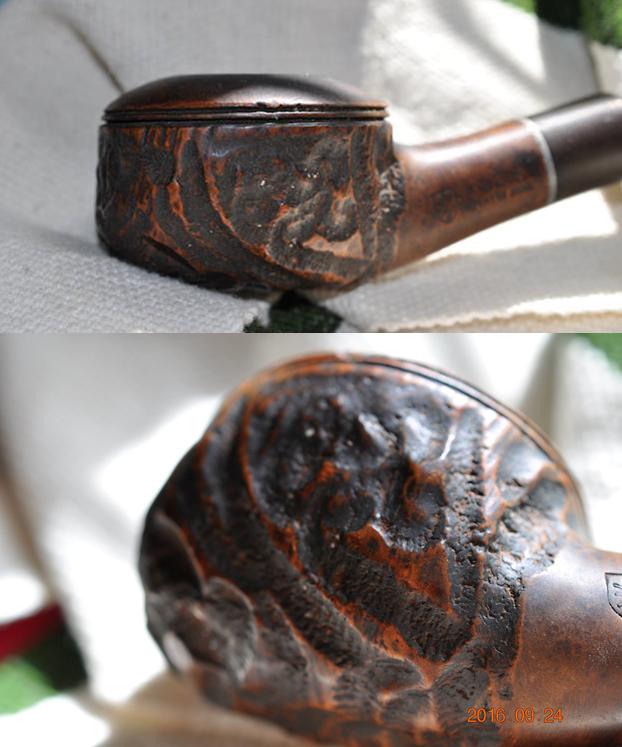
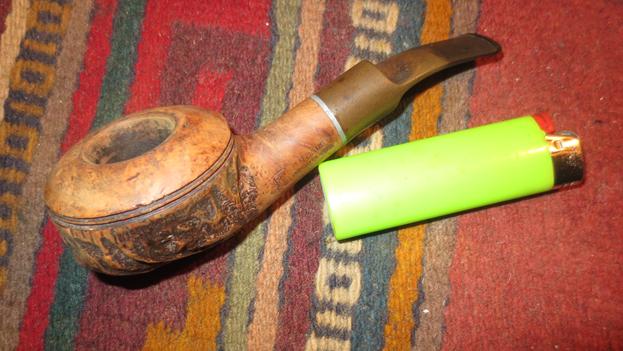
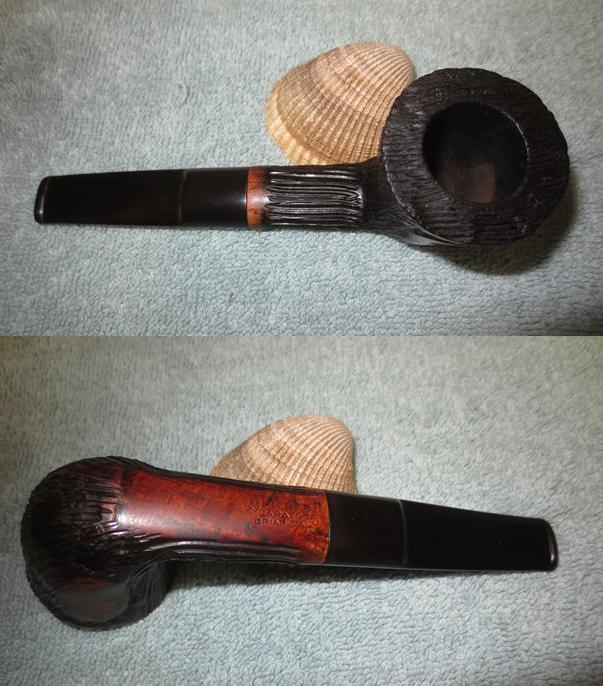
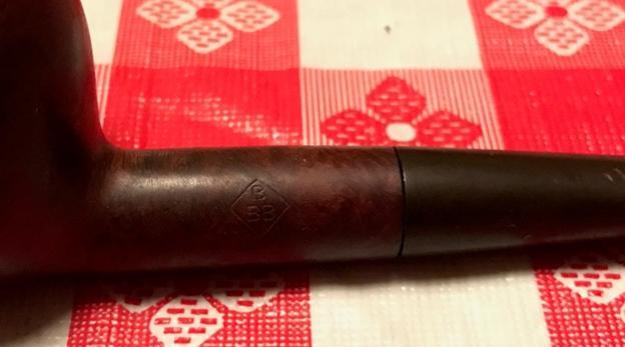
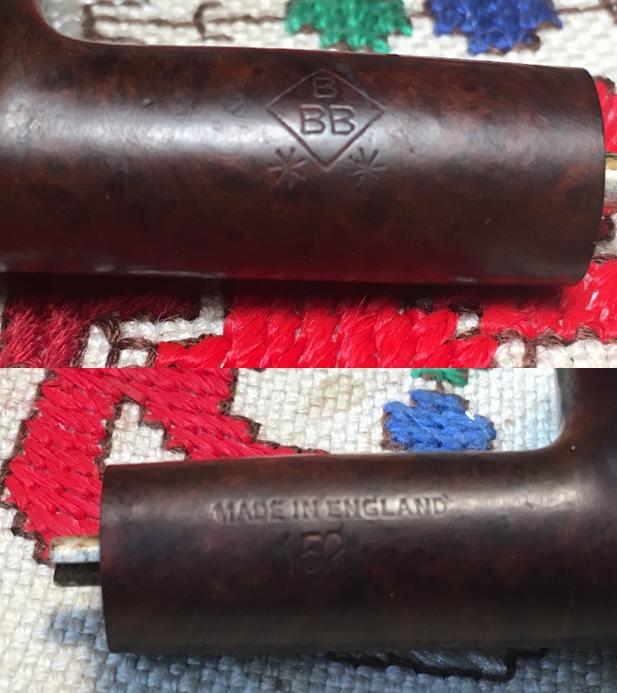
When I study the venerable pipe on my work table, it is not a glamorous display of briar and silver bands. Some might call it a basket pipe. The two stars imprinted on the shank were an indication of a working man’s pipe – not high quality, but among those pipes accessible to normal, if not common, people who work, live, love and as is the case with us all, die. This unremarkable Apple shaped, BBB [diamond over] Double Star, MADE IN ENGLAND [over] 152, is remarkable because of the story it represents. I enjoy restoring ‘estate’ pipes because they were left to others and these pipes carry with them stories and memories of loved ones who once befriended and valued them. Greg heard from my son, Josiah, who are college buddies, that Josiah’s old man (my words not theirs!) restored ‘old’ pipes. This ‘old’ pipe came to Greg from his grandfather through his mother. Josiah’s email came to me asking what I could do with these pictures from Greg.
 My understanding is that Greg was a bit reluctant at first to send his pipe off to Bulgaria to be restored, but after Josiah directed him to some of the restorations I’ve done, he felt he could trust me with the heirloom that had come to him. Knowing that this pipe was from his grandfather I asked that Greg send me information about his grandfather so that I not only could place the pipe better in history, but Greg’s grandfather as well. This is the letter he sent me:
Hi Mr. Stanton,
Thank you so much for agreeing to restore my grandfather’s pipe. I am sorry for the delay in getting you the below information, but it’s been a crazy couple of weeks.
My mother inherited the pipe from my grandfather when he passed away in 1998. I saw it in the china cabinet one day and asked her if I could have it, since I had taken up pipe smoking. She kindly agreed. She doesn’t really know when my grandfather got the pipe, but she said he must have bought it in Hong Kong.
My grandfather was from Hong Kong, and only emigrated to the United States in the 1980s. He was a malaria inspector for the Hong Kong government for his entire working career. He must have gotten the pipe at the latest in the late 1940s or early 1950s, as my mother remembers him having it when she was a child. He never smoked the pipe when I knew him, but from its condition, I assume it was well used at an earlier period in his life.
Having graduated from the University of Georgia Law School in Athens, Georgia, passed his bars and currently serves as a law clerk to a federal magistrate judge in Augusta, Georgia, AND as a young married man, I can understand why Greg “took up” smoking pipes! Pipes are wonderful companions for blooming attorneys! His letter concluded with an agreement to the cost of the restoration would benefit our work with the Daughters of Bulgaria! Thank you, Greg!
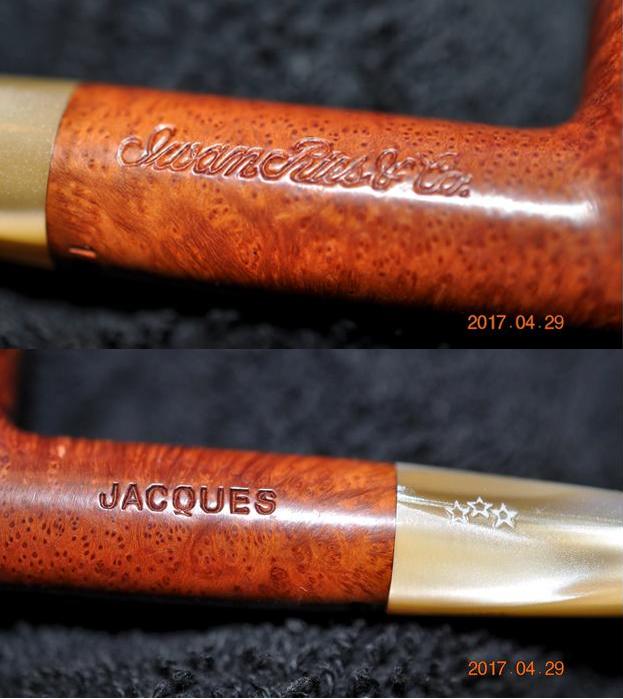
The information Greg received from his mother was invaluable for placing this BBB in time and space. Pipedia’s article about BBB is helpful. BBB in the mid-1800s originally stood for “Blumfeld’s Best Briars”, but after the death of Blumfeld, the Adolph Frankau Company took over the company and BBB gradually became “Britain’s Best Briars”.
The “BBB Two Star” rating also is referenced in the same article in a discussion of quality descriptors for BBB pipes:
In the Thirties, the top-of-the-range one becomes “BBB Best Make” with alternatives like “Super Stopping” and “Ultonia Thule”. The BBB Carlton, sold with the detail with 8/6 in 1938, is equipped with a system complicated out of metal, system which equipped the BBB London Dry too. Blue Peter was not estampillées BBB but BBB Ultonia, and the BBB Two Star (* *) become the bottom-of-the-range one.
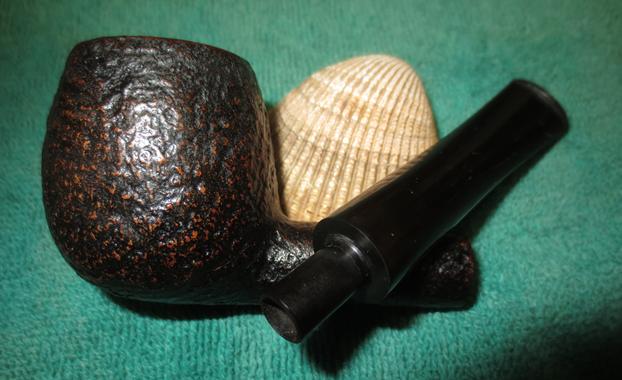
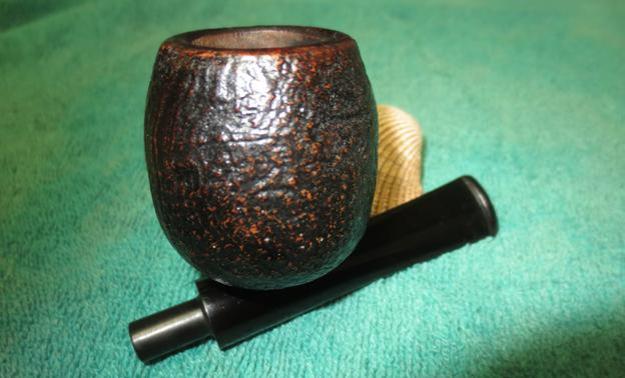
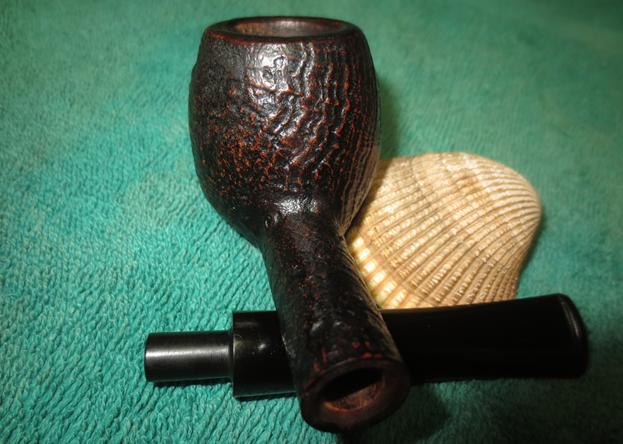
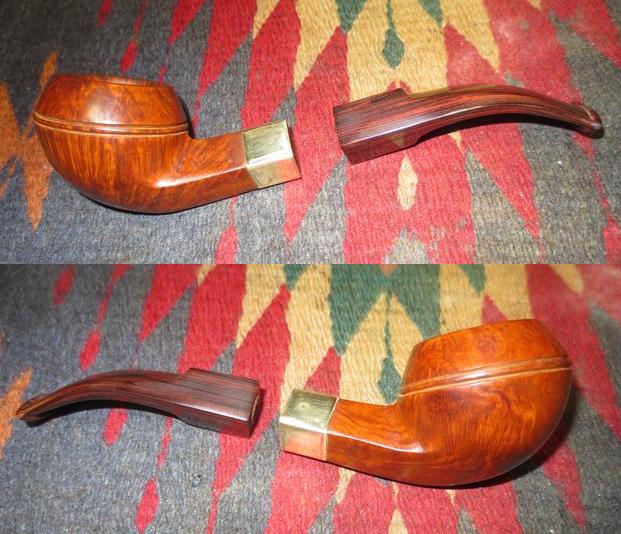
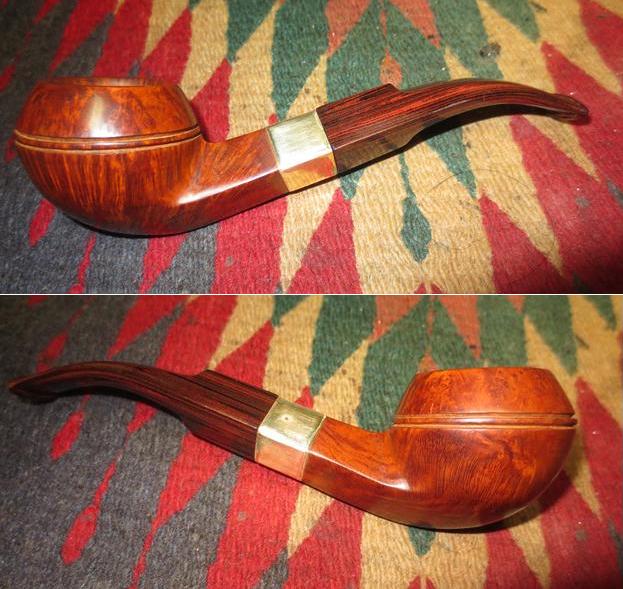
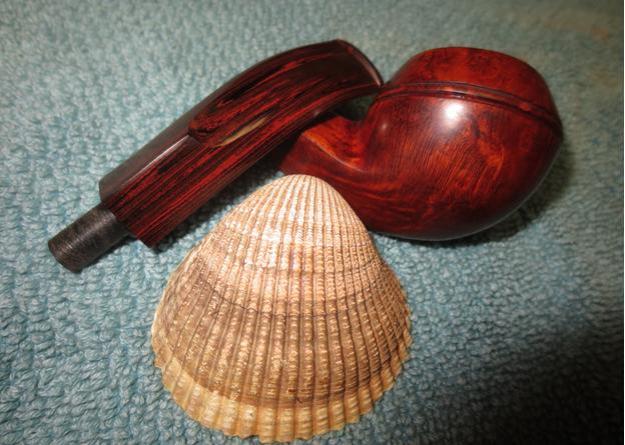
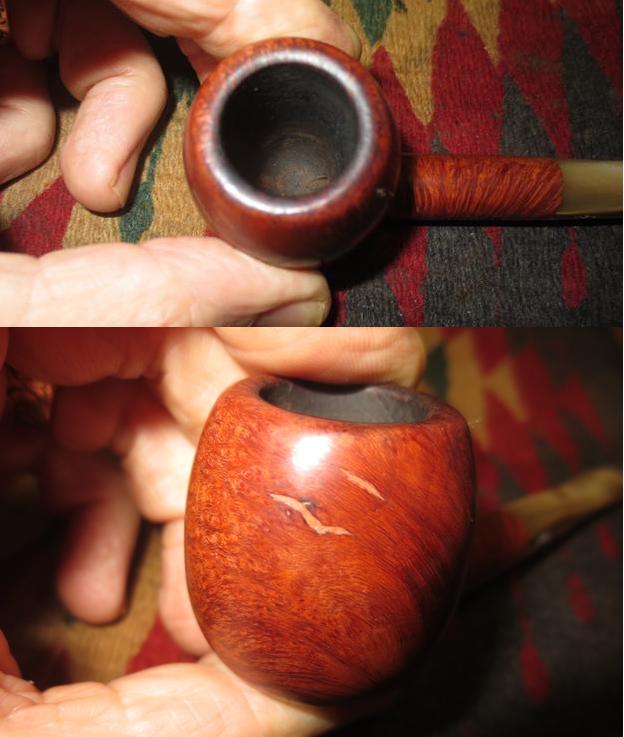
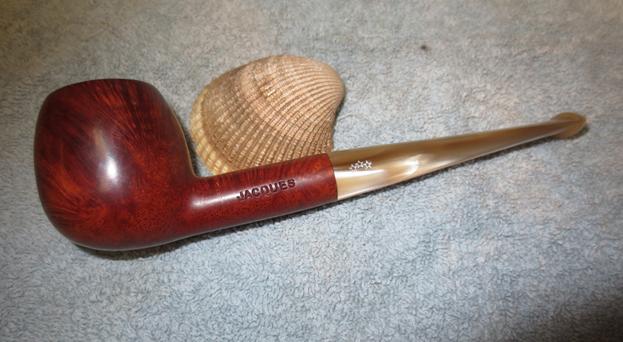
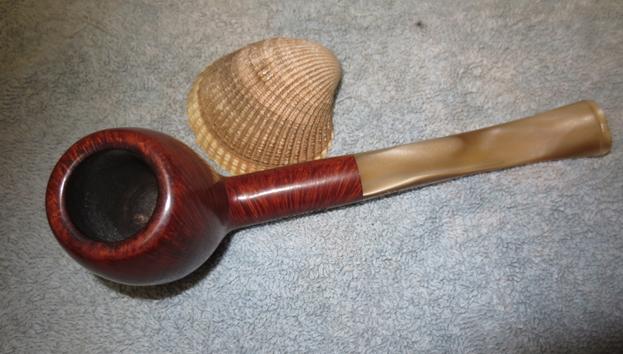
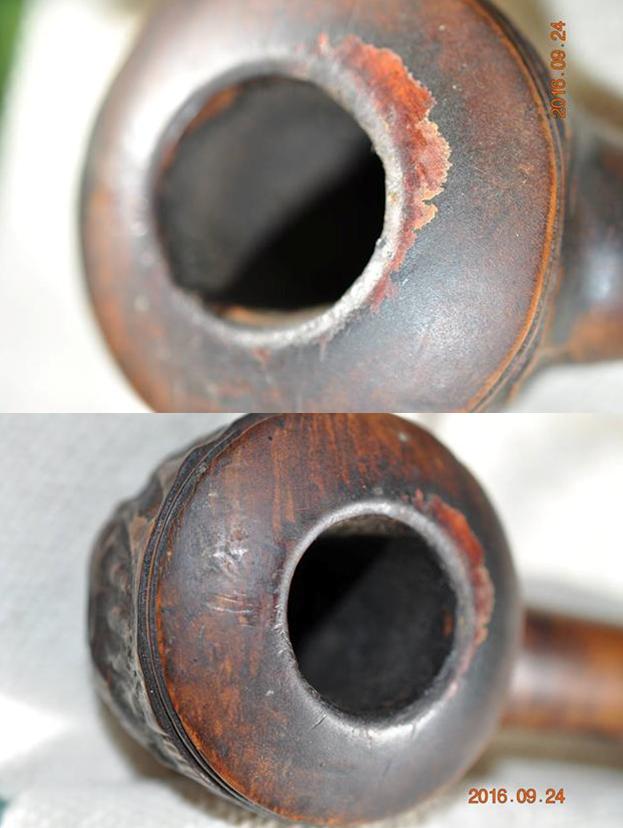
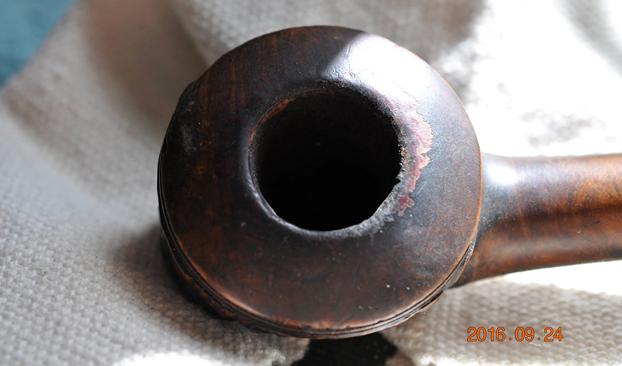
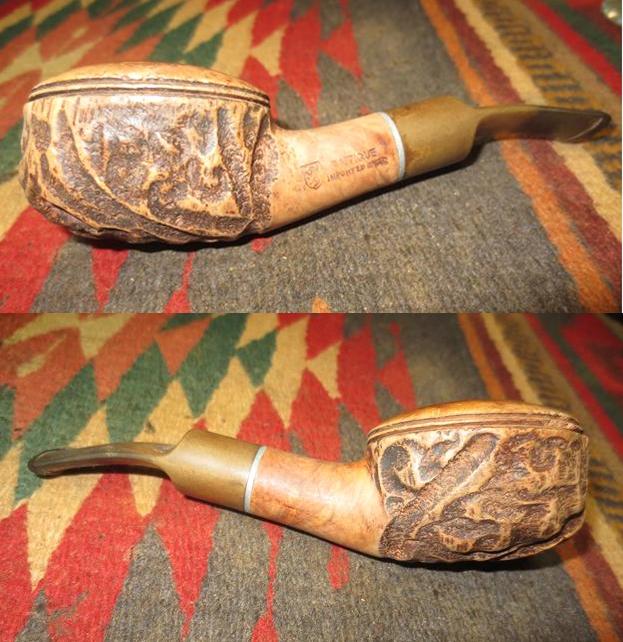
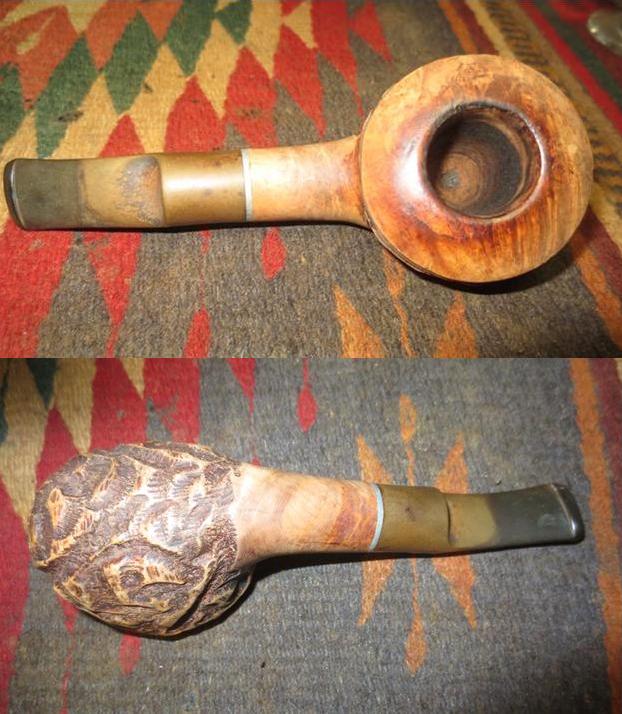
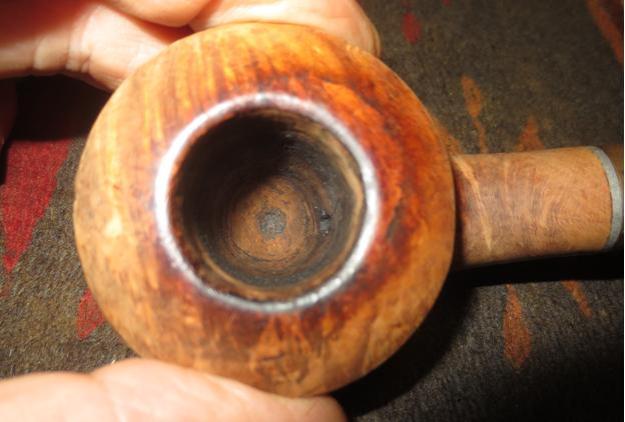
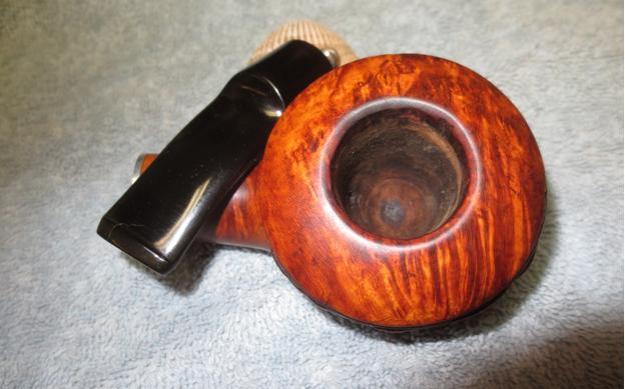
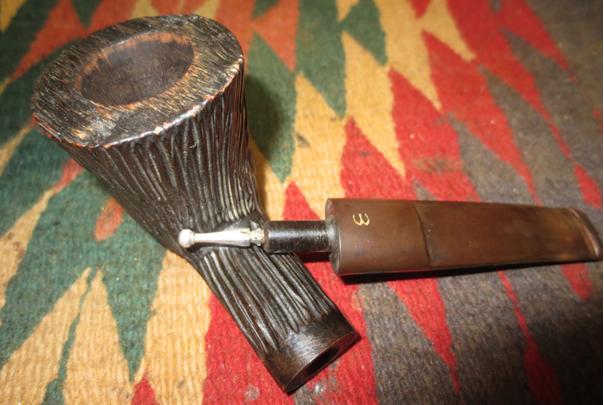
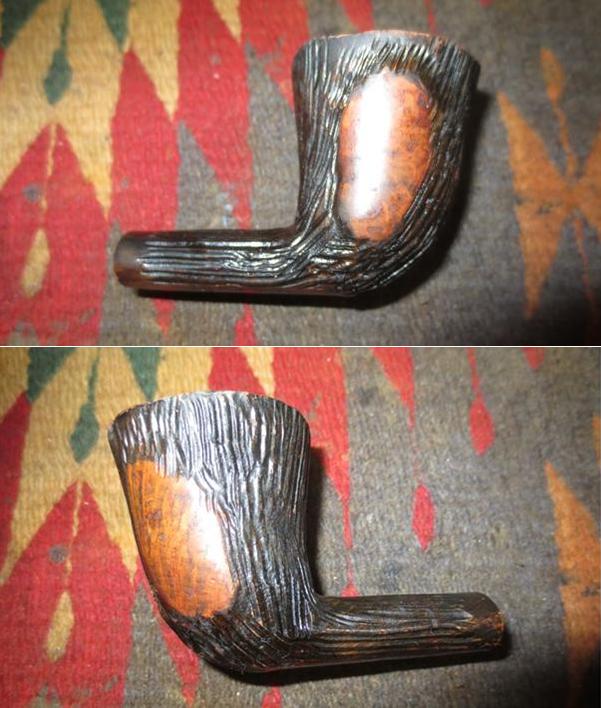
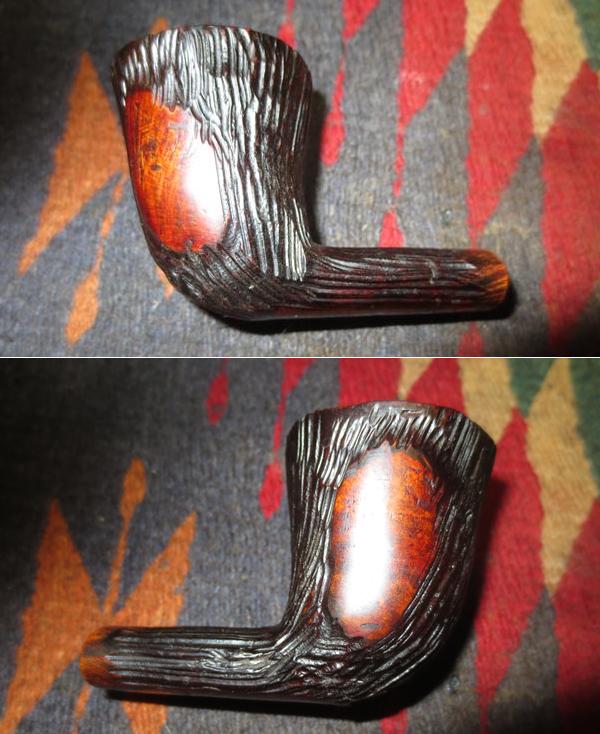
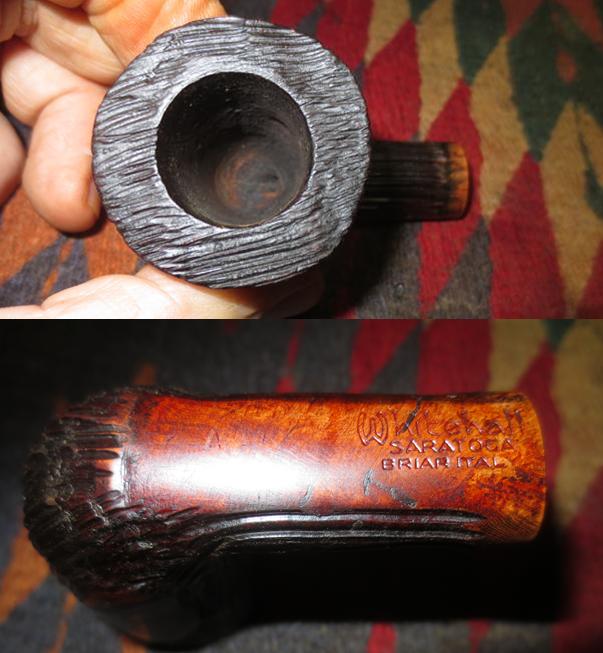
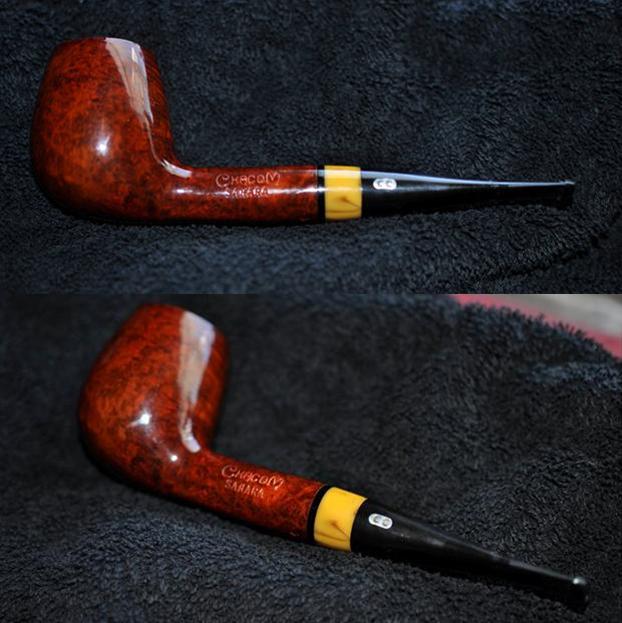
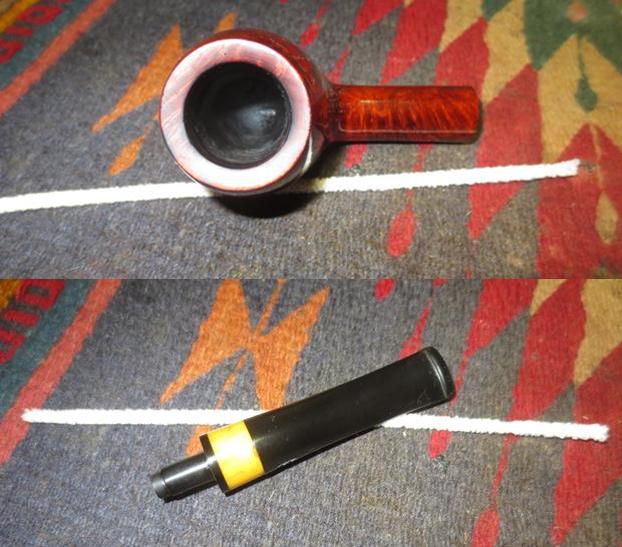
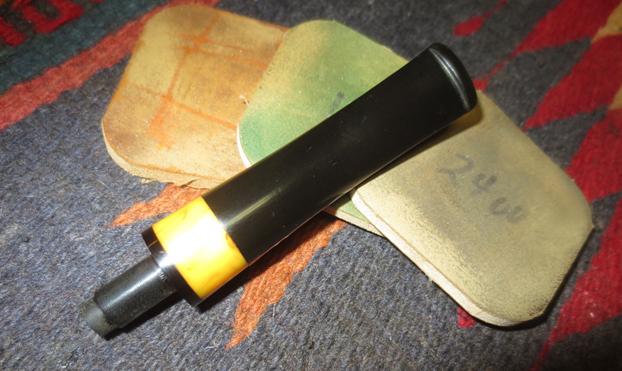
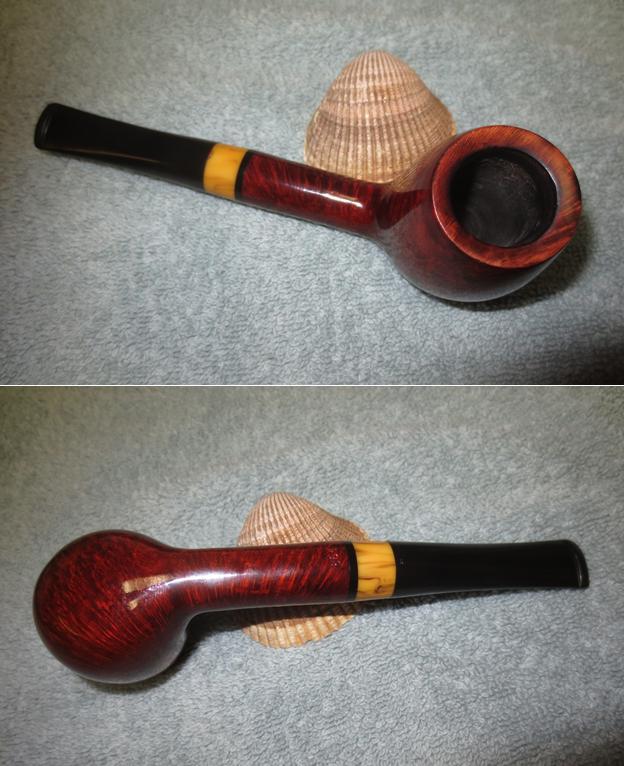
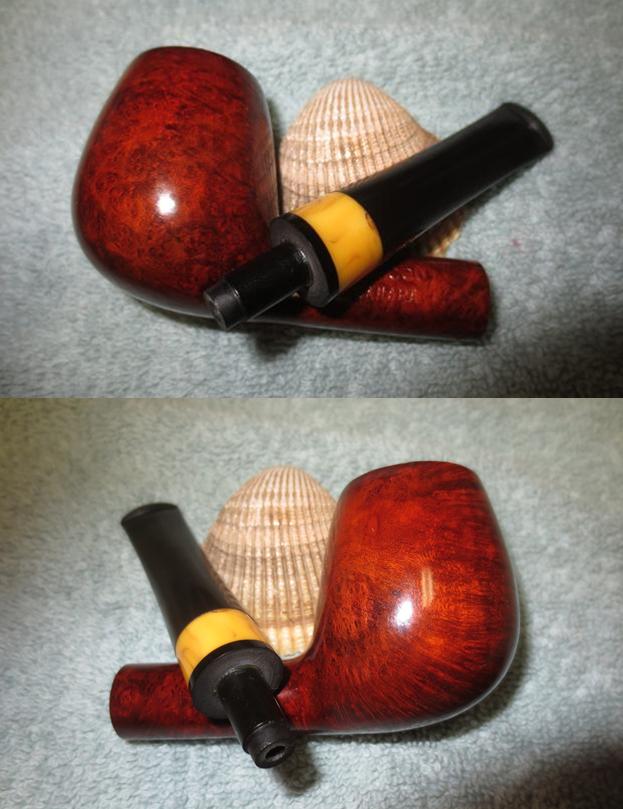
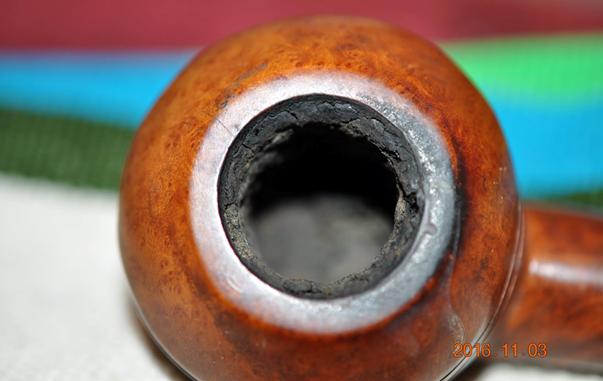
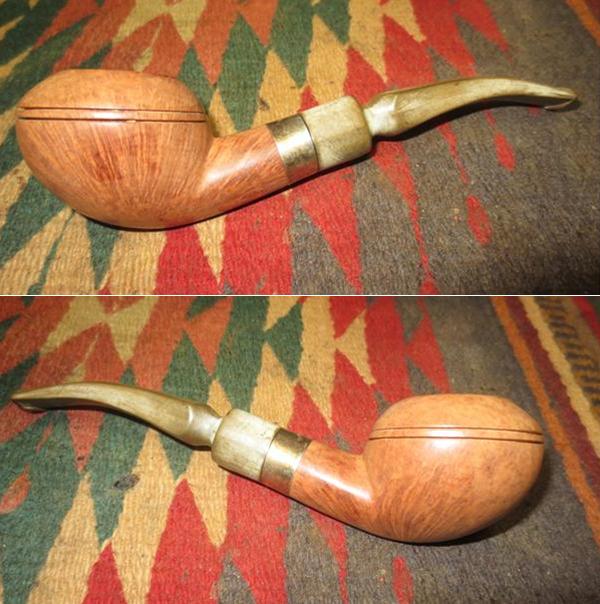
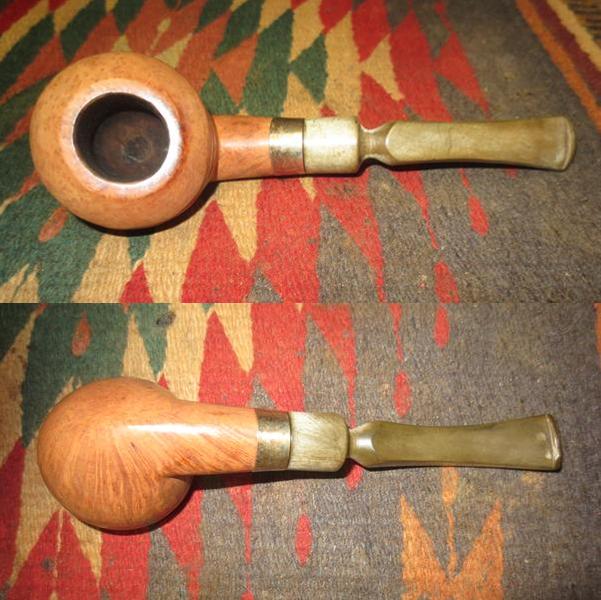
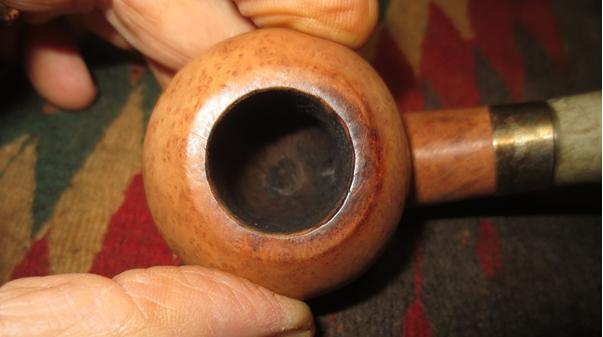
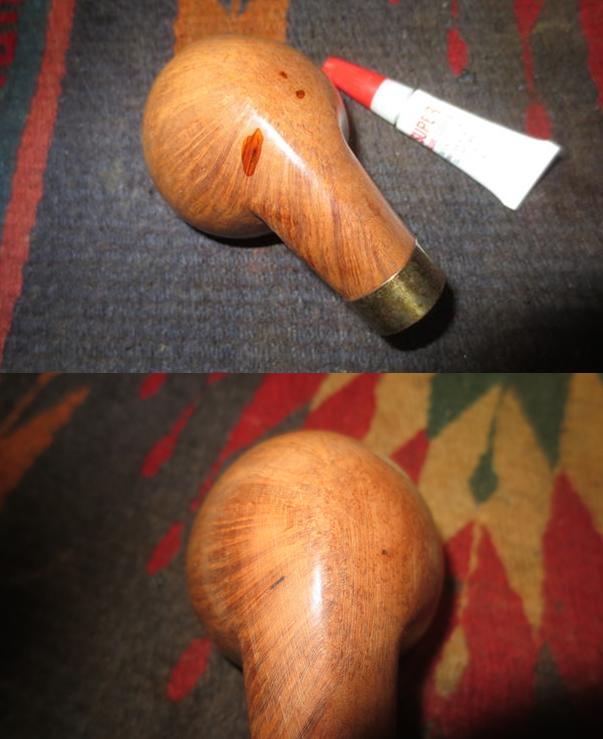
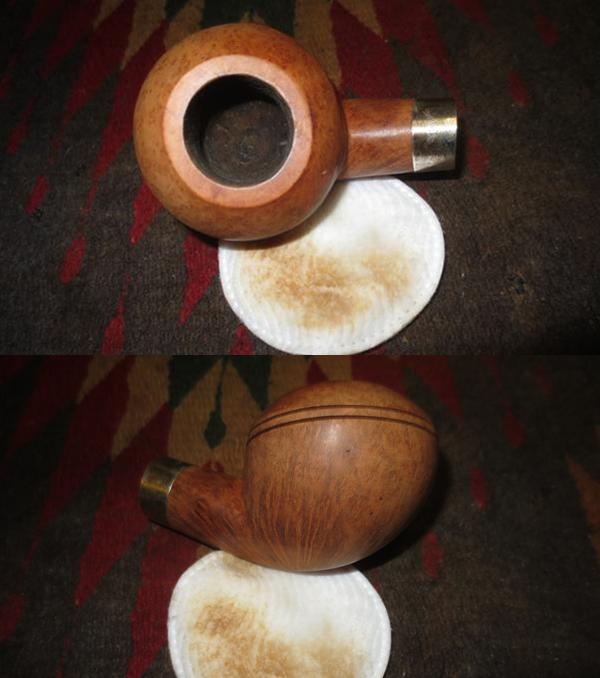
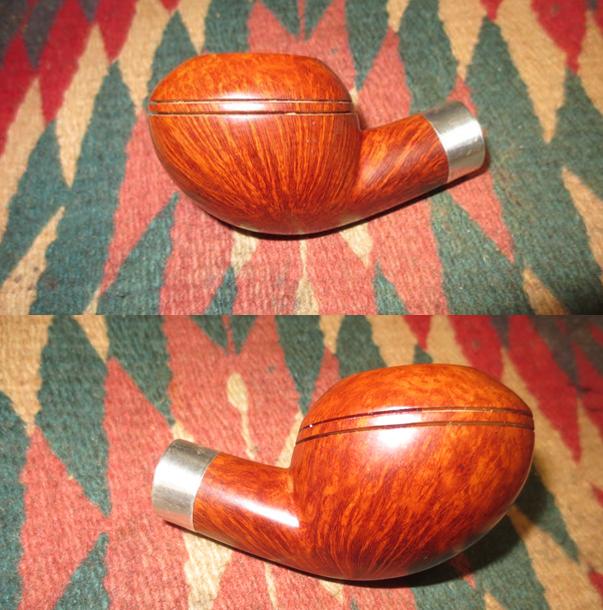
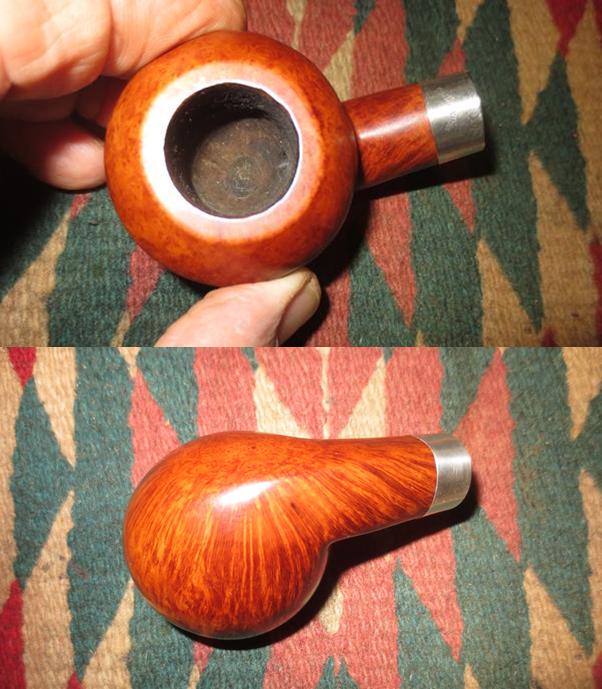
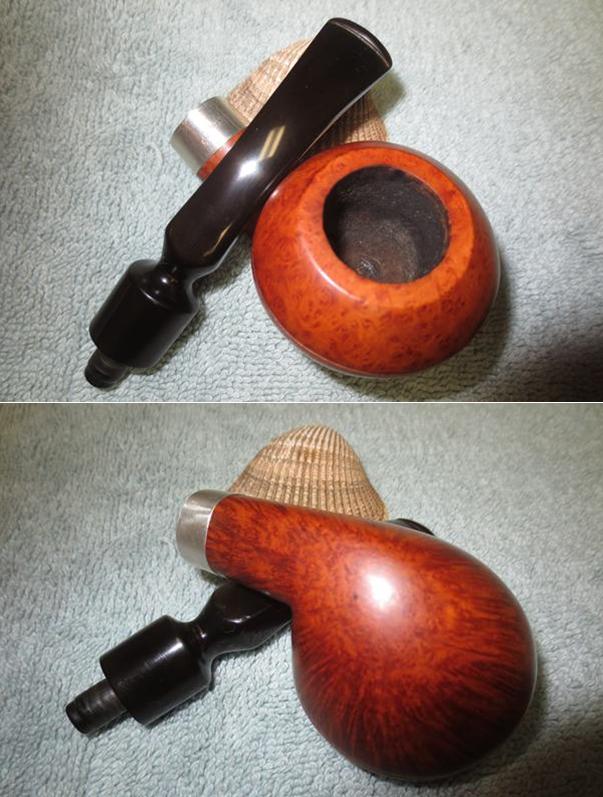
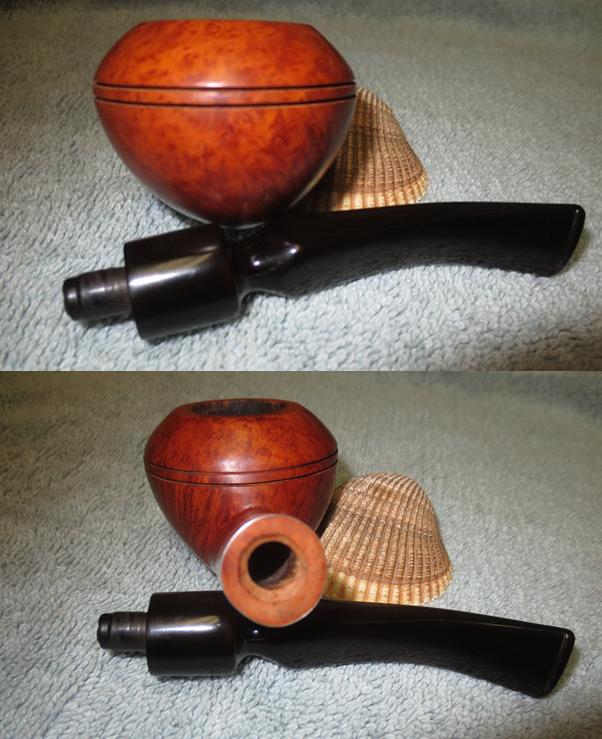
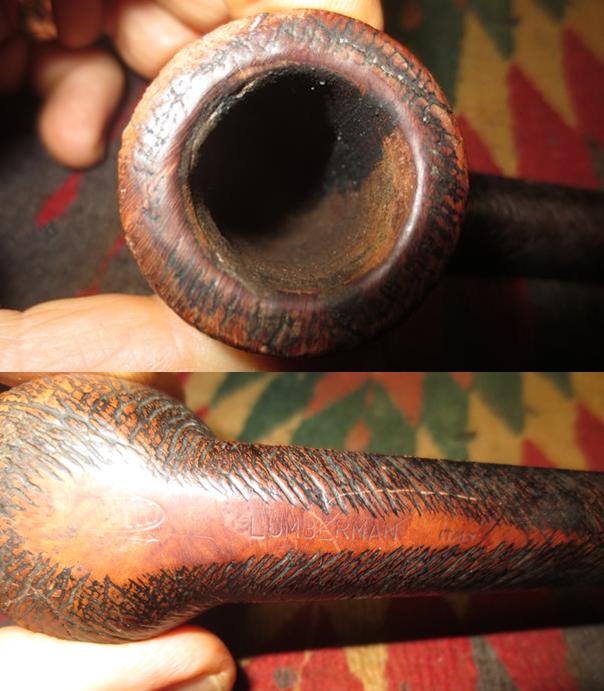
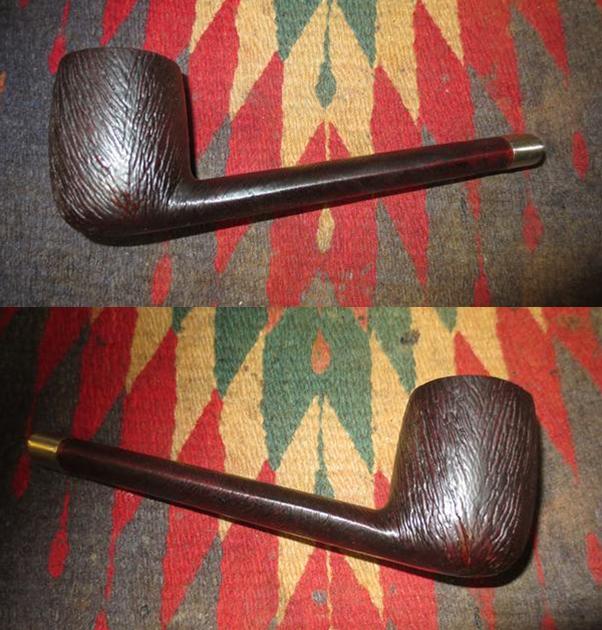
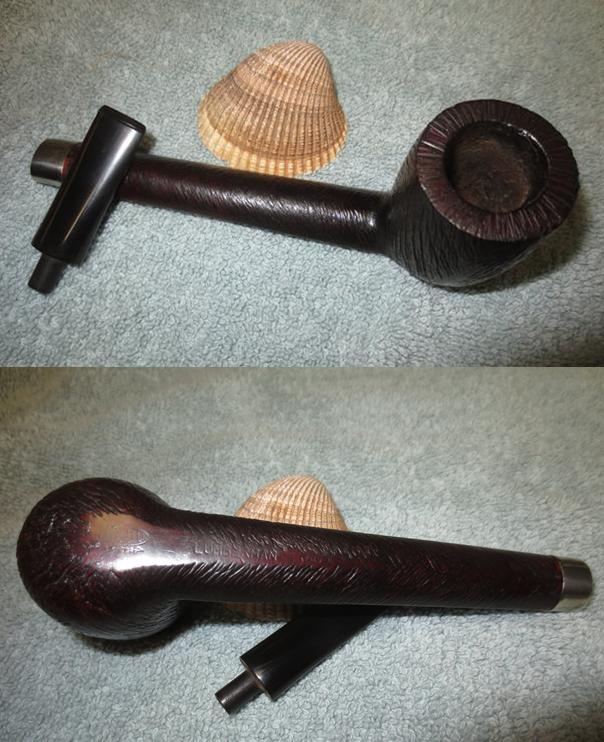
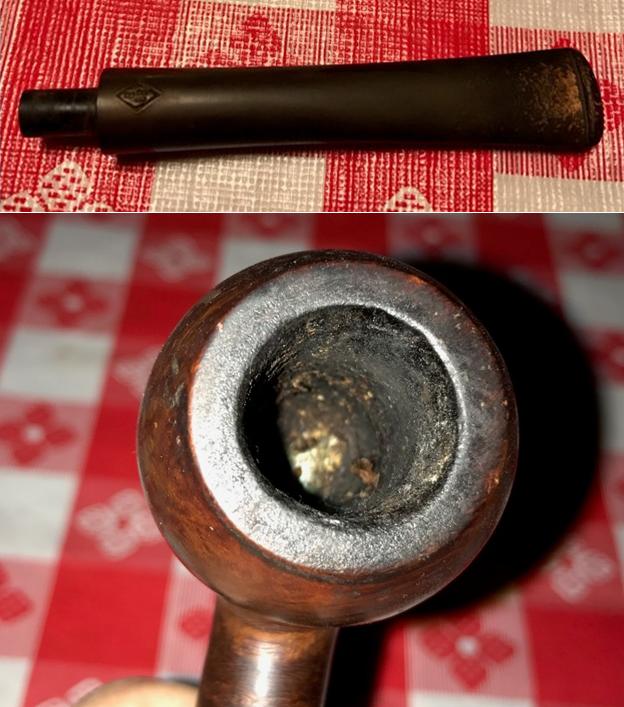
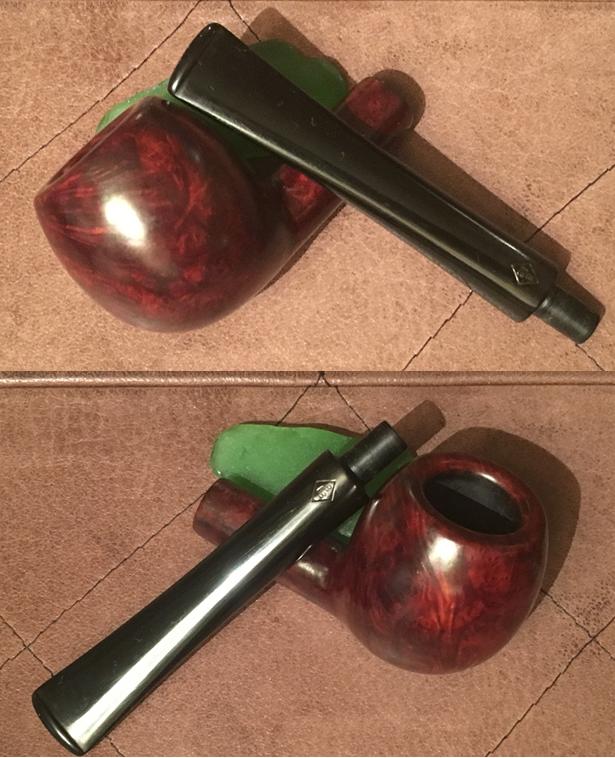
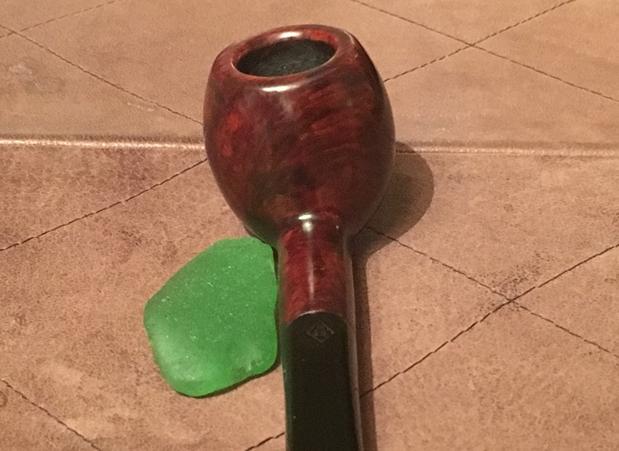
When Greg’s pipe arrived in Bulgaria, thanks to a visitor’s willingness to carry it across the Atlantic and European continent, I unwrapped it and put it on my work desk and took these pictures to fill in the gaps.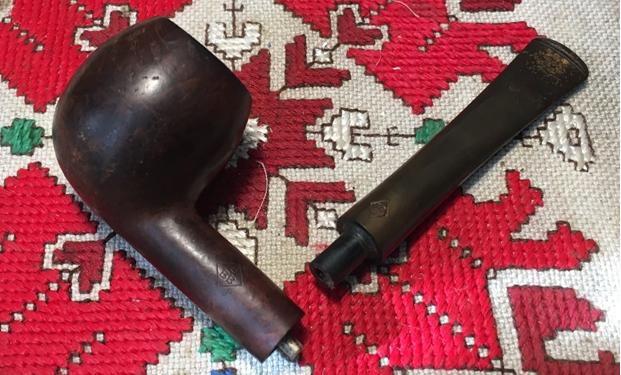
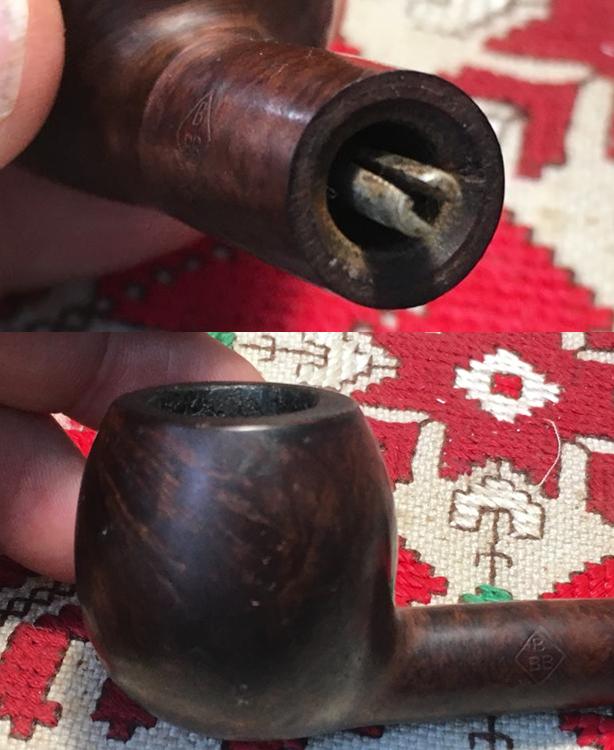
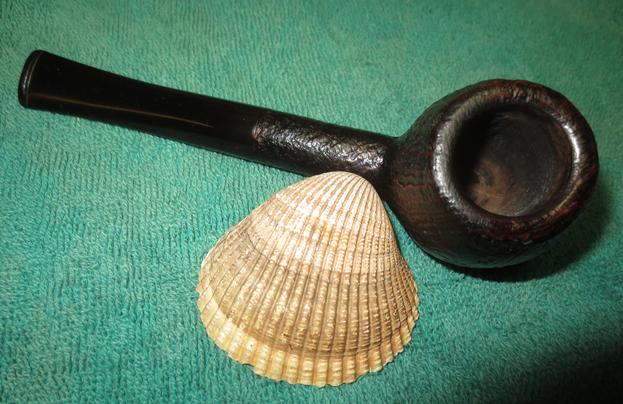
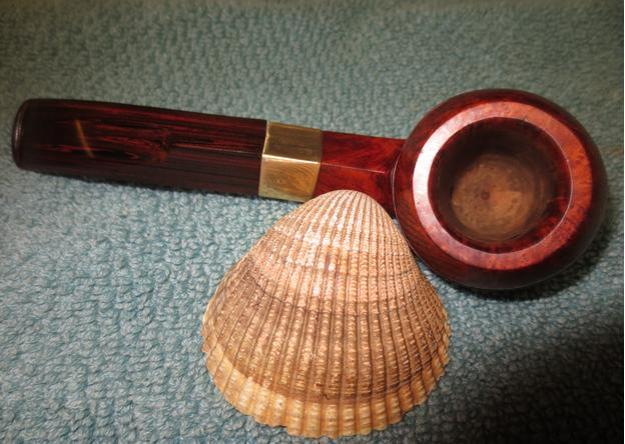
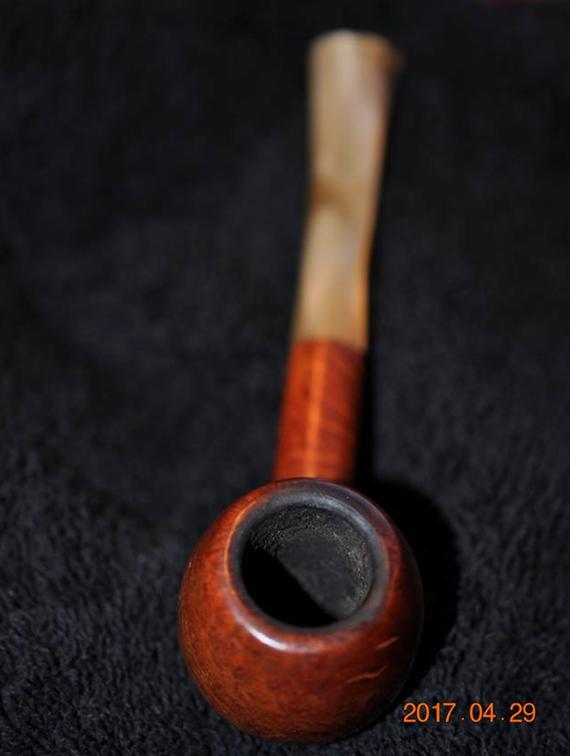
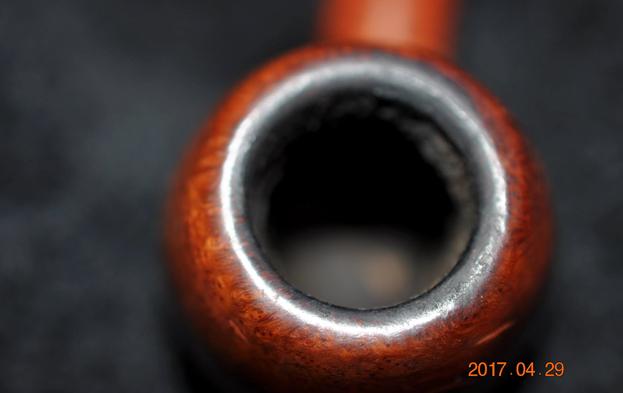
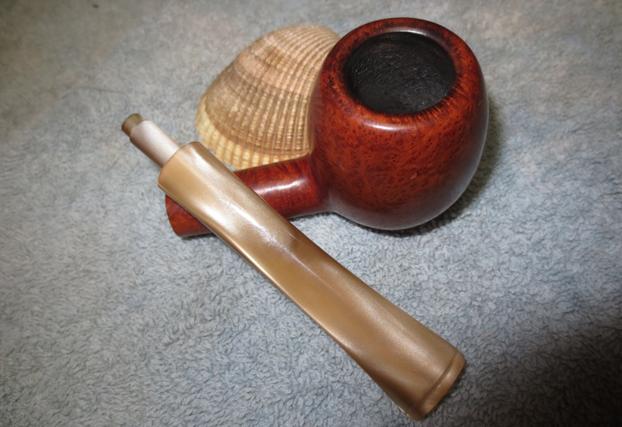
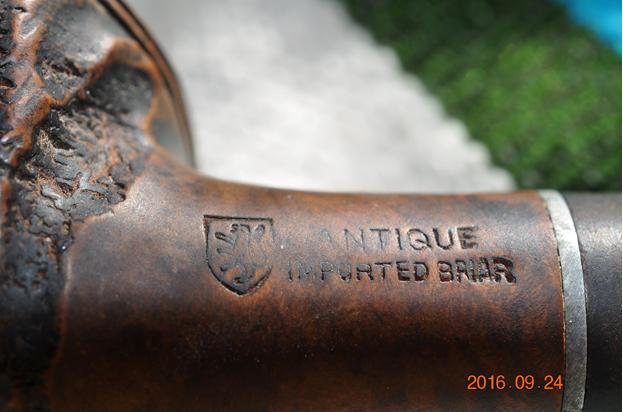
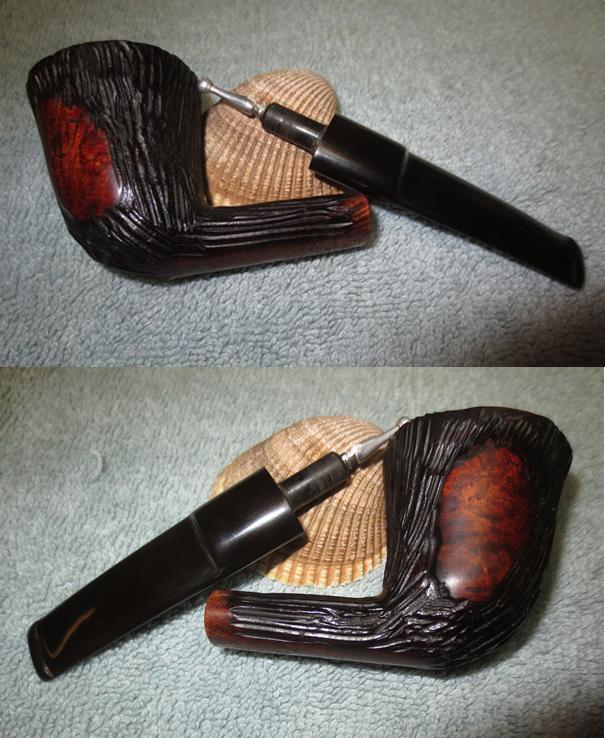
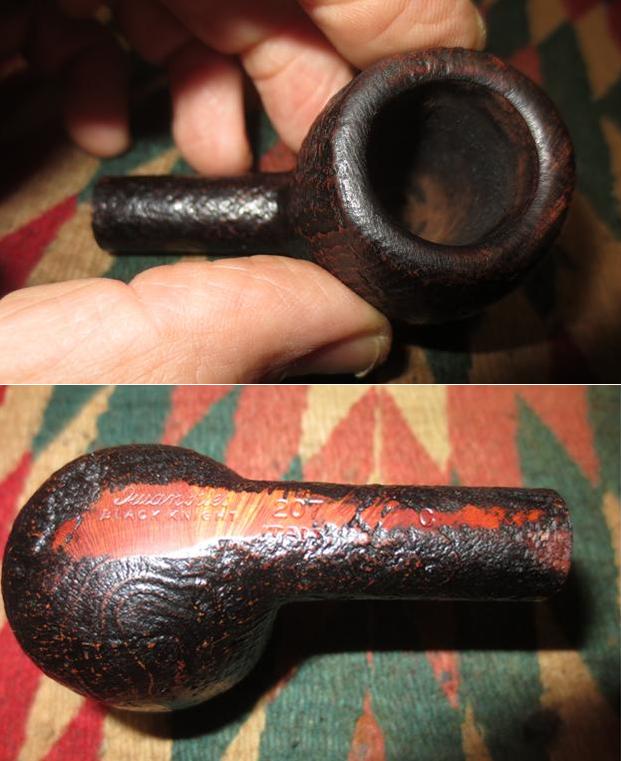
 At PipePhil.eu an example of the BBB Two Star marking is pictured along with the stinger/tube style extending into the chamber as Greg’s grandfather’s BBB does ( as seen above).
 In Pipes Magazine, I found a thread discussing the dating of the BBB Two Star. One threader’s opinion, ‘jguss’ corroborates Greg’s mother’s recollections:
 My guess is that the Two Star line started at the end of WWII; the first mention I’ve found so far is dated 1945, which at least gives a tpq (that is, an approximate dating). I know the line lasted at least into the early sixties.
It is not too difficult to speculate about the provenance of Greg’s pipe. During WW2, briar became a scarce commodity throughout Europe and pipe manufacturing companies made do with what they could acquire. Two Star BBBs would be lower end but more than likely during this time, a very close second when rations were short.  Added to this backdrop is the origin of our story in Hong Kong. Hong Kong, a British holding since 1841 (see LINK), lost control of Hong Kong during WW2 to Japan in 1941 during the Battle of Hong Kong. Undoubtedly, Greg’s grandfather would have experienced this first hand. When Japan unconditionally surrendered in 1945, the British regained control of Hong Kong, but to counter Chinese pressures to control Hong Kong, reforms were introduced that broadened and increased the stake of local inhabitants of Hong Kong:
Sir Mark Young, upon his return as Governor in early May 1946, pursued political reform known as the “Young Plan“, believing that, to counter the Chinese government’s determination to recover Hong Kong, it was necessary to give local inhabitants a greater stake in the territory by widening the political franchise to include them.[19] (Link)
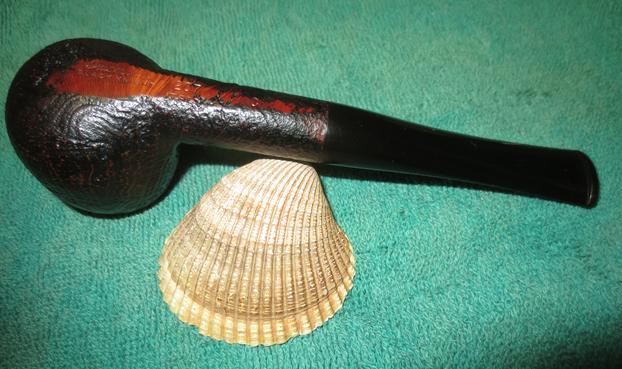
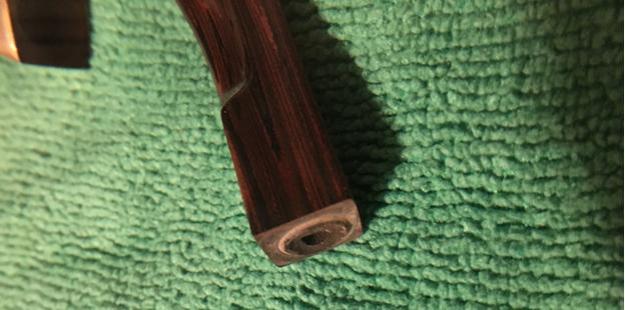
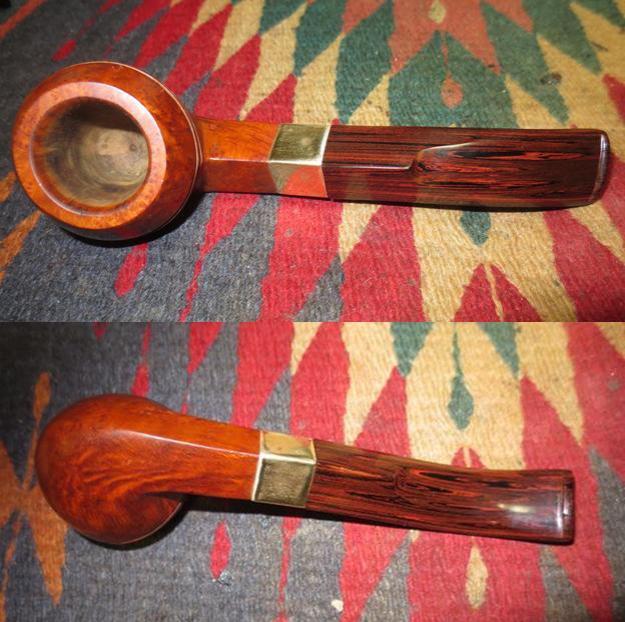
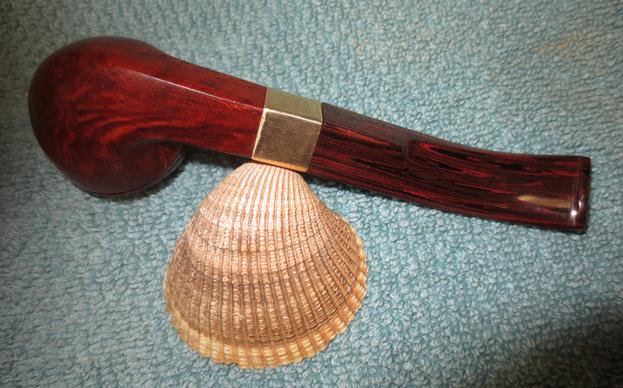
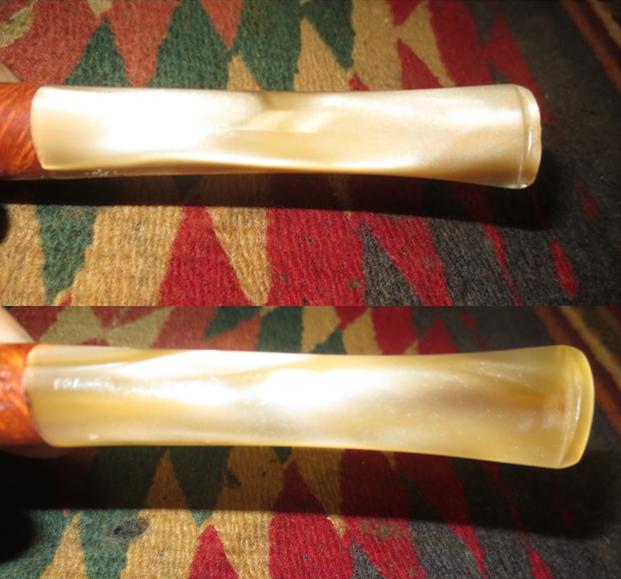
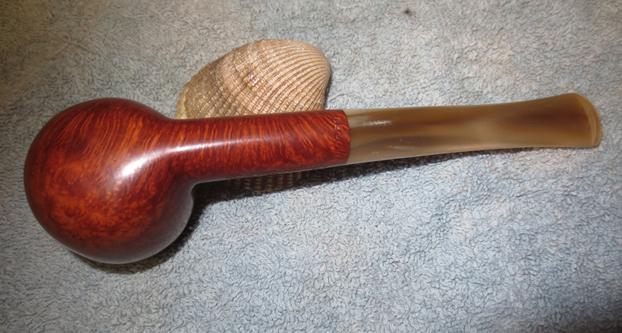
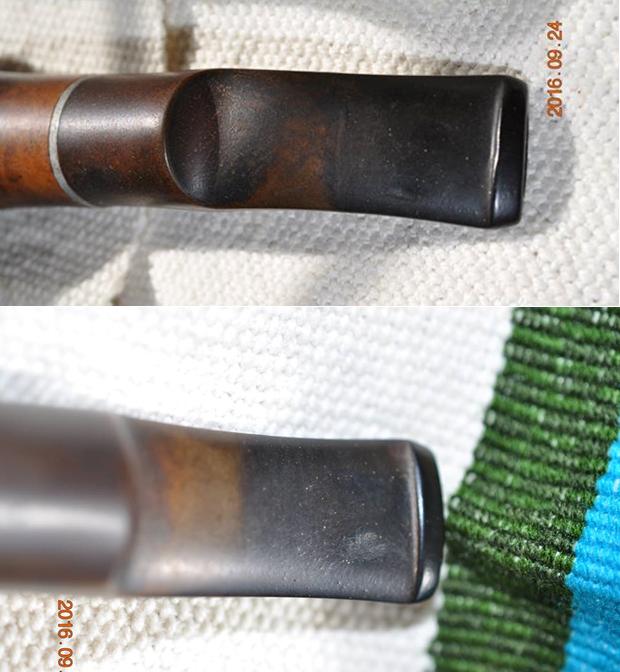
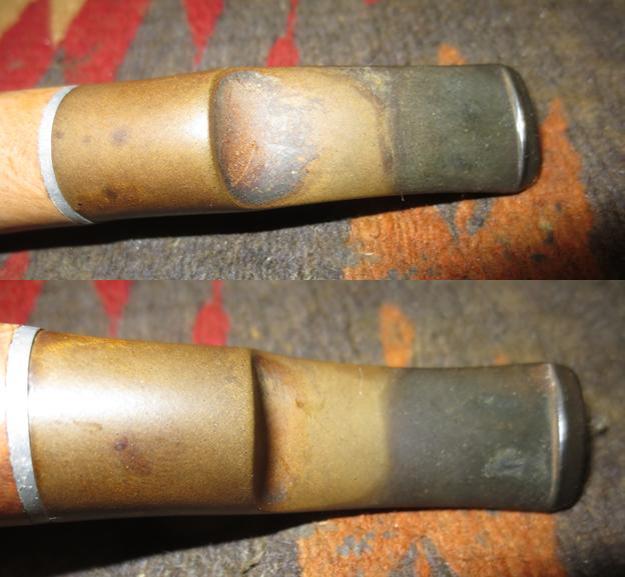
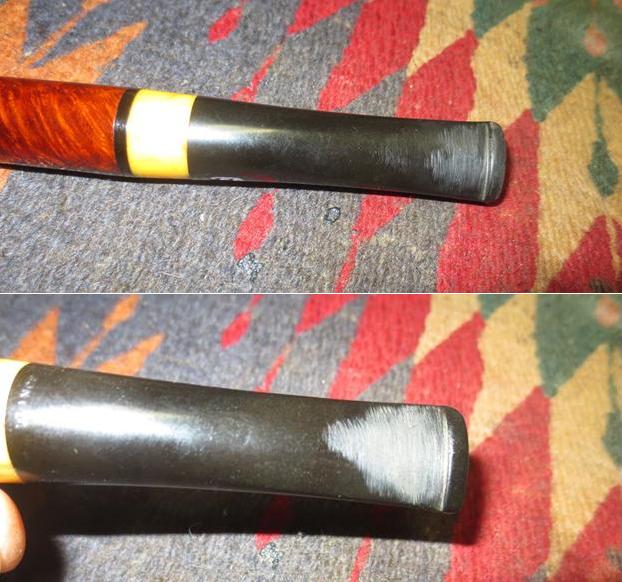
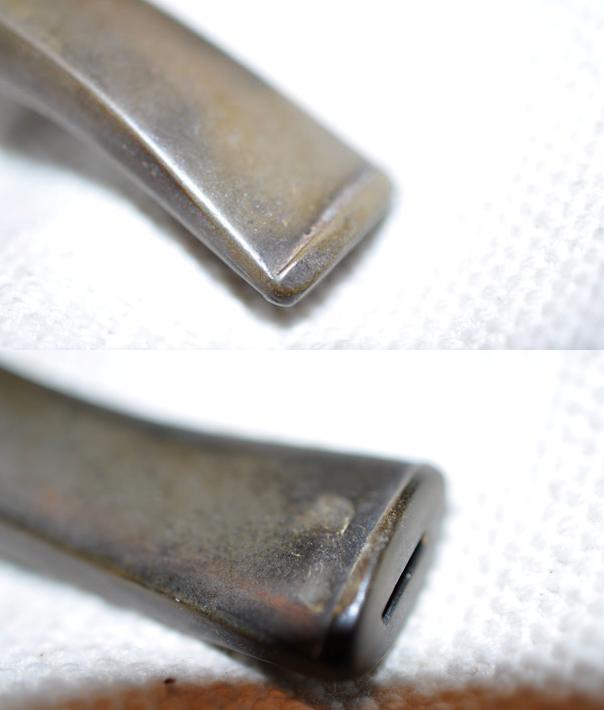
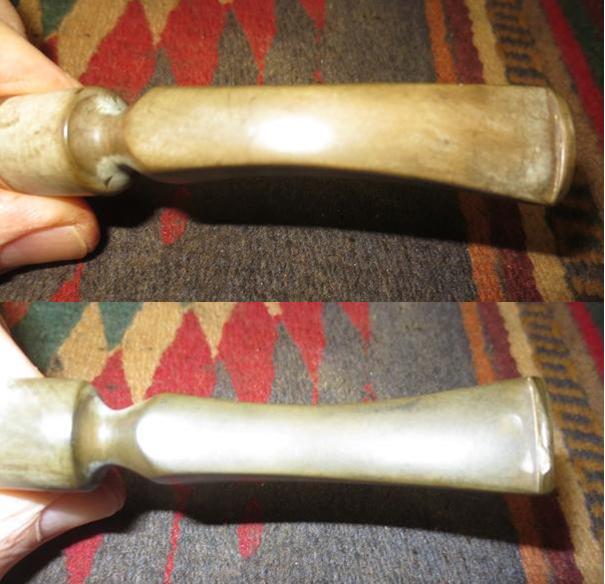
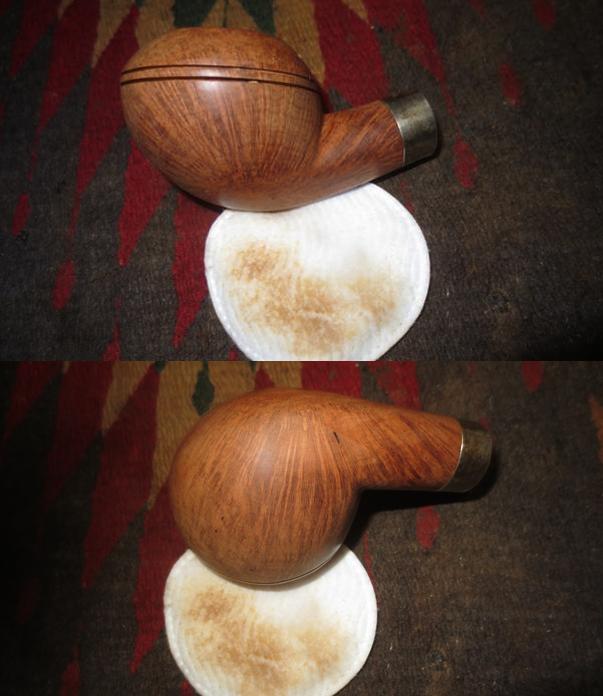
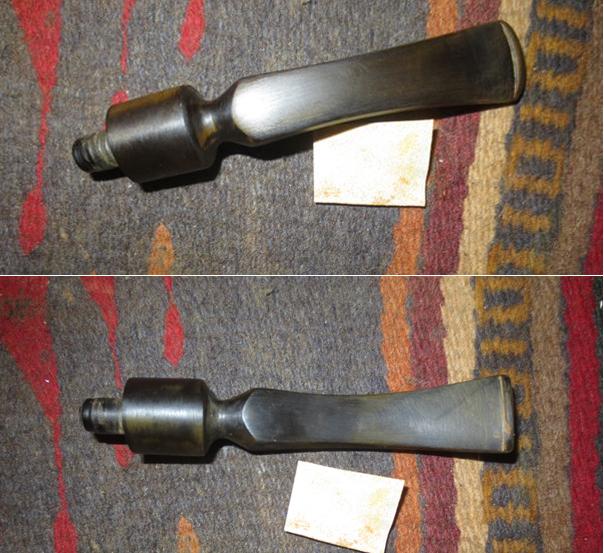
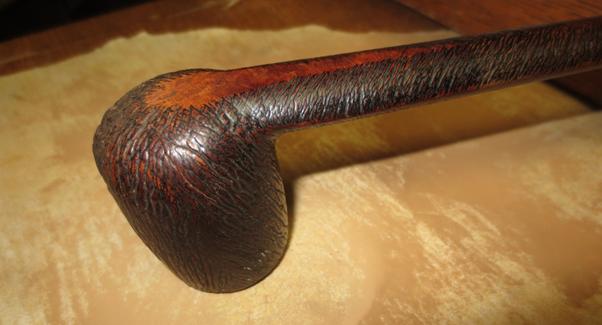
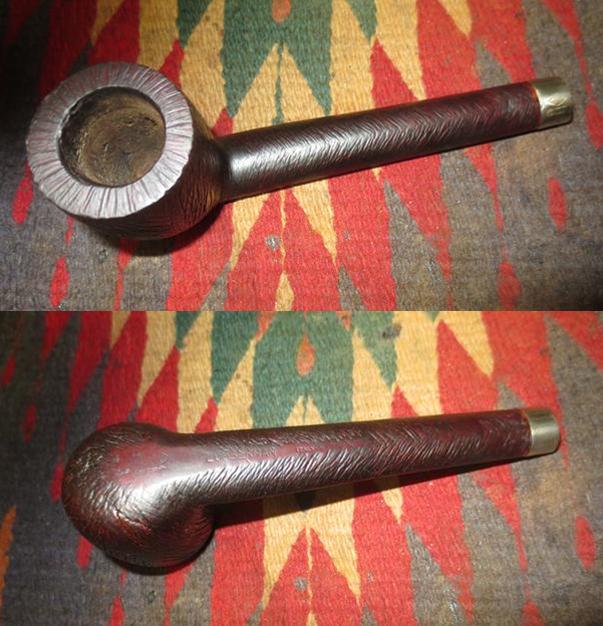
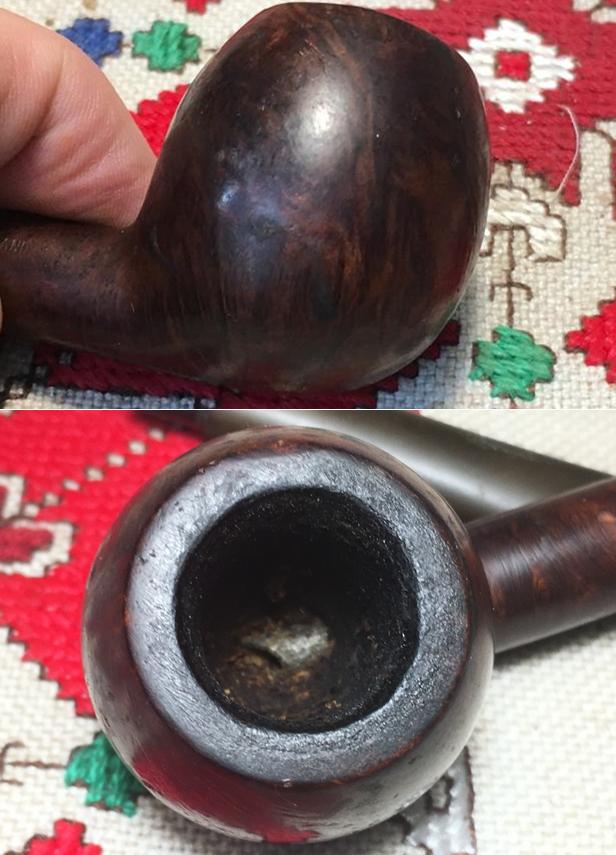
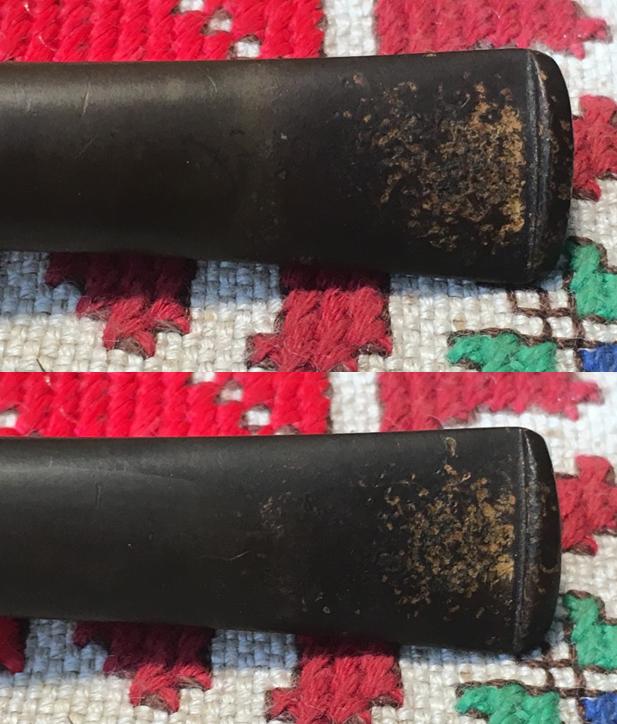
During the years following the Second World War, the same article describes unprecedented economic development which resulted in the economic powerhouse that Hong Kong became. This period would have been while Greg’s grandfather was working as a malaria inspector for the government of Hong Kong and during which he acquired this BBB Two Star. The smaller Apple shape would have served him well as he performed his inspection duties but given the ‘stem forensics’ pictured above, he probably chewed on it a bit as well while he worked!
With a greater sense of the story that this BBB Two Star tells, from England, to Hong Kong, to America, and now to Bulgaria, I’m anxious to restore this precious family gift from Greg’s grandfather. At Greg’s request, he’s hoping for a pipe that is as good as new and ready for a new lifetime of service. Yet, with all restorations, undoubtedly there will be some marks and blemishes remaining – these an ongoing testament to the memory of those who those who went before.
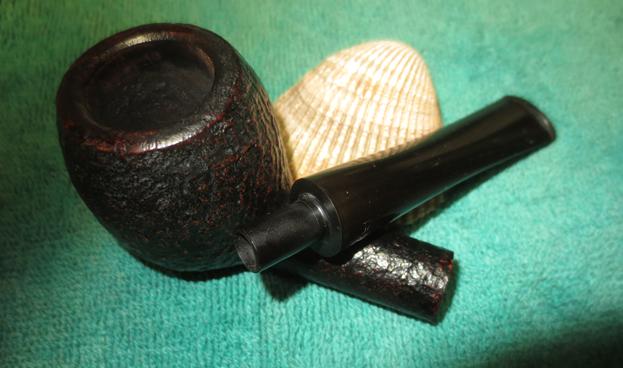
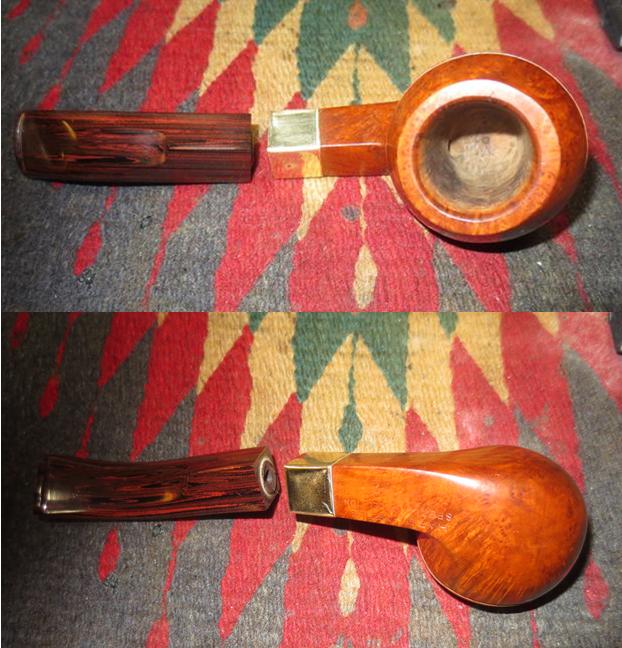
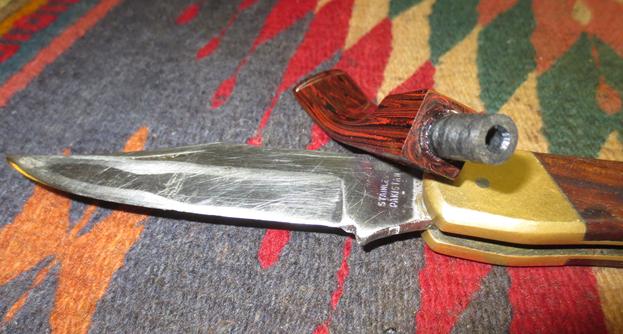
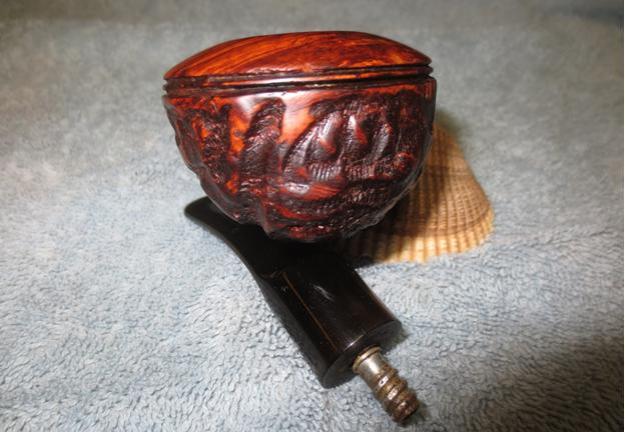
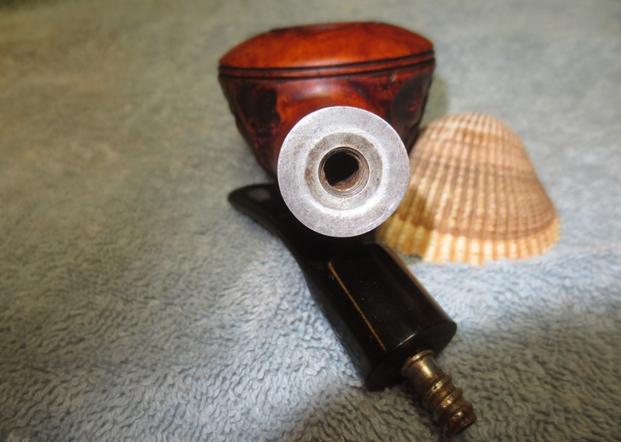
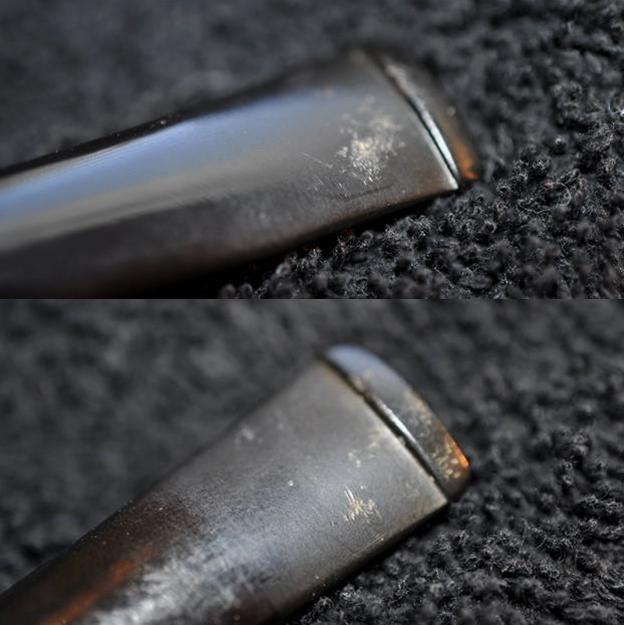
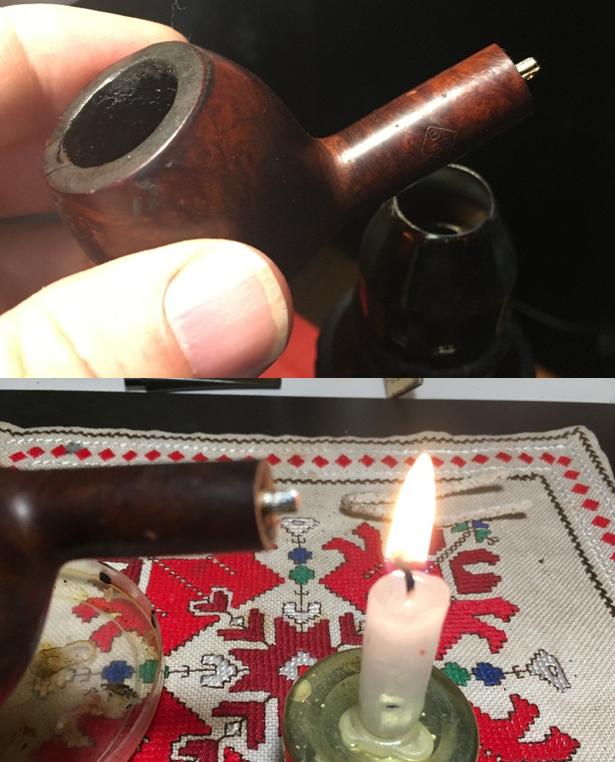
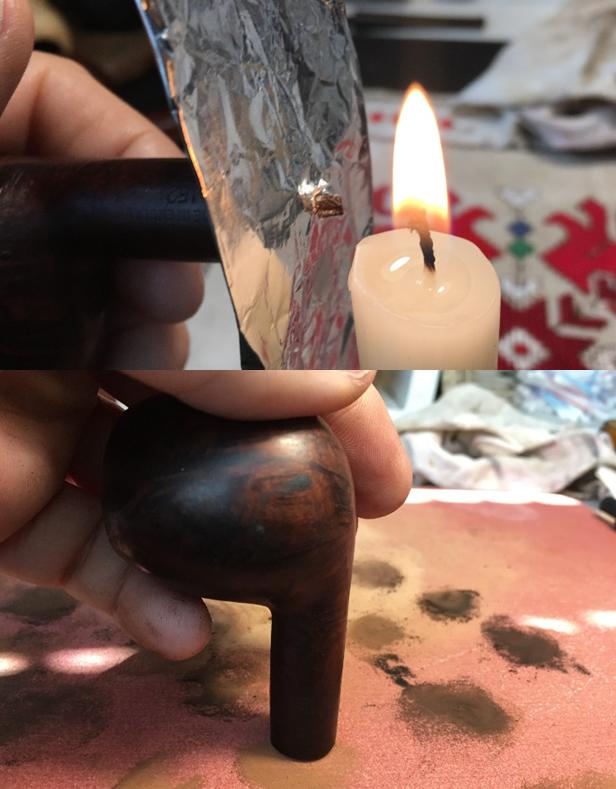
The first order of approach is with the stinger. When the pipe arrived, the stinger was already separated from the stem. The stinger extends from the stem through the mortise into the chamber itself through a metal tube air draft hole. Using a pair of plyers, I wrap a piece of cloth around the end to pull gently to dislodge the stinger from the mortise. I can see in the mortise that there appears to be a metal sheath that the stinger is lodged in – at least, that is what it appears to be. The stinger is not budging and I do not want to break the stinger off. To try to loosen things up, I pour some isopropyl 95% in the chamber to allow it to soak into the draft hole. Hopefully, in time, this will loosen the stinger. 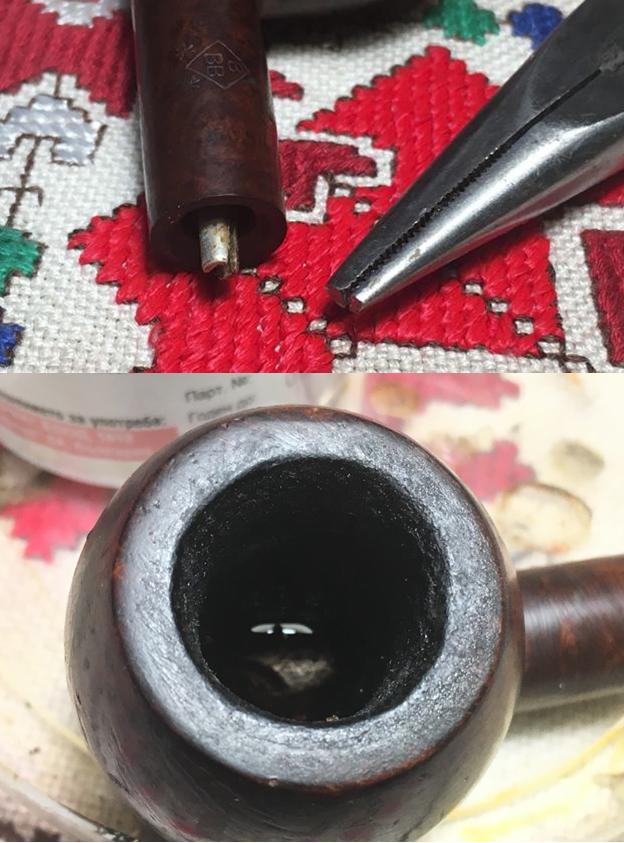 The alcohol soak did not work. In fact, a few weeks have transpired since writing the words above. This stinger has given me quite the challenge. In the back of my mind constantly, is the concern that I not leverage too much pressure pulling on the stinger. I’m concerned about damaging the shank. After soaking the internals for some time with alcohol, I pulled with plyers hoping to break the grip. I also attempt heating the stummel with a heat gun in hope of dislodging the stinger. I also heat the protruding part of the stinger with a candle, hoping that this would break the bond. It did not. I also was concerned about the candle flame close to the briar while trying to heat the stinger. I craft a tinfoil shield, but this was not successful. Unfortunately, I singed the end of the shank and had to remove the damage by ‘topping’ the shank end, which leads to a bit of work lining up the stem and shank later. As you might expect, the protruding end of the stinger did not hold up under the pressure and eventually broke off.
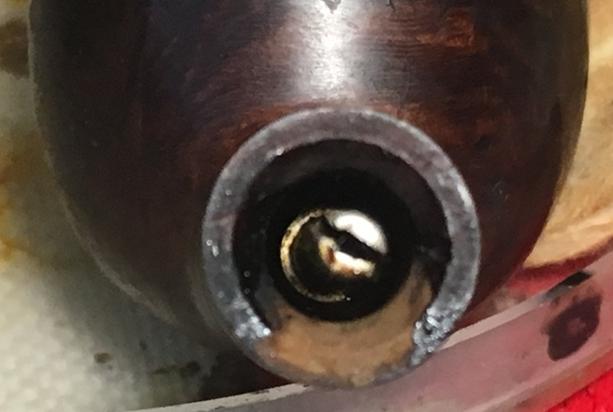
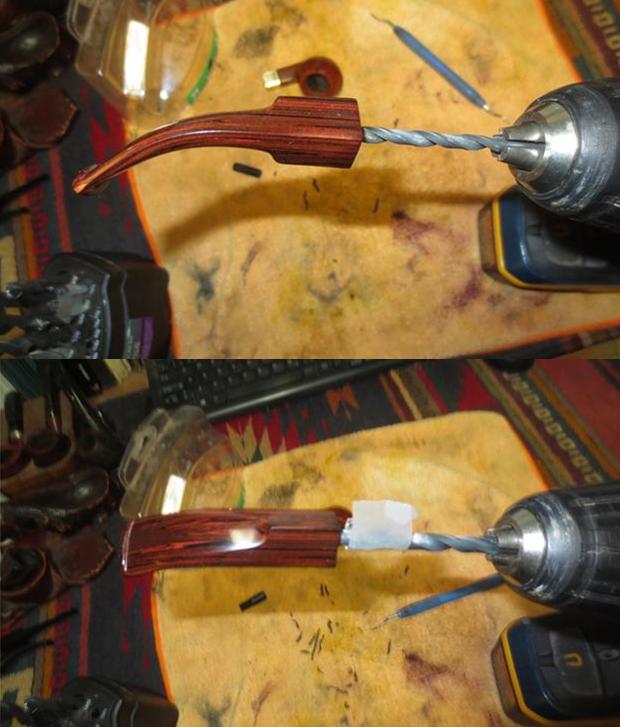
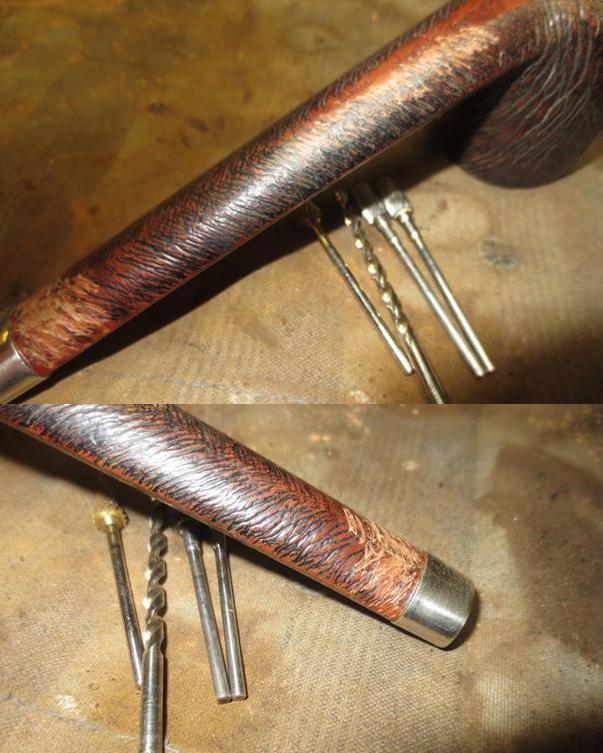
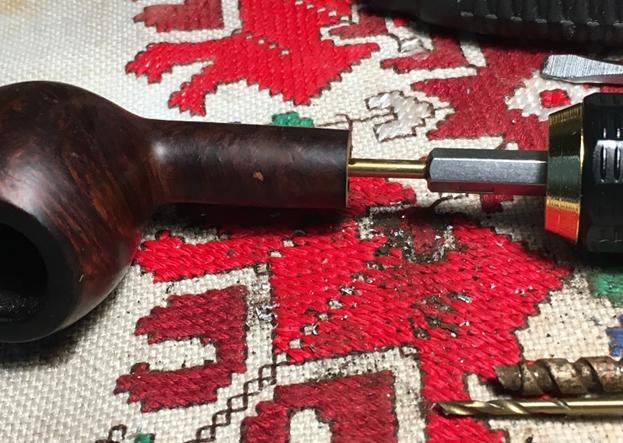
 After the stinger protrusion broke off, and after a second email to Steve for input, I’m at the point of using a drill bit in another attempt to remove the bonded stinger. Starting with a very small bit, I hand turn the bit to allow the drill to find the center of the stinger and gradually, remove the stinger introducing the next larger drill bit. The end of the broken stinger begins at about 1/4-inch-deep into the mortise. Unfortunately, this method is not working either because the drill bit will not bite into the metal and remain straight. At the end of the stinger slot that I’m boring into with the drill bit, my efforts are flummoxed by the stinger’s design. It has a slanted metal airflow deflector that causes the drill bit to veer off mark.
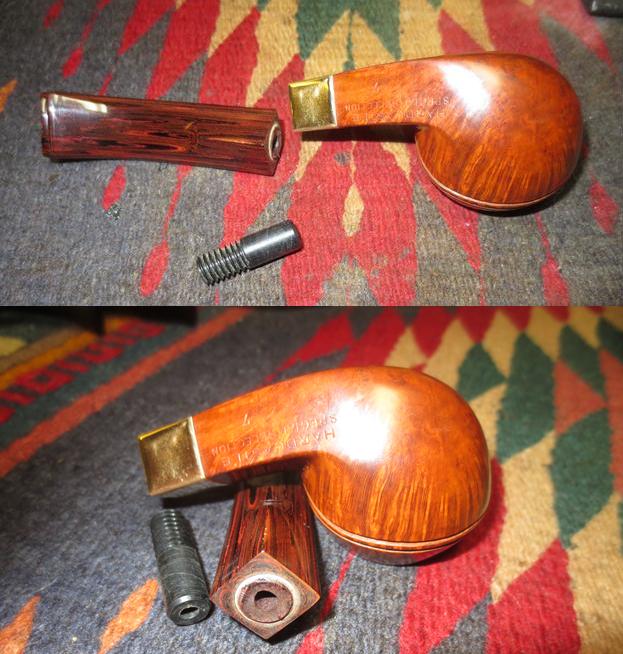
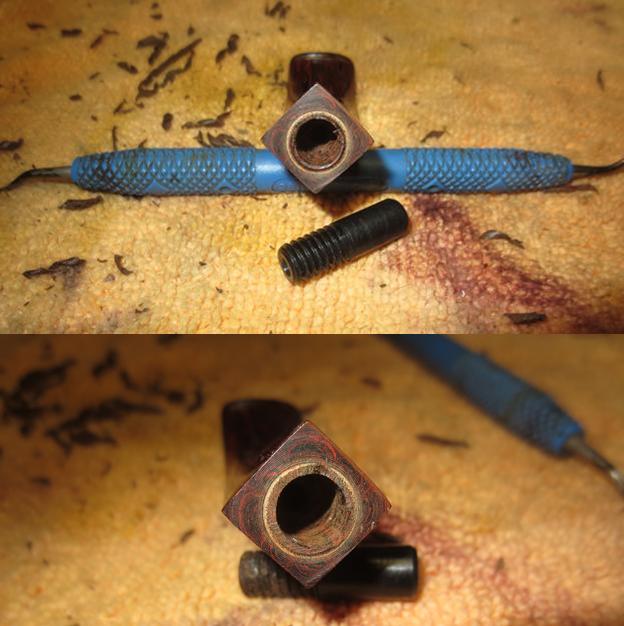
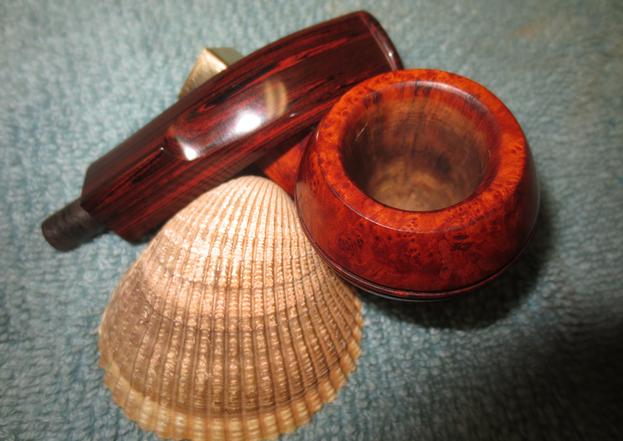
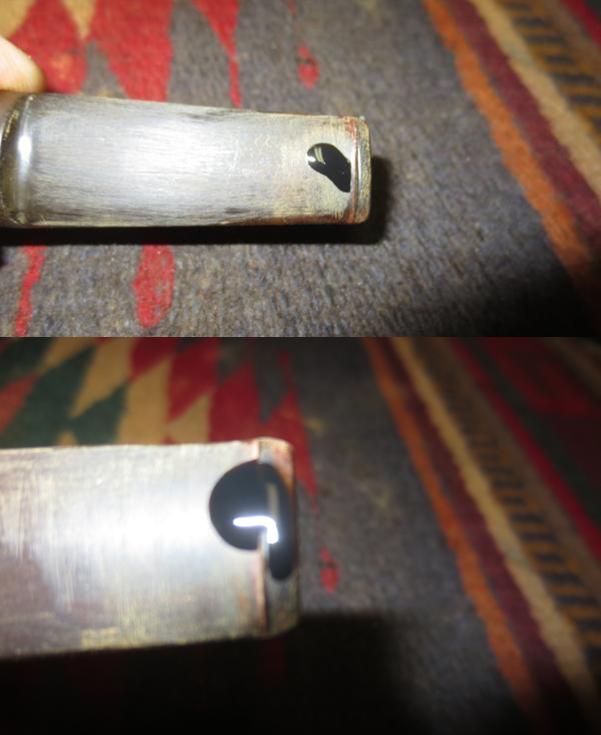
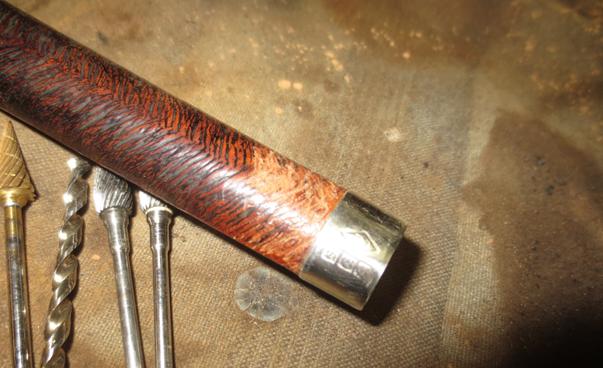
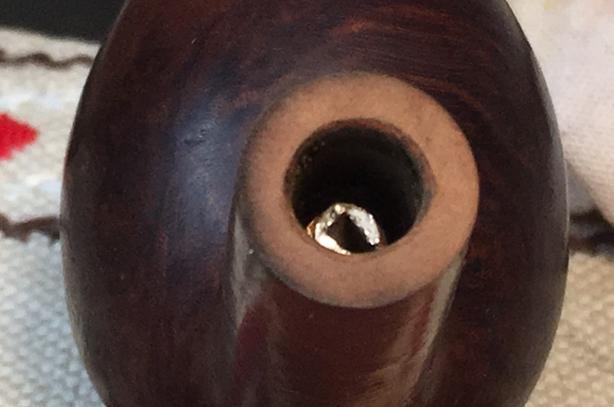
 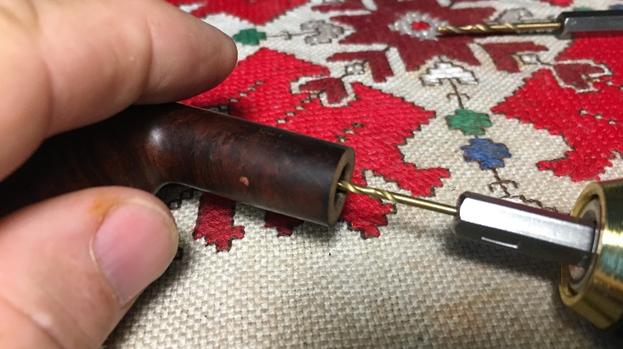 After breaking the end of the drill bit in the slot (ugh!), and digging it out with needle nose pliers, I sit and begin to think I was facing failure. Nothing was working. I’m introducing more problems to the restoration as I try unsuccessfully to solve the stuck stinger problem. I can’t move forward and I’m stuck and begin to compose an apology letter to Greg in my mind. UNTIL, on a fancy, I insert a small flat head screw driver into the slot at the end of the broken stinger 1/4-inch-deep in the mortise and I twist it gently counter-clockwise, and it snaps. Suddenly, it was loose and I easily extract the ‘middle’ of Grandpa’s old stinger – I’m sure he was the last one to see this artifact! I see daylight through the mortise and I’m hoping that it might also be a metaphoric ‘light at the end of the tunnel’! I’ve not forgotten that the other end of the stinger remains lodged in the draft hole tube at the foot of the chamber. Thankfully, a larger drill bit was the perfect size and it reaches into the mortise and hand turning the bit, it clears the rest of the stinger shrapnel. Finally! Oh my…. I’ll be saving the stinger debris for Greg. This BBB will continue without difficulty stingerless. The pictures show the results.
 In the interest of full disclosure, these words are coming weeks after. Why the hiatus? Life’s normal twists and turns, work, some wonderful travel to Crete for an organizational conference, to Athens (not in Georgia) for a consultation on the Eastern Orthodox Church, AND my growing frustration with Greg’s grandfather’s pipe’s restoration as more complications arrived! I’ll try to catch you up to the present:
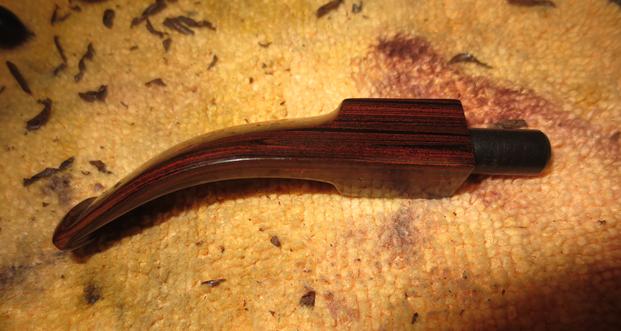
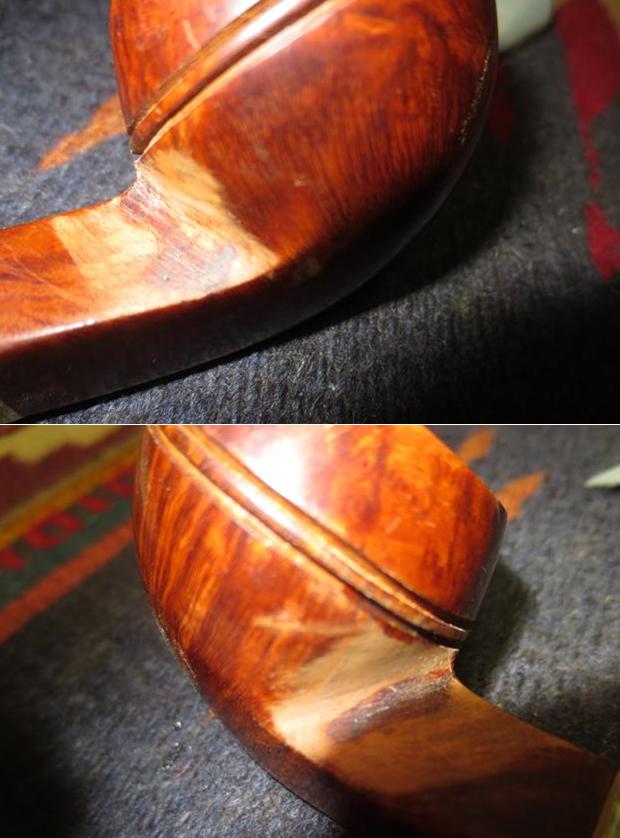
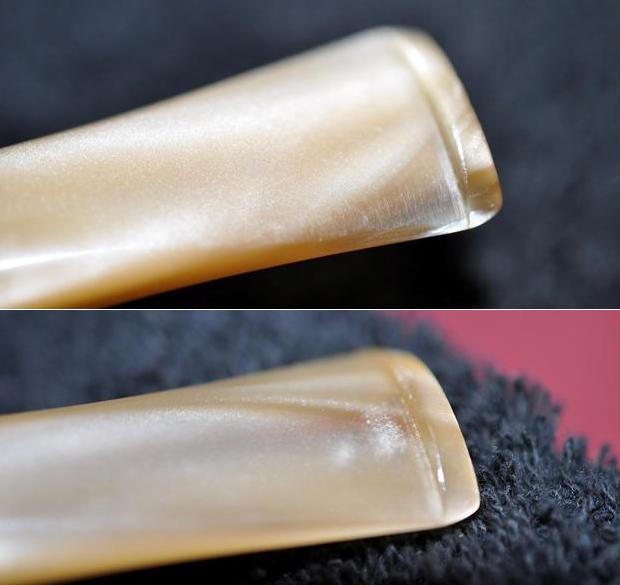
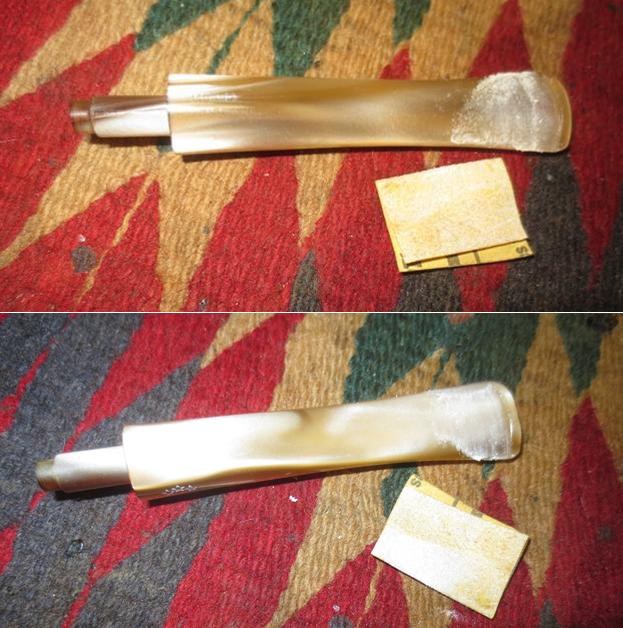
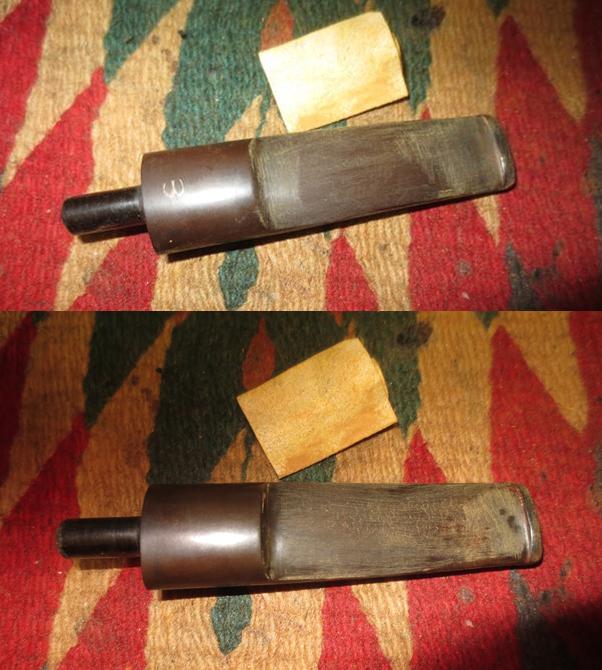
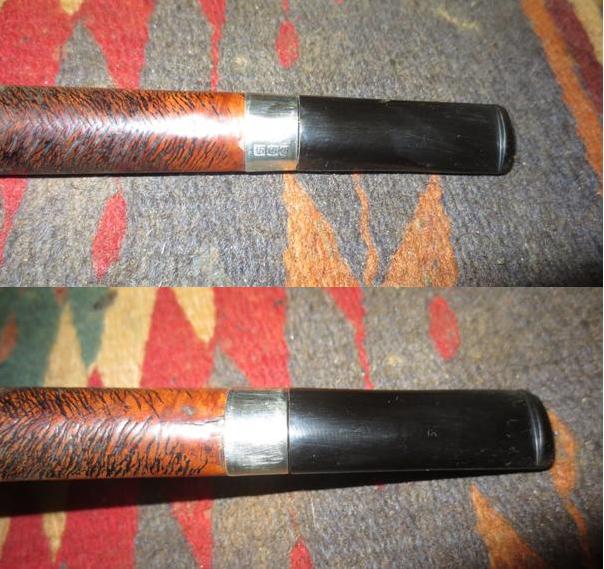
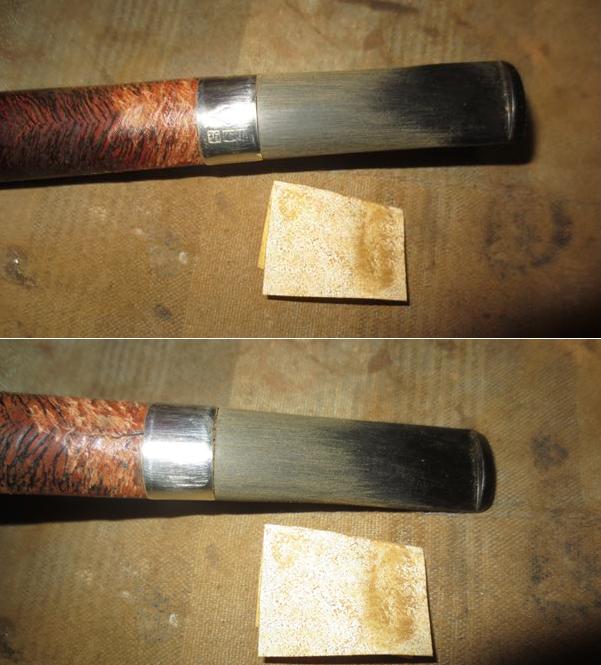
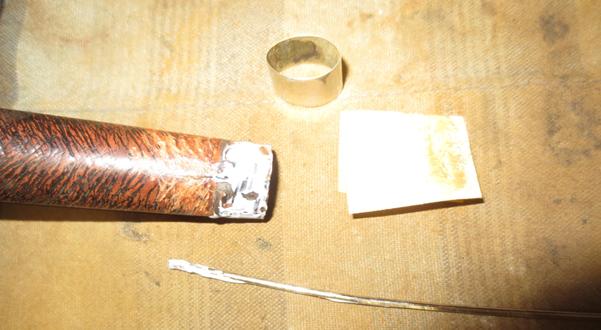
With the stinger removed, I was anxious to continue the restoration with a ‘normal’ pattern – the stem goes into the Oxi-Clean bath to deal with the oxidation in the stem. After some hours, the stem is removed from the bath and I wet sand with 600 grade sanding paper removing the raised oxidation followed by 0000 steel wool. To clean and protect the BBB stamping on the stem, I use a non-abrasive Mr. Clean ‘Magic Eraser’ sponge. The pictures show the progress.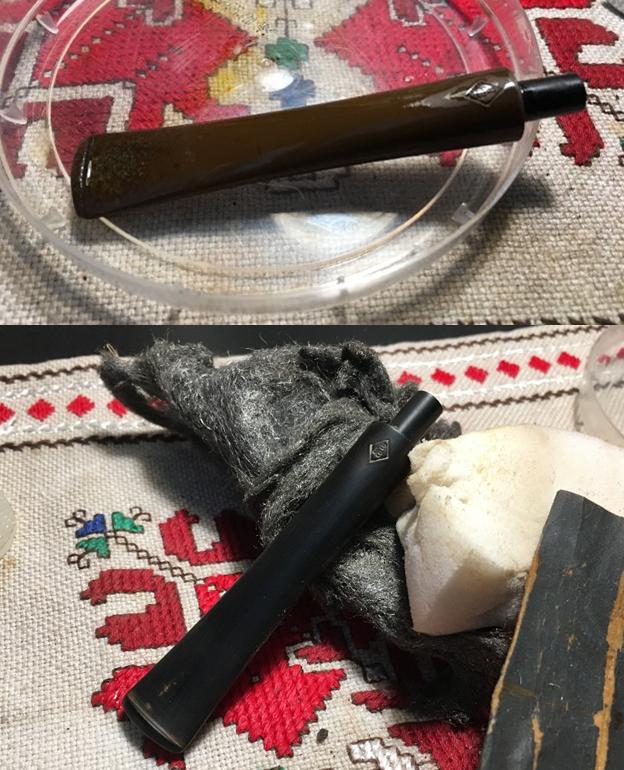 The next step is to re-seat the tenon into the mortise. After the arduous process of removing the stinger, and after singing the shank end with a candle flame, and after ‘topping’ the shank to remove the damaged briar, the tenon and mortise needed to be re-wedded with the new realities. The tenon was too large for full insertion into the shank. Using a combination of reducing the tenon size with sanding paper and steel wool, sanding and filing the throat of the mortise, and using a rounded needle file to cut a new internal mortise openning bevel to accommodate the broader tenon base, I patiently, slowly, methodically worked to re-seat the tenon in the mortise which included working and then testing the new fit – GENTLY! I suppose the fact that I said to myself, ‘Dal, careful, don’t crack the shank’, at least a 1000 times only made the sinking feeling more intense when I heard the sickening sound during what proved to be my last, ‘gentle testing’ of the tenon inserted into the mortise. The hairline crack is pictured below that I took only a day ago – I couldn’t bear to take it then, when it happened. I was sickened and put Greg’s pipe aside. I needed some time to work through my own sense of failure of the trust given me to restore this family heirloom.
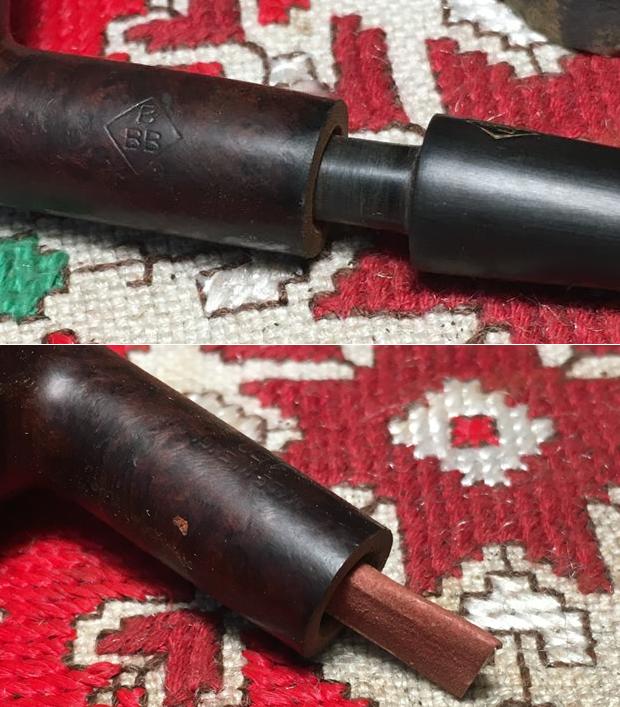
 Now, after several weeks, I’ve regrouped and have taken up Greg’s pipe again. The travels that I described above during this time in some ways felt more like Jonah running from Nineveh not wanting to face the scene of his calling and his sense of failure! Though, my trip did prove beneficial – I sold some of my finished pipes to colleagues to benefit and raise the awareness of the Daughters of Bulgaria that The Pipe Steward supports. I’ve included my Nineveh travels below for you who may not be familiar with ‘my world’, the Balkans – Sofia to Crete to Athens and back.
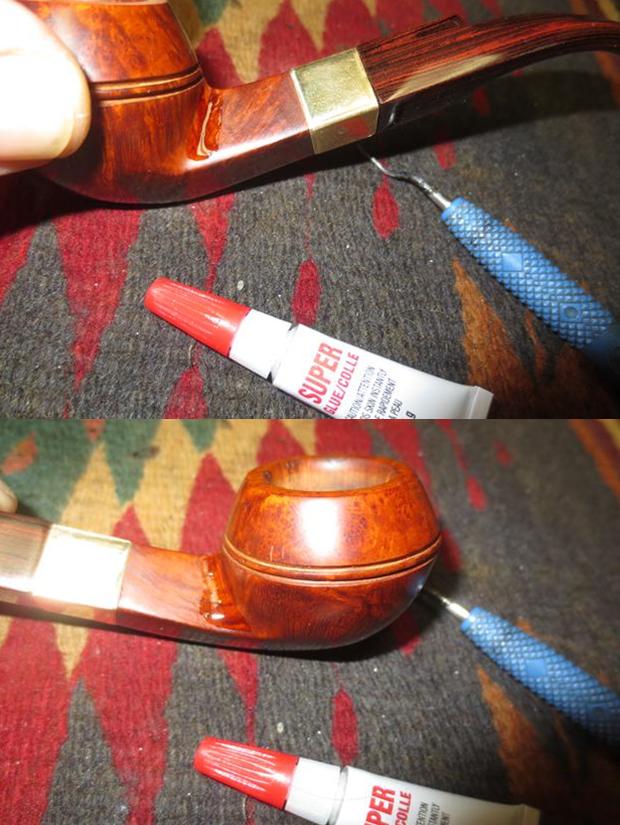
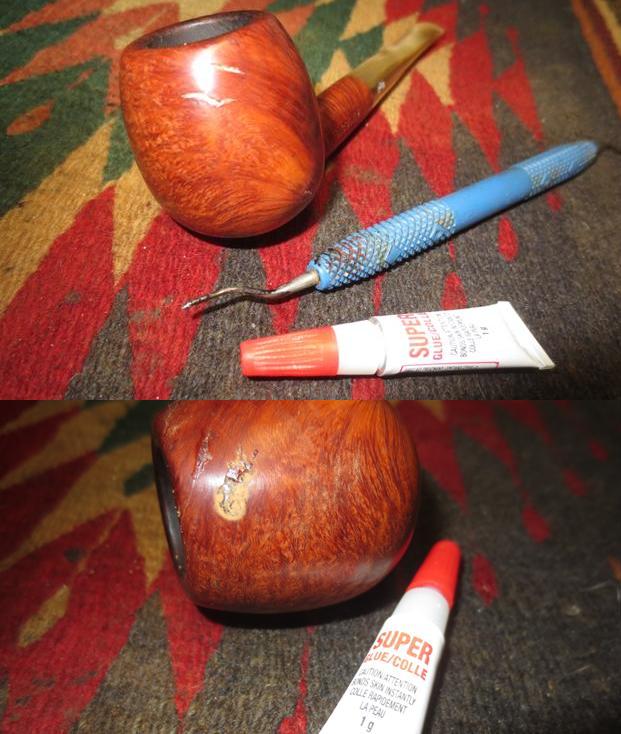
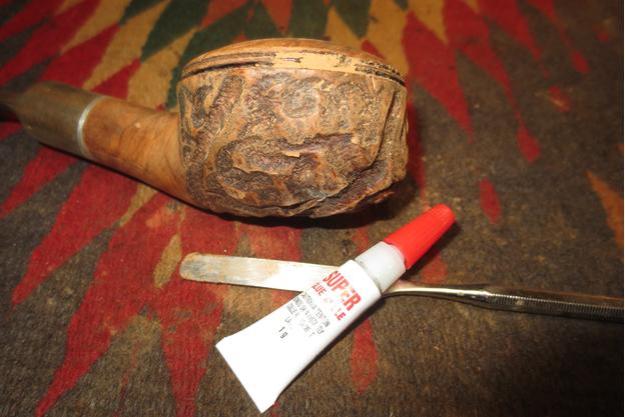
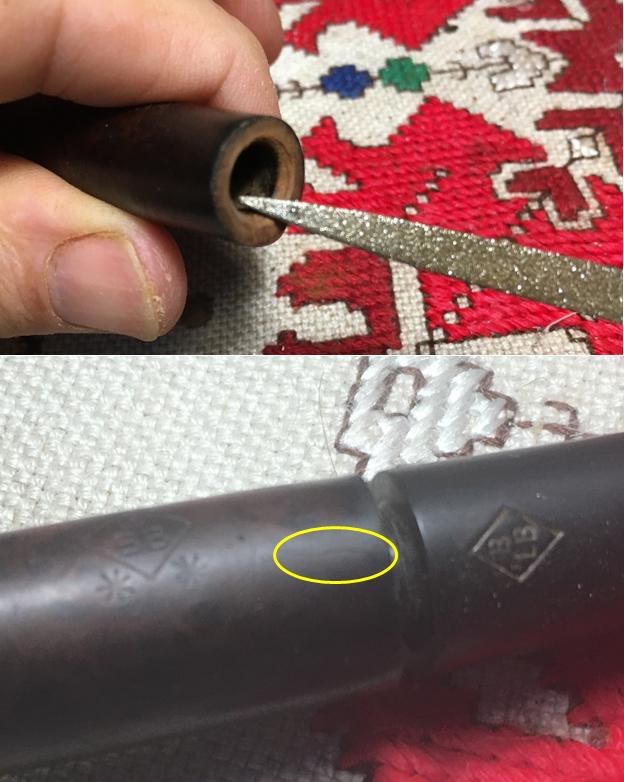
  Before moving forward, I needed to repair the cracked shank. With the help of a magnifying glass, I locate the terminus of the crack and mark it by creating an indentation with a sharp dental probe. The arrow to the left below marks this. Using the Dremel tool, I mount a 1mm sized bit and drill a hole at that point – but not going through! This hole acts like a controlled back-fire to stop the progress of a forest fire. This will not allow the crack to continue creeping. With the use of a toothpick, I spot-drop Hot Stuff CA Instant Glue in the hole and along the line of the crack which I expanded microscopically by partially inserting the tenon into the mortise. This allows the CA glue better penetration to seal the crack. I remove the stem immediately after the application of CA. With the CA glue still wet, I apply briar dust to/in the hole and along the crack to encourage better blending. The pictures show the progress.
 After some hours allowing the CA glue to cure on the shank repair, using a round grinding stone bit mounted on the Dremel, I reestablish an adequate and uniform internal bevel on the end of the shank to accommodate the base of the tenon when it is fully inserted into the mortise. My theory is this is what caused the crack – lack of a sufficient internal bevel giving room for the slightly enlarged tenon as it merges with the stem proper. With the Dremel engaged at the slowest setting, I’m careful to apply minimal pressure as I rotate the ball a bit to make sure it’s centered. It looks good – the pictures show the progress.
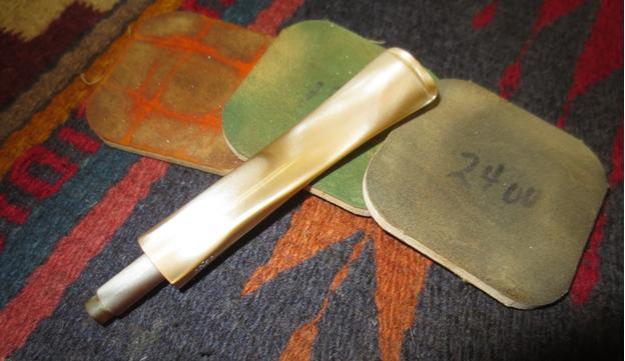
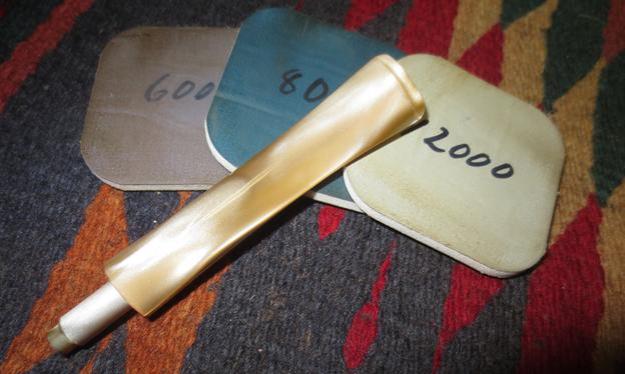
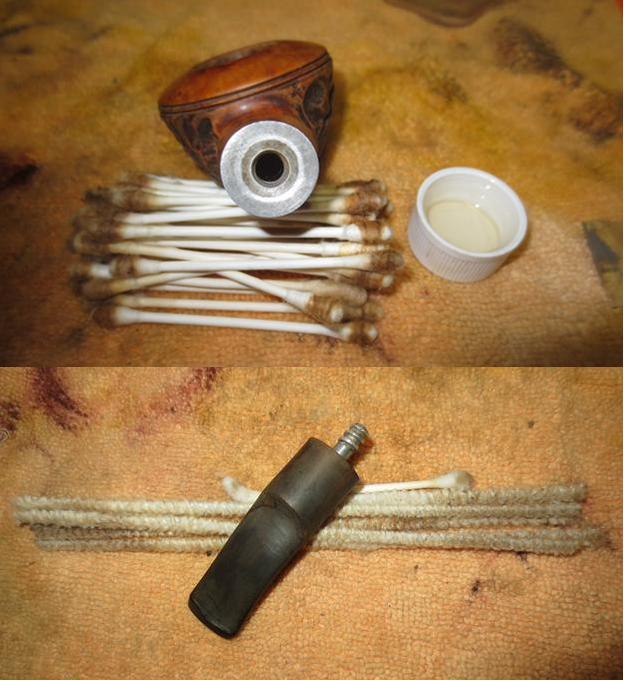
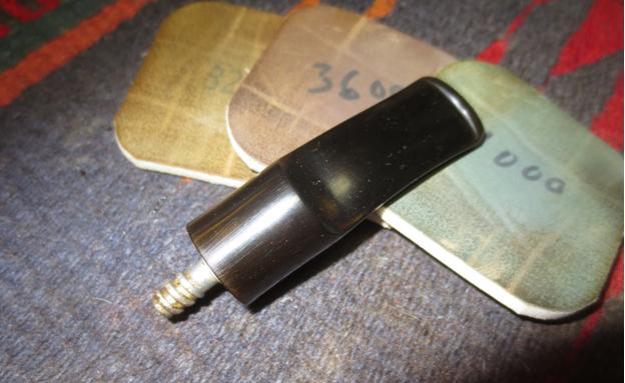
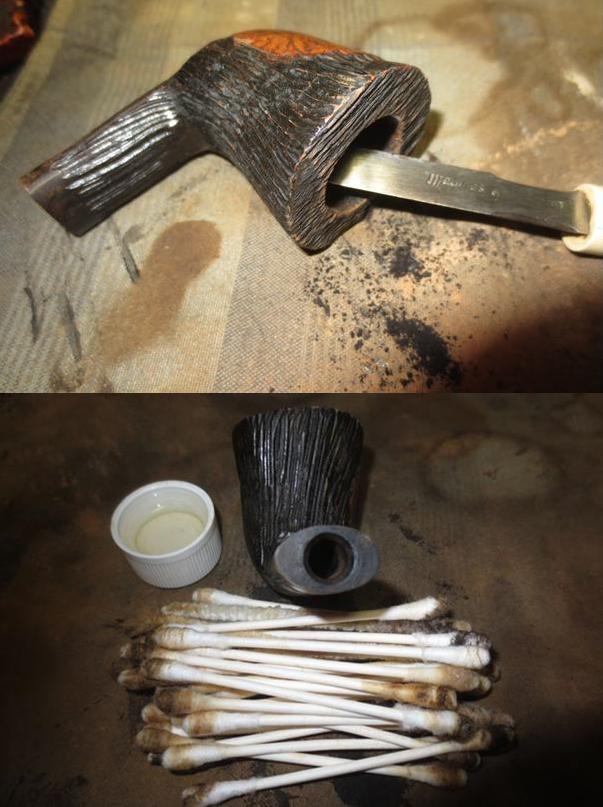
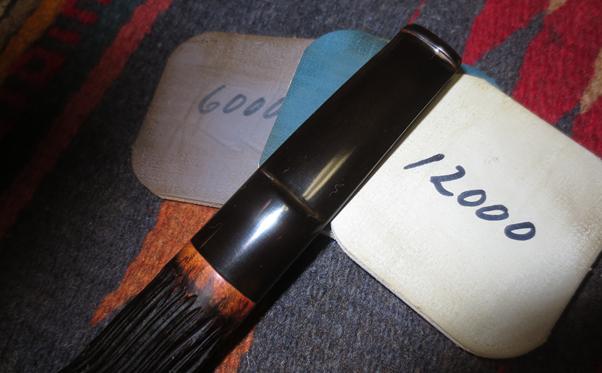
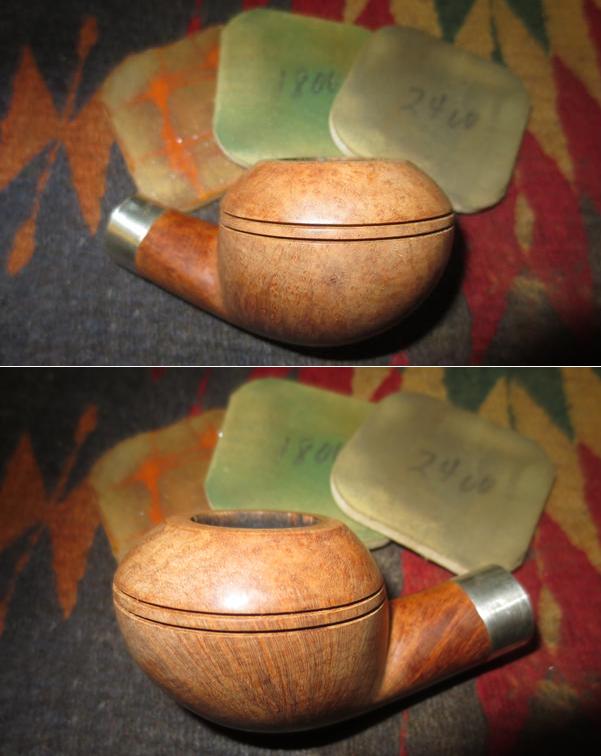
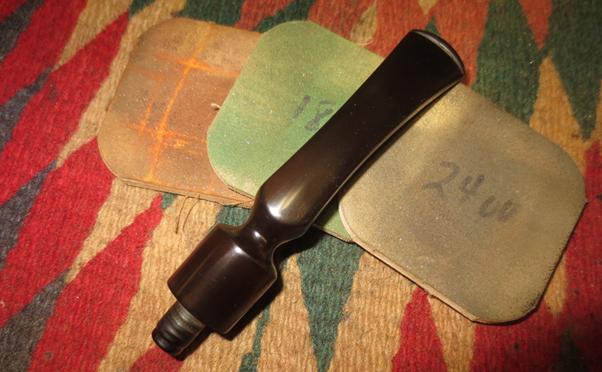
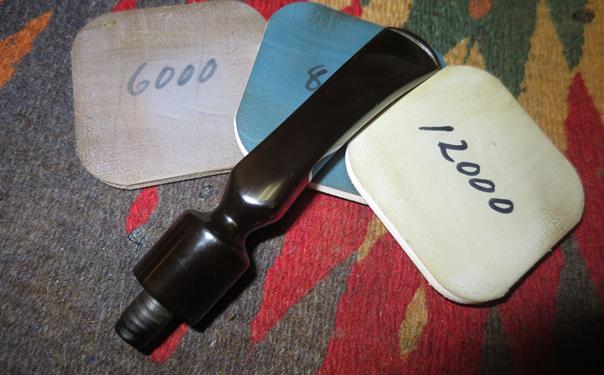
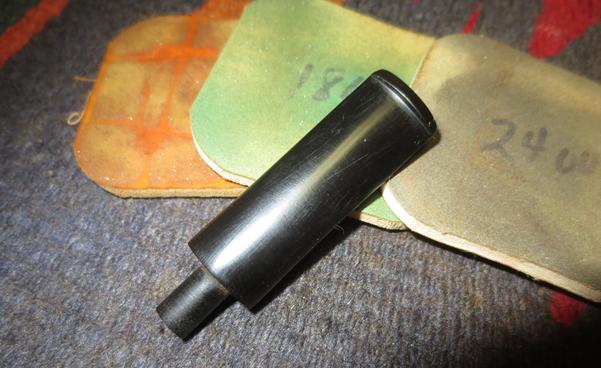
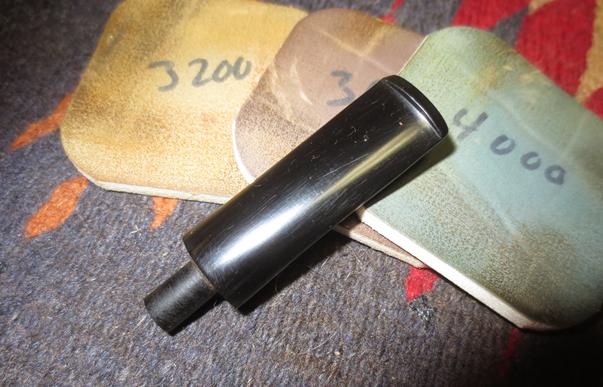
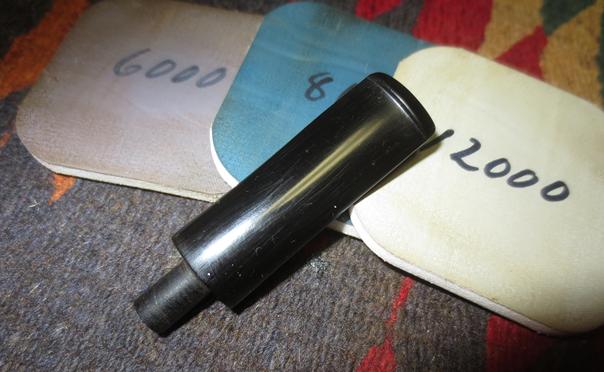
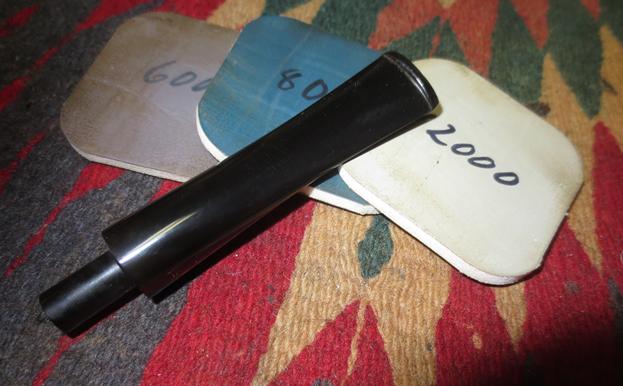
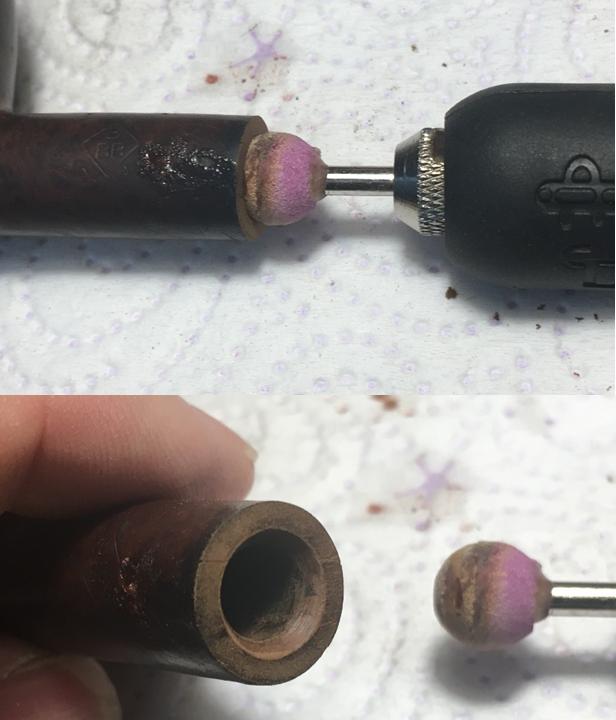 Due to a lapse of sorts and the intensity of my focus on re-seating the stem again without re-cracking the shank, I failed (or perhaps, had little desire) to take any pictures. The short of it is, the stem and stummel have been reunited after some difficult times. Also, not pictured are some of the basic steps: reaming the fire chamber of carbon cake buildup, cleaning the internals of the stummel and stem with cotton swabs and pipe cleaners wetted with isopropyl 95%, and cleaning the externals of the stummel with Murphy’s Soap. Again, picking up the trail, pictured below is the micromesh pad process with the stem. Using pads 1500 to 2400, I wet sand the stem, followed by dry sanding with pads 3200 to 4000 and then 6000 to 12000. I follow each cycle with an application of Obsidian Oil to revitalize the vulcanite.
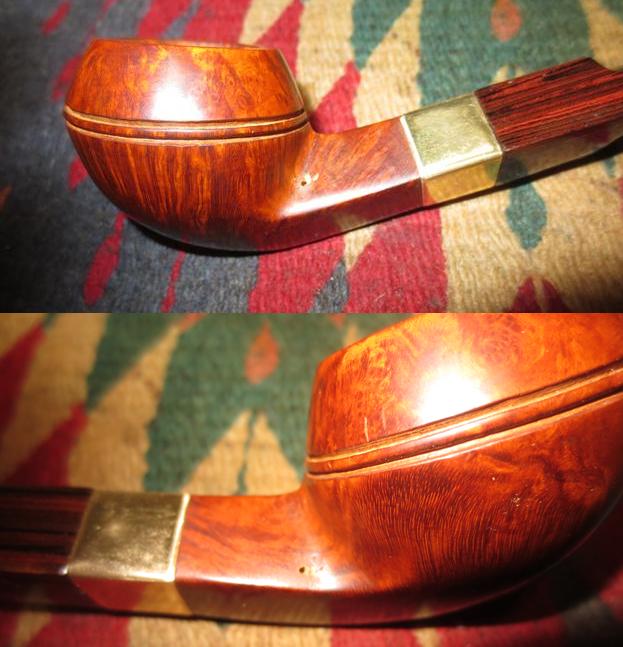
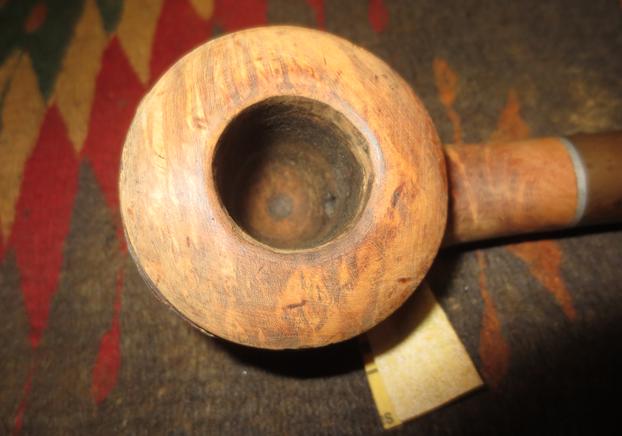
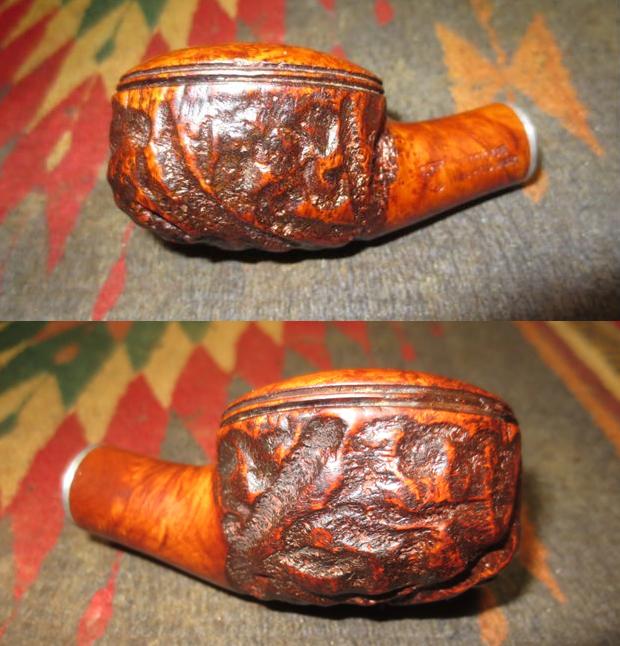
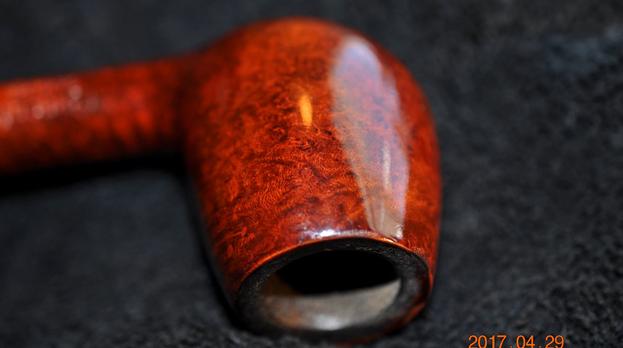
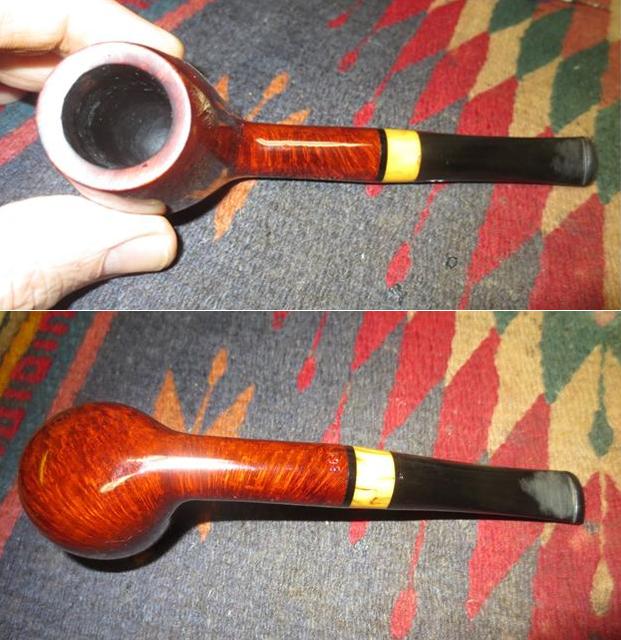
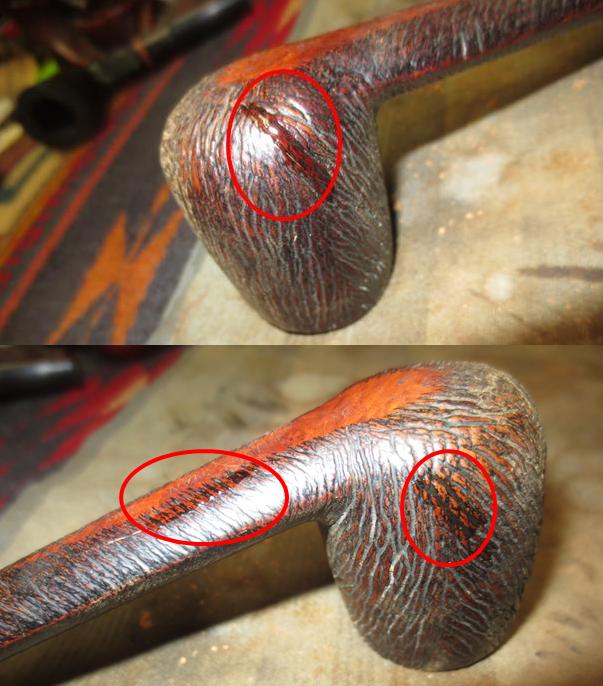
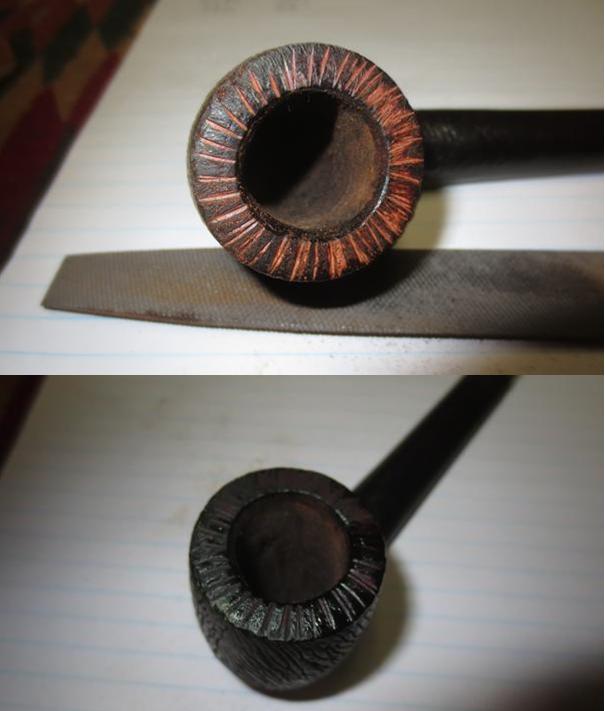
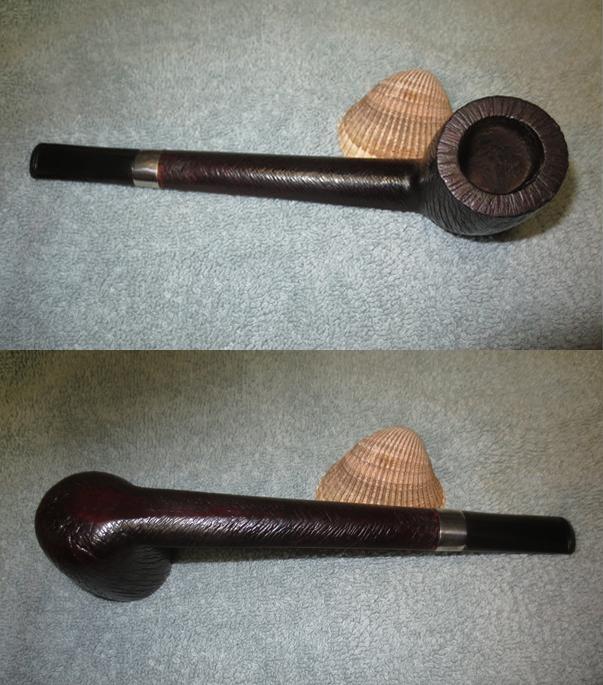
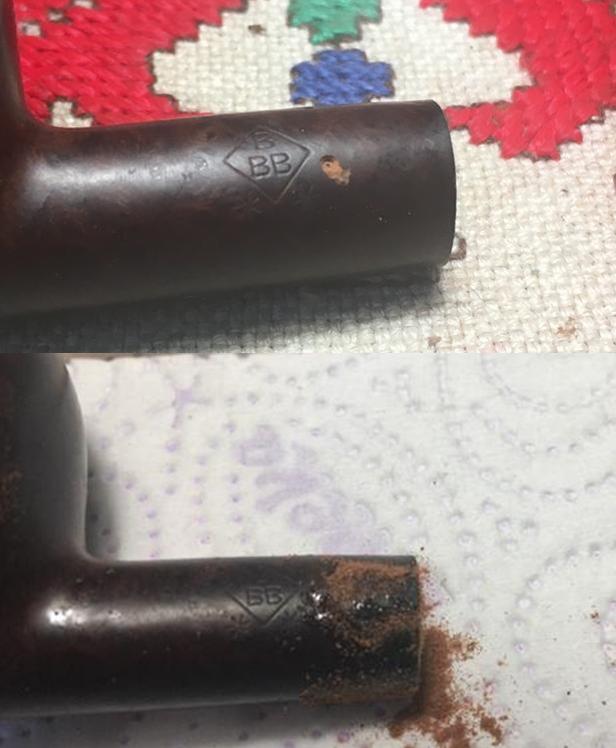
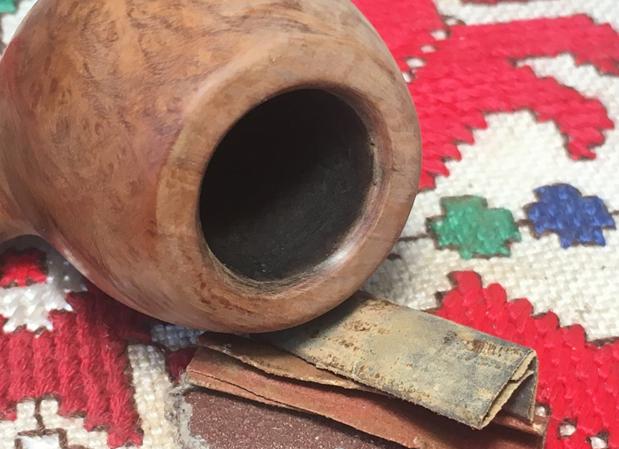
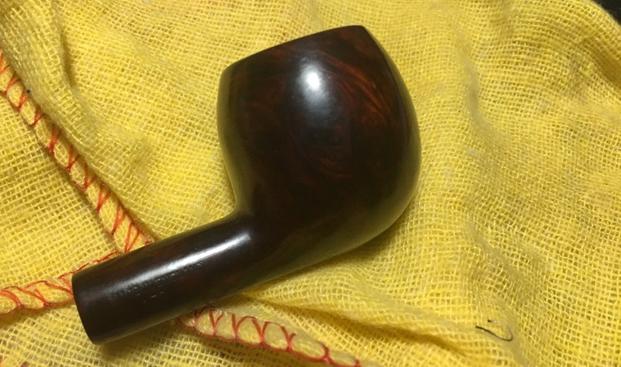
 The stummel surface shows quite a bit of pitting in the first picture shown again below. The rim also shows nicks. On the larger pits shown below on the heel of the stummel, I spot-fill with a toothpick using CA glue and shorten the curing time by using an accelerator spray on the fills. After filing and sanding the fills to the briar surface, using a progression of 3 sanding sponges from coarse, medium to light, I work out most the remaining pitting over the stummel surface. Using 600 grit paper on the chopping block, I also give a light topping to the rim to remove nicks and create fresh lines for the rim. Following the topping, I introduce an internal bevel to the rim, first using a coarse 120 paper rolled tightly, then with 240 and 600. The internal rim bevel to me, always adds a touch of class but also helps create softer lines which enhances this Apples shape. The pictures show the unhindered progress!
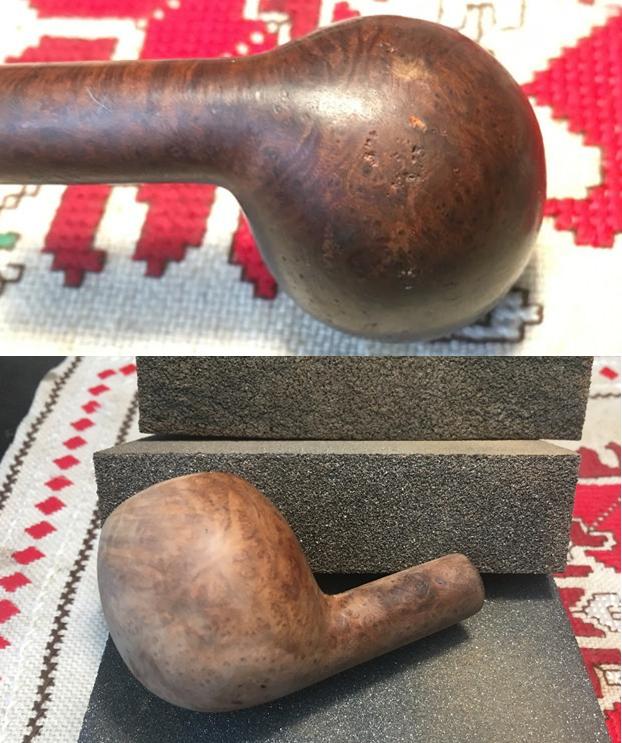
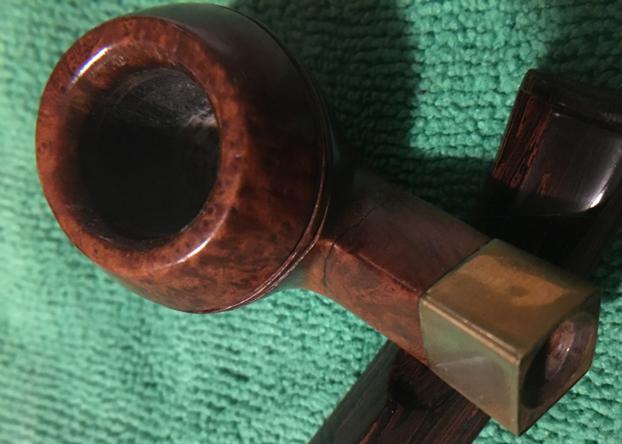
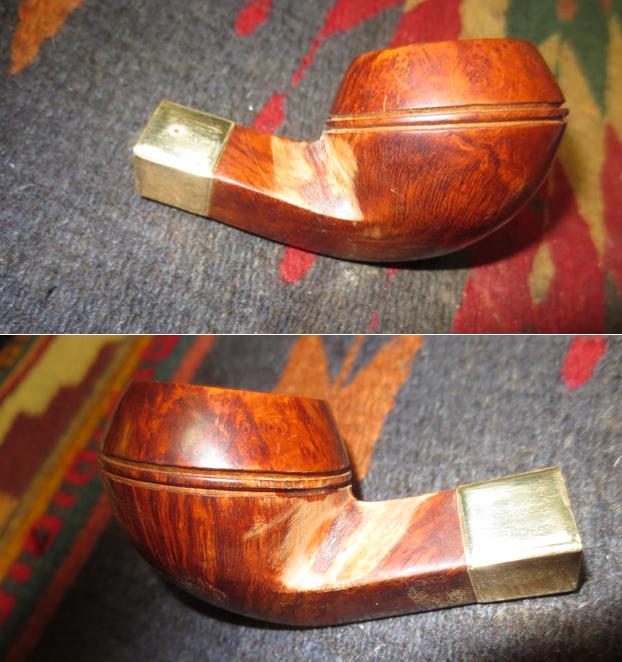
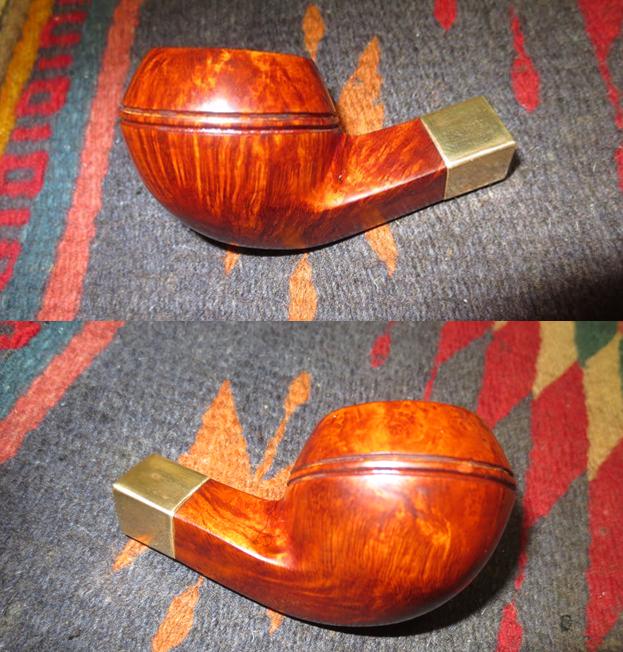
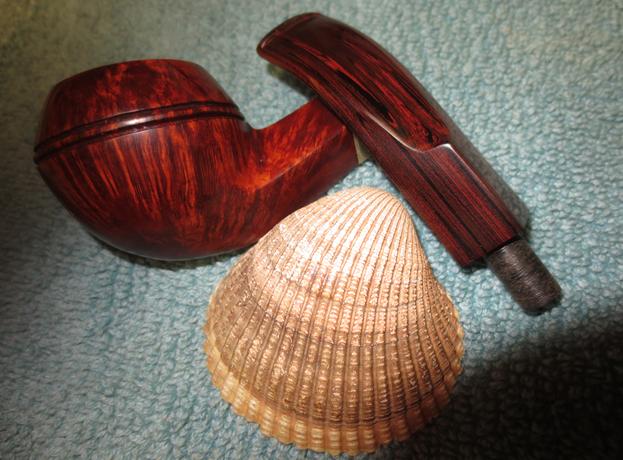
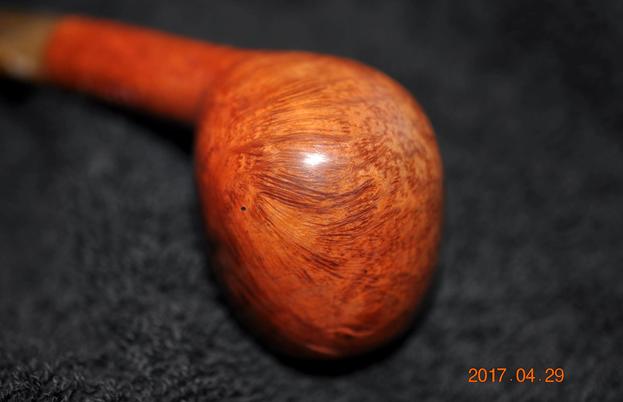
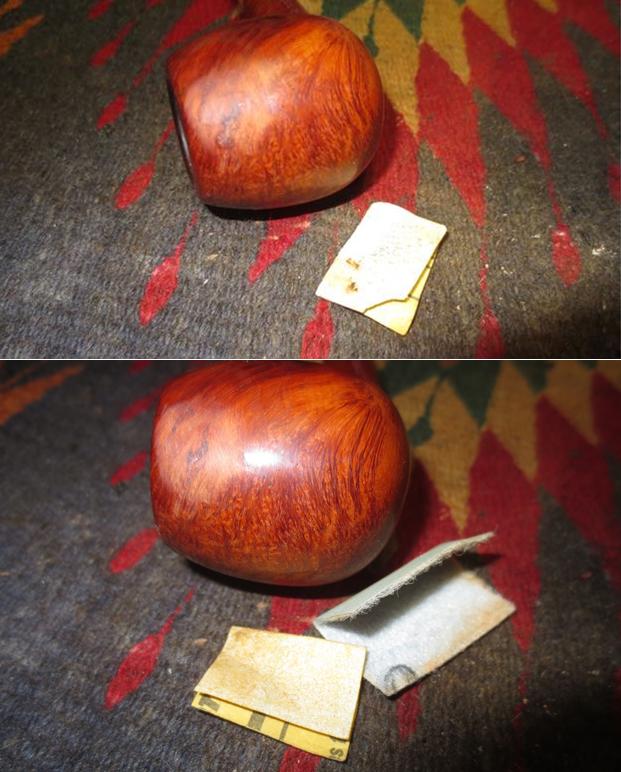
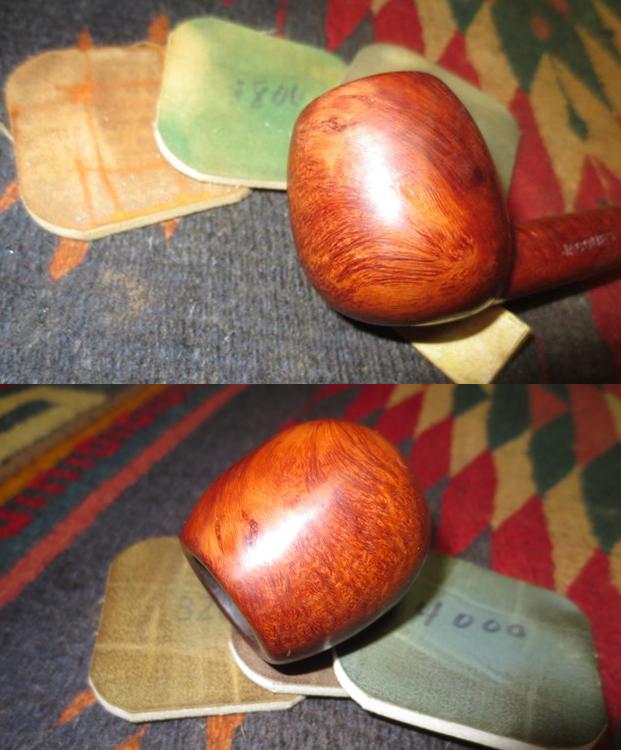
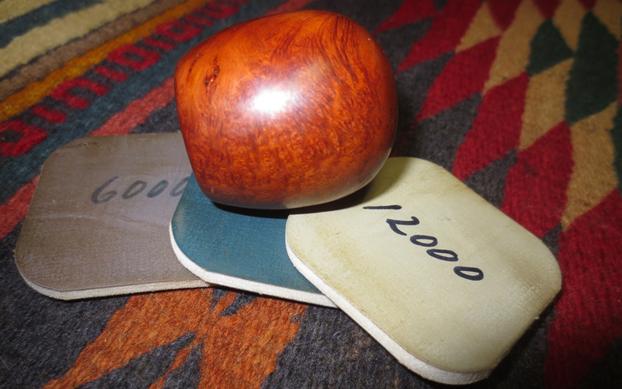
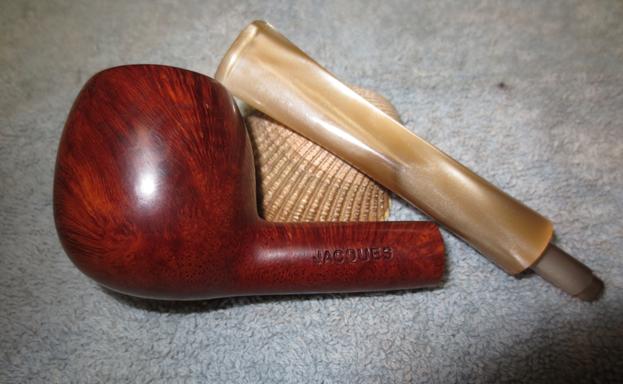
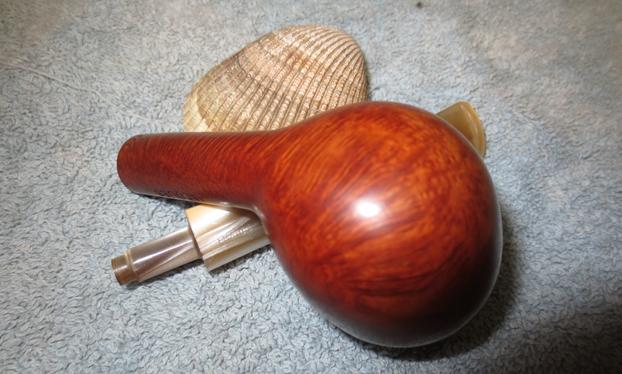
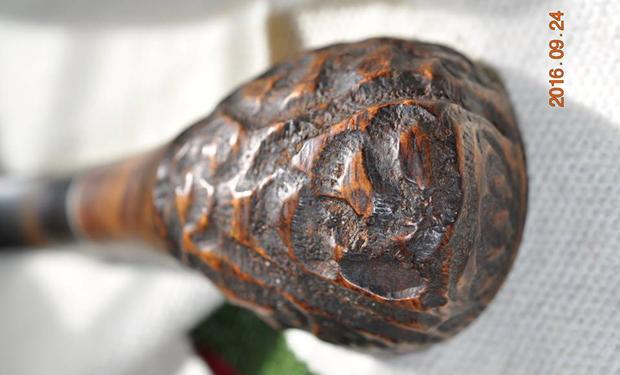
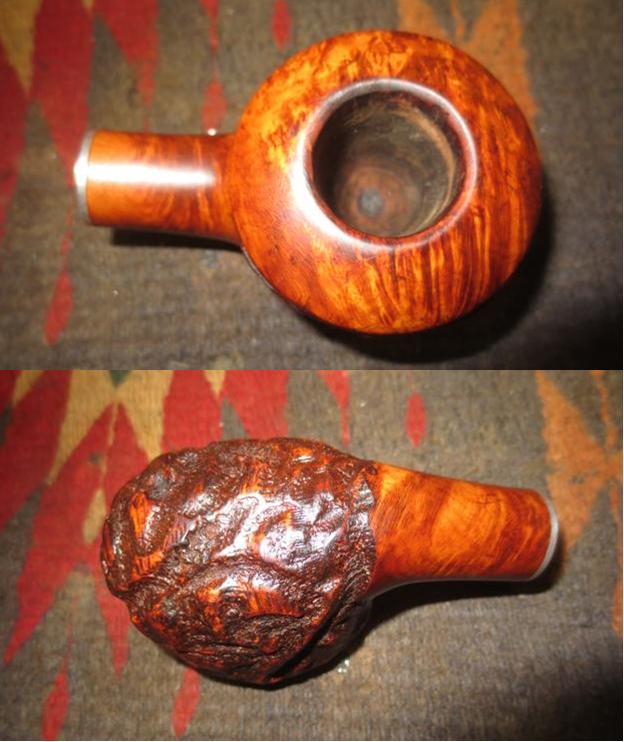
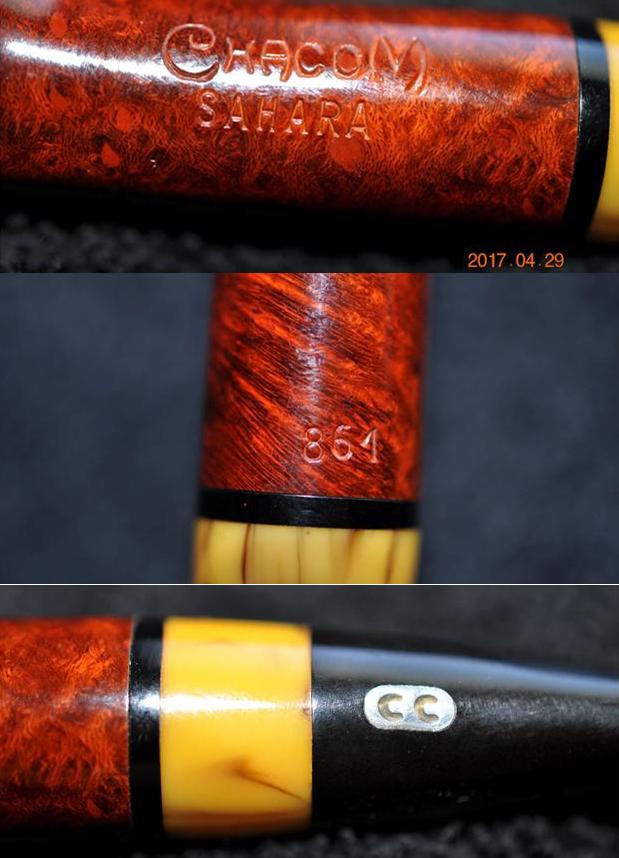
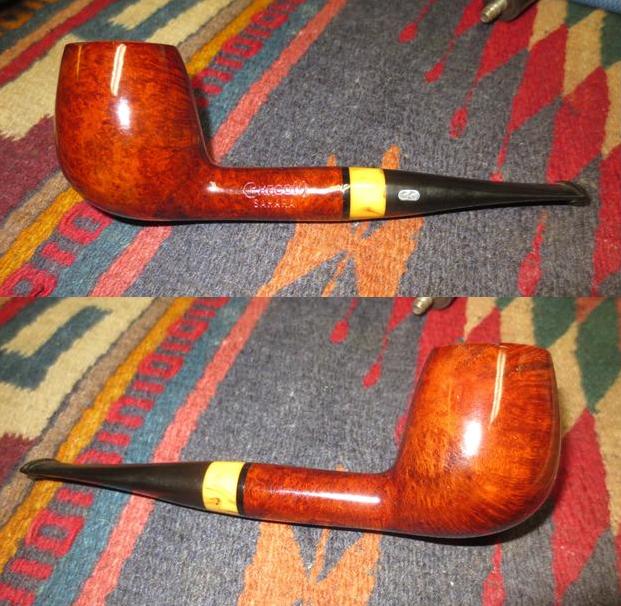
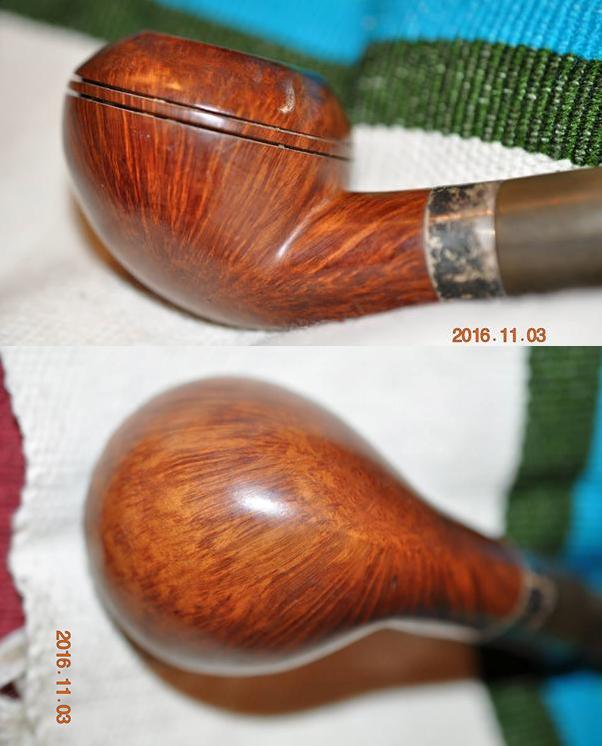
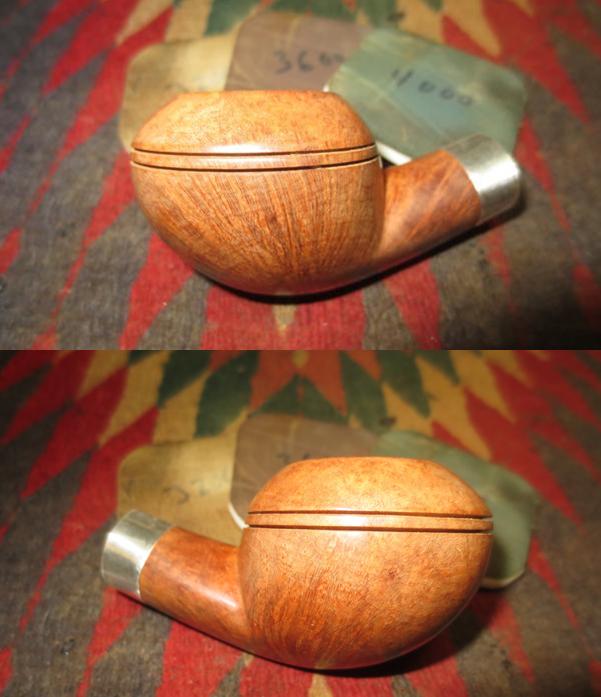
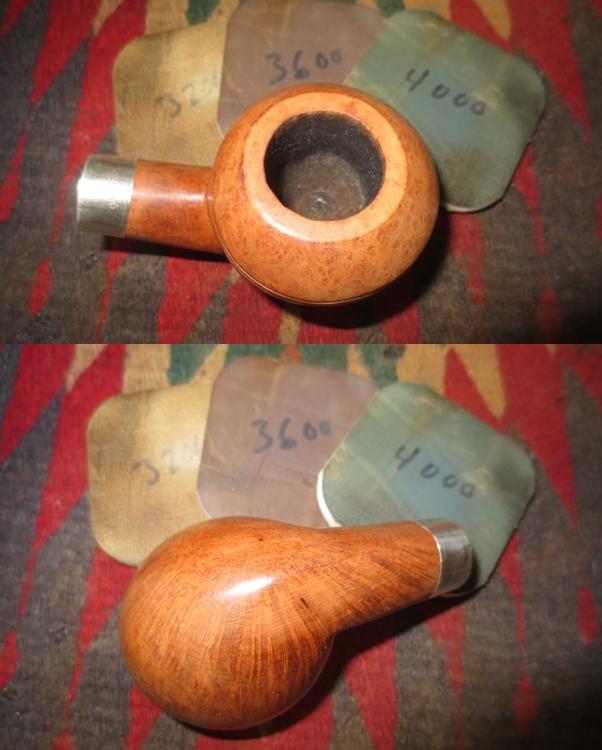
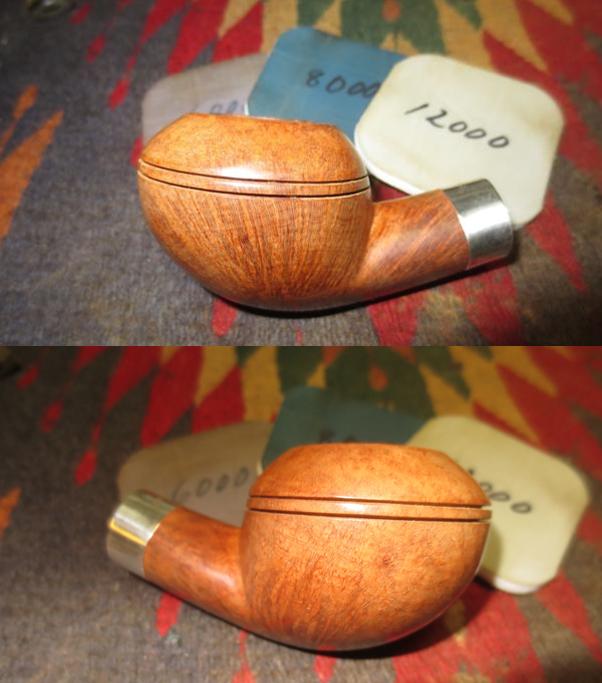
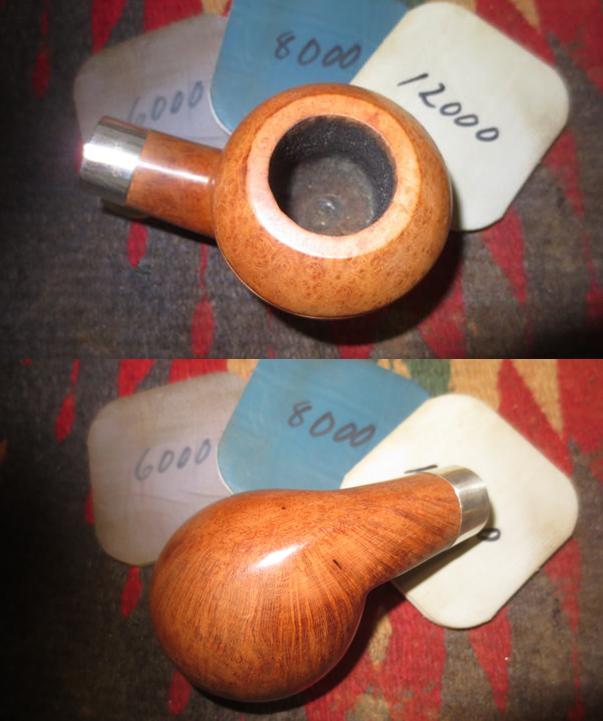
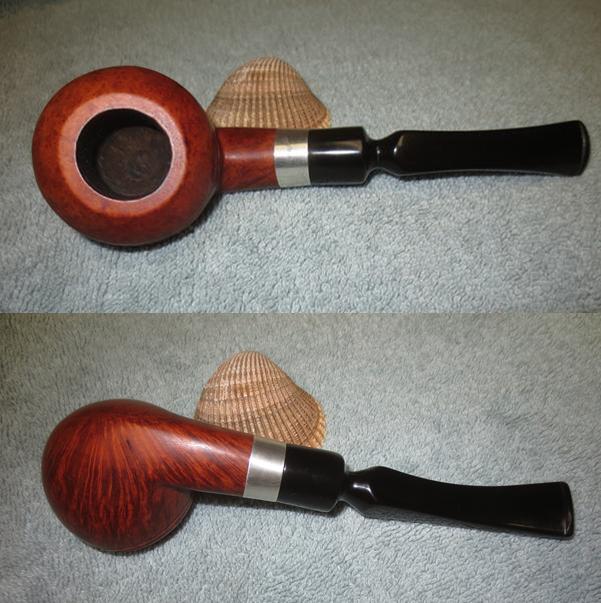
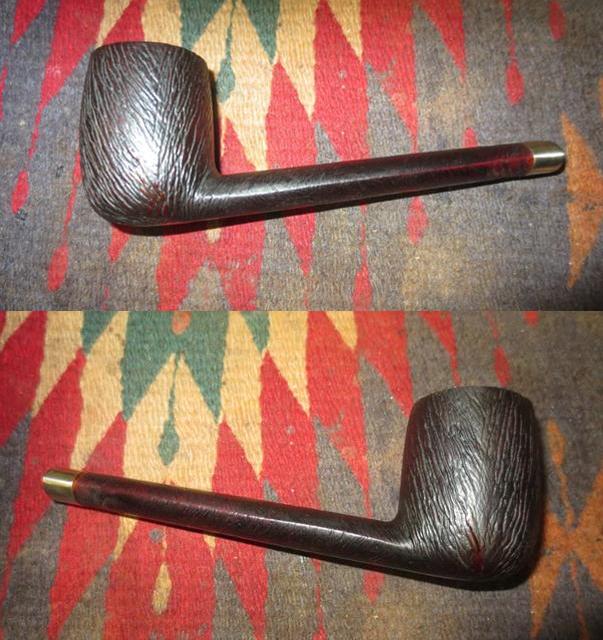
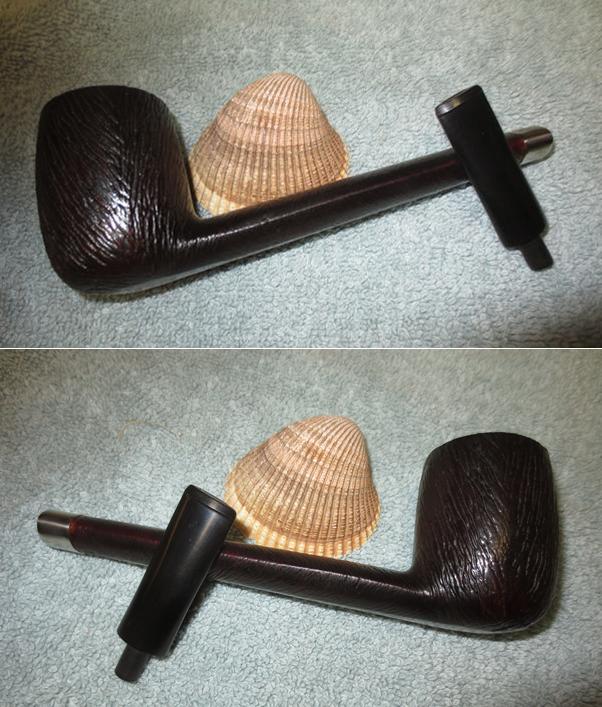
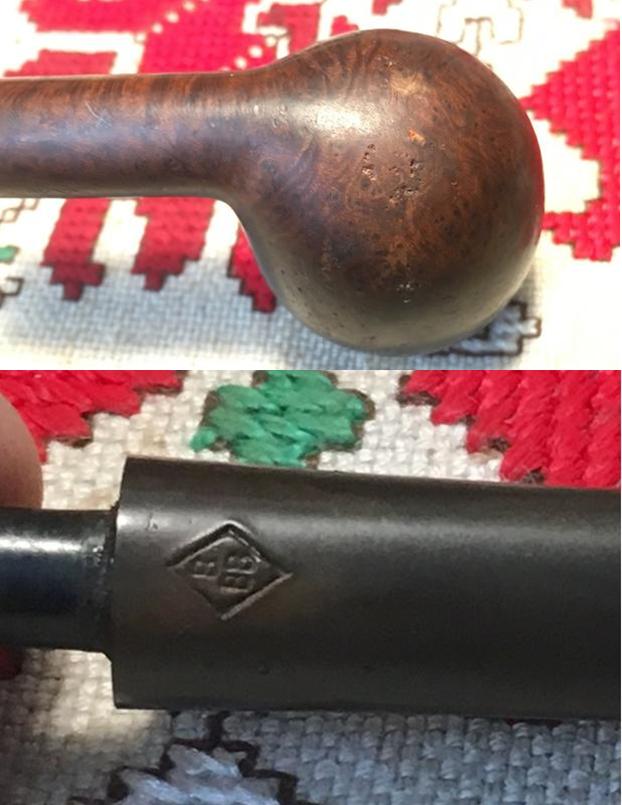
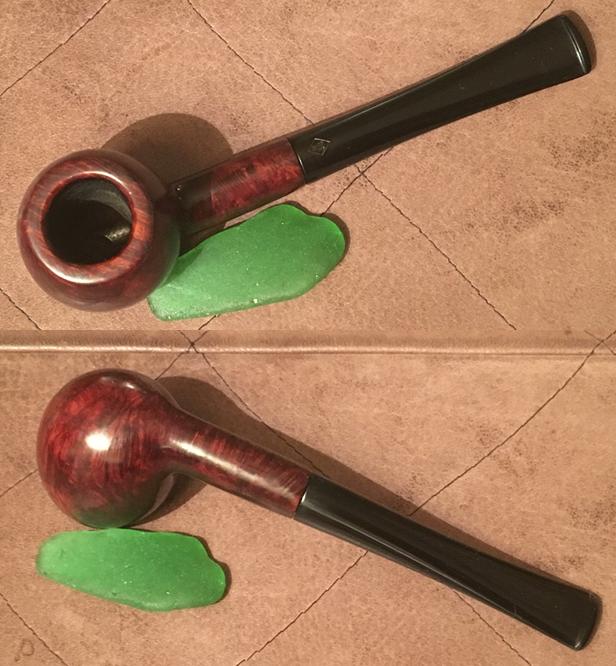
 I now take micromesh pads 1500 to 2400 and wet sand the stummel followed by dry sanding with micromesh pads 3200 to 4000 and then 6000 to 12000 taking a picture after each set to mark the progress. I am careful to guard the BBB nomenclature on the shank sides. As I move through these cycles, I realize that I have been so wrapped up in the technical aspects of this restoration for Greg, that I failed to see the beauty of this diminutive Apple shape. The grain that emerges from Grandpa’s old timer is truly beautiful. Flame grain and swirls, with a few bird’s eyes accenting the whole – totally eye-catching for a Two Star sub-mark BBB I would say!
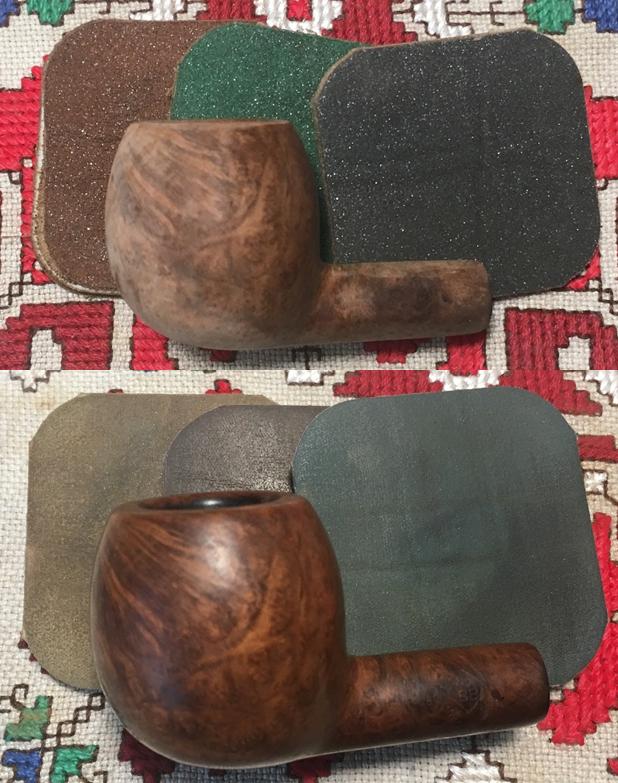
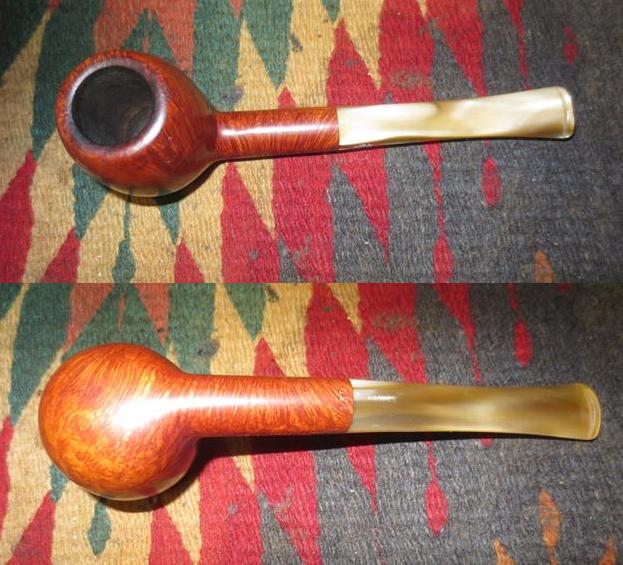
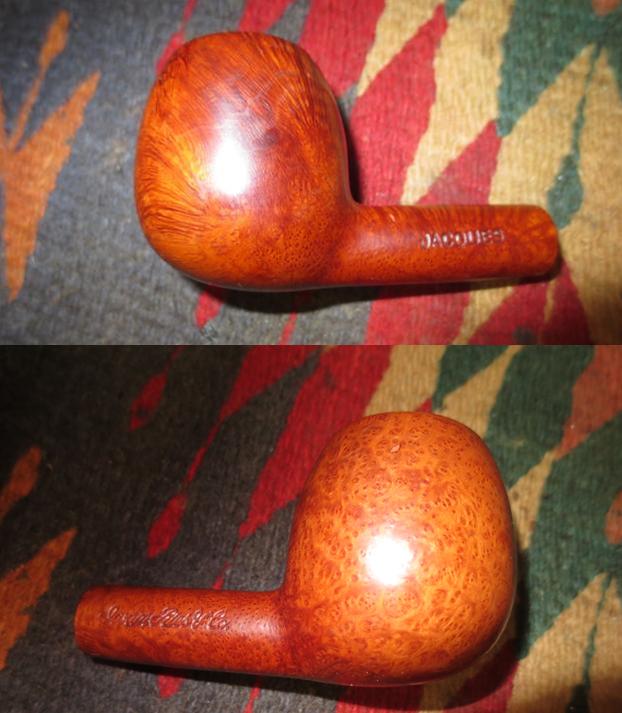
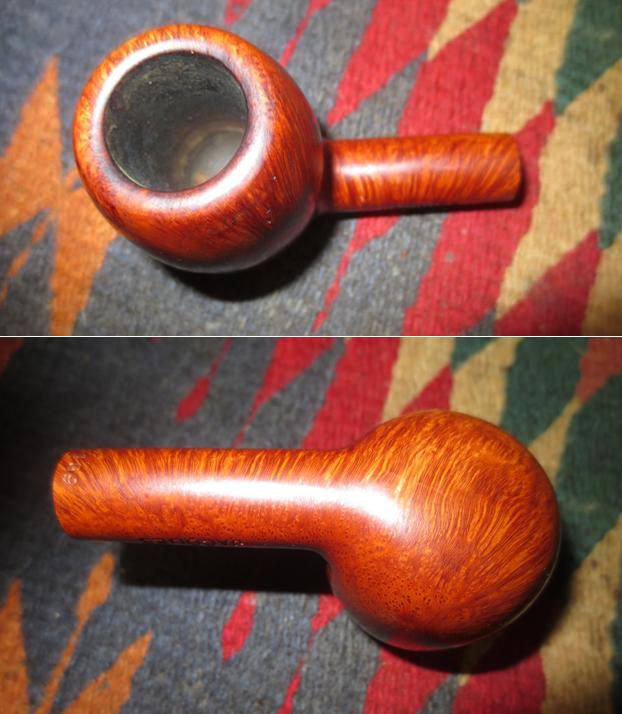
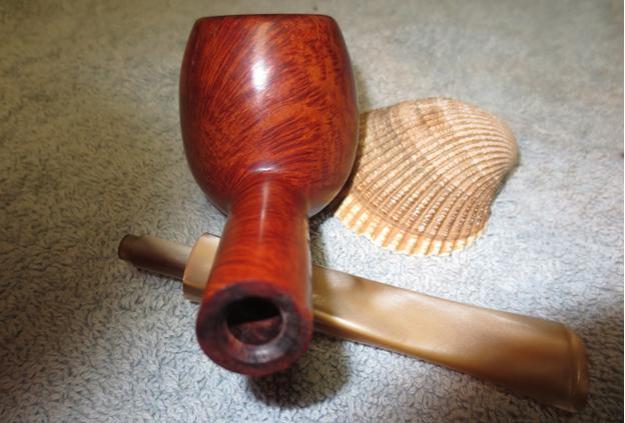
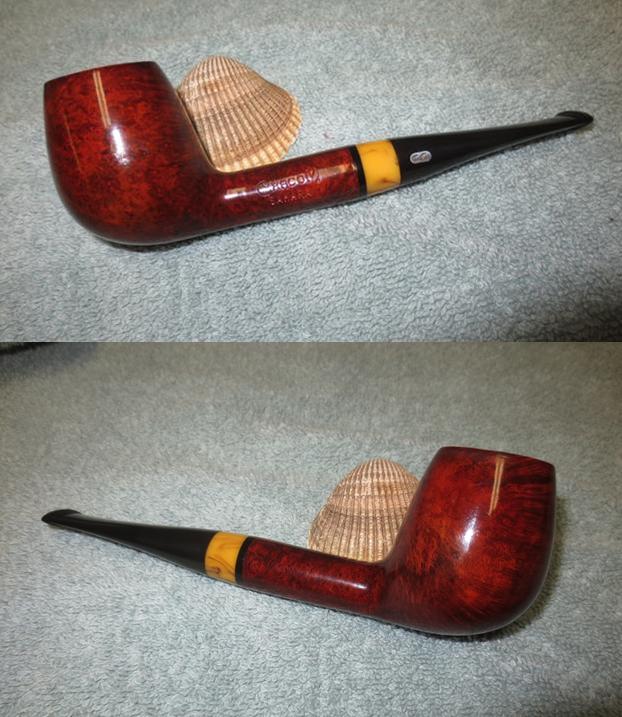
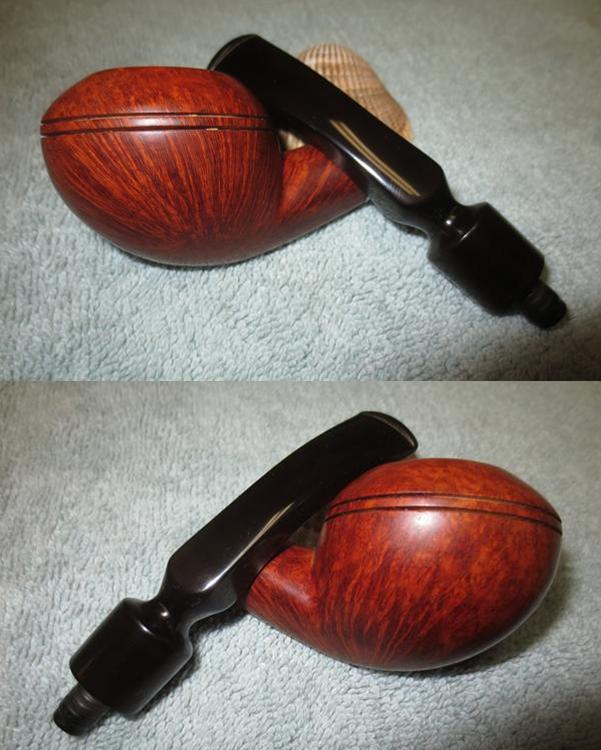
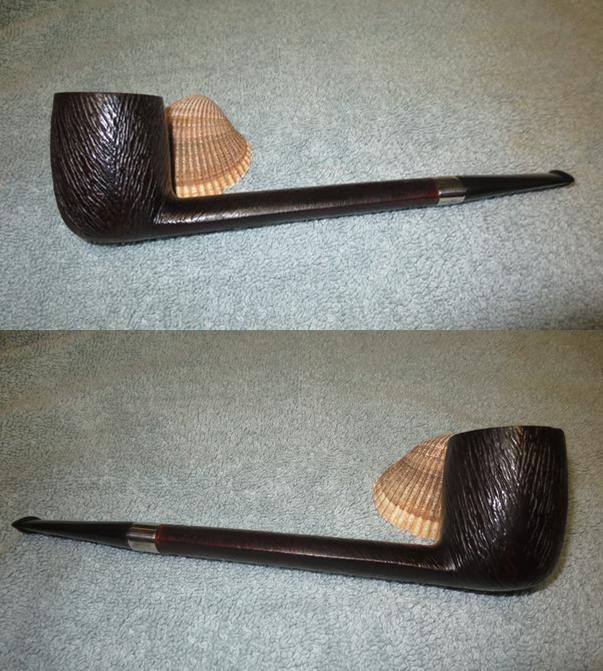
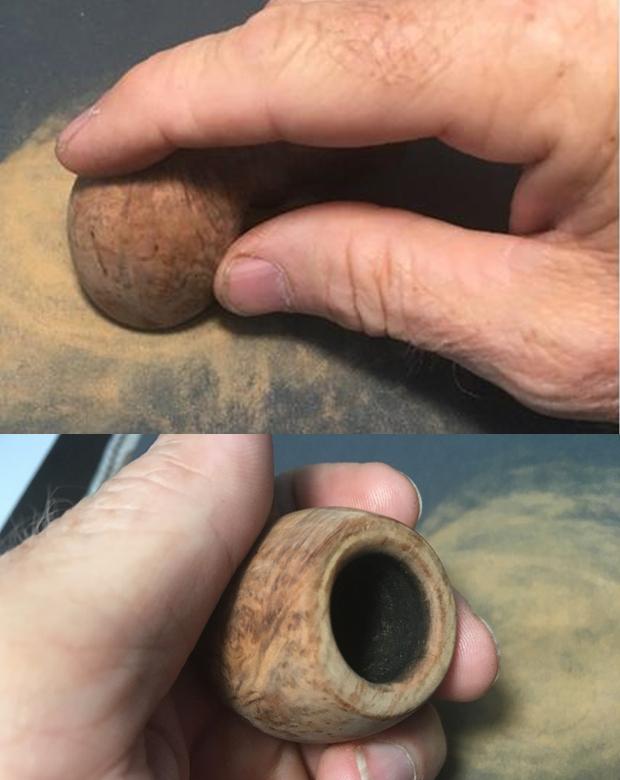
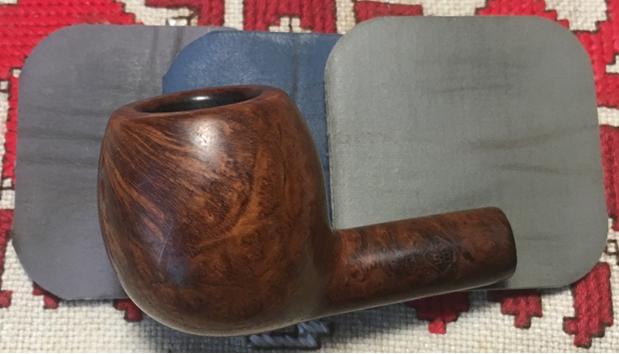 To see the big picture to help determine the next steps, I reunite stem and stummel and stand back and take a good look. This BBB Made in England is looking real good – in spite of everything! I can see by the way the BBB Apple naturally sits on the surface, leaning slightly like a listing ship, but remaining upright, provides some clues regarding the significant pitting on the heel of the stummel – just off center. Greg’s grandfather undoubtedly and conveniently placed his pipe on a table or counter surface, or perhaps on a nearby crate, as he made his rounds as a malaria inspector for the province of Hong Kong.
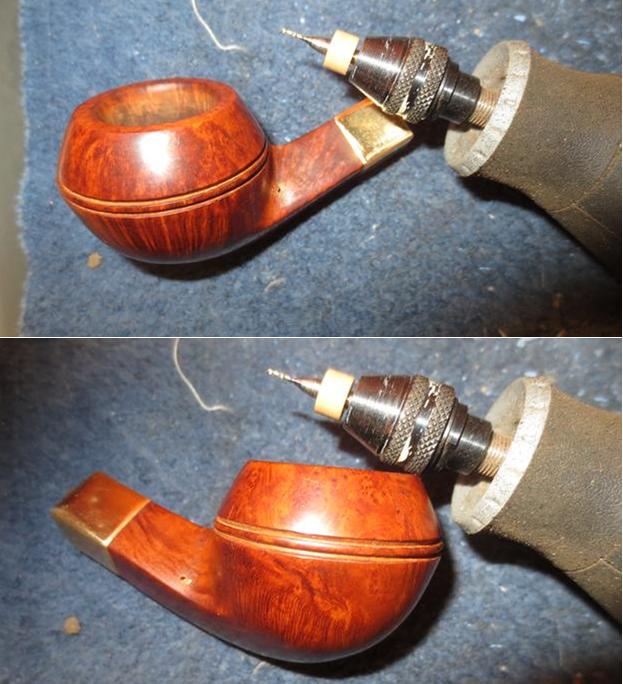
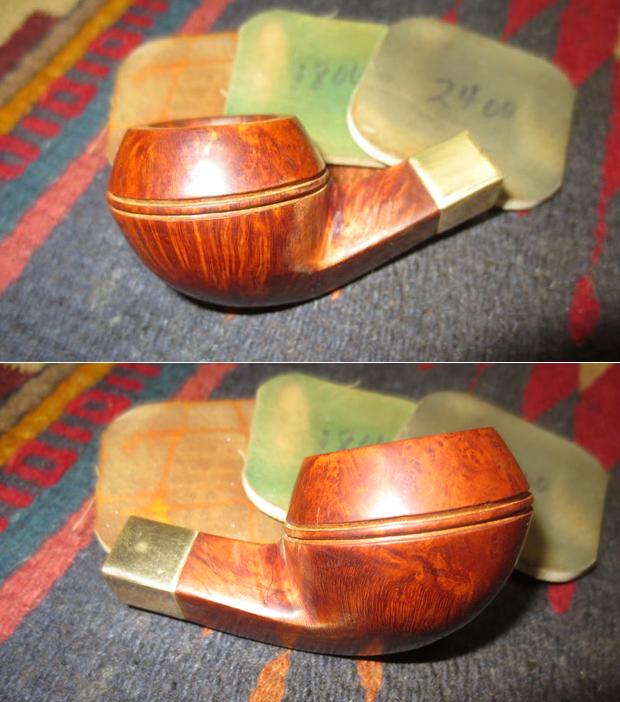
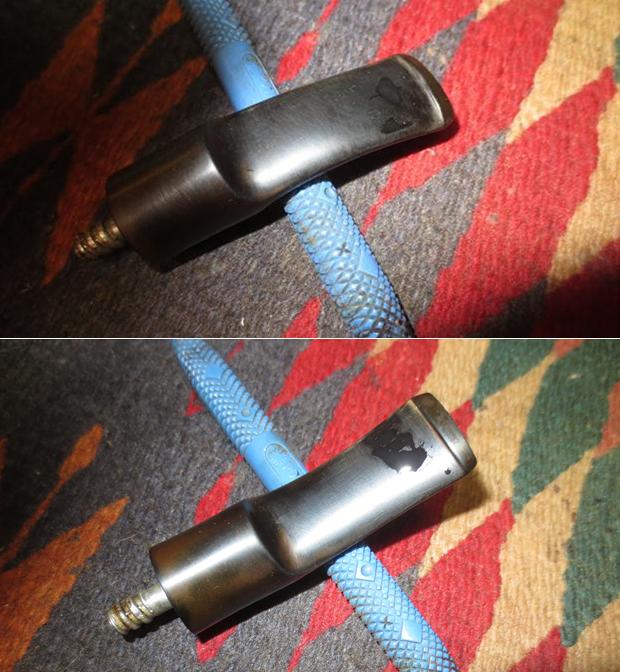
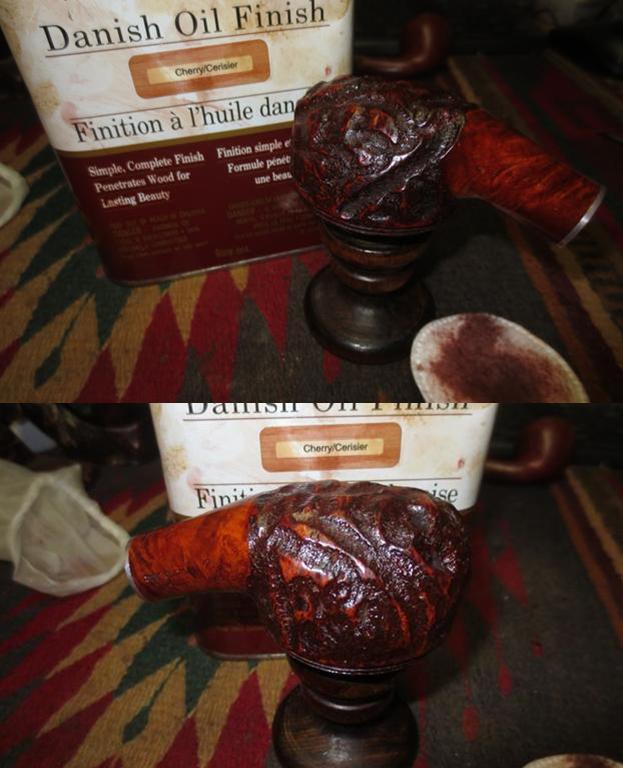
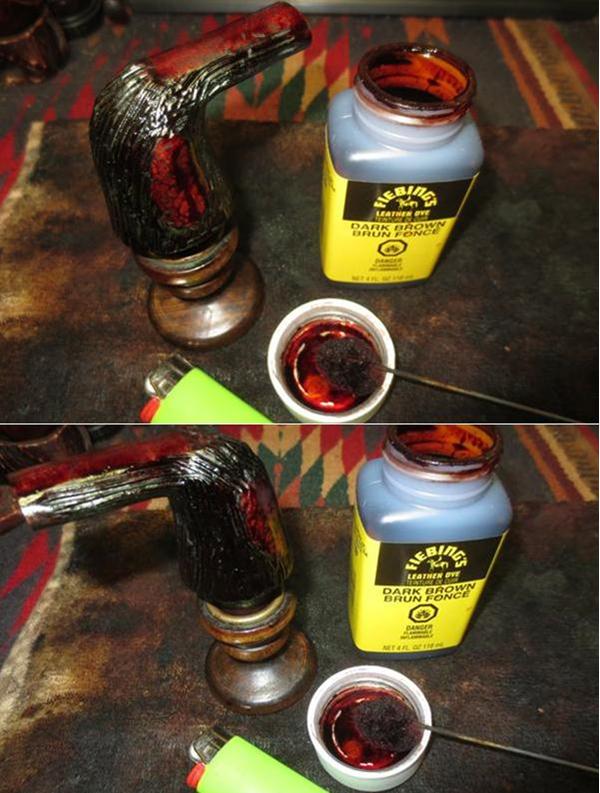
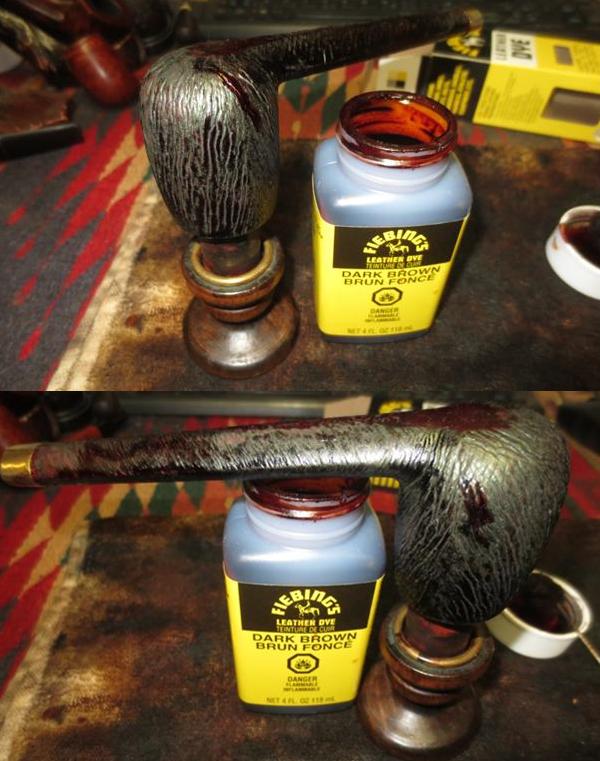
  The original BBB coloring leaned toward the favored darker hues of English pipe makers and client proclivities. I decide not to go that dark, but to stain the stummel using a light brown base with a touch of dark brown to tint it down that track a bit. This will make for better blending, especially for the darker briar around the nomenclature on the shank. Using Fiebing’s Light Brown Leather Dye as the base, I add a touch of Fiebing’s Dark Brown. Using a folded pipe cleaner in the shank as a handle, I begin by warming the stummel with a hot air gun to expand the briar making it more receptive to the dye. After heated, I apply the dye mixture to the stummel generously aiming for total coverage. I then fire the wet stummel with a lit candle igniting the aniline dye, burning off the alcohol and setting the pigment in the grain. After a few minutes, I repeat the process concluding with firing the stummel. I put the stummel aside to rest for several hours. The pictures show the staining process – yes, you can see my blue fingers – I’ve started wearing latex gloves when I’m staining.
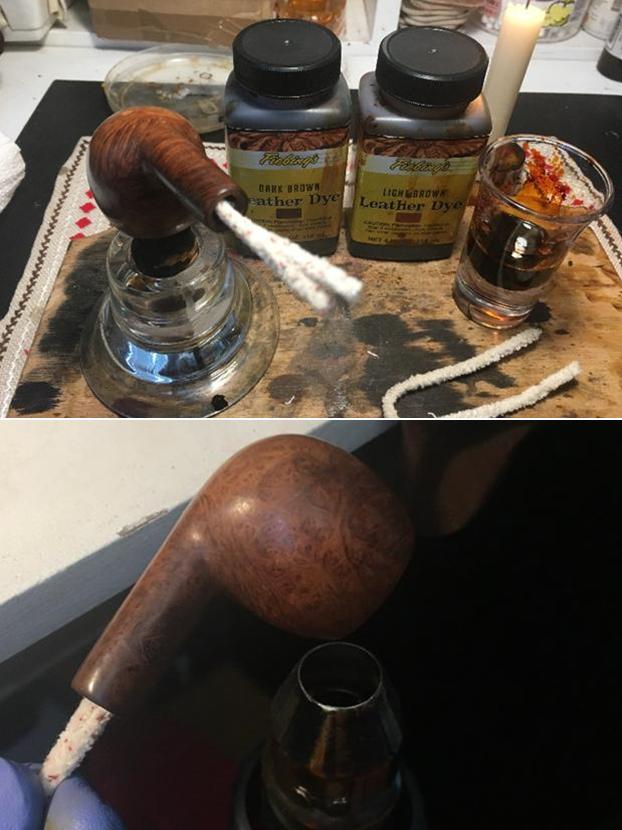
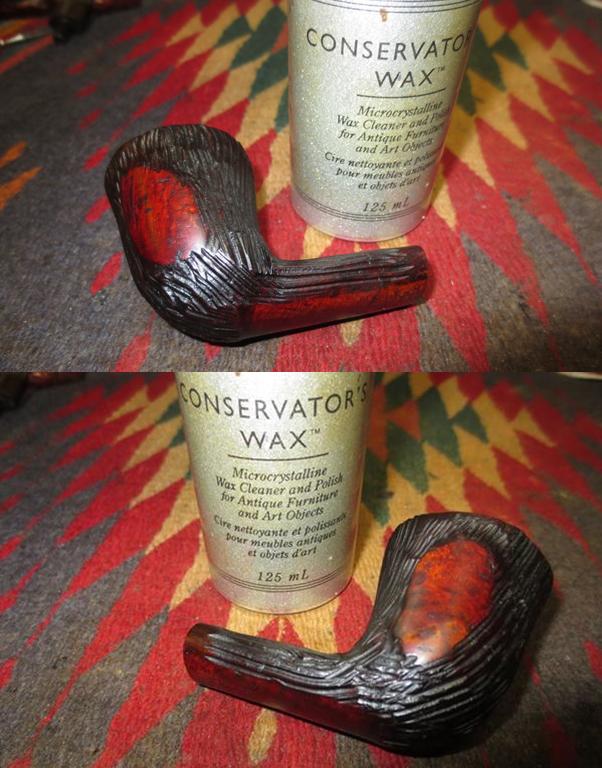
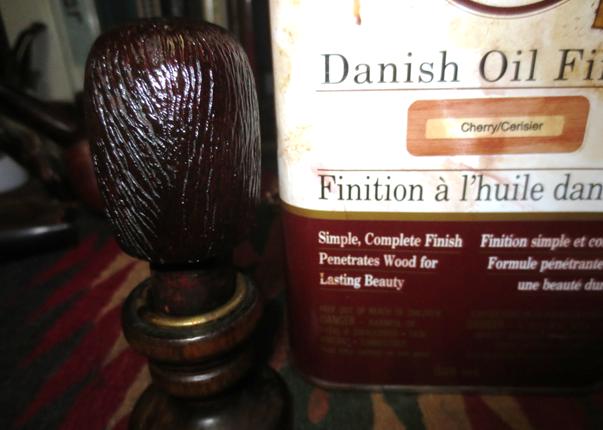
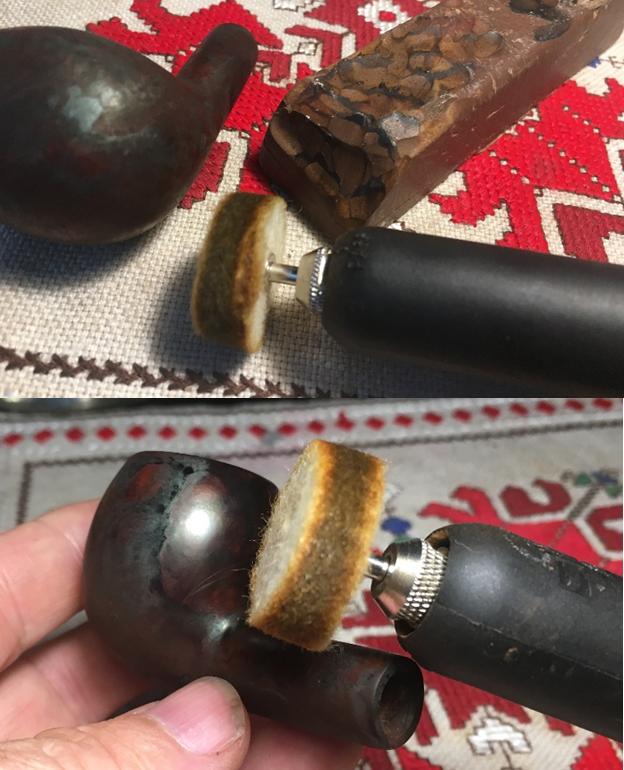
 After some hours, I’m looking forward to ‘unwrapping’ the fired stummel to reveal the stained briar beneath. Using a felt buffing wheel mounted on the Dremel, set at the slowest speed, I use Tripoli compound to remove the initial layer. Moving in a methodical, rotating pattern, I work my way around the stummel not apply a great deal of down-pressure on the wheel, but allowing the RPMs of the felt wheel and the compound to do the work. After removing the crusted layer with Tripoli, I wipe the surface with a cotton pad wetted with isopropyl 95%. I do this not so much to lighten the finish, but to blend and even out the stain over the surface. Following this, I mount a cotton cloth wheel on the Dremel, increase the speed slightly, and apply Blue Diamond – a slightly less abrasive compound. After both compounds, I use a clean towel to hand buff the stummel to remove excess compound dust before applying the wax. Pictures show the progress.

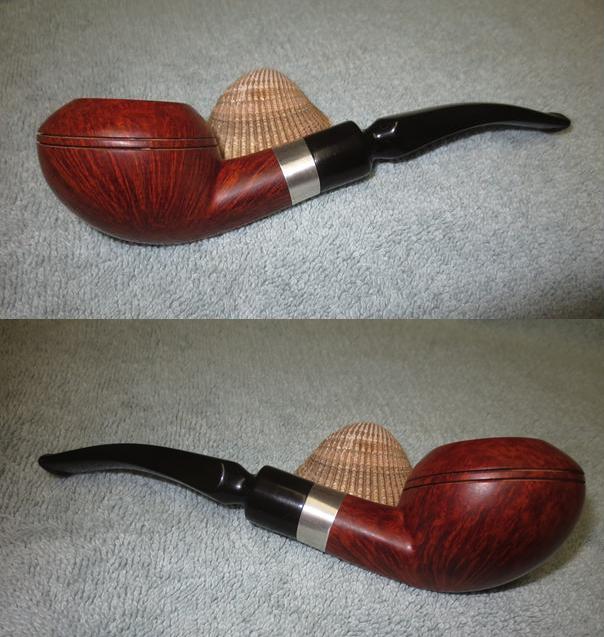
 Reattaching the stem and stummel, I apply several coats of carnauba wax to both. Using a cotton cloth wheel, I set the speed of the Dremel to 2 with 5 being the fastest, I apply the carnauba and I like what I see. With the carnauba wax applied, I mount a clean cotton cloth buffing wheel on the Dremel and again buff the stummel and stem. Finally, I apply a rigorous hand buff using a micromesh cloth to raise the shine more.
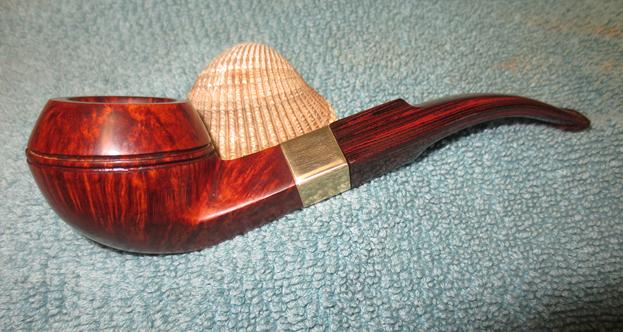
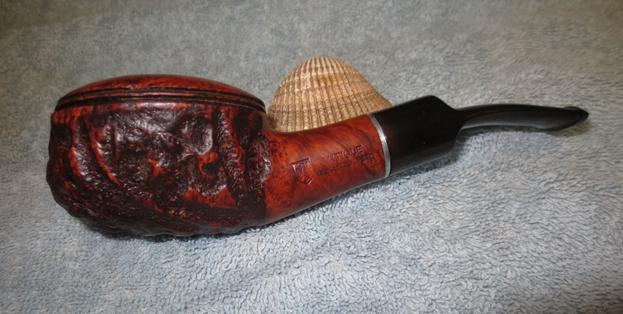
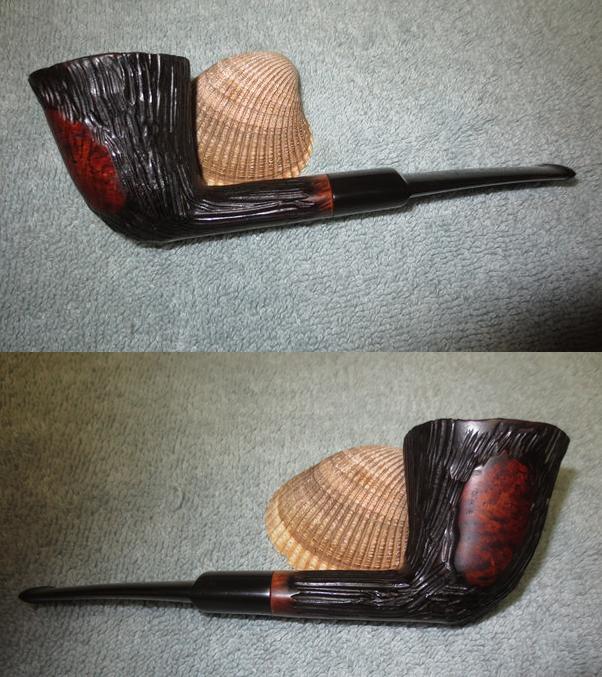
This BBB Double Star Apple has come a long way from England to Hong Kong to the US to Bulgaria, and now it’s ready to return to its new steward. This restoration was a bit bumpy, but then, so is life. I’m glad to help give this pipe a new lifetime and I hope Greg not only enjoys it, but that it provides a special connection with his past. I’m sure Grandpa would be proud. Thanks for joining me!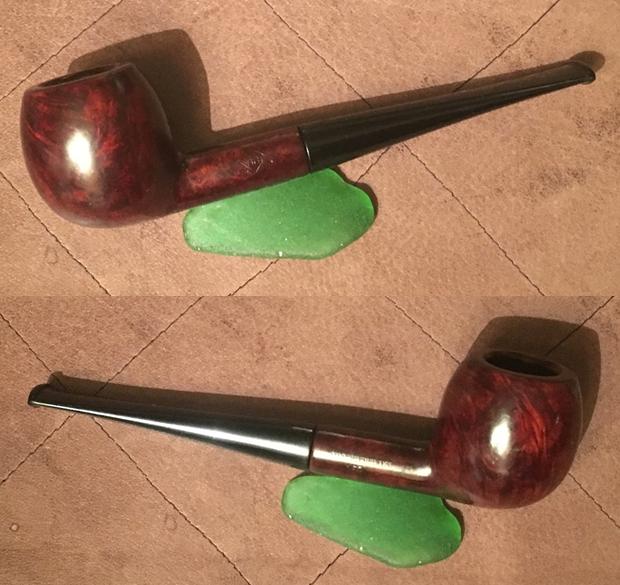

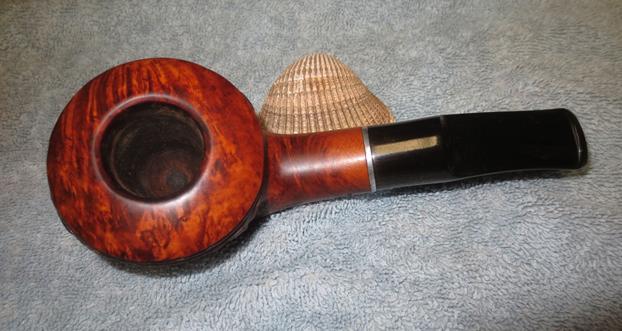
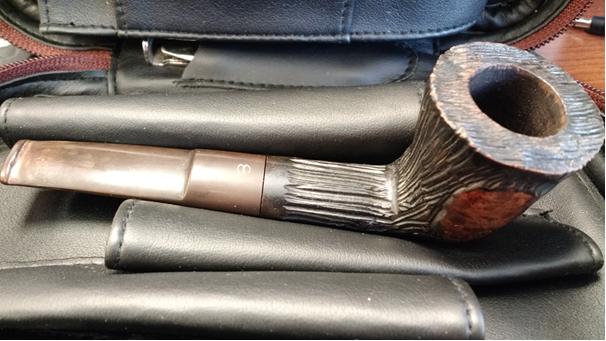
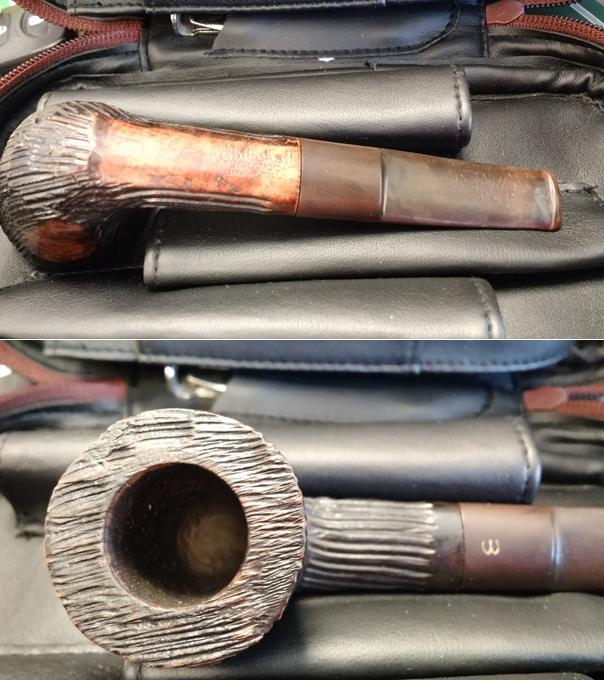
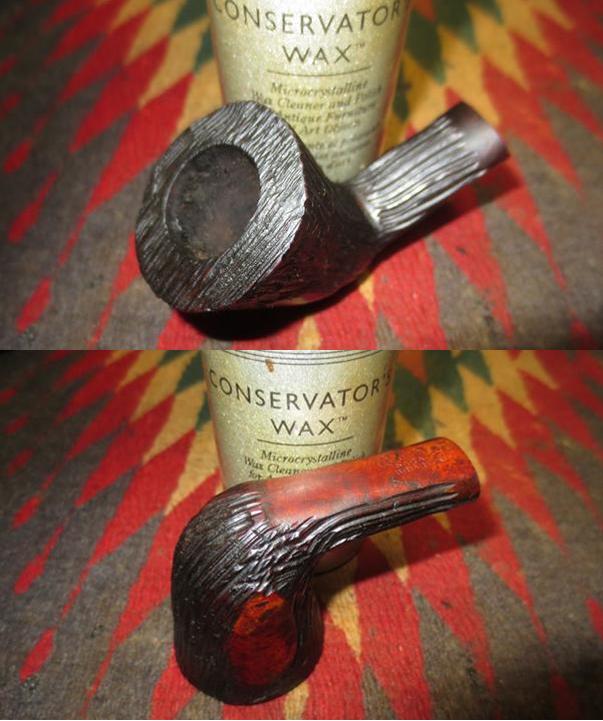
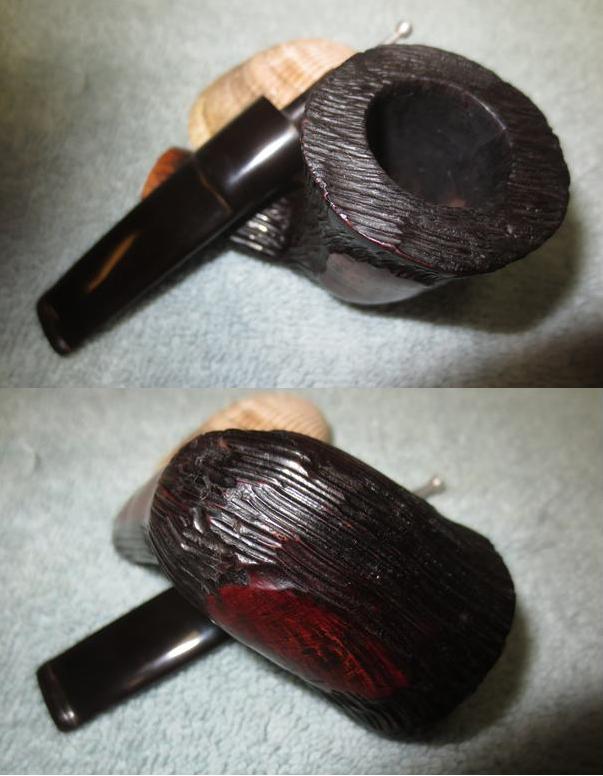
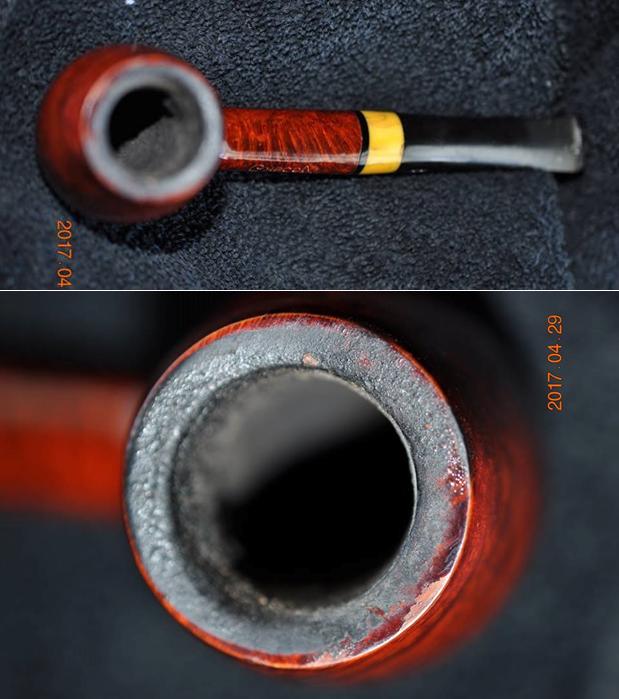
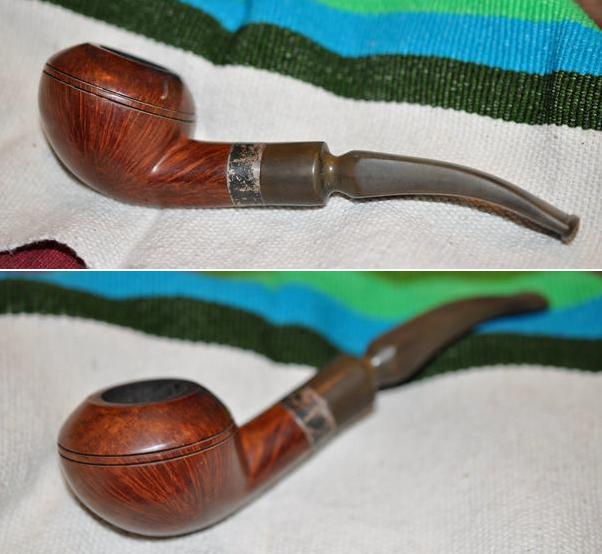
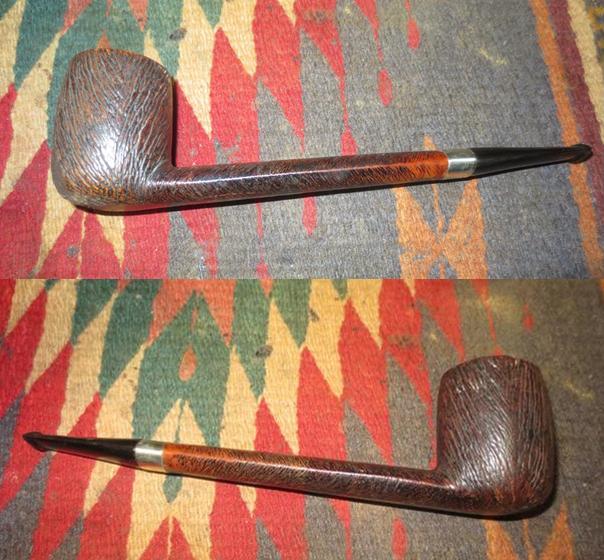
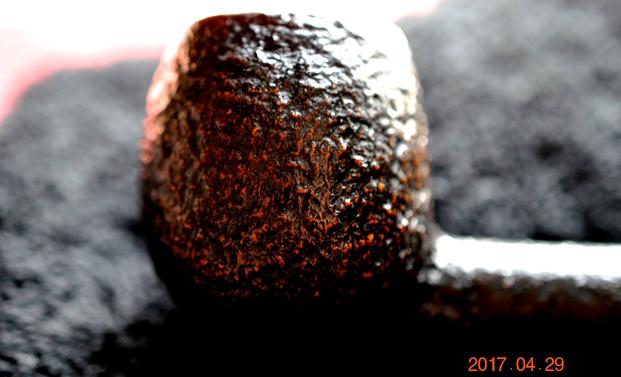
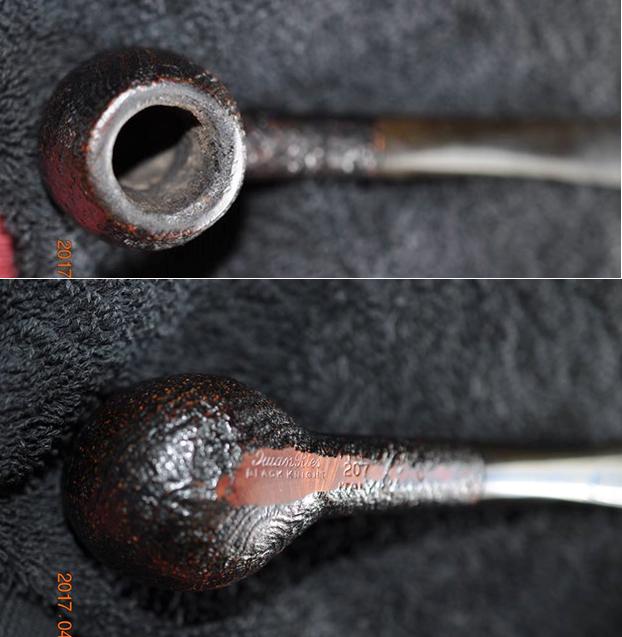 He took a photo of the bowl from the top to show the cake in the bowl and the tarry build up on the rim top. The second photo below shows the sandblast on the left side of the bowl which is birdseye. The right side shows more of the ring grain but it will show up in later photos.
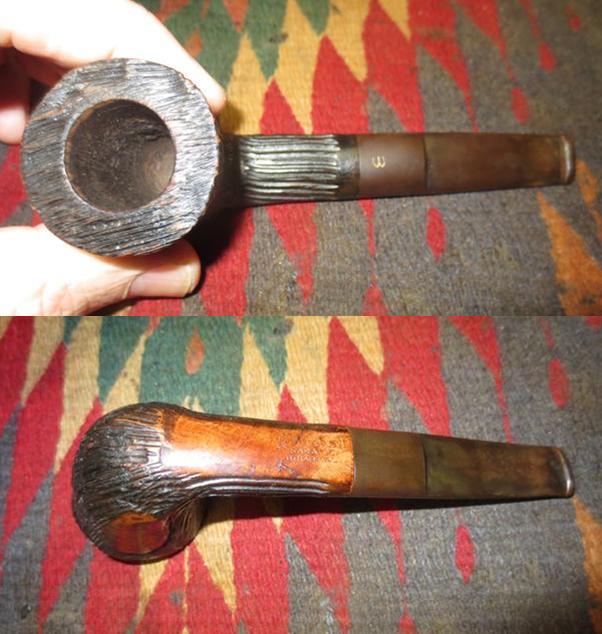
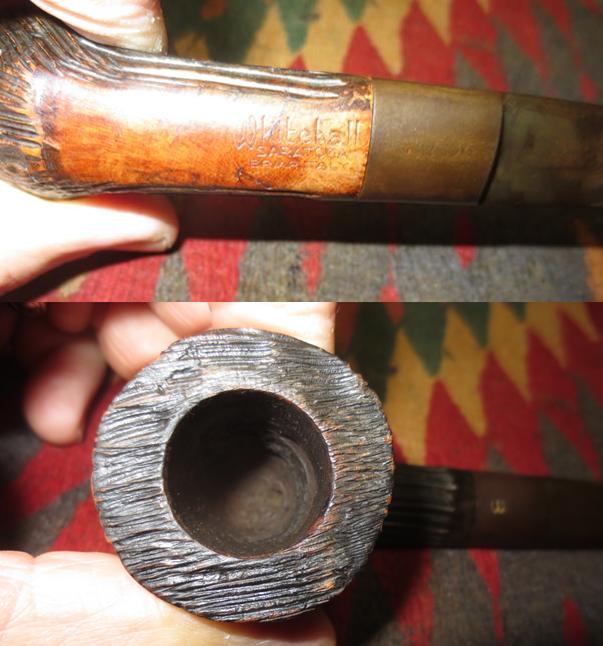
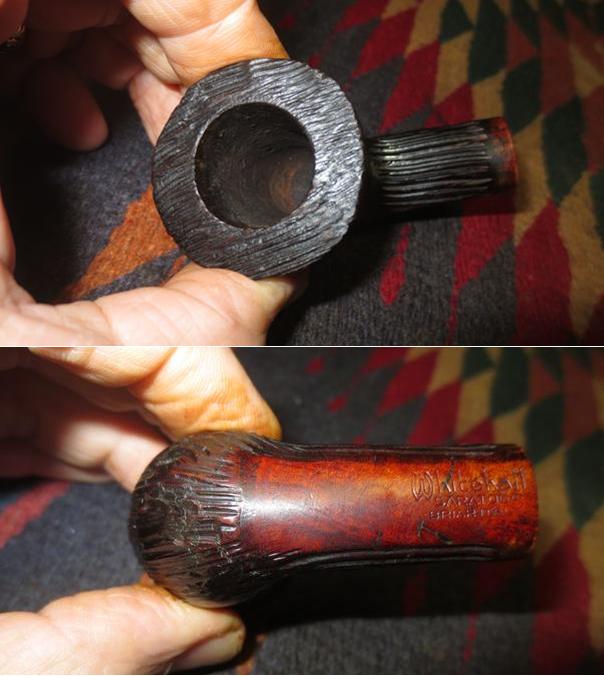
 The next photos show the clear and sharp stamping on the bottom of the bowl and the IRC stamp on the left side of the stem. It looks more deeply stamped than it appeared once it arrived in Vancouver.
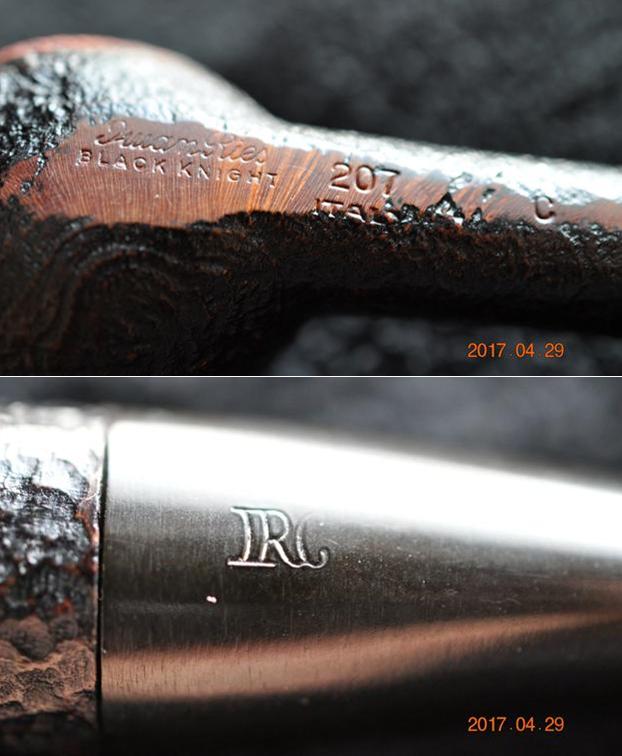 The stem shows the now characteristic tooth marks and chatter on both sides and the wear on the button surface as well, just as the rest of the pipes in the lot did.
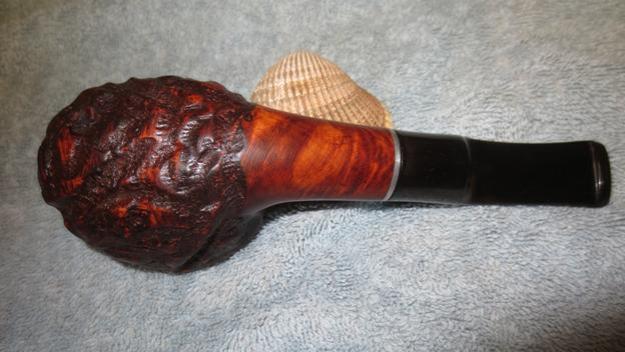
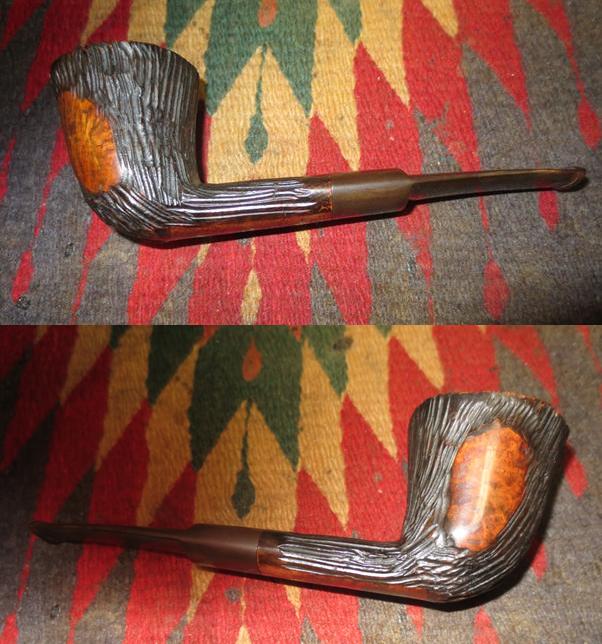
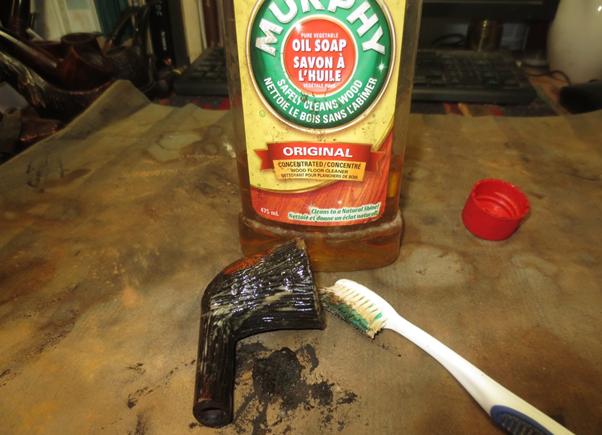
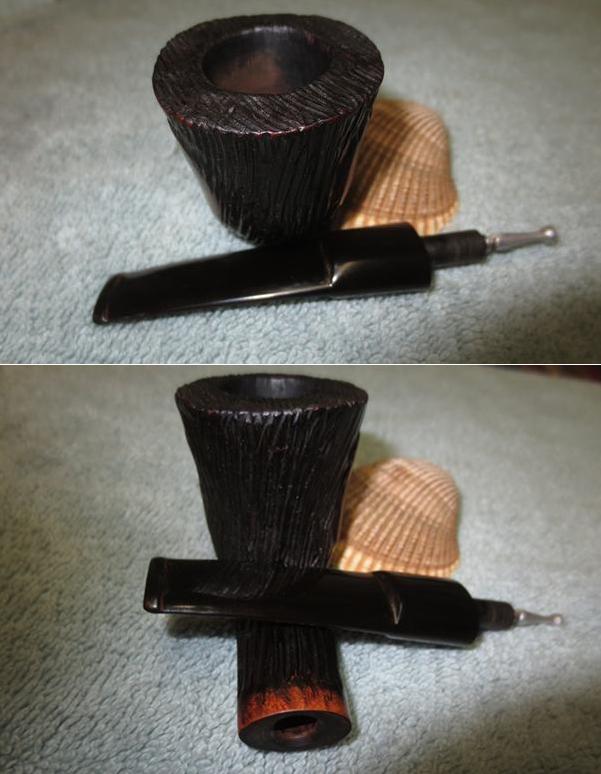
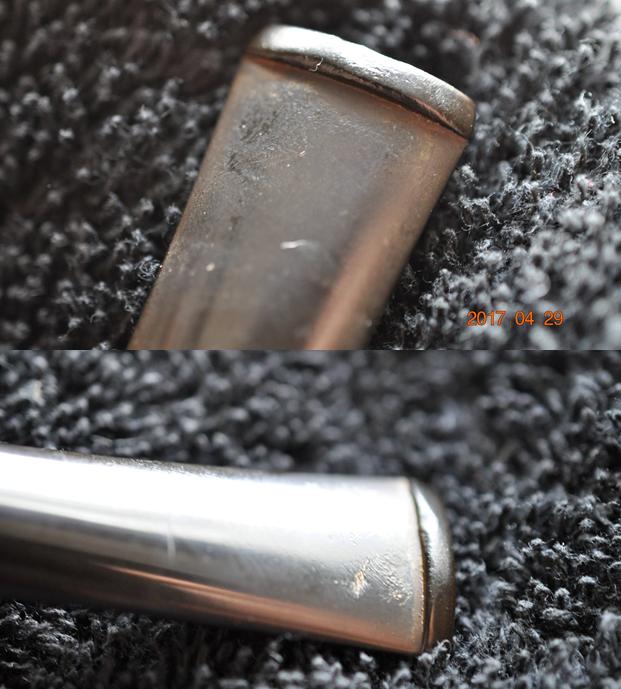 My brother scrubbed the bowl exterior with a tooth brush and Murphy’s Oil Soap to remove the sticky buildup and the grime in the grooves. He rinsed it with warm water to remove the soap and the dust. He reamed the bowl and scrubbed the rim top with the soap and tooth brush. He cleaned out the mortise and the airway in the shank and stem. He cleaned the stem with a short soak in Oxyclean. The soak brought the oxidation to the surface. I took the next four photos of the pipe when it arrived in Vancouver. The grain shows through the blast – birdseye on the left side and ring grain on the right side.
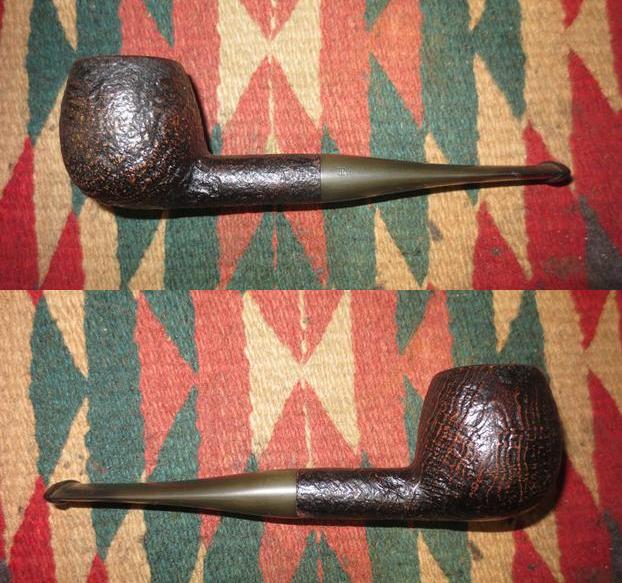
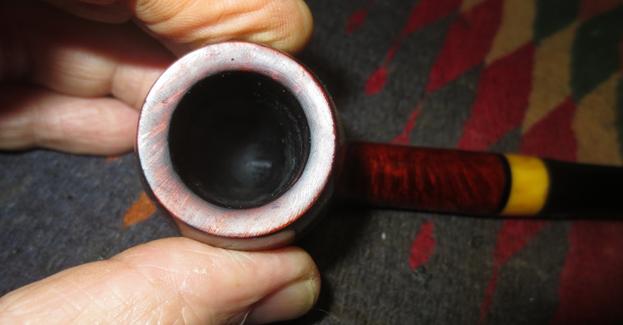
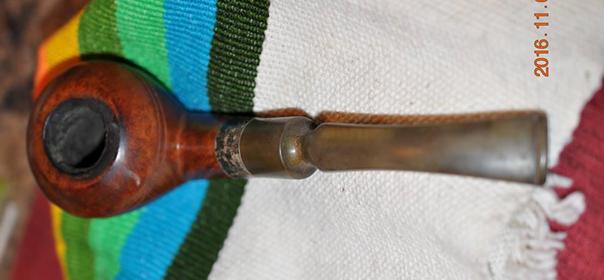
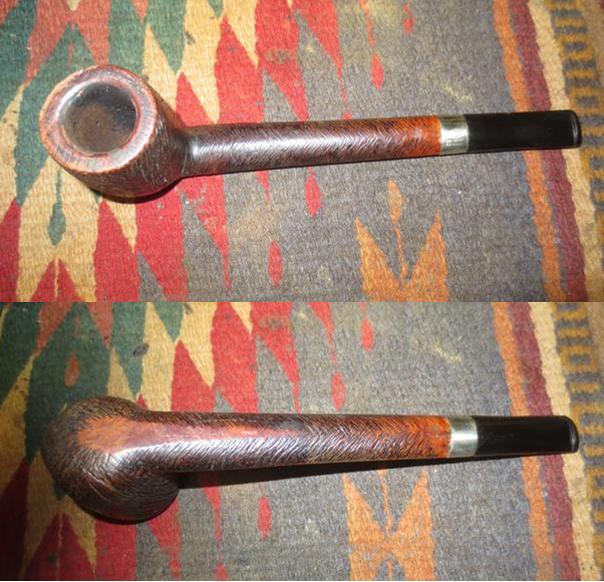
 I took a photo of the rim top and the inside of the bowl to show the condition. Like several other pipes in the estate lot this one still had raw briar at the bottom third of the bowl.
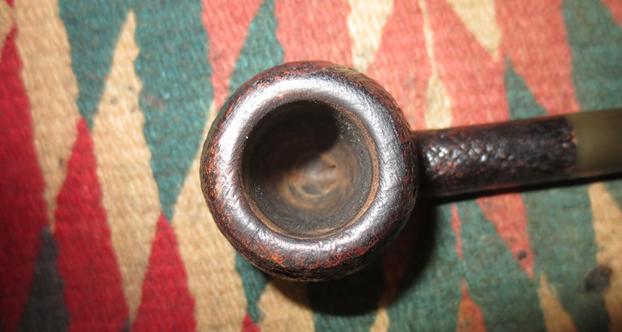 The next two photos show the condition of the stem. The tooth marks and chatter are visible in the photo. The ones on the underside of the stem were deeper than the ones on the top side.
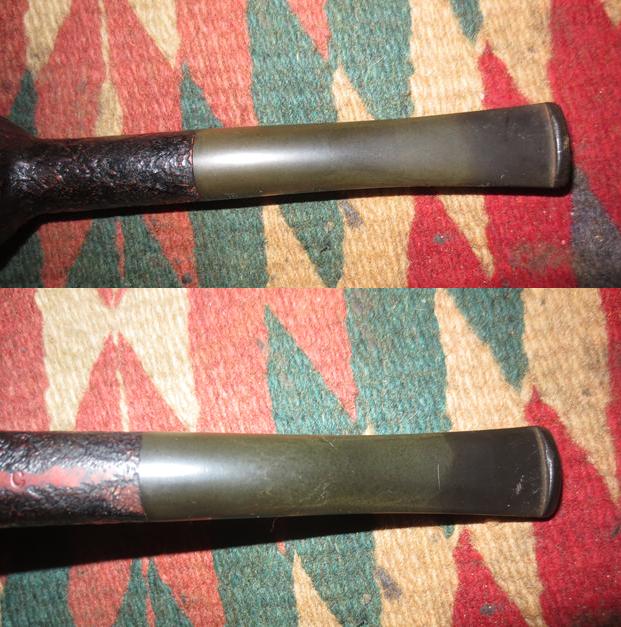 I sanded the stem with 220 grit sandpaper to remove the tooth marks and chatter. I worked over the entire stem to break up the oxidation.
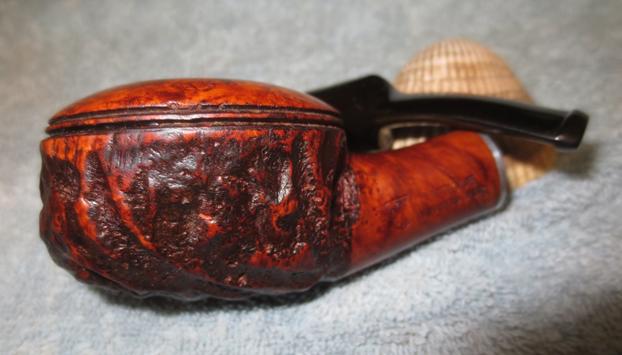
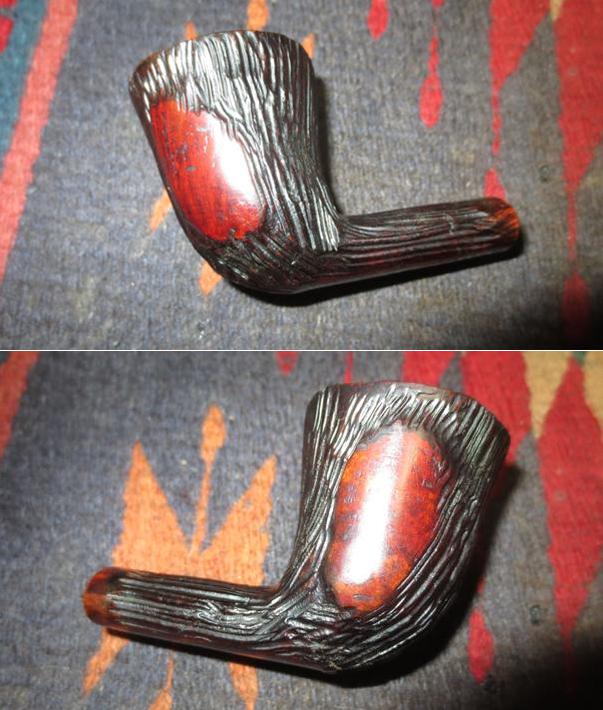
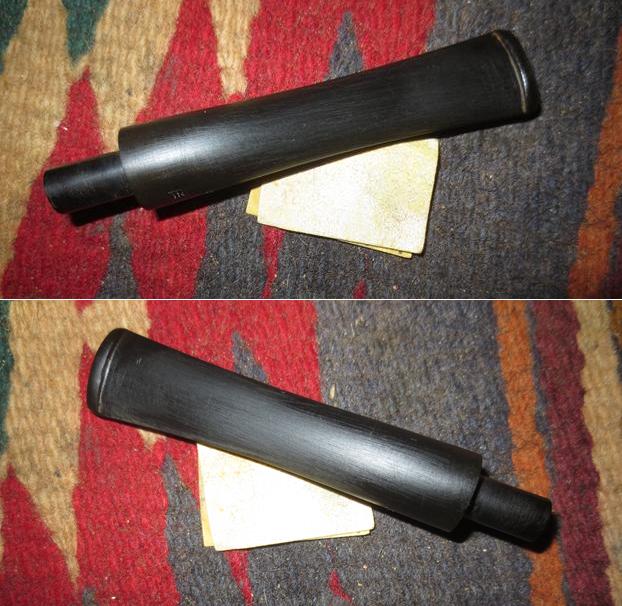 I rubbed the bowl down with a light coat of olive oil on a soft towel. I took the following photos of the pipe after I had wiped it down. The shine on the sandblast revealed the contrast stains that had been used on the bowl – both a dark brown and black.
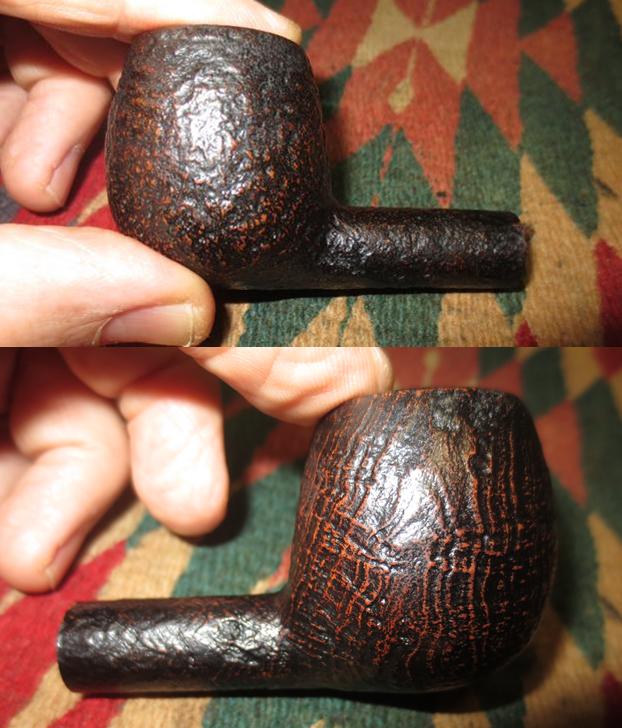
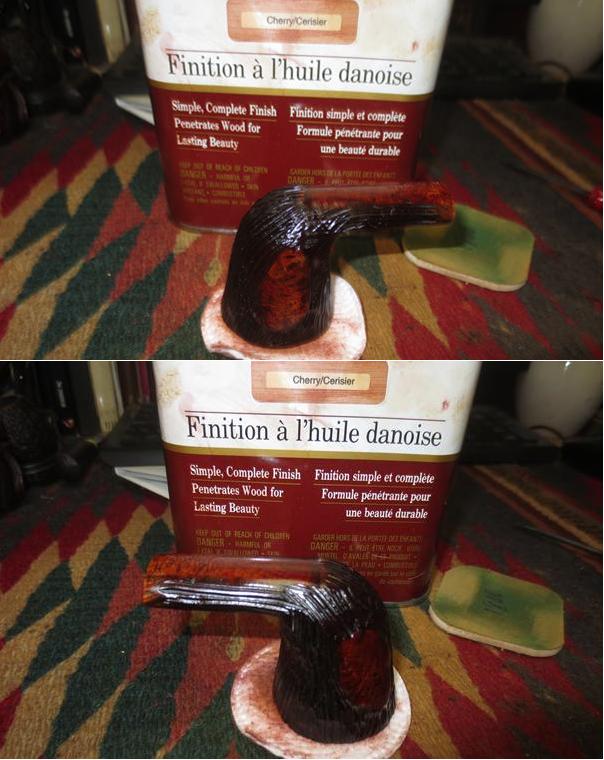
 I touched up the rim top with a dark brown stain pen to blend the rim into the rest of the bowl colour. The dark brown stain worked well on the high area and the black filled in the grooves of the blast.
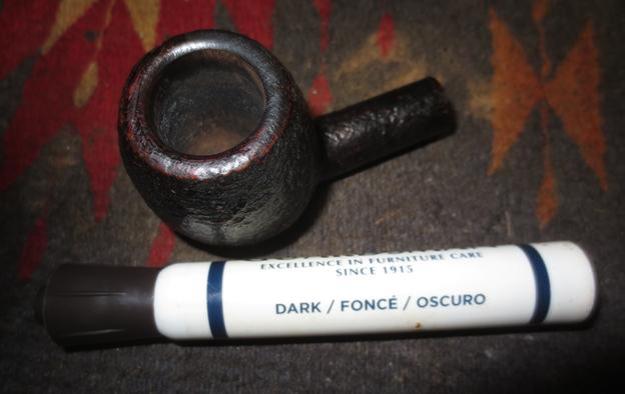 I set the bowl aside and worked on the stem. I wet sanded it with 1500-2400 grit micromesh sanding pads and gave it a rub down with Obsidian Oil. I dry sanded it with 3200-4000 grit pads and gave it another coat of oil. I let the oil dry and then buffed the stem with red Tripoli and Blue Diamond on the buffing wheel. I brought it back to the work table and finished polishing it with 6000-12000 grit micromesh pads. I gave it a final coat of Obsidian Oil and set it aside to dry.
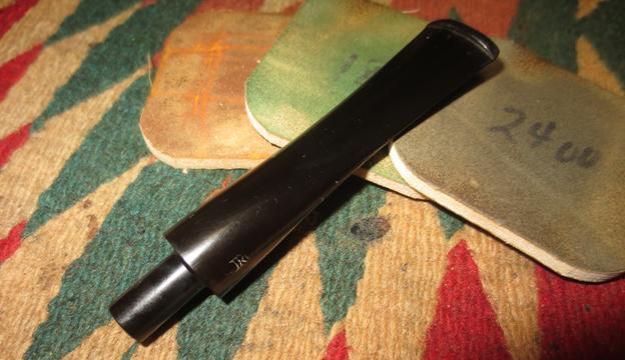

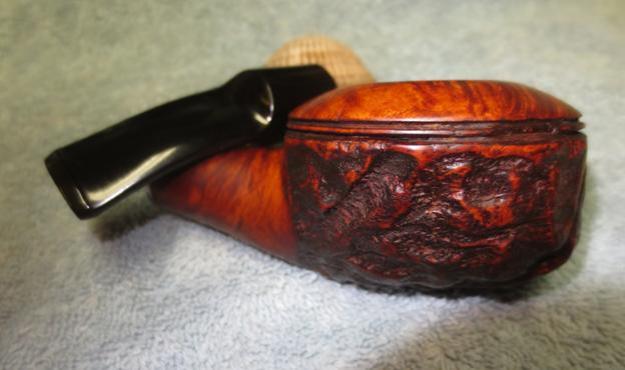
 I put the stem back on the bowl and buffed the bowl lightly with Blue Diamond and more intently on the stem. The Blue Diamond polishes out the minute scratches in the vulcanite and gives the material more shine. I gave the stem multiple coats of carnauba wax and hand waxed the bowl with Conservator’s Wax. I buffed the pipe with a clean buffing pad to raise the shine. I hand buffed it with a microfibre cloth to deepen the shine. The finished pipe is shown in the photos below. The dimensions of the pipe are Length: 5 ¾ inches, Height: 1 1/8 inches, Outer diameter of the bowl: 1 ¼ inches, Chamber diameter: ¾ inches. The pipe is the kind of shape that feels great in the hand, it is light weight and comfortable. The look of the finished pipe is quite attractive and the contrast between the brown of the high spots on the briar and black in the crevices contrast well with the polished vulcanite stem. This one will soon be on the rebornpipes store. If you are interested in adding it to your rack email me at slaug@uniserve.com or send me a message on Facebook. Thanks for looking.