by Steve Laug
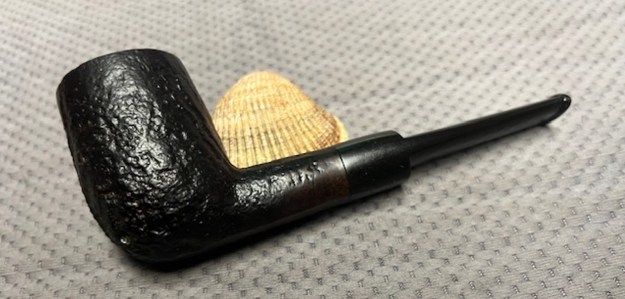
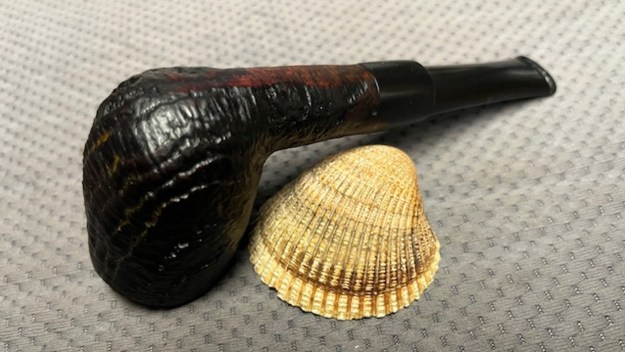
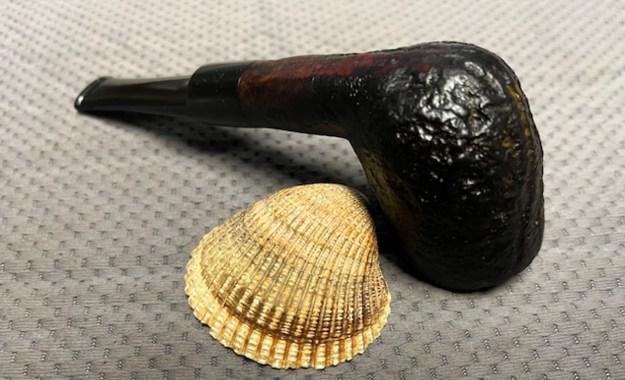
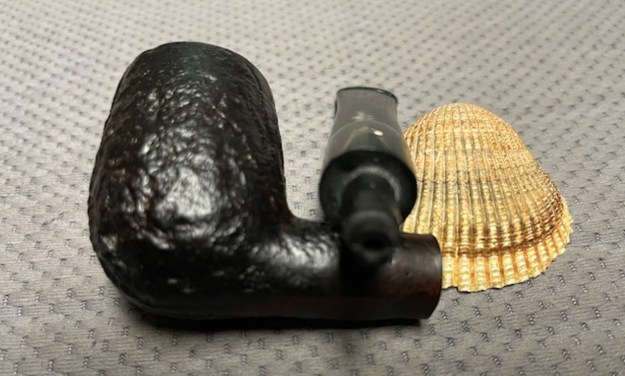
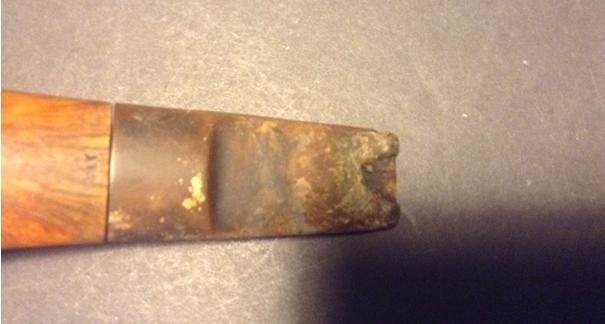
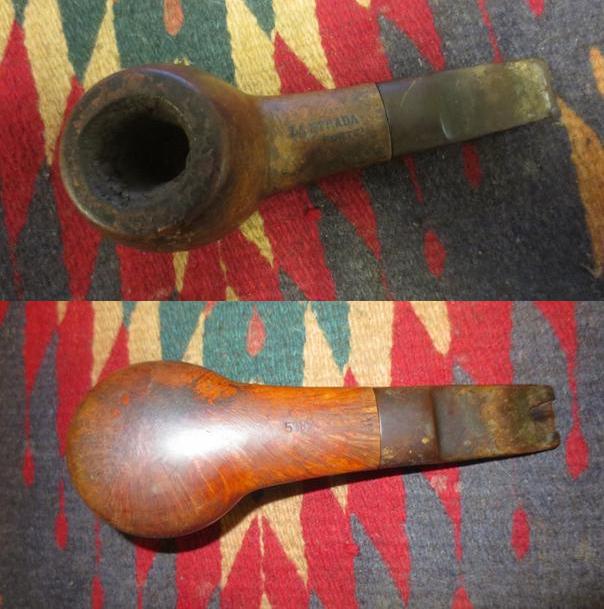
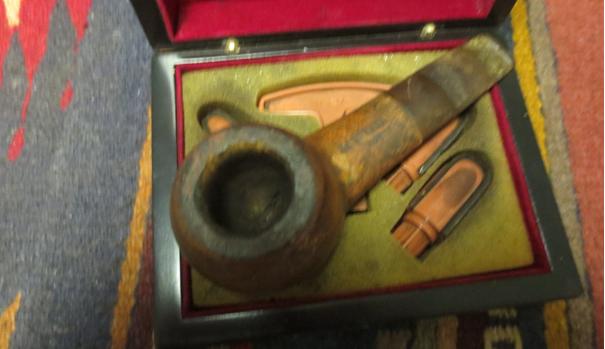
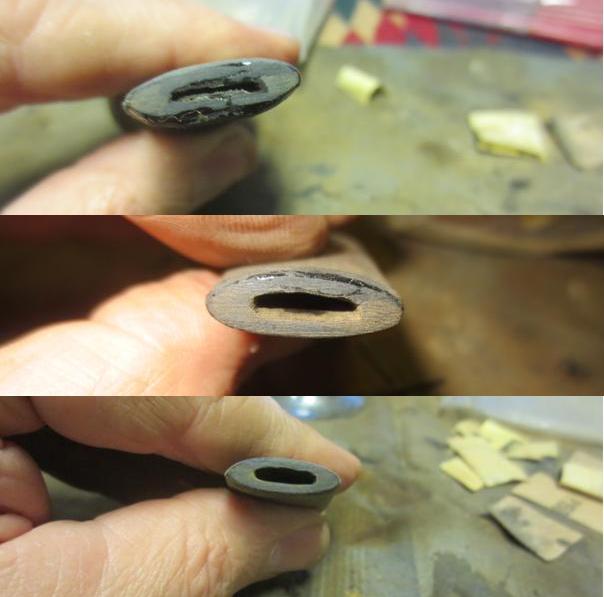
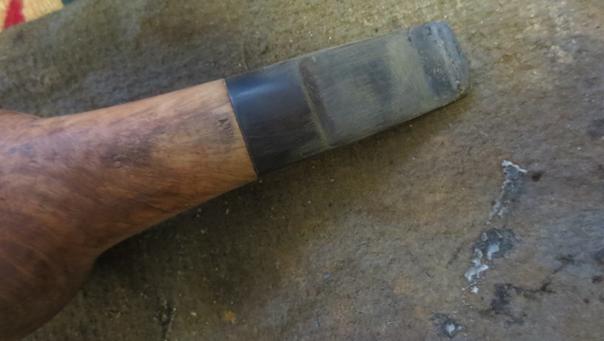
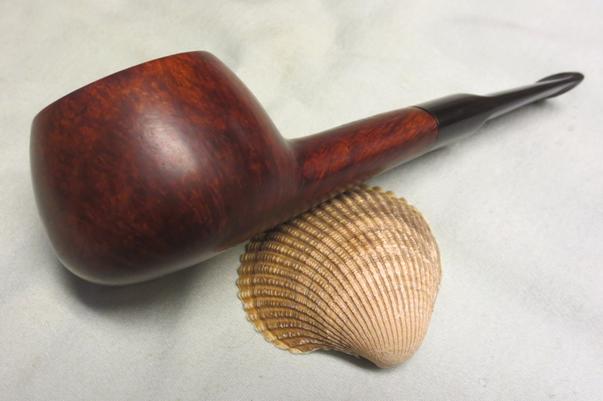
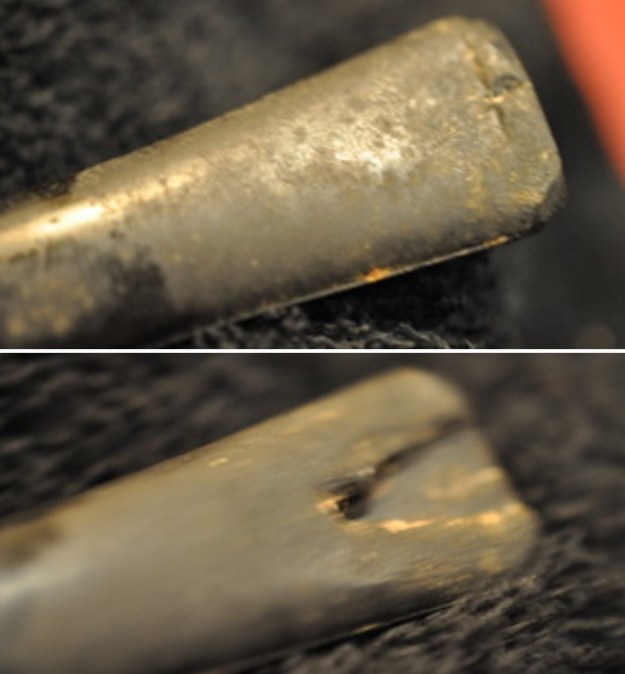
The next pipe on the table came to us from a seller in Cleveland, Ohio, USA on 04/26/2022. It is a Dunhill Shell Briar Billiard with a saddle stem that has been “ridden hard”. It is in rough shape as can be seen in the photos below. It is stamped on a smooth panel on the underside of the shank. On the heel of the bowl it is stamped with the shape number 52033 followed by Dunhill Shell Briar [over] Made in England25. The stamping is faint in spots but still readable. The date number is a bit faint and worn. The pipe has a mix of black, cordovan and brown stains on a Shell sandblast finish and some amazing grain that the shape follows well. The finish was dusty and dirty with grime ground into the nooks and crannies of the sandblast. The bowl had a thick cake and there was heavy lava in the sandblasted rim top and edges. The original stem is on the pipe and it is a mess. The button has a crack on the top side and the underside is missing a huge chunk from the button forward about ¾ of an inch or more. Jeff took photos of the pipe to show what it looked like before he started working on it.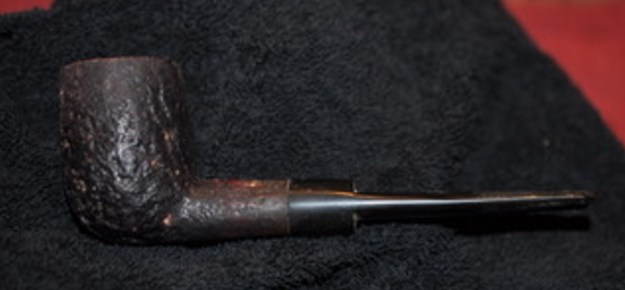
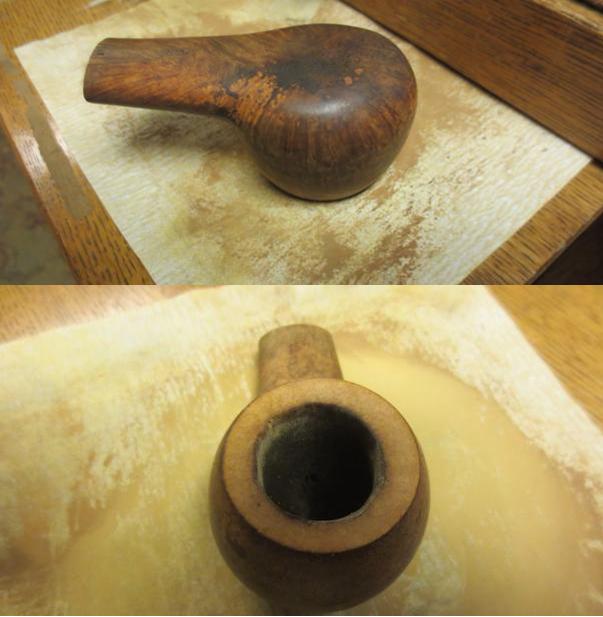
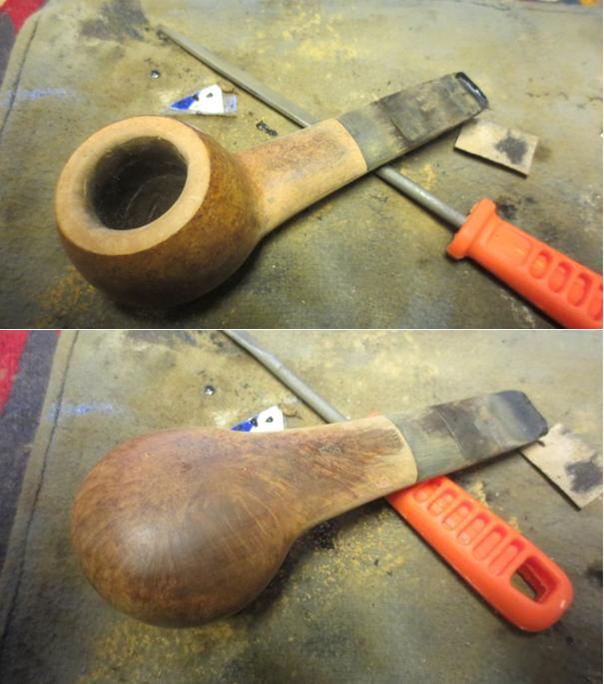
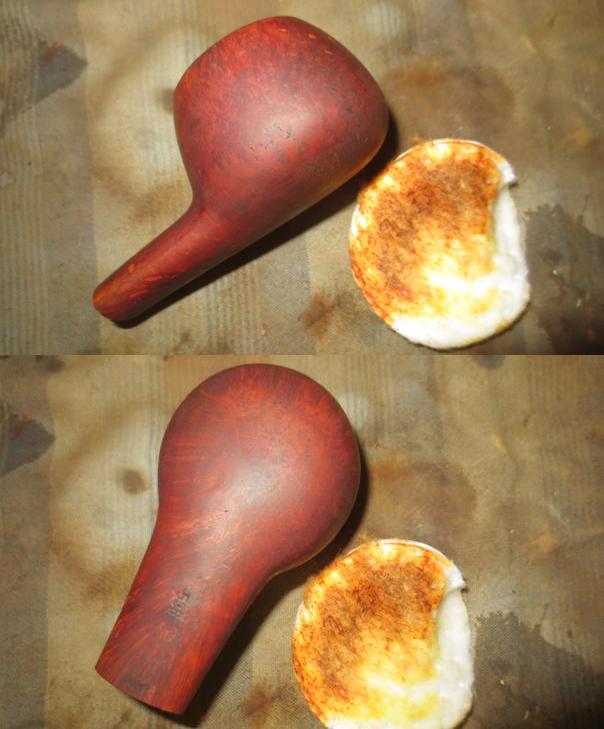
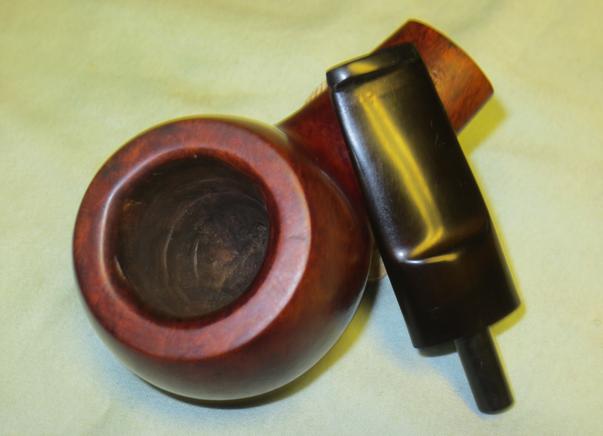
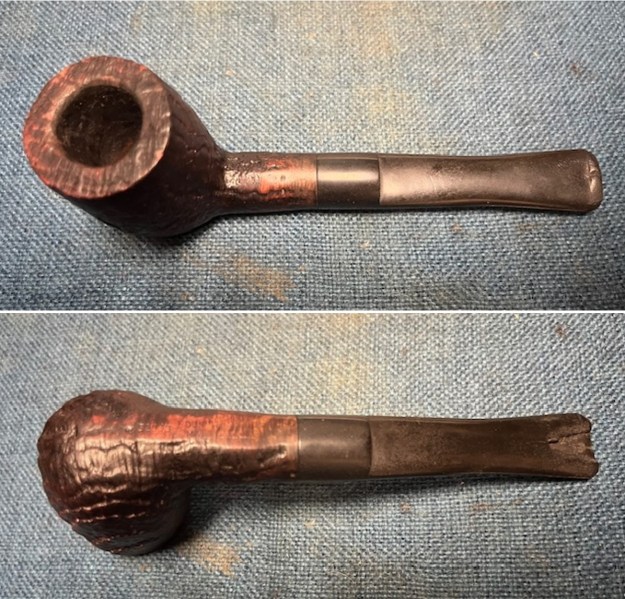
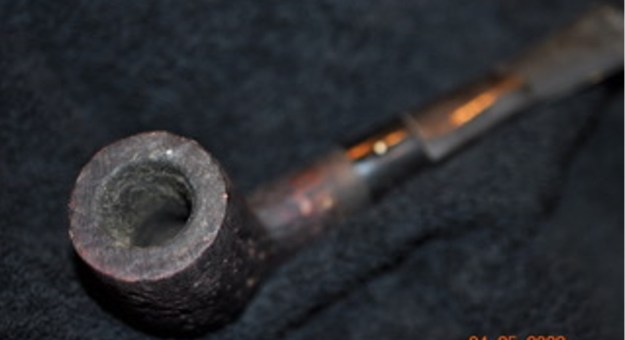 He took photos of the bowl and rim top to show the thickness of the cake and the lava coat on the rim top. The bowl is a bit of a mess. The stem photos show the damage on the top and underside of the stem ahead of the button.
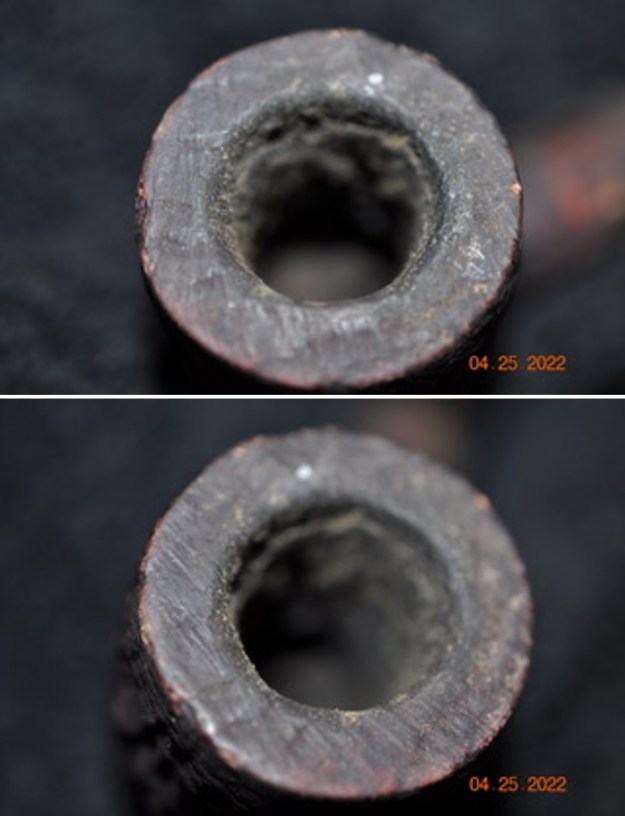
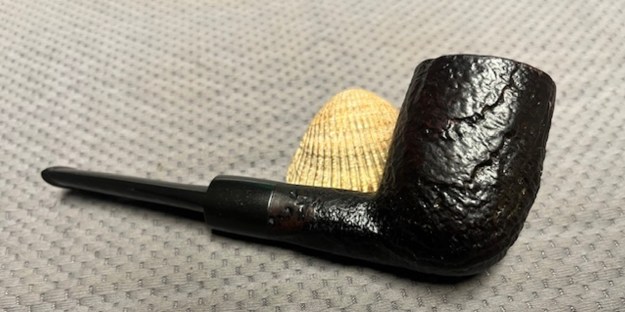
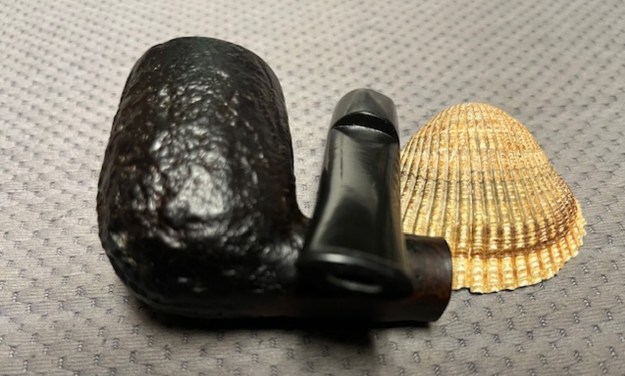
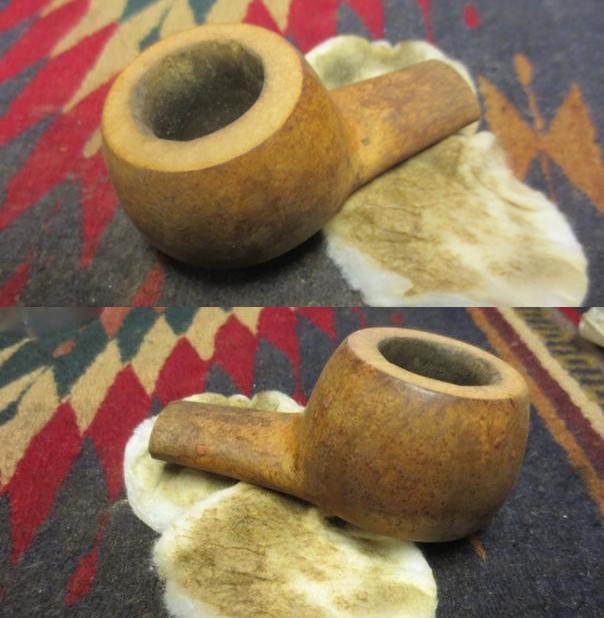
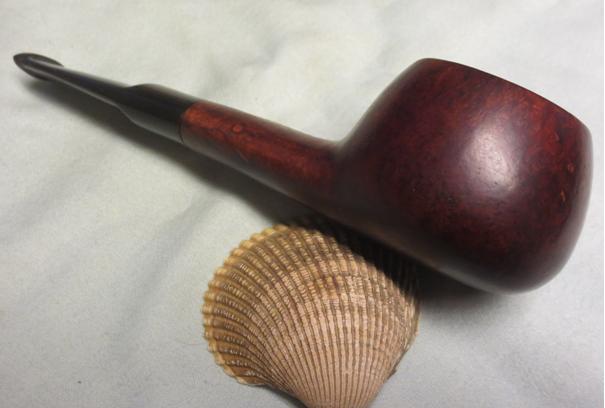
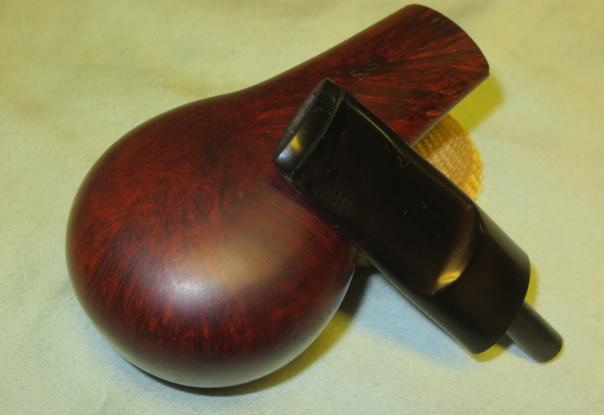
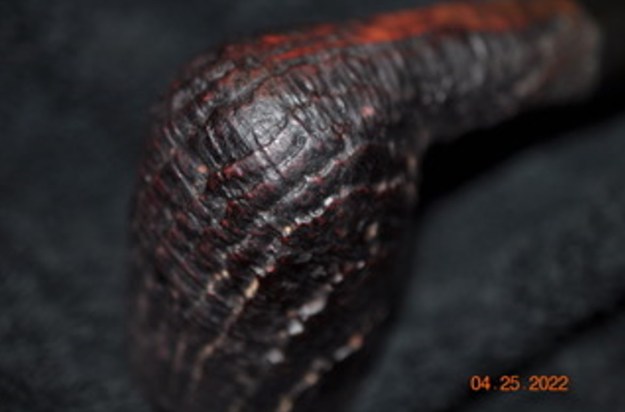
 The photos of the sides and heel of the bowl show the deep sandblast grain on the pipe. There was a lot of grime ground into the bowl sides. But it still did not obscure the beauty of the pipe.
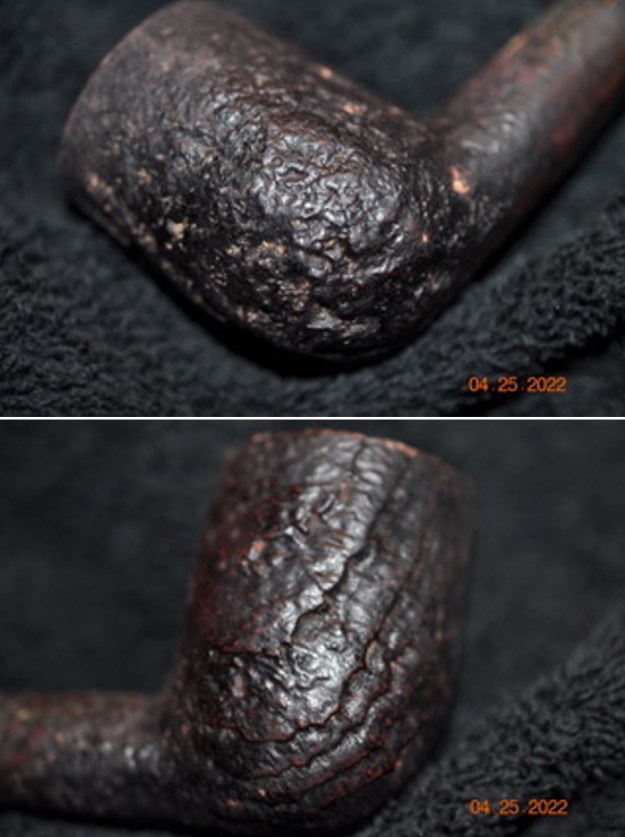
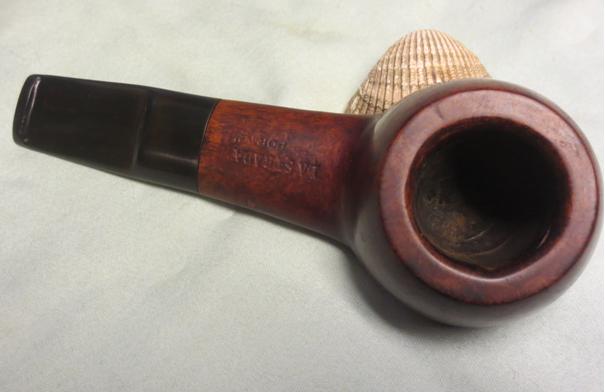
 The stamping on the heel of the bowl and shank read as noted above. It was faint in spots but it is readable in good light.
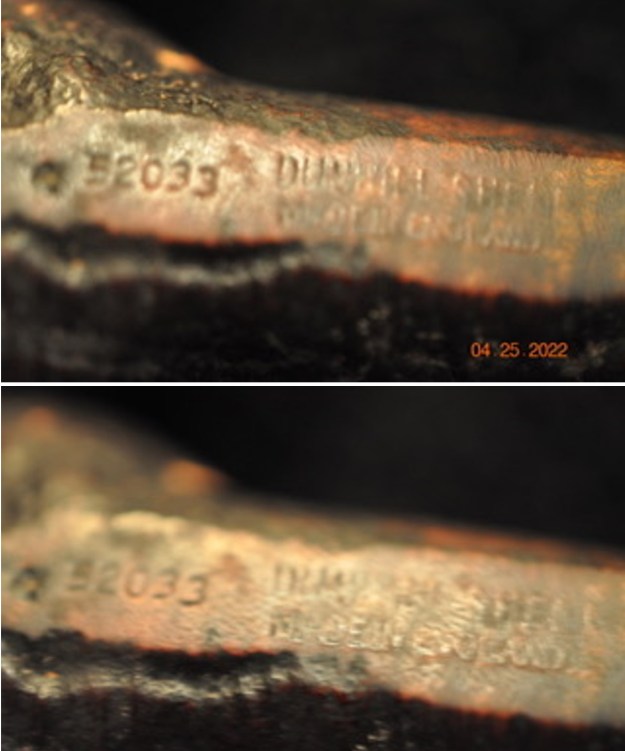 One of the first things I like to do is to unpack the stamping and understand each element in it. I turned to Pipephill helpful site (http://pipephil.eu/logos/en/dunhill/shell-briar1.html). The stamping is interpreted as follows: The 52033 is the shape for a saddle stem Billiard. The Dunhill Shell Briar is the finish. Following the Made In England25 gives the year that the pipe was made. I did a little more work on the five-digit shape number. On Pipephil’s site I found some information (http://www.pipephil.eu/logos/en/dunhill/cumber1.html#52031). I have included the information below to help interpret the number 52033.
Dunhill pipes are stamped with a four-digit code.
Digit 1: (from 1 to 6) denotes the size of the pipe (the group). In this case it is size 5 pipe.
Digit 2: denotes the style of the mouthpiece (0,1=tapered, 2=saddle). The second digit 2, says that it is a saddle stem which it is.
Digit 3 and 4: denote the generic pipe shape (in yellow in the chart on top). This 03 says it is a billiard.
When 5 digits occur, the meaning of the 4 first remain the same.
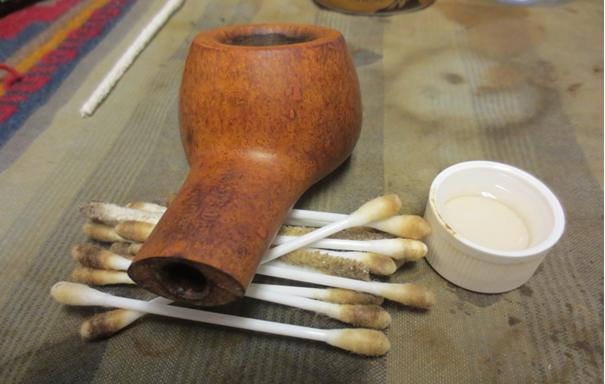
The dating chart helped me understand the date stamp 25. I have included the chart below for you to follow (http://www.pipephil.eu/logos/en/dunhill/cledat-en1a.html). The second column is where the 25 year suffix fits. To arrive at the date the suffix is added to 1960 making the pipe a 1985 Shell Briar.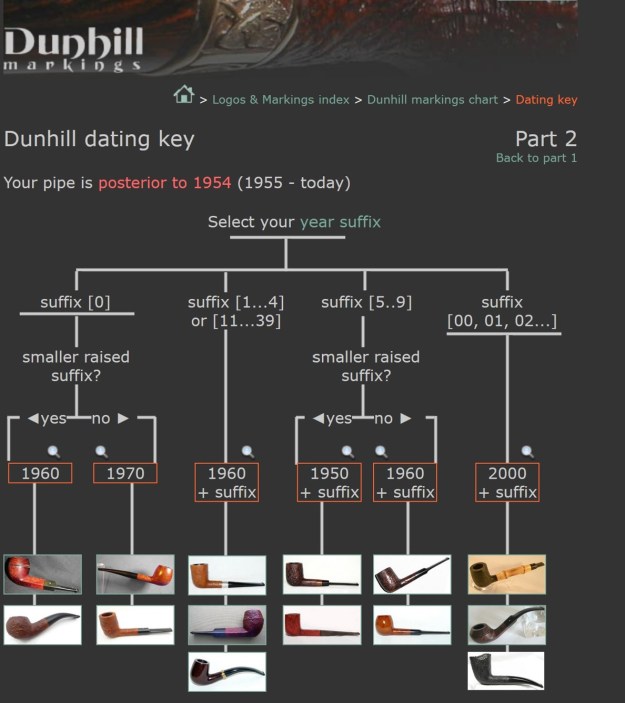 I turned to work on the pipe itself. Jeff had carried out his usual thorough cleanup of the pipe. He reamed the bowl with a PipNet reamer and cleaned up the reaming with a Savinelli Fitsall Pipe Knife. He scrubbed the internals of the bowl, shank and stem with alcohol, cotton swabs, shank brushes and pipe cleaners. He scrubbed the externals with undiluted Murphy’s Oil Soap and a tooth brush. He rinsed the bowl off with running water and dried it off with a soft cloth. He soaked the stem in Briarville’s Pipe Stem Deoxidizer and once it had soaked rinsed it off with warm water to remove the residual solution. He dried it off and rubbed it down to remove any oxidation that was still on the stem. The pipe looked very good when I received it. The bowl and rim top were in excellent condition. The saddle stem had a small crack in the top of the button and a large piece of vulcanite missing on the underside from the button forward.
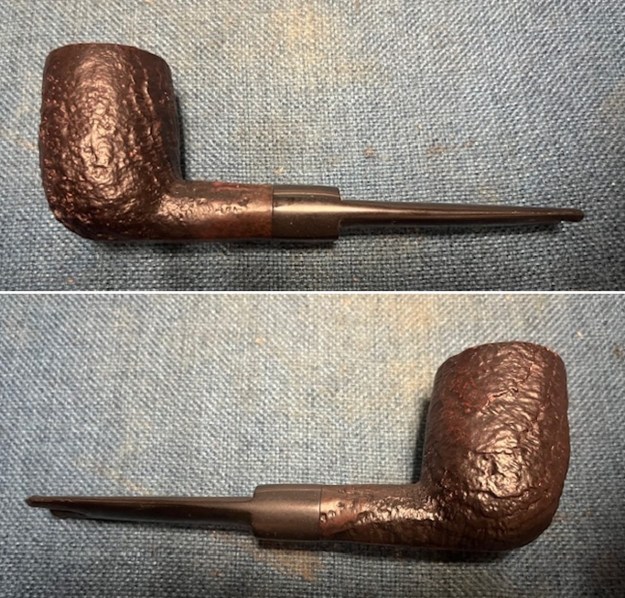
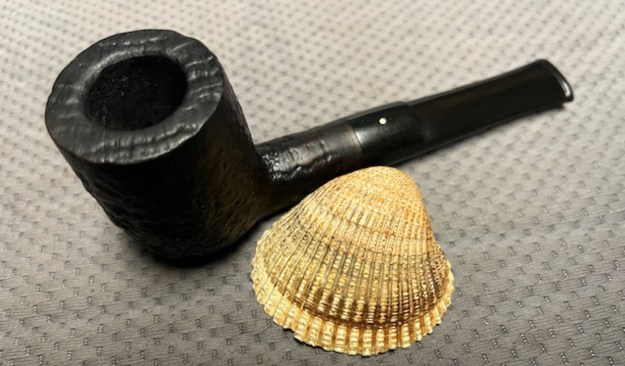
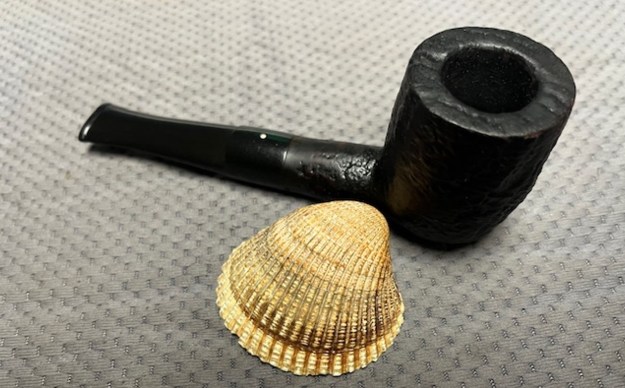
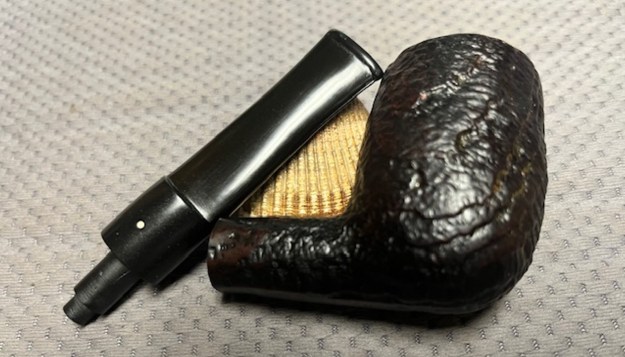
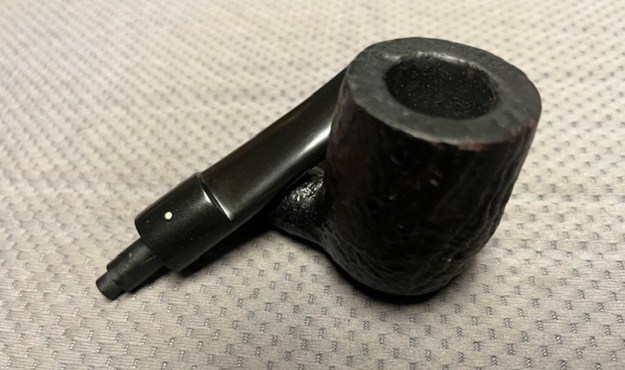
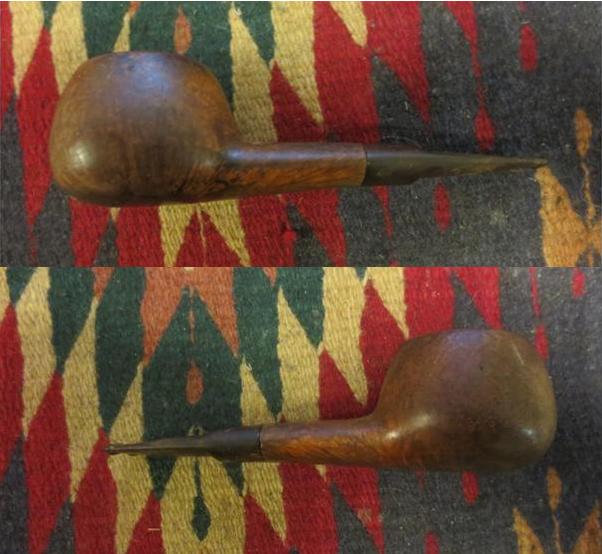
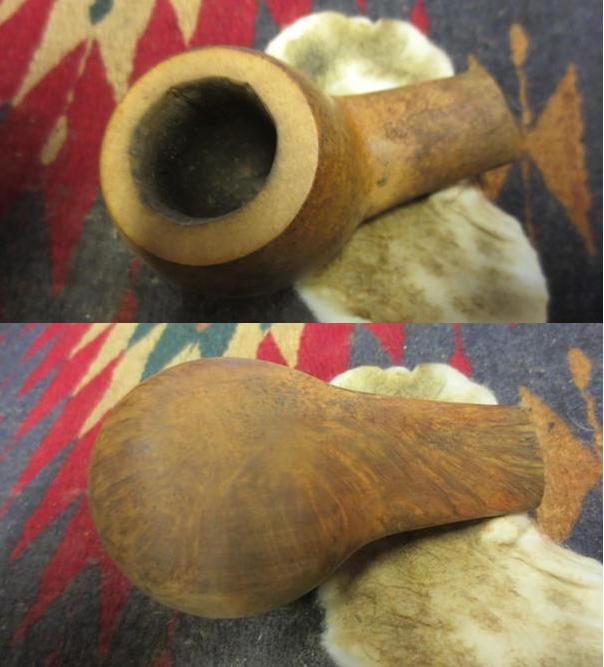
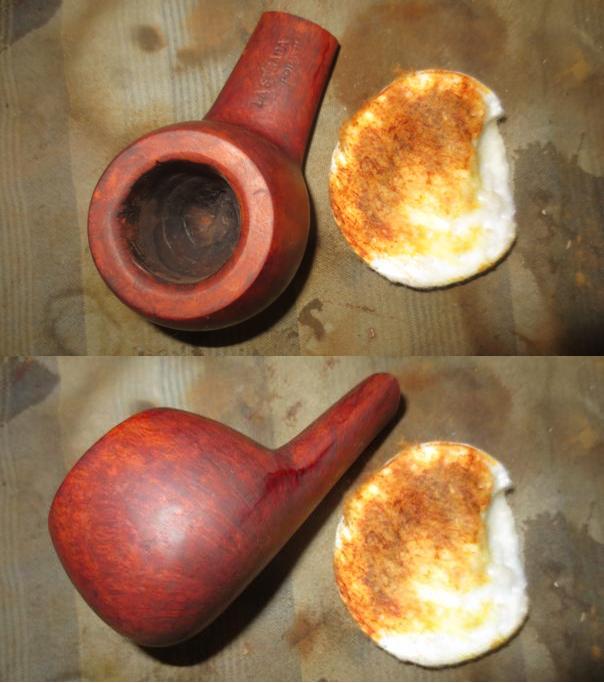
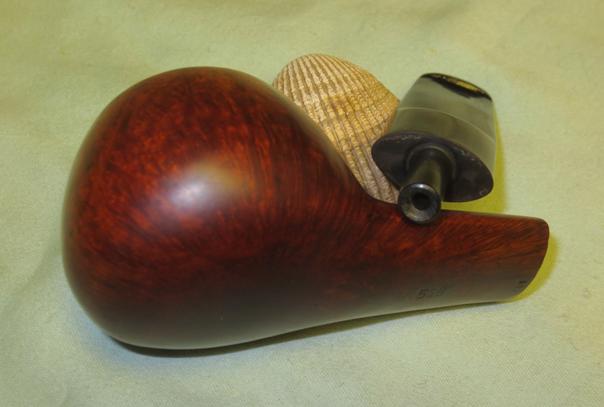
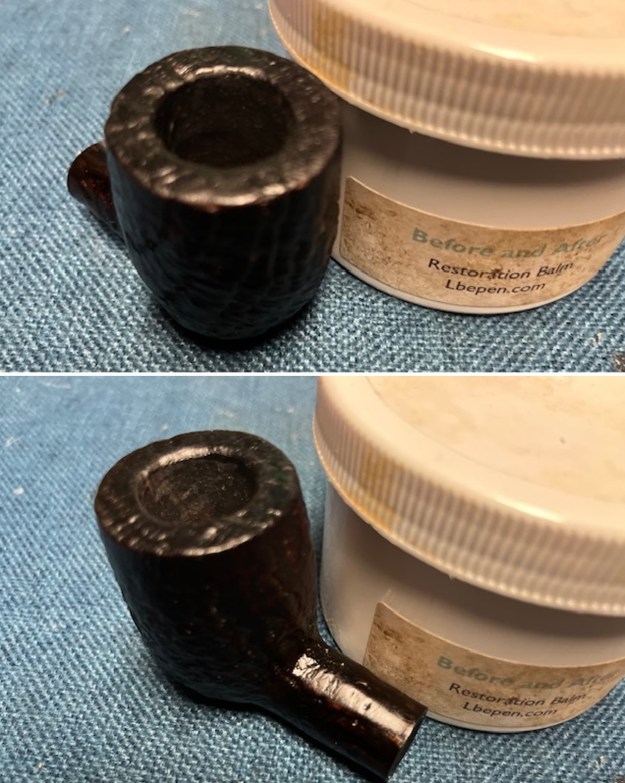
 I took a photo of the rim top to show the condition. You can see the clean bowl and fading of the stain on the rim top. The stem came out looking clean. The issues noted above are visible in the photos below.
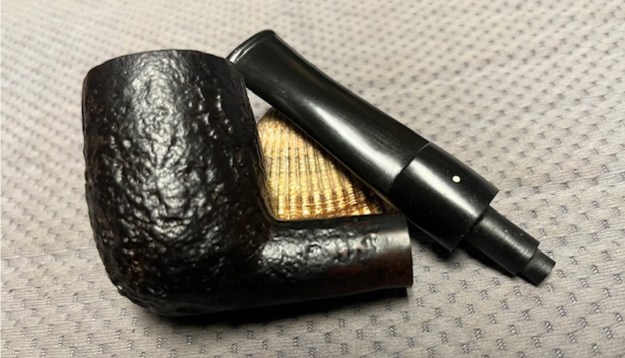
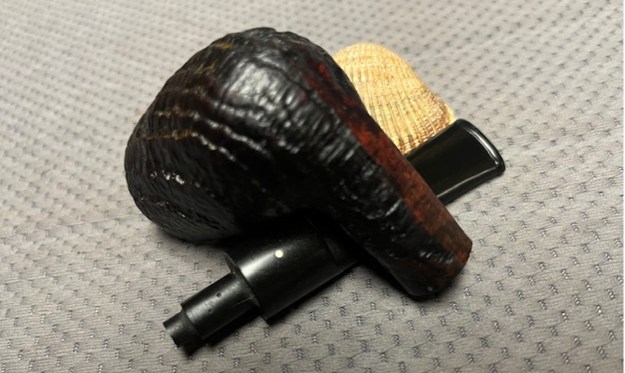
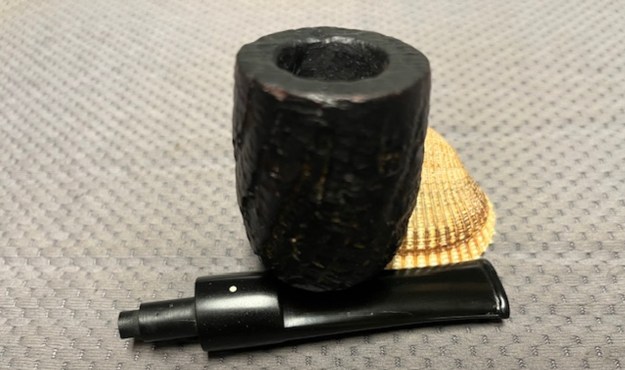
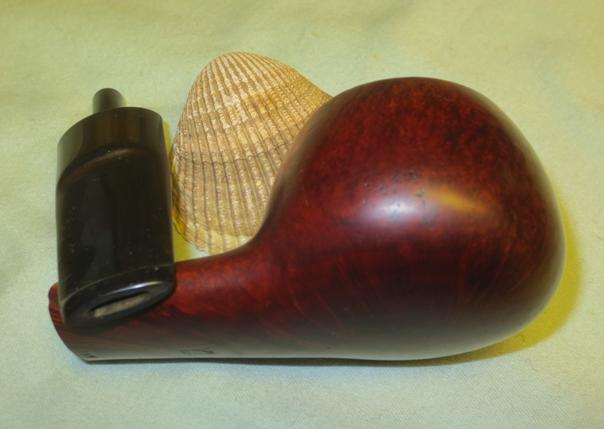
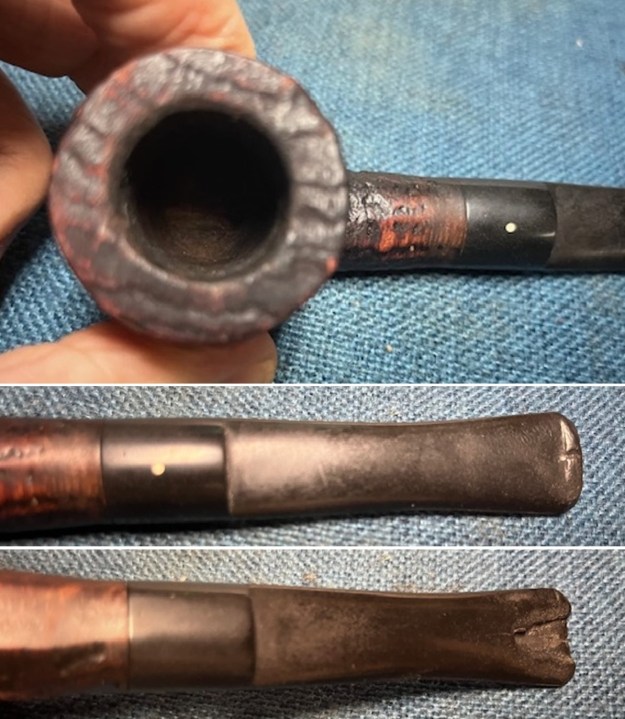 I took a photo of the underside of the shank to show the stamping. It is clear, though faint toward the stem and readable as noted above. I removed the stem from the shank and took a photo of the pipe parts to show what I was working with. It is a nice looking pipe.
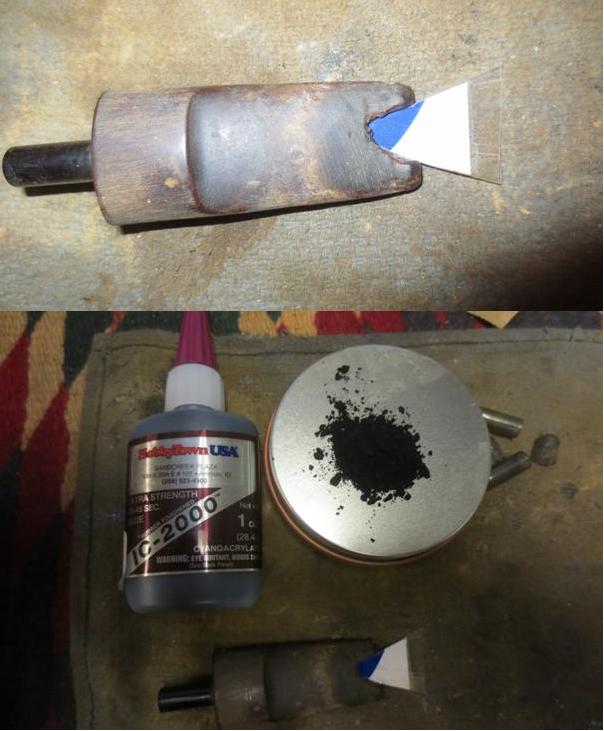
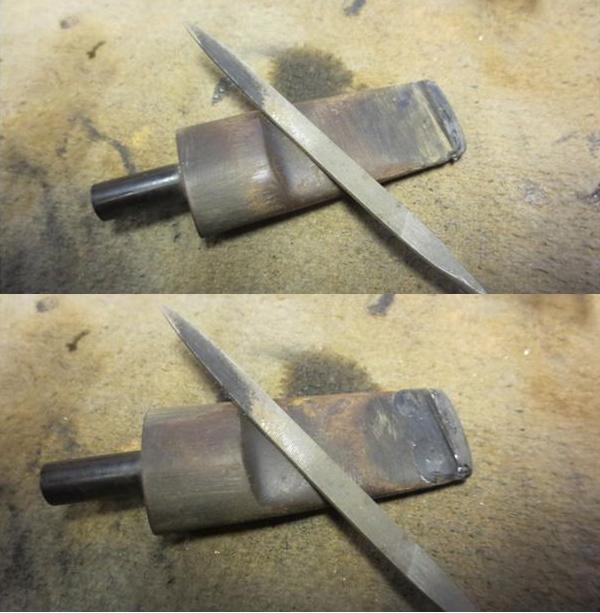
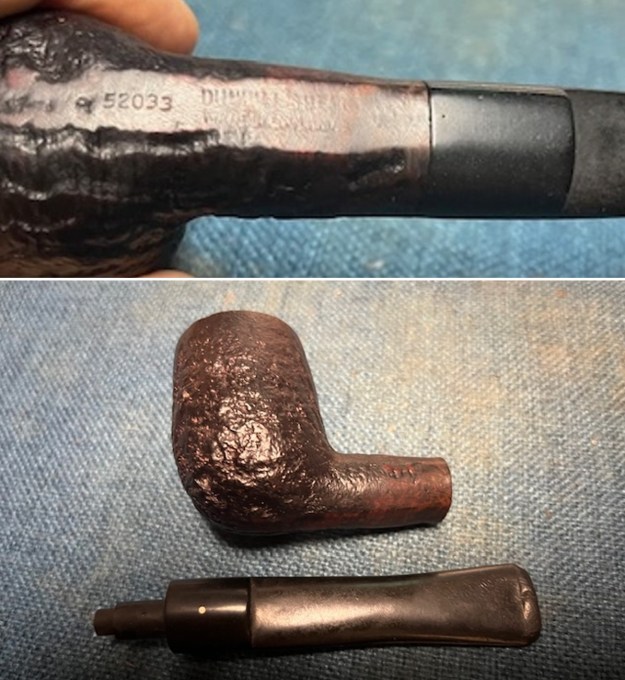 I decided to start my work on the pipe by addressing the significant damage to the stem service. I measured the length of the stem and chose to cut off the damaged portion of the stem. I would lose about ¾ of and inch to an inch in length. I used a Dremel and sanding drum to remove the damaged portion of the stem. I would rebuild a button on the end of the stem.
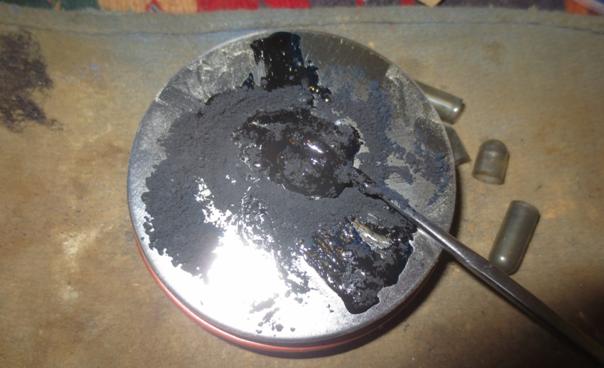
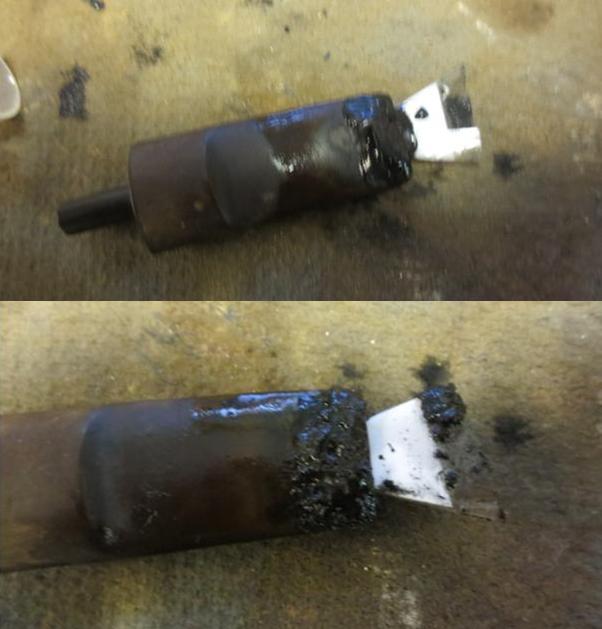
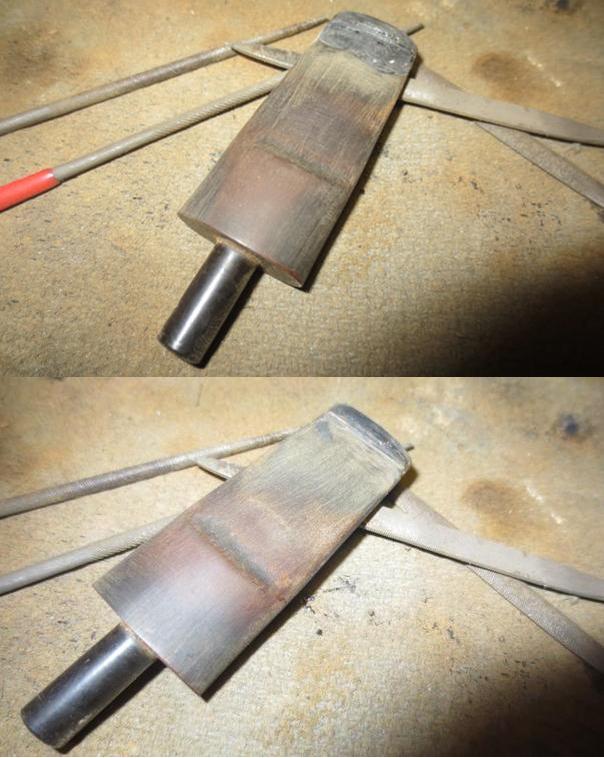
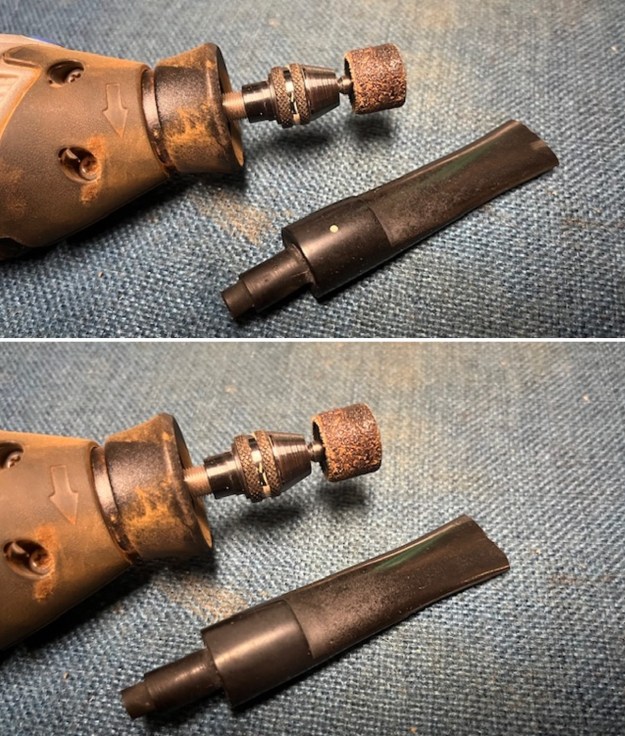 I smoothed out the end of the button on a topping board. I top of the stem had a lot of room to recut the button. The bottom edge was thin. I rebuilt the button on the top and underside of the stem with black rubberized CA glue. Once it cured I would reshape it into a standard button.
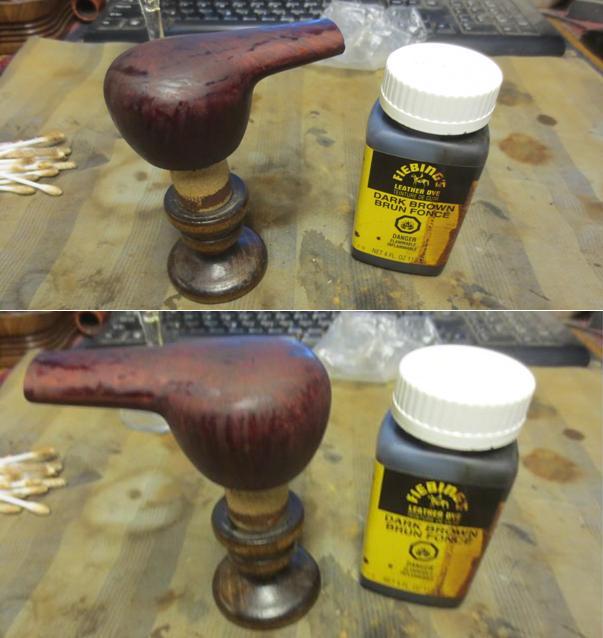
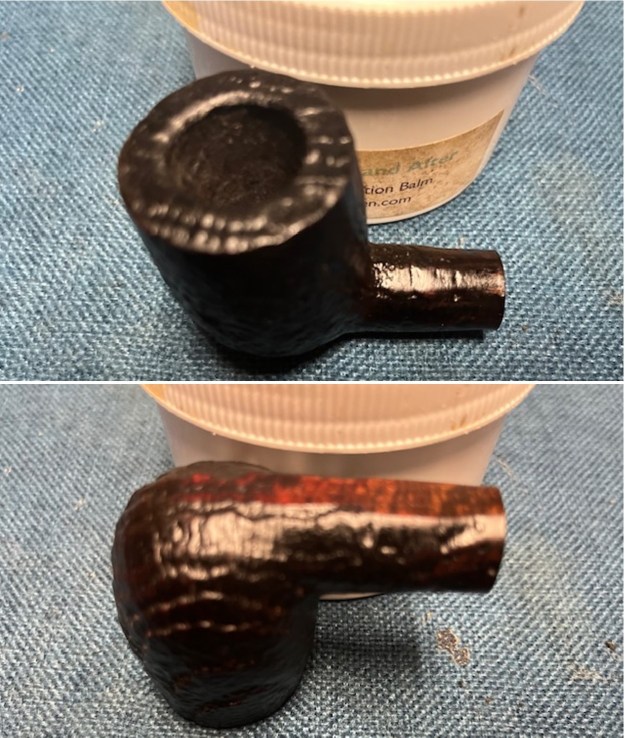
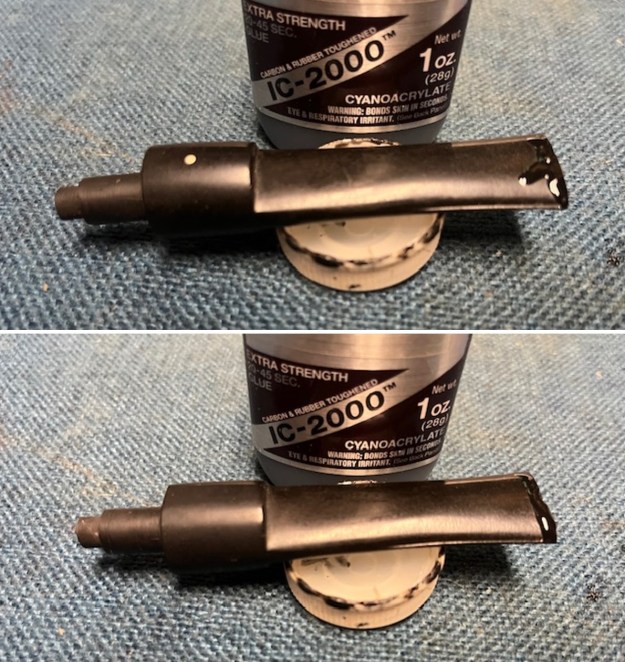 I set the stem aside to let the rebuilt button cure. I would leave it overnight to get a deep cure. I turned my attention to the bowl. I started by working over the debris in the valleys of the rim top sandblast surface with a brass bristle wire brush. It looked significantly better. I used a black stain pen to touch up the rim top and the top of the shank.
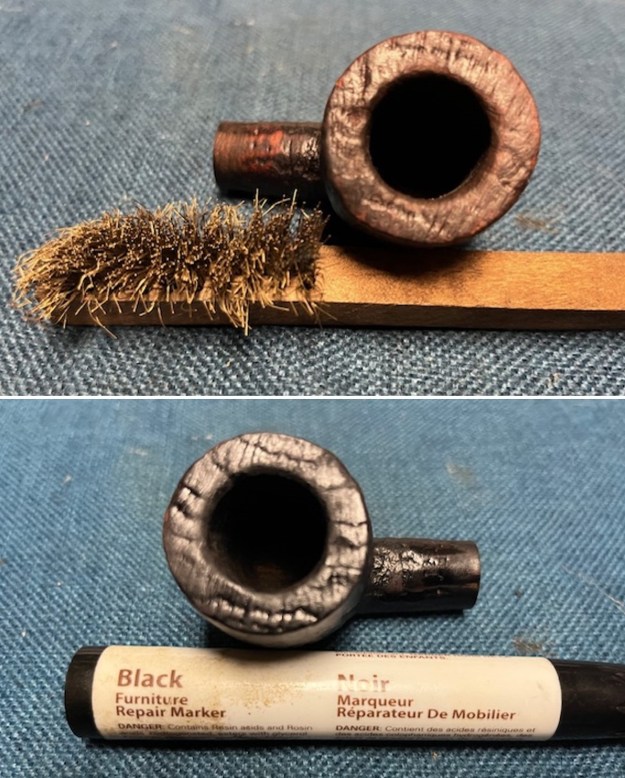 I rubbed the briar down with Before & After Restoration Balm. I worked it into the briar with my fingertips and a horsehair shoe brush to work it into the nooks and crannies of the sandblast finish. The product works to clean, enliven and preserve the briar. I let it sit for 10 minutes then I buffed it with a cotton cloth to deepen the shine. The briar really comes alive with the balm.
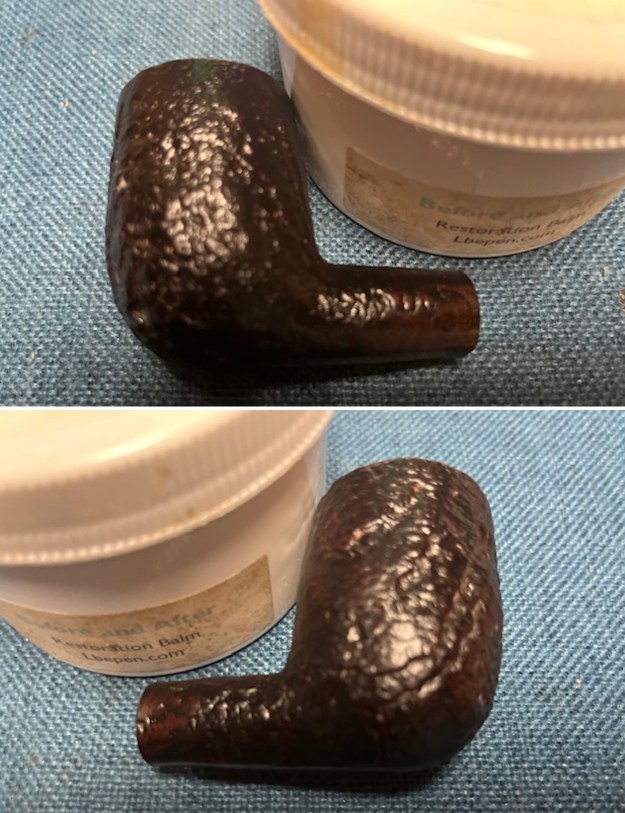
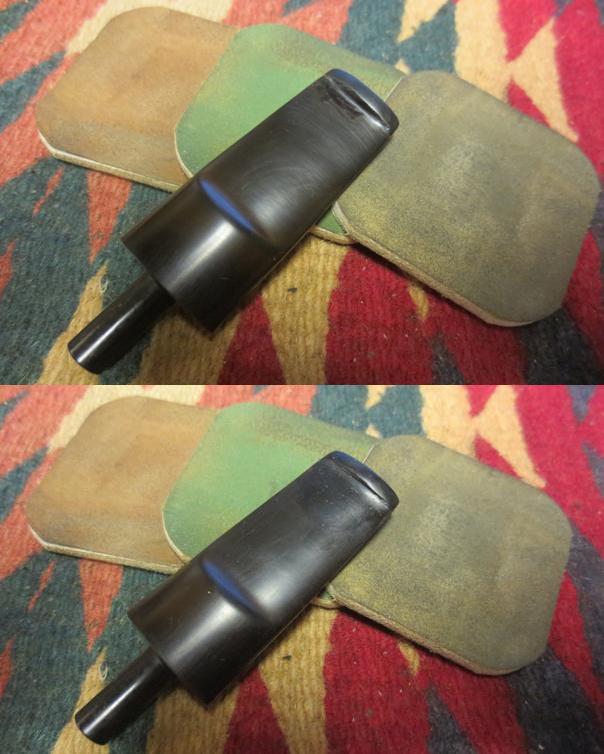
 I reshaped the rebuilt button on the stem and shaped the slot in the button with a button saw and small files. I smooth out the shape of the newly formed button and slot with 220 grit sandpaper. It looked very good at this point.
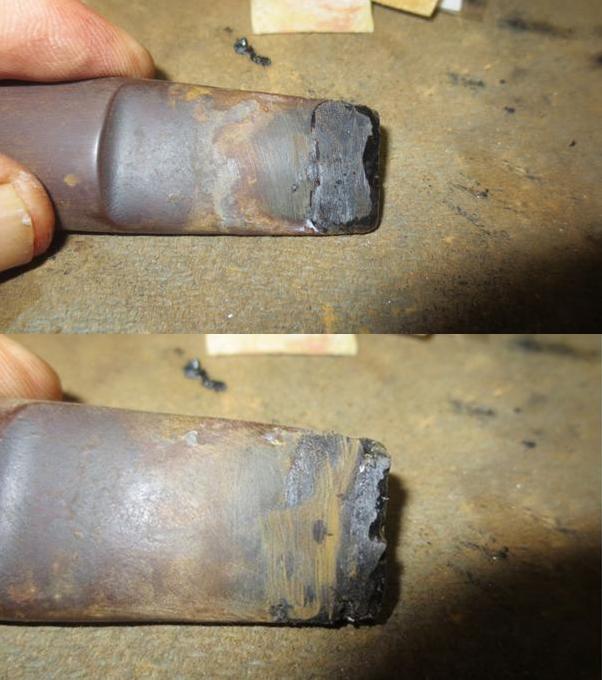
 I sanded the stem surface with 320-3500 grit 2×2 inch pads. I wiped the stem down with an Obsidian Oil cloth after each sanding pad.
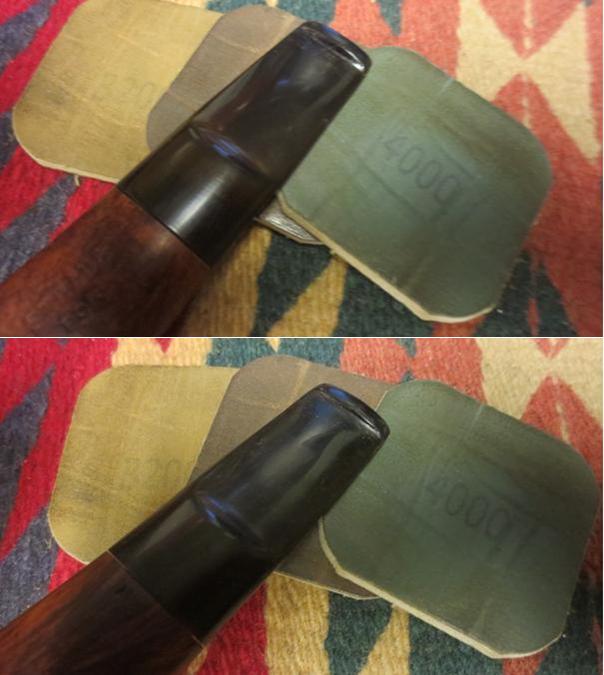
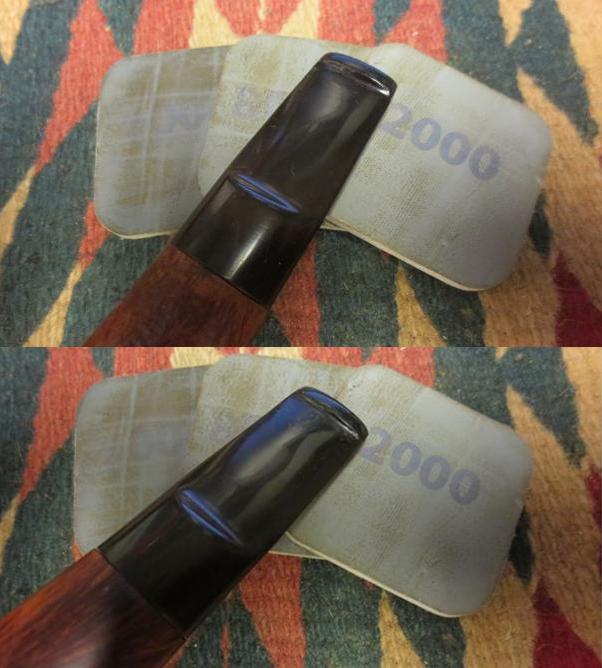
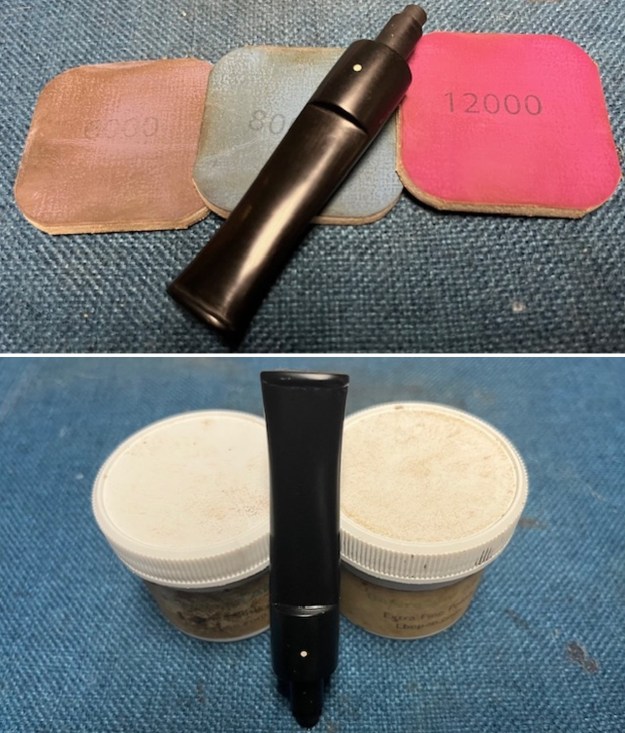
 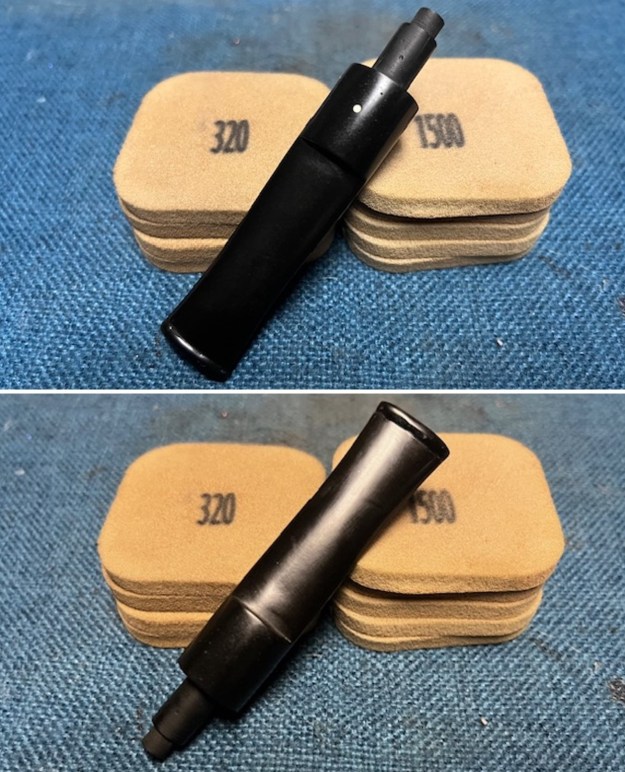 I polished the vulcanite with micromesh sanding pads – 1500-12000 grit pads. I wiped it down with Obsidian Oil after each sanding pad. I used Before & After Pipe Polish – both Fine and Extra Fine to further polish the stem.
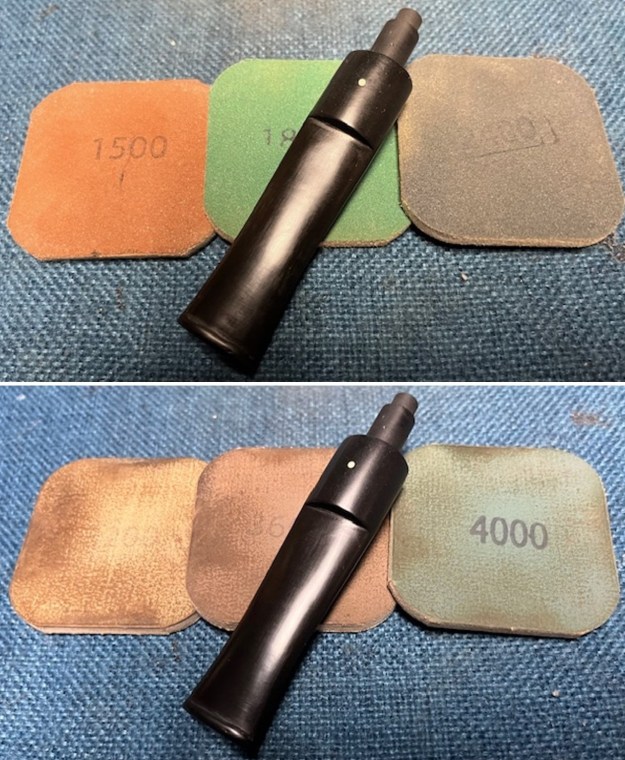
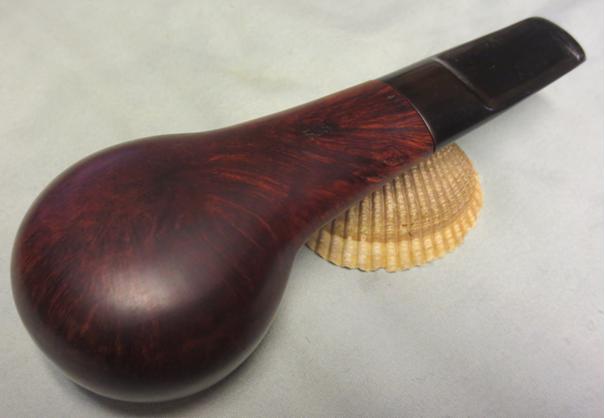
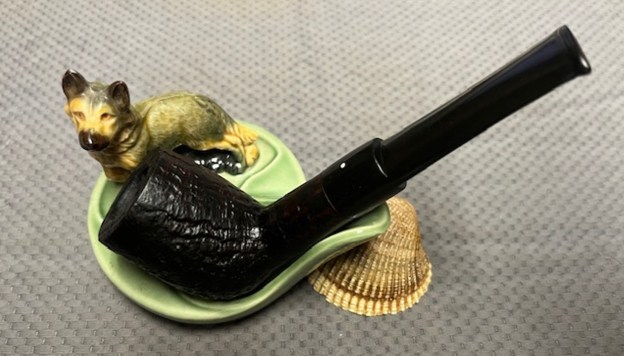
 This 1985 Dunhill Shell Briar 52033 Saddle Stem Billiard has a beautiful, unique Dunhill Sandblast finish made in 1985. The rich Shell Briar finish that is identified with some great grain around the bowl and shank. It has some great rugged sandblast that Dunhill specialized in making. The polished black vulcanite saddle stem adds to the mix. I put the stem back on the bowl and buffed the pipe with Blue Diamond on the buffing wheel being careful to not buff the stamping. I gave the bowl and the stem multiple coats of carnauba wax on the buffing wheel and followed that by buffing it with a clean buffing pad. I hand buffed the pipe with a microfiber cloth to deepen the shine. The finished Dunhill Shell Briar 52033 Billiard is quite nice and feels great in the hand. Give the finished pipe a look in the photos below. The dimensions of the pipe are Length: 5 ½ inches, Height: 2 inches, Outside diameter of the bowl: 1 ½ inches, Chamber diameter: ¾ of an inch. The weight of the pipe is 48 grams/1.69 ounces. This one will be going on the rebornpipes store in the British Pipemakers Section. The shortened, reshaped stem looks good to me. The price is a good entry level Dunhill for the interested Group 5 Billiard. Thanks for walking through the restoration with me as I worked over another beautiful pipe Thanks for your time.