Blog by Dal Stanton
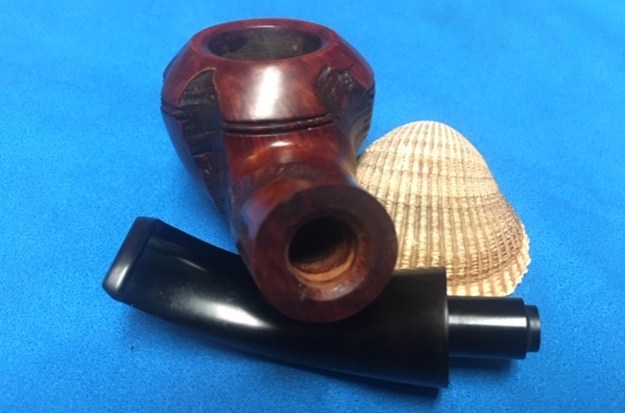
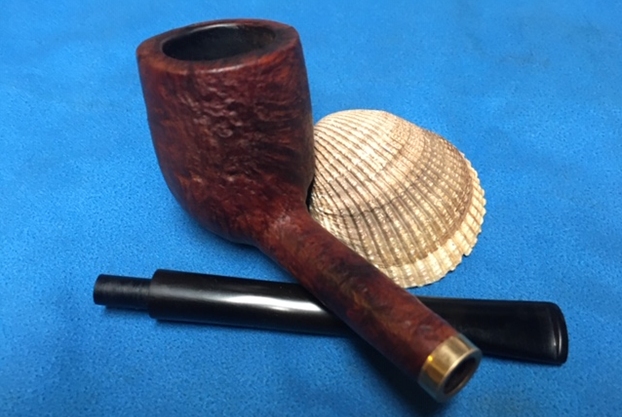
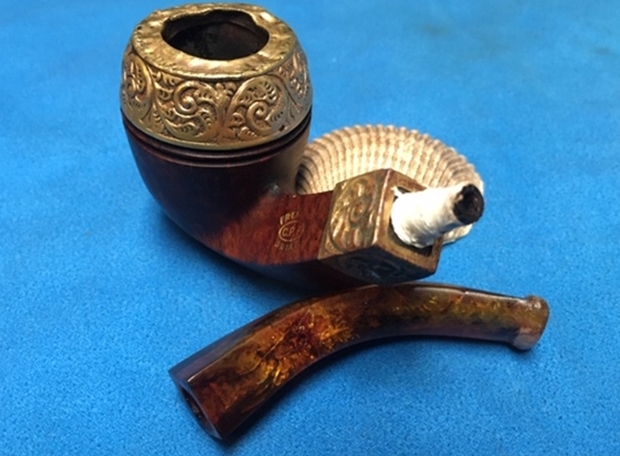
I came into possession of this attractive Danish Freehand when I acquired what I call the St. Louis Lot of 26 which my son, Josiah, helped me secure when he was a student in St. Louis. He texted me from St. Louis about this box of pipes that were for sale at an antique shop he found. Josiah wanted to split the cost of the Lot with me so that I could pick out a pipe in the Lot that would join my personal collection and would be his gift to me. The rest of the pipes would benefit the Daughters of Bulgaria – our work here in Bulgaria with women and girls who have been trafficked and sexually exploited. It was a win/win proposition! I chose as his gift to me the Champion Churchwarden in the center of the picture below. The rest of the Lot of 26 went to my online collection I call For “Pipe Dreamers” Only! where pipe men and women can choose a pipe – or a pipe chooses them – to be commissioned for restoration.
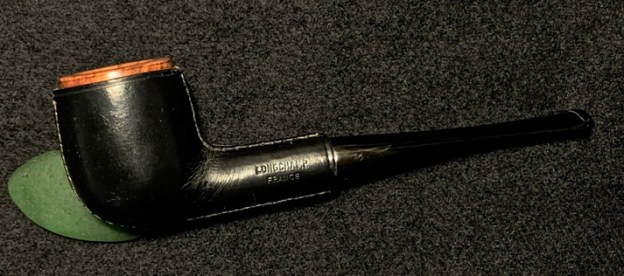
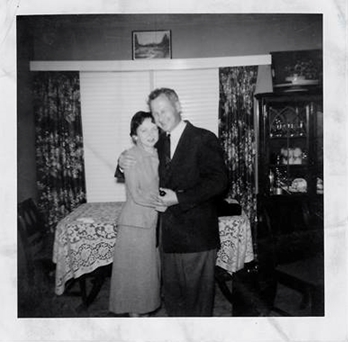
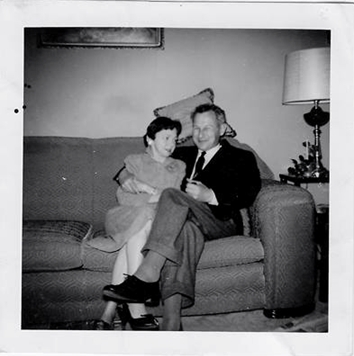
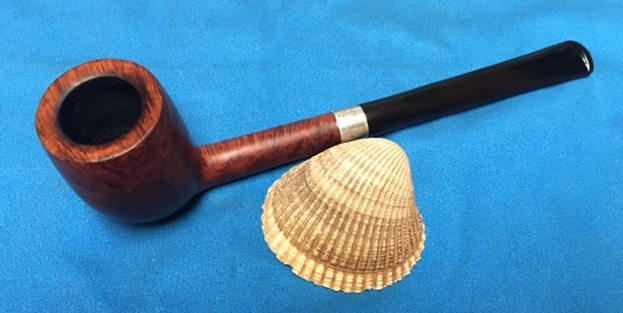
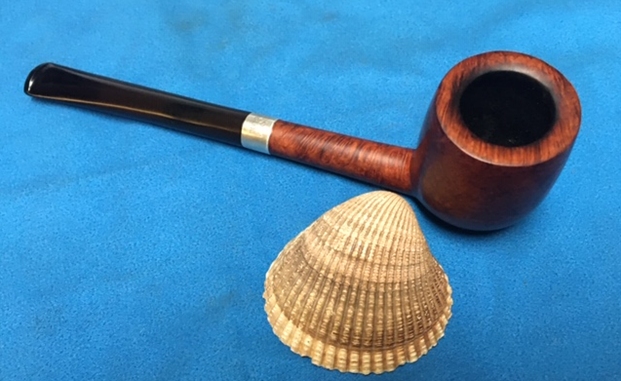
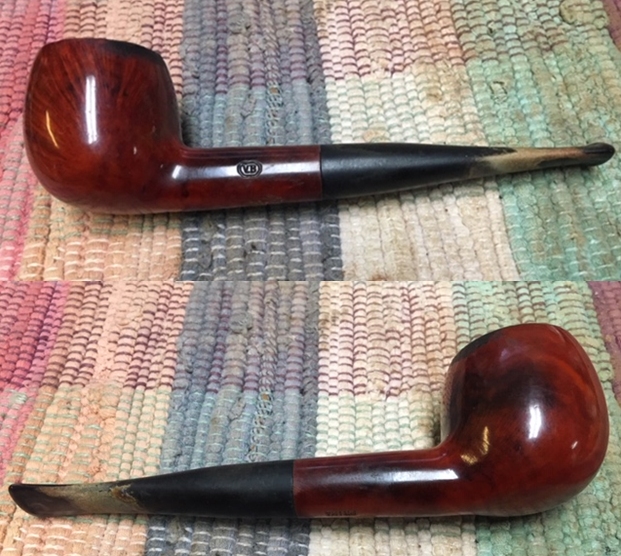
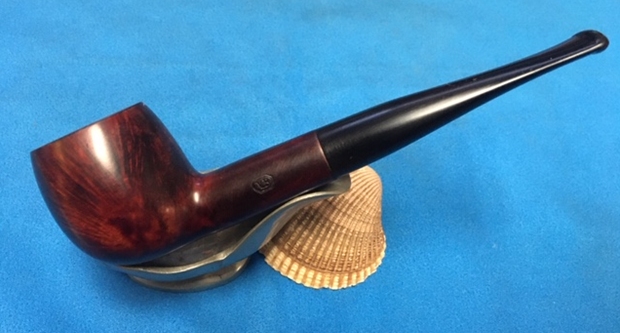
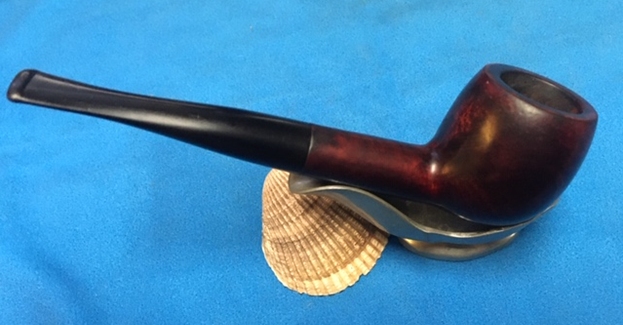
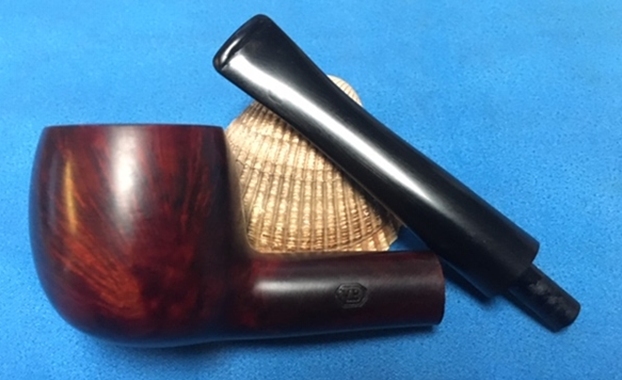
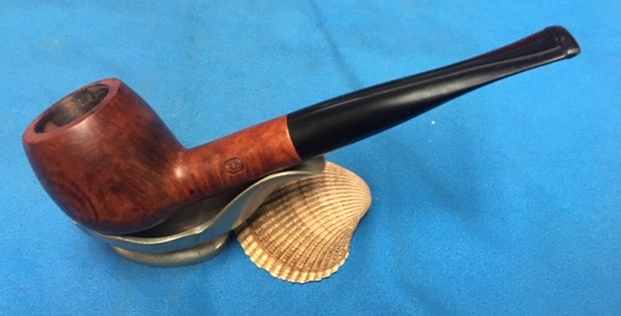
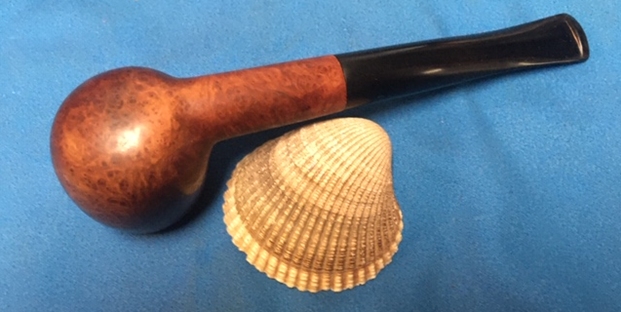
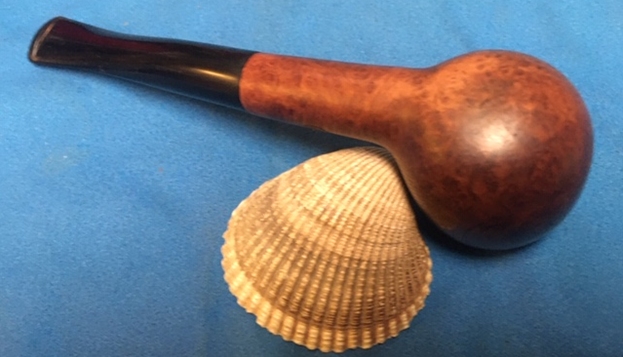
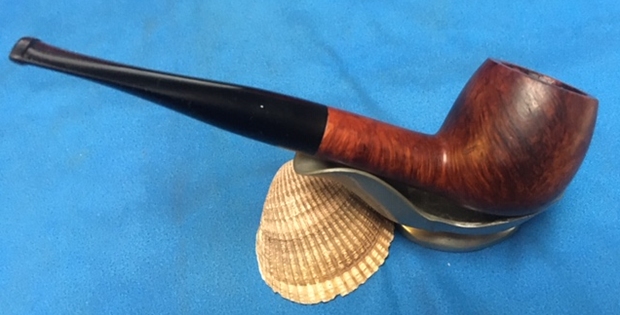
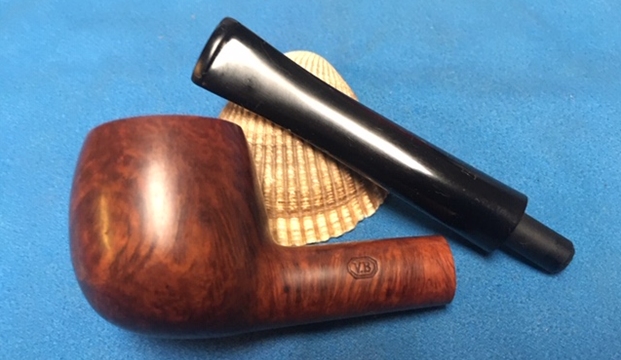
Andy has commissioned pipes from The Pipe Steward before and I love it when pipe men (and women) keep coming back! The pipe calling his name from the St. Louis Lot of 26 is the Danish Freehand marked in the picture below. As a return patron of The Pipe Steward which benefits the Daughters of Bulgaria, Andy’s contribution has been appreciated. His first commission was a striking Monarch Bent Ball (see: Link) and then a Churchwarden I fashioned from a throw-away bowl (see: Link) which was on his list to add to his personal collection. Andy came back again and commissioned a Trent Lev-O-Lator Half Bent Billiard (see: Link) that turned out beautifully. His three previous restorations are pictured below.
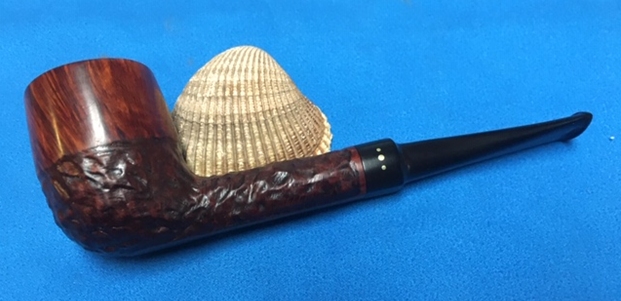
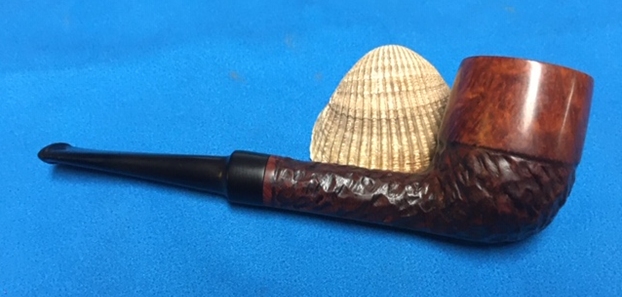
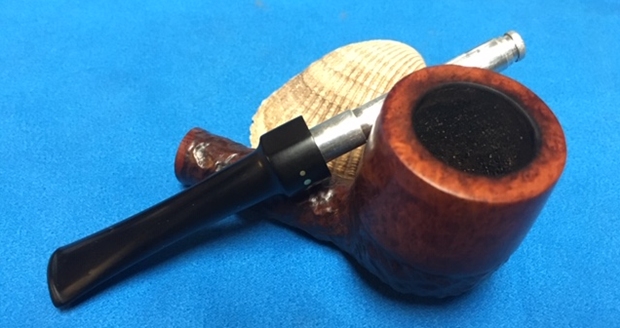
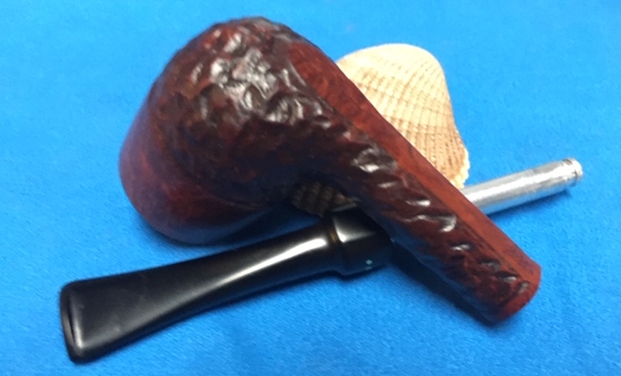
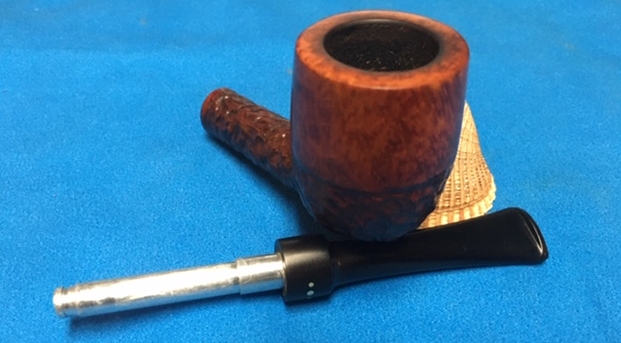
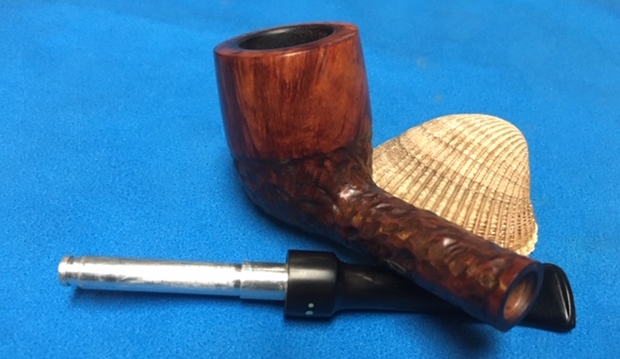
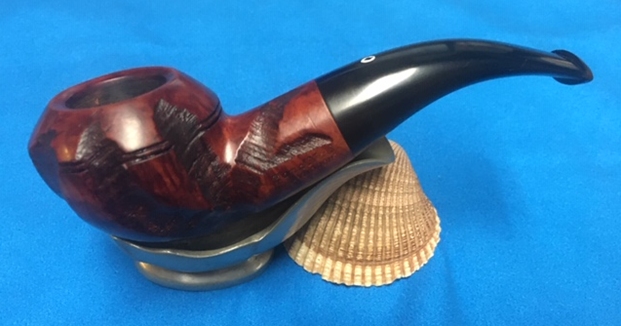
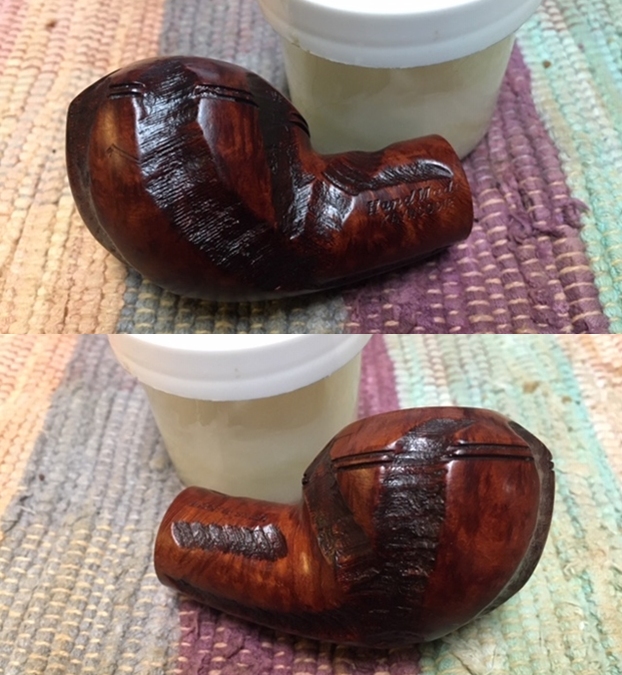
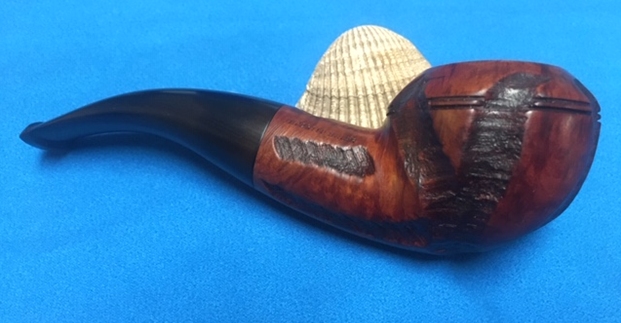
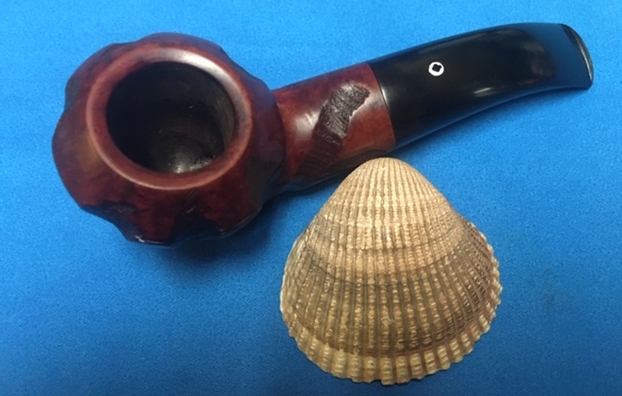
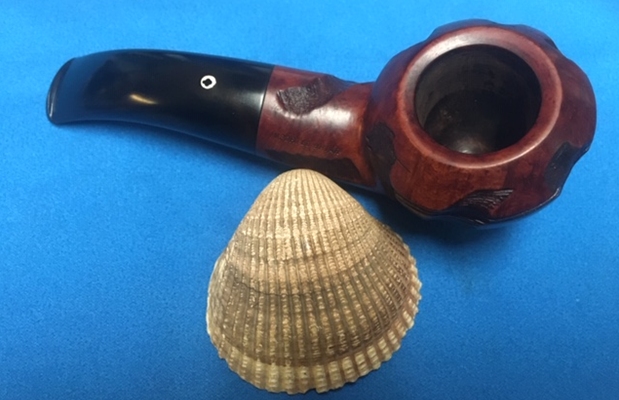
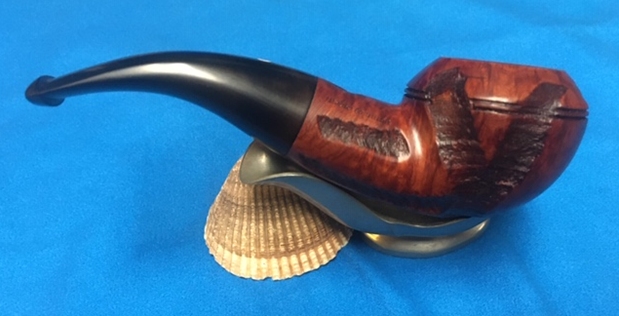
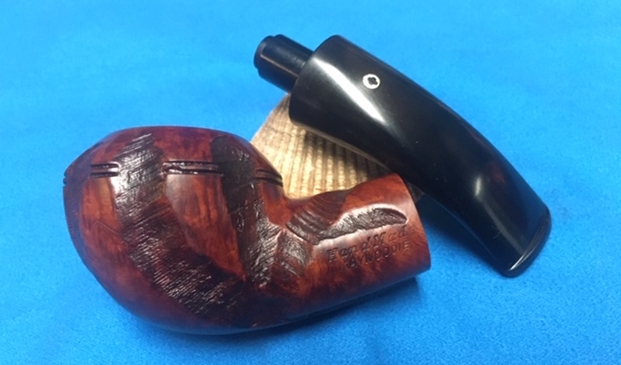
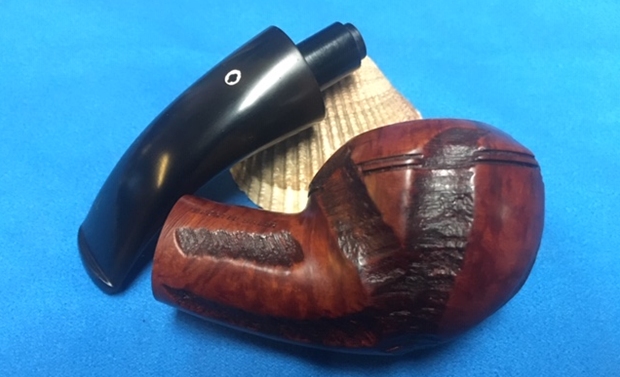
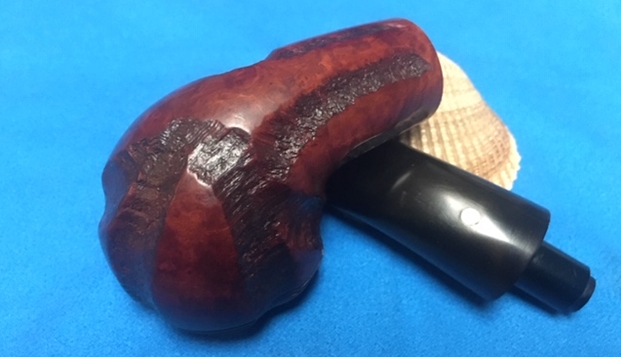
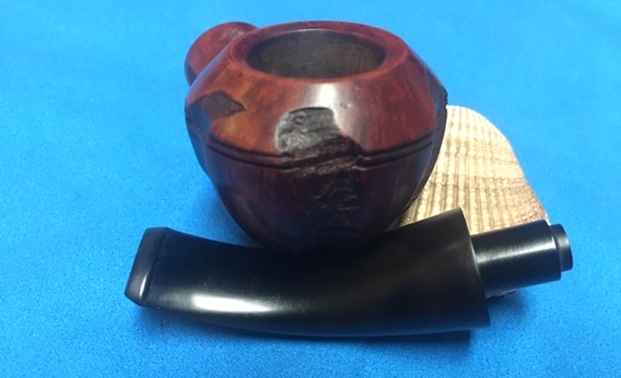
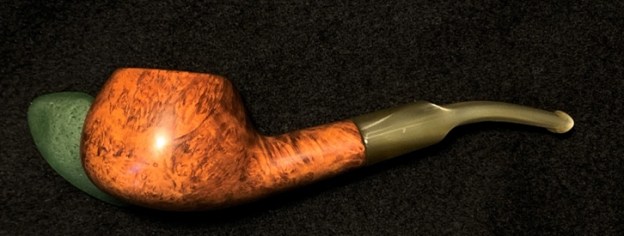
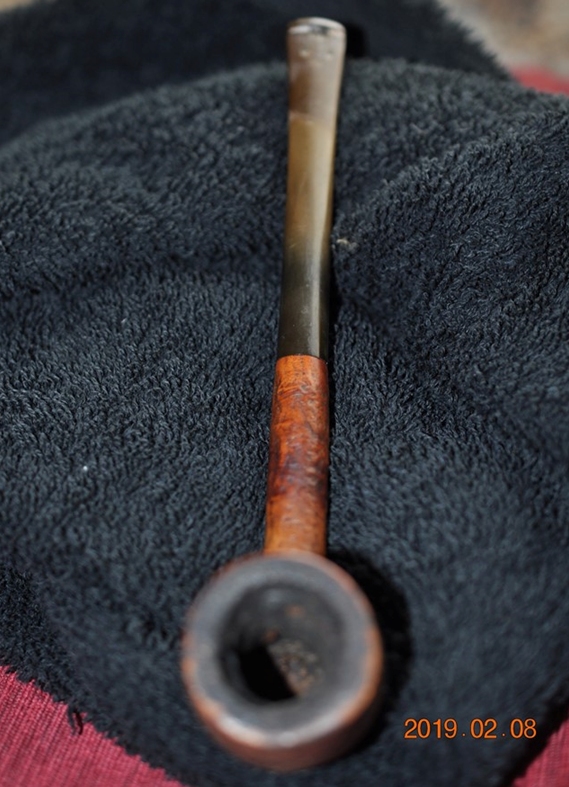
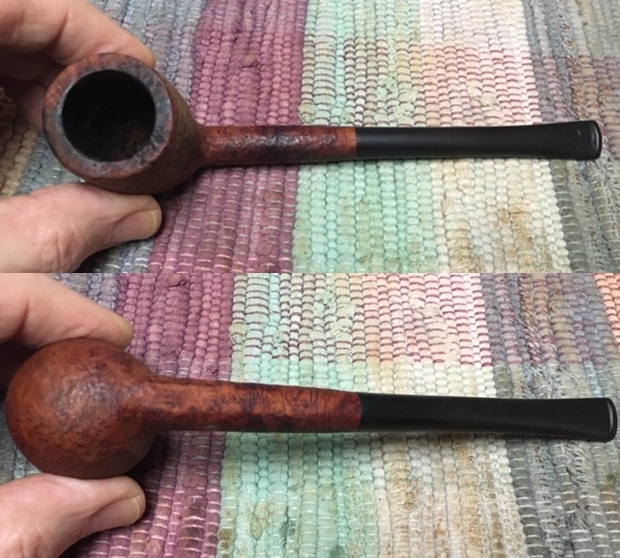
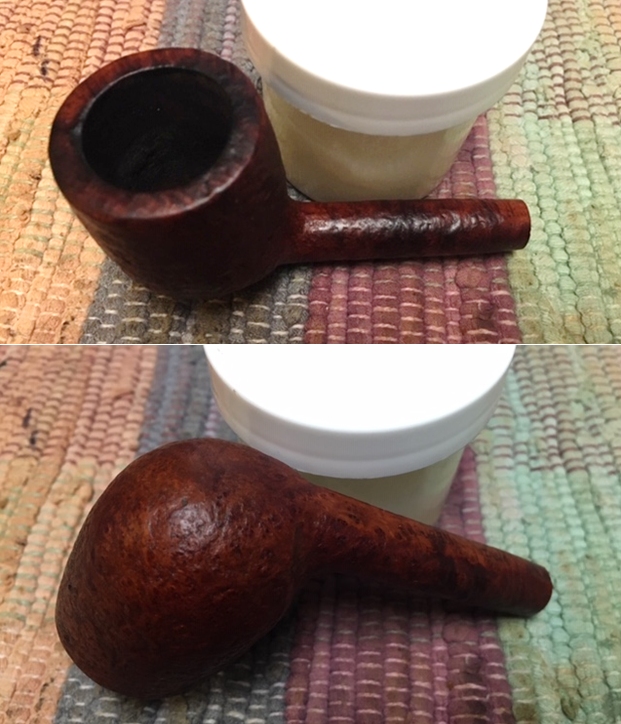
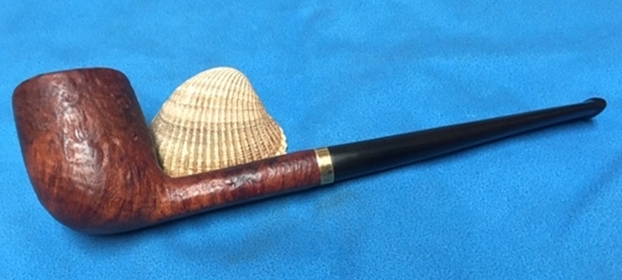
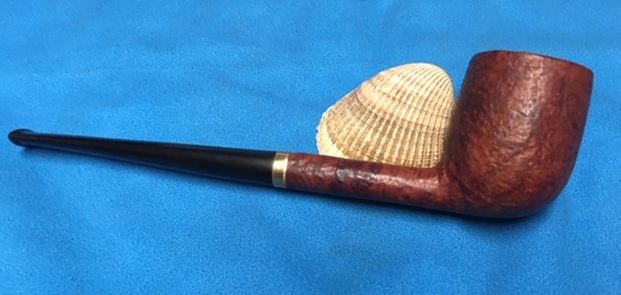
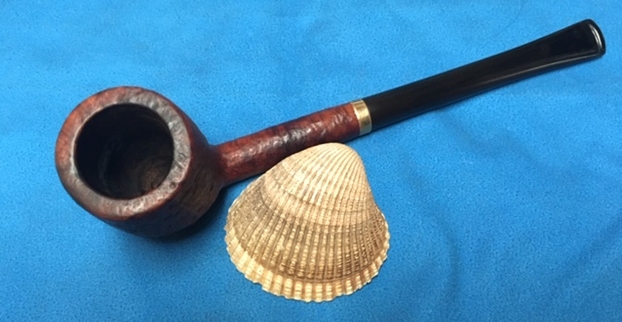
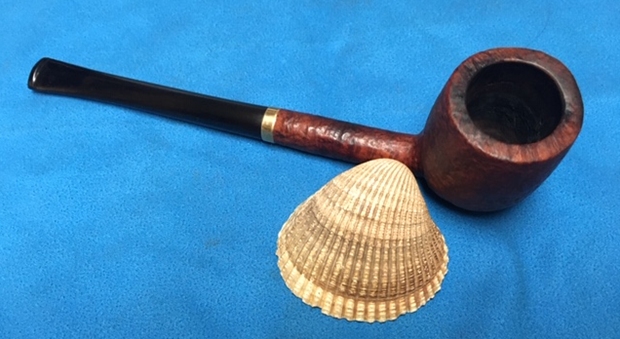
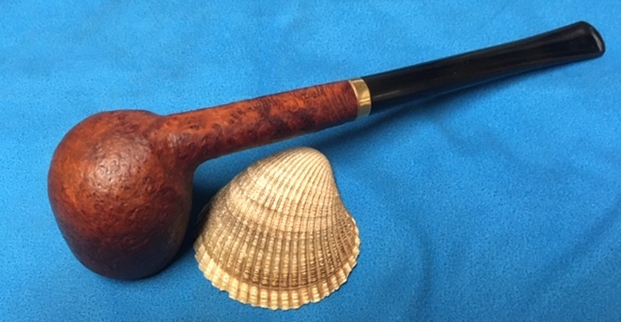
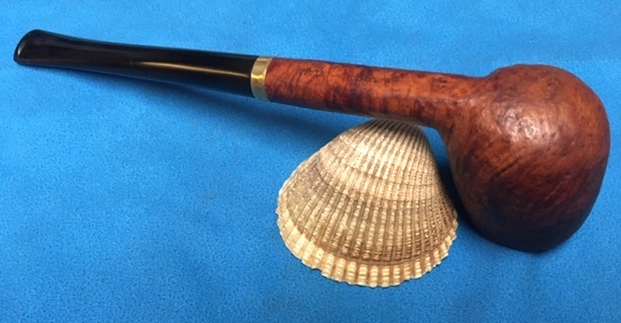
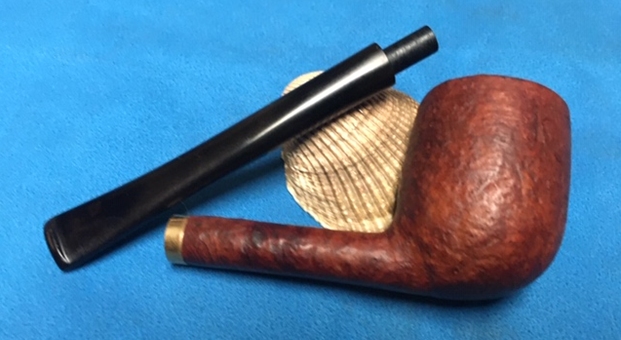
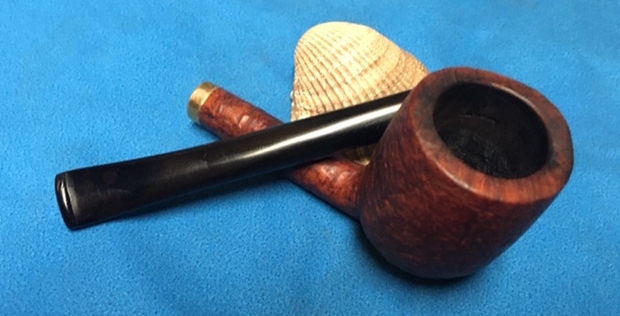
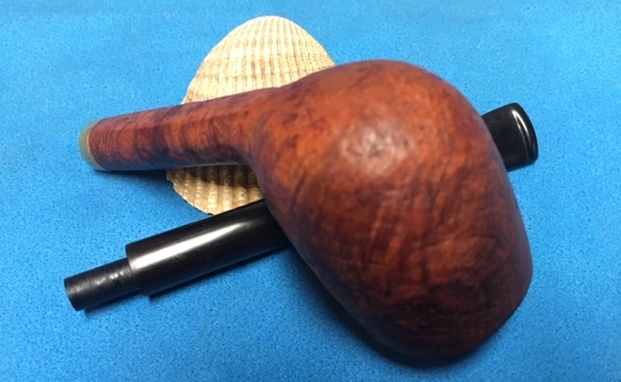
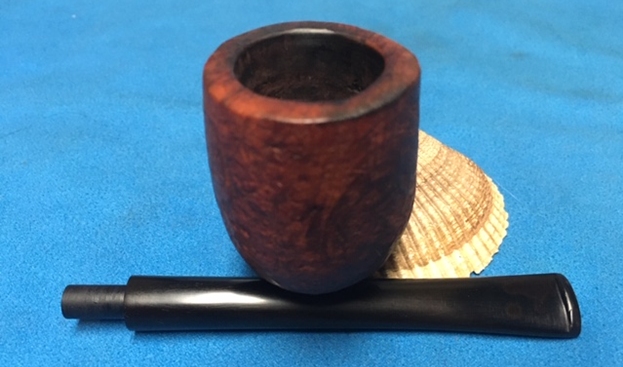
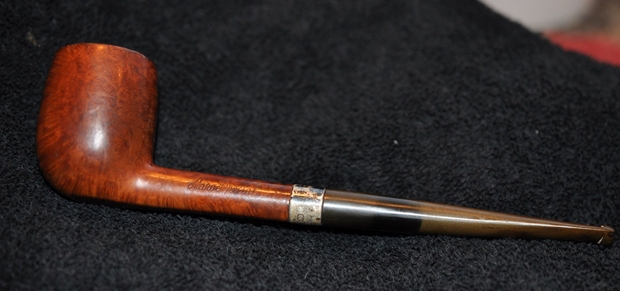
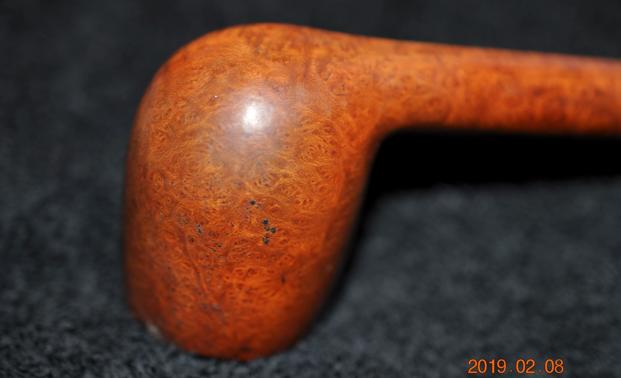
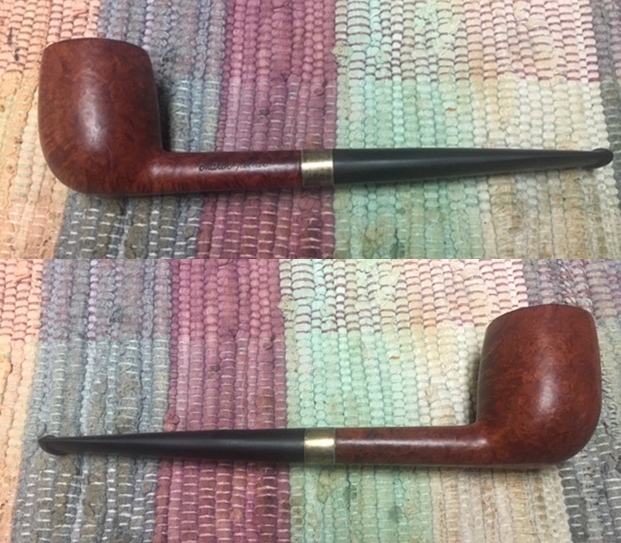
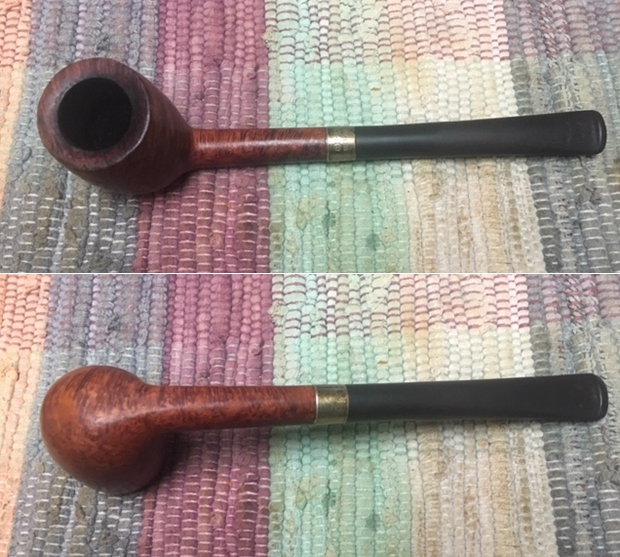
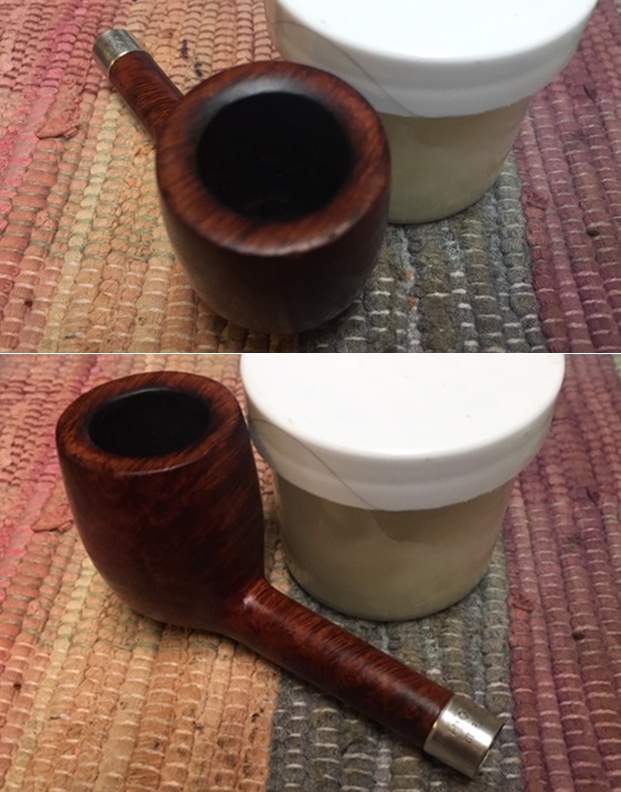
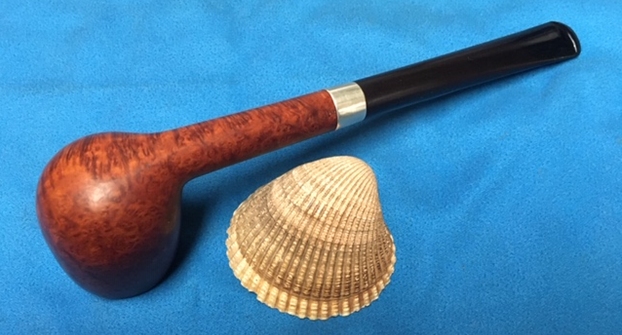
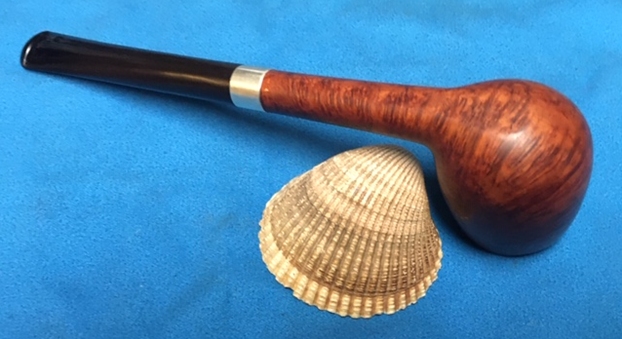
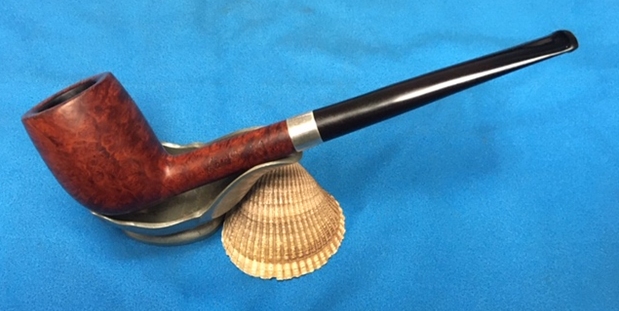
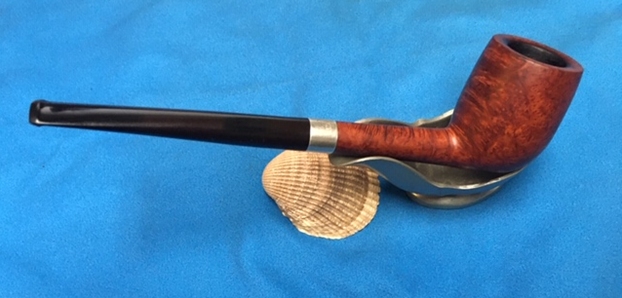
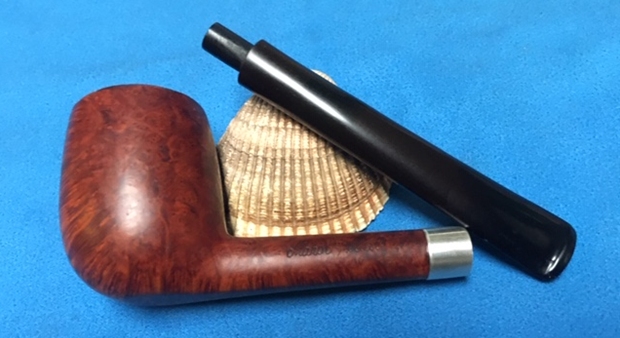
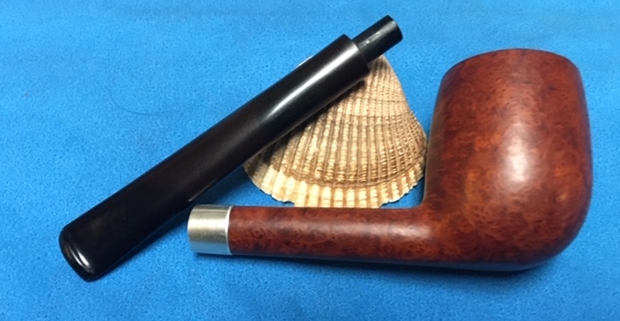
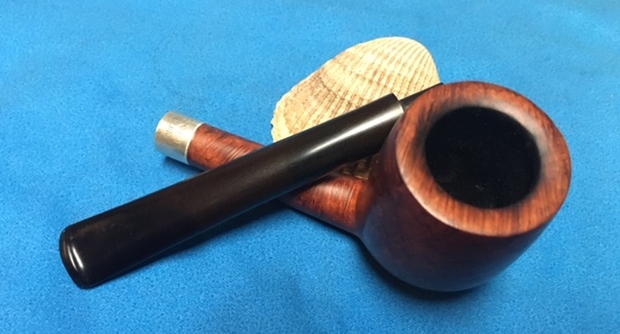
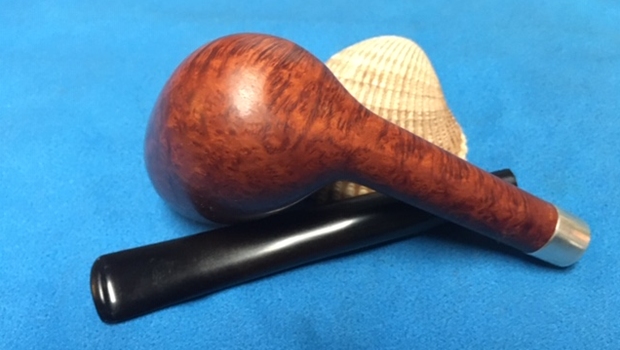
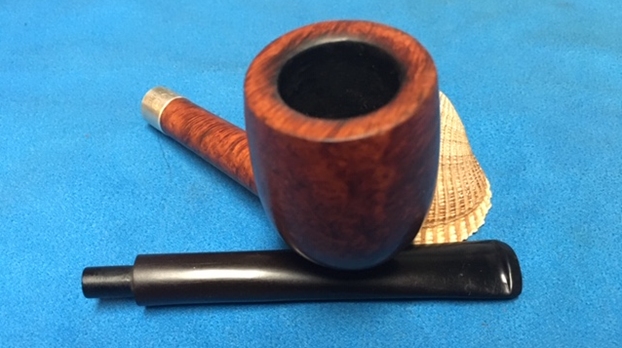
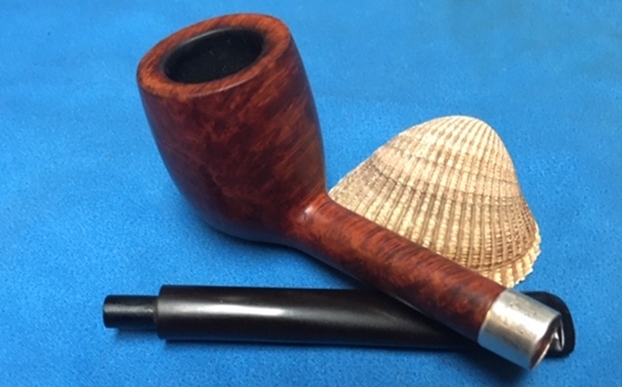
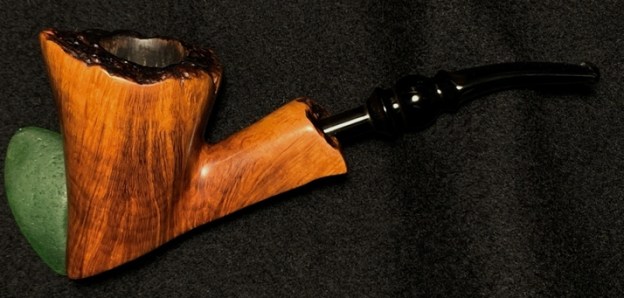
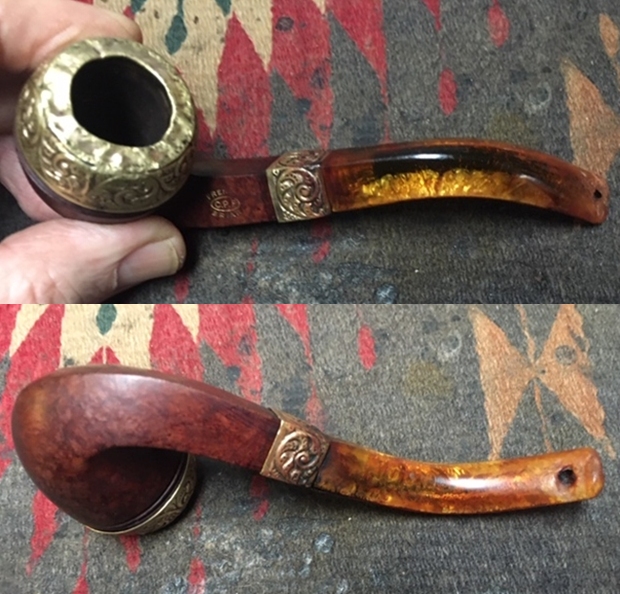
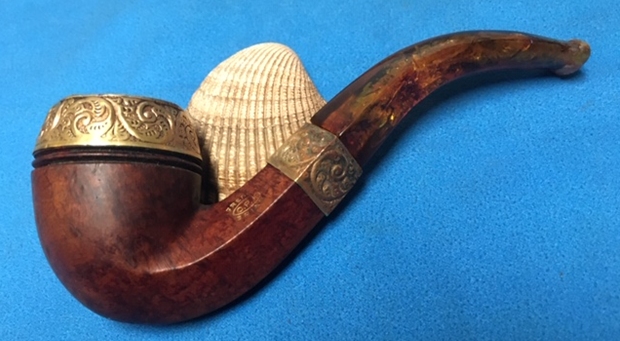
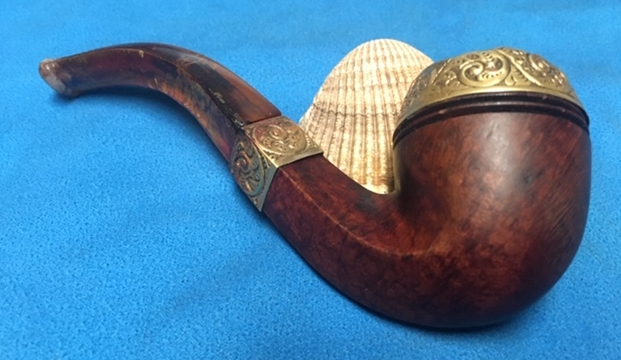
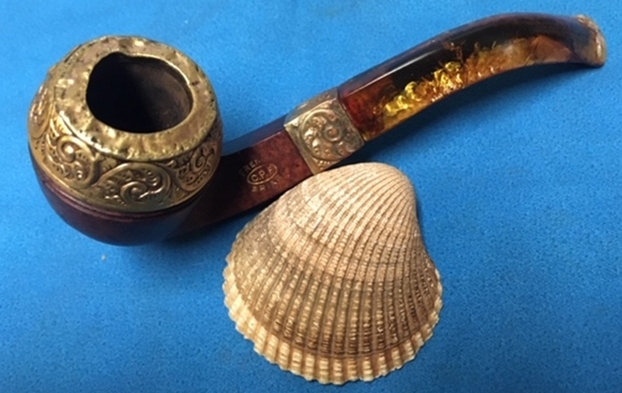
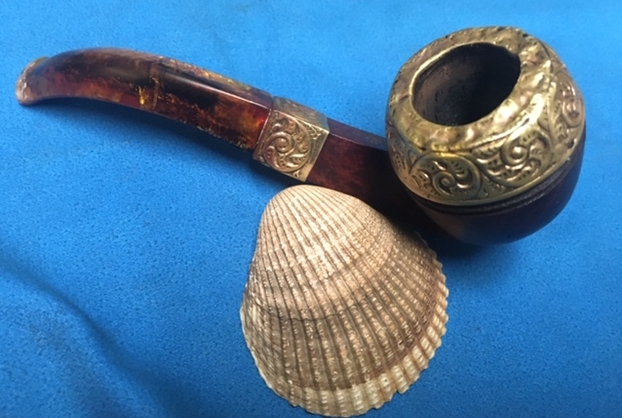
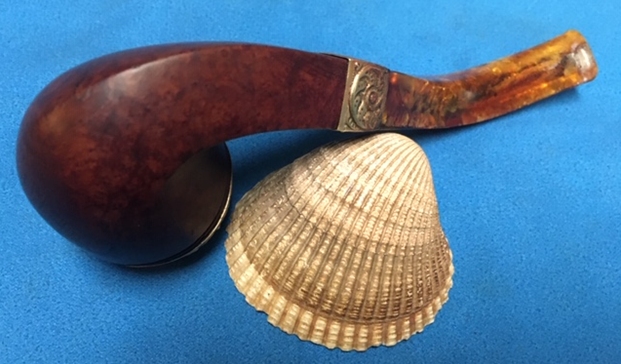
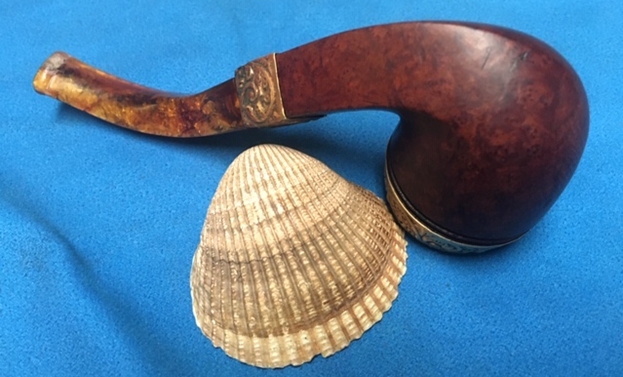
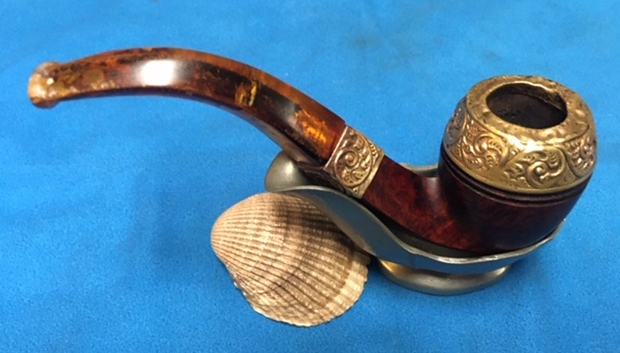
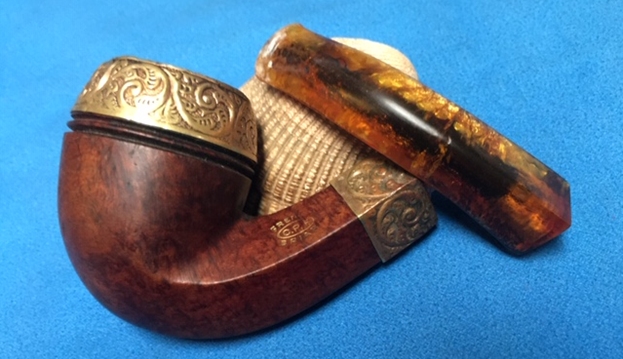
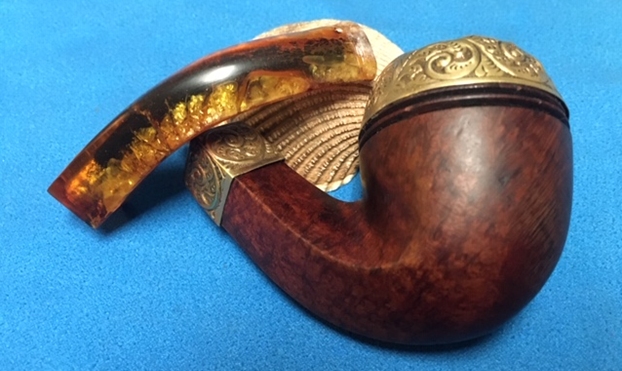
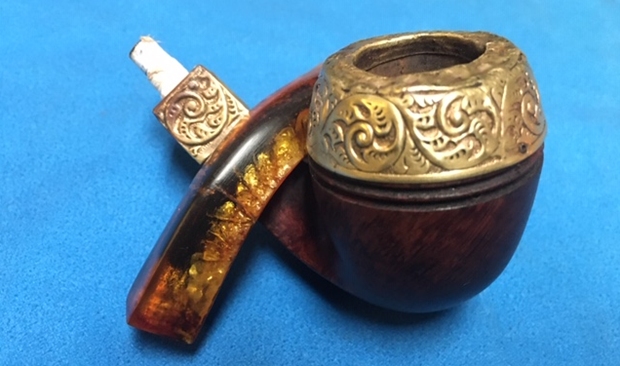
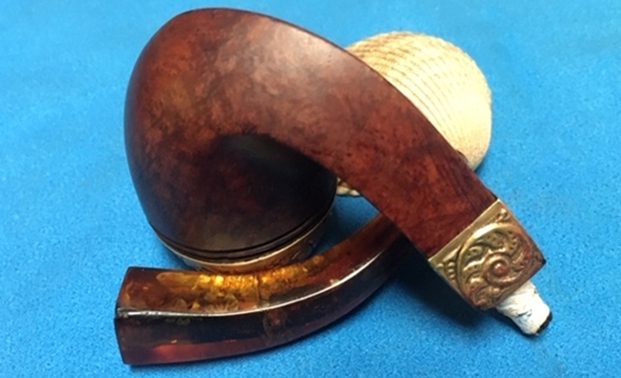
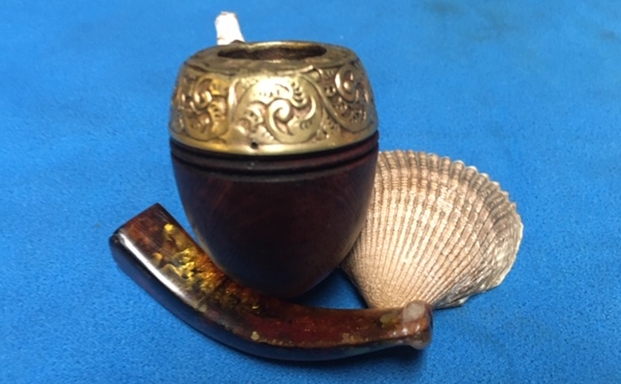
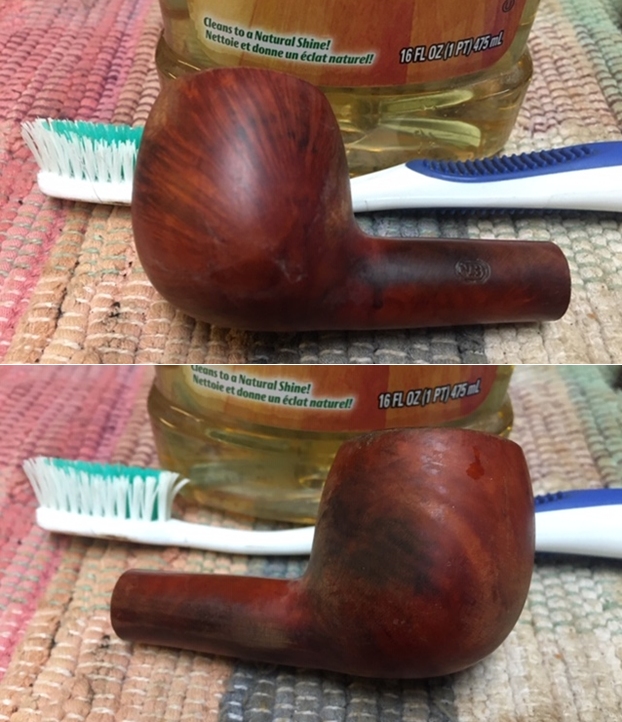
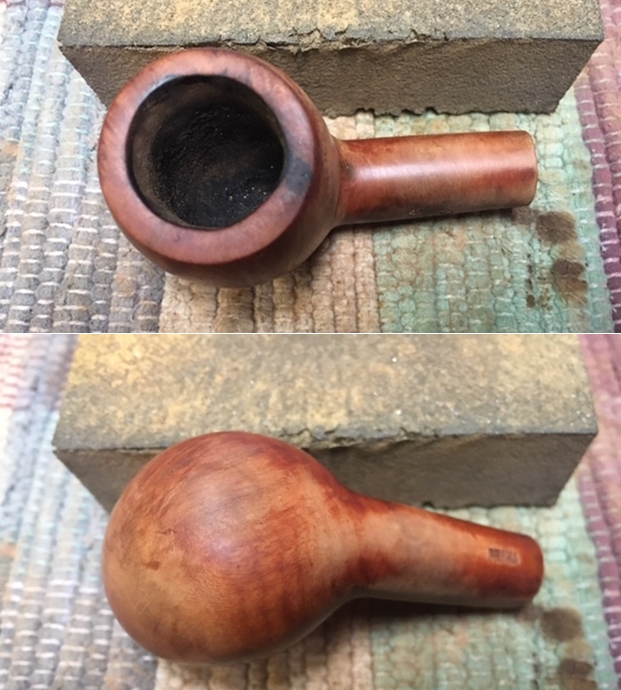
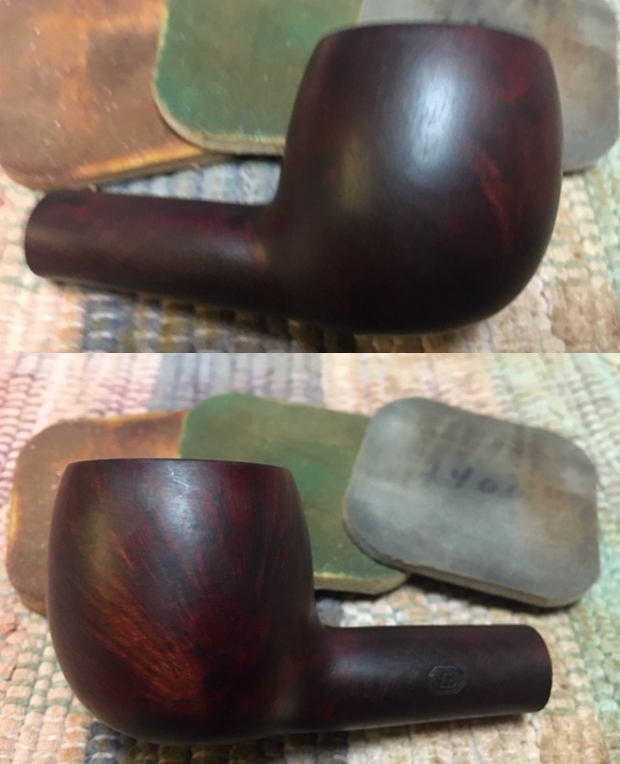
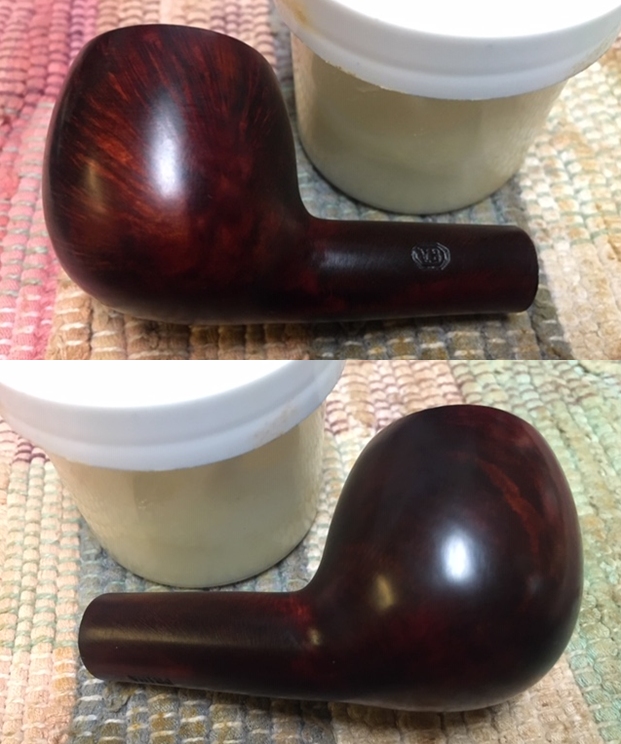
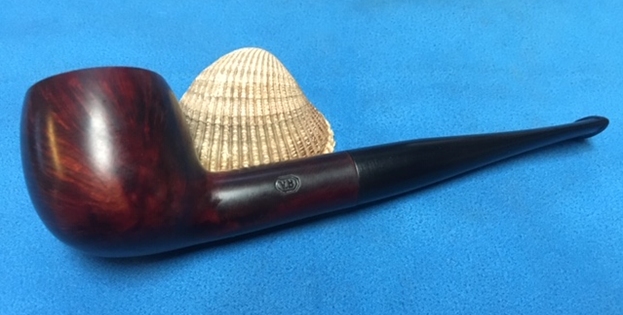
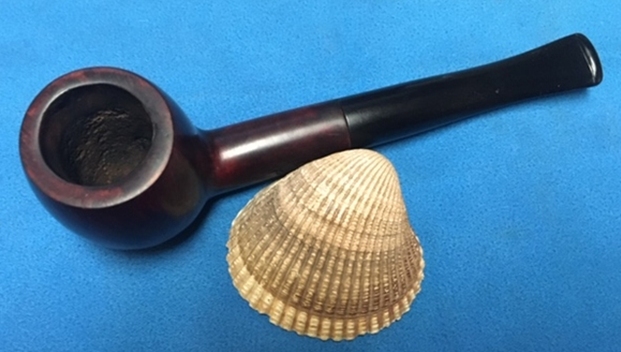
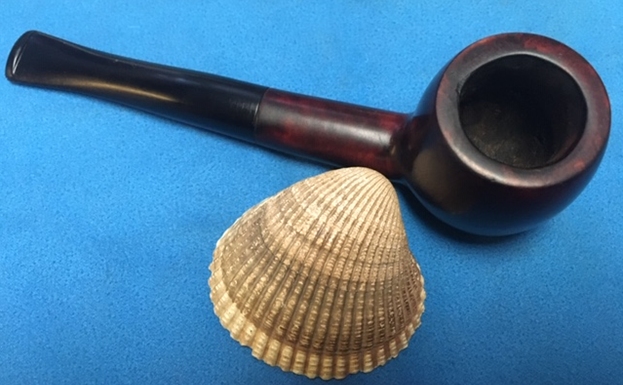
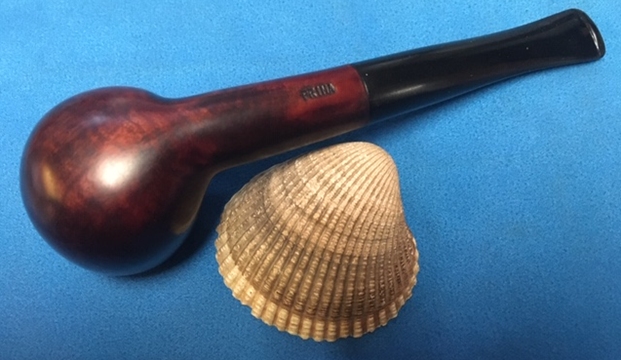
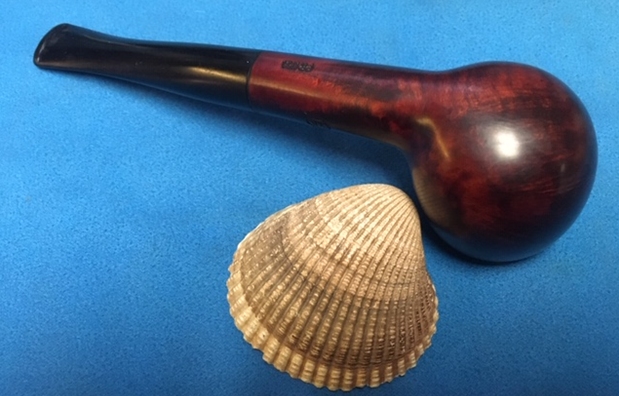
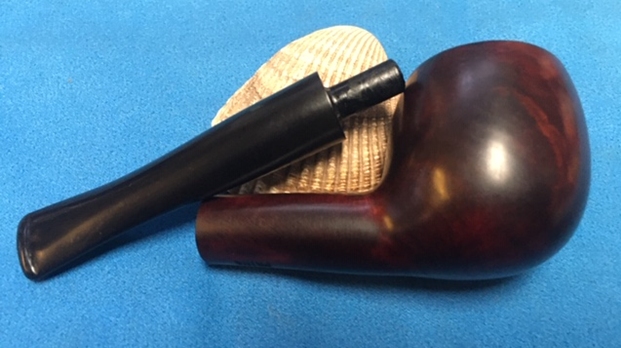
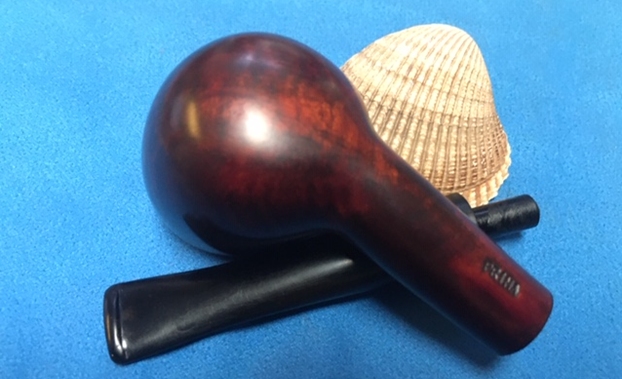
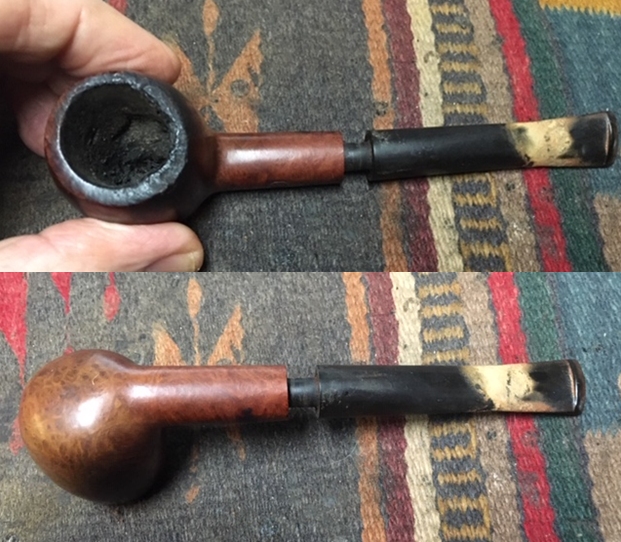
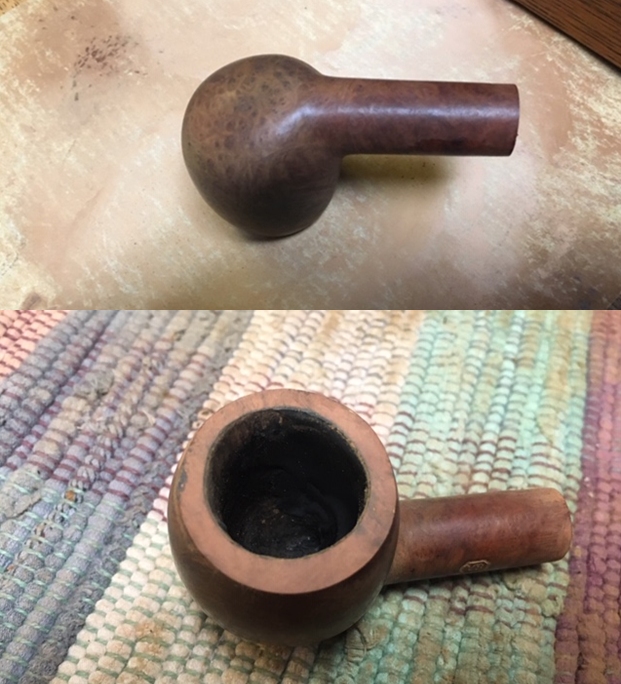
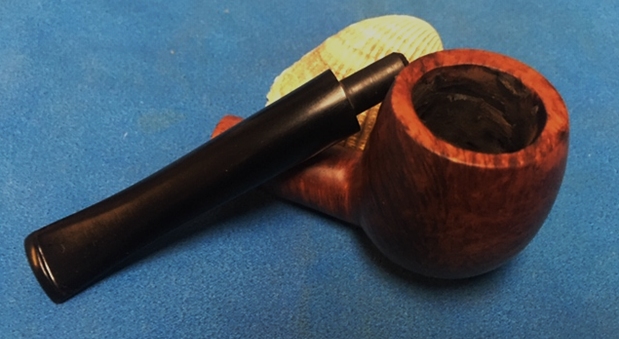
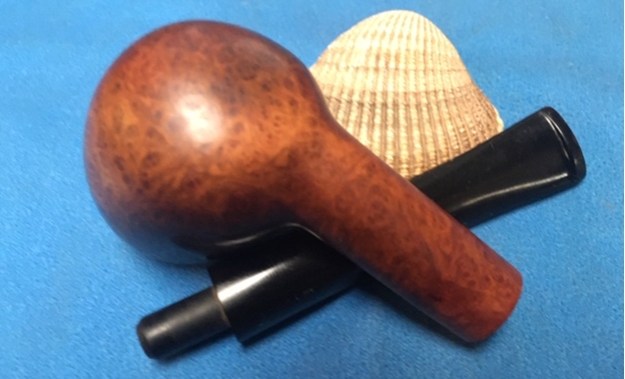
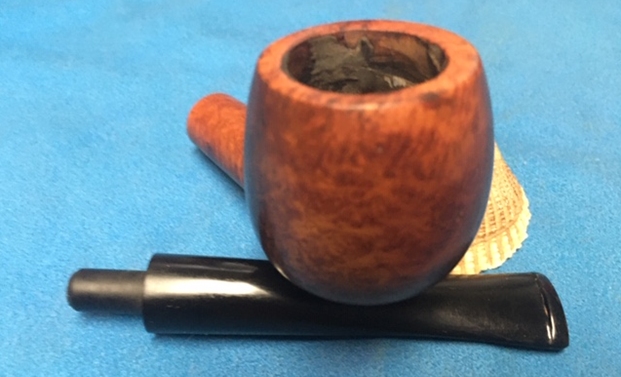
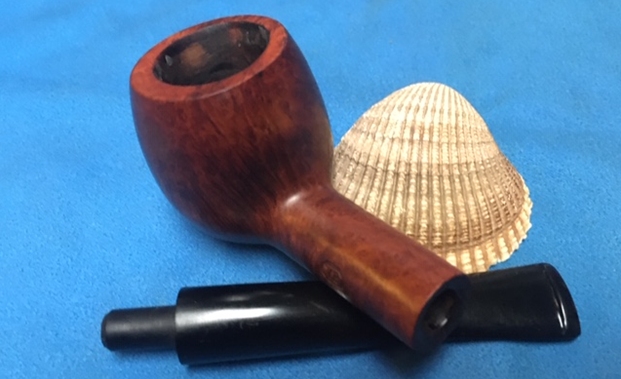
 Now, the striking Danish Freehand now on the worktable. Here are pictures of the Freehand that got Andy’s attention.


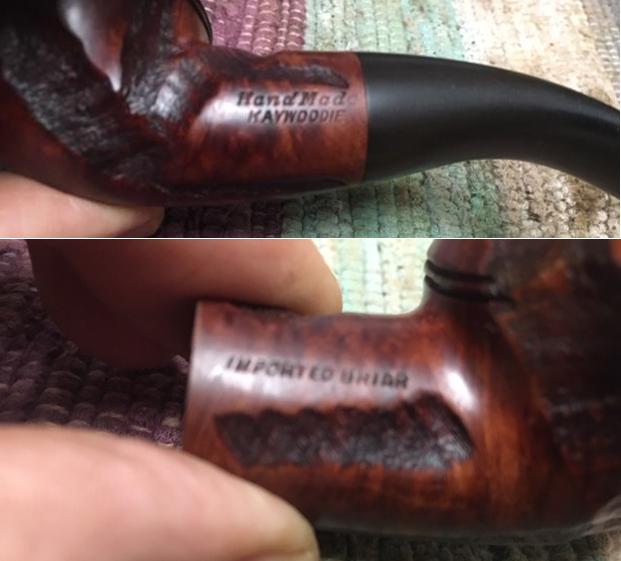
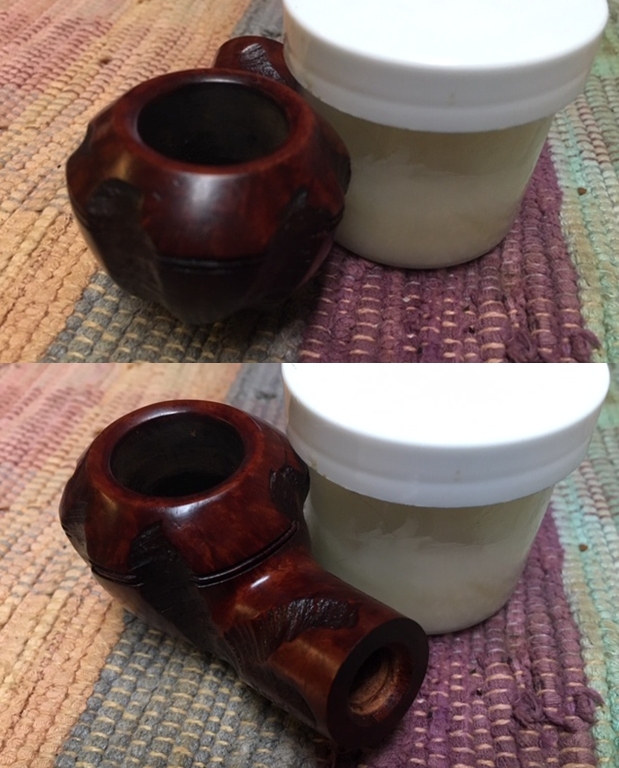
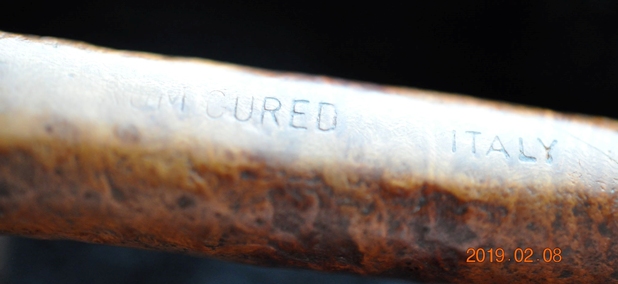
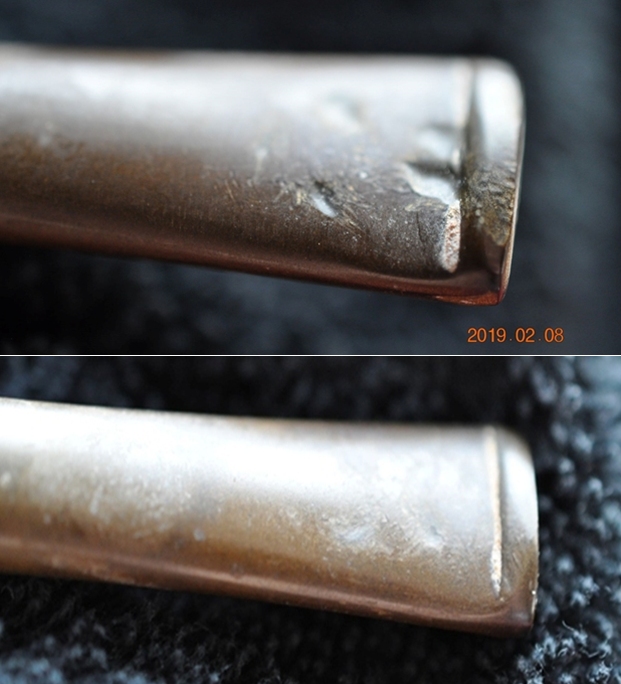
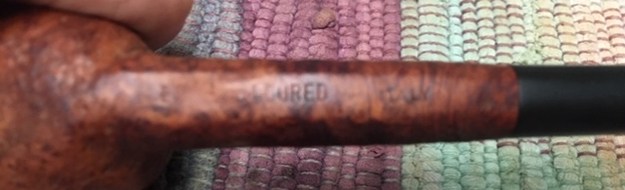
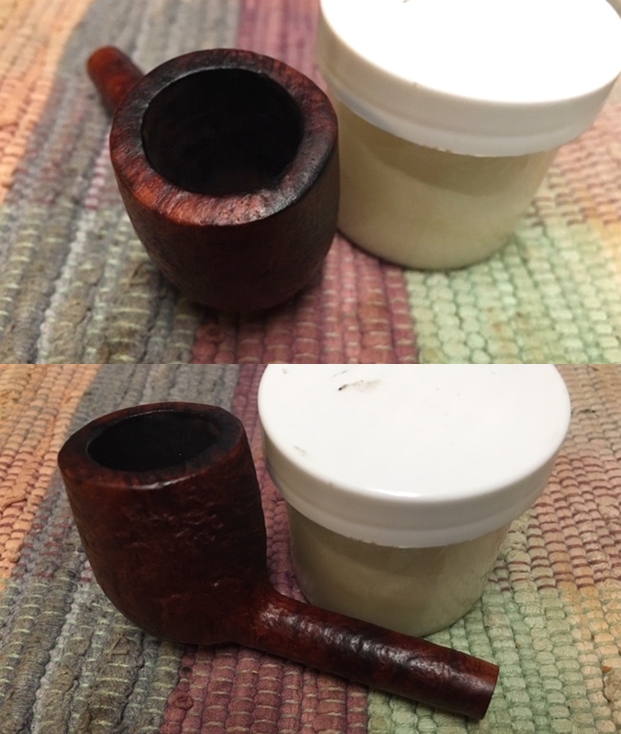
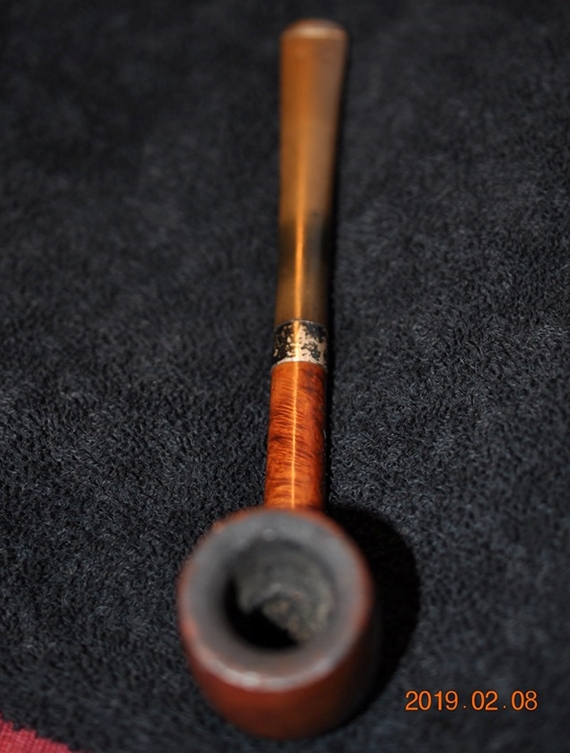
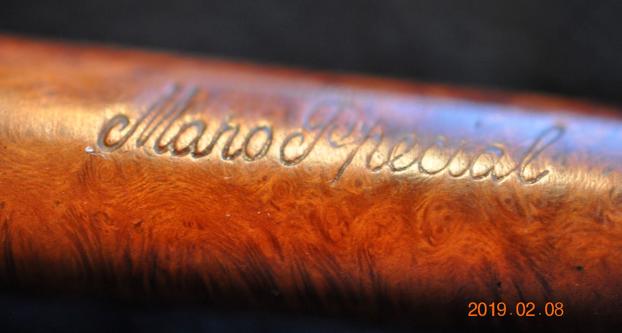
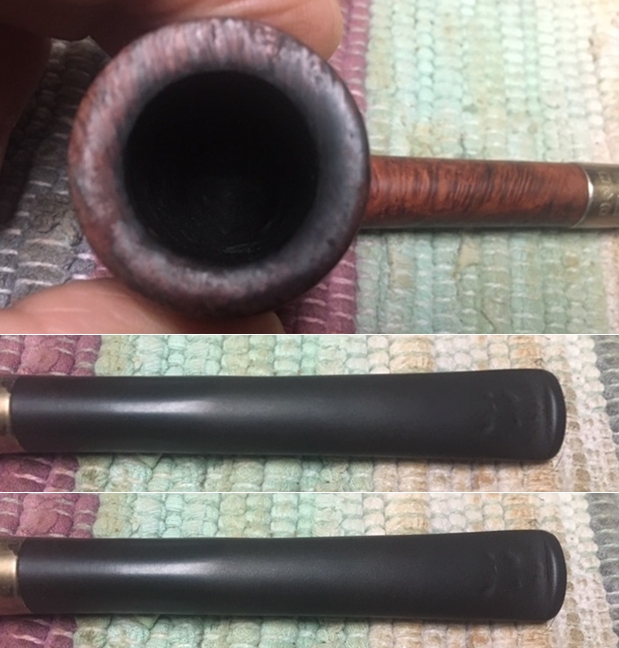
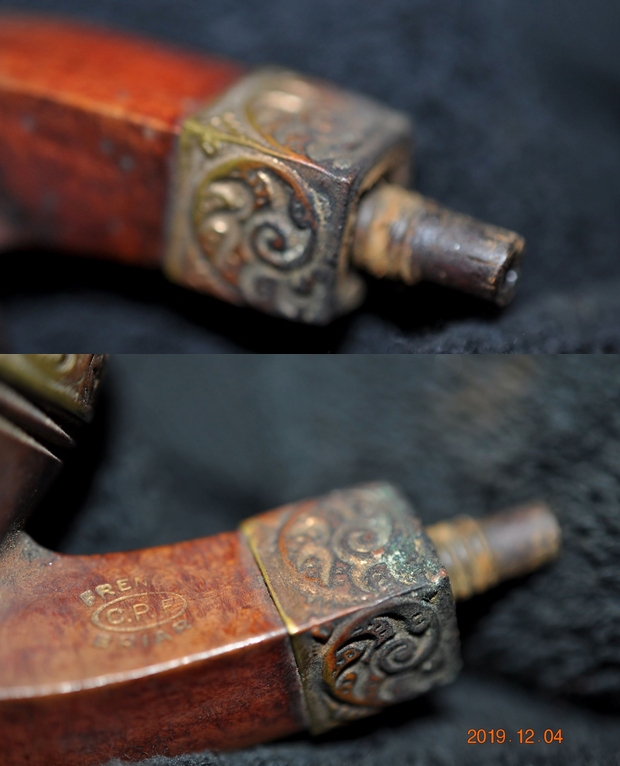
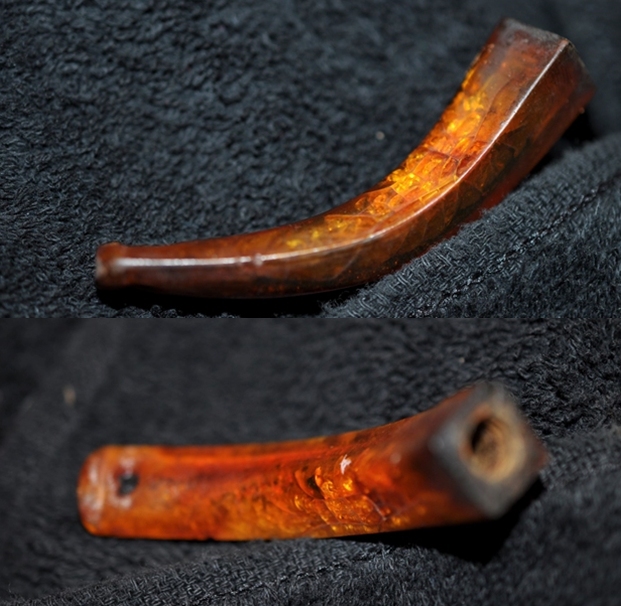
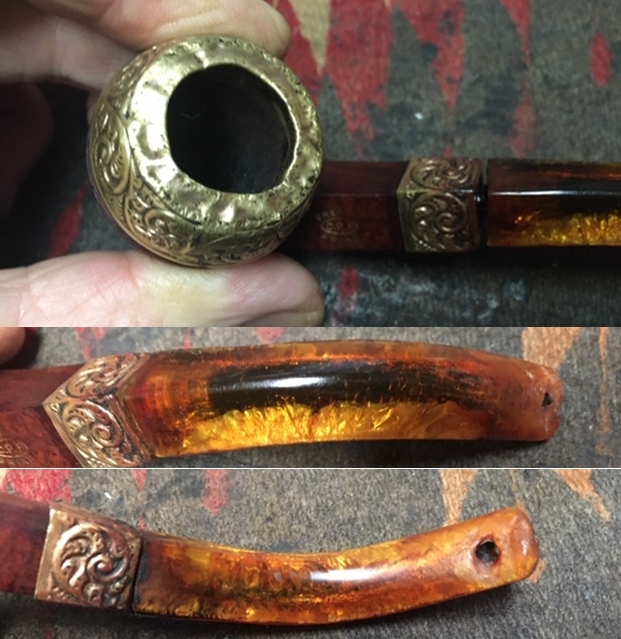
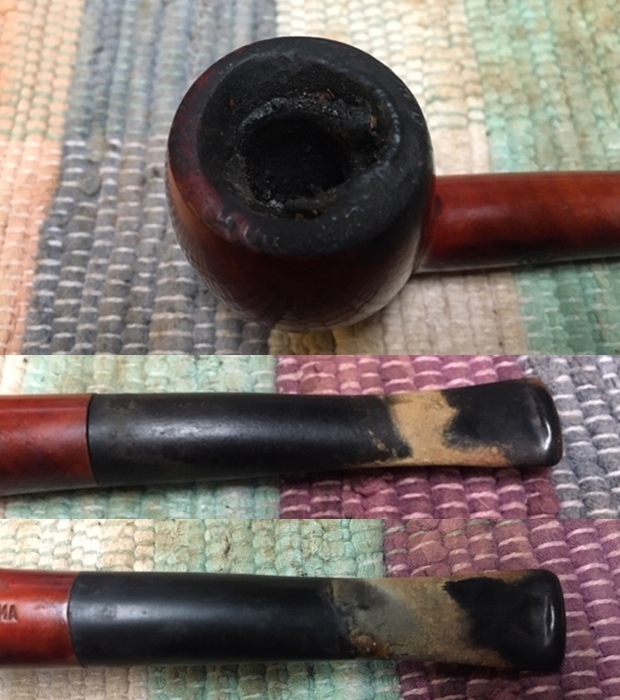
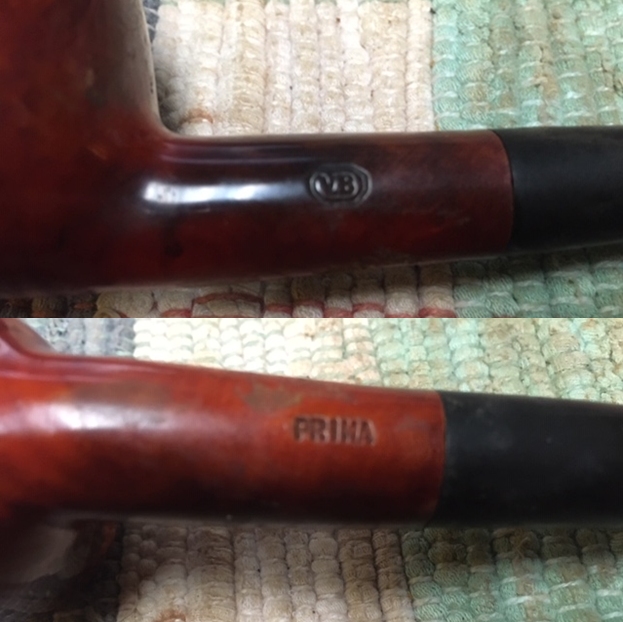
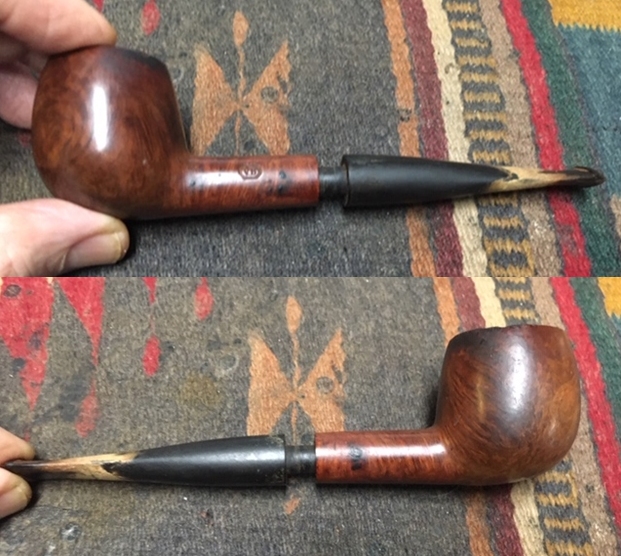
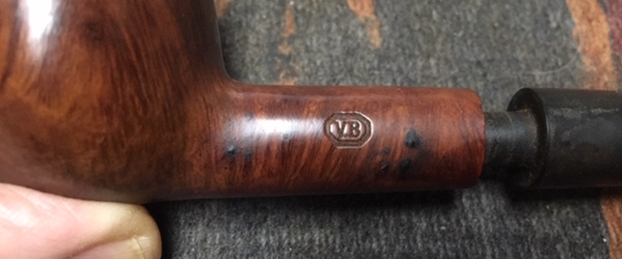
 When I first acquired this Lot of 26 and it made its way here to Bulgaria, I was anxious to get a closer look at this Freehand. When I first saw it in the pictures that Josiah sent, I thought that it might be a Karl Erik. When I finally looked at the Freehand on the worktable here in Sofia, I had to work hard to find any identifying markers. With the help of a magnifying glass and carefully angled lighting, I could only make out with certainty extremely ghosted lettering, ‘Made in Denmark’. The next two pictures show this ghosted lettering.
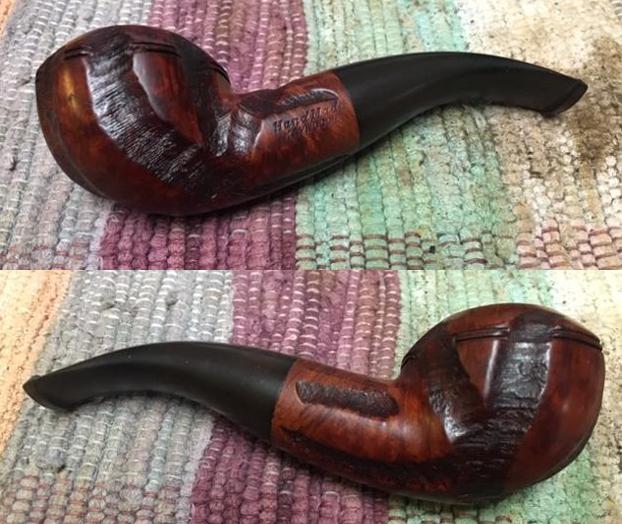
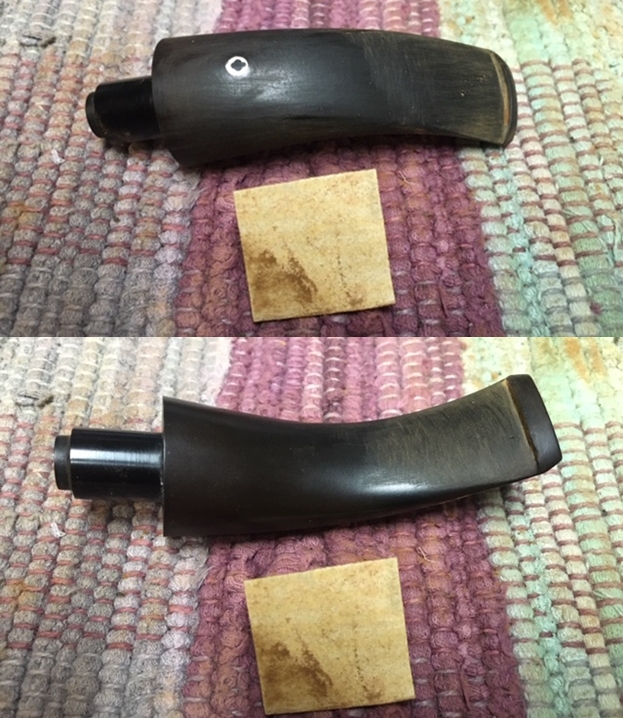
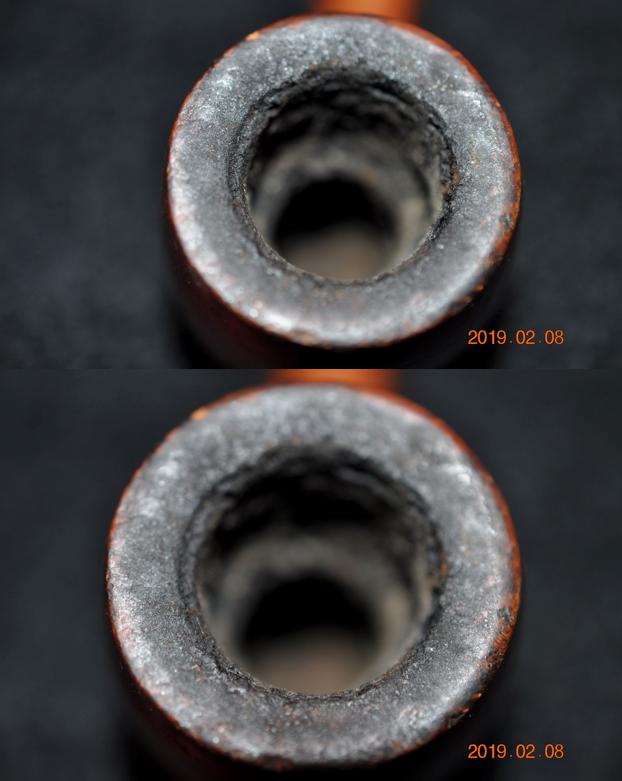
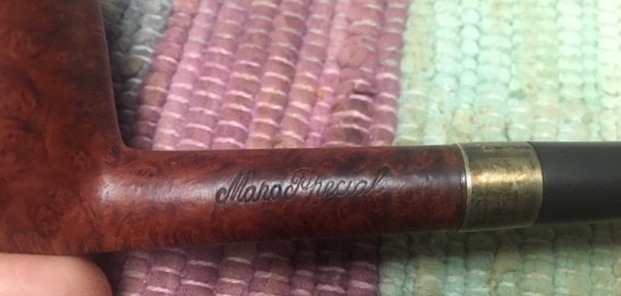
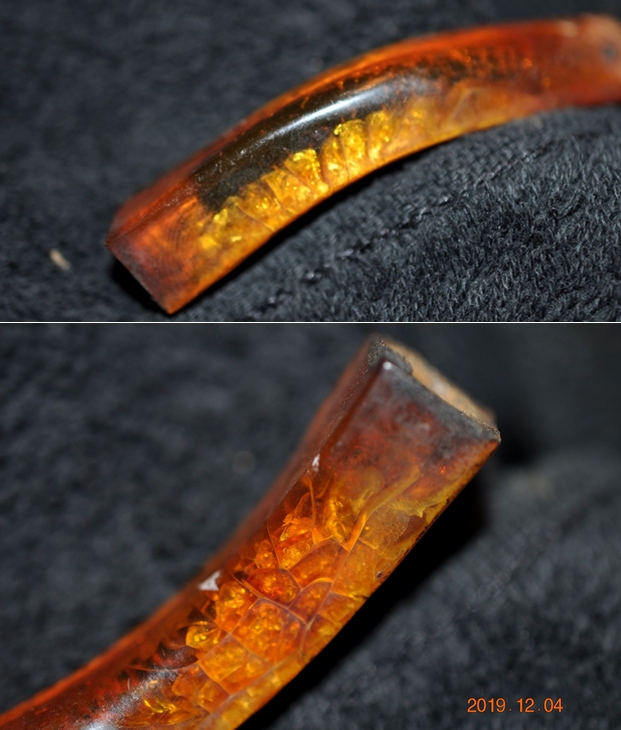
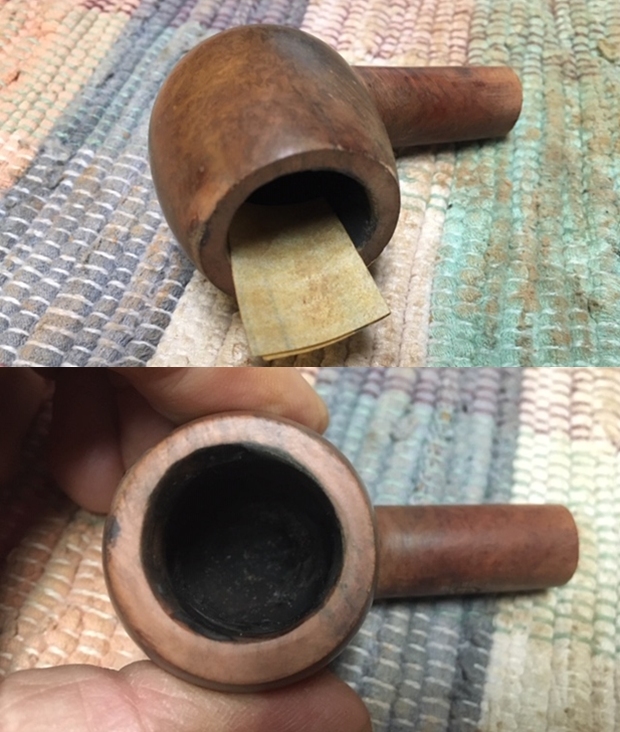
 Yet, in the two pictures following with the light angled differently, the second picture being a blow-up of the first, I can make out just above the ‘Made’, I think I can see two letters: ‘N’ and possibly another ‘N’ or a ‘W’? And to the far right, possibly the number ‘5’ or another letter? Often these are phantom letters that form from the grain and our desire to see something that’s not there! Phantom or not, there’s not a lot to go on.
 With this meager information I looked at Pipephil.eu where you can search by country. I clicked on Denmark and as you might expect, several options surfaced of Danish pipe names and carvers. With the possibility of the phantom ‘N’ being the first letter of a name, I looked at the N section to see if any of the names and pipes made by these might resemble the Danish Freehand on my worktable – reaching at straws!
 With no leads, I sent a note and pictures of this Freehand off to Steve with his rebornpipes.com depth of experience to draw upon again! Perhaps there was something he would see in the pipe that would lean toward a Danish style and maker. The next day I received Steve’s reply which was encouraging:
It has the look of a Preben Holm… under the pipes he made is a group of them – freehands labeled Monte Verde I wonder if that is not what is there.
Steve included the Pipephil.eu link that took me to the Monte Verde panel attributed to Preben Holm. Wow! Again, I look at the lettering on the lower panel of the Freehand and it could be…. The ‘Made in Denmark’ looks like the same, all cap letters. With Steve’s input the likelihood of Freehand being a Preben Holm is enhanced. Not long ago, wishing to add to my personal collection a Freehand with Preben Holm’s name on it, I landed on eBay a beautiful piece of his workmanship. This Freehand is still in need of restoration but putting it along side of the smaller Freehand on my worktable, one can easily see why Steve says that it has the ‘look of a Preben Holm’. Looking at the curves, the angles of the cuts, even the grain pattern presentation – the resemblance is there. I’m looking forward to restoring this big boy one of these days!
 The Pipedia ‘Preben Holm’ article is full of information and examples of his work. The opening paragraph is enough to capture the impact that his work has had – why, like me, adding a Preben Holm Freehand to one’s collection checks a box on most pipe men and women’s pipe bucket list:
 Preben Holm (1947 – 1989) has set some marks in pipe history. Just before his 16th birthday in 1963 he sold pipes to the legendary Pipe-Dan shop and at the age of only 22 he headed 45 employees. He was among the first Danish artisans who made “Danish pipe design” famous in the USA in the 1960’s. More than that he was one of the very first carvers who exceeded this moderate Danish design which based on the classical shapes. “Chaising the grain” they turned out wild and dramatic fancy pipes. Combining smooth with blasted surfaces, showing big areas of the original bark at the top of the bowl and at the end of the stem, these pipes were quite shocking to many elder and more conservative pipesmokers.
When he started to sell his pipes to Lane Ltd. under the Ben Wade label, he caused a hype fairly beyond comparison. Especially in the U.S., as most of his pipes were sold there.
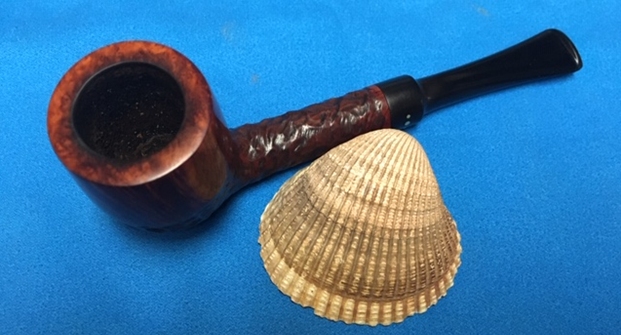
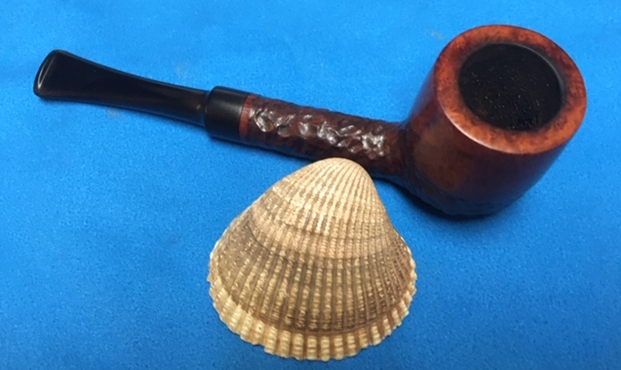
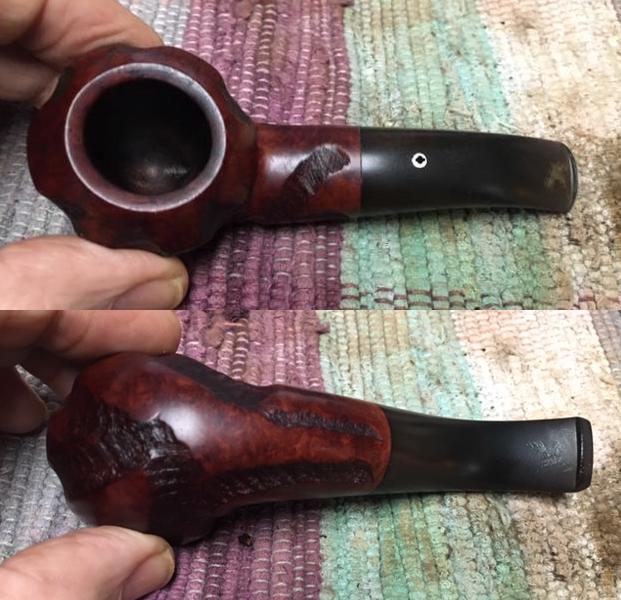
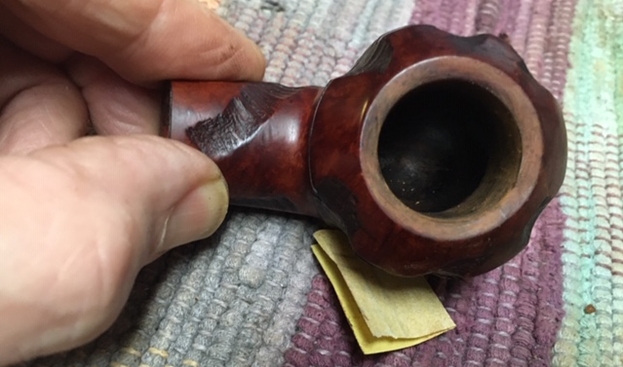
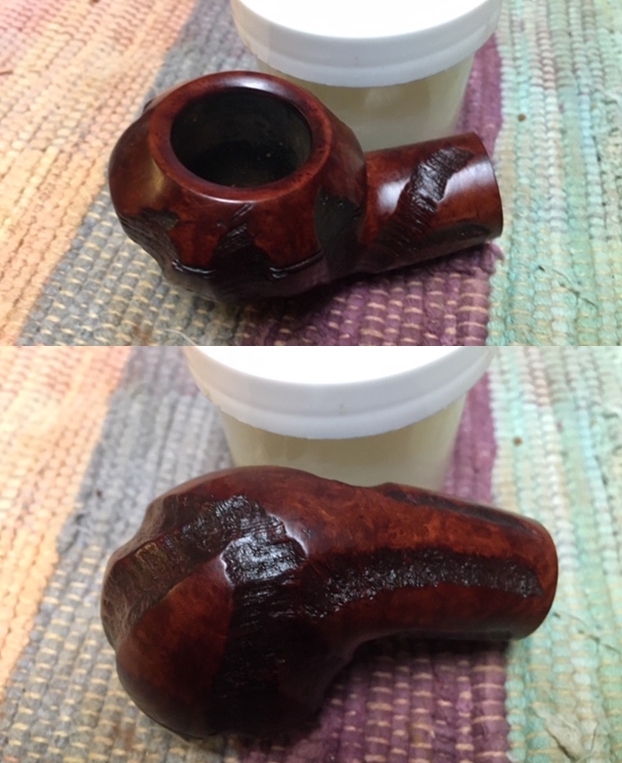
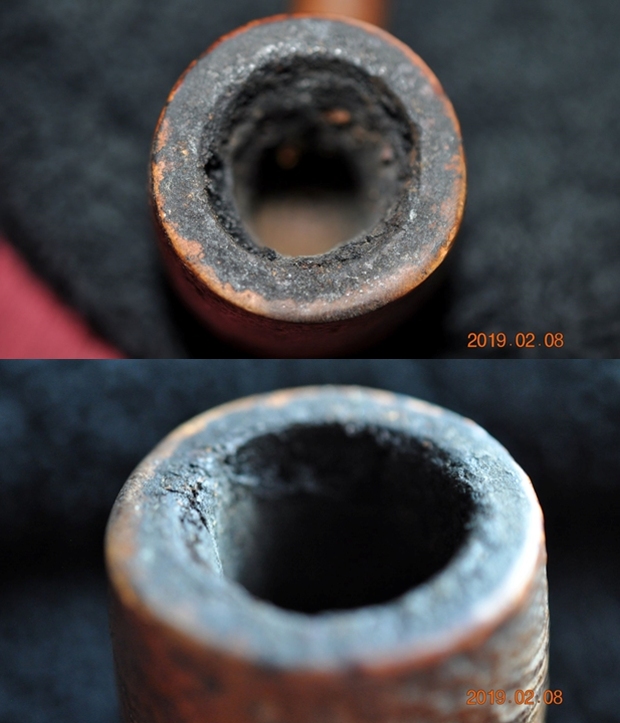
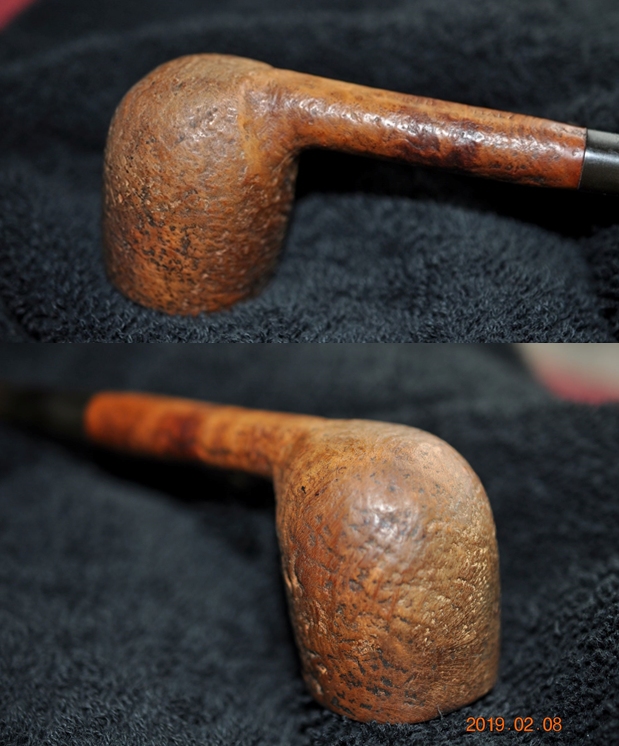
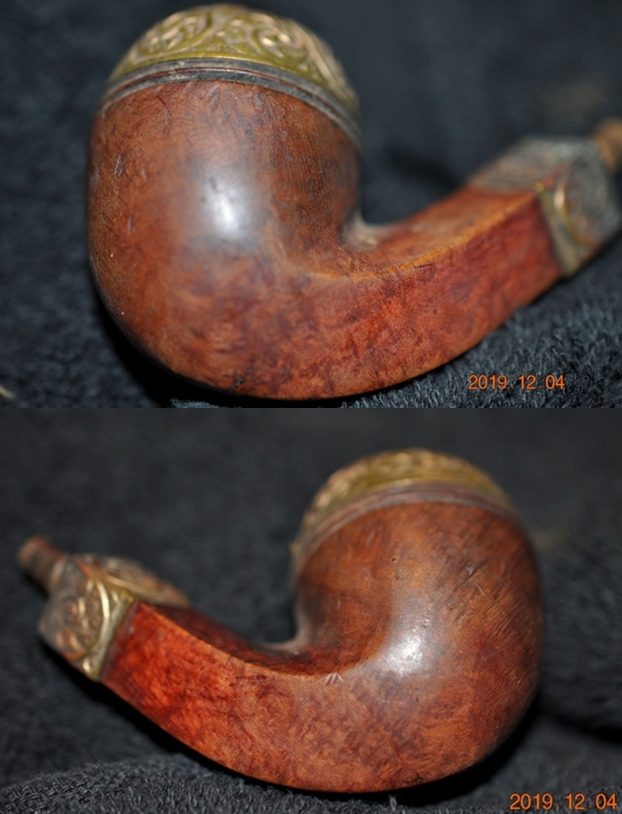
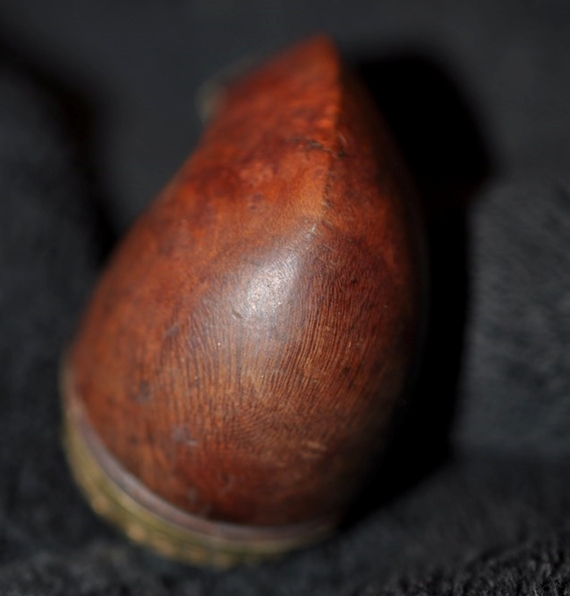
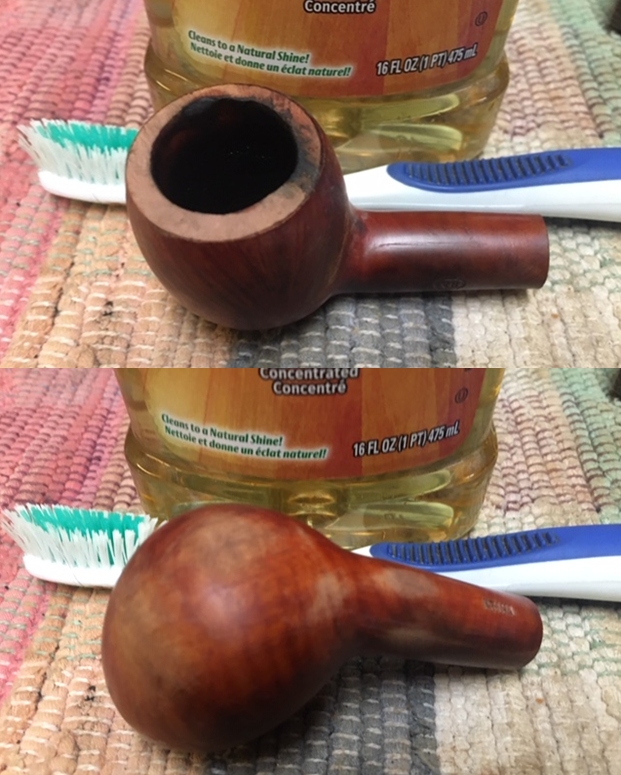
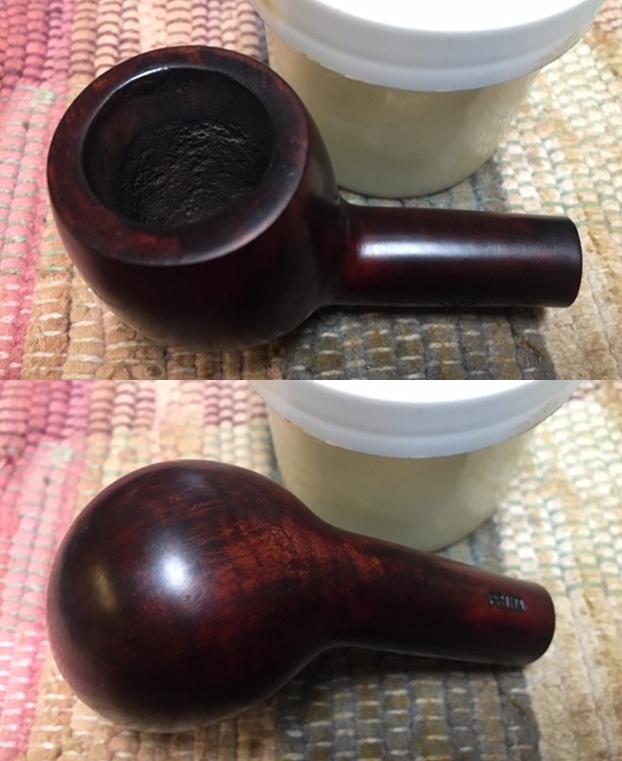
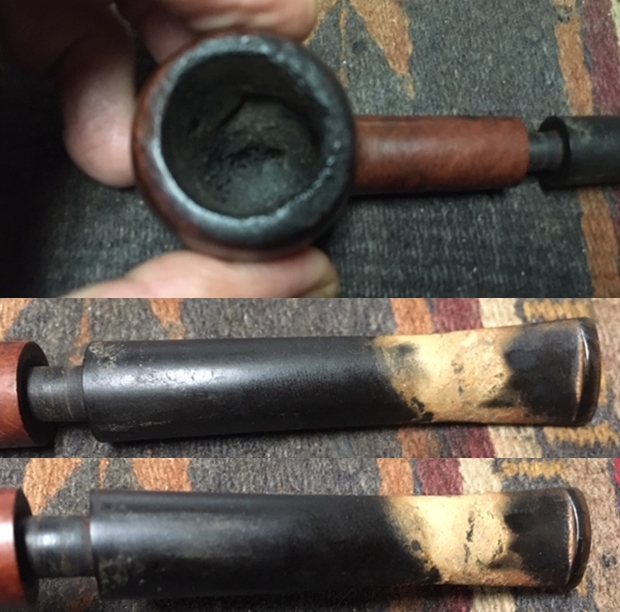
Looking now more specifically at the ‘possible’, perhaps probable, Preben Holm on my worktable, the 1 5/8-inch-deep chamber has a light to moderate layer of cake and the plateau is full of grime and lava flow. I am struck by the vertical grain that the carver took advantage of as he shaped the pipe. In the Pipedia Preben Holm article quoted above, I took special note of the phrase, ‘“Chaising the grain” [sic]. Breaking out of the classic shape mold where shape dictated the pipe, in the Freehand movement Preben Holm revolutionized, ‘chasing the grain’ challenged the carver to allow the grain to shape the pipe’s presentation. This Freehand definitely chased the grain! The large briar landscape of the peaked stummel is dirty with thick grime as well as some minor dings and scratches from normal use.
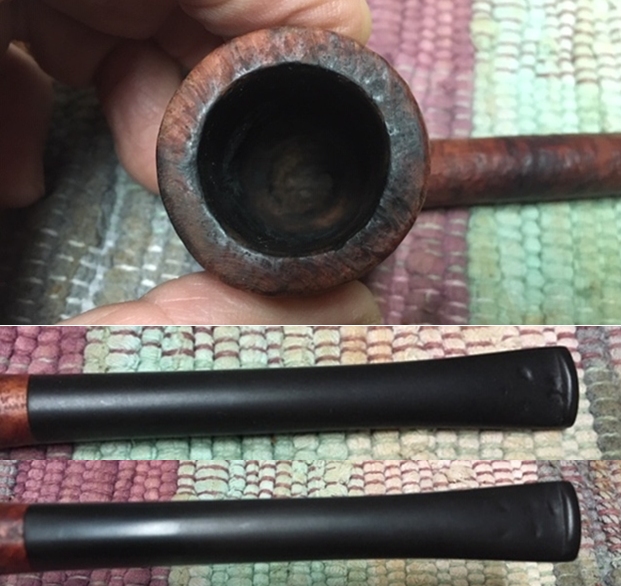
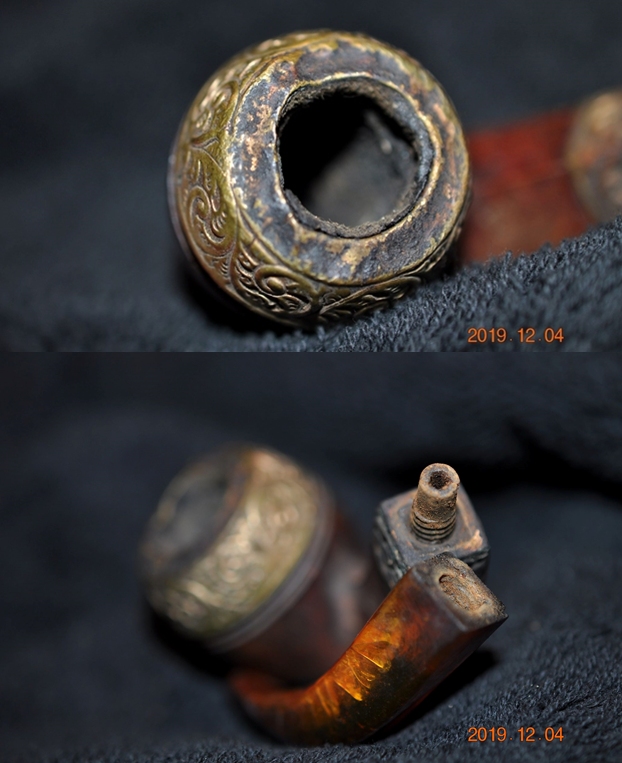
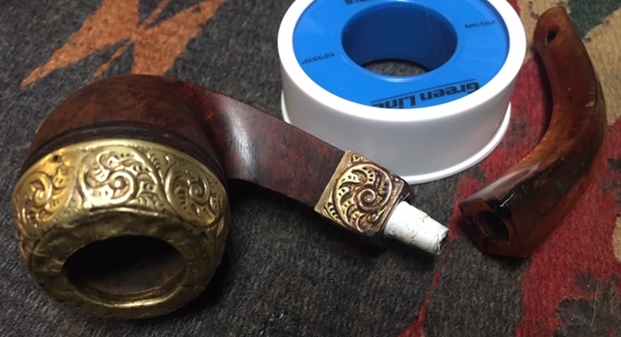
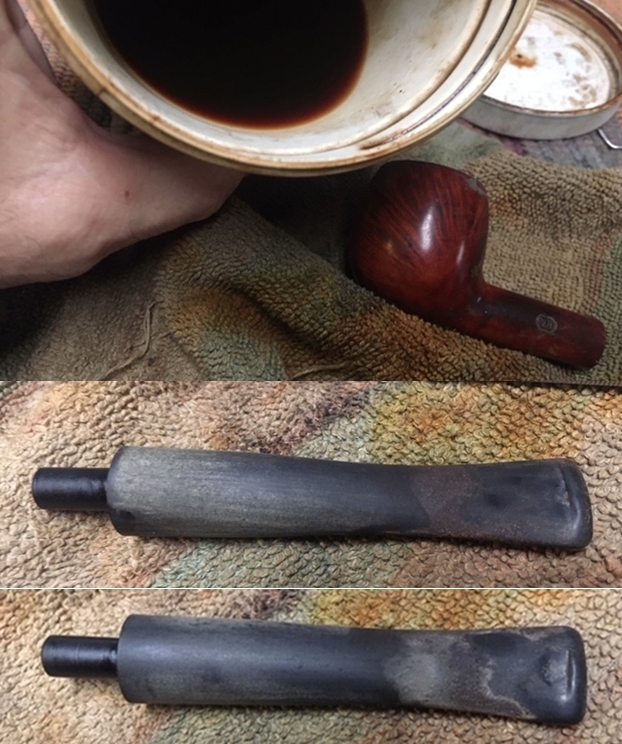
 The fancy stem has deep oxidation and calcium build-up on the bit. The bit and button have been mercilessly chewed like cud! The former steward saved money on not purchasing bite guards but it’s obvious this pipe was loved! To smoke the pipe hands-free would require this kind of clenching with the size of the stummel.
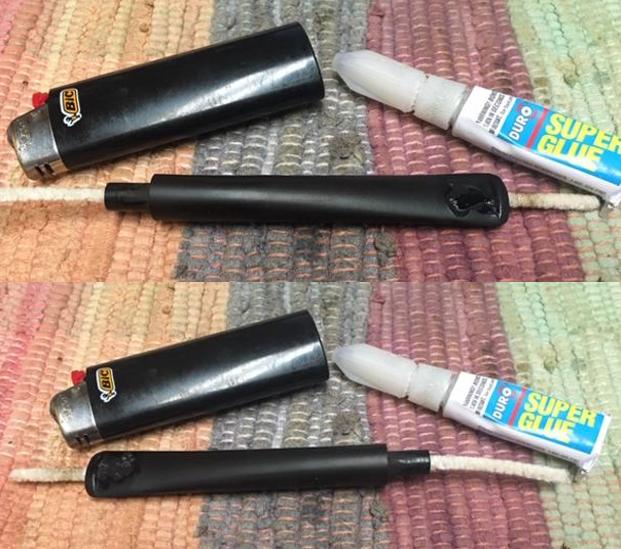
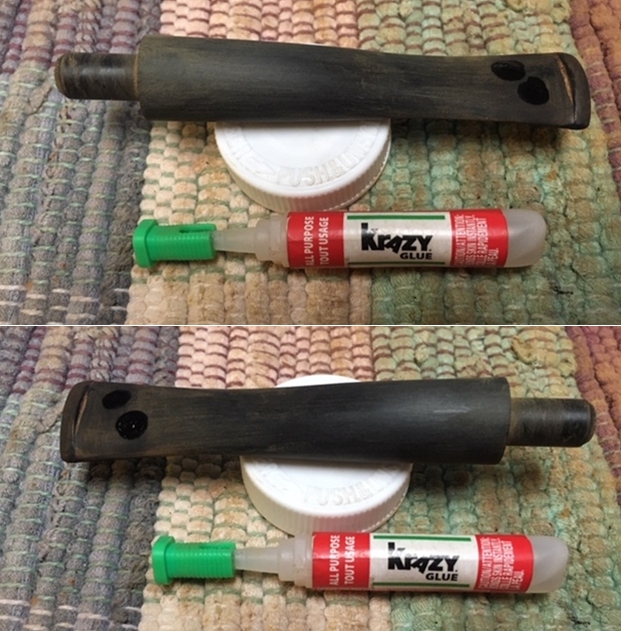
 To begin the restoration, using pipe cleaners wetted with isopropyl 95%, the fancy stem airway is cleaned.
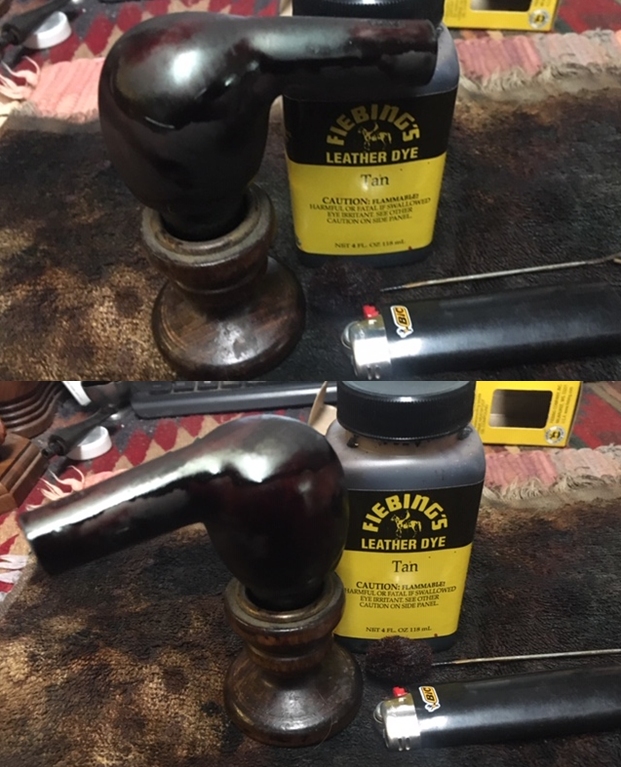
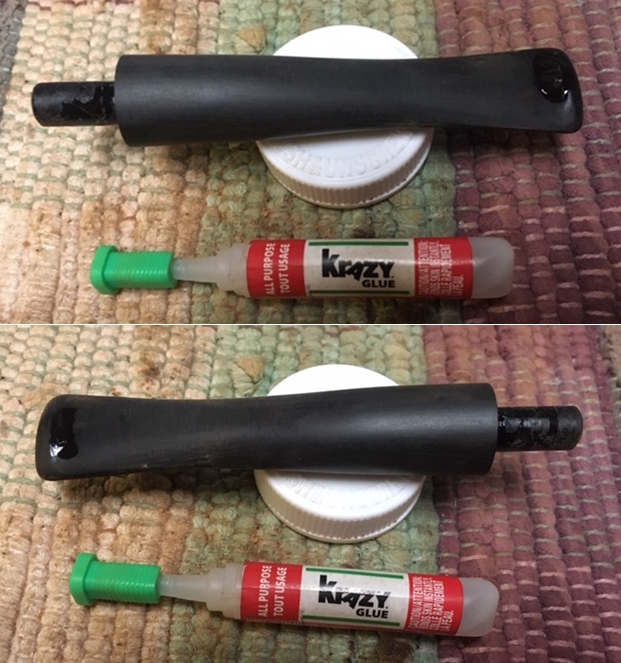
 With the oxidation so thick and with calcium caked on the mouthpiece, before putting the stem into a soak of Before & After Deoxidizer, I decide to get a head start on breaking up the crud. I use 000 grade steel wool on the stem. I recently read Jeff Laug’s rebornpipes blog on his cleaning methods (Got a filthy estate pipe that you need to clean?) which is very helpful. One thing he mentions about stem cleaning is to use ‘Soft Scrub’ which unfortunately I didn’t have for this stem. I used alcohol with the steel wool, but next time I’ll try to find a comparable product to use here in Bulgaria.
 After attacking the oxidation and calcium build-up with the steel wool, I’m hopeful that the Before & After Soak will prove to be more productive than in the past with heavily oxidized stems. The Danish Freehand joins other stems of pipes in the queue for a soak of several hours.
 After soaking for some time, I use a stiff wire to fish the fancy stem out of the Deoxidizer and allow the fluid to drain. Notice that I have surgical gloves on – I squeegee the excess fluid off the stem with my fingers.
 I then wipe/scrub the surface with a cotton pads wetted with isopropyl 95% to remove the raised oxidation. The Before & After Deoxidizer seems to have done a good job after prepping the oxidation first with the steel wool.
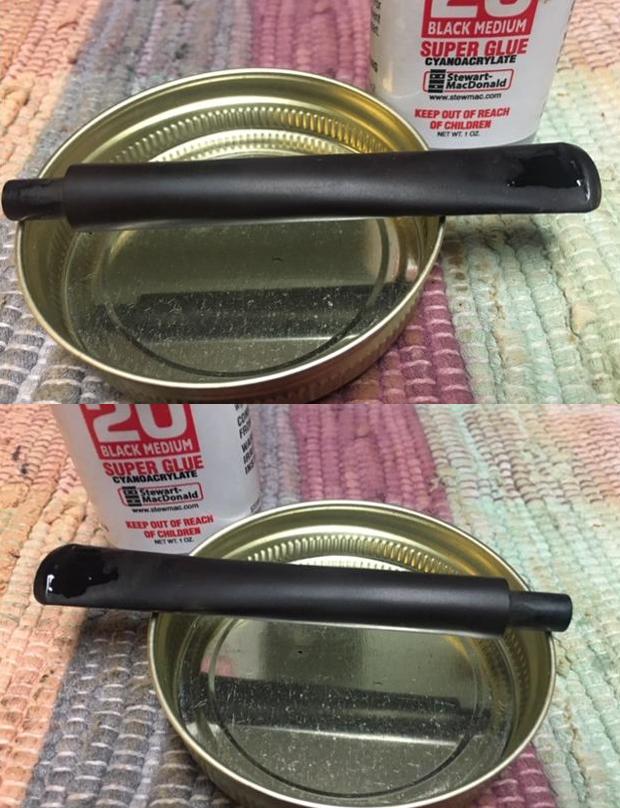
 At this point, I apply paraffin oil to the stem to begin the rejuvenation of the vulcanite. I put the stem aside and turn to the stummel.
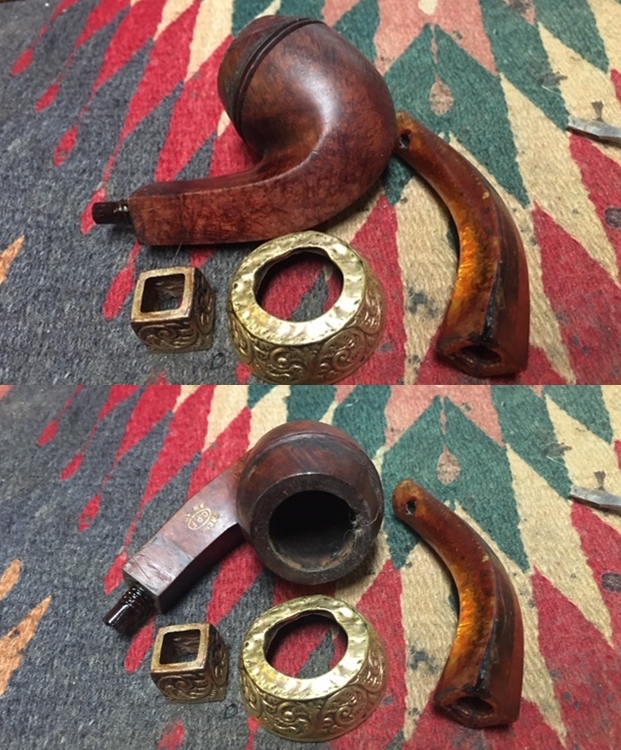
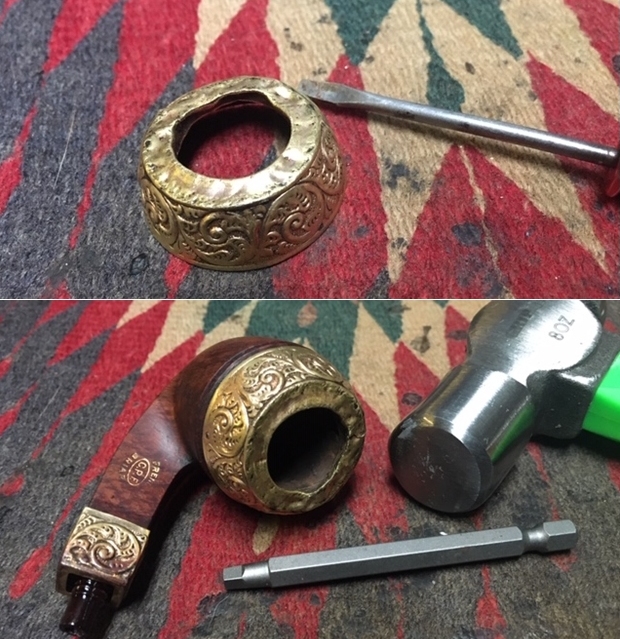
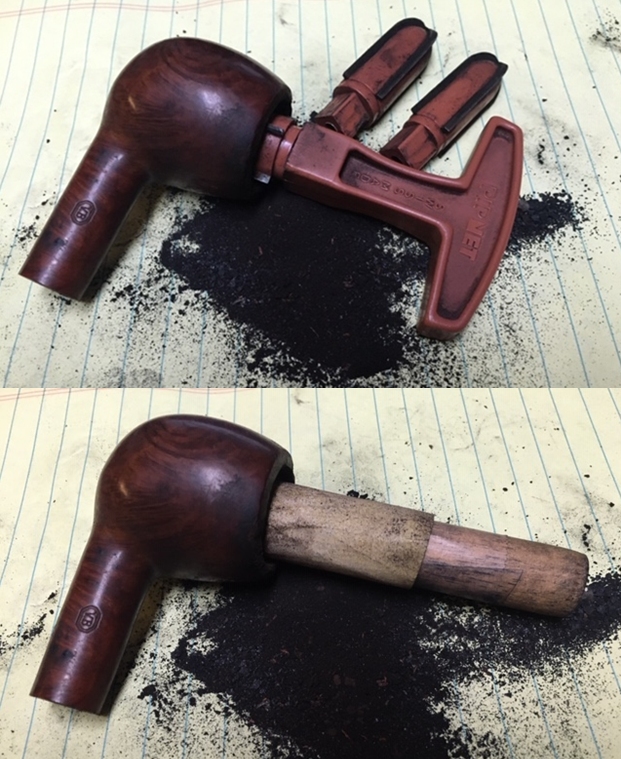
 With the stummel in hand, I take a closer look at the conical chamber and the minor/moderate carbon cake build-up. I’m not sure how well the Pipnet Reaming Tool’s blade heads will fit this chamber, but I’ll give it a go.
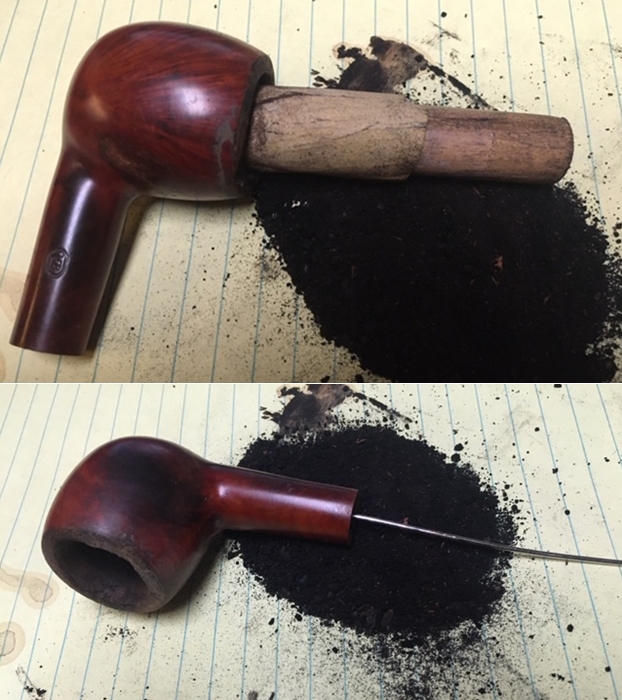
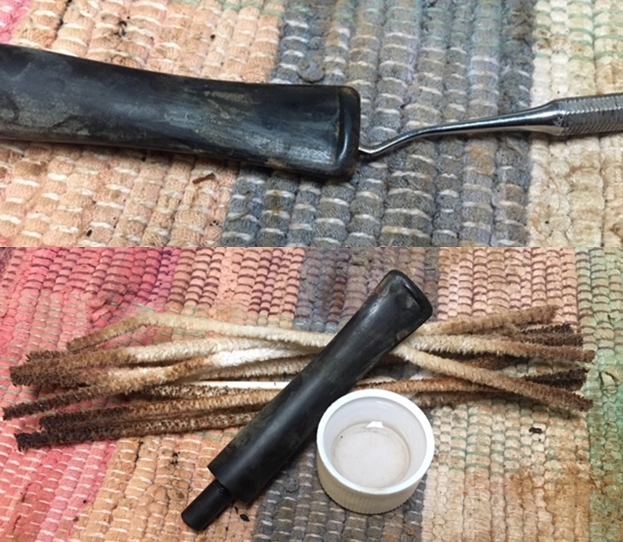
  I use the first two smaller blade heads, but as I suspected, the chamber narrows too much for the blades to reach the floor of the chamber, so I use the blades simply to scrape the walls. It was then that I remembered a reamer that I picked up a few years ago at a flea market somewhere in Kentucky when my wife and I were in the States. The Kleen Reem Pipe Tool has some years on it. I remember when I found it, I thought that it might come in handy.
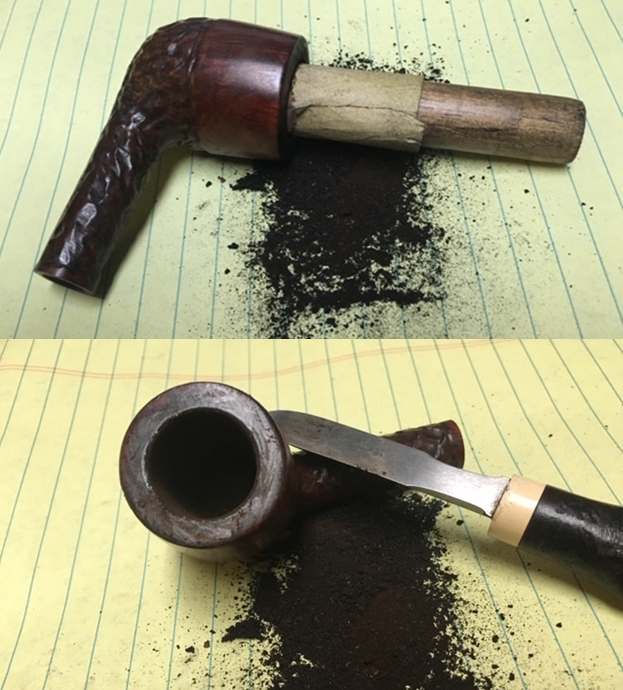
  I love old boxes and paraphernalia. The company printed underneath the name is W. J. Young Co. Peabody. A quick look on the internet revealed that Peabody is in the US state of Connecticut. The reamer is in a case with several shortened pipe cleaners. I’m not sure what the function is of the pipe cleaners.
  Taking a closer look at the reamer I discover the smaller knob on the end unscrews and sheathed inside I withdraw a drill bit. As I rotate the end knob of the reamer, the three blades expand in unison as a metal cylinder pushes the blades open. The workings are solid.
  With my curiosity piqued, I dig a bit more on the internet to see if I can find more information. I find a classic owner’s leaflet (See: LINK) extolling the benefits of keeping one’s pipe clean and the benefits of the Kleen Reem Pipe Tool. Below the text, a schematic of the reamer clearly describes the critical working parts.
 The next page of the leaflet solved the mystery of the miniature pipe cleaners. The picture shows a pipe cleaner hooked on the end of the shank reamer. I look at mine and discover that its not a hook, but a small hole through the pipe cleaner is threaded. I would imagine that it puts a lot of torque on the crud in the airway when the shank reamer is rotating. After reading the ‘Directions for Use’ below, I decide to see for myself if the claim holds true: ‘The Kleen Reem Pipe Tool fits any pipe….’
  The claim held true, at least for this Danish Freehand! The end of the reamer blades reached down to the floor of the chamber and I expanded the blades gradually as I rotated the reamer moving up the chamber. A great debut for this vintage old boy Kleen Reem Pipe Tool! I follow the Kleen Reem by scraping the walls further with the Savinelli Fitsall Tool and finish by sanding the chamber with 240 grade paper wrapped around a Sharpie Pen.
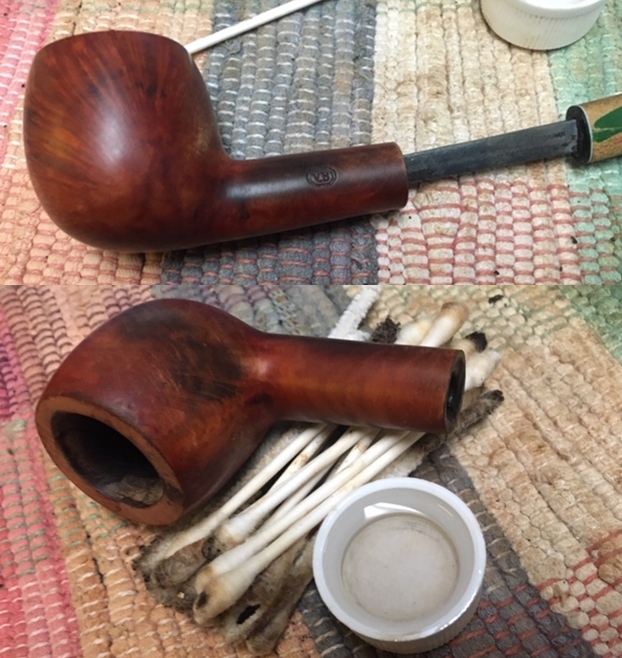
  After wiping the chamber with a cotton pad wetted with alcohol to clean the carbon dust, I inspect the chamber walls to find everything looking great.
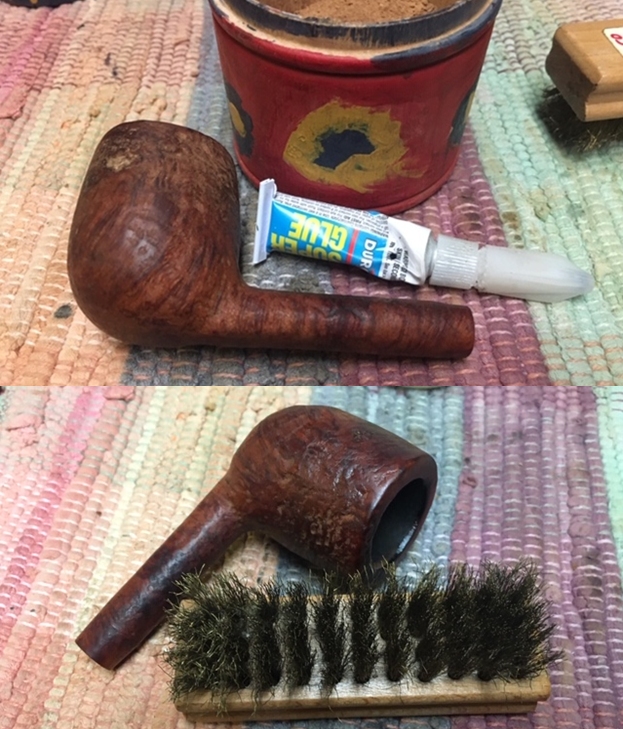
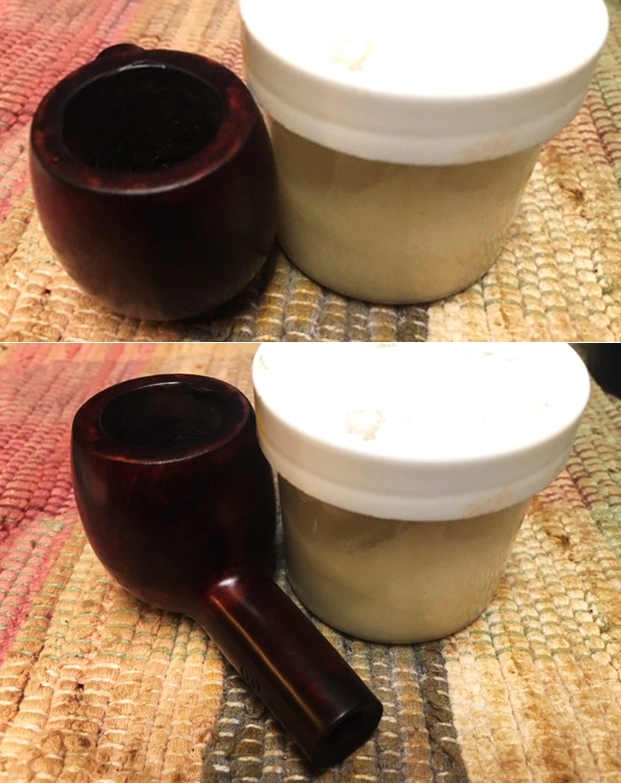
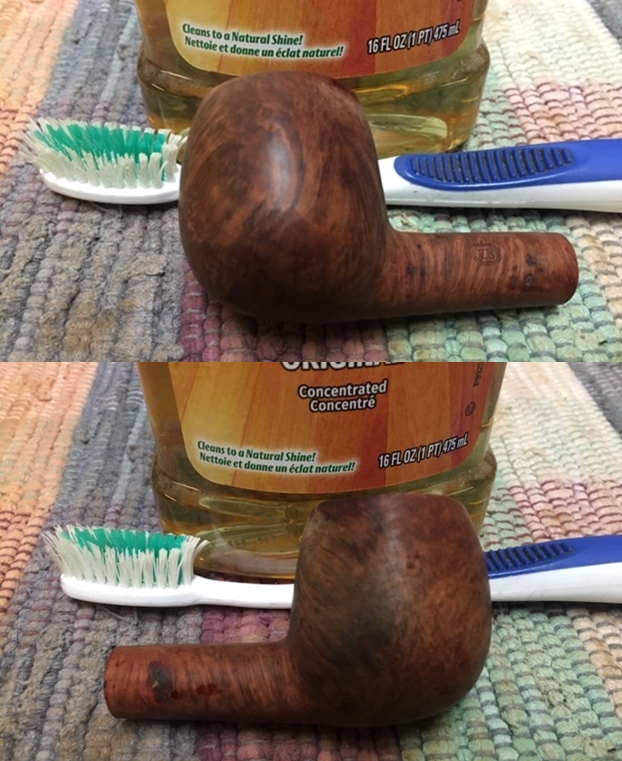
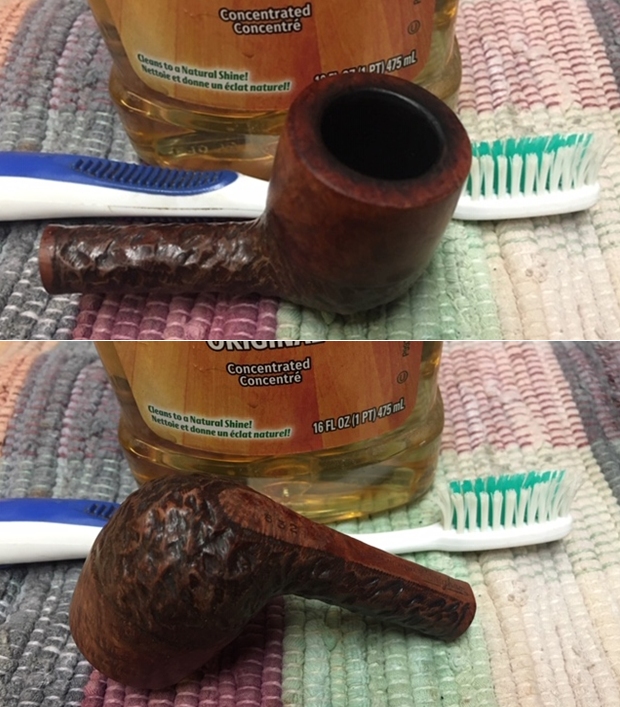
 Transitioning to cleaning the external briar surface, using undiluted Murphy’s Oil Soap, I scrub the surface using a cotton pad as well as a bristled toothbrush on the plateaus – rim and shank.
  I then transfer the stummel to the kitchen sink where I continue the cleaning using shank brushes with anti-oil dish liquid soap (out of Jeff Laug’s Playbook!) and using warm to hottish water, I clean the mortise and airway. I also use the brass wire brush on the rim plateau where the lava overflow is still hanging on.
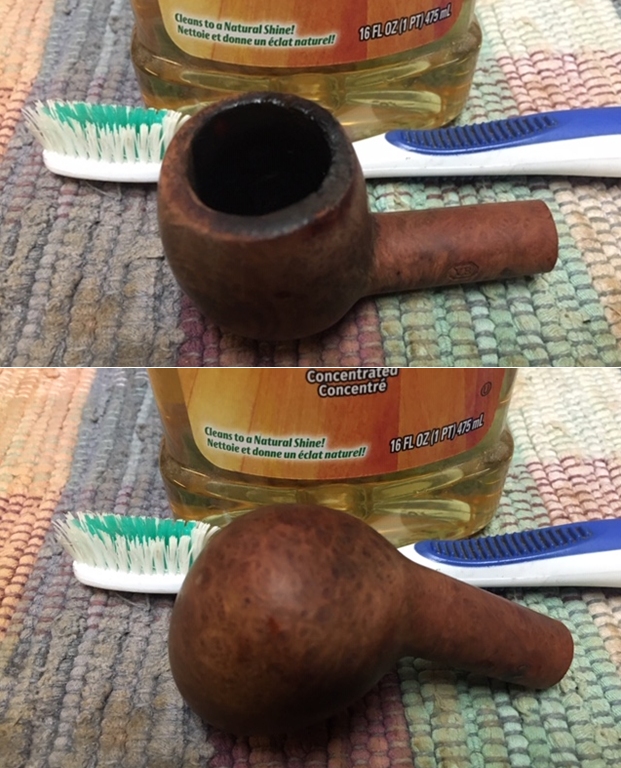
  After the cleaning, a few pictures show the results. The plateau is cleaned of the caked crud and most of the dark color is gone. The old wax build-up and finish, if there was much of a finish, seems now to be gone. Fresh briar.
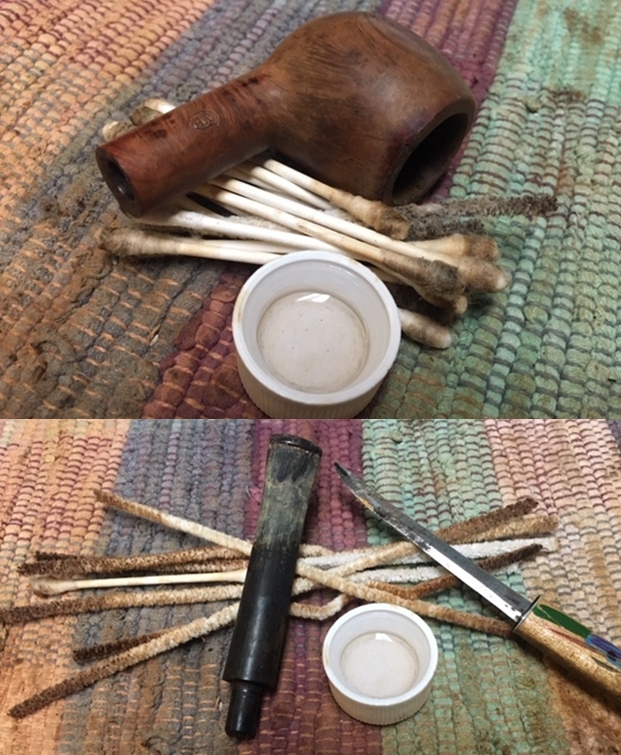
 Continuing the internal cleaning, pipe cleaners and cotton buds wetted with isopropyl 95% go to work on the mortise and airway. I also employ a small dental spoon to scrape the mortise walls. When I was doing this I suddenly thought, ‘Why am I not testing out the Kleen Reem shank reamer?’ I pull it out of the Kleen Reem case again and rotate it into the airway. The reamer grabs with traction and begins to move slowly through the airway as I rotate the reamer. It makes it through to the draft hole and I retract it without difficulty. It works!
 I decide to drink the Kool Aide and try out the miniature pipe cleaners. I thread one through the hole on the tip of the reamer per the directions I read earlier. I’m wondering to myself, how is all of this going to fit and move through the airway?? I decide to wet the pipe cleaner some with isopropyl 95% as I do regular pipe cleaners. I push it into the mortise and the halves of the pipe cleaner fold back like slanted wings as I begin rotating the reamer as I did before. As before, the reamer grabs and gains purchase while the rotation of the reamer pulls the tool into the airway. It makes it to the draft hole and as before, before trying with the pipe cleaner, I retract it without trouble.
 I am amazed! When I extract the reamer, I discover that the pipe cleaner was neatly embedded in the troughs of the reamer – sweet! The pipe cleaner provides a slightly expanded ‘brushing’ activity while the reamer does the plowing with its blades. The second picture below shows the pipe cleaner unwrapped a bit. I’m impressed with the engineering of this tool.
 After several more cotton buds and pipe cleaners, they begin to emerge lighter and cleaner and I call it ‘cleaned’ for the moment.
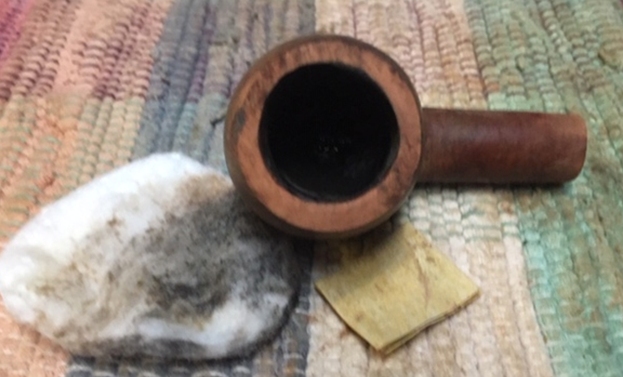
 The hour is late and before the lights go out, I’ll continue the internal cleaning with a kosher salt and alcohol soak. This both continues to clean the internal briar walls, but also refreshes the bowl for the new steward’s enhanced enjoyment! I first fashion a mortise ‘wick’ by pulling and twisting a cotton ball. The wick serves to help draw the tars and oils out of the briar.
  I then guide the wick down the mortise into the airway with the aid of a stiff wire.
  With the wick in place, the chamber is filled with kosher salt. Kosher salt leaves no aftertaste unlike iodized salt.
  With the bowl in an egg crate to keep it stable, I add isopropyl 95% to the chamber with a large eyedropper until it surfaces over the salt. After a few minutes the alcohol is drawn into the pipe and I again add some alcohol to top it off. I put it aside, turn out the lights and let it soak through the night!
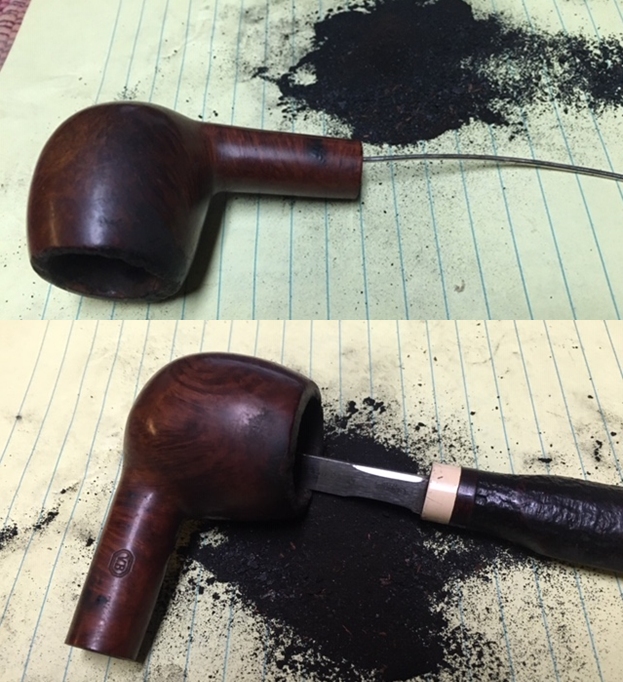
 The next morning the soak has done the job. The soiling of the wick and salt indicates the absorbing action of drawing the tars and oils out of the briar. After tossing the expended salt in the waste, a paper towel and blowing through the airway clears the pipe of salt crystals.
 I put the stummel aside to address the chewed-up stem. I take a few pictures to show the upper, lower then a lateral view of the button. The results of the biting and clenching are not only the severe teeth damage but also that the button is so compressed, there’s essentially no lip left to hang the pipe normally. This is not good even when you’re not a clencher. My approach will first seek to expand and raise the tooth compressions and chatter as much as possible on the upper and lower bit. I’ll attempt this using the heating method with a Bic lighter. I don’t believe there’s any way to avoid having to rebuild the button to restore a proper lip to hang the Freehand. First, using a Bic lighter, I paint the upper and lower bit with the flame. My hope is to minimize the compressions so that sanding is all that will be necessary on the bit. I take a start picture of upper and lower, then after using the Bic lighter for comparison.
I believe the process did minimize the damage as the heated vulcanite expanded toward its pre-damage condition, but we’re a long way from where we need to be!
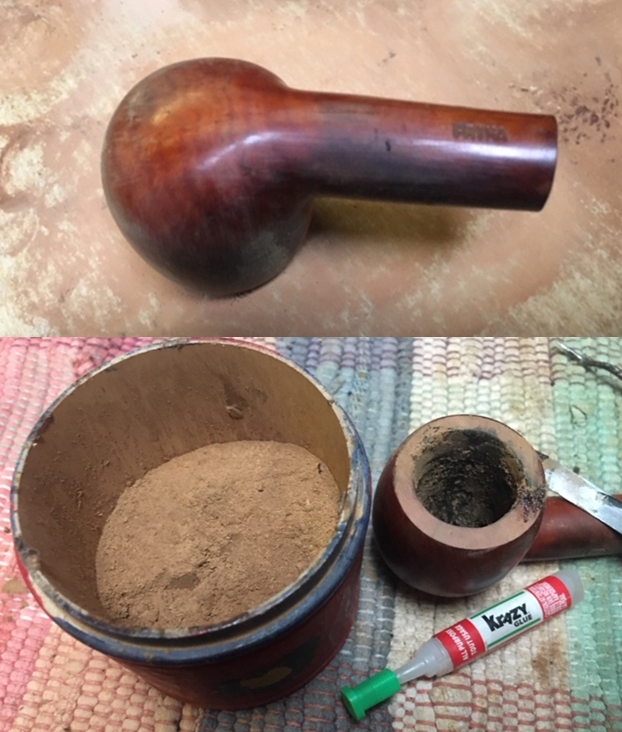
 The button was so thin on the top that the flame burned a small bit of the upper lip in the center and it broke off leaving a divot in the middle of the upper lip.
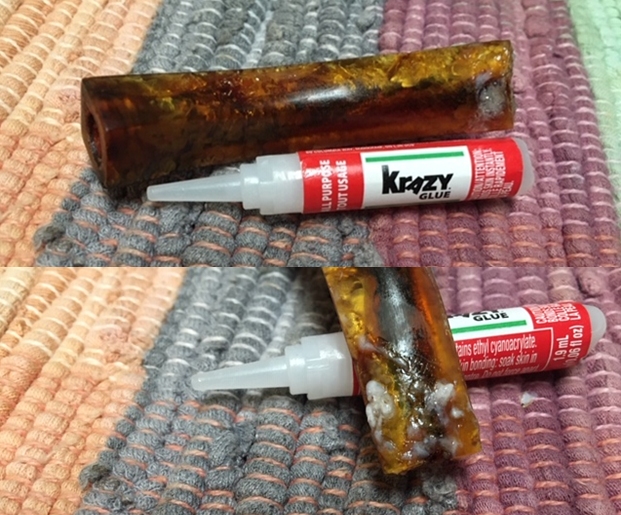
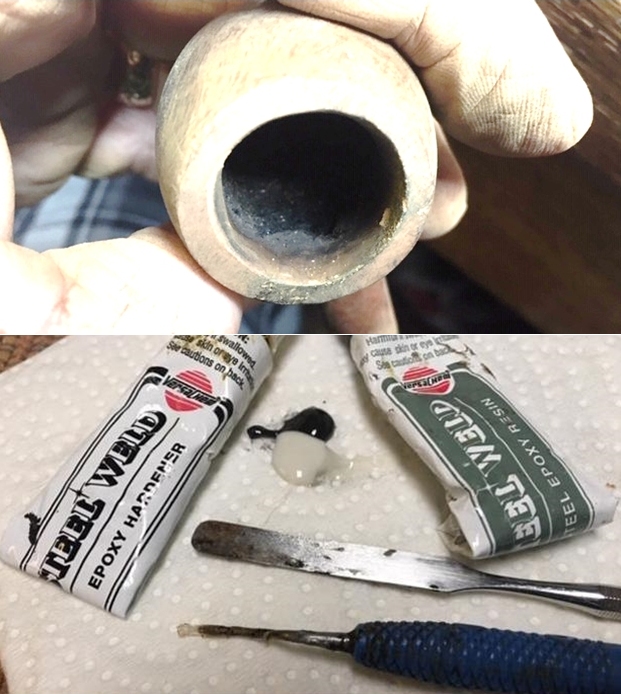
  To rebuild the button, I mix activated charcoal with BSI Extra Thick Maxi-Cure CA glue. To help in cleaning, I put scotch tape down on a plastic disk that serves as my mixing pallet, and then clean the bit with a cotton pad and alcohol. I place a small pile of charcoal on the disk and then a dollop of the glue next to it. I gradually mix as I pull charcoal into the glue using a toothpick.
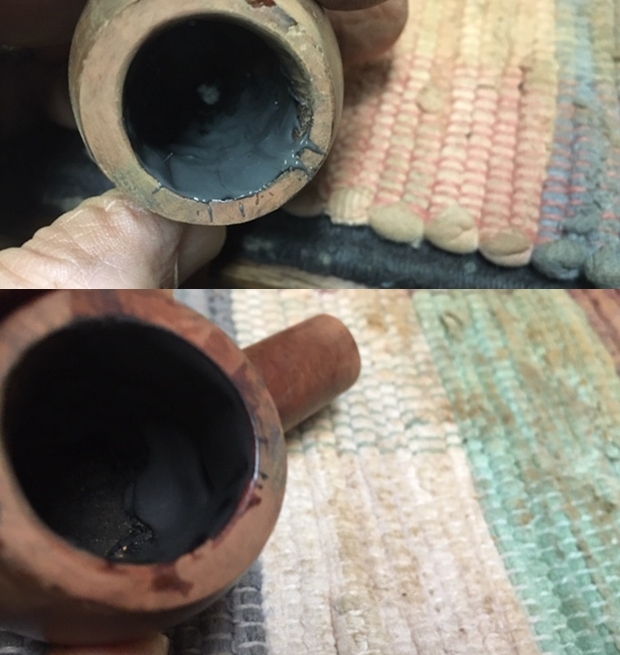
 As the mixture thickens, I trowel the charcoal/CA mixture onto the button to build a mound over the repair site for the button and on the bit area to fill tooth compressions remaining in the vulcanite. An accelerator is used on each side of the bit to quicken the curing time.
 After cleaning up, the flat needle file is first used to begin the rough shaping of the button.
 Starting with the upper side, I file and gradually shape the button.
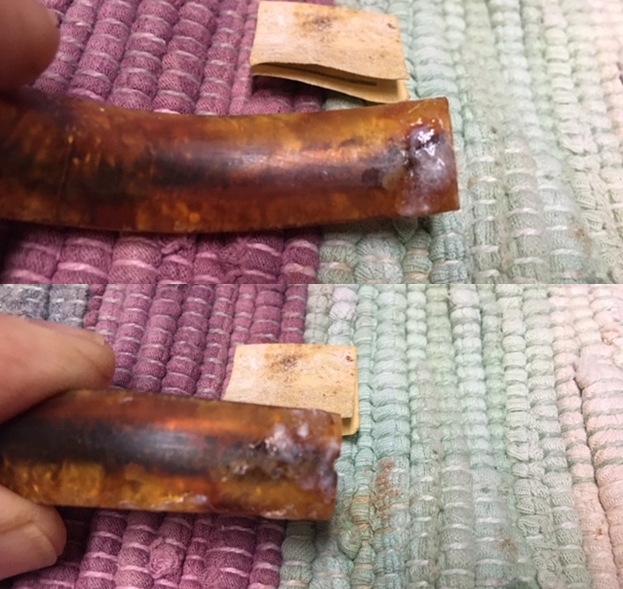
 After making progress on the upper bit and button, the patch just above the small air slot that was thin earlier and burned some, is not adequately filled. With a magnifying glass I see a gap in the patch.
 To do a quick patch fill above the slot, I fashion a piece of index card into a sharp point that will fit into the slot to form a mold barrier. I cover the tip of the card stock with a piece of scotch tape to keep the glue from sticking.
  Using a medium-thick black CA glue, I spot drop the glue in the center above the slot and spray it with accelerator.
 After waiting a few minutes for the black CA glue to thoroughly cure, I wiggle the card stock out of the slot with no problems of sticking. The patch above the slot looks good and I continue filing.
 I finish the roughing out of the upper button with the flat needle file.
 I transition to filing and shaping the lower button and bit.
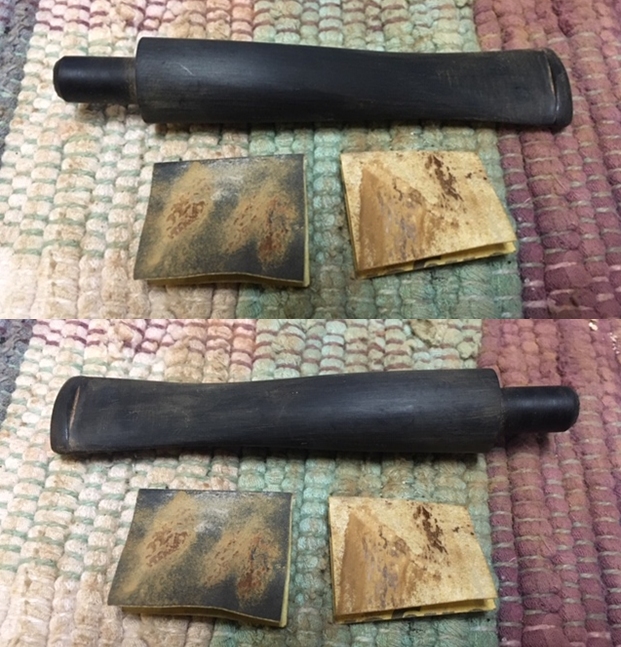
 With the lower roughing out completed, I transition to 240 grade paper and sand to smooth more and to erase the scratching left from the file.
 Next, using 600 grade paper, I wet sand the entire stem. I follow this by applying 000 grade steel wool to the entire fancy stem. It takes some time to work sand in the grooves and around the bulges of the stem.
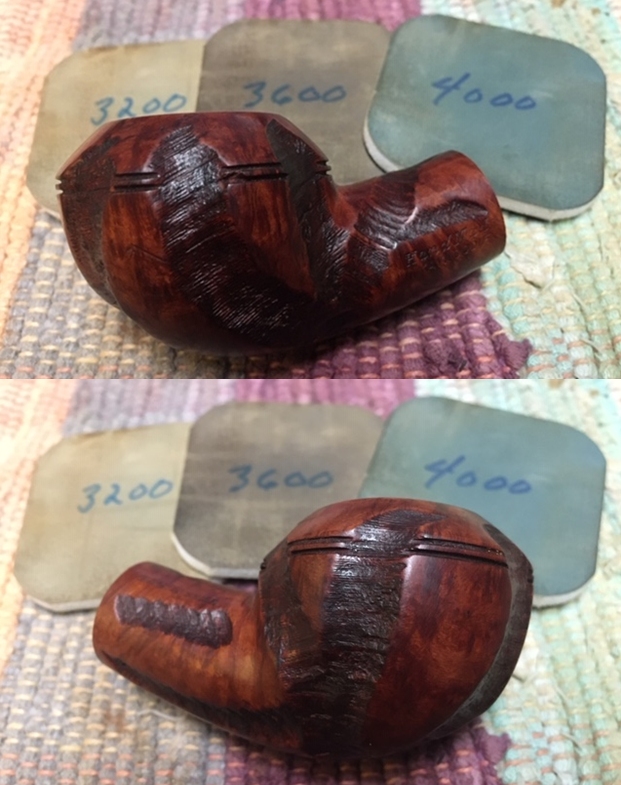
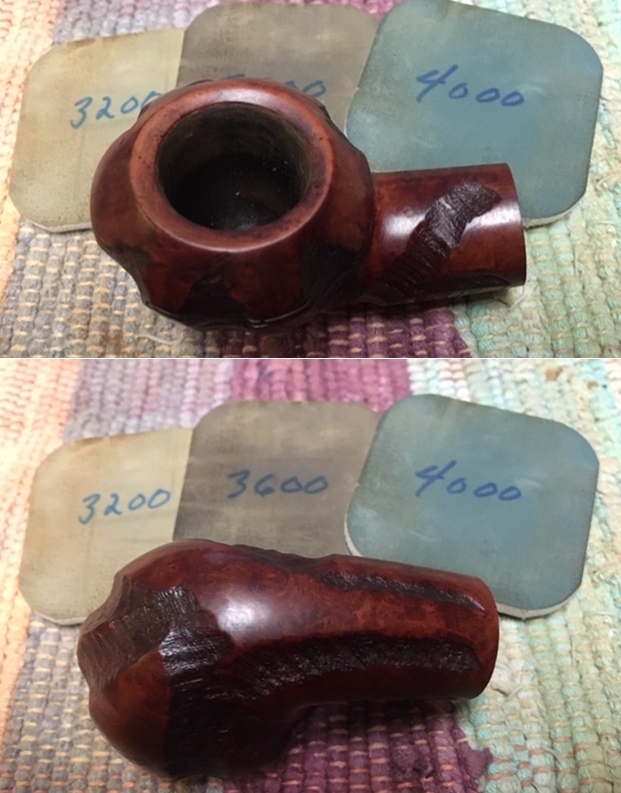
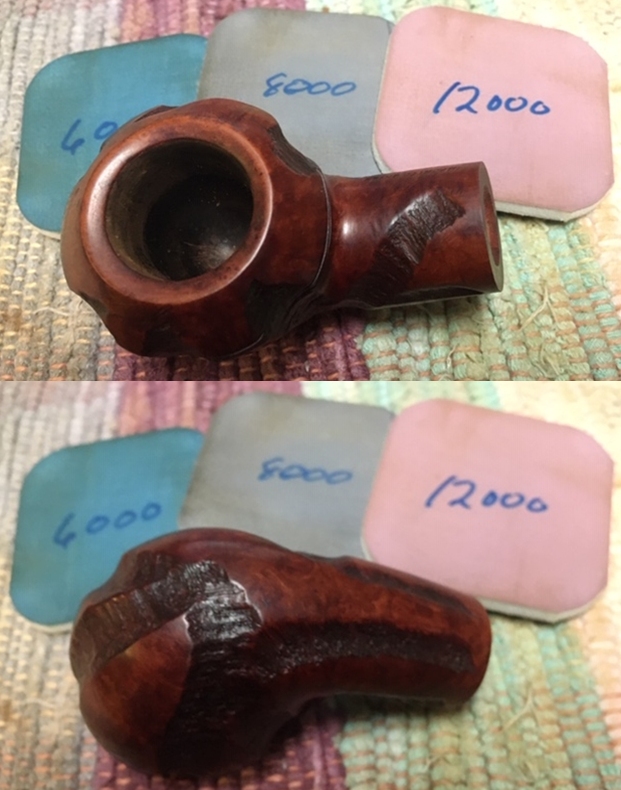
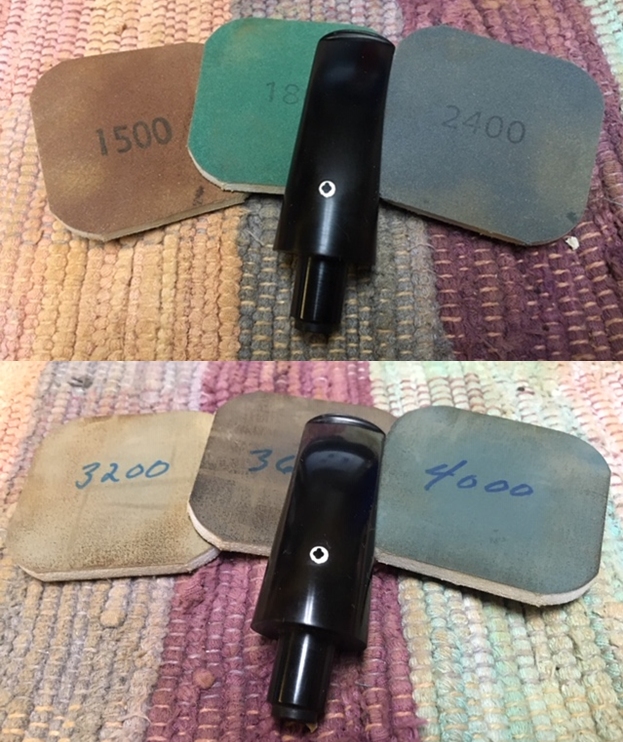
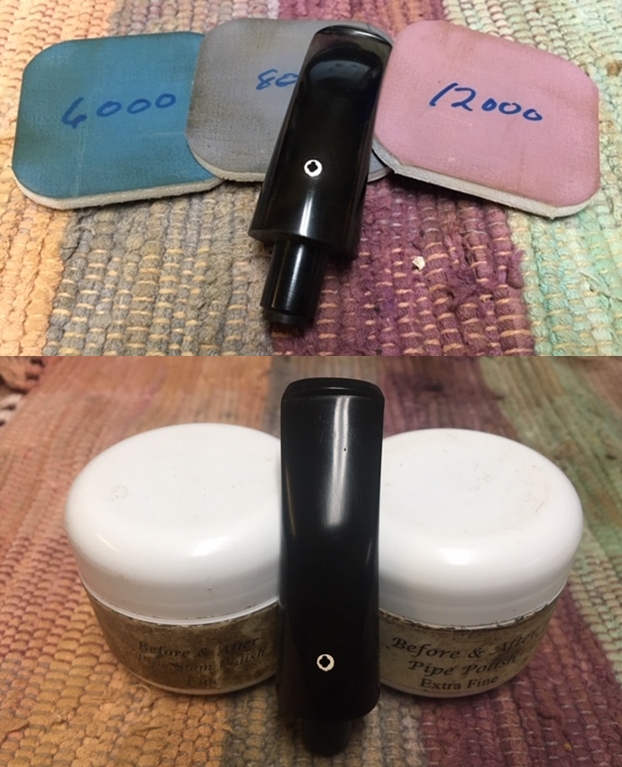
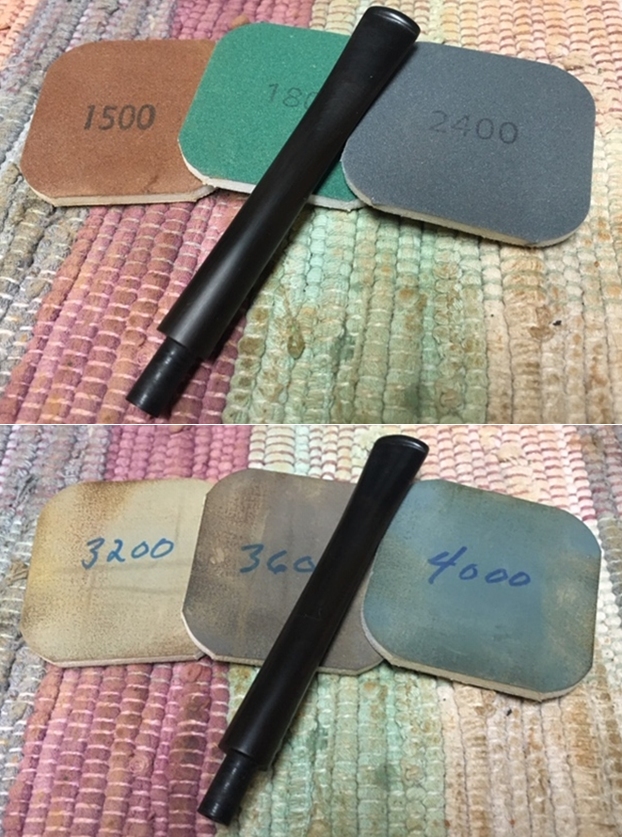
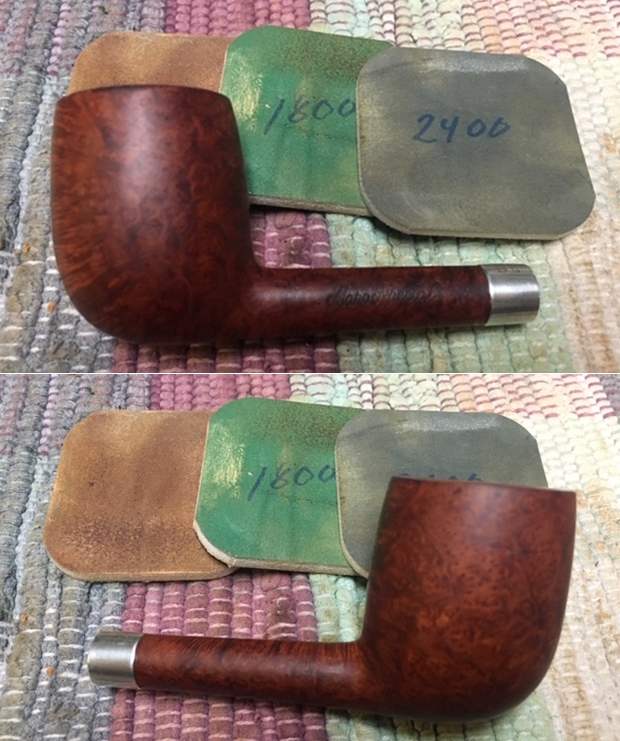
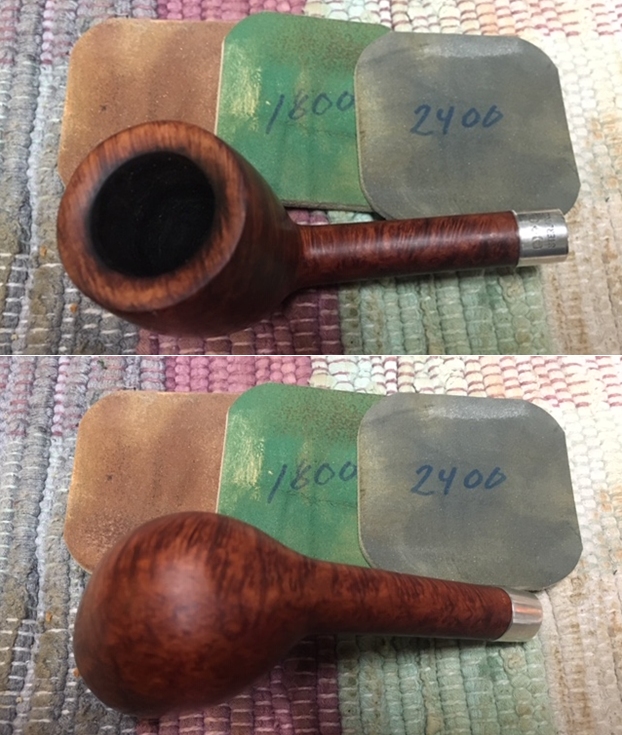
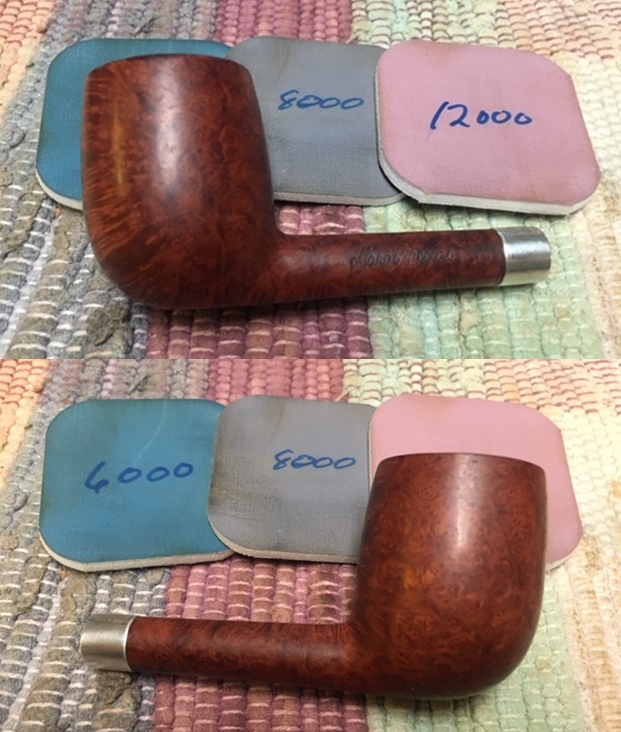
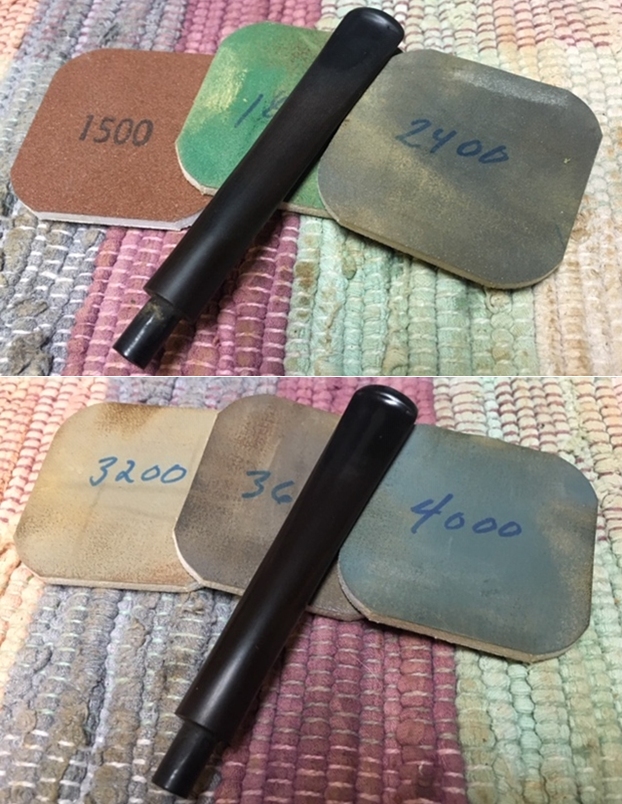
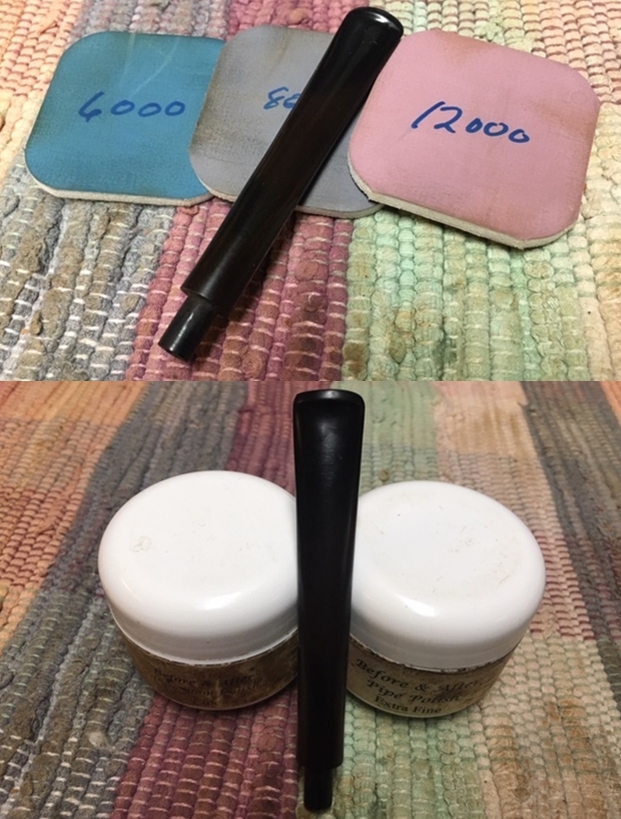
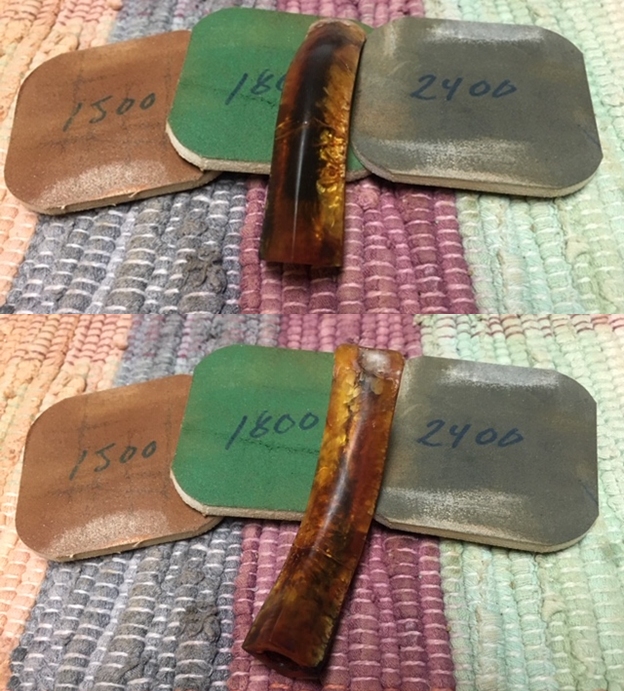
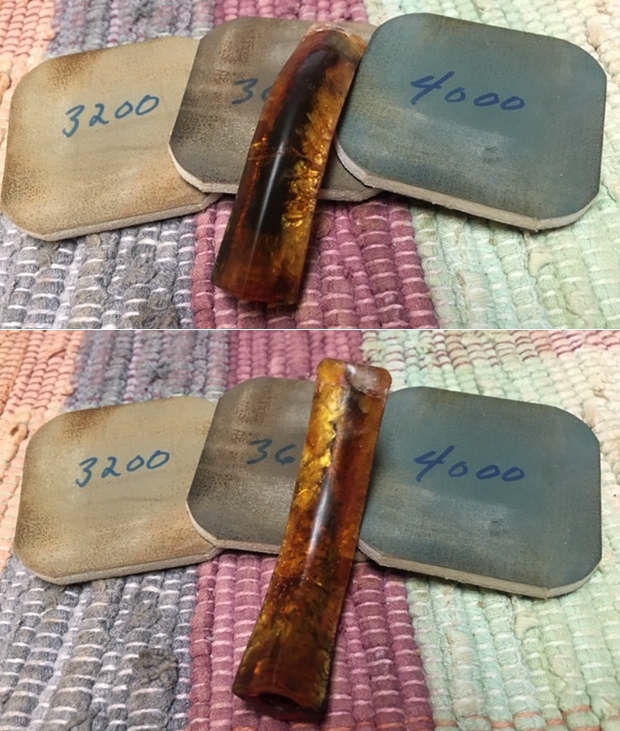
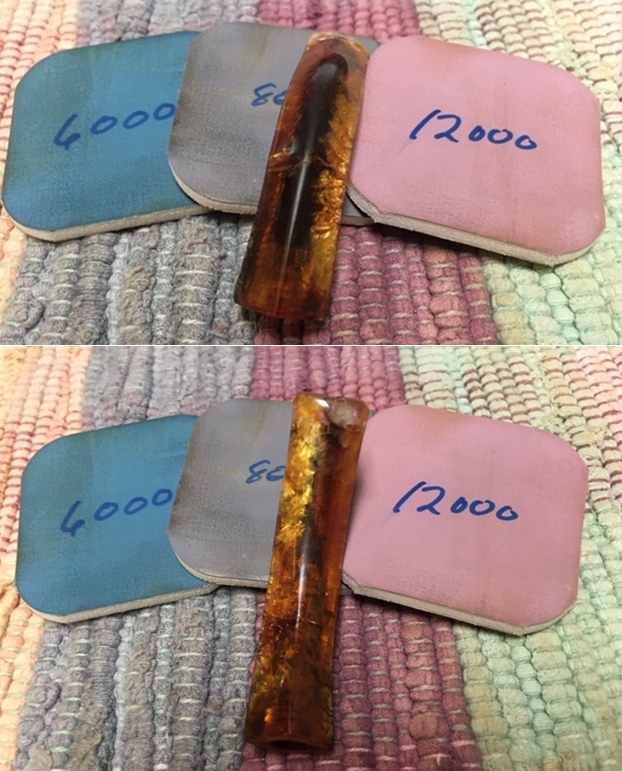
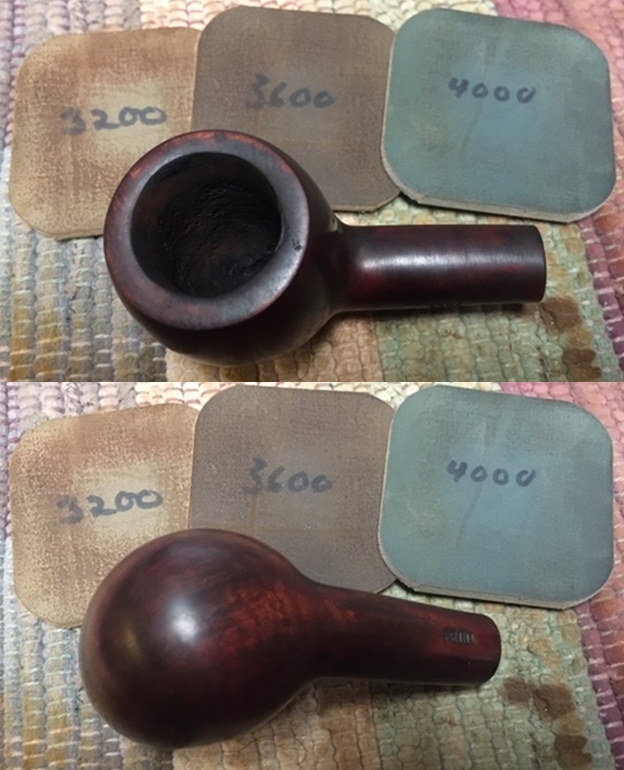
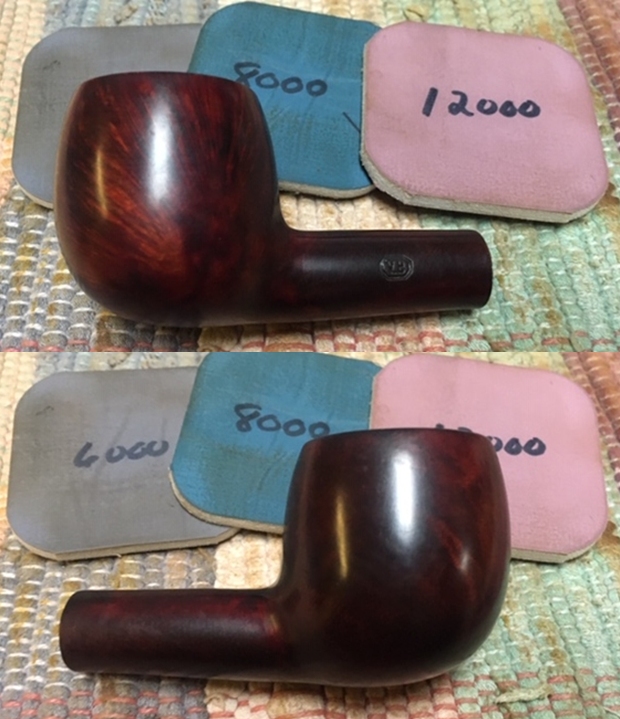
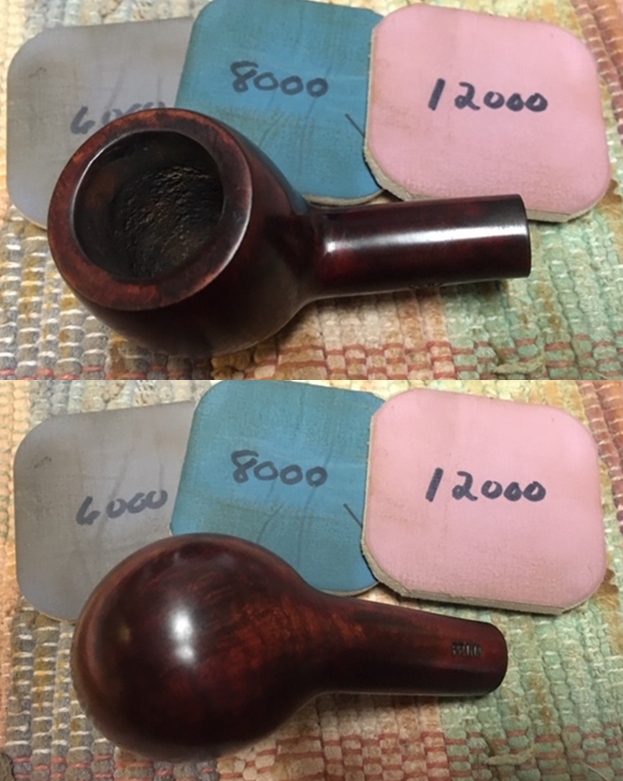
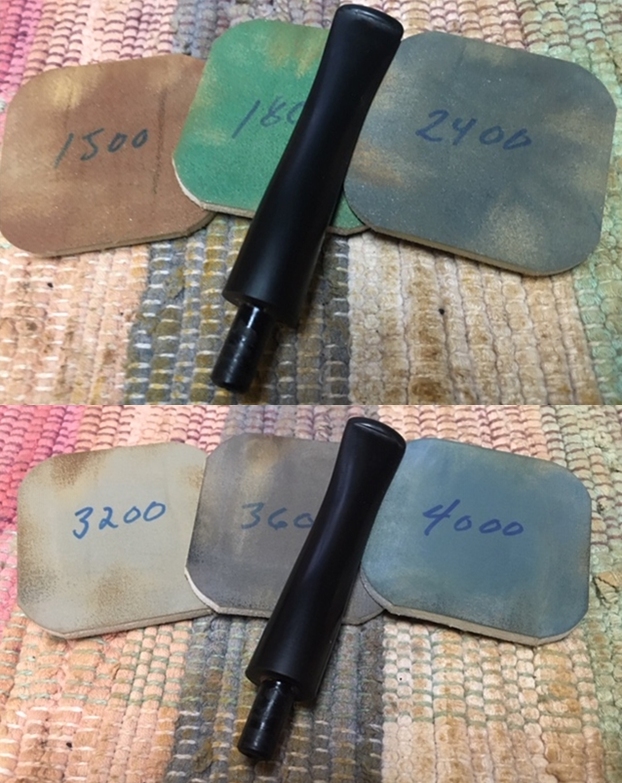
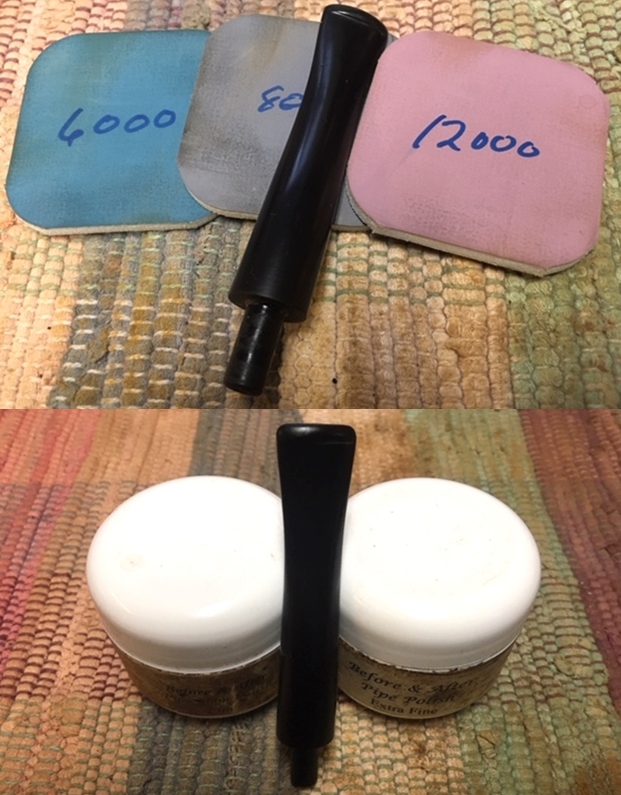
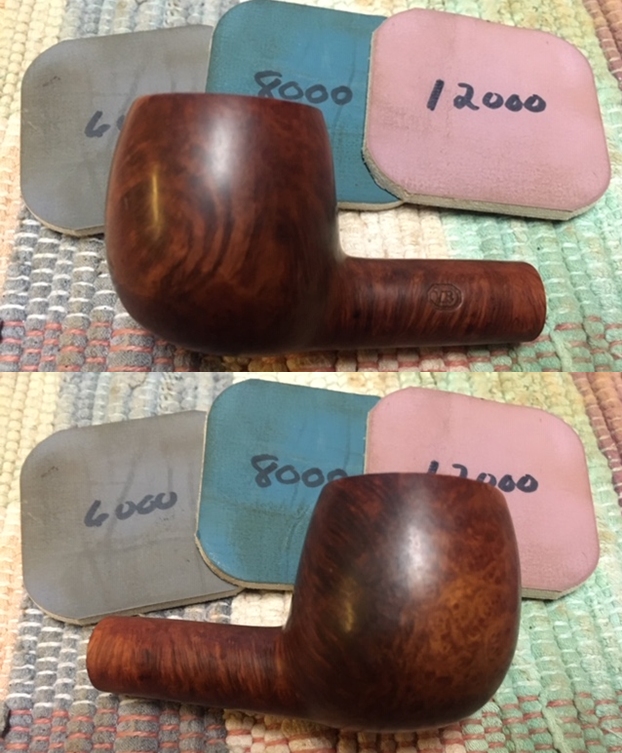
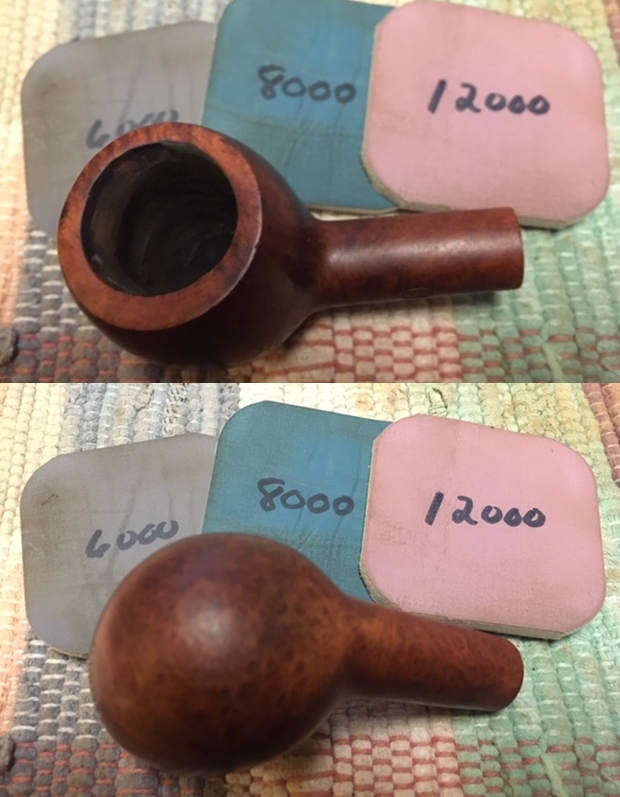
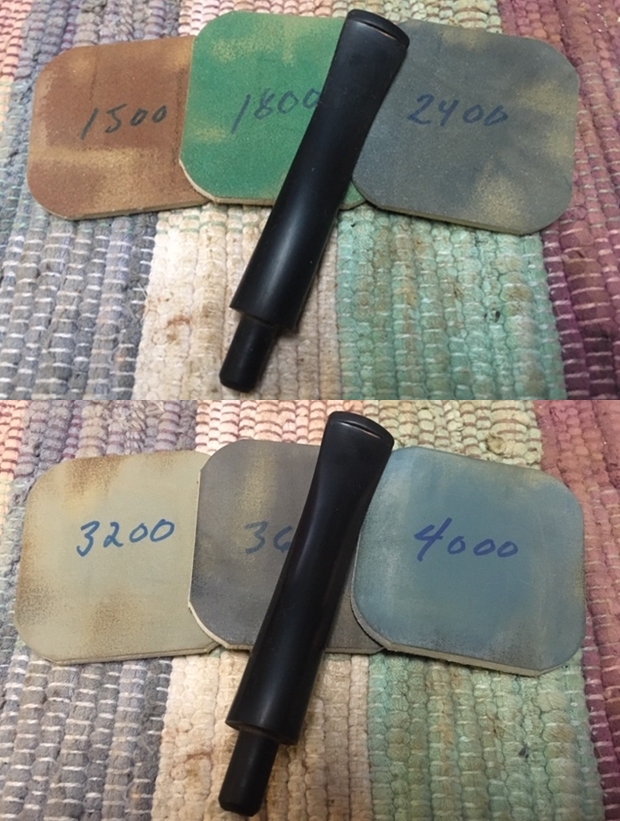
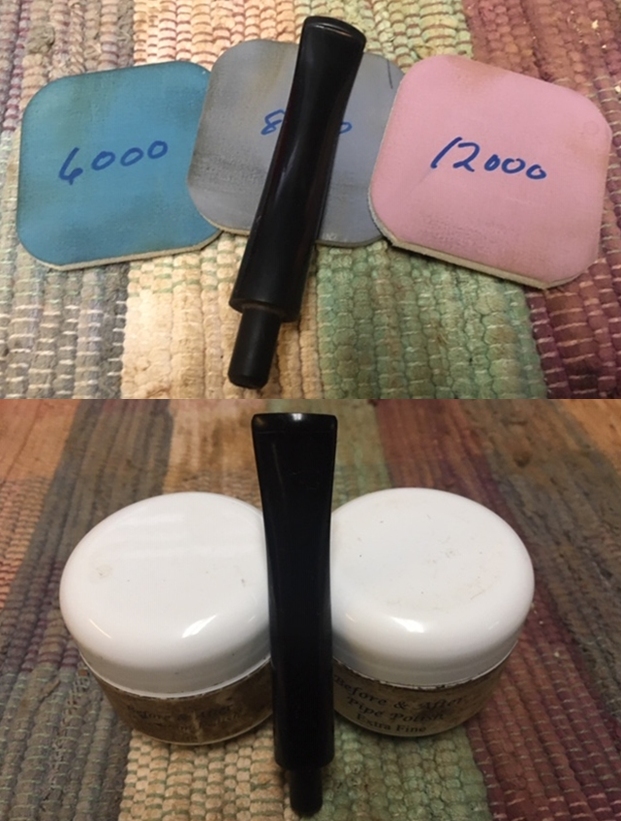
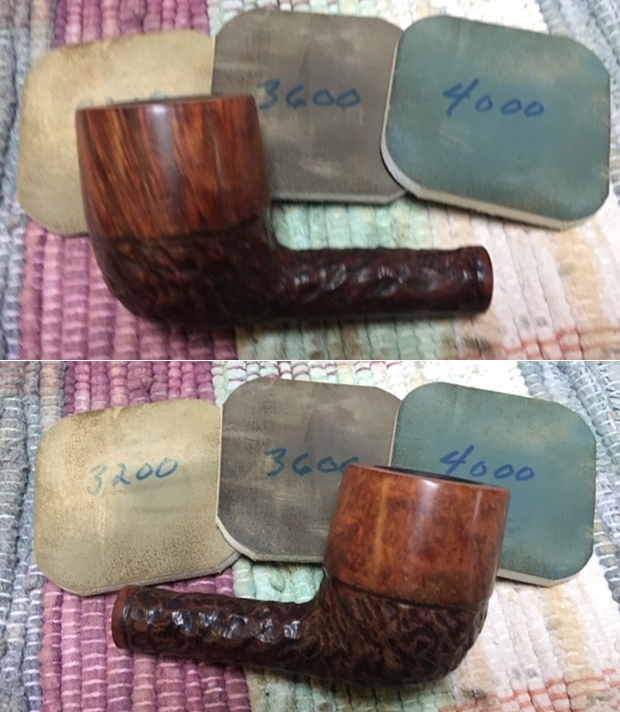
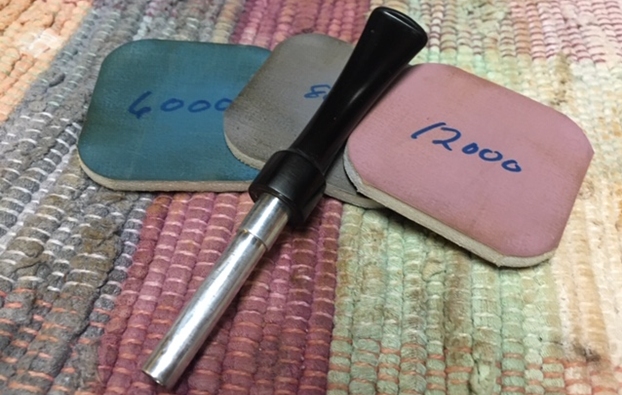
 Stem work is the most time consuming and meticulous part of a pipe’s restoration, usually. I look at the possible Preben Holm Freehand stummel waiting for attention and I would rather put the stem aside and switch to the ‘milk and honey’ part of a restoration, but I press on with the stem applying the full battery of micromesh pads starting with wet sanding with pads 1500 to 2400. I follow this by dry sanding with pads 3200 to 4000 and 6000 to 12000. In between each set of 3 pads, I apply Obsidian Oil which helps rejuvenate the vulcanite stem as well as helping retard the development of oxidation.
 After finishing the micromesh process, I note that the button rebuild patch material has air pockets showing. This happens often with this repair.
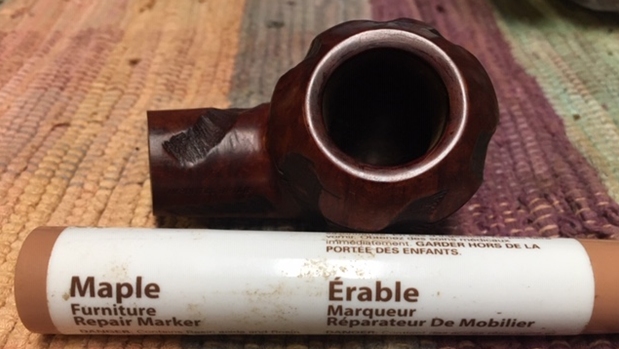
 To remedy this, I use clear acrylic nail polish to paint the button with the small brush that comes with the bottle. The acrylic fills the pockets. After applying, I put the fancy stem aside for the acrylic polish to cure.
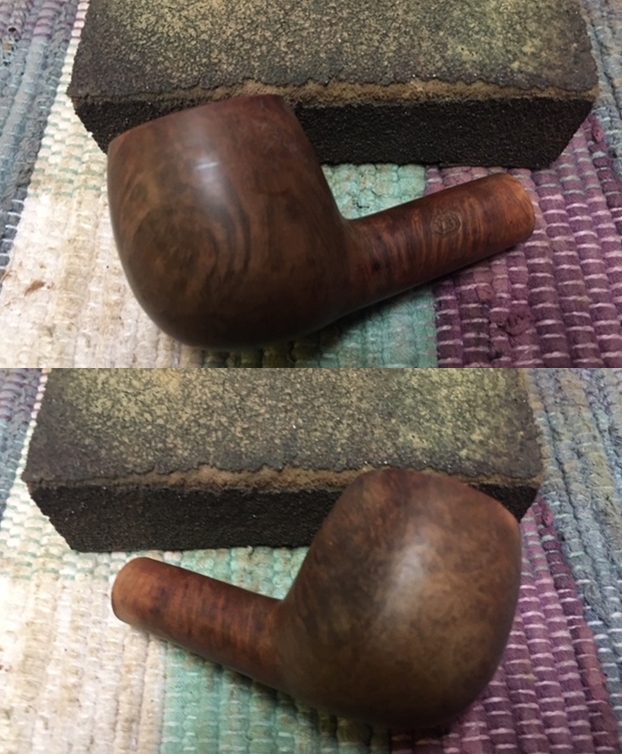
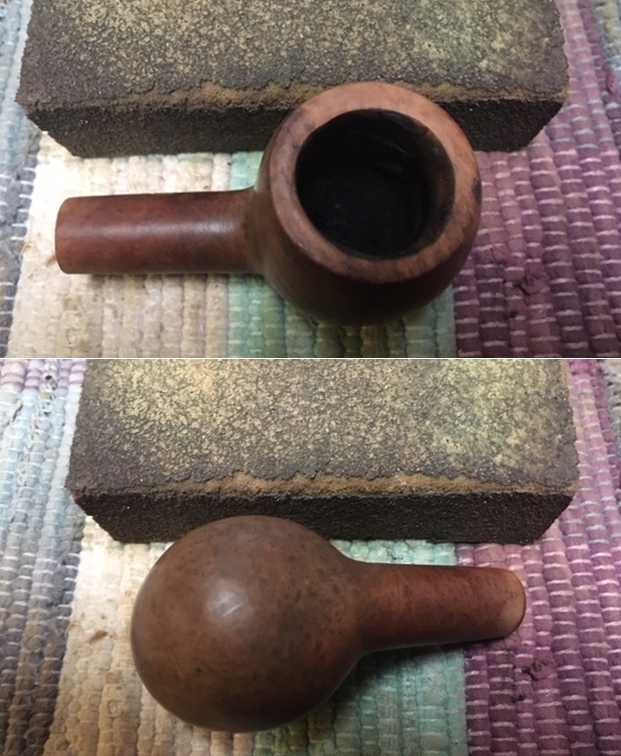
 With the stem on the side, I now take another look at the Danish Freehand stummel. The grain is beautiful, and the surface is in very good shape but shows normal nicks and scratches from normal wear.
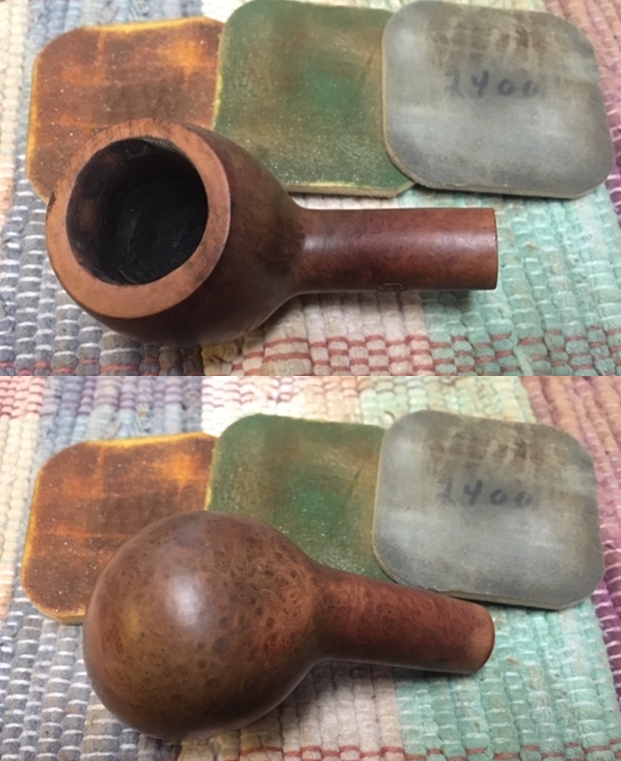

 I will use micromesh pads to refresh the briar surface but first I cover the area of the last vestiges of the nomenclature. I do not wish to contribute to its demise.
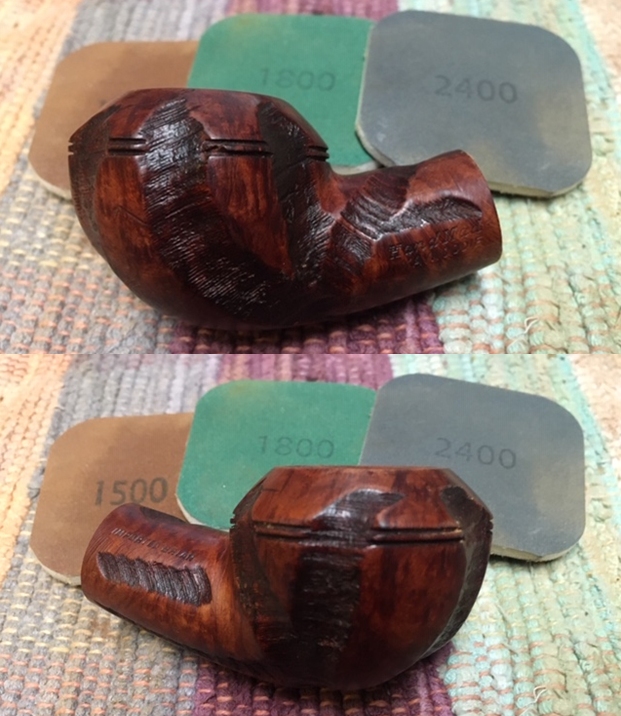
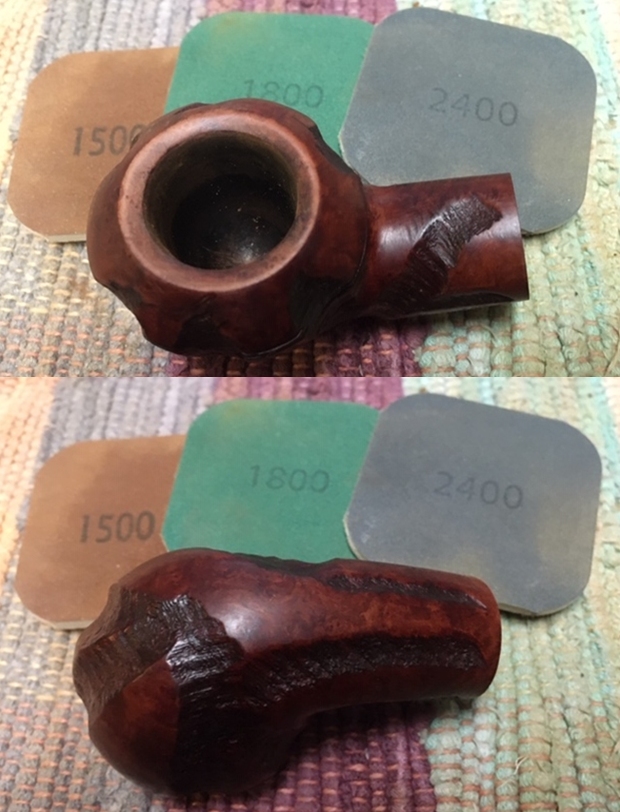
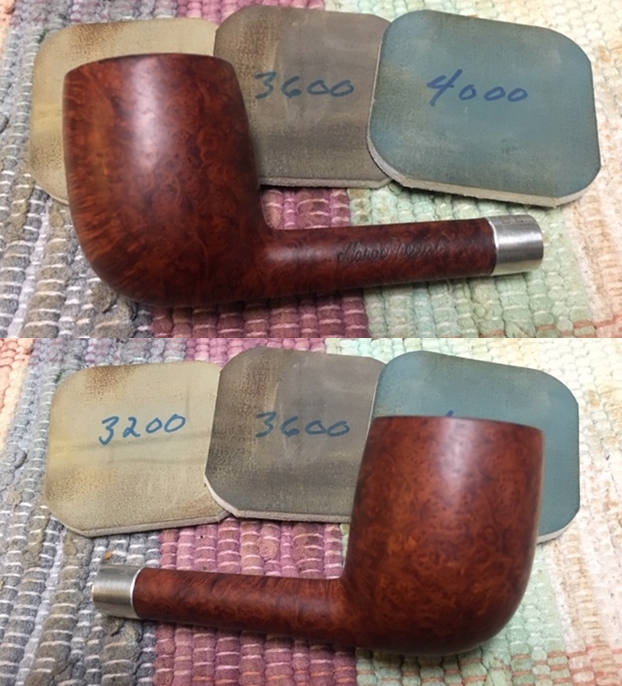
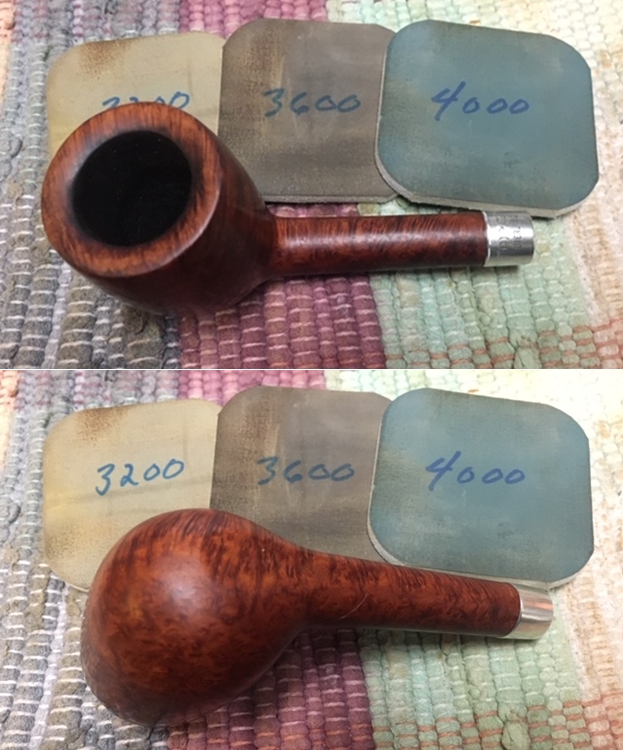
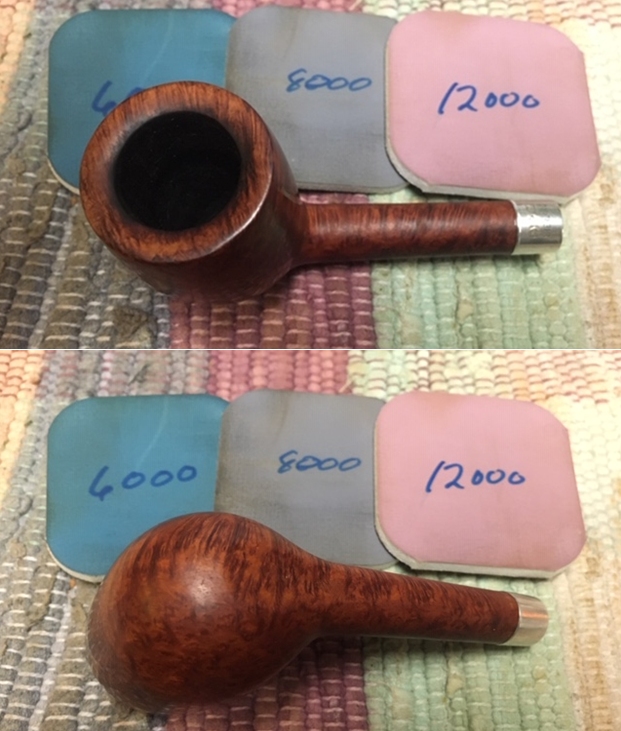
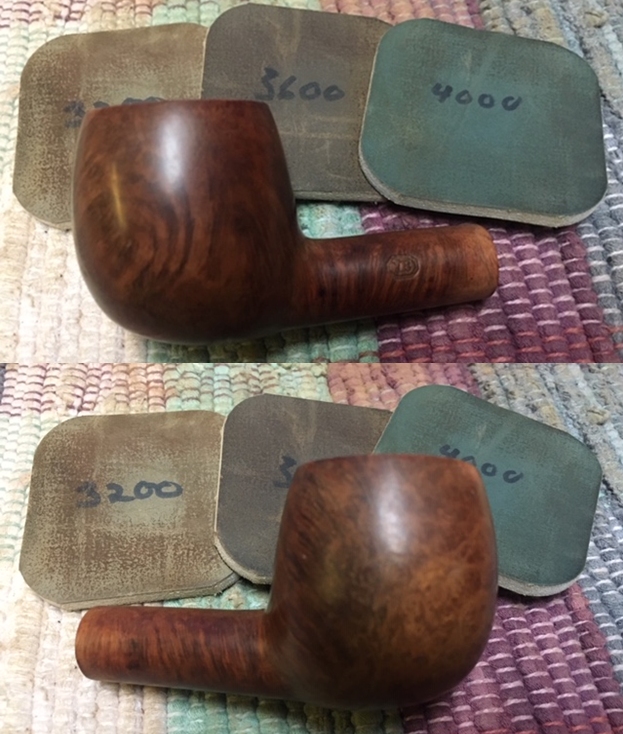
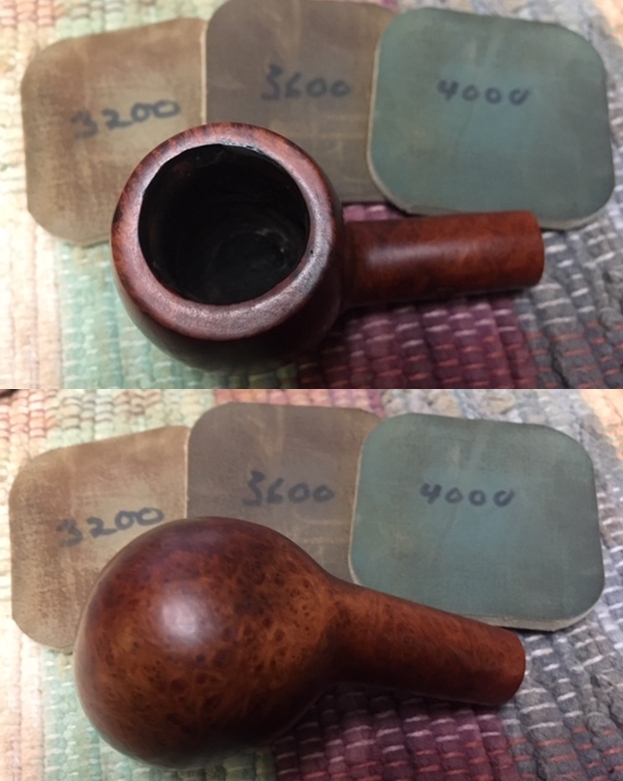
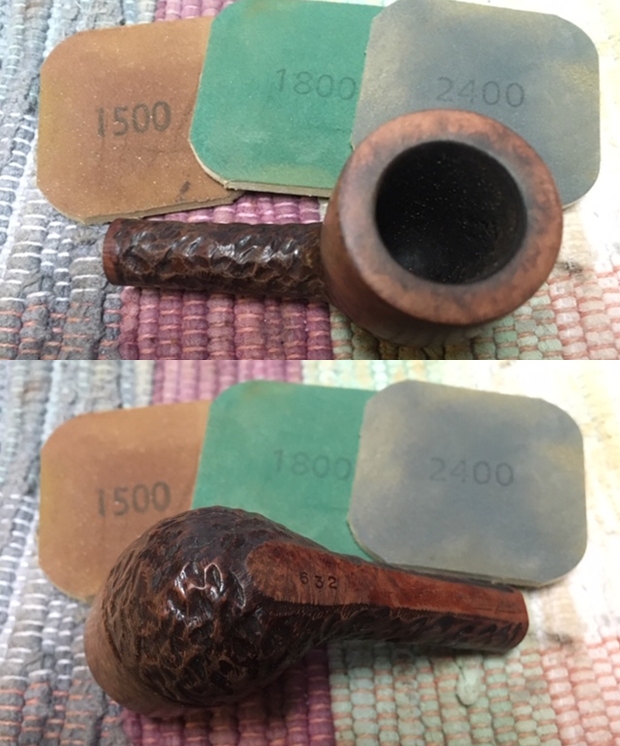
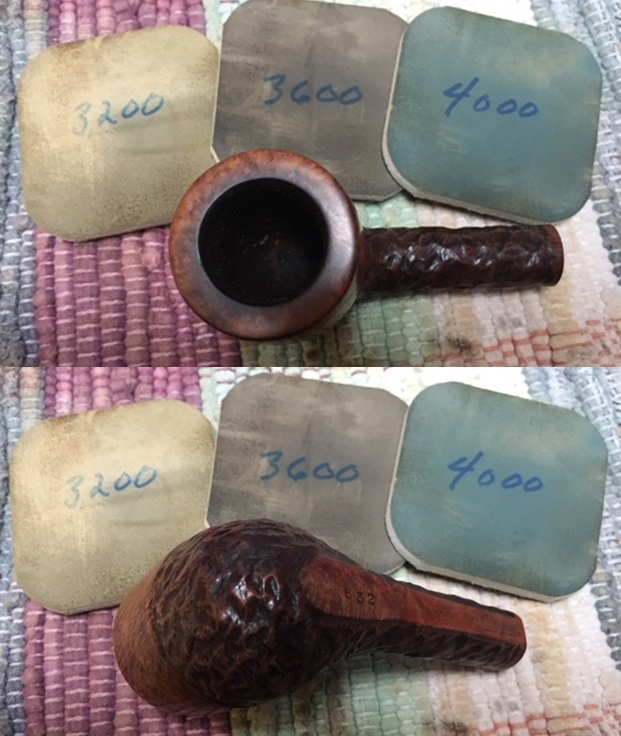
 Using pads 1500 to 2400, I wet sand the surface. Following this, using pads 3200 to 4000 and 6000 to 12000, I dry sand the large briar landscape. It’s exhilarating to see the metamorphosis of the grain through each minute gradation of grade provided by each successive micromesh pad. It’s as if the grain is coaxed out. I love the grain on the Danish Freehand. If this is indeed a work of Preben Holm, it is truly ‘chasing the grain.’

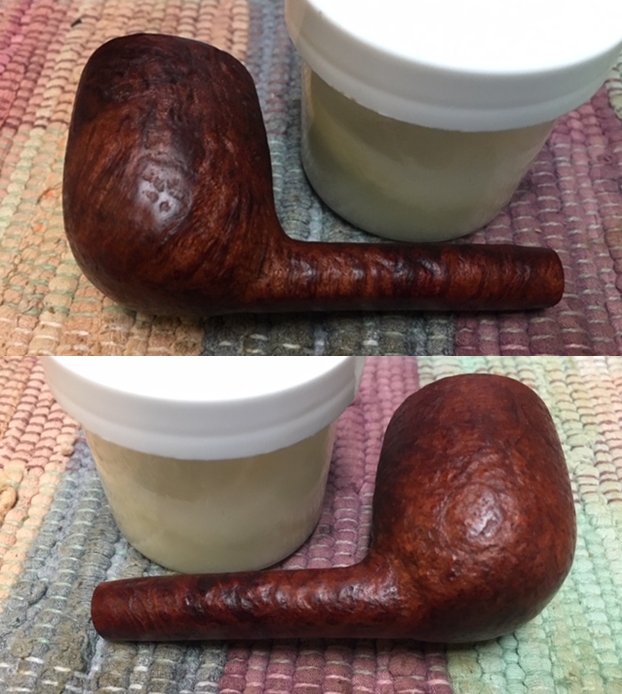
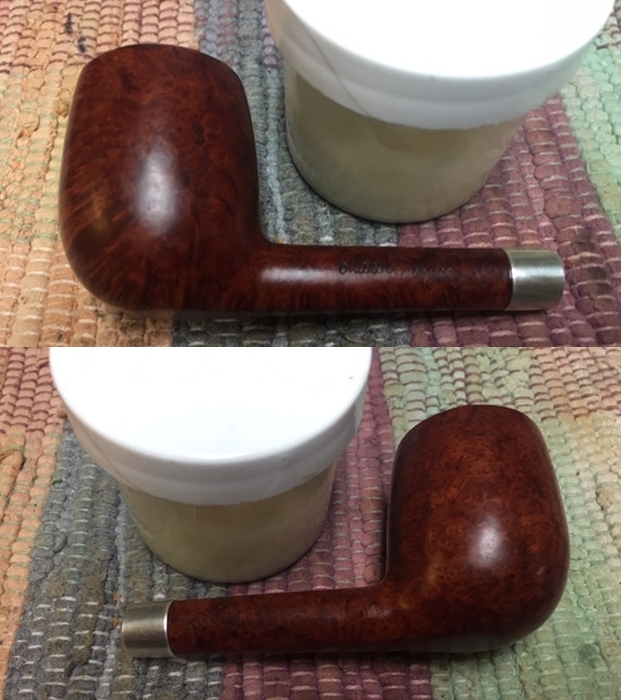
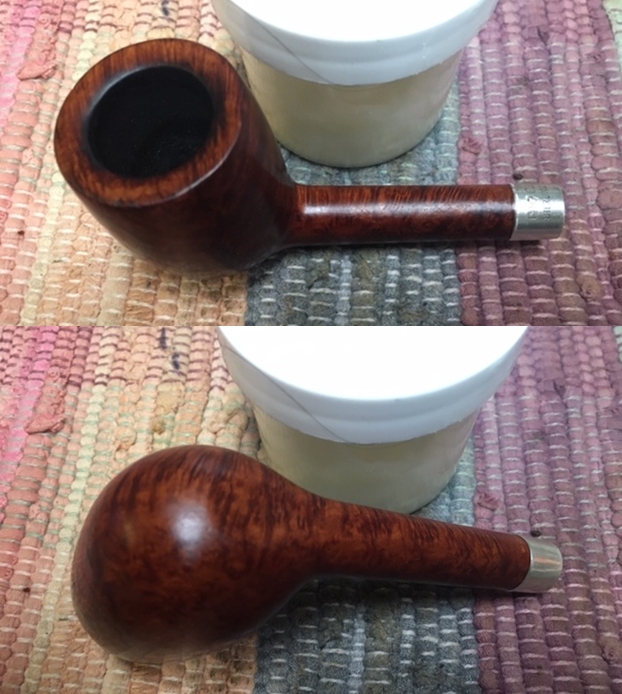
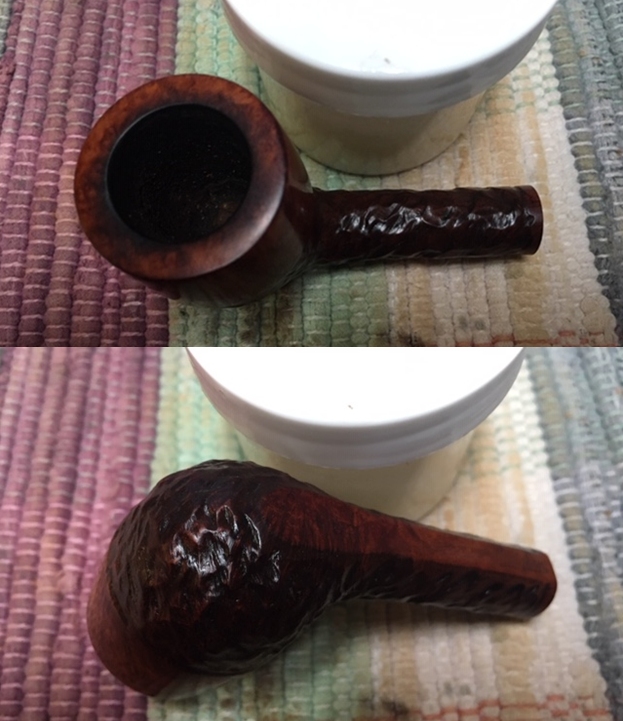
 To tease out further the natural hues of the briar, Mark Hoover’s product (www.ibepen.com), Before & After Restoration Balm, does the job well. After putting some Balm on my fingers, I work it into the briar surface including the rim and shank plateaus. I then put the stummel aside for about 20 minutes, then wipe/buff the excess using a microfiber cloth dedicated to this. I follow with another microfiber cloth to buff the surface further.
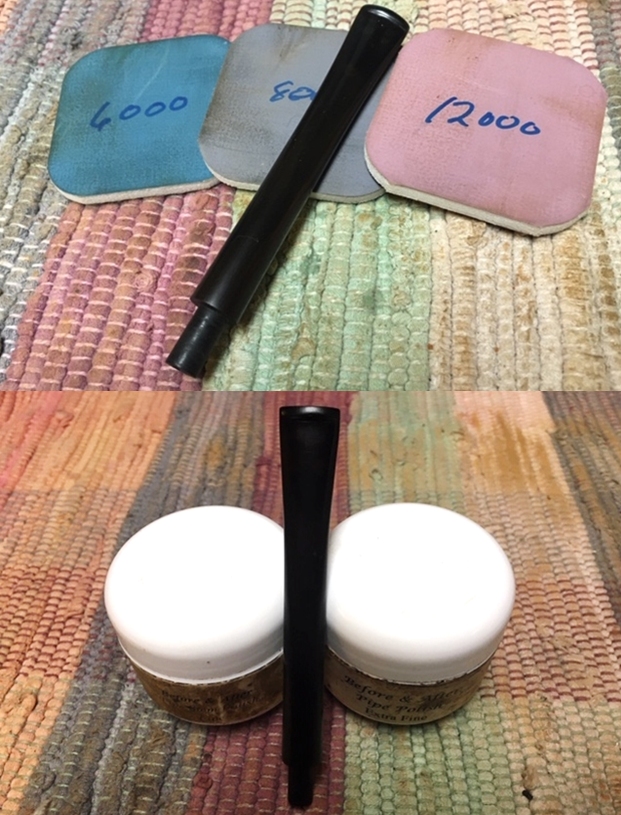
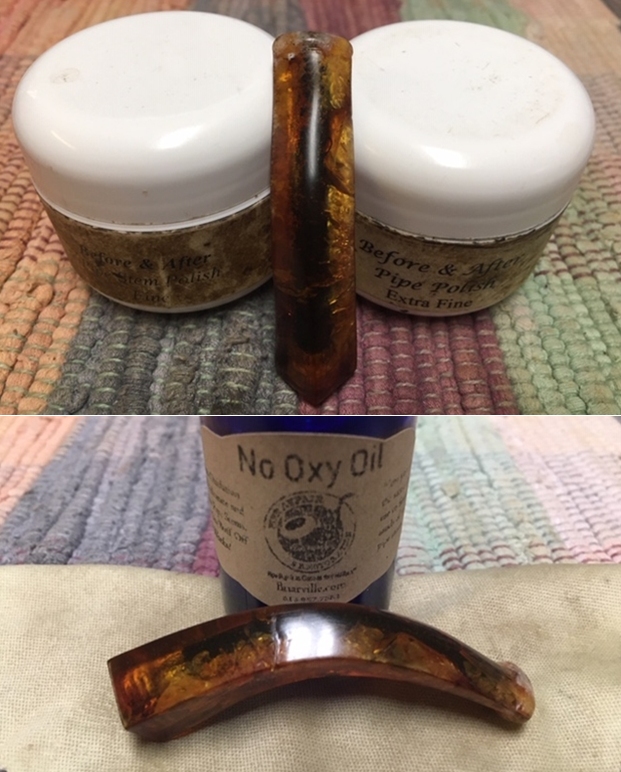
 Next, I use another product of Mark Hoover, Before & After Fine and Extra Fine polishes. Not only does the polishes revitalize the vulcanite, Mark says that it also has properties that continue to fight or remove oxidation. Starting with the Fine polish, like the Balm, after placing a small amount on my finger, I work it into the vulcanite and let it set for a few minutes. With the polishes, I like removing the excess initially with a paper towel – it absorbs and is a bit rougher which seems to help in the polishing at this stage. I follow the Fine with the Extra Fine polish in the same manner. The stem looks great.
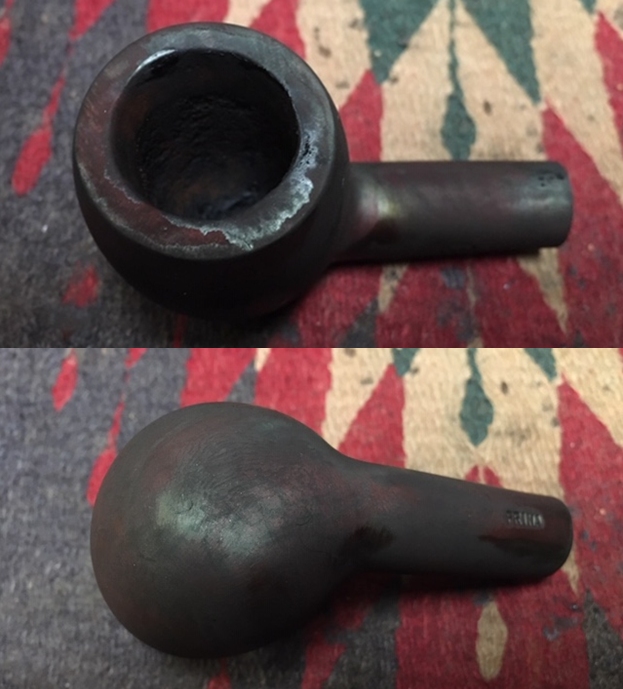
 Next, I address the plateaus of rusticated briar – a hallmark characteristic of many Freehand pipes. This Freehand appears to have had a darkened plateau originally and I use a fine point black Sharpie Pen to do the highlighting and darkening. I also darken and freshen the straight highlight carvings on the heel.
 I focus on the inner two thirds of the rim plateau intentionally leaving some of the rustication on the outer edge natural briar – I like contrasting and texturing. I do the same with both plateaus and the heel sculpting.

 In order to ‘weather’ the freshly darkened plateaus so that the black doesn’t look new, I lightly sand the plateaus with the roughest micromesh pad, 1500 grade. What this also does is lighten the peaks of the rustication giving more depth of contrast – I like this!
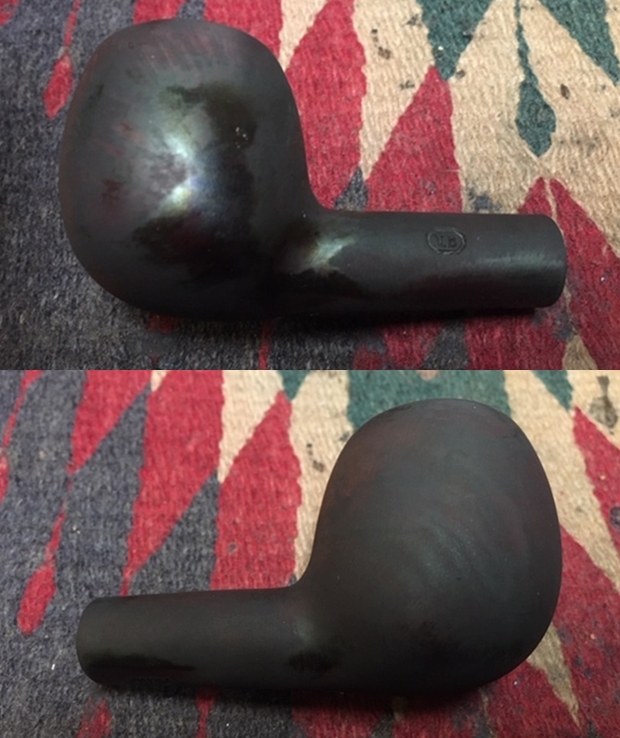
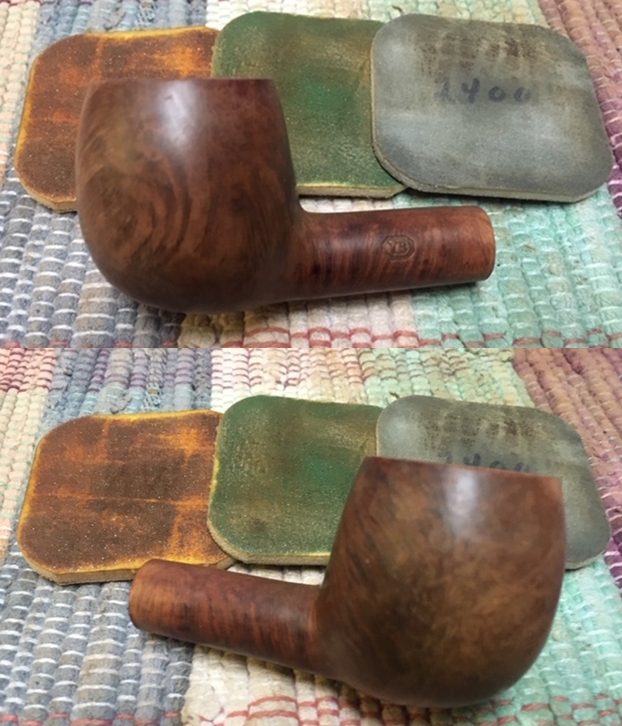
 The home stretch – after mounting a cotton cloth to the Dremel with the speed set at about 40% full power, Blue Diamond compound is applied to stem and stummel.
  Following Blue Diamond, another cotton cloth buffing wheel is mounted on the Dremel, and maintaining the same speed, carnauba wax is applied to the Freehand. After applying the wax, I use a microfiber cloth to give the pipe a rigorous hand buffing to raise the shine.
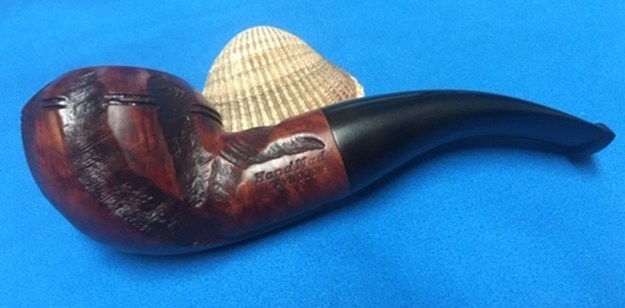
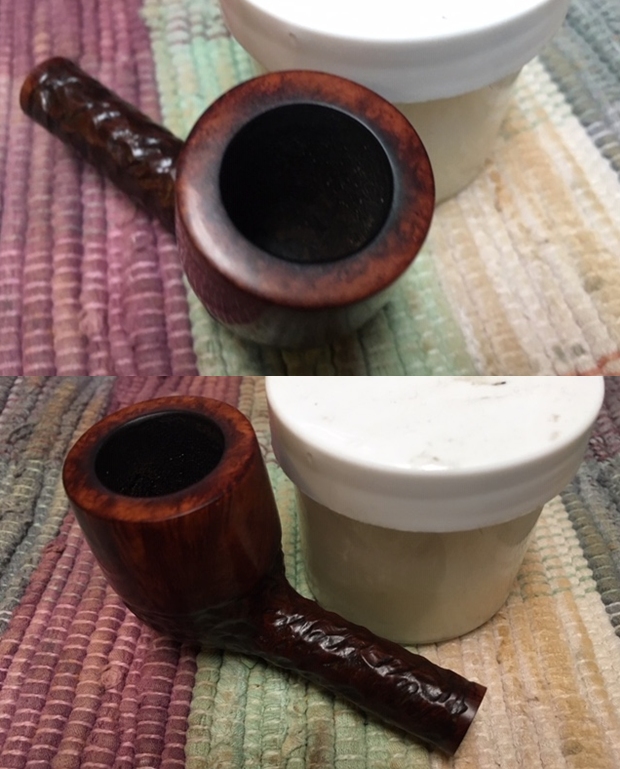
 If this Danish Freehand is not a Preben Holm, it’s an excellent facsimile. The vertical grain is mesmerizing. It reaches up the 2 1/2 inch height of the Freehand’s front bowed bowl section and culminates in the classic rusticated plateau. The plateau measures 1 3/4 inches across surrounding a 1 3/4 inch deep chamber that will hold an ample load of tobacco. The length from the front point to the button is 5 3/4 inches. The button re-build came out well – I’m pleased. Andy commissioned this Made in Denmark Freehand and will have the first opportunity to claim it in The Pipe Steward Store benefiting the Daughters of Bulgaria. Thanks for joining me!


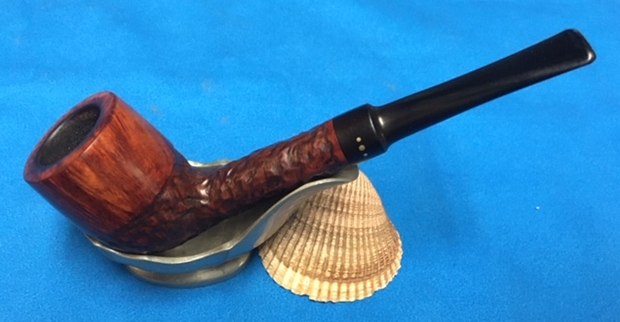

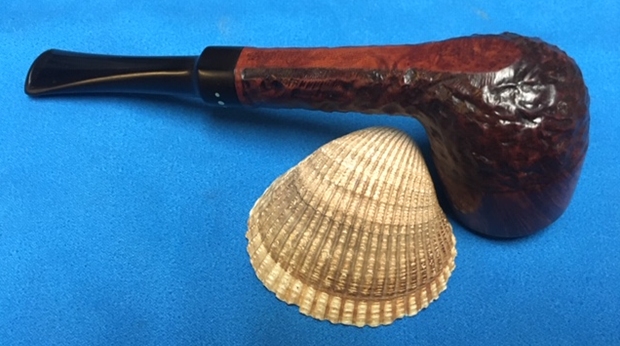
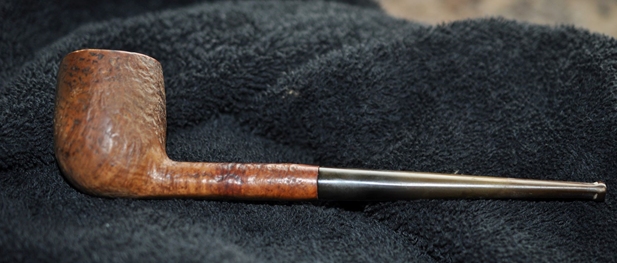
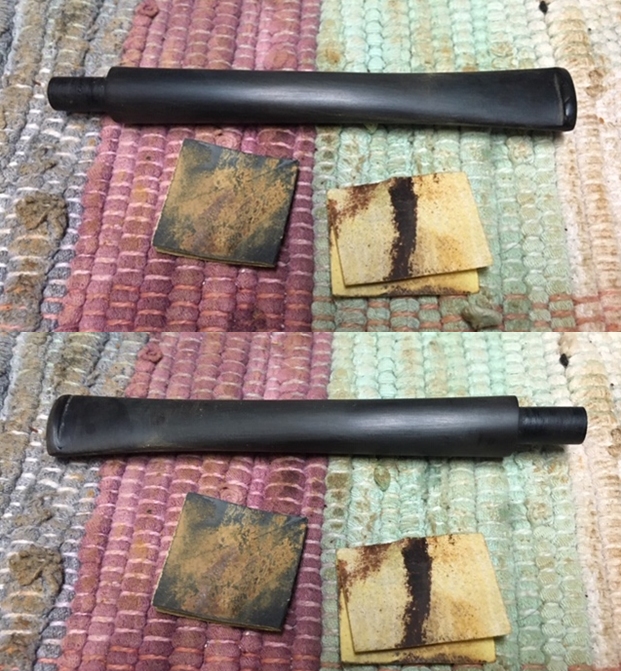
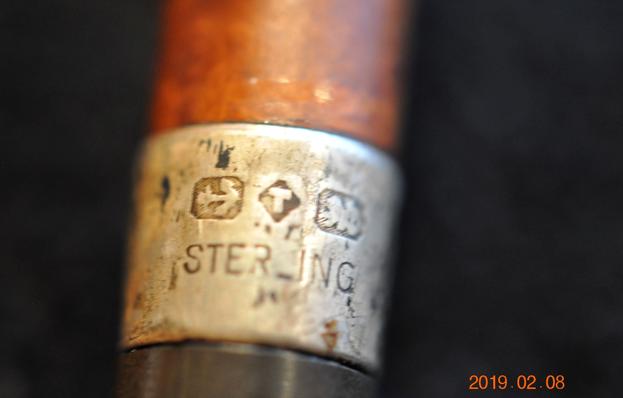
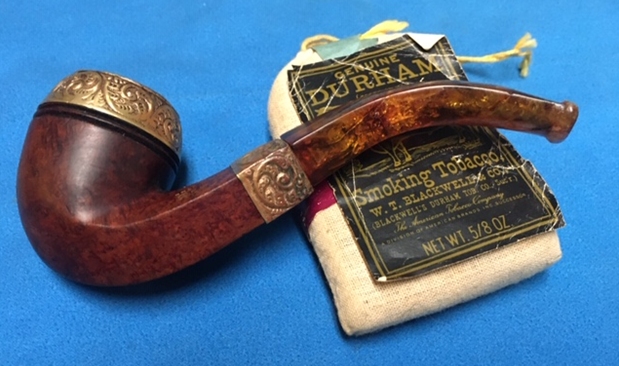
 When I unwrapped it the pipe it was a Brigham Billiard. It was stamped on the heel 632 which is the shape number. That is followed by Can Pat. 372982 then Brigham in a script. It had a rusticated lower half of the bowl and shank with a smooth top half. The rim top had a lava overflow from the thick cake in the bowl and some darkening around the top and edges of the bowl. The inner edge of the bowl was out of round. It was a dirty pipe but appeared to be in okay condition under the grime. There was a shiny finish that was spotty around the smooth portions of the bowl. The 3 Vertical Dot saddle stem was oxidized and had tooth marks and chatter near the button on both sides. There was also some calcification for about an inch up the stem.
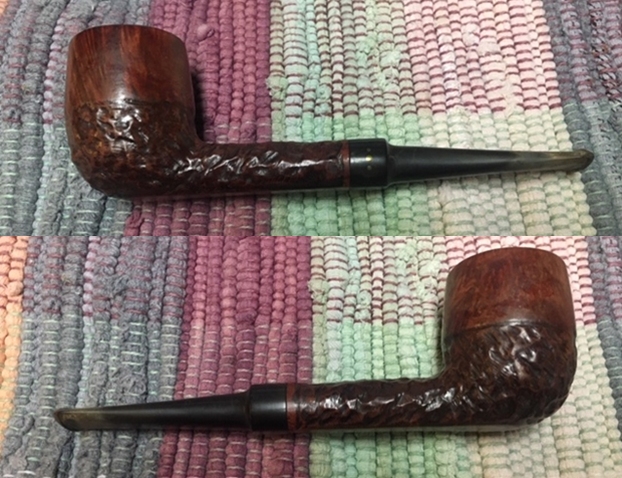
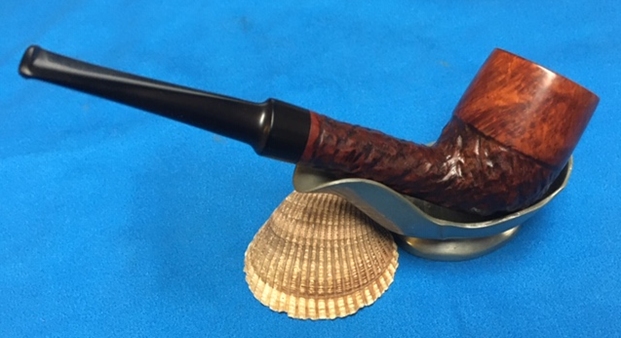
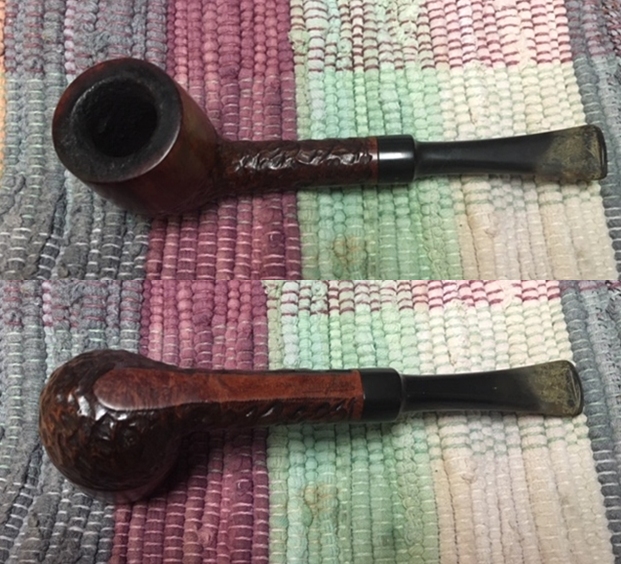 I took close up photos of the bowl and rim top to show the condition of the bowl and rim as well as the thick cake and lava overflowing onto the rim top. I also took close up photos of the stem to show its condition as mentioned above.
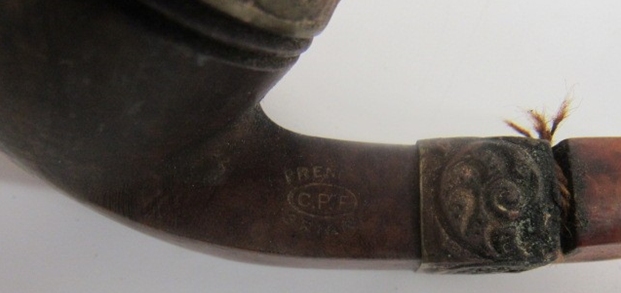
  I took a photo of the stamping on the underside of the shank to show what I was speaking about above. It is very clear and readable. It reads 632 followed by Can. Pat. stamp 372982 then Brigham in script.
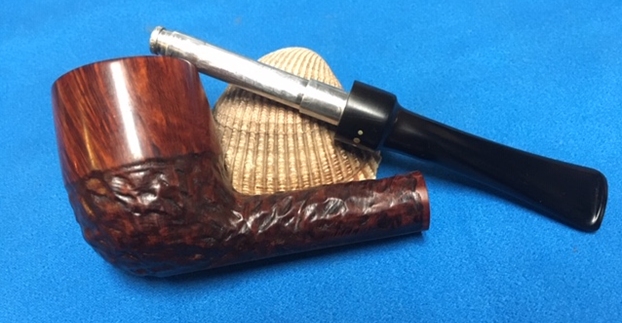
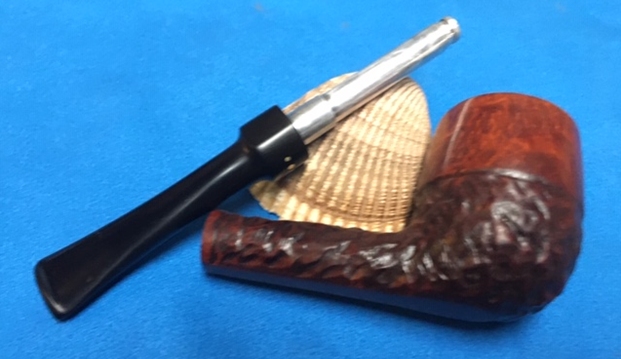
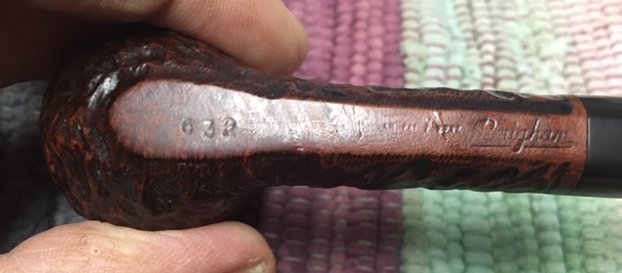 I removed the stem from the shank to reveal the aluminum tube/tenon that held the Rock Maple Distillator. The distillator was was missing in this pipe so I would need to replace it with a new one once I had cleaned it.
 It is helpful having this chart and getting a quick picture of where the pipe fits in the Brigham line. Now it was time to work on the pipe.
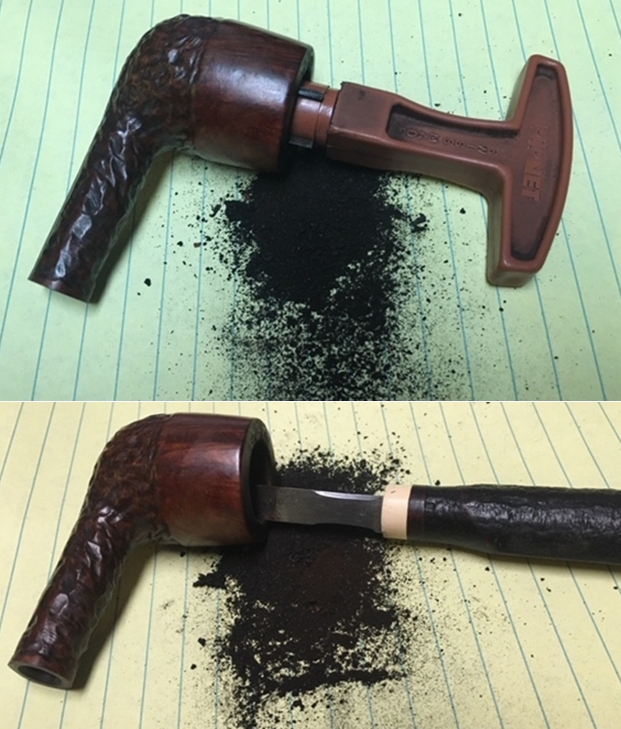
 I cleaned out the mortise area and airway to the bowl and the interior of the metal tube and airway in the stem with pipe cleaners, cotton swabs and alcohol. The aluminum tube was really dirty since it had been smoked frequently without the distillator in place. It took a lot of work to clean out all of the grit and tars.
 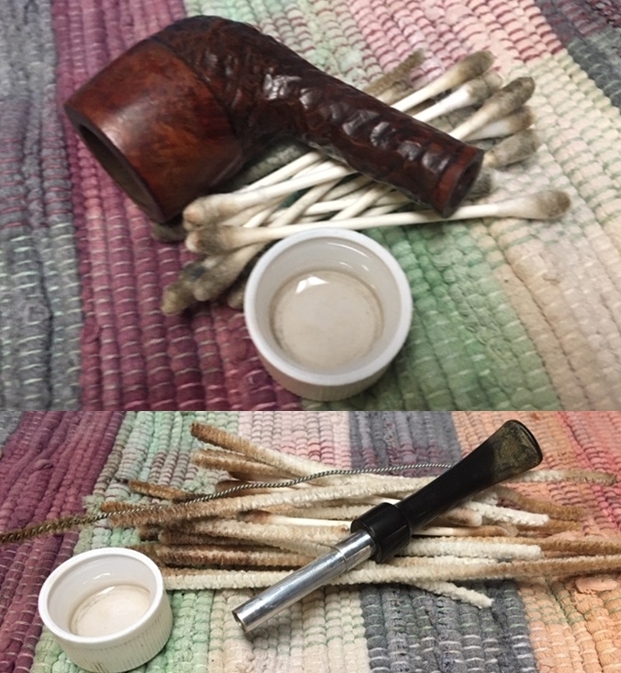 I scrubbed the surface of the bowl with undiluted Murphy’s Oil Soap and a tooth brush to remove the grime and grit as well as the remnants of the shiny finish on the smooth portions of the bowl.
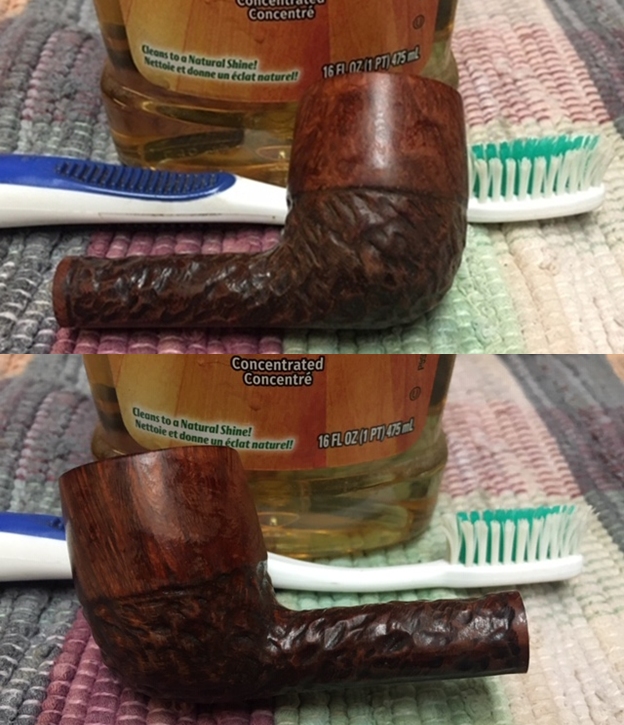
 I worked on the darkening on the rim top and the rough inner edge of the bowl with a folded piece of 220 grit sandpaper to remove the darkening and smooth out the inner edge of the bowl.
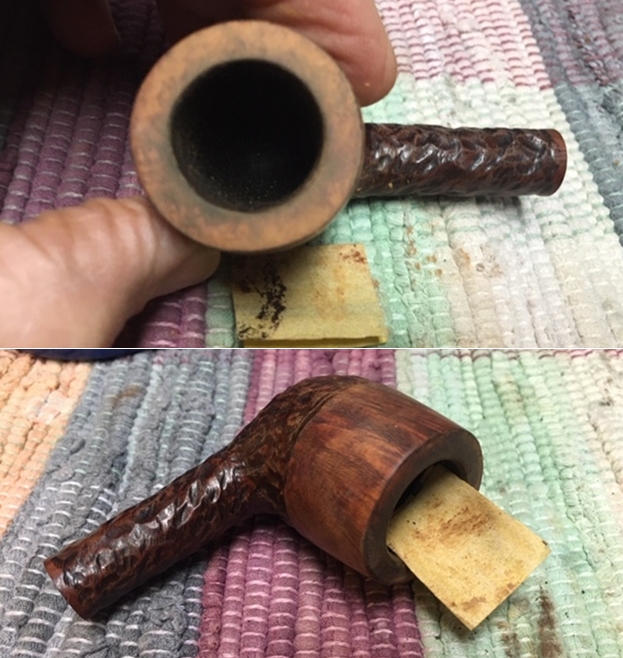 I wet sanded the rim top and the smooth portions on the bowl sides with micromesh sanding pads – 1500-12000 grit sanding pads. I wiped the bowl surface down with a damp cloth after each sanding pad to remove the sanding dust. Once I finished the bowl looked good.
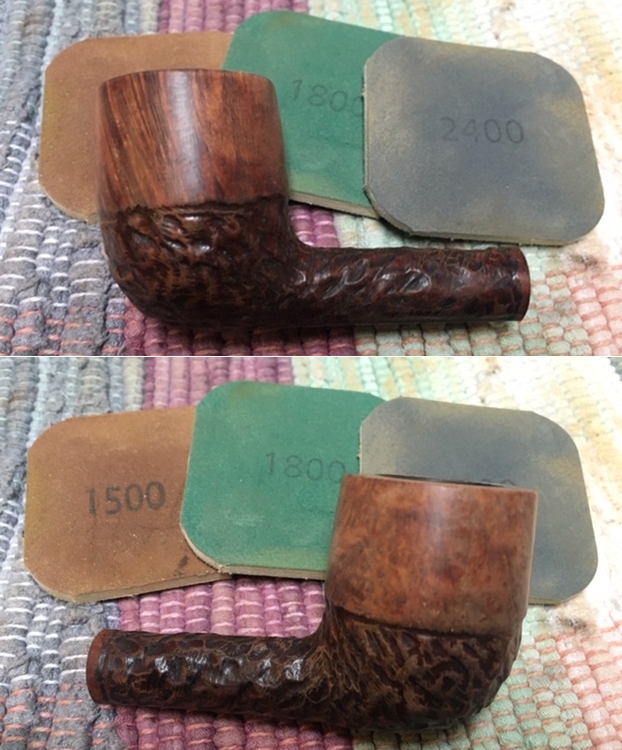

 I rubbed the bowl and shank down with Before & After Restoration Balm. I worked it into the surface of the briar with my fingertips and a horsehair shoe brush to clean, enliven and protect it. I let the balm sit for a little while and then buffed with a cotton cloth to raise the shine. Mark Hoover’s Balm is a product that I have come to appreciate and one I use on every pipe I have been working on. It really makes the grain stand out on this pipe.
 I set the bowl aside and turned my attention to the stem. When I was in the US visiting Jeff and his wife I picked up some Soft Scrub. Jeff swears by this stuff as the first tool to use to remove a lot of the oxidation on the stem. I rubbed it on with a cotton pad and sure enough it removed the oxidation and the calcification build up. It looked a lot better.
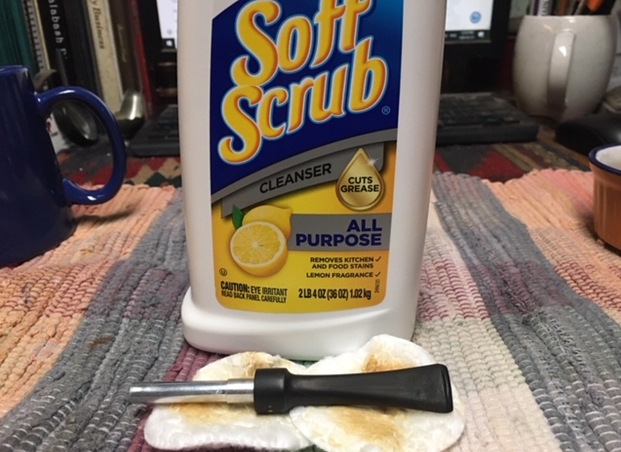 I painted the tooth marks on the stem with the flame of a Bic lighter to lift them as much as possible. It removed several on each side. There were three left on the top side and one on the underside that did not lift much.
  I cleaned out the marks with alcohol and a cotton swab. I filled them in with clear super glue and set the stem aside to cure.
  I smoothed out the repairs and sanded out the remaining oxidation with 220 grit sandpaper and started the polishing with 400 grit wet dry sandpaper.
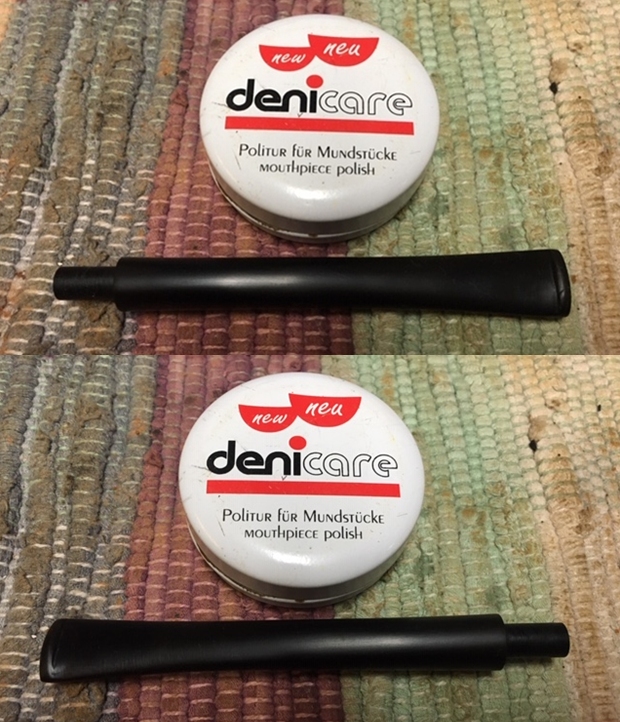
  I rubbed down the stem with Denicare Mouthpiece Polish and a cotton pad to remove the remnants of oxidation and to blend in the sanding. The stem is starting to show promise at this point in the process.
  I polished the stem with micromesh sanding pads – wet sanding it with 1500-12000 grit pads. I wiped the stem down after each sanding pad with a cotton pad to remove the sanding debris.
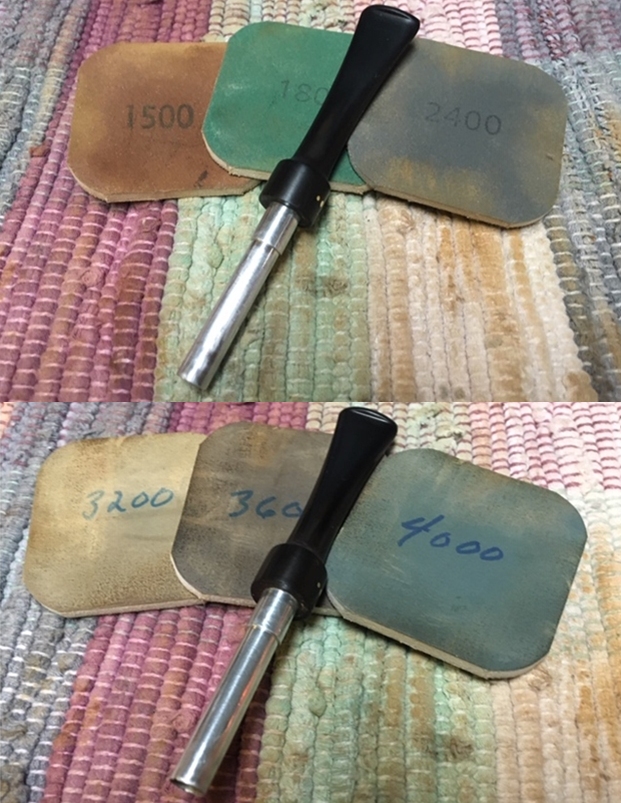
 Before I finished the last polishing touches on the stem I decided to fit it with a new Rock Maple Distillator.
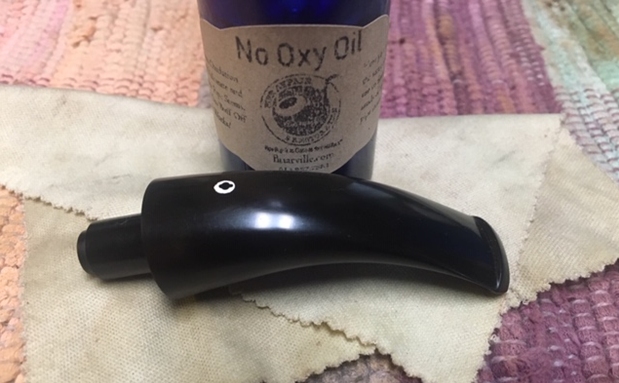
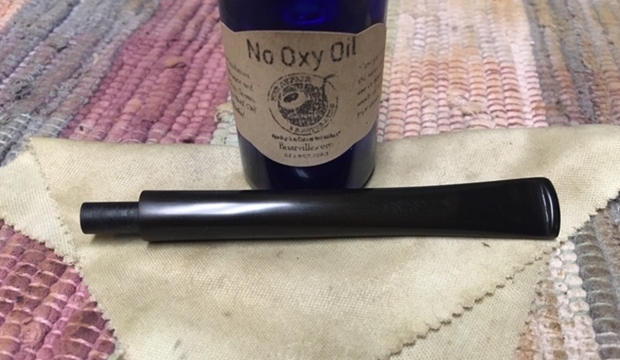
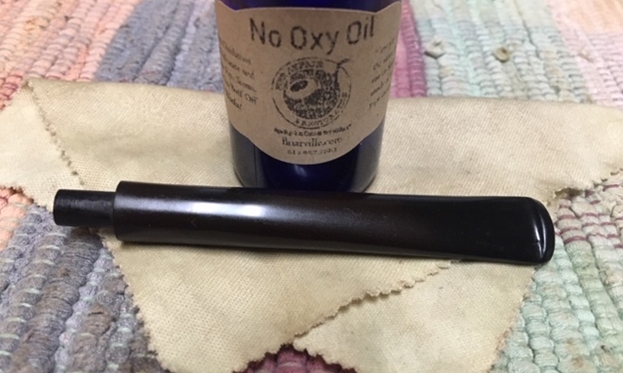
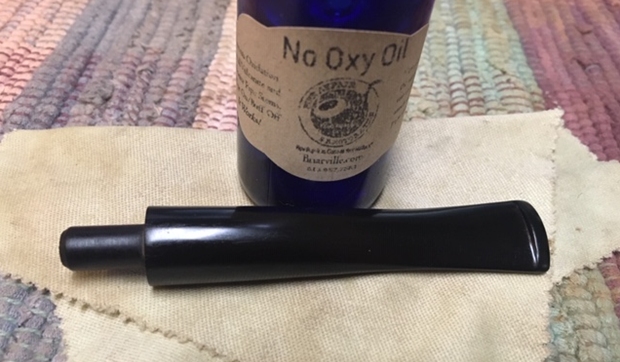
 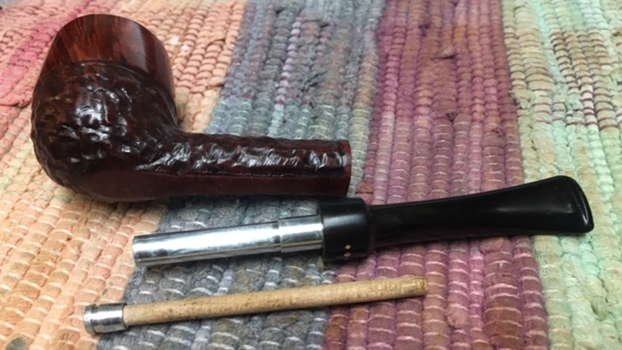 I finished polishing the stem with Before & After Pipe Stem Polish – both fine and extra fine. I finished by wiping it down with Briarville’s No Oxy Oil and buffing it to a shine.
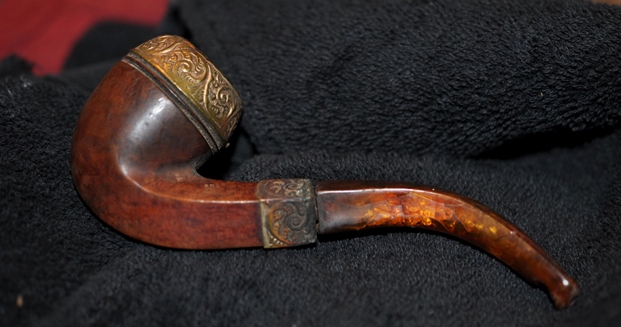
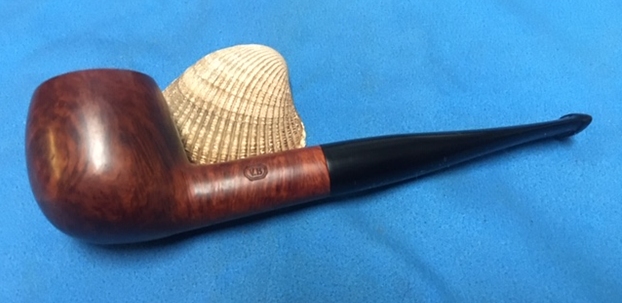
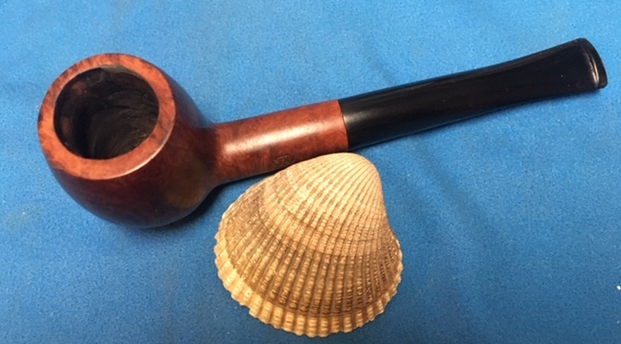
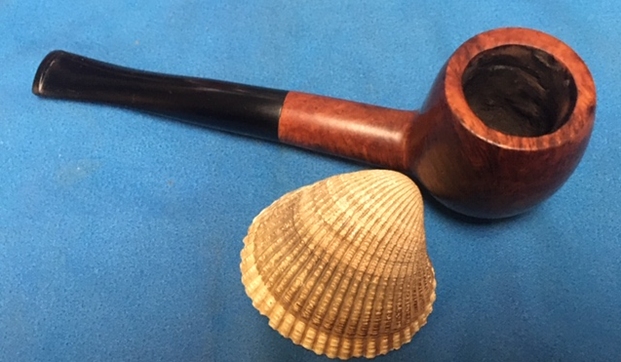
 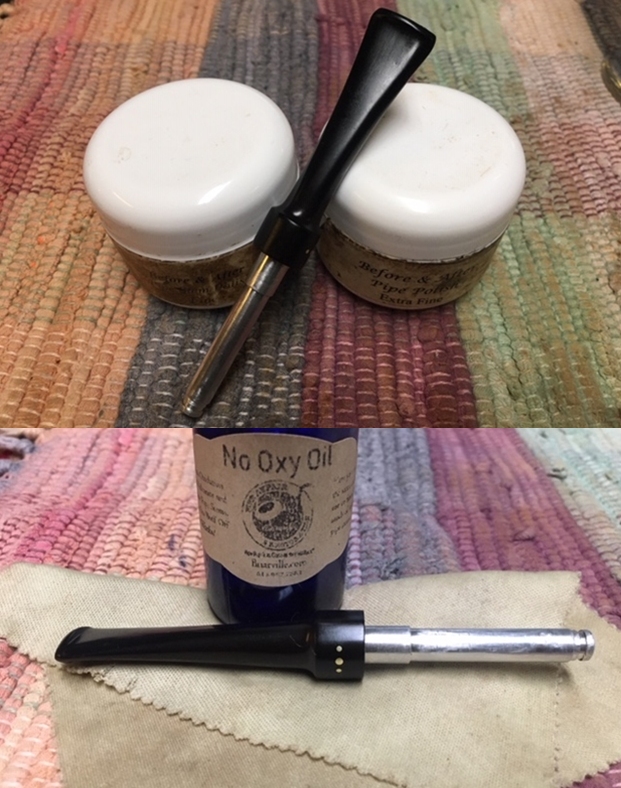 I always look forward to this part of the restoration when all the pieces are put back together. I put the pipe back together and buffed it with Blue Diamond on the buffing wheel. I gave the bowl and the stem multiple coats of carnauba wax. I hand buffed the pipe with a clean buffing pad to raise the shine. It is fun to see what the polished bowl looks like with the smooth portion and the rusticated portion contrasting well and added to that the polished black vulcanite stem with the shining brass pins. This Brigham Executive 632 Billiard is nice looking and feels great in my hand. The pipe is one that is light enough that it could be clenched and smoked while doing other things as it is very light weight and well balanced. Have a look at it with the photos below. The dimensions are Length: 5 ¼ inches, Height: 1 ¾ inches, Outside diameter of the bowl: 1 ½ inches, Chamber diameter: ¾ of an inch. This is the fourth of the pipes sent to me from Eastern Canada for restoration. Once again I am looking forward to what the pipeman who sent it thinks of this restoration. Lots more to do in this lot! Thanks to each of you who are reading this blog. Remember we are not pipe owners; we are pipemen and women who hold our pipes in trust until they pass on into the trust of the next pipeman or woman.