Blog Steve Laug
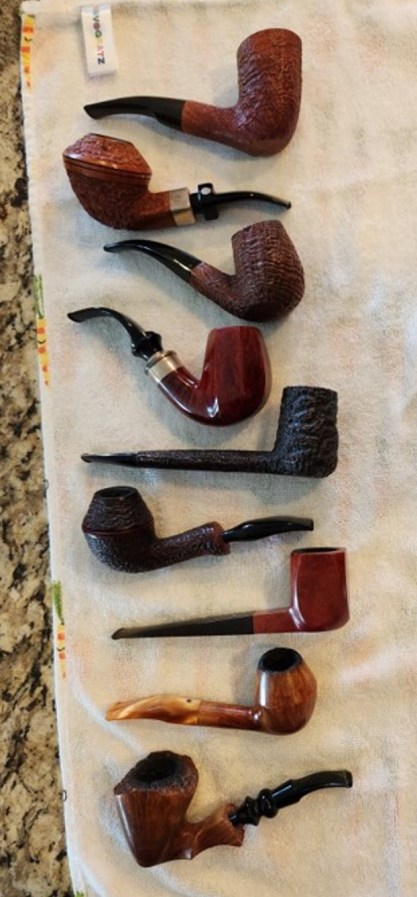
 A few weeks ago I was contacted from a fellow in Montana who was selling his pipes as they had not been used for quite a few years. I asked him for a picture and he sent me the one to the left. It included the following brands (from the top to the bottom of the photo): Savinelli Autograph 5 Freehand, Mastro de Paja Ciocco 0C Bulldog, Mastro de Paja Media 1B Bent Billiard, Ser Jacopo Delecta Octagonal Bent Billiard, Caminetto Business KS 118 Canadian, Radici Rind Rhodesian, Dunhill Bruyere ODA 836 Panel Billiard, Barontini Straight Grain B3 Freehand and a Ben Wade Martinique Hand Made in Denmark Freehand.
Almost all of them were higher end pipes and all were hand made pipes. They were a mix of finishes – smooth, sandblast and also rusticated. They were a mix of shapes as well and the majority of them were Italian Made other than the Dunhill and the Ben Wade Martinique. They were beautiful pipes and after exchanging quite a few photos of the pipes from various angles to get a sense of what was there we struck a deal. We sent him the payment and the pipes arrived in Idaho a few days after I left for Vancouver.
Jeff cleaned them all and this week I received them in Vancouver. I am impressed with the way they cleaned up and the beauty of the brands. They truly are some beautiful pipes. I just need to put the final touches on each of them and address minor issues on the bowl rims and the stems and they should be good to go. I am really looking forward to working on each of them in the days ahead.
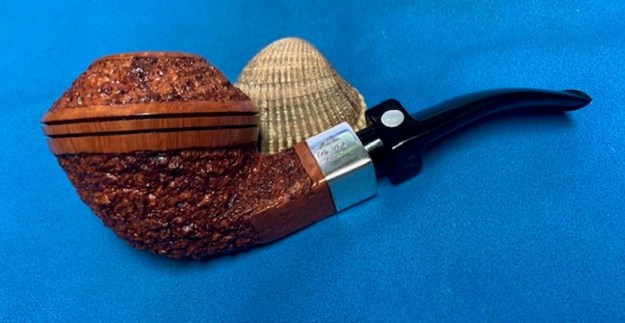
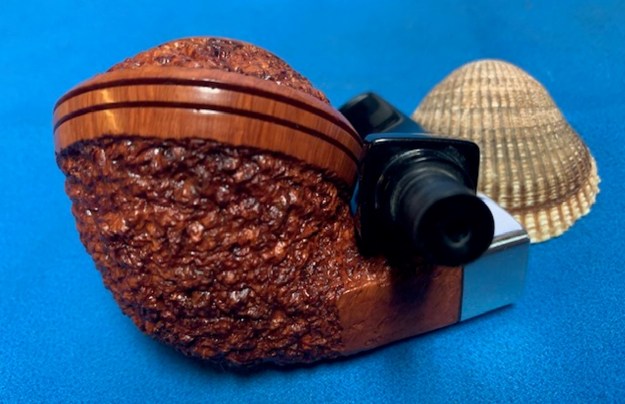
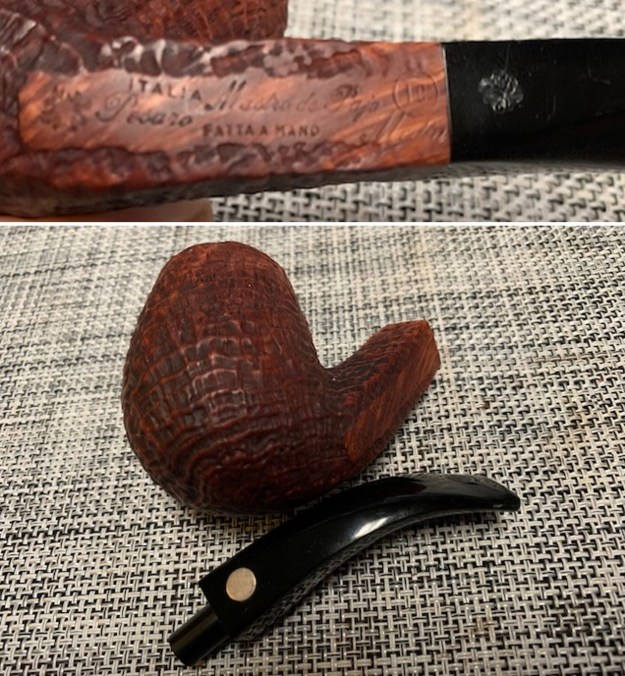
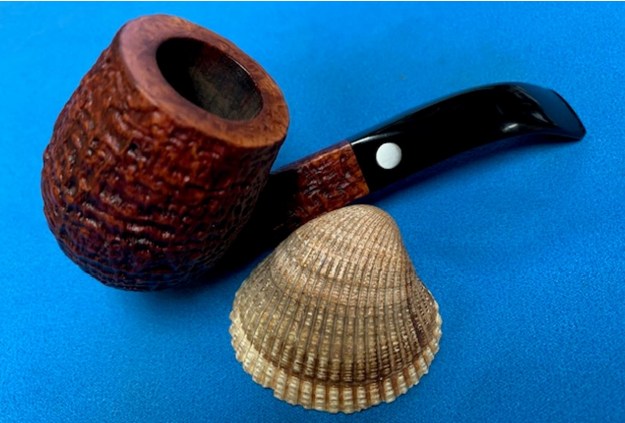
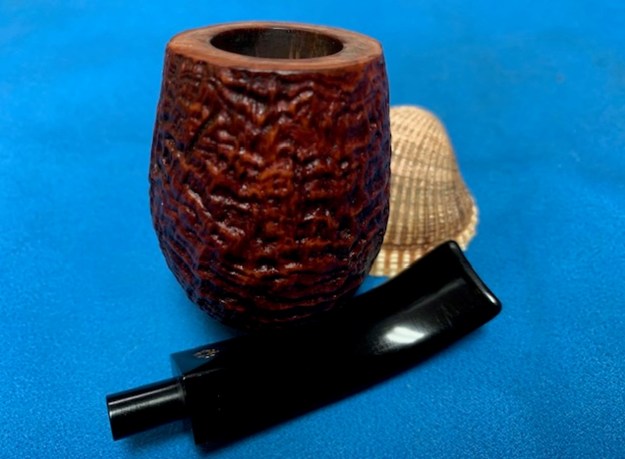
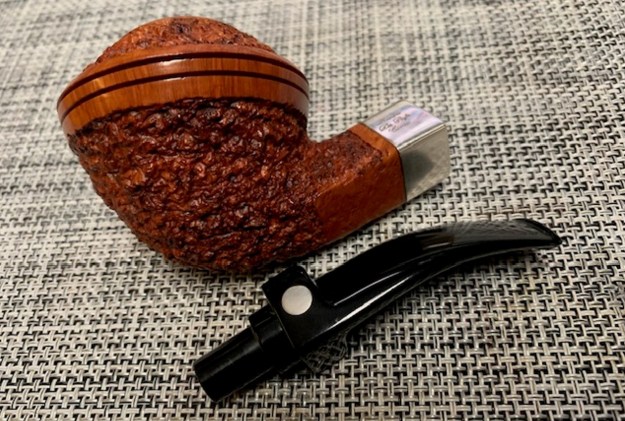
This evening after work I decided to continue working on the lot. I chose to work on the rusticated Mastro de Paja Pesaro Ciocco Gigante 0C Large Bulldog. It has a classic Large Bent Bulldog shape with an Italian twist. The rustication is extremely rugged and tactile. The crowned rim top, the briar around the twin rings on the cap are smooth. There is also a smooth band around the shank end just ahead of a silver ferrule. The pipe is stamped on a smooth panel on the left underside of the diamond shank. It has a sun logo that is followed by Mastro de Paja [over] Fatta A Mano (made by hand). Under that it is Persaro [over] Ciocco. Next that just in front of the ferrule is stamped with a 0C in a circle [over] Gigante. The silver ferrule is stamped on the top left side and reads Mastro [over] De Paja [over] Ciocco. There is a Mastro de Paja metal circular disc logo is on top left side of the stem and on the left underside it is stamped with the sun logo. The stamping is clear and readable. The finish was very dirty with grime ground into the grooves of the rustication. The bowl had a thick cake and the crowned rim top/inner edge had a thick coat of lava flowing up from the bowl. The inner edge of the bowl was covered with a thick cake so it was hard to know its condition with certainty. The stem is black acrylic fancy saddle stem and was dirty with tooth marks and chatter on both sides ahead of the button. Jeff took photos of the pipe before he started his clean up work on it.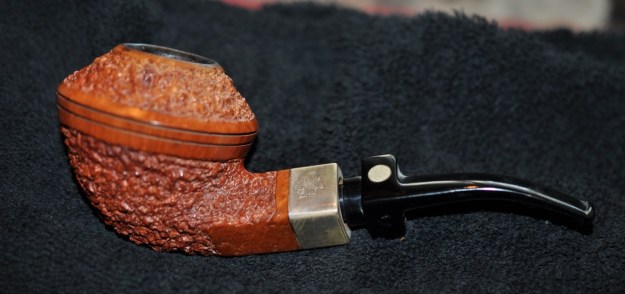
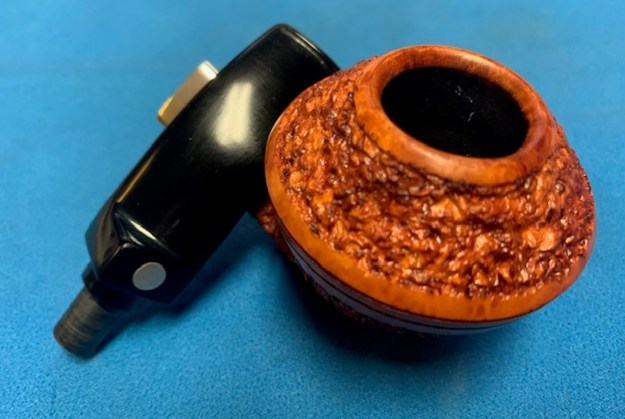
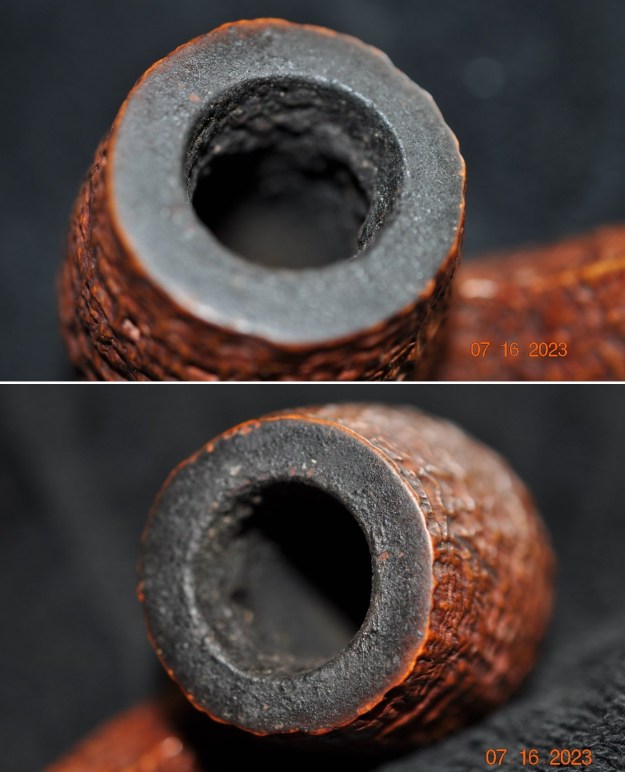
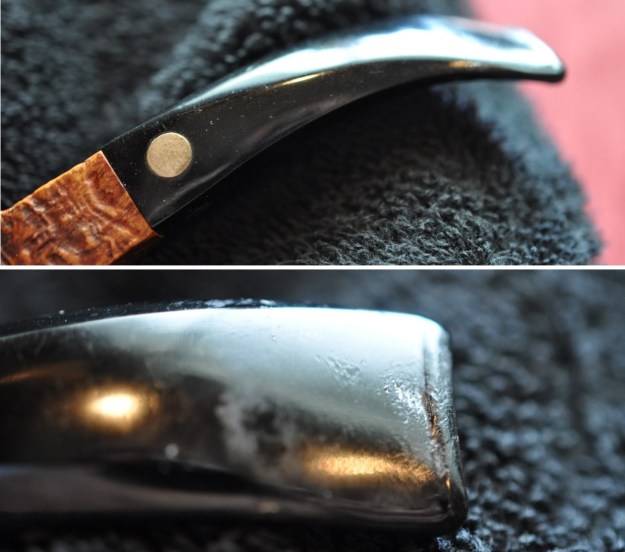
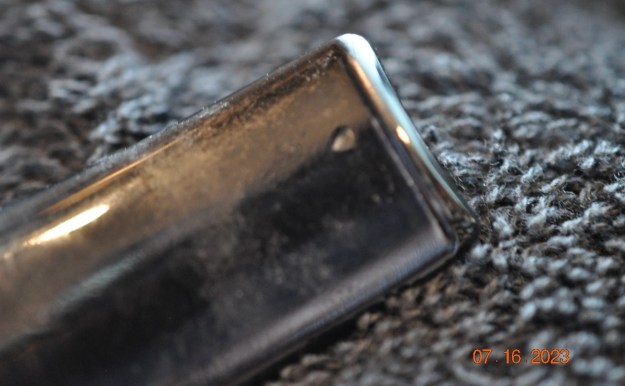
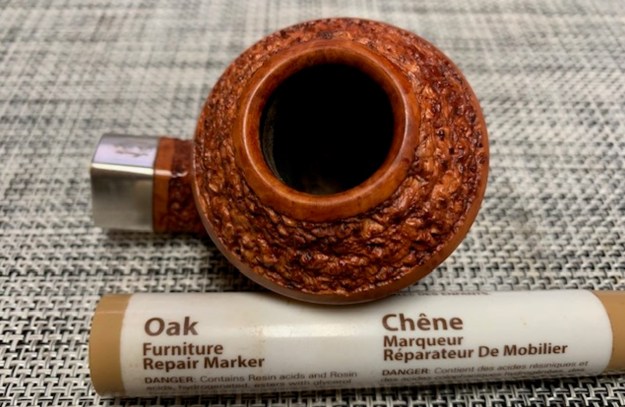
 Jeff took photos of the bowl and rim top to show what they looked like before the clean up. You can see the thick cake in the bowl overflowing on the inner edge/crowned rim top. He also took some photos of the stem to show the condition of both sides. You can see the tooth marks and chatter on the top and underside next to the button.
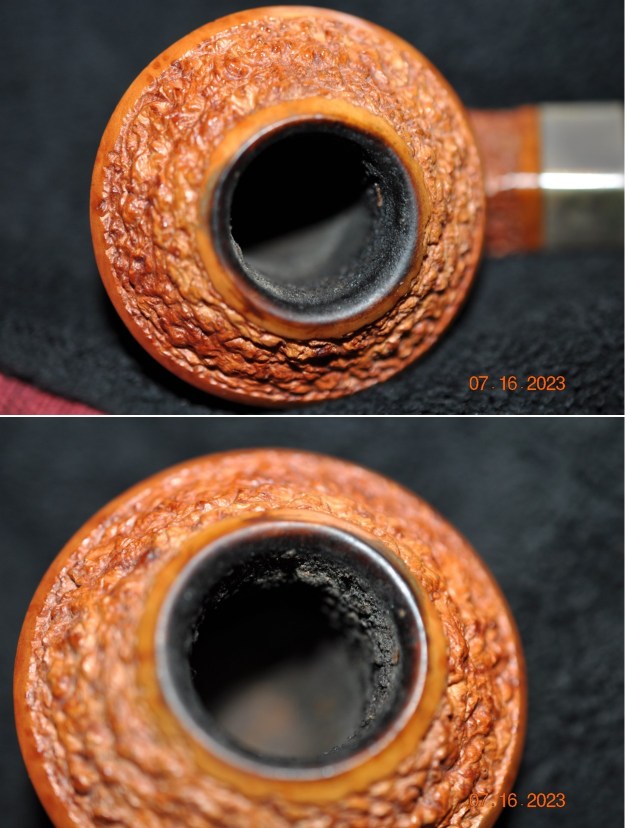

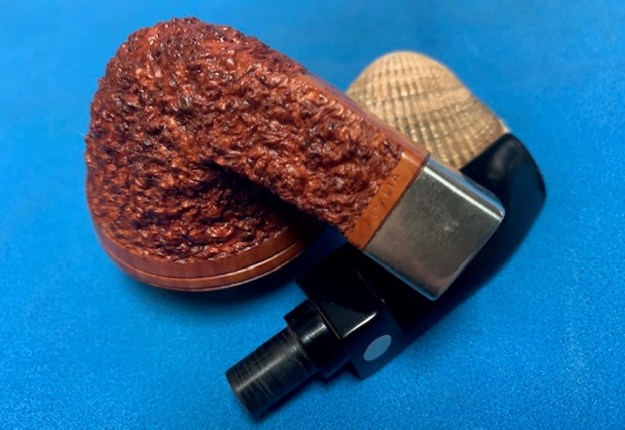
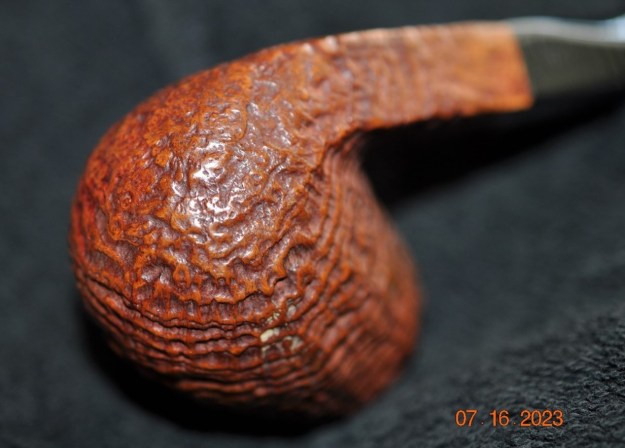
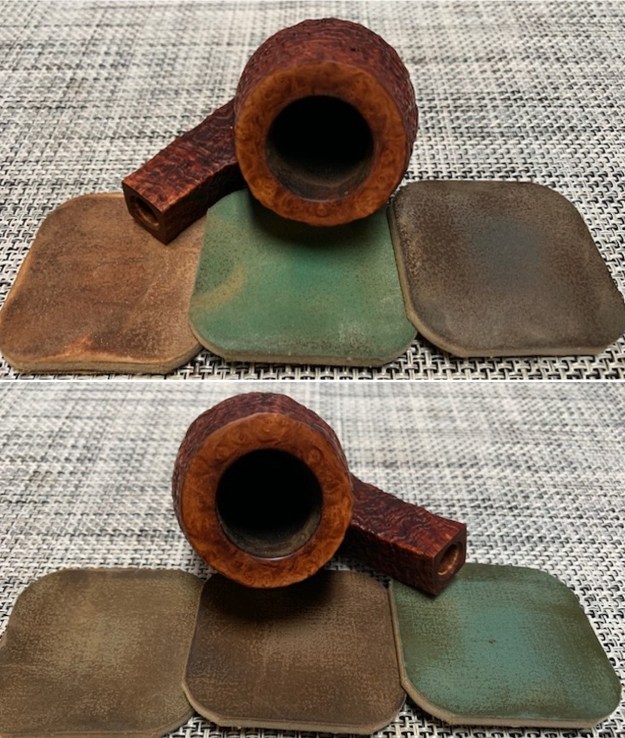
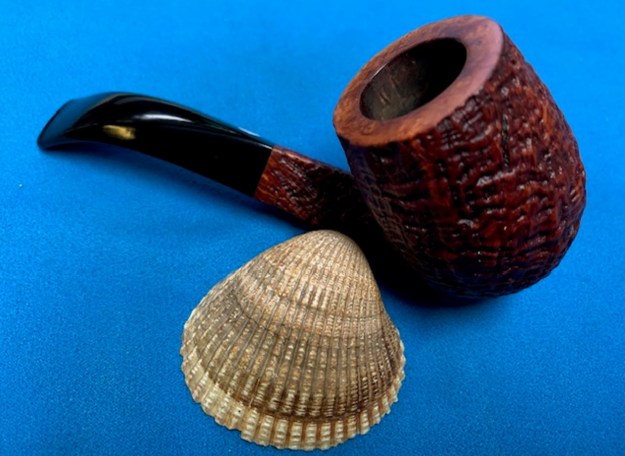
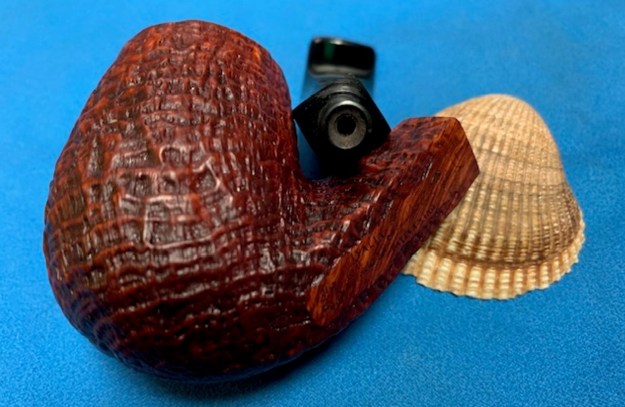
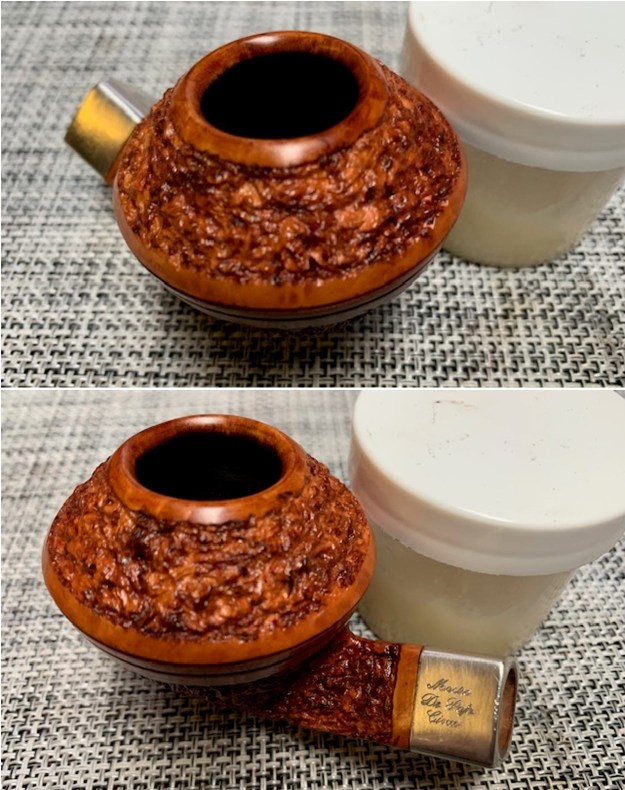
 The photos of the sides and heel of the bowl show the deep rusticated finish around the bowl and shank. The stain adds depth finish on the pipe. Even under the grime it is a real beauty.
 The stamping on the underside of the shank and on the silver ferrule is shown in the photos below. It is clear and readable as noted above. There is also a stamping reading Italia on the lower right side on the smooth band on the shank end ahead of the silver.
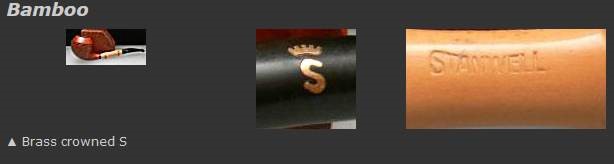
 Before moving on to the clean up I wanted to build my knowledge of background on the brand. I have looked at them quite often and perhaps worked on a few in past years but I have no memory of the brand. I turned first to Pipephil’s site (http://www.pipephil.eu/logos/en/logo-m3.html). I have included a screen capture of the information on the site as well as some side bars notes below the photo. The last pipe pictured shows the circle 1B stamp as well as the one Sun logo which is noted as the grading stamp. That was information it did not have before.
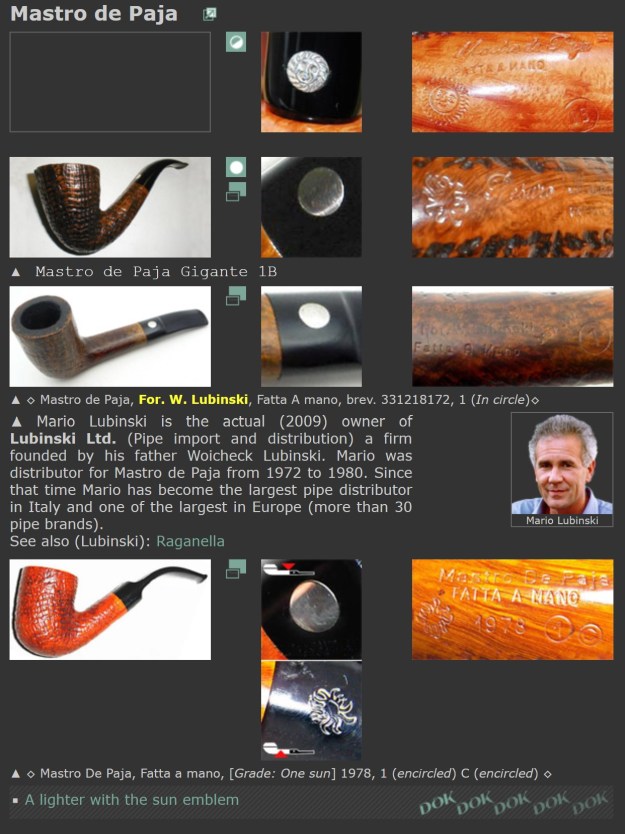 Brand founded in 1972 by Giancarlo Guidi. He left it for Ser Jacopo in 1982. Alberto Montini became the owner of the brand in 1995. Production (2010): ~ 5000 pipes/year. Seconds: Calibano, Montini,
That led me to the Mastro de Paja website (https://www.mastrodepaja.it/en/pipes-and-accessories.html). There was a lot of information on the brand and the quality of the briar and craftsmanship of the pipes. I quote below:
 Mastro de Paja are formed by the expert and highly capable hands of craftsmen – famous pipes with the unmistakable sun brand, known and appreciated by connoisseurs throughout the world. Unique and inimitable because they are unrepeatable encounter of precious Mediterranean briars, with the sensitivity of the craftsman who, using art and inspiration, models them individually. And, in the modelling process, brings to light the most concealed and valuable qualities of the briar. Varied designs, original lines and a deriberately (sic) limited productions make Mastro de Paja pipes objects destined for the most demanding and refined collectionists. Beautiful and loved, they are also excellent pipes because they are worked with care by those who know them: a successful synthesis of formal beauty and functionality. Rigorous controls and selections give Mastro de Paja pipes, right from the first smoke, that rounded taste which is then maintained intact for the whole of its long and extraordinary life.
The site also had a video entitled “How to make a Smoking Pipe by Hand – Mastro de Paja”. I have included the youtube link as well as the code for embedding.
I turned to Pipedia for more information on the brand (https://pipedia.org/wiki/Mastro_de_Paja). The site is full of information on the brand and the philosophy behind the carving of the hand made pipes. I am including the information on the site listed as the Elite Collection that listed the stamping information. I have highlighted pertinent information on this particular pipe in red in the list below.
Mastro de Paja “ELITE COLLECTION”
It is the production of pipes made entirely by hand, even they are unique but of regular production.
On all “Mastro de Paja” pipes you can see fire stamped all the information for tracing the value of each creation.
RUSTICATED
- 0B: Completely rusticated
- 0B Unica: Completely rusticated with some smooth sections
SANDBLASTED
- 1B: Dark brown or black sandblasted
- 1B + 1 Sun: Light brown sandblasted
PARTIALLY RUSTICATED
- 2D: Smooth with small sections rusticated
- 2D + 1 Sun: Smooth straight grain with small sections rusticated
SMOOTH WITH COLORED FINISH
- Ruber: Smooth with red stain
- Castanea: Smooth with brown stain
- 3A: Smooth with brown-orange stain
- 3A + 1 Sun: Smooth good grain with brown-orange stain
- 3A + 2 Sun: Smooth straight grain with brown-orange stain
SMOOTH WITH NATURAL FINISH
- 3B: Smooth with a good grain and a natural finish
- 3B + 1 Sun: Smooth excellent grain with natural finish
- 3B + 2 Sun: Perfect grain
- 3C: Good grain
- 3C + 1 Sun: Excellent grain
- 3C + 2 Sun: Perfect grain
- F: Straight grain
- F + 1 Sun: Good straight grain
- F + 2 Sun: Excellent straight grain
- F + 3 Sun: Perfect straight grain
Sometimes “Mastro de Paja Pipes” are enhanched with sterling silver, gold, precious stones and/or fine wood and are further classified and fire stamped on each pipe.
- Stamp “P” : “Personal” with fine ornamentation.
- Stamp “N” : “Normal” with basic sterling silver.
- Stamp “L” : “Lavorata” with more complex sterling silver.
- Stamp “S” : “Special” with elaborate sterling silver and specially worked.
- Stamp “G” : “Gold” with special gold ornamentation.
- Media : Medium size pipe
- Gigante: Giant pipe
From that information I knew that the pipe I was working on was a Rusticated Pipe and a Sun which made it a completely rusticated. It also is stamped Gigante which makes it a Giant pipe. It is a beauty and now it is time to look at it up close and personal.
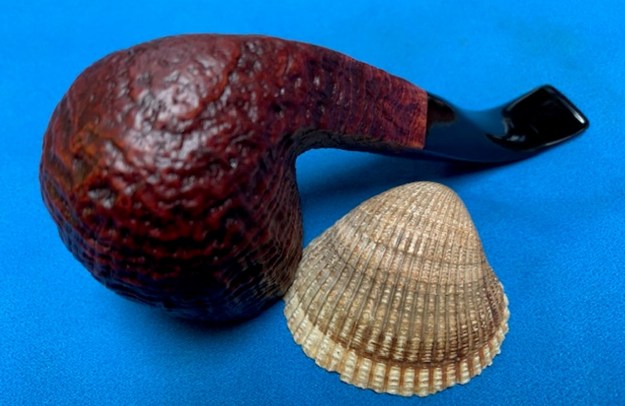
Jeff had done an amazing job in removing all of the cake and the lava on the rim top. He had reamed the bowl with a PipNet Pipe Reamer and cleaned up the remnants with a Savinelli Fitsall Pipe Knife. He took the cake back to bare briar so we could check the walls for damage. He scrubbed the exterior of the bowl with Murphy’s Oil Soap and a tooth brush to remove the grime on the bowl and rim and was able to remove the lava and dirt. He cleaned out the interior of the bowl and shank with pipe cleaners, cotton swabs and alcohol until they came out clean. He cleaned the stem with Soft Scrub to remove the grime on the exterior and cleaned out the airway with alcohol, cotton swabs and pipe cleaners. I took photos of the pipe before I started my part of the restoration. 
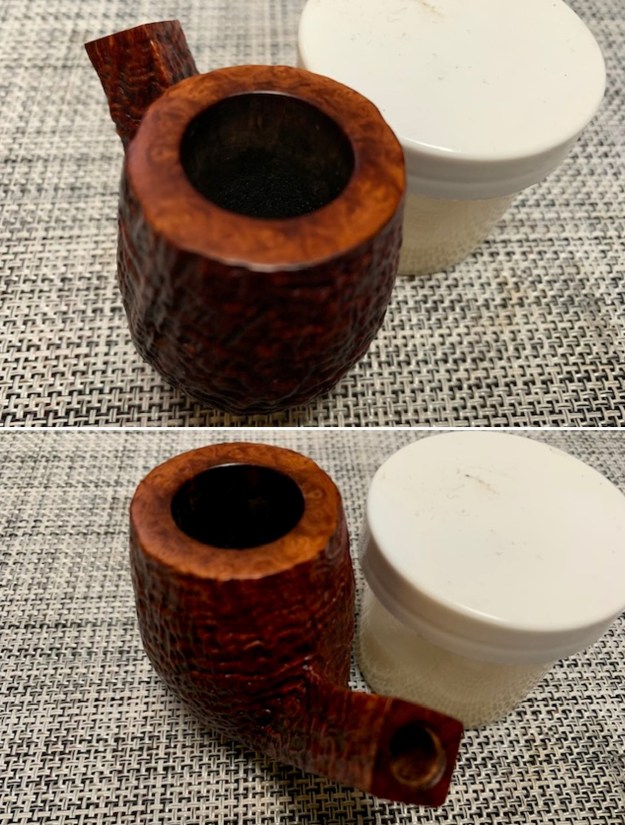
 I took close up photos of both the rim top and the stem. Jeff had been able to get the grime and lava off of the rim top and it looked good. There was some burn damage and darkening on the right front of the crowned rim top and beveled inner edge. The stem looked very clean. The tooth marks and chatter were predominantly near the button. They should be easy to remove.
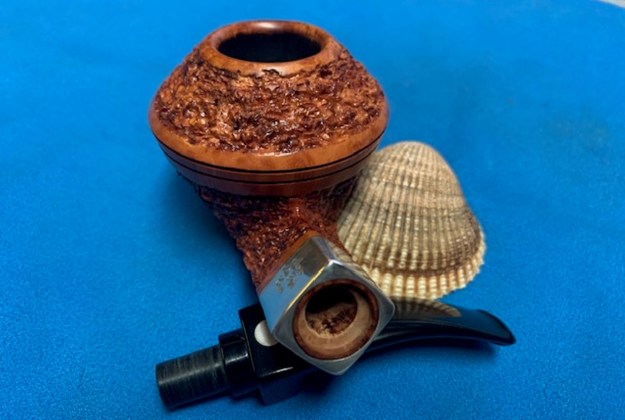
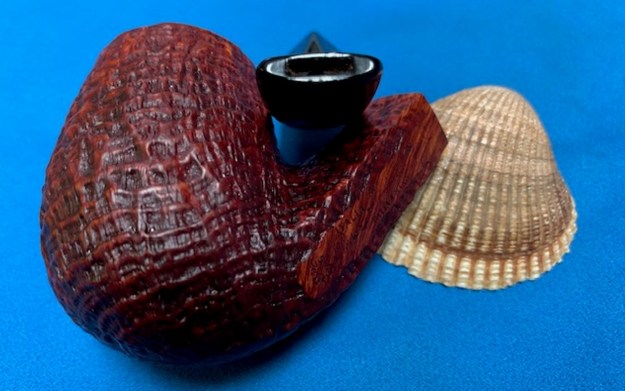
  The stamping on the left underside of the diamond shank was readable as noted above. The stamping on the silver ferrule is also very readable as noted. I also took a photo with the stem removed to give an idea of the perspective and design of the pipe.
 I started my work on the pipe by addressing the burn damage and darkening on the right front of the rim top with a folded piece of 220 grit sandpaper. Fortunately the burn damage was not deep but mainly surface. I was ale to remove and minimize it without changing the shape of the rim top. I also worked on the darkening on the inner bevel and removed it as well. I polished it with 1200-3200 micromesh sanding pads and then restained the rim top and edge with a Oak Stain Pen to match the rest of the bowl. Over all the rim top and edges looked much better.
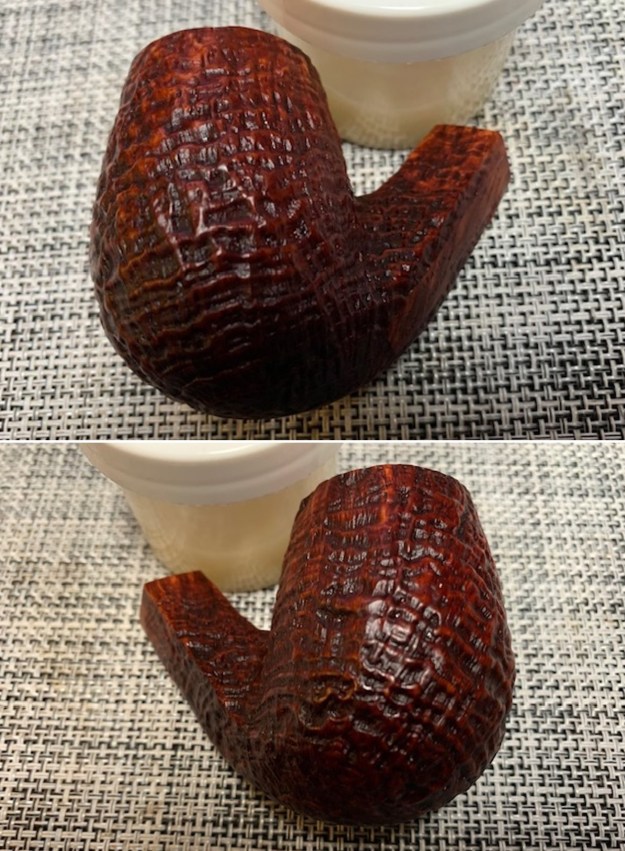
 The bowl and shank were very clean and the rim top finished. I worked some Before & After Restoration Balm into the finish of the bowl and shank with my fingers and a horsehair shoe brush. I want the product to go deep into the finish because it works to clean, enliven and protect the briar. Once I was confident that it was deeply worked into the finish I wiped it off and buffed it with a soft cloth to polish it. The pipe really began to have a rich shine. I took some photos of the bowl at this point to mark the progress in the restoration. The rusticated finish on the pipe is beautiful and shows depth in the photos below.

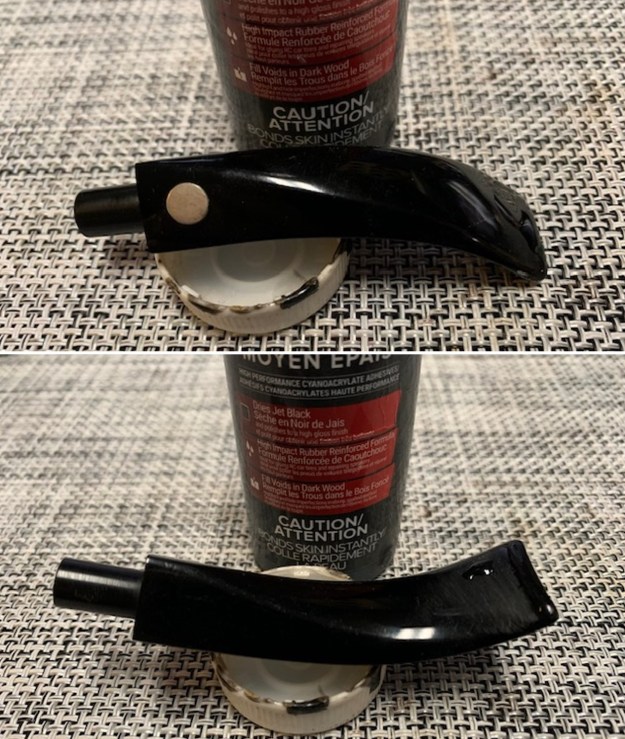
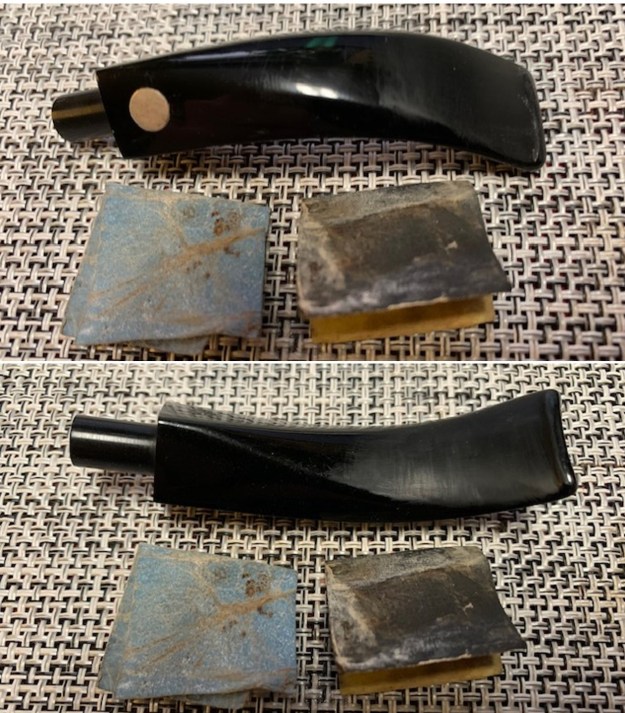
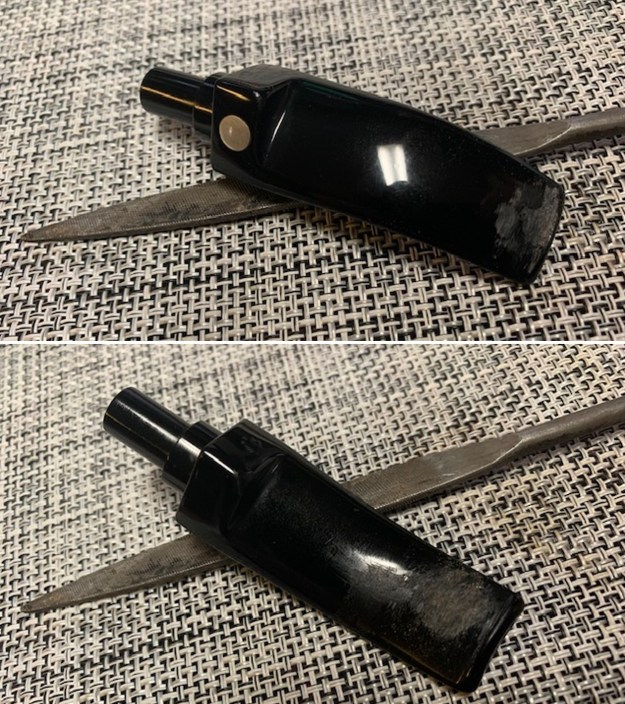
 I set the bowl aside and turned to work on the stem. I filled in the deep tooth marks with black CA glue and set it aside to cure. Once cured I flattened them out with a small file and then sanded the smooth with 220 grit sandpaper. I started polishing it with 600 grit wet dry sandpaper.
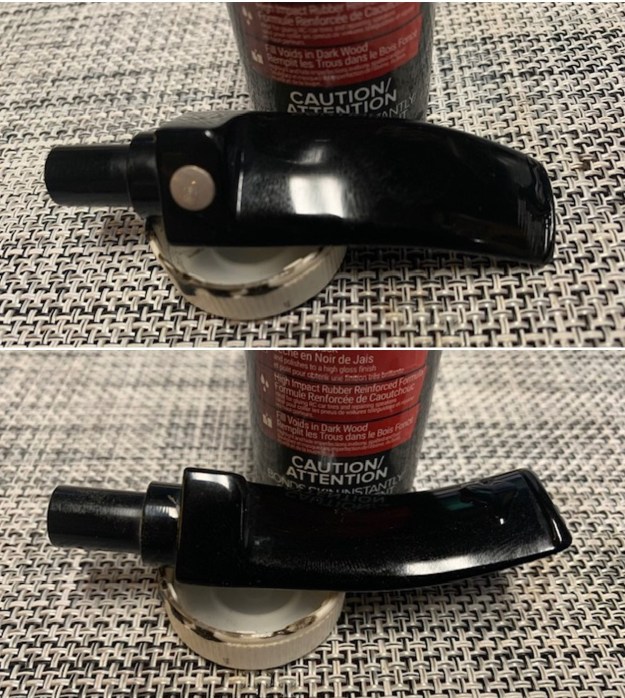
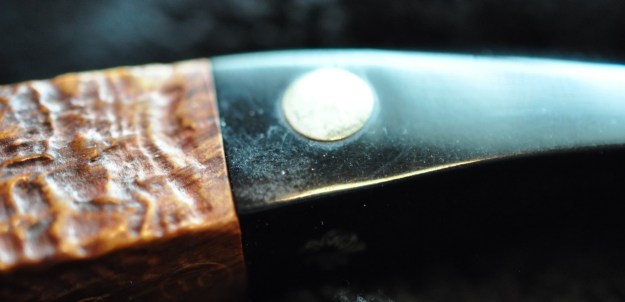
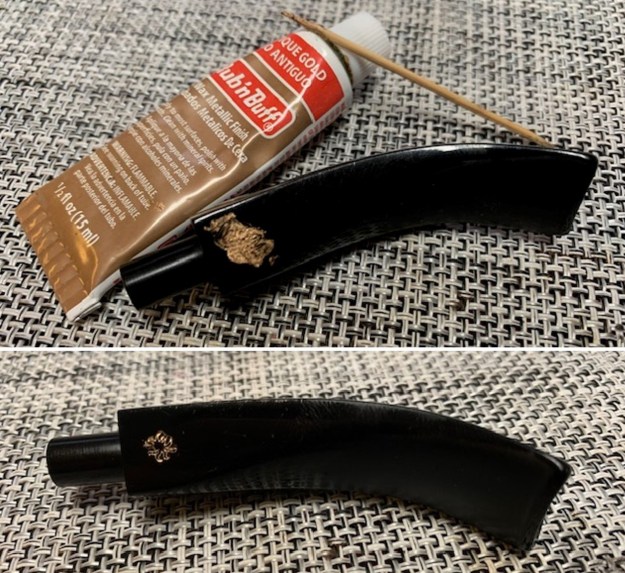
 I touched up the Sun logo on the left underside of the diamond shaped stem with some Rub’n Buff Antique Gold. It picks up the Sun shaped stamp very well.
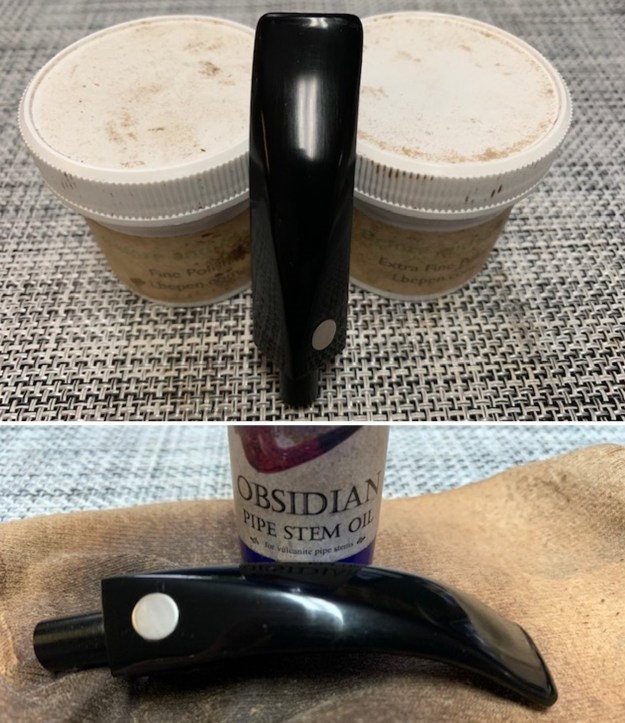
 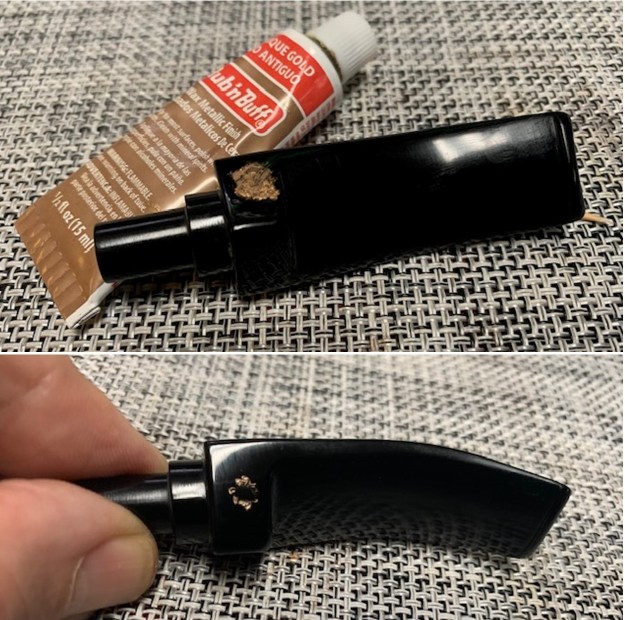 I polished the acrylic stem with micromesh sanding pads – wet sanding it with 1500-12000 grit pads. I wiped it down with Obsidian Oil after each sanding pad because I find that the oil provides a great surface for polishing with the micromesh pads.
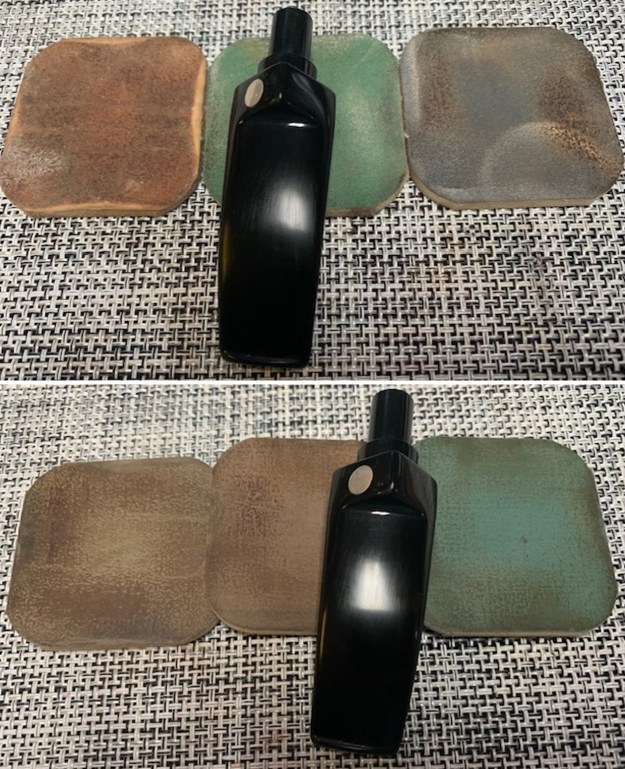
 I finished polishing it with Before & After Pipe Polish – both the Fine and Extra Fine polishes. I gave it a final coat of oil and set it aside to dry.
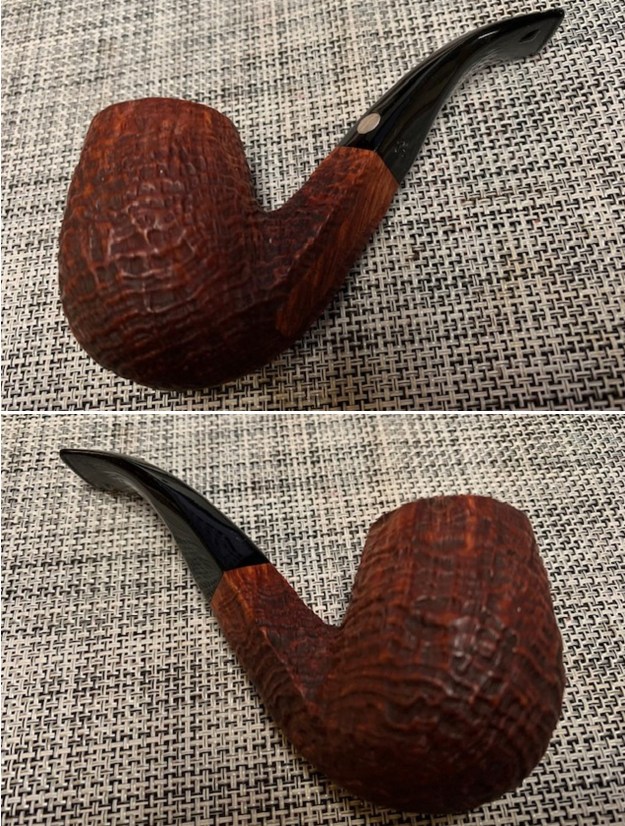
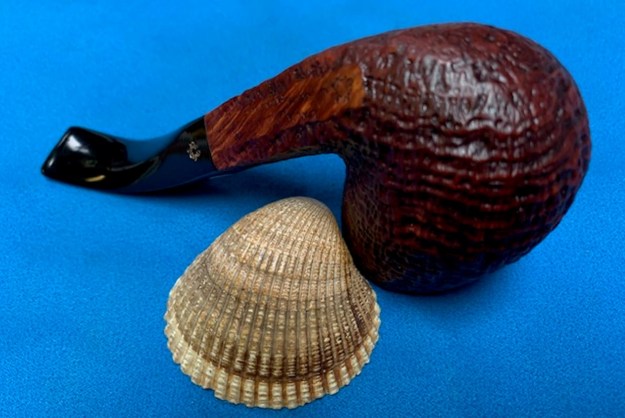
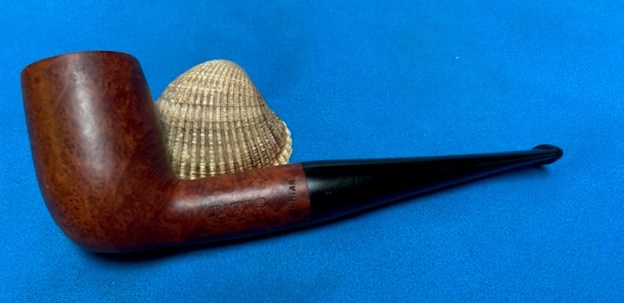
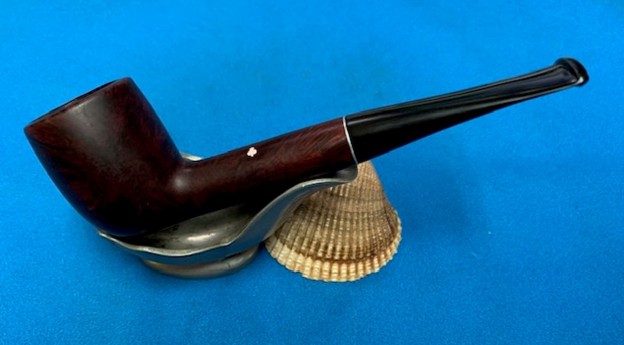
  This Mastro de Paja Pesaro Ciocco Gigante Rusticated 0C Bent Bulldog is a real beauty with a deep and tactile rustication and a silver ferrule. I put the bowl and stem back together again and buffed the bowl and the stem with Blue Diamond on the buffing wheel. I used a soft touch on the bowl so as not to fill it in with the polishing product. I gave the bowl several coats of Conservator’s Wax and the stem several coats of carnauba wax. I carefully buffed the entire pipe with a clean buffing pad to raise the shine. I polished the silver ferrule with a jewelers cloth to protect and shine. I finished buffing with a microfiber cloth to deepen the shine. The finished pipe looks very good. It is comfortable and light weight. The finished Mastro de Paja Ciocco Gigante Bent Bulldog is shown in the photos below. The dimensions of the pipe are Length: 6 inches, Height: 2 ½ inches, Outside diameter of the bowl: 1 ¼ inches, Chamber diameter: ¾ of an inch. The weight of the pipe is 78 grams/2.75 ounces. This great looking rusticated Bulldog turned out very well. It should be a great pipe. It will be going on the rebornpipes store in the Italian Pipemakers Section shortly if you are interested in adding it to your collection. Email me at slaug@uniserve.com
As always, I encourage your questions and comments as you read the blog. Thanks to each of you who are reading this blog. Remember we are not pipe owners; we are pipe men and women who hold our pipes in trust until they pass on into the trust of those who follow us.