Blog by Steve Laug
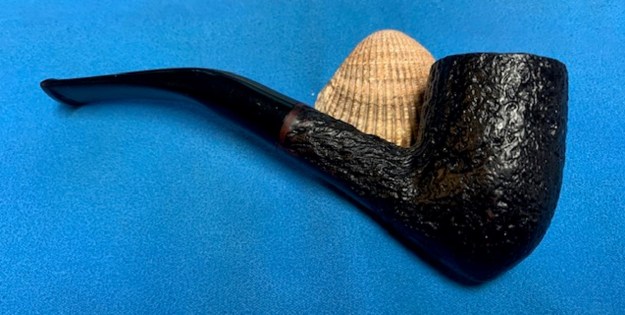
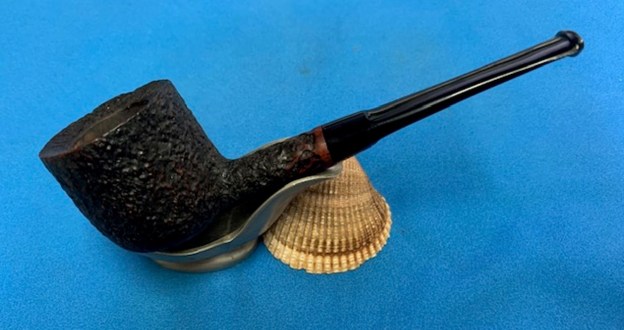
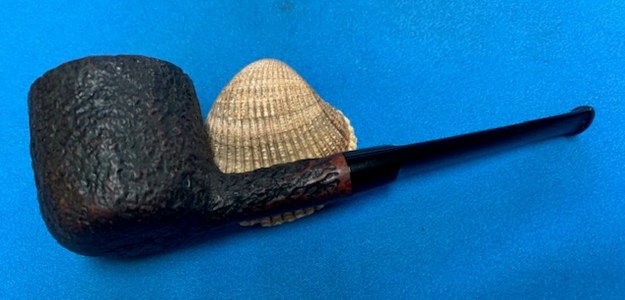
The next pipe on the work table is a nice-looking sandblast Pickaxe shaped pipe that we purchased from an estate sale from Plano, Texas, USA on 03/30/2022. It was stamped on the underside of the shank and read Charatan’s Made [over] London England [over] shape number 318. To the left and below the stamping is a circled cursive L. It has a sandblast finish around the bowl and rustication on the shank that is covered with a shiny coat of shellac it appears over a lot of oils, debris and grime. There was a thick cake in the bowl and tobacco debris stuck to the walls. There is a thick lava overflow in the sandblast on the inwardly bevelled rim top. The top and edges of the rim looked good under the tars and lava, but that would be very clear once the pipe is cleaned. There was a very beautiful pipe underneath all of the buildup of years of use. The taper stem was an acrylic replacement. It was filthy and there were some deep tooth marks and chatter on both sides ahead of the button. The button had not been shaped at all and still needed to be slotted and shaped. Jeff took photos of the pipe before he started his cleanup work on it.
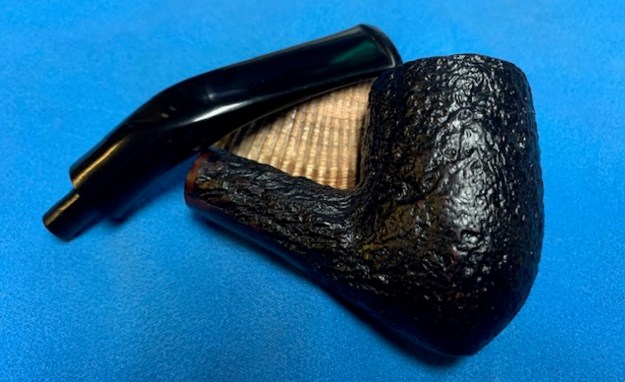
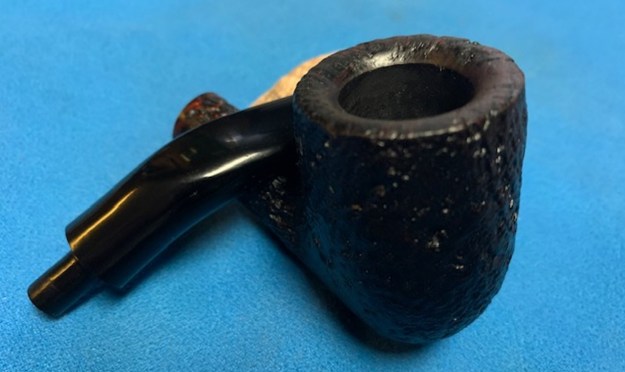
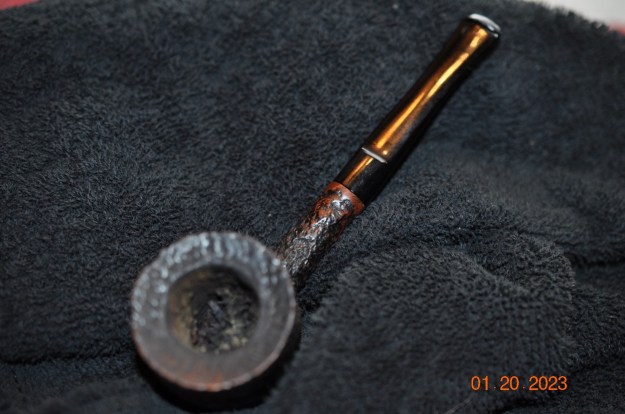
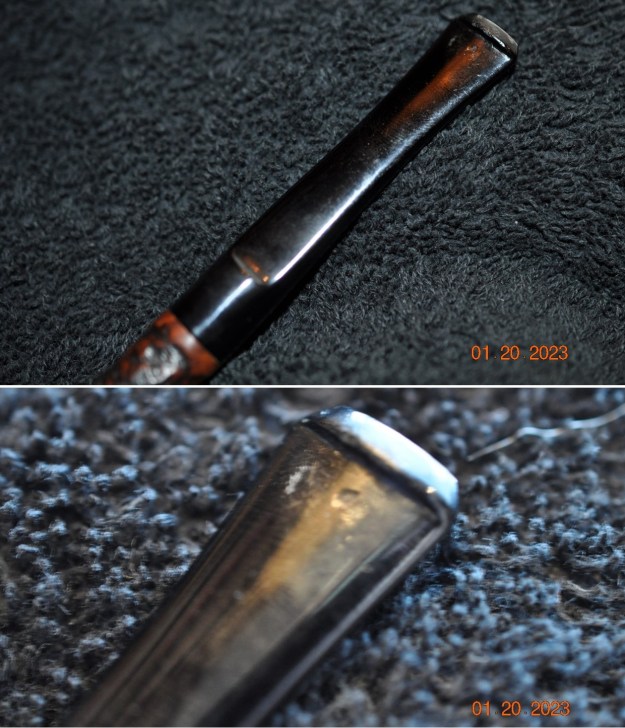
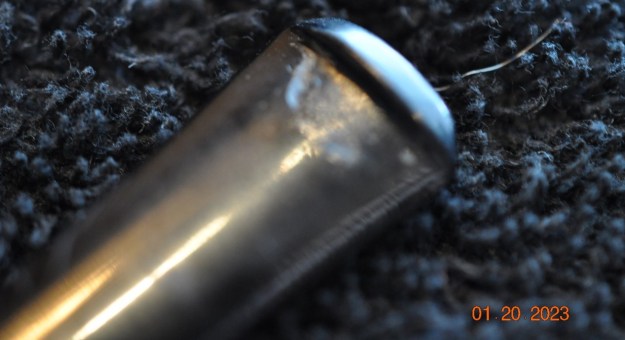
 Jeff took photos of the bowl and rim top to show the thick cake and tobacco debris in the bowl and the heavy lava build up on the sandblast rim top and the edges of the bowl. The rim top and edges looked pretty good but a proper clean up would tell the full story. Jeff took photos of the top and underside of the stem showing the tooth marks and chatter on the stem surface.

 Jeff took photos of the sides and heel of the bowl to show the condition of the finish. You can see the grime around the sides of the bowl and shank under the shiny coat on the finish. It seems to fill in the grooves in the blast.
 Jeff took a photo of the stamping on the underside of the bowl and shank. The stamping was readable as you can see from the photos. It read as noted above.
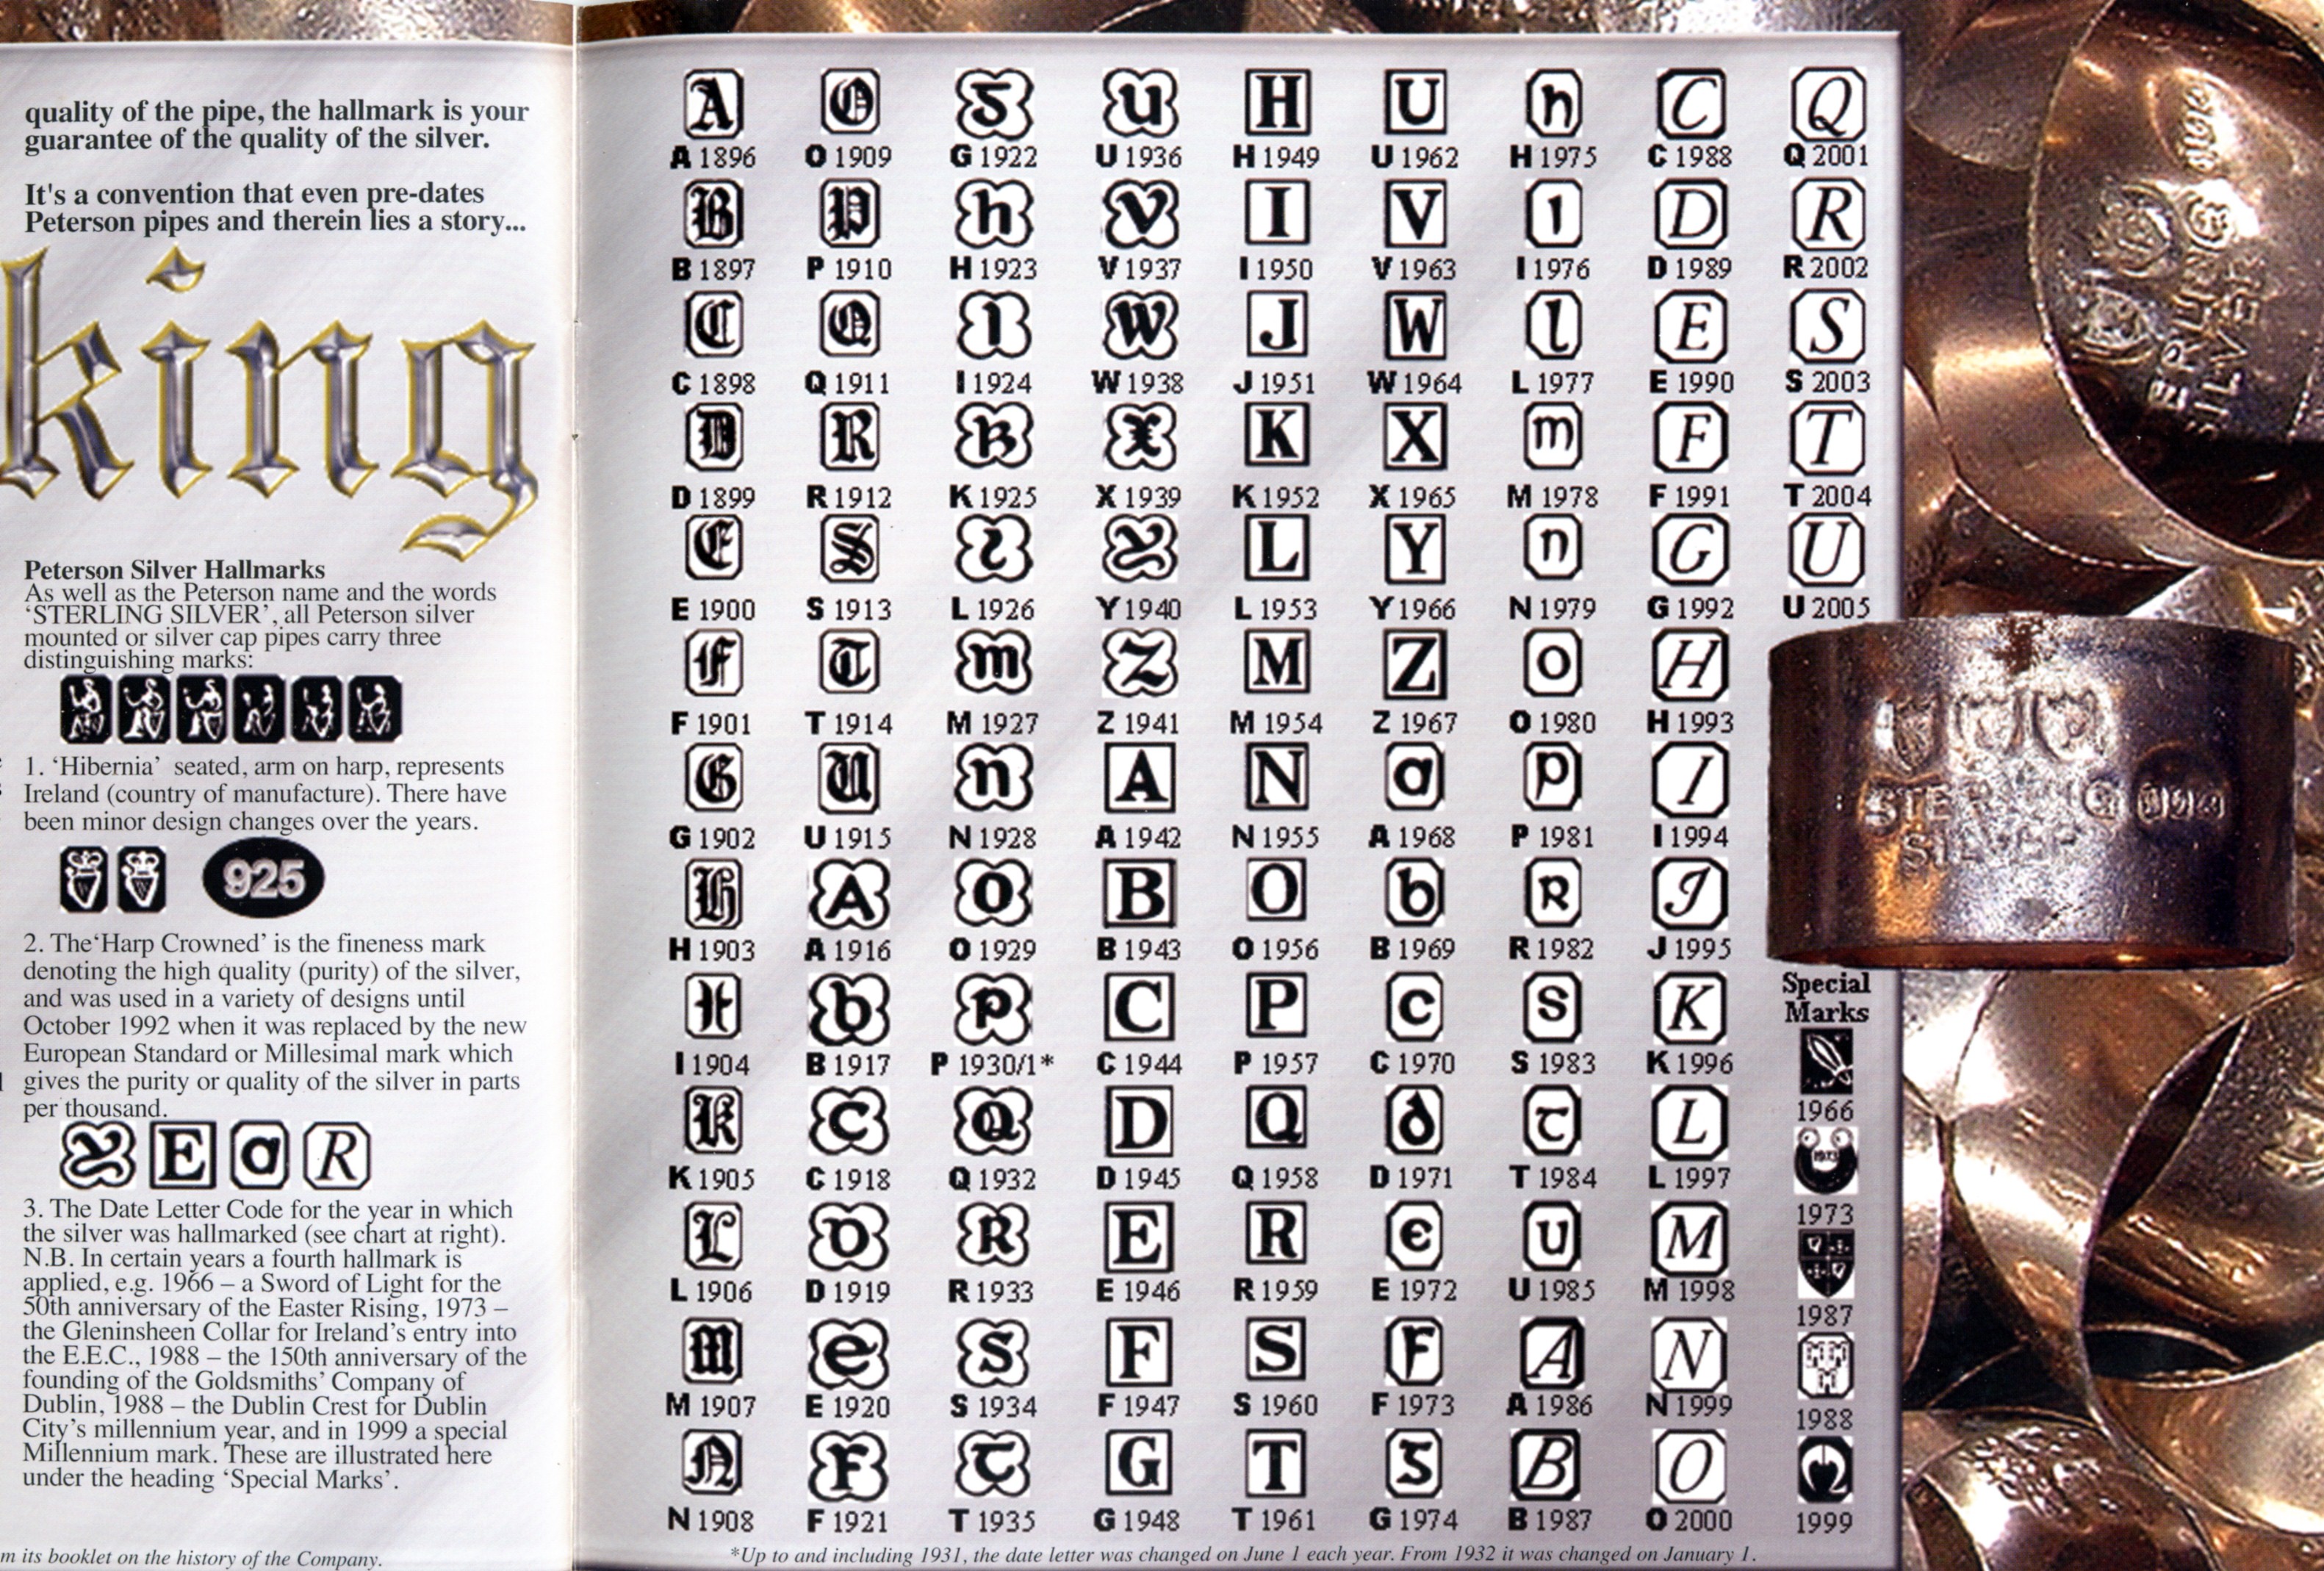
  An added part of pipe restoration for me is to try to gather as much background on a brand and maker as I can find. With Charatan that is an enjoyable web to try to untangle. There is a lot of information and it can lead to understanding what era a pipe was made in. To try to figure out the era of the Charatan’s pipe I was working on I turned to the Pipephil website, Logos and Stampings (http://www.pipephil.eu/logos/en/logo-charatan.html). There is some really helpful information on each of the lines of Charatan’s Make pipes that entered the market. There was not a sandblast stamped like the one in hand. The site did give a short history of the brand. I quote the portion that is most pertinent.
The brand was founded in 1863 by Frederik Charatan. When his father retired in 1910, Reuben Charatan took over the family business. All the pipes were handmade until 1973. The brand name has been overtaken by Dunhill in 1978 and sold in 1988 to James B. Russell Inc.(NJ, USA). During the period 1988-2002 Charatans were crafted by Butz Choquin in St Claude (France). Dunhill re-purchased Charatan brand name in 2002 and Colin Fromm (Invicta Briars, Castleford) followed up on freehand production.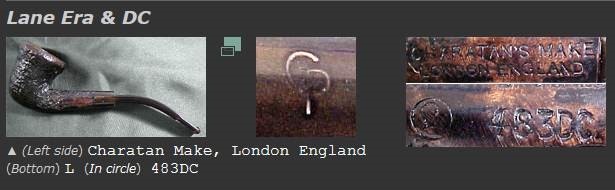 Next, I turned to Pipedia to see if I could find more information on the brand and possibly a link to a sandblast finished Dublin (https://pipedia.org/wiki/Charatan) but once again in the general article it was not listed. It did give a little more historical information. I quote the pertinent parts that give information on this particular pipe.
In 1950 Herman G. Lane, striving to expand his business in Great Britain, made contacts with the Charatan family. Apparently, Lane got a certain influence soon, but it was not until 1955 that Lane Ltd. became the sole distributor for Charatan’s in the United States superseding Wally Frank. This can be documented in a “biography” written for Herman G. Lane titled “Leaves from a Tobaccoman’s Log”.
Thanks to Herman G. Lane’s dedicated labor Charatan became hugely popular in the States. As reported by Ken Barnes in an interview with Rick Newcombe, Reuben Charatan passed away in 1962, and his widow sold the firm to Herman Lane 1 or 2 years after his death.[1] In the early 1960s Charatan pipes were the first to overstep the $100 Dollar line in US pipe sales. In 1978 Lane’s heirs sold the Charatan company to Dunhill. The Prescot Street factory was closed in March 1982. Thereafter the fame and quality of the make declined.
The pre-Lane period (prior to 1955) and the Lane era pipes (1955 to until sometime between 1979 – 1984) are of primary interest the collector. The Lane era is often quoted as beginning about 1950.
Charatan records are almost non-existent before Lane due to a factory fire, making it difficult to date pre-Lane pipes. Charatan used 4 basic grades prior to 1950: Supreme, Selected, Executive, and Belvedere. After 1950 Herman Lane’s influence began, and the grades started to expand. In 1955 Lane took over sole distributorship of Charatan in the US. In 1957 he introduced the Supreme S. Most of his other introductions were from the 1960s and early 1970s.
From this I am fairly certain I am dealing with a Lane pipe made after 1955. There is also a circle L script mark that is a Lane stampings on the pipe which also supports this.
I continued digging further into the dating of the pipe, but what I had found above was a good start for me. If some of you would like to try your hand at dating it more accurately as to the time period it came out you might want to check out the article on Pipedia on Dating Charatans (https://pipedia.org/wiki/Dating_of_Charatans).
I also reread the article on Pipedia by the Italian fellow who contributed some really helpful information on the brand (https://pipedia.org/wiki/Charatan_-_Milan_2014). I quote the section on the Second period: Reuben Charatan 1910 – c. 1962. I have highlighted a portion of the section on the shank in red to point out some more helpful dating information.
– In 1962 Herman Lane took over the business from the Charatan family, although he had already influenced production from the 1950s.
– The pipes were mostly larger than the previous ones and corresponded in size to Dunhill group 5. These are slightly less rare, but still difficult to find.
– Stem: Usually in ebonite, saddle shaped or tapered, bearing a fine “CP” stamp, underbore system (see below) used when necessary.
– Shank: The shape code is stamped on it together with the nomenclature “CHARATAN’S MAKE LONDON ENGLAND” arranged in two lines. From 1955 onward on the models marketed for the USA there is also a serif and circled capital “L” (but not all models bear this) which resembles the pound sterling symbol. The “L” is for Lane, the importer.
From 1958, Lane changed the nomenclature for models marketed for the US to clarify the message: “MADE BY HAND”. In this period the underbore was introduced. Its manufacturing period ranged between 1920 and c.1930. This model was equipped with a duralumin plunger trap fitted in the stem, which served to clean the residue more easily. This particular model bore a special stamp on the stem, and also had its own catalogue…
QUALITY GRADES…The stem did not only display the stamps mentioned above. Another stamp that can help dating is the one referring to the quality of the pipe. Until Herman Lane arrived on the scene there were four quality grades. Starting with the lowest: Belvedere, Executive, Selected, and Supreme. Lane went on to add higher grades from time to time: Supreme S, Supreme S100, S150, S200, S250, S300, Coronation, Royal Achievement, Crown Achievement, and Summa Cum Laude; these last three are extremely rare and almost impossible to find. He also invented other, different grades, even changing the previous pipe classification standards. We will not go into detail here, but it means that if we find an S100 or Coronation the pipe was manufactured following Herman Lane’s acquisition. In particular, the FH mark, or Freehand pipe was commissioned to the famous Danish craftsman, Preben Holm.
Nomenclature
The Lane Trademark serif and circled L indicates the pipe is from the “Lane Era” (approx. 1955 to 1979 -1984?), however it appears that both the English factory or Lane themselves sometimes, or perhaps even often forget to stamp the L on a pipe. The Charatan factory was known for inconsistencies, especially in stampings. Therefore, although an L on the pipe definitely defines it as a Lane Era pipe, the lack of it could simply mean the pipe missed receiving the stamp from the factory. The lack of the trademark could also mean the pipe was destined for the European market.
Charatan pipes were not well distributed prior to the Lane Era, so very few pre-Lane pipes exist today. Herman Lane greatly grew the brand in the U.S., which caused corresponding growth in Europe.
Generally, when the pipe is stamped with the BLOCK letters “MADE BY HAND” it means the pipe was probably made between 1958 and 1965”
Generally, block letters “MADE BY HAND” and some of the other nomenclature in script (i.e. City of London or Extra Large next to the MADE BY HAND) means the pipe was made sometime between 1965 and the mid 1970s. The total script nomenclature “Made by Hand in City of London” evolved over this period of time, so many pipes had variants, such as Made By Hand in block letters and City of London in script, or some other variation of the terms or stampings.
It is believed the FH was used on Charatan pipes between 1957 and 1967-68. Three different sizes were used. The Charatan Logo (CP) on the pipe bit was changed over the year
Now I knew I was working on Lane Era pipe which actually means it was between 1955 and 1988 as shown by the stamping. Now it was time to work on the pipe.
Jeff had cleaned it thoroughly. He had reamed it with a PipNet reamer and cleaned that up with a Savinelli Fitsall Pipe Knife. He had scrubbed the exterior of the briar with undiluted Murphy’s Oil Soap. He removed the shiny coat on the briar with acetone on cotton pads. He cleaned out the interior of the shank, sump and airway in the shank and stem with alcohol, pipe cleaners and cotton swabs. He scrubbed the stem with Soft Scrub to remove the oxidation and calcification on the surface. He soaked it in Before & After Deoxidizer to remove the oxidation. He removed it from the Deoxidizer and rinsed it off with warm water. I took some photos of the pipe before I started my part of the work. 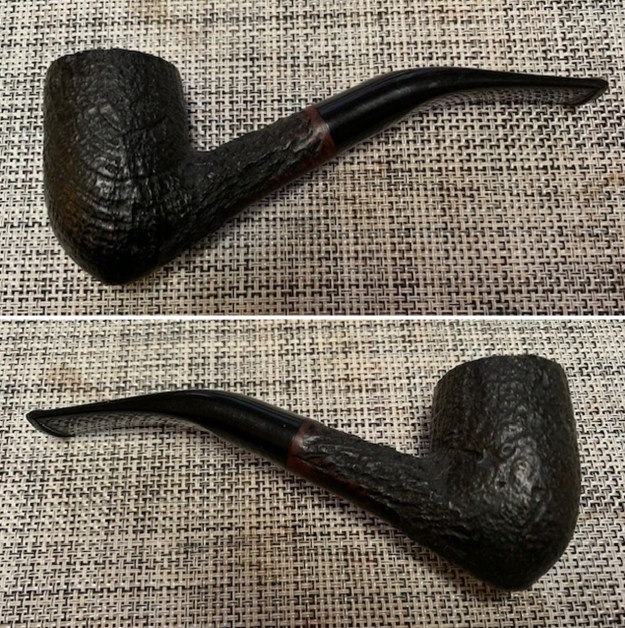
 I took some close up photos of the rim top and also of the stem surface. I wanted to show what an amazing job Jeff did in the cleanup of the rim top. The rim top was and inner edge were in excellent condition. There were spots on the surface where the stain had lightened – both inner and outer edges. I also took close up photos of the stem to show the condition of the acrylic. It was clean but there were tooth marks and chatter on the stem ahead of the button on both sides.
  One of the things I appreciate about Jeff’s cleanup is that he works to protect and preserve the nomenclature on the shank of the pipes that he works on. The stamping on this one had faint spots on the edges so I was worried that it would worsen with the cleanup. I took some photos to show the clarity of the stamping. The photo is a little blurry but the stamping remains the same. I have noticed that many restorers are not careful to protect the stamping in their cleaning process and often by the end of the restoration the nomenclature is almost destroyed. I would like to encourage all of us to be careful in our work to preserve this as it is a critical piece of pipe restoration! I took the stem off the shank and took a photo of the pipe to capture the look of the pipe as a whole.
 I started my work on the pipe by touching up the light areas around the rim top and edges with a Walnut Stain pen. It blended well into the surrounding briar.
  With that finished the bowl was very clean and the sandblast looked great. I rubbed the bowl and rim down with Before & After Restoration Balm. I worked it into the sandblast surface of the briar with my fingertips and a horse hair shoe brush to clean, enliven and protect it. I let the balm sit for 10 minutes and then buffed with a cotton cloth to raise the shine. I really like watching the Balm do its magic and bring the briar alive.

 I set the bowl aside and turned my attention to the stem. I “painted” the tooth marks on both sides of the stem with the flame of a Bic lighter and as expected I was not able to lift them at all. I filled in the tooth marks with clear CA glue and let the cure. I flattened out the repairs with a small file to start blending them in. I sanded the areas smooth with 220 grit sandpaper and started polishing with 600 grit wet dry sandpaper, though I forgot to take photos of this part of the process.
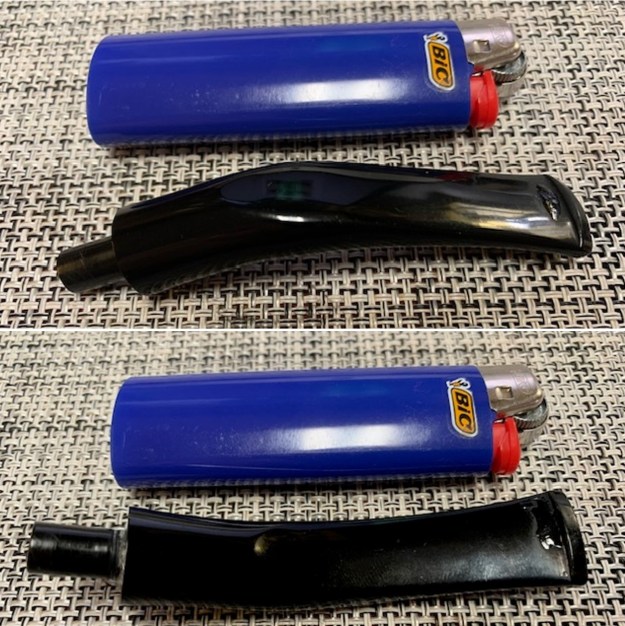

 I polished the stem with micromesh sanding pads – wet sanding with 1500-12000 grit pads. I wiped the stem down after each sanding pad with Obsidian Oil to give the sanding pads some bite.
 I polished it with Before & After Pipe Stem Polish – both Fine and Extra Fine. I gave it a coat of Obsidian Pipe Stem Oil. I know that most think it does nothing for acrylic stems but I use it anyway as I find it works very well to deepen the shine. I set it aside to dry.
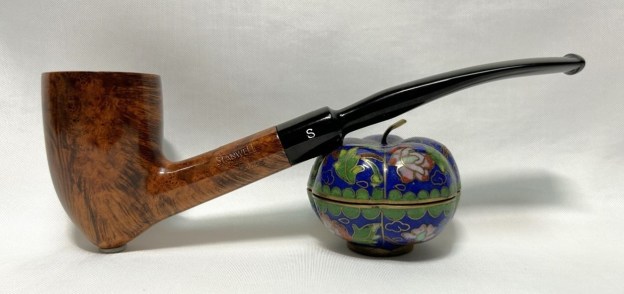
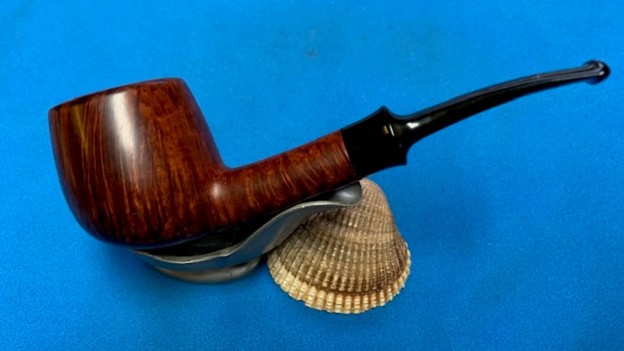
 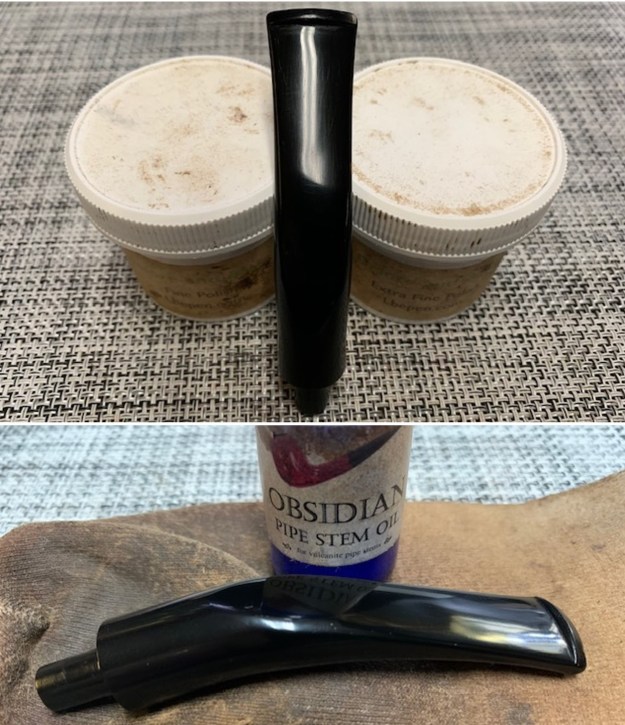 Once again at this point in the restoration process I am excited to be on the homestretch. I look forward to the final look when the Charatan’s Make London England 318 Sandblast Pickaxe is put back together, polished and waxed. I put the bowl and stem back together. I lightly polished the bowl and the replacement stem with Blue Diamond. I gave the bowl and the newly fit stem multiple coats of carnauba wax. I buffed the pipe with a clean buffing pad to raise the shine. I hand buffed it with a microfiber cloth to deepen the shine. The pipe polished up pretty nicely. The depths of the sandblast really pop with the wax and polish. The shiny black acrylic stem is a beautiful contrast to the browns of the bowl. This Charatan’s Make London England 318 Sandblast Pickaxe with an acrylic replacement stem was another fun pipe to work on. It really is a quite stunning piece of briar whose shape follows the flow of the briar. The pipe feels great in the hand will be better when warmed up while smoking. The finished pipe is shown in the photos below. The dimensions of the pipe are Length: 5 ¾ inches, Height: 2 ¼ inches, Outside diameter of the bowl: 1 ¼ inches, Chamber diameter: 7/8 of an inch. The weight of the pipe is 1.66 ounces/47 grams. I will be putting it on the rebornpipes store in the British Pipemakers Section if you would like to add it to your rack and carry on the previous pipeman’s legacy. This is an interesting estate to bring back to life.
As always, I encourage your questions and comments as you read the blog. Thanks to each of you who are reading this blog. Remember we are not pipe owners; we are pipe men and women who hold our pipes in trust until they pass on into the trust of those who follow us.


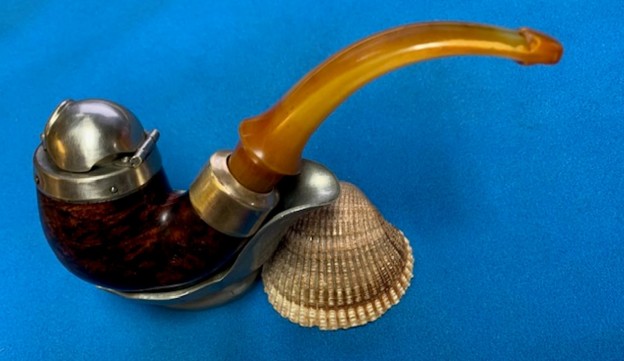
 The left side of the shank reads Stanwell [over] Regd. No. 969-48 [over] de Luxe. The right side of the shank reads Fine Briar [over] 482. Finally, the stem’s left side also has the trademark S of the Stanwell company.
 Of course, 482 refers to the model number, and I went to check the list of Stanwell shapes here on rebornpipes. Hmm – no shape number 482. Fair enough, so I looked up shape number 48, but that was a egg-shaped bowl – definitely not this pipe. I figured it was worth looking up shape number 82 and that was blank. Drat.
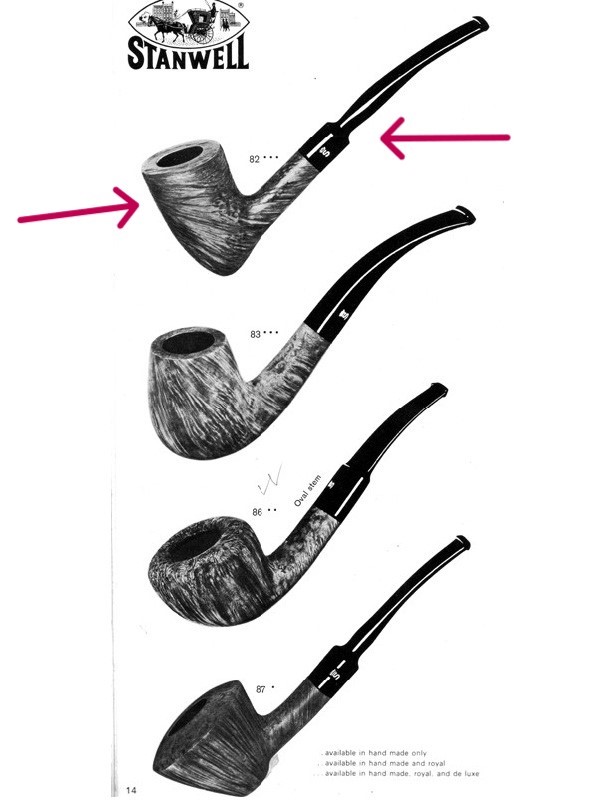
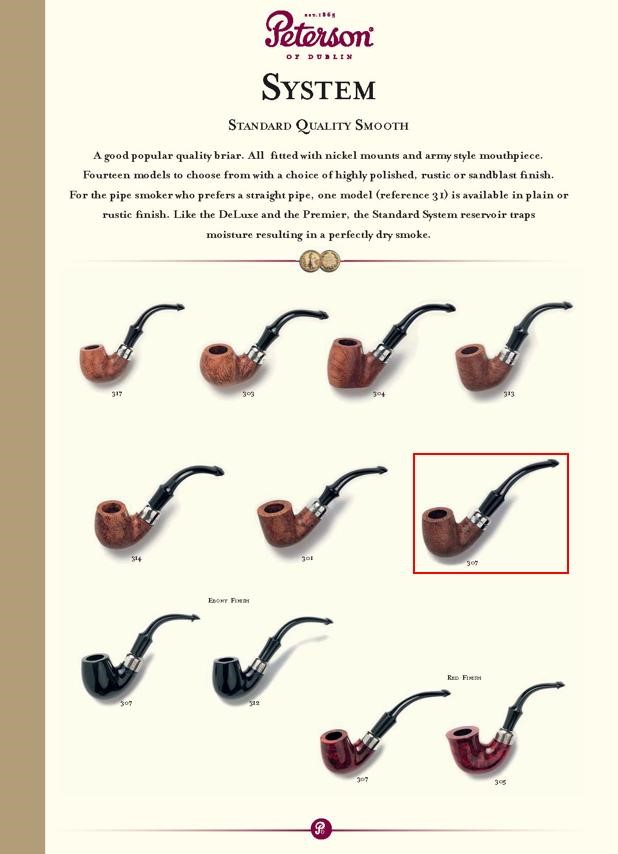
 I went searching through some old Stanwell catalogues and, ultimately, found an image for my pipe – and with the number 82. This catalogue is from 1970 and I have included the image below:
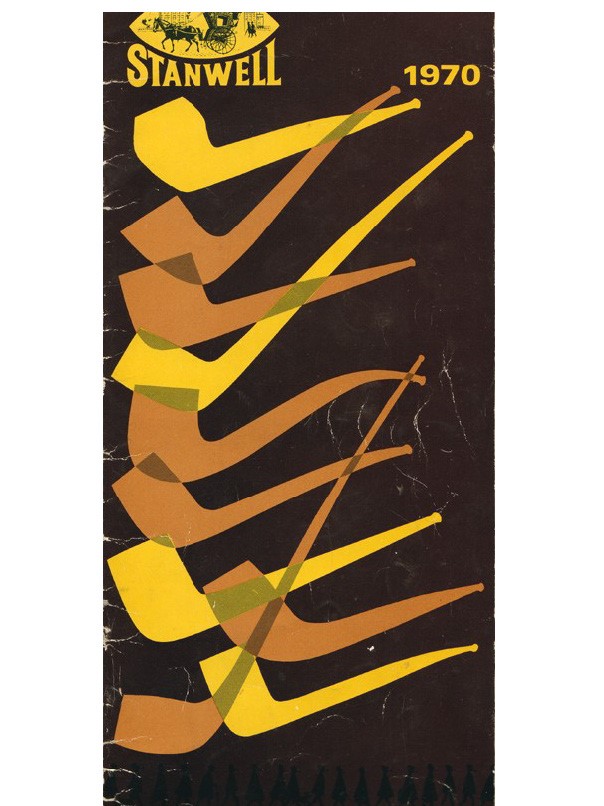
 I know from information at Pipephil that the pipe I have is certainly more than 50 years old – and this corresponds to the catalogue above. Pipephil says, “The “Regd. No.” stamping discontinued in late 1960s to very early 1970s”. My pipe has both the “Regd. No.” and the S logo without a crown. The screen capture below explains that clearly. Meanwhile, Pipedia has a good amount of information on the Stanwell brand and its history. I certainly recommend looking it over: https://pipedia.org/wiki/Stanwell.
 Anyway, this is a great-looking pipe. No major issues to resolve – just a few minor ones. The stem was dirty, though not too beat up. There were some scratch/tooth marks on the stem, and some oxidation and calcification on the vulcanite. The rim on the stummel had some very light charring. The insides were a bit dirty and would need a little work to clean out.

 The stem was first on my list. I wiped down the outside of the stem with Murphy’s Oil Soap on some cotton pads. Then, I cleaned out the inside with pipe cleaners and isopropyl alcohol. It wasn’t too dirty and only required a few pipe cleaners.
 I then wiped down the stem with SoftScrub cleaner to remove surface oxidation. Once this process was done, the stem went for an overnight soak in the Pipe Stem Oxidation Remover. This allows me to clean the oxidation off in a couple of ways: by applying a mild cleaner to the surface and sanding the stem. The next day, I used SoftScrub again with some cotton rounds.

 Some of the more pronounced dents had to be dealt with, so I whipped out my black cyanoacrylate adhesive to fill those in and let them fully cure. After curing, I used some paint to restore the letter S on the stem. I painted the area carefully and let it fully set before proceeding.
 For sanding the adhesive, I used 220- and 400-grit sandpapers to meld seamlessly into the stem. Then I used a set of nine Micromesh pads (1,500 through 12,000 grit) which gradually erased the ravages of time and brought out the stem’s lovely black lustre. For the last five pads, I also lightly coated the stem with Obsidian Pipe Stem Oil in between each scrubbing. The restored logo came out very nicely. At last, I set the finished stem aside.
 Off to work on the stummel! The bowl needed a bit of reaming, so I used the Kleen Reem to scrape off the built-up cake, and I followed that with 220-grit sandpaper taped to a dowel to eliminate as much as possible. Generally, I prefer to sand the chamber down to bare briar. When restoring, it is important to ensure that there is no damage to the briar in the bowl under the cake. Fortunately, there were no hidden flaws in the briar on this pipe.
 I gently removed the lava on the rim with a piece of machine metal. When the rim of a pipe isn’t damaged, I prefer to use this technique rather than my topping board. The machine metal preserves the rim and doesn’t remove stain and/or patina.
 I then proceeded to clean out the insides of the shank with Q-tips, pipe cleaners, and lemon-infused isopropyl alcohol. I also used some more Murphy’s here. There wasn’t too much filth in this one, fortunately. I followed that up by cleaning the insides with some dish soap and tube brushes.
 I decided to de-ghost the pipe in order to remove any lingering smells of the past. I thrust cotton balls into the bowl and the shank and saturated them with 99% isopropyl alcohol. I let the stummel sit overnight. This caused any remaining oils, tars and smells to leach out into the cotton. The bowl was nice and clean after this.
 I used all nine Micromesh pads (1,500 through 12,000 grit) on the stummel to make it lovely and smooth.
 At this point, I rubbed some Before & After Restoration Balm into the briar and left it to sit for 15 minutes or so. I brushed it with a microfibre cloth. The B&ARB does wonderful things to the wood, and I really like the walnut colour of the briar.
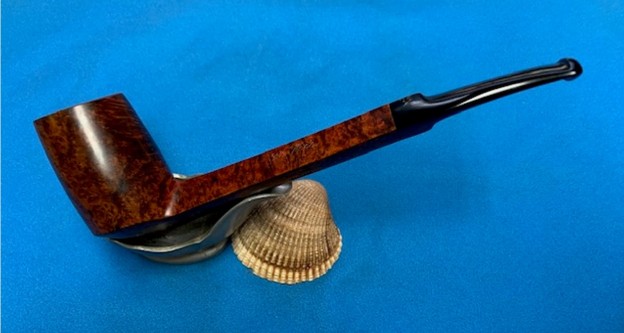
 Finally, it was off for a trip to the bench polisher. A dose of White Diamond and a few coats of carnauba wax perfectly complemented the briar. The lovely shine made the wood look absolutely beautiful. This pipe is elegant, light, and incredibly comfortable to hold.
 I thoroughly enjoyed bringing this Stanwell de Luxe 482 freehand pickaxe back to life. It is a gorgeous pipe. I know that my cousin will enjoy it for many years to come. I hope you enjoyed reading the story of this pipe as much I as I did restoring it. The approximate dimensions of the pipe are as follows: length 5⅞ in. (150 mm); height 2 in. (50 mm); bowl diameter 1¼ in. (31 mm); chamber diameter ⅝ in. (18 mm). The weight of the pipe is ⅞ oz. (29 g). If you are interested in more of my work, please follow me here on Steve’s website or email me directly at kenneth@knightsofthepipe.com. Thank you very much for reading and, as always, I welcome and encourage your comments.


