Tag Archives: repairing bite marks

Restoring an Older GFB Three Star Horn Stem Bent Bulldog


Blog by Steve Laug

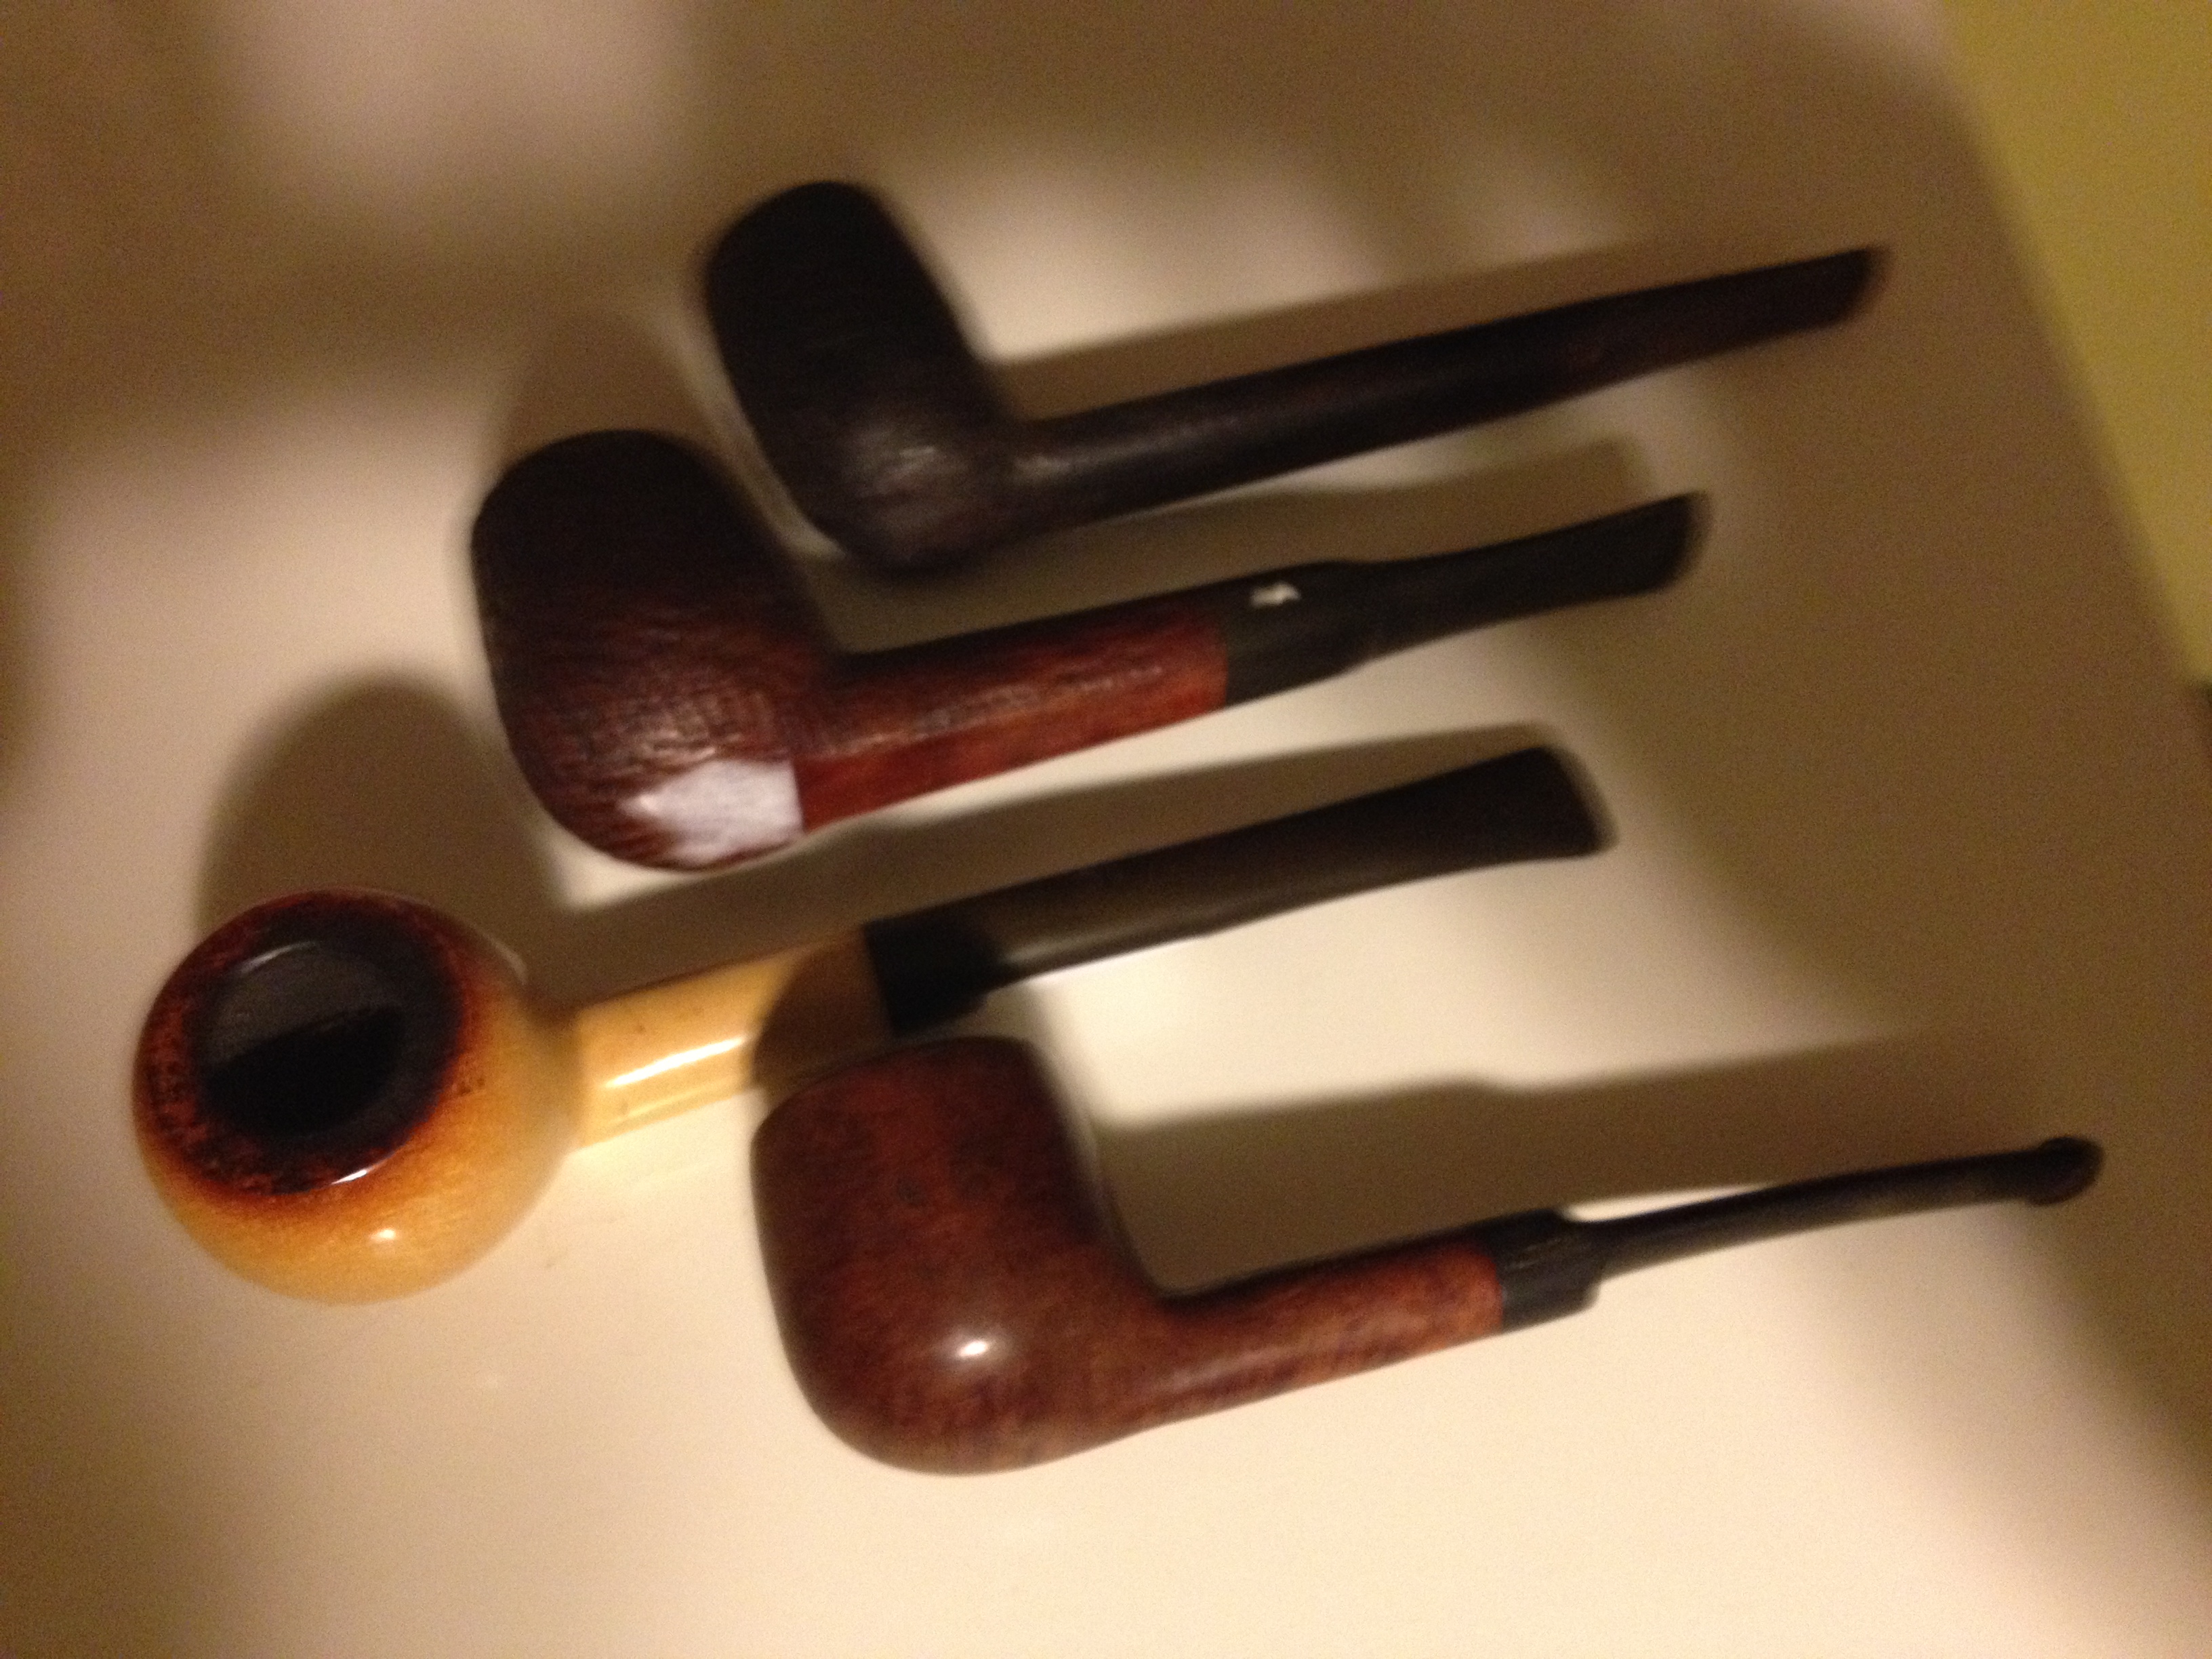
The pipe below is one I bought off EBay because it looked like a challenge, that and the fact that it was another GFB pipe. This is the third GFB that I have in my collection. I love the way they feel in the hand and the elegant look of the curves and angles they have. I went back and reread my previous two posts on the GFB pipes I had refurbished to remind myself of their history. There I described the process of hunting down information on the brand. I summarize that here for those may not have read the other two posts. (https://rebornpipes.wordpress.com/2013/06/07/restemming-and-reclaiming-an-older-unsmoked-gfb-briar-calabash/ , https://rebornpipes.wordpress.com/2013/04/01/restoring-a-gfb-bent-billiard-another-reclamation-project/)

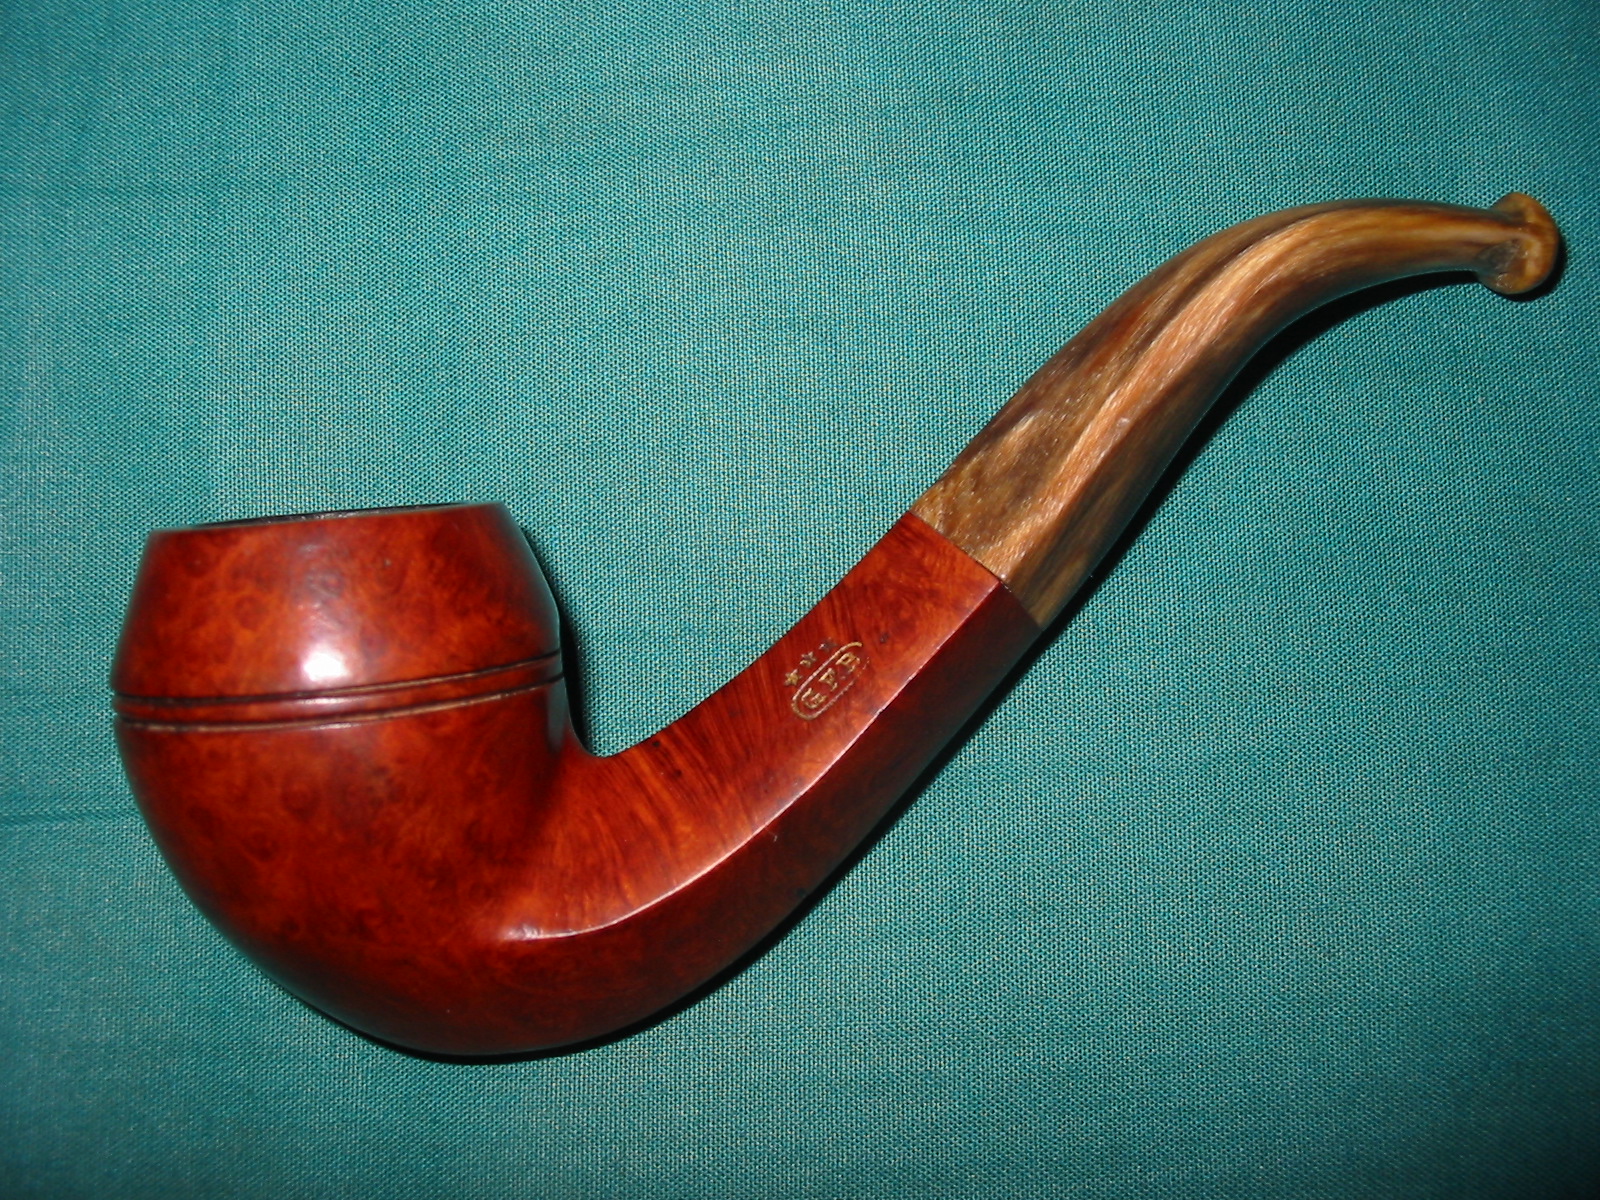
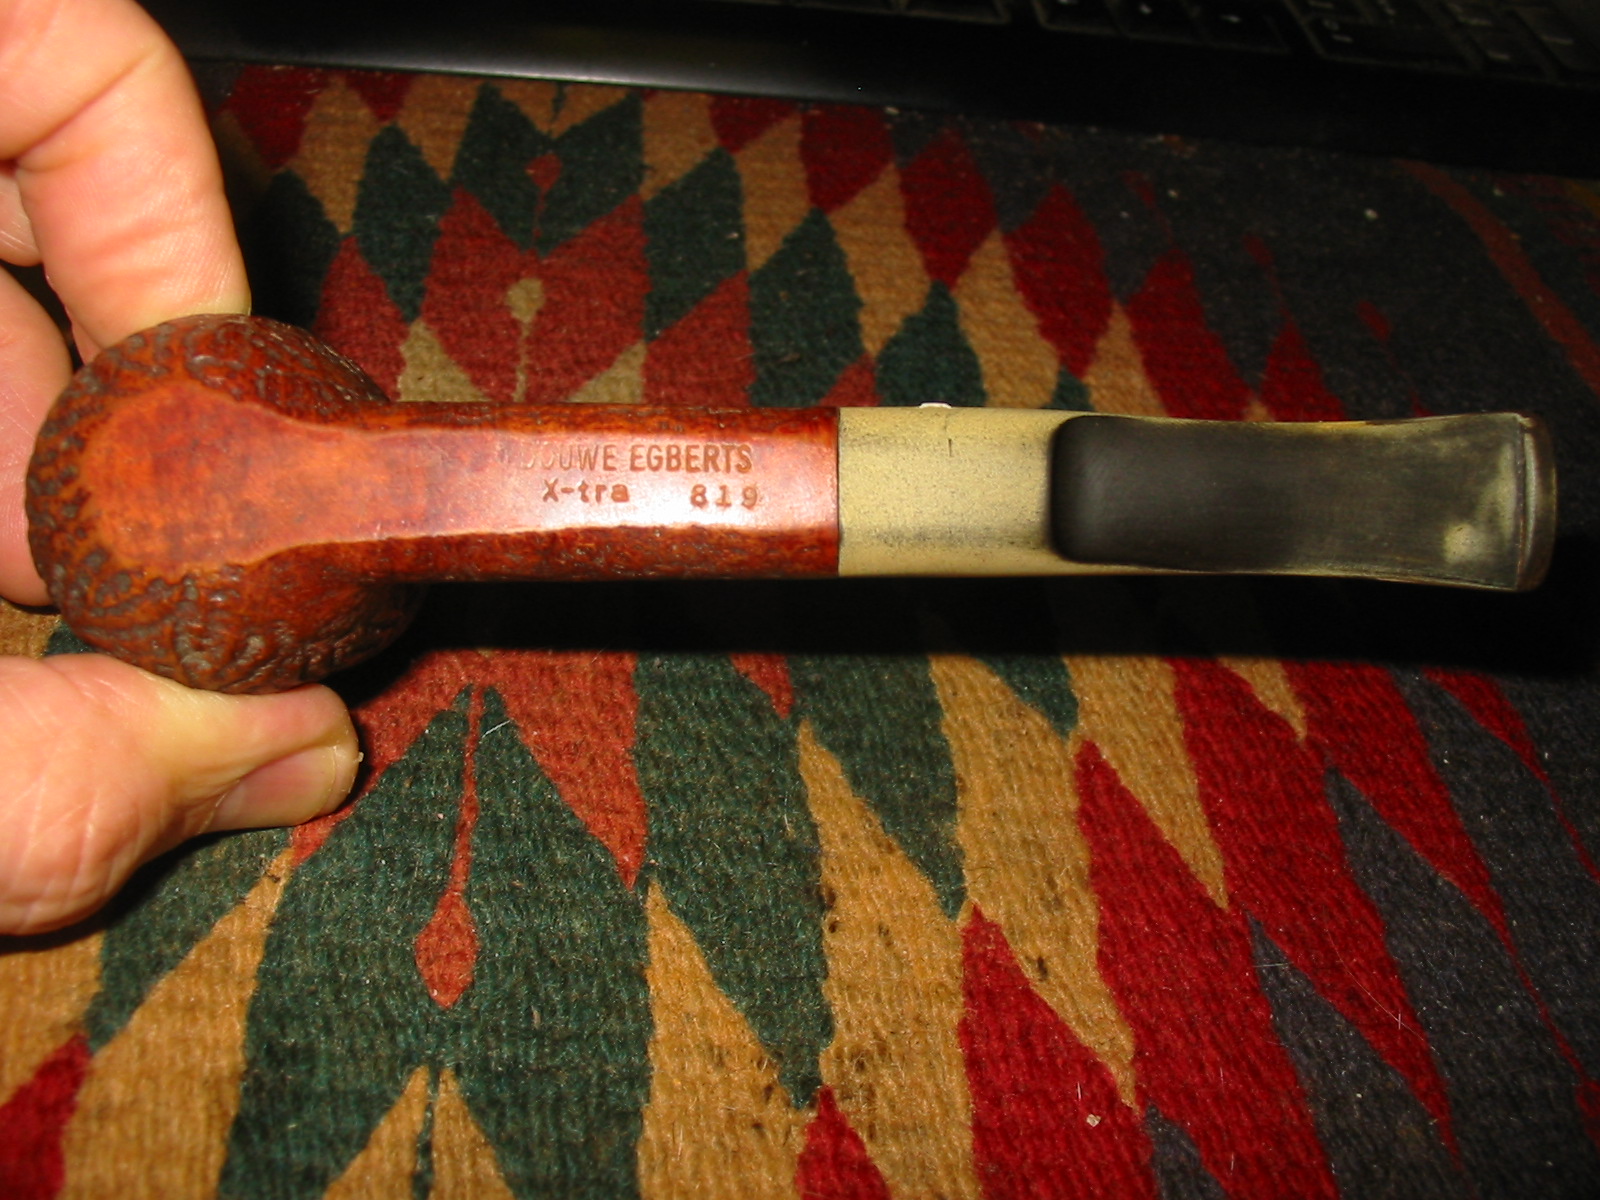
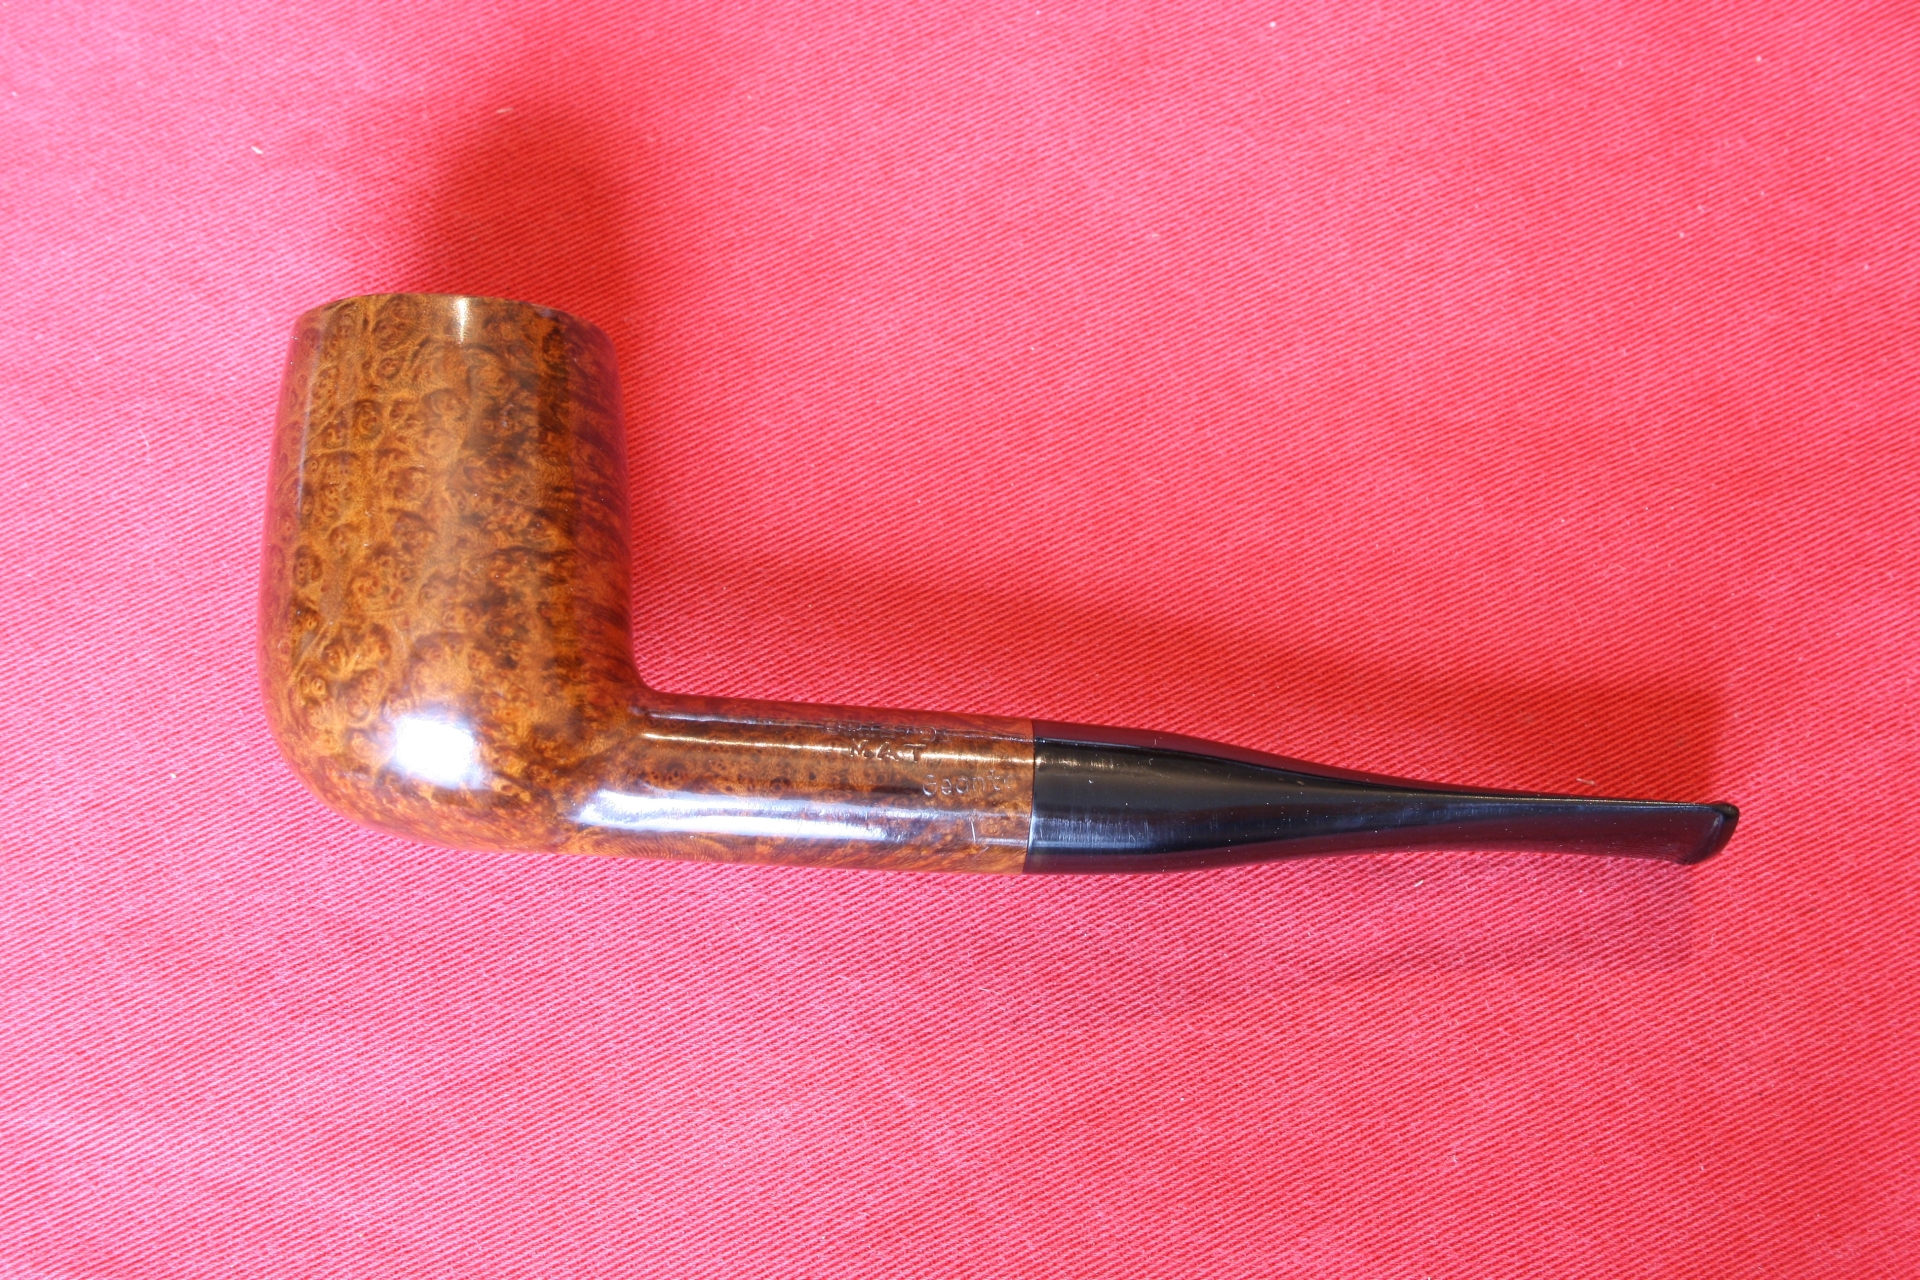
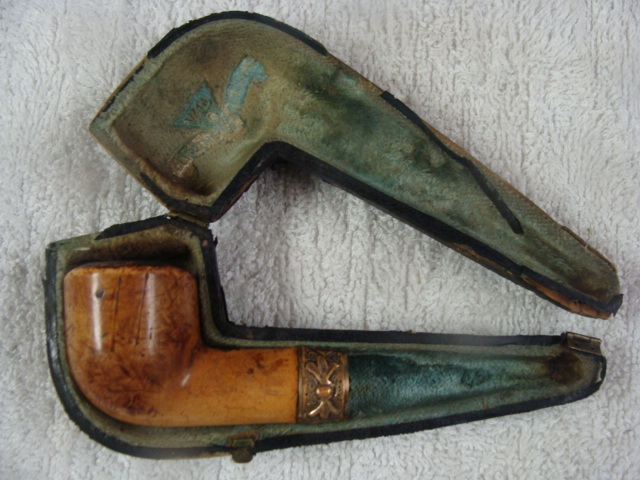
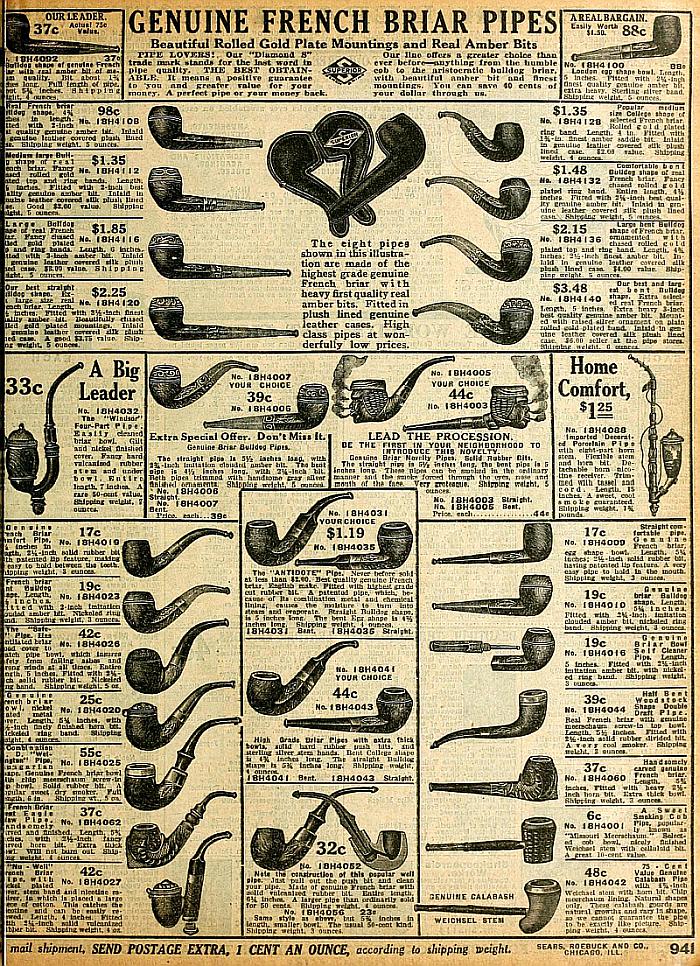
The first thing I found was information that the GFB brand was an older French Trademark and that it came from Saint Claude, France. A more focused search for GFB French Briar Pipes led to information that the stamping GFB stood for Great French Briar – something about that did not seem right to me so I continued to look and finally came across the following advertisement from a Sears Catalogue. It shows a full page of GFB pipes and the header says GENUINE FRENCH BRIAR. That made much more sense to me, and all three of my GFB pipes match the pipes in the catalogue. It was good to be reminded of the old brand. I am pretty sure that all three of my GFB pipes come from either the late 1890’s or the early 1900’s.
genuine-french-briar-pipes-on-parade

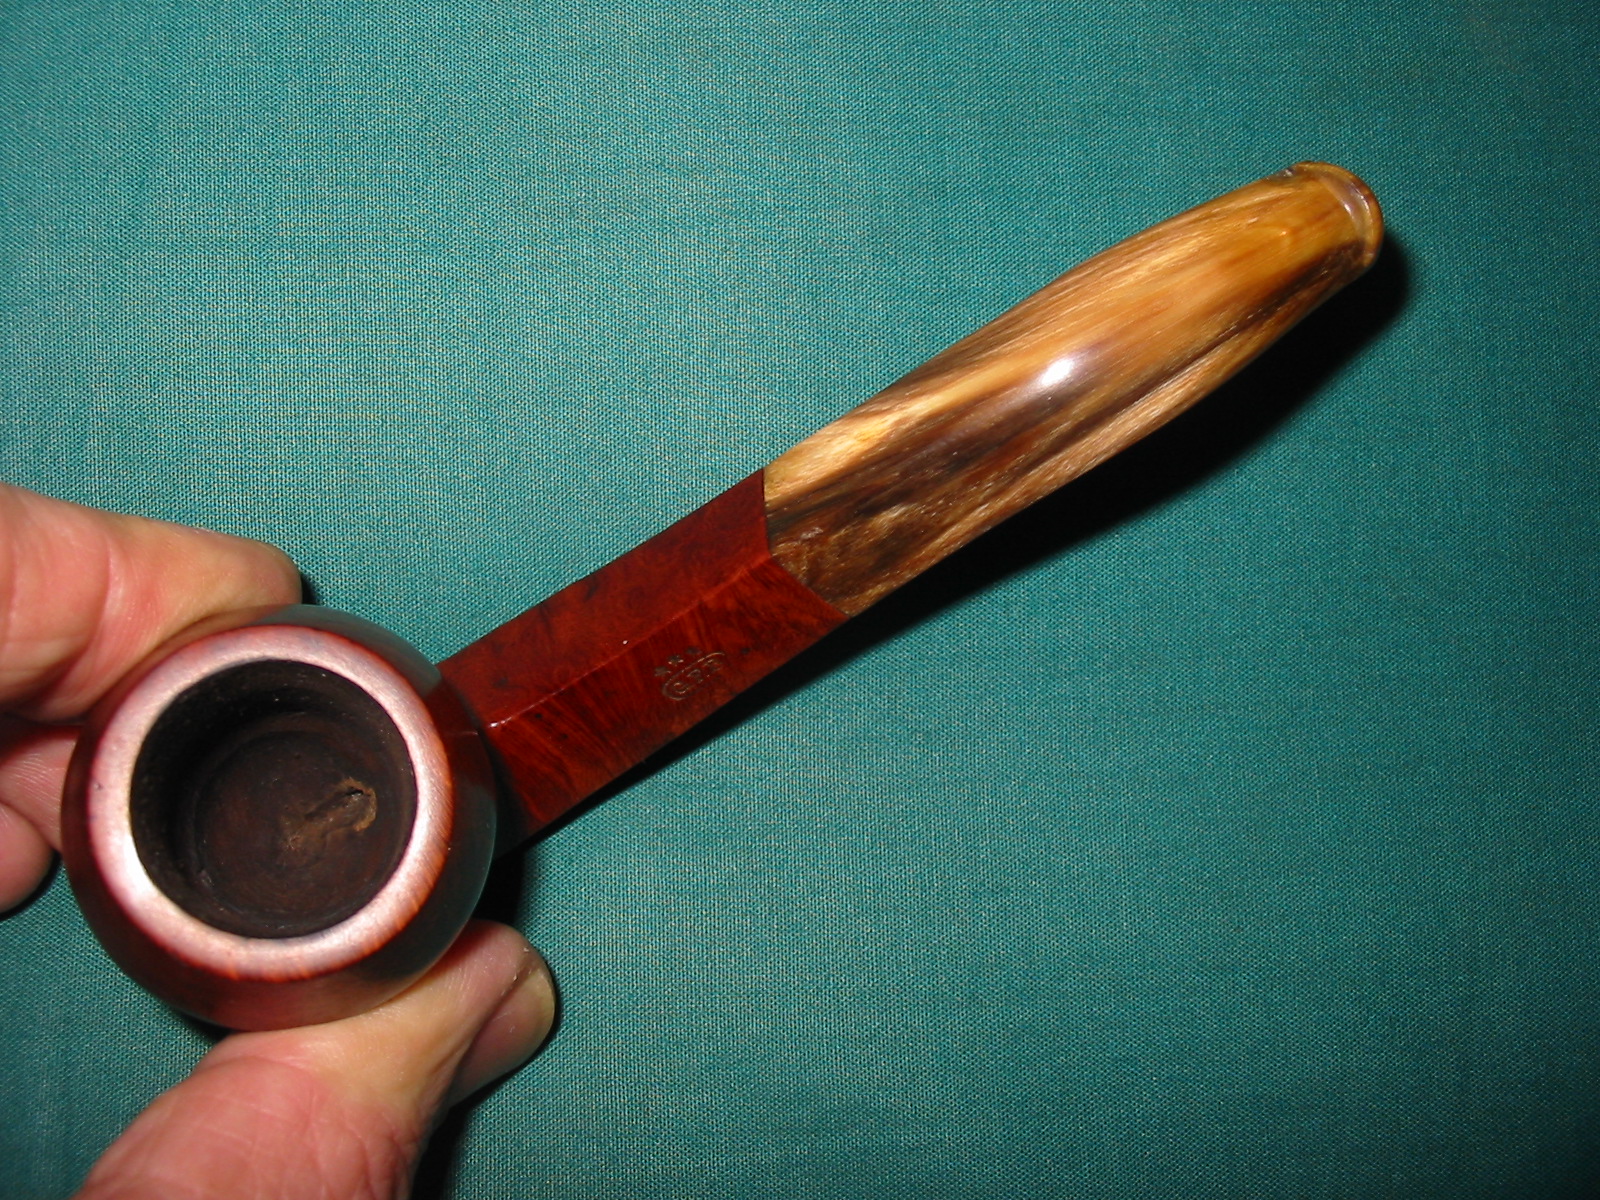
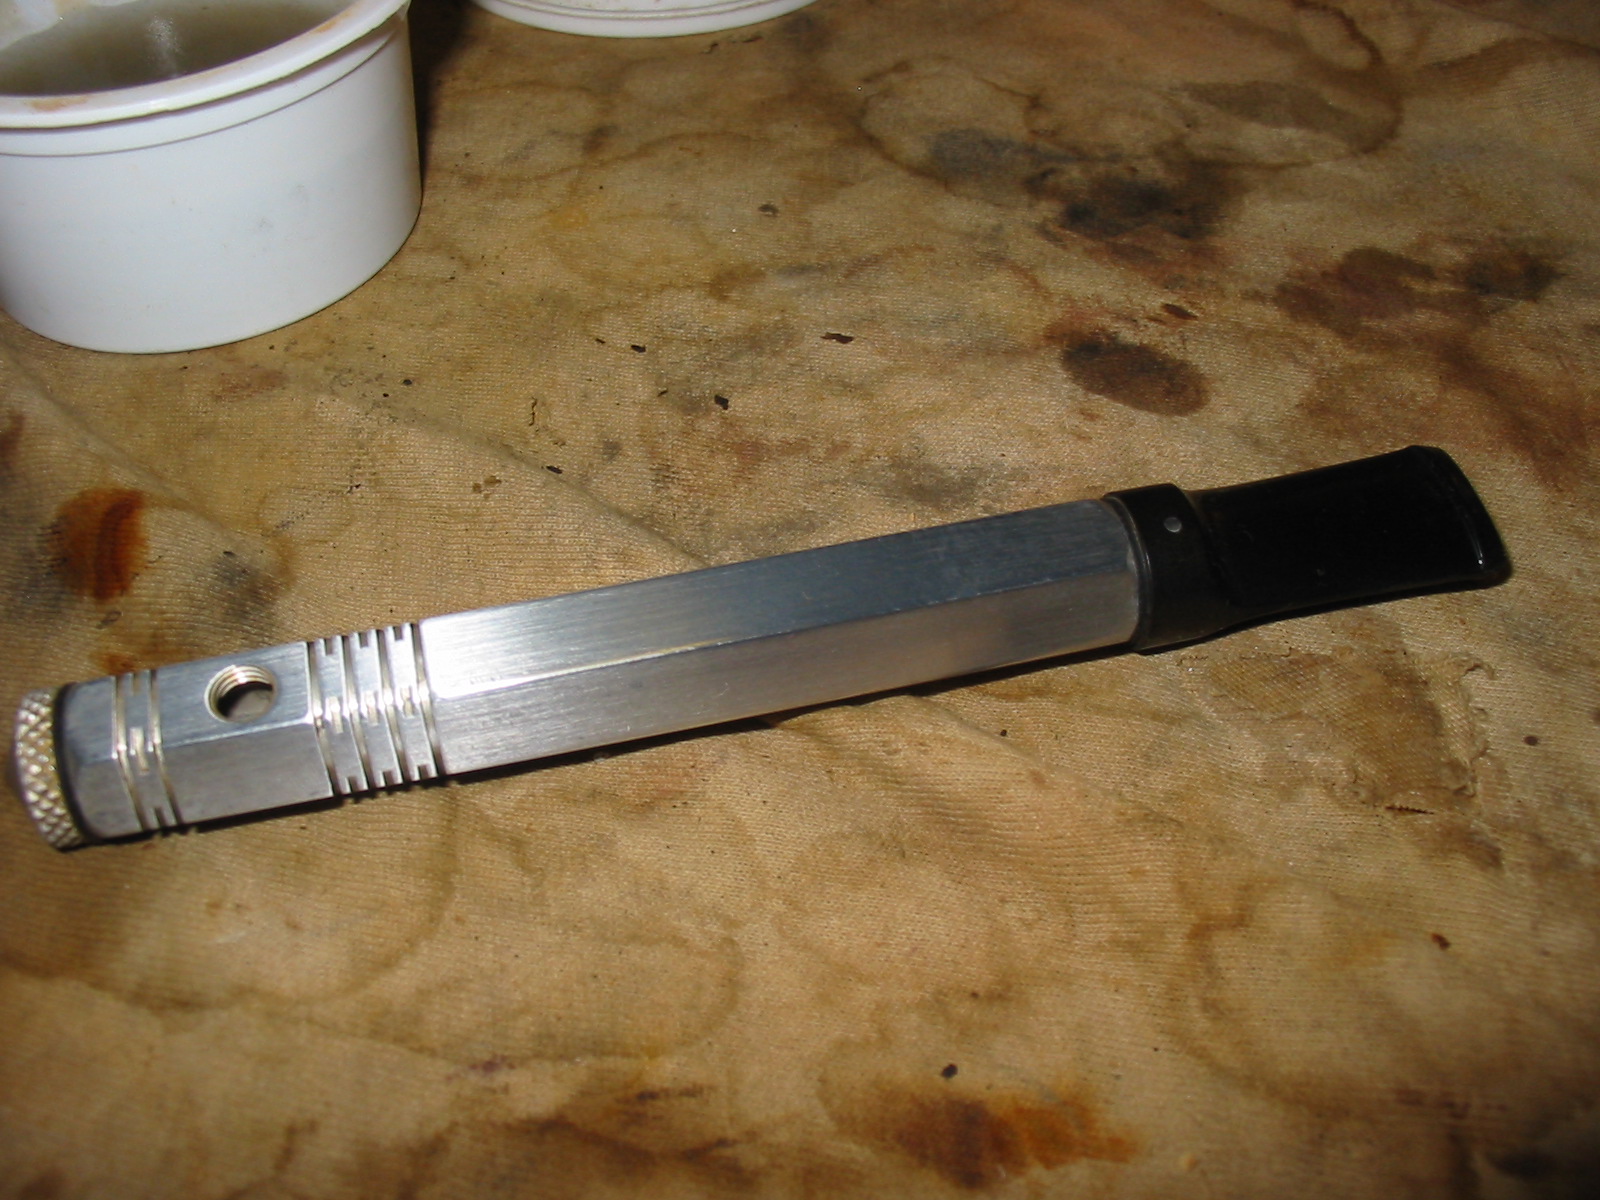
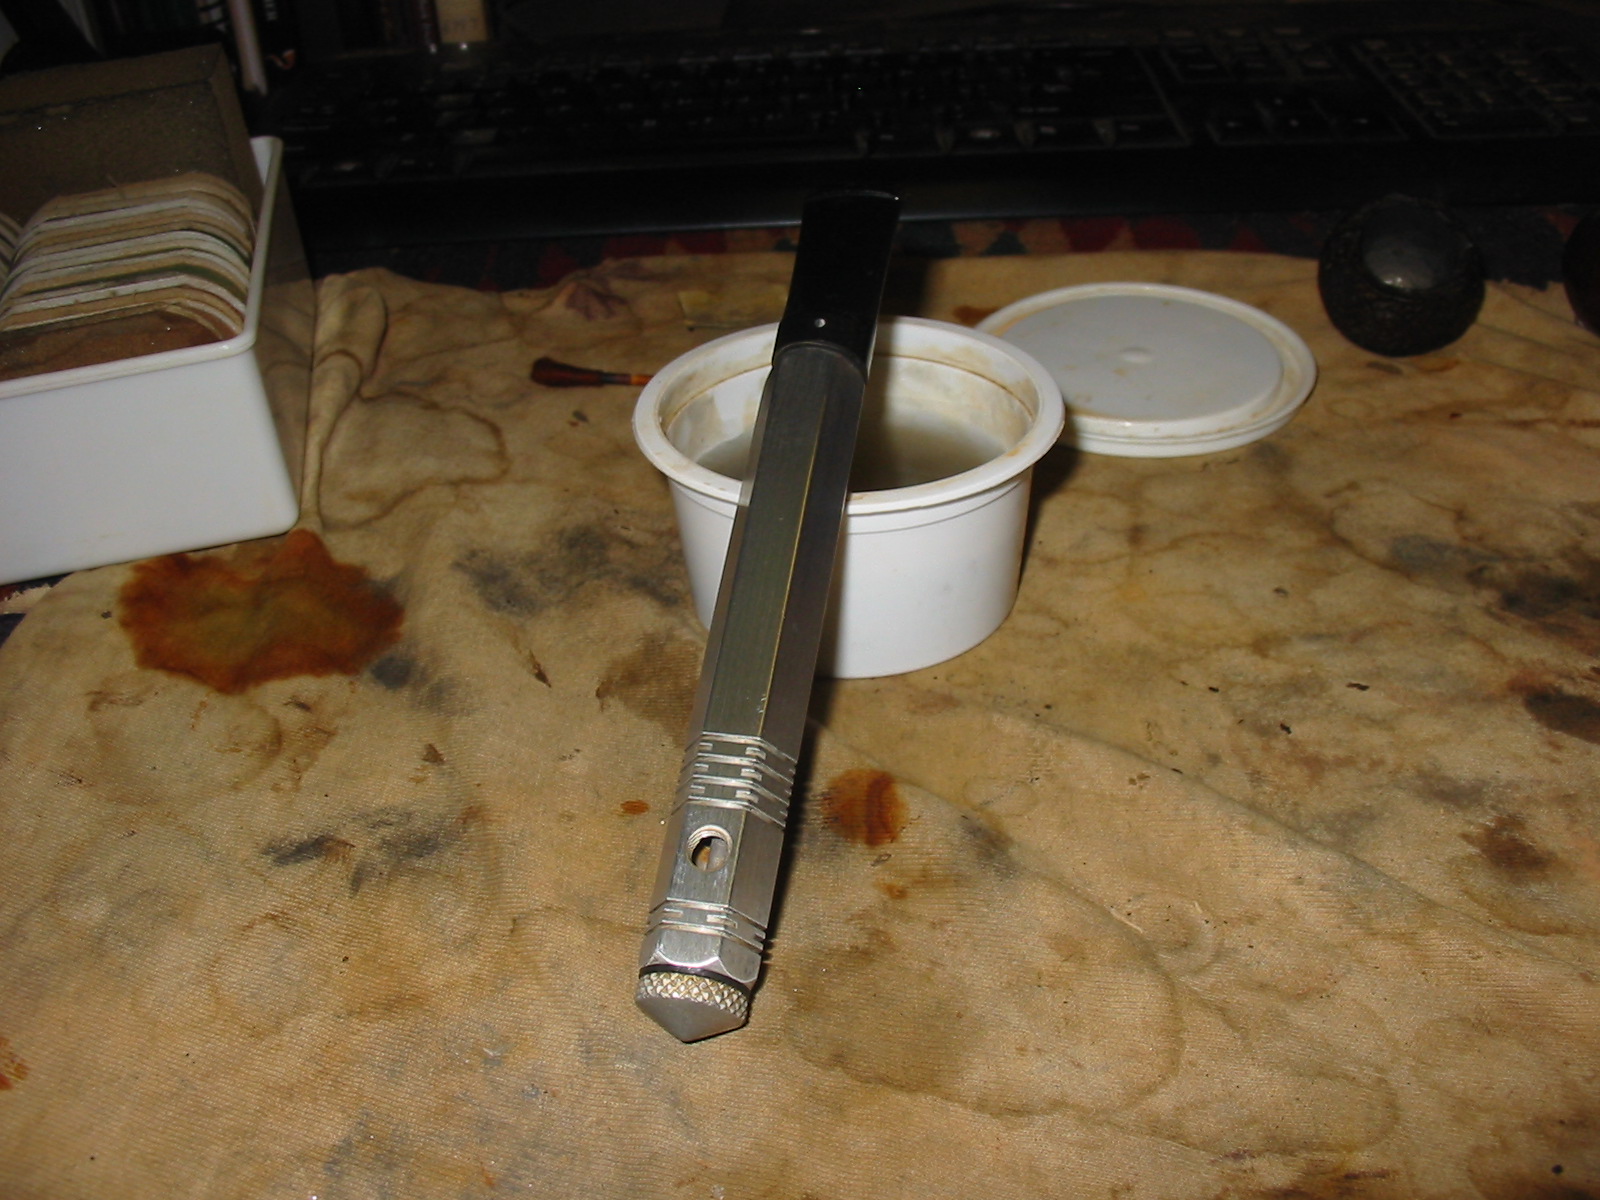
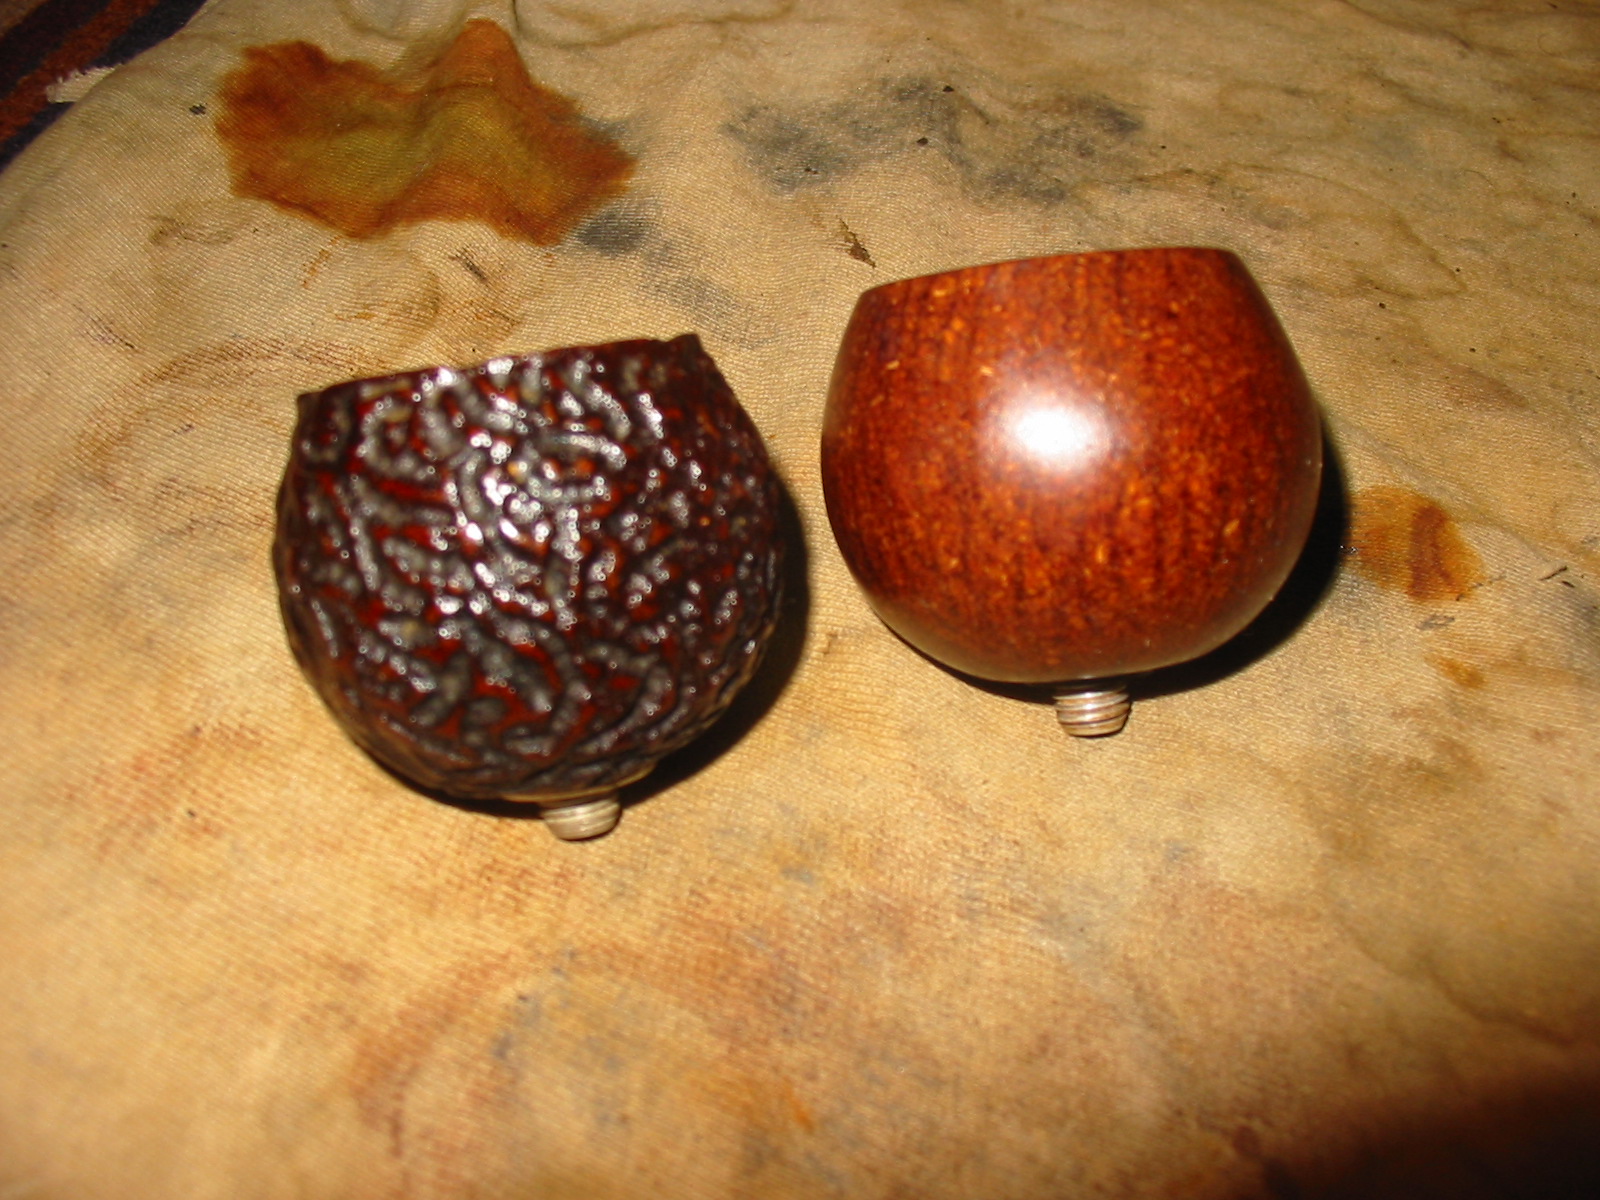
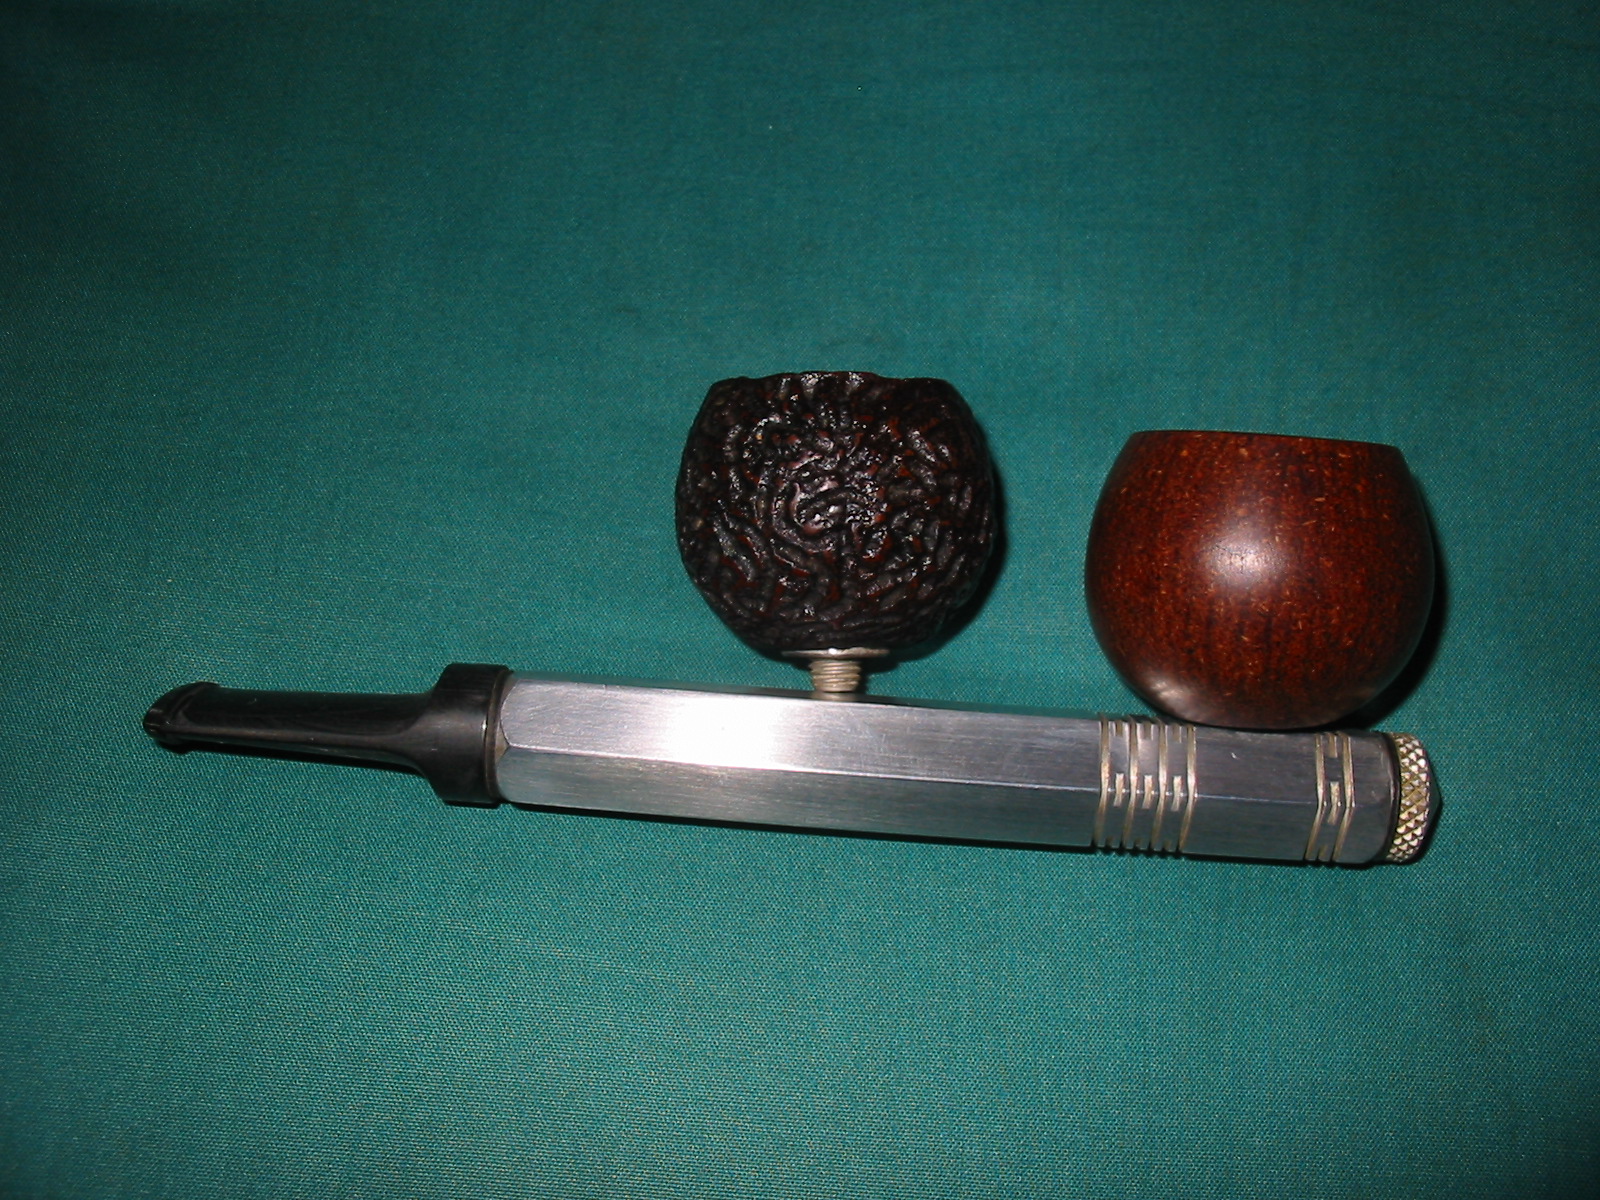
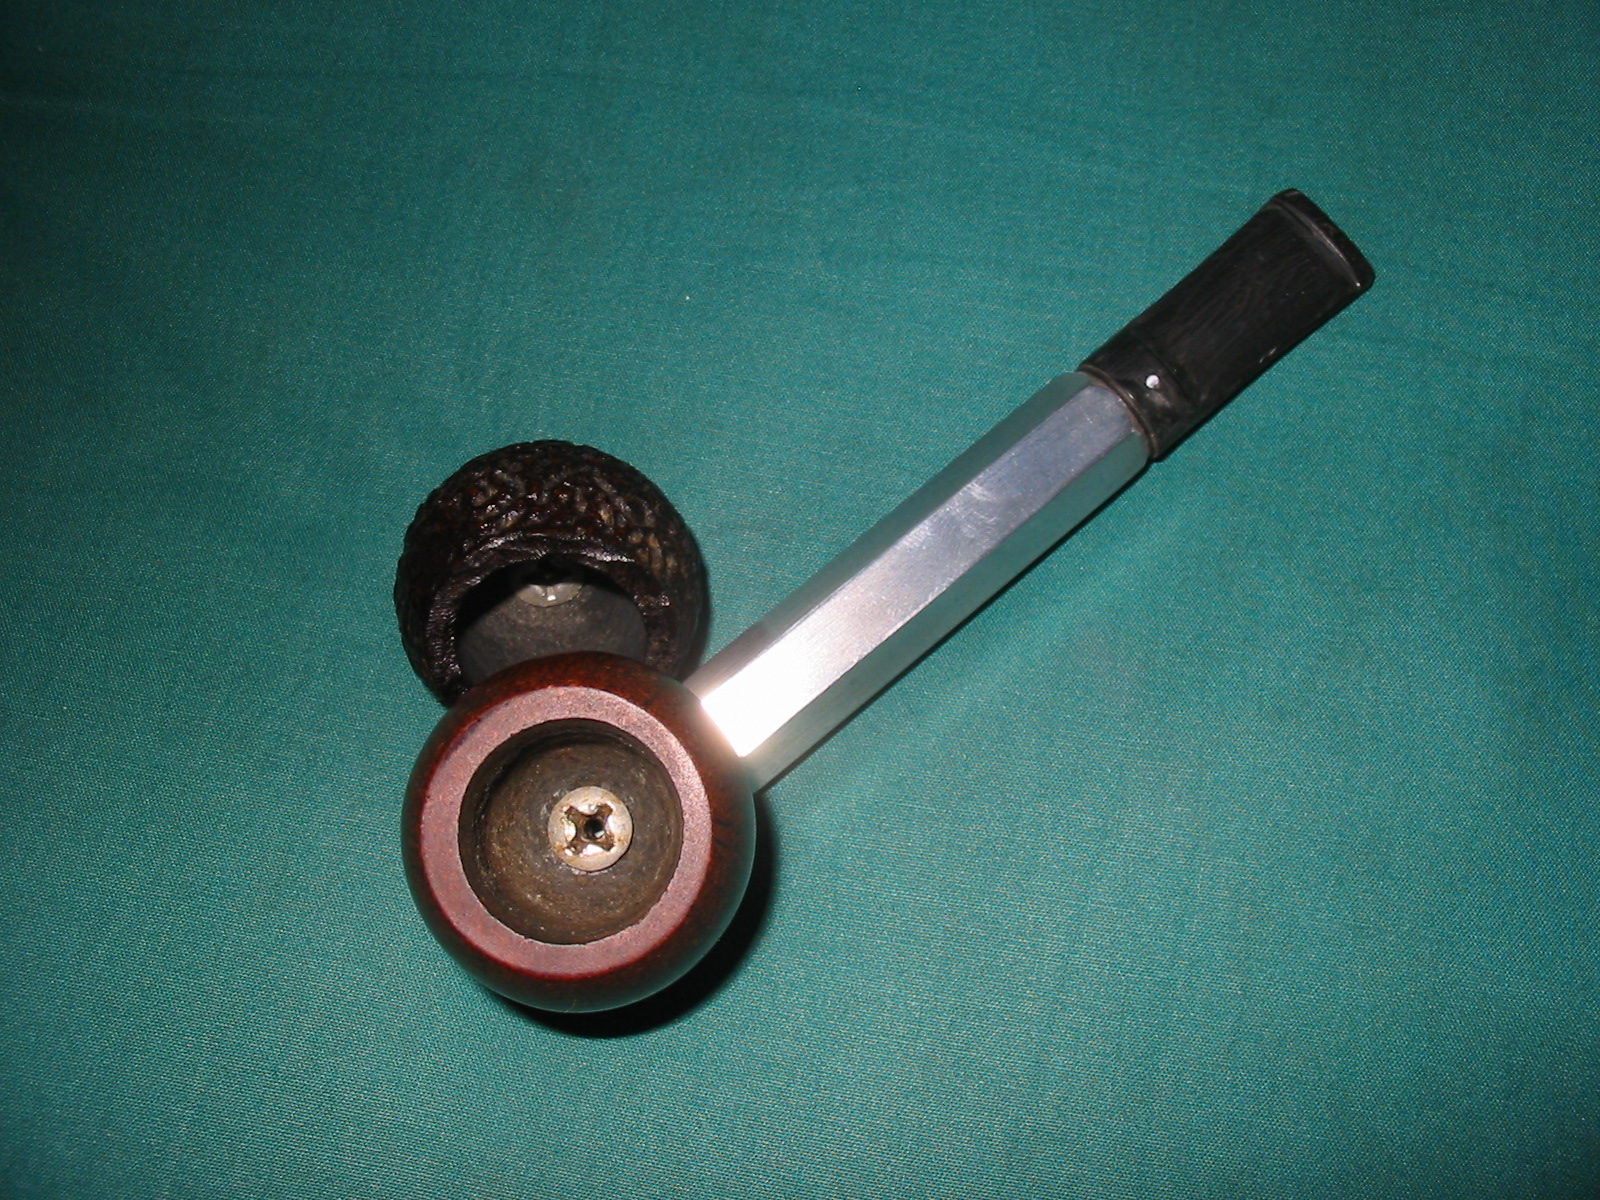
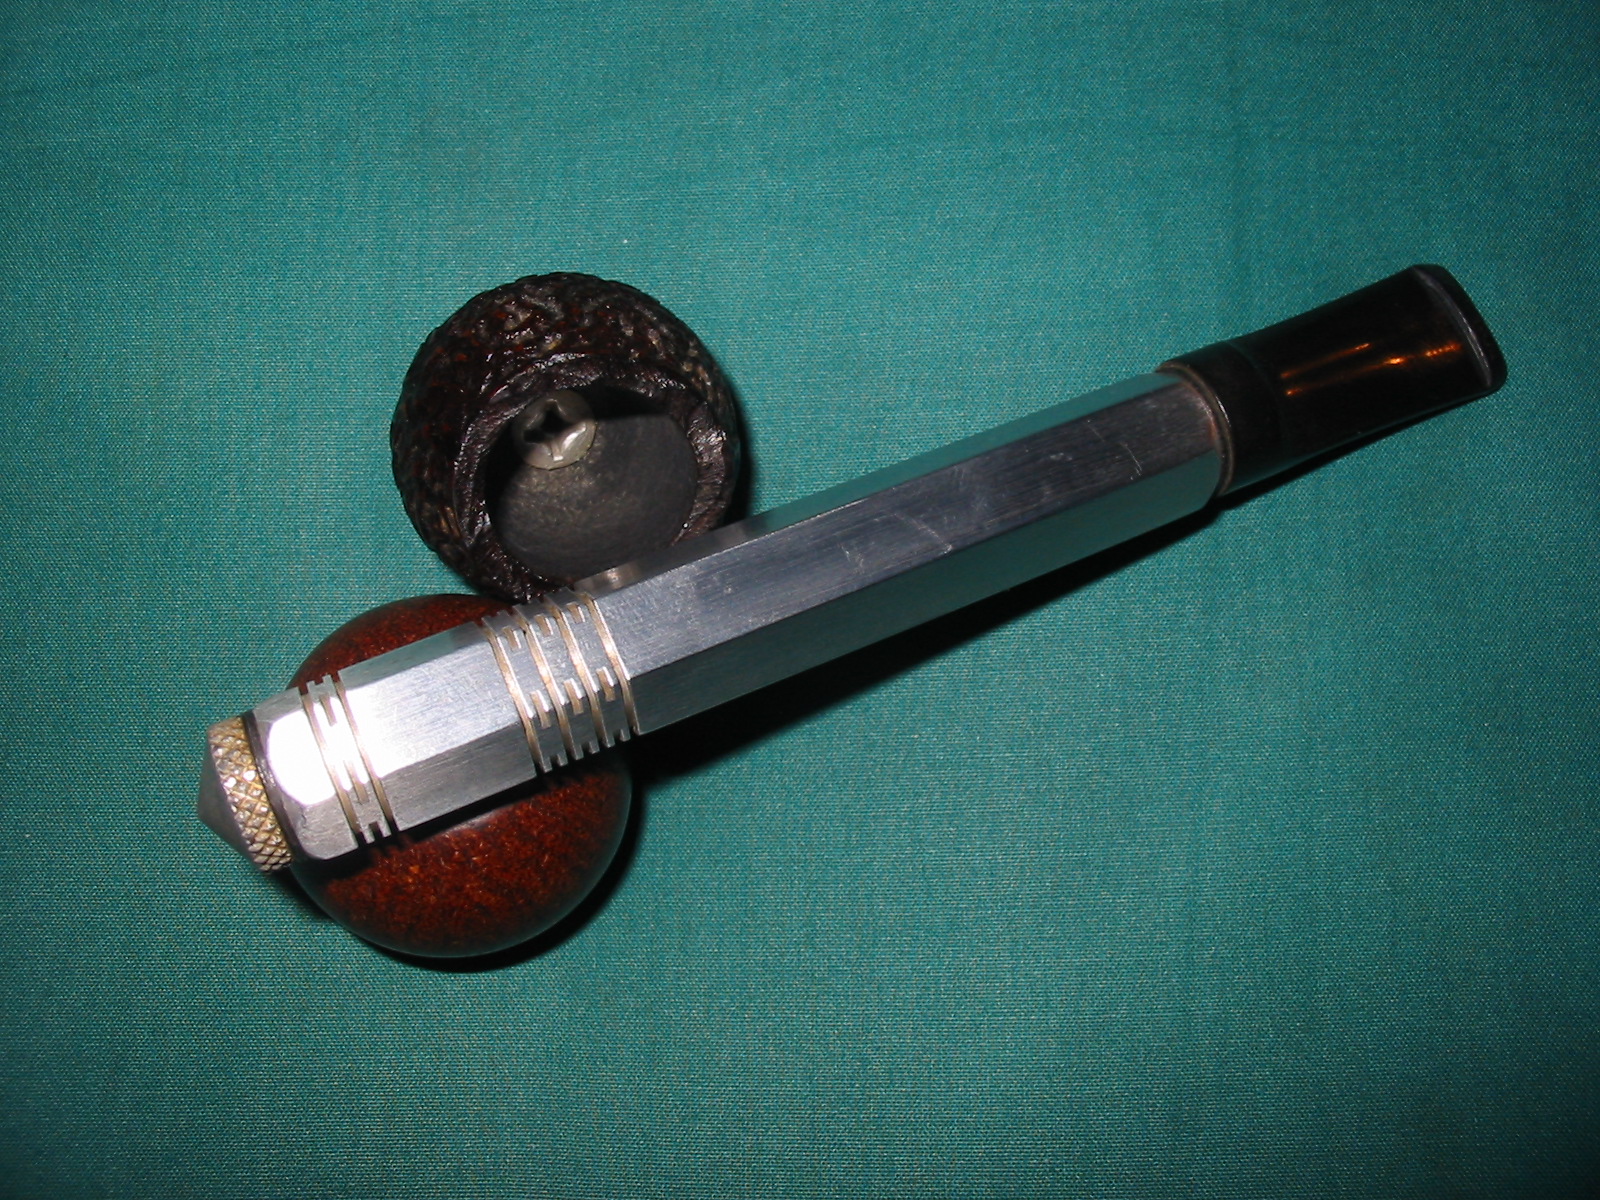
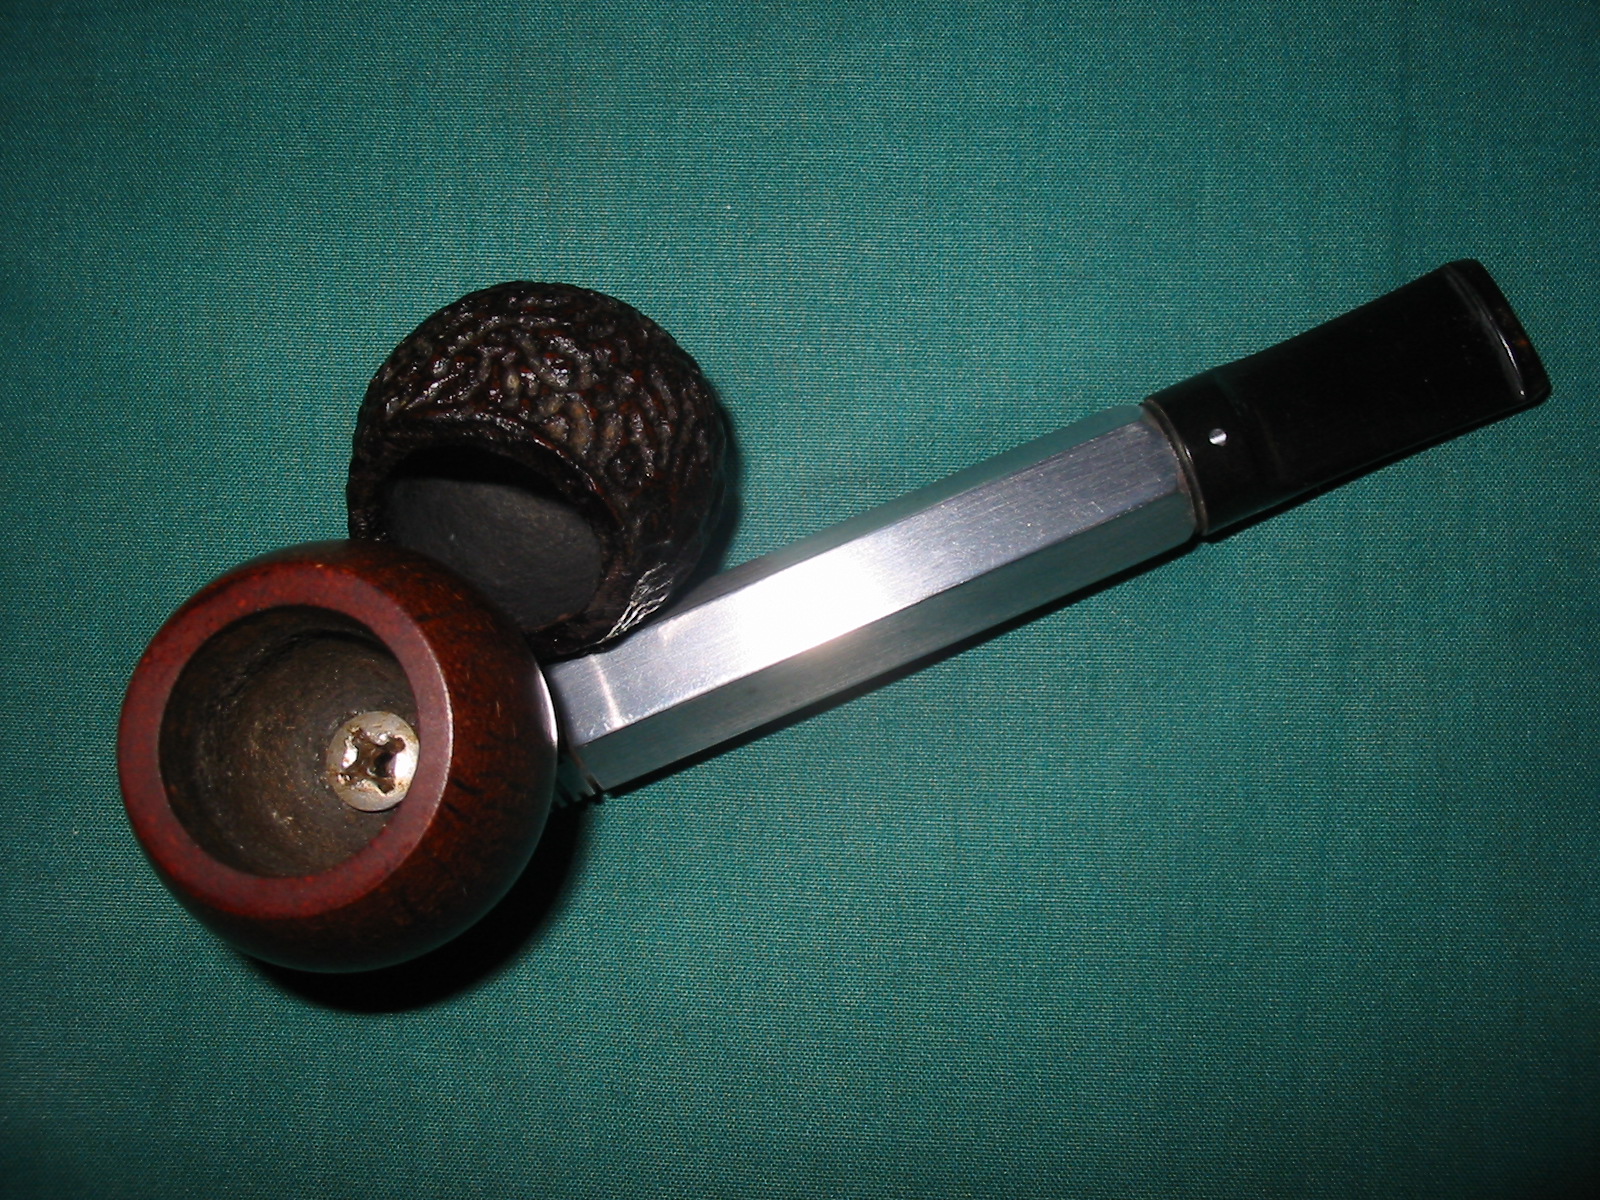
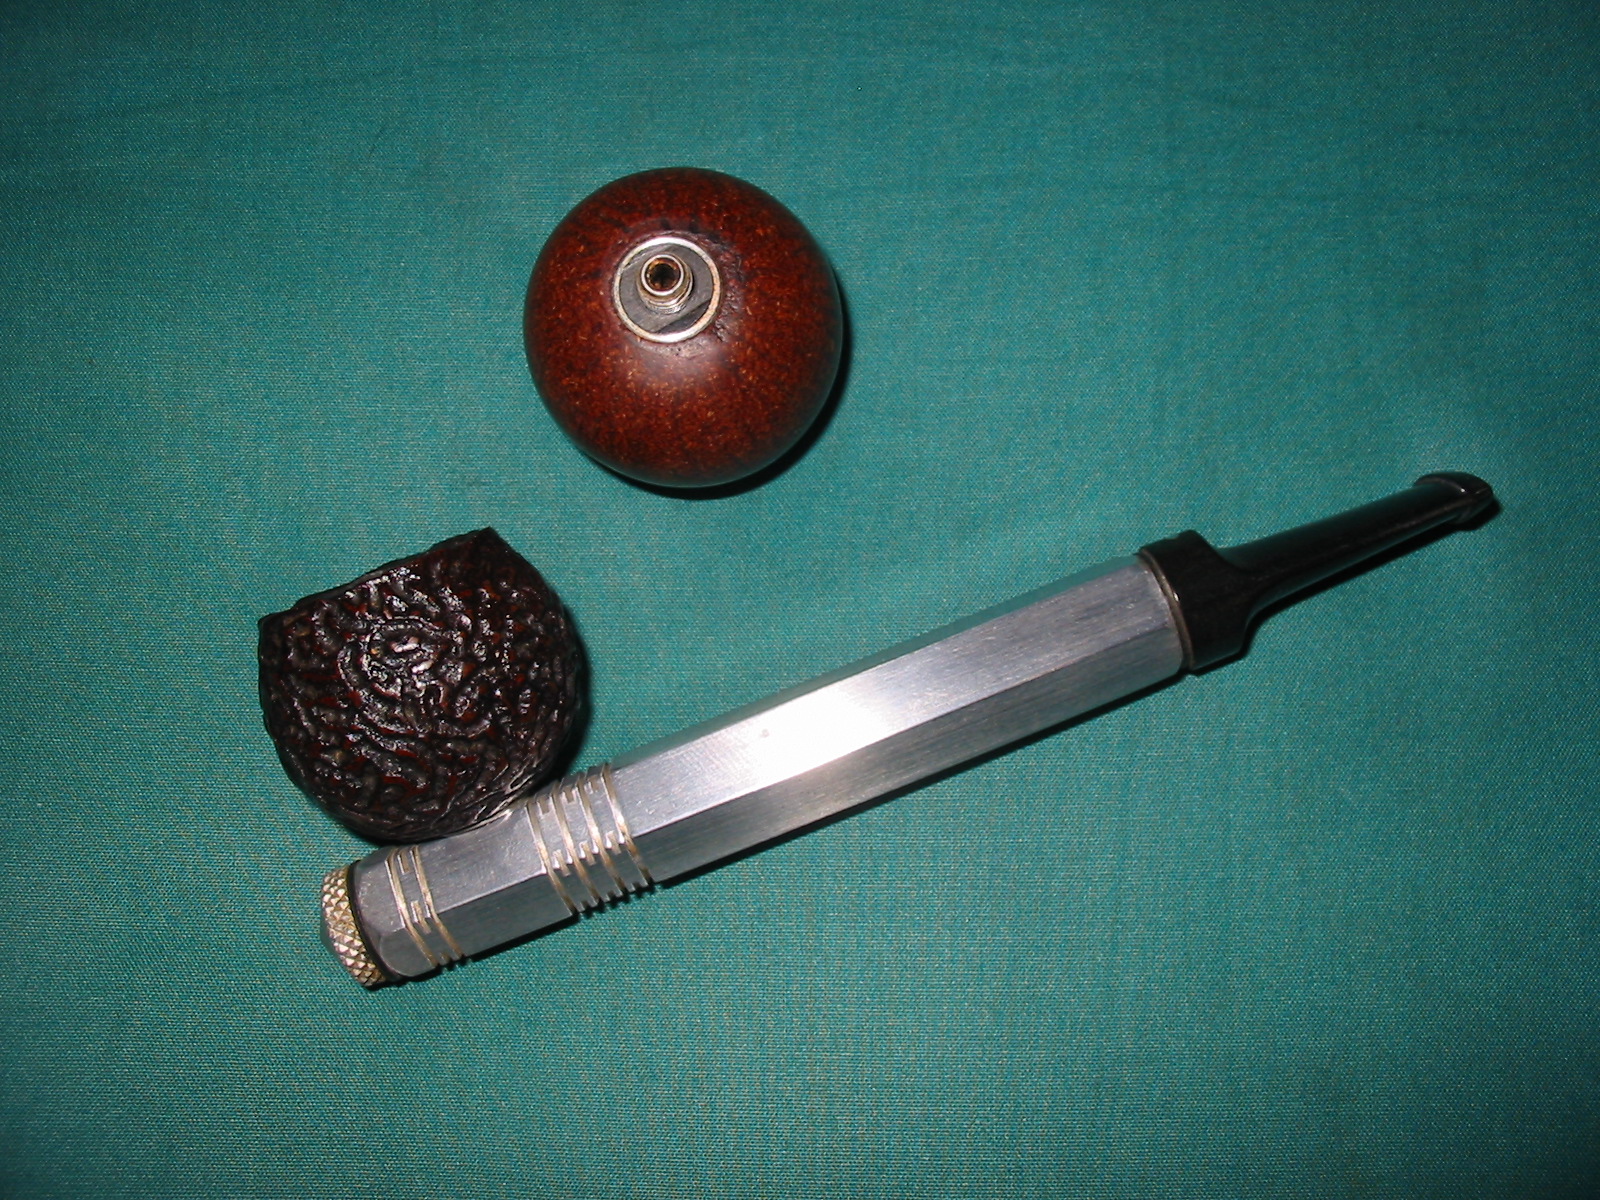
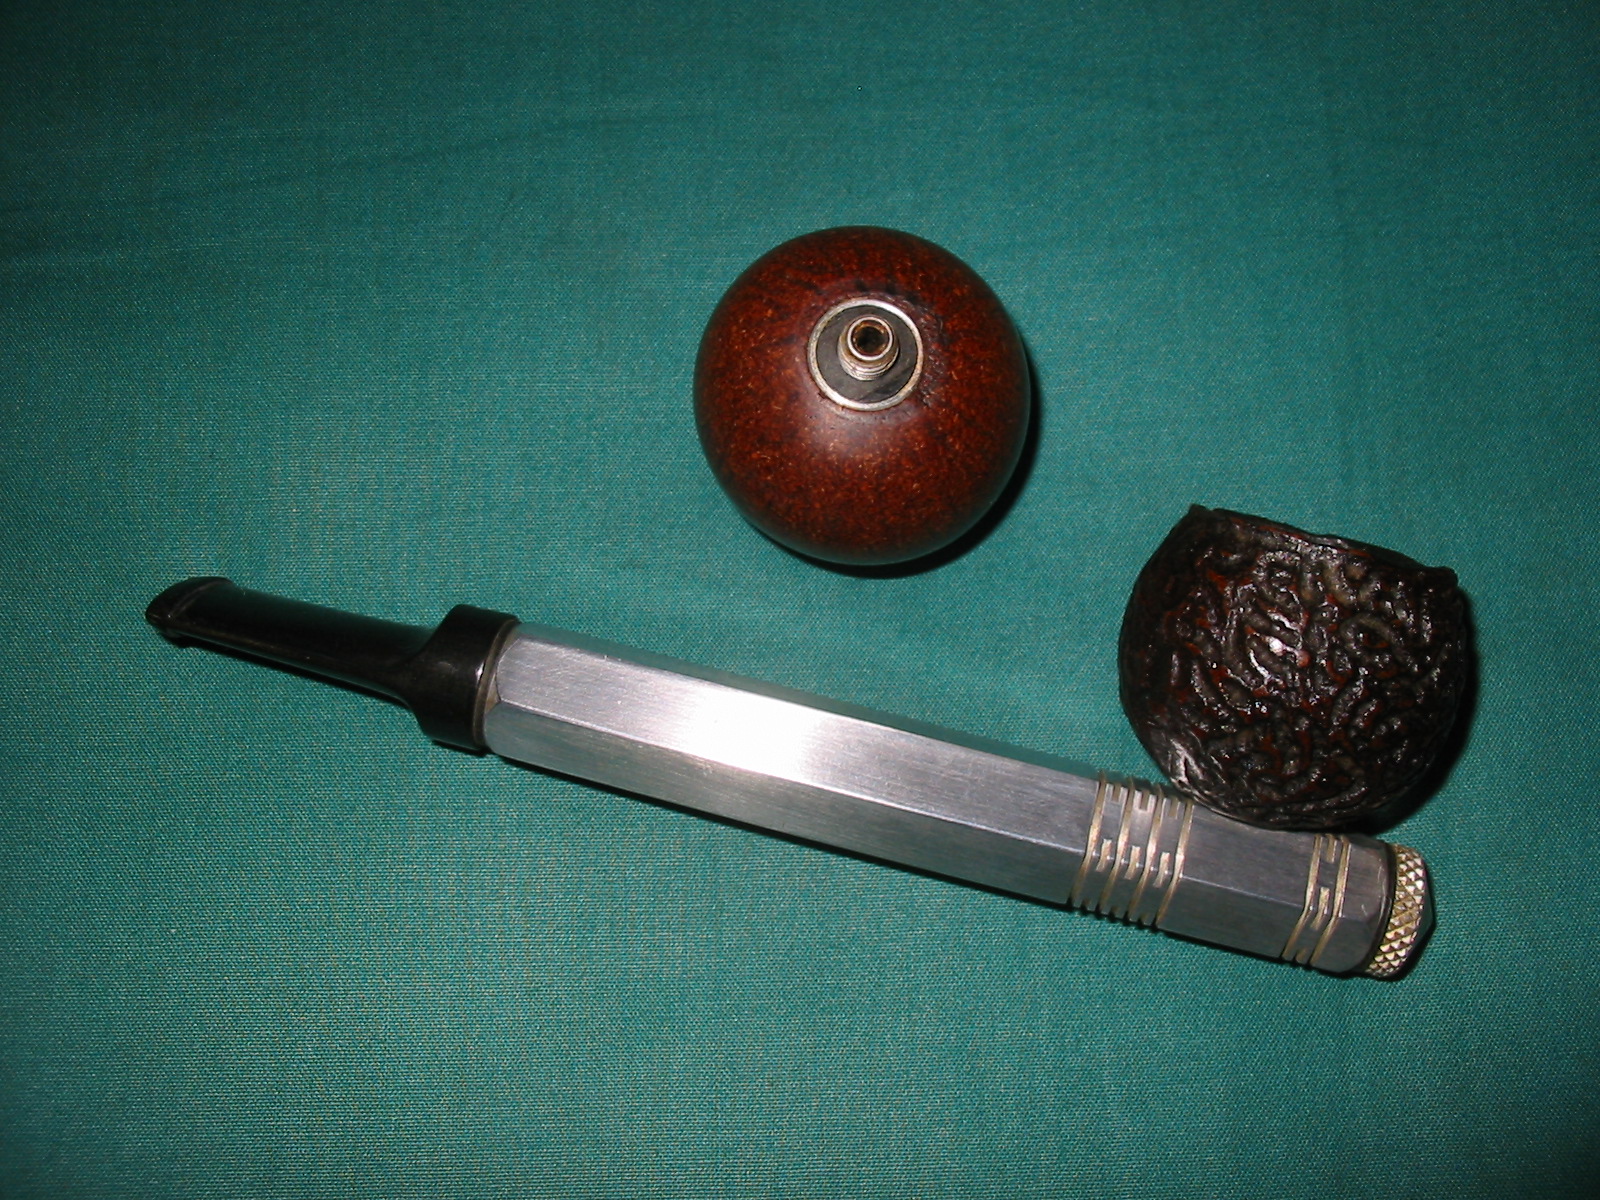
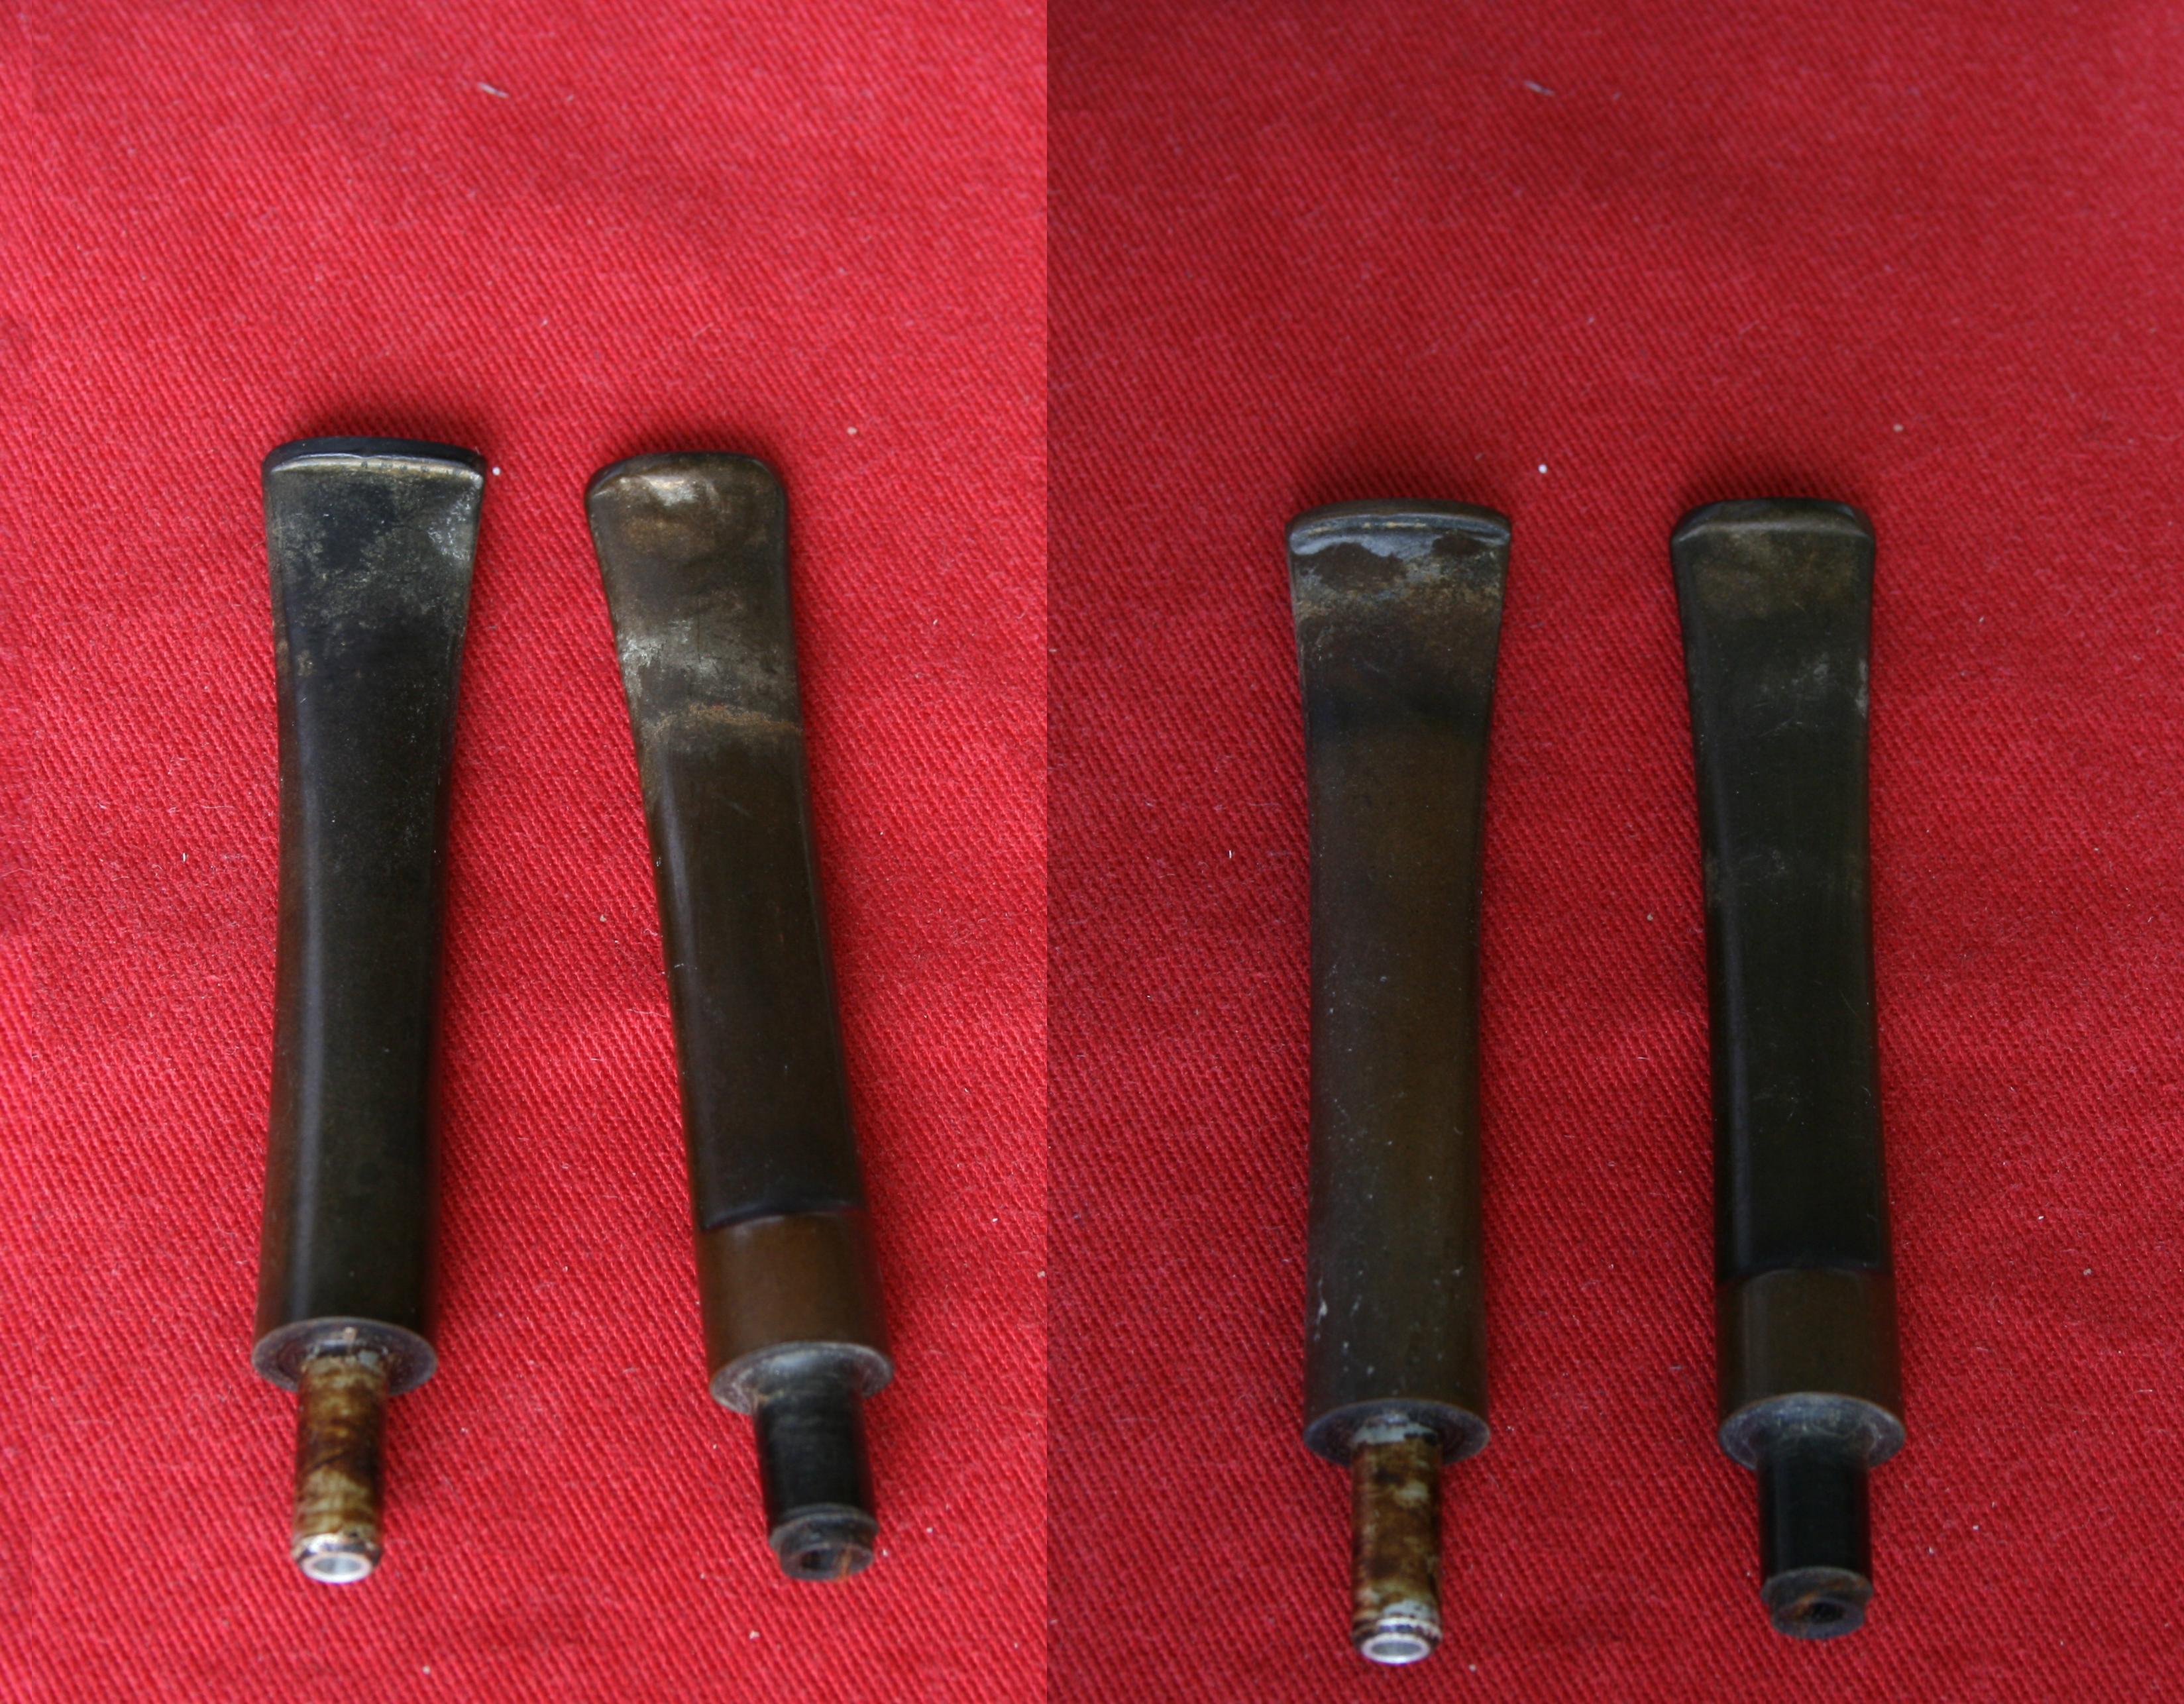
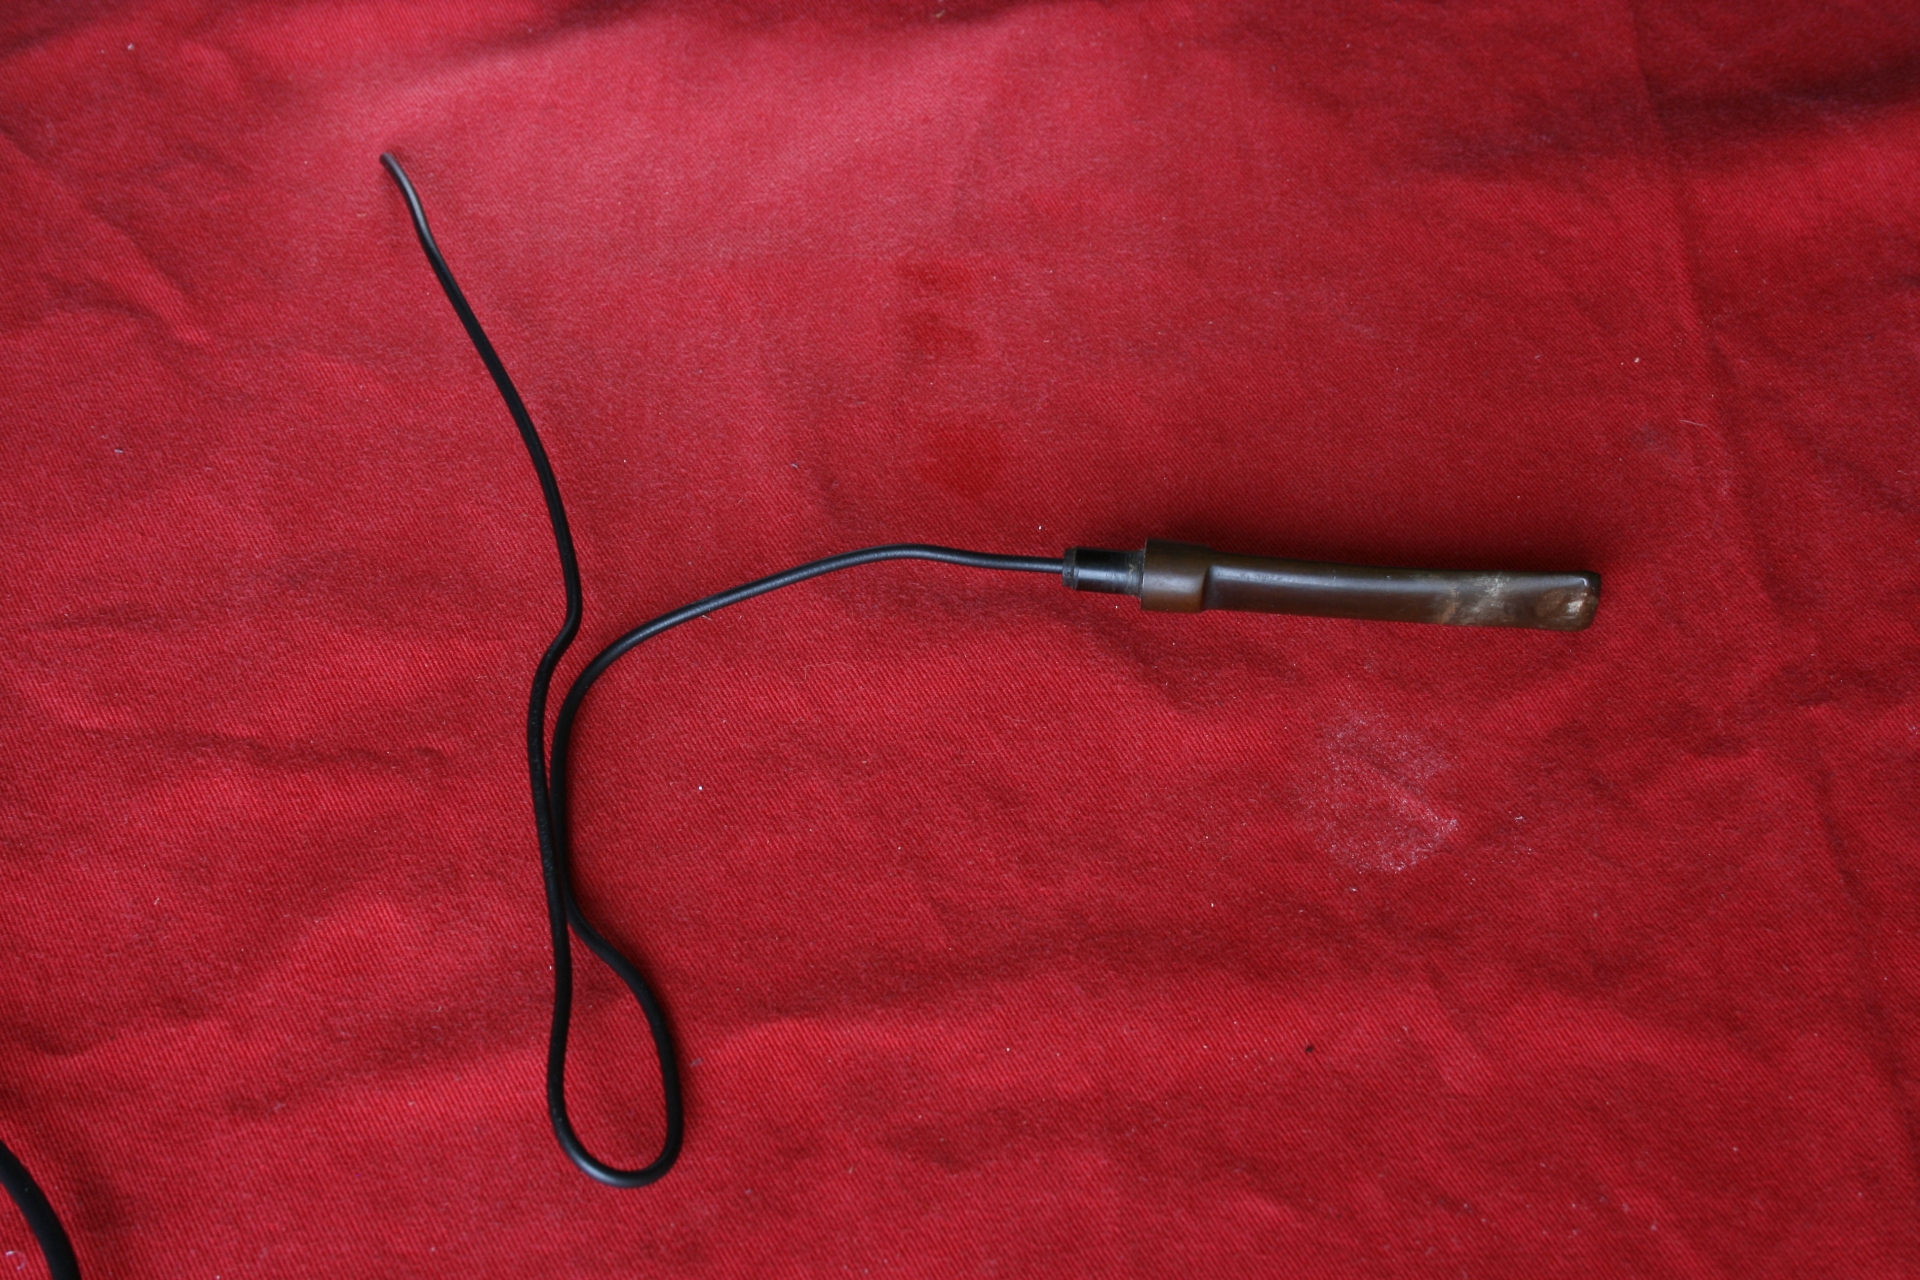
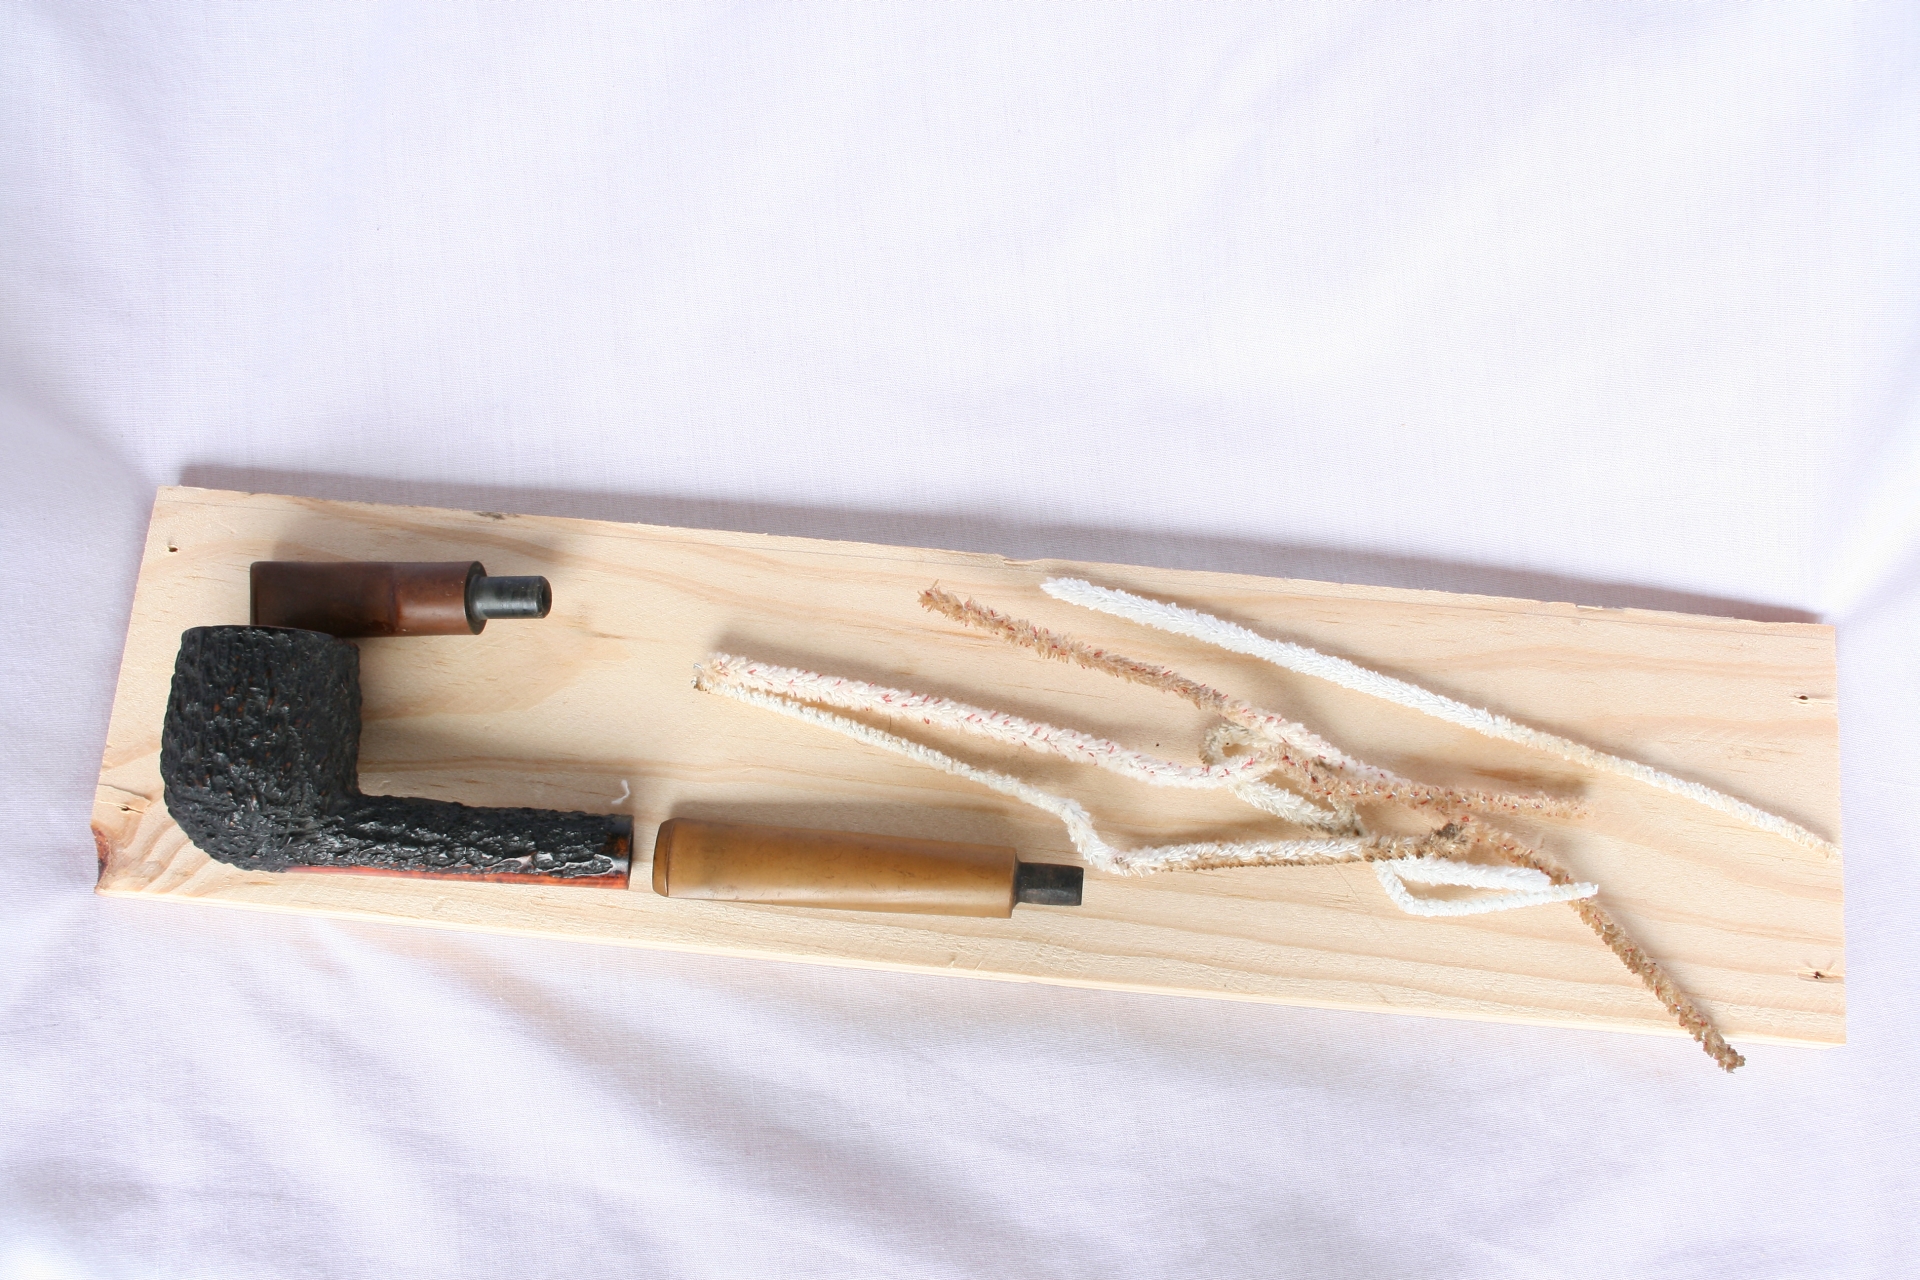
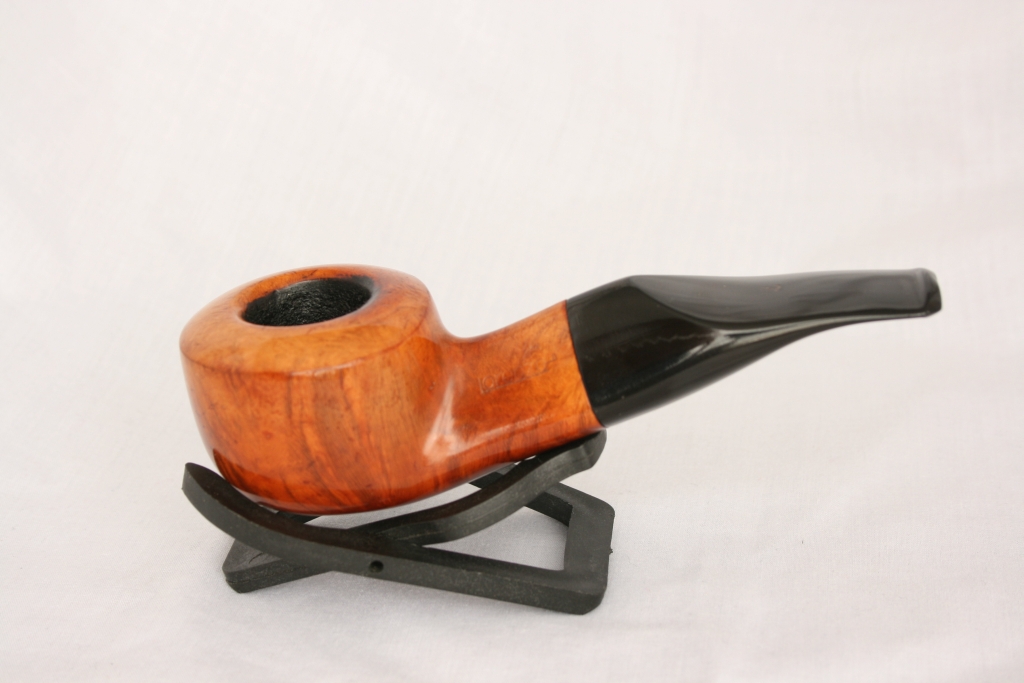
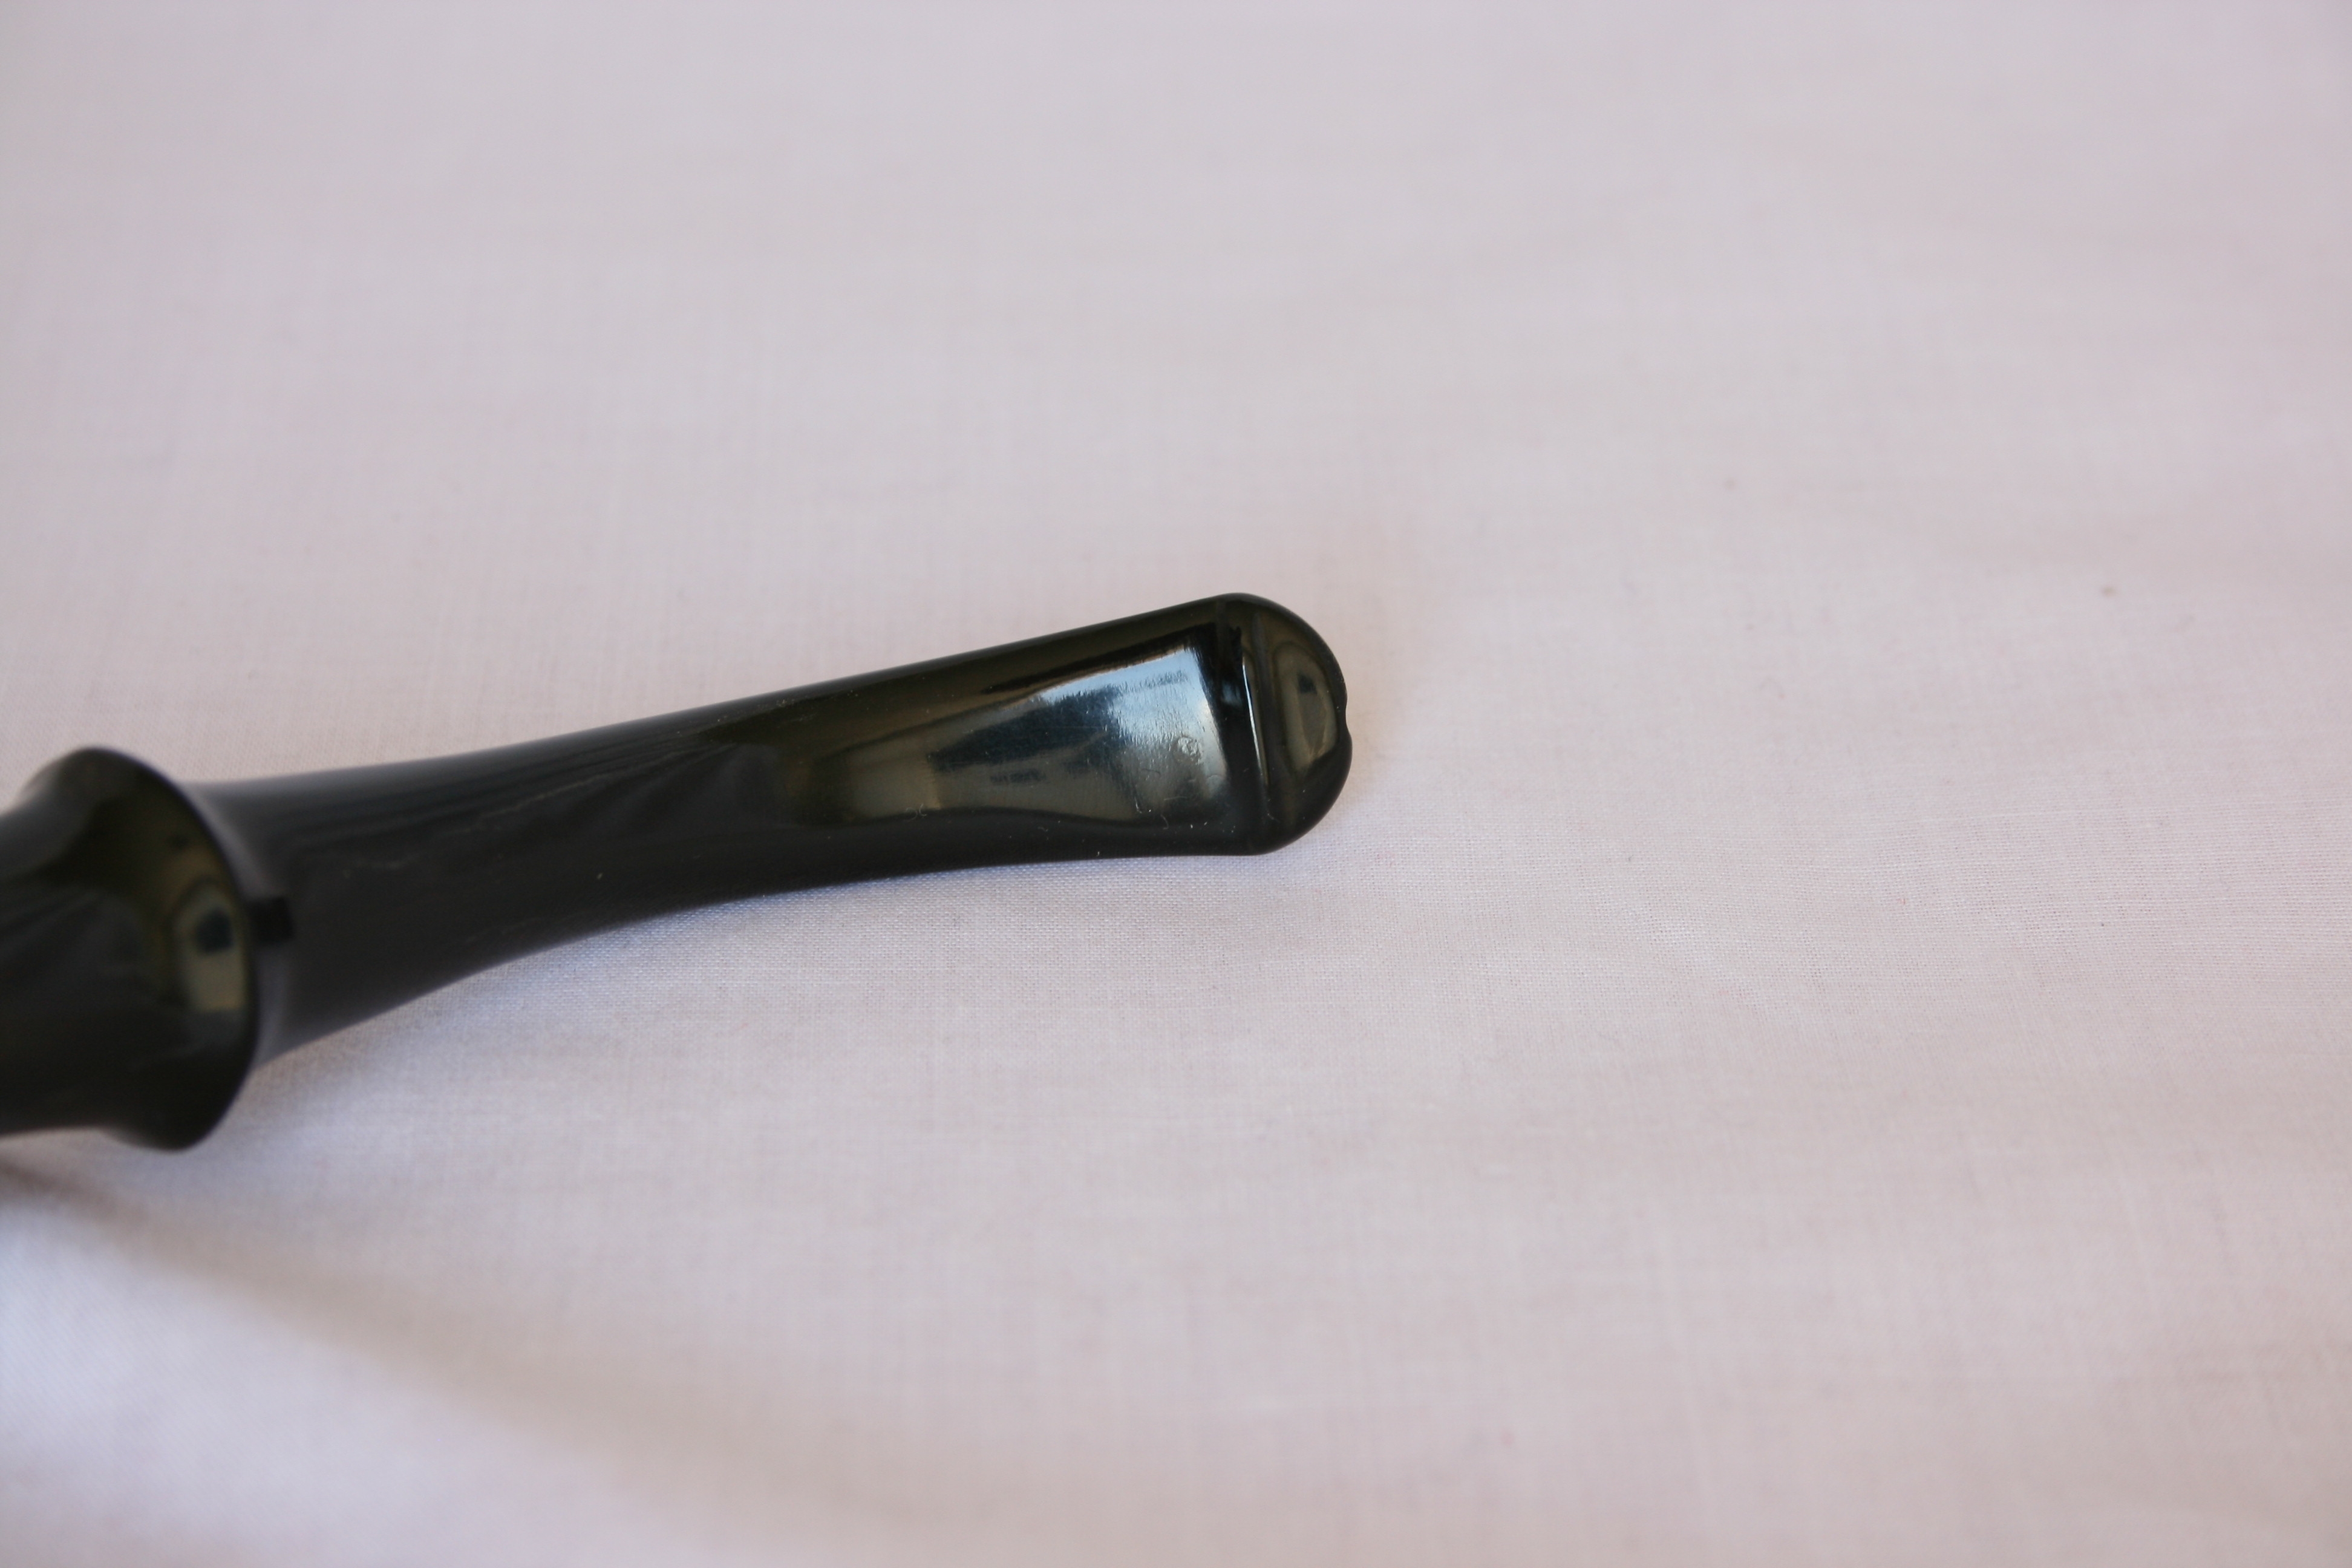
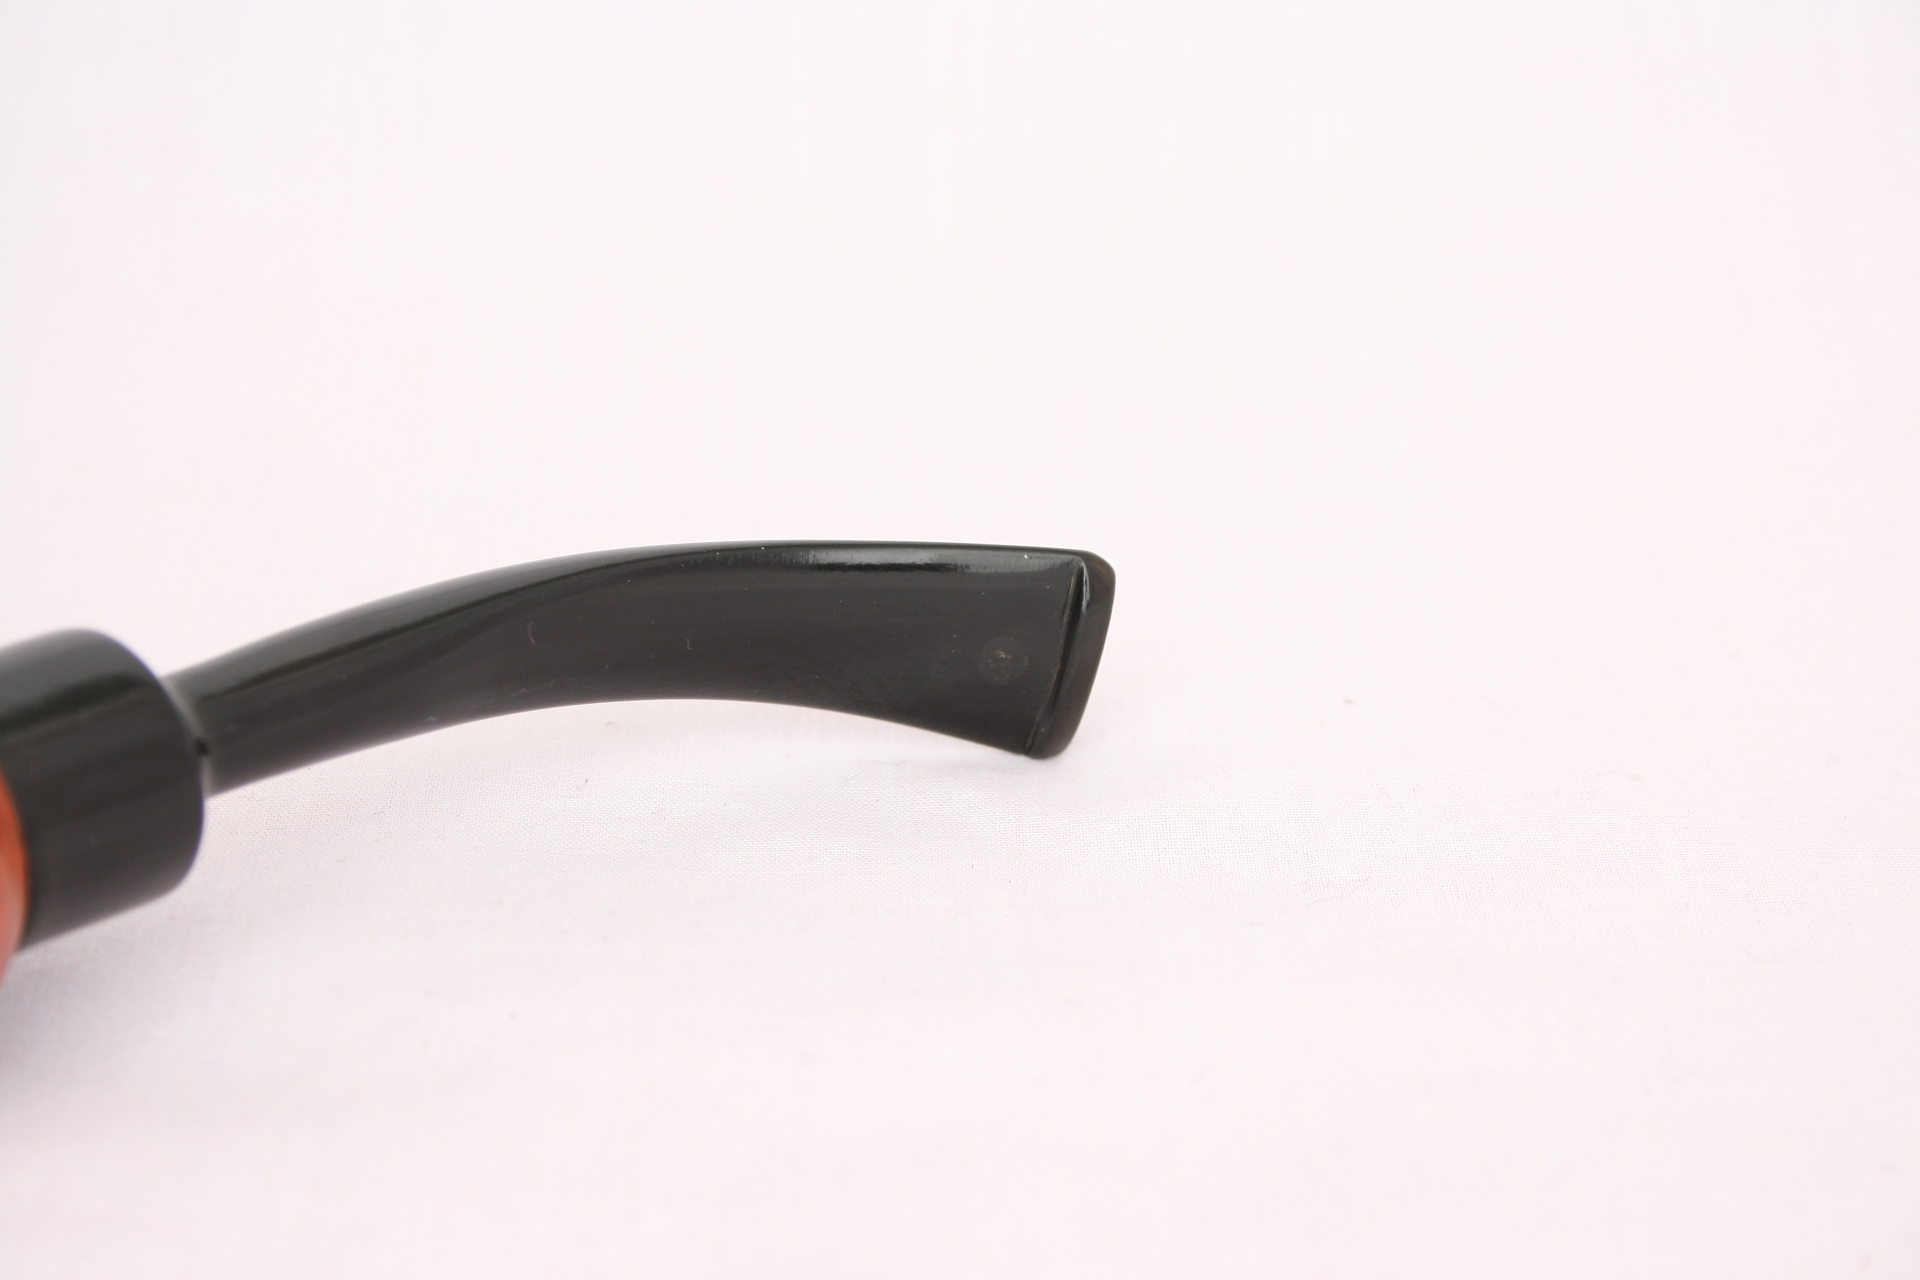
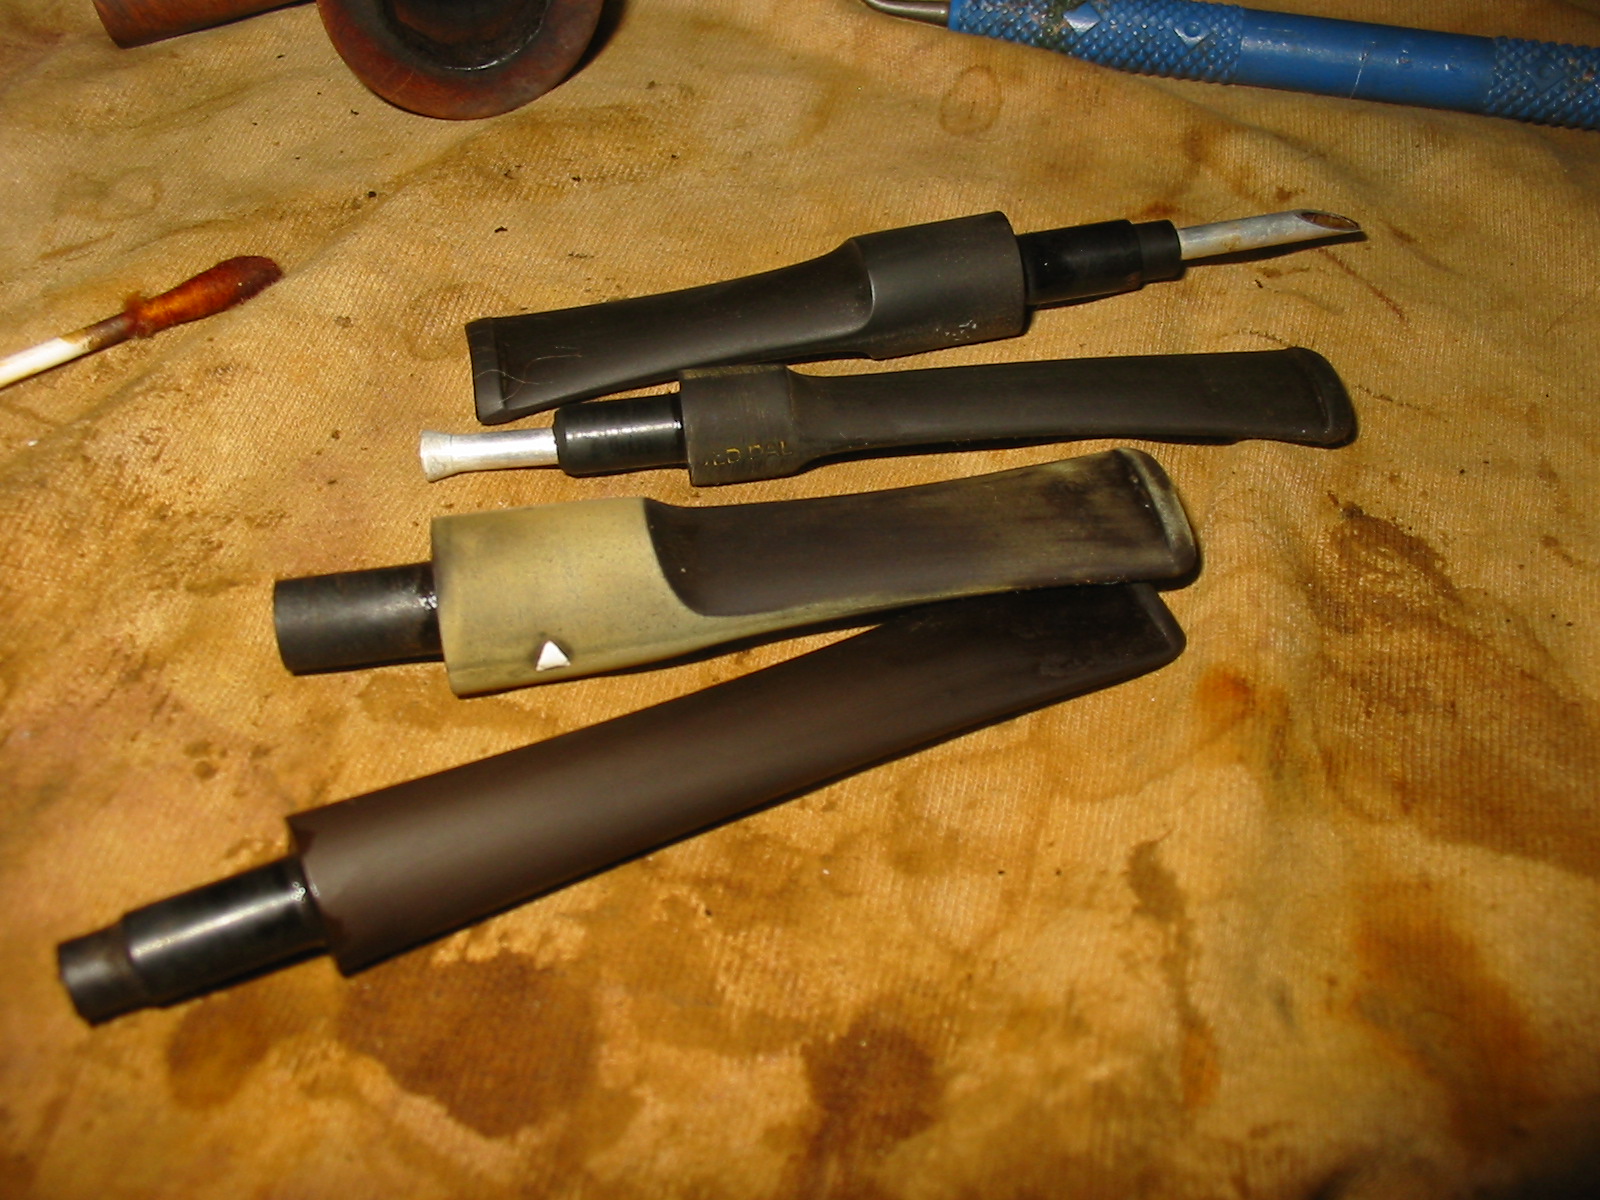
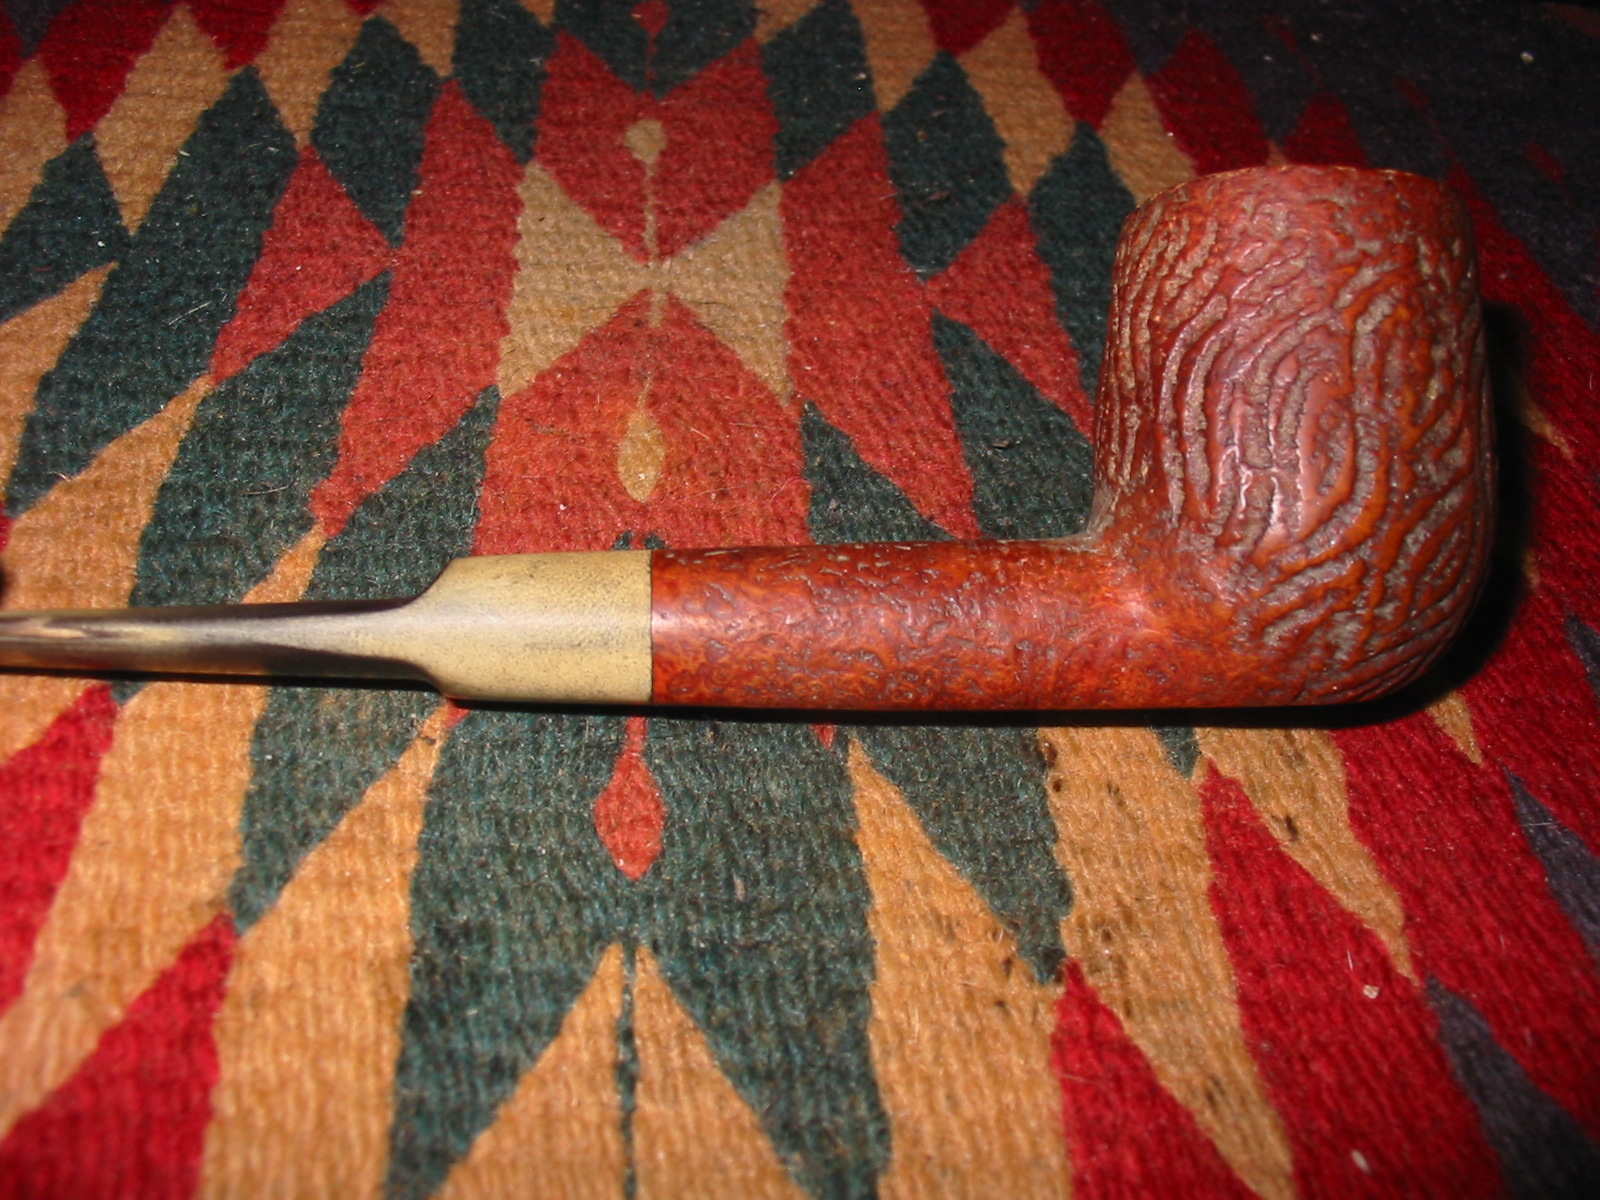
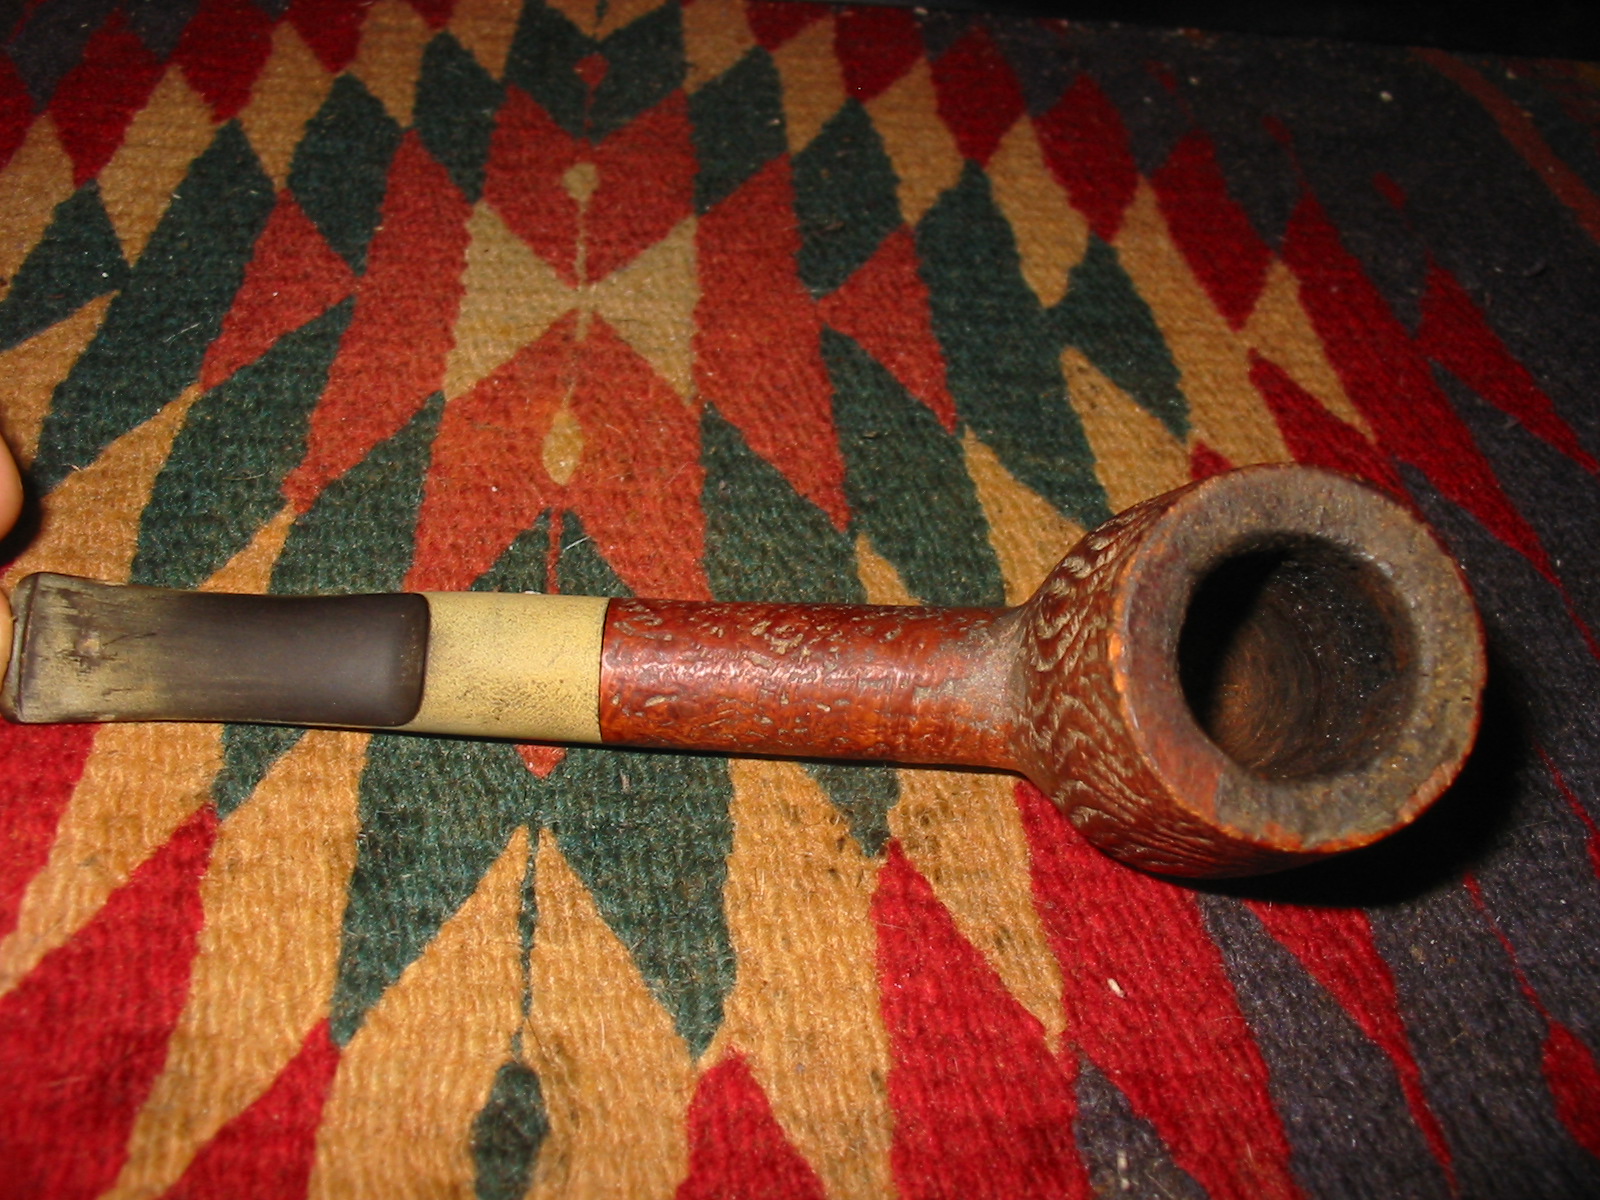
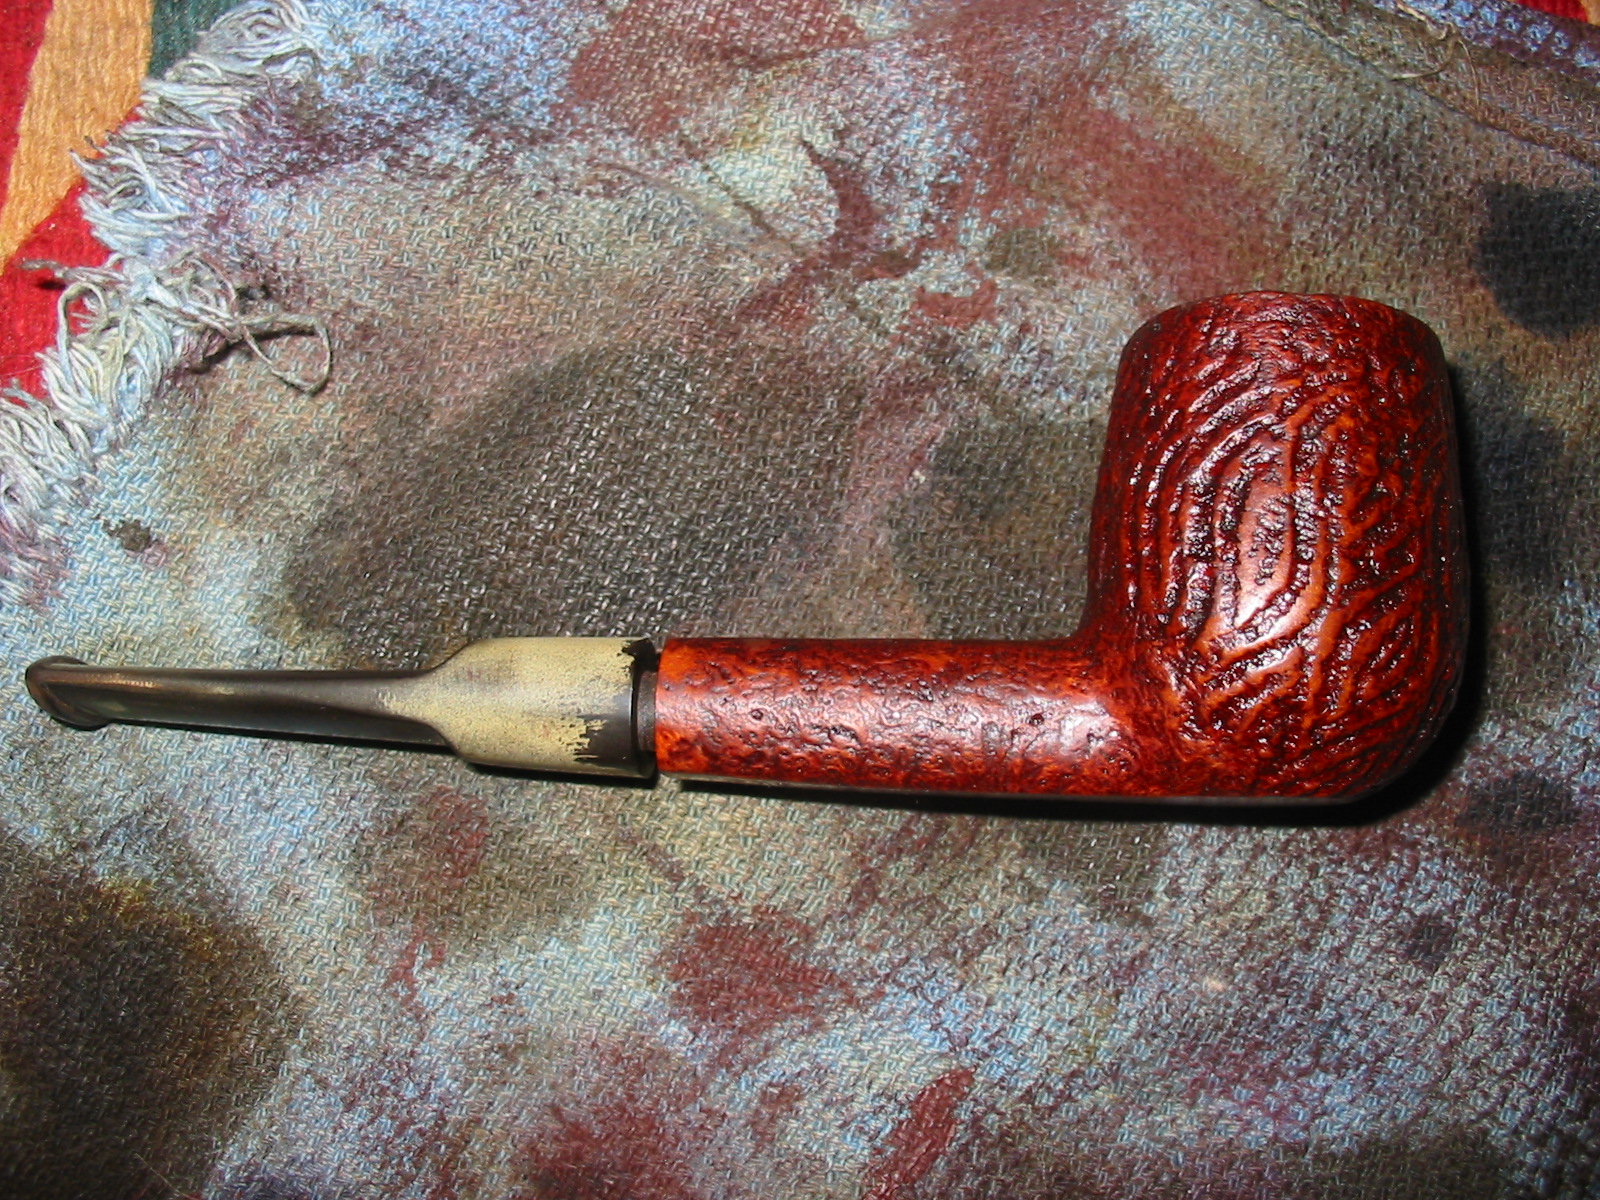
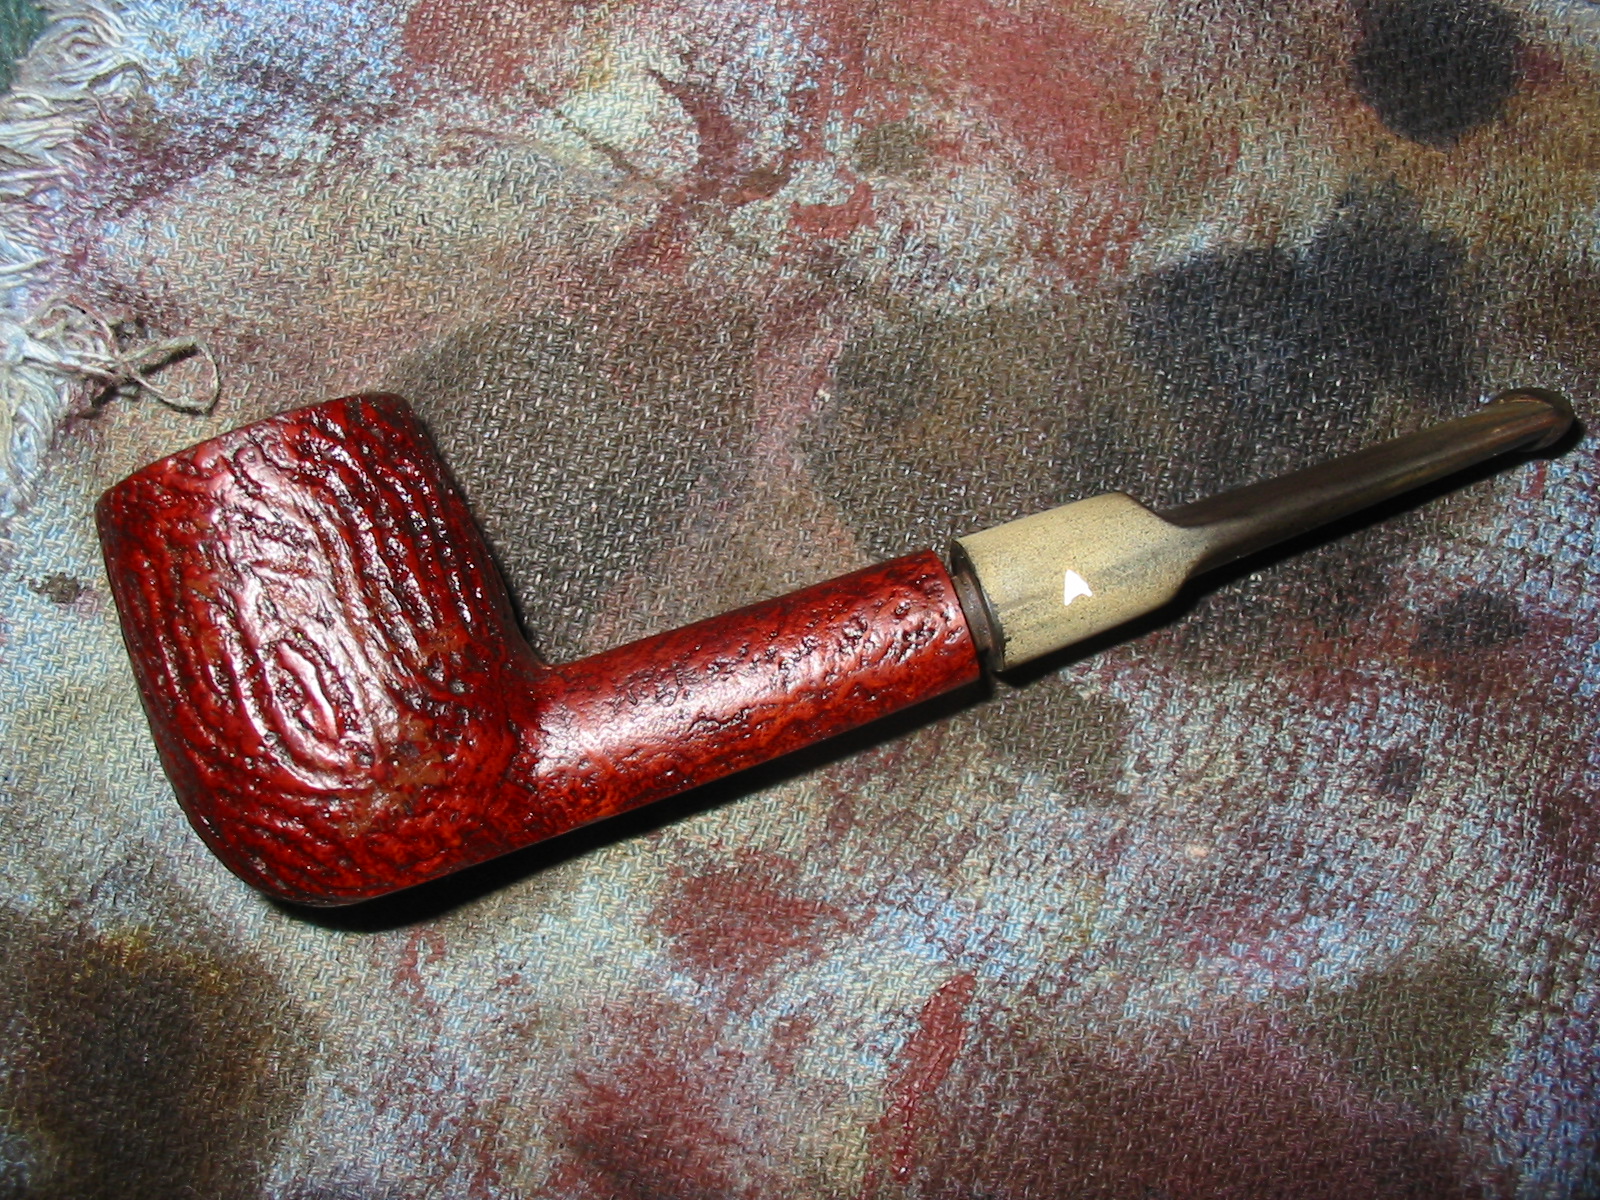
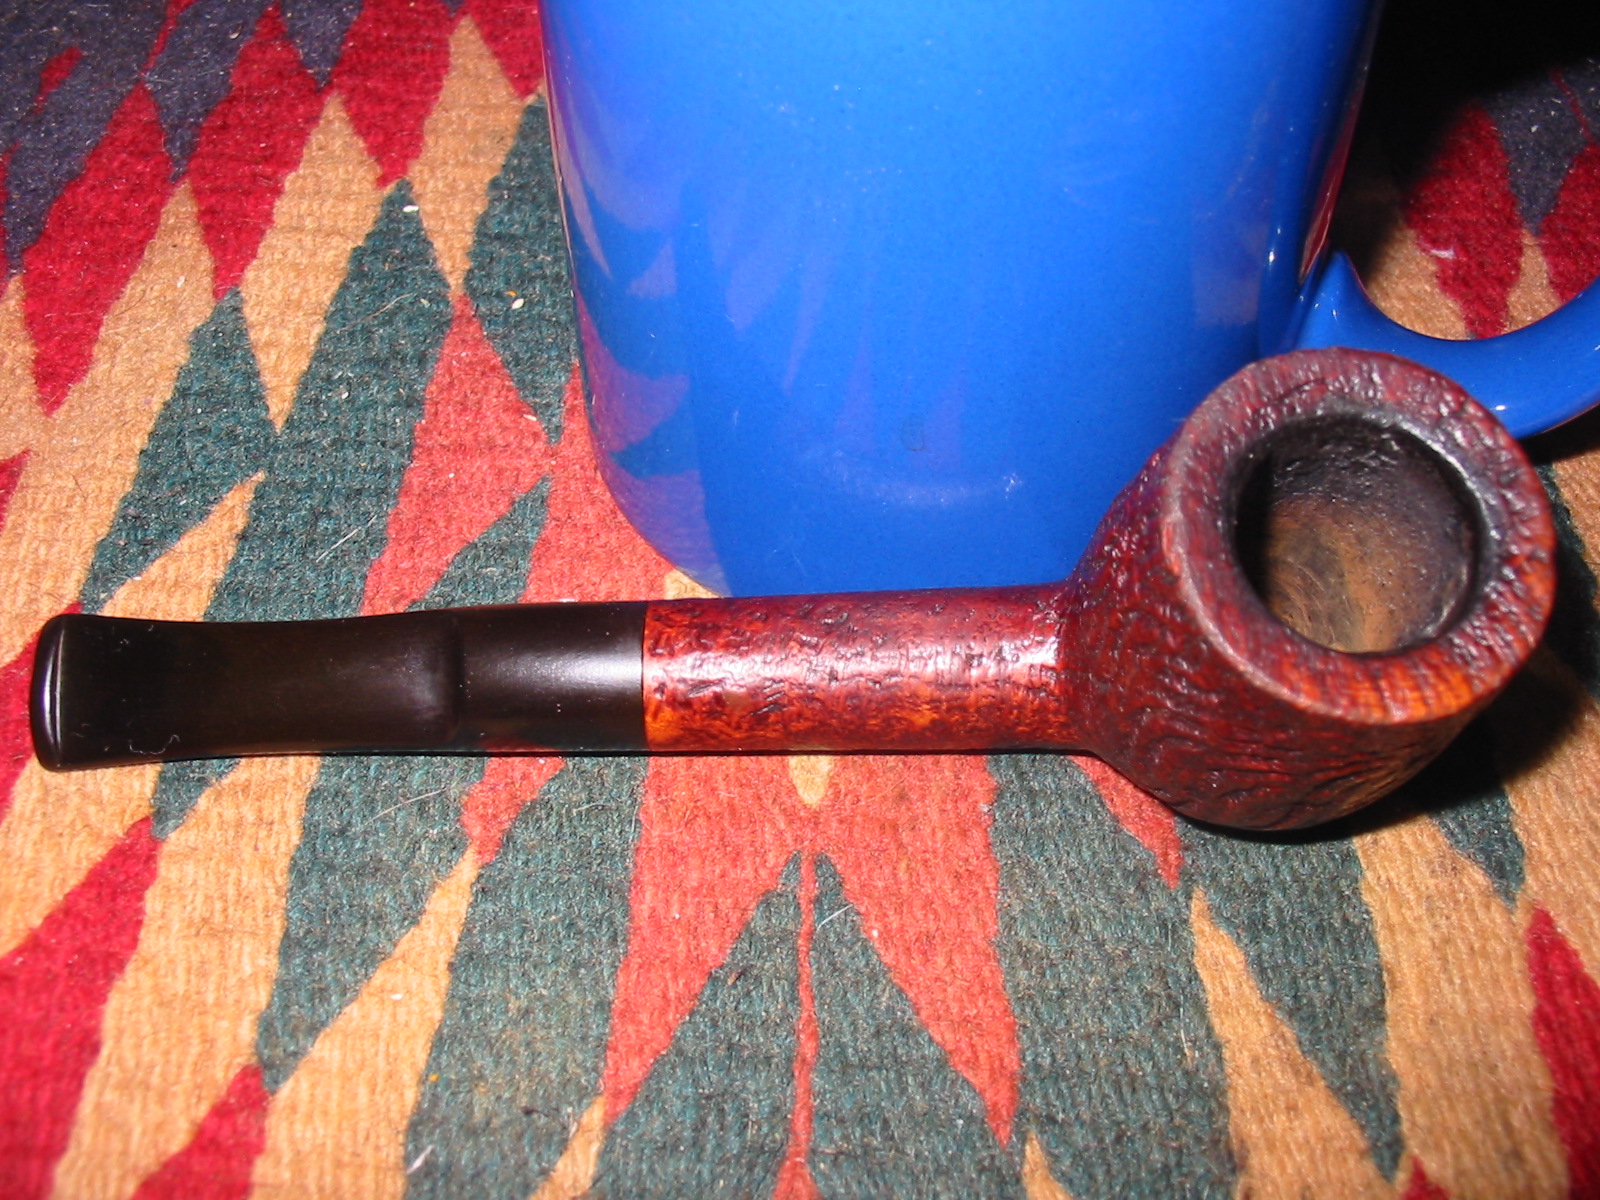
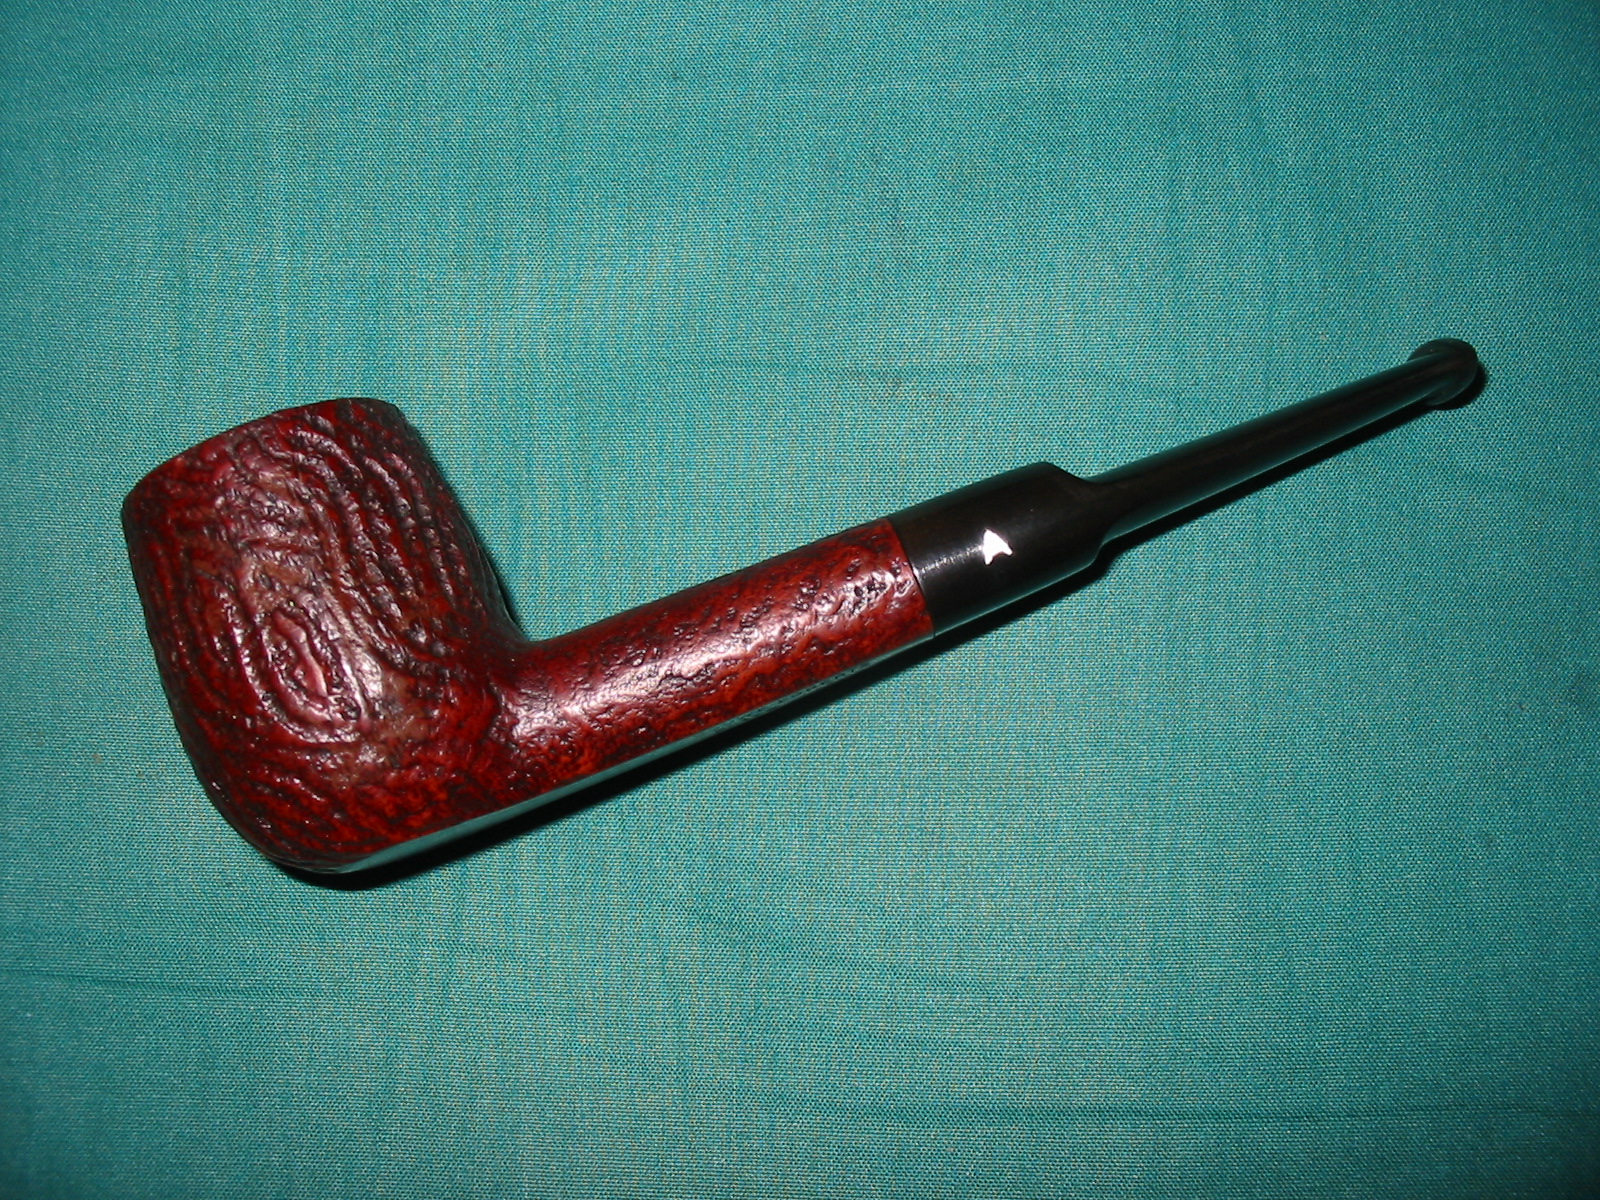
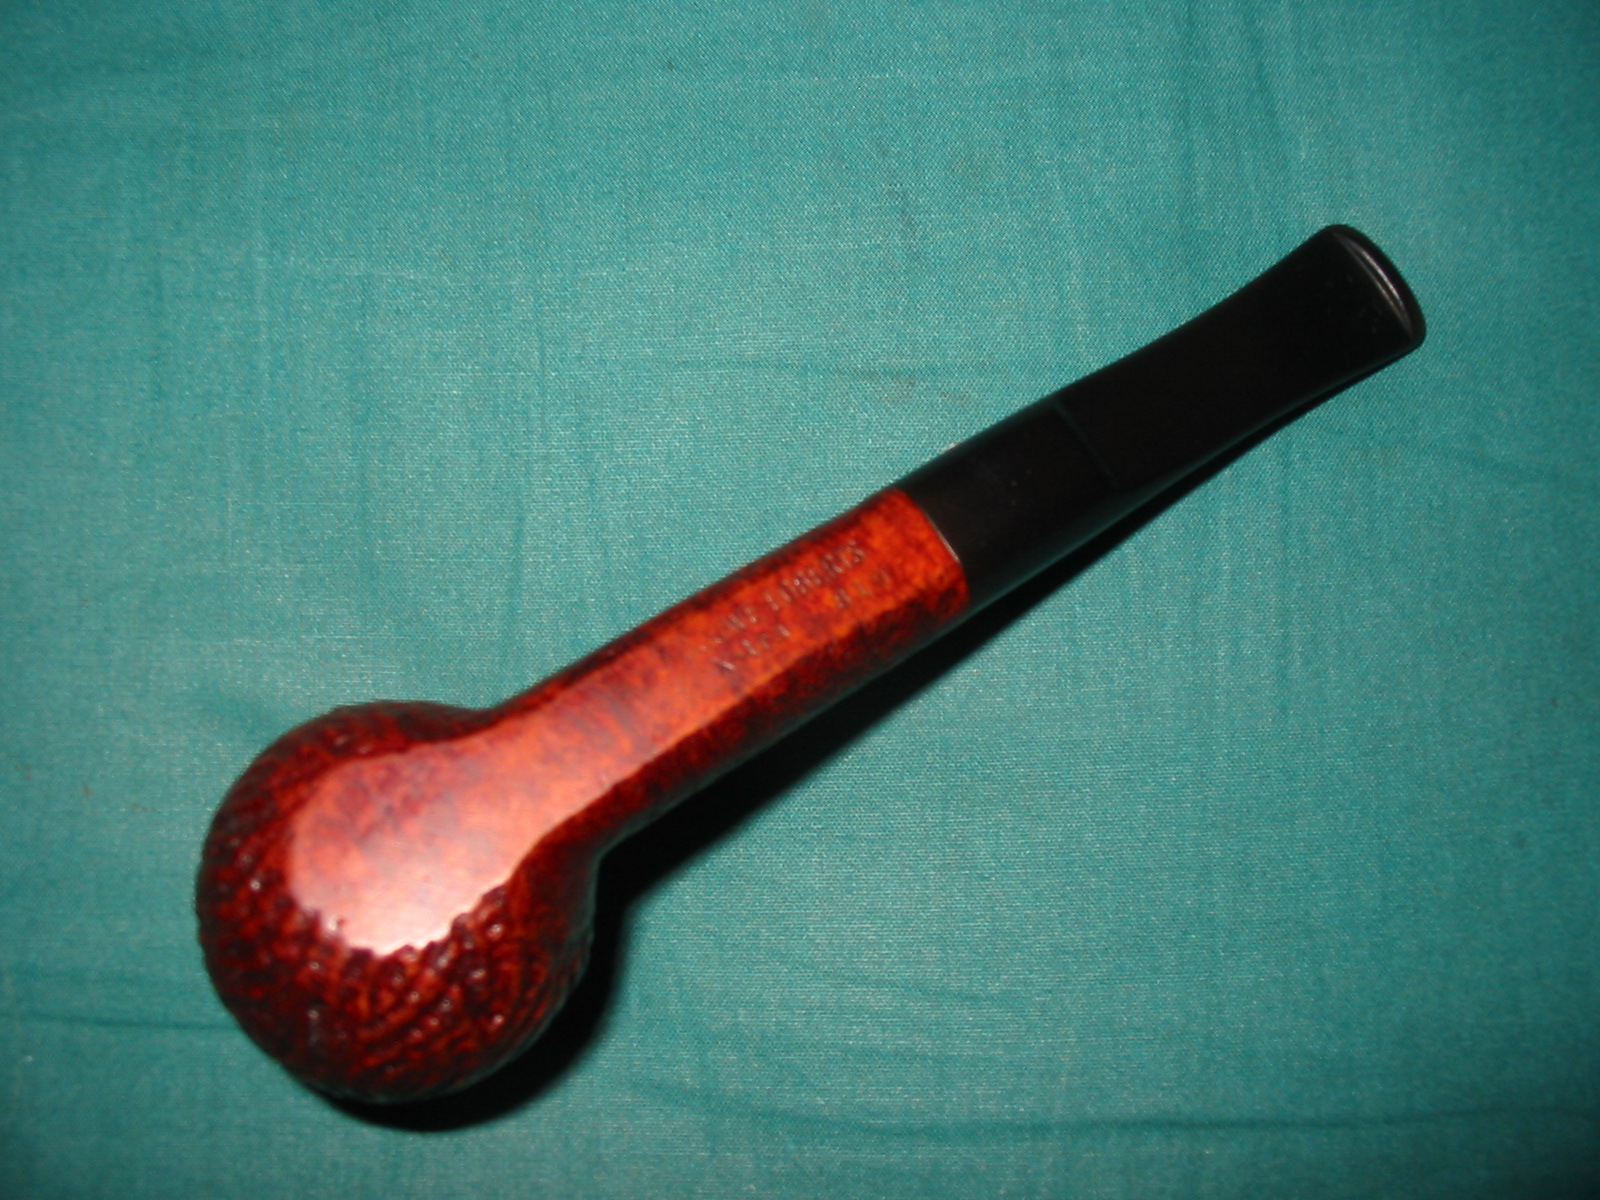
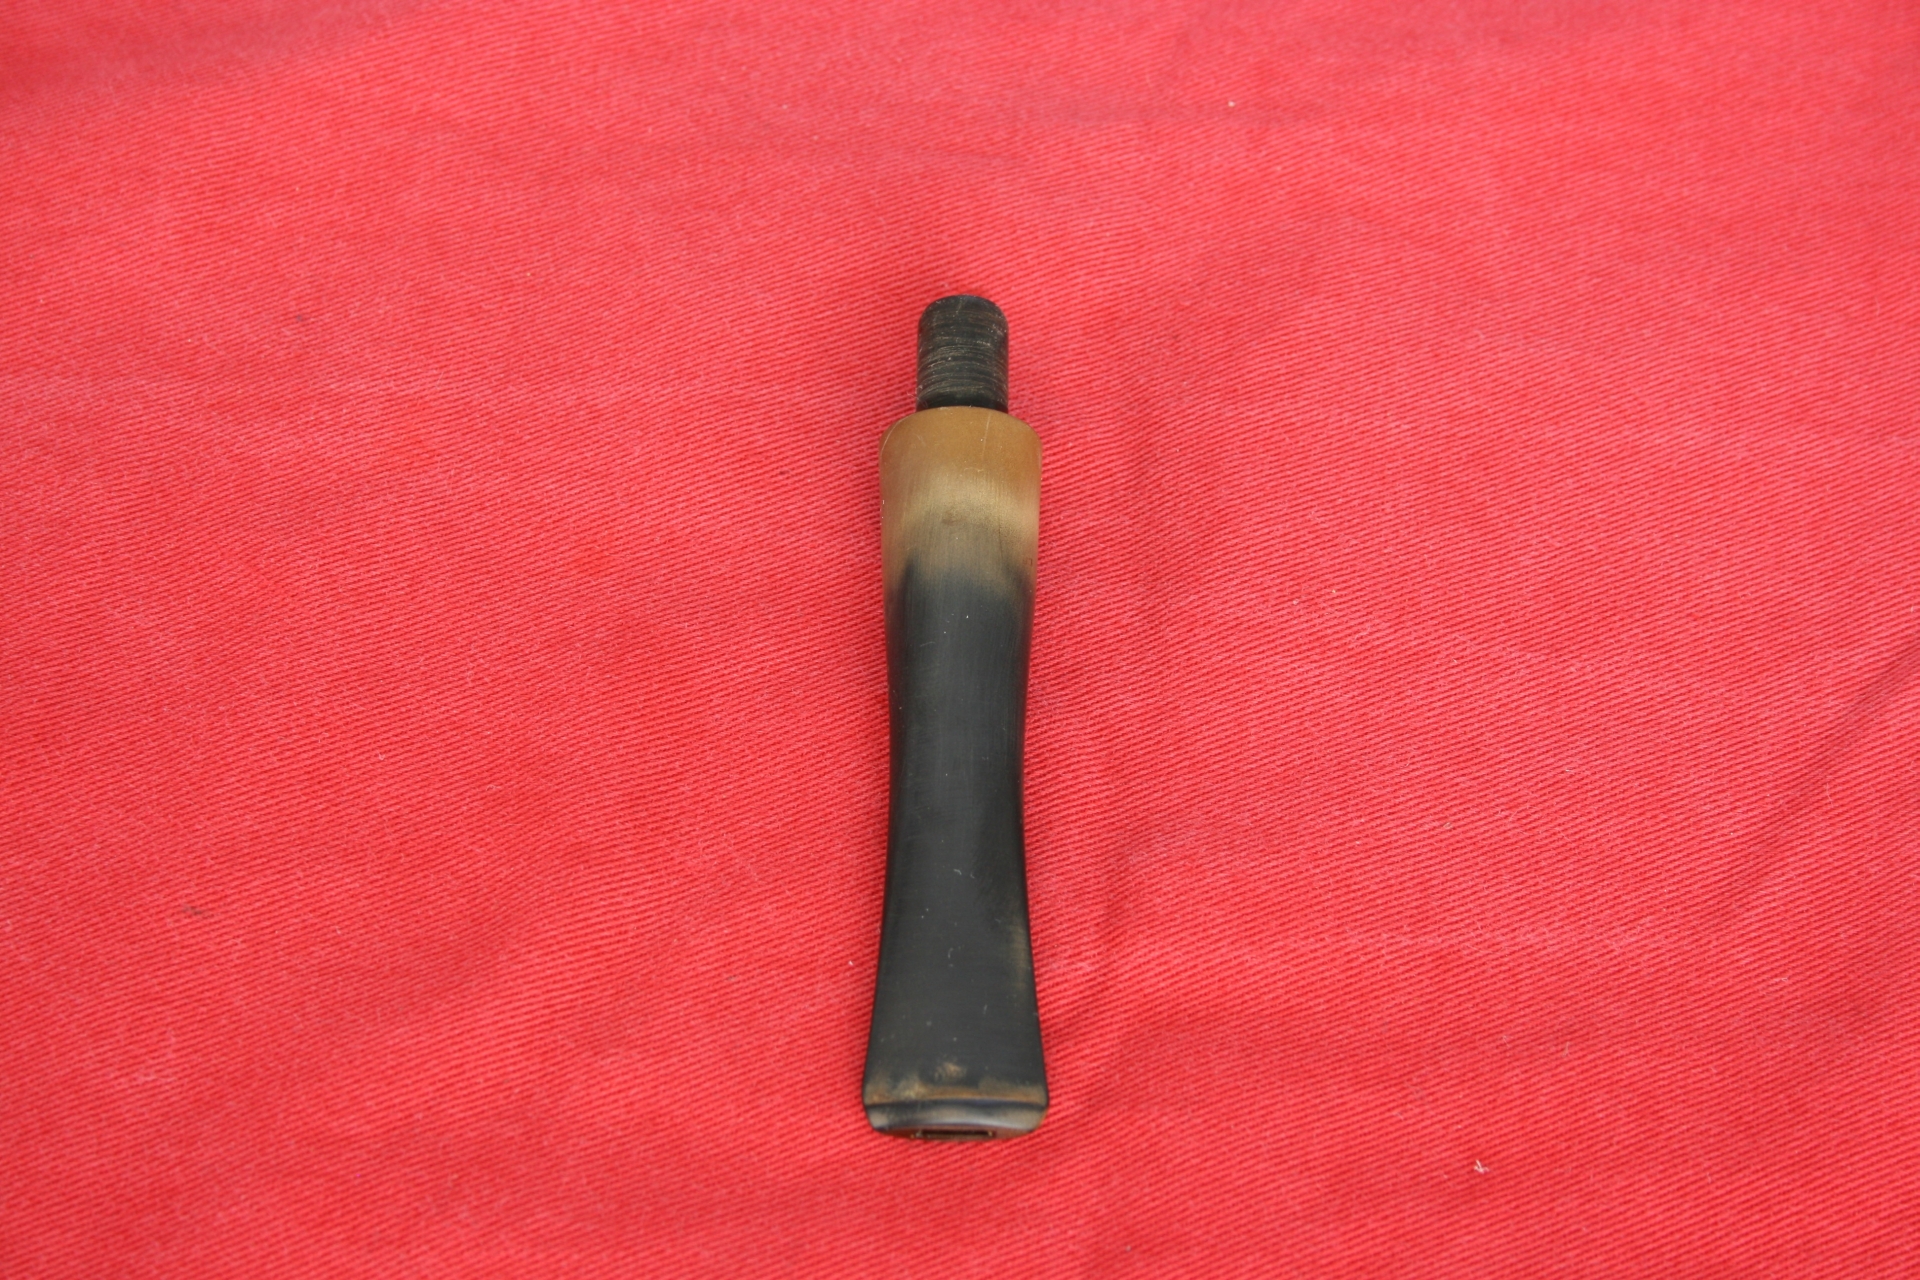
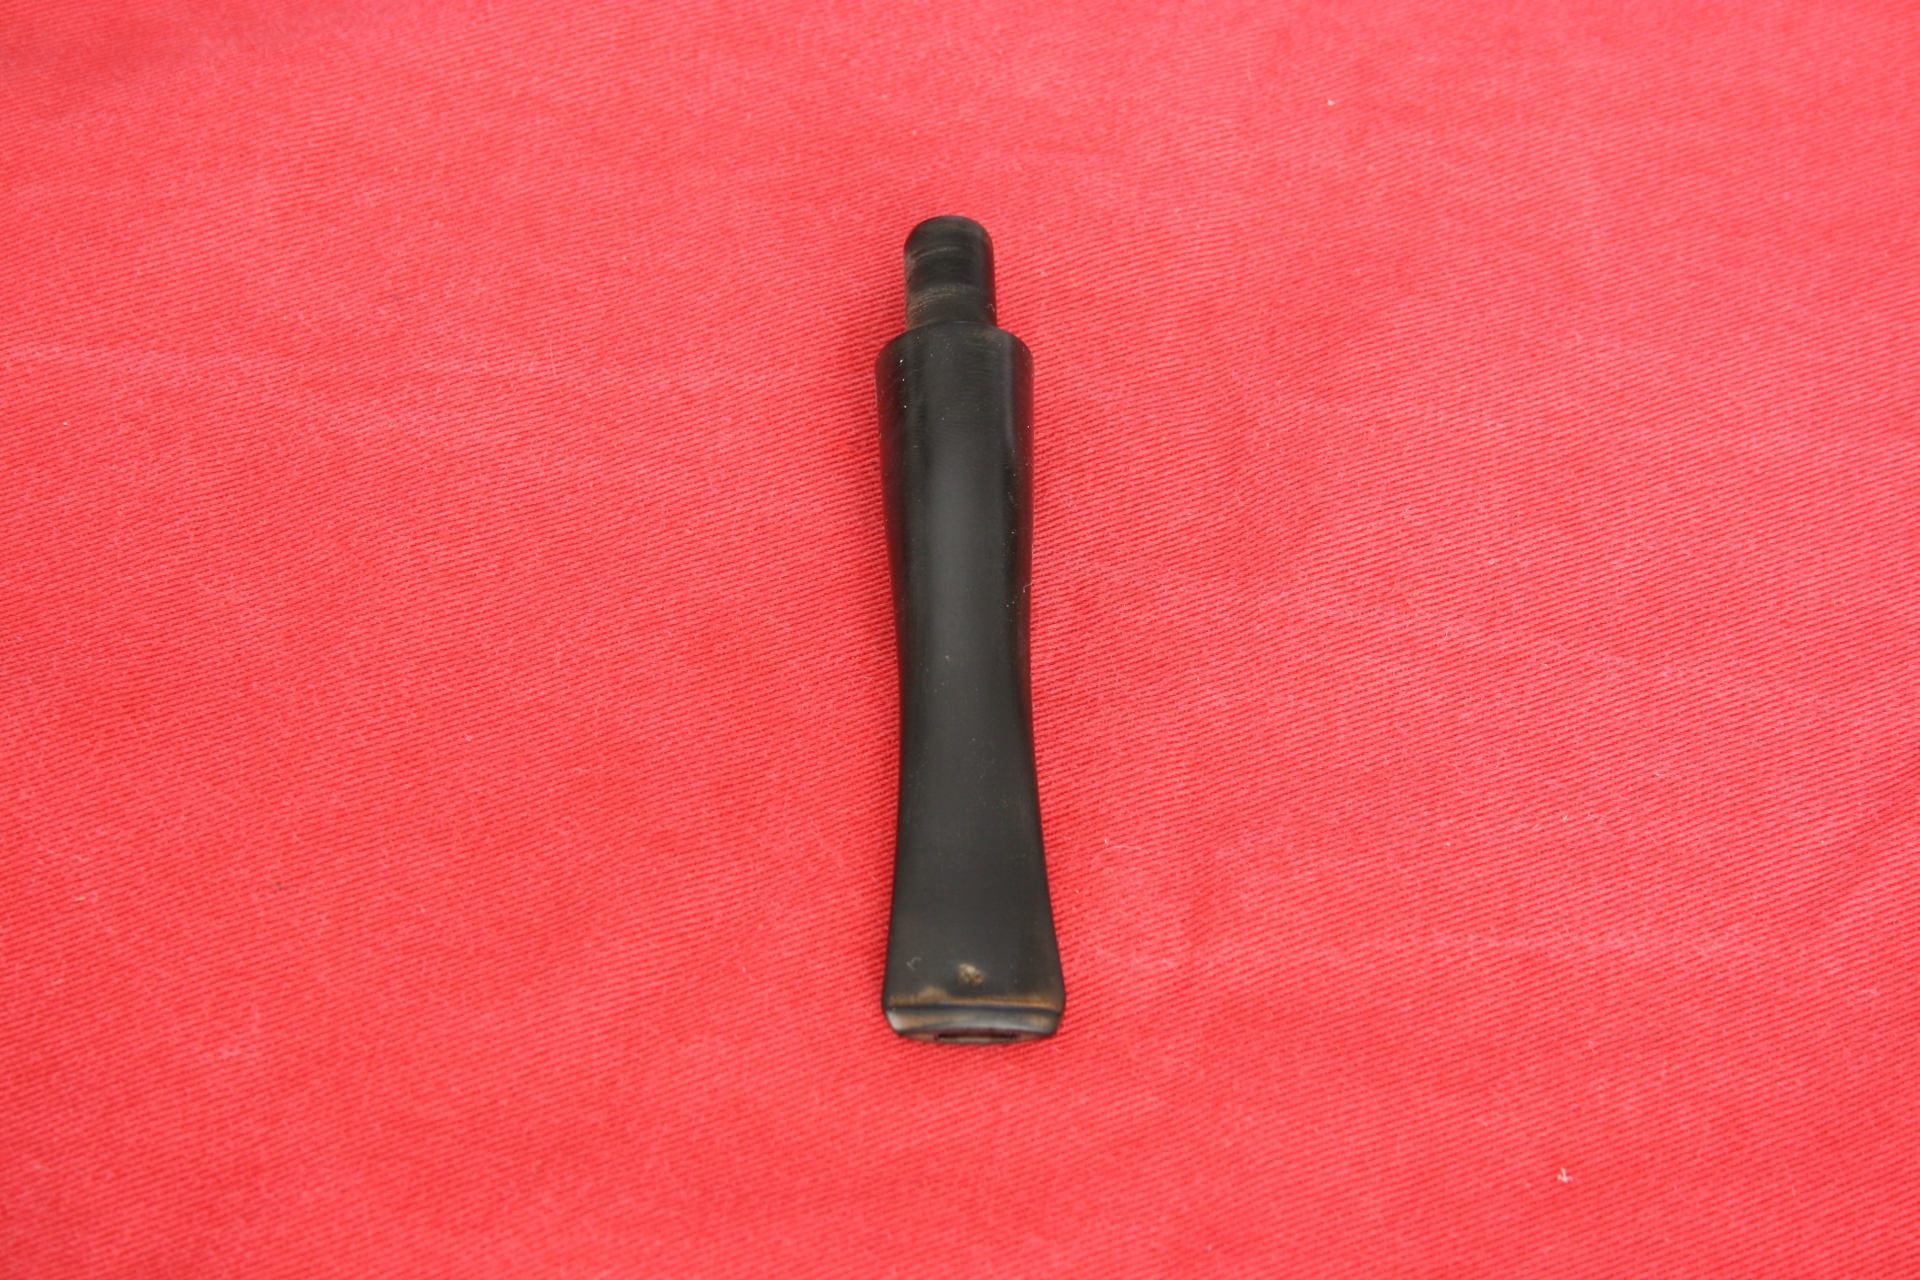
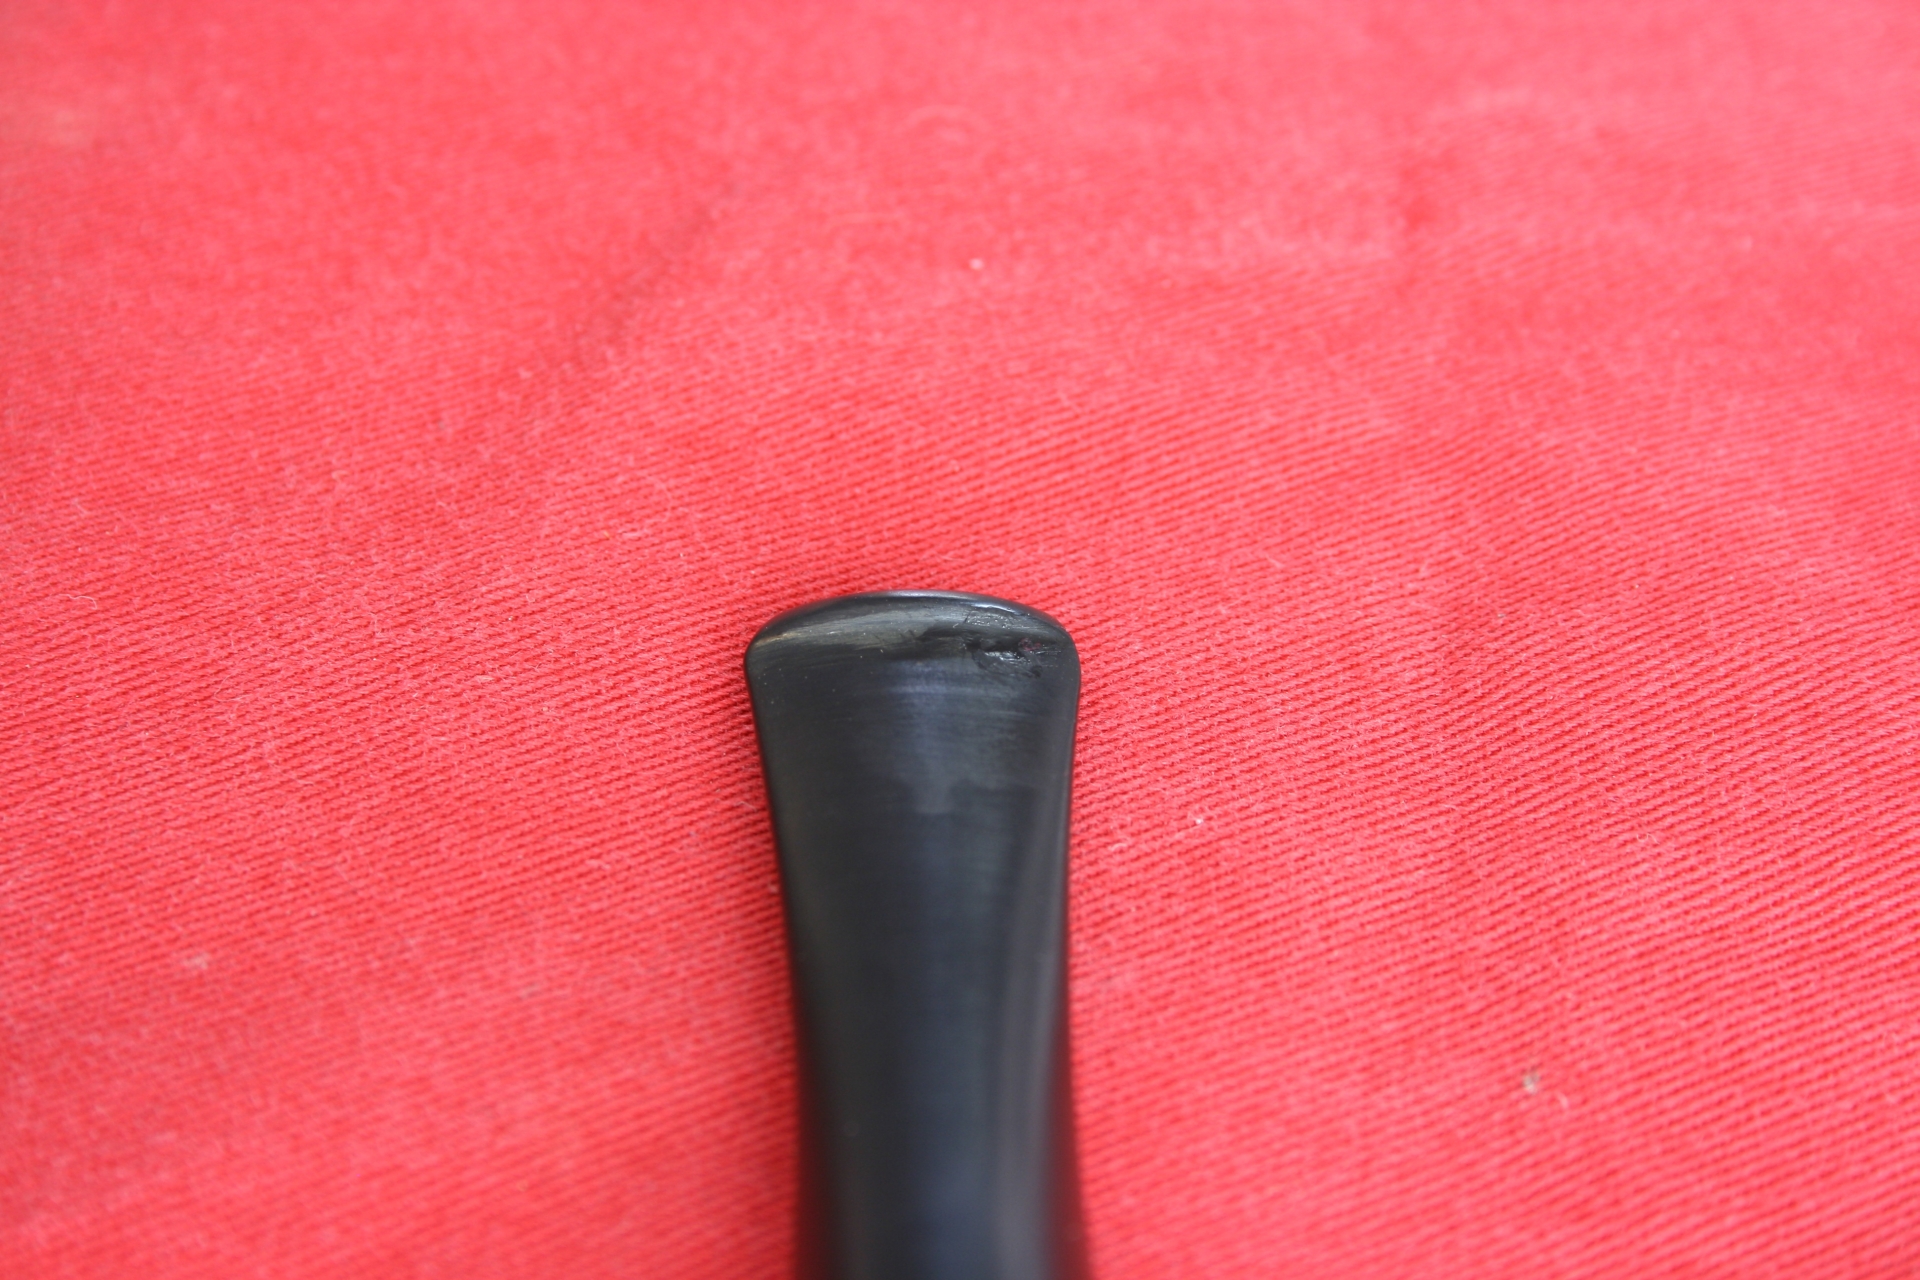
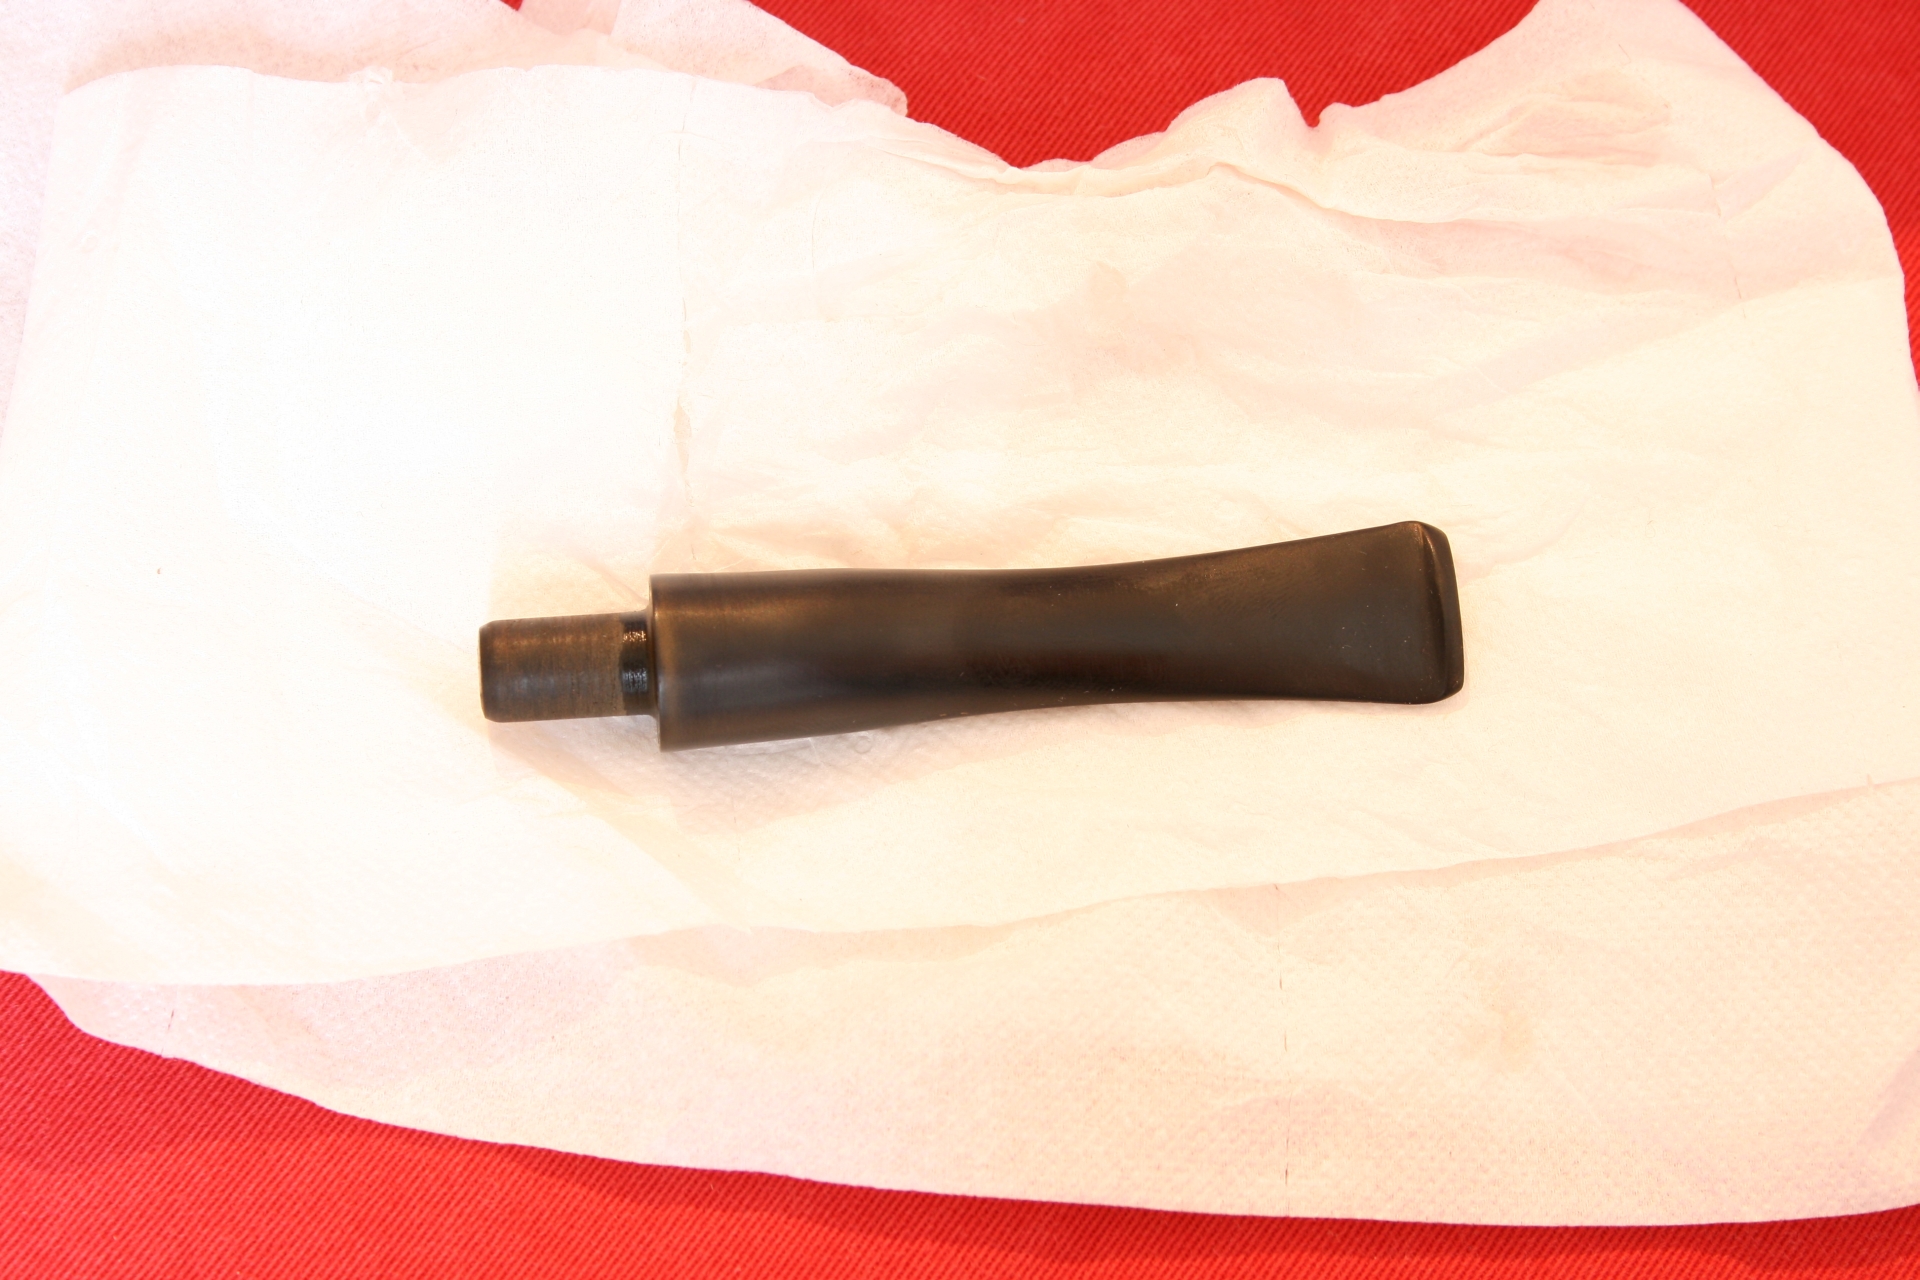
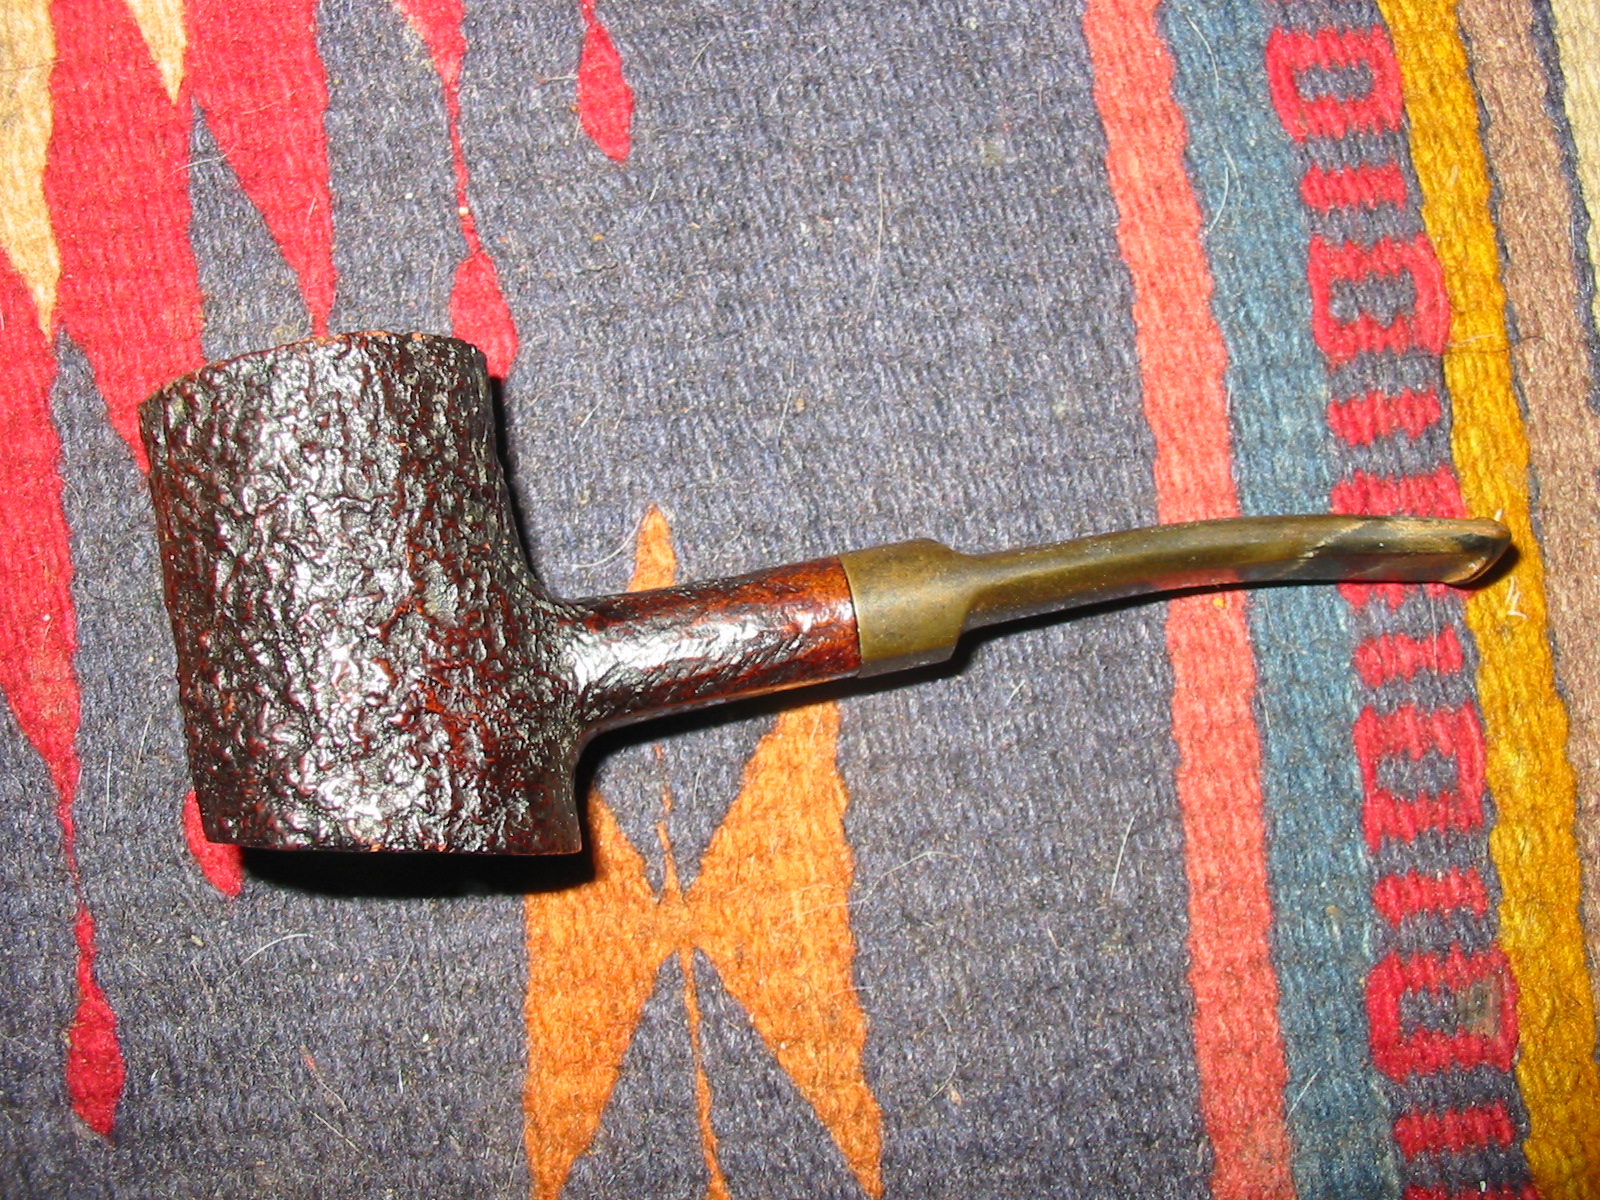
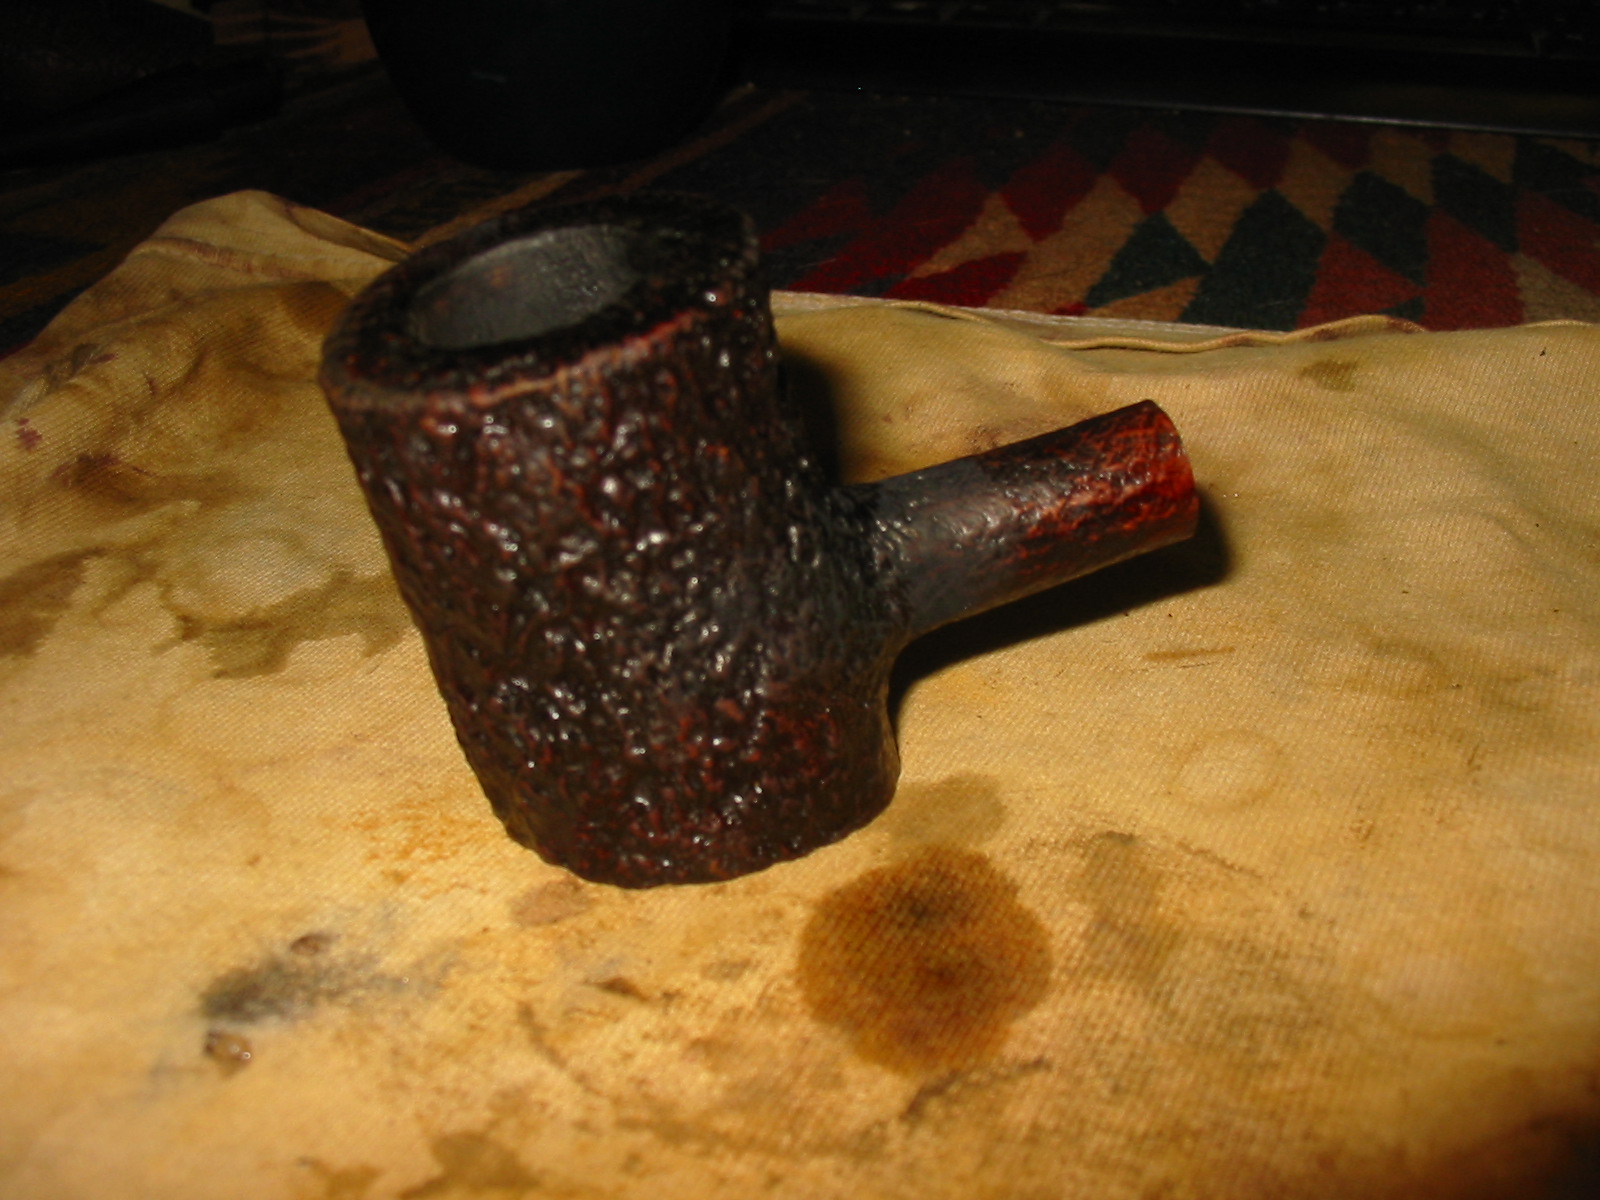
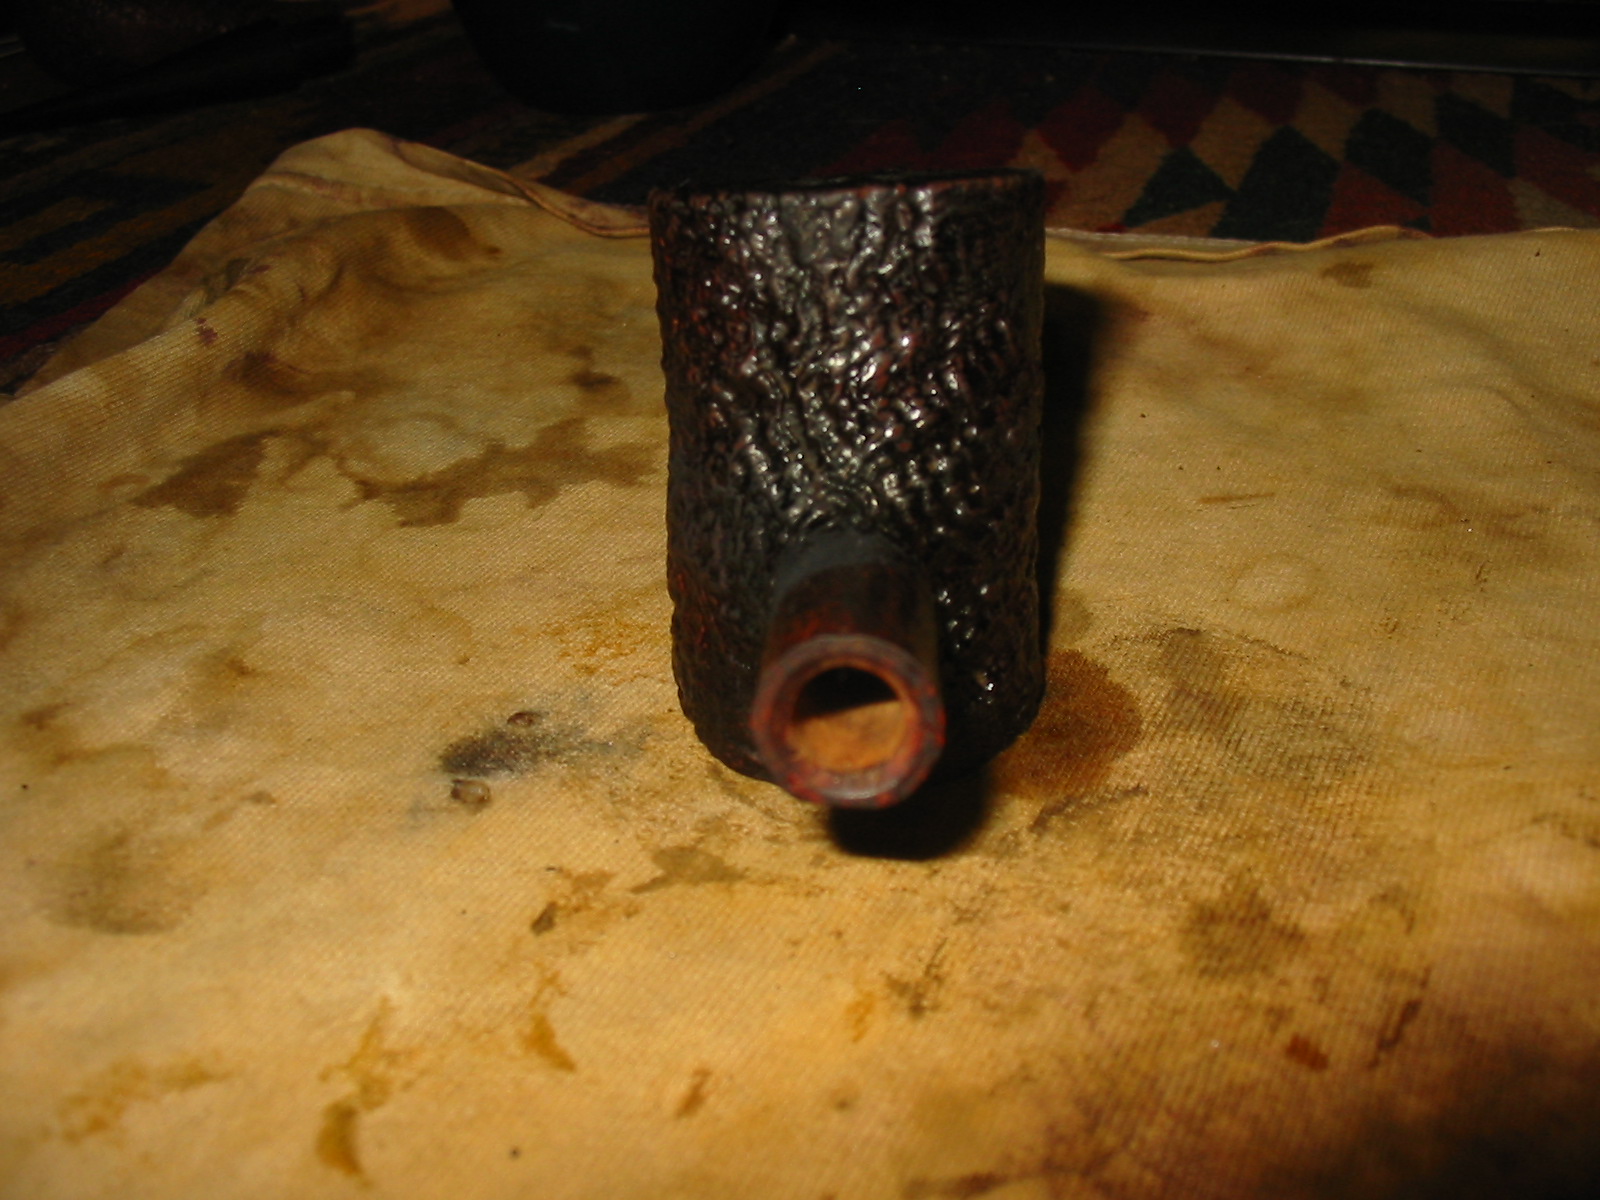
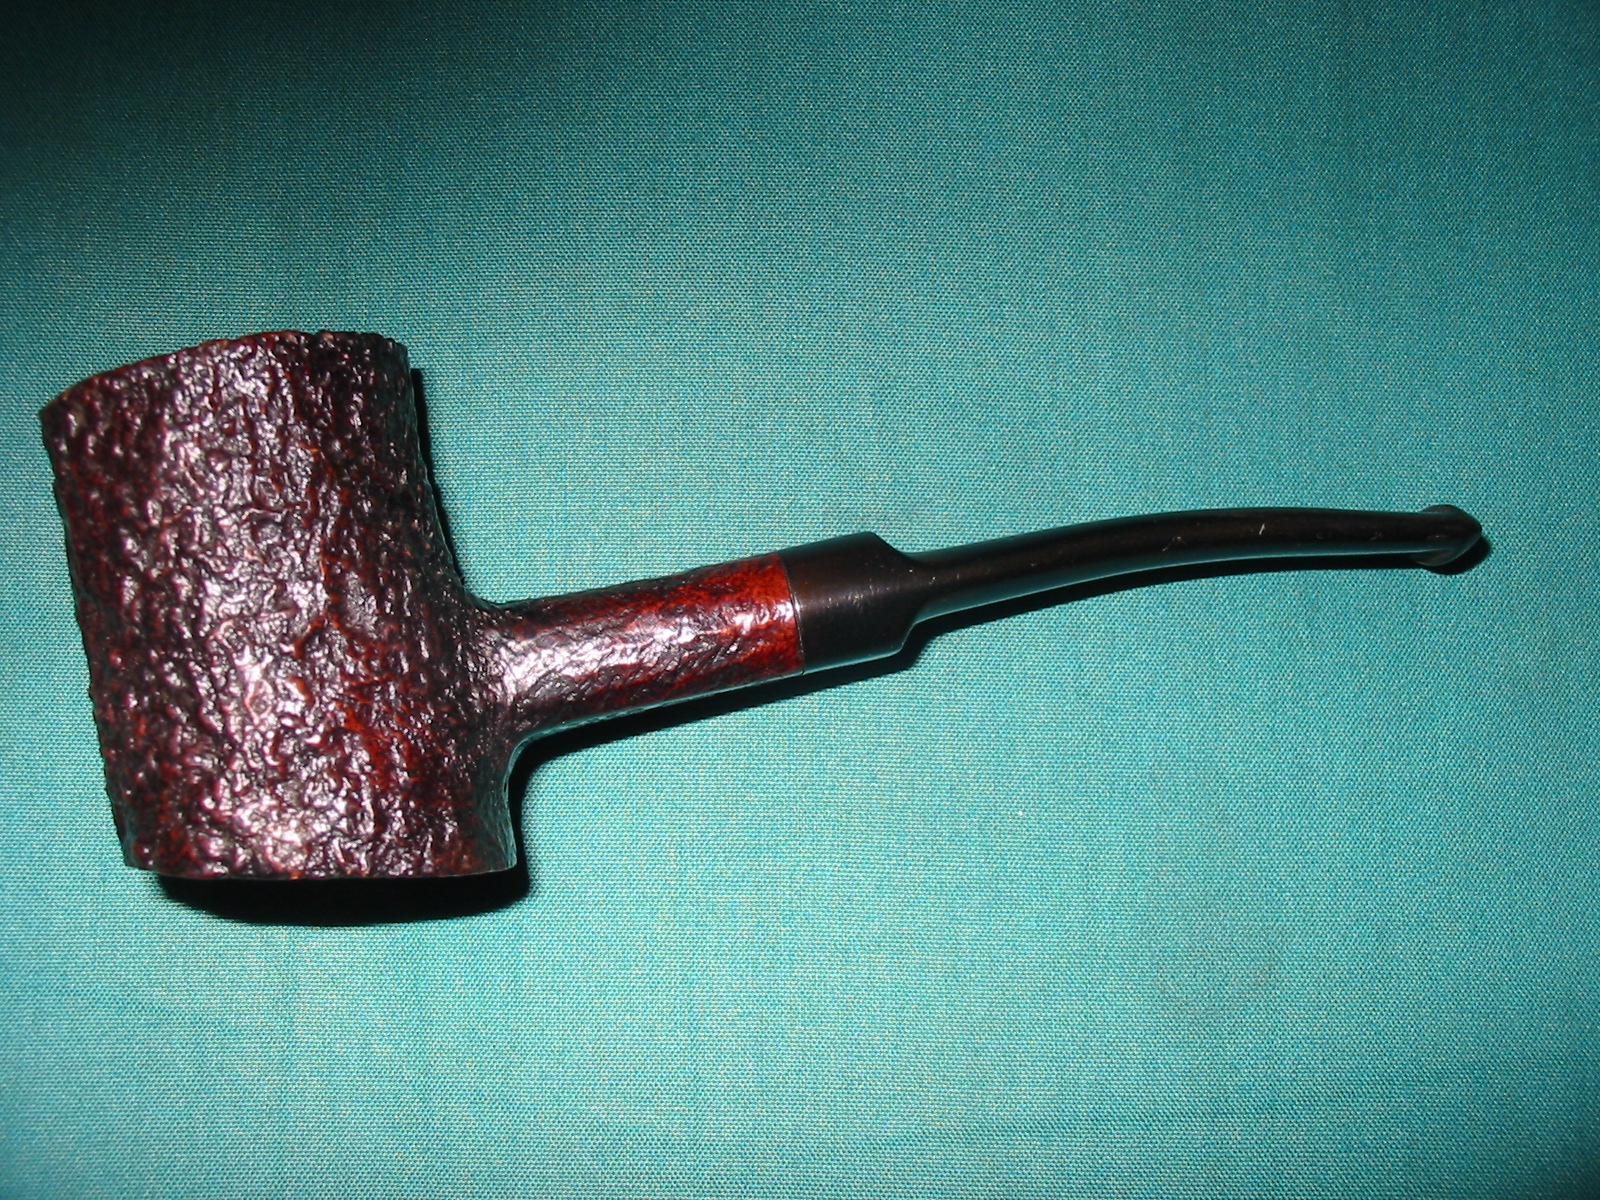
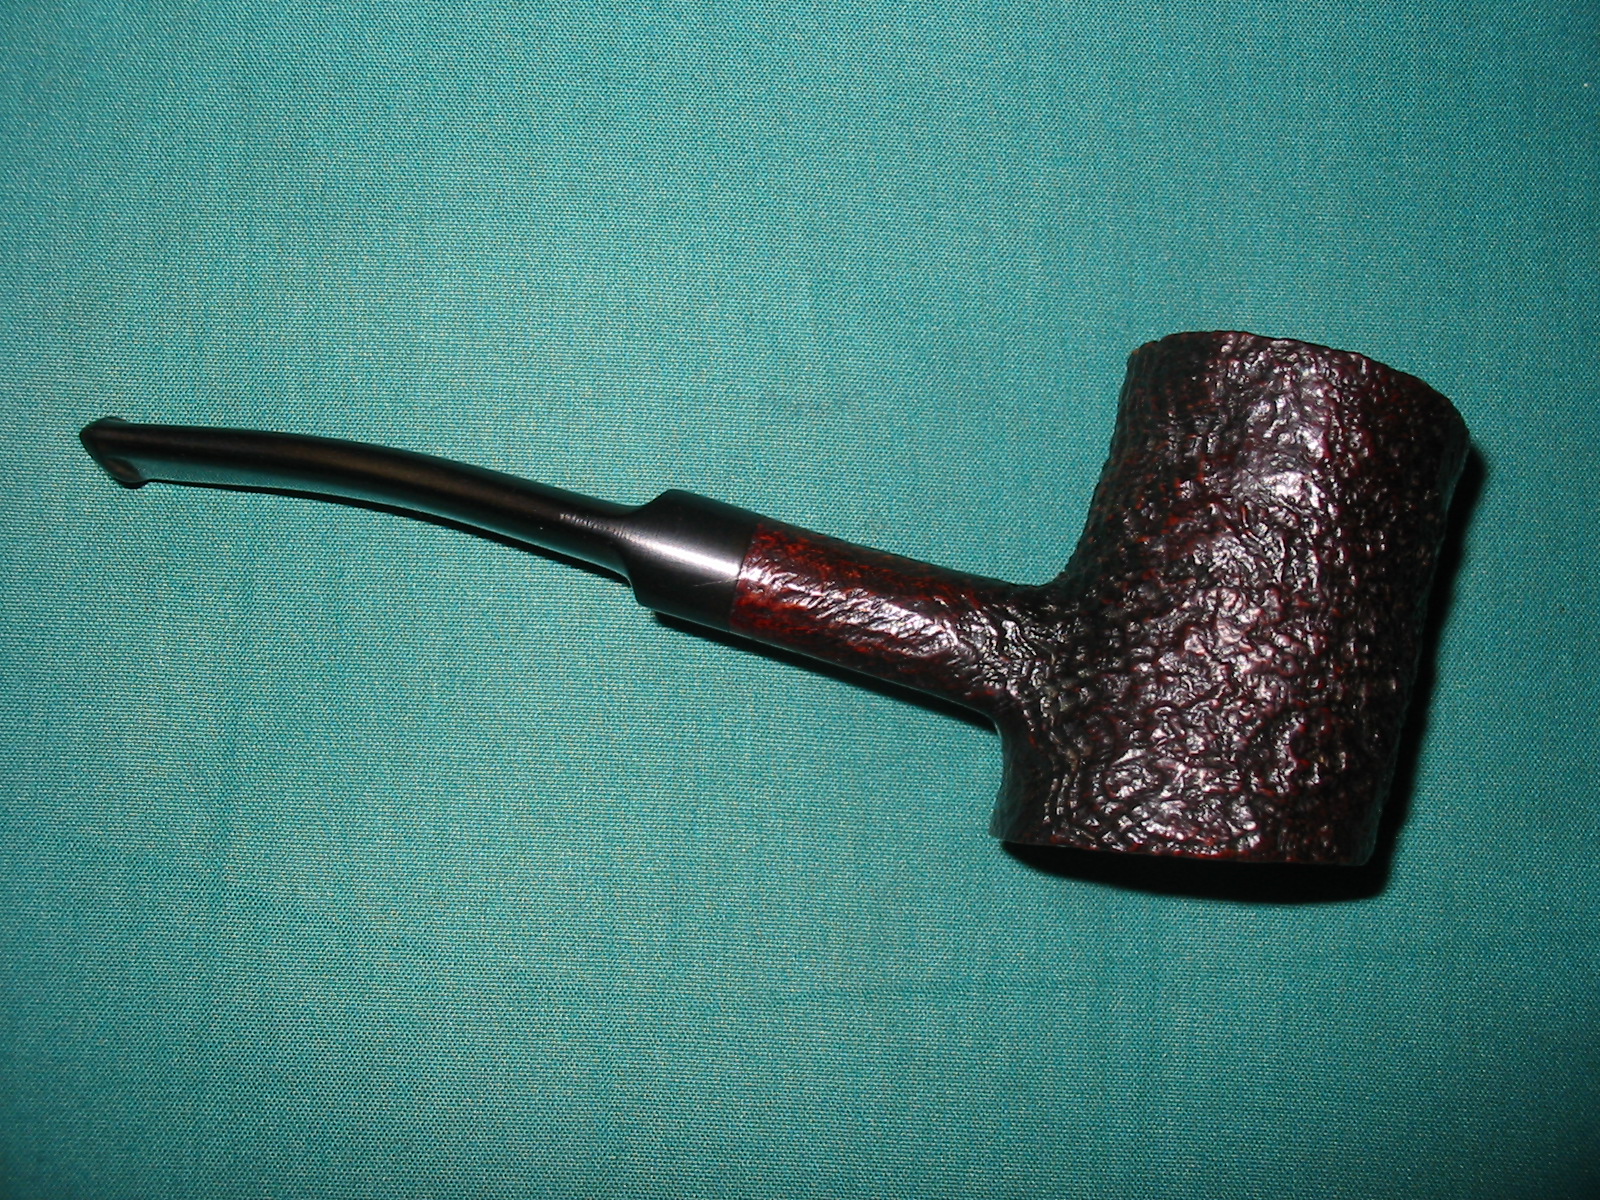
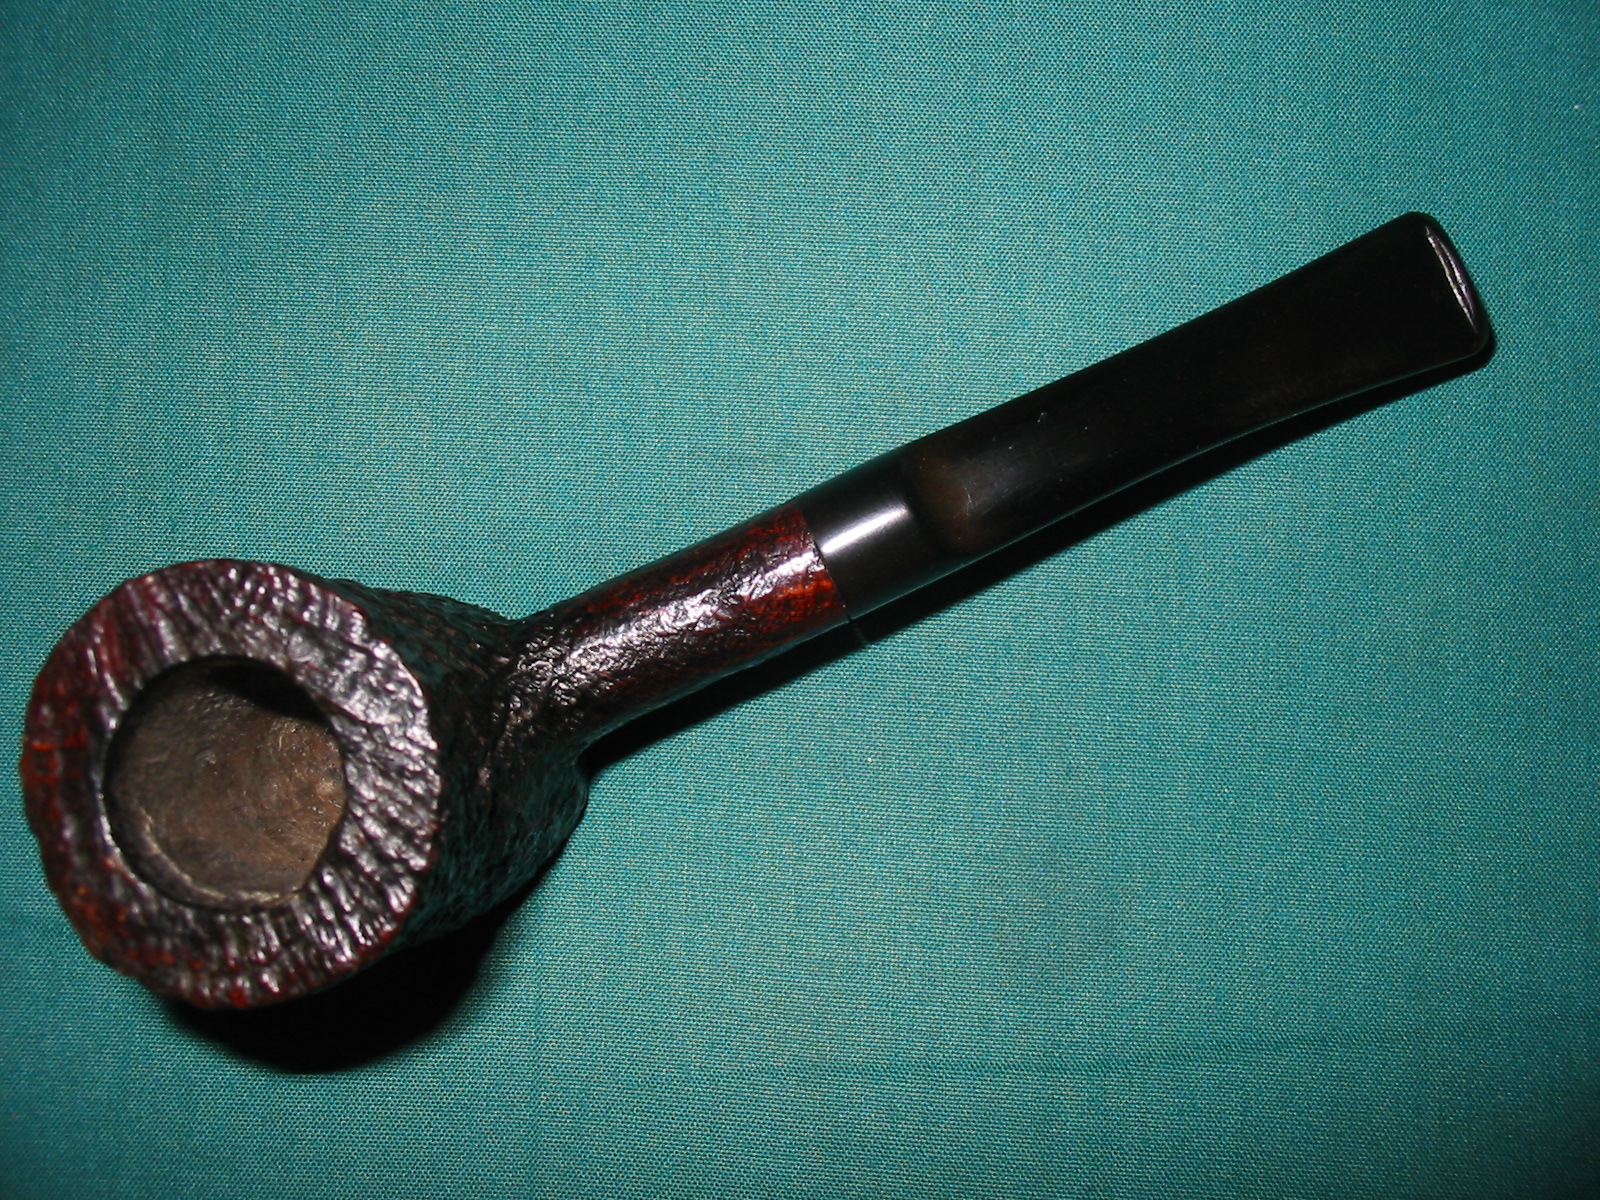
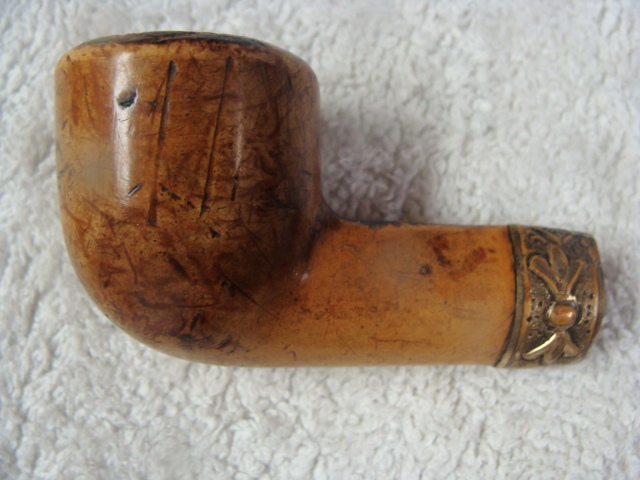
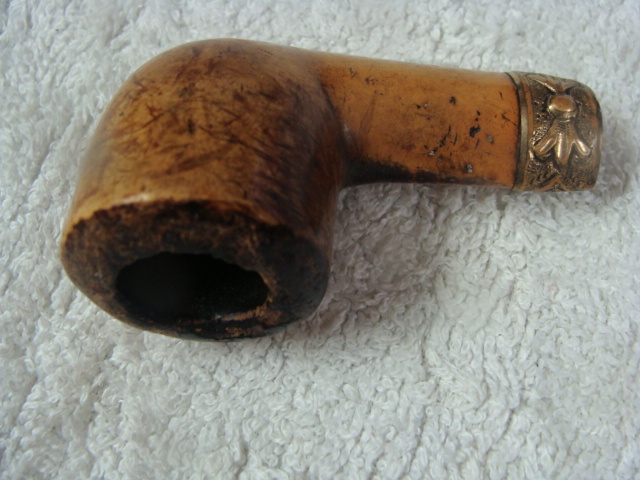
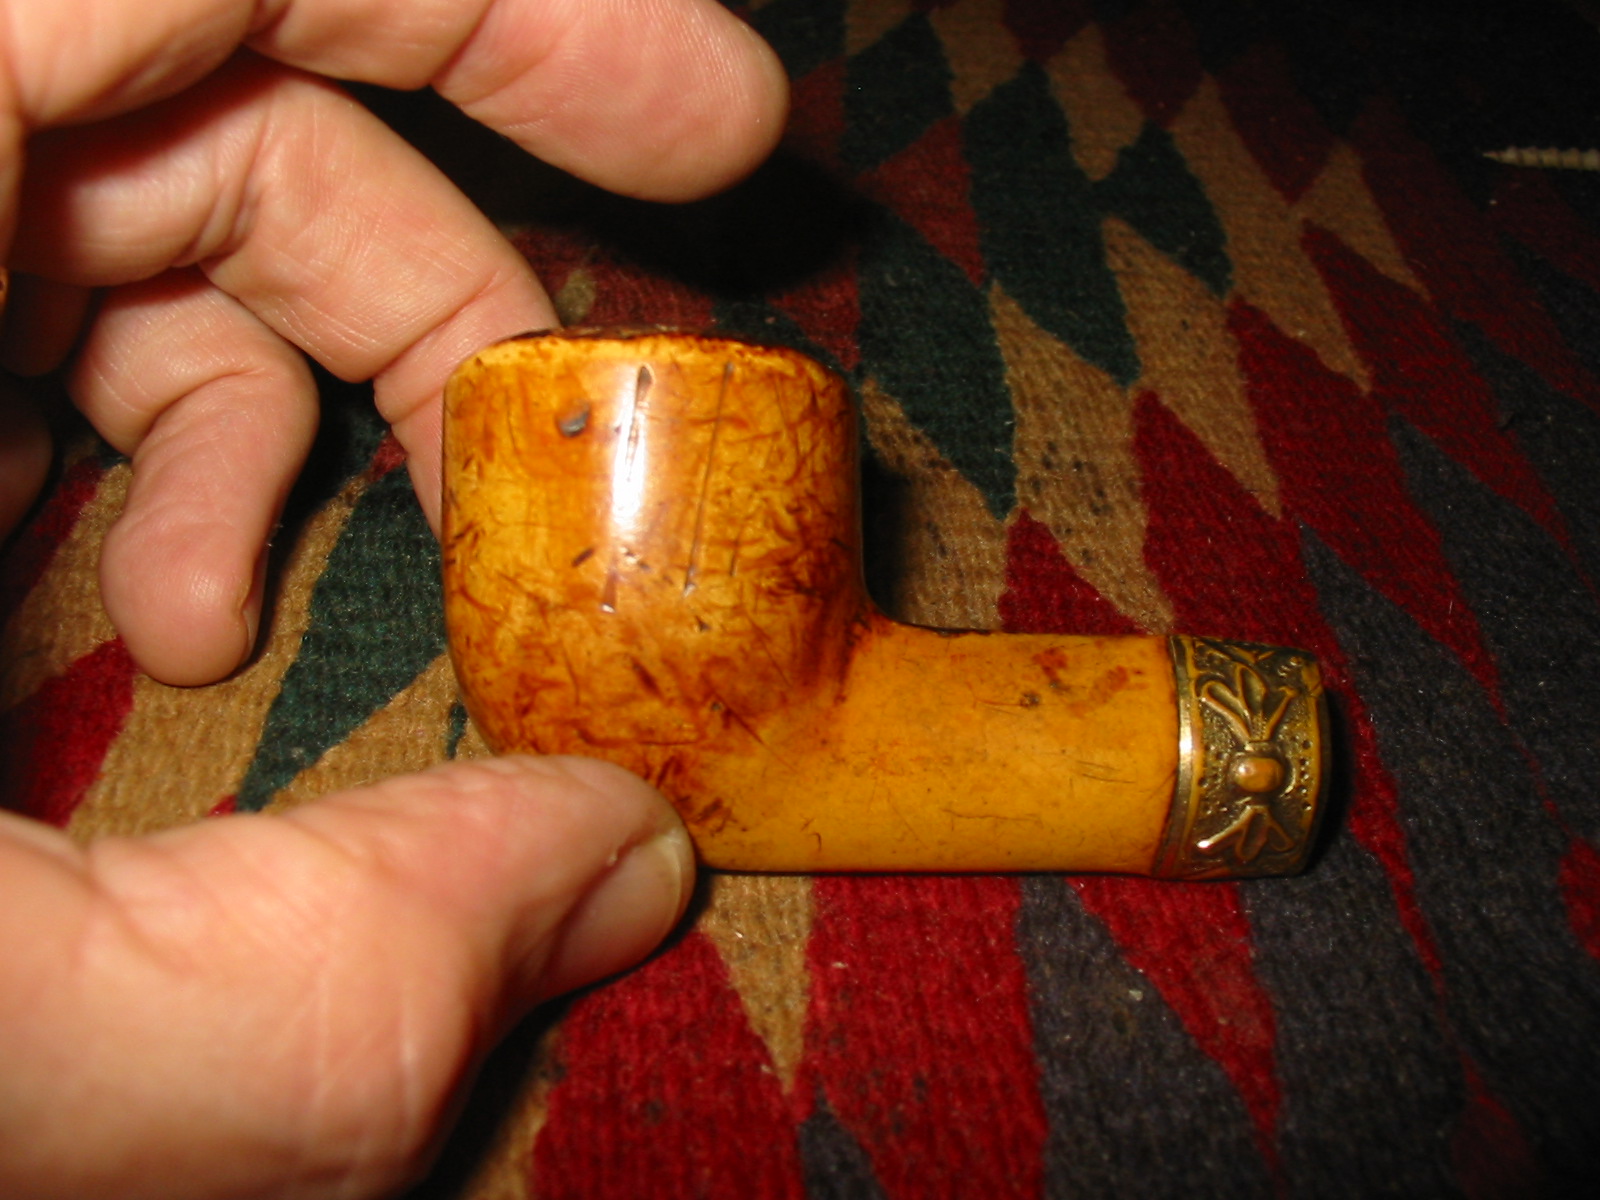
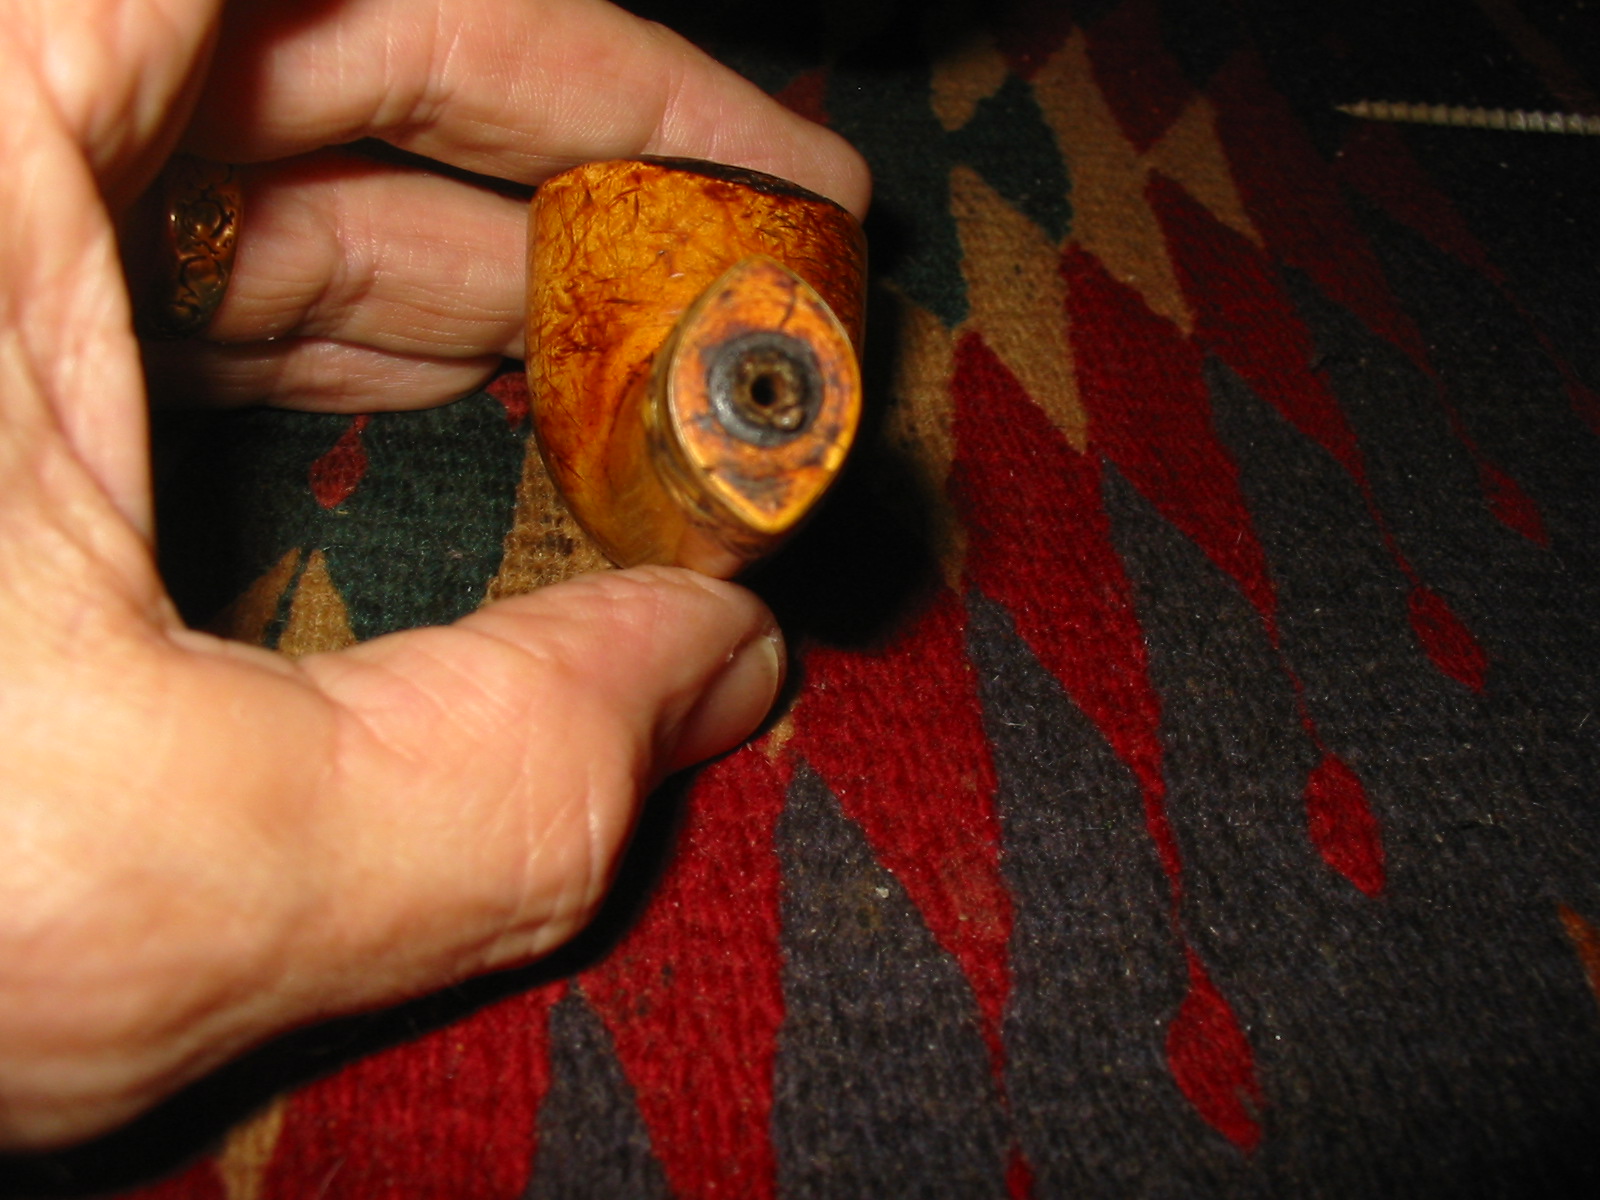
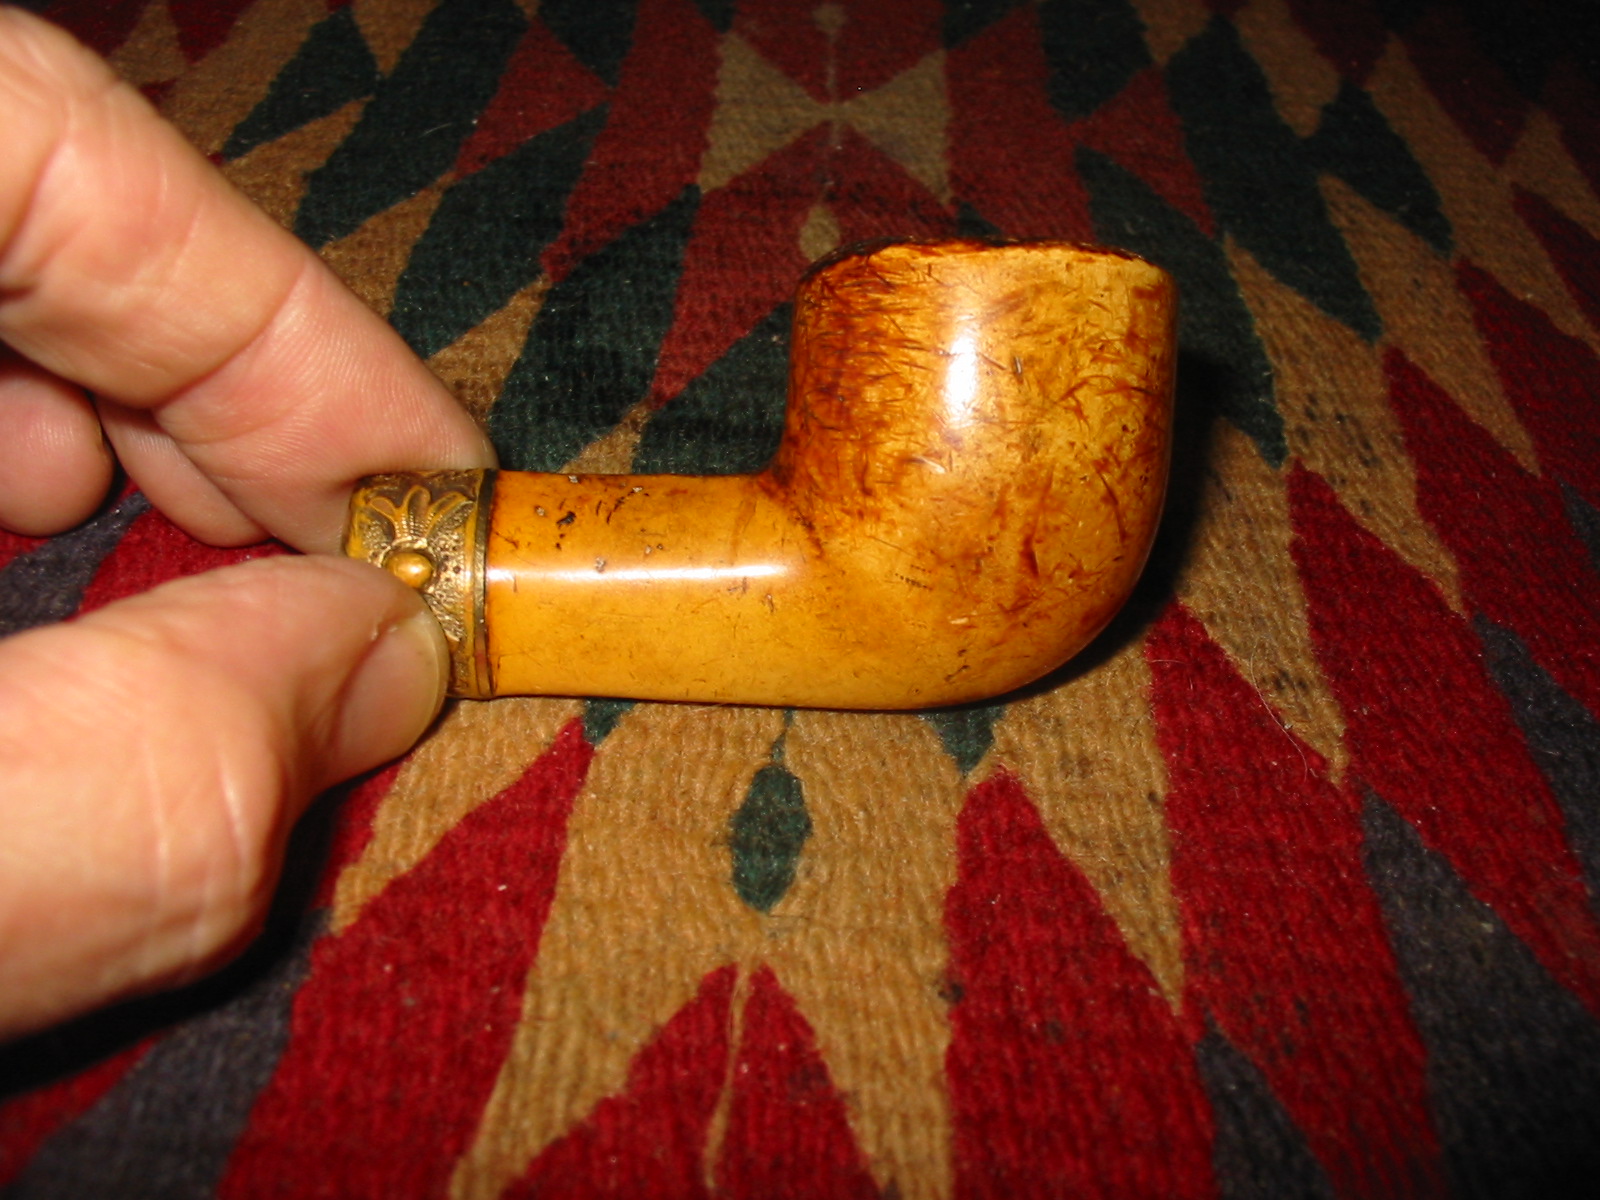
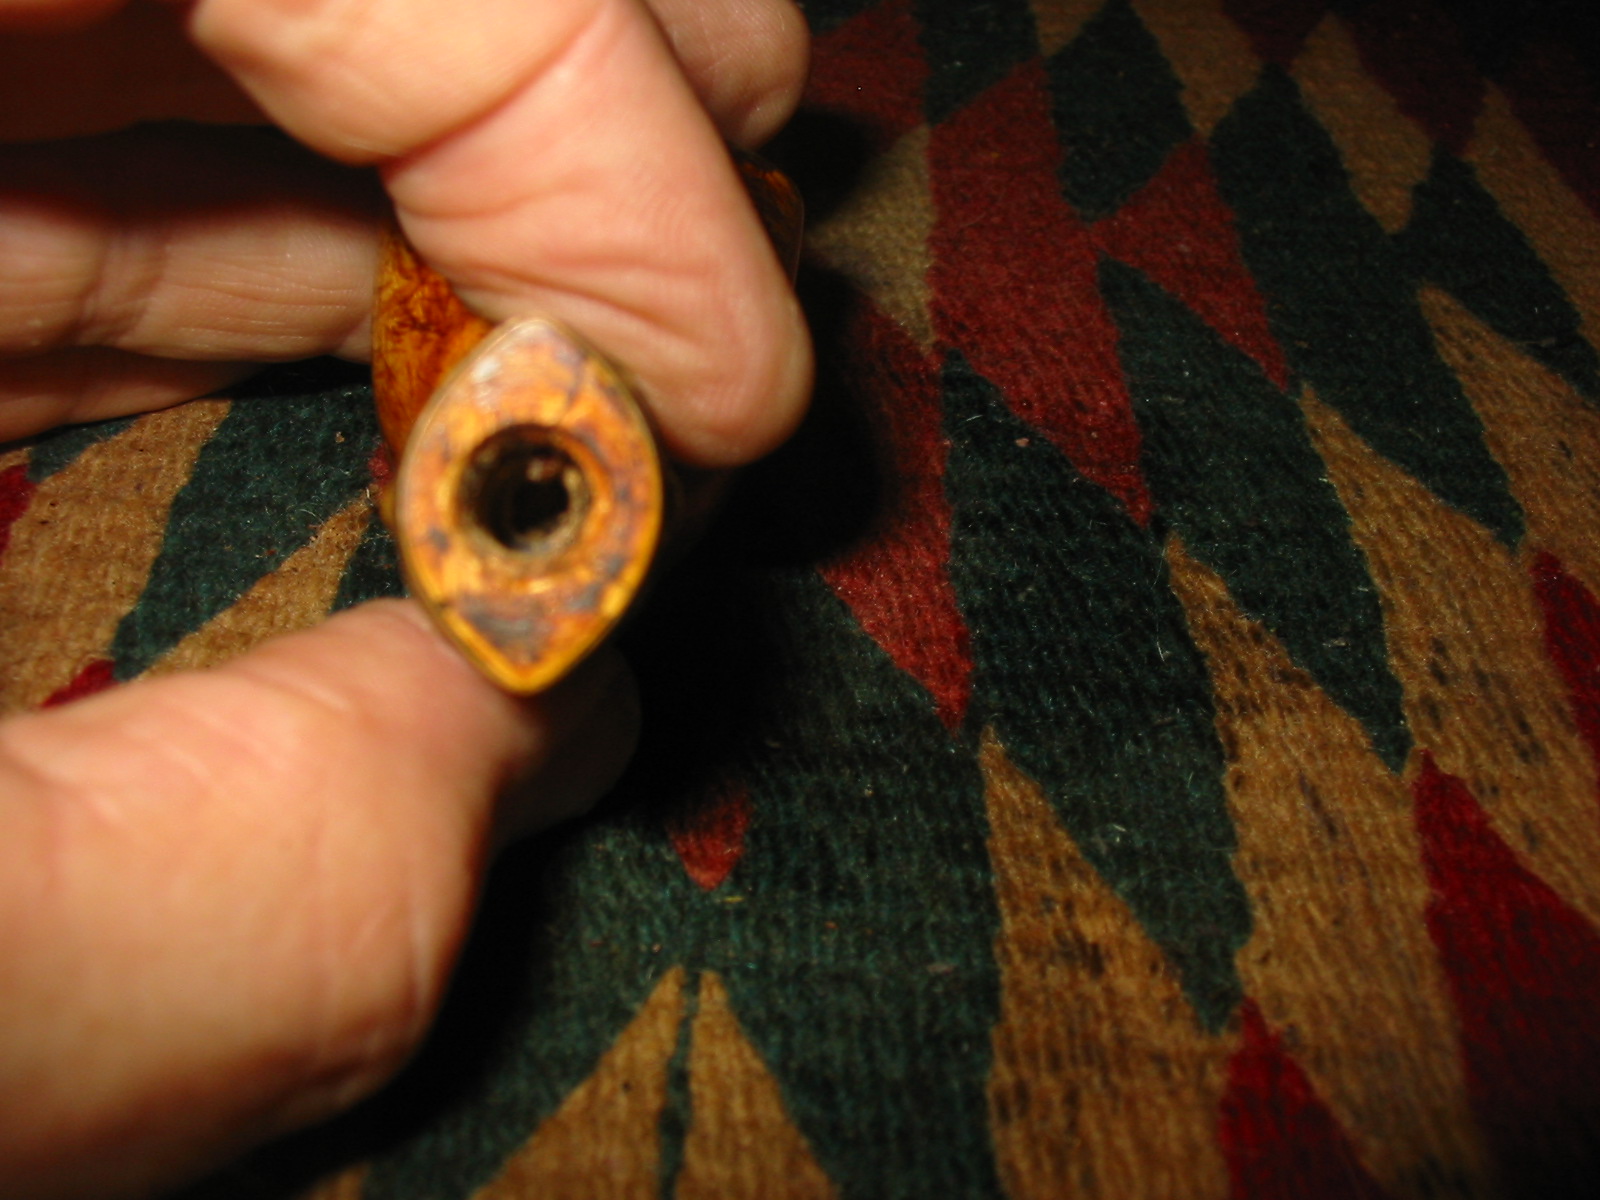
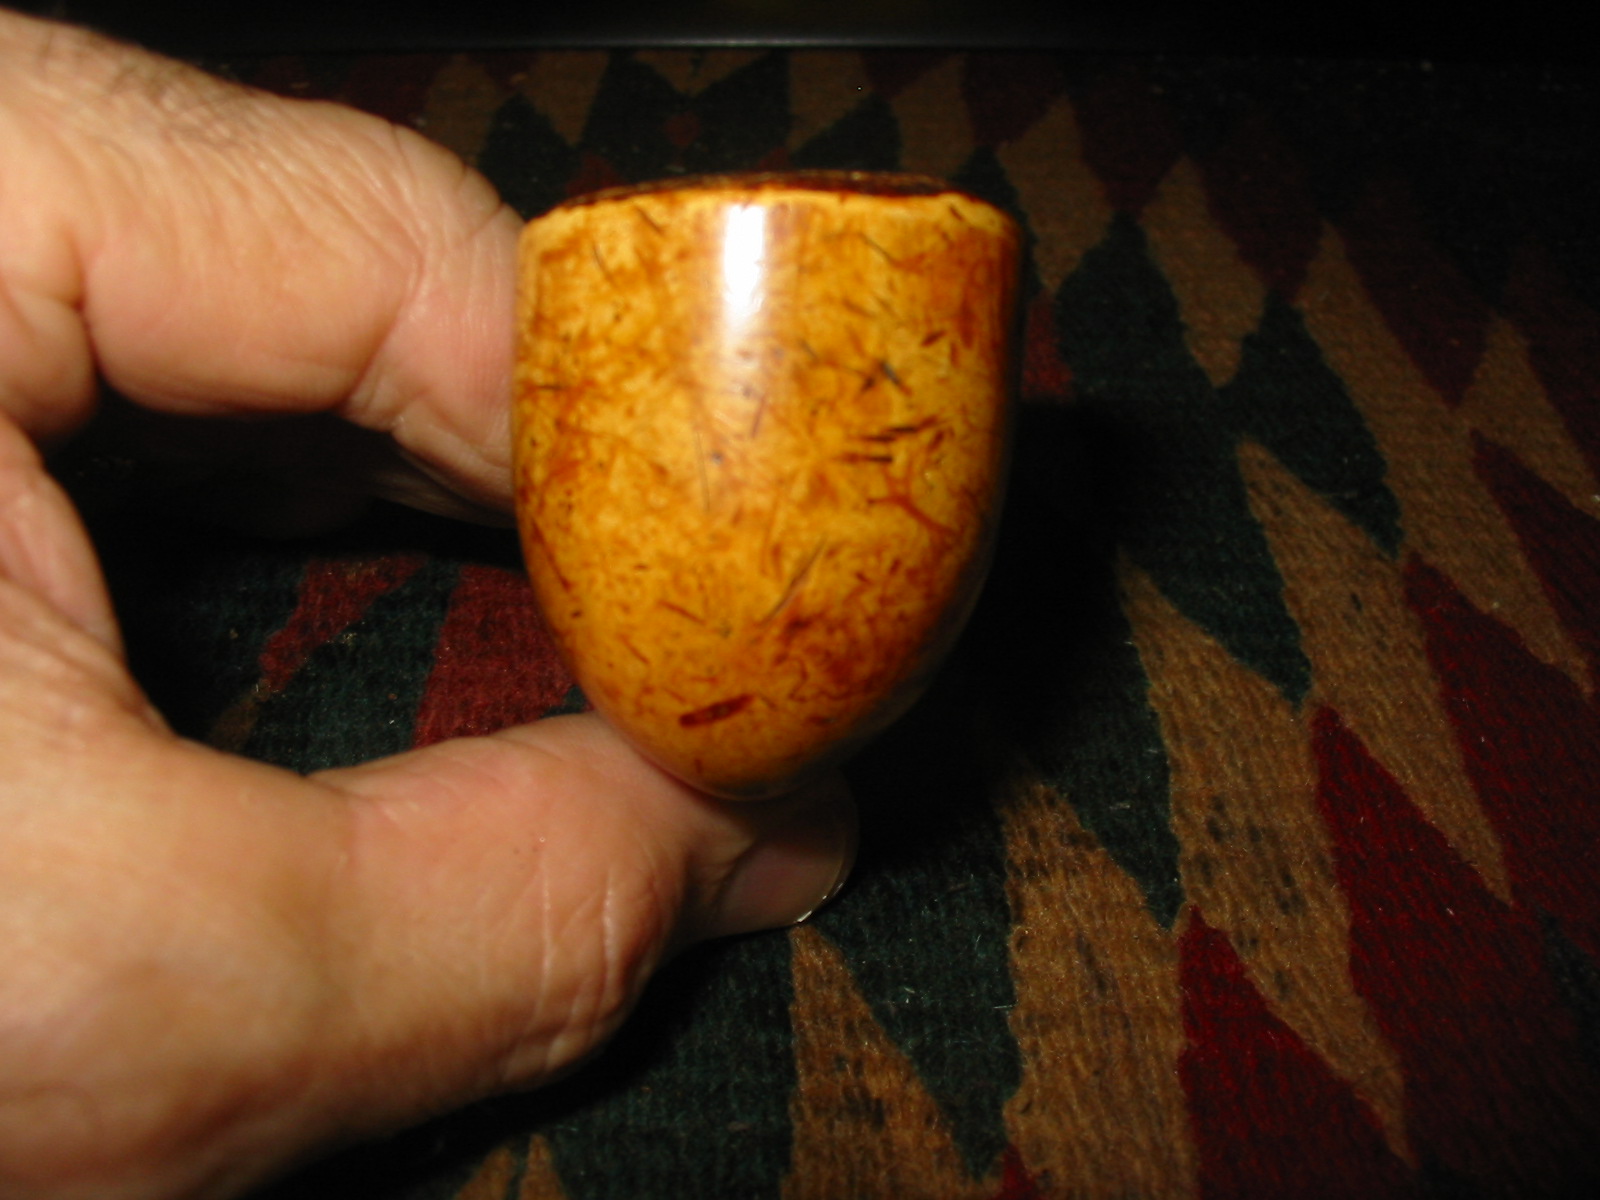
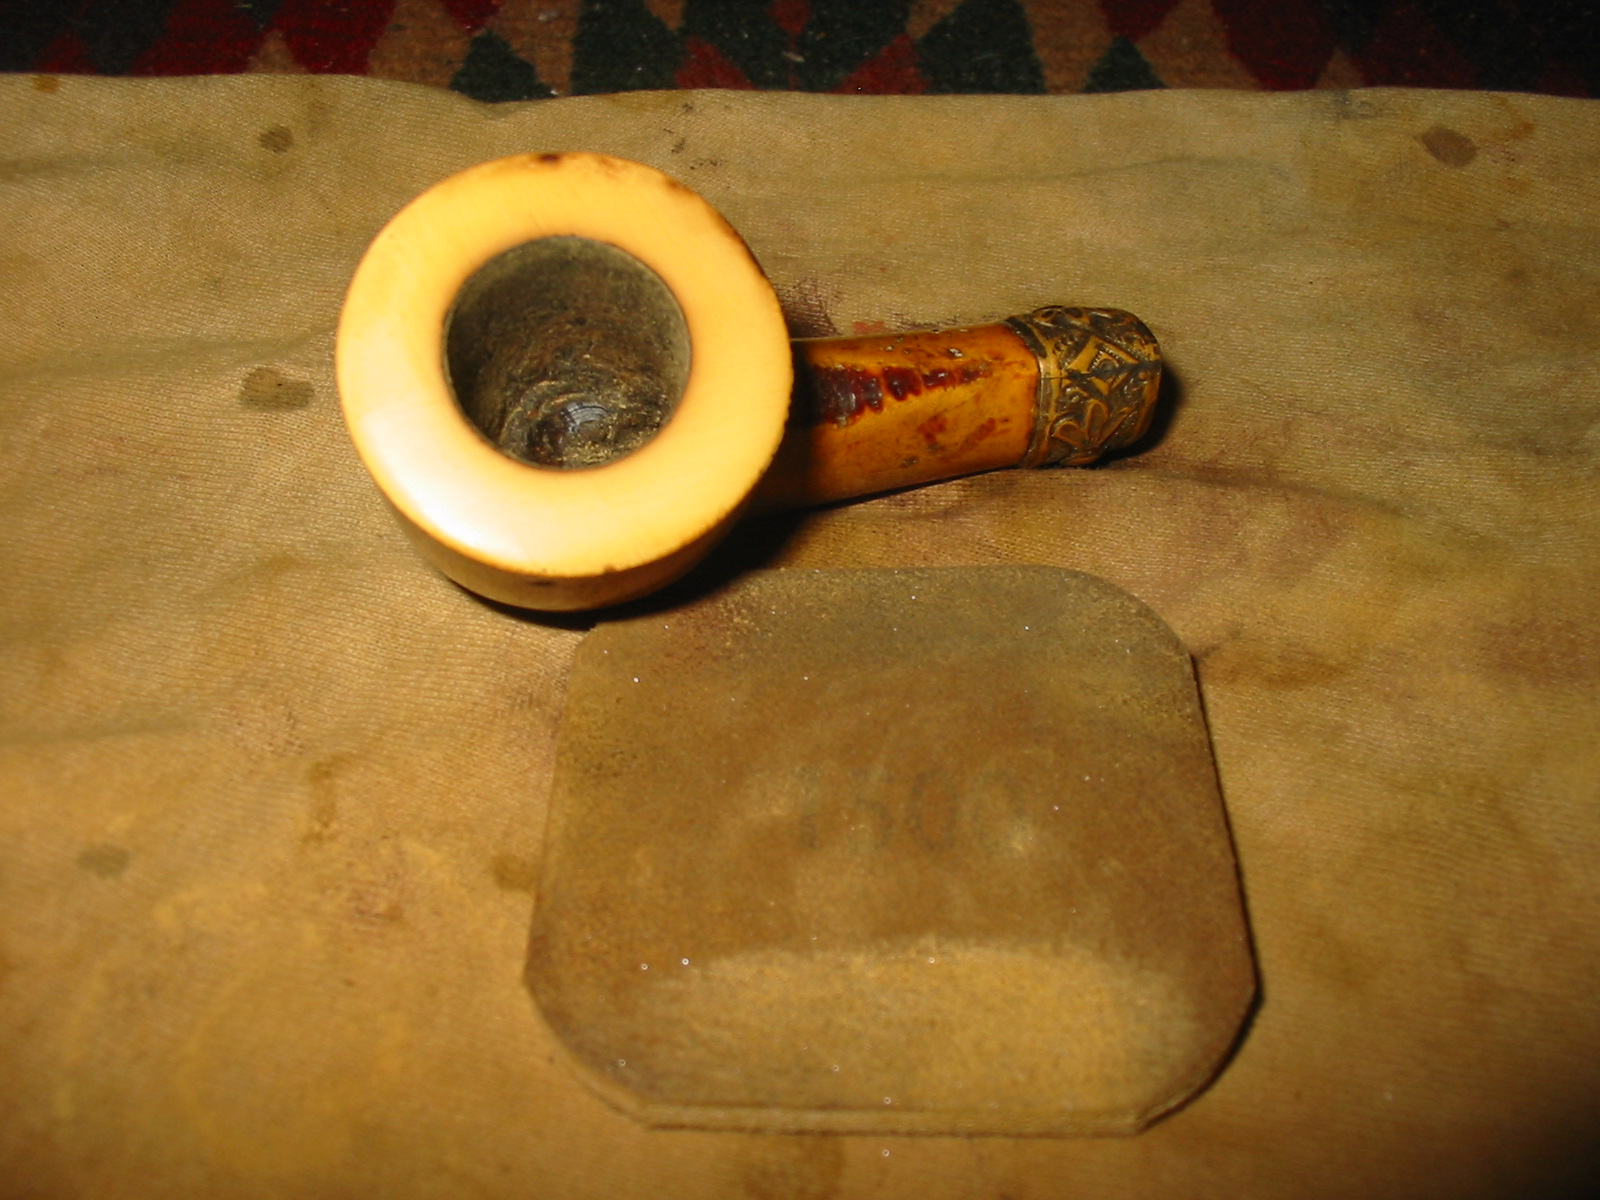
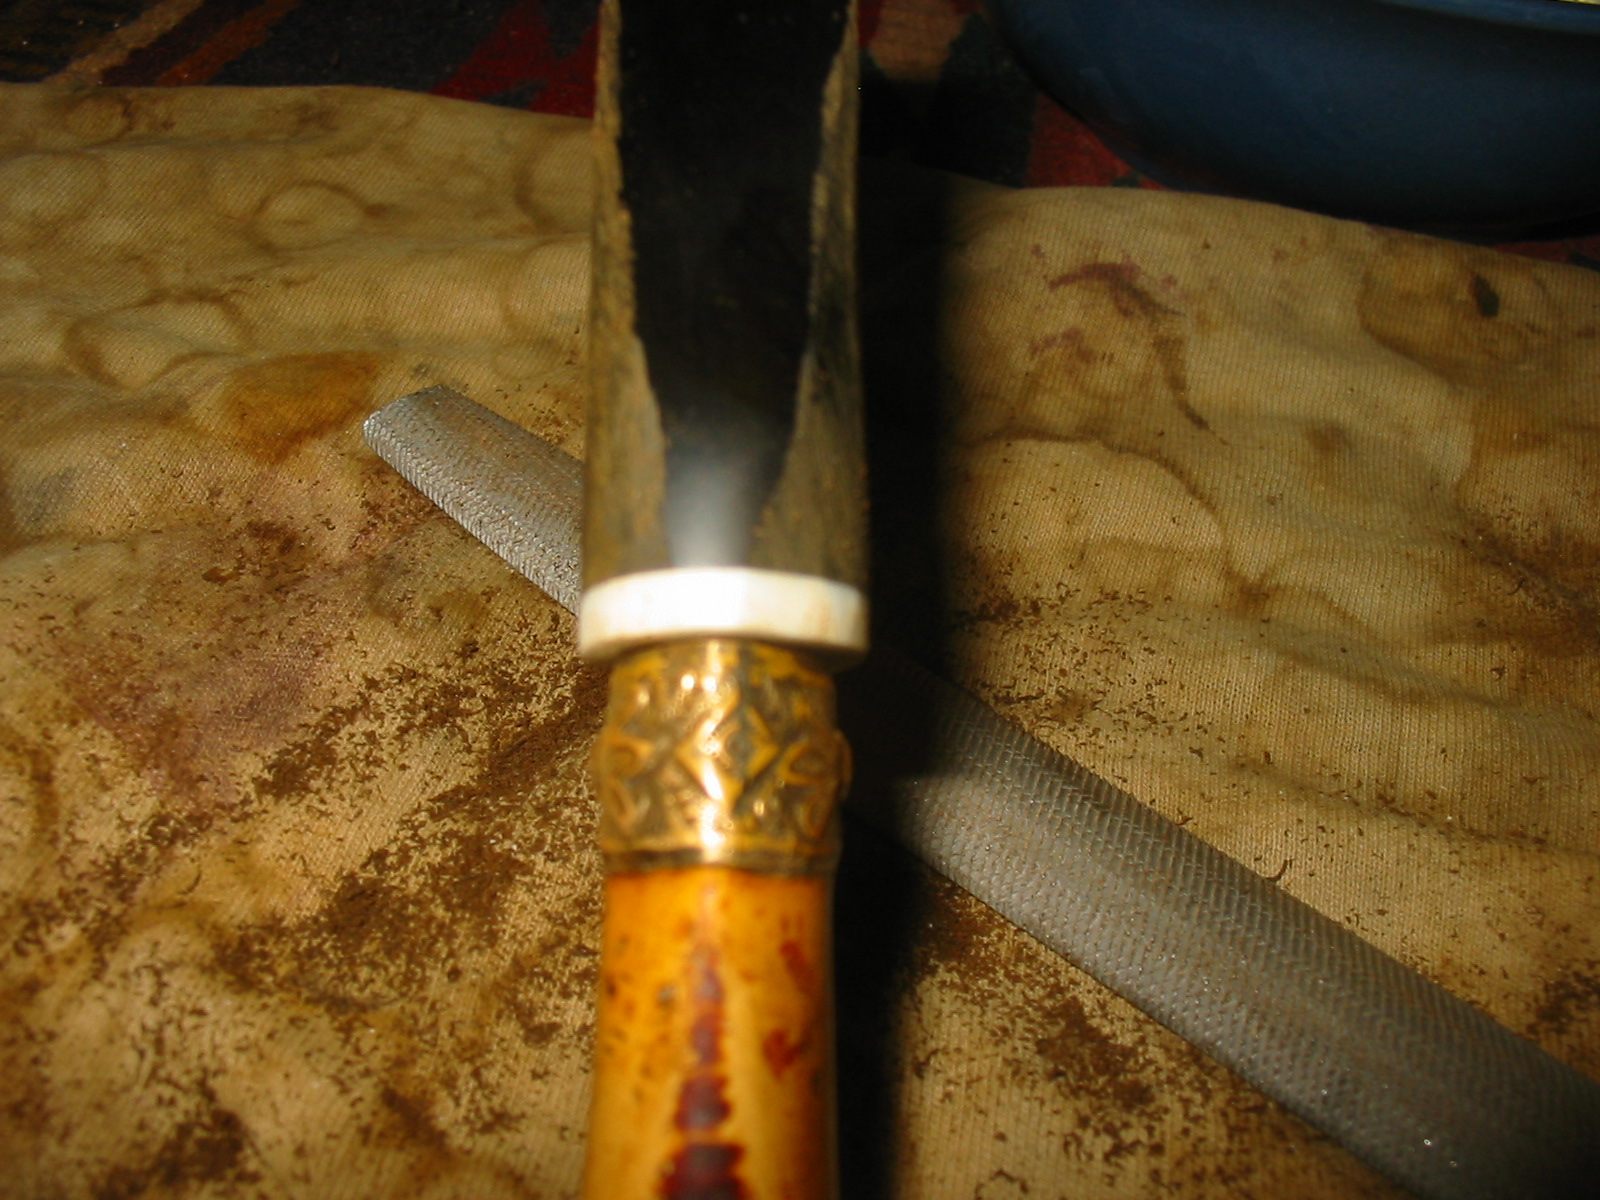
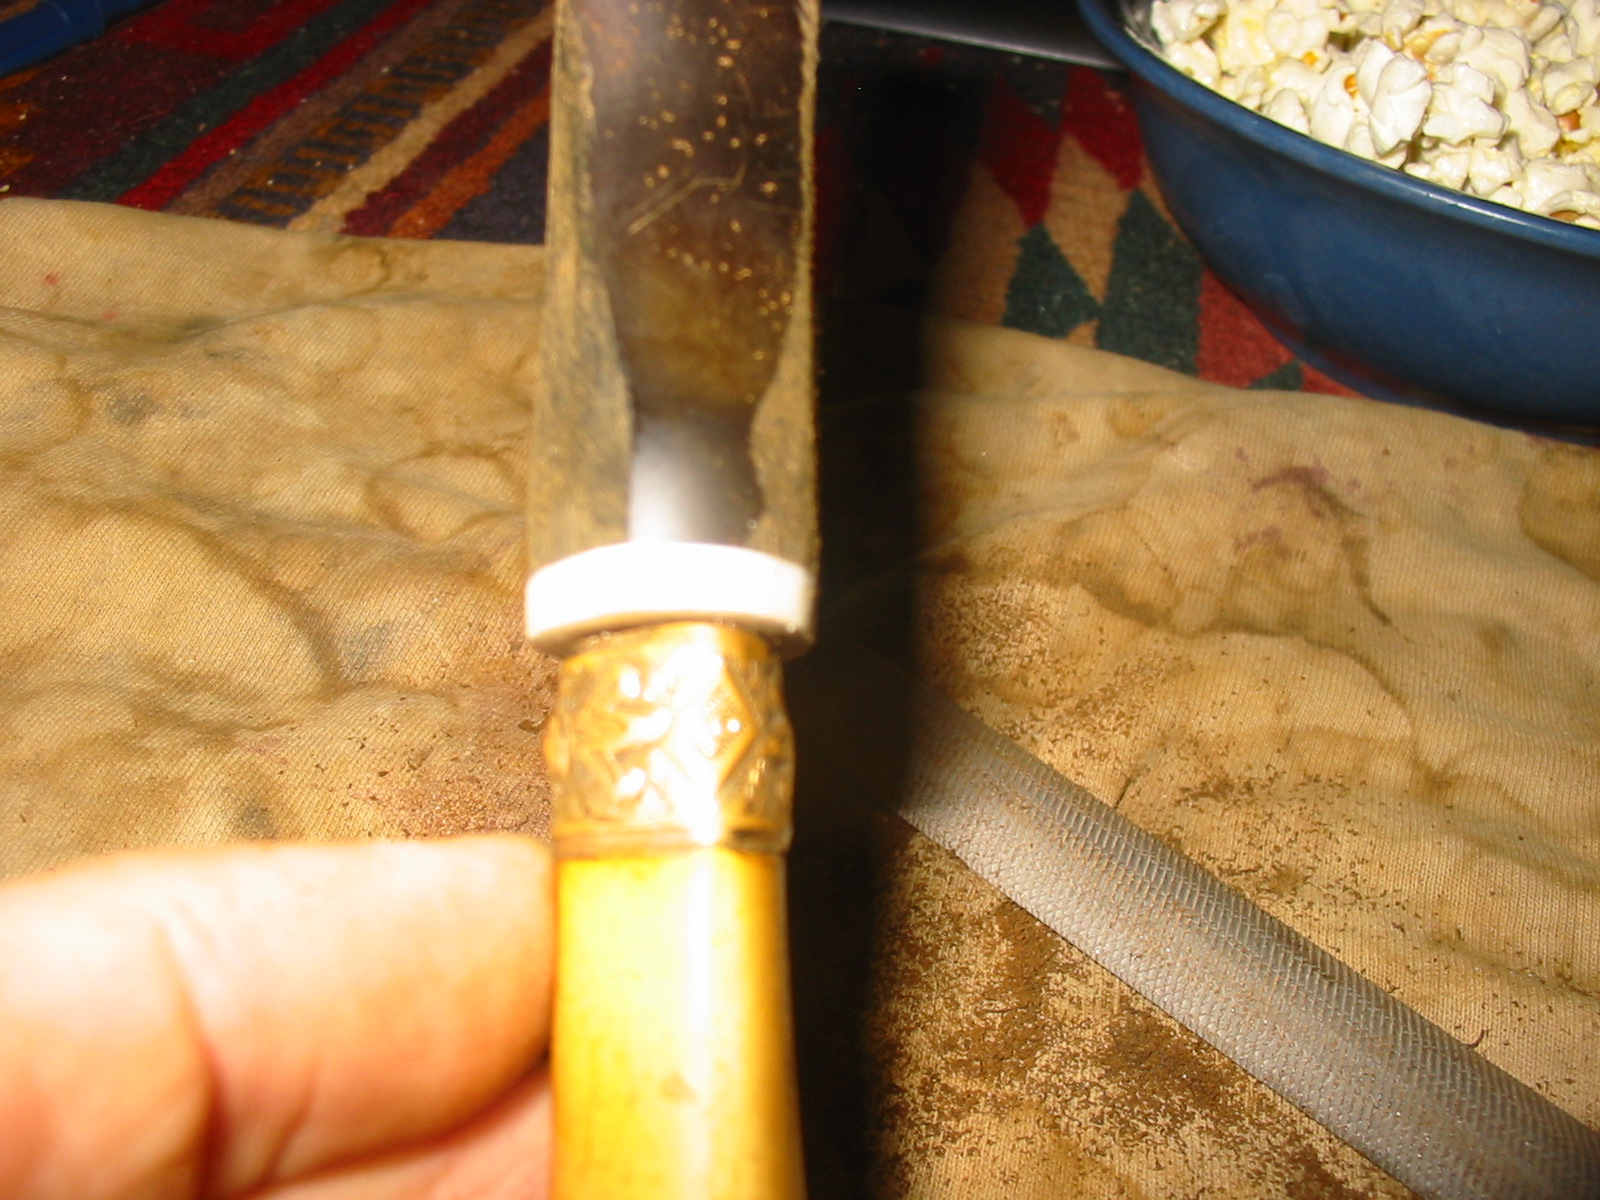
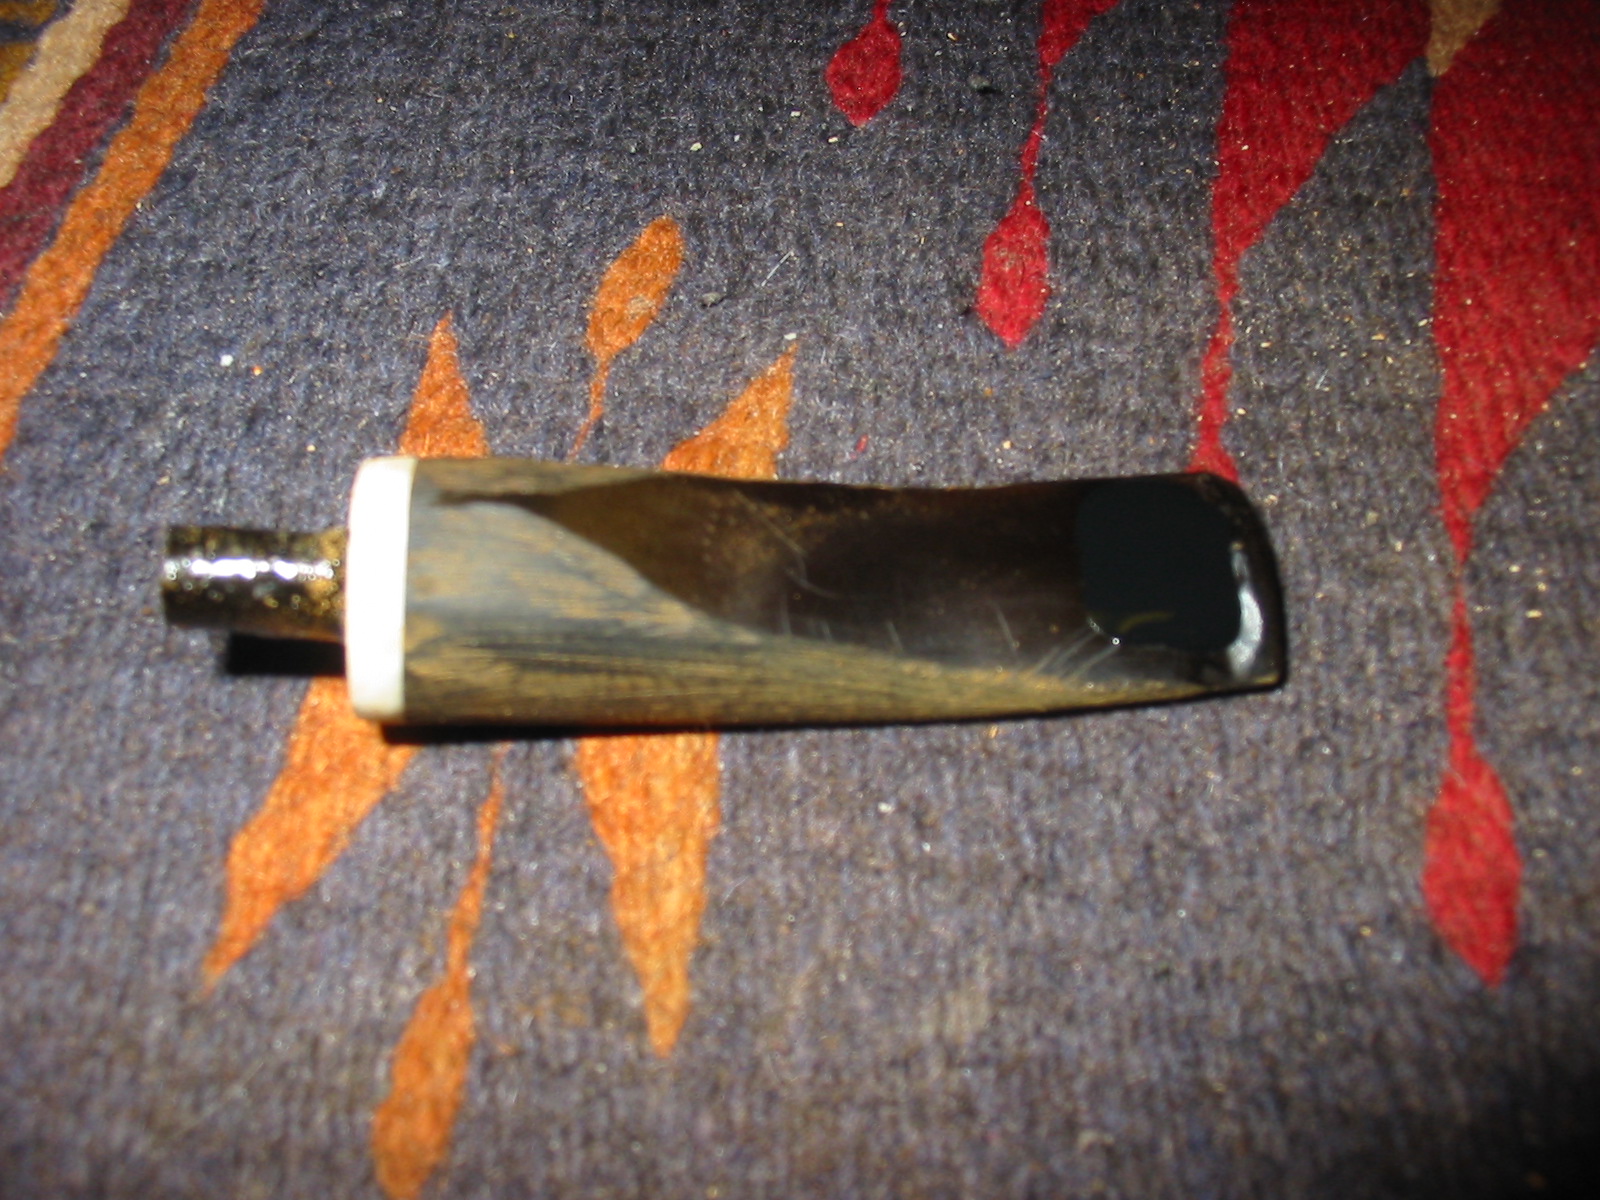
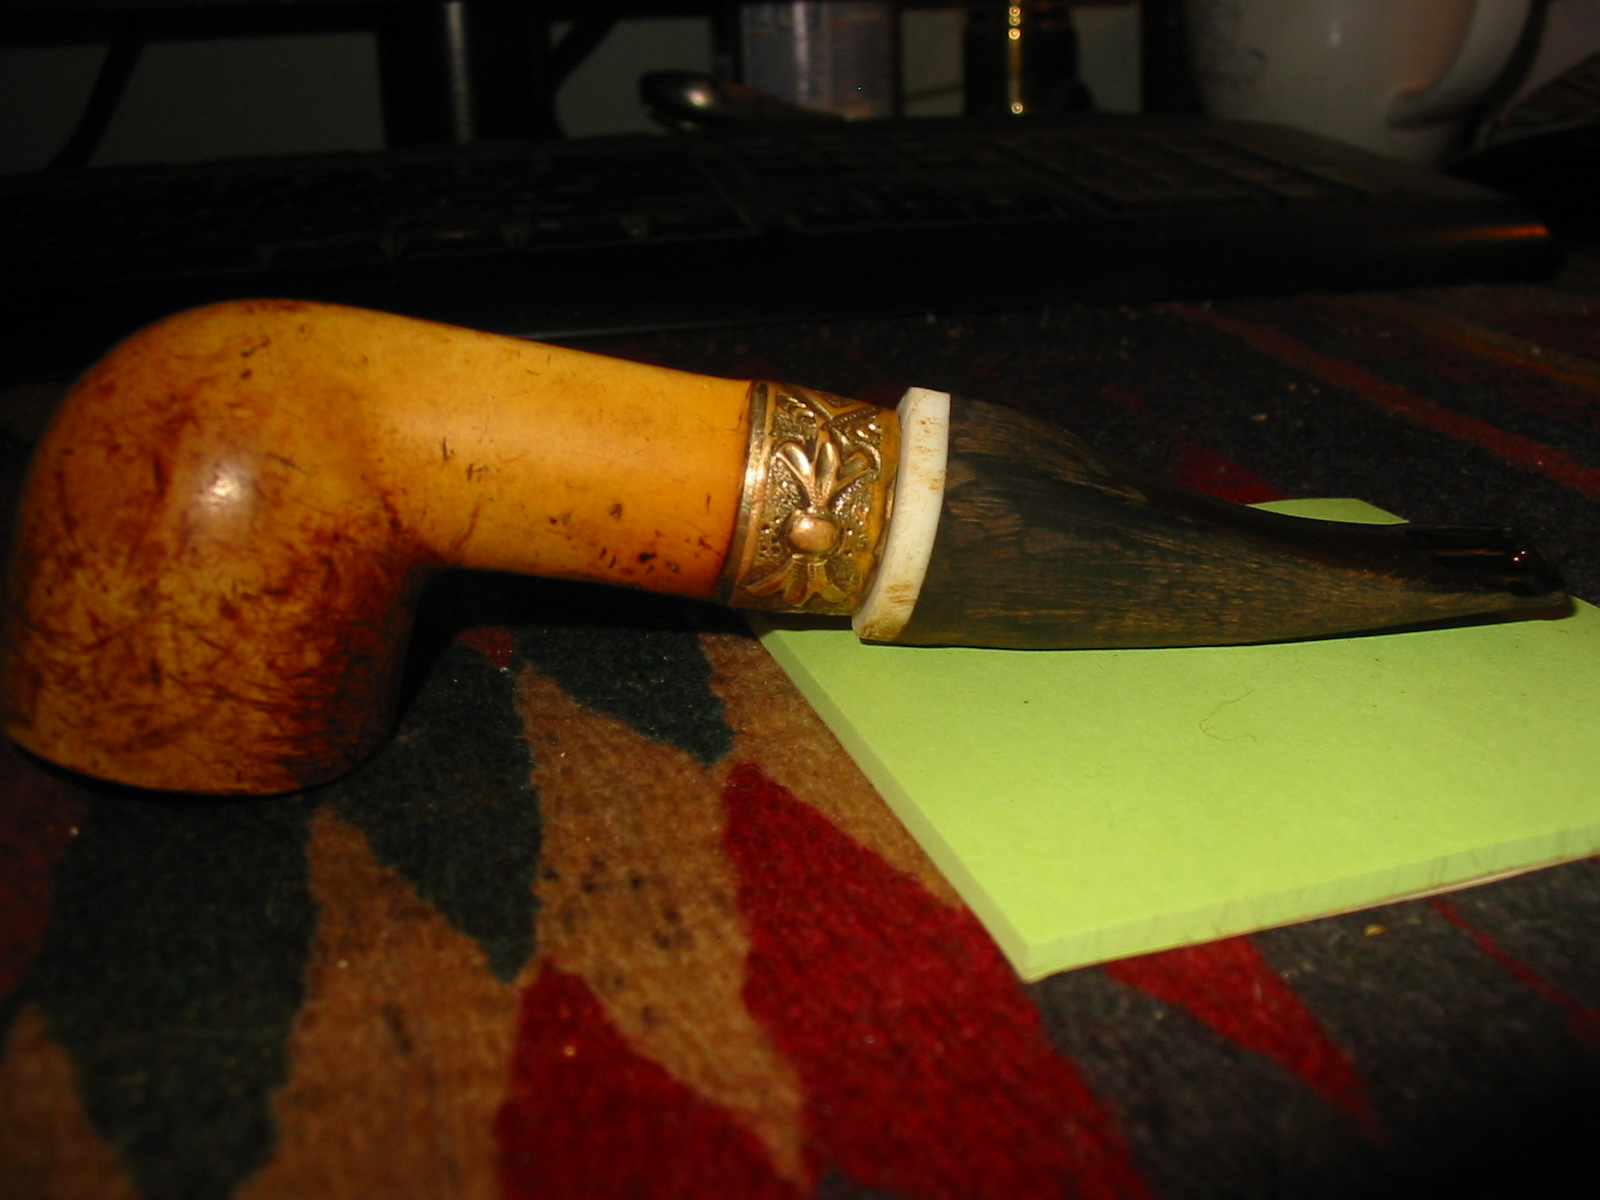
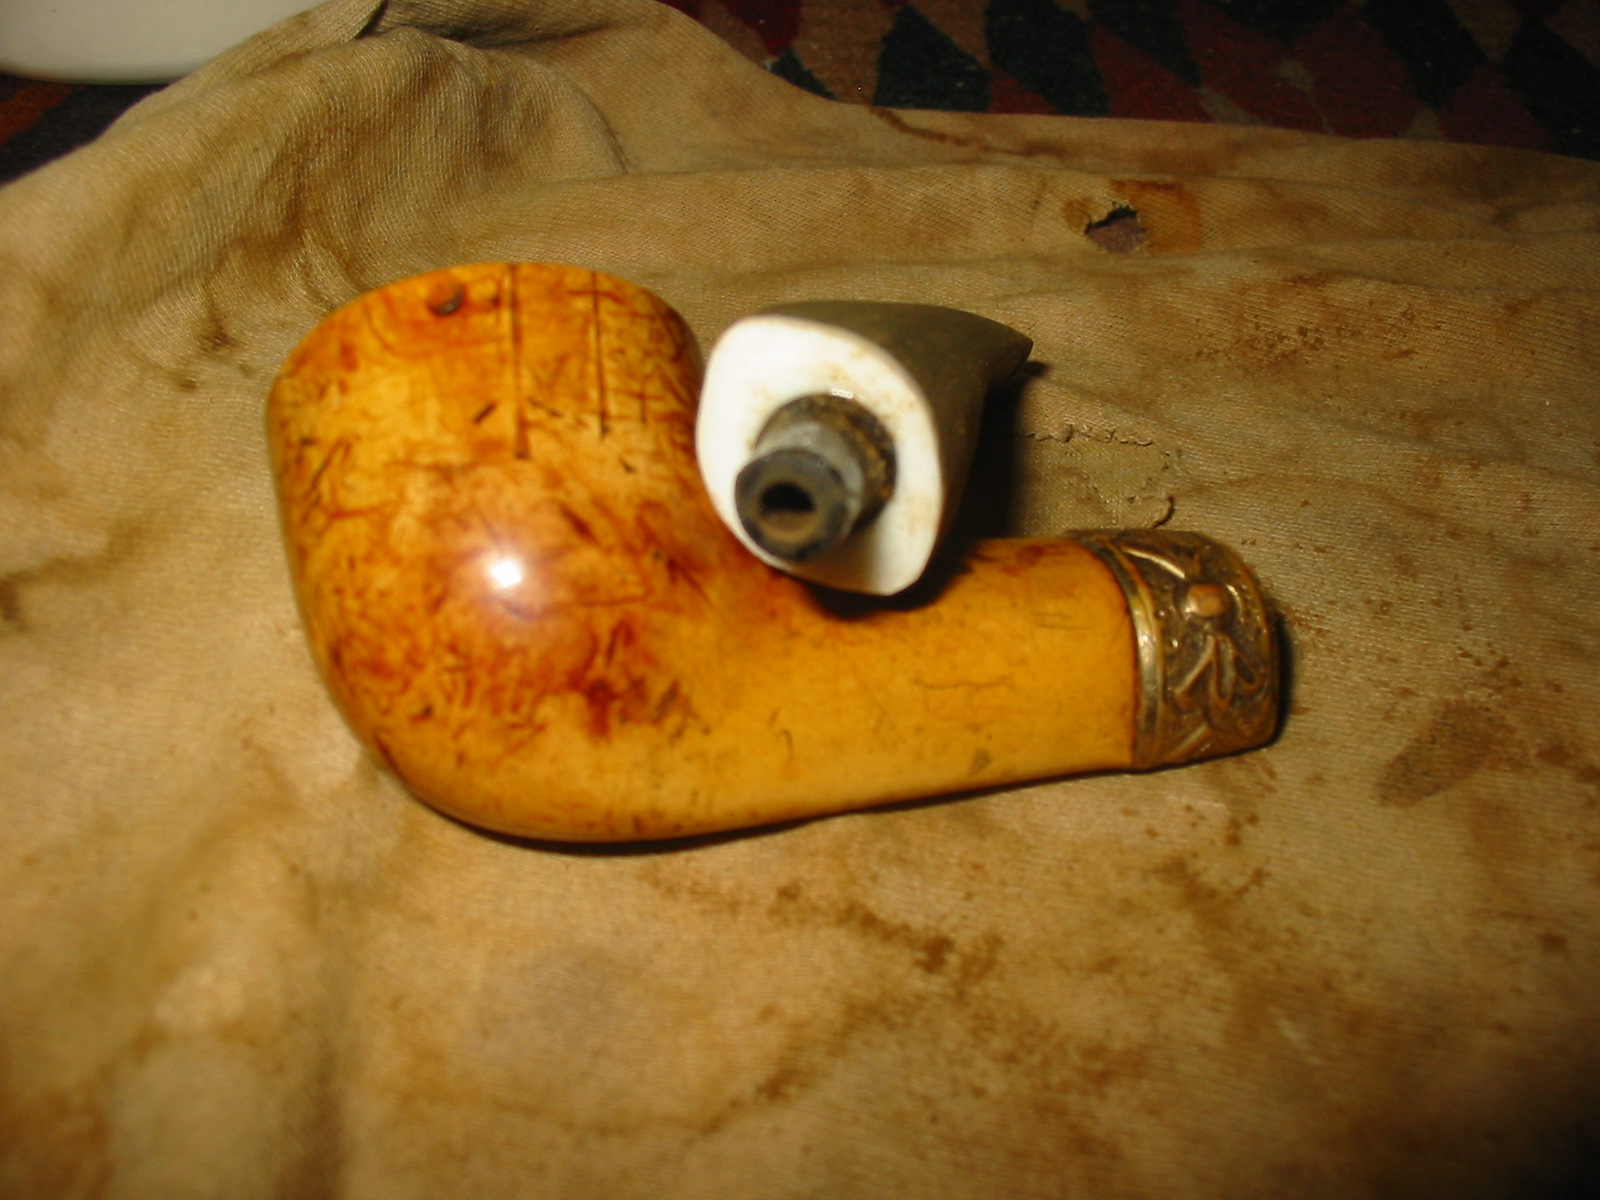
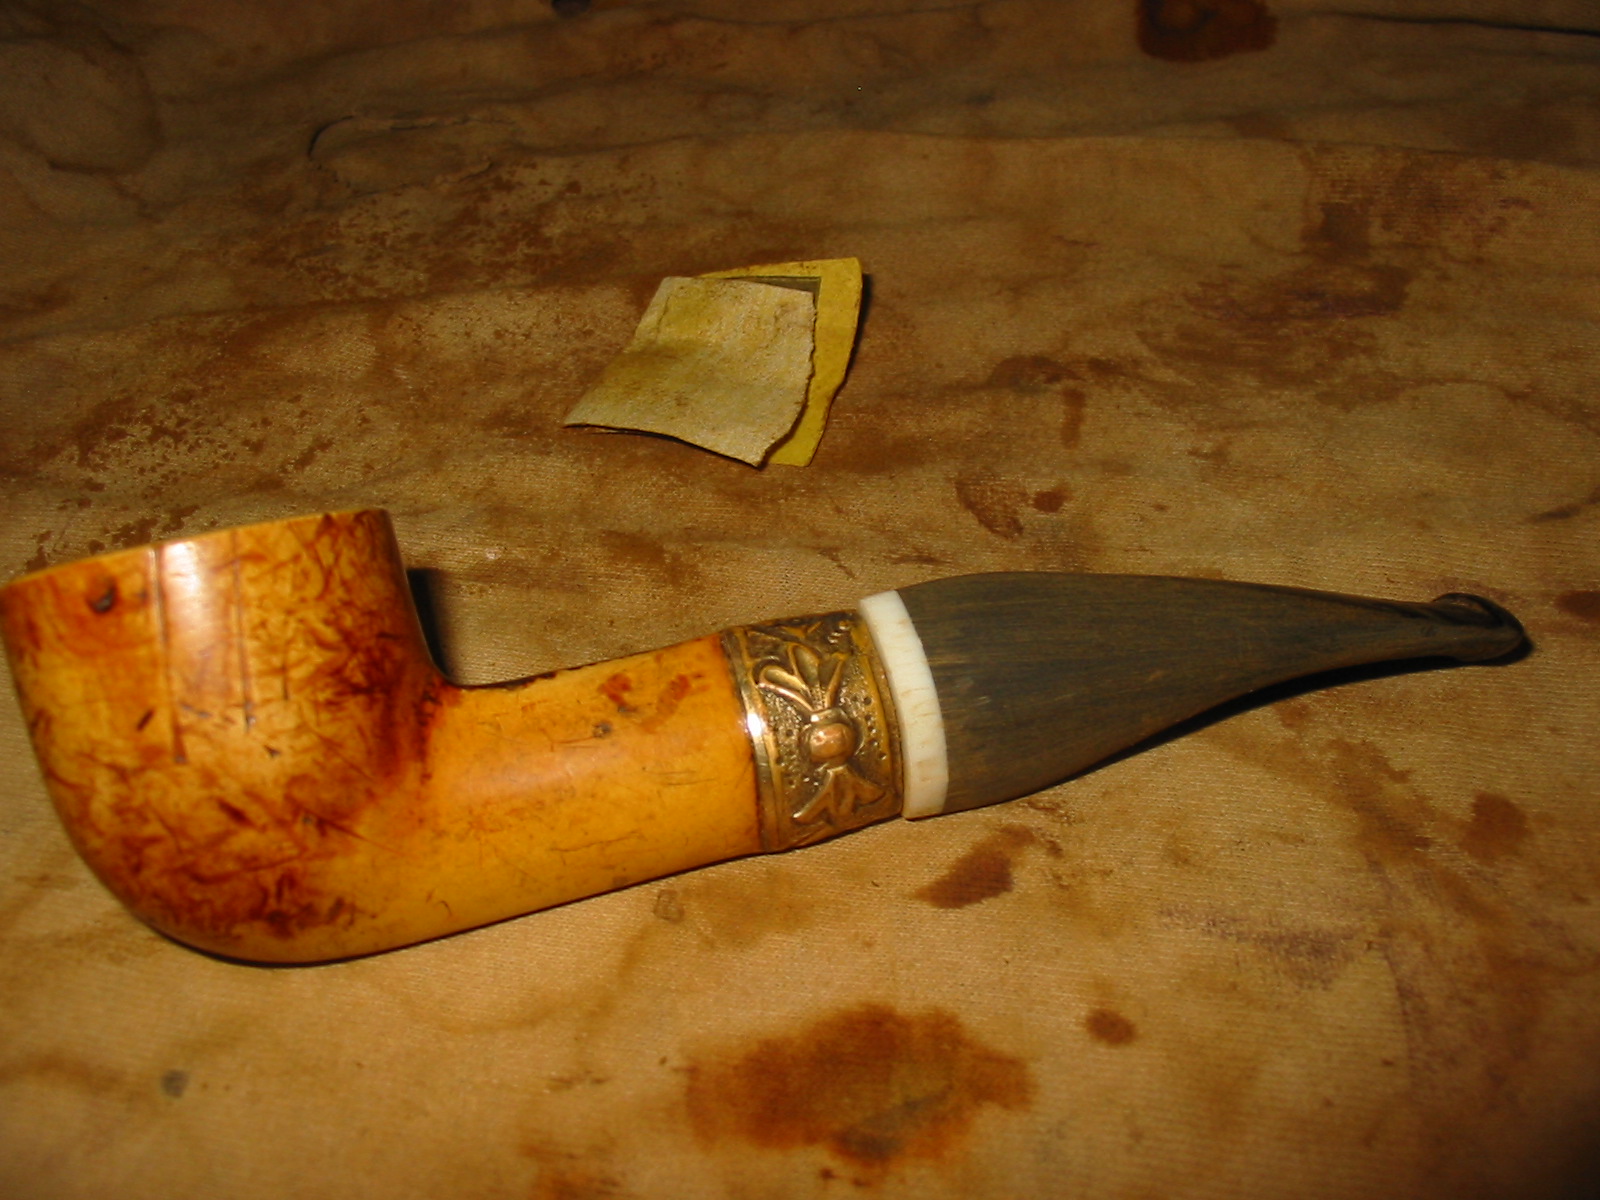
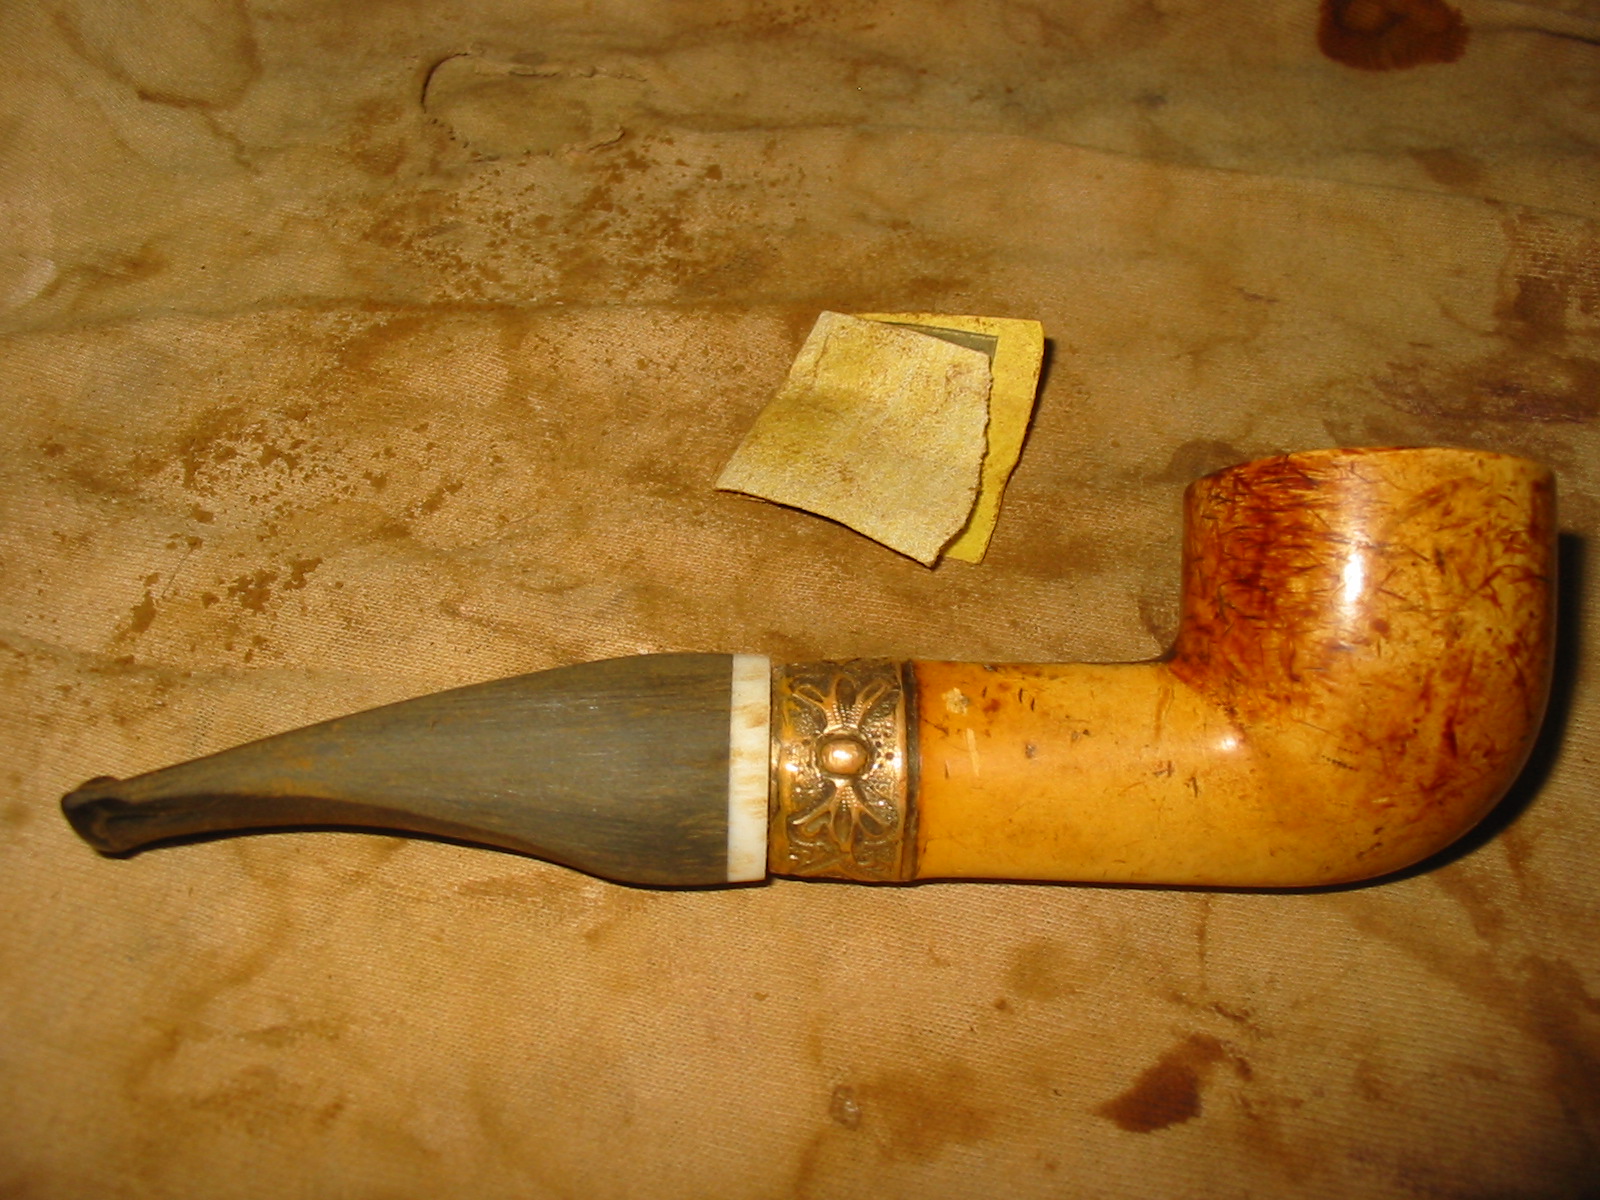
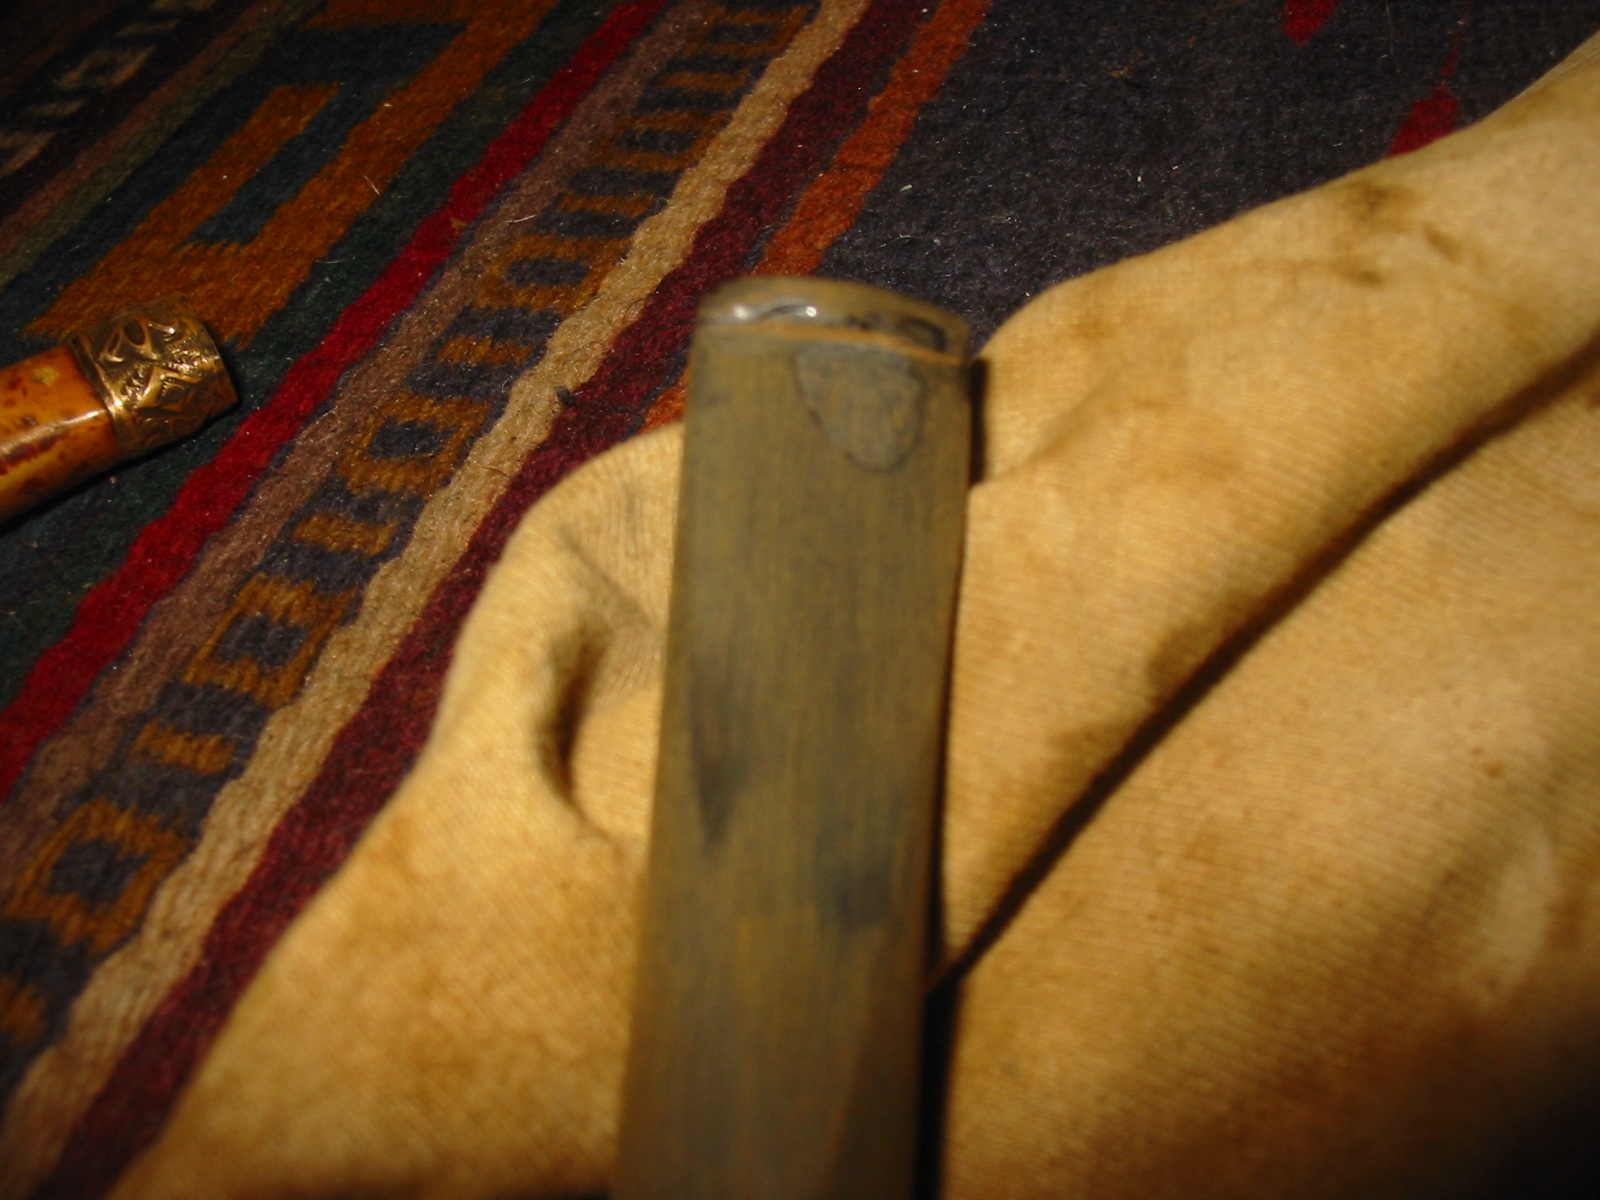
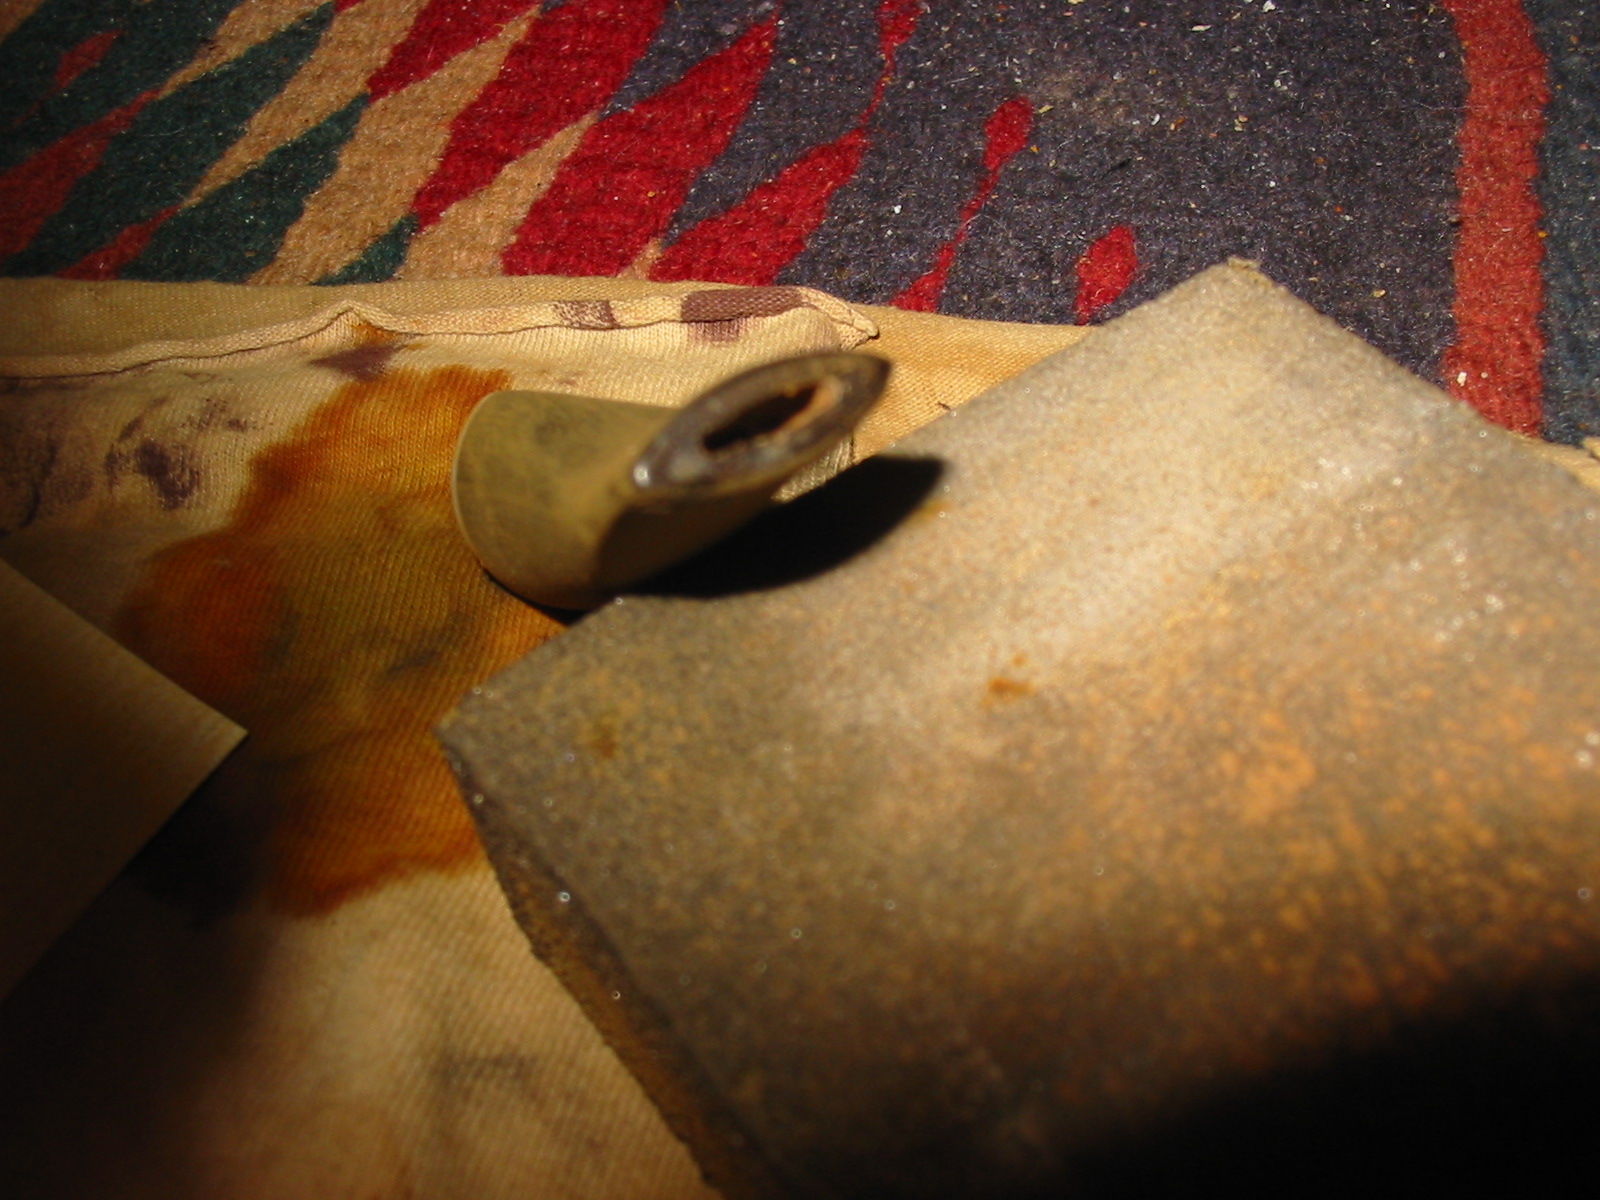
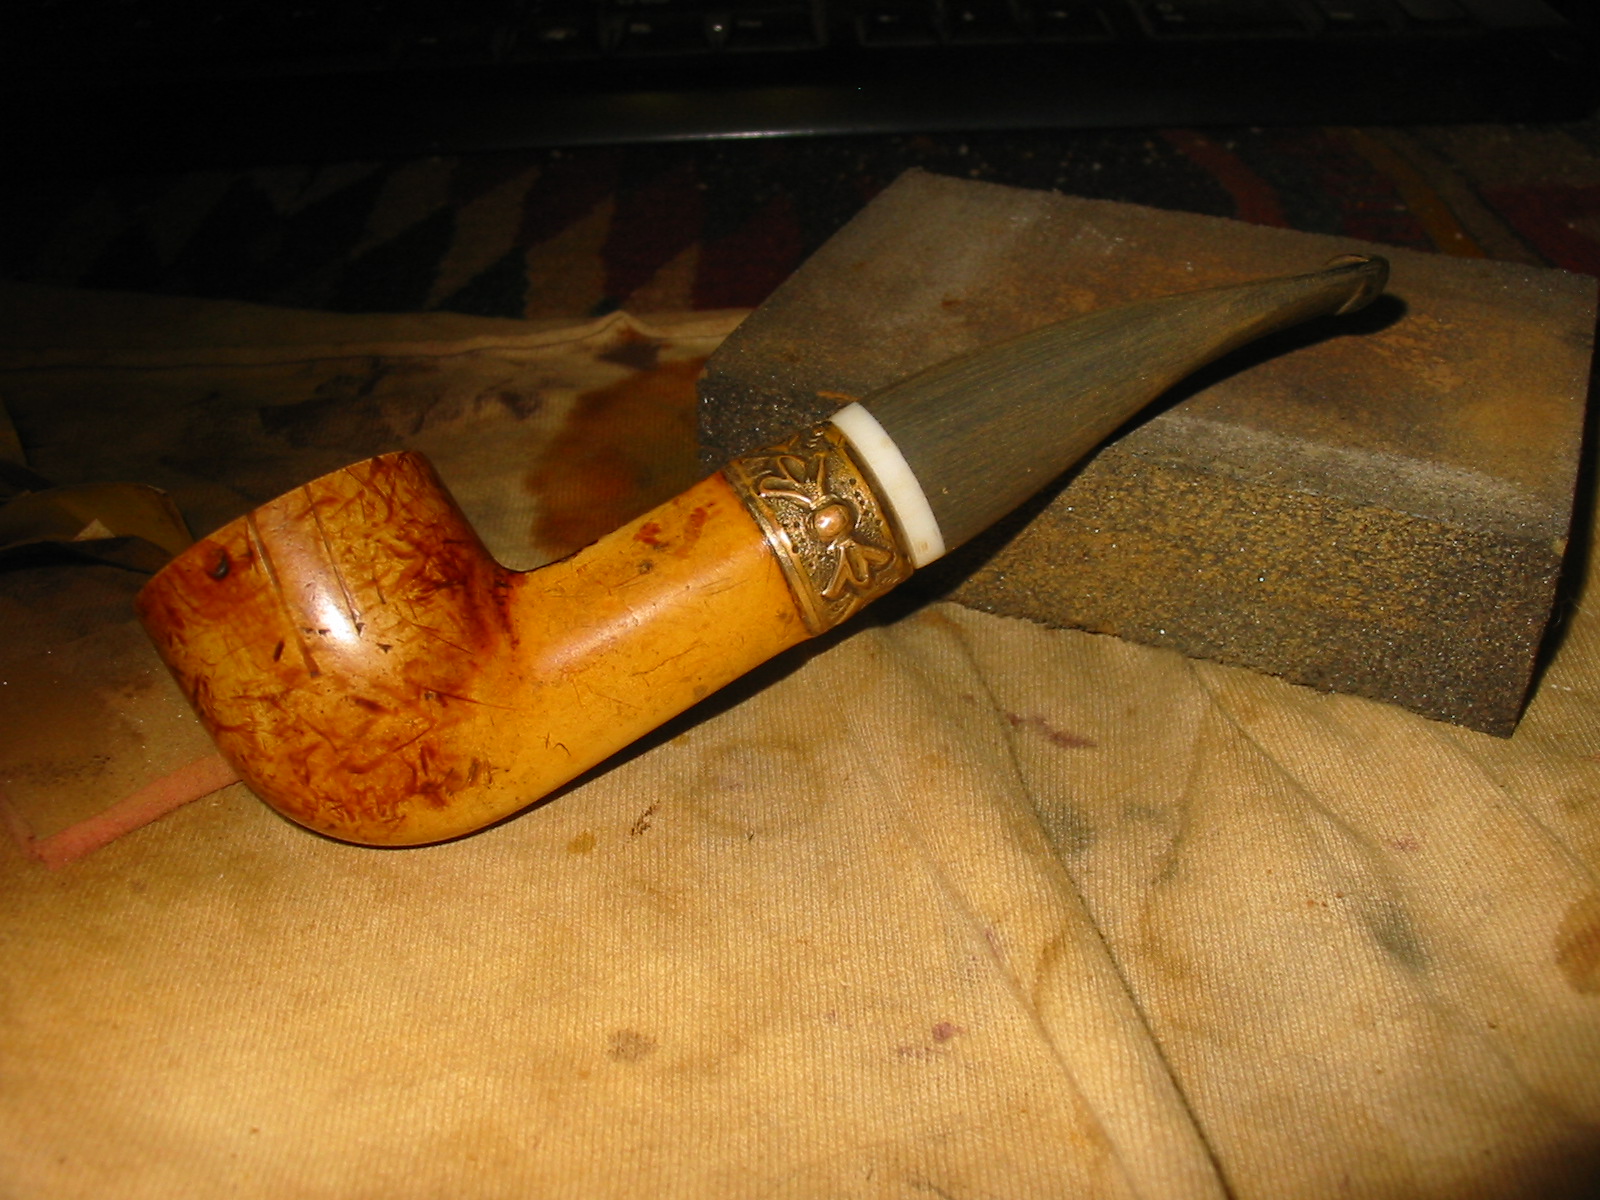
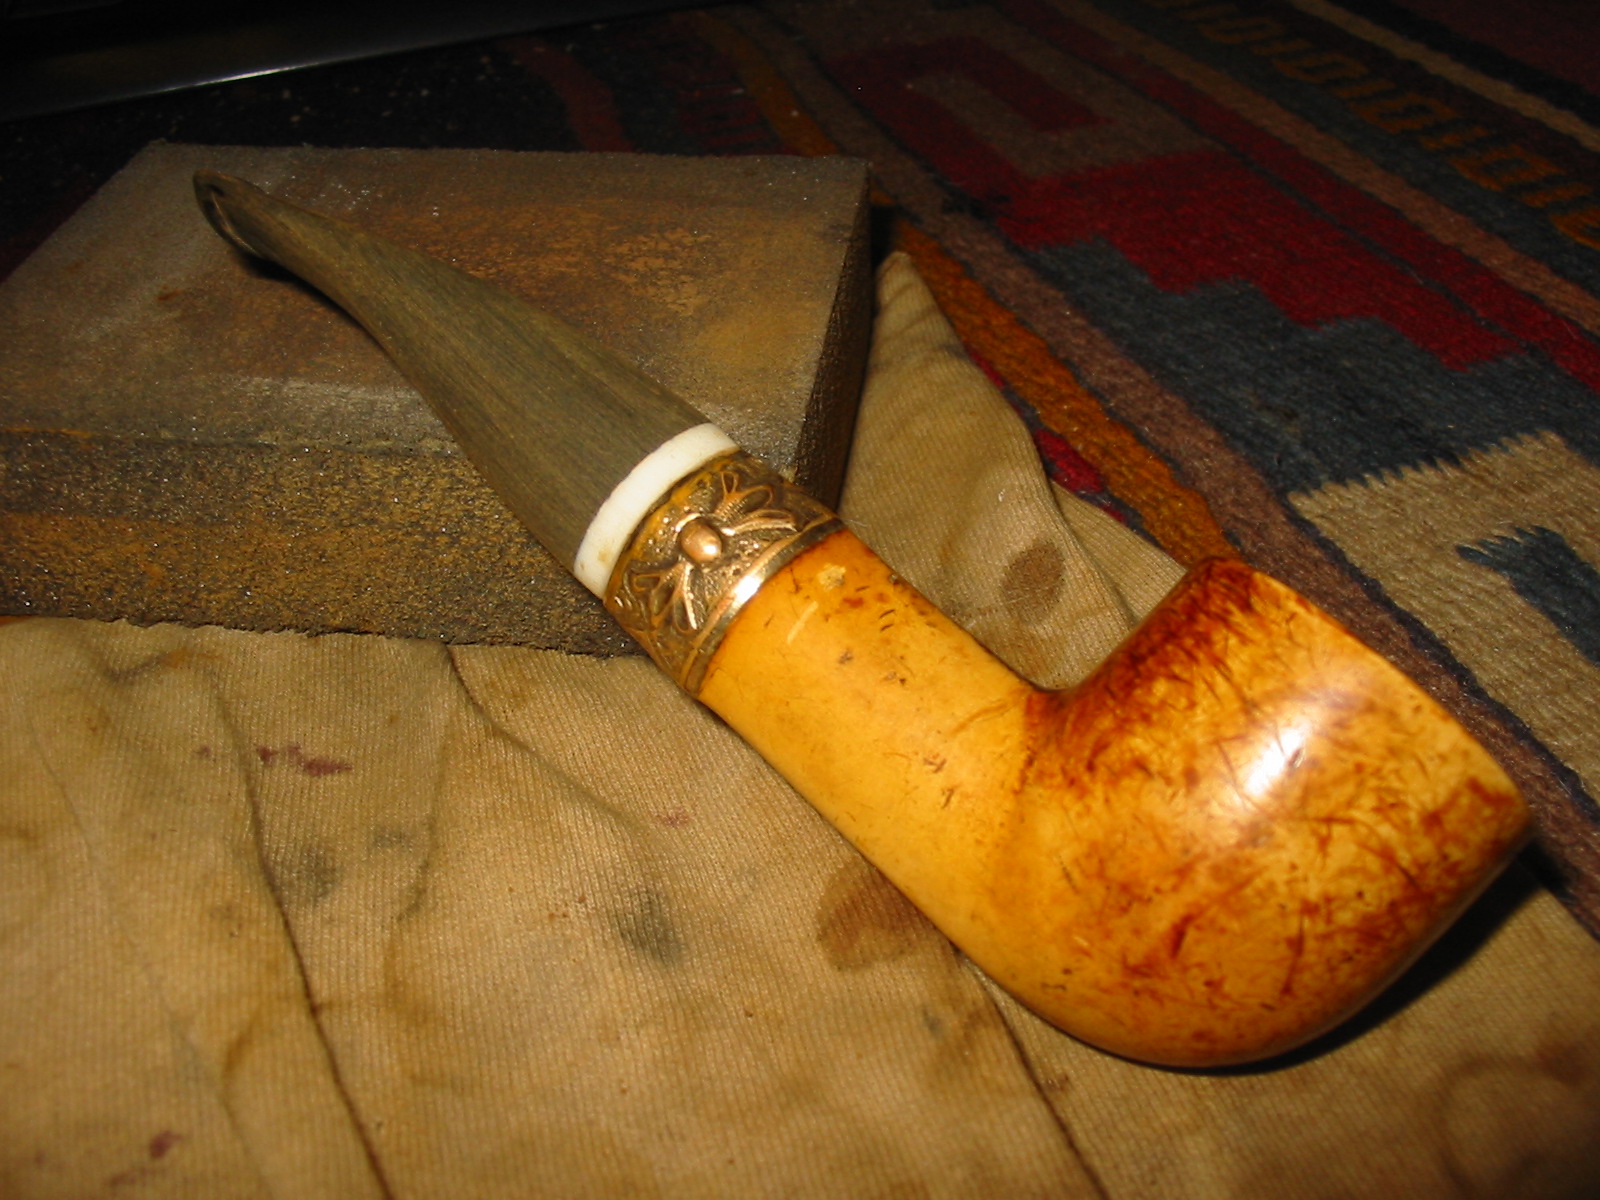
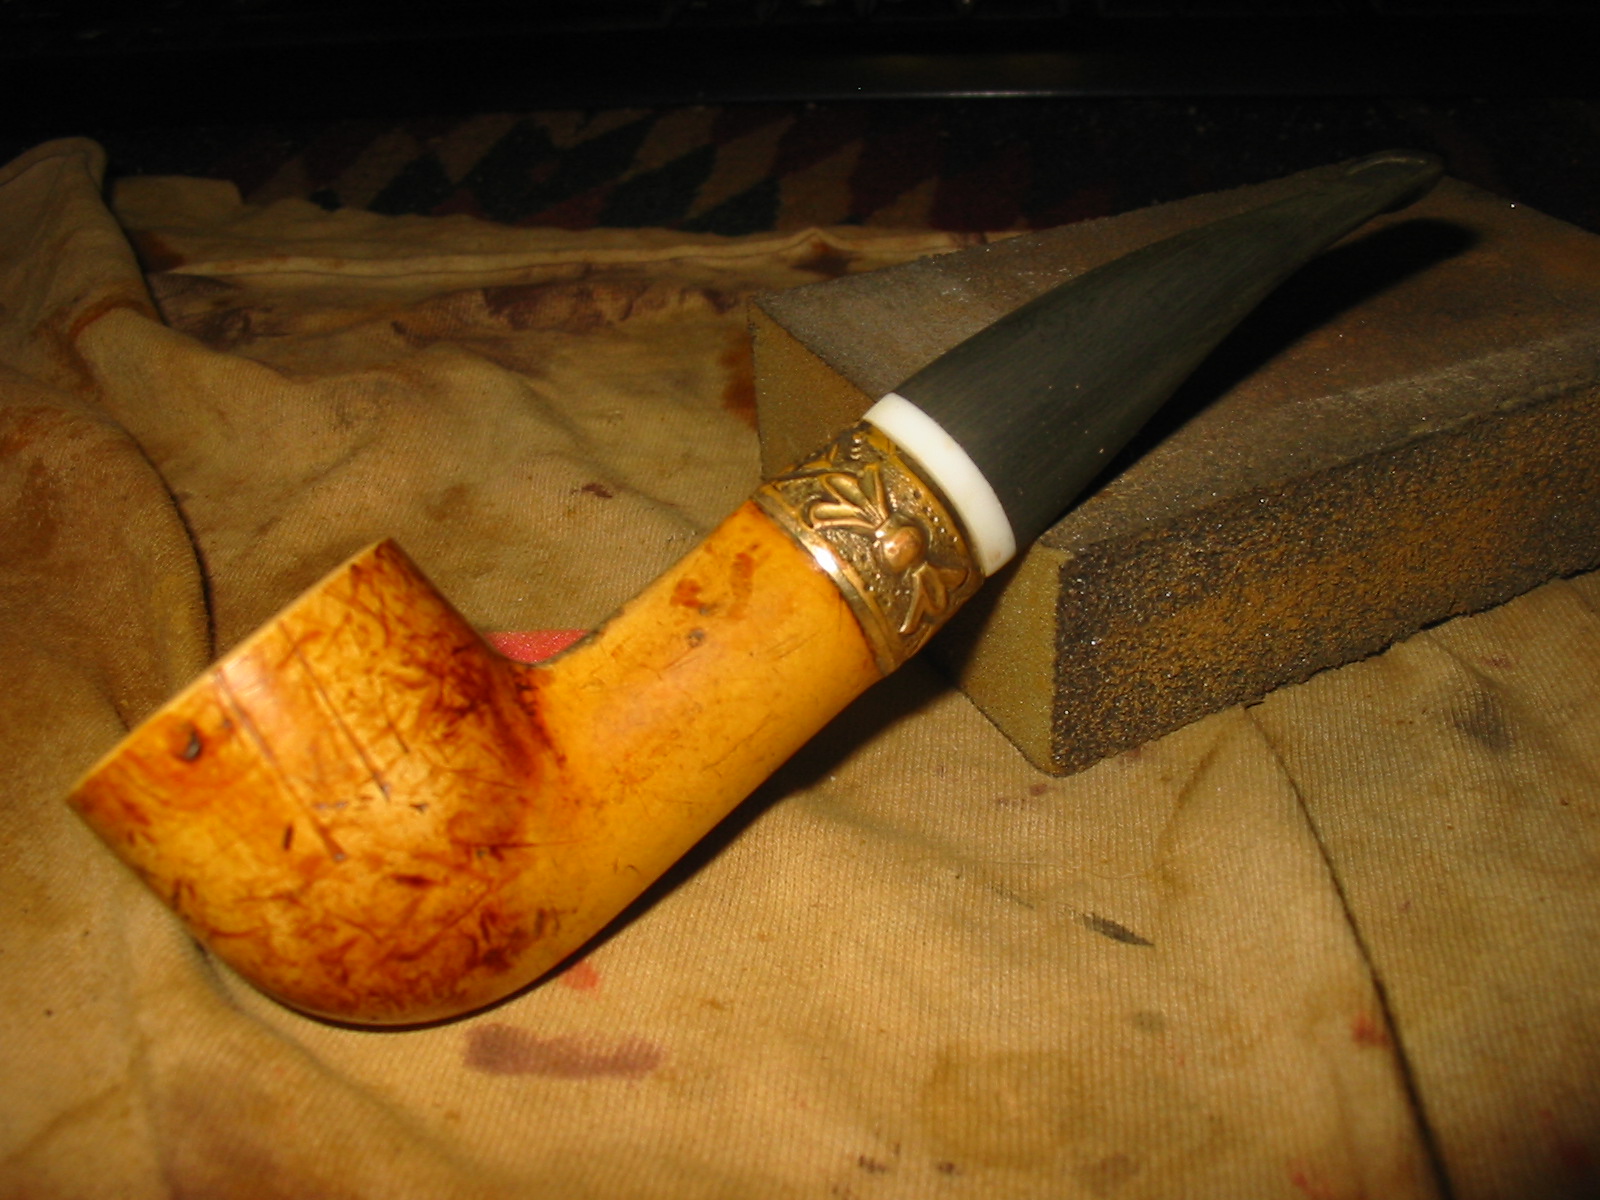
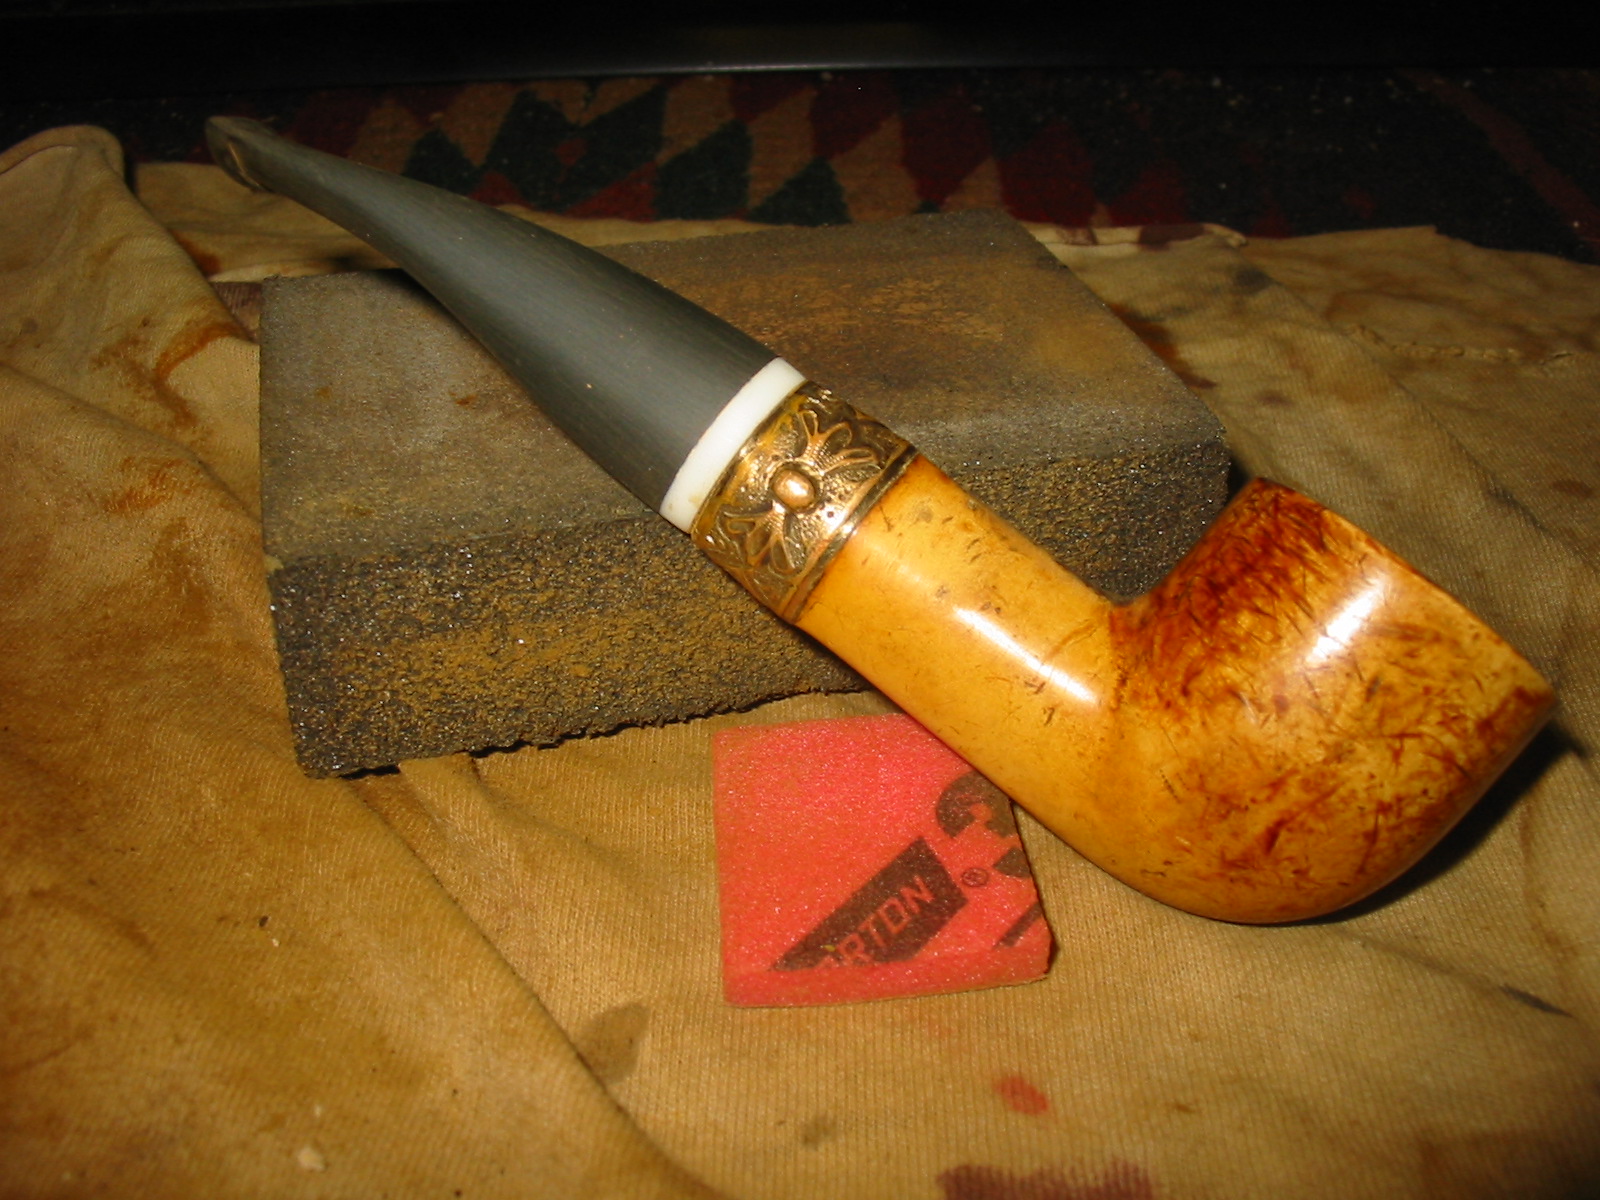
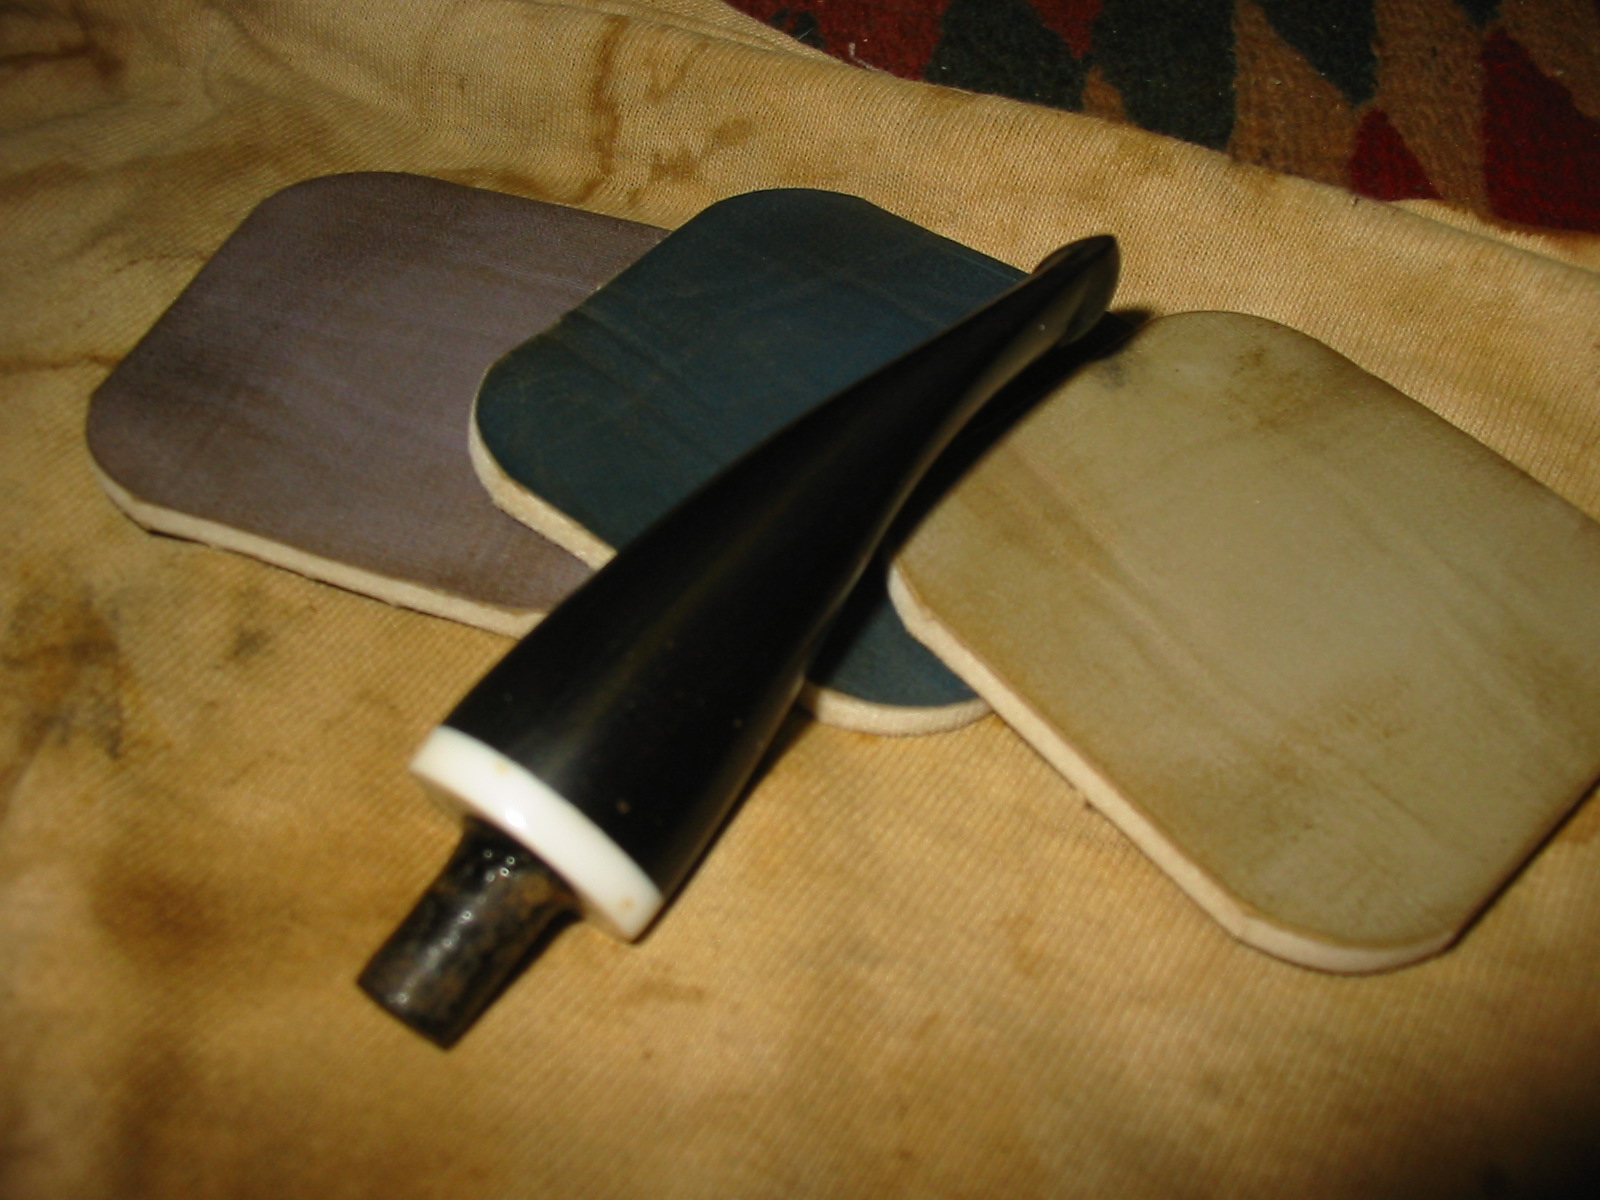
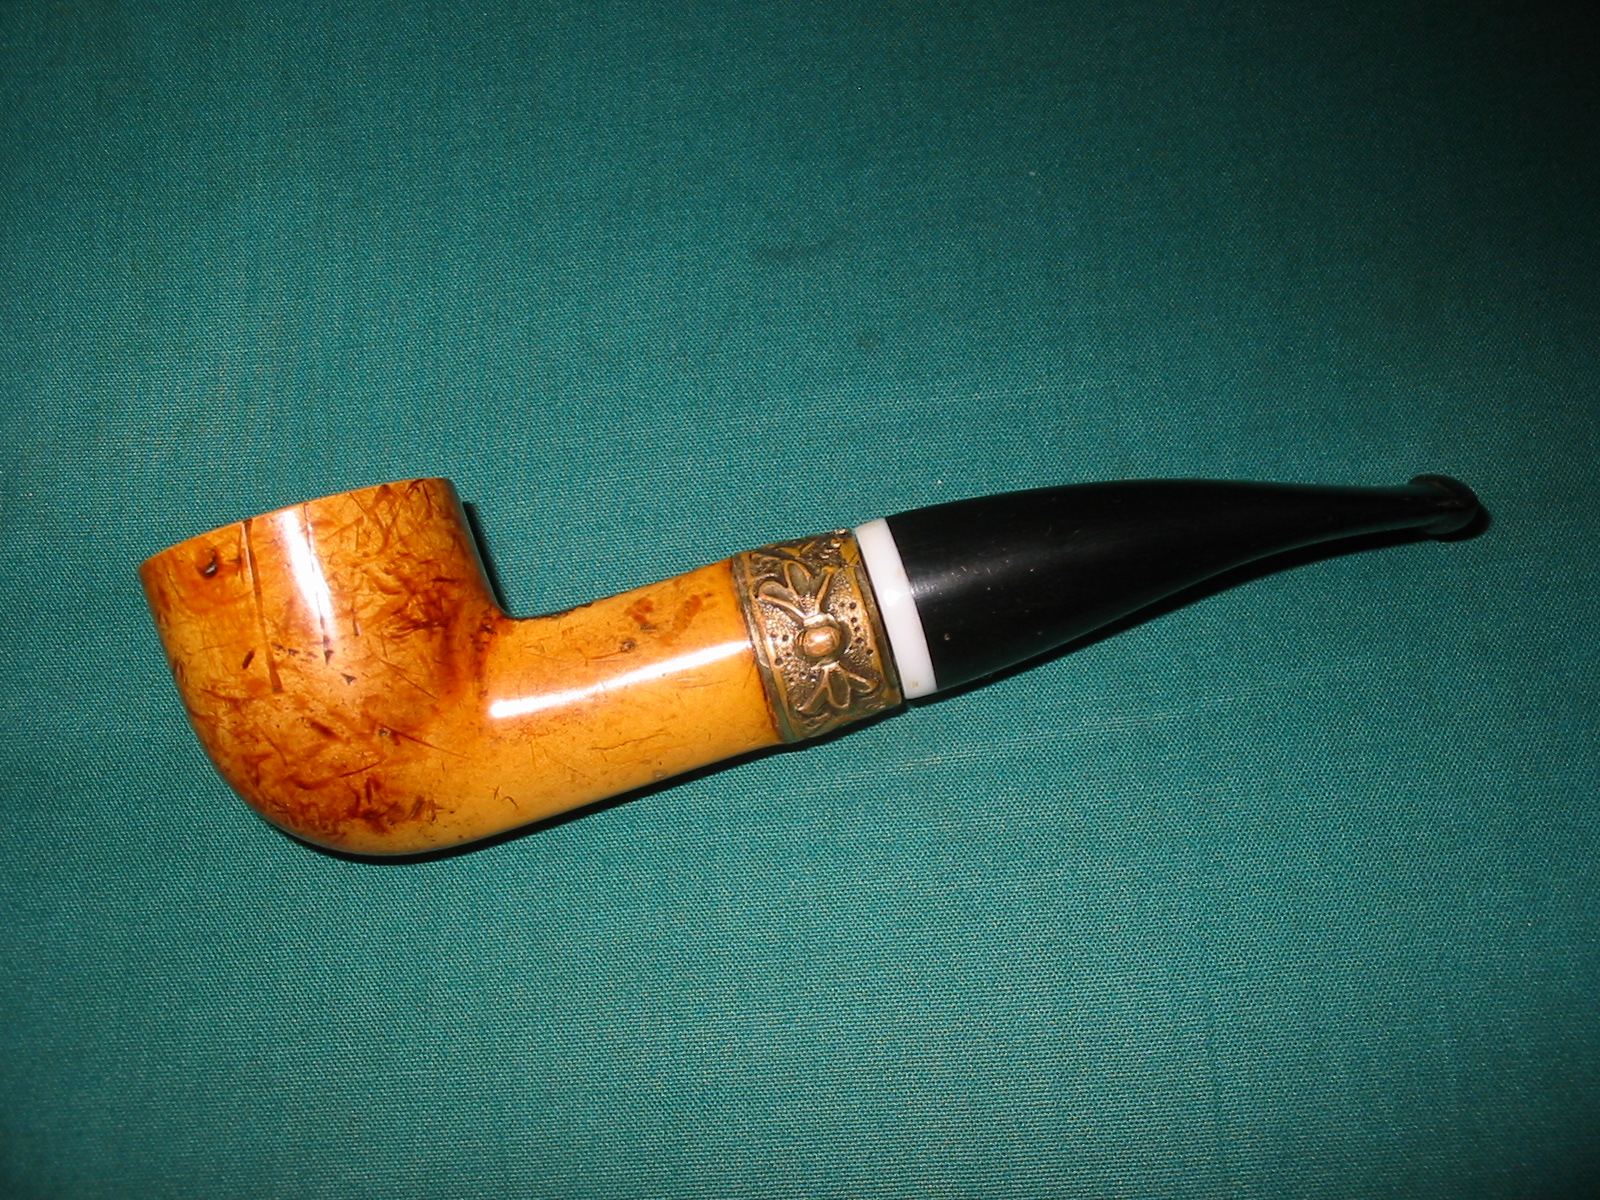
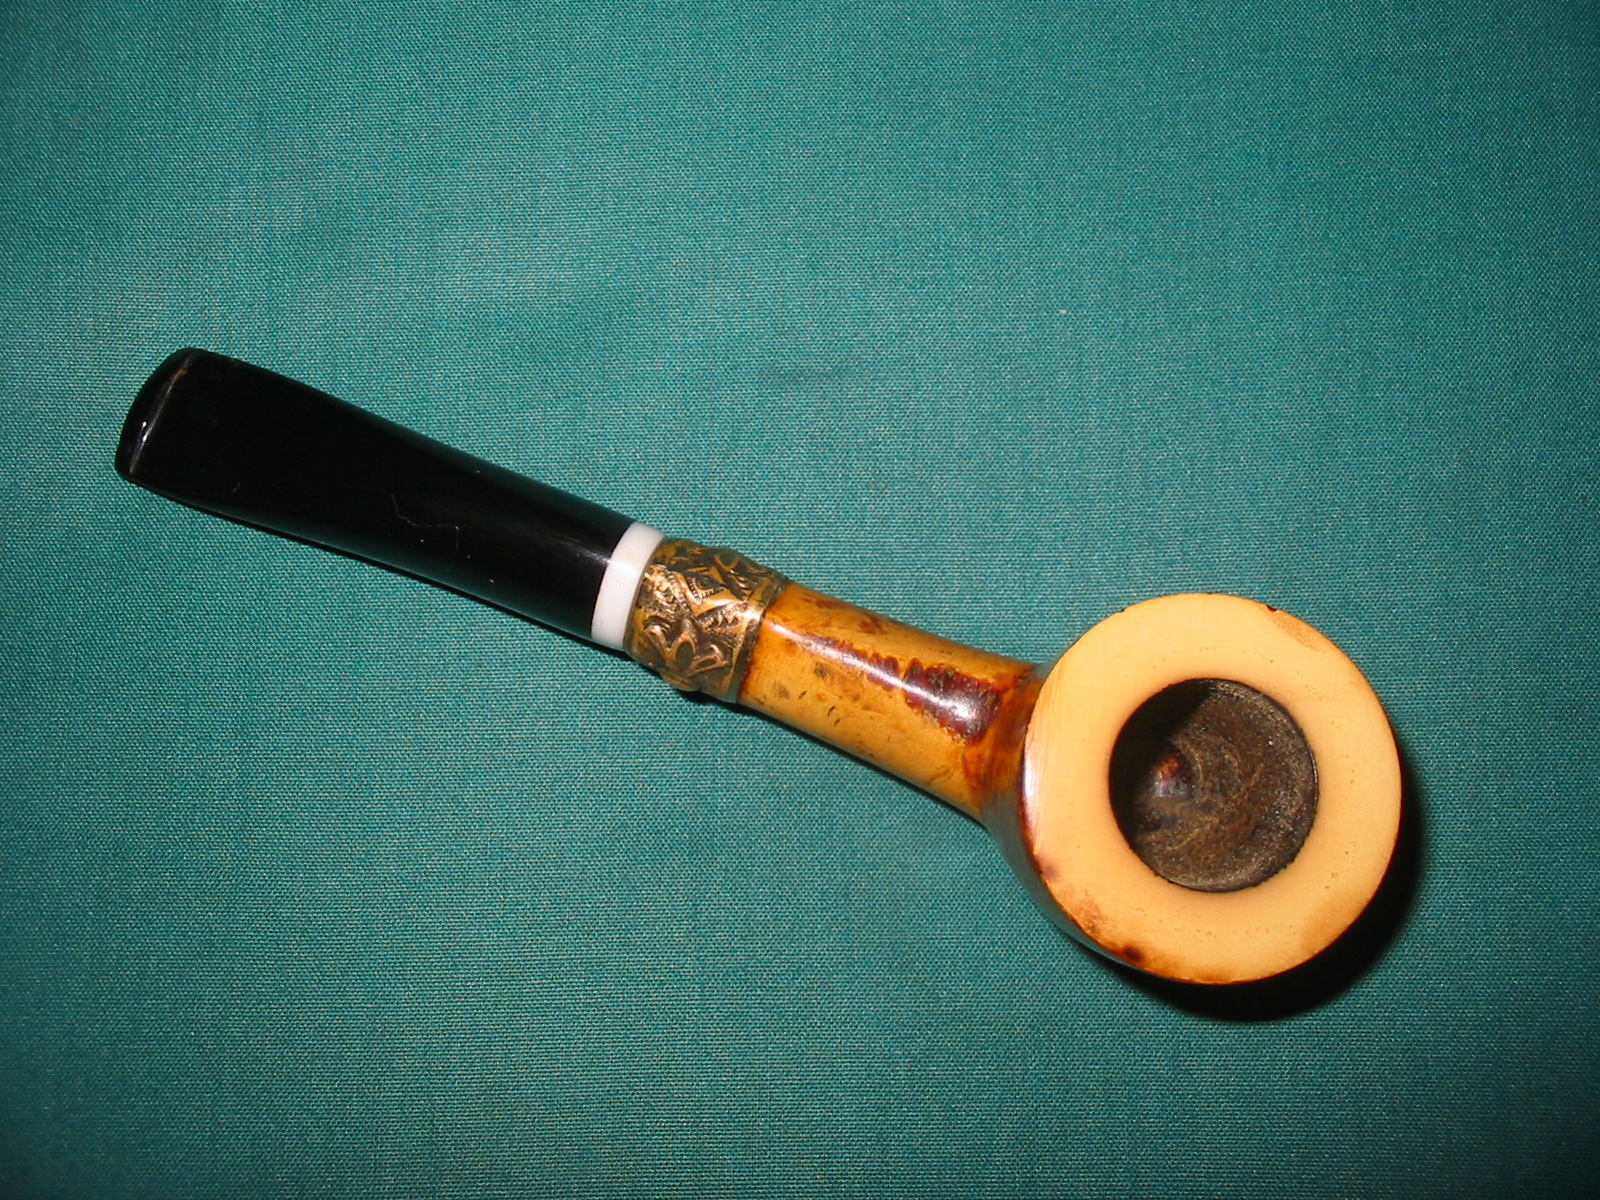
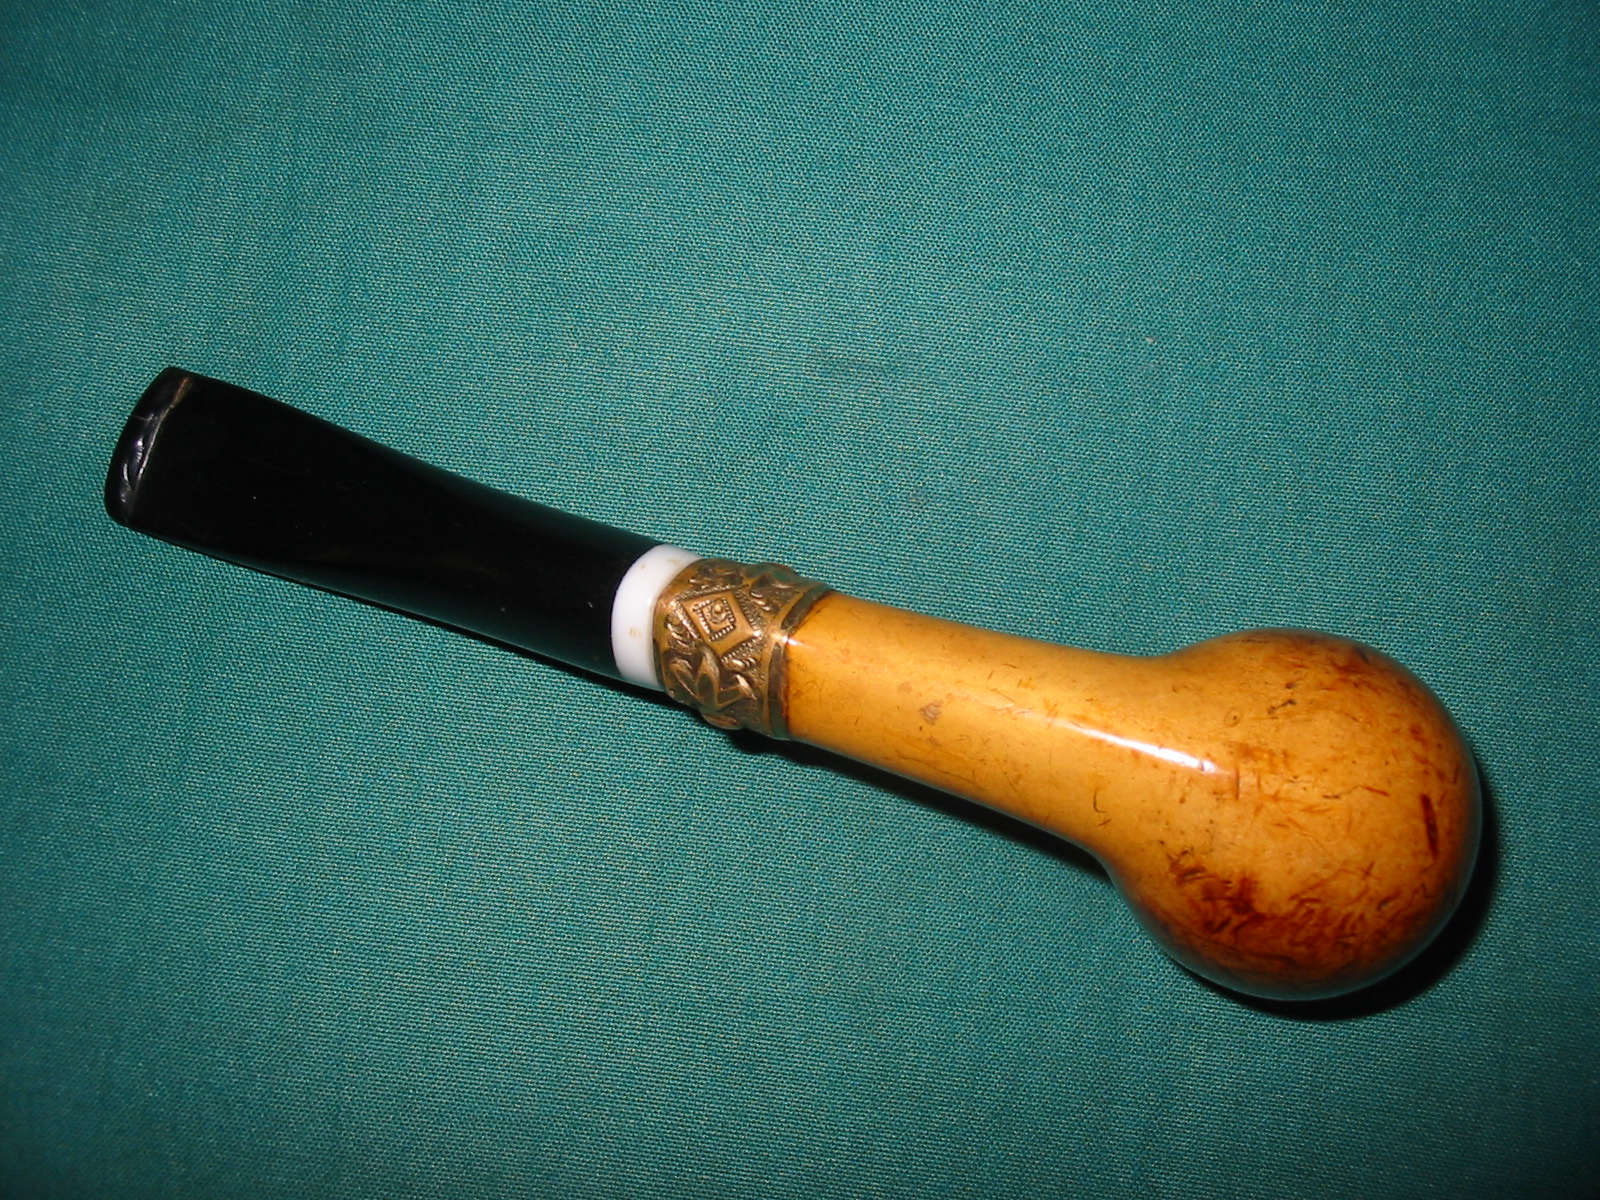
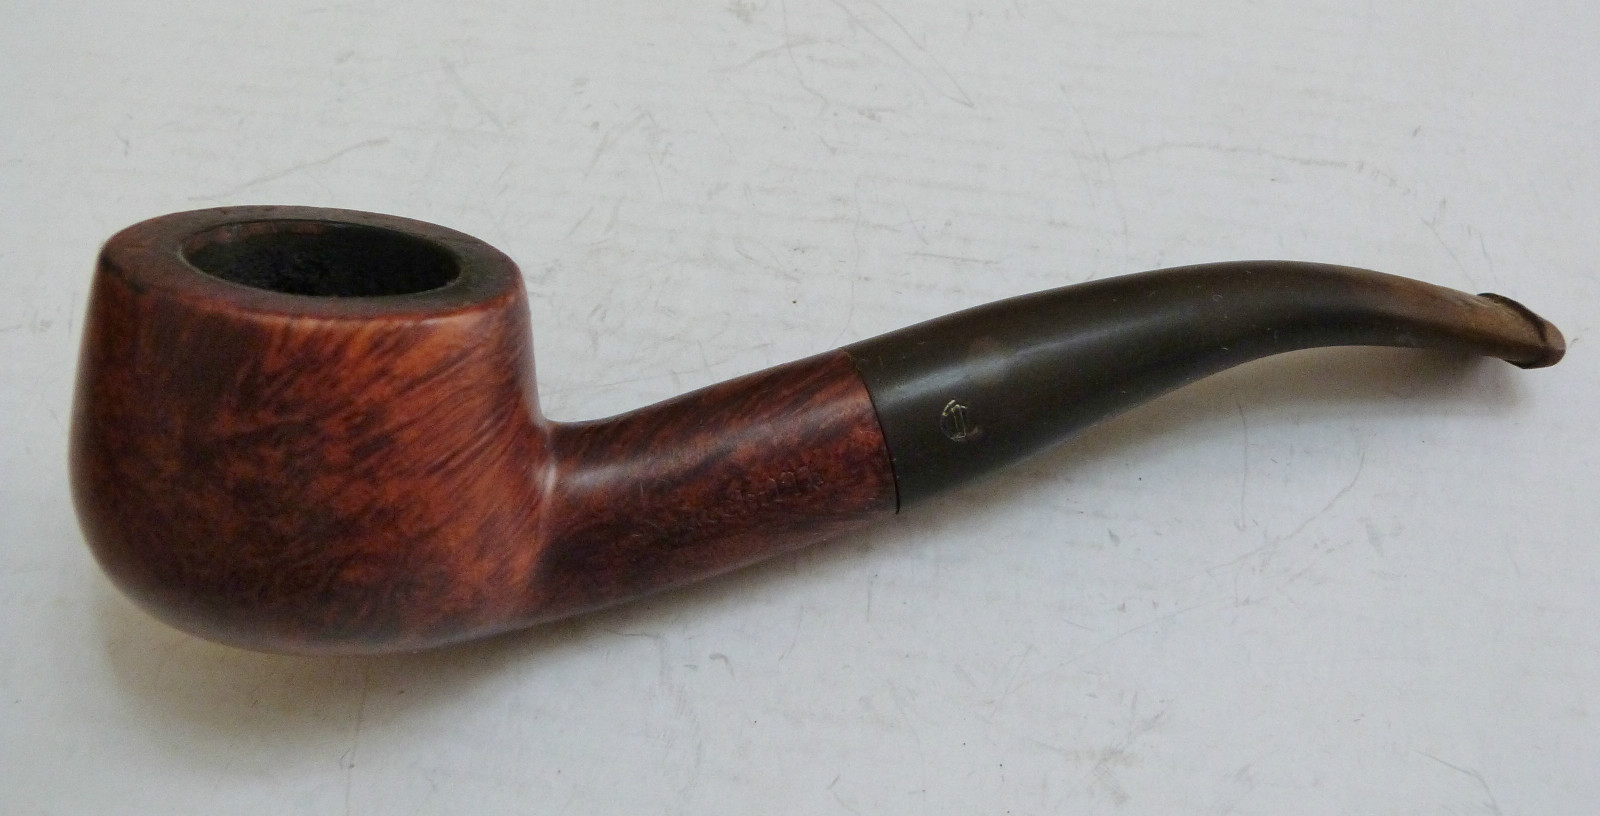
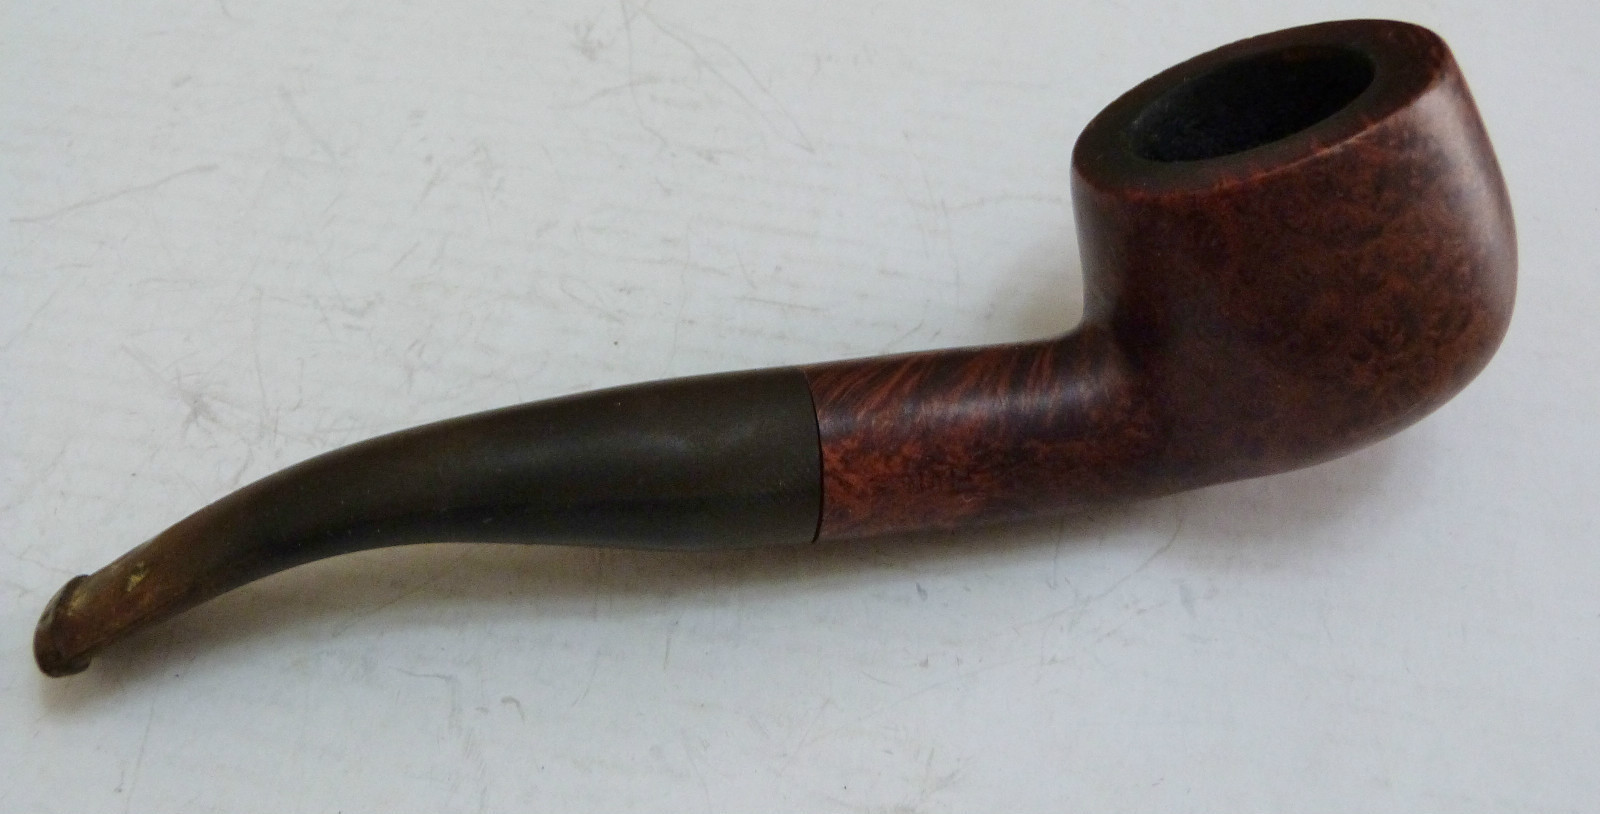
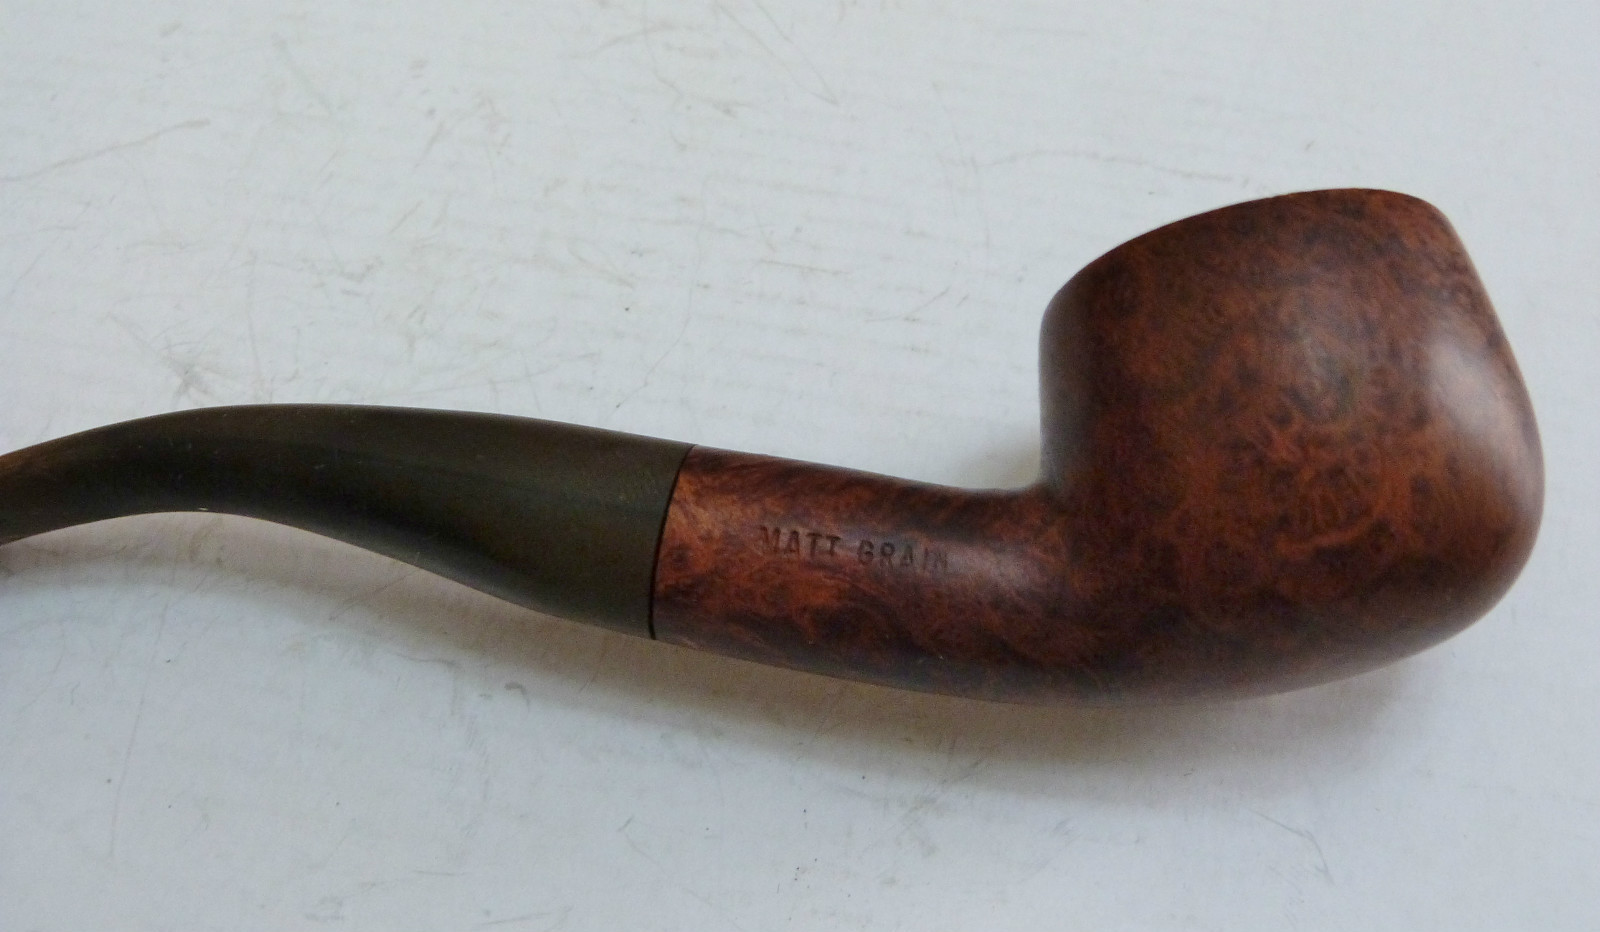
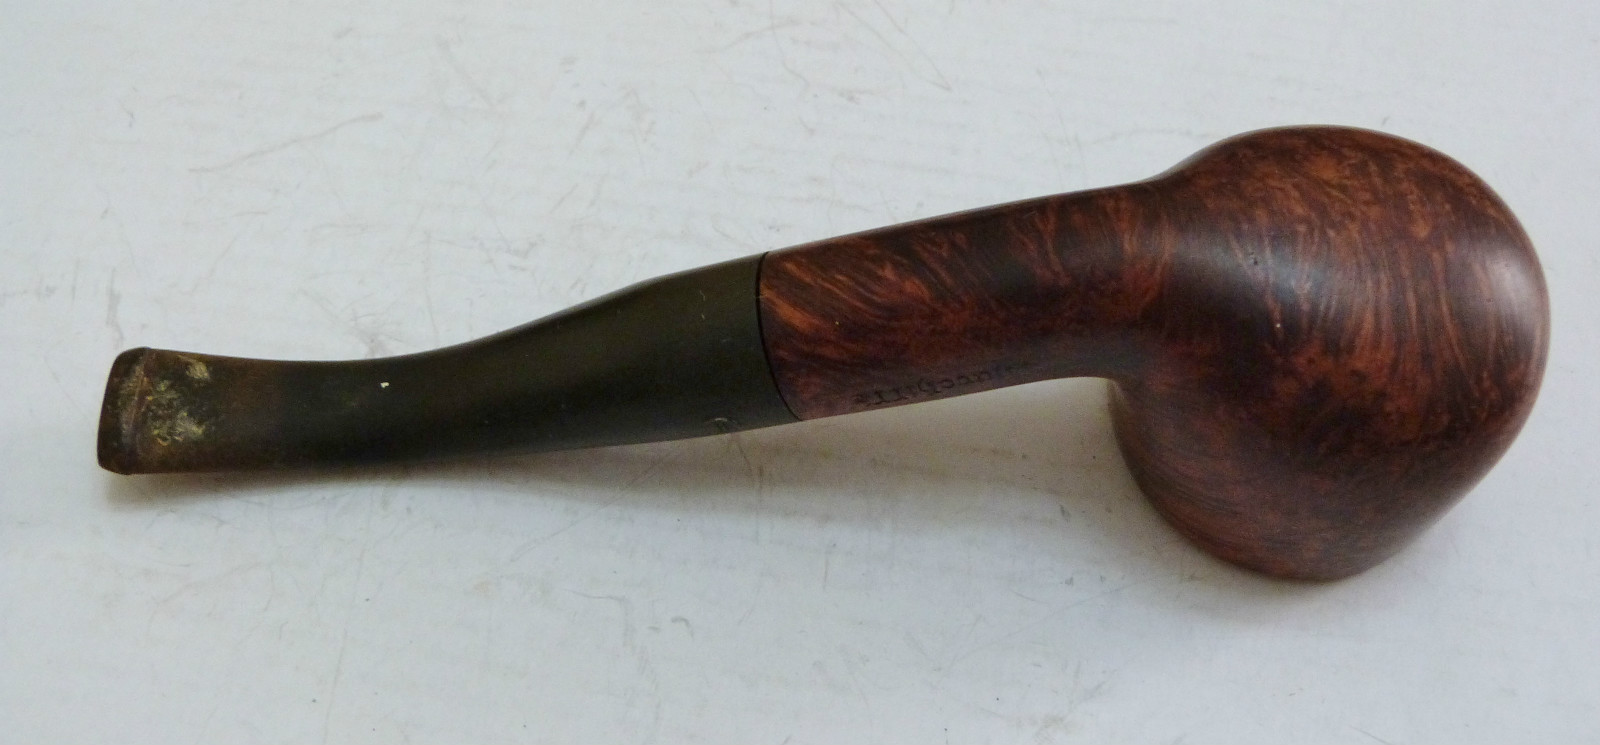
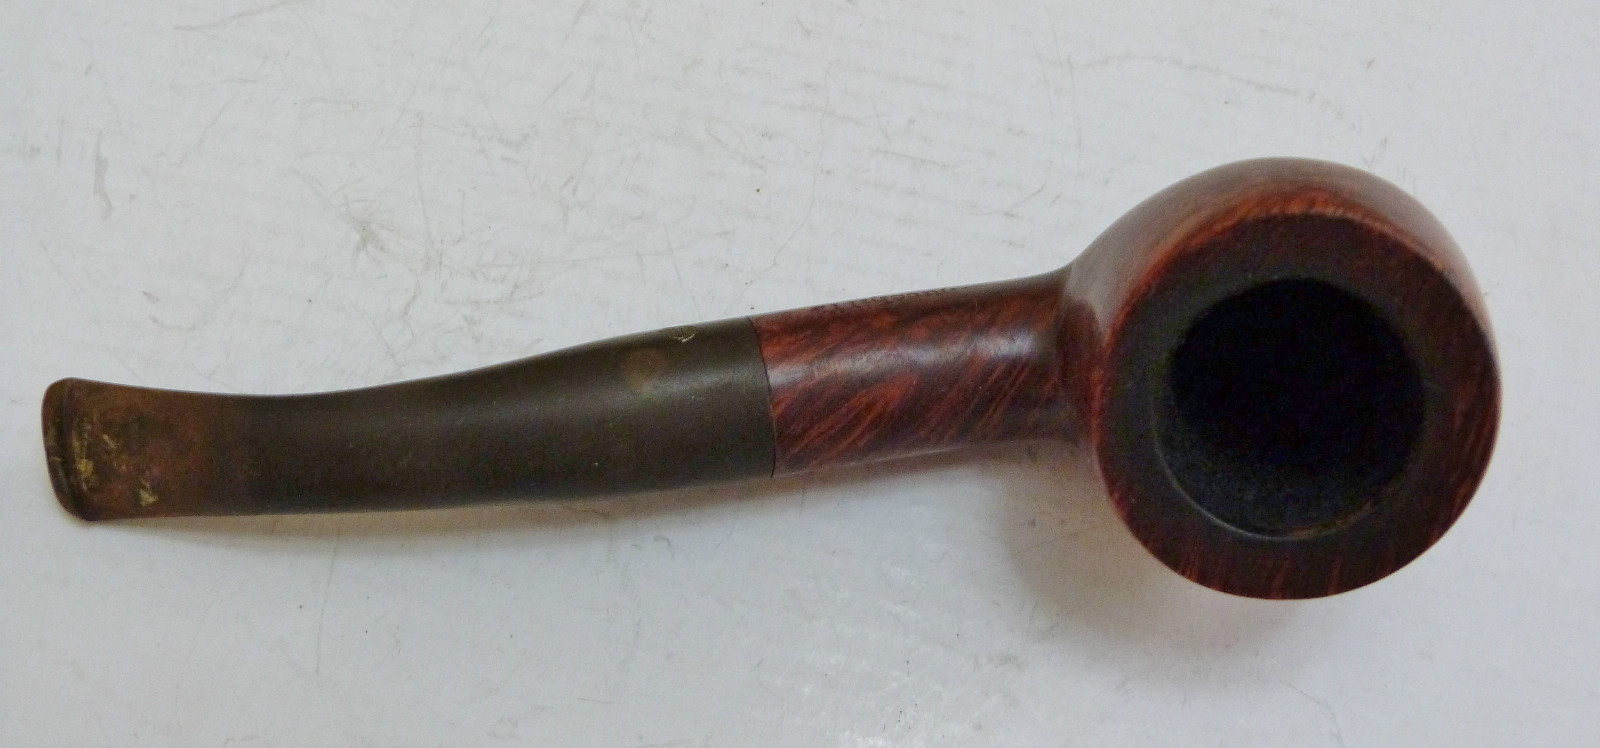
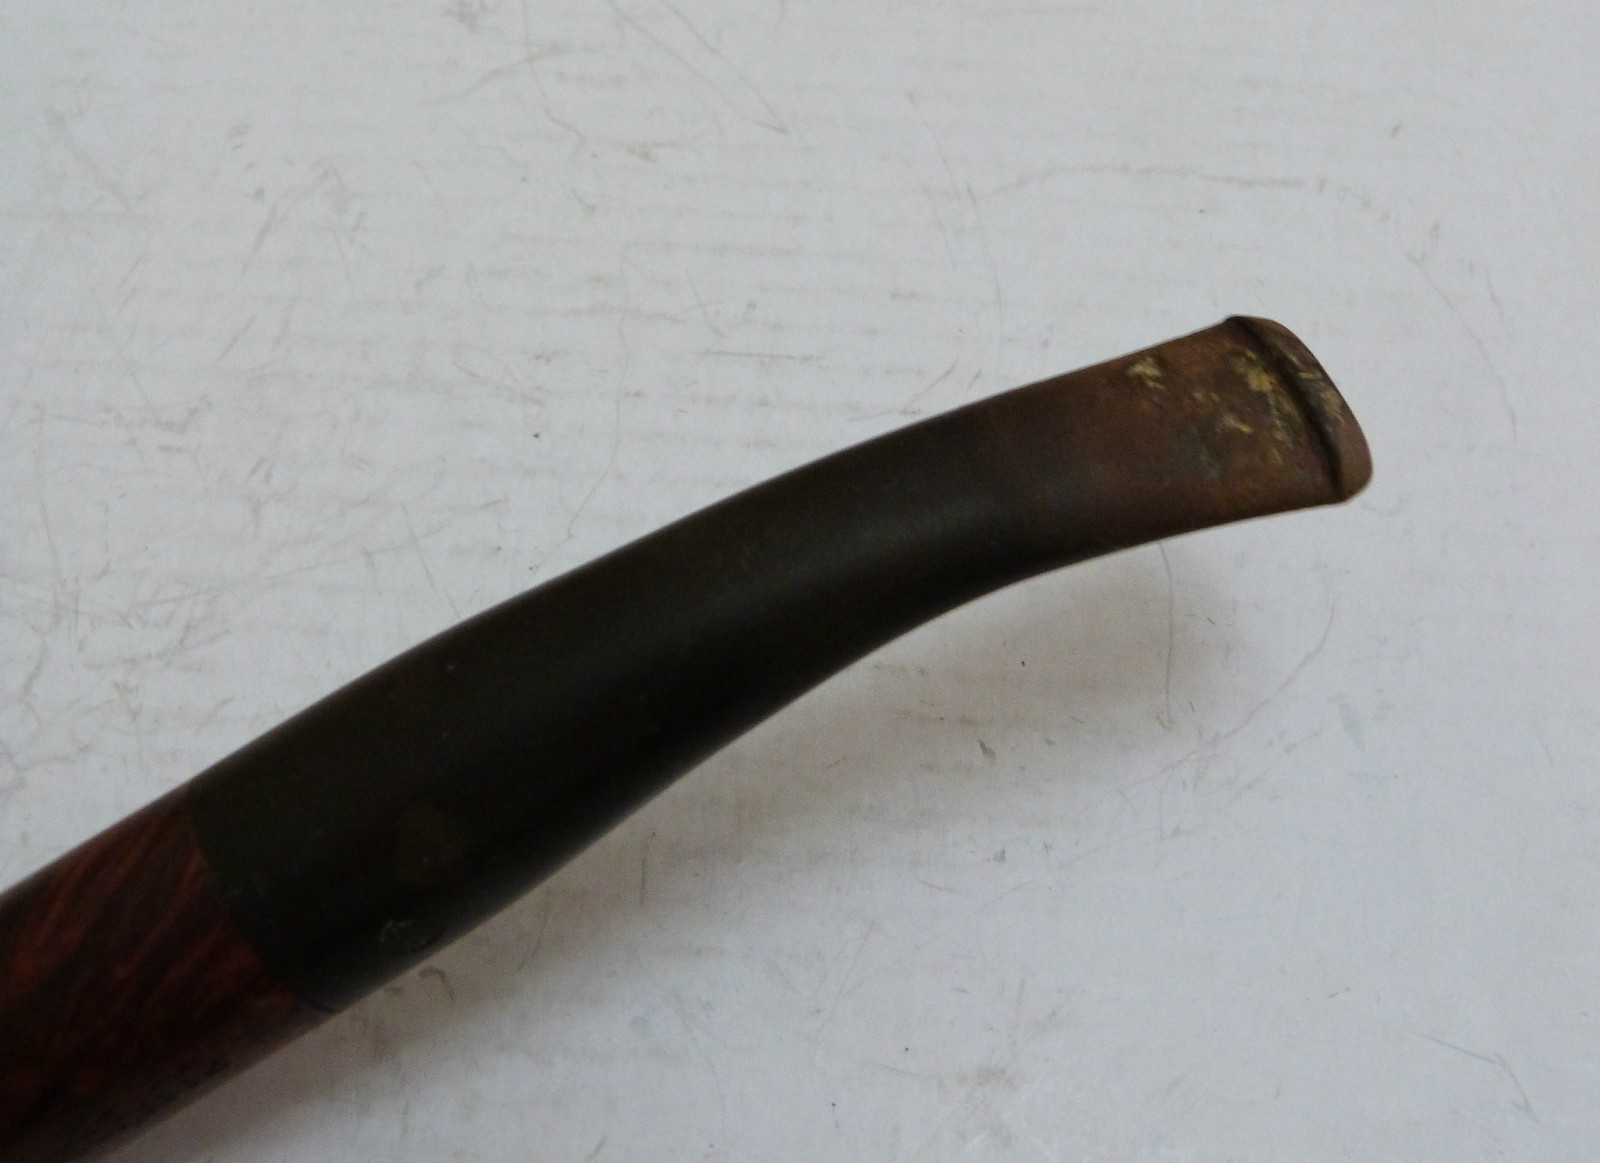
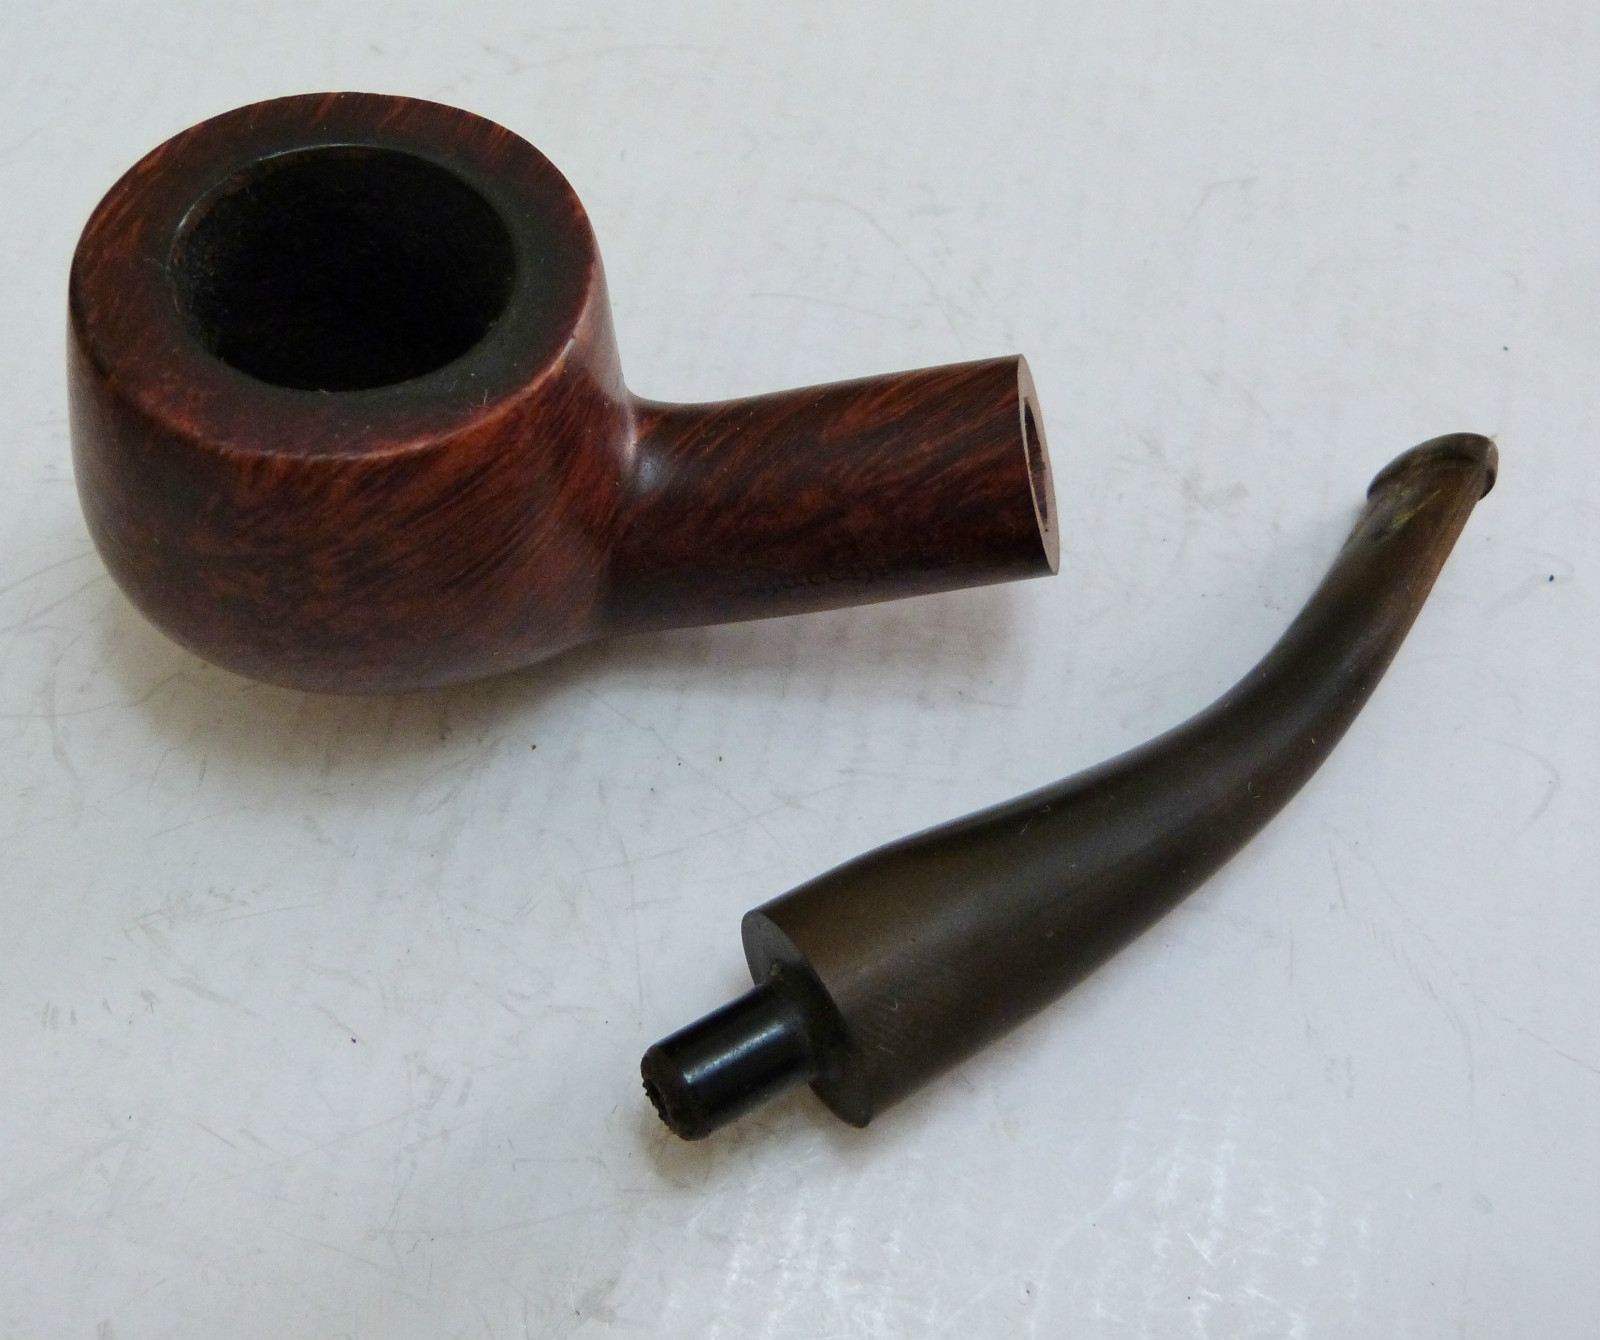
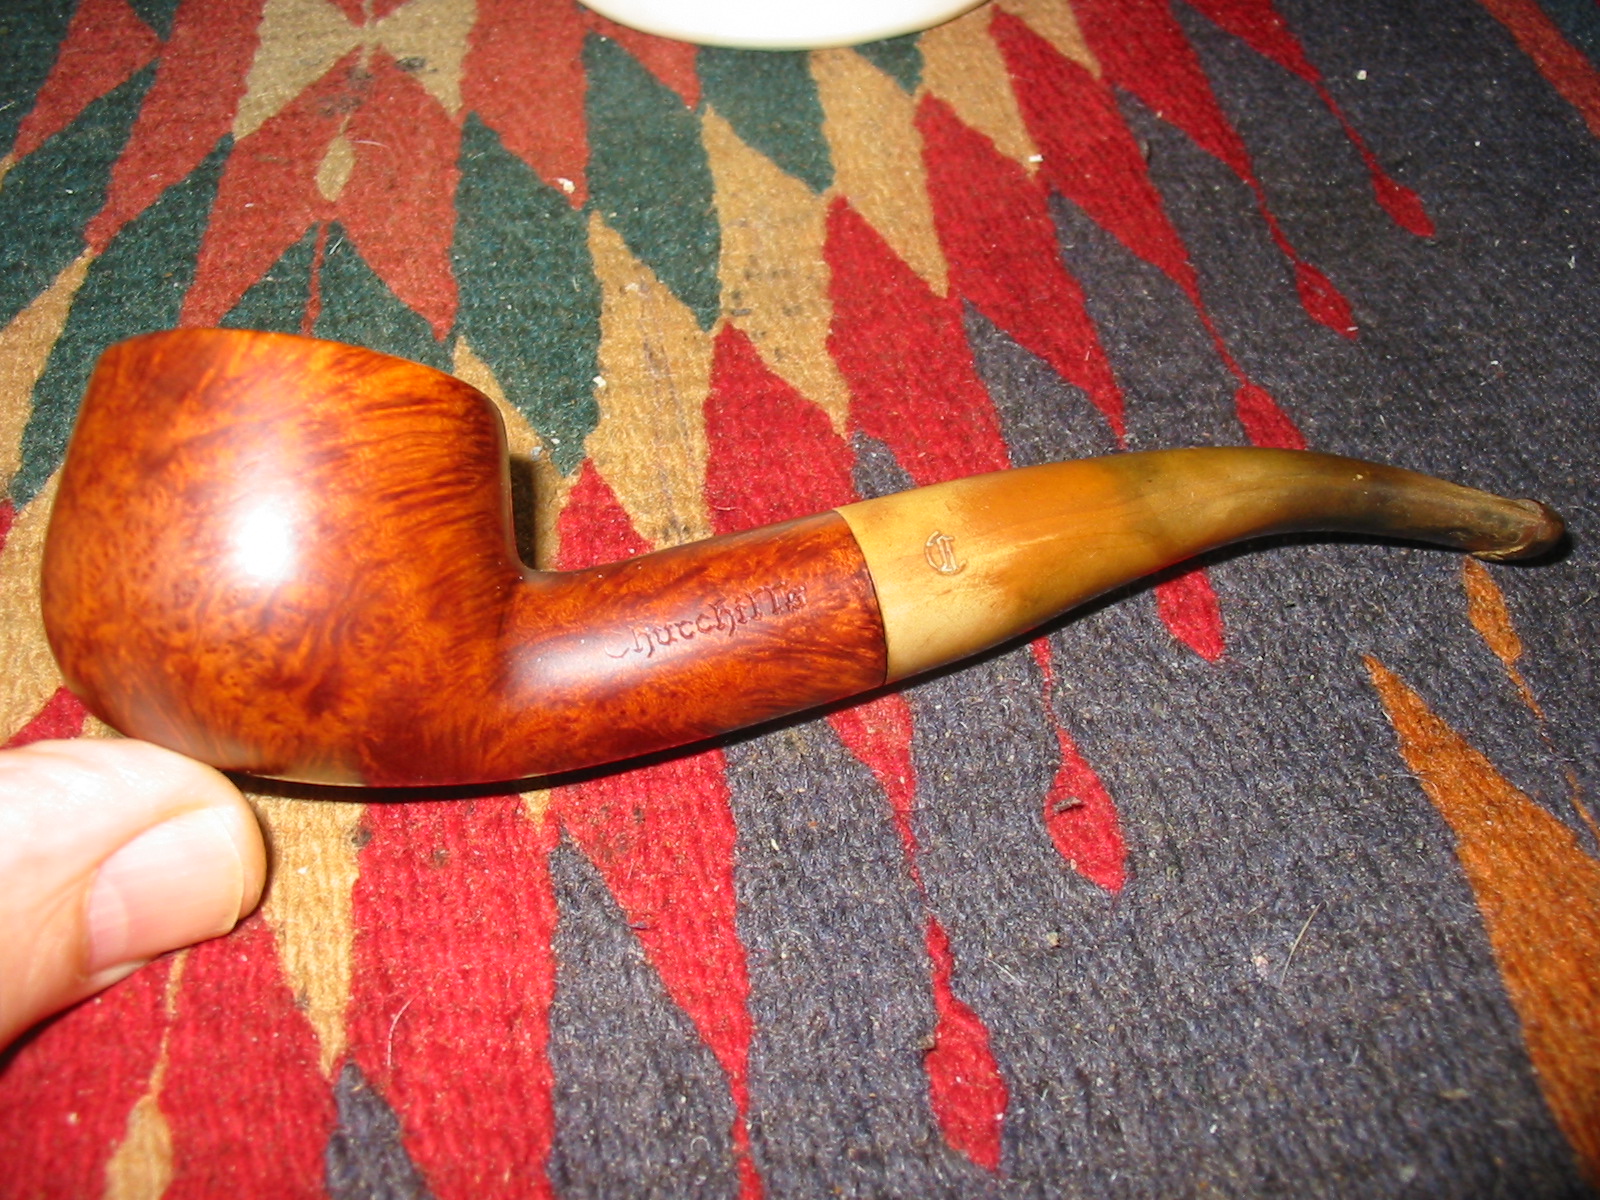
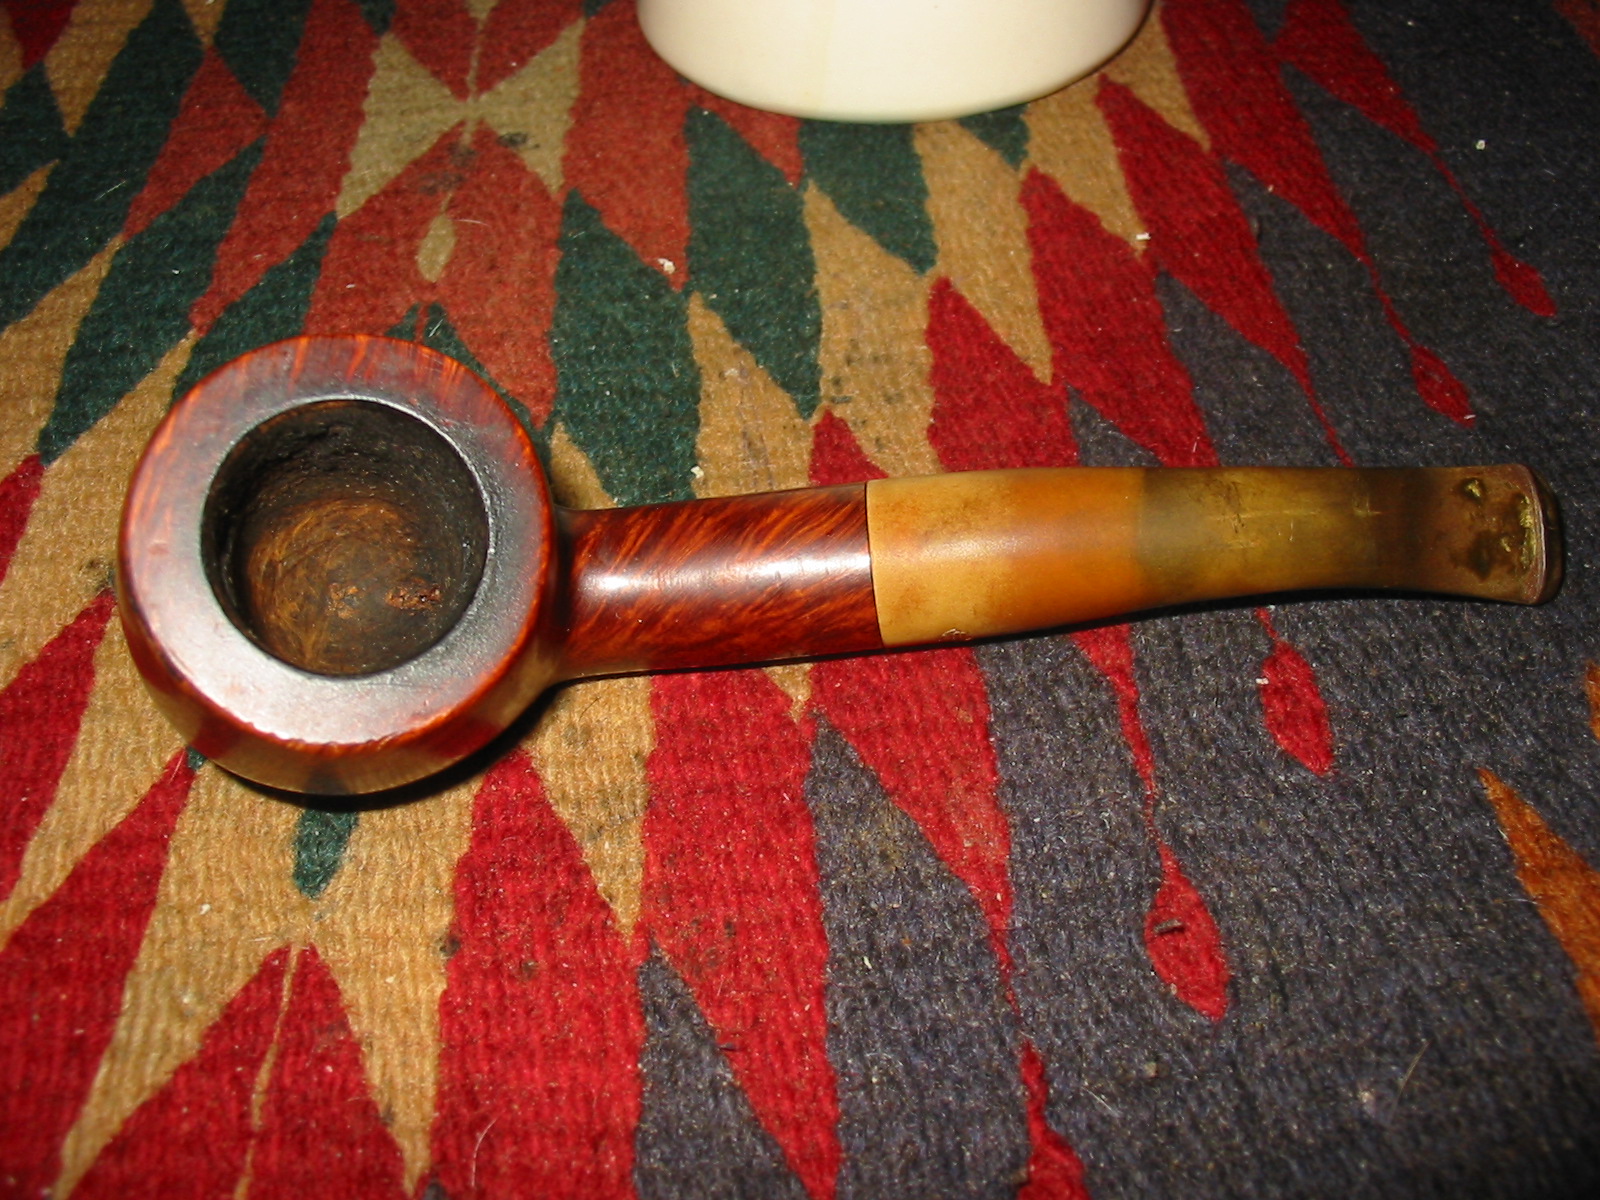
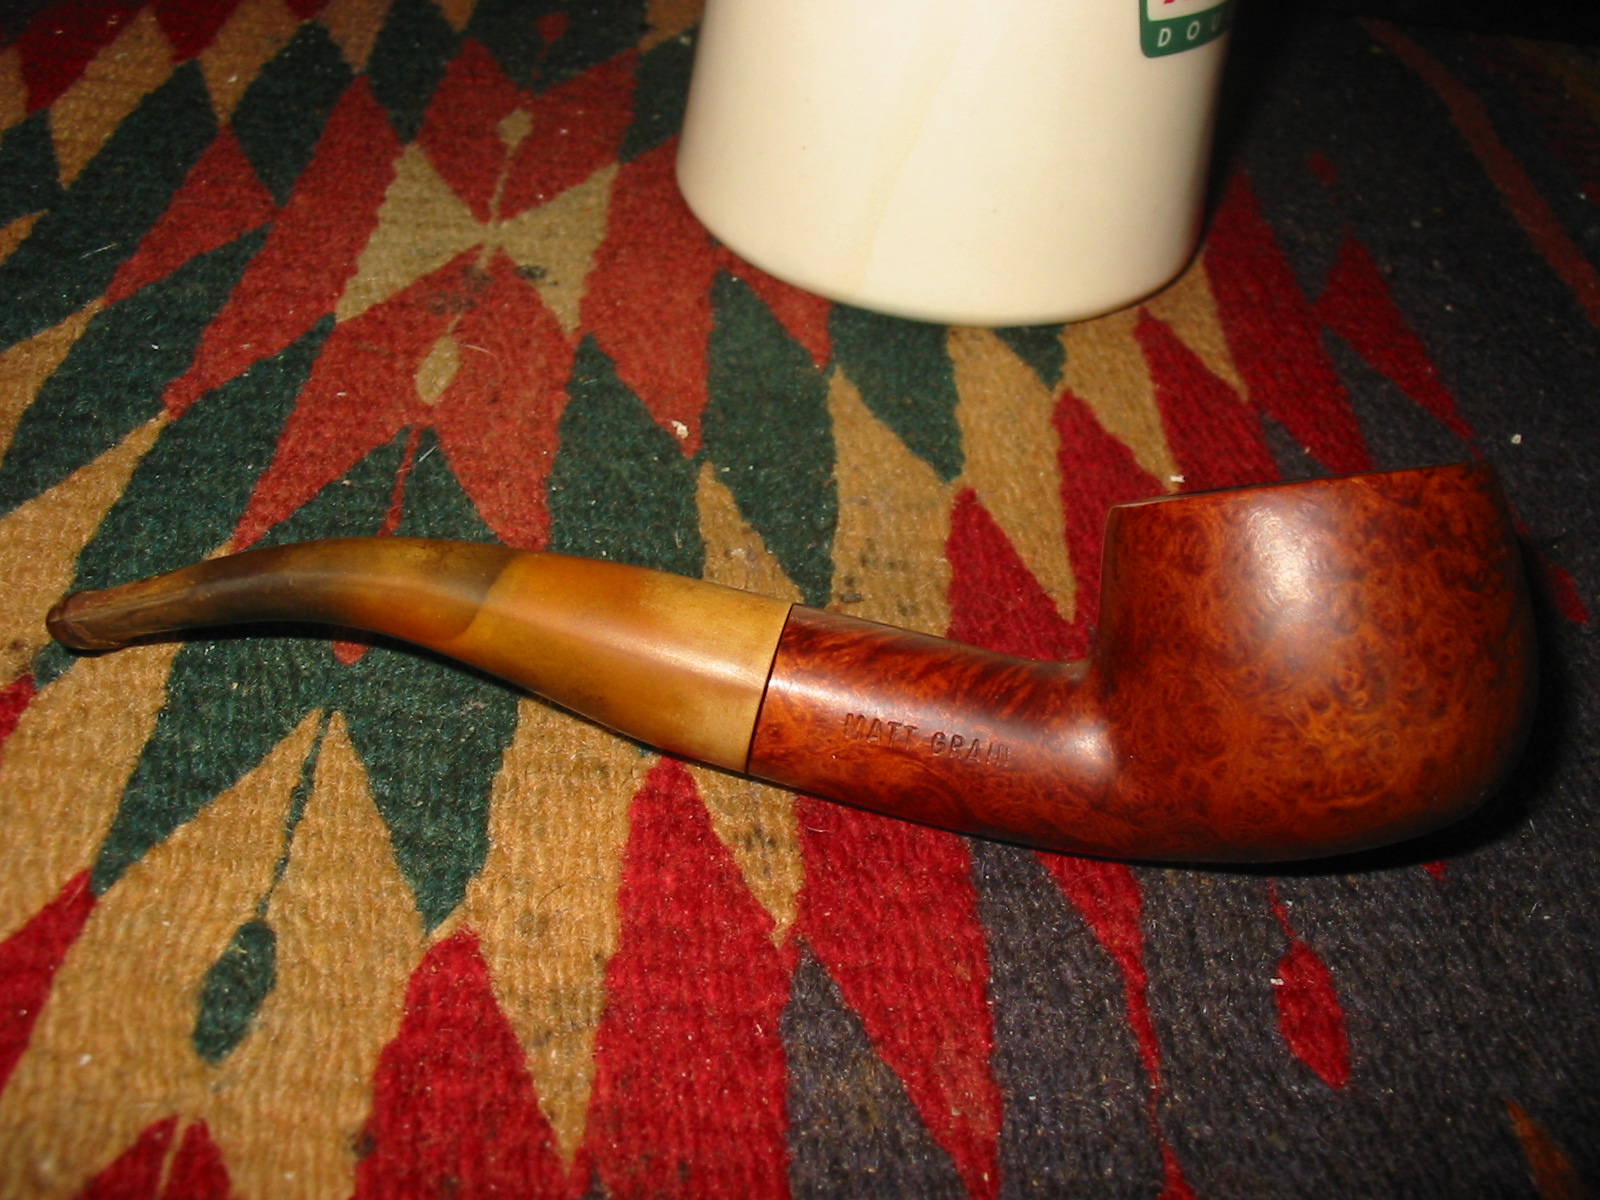
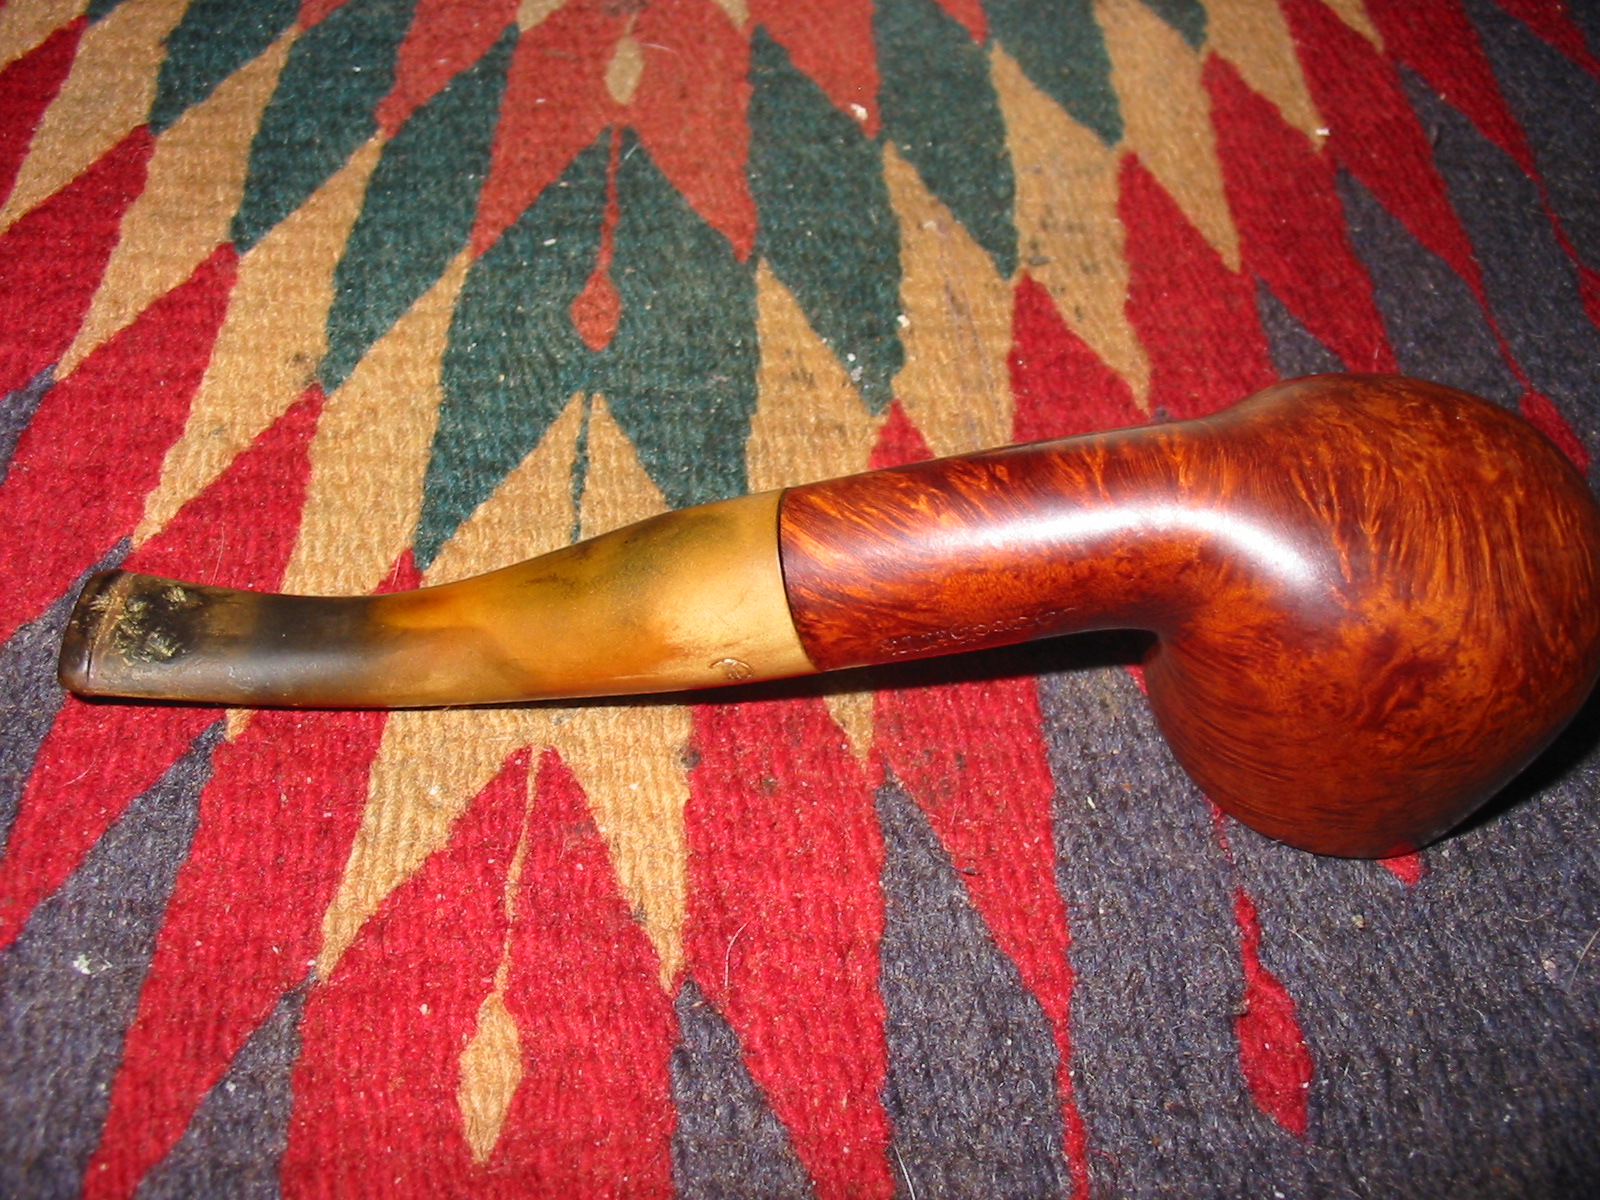
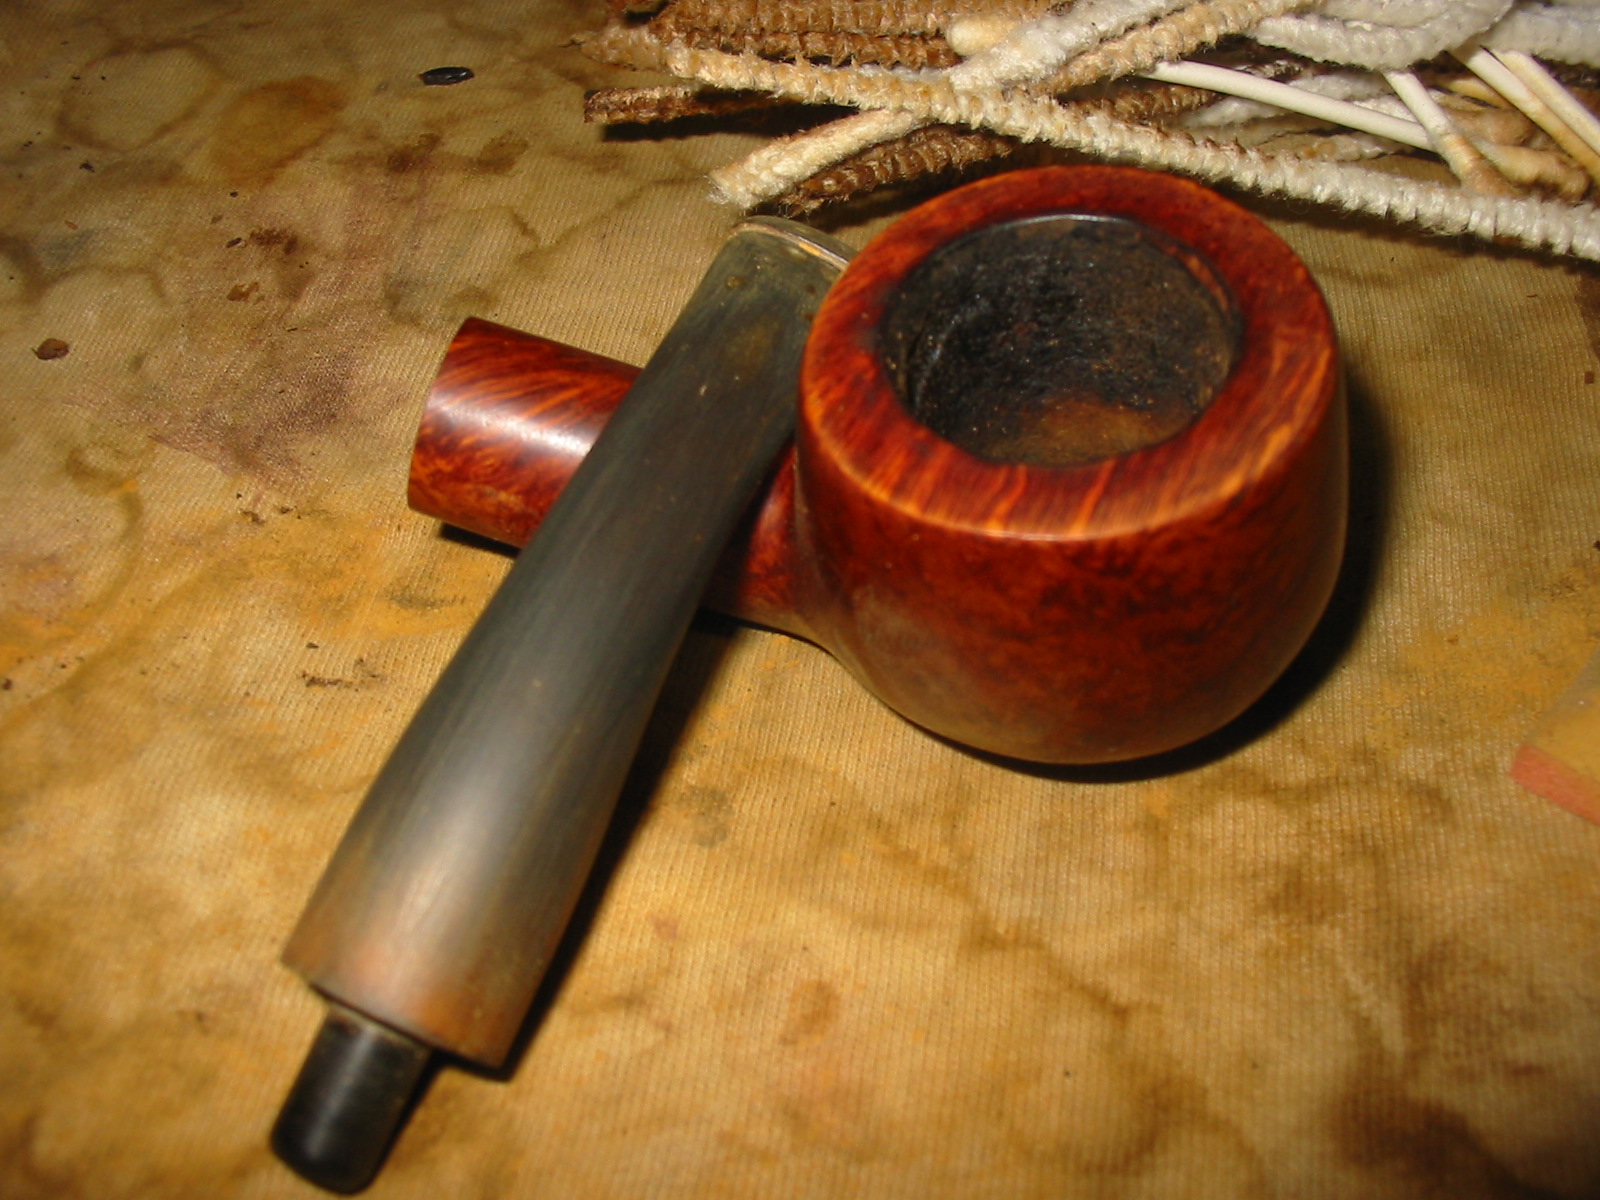
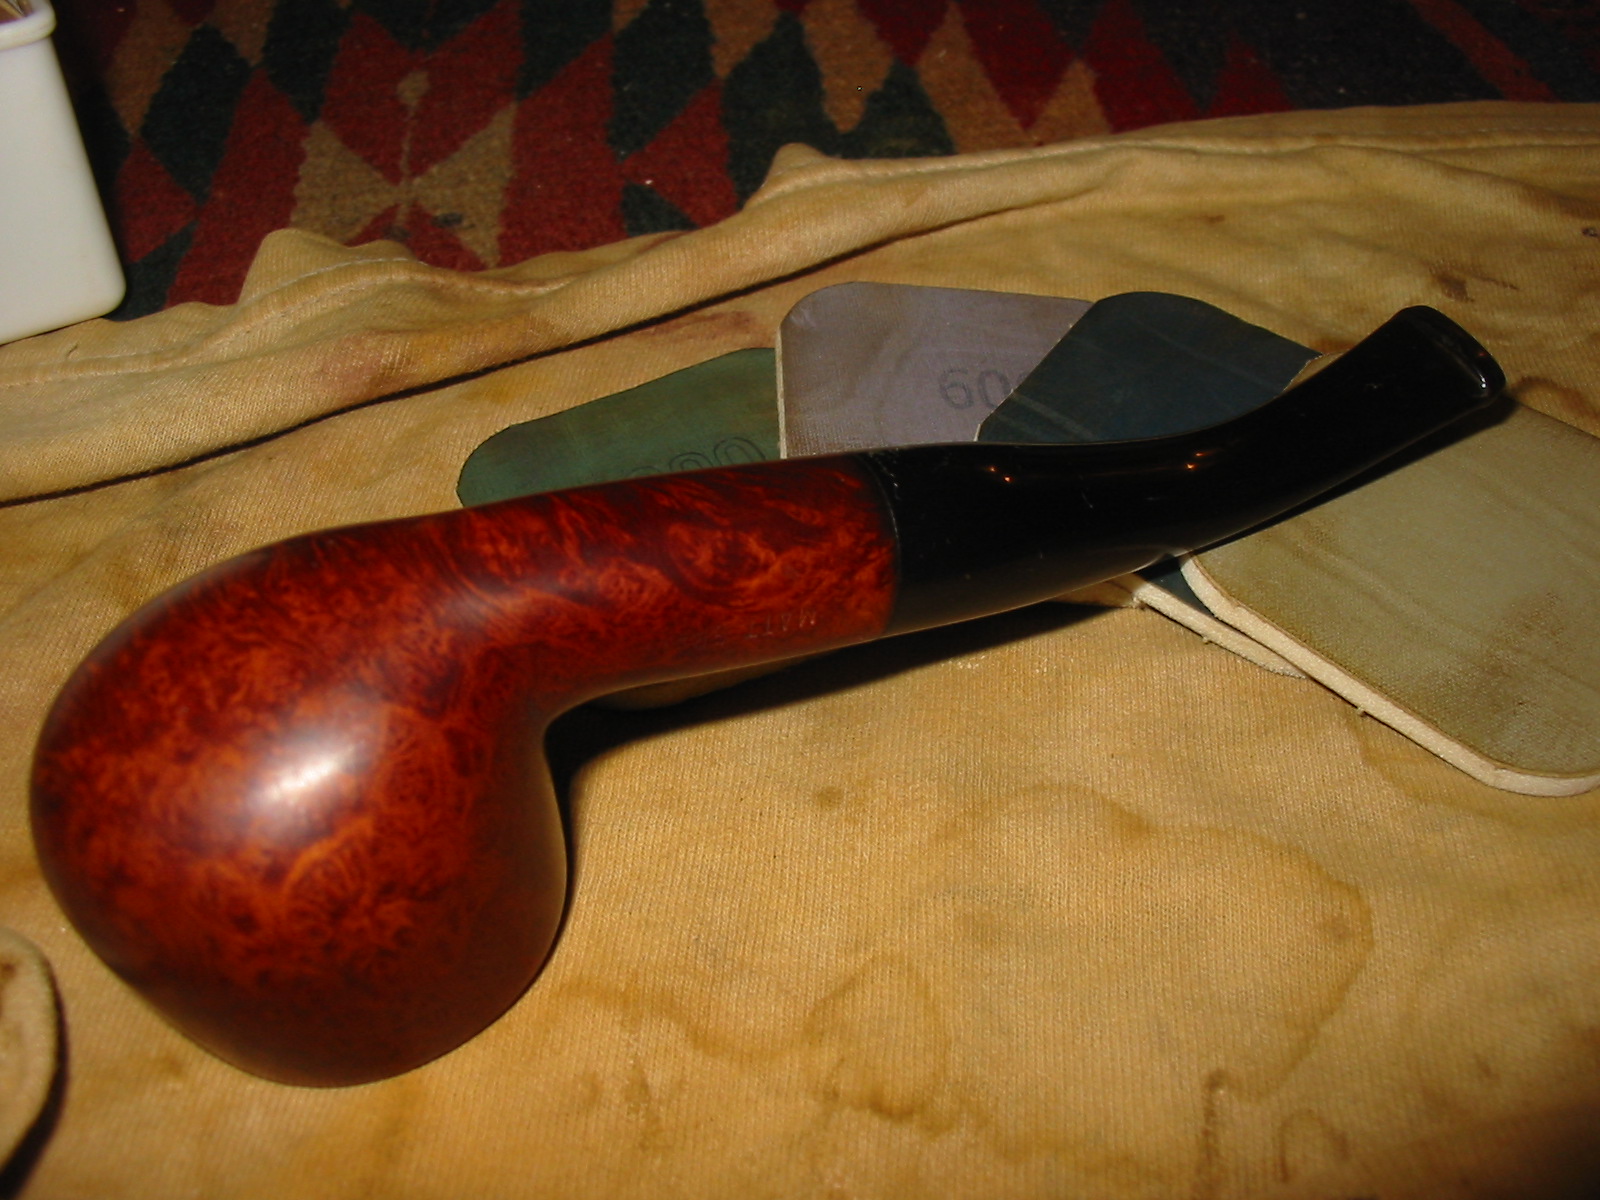
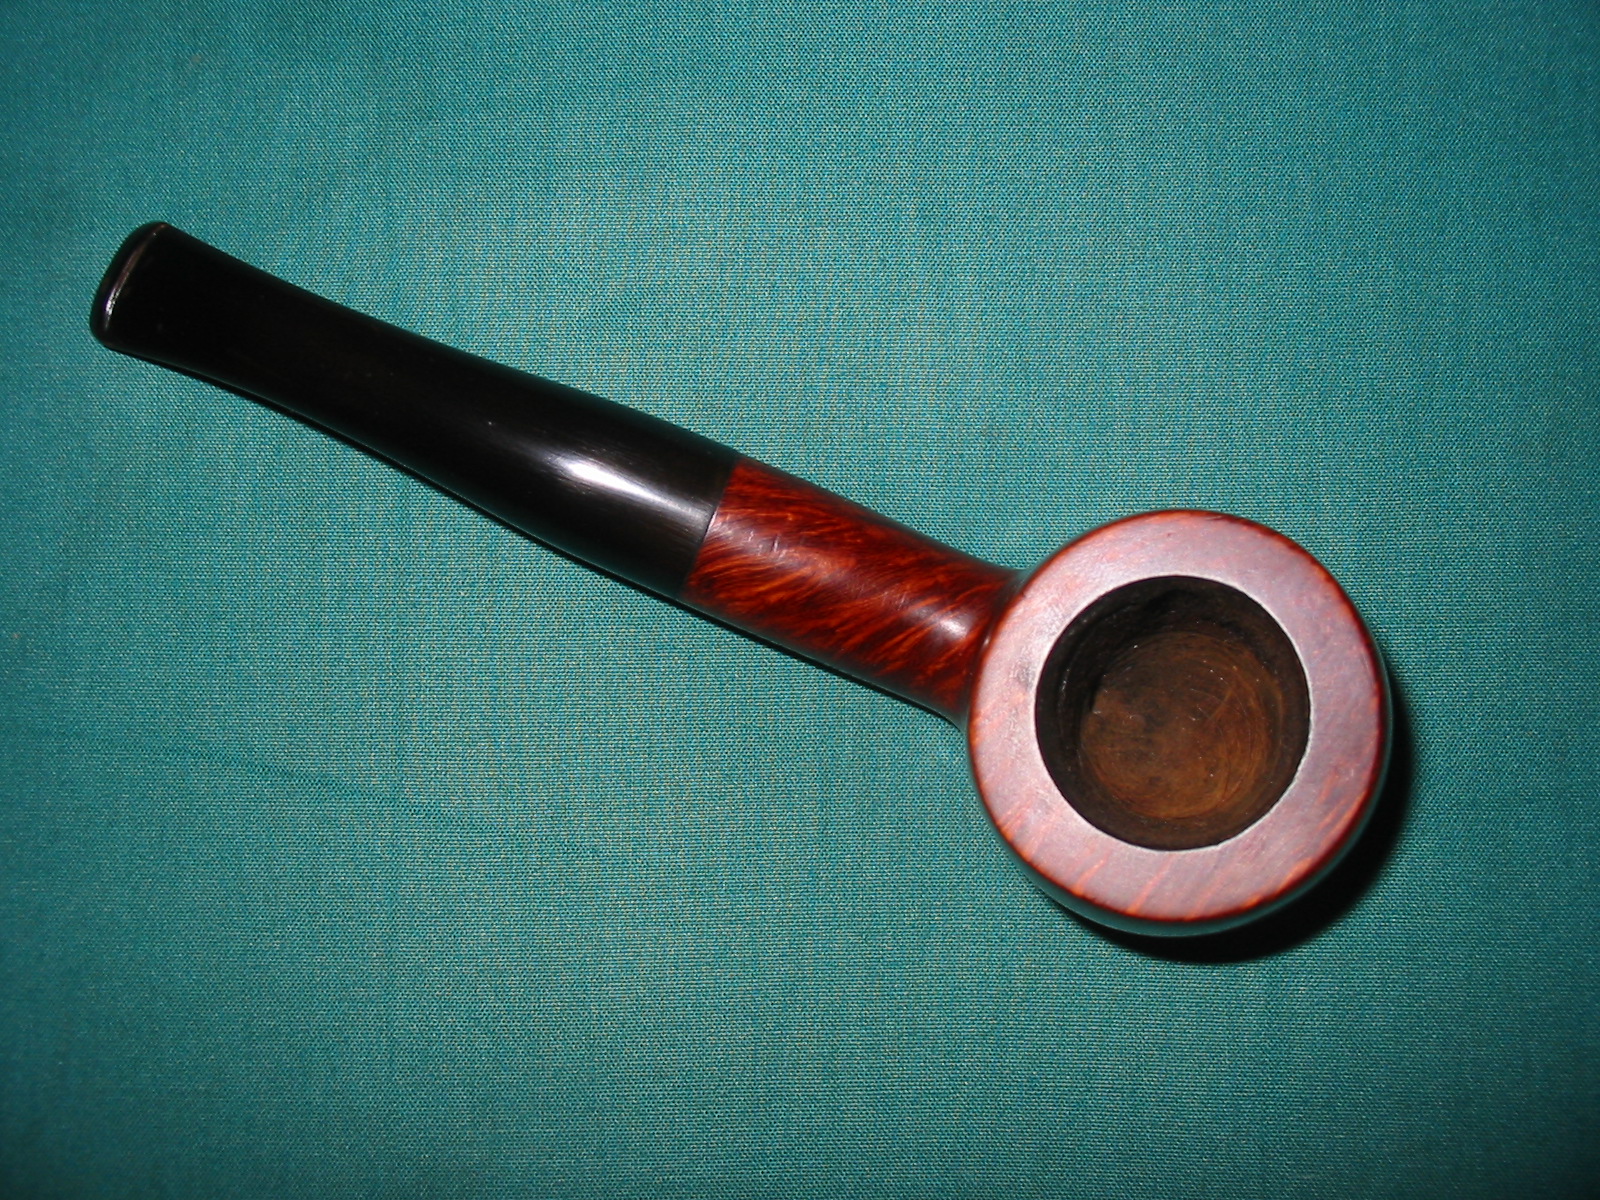
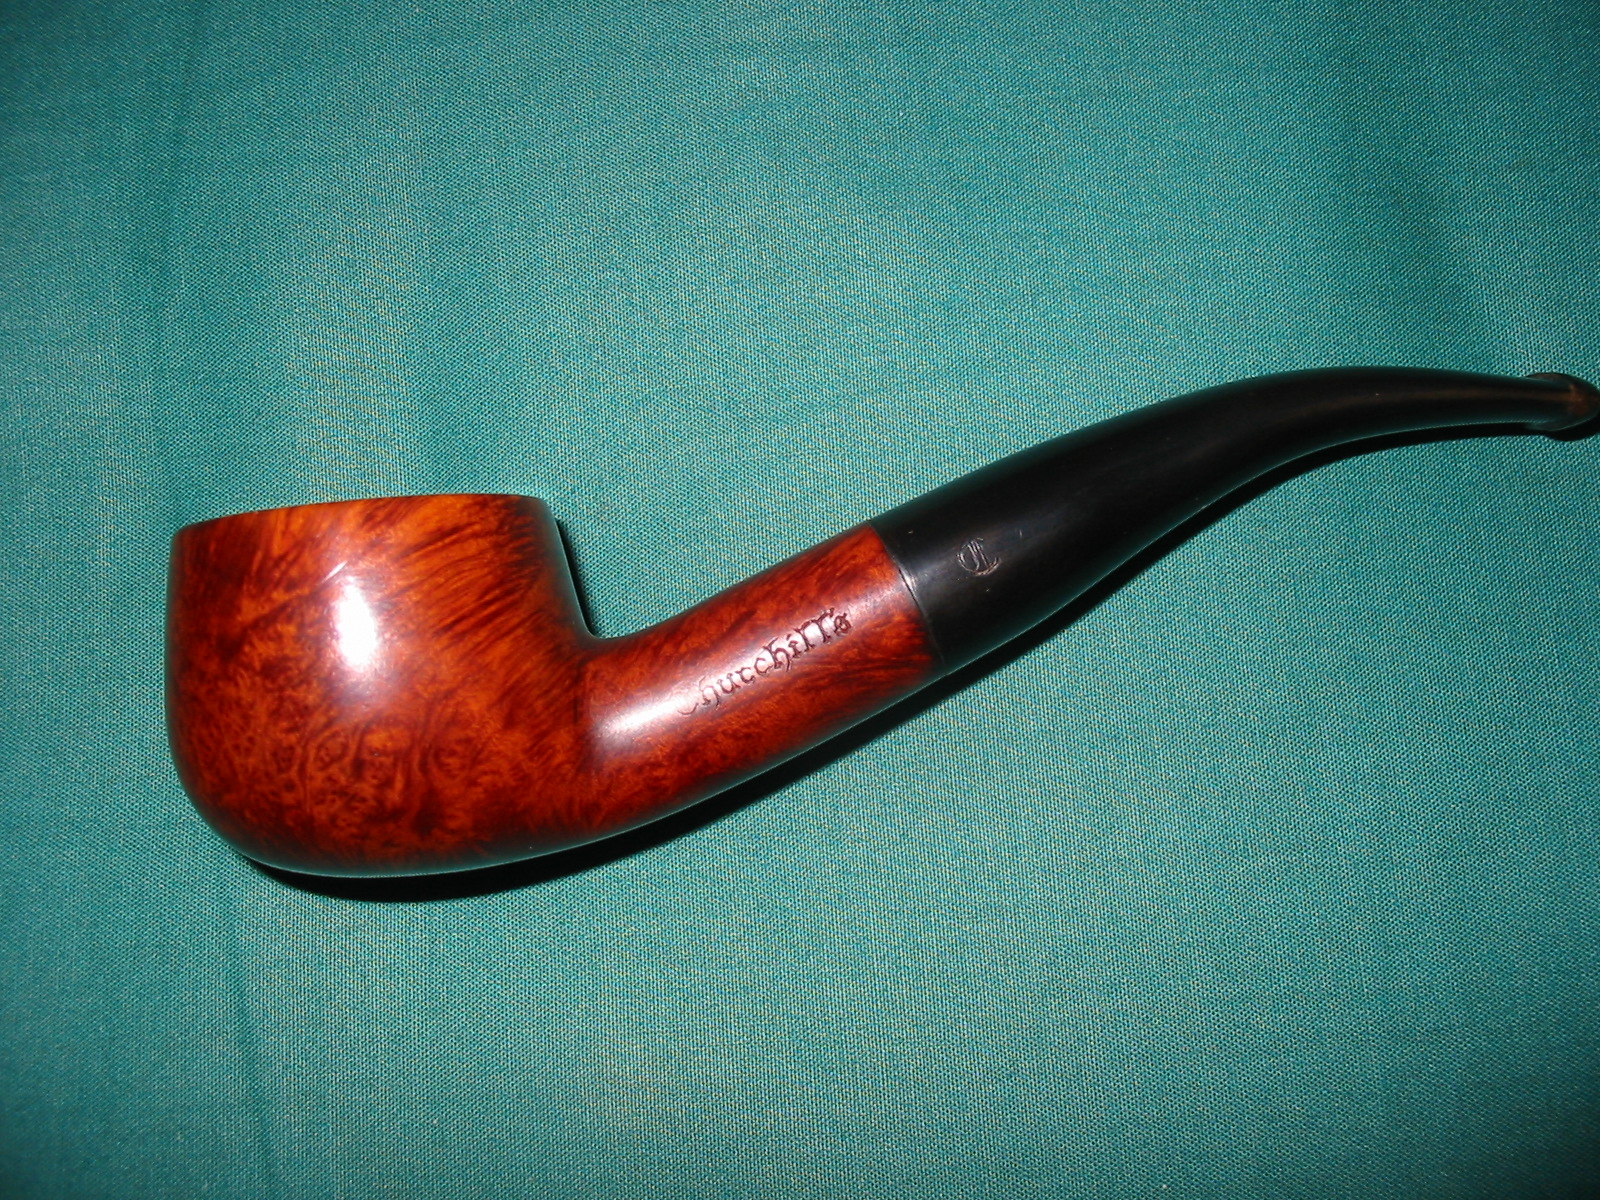
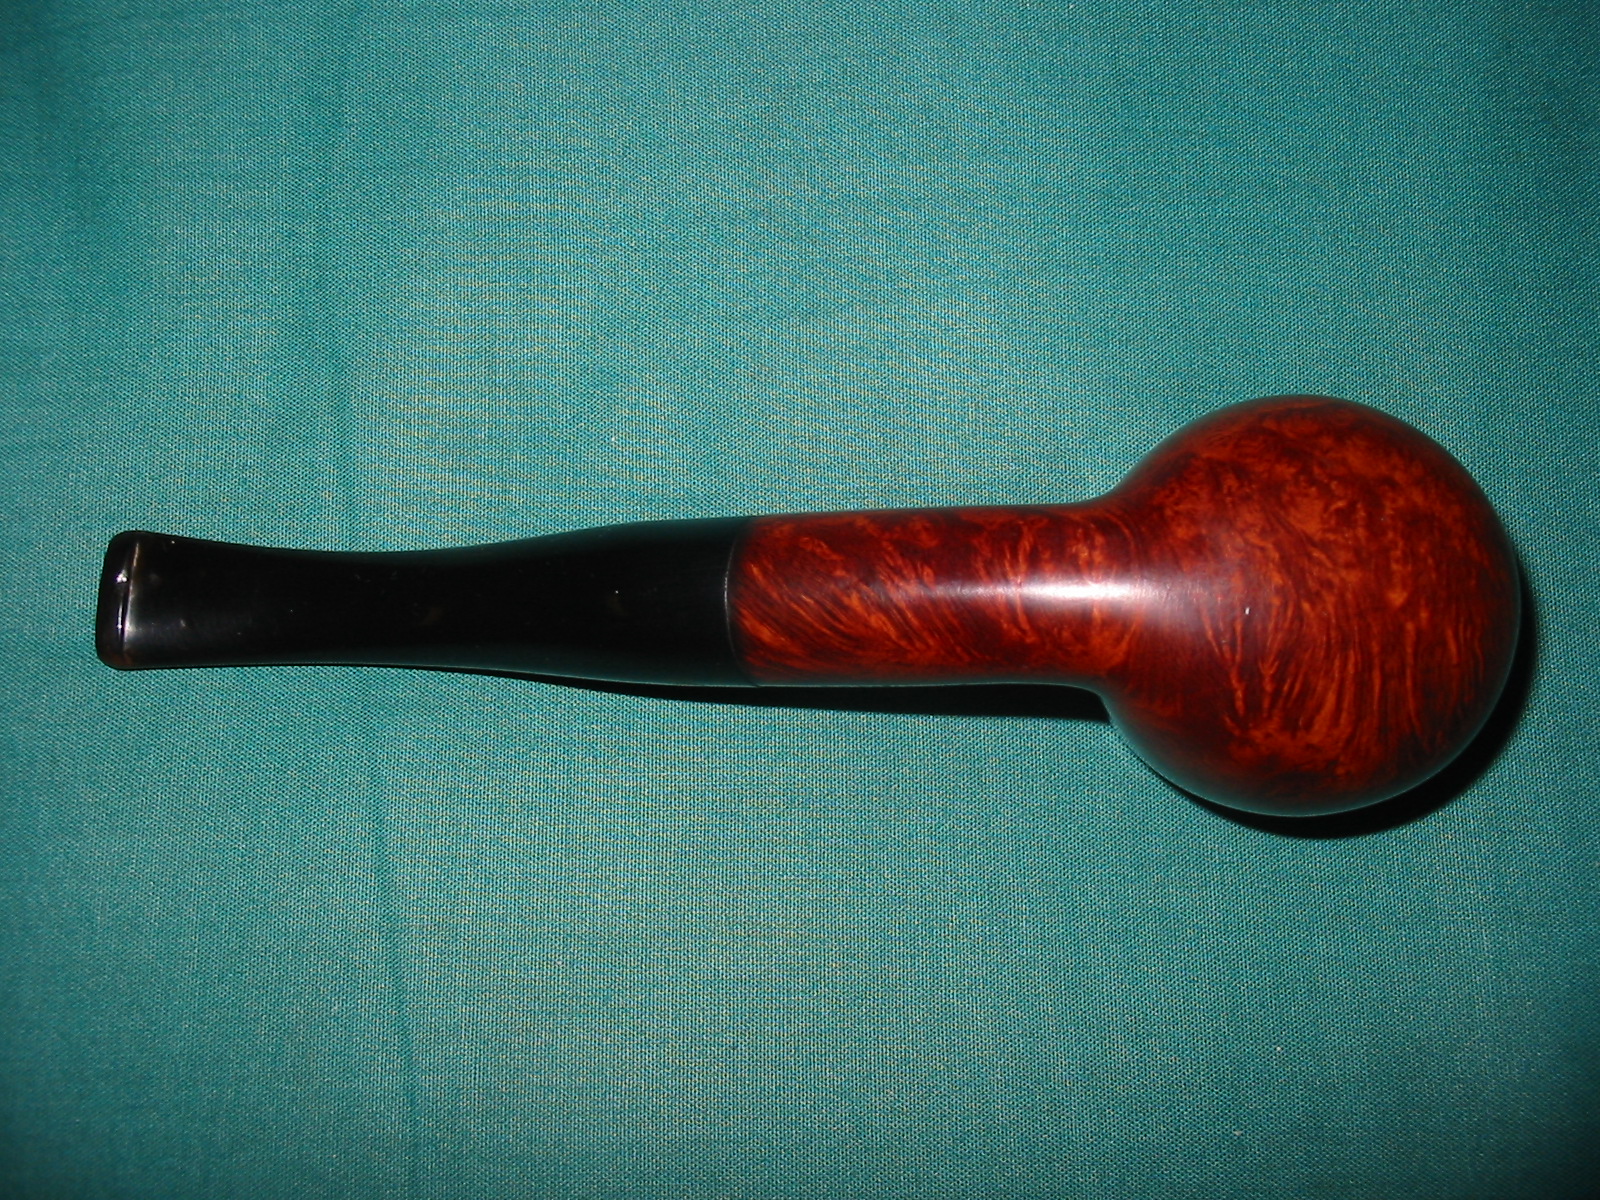
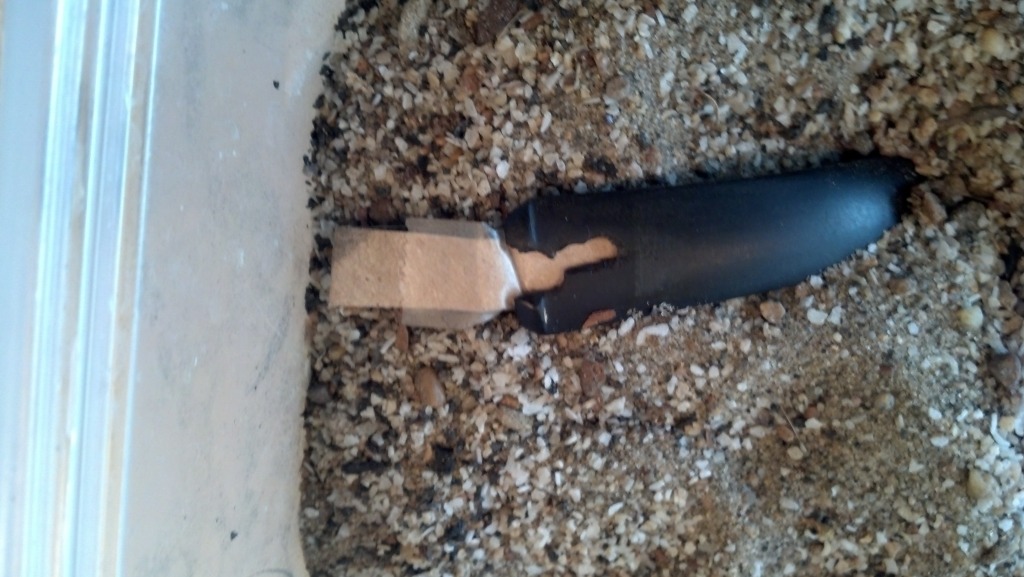
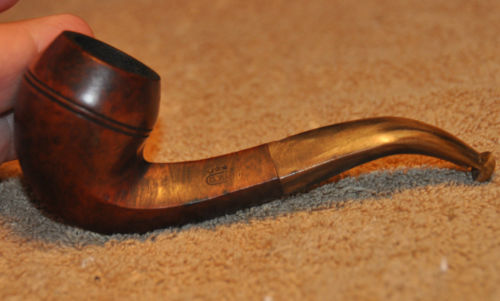
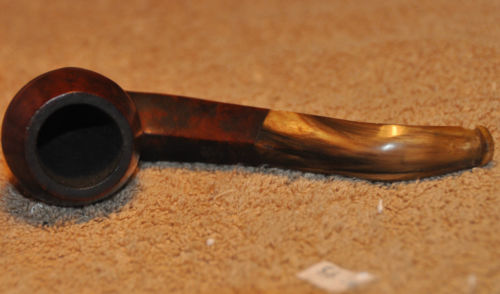
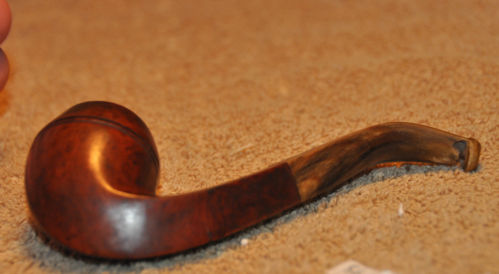
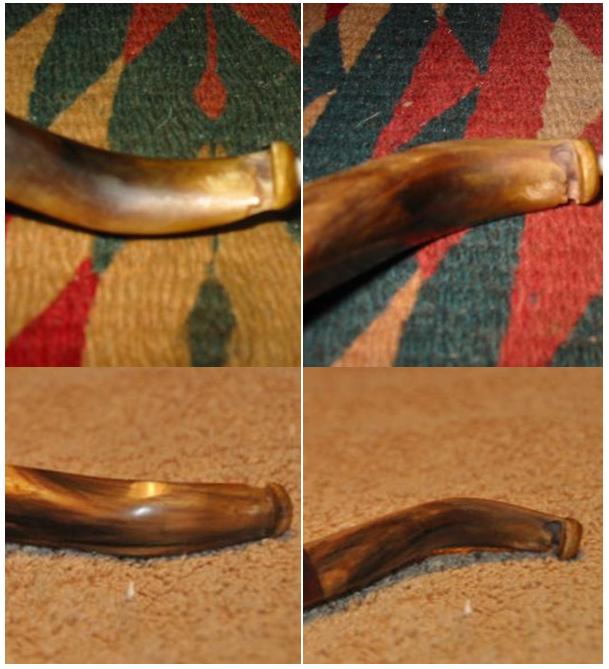
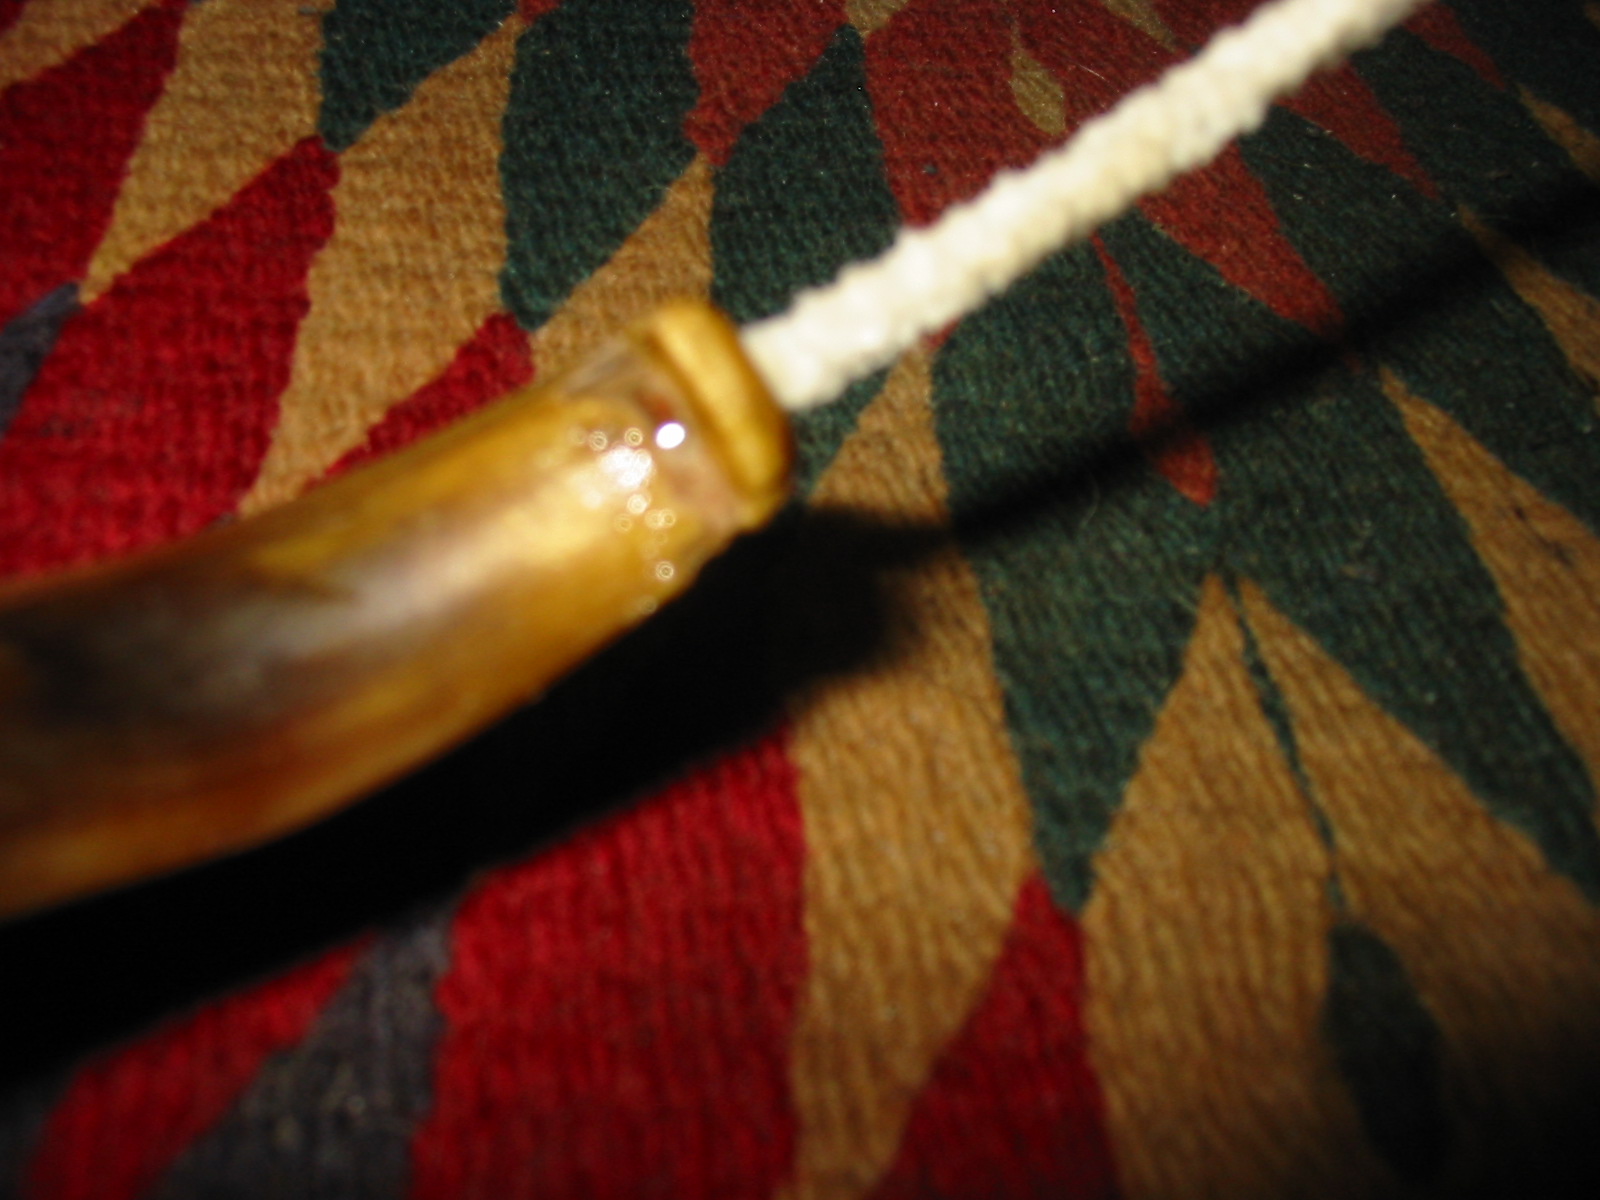
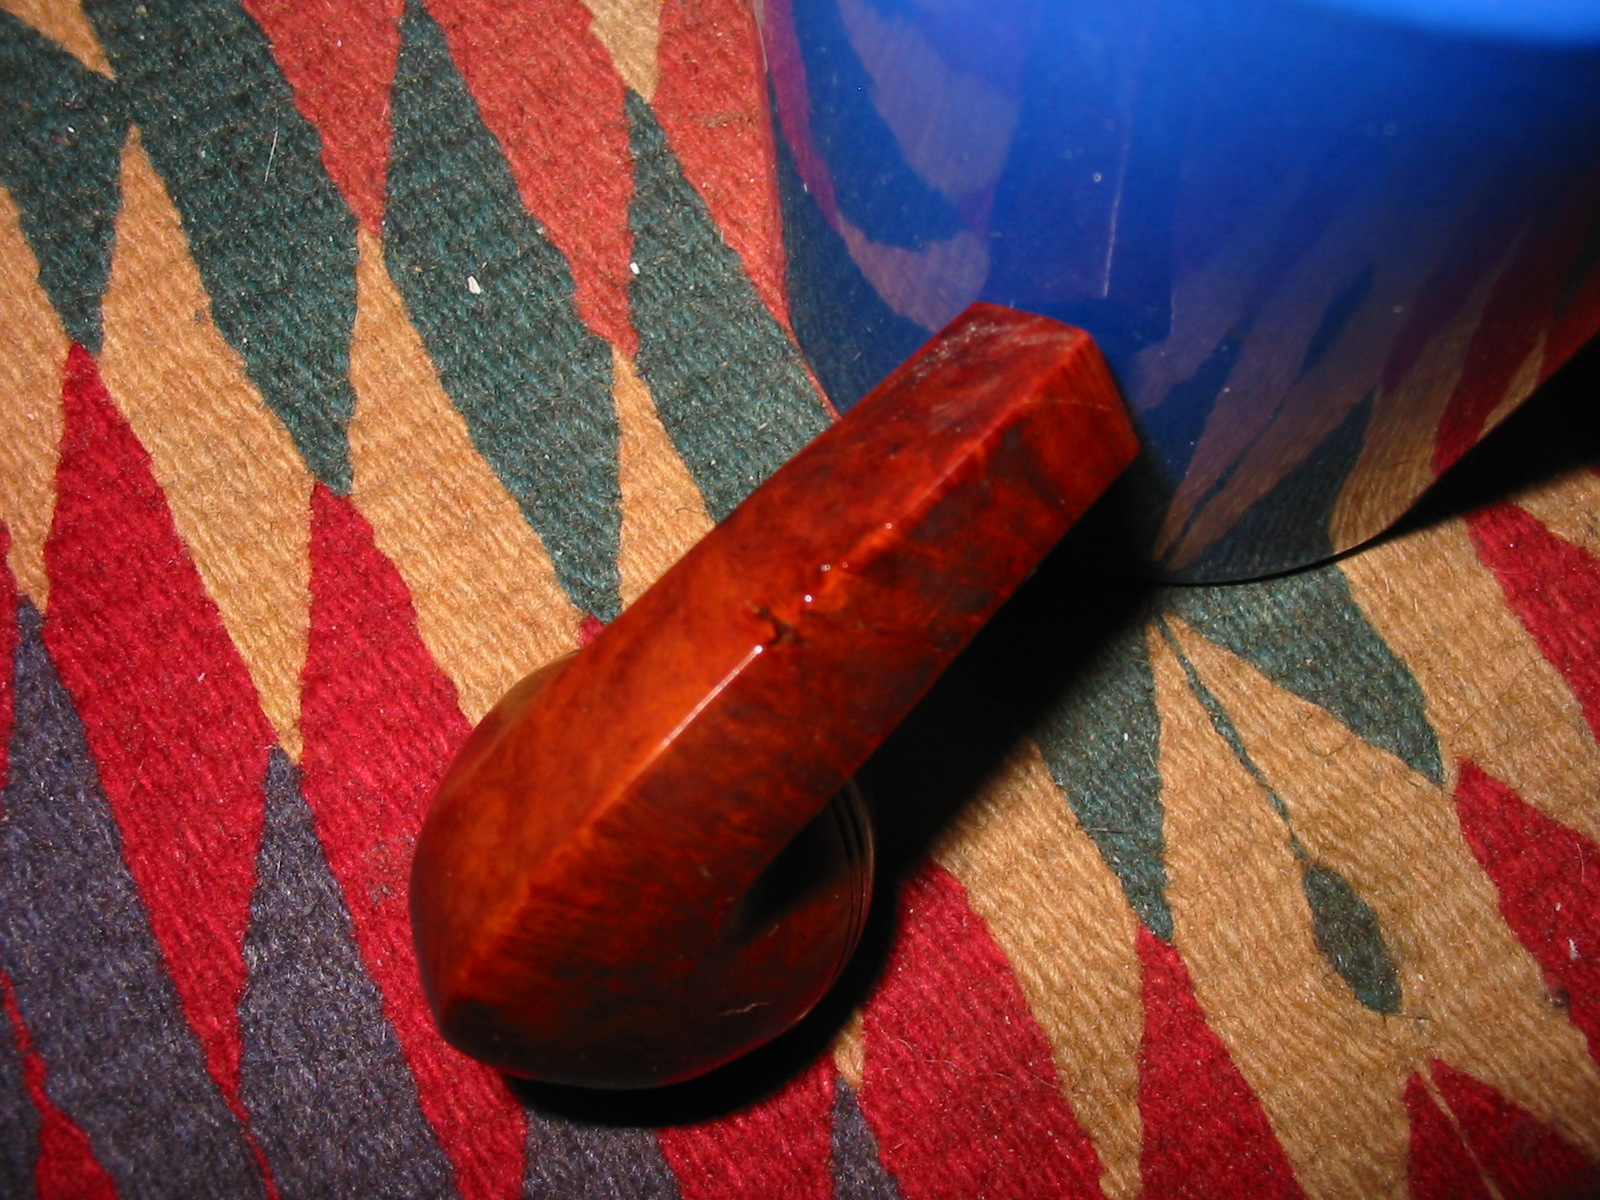
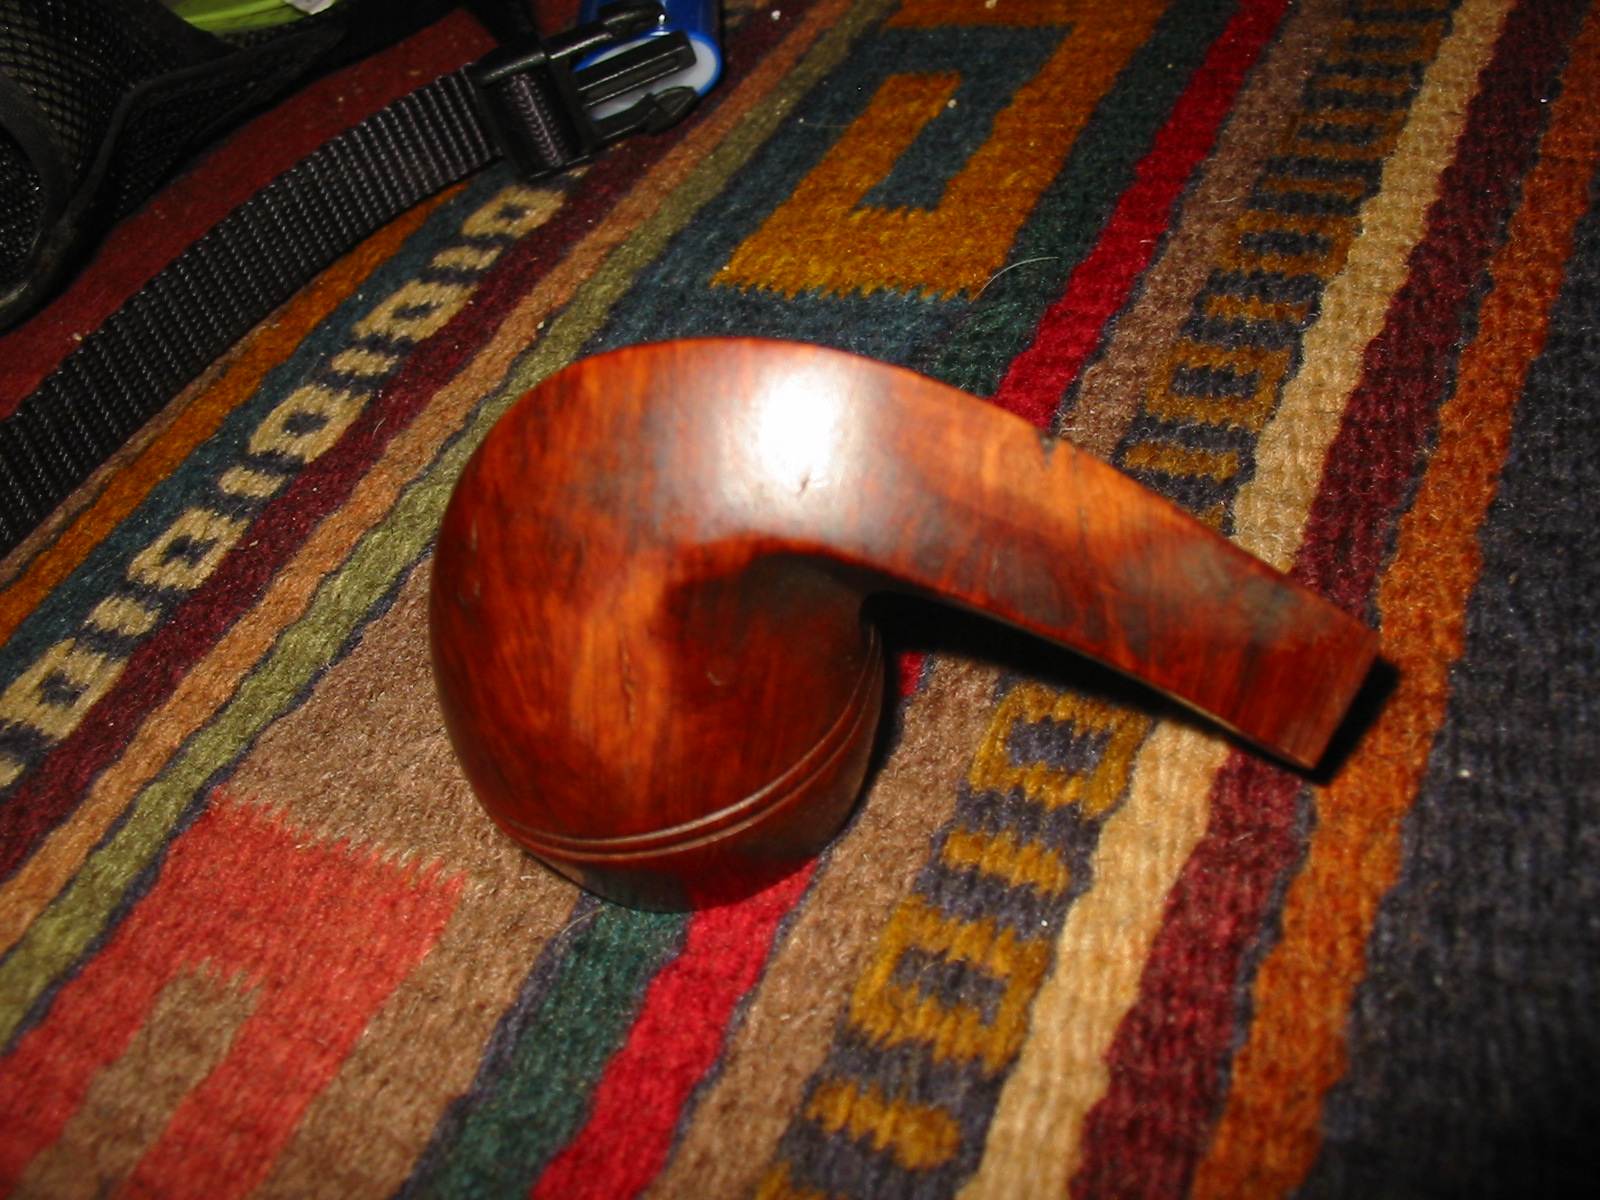
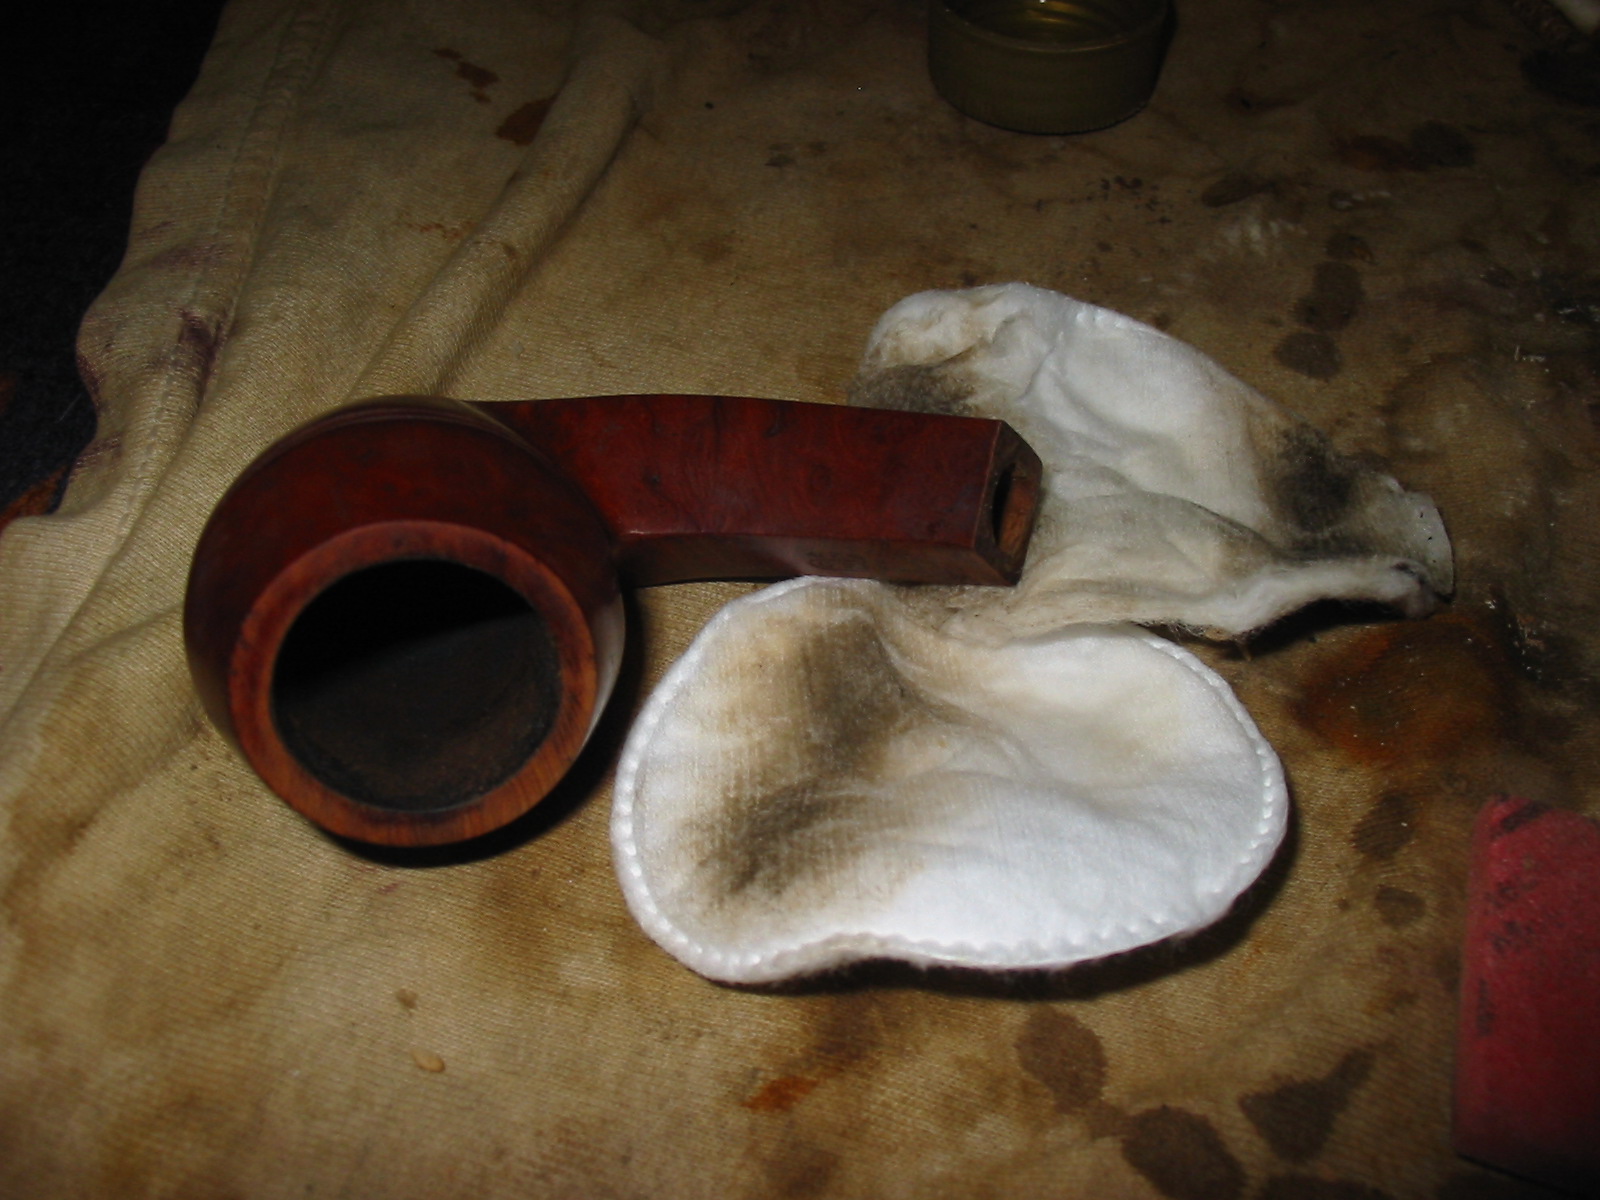
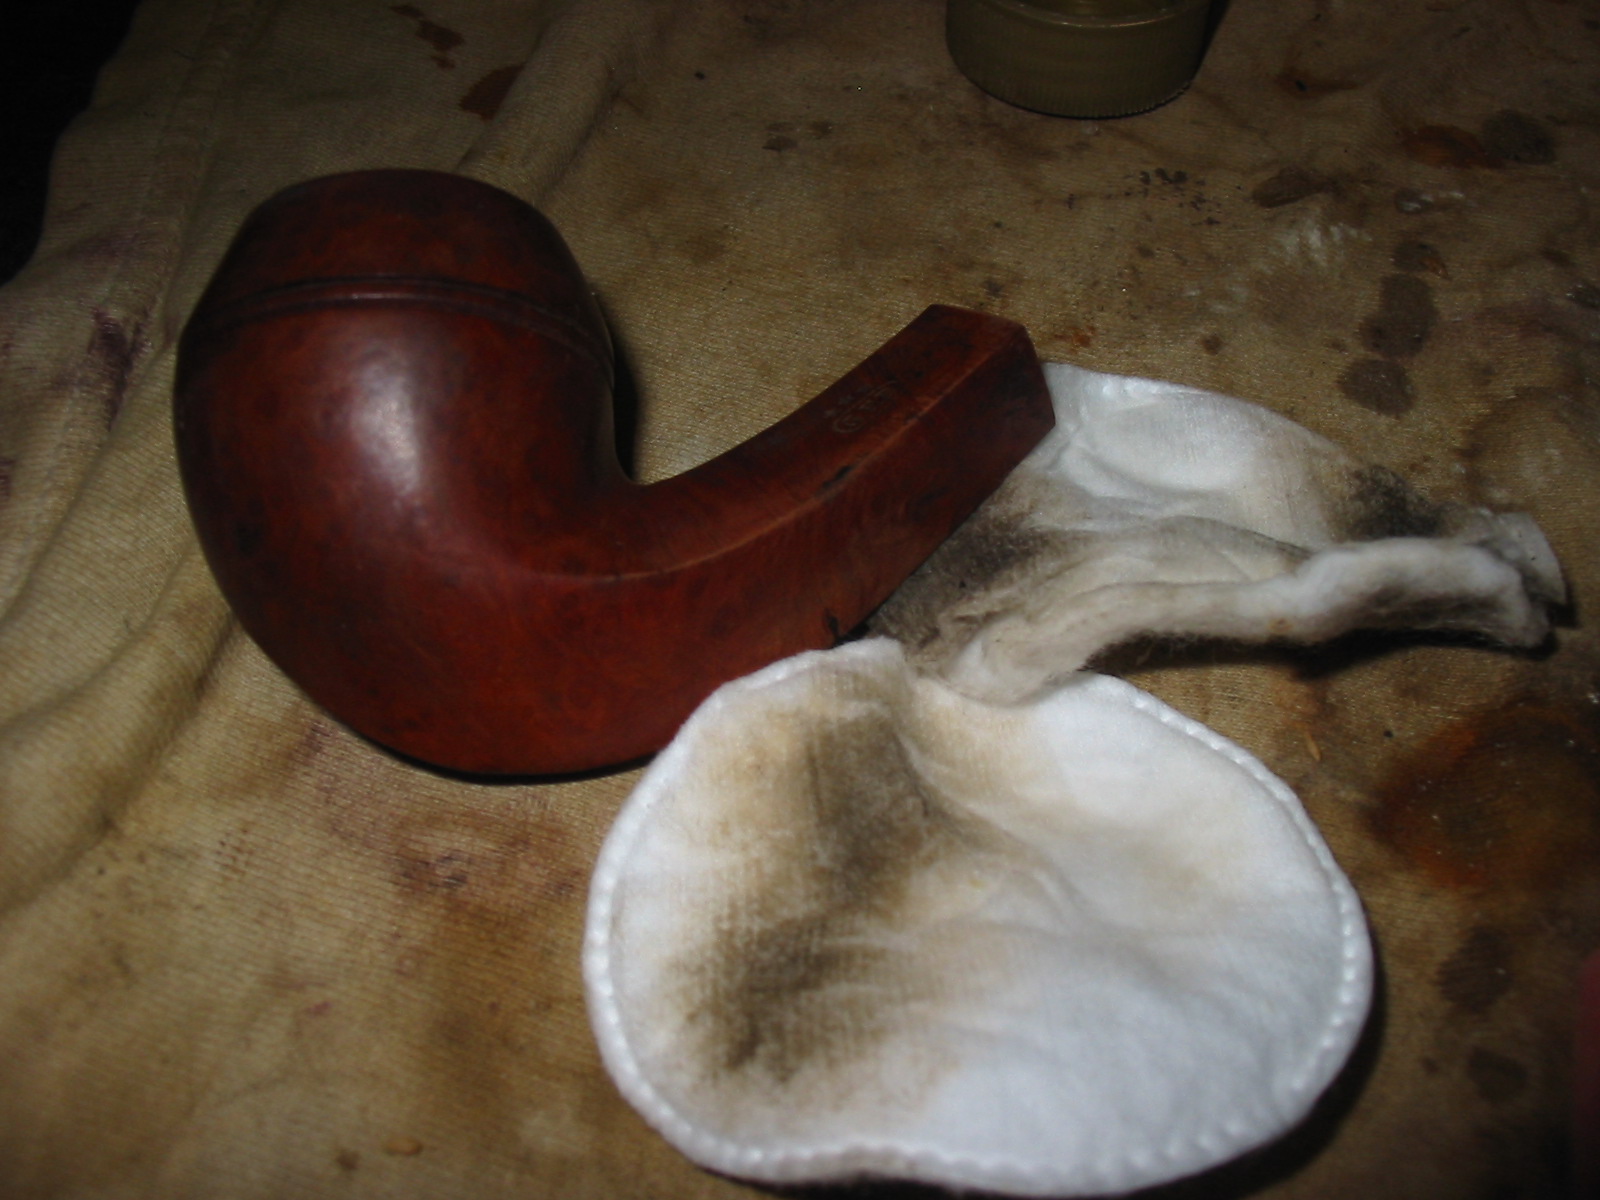
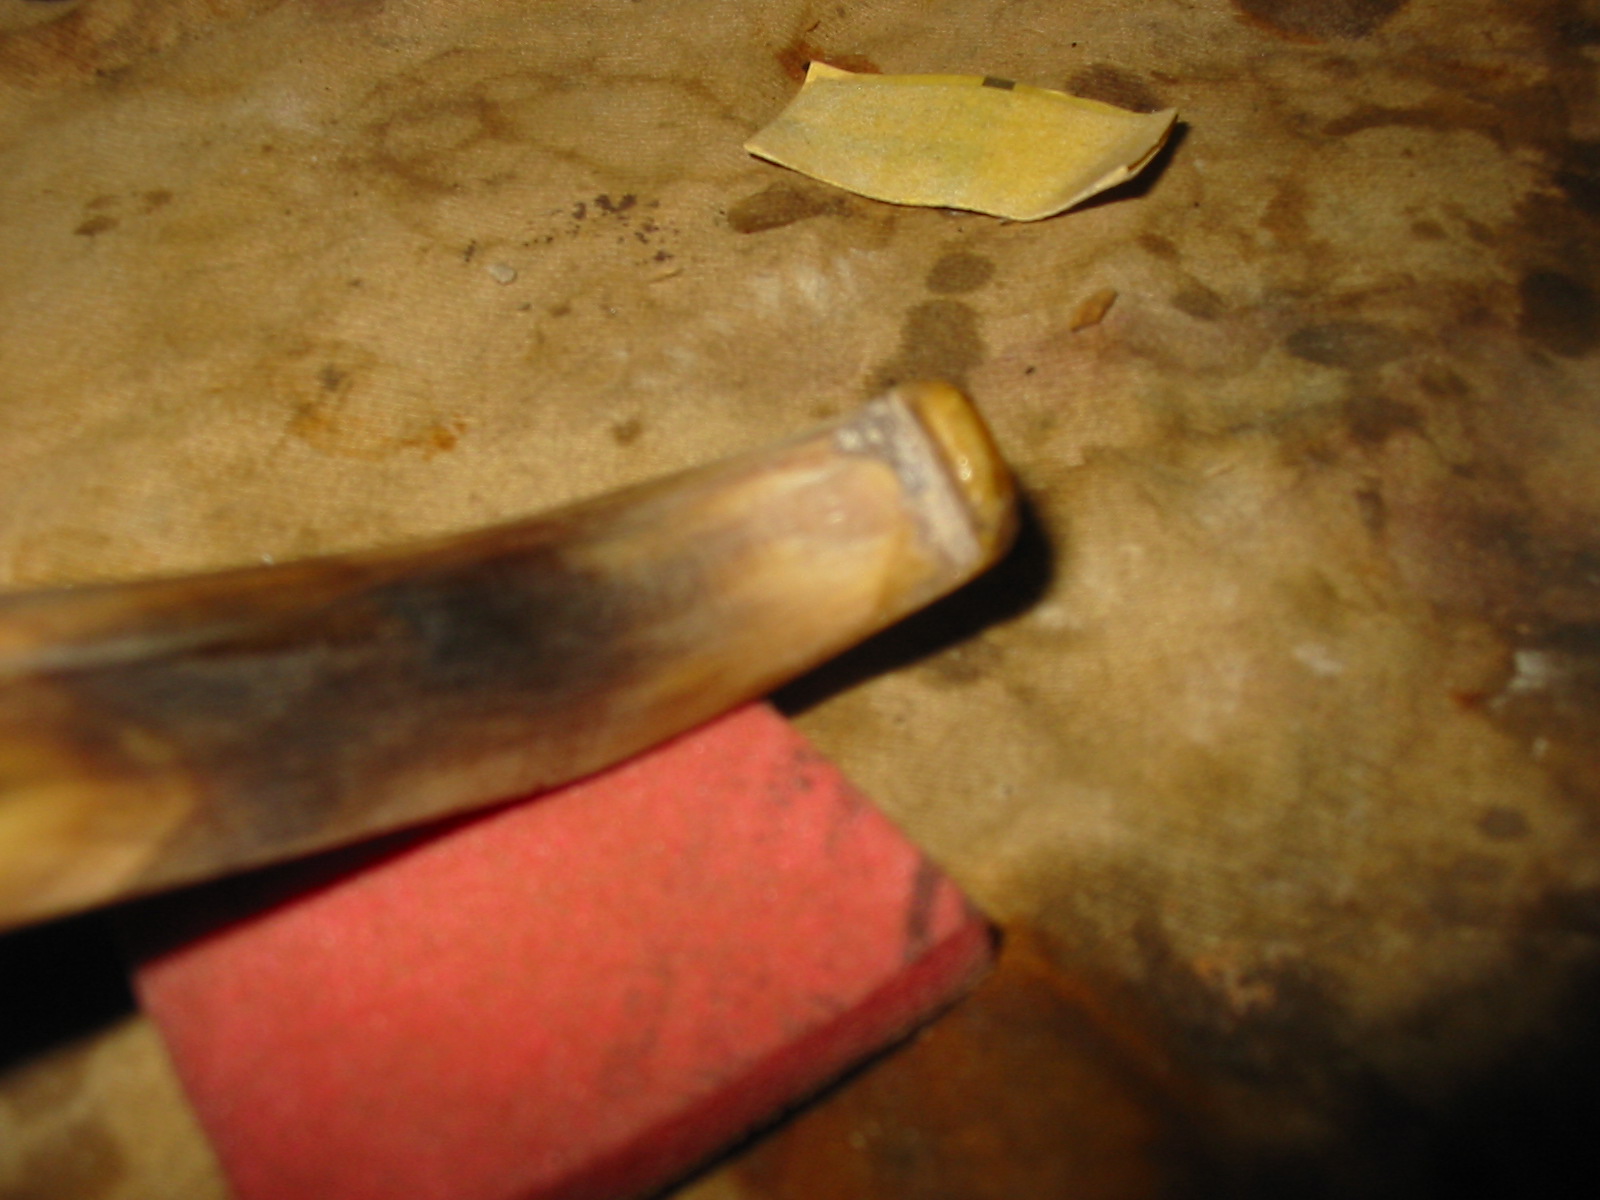
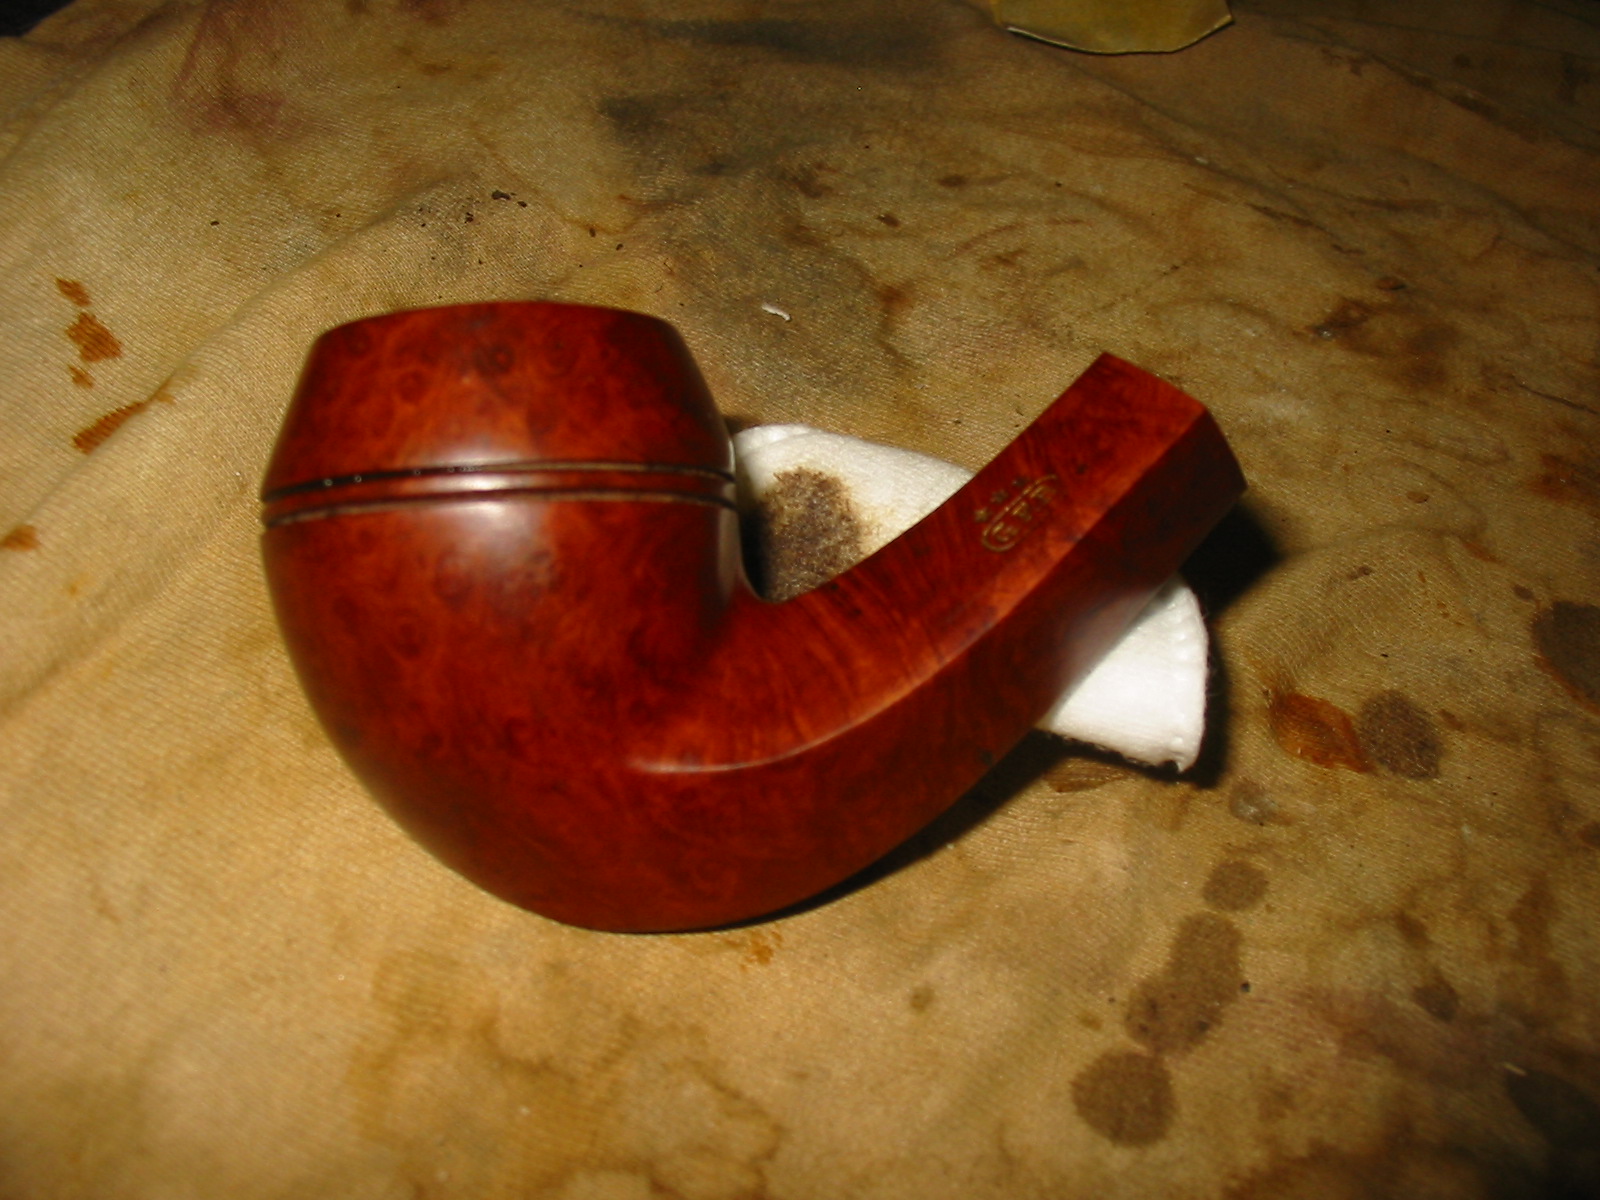
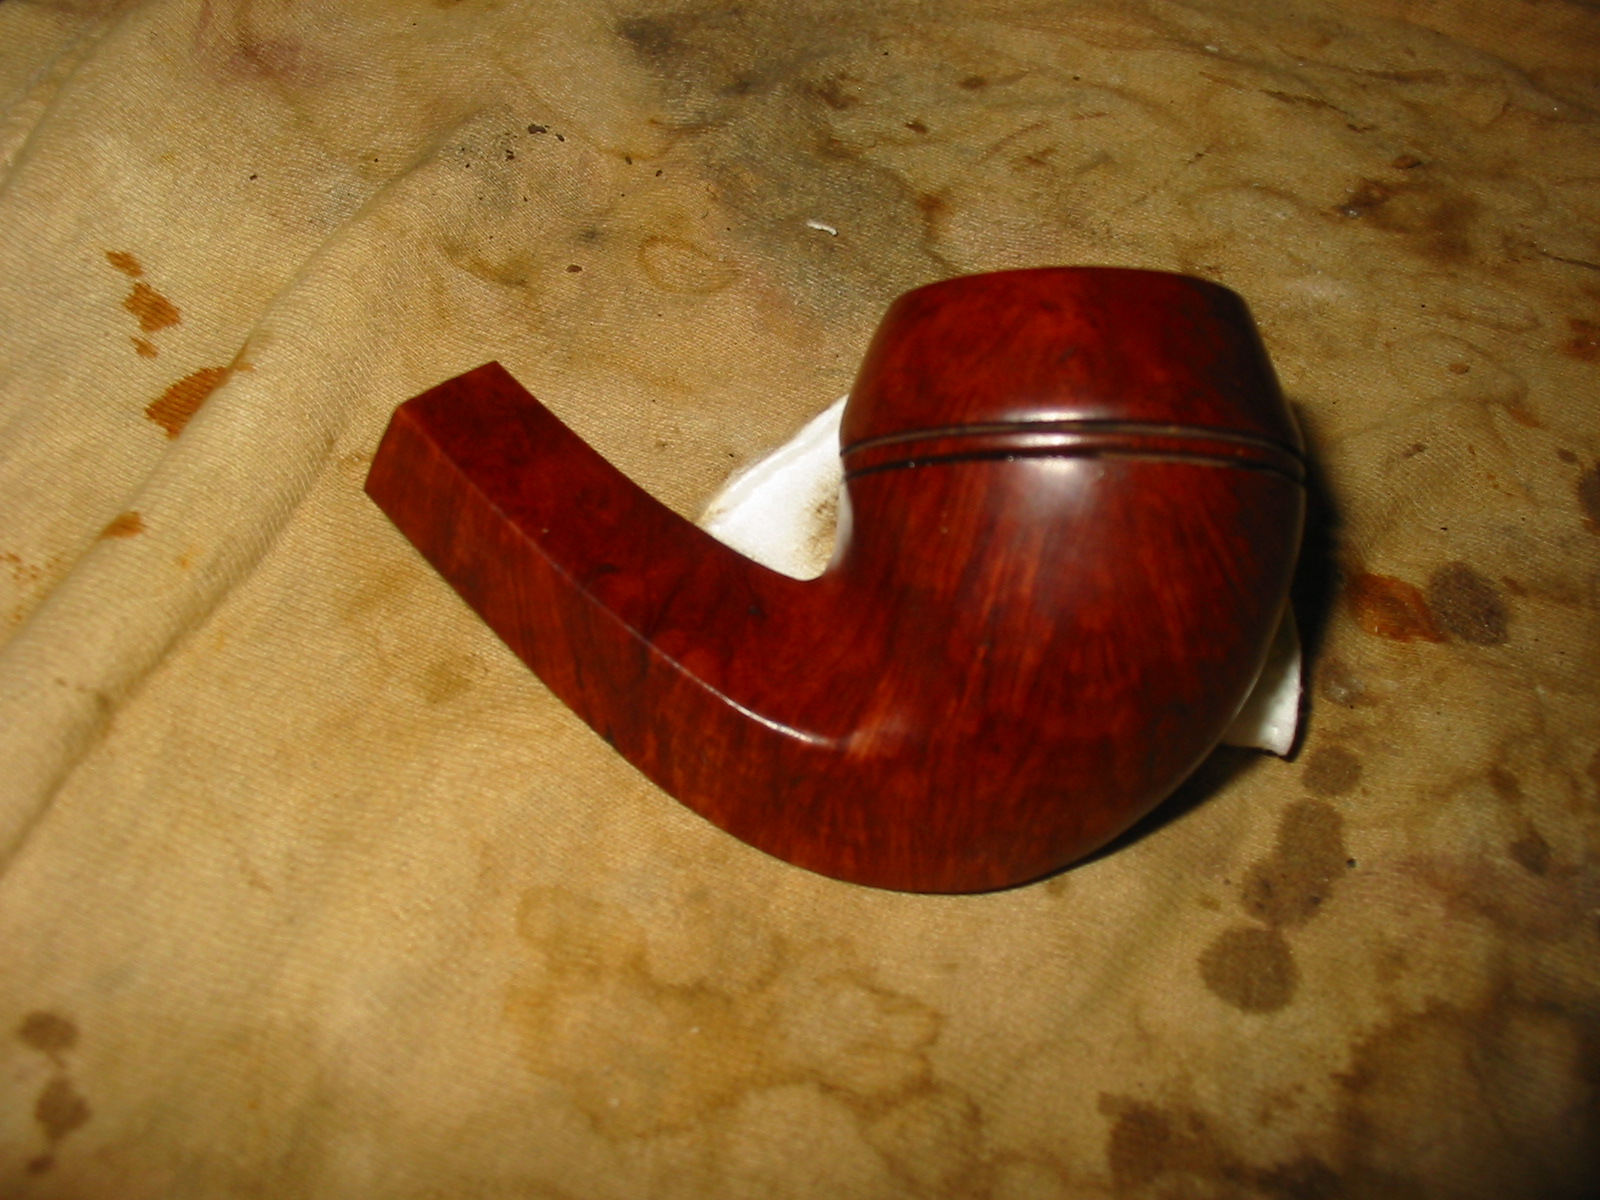
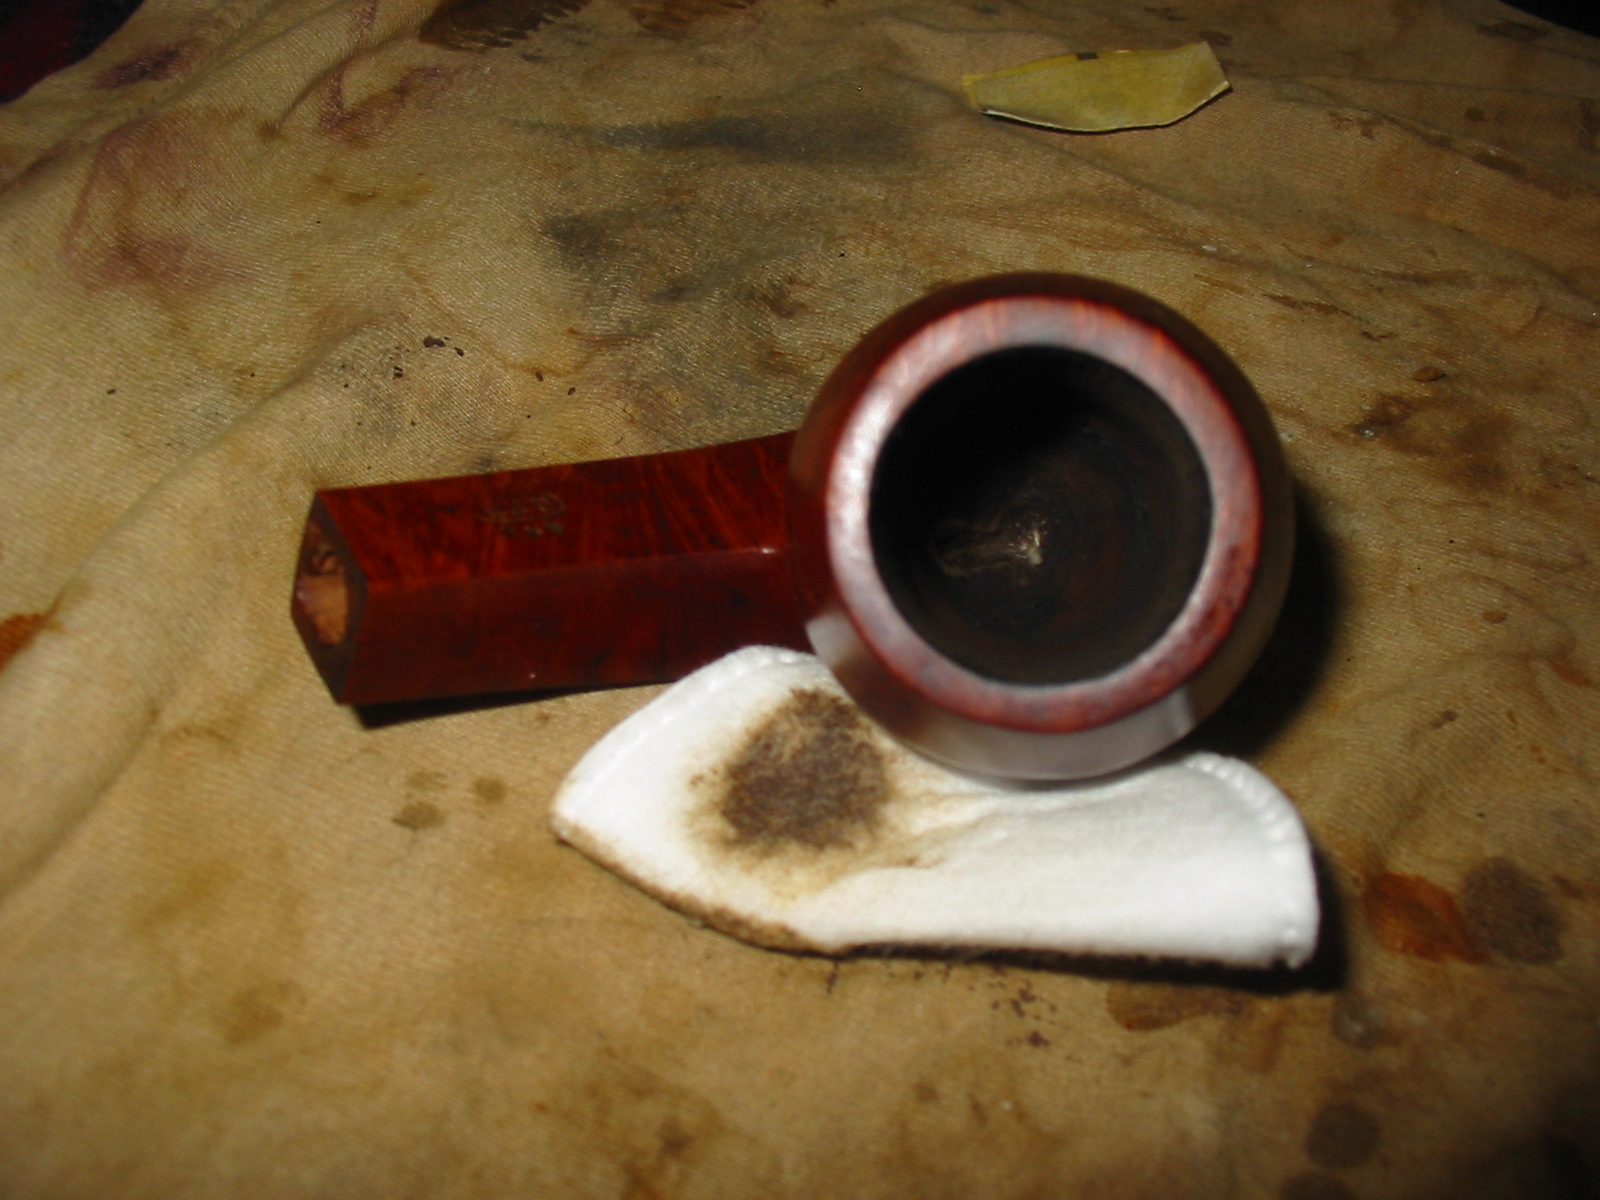
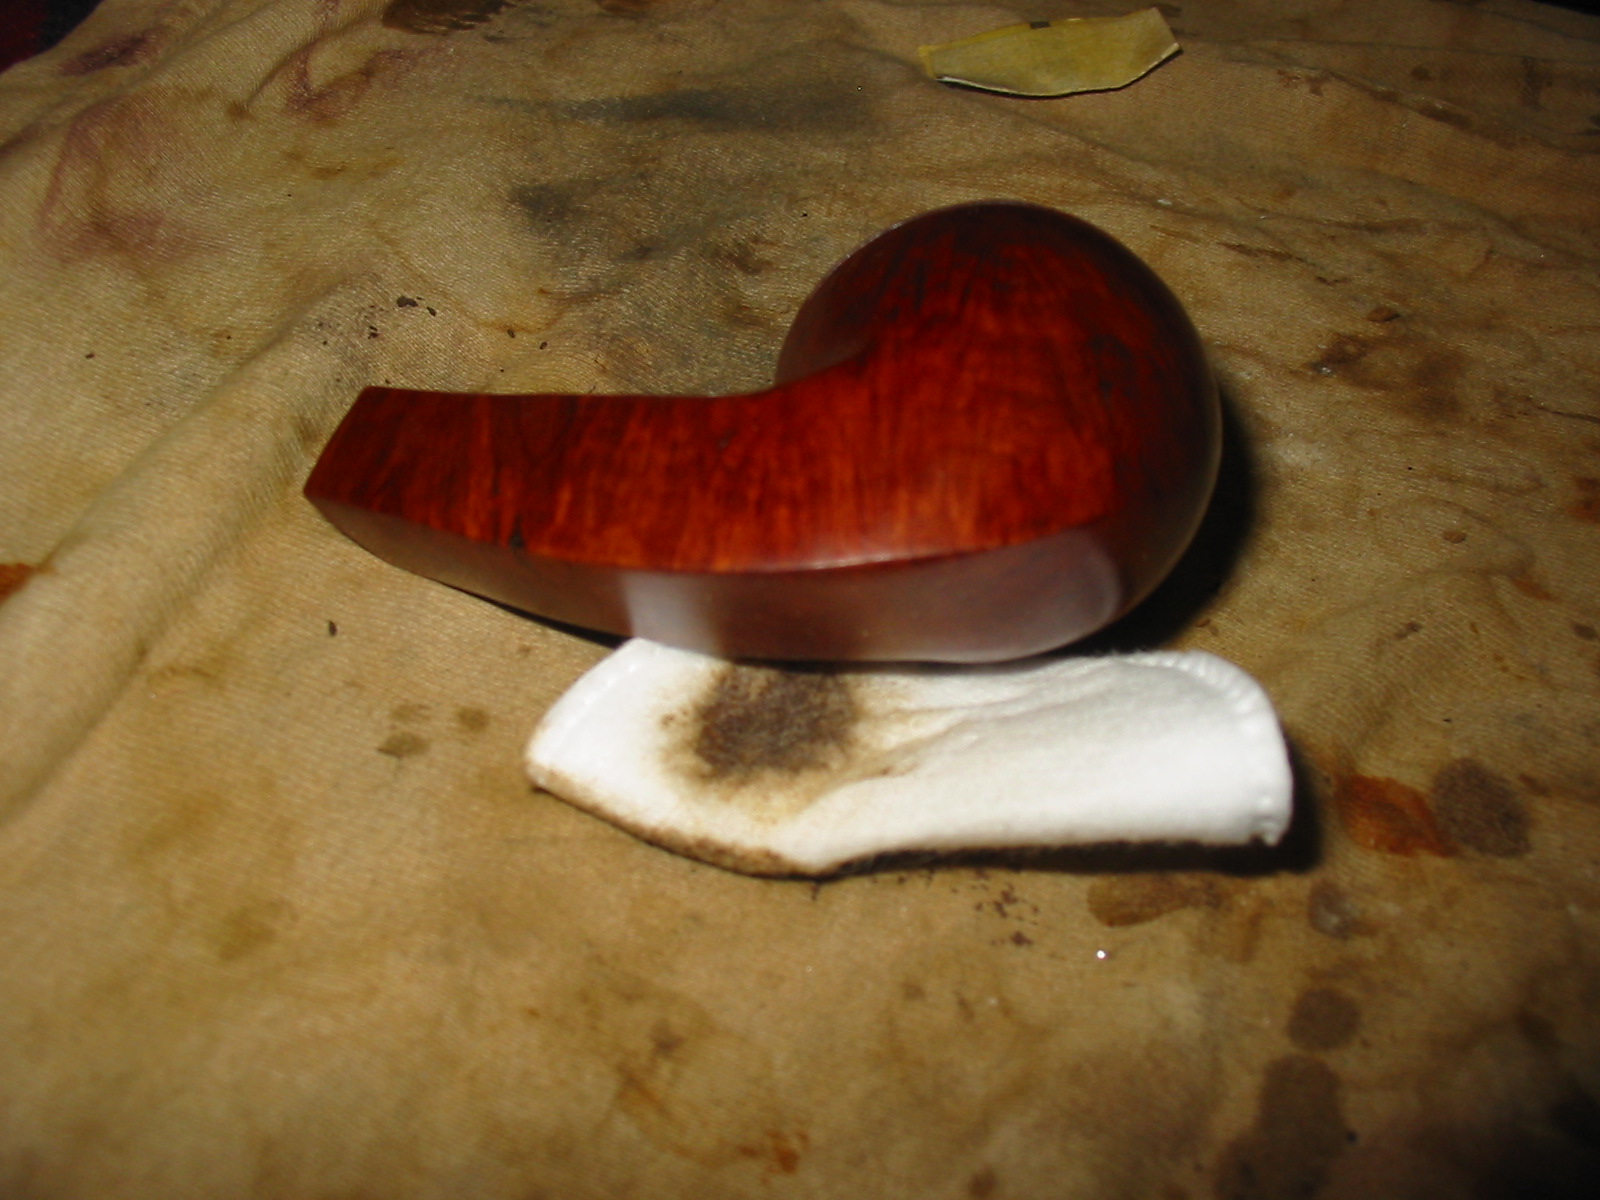
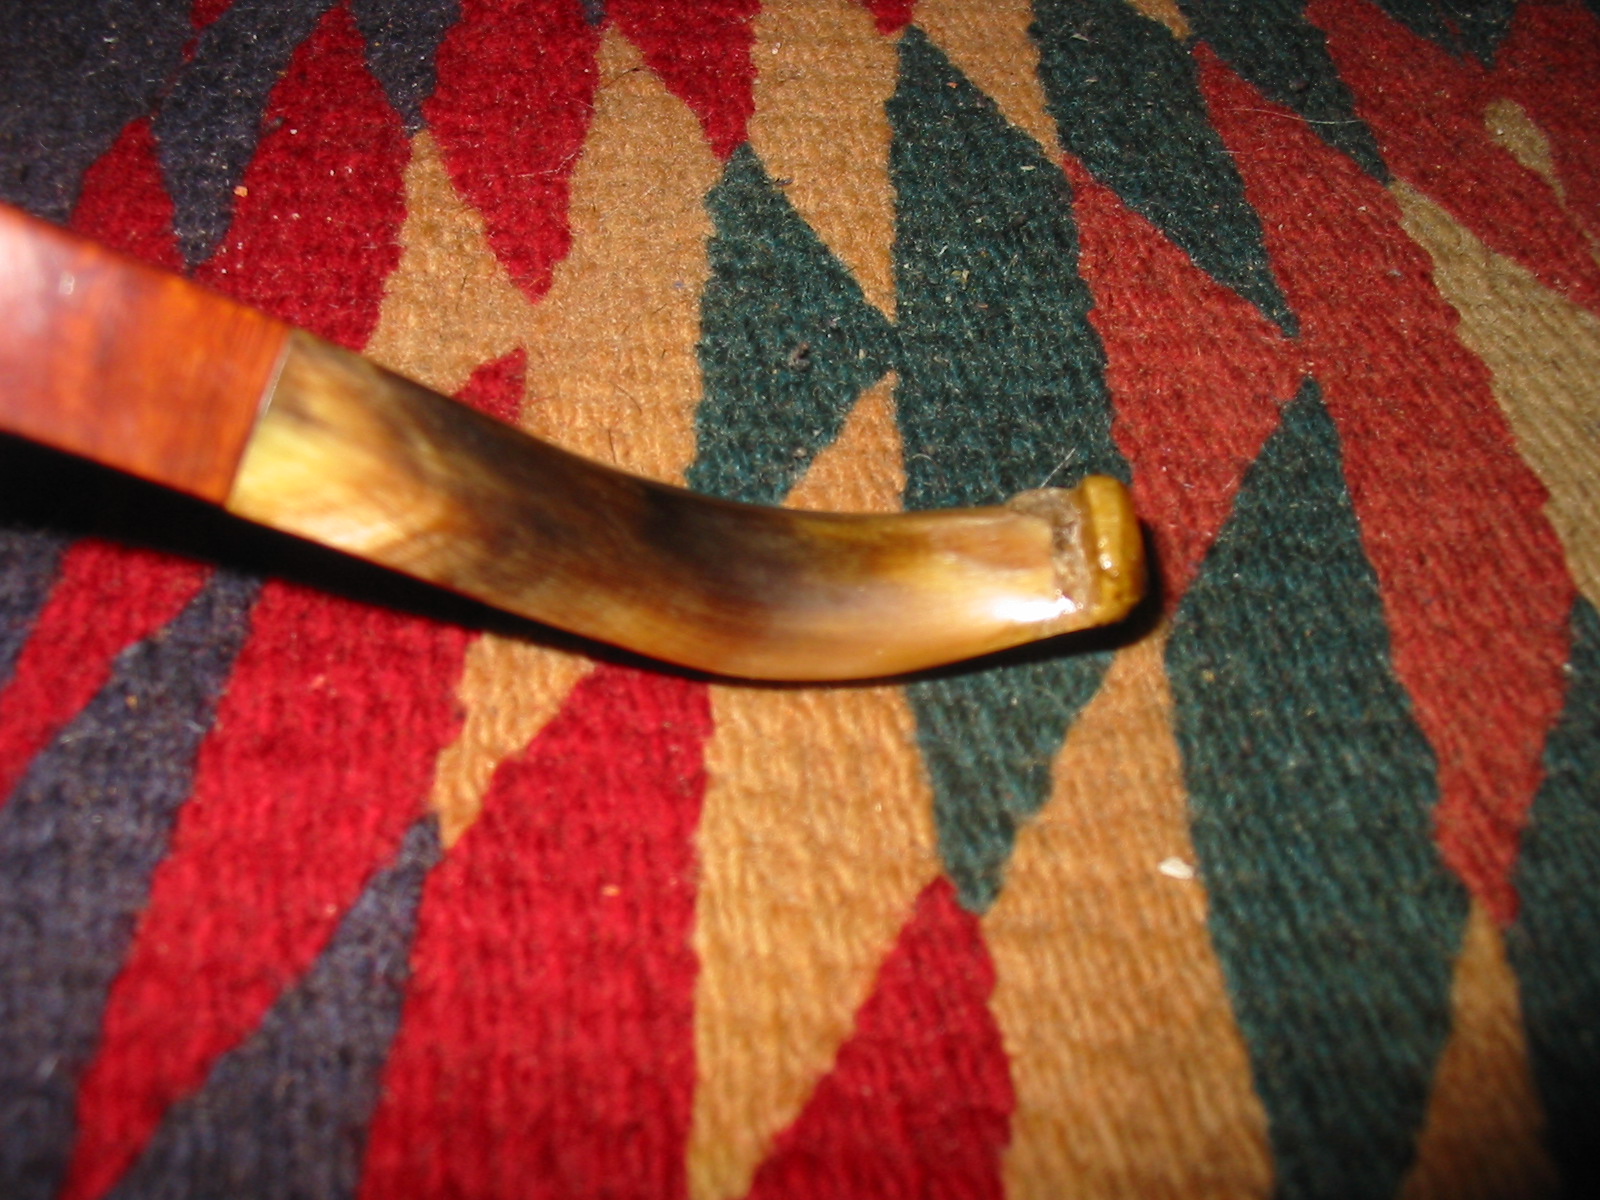
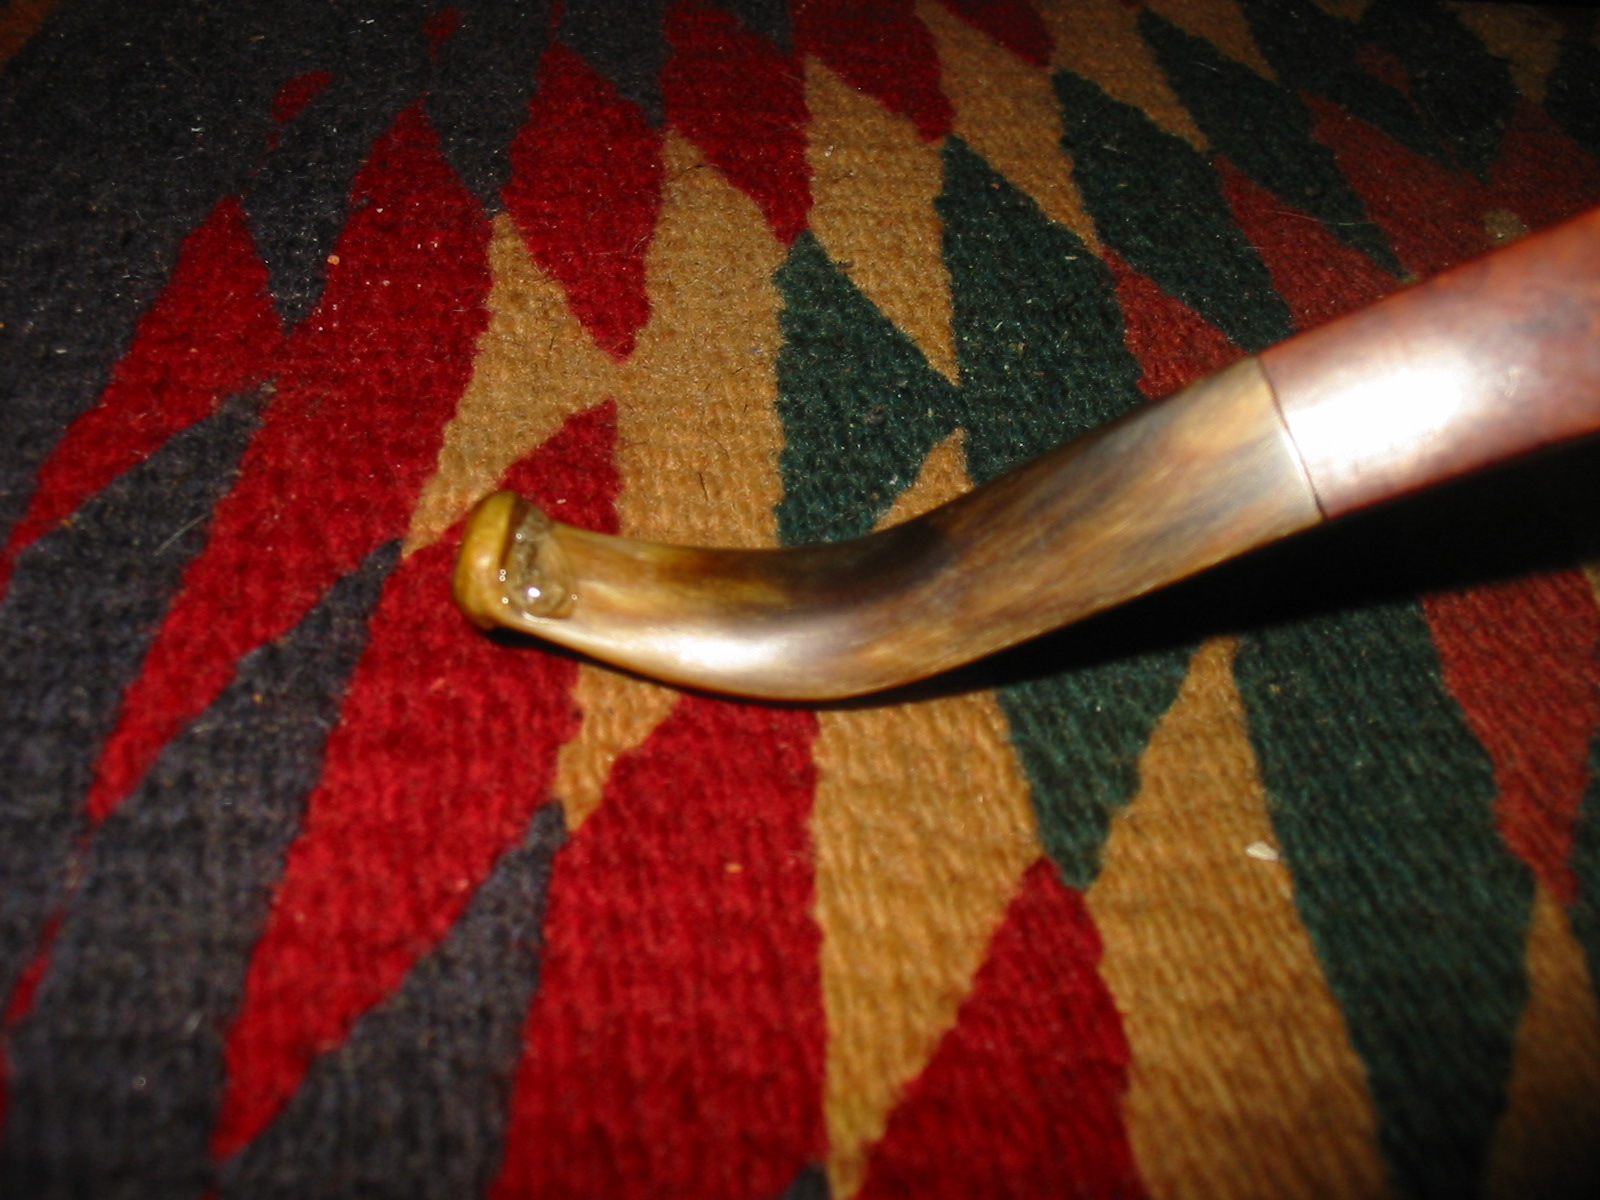
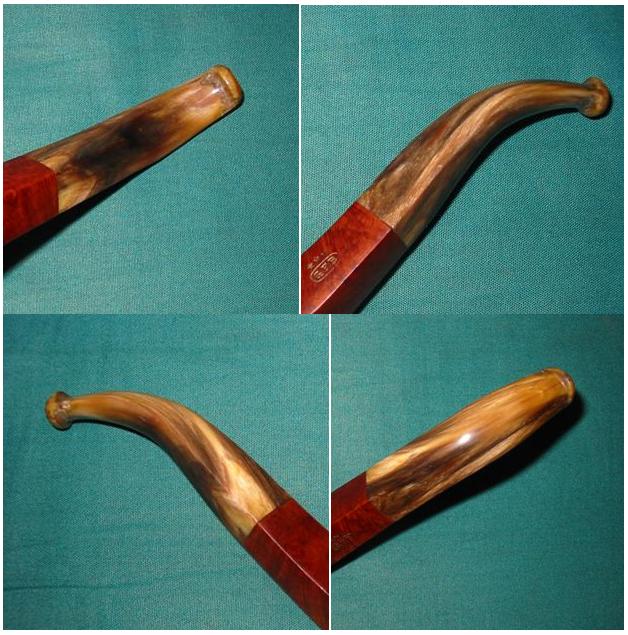
This third pipe was a charmer to me. When I saw the photos I decided I would bid to win it. The elegance of the old pipe caught me. The bowl appeared to be in good shape and it had a horn stem. The striations and colour of the stem was beautiful even in its oxidized state. The three photos below were included in the EBay sale. The third photo shows the underside of the stem and the damage to the underside near the button. It looked to be more than tooth marks or chewing. It actually looked like “worm” damage. From the photos it appeared to be localized to that part of the stem and was worth a chance. Worst case scenario, I would sacrifice the stem and restem the old pipe with a vulcanite stem.
GFB1

GFB2

GFB3

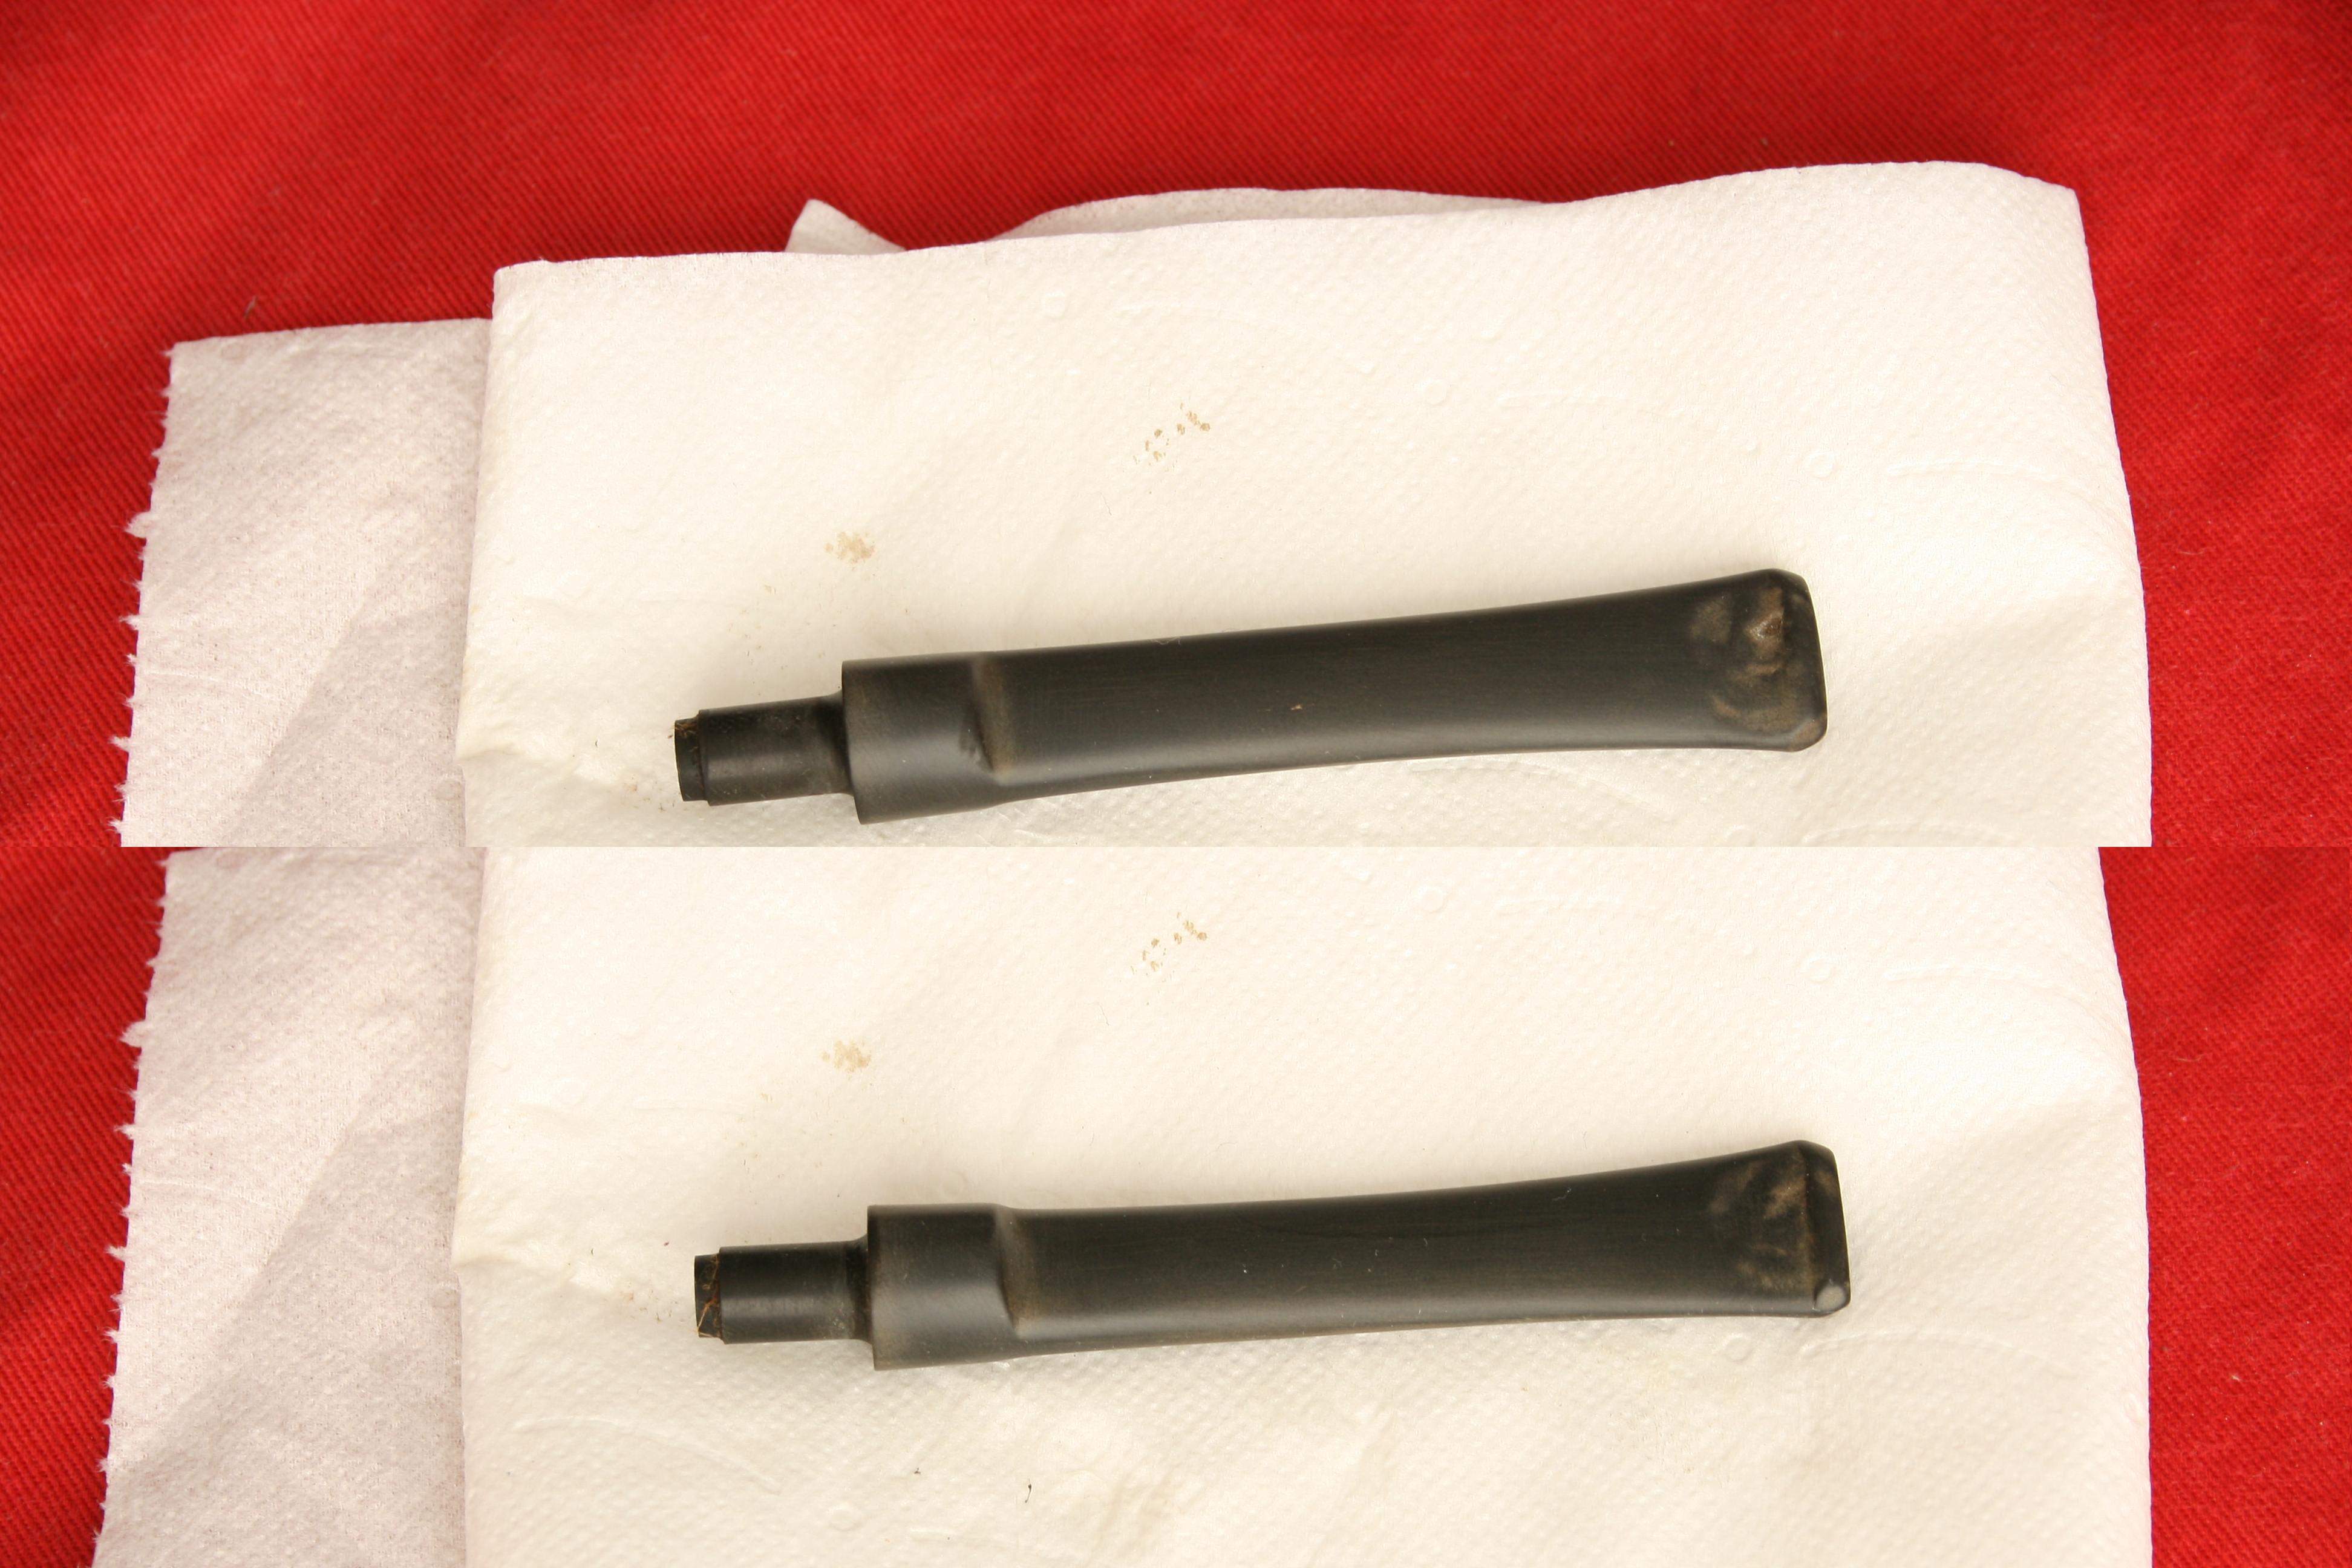
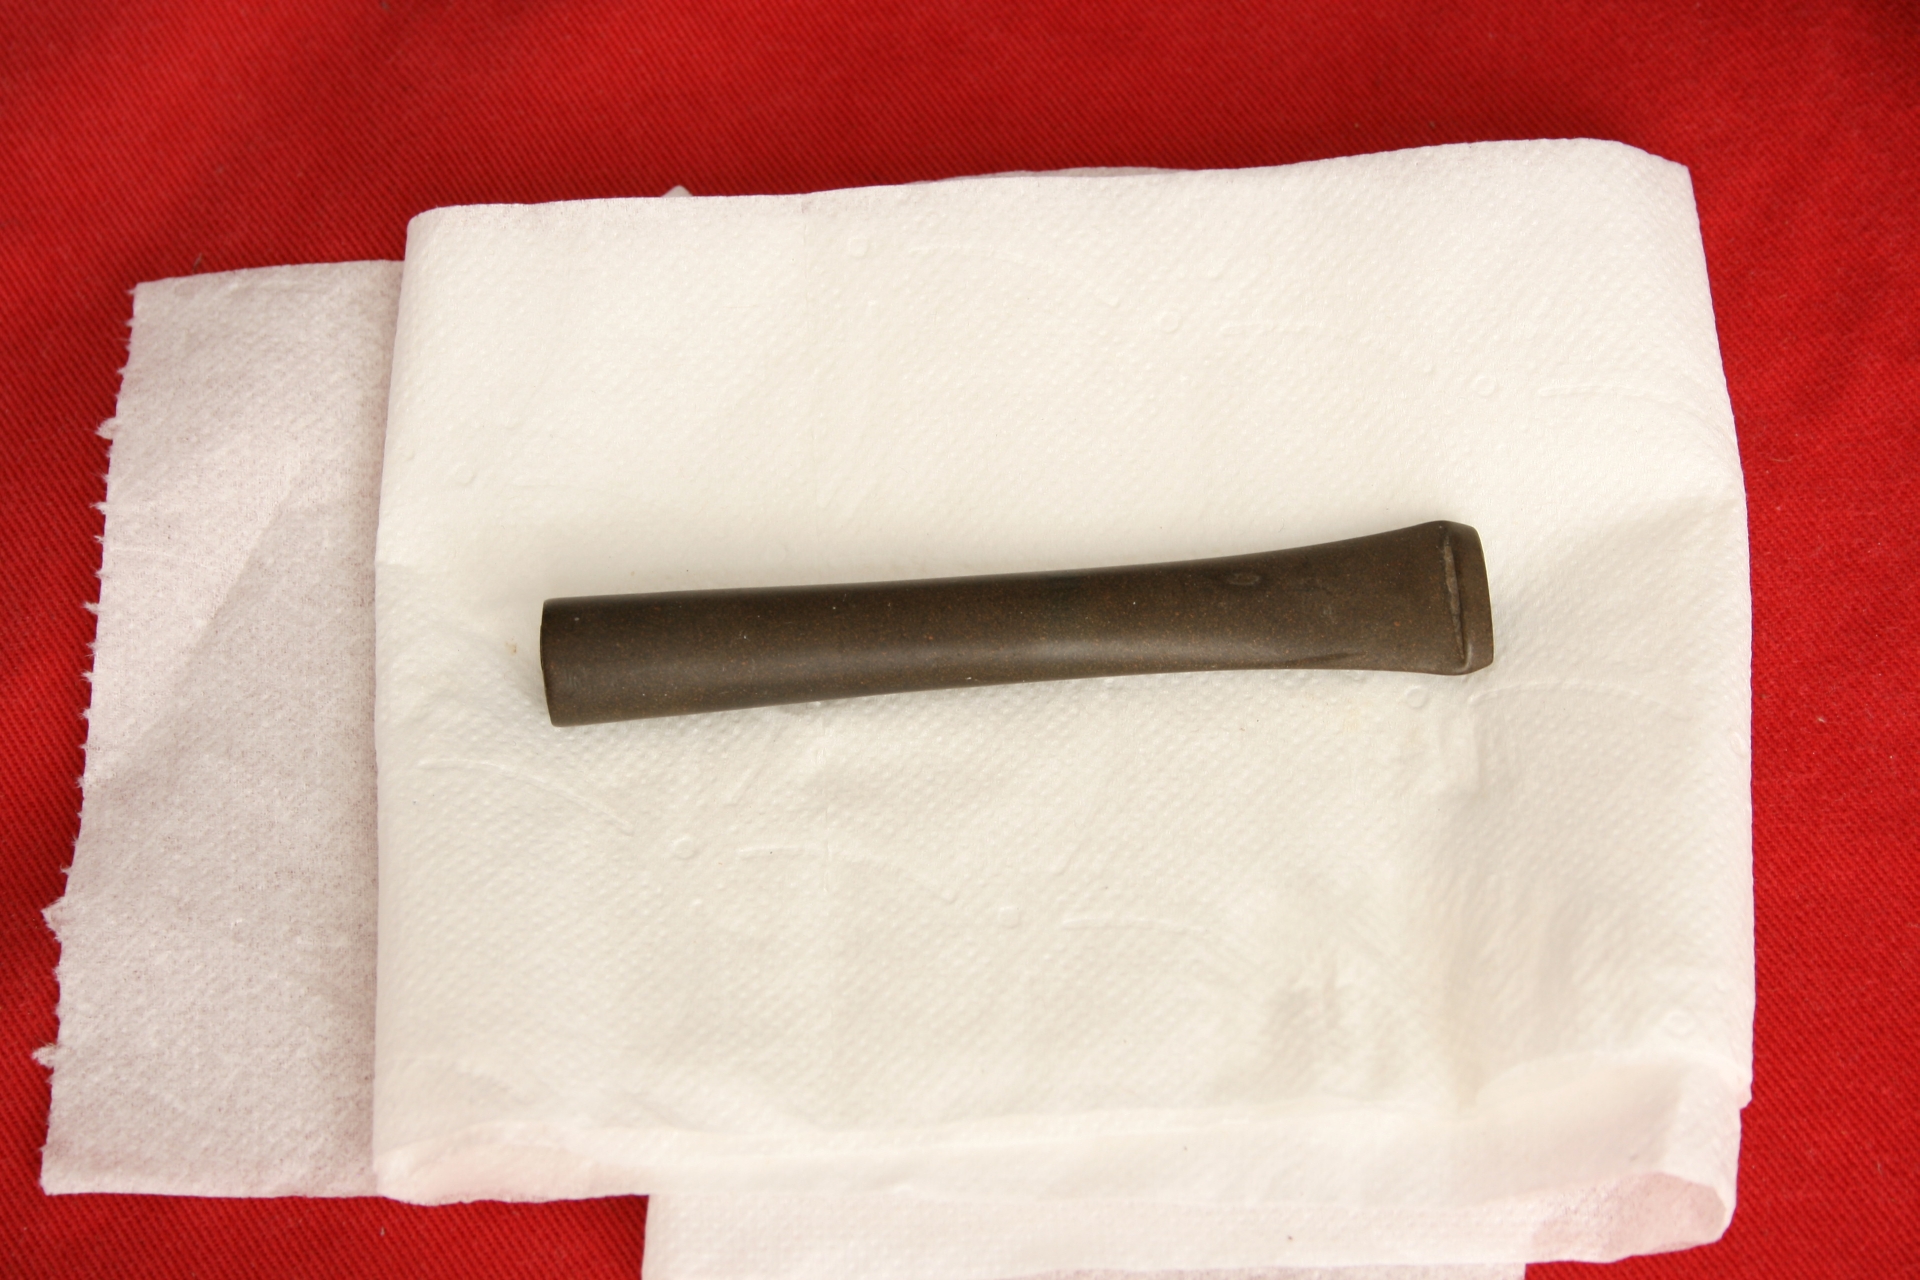
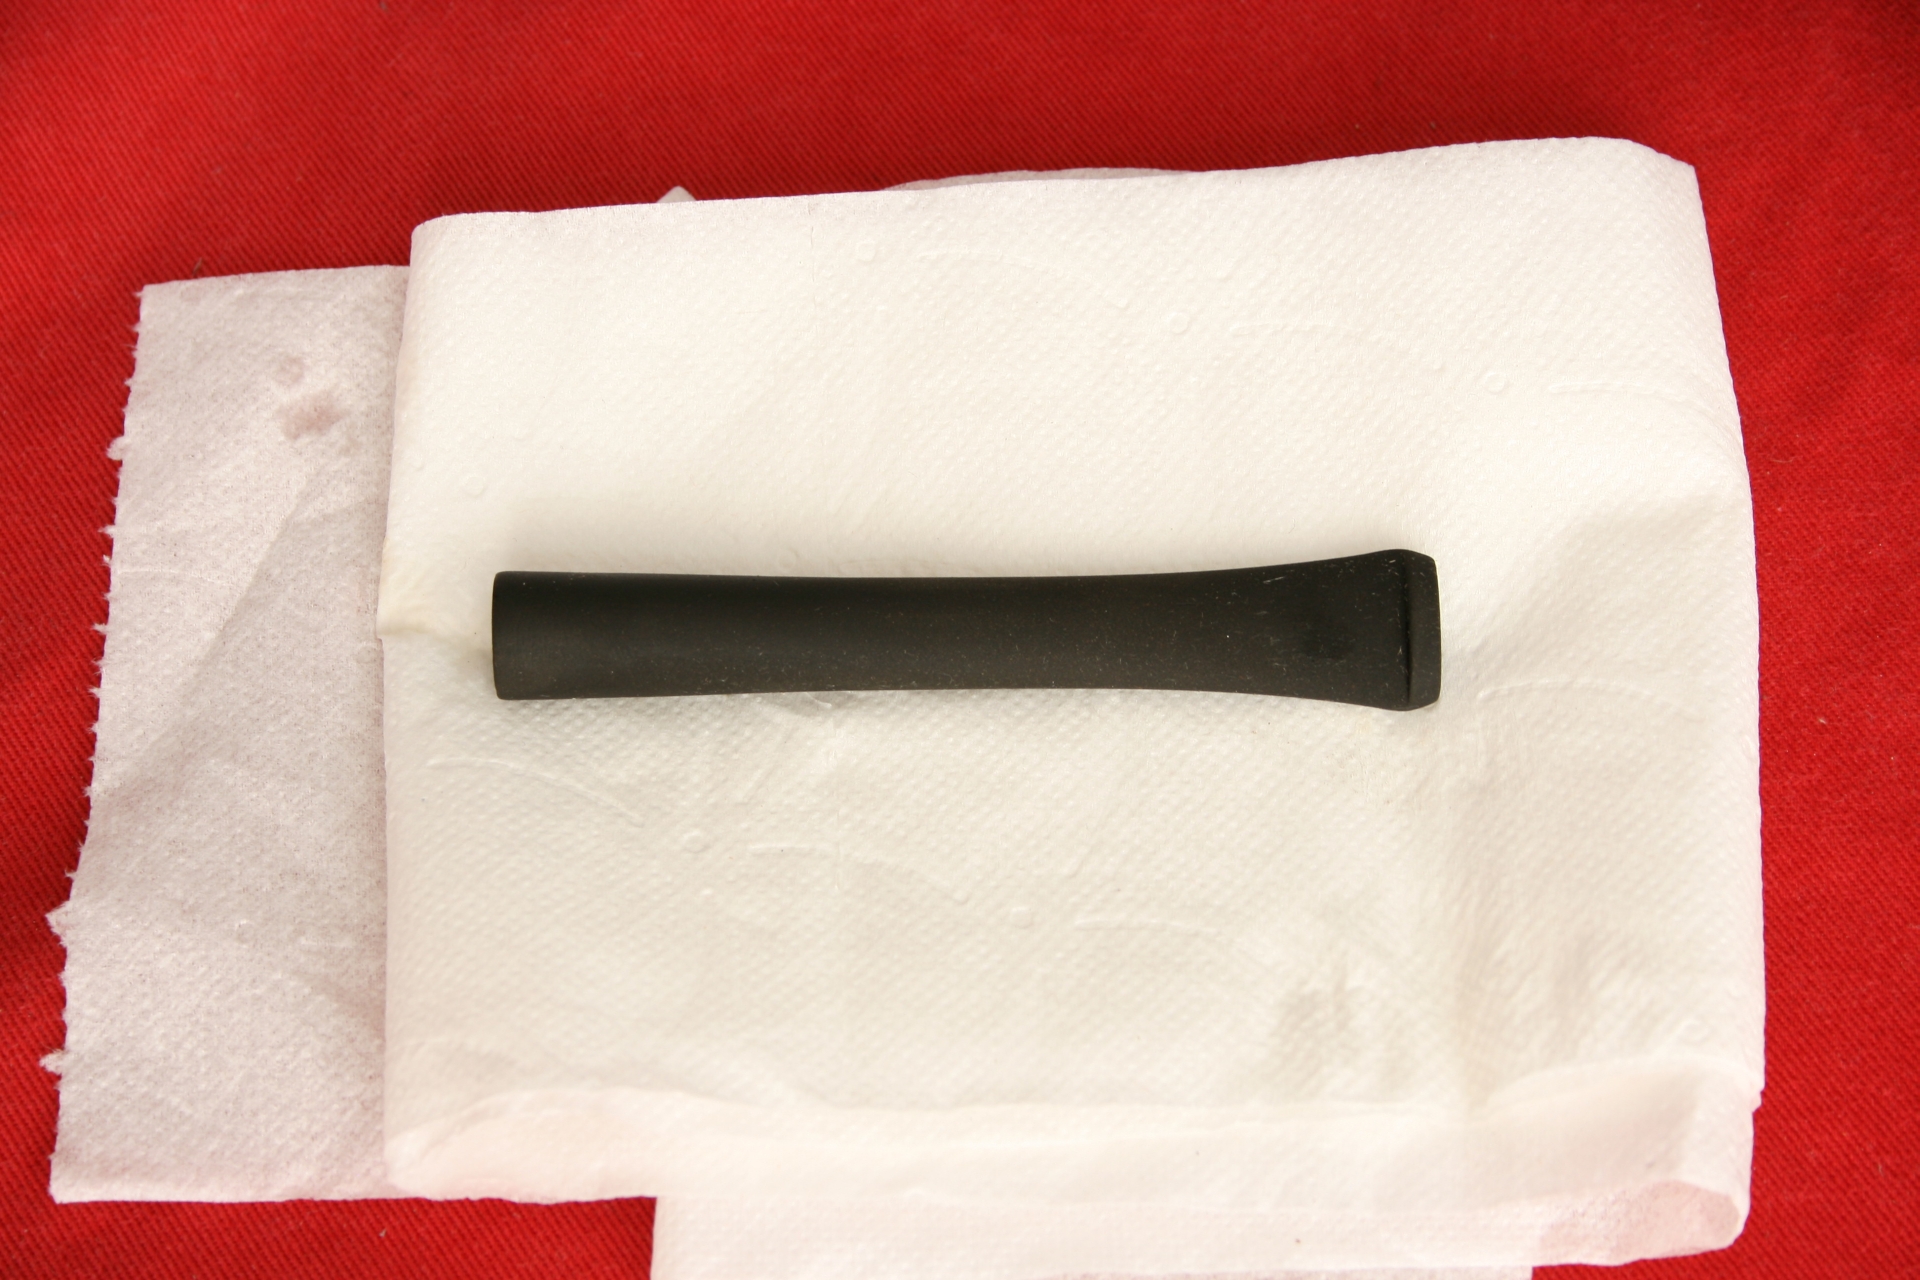
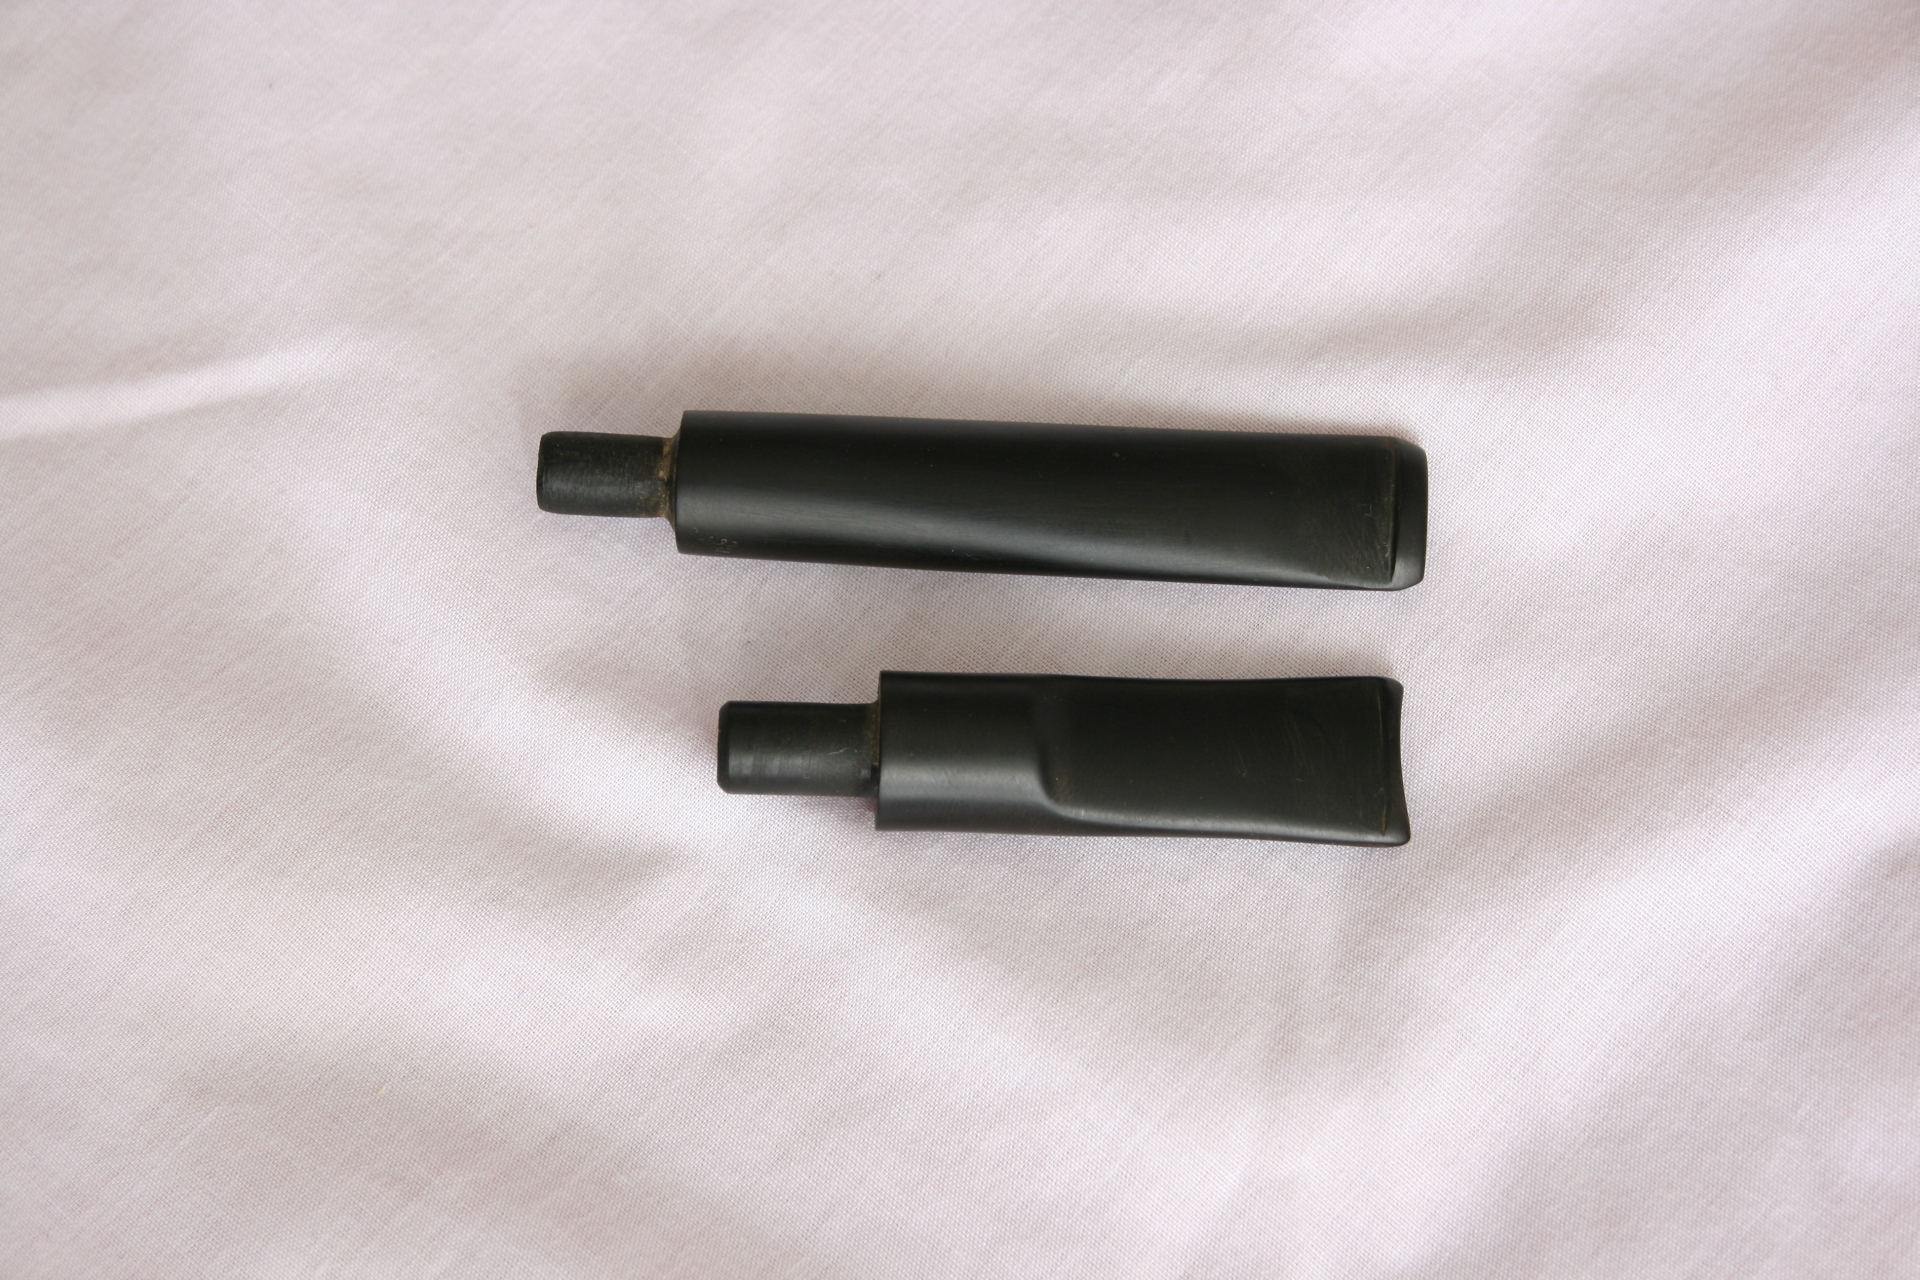
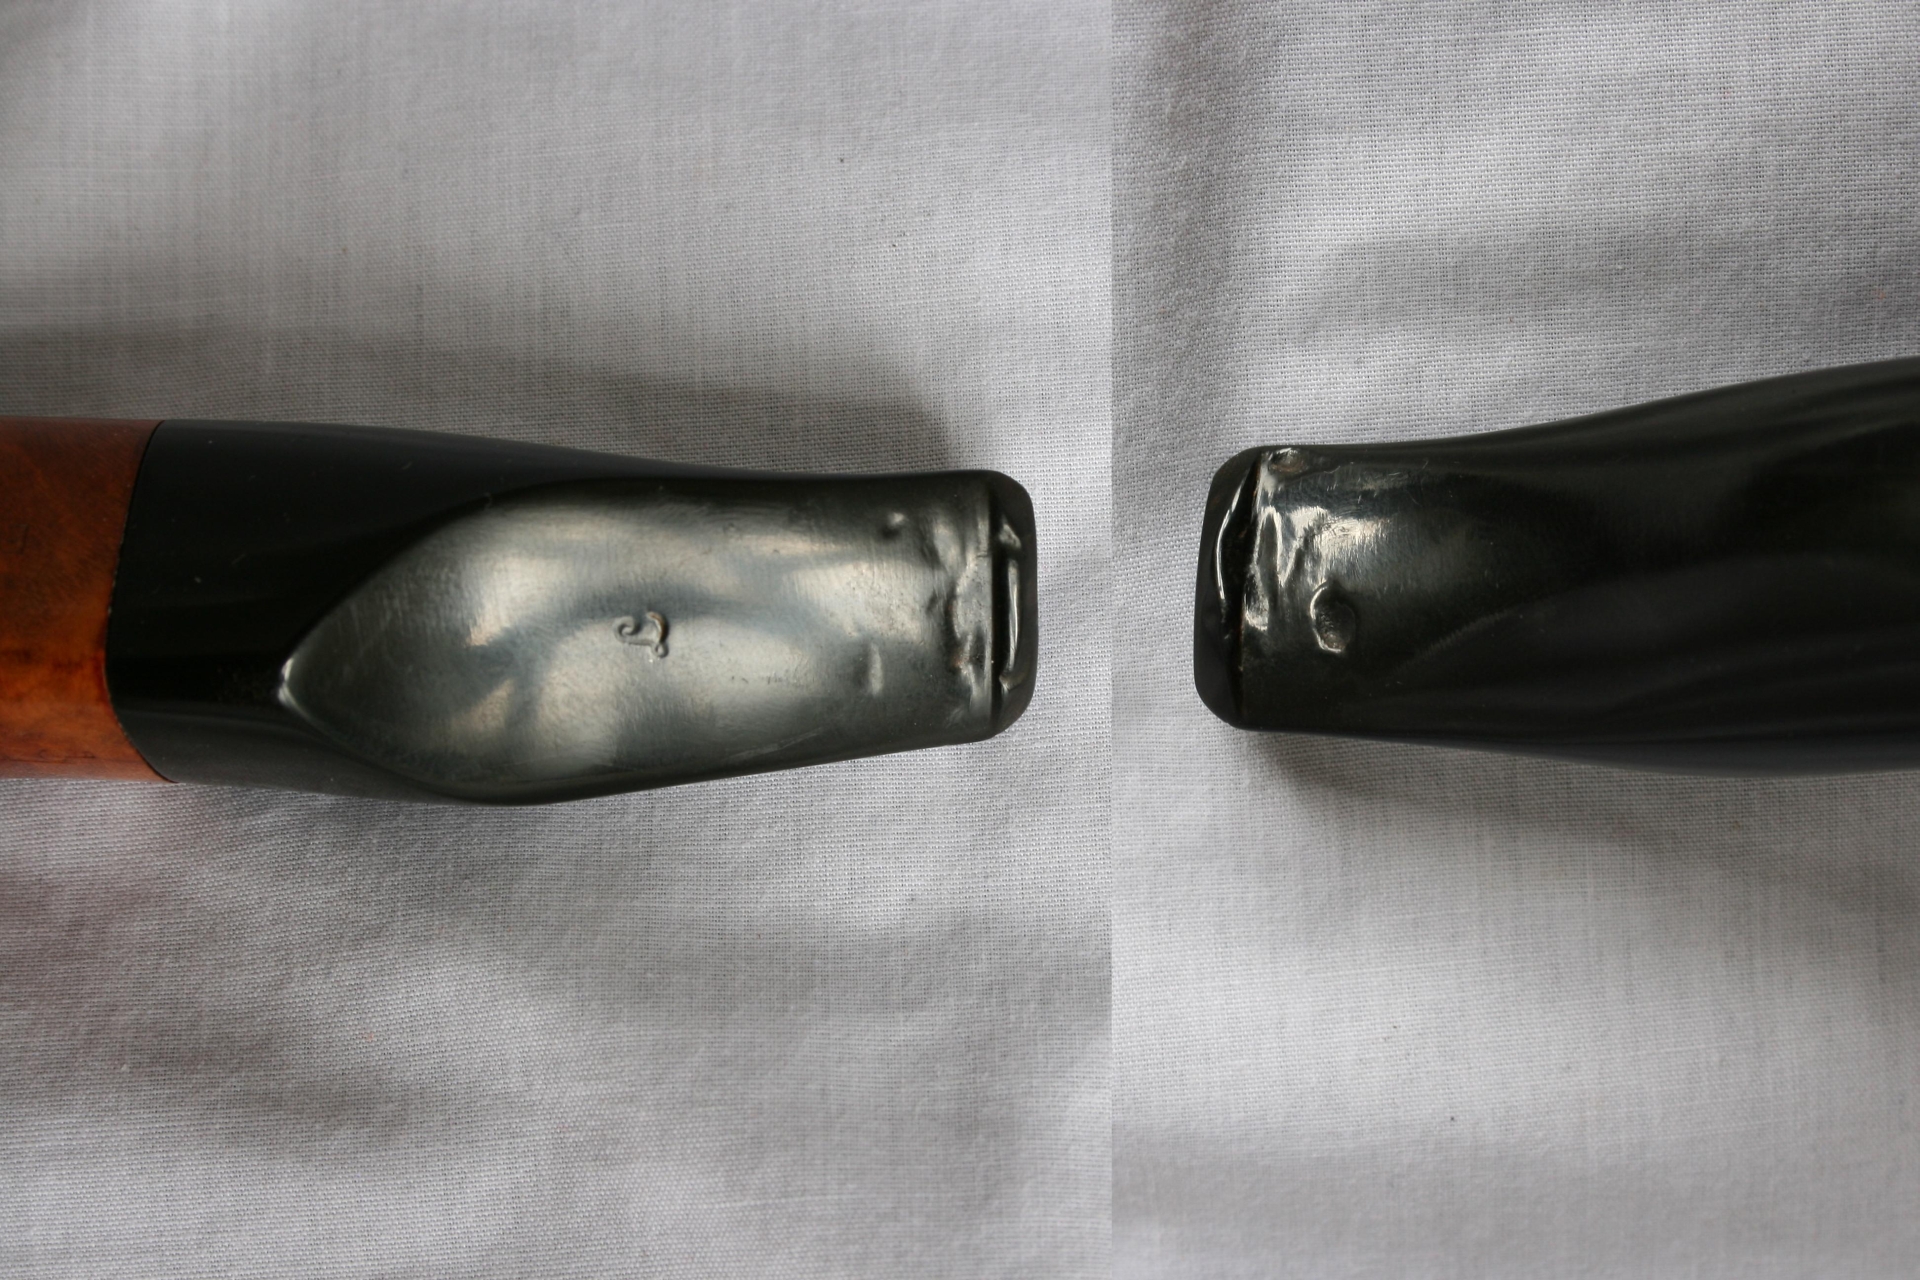
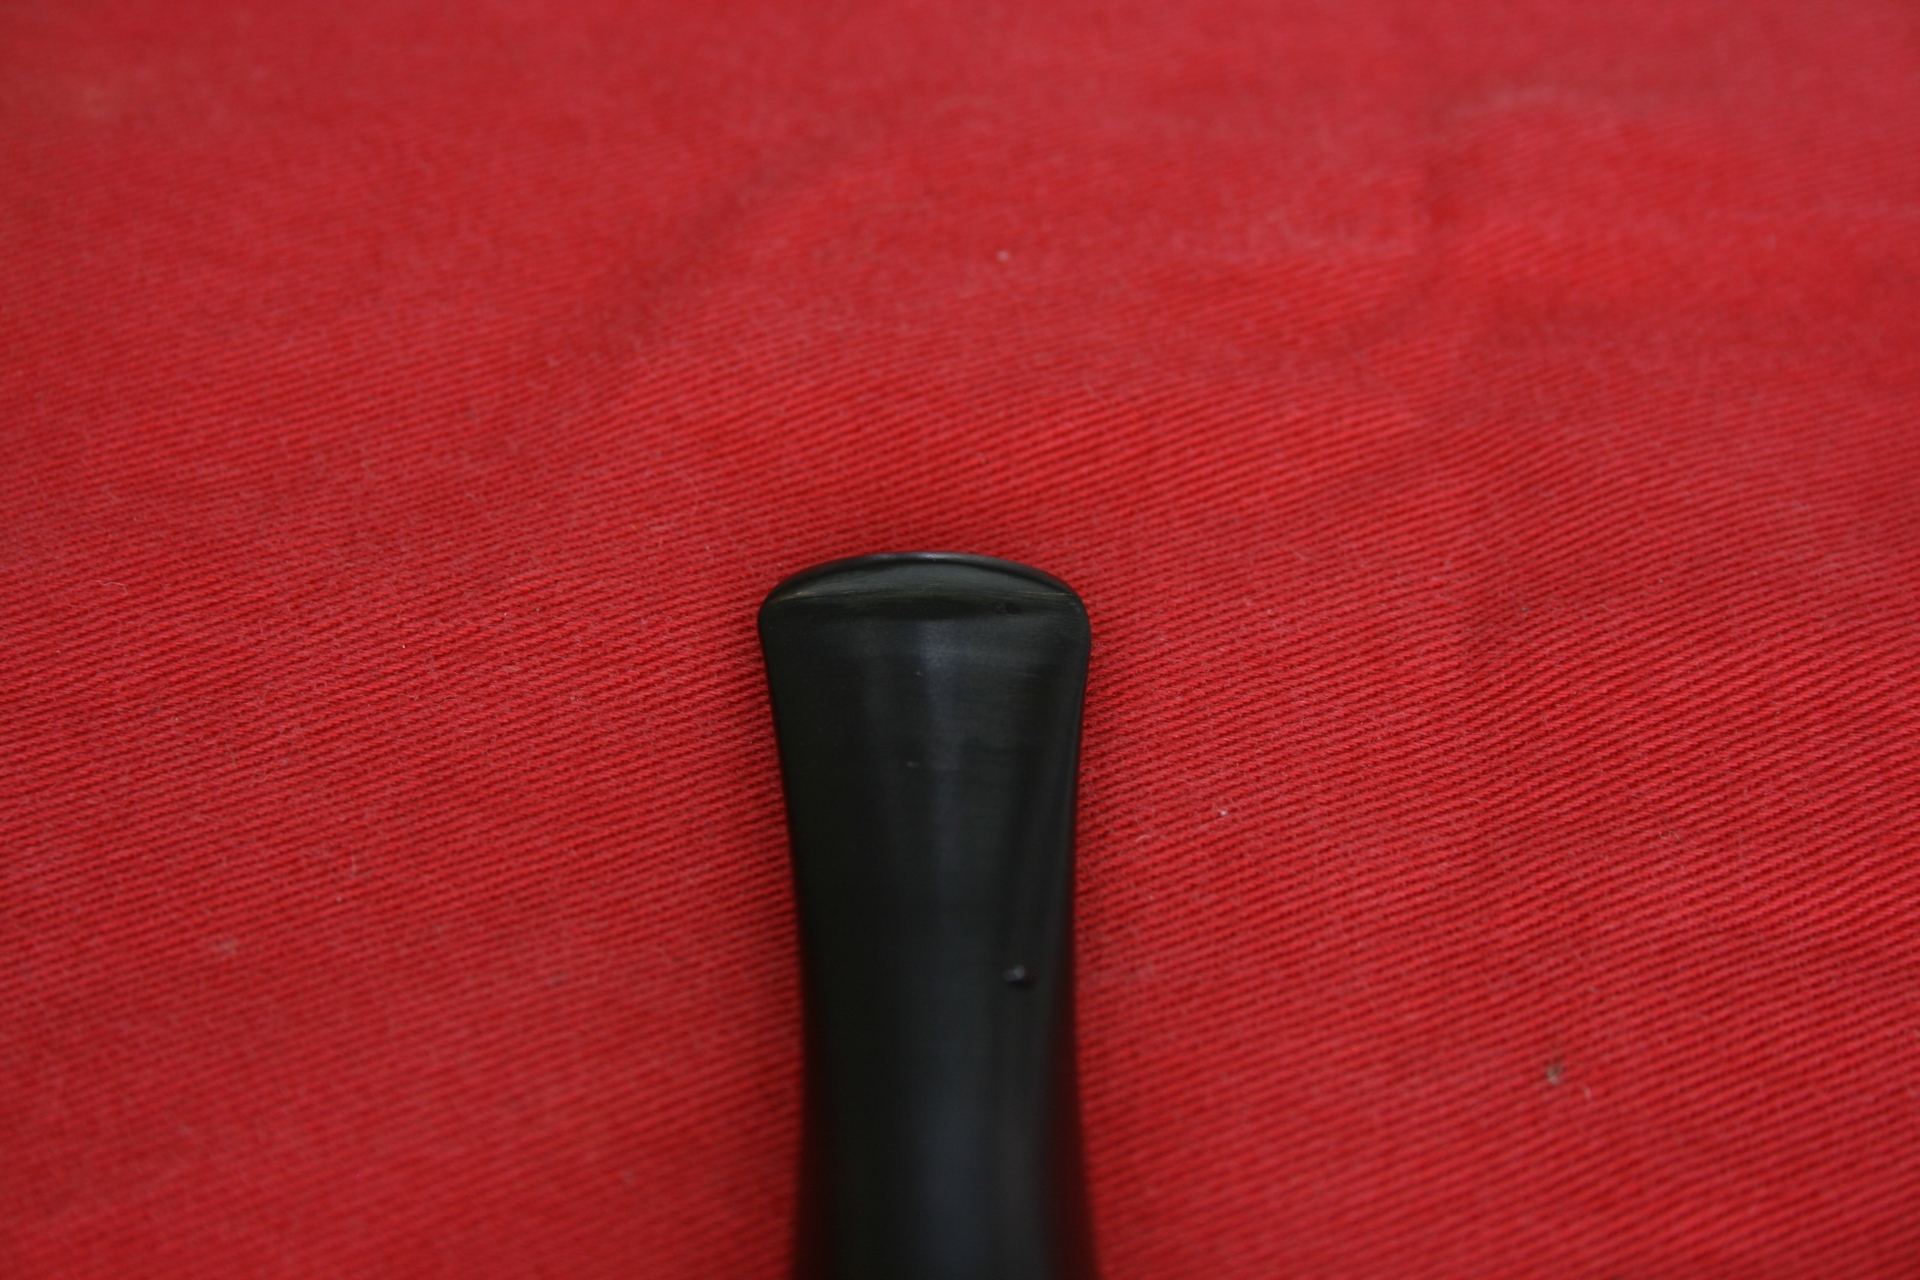
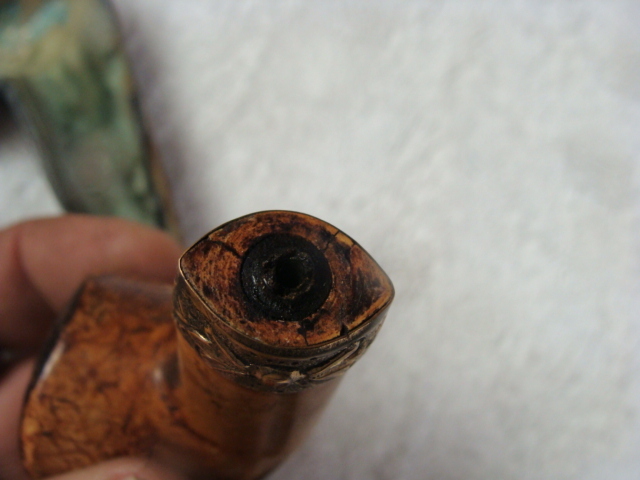
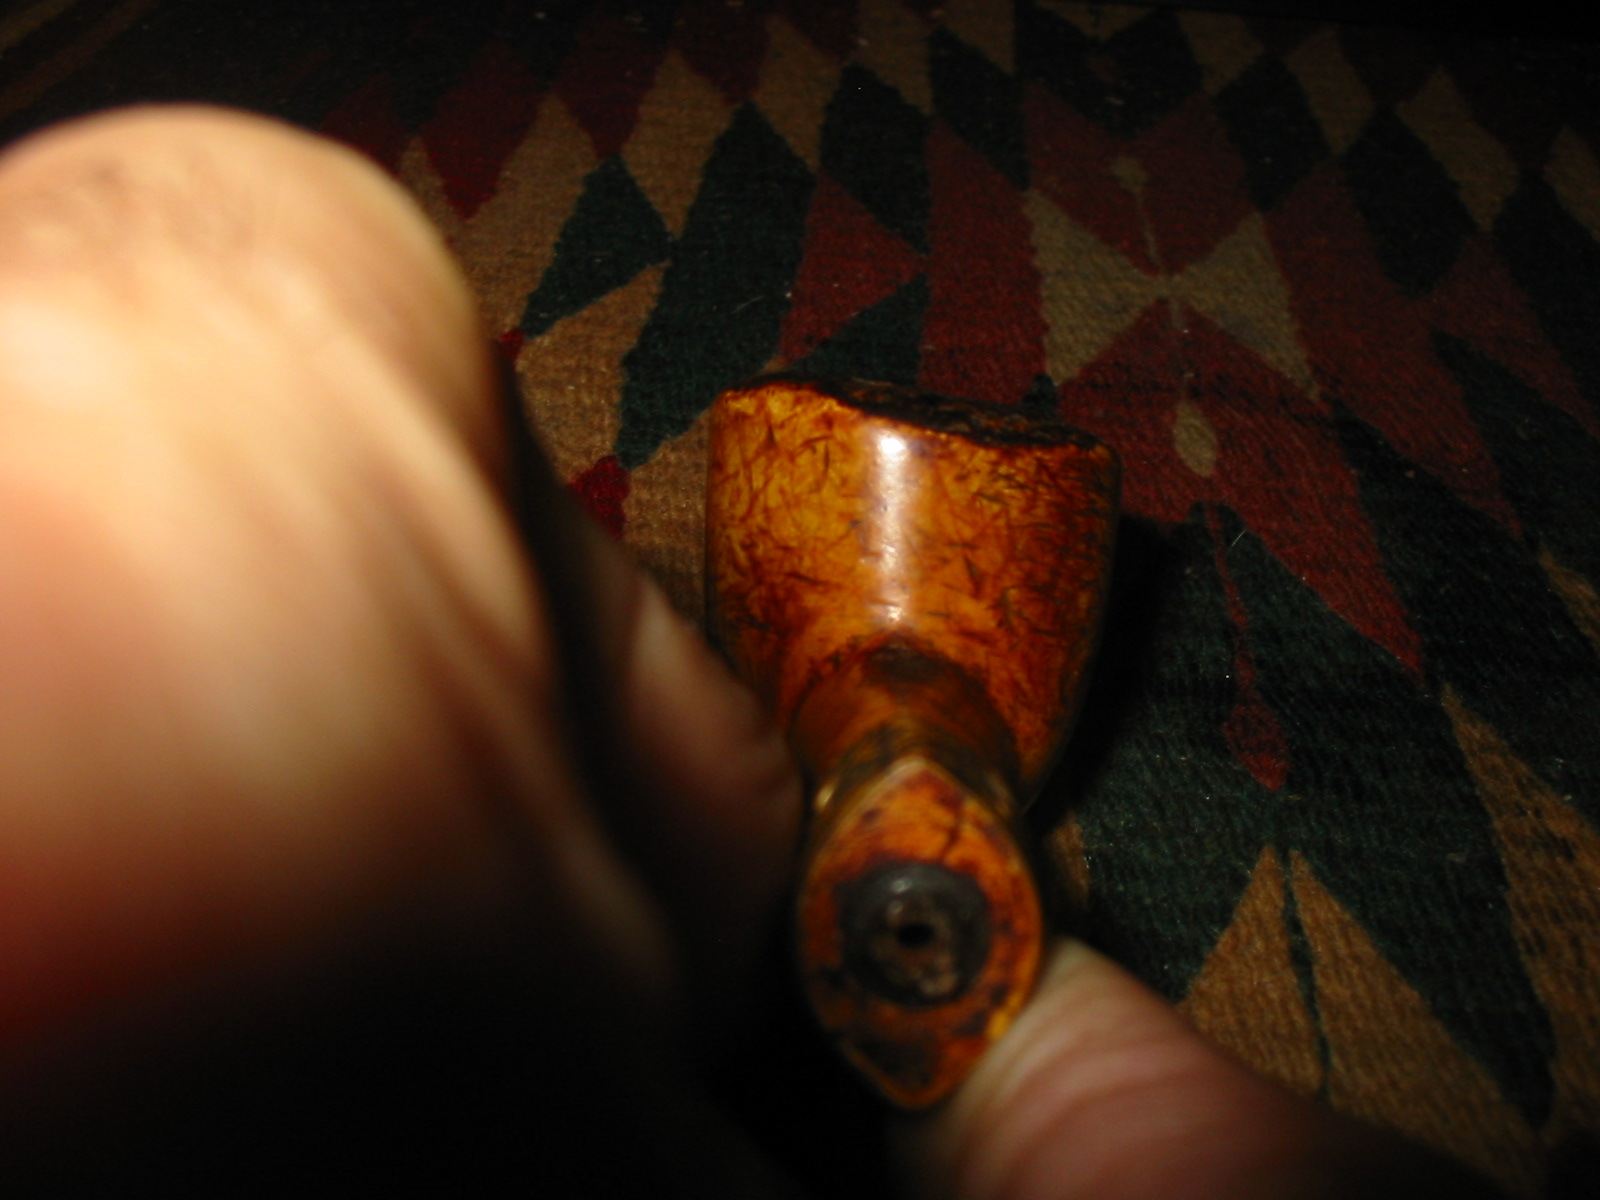
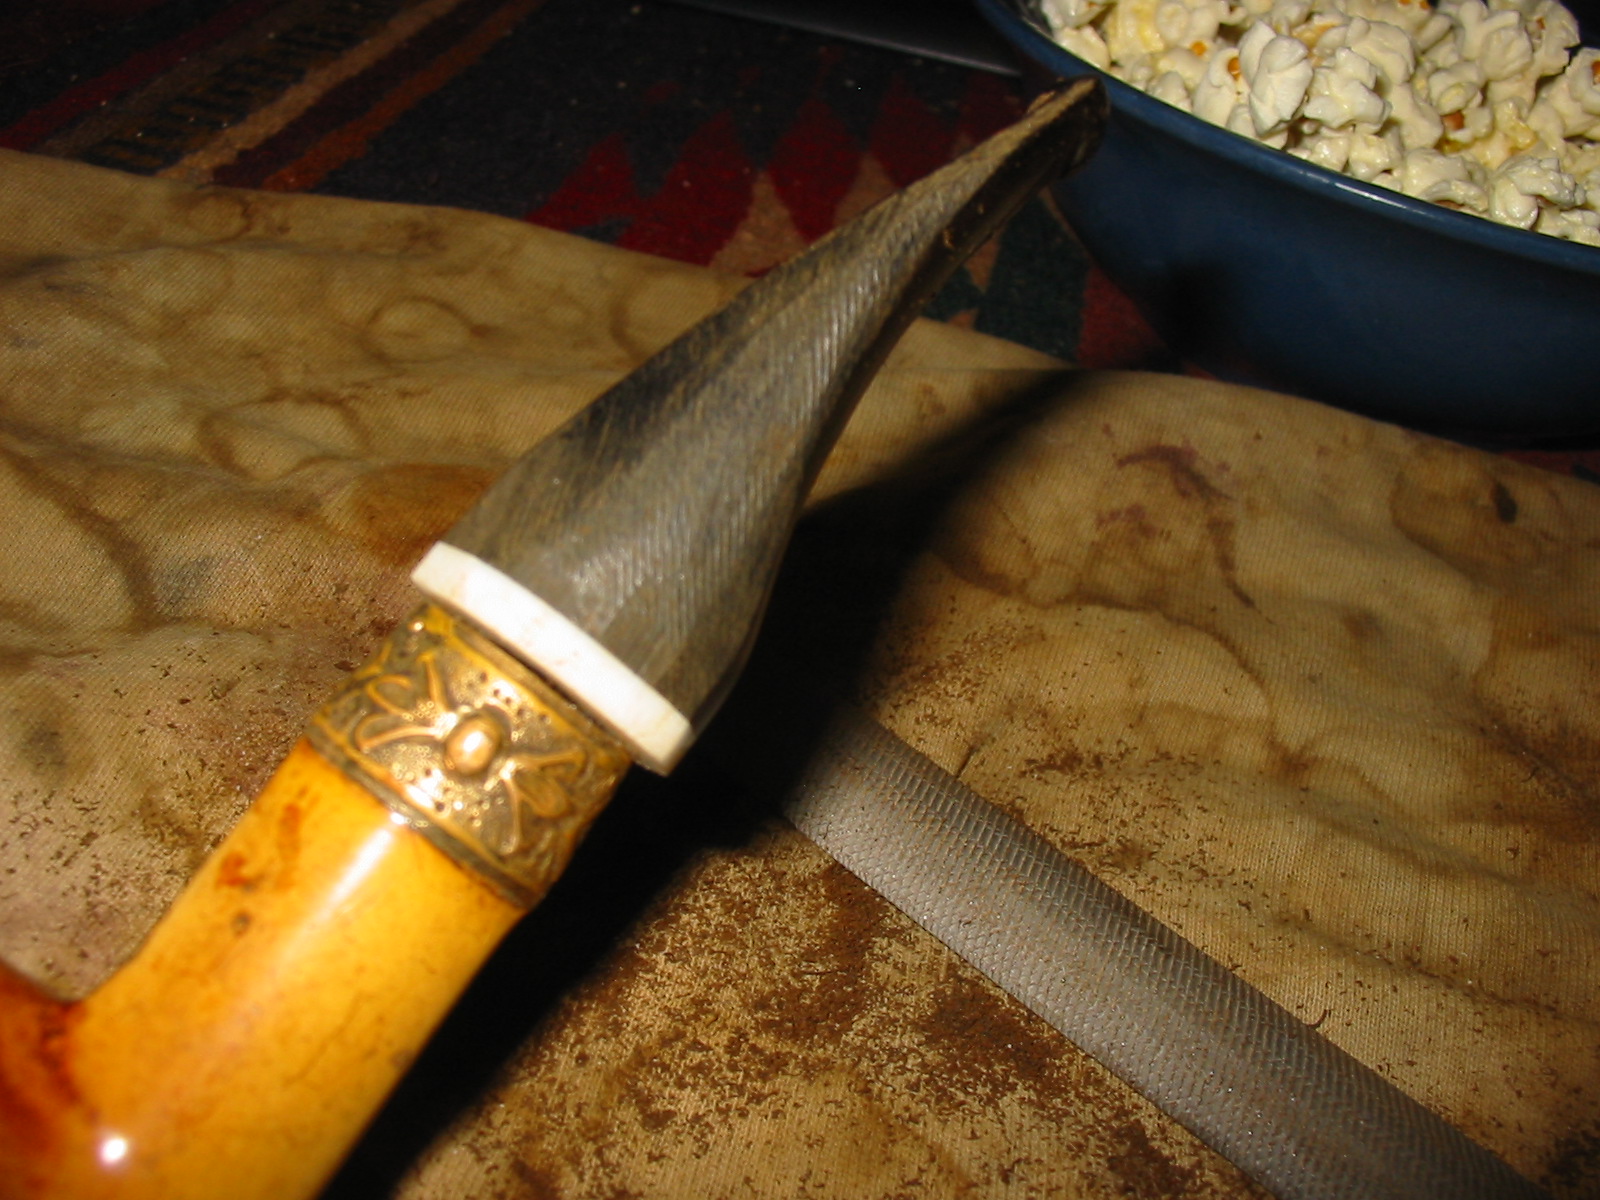
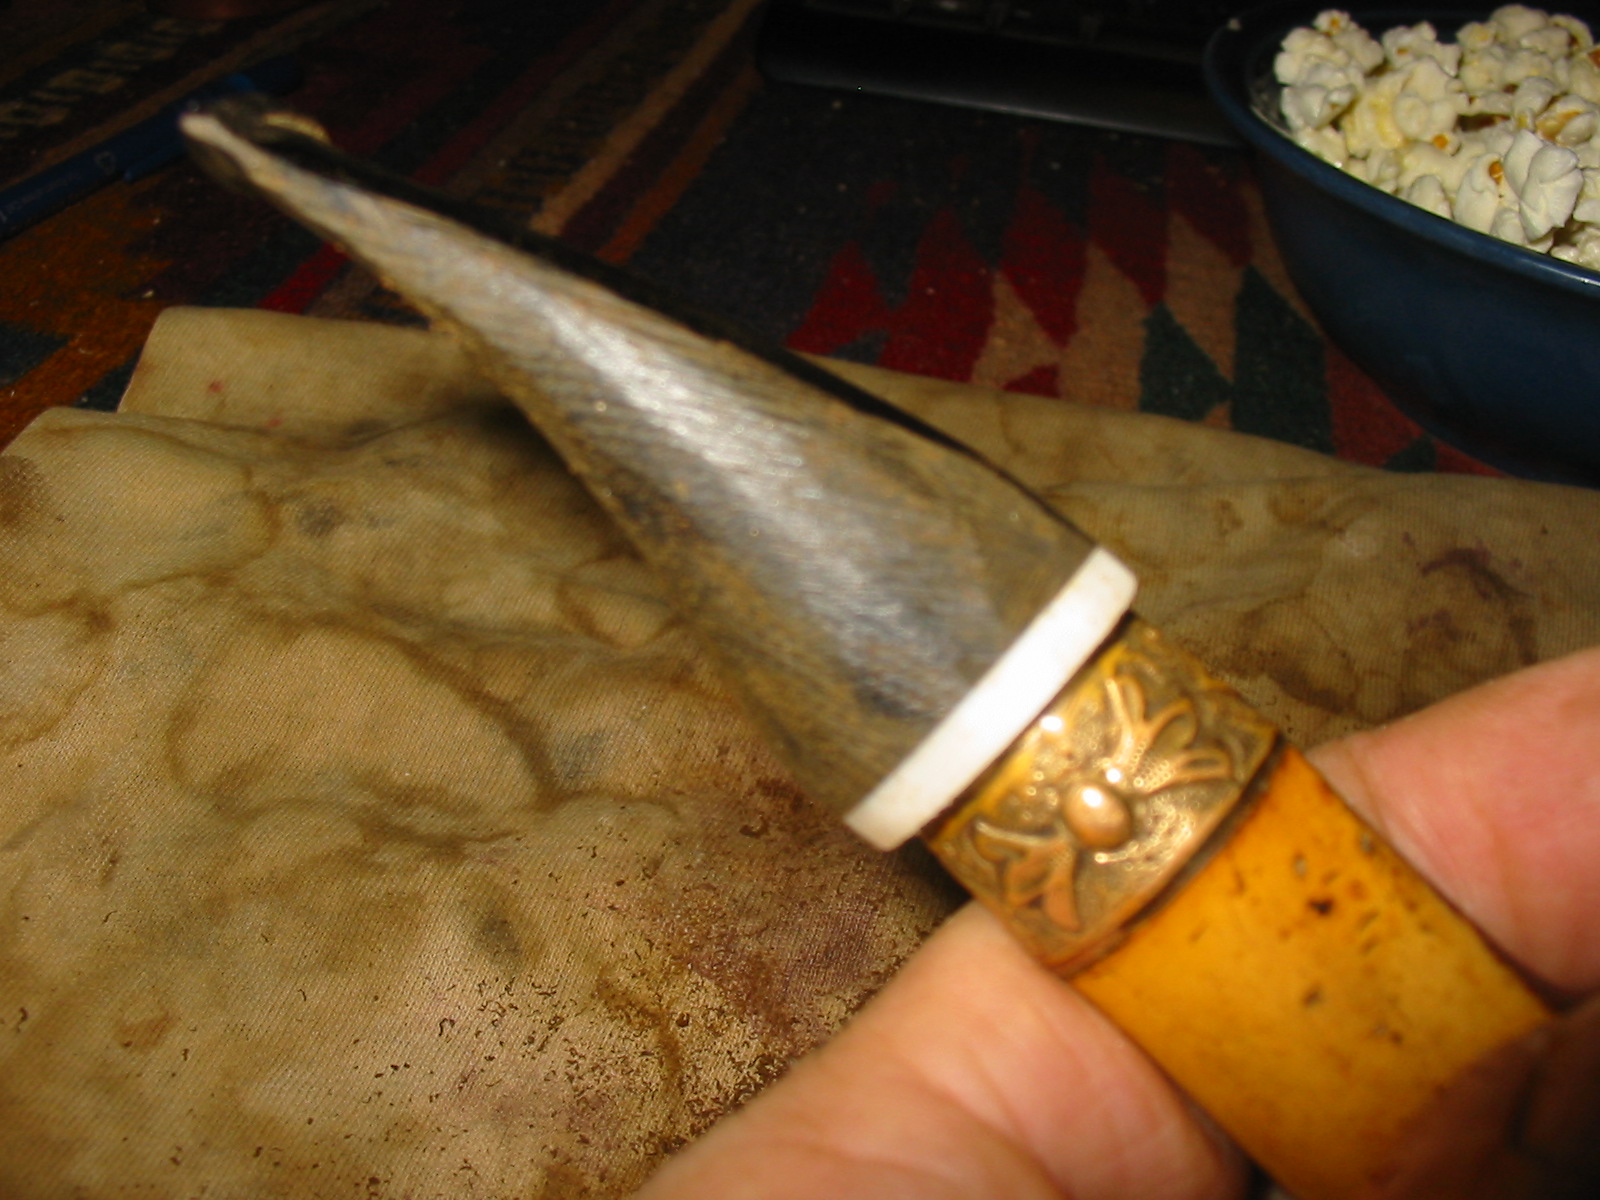
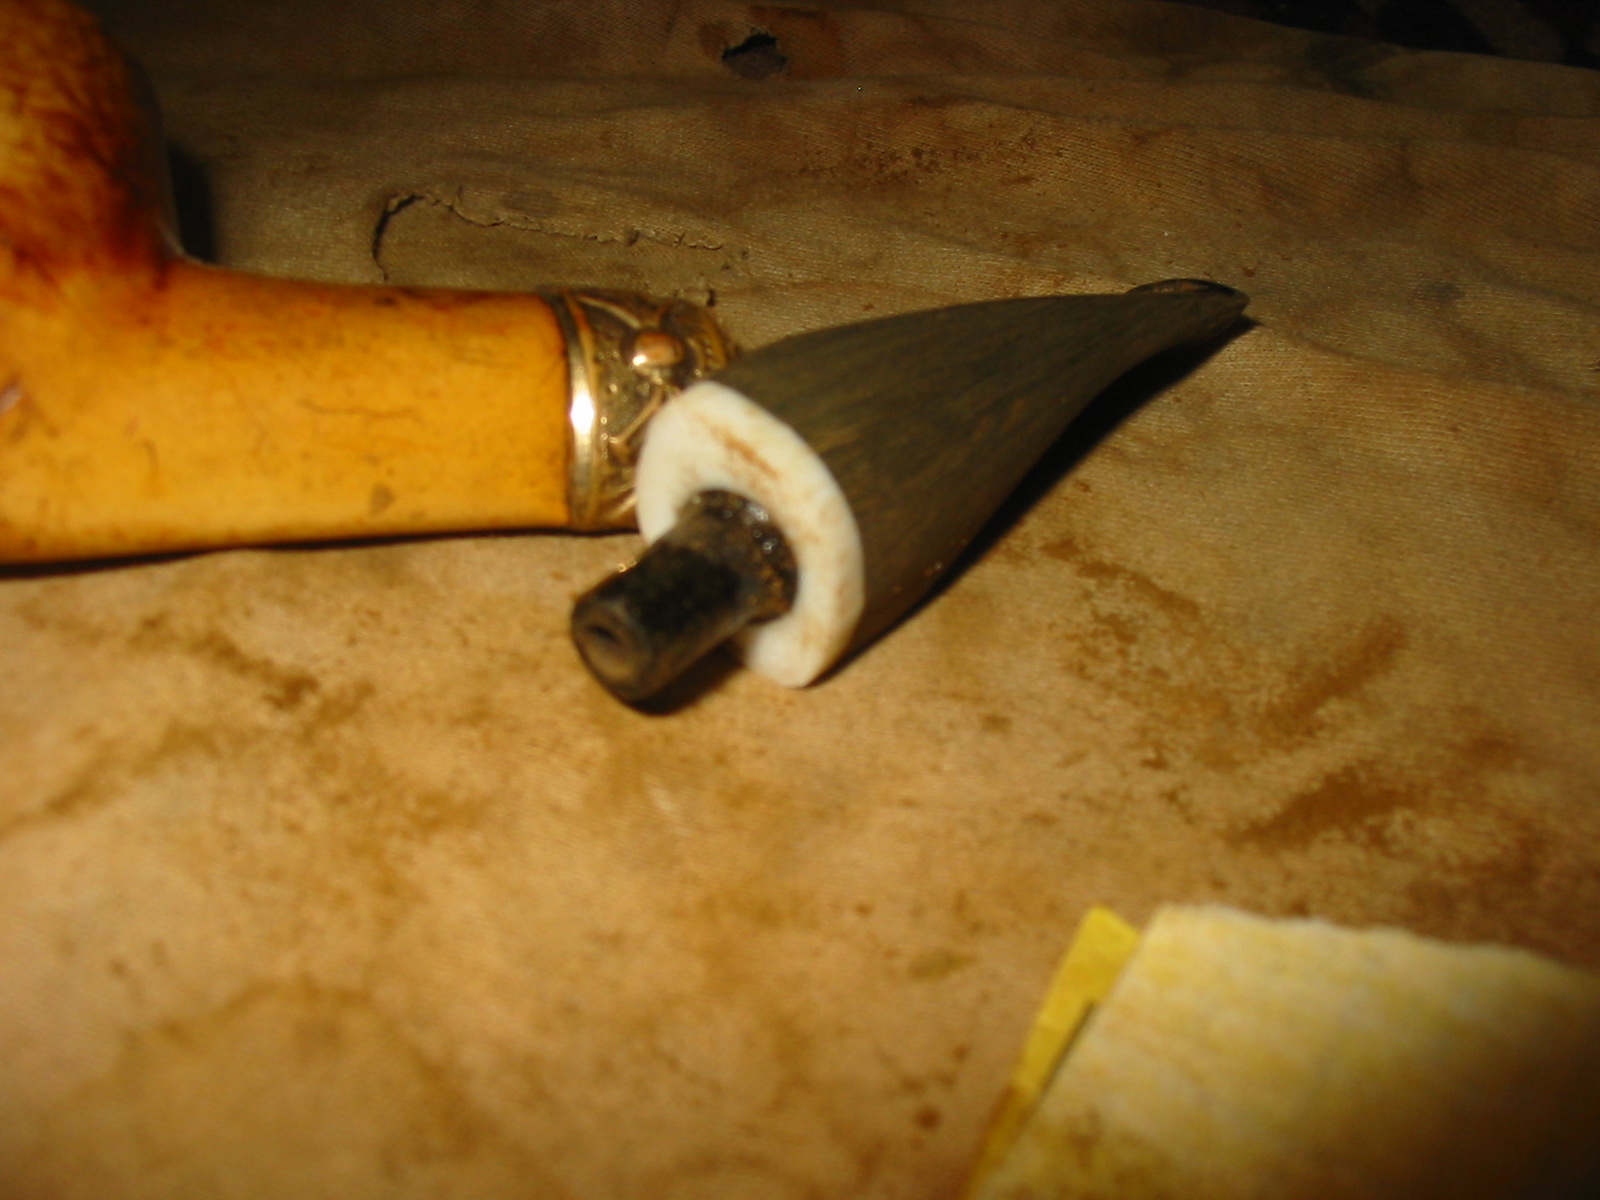
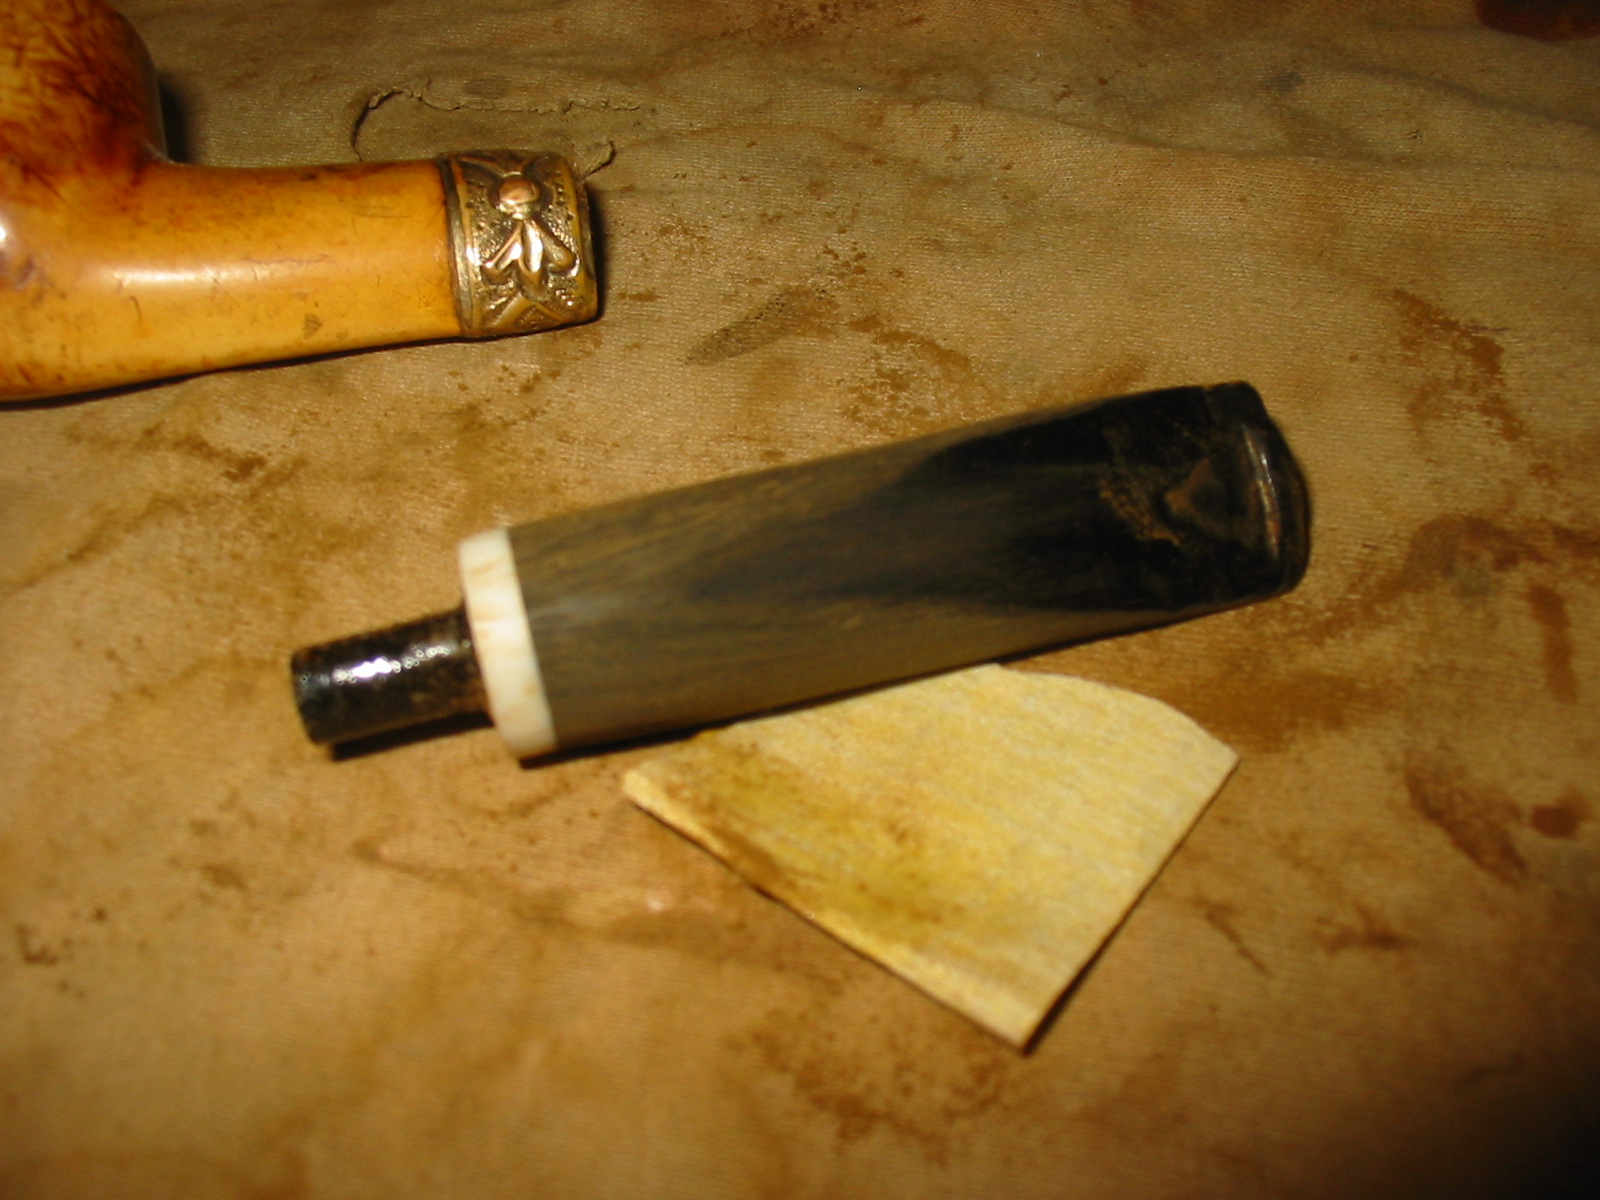
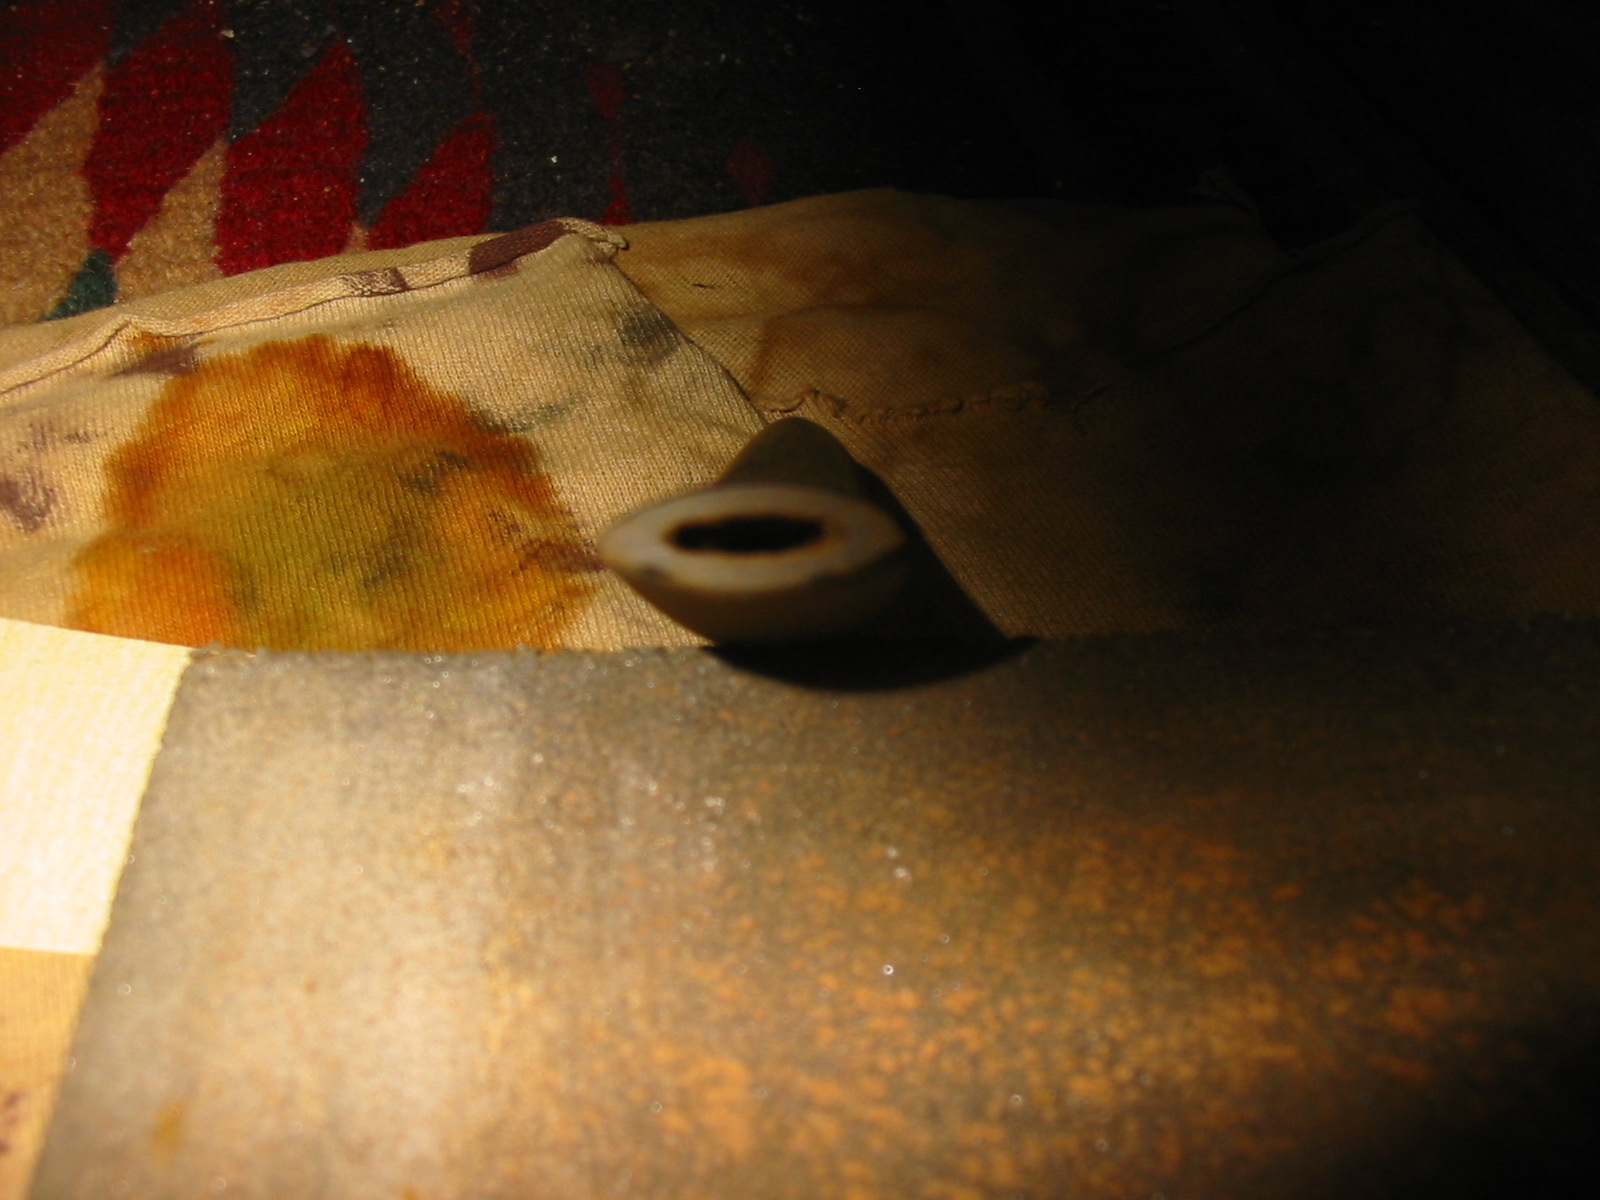
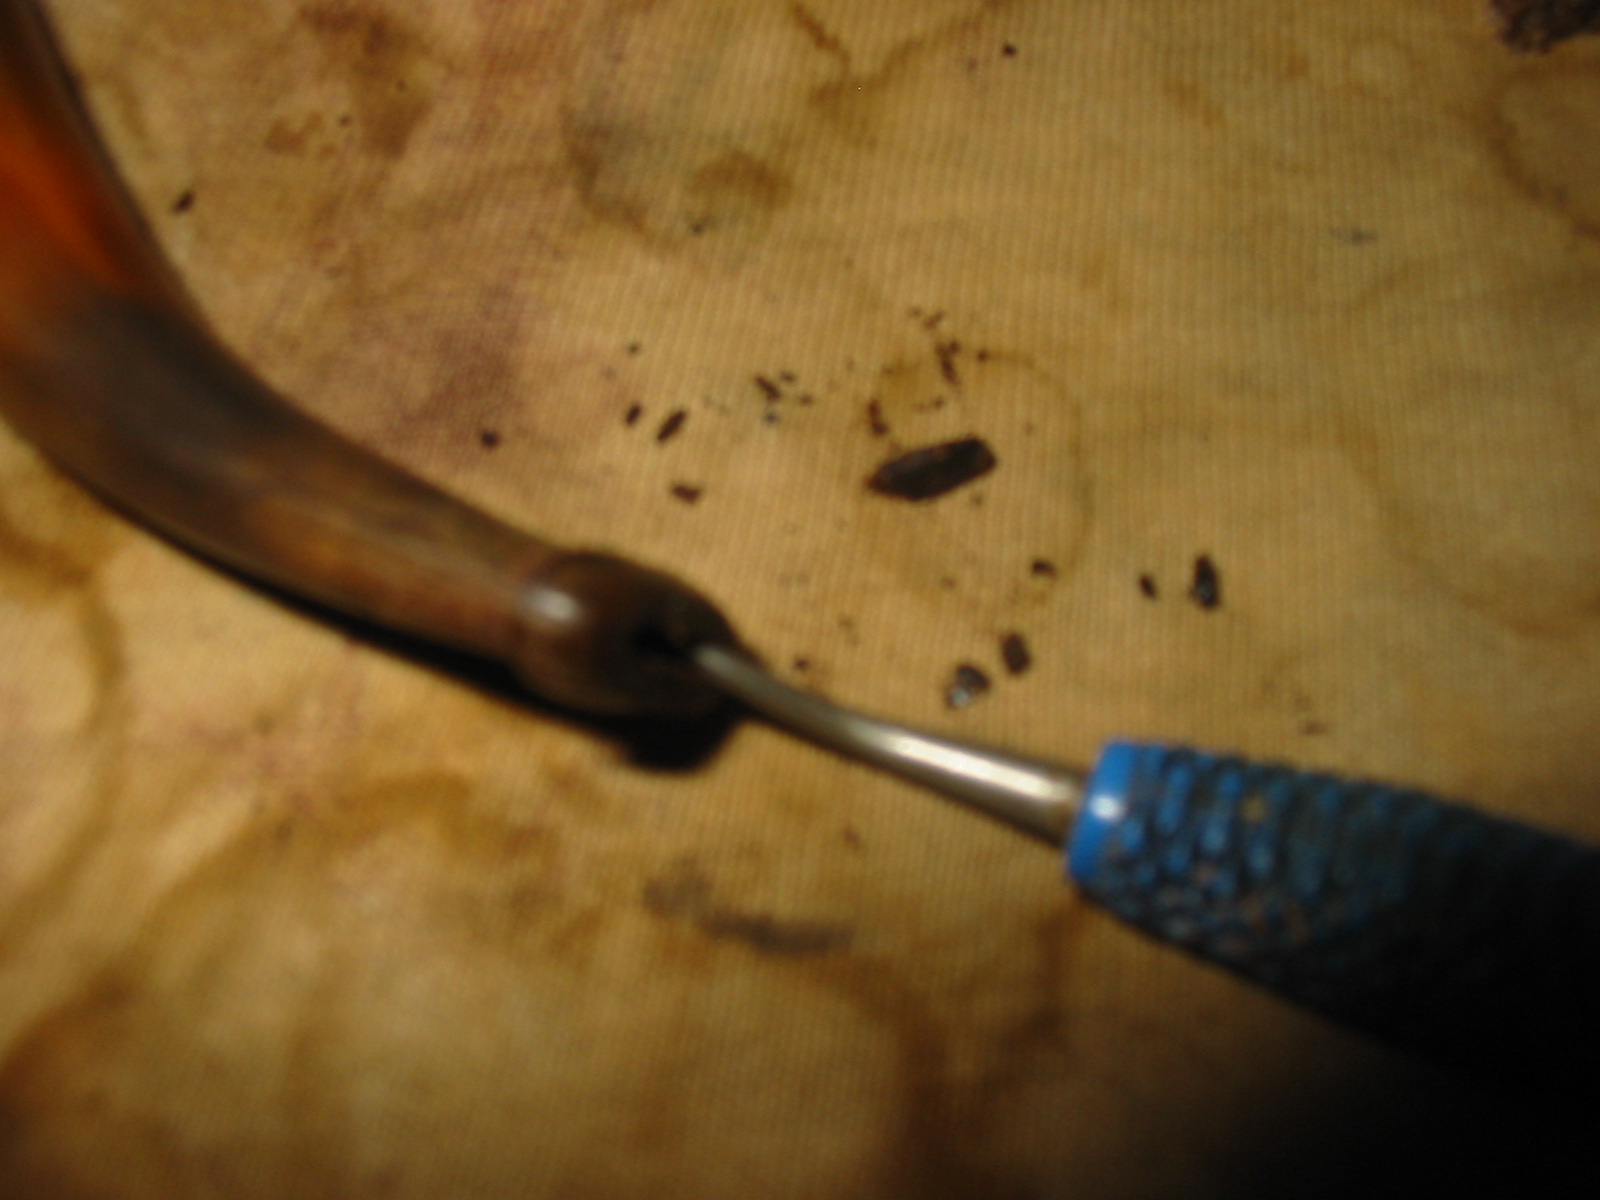
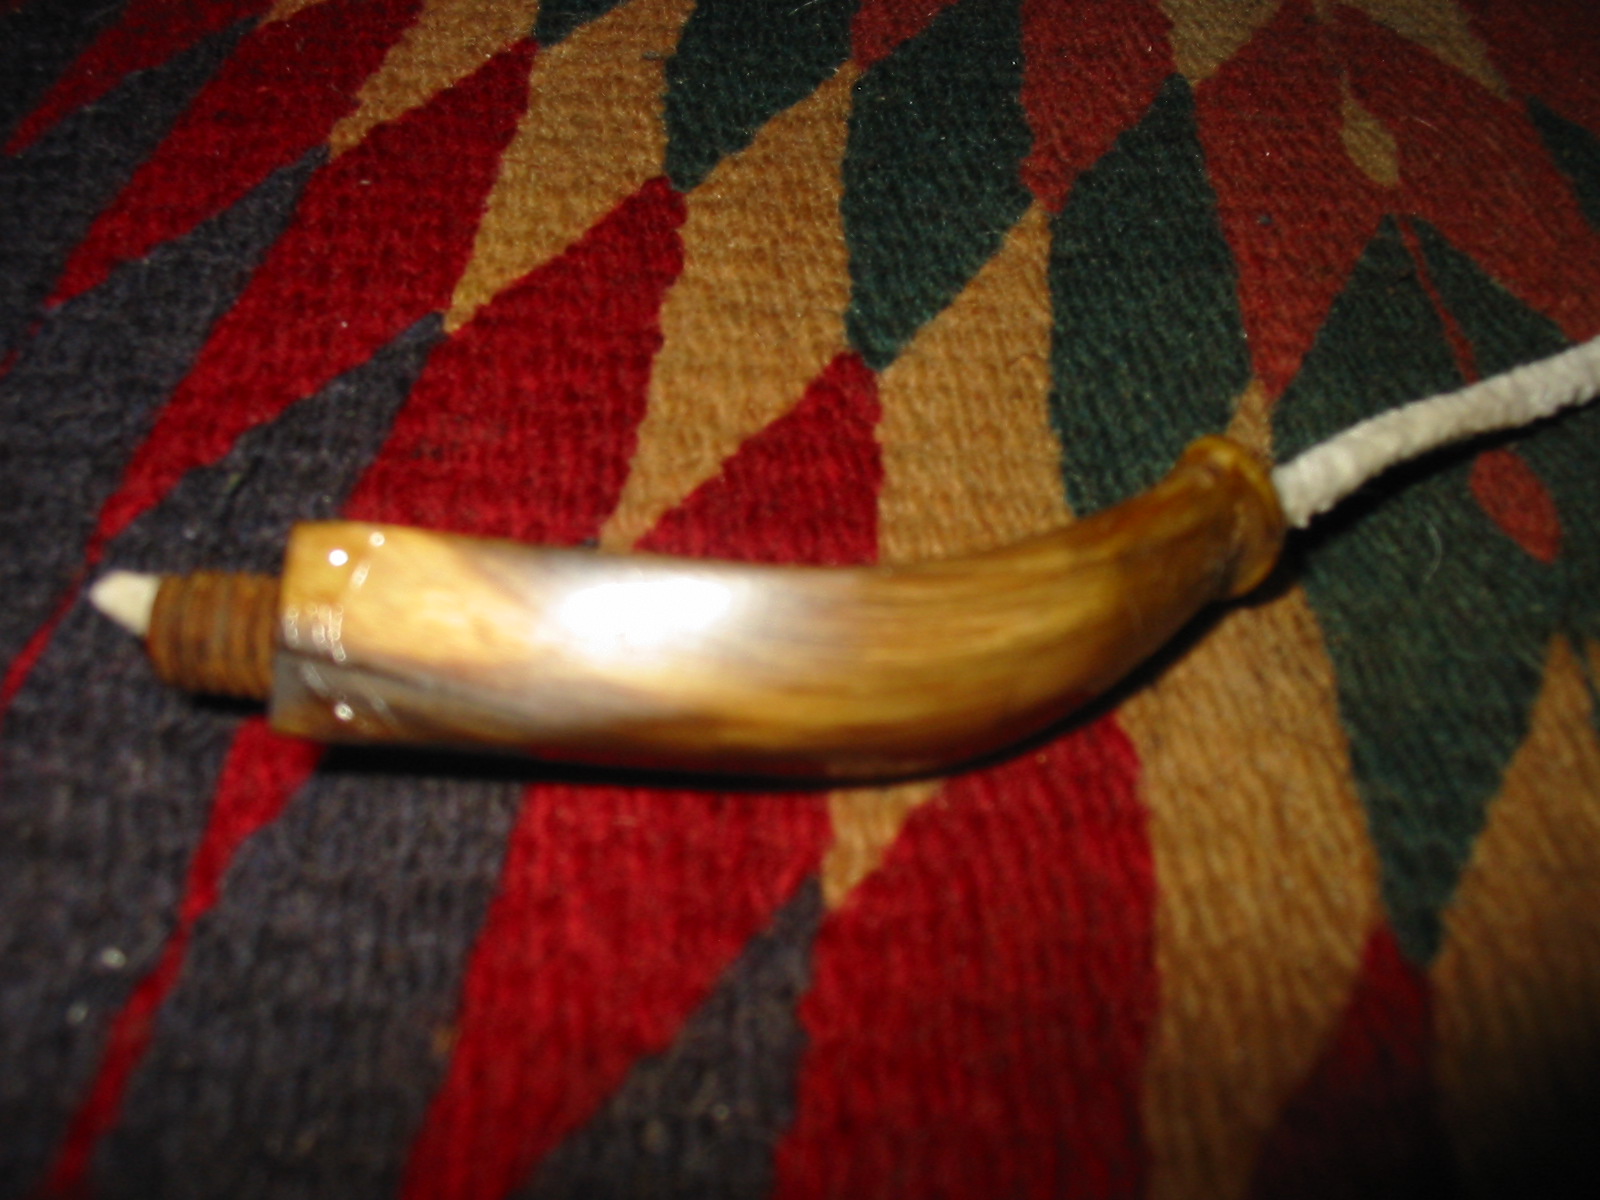
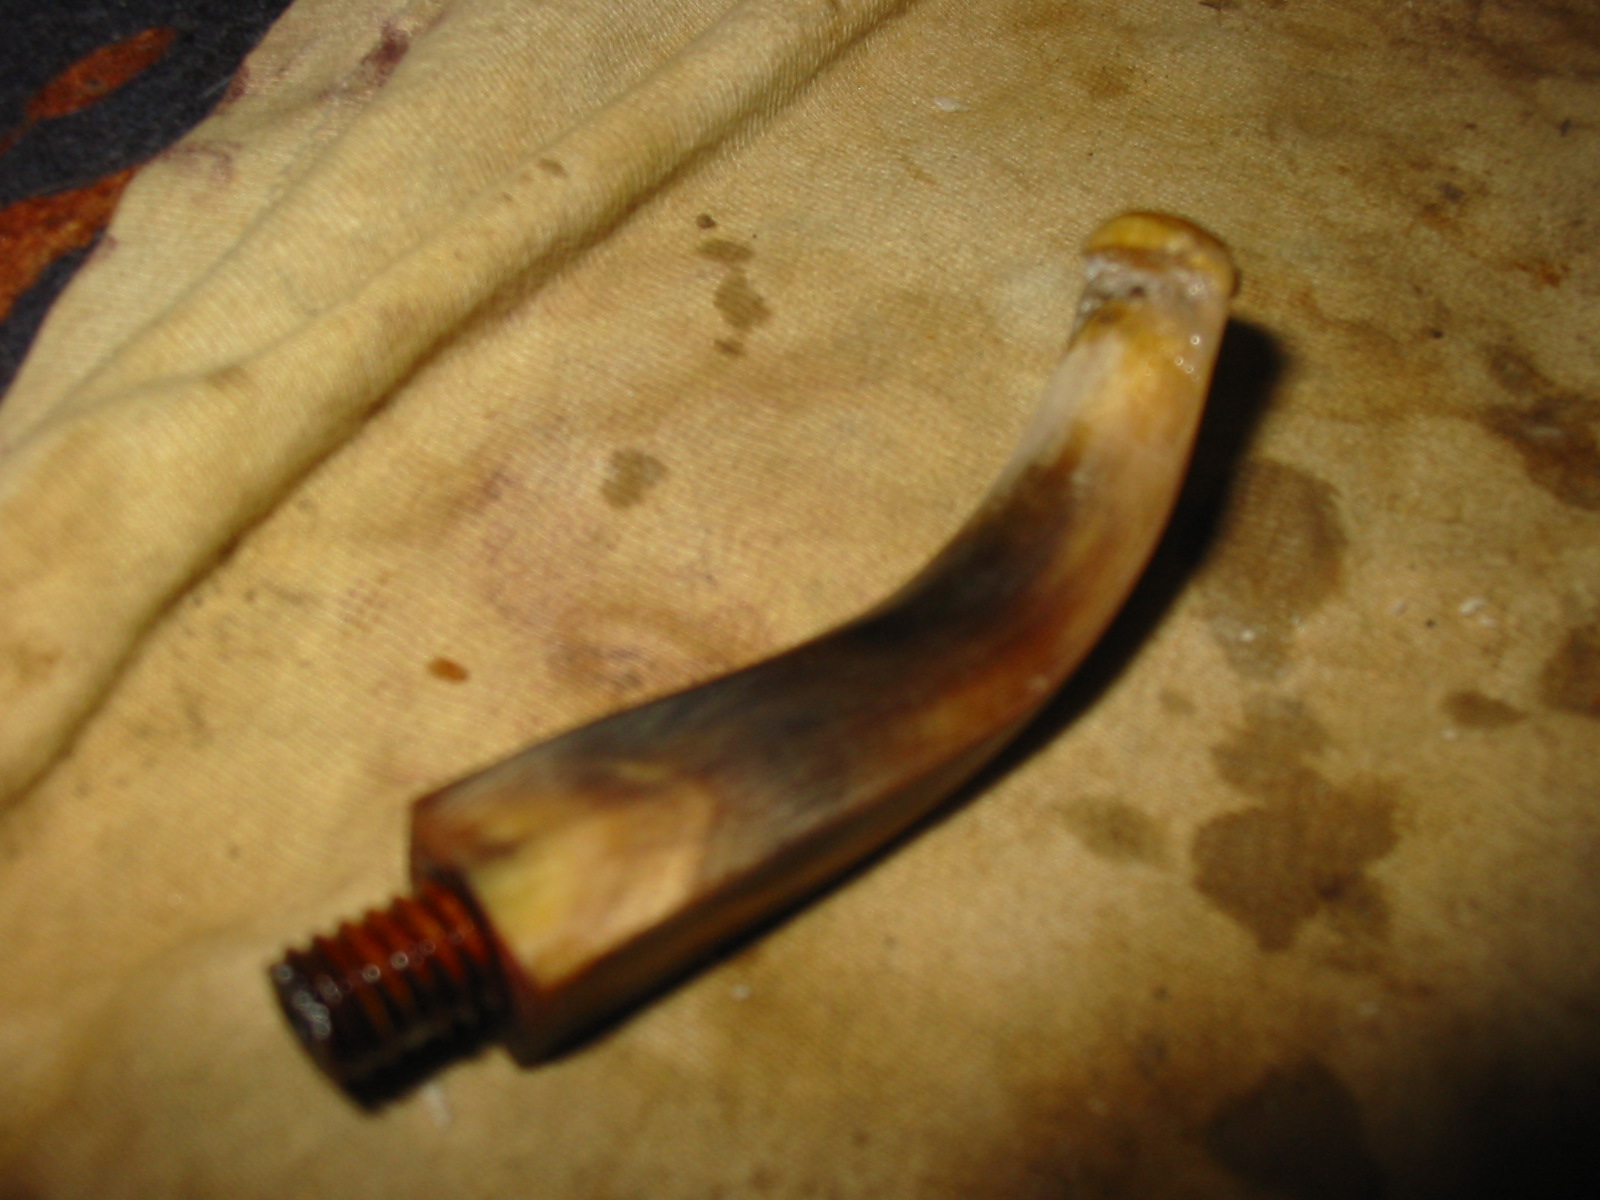
I find that photographing stem damage is difficult and my photos can be out of focus. But I now have a tripod to help with the clarity of the photos (did not get it until after I had started the repairs on this stem. Ah well sorry about the clarity of some of these). When the pipe arrived I took it apart and examined the holes on the end of the stem. Under the lens it was clear that it was not a worm hole at all. Rather it had been bitten and the stem had crumbled in that area. It did not go through into the airway so I think that the previous owner had scraped out the crumbled area of the horn stem for cleanliness and just kept smoking it. That was encouraging to me as it meant that I could repair and not worry about an old “worm” somewhere in the horn stem chewing his way out later! The next two photos show the extent of the damage to the area
GFB4

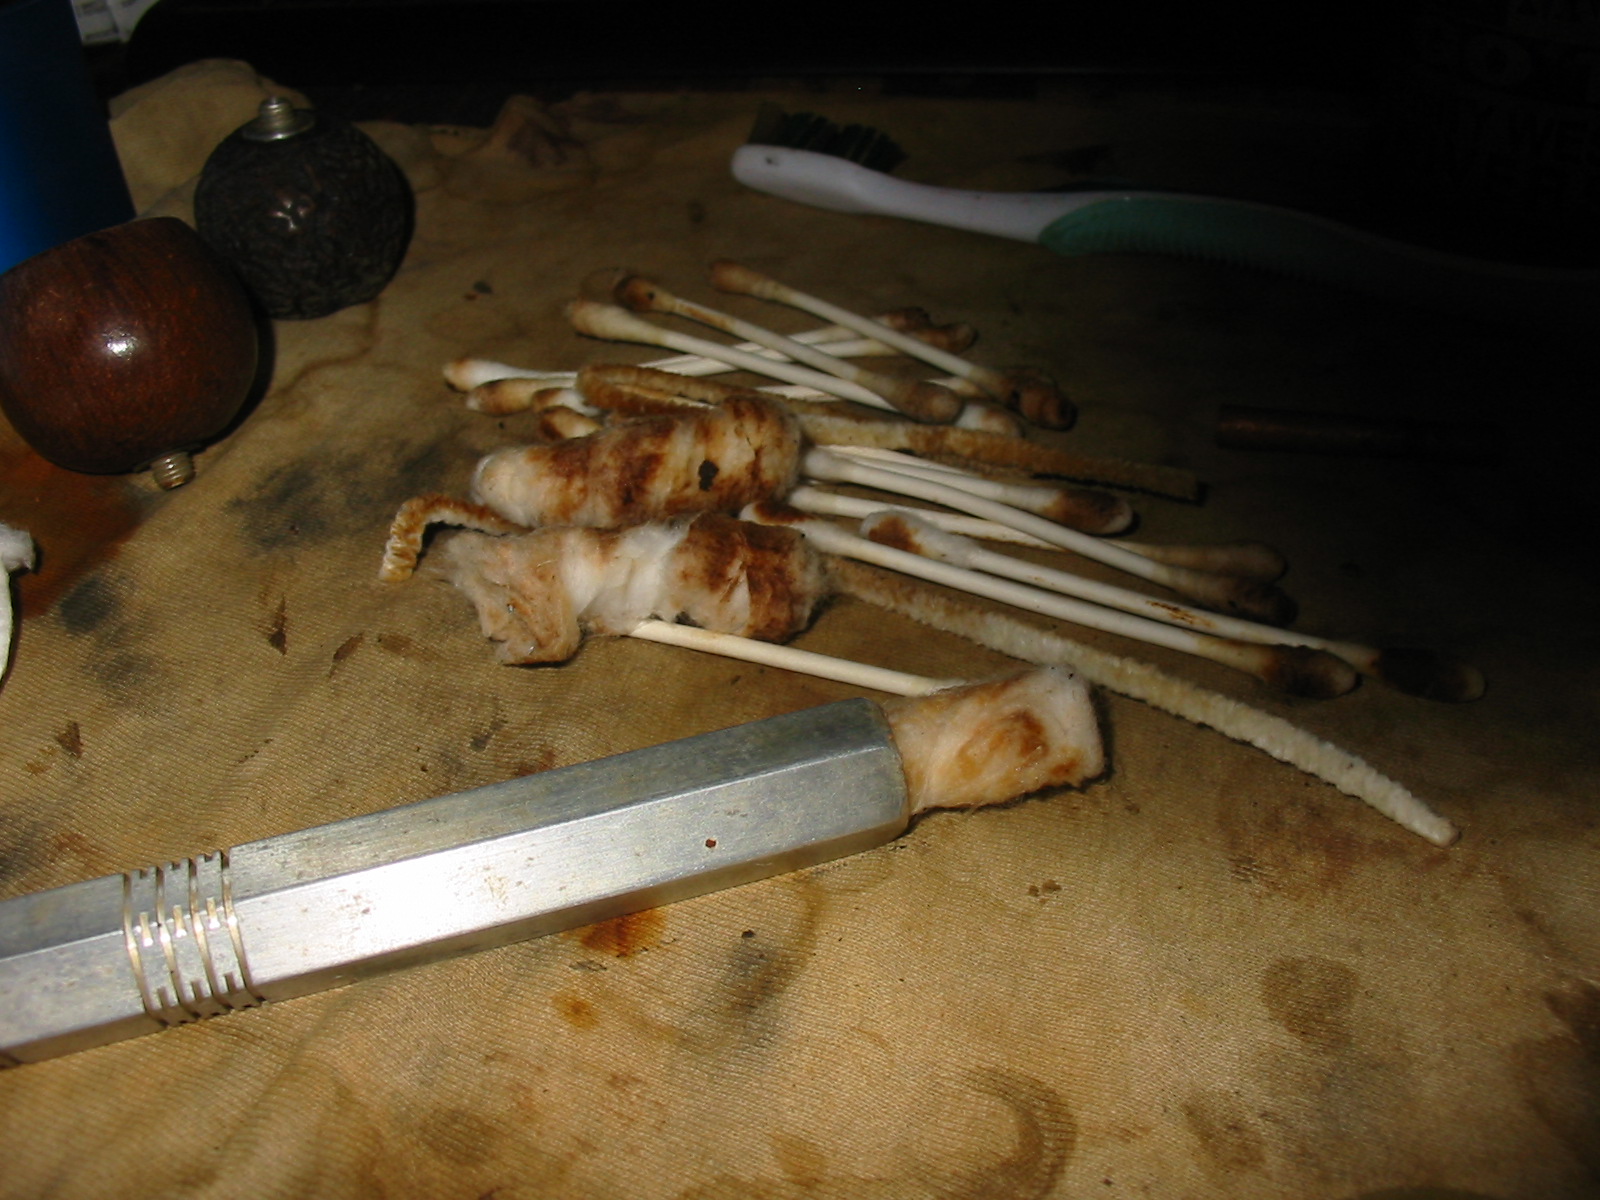
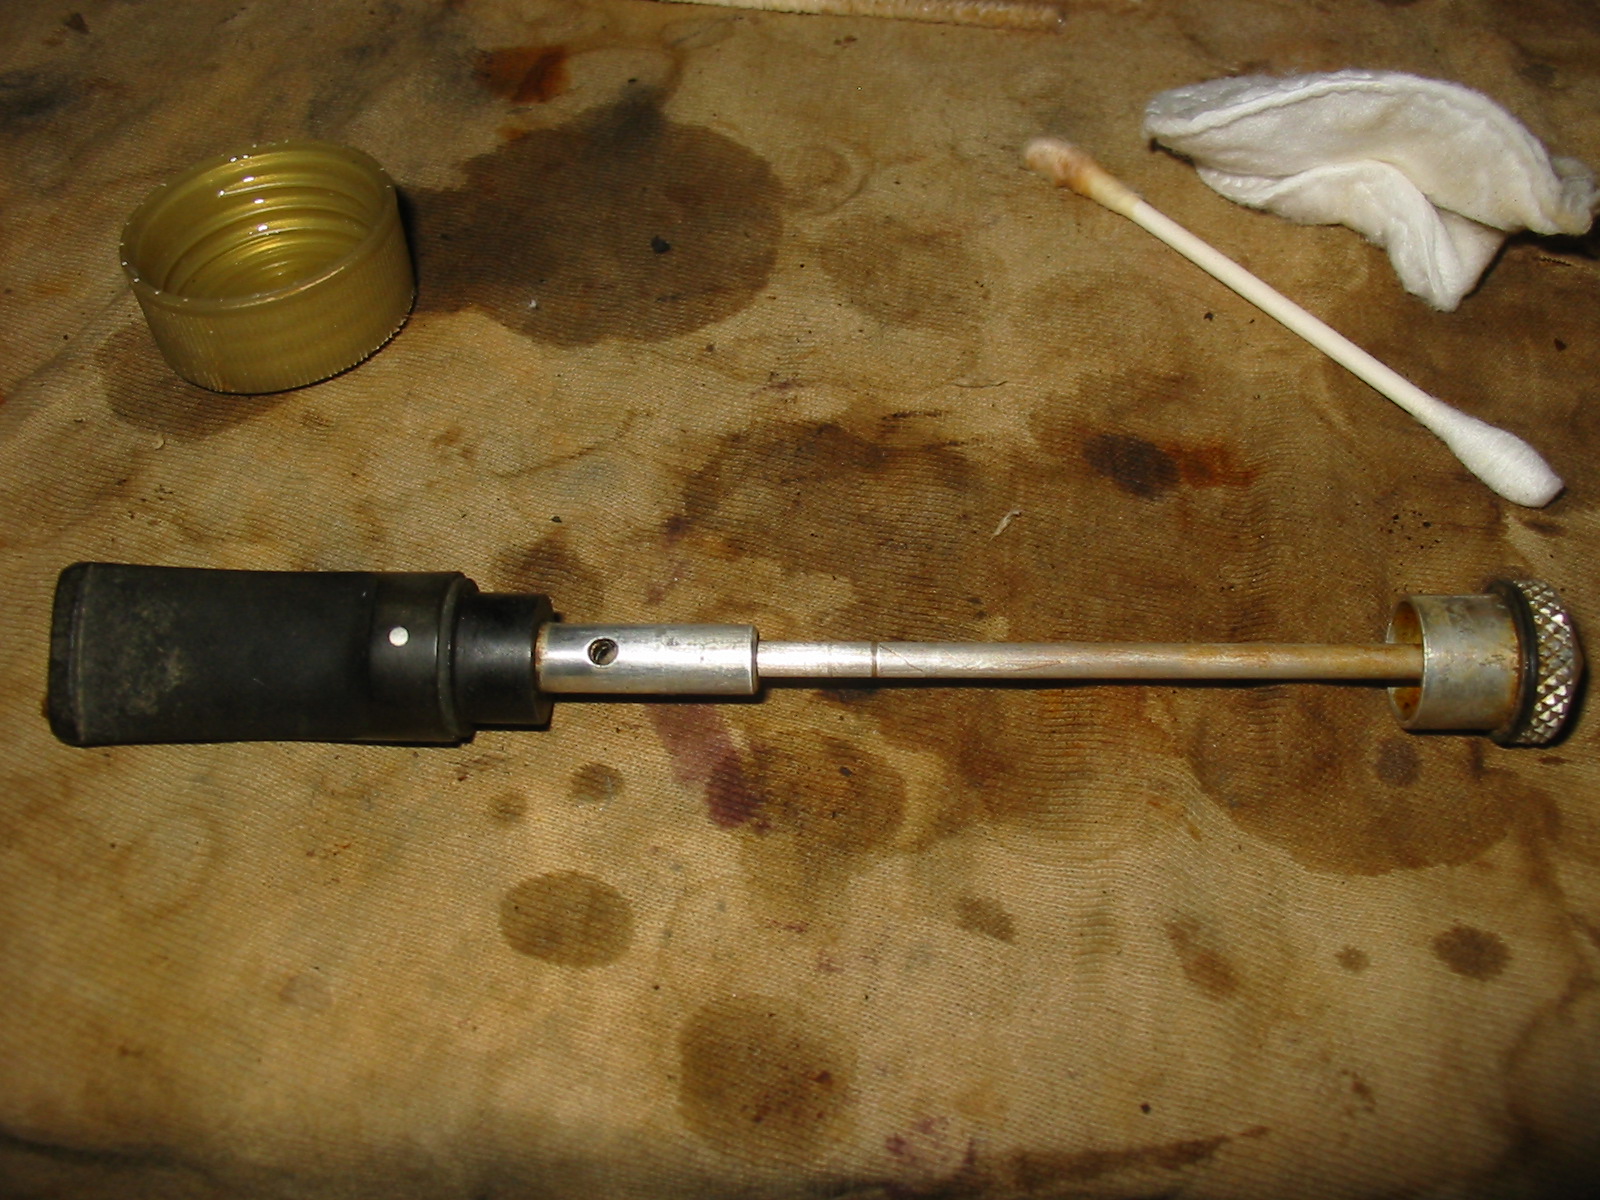
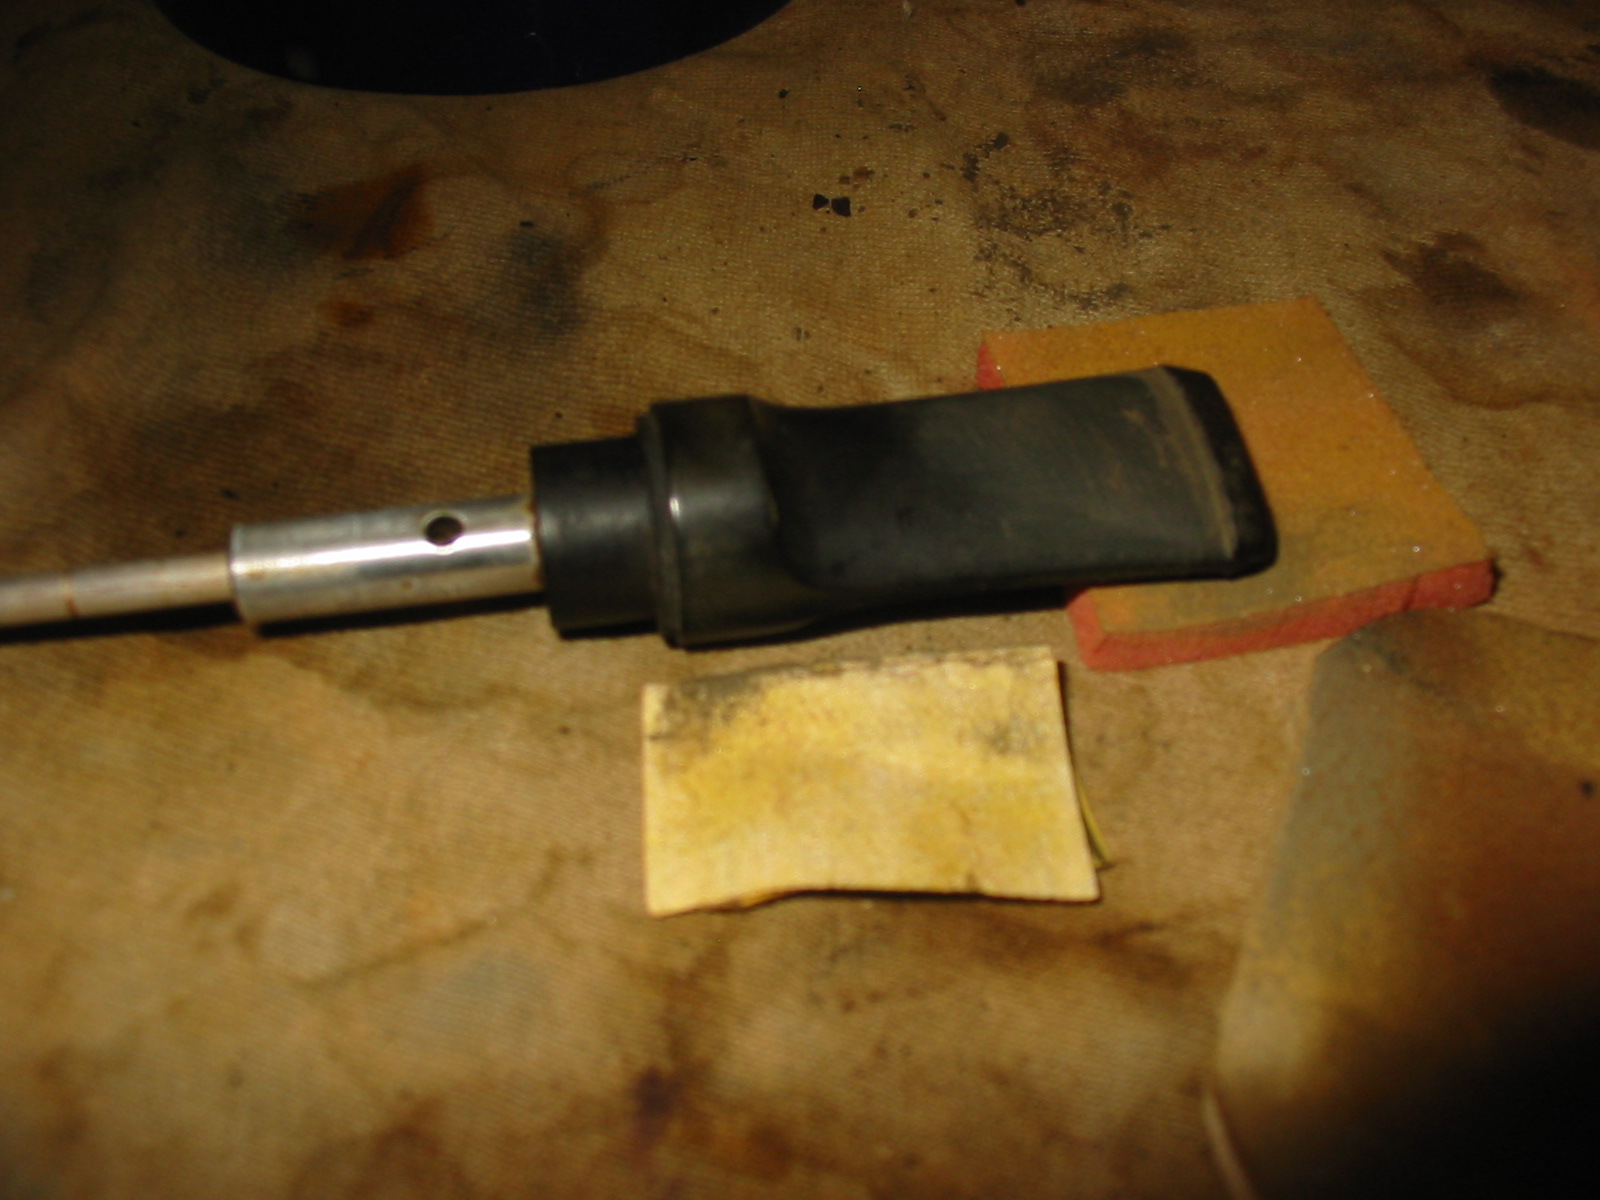
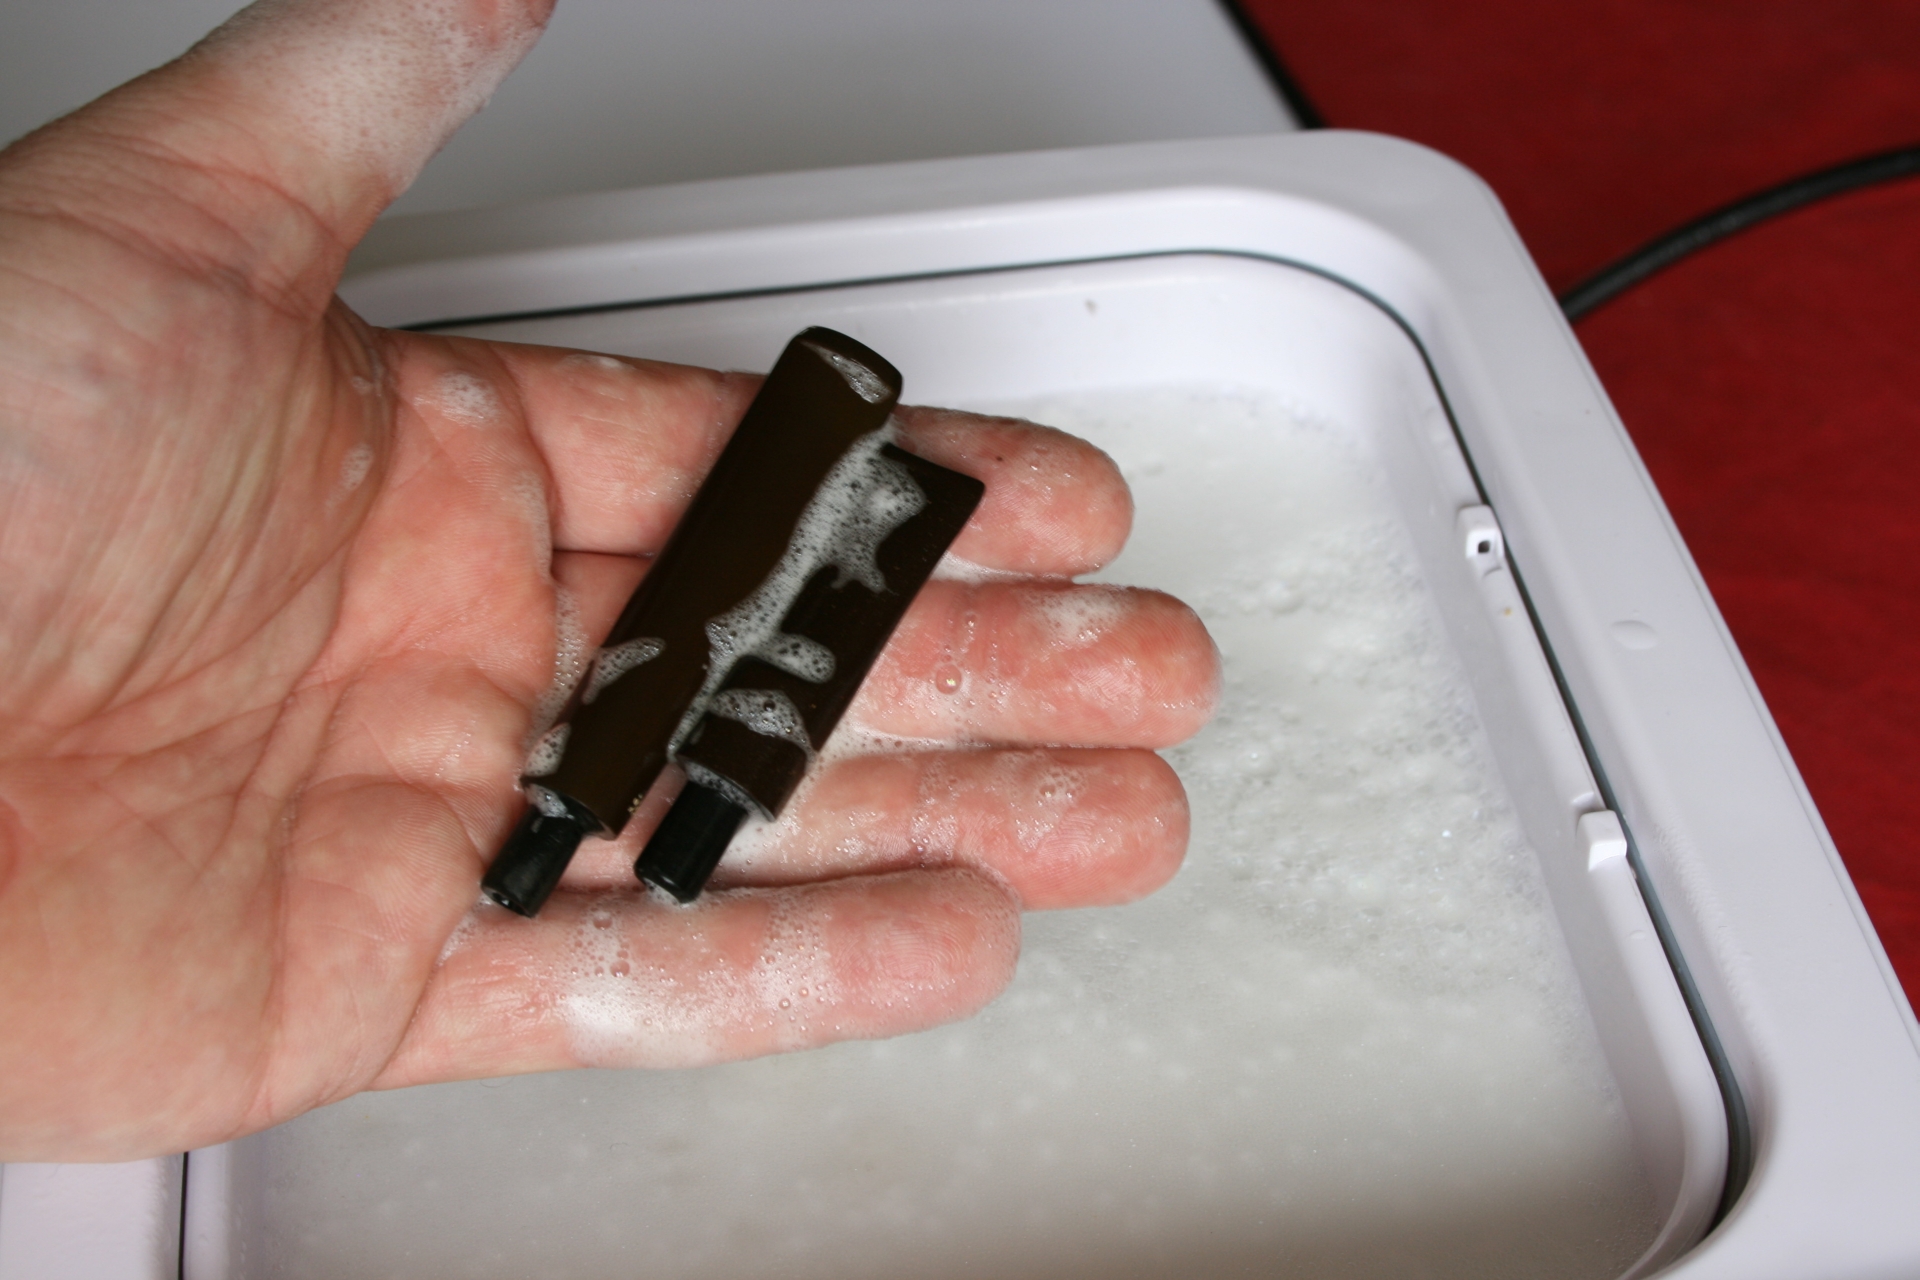
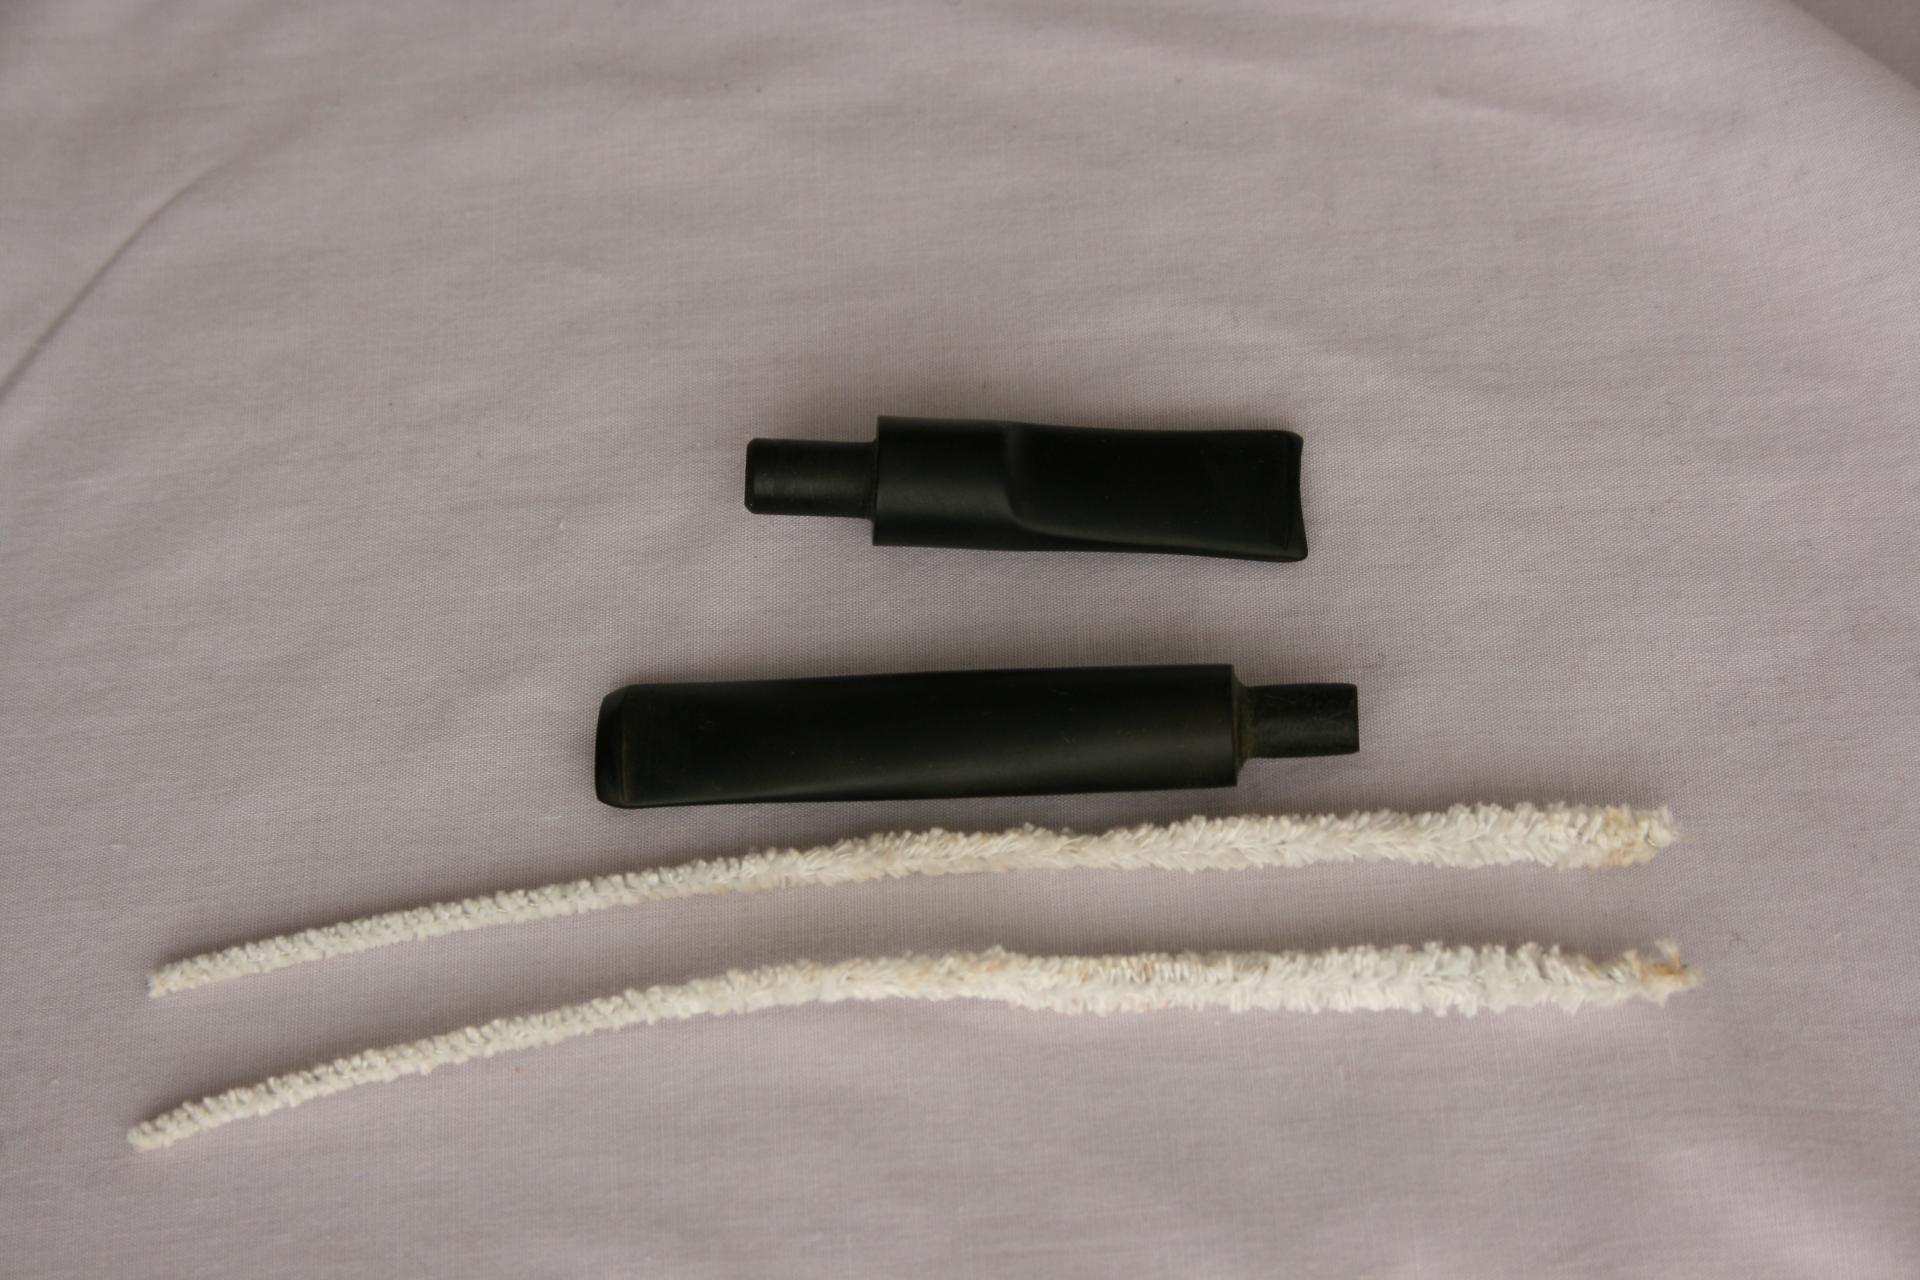
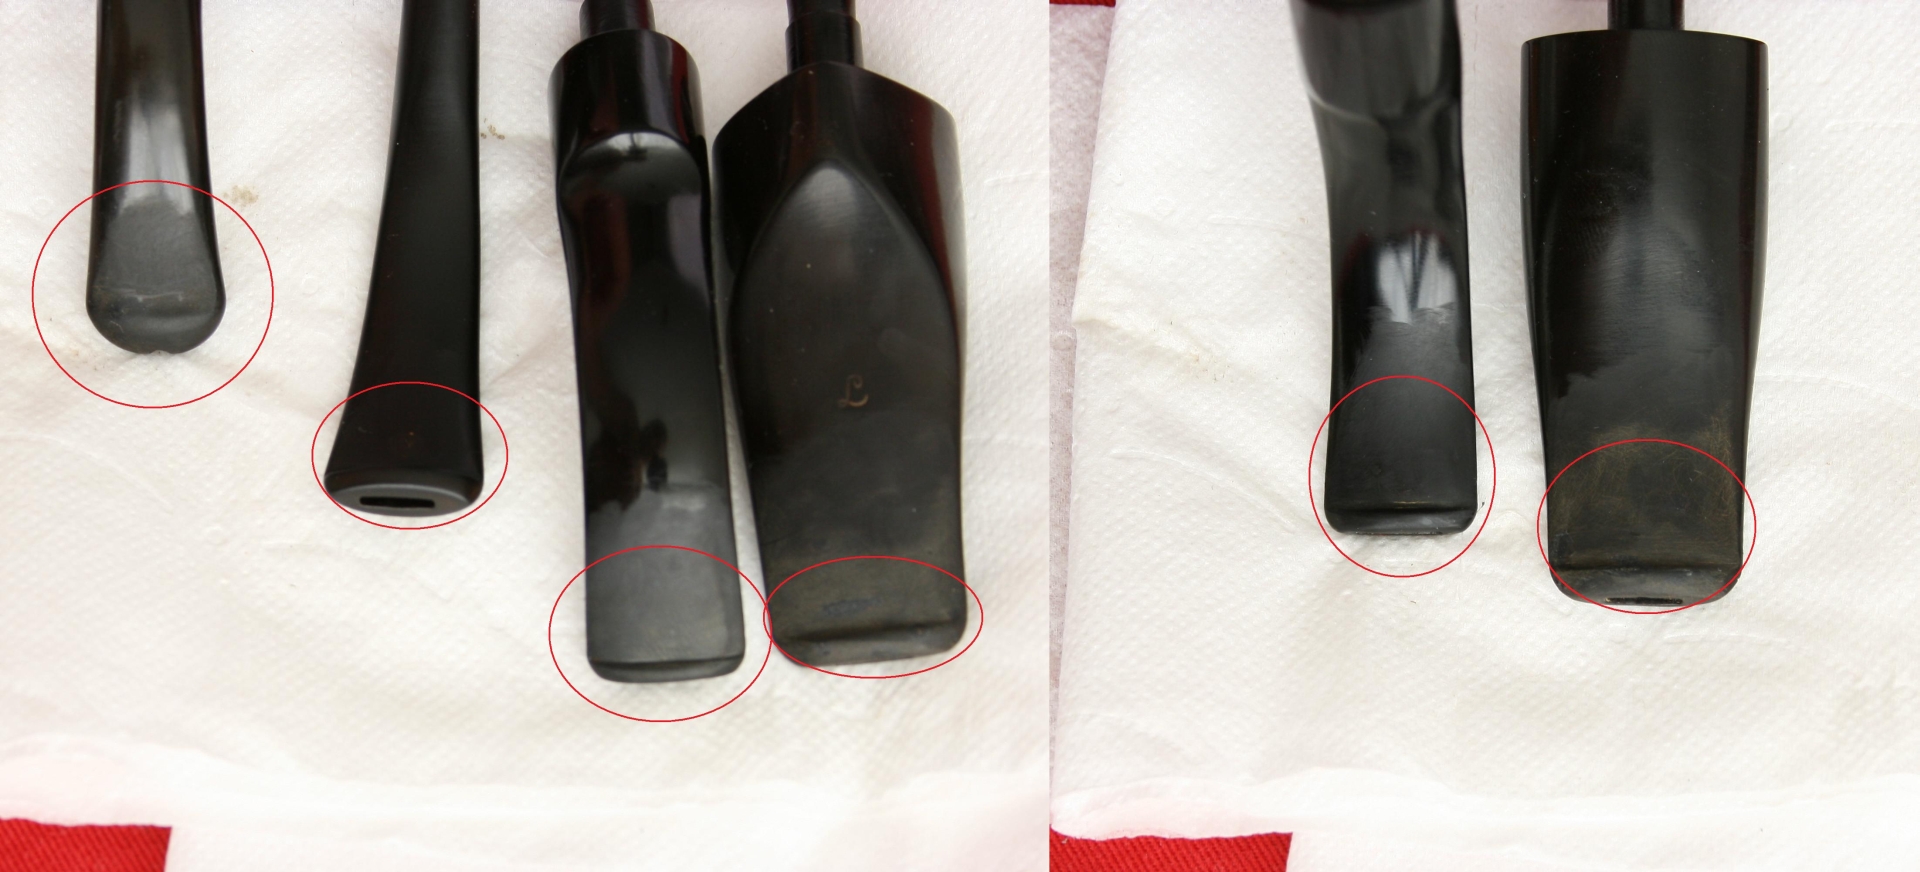
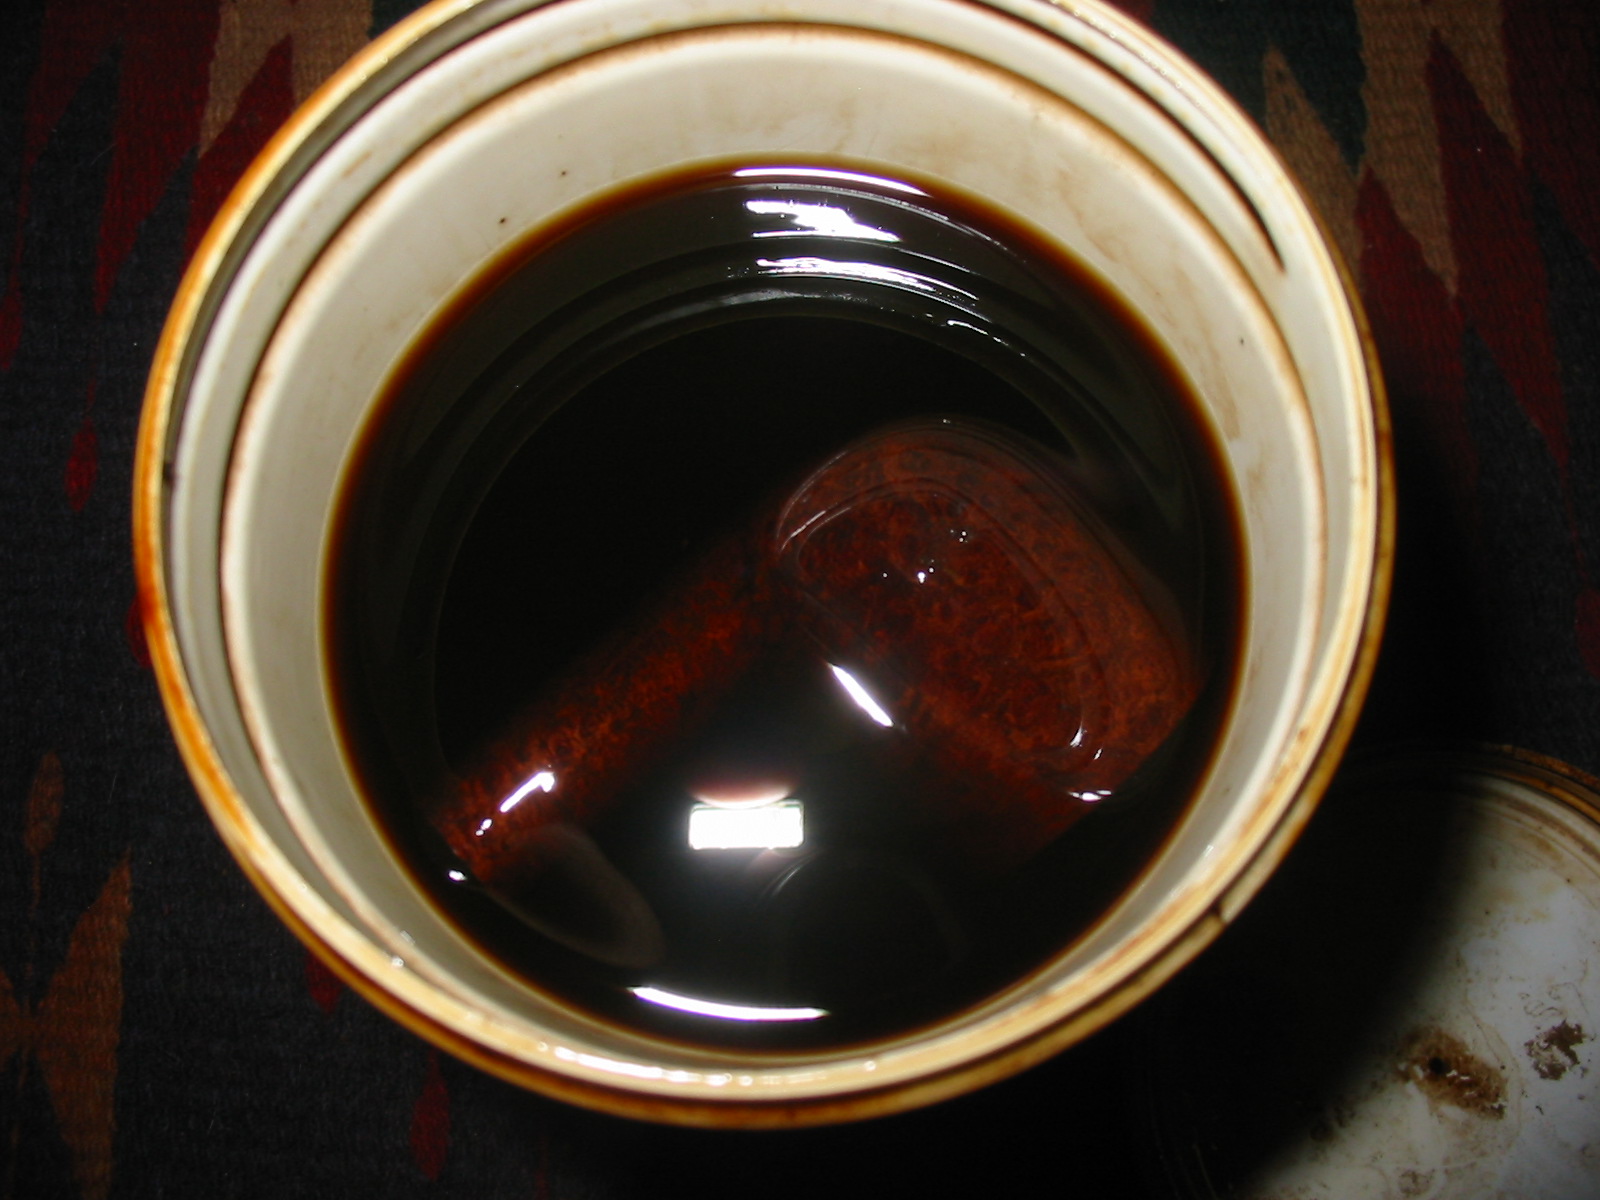
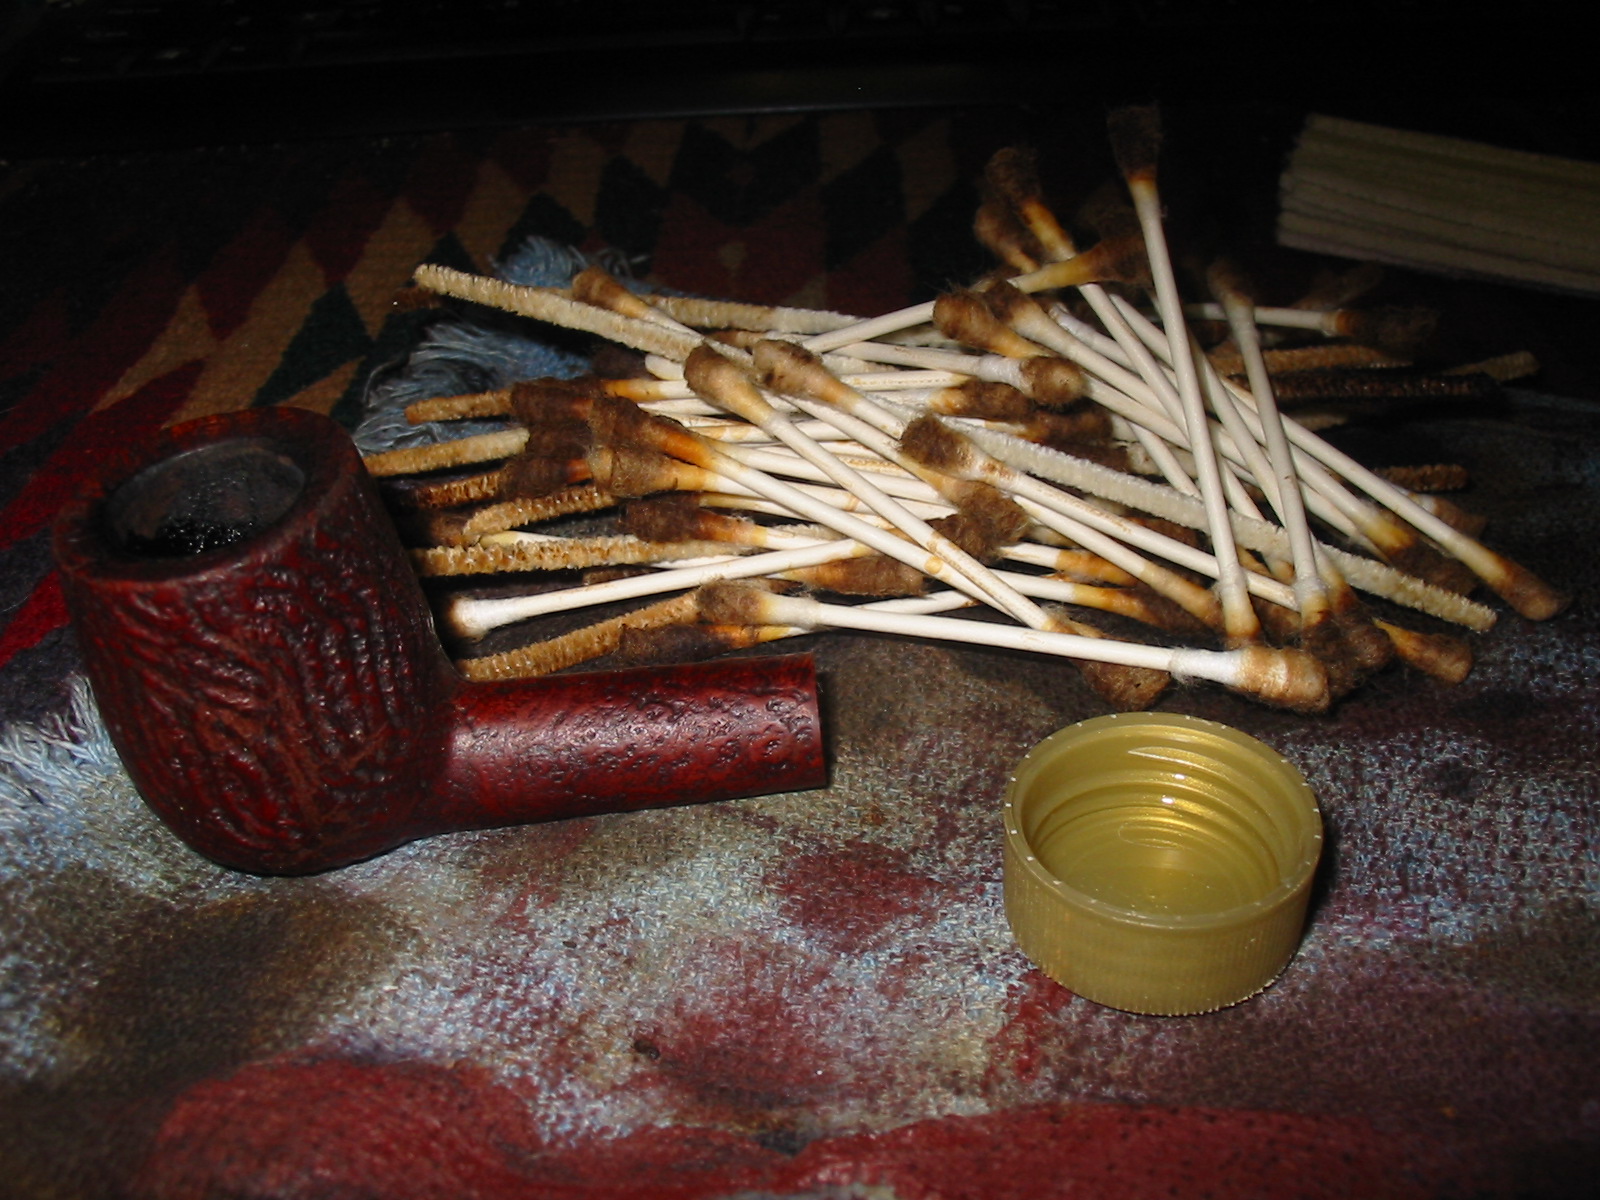
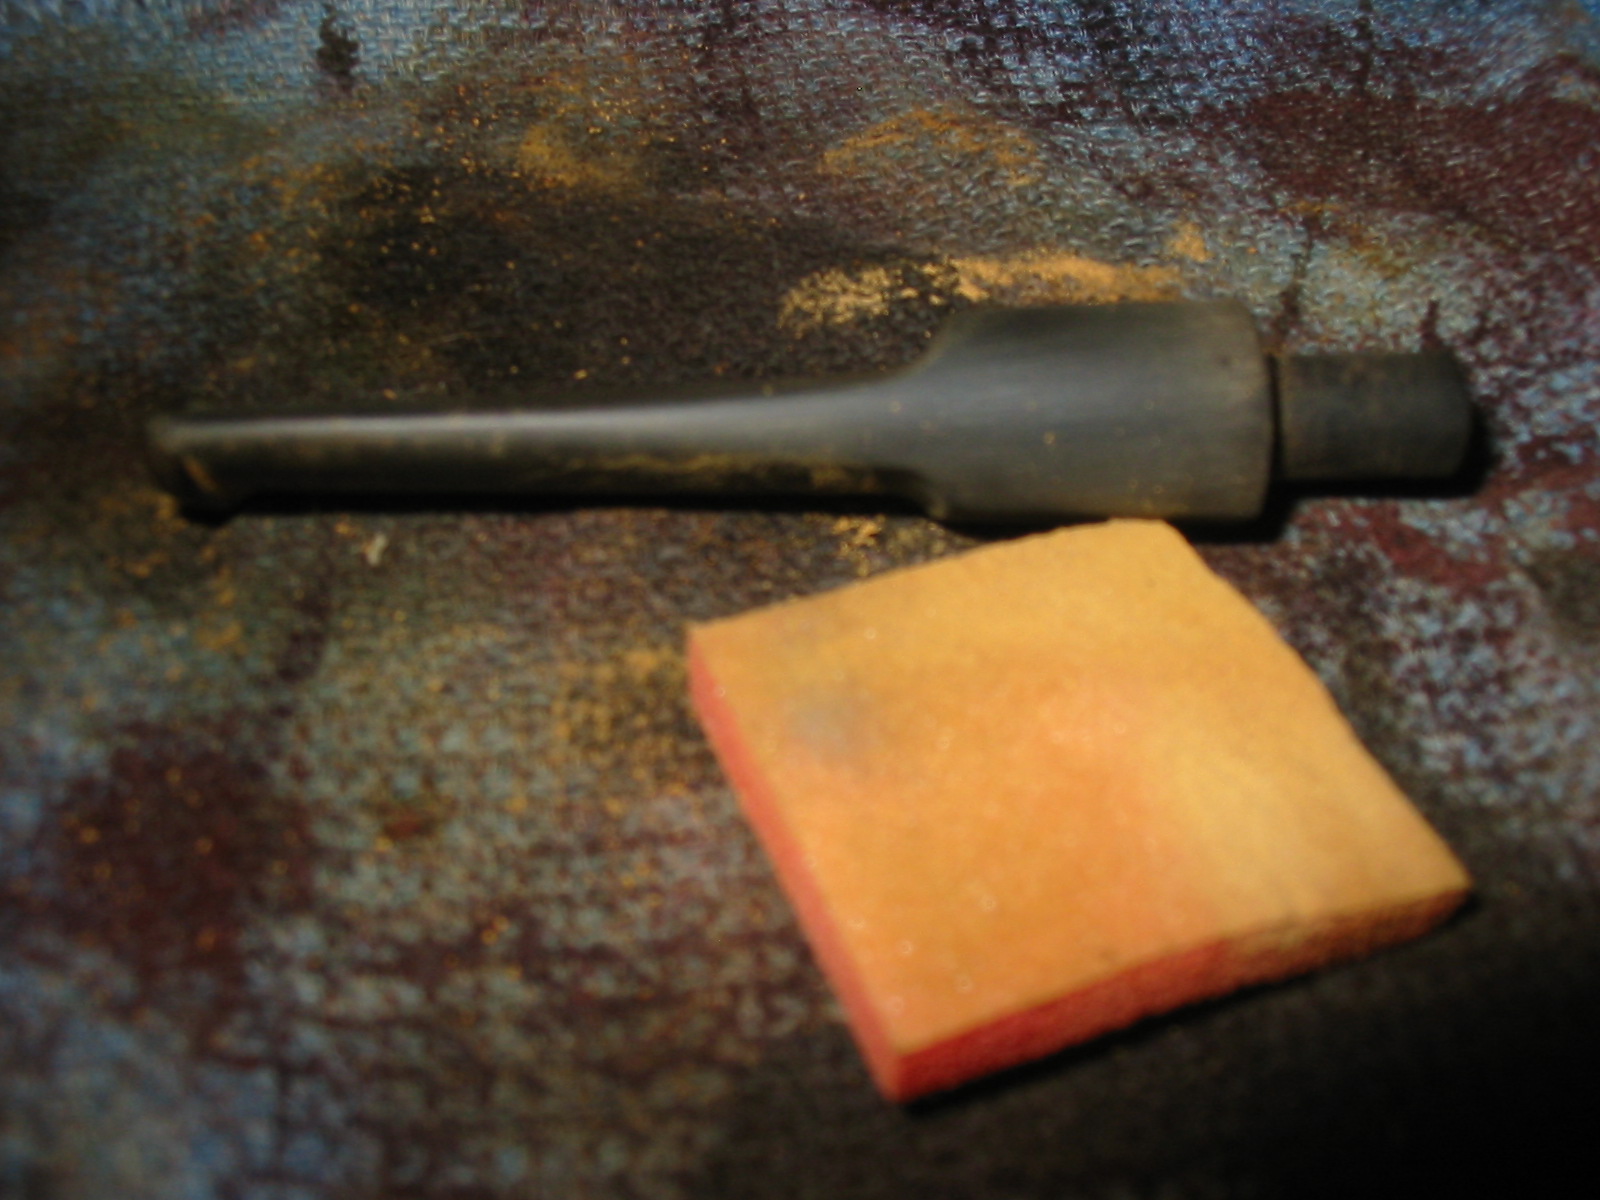
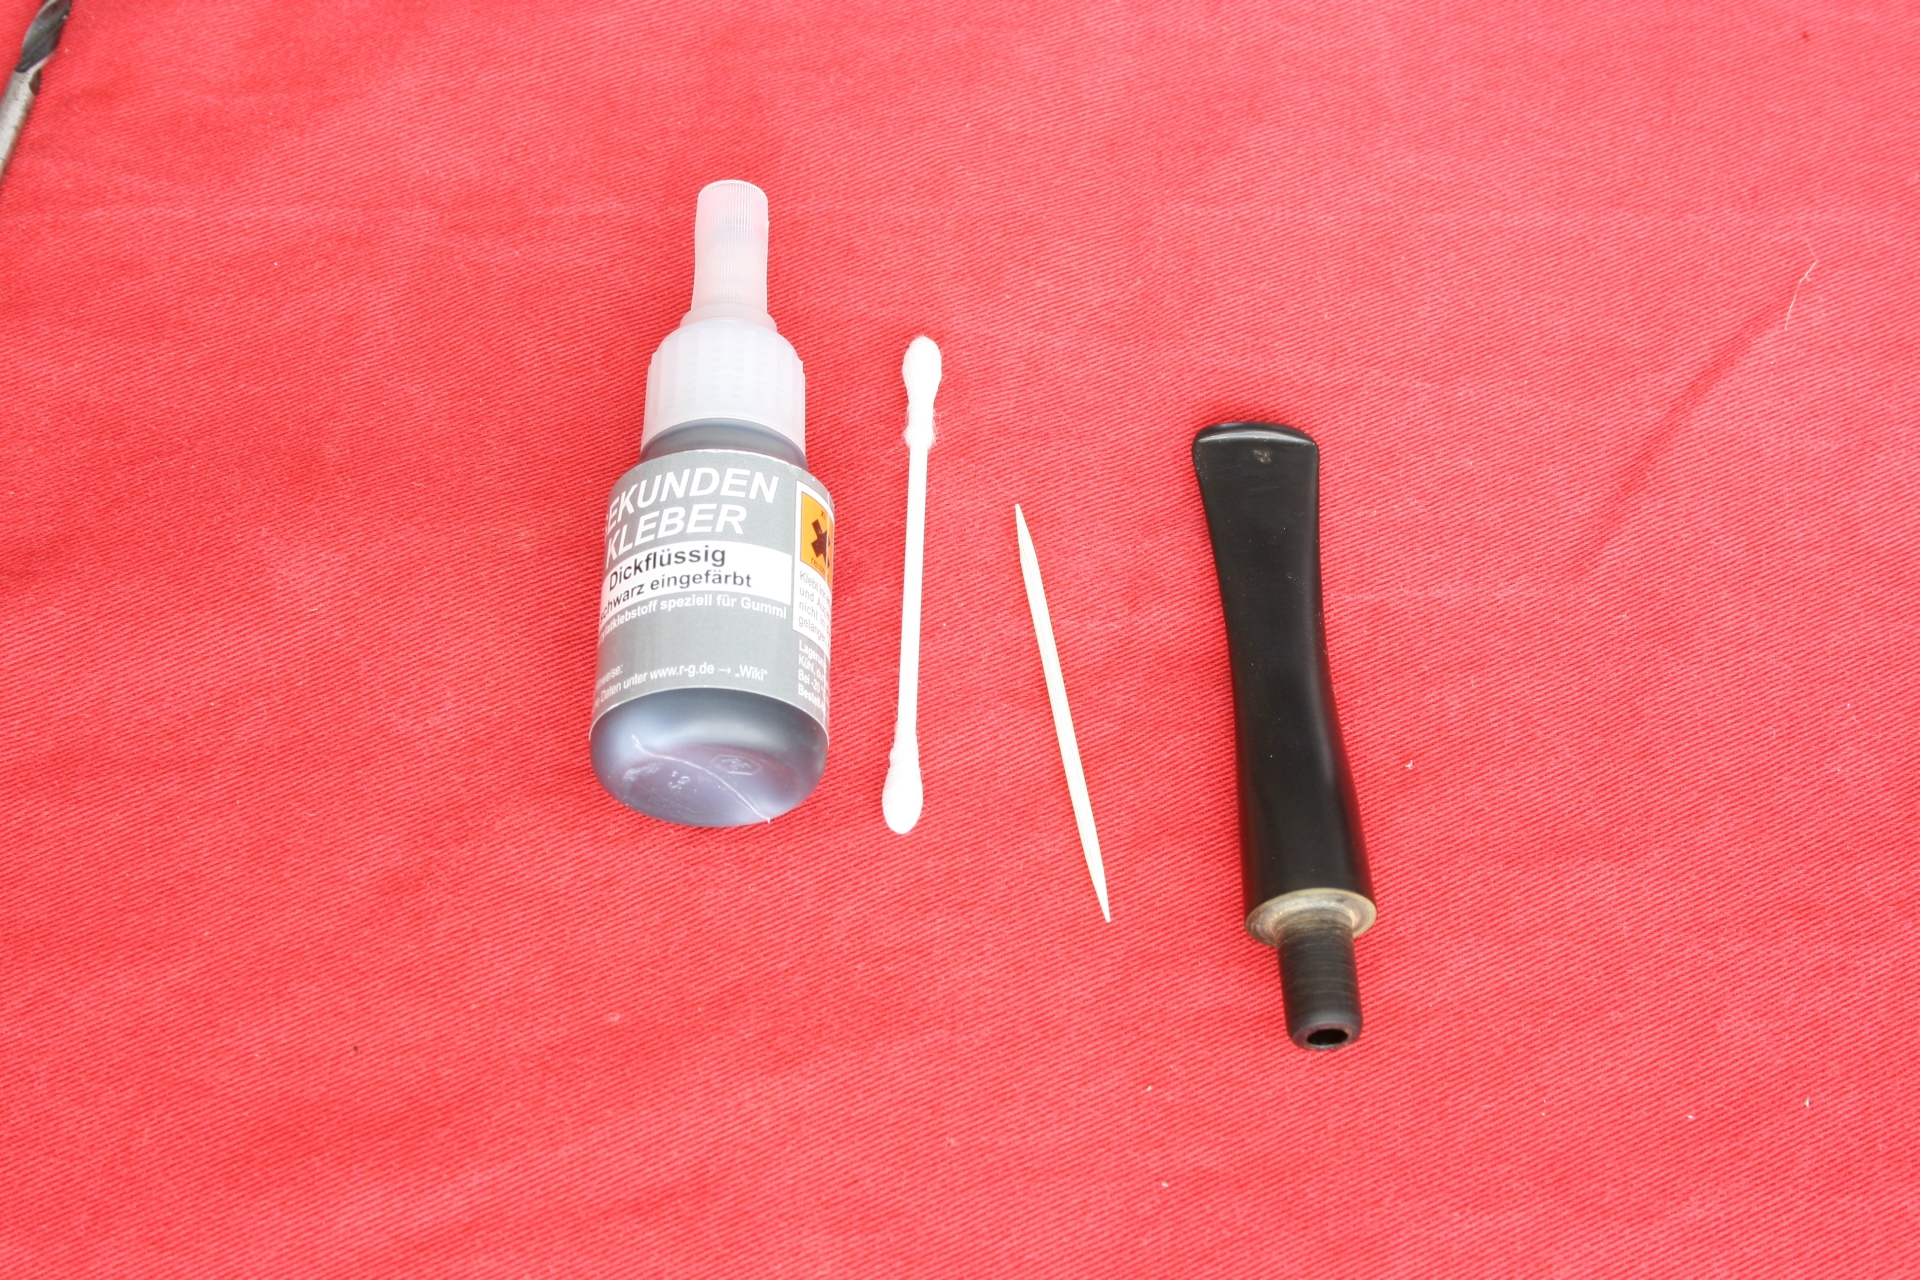
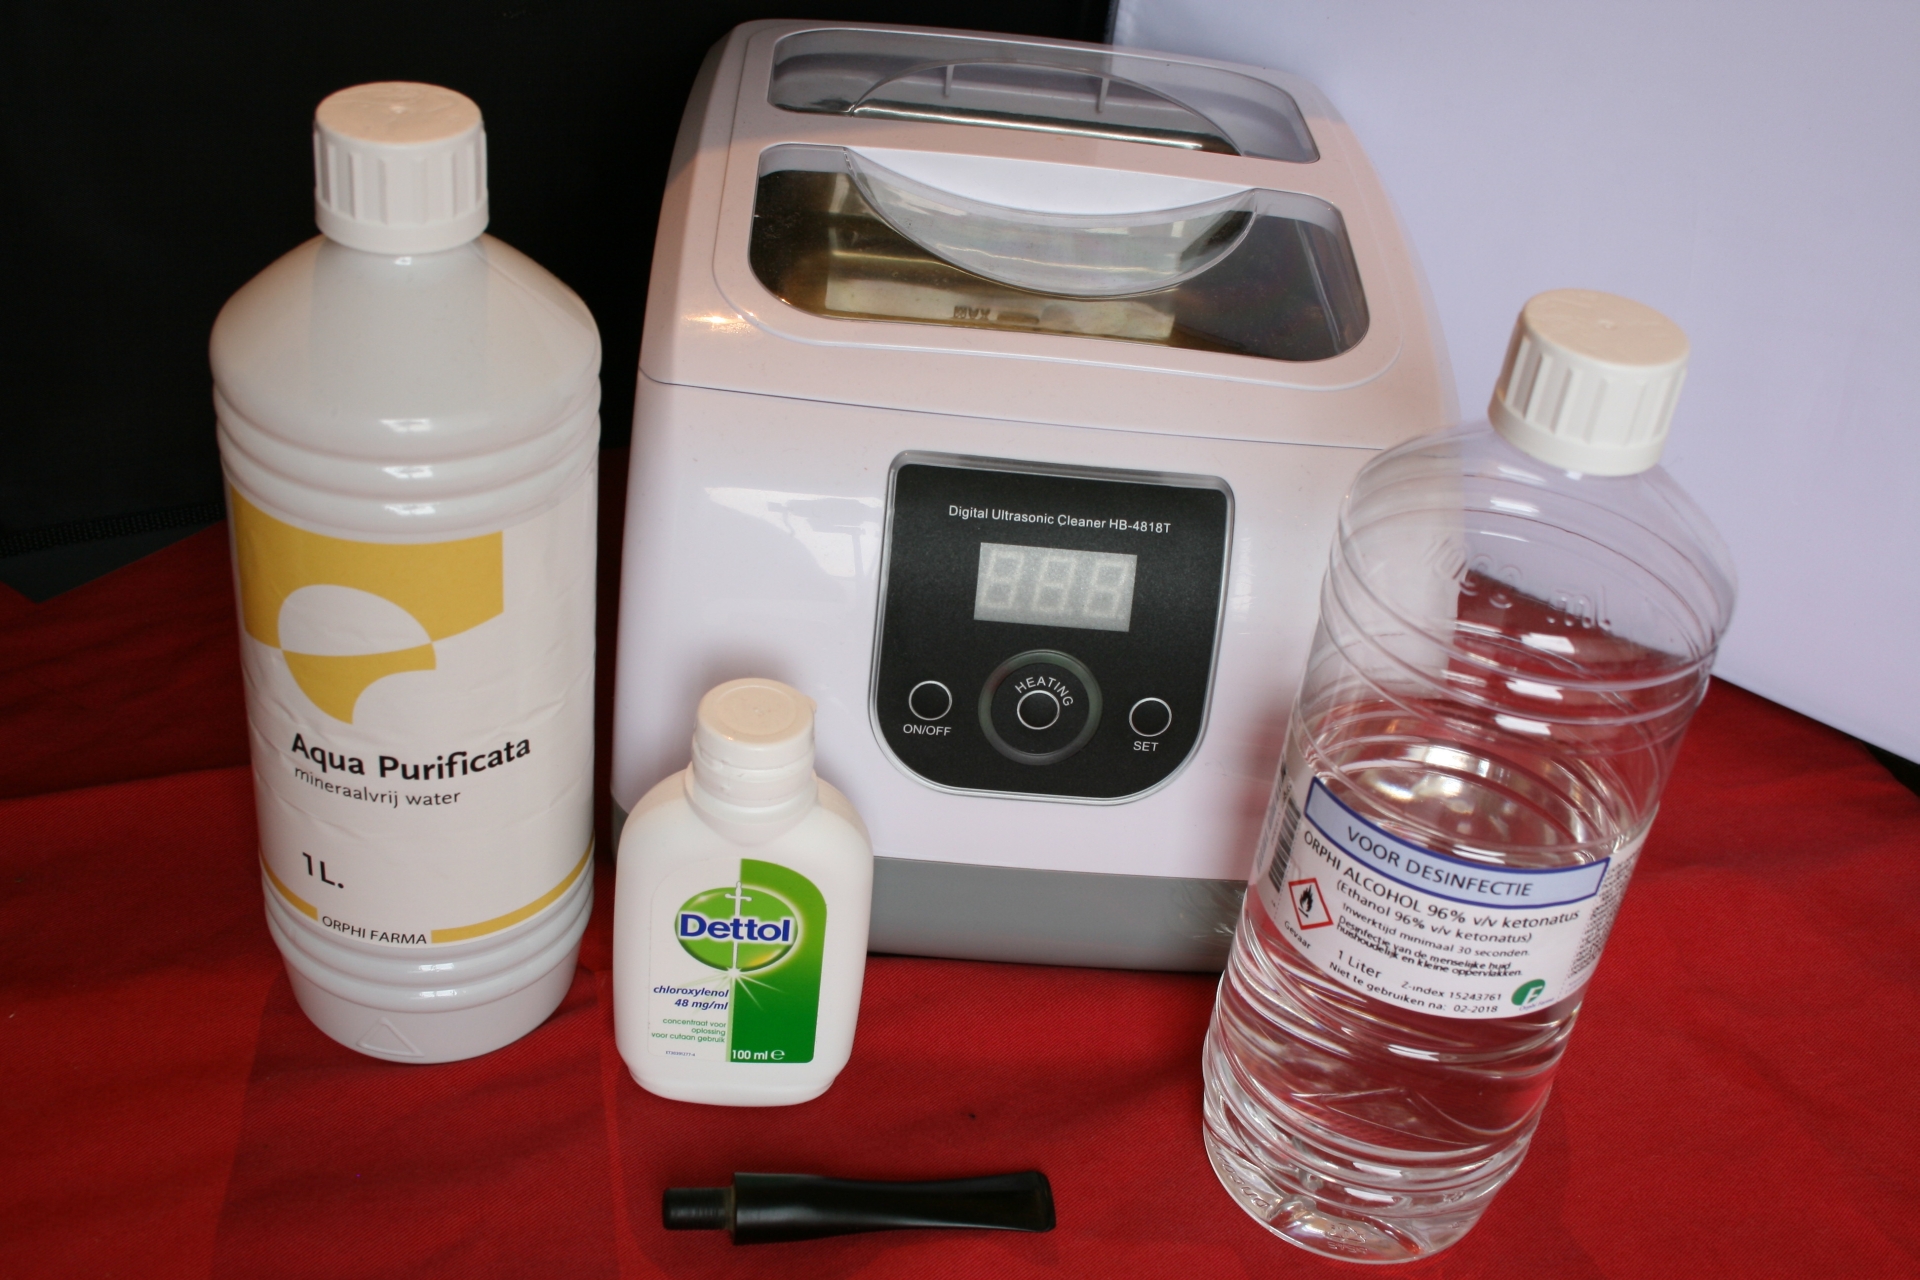
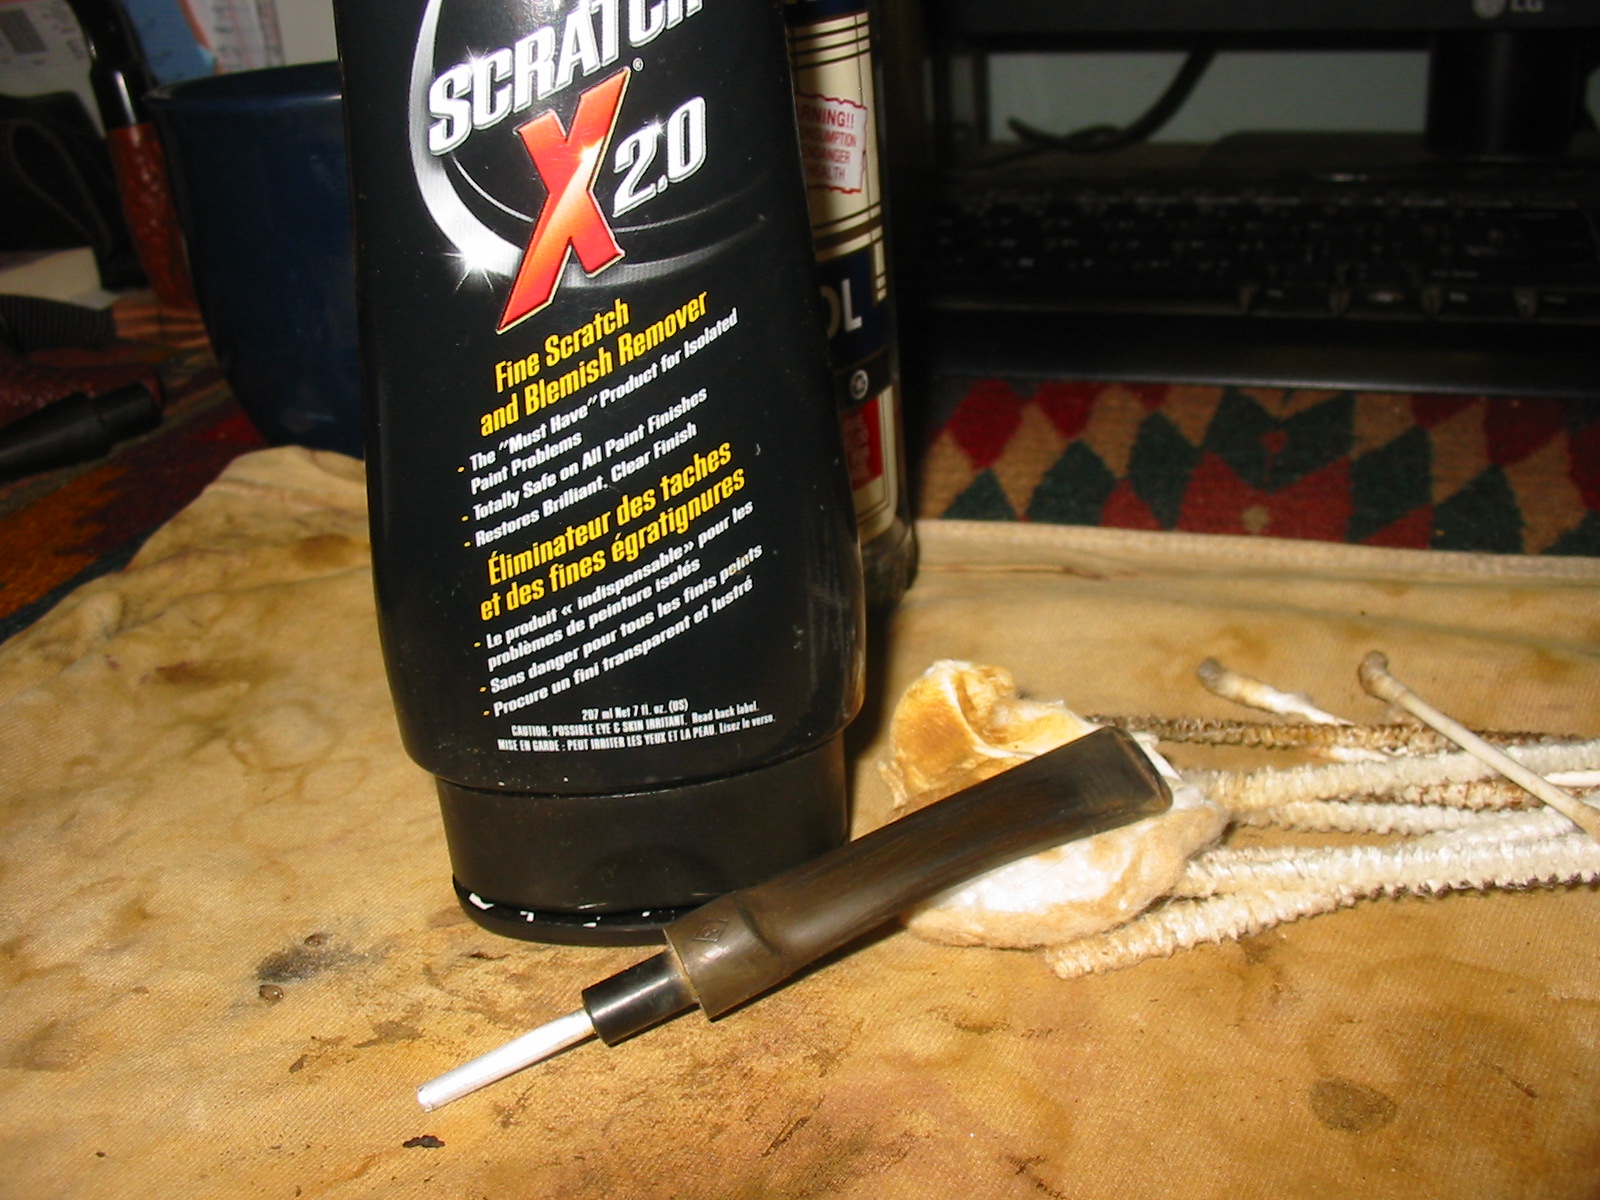
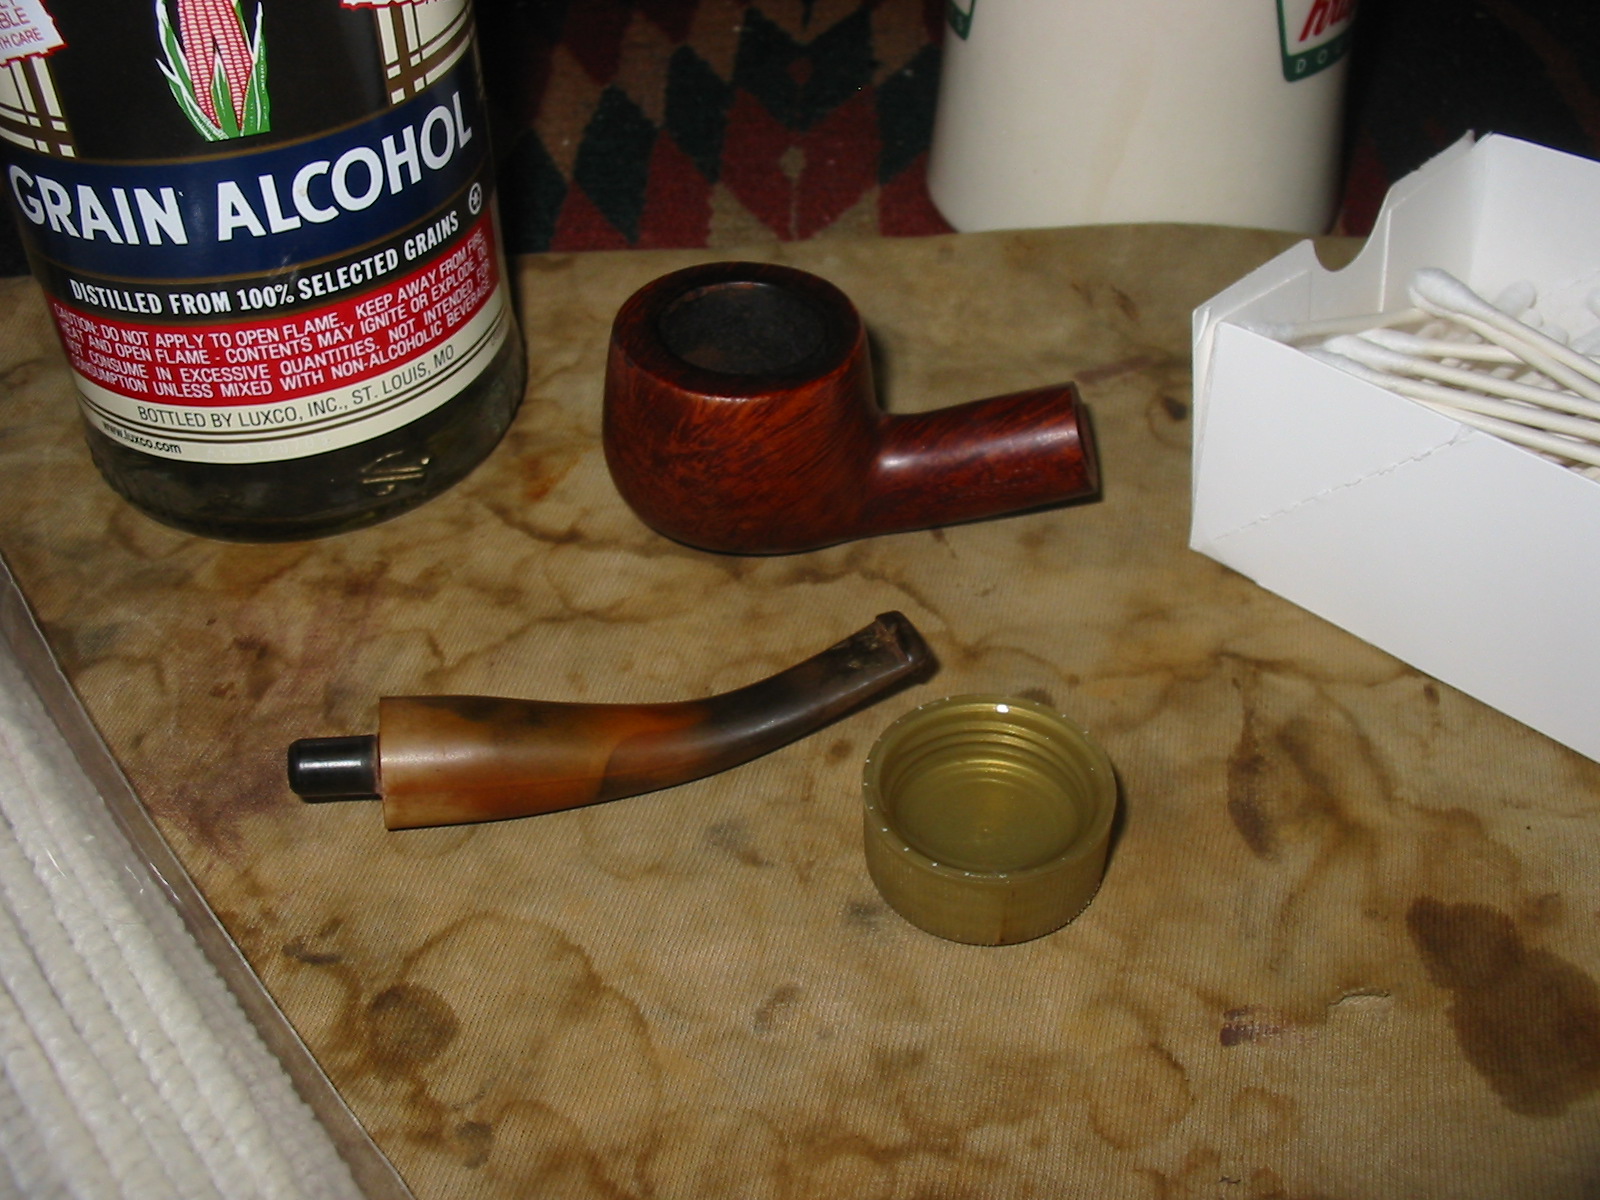
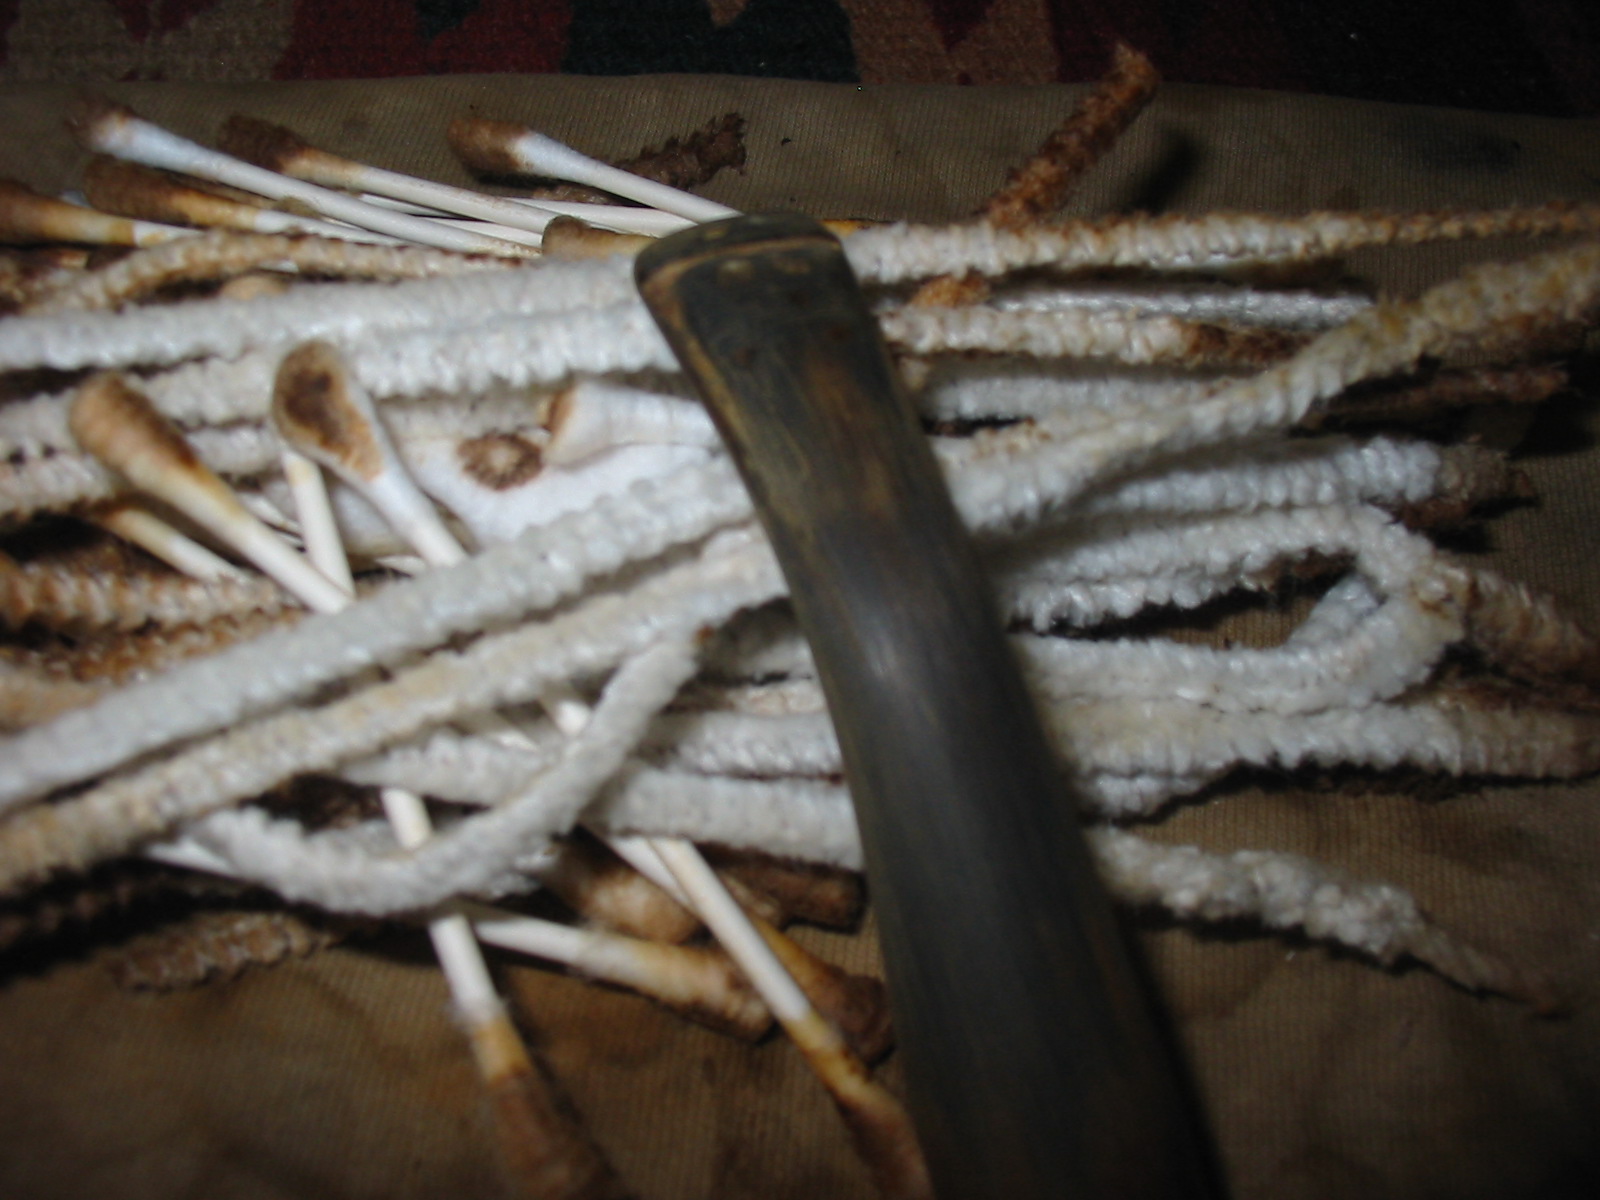
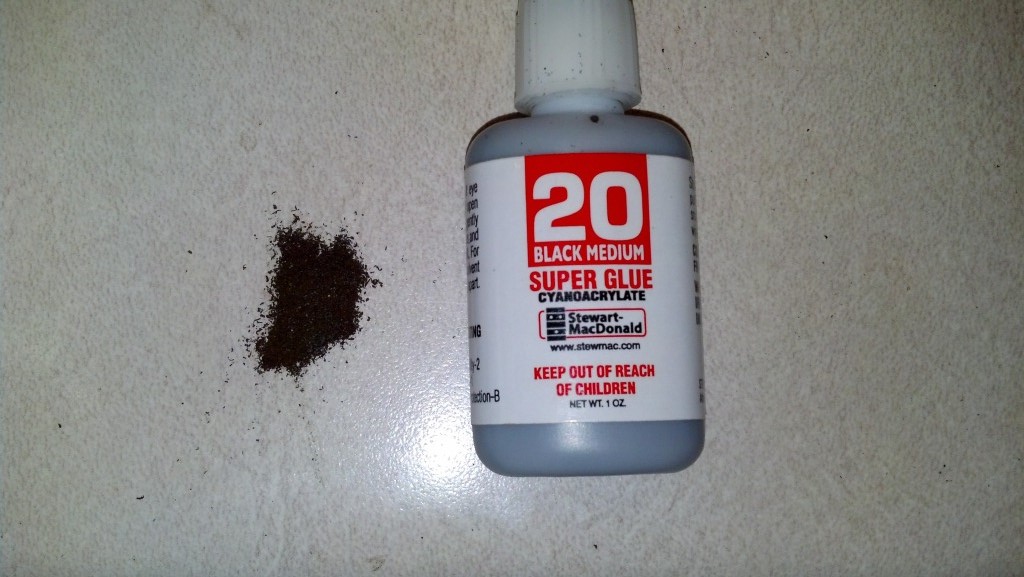
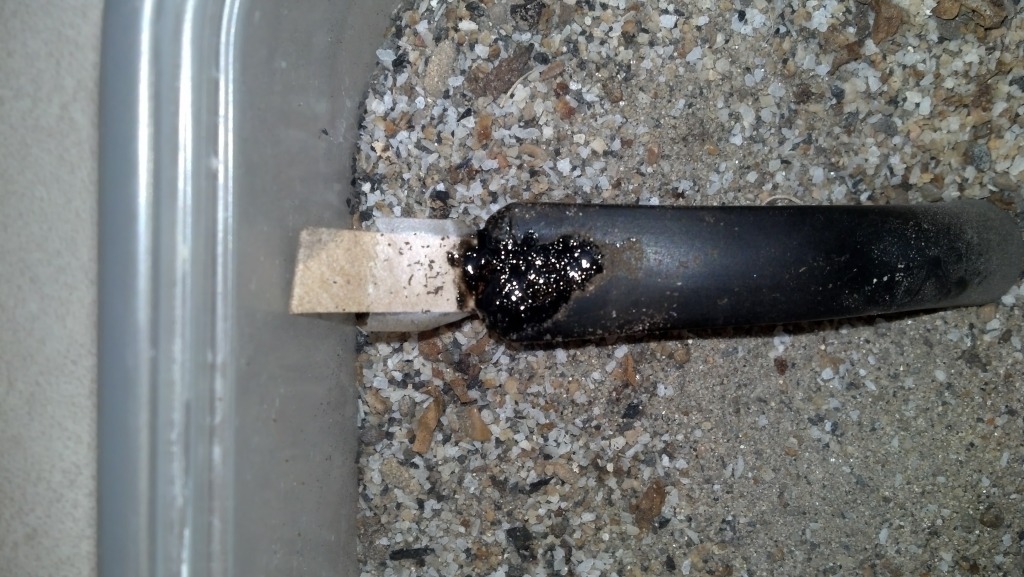
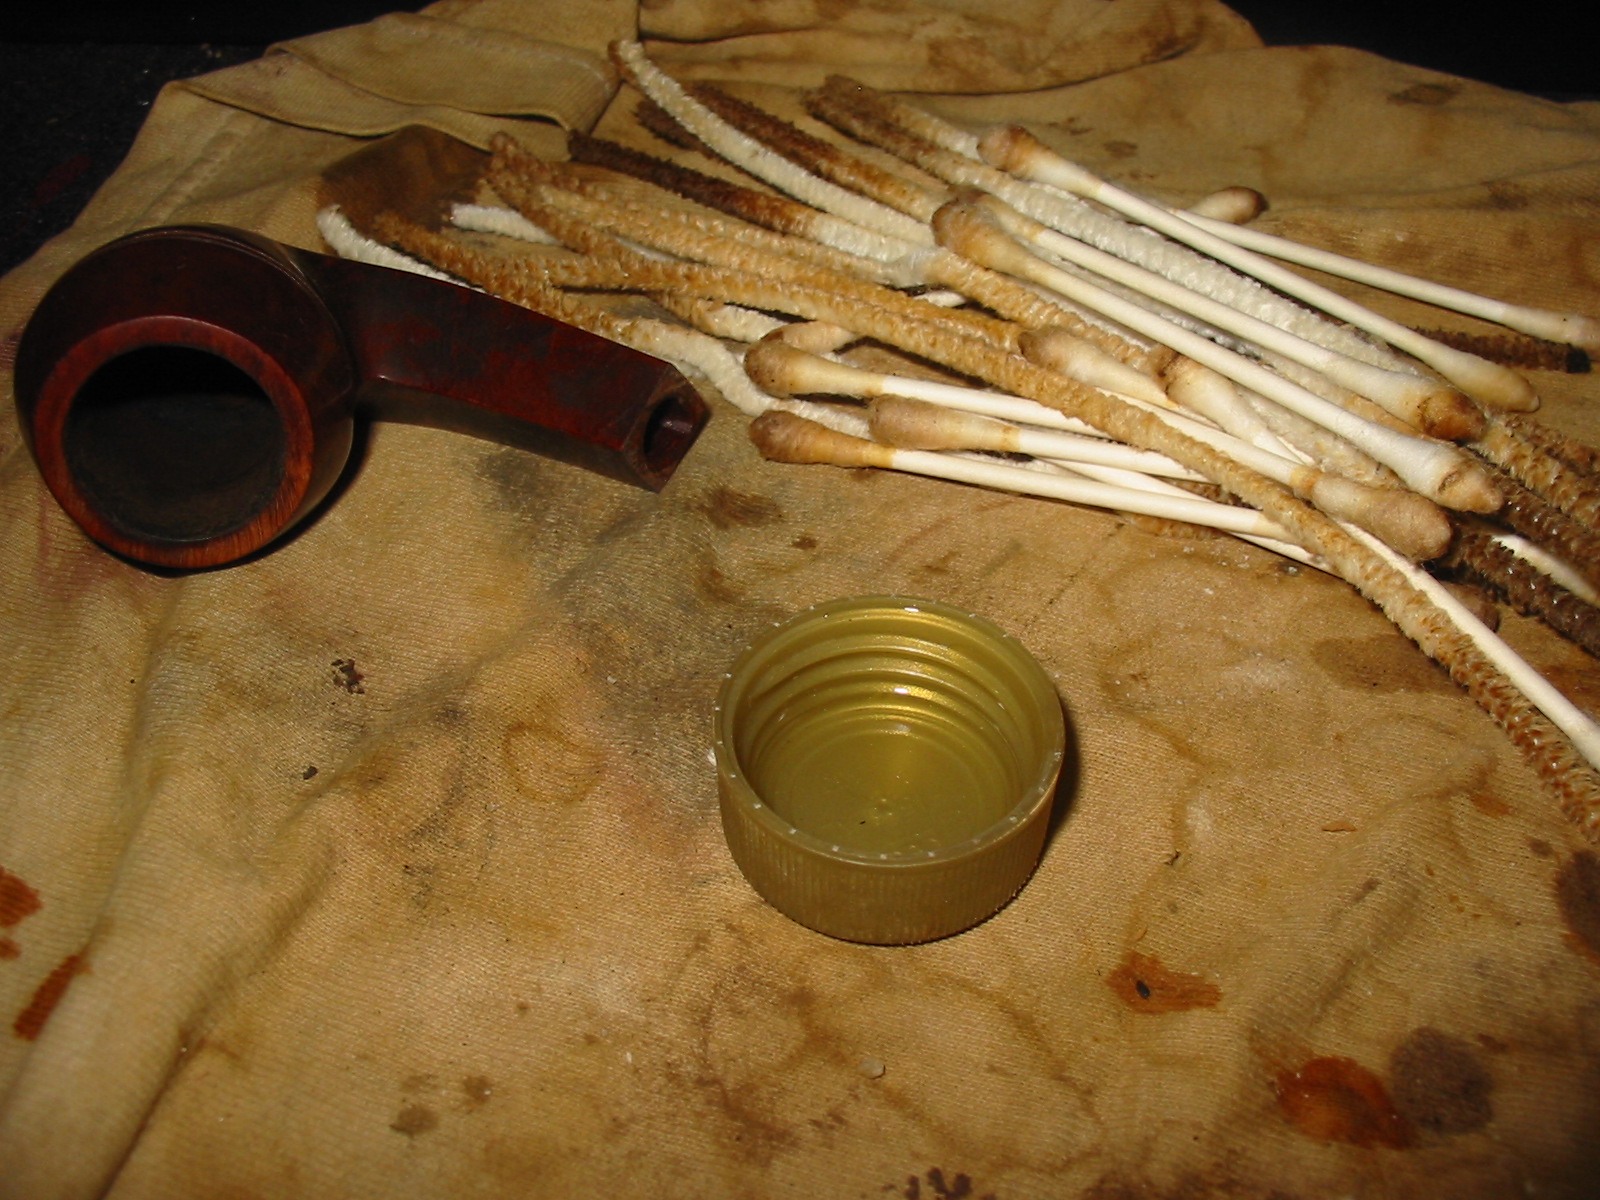
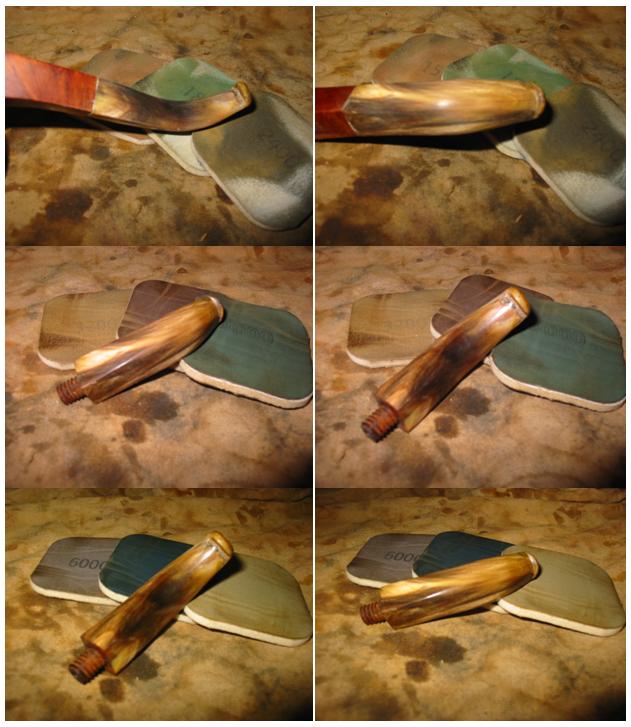
I cleaned out the open area with cotton swabs and Everclear, careful to not use too much of the alcohol on the horn stem. Once it was clean of debris and dust I decided to fill the area with a superglue gel rather than the usual liquid superglue I generally use (Photo 1). My thinking was that the gel would sit better in the large area without running all over the stem. There were also nicks on the sharp edges near the shank that I also repaired with the superglue gel (Photo 2). I layered the glue into the hole to build it up gradually (Photo 3) as each previous layer dried.
GFB5

GFB6

GFB7

Once the glued cured over night I sanded the area with medium grit emery paper to remove the high spots and smooth out the surface (Photo 1). I refilled the low areas on the fill to further level out the area. There was also a deep nick on the sharp edge of the shank. I cleaned that out and used the superglue to fill that as well. It would dry black but with the staining of the bowl that could be minimized and I wanted it smooth to the touch rather than the sharp cut of the nick that was previously present (Photo 2).
GFB8

GFB10

With everything glued I set the bowl and stem aside and went to work for the day. I would work on the patched areas when I returned home in the evening.

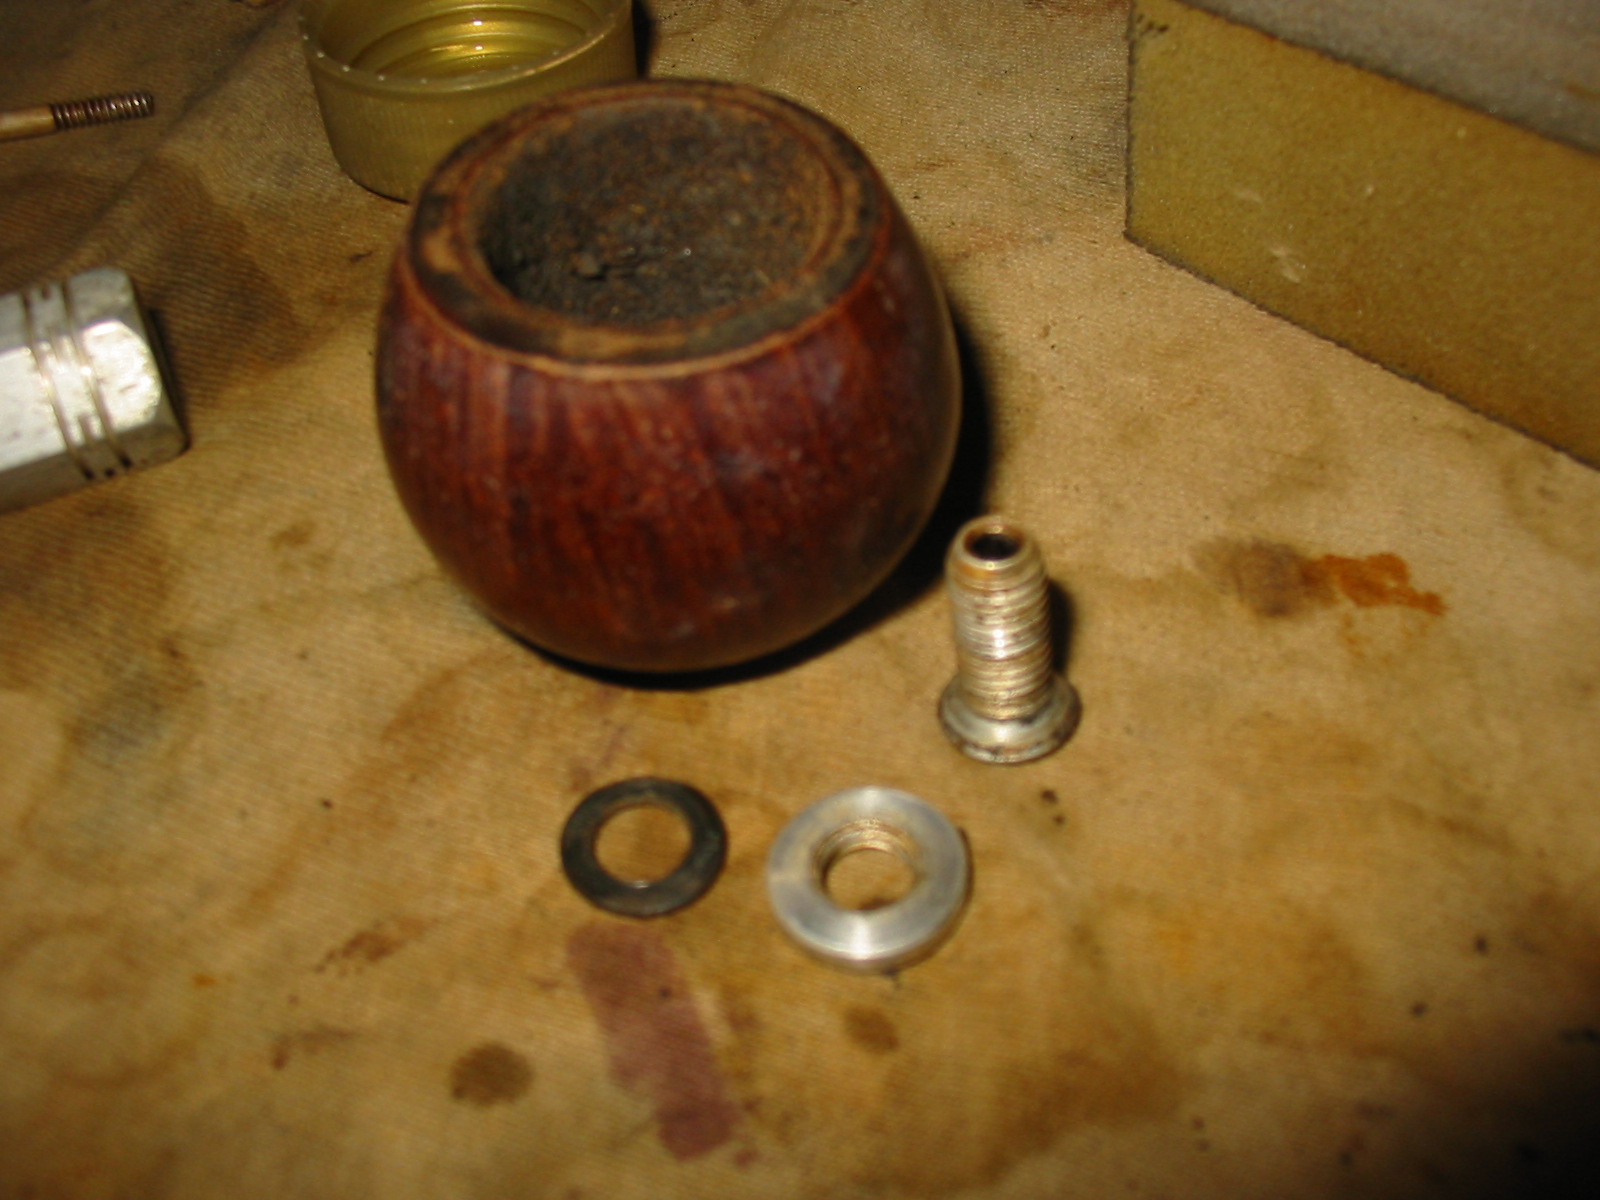
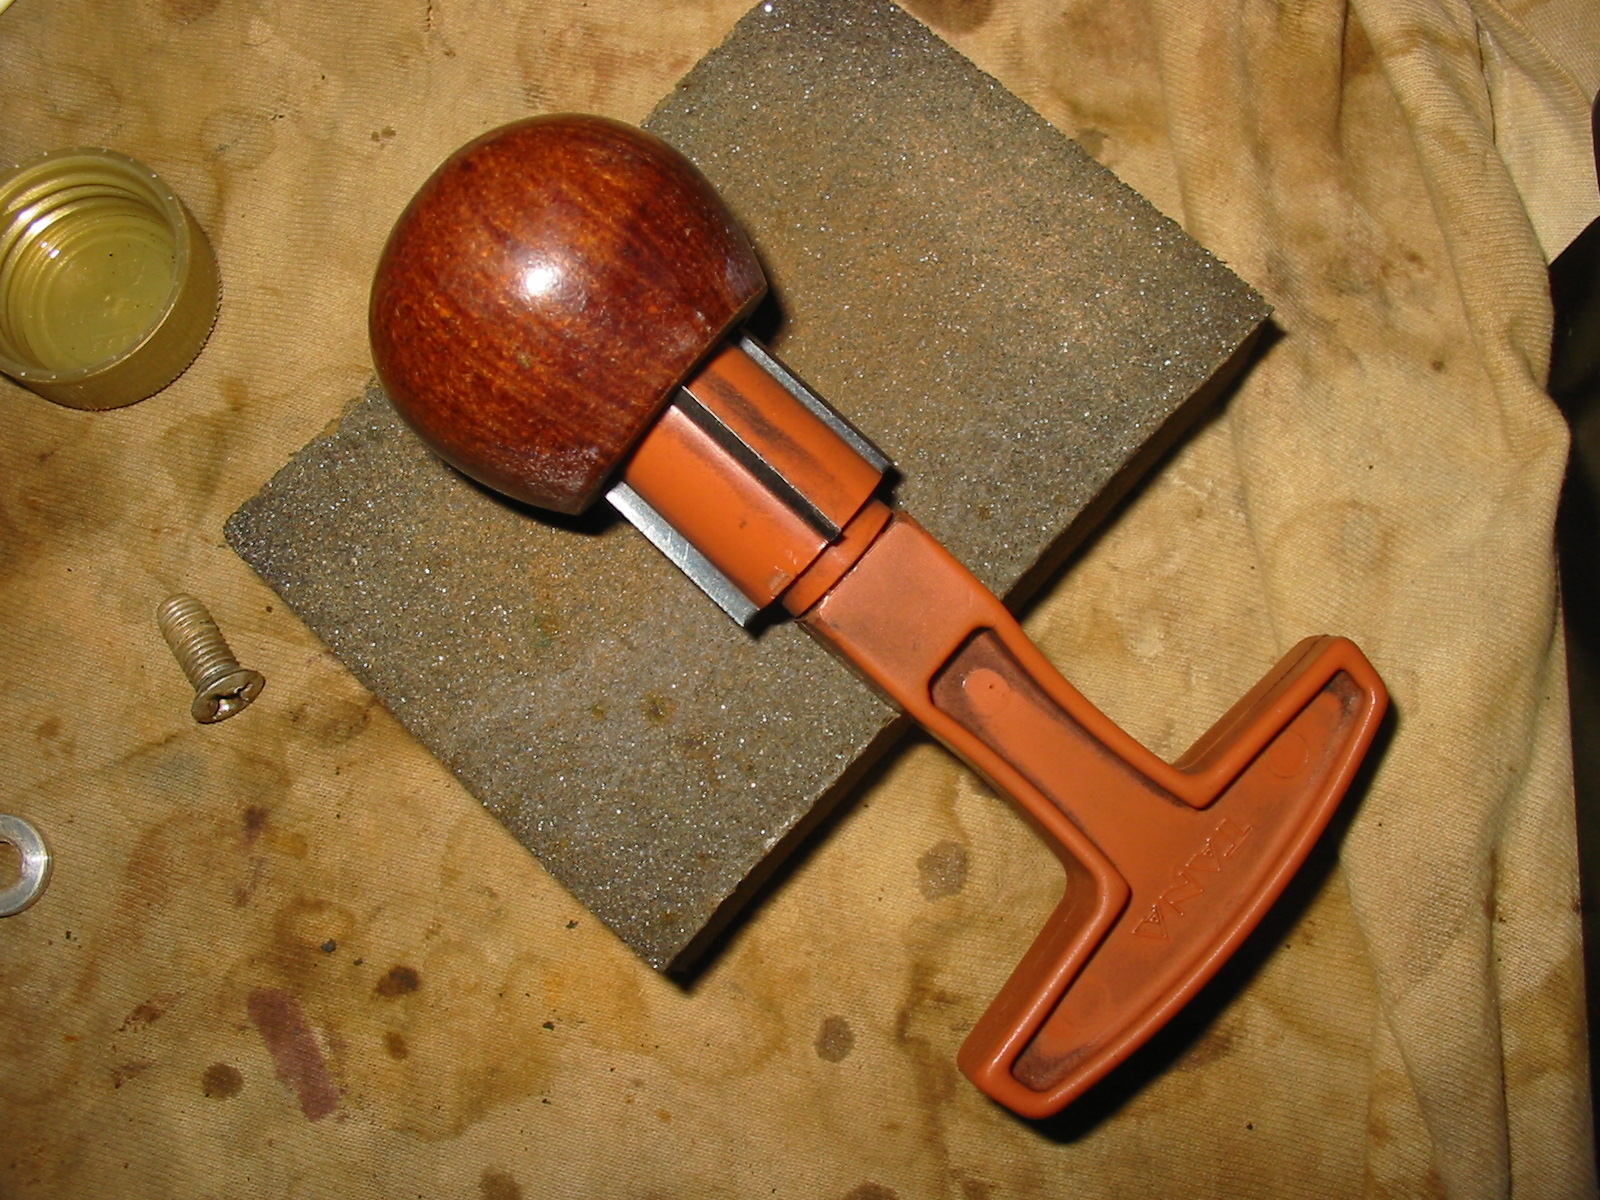
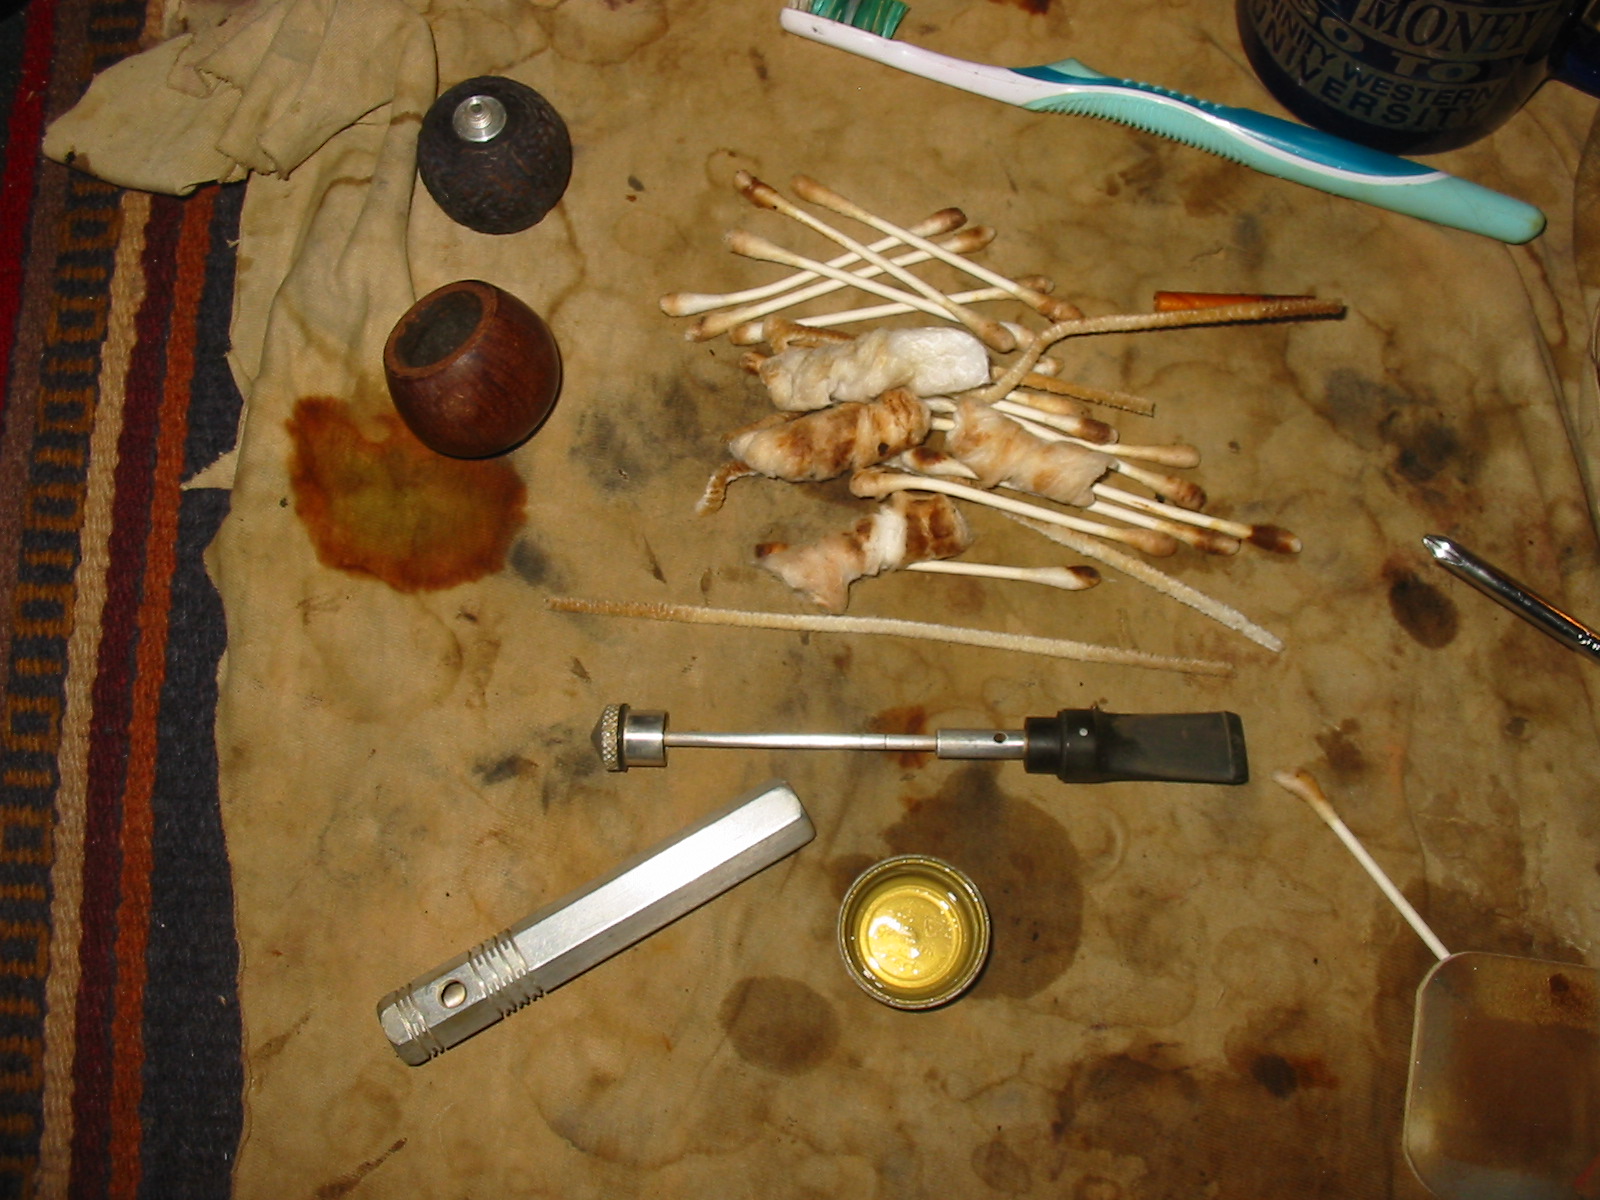
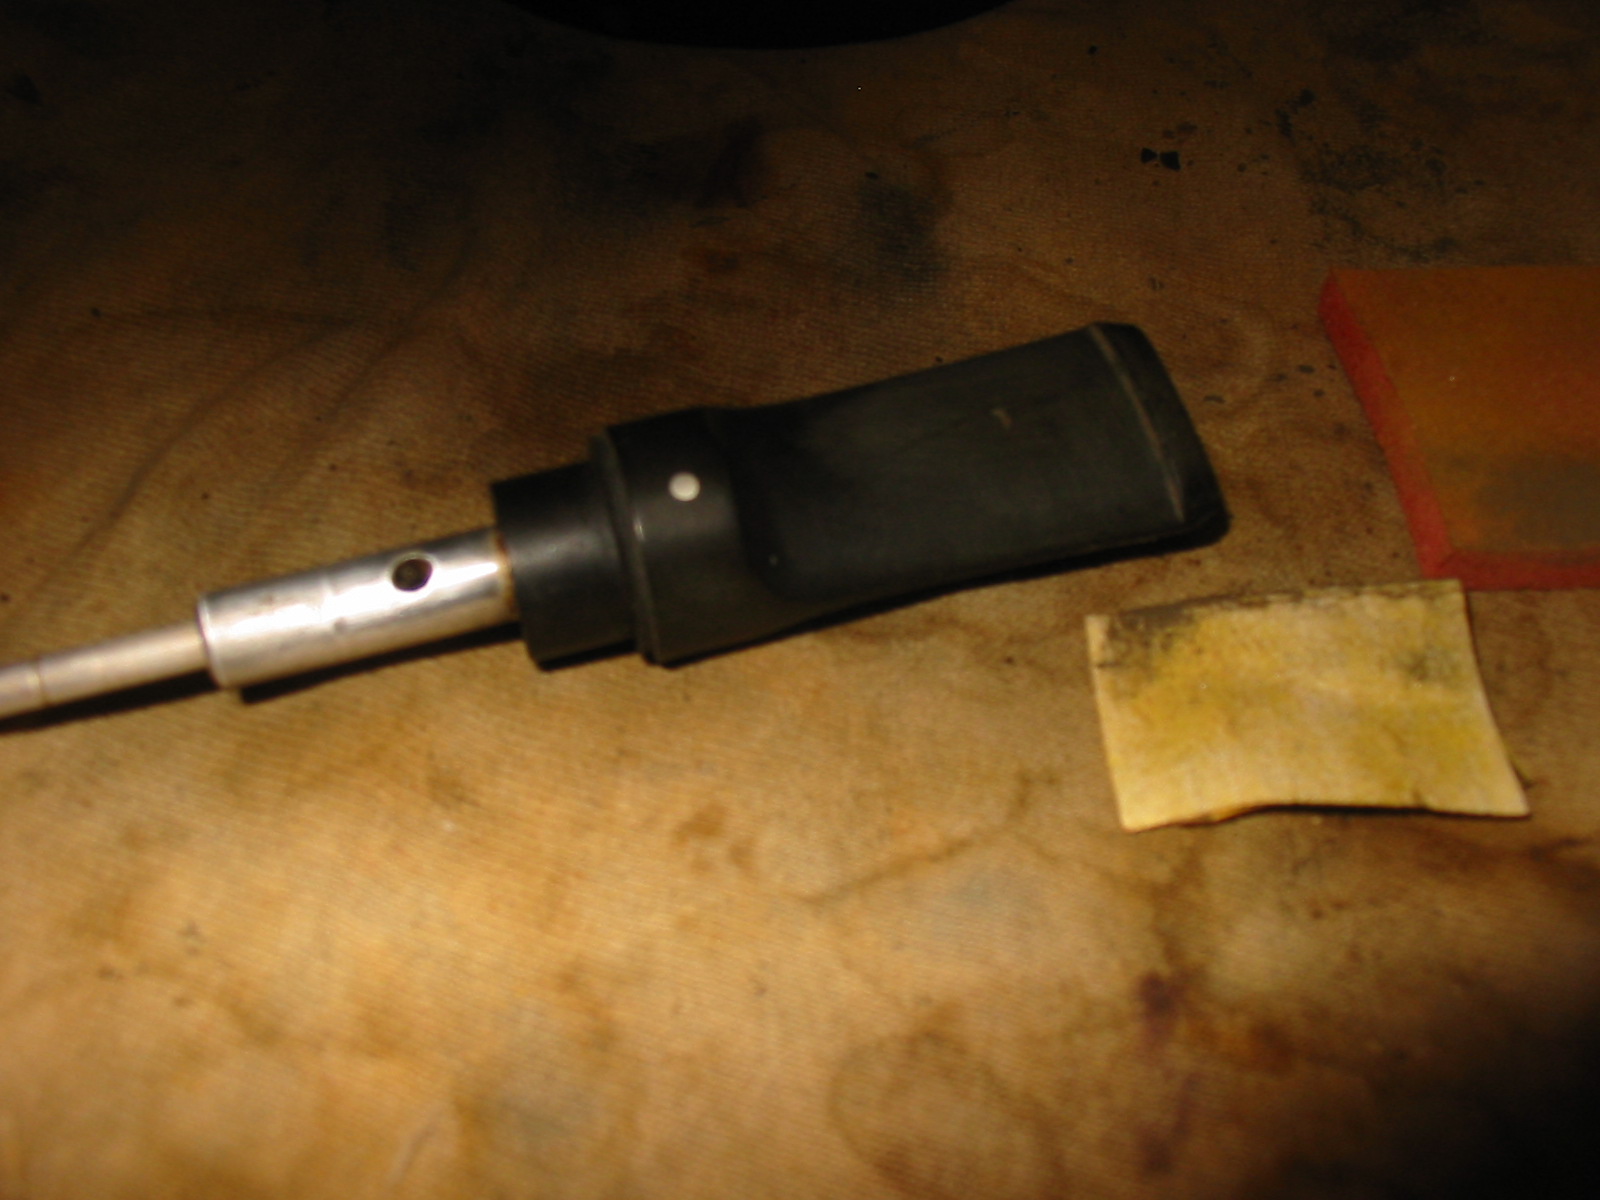
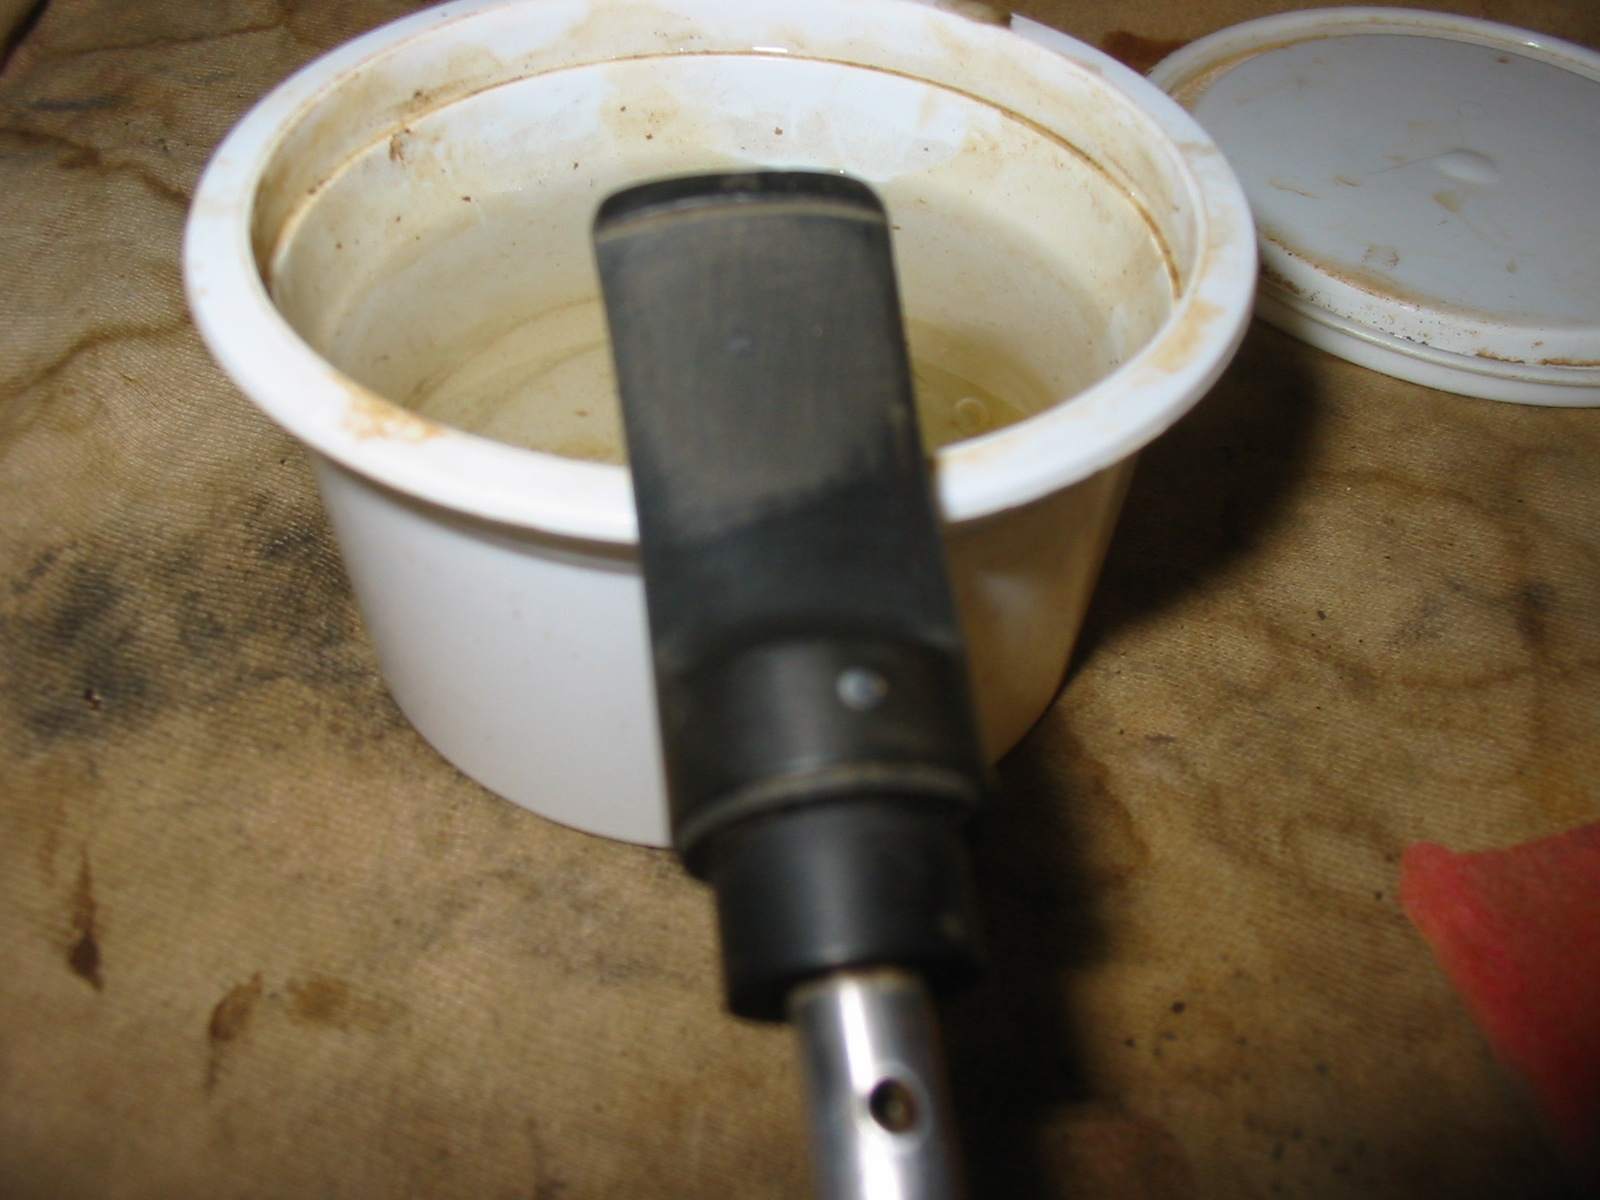
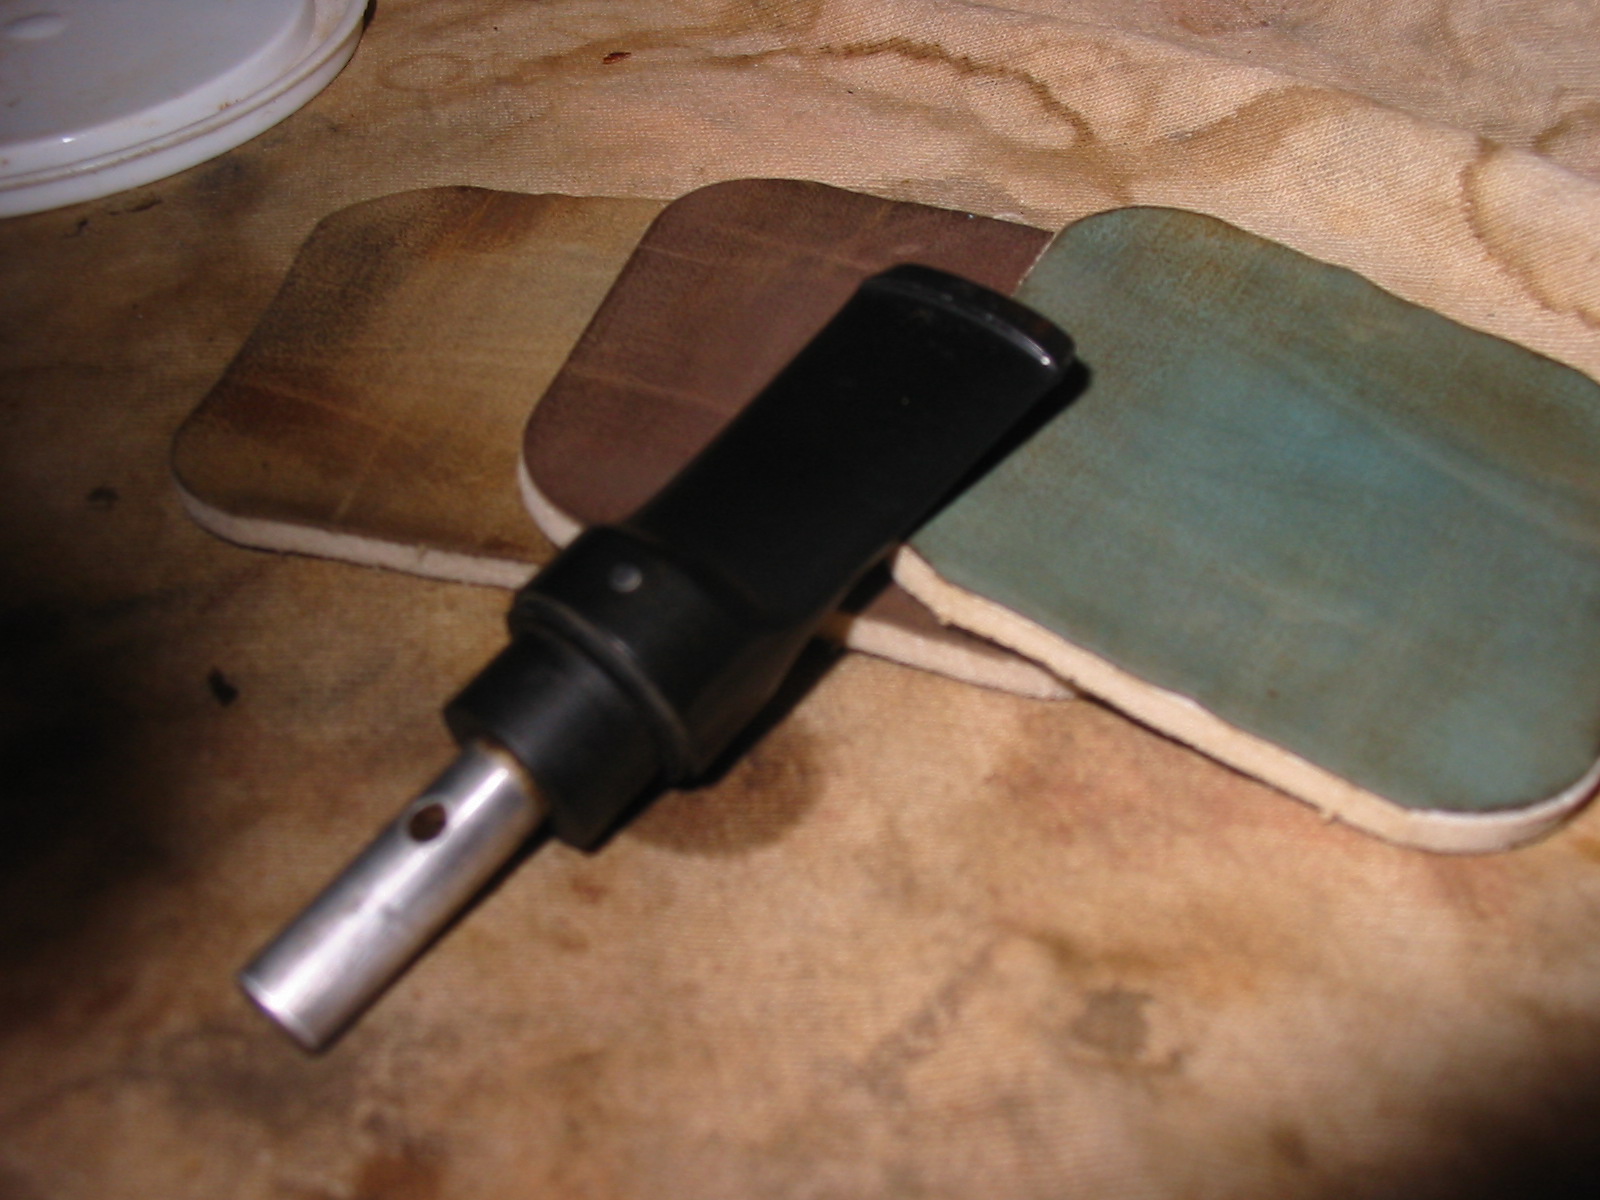
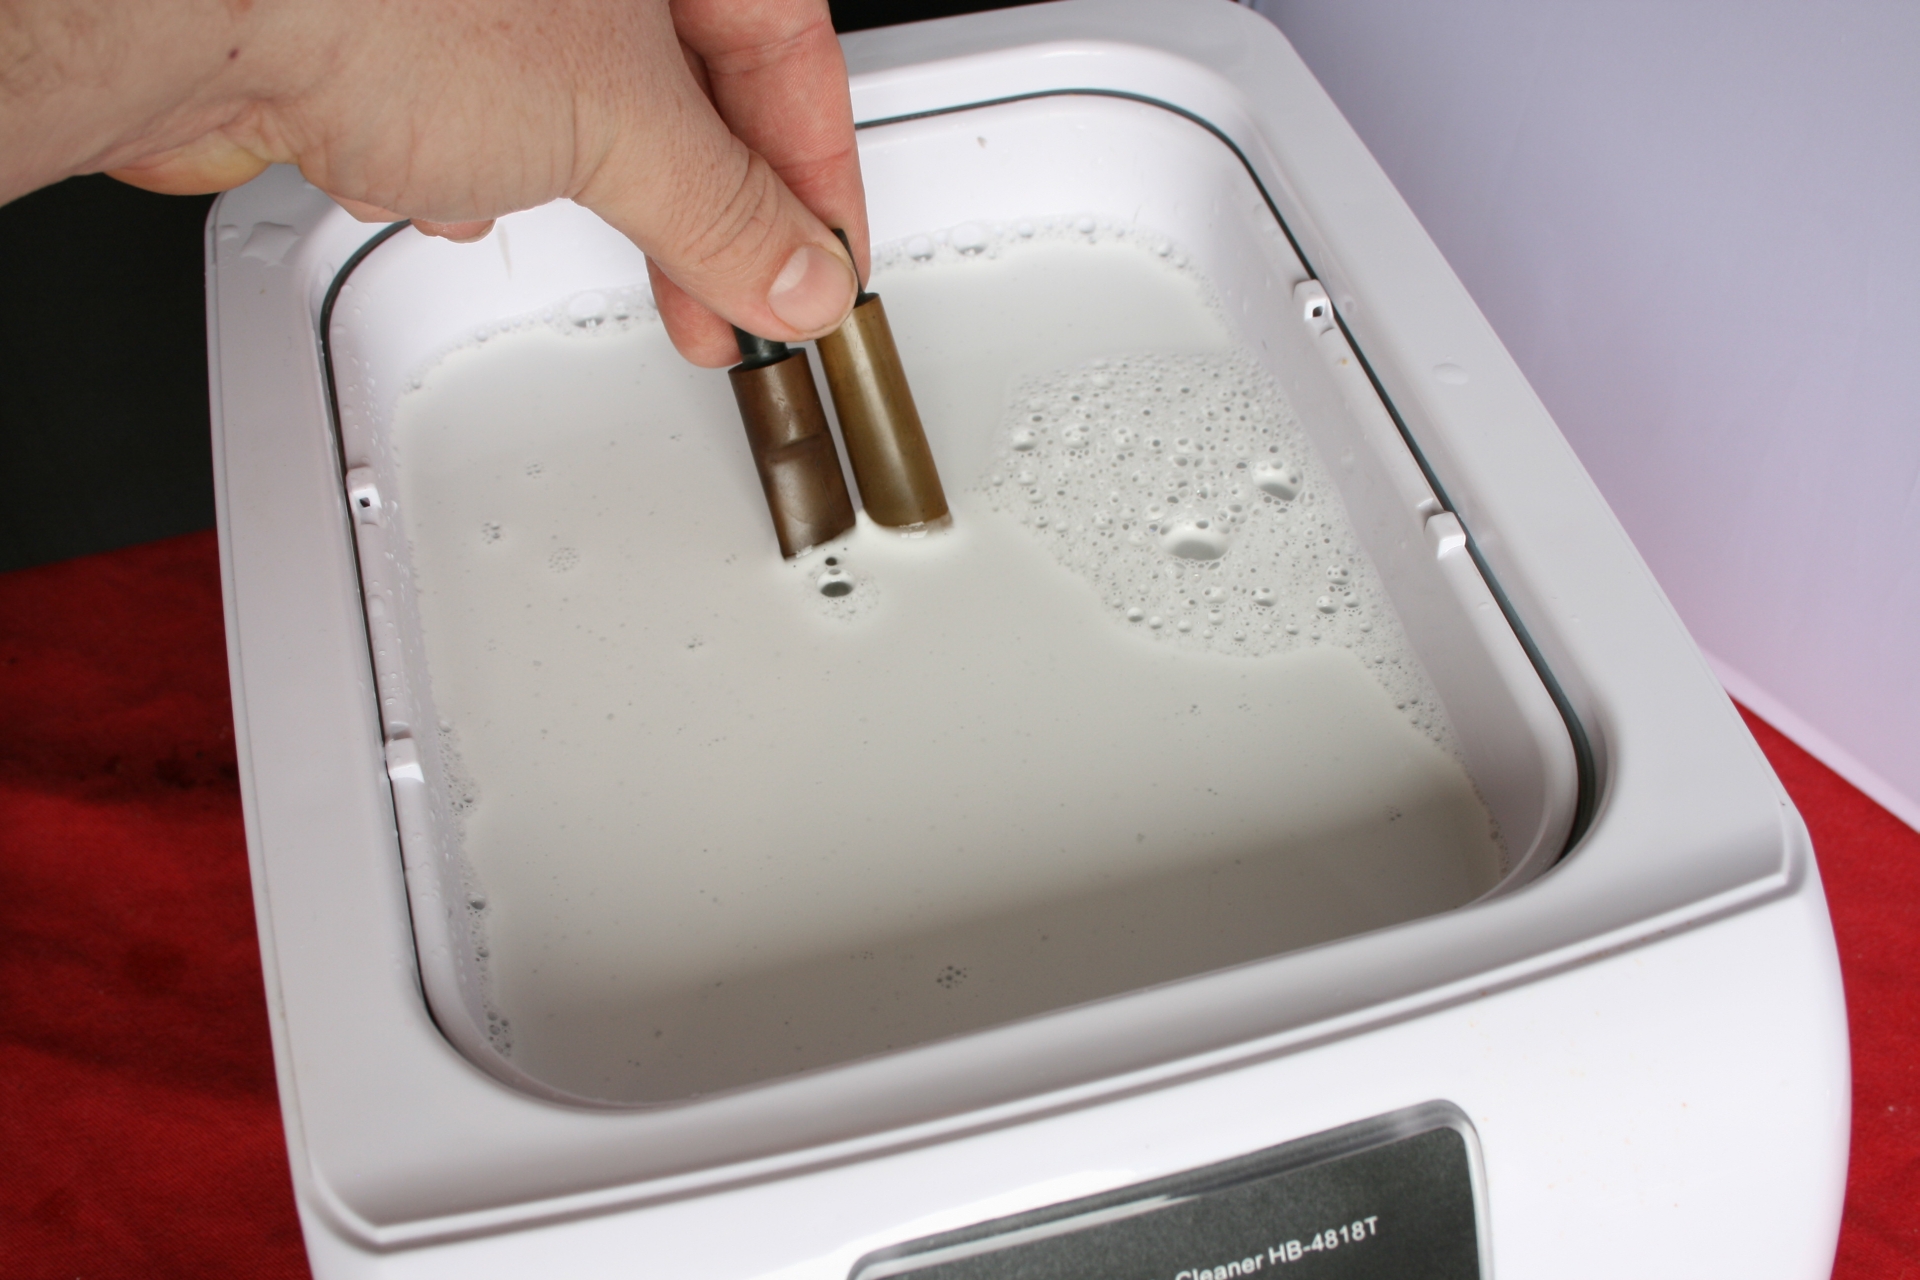
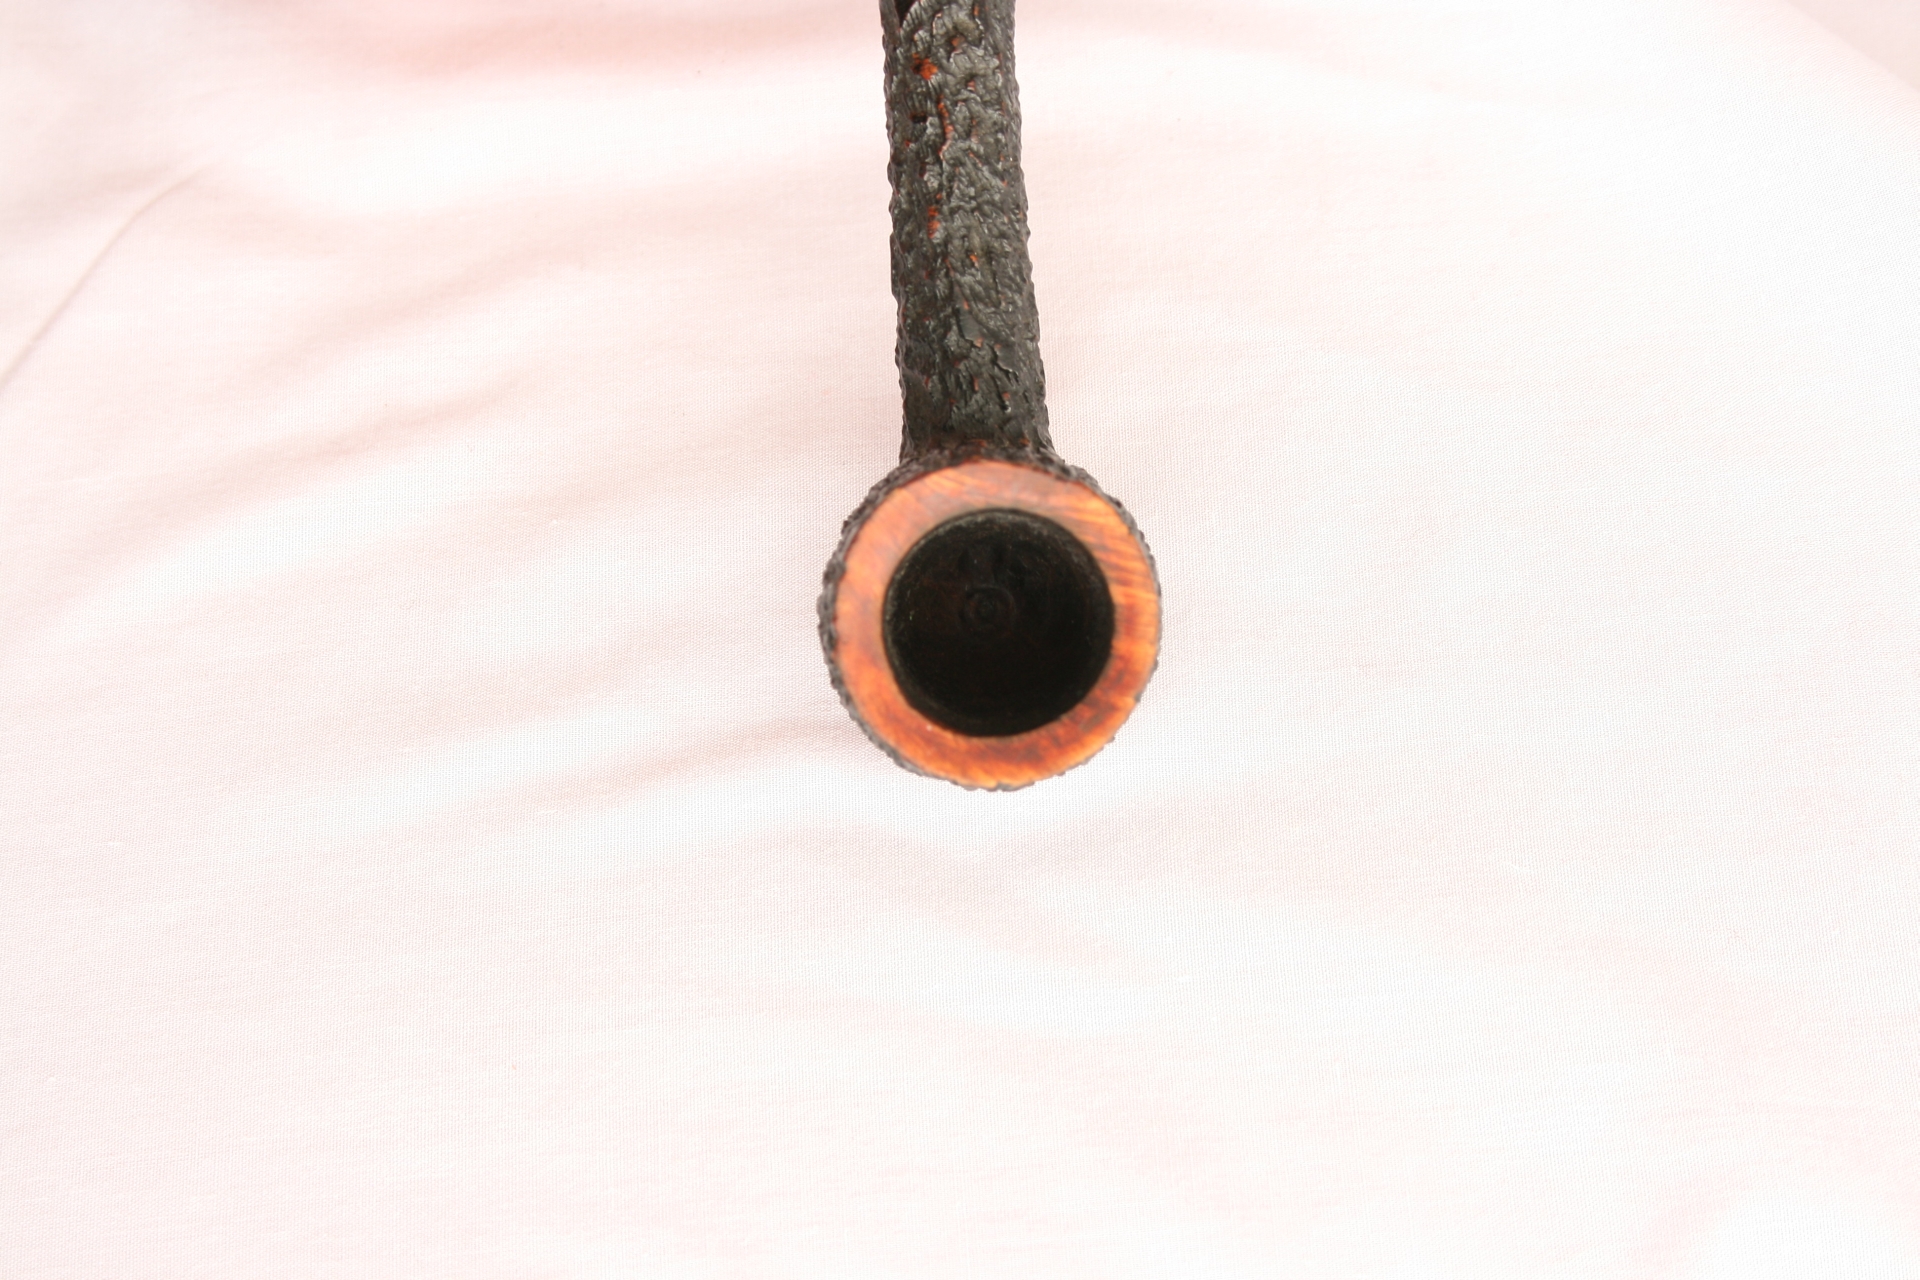
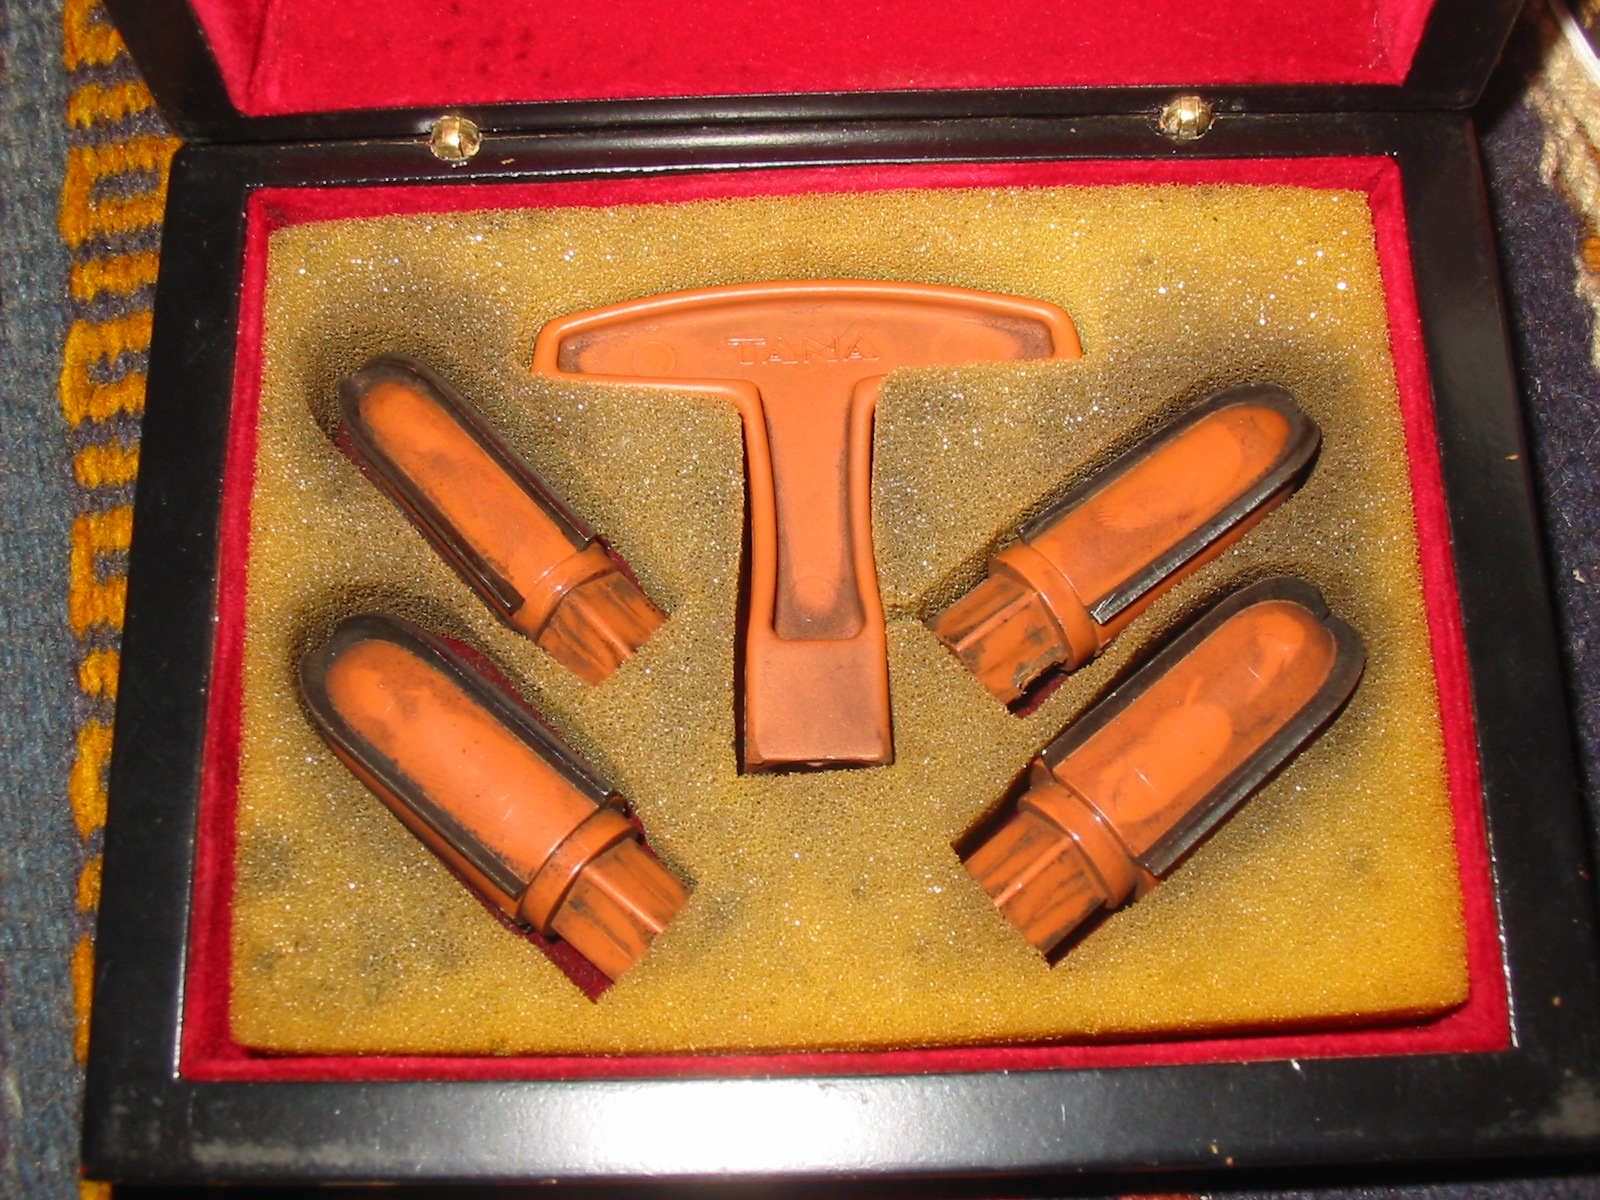
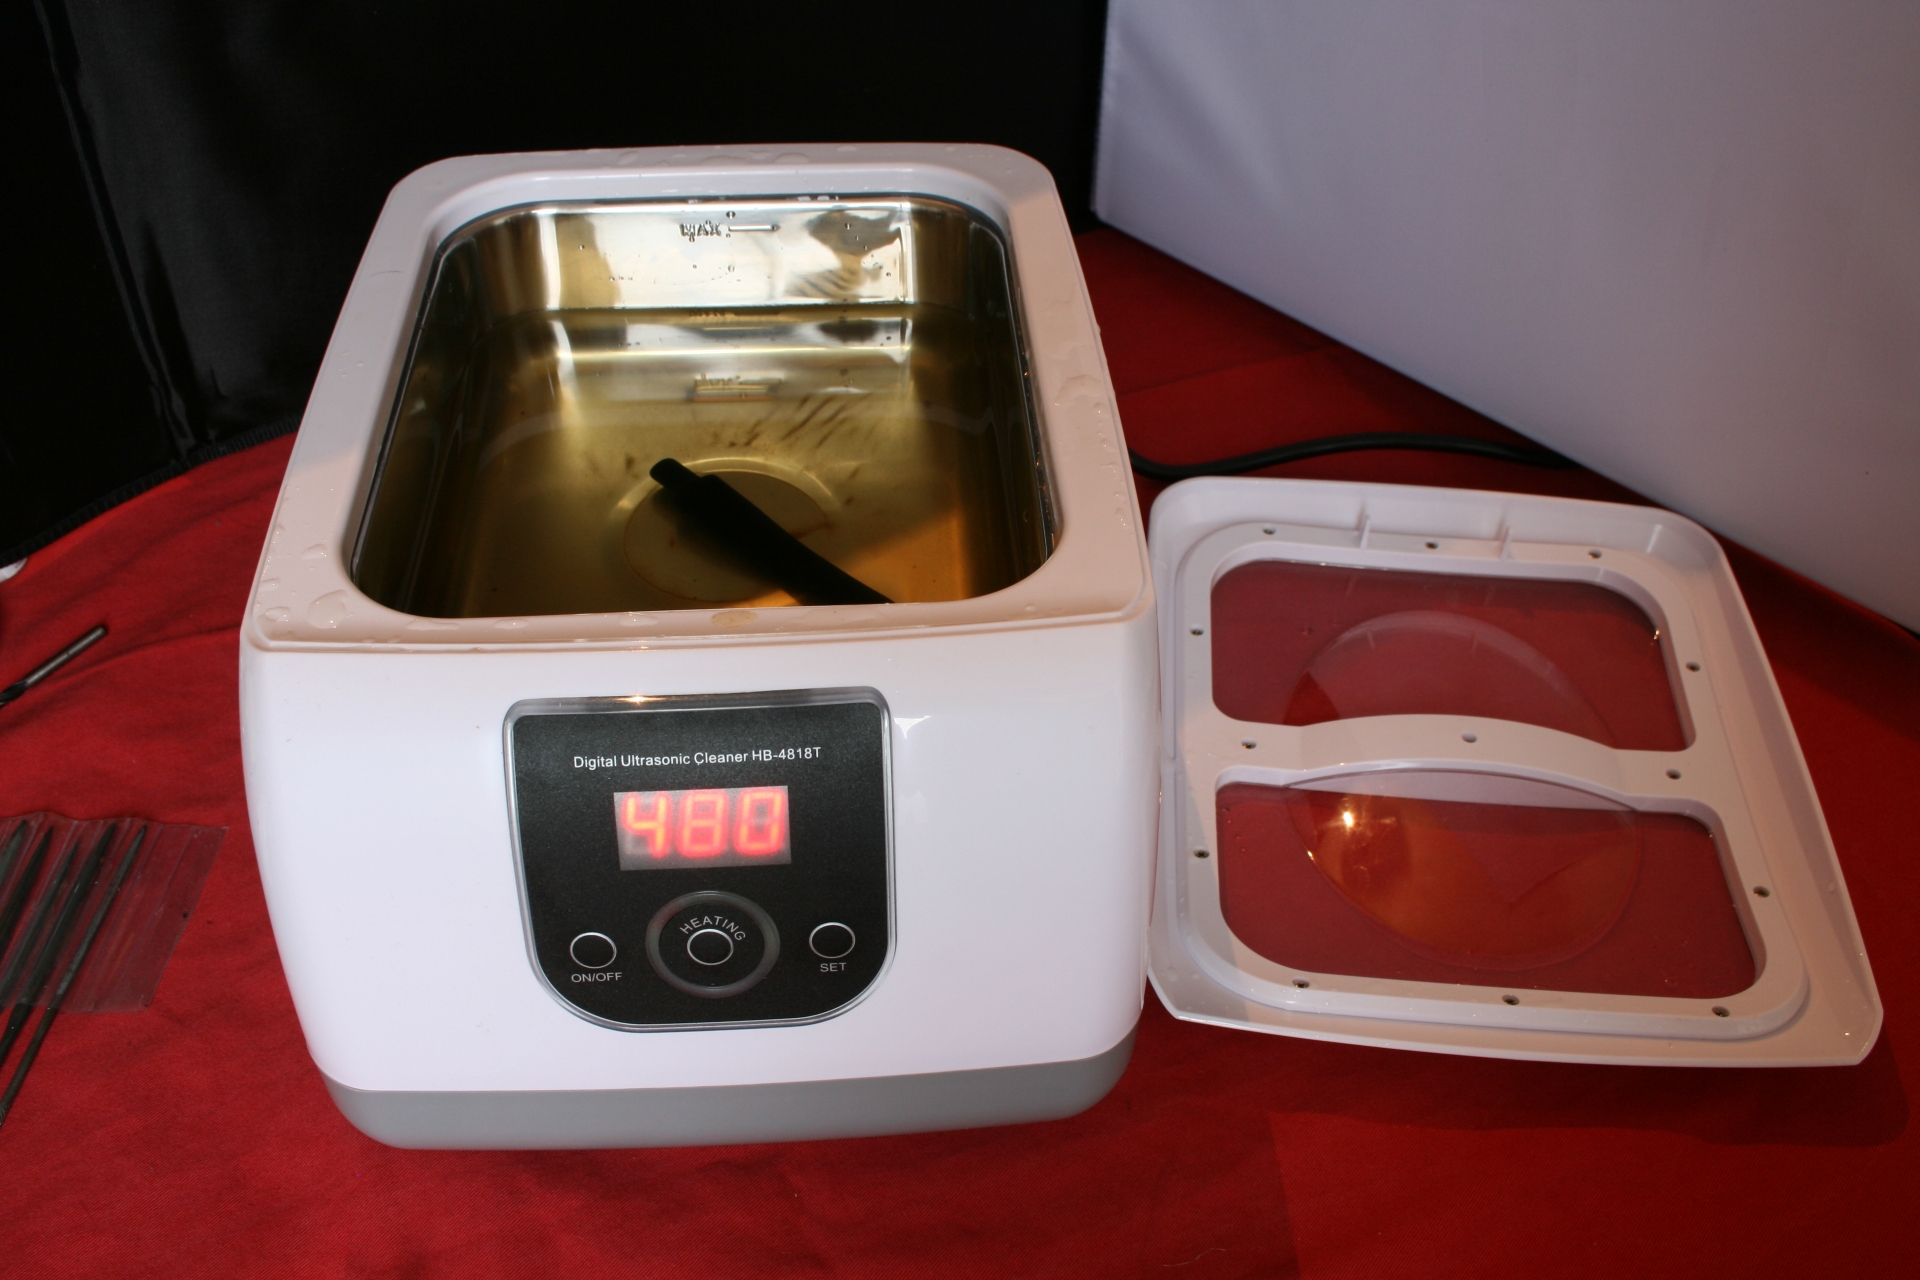
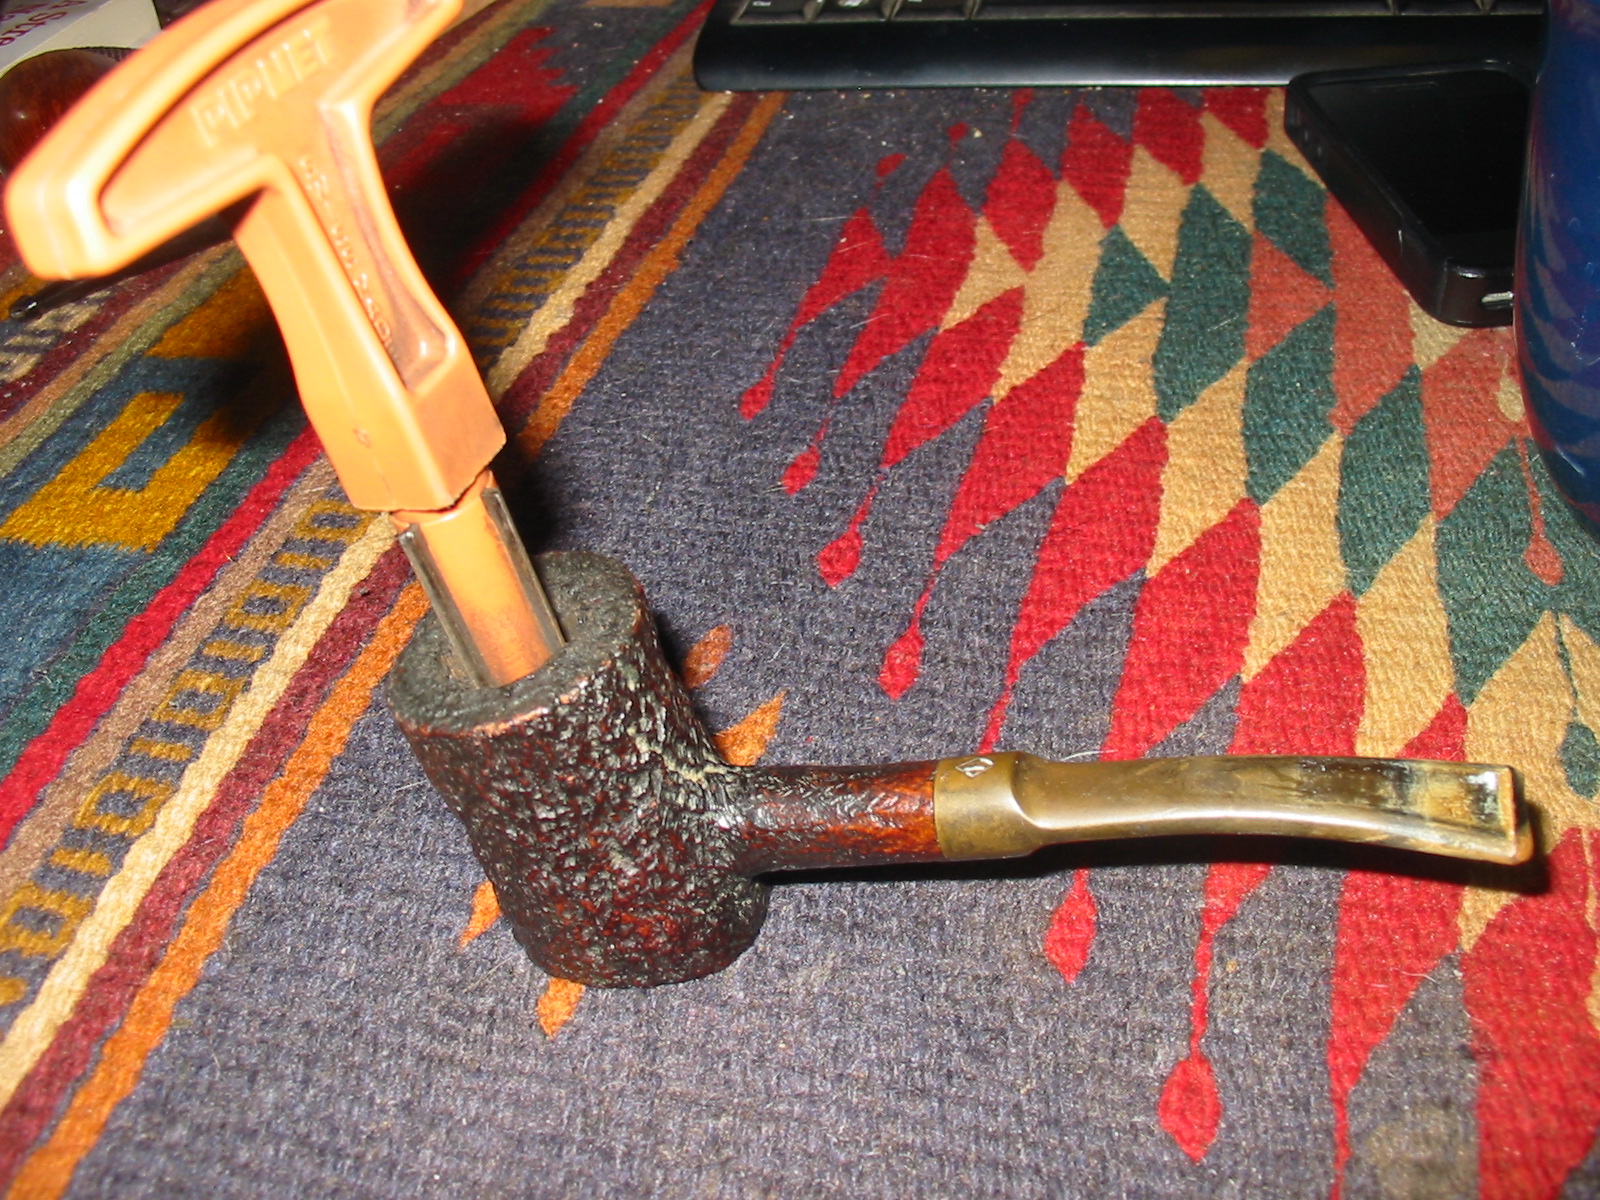
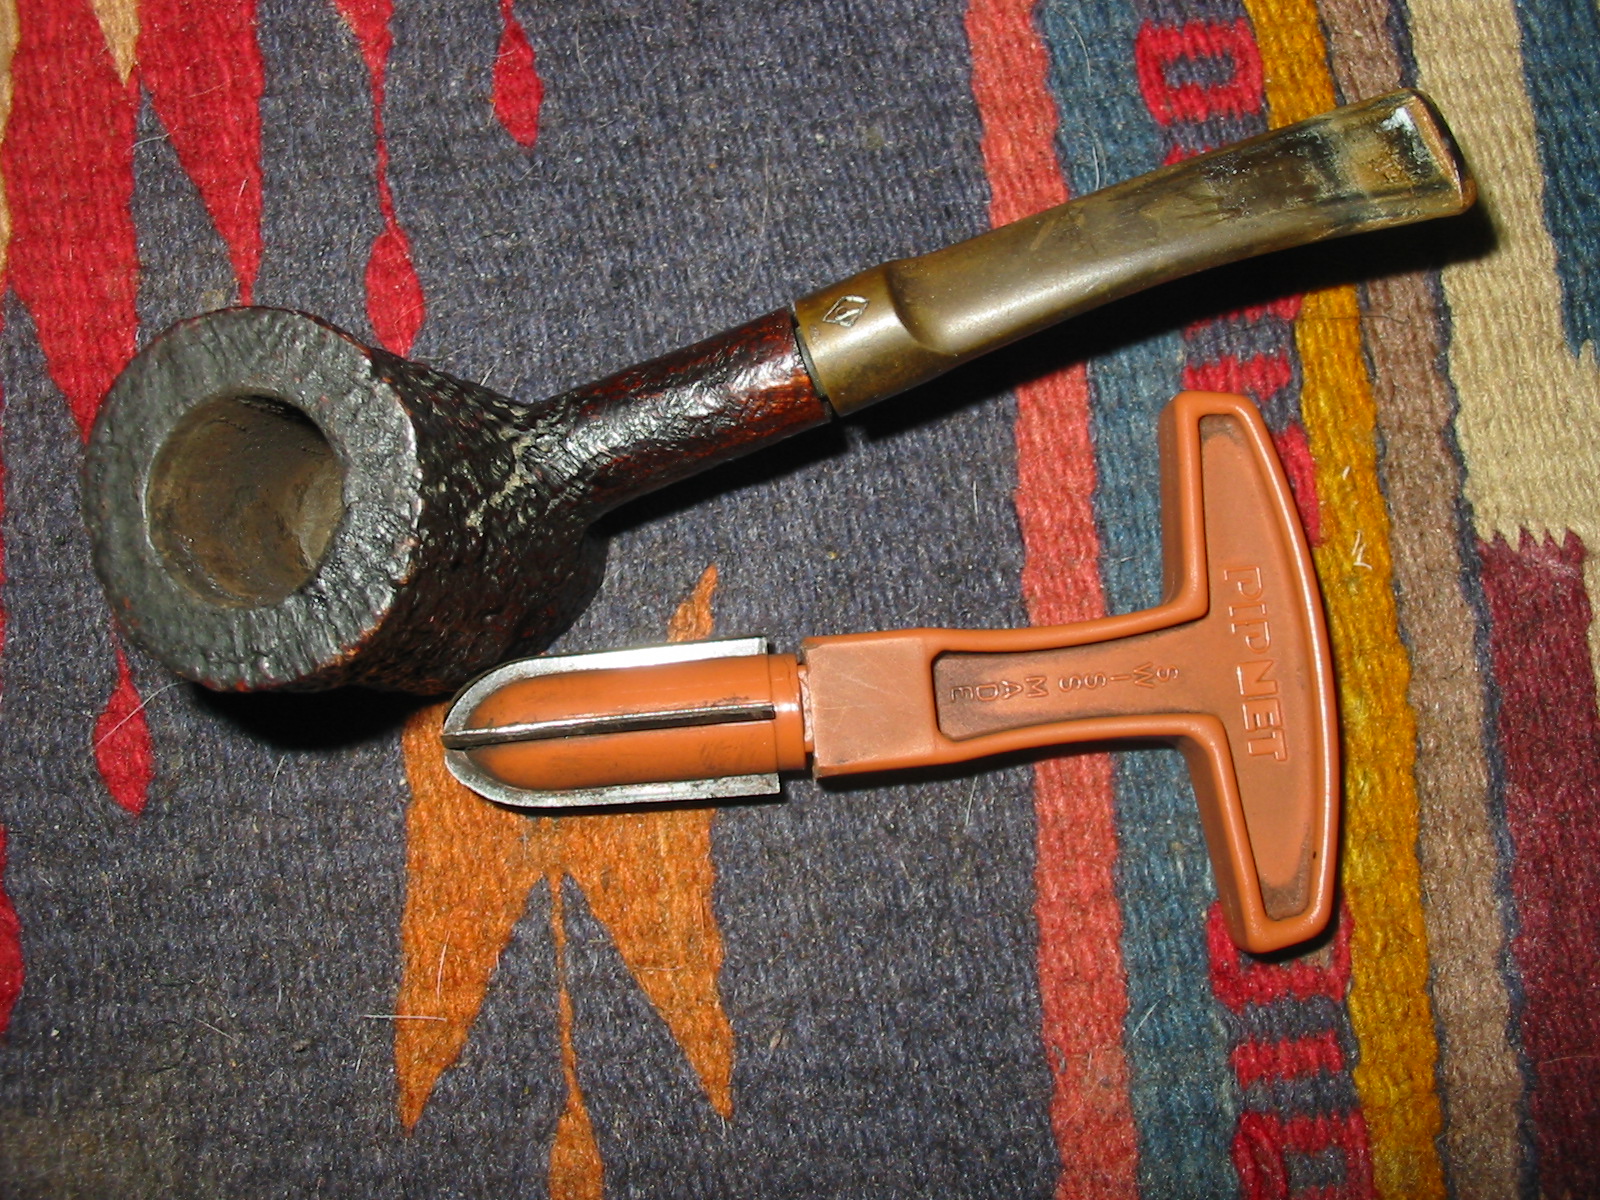
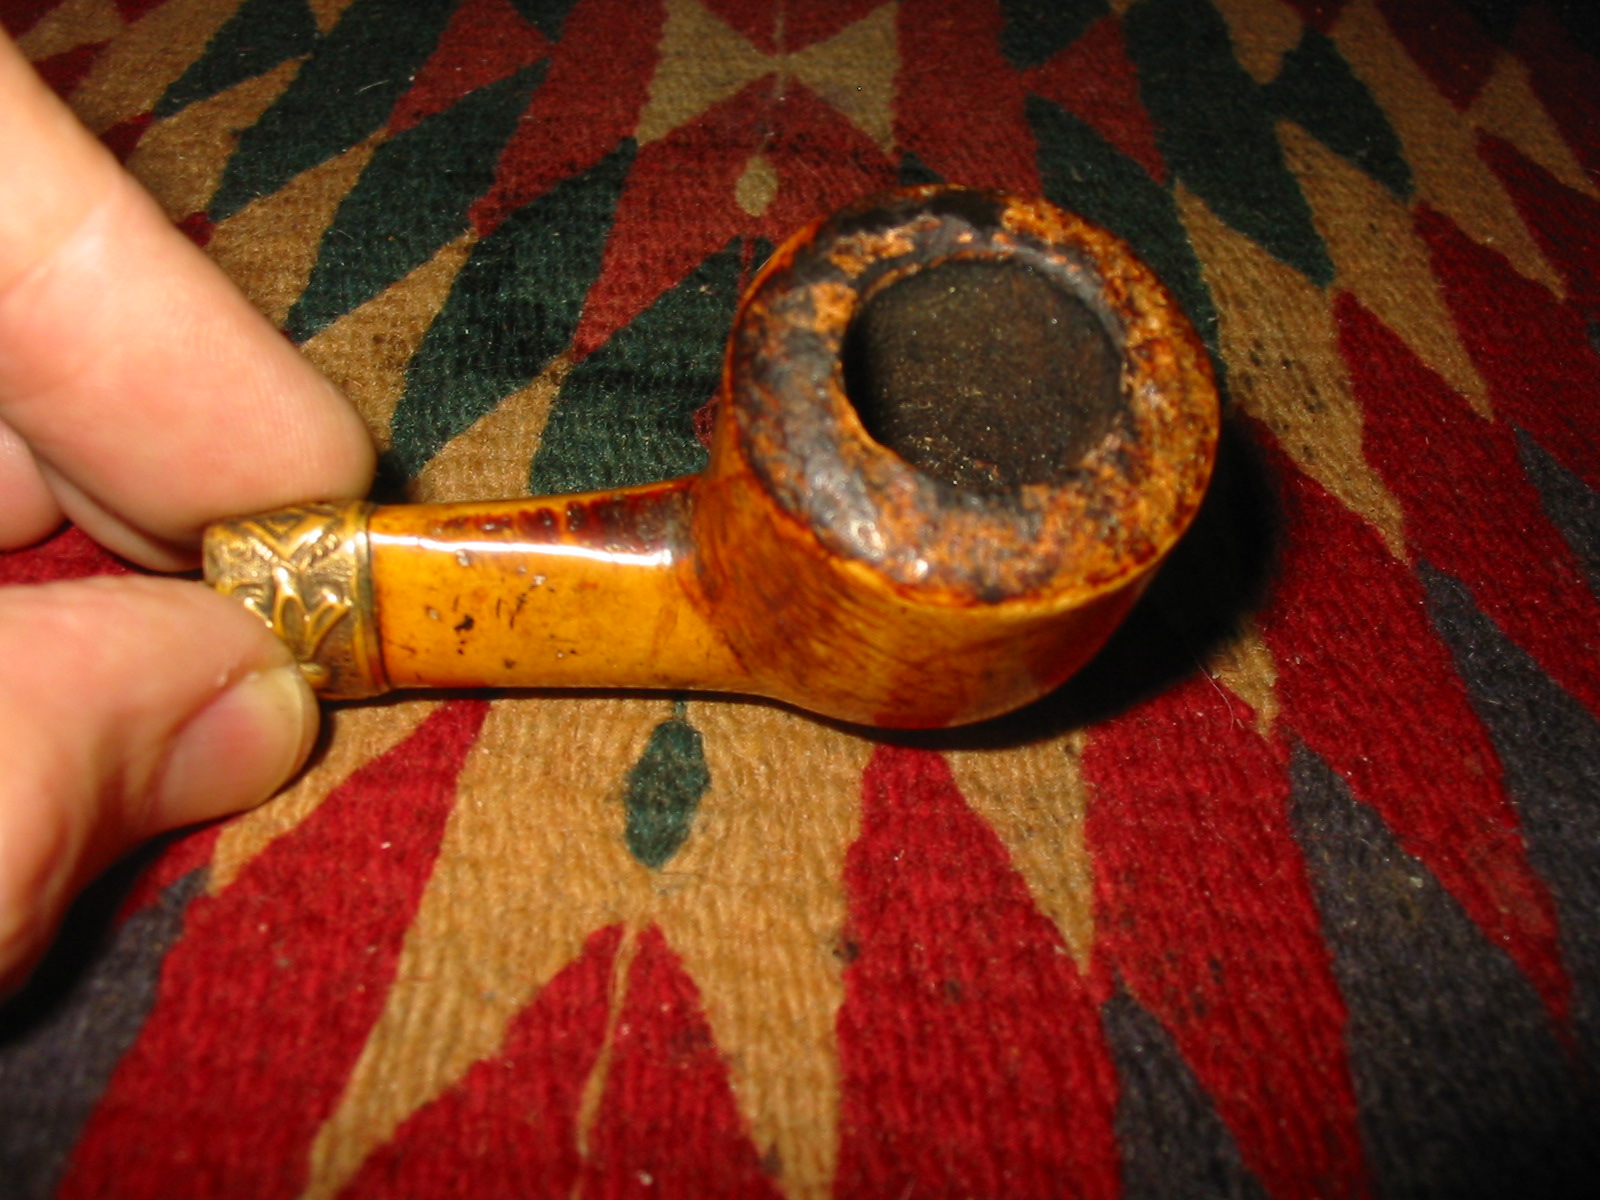
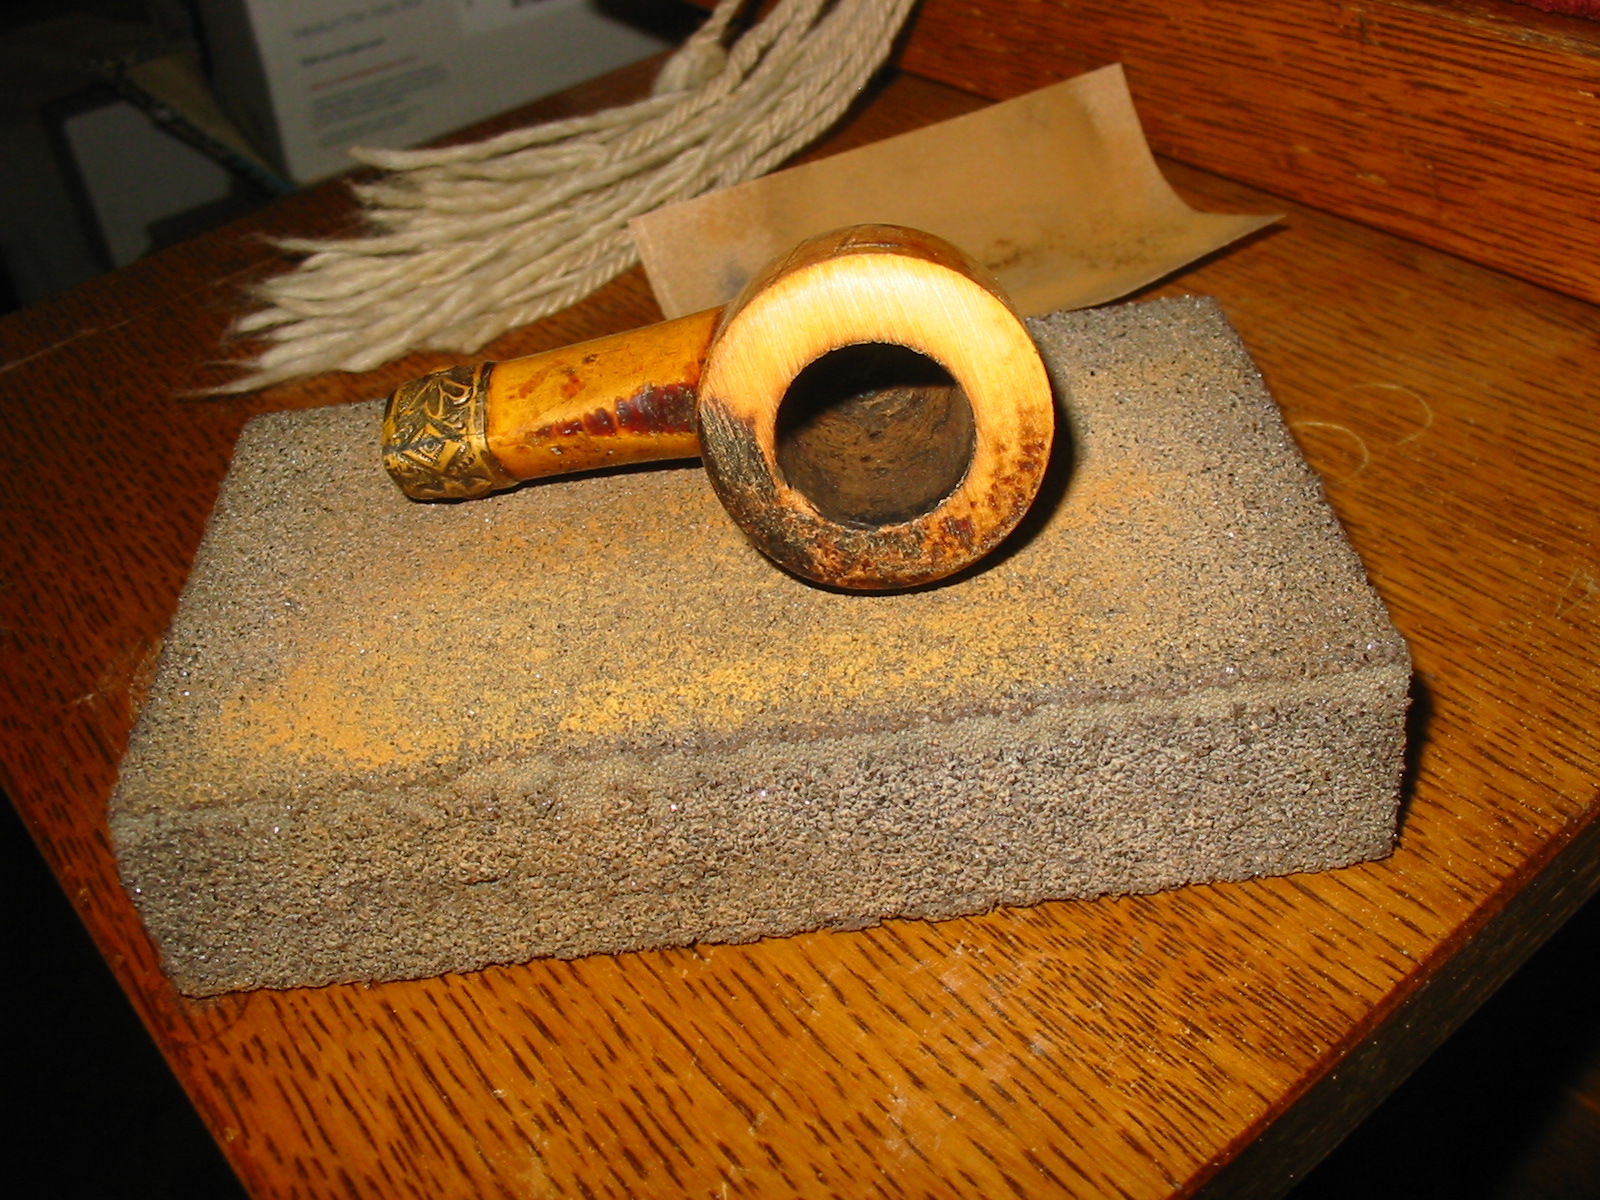
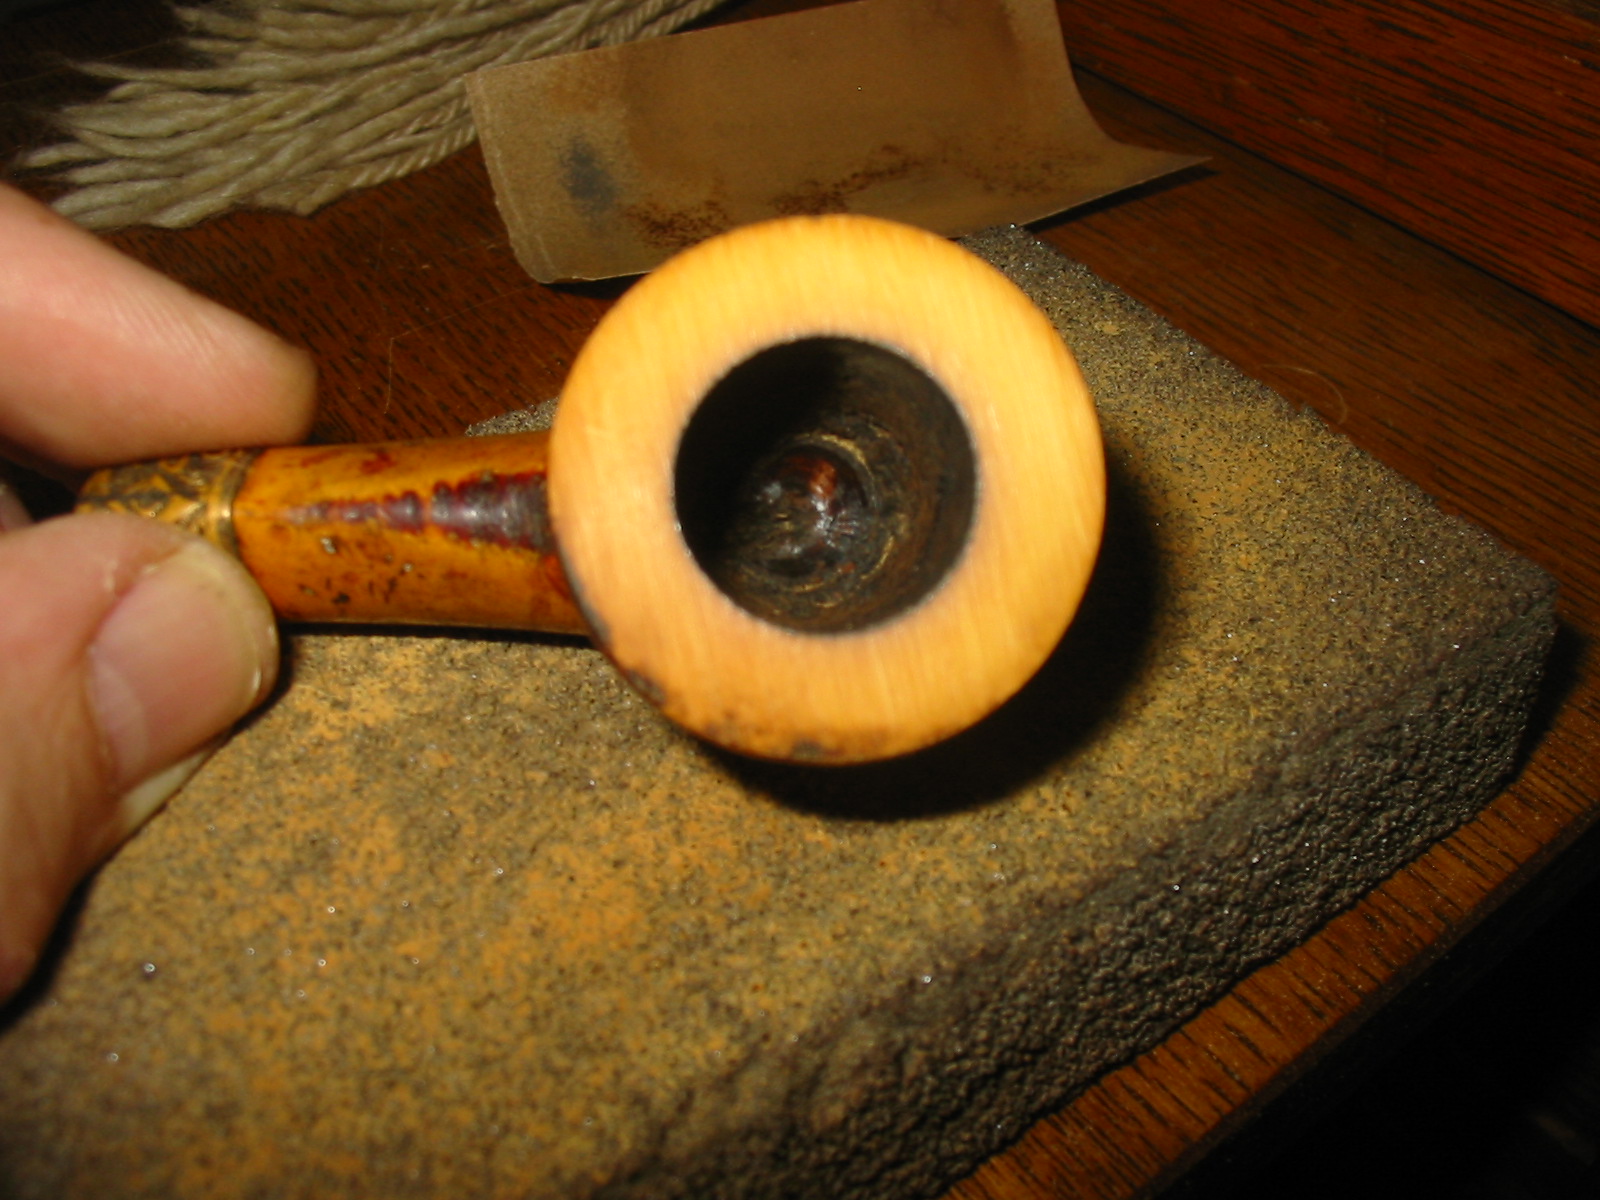
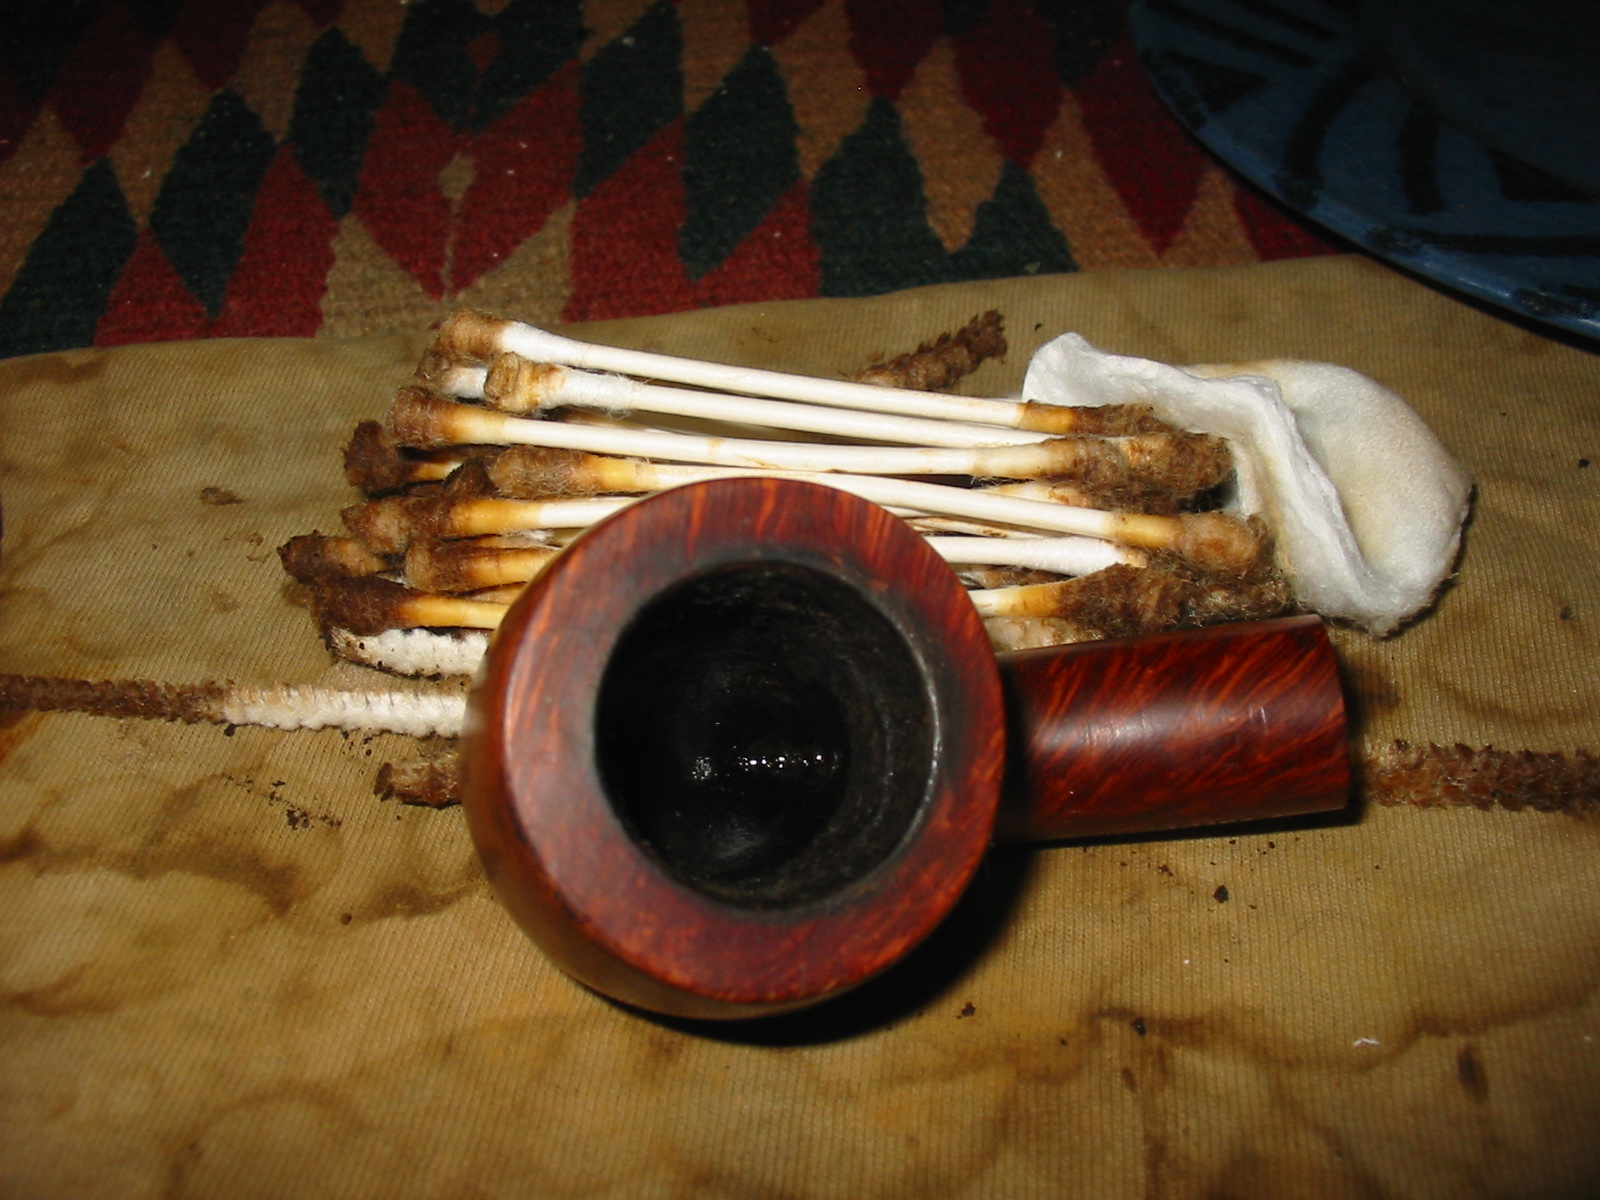
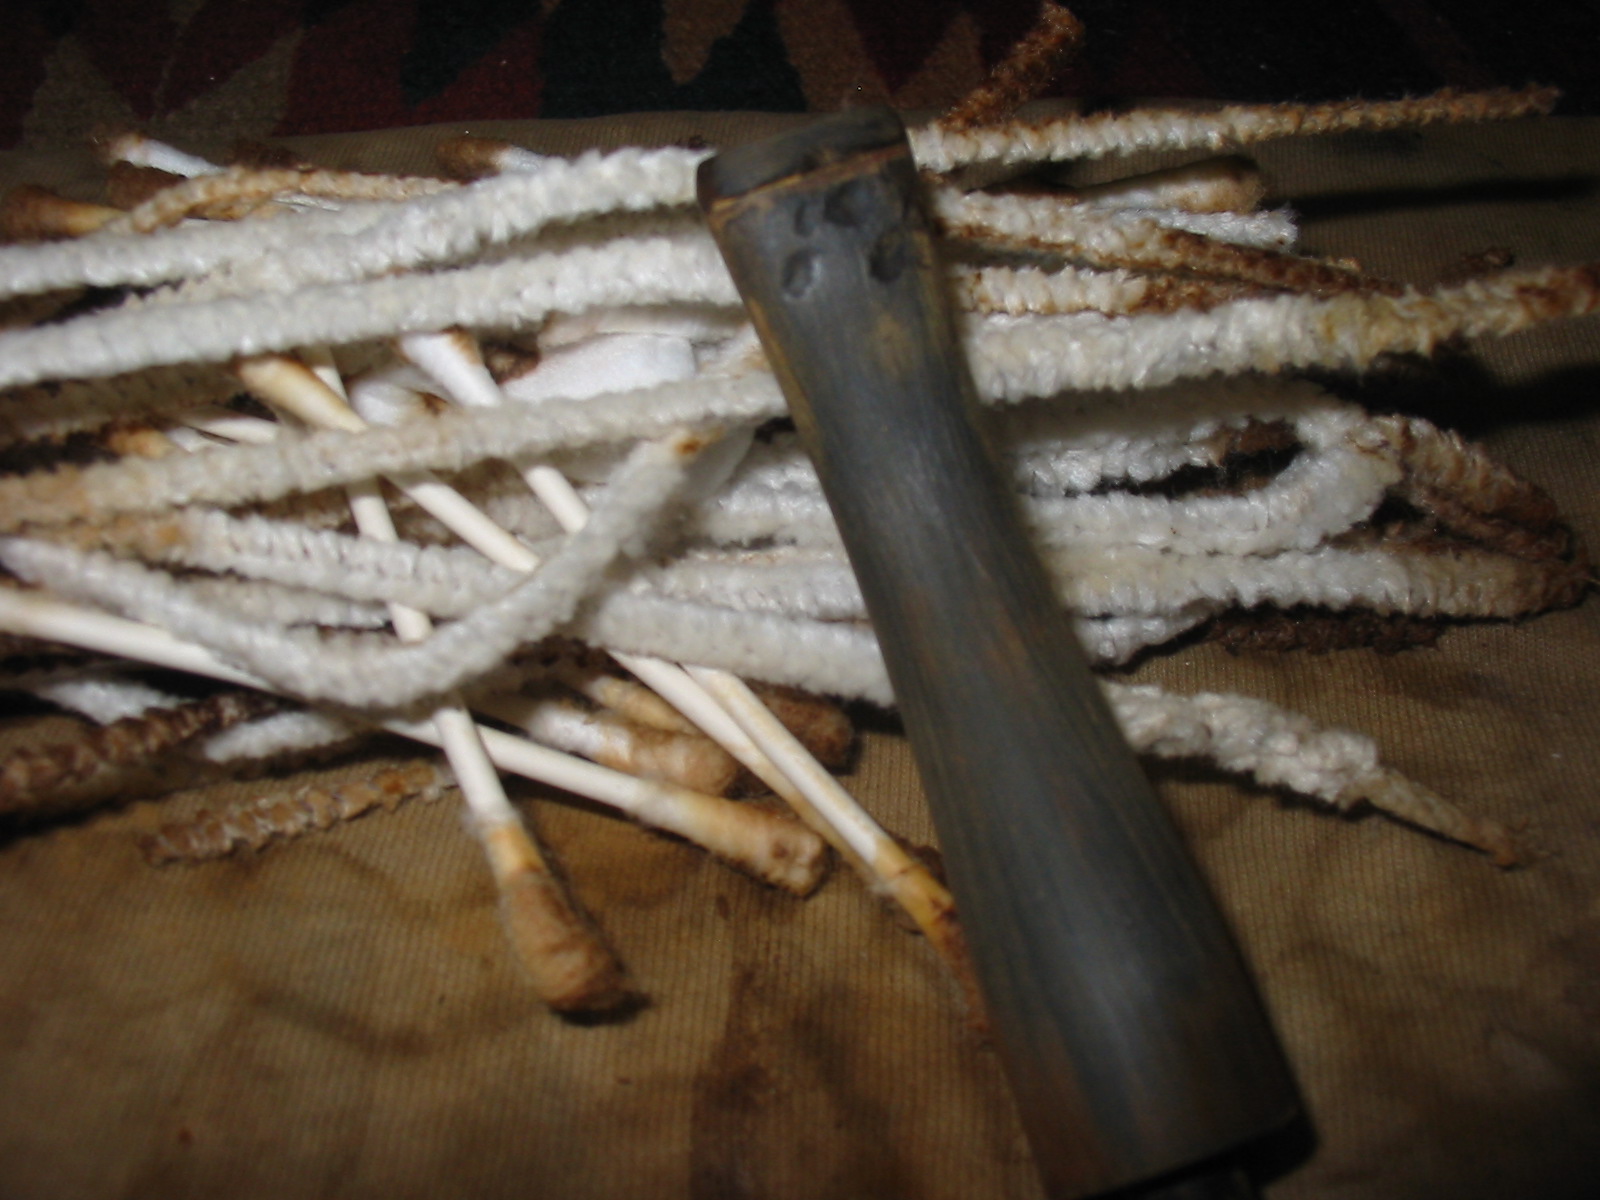
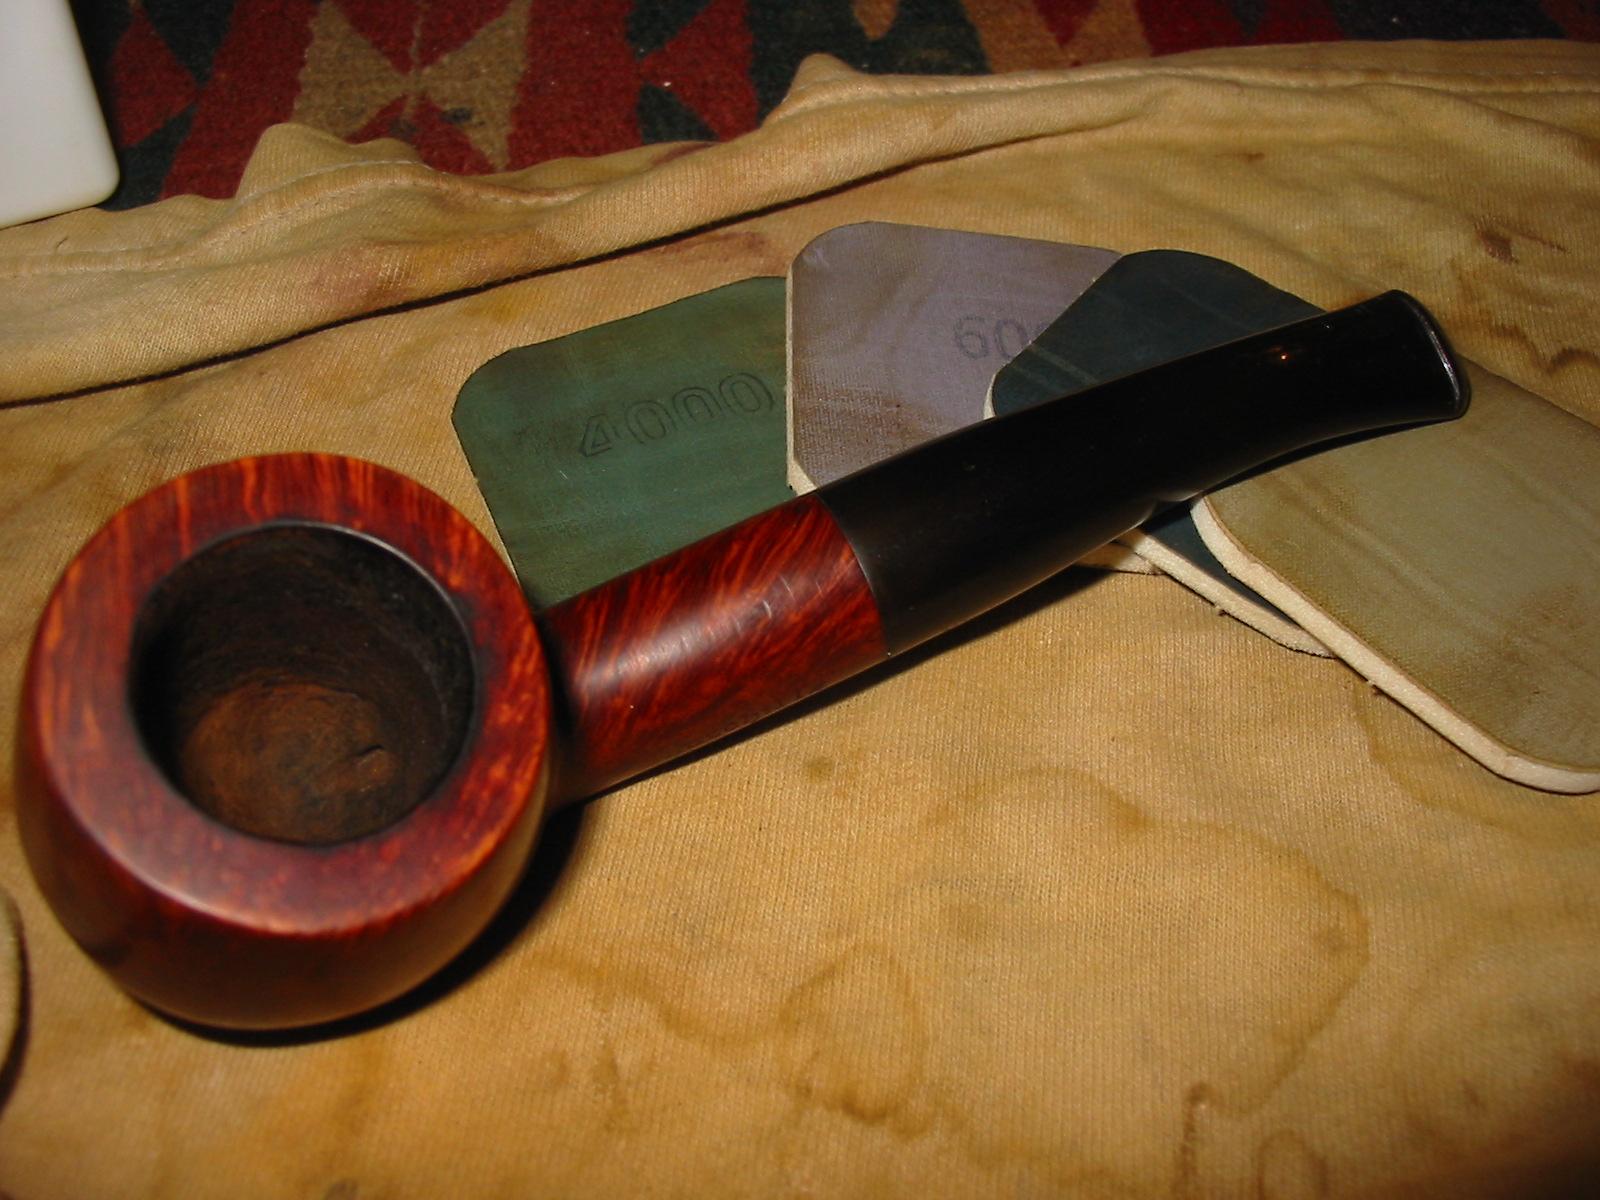
When I returned in the evening, the patches were dry and the pipe was ready to be worked on. I reamed the bowl with the PipNet reamer. On this particular pipe the bowl was conical so it took three different cutting heads on the T handle to ream the bowl to the bottom. With down I cleaned the bowl, shank and stem with Everclear, pipe cleaners and cotton swabs. I wanted the pipe cleaned out before I worked on the exterior.
GFB11

GFB15

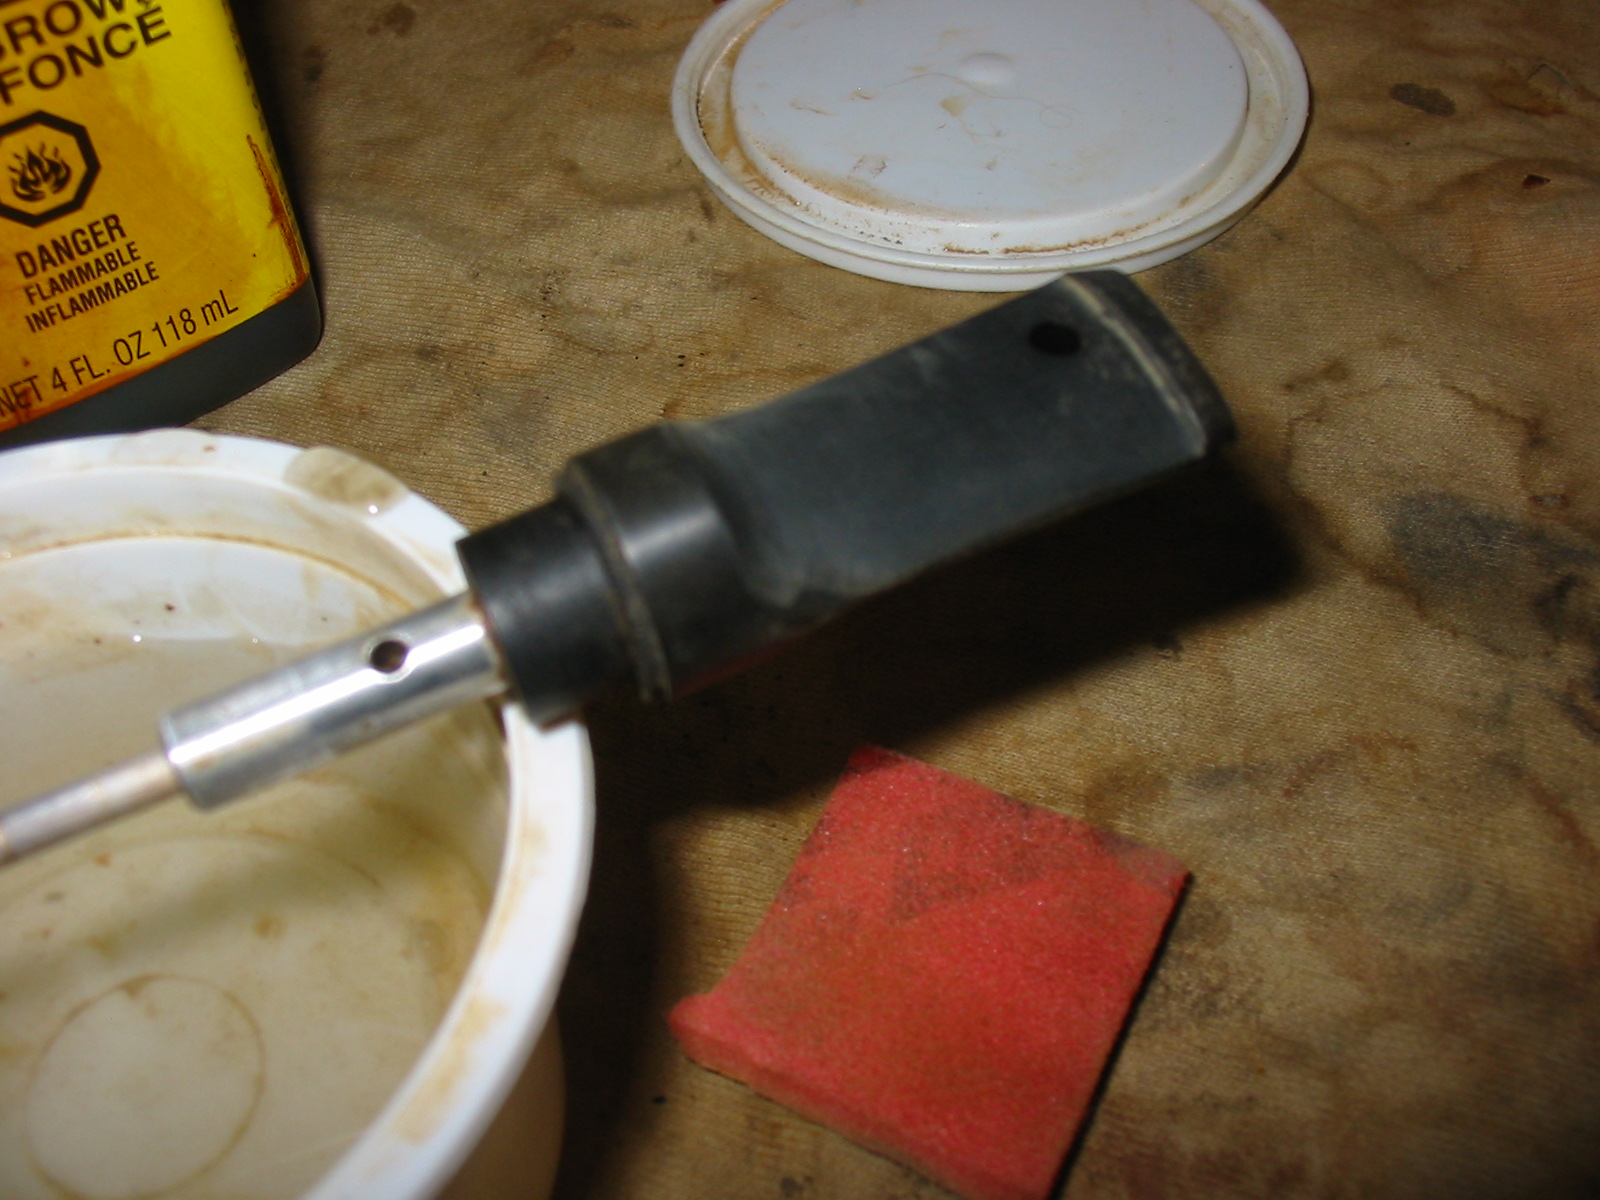
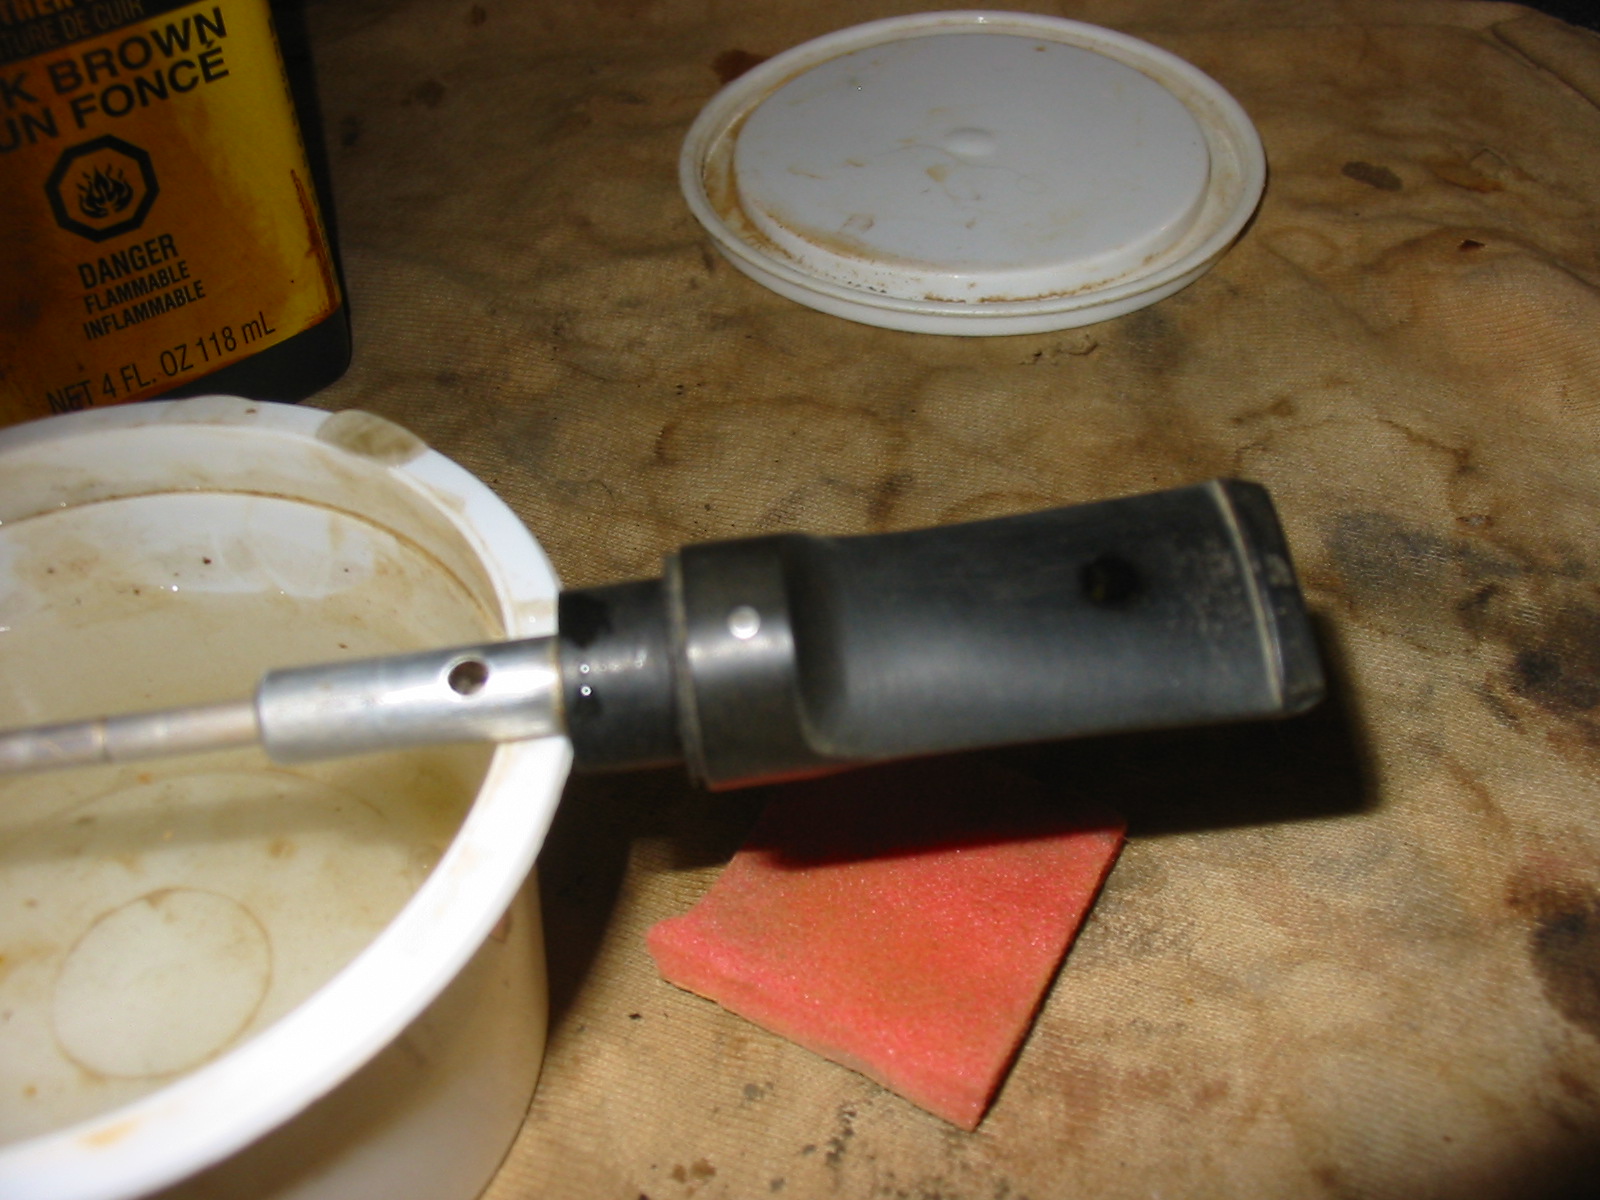
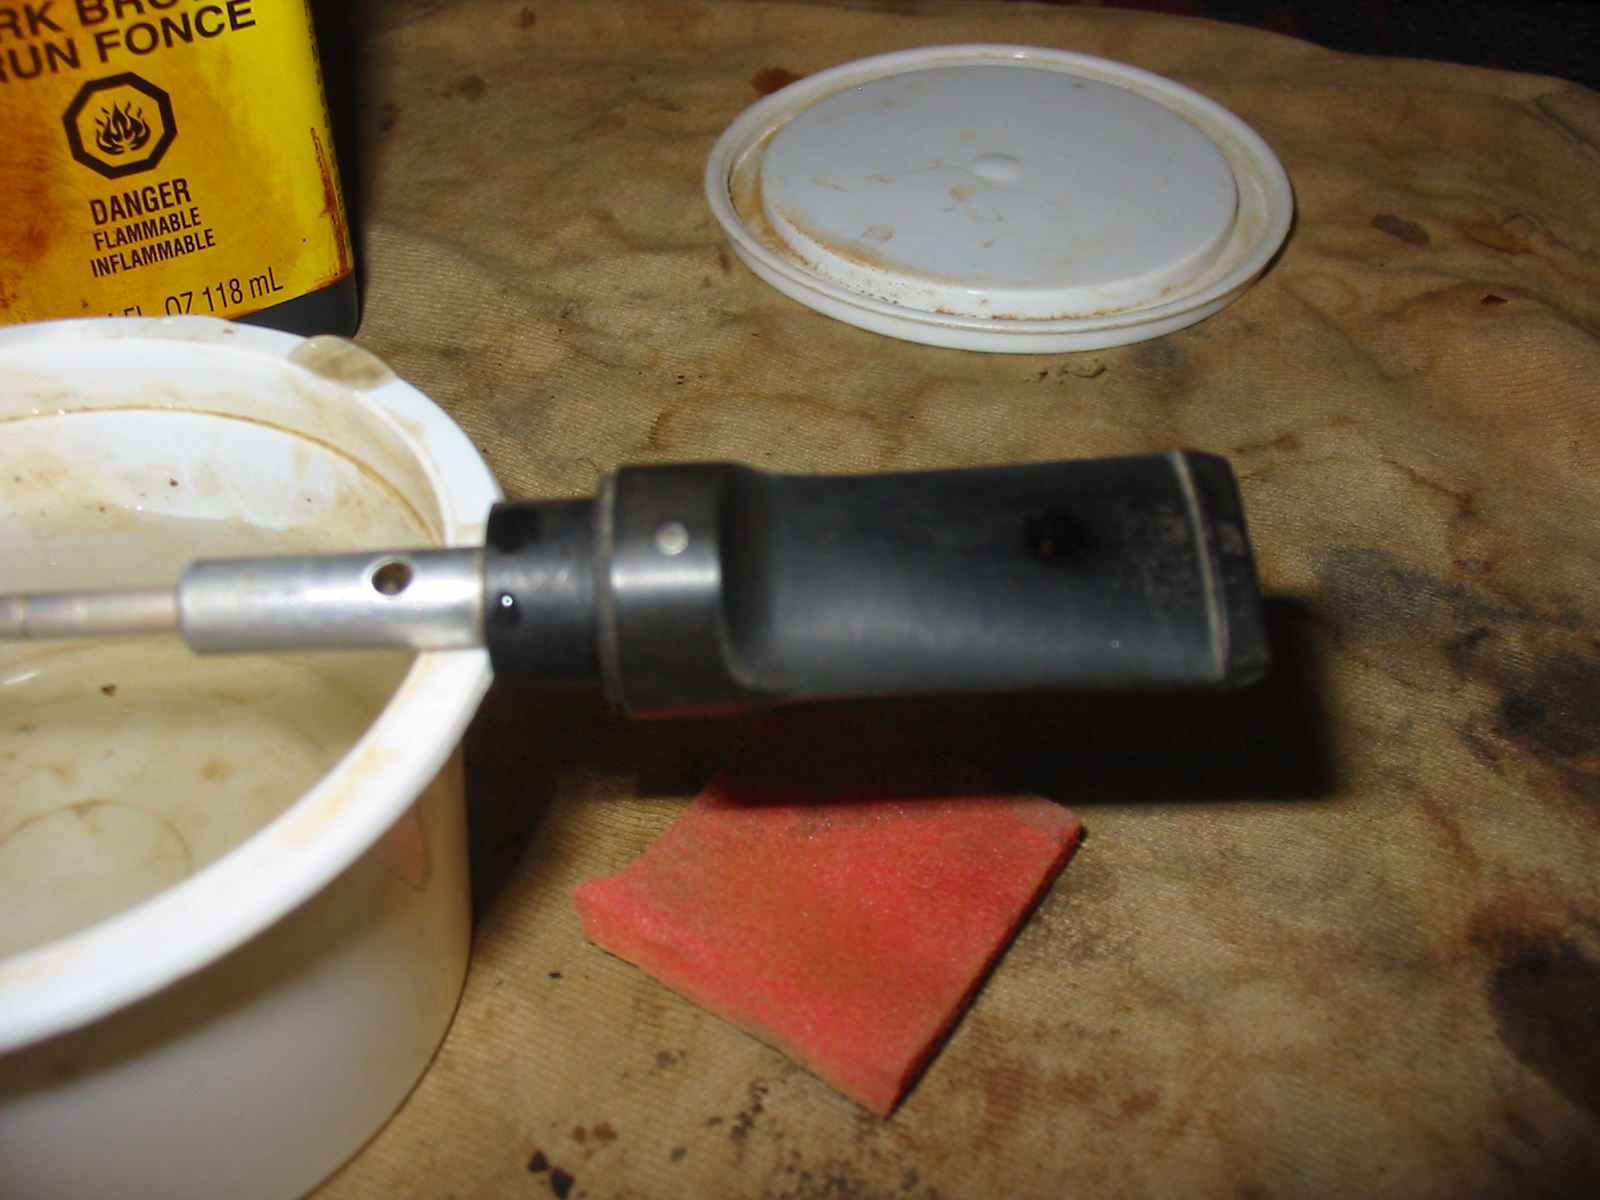
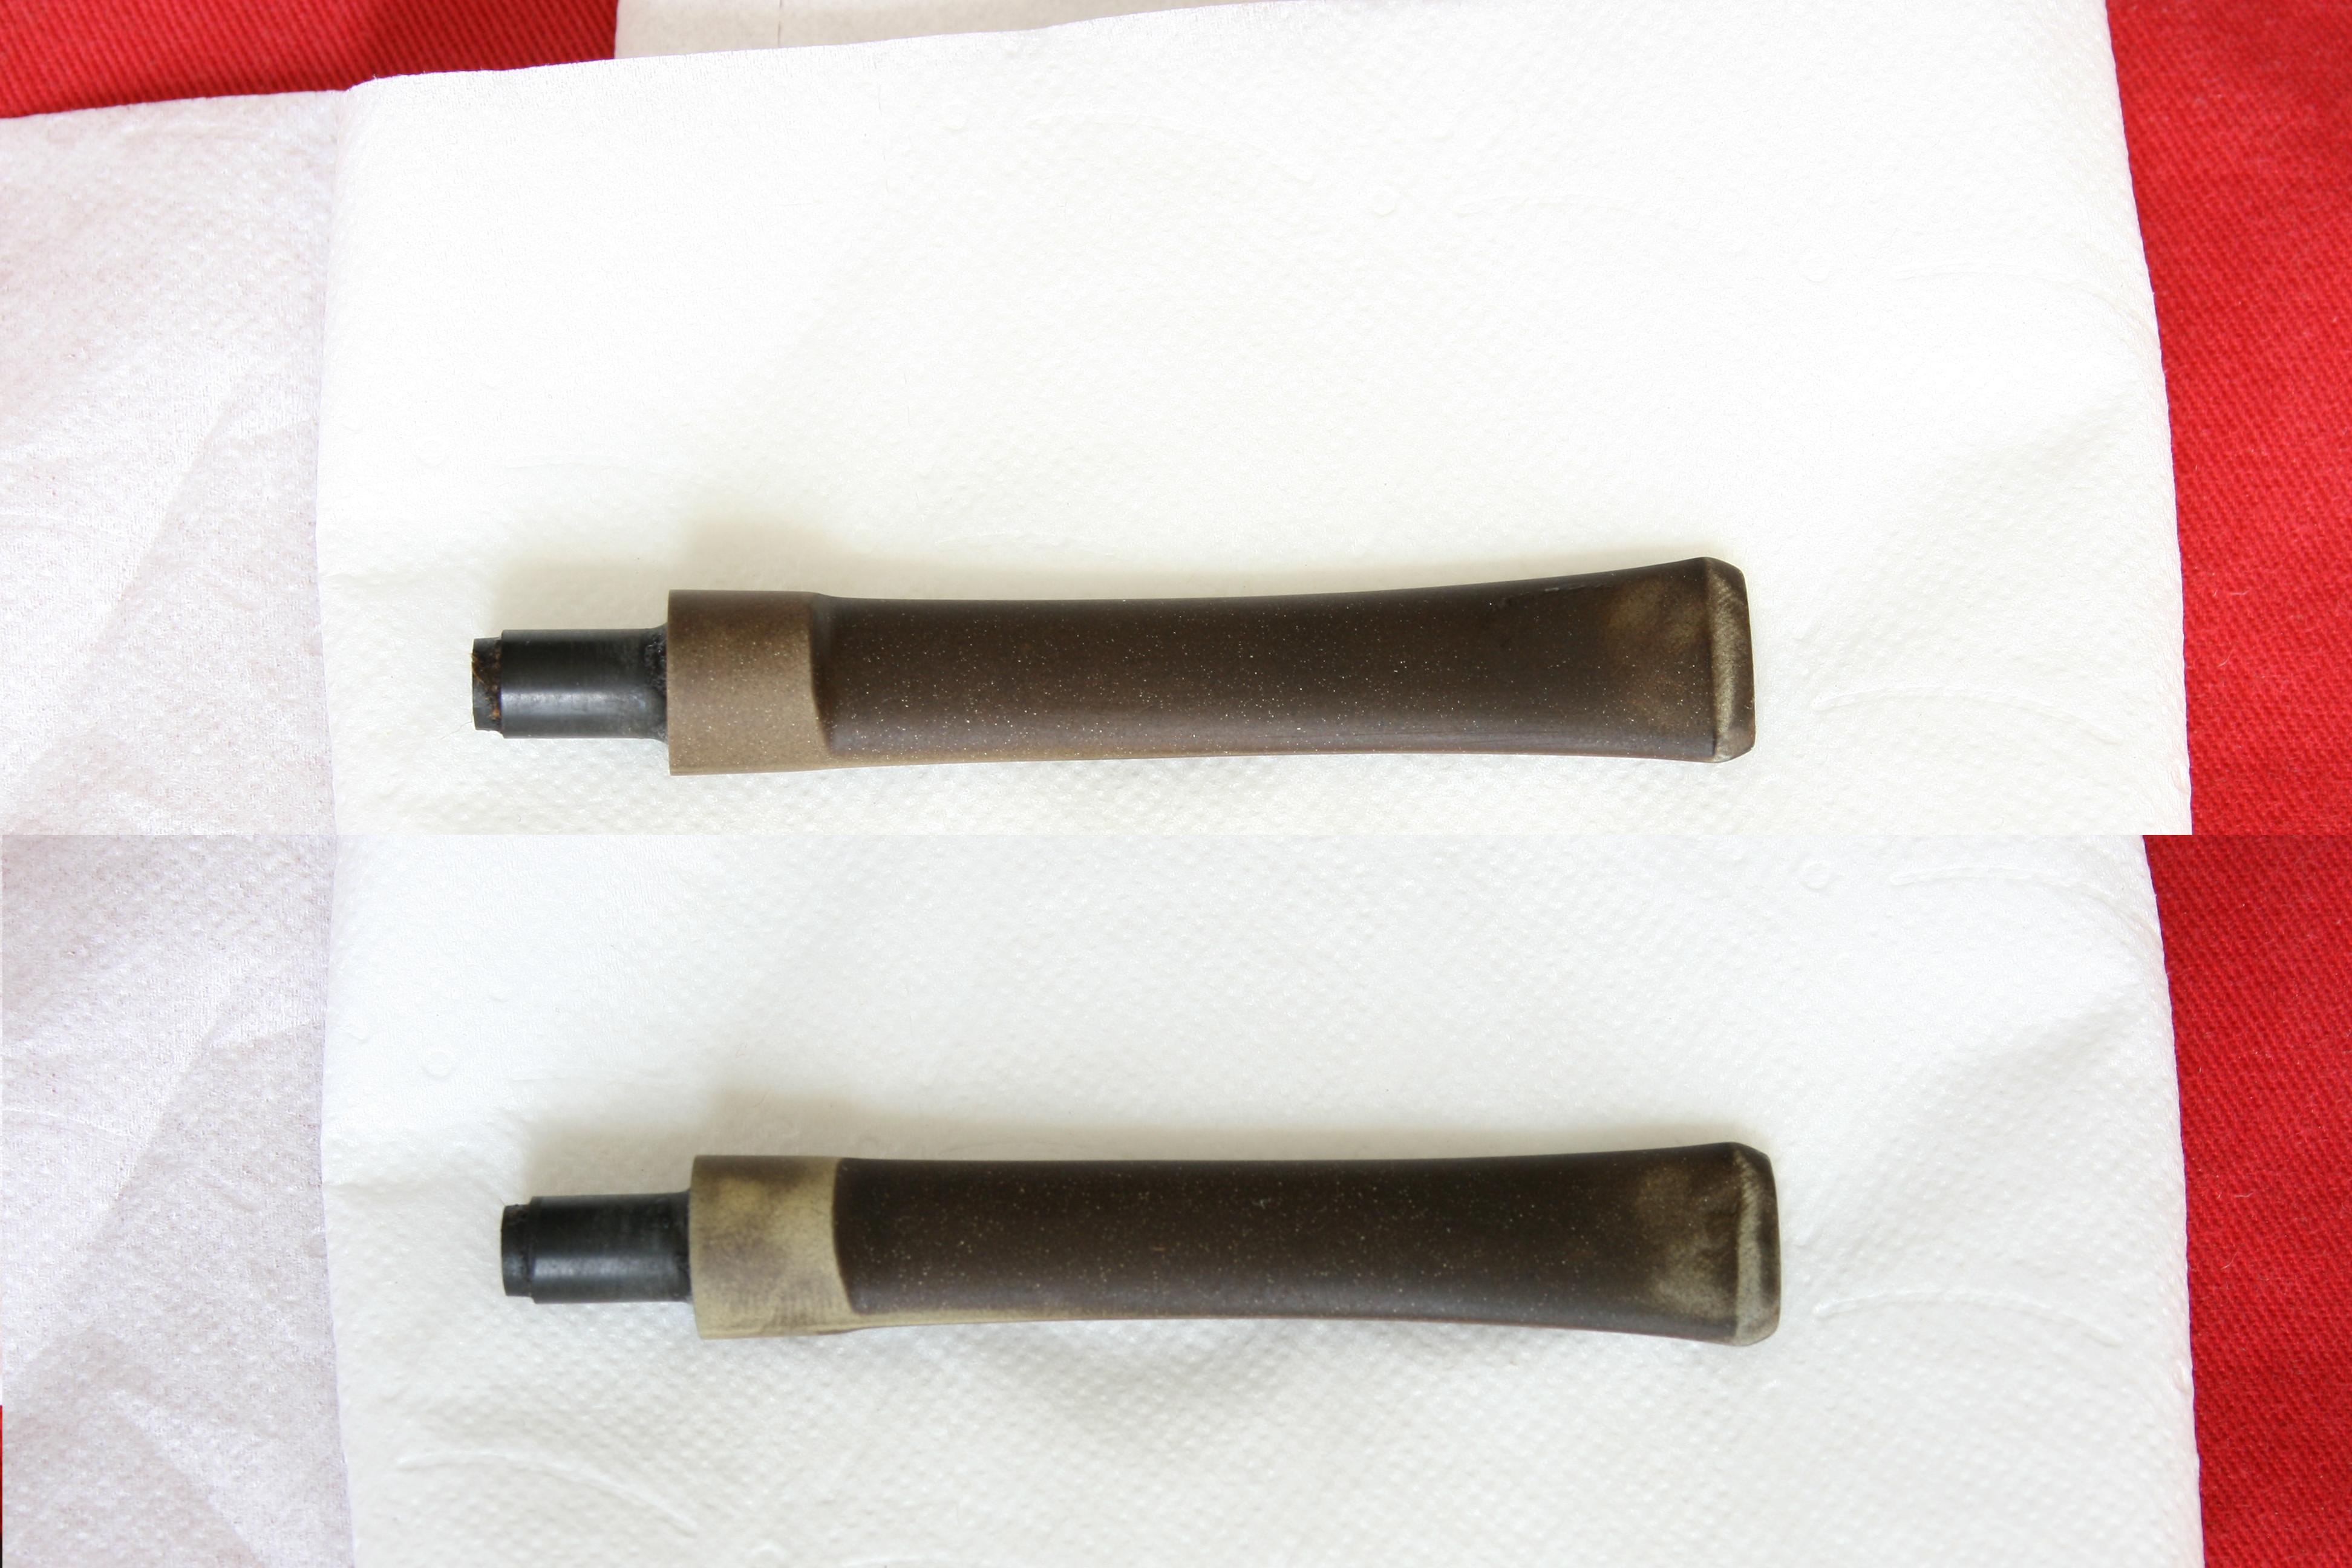
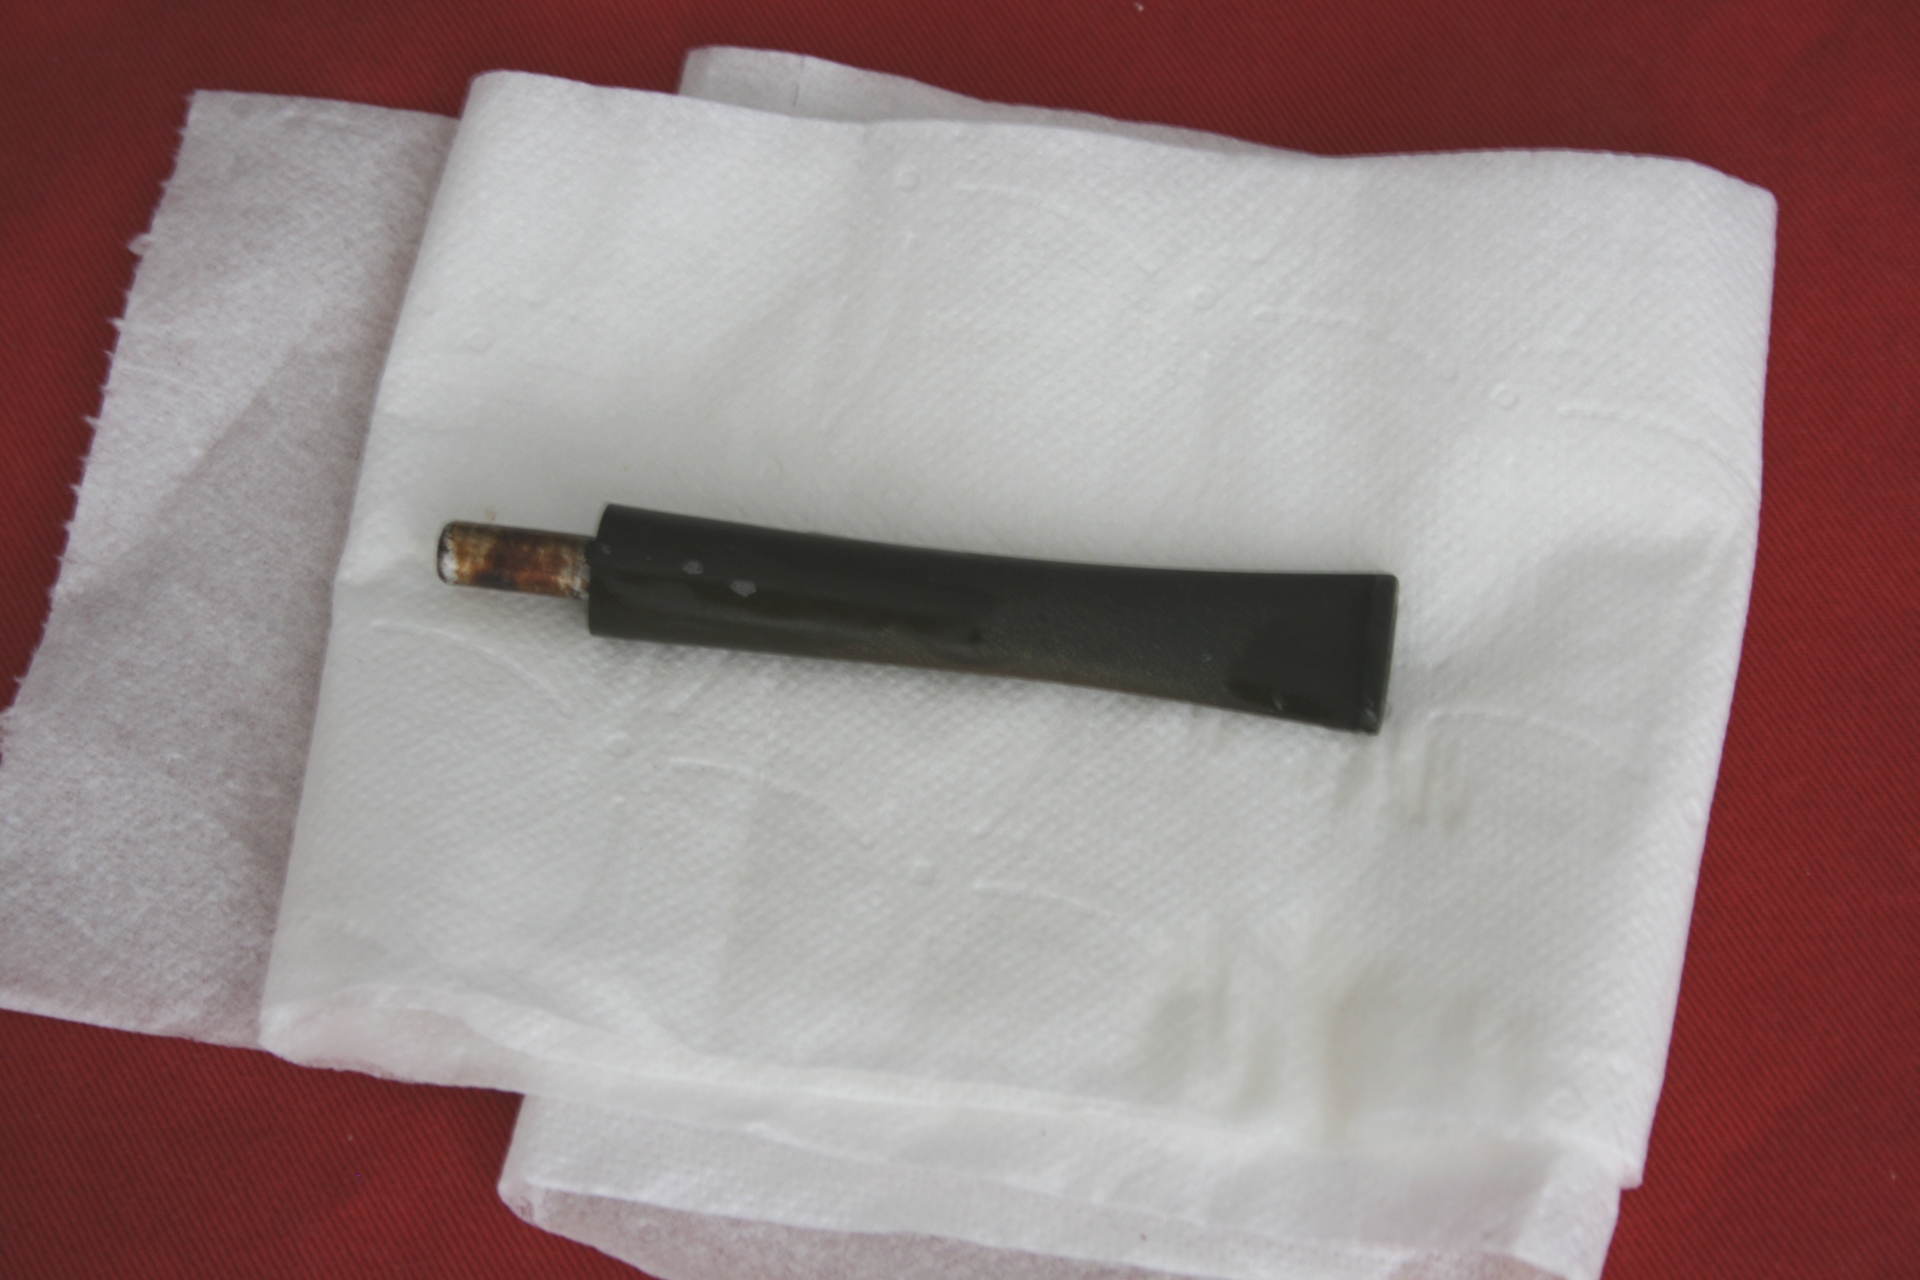
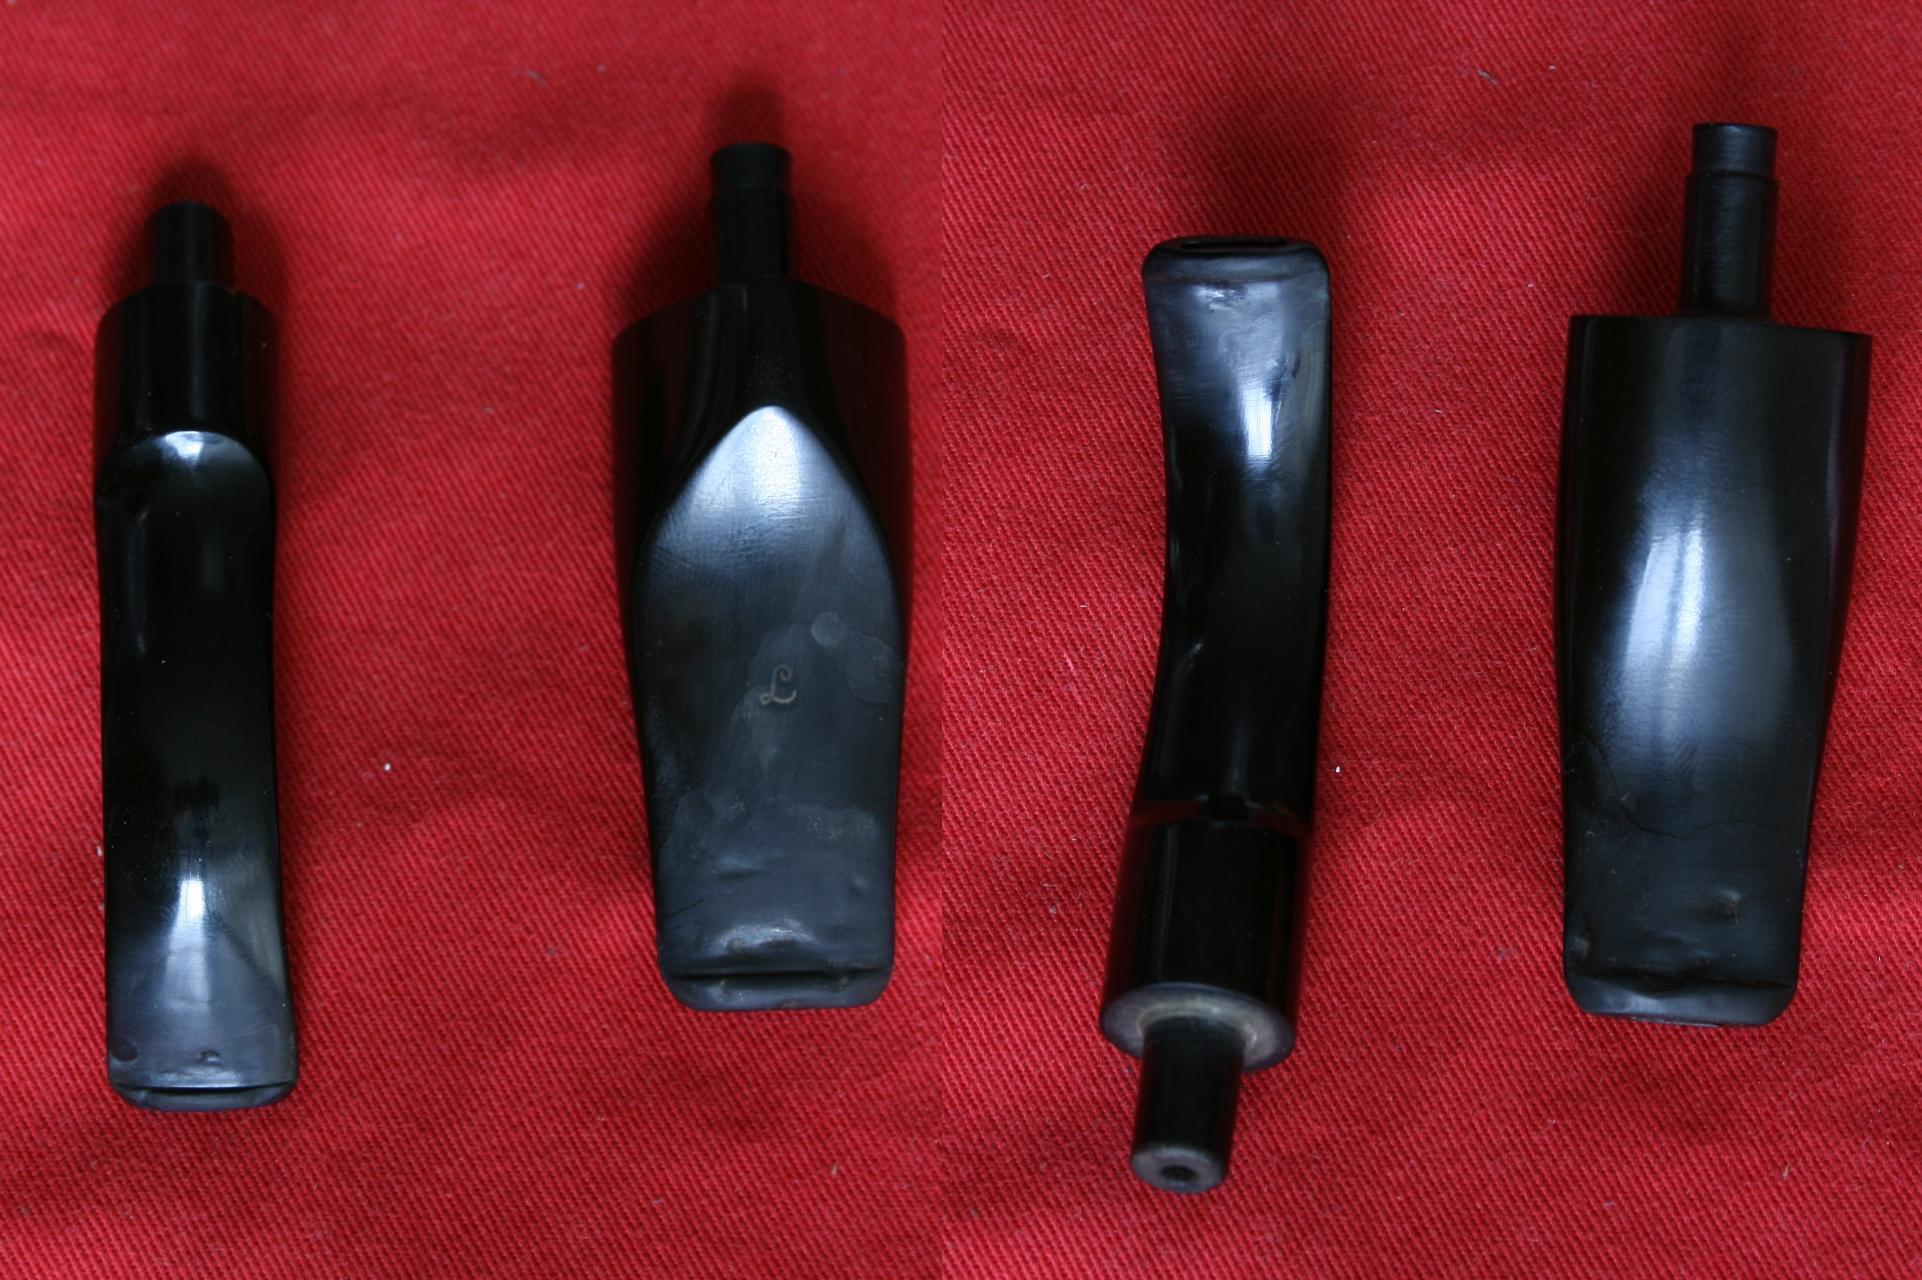
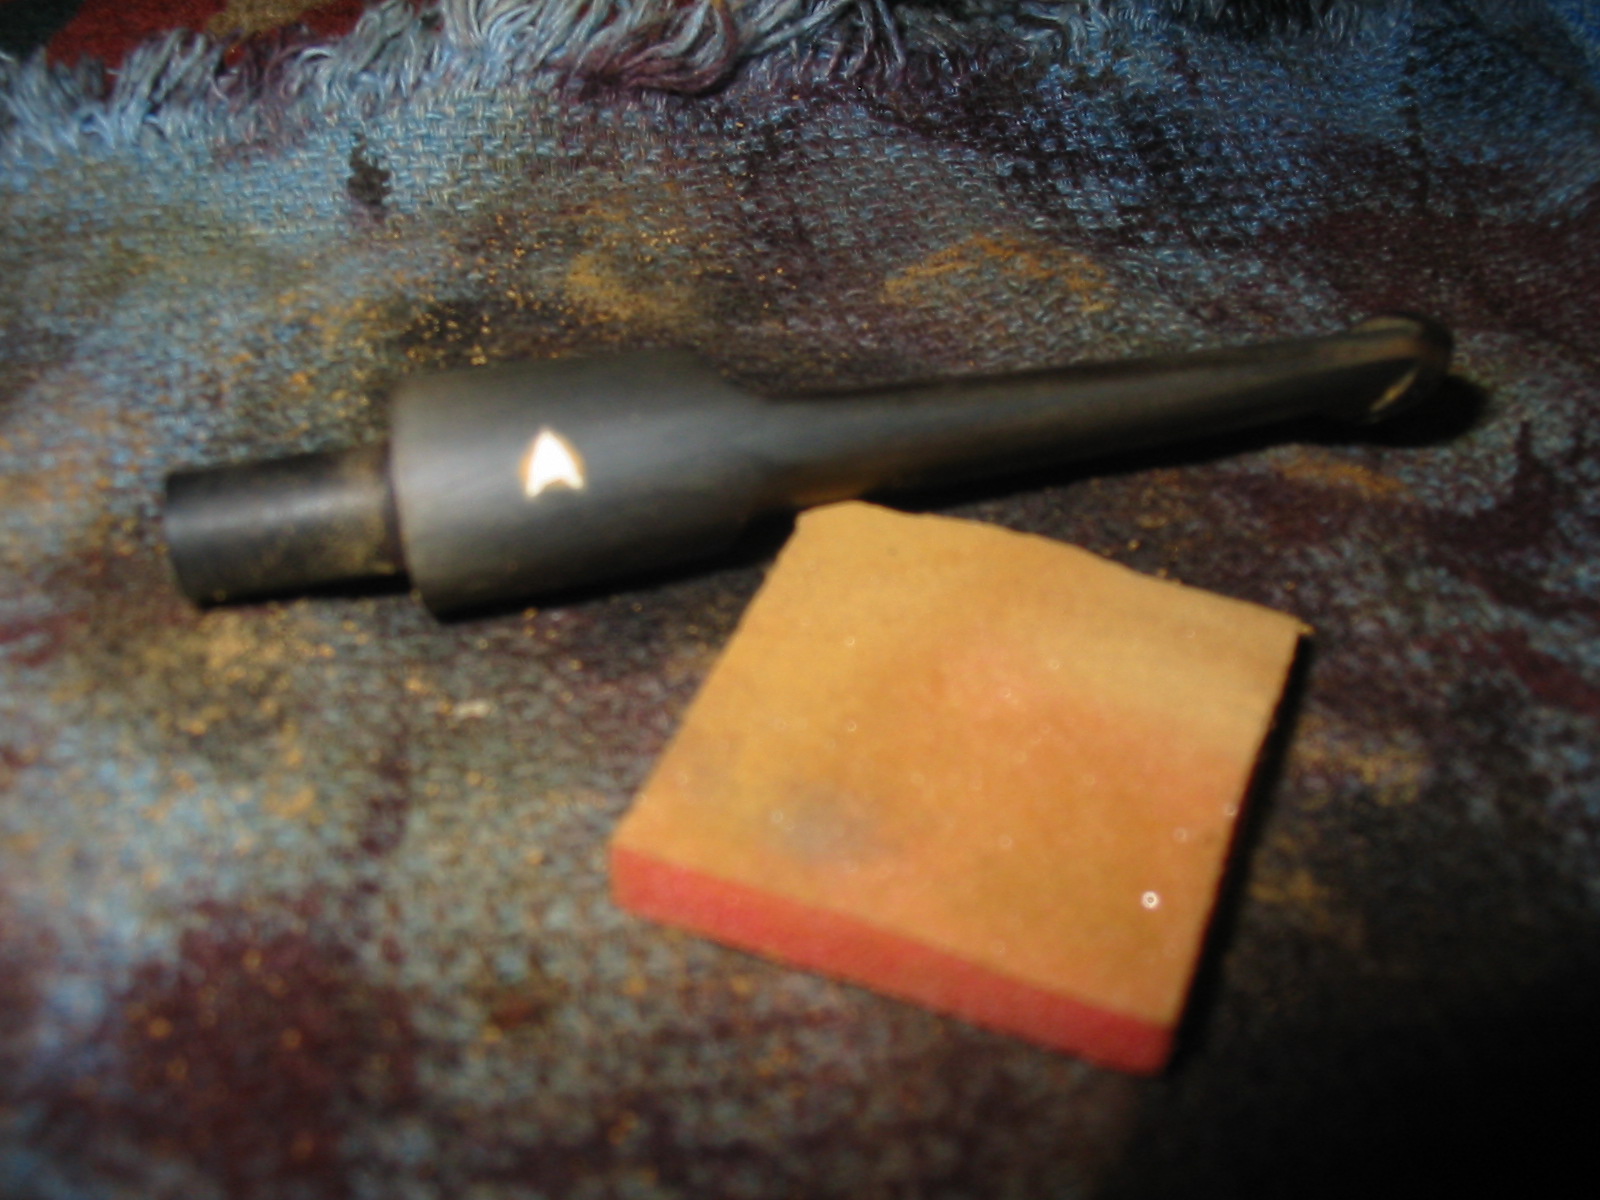
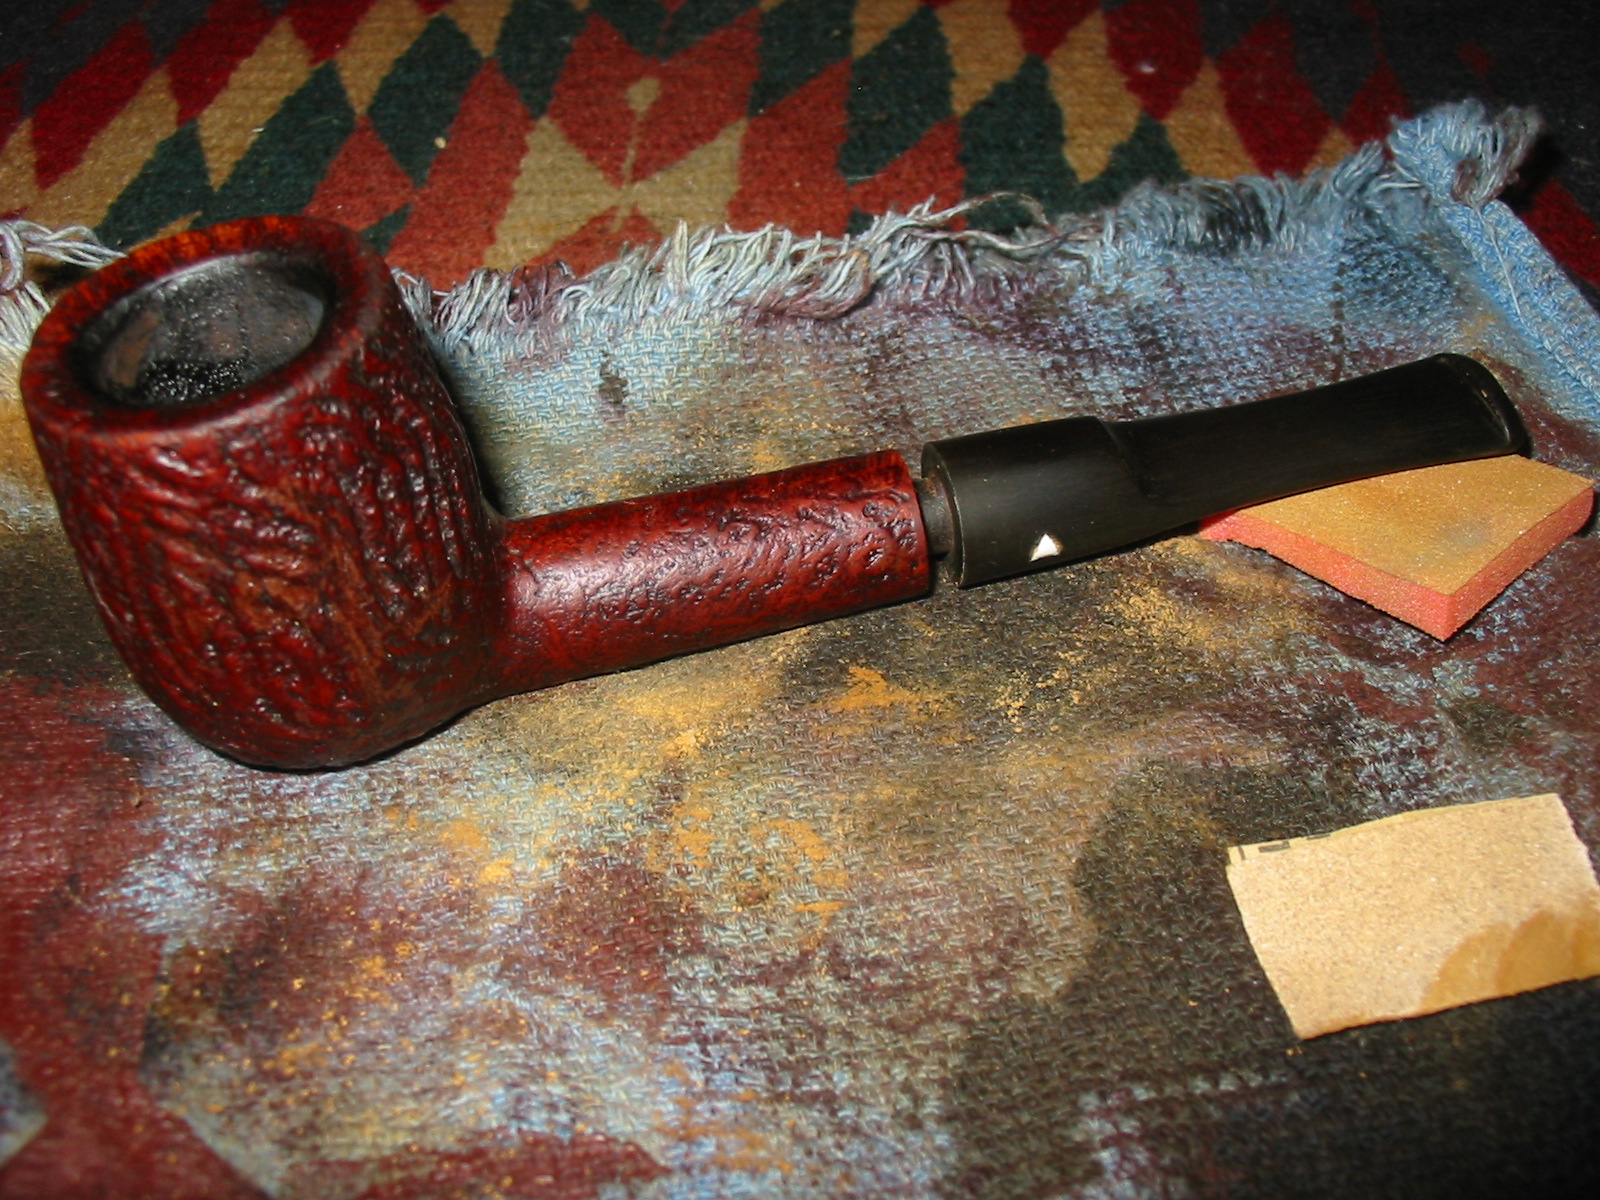
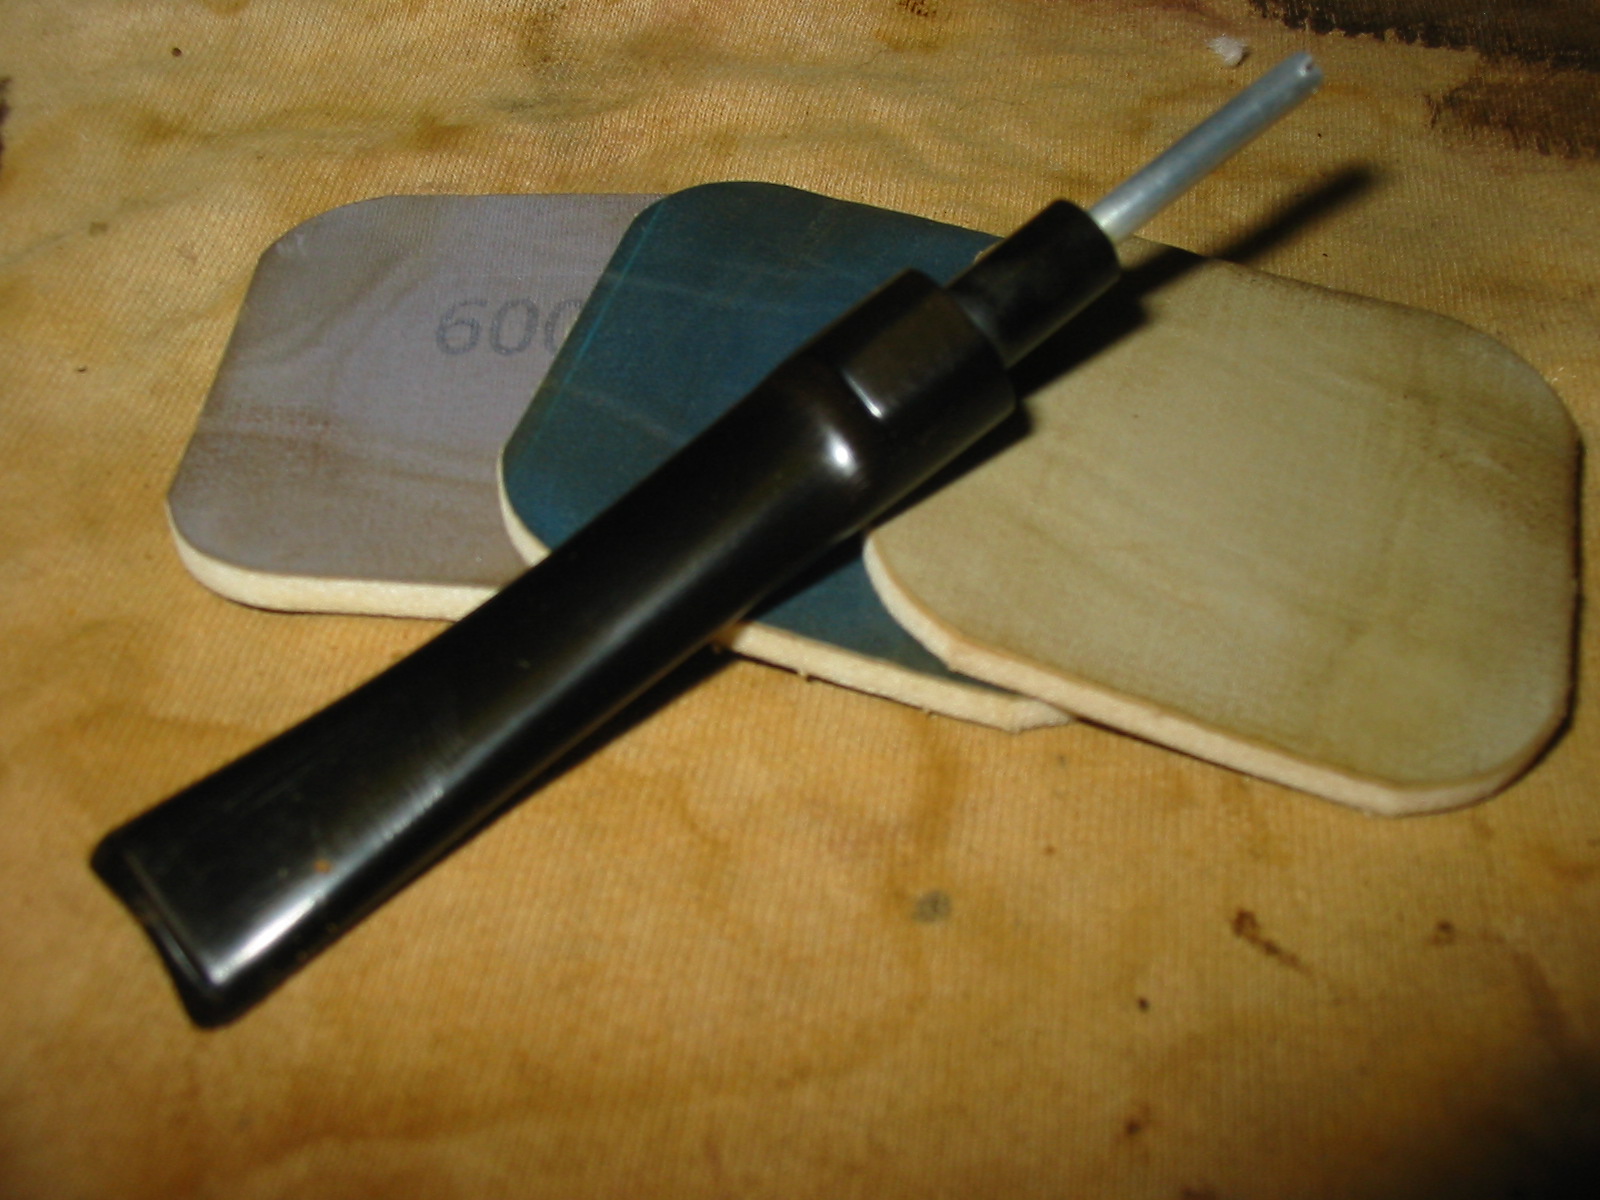
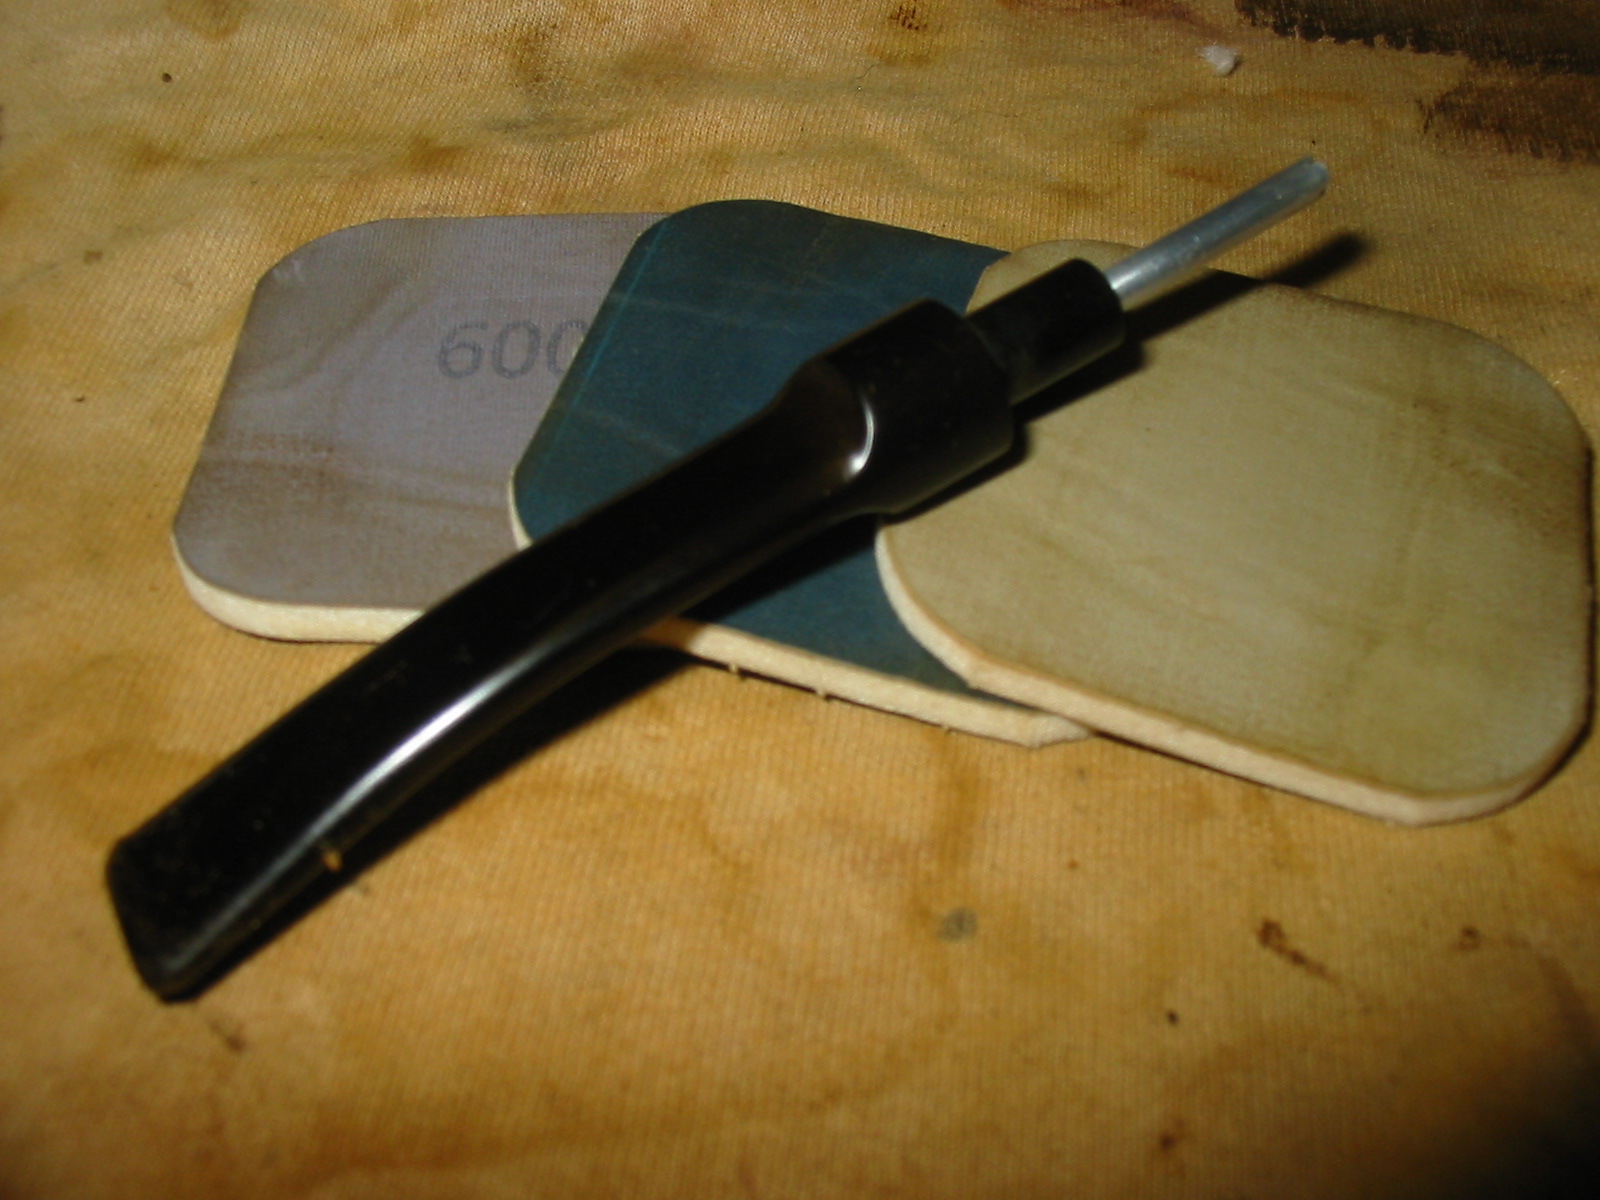
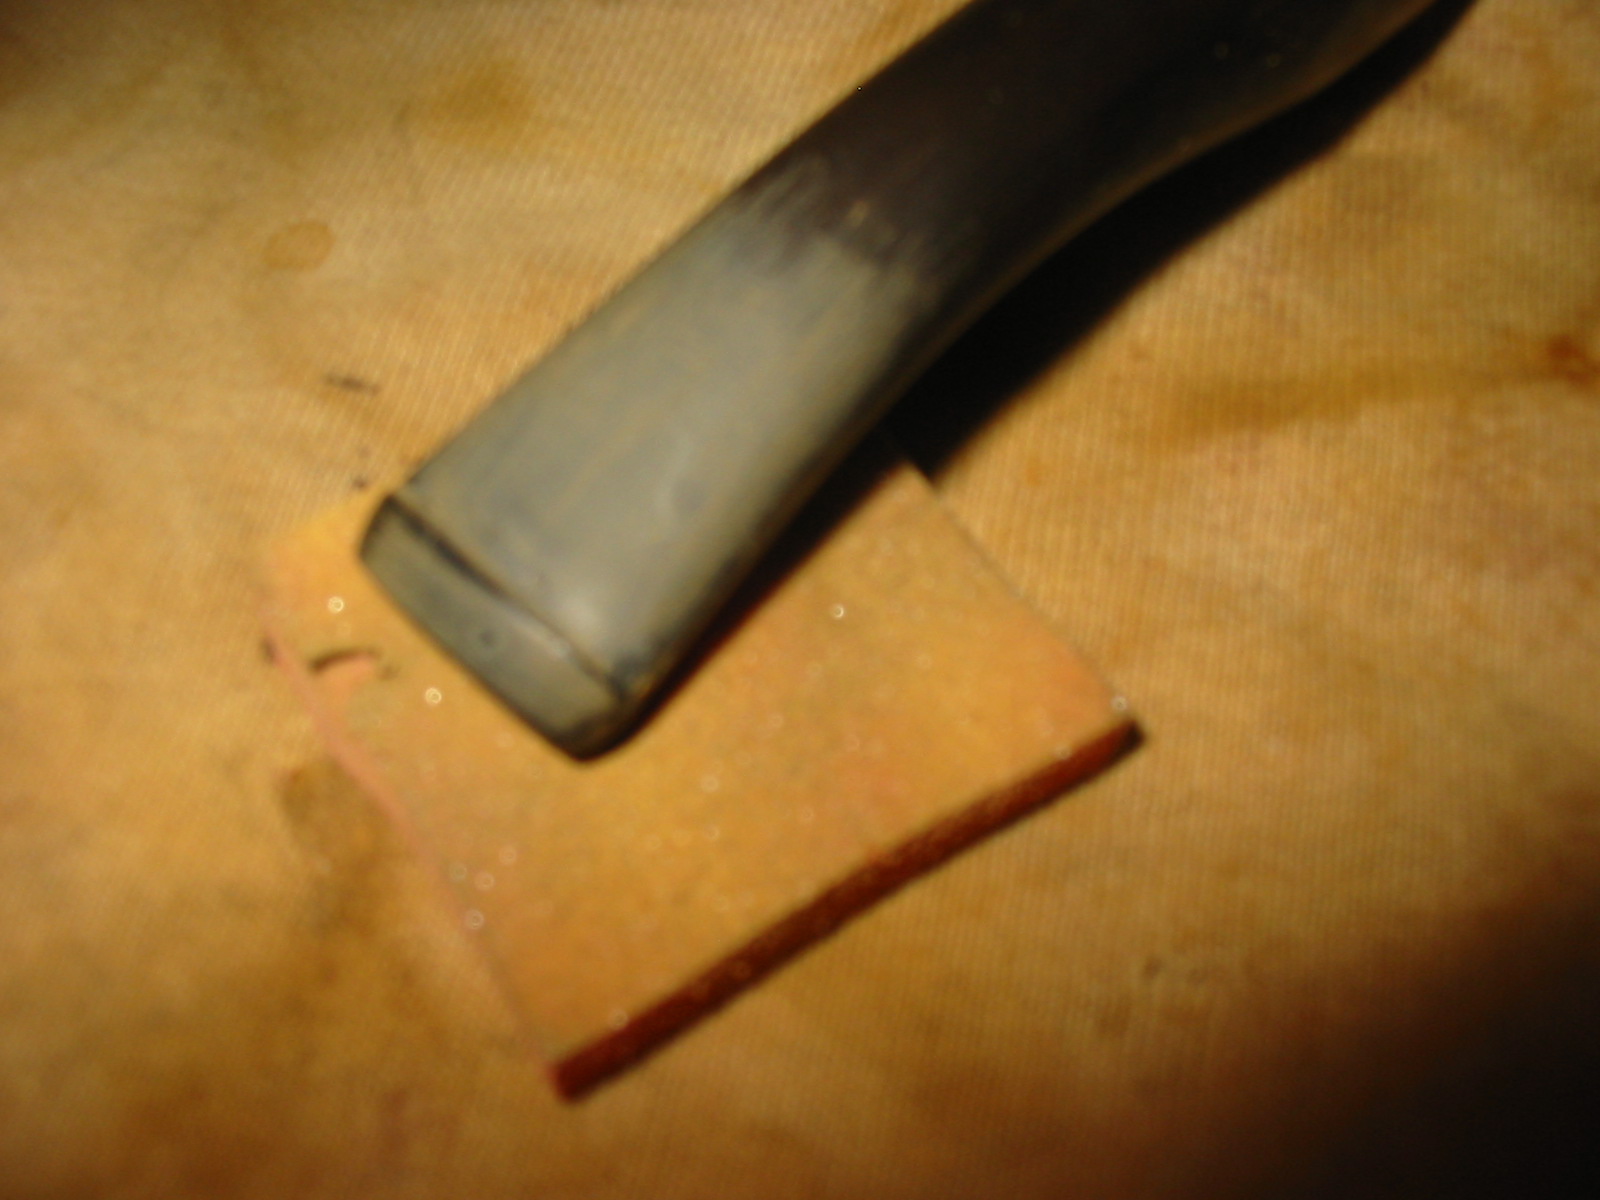
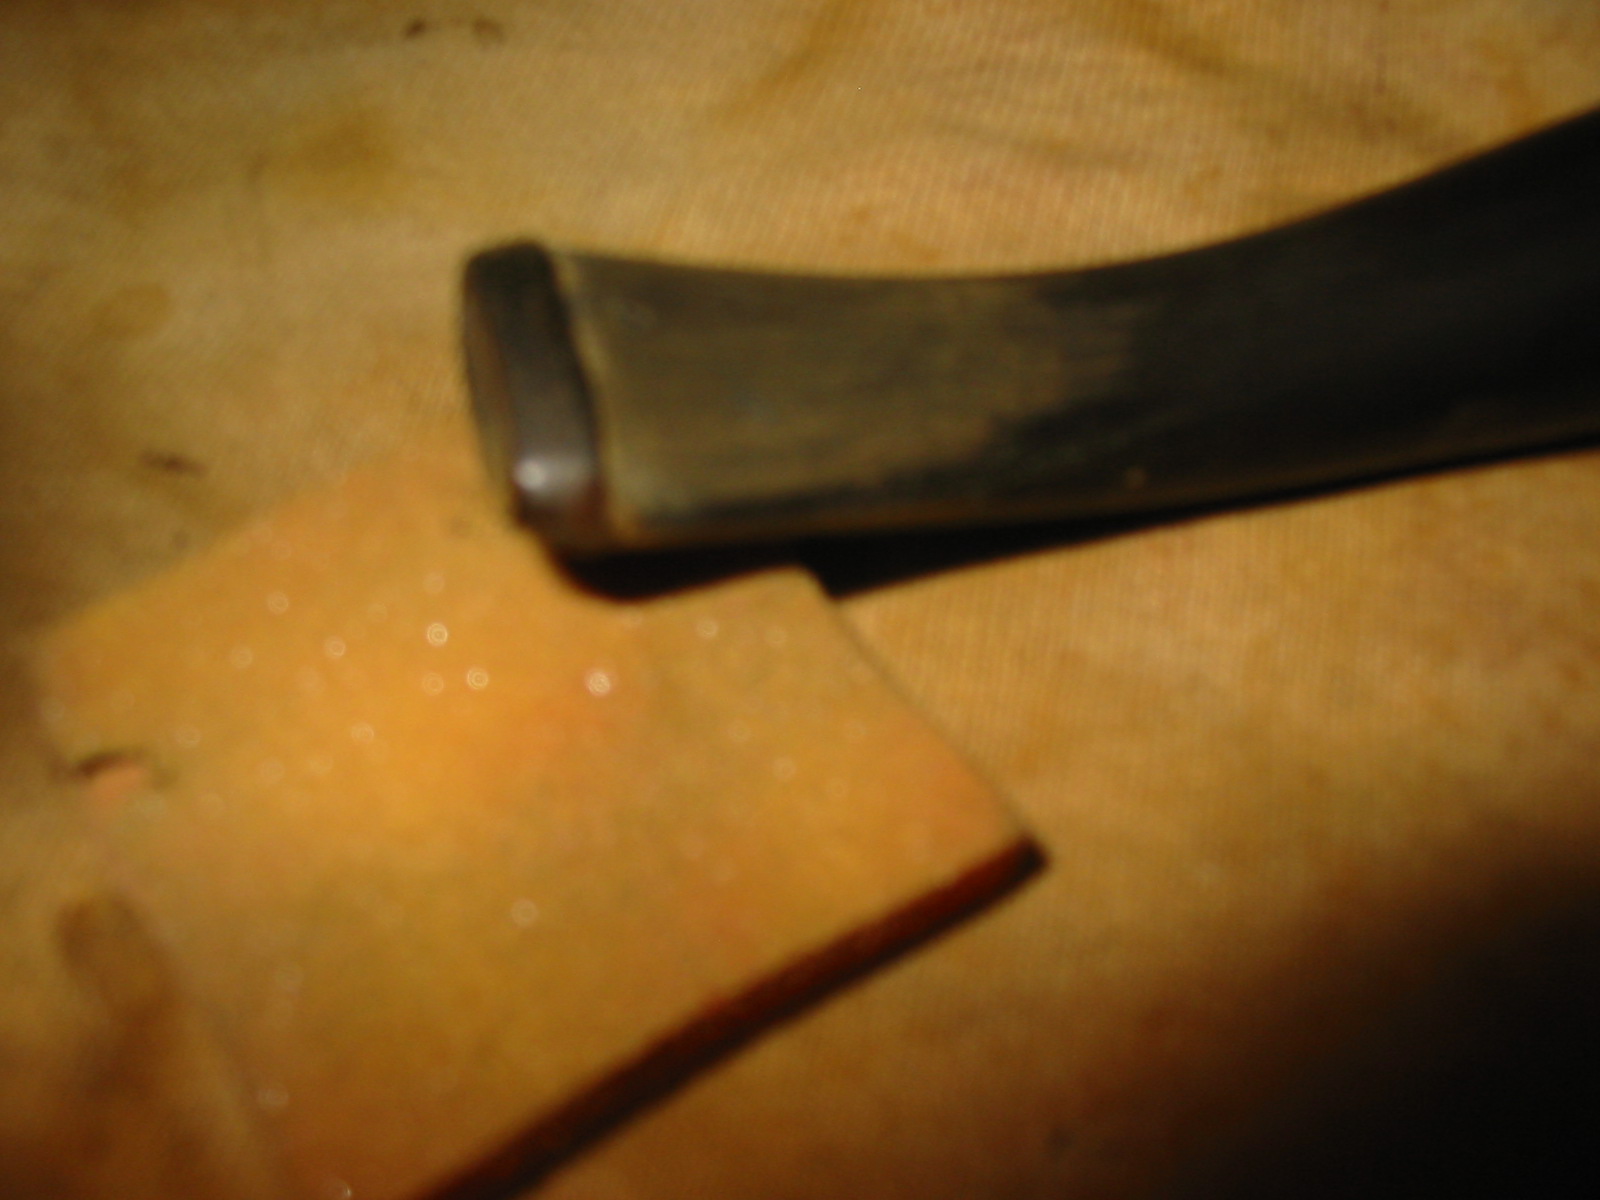
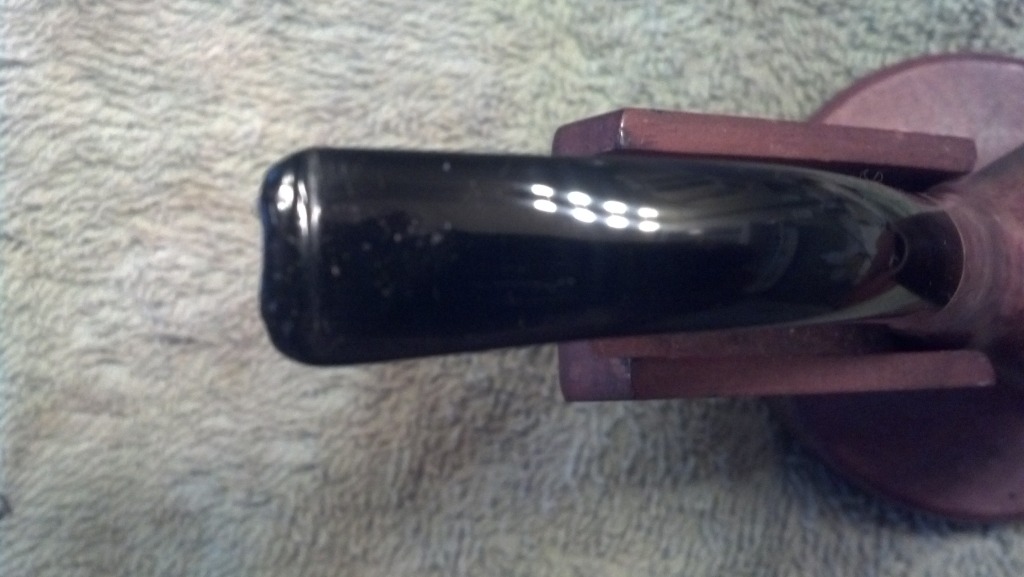
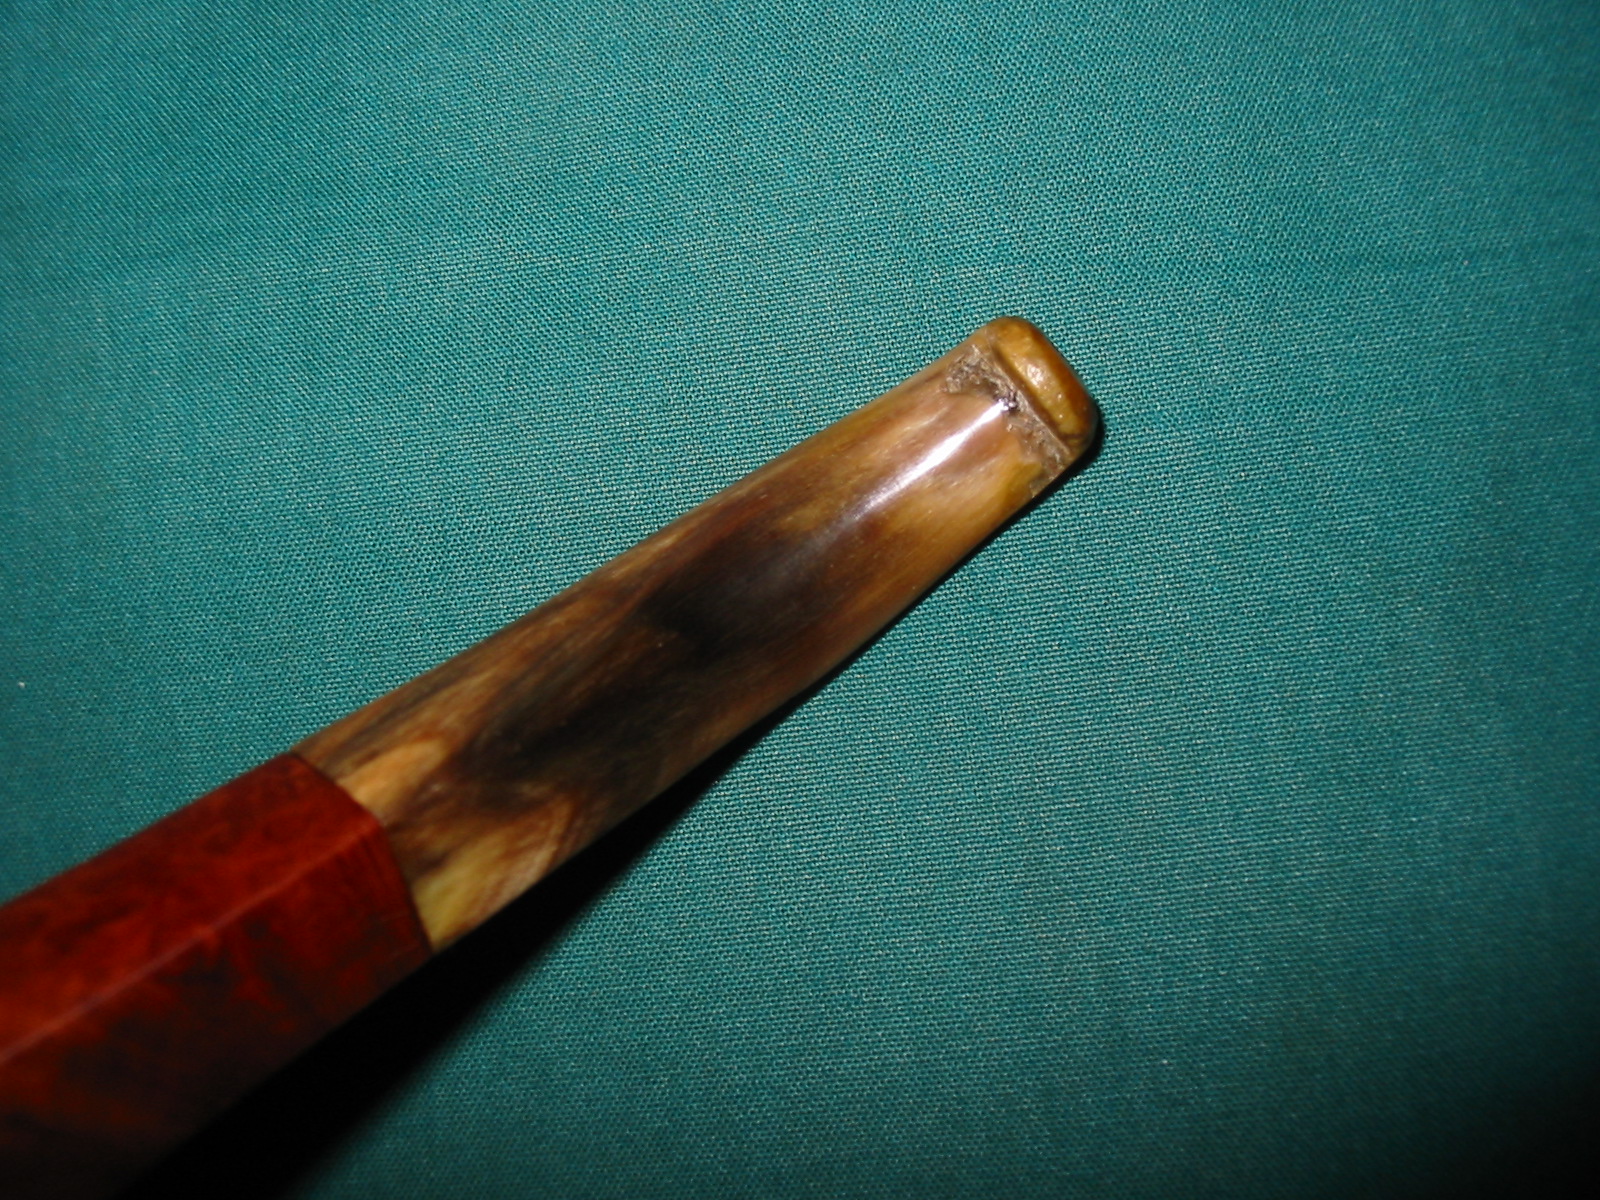
The next two photos show the stem after the patches had hardened. Though the photos are a bit blurry, the shininess of the spots where the superglue patches were applied is very clearly visible. Those areas would need to be sanded smooth to match the surface of the surrounding horn.
GFB12

GFB13

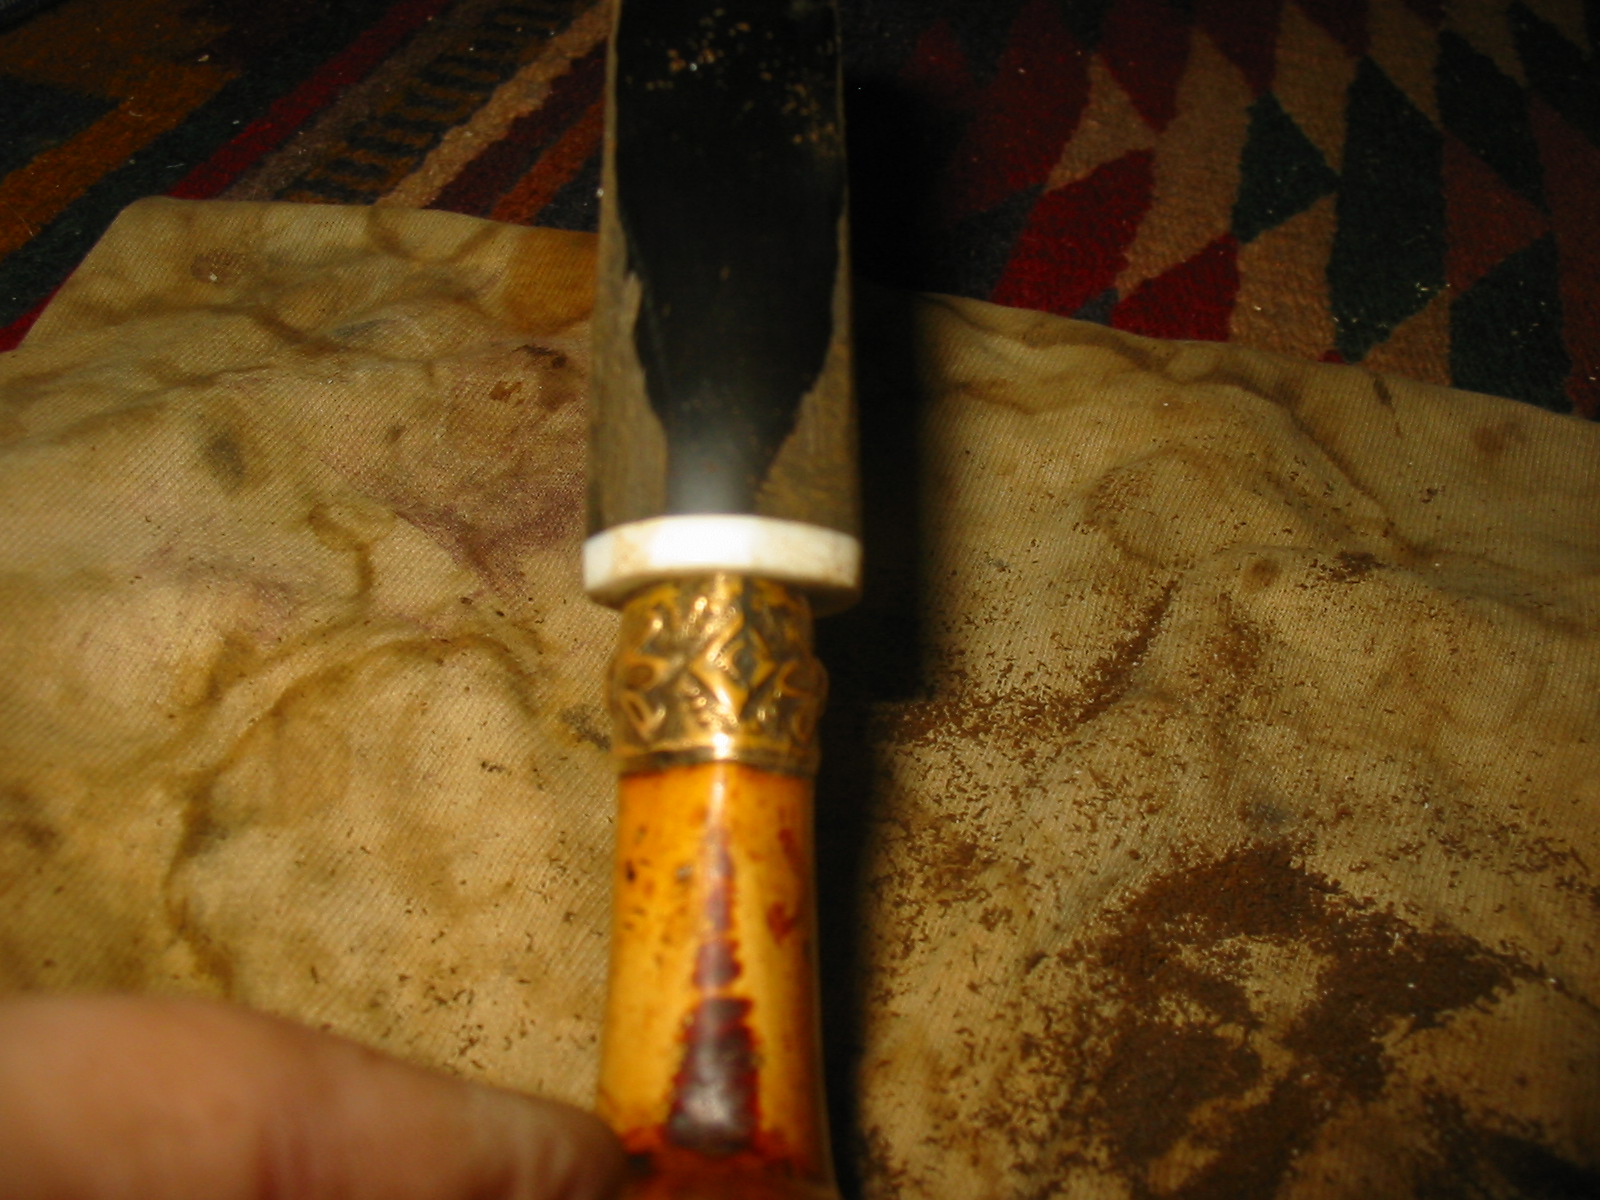
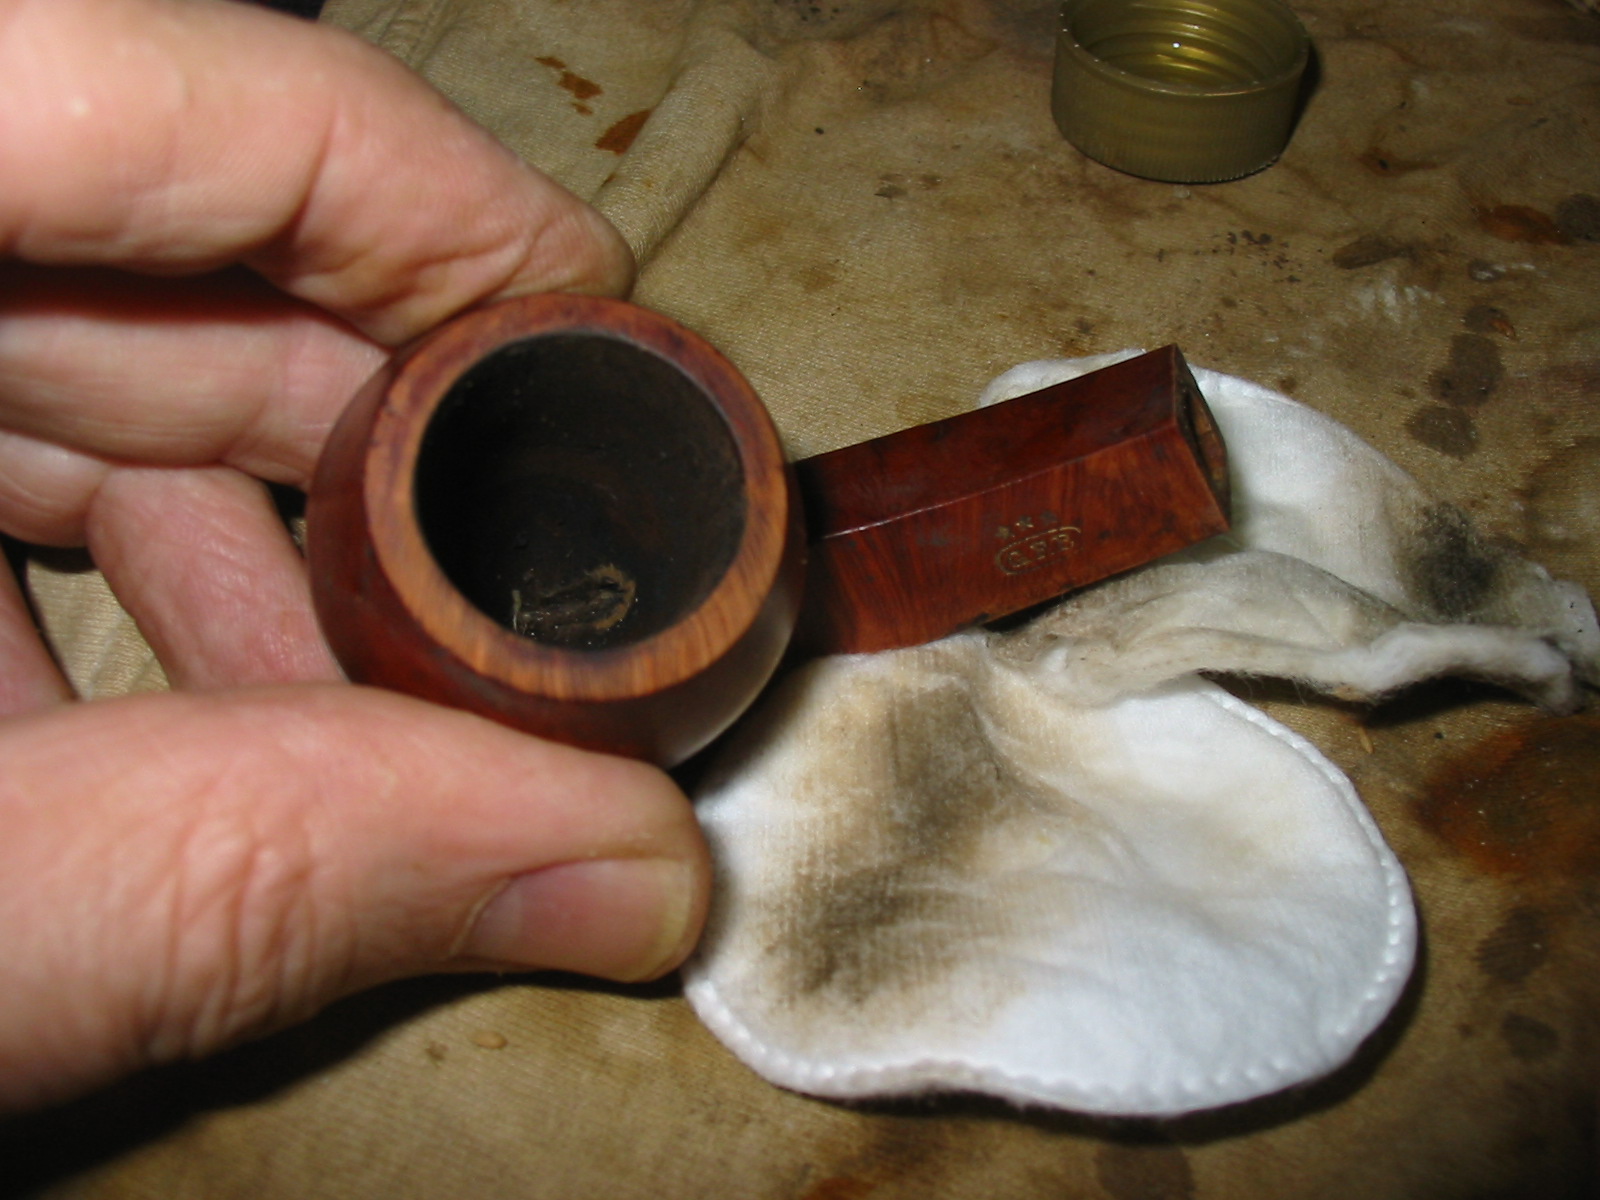
I sanded the patch on the shank of the pipe with 220 grit sandpaper and also medium grit sanding sponge to remove the excess glue from the patch. Then I wiped the bowl down with Everclear on a cotton pad. I decided not to use acetone as the stamping on the shank was filled with a gold paint and was still visible. I did not want to damage that stamping. I carefully worked the Everclear around the stamping so as not to get any in the grooves of the stars and GFB stamp.
GFB14

GFB16

GFB17

GFB18

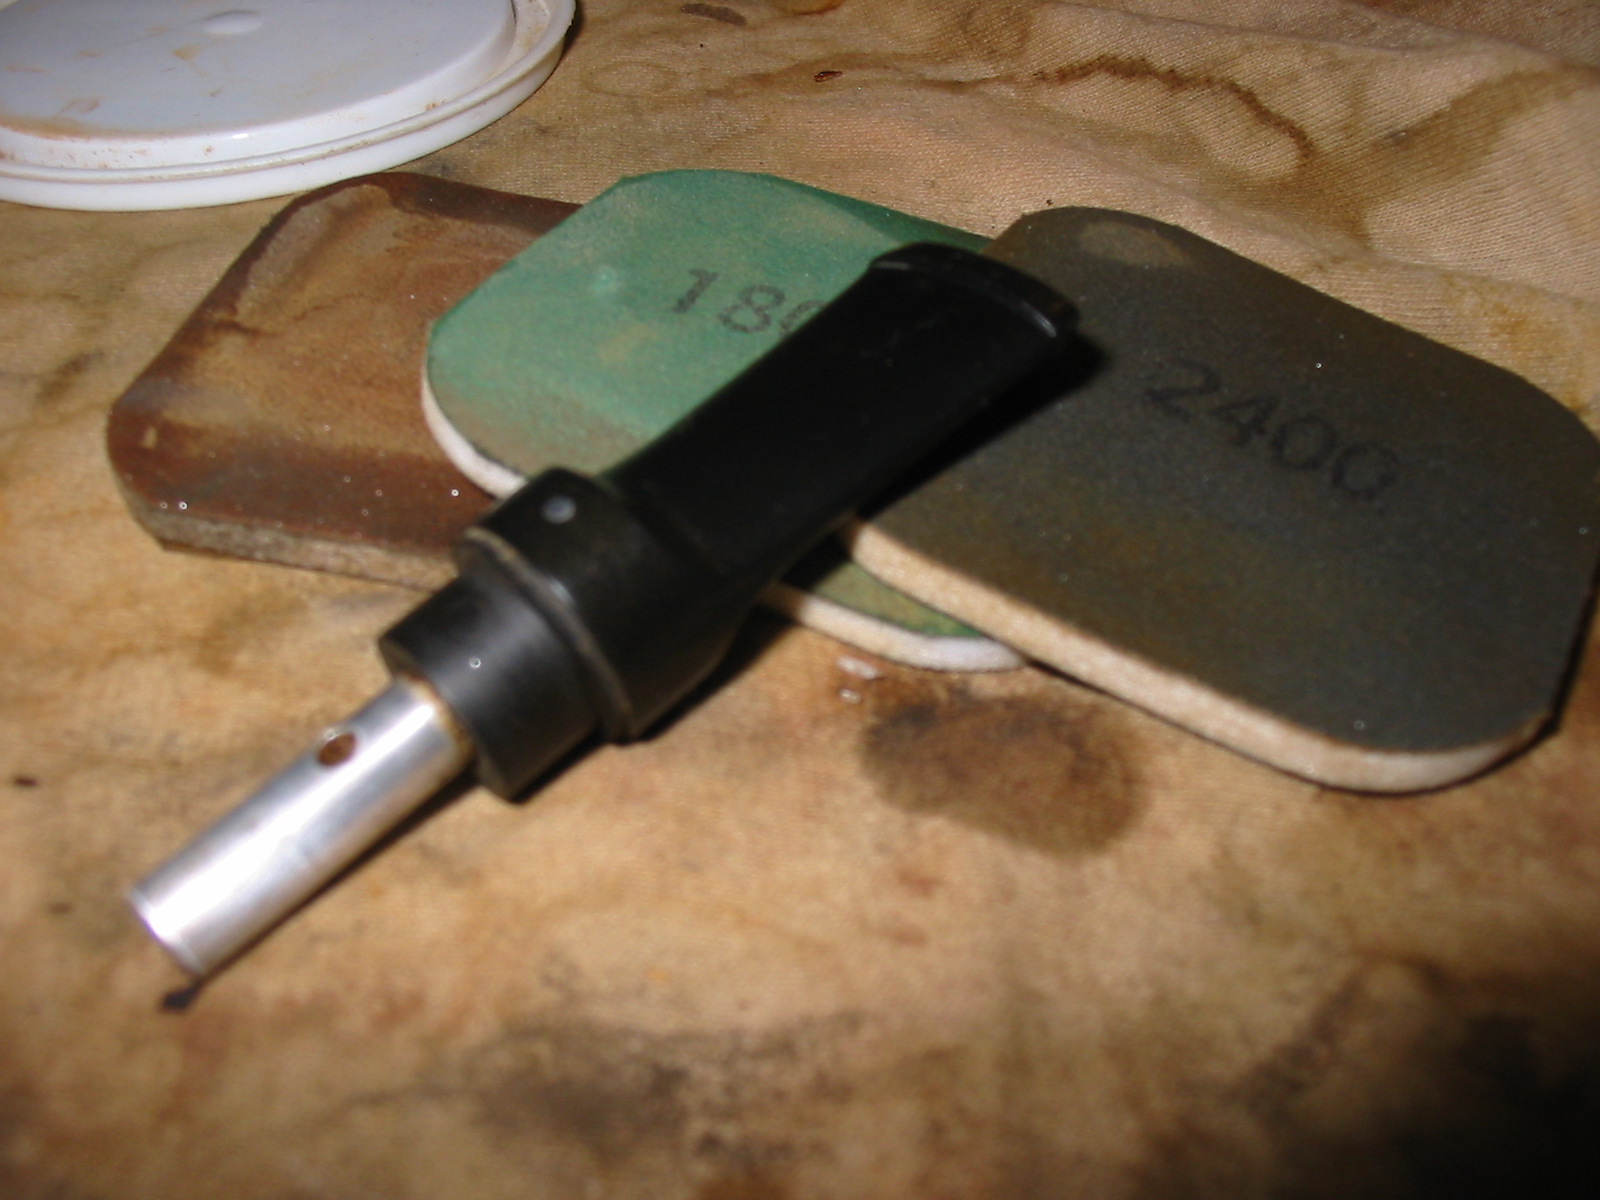
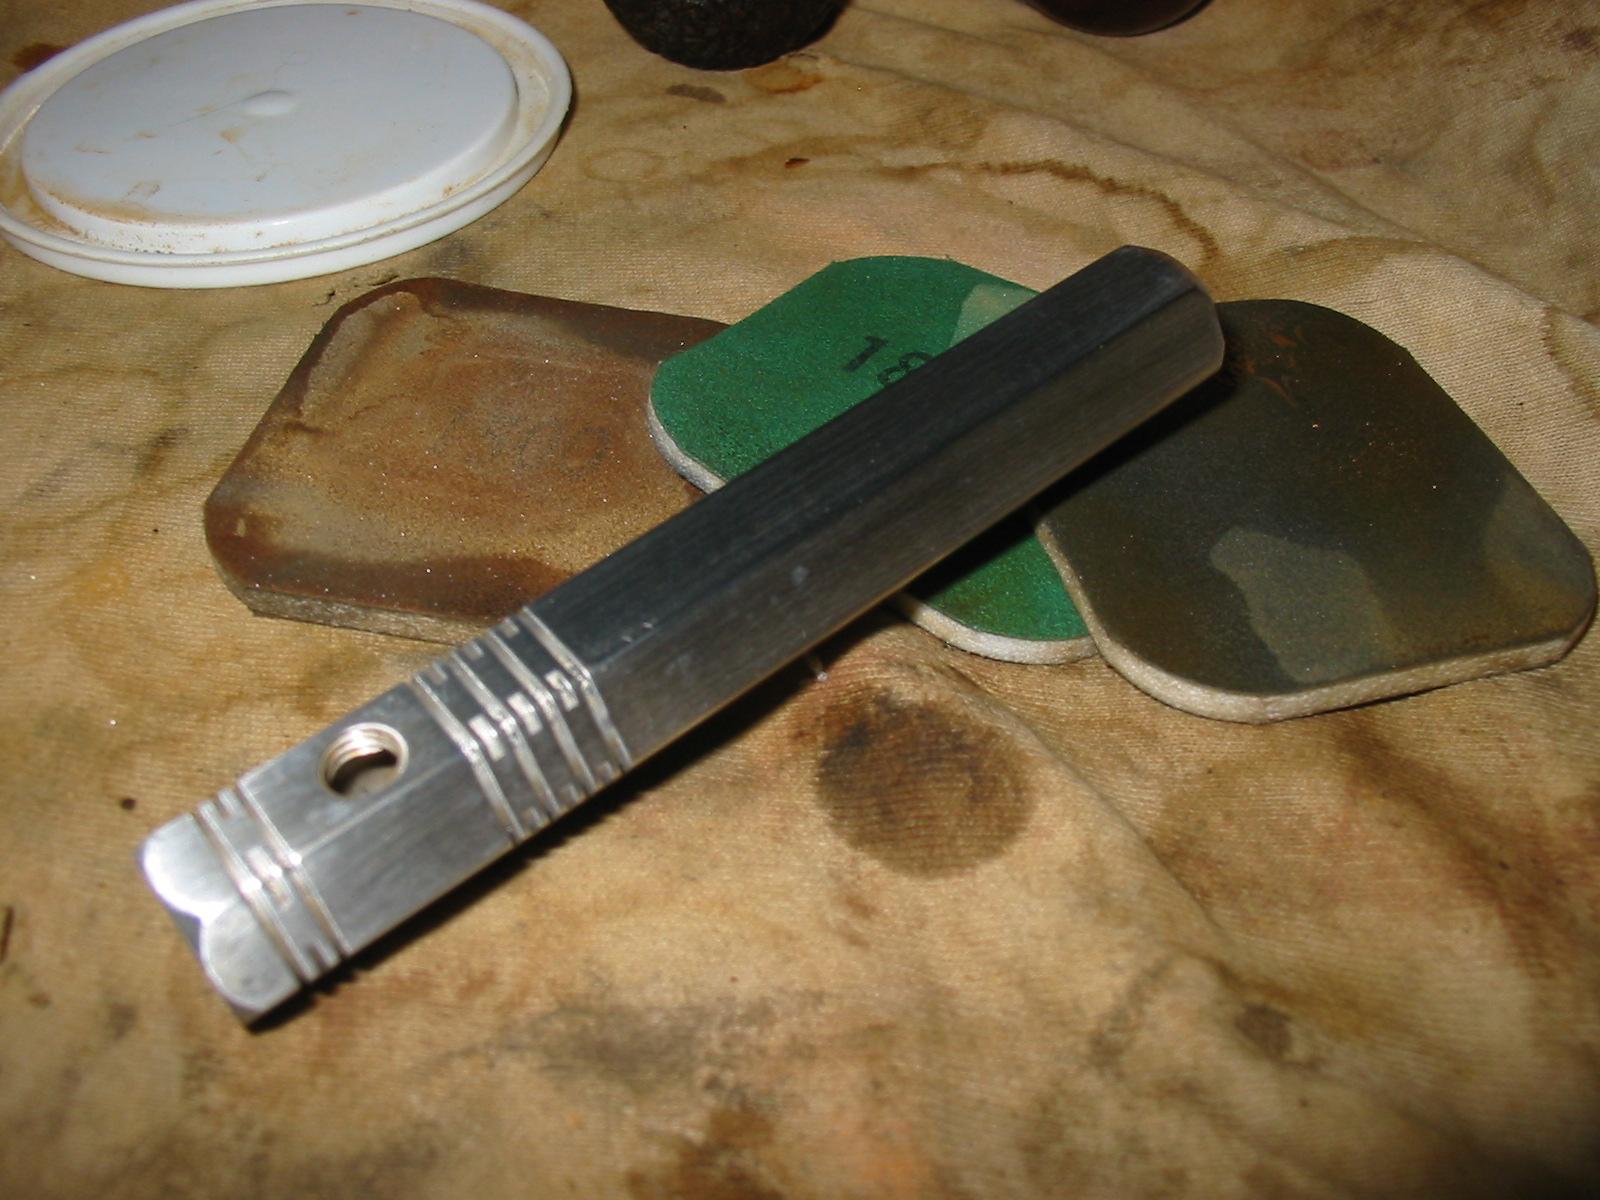
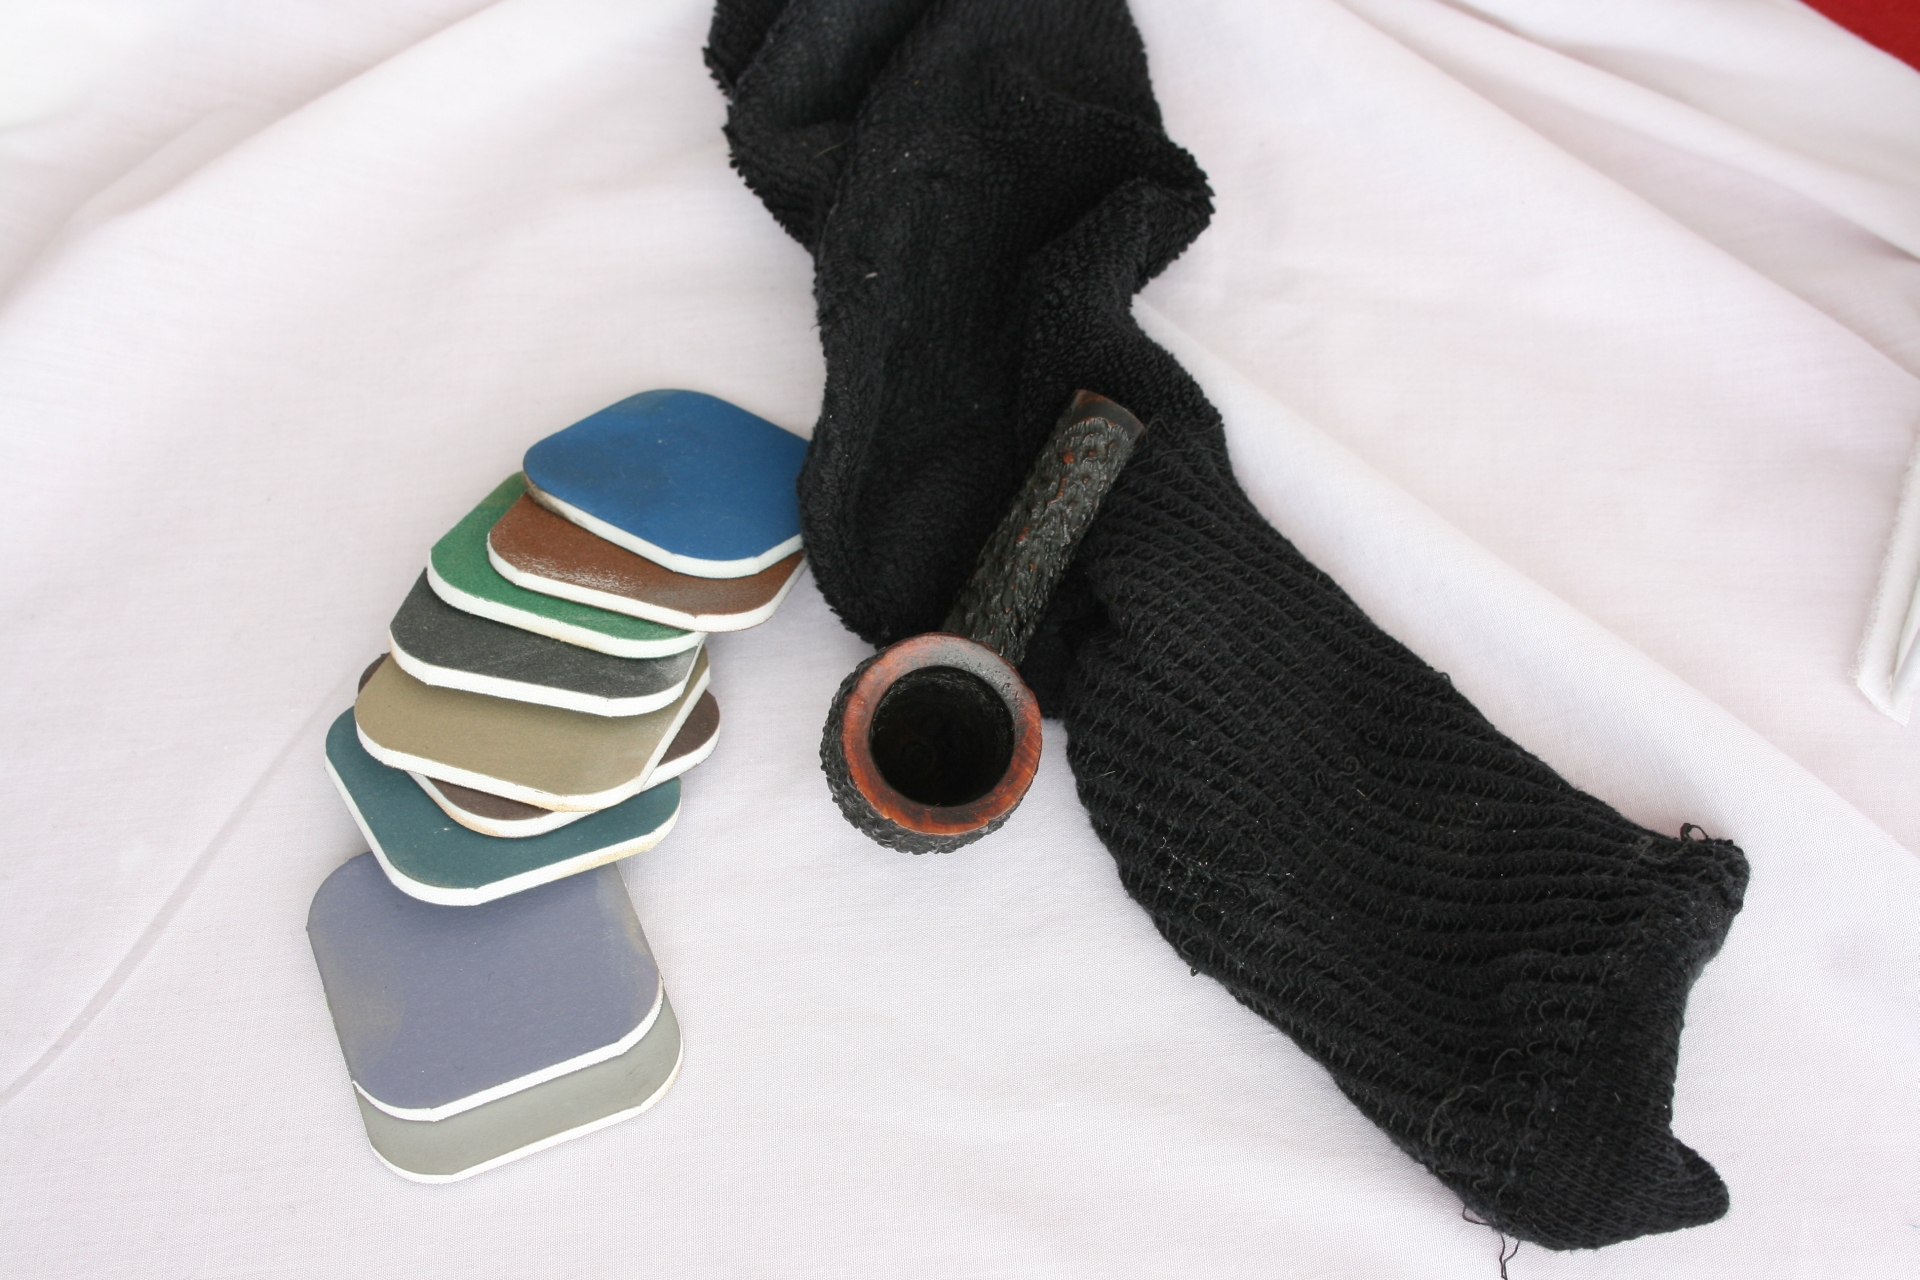
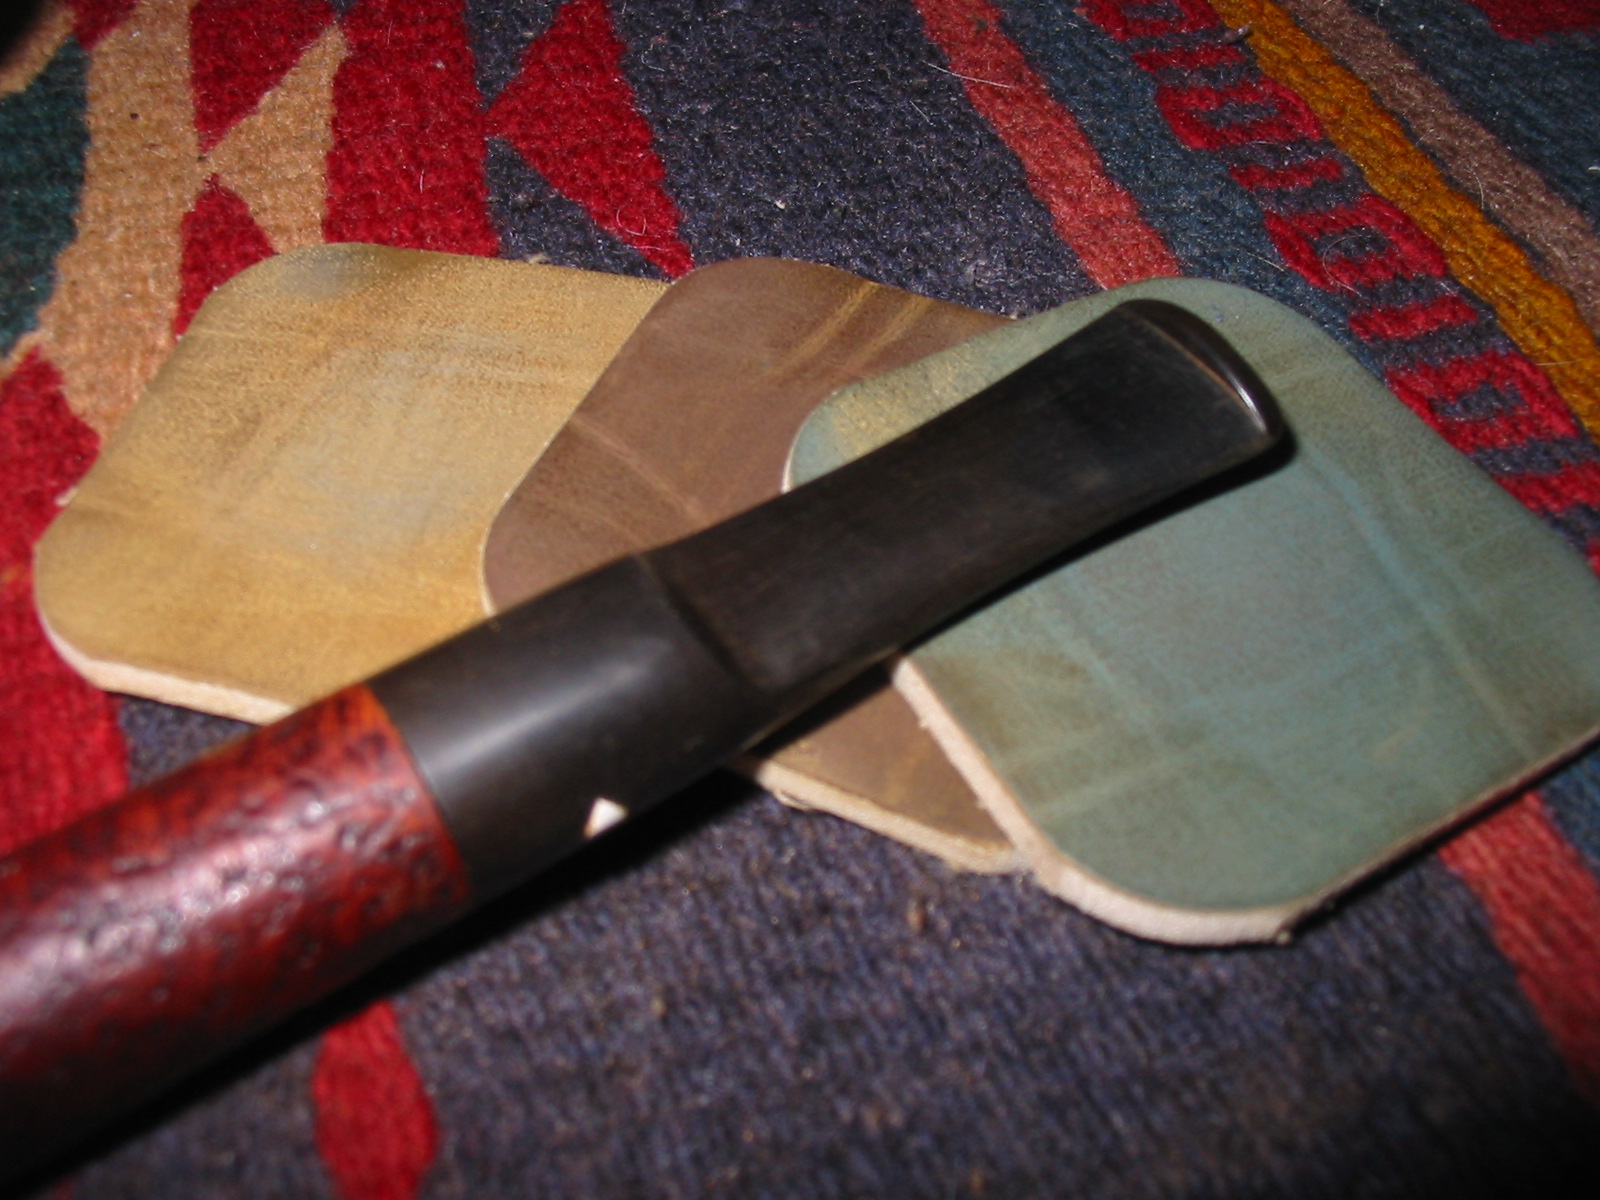
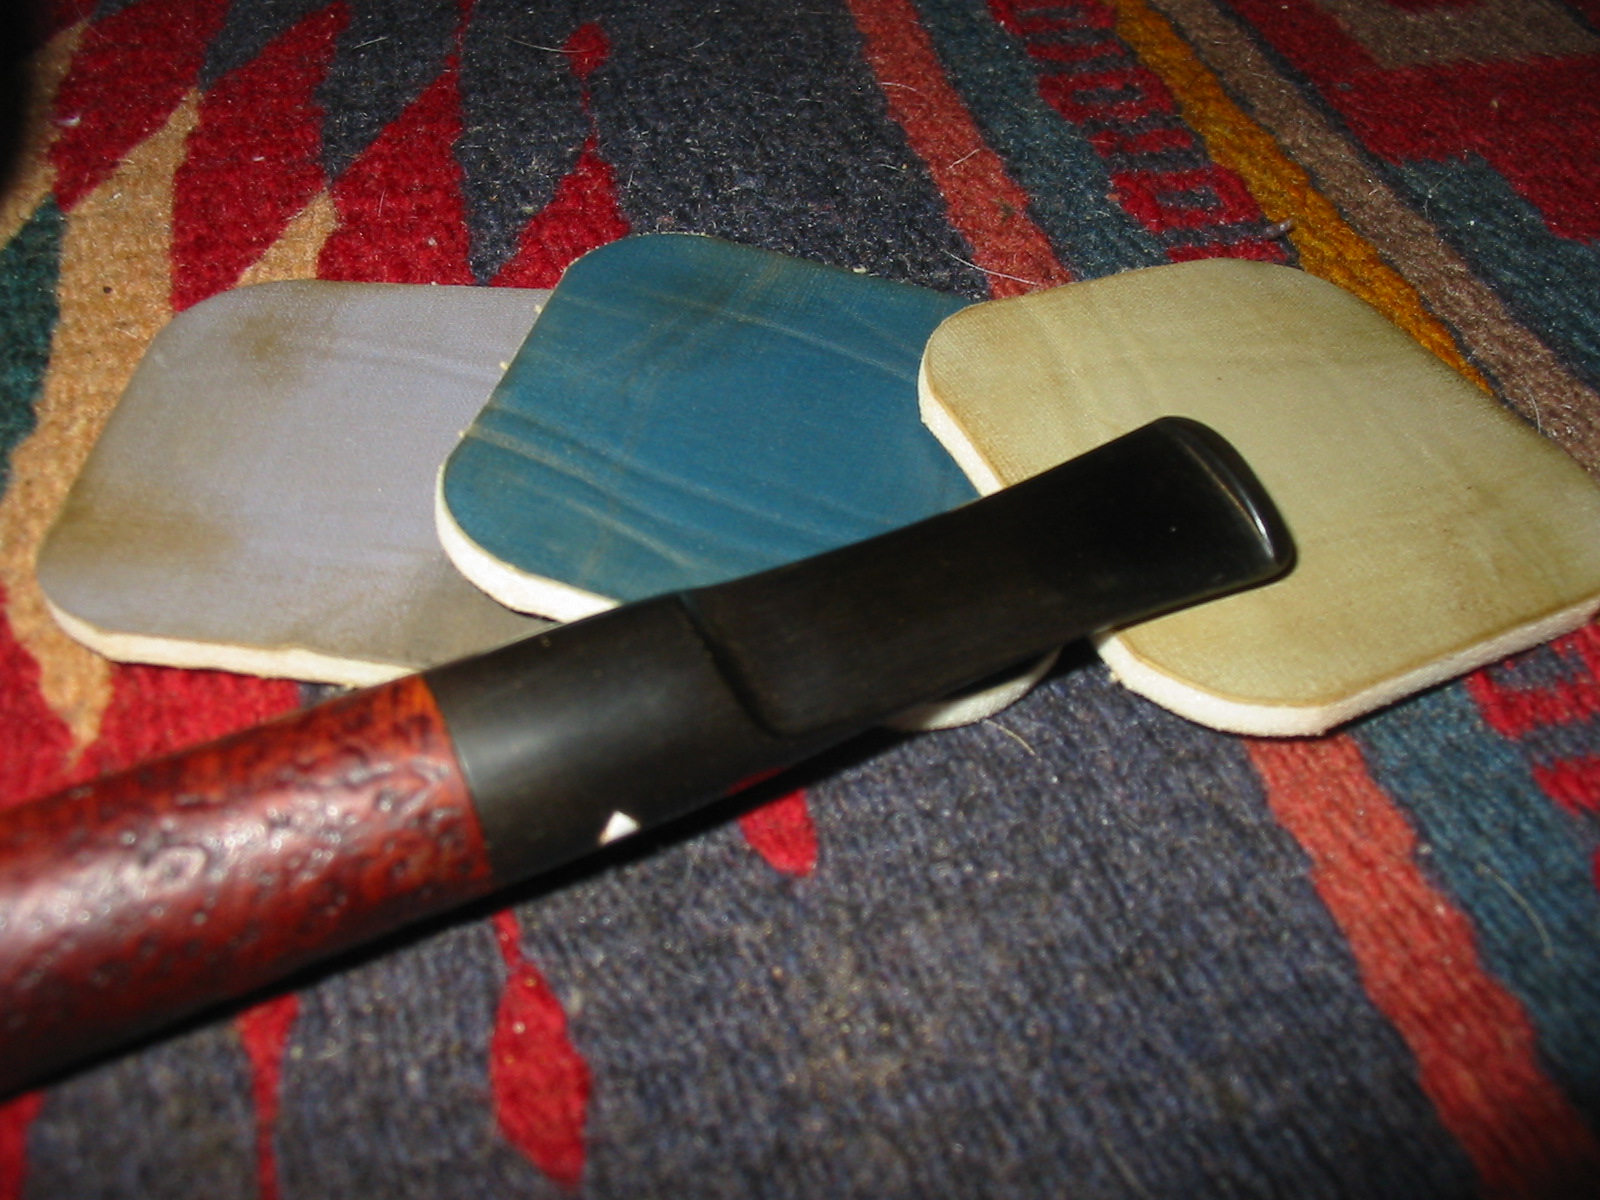
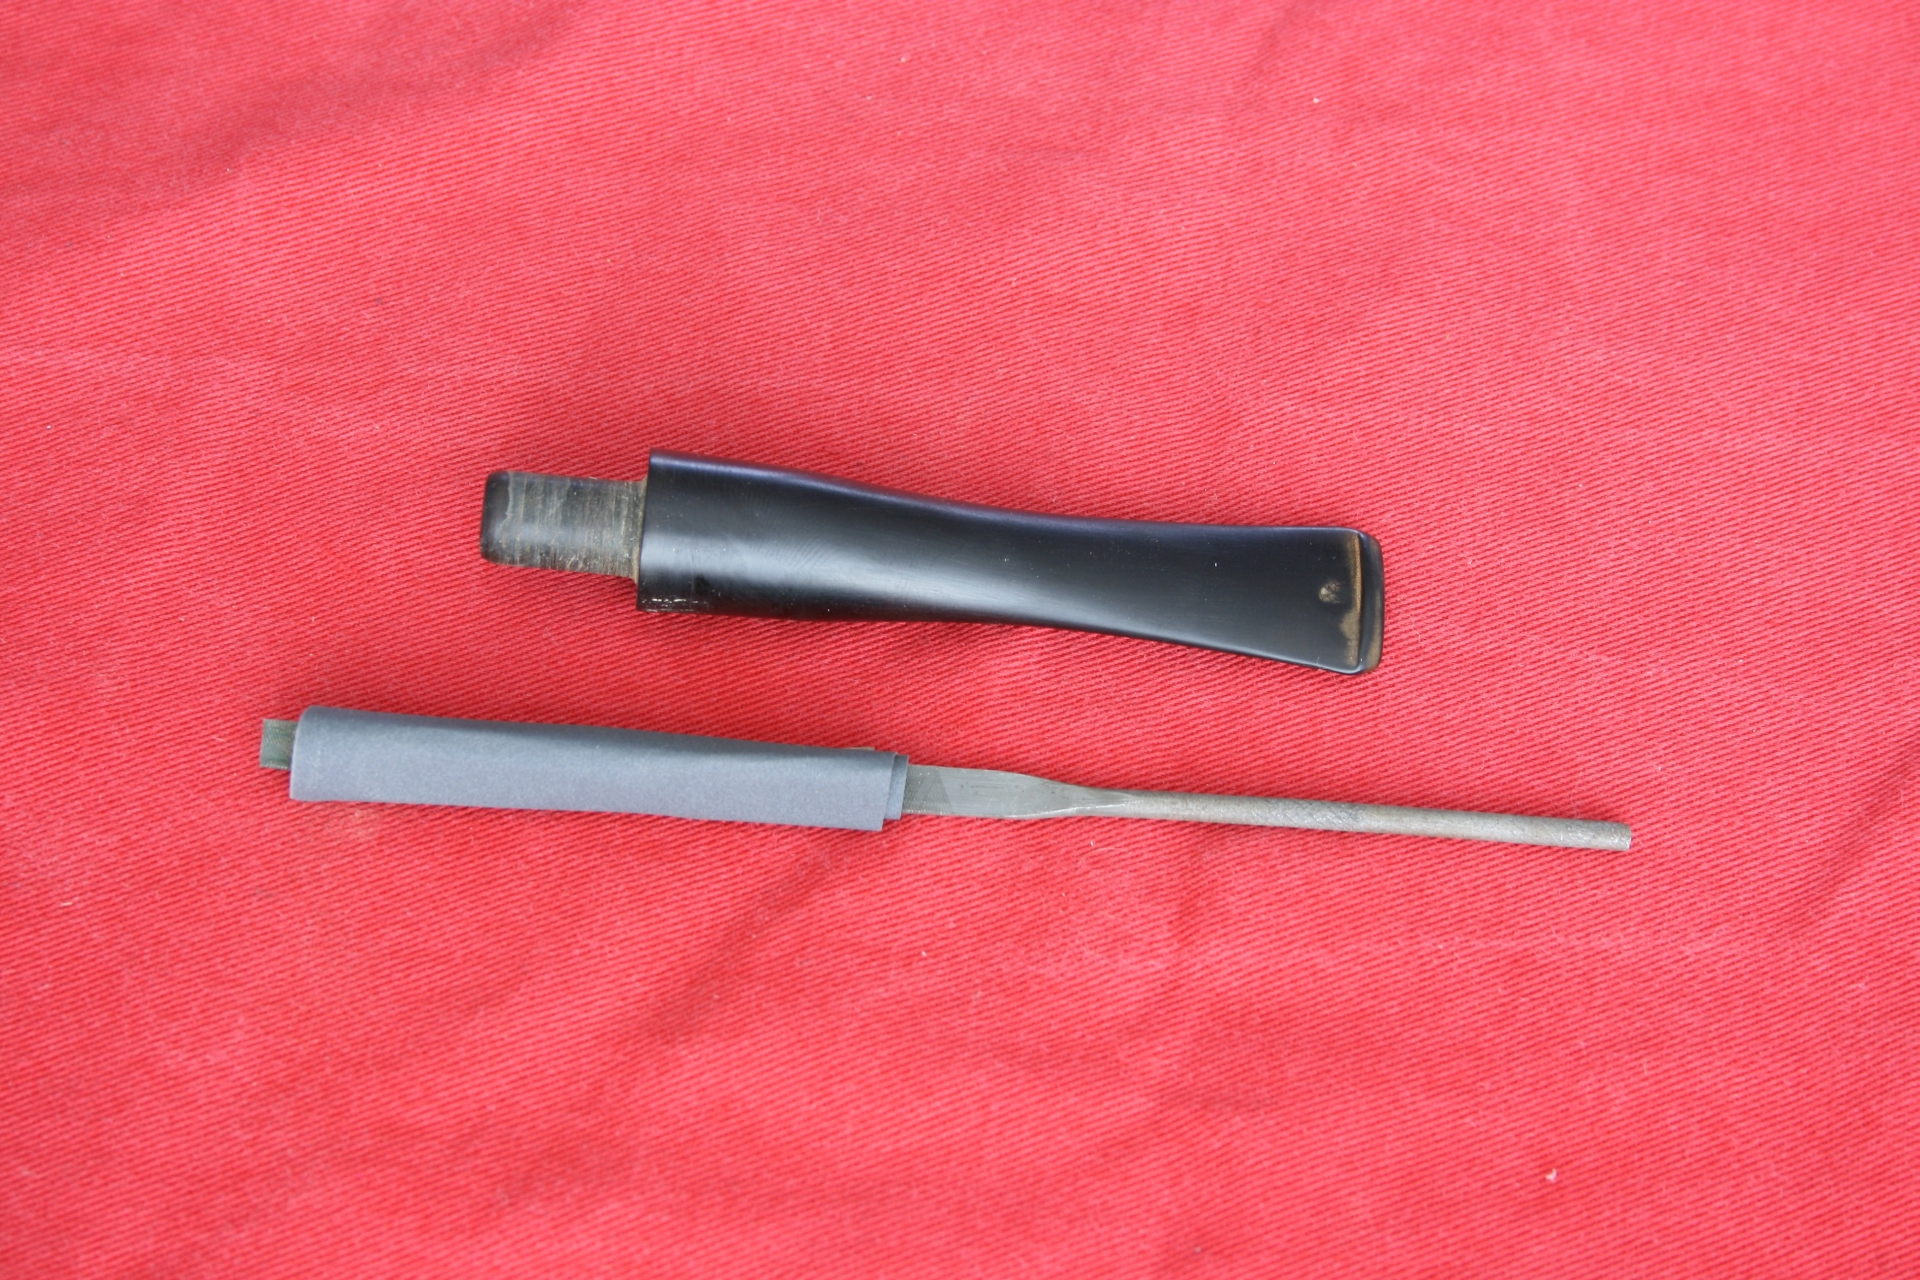
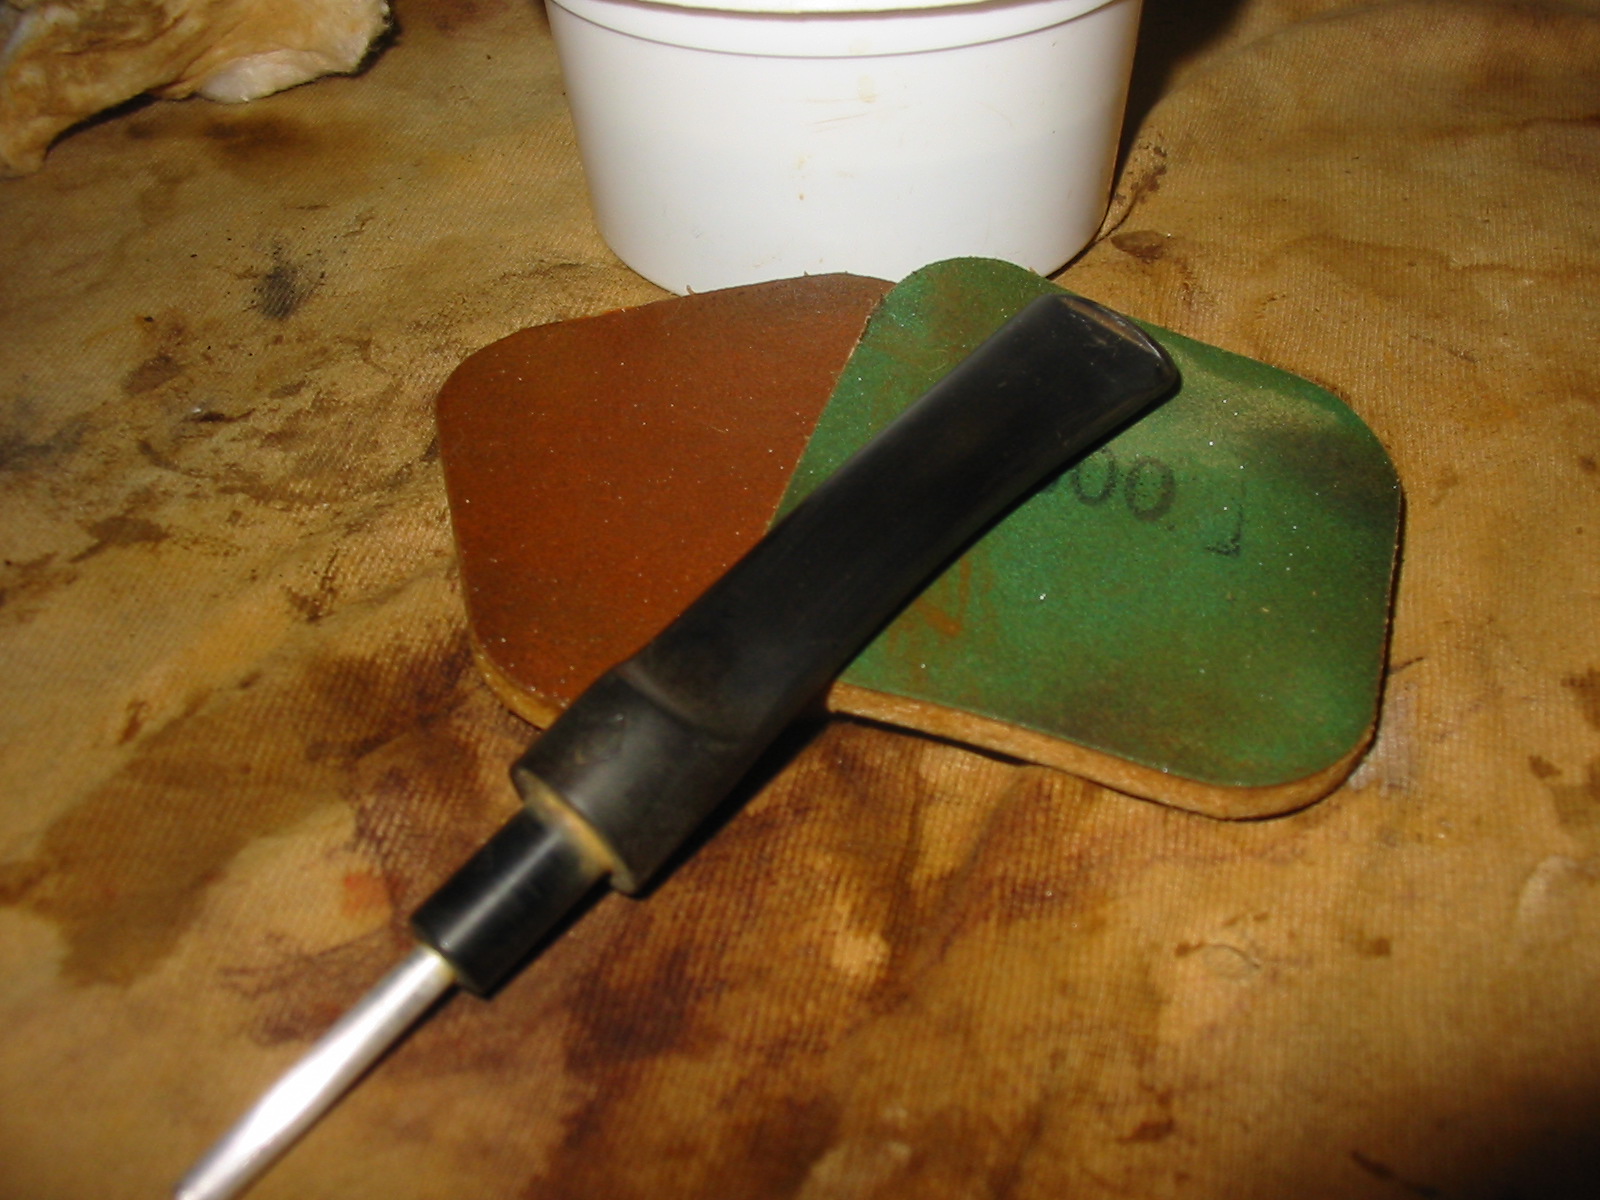
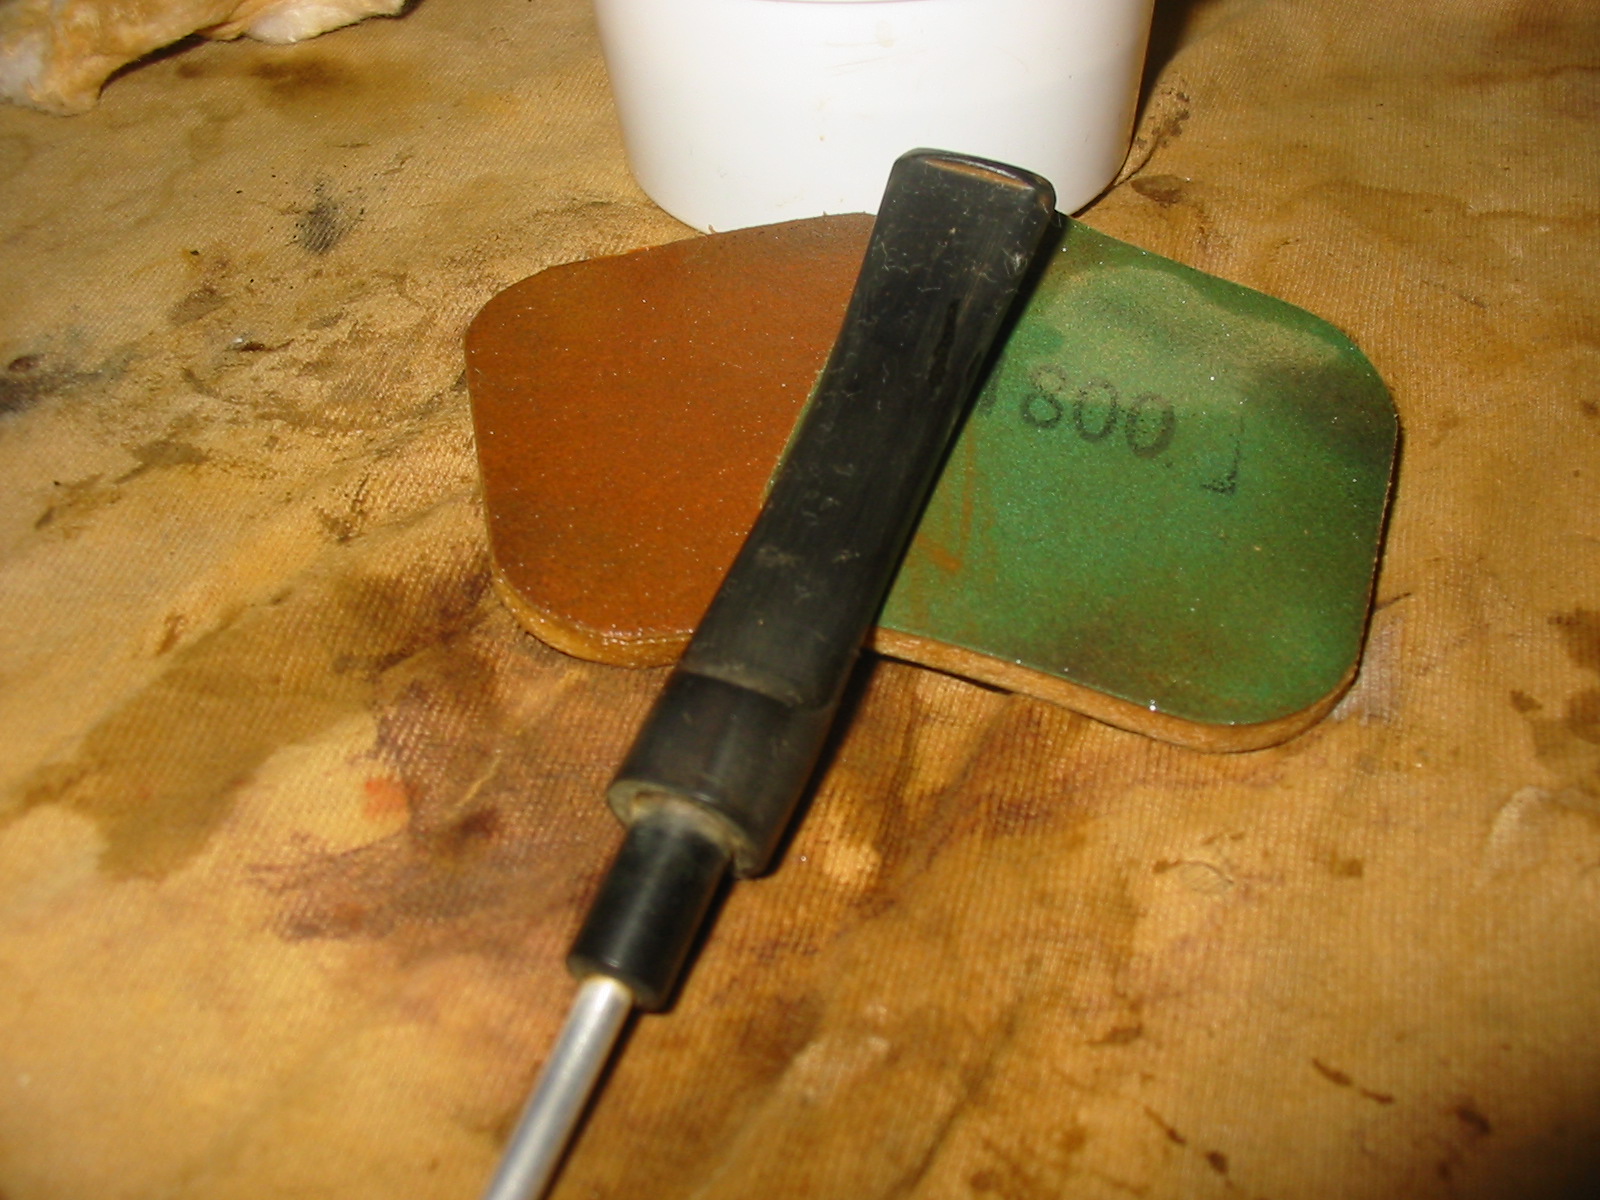
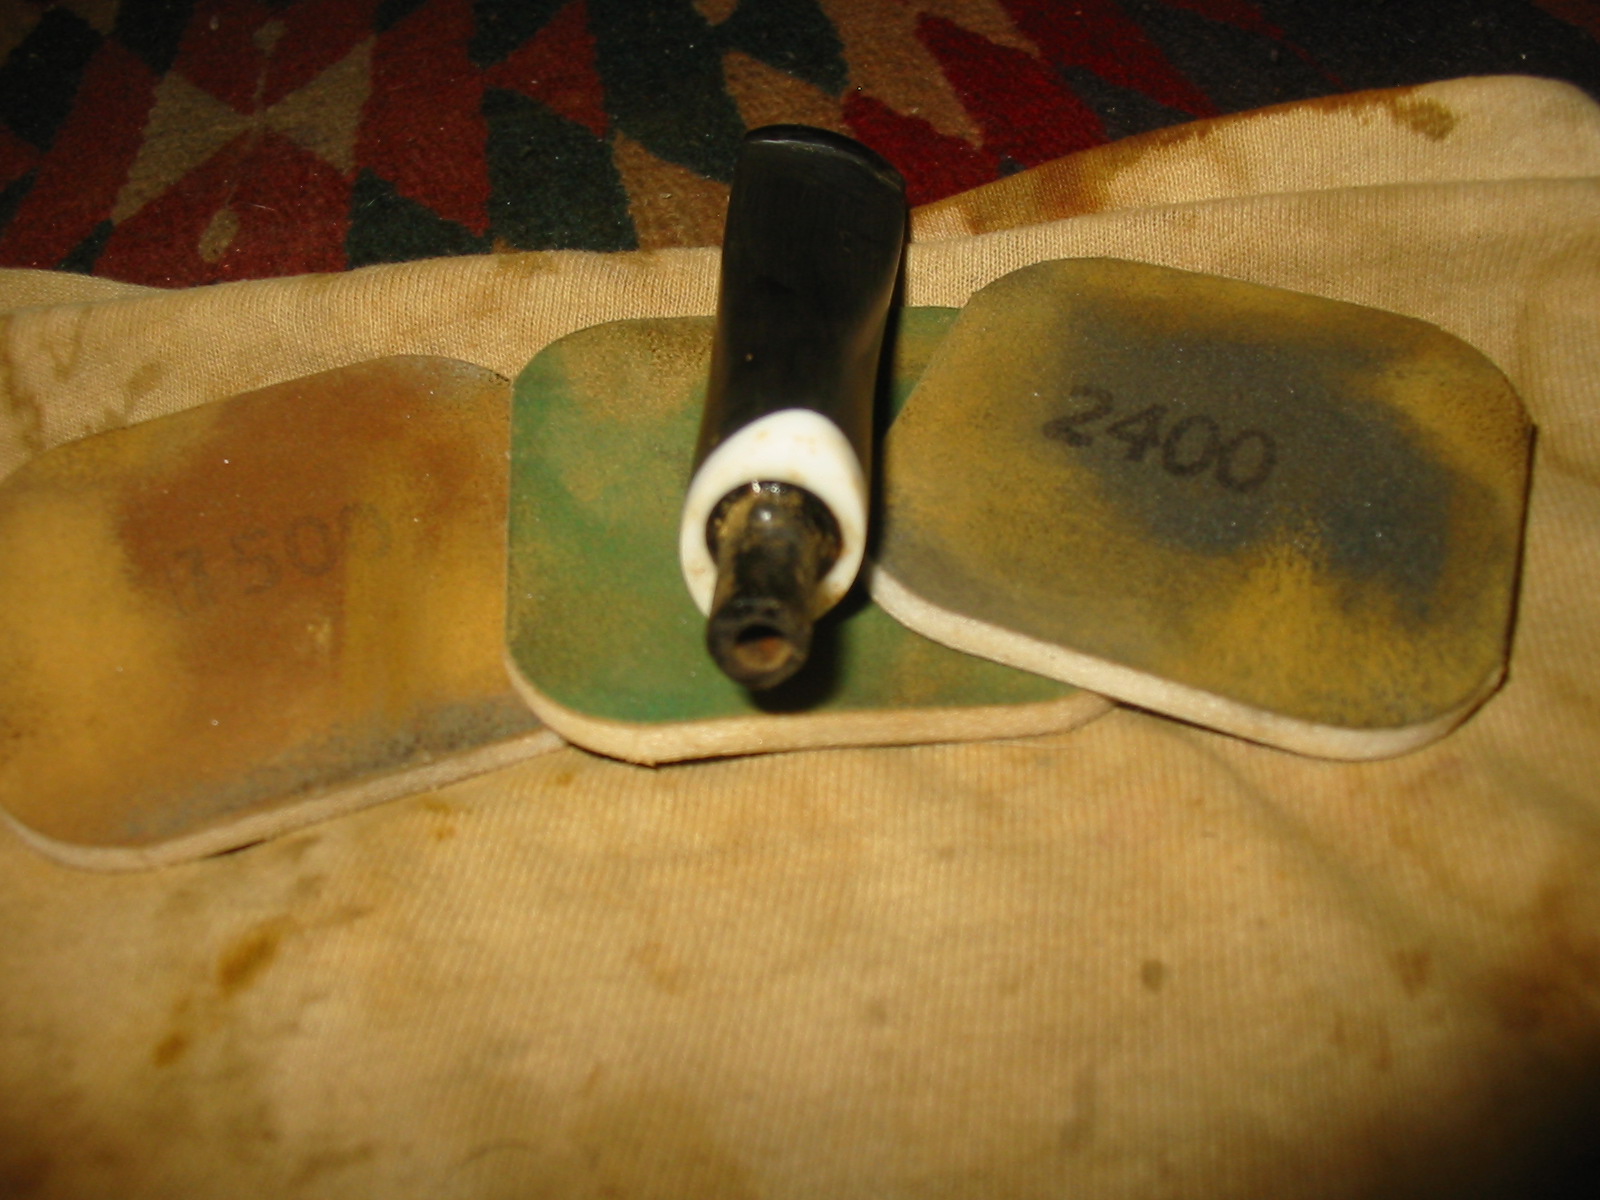
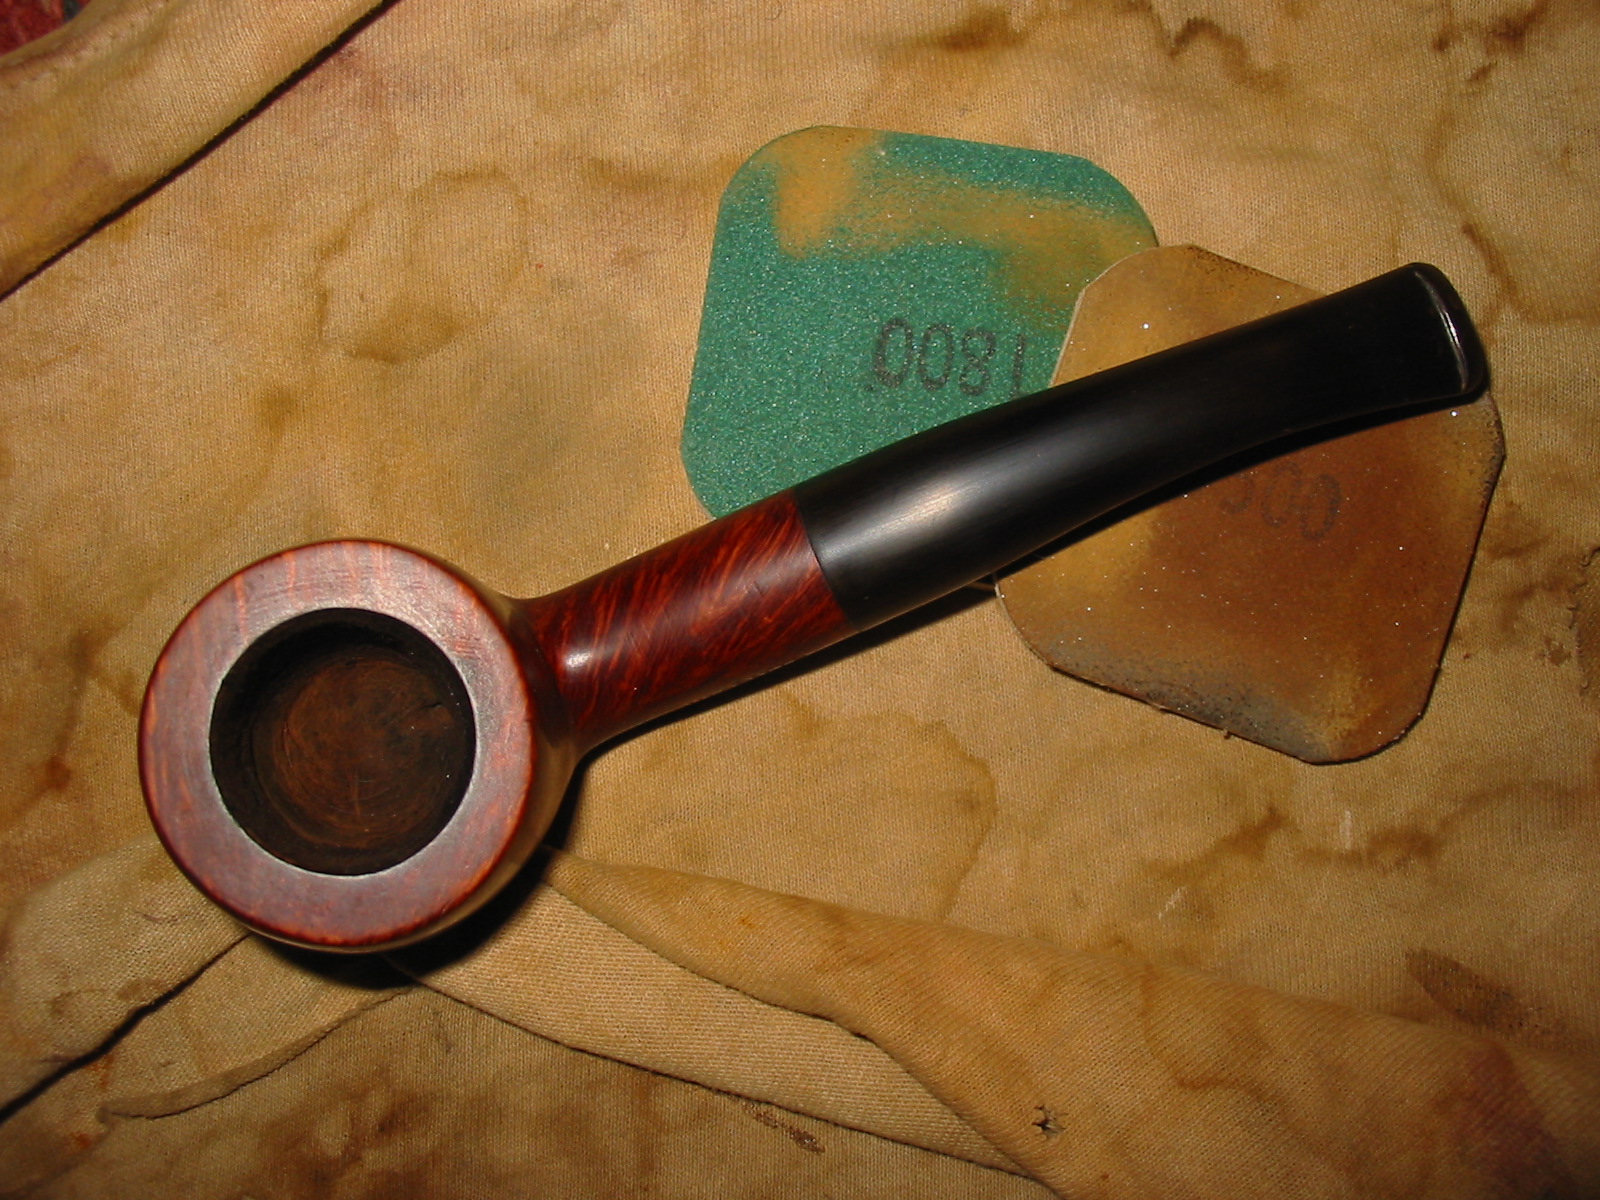
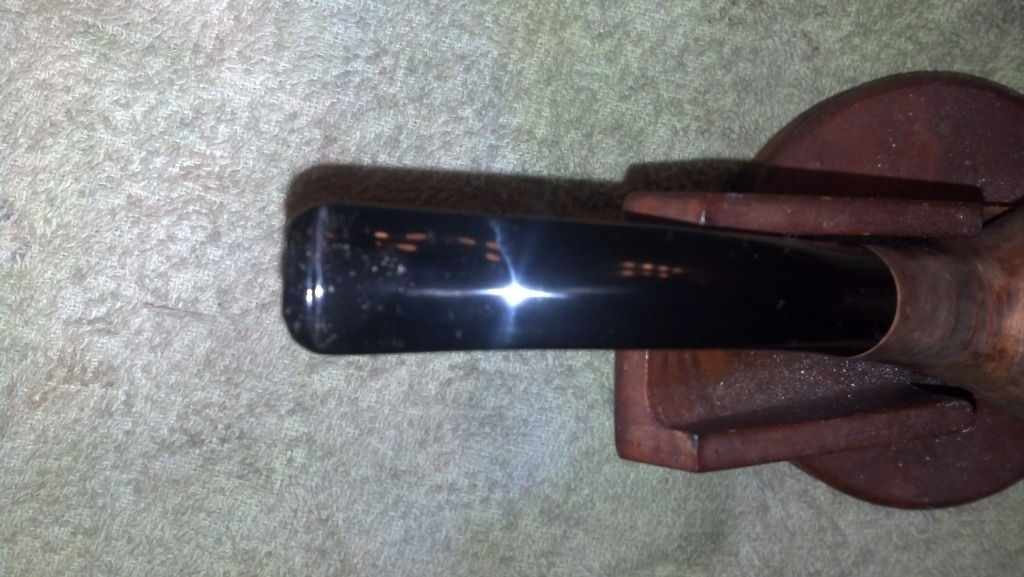
I sanded the patch on the stem with 220 grit sandpaper and then a medium grit sanding sponge to smooth out the patch. I continued to sand it with the micromesh sanding pads. I wet sanded with 1500-2400 grit and dry sanded with the remaining grits up to 12,000.
IMG_2645

GFB19

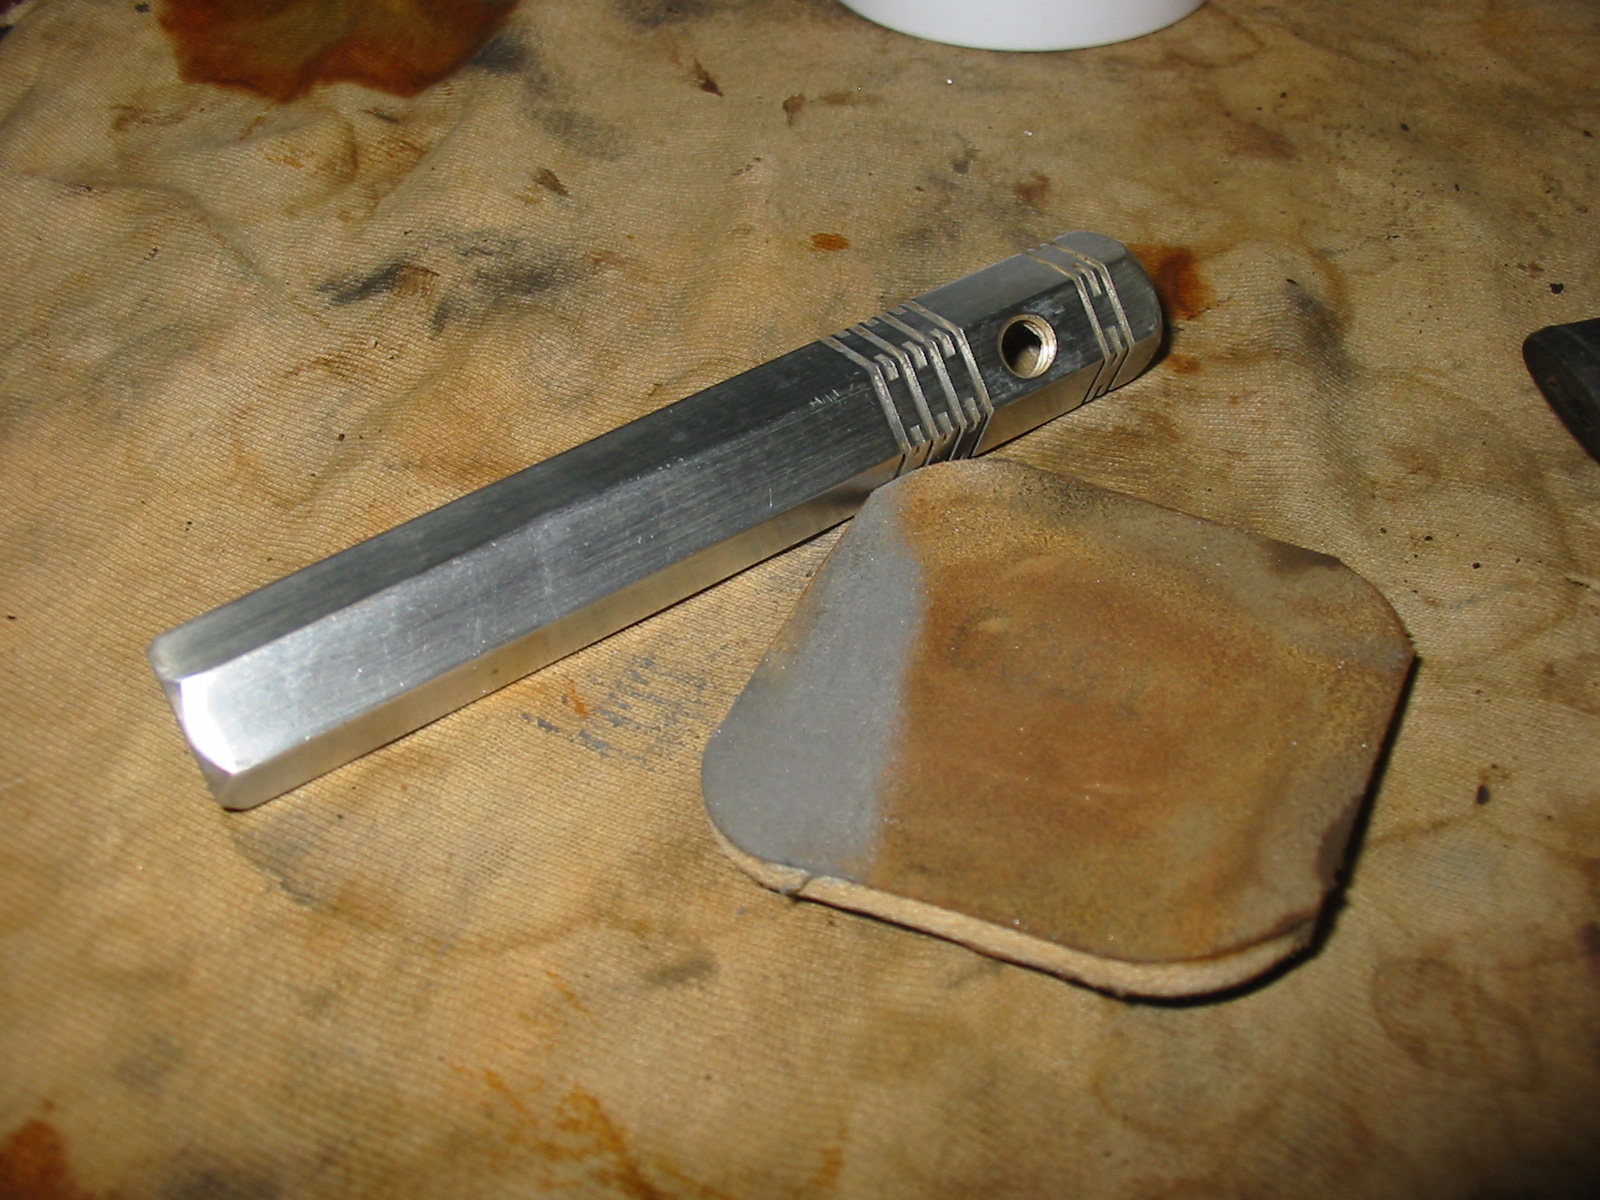
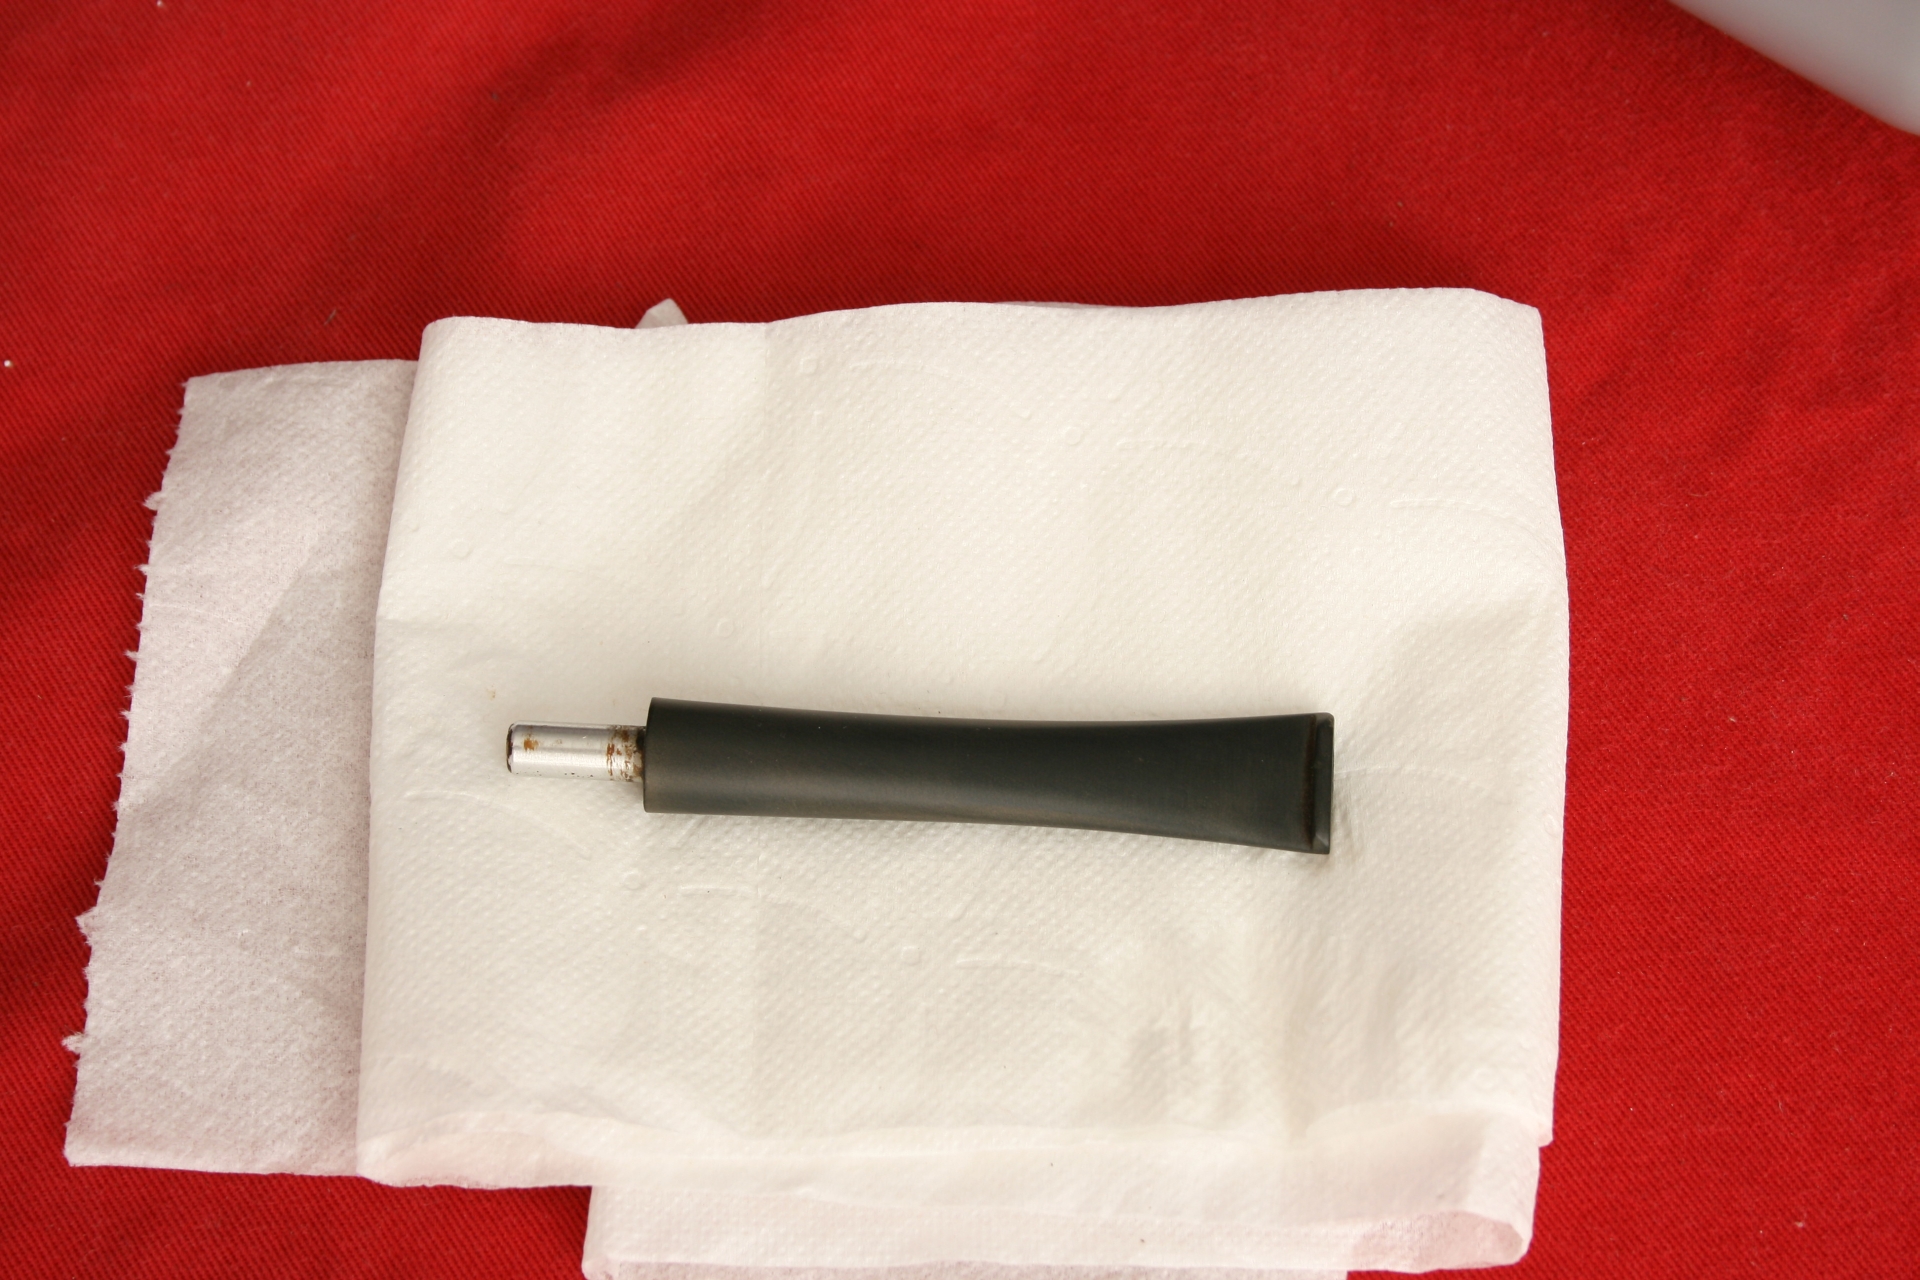
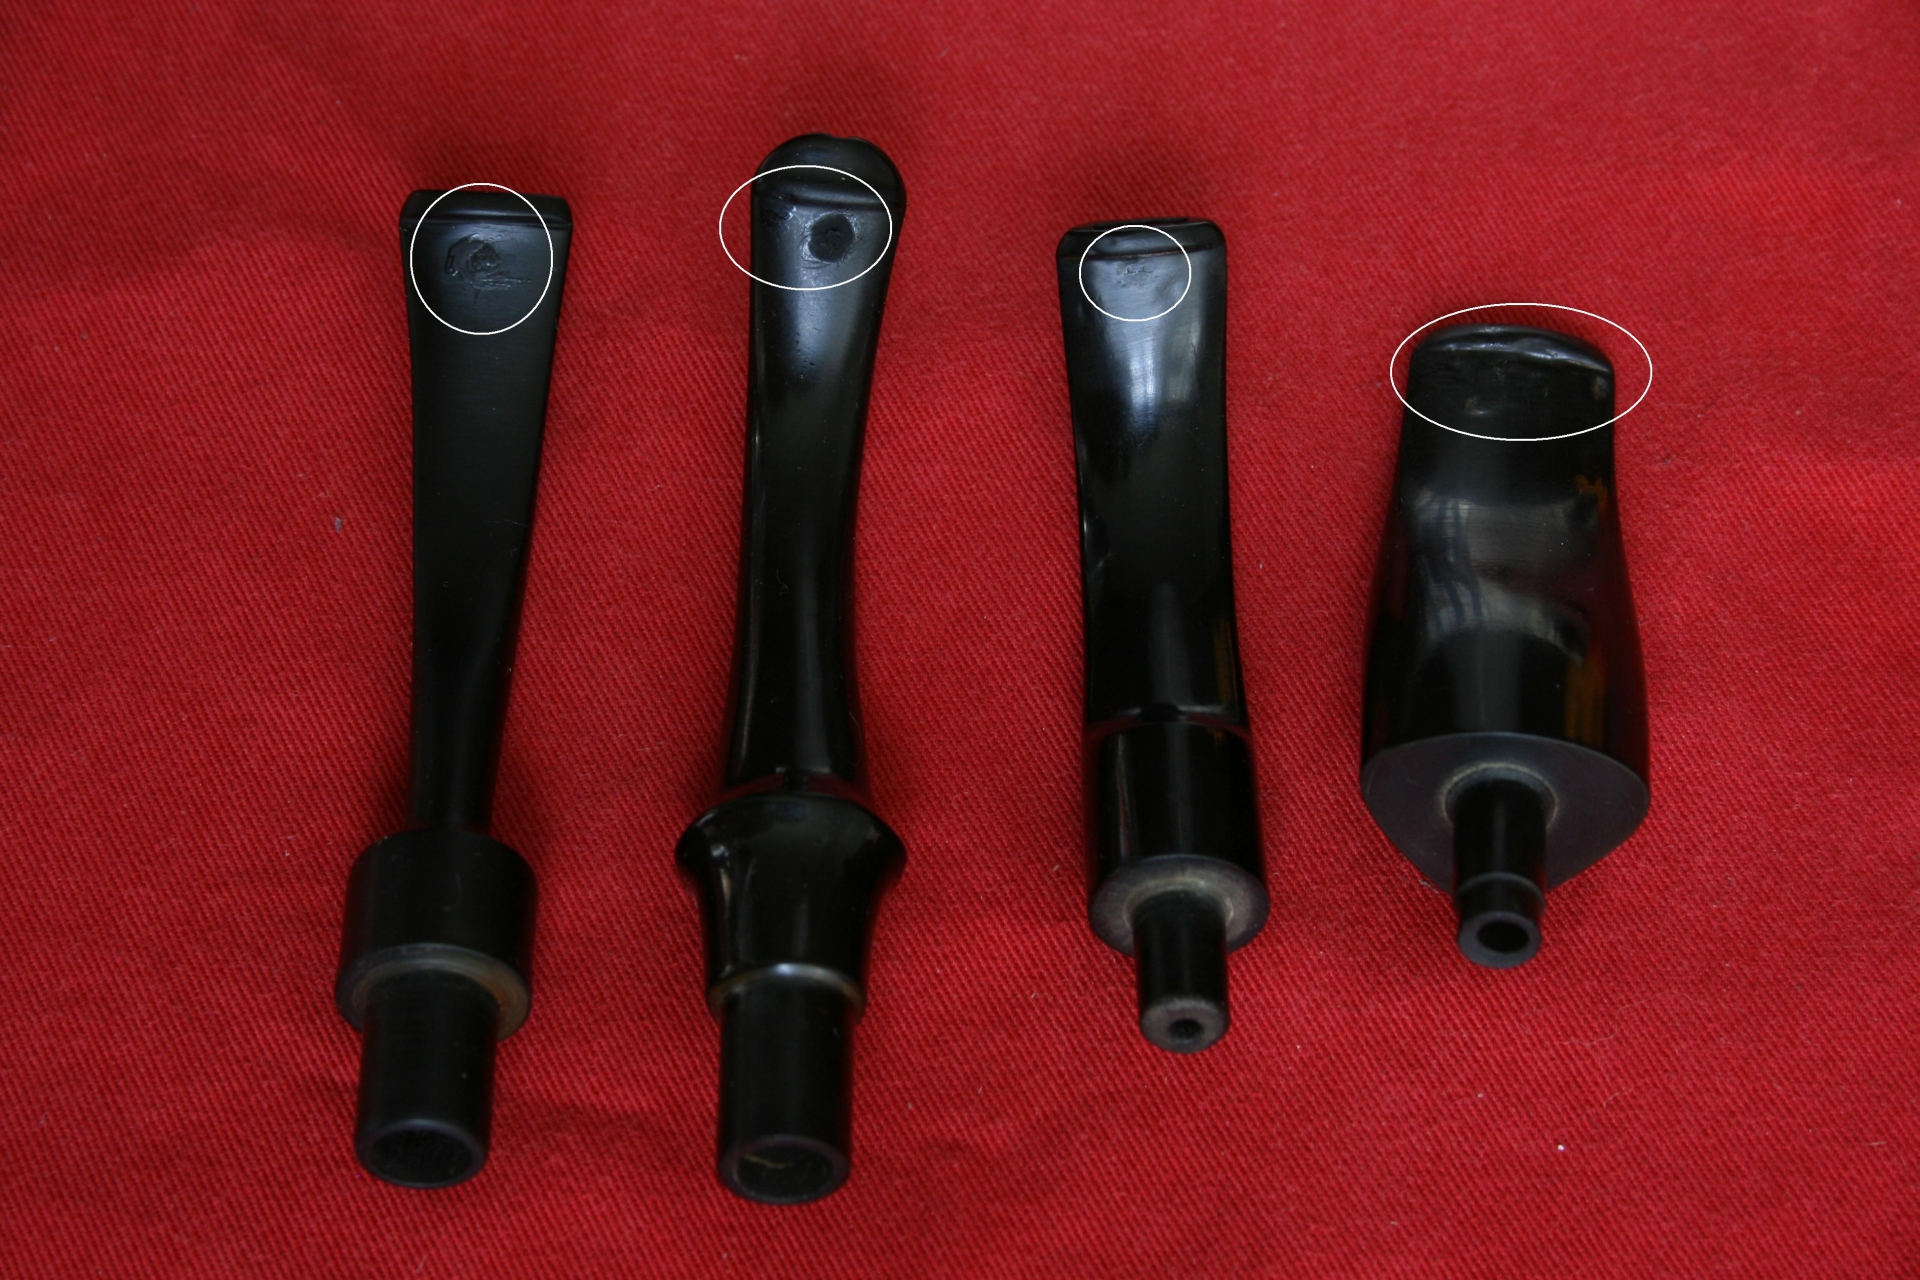
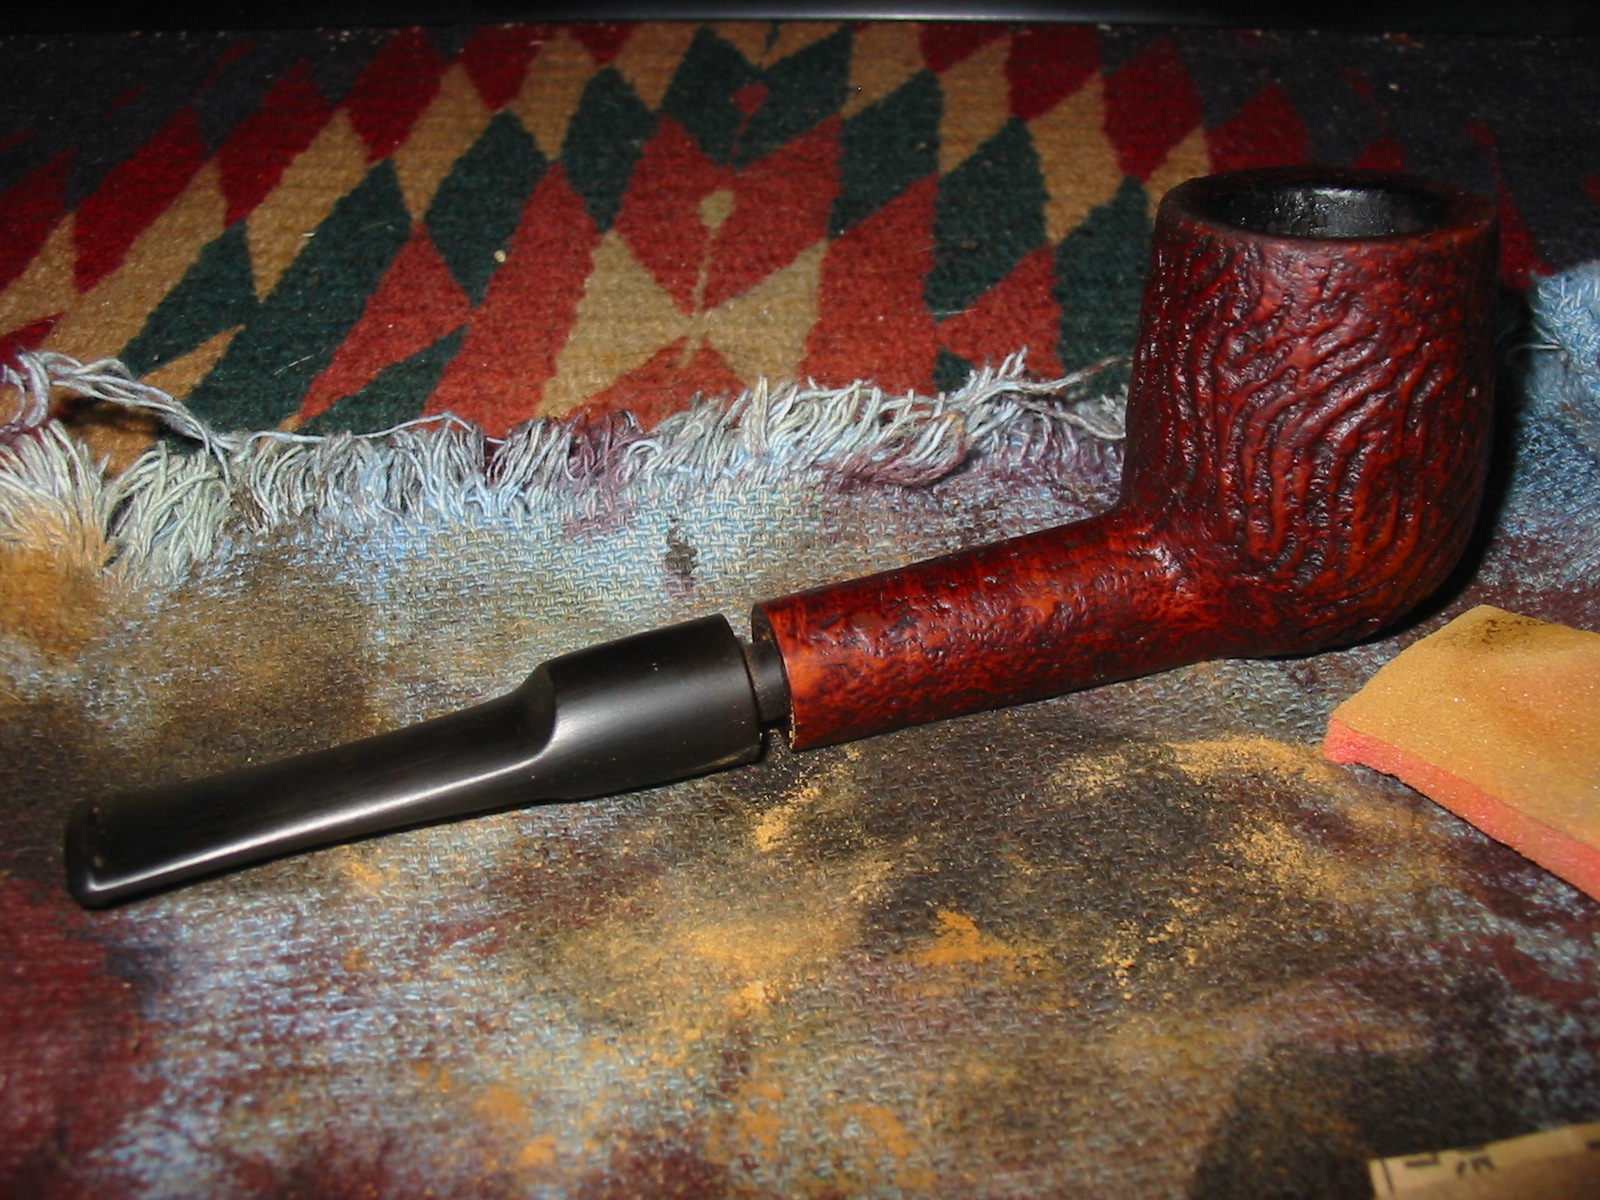
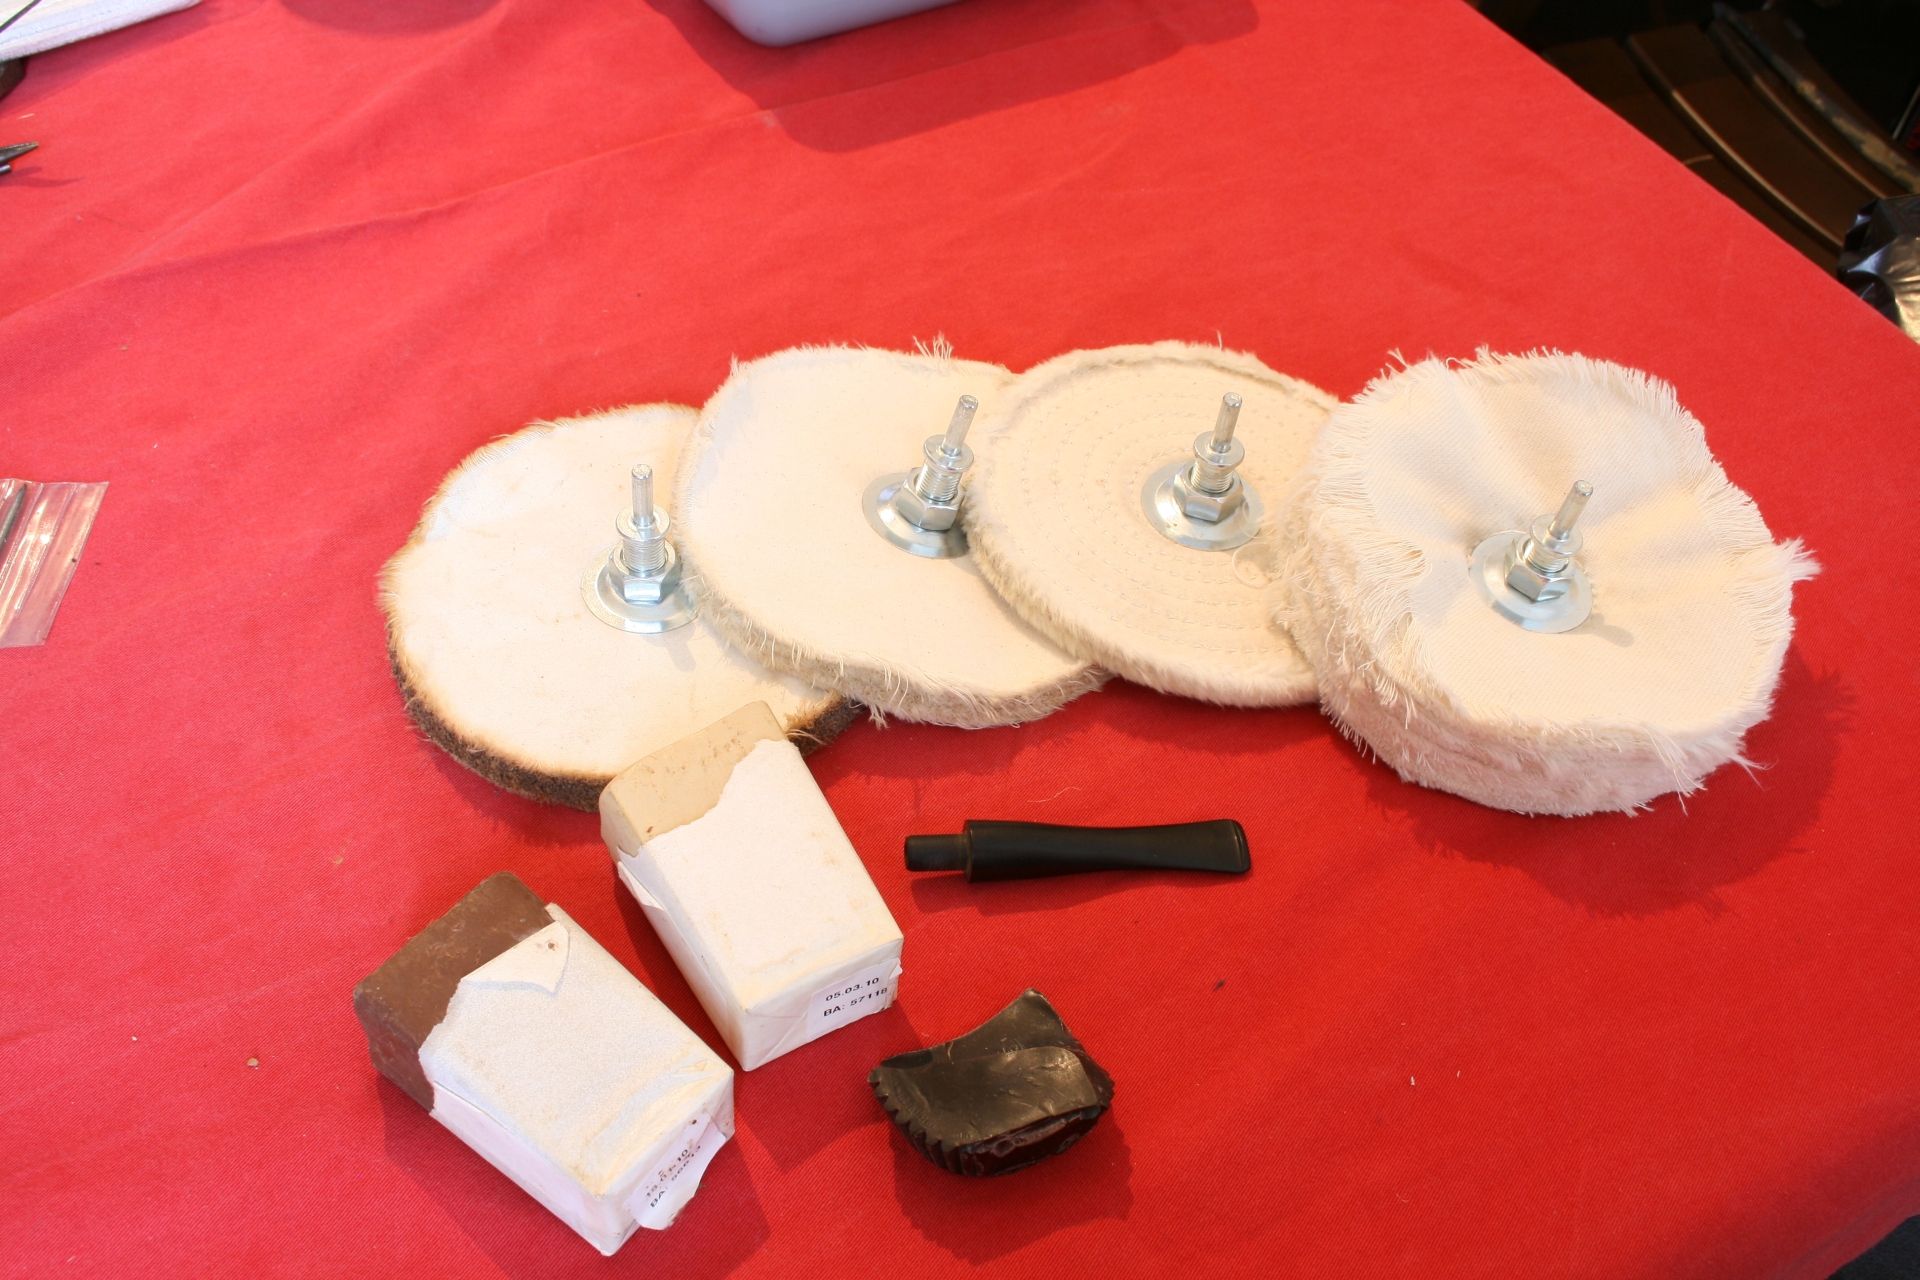
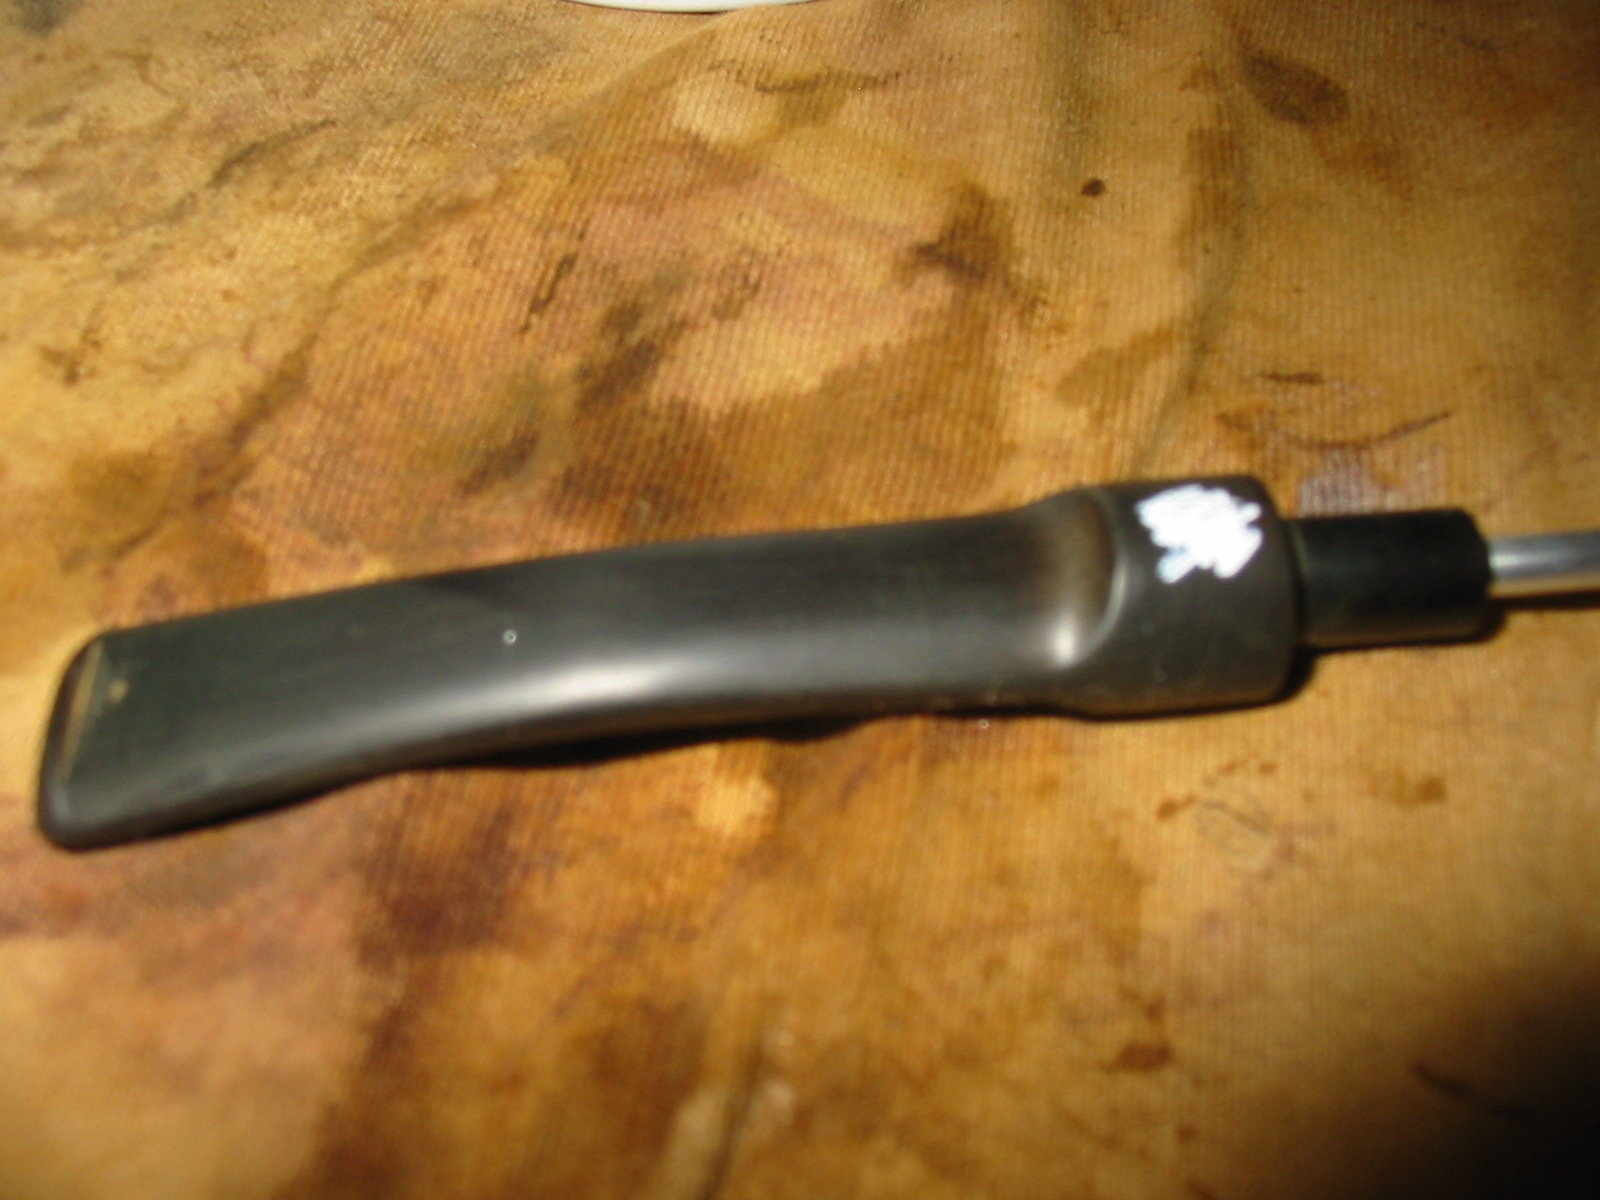
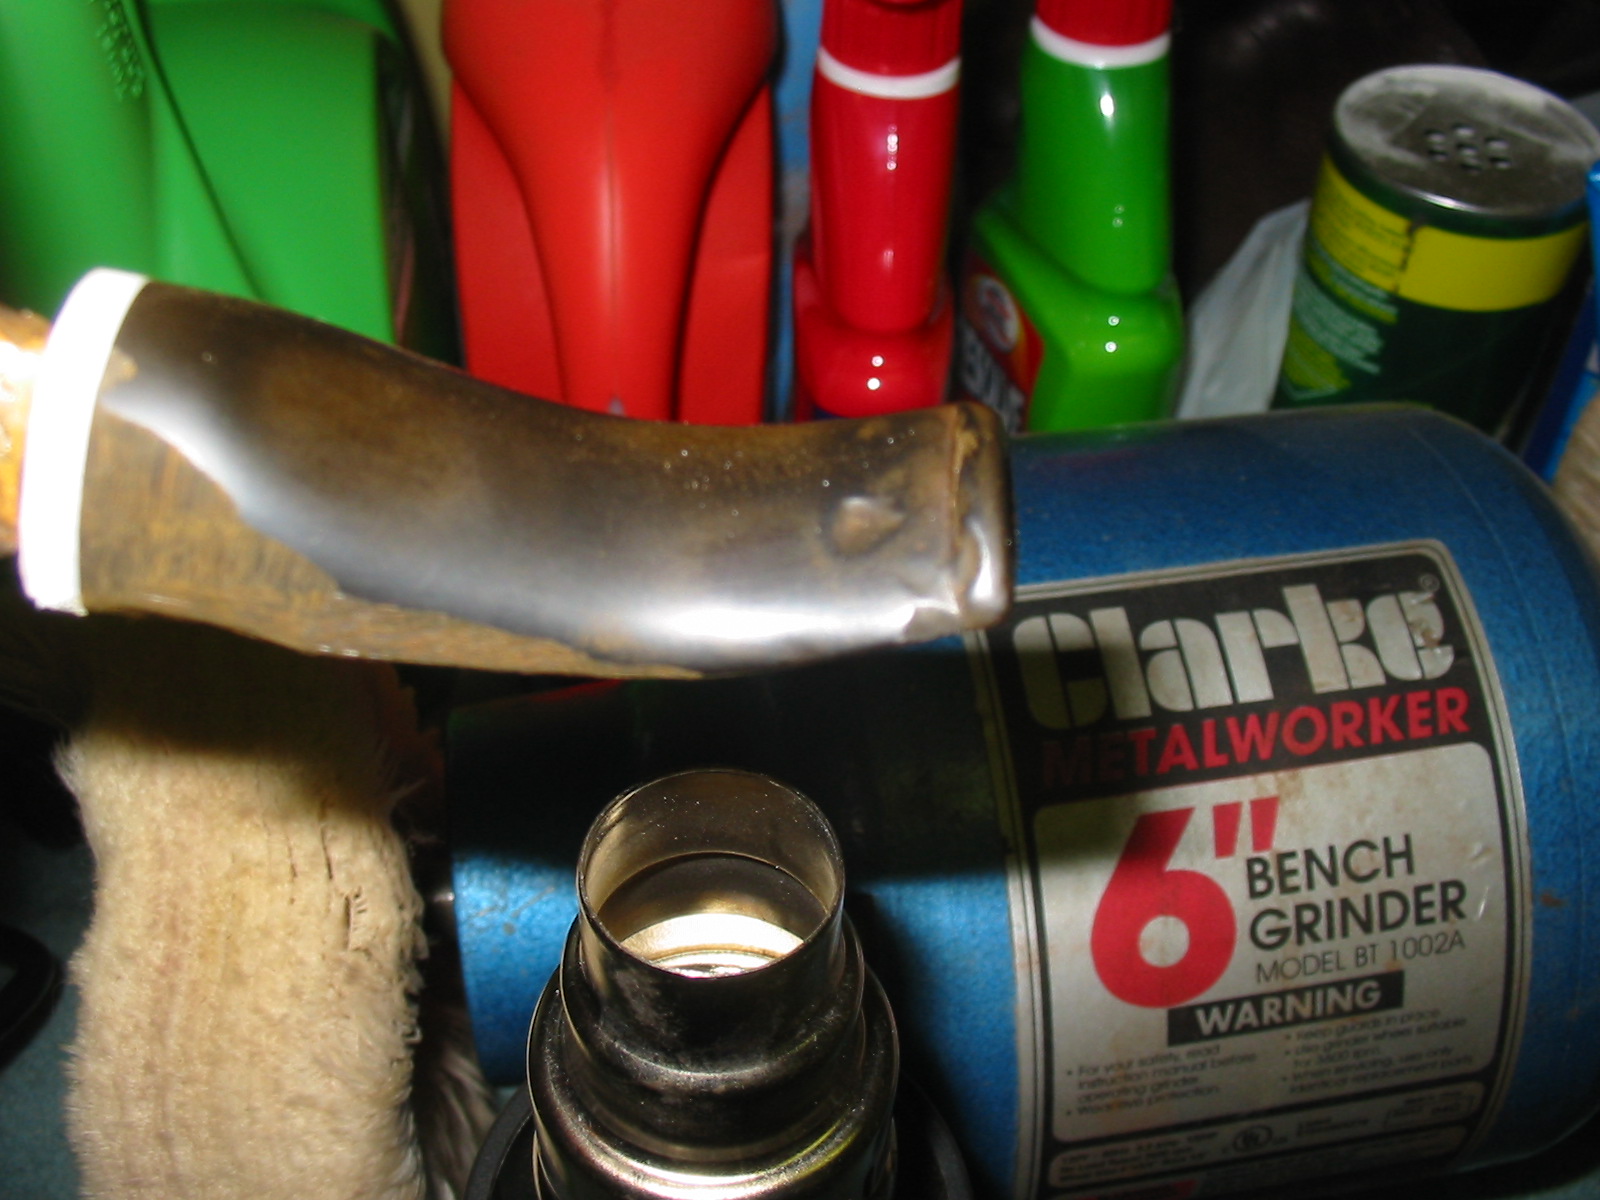
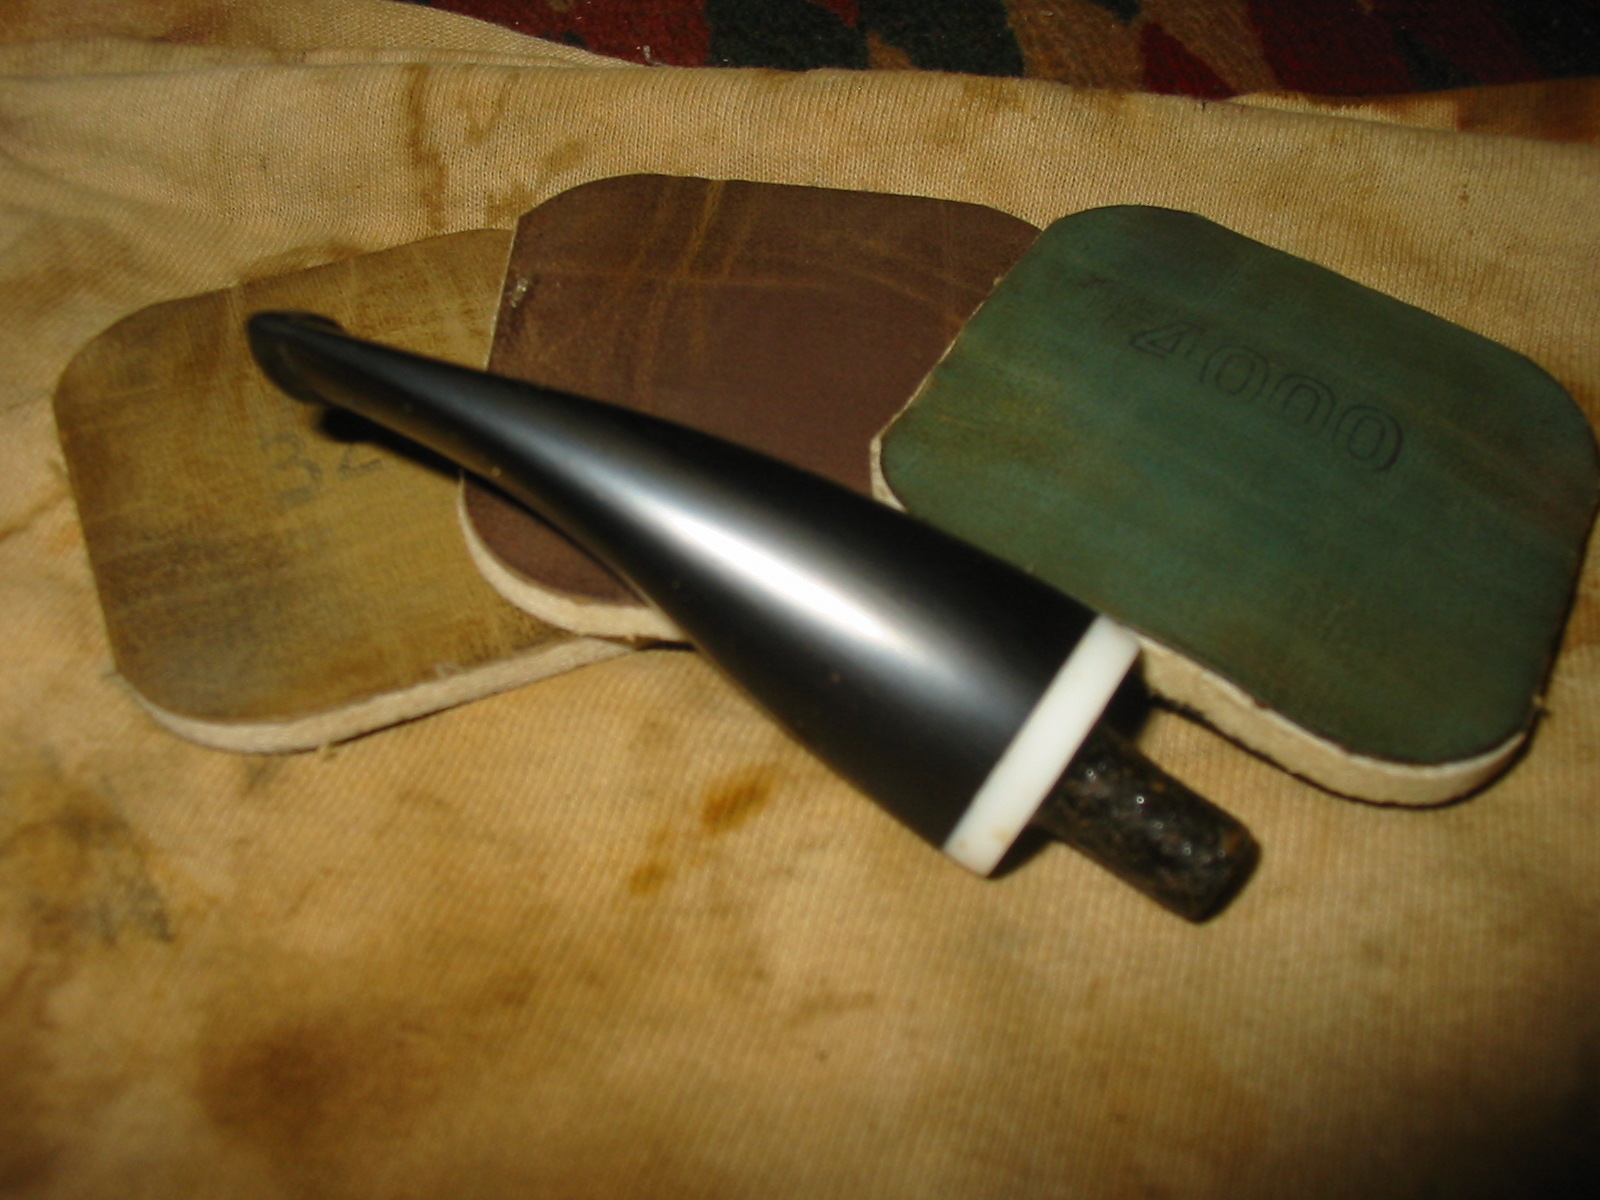
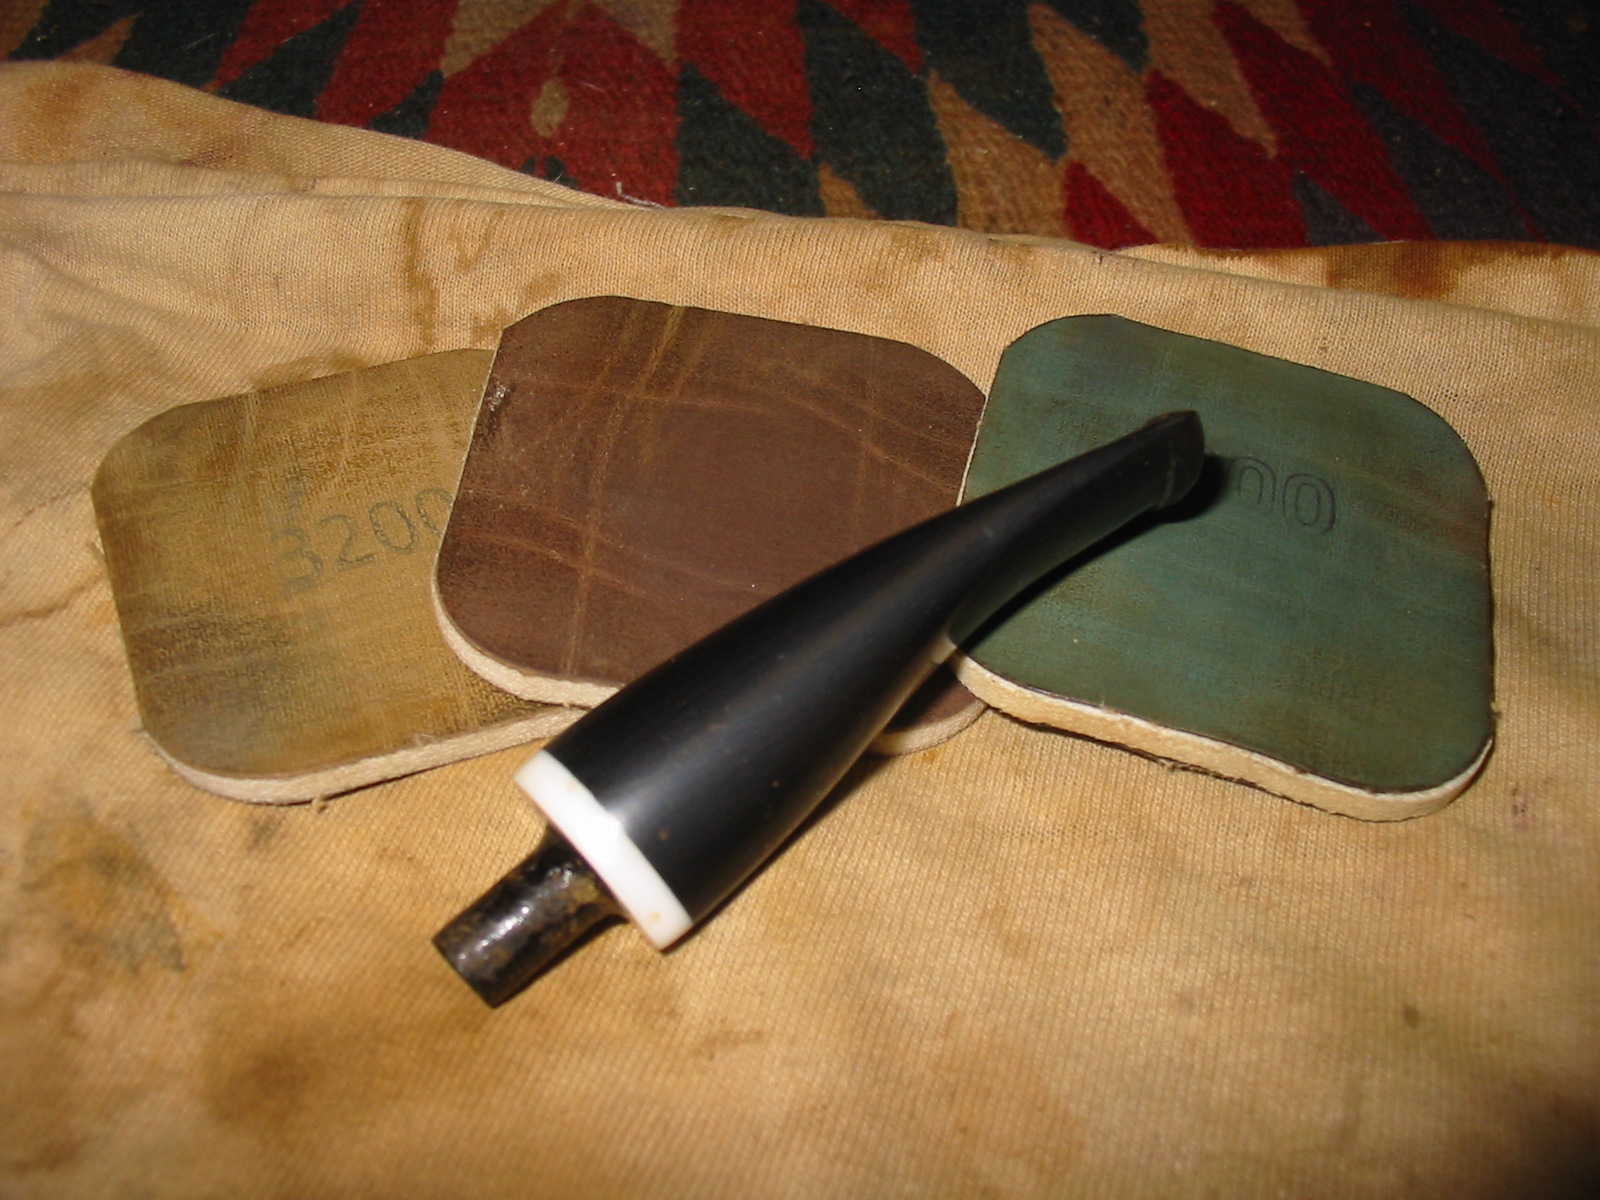
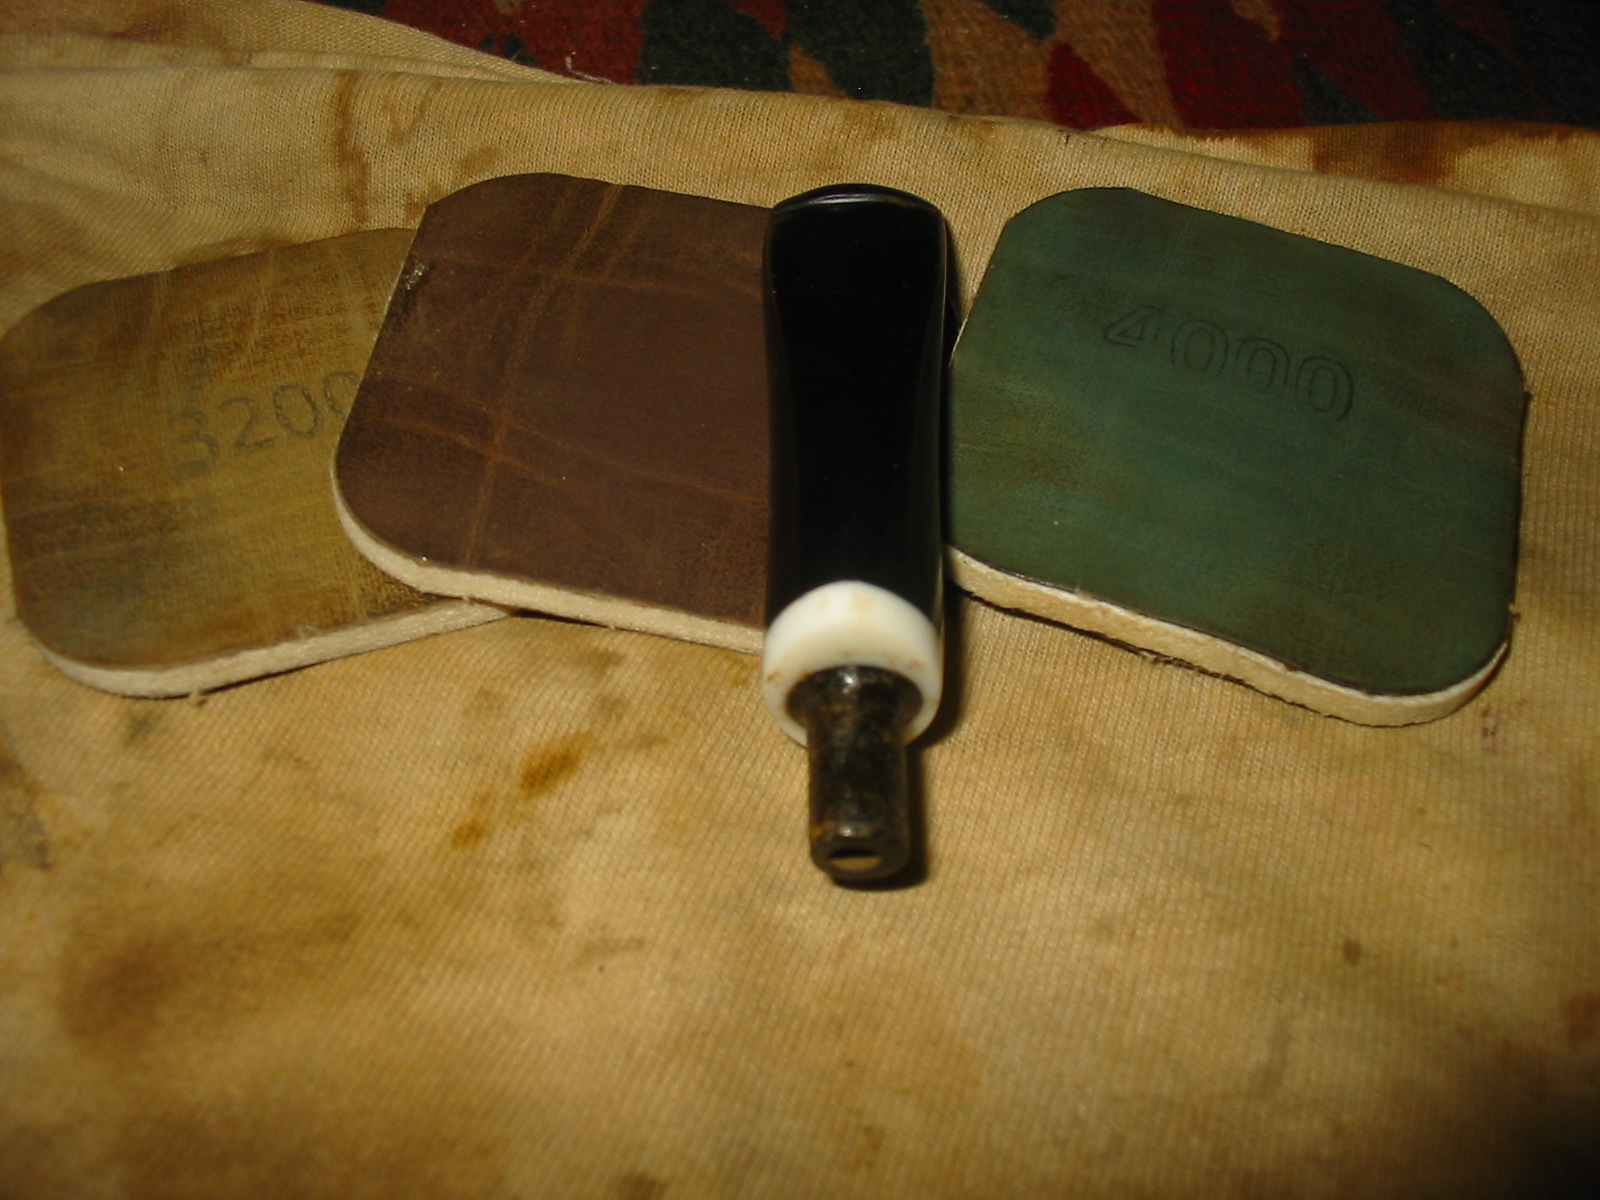
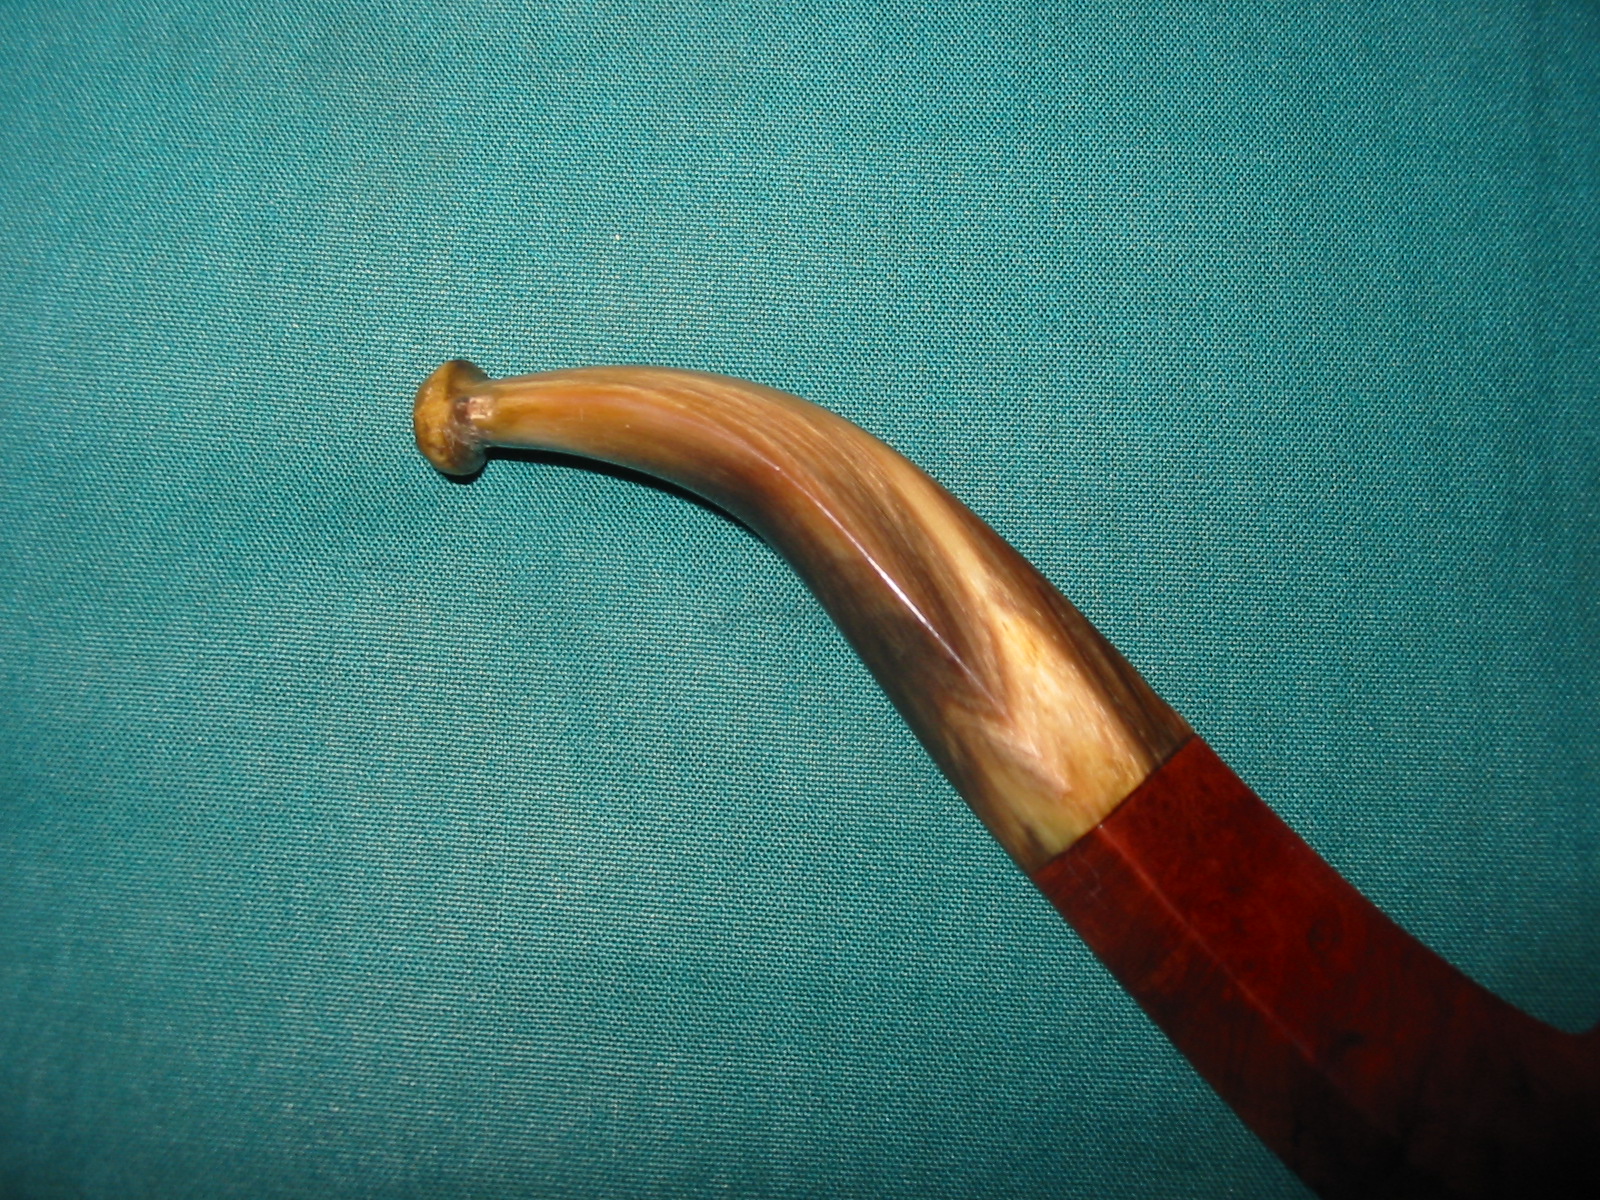
I buffed the stem with White Diamond on the buffer and the finished stem is shown below. The patch still shows some small holes that need to be repaired with superglue. The sanding and polishing made them very apparent in the first photo below. The patch at the sharp edge near the shank came out very well and is invisible. The horn of the rest of the stem has a deep sheen to it after all the sanding and polishing.
GFB20

GFB21

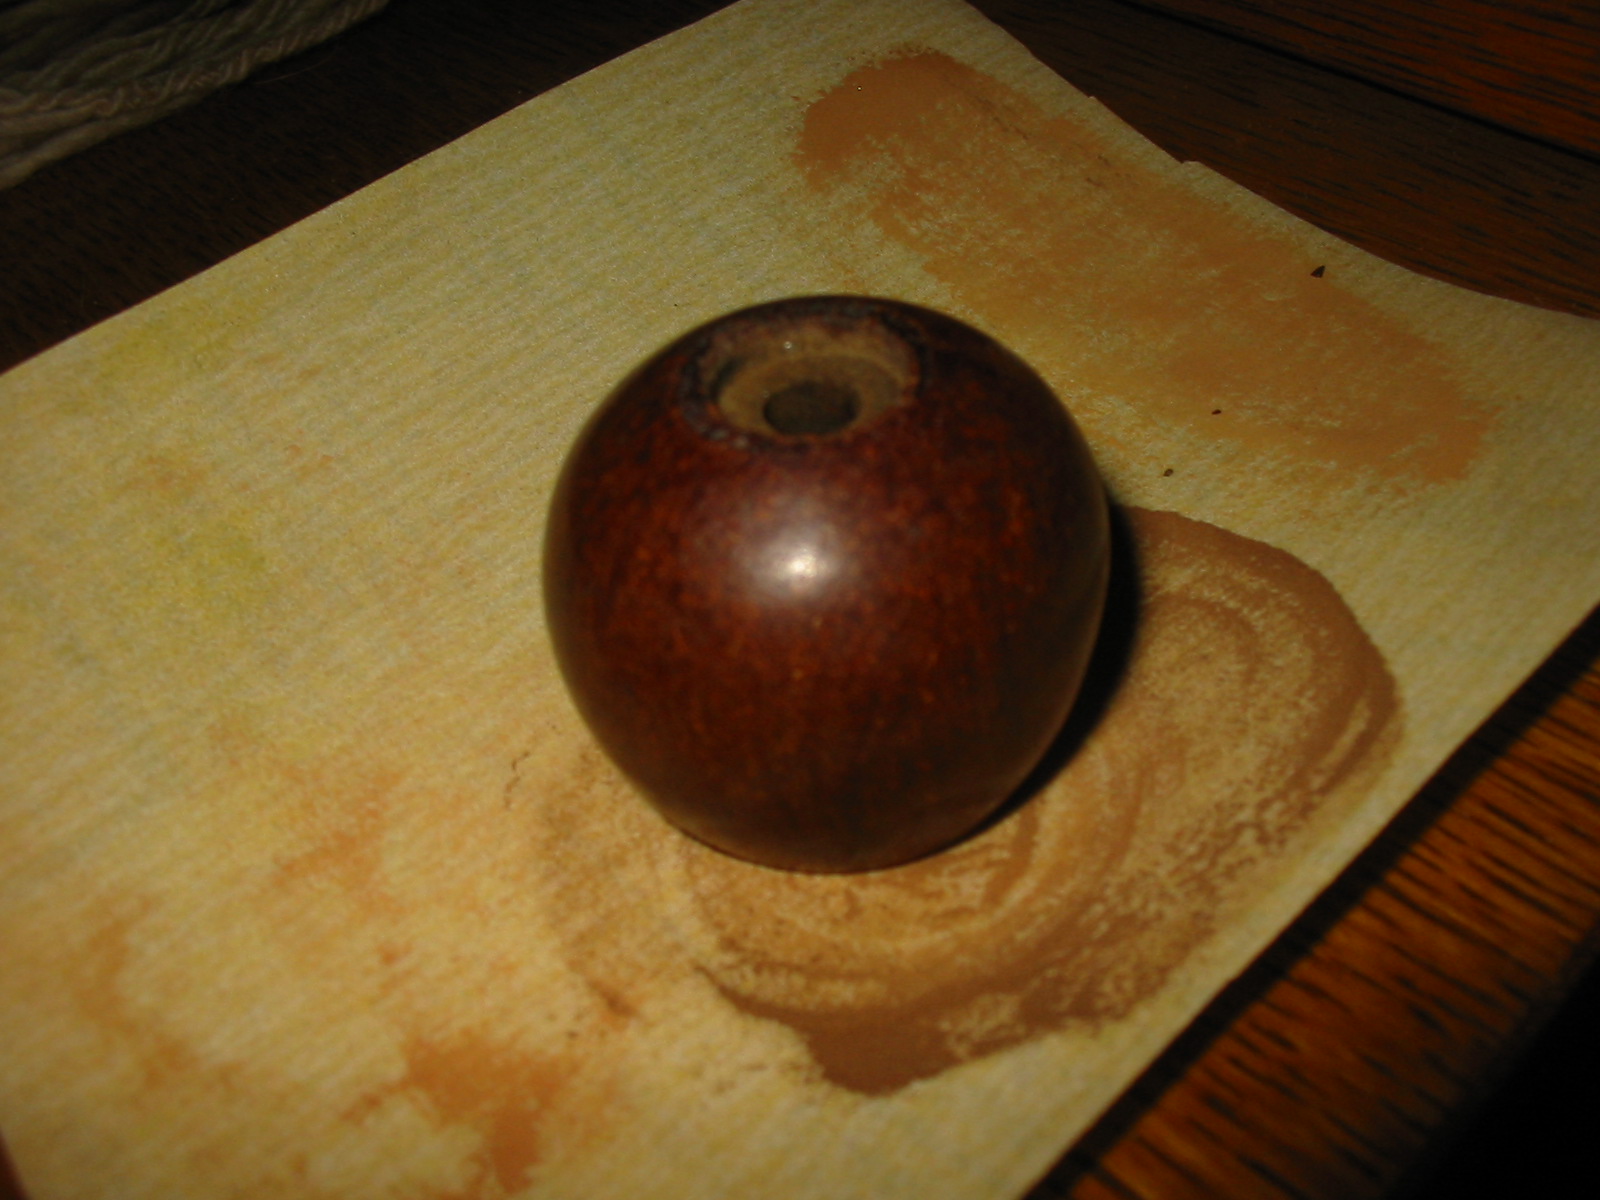
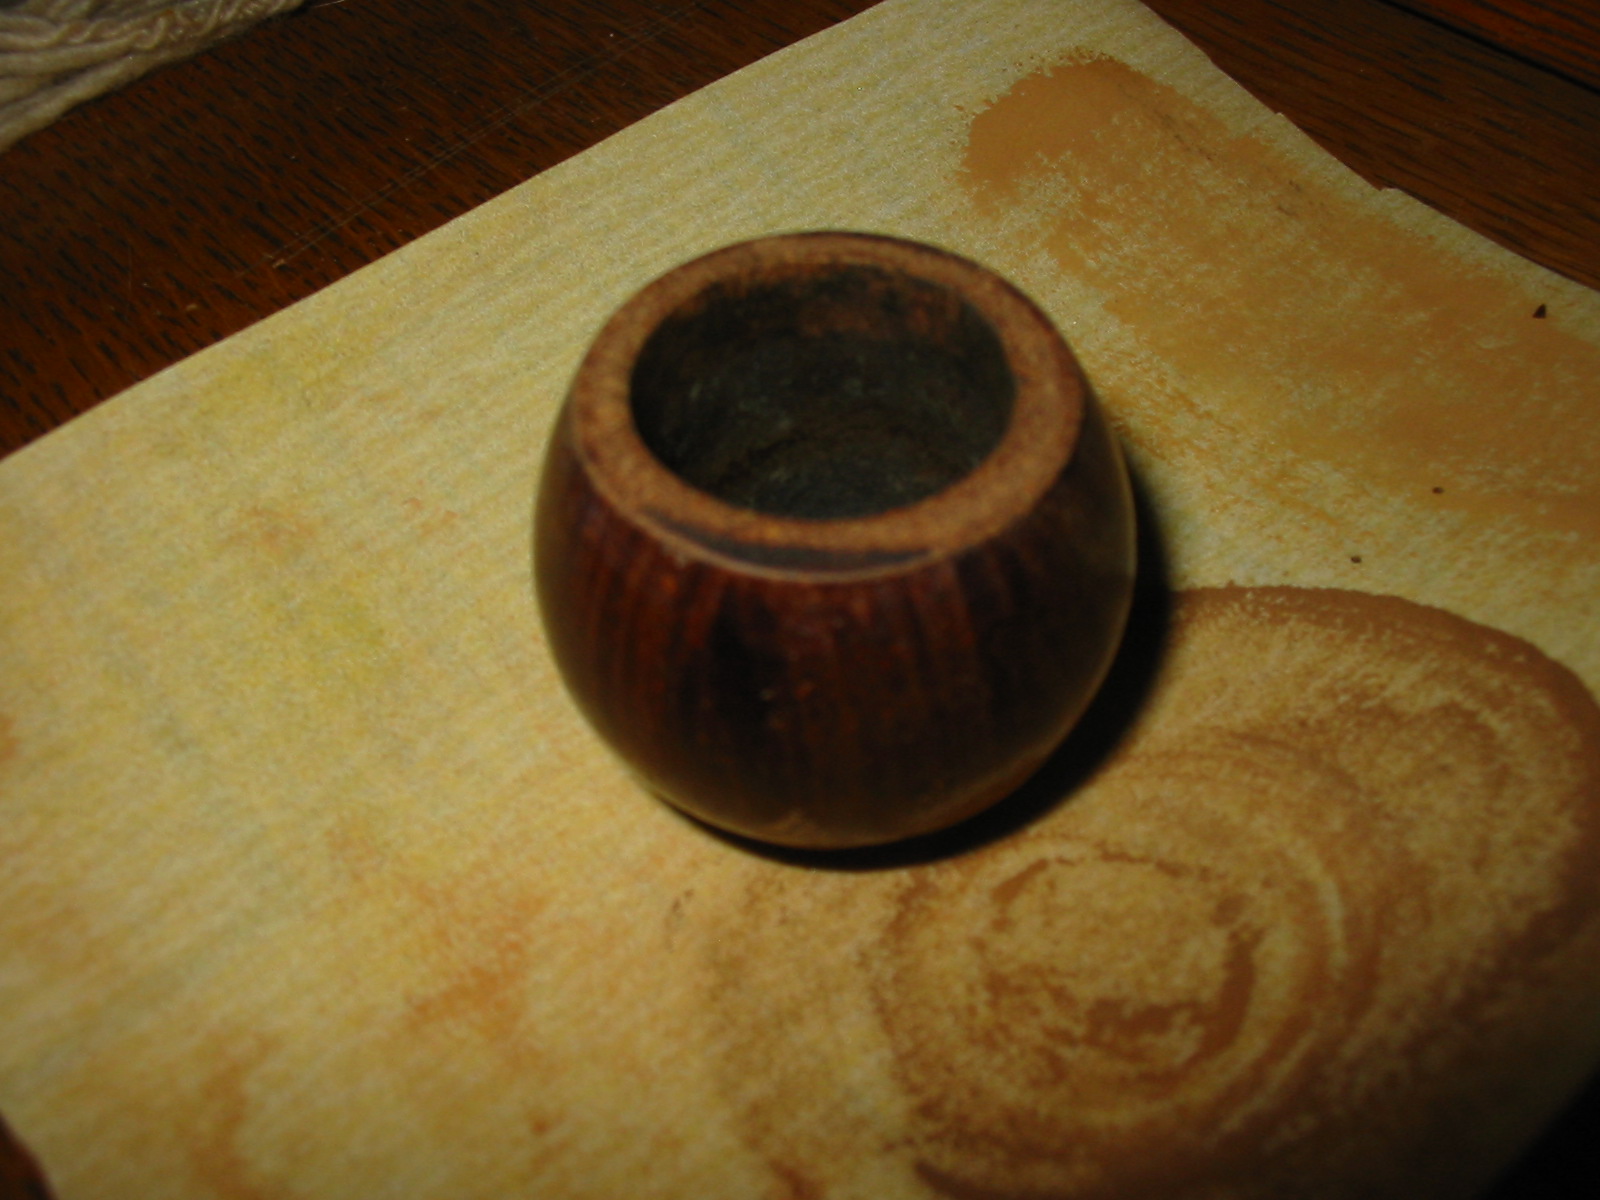
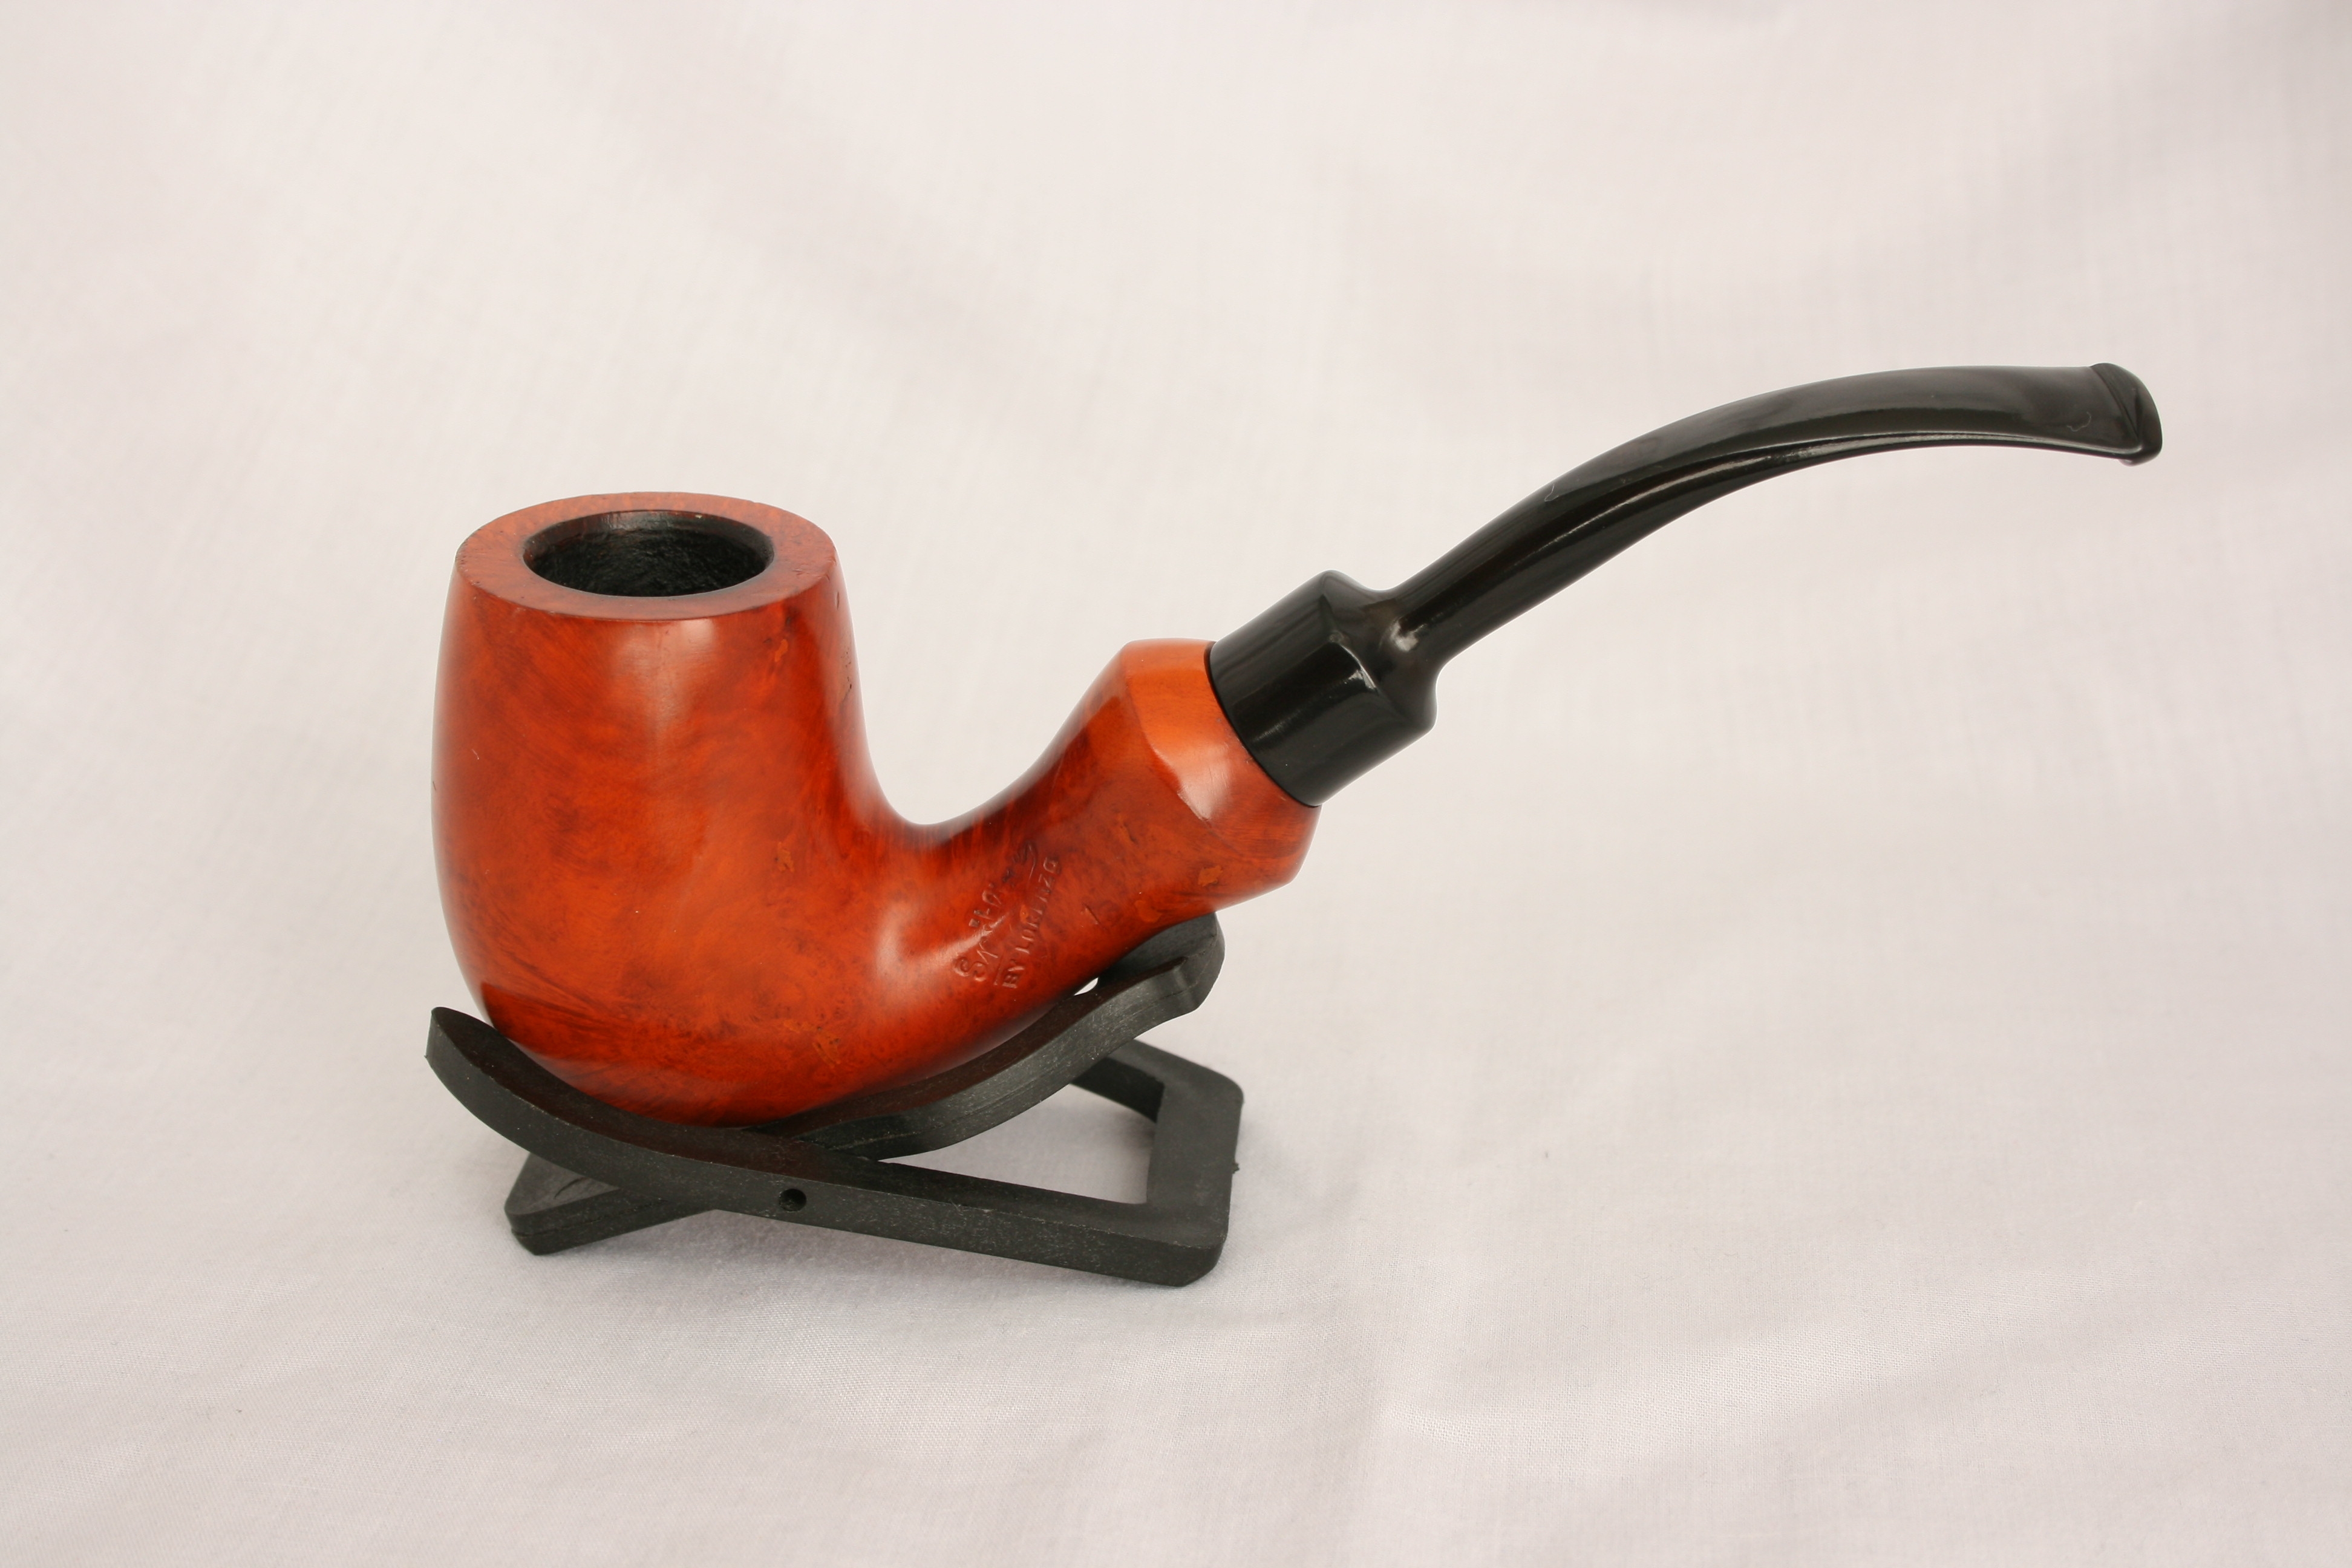
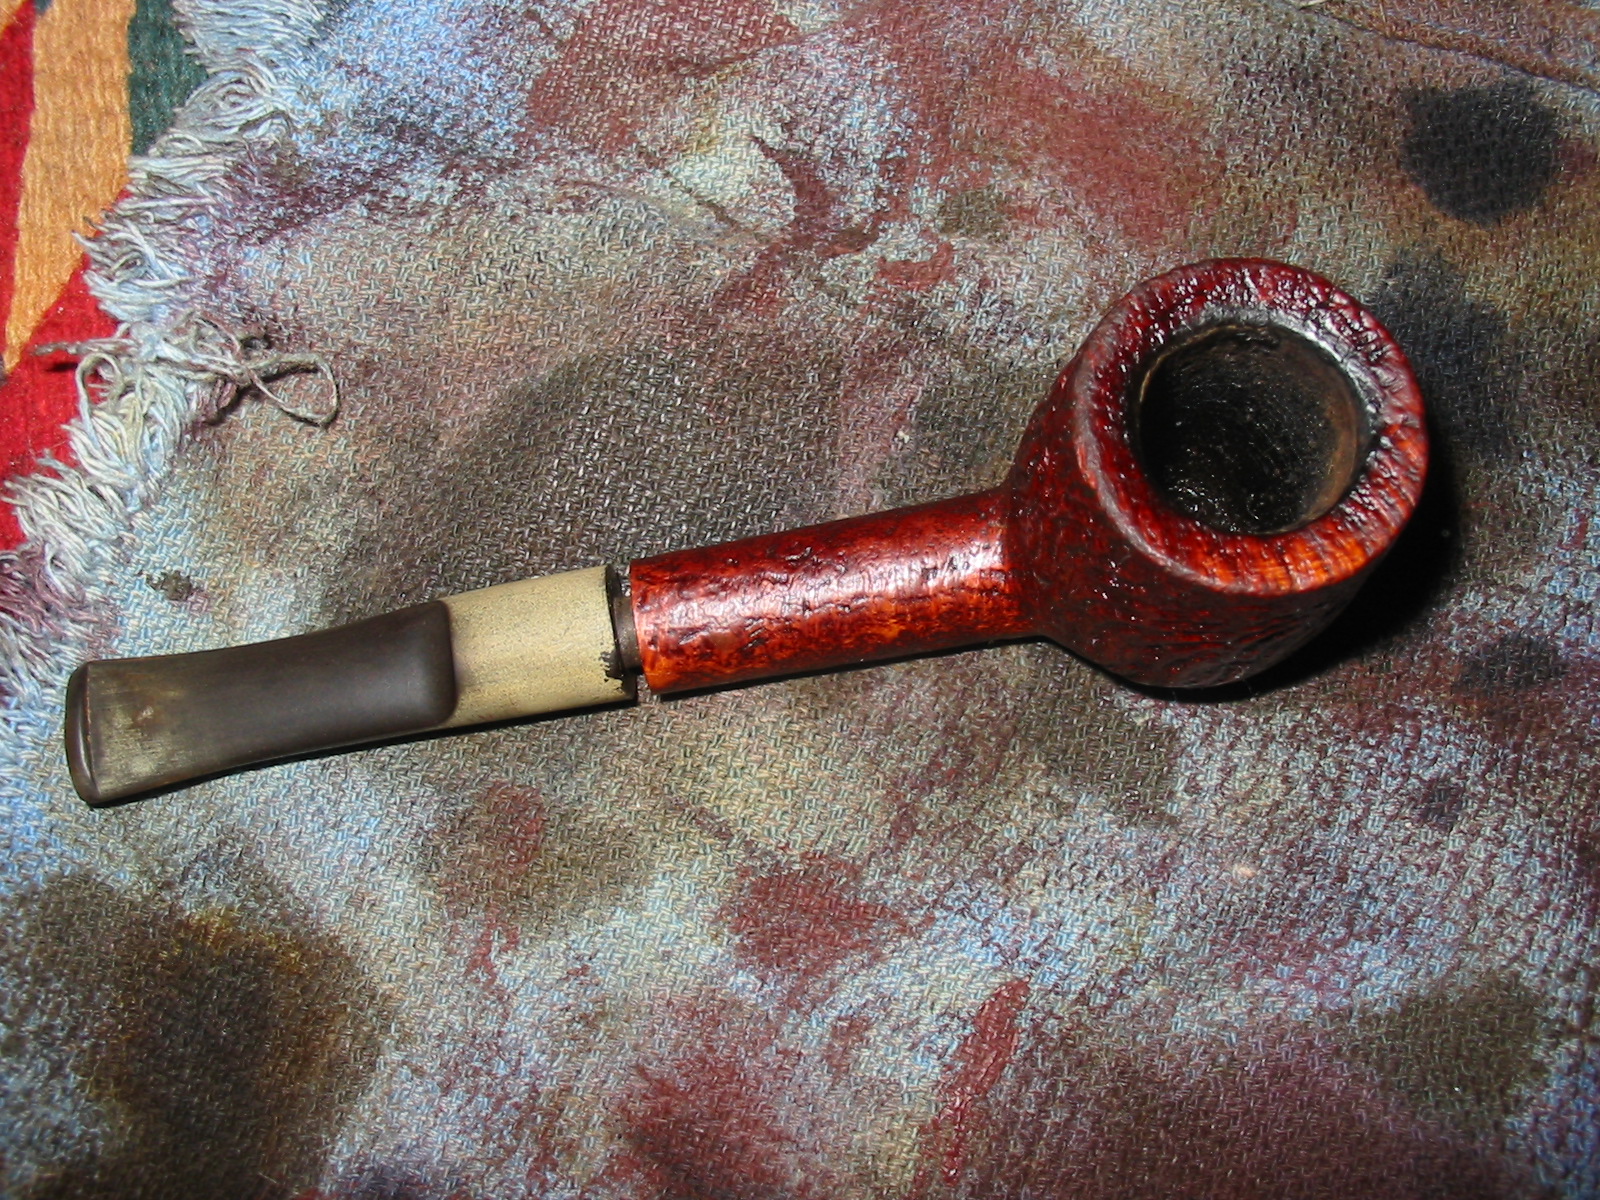
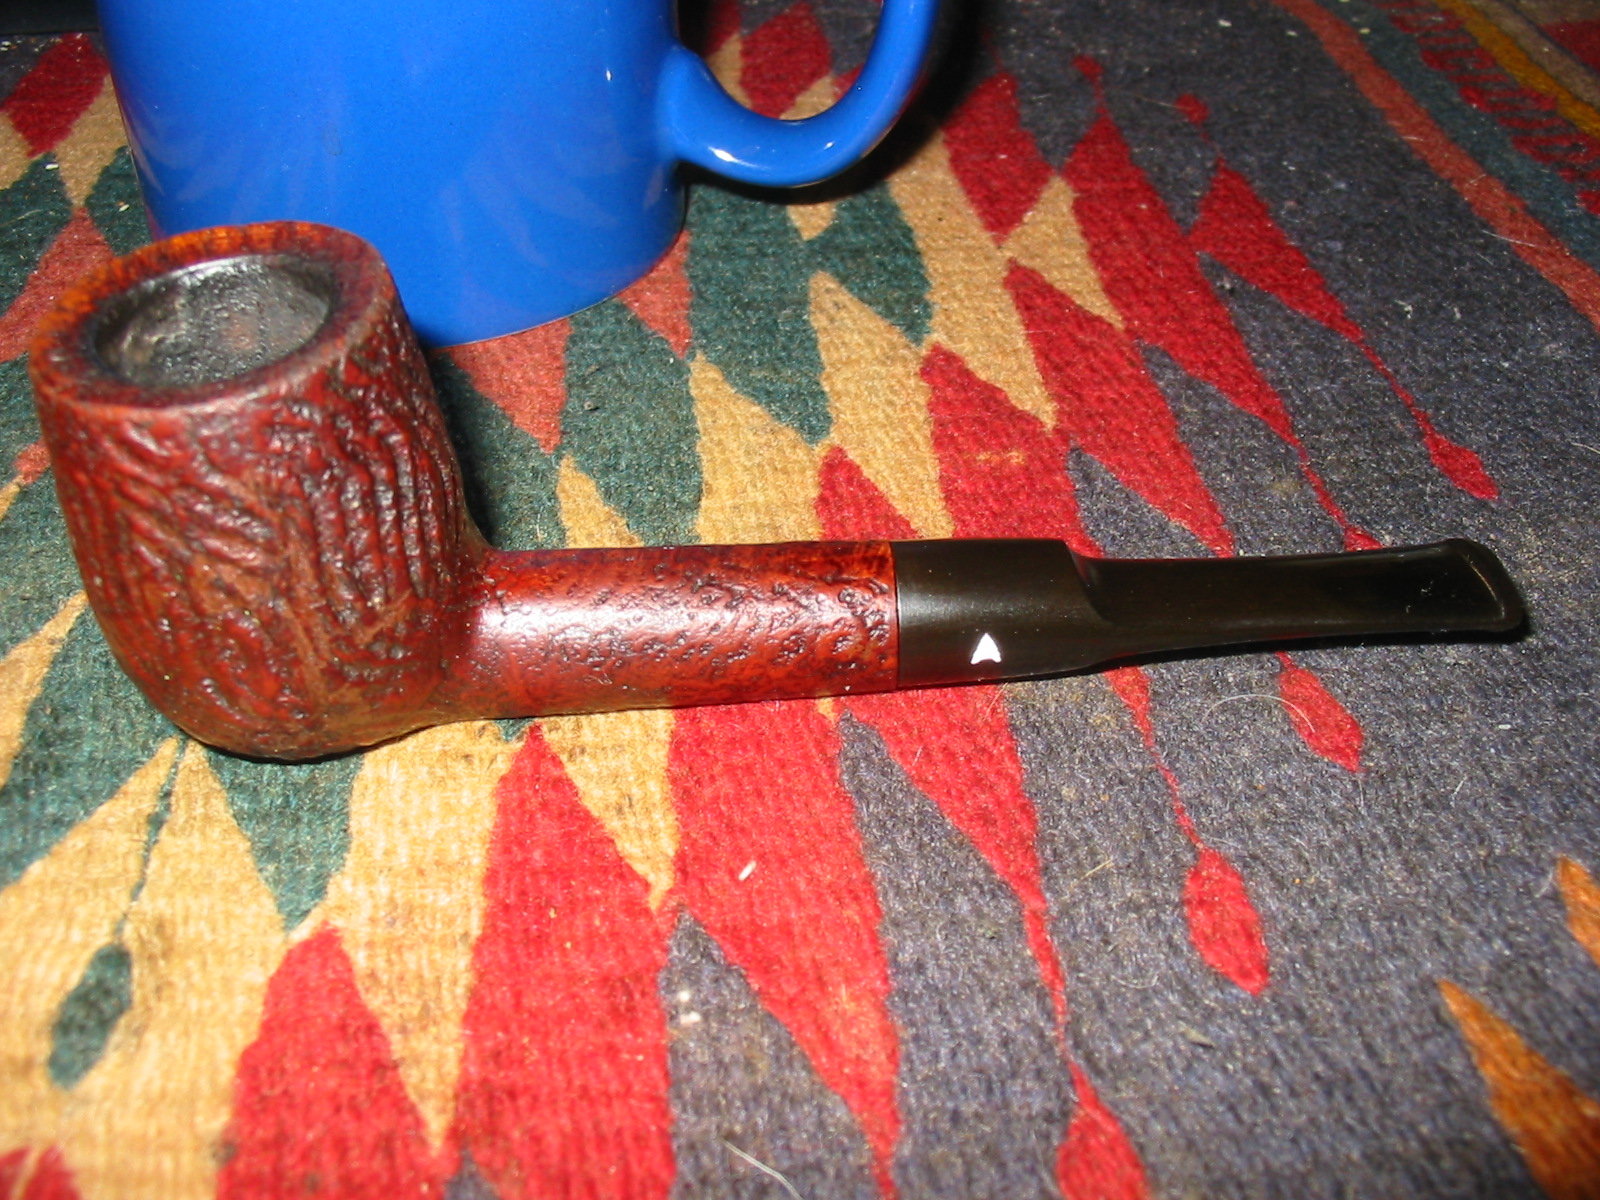
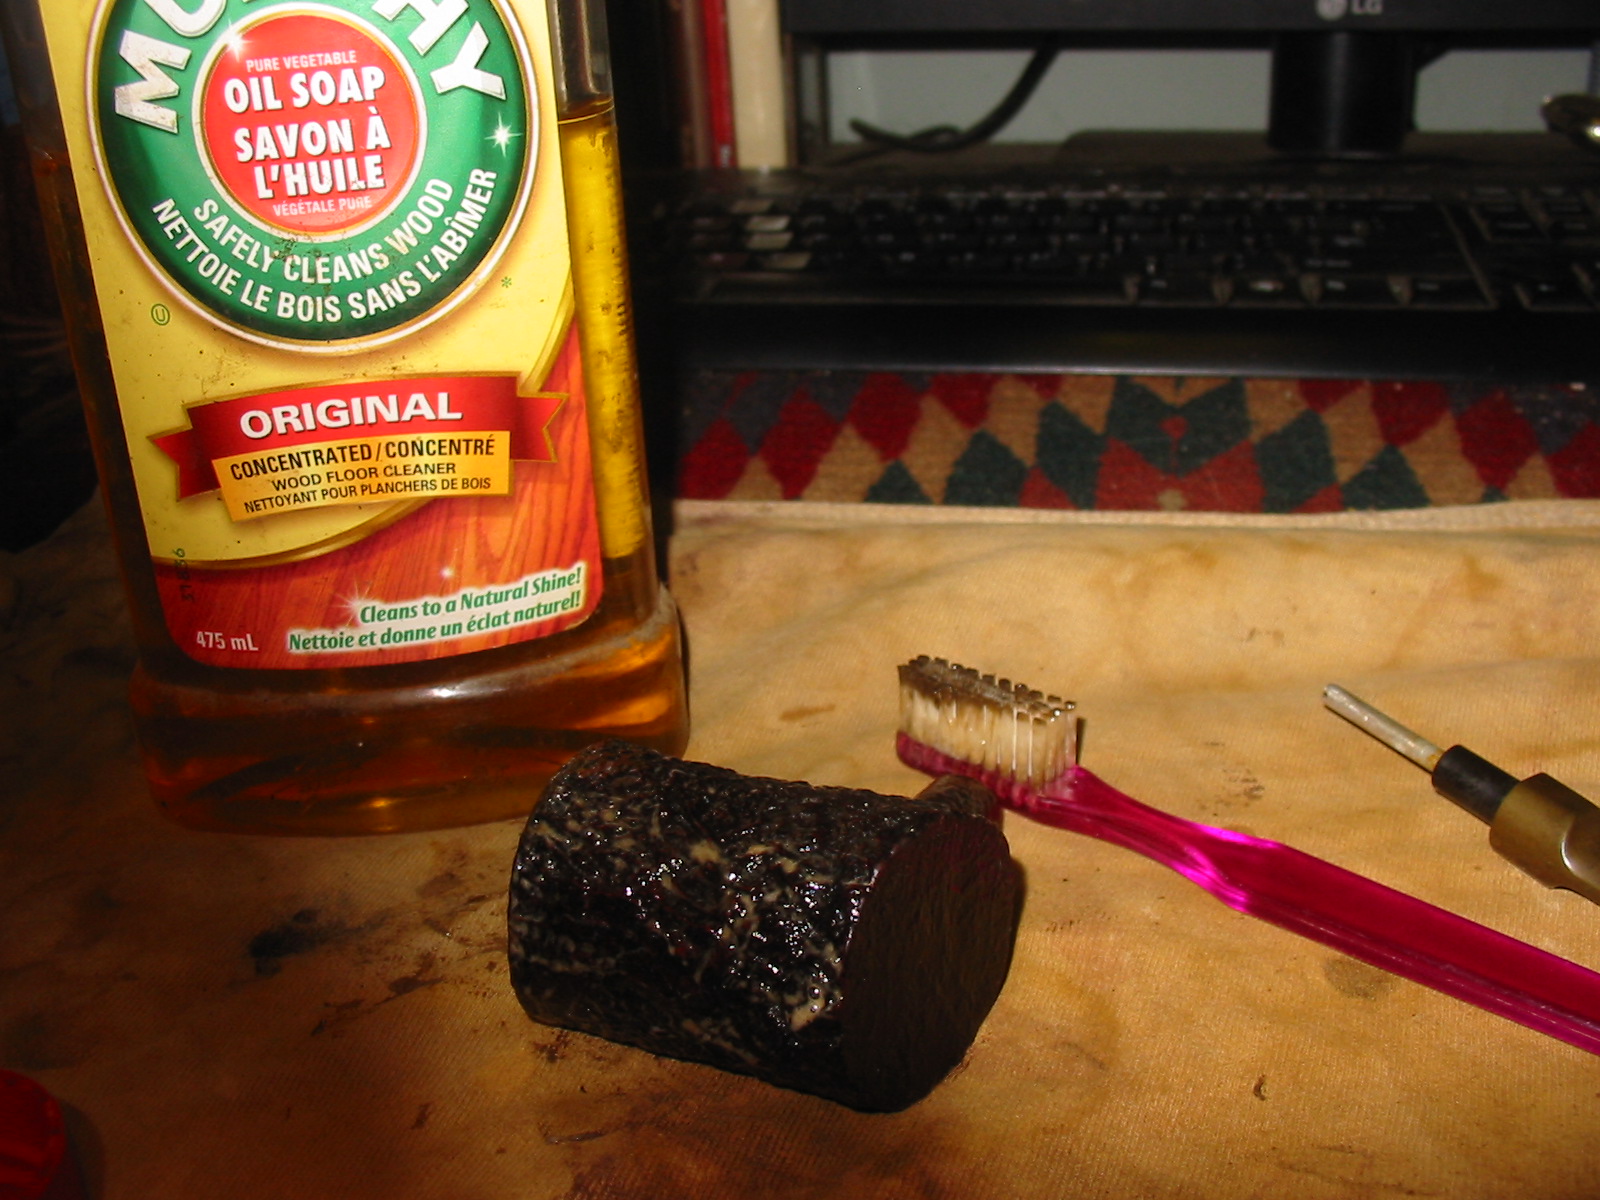
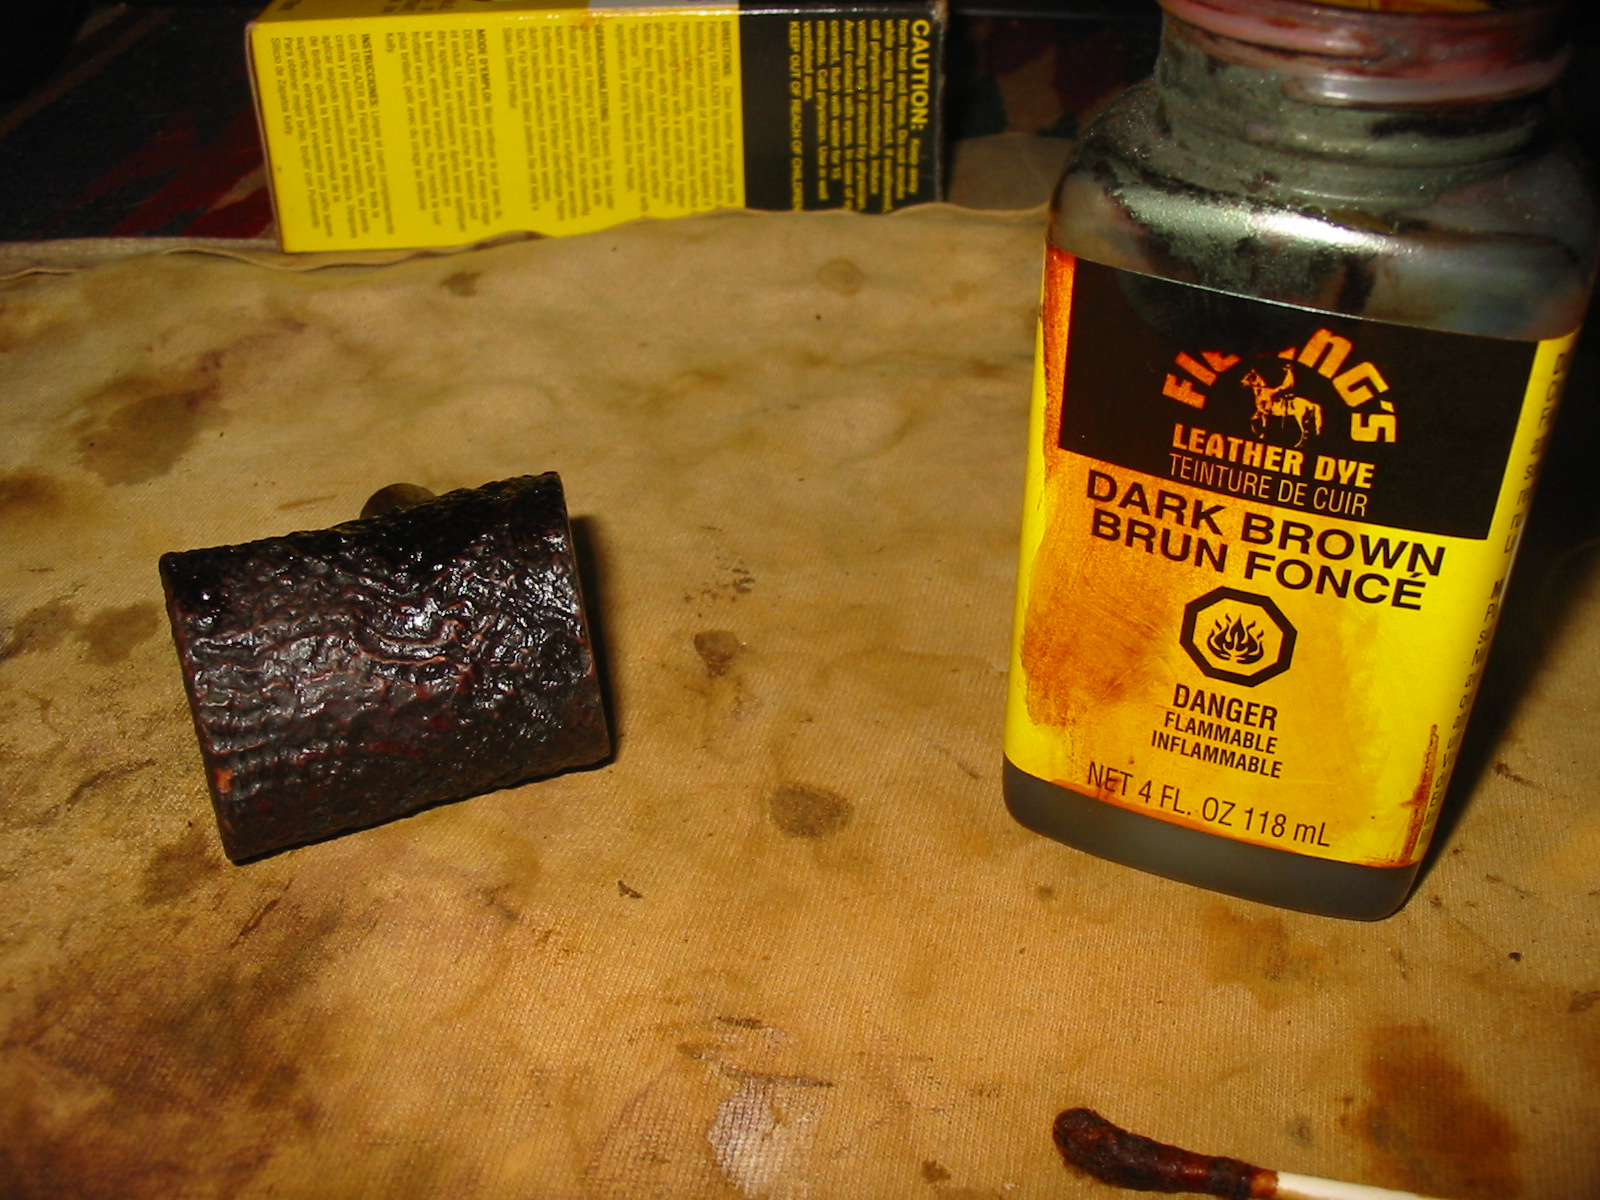
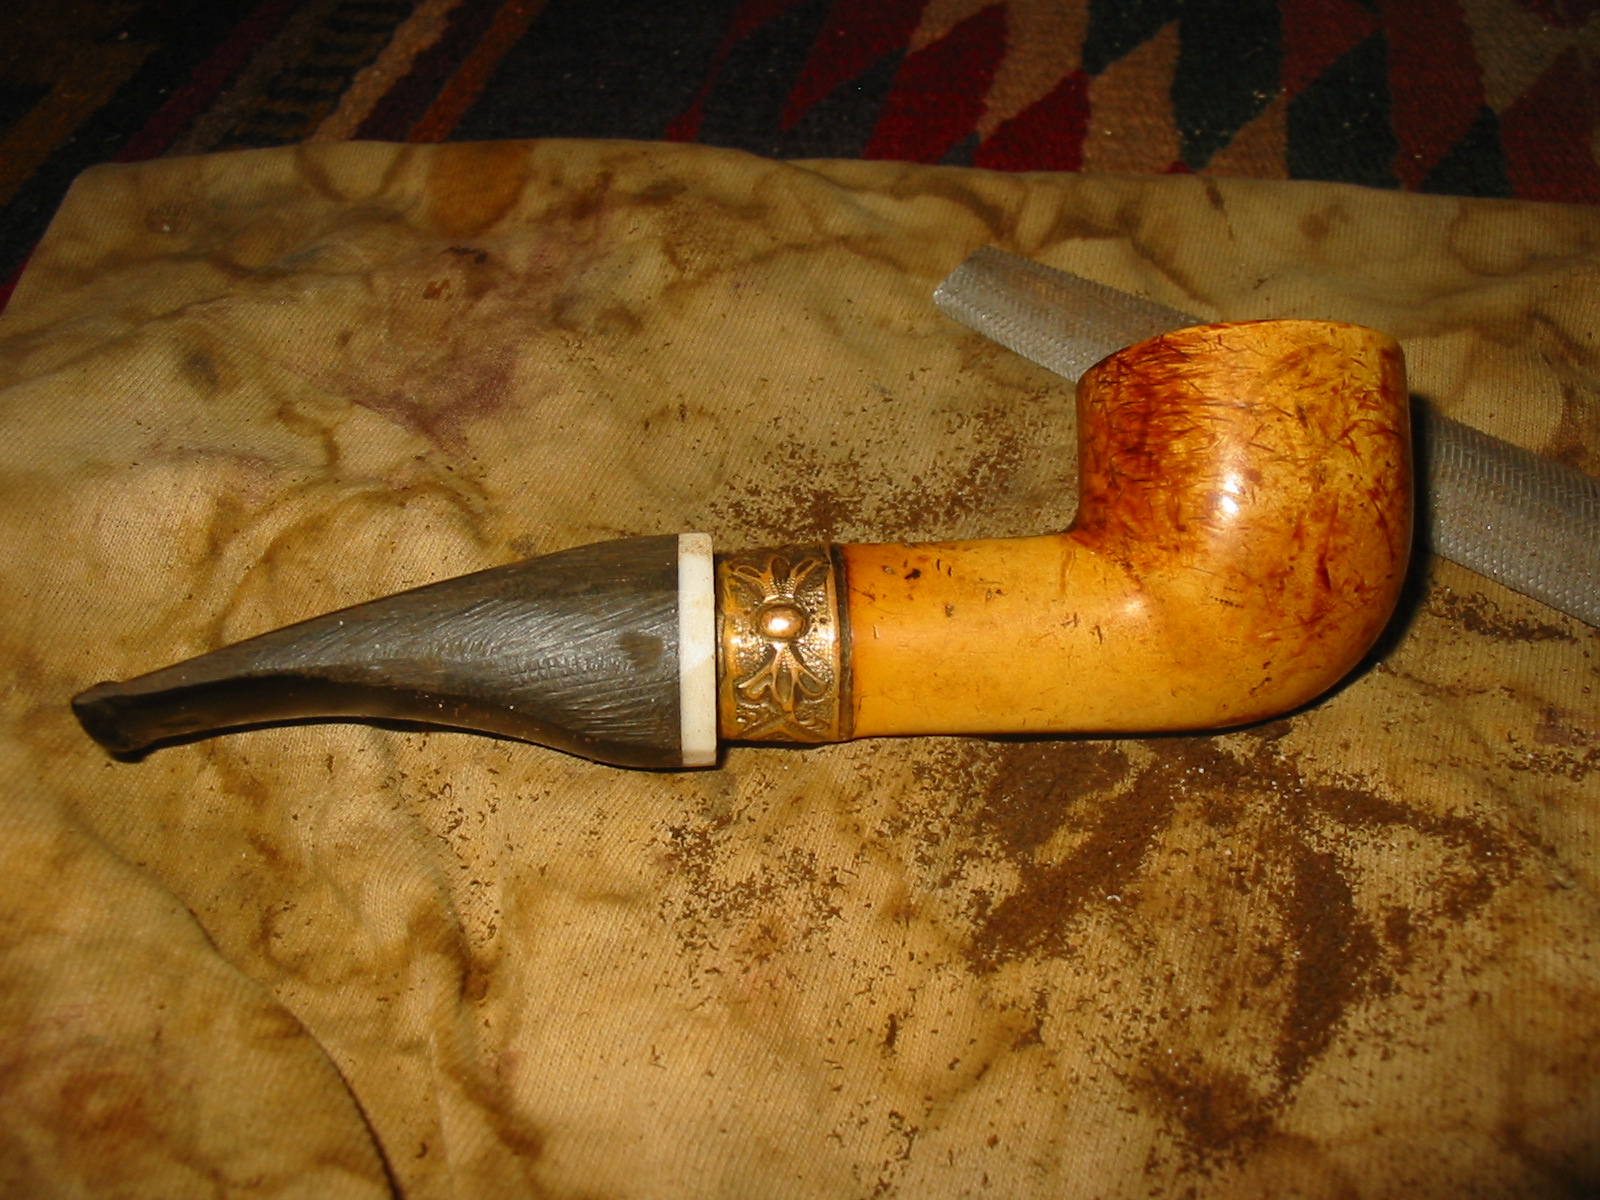
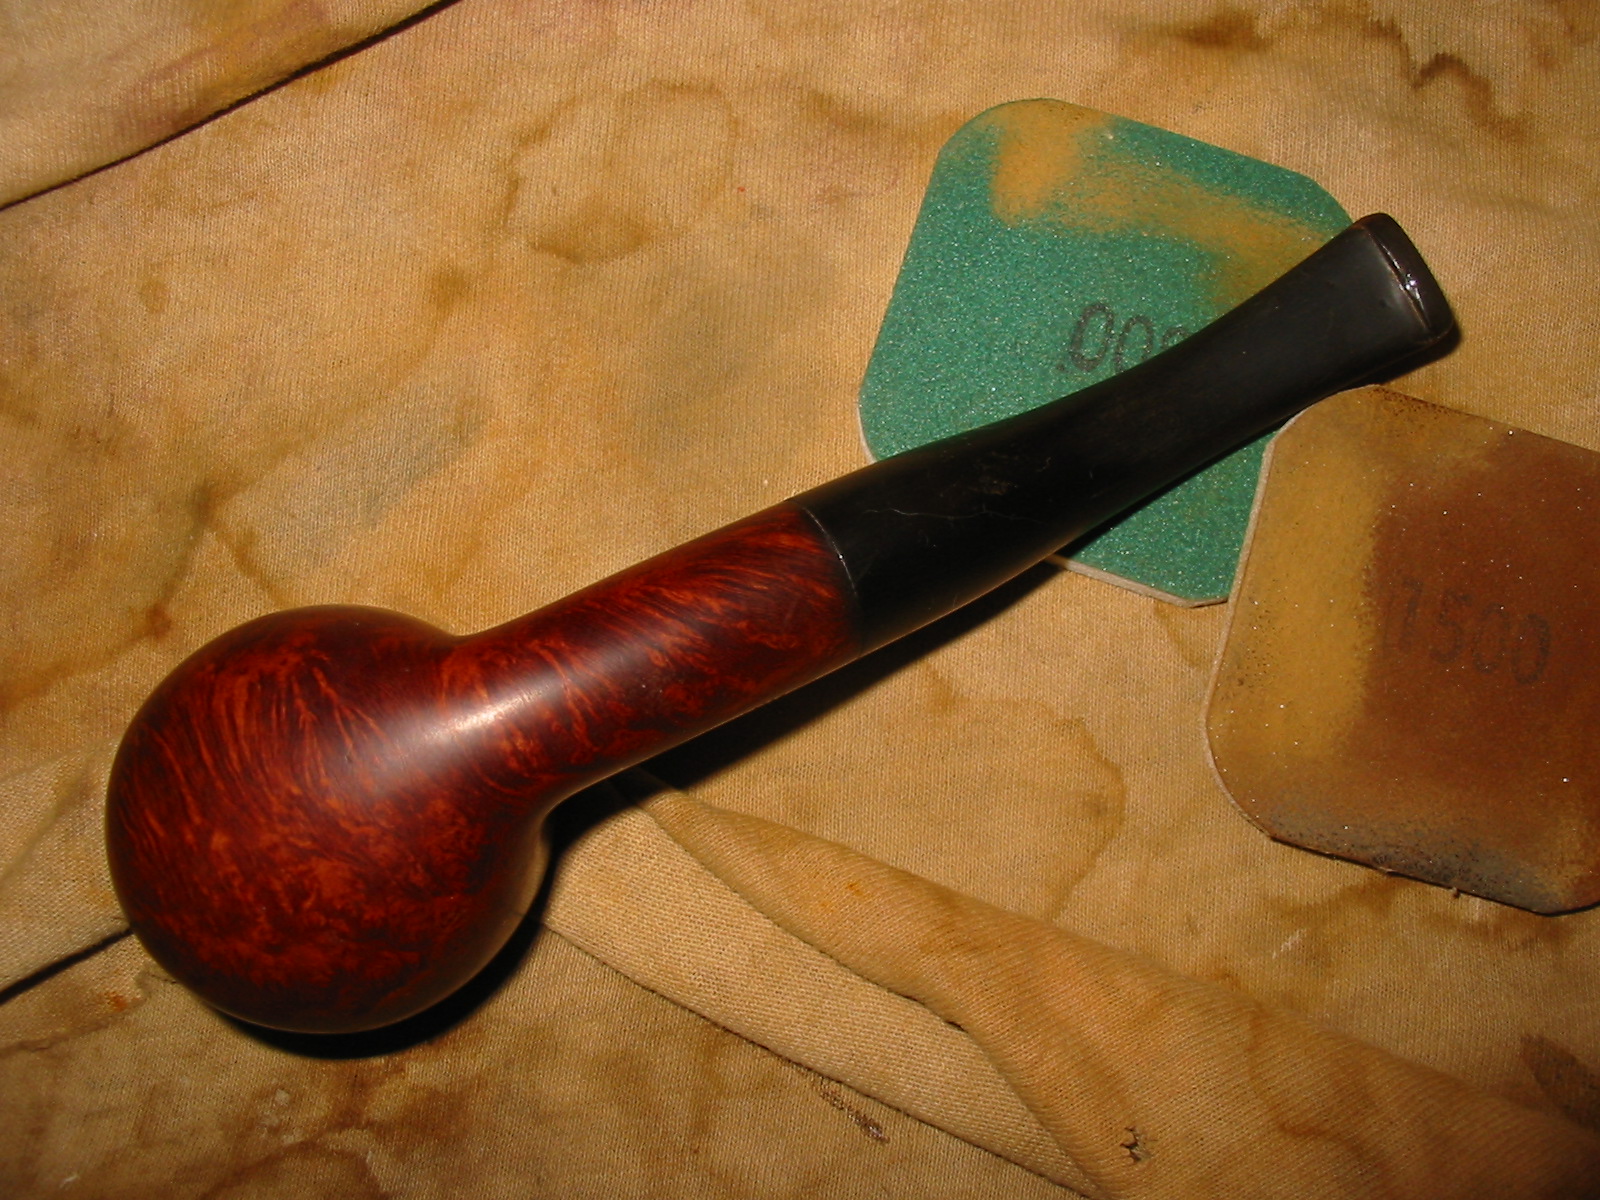
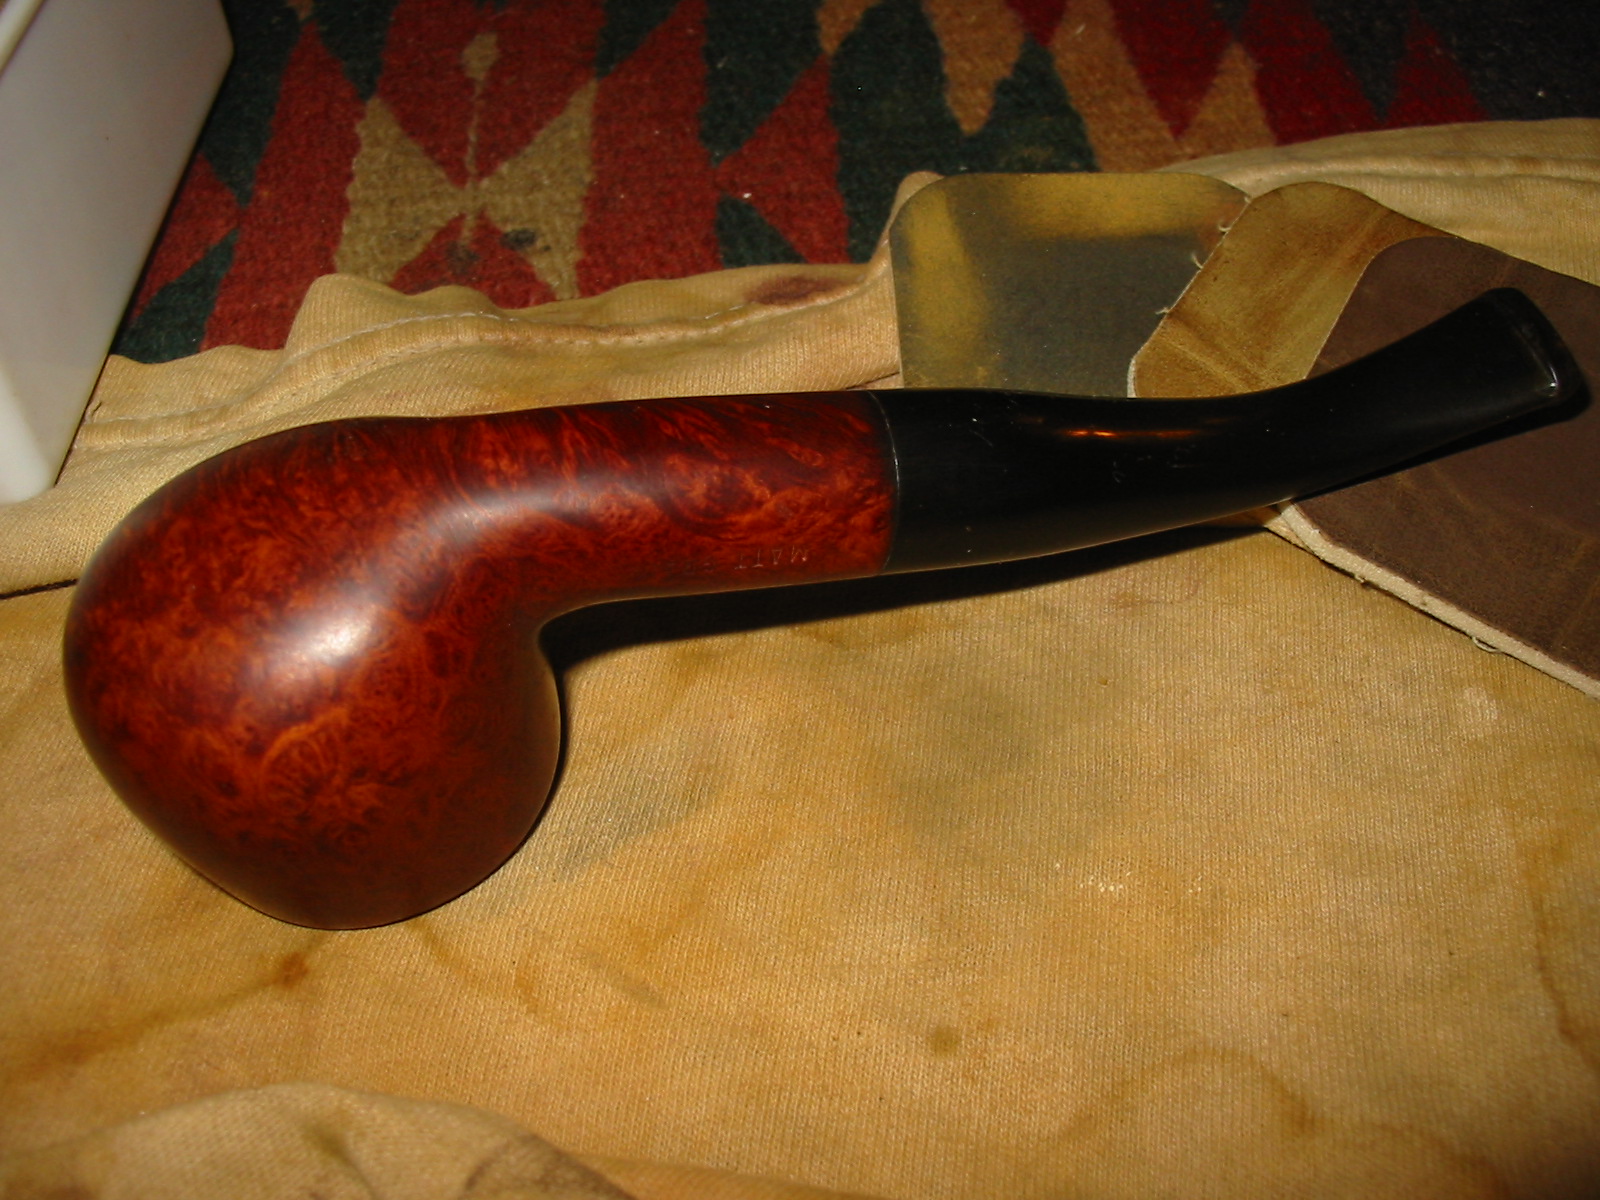
I unscrewed the stem and set it aside while I stained the bowl. I used a medium walnut stain mixed with linseed oil to stain this pipe. The colour is a rich brown with a slight red in certain lights. It matches the colour of the other GFB pipes that are in my collection. I buffed the bowl with White Diamond on the buffing wheel. Then I gave it a coat of carnauba wax and set it aside to work some more on the stem.
GFB22

GFB23

GFB24

GFB25

I was not completely satisfied with the stem patch so I sanded it next to the button some more and cleaned it out. I put some more of the superglue in the low spots and set it aside to cure while I went to work for the day.
GFB26

GFB27

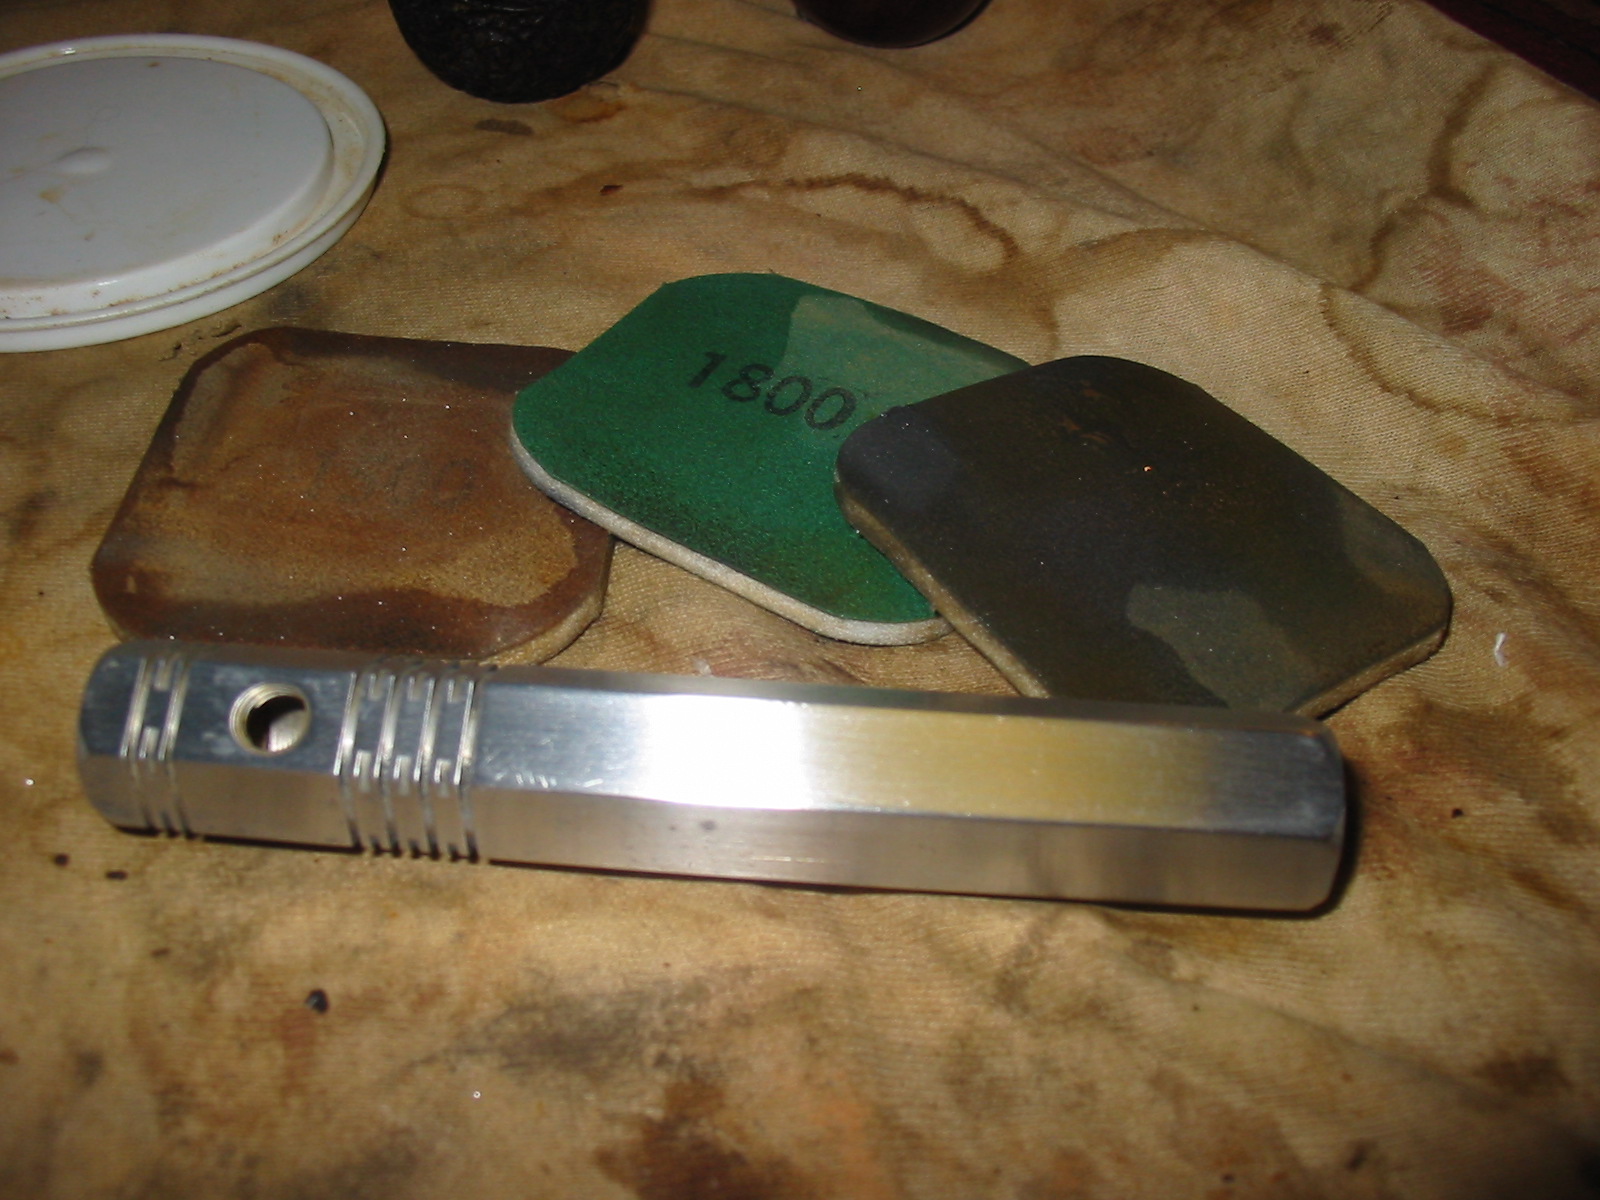
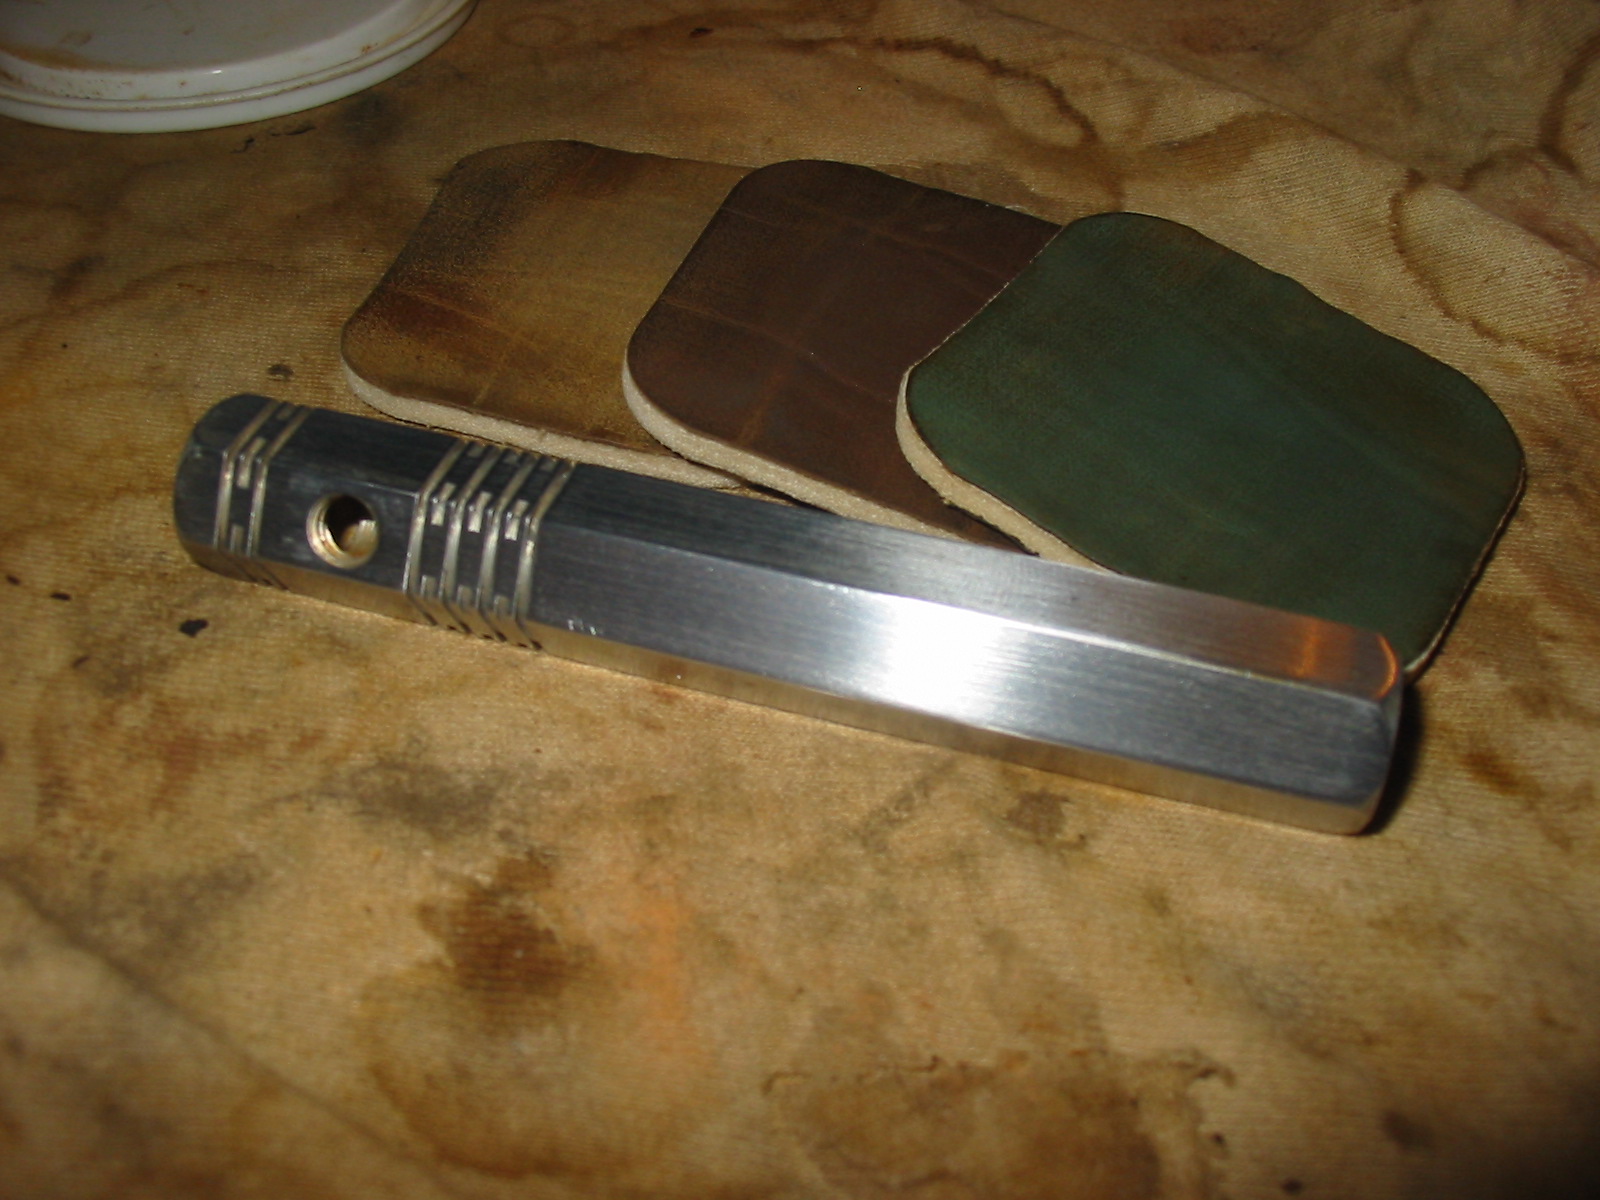
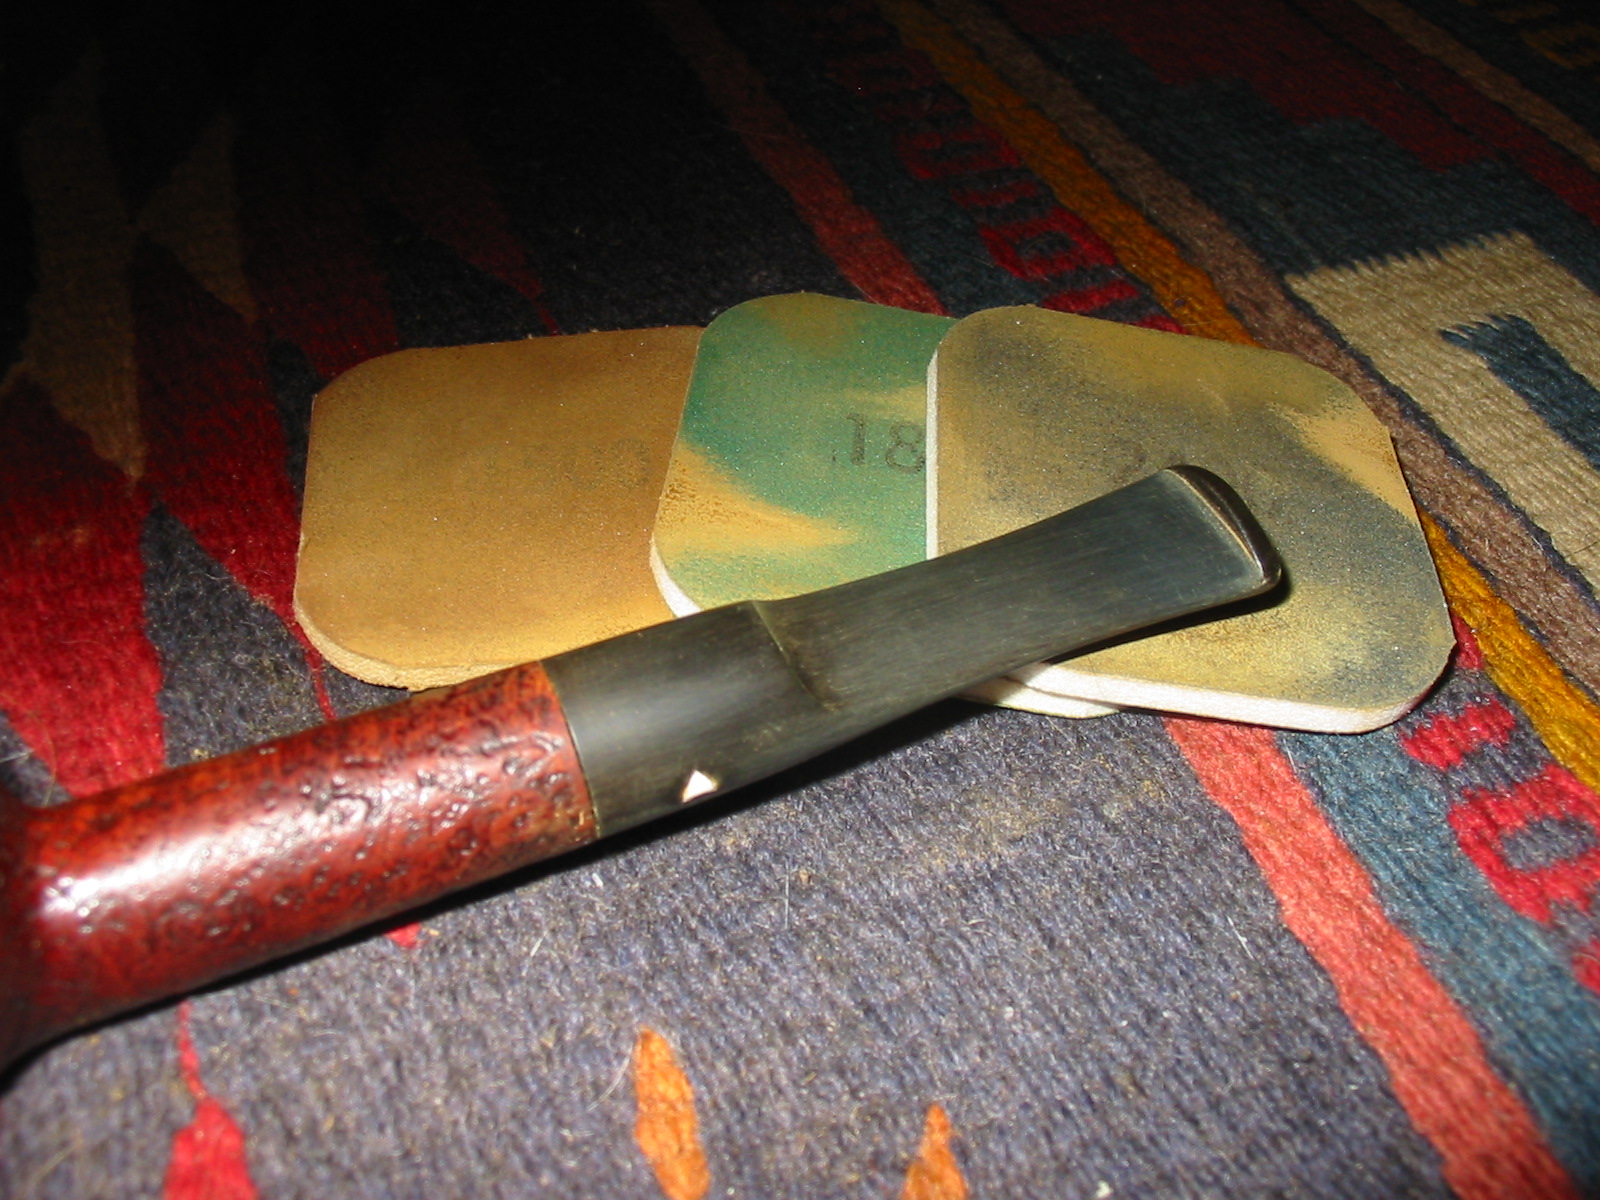
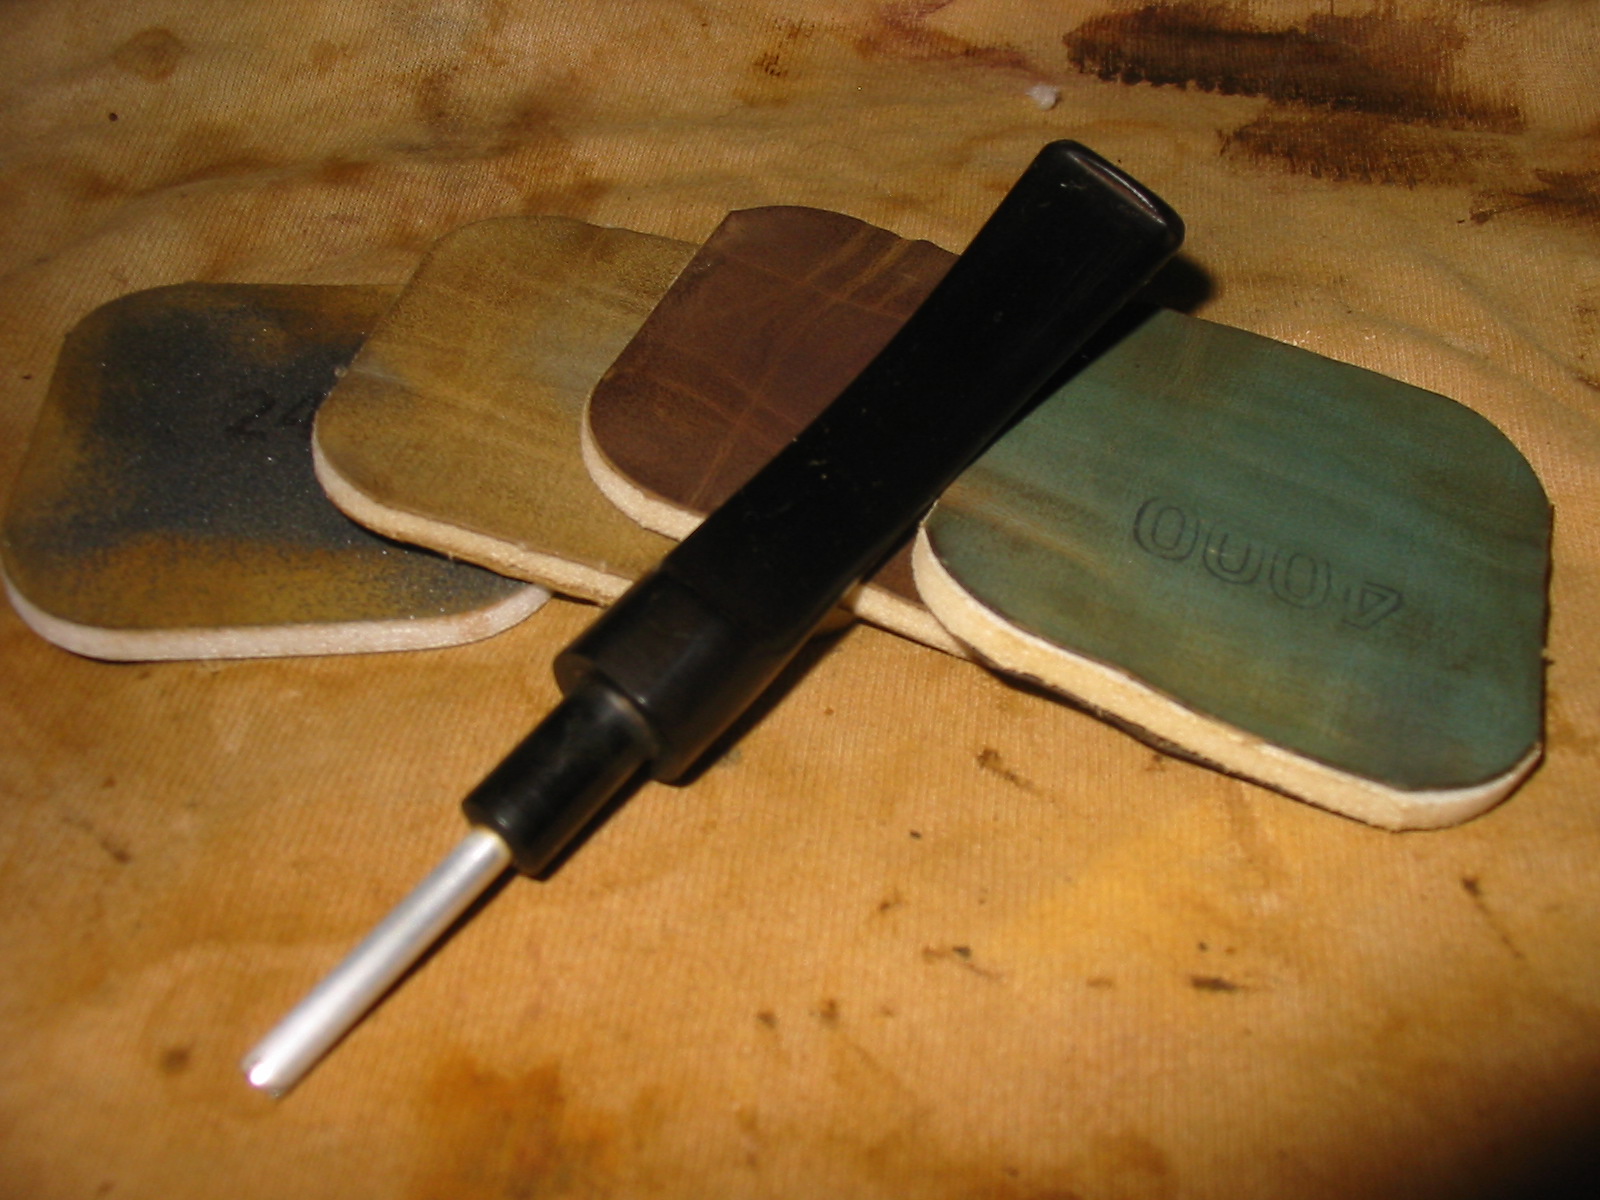
When I returned the glue was hard and the patch a solid bubble on the surface of the stem. I sanded it with the medium grit emery paper and then 220 grit sandpaper to remove the over fill. I always over fill the spots as the glue shrinks as it dries. I have learned that it is easier to remove the excess than to continue to fill and sand repeatedly. I sanded it with a medium grit sanding sponge and then went through the grits of micromesh sanding pads again from 1500-12,000 grit. When I had finished I rubbed the stem down with Obsidian Oil and set it aside to absorb. Once done I buffed it on the wheel with multiple coats of carnauba wax.
GFB28

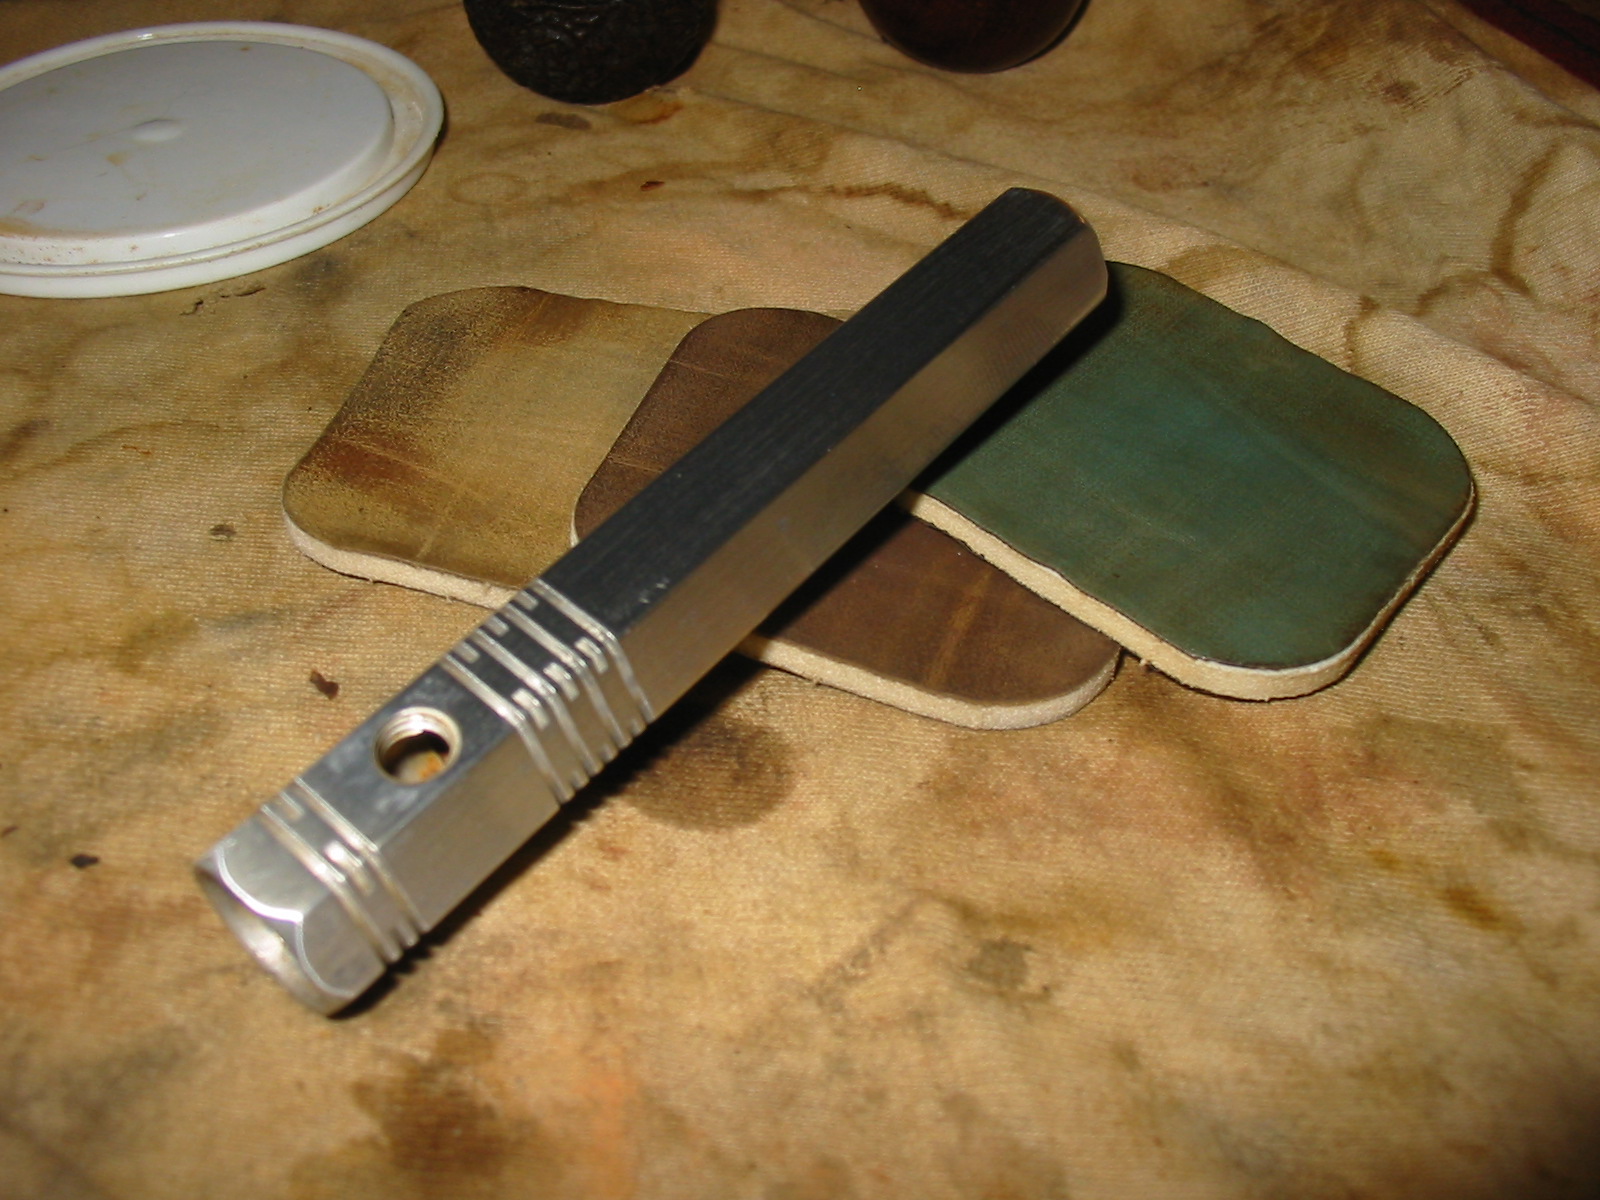
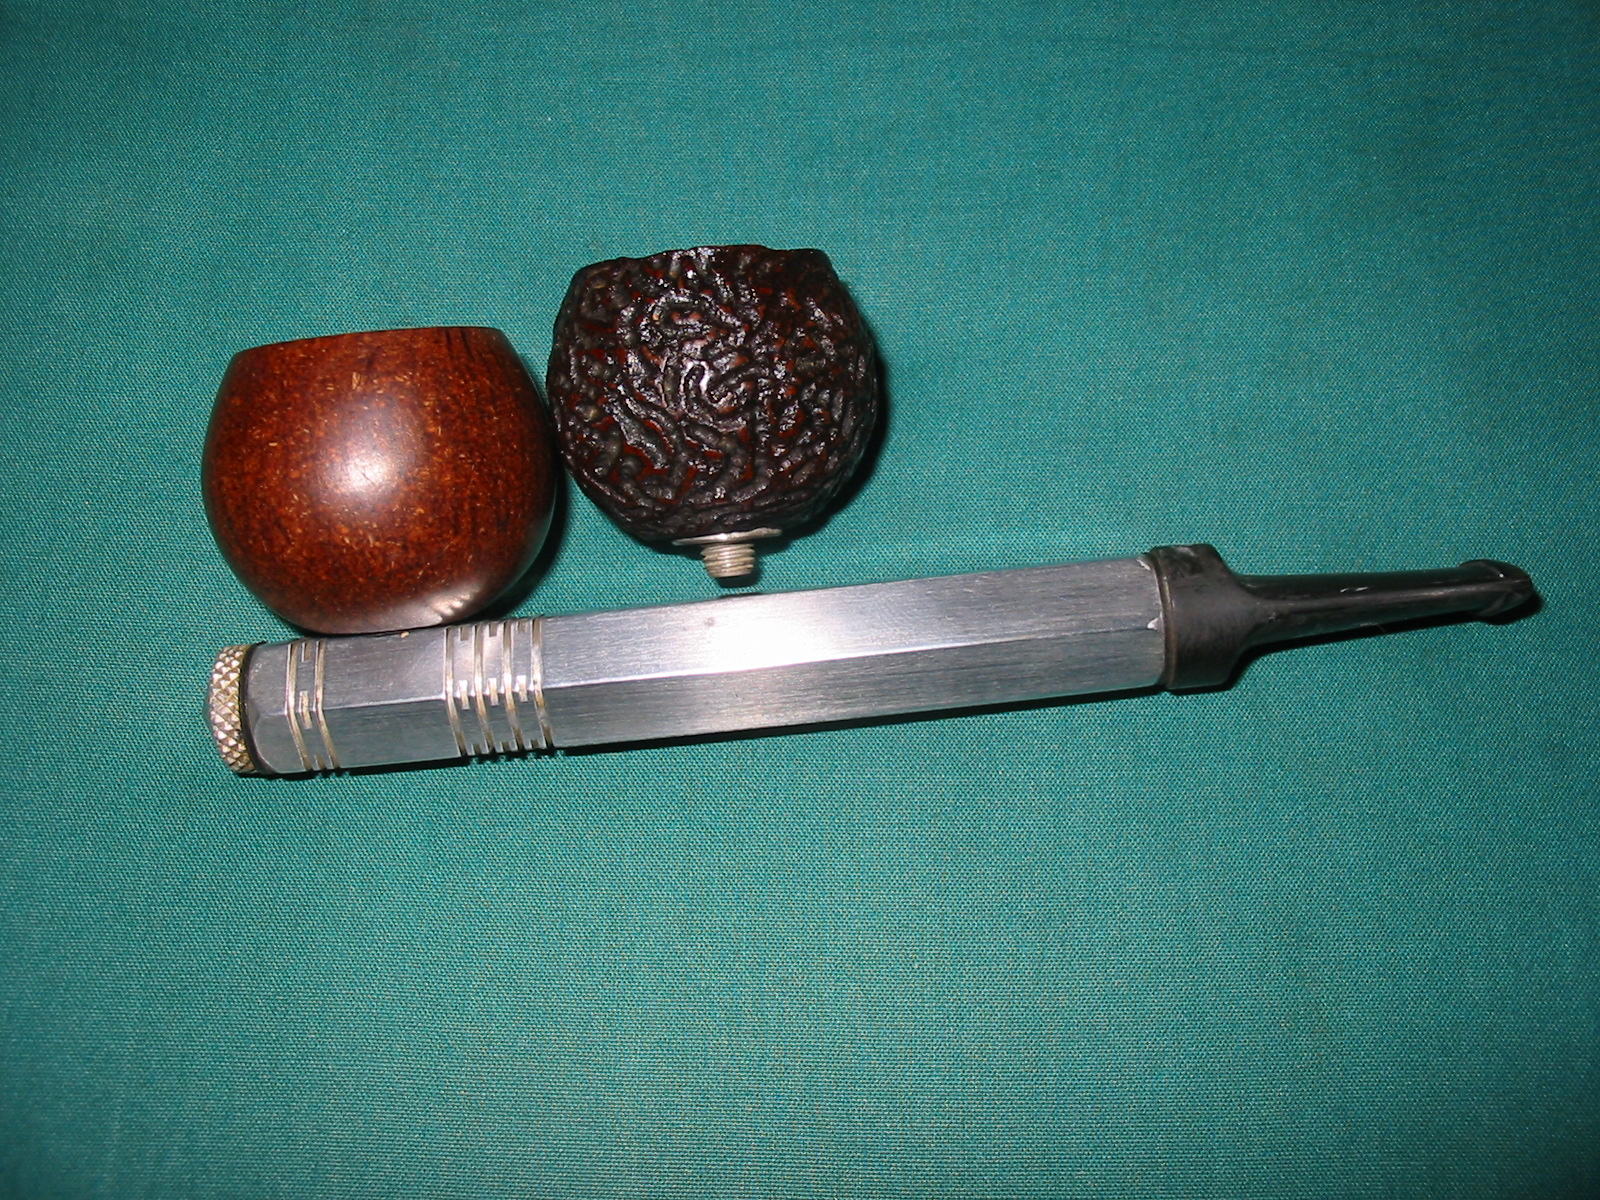
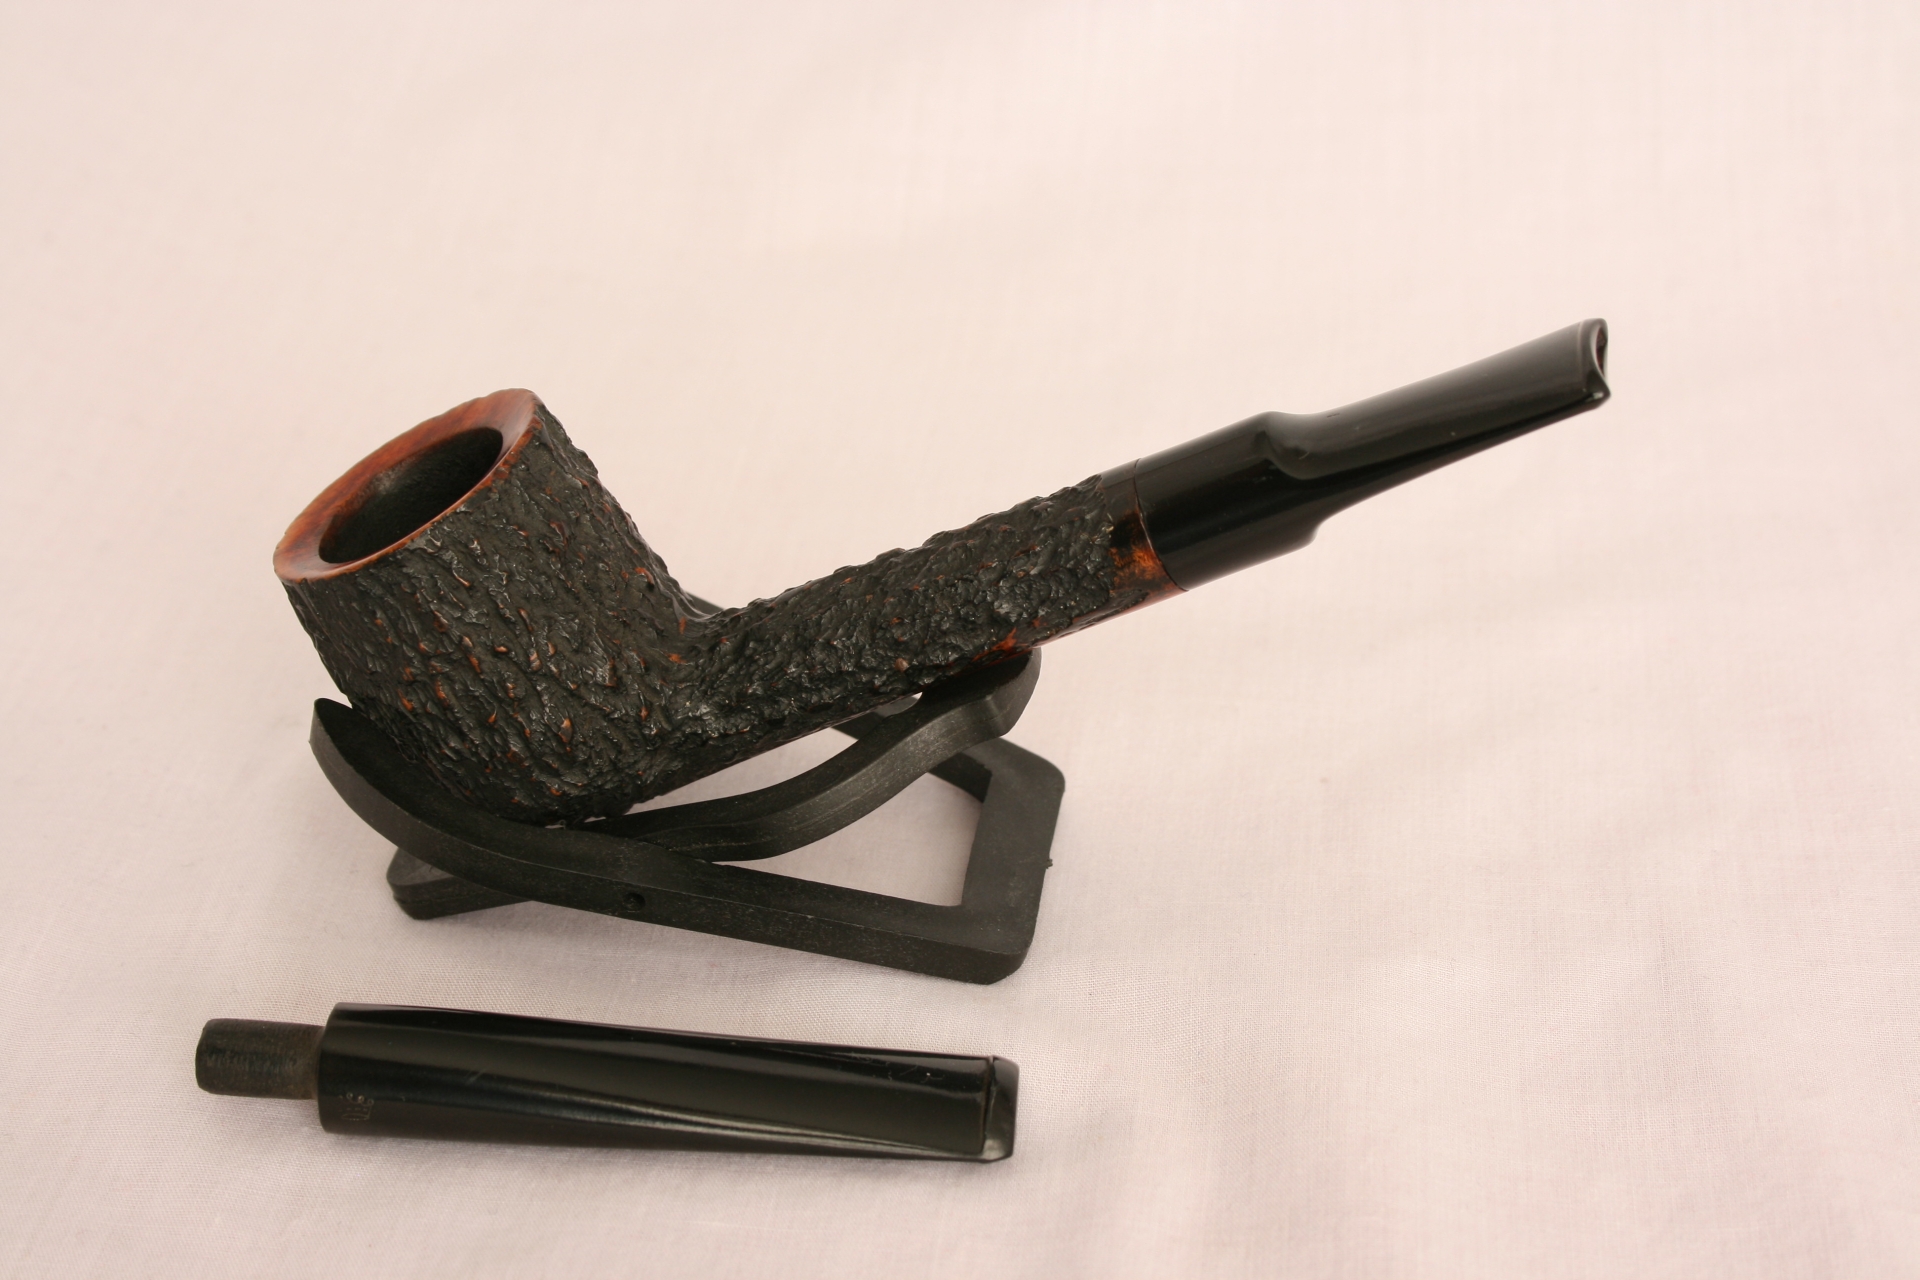
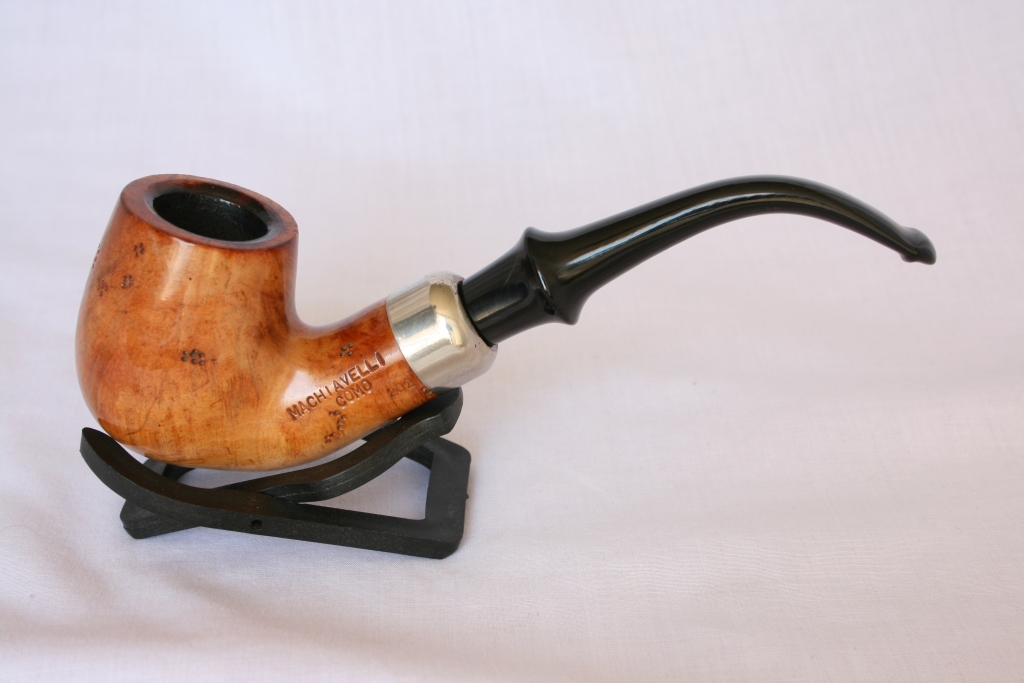
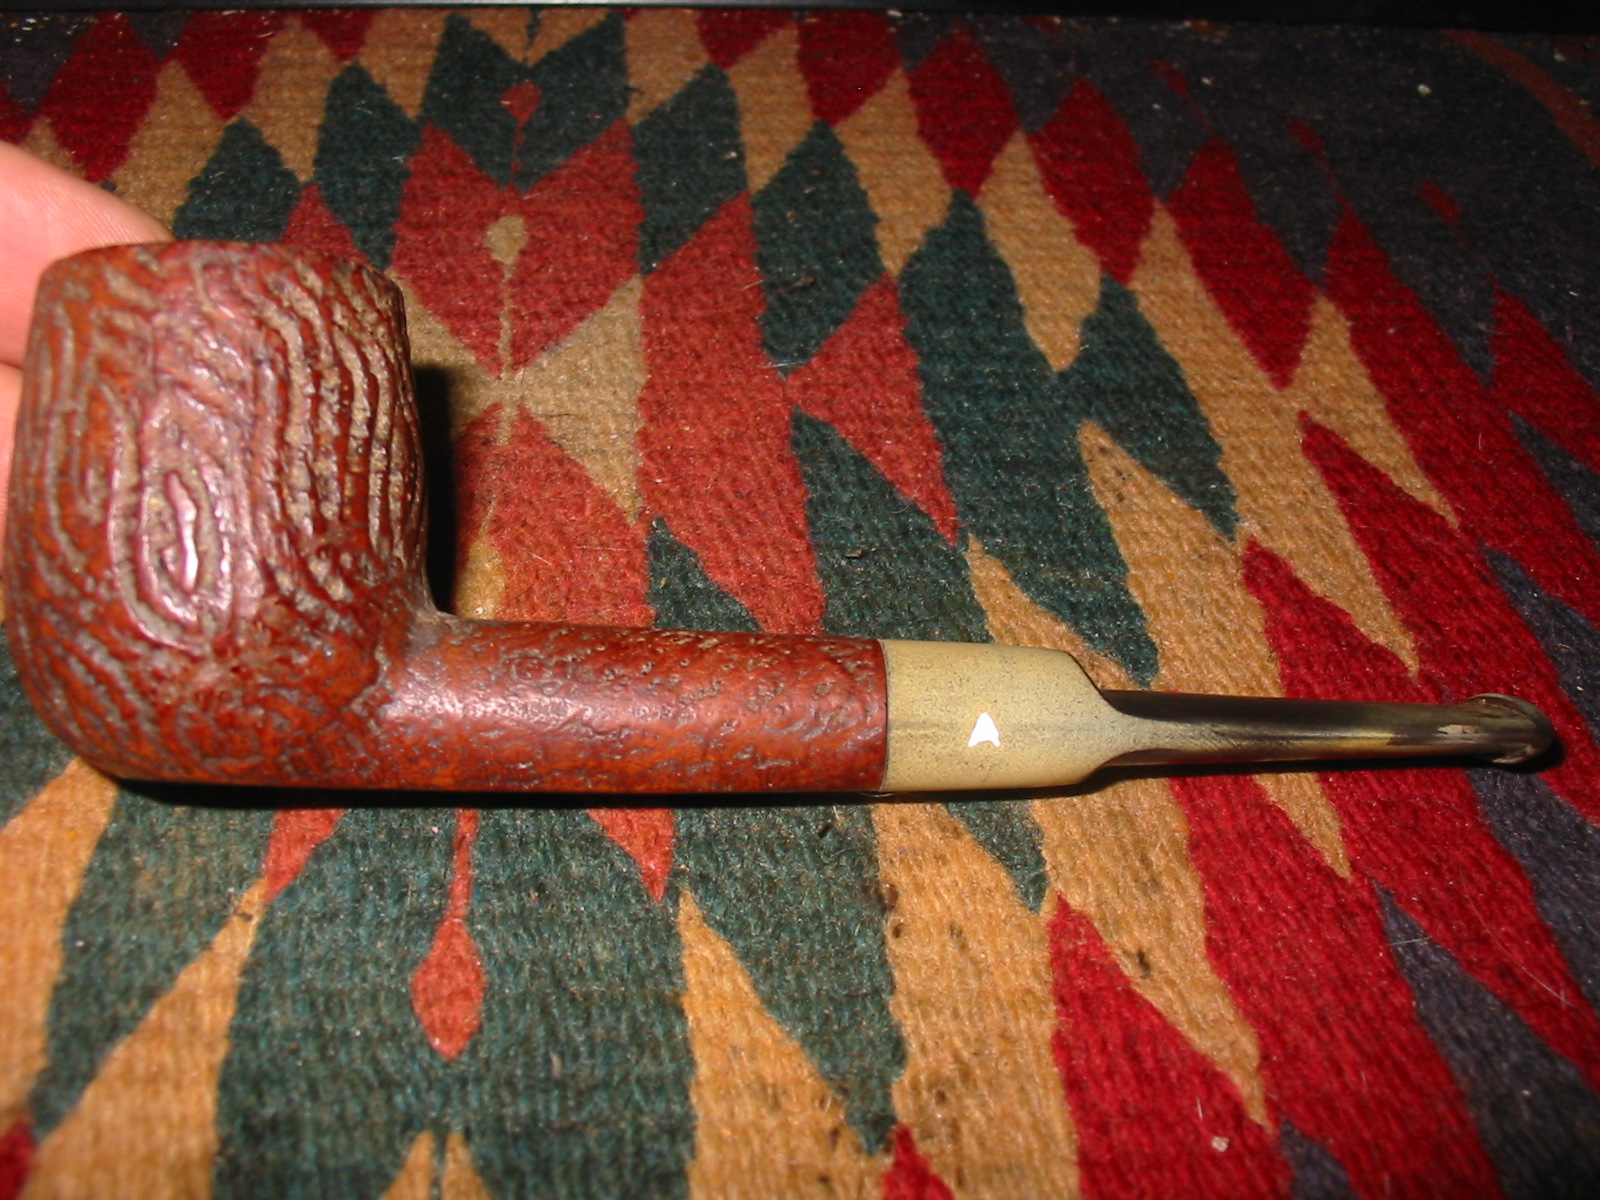
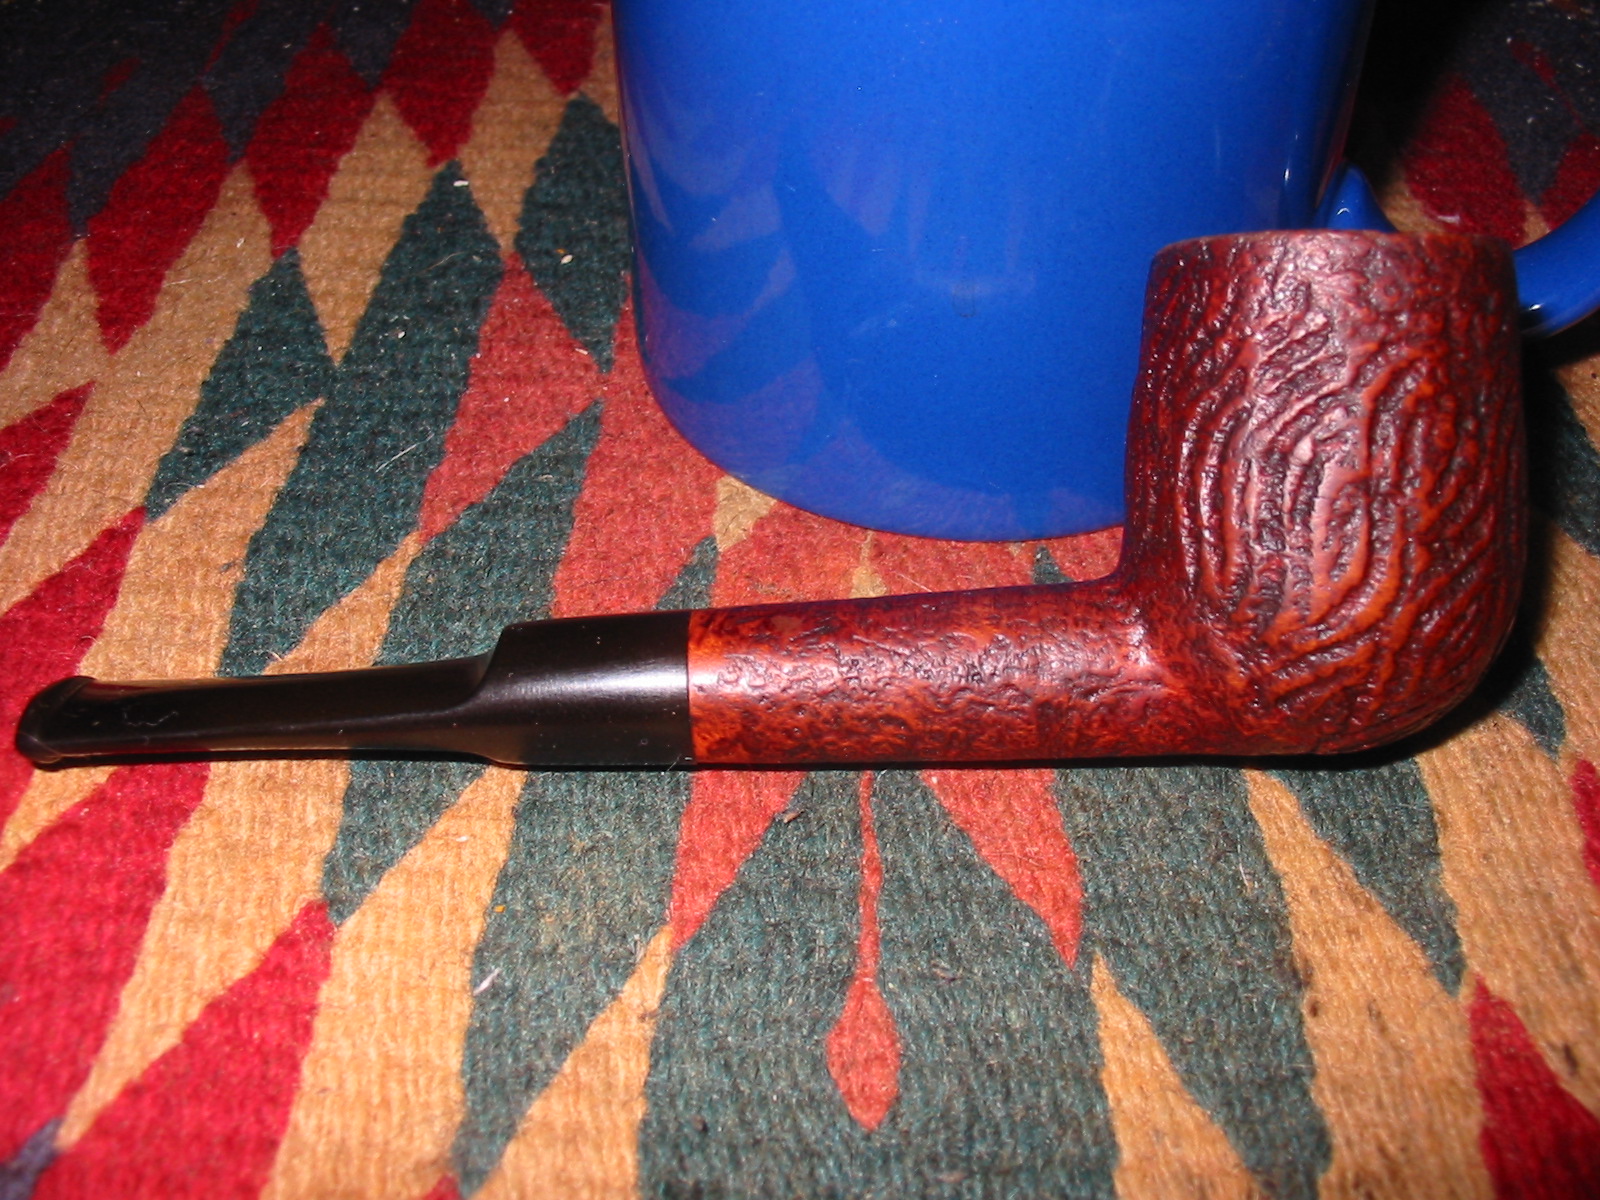
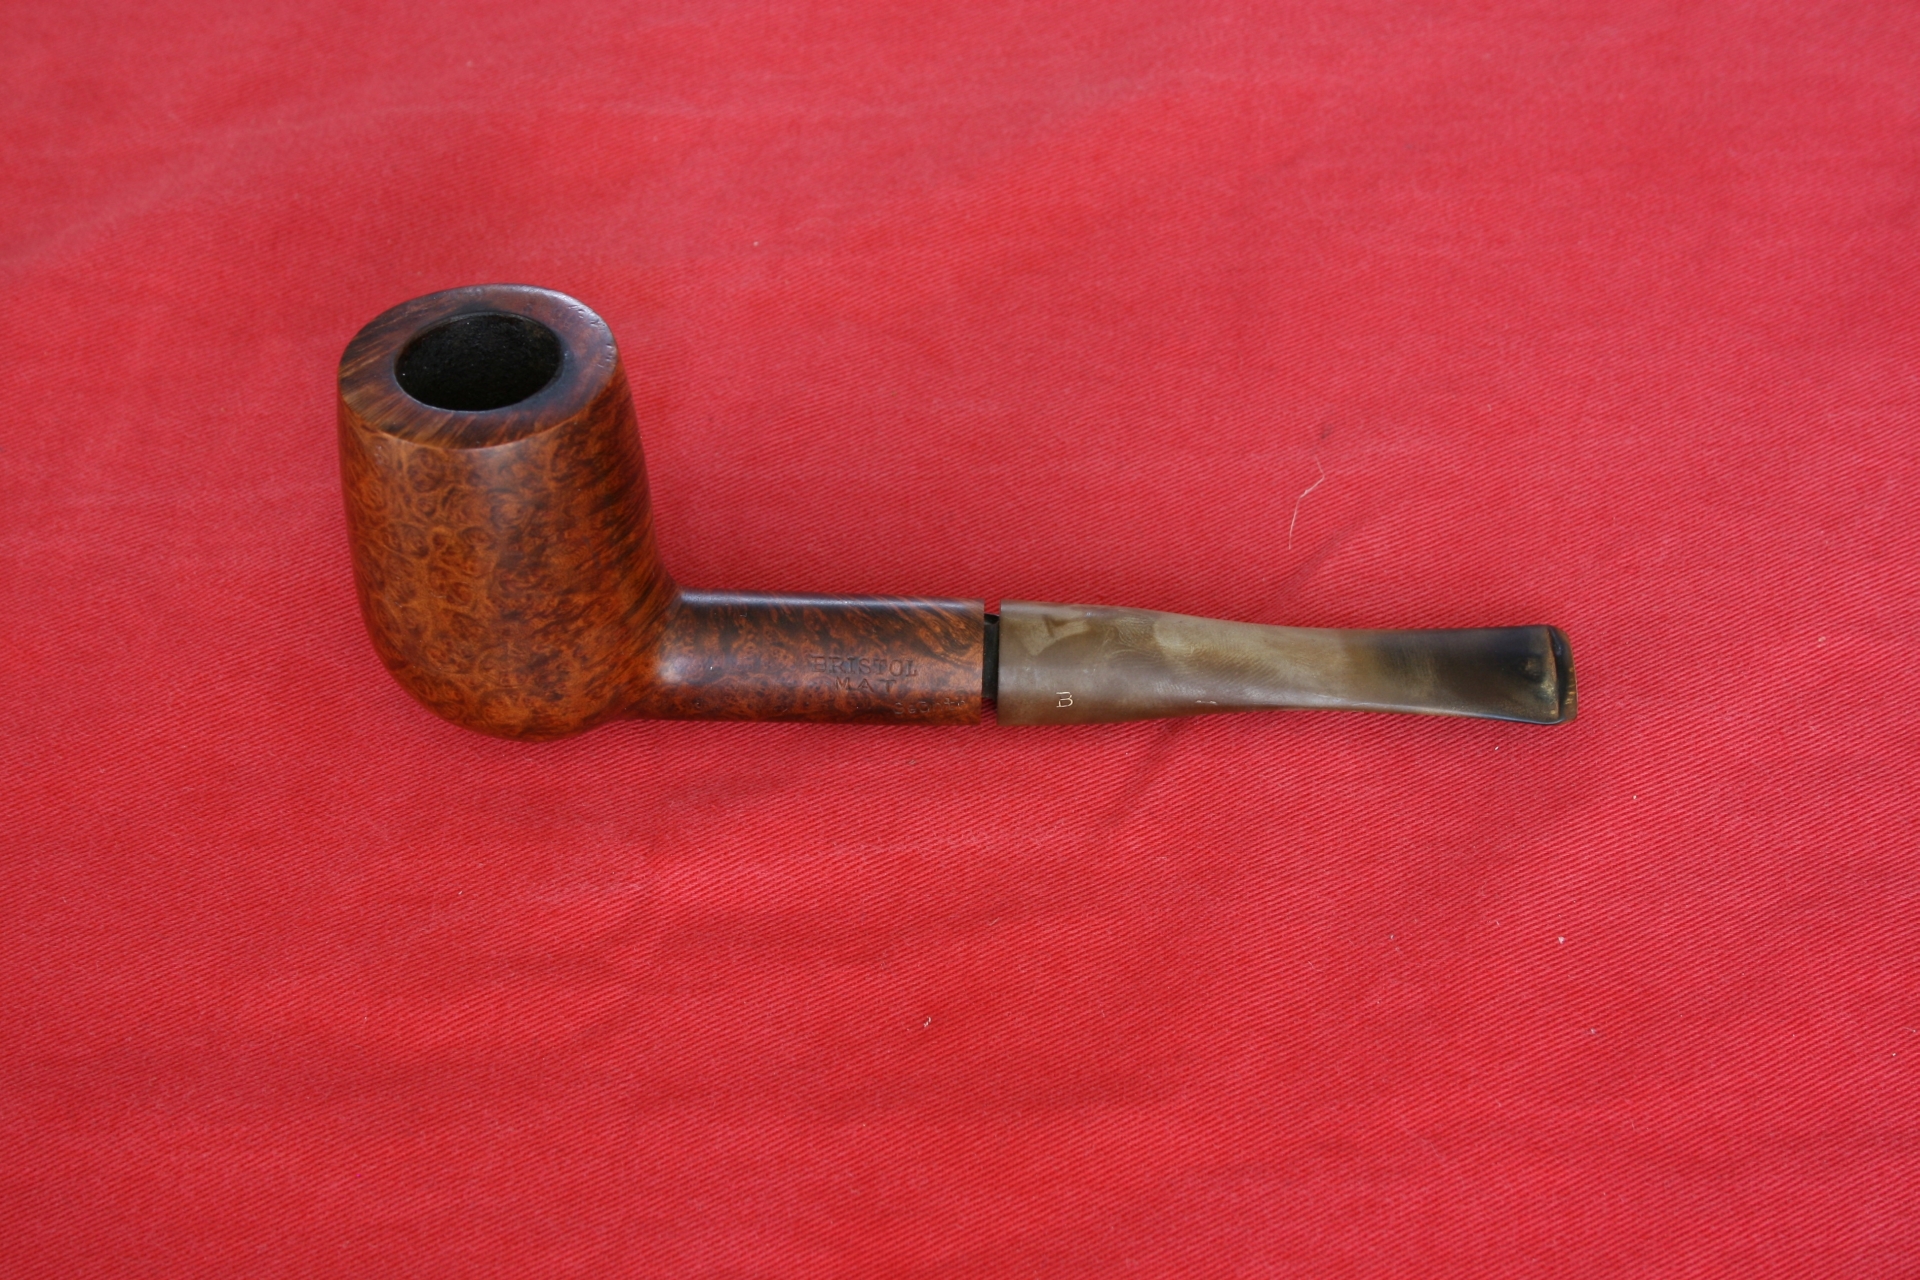
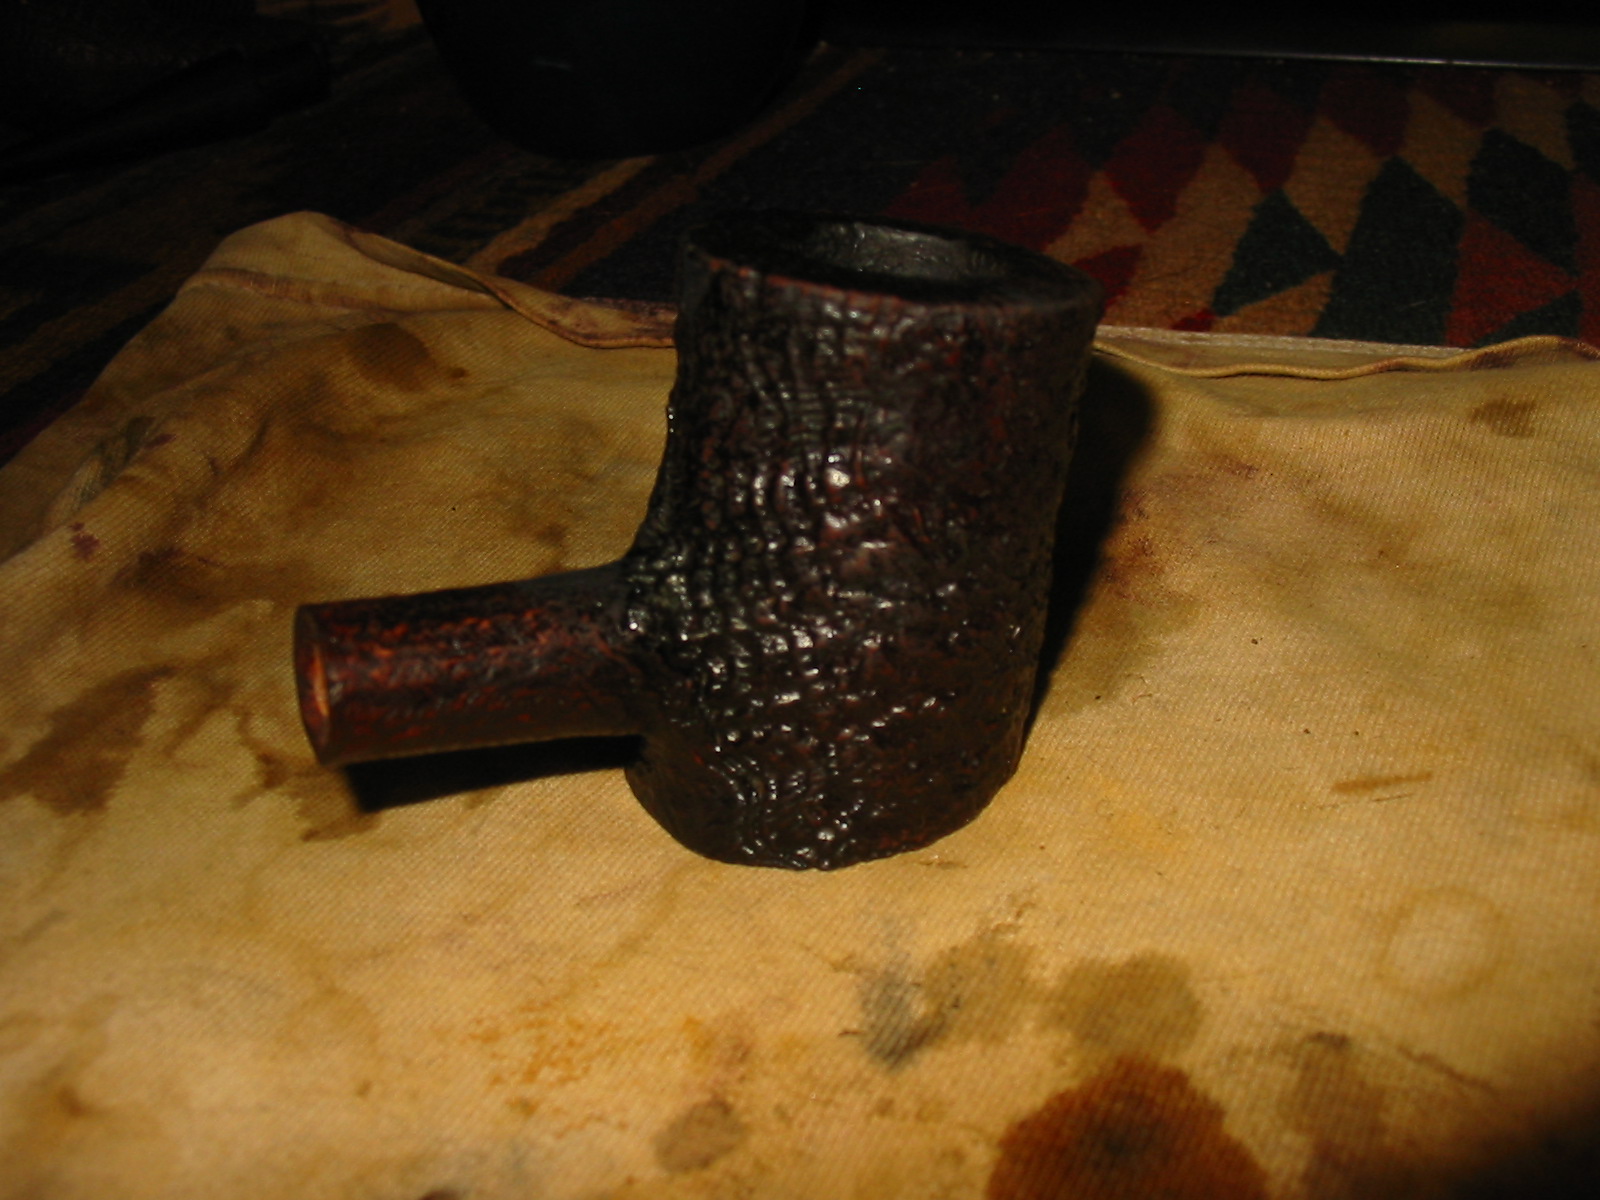
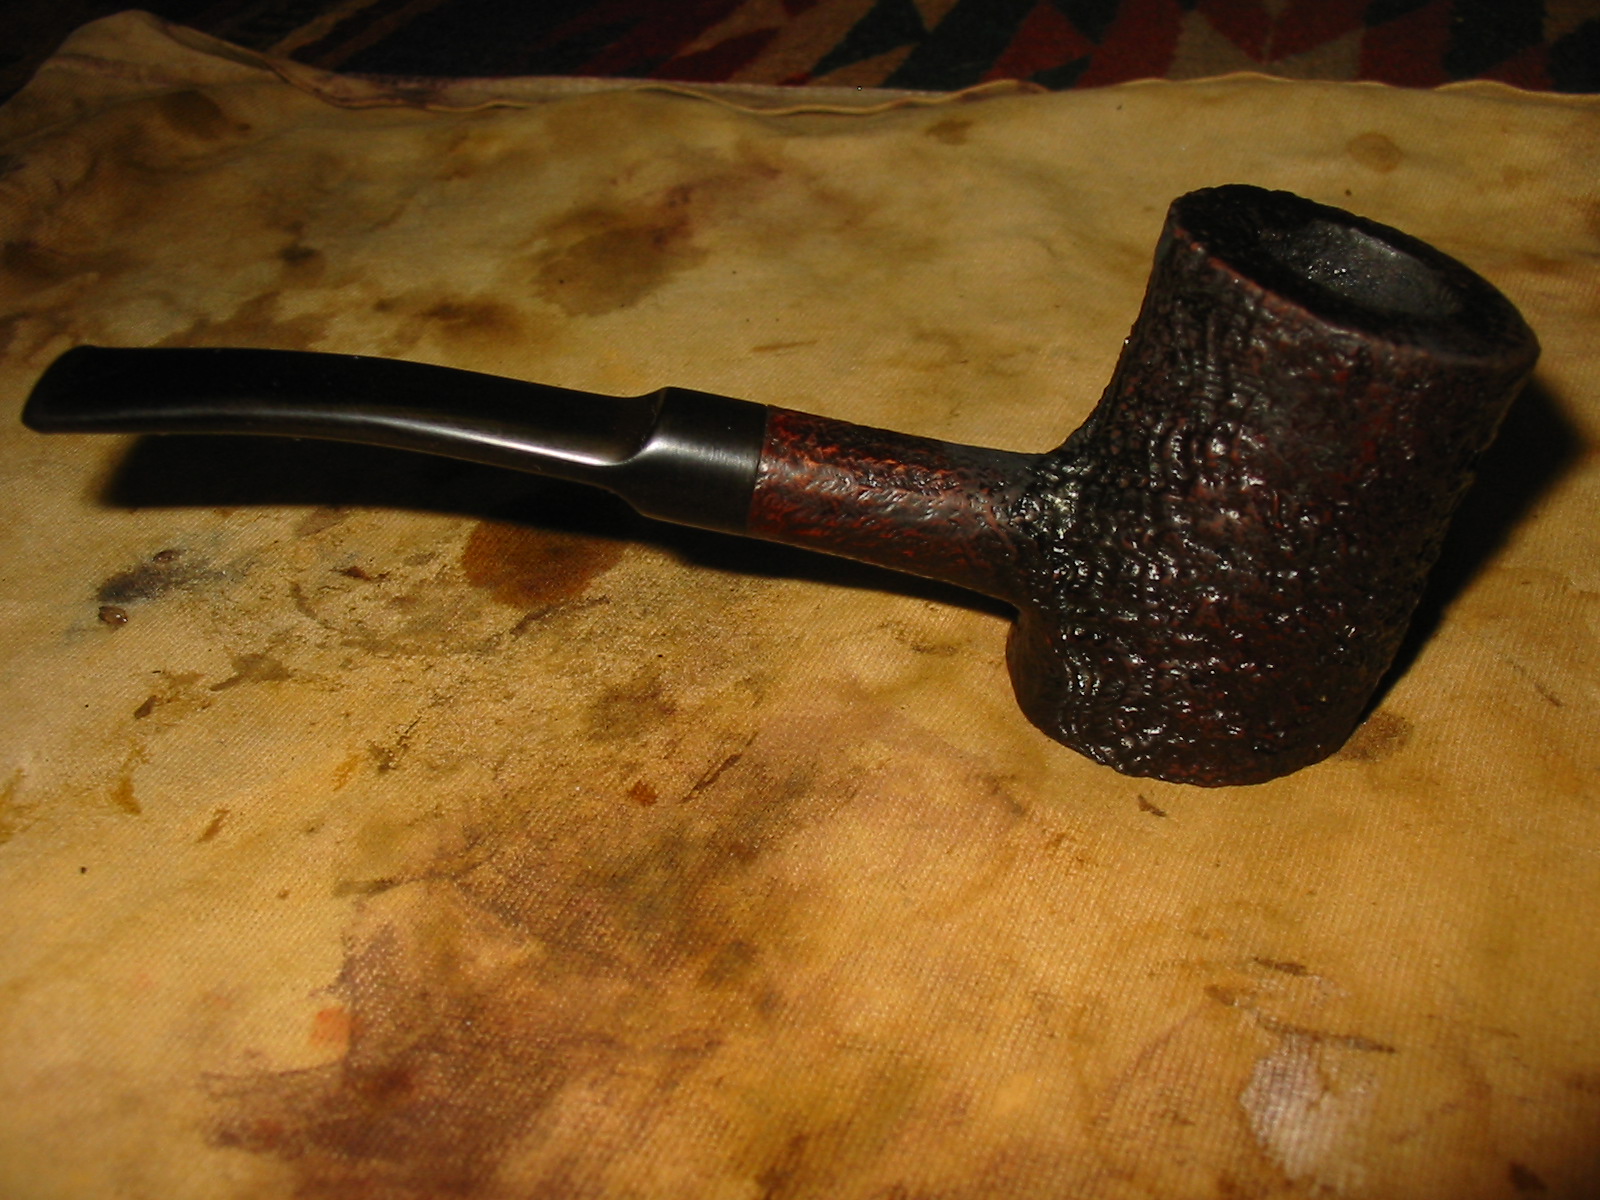
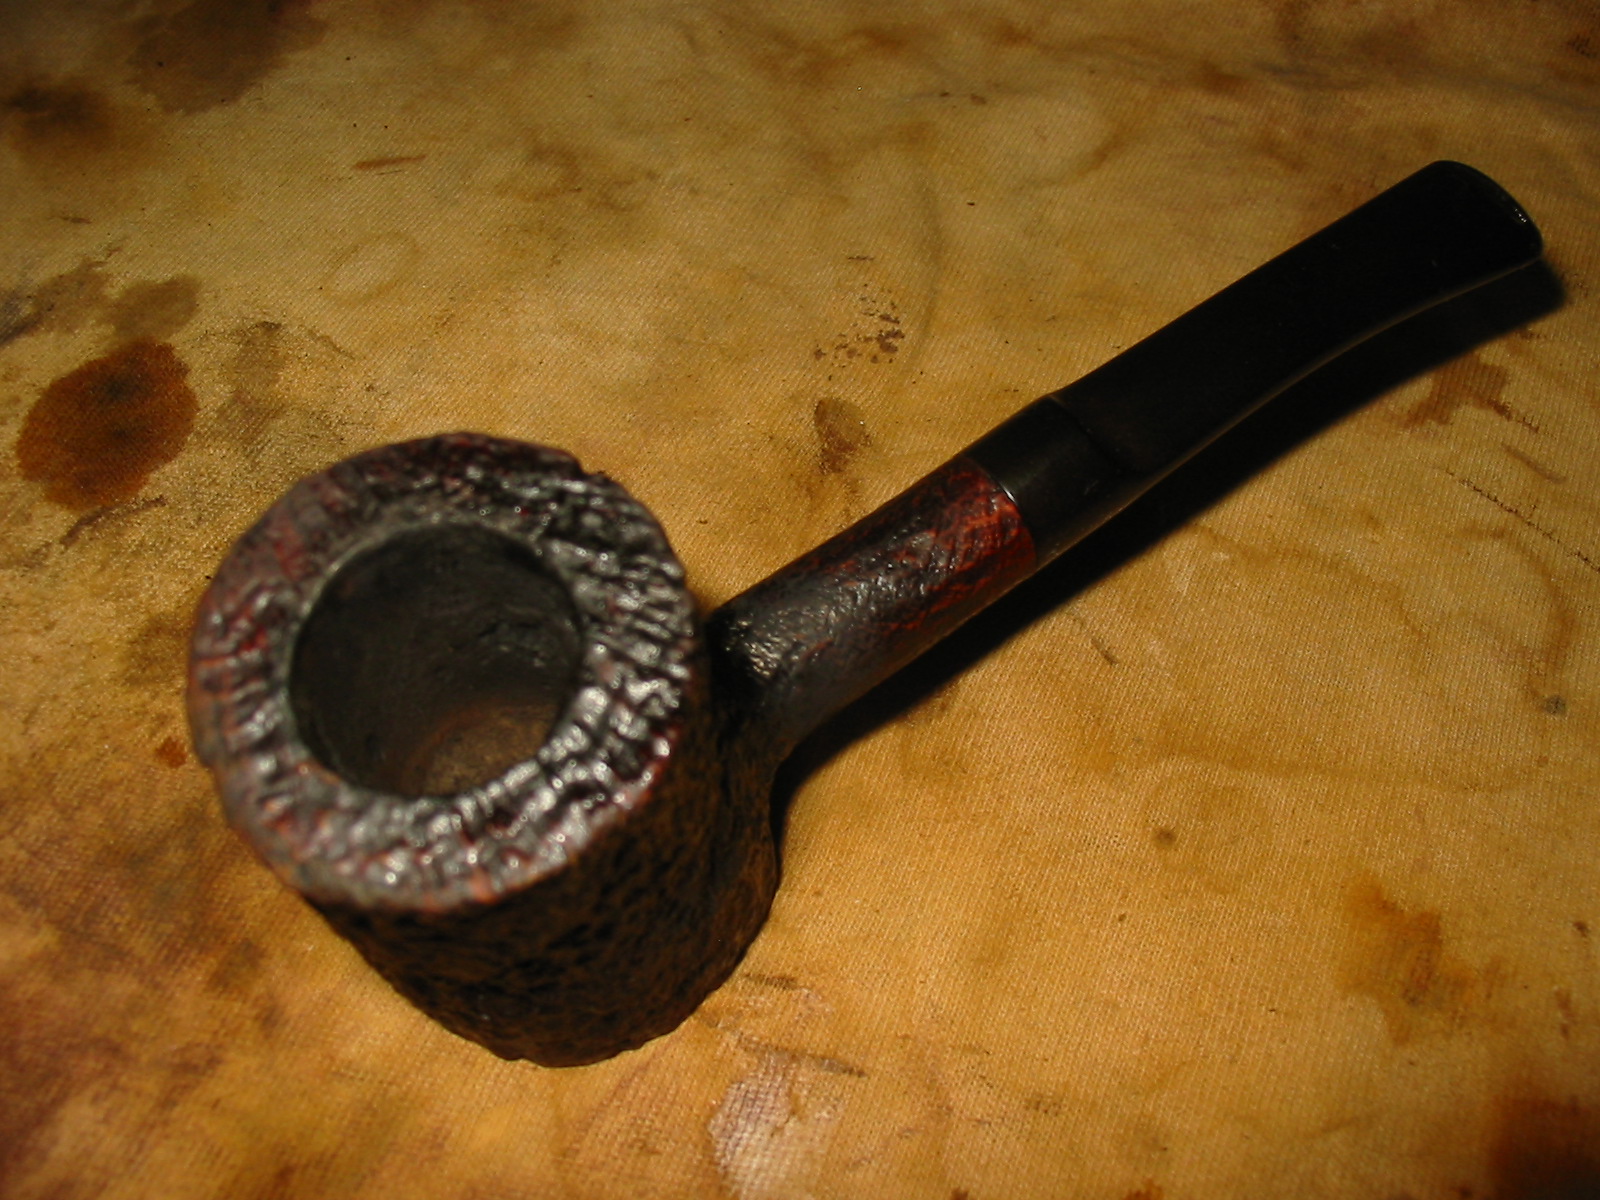
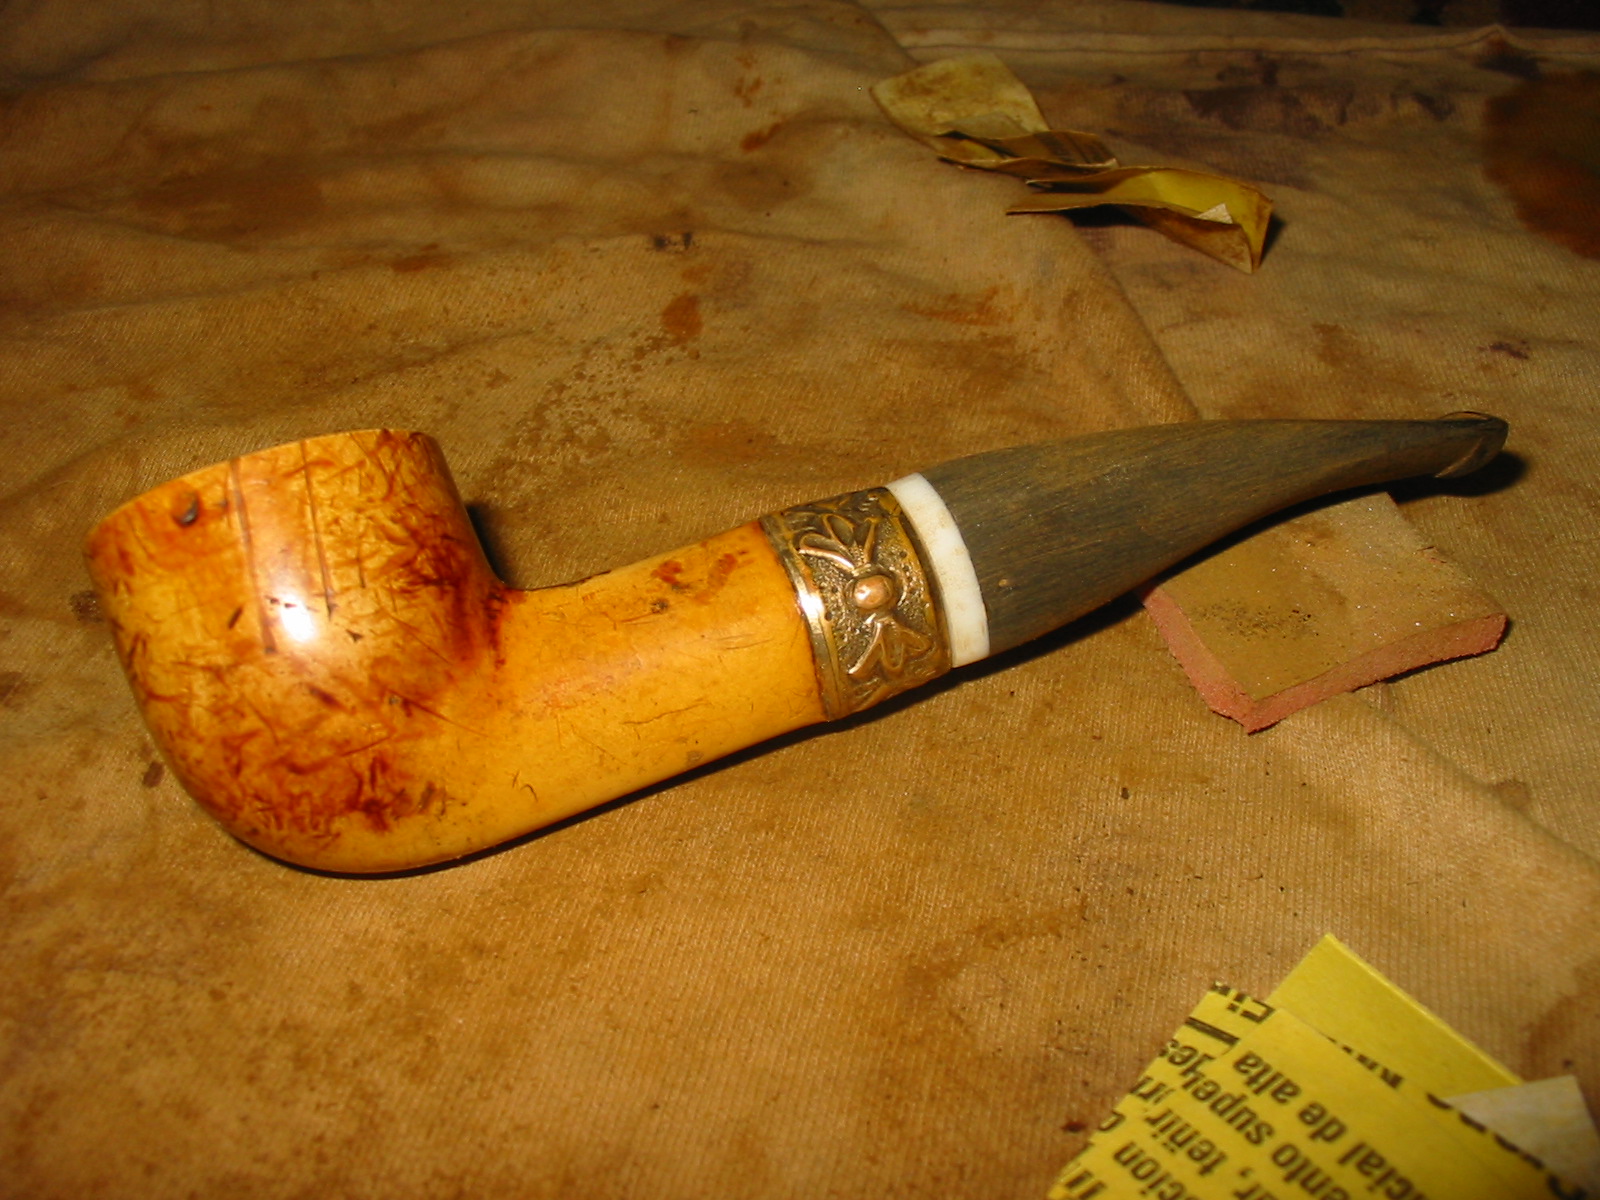
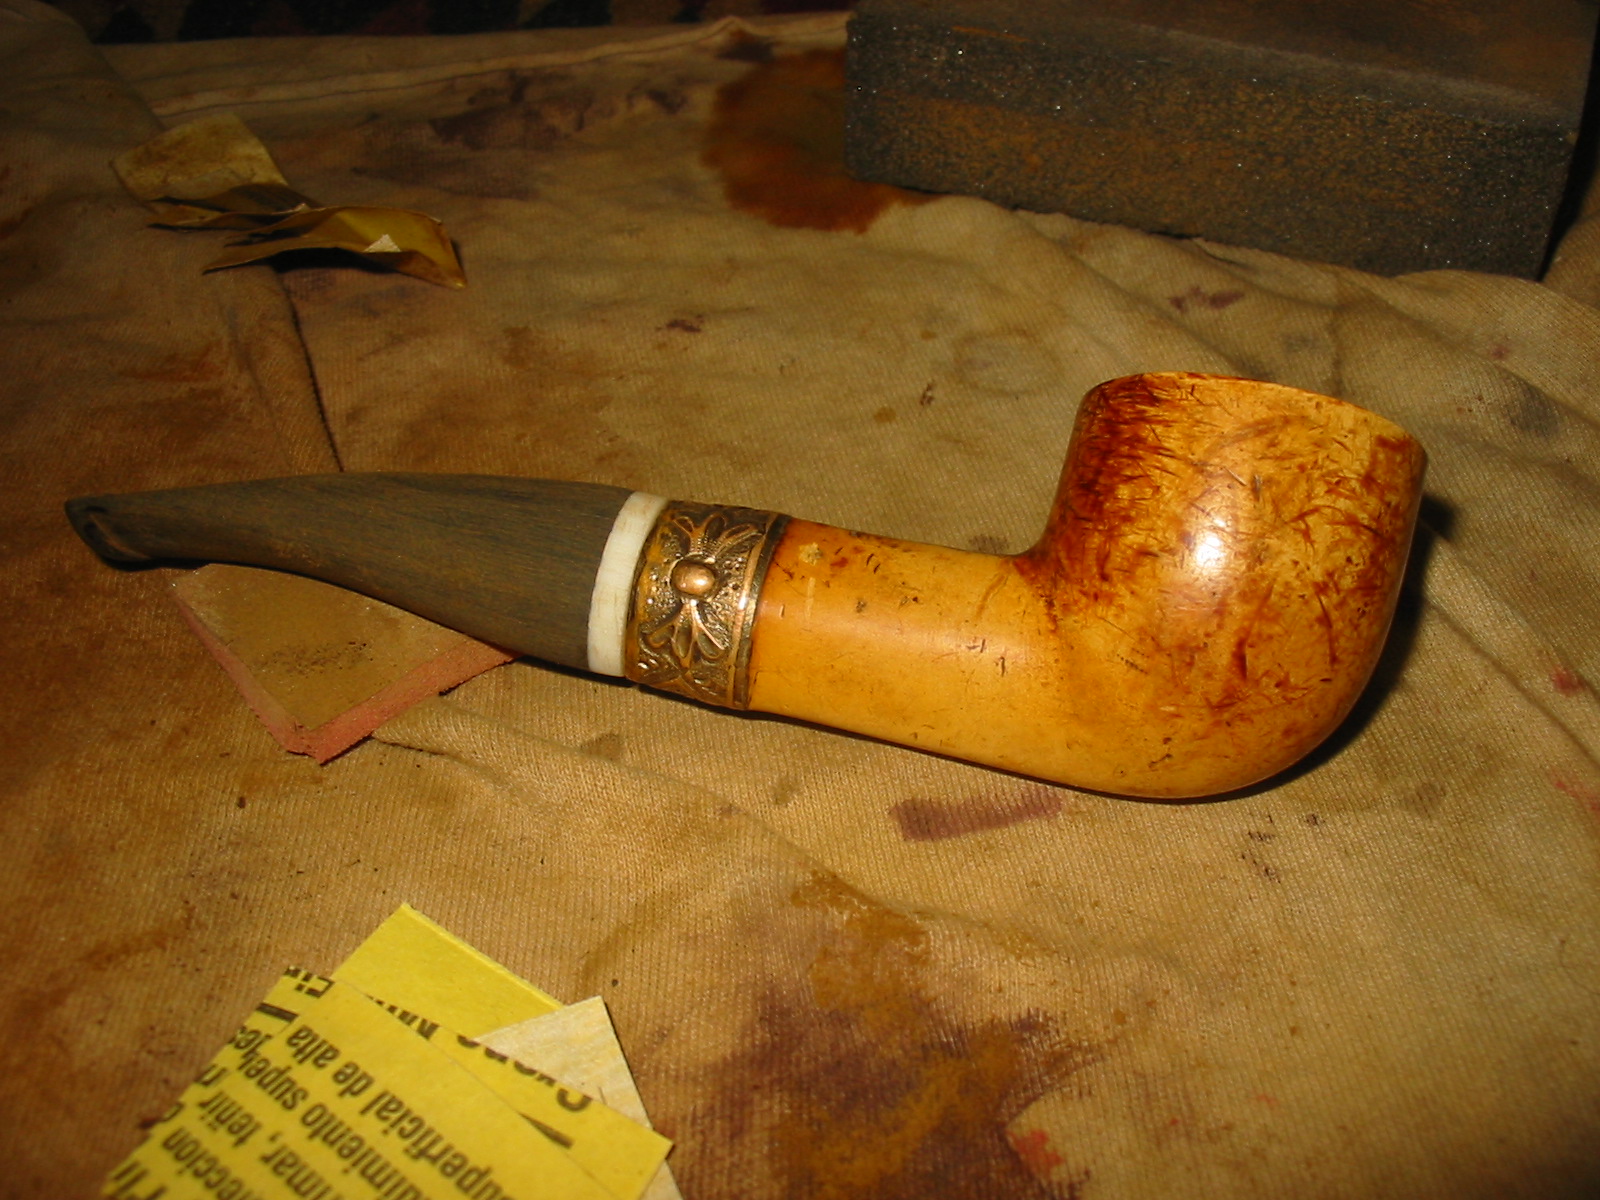
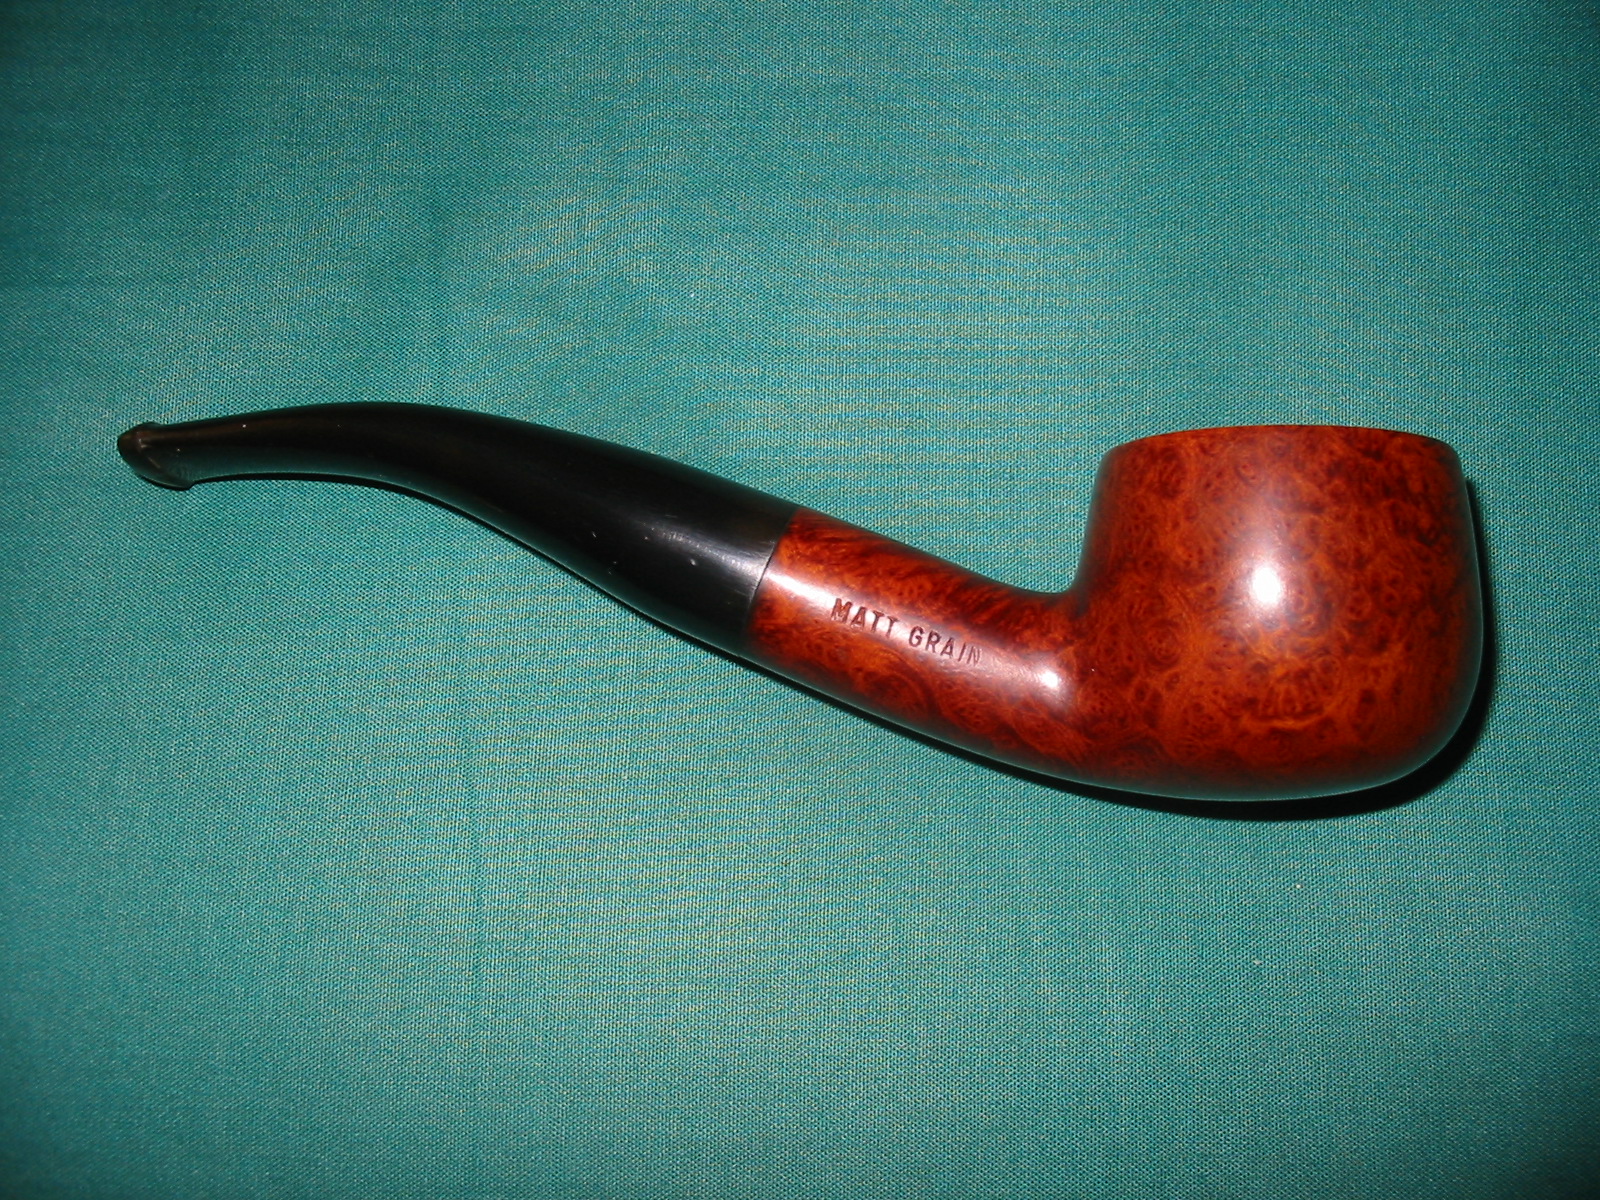
After buffing and polishing the horn stem I buffed the entire pipe with White Diamond on the buffing wheel to polish it then gave it multiple coats of carnauba wax to restore and preserve the shine on the horn and the briar. The finished pipe is back to usable with the stem patch taking care of the deep holes that were previously in the stem. The striated horn stem looks like new and the colouration of the horn goes amazingly well with the medium brown walnut stain. Other than the slightly visible patch the pipe looks like new. I intend to enjoy a bowl of some aged tobacco in a pipe that is far older than I am. I look forward to the day when I pass it on in trust to the next pipeman who will care for and cherish it. Sentimental? I don’t think so, just a realist who knows that this pipe has lived and will live longer than I.
GFB29

GFB30

GFB31

GFB32

Restoring a Bryson Metal Pipe with Two Bowls


I picked up this metal pipe with two bowls in an eBay lot recently. The shank shape and the two bowls intrigued me. I had no idea who had made the pipe but I bid on it because of some other items in the lot.
pipes4

pipes5

I decided to do a bit of research on the metal pipe on the great Smoking Metal website. It is a gift to the pipe smoking community looking for information on particular metal pipes that they come across or may have in their collection. The web address is: http://www.smokingmetal.co.uk/pipe.php?page=57
This is what I found out about the metal pipe pictured above: (credit given to the site above)

“This pipe was made by the Briarwood Corporation, Palo Alto, California; the BRYSON has number D120275 under the Bryson name on the pipe stem. There is a crosshead screw to attach the briar bowl to the stem. The end cap attaches to the mouthpiece by means of a rod through the length of the pipe, in which the air hole is close to the mouth piece. The stem is of polished duraluminum and hexagonal in cross-section.

The bowls are unusual in that they are not briar turned on a lathe, but briar wood, ground to a powder and compressed under very high pressure (no glue, heat or plastics are used, just pressure. It is claimed this produces a perfect bowl of aged briar every time with increased porosity. The varnished finish on the smooth bowl however is often very badly crazed.

Two bowls, one smooth and one rusticated, were supplied with the new pipe. The bowl retaining screw is ‘locked’ onto the bowl by a gasket and metal collar, enabling rapid replacement of the bowls without the need of a screwdriver. The corn cob bowl, in centre image, is another version, not sure if this was manufactured by Bryson, or a home workshop job.

The set here shown was available for $3.50 new, but in what year? Below that are pictures of adverts seen from 1946 magazine. The last photograph was of a possible derivative on eBay in 2003, although US patent D122042 seems to be this pipe, invented by Max Bressler, Chicago Ill 1940.

There are also other derivatives without the Bryson name stamped in the metal and variations on the shape and grooving of the stem. The pipe pictured with Pat Pend under the Bryson name has no grooves forward of the bowl and the front end cap is a larger thread than the other models, including my version with no name. 30 April 1940 US patent # D120275 Inventor Charles Rothman, Cleveland Heights, Ohio, assignor Briarwood Corp, also of Cleveland Ohio at that time.”
Bryson1

Bryson2

Bryson3

When the pipe arrived it was in pretty rough shape. The aluminum was oxidized on the barrel and the bowls were both very dirty and filled with cobwebs and built up grit. The rusticated bowl had not been smoked very much so it was clean on the inside underneath the dust and webs. There was no cake or tars. The smooth bowl was the exact opposite. The bowl was caked and the top of the rim was tarred and dented. In examining it I notice that the grain on the smooth one was peeling and fading in places – it was a decal and not truly grain. I could also see the composite make up of the pipe bowl as described above. This was strange looking material – similar to my Medico Brylon but also a lot like particle board that is used in building. This was going to be a fun piece to clean up and restore. The metal barrel was unstamped but the lines on the barrel match the photos above perfectly.

I was able to take it apart, which sounds normal but I have found that on these metal pipes that are in this condition the end cap and bowl are often welded together with tars that make breaking it free and taking it apart virtually impossible. The four photos below show the state of the parts once the pipe was disassembled. The bowl each had a screw in the bottom of the bowl with a hole in the center and a cap on the bottom of the bowl that was inset. The bowls thus could be quickly interchanged. The apparatus on the inside consisted of an end cap, a long pin that was threaded on both ends – into the cap and into the tenon on the stem, a nylon stem and in this case a paper filter slid over the pin. The pin was not hollow but acted as the connection that held the stem in place in the aluminum barrel. The end cap was inserted on one end with the pin extended the length of the barrel and the stem screwed onto the pin and tightening against the barrel. Without the end cap and pin in place the stem did not stay in place.

The inside of the barrel had a dark lacquer of tobacco juices that had hardened on the walls. The pin and inside the cap and tenon the same dark amber lacquer was hardened. This was going to be a challenge to clean up. The pressed briar bowls would also not be easy to clean as I was afraid of using alcohol on them for fear of decompressing the material with moisture.
IMG_2378

IMG_2379

IMG_2380

IMG_2381

I took apart the smooth bowl in order to ream and clean it. The next two photos show the parts of the bowl. You can see the hollow screw, the insert cap and a small washer. From all appearances the washer was an addition to the set up done by the previous owner. I appeared to me that the bowl had been over tightened and the cap pressed to deeply into the bowl for a tight fit. The washer took up the excess space and allowed the bowl to be tightened. In the second photo the top edge of the rim can be seen with the dents and damage visible.
IMG_2383

IMG_2384

I cleaned the screw and the washers with Everclear and cotton swabs to remove the lacquer buildup. I reamed the bowl with the largest cutting head of the PipNet reamer set as the bowl is quite large. In the first photo below the damaged finish is also visible. Once I had reamed the bowl I topped it with my usual method – a piece of sandpaper on a flat board. I twisted the bowl surface against the sandpaper until the damage was removed. Once done the composite nature of the bowl material was very visible.
IMG_2385

IMG_2386

IMG_2388

Cleaning out the barrel and all of the metal internals was labour intensive. It took many pipe cleaners, cotton swabs and Everclear to get the pipe barrel clean. I used cotton bolls that I twisted into plugs, dipped in Everclear and rammed through the barrel – just like cleaning a rifle. In the photos below you can see some of the plugs and swabs that were used. Once I had scrubbed the surfaces clean inside the barrel I worked on the pin, tenon and end cap. I used 0000 steel wool to clean the aluminum surface and brighten it.
IMG_2389

IMG_2391

IMG_2392

The nylon stem had a deep tooth mark on the top and on the underside of the stem. I sanded the stem with 220 grit sandpaper and then a medium grit sanding sponge to remove the tooth chatter and the calcification on the stem. I wiped it clean with Everclear to remove the sanding dust, cleaned the inside with Everclear and picked out the debris in the tooth dents. Once they were clean and dry I patched the dents with a drop of clear superglue. Because the colour of the stem is more of a grey black the black superglue did not match. The clear superglue was transparent and when dried and sanded was invisible.
IMG_2393

IMG_2394

IMG_2395

IMG_2396

IMG_2397

I set the stem aside to let the superglue spot patches to cure before I sanded them smooth. While it was drying I restained the bowls with a dark brown aniline stain applied with a cotton swab. I applied it and flamed it to set it. I was not sure the stain would take on the smooth bowl as it seemed to have a varnish coat on the surface and the grain pattern was a decal. Once it was dry I would give it a light buff and see if it took.
IMG_2399

IMG_2401

I set the bowls aside and worked on the superglue patches on the stem. I sanded them smooth with 220 grit sandpaper and then followed that by sanding with a medium grit sanding sponge. The next series of four photos show the process of blending in the repair.
IMG_2402

IMG_2403

IMG_2404

IMG_2405

Once I had blended the patch into the surface of the stem it was time to sand it with the micromesh sanding pads from 1500-12,000 grit. I decided to sand both the stem and the aluminum barrel at the same time. I wet sanded with the 1500—2400 grit pads to minimize the scratching on both and then dry sanded with the remaining grits. By the end of the process the patch was invisible and both the stem and the barrel shone.
IMG_2406

IMG_2407

IMG_2408

IMG_2409

IMG_2410

IMG_2411

IMG_2412

Once I had finished with the micromesh sanding pads I reassembled the internals, stem and the barrel. I gave it a light buff with White Diamond. A light touch is necessary in order not to turn the buffing pads black with the metal as it is polished. I took it back to the work table and hand applied wax and hand buffed it with a soft towel. The next two photos show the finished barrel and stem.
IMG_2413

IMG_2414

When the bowls had dried I buffed them with White Diamond as well. The rusticated bowl worked well and the shine came up on it with no problem. The smooth bowl was another story altogether. As I buffed it the finish came off in pieces. The varnish coat lifted and along with it the decal. The grain coat disappeared. I then gave it a clean buff with red Tripoli to remove the coat in its entirety. I hand sanded the bowl with the medium grit sanding sponge. Once the surface was clean I wiped it down with an alcohol dampened cotton pad. I then used a permanent black marker to draw grain lines on the surface of the bowl. These looked horrible after I had applied them but with some sanding with micromesh sanding pads and the sanding sponge I was able to lighten them and they began to look more natural. I then restained the bowl with some linseed oil and cherry stain. The photo below shows the finished surface of both bowls.
IMG_2415

When the bowls had dried I tried screwing each bowl to the barrel to make sure they fit well. I coated the rusticated bowl with Halcyon II wax and gave it a light buff with a clean flannel buffing pad. The smooth bowl I coated with carnauba wax and lightly buffed with the flannel buff as well. The finished pipe is pictured below with each of the bowls in place. I am pleased with how it turned out. In evaluating the amount of work to keep it clean, I am not sure I will ever smoke this one. It may well end up in the display cupboard as part of my oddities collection.
IMG_2416

IMG_2417

IMG_2418

IMG_2420

IMG_2421

IMG_2422

IMG_2423

IMG_2424

An Ultrasonic Stem Cleaning Experiment – AJ Verstraten (aka Bananabox-Ninja)


What follows is another article by AJ on his use of the ultrasonic cleaning machine. He has written it in response to the many who asked to hear more about it after his first article here on rebornpipes. I wish to thank AJ for his contributions to the blog and to encourage him to continue to write for us. It is a pleasure to post his next contribution. Thank you AJ.

Greetings, when using a new technique I can’t help but experiment like a mad scientist. So when I heard of the ultra sonic cleaning from my fellow cleaner on the PRF (The Dutch Flemish pipe smoking forum) named ‘Meindert’ I dove into it, because science! One of the first try-outs was posted in my first article and I was carefully optimistic about the end result. During the course of this clean-up I learned why I was not completely happy about it.

When I read the comments on my first article, Mark Domingues mentioned the Oxyclean method. To be honest I never heard of Oxyclean but it triggered a mention done by another fellow PRF-er named ‘annie69’. Who once told me he used hand warm water and Oxi-Action to remove the heavy oxidation on a stem. I tried this method a few months ago, but was not very happy with the end results as it left the stems slippery and gooey, which in my eyes prevented the rest of the oxy-water reaching the stem.

As an ultrasonic vibrates the water I thought: “What if the water is in motion, would it remove the goo from the stem during the soak and so give a deeper penetration?” followed by: “What if I combine the oxy-method with the ultrasonic?” So I set up a test with two almost similar oxidized stems which are from my ‘bit-box’ of pipe heads and stems that are missing their counterpart.

Oh, I should mention I work for a company that supplies laboratory equipment and some of the tools are old stock that was distributed to personnel, hence the use of a magnetic stirrer.

First the stems: The one on the left for the ultrasonic, the one on the right for the stirrer.
001 The stems

The stirrer setup: A glass on a magnetic stirrer, hand warm water, stirrer, amount of Oxi-Action and the stem.
002 Stirrer set up

To keep the stem in the liquid I used a bent electric wire and hung it in the glass.
003 Stem holder

So I poured the hand warm water, the Oxi-Action, and the stirrer in the glass, hung the stem in the mixture and set the timer for 20 minutes.
004 Here we go

005 20Minutes later

What happens is that a rotating magnetic field lets the stir bar rotate in the liquid, creating a whirlpool inside the glass. Thus the water is in motion and hopefully rinses off the goo that is formed on the stem by the Oxi-Action.

When I retrieved the stem and it was as I expected, greenish brown from the Oxi-Action. But not as gooey as before, so it worked to some degree.
006 Dried

Then I put the stem to the grind wheel and it came out as normal.
007 after the grind

The light brown patches are hard to reach for the wheel and I normally do those by hand.
To be honest, I was not really happy with the end result and did not finish all the way through with polishing and buffing the stem. In all it only saved me a little time and was a headache to set up right.

While I worked the previous stem on the grind wheel I let the ultrasonic do its thing. Again the setup: Warm water, ultrasonic with Oxi-Action and the stem.
008 Ultrasnic setup

The ultrasonic in action.
009 Look at her go

The stem just removed from the bath.
010 On to something

When I retrieved the stem I was blown away by the result, the stem came out cleaner than with the normal soak method and less gooey as with the stirring method. (However the photo did not show this, so I had to lighten it to make it clearer.) Also when I put the stem to the grind wheel I found that the liquid was a deeper brown colour instead of the golden light-brown colour I usually get when grinding.

The result after grinding.
011 After the grind

Was I on to something or was it a fluke with this particular stem? I decided to leave the stems as is, find another stem in my ‘bit-box’ and try the ultrasonic again to see if I could duplicate the result. I found a stem without its tenon and dunked it in the ultrasonic.
012 Before

While this was going on I Googled about ultrasonic cleaning and I stumbled on a very well written site: http://www.tmasc.com/qa%20process.htm by an unknown author. In it I found a certain line that made me stop the ultrasonic and reconfigure it, namely this:

‘Parts should be racked in a basket or work holder designed to handle your specific part. This is very important in high-end cleaning systems where you want the cleanest part possible. You should always use a stainless steel basket, as softer materials will absorb the ultrasonic energy. Never use plastic or other soft materials. If your part is easily damaged or scratched, stainless steel racks with Nylobond or Teflon coatings are available.’

Now if you look in the previous pictures you will notice I left the basket out of the cleaner thinking it was not needed for my purposes. Boy was I wrong. Having the stems in contact with the bottom meant that the sonic vibrations were interrupted and as such the cleaning was not optimum. Whoops. So I put the basket that came with the cleaner, put the stem in and let it go for 8 minutes. The end result really surprised me.

013 After

When I used the grind wheel on it the liquid was almost black. Here are the stems next to each other.
014 All three stems

You can clearly see that the middle one has had more oxidation removed than the other two and in the case of the upper stem I blame my inexperience with the ultrasonic. Still the end result for me was quite exciting and I wanted to try it in a complete cleaning process. So I rummaged through my pipe- and bit-boxes to find almost equally oxidized stems. I found a ‘Belmont Grain London Style’ pipe and a loose stem.
015 Pipe and stem

First I cleaned the inside using 96% alcohol and pipe cleaners, they came out pretty clean indicating that the stems were not heavily used.
016 Cleaning inside

Then I set up the ultrasonic again with the Oxi-Action solution, warm water and the basket in place. The stems were placed in the basket and I let her go for 8 minutes.
017 Setup

018 In they go

019 Retrieved

When I retrieved the stems, the first thing I noticed was that they were not as gooey as I was used to and the water smelled rather…..well….like oxidation but more moist. There is no good way to describe it.

I put the stems to the grind wheel and the oxidation came off way faster than if I would not have soaked them. Also the liquid that came off the wheel and stems was way darker as I mentioned before. At this time I also sanded the hard to get edges with 600 grit paper wrapped around a modelling file.
020 After the grind

021 After sanding

Then I proceeded to empty the ultrasonic and put in the 50-50 alcohol and water mixture with a dash of disinfectant.
022 Ultra cleaning

One of the positive things of the ultrasonic is that it goes on a timer and you have your hand free to do another thing until it is done, so I proceeded to clear the top of the bowl of its soot using a sock, salvia and the abrasive pads. Using the sock I got most of the soot build-up off the bowl and used the 1800 grit to get the thicker and harder pieces off.
023 Bowl before

024 Bowl after

Then it was time to retrieve the stems. They came out nice and clean and when dried were a little dull. I pulled pipe cleaners through them and as you can see they were only a little brown at the beginning (right side).
025 Pipe cleaners

Replacing the stem on the pipe I used the muslin buff wheels and polishing wheels to buff the stems to get a nice shine on them.
026 Attached

027 Done

And the final pictures of the tools used in the experiment and the cleaning.
028 Tools used in experiment

029 Tools used

So far I am optimistic and happy with the end results using the ultrasonic cleaner with the Oxi-Action cleaning solution. The oxidation gets off rather well using the grinding wheel and it saves me roughly 30 minutes of work. This means a relief for my tennis elbow I have in both arms. So for me it is quite a pleasant addition in the cleaning process.

The negative aspect so far encountered was that this particular model ultrasonic bath is not very drain friendly, in this I mean that getting the liquid out is rather a messy business. Also I have no idea what will happen in the long run with the stem if you use it for a prolonged time. As I read that some items can turn brittle when used too much in an ultrasonic cleaner. But so far I have not found any evidence this is happening with the stems. And there is of course the fact that Vulcanite tends to bend back to its original form when heated too hot, so far this has not happened but I can imagine that if using water that is too hot in combination with the ultrasonic vibrations that add extra heat it can happen.

All-in-all an experiment that opened my eyes to two cleaning methods and I hope it was as informative for you to read as it was for me to do.

Repairing Deep Tooth Marks and Bite Throughs on Vulcanite Stems – AJ Verstraten


Blog by AJ Verstraten

It is with pleasure that I post AJ’s second post on rebornpipes. AJ is known to the online community as Bananabox-Ninja.

Greetings, today a small post about the use of black super glue on a few pipes I had previously cleaned and refurbished; before I found Rebornpipes. This did give me a small problem as I did not extensively take pictures of the process as I had no reason to share the process at that moment and as such I am missing a few ‘before’ pictures.

The pipes I revisited for this project were:
– 11 Wahl Filtro
– Lorenzo Elba
– Machiavelli Como
– BBB Medina
– Spitfire by Lorenzo Riviera
All of them had bite marks on the mouthpiece and the Riviera had even been bitten clean through.

Lorenzo is a good Italian brand that is quite popular in Germany. The BBB Medina is an old English made pipe that has a good reputation here in the Dutchlands. The Wahl and the Machiavelli pipes are a mystery to me. I can find some eBay listings for them but I cannot pinpoint their true origin.

First up the pictures I did have of the before process.

BBB Medina
001 BBB Before

Lorenzo Elba
002 Lorenzo before

11 Wahl
003 11 Wahl Filtro before

As these pipes had already been waxed I first removed the wax layer using my motor, water and grinding wheel. This only took a few moments, after which I used a cotton swab and some alcohol to really clean the surface of the mouthpiece.
004 Wax removed

The following steps I repeated a few times as I found I was a little impatient in the drying process, I advise to let the glue set for a night just to be sure it is dry to the core.

Using a piece of cardboard dipped in Vaseline (sorry no pictures) I closed the hole in the Riviera mouthpiece and with cotton swabs and toothpicks applied the glue to the bite marks on all the other mouthpieces.
005 Glue applied

When the glue had dried I used 600 and 1000 grit sanding paper wrapped around a model file to sand off the excess glue and smooth the mouthpiece.
006 Top and bottom after sanding

I checked the smoothness using my mouth and tongue and although in all cases it felt smooth I noticed that in taking the pictures of the finished product the glue spots are visible. This bothered me, like when I sand a round shoulder or edge on the stem. A casual observer will not notice this, but I know it is there and it will bother me. However I decided against re-sanding them in the hopes of getting them perfect. Because in the end it is my lips and tongue that are handling the mouthpiece the most, not my eyes 

To finalize this short post here are the finished mouthpieces, pipes and the tools I used for this project.

11 Wahl Filtro
007 11 Wahl Filtro

008 11 Wahl Filtro

Lorenzo Elba
009 Elba mouthpice finished

010 Lorenzo Elba

Machiavelli Como
011 MAchiavelli Como finished mouthpiece

012 Machiavelli Como

BBB Medina
013 BBB Mouthpiece finished

014 BBB Medina

Spitfire by Lorenzo Riviera
015 Spitfire by Lorenzo Riviera Mouthpiece

016 Spitfire by Lorenzo Riviera

Tools used during this project
017 Tools used

I had no idea Douwe Egberts made pipes


Blog by Steve Laug

When I posted the find of this pipe on Twitter, I received an email from Al Jones (upshallfan) that pretty well summarized my thinking. I post a bit of that email here: Douwe Egberts pipe??? We used them for our restaurant coffee program for many years (they provide the on-demand brewers used by Burger Kings as well). They are now owned by Sara-Lee. Who knew they made pipes! I’ll look forward to that restore and history lesson… If I had thought a bit more about it I would have remembered that Amphora tobacco was once made by Douwe Egberts but I did not remember that.

The one I picked up is a nice rusticated briar billiard. It is stamped Douwe Egberts X-tra 819. The stem also has a logo – an upward pointing white arrow-head. The bowl had a thick cake and the rim had a buildup of cake and tars. The bowl had what appears to be a combination of sandblasted and rusticated finish. The shank is sandblasted and it appears that the bowl was rusticated first and then sandblasted afterwards. The rustication has a rough edge appearance to it like it was blasted after the patterns were cut. The finish was dirty and worn and the stem had hints of oxidation under the grit and grime. There was minor tooth chatter on the top and bottom of the stem near the button. In the photo below, taken on my iPhone the pipe I am speaking about is the second one down from the top of the photo. (I apologize for the blurriness of the photo.)
IMG_0470

Wikipedia states that Douwe Egberts (often abbreviated as DE) is a Dutch corporation that processes and trades coffee, tea, and other groceries. Its full name is Douwe Egberts Koninklijke Tabaksfabriek-Koffiebranderijen-Theehandel NV, which translates as “Douwe Egberts Royal Tobacco Factory – Coffee Roasters – Tea Traders, Plc.” http://en.wikipedia.org/wiki/Douwe_Egberts

The late Bob Runowski (Morelysson) had this to say about the brand: Douwe Egbert was a conglomerate which used to manufacture Amphora. I don’t recall if the conglomerate ever owned pipe manufacturing. DE offered pipes as a premium for coupons in Amphora Pipe Tobacco, I think in the ’60s. Strange to me, though, because their Amphora pipes were always stamped “Amphora”. I did smoke a fair amount of Amphora Brown in my time. It was quite common for most tobacco firms to offer some inducement for the smoker to continue to buy their products. One of the better known was the Reynolds offerings for PA and CH users. H&H used to include a pipe tool (tamper/knife).

As Bob spoke of above, I have seen DE offering pipes with Amphora coupons. But those pipes were consistently stamped Amphora –and sometimes X-tra as the DE one I have is stamped. Generally they also bore the Made in Holland stamp as well. This pipe is not stamped with any other than the Douwe Egberts stamp.

I reamed the bowl with a PipNet reamer to remove the cake, taking it back to bare wood. This pipe had a heavy aromatic smell so I decided to go back to the beginning and clean it out. Once I had reamed it I dropped it in an alcohol bath to soak for several hours.
IMG_2067

IMG_2066

I dropped the stem in a Oxyclean bath while the bowl was soaking. The Oxyclean softens the oxidation and makes it much easier to remove.
IMG_2068

After a two hour soak, I took the bowl and the stem out of their respective baths and dried them off. In the first photo below you can see the oxidation has all risen to the surface of the DE stem. It is the third stem from the top in the photo.
IMG_2080

I pushed the stem back into the shank once the shank had dried out and took some pictures to show the state of the pipe after the soaks.
IMG_2118

IMG_2119

IMG_2120

IMG_2121

I scrubbed the exterior bowl and shank down with a soft bristle tooth brush and Murphy’s Oil Soap to remove the grime and build up in the grooves of the finish. I also scrubbed top of the rim with the tooth brush and used a dental pick to remove the buildup from the grooves of the finish. Once I had scrubbed the bowl I rinsed it with warm water under the tap. I scrubbed it with the warm water to remove the soap and then dried it with a soft cloth.
IMG_2122

I wiped the bowl down with acetone on cotton pads to clean off the remainder of the finish on the pipe. I worked on the rim until it was clean and free of the buildup that was deep in the grooves.
IMG_2123

I restained the bowl and shank with a dark brown aniline stain, flamed it and then gave it a coat of Linseed oil with a light cherry stain.
IMG_2124

IMG_2125

IMG_2127

This time around in the cleaning process I had gotten ahead of myself and stained the pipe before I had thoroughly cleaned out the interior of the pipe. IT WAS AN ERROR. Normally I clean and scrub the interior the same time I do the outside. It makes the cleaning with Everclear much easier and if the alcohol drips on the surface no harm is done. Doing it after the staining made the cleaner process fussy and I had to be careful not to harm the finish of the newly stained bowl and shank.
IMG_2128

Once the interior was cleaned I set the bowl aside and worked on the stem. I sanded the stem with a fine grit sanding sponge to remove the surface oxidation. The Oxyclean had done a great job in bringing it all to the surface.
IMG_2129

IMG_2130

IMG_2131

I put the stem back in the shank and did some work on the tooth marks on the top and bottom of the stem. I flamed them with a Bic lighter to lift them as much as possible. On the top side the marks disappeared altogether between the light sanding and the flame of the lighter. On the underside one deeper bite mark remained. I continued to flame it and sand until I had minimized its appearance on the stem.
IMG_2132

IMG_2133

I dry sanded the stem with micromesh sanding pads from 1500-12,000 grit. Each successive grit removed more of the scratches on the vulcanite and brought a deeper shine to the stem.
IMG_2134

IMG_2135

IMG_2136

I rubbed down the stem with Obsidian Oil and set it aside to dry and soak into the stem and buffed it by hand.
IMG_2137

IMG_2138

IMG_2139

IMG_2140

I took it to the buffer and buffed it with White Diamond and then with carnauba wax. I gave it multiple coats of wax and then buffed the pipe with a soft flannel buffing pad to give it a shine. The finished pipe is pictured below.
IMG_2142

IMG_2144

IMG_2143

IMG_2146

Cleaning a Bristol Mat Geante – by AJ Verstraten (AKA Bananabox-Ninja)


This post has been written by a Dutch reader of the blog, AJ Verstraten who contacted me a few weeks ago. Several emails later and we had exchanged a lot of ideas and tips. I thought it would be of interest for others here to read about AJ’s ultrasonic cleaner addition to the process. It was one I had not heard of before so I asked him to write up a piece on it with pictures of a pipe that he put through his process. AJ was graciously willing to write it up and submit it for posting here. Thanks AJ for your willingness to do this. It is great to hear from others about the methods they are using and how they work. The photos are well done and the words well written. Without further ado here is AJ’s article.

Greetings, my name is AJ and I hail from the Dutch city of Dordrecht. I go by the internet name of ‘Bananabox-Ninja’ and I am more easily found under that name then under AJ.

A few weeks ago I broke my knee in a motorcycle accident and it was put in a plaster cast with the instruction to let it rest and heal up. In this time I stumbled upon Steve’s website through ‘Het Pijprokersforum’ a forum of Dutch and Belgium pipe smokers.

As I like to refurbish pipes myself and I had time to kill I went through his whole website and learned many, many new things. In the weeks that followed I tried to get a hold of the things Steve used and tried them myself, like the black superglue and the grinding pads for example. Blown away by how well some things worked out I sent an email thanking Steve for all the tips and asking if he had ever used an ultrasonic cleaner. He replied that he had not but that he was interested to know in the workings and would I like to write about it?

So this weekend I cleaned a pipe from my ‘project-box’ and snapped pictures from beginning to end including the ultrasonic cleaning method I currently use. (The numerical key below the photo identifies the tools in the photo.)

These are the tools I tend to use in the cleaning/refurbishing of a pipe, currently I have some tools on order and they have not come in yet.
001 Tools LR

1 – Polishing wheels and waxes
2 – Sanding paper (600 & 1000), sanding pads (1500 to 12000) and modeling files.
3 – Ultrasonic cleaner
4 – Old socks (but clean)
5 – Vaseline and 96% alcohol
6 – Hard and soft bristled pipe cleaners
7 – Q-tips (cotton swabs)
8 – Pliers
9 – Assortment of drills
10 – Senior pipe reamer
11 – Games Workshop paint
12 – Electric motor (0-2000 RPM) with grinding wheel (1500)
13 – Toothpicks

The pipe I chose to work on and record is a nice straight, big chambered Bristol Mat Geante, I presume the Geante is for its size as the chamber is rather big or as we say in Dutch a ‘Speciekuip’ (mortar trough). As far as I can tell Bristol a B-brand from France but I am unable to pinpoint exactly. I personally like the bird’s-eyes all over the left and right side of the bowl.
002 The Pipe LR

As you can see the stem has oxidation all over and the bowl itself is rather dull. Not visible on this photo are the 2 bite marks on the stem.

First I cleaned the pipe on the inside with alcohol and pipe cleaners until they came out almost white. If there is a thick layer of tar in the air canal I use the drills to scrape the inside out lightly using drills of various diameters. Tar will give way far more easily than the ebonite or acrylic it is in.

In this case it was not needed as the pipe’s previous owner was very tidy or had not smoked it much.

Then with just water and the grinding wheel I removed the heavy oxidation from the stem, careful not to create a round shoulder or to grind off too much for it to create a ridge.

003 Set up LR

004 Half way LR

005 Full LR

Using the sanding paper wrapped around a file I removed the hard to reach oxidation on the mouth bit.
006 Filing and sanding LR

007 Sanding wrap LR

008 Sanding result LR

And afterwards to fill the bite marks using the superglue, q-tips and toothpick.
009 Superglue LR

010 Filled SG LR

011 Sanded SG LR

Now the stem was ready for the ultrasonic bath. This is a new method I have only recently started using and so far I am positive on the results. Using a mixture of 50-50 water and alcohol with a teaspoon of disinfection agent, place the stem in the liquid and let the bath go at it for 8 minutes.

This bath can also heat up to 40 degrees but seeing as ebonite tends to bend back to it’s original shape if heated too much I leave that feature off.

You’ll notice in the last picture that the stem looks almost the same as it went in, however when you pull a pipe cleaner through it, there will be some mild discoloration coming out of the stem.

This method of cleaning is a good way to get the last remaining specks of dirt out of those hard to reach places, I myself was skeptical at first but I was swayed when I pulled the pipe cleaner through it after the bath I found that it did do its job.

It does not however remove oxidation completely, I tried with an unprepared stem and it came out browner than going in.

So as an extra step I find it a great addition to my cleaning process.
012 Sonic cleaning fluids LR

013 Turn on LR

014 Waiting LR

015 Sonic done LR

In the mean time I cleaned some of the soot from the top of the bowl with some spit and the old sock. Especially the part of the sock that fits over your ankle is rather coarse and excellent for this process. The chamber had a nice smooth coal layer in it so I left it in there.

After the bath I gave the inside of the stem few more scrubs with the pipe cleaner and the outside another run with the grinding wheel.

Then I started polishing with the wheels and the waxes.
016 Polishing LR

First a pre-polish with brown, followed by white, a coat of carnauba wax and a final buff.

The end result as you can see below:
017 Pipe done LR

Parker Super Briar Bark Cherrywood Restored


Blog by Steve Laug

The first of the latest lot I picked up on my trip to Northern Alberta was brought to the work bench this afternoon. I decided to work on little Parker Super Briar Bark Cherrywood. It is stamped on the underside of the shank Parker over Super in a diamond over Briar Bark. Next to that is Made in London England with both a size number – 4 – and a shape number – 283.
IMG_1862

The bowl had a lot of cake build up in the bowl and had some nicks in the briar around the outer edge of the rim. The finish was dirty with grime in the deep crevices of the sandblast on the outside of the bowl and a buildup of tars on the top of the rim. The stem was oxidized and had some tooth damage on both the top and bottom sides near the button. The Parker logo “P” in a diamond was partly visible on top of the stem. It was merely a painted on logo and not stamped in the vulcanite so it would be hard to clean and leave in place.
IMG_1863

IMG_1864

IMG_1865

I reamed the bowl with a PipNet pipe reamer – a T handle and different cutting heads. The smallest diameter cutting head trimmed back the cake to a thin coat. I dumped the carbon buildup in the rubbish and then cleaned out the bowl with a cotton swab dipped in Everclear to remove any leftover loose carbon.
IMG_1946

IMG_1947

I removed the stem and found that the pipe had an inner tube like the Dunhill Inner Tube that was used as a method of keeping the shank clean from tar buildup.
IMG_1948

I scrubbed the surface of the bowl and shank with a soft bristle tooth brush and undiluted Murphy’s Oil Soap. I scrubbed it until the soap was dirty and then rinsed it off under warm running water and patted it dry. I kept the water out of the bowl and the shank as I did not want those areas wet.
IMG_1949

I cleaned out the shank and the bowl with pipe cleaners and cotton swabs and pipe cleaners dipped in Everclear. Once the inside was clean I worked on the oxidized stem. I sanded it with 220 grit sandpaper to break up the calcium buildup around the button area and to also minimize the tooth marks on the top and the bottom side of the stem. After the initial sanding I scrubbed the surface of the stem with Meguiar’s Scratch X2.0 to remove the surface oxidation and to soften the oxidation deep in the stem.
IMG_1950

IMG_1951

I scrubbed the inside of the stem with pipe cleaners and Everclear and used 0000 steel wool on the aluminum inner tube. I sanded the stem with micromesh sanding pads from 1500-12,000 grit. I wet sanded with the 1500 and the 1800 grit and afterward applied some white out to the area of the logo. I decided to try and build it up a bit. The logo appeared to be stamped in the stem but as I looked at it I could see that it was a painted on logo. In the polishing of the stem I sacrificed the logo. I dry sanded with the remaining grits of micromesh from 2400-12,000.
IMG_1952

IMG_1953

IMG_1954

IMG_1956

IMG_1957

IMG_1959

IMG_1960

When the sanding was completed I gave the stem a rub down with Obsidian Oil and let it soak into the vulcanite. I buffed it with a soft cloth and gave the stem a coating of carnauba wax by hand. I restained the bowl with a dark brown stain that had been diluted with one part alcohol to one part stain. I wanted to cover some of the nicks in the outer rim and some of the light spots on the shank that showed wear and tear. I applied it with a cotton swab and then flamed it with a lighter. I reapplied the stain and reflamed it until I had the colour match I was looking for.
IMG_1961

IMG_1962

IMG_1963

IMG_1964

I reinserted the stem and gave the bowl and the stem a coat of Halcyon II wax and hand buffed it with a soft cotton cloth and a shoe brush.
IMG_1965

IMG_1966

IMG_1967

To finish the pipe I buffed the stem with White Diamond and lightly buffed the bowl with the same. After the buffing I gave it a light coat of carnauba wax and buffed it with a clean flannel buff. The finished pipe is pictured below and awaits its inaugural smoke.
IMG_1968

IMG_1969

IMG_1970

IMG_1971

A Unique Vertical Oval Shank Meerschaum Reborn


I saw this old Meerschaum pipe bowl on Ebay and decided to put a low bid on it. I was not surprised to have won it and paid for it quickly. The seller packed it very well and shipped it off to Vancouver, Canada. Below are the Ebay photos that caught my attention. I think the thing that intrigued me the most was the vertical oval shank on the pipe. To restem that pipe would be a great challenge – find a stem large enough to work with and shape it until it fit. I thought I had just the stem in my box – a gift from a friend on Pipesmokers Unleashed Forum, Robert.

From the photos it looked to be in rough shape. The pipe case said it was a WDC but I have no way of knowing if that is true. The gold filigree on the band looks like the old WDC pipes of the late 1890s but I am still uncertain as to the maker. It was in rough shape as can be seen from the photos. There were many scratches and gouges around the outside of the bowl. The shank had marks on the top that looked like someone had taken a file to it. The rim was probably the worst. With the rough edges on the back right side of the bowl the rim/top appeared to be angled to the right side and worn down. The tar build up was heavy in the bowl and on the rim. The tenon was broken off in the shank. It appeared to be an old bone tenon and a bone insert in the mortise that was threaded to take the screw in tenon. I am assuming the pipe probably had an amber stem in its first appearance in the shop but that was long since broken and lost. The WDC case was also very rough – the edges were worn away, the wood broken and a hinge dangling unused. The inside was badly stained.

meer1

meer3

meer4

meer5

Yesterday afternoon I came home from work early and found a package awaiting me – I knew that the meer had arrived. I had to laugh when I cut open the box – it had a previous label a Funeral Home in Ohio. I don’t know if that was a commentary on the pipe bowl that resided inside the box or if a funny coincidence. I cut the tape and opened the box. The pipe inside was both in worse shape than I had imagined from the seller’s excellent pictures and in better shape. The meer under the band was cracked as can be seen in the photo above and that was as it was when it arrived. The scratches in the surface of the bowl were not as deep as they appeared in the photos and the pipe when place on the rim on a flat board was actually not slanted to the right – the damage to the outer edges of the right back side made it appear worse than it actually was in reality. The next photos show the pipe on the work table just out of the box.

IMG_1799

IMG_1800

IMG_1801

IMG_1802

IMG_1803

After examining it carefully with my lens and a dental pick I decided to begin the clean up by trying to remove the tenon. I used the screw that I generally use to remove a tenon to no avail. The threads in the mortise were locked tight around the tenon. I picked at it with the dental pick and was unable to remove it that way either. I decided to drill out the old tenon. So I set up a cordless drill with a drill bit slightly larger than the airway in the broken tenon. I slowly drilled the airway with the bit and exchanged it for increasingly larger bits until I had the airway cleared of the debris. I then used a ¼ inch bit to open the mortise and clear out the remaining debris of the mortise and tenon. The second photo below shows the mortise after I opened it up. I used a dental pick to clean out the remaining pieces and hand turned the quarter-inch drill bit into the mortise to smooth out the walls of the airway and open it to receive a new tenon.

IMG_1804

IMG_1806

I took the pipe bowl back to the work table and set up a coarse sanding block on my worktable to top the bowl of the meer. I have used this block in the past with good success on the softer meerschaum material. I placed the bowl, rim down on the surface of the block and sanded it in a clockwise direction (no reason for that other than I am right-handed). I sanded it, checking often to see how the rim was cleaning up until the surface was clear and the top of the bowl once again level. Surprisingly I did not have to remove too much material from the rim to clean up the surface.

IMG_1805

IMG_1808

IMG_1809

IMG_1810

When I had finished the sanding, I used micromesh sanding pads to sand the top smooth once again and remove the scratches from the coarse sanding block. The micromesh sanding pads from 1500 – 12,000 grit bring a shine back to the surface of the meer and prepare it for rewaxing once the pipe is finished.

IMG_1811

At this point in the process I decided to see if I could fit a new stem on the pipe. The diameter of the oval shank was quite large and would require a large diameter round stem. To make it an oval stem would require that much of the existing vulcanite of the stem would have to be removed in the shaping process. I had an old Brebbia stem that a friend on Pipe Smoker Unleashed Forum sent me for an old Peterson that I was restemming. The tenon was too small for the Pete but too large for the old meer. I used a Dremel with a sanding drum to remove the excess material from the tenon until the fit was very close. The remainder of the fitting was done with a wood rasp and sandpaper. Once the tenon was finished I pushed the stem into the old meer to check on the fit of the tenon in the newly opened mortise. As can be seen in the photo below, the fit was perfect. You can also see from that photo how much work would need to be done to fit the stem to match the shank of the pipe.

IMG_1812

The stem had deep bite marks on the top and the bottom near the button. They did not break the surface of the vulcanite. I decided to heat the surface of the stem with a heat gun and try to lift the dents from both sides as much as possible. I also wanted to straighten the stem significantly to give a better profile to the pipe. The heat gun worked to achieve both aims. The tooth marks lifted quite a bit and would have to be filled with black superglue to finish the work and the bend straightened to the angle I wanted for the new stem.

IMG_1813

I sanded the initial excess vulcanite off the diameter of the shank with the sanding drum on the Dremel. Once I had removed a large portion I took it back to the work table and used a rasp to continue to shape and reduce the stem to the right proportions. The next series of eight photos shows the effectiveness of the rasp in shaping the stem. (In the midst of the shaping my daughters brought down a bowl of popcorn for a snack while I worked – that appears in several of the photos.)

IMG_1814

IMG_1815

IMG_1816

IMG_1817

IMG_1818

IMG_1819

IMG_1820

IMG_1821

I removed the stem from the shank and cleaned up the tooth dents so that I could fill them with black superglue. The glue takes quite a bit of time to cure so I waited until I was finished for the evening and then filled the dents and set the stem aside to cure over night.

IMG_1822

IMG_1823

This morning I sanded the stem with 220 grit sandpaper and also sanded the superglue patch on the underside of the stem. The next four photos show the stem as it begins to take shape and the repaired spot on the underside of the stem. The oval is coming along nicely but there was still a lot of excess material that still needed to be removed.

IMG_1824

IMG_1825

IMG_1826

IMG_1827

I continued to sand the stem to further tune the shape of the oval to match the shank. I used 220 grit sandpaper to remove the excess and shape the stem. I worked on the superglue patch on the underside of the stem with the 220 grit sandpaper as well. In the next series of three photos you can see the shape I am aiming for with this stem. You can also see the size of the patch on the stem. The patch is still larger than the marks it covers so more sanding will need to be done on it to blend it into the vulcanite.

IMG_1828

IMG_1829

IMG_1830

I cleaned up the bite marks on the top of the stem and applied the black superglue patch to that surface as well. I set it aside while I worked on the bowl. I wiped the bowl down with Murphy’s Oil Soap on a cotton pad to clean off the grime on the surface while leaving as much of the old patina as possible. The first photo below shows the superglue patch. I applied it and used a dental pick to push it around the surface and also build up a few tooth marks on the edge of the button. The second photo below shows the patch after it had dried and I had sanded the patch with 220 grit sandpaper.

IMG_1831

IMG_1833

While working on the stem I decided to open the button to make it simpler to insert a pipe cleaner. I used needle files to make the slot larger. The second photo shows the opened slot in the button. I sanded the inside of the slot with a folded piece of sandpaper to smooth the surface and polish the slot.

IMG_1834

IMG_1835

I took the pipe back to the Dremel and sanding drum to remove more of the excess vulcanite. I had the basic shape in hand and just wanted to get it closer to the size of the shank before doing the finish sanding. I brought it back to the work table and sanded with 220 grit sandpaper until the fit was right. The next four photos show the progress in the fitting of the stem.

IMG_1837

IMG_1838

IMG_1839

IMG_1840

I sanded the stem with a medium grit sponge backed sanding pad. It helped to remove the scratches left behind by the 200 grit sandpaper. Then I sanded the stem with micromesh sanding pads from 1500-12,000 grit to polish and shine the vulcanite and the patched areas. The white Lucite band that was a part of the stem began to take on a shine as well in the process. The next nine photos capture what took about an hour to achieve in the sanding process. I wet sanded with the 1500, 1800 and 2400 grit sanding pads and dry sanded with the remaining grits of micromesh.

IMG_1841

IMG_1842

IMG_1844

IMG_1845

IMG_1846

IMG_1847

IMG_1848

IMG_1849

IMG_1850

I buffed the stem with White Diamond and a blue plastic polishing compound to bring out the final shine on the stem. I hand waxed the meerschaum with beeswax and hand buffed it with a shoe brush. The next four photos show the finished pipe with the new stem. I like the marks and scratches in the meer as they seem to speak of the long journey the pipe took to get to me. The white Lucite band on the stem fits nicely in my thinking against the gold of the filigree band. The slight bend it the stem works nicely for me. From the last two photos you can see the oval shape of the stem now that it is completed. It has come a long way from the round stem I received as a gift from Ron.

IMG_1851

IMG_1852

IMG_1853

IMG_1854

Churchill’s Bent Pot


Blog by Steve Laug

I saw this pipe come up on Ebay and love the shape. Some have called it a bent pot but I am not sure that the name captures the shape but I will call it that nonetheless. Churchill’s was not a brand I was familiar with but it looked very good. The stamping on the pipe is very simple on the left side of the shank it is stamped Churchill’s and on the right side it is stamped Matt Grain. The bowl had been reamed back by the seller before shipping and was well done. No damage to the roundness of the bowl. The inside of the shank was filled with chips of carbon from the reaming and they were stuck in the tar in the shank. The buildup was enough that the stem did not seat in the mortise and there was a gap in the fit of the stem and shank. The rim had some tarry buildup. The stem sat at an angle to the shank as if the tenon was bent slightly. There were three deep tooth marks on the top and the bottom of the stem near the button. The oxidation was present but not heavy at this point. The stem was also plugged with tars and the airflow was very constricted. There was an old English style C stamped on the stem. The first nine photos below were provided by the Ebay seller.

Churchill 1

Churchill 2

Churchill 3

Churchill 4

Churchill 5

Churchill 6

Churchill 7

Churchill 8

Churchill 10

Logo NEW Logo 2012 Small

I am fairly certain that the pipe came from Churchill’s Tobacco Shop in Norwich, England. I found the following information on the Pipes and Logos website http://pipephil.eu/logos/en/logo-c4.html On the site there is a small paragraph which I have copied as follows: “Churchill’s Tobacco shop is situated in St Andrew’s Street at the corner of Bridewell Alley in Norwich, England. The shop was next to a church and at the bottom of two hills, and that’s how it became “Churchill’s”. Former manager: John Elvin (retired on May, 31 2008). Current owner (2008): Keith Garrard.” I have included these pictures from that website as they show the stamping on both the shank and stem that is identical to the pipe that I have just refurbished.

Church

According to the Churchill’s website it is the last remaining specialist tobacconist in Norwich, originally standing at 32 St Andrews Street for over 23 years. http://www.churchillsofnorwich.com/index.php?_a=viewDoc&docId=1 The site also notifies the shop’s clients that Keith Garrard, who had a wealth of knowledge and was an avid pipe and cigar smoker himself, passed away on 23rd March 2012. His wife Coral continues to maintain the business in his honor.

I decided to try to remedy the bent tenon on the pipe to begin with. I heated it in a cup of boiling water to try to adjust it and tighten the fit in the mortise. I was able to adjust the fit and get a good tight seat with no gap between the shank and the stem. However, in the process the water oxidized the stem badly. The four photos below show the adjusted fit of the stem and also clearly show the bite marks on the stem – top and bottom near the button.

IMG_1738

IMG_1739

IMG_1740

IMG_1741

I scrubbed the inside of the shank with Everclear and cotton swabs. I cleaned the airway with bristle pipe cleaners and then fluffy pipe cleaners. I continued to scrub it until the pipe cleaners and cotton swabs came out clean. I cleaned the rim of the bowl with saliva and a cotton pad until the grime was gone. It took a bit more than a cotton pad and saliva so I also used a very fine grit sanding block to knock off the remaining tar, being careful to not break the finish.IMG_1743

IMG_1744

IMG_1745

The stem took a bit of work as it was plugged with grit and tar. I used a dental pick to clean out the slot. To the right of the stem in the photo is some of tar and grit I picked out of the slot. I used a straightened end of the pick to clean deeply in the slot. I then used pipe cleaners soaked in Everclear and pushed them through the blockage. I also opened the slot with needle files to facilitate easy access with pipe cleaners. The slot was very narrow which also made the blockage hard to get at.

IMG_1746

I sanded the stem with 220 grit sandpaper to clean up the surface around the bite marks. In the next three photos the bite marks are visible. I heated them to lift them as much as possible. The bite marks on the top were less troublesome than the ones on the underside. Fortunately the stem was quite thick so that the tooth marks did not go all the way through the vulcanite.

IMG_1747

IMG_1748

IMG_1749

I picked the tooth marks clean with a dental pick and then used black super glue to patch the deep marks that remained. Once the glue had cured and was hard I sanded the patches with 220 grit sandpaper and then a medium grit sanding sponge to smooth out the surface and blend in the patch. The next three photos show the patch after it had been applied and after sanding.

IMG_1750

IMG_1752

IMG_1753

I sanded the stem with micromesh sanding pads from 1500-12,000 grit to finish removing the oxidation and the scratches left behind by the various sandpapers I used. The next series of photos show the progress of the shine after each group of sanding pads.

IMG_1755

IMG_1756

IMG_1757

IMG_1758

IMG_1761

IMG_1762

I wiped the stem down with Obsidian Oil and rubbed it into the surface of the stem. Once it had dried I rubbed it and polished it with a shoe brush before taking the pipe to the buffer. I buffed it with White Diamond and then carnauba wax. I gave it a polish with a clean flannel buffing wheel. The next four photos show the finished pipe. I really like the way the matte finish came alive. The grain really pops. This was an easy refurbish as the finish was in very good shape under the top layer of grime.

IMG_1770

IMG_1771

IMG_1772

IMG_1773

Stem Repair Failure – by Mark Domingues


This is an interesting piece that Mark wrote on a stem repair that not even I would have undertaken. To me this stem was a goner. The hole and missing vulcanite would make a patch virtually impossible in my opinion. But my hat’s off to Mark for giving it a go. He writes up the repair and the failure of the repair in a clear and concise way. Thanks Mark for blazing the trail on this and letting know about one that did not work.

I got a Peterson Shamrock off Ebay with a chunk missing from the stem near the bit. I figured I would try to shape a repair using black super glue and vulcanite dust from an old stem. Instead of using the Oxyclean soak, I “painted” the stem with a bic lighter to remove the oxidation. I put a piece of cardboard wrapped with scotch tape and smeared with Vaseline in the bit end. Then put some glue on the cardboard, sprinkled dust and dripped more glue to make a patch. Since it was a curved stem, I placed it in my bowl of sand I use to do the alcohol and cotton ball treatment. I used to do the alcohol/salt but this is far easier and has the same effectiveness IMHO.

stem1

stem2

stem3

stem4

After drying, I used files and wet/dry paper moving from 320 up to 2000 to get the stem shaped. I used a needle file to reshape the bit, and then took it to my buffer wheels to really shine it. I think it came out great. The camera has some white spots that aren’t on the stem. It looks like a new stem!

stem5

stem6

Well, the repair LOOKED beautiful but didn’t hold!! Running a pipe cleaner through it a week later, it cracked and just crumbled away back to the original picture. I’m wondering about the ratio of glue to vulcanite dust, or like someone said on a pipe forum, the 2 different materials will not hold due to expansion and contraction when heated. Maybe I will try again with more glue, less dust.