by Steve Laug
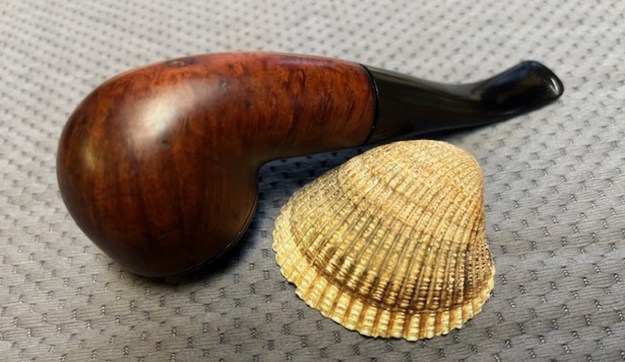
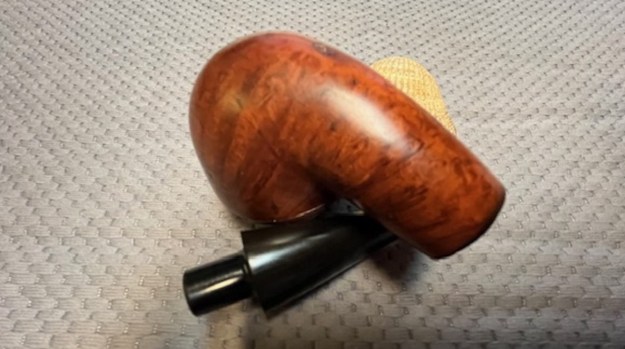
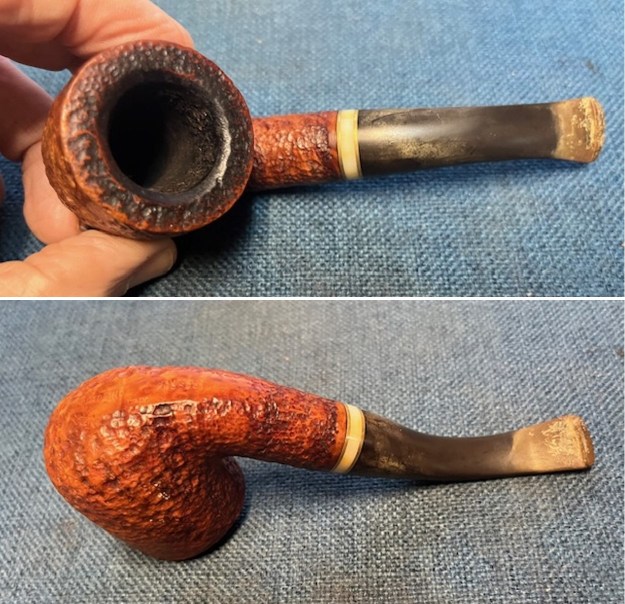
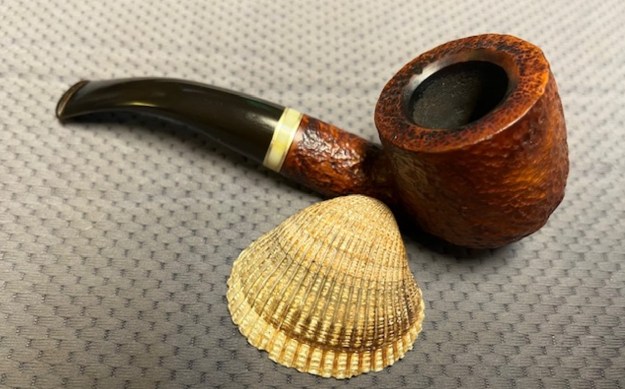
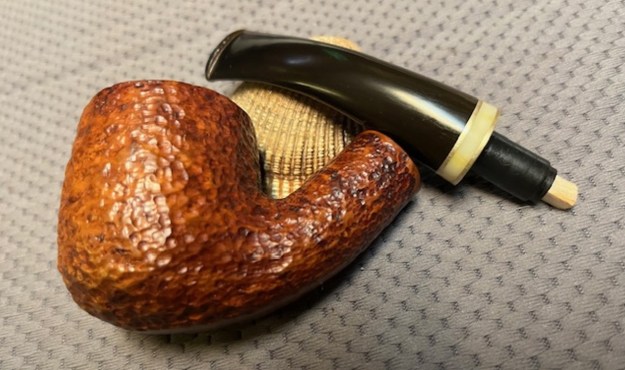
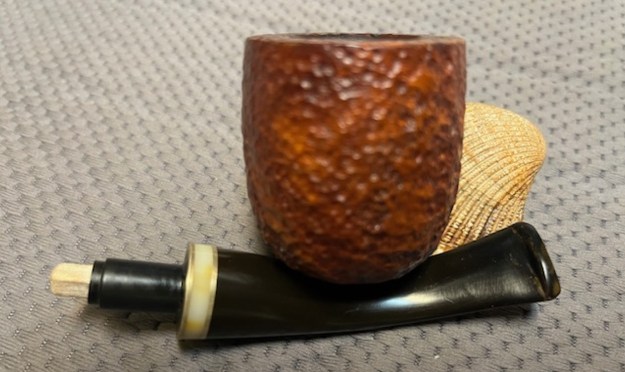
Earlier this week I received an email from Stephen regarding a few more pipe projects that he had for me to work on. He dropped them off here yesterday for me to work on. There were six pipes in the lot. Two were his that I had worked on a few years ago – a Mayfair 1005 rusticated tree stump and a Jost Supreme. Both were favourite pipes of his. One was a Savinelli Bent Billiard that he purchased on a trip to Italy. The final three were pipes that belonged to his father who would soon be visiting him in Vancouver – a Brigham full bent four dot 4244, a Savinelli Portofino Bent Pot and a Bent Rhodesian with no name stamped on the shank sides. Stephen texted me this photo of the pipes before he sent them.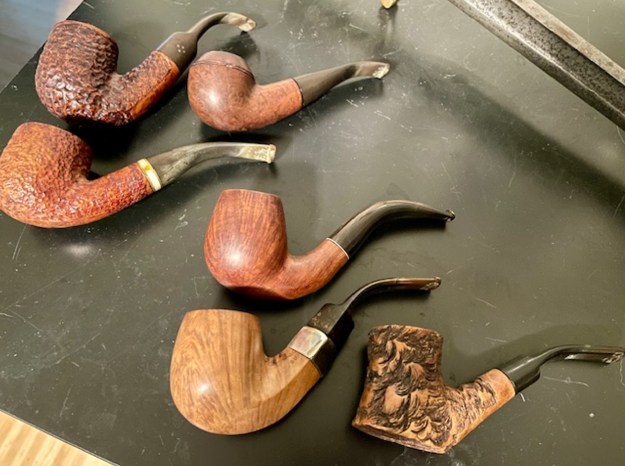 I decided to work on the second of Stephen’s father’s pipes. It is a smooth Bent Rhodesian. It is a beautiful grained piece of briar that I can appreciate why he chose it. The pipe is unstamped and does not appear to have even the remnants of any stamping. The briar is dirty from use with a moderate cake in the bowl and a lot of chipping and dents in the rim top and the twin rings on Bullcap on the bowl. The stem was oxidized, calcified and had some tooth marks and chatter on the top and underside of the stem ahead of and on the surface of the button. There is no stamping on the side of the stem as it was unmarked. I took photos of the pipe before I started my work and included them below.
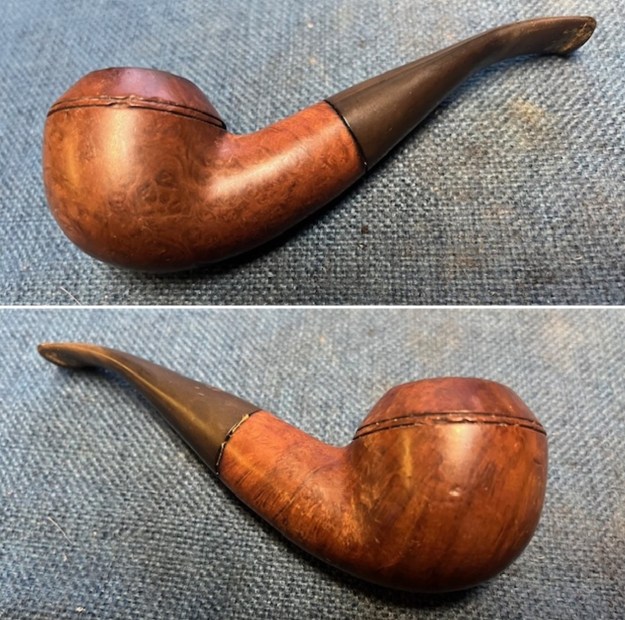
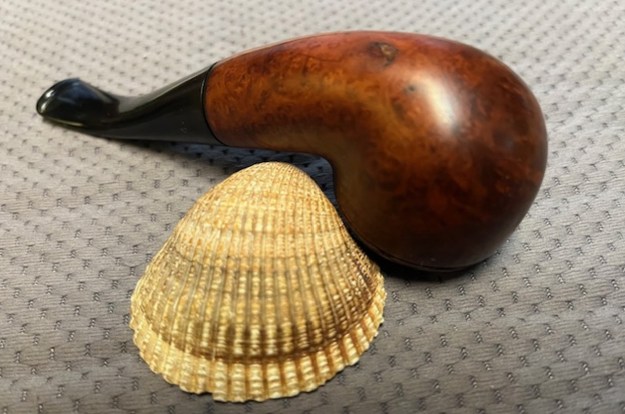
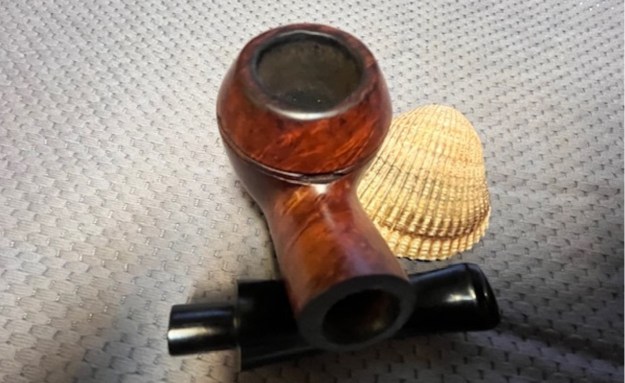
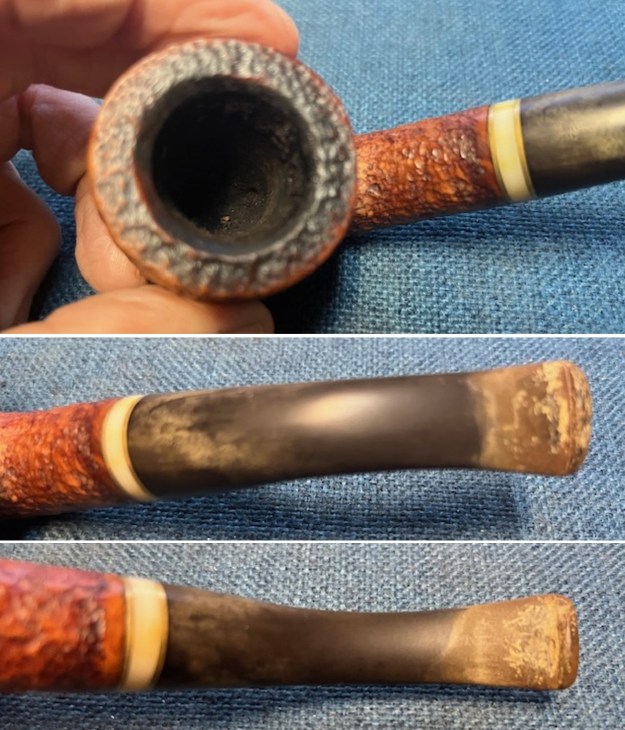
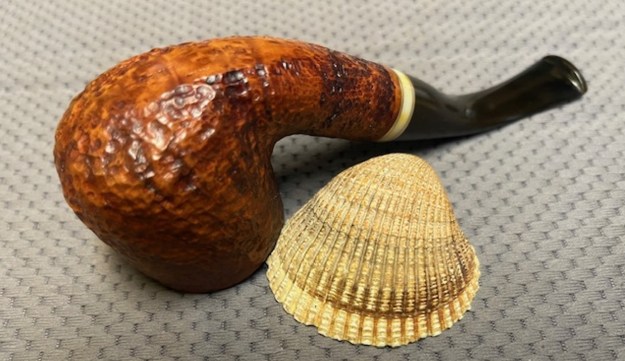
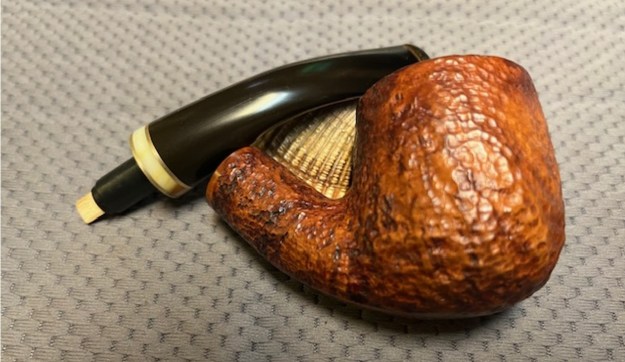
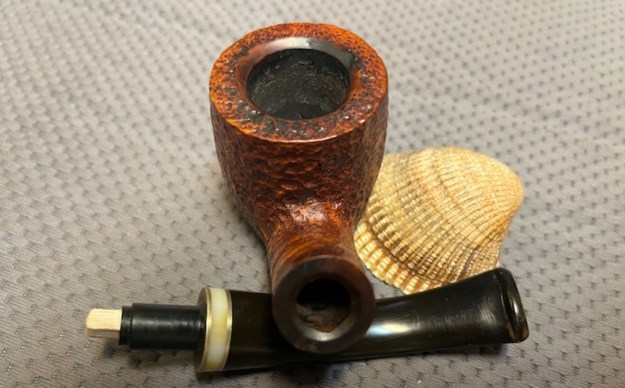
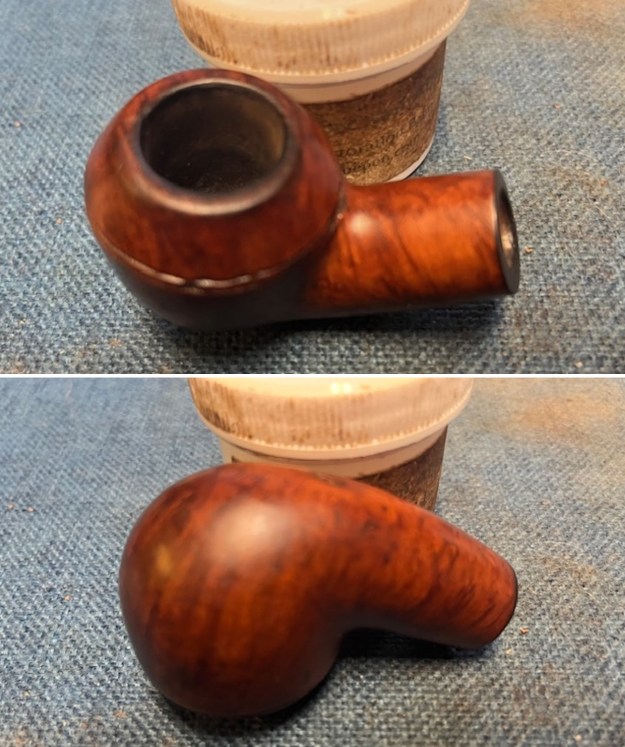
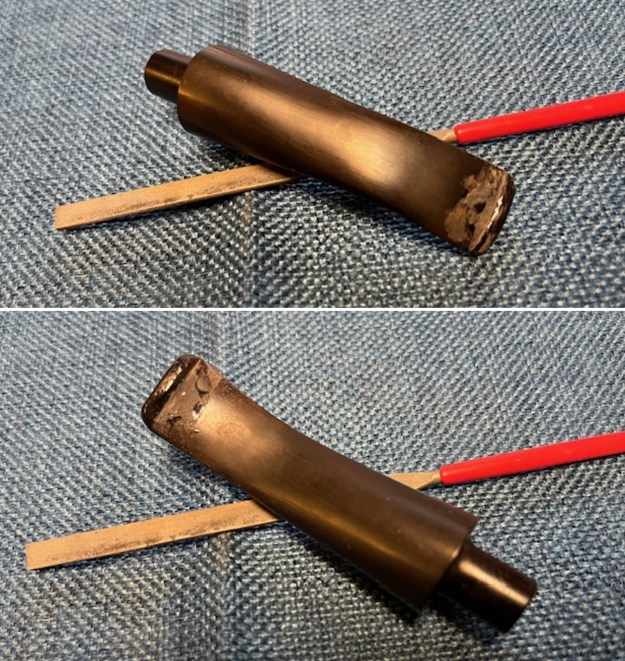
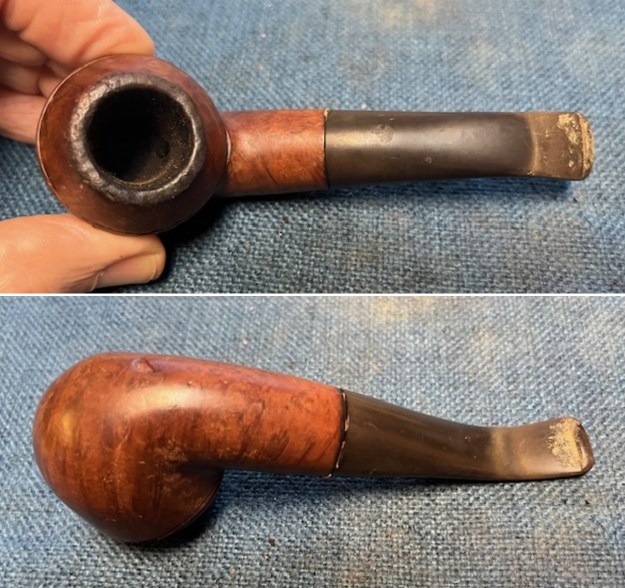 I took a photo of the stem surfaces and the bowl and rim to give a sense of condition of the pipe. You can see the cake in bowl and the lava overflow and the heavy nicking and denting on the edges and rim top of the bowl. The stem surface is very dirty and you can see the tooth marks and chatter on both sides ahead of the button. There is also a paper wash inserted in the mortise of the pipe to tighten the fit of the stem.
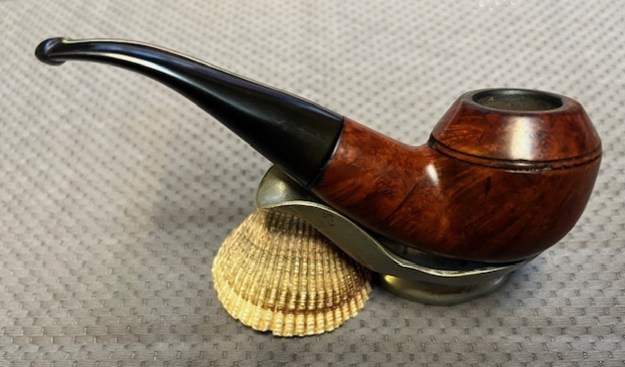
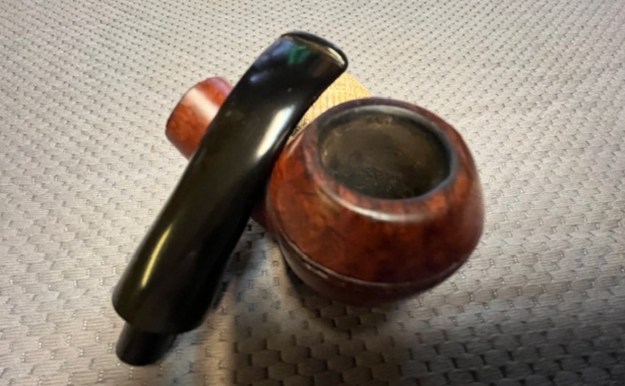
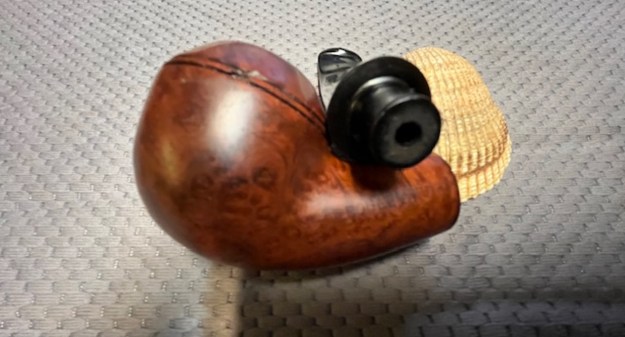
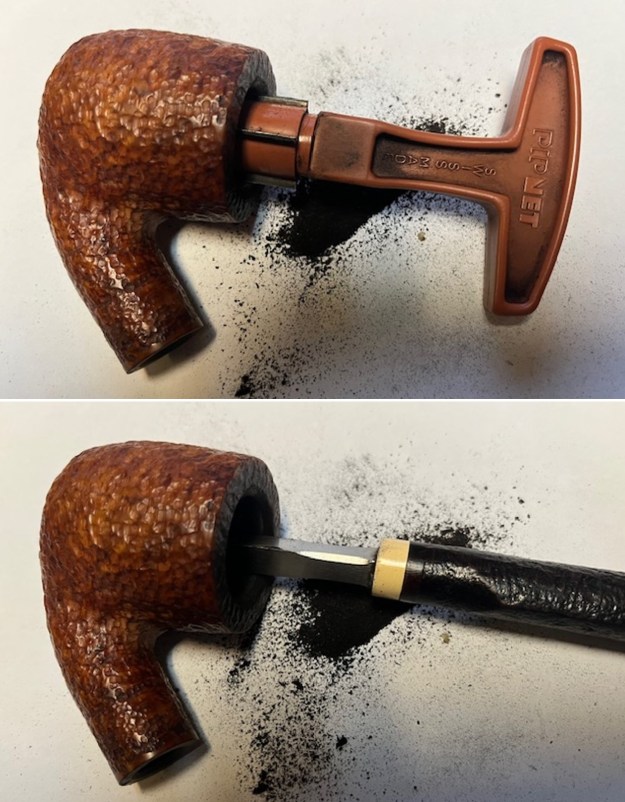
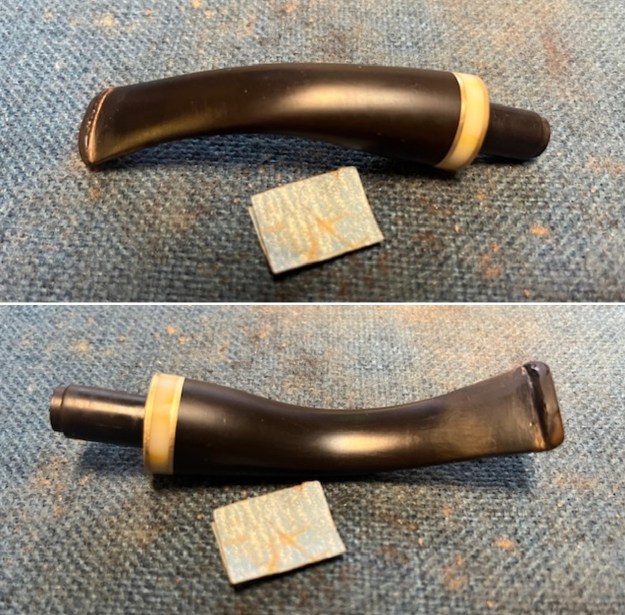
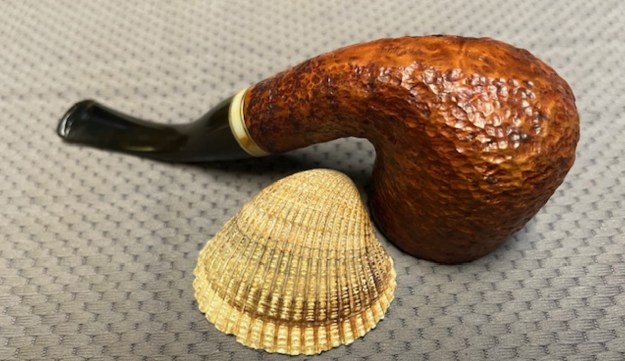
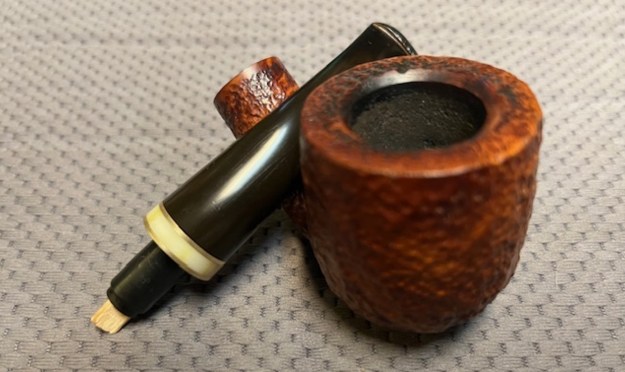
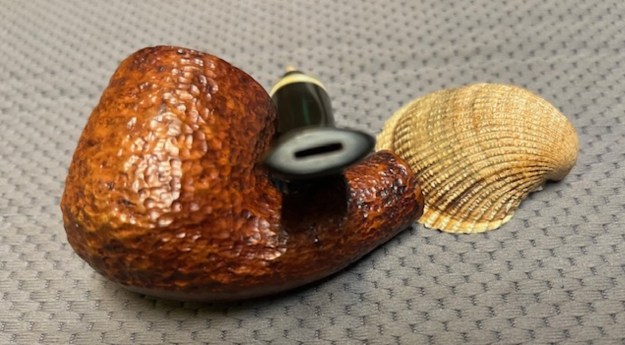
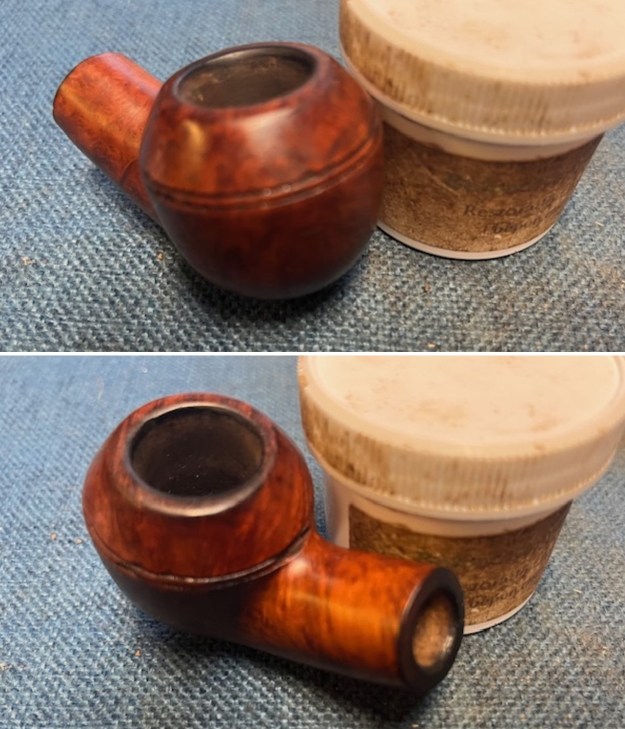
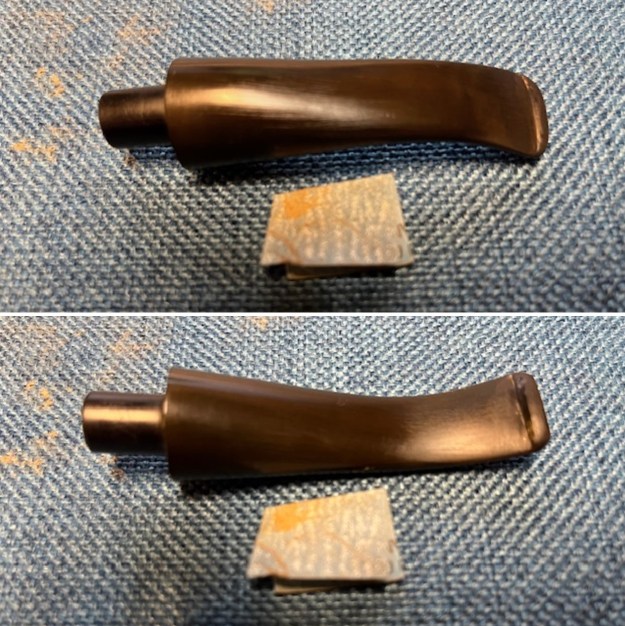
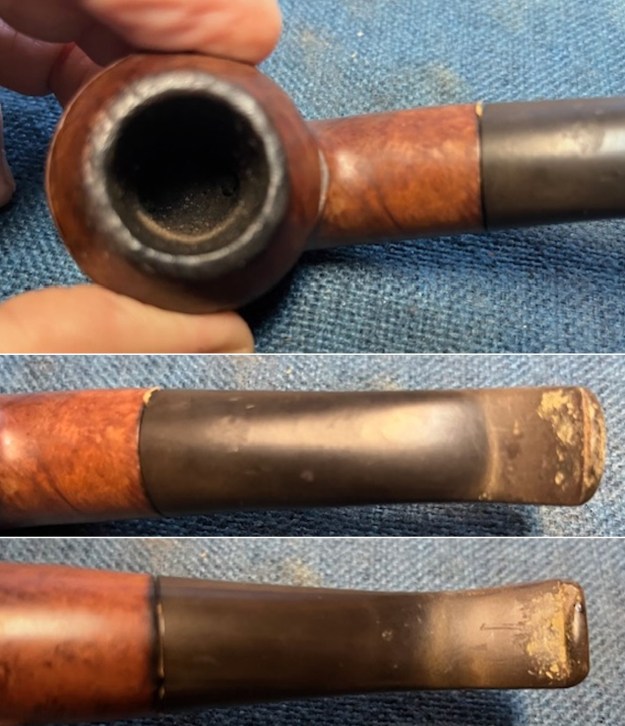 I removed the stem from the shank of the pipe and took a photo of the parts to show the flow of the pipe. It has some great grain.
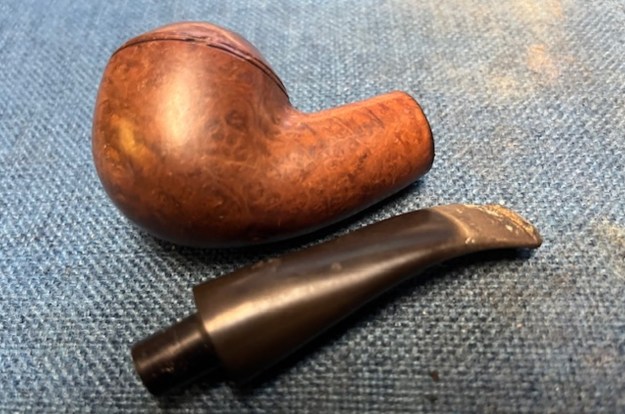 I used a dental spatula to scrape out the paper washer from the inside of the shank. It had been glued to the right side of the shank to thicken the wall of the right side. It was not an effective way as the shank was not drilled evenly. It was straight but the shank was not round. The stem turned the same way the stem was.
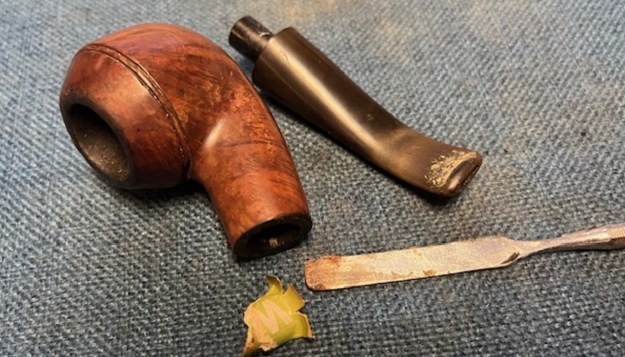 To address the damage on the rim top I topped it with 220 grit sandpaper on a topping board. I took off the rim damage and smoothed out the top of the rim. It looked much better.
 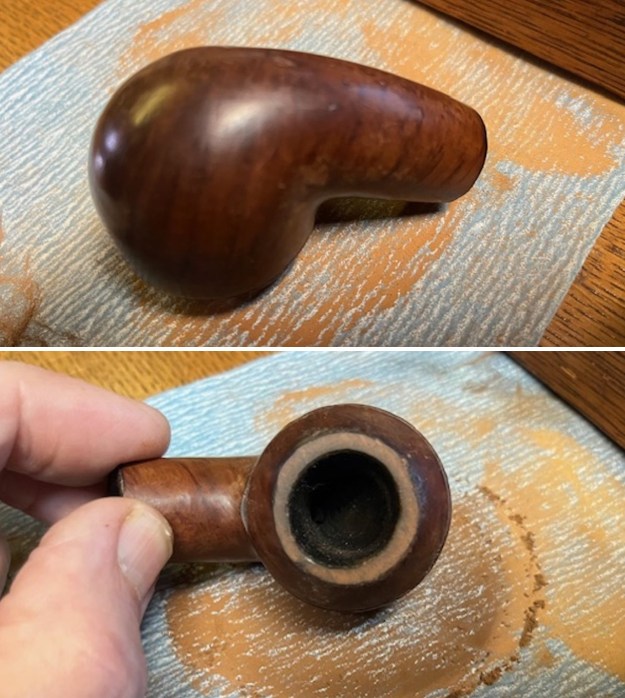 I reamed the bowl with a PipNet pipe reamer using the second and third cutting head to trim the cake back. I used a Savinelli Fitsall Pipe knife to clean up the remnants leaving bare briar. I sanded the bowl walls with 220 grit sandpaper wrapped around a piece of dowel. The bowl was significantly cleaner.
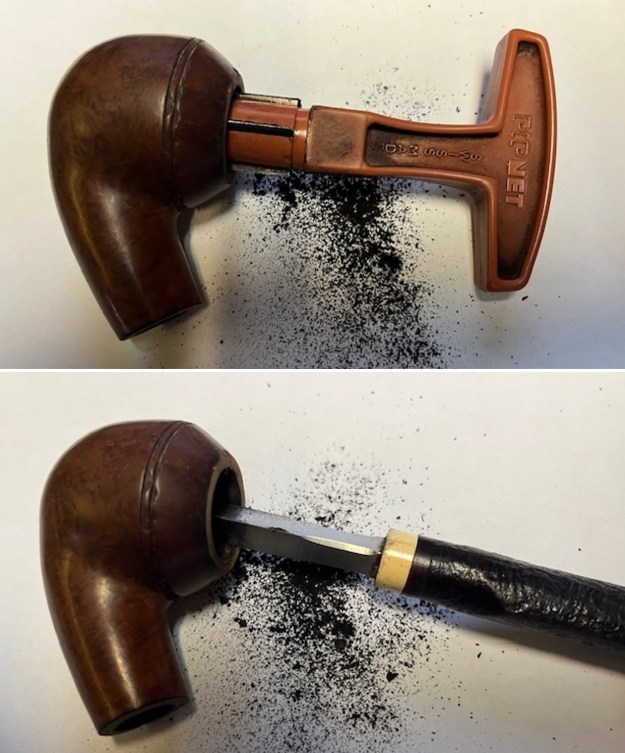
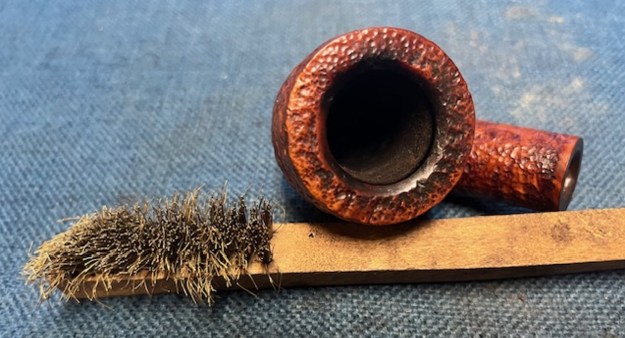
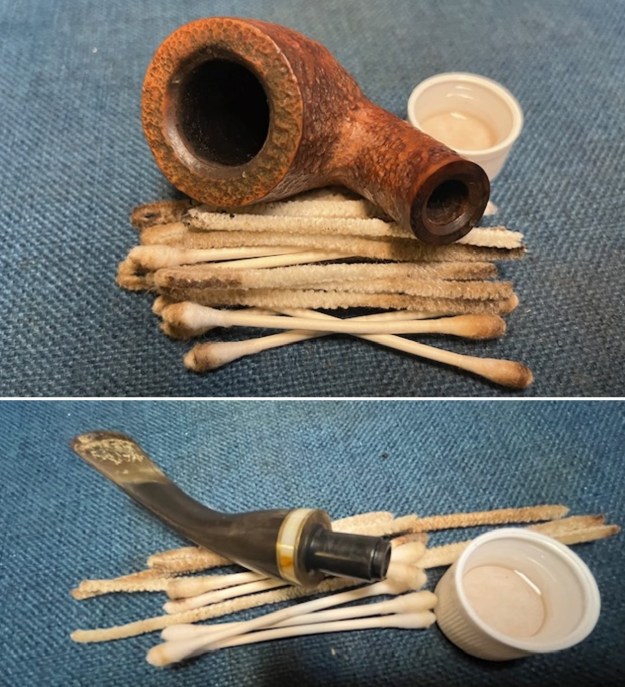
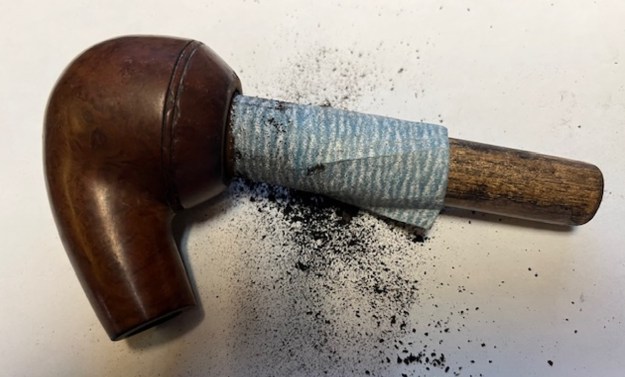 I cleaned out the airway in the shank and mortise as well as the stem with cotton swabs, pipe cleaners and isopropyl alcohol. It was dirty but it cleaned up very well.
 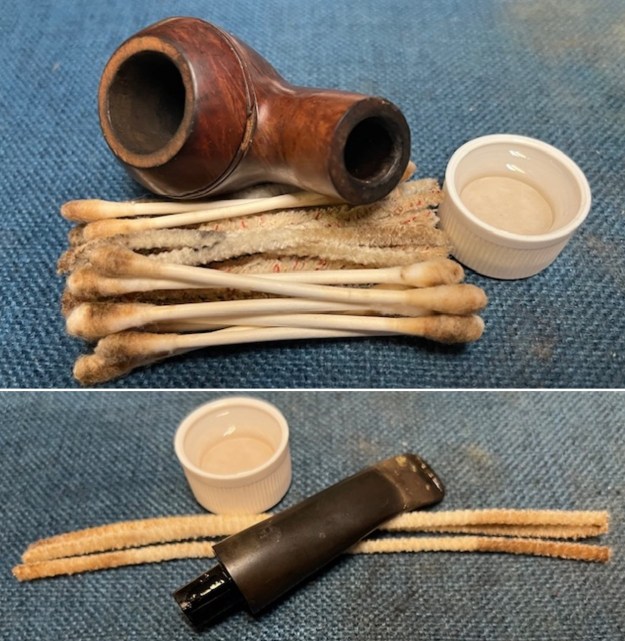 I cleaned the surface of the briar with a cotton pad and acetone to remove the grime and the remnants of the finish on the briar. It looked much better.
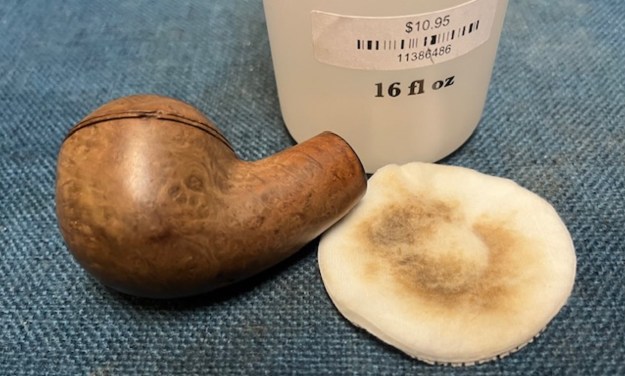 There was a large divot on the bottom of the bowl that I decided to repair. I filled it in with some clear CA glue and pressed briar dust into the glue. I repeated the process until the damaged area was filled in. Once the repair cured I sanded it flat to blend it into the surrounding surface of the briar. It looked much better when I was finished.
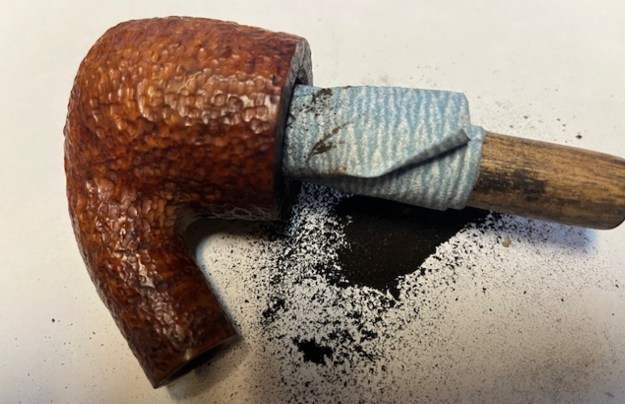
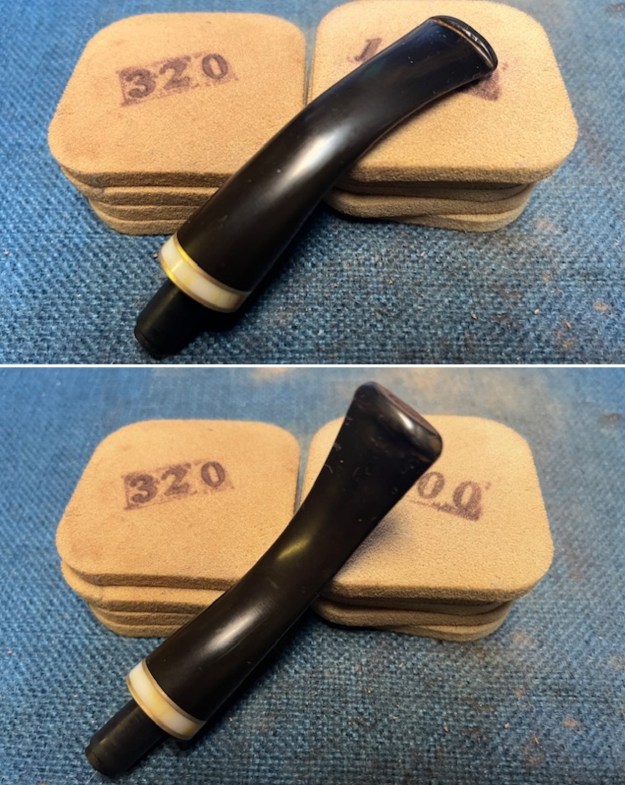
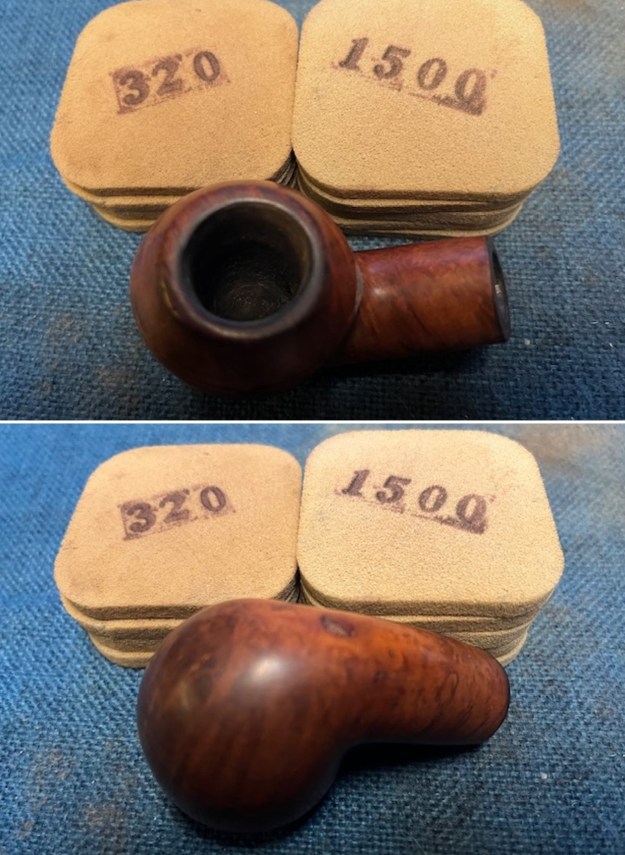
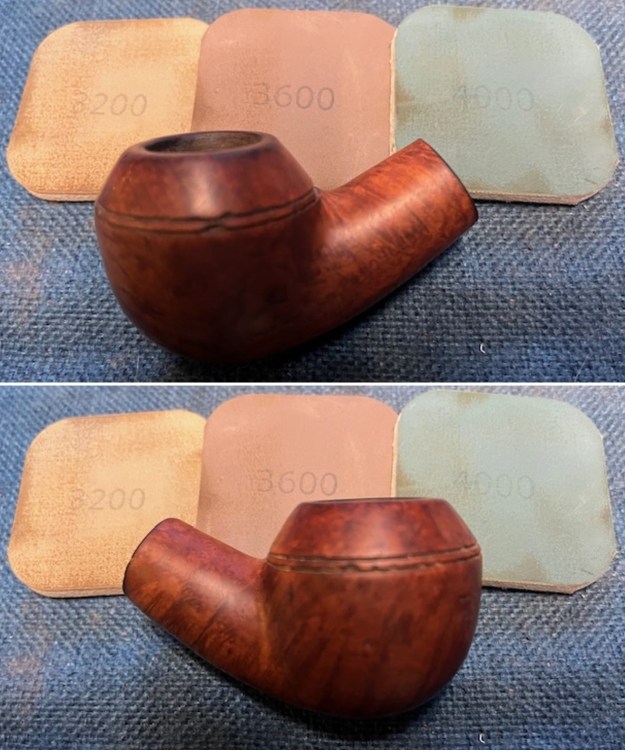
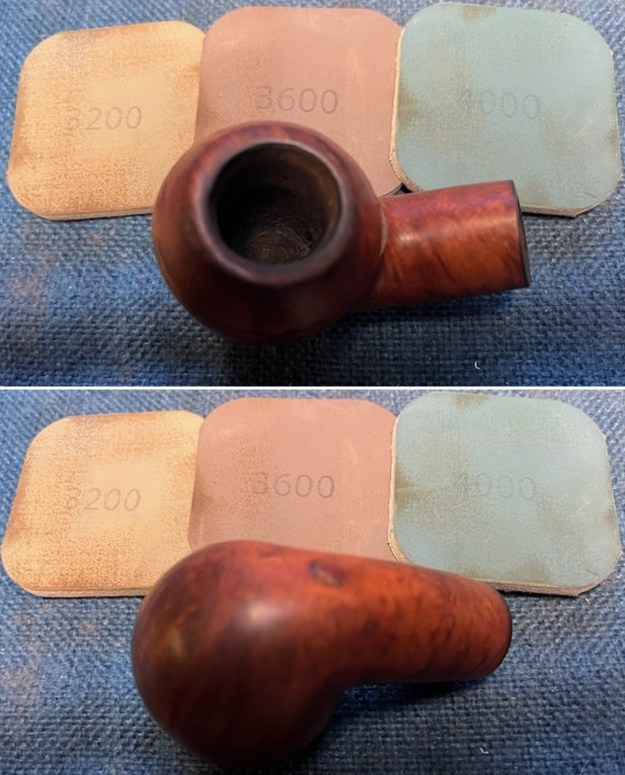
 I sanded the bowl with 320-3500 grit sanding pads. I wiped the bowl down after each sanding pad with a damp cloth to remove the sanding debris.
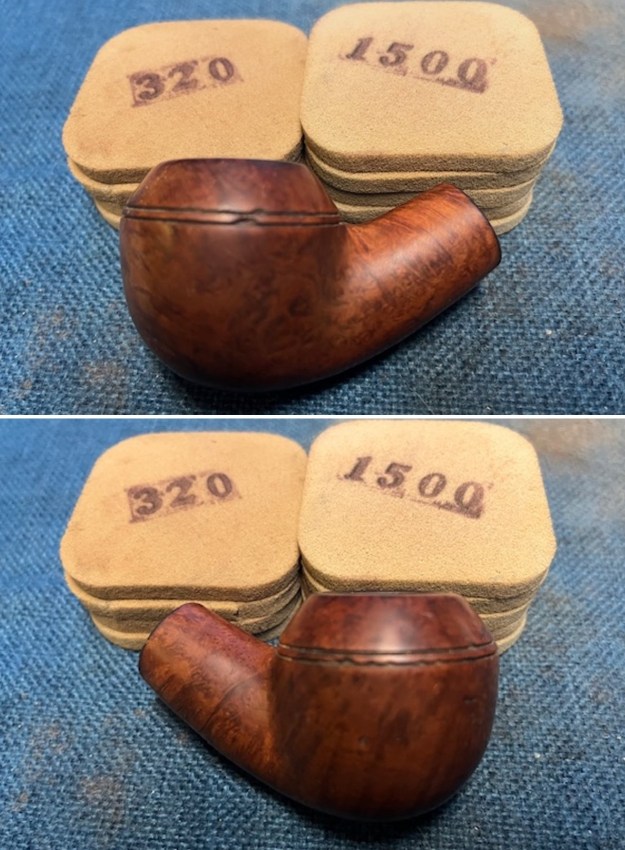
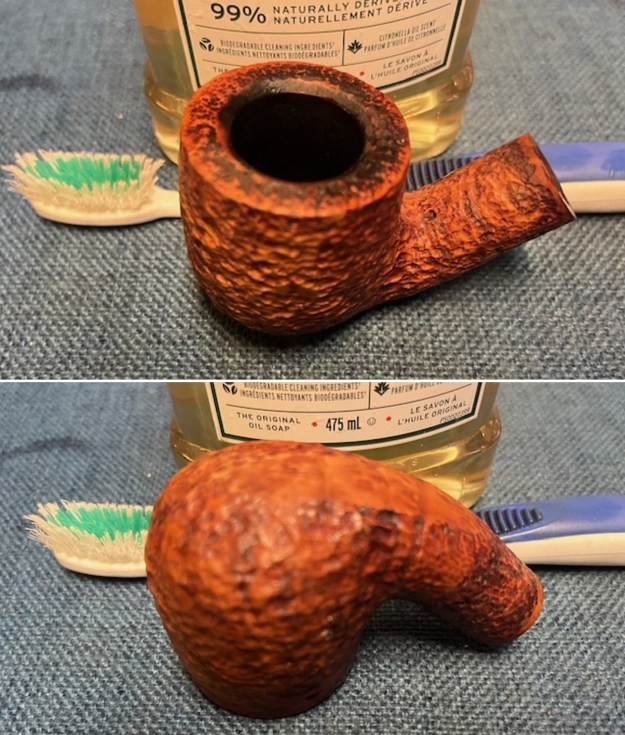
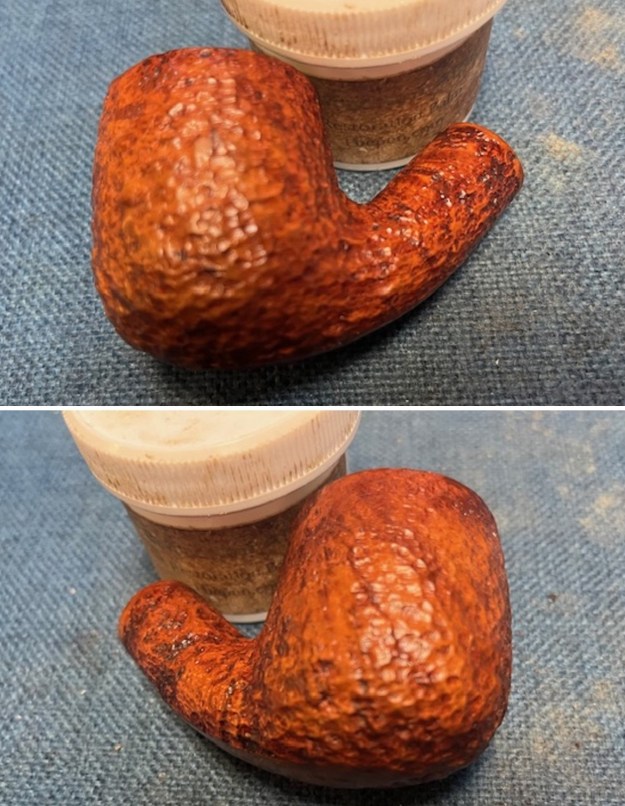
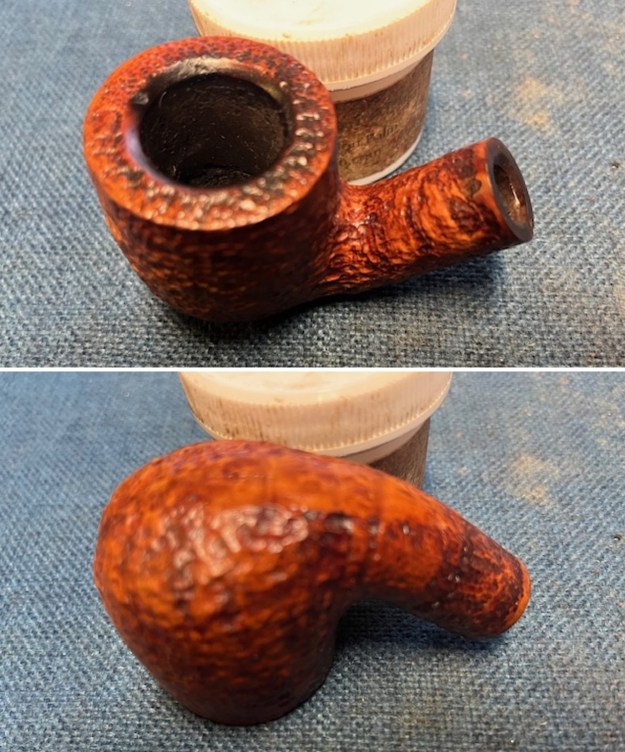
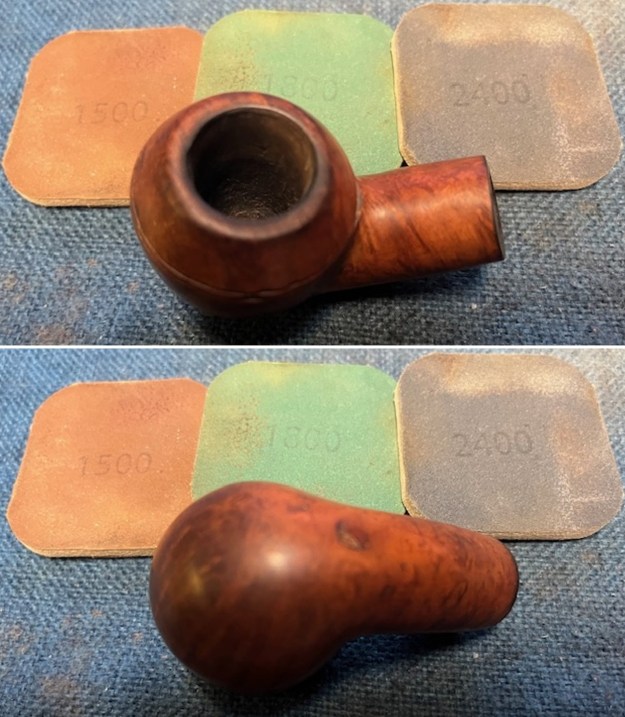
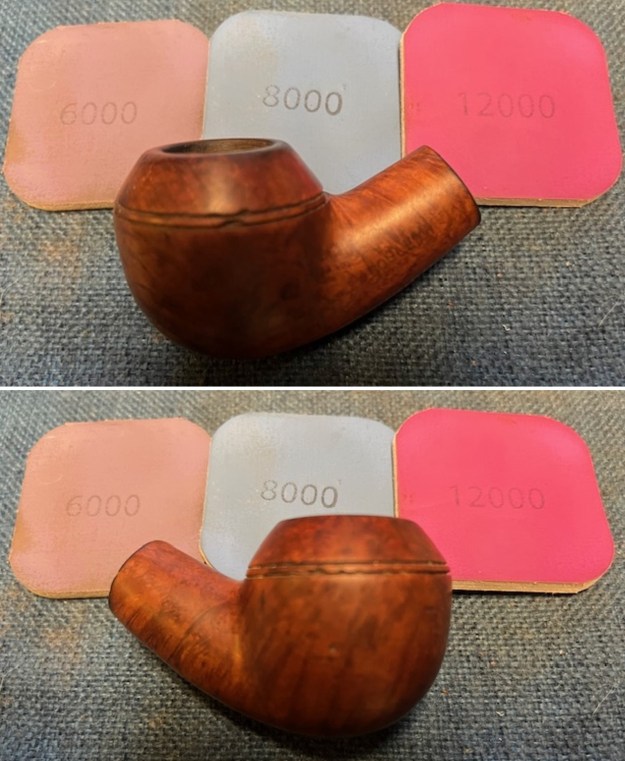
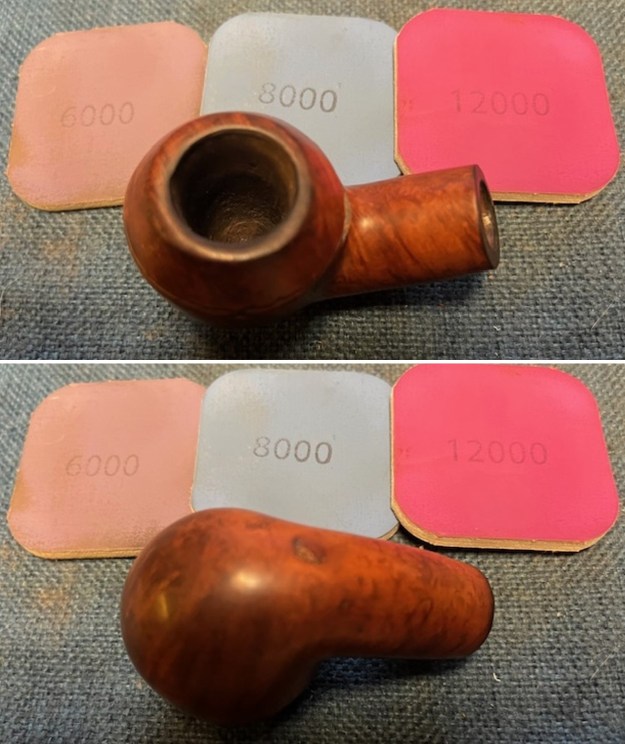
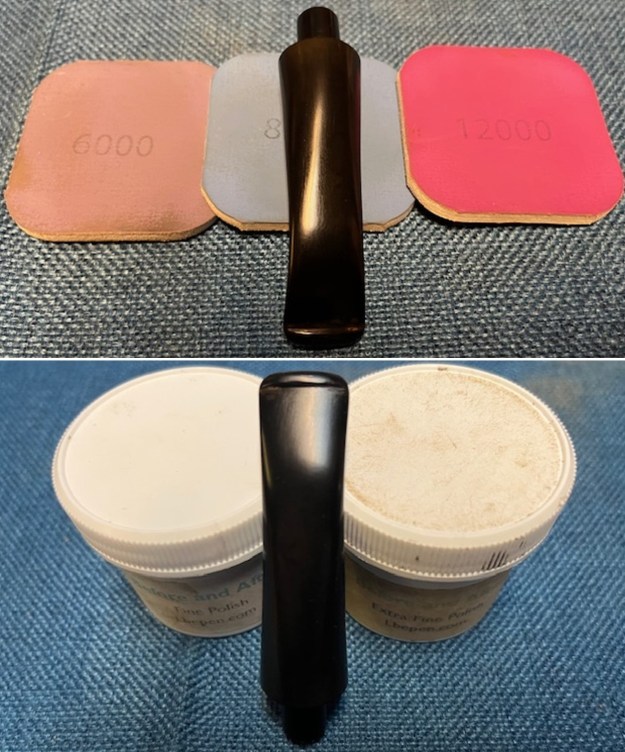
 I polished the briar with 1500-12000 micromesh sanding pads – dry sanding the bowl with the pads and wiping it down after each sanding pad to remove the sanding debris. It is looking much better. I left the nicks on the twin rings around the top of the Bullcap as they are a part of the pipe’s journey.
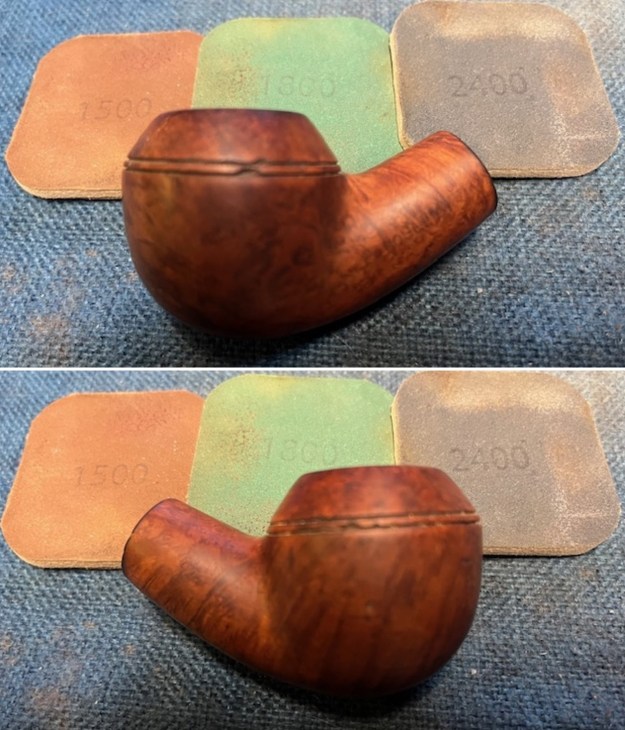
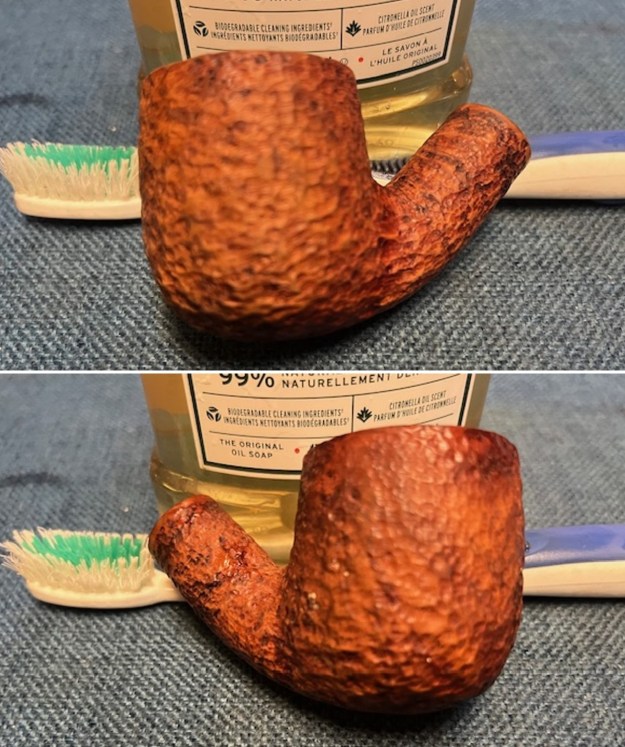
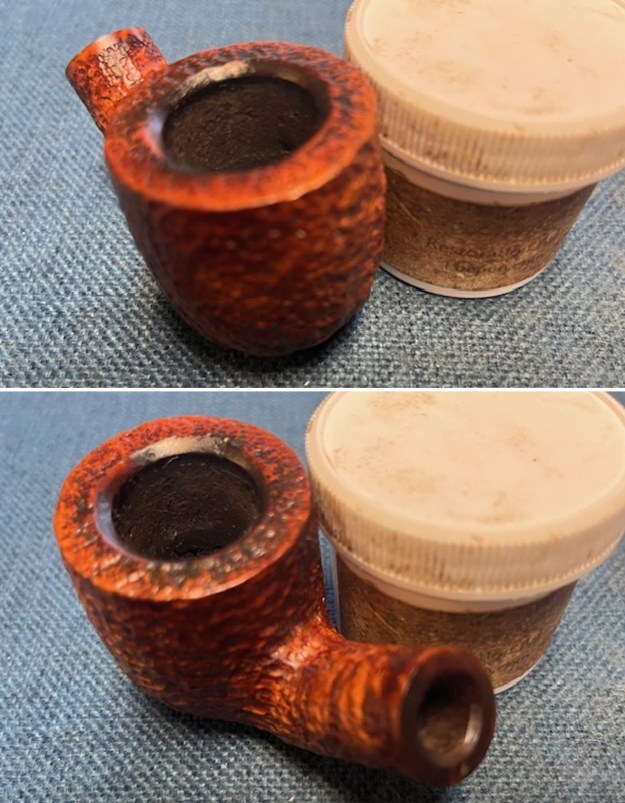
 I rubbed the bowl down with Before & After Restoration Balm. I worked it into the surface of the briar with my fingertips and a shoe brush to work it into the rings around the Bullcap. The product works to clean, restore and preserve the briar. I let it do its magic for 15 minutes then buffed it off with a cotton cloth. The pipe looks very good at this point in the process.
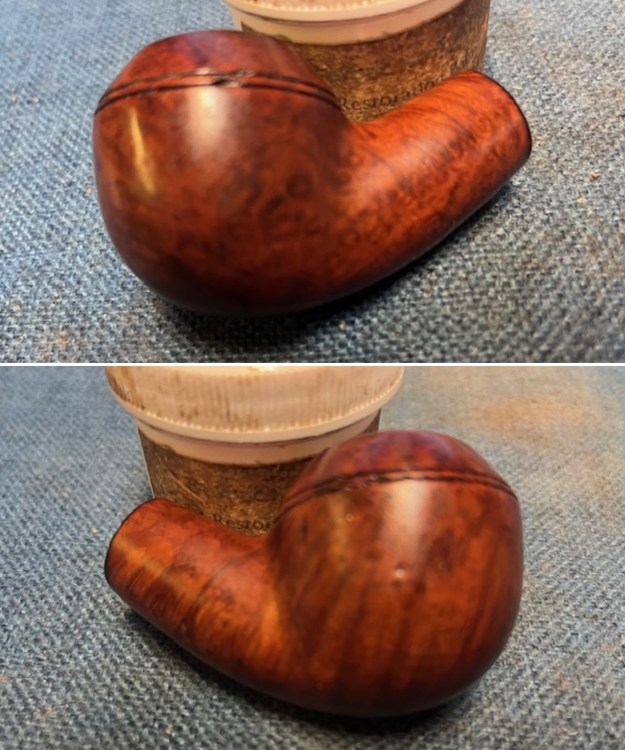
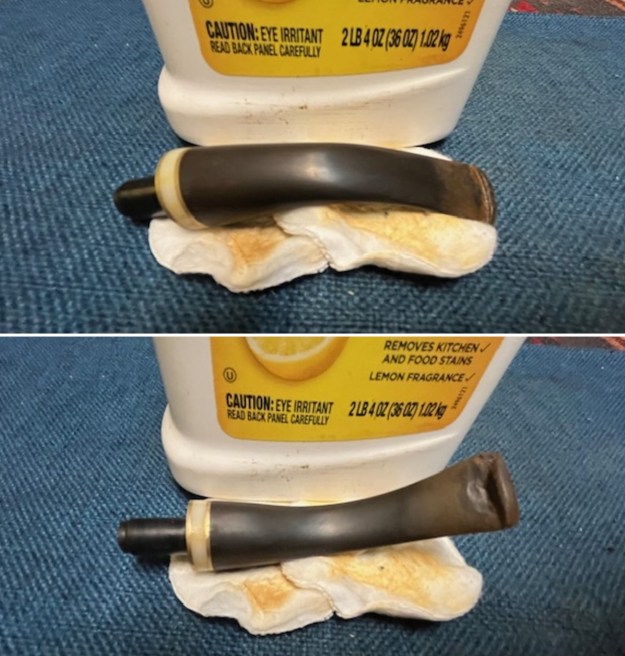
 I set the bowl aside and turned my attention to the vulcanite taper stem. I scrubbed the surface of the stem with Soft Scrub to break through the oxidation, calcification and clean up the tooth marks.
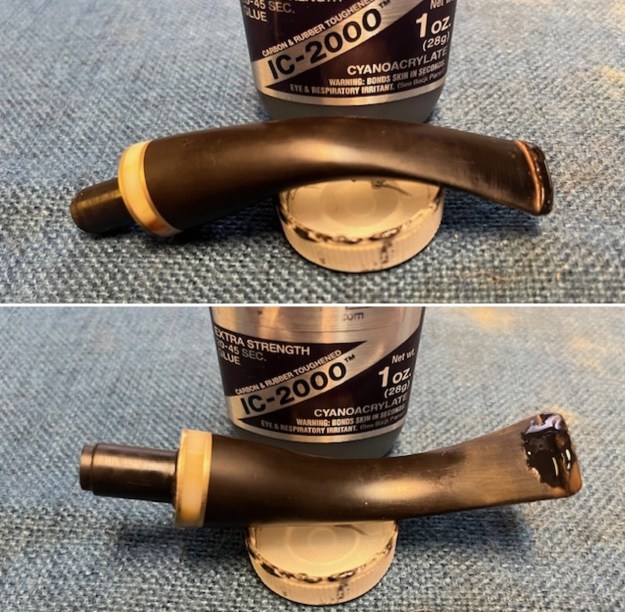
 I filled in the tooth marks on the stem surface and on the surface of the button on both sides with black CA glue. The glue I use has both rubber and carbon in the mix that harden as it dries but does not become brittle. Once it cured I flattened the repairs and reshaped the button edge with a flat needle file. I cleaned up the repaired areas with 220 grit sandpaper.
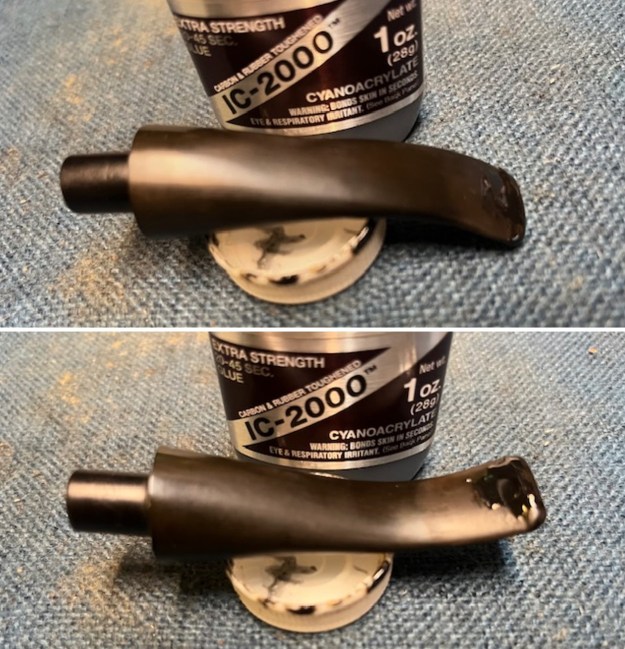
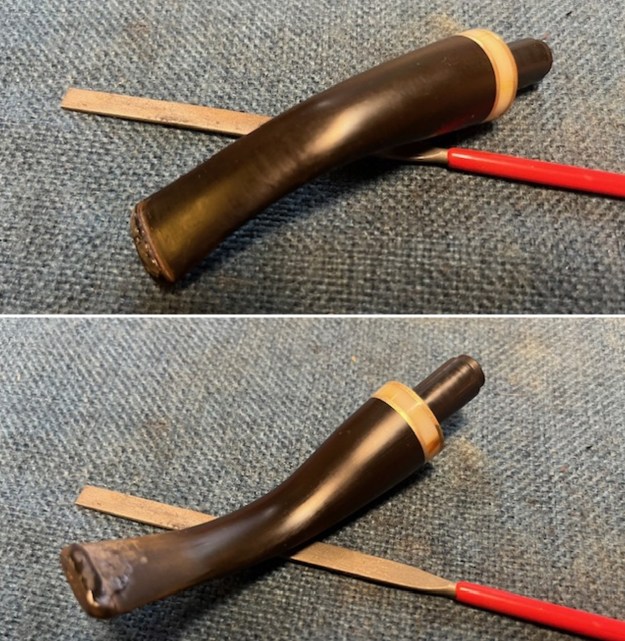
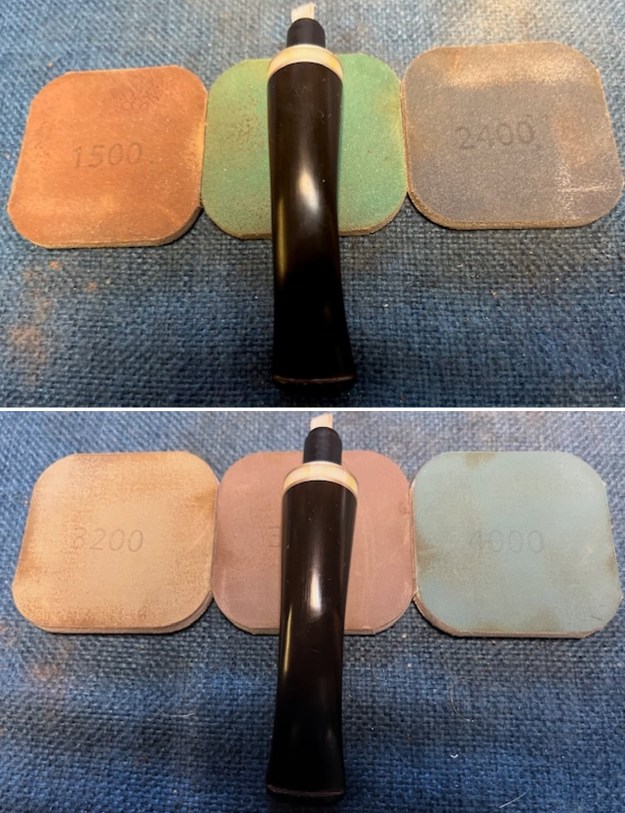
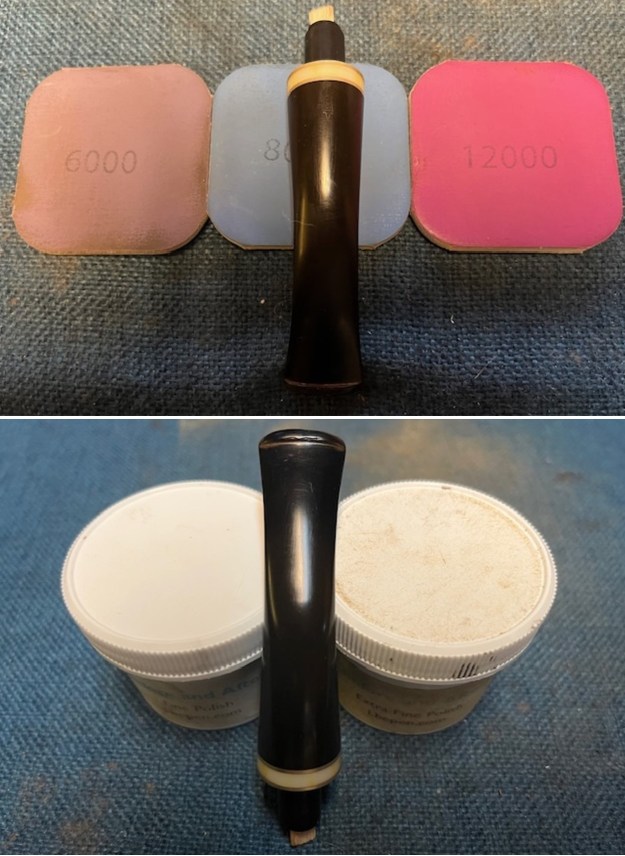
 I sanded the stem with 320-3500 grit sanding pads. I wiped the stem down after each sanding pad to remove the sanding debris and dust. The stem looked very good.
 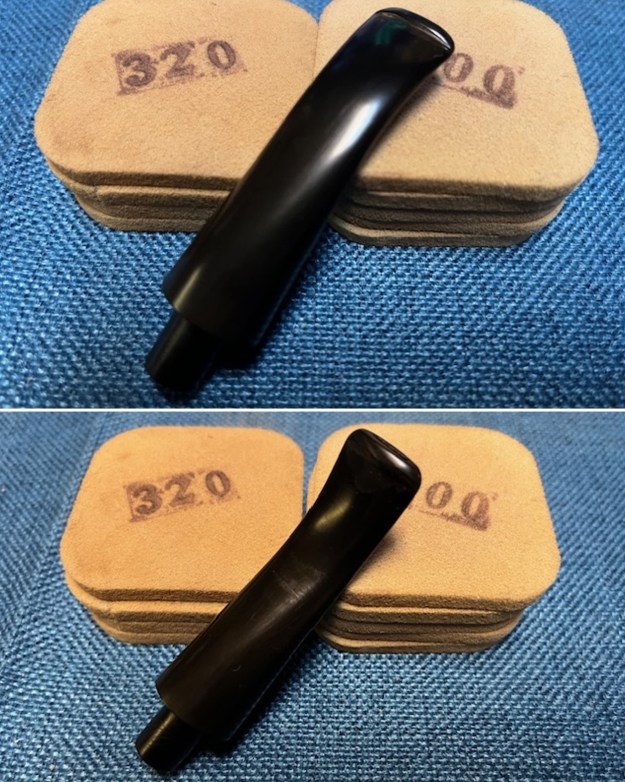 I polished the stem with micromesh sanding pads – 1500-12000 grit pads. I wiped it down with an Obsidian Oil cloth after each sanding pad. I finished polishing it with Before & After Pipe Stem Polish – both Fine and Extra Fine and buffed it off with a cotton cloth. I gave it a coat of Obsidian Oil to preserve and protect the stem.
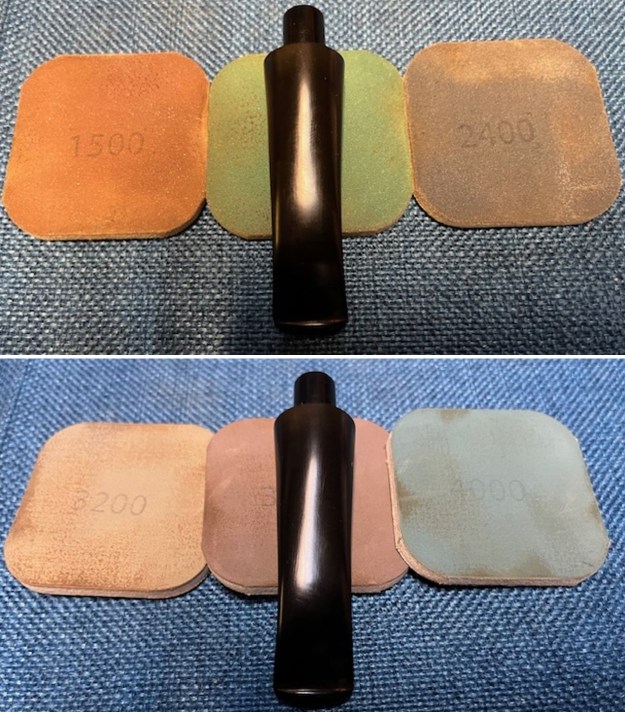
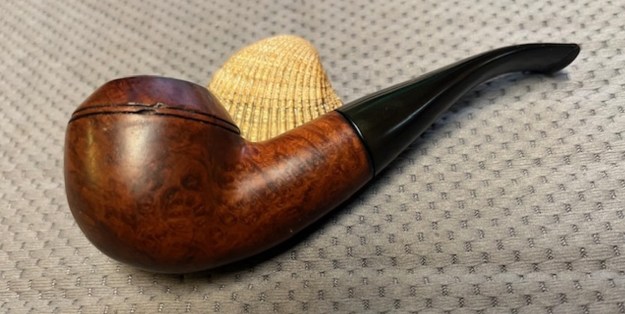
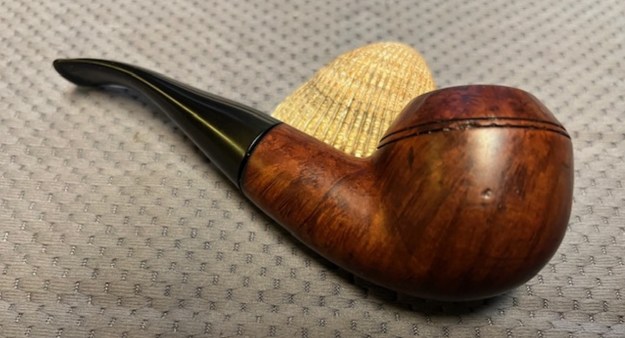
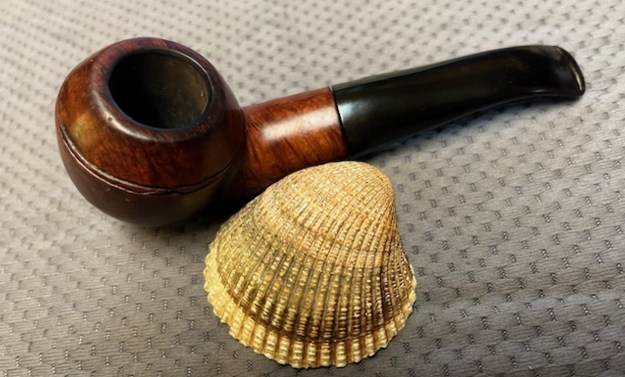
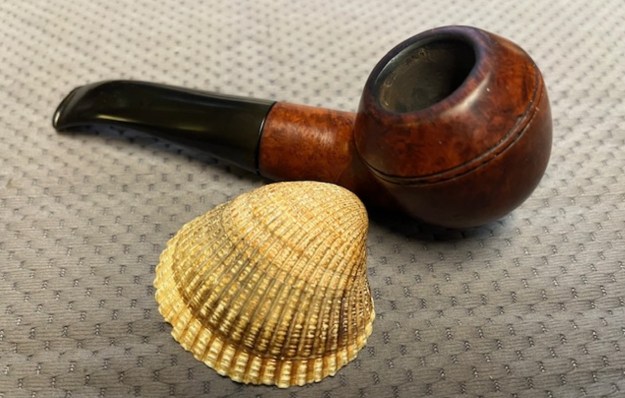
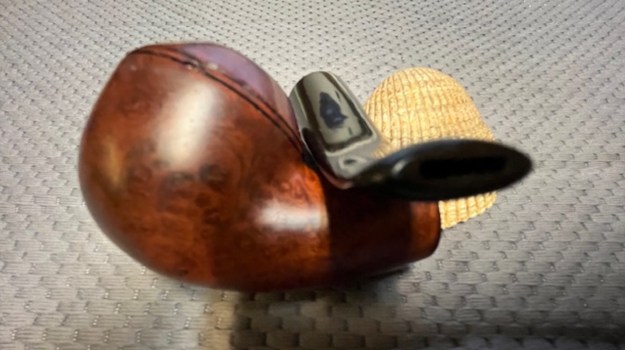
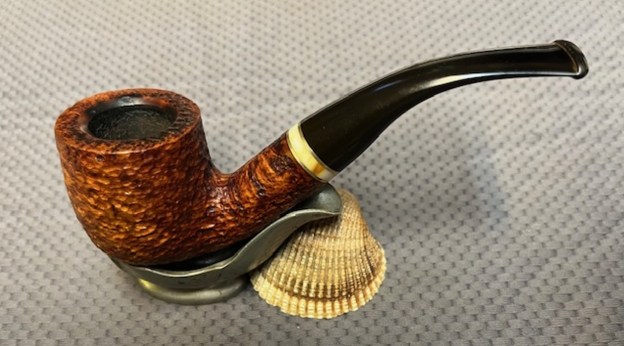
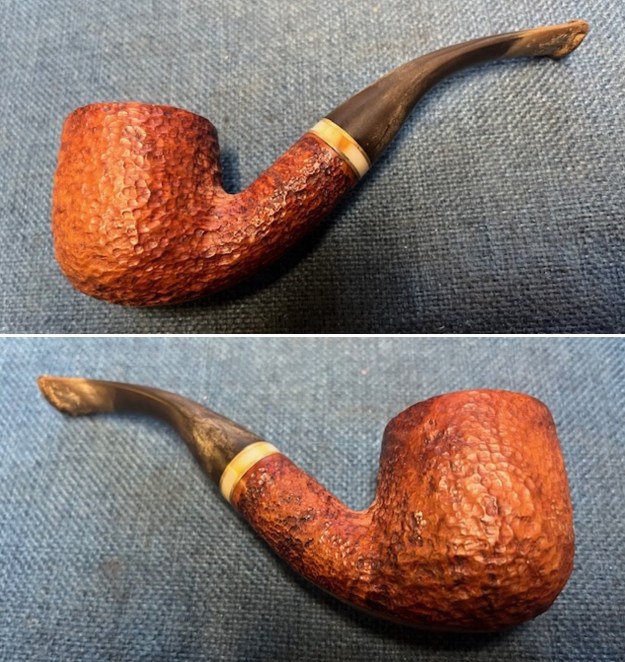
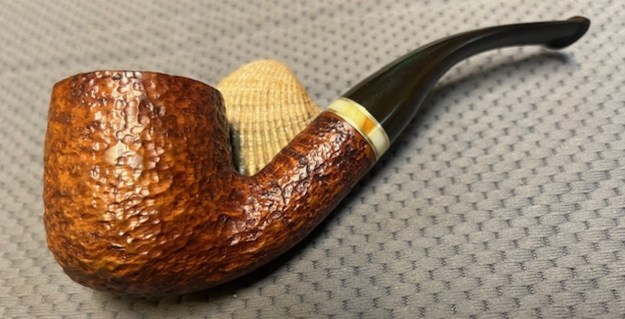
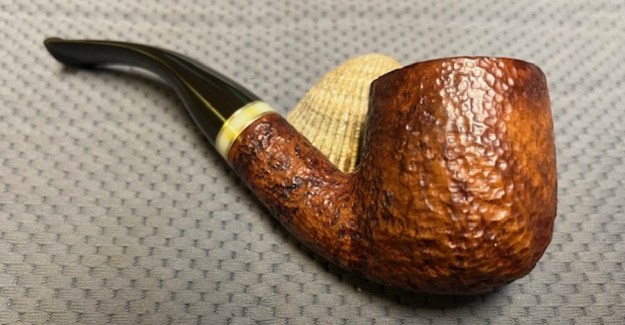
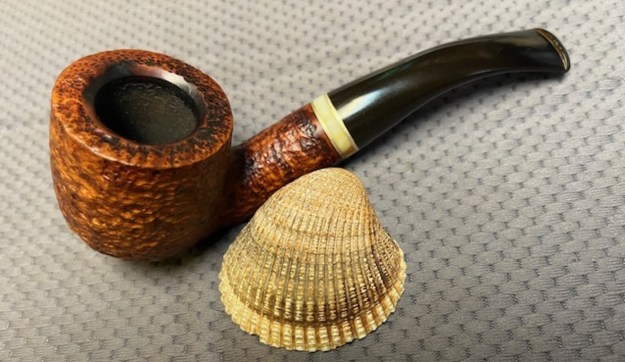
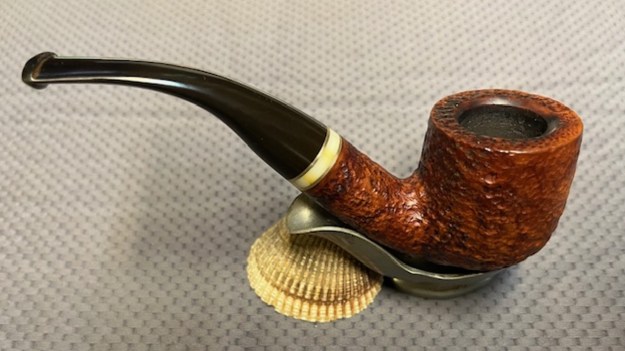
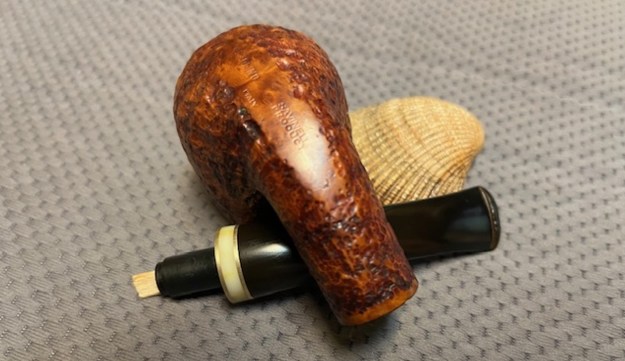
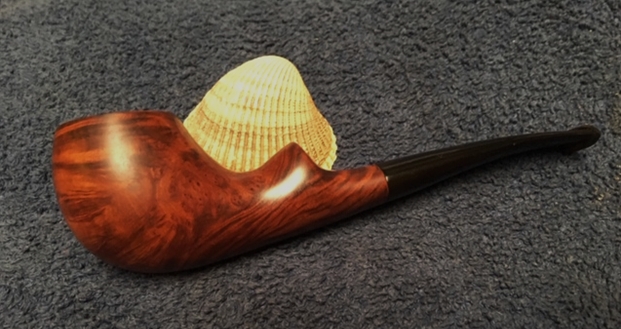
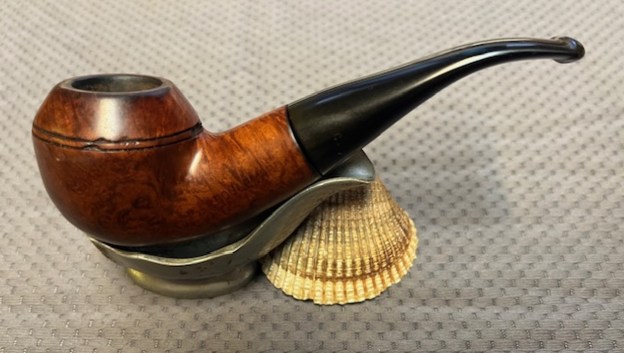
 This No Name Bent Rhodesian is a great looking pipe now that it has been restored. The mix of brown stains really highlight the grain and the polished finish has depth. The nicks in the rings give a bit of character and history to the pipe. I put the vulcanite stem back on the bowl and carefully buffed the pipe with Blue Diamond on the buffing wheel. I gave the bowl and the stem multiple coats of carnauba wax on the buffing wheel and followed that by buffing the entire pipe with a clean buffing pad. I hand buffed the pipe with a microfiber cloth to deepen the shine. The finished Bent Rhodesian fits nicely in the hand and feels great. Give the finished pipe a look in the photos below. The dimensions of the pipe are Length: 5 inches, Height: 1 ½ inches, Outside diameter of the bowl: 1 inch, Chamber diameter: ¾ of an inch. The weight of the pipe is 48 grams /1.69 ounces. I have three more of Stephen’s pipes to work on. Once I have finished I will get them back to him to enjoy with his father. Thanks for reading this blog and my reflections on the pipe while I worked on it.
As always, I encourage your questions and comments as you read the blog. Thanks to each of you who are reading this blog. Remember we are not pipe owners; we are pipe men and women who hold our pipes in trust until they pass on into the trust of those who follow us.