Tag Archives: removing oxidation

Restoring a Beautiful Bari Select nature Old Briar 7963


Blog by Steve Laug

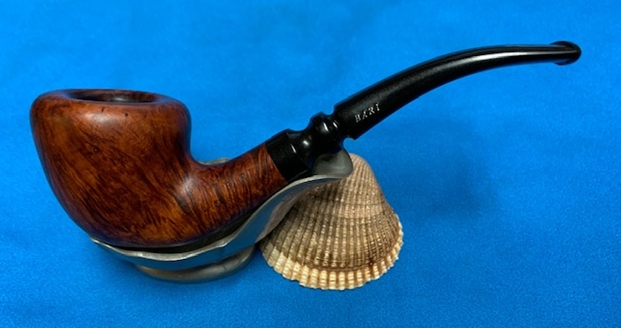
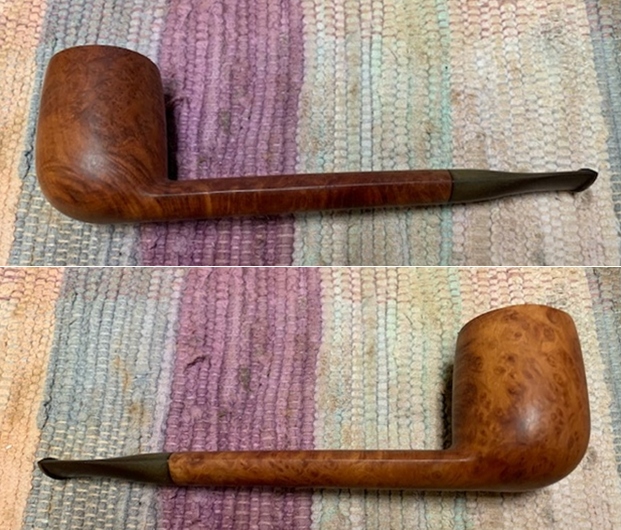
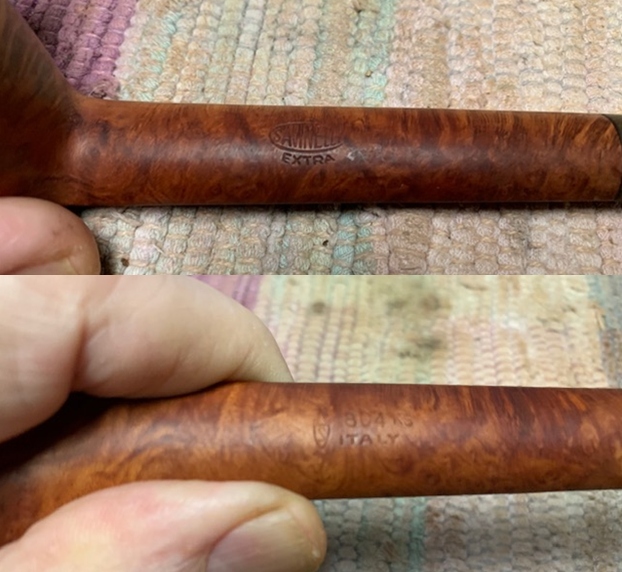
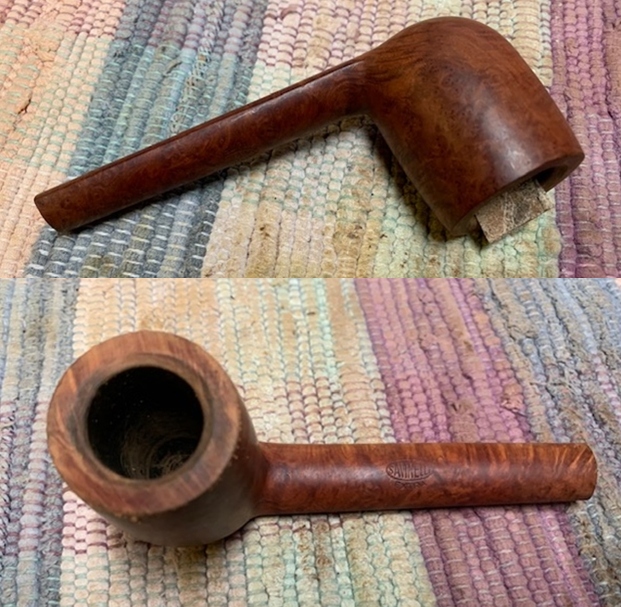
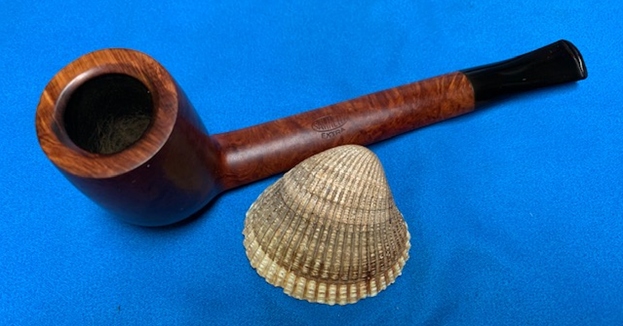
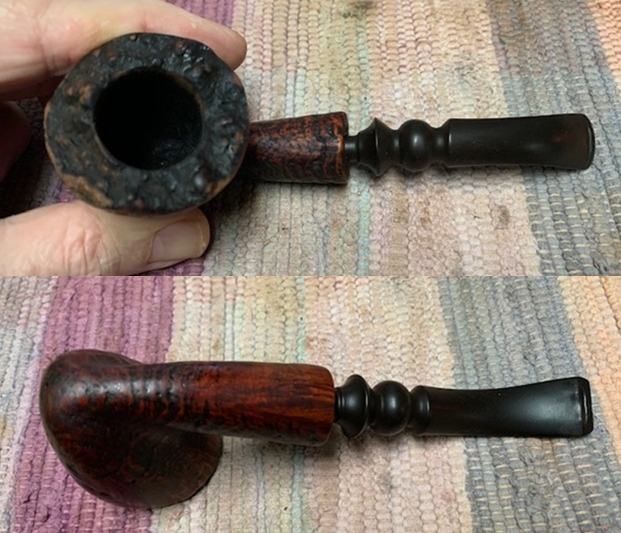
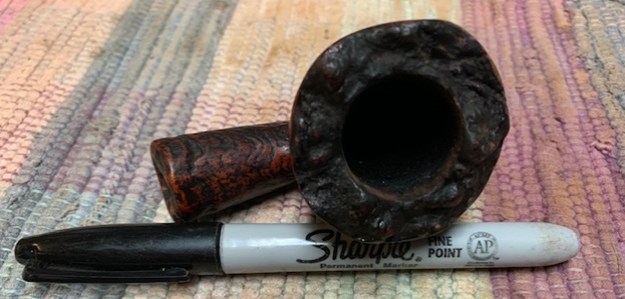
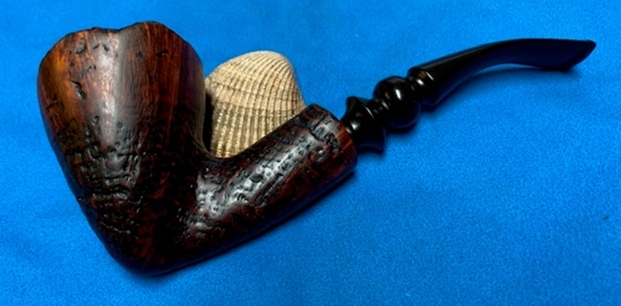
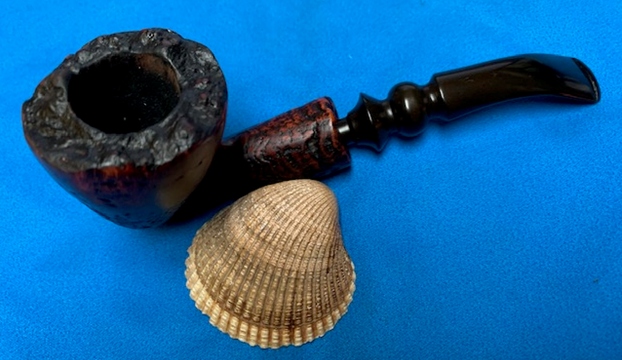
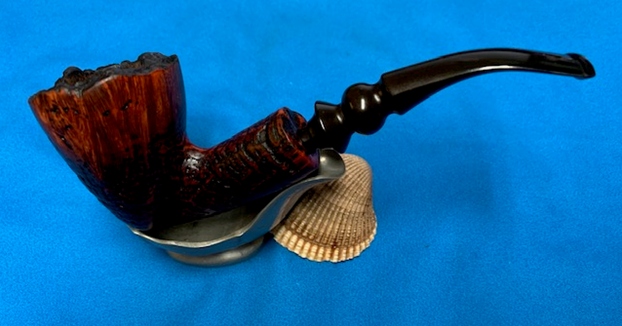
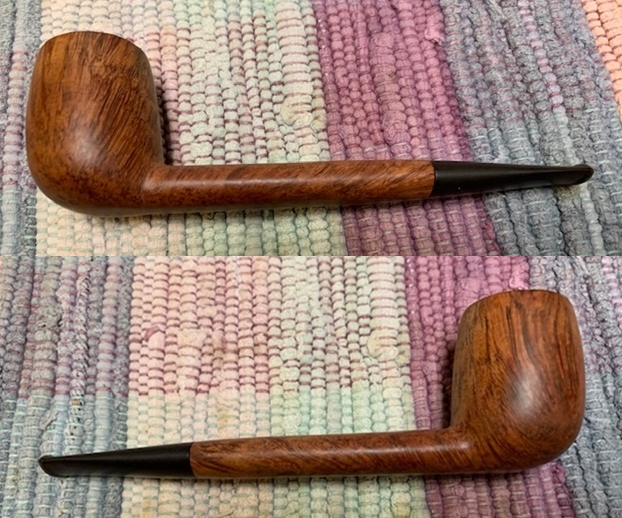
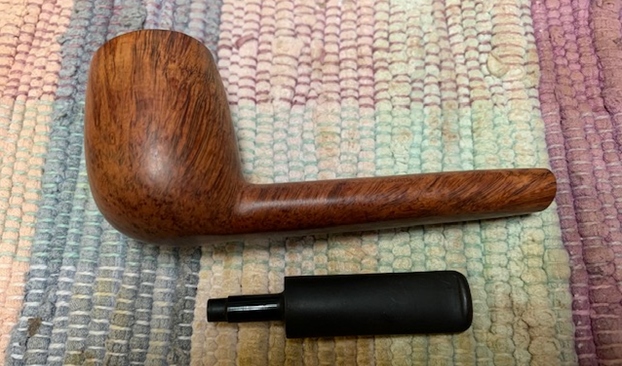
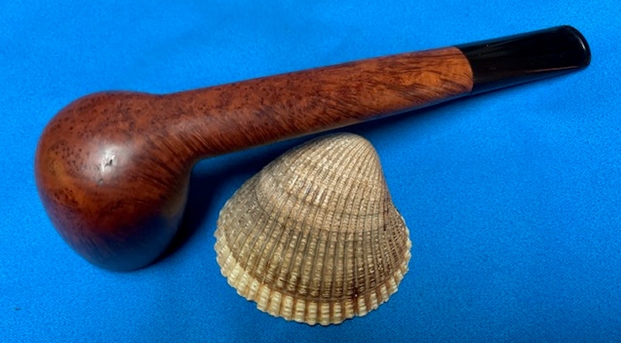
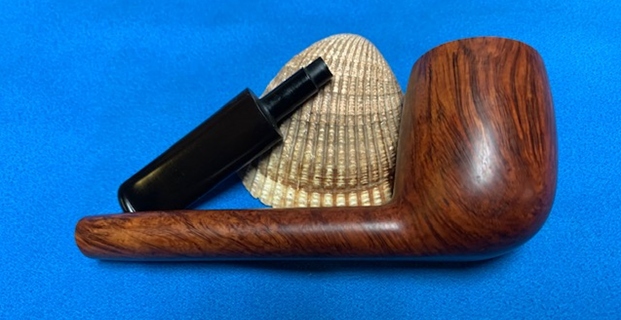
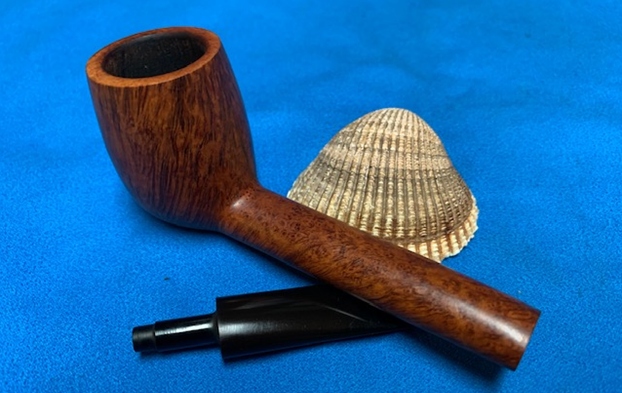
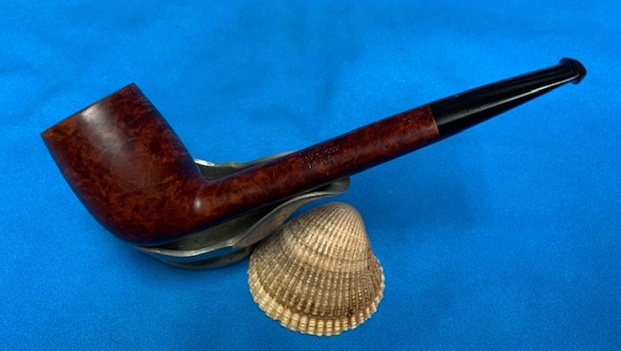
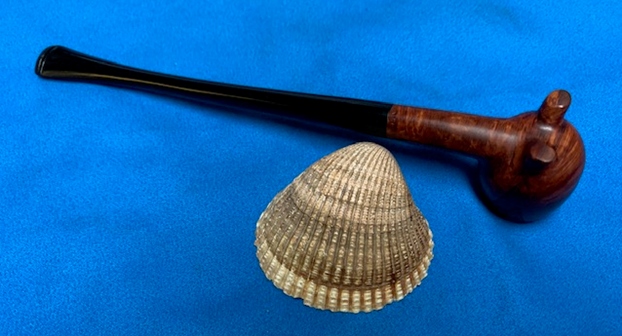
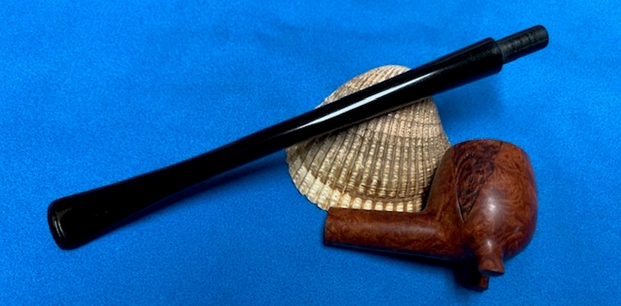
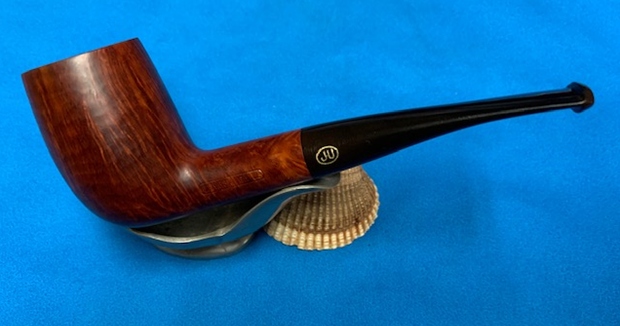
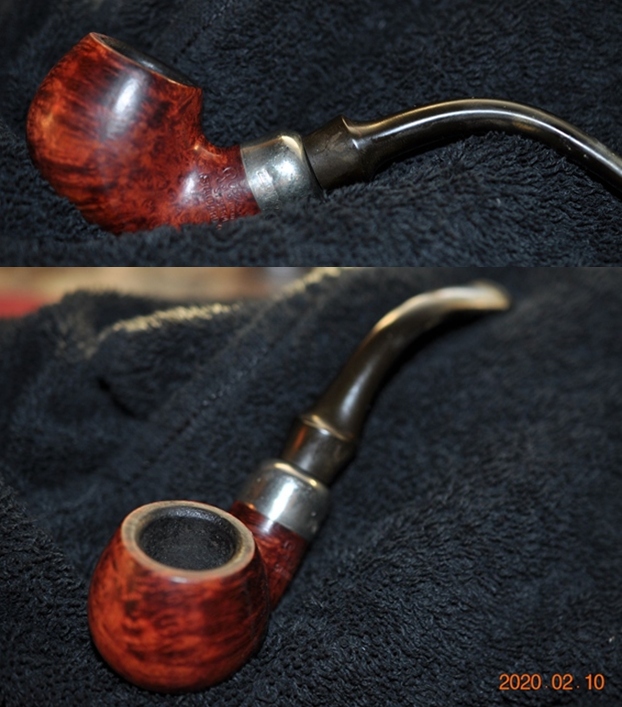
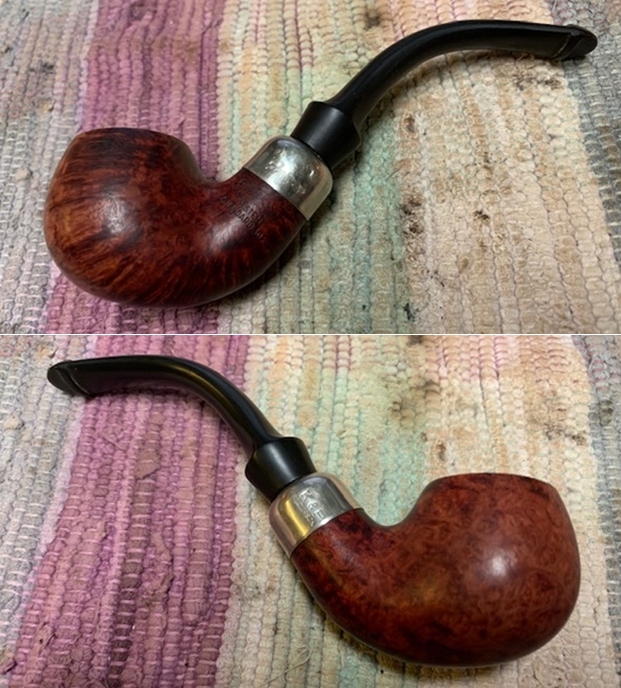
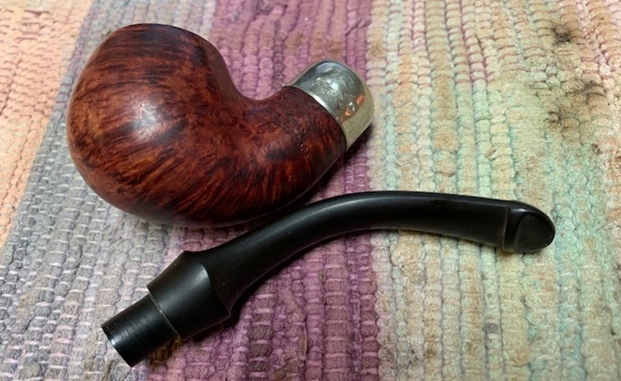
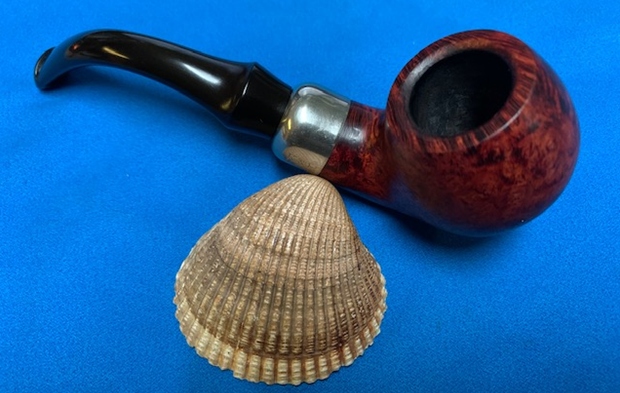
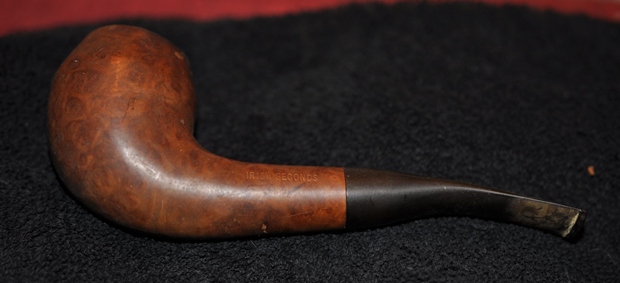
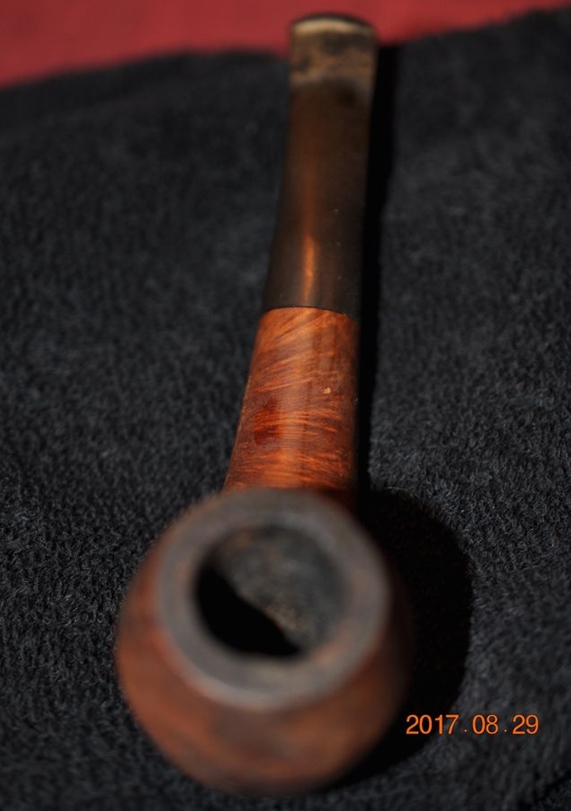
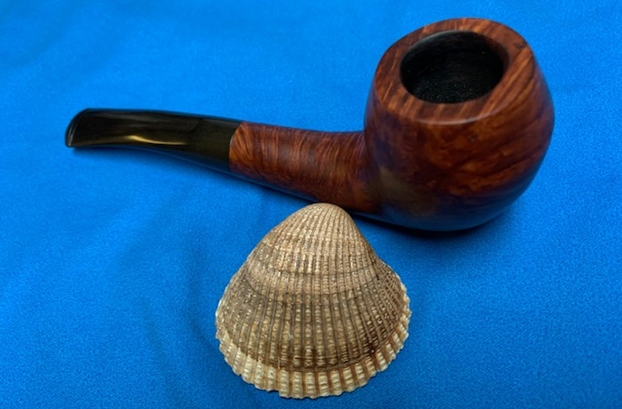
The next pipe on the work table came to us from one of Jeff’s pipe hunts in Utah, USA back in 2018. Now I am finally getting a chance to work on it. The pipe is a classic Bari Bent Dublin like pipe. The pipe was a mess which probably accounted for how we ended up purchasing it for a fair price. On the left side of the shank it is stamped with the Bari [over] Select nature [over] Old Briar. On the right side of the shank it is stamped Made In Denmark [over] the shape number 7963. The mix of stains makes the grain just pop even with the grime ground into the finish. It was very dirty with dust and debris in finish. There was a thick cake in the bowl and an overflow of lava on the rim top that is heavier on the back of the bowl. The edges look to be in good condition as far as we can tell until we clean up the pipe. The stem was oxidized, calcified and there were deep tooth marks and chatter on both sides near the button. The stem had a white Bari stamp on the left side of the fancy saddle. Jeff took photos of the pipe before he started working on it. I include those below.

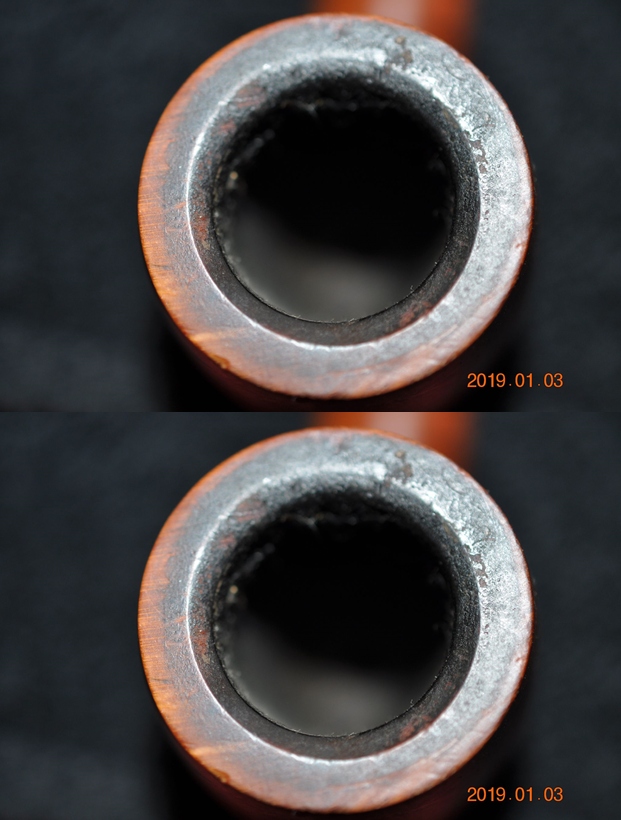
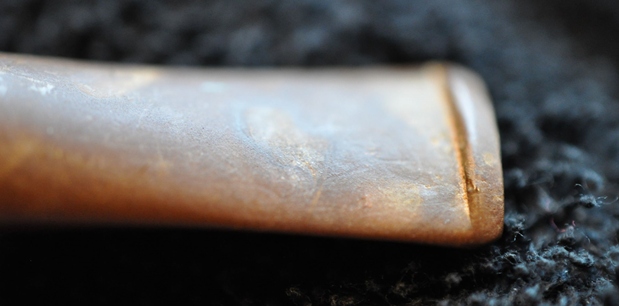
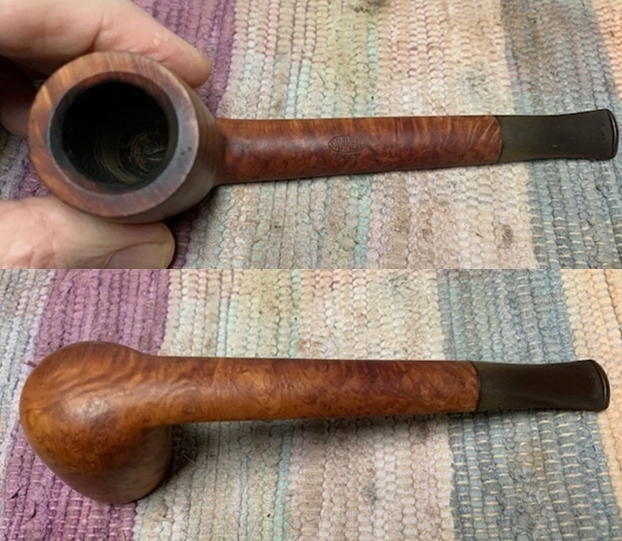
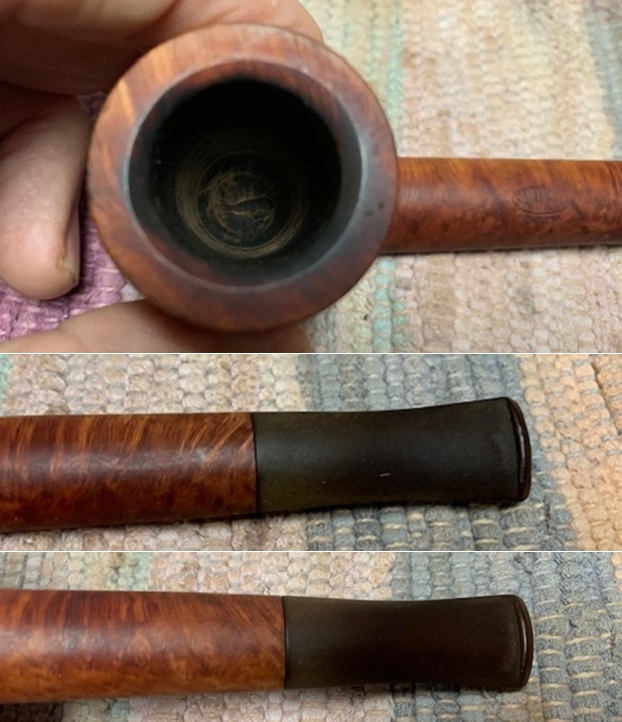
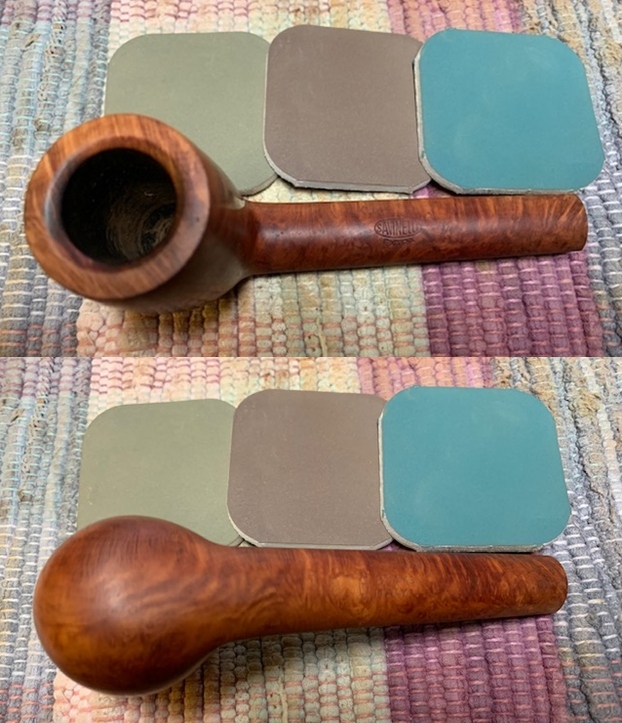
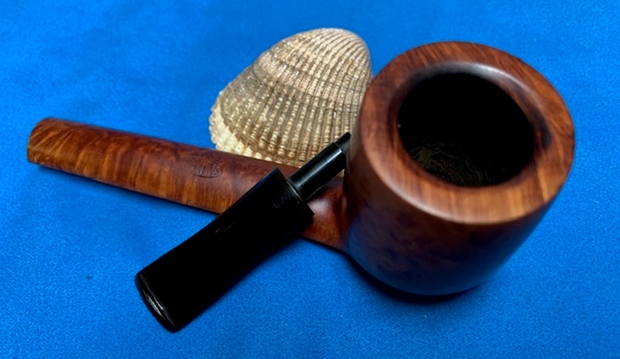
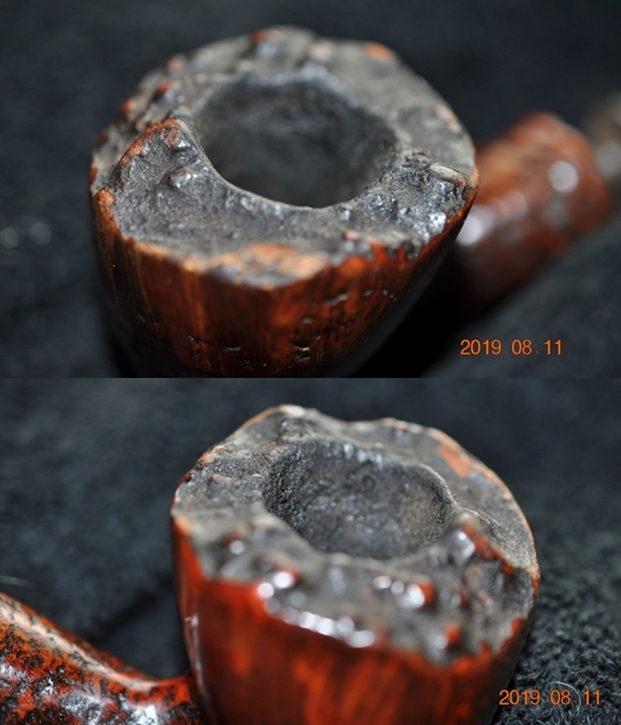
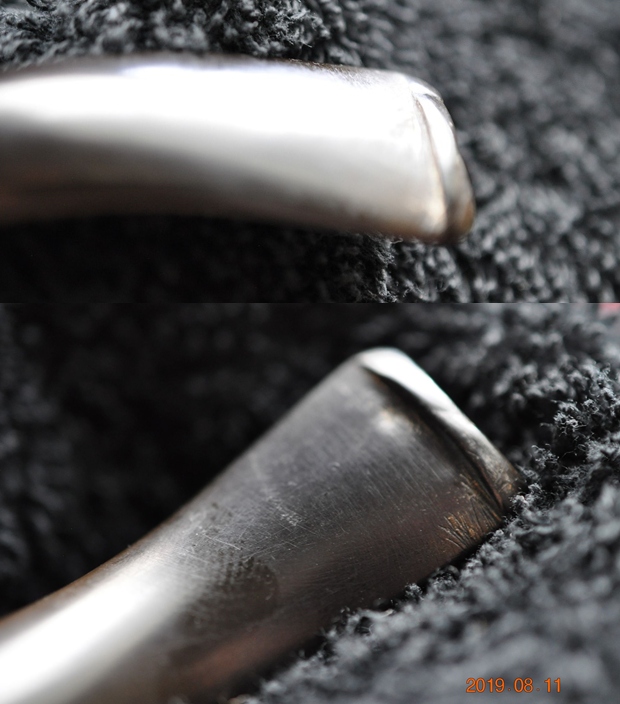
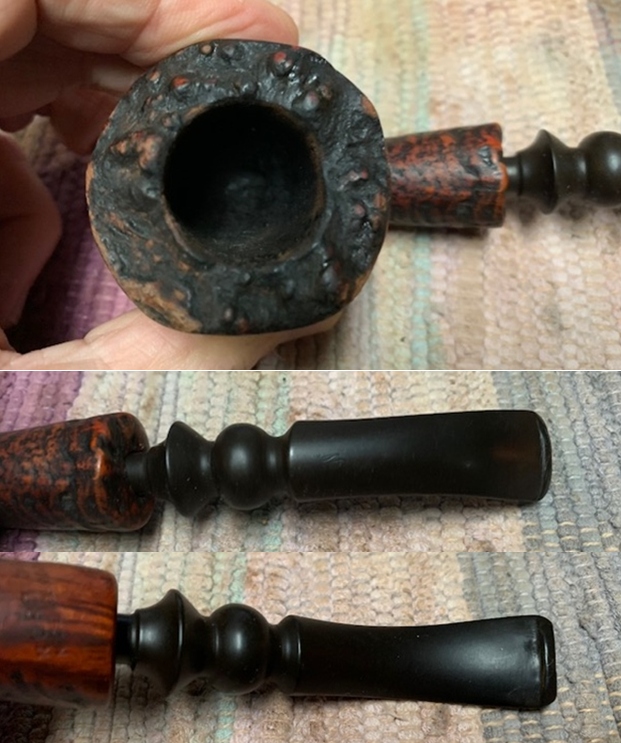
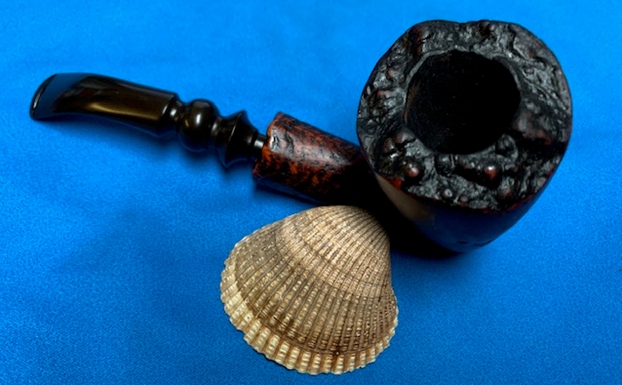
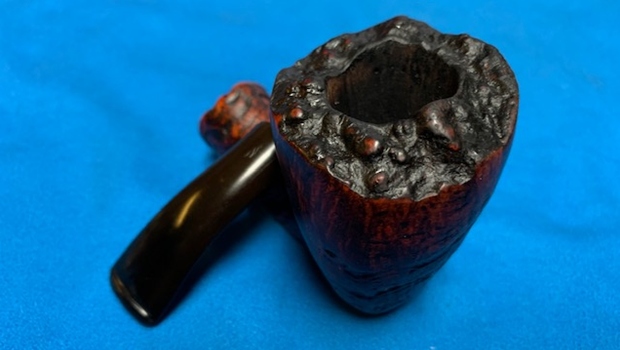
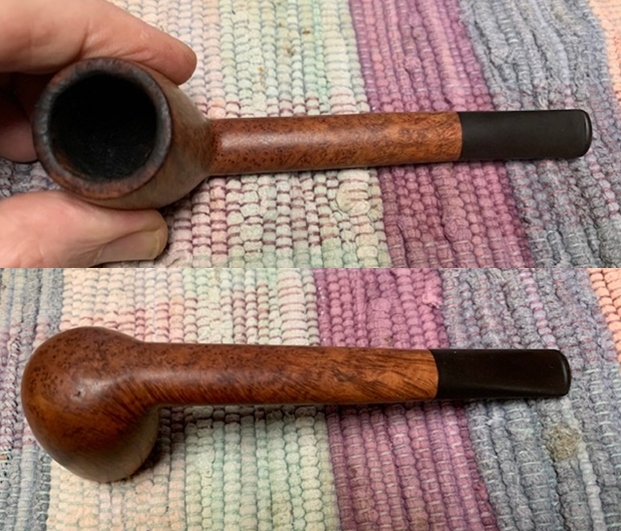
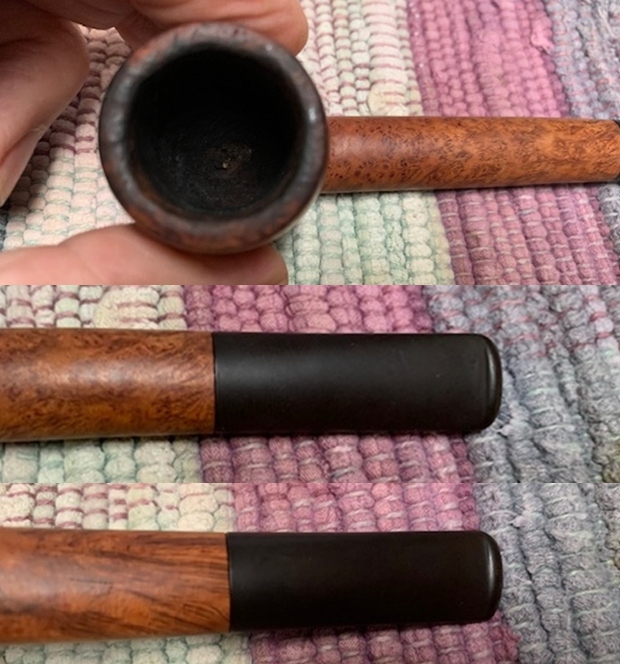
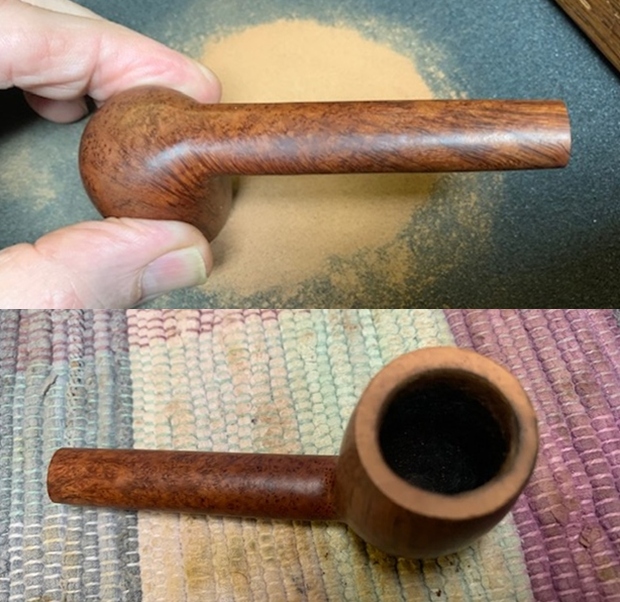
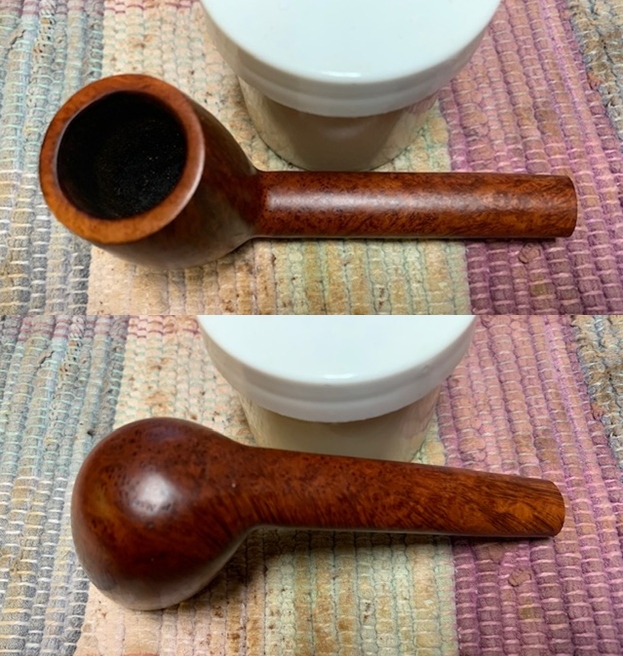
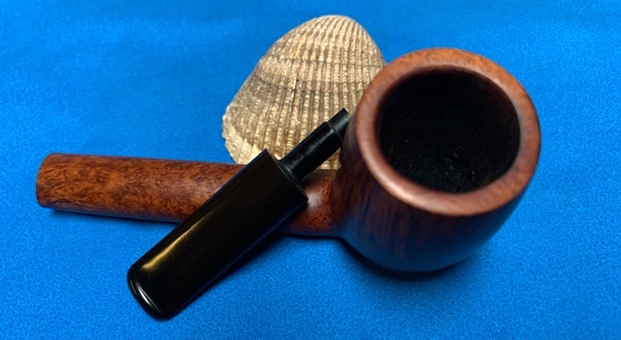
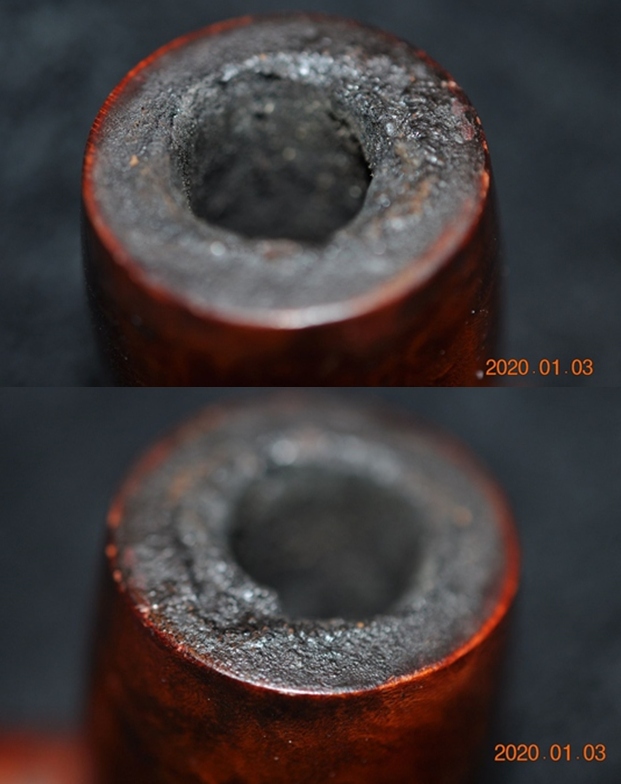
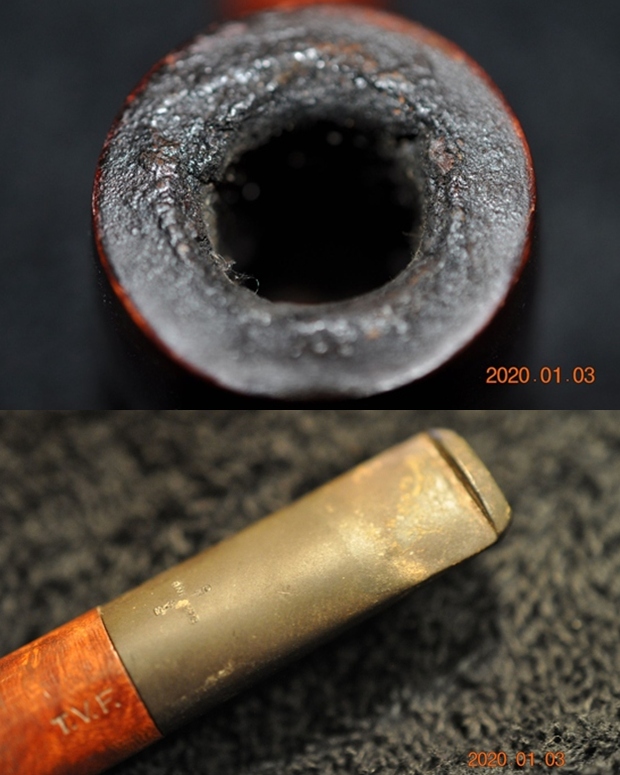
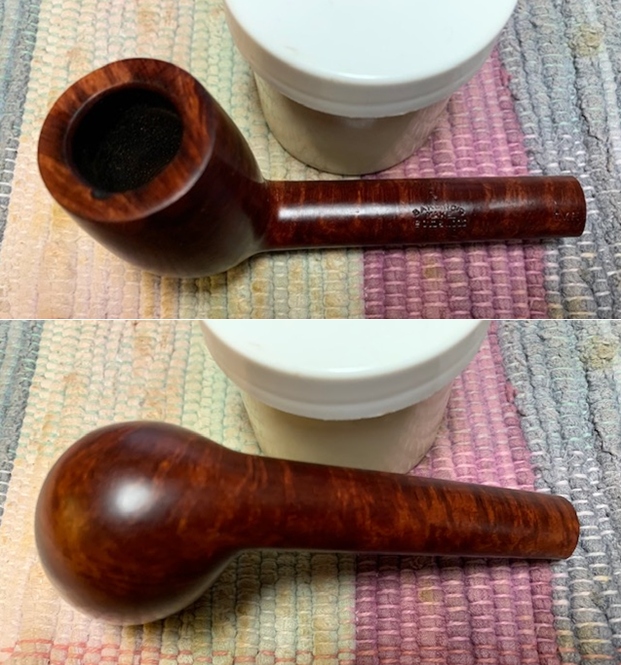
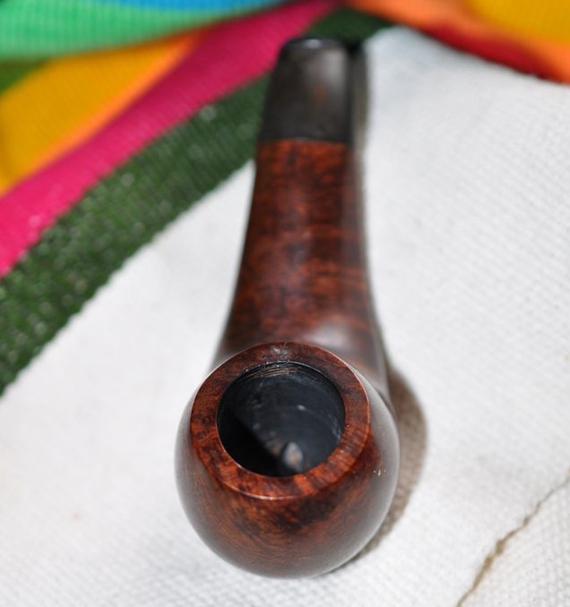
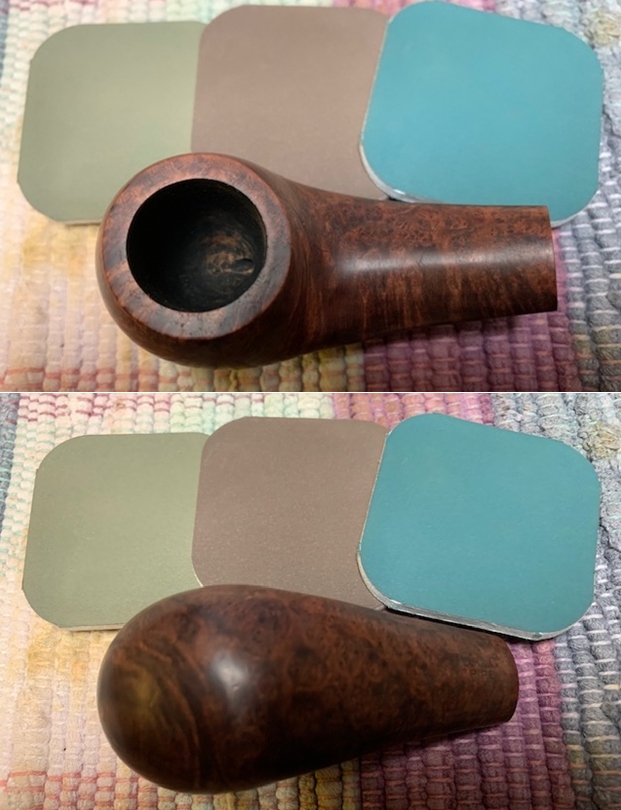
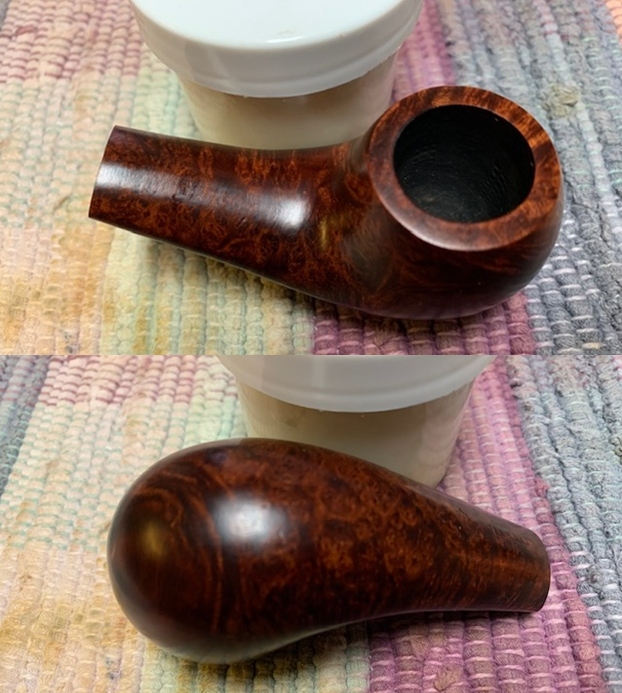
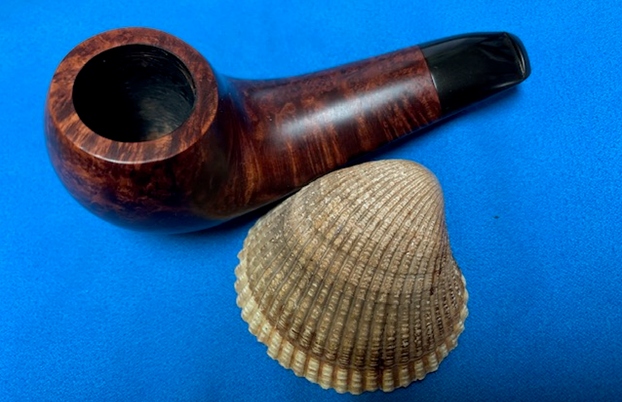
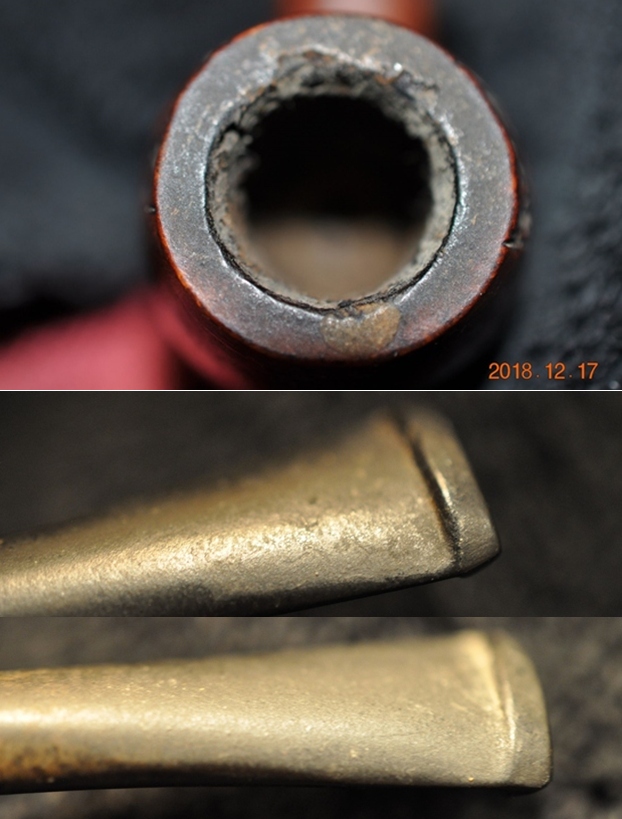
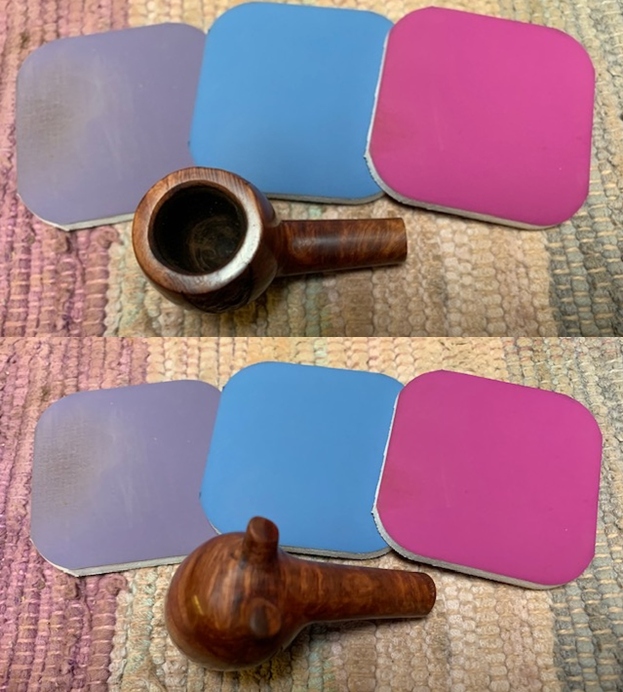
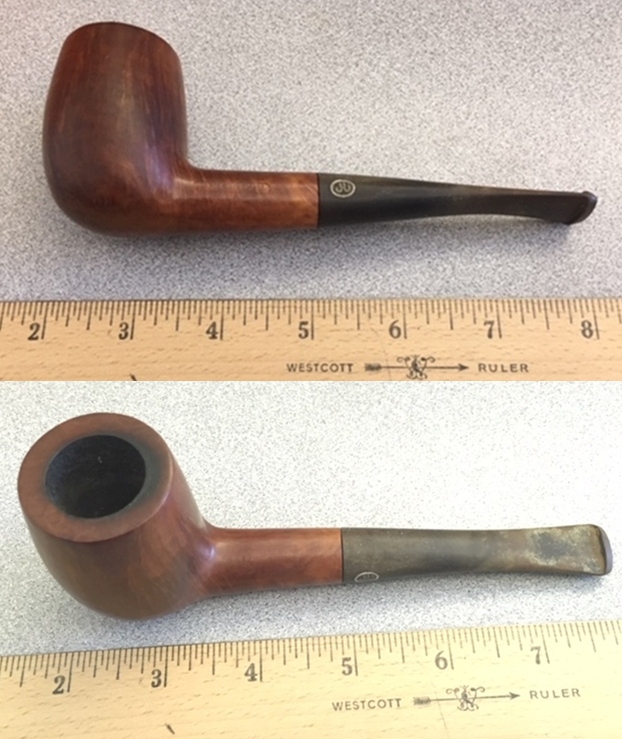
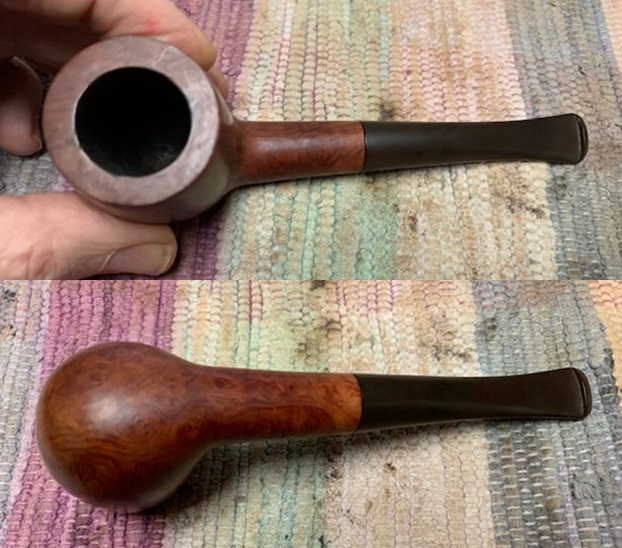
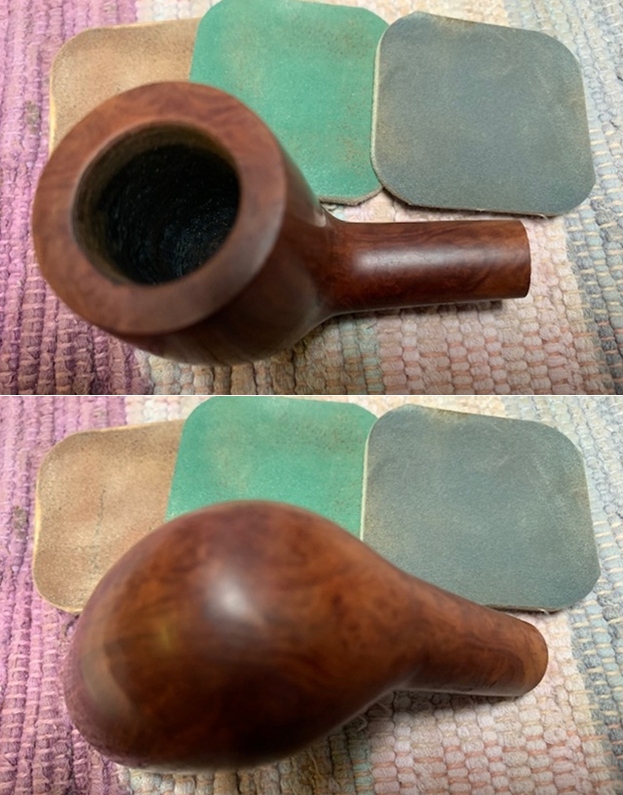
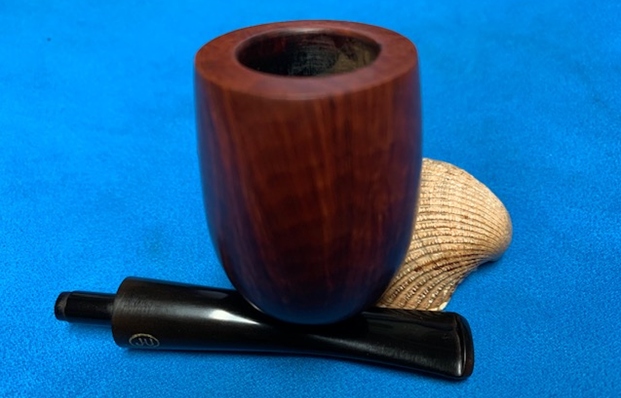
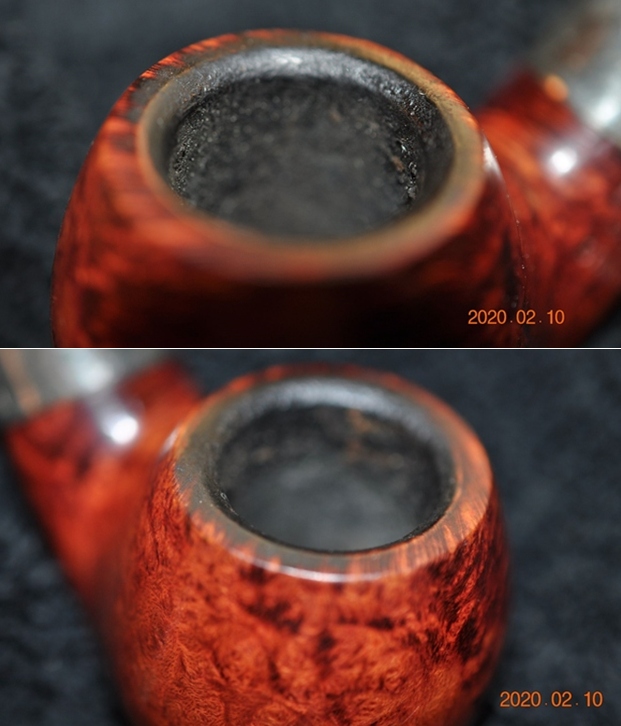
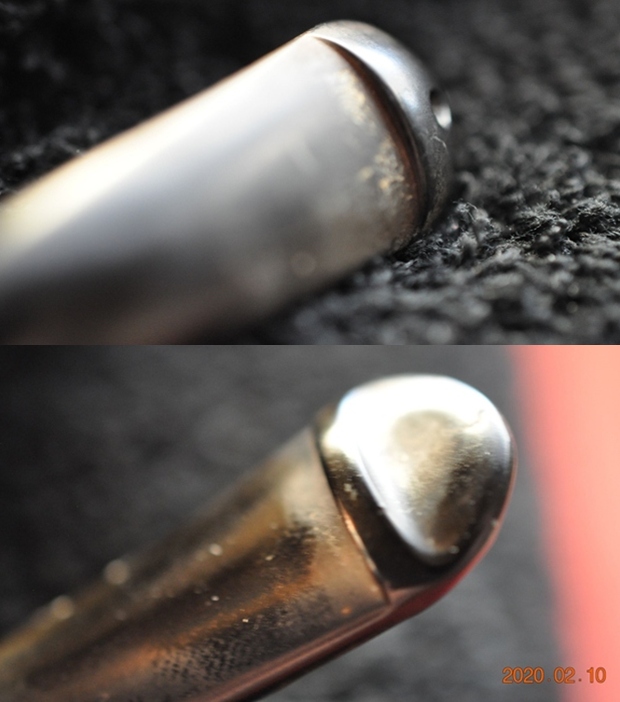
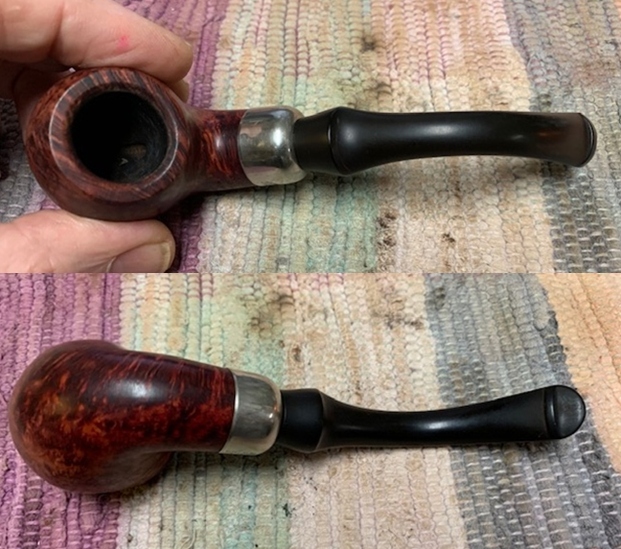
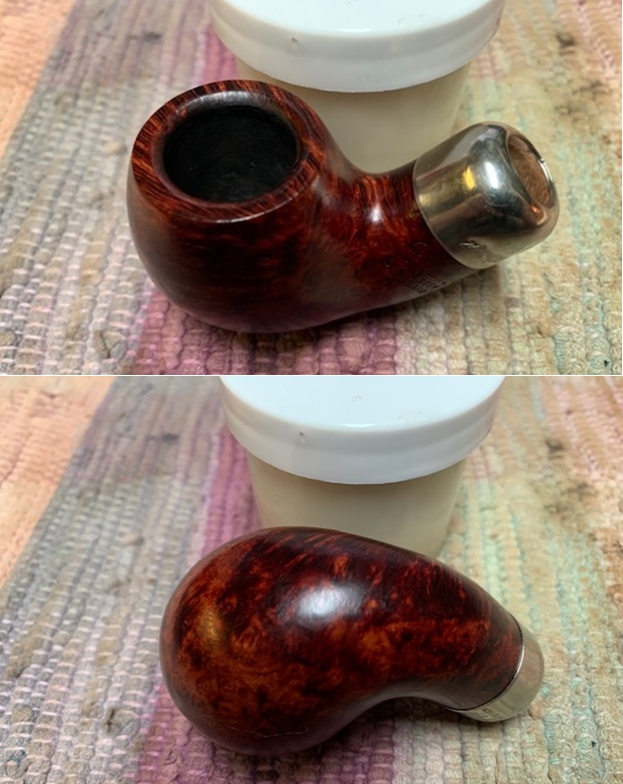
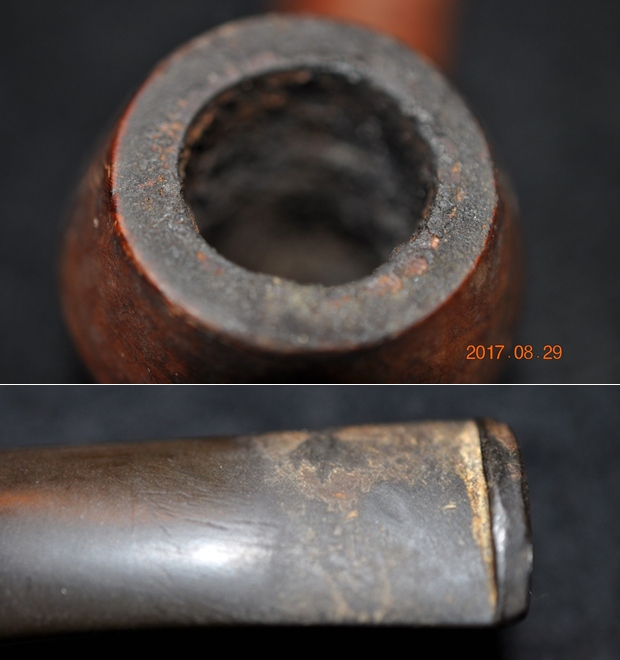
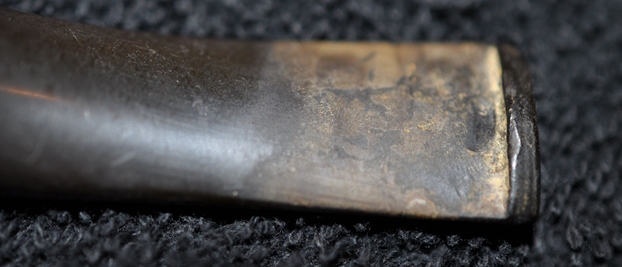
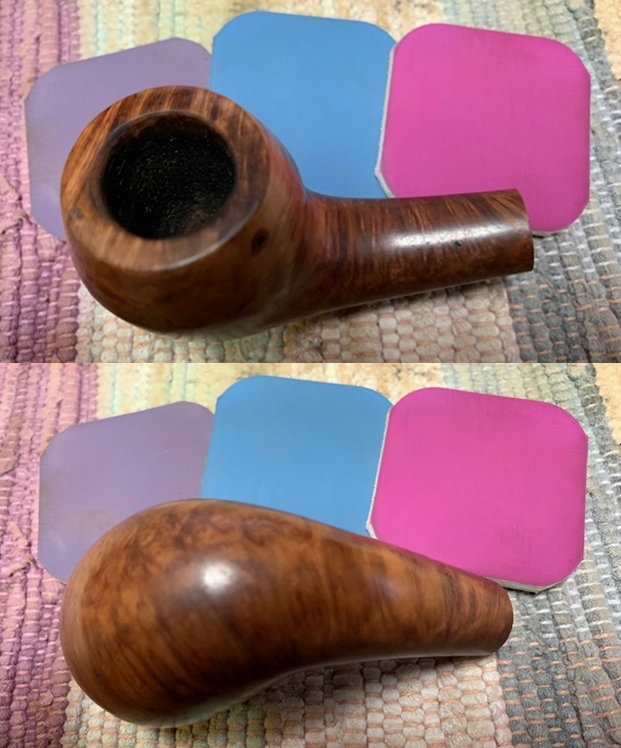
Jeff took photos of the bowl and rim top to show the cake in the bowl and the condition of both. It was heavily caked with a lava overflow on the rim top. The inner and outer edges look very good. He took photos of the top and underside of the stem showing the oxidation and tooth marks on the stem surface and button.  In person the tooth marks are far deeper than they look in the photos.  
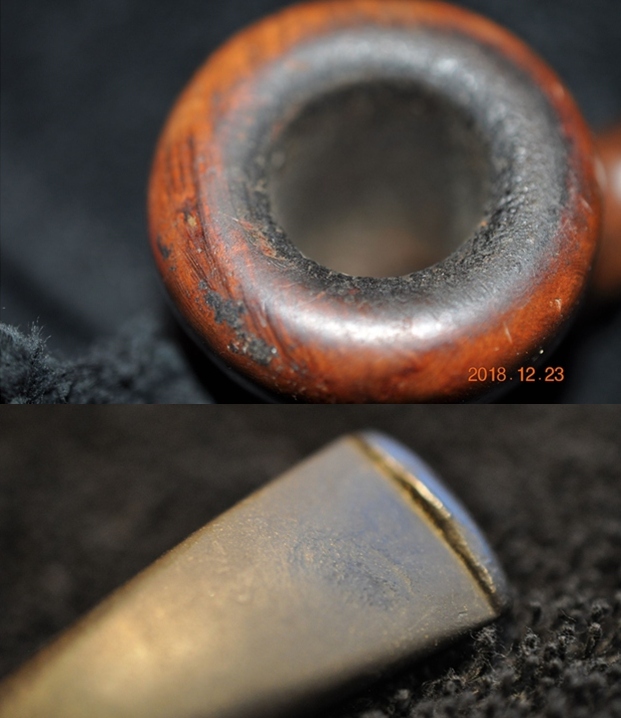
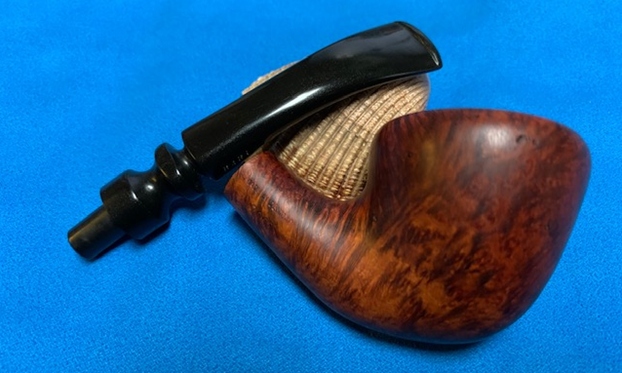
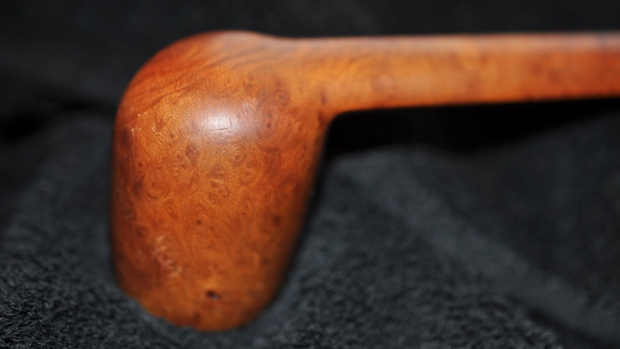
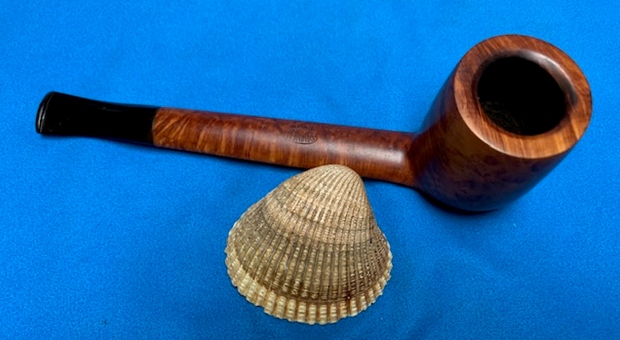
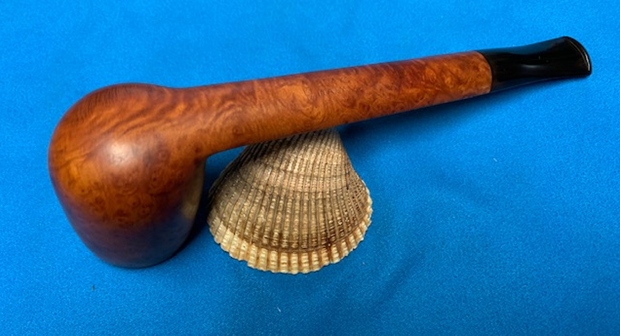
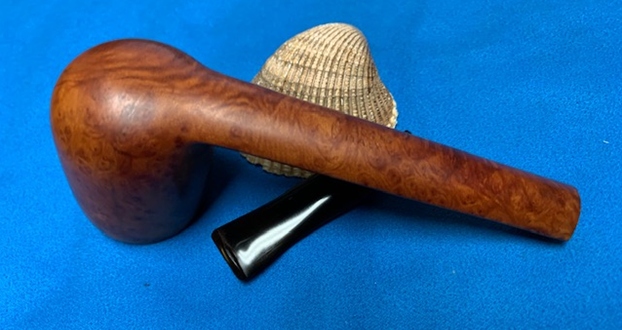
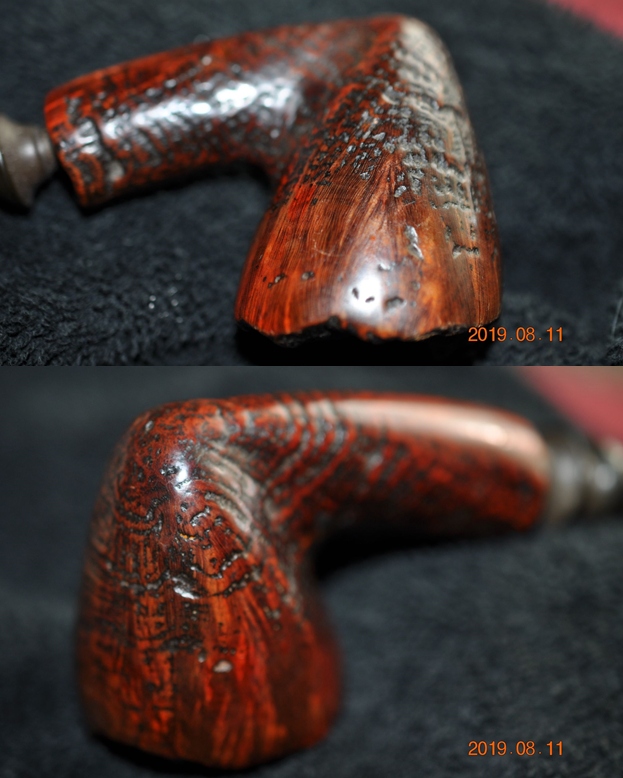
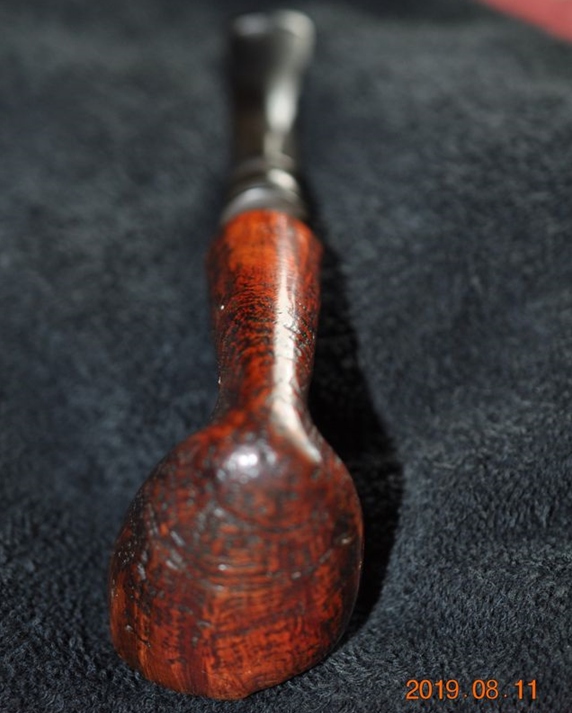
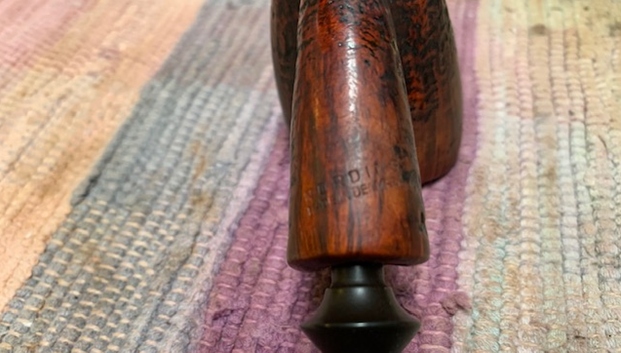
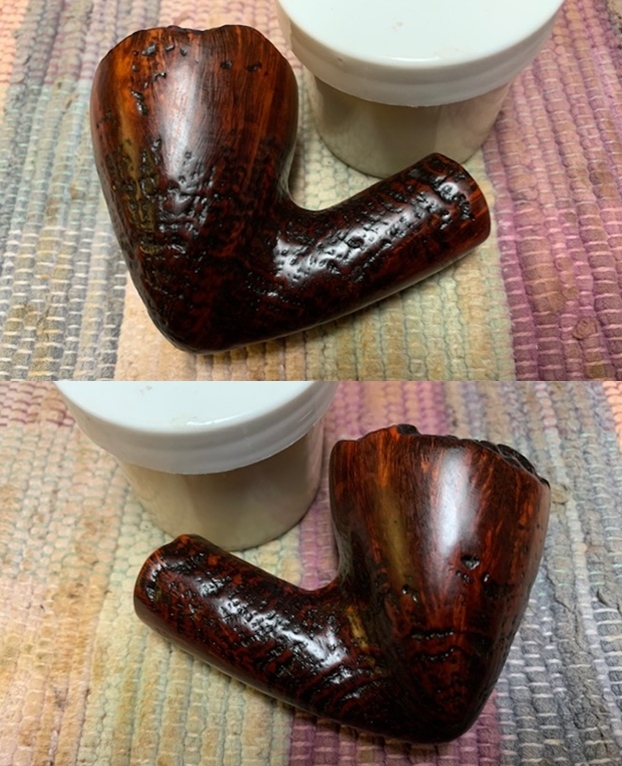
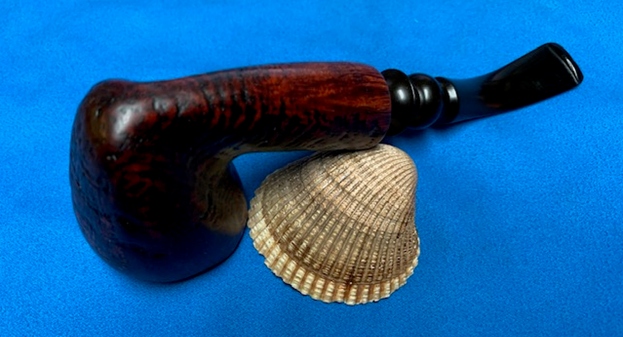
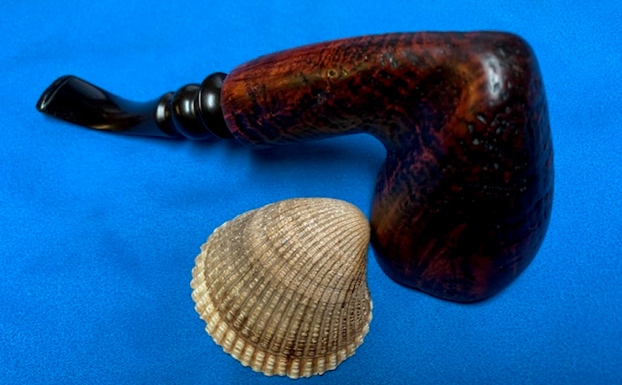
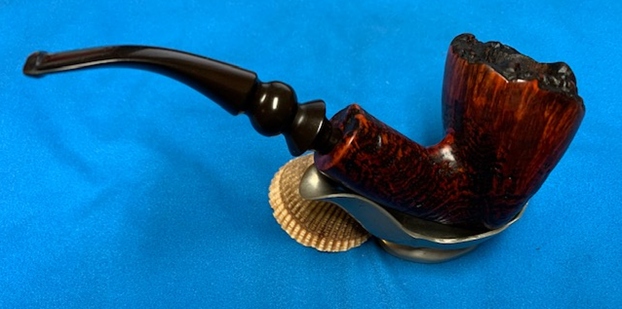
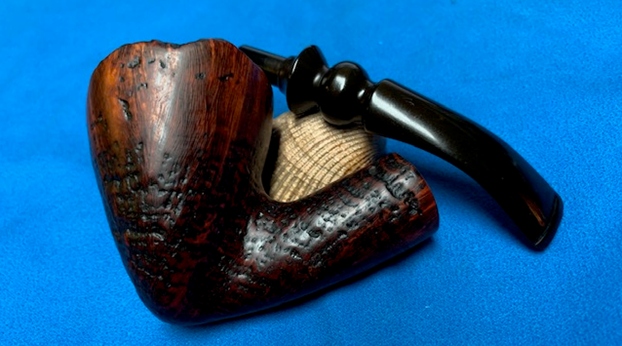
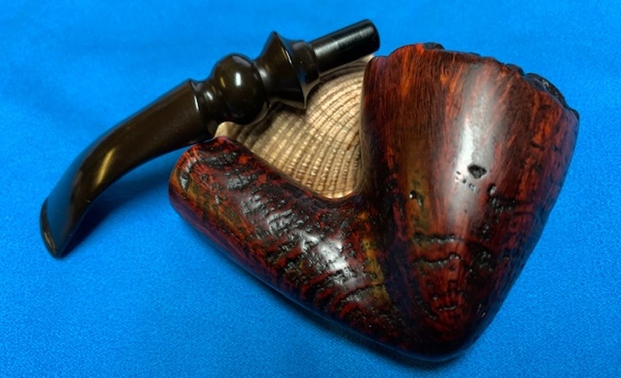
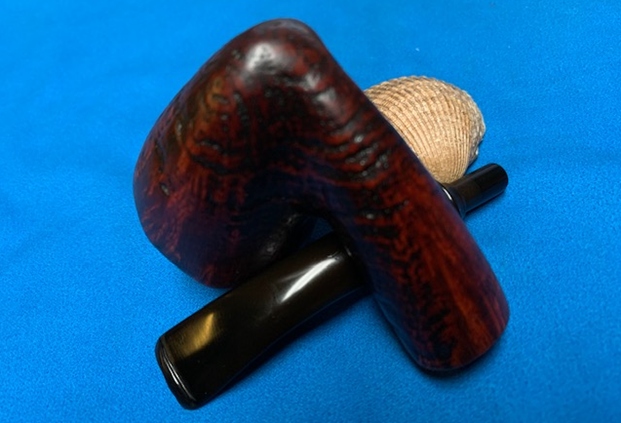
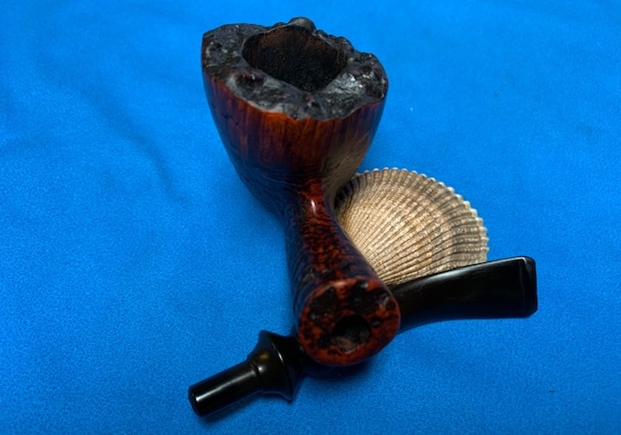
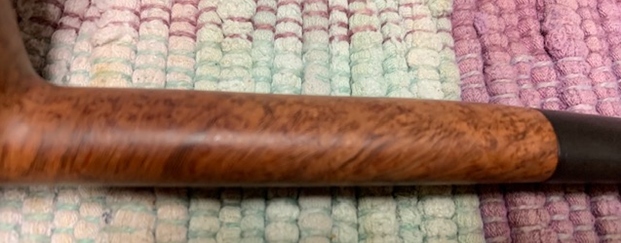
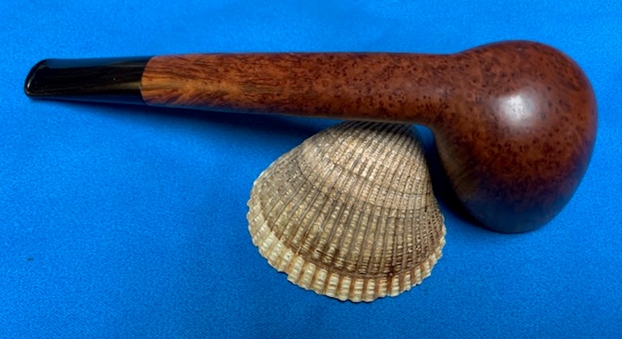
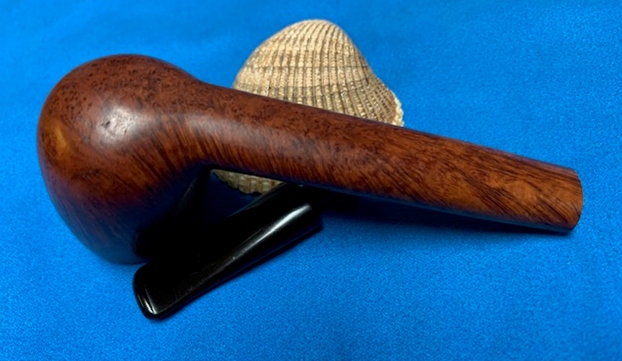
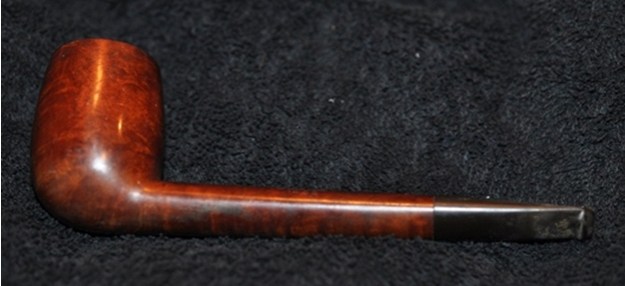
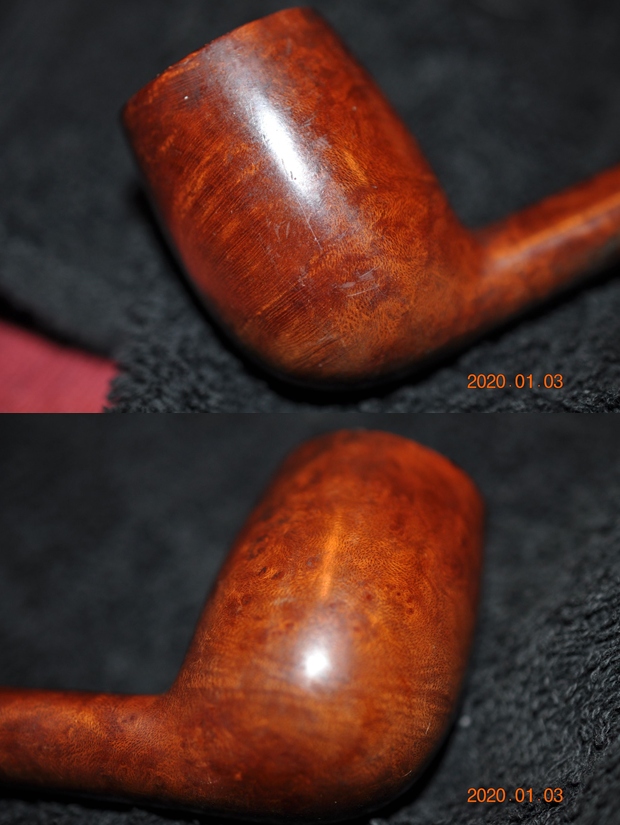
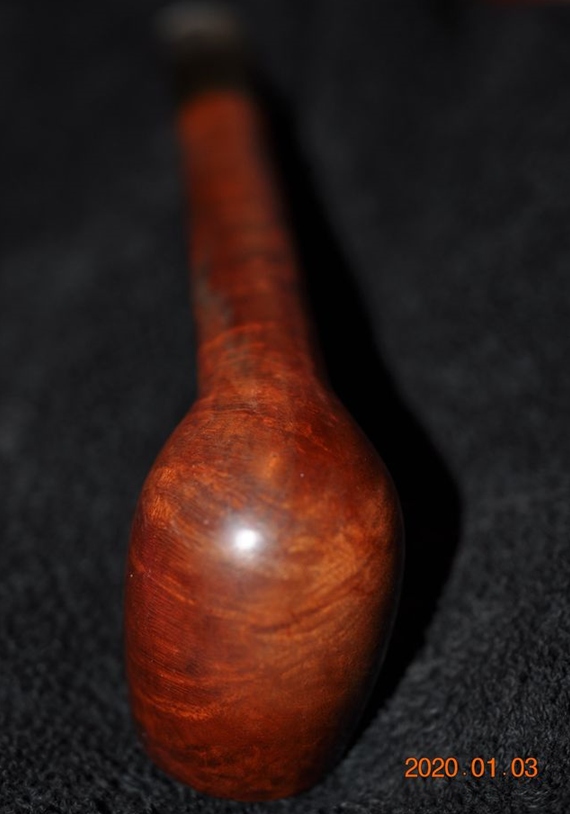
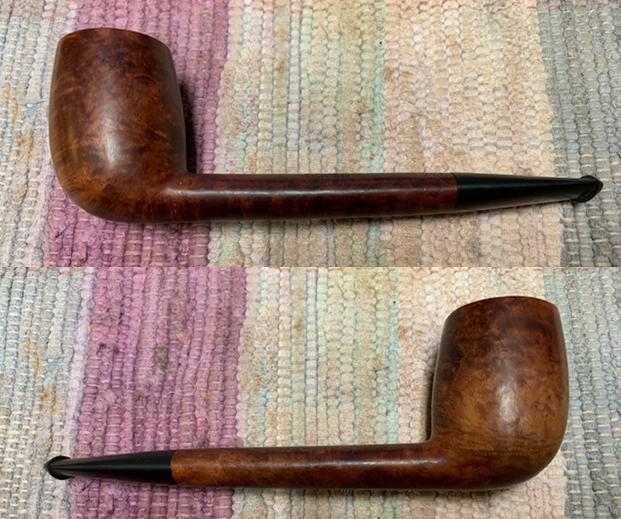
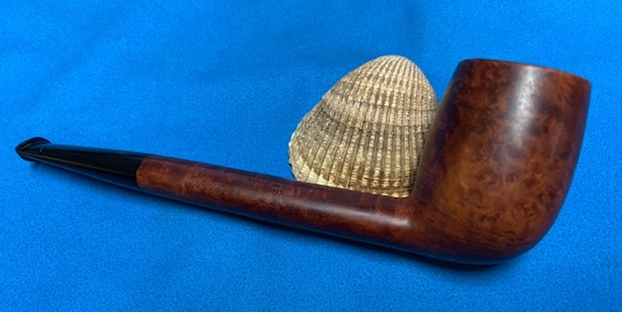
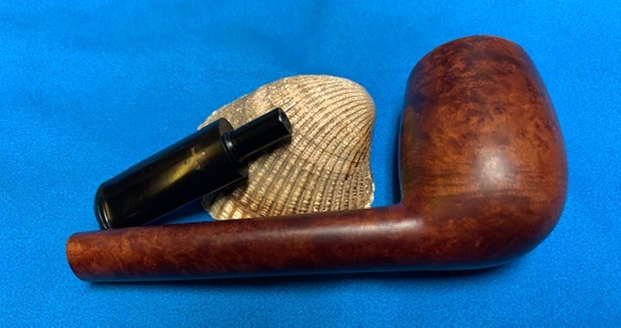
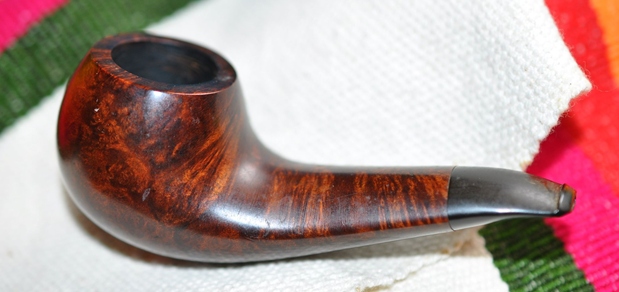
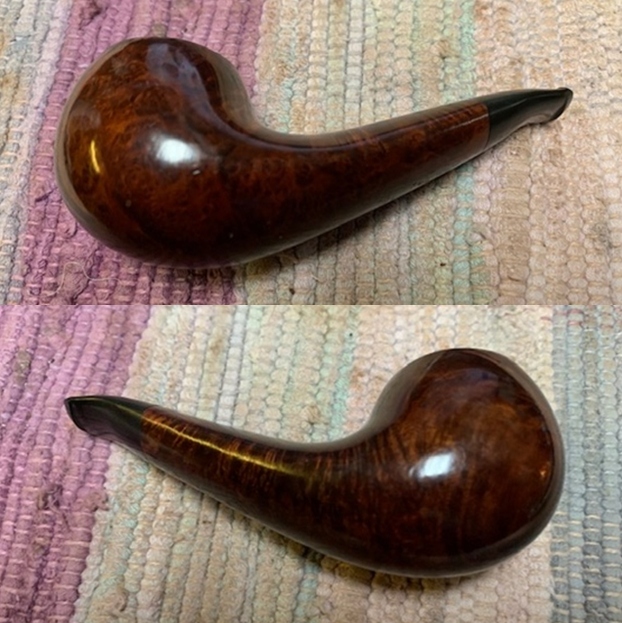
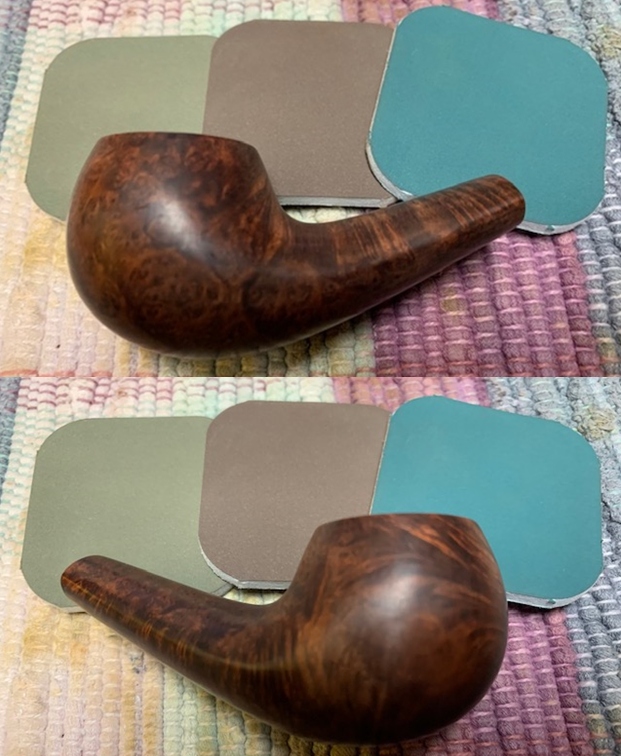
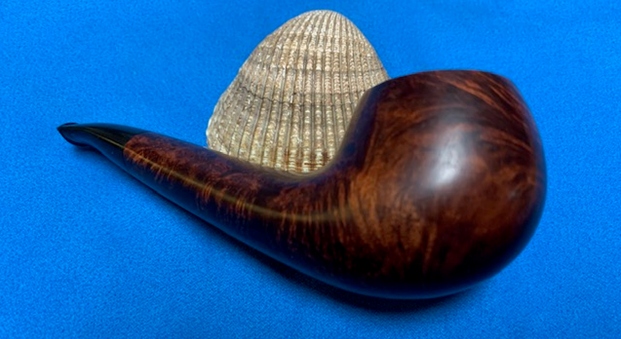
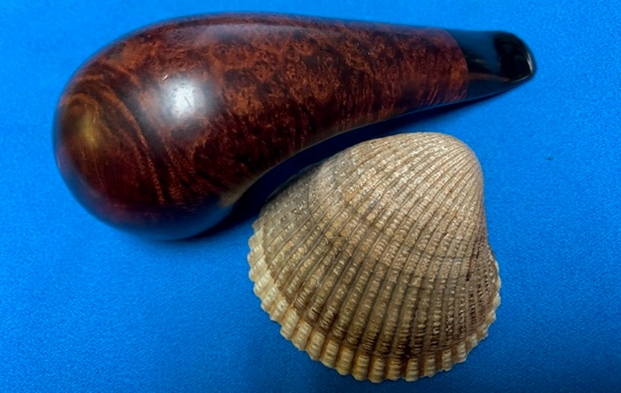
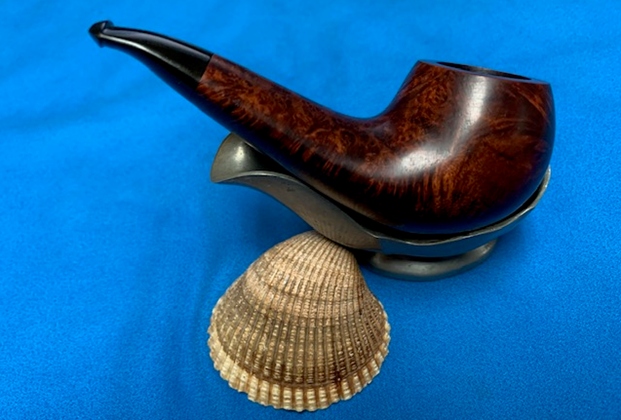
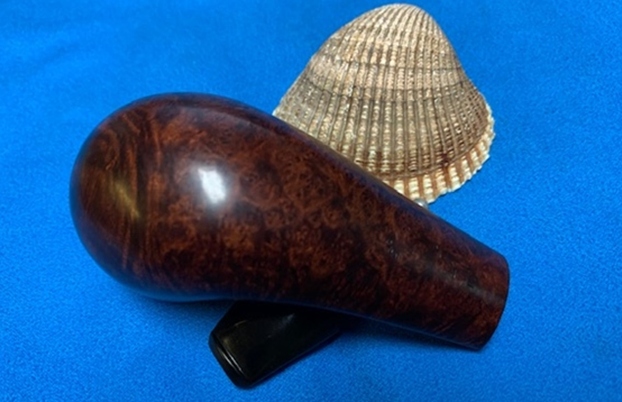
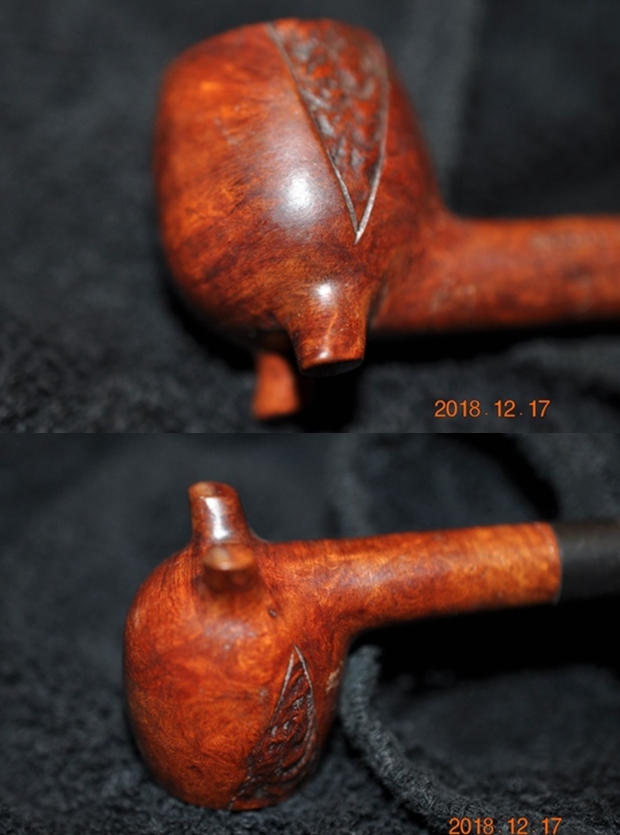
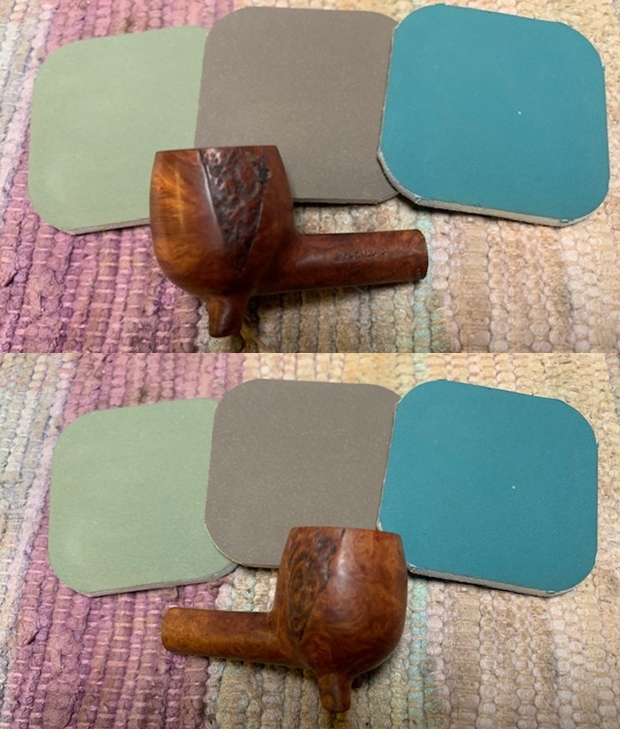
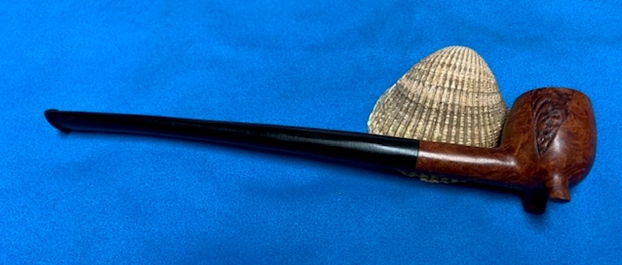
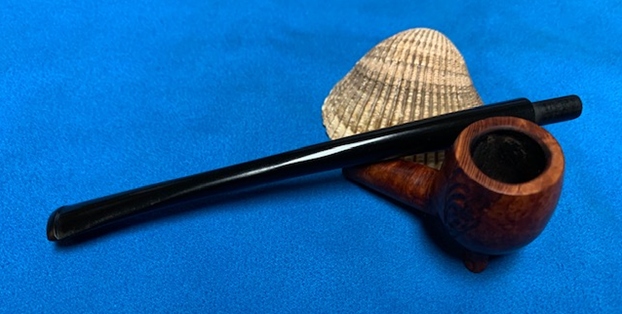
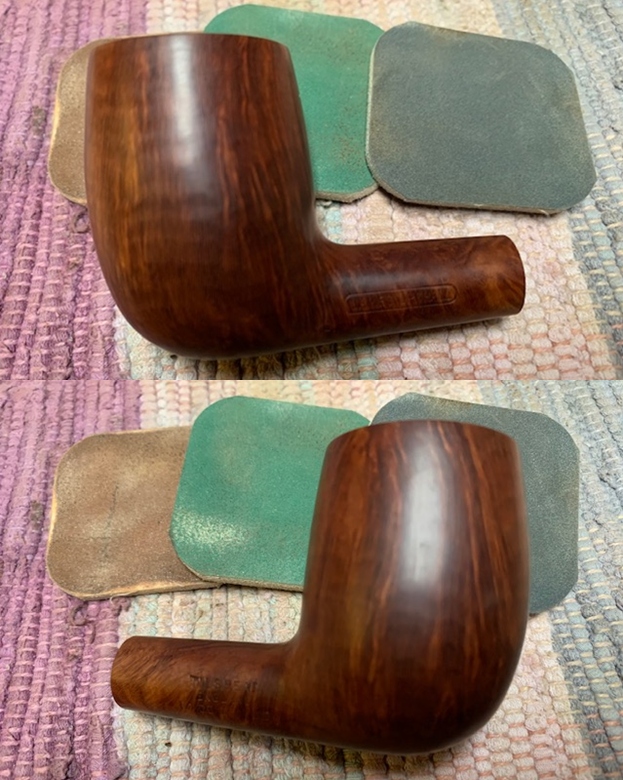
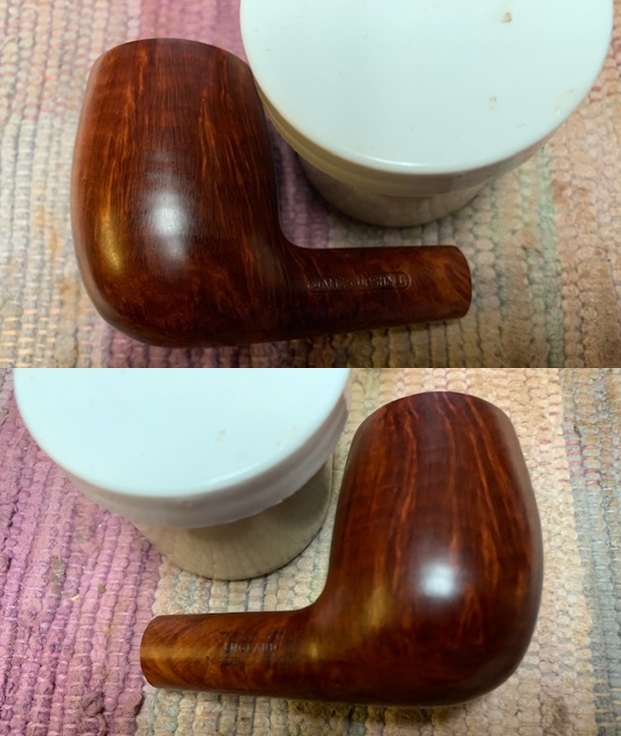
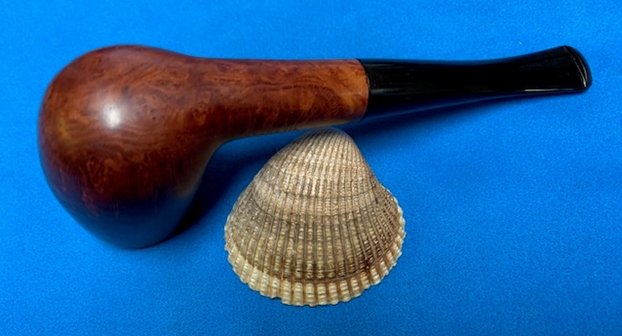
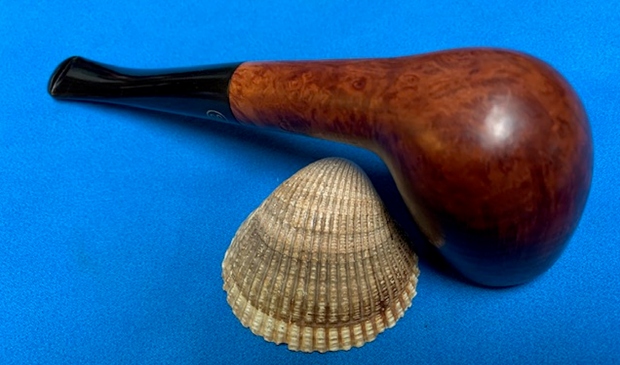
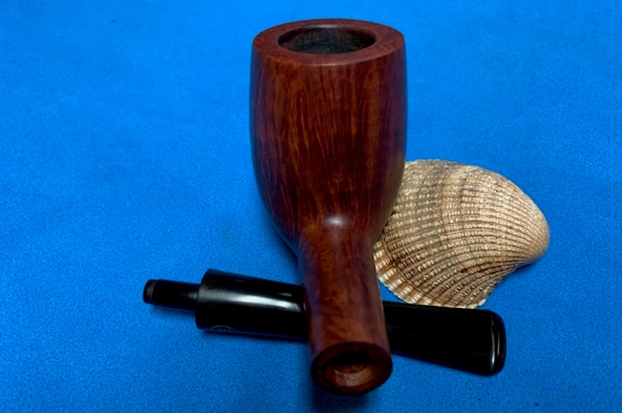
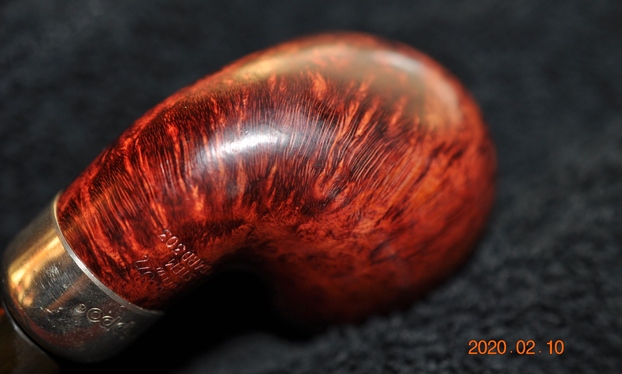
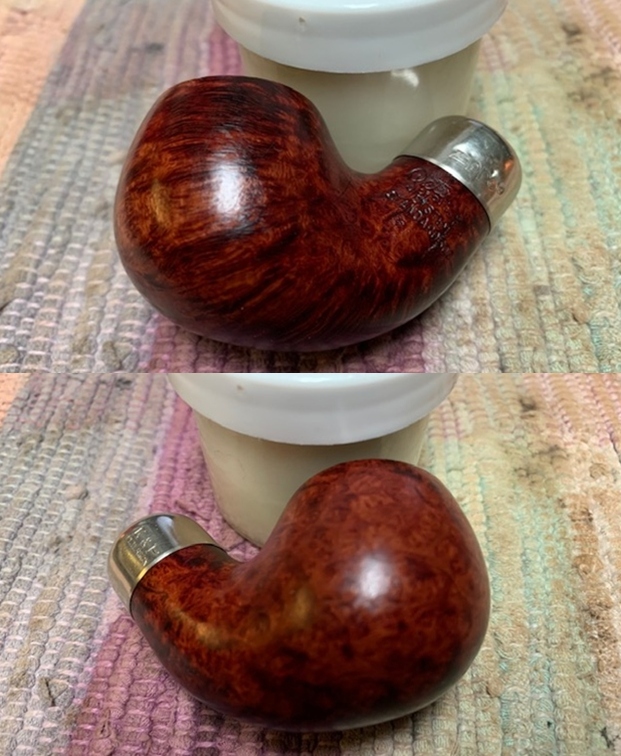
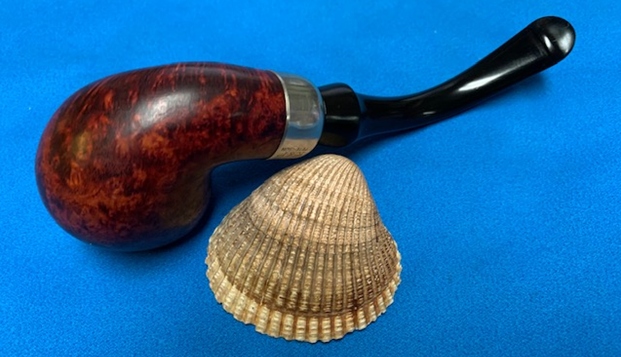
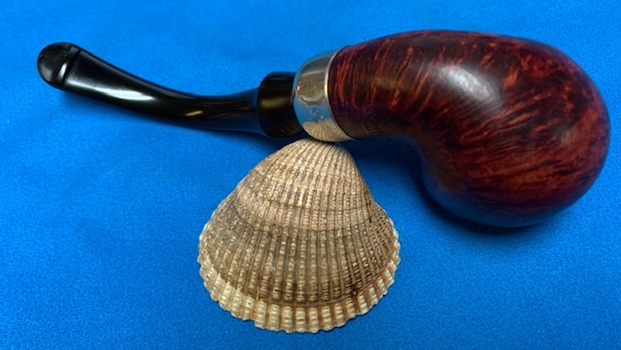
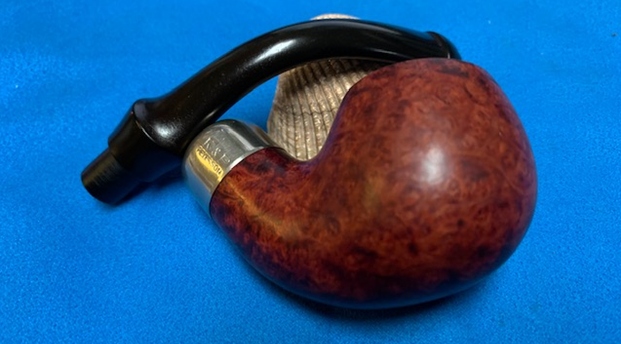
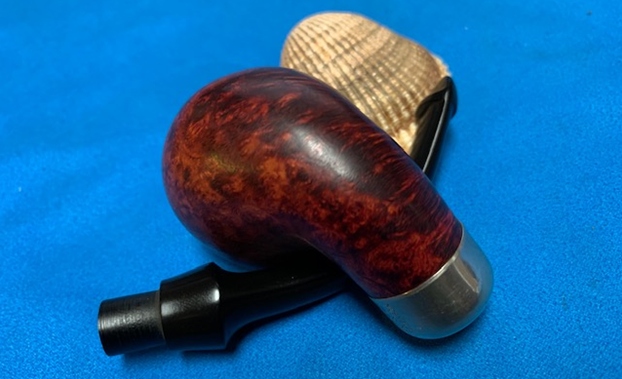
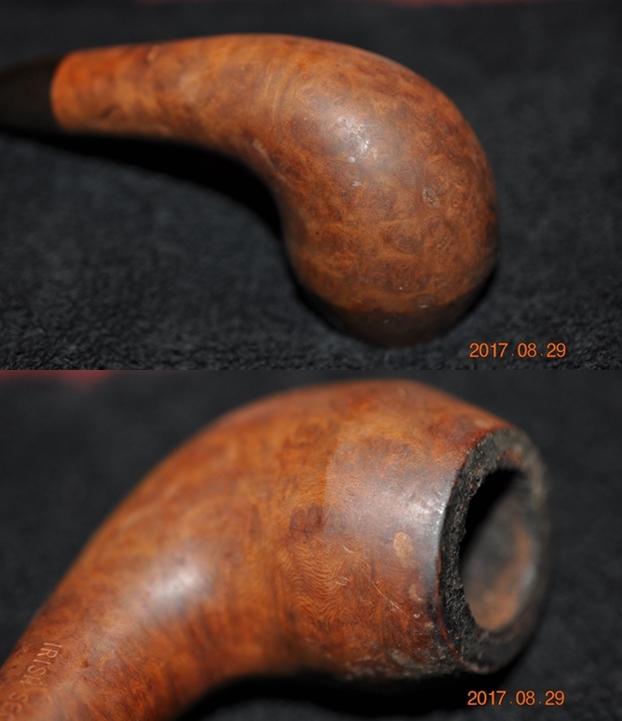
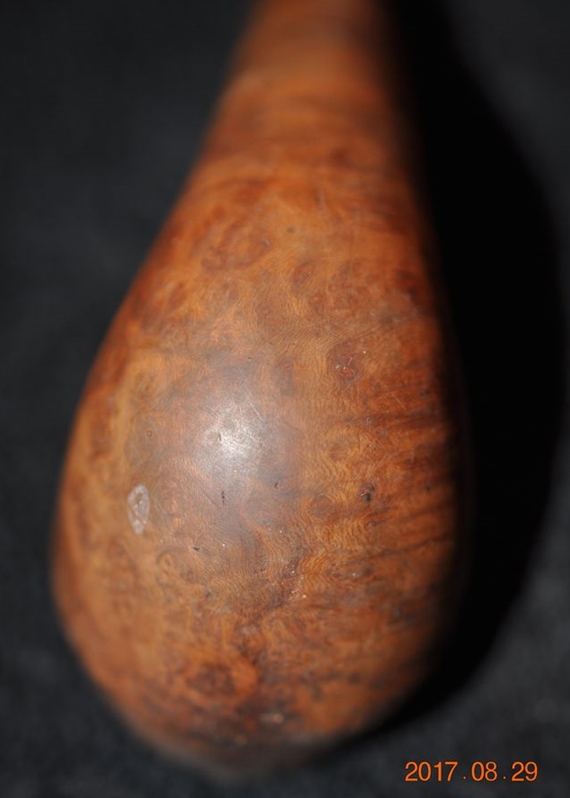
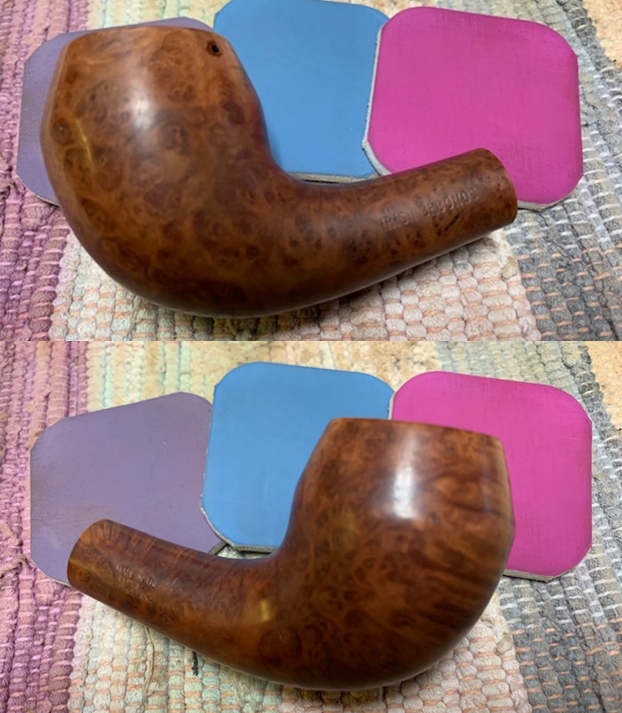
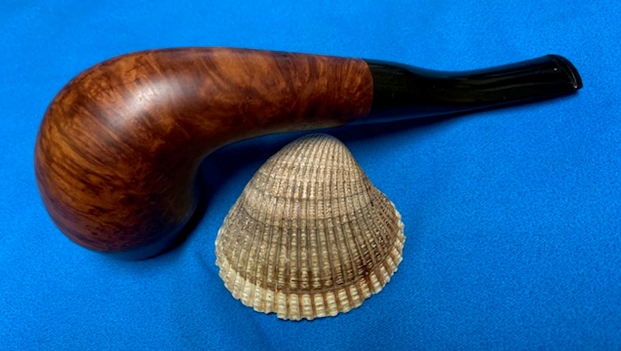
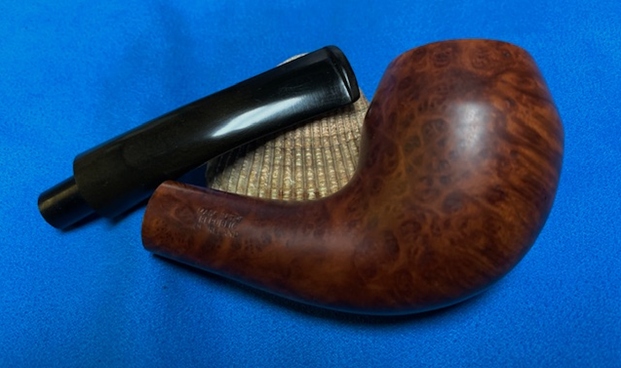
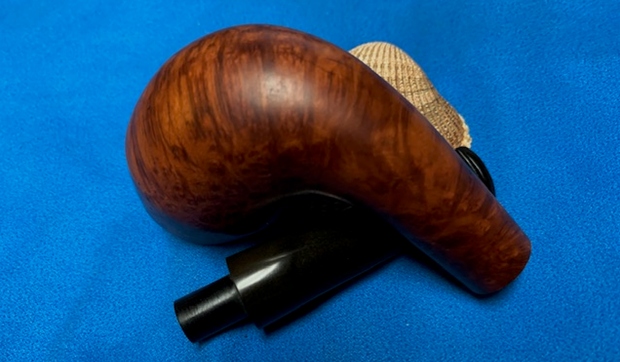
Jeff took a photo of the heel and the side of the bowl and shank to show the grain on the pipe. It is a beauty.
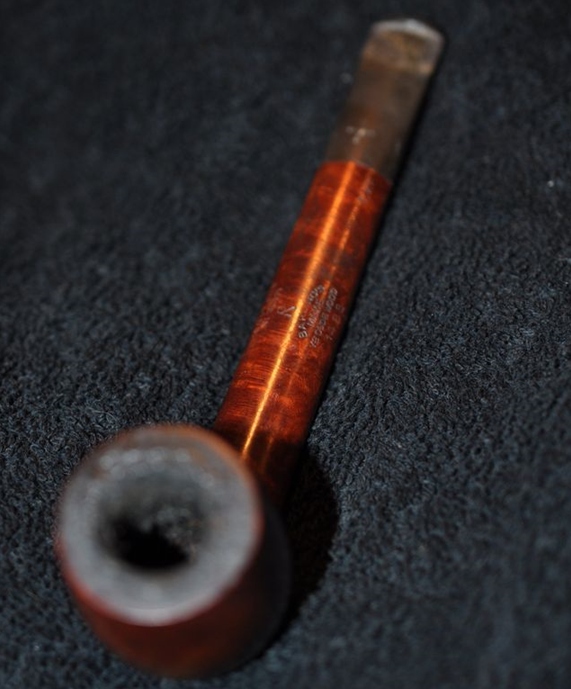
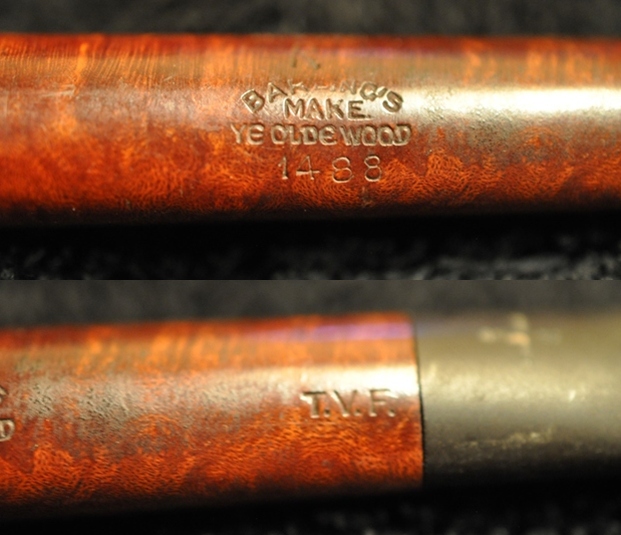
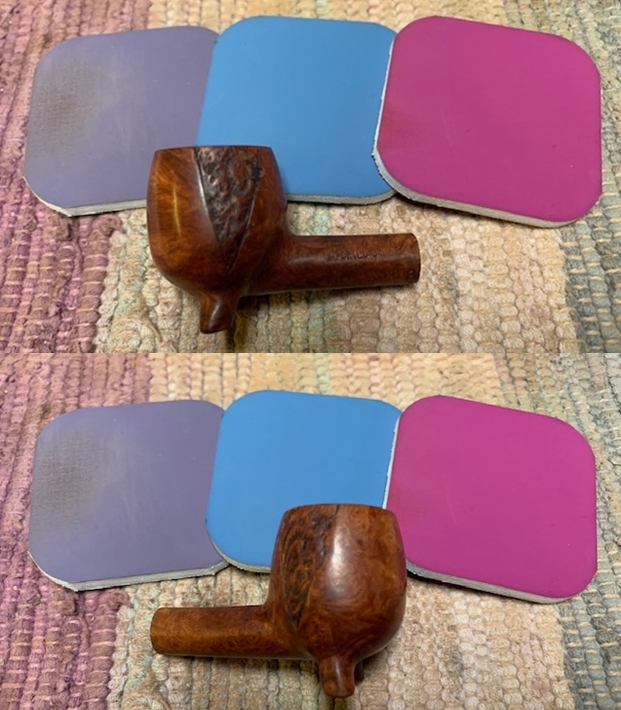
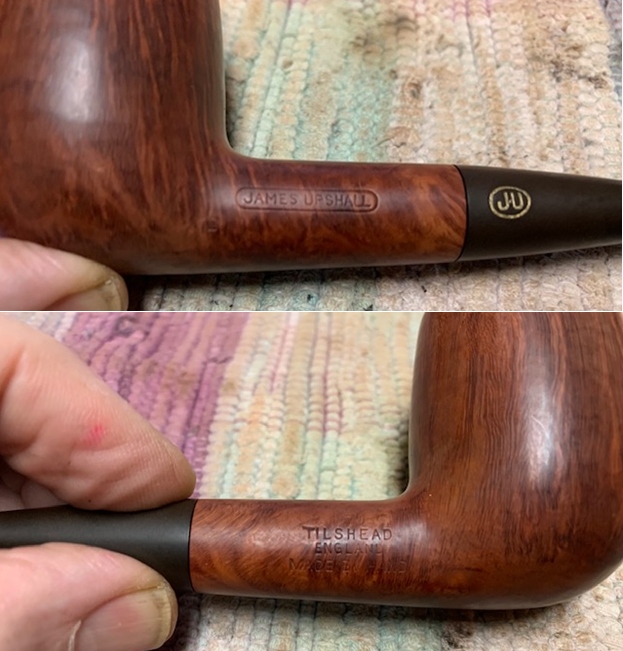
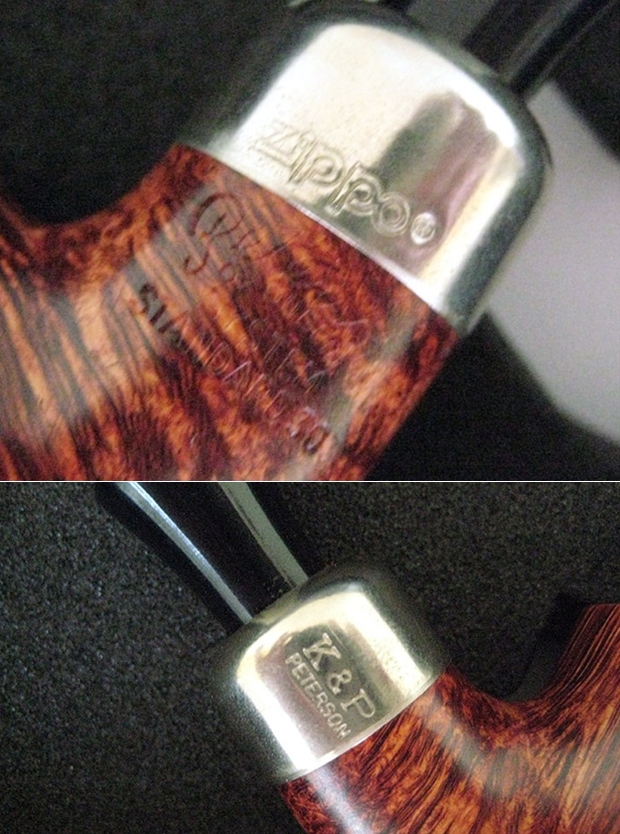
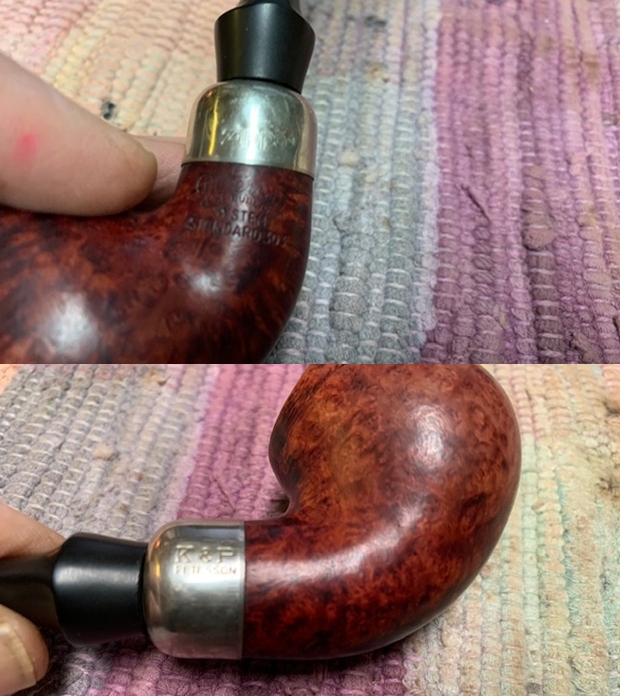
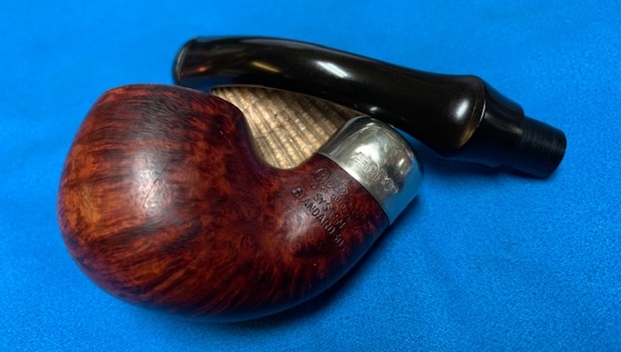
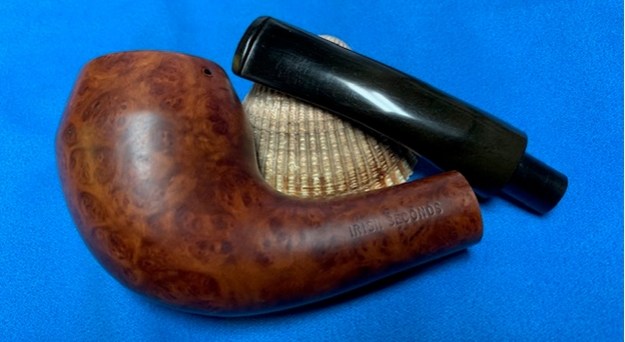
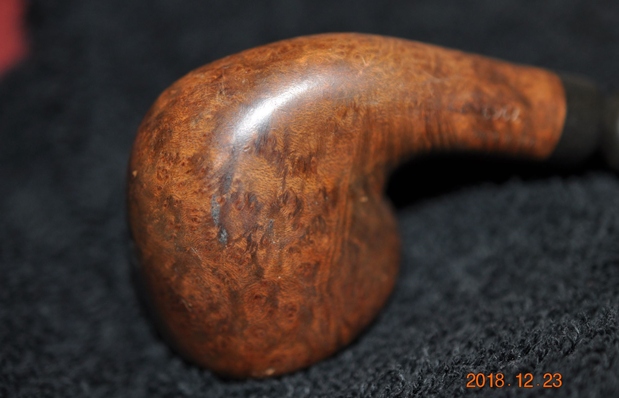
Jeff took photos to capture the stamping on the sides of the shank. It is clear and readable as noted above.   He also took a photo of the Bari stamp on the left side of the stem. 
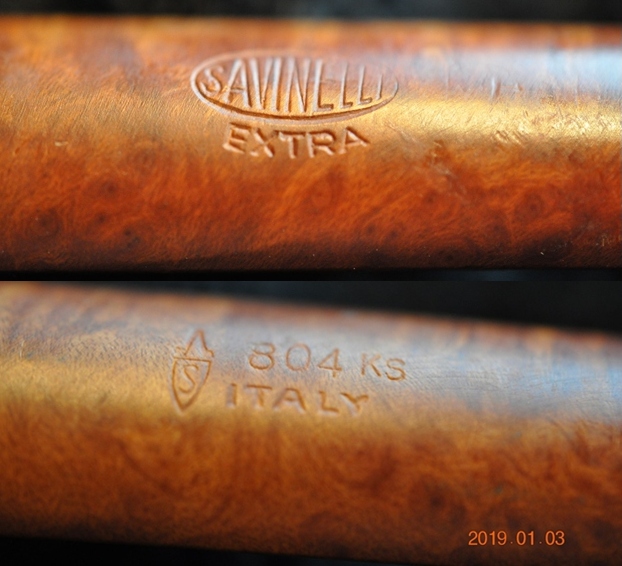
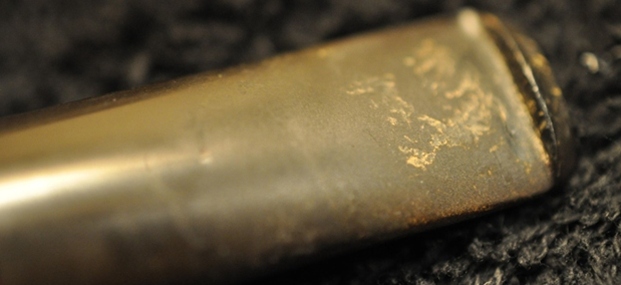
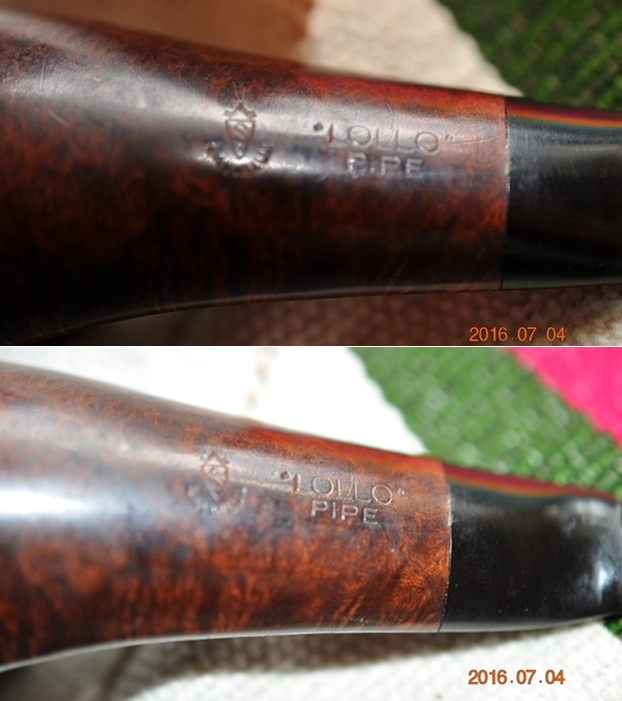
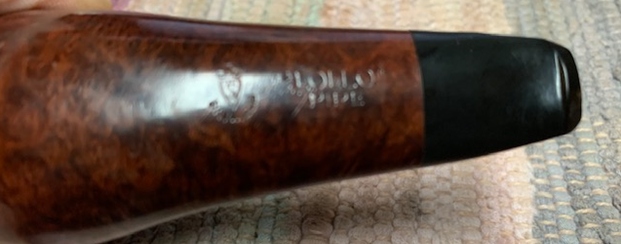
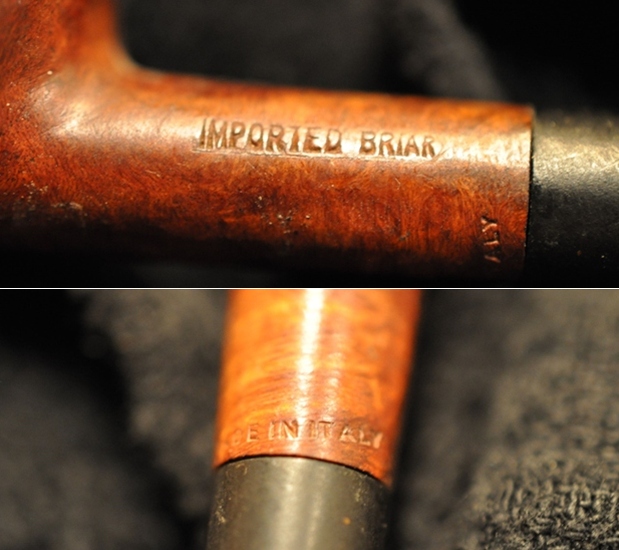
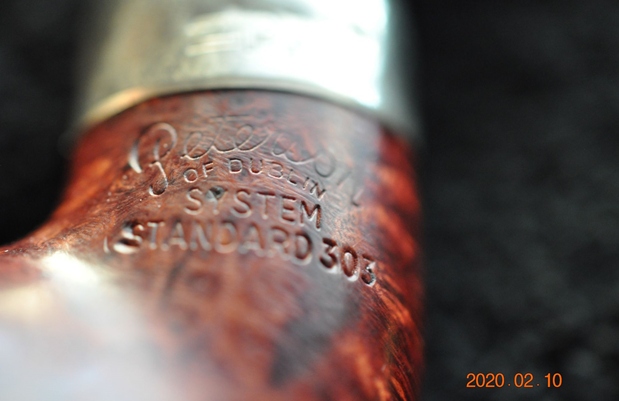
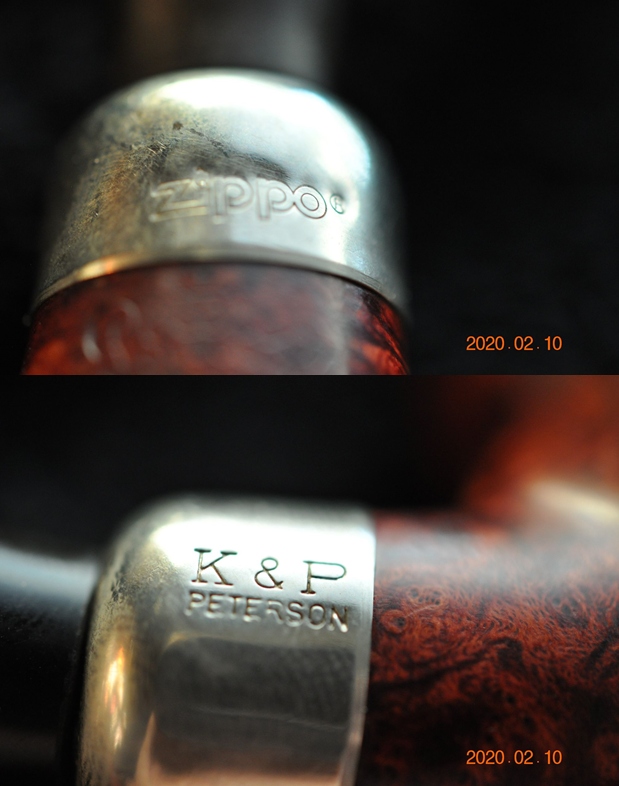
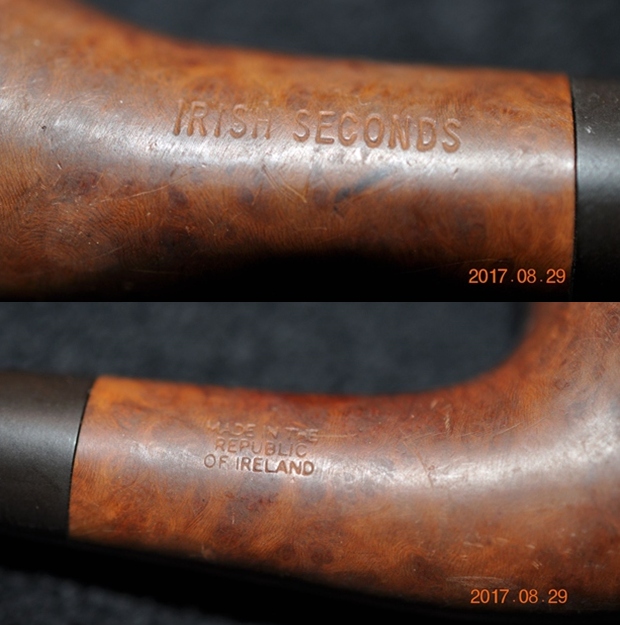
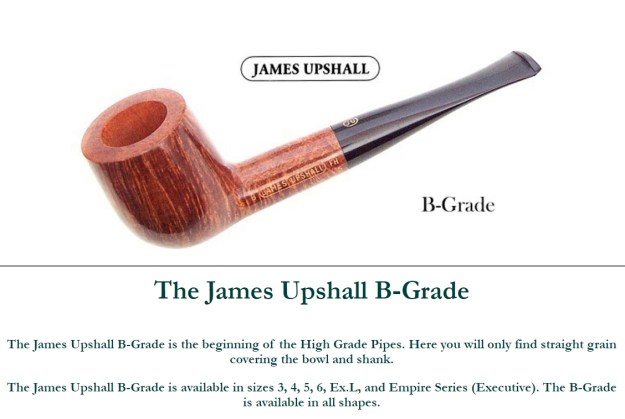
I turned to Pipephil’s site (http://www.pipephil.eu/logos/en/logo-b1.html) to see if I could find a listing for the Bari Select nature Old Briar with this four digit number. There was nothing specifically listed for this line of Bari pipes. There was also good info on the brand as a whole and that it was founded by Viggo Nielsen in 1950 and he ran it until 1978 when Age Bogelund managed the production for them. In 1993 it was sold to Helmer Thomsen. I have included a screen capture of the section below.Pipedia gives a great history of the brand (https://pipedia.org/wiki/Bari) that is well worth reading. There were also photos of the Bari stamping on the Select nature Old Briar line of pipes.

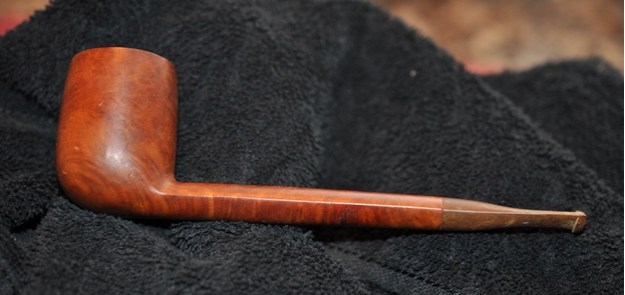
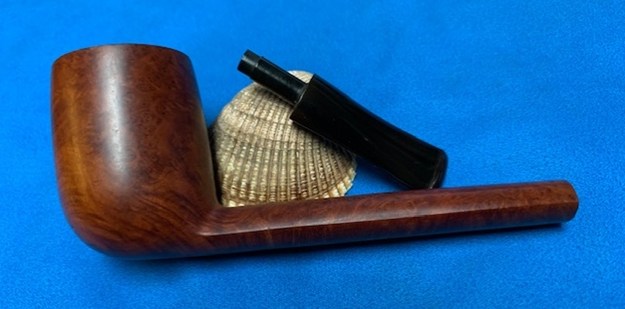
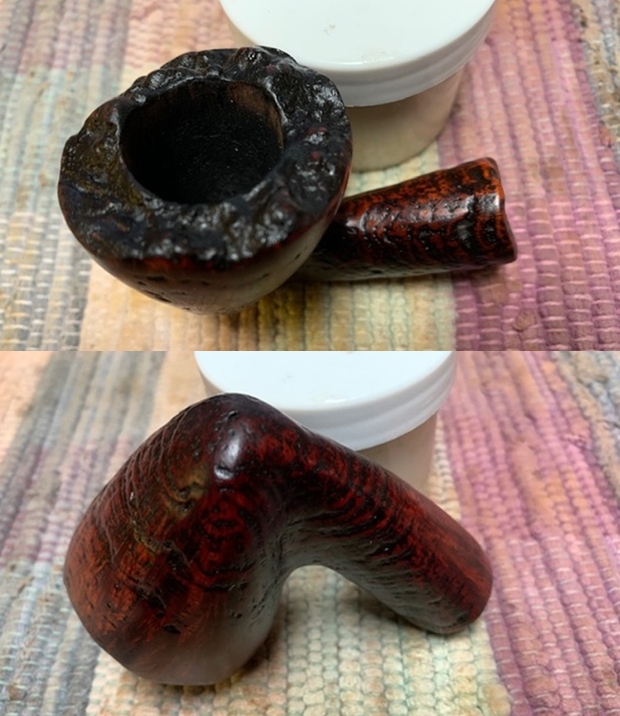
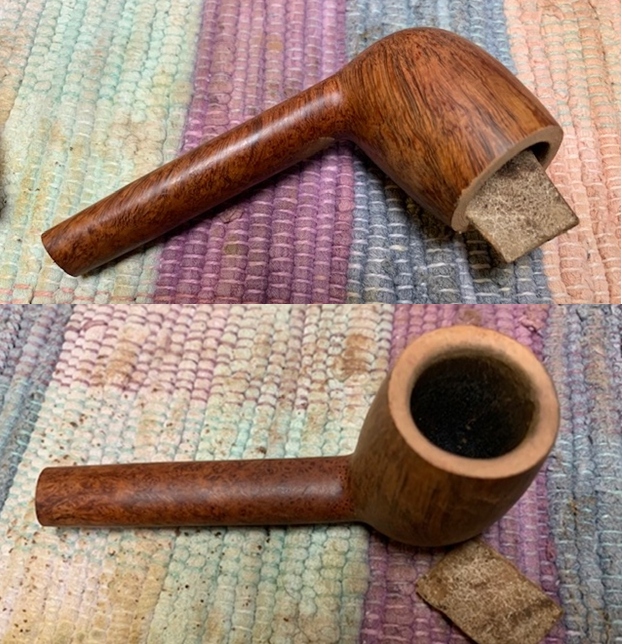
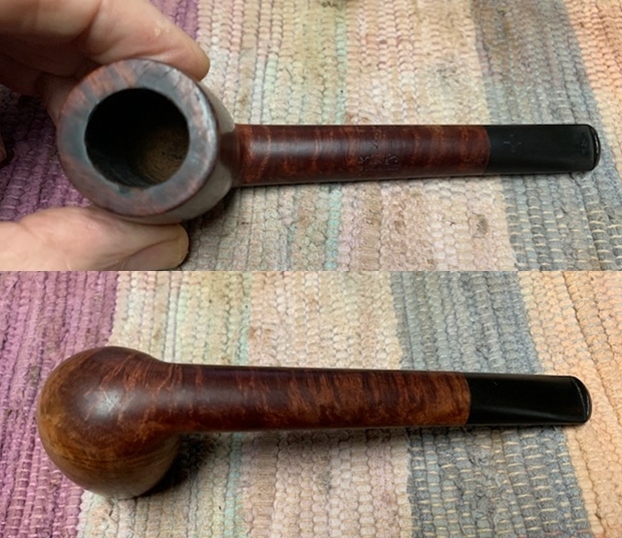
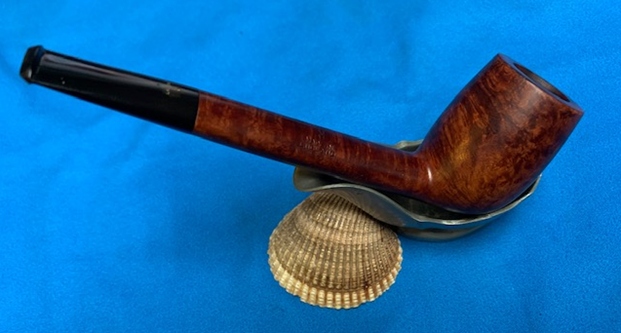
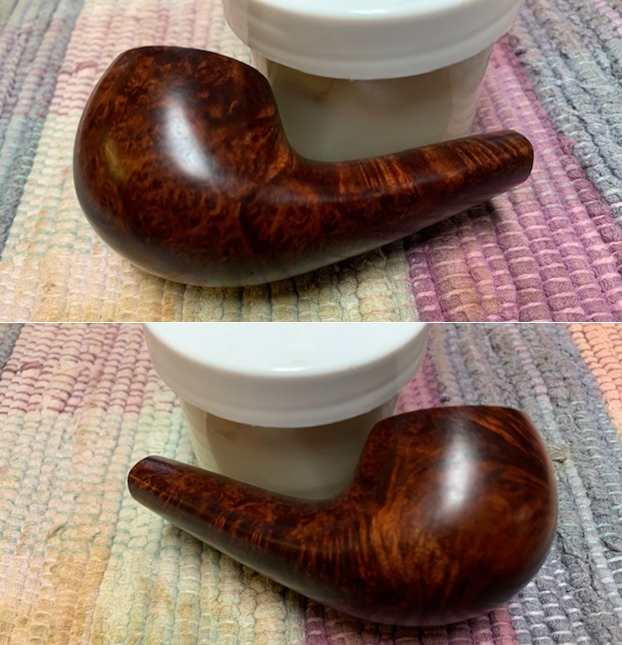
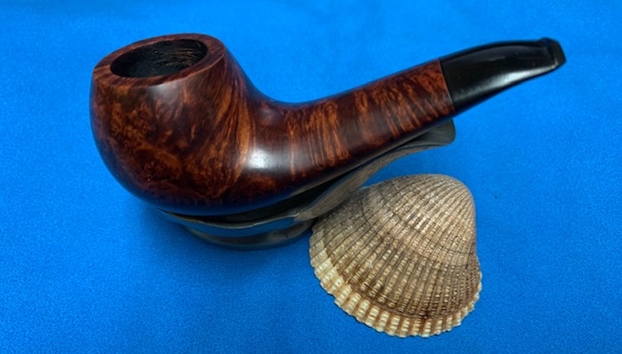
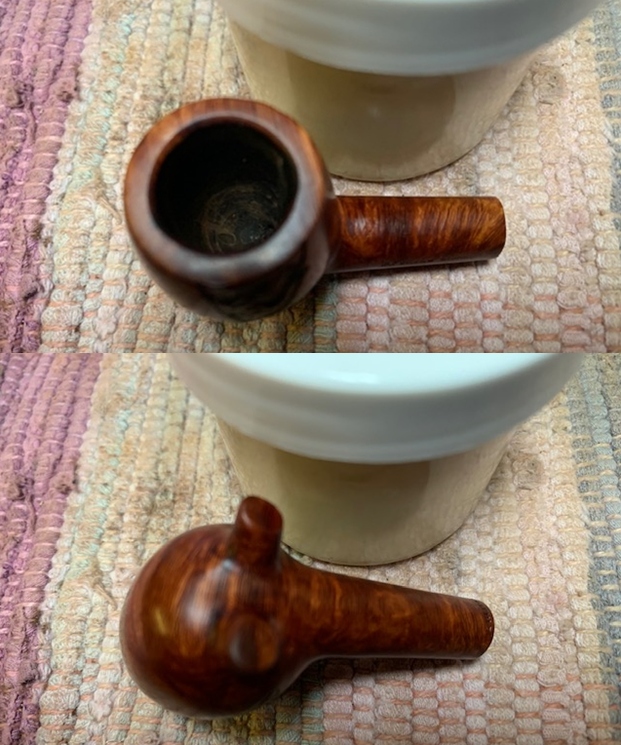
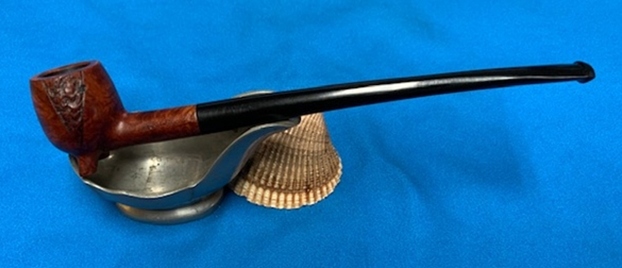
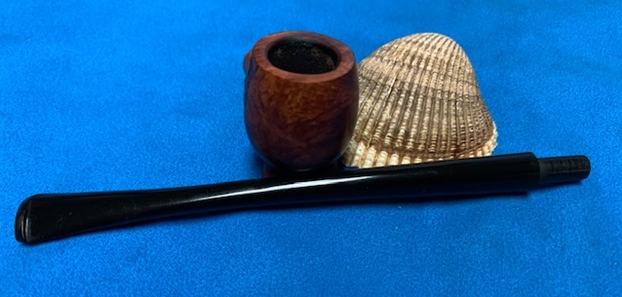
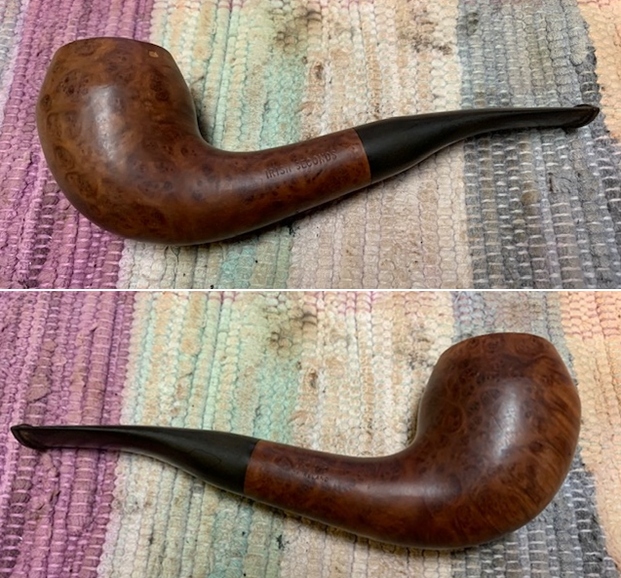
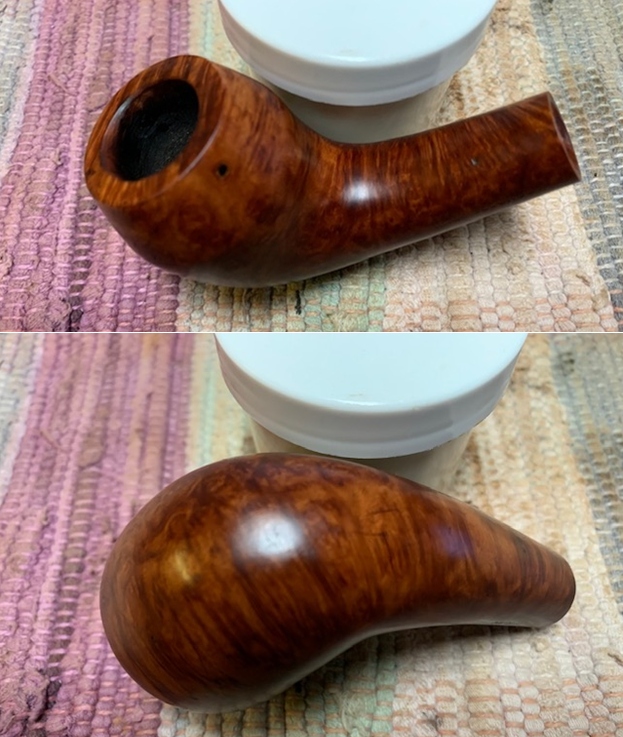
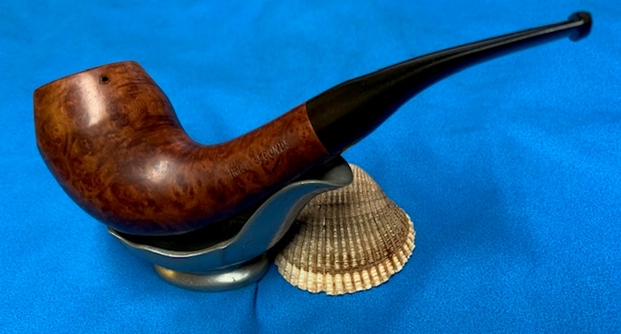
Jeff reamed it with a PipNet pipe reamer and cleaned up the reaming with a Savinelli Fitsall Pipe Knife. He scrubbed out the internals of the shank and stem with alcohol, pipe cleaners and cotton swabs until the pipe was clean. He scrubbed the exterior of the bowl with Murphy’s Oil Soap and a tooth brush to remove the grime and grit on the briar and the lava on the rim top. The finish on the bowl looked really good when I got it. The rim top looked very good. He soaked the stem in Before & After Deoxidizer bath to remove the oxidation. The stem looked better other than the light oxidation that remained and the deep tooth marks and chatter on the surface. When the pipe arrived here in Vancouver for the second stop of its restoration tour it looked much better than when he found it. I took photos of the pipe before I started my work on it.  
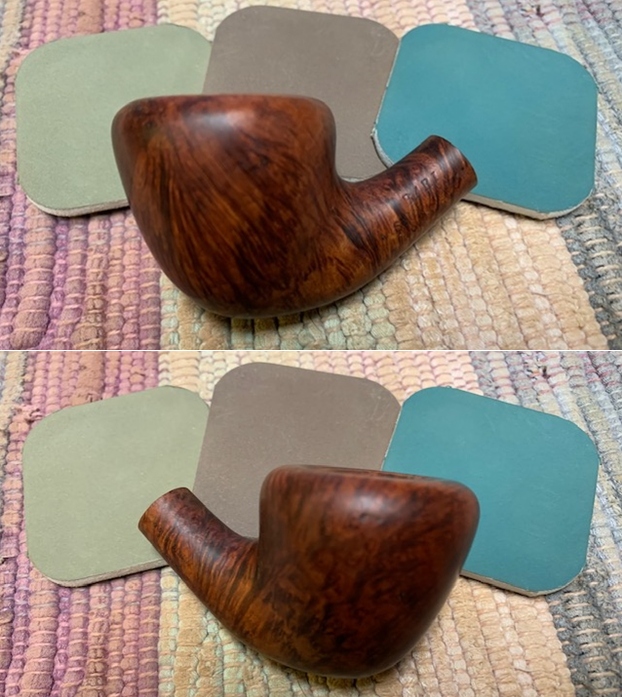
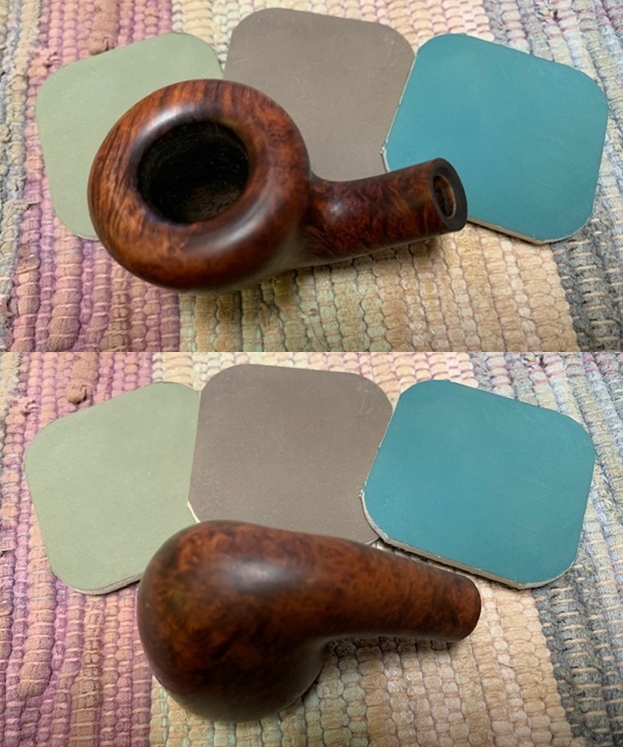
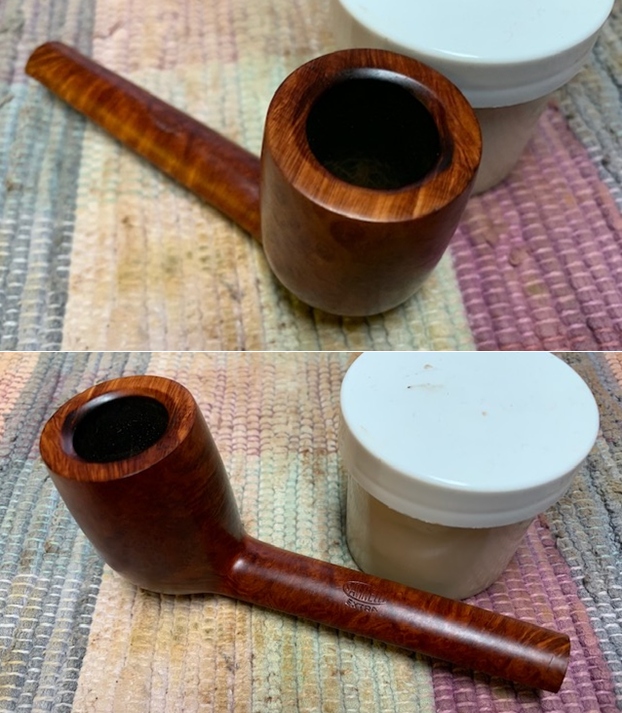
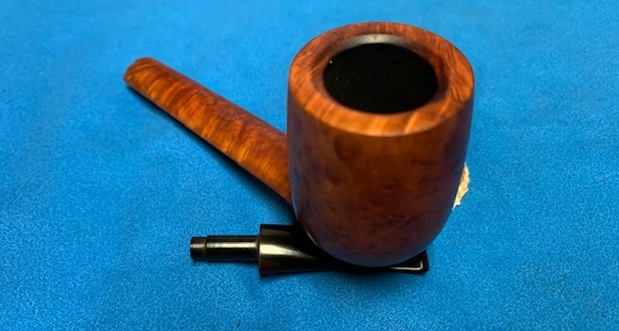
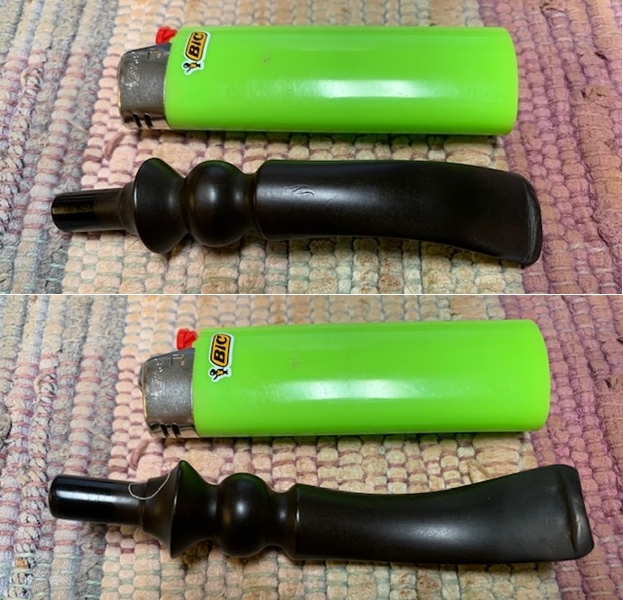
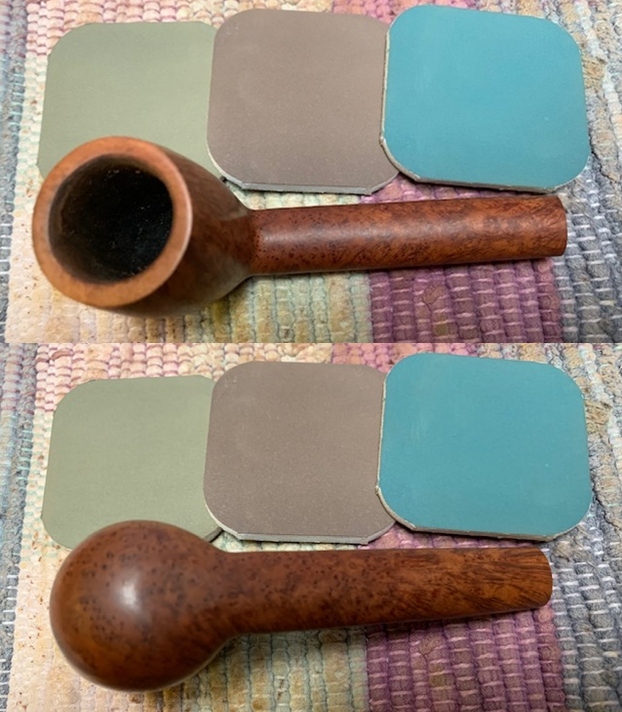
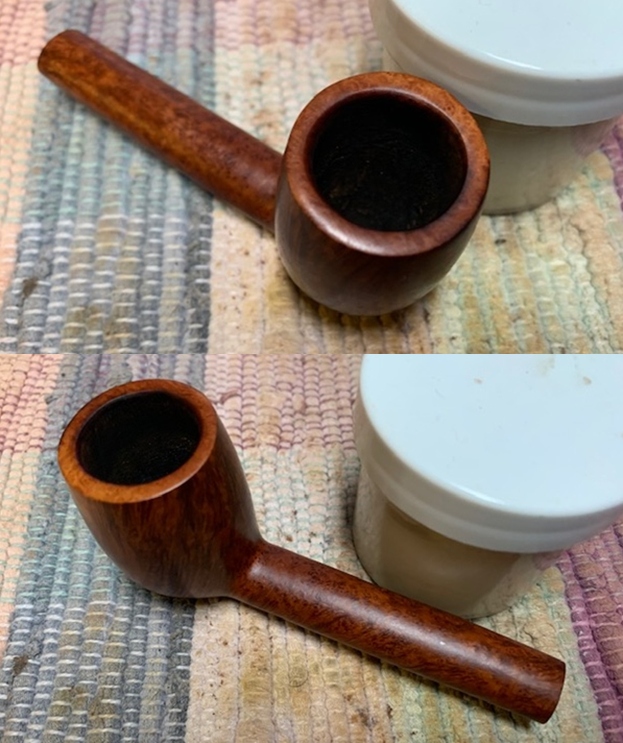
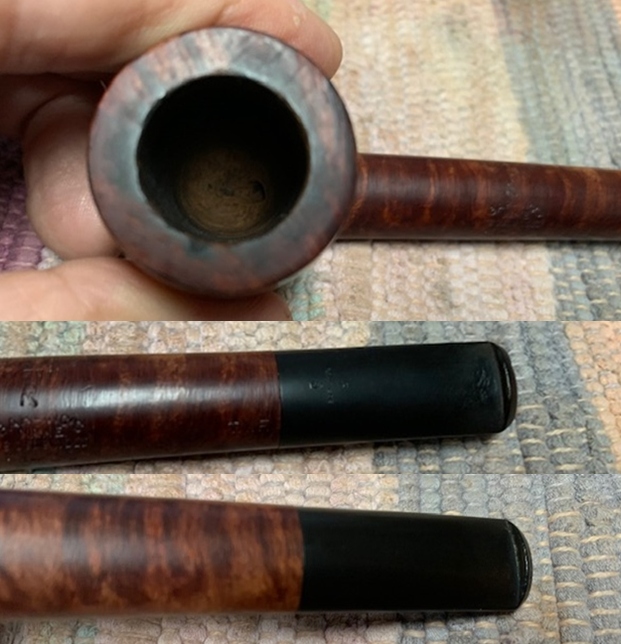
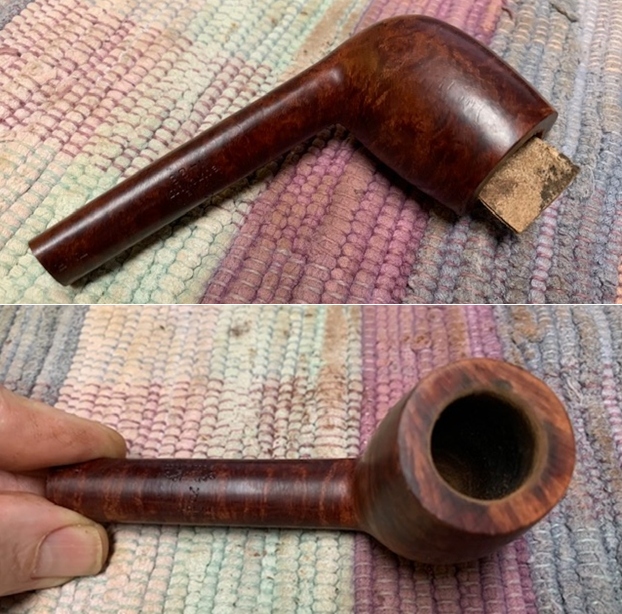
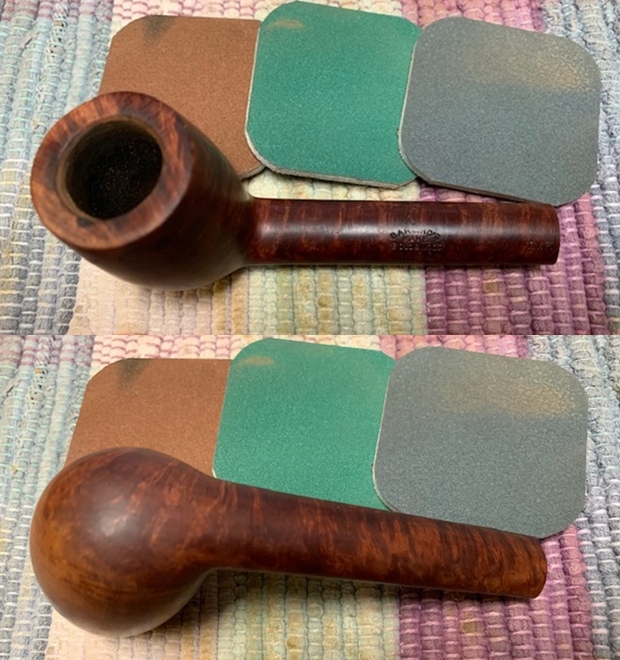
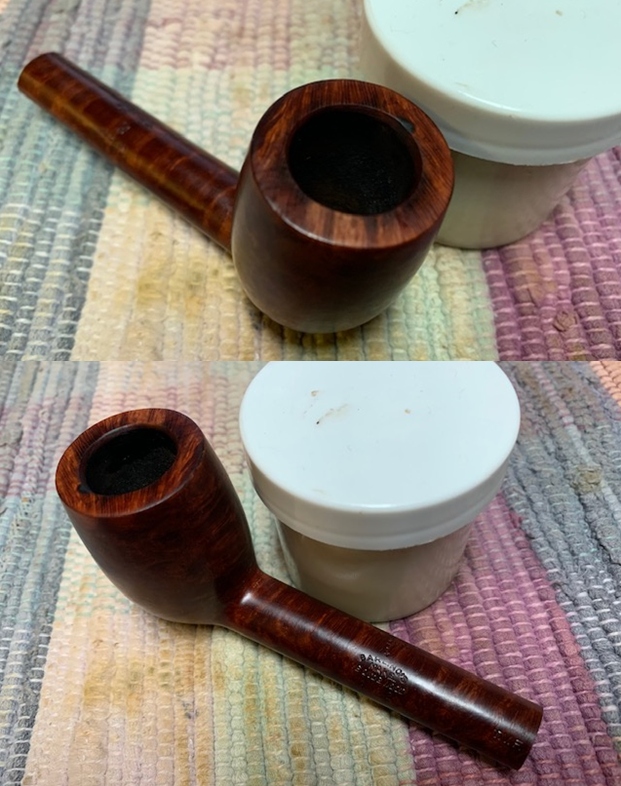
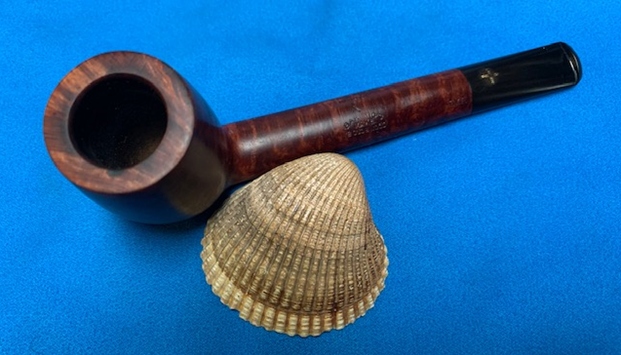
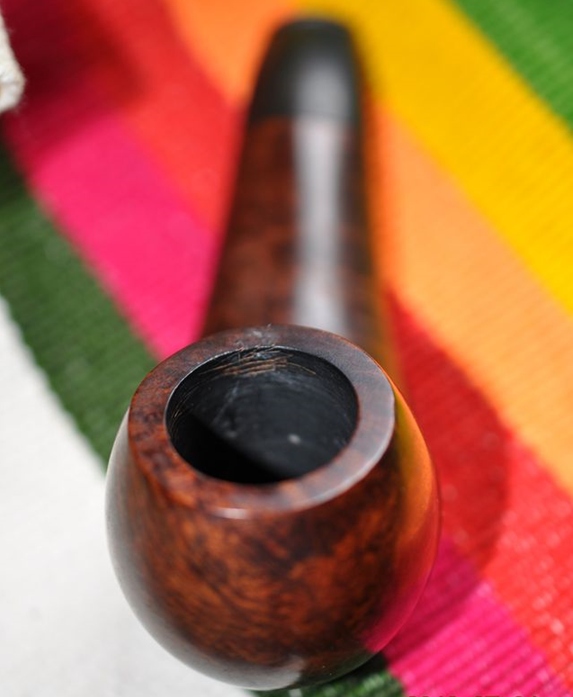
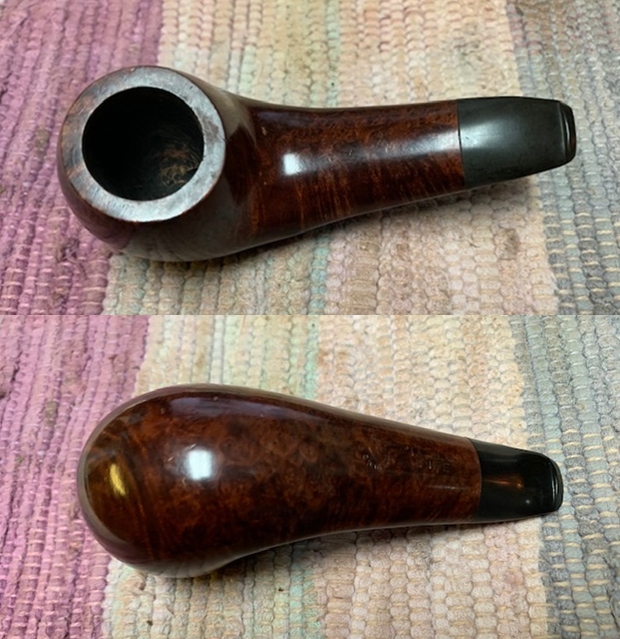
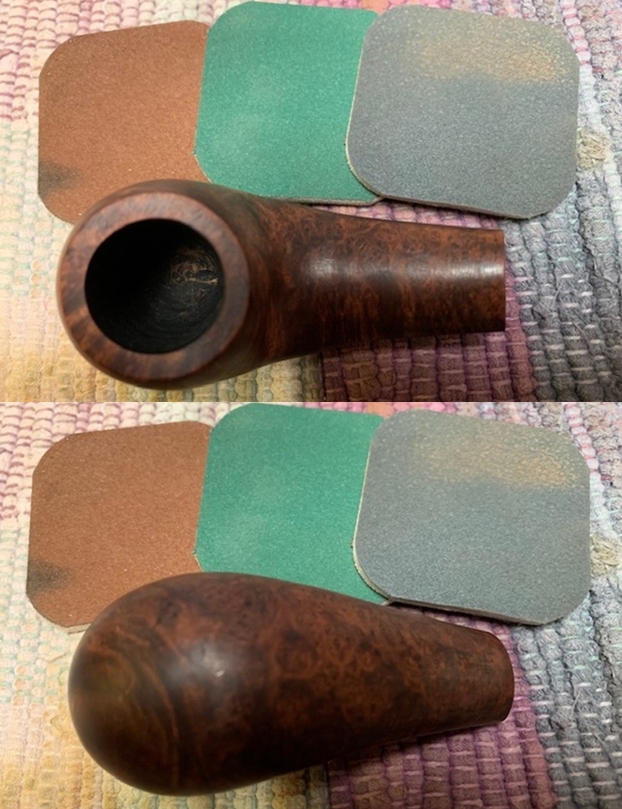
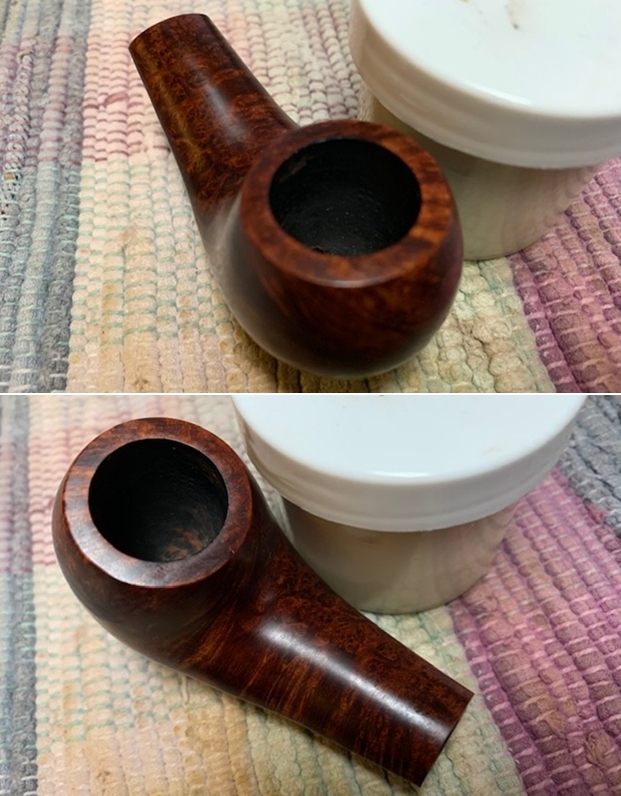
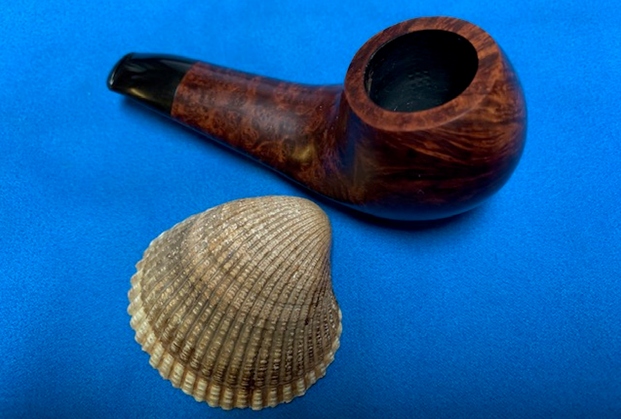
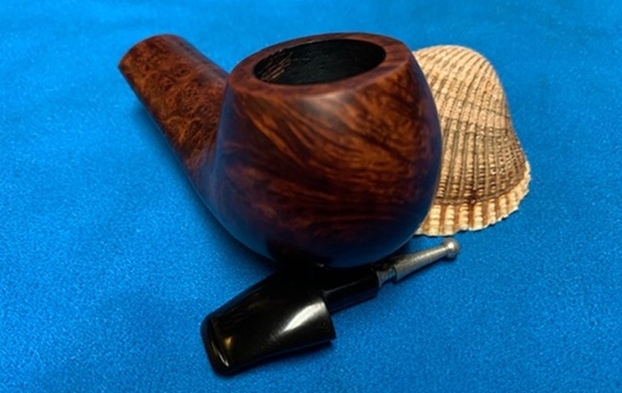
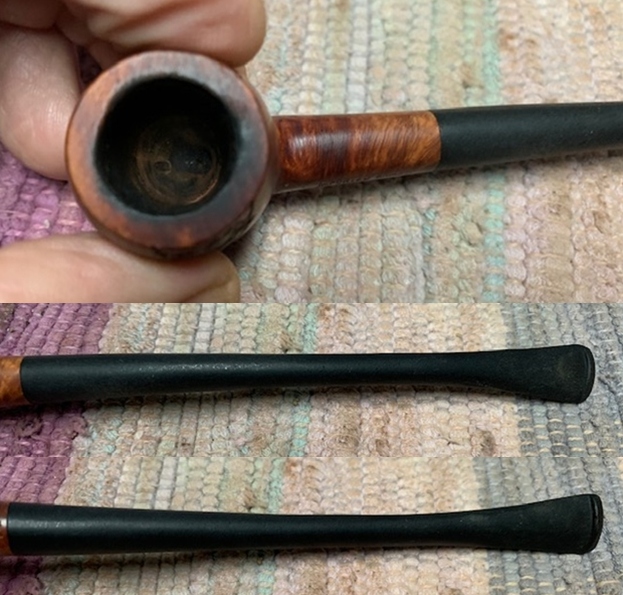
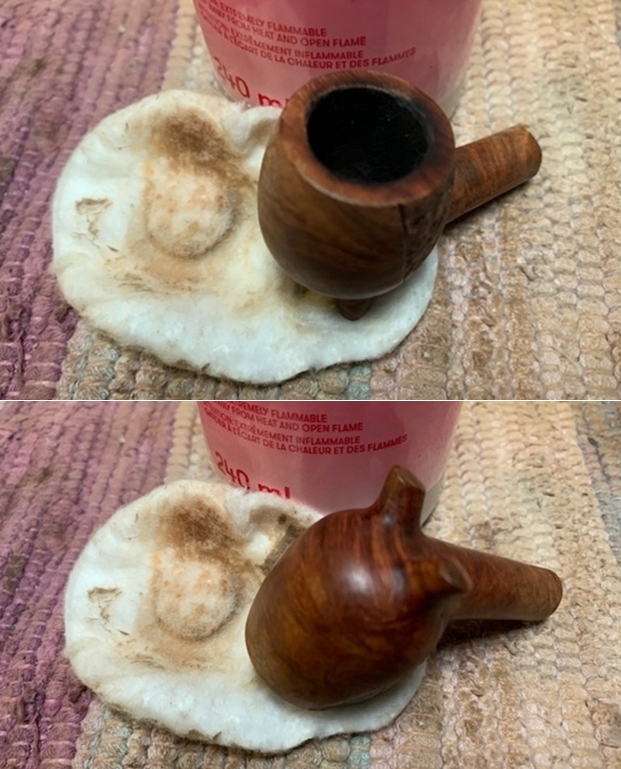
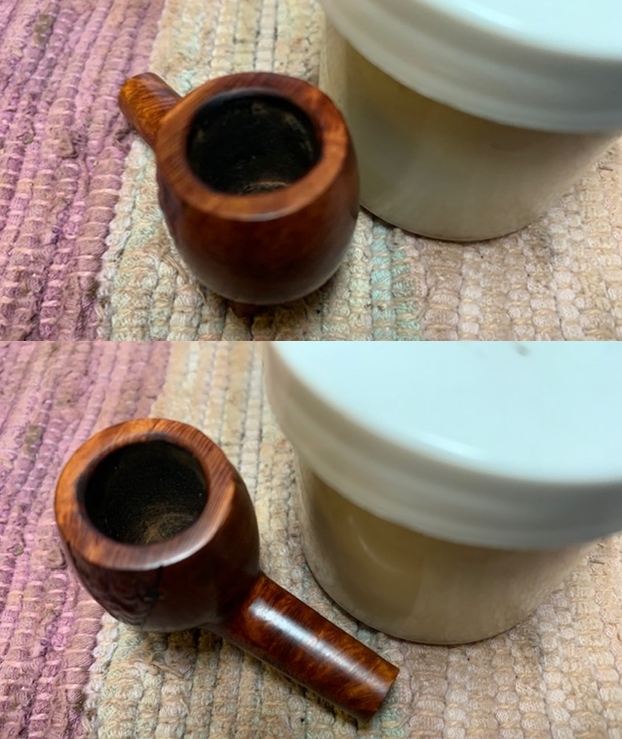
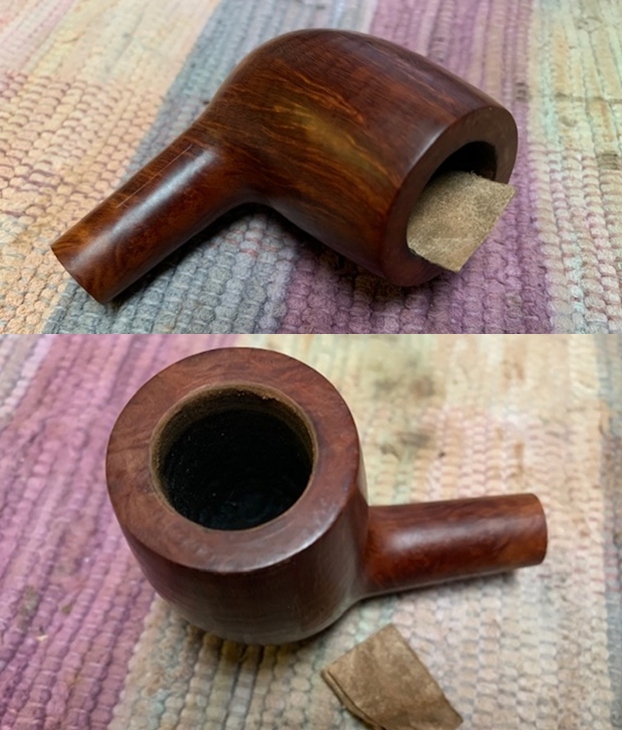
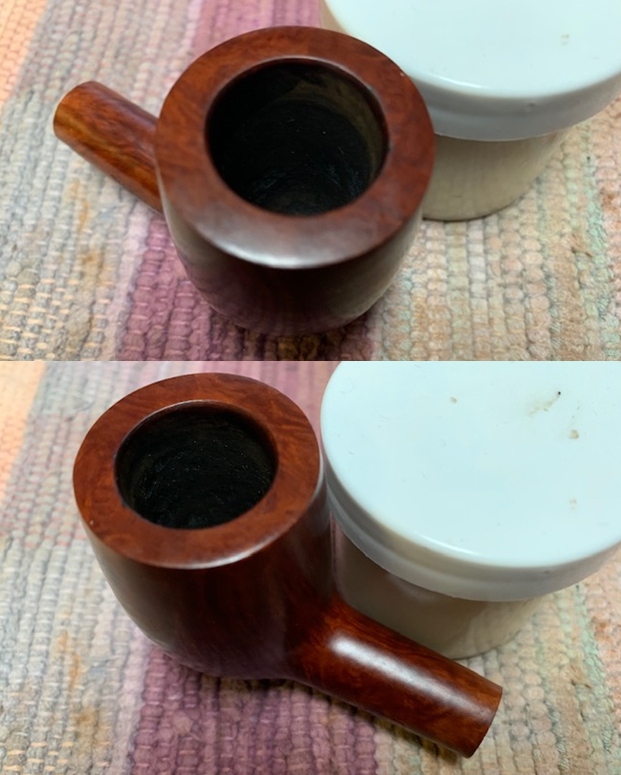
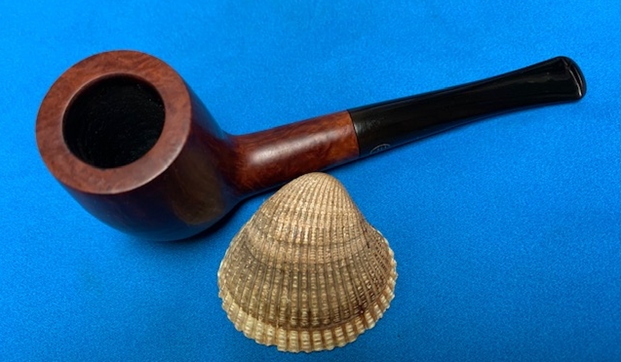
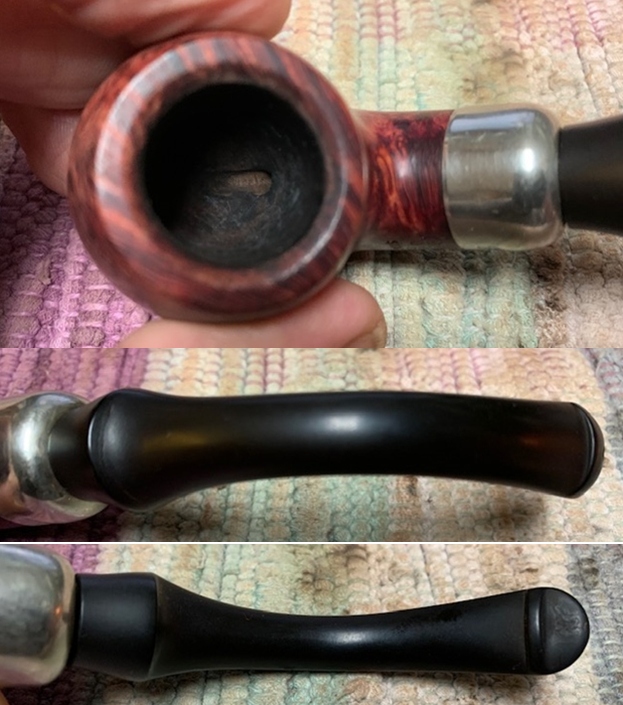
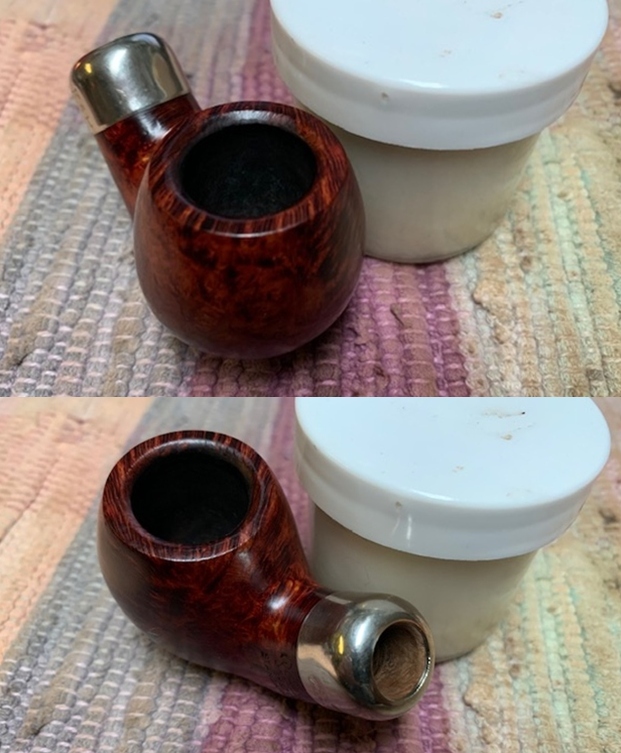
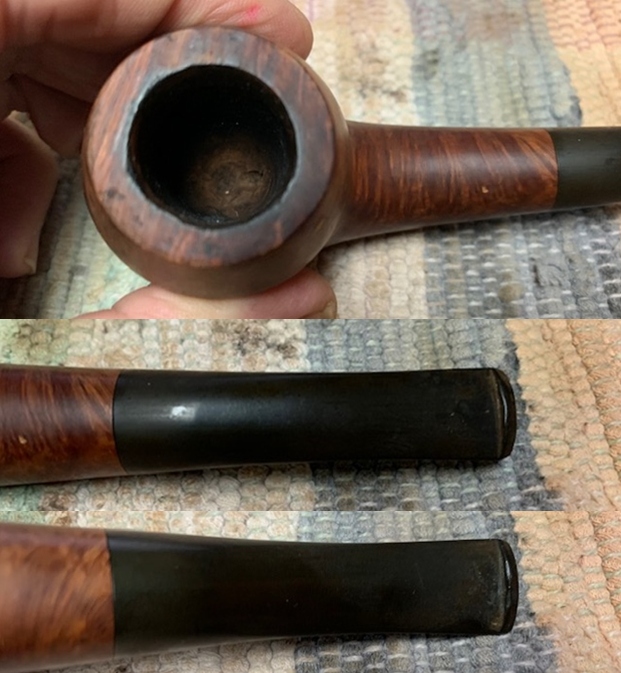
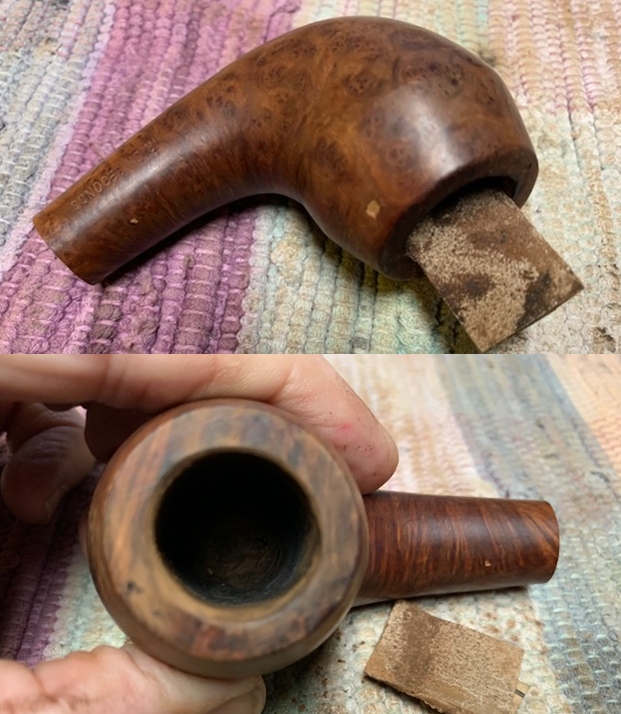
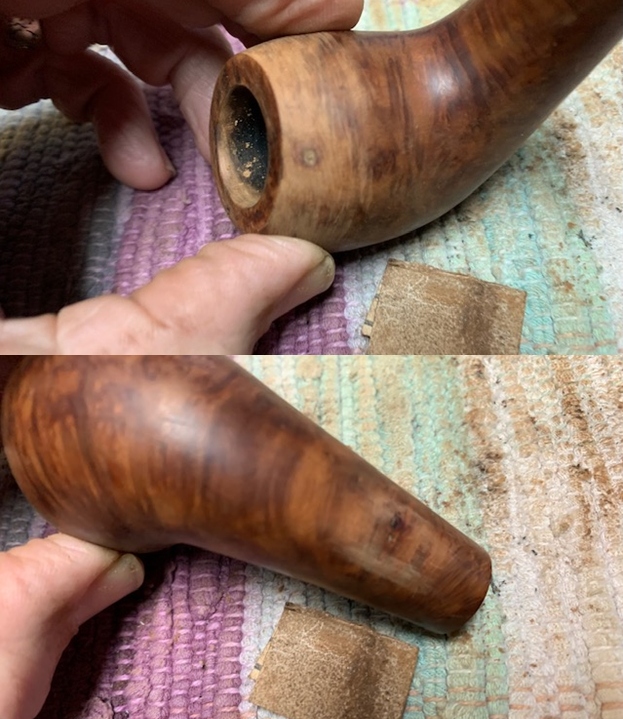
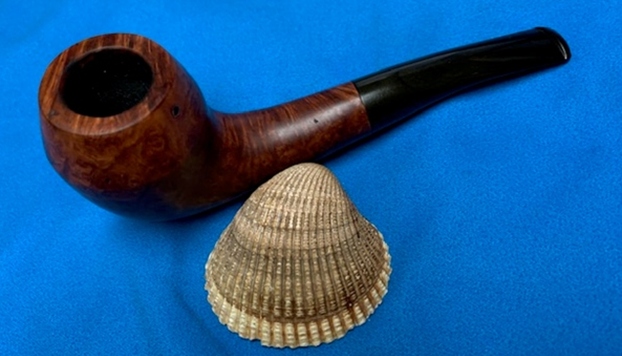
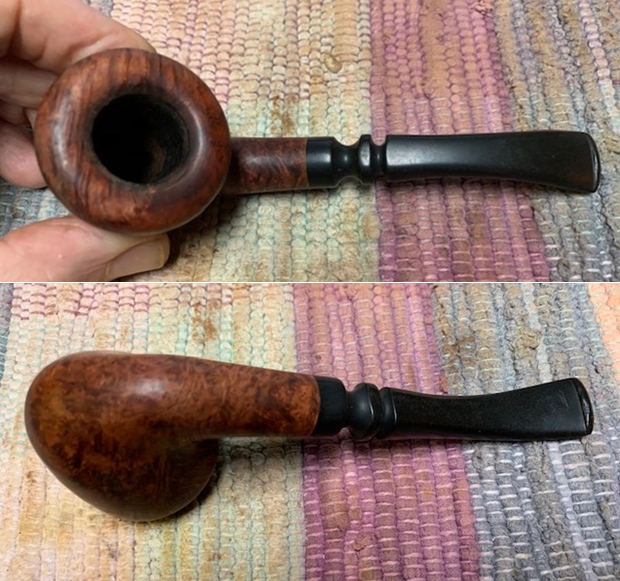
I took photos of the condition of the rim top and stem before I started working. The rim top looks very good and the bowl is spotless. The stem has light oxidation remaining and some tooth chatter and marks on both sides near the button.   
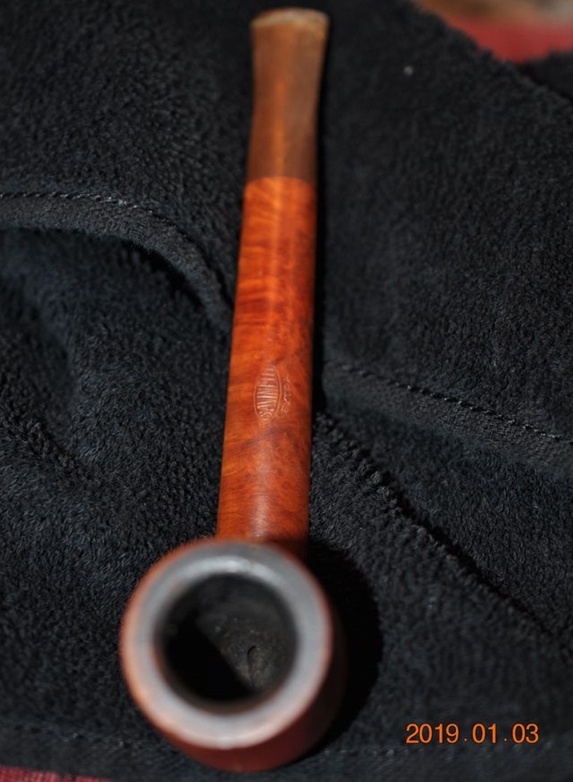
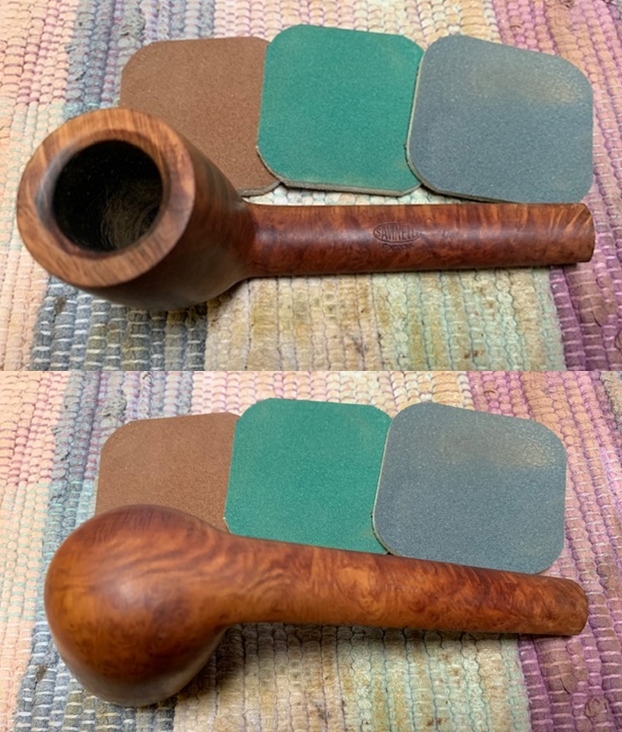
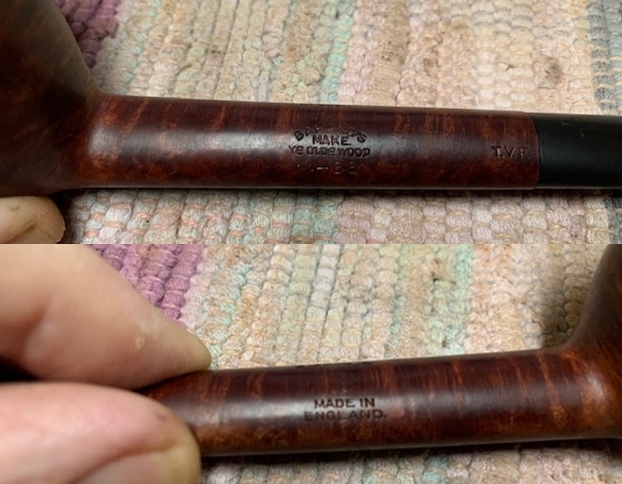
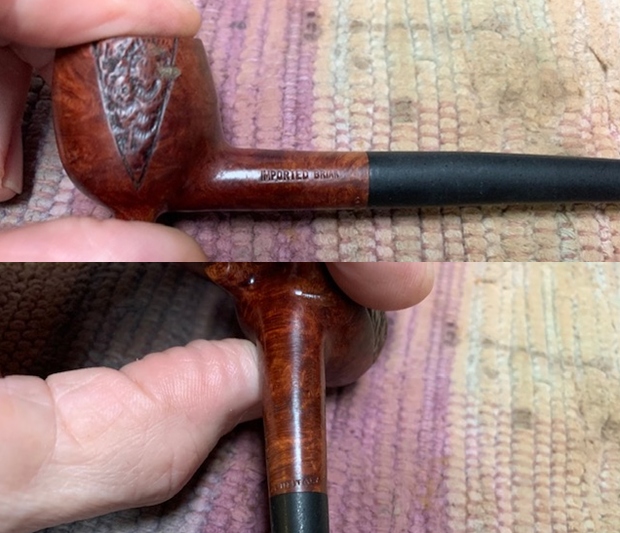
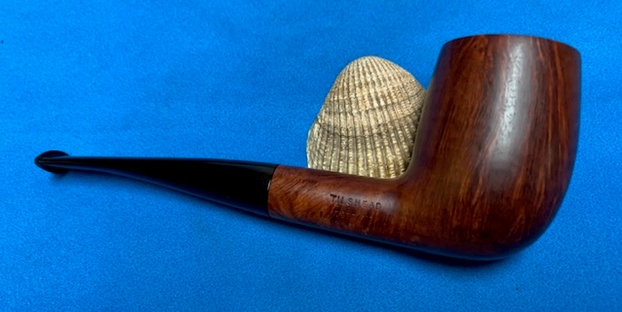
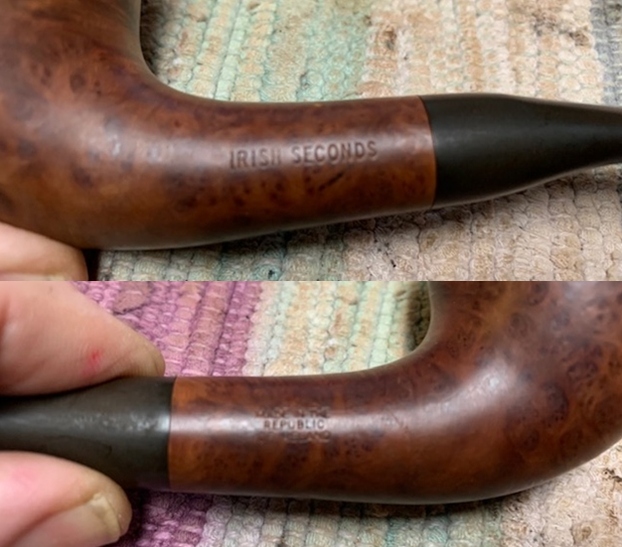
I took a photo of the stamping on the sides of the shank. The stamping was faint but readable. It reads as noted above.   
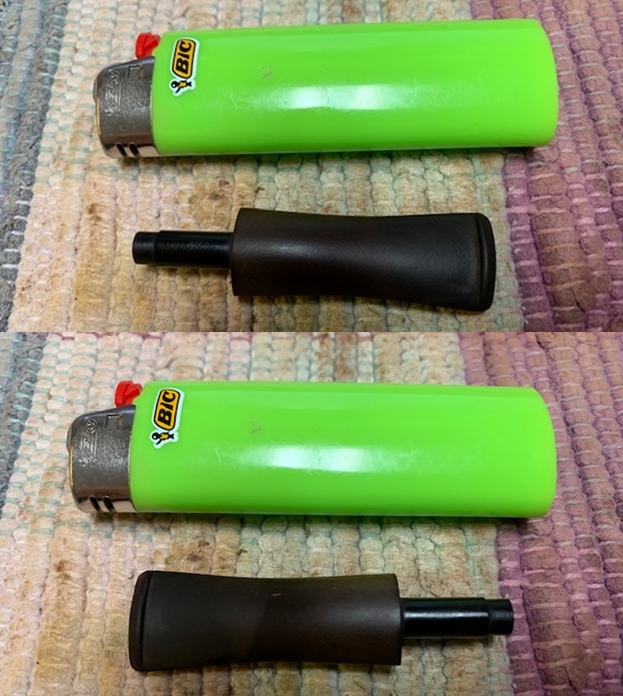
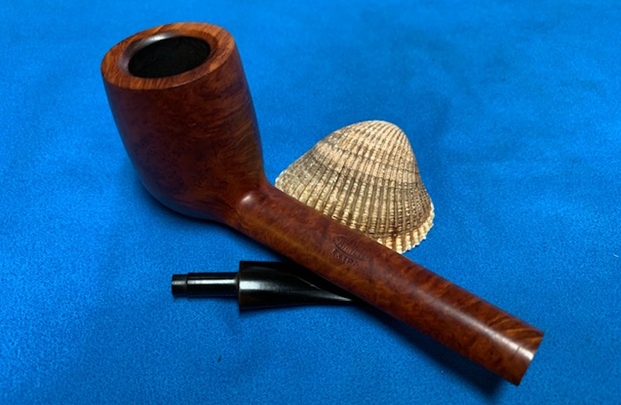
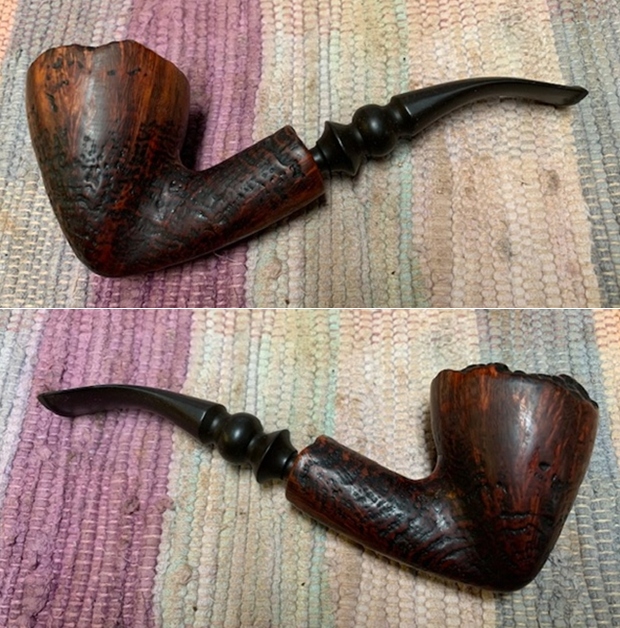
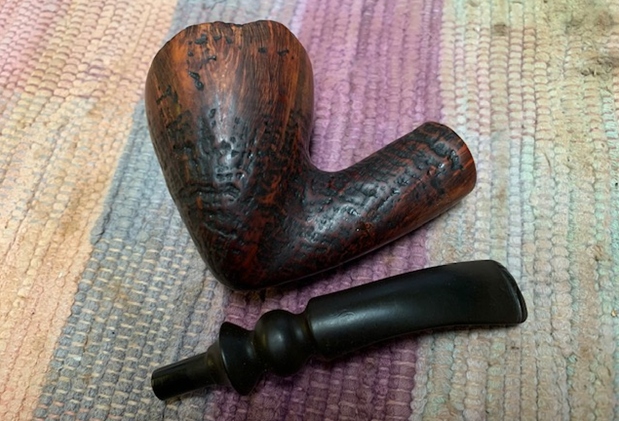
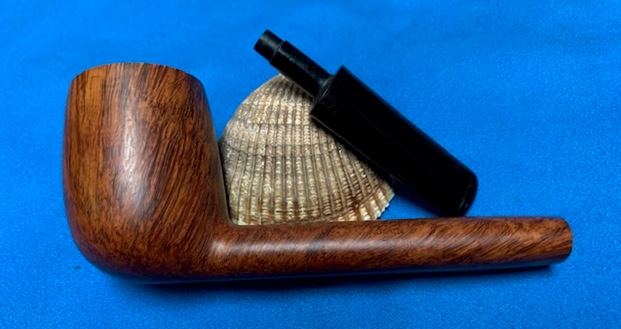
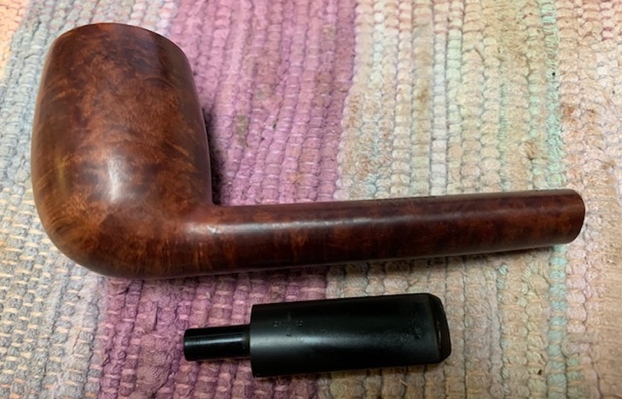
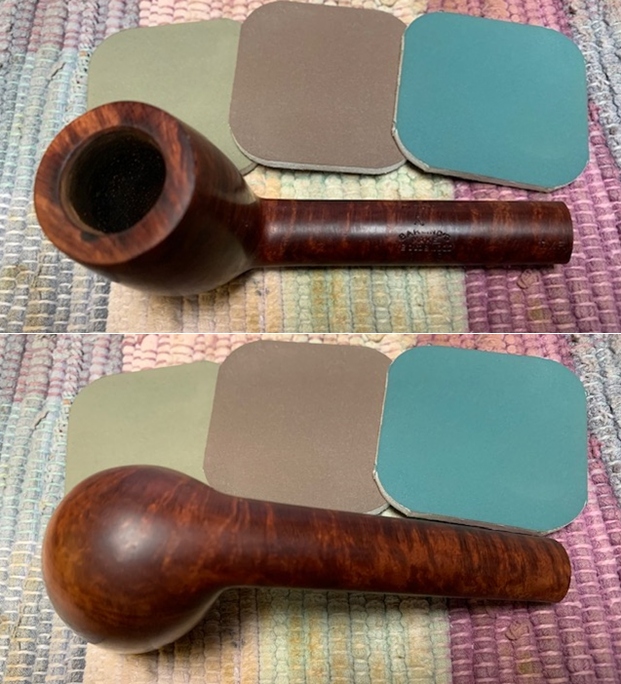
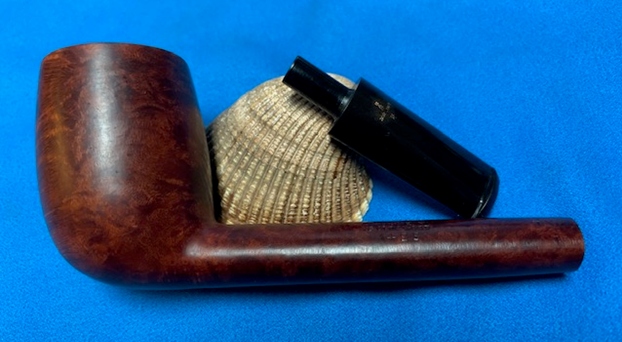
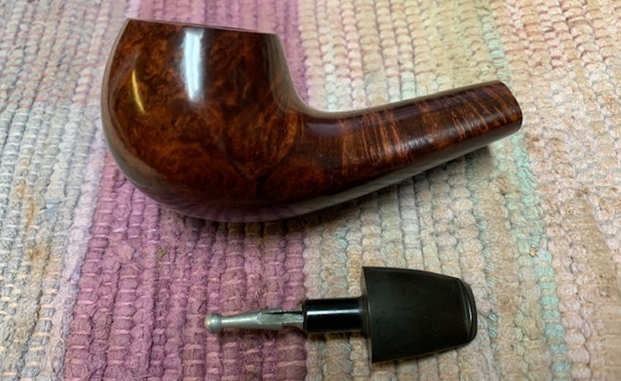
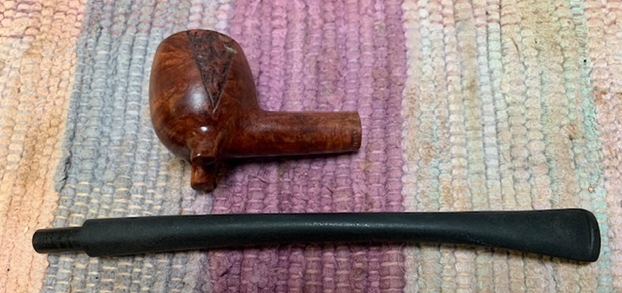
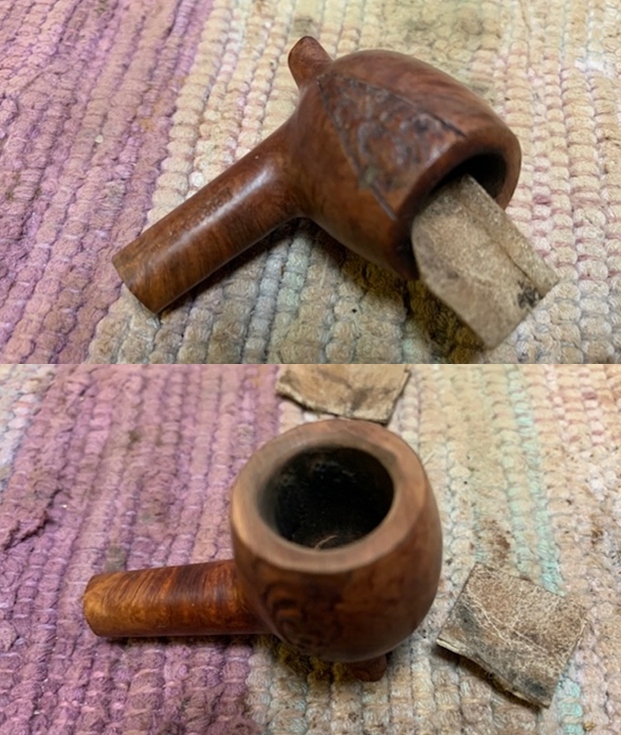
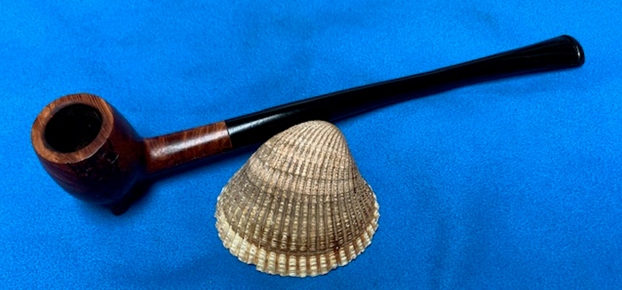
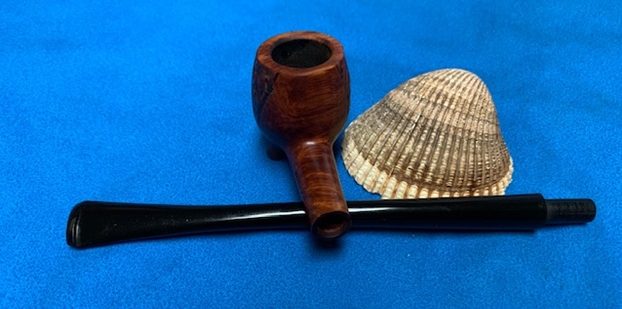
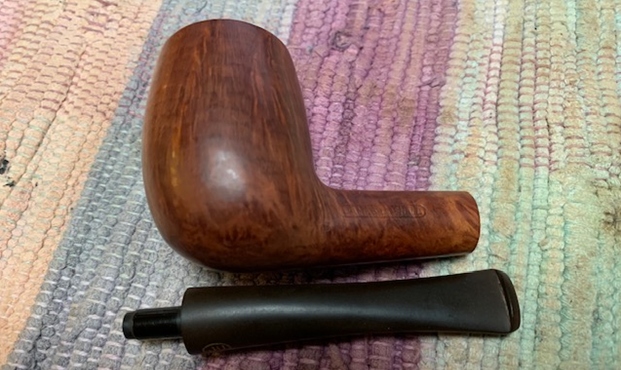
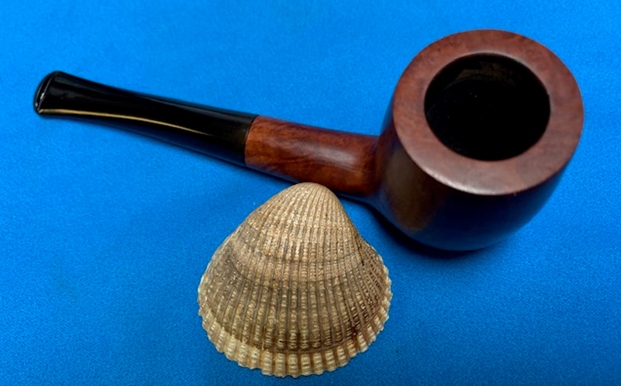
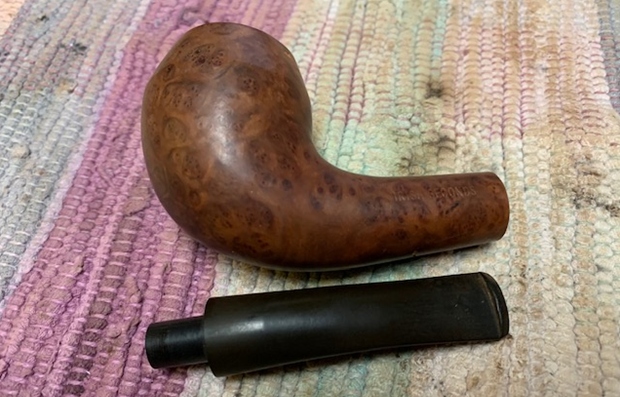
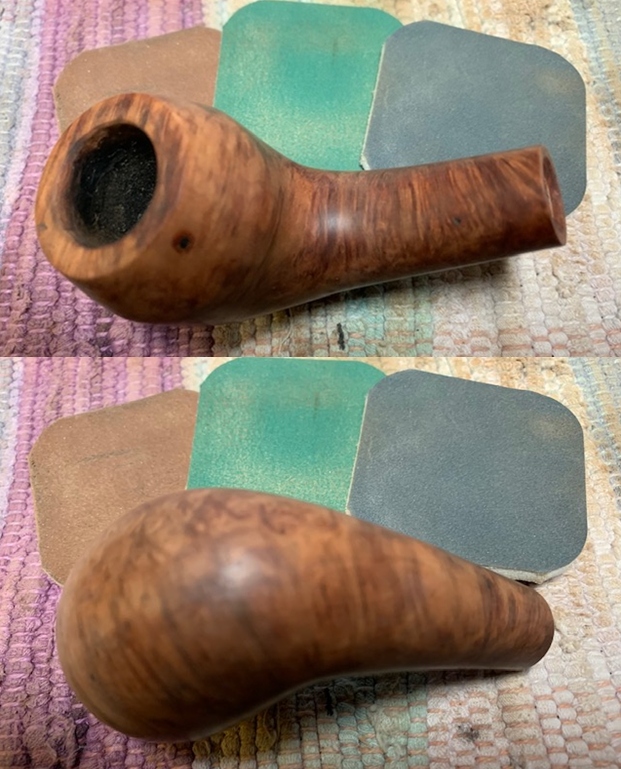
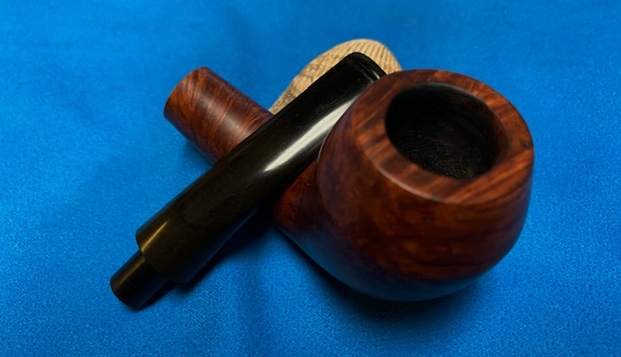
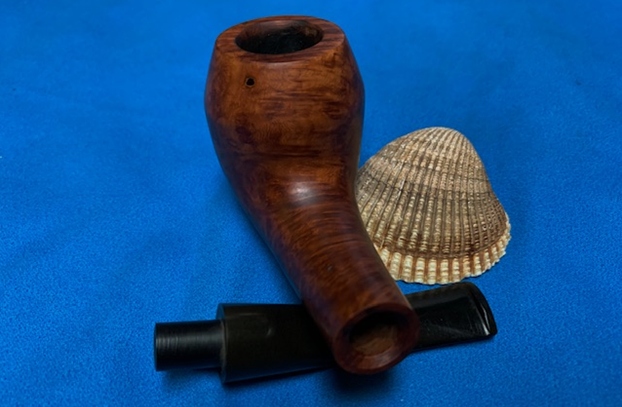
I took the bowl and stem apart and took a photo of the pipe to show the look of the pipe. 
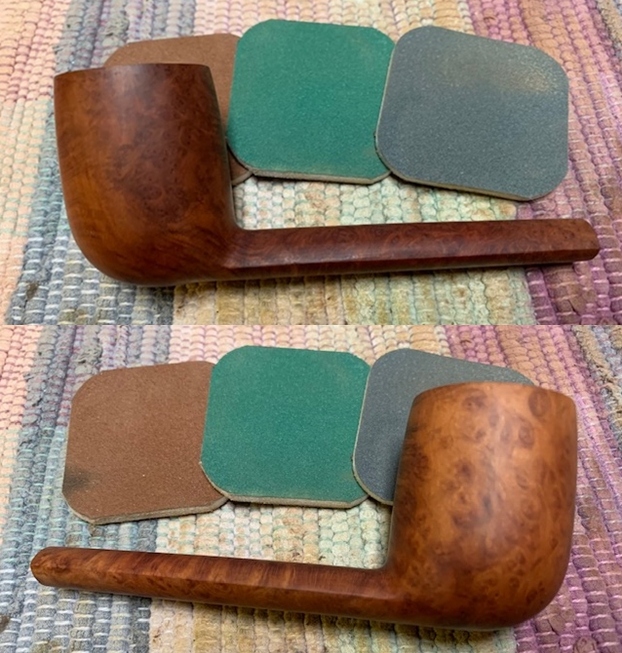
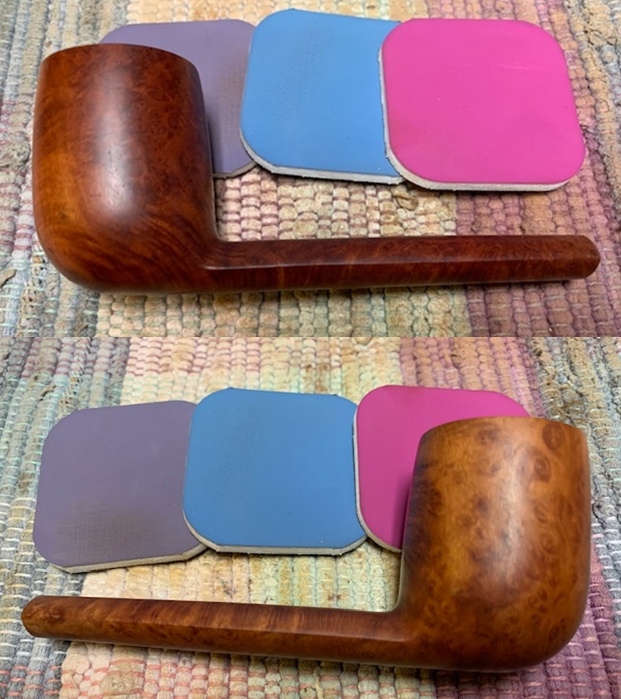
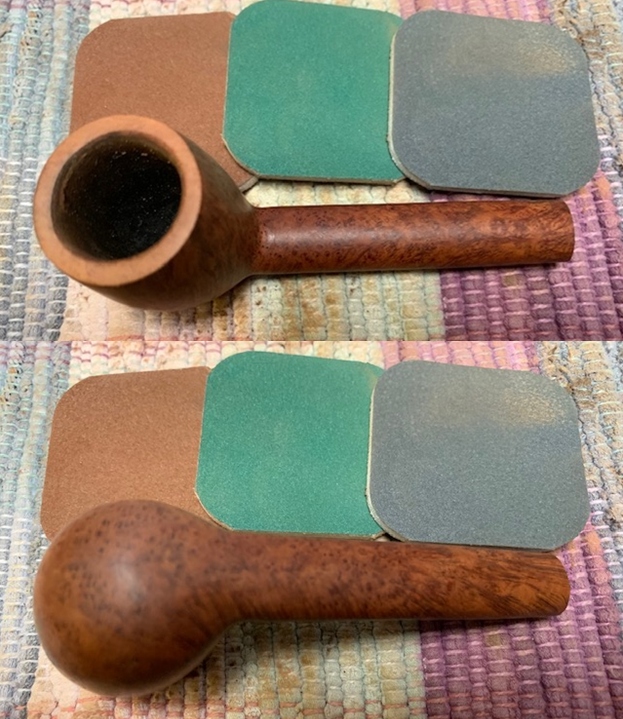
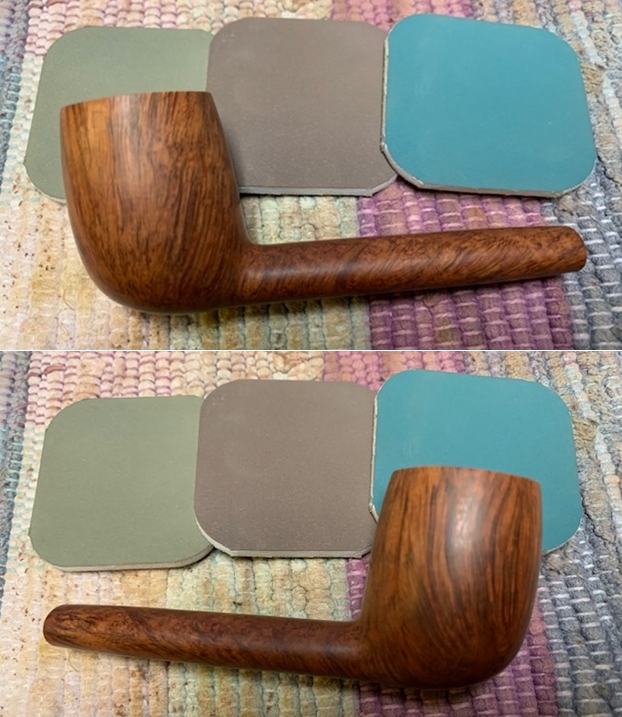
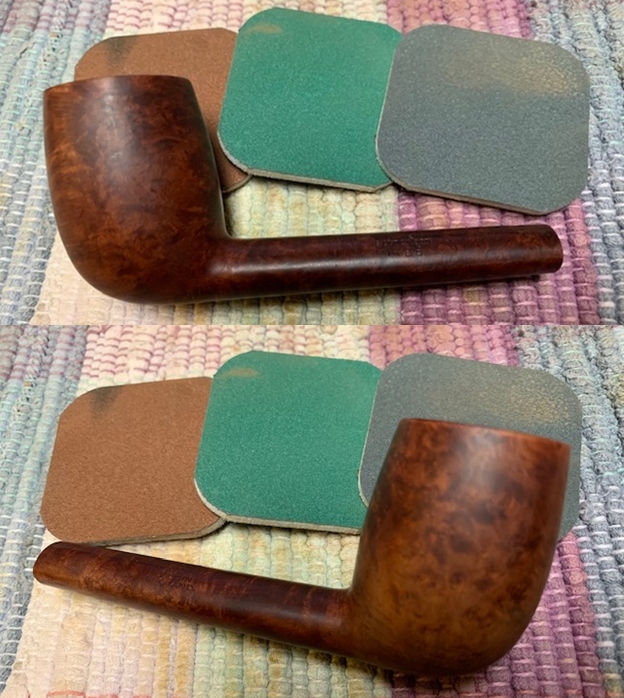
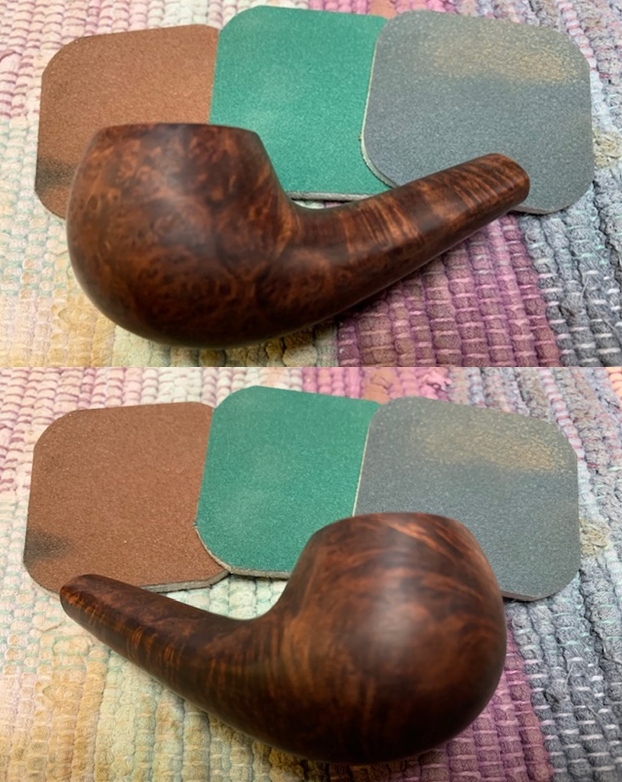
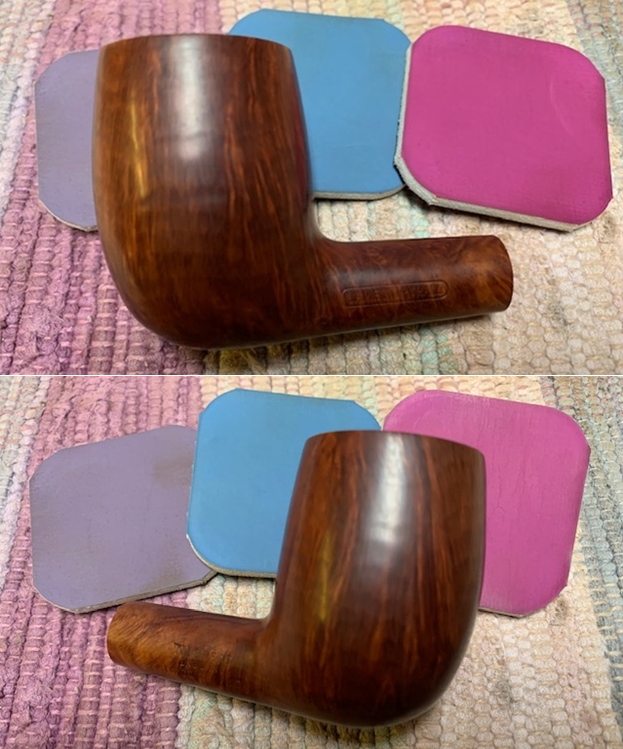
I polished the briar with micromesh sanding pads – dry sanding with 1500-12000 grit pads. I wiped the bowl down after each pad with a damp cloth to remove the sanding dust. 
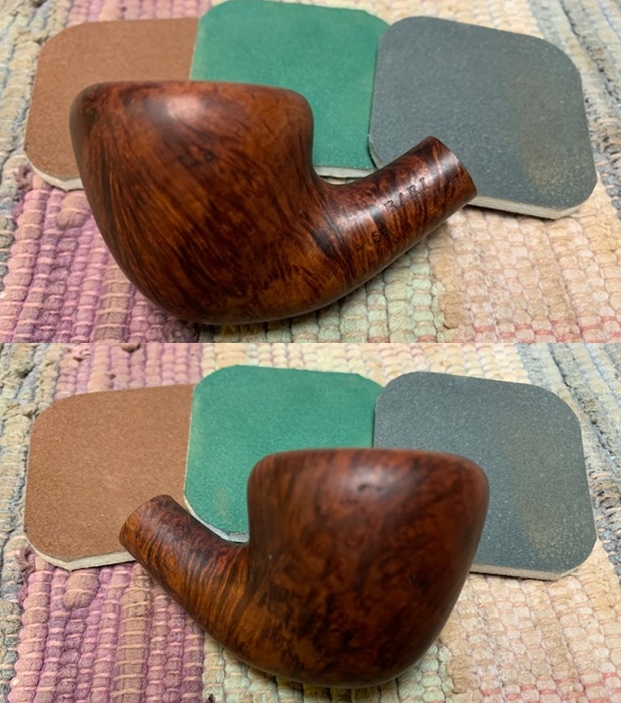
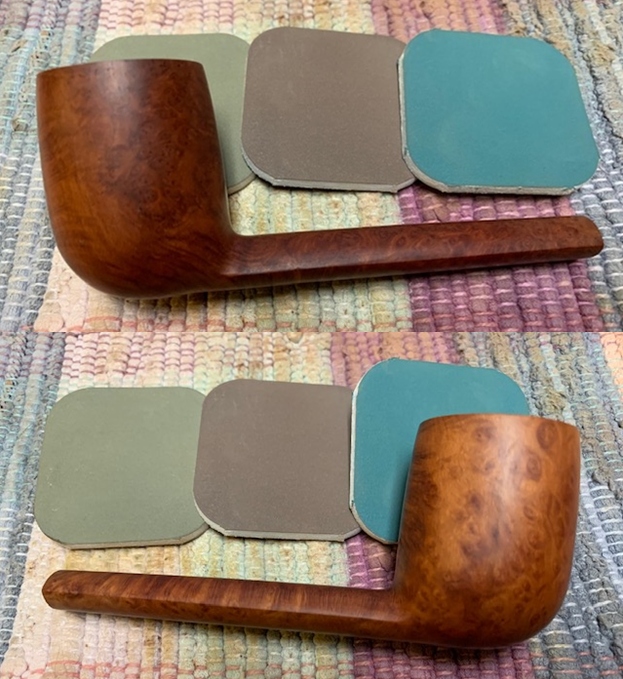
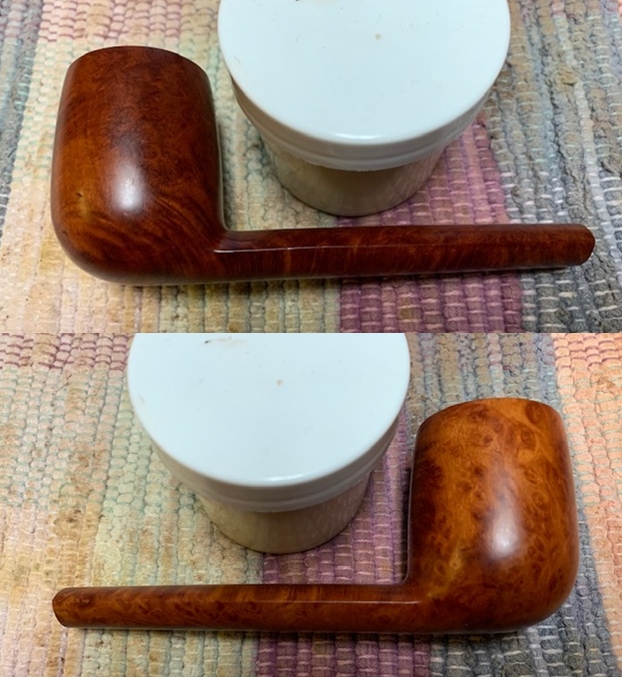
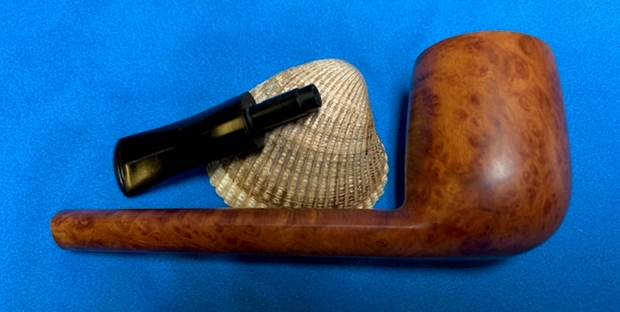
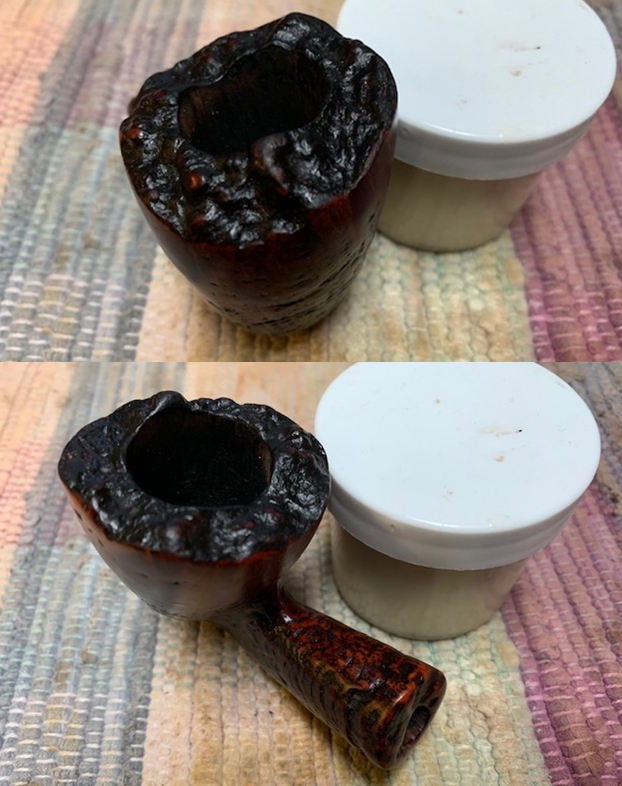
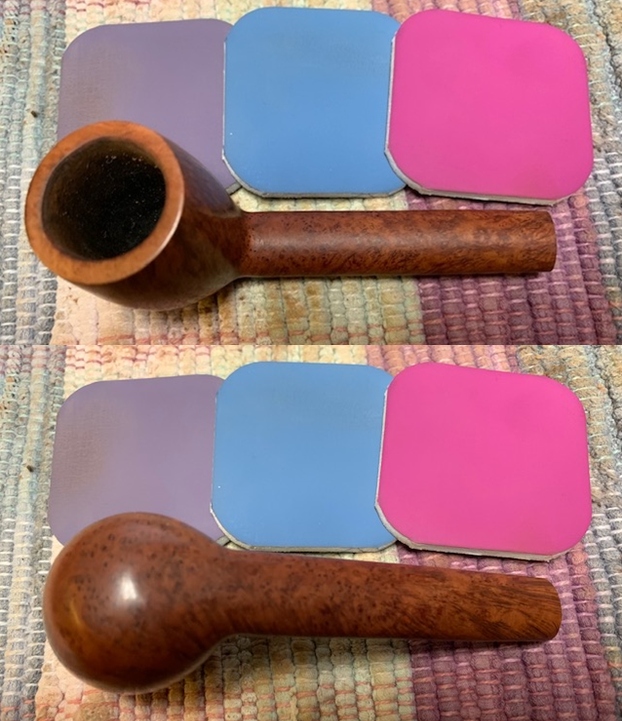
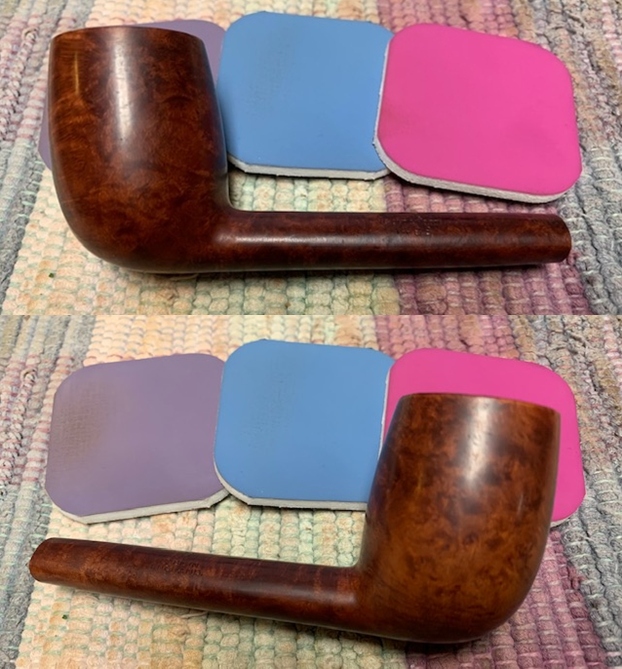
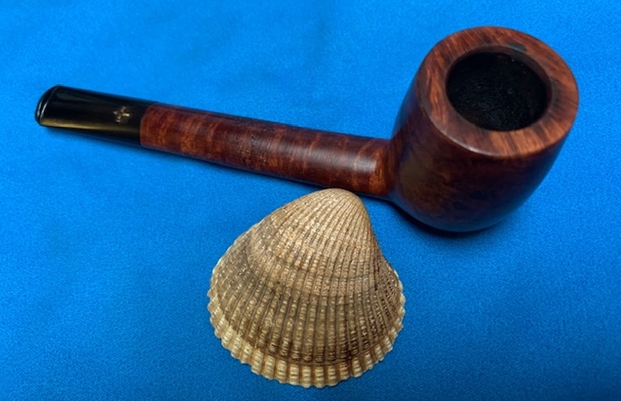
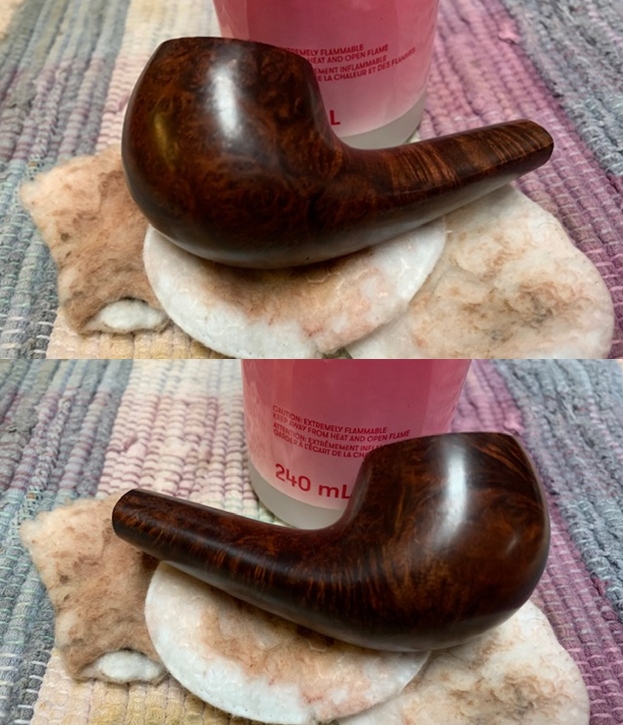
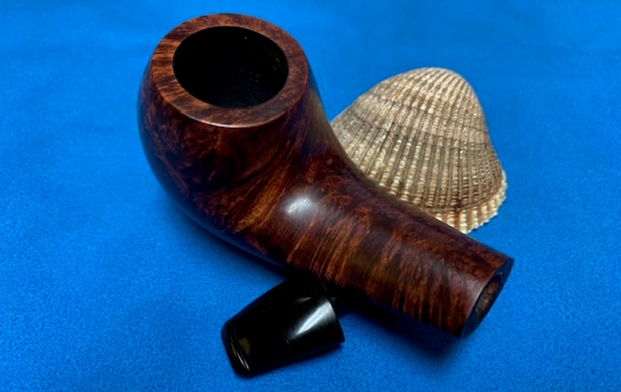
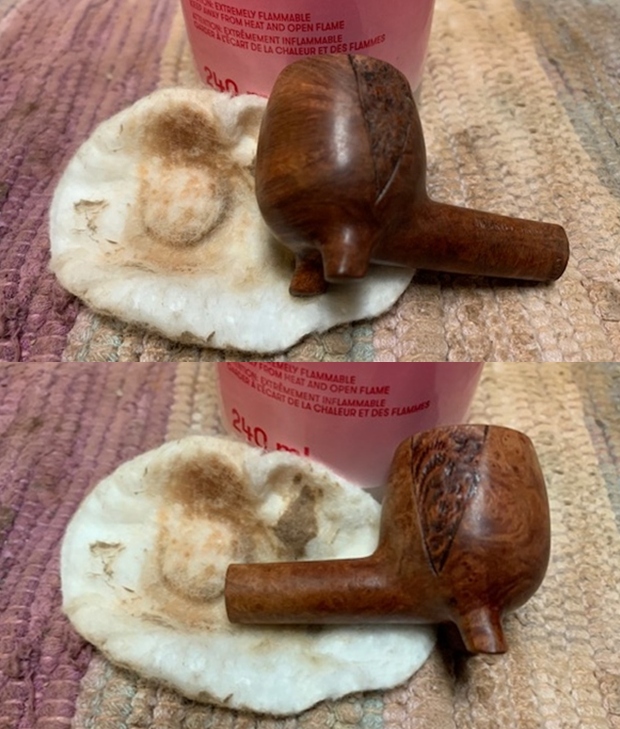
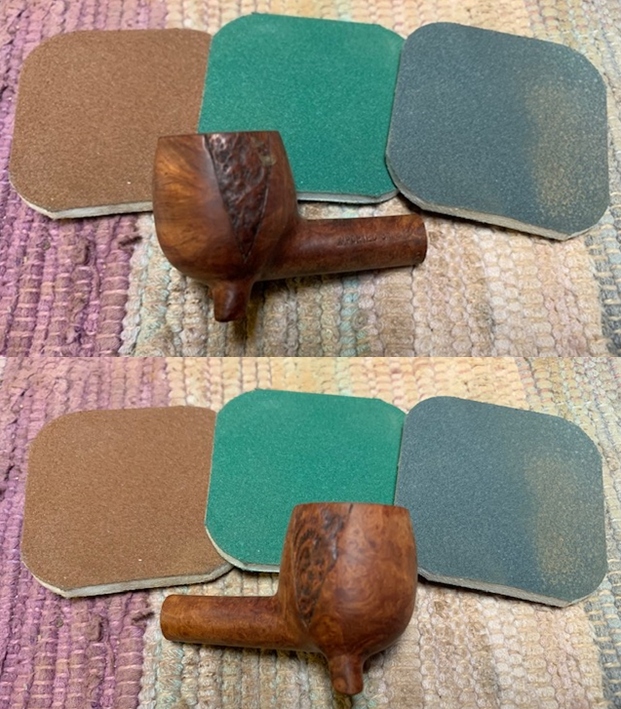
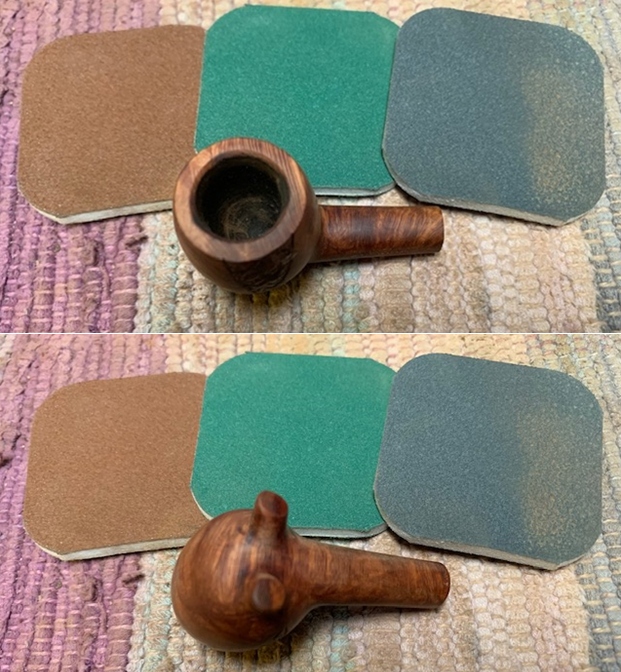
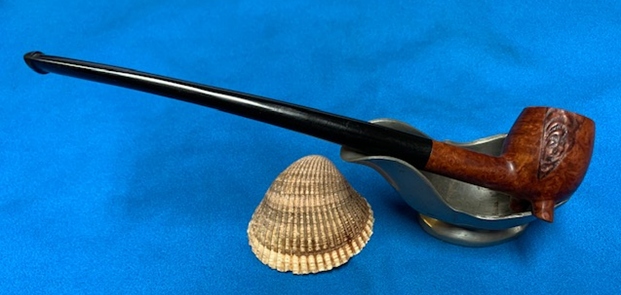
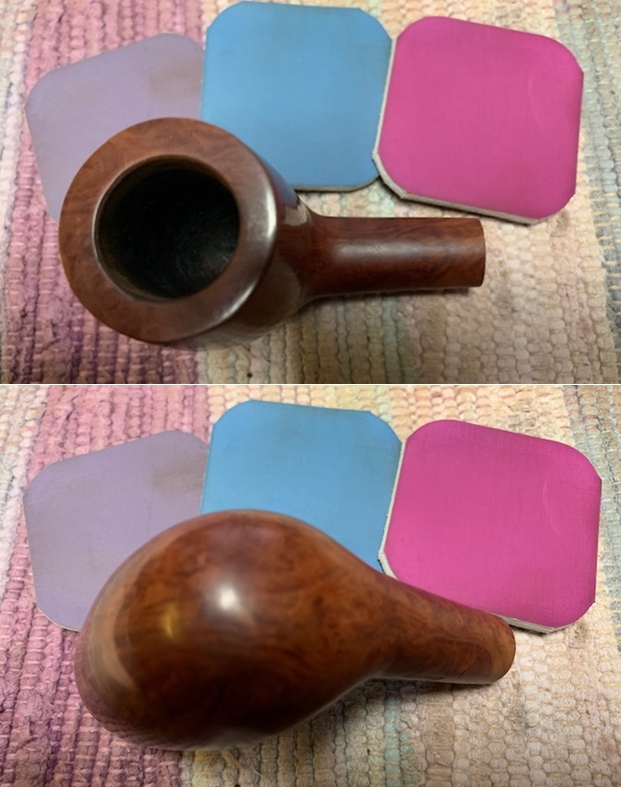
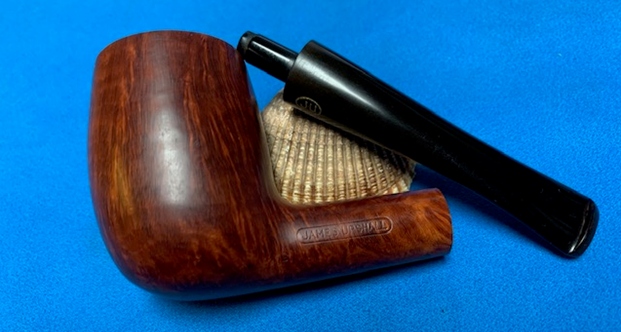
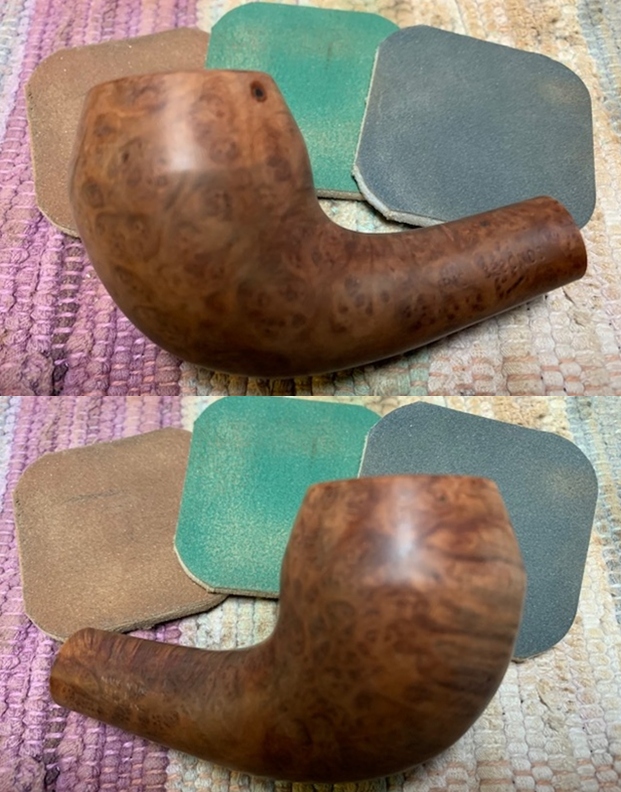
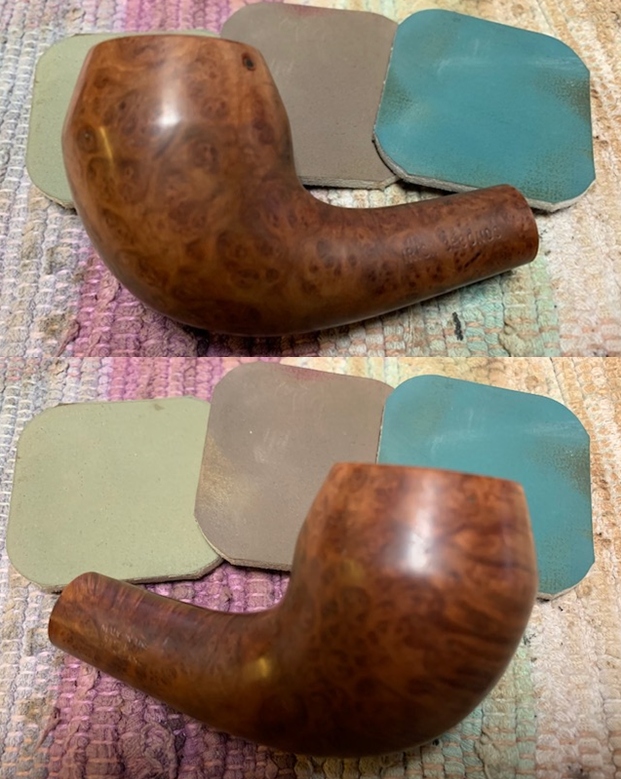
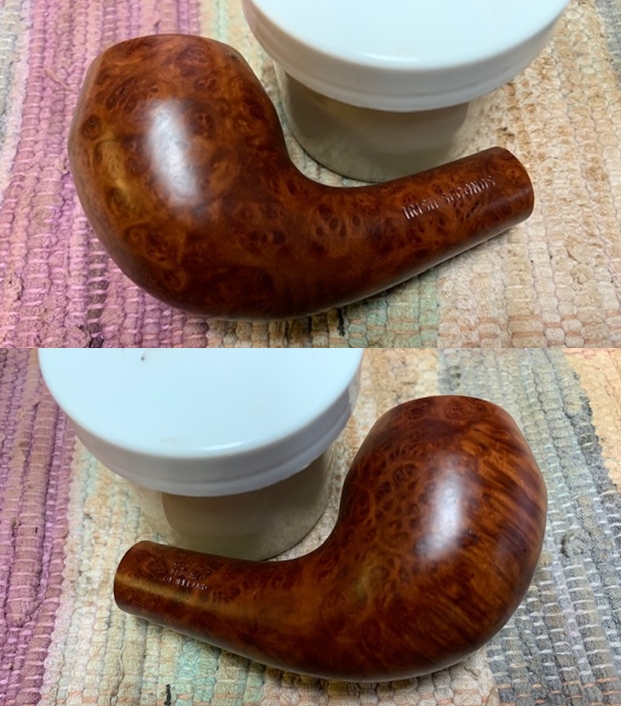
I worked some Before & After Restoration Balm into the finish of the bowl, rim top and shank with my fingertips to clean, enliven and protect it. I find that the balm really makes the briar come alive again. The contrasts in the layers of stain really made the grain stand out. I let the balm sit for 15 minutes and then buffed with a cotton cloth to raise the shine. The bowl really looks good at this point. 
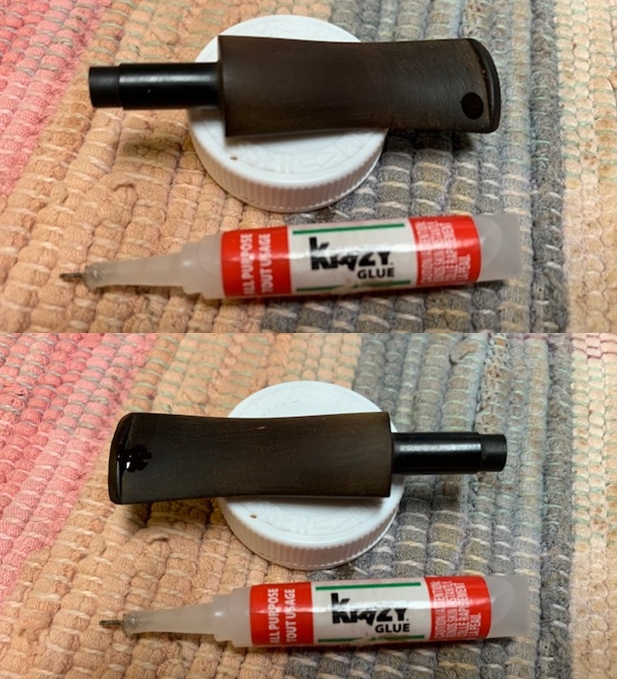
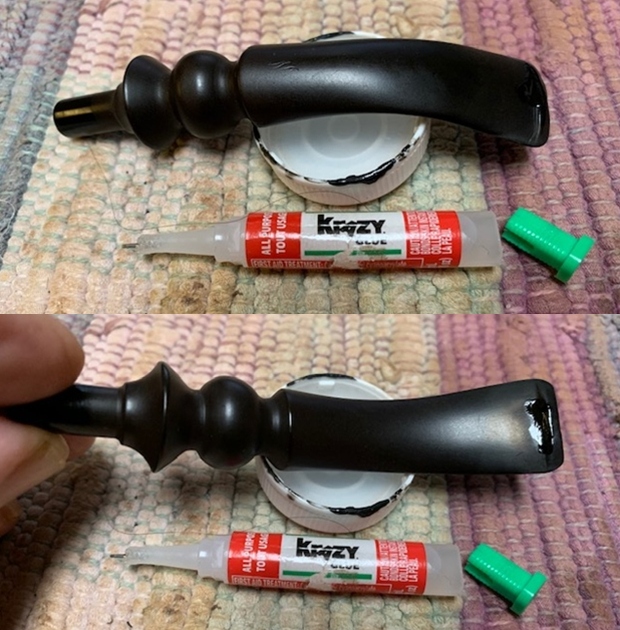
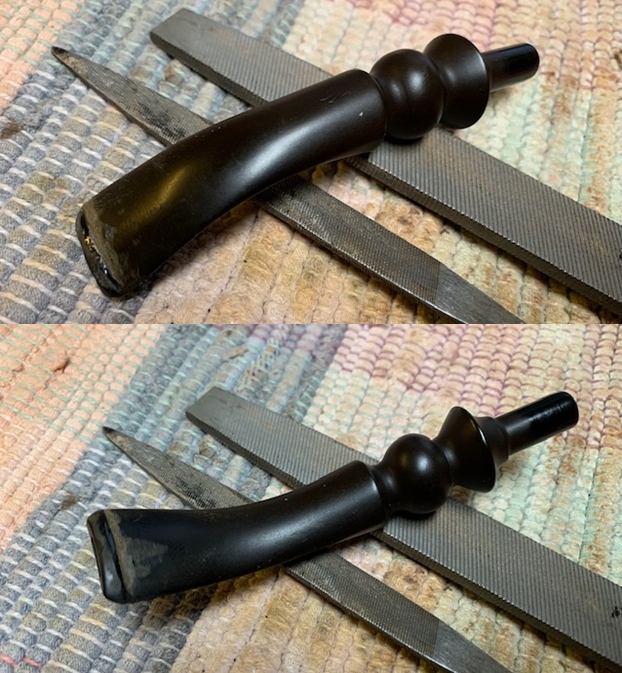
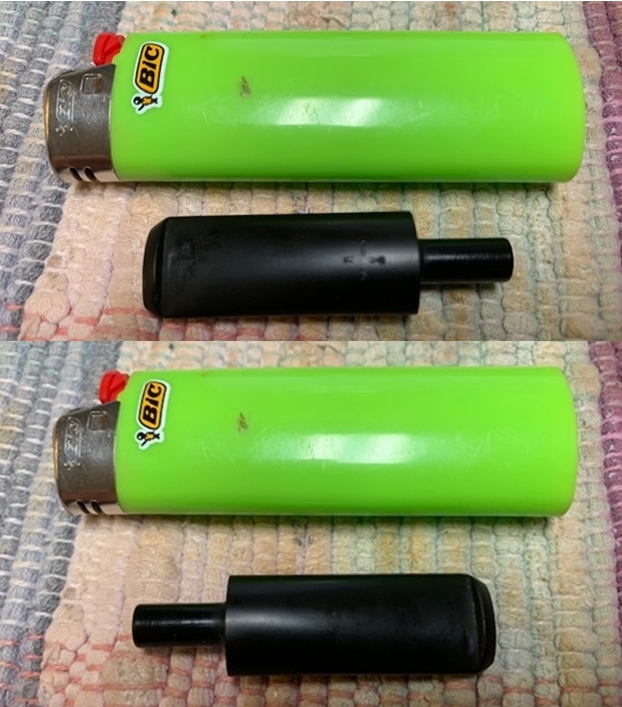
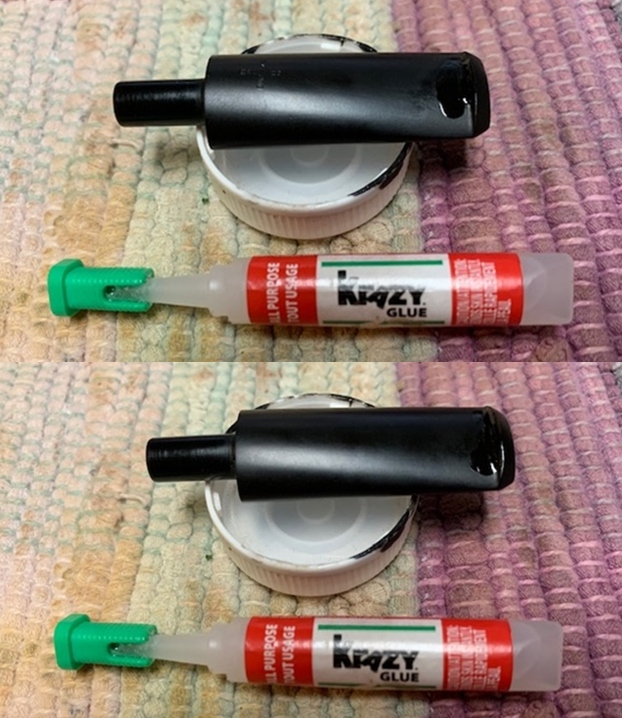
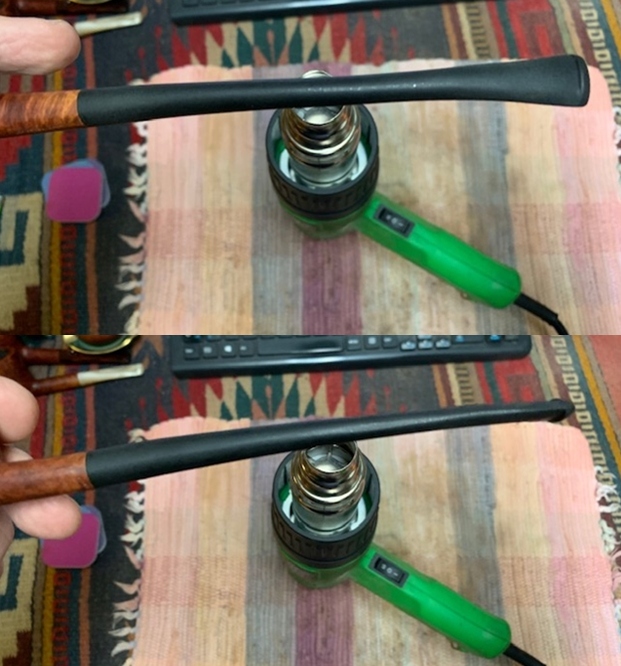
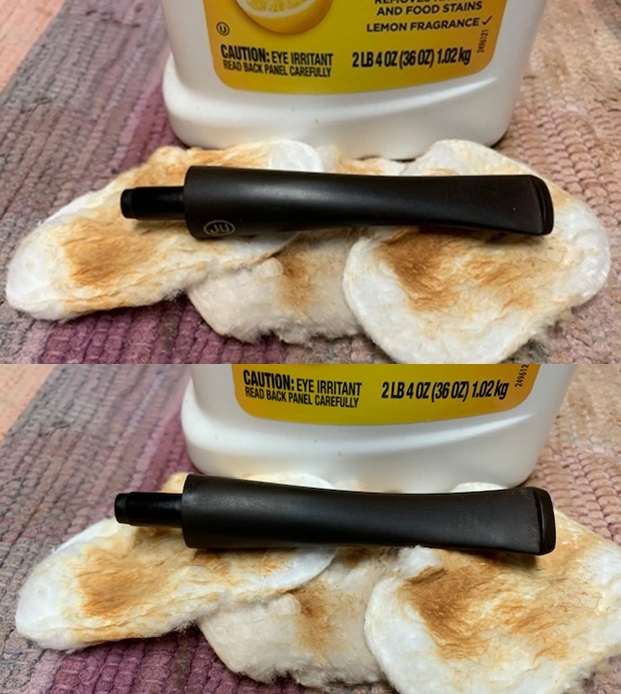
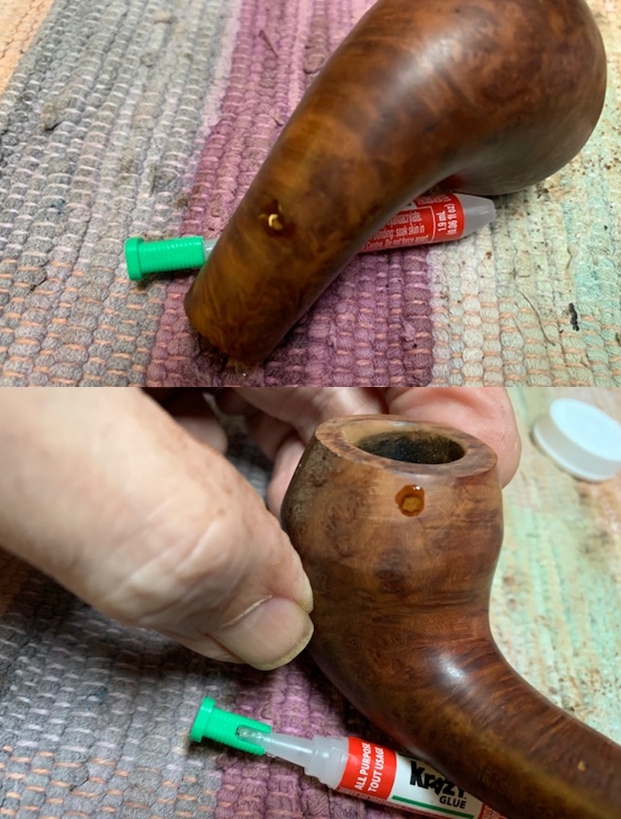
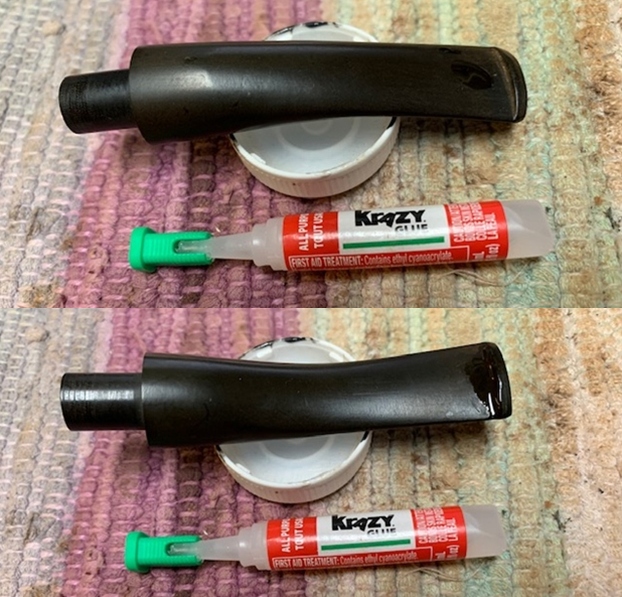
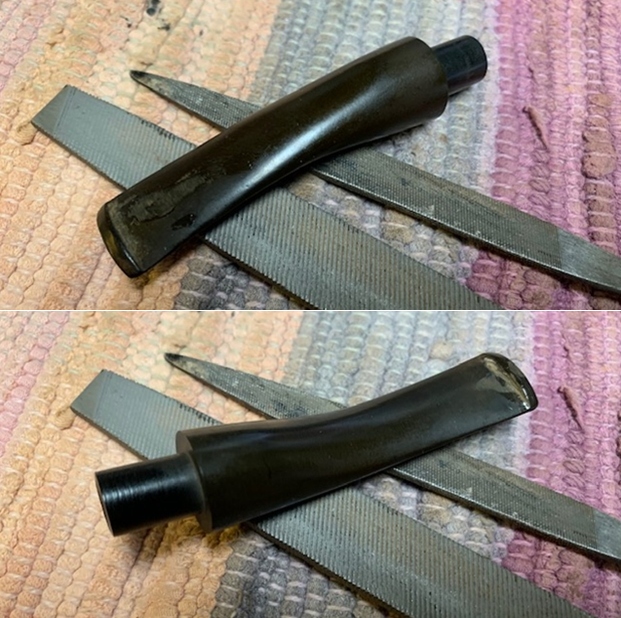
I set aside the bowl and turned my attention to the stem. I “painted” the tooth marks on the surface of the stem and was able to lift them significantly. I filled in the remaining spots with super glue. Once the repairs cured I flattened them out with a file to bend them into the surface. I further smoothed them out with 220 sandpaper to blend and started polishing with 400 grit wet dry sandpaper. 
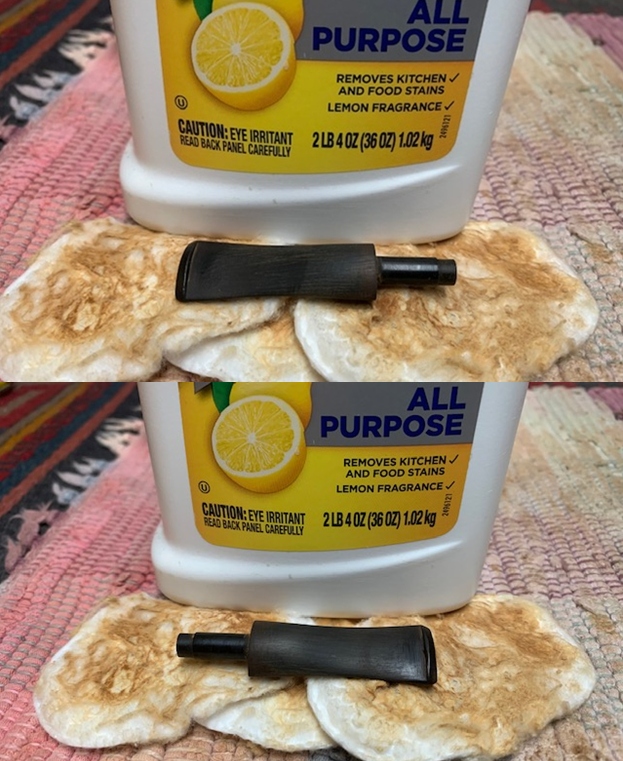
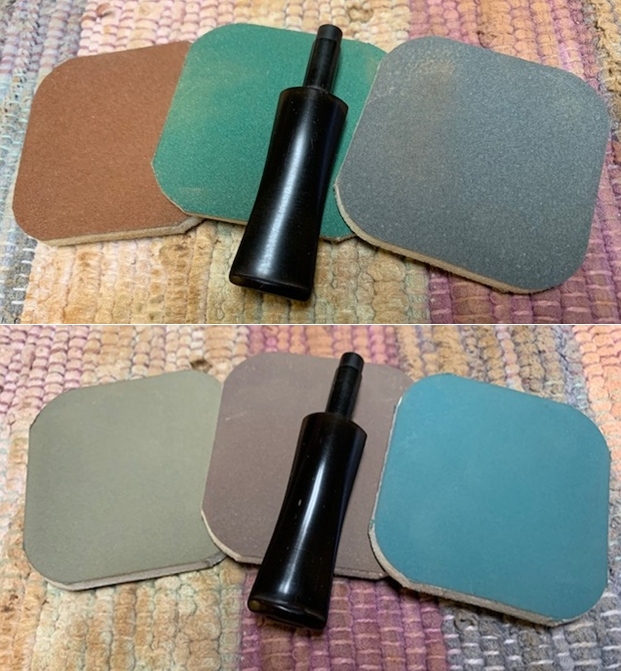
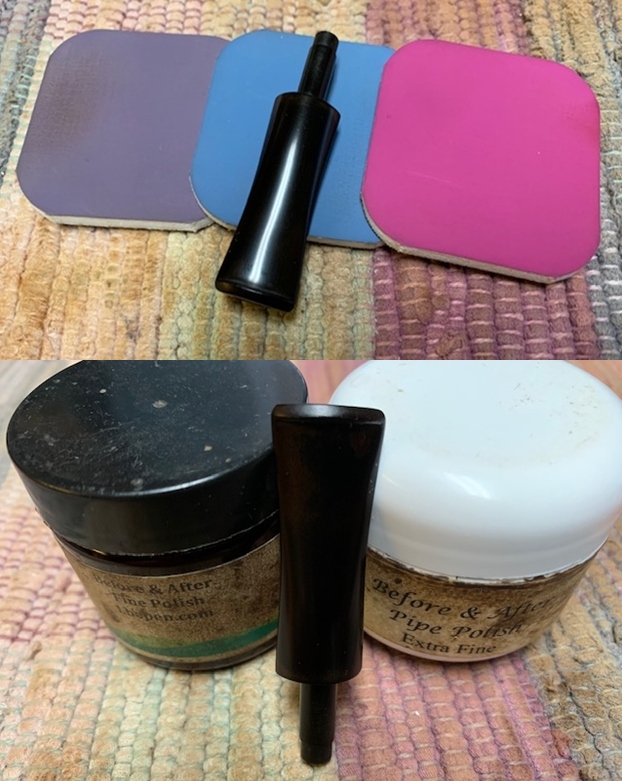
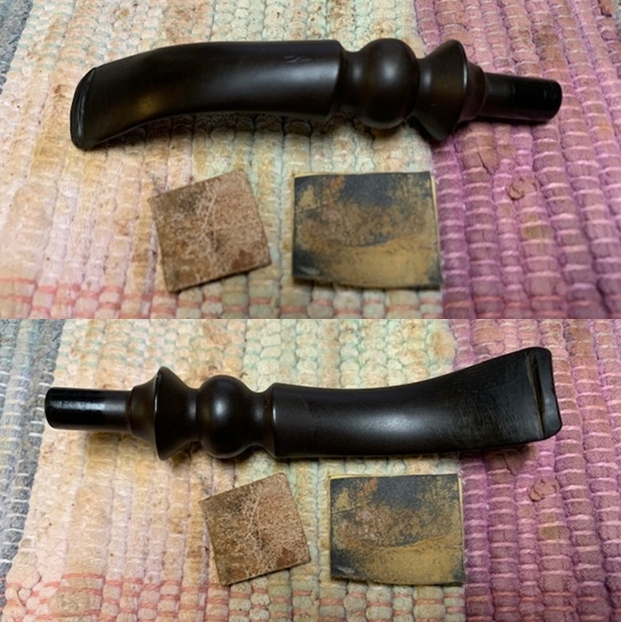
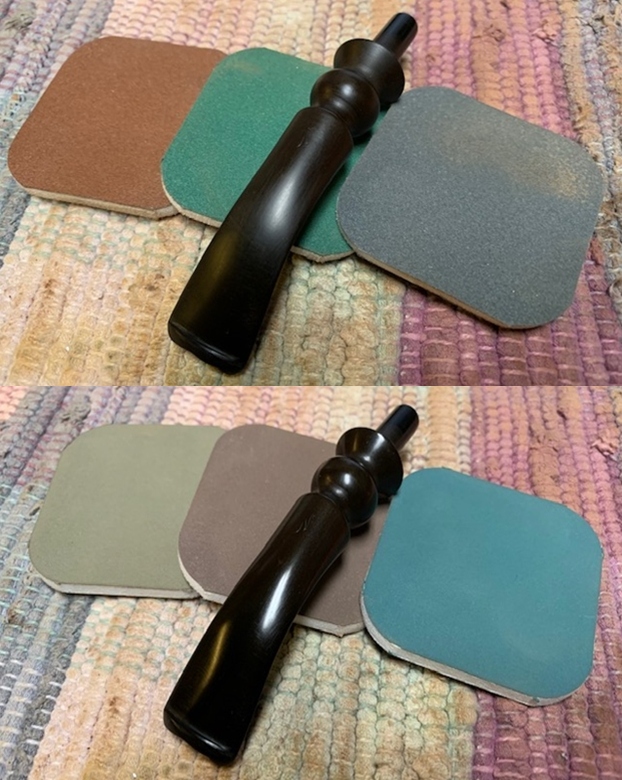
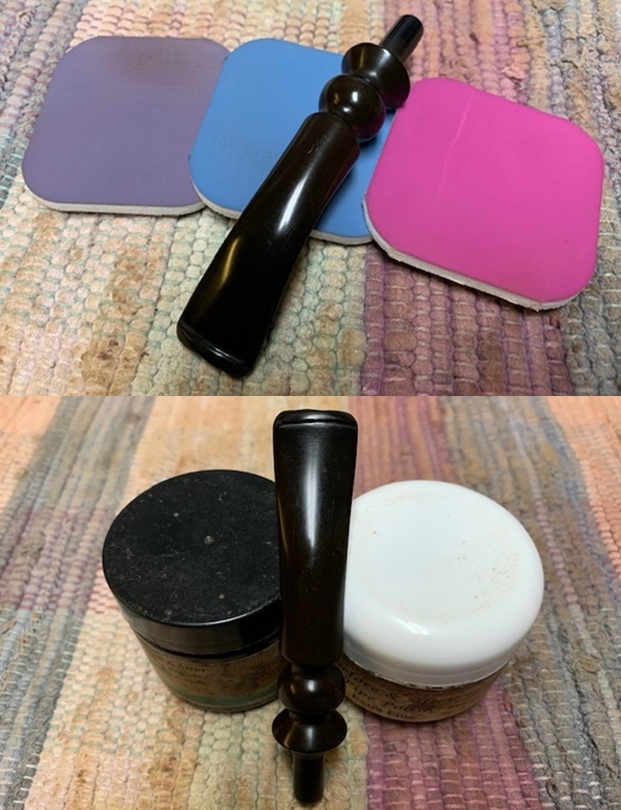
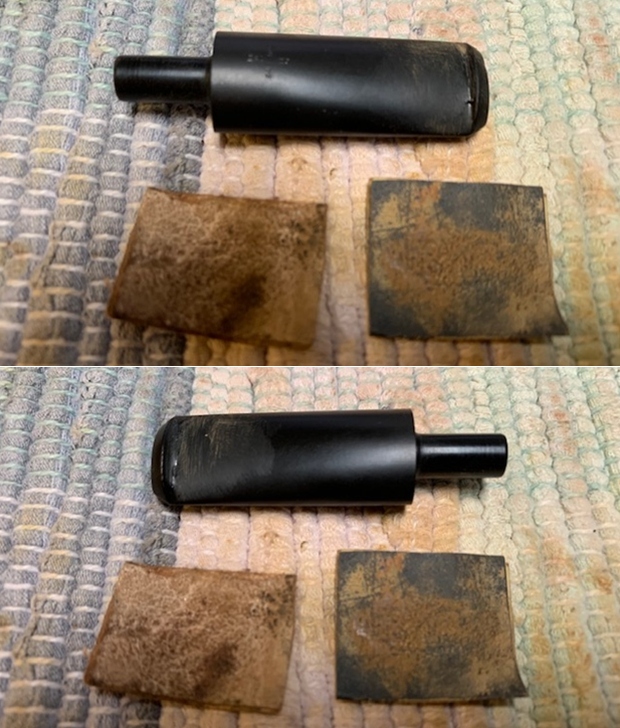
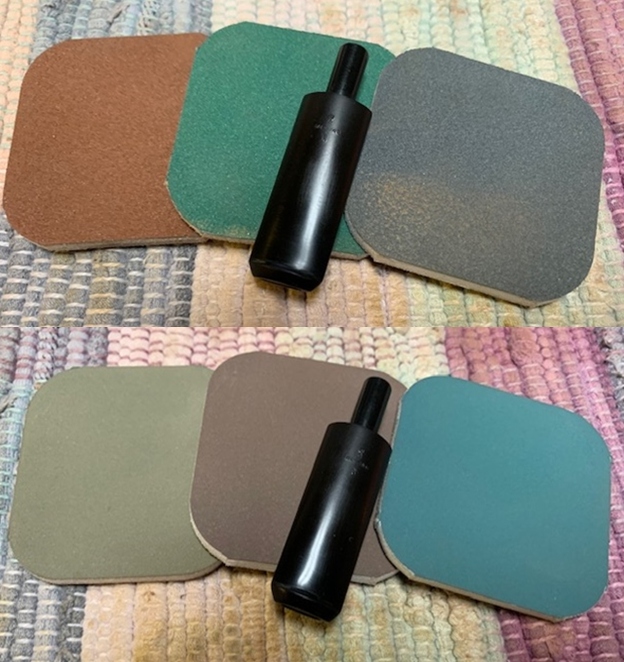
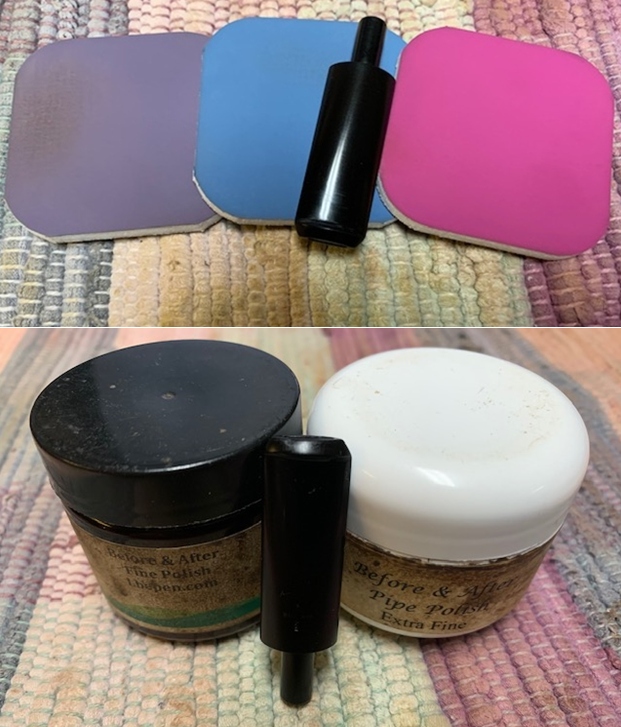
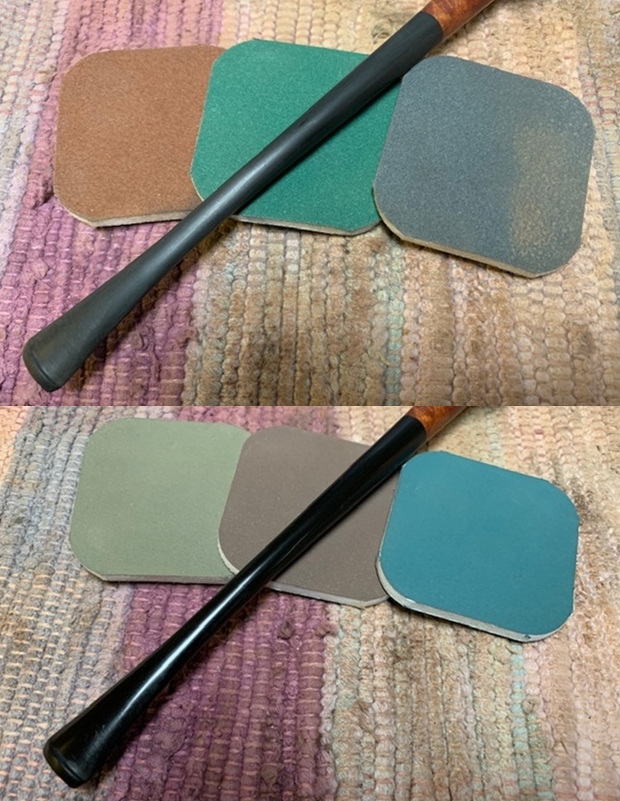
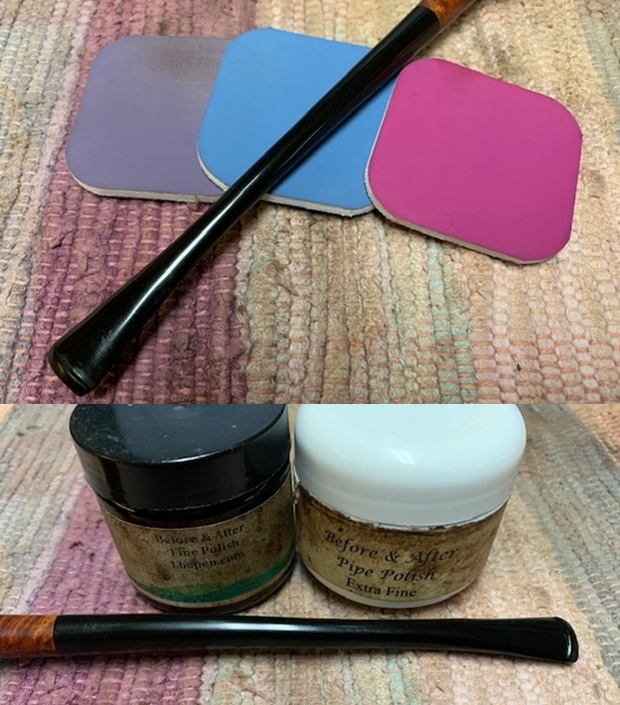
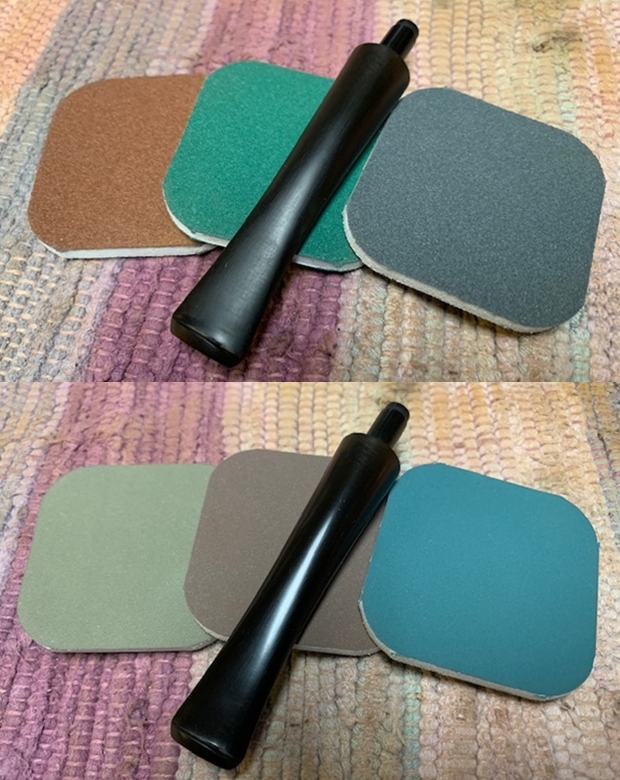
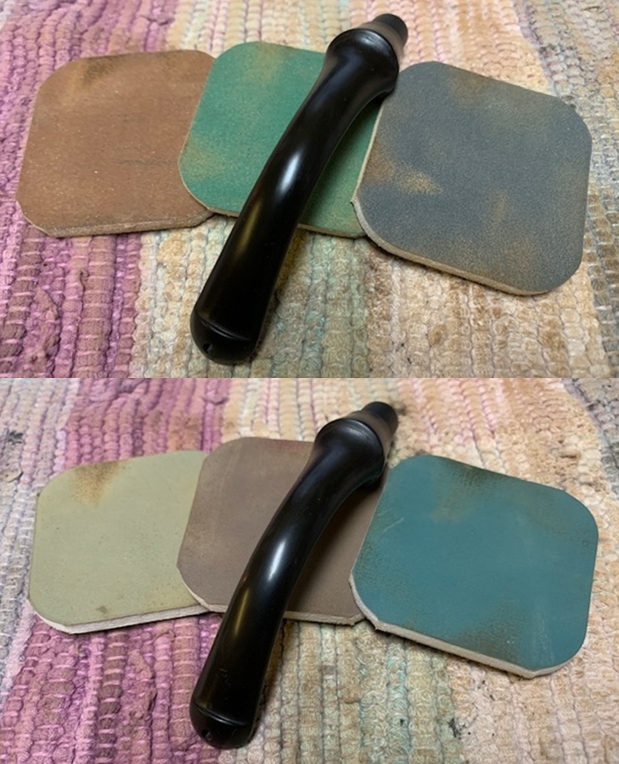
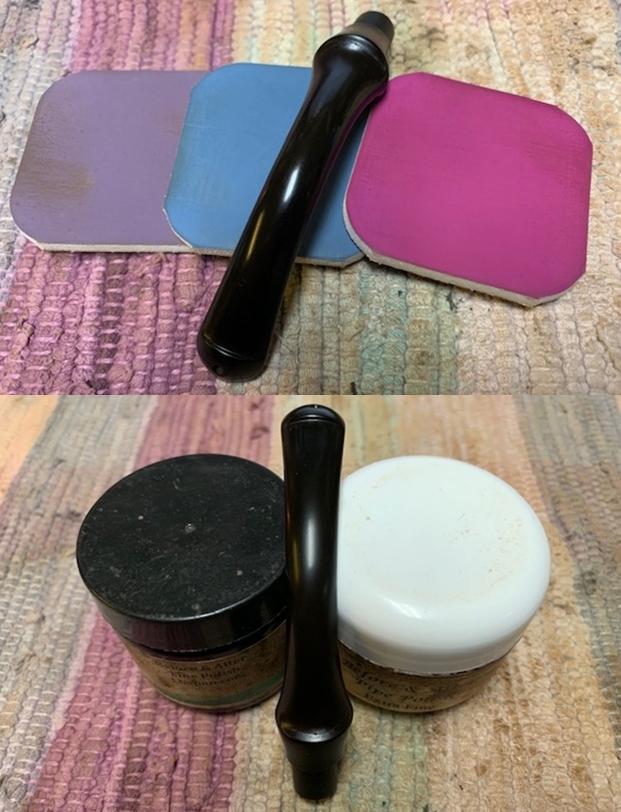
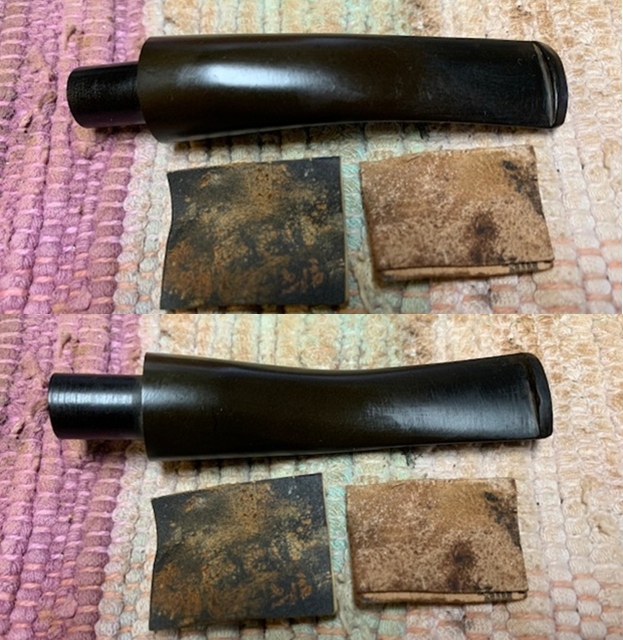
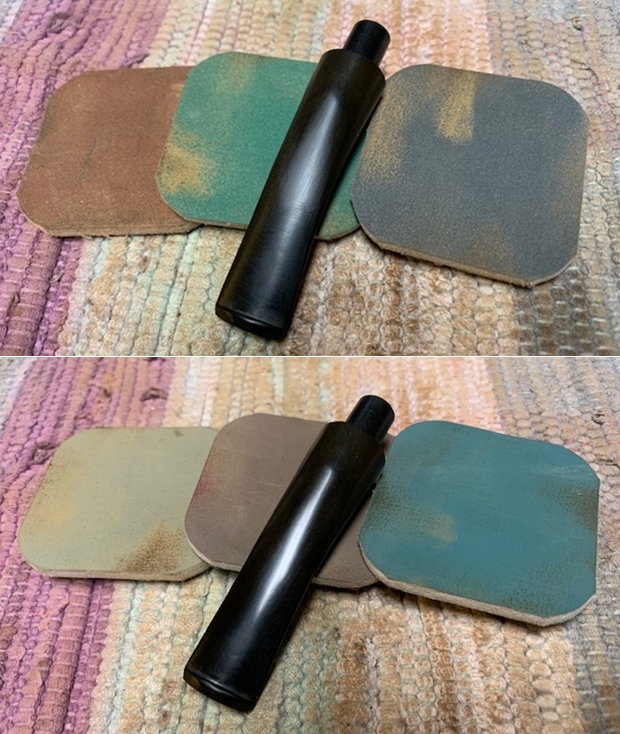
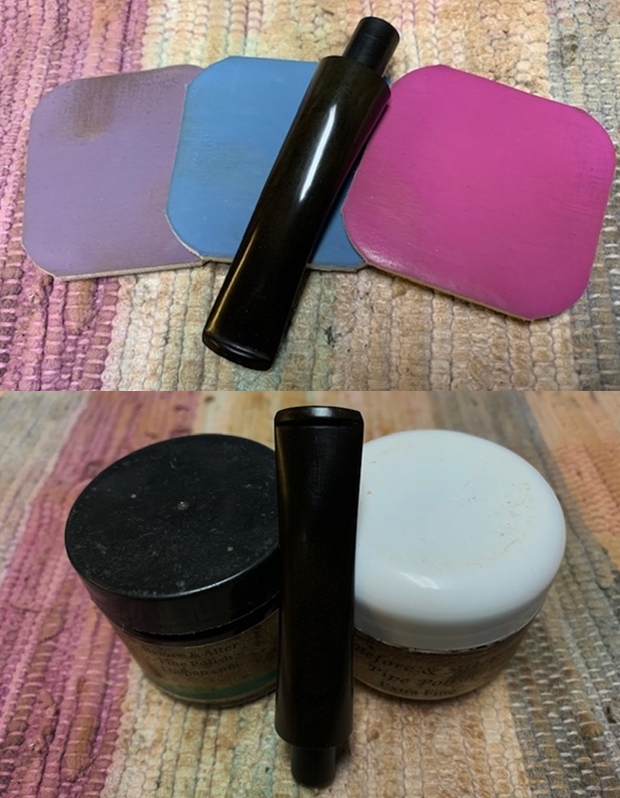
I polished the stem with micromesh sanding pads – wet sanding it with 1500-12000 grit pads. I polished it further with Before & After Pipe Stem Polish – both fine and extra fine.    
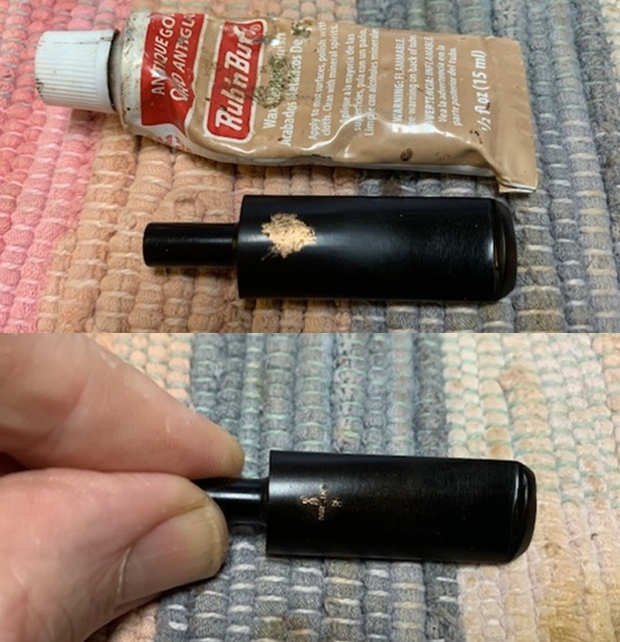
I touched up the Bari white logo on the stem with Liquid Paper. Once it dried I buffed off the excess with a cotton pad. I wiped the stem down with Obsidian Oil once more. 
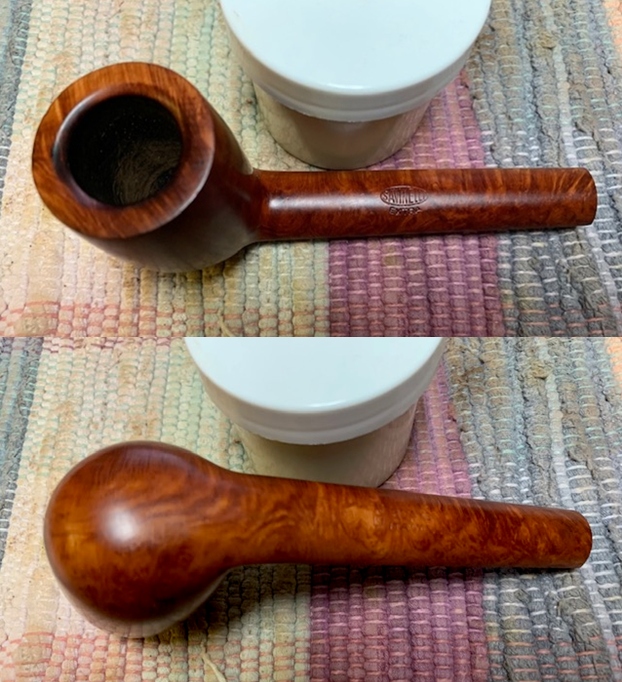
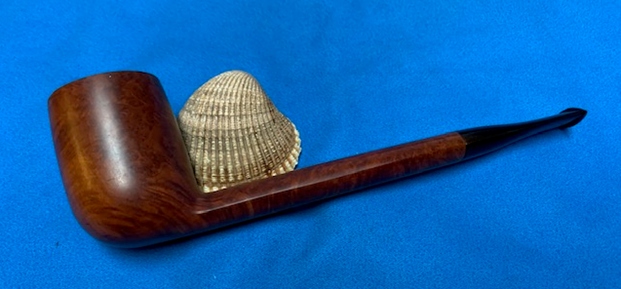
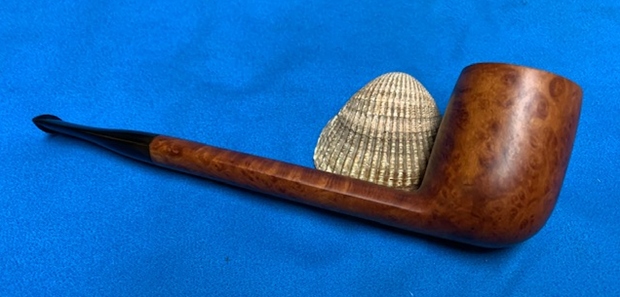
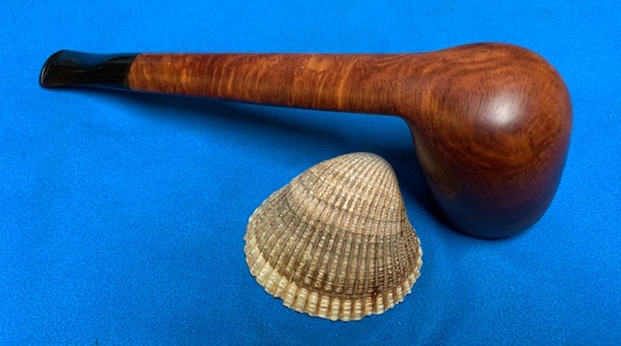
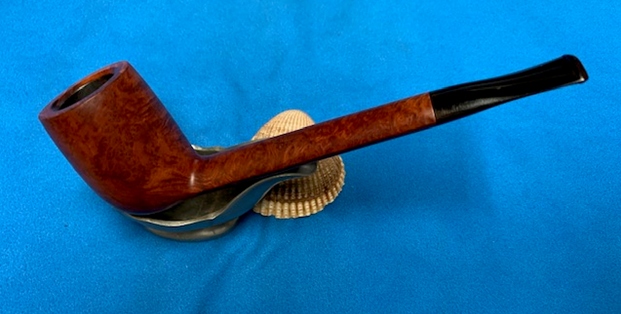
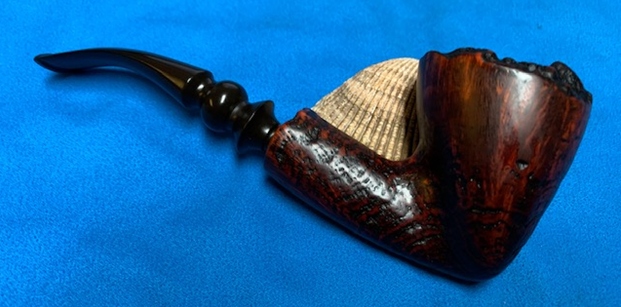
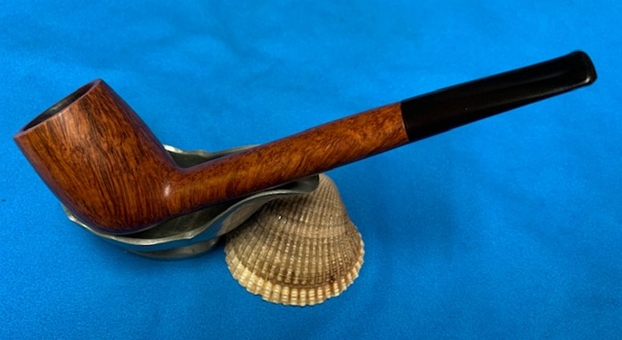
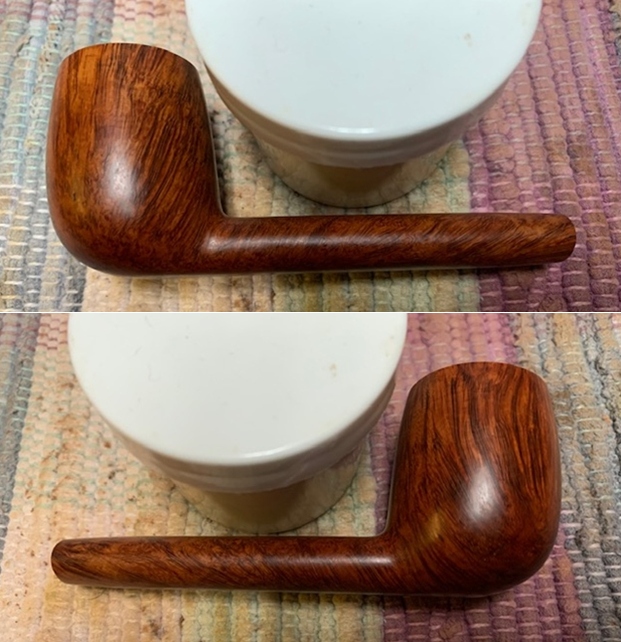
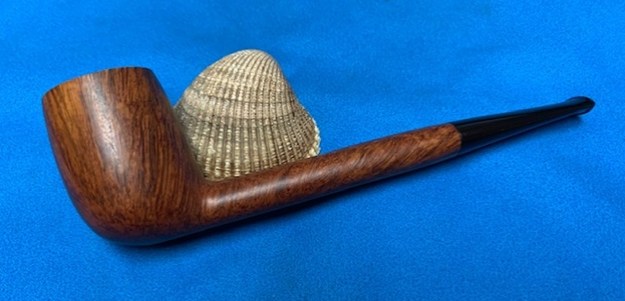
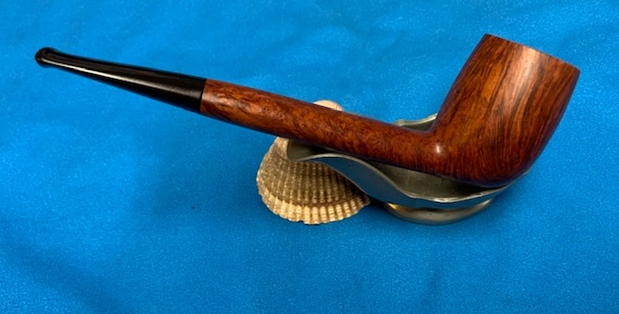
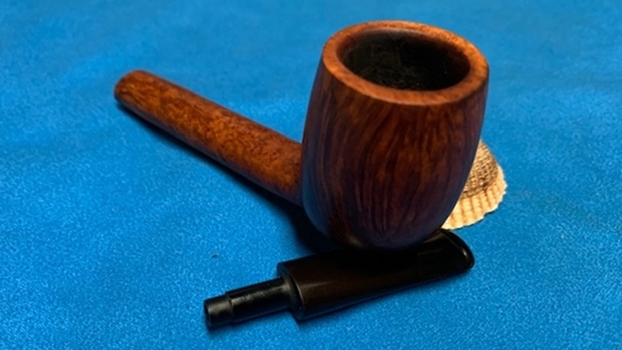
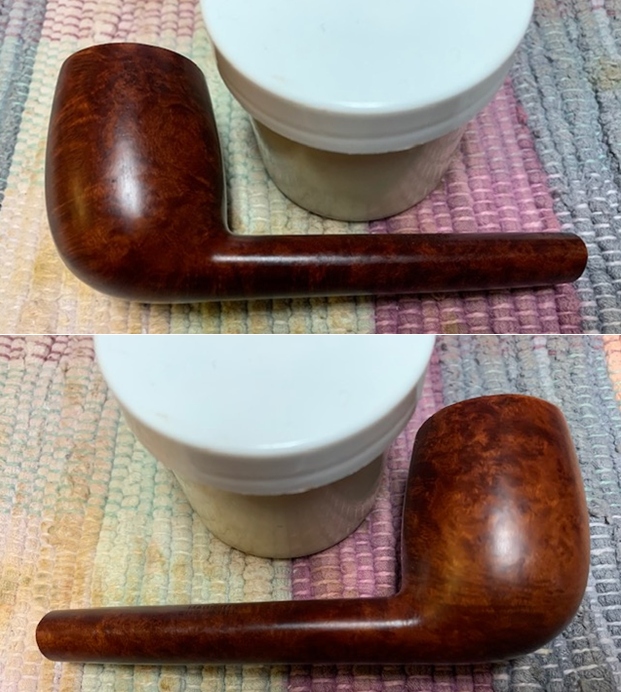
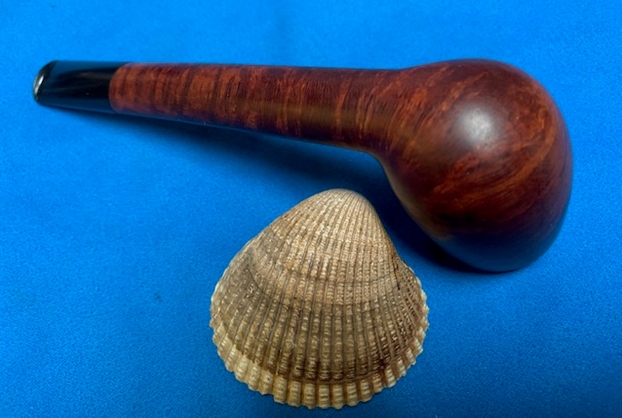
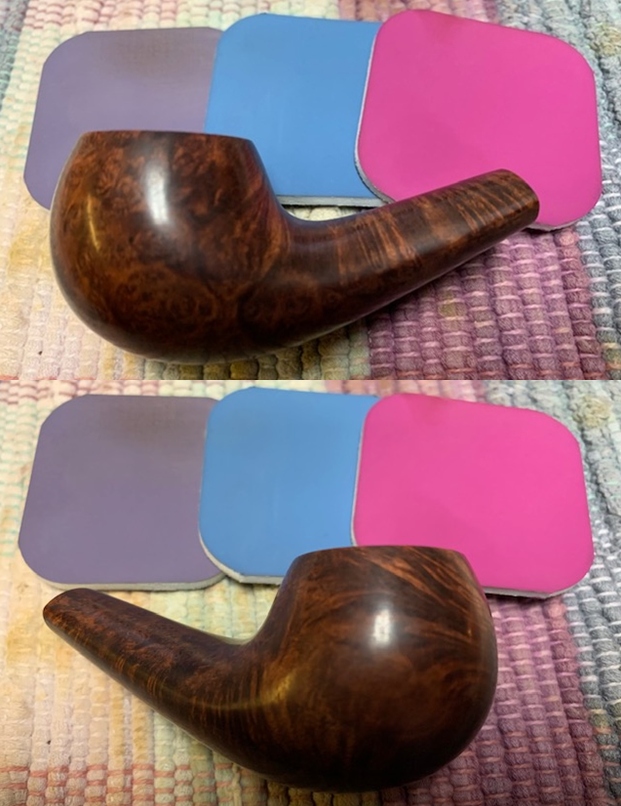
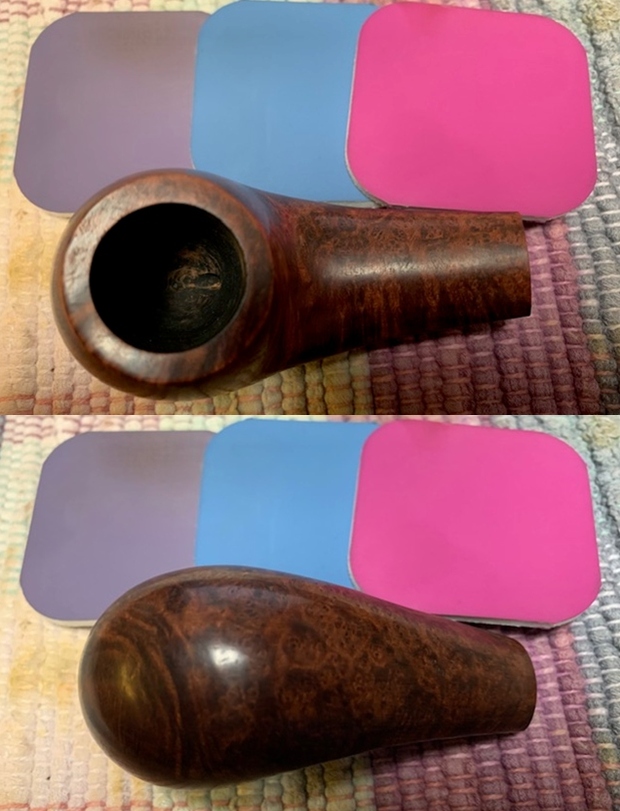
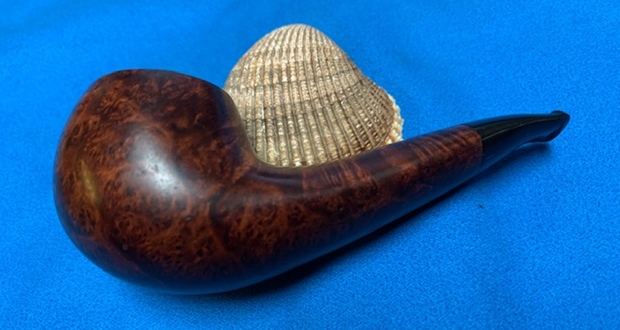
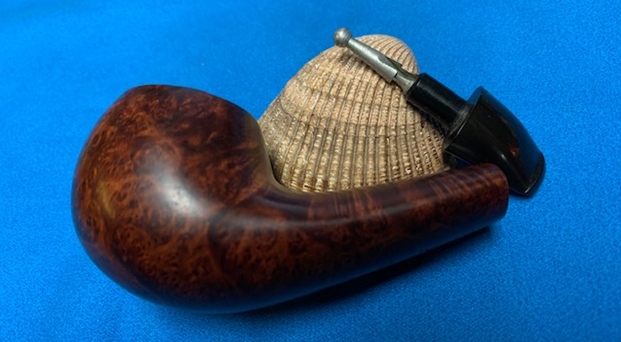
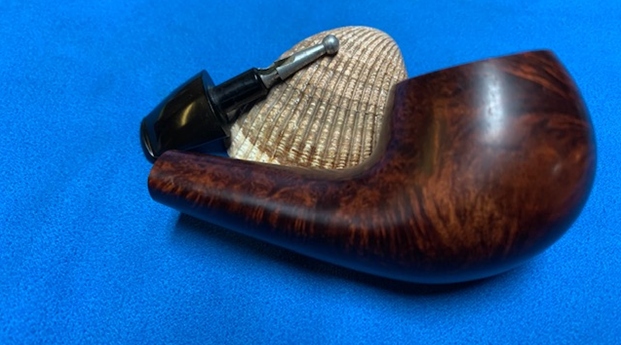
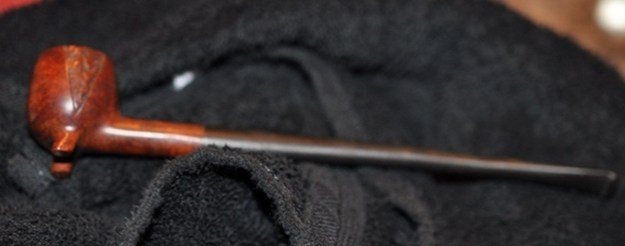
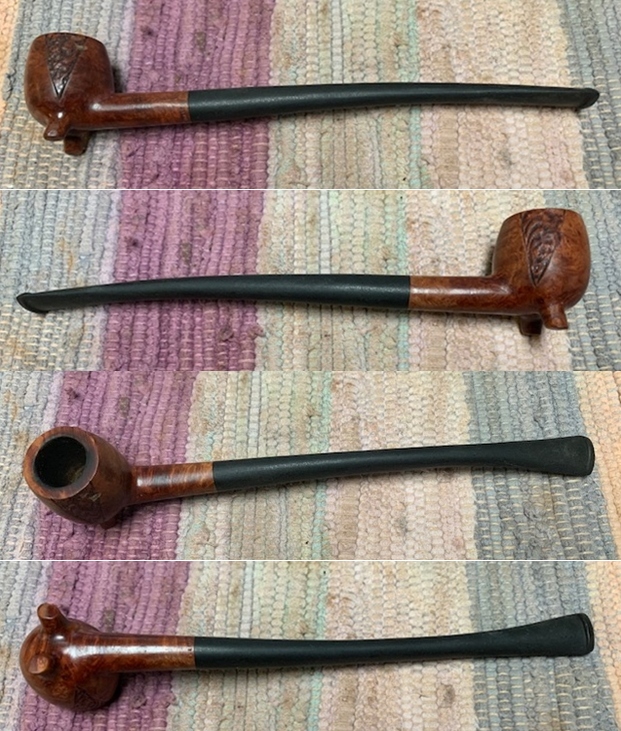
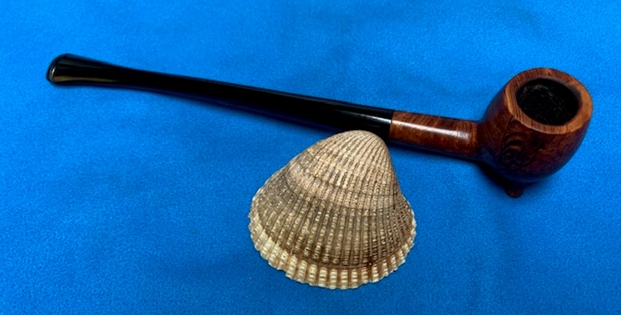
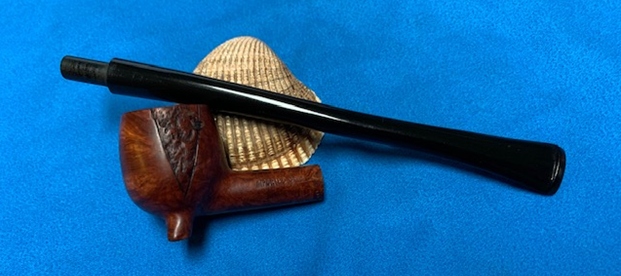
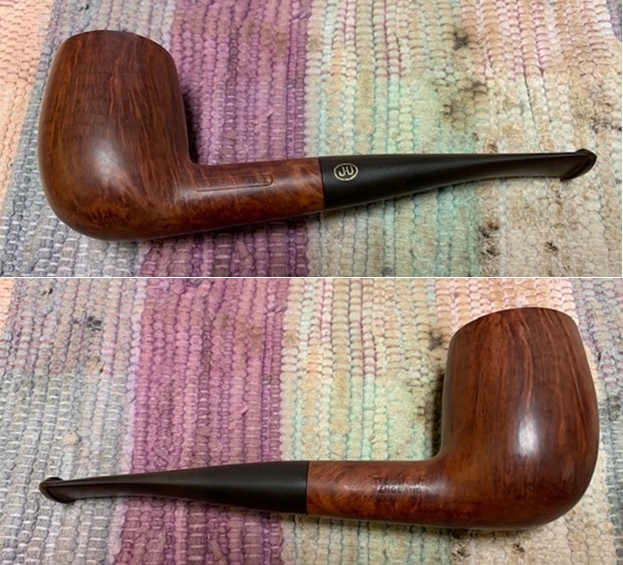
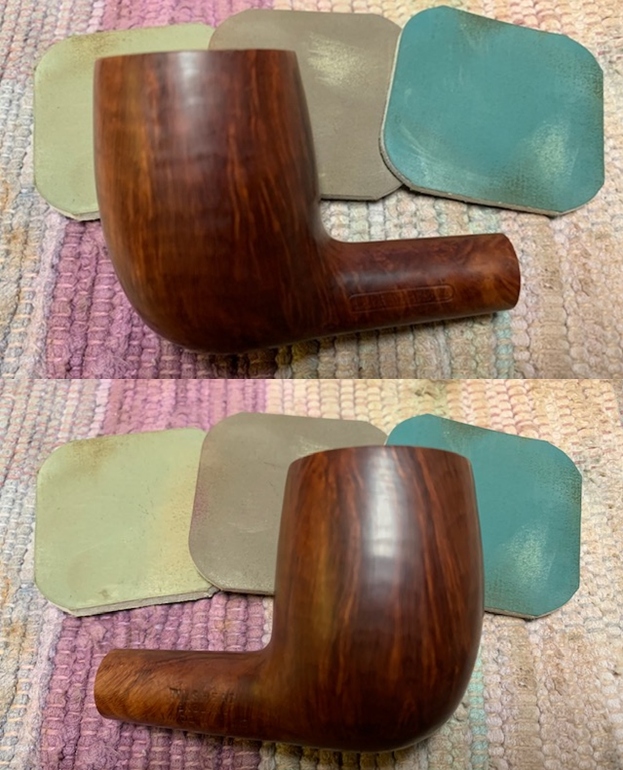
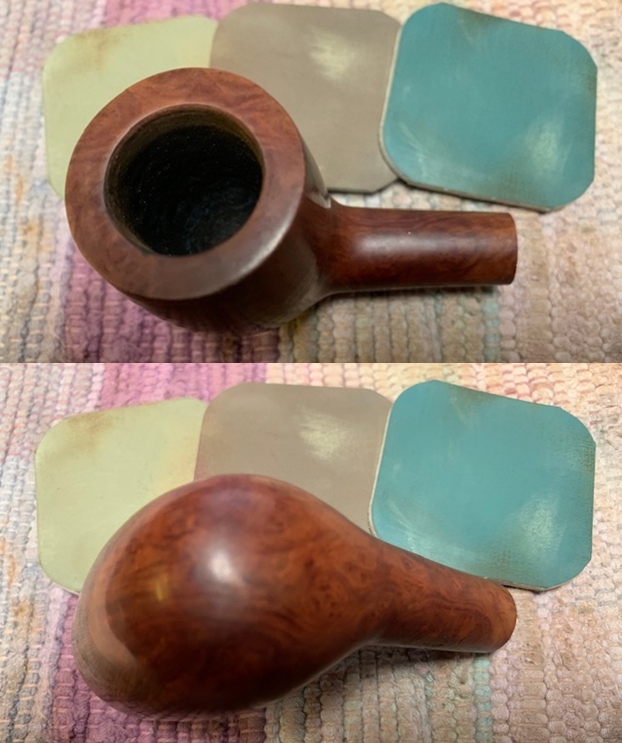
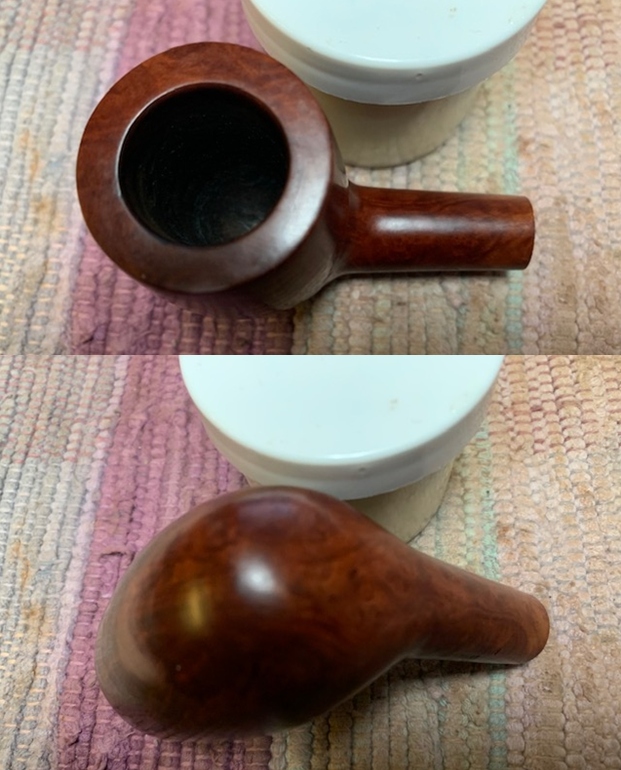
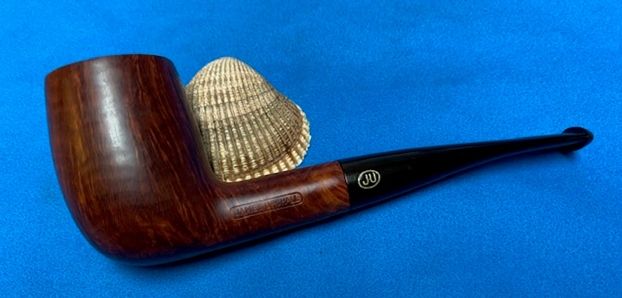
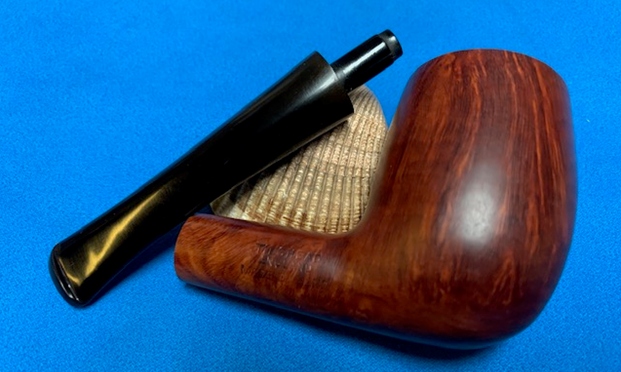
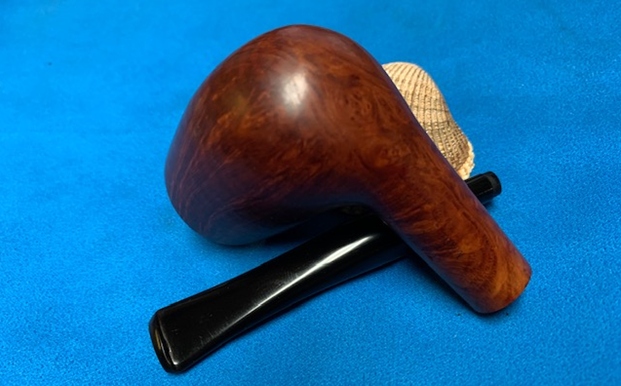
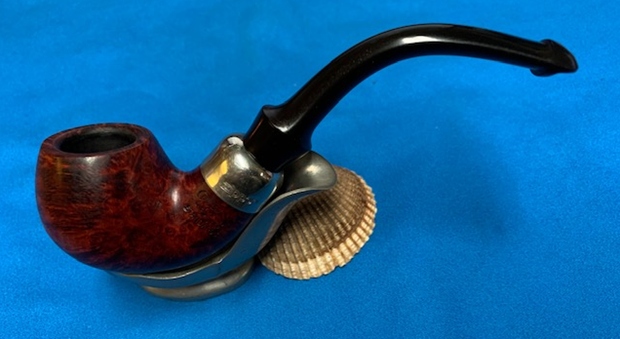
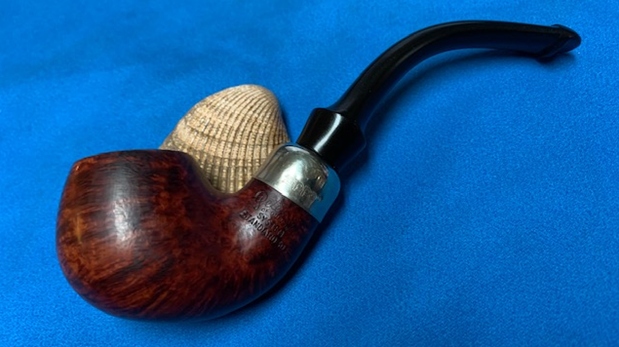
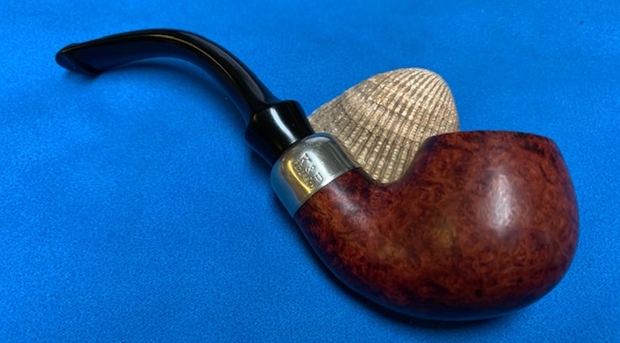
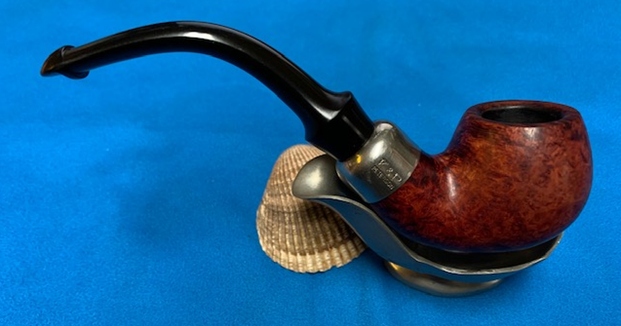
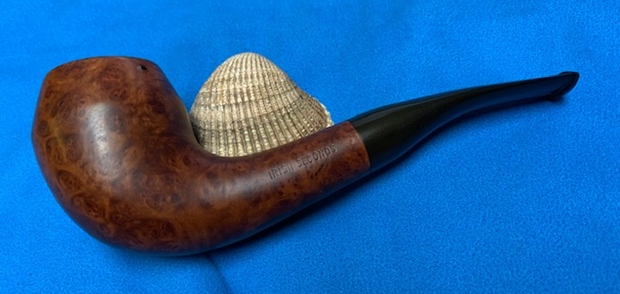
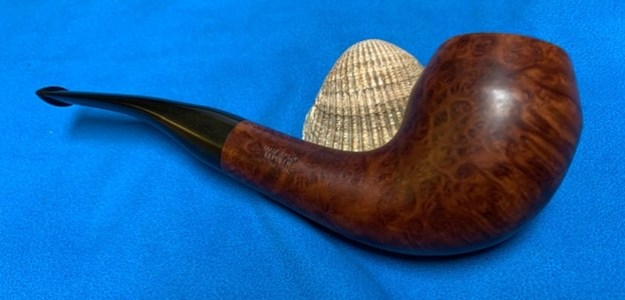
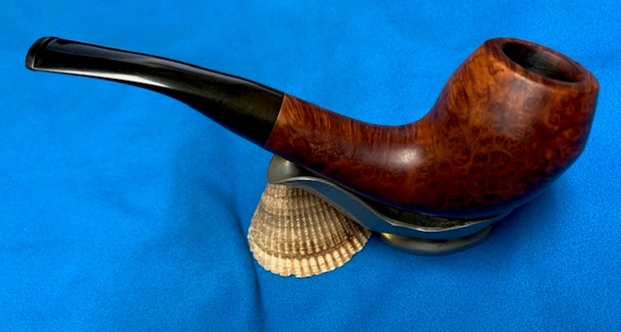
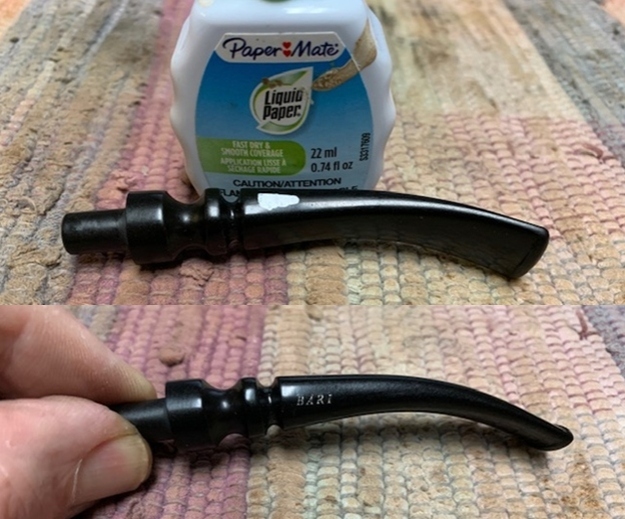
Once again I am the part of the restoration that I always look forward to – the moment when all the pieces are put back together. I put the pipe back together and  buffed the bowl and the stem with Blue Diamond on the buffing wheel. I gave the bowl and the stem multiple coats of carnauba wax. I buffed the pipe with a clean buffing pad to raise the shine. I hand buffed it with a microfiber cloth to deepen the shine. It is fun to see what the polished bowl looks like with the smooth finish and the black vulcanite stem. This richly stained Bari Select nature Old Briar 7963 Dublin is light weight and ready for you to load up a tobacco of preference and enjoy breaking it in. Have a look at it in the photos below. The dimensions are Length: 5 ½ inches, Height: 1 ¾ inches, Outside diameter of the bowl: 1 ½ inches, Chamber diameter: ¾ of an inch. The weight of the pipe is 18grams/.63oz. This is one that will go on the Danish Pipemakers section of the rebornpipes online store shortly. Thanks to each of you who are reading this blog. Remember we are not pipe owners; we are pipemen and women who hold our pipes in trust until they pass on into the trust of the next generation.
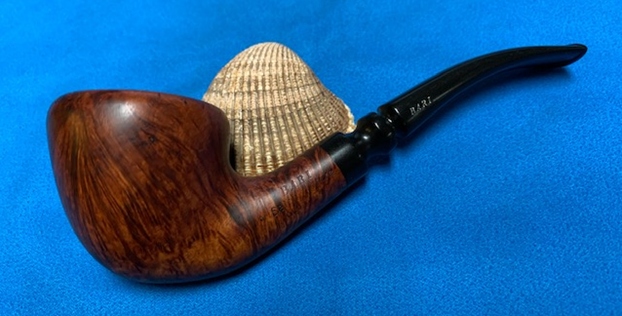
Restoring a Long Savinelli Extra 804KS Canadian


Blog by Steve Laug

The next pipe on the work table came to us from a Goodwill Easter Seal Auction in 2018 from Minnesota. The pipe is an interesting long shanked Savinelli Canadian with sharp edges on the oval shank. The pipe is well shaped and has nice grain around the bowl and shank. The pipe is stamped on the topside of the shank and reads Savinelli [over] Extra. On the underside of the shank it had a Savinelli S shield followed by 804KS [over] Italy. There was a grime and dust in the surface of the briar. The bowl was moderately caked while the top and the beveled inner edge of the rim had a thick coat of lava. The inside edge looks very good but we will know for sure once it is cleaned. The taper vulcanite stem was oxidized, calcified and had tooth chatter and marks on the top and underside near the button and on the button edge. The pipe showed a lot of promise but it was very dirty. Jeff took some photos of the pipe before he started his cleanup work. He took photos of the rim top and bowl to give a clear picture of the thickness of the cake and tobacco debris as well as the relatively clean inner edge of the rim. He also took photos of the top and underside of the stem to show its overall condition. Jeff took a photo of the sides and heel of the bowl to give a picture of what the briar looked like. It truly has some nice grain – birdseye and cross grain around the bowl and shank. The stamping on the top and underside of the shank is clear and readable as noted above.   I turned to Pipephil (http://www.pipephil.eu/logos/en/logo-savinelli2.html) to get a quick view of the Extra Line. I did a screen capture of the site’s information and have included that below. I am also including a screen capture of the Shape and code chart introduction that is link in the above capture.I turned to Pipedia (https://pipedia.org/wiki/Savinelli) for a quick read. The site is worth reading the history of the Savinelli brand and it philosophy of pipemaking. There was a photo of a brochure that included the Extra (https://pipedia.org/wiki/File:Sav_Extra.jpg) that came from Doug Vliatchka.Jeff had cleaned up the pipe with his usual penchant for thoroughness. He reamed the pipe with a PipNet pipe reamer and removed the rest of it with a Savinelli Fitsall Pipe Knife.  He scrubbed the bowl with undiluted Murphy’s Oil Soap with a tooth brush. He rinsed it under running warm water to remove the soap and grime. He cleaned out the inside of the shank and the airway in the stem with alcohol, cotton swabs and pipe cleaners. He soaked the stem in a Before & After Deoxidizer bath and rinsed it off with warm water. I took photos of the pipe before I started my part of the restoration work.   The rim top cleaned up really well. The rim top, inner and outer edge of the bowl is in excellent condition there is darkening on both. The stem surface looked very good with a few tooth marks and chatter on both sides near the button.   The stamping on the shank top and underside is clear and readable. It is stamped as noted above.   I removed the stem started working on the darkening on the rim top and edges. I worked them over with a folded piece of 220 grit sandpaper. Once it was finished it looked better.   I polished the rim top and bowl with micromesh sanding pads – dry sanding with 1500-12000 grit pads. I wiped the bowl down after each sanding pad to remove the debris and dust. I rubbed the bowl and shank down with Before & After Restoration Balm. I worked it into the surface of the bowl sides and shank with my fingertips to clean, enliven and protect the briar. I let the balm sit for 15 minutes and buffed with a cotton cloth to raise the shine. The grain came alive and the pipe looked great.    I set the bowl aside and turned to work on the stem. I “painted” the stem surface with the flame of a lighter and was able to lift out all but one deep tooth mark on the top surface ahead of the button. Once the repair cured I used 220 grit sandpaper to blend it into the surface of the vulcanite. I started polishing the stem with 400 grit wet dry sandpaper.   I scrubbed the stem with Soft Scrub All Purpose cleanser to remove the remaining oxidation. I have found that a good scrub with this product removes the oxidation left behind by the other methods. You can see it on the cotton pads underneath the stem.I polished the vulcanite stem with micromesh sanding pads – 1500-12000 grit pads. I wiped it down with Obsidian Oil after each sanding pad. I used Before & After Pipe Polish – both Fine and Extra Fine to further polish the stem.     This Savinelli Extra 804KS Long Canadian is a great looking pipe now that it has been restored. The smooth finish gives the shape an elegant look. The flow of the bowl, long shank and short stem are well done make for a great looking pipe. I put the stem back on the bowl and carefully buffed the pipe with Blue Diamond on the buffing wheel using a light touch on the briar. I gave the bowl and the stem multiple coats of carnauba wax on the buffing wheel and followed that by buffing the entire pipe with a clean buffing pad. I hand buffed the pipe with a microfiber cloth to deepen the shine. The finished Savinelli Extra 804KS Canadian fits nicely in the hand and feels great. Give the finished pipe a look in the photos below. The dimensions of the pipe are Length: 6 ½ inches, Height: 2 inches, Outside diameter of the bowl: 1 ½ inches, Chamber diameter: ¾ of an inch. The weight of the pipe is 45grams/1.59oz. It is a great looking and light weight pipe. I will be putting it on the rebornpipes store shortly. If you are interested in adding this pipe to your collection send me a message or an email. Thanks for reading this blog and my reflections on the pipe while I worked on it. There are many more pipes to come!

Rejuvenating a Nording Made in Denmark Freehand


Blog by Steve Laug

The next pipe on the table came to us in 2018 from a fellow in Naples, Florida, USA. It is a classic Freehand with a mixed finish of sandblast and smooth with a plateau on the rim top and shank end. It had a fancy turned vulcanite stem. The rim top is plateau and is stained black. The shape follows the grain of the block of briar very well. It is stamped on the underside of the shank reads NORDING over Made in Denmark near the stem/shank union. There is no other stamping on the pipe. The stem has a faint Nording N on the topside of the stem. The pipe was very dirty with a thick cake in the bowl and some lava overflowing on to the plateau rim top filling in the plateau. It was hard to know what the inner edge of the rim looked like because of the lava and cake. Other than being dirty the finish appeared to be in good condition. The stem was oxidized and had come calcification. There was some tooth chatter and tooth marks on both sides of the stem at the button and on the button surface. Jeff took photos of the pipe before he started working on it. He took a photo of the rim top to show the thick cake in the bowl and the overflow of lava. The cake is thick and hard and the lava overflow is in the plateau. The bowl is a real mess but it must have been a great smoking pipe. The stem looked dirty and oxidized. The bite marks and tooth chatter on the stem were very visible. The remaining light oxidation was another issue that would need to be addressed.    The next photos show the sides and heel of the bowl to give a clear picture of the beauty of the grain around the bowl of the pipe. Under the grime there is some great grain peeking through. Jeff took photos of the stamping to capture the clarity of it even under the grime. The stamping is faint but readable. He also included a photo of the turned stem and the remnant of plateau on the shank end.   Before I started my work on the pipe I wanted to learn more about where this pipe fit into the Nording lines so I turned to the first of two sites that I always check to gather information on a brand. I turned first to Pipedia (https://pipedia.org/wiki/N%C3%B8rding). Nording’s were exclusively freehand shapes. There were quite a few photos and a longer history of the brand. It is well worth reading. I also found a collage of photos of Erik Nording included below. I turned to the second information site – Pipephil’s (http://www.pipephil.eu/logos/en/logo-n2.html) and found a great history of the brand in brief form and many photos of different pipes by Nording.

Armed with the information on the Nording Freehand I turned to address the pipe itself. Jeff cleaned up the pipe for me. He reamed the bowl with a PipNet pipe reamer and cleaned it up with a Savinelli Fitsall Pipe Knife. He scrubbed the exterior with Murphy’s Oil Soap and a tooth brush to clean off the grime off the finish and the heavy overflow of lava on the rim top. The cleaning had removed some of the black stain on the rim top. He cleaned up the internals of the shank, mortise and stem with pipe cleaners, cotton swabs and alcohol to remove all of the oils and tars in the pipe. He soaked the stem in Before & After Deoxidizer and was able to remove much of the oxidation. When it arrived here in Vancouver it was a clean pipe and I knew what I had to work with. I took photos of it before I started my part of the restoration.   I took photos of the rim top and the stem to show their condition once it arrived in Canada. Jeff was able to clean up the incredibly thick cake and lava overflow that was shown in the rim and bowl photos above. You can see the spots where the black stain had been removed from the plateau top. He was also able to get rid of the grime and grit in the surface of the briar. The inner edge of the bowl was in very good condition and was smooth to the touch. The rest of the rim top and edges looked very good. The stem looked very good and was much cleaner. The faintly stamped N is visible on the stem top. There were tooth marks and chatter on both sides near the button.  I took a photo of the stamping on the underside of the shank. It is readable as noted above.I removed the stem from the pipe and took a photo to show the look of the parts.I decided to start the restoration by touching up the grooves and edges of the plateau rim top with a black Sharpie pen. It works really well to get into the grooves and blends with the rest of the blackened rim top.I rubbed the bowl and shank down with Before & After Restoration Balm to deep clean the finish on the bowl and shank. The product works to clean, enliven and protect the briar. I worked it in with my fingers to get it into the briar. I used a horsehair shoe brush to work it into the plateau top.  After it sat for 15 minutes I wiped it off and buffed it with a soft cloth. The briar really began to have a rich shine. I took some photos of the bowl at this point to mark the progress in the restoration. It is a beautiful bowl.   I set the bowl aside and worked on the stem at this point in the process. I “painted” the surface of the stem with the flame of a lighter to lift the dents in the vulcanite as much as possible. I filled in the remaining marks with clear super glue. Once the repairs cured I used a file to reshape the button and flatten the repairs. I sanded the repairs with folded pieces of 220 to remove the file marks as well as the remaining oxidation. I started polishing the stem with 400 grit wet dry sandpaper.   To take care of the residual oxidation on the turned portions of the stem I scrubbed it with Soft Scrub All-Purpose Cleaner. I have found that it does a great job and is easy to work into hard to reach spots.  I polished the stem with micromesh sanding pads – wet sanding with 1500-2400 grit pads and dry sanding with 3200-12000 grit pads. I wiped the stem down after each pad with a damp cloth to remove the sanding dust. I used the Before & After Pipe Polish to remove the small minute scratches left in the vulcanite even after the micromesh regimen. I finished by wiping the stem down with a final coat of Obsidian Oil and set it aside to dry.   I put the stem back on the Nording Freehand and took it to the buffer. I buffed the bowl and stem with Blue Diamond to polish the briar and the vulcanite. Blue Diamond does a great job on the smaller scratches that remain in both. I gave the bowl and the stem several coats of carnauba wax and buffed the pipe with a clean buffing pad to raise the shine. I hand buffed it with a microfiber cloth to deepen the shine. The pipe polished up really nicely with a great contrasting stain look to the briar. The finished pipe is shown in the photos below. This Nording Freehand turned out looking very nice. The polished black vulcanite stem looks really good with the browns and blacks standing out in the grain. The dimensions of the pipe are Length: 6 inches, Height: 2 ½ inches, Outside diameter of the bowl: 2 inches, Chamber diameter: ¾ of an inch. The weight of the pipe is 61grams/2.15oz. This is another pipe that I will be putting it on the rebornpipes online store shortly, if you are interested in adding it to your collection. Thanks for walking through the restoration with me on this beauty!

Wow what amazing grain on this tired looking Selected Straight Grain Canadian


Blog by Steve Laug

The next pipe I have chosen is one that neither Jeff nor I remember picking up. It could have come to us through a trade for work on a pipe or it could have come from one of an earlier pipe hunts that either Jeff or I did. Either way, the long and short of it is that this is another pipe that we have no idea how it came into our hands. It is stamped on the left topside of the shank and reads faintly Selected[ arched over] Straight [over] Grain underneath that. The rest of the stamping is lost to overzealous buffing. While I was trying to figure out the stamping on it and finally was able to read the Selected  Straight Grain stamp I remember that I had worked on several with the same stamp in the past and had come understand that they were Comoy’s made pipes. The shape definitely looks like a Comoy’s Canadian shape. It was a nice pipe that showed some extraordinary grain.

Jeff had cleaned up the pipe with his usual penchant for thoroughness. He reamed the pipe with a PipNet pipe reamer and removed the rest of it with a Savinelli Fitsall Pipe Knife.  He scrubbed the bowl with undiluted Murphy’s Oil Soap with a tooth brush. He rinsed it under running warm water to remove the soap and grime. He cleaned out the inside of the shank and the airway in the stem with alcohol, cotton swabs and pipe cleaners. He soaked the stem in Before & After Deoxidizer and rinsed it off with warm water. I took photos of the pipe once I received it.   I took a photo of the rim top to show the interior the bowl and the rim top and inner edge. The rim top and edges were quite damaged with nicks, dents, darkening and burn marks. The vulcanite tape stem is in decent condition with light tooth marks on the top and underside near the button.  I took a photo of the top left side of the shank to try to capture the stamping that was there. It is too faint to pick up with my camera.I found a photo of the same shank stamp when I did a google search for Selected Straight Grain pipes. It perfectly matches the one that is barely visible on the pipe that I am working on now. It is faint but it is identical to that in the photo to the left.

I took the stem off the bowl and took a picture of the parts of the pipe to give a sense of the beauty of the grain on this pipe.Before I started my work on the pipe I wanted to double check the connection that my brain had made when I made out the stamping. I turned to a blog that I had written on the restoration of another Selected Straight Grain pipe (https://rebornpipes.com/tag/selected-straight-grain-pipes/). This is what I found.

…I did a bit of hunting online and read on Pipedia that these pipes were made by Comoy’s and were essentially “Specimen Straight Grain” (exceptional line of Comoy’s pipes). The Selected Straight Grain pipes were seconds to the Specimen line that exhibited some small flaw or sand pit. They were listed in the 1965 catalogue at $15 or $17.50 in Extraordinaire size.

I decided to begin my work on the pipe by addressing the damage to the rim top and edges. I topped the bowl on a piece of 220 grit sandpaper on a topping board. Once I had finished I used a folded piece of 220 grit sandpaper to rework the inner edge of bowl. It took some time but I was able to bring it back to a pretty clean condition.   I polished the briar with micromesh sanding pads – wet sanding with 1500-12000 grit pads and wiped down the bowl after each sanding pad. I carefully avoided damaging the already faint stamping.   I worked some Before & After Restoration Balm into the surface of the briar with my fingertips to clean, enliven and protect the briar. I let the balm sit for 15 minutes and then buffed with a cotton cloth to raise the shine. The photos show the bowl at this point in the restoration process. It looks quite nice at this point.  With that done the bowl was finished other than the final buffing. I set it aside and turned my attention to the stem. I polished it with micromesh sanding pads – wet sanding with 1500-12000 grit sanding pads. I used the pads to remove the tooth marks on the stem on both sides near the button. I wiped it down after each sanding pad with Obsidian Oil. I was just getting ready to post the final photos of the restored pipe when my daughter’s dog, Frankie came and climbed up on the desk top and laid down in front of me with his head on my arm. He has taken it upon himself to be my buddy when I am working on pipes.

With Frankie’s help I am posting these last photos of the pipe. This beautifully grained Comoy’s Made Selected Straight Grain Canadian is a great looking pipe now that it has been restored. The briar is clean and really came alive. The rich medium brown coloured stain gave the grain a sense of depth with the polishing and waxing. The grain really popped. I put the vulcanite stem back on the bowl and carefully buffed the pipe with Blue Diamond on the buffing wheel using a light touch on the briar. I gave the bowl and the stem multiple coats of carnauba wax on the buffing wheel. I buffed the pipe with a clean buffing pad to raise the shine. I hand buffed the pipe with a microfiber cloth to deepen the shine. The finished Selected Straight Grain Canadian is a beauty and feels great in the hand and looks very good. Give the finished pipe a look in the photos below. The dimensions of the pipe are Length: 5 ½ inches, Height: 1 ¾ inches, Outside diameter of the bowl: 1 ¼ inches, Chamber diameter: ¾ of an inch. The weight of the pipe is 26grams/.92oz. Thanks for reading this blog and my reflections on the pipe while I worked on it. Remember we are not pipe owners; we are pipemen and women who hold our pipes in trust until they pass on into the trust of the next pipeman or woman.


New Life for a Barling’s Make Ye Olde Wood 1488 T.V.F. Canadian


Blog by Steve Laug

The next pipe on the work table came to us in a group of pipe that we purchased from a fellow in Los Angeles, Californa, USA.  The pipe is smooth, nicely grained Canadian shaped pipe with an oval shank and taper stem. The pipe is stamped on top left side of the shank and reads Barling’s [arched over] Make [over] Ye Olde Wood [over] the shape number 1488. That is followed by T.V.F. near the shank. On the right topside of the shank it is stamped Made In [over] England. In the center of the top of the shank is a large upper case R. There was a lot of grime and dust ground into the smooth finish. The bowl was thickly caked with a thick lava coat flowing onto the rim top and the inner edge of the rim. The inside and outside edges looked to be in good condition but we would know more once Jeff had cleaned it. The stem was oxidized, calcified and had tooth chatter and marks on the top and underside near the button. The stem was stamped on the topside with the Barling Cross. The stamping was readable but damaged. It had promise but it was very dirty. Jeff took some photos of the pipe before he started his cleanup work.   He took photos of the rim top, bowl and stem to give a clear picture of the condition of the pipe. The thickness of the cake and tobacco debris as well as the lava on the rim top and inner edge is visible. The photos of the stem show the oxidation, calcification and the chatter and tooth marks on the top and underside.  He took some photos of the sides and heel of the bowl to give a clear picture of the condition of the pipe and the grain that was shining through the grime. He took photos of the stamping on the underside of the shank. It is clear and readable as noted above.  I turned to Pipephil’s site (http://www.pipephil.eu/logos/en/logo-barling.html) to see if I could find a listing that had the same or similar stamping on the pipe. The stamping is similar to the one I am working on other than the shape number. The pipe that I am working on has the shape number 1488 on the shank. Barling’s [Arched], Make, Ye Olde Wood, T.V.F. and on the right side Made in England. Pipedia gives a great history of the brand (https://pipedia.org/wiki/Barling) that is well worth reading.

I worked through the different eras of the Barling pipes. I found a section on redefining the eras and quote from that section as followed:

Family Era 1912 – 1962: Pipes made by the Barling family while it either owned or managed B. Barling & Sons.

Corporate Era 1962 – the Present: Pipes made after the family left off managing the company, beginning with the revised product grades and revised nomenclature that were introduced in the 1962 Dealers’ Catalog.

The Family Era pipes are highly sought after by collectors and have excellent smoking and aesthetic qualities. These pipes are famous for the “old wood” from which they were made. I’m including the 1962 “Barling’s Make” pipes in this category because, initially, they were made while the Family still ran the business. Montague Barling was still President, and Williamson-Barling was still General Manager.

These 1962 pipes were made by the same craftsman from the same materials, as the earlier product. Some of them are stamped with both the old and new model numbers.

…The “BARLING’S MAKE” has the word “BARLING’S” arched over the word “MAKE” in capital block letters. Barling used this block letter logo until late 1962.

… Ye Olde Wood Stamp: Sometime around 1913, the “Ye Olde Wood” stamp made its appearance on selected pipes. An example exists stamped on a 1913 date hallmarked pipe.

This logo will continue to be used in the decades to come. Initially it was used to designate a higher grade than the average, much as the “Special” grade would after the Second World War. Price lists show the “Ye Olde Wood” pipes as a separate grade from the basic BARLING’S MAKE pipe. Eventually, “Ye Olde Wood” came to represent the company to the world. The use of “YE OLD WOOD” as a stamp prior to 1940 was haphazard, at best, although the company used the slogan in advertising materials from the early teens onward. (Gage)

Crossed Barling Stem Logo: It is not known when the crossed Barling stem logo first appeared, but an example exists on a pipe with a 1923 date hallmark. And several of the mid 1920’s pipes added in this update also feature the crossed Barling stem logo.

Size Stampings:  Up to 1926 and possibly beyond, Barling used specific, completely unrelated, model numbers to designate the various sizes of a specific shape. They produced pipes in three sizes, small, medium, and large.

Barling’s published price lists show that they continued to offer pipes in only three sizes, small, medium, and large until 1941. That’s it, small, medium, and large. So when someone claims that they have a 1930’s EL, EXEL, or other size, they are mistaken.

In 1941 the published range of sizes expanded. Going from the smallest to the largest, they are SS, S, S-M, L, EL, EXEL, and EXEXEL. There is no “G” for giant. Giant pipes, or magnums, which are oversized standard billiards, were not stamped “G” but are commonly identified by collectors as such because they are obviously large relative to even EXEXEL pipes, and carried no size stampings (Gage).

Now I knew a bit about the pipe I was working on. The Barling’s Make stamp gave me an end date of 1962. The fact that there is no size stamp on the pipe puts the end date for it at 1941 when the sizes expanded and the pipes were stamped with the size as noted above. So the odds were very good that the pipe I was working on was pre-1941.

Jeff had cleaned up the pipe with his usual penchant for thoroughness. He reamed the pipe with a PipNet pipe reamer and removed the rest of it with a Savinelli Fitsall Pipe Knife.  He scrubbed the bowl with undiluted Murphy’s Oil Soap with a tooth brush. He rinsed it under running warm water to remove the soap and grime. He cleaned out the inside of the shank and the airway in the stem with alcohol, cotton swabs and pipe cleaners. He soaked the stem in Before & After Deoxidizer and rinsed it off with warm water. I took photos of the pipe once I received it. The rim top cleaned up really well. The rim top has some darkening and inner edge shows some damage and is slightly out of round with rough nicks. The stem surface looked good with tooth marks and chatter on both sides near the button.   The stamping on the right and left topside of the shank is clear and readable and reads as noted above.  (Note the upper case R stamped on the top of the shank on the second photo above.)  I removed the stem and took a photo of the pipe to give a sense of the whole. It would clean up and be a gorgeous pipe.I started working on the pipe by cleaning up the damaged inner edge of the rim with a folded piece of 220 grit sandpaper.  I polished the briar with micromesh sanding pads – wet sanding with 1500-12000 grit pads and wiped down the bowl after each sanding pad.  I rubbed the bowl and shank down with Before & After Restoration Balm. I worked it into the surface of the bowl sides and shank with my fingertips to clean, enliven and protect the briar. I let the balm sit for 15 minutes and then buffed with a cotton cloth to raise the shine. The Balm did its magic and the grain stood out.   I set the bowl aside and turned my attention to the stem. I “painted” the tooth marks in the vulcanite with the flame of a Bic lighter. I was able to lift almost all of them. The ones on the underside disappeared except for one next to the button edge. The ones on the top side lifted considerably. I filled in the remaining marks with clear super glue and set the stem aside to let the repairs cure. Once the repairs cured I sanded them out with 220 grit sandpaper to blend them into the surrounding vulcanite. I started polishing the stem with 400 grit wet dry sandpaper. I polished the vulcanite stem with micromesh sanding pads – 1500-12000 grit pads. I wiped it down with a damp cloth after each sanding pad. I used Before & After Pipe Polish – both Fine and Extra Fine to further polish the stem. The photo below shows the polished stem. I touched up the Barling Cross logo on the stem with white paint and Liquid Paper and neither worked. I cleaned the stem off and used some Antique Gold Rub’n Buff. I rubbed it onto the stem top and worked it into the stamping. I buffed it off with a cotton pad. The product brought the stamping that remained to clear readability. I keep trying to find Rub’n Buff White but it seems to be out of stock everywhere.  This beautifully grained Barling’s Make Ye Olde Wood 1488 T.V.F. Canadian is a great looking pipe now that it has been restored. The briar is clean and really came alive. The rich brown coloured stain gave the grain a sense of depth with the polishing and waxing. The grain really popped. I put the vulcanite stem back on the bowl and carefully buffed the pipe with Blue Diamond on the buffing wheel using a light touch on the briar. I gave the bowl and the stem multiple coats of carnauba wax on the buffing wheel. I buffed the pipe with a clean buffing pad to raise the shine. I hand buffed the pipe with a microfiber cloth to deepen the shine. The finished Barling’s Make Ye Olde Wood Canadian is a beauty and feels great in the hand and looks very good. Give the finished pipe a look in the photos below. The dimensions of the pipe are Length: 5 ½ inches, Height: 2 inches, Outside diameter of the bowl: 1 ¼ inches, Chamber diameter: 5/8 of an inch. The weight of the pipe is 35grams/1.12oz.Thanks for reading this blog and my reflections on the pipe while I worked on it. There are many more to come!

New Life for a Small Savinelli Lollo Pocket Pipe


Blog by Steve Laug

The next pipe on the work table is one that Jeff picked up on eBay in 2016 from San Francisco, California, USA. That means that it has been sitting here for over 4 years and I am just now getting to work on it. This seems to be the story of my life these days. I am trying to work through the large backlog of pipes that I have sitting in boxes in my workshop/office and try to catch up a bit. It is an interesting pocket style pipe that has a mix of grains around the bowl and shank that really are quite nice. The bowl has a rich reddish brown colour combination that highlights grain. It bears a heavy varnish coat that I will want to remove. The pipe has some grime ground into the surface of the smooth finish and on the rim top. This pipe is stamped on the underside of the shank and has the Savinelli “S” shield logo with Savinelli stamped in an arch underneath the shield. That is followed by the stamping ‘LOLLO’ [over] Pipe. There is a thin cake in the bowl, but the top and inner edge of the bowl looks very good. The stubby vulcanite stem was oxidized, calcified and there were some light tooth marks and chatter on both sides near the button. The pipe looks to be in good condition under the grime. Jeff took photos of the pipe before he started his cleanup. He took photos of the rim top to show the condition of the bowl and rim top. You can see some scratching from an earlier reaming on the back wall of the bowl. There was a small spot of the finish missing on the rim top toward the back of the bowl. He took photos of the stamping on the underside of the shank. It is clear and readable as noted above.It was time to work on the pipe. As usual Jeff had done a thorough cleanup on the pipe. He reamed the bowl with a Savinelli Fitsall pipe knife to remove the cake. He scrubbed out the mortise and the airway in the shank and the stem with alcohol, cotton swabs and pipe cleaners. He scrubbed the exterior of the bowl, rim, shank and stem with a tooth brush and Murphy’s Oil Soap to remove the oils and tars on the rim and the grime on the finish of the bowl. He rinsed it under running water. One of the benefits of this scrub is that it also tends to lift some of the scratches and nicks in the surface of the briar. He dried it off with a soft cloth. He cleaned the internals and externals of the stem with alcohol, pipe cleaners and cotton swabs. He soaked the stem in Before & After Deoxidizer and rinsed it off with warm water and cleaned out the airway in the stem with alcohol. The pipe looked good. I took a photo of the bowl, rim top and stem to show the condition. The inner edge of the bowl was in good condition. There were a few spots on the rim top where the varnish had come off. The vulcanite stem had light tooth chatter and marks on both sides ahead of the button and on the button edges.  The stamping on the underside of the shank is clear and readable even with my poor photo. It reads as noted above.   I removed the stem from the shank and took a photo of the pipe to give a sense of the whole. It is a interesting looking pipe that should clean up very well. It also has a short stinger in the tenon.I started working on the pipe by wiping the bowl down with acetone to remove the spotty varnish coat from the bowl and shank. I wiped it down with a cotton pad until the varnish coat was gone and the grain began to stand out.    I polished the briar with micromesh sanding pads – wet sanding with 1500-12000 grit pads and wiped down the bowl after each sanding pad.    I rubbed the bowl and shank down with Before & After Restoration Balm. I worked it into the surface of the bowl sides and shank with my fingertips to clean, enliven and protect the briar. I let the balm sit for 15 minutes and then buffed with a cotton cloth to raise the shine. The Balm did its magic and the grain stood out. I set the bowl aside and turned to the stem. I polished the vulcanite stem with micromesh sanding pads – 1500-12000 grit pads. I wiped it down with a damp cloth after each sanding pad. I used Before & After Pipe Polish – both Fine and Extra Fine to further polish the stem. The photo below shows the polished stem. This nicely grained Savinelli Lollo Pocket Pipe with its short snub nosed vulcanite stem is a great looking pipe now that it has been restored. The briar is clean and really came alive. The rich walnut coloured stain gave the grain a sense of depth with the polishing and waxing. The grain really popped. I put the vulcanite stem back on the bowl and carefully buffed the pipe with Blue Diamond on the buffing wheel using a light touch on the briar. I gave the bowl and the stem multiple coats of carnauba wax on the buffing wheel. I buffed the pipe with a clean buffing pad to raise the shine. I hand buffed the pipe with a microfiber cloth to deepen the shine. The finished Lollo Pocket Pipe is a beauty and feels great in the hand and looks very good. Give the finished pipe a look in the photos below. The dimensions of the pipe are Length: 4 inches, Height: 1 ½ inches, Outside diameter of the bowl: 1 ¼ inches, Chamber diameter: ¾ of an inch. The weight of the pipe is 38grams/1.34oz.Thanks for reading this blog and my reflections on the pipe while I worked on it. There are many more to come!

Fresh Life for a Small Imported Briar Kettle Mini Churchwarden


Blog by Steve Laug

The next pipe on the work table is a mini churchwarden that we picked up somewhere in our travels. Neither of us remembers where we found it but it is an interesting pipe. Looking at it brought back all kinds of memories. Do you remember when the Salvation Army used have the big kettle sitting on the side walk or hanging from a tripod in front of shops during the Christmas season? There would be folks ringing bells there and taking donations for their work with the poor. When I look at this pipe that is what I see in the bowl. It is shaped like a kettle with feet on the bottom of the bowl. The feet make it a sitter. It is a nice looking briar bowl with rusticated triangles on both side of the bowl and the rest of the bowl is a mix of various grains. The long vulcanite stem is tweaked to the left from sitting in the heat somewhere and will need to be straightened out and re-bent. The bowl has a rich reddish brown colour combination that highlights grain. The pipe has some grime ground into the surface of the rustication and the smooth finish. This pipe is stamped on the sides of the shank. On the left it reads Imported Briar. On the underside it reads Made in Italy. There is a thick cake in the bowl and an overflow of lava on the top and inner edge of the bowl. The rim top looks good but it is hard to be certain with the lava coat. The stem was oxidized, calcified and there were some light tooth marks and chatter on both sides near the button. The pipe looks to be in good condition under the grime. Jeff took photos of the pipe before he started his cleanup. He took photos of the rim top to show the thick cake and the thick lava coat. It is hard to know what the condition of the rim top and edges is like under that thick lava. It is an incredibly dirty pipe but obviously one that was a great smoker. The vulcanite taper stem had light tooth marks and chatter on both sides ahead of the button.    He took a photo of the sides and heel of the bowl to show the mixture of grain around the bowl and the condition of the pipe. You can see the grime ground into the surface of the briar.    He took a photo of the stamping on the left and underside of the shank. It is clear and readable as noted above. It was time to work on the pipe. As usual Jeff had done a thorough cleanup on the pipe. He reamed the bowl with a Savinelli Fitsall pipe knife to remove the cake. He scrubbed out the mortise and the airway in the shank and the stem with alcohol, cotton swabs and pipe cleaners. He scrubbed the exterior of the bowl, rim, shank and stem with a tooth brush and Murphy’s Oil Soap to remove the oils and tars on the rim and the grime on the finish of the bowl. He rinsed it under running water. One of the benefits of this scrub is that it also tends to lift some of the scratches and nicks in the surface of the briar. He dried it off with a soft cloth. He cleaned the internals and externals of the stem with alcohol, pipe cleaners and cotton swabs. He soaked the stem in Before & After Deoxidizer and rinsed it off with warm water and cleaned out the airway in the stem with alcohol. Other than the damaged rim top and twisted stem the pipe looked good.   I took a photo of the rim top and stem to show the condition. The inner edge of the bowl was in very rough condition. The rim top and the edges of the bowl had darkening, burn marks and some nicking. The vulcanite stem had light tooth chatter and marks on both sides ahead of the button and on the button edges.  It also was slightly twisted to the left side.  The stamping on the sides of the shank is clear and readable as noted above. I removed the stem from the shank and took a photo of the pipe to give a sense of the whole. It is a interesting looking pipe that should clean up very well. I started working on the pipe by wiping the bowl down with acetone to remove the spotty varnish coat from the bowl and shank. I wiped it down with a cotton pad until the varnish coat was gone and the grain began to stand out.  I liked the way the rusticated panels looked at this point as well. I reworked the damaged rim top and edges. I worked over the rim top and inner bevel of the rim with 220 grit sandpaper. I smooth out the damage and gave the  rim top and edge a clean look that would polish out nicely. I wiped the rim top down with a damp cloth to remove the dust and debris.   I polished the briar with micromesh sanding pads – wet sanding with 1500-12000 grit pads and wiped down the bowl after each sanding pad.     I rubbed the bowl and shank down with Before & After Restoration Balm. I worked it into the surface of the bowl sides and shank with my fingertips to clean, enliven and protect the briar. I let the balm sit for 15 minutes and then buffed with a cotton cloth to raise the shine. The Balm did its magic and the grain stood out.  I set the bowl aside and turned to the stem. I heated it with a heat gun and worked the twist out of the vulcanite. I also gave it a more subtle bend that allowed the feet on the kettle bowl to sit flat on the desk top.    I polished the Lucite stem with micromesh sanding pads – 1500-12000 grit pads. I wiped it down with a damp cloth after each sanding pad. I used Before & After Pipe Polish – both Fine and Extra Fine to further polish the stem. The photo below shows the polished stem. This nicely grained Imported Briar Kettle Mini Churchwarden with a long taper stem is a great looking pipe now that it has been restored. The briar is clean and really came alive. The rich reddish, brown stains gave the grain a sense of depth with the polishing and waxing. The grain really popped. I put the vulcanite stem back on the bowl and carefully buffed the pipe with Blue Diamond on the buffing wheel using a light touch on the briar. I gave the bowl and the stem multiple coats of carnauba wax on the buffing wheel. I buffed the pipe with a clean buffing pad to raise the shine. I hand buffed the pipe with a microfiber cloth to deepen the shine. The finished Kettle Mini Churchwarden is a beauty and feels great in the hand and looks very good. Give the finished pipe a look in the photos below. The dimensions of the pipe are Length: 7 inches, Height: 1 ¼ inches, Outside diameter of the bowl: 1 inch, Chamber diameter: ½ of an inch. The weight of the pipe is 19grams/.67oz.Thanks for reading this blog and my reflections on the pipe while I worked on it. There are many more to come!

Fresh Life for a James Upshall B Grade Large Billiard


Blog by Steve Laug

This past May, 2019 I received an email from John in Iowa City, Iowa inquiring whether I would be interested in purchasing three Upshall pipes that he was selling. He sent photos and we chatted back and forth via email and a deal was struck. I had him ship the pipes to Jeff’s place in Idaho. They were generally well cared for pipes but they were dirty. This is the third and final pipe from that lot that I have chosen to work on. The shape and design caught my eye as I was going through the pipes in the queue. The shape is what I would call a Large Billiard. It is a B Grade smooth, walnut finished pipe. The B grade is the “entry” level for the Upshall Straight Grains and retail new at about $1500. The finish is very dirty with dust and grime. The bowl has a thick cake and the rim top has some darkening, lava and perhaps some damage around the inner edge. The stem is oxidized and has tooth chatter and light tooth marks on both sides near the button. The surface of the button looks very good on both sides. I am including the photos that John sent of the pipe to give and idea of the general condition of the pipe before Jeff started his cleanup work on it.  (Normally Jeff has quite a few before photos but about the time this pipe came we lost a large number of photos).Before I started my work on the pipe I looked up the Upshall listing in Pipedia to remind myself of the background on the brand (https://pipedia.org/wiki/James_Upshall). I read through the article and found the section on Grading & Sizing Information really helpful. I have included that below. I have highlighted the pertinent text in red below.

James Upshall pipes are graded by various finishes, i.e. bark, sandblast, black dress and smooth etc. Then by cross grain, flame grain, straight grain and, last but not least, the perfect high grade, which consists of dense straight grain to the bowl and shank. The latter being extremely rare. In addition, the price varies according to group size, i.e. from 3-4-5-6 cm high approximately Extra Large. We also have the Empire Series which are basically the giant size, individually hand crafted pipes which come in all finishes and categories of grain. All our pipes are individually hand carved from the highest quality, naturally dried Greek briar. In order to simplify our grading system, let me divide our pipes into 4 basic categories.

  1. It begins with the Tilshead pipe, which smokes every bit as good as the James Upshall but has a slight imperfection in the briar. In the same category price wise you will find the James Upshall Bark and Sandblast finish pipes, which fill and smoke as well as the high grades.
  2. In this category we have the best “root quality” which means that the grain is either cross, flame or straight, which is very much apparent through the transparent differing color finishes. This group will qualify as the “S”- Mahogany Red, “A” – Chestnut Tan and “P” – Walnut. The latter having the straighter grain.
  3. Here you have only straight grain, high grade pipes, which run from the “B”, “G”, “E”, “X” and “XX”. The latter will be the supreme high grade. Considering the straightness of the grain the latter category is also the rarest. Usually no more than 1% of the production will qualify.
  4. Lastly, we have the Empire Series. These are basically Limited Edition gigantic individually hand crafted pieces, which again are extremely rare due to the scarcity of large, superior briar blocks.

There was a link at the bottom of the article that led to a 1984 Catalogue. I have included a page from that catalogue below (https://pipedia.org/images/a/a6/James_Upshall_1984Catalog.pdf).    The pipe at the top of the photo marked Medium Billiard is similar in shape to the one I am working on but the one I have I would classify as a Large Billiard.I turned to the James Upshall of England website and looked up the guarantee on their pipes. I have included it below because of the commitment to quality that is spoken of in the description (http://www.upshallusa.com/products.htm).I also copied the section from the website on the B-Grade pipe and the description about the nature of the briar used in that pipe (http://www.upshallusa.com/html/JUB-Grade.htm).Armed with that information I turned my attention to the pipe itself. Jeff had cleaned the pipe with his usual penchant for thoroughness that I really appreciate. He reamed it with a PipNet pipe reamer and cleaned up the reaming with a Savinelli Fitsall Pipe Knife. He scrubbed out the internals with alcohol, pipe cleaners and cotton swabs until the pipe was clean. He scrubbed the exterior of the bowl with Murphy’s Oil Soap and a tooth brush to remove the grime and grit on the briar and the lava on the rim top. The finish looks very good with good looking grain around the bowl and shank. Jeff soaked the stem in Before & After Deoxidizer to remove the oxidation on the rubber. When the pipe arrived here in Vancouver for the second stop of its restoration tour it looked very good. I took photos before I started my part of the work.   I took some close up photos of the rim top and also of the stem surface. The bowl and the rim top look good. The inner edge of the rim had some nicks in the edge. There was some wear in the finish on the rim top.  I also took close up photos of the stem to show how clean the stem was. There were very light tooth marks or chatter on both sides of the stem.  I took photos of the stamping on the shank. On the left side of the shank it reads B (Grade stamp) at the shank/bowl junction. That is followed by the James Upshall stamp in an oval. There is a JU logo on the left side of the stem. The stamping was very clear. The right side of the shank was stamped Tilshead over England over Made by Hand. The grain on this pipe was highlighted by the shaping of the pipe.I took the stem off the bowl and took a picture of the parts of the pipe to give a sense of the parts of the pipe. It really is a beautiful straight grain pipe.I decided to clean up the inner edge of the bowl and straighten out the damage to the rim edge with a folded piece of 220 grit sandpaper and polished it with 400 grit sandpaper. It did not take too much to give the edge a light bevel and remove the damage.  I sanded the briar with micromesh sanding pads – 1500-12000 grit sanding pads. I wiped the bowl surface down with a damp cloth after each sanding pad to remove the sanding dust. Once I finished the exterior of the briar was clean and the grain really stood out.      I worked some Before & After Restoration Balm into the surface of the briar with my fingertips to clean, enliven and protect the briar. I let the balm sit for 15 minutes and then buffed with a cotton cloth to raise the shine. The photos show the bowl at this point in the restoration process. It looks quite nice at this point.  I set the bowl aside and turned my attention to the stem. I scrubbed the remaining oxidation on the stem with Soft Scrub all-purpose cleanser. It works well to remove oxidation in the surface of the vulcanite. The pads show the oxidation that came off.     I polished the stem with micromesh sanding pads – wet sanding with 1500-12000 grit pads. I wiped the stem down after each sanding pad with Obsidian Oil. I polished it with Before & After Pipe Stem Polish – both Fine and Extra Fine. Once I had finished the polishing I gave it final coat of oil and set it aside to dry.   I am excited to be on the homestretch with beautiful James Upshall B-Grade pipe. I look forward to the moment when it all comes back together, polished and waxed. I put the bowl and stem back together. I polished the bowl and stem with Blue Diamond to polish out the scratches in the briar and the vulcanite. I gave the bowl and the stem multiple coats of carnauba wax. I buffed the pipe with a clean buffing pad to raise the shine. I hand buffed it with a microfiber cloth to deepen the shine. The pipe polished up pretty nicely. The beautifully grained finish looks really good with the interesting grain patterns standing out on the shape. The grain and the polished black vulcanite went really well together. This James Upshall Large Billiard was another fun pipe to work on thanks to Jeff’s cleanup work. It really has that classic English look that catches the eye. The combination of various brown stains really makes the pipe look attractive. It is another comfortable pipe to hold in the hand. The finished pipe is shown in the photos below. The dimensions of the pipe are Length: 6 inches, Height: 2 ¼ inches, Outside diameter of the bowl: 1 ½ inches, Chamber diameter: ¾ of an inch. The weight of the pipe is 51grams/1.76oz.  This is an Upshall that catches my eye. This is the last of the three Upshalls that I have here and I am probably going to hand on to this one. Thanks for reading this blog and my reflections on the pipe while I worked on it. This was an interesting estate to bring back to life.

Restoring a Peterson’s of Dublin System Standard 303 from a Zippo gift set.


Blog by Steve Laug

The next pipe on the work table came to us from an antique store on one of Jeff’s pipe hunts in Utah, USA. It is a smooth Peterson’s Apple shaped System pipe with a saddle vulcanite stem. The pipe is stamped on the left side of the shank and reads Peterson’s [over] of Dublin [over] System [over] Standard followed by the shape number 303. The nickel ferrule is stamped on the left side and reads ZIPPO and on the right side it reads K & P Peterson. That was interesting information so I did a bit of hunting on the web and found photos of a gift set that was issued by Peterson and Zippo together. I wrote them and asked about when it was first issued. In the mean time I also found a link on Pipesmagazine.com where the gift set was discussed and some photos shared of the original (https://pipesmagazine.com/forums/threads/peterson-zippo-combo.1499/). I have included the photos below as they provide a context for the pipe I am working on. I only wish I had the Zippo lighter that it came with originally! It appears from the photos that the set sold for at least $99.00US.

The pipe on the desk before me now was similar to the one in the above photos. It had different grain but the shape and stamping was identical. The finish had a lot of grime ground into it and it was very dirty. The bowl was moderately caked and there was a lava coat on the flat rim top and the beveled inner edge of the rim. The edges looked okay but we would know more after the cleanup.. The nickel ferrule was undamaged and did not have dents of nicks in the surface. It was oxidized a bit but would clean up very well. It is stamped K&P [over] Peterson on the right side of the ferrule and had the ZIPPO logo on the left side of the ferrule. The stem was oxidized, calcified and had tooth chatter and marks on the top and underside near the P-lip style button. It also had a unique style stem in terms of fitting to the ferrule. The pipe seems petite to me but I do not have another 303 to compare it to so it is only a feeling. The pipe showed promise but it was very dirty. Jeff took photos of the pipe before he started his cleanup work.   He took photos of the rim top and bowl to give a clear picture of the thickness of the cake and the condition of the rim top and edges. He also took photos of the top and underside of the stem to show the oxidation, calcification and chatter and tooth marks.    Jeff took a photo of the side and heel of the bowl to give a picture of what the briar around the pipe looked like.   He took photos of the stamping on the shank and the nickel ferrule. It reads as noted above and is clear and readable.   Jeff had cleaned up the pipe with his usual penchant for thoroughness. He reamed the pipe with a PipNet Pipe Reamer and cleaned up the remnants with a Savinelli Fitsall Pipe Knife.  He scrubbed the bowl with undiluted Murphy’s Oil Soap with a tooth brush. He rinsed it under running warm water to remove the soap and grime. He cleaned out the inside of the shank and the airway in the stem with alcohol, cotton swabs and pipe cleaners. He soaked the stem in Before & After Deoxidizer and rinsed it off with warm water. I took photos of the pipe once I received it. The rim top and inner edge of the rim looked very good with a bit of damage on the inner bevel of the rim surface. The stem surface looked very good with some tooth marks and chatter on both sides near the button. I took a photo of the stamping on the shank. It is clear and readable as noted above.    I removed the stem and took a photo of the pipe to give a sense of the whole. The stem is a fancy saddle version. The pipe was in such good condition that I started by rubbing it down with Before & After Restoration Balm. I worked it into the surface of the bowl sides and shank with my fingertips. The product works to clean, enliven and protect the briar. I let the balm sit for a little while and then buffed with a cotton cloth to raise the shine.     I set the bowl aside and turned to work on the stem. I sanded the tooth chatter and marks with 220 grit sandpaper to smooth them out and blend them into the surface. I started polishing the stem with 400 grit wet dry sandpaper.   I polished the vulcanite stem with micromesh sanding pads – 1500-12000 grit pads. I wiped it down with a damp cloth after each sanding pad. I used Before & After Pipe Polish – both Fine and Extra Fine to further polish the stem.    This Peterson’s of Dublin System Standard 303 Bent Apple originally made in partnership with Zippo with a vulcanite saddle stem is a great looking pipe now that it has been restored. The beautiful grain that shines through the polished finish is stunning. As the pipe is smoked the patina should develop and look even better. I put the stem back on the bowl and carefully buffed the pipe with Blue Diamond on the buffing wheel. I gave the bowl and the stem multiple coats of carnauba wax on the buffing wheel and followed that by buffing the entire pipe with a clean buffing pad. I hand buffed the pipe with a microfiber cloth to deepen the shine. The finished Peterson’s System Standard 303 fits nicely in the hand and feels great. Give the finished pipe a look in the photos below. The dimensions of the pipe are Length: 5 ½ inches, Height: 1 ½ inches, Outside diameter of the bowl: 1 ¼ inches, Chamber diameter: ¾ of an inch. The weight of the pipe is 47gr/1.66oz. If you are interested in adding this pipe to your collection send me a message or an email. Thanks for reading this blog and my reflections on the pipe while I worked on it. There are many more to come!

Cleaning up a Peterson’s Made Republic Era Irish Second Rhodesian


Blog by Steve Laug

The next pipe on the work table came to us from Ebay 2017 and it has been sitting here for a long time. It is a nicely grained Irish Second Rhodesian with a tapered vulcanite stem. The pipe is stamped on the left side of the shank and reads IRISH SECONDS. On the right side it is stamped Made in the Republic of Ireland. Irish Seconds were a Peterson’s second line that usually did not make the grade because of flaws in the briar or sandpits. This is another nicer piece of briar than I have seen on some of the firsts I have worked on. The finish had a lot of grime ground into the smooth finish on the bowl and some darkening around the sides of the bowl. The bowl was heavily caked in the lower half of the bowl and thinner toward the top. There was a light lava coat and darkening on the inner edge of the rim. The edges looked okay but we would know more after the cleanup. There were a few sandpits and nicks around the sides of the bowl. The stem was oxidized, calcified and had tooth chatter and marks on the top and underside near the button. There were not markings or a logo on the taper stem. The pipe showed promise but it was very dirty. Jeff took photos of the pipe before he started his cleanup work. He took photos of the rim top and bowl to give a clear picture of the thickness of the cake and the condition of the rim top and edges. He also took photos of the top and underside of the stem to show the oxidation, calcification and chatter and tooth marks. Jeff took photos of the sides and heel of the bowl to give a picture of what the briar around the pipe looked like. There is some great grain under the grime. He took photos of the stamping on the shank. It reads as noted above and is clear and readable. I am including the information from Pipedia’s article on Peterson pipes. It is a great read in terms of the history of the brand (https://pipedia.org/wiki/Peterson). I have included a bit of the pertinent history here.

1950 – 1989 The Republic Era – From 1950 to the present time, the stamp for this era is “Made in the Republic of Ireland” in a block format generally in three lines but two lines have been used with or without Republic being abbreviated.

I knew that I was dealing with a Republic Era pipe made between 1950-1989. It was a smooth bent Rhodesian with nice grain. The finish was stained with a combination of brown stains. Now it was time to work on the pipe.

Jeff had cleaned up the pipe with his usual penchant for thoroughness. He reamed the pipe with a PipNet Pipe Reamer and cleaned up the remnants with a Savinelli Fitsall Pipe Knife.  He scrubbed the bowl with undiluted Murphy’s Oil Soap with a tooth brush. He rinsed it under running warm water to remove the soap and grime. He cleaned out the inside of the shank and the airway in the stem with alcohol, cotton swabs and pipe cleaners. He soaked the stem in Before & After Deoxidizer and rinsed it off with warm water. I took photos of the pipe once I received it. The rim top and inner edge of the rim showed some damage. The inner edge of the bowl was roughened and showed some darkening. The rim top also showed some damage. The stem surface looked good with some remaining oxidation and tooth marks and chatter on both sides near the button.     I took a photo of the stamping on the shank. It is clear and readable as noted above.    I removed the stem and took a photo of the pipe to give a sense of the whole. The stem is short and tapered. I decided to start my work on the pipe by cleaning up the damaged rim top and inner edge. I reworked the edge and top with a folded piece of 220 grit sand paper. Once I finished the rim and edges looked much better.I moved next to repairing the damaged fills on the underside of the shank and the back side of the rim cap. I filled them in with clear super glue and briar dust. Once it cured I sanded them smooth and blended them into the surrounding briar.    I polished the bowl and the rim top, sides and shank with micromesh sanding pads – wet sanding with 1500-12000 grit pads and wiping it down after each pad with a damp cloth.  I rubbed the bowl and shank down with Before & After Restoration Balm. I worked it into the surface of the bowl sides and shank with my fingertips to clean, enliven and protect the briar. I let the balm sit for a little while and then buffed with a cotton cloth to raise the shine.    I set the bowl aside and turned to work on the stem. I filled in tooth marks in the stem surface with clear super glue. Once the repairs cured I used a rasp and a file to recut the button edge and flatten out the repairs. I sanded out the file marks and smoothed out the rest of the repair with 220 grit sandpaper and started polishing the stem with 400 grit wet dry sandpaper.     I polished the vulcanite stem with micromesh sanding pads – 1500-12000 grit pads. I wiped it down with a damp cloth after each sanding pad. I used Before & After Pipe Polish – both Fine and Extra Fine to further polish the stem.  This Peterson’s made Irish Second Rhodesian with a vulcanite taper stem is a great looking pipe now that it has been restored. There is some great grain around the bowl and shank. I put the stem back on the bowl and carefully buffed the pipe with Blue Diamond on the buffing wheel using a light touch on the briar. I gave the bowl and the stem multiple coats of carnauba wax on the buffing wheel and followed that by buffing the entire pipe with a clean buffing pad. I hand buffed the pipe with a microfiber cloth to deepen the shine. The finished Irish Second Rhodesian fits nicely in the hand and feels great. Give the finished pipe a look in the photos below. The dimensions of the pipe are Length: 5 ¾ inches, Height: 2 inches, Outside diameter of the bowl: 1 ¾ inches, Chamber diameter: ¾ of an inch. The weight of the pipe is 56gr/1.94oz. If you are interested in adding this pipe to your collection send me a message or an email. Thanks for reading this blog and my reflections on the pipe while I worked on it. There are many more to come!