Tag Archives: refinishing

A Savinelli de Luxe Milano 431KS Reborn Twice – PART 1: reshaping a broken stem.


Blog by Steve Laug

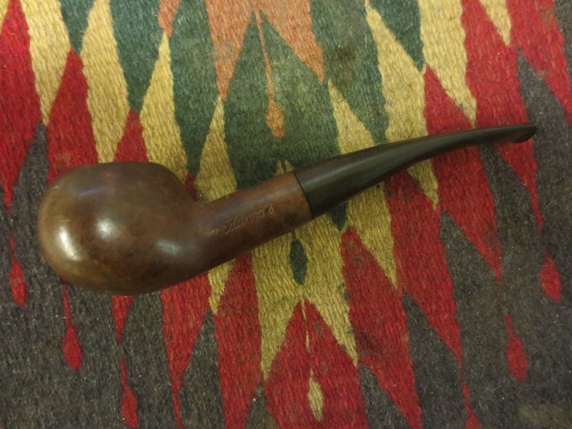
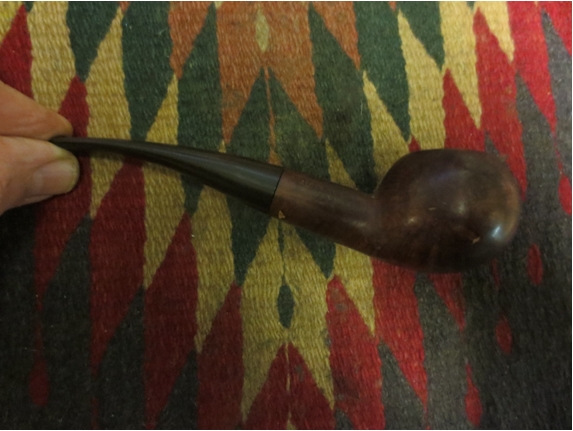
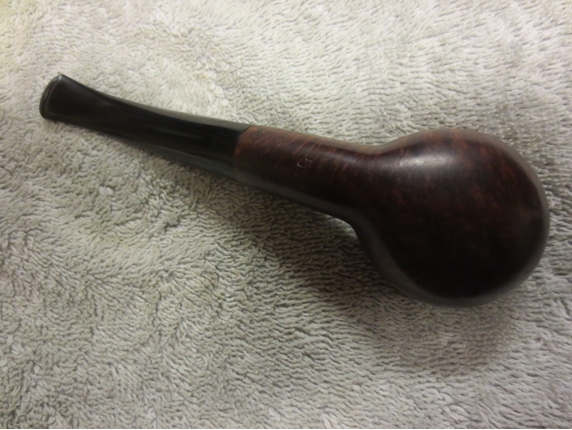
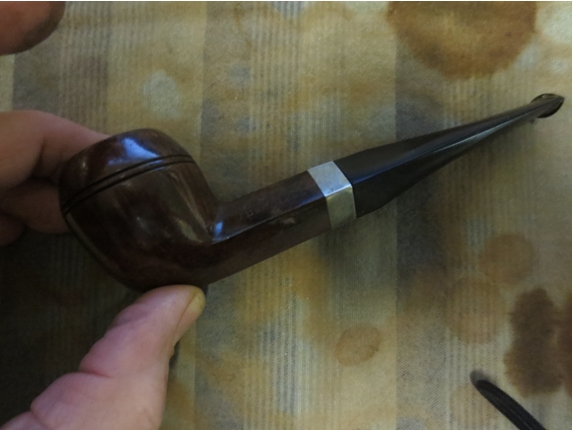
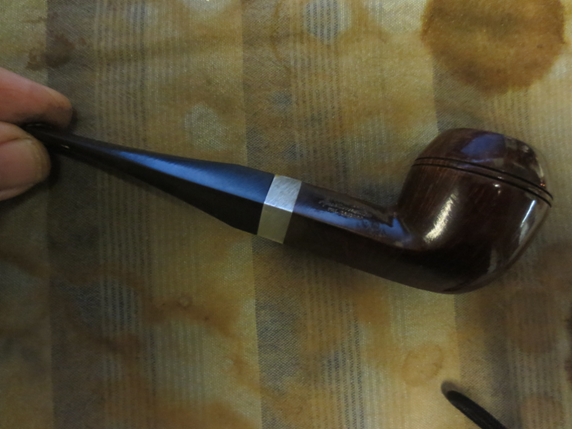
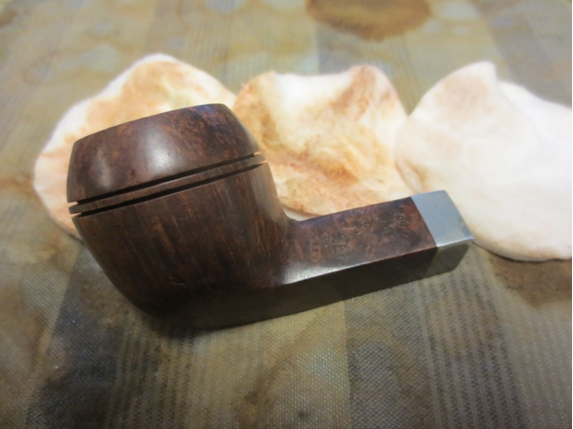
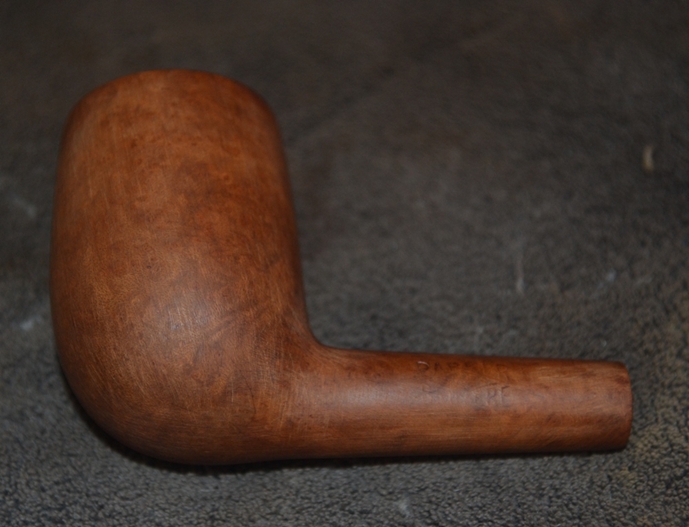
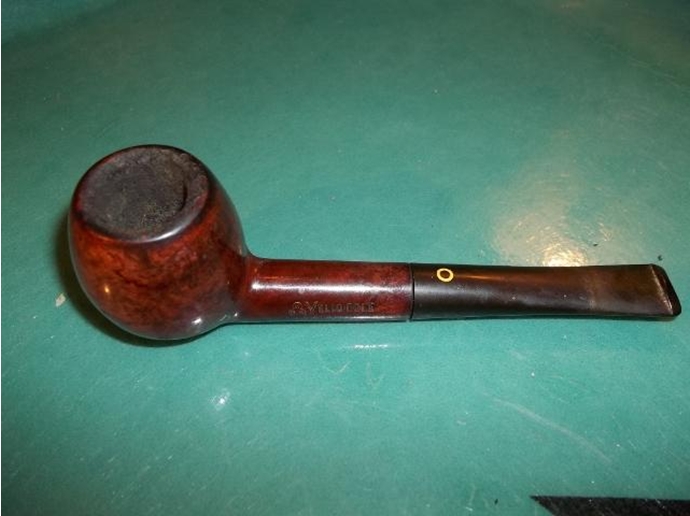
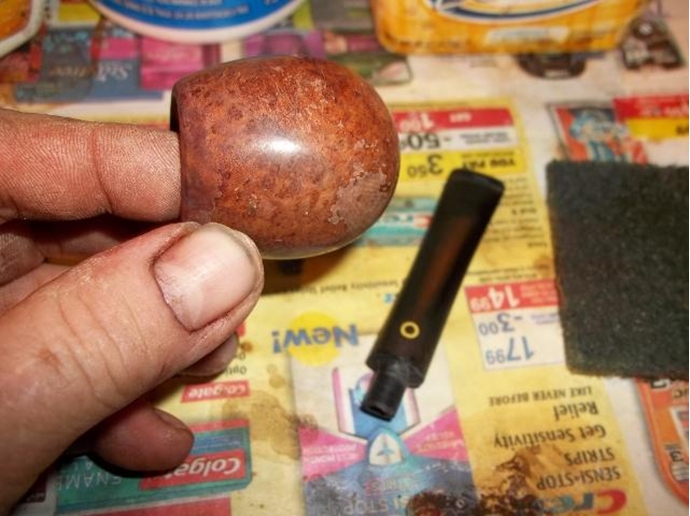
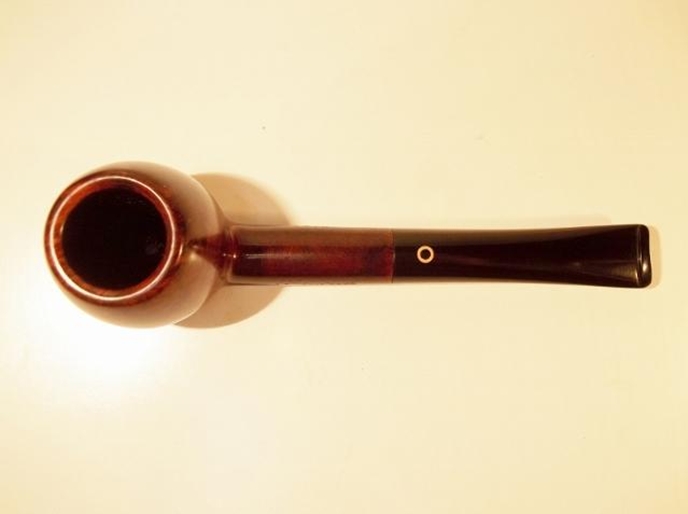
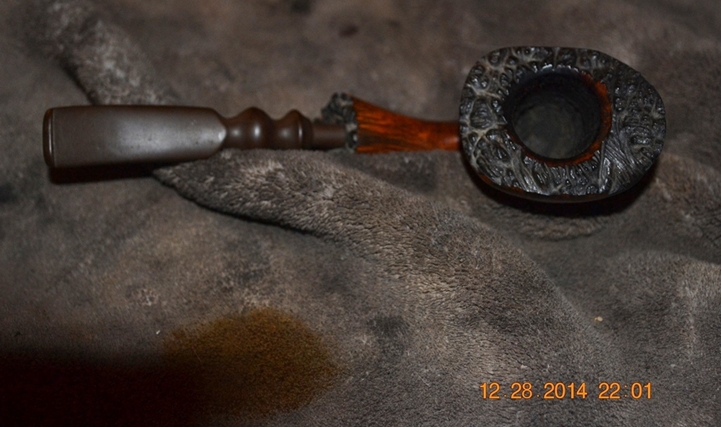
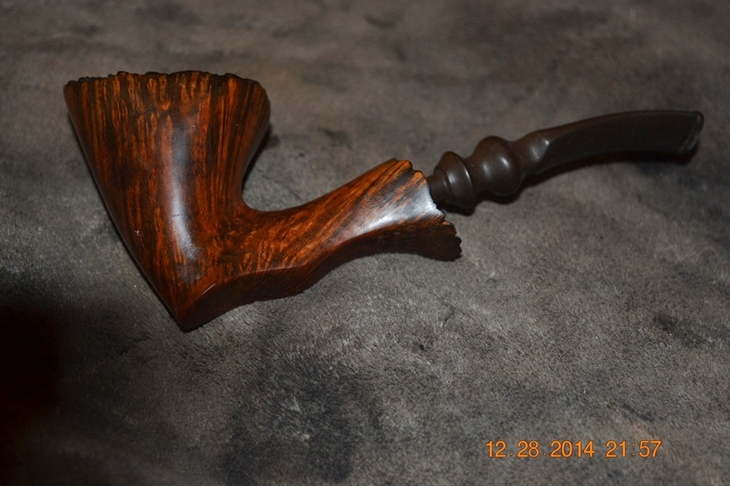
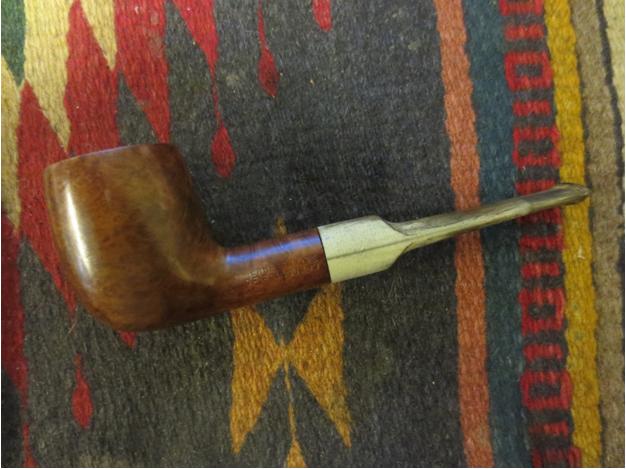
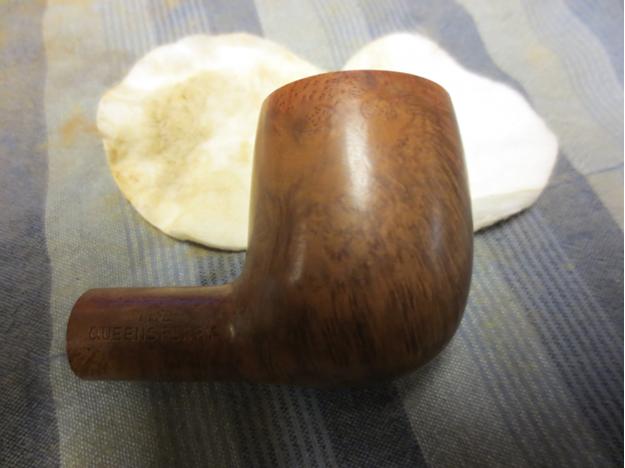
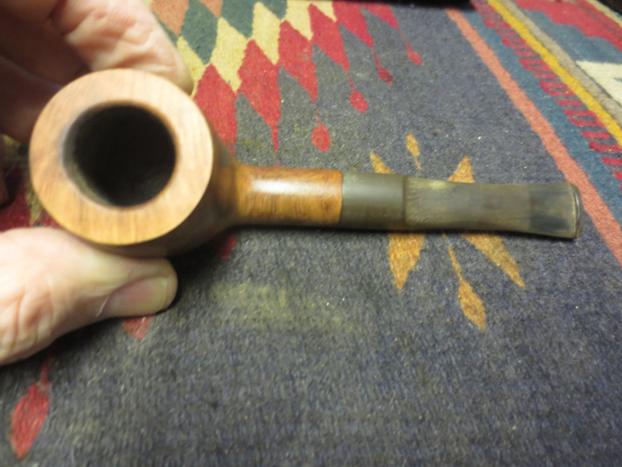
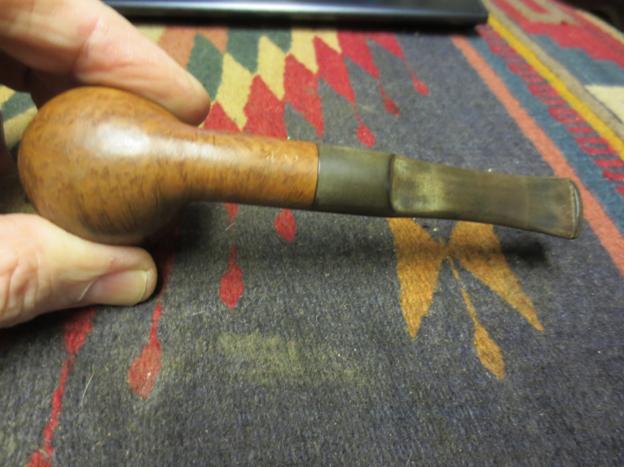
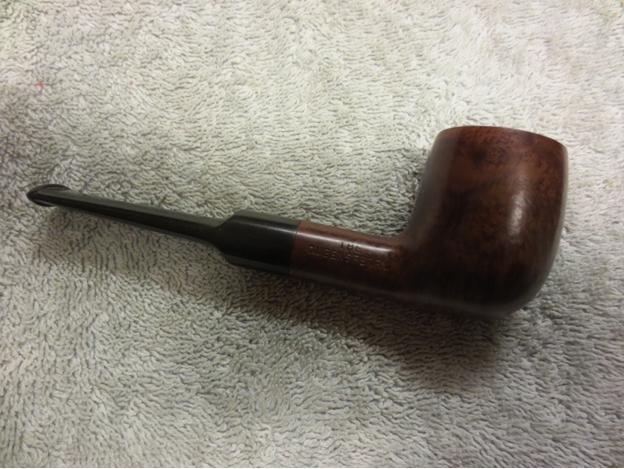
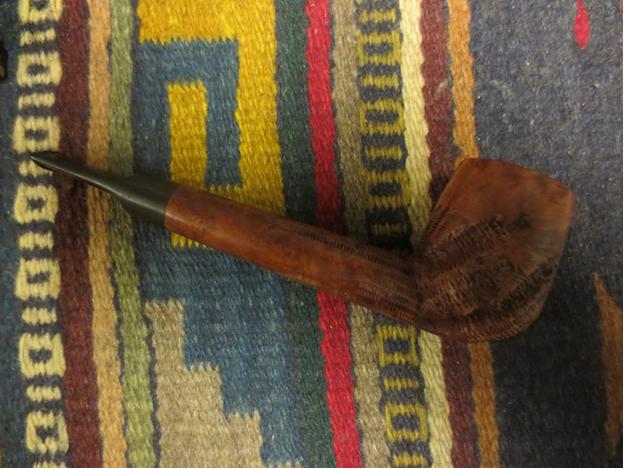
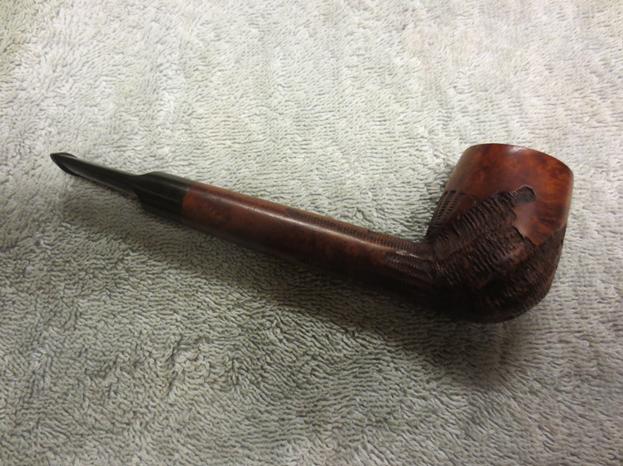
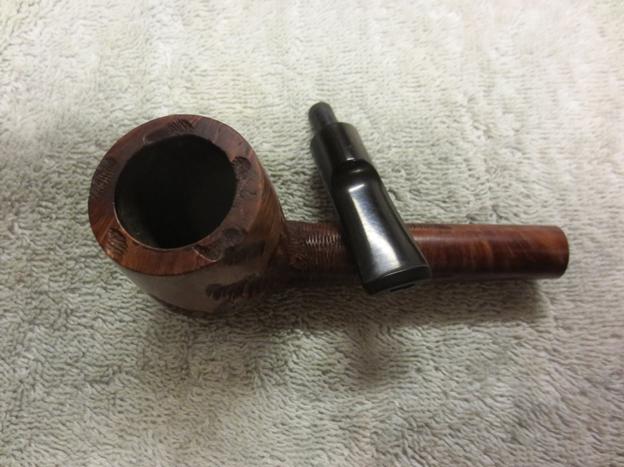
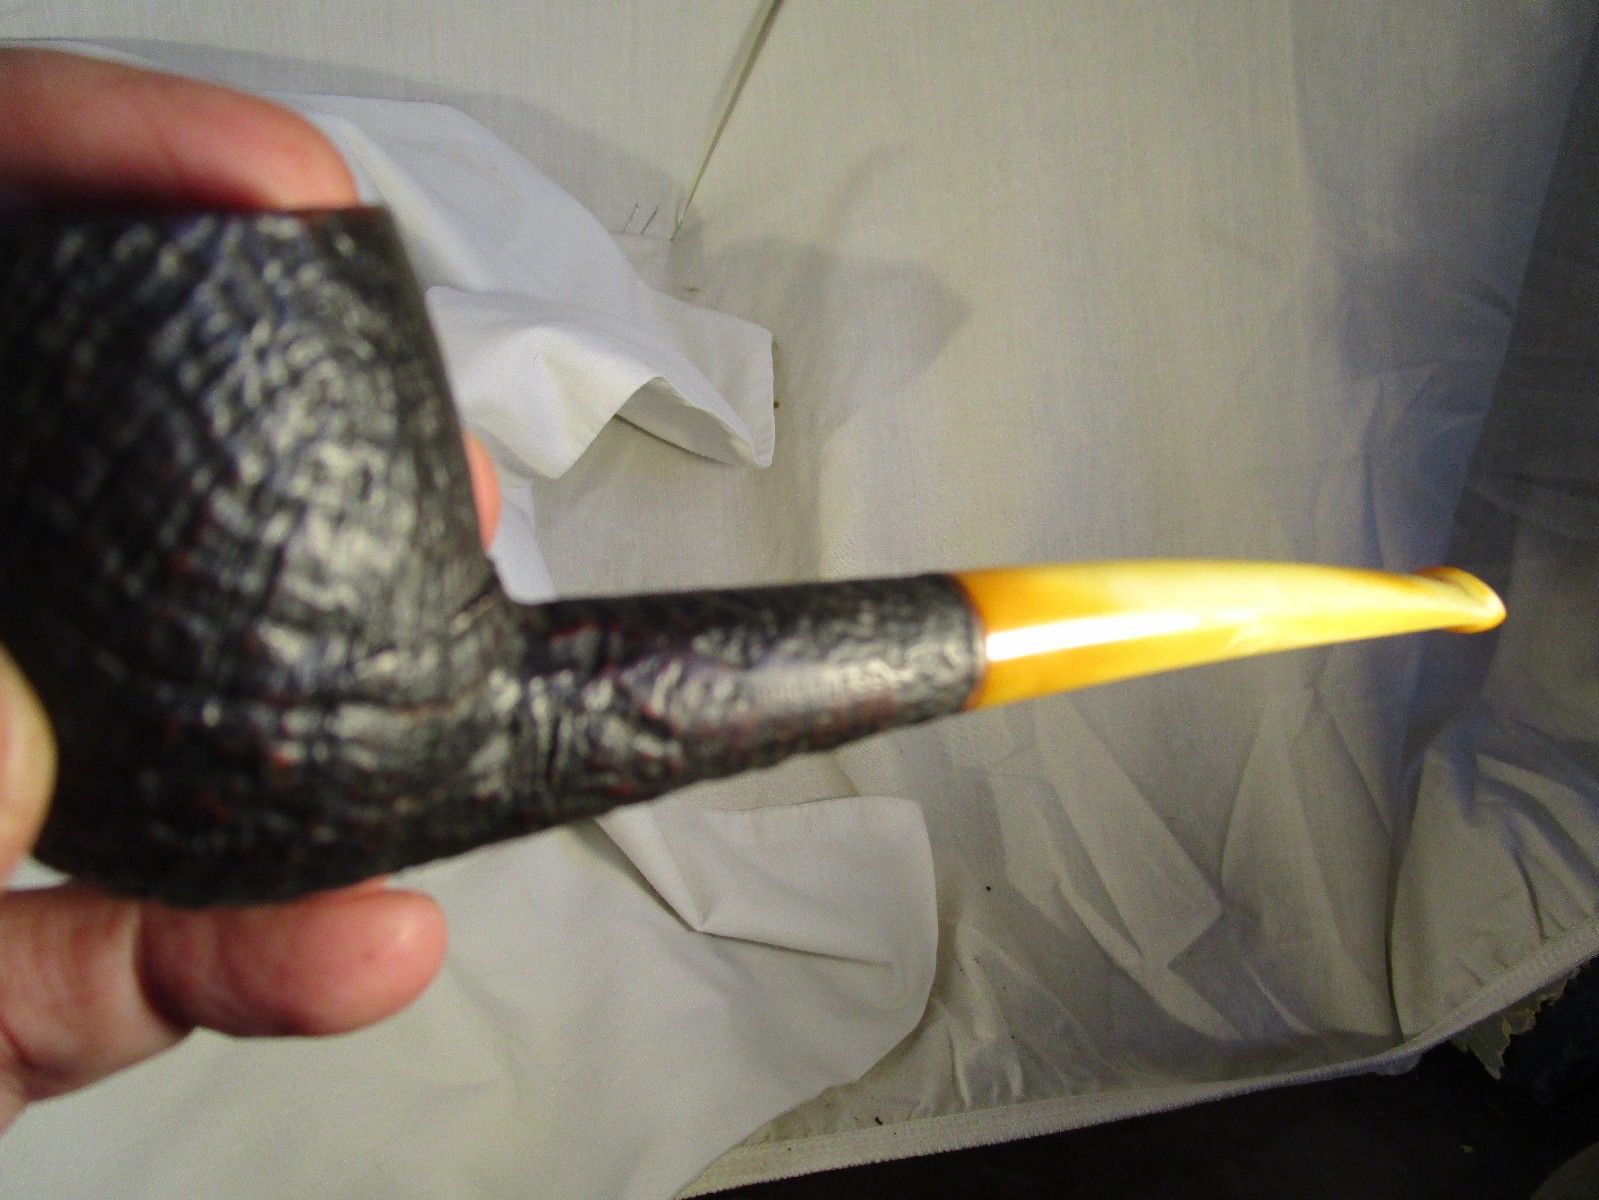
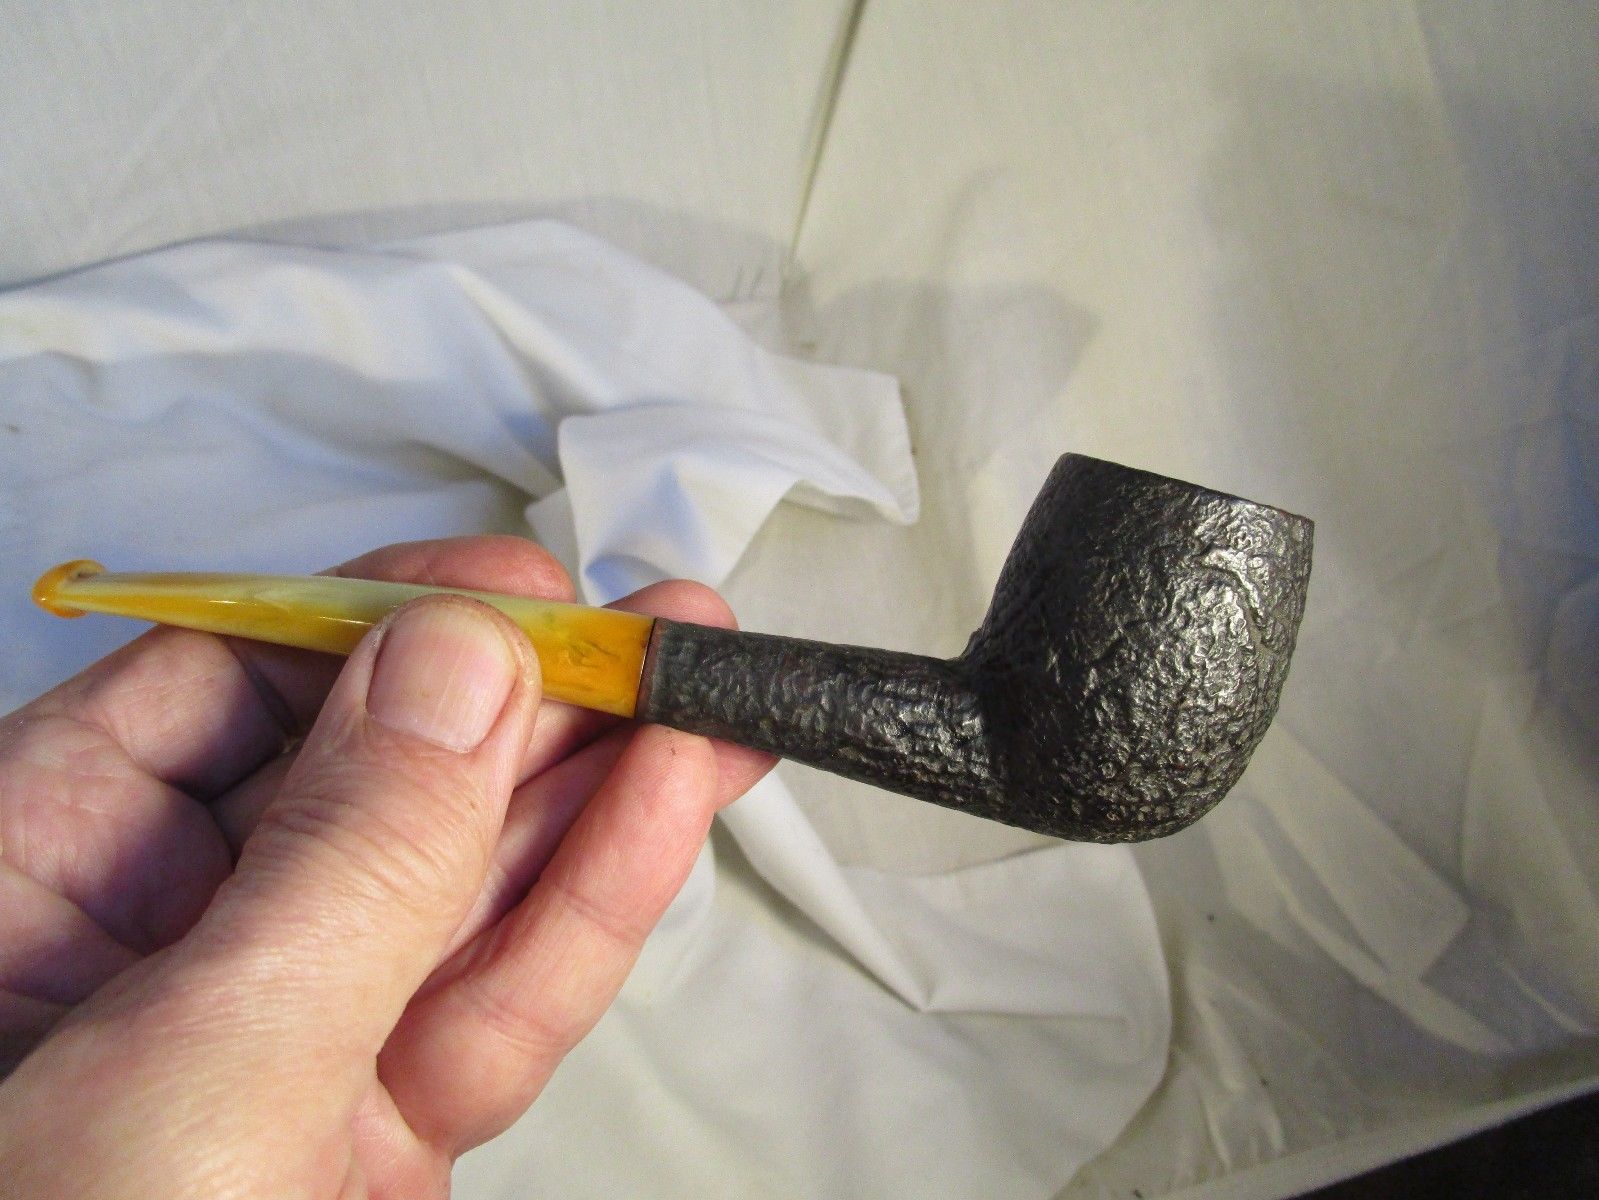
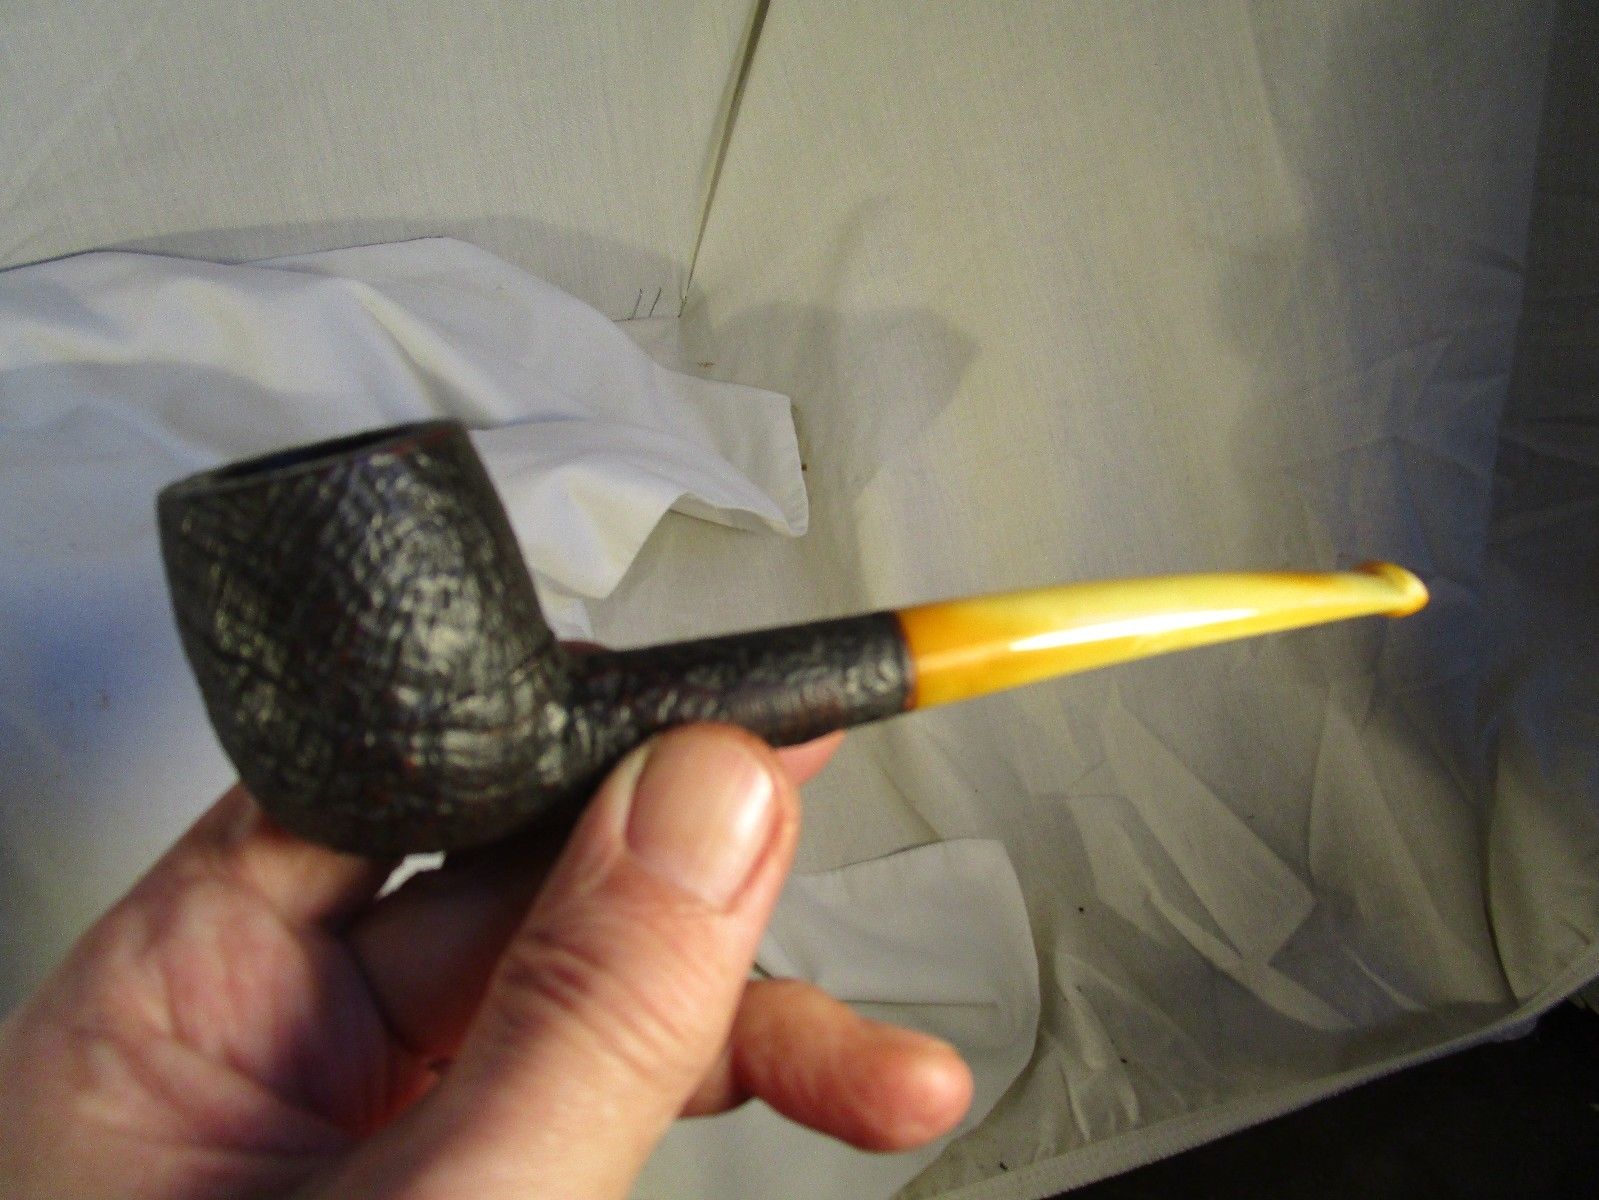
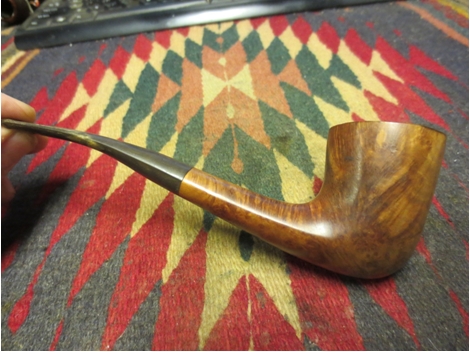
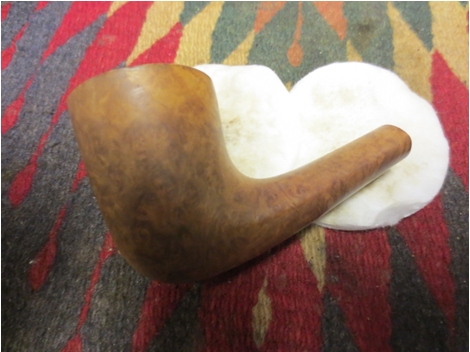
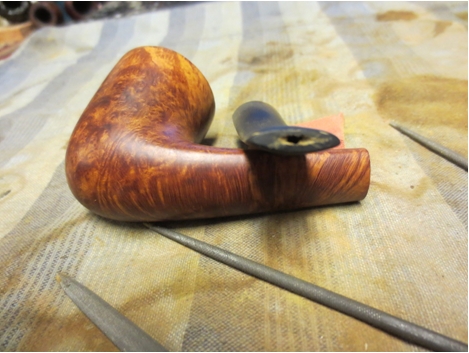
You will see by the end of this blog why I say the pipe was reborn twice. Suffice it to say in this opening paragraph that a near pipe repair tragedy occurred when I had all but finished the first rebirth.When I picked up the pipe it was one of two that I found while on a pipe hunt in Bellingham, Washington with a friend. The other pipe was a Custom Bilt that I have already blogged about. The grain on this pipe attracted my attention and made me want to see what I could do with it.Sav 
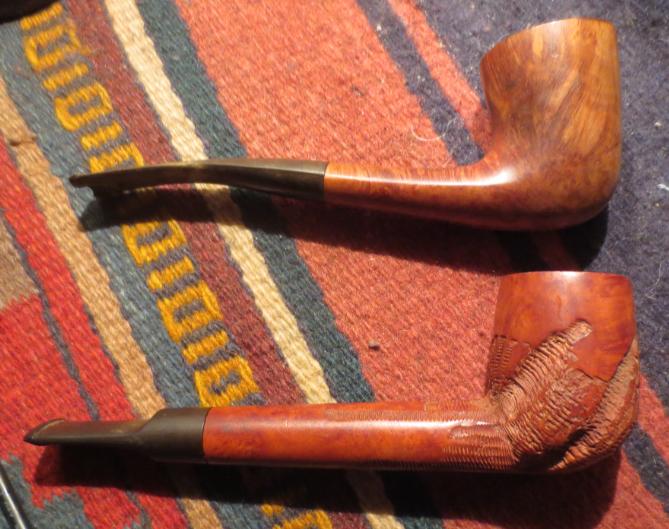
When I brought the pipe to the work table most of the issues were with the stem. The bowl had originally had a natural finish so it was dirty but not stained. There was no finish on it or varnish that needed to be removed so the clean up would be quite simple. The rim was caked with a thick tar and oil buildup that was shiny and hard. The bowl had a cake of the same material and had the sweet smell of an aromatic – lots of vanilla. The main issue with the stem was twofold. The top surface of the stem from the button up the stem about 1 inch there were many dents and bite marks. The underside of the stem had a large piece of vulcanite missing from the stem and the airway had been clamped down by biting. It also was oxidized and calcified. The fit against the shank was fairly decent with a slight gap on the left side, top and bottom at the shank.Sav1

Sav2

Sav3

Sav4 
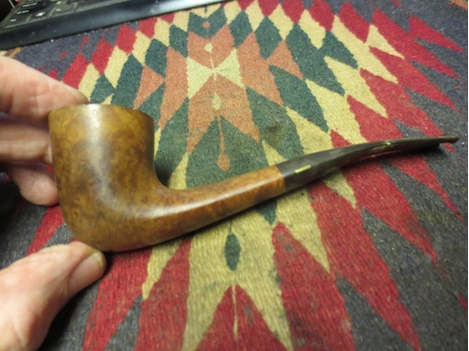
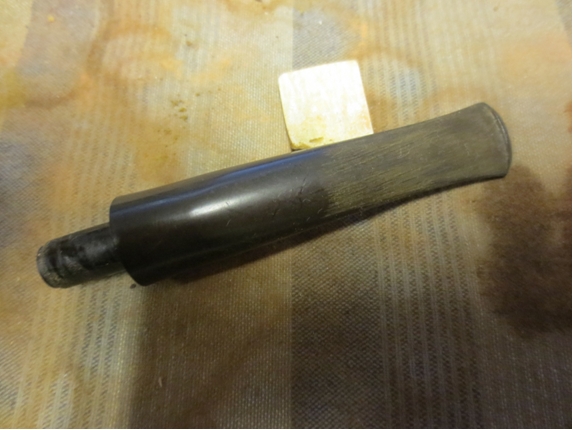
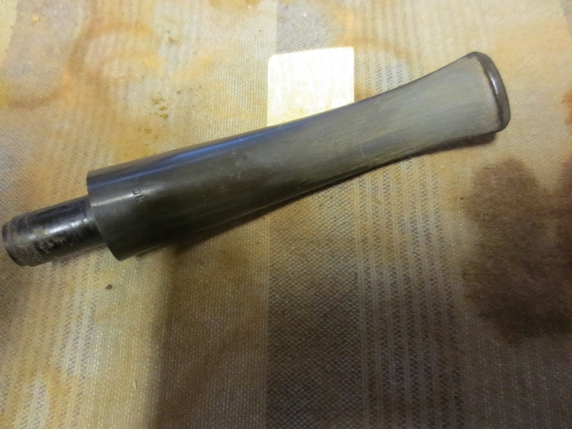
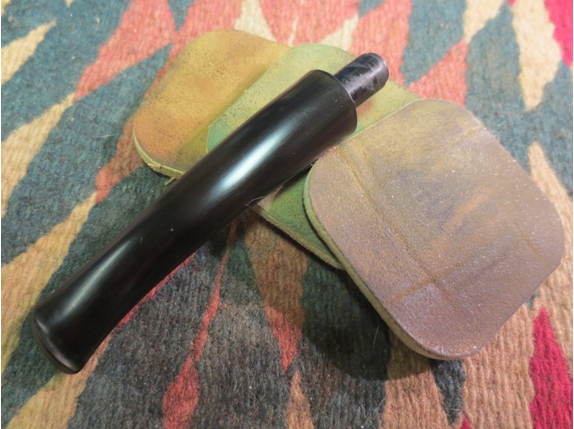
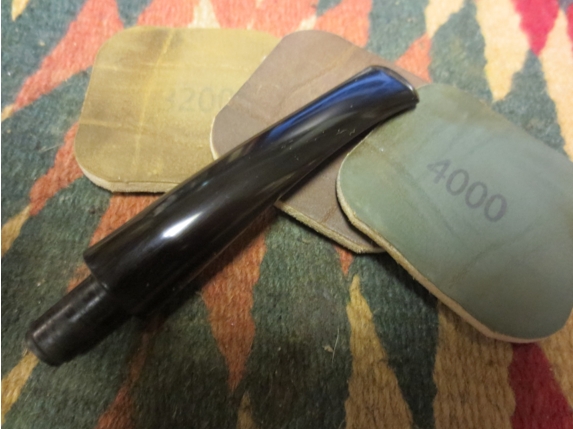
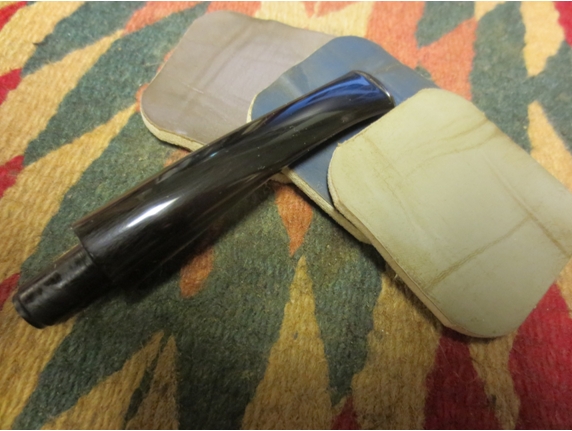
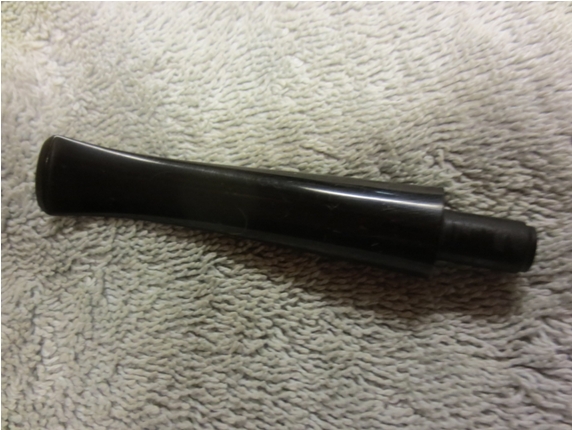
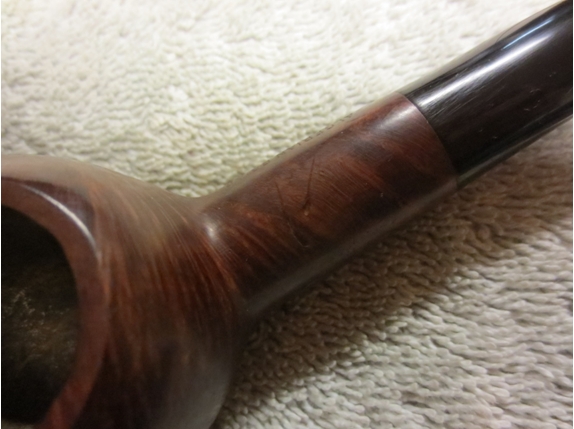
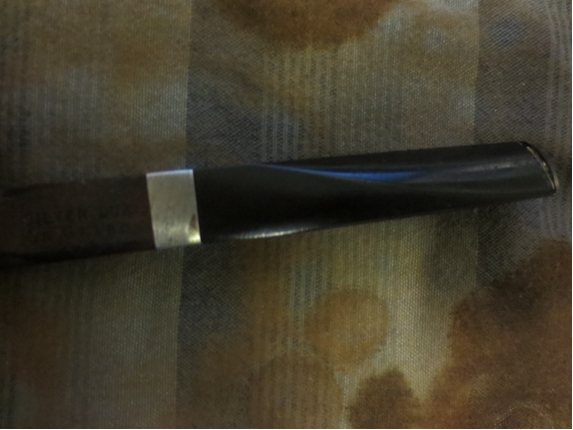
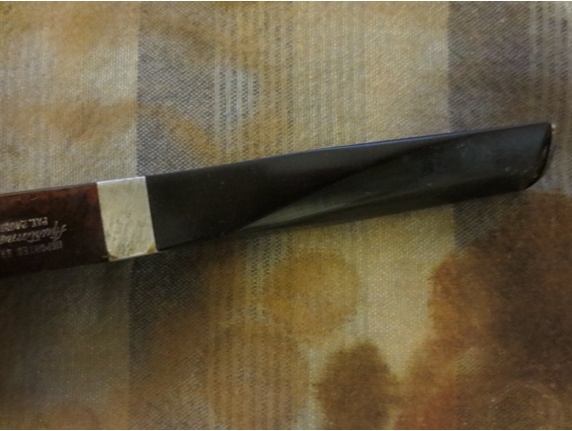
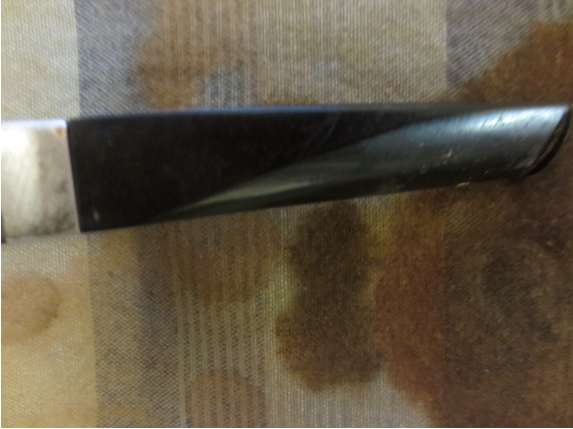
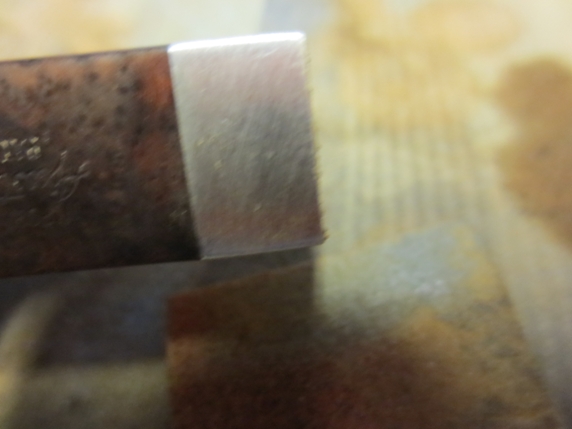
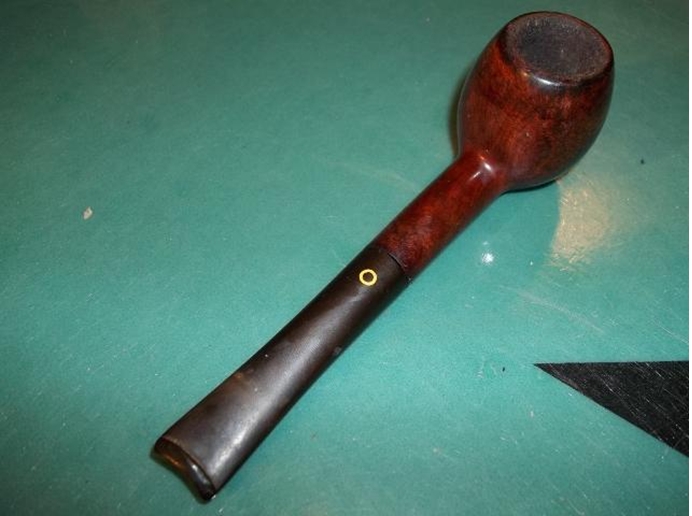
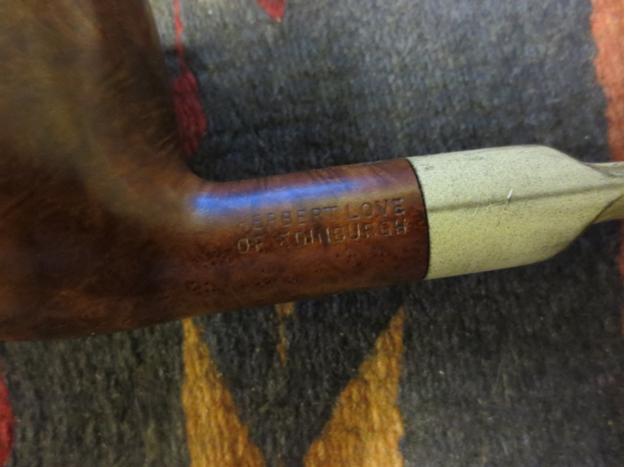
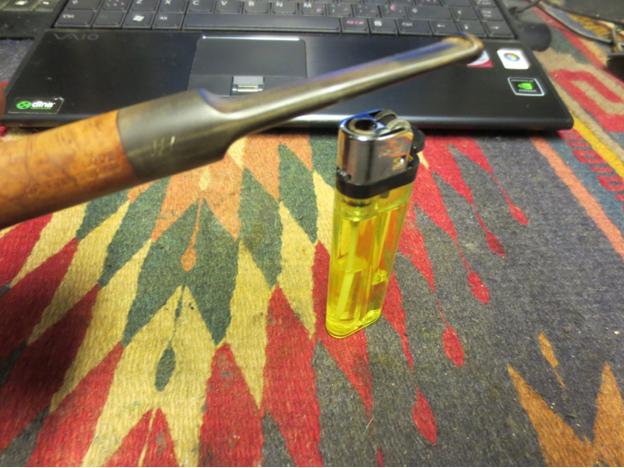
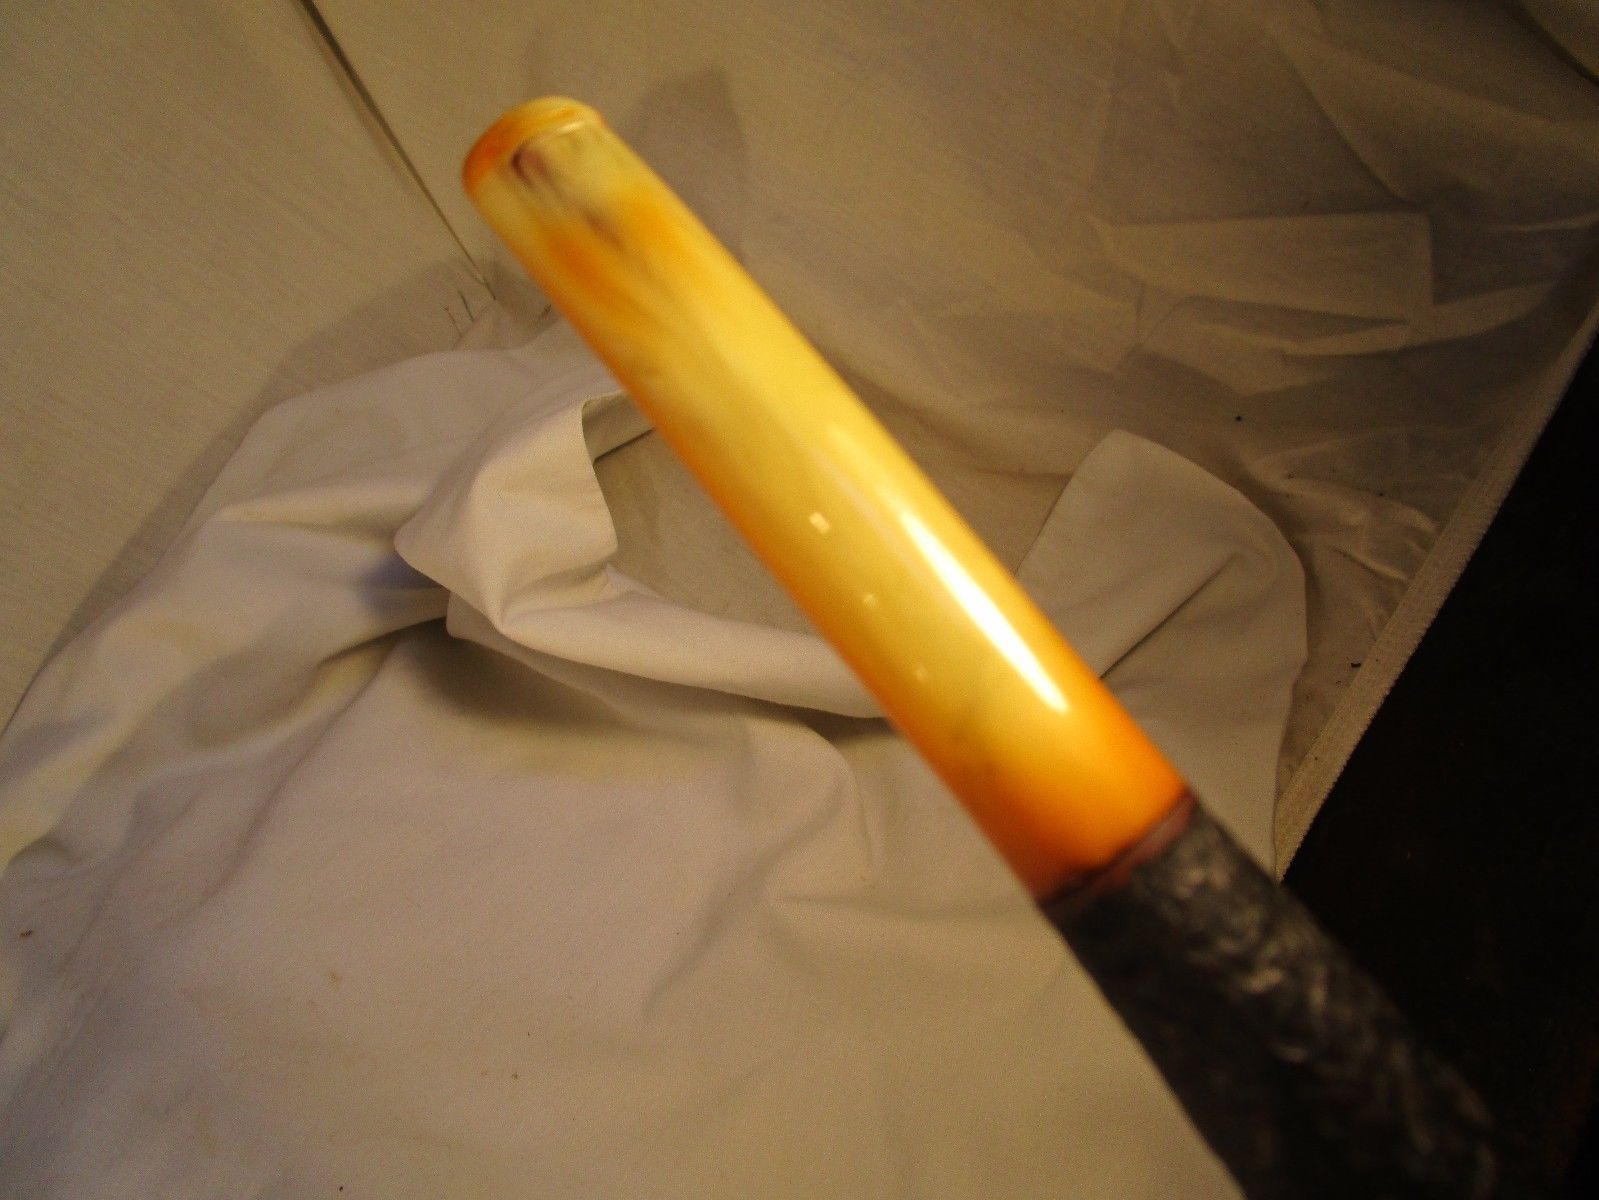
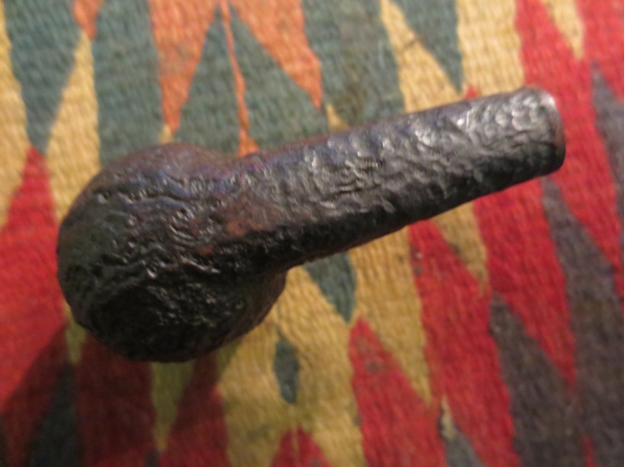
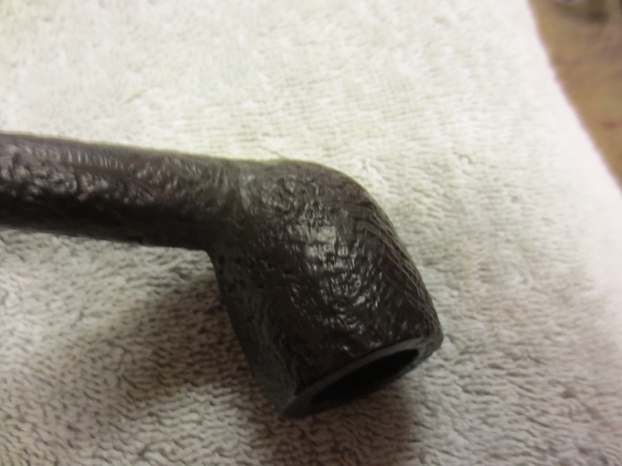
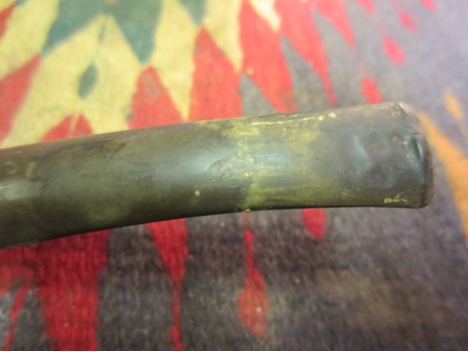
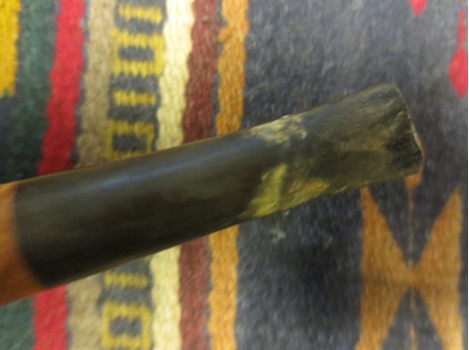
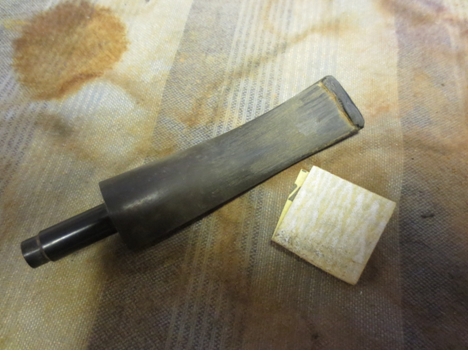
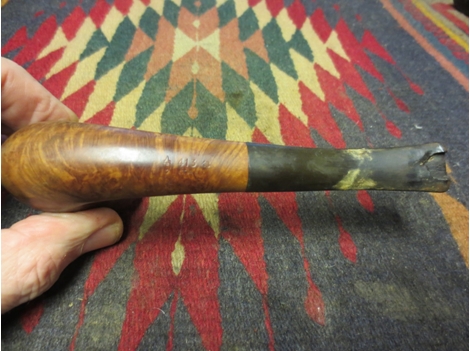
The next two close up photos of the stem show the damage to the top and bottom side of the surface next to the button. The underside is the most damaged with a huge chunk missing. The second photo shows the top of the stem with the many tooth marks and bumps that created a thin surface on the top of the stem.Sav5

Sav6 
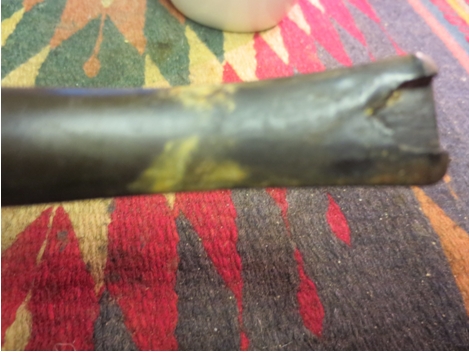
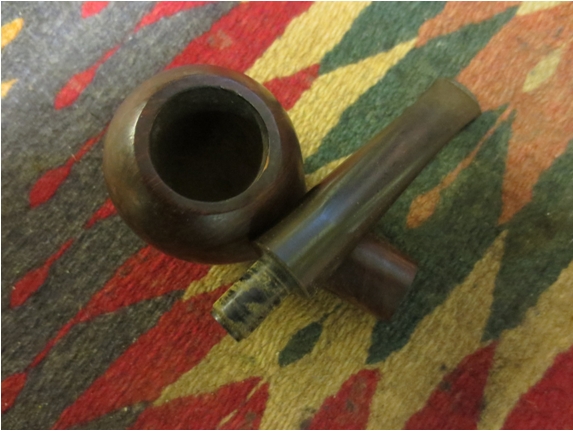
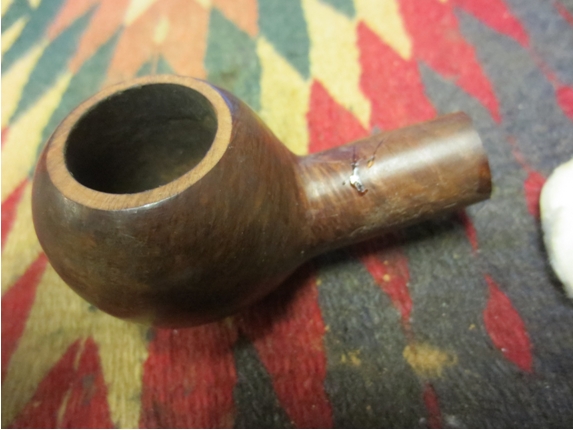
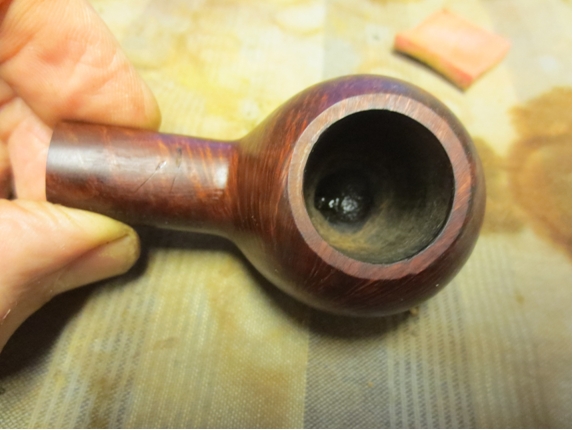
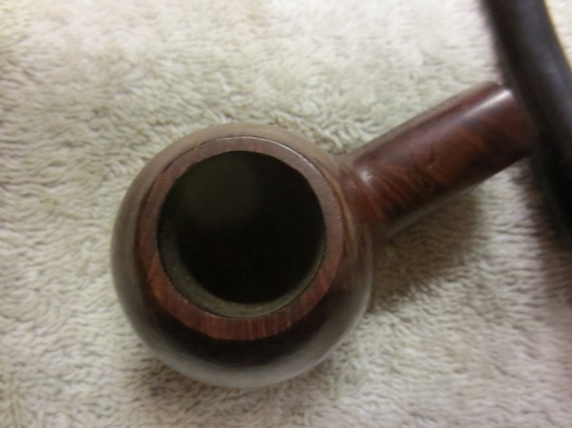
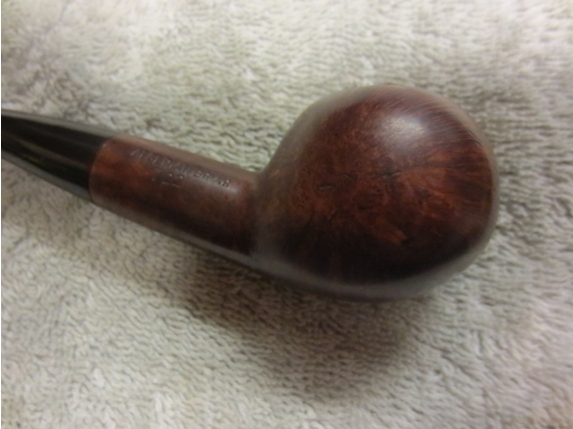
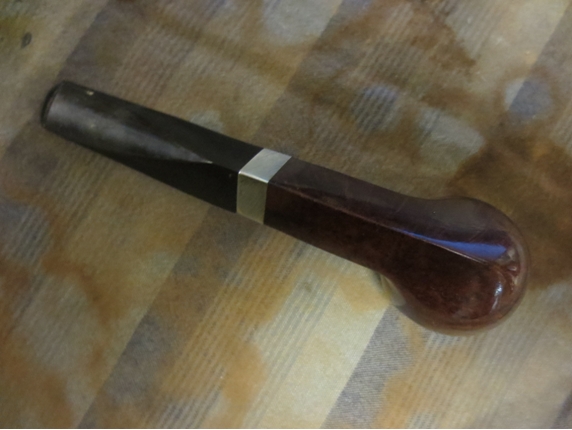
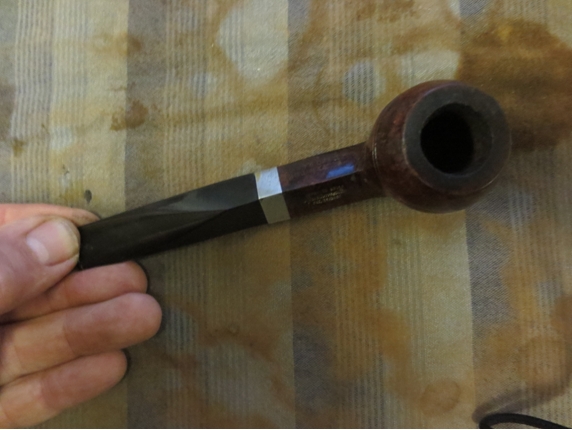
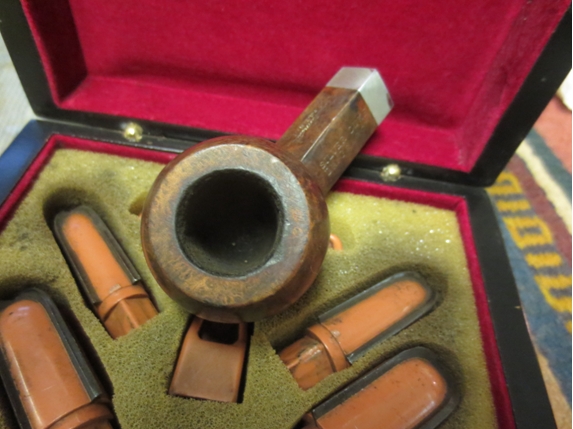
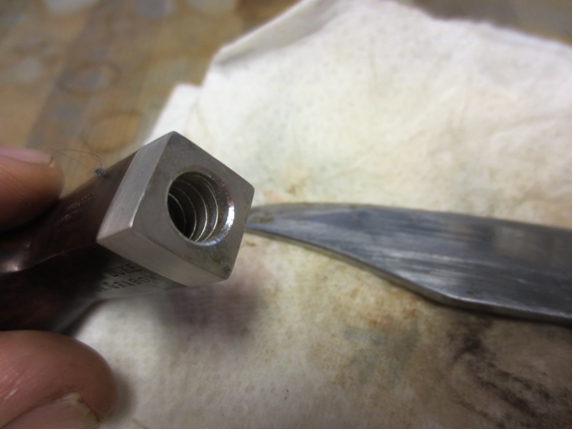
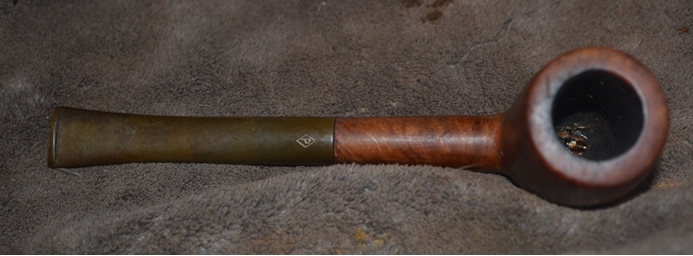
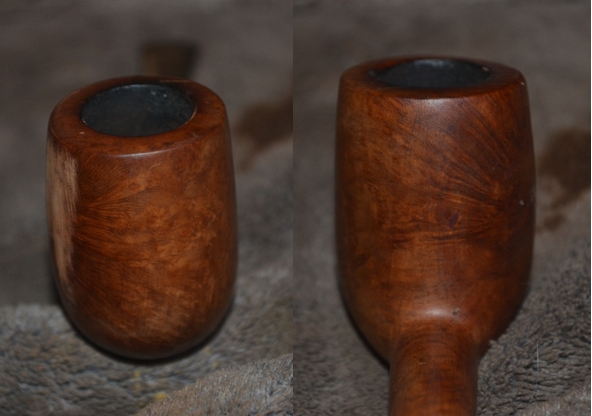
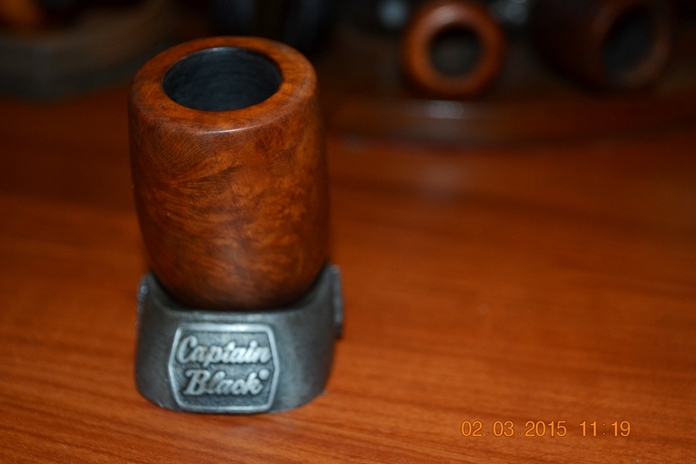
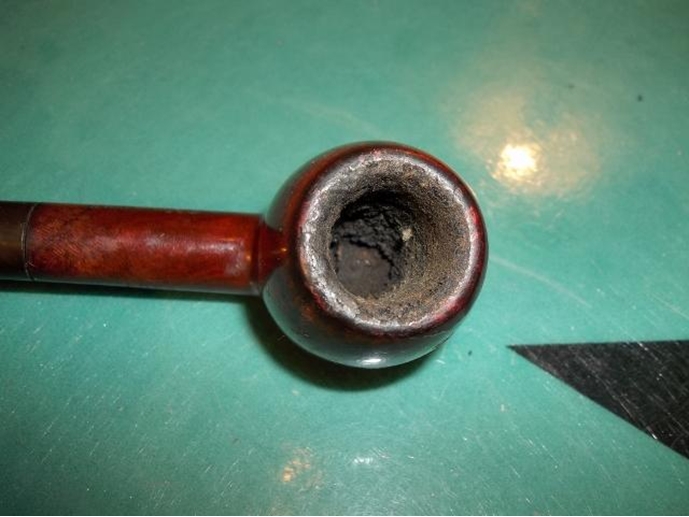
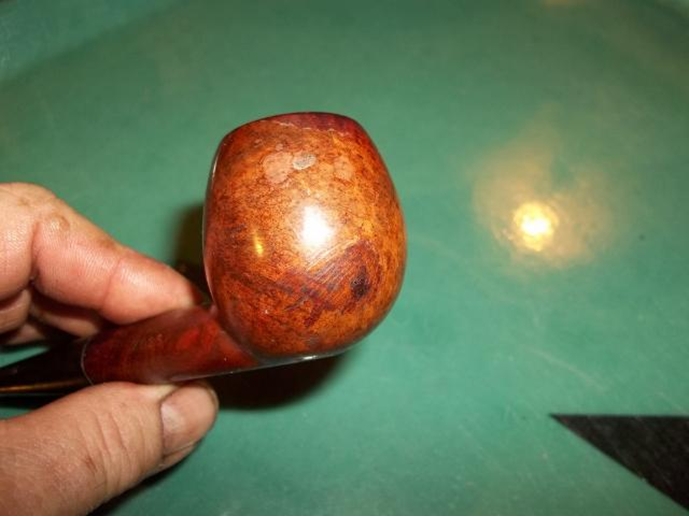
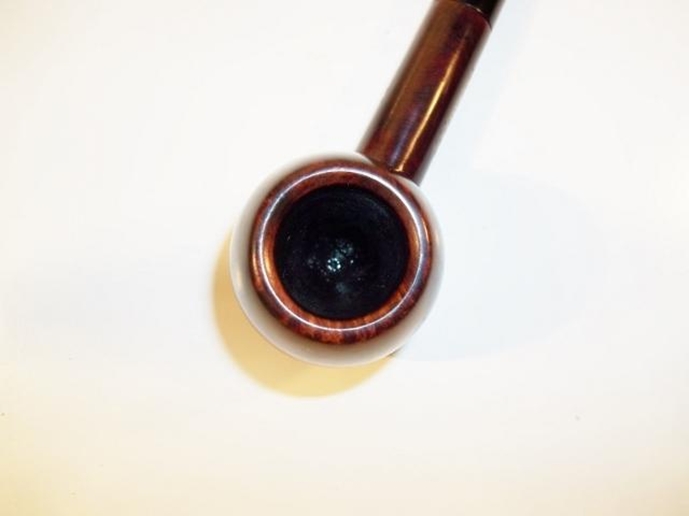
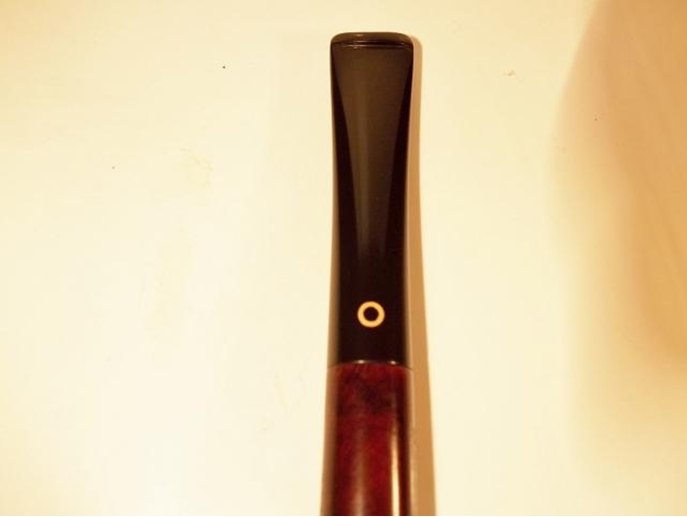
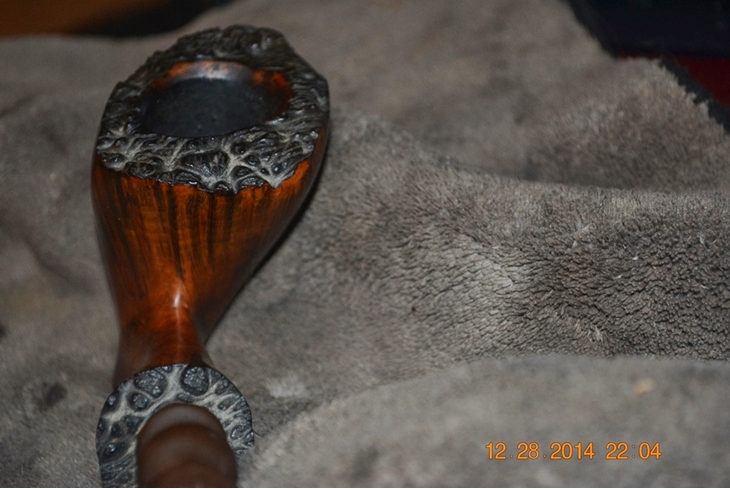
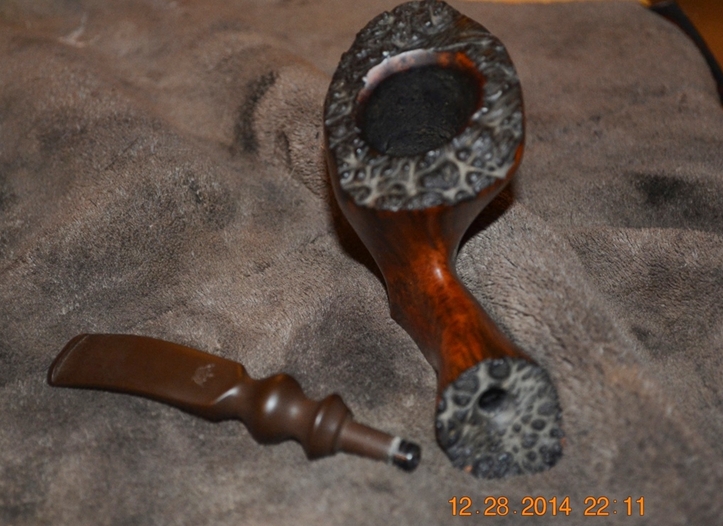
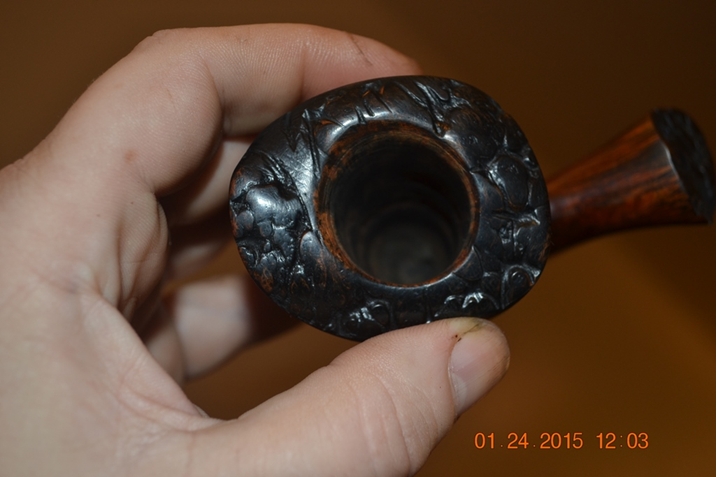
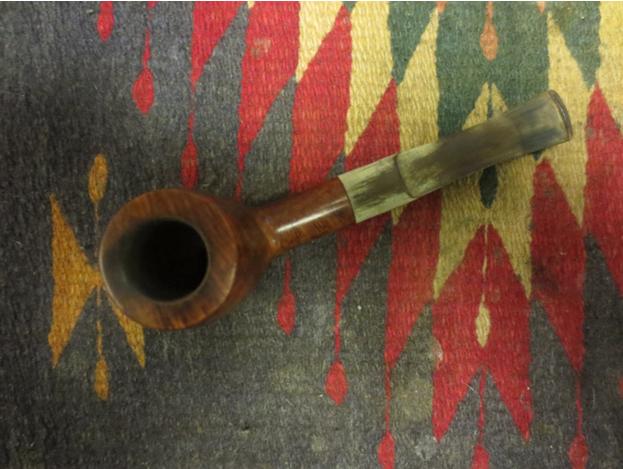
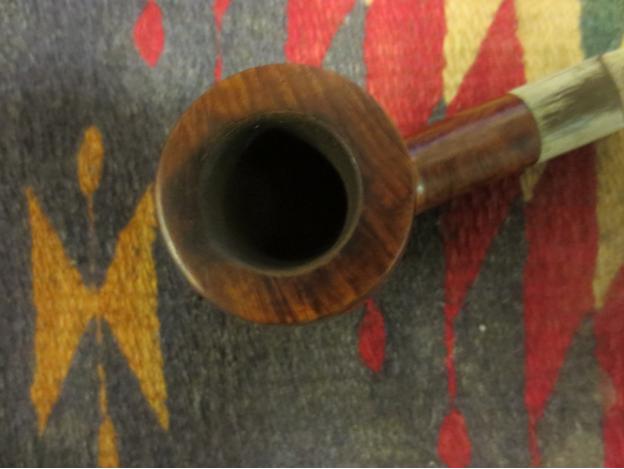
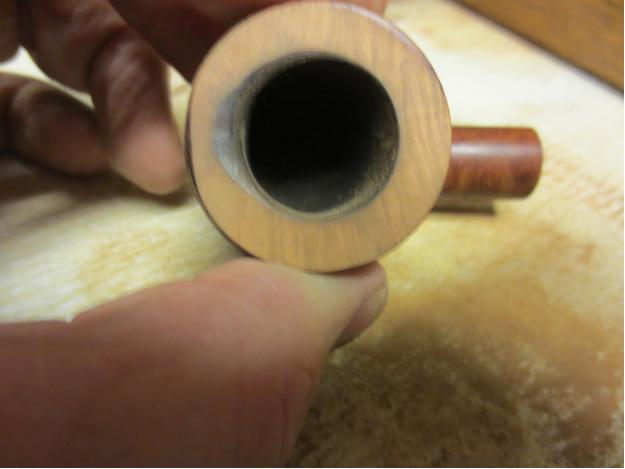
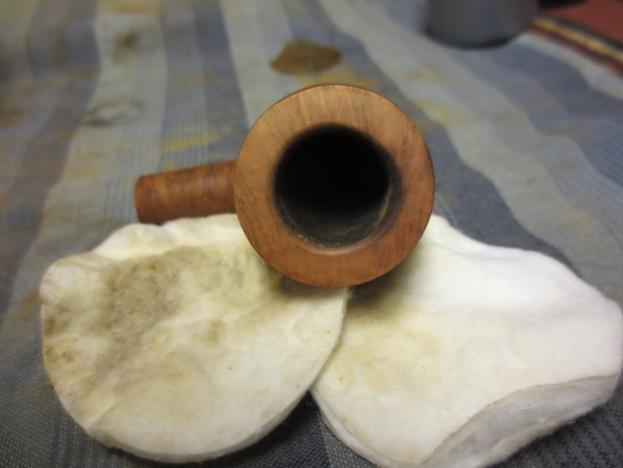
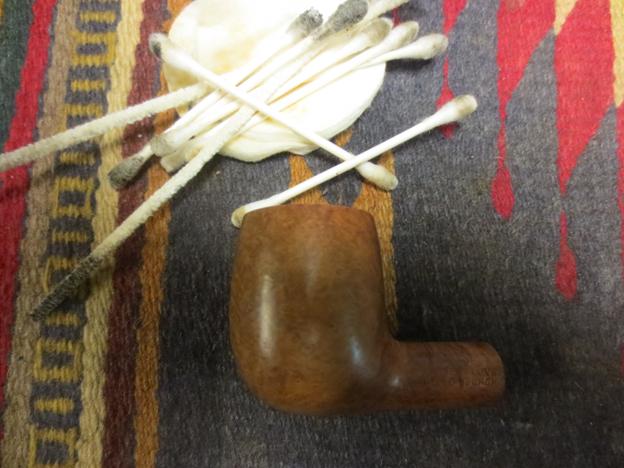
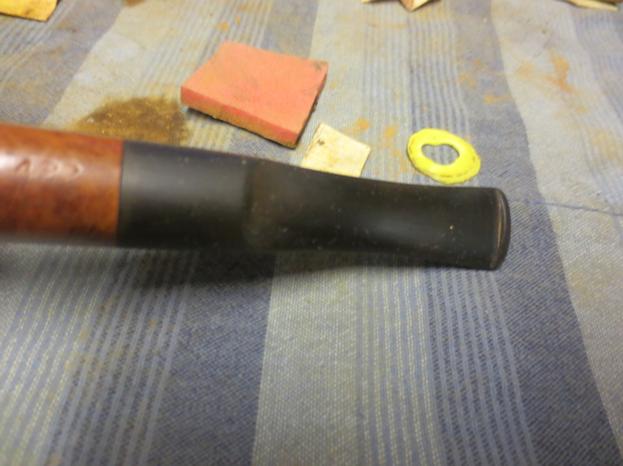
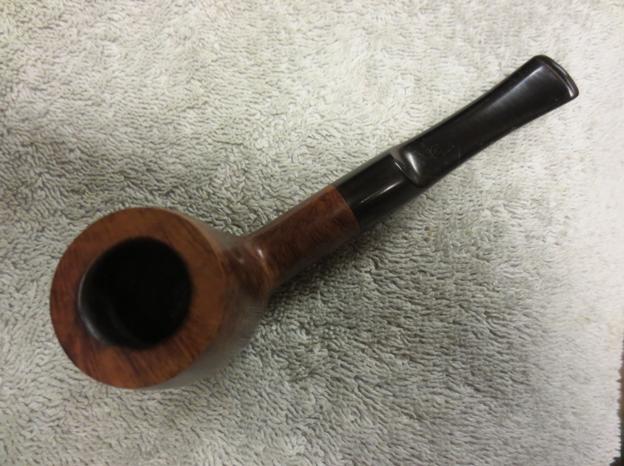
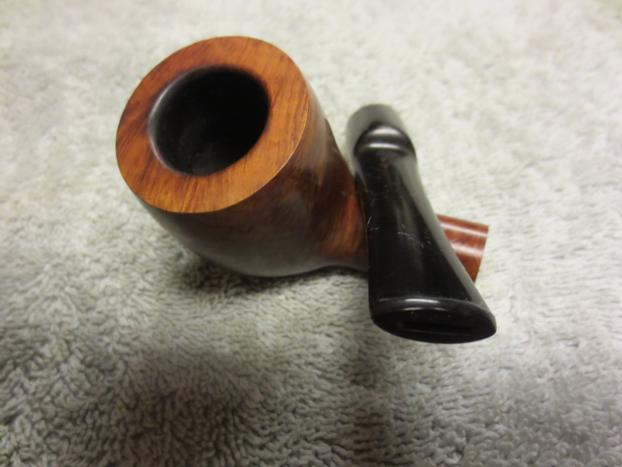
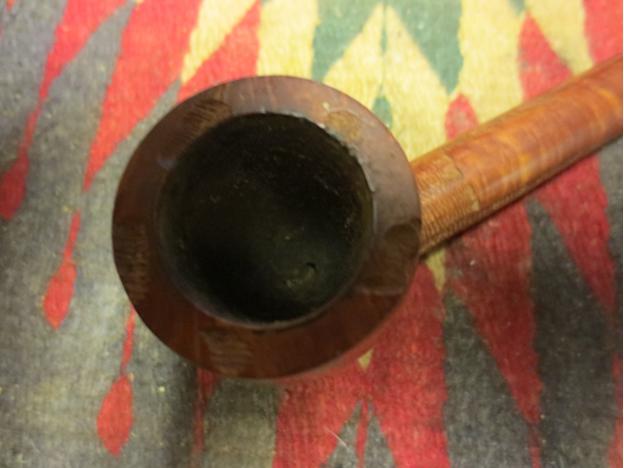
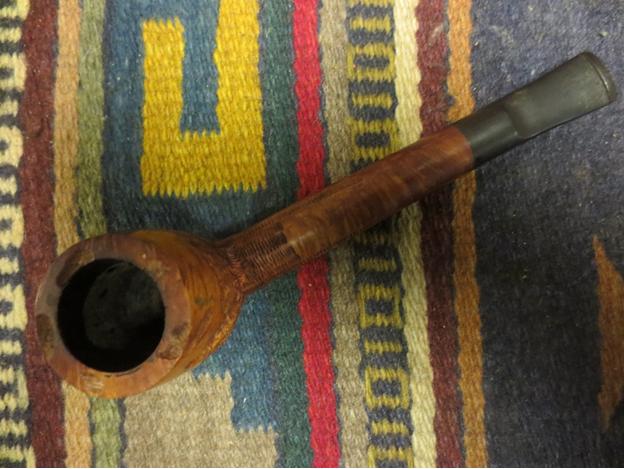
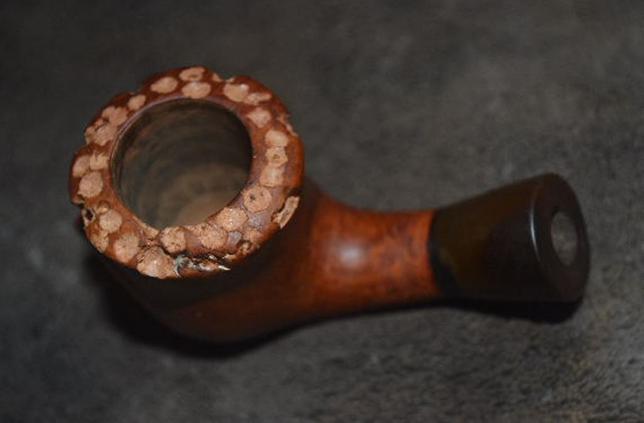
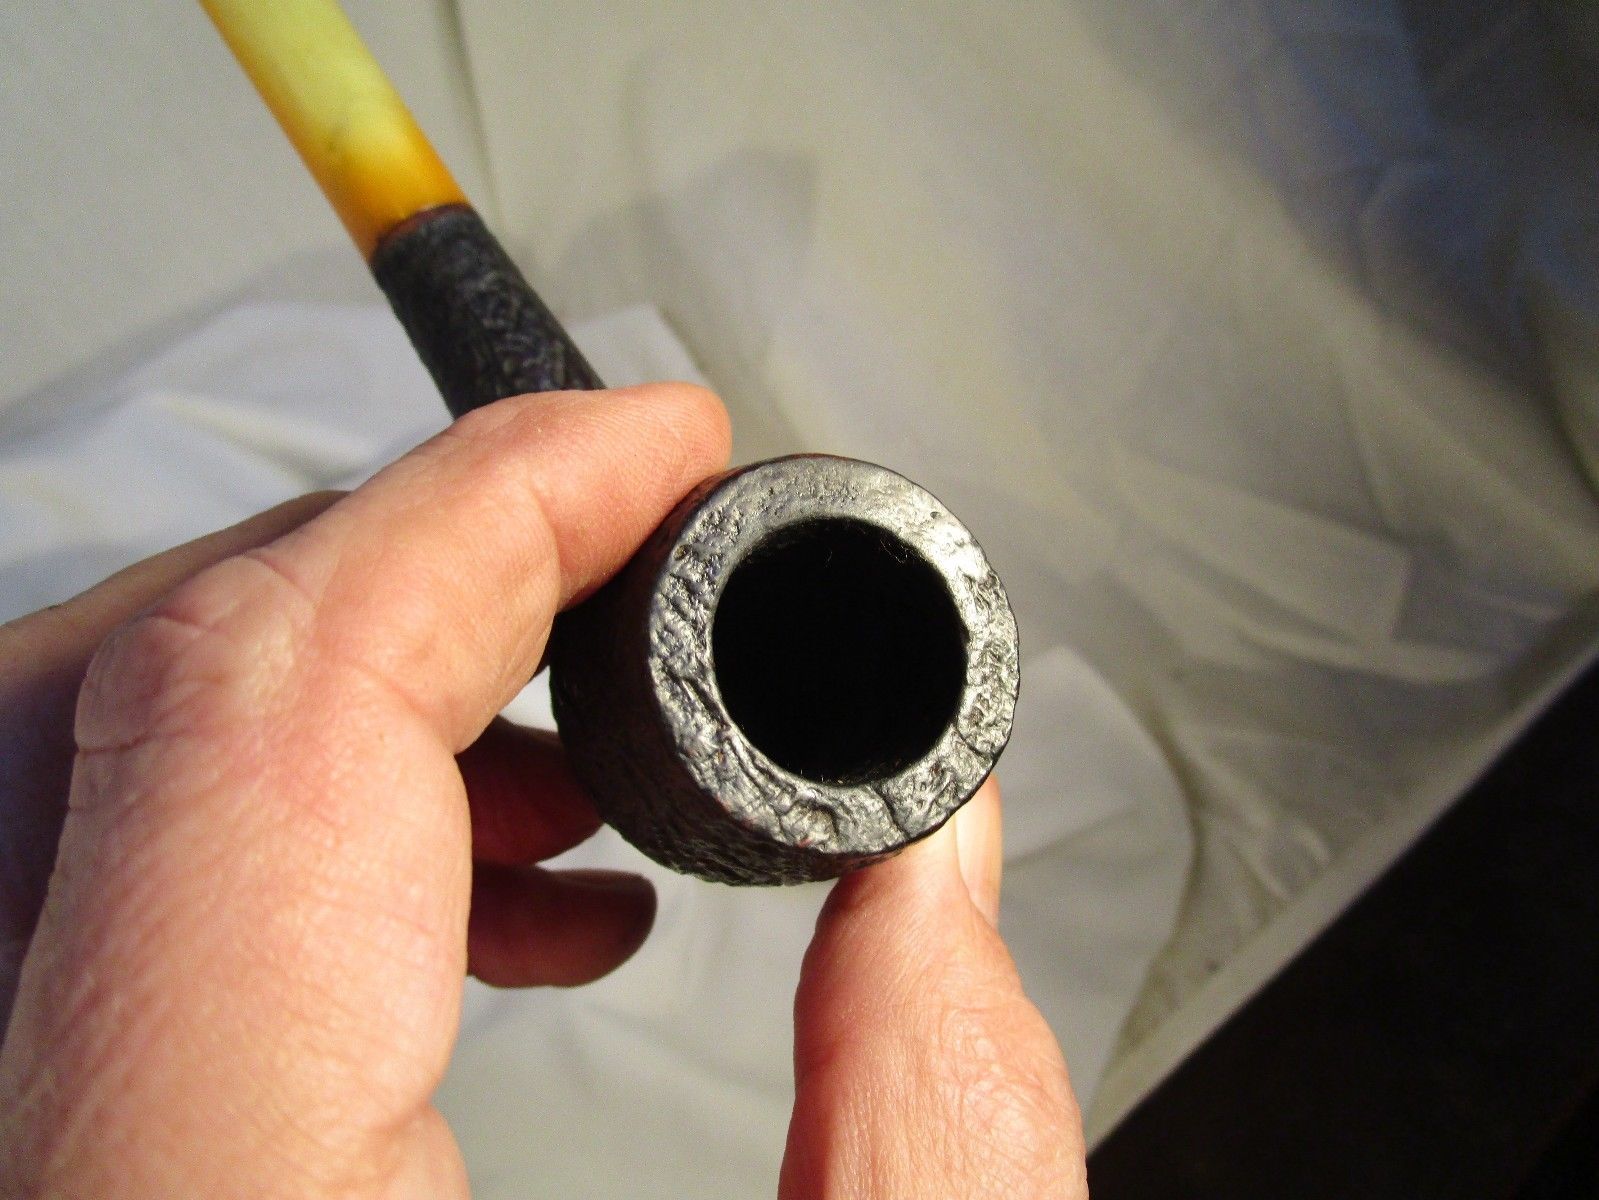
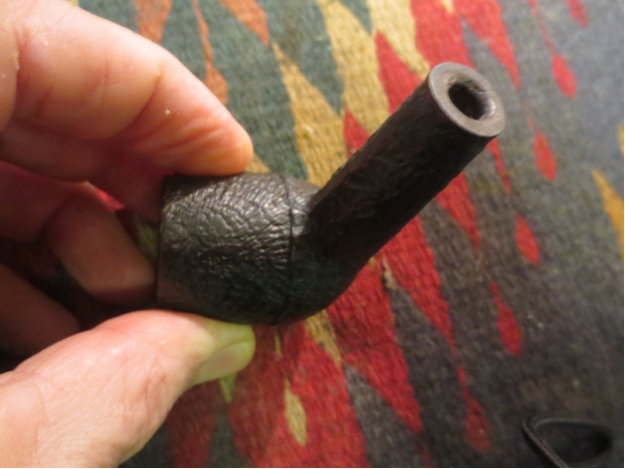
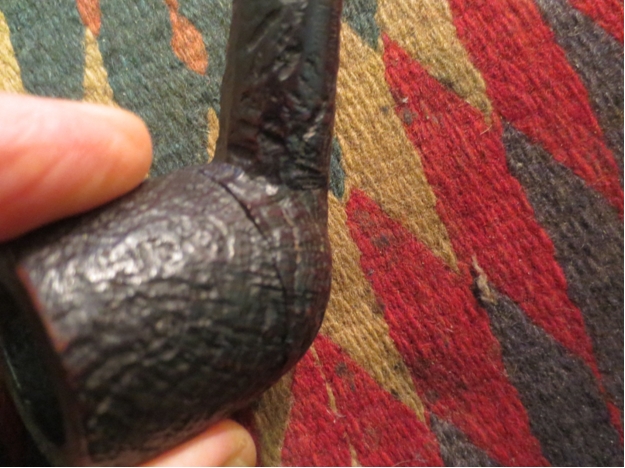
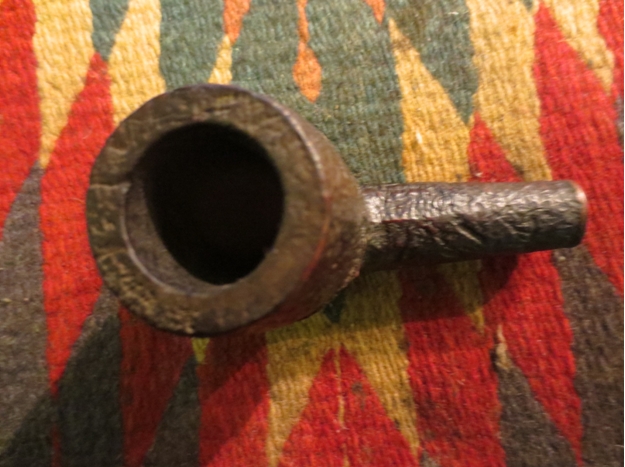
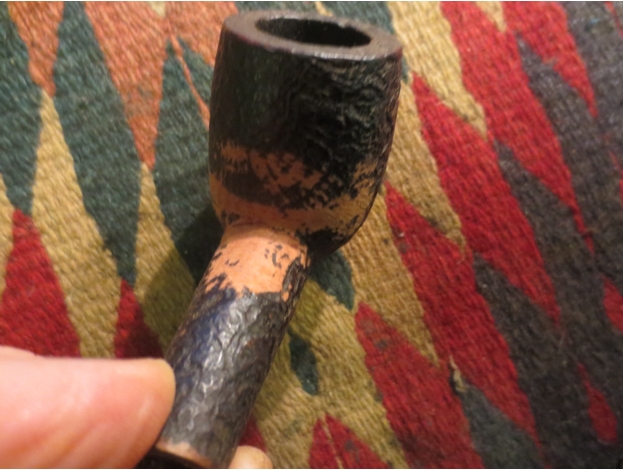
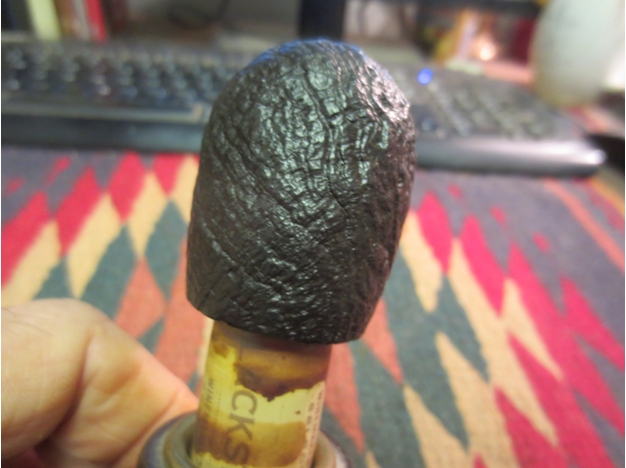
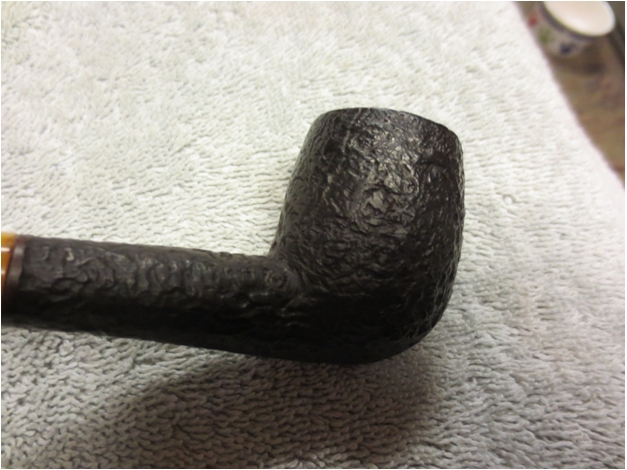
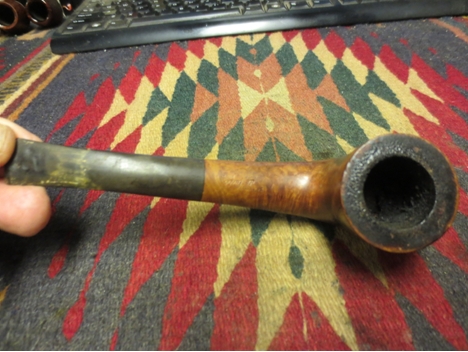
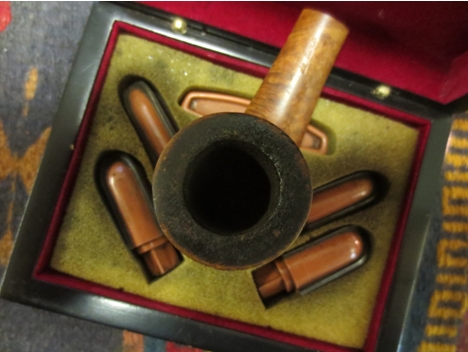
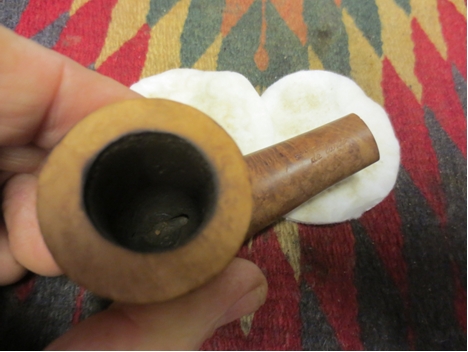
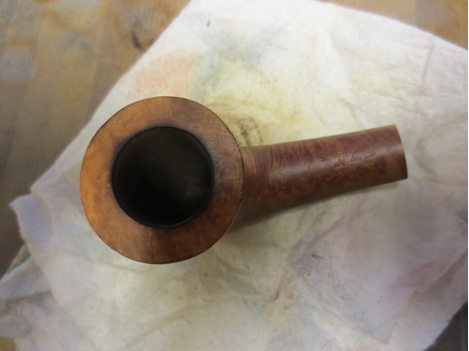
I took the next photo to show the rim. All edges are intact but the surface is coated with a thick, hard coat of oils and tar.Sav7 
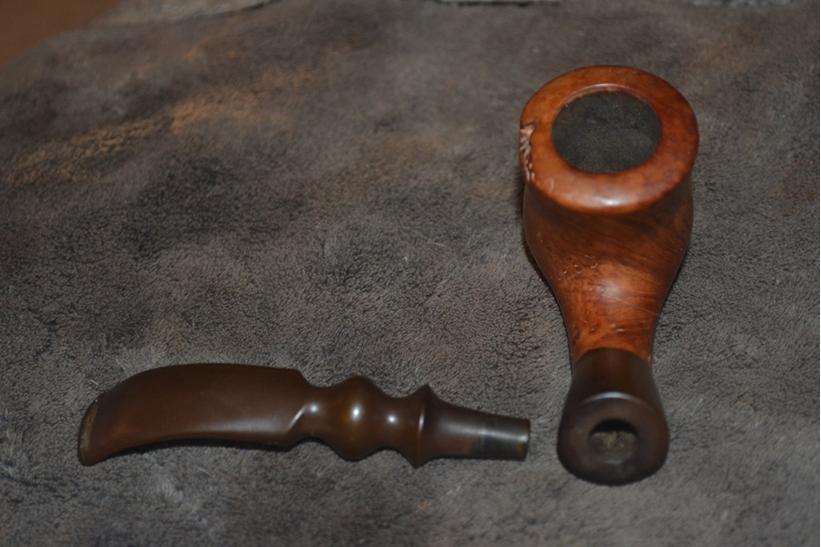
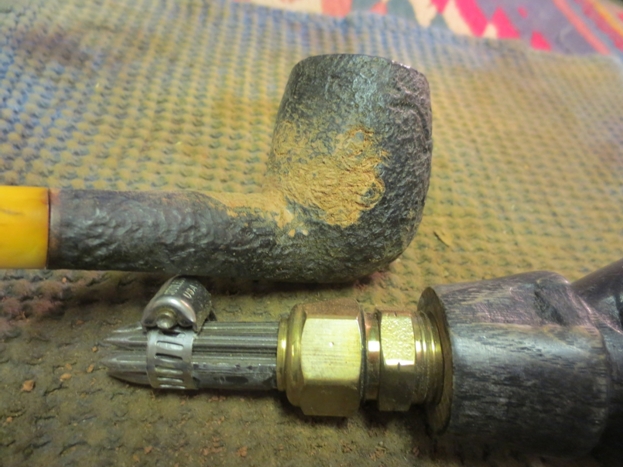
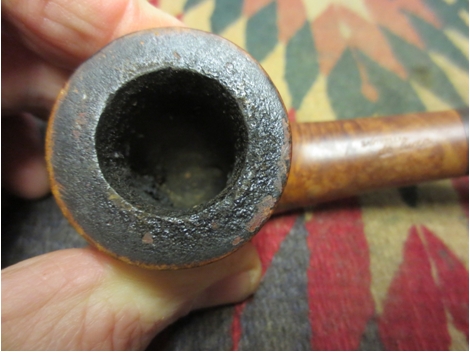
The tenon had an inner tube insert in it. I have had several of these Savinellis but never had one with the tube. It would turn out to come in handy later.Sav8 
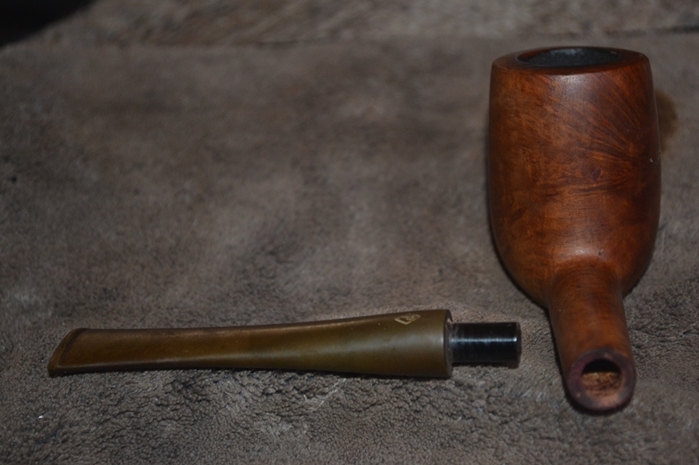
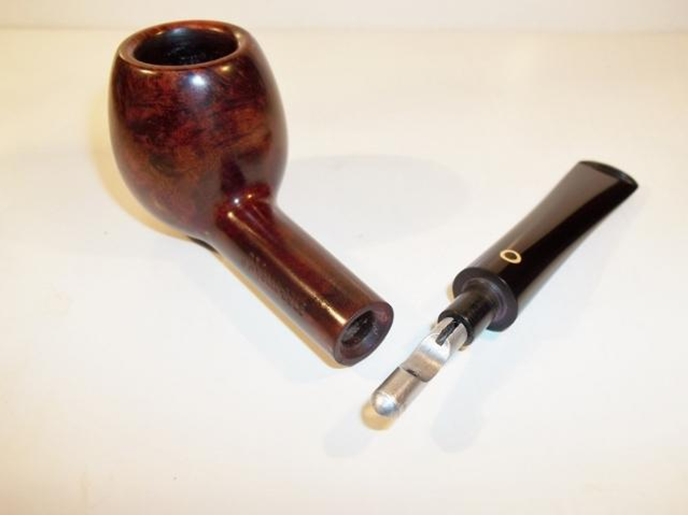
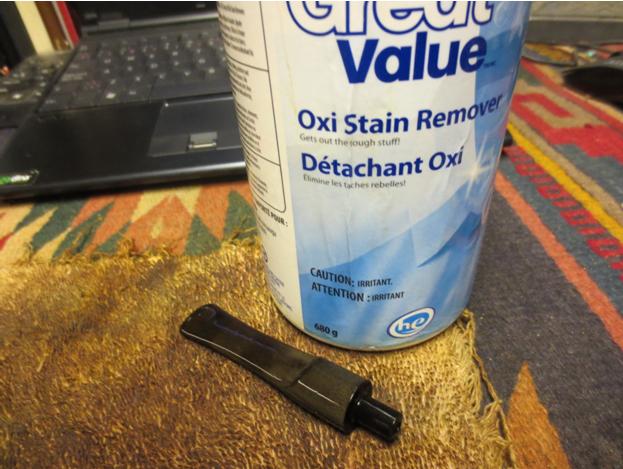
I weighed my options with the stem for several days before I decided to cut off the damaged portion of the stem. I used my Dremel with a sanding drum and took the stem back to solid material.Sav9

Sav10 
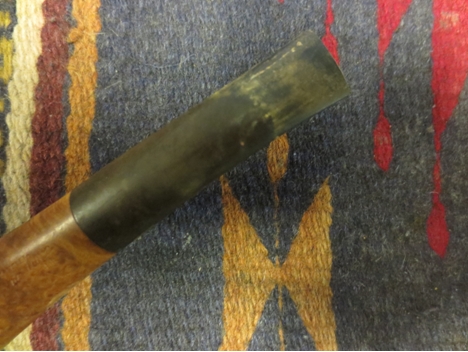
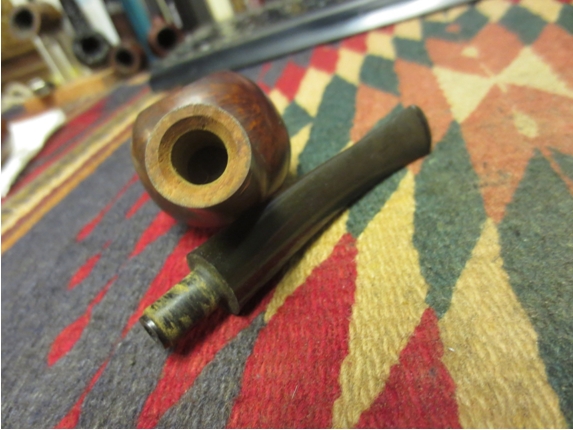
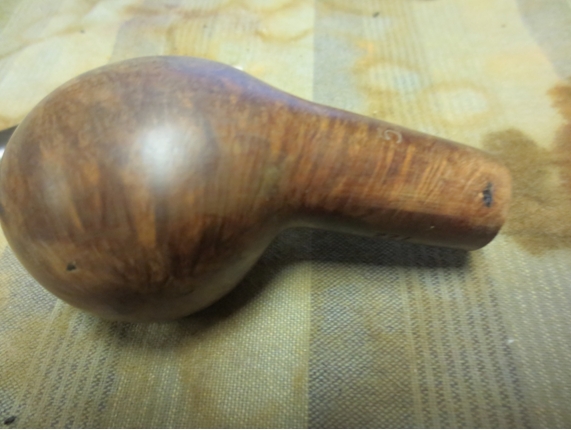
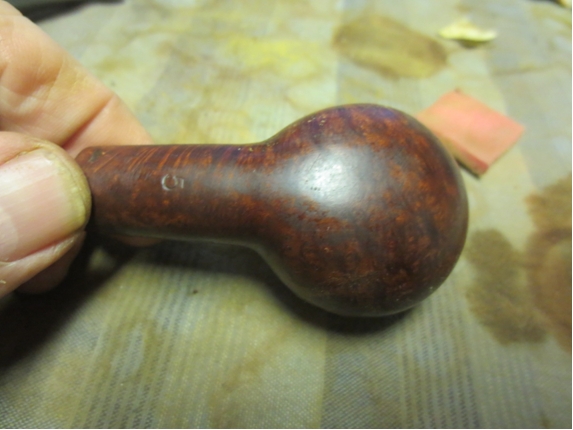
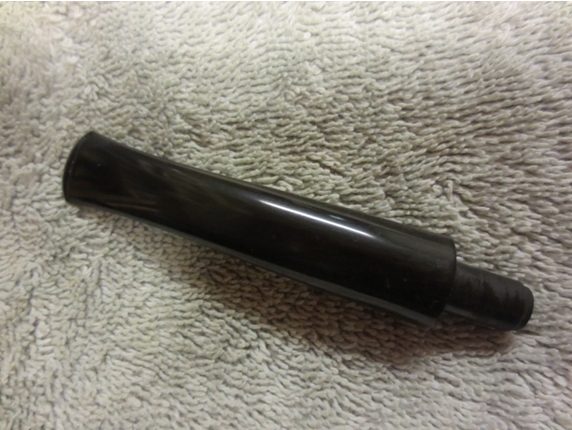
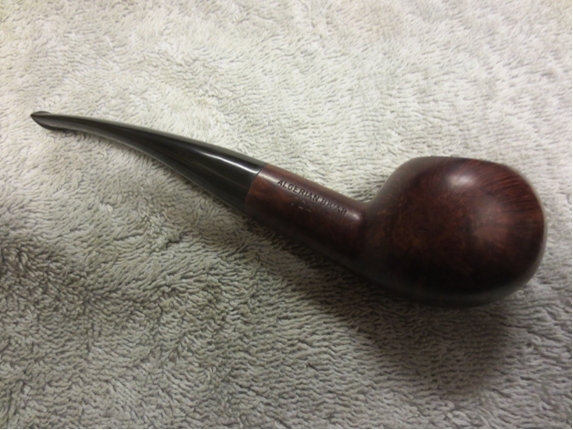
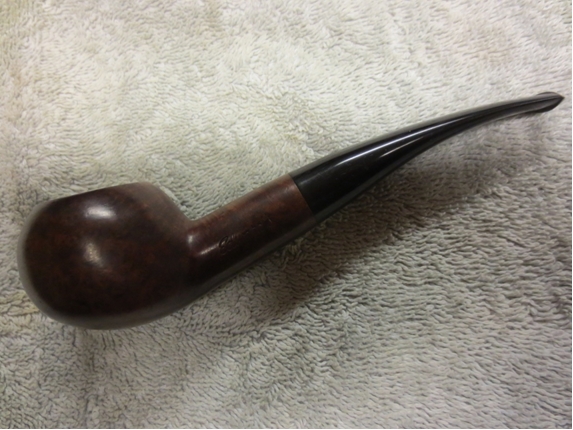
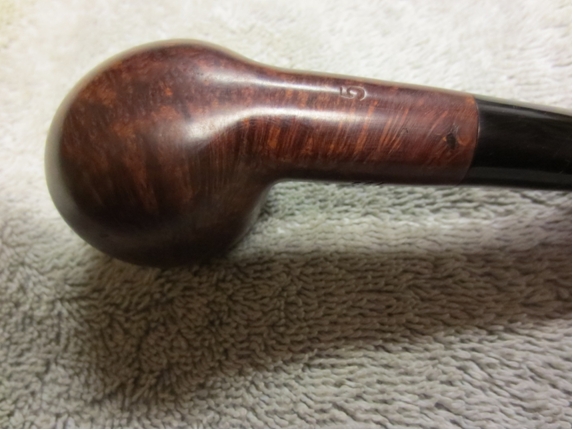
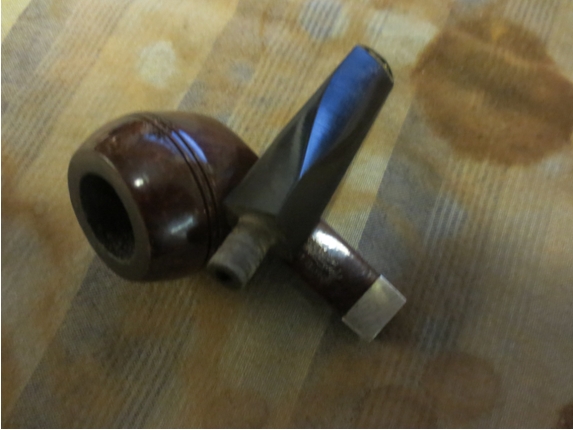
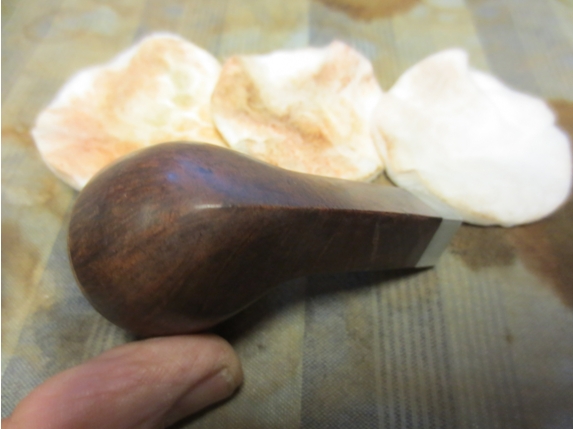
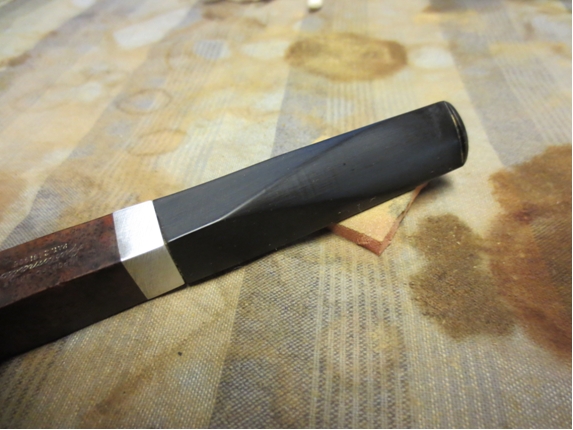
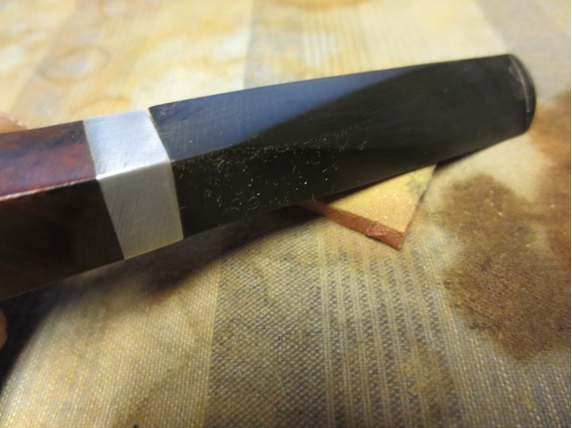
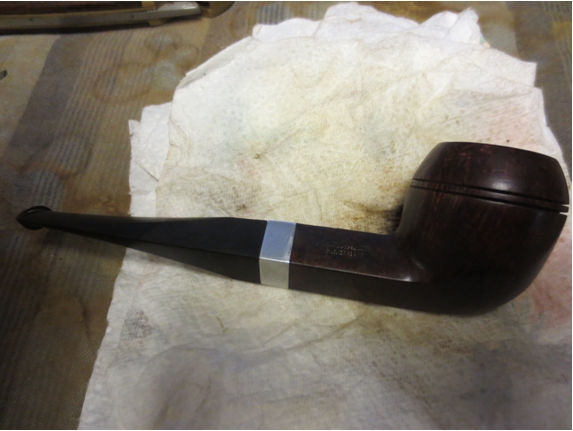
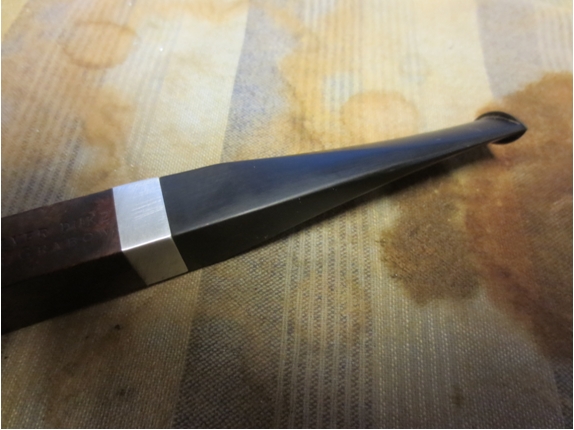
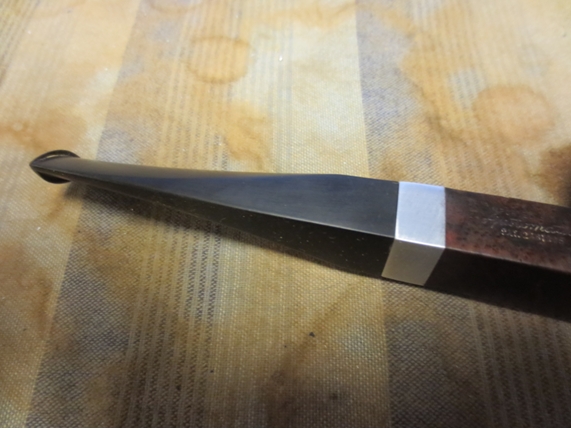
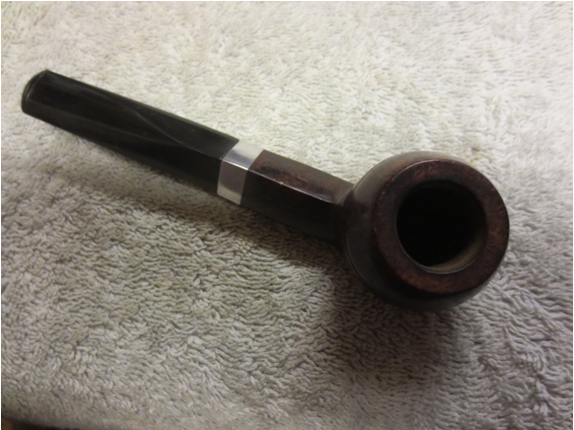
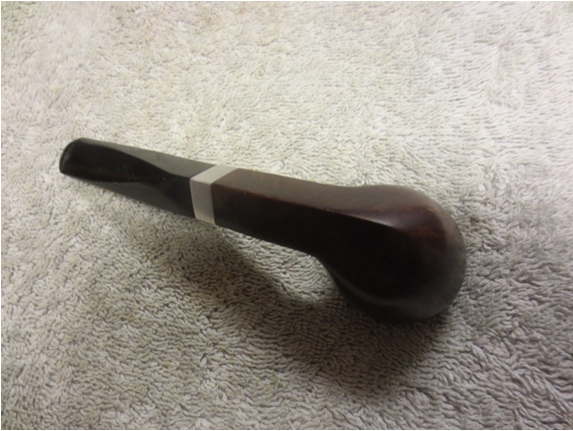
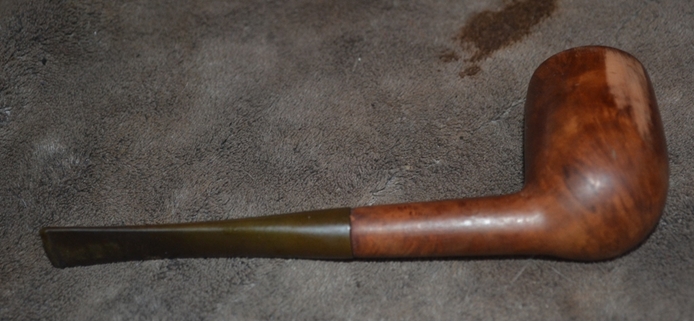
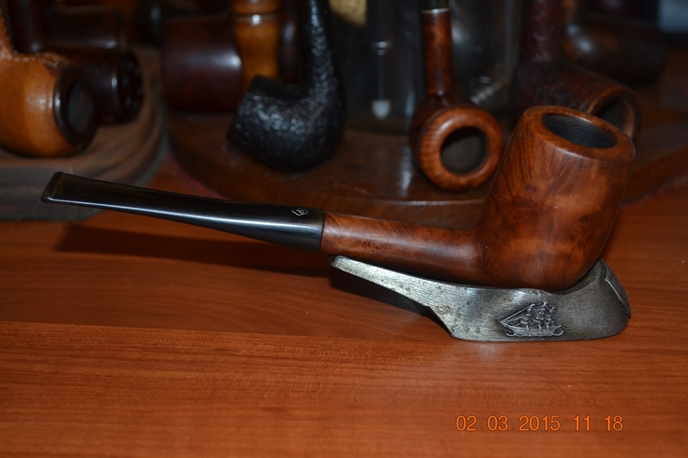
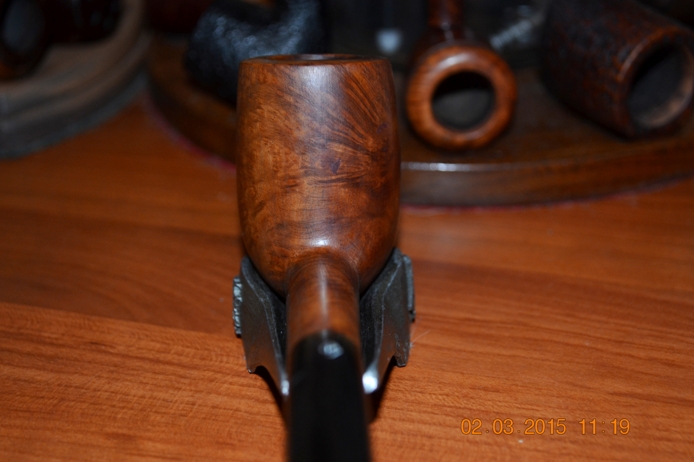
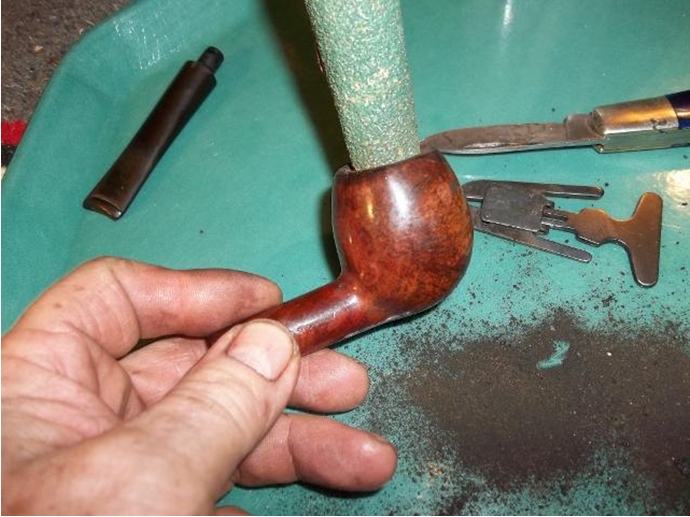
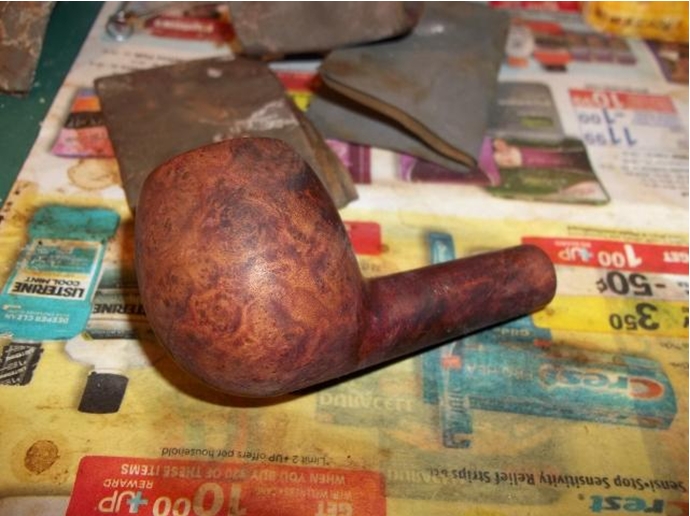
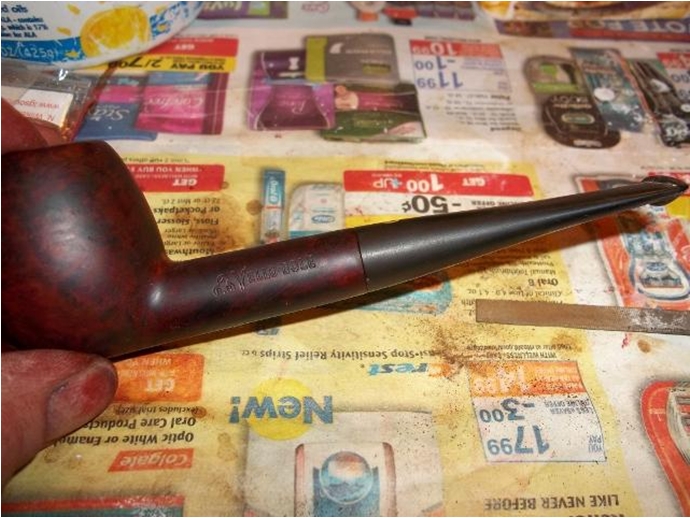
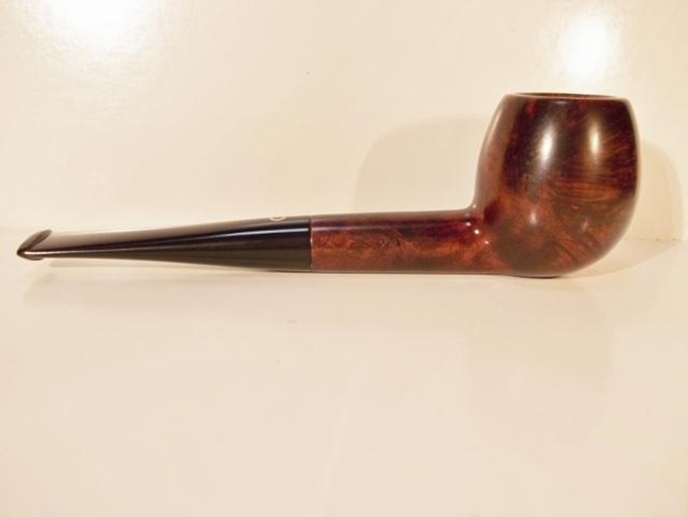
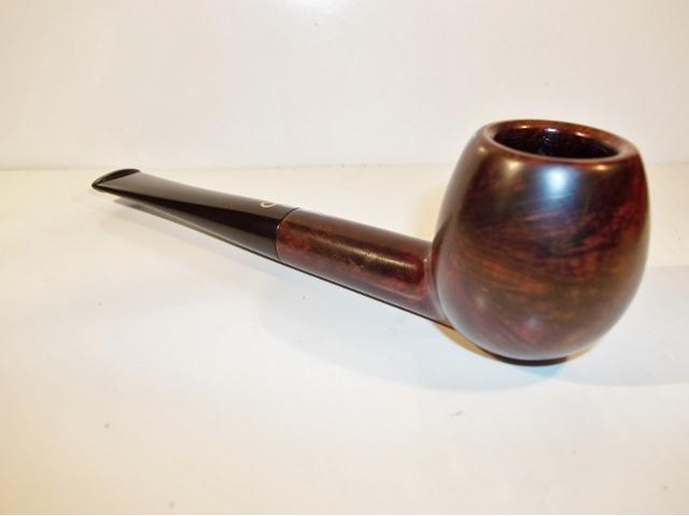
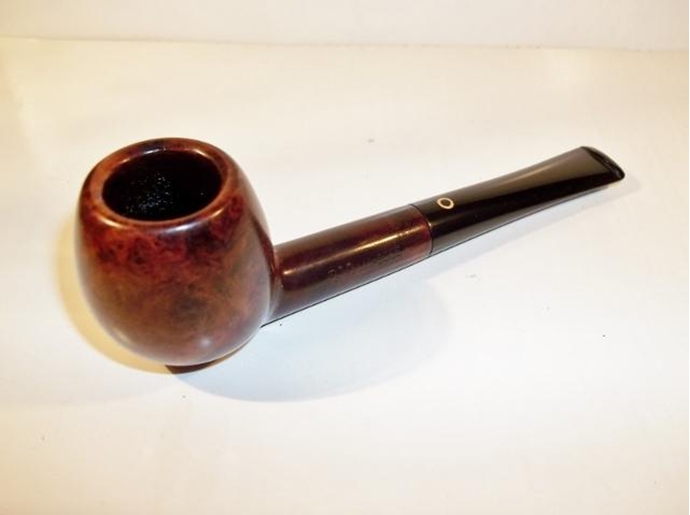
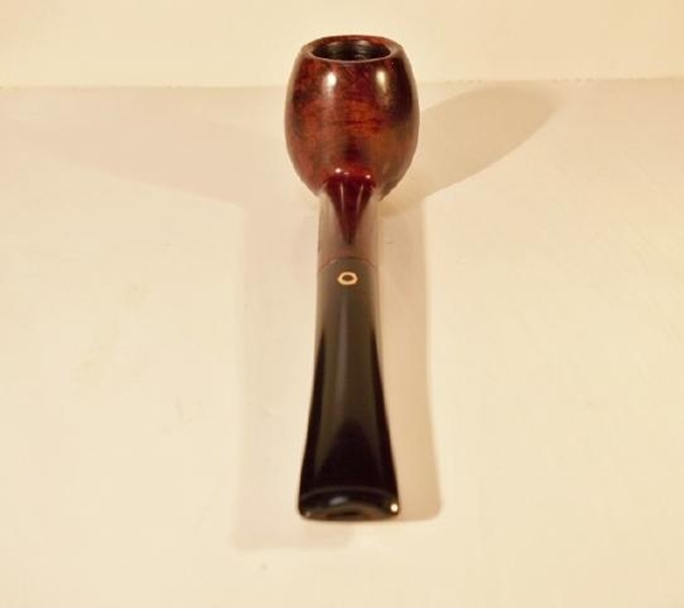
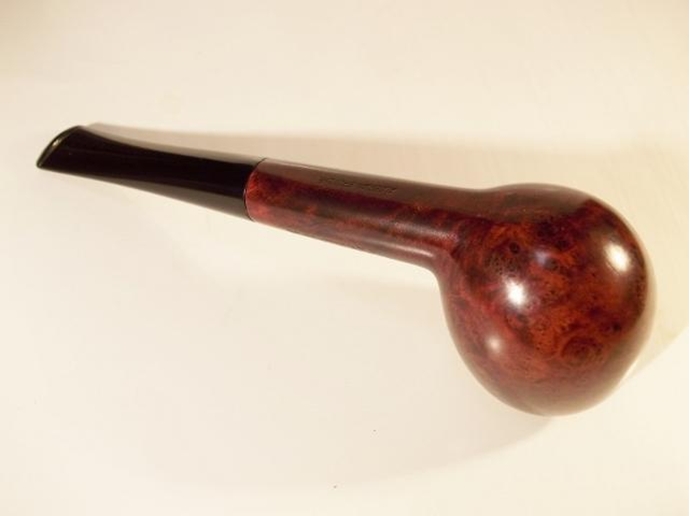
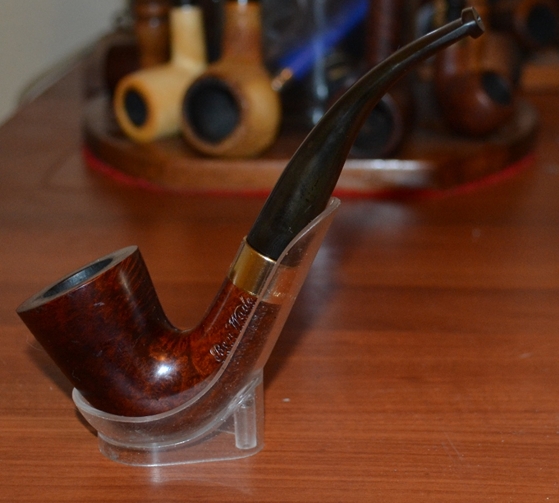
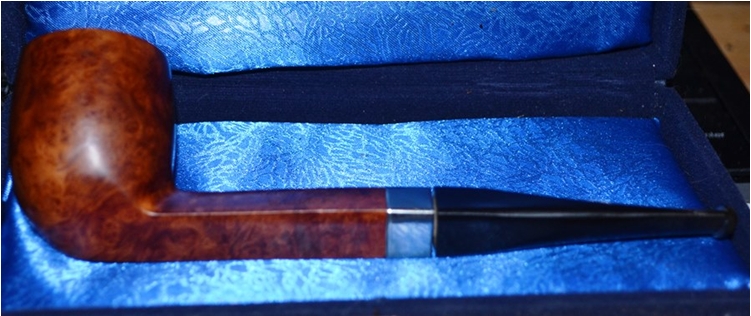
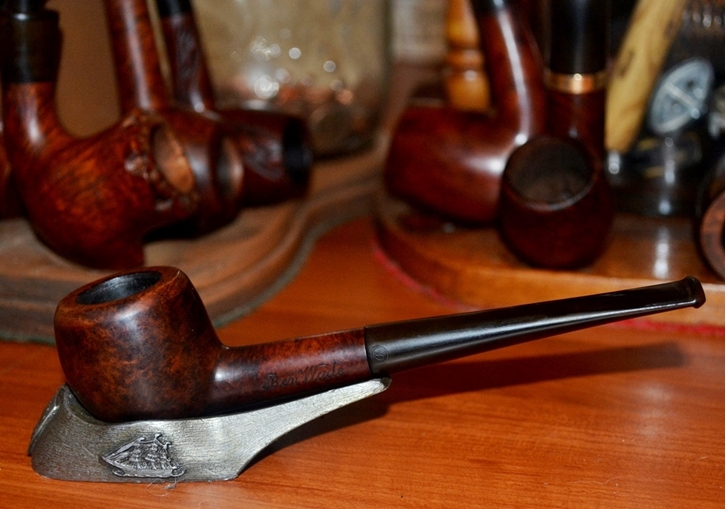
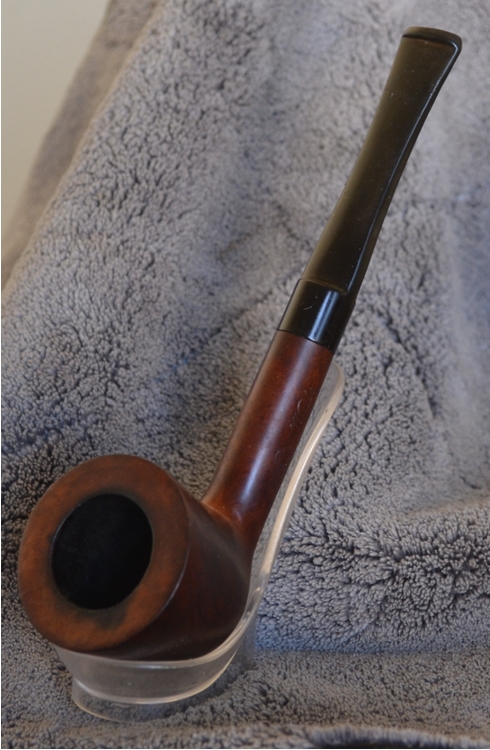
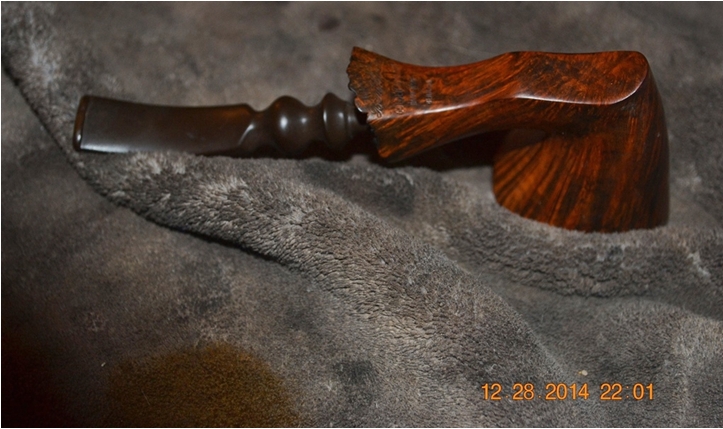
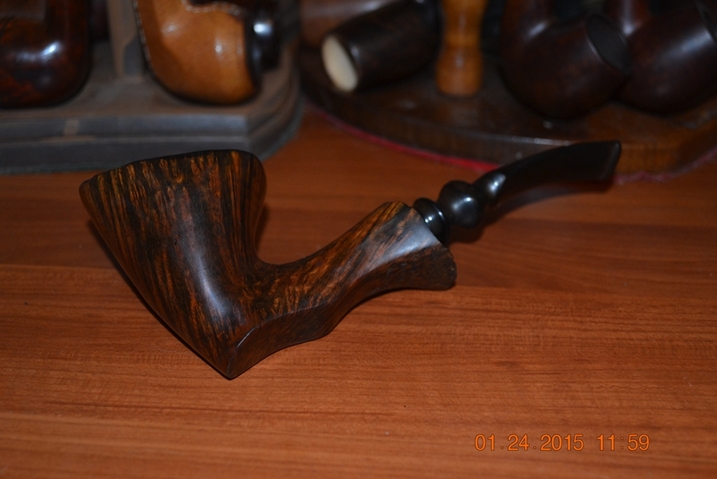
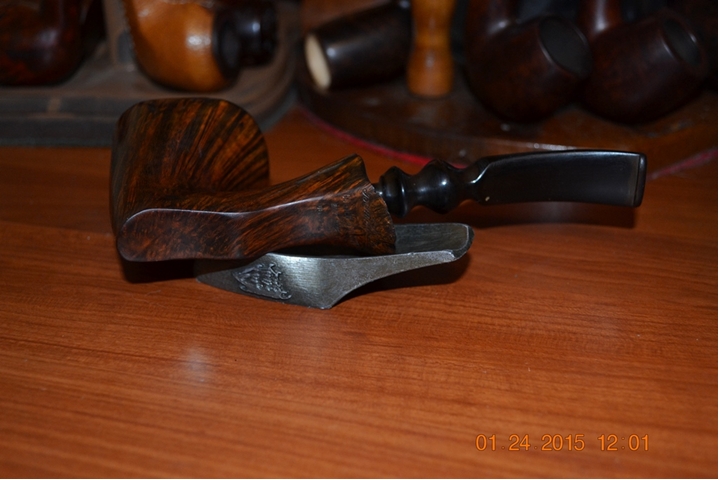
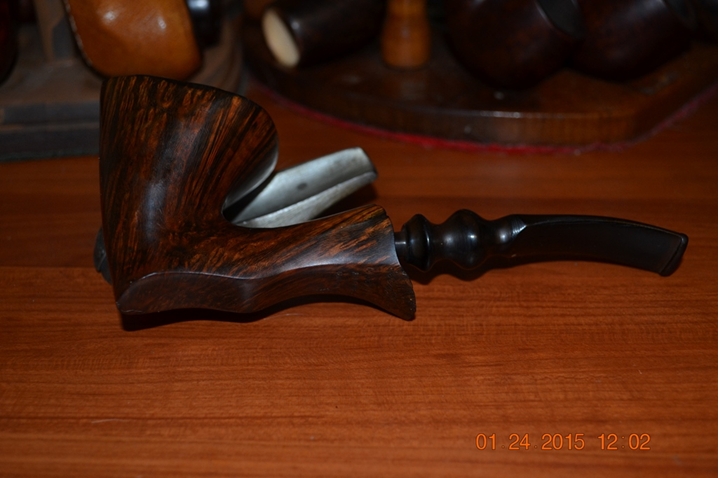
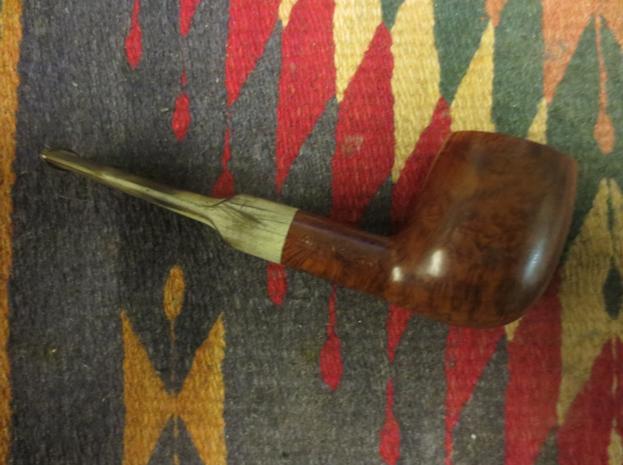
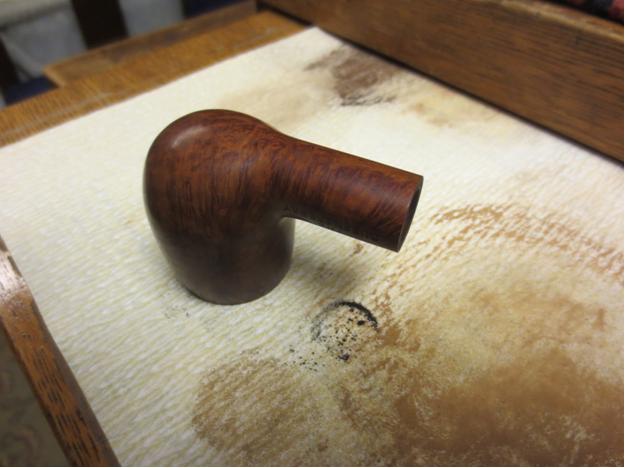
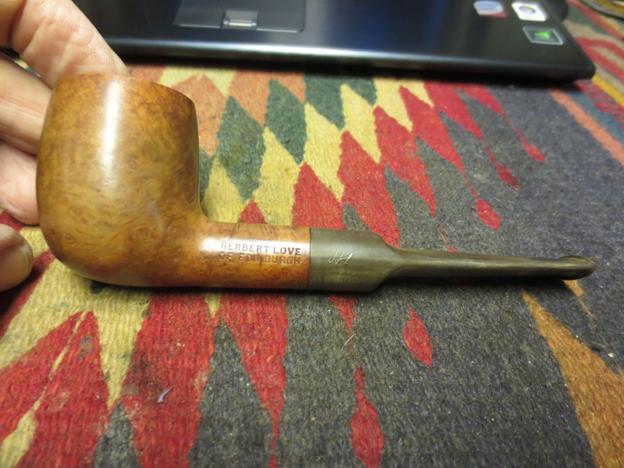
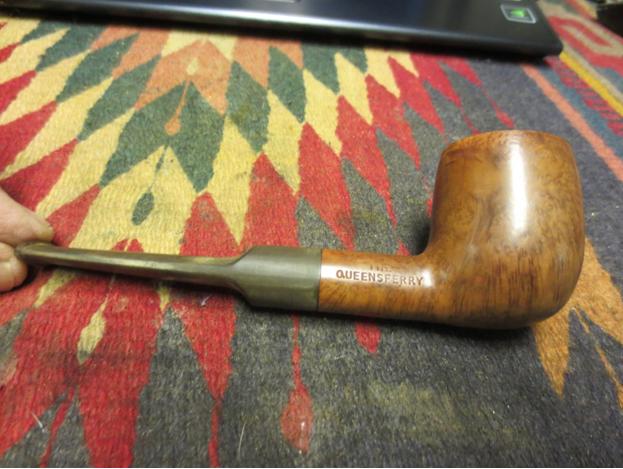
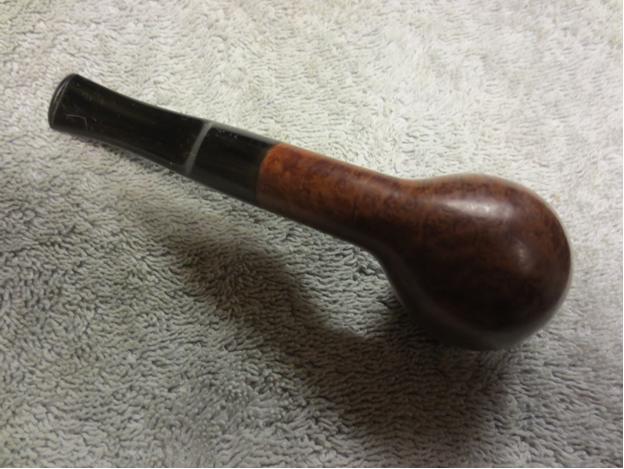
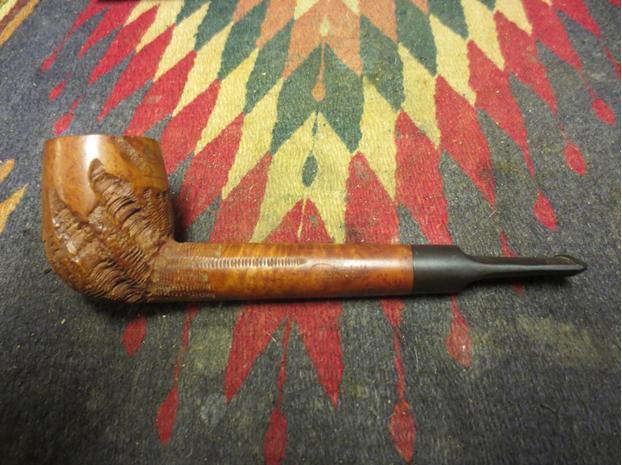
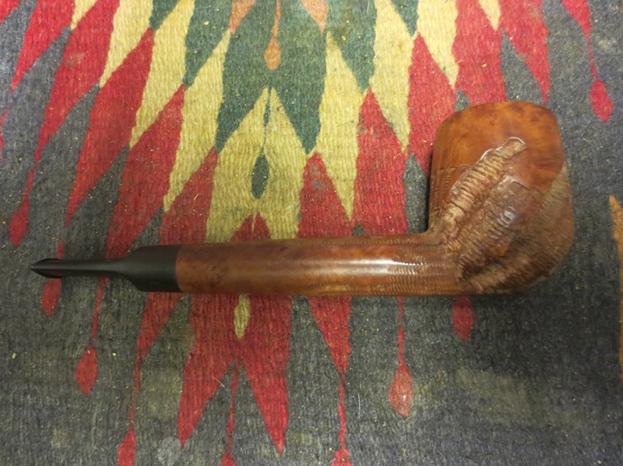
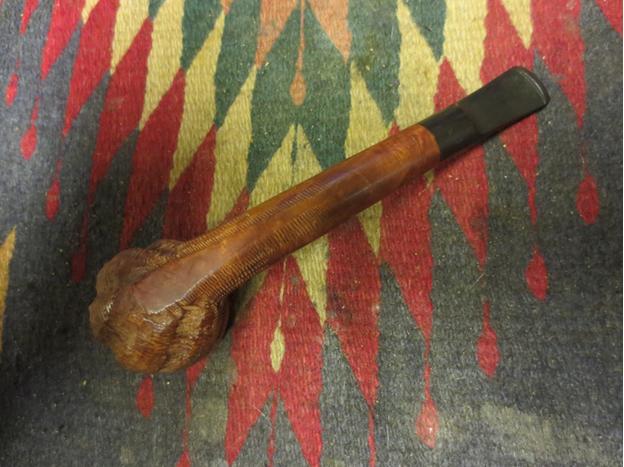
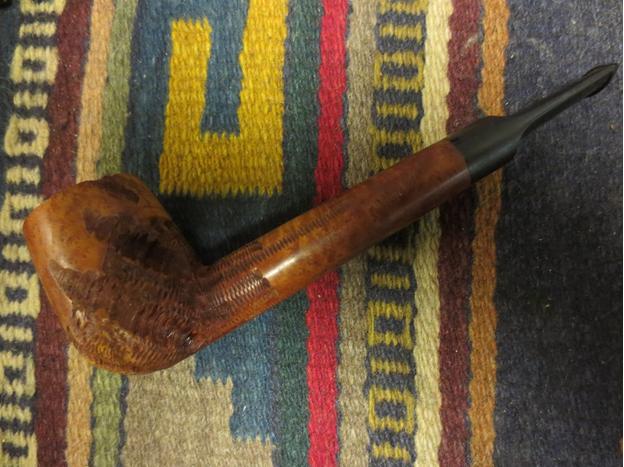
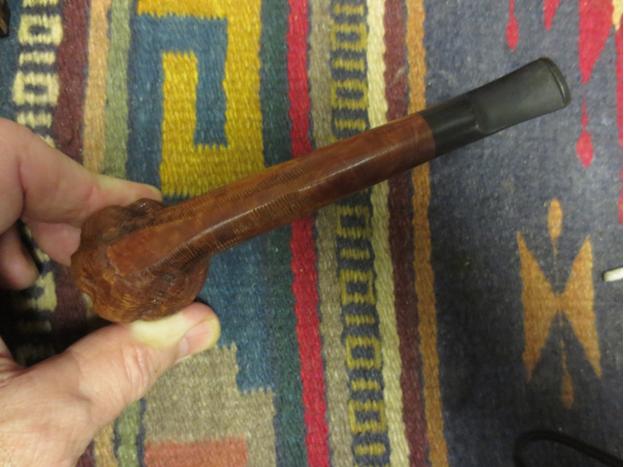
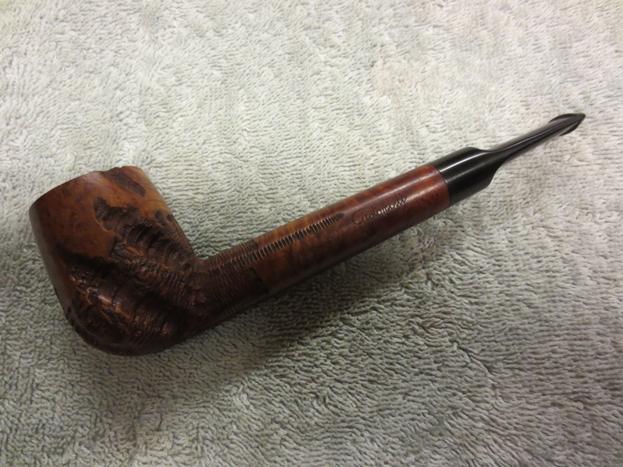
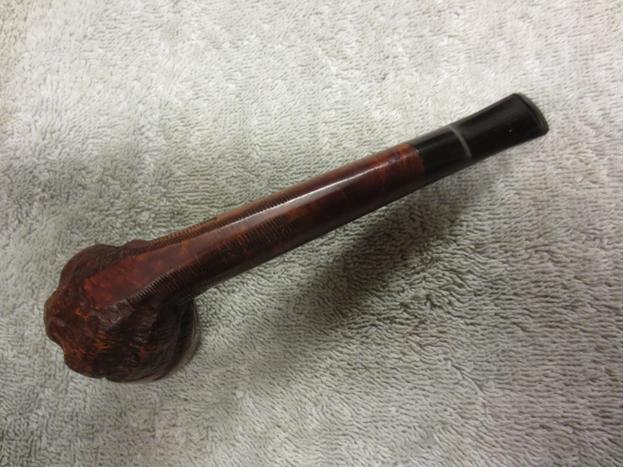
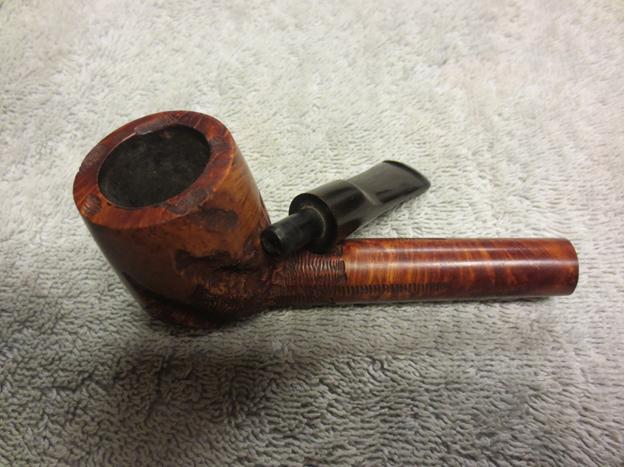
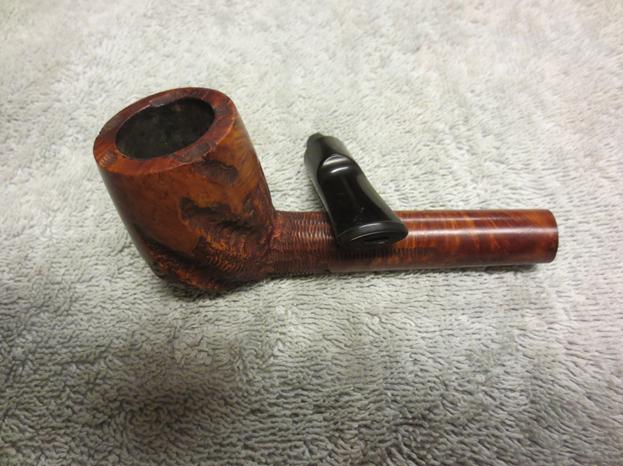
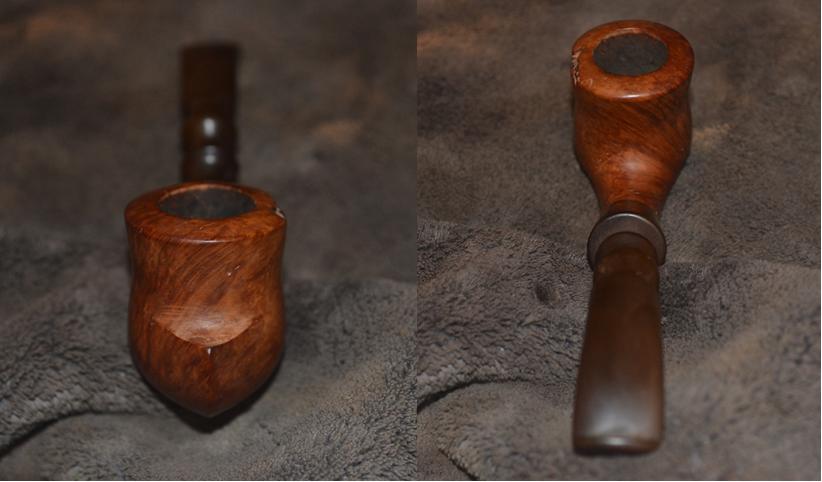
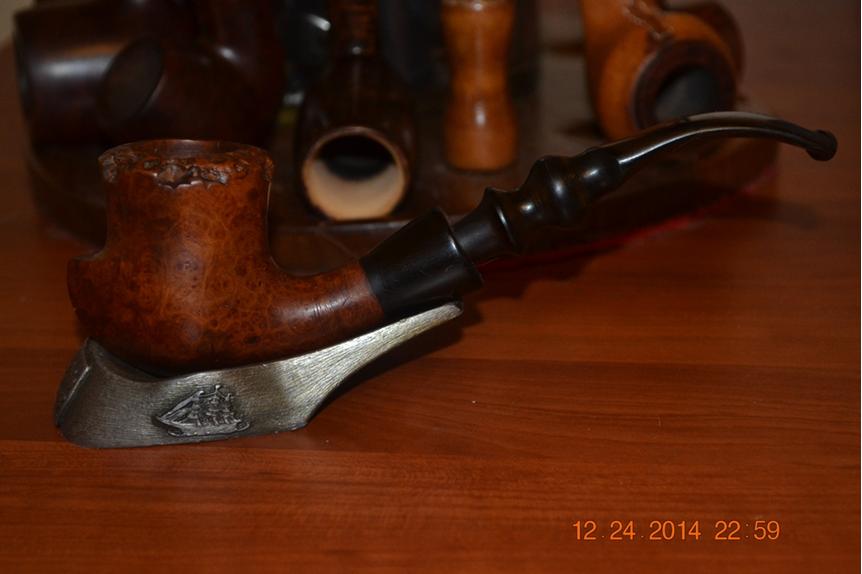
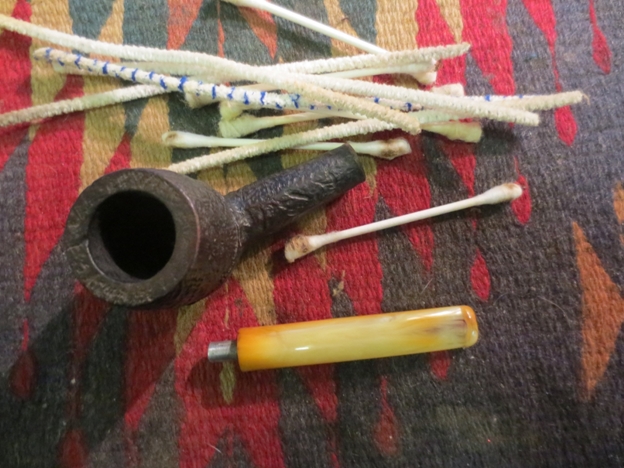
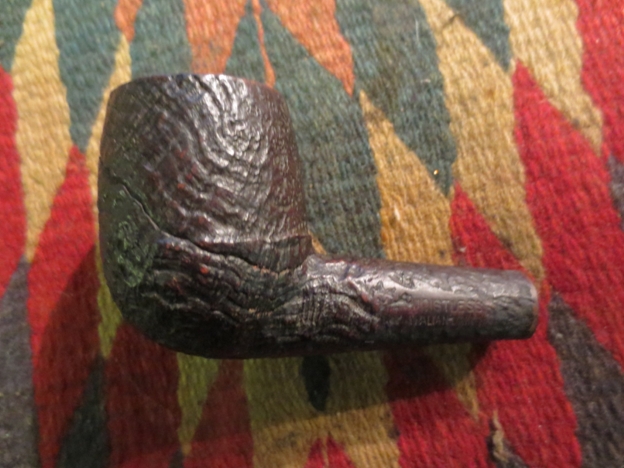
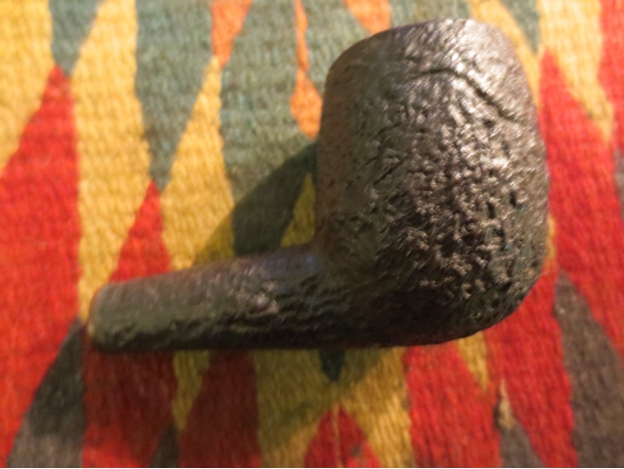
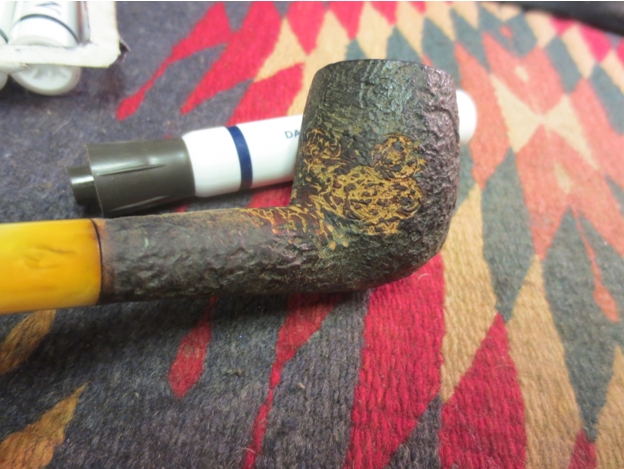
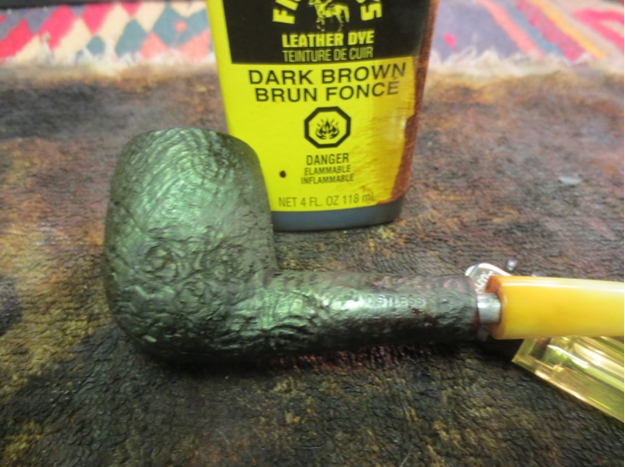
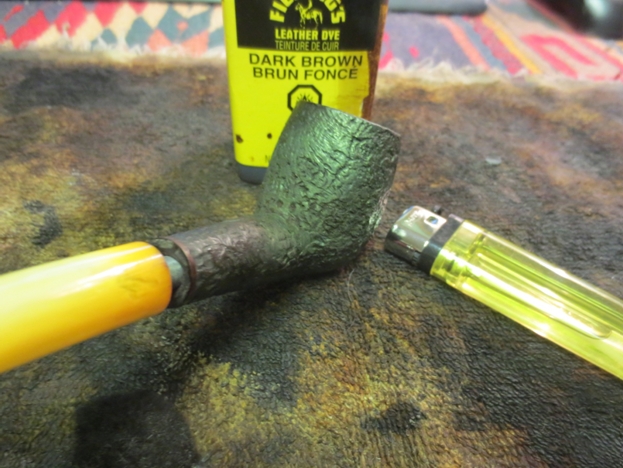
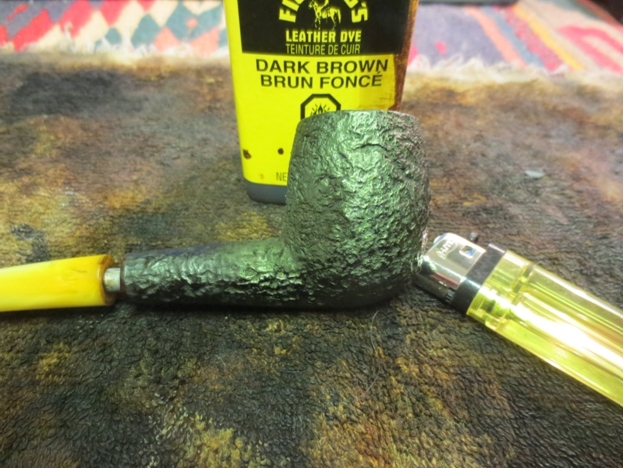
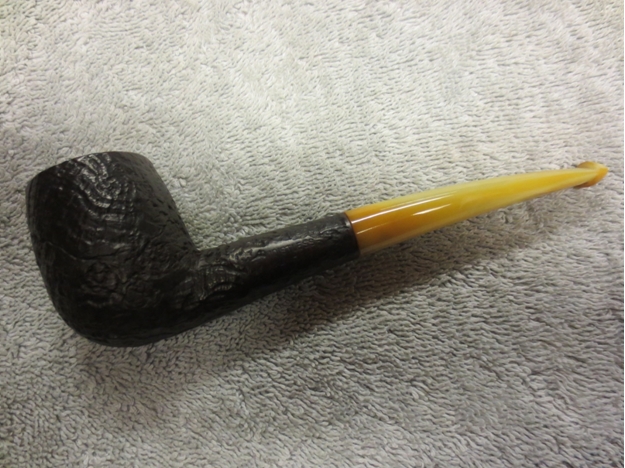
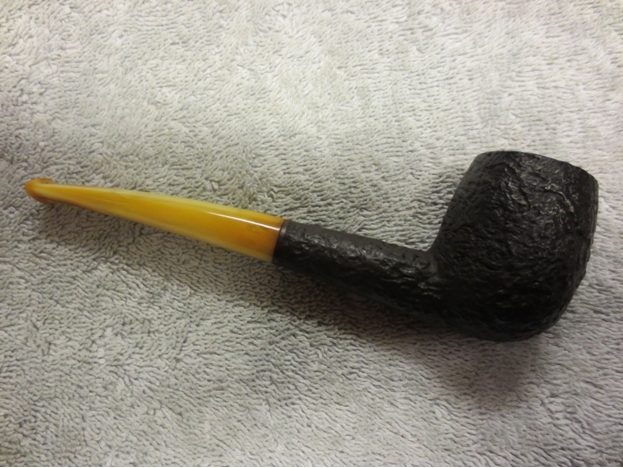
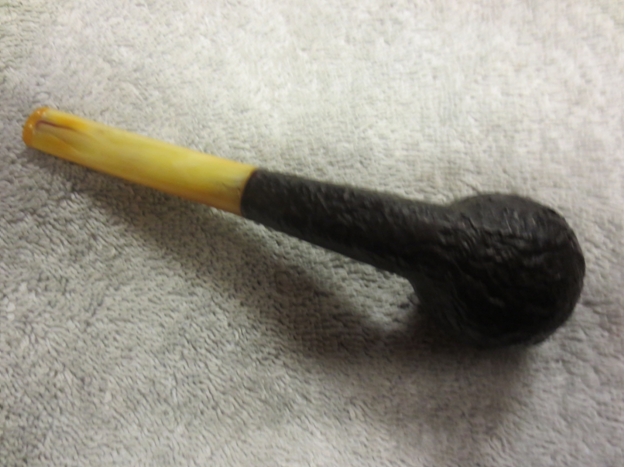
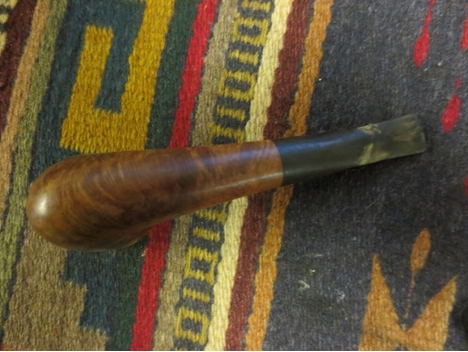
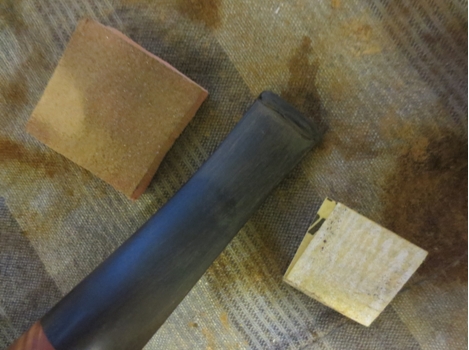
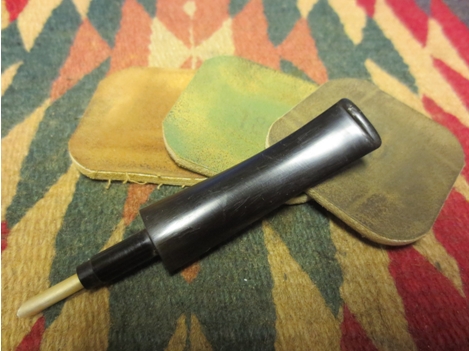
The next four photos show the look of the pipe with the shorter stem. Personally I like the more compact look of the stem as it seems to fit proportionally well with the pipe.Sav11

Sav12

Sav13

Sav14 
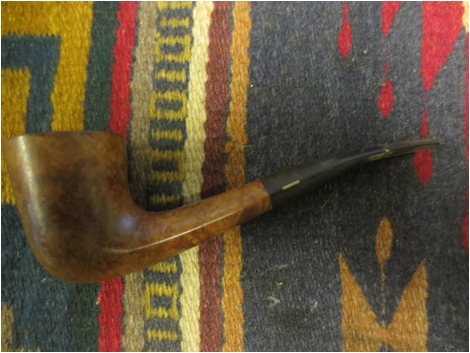
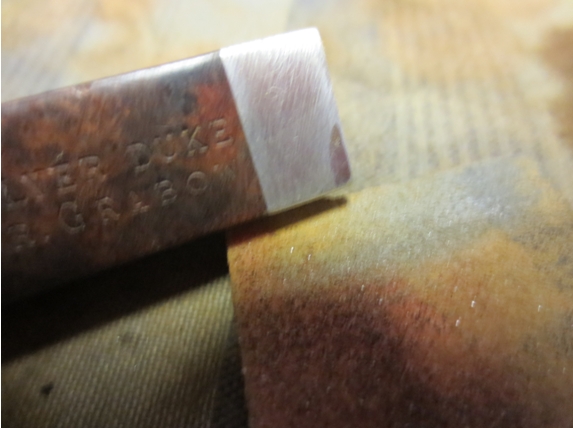
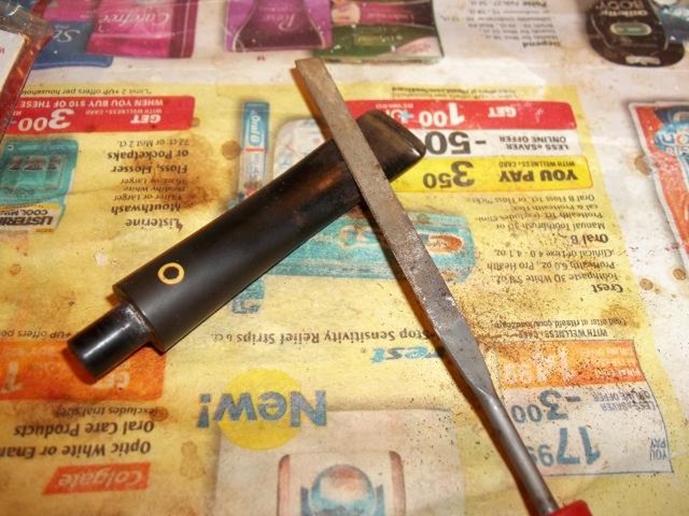
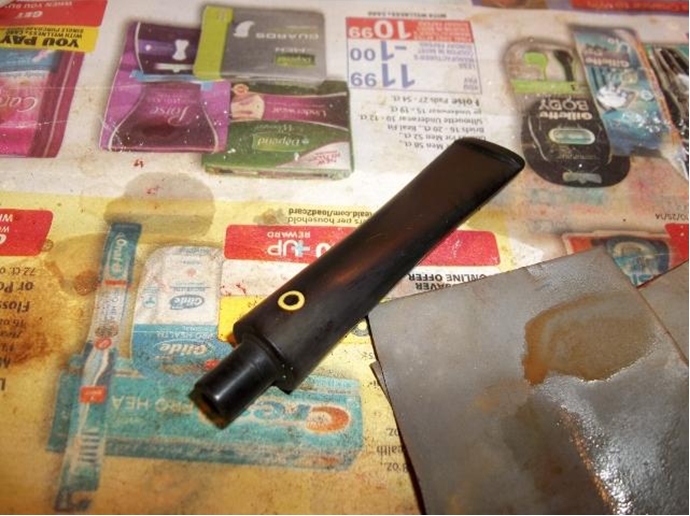
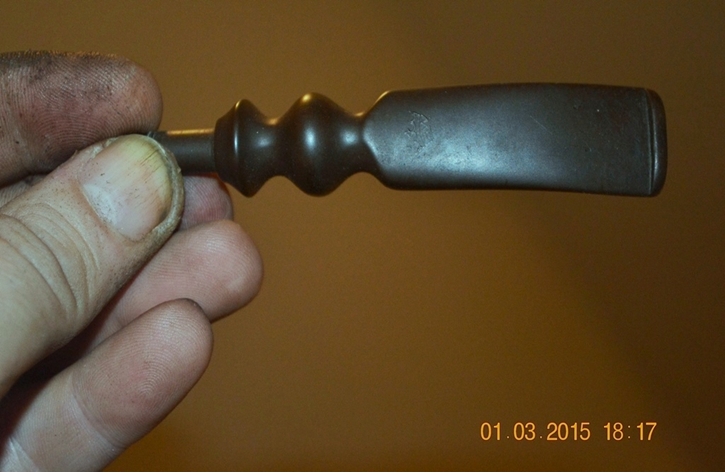
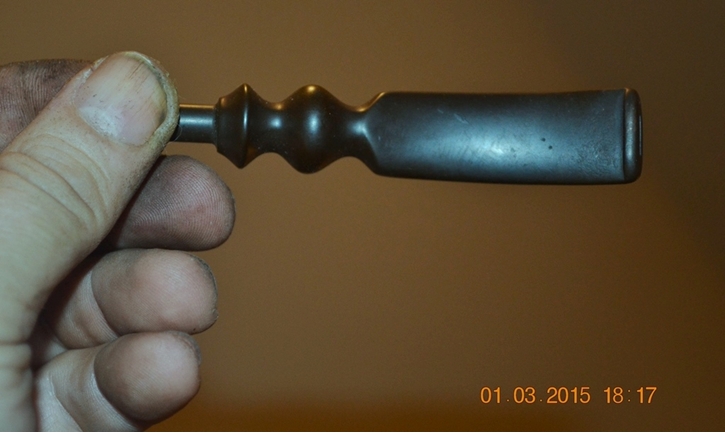
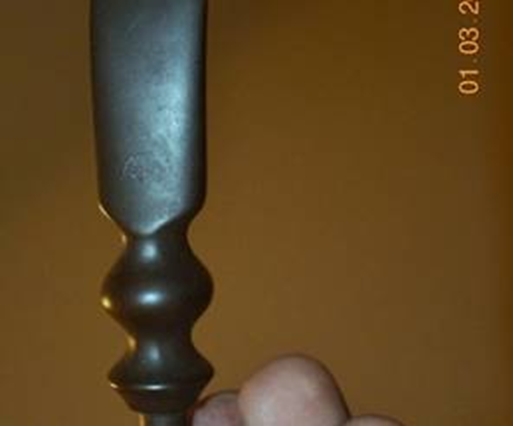
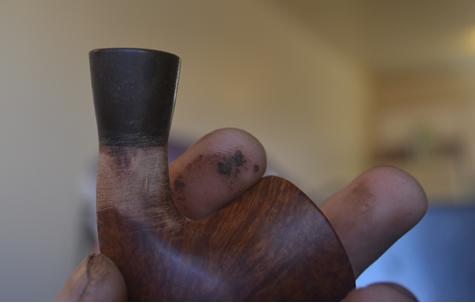
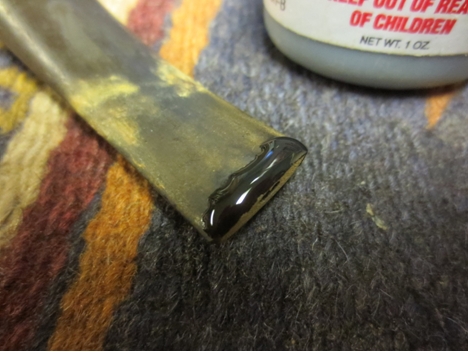
I decided to work on the button on the pipe before turning to the bowl. You can see from the photo below that the underside of the area where I would cut the button was quite thin. I did not want to cut back the stem any further so I built up that area with black super glue. I applied the glue and set the stem aside to cure. It would take several coats before the button was built up.Sav15

Sav16

Sav17 
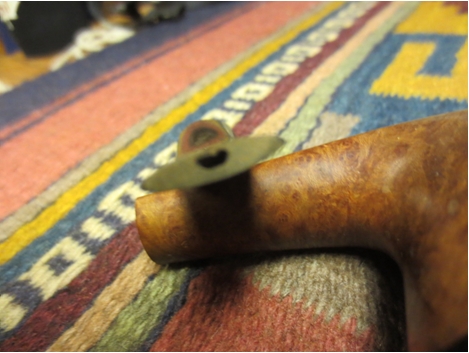
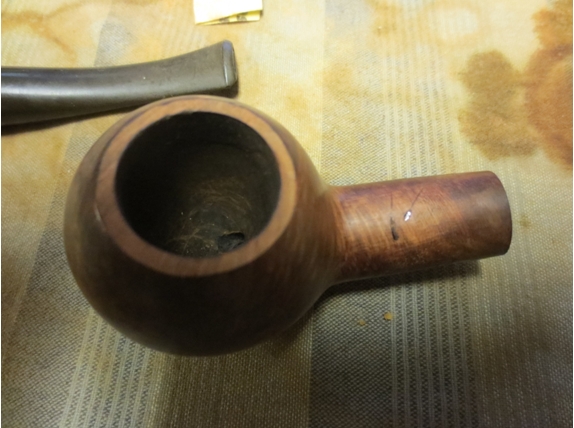
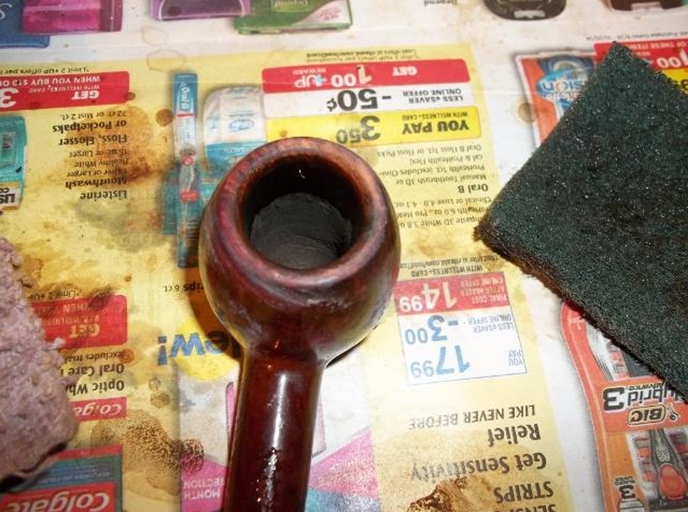
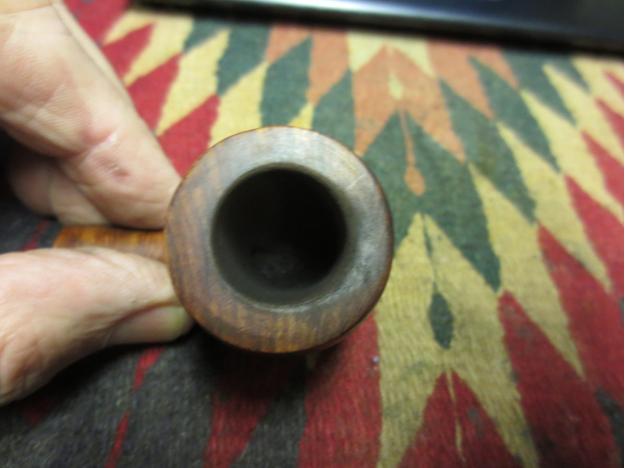
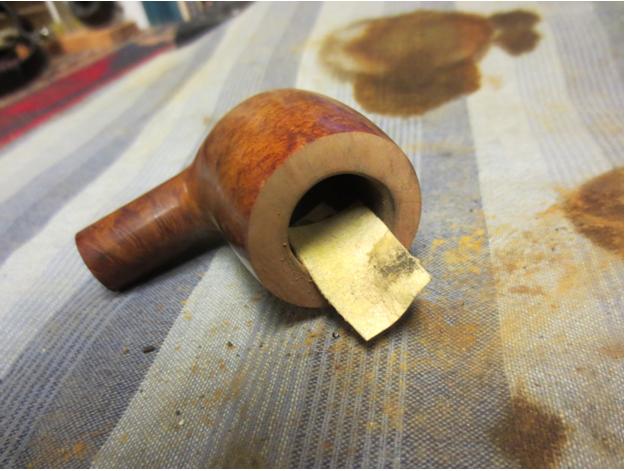
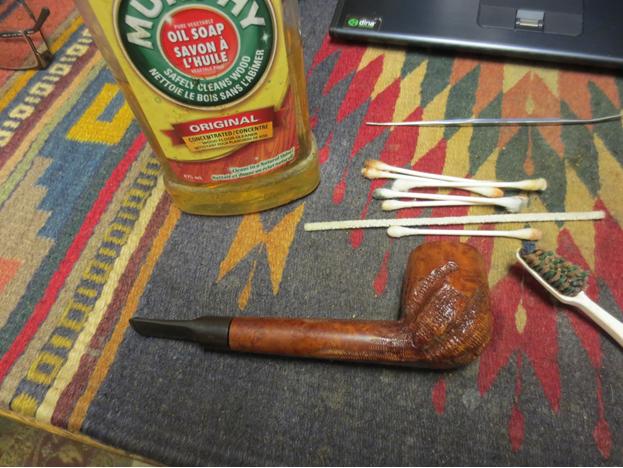
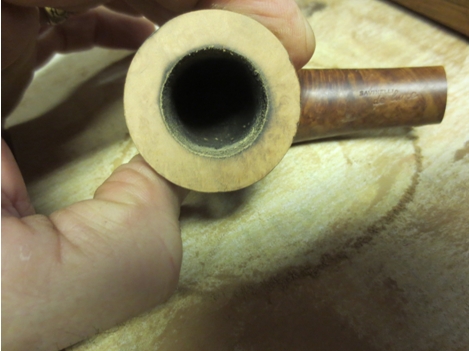
While the glue cured and hardened I worked on the bowl. I reamed it with a PipNet reamer starting with the smallest cutting head and working up to a head that would cut back the cake to bare briar.Sav18

Sav19 
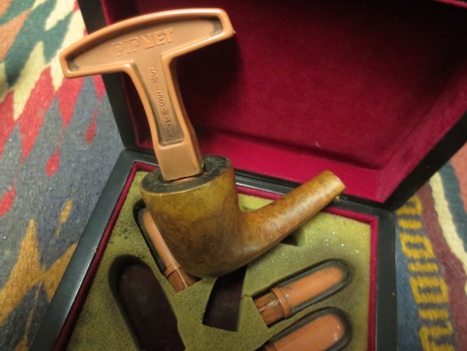
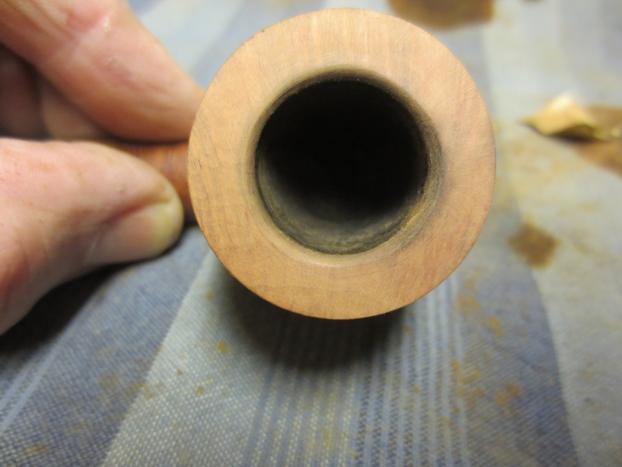
With the bowl reamed back I could tackle the top of the bowl. Even using the reamer did not chip or crack the buildup on the top of the rim. It was like rock. I scrubbed the rim with oil soap and a tooth brush. I picked at it with a dental pick and was not able to break through the rock. I decided to lightly top the bowl to remove the buildup. The idea was not to remove any briar but merely to take of the rock hard tars on the rim. I used my topping board and 220 grit sandpaper and worked the rim carefully to ensure that I only took the rim down to briar. Once I broke through the rock I took several more turns on the sandpaper to finish up the rim.Sav20

Sav21 
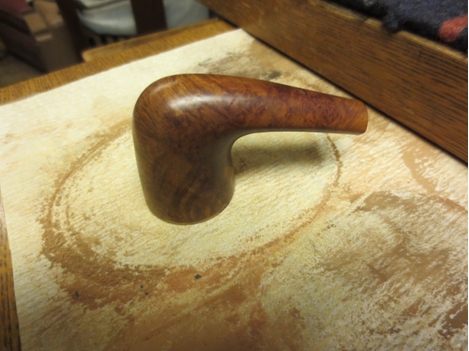
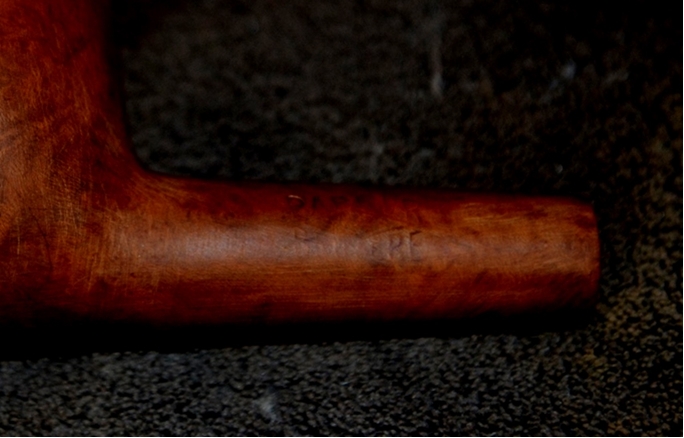
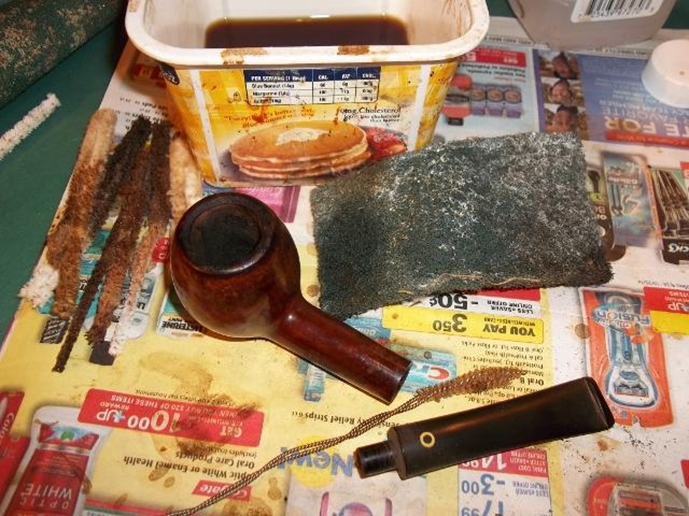
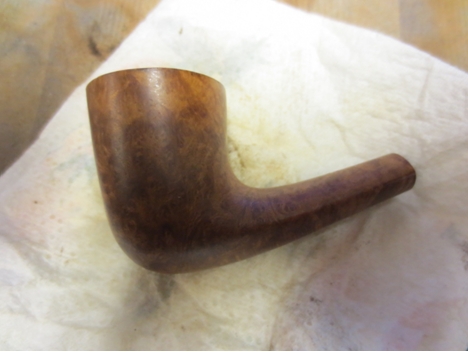
I scrubbed the bowl with acetone on cotton pads to remove the soiling and oils in the briar. It did not take much to bring the briar back to its natural state.Sav22

Sav23

Sav24 
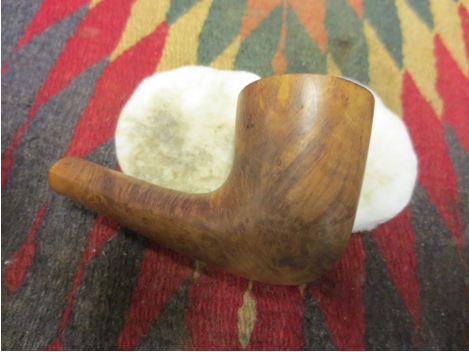
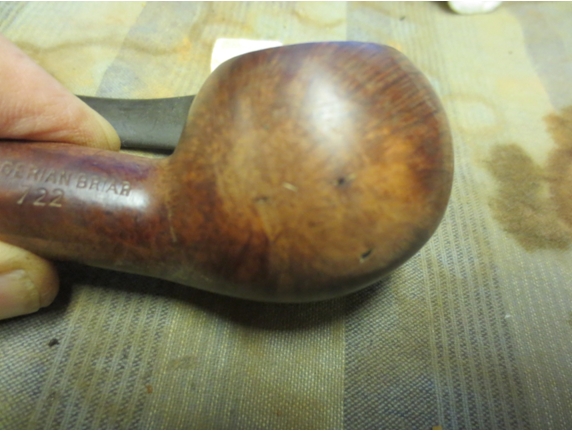
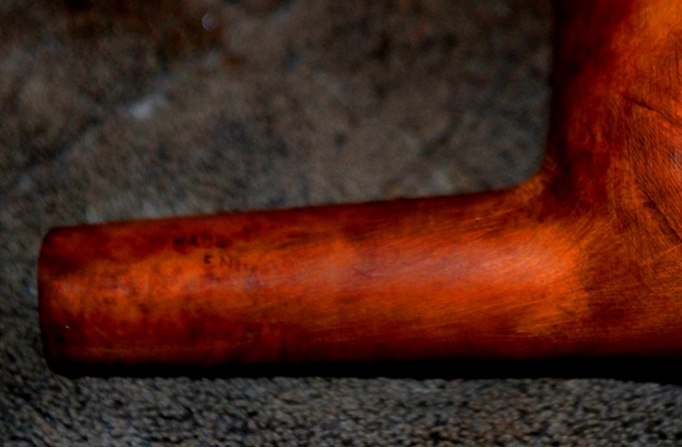
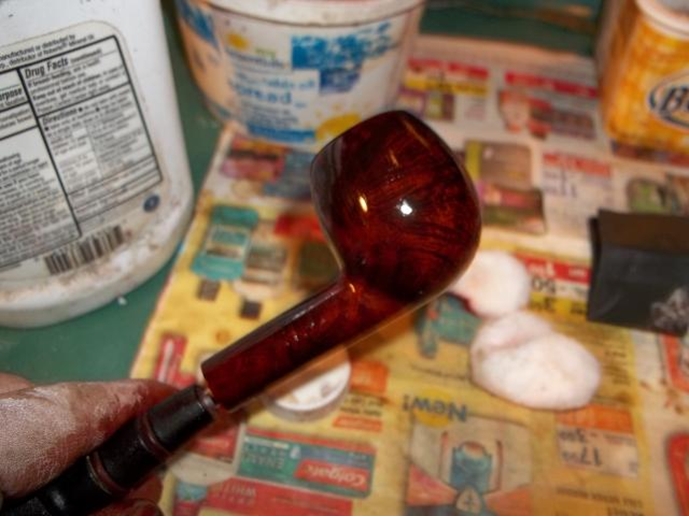
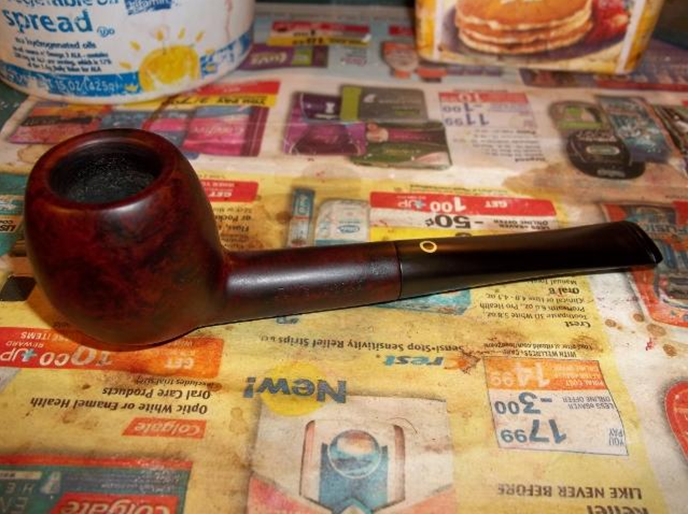
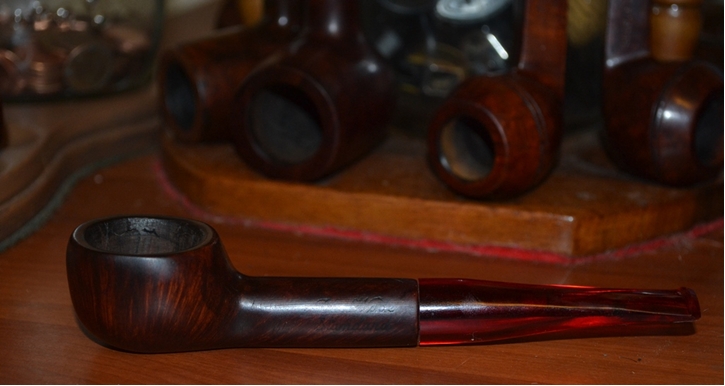
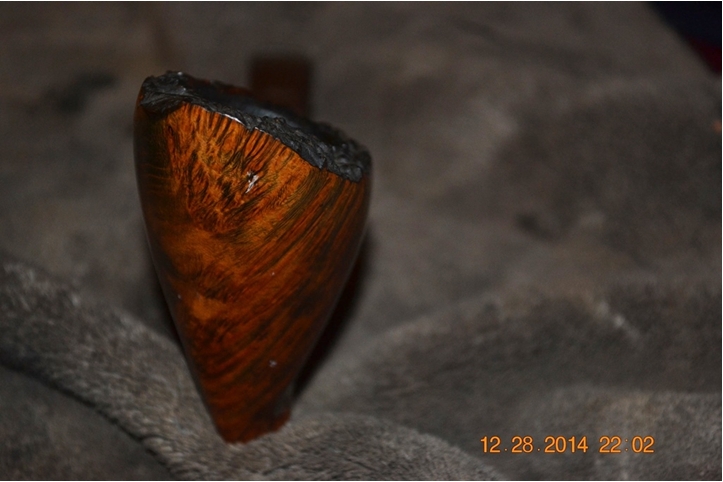
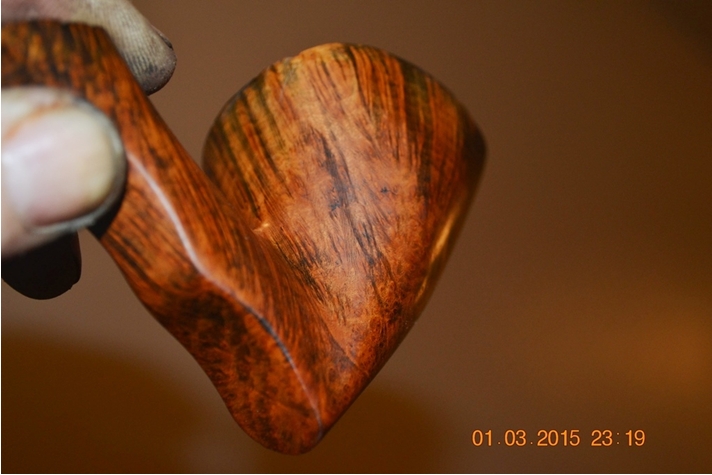
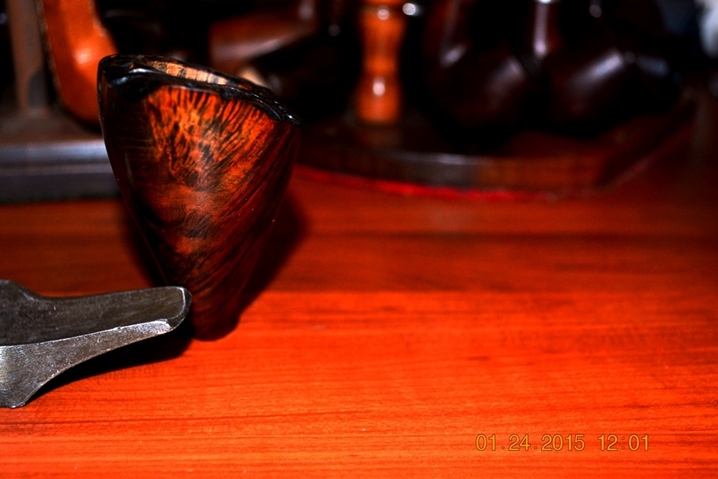
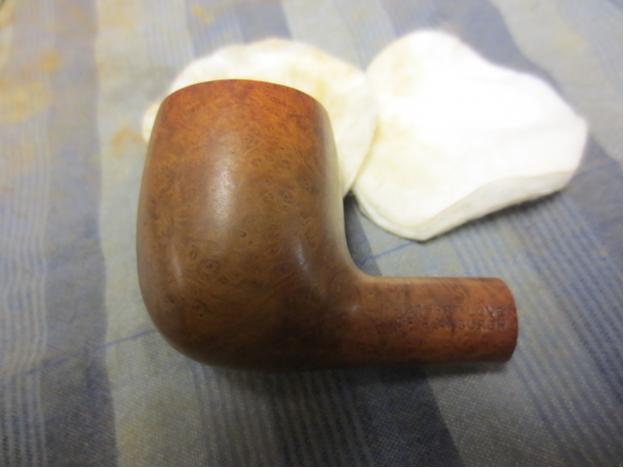
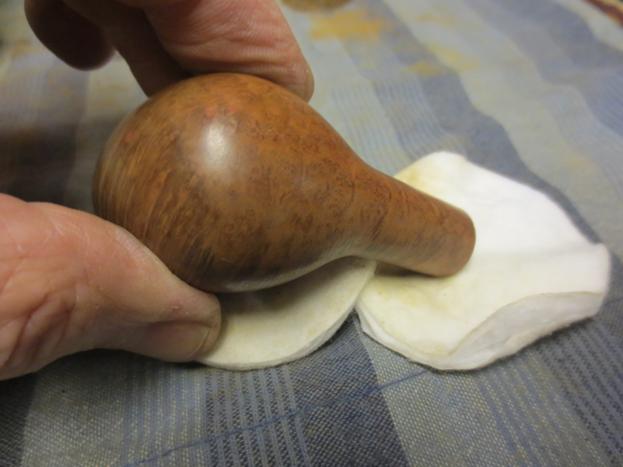
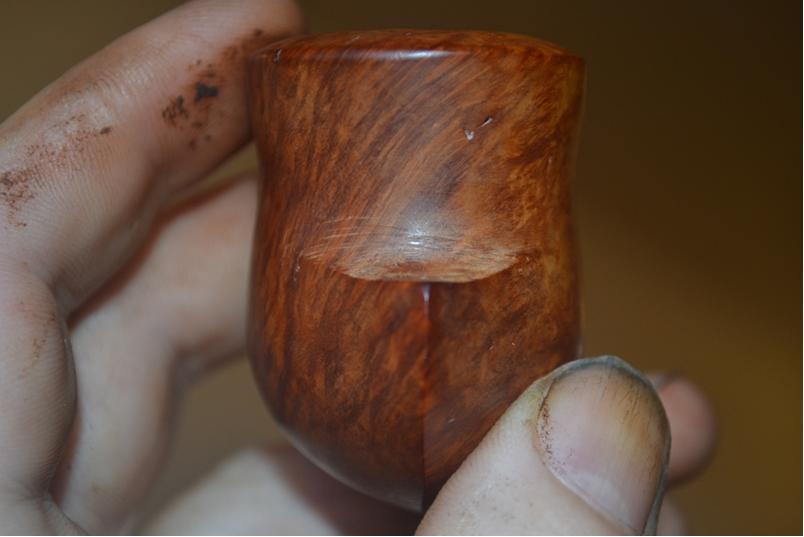
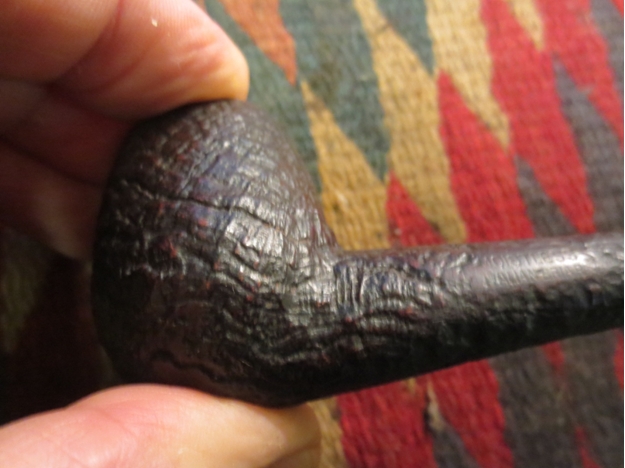
I decided to rub down the bowl with a light coat of olive oil to protect the briar and give it some life. I applied the oil with a paper towel and rubbed it in and rubbed it off. It also served to highlight the grain and make it stand out.Sav25

Sav26

Sav27

Sav28 I cleaned out the shank with cotton swabs, pipe cleaners and isopropyl alcohol until they came out clean. For the amount of build up of tars and oils on the rim the shank was quite clean.Sav29 
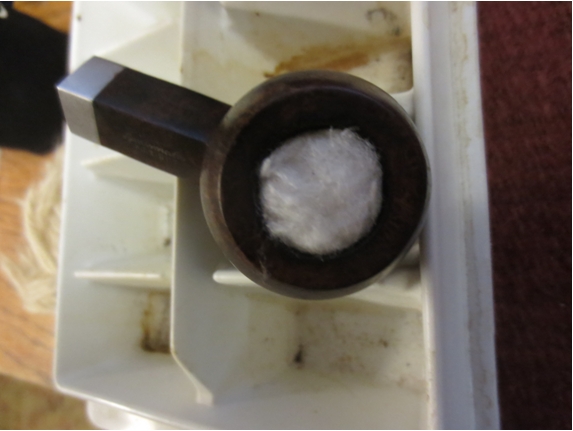
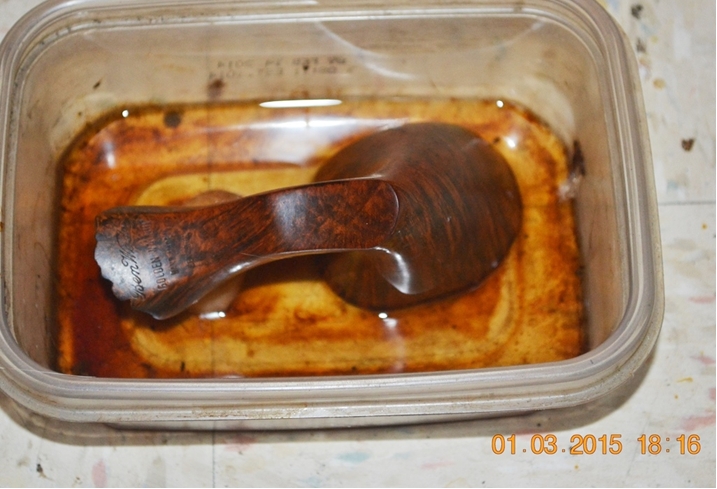
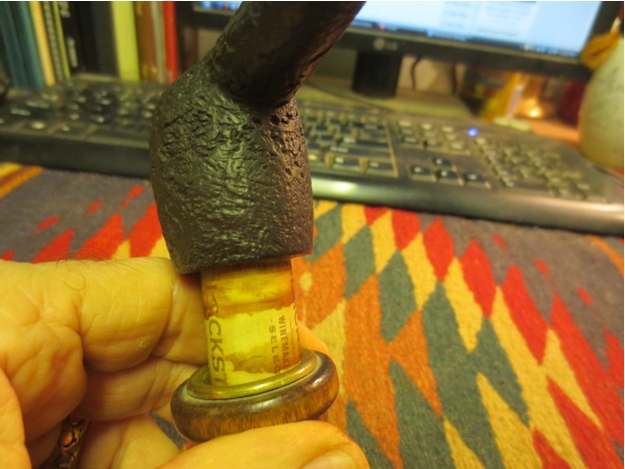
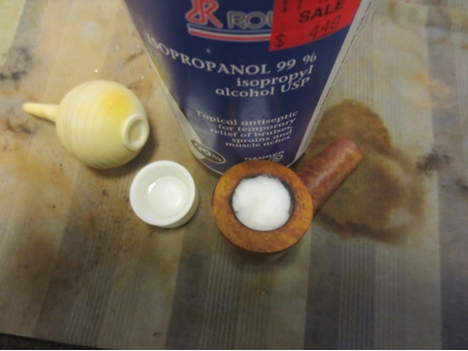
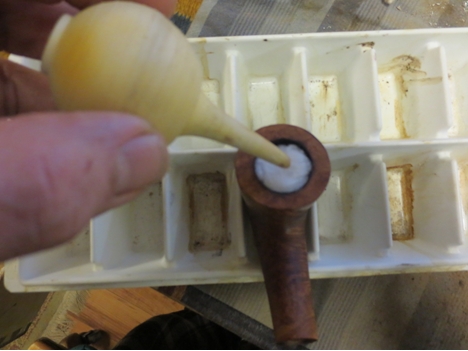
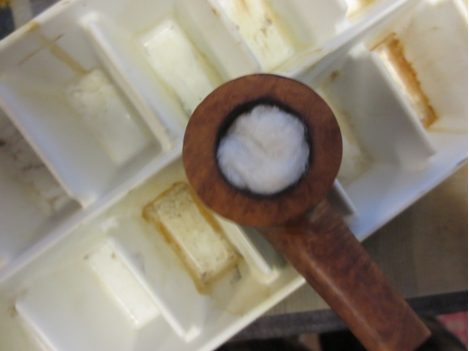
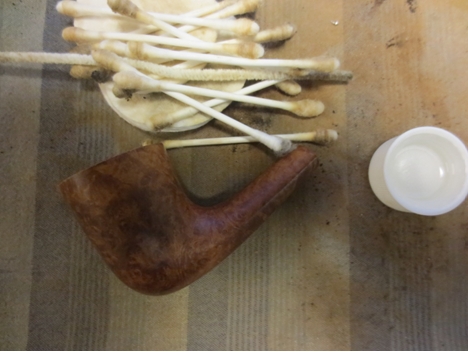
I decided to use a cotton ball and alcohol soak on the bowl to remove the sweet smells of the aromatics that had been smoked in the bowl. It had a thick vanilla smell that needed to go in my opinion. I set the stuffed bowl in an ice cube tray and used an ear syringe to fill it with alcohol. I let the bowl soak overnight to leach out the oils in the wood.Sav30

Sav31

Sav32

Sav33 
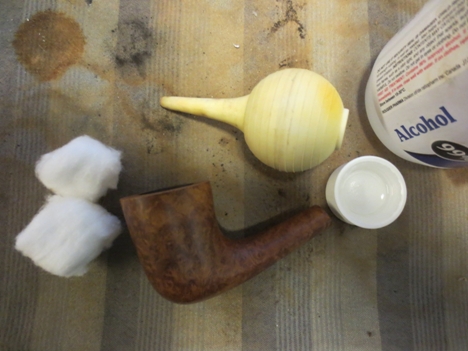
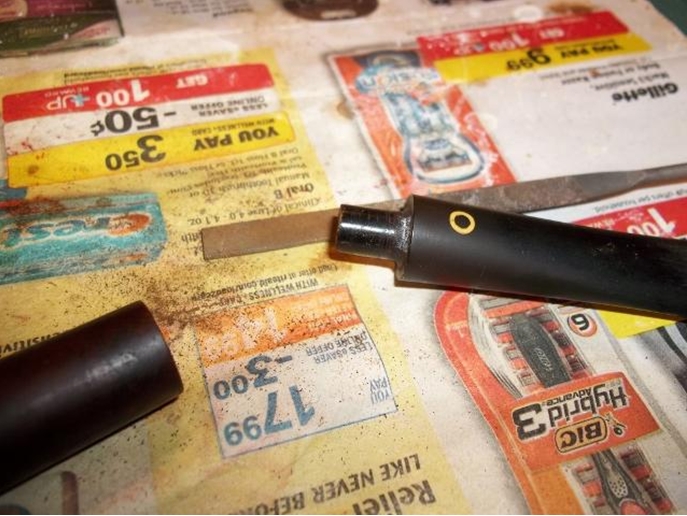
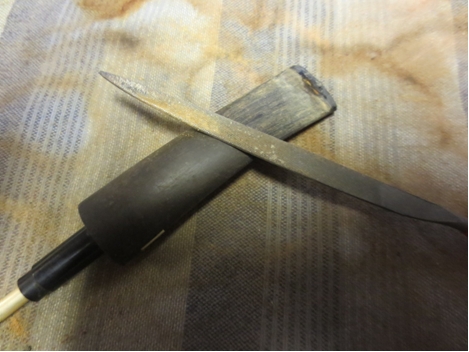
By the time I had finished setting up the bowl I called it a night and went to bed. The next morning I worked on cutting and shaping the new button on the stem. I used my usual knife blade file to make the initial cuts and shave back the slope of the stem.Sav34

Sav35 
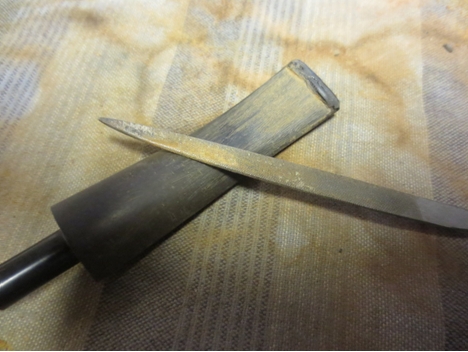
When I had the slope and look right I sanded the newly shaped button and stem with 220 grit sandpaper. I then repaired some of the low spots with clear super glue. I recut the button with the needle files and sanded it with 220 grit sandpaper to clean up the edges.Sav36

Sav37 
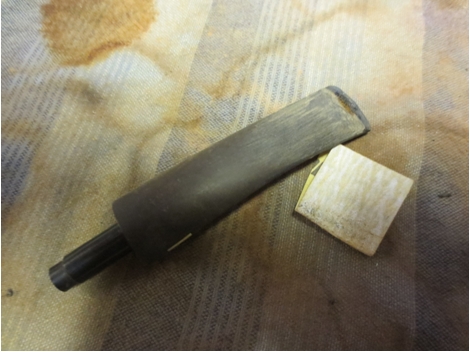
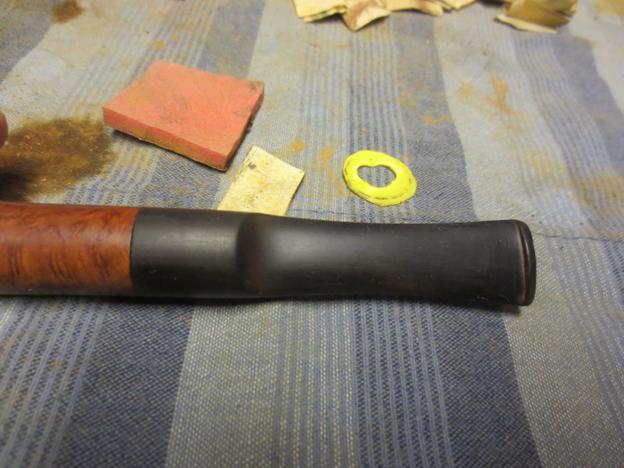
With more sanding and shaping I had it where I wanted it and then sanded the stem with a medium and a fine grit sanding sponge to clean up the scratches in the vulcanite.Sav38

Sav39 
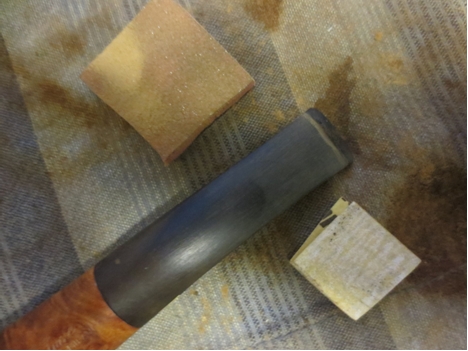
With the button shaped in I worked on the slot in the airway. I used my usual three needle files – a flat oval, an oval and a round file to work on the slot. I always start with the flat oval and work to the round file.Sav40

Sav41 
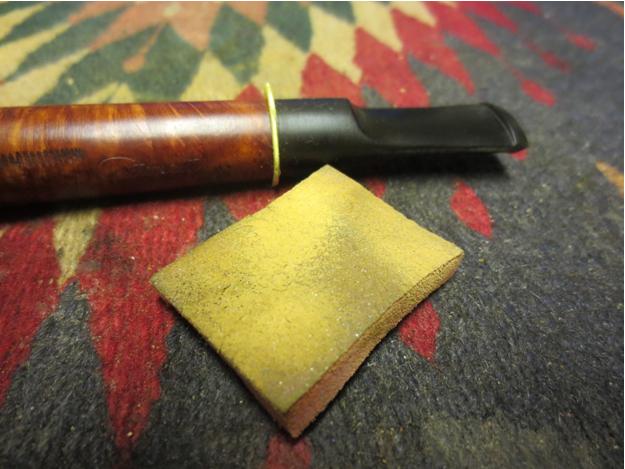
I used a folded piece of sandpaper to smooth out the inside of the slot.Sav42 
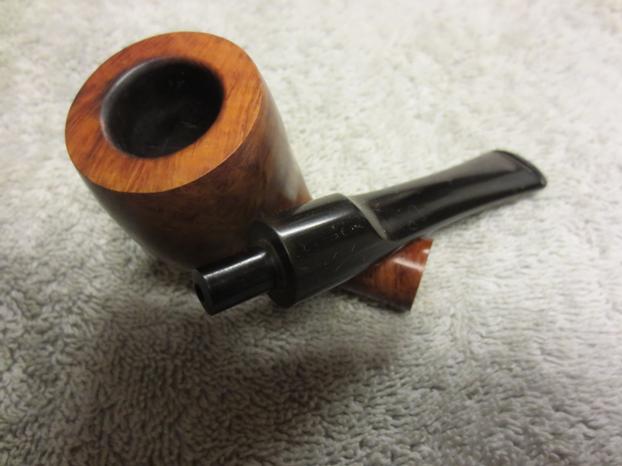
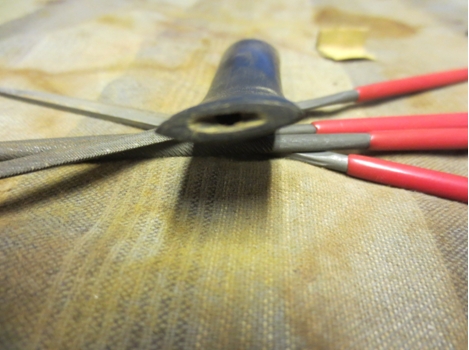
At this point I worked some more on the surface of the button. It still was too rough to my liking. I sanded and filed it to reshape it. The next two photos show it before I worked it over with files and papers.Sav43

Sav44 
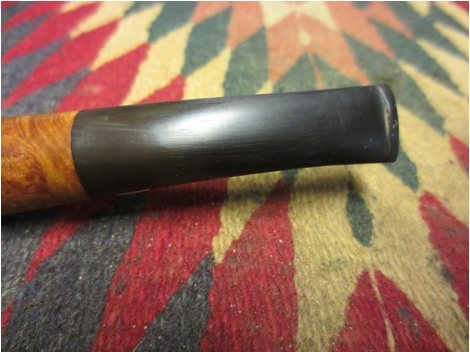
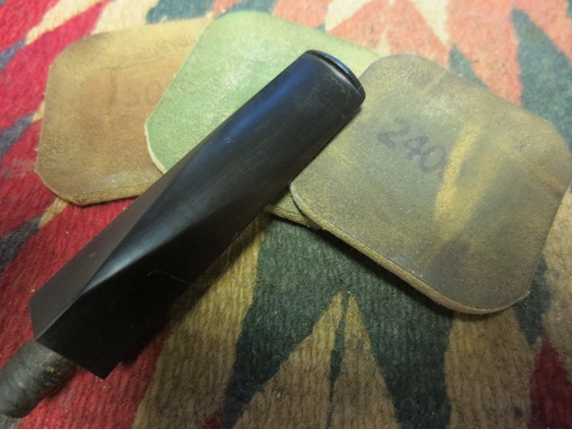
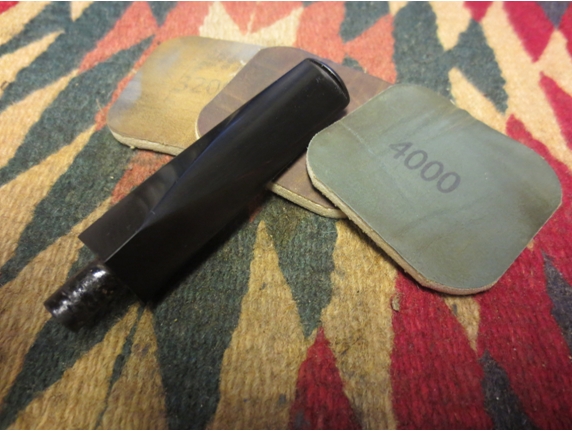
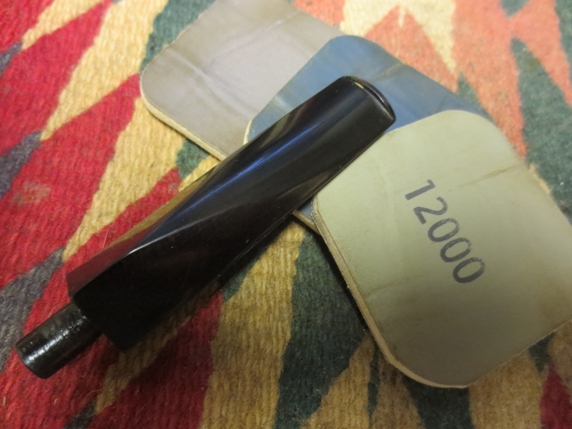
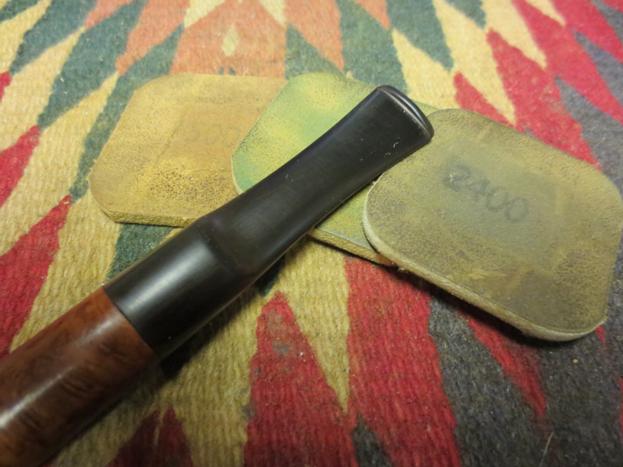
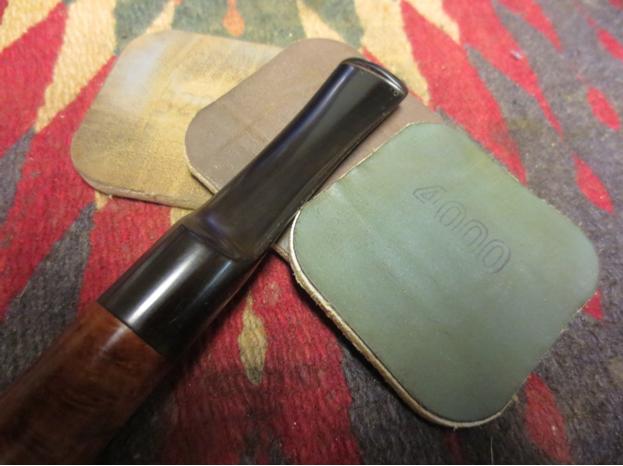
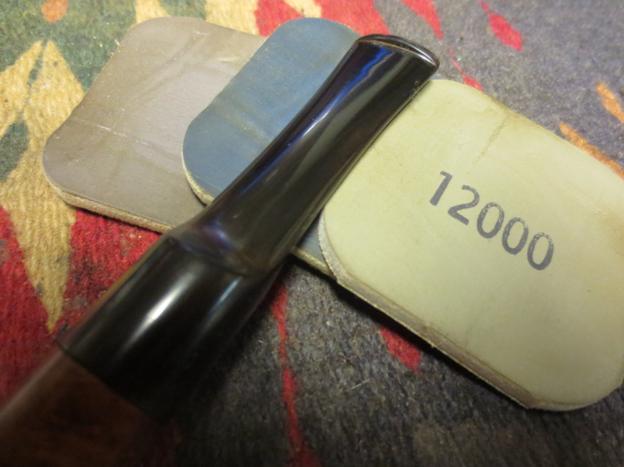
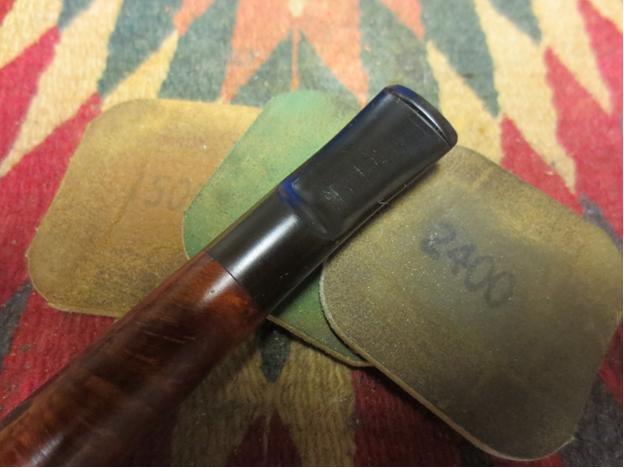
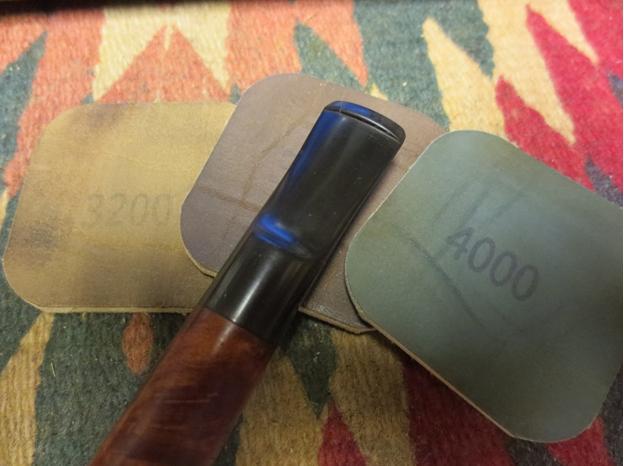
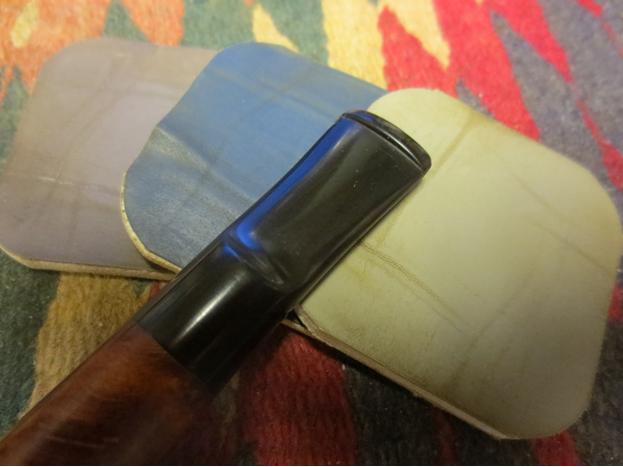
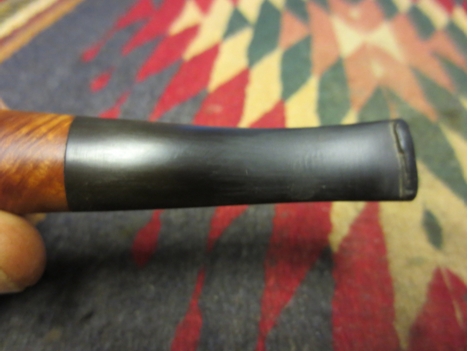
Once I had the button shaped to my satisfaction I sanded it with micromesh sanding pads. I wet sanded with 1500-2400 grit pads, rubbed down with Obsidian Oil and then set it aside to dry. I was pleased with the overall effect of the new button and could not wait to finish polishing it. This is where I made the first mistake in this repair.Sav45

Sav46 
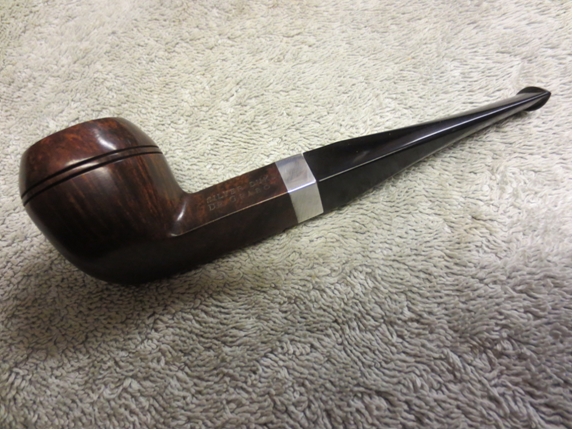
Instead of leaving it on the work table and calling it a night I brought the pipe upstairs with me from the basement work area. I wanted to show the girls in my family the result of my work. I know that they are not that interested but they attempt to humour the old man. I stopped at the fridge to get some water and that is when the disaster struck. I could not believe it. The pipe simply slid through my fingers and hit the hardwood floor in our kitchen. I can’t tell you how many times that has happened with no issues. But this time there was going to be a major issue and it came with a vengeance. When it hit the floor, really only 2 feet as I was bending over, I heard the awful click and the stem and bowl separated. The tenon snapped at the shank.Sav47 
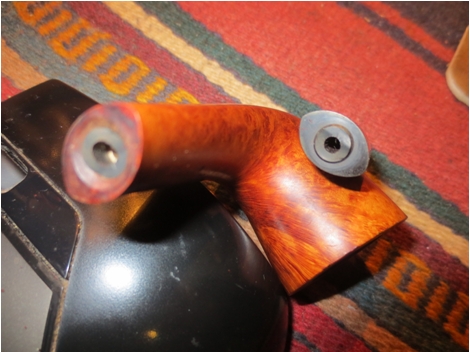
All that work done and now what to do? I was sick with the thought of starting over. I carried the broken pipe down the stairs to the work table and left it in the dark and went to bed – just a tad frustrated. If you are interested in seeing what I did to try and redeem this disaster make sure to read Part Two of the work on this pipe.

Restoring one of my favourite pipe shapes – an Edwards Author 722


Blog by Steve Laug

This Edwards Author 722 came to me in the gift box I received. The shape has always been one of my favourites. This one is stamped Edwards in script on the left side of the shank. On the right side it is stamped Algerian Briar over 722. I am guessing that the 722 is the shape number. I have looked but cannot find any information on the Edwards shapes. On the underside of the shank it is stamped with a large number 5. On the underside of the stem was stamped the word FRANCE.Ed1

Ed2 From what I could find Edwards left all of their pipes with a natural finish, as was the case with this one. It was dirty and had darkened from smoking but it did not have a finish or stain on the briar. The bowl had been reamed and cleaned and the shank was clean. The briar had fills on the topside and the underside of the shank and on the left side of the bowl. They were white putty and some of them were shrunken and missing bits of the putty. The rim was dirty and slightly damaged.Ed3

Ed4 The stem was very tight in the shank and I carefully twisted it slowly from the shank. There was a yellow waxy substance on the tenon like old and dried beeswax. The mortise area was clean briar and was unstained by tars or oils. The fit of the stem to the shank was perfect. It was a smooth transition with no ridges or gaps.Ed5

Ed6 I wanted to know more about the brand. I have had several Edwards pipes over the years and still have them. I checked out my two usual sources Pipedia and PipePhil’s site. Reading on Pipedia I found the following information that I quote. http://pipedia.org/wiki/Edward%27s

“Edward’s pipes were originally produced in St. Claude, France when France actually was a world-class pipe maker with longstanding business & political connections to Colonial Algeria that allowed them to obtain the finest briar. During the tumultuous 1960’s, Edward’s created a business model to offer the finest briar available in both Classic and Freehand shapes – all at a fair price. They bought the company & equipment and cornered the market on the finest, choice Algerian Briar just before the supply vanished in political turmoil of Algeria’s independence. Edward’s packed up both machinery and briar-treasure to America, safely caching the essentials to create a new pipe-making dynasty. This was a coup, for the 70’s and 80’s were grim years for pipe smokers as quality briar all but disappeared.”

“Edward’s Design Philosophy is hard to pin down, think of their style as the “American Charatan” with unique & clever twists all their own. Today, they fashion pipes in several locations across the USA. All of Edward’s pipes are Algerian Briar – a fact very few pipe companies can claim, and all are oil-cured utilizing natural finishes – no strange concoctions are used to interfere in your tastebud’s dance with the briar. Algerian, Calabrian, Sardinian, Corsican – take your pick, but Algerian Briar is generally considered the finest smoking briar ever used. When combined with oil-curing, Algerian takes on a magical quality that even Alfred Dunhill recognized as far back as 1918 as the choice for both his Bruyere and Shell.”

There was also a non-working link to http://www.otcpipes.com that reference a collection of vintage Edward’s pipes and scans of Edward’s catalogs. I wish I could get that link to work. (If anyone has information on this please let me know as I would love to view this site and its information.)

I found a bit of additional information on the PipePhil site (http://www.pipephil.eu/logos/en/logo-e1.html). I quote it here as well.

“Edward’s Pipes, headquartered in Tampa, FL, got its start importing pipes from France and continued to do so from 1958 to 1963 when it started producing pipes in Florida from prime Algerian Briar, a practice they continue to this day (2010).”

I also found an interesting exchange on the Pipes Magazine site regarding Edwards that was posted three years ago. http://pipesmagazine.com/forums/topic/edwards-pipe I have copied one portion of that interchange by a poster named cypresspipe. He adds a personal dimension to the information having worked for Edwards in the 70’s. I quote him in full below.

“I worked at an Edward’s Pipe Shop in Jacksonville in the 70’s and I can provide more information about Edward’s pipes. Edward’s still exists with a few remaining shops around the country. Like the rest of the industry, they are primarily cigar stores and gift shops now. Edward’s pipes were and are their house brand and they were made in their factory in Tampa. I visited the Tampa store several years ago and they told me that Edward’s pipes are now made in Spain. They also told me that they were running out of Algerian Briar and, as a result, many of their pipes were no longer carrying that stamping.”

“If you are familiar with Randy Wiley pipes, he started out making pipes in the Edward’s factory in Tampa back in the 1970’s.”

“The models Skylark, Skipper, Royce, Benton, etc. are fairly recent name categories, probably starting in the 90’s. They didn’t use these names when I worked there, except the “Skipper” was a pipe with a particular style of etching on it. At the time they made some very nice high-grade freehands that sold in the $100-150 price range (several hundred dollars today).”

“While the individual Edward’s shops are franchisee-owned the parent company is FGT Enterprises of Tampa, Florida. The company makes pipes under the “Benton” brand for other shops around the country, and makes private label pipes for some shops as well. They are a leading wholesaler of smoking accessories. You can go to their website and download their catalog (www.fgtenterprises.com–you might want to check out the “About Us” page on the site. FGT at one time did not stress their connection to the Edward’s shops, as they wanted to downplay the fact that they were associated with stores that were competitors to some of their other customers.”

“I have about 20-30 Edward’s pipes from the time I worked there and they have always been good smokers. The only problem with them is that pipes in the 70’s tended to be smaller (about group 3) than they are today.”

“As far as I know, there are still Edward’s shops in Los Altos (CA), Englewood (CO), Tampa, Atlanta, Jacksonville, and Dallas. In case you are interested Edward’s was named after Edward Rowley, a Tampa TV personality of the 50’s and 60’s who founded the company in partnership with Frank Smith (“Smitty”). Rowley was essentially the “face” of the shops while Smitty was the tobacco and pipes guy. Smitty bought out Rowley’s interest in the company sometime in the late 70’s or early 80’s.”

Armed with that information I went to work cleaning up the pipe. I started by topping the bowl with 220 grit sandpaper on a topping board to smooth out the rim and even out the smooth surface. I followed that by sanding it with a medium and a fine grit sanding sponge.Ed7

Ed8 I picked out the ugly pink/white fills with a dental pick. I scrubbed the bowl down with acetone on cotton pads to remove the grime and the dust from the fills. When the bowl was clean I refilled the sand pits with briar dust from the rim and clear super glue. I have learned that these turn almost black but that is far easier to work with than the pink/white putty.Ed9

Ed10

Ed11 I sanded the repairs with 220 grit sandpaper and then with a medium and fine grit sanding sponge. I followed that by sanding with 1500-2400 grit micromesh sanding pads.Ed12

Ed13

Ed14 I have a dark alcohol bath – I filter out the sludge monthly but leave the alcohol dark. I have found that a soak in it not only removes the finish but also gives a patina to the briar. It tends to make blending the repairs and the topped rim much easier.Ed15 While the bowl soaked in the bath I turned to the stem. I sanded the tooth marks and tooth chatter on the stem with 220 grit sandpaper to remove it and smooth out the surface.Ed16

Ed17 By the time I finished the initial sanding of the stem it was time to remove the bowl from the bath. I dried off the bowl and took the photos below to show the colour that the bath added to the briar.Ed18

Ed19

Ed20

Ed21 I set it aside and finished working on the stem. I sanded it with medium and fine grit sanding sponges and then with micromesh sanding pads. I wet sanded with 1500-2400 grit pads and dry sanded with 3200-12,000 grit pads.Ed22

Ed23

Ed24 I buffed the stem with White Diamond and Blue Diamond on the buffing wheel. I gave it several coats of carnauba wax and lightly buffed it with a flannel buff. I am always careful when buffing the stem without the bowl (in fact I rarely do it) because it is very easy to round the shoulders on the stem making a tight fit against the shank impossible.Ed25

Ed26 I buffed the bowl with red Tripoli and White Diamond to remove the surface scratches around the patches. I buffed the rim carefully with the same product. I took the next two close-up photos of the rim to show the repaired and polished rim.Ed27

Ed28 The finished pipe is shown in the photos below. The rich patina is only from the alcohol bath. I used a stain pen to touch up the light spots around the patches on the right side of the bowl and shank. I gave the pipe several coats of carnauba wax and buffed it with a soft flannel buff to raise a shine. All that is left to do is to load the bowl and fire it up. Something I hope to do before the end of the week.Ed29

Ed30

Ed31

Ed32

Ed33

Ed34

Ed35

Cleaning up a Dr. Grabow Silver Duke Bulldog


Blog by Steve Laug

This old Dr. Grabow Silver Duke Bulldog is a bit of a variation on a restoration for me. Someone earlier had replaced the Adjustomatic stem with a push stem. Whoever made the stem did an amazing job cutting it to fit perfectly with the angles of the shank. I say it is amazing because on these old pipes none of the angles are the same and matching all the points of the diamond shank is a lot of tedious hard work (at least for me and I have done a few of them). Add to that the stem was converted to a push stem instead of the normal threaded stem. It is a high quality vulcanite also as it did not have any oxidation.Duke1

Duke2 All I would have to do was sand out the blade or file marks on the stem and the metal mortise cap. The finish was very shiny and had some bubbles on the rim along with a tar build up. It was like a thick varnish. I always remove these top coats and wax and oil the bowl to make the grain stand out. The briar was pretty clean with only two recognizable fills that I could see, though well blended into the stain coat on the pipe. The bowl had a thin uneven coat of cake that would need to be reamed.Duke3

Duke4 The pipe was stamped Silver Duke over Dr. Grabow on the left side of the shank and Imported Briar over Adjustomatic in script over Pat. 2461905. That confirmed the replacement stem. The only thing wrong with the stem was that it had lots of marks in the surface left from either a saw that was used to cut the angles or the files. The stem was not smooth and shiny like the bowl but was rough to touch with small ridges on the surface from the cut marks. The metal mortise insert had matching marks so it looks to me that the stem was cut on the shank. The thin button is perfect. A taper stem on a bulldog is something I have always liked better than a saddle so this one looked great to me.Duke5

Duke6

Duke7

Duke8 The tenon was also ridged. I have found that when the adjusting screw is loose on my tenon turning tool I get a tenon that looks like this one. It also has a slightly deeper groove next to the bottom of the tenon where it joins the stem. These issues would need to be addressed. It would take a little bit of finessing to clean up the ridges and keep the fit of the stem snug in the metal mortise but it could be done.Duke9

Duke10 I could see some nice grain under the shiny varnish coat. It was cloudy and the rim had a slight build up of tars and oils. I wiped the bowl down with acetone on cotton pads. The varnish came off and left the pad orange. I had to keep the acetone pads wet otherwise the varnish gummed up on the surface and the pads stuck to the briar. After a lot of scrubbing (three pads and much acetone to keep a wet edge) the finish was gone and the grain stood out in its beauty.Duke11

Duke12

Duke13

Duke14 I reamed the bowl with a PipNet reamer and took the cake back to the bare briar in order to provide a smooth surface for a new cake to be developed.Duke15

Duke16 I scrubbed out the shank and airway with cotton swabs, pipe cleaners and isopropyl alcohol. I scrubbed until it was clean. In this case the deepest part of the mortise was clean quickly. Most of the oils and tars came out of the metal threads of the Adjustomatic tenon insert. Even cleaning that did not take too many pipe cleaners before it was shiny. I also scrubbed the end of the shank insert to remove the varnish and tars left on the end.Duke17 I sanded the scratched aluminum mortise insert/cap with a fine grit sanding block to minimize some of the scratches and remove the cut marks left behind from the manufacture of the stem. It took a bit of sanding but I was able to remove the deepest ones. The rest would polish out with sanding sponges and micromesh sanding pads.Duke18

Duke19 I sanded the stem with the sanding block and then with a medium and fine grit sanding sponge. I sanded until the deeper scratches were minimized and the surface was free of the earlier ridges. I also sanded the area around the top and bottom surfaces next to the button to remove the tooth chatter that was there.Duke20

Duke21

Duke22

Duke23 I rubbed the briar down with a folded paper towel lightly coated with olive oil. I wanted to highlight the grain and give some life to the finish before waxing it so I used the oil. Once it is wiped on and absorbs it has a glow that I like. I cover that with carnauba in the end and the finish shines and has warmth that was lacking in the previous varnish coat.Duke24

Duke25

Duke26 The stem did not seat well in the mortise. The flat surface of the aluminum insert needed to be beveled to let the tenon sit right in the mortise. I used a sharp knife to bevel the inner edge of the mortise to accept the tenon correctly and close up the gap between the stem and shank.Duke27

Duke28 I put the stem back on the bowl and the fit against the shank was now snug with no gap. The beveling of the inside of the mortise achieved what I was hoping and the fit was perfect.Duke29

Duke30 When the shaping of the replacement stem had originally been done the blade or file had rubbed against the shank in two places on the bottom sides of the diamond. It looked to me that it had rubbed off the varnish coat and also some of the stain so that the spots looked lighter than the rest of the shank and bowl. I used a dark stain pen to touch up these areas on the shank and blend them into the finish of the rest of the pipe.Duke31 With the first steps in refinishing the bowl done I wanted to remove the ghosts that were in the bowl. There was an aromatic smell that I wanted to remove. I stuffed cotton balls into the bowl and set the bowl upright in an old ice cube tray. I use an ear syringe to fill the bowl with isopropyl alcohol. The bowl would sit for the day absorbing the oils from the briar into the cotton and alcohol. As the alcohol evaporated the tars would remain in the cotton.Duke32

Duke33 I let the bowl sit and while the cotton and alcohol did its magic I worked on the stem with micromesh sanding pads. I wet sanded with 1500-2400 grit pads to remove the remaining surface scratches and begin to polish the vulcanite.Duke34 I used some clear super glue to fill the ridges on the tenon and smooth it out before going on to sand the stem with the remaining grits of micromesh sanding pads. I rubbed the stem down with Obsidian Oil after the first set of three pads and then again after the second set. I find that the oil helps the higher grit pads to really cut into the surface and help polish the vulcanite.Duke35

Duke36 The bowl had been sitting for about three hours so far. I took a picture of the cotton to show the colour that was beginning to leach into it from the bowl.Duke37 I let the bowl soak for another hour and very little more came to the cotton. I pulled the cotton pads out of the bowl and ran a cotton swab through the bowl and shank to clean up the remaining alcohol there. I ran a pipe cleaner through the airway into the bowl to dry it out. I put the stem on the bowl and took it to the buffer. I buffed the pipe with White Diamond and then gave the bowl and stem multiple coats of carnauba wax. I finished by buffing it with a soft flannel buff. The finished pipe is shown below.Duke38

Duke39

Duke40

Duke41

Duke42

Duke43 While I worked on this pipe I have been posting updates and asking for information on the Dr. Grabow Collectors Forum (http://drgrabows.myfreeforum.org/index.php) and gotten a lot of information from the folks there. I found out that I can order an original stem for this pipe by sending them the bowl and some money for the stem and shipping. I may well do that one day. I raise a bowl to them and dedicate this blog post to the members of that site. Thanks for the help.

Parker Super Bruyere Straight Billiard


Guest Blog by Robert M. Boughton
Member, North American Society of Pipe Collectors
http://www.naspc.org
http://www.roadrunnerpipes.com
http://about.me/boughtonrobert
Photos © the Author

I have made it a rule never to smoke more than one cigar at a time. I have no other restriction as regards smoking. I do not know just when I began to smoke, I only know that it was in my father’s lifetime, and that I was discreet. He passed from this life early in 1847, when I was a shade past eleven; ever since then I have smoked publicly. As an example to others, and not that I care for moderation myself, it has always been my rule never to smoke when asleep, and never to refrain when awake.
― Mark Twain (Samuel L. Clemens, 1835-1910), U.S. author, humorist and critic, at his 70th Birthday Speech, 1905

INTRODUCTION
The nomenclature on this Parker Straight Billiard is worn beyond much recognition, but certain details stand out enough under the closest of scrutiny to make me confident it is a Super Bruyere, Made in London England. The following pictures, “enhanced” by various means with photo editing, are all I have to go with.Parker1

Parker2 On the left, the words Parker at the top followed in the middle with a clear enough trademark diamond and on the bottom a definite, fancy Bruyere can be made out. This combined with the very rough yet apparent Made in London England in the photo to the right seem to compare on pipephil.eu only to the Super Bruyere.

That said, the other most notable condition of the pipe as I received it, other than fading of the original stain, was the actual presence of a small amount of tobacco in the bottom of the chamber. That was a somehow endearing quality I had never before seen.Parker3 This angle also shows the majority of the kind of work I needed to do to make the once precise pipe presentable again. The stem was discolored and scratched with minor chatter but no teeth marks. There were also slight dings around the inside of the rim and some blemishes on its top that appeared elsewhere throughout the pipe’s outer area.Parker4

Parker5

Parker6

Parker7

Parker8 I apologize for jumping the gun on the sanding away of one patch of bad pits on the right side before even documenting its original state.

THE RESTORATION
The chamber needed considerable reaming, which also removed the dings in the rim diameter, before sanding with 150-grit paper followed by 200 and 320. I swabbed it with small Everclear-soaked cotton cloths, scoured the shank over and over again with a wire-handled cleaner dipped in the alcohol, did a preliminary cleaning of the stem’s air-hole and retorted the pipe.

After those steps, I sanded the top of the rim with 200 paper, eliminating the scratches there. I followed that with 320 paper over the entire bowl and shank and buffing with super fine steel wool, then 1500, 3200, 3600 and 4000 micromesh.Parker9

Parker10 As much as I liked the lighter color of the briar, I concluded that re-staining with medium brown boot dye seemed the best course. I flamed it, let the wood cool and buffed with 3200 micromesh.

The stem needed 200-grit paper before micro-meshing with 1500, 3200, 3600 and 4000 grades.

To finish, I buffed the stem with red Tripoli and White Diamond, and the wood with red and White Tripoli, White Diamond and carnauba.Parker11

Parker12

Parker13

Parker14

Parker15

Parker16 The last touch was to refill the Parker “P” in a diamond on the stem with a white marker.

CONCLUSION

This restore, I’m happy to report, went without a hitch, although that does leave me with a rather unexciting blog. I almost wish something exciting had gone wrong and required a clever solution!

Restoring an Old Yello Bole 2033 Apple


Blog by Troy Wilburn

This is the other pipe I got with the Doc Watson. Both came from the same owner estate sale – an old gentleman that had them has since passed on to glory. The two pipes have been together longer than I have been alive. It’s an early Yello Bole in that it has the Imported Bruyere stamp but no “Honey Cured Briar” along with the 2033 four digit shape stamp. I’m guessing 1930 – 1933 roughly.

The pipe as it was when I got it.YB1

YB2

YB3

YB4 I started out by removing most of the cake, then sanding inner bowl with some rough grit paper leaving a thin coat of cake.YB5 Next I cleaned out inner shank and stem with 91% alcohol. On these large airway YBs I like to twist 2-3 shank brushes together for better scrubbing. I also scrubbed outer stem with 91% alcohol and a Scotch Brite pad to remove grease, oil, wax etc.YB6 This is easiest way I’ve found to remove rim cake. I mix up some Oxy Clean and warm water. Dip a piece of Scotch Brite pad in it leaving it not quite dripping wet. Lay it flat on surface and move rim along lightly. It takes it off pretty fast and will not harm under finish if you are trying to save it. It will leave it discolored but a little mineral oil will bring the color back to original.YB7

YB8Next I went ahead and scrubbed bowl and stem with same pad and Oxy Clean solution. It will remove contaminants and not hurt the finish just dull it. It will remove any light oxidation from stem that might be present. I scrub the stem harder than the bowl.YB9 Next I went ahead and scrubbed bowl and stem with same pad and Oxy Clean solution. It will remove contaminants and not hurt the finish just dull it. It will remove any light oxidation from stem that might be present. I scrub the stem harder than the bowl. After getting a good look at the bowl after old dirt and such was removed the finish looks toasted. Sadly it cannot be saved.

So I went ahead and sanded bowl with 400-2000 grit sandpaper. Never touching the stampings with any grit sandpaper less than 1200 grit. I will leave a defect or mark near a stamping just so it won’t be harmed.YB10 Luckily the stain I had left over from the Doc Watson was a good match so I was able to use it. I applied three coats letting in dry in between.YB11 After third coat of stain I like to apply mineral oil to help the grain stand out and condition the briar. The mineral oil lets you see any defects in the finish and what the bowl will look like when waxed. I set it to the side and let it air dry.YB12 I had to do some filing on the stem and button to remove some tooth marks.YB13 If you noticed in before pic the stem did not fit tight to the shank, so I filed down tenon a little at a time until it fit tight.YB14

YB15 I wet sanded the stem again using 400-2000 grit sandpaper.YB16 I put the bowl and stem back together and it is ready for some buffing and wax.YB17 On bowls I’ve stained I put about 3 coats of base wax then go back over with white Tripoli then go back to wax .

On the stems I use brown Tripoli, white Tripoli and then wax.YB18 Here are pics of the finished pipe.YB19

YB20

YB21

YB22

YB23

YB24

YB25 It was missing a stinger so I dug out an extra I had and cleaned it up.YB26

YB27

YB28

YB29

YB30 It should make a fine daily smoker and better than most any pipe I could buy today for under a 100 dollars. I have less than 12 dollars in it.YB31

Grooming a Ben Wade Golden Walnut Danish Freehand


Guest Blog by Robert M. Boughton
Member, North American Society of Pipe Collectors
http://www.naspc.org
http://www.roadrunnerpipes.com
http://about.meboughtonrobert
Photos © the Author

“There is nothing like being left alone again, to walk peacefully with oneself in the woods. To boil one’s coffee and fill one’s pipe and to think idly and slowly as one does it.”
― Knut Hamsun (1859-1952), Pulitzer Prize winning Norwegian author

INTRODUCTION
When, a few years back, I became serious about collecting pipes, it was for the most part all about anything made by Peterson’s and Savinelli in particular and meerschaums in general, with an emphasis on the latter. While these pipes formed the basis for what has become a rather large, P.A.D.-fueled assemblage, I have, since those earliest days, branched out, so to speak, into many other fine brands.

Some of the brands of which I have various models greater than one include Barling, Butz-Choquin, Comoy’s, Dunhill, GBD, Karl Erik, Kaywoodie, V. Rimkus, Ropp, Stanwell and Don Warren, which do not include the large selection of individuals such as a Cavicchi 4C Silver Band Freehand, Burgundy Falcon, Charatan Make Deluxe Prince and Stefano FX Bean Pot. In short, I have become, as time passes, more attuned to the endless variety of great pipes out there, not to mention a few of more dubious origin such as a “The Pipe” (which nevertheless, in my opinion, no true collection should lack at least one sample) and a recent, still to be restored but excellent example of the odd but unique Doodler.

To use a term I recently coined in a previous blog, I am an omnitobacarius-phile, or lover of all things tobacco-related, at least as far as smoking pipes are concerned.

And, of course, there is my growing assortment of Ben Wade pipes, the latest addition to which this blog concerns.

Here are my other BW pipes, in order: a Town and Country Bent Dublin London Made with a 14K gold “Barling” band (don’t ask me how), Cheltenham Straight Billiard, Selected Grain Short Apple, London Made Dublin, Blue Diamond and Tall Canted Poker. There is also a BW that was once a Tall Straight Billiard but, due to extreme abuse by some unknown villain, suffered a large and fatal crack from the top of the bowl about halfway down, requiring a radical change in shape to a squat pot, as I call it. The result of that surgery is now a very special shop pipe.Ben1

Ben2

Ben3

Ben4

Ben5

Ben6

Ben7 What, you might well ask, do all of these pipes have in contrast to the one of which I will describe the light refurbish in this blog? They were all made in England, where BW is best known for its production, although it has also made pipes in France and Denmark. The uncommon country of origin, the unusual wood and the beauty of the freehand itself wangled my mind around the idea that I truly needed this fine specimen. Of course, I was also very strongly attracted to the Danish golden walnut freehand.

Of an incidental reason for my appreciation of this pipe, I came to suspect, during the research phase, that the beauty was crafted by the late great pipe maker, Preben Holm, who sometimes made his services available to BW. One reason is the inclusion of “Hand Made” in the nomenclature of another golden walnut freehand that Hr Holm just happened to make for BW, while a briar plateau freehand the master carver created for BW bore only the stamp “Made in Denmark.” For the rest of my reasoning, see http://www.pipephil.eu/ logos/en/logo-benwade.html to start, and click on the link to Preben Holm for more examples of his distinctive work and style.

THE GROOMING

Honestly, this was one of the few almost ready to enjoy pipes I have ever bought online. The only completely restored, cleaned and sanitized pipe I purchased by this medium was a Ropp Deluxe Cherrywood #901. I sold it for less than my cost to a prospective basic cleaning customer in Scottsdale, Arizona whose #815 of the same brand and general look was delivered to another Post Office Box holder who seems to have the deficient morals needed to abscond with it. What can I say? It seemed to be the right business thing to do, and the buyer of the 901 wrote that its condition upon arrival was “fantastic” and promised to send me future estate pipes he finds for cleaning. He will not, however, be sending them via USPS. And yo! To the deadbeat out there who stole the 815, if you’re reading this, feel free to let me do the cleaning it likely still needs, and I’ll give you the deal you deserve.

But returning to my subject, had our excellent host, Steve, not wanted to see what became of the pipe he explained was made from a piece of plateau walnut, so simple was the “refurbishing” process that I never would have bothered with a blog on it. Still, given that the Danish freehand did need slight chamber work, re-staining of the plateau rim and shank opening, minor scratch removal, retorting and stem shining, I could not help giving the pipe attention I have to rank even below refurbishing: what I call here a grooming, much as an unruly lad sometimes needs his face wiped, hair combed and shirt tucked in.Ben8

Ben9

Ben10

Ben11

Ben12

Ben13

Ben14

Ben15

Ben16 Making the dulled black stain of the plateau rim and shank opening the first order of business, I decided to remove the stain with a localized soak in Everclear.Ben17 I had hoped that removing the old plateau stain would reveal a rim suitable for buffing in its natural state and color, but such was not the case. And so I re-stained it.Ben18

Ben19 A small but clear rectangular pattern of black pits near the upper right area of the right side of the bowl annoyed me.Ben20 Trying 1500 micromesh, I was able to lessen the downgrade the presence of the pits to dots, but 800 was needed to get rid of them altogether. A quick buff with superfine steel wool returned the natural golden glow of the walnut.

There were other small defects on the bowl too small even to show up in photos, but my eye saw them, and that was what mattered. I gave the entire bowl a going over with micromesh from 2400 through 4000 and found the walnut as smooth and fresh as could be.

Last of all, I attacked the stem. Although I like the look of the freehand style stem, in particular this one with two rounded bulges, for lack of a better term at the moment, near the shank opening, they are always more of a bother to sand away discoloration. I always have to do the process in stages, sanding the entire stem with 200-grit paper, wiping it down with a soft cloth, then focusing on the harder areas, sometimes three or even four times until the color is uniform. Then I apply the micromesh, starting with 1500 and progressing upward to 4000.

Ready for the final buffing, I used red and white Tripoli followed by White Diamond on the stem and those waxes plus a final coat of carnauba on the bowl and shank, including the black plateau spaces. I worried – as I perhaps too often do – that the resulting shininess of the plateaus was a bit much, but that’s my nature.Ben21

Ben22

Ben23

Ben24

Ben25

Ben26 CONCLUSION
So there it is. After writing this up, I realize there was more work than I remembered, but then this pipe presented itself to me in such glory that I never considered the task as anything more than that.

I kept this one, as you might have surmised. I have come to have a genuine respect and weakness for the wonderful variety of pipes made by Ben Wade and their consistent quality of engineering, grace and high-grade pleasure of smoking.

ADDITIONAL PHOTOS AND INFORMATION

I made a comment on the blog thanking Steve for the great history he emailed me and the confirmation of the Preben Holm connection. I was troubled by not seeing the stem etching the pipephil.eu photos showed and then noticed on the pictures of the stem in my blog that the etch was still there! After filling in with a marker, I was able to make out the mark better. Here are the new before and after photos (the after shot, obviously, being before cleaning up the stem again):Robert1 Robert2

Bringing a Herbert Love of Edinburgh The Queensferry Billiard 422 back to life


Blog by Steve Laug

I received a gift box of pipes from a friend on Smokers Forums this week and it contained 23 pipes that presented a variety of challenges for repairs. Looking them over, I found that there were quite a few pipes with stampings that I was unfamiliar with. There were brands and sub-brands that were new to me. I chose to work on one of those I knew nothing about first. I had never heard of the Herbert Love Shop of Edinburgh. The stamping intrigued me. On the left side of the shank it was stamped Herbert Love of Edinburgh and on the right side it was stamped The Queensferry. On the underside of the shank it was stamped horizontally along the shank with the shape number 422. On the left side of the saddle portion of the stem it had a faint HL stamping.

I did my normal search on Pipedia and Pipephil’s site to see if I could find the stampings or the cursive HL on the saddle of the stem. There was nothing to be found. I posted a request for information on Pipe Smoker’s Unlimited Forums specifically asking several of the members there that are from Edinburgh to see if they had any information. I received a response from a collector of English pipes that included the photo and article on another Herbert Love Tobacco Shop in Glasgow. I also received a response from one of the Edinburgh folks, Chris with this information: … it closed down many years ago. It was on Queensferry St. (the road to the old ferry across the Forth before the rail and road bridges were constructed) at the West End, handily situated next to the iconic ‘Old Man’s Pub’, “Mather’s Bar”. At that time there were three pipe shops in Edinburgh (HL’s, one on George 1V Bridge and another in Leith); now only the latter exists… All I remember about the shop itself, apart from it being very old-fashioned, was that they used some interesting old scales for weighing out the loose tobaccos.

Here is the link to the article that I received about the closure of the Glasgow shop. http://www.heraldscotland.com/last-smokers-paradise-closes-1.828258 Sadly I could find no photos or information online regarding the now close Edinburgh shop to include in this post. If anyone reading has information be sure to let us know in the comments section below. Thank you.

When I brought the pipe to the worktable it is in pretty rough shape. The finish was damaged and spotty. The rim had a burn spot on the inner edge and the top at the front of the bowl. This damage also made a dip in the surface of the top of the rim. The bowl was filled with a crumbling cake that was uneven. The stem was oxidized and looked greenish yellow in colour. There were bite marks and tooth chatter on the top and bottom sides of the stem next to the button. The internals of the stem and shank were not too dirty and would clean up quite easily. There was no sweet smell of aromatics or the smoky smell of Latakia in the bowl so ghosting would not be an issue. Love1

Love2 I took close-up photos of the shank on both sides to show the stamping. The left side bore the Herbert Love of Edinburgh and the right side the Queensferry. From my queries I had learned that the Queensferry was actually the street the shop was located on. Herbert Love Tobacconists seemed to be quite widespread in Scotland – I found them in Aberdeen, Glasgow, Aylesbury, and Edinburgh. There were also hints of it being found in other locations as well.Love3

Love4 I scraped some of the oxidation away on the left side of the saddle stem and found that underneath was some faint stamping that read HL in script. I checked the right side and top and bottom for further marks and found none.Love5

Love6

Love7

Love8 I took a close up photo of the rim and bowl to show the damage from the burn on the surface. You can see that it is deeper than the surface of the rim and extends from the inner edge to the outer edge of the rim.Love10 I reamed the bowl with a PipNet reamer using the cutting head that fit the bowl properly. I took the cake back to bare wood on all sides of the bowl so that I could address the rim damage on an even and hard surface.Love11 The next photo shows the cleaned up bowl and further shows the damage to the inner edge and top of the rim.Love12 The first step in addressing this kind of rim damage is to top the bowl to even out the dip from the burn. I wanted the top surface to be smooth so that I could then chamfer the inner edge of the rim with a slight bevel to deal with the burned front edge. I used a flat board and a piece of 220 grit sandpaper to top the bowl. I sanded until the top of the rim sat flat against the board. As usual I collected the briar dust in my box for repurposing on fills and repairs.Love13 The next photo shows the top of the bowl after sanding and smoothing out the rim. It really shows the extent of the damage on the rim.Love14 I decided to keep topping the bowl until I had evened out the rim and removed as much of the top damage as possible without dramatically changing the profile of the bowl. The next photo shows the bowl rim after I had finished topping it with the 220 grit sandpaper. It still would be sanded with 400 grit wet dry and fine grit sanding sponges before the surface was finished. While I worked on the bowl the stem was soaking in a bath of OxyClean to soften the oxidation.Love15 With the top of the rim smoothed out I worked on the inner edge with a folded piece of 220 grit sandpaper. I chamfered or beveled the inner edge to minimize the damage and to give the entire inner edge a similar look.Love16 The next photo shows the beveled inner rim and how that process served to minimize the effect of the burn mark.Love17 With the repair to the rim finished I wiped down the bowl with acetone on cotton pads to remove the finish and facilitate matching the restain on the rim with the colour of the rest of the bowl. It also removed the damage and spotty finish that covered the bowl. It appeared to have a thin varnish coat over the stain that came off quite easily with the acetone.Love18

Love19

Love20

Love21 I used the Guardsman stain touch up pens to stain the rim. I chose the lightest coloured stain to get a proper match for the first coat of stain. When it dried I would then stain the entire pipe with a medium walnut aniline stain. The stain pen was the first step in matching the colours of the bowl.Love22 I cleaned out the shank with pipe cleaners, cotton swabs and isopropyl alcohol to remove the tars and oils in the shank. It was an easy clean up so I decided not to use a retort on this one. It took very few swabs and pipe cleaners before the mortise and airway was clean.Love23 With the bowl at this point in the process I set it aside and took the stem out of the OxyClean bath. It had been soaking for several hours while I had worked on the bowl. The bath had done its magic and when I rubbed it down to dry it much of the surface oxidation came off and the deeper oxidation would easily be removed with a light sanding.Love24 I put the dried stem back on the bowl so that I could finish staining the bowl. I used a medium walnut aniline stain, applied it and flamed it. I lightly buffed the bowl with White Diamond to even out the stain coat. I took some photos to show the progress. Note in the first photo the HL cursive stamp that is on the surface of the stem.Love25

Love26

Love27

Love28 I decided to use the Bic lighter trick that I have written about in other articles on the blog and painted the stem with the flame of the lighter to burn off more of the oxidation. It also helped to raise the tooth dents on the top and bottom of the stem next to the button.Love29 I put the plastic washer on the tenon between the stem and shank so that I could sand the stem and not damage the shoulders of either shank or stem. I lightly sanded the stem with 220 grit sandpaper and then with a medium and a fine grit sanding sponge to remove the remaining oxidation and tooth chatter.Love30

Love31

Love32 I sanded the stem with my usual micromesh sanding pads – wet sanding with 1500-2400 grit pads and dry sanding with 3200-12,000 grit pads. I rubbed the stem down with Obsidian Oil between each set of three pads. When I finished sanding with the 12,000 grit pad I rubbed it down one last time with the oil.Love33

Love34

Love35 I buffed the pipe with White Diamond and then gave it multiple coats of carnauba wax and buffed it with a soft flannel buffing pad to raise the shine. The stamping on the stem was very faint to begin with and when I removed the oxidation it is still present but is not deep enough to repaint.Love36

Love37

Love38

Love39 The last three photos give a closer picture of the top of the pipe – showing the rim edges and surface more closely. In comparison with where I started with this pipe the new look is dramatically better. The burn mark is much less visible and the grain on the rim looks sharp. The outer and inner edge are clean and crisp.Love40

Love41

A Custombilt Lovat Reborn


Blog by Steve Laug

I found this pipe on a recent pipe hunt in the US. It was sitting in a locked cabinet in an antique mall just waiting to be found. It has a long round shank with a saddle stem so it fits the description of a Lovat. It is a large pipe however – approximately 6 inches long. The combination of rustication and smooth is attractive. It has the standard Custombilt rustication but for some reason on this old pipe it looks more refined and less clunky (good scientific term, LOL!) than the other Custombilts and CustomBilts that have passed through my hands.hunt I have several Custom Bilt or Custom-Bilt pipes stamped with a separation or a capital B on bilt. I remembered reading Bill Unger’s book on CustomBilt pipes and knew that the change of stamping reflected a change in the company. I turned to one of my reference sources – Pipedia, to see what they said. Here is the link to the full article by Rich Essermann http://pipedia.org/wiki/Custom-Bilt I quote from that article below:

“In 1946, the name was changed to Custombilt after Mincer began an association with Eugene J. Rich, Inc. There were some big changes in advertising and distribution. The slogan “AS INDIVIDUAL AS A THUMBPRINT” began at this time as well.”

“In the early 1950’s, Tracy Mincer developed severe financial problems that caused him to stop making the Custombilt, and he lost the name. In 1953, Leonard Rodgers bought the company and emphasized tobacco pouches and butane lighters. (However, it appears Mincer was working on his new pipe, the Doodler.) In 1968, Rodgers sold the Company to Consolidated Cigars. In the early 1970s, Wally Frank Co. bought the Custombilt trademark and began to produce their version of the pipe in 1974 or 1975. Hollco Rohr owned the Weber pipe factory, located in New Jersey, and produced the Custombilt pipes there. In 1987, the pipes were made out of the Butz-Choquin factory (France) and then Mexico until the late 1990s. Currently, the Custombilt name is owned by Tobacalera of Spain.”

From the above information it seems that the pipe I have could have been made between 1946 and 1953 if it is one made by Tracy Mincer. Otherwise it could have been made during the 1970’s. In my opinion the more refined less classic Mince CB look of the pipe, the variations on the rustication pattern from the bowl to the shank, the type and look of the stem all lead me to put it in the later era – the 1970s and attribute its manufacture to Wally Frank and Company. I may be wrong but that is my read on this particular Custombilt Lovat.

The pipe I found was in very good shape. The stem was slightly oxidized and had some roughness like it had never been finished well. There was no bite or tooth marks or tooth chatter on the stem. The interior of the stem and shank were also clean. The briar in the shank was unstained and looked new. The bowl had a very light cake. The finish was virgin/natural and originally had probably been oiled or just waxed. There was no stain coat or lacquer/varnish coat. Whew! The stamping on the pipe is simple. On the left side of the shank it is stamped Custombilt over Imported Briar. On the underside of the shank it is stamped with the shape number 12 running horizontally next to the stem/shank union.CB1

CB2

CB3

CB4 The closeup photo below shows the top of the rim with its unique rustication and the state of the bowl. The rim is in great shape and the bowl is fairly clean.CB5 I cleaned out the shank and the stem with pipe cleaners, cotton swabs and isopropyl alcohol to remove the light oils and tars. It took very little effort to clean this pipe.CB6 I gave it a light reaming with the PipNet reamer and took it back to bare wood so that whoever ends up with this pipe can break in and build an even cake of their own.CB7 I scrubbed the rusticated areas on the bowl and shank with a tooth-brush and Murphy’s Oil Soap. The grooves and crevices had a buildup of dust in them that dulled the finish. After scrubbing I rinsed the pipe under running water to remove the soap. I put my thumb over the bowl to keep the interior dry.CB8 The next series of four photos show the bowl after the rinse and dry. The grooves are clean and the pipe is ready for the next step in its cleanup.CB9

CB10

CB11

CB12 I use a plastic washer that I made out of a bread tab between the shank and the stem to allow me to sand up against the shank without damaging the finish and without rounding the shoulders of the stem or shank. It works like a charm and I have several of these that I have punched with a variety of holes to fit different tenon sizes. I sanded the stem with 220 grit sandpaper to smooth out the roughness and followed that with a medium and fine grit sanding sponge.CB13 Once I had smoothed out the roughness of the stem I moved on to sanding with micromesh sanding pads. I followed my usual method of wet sanding with 1500-2400 grit pads and dry sanding with 3200-12,000 grit pads. I rubbed the stem down with Obsidian Oil between each set of three pads.CB14

CB15

CB16 I rubbed the bowl down with a paper towel and a dab of olive oil to bring the natural finish of the bowl back to life before I buffed it. I rubbed it down and let the oil dry overnight. In the morning I buffed the pipe and stem with White Diamond and gave the bowl a light buff of carnauba and then rubbed it down with some Halcyon II Wax. I gave the stem multiple coats of carnauba wax. The finished pipe is shown below.CB17

CB18

CB19

CB20 The final three photos give a close up view of the bowl and stem from various angles. There is something quite attractive about this particular Custombilt. It has a dignity that draws me to it.CB21

CB22

CB23

Anonimo, or the Modern Westminster Cathedral*


Guest Blog by Robert M. Boughton
Photos © the Author
Member, North American Society of Pipe Collectors
http://www.naspc.org
http://www.roadrunnerpipes.com
http://about.me/boughtonrobert

“…once I falsely hoped to meet the beings who, pardoning my outward form, would love me for the excellent qualities which I was capable of unfolding.”
― Mary Wollstonecraft Shelley (1797-1851), English novelist, in “Frankenstein; or, The Modern Prometheus,” 1818

PREFACE
I was, as my ancestors, a native of Redondo Beach and its environs, and most of my family born in that temperate South Bay region of the California Republic was by any appraisal undistinguished, indeed, a study in dysfunction. Whilst every genealogy has its heritage of eccentricity and neurosis, mine is cursed with a spasmodic line of schizophrenia.

My grandfather, the one shining beacon, remains known the world round for his pioneering and influential photography of the sport that is known as surfing, owing to the vernacular origin peculiar to the American colonies. The good gentleman was a lifelong champion and active participant, with vigor, flair and skill, both in the sport and his avid documentation of its participants, famous and obscure, and the attendant culture. Who knew, in its inception, that his physician’s prescription, ordered in the middle part of the late twentieth century, for a hobby to aid the old man in recovering from a particularly tenacious bout with peptic ulcers, would spawn a latent talent and lead to eternal glory?

Indeed, one beguiled writer at a magazine that showcased most of the great photographers of the previous century – which renowned publication, alas, has now passed almost as thoroughly as my grandfather, remaining for the living and breathing inhabitants of this wayfarer’s station, before the Great Unknown, to appreciate only in the ether realm known as the World Wide Web – was so beside himself with giddiness as to dub the much beloved old man “the godfather of surf photography.”

My mother, being the first offspring of the great man, was the only one of her siblings to pursue a noted career, as a nurse now retired. Together the patriarch and eldest daughter formed the bulwark of the otherwise mostly listless, melancholy clan.

On the subject of my own eclectic interests, I have, since childhood, had a consuming hunger for the study of diverse subjects. This omniology put me on my present path, that is, to understand every facet of human knowledge concerning everything, particularly, in my case, the often seemingly unfathomableness of information relating to the genesis, history, science, study, culture, enjoyment and preservation of smoking pipes. One could call me an omnitabacariusphile, although in my zeal for this inclination, however well-meaning and innocent its beginning, the pursuit lead me to a monster I shudder to recall and doubt in my constitution to do so.

Some months have passed since I set upon the fearsome, God-like determination of restoring life to the creature that this narration shall endeavor to describe in the entirety of its awful nature, the frightful apparition of which you shall observe in its original form as I first perceived it in the mists of the cold, barren, lifeless wasteland that is called the Internet in these peculiar times we are fated to spend our lives. Nothing of that initial sighting, the image of the monster blurred by the swirling incorporation of sundry others similar in basic form yet far fairer in the details of their corporeal makeup, could prepare me for the spectre I beheld when the entire host of them arrived by poste.

Good God! Readers, had you been in my company at the instant when first I disrobed the fiendish animation that was hurled through space and time to alight in my quivering hands, then only would you comprehend truly the horror that consumed my entire humanity. Yet, think not for an instant that the visage I discerned was the genuine inception of my natural sense of loathing. The full nature of my revulsion sprang, as fast as the Trees of Truth and Knowledge, from the immediate and overwhelming understanding of the cruelty that was inflicted by Man upon this poor brute.

FIRST SIGHTING

Now, at last, I have regained enough of my stamina – which, for all of my life prior to the advent of the incident which forms the central theme of this account, was as vigorous as that of any young man who plays cricket almost every day – to reveal the thing as I found it, through the following crude illustrations.Anon1

Anon2

Anon3

Anon4

Anon5

Anon6 I implore you, in the name of all that is Holy, to scrutinize the abominable disfigurements of the beast’s original form. Perceive with more than just your eyes, and especially with pity in your hearts, I further beseech you, the jagged wound inflicted just below its forehead, or rim; the dreadful rending of its skin from the right side of its torso – shank, rather – beside the artificial extension of the same, and lastly, the woeful bleeding of black stain, as blood, from this extension onto the very wood that was to be its natural makeup. At first I took the freak of nature, nay, far worse, the creation of a man, to be the first attempt of a novice at crafting a briar pipe of the freehand variety. Only later was I corrected by one whose opinion and experience in such matters I hold inviolate, my mentor and good friend Chuck Richards, who informed me to my astonishment and dismay that the egregious work was in fact of Italian descent with no name.

Read on at your own peril.

RESTORATION OF LIFE
Seeking no more than to breathe new life into the ruined corpse of a smoking pipe, one I envisioned in my mind’s eye as it could have been, had it been born into the good society so many take for granted, I proceeded with the course of action which I perhaps foolishly believed was pre-determined. Regardless of my motives, I felt a pull that led me inexorably to the conclusion I shall in good time reveal.

Having triaged the wounds to the unknown pipe, I found myself in the gravest sense of urgency whilst I resolved to expunge the haphazard spatter of bloodlike blackness betwixt the briar shank and its extension.Anon7

Anon8 With the utmost surgical care, employing 220-grit paper, I erased the accursed stains.Anon9

Anon10

Anon11 Regarding the ridge of the odd, beak-like figure on the front of the bowl, the un-level aspect of the prominently scabrous feature was positively unnerving to behold. Though a full frontal view is not available before its correction, these left and right images reveal the disparity.Anon12 The cruel hideousness of the misdeed inflicted upon a central feature of the freehand was so ghastly to behold, reminding one of the nose of an old man spotted and mangled by the advanced stages of alcoholism, that its repair was my second priority. With the aid of a flat filing tool, I corrected the flaw whilst also removing a gash above it.Anon13 A cursory smoothing of the abraded surface resulted in the beginning of an almost intoxicating, God-like improvement, though minor work to finish the makeover I had begun was still necessary.Anon14 Scarcely able to control my escalating excitement that was directed with all-consuming mania toward the ultimate re-animation of the pipe, I turned my gaze again to the frightful laceration to the cranium – that is to say, the rim.Anon15 Devoid of even a dash of hope for correcting the near fatal head wound, and directly upon the heels of the greatest battle between my ever-intensifying lust to restore the spark that is life to this wretched pipe versus my thoughts of utter failure and ruin, I could envision no measure short of inflicting a deliberate pattern of the very same gouges round the rim and the immediate area of the bowl beneath it. Toward this remarkably heady end, I embarked upon a slippery path of utter destruction of the rim with naught but prayers that I could complete and then reverse, as it were, the radical procedure. The only implement available being a spring-loaded round hole-puncher with a small but sturdy grip, I commenced the initial task of creating matching and equidistant blemishes round the top of the bowl.Anon16

Anon17

Anon18 And then, with mounting glee at the sheer recklessness of the notion, onto the top of the skull – or rim – I repeated the same process with tighter punches.Anon19 Oh, to formulate in words the wonder and terror that overwhelmed my senses is beyond the power of the greatest poet! In my crazed mind I entertained a vision of beauty like a newborn phoenix rising from the ashes! The mental snapshot was breathtaking in its audacity and execution! I was all but hopelessly mad in the ecstasy of the moment! I daresay some would now postulate that I had already surpassed that precipitant threshold.

Therefore it is without any sense of sin whatsoever that I confess my elation at the removal of the few remaining but festering sores that upon first sight of the beleaguered pipe put me in such a state of apprehension.

I performed a retort for a thorough purging of the accreted waste and other filth that continued to leech the innards of the reanimated Italian pipe with no name, though I retained hope that the poor thing would regain some of its more pleasant previous memories, if indeed it ever possessed any, as its recovery progressed.

Wishing to be done forever with the coarse, disheveled appearance of the still recuperating pipe, I applied a progressive regimen of micromesh from 1500 to 4000 upon the unfinished pocks covering the rusticated dome and the pale, sickly spots at various intervals of the pipe’s wooden body where once had flourished cuts, scrapes and crevasses.

The quick application of a double-coat of medium brown leather stain to the areas of the wood effected by the various degrees of sanding and more aggressive restorative measures, and the immediate removal of the dye’s alcohol by ritual of fire left a meager residue of ash that was banished with ease using the 4000 micromesh pad.

The stem, once oxidized to a uniform sickly green shade, glimmered again in its healthy black condition following a treatment with red and white Tripoli and White Diamond.

The wooden body, cured of every ailment that had at first glance so shocked me to the very core of my being, was ready for the final course of medicine, which included the same wholly natural elixirs and a gentle buff with carnauba.Anon20

Anon21

Anon22

Anon23 CONCLUSION
Though mighty powers of science, craftsmanship and other forces beyond the comprehension of Man indeed coexist on some unseen dual plain of reality, the awesome dynamism behind them must be harnessed by the guardians of restoration before they can be utilized on a regular basis. I count myself among the fortunate to have survived this harrowing ordeal with my body, mind and soul intact.

I entreat all those who read this to consider it with open minds, but as a cautionary tale.

*Reconstruction of Westminster Cathedral, the mother church of English Catholicism, began in 1895, but due to the cost has never been completed – leaving much of the interior unfinished brickwork.

A Bit of Cosmetic Surgery in Restoring a Moistless Sandblast Billiard


Blog by Steve Laug

When I saw this pipe come up on eBay I was struck by the combination of the colours and textures. The yellow Lucite stem and the dark reddish black sandblast went well together. The slight bend in the stem looked perfect. I had not heard of the brand before but decided to bid on it anyway. The first seven photos are from the seller and give different views of the pipe and the stem. In several of the profile photos there appeared to be a lip or ledge near the shank bowl junction. It was a curious thing that I would check when it arrived.Moistless1

Moistless2 The stem also made me wonder about the material it was made of. It has the rounded end button that often appears on orific button stems but there no photos of the end of the stem so it would also be clear once I received it. The stem appeared to be in great shape other than some internal staining.Moistless3

Moistless4

Moistless5

Moistless6

Moistless7 I did some research on the brand and found that there was a patent taken out for a Moistless Pipe in 1935 by a S. Guida. The pipe I purchased is stamped Moistless over Italian Briar. The patent is from the US Patent Office and the pipe I have is American made in my opinion. Moistless patent When it arrived I took it apart to see if the insides reflect the drawings from the Patent diagrams. They did not. The tenon on this one is a metal tenon but there are no any of the other parts of the insert shown. The shank is quite open and deeply drilled so it well could have had the apparatus inside. The inside of the tenon looks like it could have had an insert as it is tapered into a cone shape guiding the smoke into the airway. The inside of the pipe was clean and the bowl lightly smoked with no cake build up. I ran some pipe cleaners, cotton swabs and isopropyl alcohol through the shank and stem. They came out remarkably clean.Moistless8

Moistless9 When I examined the bowl there was a ridge that ran around ½ of the bowl just above the shank bowl junction. It was like a shelf and felt uncomfortable in the hand. The blast had taken some material but left a very distinct shelf and a ridge along the topside of the shank. In my mind it was an unattractive interruption in an otherwise classic shape. It would need to go to bring the most out of the shape of this pipe. The next seven photos show the bowl from a variety of angles to highlight the issue I am speaking of regarding the shelf. It is these issues that the impending plastic/cosmetic surgery will deal with.Moistless10

Moistless11

Moistless12

Moistless13

Moistless14

Moistless15

Moistless16

Moistless17 It almost took more time to decide to remove the shelf and clean up the shape of the bowl and the shank than it did to do the work. I wanted a cleaner junction for the shank and bowl as well. I used a Dremel and sanding drum to remove the excess material. The next three photos show the bowl after surgery – the cosmetic surgery/face lift had begun. The patient did not squeal too much even though there was no anesthesia. Within a matter of five minutes the foundational work was finished and what remained was hand work.Moistless18

Moistless19

Moistless20 I don’t have a sandblaster so I decided to start with a basic rustication pattern and then work it with carving knives and sandpaper to give the rustication a more blasted look. I used the rustication tool that Chris made for me and it did a great job turning the smooth sanded surfaces into a more patterned look.Moistless21

Moistless22 I then used a carving knife to give swirls and movement to the rustication and try to blend it into the surface of the sandblast. I used the dark brown stain pen to highlight the high spots on the rustication to enable me to better determine the pattern I was working on.Moistless23

Moistless24 When I had finished the matching of the pattern as best I could I stained the bowl with a dark brown aniline stain and flamed it to set it in the briar.Moistless25

Moistless26

Moistless27 I buffed the bowl with red Tripoli to smooth out the rough spots and specifically used a sanding block to flatten the rustication more. Then I stained the bowl with an oxblood aniline stain and flamed it. I set the bowl aside to dry. Overall I am happy with the rustication and the match to the sandblast of the bowl.Moistless28

Moistless29

Moistless30

Moistless31 When the stain was set and dry I took the pipe to the buffer and gave it a light buff with White Diamond. I also buffed the stem lightly with it to give it a shine. I gave the stem several coats of carnauba wax and buffed it to a shine. I rubbed the bowl down with Halcyon II wax and then buffed the bowl with a shoe brush to raise the shine. The finished pipe is shown in the photos below.Moistless32

Moistless33

Moistless34

Moistless35 I have included the next two close-up photos of the bowl to show the finished rustication after the two coats of stain and the buffing and polishing have been finished. I really like the finished shape and look of the bowl and the bothersome shelf is gone. The junction of the bowl and shank is much cleaner with a sharper angle. The pipe now fits the classic shape that it approximated previous to the plastic surgery! The patient survived the procedure and looks to be thriving in its post operative glory. Oh, and the stem had an orific opening in the button and it was in excellent shape only needed a quick polish.Moistless36

Moistless37