Tag Archives: pipe restemming

Giving a Yorkshire Natural Billiard a new look – Restain & Cumberland Stem


Blog by Steve Laug

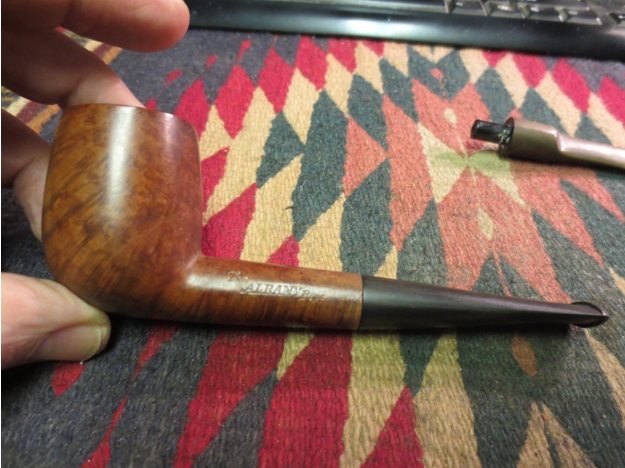
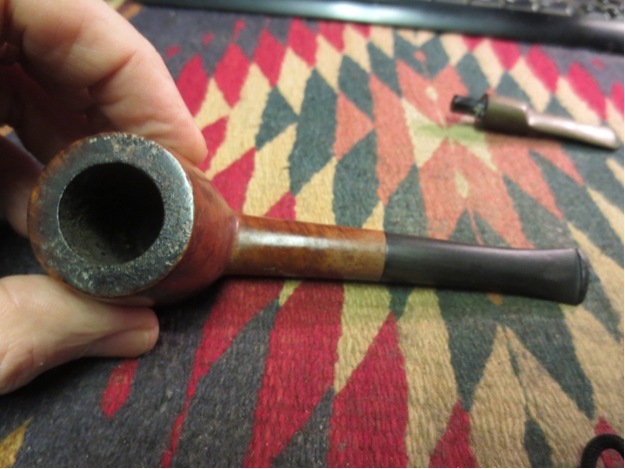
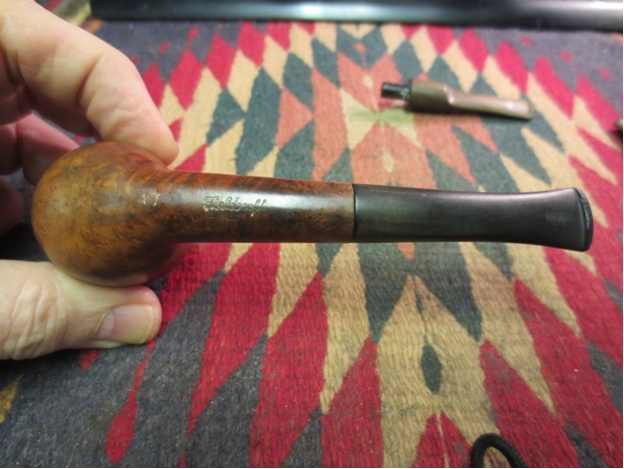
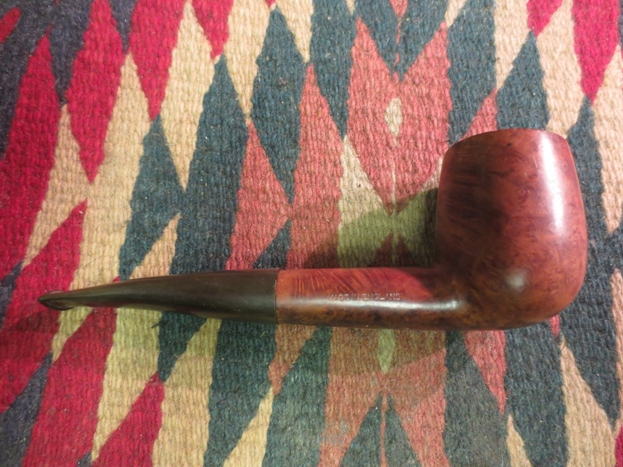
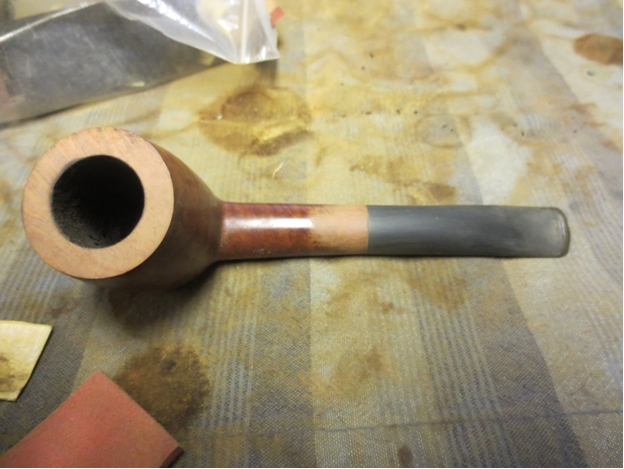
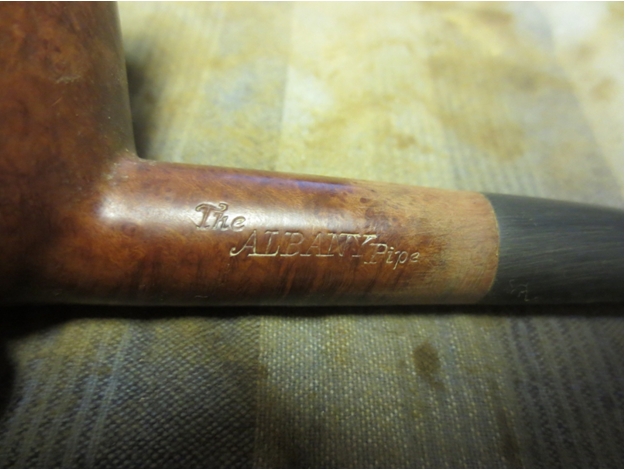
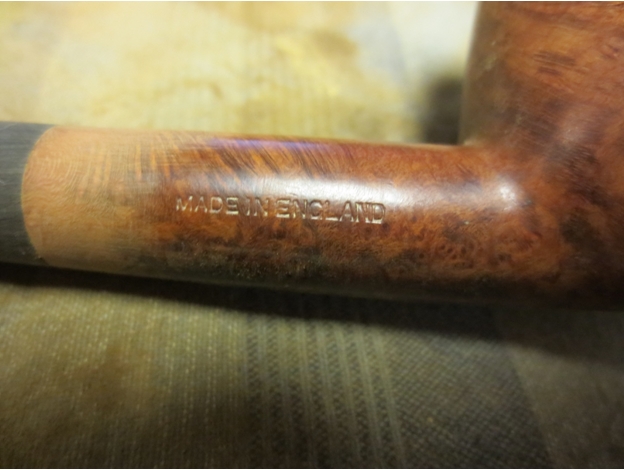
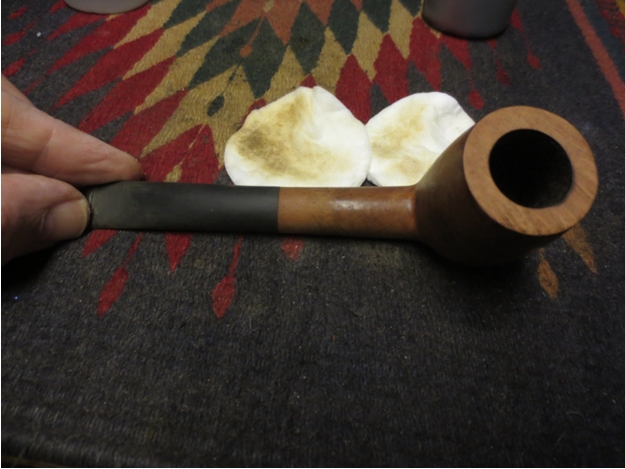
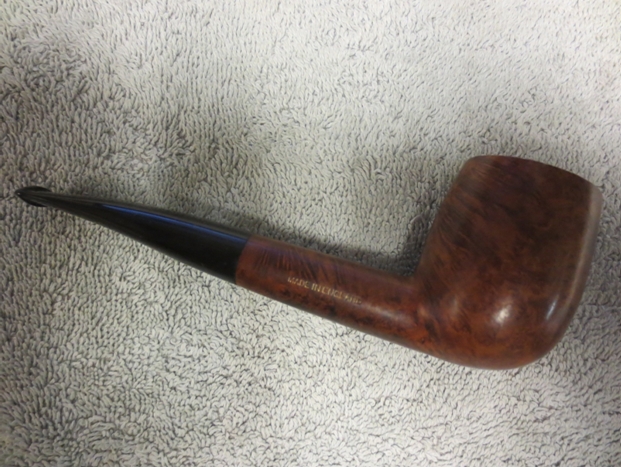
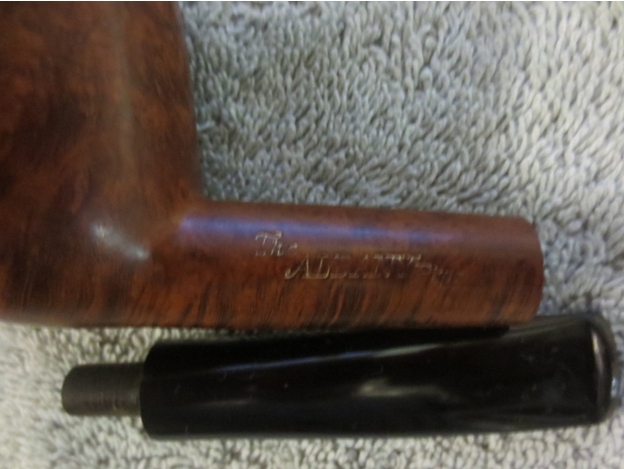
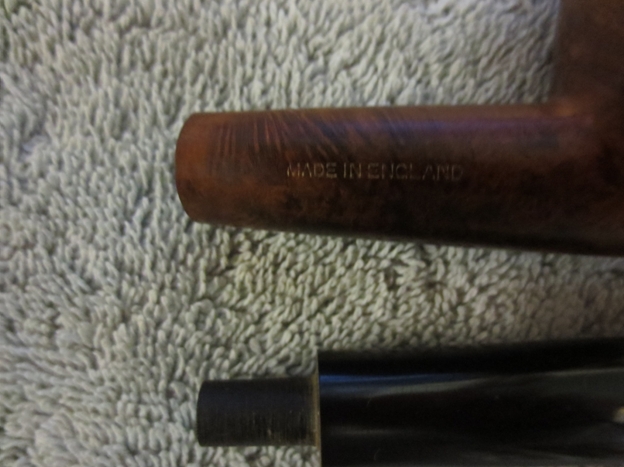
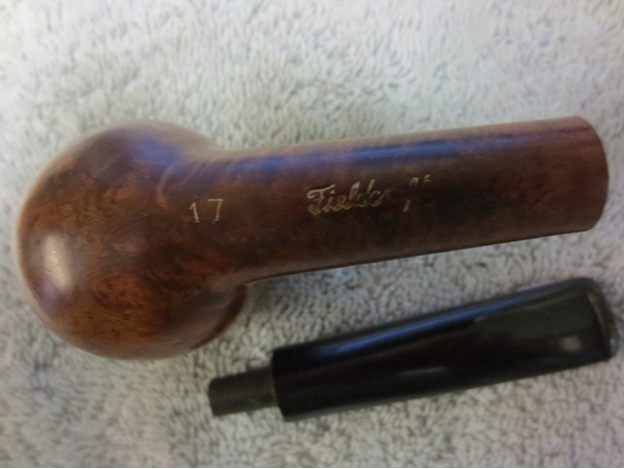
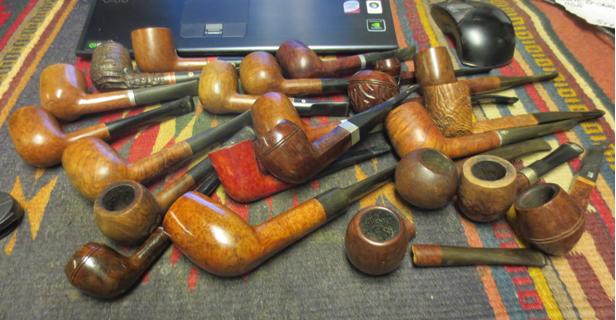
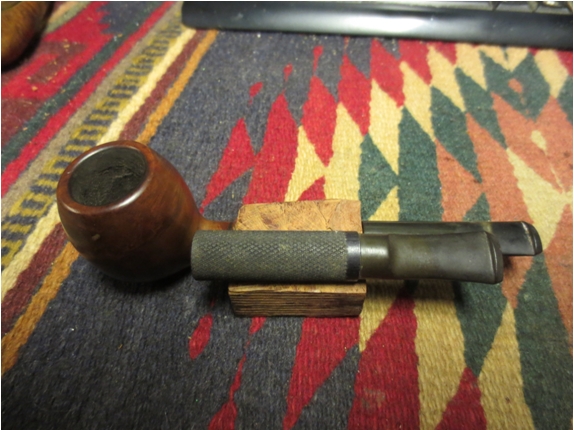
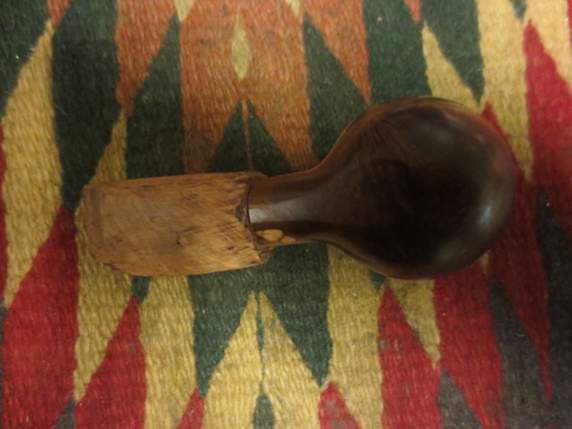
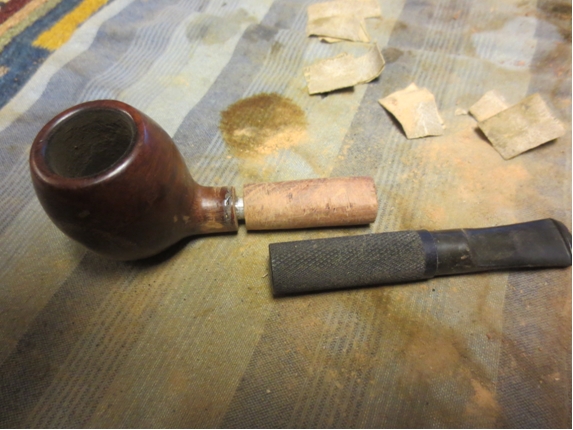
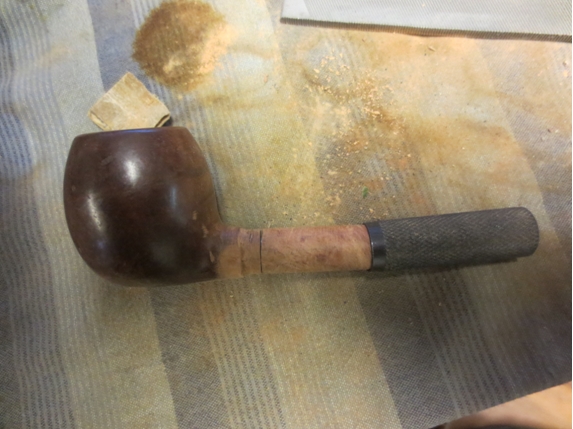
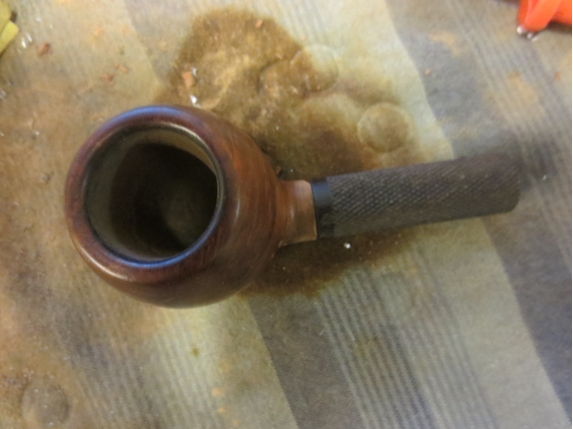
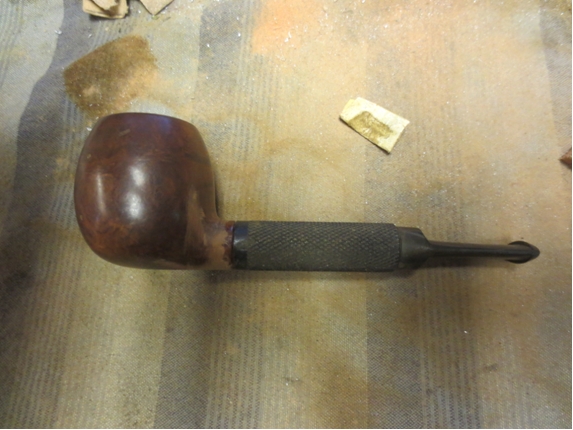
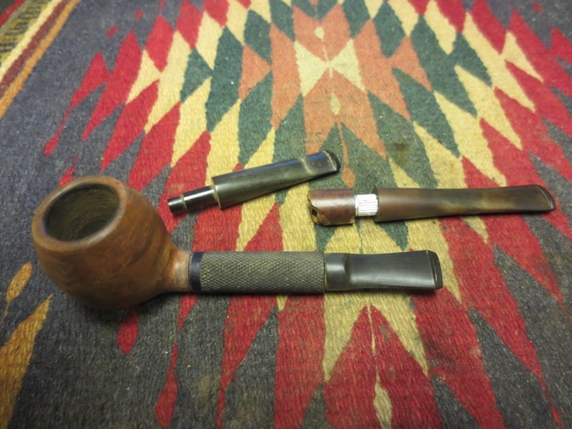
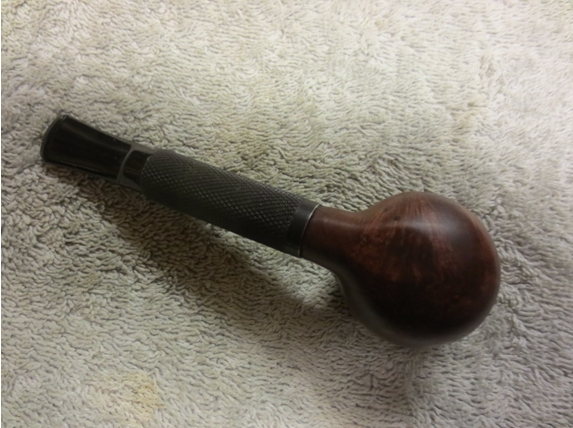
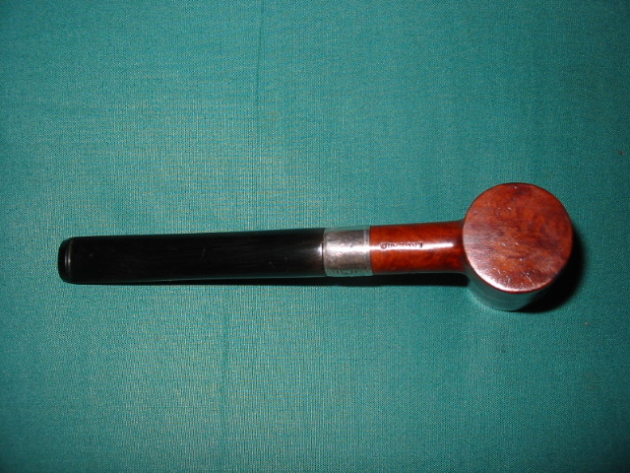
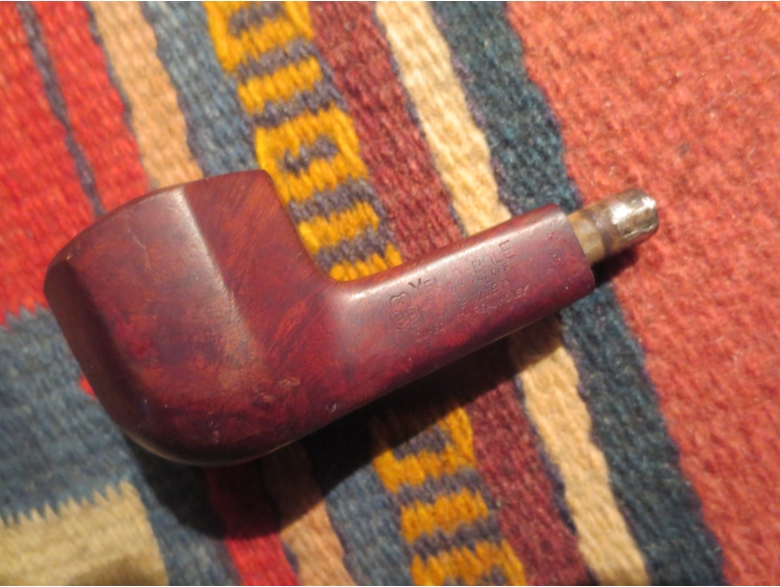
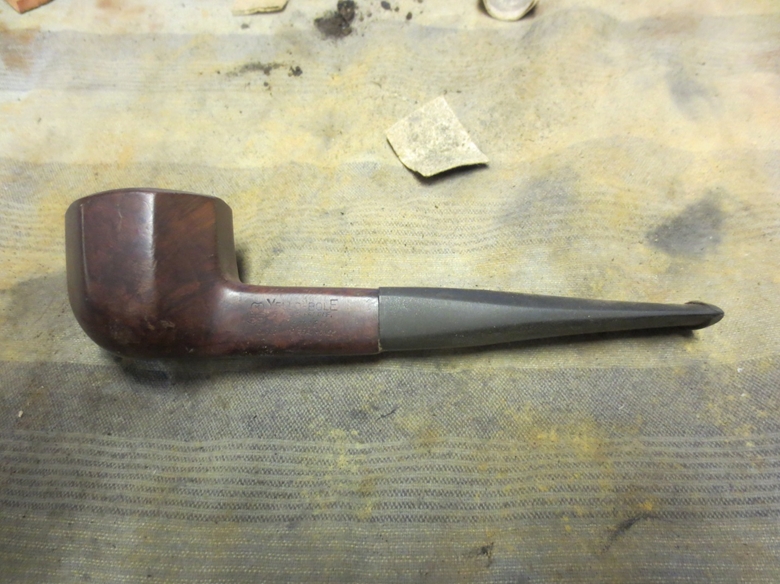
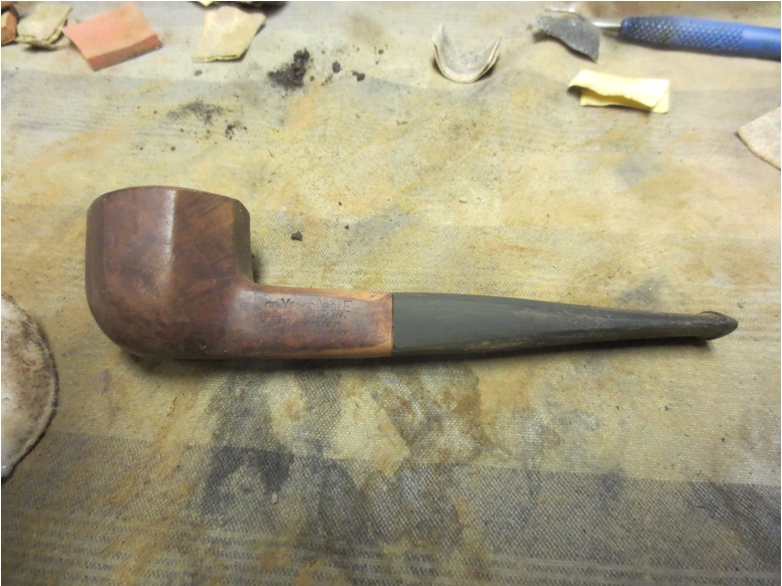
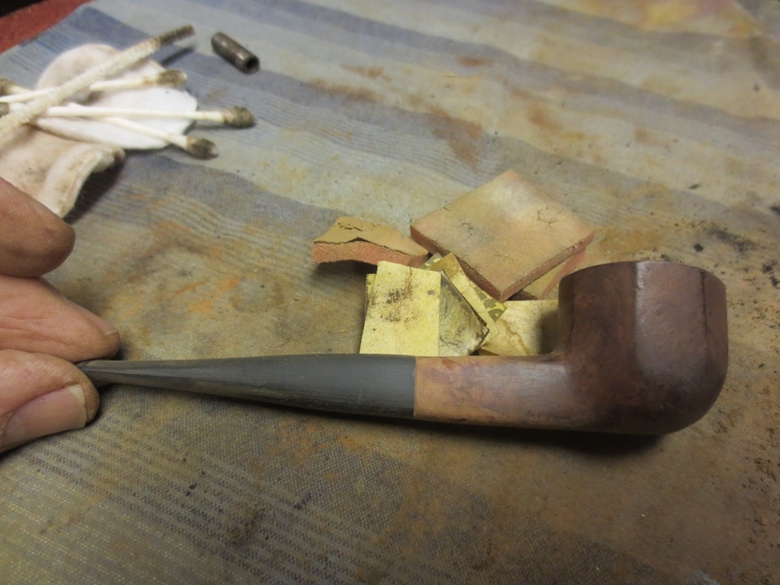
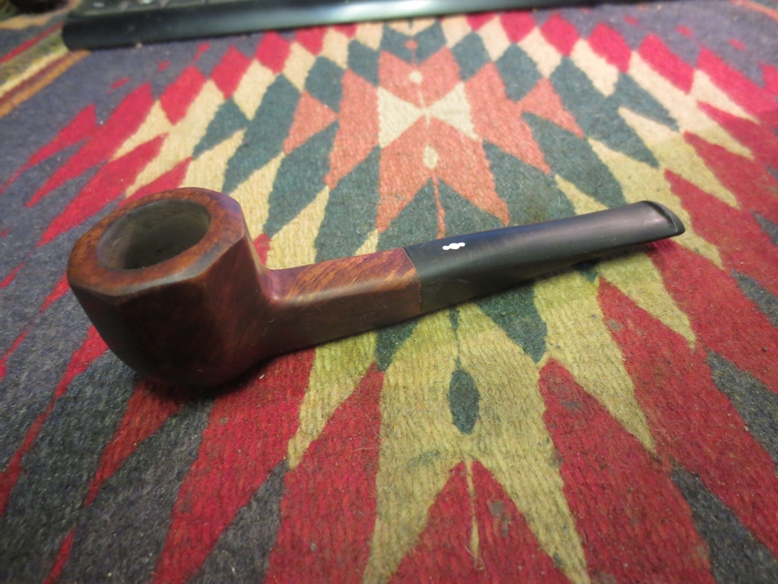
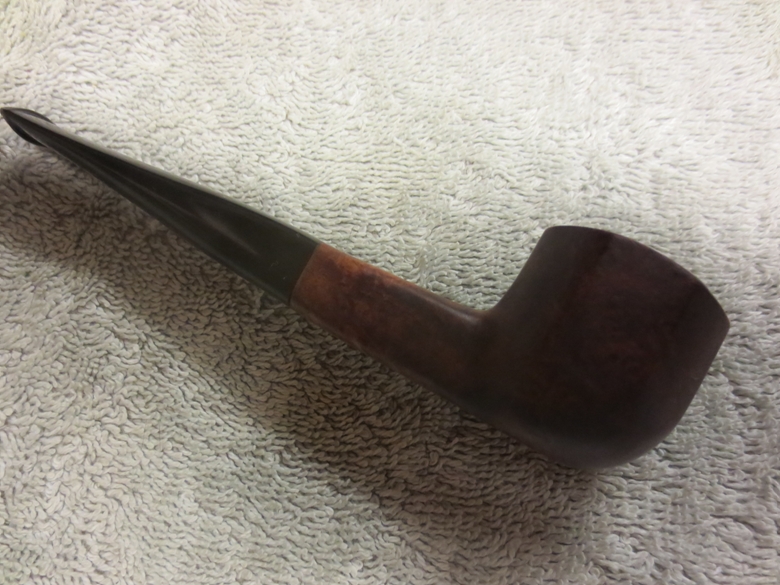
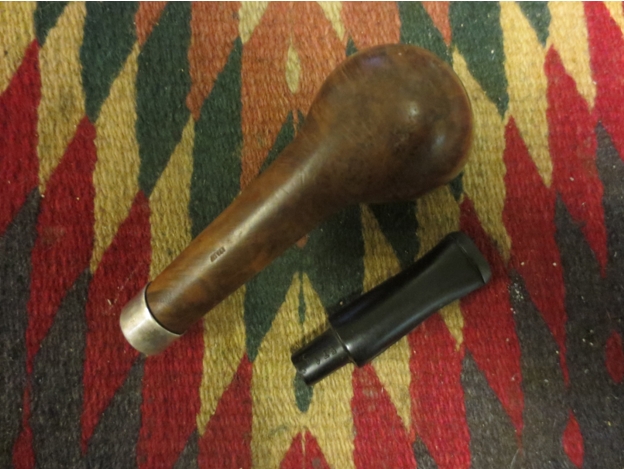
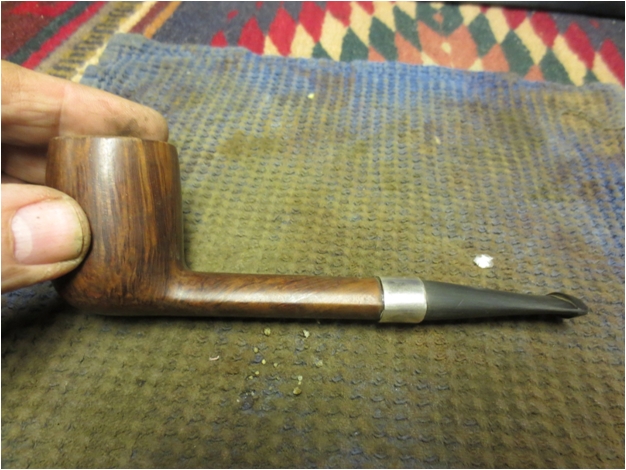
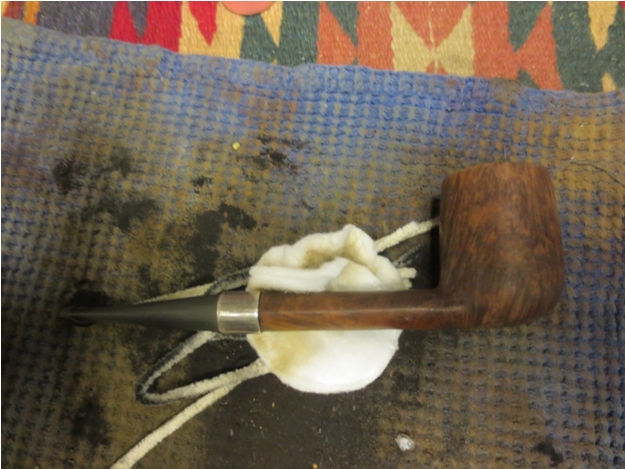
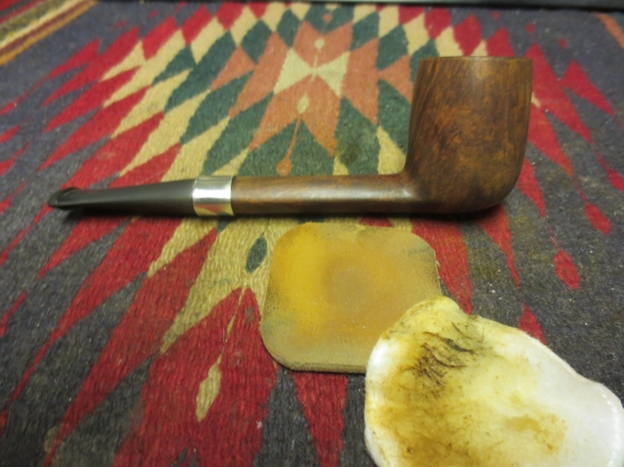
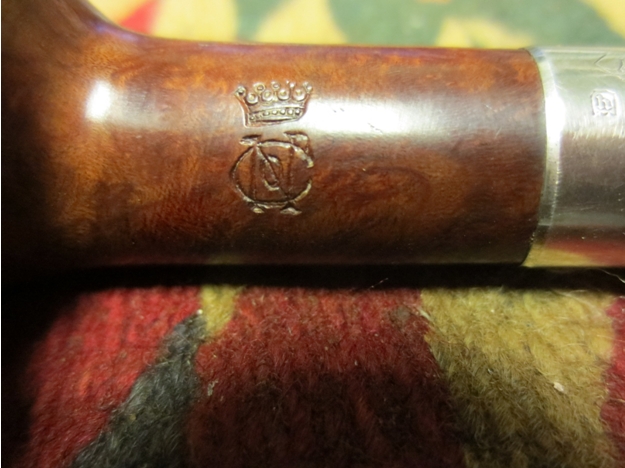
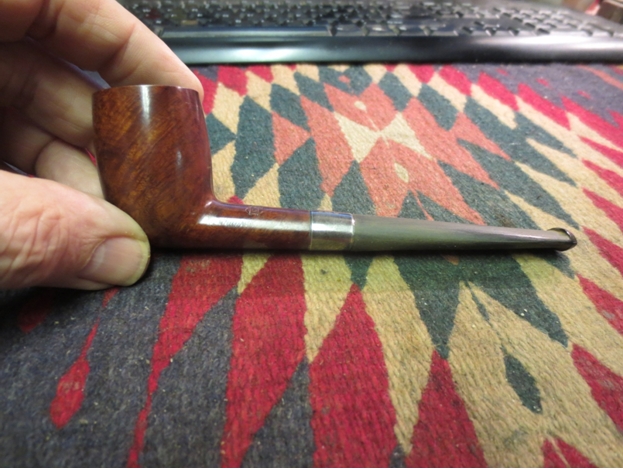
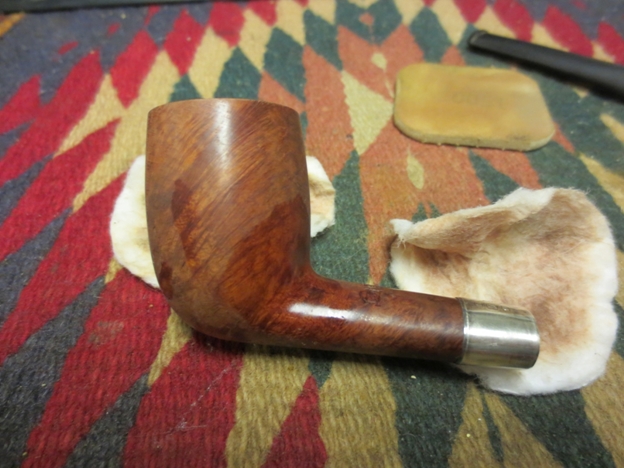
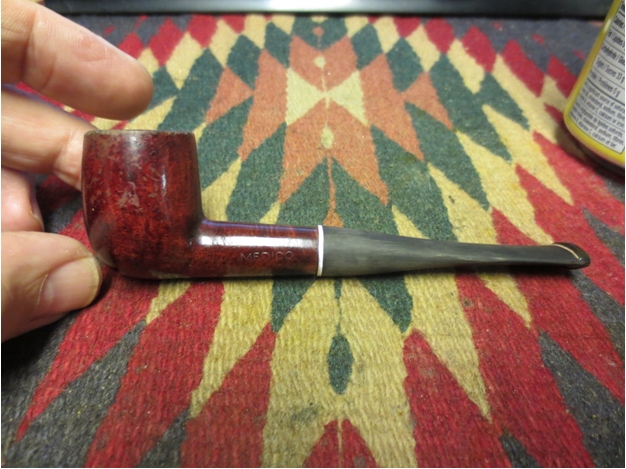
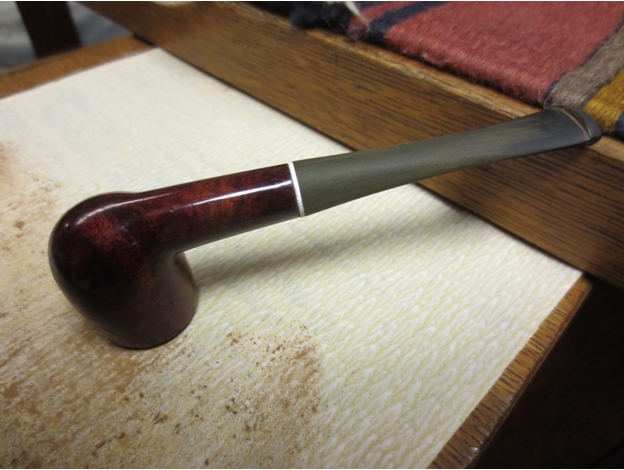
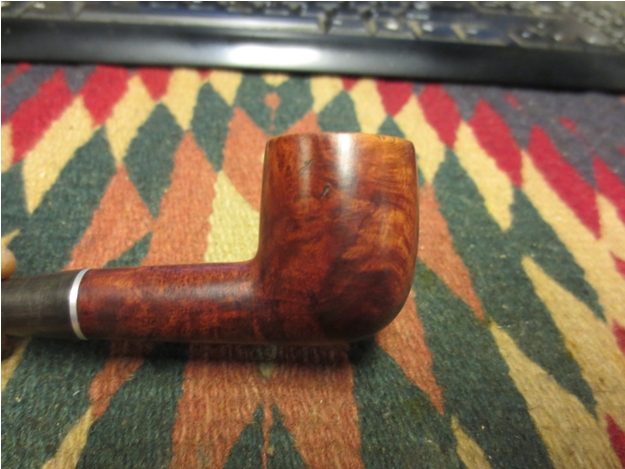
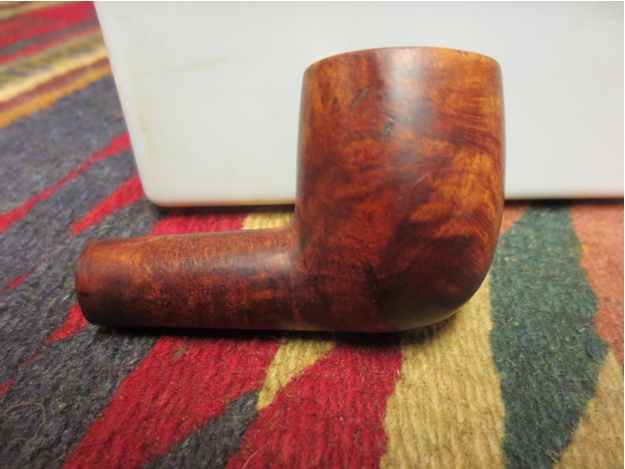
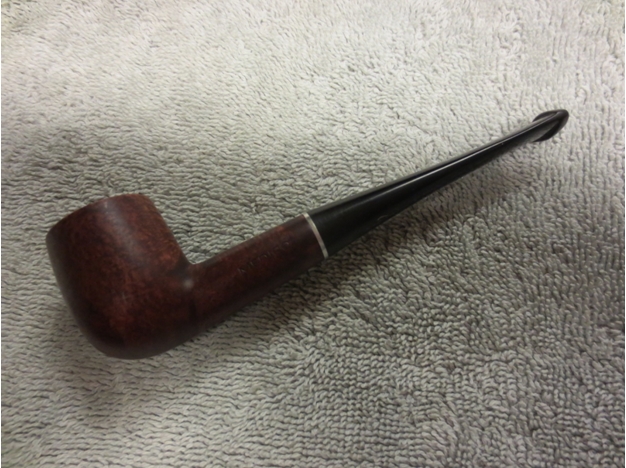
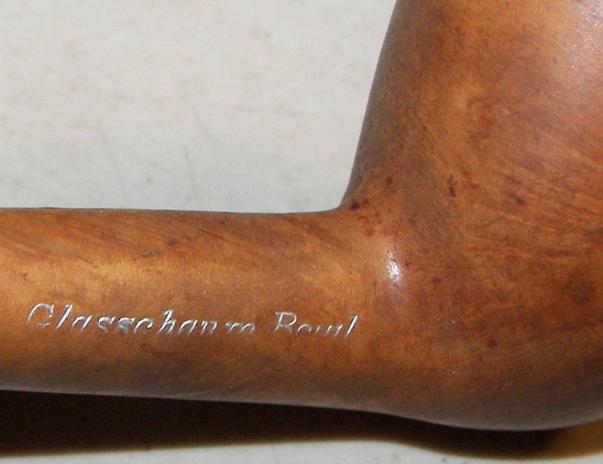
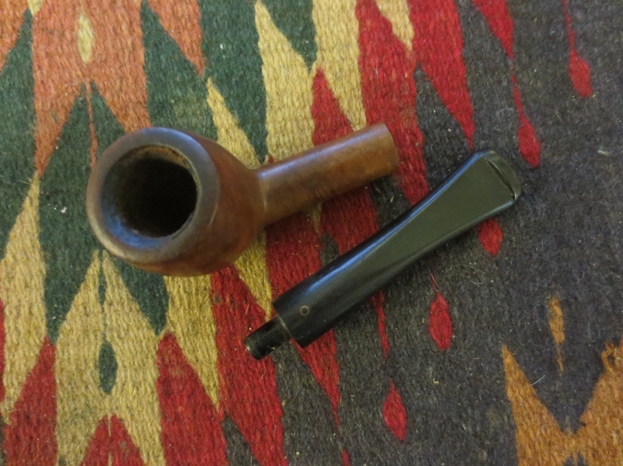
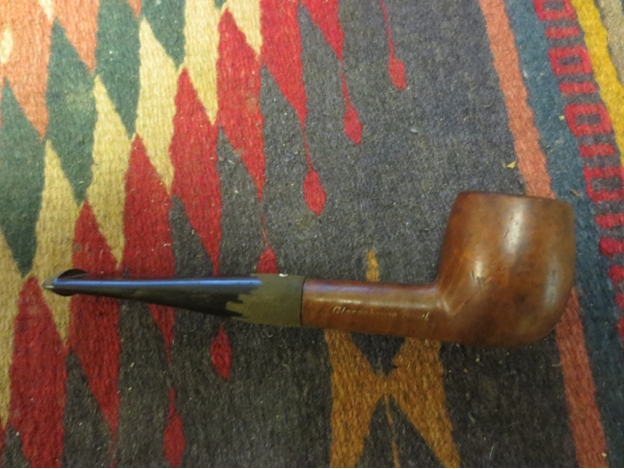
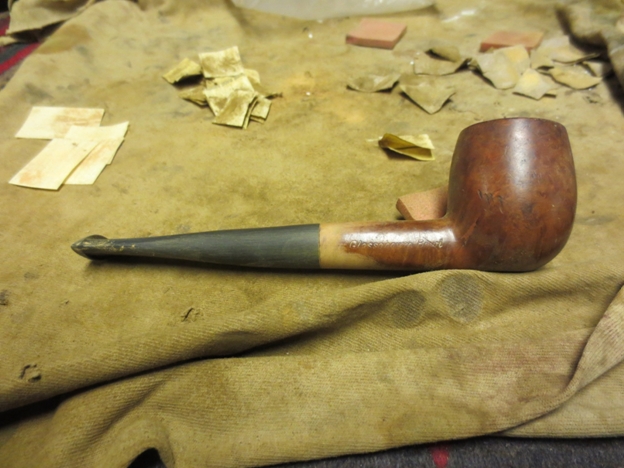
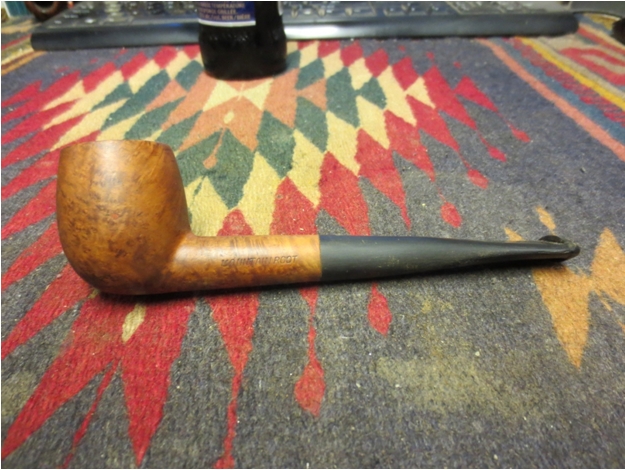
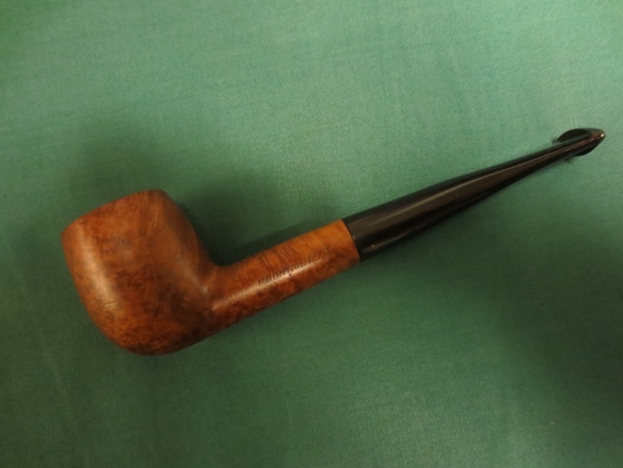
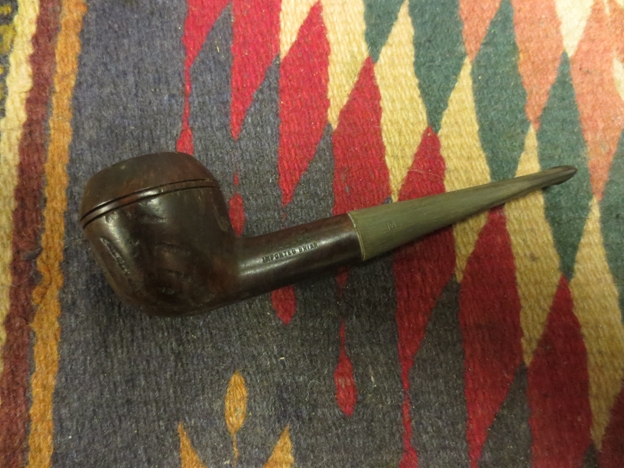
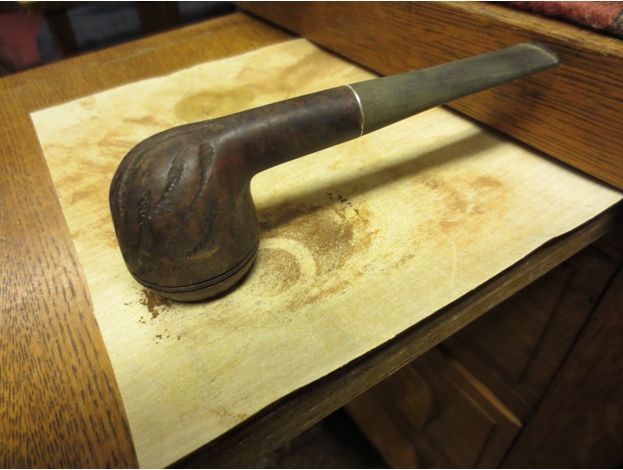
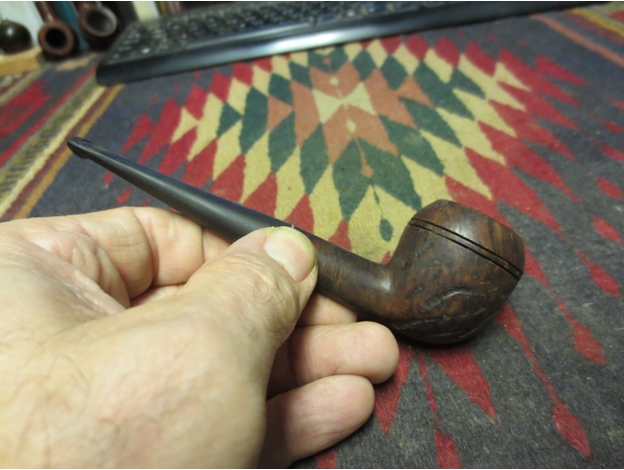
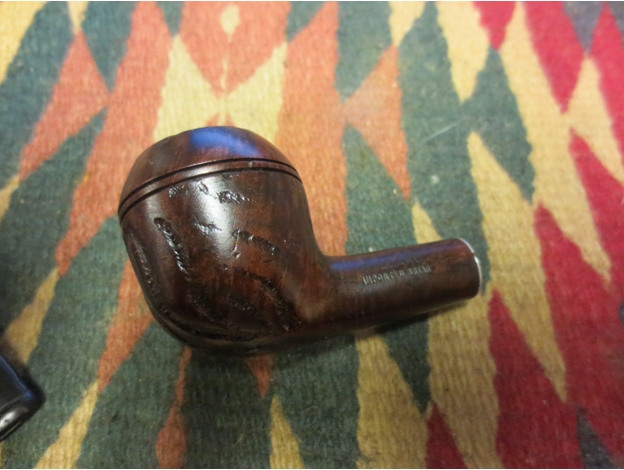
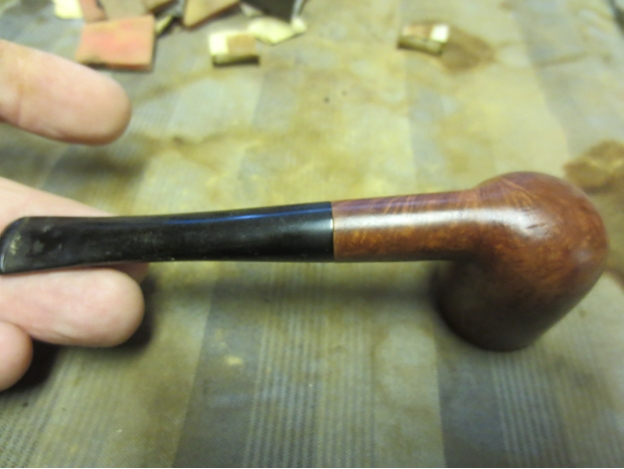
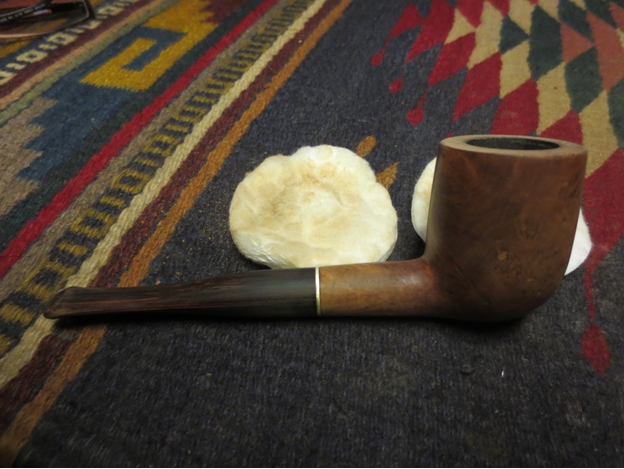
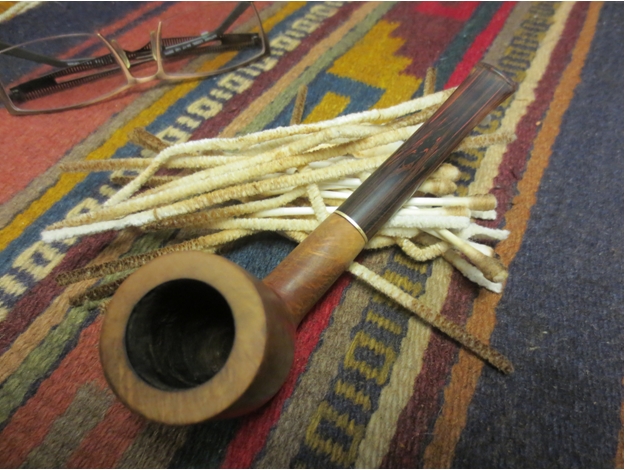
I am slowly but surely working my way through the gift box of pipes I received. The next one that I chose to work on was a billiard. It is stamped Yorkshire in an arch over Natural and another reverse arch with the words Algerian Briar.York1 
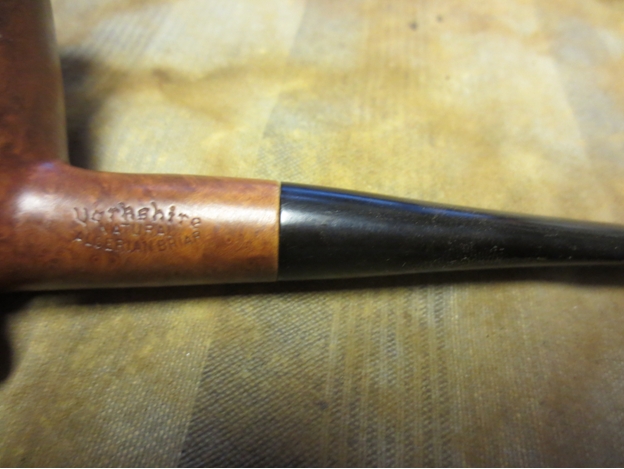
The stem on it was a replacement and did not fit well on the shank. It was slightly smaller in diameter and also had rounded shoulders. The angles and flow of the stem did not work well with the pipe in my opinion as the taper on the top of the stem was different from the one on the bottom side. The bowl itself was clean but and the finish dirty. The rim had been damaged around the outer edge on the front of the bowl rounding it slightly. The stamping was clear and distinct. From what I can find on the internet the Yorkshire brand is a US Made pipe that came from Barnaby Briars (smoking pipe retailer) that was located at 28 Powell St. in Brooklyn (NY). They also made pipes stamped Barnaby. The Germanic Script differentiates it from the other Yorkshire Brand that was made in Italy by Gasparini for Sears and Roebuck.York2 
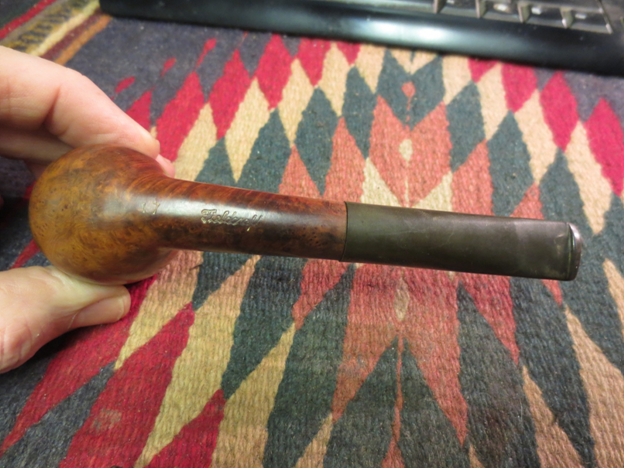
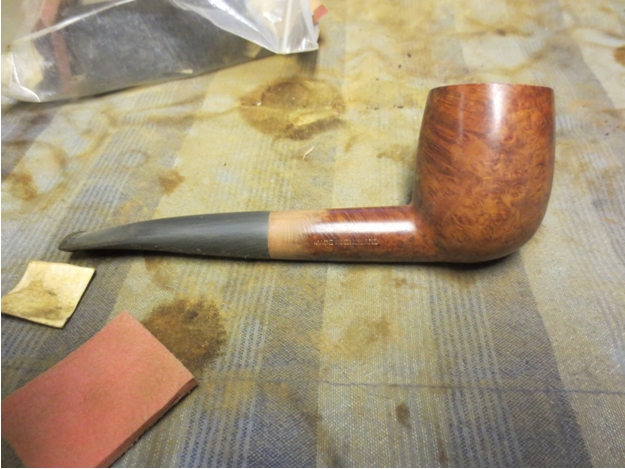
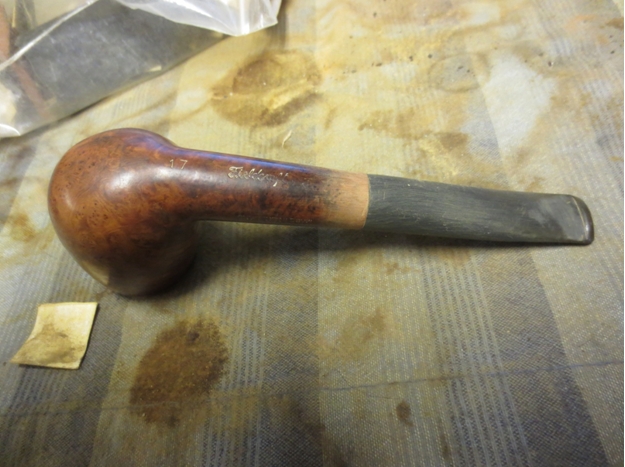
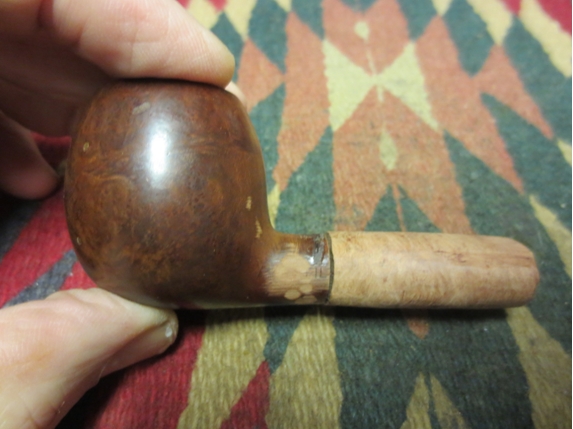
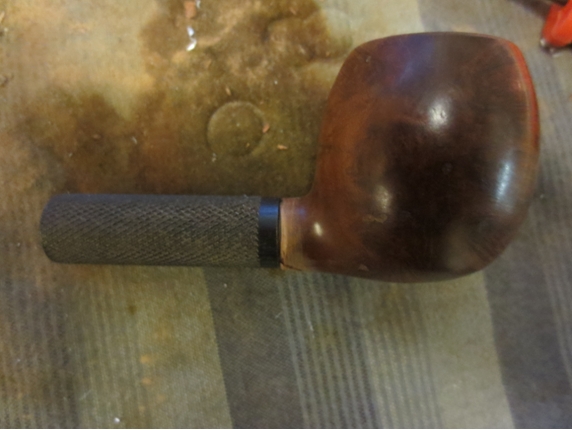
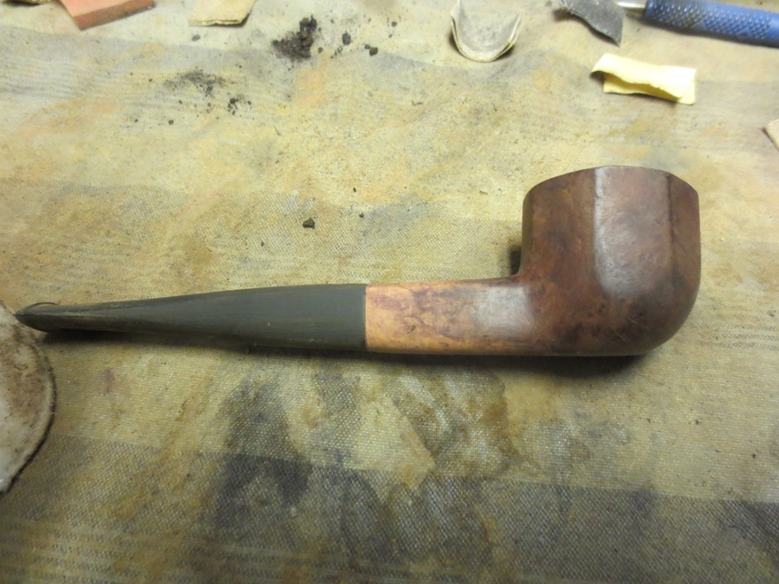
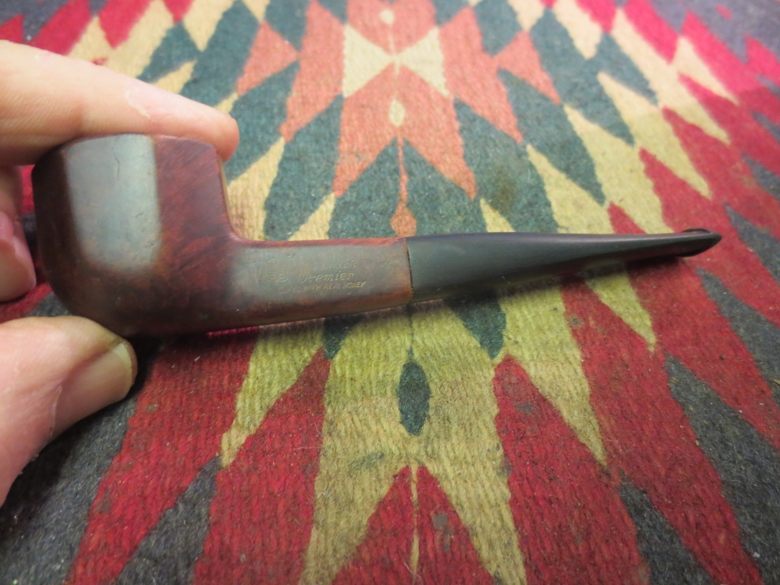
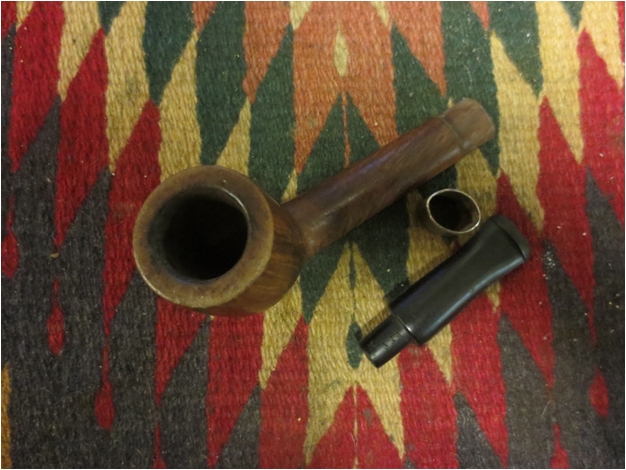
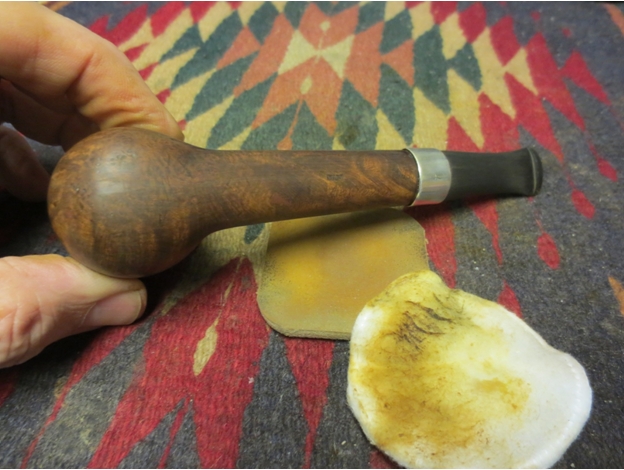
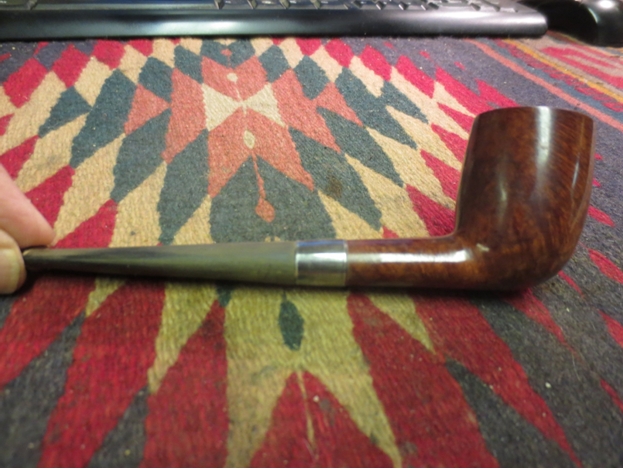
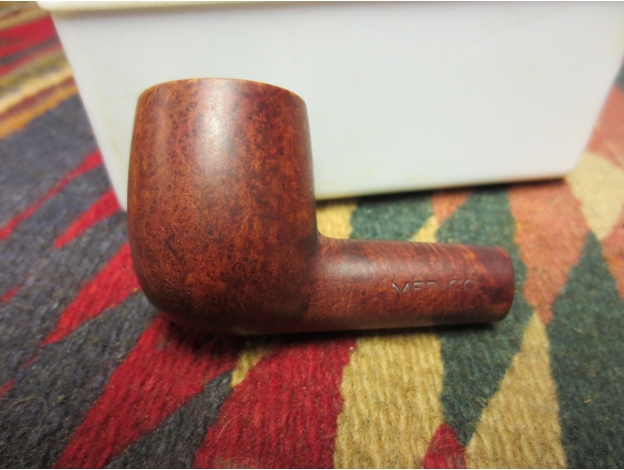
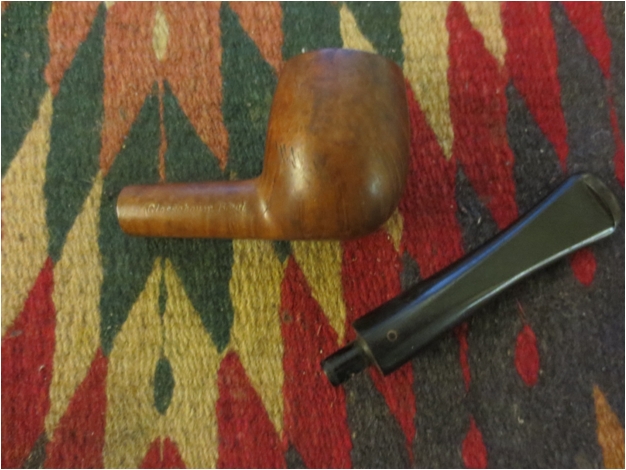
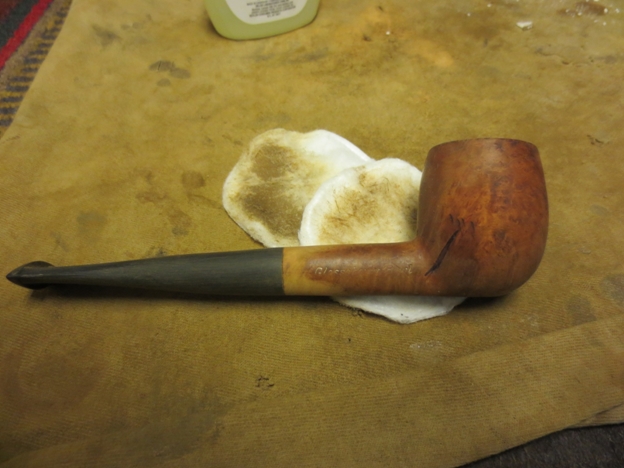
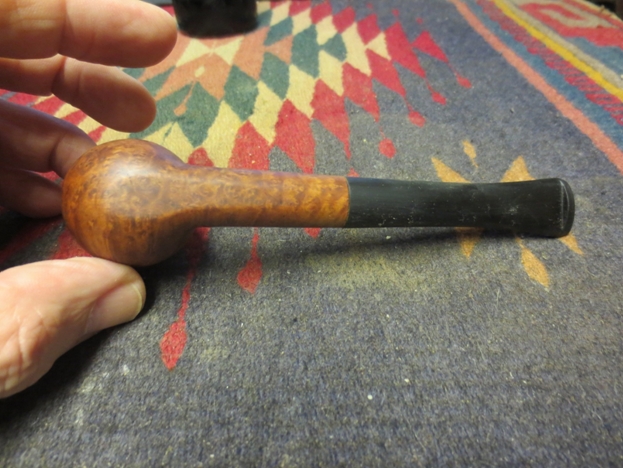
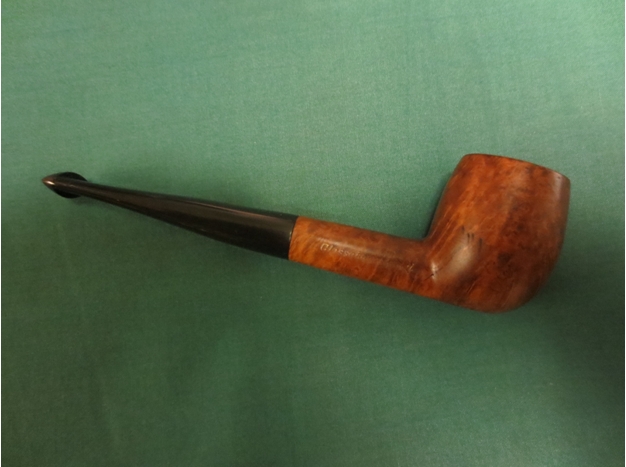
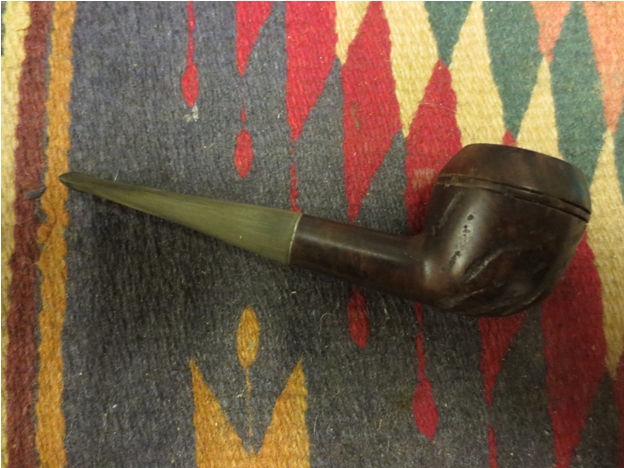
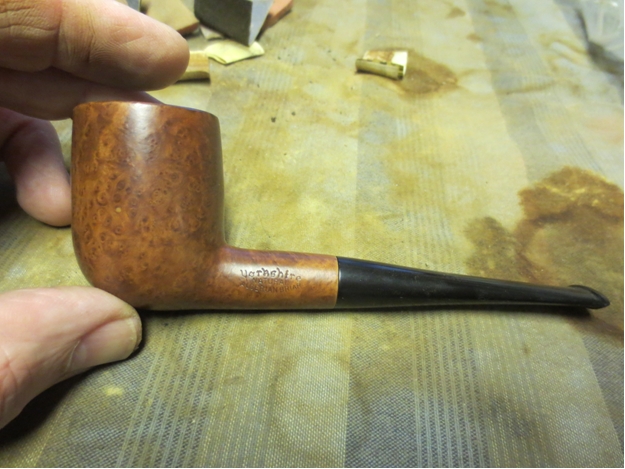
The right side of the bowl had the only fills present on the pipe – and there were about five of them visible. The largest is almost in the middle toward the back. These fills were hard, smooth and tan in colour.York3

York4

York5 
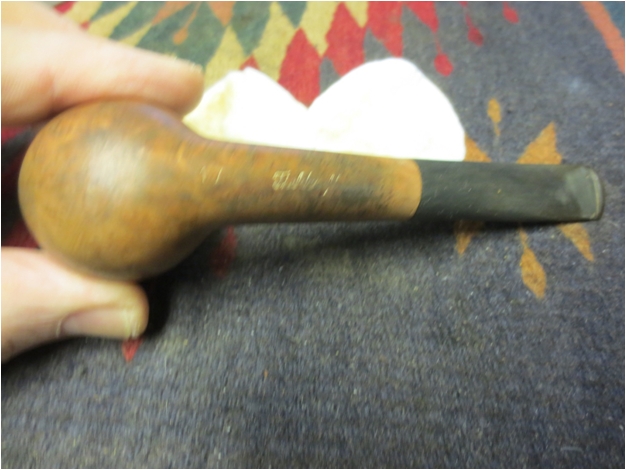
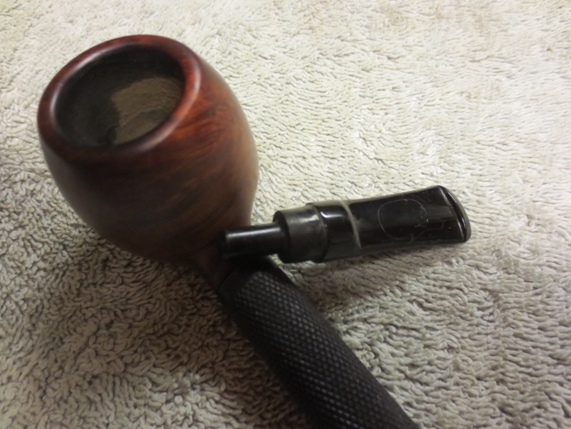
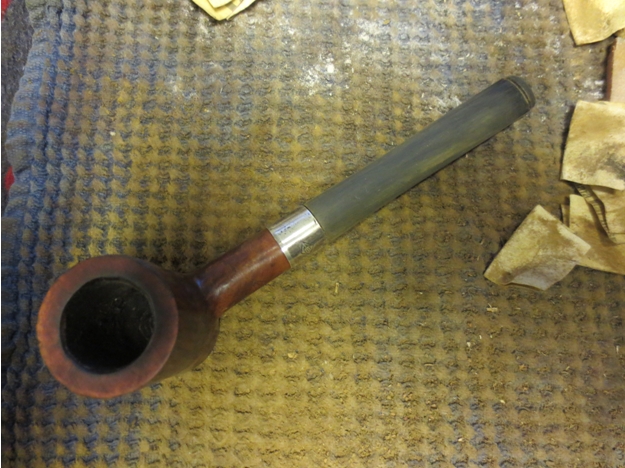
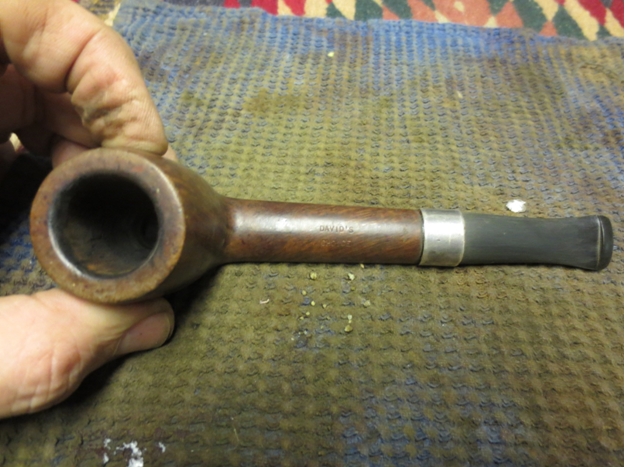
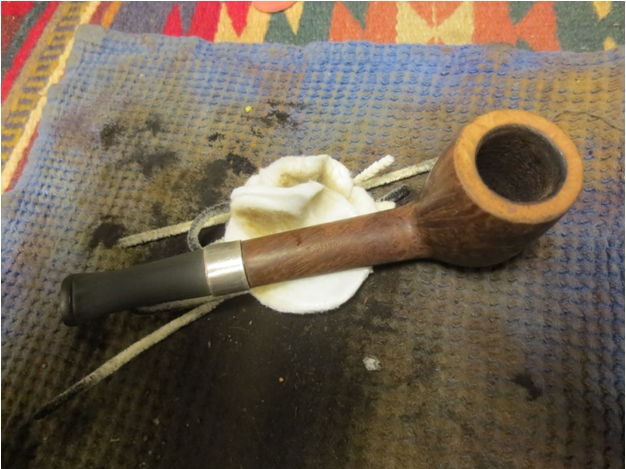
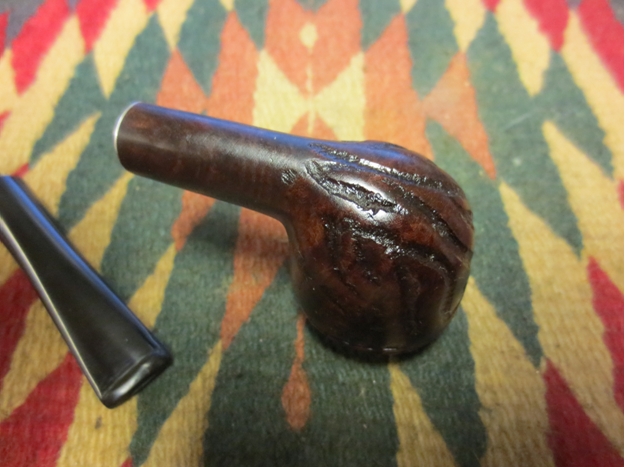
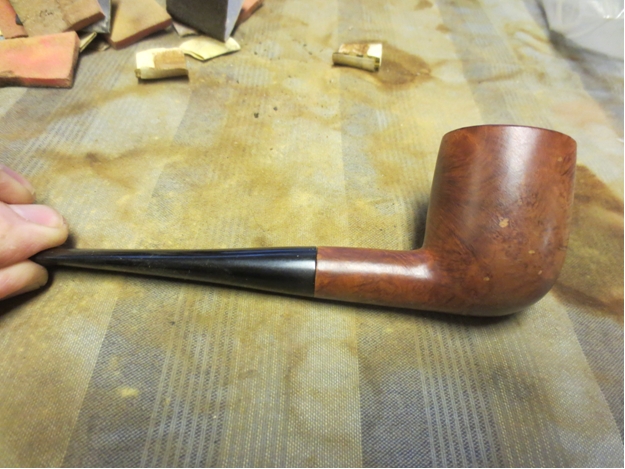
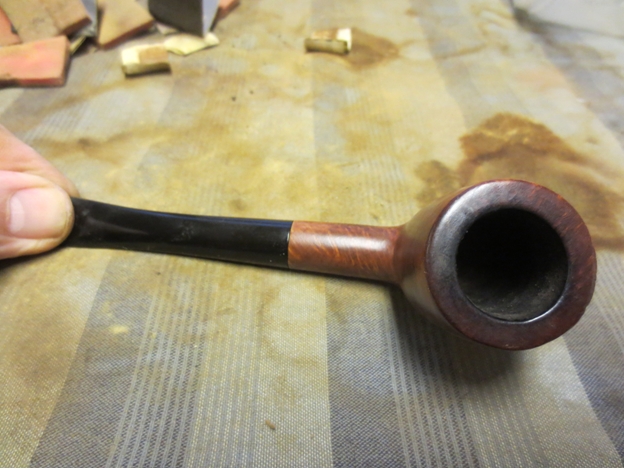
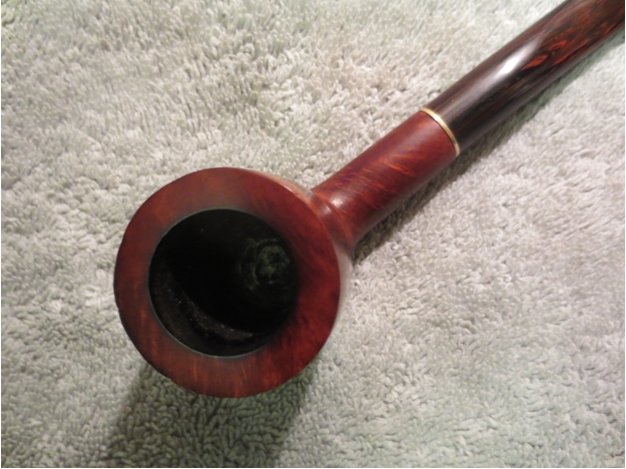
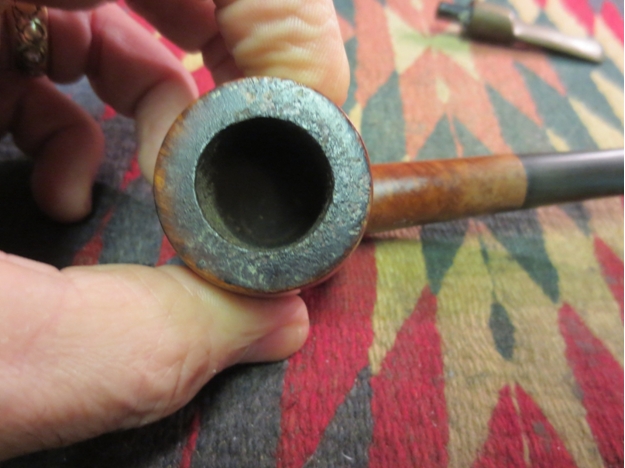
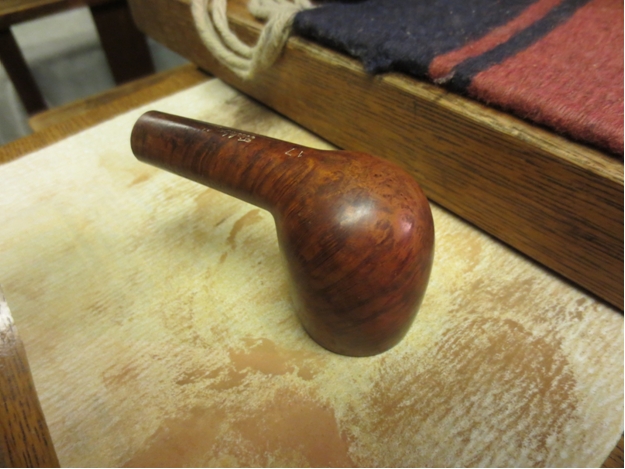
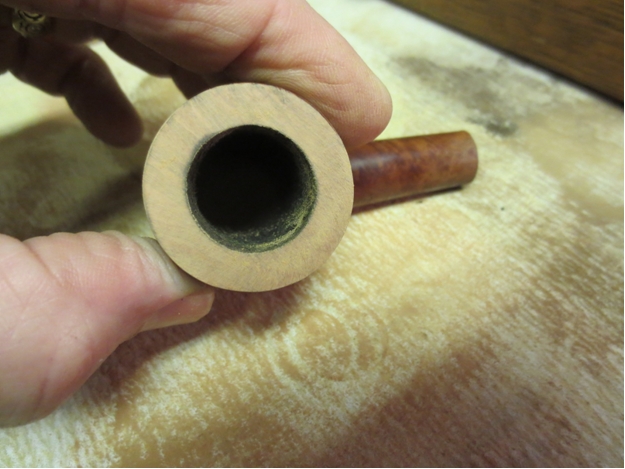
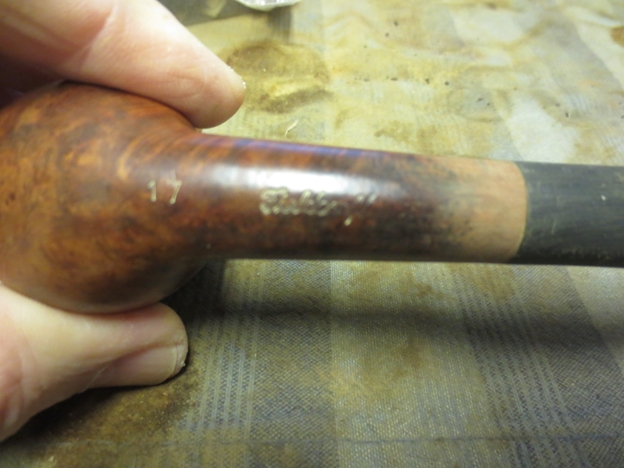
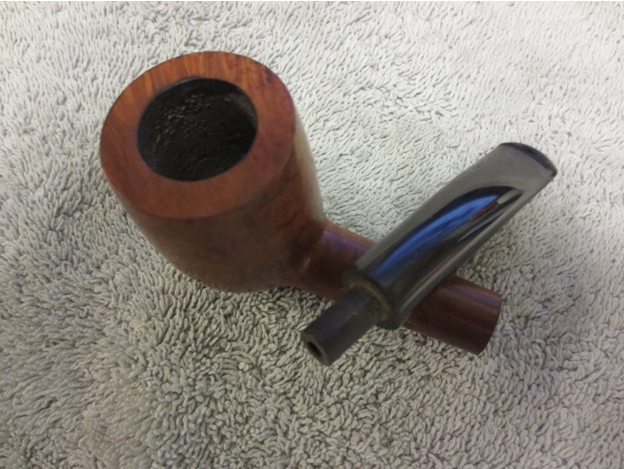
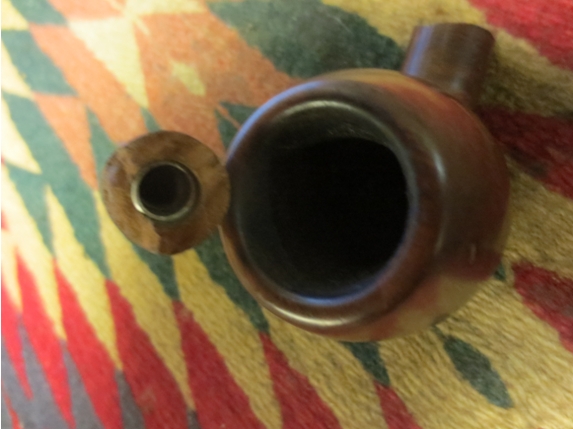
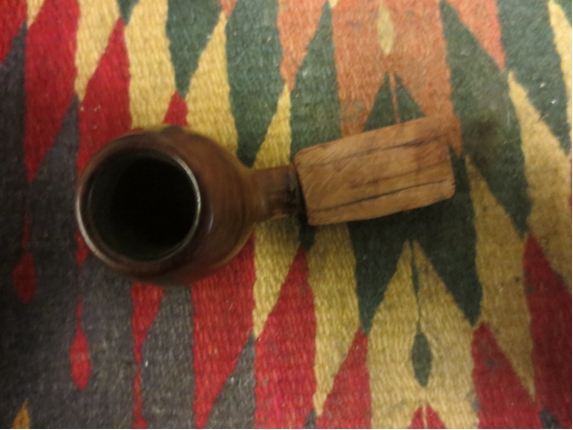
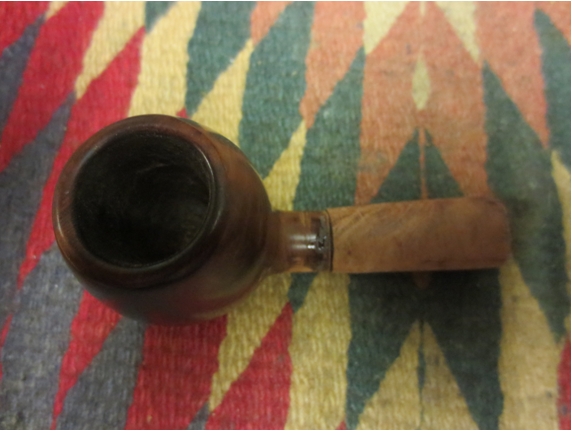
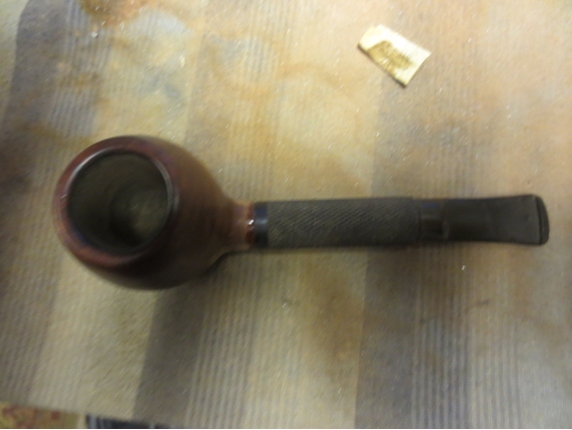
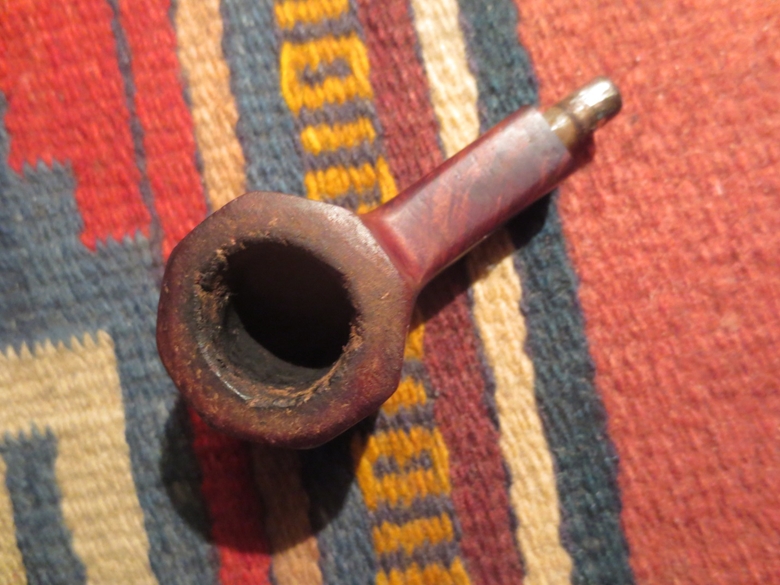
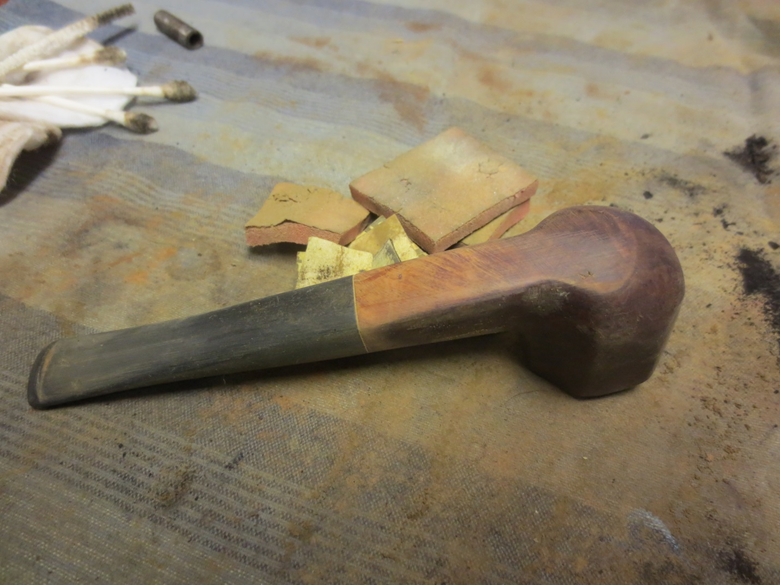
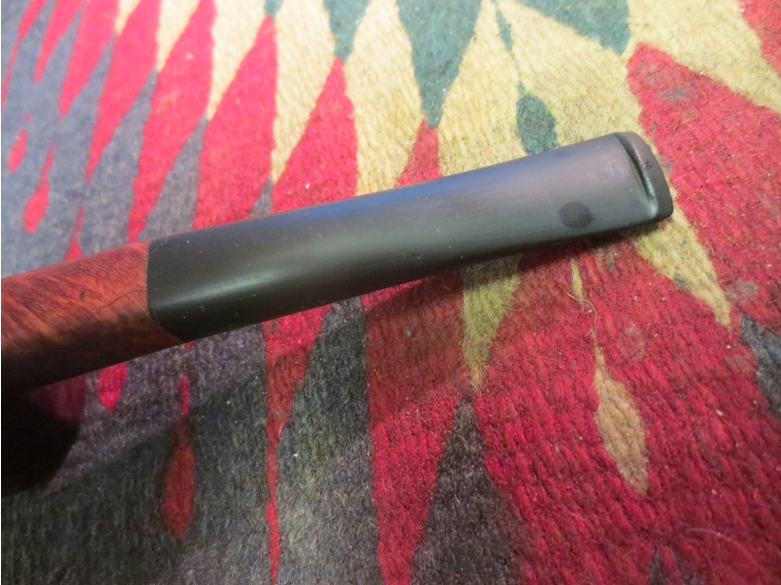
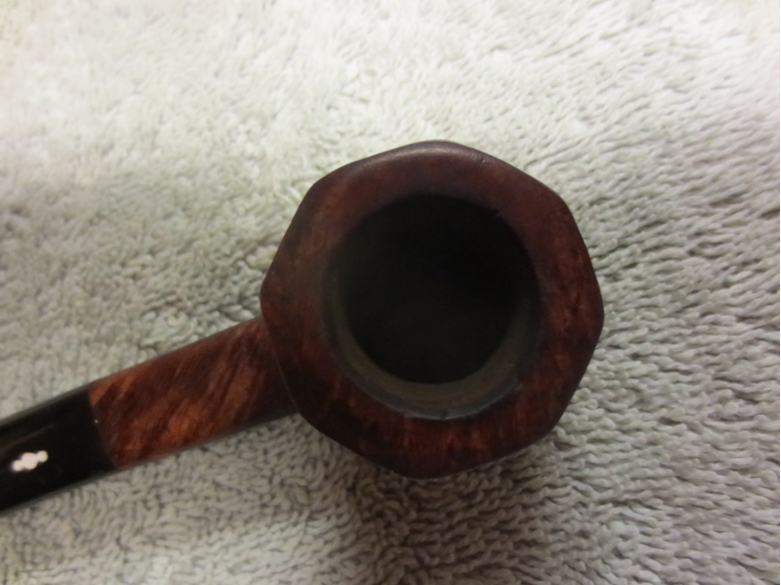
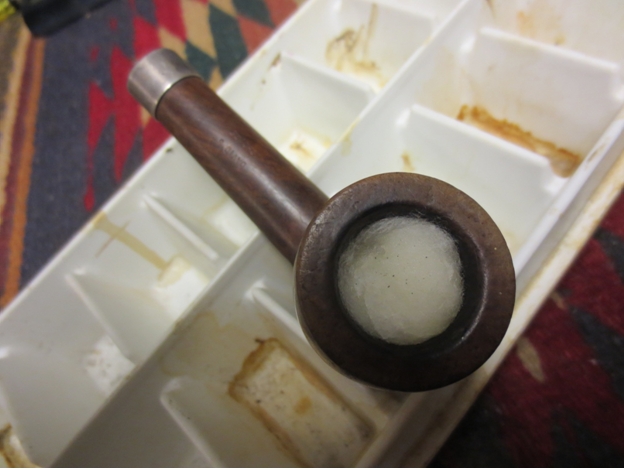
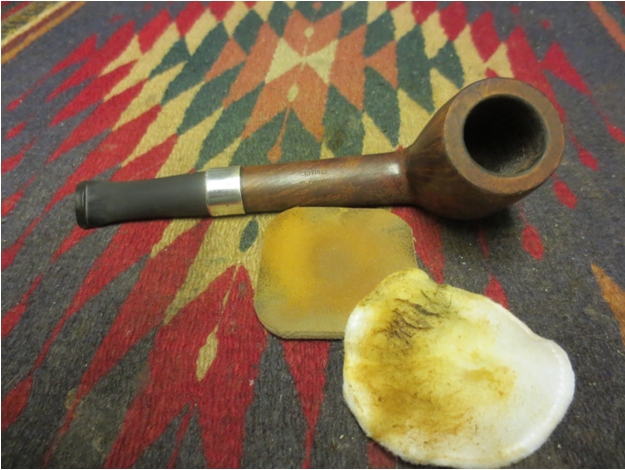
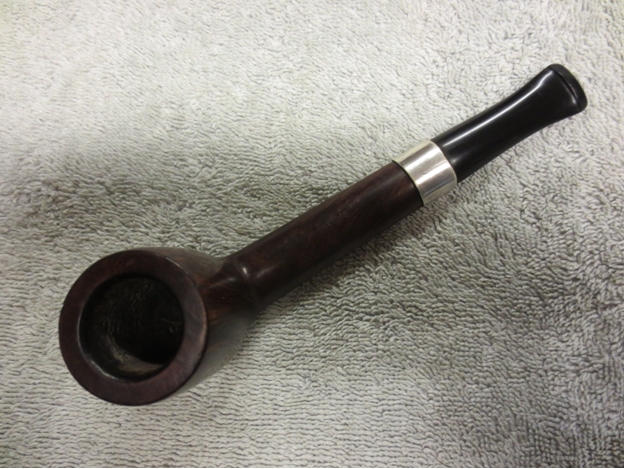
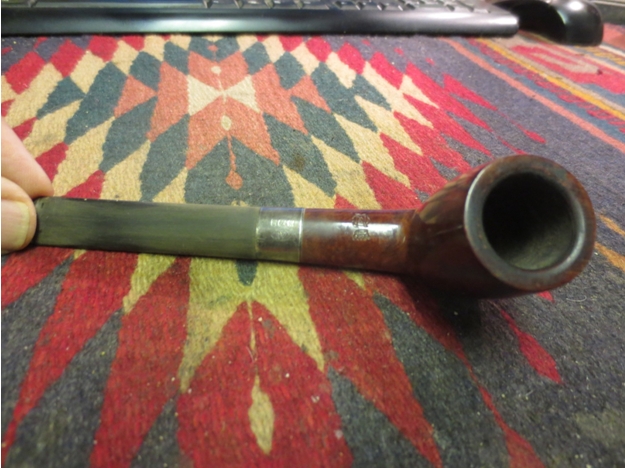
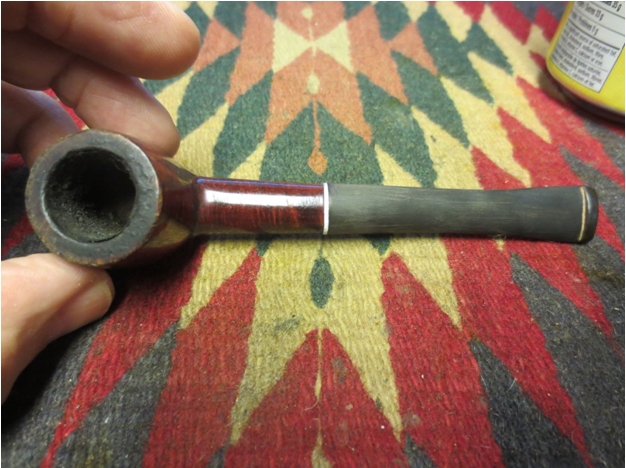
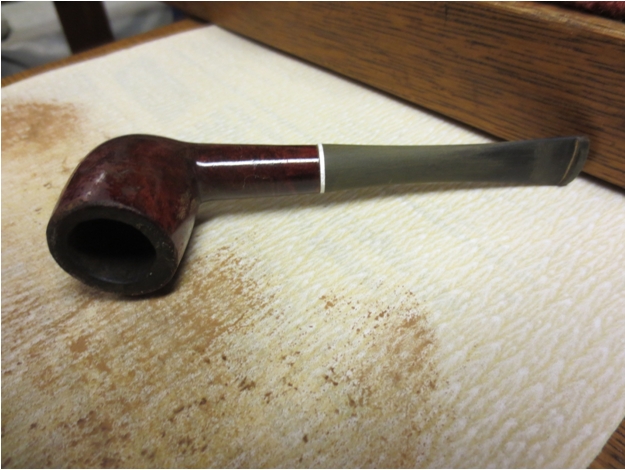
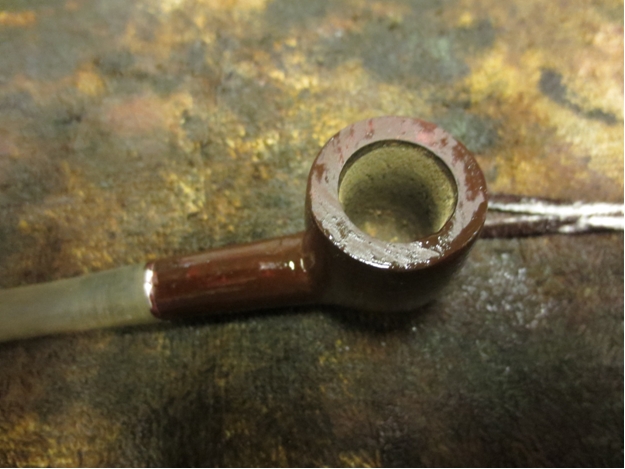
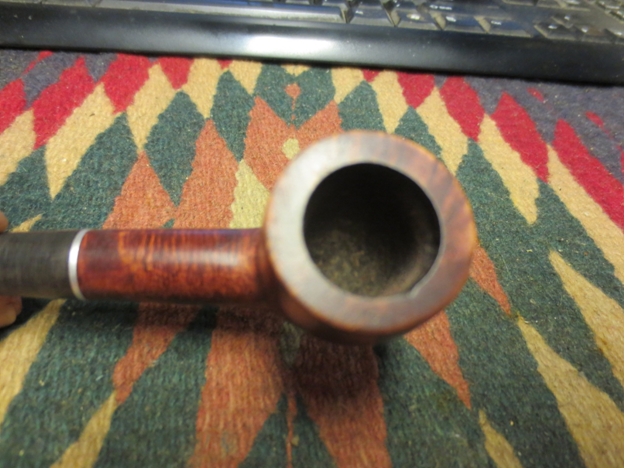
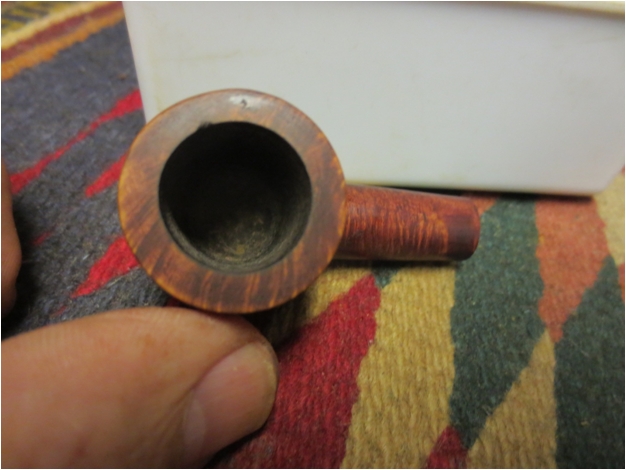
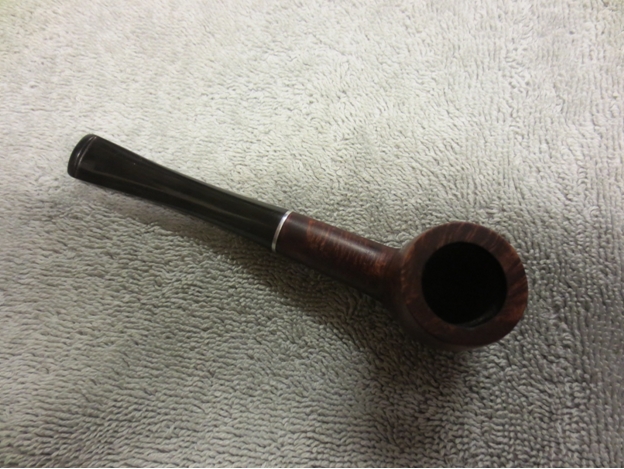
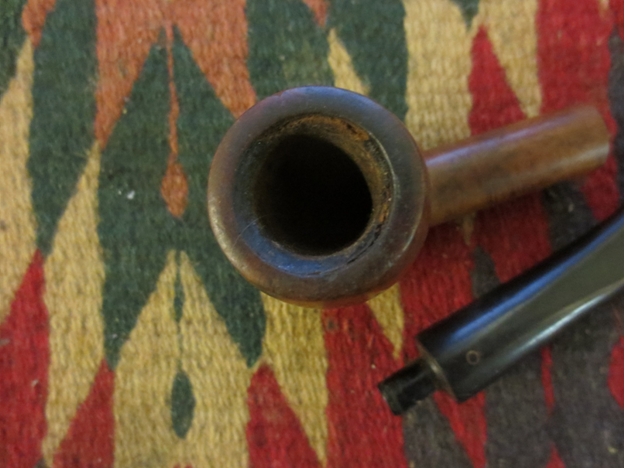
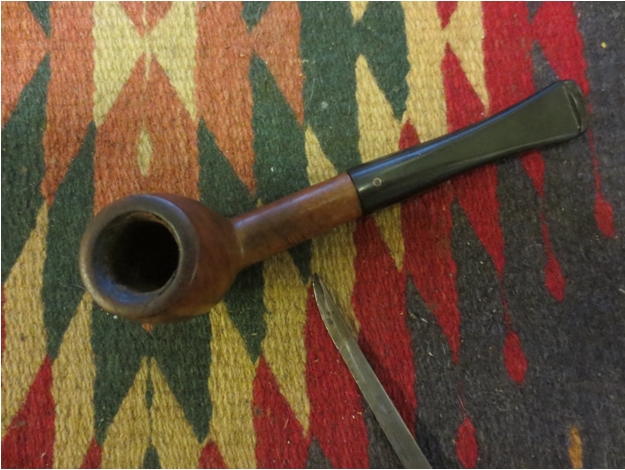
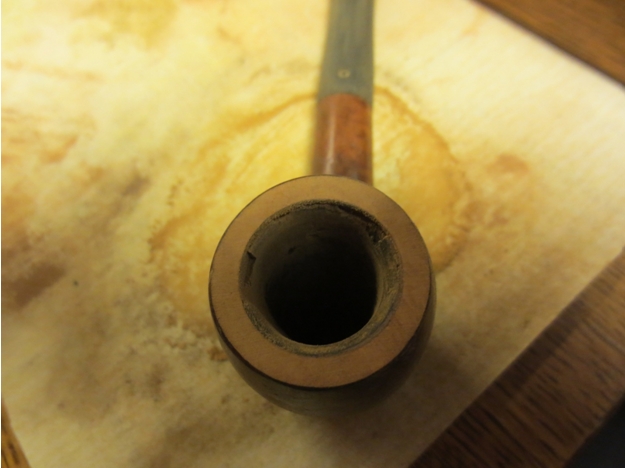
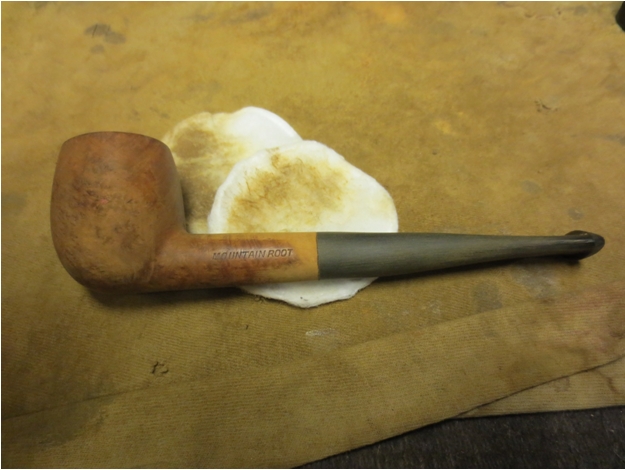
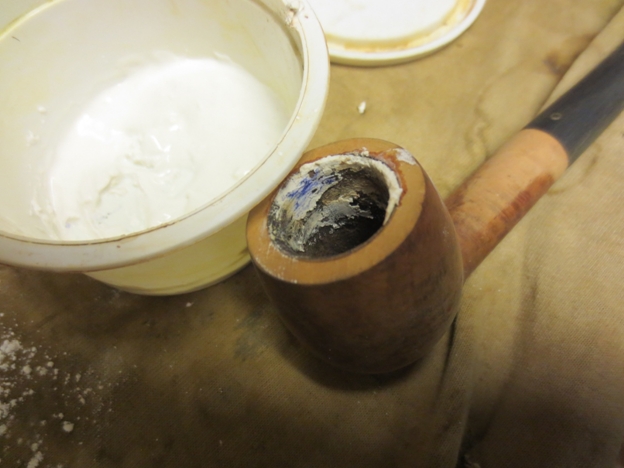
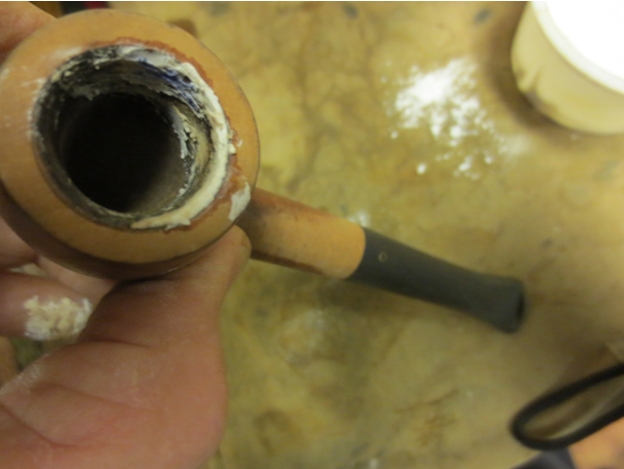
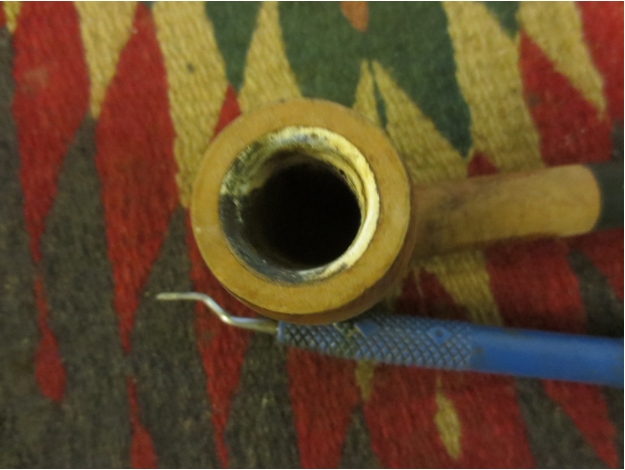
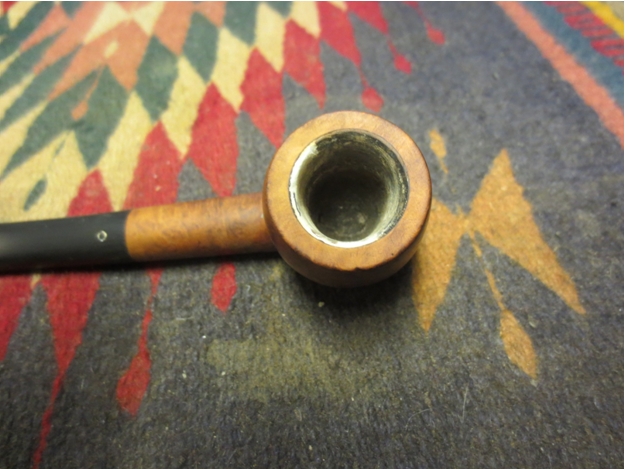
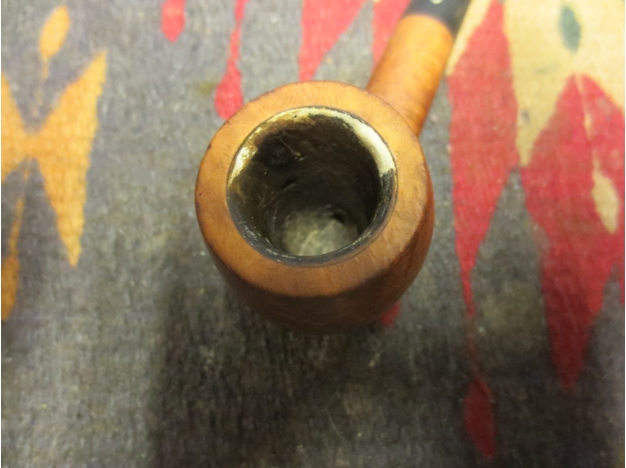
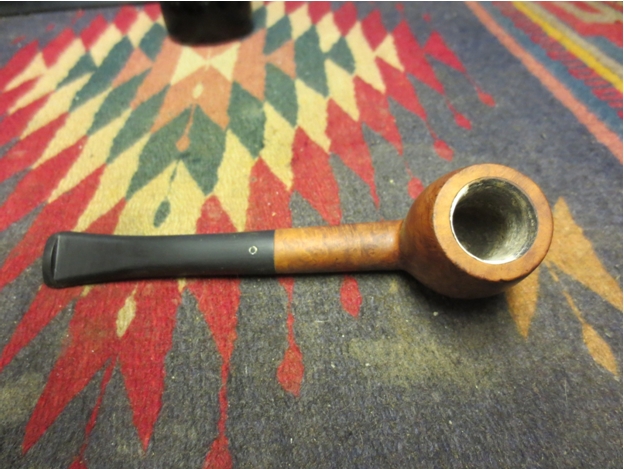
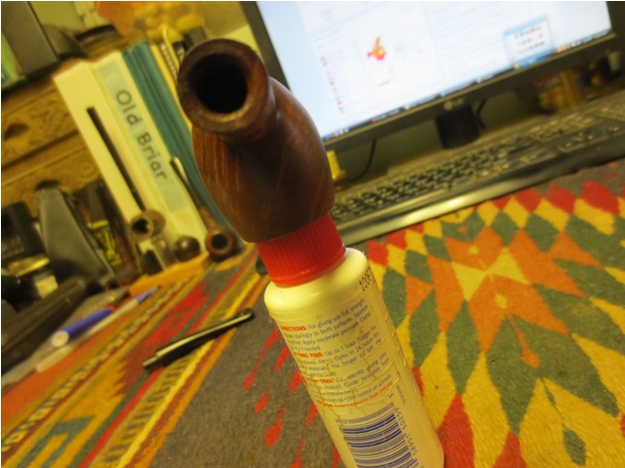
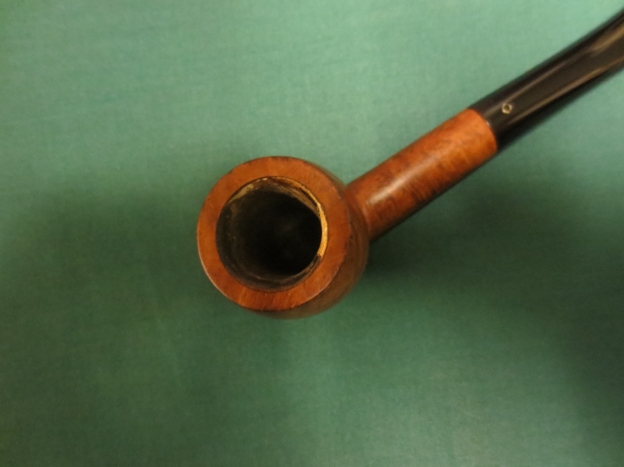
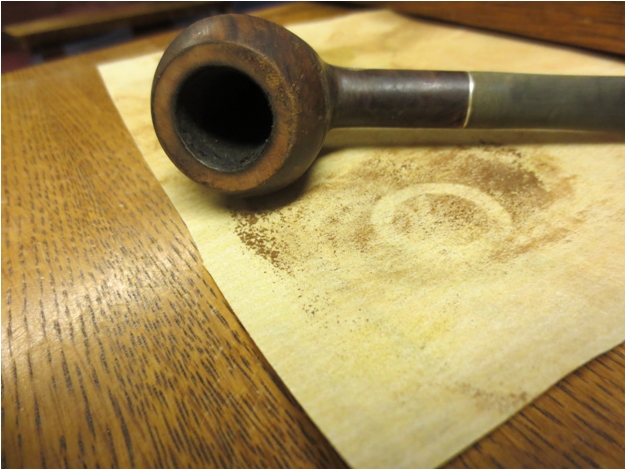
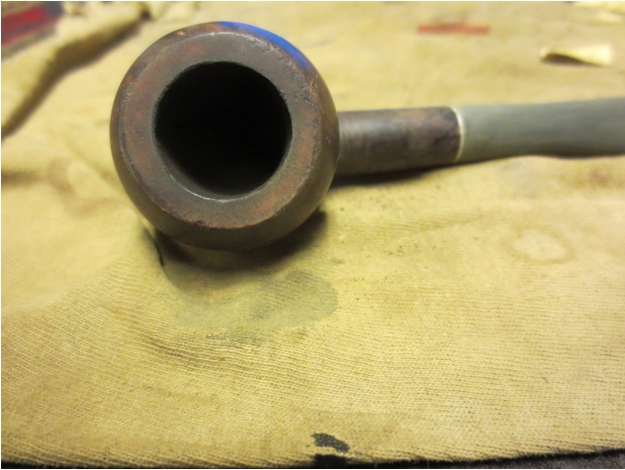
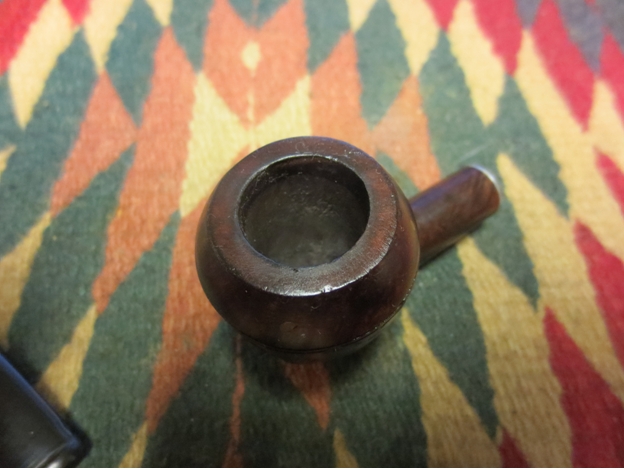
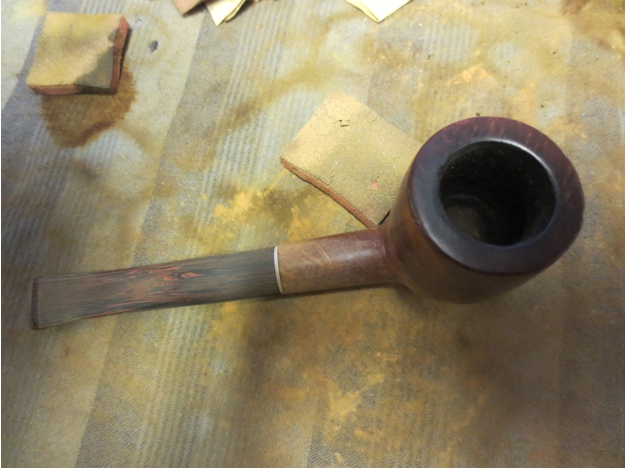
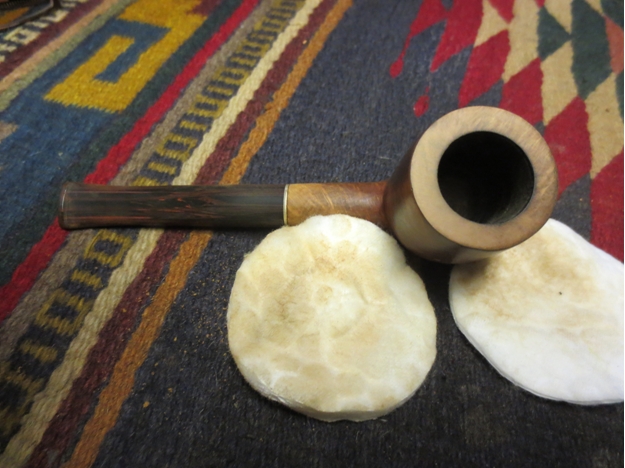
The close-up photo of the rim below shows the rounding of the edges on both the front and the back sides of the rim.York6 
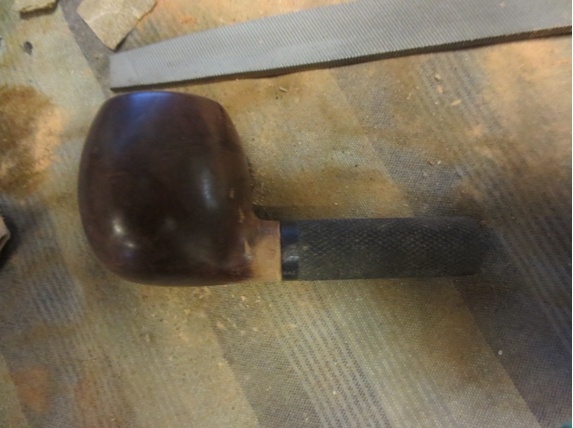
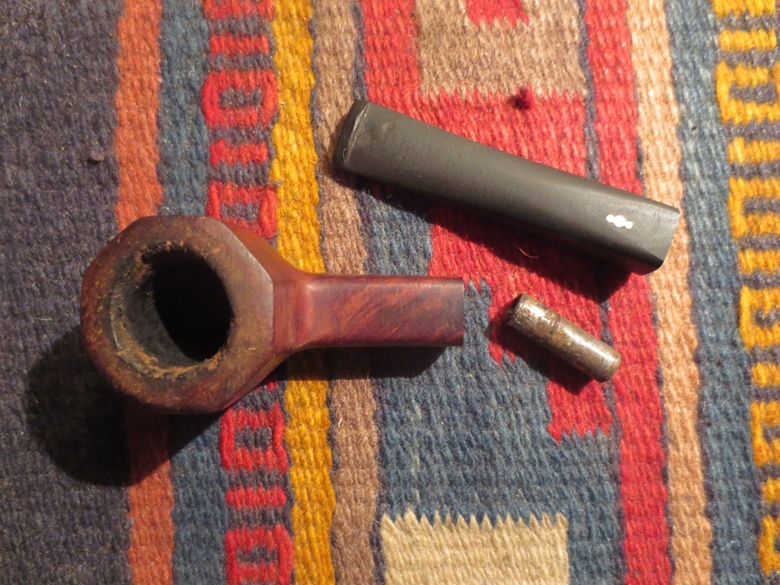
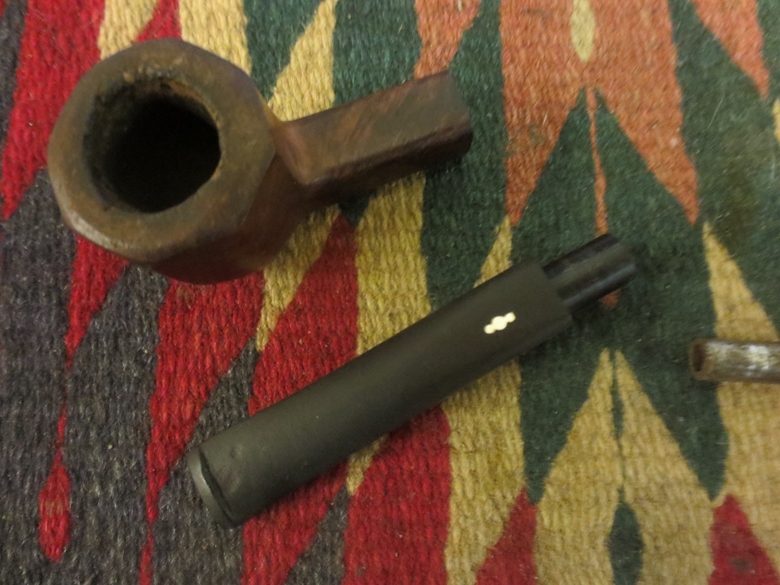
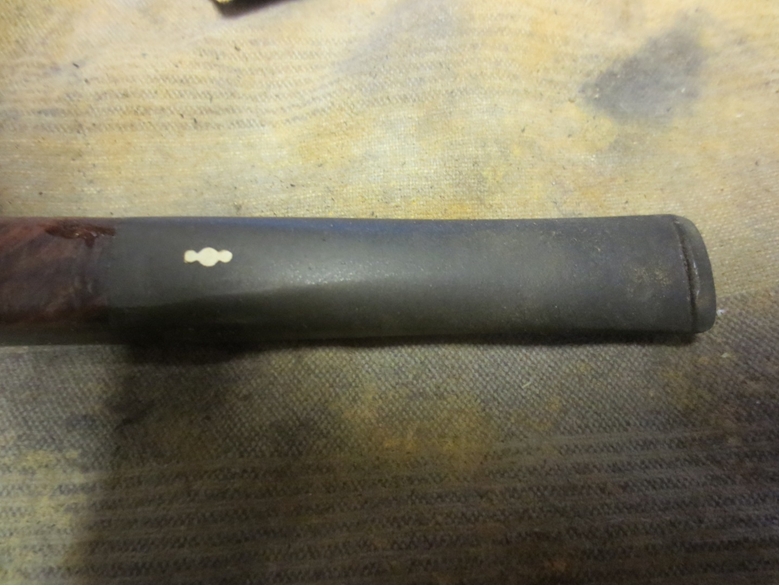
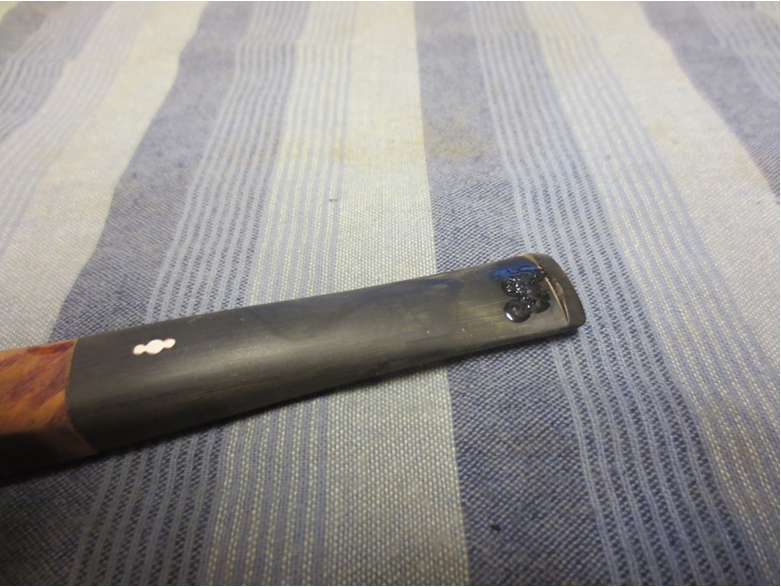
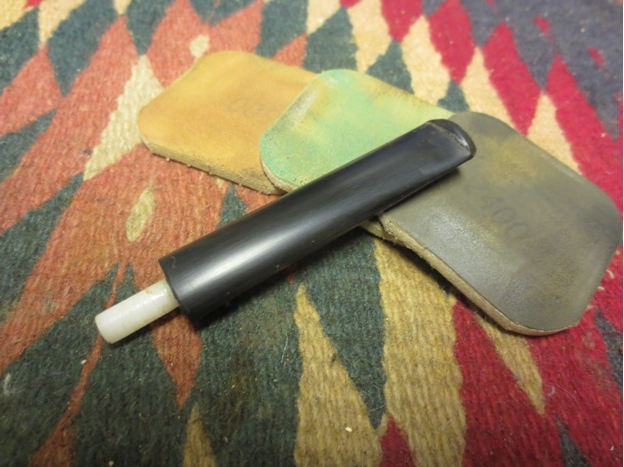
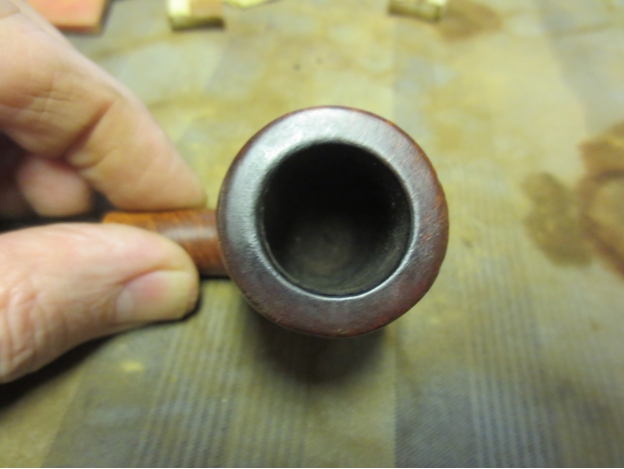
I absolutely hated the look of the stem on this pipe so I went through my can of stems until I found one that would work well. It was a well broken in stem that had a lot of oxidation and calcification on the top and bottom of the stem. There were no tooth marks which were a bonus and the stem was Cumberland! Once I had cleaned up the bowl and the stem the combination would look really good.

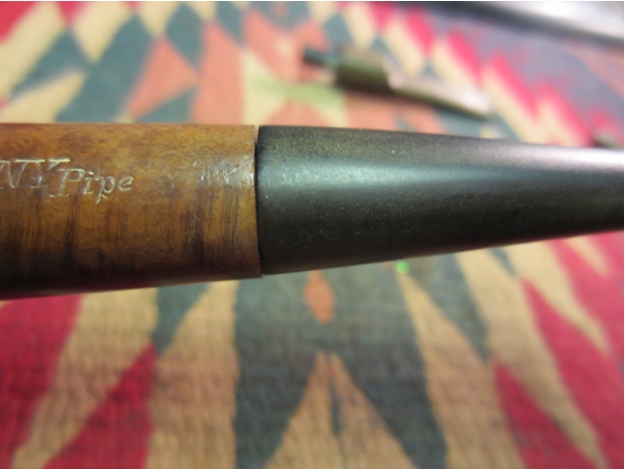
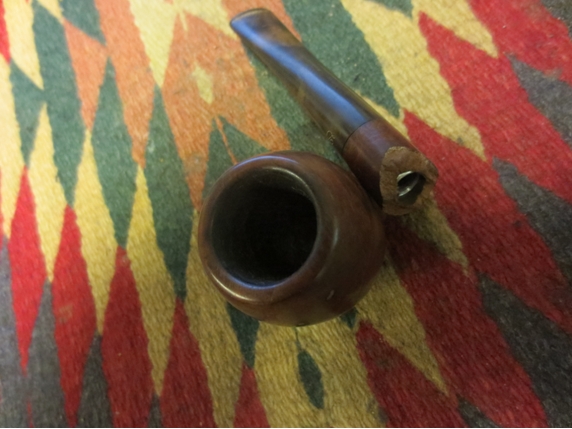
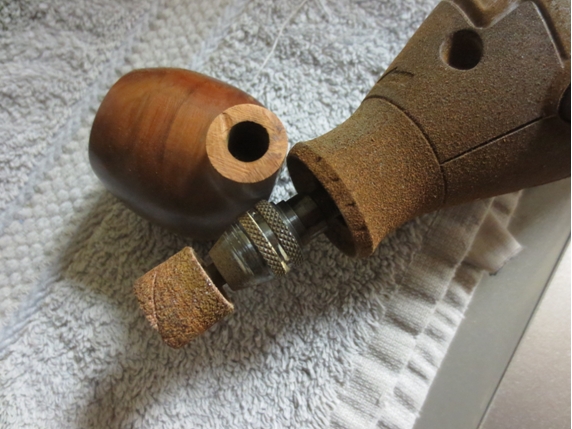
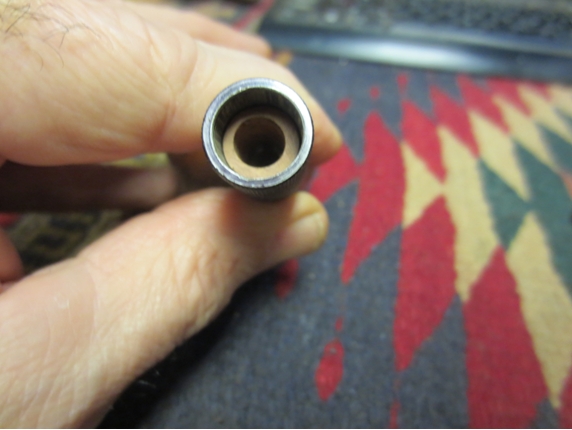
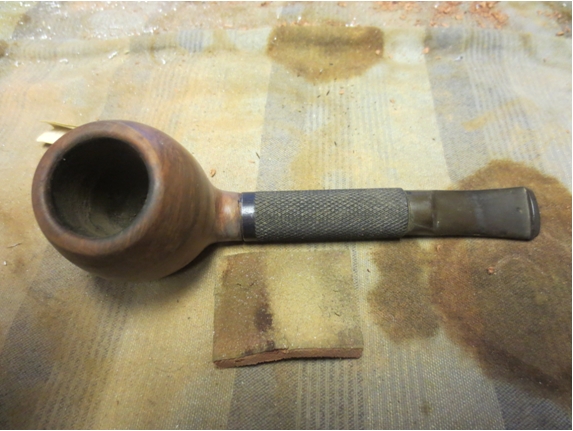
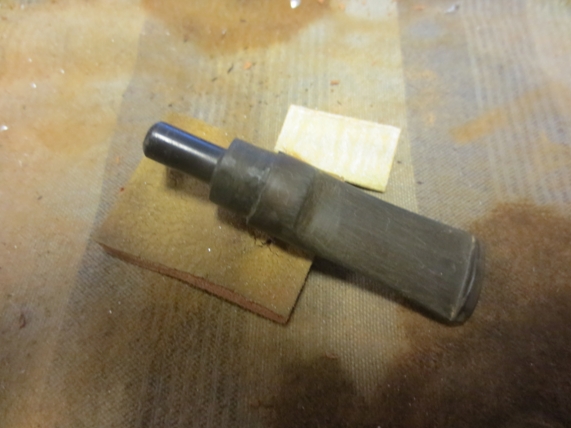
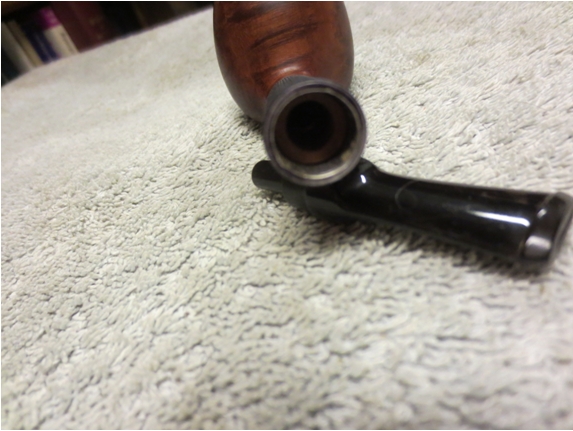
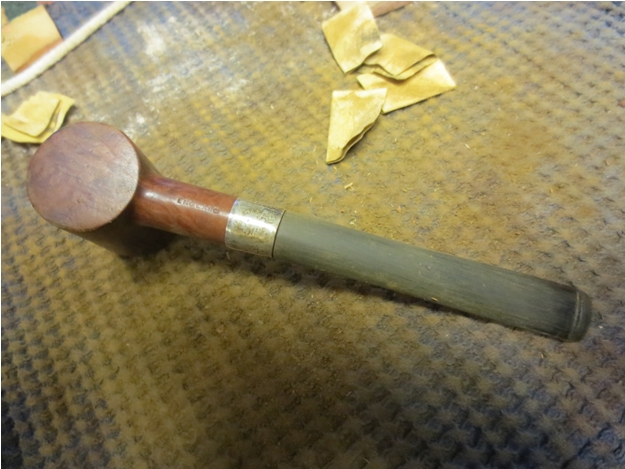
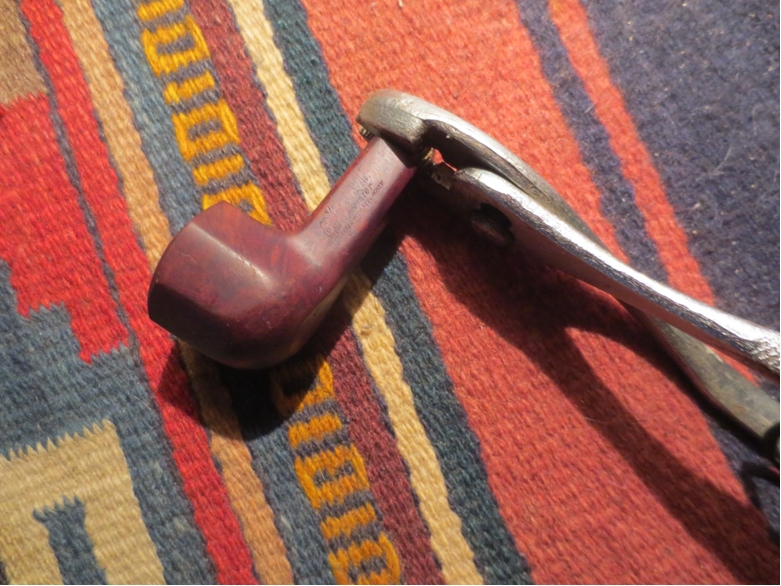
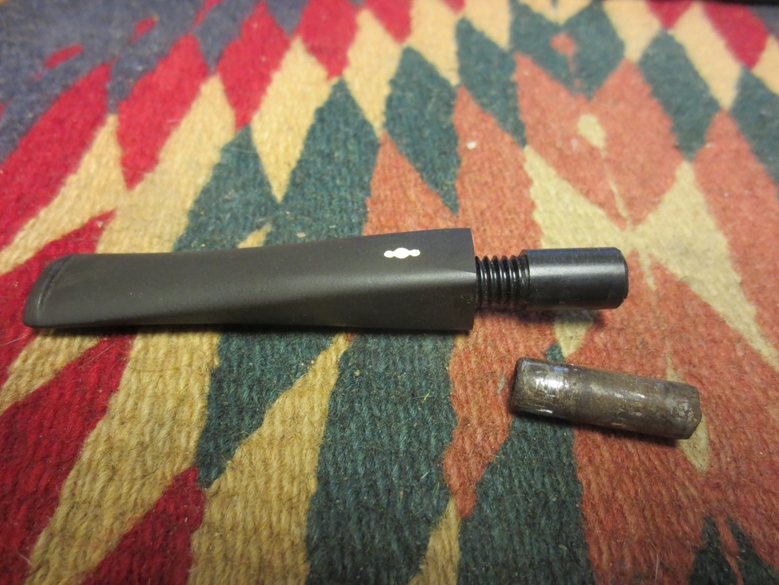
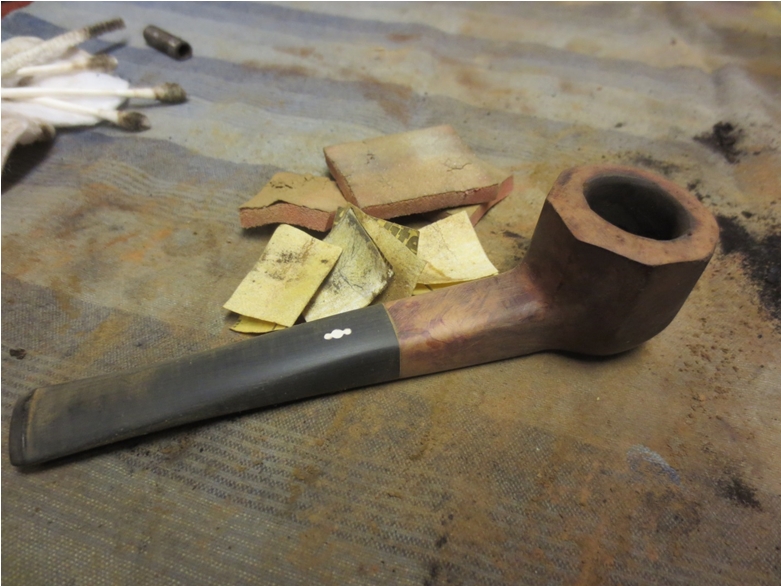
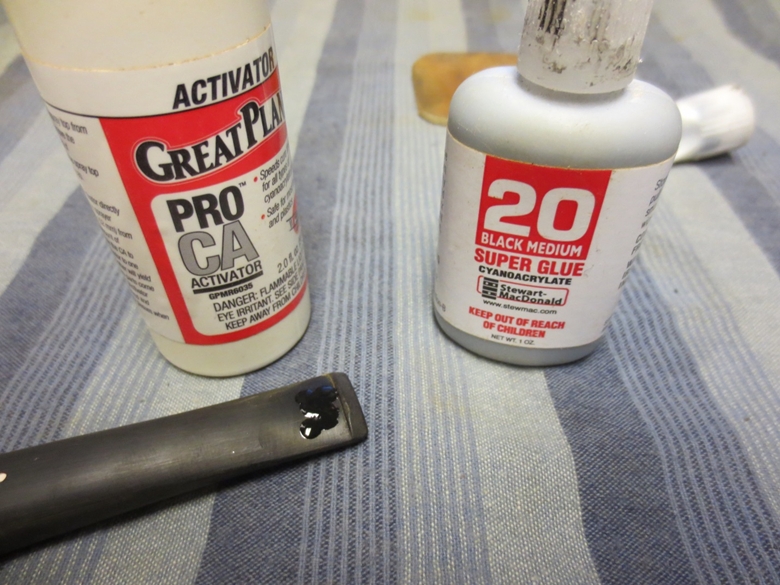
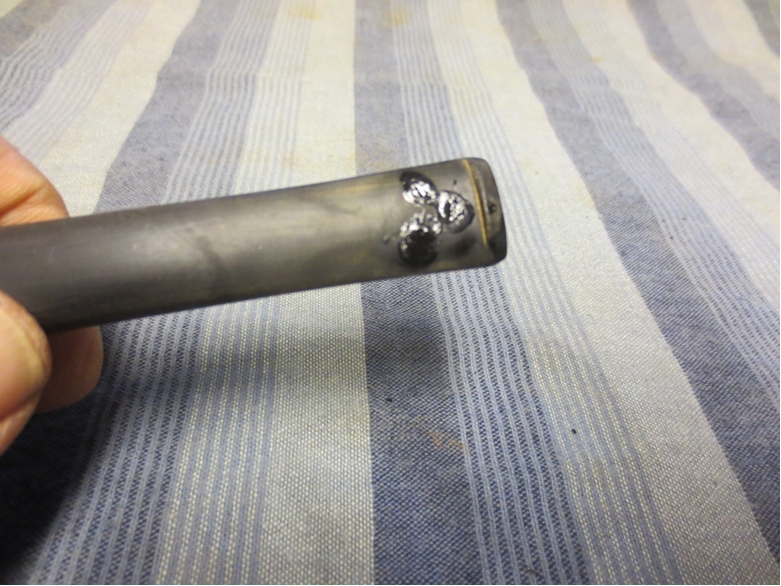
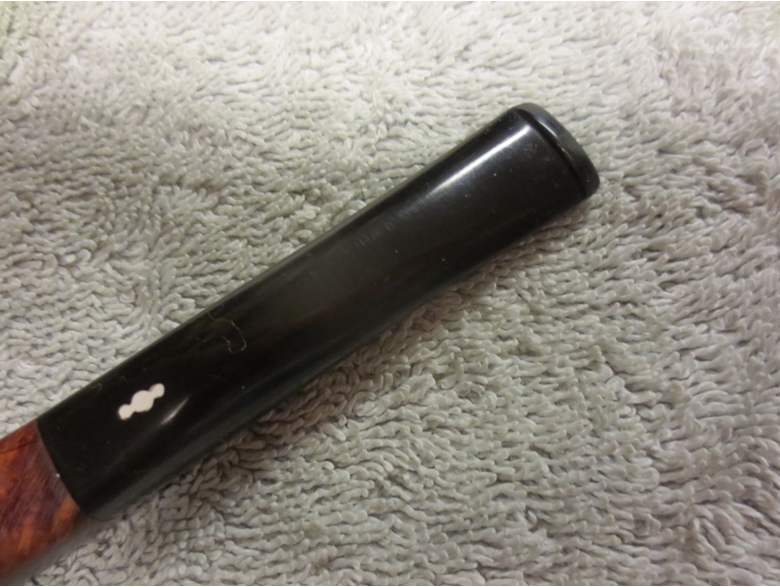
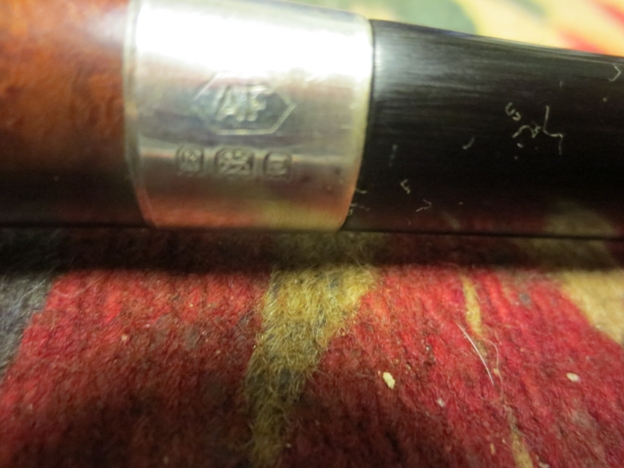
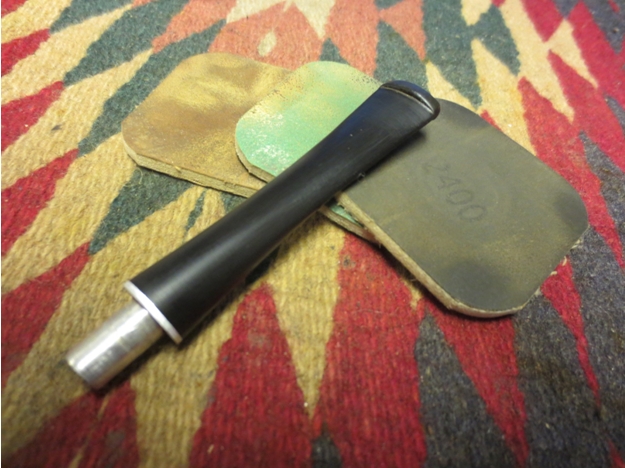
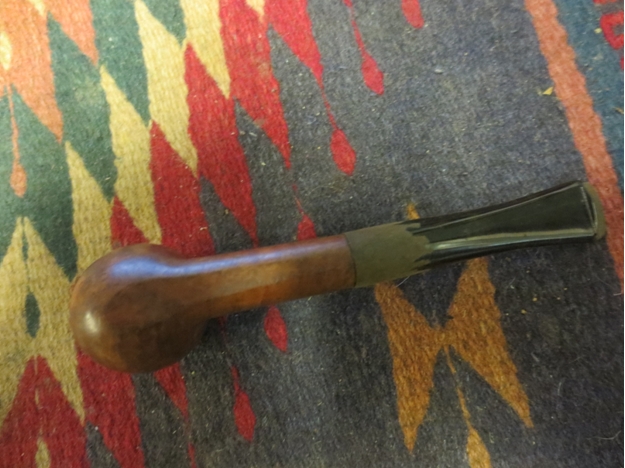
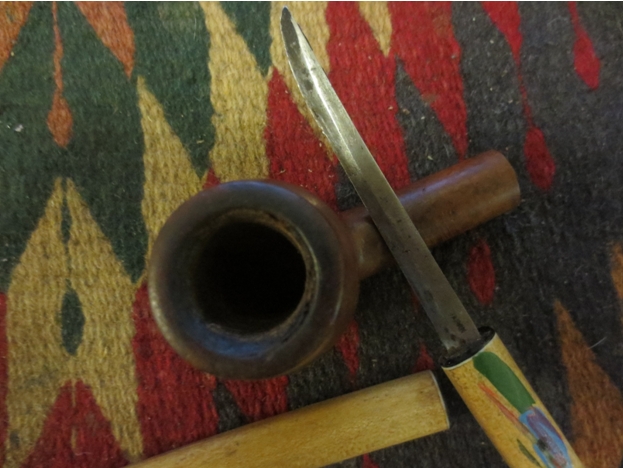
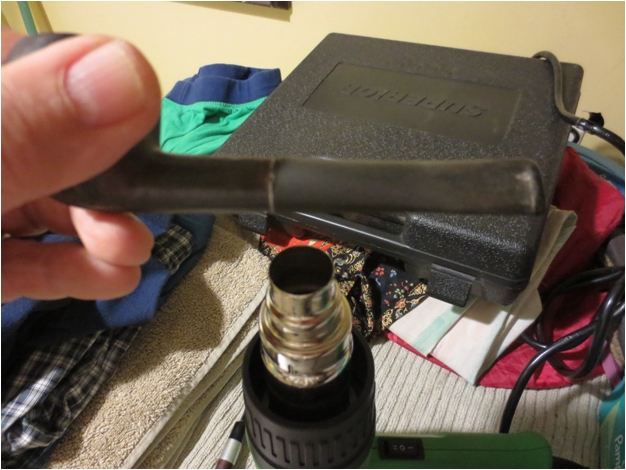
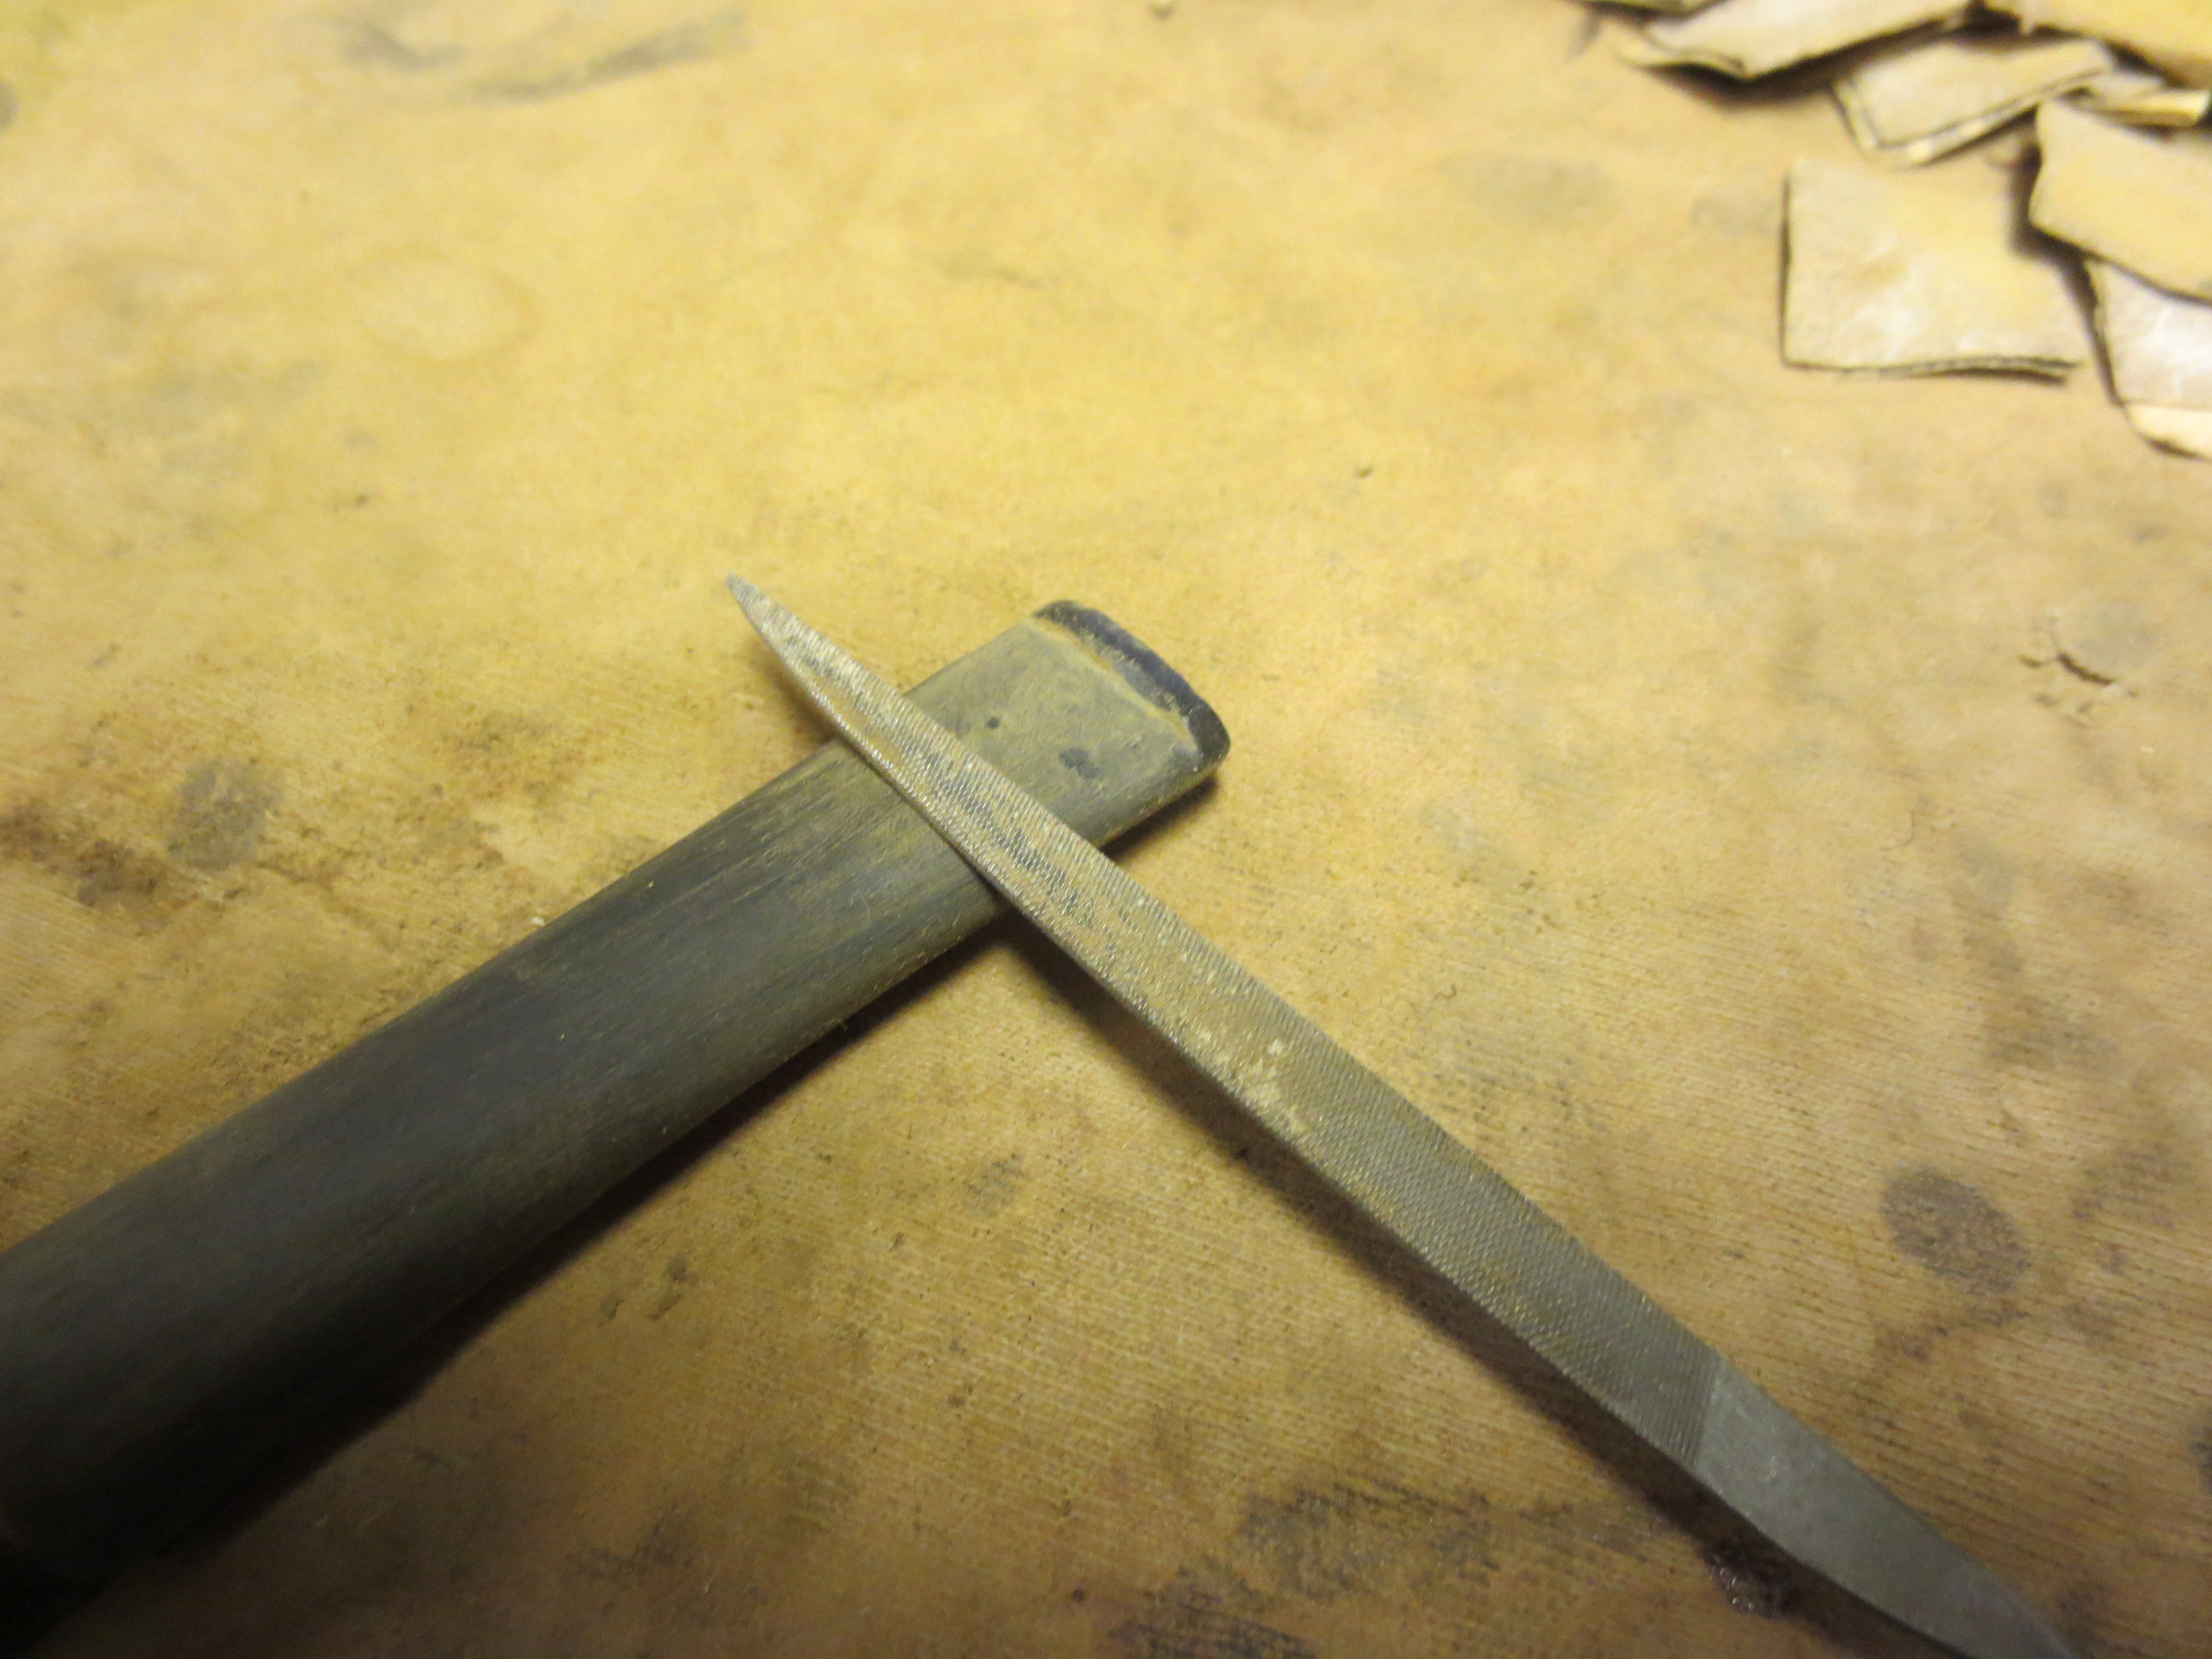
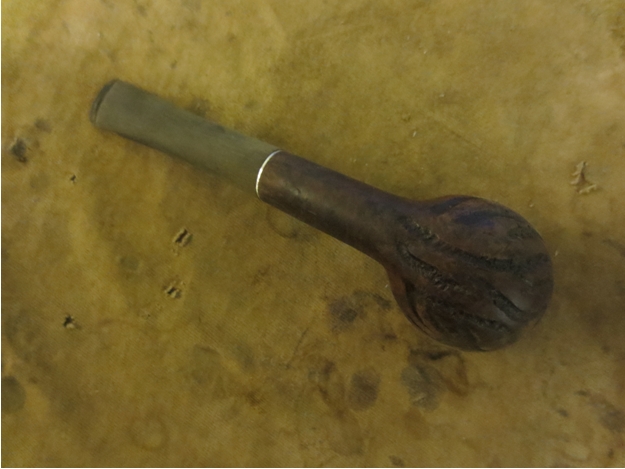
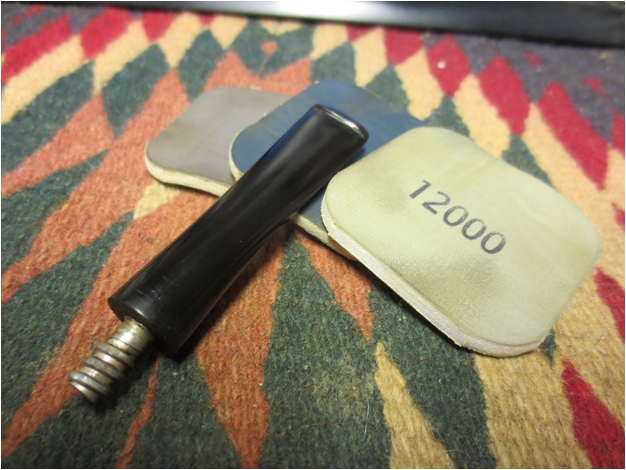
The tenon was slightly larger than the mortise so I used a Dremel with a sanding drum and took some of the Cumberland material off the tenon. I worked on it until it was close to fitting. Then I took it back to the work table and use a folded piece of sandpaper to get a good snug fit in the mortise. I had no idea that there was a brass band that was a part of the stem until I began to clean it up.York7

York8 
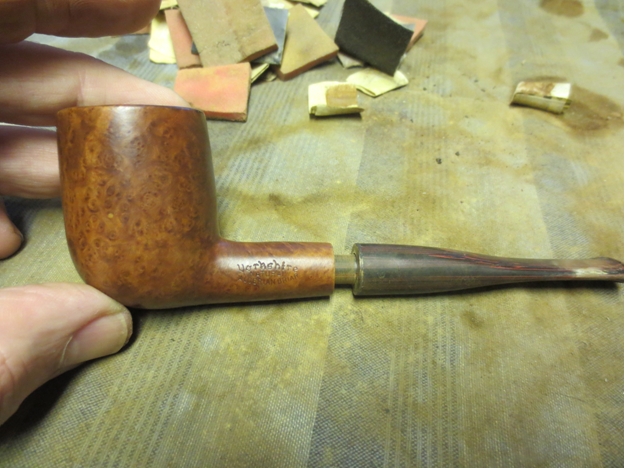
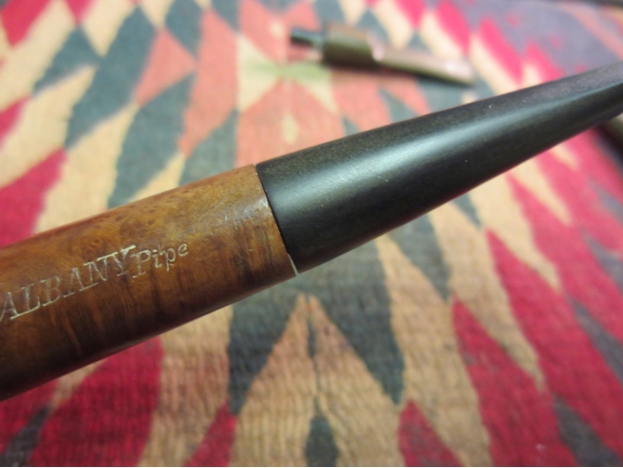
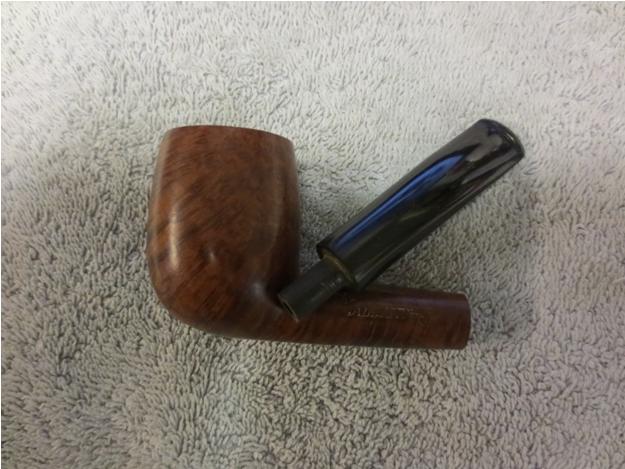
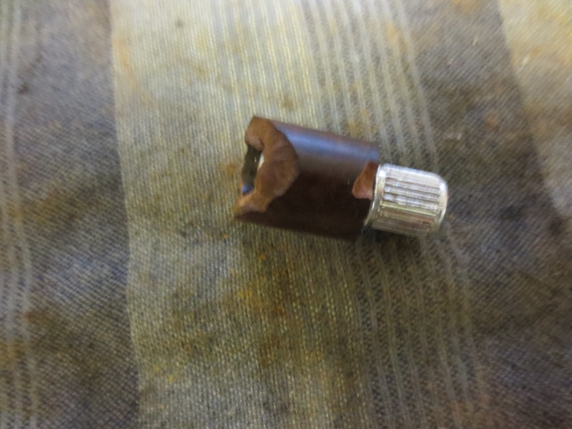
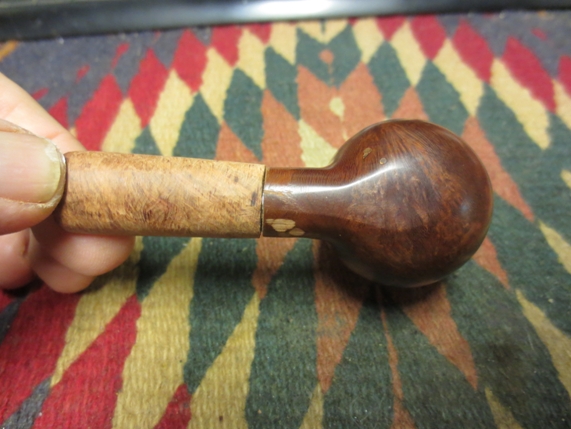
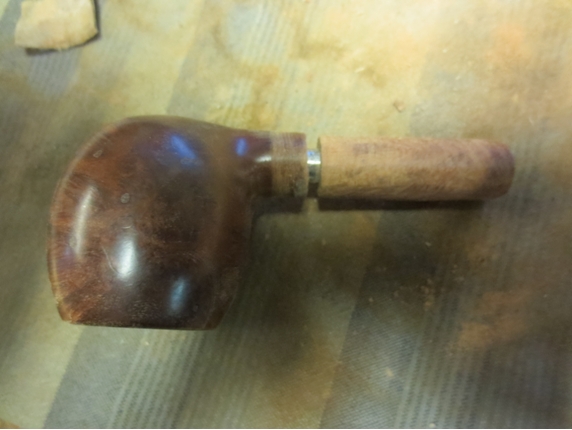
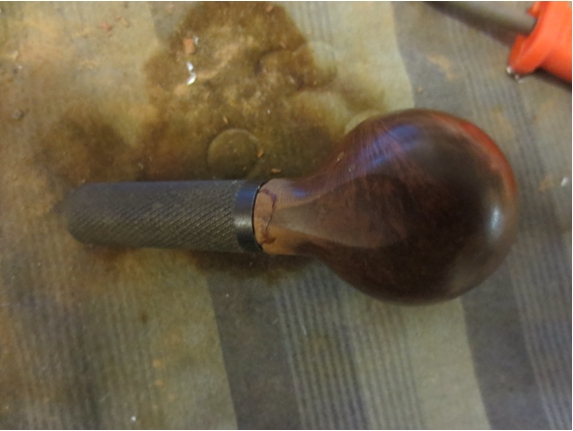
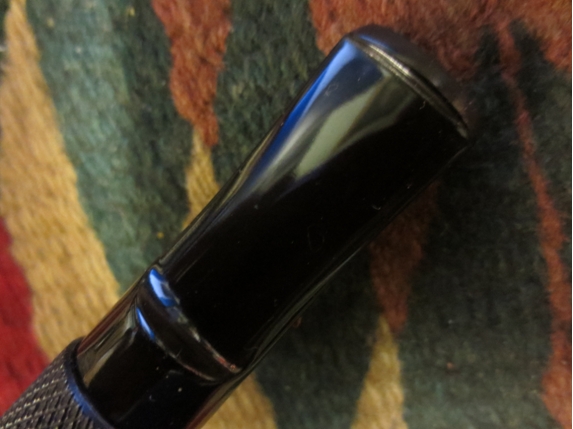
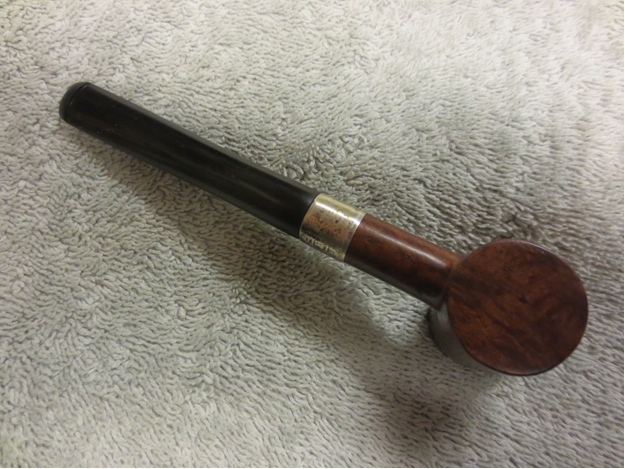
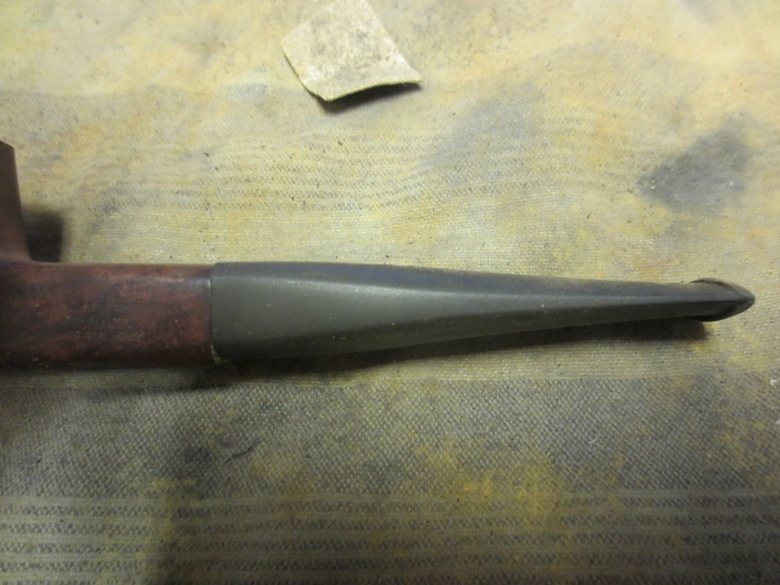
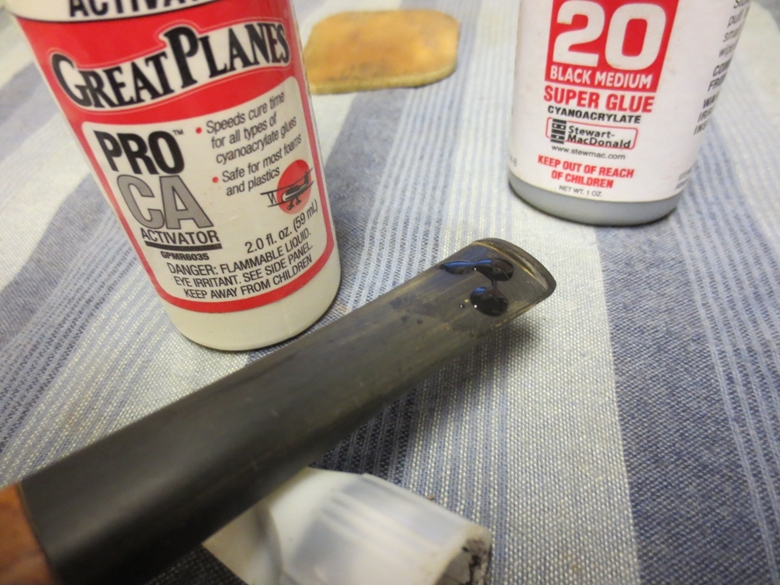
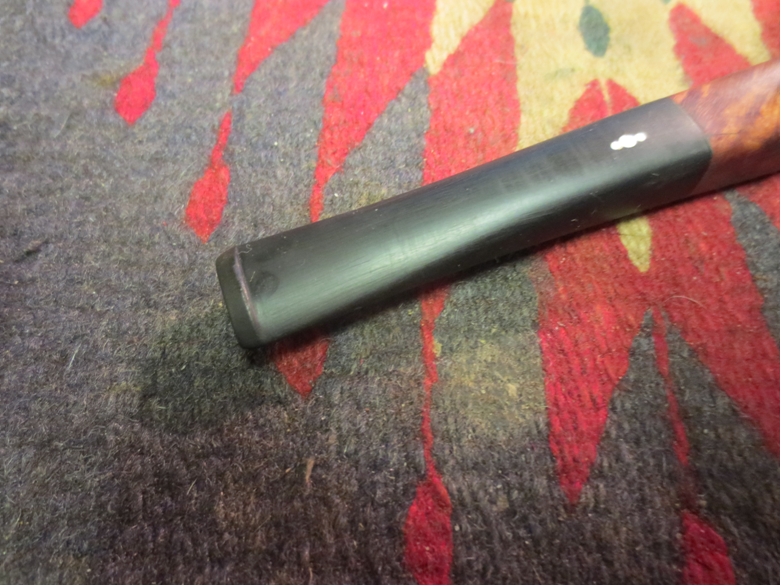
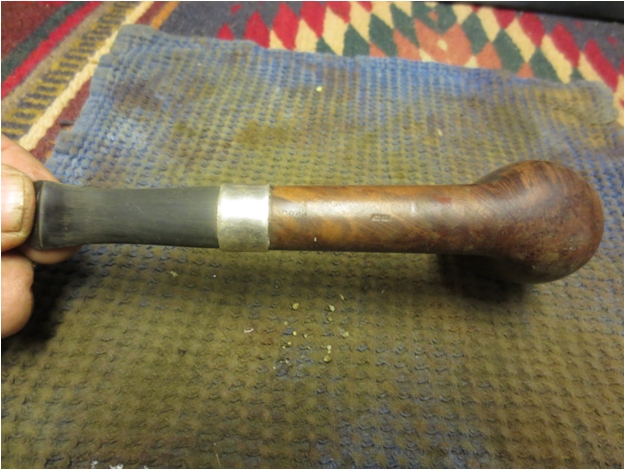
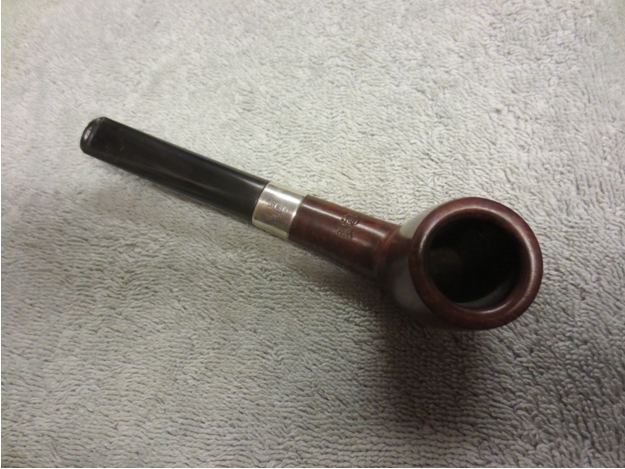
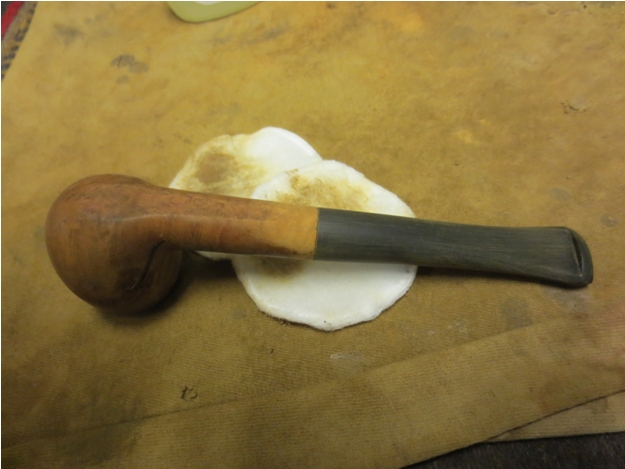
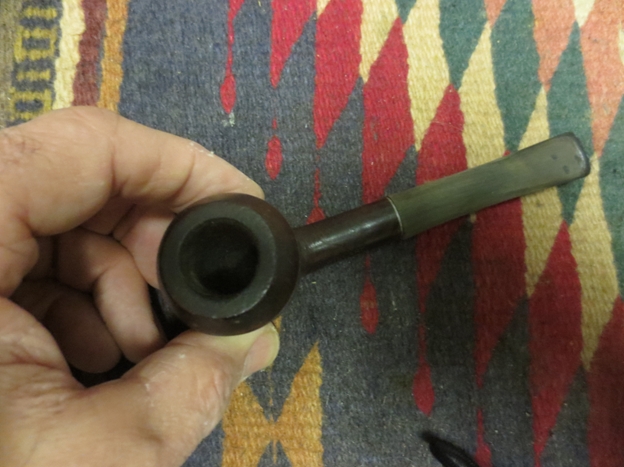
When the stem was in place I sanded the stem and the junction of the shank and stem to make sure that the fit was smooth and the transition was as seamless as I could make it. I sanded with 220 grit sandpaper to even things out. As I did it I found that there was a brass coloured band that was a part of the stem. I removed the stem and cleaned off the face of the stem and found the band extended across the face of the stem like a washer around the tenon. I really liked the way the stem tapered quickly to from the shank to the button.York9

York10

York11

York12 
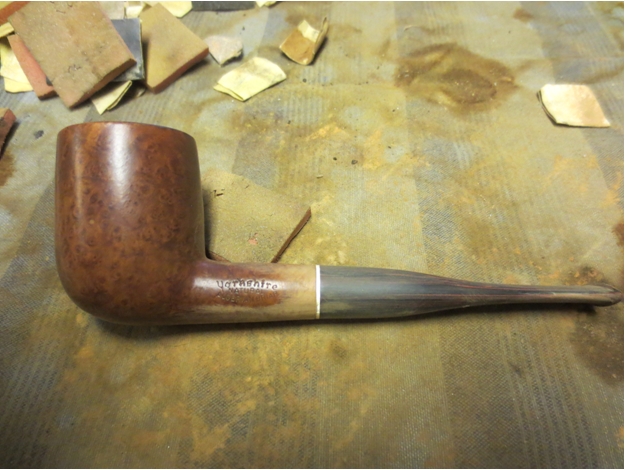
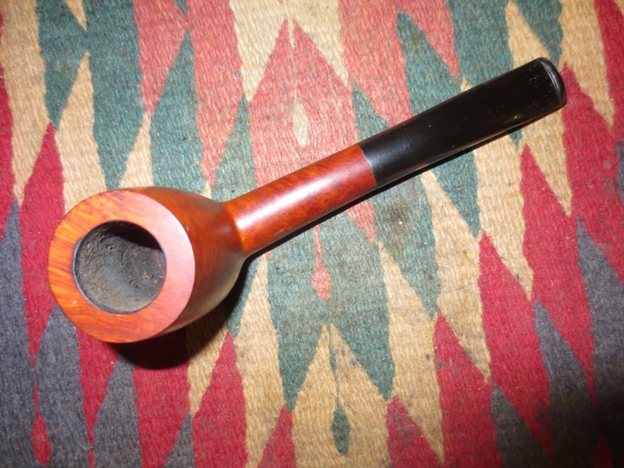
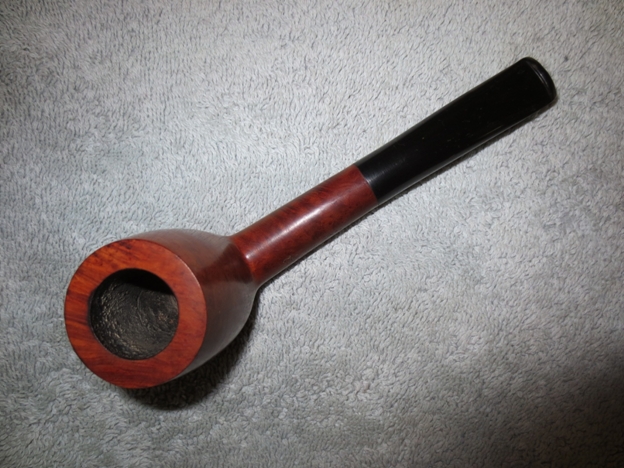
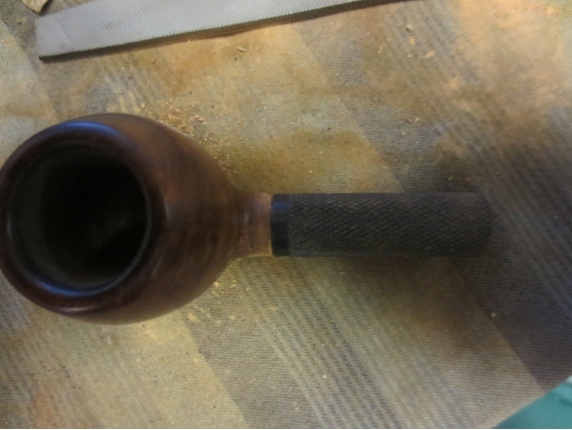
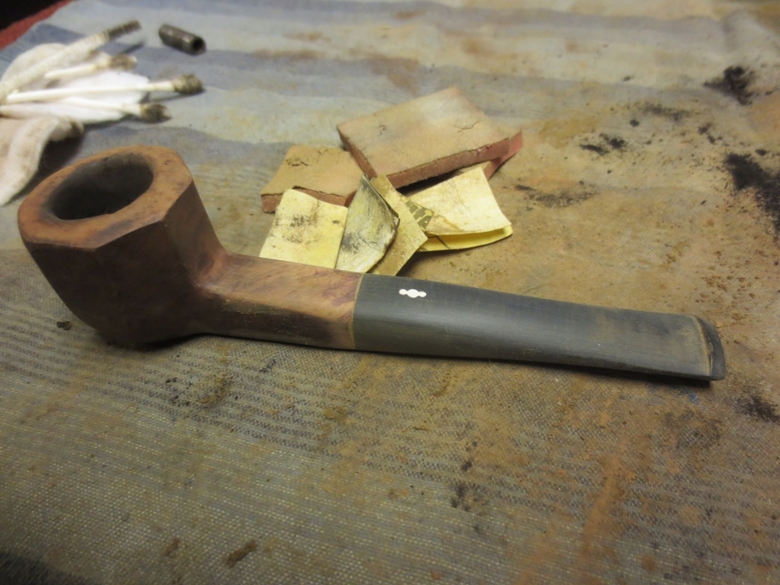
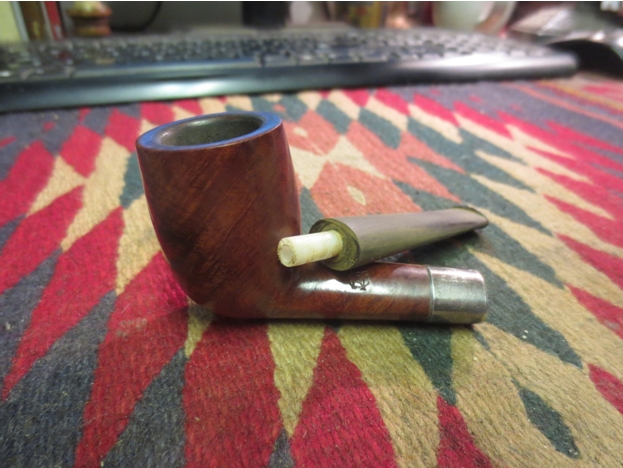
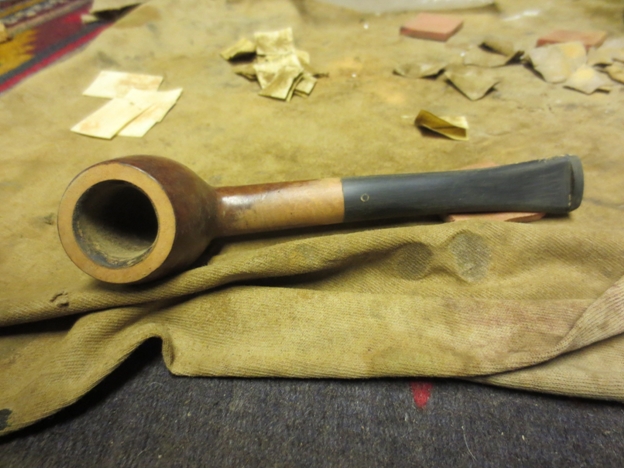
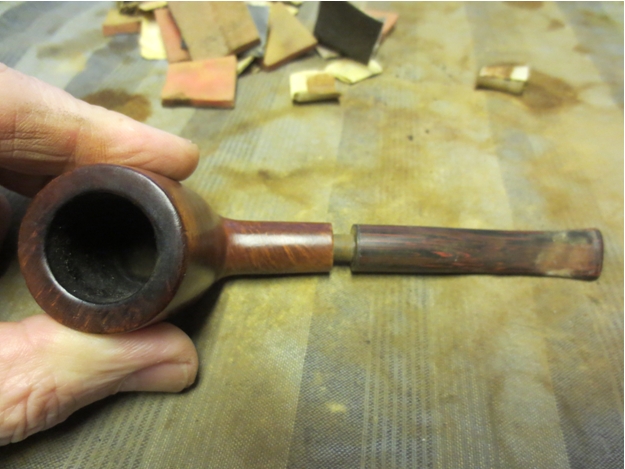
I topped the bowl on a topping board to remove the damage on the rim and clean up the outer edges. I wanted to remove the damaged, rounded edges. I also sanded the scratches on the underside of the bowl.York13 
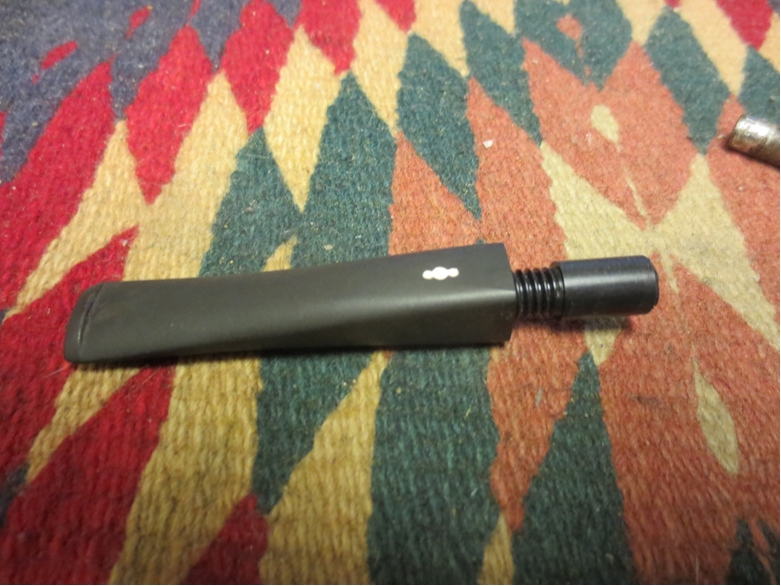
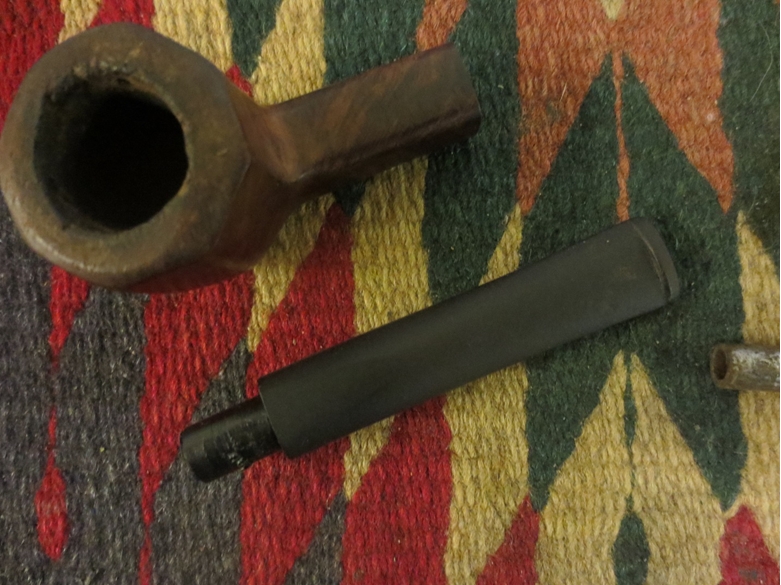
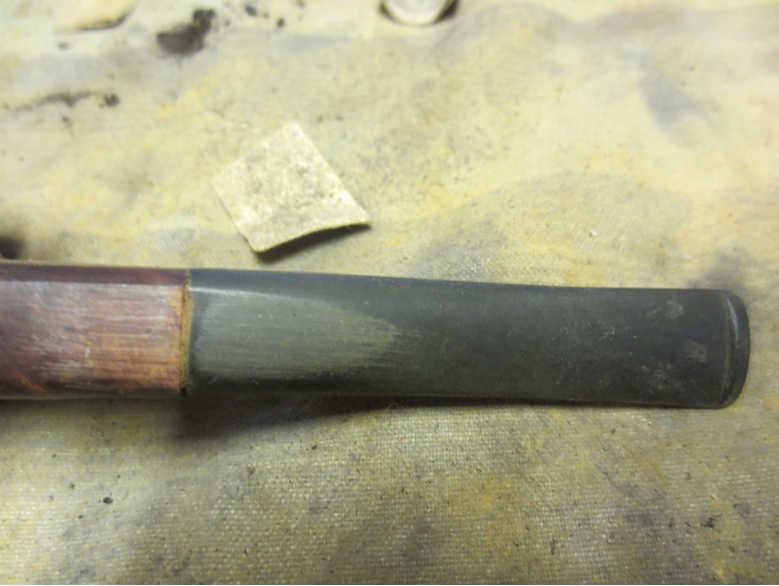
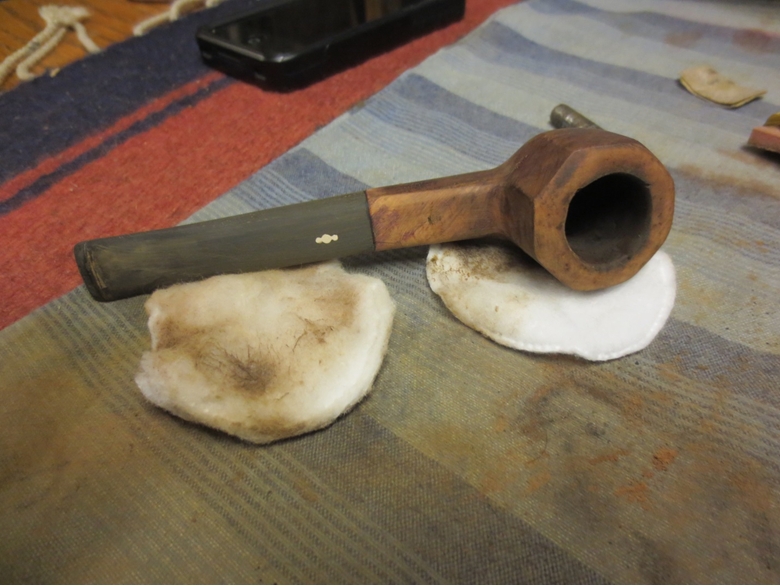
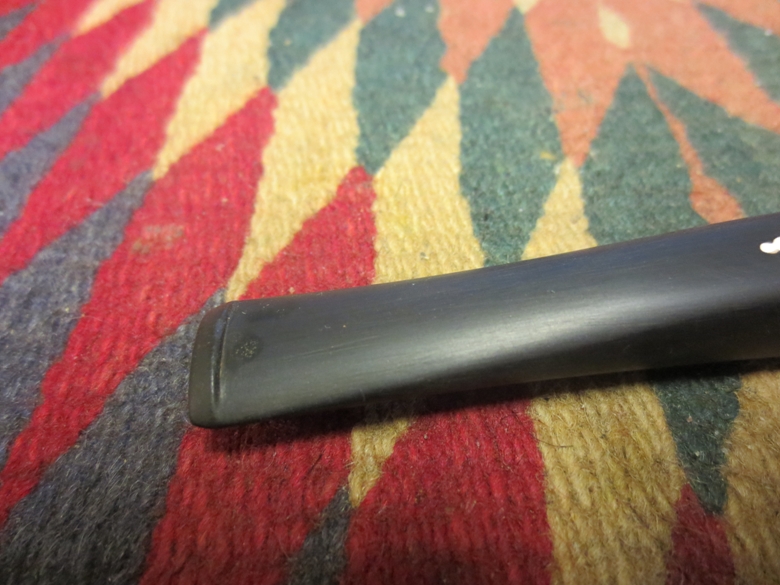
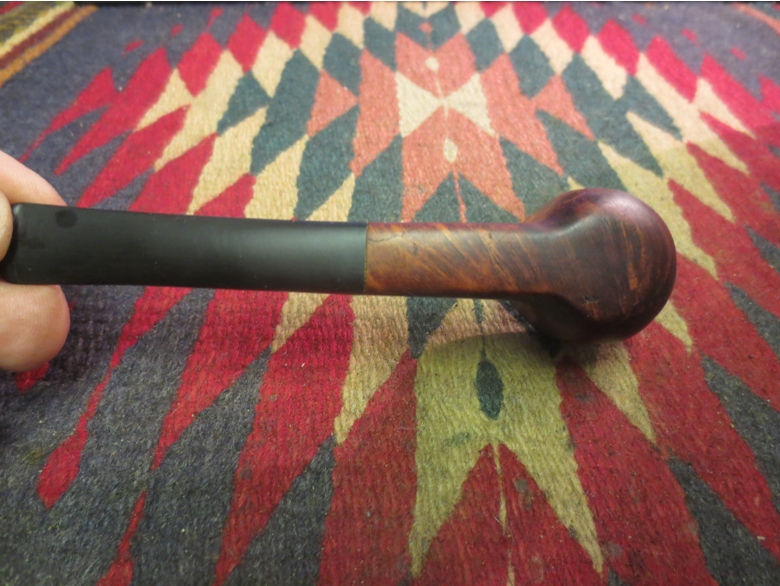
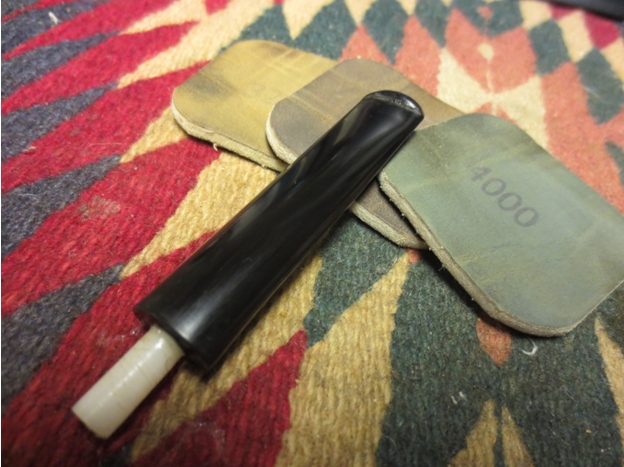
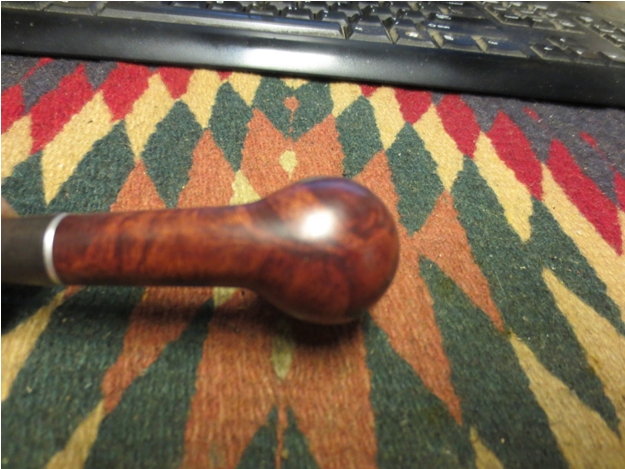
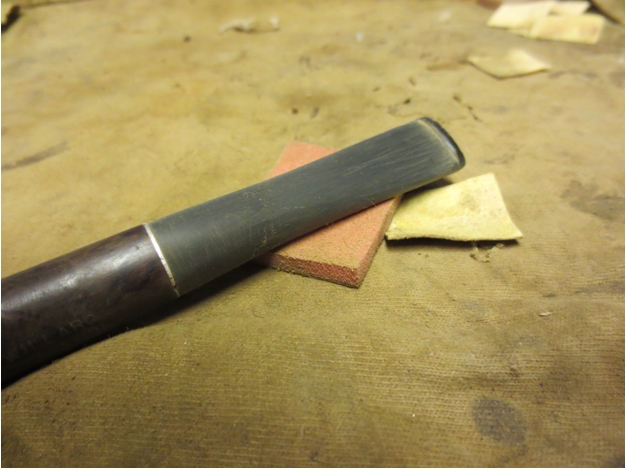
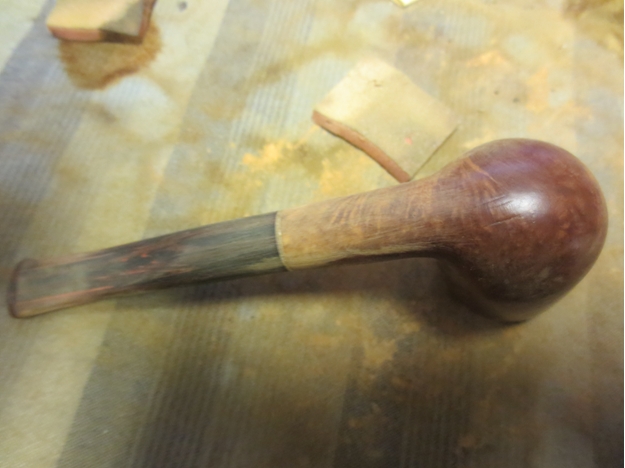
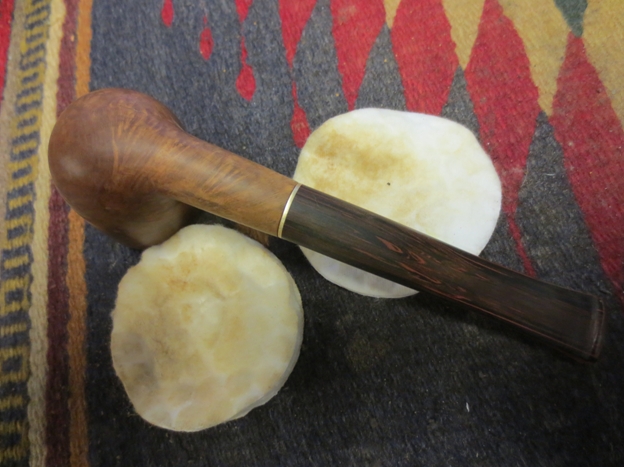
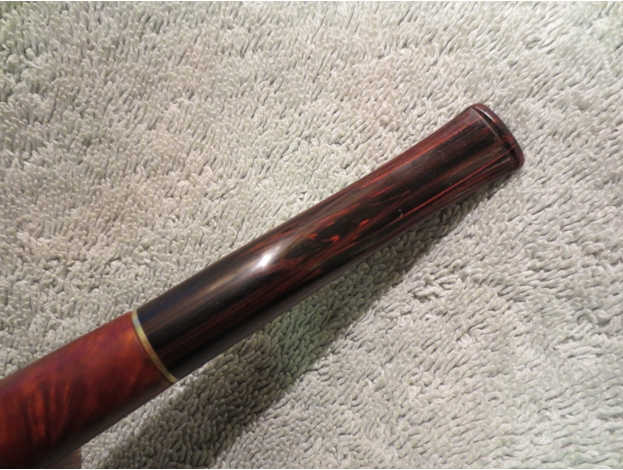
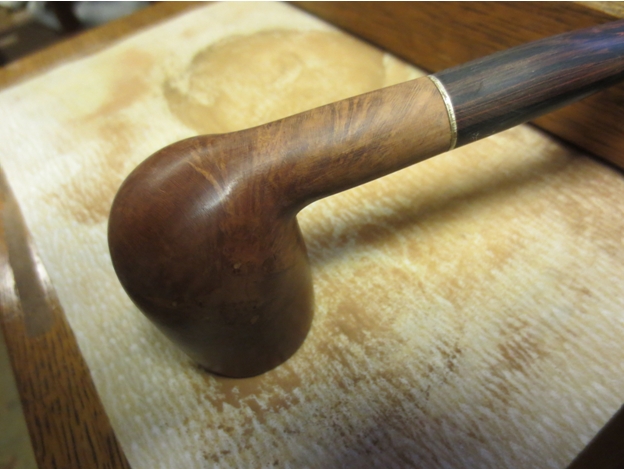
I sanded the stem and shank with a medium and a fine grit sanding sponge. I also sanded the brass shank adornment to remove the scratches and polish it. I wiped it down with a wet cloth to remove the sanding dust. The Cumberland is coming to life the more I sand it and remove the oxidation and buildup. The lines of red and burgundy flow through the stem horizontally along the taper and the sides.York14

York15

York16

York17 
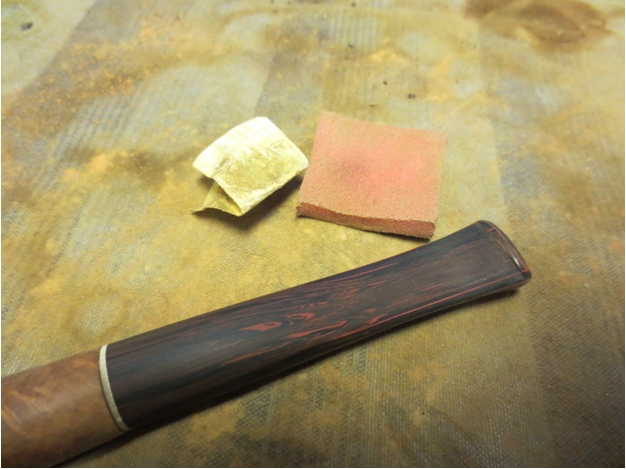
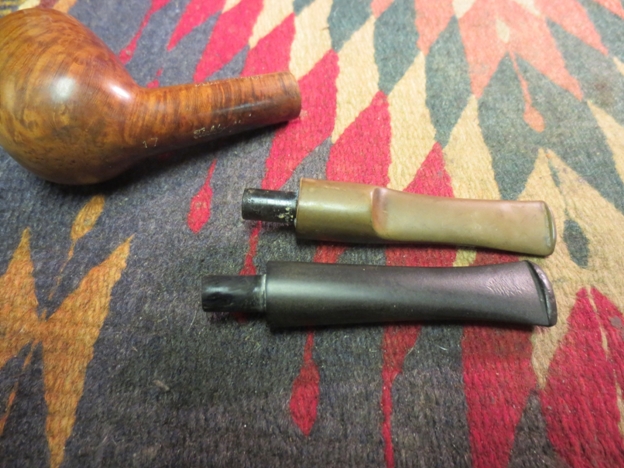
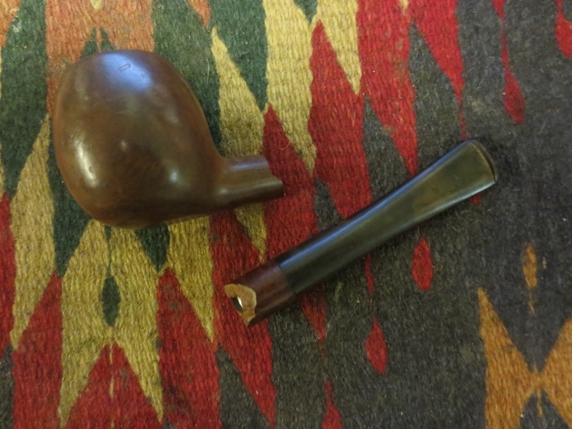
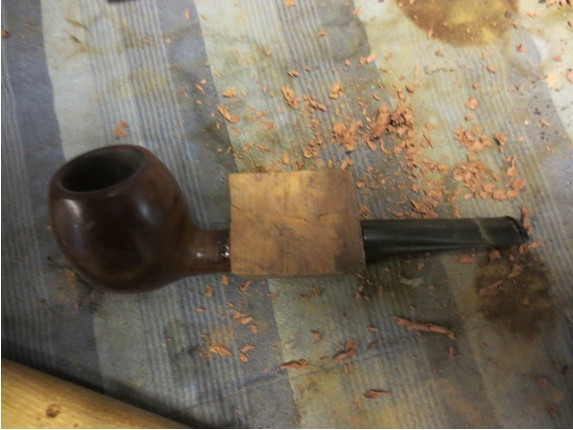
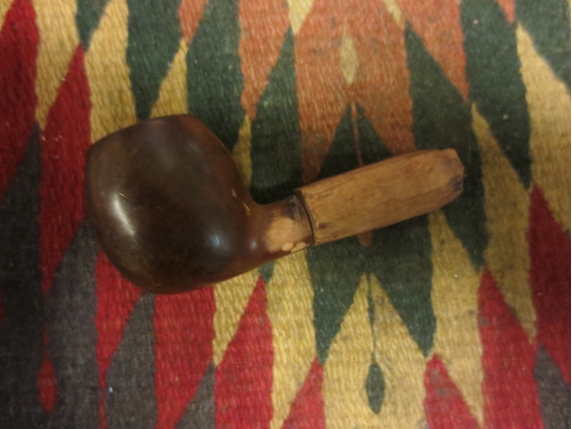
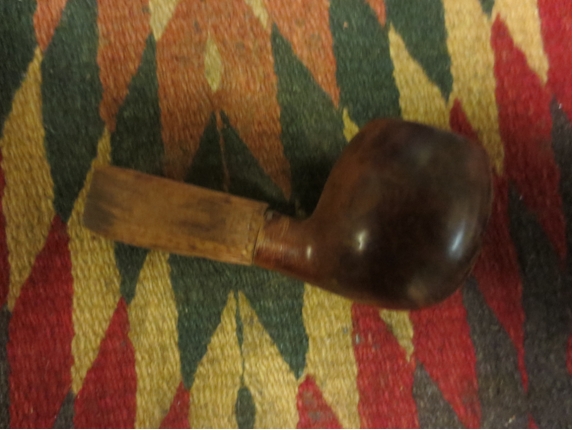
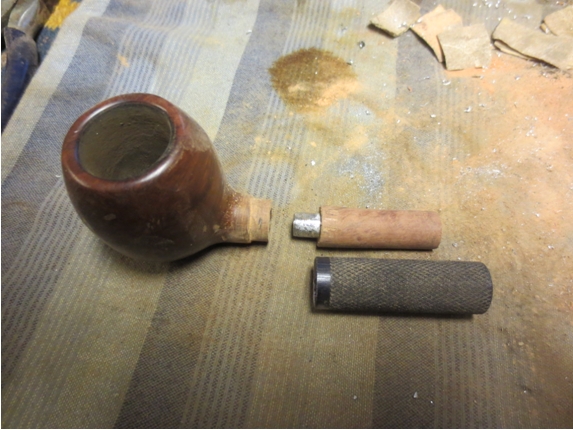
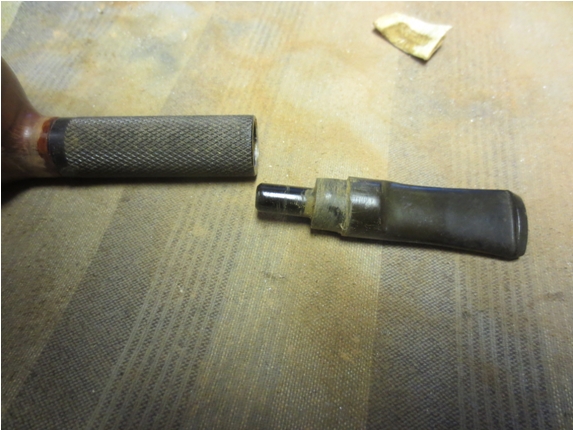
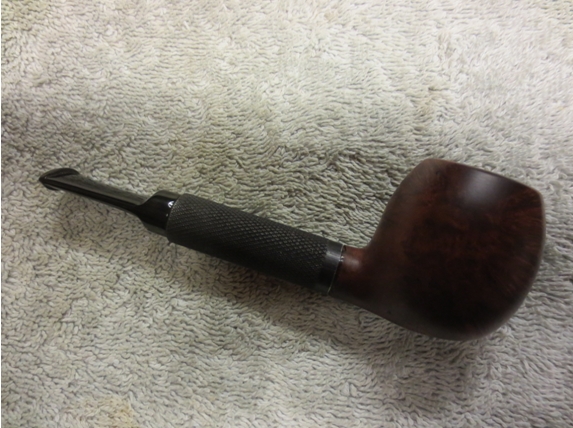
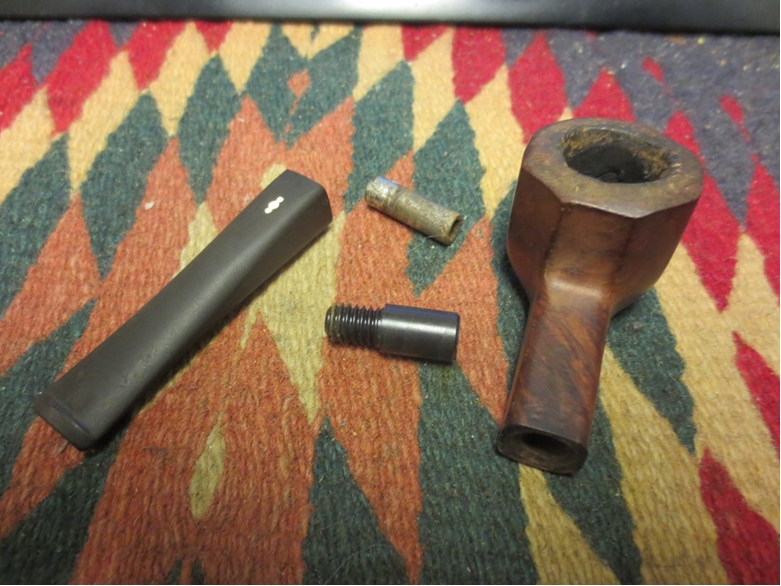
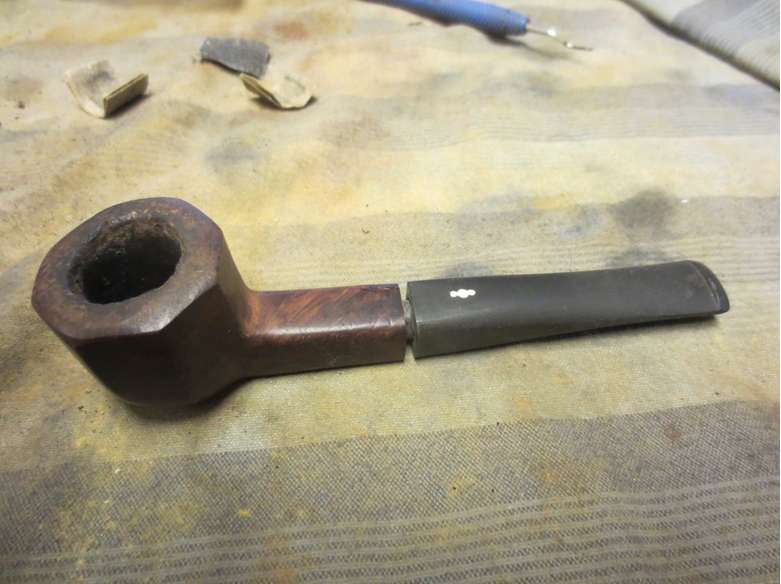
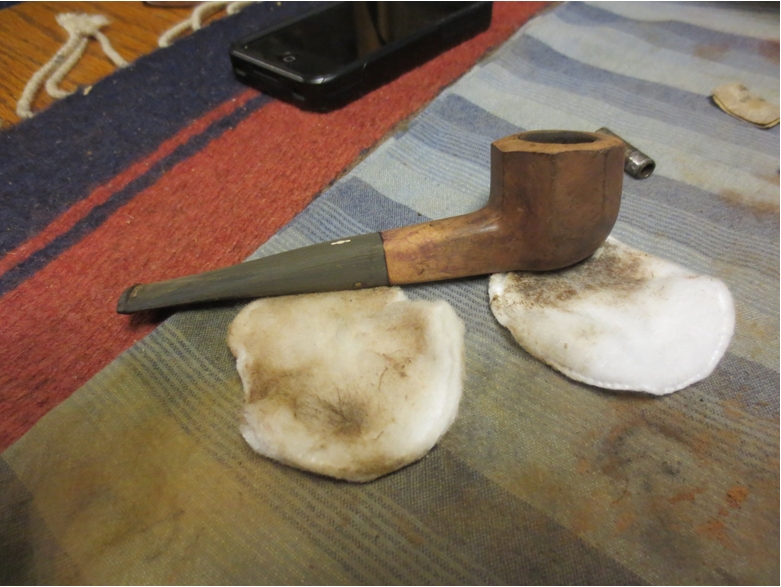
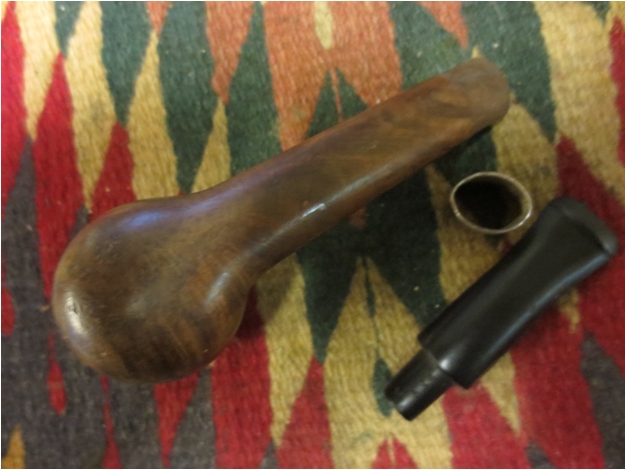
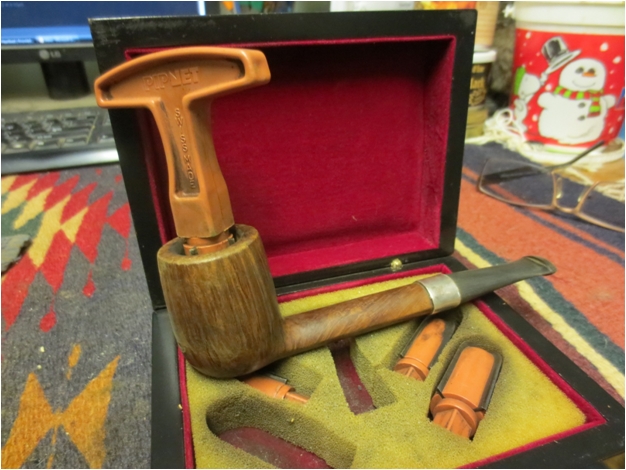
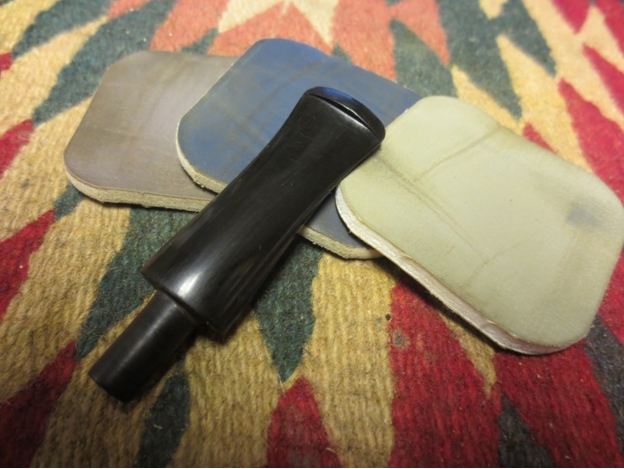
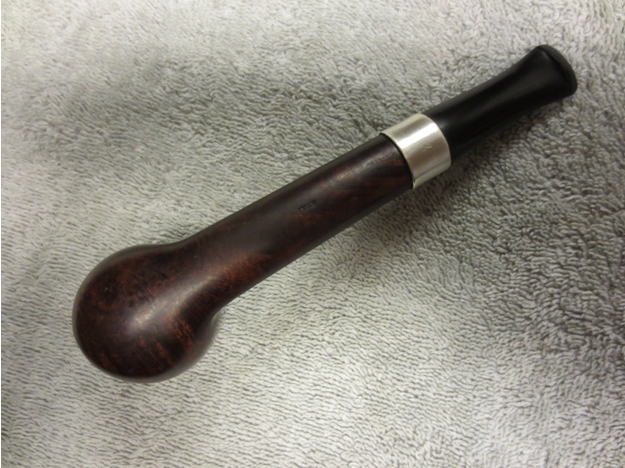
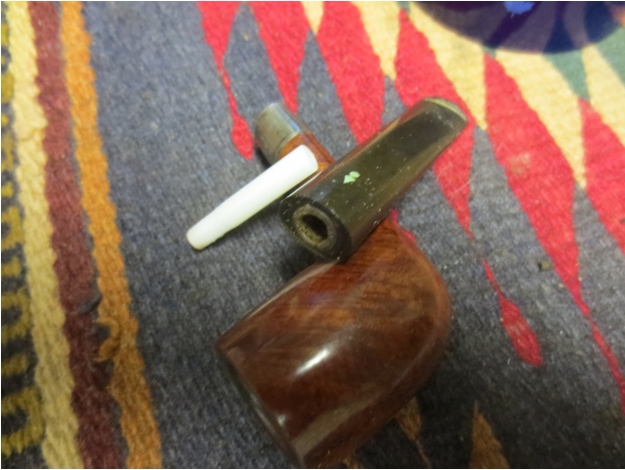
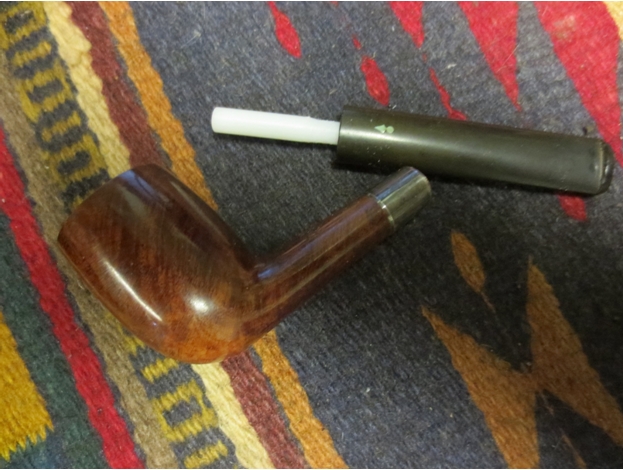
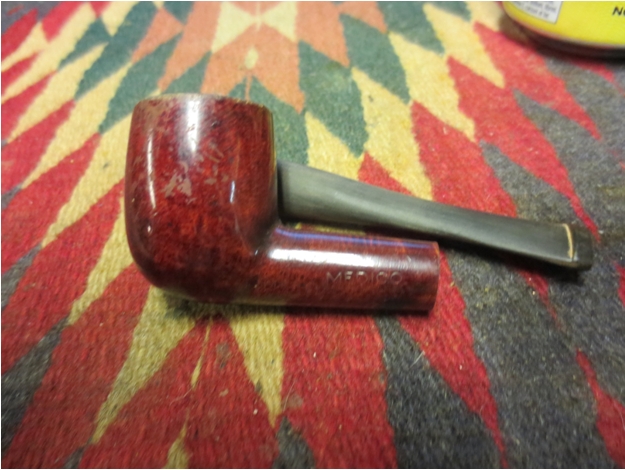
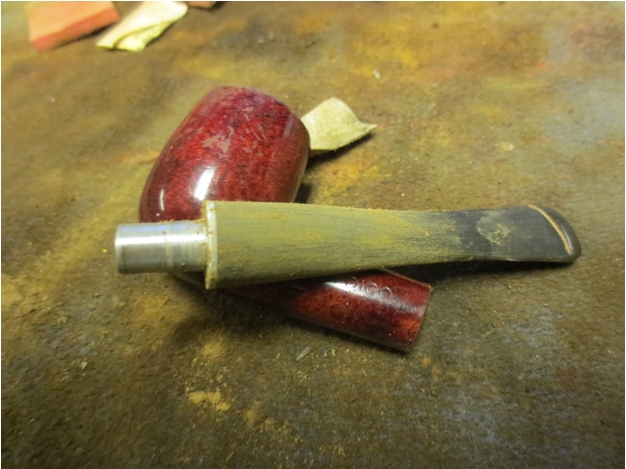
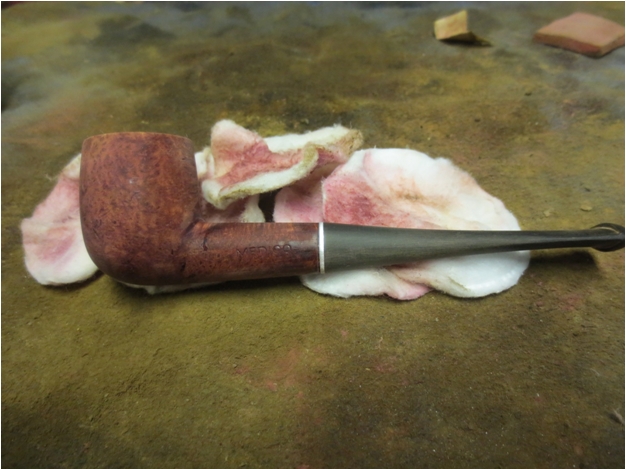
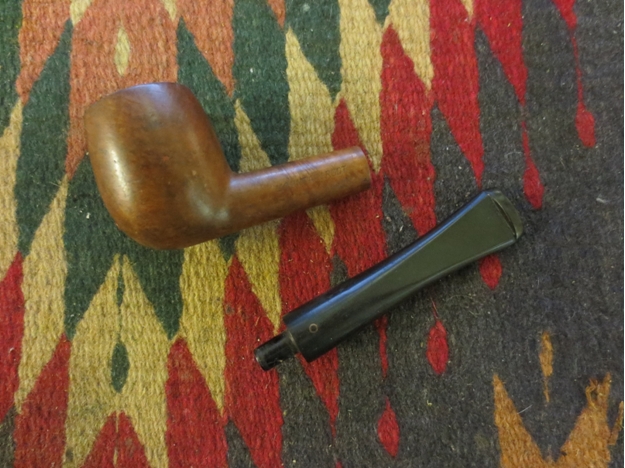
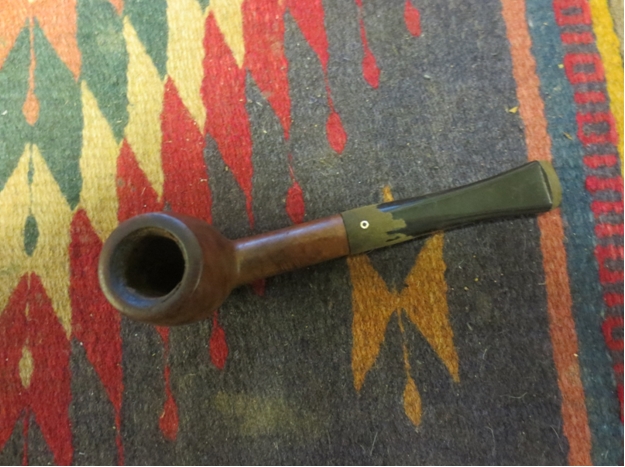
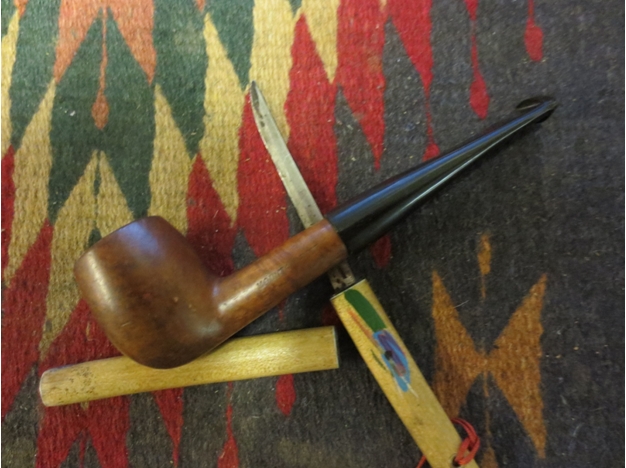
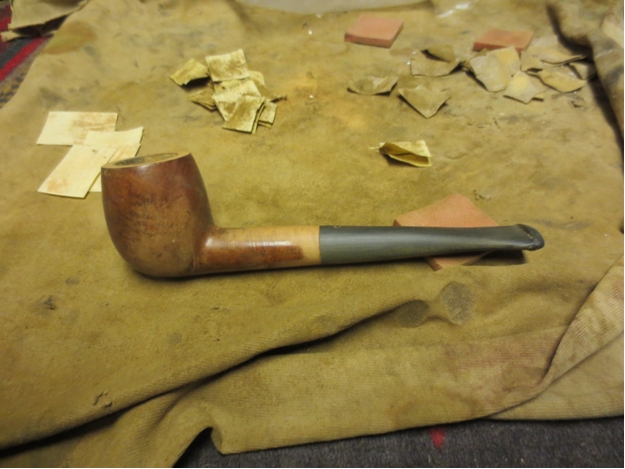
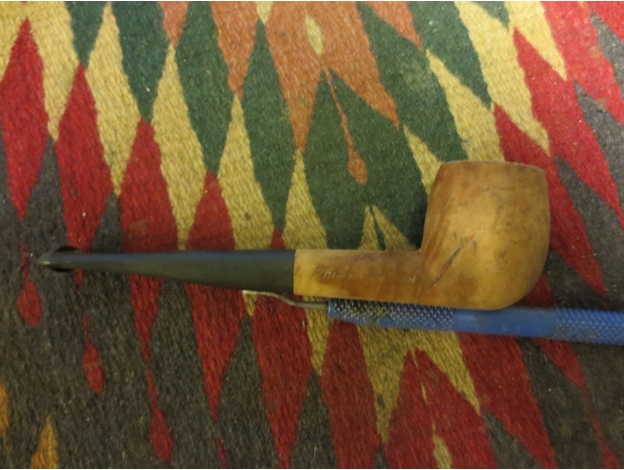
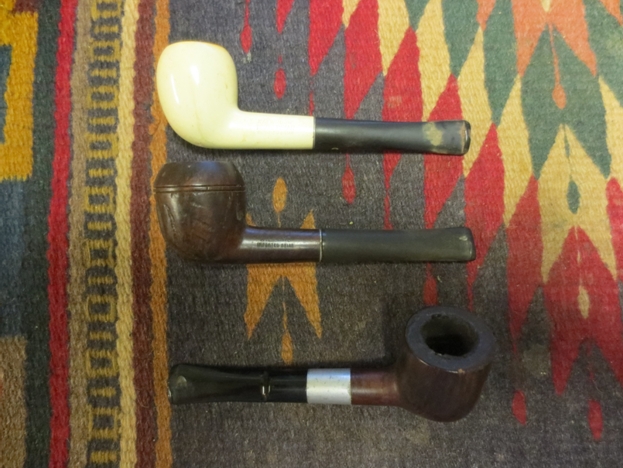
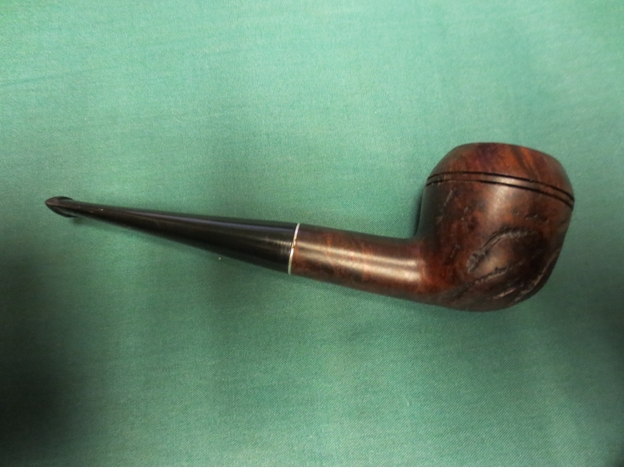
I took a picture of the pipe and stem with the old stem beside it for comparison sake. The stem is about ¼ inch longer than the old one and the taper more radical. The Cumberland looked better with the briar than the old as well.York18 
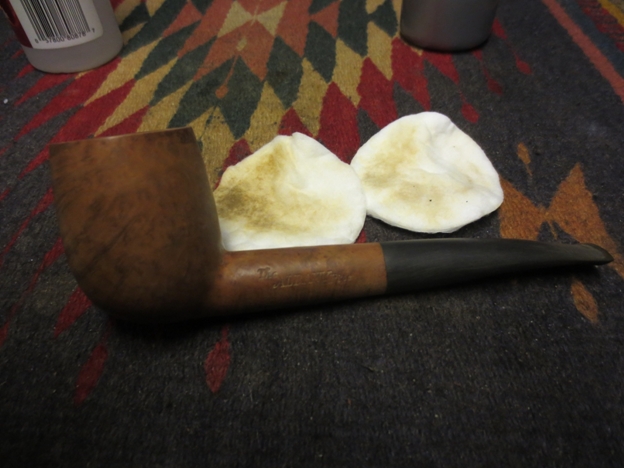
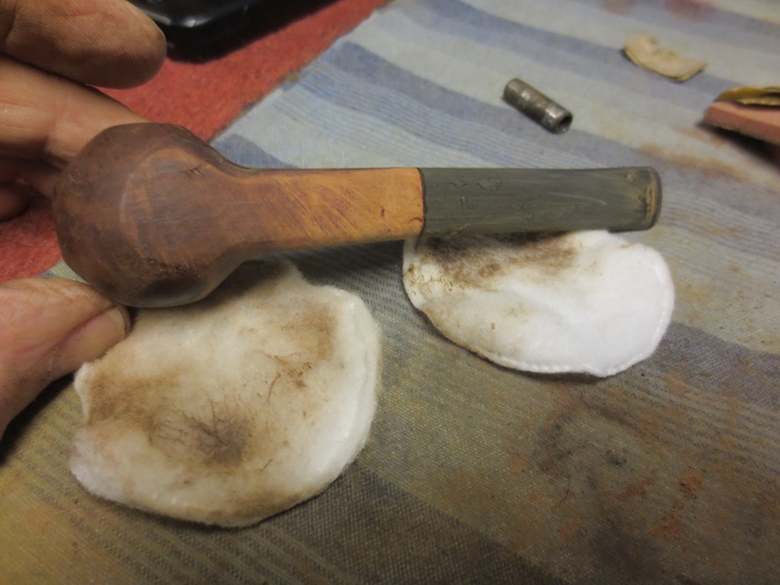
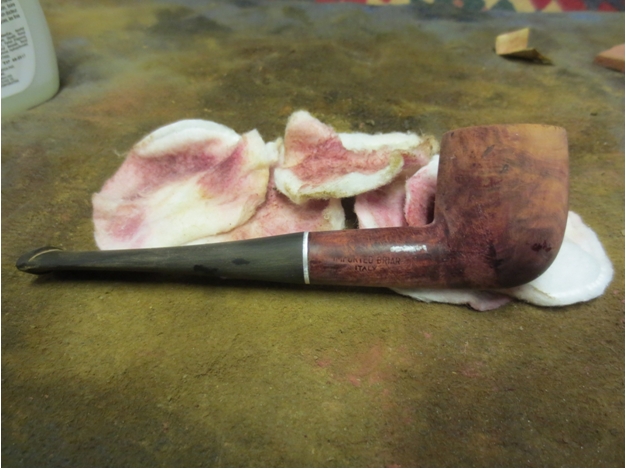
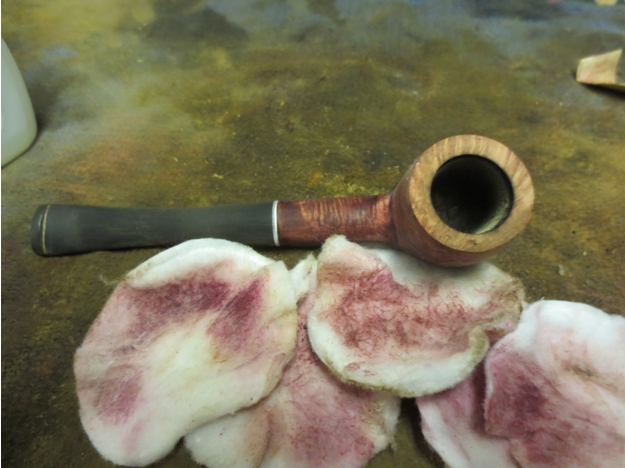
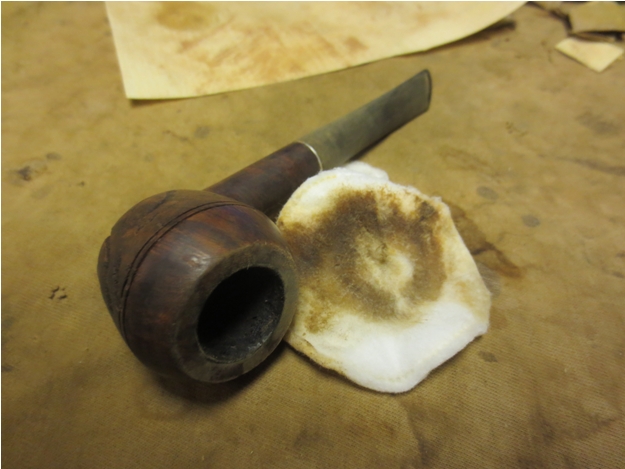
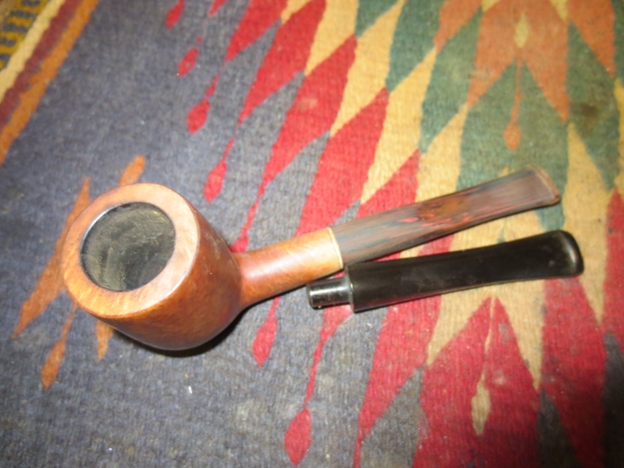
I wiped down the bowl and shank with acetone on cotton pads to remove the oils and grime that was on the surface of the briar. I wanted to bring the rest of the briar as close to the colour of the sanded rim and shank.York19

York20

York21

York22 
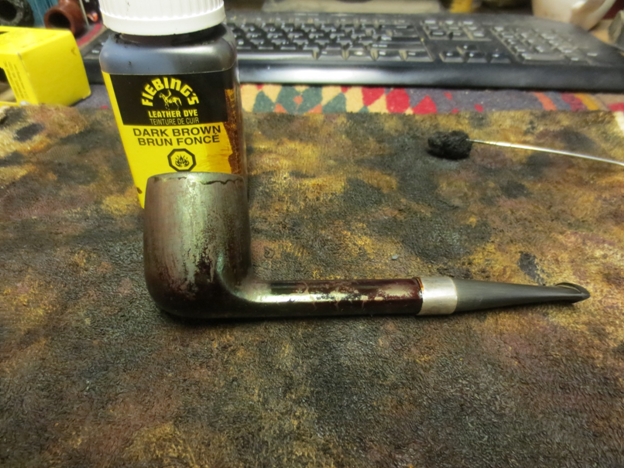
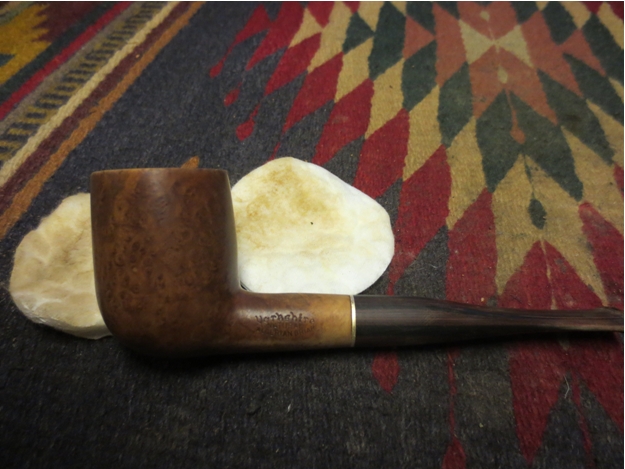
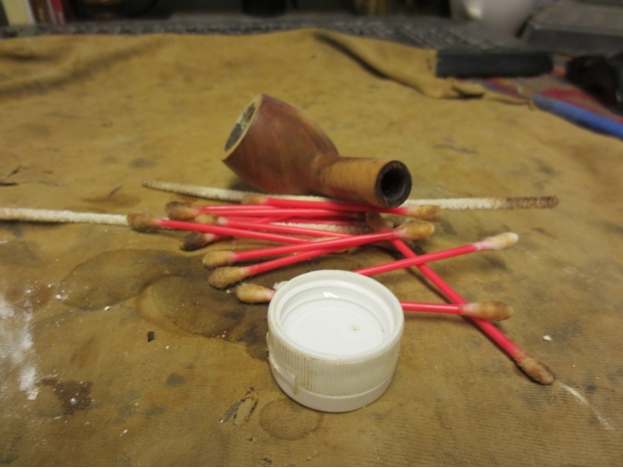
I cleaned out the shank and the stem with cotton swabs, pipe cleaners and isopropyl alcohol to remove the tars and oils.York23

York24 
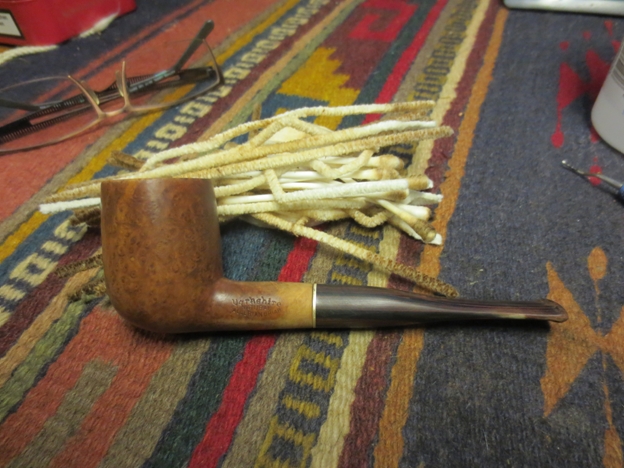
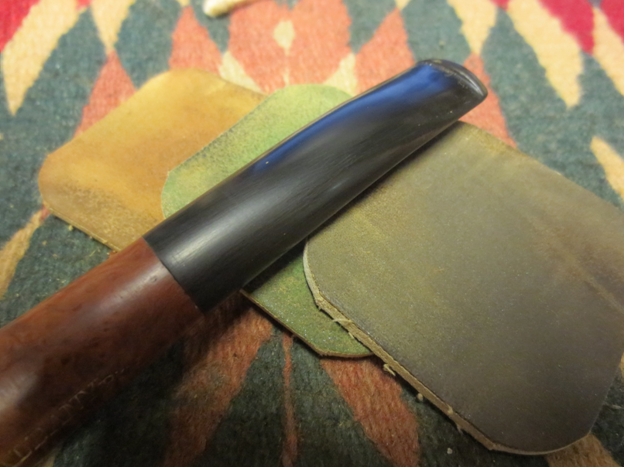
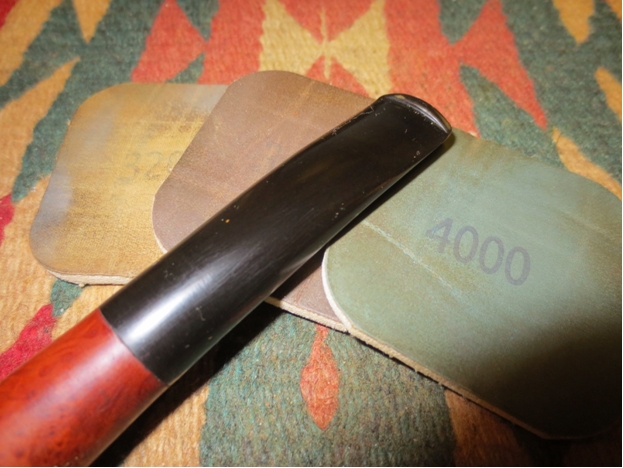
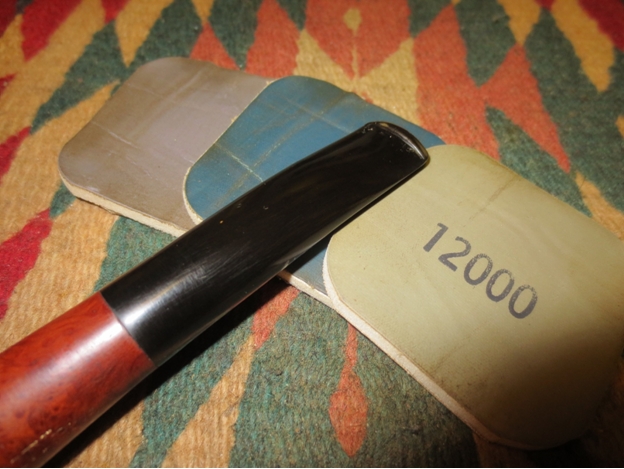
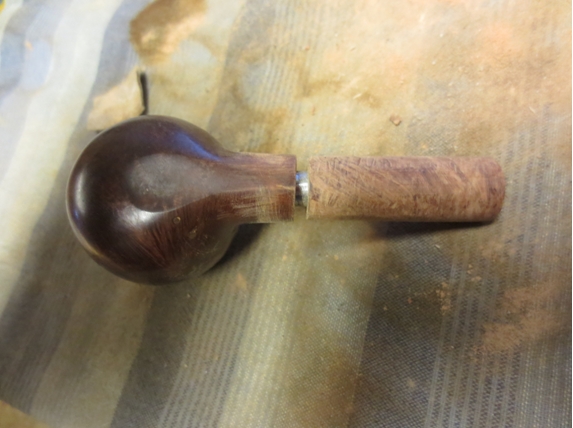
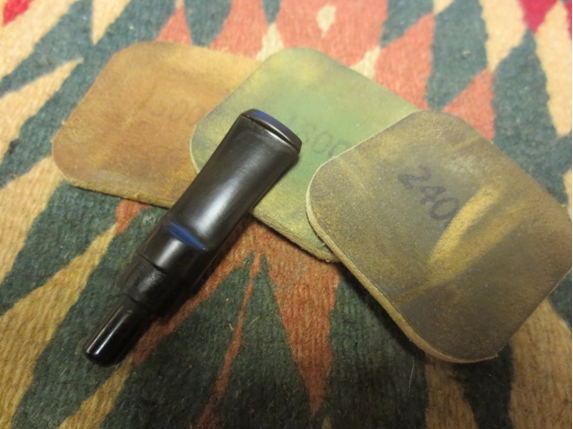
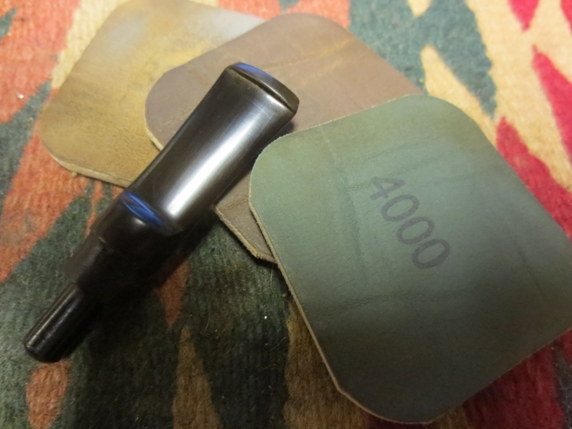
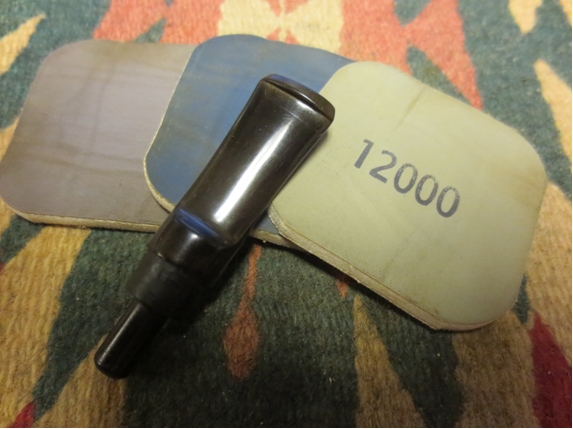
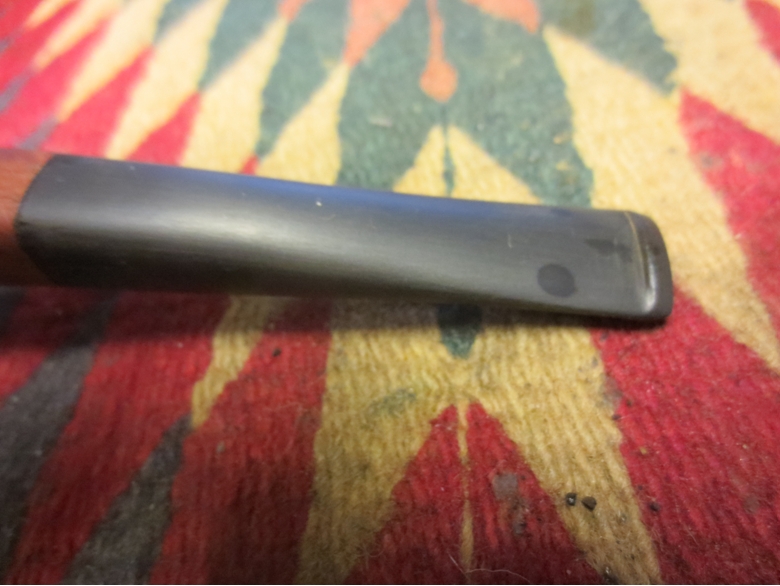
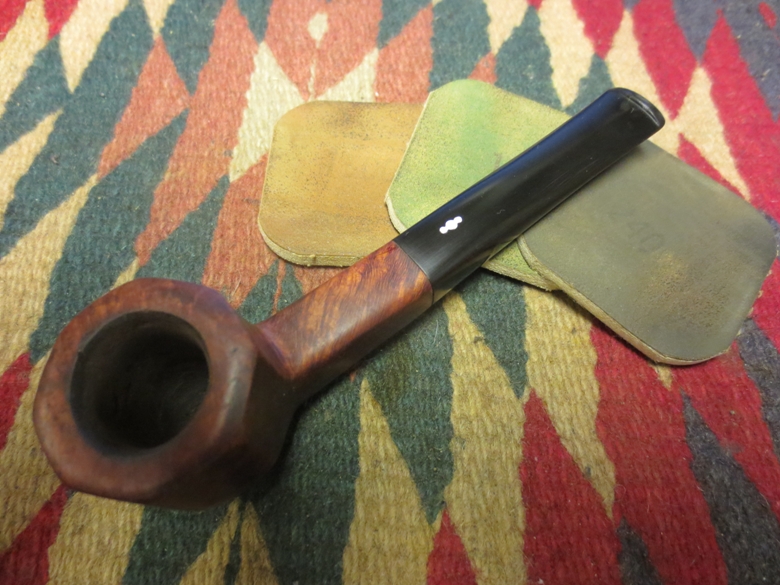
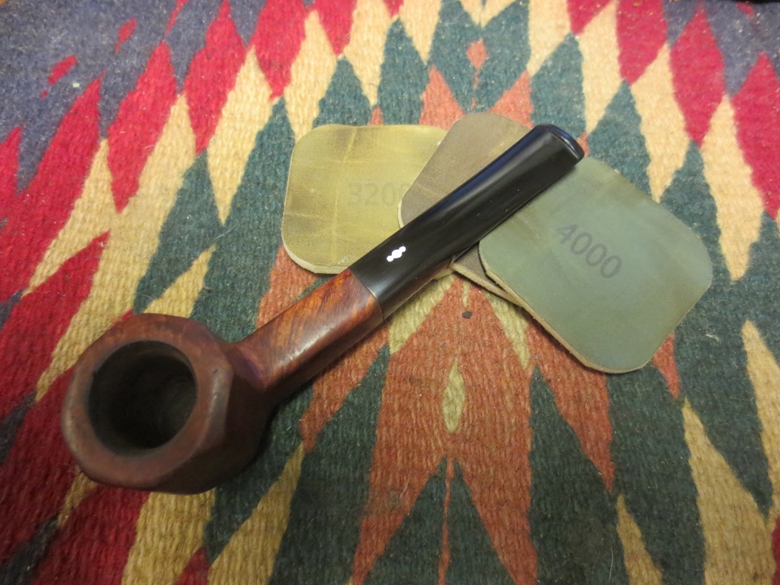
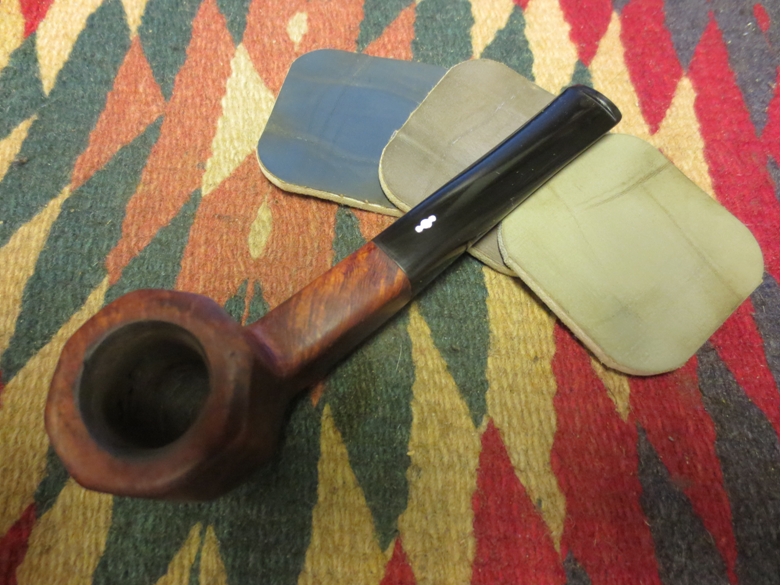
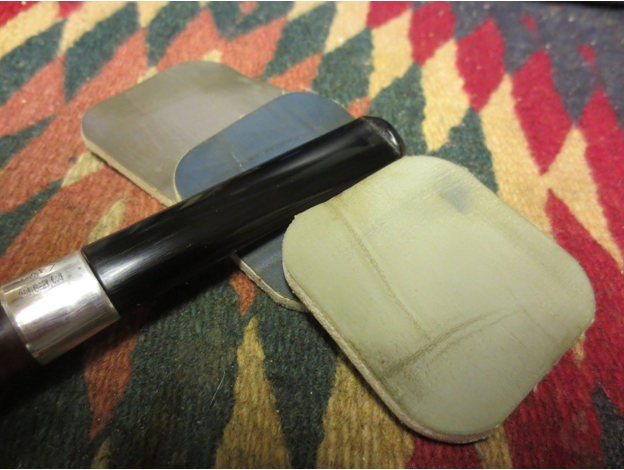
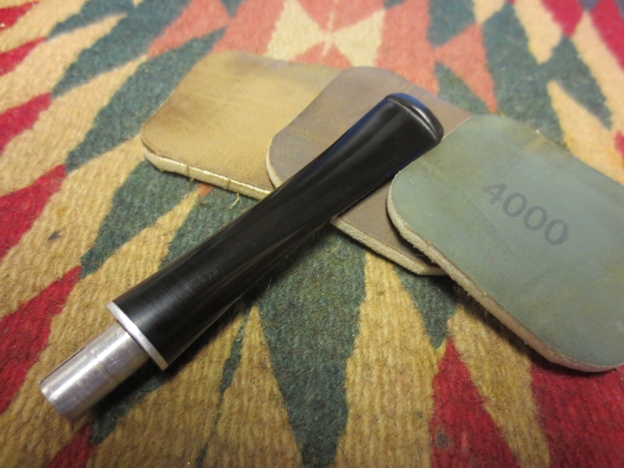
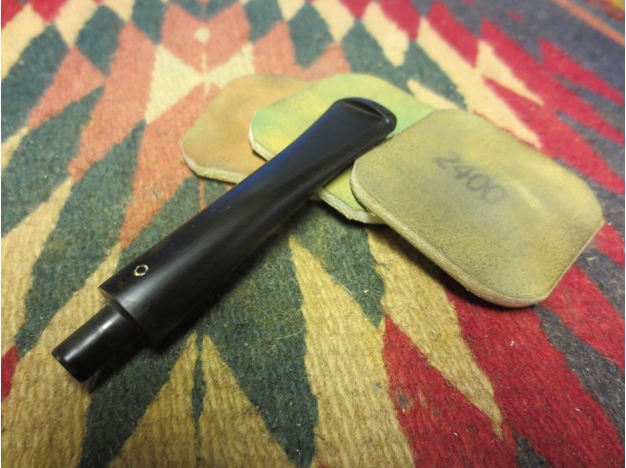
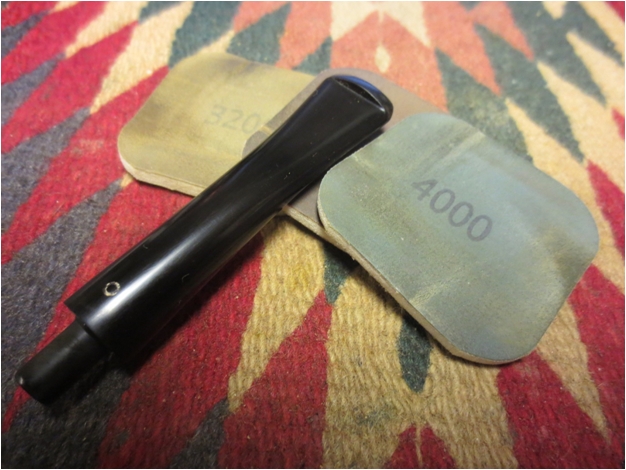
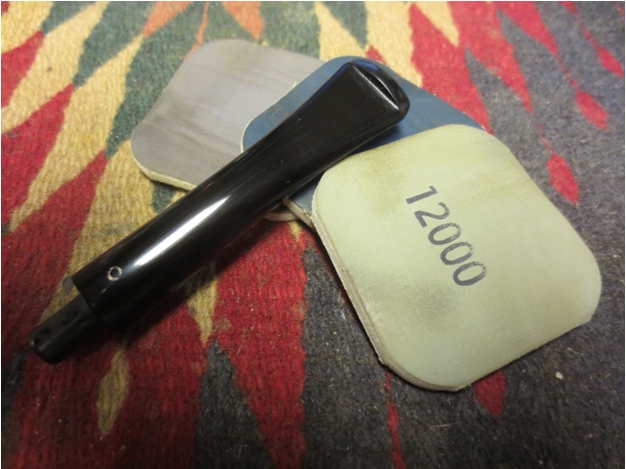
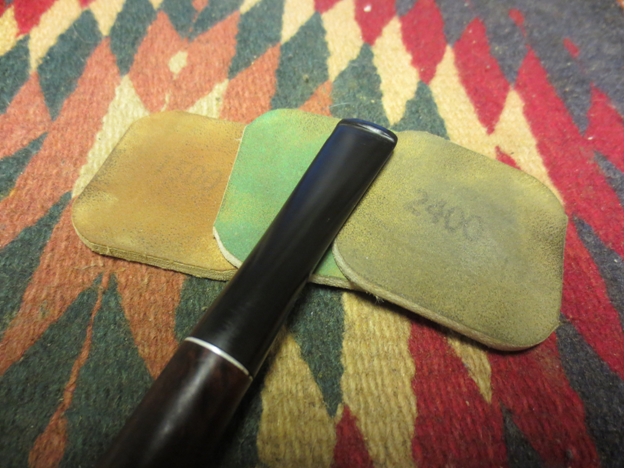
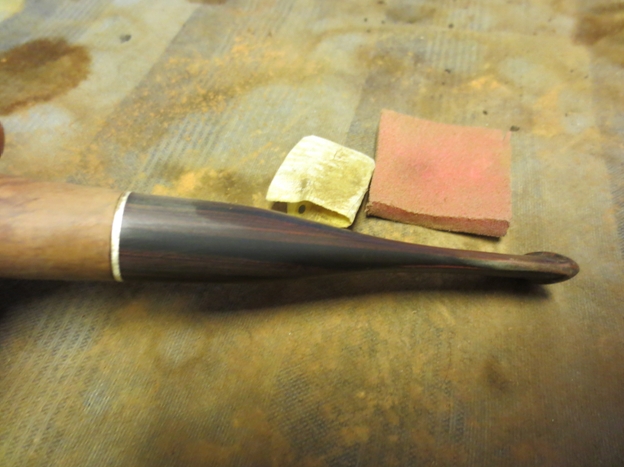
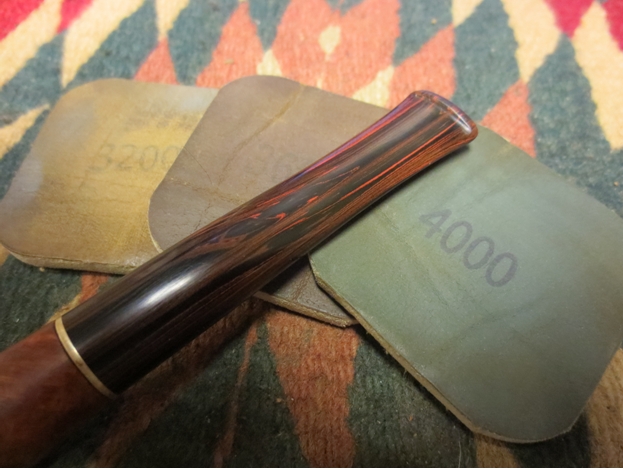
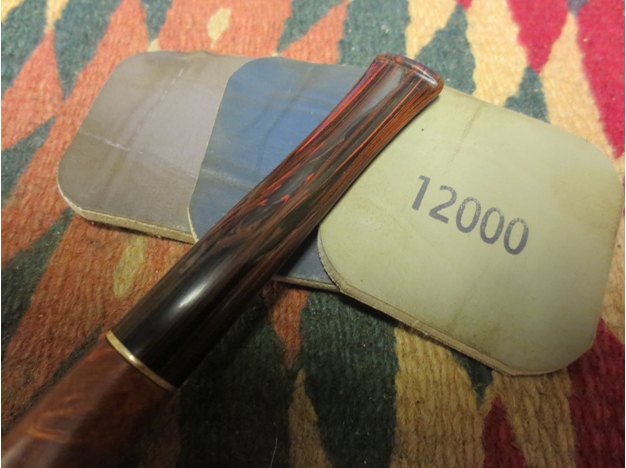
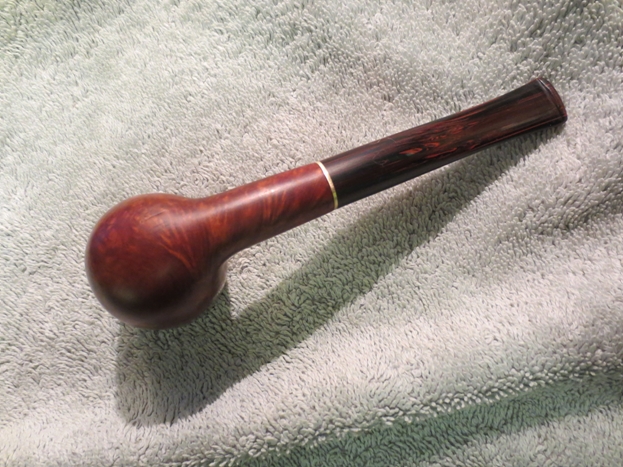
I sanded the stem and shank with micromesh sanding pads – wet sanding with 1500-2400 grit pads and dry sanding with 3200-12,000 grit pads. I rubbed the stem down with Obsidian Oil between each set of three pads. I did not let the oil dry between rub downs as I find that the oil gives the micromesh some cut on the surface of the stem. The translucence of the Cumberland really shows through the shine.York25

York26

York27 
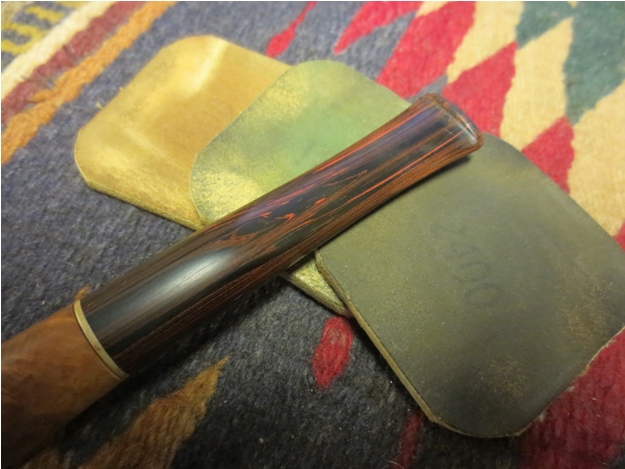
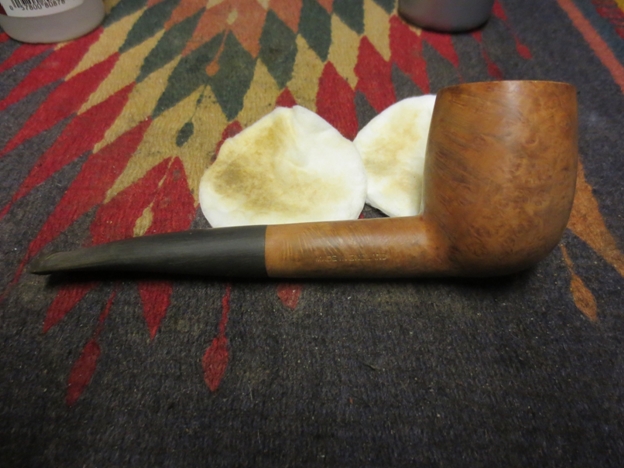
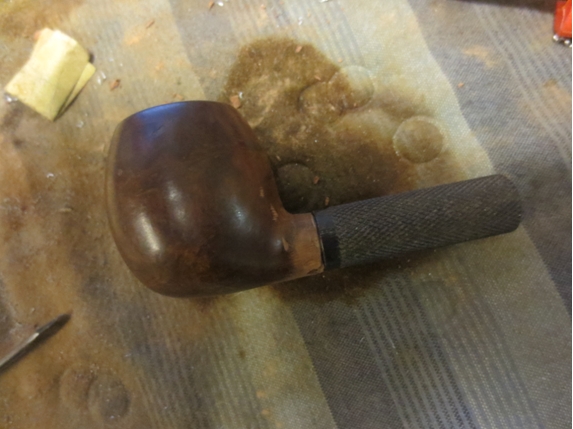
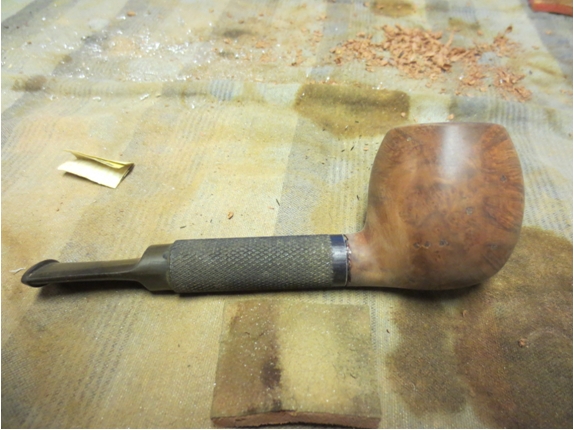
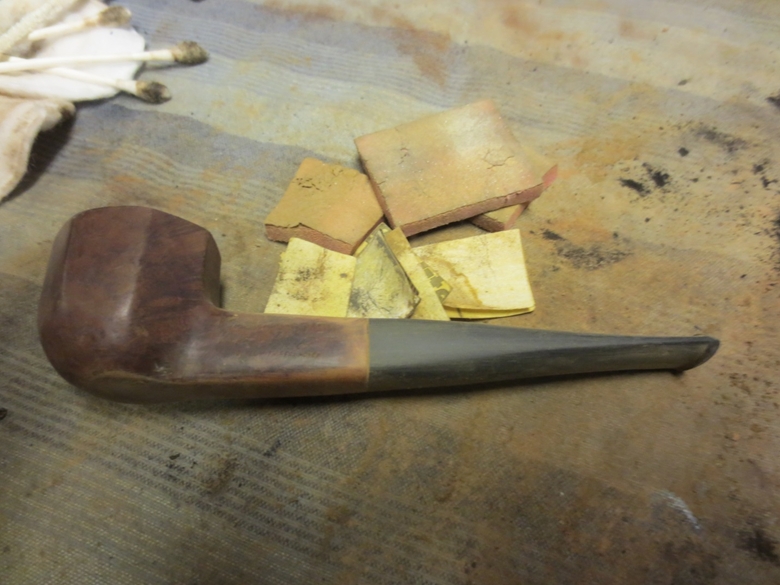
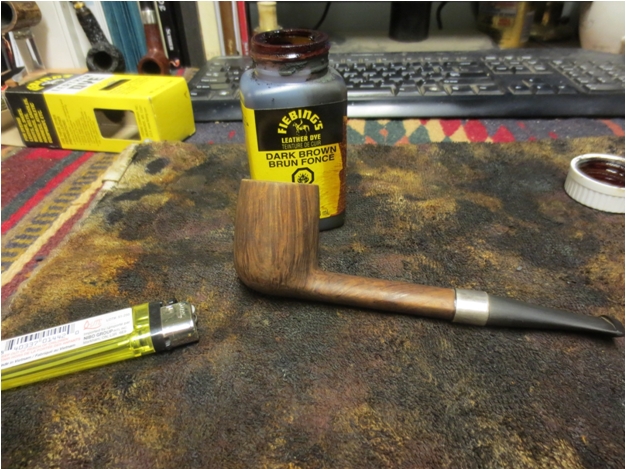
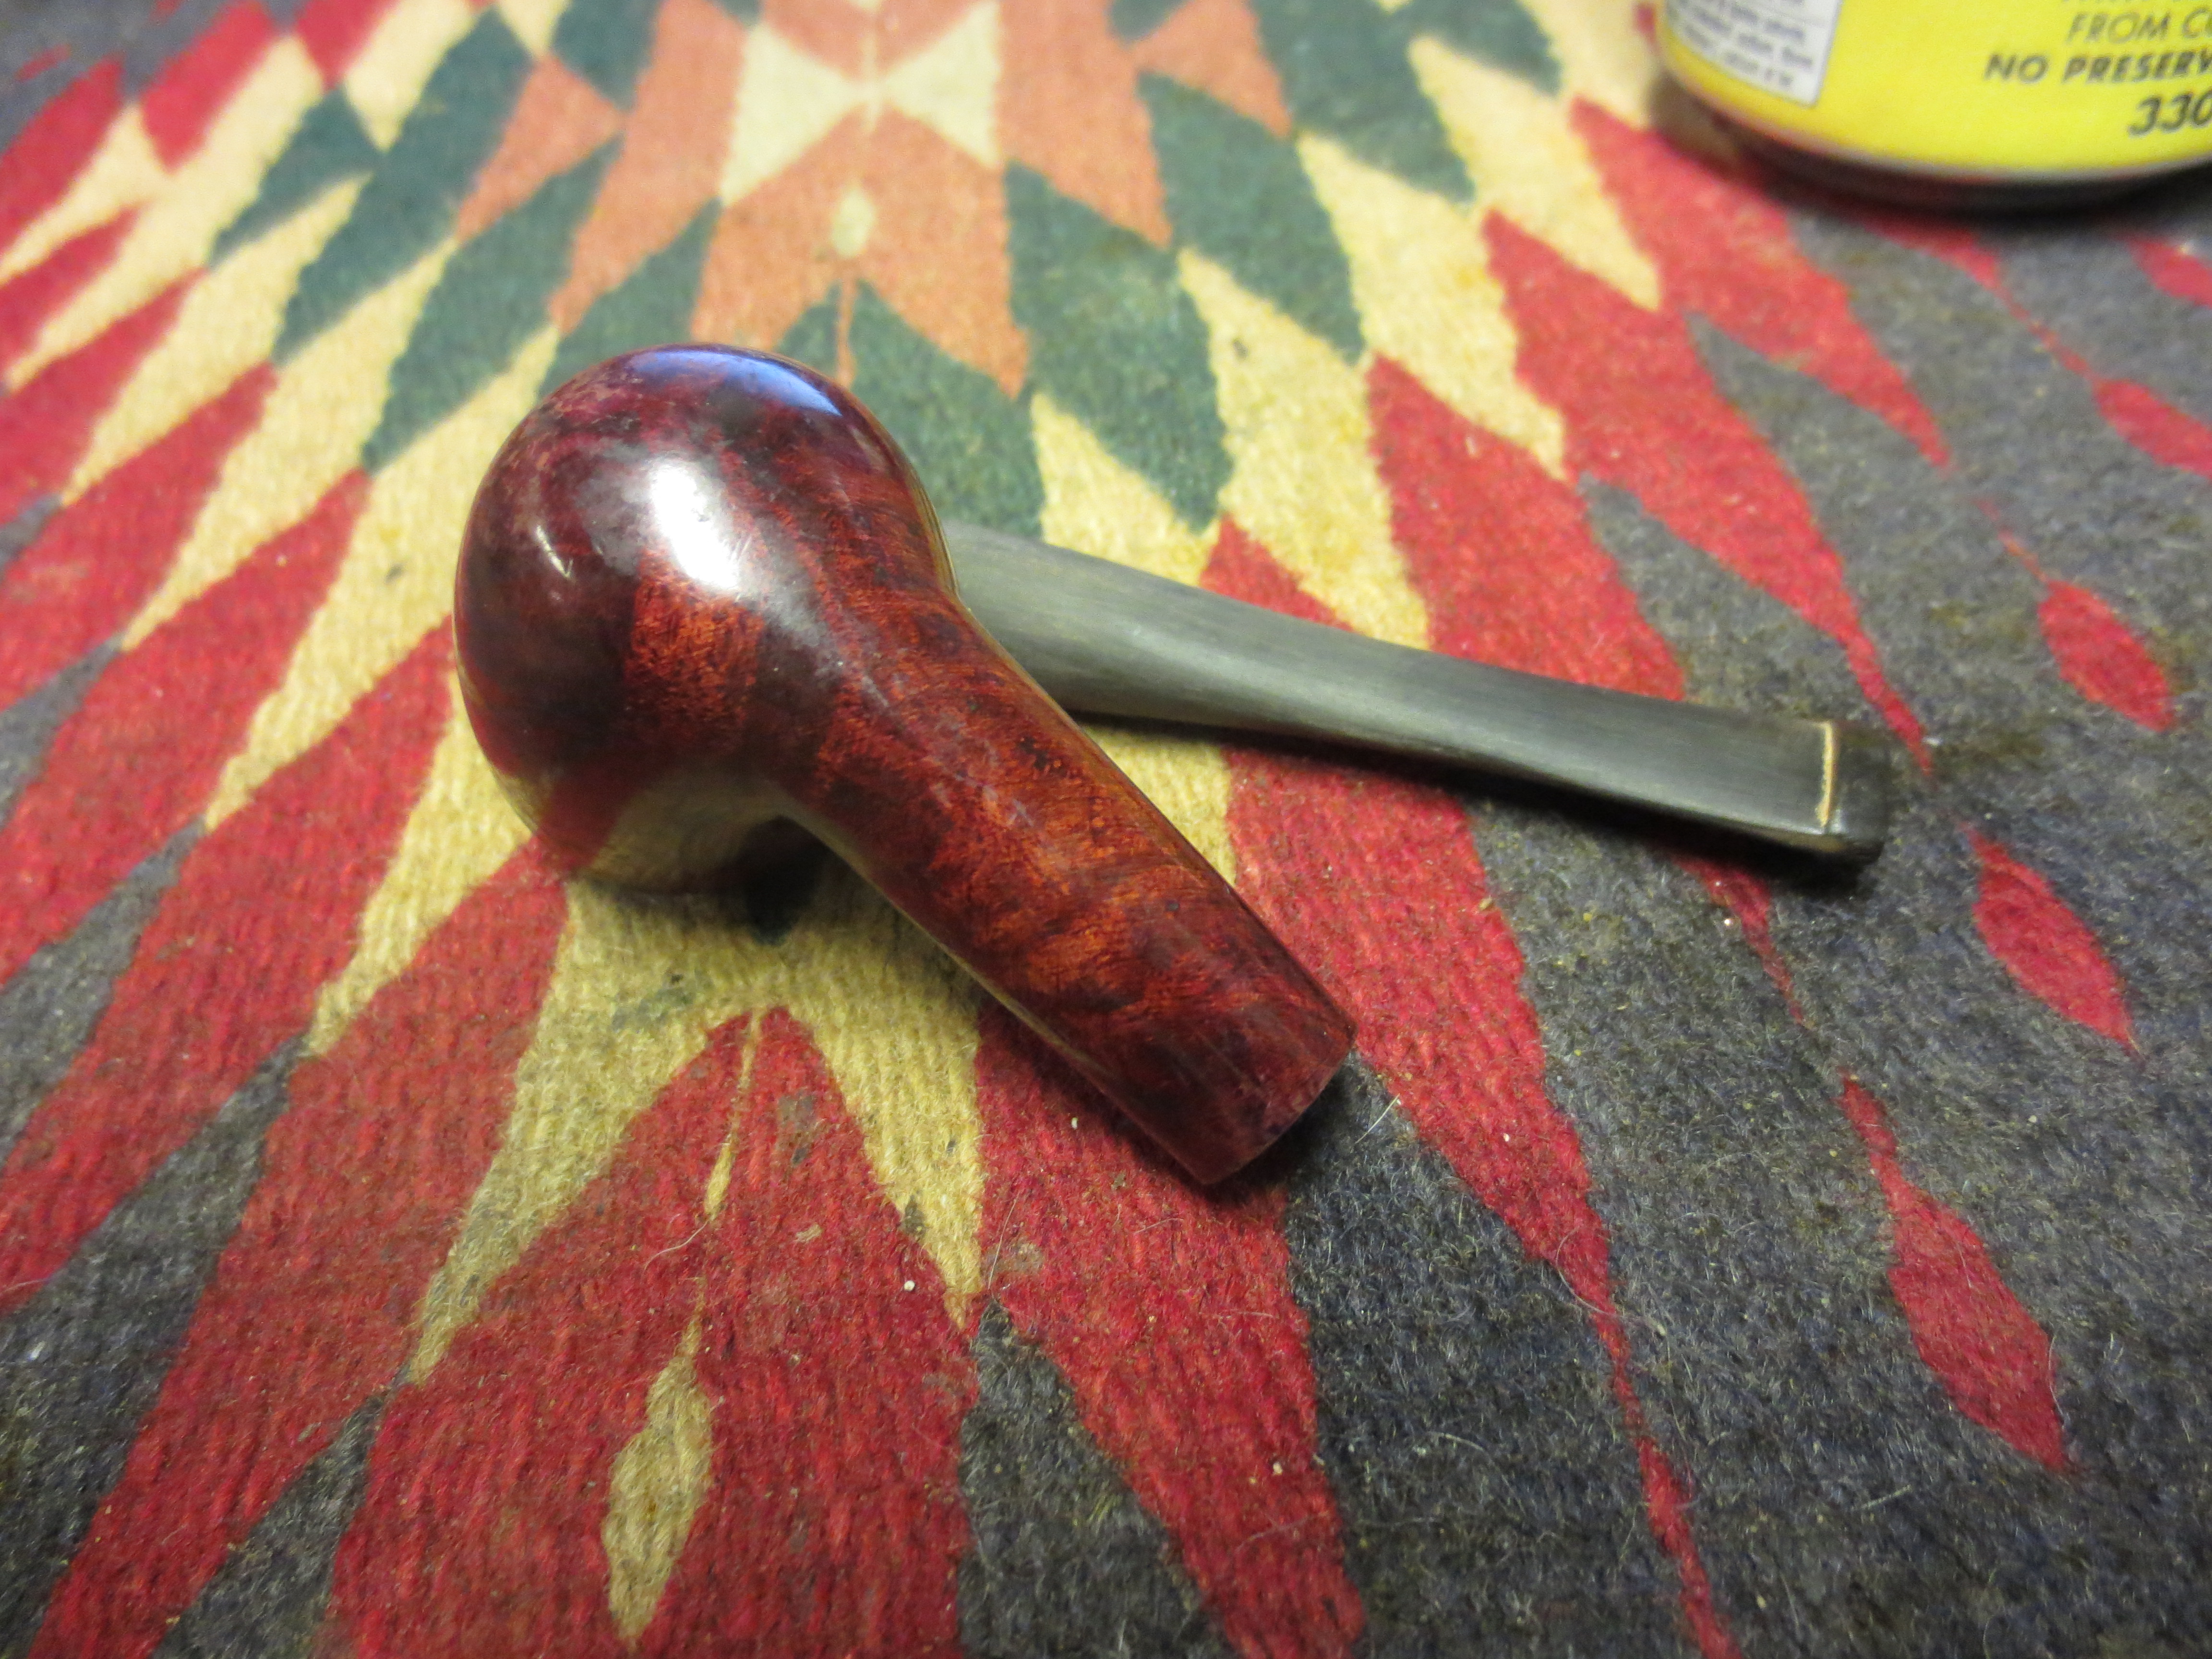
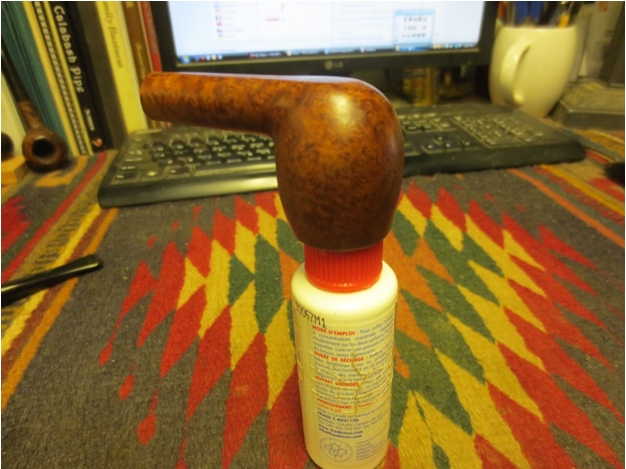
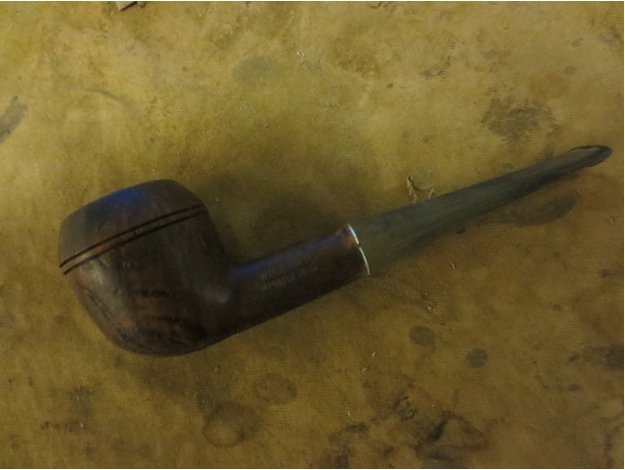
I rubbed the bowl and down with olive oil and let it soak into the briar. The oil brought out the reddish brown tones of the briar and made the grain stand out. Sadly it also made the fills on the right side of the bowl stand out as well.York28

York29

York30

York31 
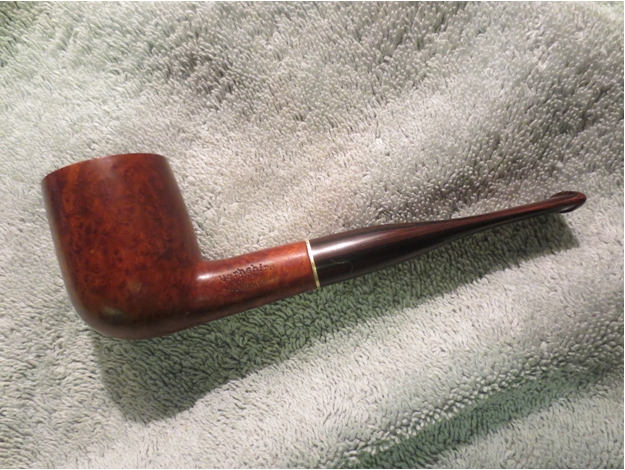
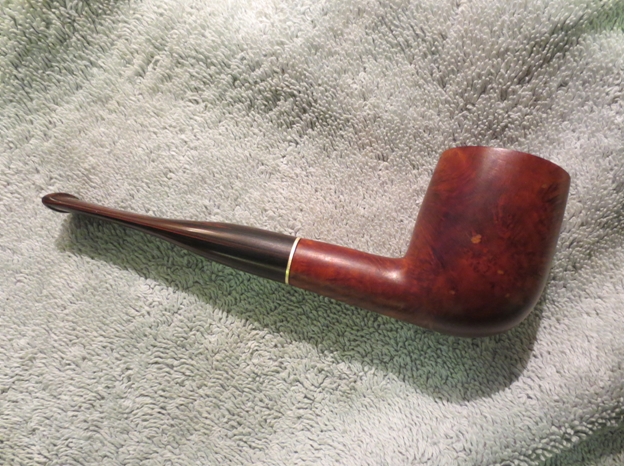
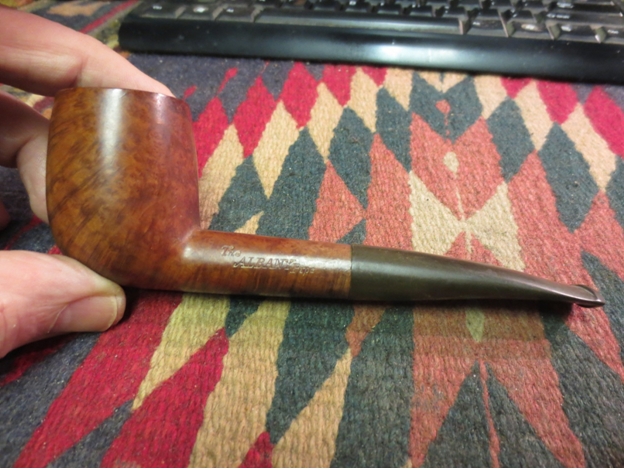
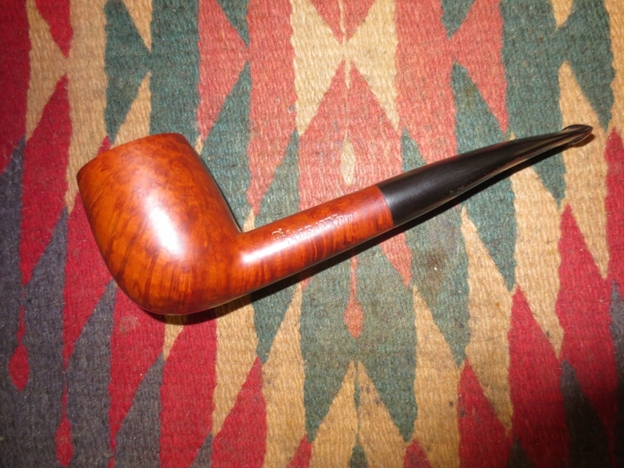
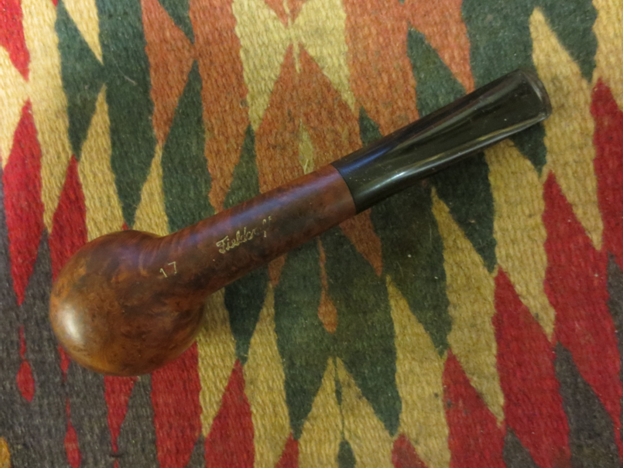
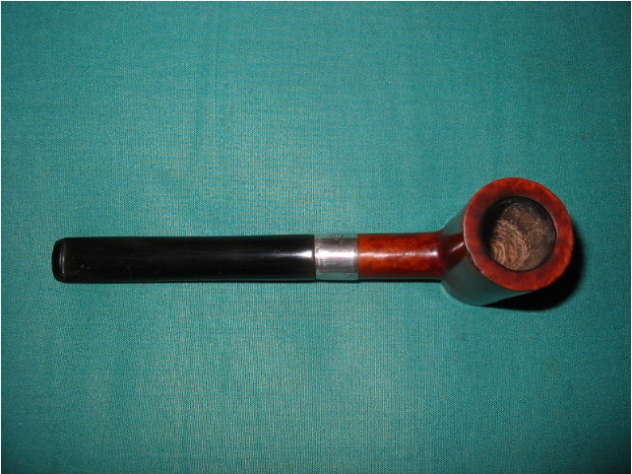
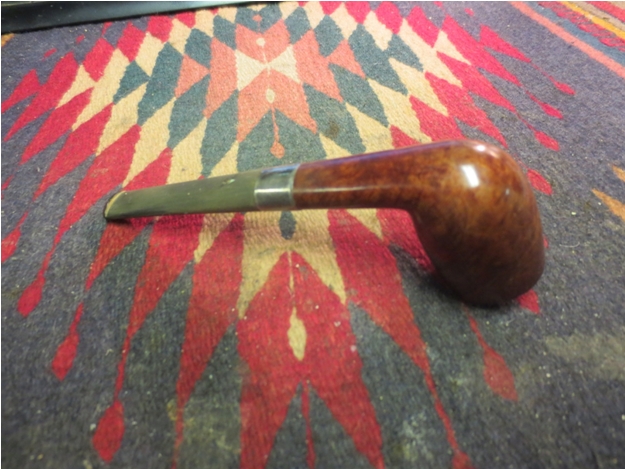
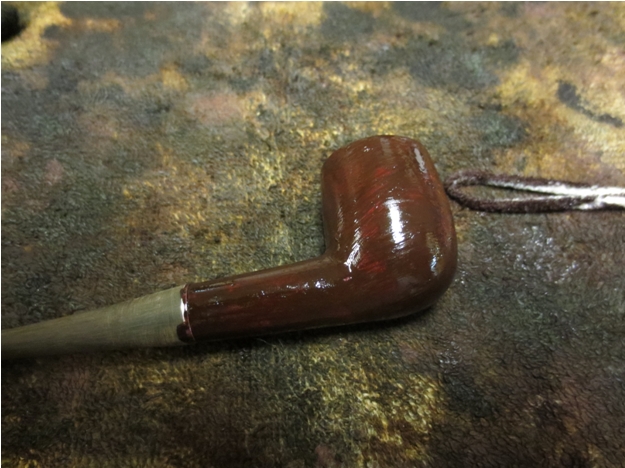
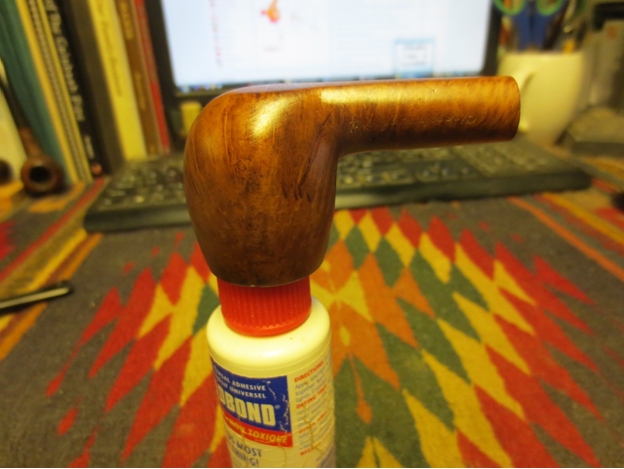
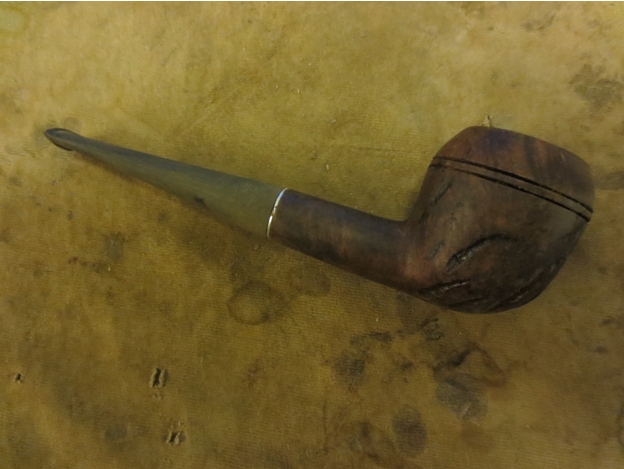
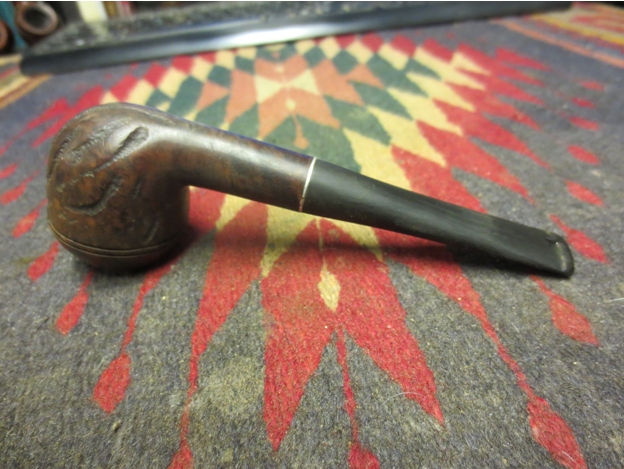
While the brown tones stood out well I wanted to bring out some of the red tones in the briar. To highlight the reds I stained the bowl with a coat of oxblood stain. Before I stained the briar I used a permanent black marker to darken the fills on the side of the bowl. When it had dried so that it would not rub off when I put the stain coat on the bowl. I applied the stain with a cotton pad and then flamed it. Once it dried I polished the bowl with White Diamond on the buffing wheel. The finished pipe is shown below.York32

York33

York34

York35 
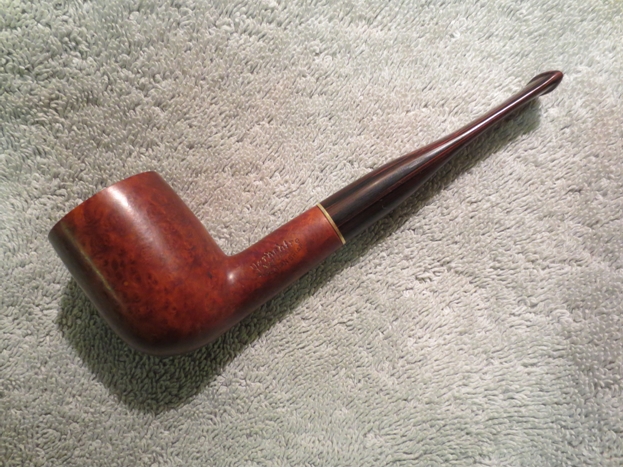
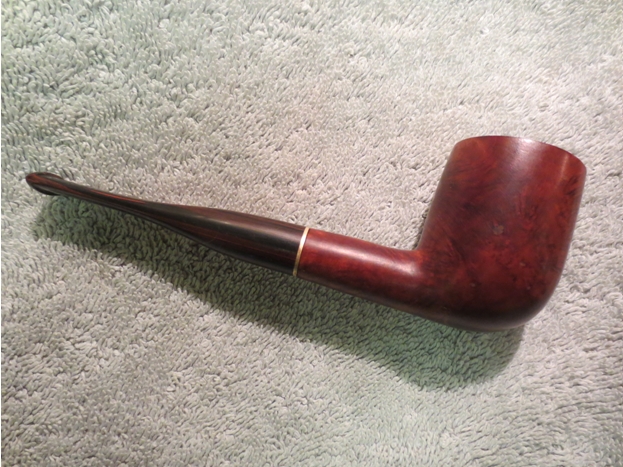
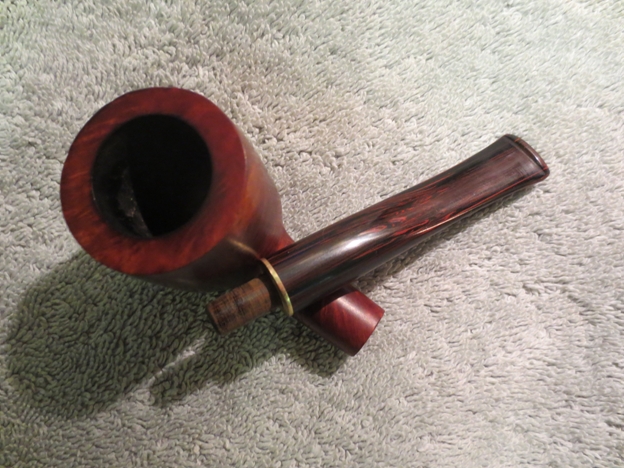
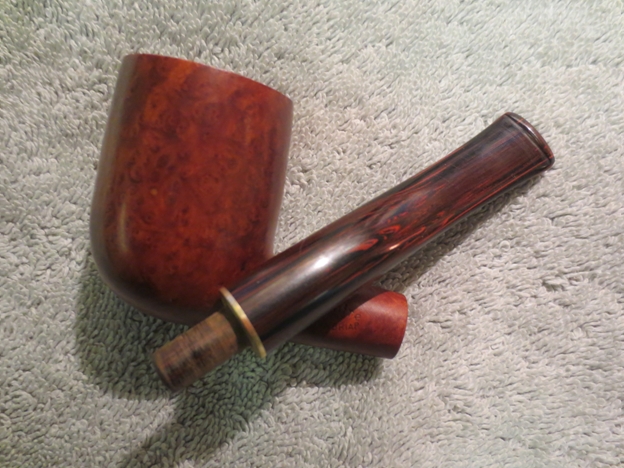
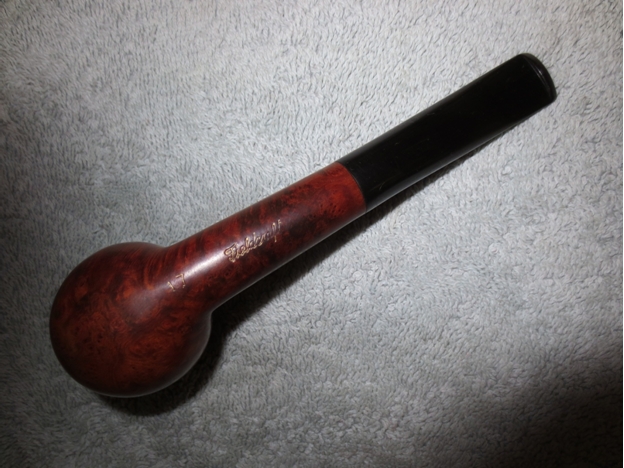
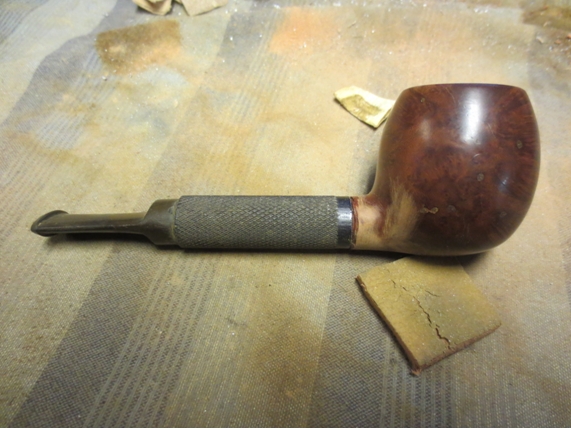
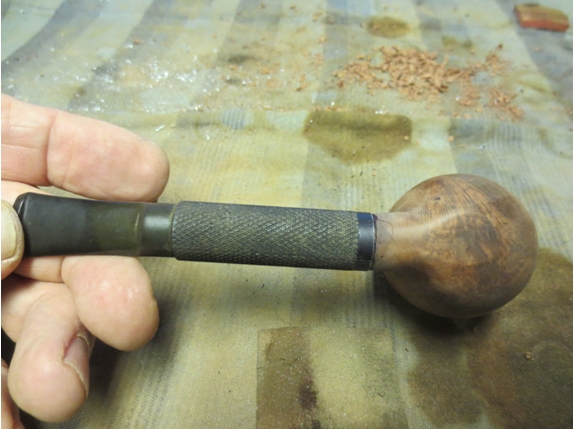
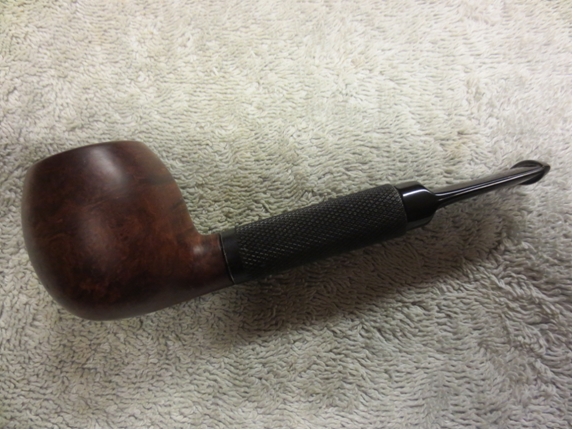
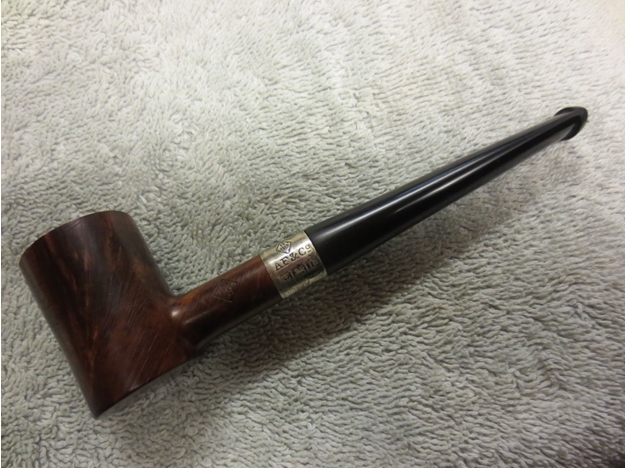
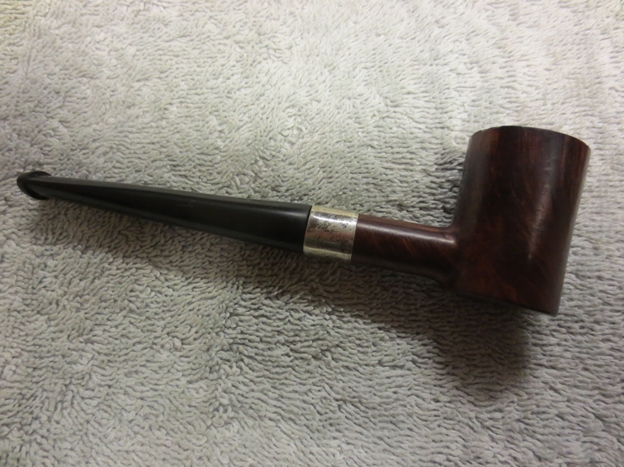
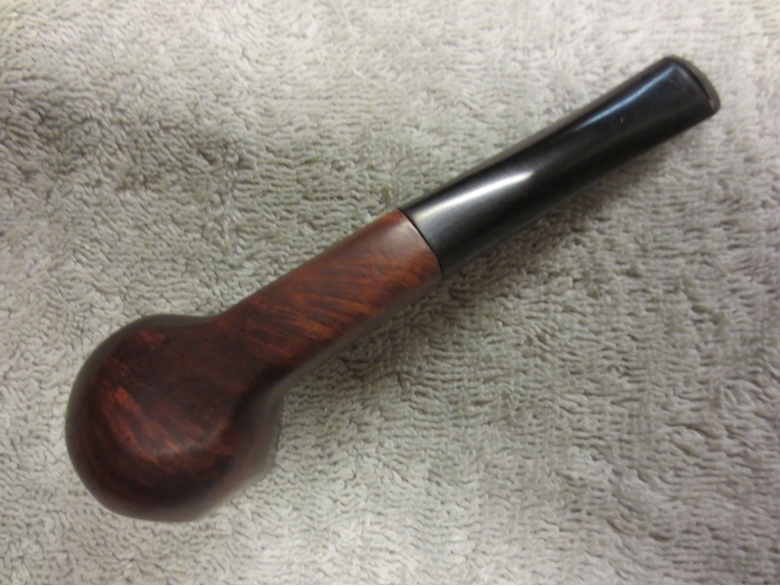
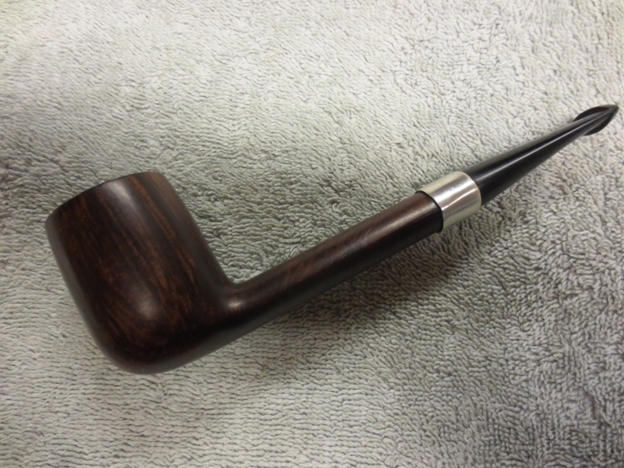
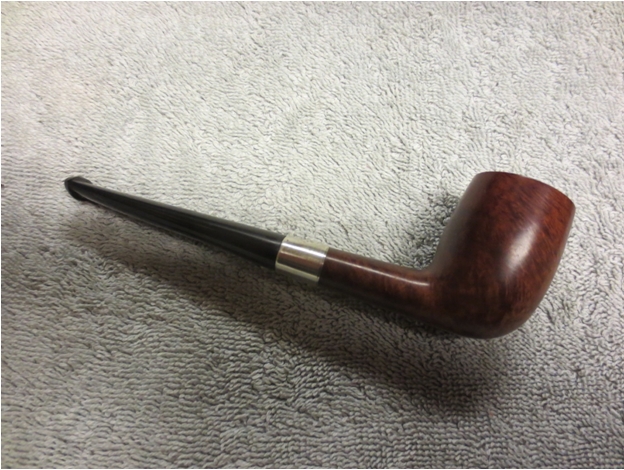
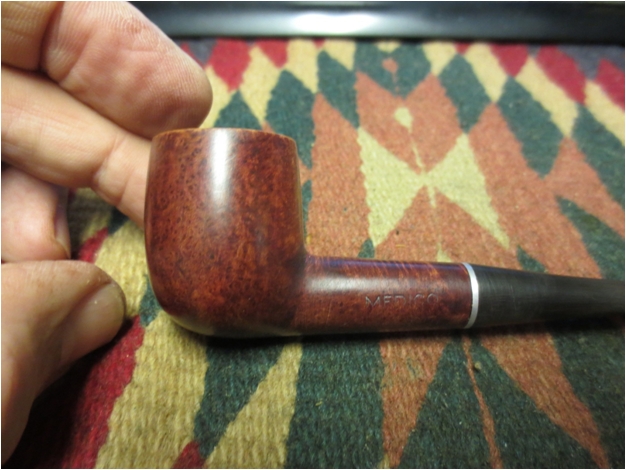
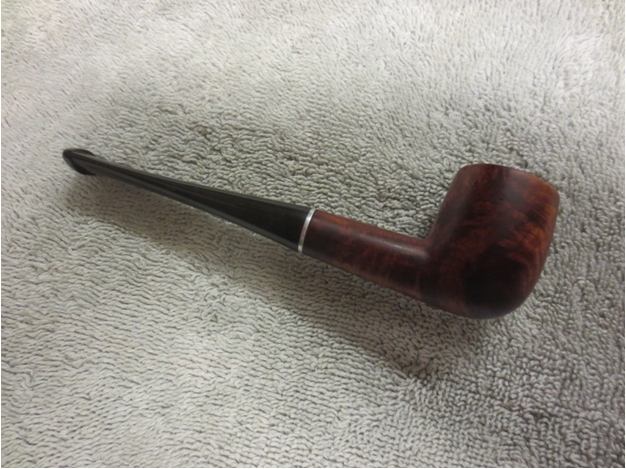
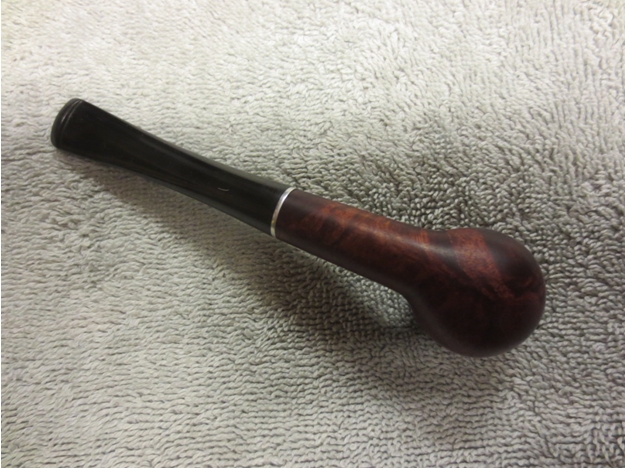
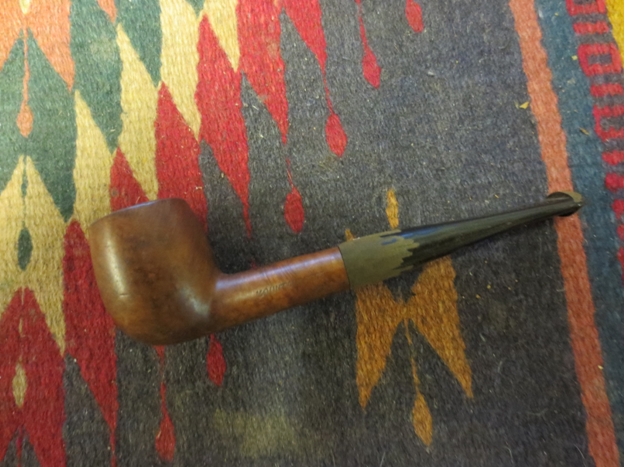
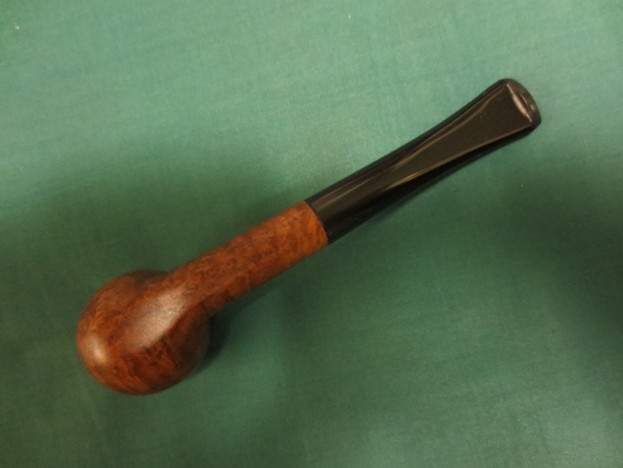
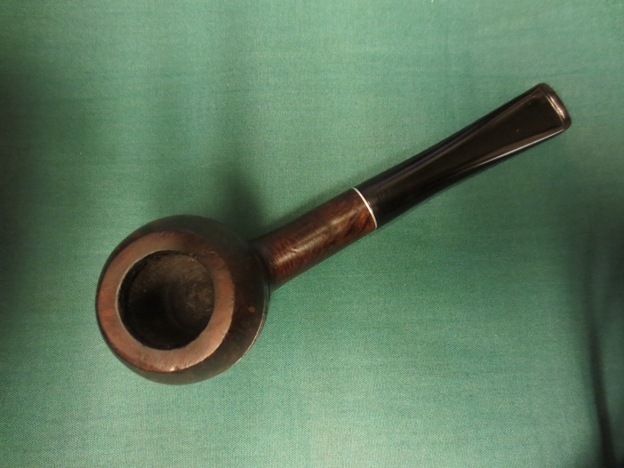
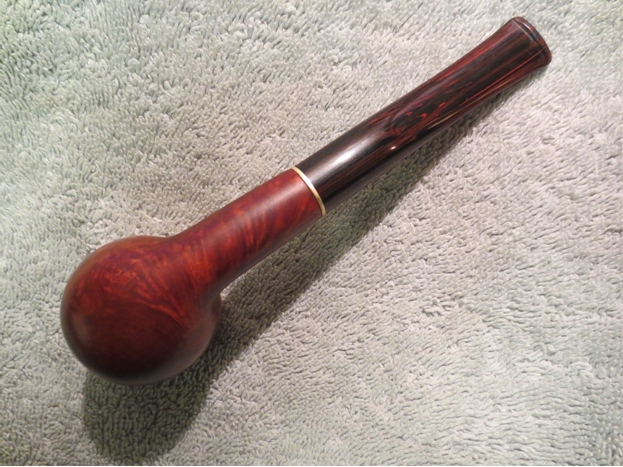
The rich colours of the briar work really well with the reds of the Cumberland stem. The light brass band that separates the stem and the shank adds a light brass coloured horizontal line that breaks up the vertical Cumberland and the horizontal grain of the briar.York36

York37 
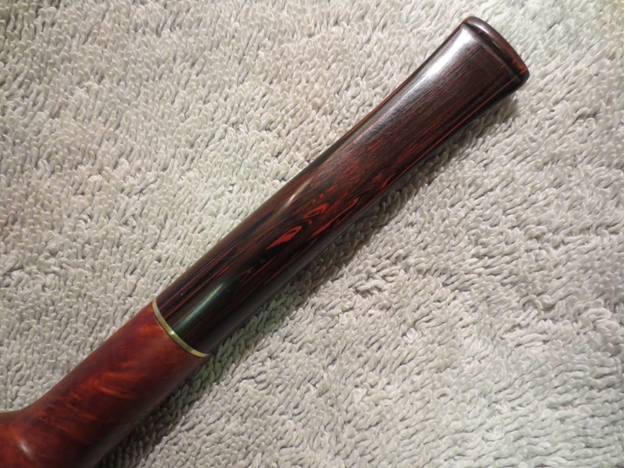
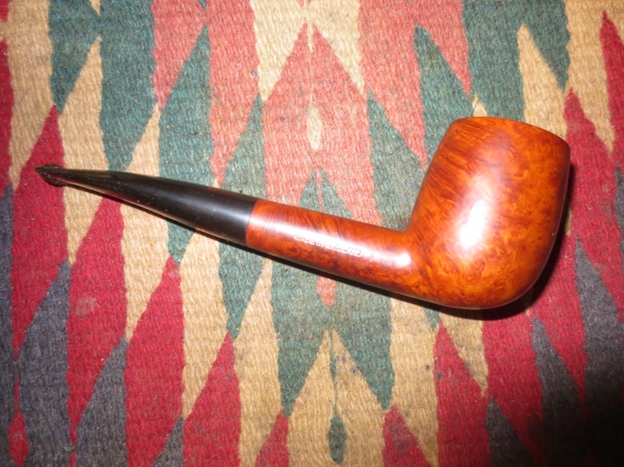
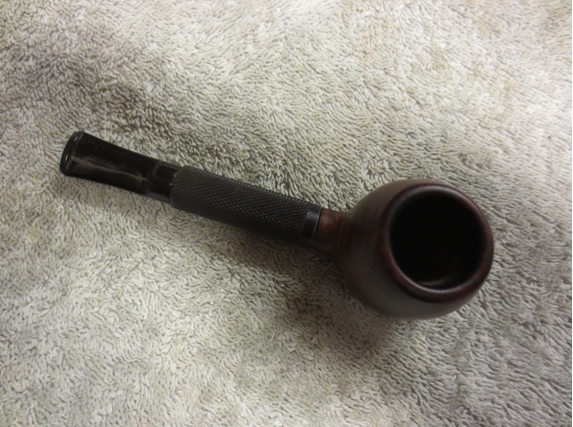
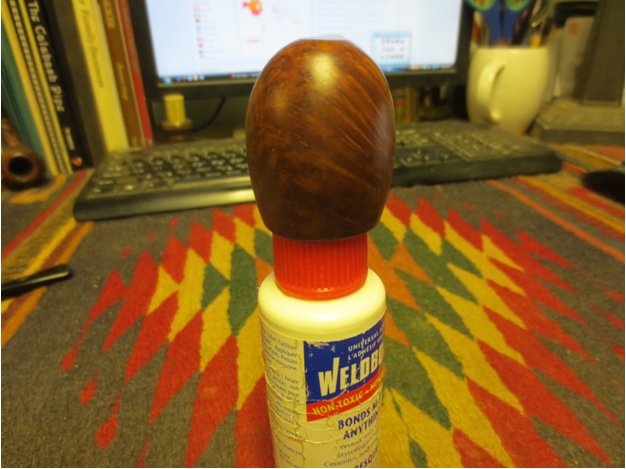
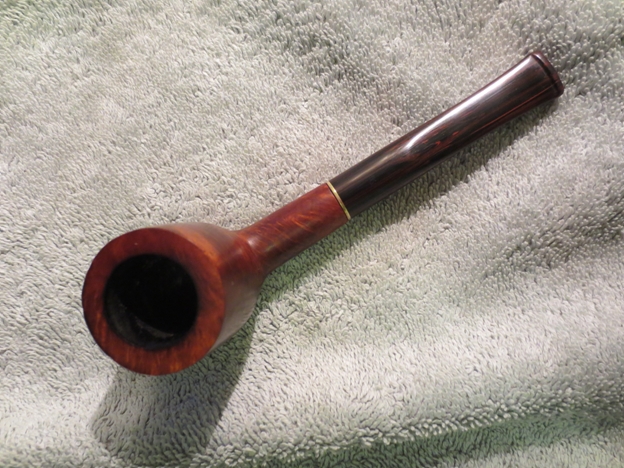
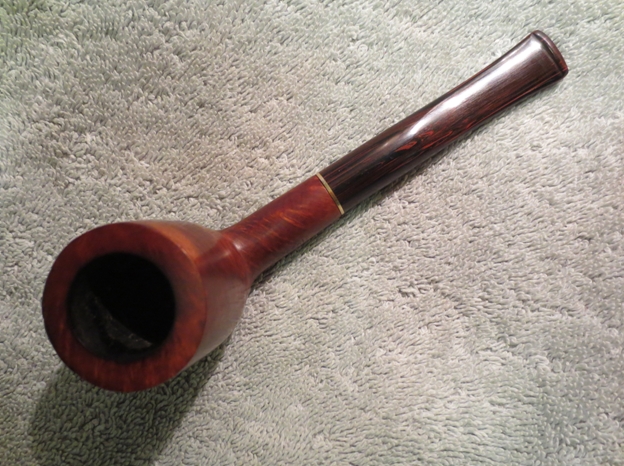
The sharp edges of the rim and the grain on the surface look far better than the round outer edge of the bowl.York38

York39

York40

Restemming and Restoring The Albany Pipe by ?Orlik?


Blog by Steve Laug

In a recent gift box of pipes there was a billiard that had a replacement stem. The stem did not fit correctly and when it was rotated in any other way but the one it did not fit and showed light between the shank and stem. The diameter of the shank and that of the stem did not match either and the shoulders on the stem were rounded – one of my pet peeves. The pipe is stamped with gold on the left side of the shank The Albany Pipe. On the right side it is gold stamped Made in England. On the bottom of the shank it is gold stamped 17 and Fieldcraft in script.Albany1

Albany2 The finish was natural – no stain and had begun to pick up a patina of age. The stamping was clear but the gold was faded and missing in some parts. The rim was dirty and also damaged on the outer edge and had some deep scratches in the top. The stem was not original. The bowl had a light cake and looked like someone had reamed it recently.Albany3

Albany4 I took a few close-up pictures of the rim and the stamping to give a clear picture of the state of the pipe when I brought it to the work table. You can also see the poor fit of the replacement stem in the photos as well.Albany5

Albany6

Albany7 The brand is one that I am unfamiliar with though in the back of my mind I have a memory of seeing it somewhere listed as a second line of a major English brand. I just cannot find it now. Does anyone have any ideas regarding the maker? I have looked in WMTP and on PipePhil and Pipedia and found nothing so far. I like knowing some of the history of the brands I restore so I am still digging on this one.

One suggestion in response to a post I made on Smokers Forums was from flatticus (Chris) who wrote the following: “Steve, I think The Albany Pipe must be the tobacconist (there was The Albany Pipe Hospital circa 1920?) and Fieldcraft must be the brand of the pipe. There was another Fieldcraft marked for Frederick Tranter Pipe Shop in Bath, England which came up on eBay some years back, unfortunately too long ago to link properly. I can’t find a thing (trademarks, old ads, what have you) mentioning the Fieldcraft name in relation to pipes, but Tranter is still in business. I wonder if someone there would know who used to make their pipes. They were bought out by Havana House, but only about 4 years ago, so you may get lucky.”

Thanks Chris I will keep looking. I did a bit more digging on PipePhil’s site and looked at the major English brands and sub-brands. The Made in England stamping looks much like that on Orlik Pipes. The shape number 17 also fits one shown in the Orlik Catalogue on Chris Keene’s Pipe pages.Albany8 I removed the stem and looked through my can of stems to find one that would work better for this billiard bowl. Two options came to the front. The first is shown in the photo below next to the replacement stem that came on the pipe. It is a saddle stem that could have worked but the tenon was too small for a snug fit in the shank.Albany9 The second stem I chose was a fat taper stem that had a tenon that was a little too large. I decided to use that one. I used a Dremel with a sanding drum to reduce the tenon enough that I could get a snug fit.Albany10 The next four photos show the pipe with the new stem. It has a slight bend in it that looks dapper on the bowl. There was light oxidation on the stem and tooth marks on the top and underside of the stem next to the button. Other than that the stem was in great shape. It was also slightly larger in diameter than the shank and would need to be fit properly.Albany11

Albany12

Albany13

Albany14 I decided to clean up the bowl before working on the fit of the stem. I lightly topped the bowl to remove the damage to the surface of the rim. I also scraped the remaining cake out of the bowl with a PipeNet pipe reamer.Albany15

Albany16 With the bowl cleaned I put the stem back on the shank and worked on the fit of the stem at the junction of the two. I sanded the stem and lightly sanded the shank, being careful of the stamping to clean up the transition. Because the bowl did not have a stain coat and was natural briar I figured this would be easy to blend in later when I worked on the finish. I used 220 grit sandpaper and medium and fine grit sanding sponges to blend the transition.Albany17

Albany18

Albany19

Albany20 I took several close-up photos of the transition to show the finished fit of the stem and shank. They also show the gold stamping on the bowl.Albany21

Albany22

Albany23 I wiped down the bowl with acetone on cotton pads. I did not worry too much about the gold stamping as I have some rub and buff that I could use to redo the gold once I cleaned up the pipe.Albany24

Albany25

Albany26

Albany27 I sanded the stem and worked out the tooth marks with 220 grit sandpaper and then with medium and fine grit sanding sponges. I followed that with micromesh sanding pads – wet sanding with 1500-2400 grit pads and dry sanding with 3200-12,000 grit pads. I continue to use Obsidian Oil in between each set of three pads.Albany28

Albany29

Albany30 I buffed the stem with White Diamond and then gave it several coats of carnauba wax to protect and shine. I used the Rub and Buff antique gold on the stamping to give it the same look as before and then rubbed down the bowl with a light coat of olive oil before calling it a night. The olive oil soaked in and blended the sanded area of the shank and the topped rim with the rest of the pipe. I sanded the rim, shank and bowl with micromesh sanding pads to smooth out any scratches left behind by the sanding sponges. I usually do this while the oil is on the surface of the briar as the oil gives bite to the micromesh sanding pads. The next four photos show the pipe as it looked when I quit for the evening.Albany31

Albany32

Albany33

Albany34 In the morning I buffed the pipe with a Blue Diamond wheel and then gave it multiple coats of carnauba wax to bring a shine to the pipe. The finished pipe is shown below. I am still undecided if I will leave the slight bend in the stem or not. We shall see.Albany35

Albany36 The next two photos – top and bottom view turned out more read in the photos than they are in real life. The colour of the bowl is more properly shown in the photos above and the close-up photos following them.Albany37

Albany38

Albany39

Albany40

Albany41

Albany42

Albany43

Pipe Resurrection – from a Broken Shank to another Frankenpipe


Blog by Steve Laug

In my recent gift box was a broken shanked pipe that looked like an interesting challenge to me. It is the one pictured below in the lower right corner. It was stamped on the shank Dunbar over Filter Pipe. On the other side of the shank it was stamped 36B or 368 it was hard to read. Next to that was the circular com stamp with Made in London England. Researching the brand on the web I found that it was a Comoy’s Made pipe and was their filter pipe line. This one seems to have been snapped when someone tried to remove the stem from the shank. It was absolutely frozen solid and unmovable. I put the stem and shank in the freezer over night which usually works to break loose a tight stem. It had no effect. I also tried heating the shank and stem with hot water – also to no avail. It appeared that the stem was literally glued in the shank. To top it off it seemed that there was a broken piece of plastic – possibly a tenon insert that blocked the end of the metal tenon in the stem. I could not get air to move through the stem at all.boxadditions

Frank1

Frank2

Frank3

Frank4 Finally I used a heat gun on the stem and shank and was able to remove the stem from the tenon. PROGRESS! I soaked the junction of the tenon and mortise with alcohol and even WD40 to see if I could get the tenon to pop free. Nothing worked. The metal tenon was a permanent feature of the shank piece of this pipe. I would need to go with another plan – PLAN B.Frank6 I set aside the broken shank and tenon and decided to use piece from several other pipes and a chunk of briar to reconstruct a Frankenpipe from the nice apple bowl. In doing so I would lose the stamping altogether but I was not overly concerned with that as there was no way I could reconstruct the shank and bowl into a repaired Dunbar Filter Pipe. I cut back the broken shank on the bowl with a Dremel and a sanding drum. I squared off the shank so that I could attach something else to it. I finished by squaring it with my topping board and sandpaper.Frank7 I had a chunk of briar in my repair box that would work nicely. It was the right thickness to match the shank. I drilled it out with a drill bit that left a hole the size of the metal tube that I would use to join the bowl and the briar. I drilled the airway all the way through the briar and used a slightly larger bit on the mortise end of the block. I had a taper stem in my can of stem that was close to the diameter of the shank so I thought I would use it on this pipe. I put the pieces together for the photo below to get an idea of the work I would need to do.Frank8 I marred the surface of the metal tube with files and then mixed a two part epoxy and set the metal tube in the briar block. I did not glue it into the bowl at this point as I thought it might be helpful to have the block free of the bowl to be able to use the Dremel and sanding drum to remove the excess briar.Frank9 While I was at it I also took out an interesting old metal sleeve that had come with a box of parts I bought on eBay. It was cross hatched with a smooth band on the mortise end. It had a saddle stem in it that was also stuck. Now I had a couple of options to work with on this old bowl. I could either have a briar shank and a taper stem and then rusticate the shank and at least the union of the bowl and briar or I could have a metal sleeve that would slide over a briar tube and have the saddle stem inserted. I did not need to decide at that moment so I set both stems aside and worked on removing the excess briar.Frank10 I sanded the block with a Dremel and sanding drum until I had removed much of the excess and was left with a rectangular wedge that I would need to fit and shape to match the diameter of the shank.Frank11 More sanding with the Dremel and sanding drum brought the block closer and closer to the diameter of the shank on the bowl.Frank12

Frank13

Frank14 There was still more sanding that needed to be done. The next four photos show the block getting very close to the size and shape of the shank. I put the stem in place and looked long and hard at it and still had not decided what to do. I sanded with 180 and 220 grit sandpaper to further shape the shank.Frank15

Frank16

Frank17

Frank18 I looked long and hard at the pipe with the stem in place and decided I really did not like the look of the pipe. I put the metal sleeve next to the pipe and shank to have a look at it and made up my mind. I would continue to sand the briar until it could be pressed into the metal sleeve. I would need to shorten the briar so that it would leave room for the stem in the shank.Frank19 I went back to the Dremel and sanding drum and continued to sand the shank. It would need to be quite a bit thinner in diameter to be able to press the metal sleeve over the briar.Frank20

Frank21

Frank22

Frank23 I also decided to reverse the direction of the sleeve and have the black band against the shank and bowl junction. I figured that once I glued the tube into the airway in the bowl I would reduce the collar of the shank at that point and the slide the metal sleeve over the joint and it would not only hide the connection but strengthen the joint. I used the Dremel with the sanding drum and wood files to cut the collar down on the shank on the bowl until it matched the diameter of the briar that I would press into the metal sleeve. I shortened the briar tube enough to accommodate the stem when it was inserted in the sleeve. I wanted the airway in the briar to hold the tenon on the stem and also step the stem down so that it would sit in the metal sleeve like a faux military mount stem. I finally was ready to attach the briar tube to the bowl so I put epoxy on the piece of metal tube that I used to join the briar shank and the bowl. I pressed it into the airway on the bowl and let it dry. Once it had set I was ready to press the metal sleeve onto the briar tube. This was the moment I was waiting for to see if my vision of the pipe in my head matched the reality of the one on the table.Frank24 The photo below shows the briar tube is ready to slide into the outer cross hatched metal sleeve. I drilled out the inside of the metal sleeve to remove the step ridges and make the inside the same diameter from the bowl end to the stem end. I used a metal grinding bit on the Dremel to polish the inside.Frank25 I heated the metal sleeve with a heat gun to expand it and then pressed onto the briar tube and up on the collar of the bowl. I worked quite well. I would need to do a bit of fine tuning on the fit of the bowl and the sleeve but I liked what I saw and it was a match to my vision of the pipe when I started.Frank26

Frank27 I sanded the briar at the union of the metal sleeve and the bowl with a folded piece of 220 grit sandpaper. I wanted the joint to be smooth and even all the way around. I did not want a ridge to show at that point. I filled slight gap between the two with clear superglue and briar dust.Frank28

Frank29

Frank30

Frank31 Once the transition was smooth I turned my attention to the stem. I would need to go back and do more work on the bowl but that was good for the moment. I wanted to fit the stem and get a feel for what the finished pipe would look like. Because I reversed the metal sleeve I needed to adjust the diameter of the saddle stem to have it seat properly inside the sleeve. I used a Dremel with sanding drum and files to cut the step down. In the photo below you can see the rough fit stem. I would need to clean up the step with files and sandpaper to smooth out the newly cut portion of the saddle that would sit in the sleeve. My plan was that the tenon would sit inside the briar and the step down saddle would sit inside the sleeve.Frank32 With a little sanding my plan worked. The tenon sat perfectly in the airway in the briar and the stepped down saddle sat snuggly in the sleeve. Now all I needed to do was clean up the stem and polish it for a final fit. The first photo below shows the position of the briar insert in the sleeve. You can see the depth of the section of the sleeve for the saddle part of the stem that I modified in this photo. You can also see the airway where the tenon inserts in the briar. The three photos that follow show the progress of the Frankenpipe at this point in the process.Frank32A

Frank33

Frank34

Frank35 I sanded the bowl and shank with a medium and fine grit sanding sponge to remove the finish on the bowl, rim and smooth out the sanding scratches on the shank. The bowl was covered with quite a few fills on the sides and I wondered how they would look once I had sanded the finish off. Fortunately the fills were not pink putty but brown putty that actually blended in quite well once I had removed the finish. When I had sanded it I wiped it down with acetone on cotton pads. The first picture below shows the options I went through on this stem and the original broken shank.Frank35A

Frank36

Frank37

Frank38

Frank39 The pipe was beginning to look like I had hoped. There was still more sanding to do on the bowl and the stem but it was coming along nicely. I used a file to clean up the edge of the step on the saddle so that I could get a good fit of the vulcanite against the metal edge of the sleeve. I sanded the stem with 220 grit sandpaper and a medium and fine grit sanding sponge to remove oxidation and scratches.Frank40 I sanded the stem with micromesh sanding pads – wet sanding with 1500-2400 grit pads and dry sanding with 3200-12,000 grit pads. I rubbed the stem down with Obsidian Oil between each set of three sanding pads. I gave the stem a final rub down with oil after sanding with the 12,000 grit pad.Frank40A

Frank41

Frank42 There was still some stubborn oxidation on the saddle and next to the button. I buffed it with red Tripoli and then with White Diamond. I had a pretty heavy hand with this stem. I did it without the shank and really pressed it into the pads. I wanted to strip away the remaining oxidation. Once it was gone I gave it several coats of carnauba wax. I finished the stem by buffing it with a soft flannel buff to raise the shine. The finished stem, both top and bottom sides, is shown in the next two photos below.Frank43

Frank44 I decided to not use a stain on the bowl but to oil with a light coat of olive oil. The fills had blended in well and the grain was quite nice. The olive oil brought out a red tint to the briar. I rubbed it down and let it soak into the briar. I buffed the bowl with White Diamond and gave it several coats of carnauba wax. I buffed it to a shine with a soft flannel buffing pad. The finished pipe is shown below.Frank45

Frank46

Frank47

Frank48

Frank49

Frank50 Now all that remains is to take it on its maiden voyage. The broken shank pipe has been reborn to another Frankenpipe. It has all the parts that pretty much make it certain that it will be a good smoking pipe.

Reshaping another one that needed a bit more work – a 1912 BBB Poker


Blog by Steve Laug

I was going over some early blog posts and cleaning up the photos and adding an author line to each of them. Doing some end of year maintenance on the blog. As I was doing this I came across this blog that I wrote on a 1912 BBB Poker https://rebornpipes.com/2012/06/13/the-1912-bbb-poker/. While I like old pipes this one just never quite made it to the rotation. Not sure why until I took it out and looked at it today. Several issues are evident in just looking at the photos below. The briar is beautiful. The silver shank band is factory silver. The stem is a restem that I did earlier in my refurbishing days. The diameter of the stem at the silver band junction is too thick. It seems to bulge around the band instead of just flowing from the band smoothly. The taper was also thick at the button. Though it had an orific button on it the stem was still too thick at that point. The button also lacked the rounded edges of the early orific buttons that were on these old pipes. With those issues obvious to me today was the day that I needed to work on it.bbb1

bbb2

bbb3

bbb4 I took it apart and blew through the shank – the airway was constricted. I blew through the stem it too was constricted. I used my KleenReem drill bit to open the shank airway and cleaned out and opened the airway. Blowing through the airway was no wide open. The stem was a different story. The tenon was nice and open. The issue lay in the round airway in the button. It was significantly smaller than the airway in the stem. I used a needle file on the airway in the button to open it up and flare it around the edges – while still maintaining the round look. Once that was complete the draw on the stem and shank were both open. Now I needed to work on the taper, the shape of the button and the diameter of the stem at the shank junction.

I sanded the stem with 220 grit sandpaper to shape the taper and to reduce the diameter of the stem. It took a lot of sanding to remove what in the pictures looks like very little overage of vulcanite. I did all of the sanding and shaping with the stem removed from the shank. I checked frequently to make sure that I did not over do the sanding and shaping by putting the stem back in place on the shank. The issue for me with this stem was not to round the edges at the shank while at the same time removing the excess evenly in terms of slope, width and diameter. It took me three hours to just shape the stem. At that point I had sanded with the 220 grit sandpaper and a medium and a fine grit sanding sponge. I used a medium grit sanding block to keep the edges and slope straight so that I did not create waves or valleys in the top and bottom surfaces of the stem. The photos below show the stem after the shaping work is completed.bbb5

bbb6

bbb7

bbb8 I worked the stem over with my usual array of micromesh sanding pads, wet sanding with 1500-2400 grit pads and dry sanding with 3200-12,000 grit pads. (Note to self – pick up some more of the 1500-2400 grit pads as I go through them far more quickly than the higher grit pads. Must be the water!) I wiped the stem down with Obsidian Oil and when it had dried, gave it multiple coats of carnauba wax and buffed it with a soft flannel buff. The newly shaped stem is shown in the photos below. The draw is open, the shape more comfortable in the mouth and the lines look far better.bbb9

bbb10

bbb11

bbb12

The Resurrection of an old KBB Yello-Bole Premier Panel


Blog by Steve Laug

In a recent trade with Andrew Selking I received an older KBB Yello Bole Paneled billiard. When I removed it from the box there was something about the older KBB Panel that grabbed my attention. It was stamped on the left side of the shank with the familiar KBB logo and the Yello-Bole next to it. Underneath that it bore the stamp Reg. US Pat. Off. Directly below that was stamped Premier over Cured with Real Honey. The pipe had been repaired at some time in its ragged existence with what appeared to be a homemade repair job. The tenon had broken somewhere along the line and a previous owner had drilled out the stem and used a piece of stainless steel tubing to make a new tenon. The metal tenon was stuck in the shank of the pipe and the stem just sat loosely on it. The fit of the stem to the shank was off with the stem sitting high and to the right. The previous owner had tried to compensate for the off centered stem by sanding flat spots on the stem sides and bottom that broke the smooth lines of the square shank and stem. There were two small hairline cracks on the shank – top right and bottom left that would need to be repaired once the tenon was removed. The bowl was out of round with damage to the inner edge of the rim and a tarry build-up on the surface. The outer edge rim crown of the bowl was also compromised and would need some work. The stem was not too badly oxidized but it had tooth marks on the top and bottom near the button.YB1

YB2

YB3 Background Information
I wrote about the history of the KBB stamped Yello-Bole Pipes. The following link will give you the details: https://rebornpipes.com/2014/07/21/renewing-an-old-kbb-yello-bole-honey-cured-briar-billiard/
Yello-Bole pipes are one of my favorite older US brands doing the research would be enjoyable. As with other early brands made in the states I have found that older is better. A KBB in a cloverleaf stamp will date them back to the ’30’s. I have found through my reading that the 4 digit shape numbers are older than 2 digit ones. The pipes with the logo on top of the stem are older than ones that have them on the side. That is just some of the information that I found with a cursory read through the forums and a variety of websites.

The SM Frank website http://www.smfrankcoinc.com/home/?page_id=2 gives a wealth of historical information on Kaywoodies, Yello-Boles and the merger between KBB and SM Frank and later Demuth. It was a great read and I would encourage others to give the website a read. I also wanted to find some help in dating my old Yello-Bole Pipes and I came across this link to the Kaywoodie Forum: http://kaywoodie.myfreeforum.org/archive/dating-yello-bole-pipes__o_t__t_86.html . I am including some of the information I found there as it gives the only information that I found in my hunt to this point.
“…there isn’t a lot of dating information for Yello-Bole pipes but here is what I have learned so far.

– If it has the KBB stamped in the clover leaf it was made 1955 or earlier as they stopped the stamping after being acquired by S.M. Frank.
– From 1933-1936 they were stamped Honey Cured Briar.
– Pipes stems stamped with the propeller logo they were made in the 30s or 40s no propellers were used after the 40s.
– Yello-Bole also used a 4 digit code stamped on the pipe in the 30s.
– If the pipe had the Yello-Bole circle stamped on the shank it was made in the 30s this stopped after 1939.
– If the pipe was stamped BRUYERE rather than briar it was made in the 30s.”
Given the above information I discovered that the pipe I was working on was made sometime between 1930 and 1940. Thus it was an early Yello-Bole from the 1930s or 40s.

Restoration Process

I took the stem off the bowl and tried to remove the inserted metal tenon. It was firmly stuck in place and I could not move it even with pliers. I put the bowl in the freezer overnight hoping that the cold would contract the metal and briar differently (as is the case with the varied material and density). In the morning I took it out of the freezer and was able to turn the tenon out of the shank with pliers. Once it was removed it was clear to see that it had not been glued in the shank but merely stuck with the tars and oils of the tobacco in the shank.YB4 I found a threaded Delrin tenon in my box of tenon parts and it was a workable replacement for the metal tenon. I tapped the drilled out hole in the stem and screwed the threaded tenon into the hole. It was a perfect fit. I removed it once again and put some glue on the threads and screwed it into place and let the glue set. The diameter of the tenon would need to be adjusted as it was too big for the mortise. This was actually ideal in that I would be able to adjust the fit against the shank on the sides and the top. The bottom of the shank would take work to make a smooth transition.YB5

YB6

YB7

YB8

YB9

YB10 I sanded the tenon with a Dremel and sanding drum to remove the excess Delrin. I hand sanded it with 180 grit and 220 grit sandpaper to smooth out and fine tune the fit. I spread the hairline cracks with a dental pick and dripped superglue along the cracks and pressed them together until the glue set.YB11 The stem fit in the shank nicely. The photos below show the damage that had been done to the stem in the previous repair. It is especially visible in the photos of the pipe from the side and the bottom. The stem had been modified to the misfit of the previous tenon so work would need to be done to realign the fit against the end of the shank.YB12

YB13

YB14

YB15

YB16

YB17 I sanded the bottom, top and right side of the shank until the transition between the briar and the vulcanite was smooth. The left side was touchier in that I did not want to damage the stamping. I sanded this area while covering the stamping. The trick was to smooth out the transition without making a drastic dip in the briar – it just needed to be re-tapered until it flowed naturally into the stem. Sanding the top of the stem also took care as it had the insert of the white propeller. Too much sanding on the top would damage and compromise the insert. The photos below show the newly sanded and tapered shank/stem. I sanded with 220 grit sandpaper, medium and fine grit sanding sponges and a fine grit sanding block. I sanded the rim and curves of the rim with the same sandpapers. I folded a piece of 220 grit sandpaper and worked on the out of round bowl to clean it up as much as possible.YB18

YB19

YB20

YB21 I wiped the bowl and shank down with acetone on a cotton pad to remove the finish from the bowl.YB22

YB23

YB24

YB25 I cleaned out the bowl and shank with isopropyl alcohol, cotton swabs and pipe cleaners. I cleaned out the stem as well at the same time. I sanded the bite marks on the top and bottom of the stem with 220 grit sandpaper to minimize the damage and remove the tooth chatter. There were still some tooth marks that needed to be repaired.YB26

YB27

YB28

YB29

YB30 I scrubbed the areas around the bite marks with alcohol to clean the sanding dust and grit from around them. I then used black superglue to fill the bite marks and sprayed it with and activator/accelerator to harden it.YB31

YB32

YB33

YB34 When it dried I sanded the filled areas with 220 grit sandpaper to level them out with the surface of the stem. I sanded the stem with a medium and fine grit sanding sponge and a fine grit sanding block to further blend the patches into the stem surface. In the next two photos the patches are blended into the stem but the blackness of the super glue and the blackness of the unpolished stem do not match so they show up as spots on the stem.YB35

YB36 I stained the bowl and shank with a medium brown aniline stain thinned 50/50 with isopropyl alcohol. I wanted a medium brown wash to highlight the grain and show contrast in the finish. The wash provided just what I was looking for.YB37

YB38

YB39

YB40

YB41 I sanded the stem further with fine grit sanding blocks and also sanded the flat areas on the transition between the shank and stem to work towards a more seamless look. The next photos show the smooth transition and the smooth stem. The patches are fading more into the vulcanite of the stem as well at this point in the process.YB42

YB43 I moved on to sand the stem with micromesh sanding pads – wet sanding with 1500-2400 grit pads and dry sanding with 3200-12,000 grit pads. I rubbed down the stem between each set of three pads with Obsidian Oil and then continued sanding. I have found that sanding the stem while the oil is freshly applied allows the grit on the pads to cut into the finish and raise a shine.YB44

YB45

YB46The next two photos show the finished stem. After the final sanding I rubbed it down with Obsidian Oil and let it soak in before polishing it with the buffer. I gave it several coats of carnauba wax. The patches on the stem by this point are fully blended into the vulcanite and cannot be identified.YB47

YB48 The next photo shows the reworked inner edge of the rim to show my repairs on the out of round bowl. I sanded until it was as close to round as I could get it by hand. I bevelled the inner edge of the bowl with the sandpaper to make the transition smooth.YB49 The finished pipe is shown below. Thanks to Andrew for sending me this challenge. I really enjoyed bringing this old timer back to life. It will occupy a special spot in my older American pipe maker collection and join my other KBB Yello-Boles as favourites that I enjoy smoking. I buffed it with White Diamond and gave it multiple coats of carnauba wax and finished by buffing it with a soft flannel buffing pad to raise the shine. All that remains is to sit back and enjoy a bowl of an aged Virginia tobacco and read a good story!YB50

YB51

YB52

YB53

Giving new life to a Savinelli Product – a David’s Choice Canadian


Blog by Steve Laug

I have written about the restoration and restemming of the first pipe bowl I picked up while on a recent trip. It was found in an antique shop in Nanton, Alberta. It was an old AF Billiard from 1923. The second pipe bowl I found at the same shop is the focus of this refurbishing article. It is stamped on top of the shank with the words David’s Choice and stamped on the underside Italy and barely visible under the repair band Savinelli Product. The repair band was loose and when it was removed the shank had a crack on the bottom side. At the bowl shank junction there is also a small crack that extends back along the shank for almost an inch. It does not appear to go through the shank to the airway but it is visible. The rim of the pipe was clean but the outer edge was damaged and the top edge was badly dented. The finish on the bowl was gone and the briar, though it had stunning grain, was lifeless looking. The bowl was clean in the top ½ inch – looking to have been reamed. The rest of the bowl was badly caked to the point that a pencil would stand in the bottom half unaided. There was no room for additional tobacco. Surprisingly the shank was clean. The stem was long since gone but I found a stem blank in my stem can that would work very well with the pipe.Sav1 Sav2 Sav3 Sav4 Sav5 Sav6 The cake was like concrete in the bottom half of the bowl. I could not cut through it with either the PipNet or the KleenReem pipe reaming tools. I filled the bowl with cotton balls and then used an ear syringe to fill the bowl with isopropyl alcohol. I let it sit for several hours while I worked on fitting the stem.Sav7 Sav8 I used the Pimo Pipe Turning tool to reduce the diameter of the tenon and cut a clean edge against the stem. I sanded it by hand to get it to the proper diameter to fit the shank. I still needed to fit the stem to the angles of the shank and make the lines straight and clean from shank to button. I fit it on the pipe and took some photos to get an idea of what I needed to sand.Sav9 Sav10 I took the cotton balls out of the bowl and then reamed the bowl. The alcohol softened the hard cake and it came out more easily. I finished scraping the bowl with a sharp knife to take out the remnant of cake. I sanded the stem with 220 grit sandpaper to reduce the stem to fit the shank. I glued the band in place on the shank with an all-purpose wood glue.Sav11 Sav12 Sav13 Sav14 Sav15 I wiped down the bowl with acetone on cotton pads to remove the remaining finish from the briar. I would eventually stain the briar – not sure at this point what colour I would use but I wanted to have a clean surface for the stain. I also lightly topped the bowl with a topping board and 220 grit sandpaper to remove the damaged top and edges of the rim.Sav16 Sav17 Sav18 I heated the briar with a heat gun to open the pores in the briar to receive the stain and then used a dark brown aniline stain. I applied it and flamed and repeated the process until I had an even coverage over the surface of the bowl. In the past I have thinned the stain to lighten it but have lately just applied it and then wiped it down with alcohol and cotton pads to lighten it after staining.Sav19 Sav20 Sav21 I sanded the bowl and shank with a 1500 grit micromesh sanding pad to further lighten the finish and then wiped it down a further time with the alcohol wet pads.Sav22 Sav23 Sav24 Sav25 I sanded the stem with 220 grit sandpaper and medium and fine grit sanding sponges. I wet sanded with 1500-2400 grit micromesh sanding pads and dry sanding with 3200-12,000 grit pads. I rubbed the stem down with Obsidian Oil after each set of three pads. Once I had finished sanding I buffed the stem with White Diamond. I polished the band with silver polish and gave it a light buff with White Diamond as well.Sav26 Sav27 Sav28 I put the stem back on the pipe and buffed it all again with White Diamond and gave it a several coats of carnauba wax. I buffed it with a soft flannel buff to raise the shine. Though this old warhorse of a pipe has seen much use, the new finish and restored, rebanded and restemmed pipe should give many more years of service. It is cleaned and ready to load with its inaugural bowl. Though the pictures do not show it the pipe is a large one – it is 6 inches long with a bowl that is 2 inches tall. The diameter of the bore is 7/8 inches. It will certainly be a long smoke – and if the build of cake left behind by the previous owner tells any tales it will be a good smoking pipe.Sav29 Sav30 Sav31 Sav32

An Old 1923 Adolph Frankau Billiard Restemmed and Restored


Blog by Steve Laug

On a recent road trip to Alberta I drove over 3300 kilometres and stopped along the way at antique shops and antique malls to look for old pipes to add to my refurbishing box. I am always on the lookout for old pipes that show promise or will make good additions to my own collection. In one of the shops in Nanton, Alberta I found an old billiard and a Savinelli Made Canadian pipe bowl. Both bowls were missing their stems. The billiard bowl was stamped with a stacked lower case o and an N with C over the top of it. Above the stamped letters was a crown. There was no other stamping on the briar. I have looked around the web for this stamping and have not been able to find out who made the pipe from the stamping and the logo on the shank. The photo below gives a clear picture of the stamping on the top of the oval shank. If it looks familiar to any of you reading this article please post the information in the replies at the bottom of the page.A1 There was also a band on the shank that was factory installed. It was not a repair band or one that was added at a later date. The sterling silver band also bore stamping. On the top of the shank band there was an AF in a hexagon stamped in the silver. That AF stamping seems to point to the pipe being made by Adoph Frankau and Company as far as I can ascertain. Stamped underneath the AF there were three hallmarks in the silver. These hallmarks included the following – each of them was in a cartouche. The first was a letter h, the second was a lion, and the third was a lion’s head. The stamping and the order in which they were stamped identifies the silver band on the pipe in the following order – the h is the year 1923, the lion is the stamp for sterling silver and the third stamp, the lion’s head is the stamp for the city of London. The close up photo below shows the stamping on the silver band.A2The finish on the bowl was worn and spotty but otherwise was in good shape. The rim was slightly darkened but did not have any tarry build up. The bowl interior was clean and appeared to either have been reamed or lightly smoked. The shank had a threaded mortise and would have taken a threaded tenon. I went through my can of stems and found a stem that was oval and of a similar diameter as the shank. It had a broken off tenon that needed to be sanded smooth to flatten it against the face of the stem. With some sanding and cleaning up it would fit the shank well. Once I had faced the stem I drilled the remainder of the old broken tenon out of the stem and fit a piece of Delrin tenon into the hole. The piece of Delrin was too long and I cut it off with a hacksaw. The tenon was not threaded to fit in the threaded mortise however the diameter would make a snug fitting push tenon. The diameter of the stem was slightly larger than the shank and band so it would need to be sanded to remove the excess material.A3 A4 I cut of the tenon piece and then glued it into the drilled out stem with superglue. I sanded the stem to adjust the diameter of the oval to make the fit more precise.A5 When the stem was in place the fit was better with the logo side of the stem facing down. I decided to sand that side to fit it against the shank. The inlaid logo was not set too deeply into the vulcanite and with sanding it would be easy to remove. Once I had sanded it with 220 grit sandpaper to remove the excess vulcanite I fit it in the shank to get an overall look at the pipe with stem. More sanding would be necessary to get the fit perfect against the band and shank.A6 a7 a8 A9 To further shape the stem I removed it from the shank and sanded it some more with 220 grit sandpaper and then with a medium and a fine grit sanding sponge. I sanded the stem until the diameter matched that of the shank. I sanded the tooth marks next to the button on the top and bottom of the stem. The photo below shows the shaped and sanded stem. All tooth marks and damage to the stem was removed in the sanding and the stem was ready to polish.A10 I wiped down the bowl with acetone on a cotton pad to remove the spotty finish on the bowl. It took some scrubbing to remove the varnish coat on the pipe. I scrubbed the silver band with silver polish and wiped it down with a silver polishing cloth.A11 A12 A13 I sanded the stem with micromesh sanding pads – wet sanding with 1500-2400 grit pads and dry sanding with 3200-12,000 grit pads. I sanded the tenon smooth as well. I rubbed the stem down with Obsidian Oil after each set of three sanding pads. I buffed the stem with White Diamond to further polish it and then gave it several coats of carnauba wax and buffed it with a soft flannel buffing pad to raise the shine. A14 A15 A16 I buffed bowl with White Diamond on the buffer and then gave it multiple coats of carnauba wax to protect and polish it. I then buffed it with a soft flannel buff to give it a shine. I put the stem back in place on the shank and the buffed the pipe a final time. The finished pipe is shown in the next set of four photos below. It is ready to smoke with its inaugural bowl. It will be a treat to fire up this lightly smoked pipe from 1923.A17 A18 A19 A20

The Sentimental Journey Continued – Restoring a Second Medico, a Smooth Billiard


Blog by Steve Laug

In a previous post called a Sentimental Journey I wrote of why Medico’s always get attention when they cross my desk. Last evening I reached into my box of pipes to be refurbished and pulled out the next pipe to clean up and it too was Medico – this time it was a smooth billiard. The finish was worn and the varnish was peeling off the bowl. The rim was badly knocked around so there was damage on the outer edge at the front of the bowl and the back. There was a heavy build up on top of the damage and the bowl had a thick cake at mid bowl – not much at the top or bottom. The stamping was the same as the previous pipe – MEDICO on the left side of the shank and Imported Briar Italy on the right side. A bonus for me was that the stem I had work on for the little Rhodesian fit this one and only needed adjustment in the diameter of the stem. It had the metal tenon that was generally on Medico pipes and would hold the Medico paper filter as per design. The rest of the stem was vulcanite not nylon which was a bonus.IMG_2408 IMG_2409 IMG_2410 IMG_2411I cleaned out the shank and fit the stem in place to see how much sanding I would need to do to match the diameter of the shank. It did not look like it would take very much to bring it in line. I would need to sand the aluminum band on the stem at the same time so I would need to be careful to not create dips or valleys next to it on the softer vulcanite when sanding.IMG_2412 IMG_2413I sanded the stem with 150 grit sandpaper to reduce the diameter of the stem.IMG_2414I reamed the bowl with a PipNet reamer using the smallest cutting head to clean it out.IMG_2415To clean up the rim damage I topped the bowl with 220 grit sandpaper to take down the rim and reduce the rough pitting on the outer edge. I also sanded around the edge of the rim to smooth out the remaining roughness.IMG_2416IMG_2417IMG_2418I wanted to get rid of the peeling varnish on the bowl so I wiped it down with acetone on cotton pads to remove it. It took a lot of scrubbing as the varnish was very stubborn.IMG_2419IMG_2420IMG_2421I sanded the bowl and the rim with 220 grit sandpaper and then with medium and fine grit sanding sponges to remove more of the finish and reduce the scratching on the bowl. I sanded it with a medium and fine grit sanding sponge before wiping it down one last time with alcohol. I decided to stain it with an aniline based oxblood stain. I applied it and then flamed it to set it in the grain.IMG_2422 IMG_2423I rubbed the excess stain off with an alcohol dampened cloth and then hand buffed it with a shoe brush. This old Medico had some really nice grain and was a far better piece of briar than I had expected.IMG_2424 IMG_2425 IMG_2426 IMG_2427 IMG_2428I sanded the bowl with 1500-2400 grit micromesh sanding pads and then buffed it with White Diamond to smooth out the bowl further. I gave it a coat of carnauba wax and buffed it lightly.IMG_2429 IMG_2430 IMG_2431 IMG_2432I finished the work on the stem fit and then sanded it with micromesh sanding pads – wet sanding with 1500-2400 grit pads and dry sanding with 3200-12,000 grit pads. I rubbed it down with Obsidian Oil and moved through each successive set of three pads. Once I had finished sanding it I rubbed it down a final time with the oil and gave it a buff with White Diamond.IMG_2433 IMG_2434 IMG_2435I put the pipe back together and gave it a final buff with White Diamond and then multiple coats of carnauba wax. I buffed it with a soft flannel buff to finish and polish the wax. The finished pipe is shown in the next series of photos. It is a small light weight billiard with fairly decent grain and a few character marks. The new stem fits well and it looks better than it did when it left the factory. It should provide a great smoke to another pipeman. This is one that I will inevitably gift to someone along the way.IMG_2436 IMG_2437 IMG_2438 IMG_2439

What is a Mountain Root Pipe with a Glasschaum Bowl?


Another of the gift bowls that I received was an apple-shaped bowl stamped Mountain Root on the left side of the shank and on the right side Glasschuam Bowl. The Glasschaum Bowl stamping had remnants of silver paint in the indentations. The finish was rough with many scratches in the briar. The shank internally was very black and tarry. The bowl inside was dirty with a thin build up of cake. The internal edge of the meerschaum lining was chipped in several places but there were no cracks in the bowl. IMG_1879 The Mountain Root stamping and the Glasschaum Bowl stamp were both new to me. I looked in “Who Made That Pipe” for the Mountain Root brand and found nothing with that stamping. PipePhil did not have it on his site either, so I looked further on the web and found several posts on the brand on the Grabow forum. The link is: http://drgrabows.myfreeforum.org/about4008.html&highlight=

At that site a pipeman had posted about a pipe he purchased on Ebay: “I purchased this “Mountain Root” pipe on Ebay. Right shank is stamped “Glasschaum Bowl” and the inside of the bowl is lined with something similar to how Yello-Boles are lined with a yellow colored coating. The stinger is wooden and the stem inlay is a white or faintly yellow ring on top of the stem similar to Yello-Bole stem rings of the ’40’s except for the color.”

My pipe bowl looked just as he described though I would have said it had a meerschaum like bowl insert rather than the yellow coating on the Yello-Bole pipes. It was significantly thicker than the yellow painted coating. Mine also came without a stem so there was no wooden stinger apparatus or yellow ring on the stem.

He went on to inquire if anyone could help him with information on the brand. He received quite a few helpful replies to his query. One that summarized the lot is included below.

“Mountain Root probably refers to Mountain Laurel. That was one alternative wood used in WWII for pipes, when briar was not available or in very short supply. The wood stinger also suggests that era.”

This coincided with what I was thinking in terms of the link to Mountain Laurel and the WWII era pipes. I was not alone in thinking that I was dealing with a pipe from that era made from Laurel. The confirmation of that was not 100% certain and the next details make me wonder about that. I looked up Glasschaum Bowl pipes online and found that Ben Leibowitz, an American pipe maker marketed the Glasschaum pipe in 1941 and quickly disappeared off the scene. This reference was also confirmed in Who Made That Pipe. If it was indeed a Liebowitz pipe it would have been stamped Glasschaum Pipe with no other stamping. This one however had the Mountain Root stamping as well and it led me to believe I was dealing with something other than an American made Leibowitz pipe. Further digging was necessary.

I often turn to EBay to see if I can find a particular brand of pipe for information when it does not show up other places. In looking through the various pipes on EBay that bore the Glasschaum Bowl stamping I found several that had the identical stamping on the right side of the shank. glasschaum 1 Some of them had Mountain Root (1st photo below) on the left side the same as the bowl I have, while others were stamped Gordon Deluxe in a Diamond on the left (2nd photo below). glasschaum 2 glasschaum 3 I looked in “Who Made That Pipe?”and found that Gordon pipes were made by Villard & Strauss as well as Dan Jacobs/Comoy’s/R. Jack & Sons and Samuel Gordon (1918), all in made in England. There was also confirmation that The Samuel Gordon pipes had Gordon in a diamond logo. The fact that these were English made pipes made me question the Mountain Laurel wood comment above. The bowl also did not look like the wood on other Mountain Laurel pipes that I have in my collection so I am not at all certain of the assessment.

The information I had found made me lean toward the maker of this pipe being Samuel Gordon a London pipemaker. That meant that the pipe was English made. I don’t have a clear idea of the date of the pipe but looking at others on EBay that had the same stamping of the Gordon Deluxe stamping my thinking is that the pipes came from the 40s or 50s.

I went through my can of stems and found one that fit well in the shank with minimal sanding. When I chose the stem I had not done the research on the brand and found that the stem had a light yellow O on the top of the stem and the one I chose had a brass O on the top. Such is the one of the happy coincidences of the repair. IMG_1877 IMG_1878 IMG_1880 IMG_1881 I lightly sanded the tenon of the stem until it fit snugly in the shank. I cleaned out the stem with alcohol and pipe cleaners before beginning the shaping. The diameter of the stem was larger than the diameter of the shank. I used a Dremel with a sanding drum to remove the majority of the excess vulcanite on the stem. I carefully do this with the stem in place and try to get as close as possible to the same diameter as the shank. I try not to nick the shank while I am working on it. IMG_1885 IMG_1886 IMG_1887 IMG_1888 I used a sharp pen knife/letter opener to scrape the inside of the bowl. I wanted to remove the carbon build up around the middle of the bowl particularly and also on the upper sides of the bowl. The bottom half and the bottom of the bowl were quite clean. IMG_1884 IMG_1883 After scraping the bowl clean the chips around the edges of the rim were visible. They were deeper on the back side of the bowl at about 5 and 7 o’clock. I needed to top the bowl to remove the damaged areas on the rim and bring the top closer to the edge of the meerschaum insert. I set up a topping board and 220 grit sandpaper and sanded down the rim. IMG_1882 IMG_1889 With topping of the rim done the chipped areas were very clear. I sanded the inside edge of the rim with a folded piece of sandpaper to smooth out the areas that were not chipped and to bank the inner edge slightly. With this done the repairs to the insert edge would be quite simple to do. IMG_1890 IMG_1891 Once I had the stem diameter close I took it back to the table and hand sanded it with 150 grit sandpaper until the angles and flow of the stem was also correct. I worked so that there was not a bulge or hip at the junction. I also sanded the button on the stem as it was very thick. I sloped it toward the end of the stem. When the fit and flow were close to what I wanted I removed the stem from the shank and sanded in long strokes from the tenon end to the button to smooth out potential scratches.

I put the stem back on and sanded with 220 grit sandpaper to remove the remaining excess and some of the heavier scratches. At this point I also sanded the shank of the pipe at the same time to make sure that the transition between the briar and the vulcanite was smooth and seamless. This took quite a bit of sanding. I did not want to remove too much briar as I did not want to change the look of the shank or the diameter of the shank. I was more concerned with getting the flow and lines smooth. I sanded it with a medium and a fine grit sanding sponge once I had the fit perfected. IMG_1892 IMG_1893 IMG_1894 I wiped the bowl down with acetone on cotton pads to remove the finish from the bowl and shank. I have found that this makes staining the rim and shank much easier to achieve and matching the stain is not a problem as it is all quite light. IMG_1895 IMG_1896 IMG_1897 IMG_1898 I wiped down the inside of the bowl edges with a wet cotton pad to remove loose particles of the liner and also any dust that was present from the sanding. I mixed a small batch of Plaster of Paris to work on the chipped edges of the insert. I mixed it into a thick mud consistency that was still wet but did not clump. I pressed into the chipped areas with the cuticle tool that I cleaned up. The curves on the spoon end are perfect for pressing the mud into the chipped areas of the bowl. The next two photos show the repaired area of the bowl insert. I purposely put the plaster on heavier than necessary and then shaped it with the spoon end of the tool. I set it aside to dry. IMG_1899 IMG_1900 When the plaster was dry to the touch I cleaned out the shank with cotton swabs, pipe cleaners and isopropyl alcohol. There was some paper stuck to the inside of the shank from what appeared to be a washer that some previous owner had used to hold the stem tightly in place. IMG_1901 I sanded the bowl and shank, carefully avoiding the stamping with micromesh sanding pads – 1500-3200 grit to smooth out some of the scratches that were on the surface of the briar. I wiped it down with alcohol on a cotton pad to remove the dust from the finish. Looking at the bowl in this unfinished state it is clear that this is a piece of briar and not a piece of Mountain Laurel. The birdseye and cross grain are quite nice. I cleaned up the top of the bowl and left the inside edge untouched at this point. I wanted the plaster to cure over night before I sanded it and cleaned it up on the inside. IMG_1902 IMG_1903 IMG_1904 The next series of three photos show the work I did on the repair to the edge of the insert. The first shows the repair after it dried over night. It was hard and quite thick. The second photo shows the area after I sanded it with a folded piece of 220 grit sandpaper to smooth it out, bevel it slightly to match the rest of the rim edge and feather it into the surface of the bowl. The third photo shows it after the bowl has been wiped down with a damp cloth to clean up the dust from the sanding. The bright white areas are the repaired portions. After a few smokes this will blend in very well with the rest of the insert and will be unnoticeable. IMG_1905 IMG_1909 IMG_1911 I wiped the bowl and stem down with olive oil on a paper towel. I wipe it on and wipe it off again to give me a clear picture of areas of the bowl that still need work. It shows the scratches very clearly and also gives some colour and life to the bowl highlighting the natural grain. I am still undecided as to whether or not I will give it a coat of a light brown stain. IMG_1906 IMG_1907 IMG_1908 IMG_1910 I sanded the stem with micromesh sanding pads – wet sanding with 1500-2400 grit pads and dry sanding with 3200-12,000 grit pads. In between each set of three grits I wiped the stem down with Obsidian Oil and when dry continued sanding the stem. I buffed it with White Diamond and gave it a final wipe down with Obsidian Oil before setting it aside to work on the bowl. IMG_1912 IMG_1913 IMG_1914 I wiped down the bowl with alcohol on a cotton pad and then gave the bowl a light coat of Danish Oil and walnut stain. I wiped it on the bowl and then wiped it off and set it aside to dry over night. IMG_1915 IMG_1916 IMG_1917 IMG_1918 In the morning when it was dry I lightly buffed it with White Diamond on the wheel and then put the stem in place and repeated the buffing. I gave it several coats of carnauba wax and buffed it with a soft flannel buff. The finished pipe is shown in the photos below. It is restored and ready to be smoked. It should last for many more years ahead and provide a typical meerschaum lined smoke for the pipeman who smokes it next. IMG_1919 IMG_1920 IMG_1921 IMG_1922 IMG_1923

Rejuvenating a Willard Straight Rhodesian


Another of the bowls from the gift box was this Willard Rhodesian. It was in pretty good shape other than being dirty and stemless. The bowl had a broken cake at the top of the bowl and remnants of tobacco left in the bowl. The rim was dirty and lightly caked with some damage caused from tapping the rim on something. The outer and inner edges of the bowl were undamaged. The interior of the shank was dirty. The shank was fitted with a threaded mortise that would take a threaded stem. I had a stem in m can of stems that fit well in the shank, was overturned but workable. The diameter of the stem was larger than the shank. The photo below shows the stem on the pipe in the middle of the threesome. IMG_1750 I set up a heat gun and held the stem about three inches above the heat. The first photo below shows the stem in place. To heat it I removed it from the bowl and heated the metal tenon. When it was warm I screwed it back in place and twisted it. I had to reheat it several times to get the alignment correct. The second photo shows the aligned stem. IMG_1752 IMG_1755 I sanded the stem with 150 grit sandpaper to reduce the diameter of the stem. I also sanded the slope to the button to highlight the tooth marks on the stem. IMG_1809 IMG_1810 IMG_1811 I used a needle file to sharpen the inner edge of the button and make the angles more distinct. IMG_1812 I wiped down the bowl with acetone to remove the grime and clean up the finish. I did not want to lighten the finish as much as to clean off the light coat of varnish on the briar. IMG_1814 IMG_1813 I lightly topped the bowl to clean up the rim damage. I used a sanding board and 220 grit sandpaper to remove the damaged briar and then followed that by sanding with a medium and a fine grit sanding block. IMG_1815 IMG_1816 I continued to sand the stem to match it to the diameter of the shank. I used 220 grit sandpaper to finish the sanding and shaping of the stem. I worked on the tooth marks on the top side and underside of the stem with 220 grit sandpaper until they were no longer visible. IMG_1817 IMG_1818 IMG_1819 IMG_1820 I reamed the bowl with a PipNet pipe reamer beginning with the smallest cutting head and working up to the one that was the same diameter as the bowl. I reamed the bowl back to bare wood. IMG_1821 IMG_1822 I sanded the stem with a medium and fine grit sanding sponge to reduce the scratches left behind by the 220 grit sandpaper. IMG_1823 There was one stubborn tooth mark that I could not get out on the underside of the stem next to the button. I cleaned the area with alcohol and then used clear super glue to repair it. I sprayed the path with an accelerator so that I could sand the patch sooner. IMG_1824 IMG_1825 IMG_1826 IMG_1827 I sanded the stem with micromesh sanding pads – wet sanding with 1500-3200 grit pads and dry sanding with 3600-12,000 grit pads. I rubbed down the stem with Obsidian Oil between each group of three micromesh sanding pads and then when I finished sanding with the 12,000 grit pad I buffed it with White Diamond. IMG_1828 IMG_1829 IMG_1830 I buffed the bowl and shank with White Diamond and then gave it a coat of Danish Oil and walnut stain to protect and preserve the finish. When it was dry I buffed the pipe with White Diamond and then gave it several coats of carnauba wax. IMG_1835 IMG_1836 IMG_1837 IMG_1838 The finished pipe is shown in the photos below. The new stem fits well. In fact it looks like it came with the pipe. The repairs to the stem are not visible. The bowl itself dried well and buffing the finish gave it a softer look. The finished pipe was given several more layer of carnauba wax and then buffed with a soft flannel buffing pad. It is now ready for many more years of service to another pipeman. IMG_1844 IMG_1845 IMG_1846 IMG_1847