Blog by Steve Laug
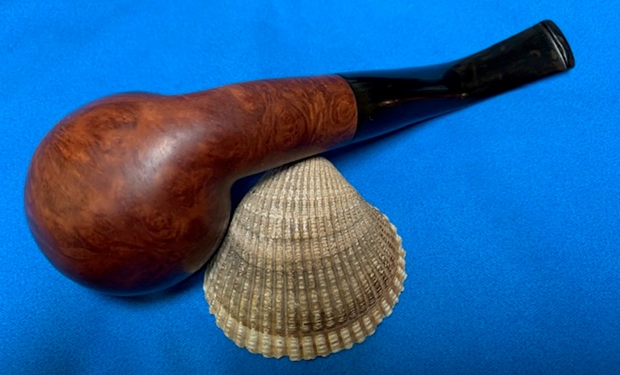
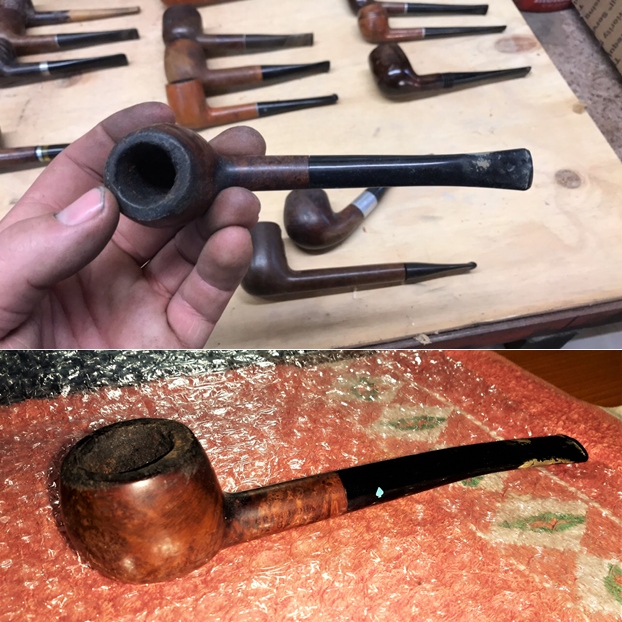
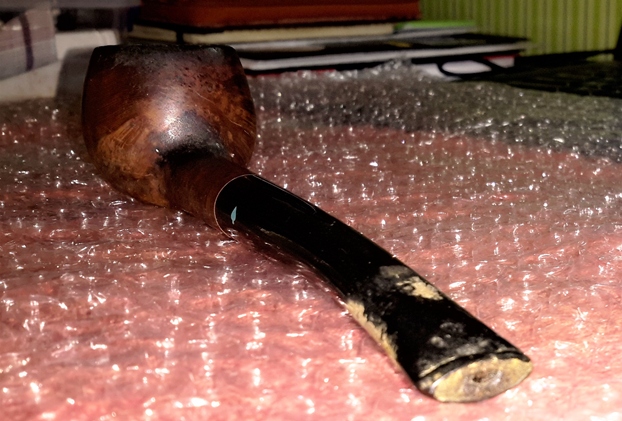
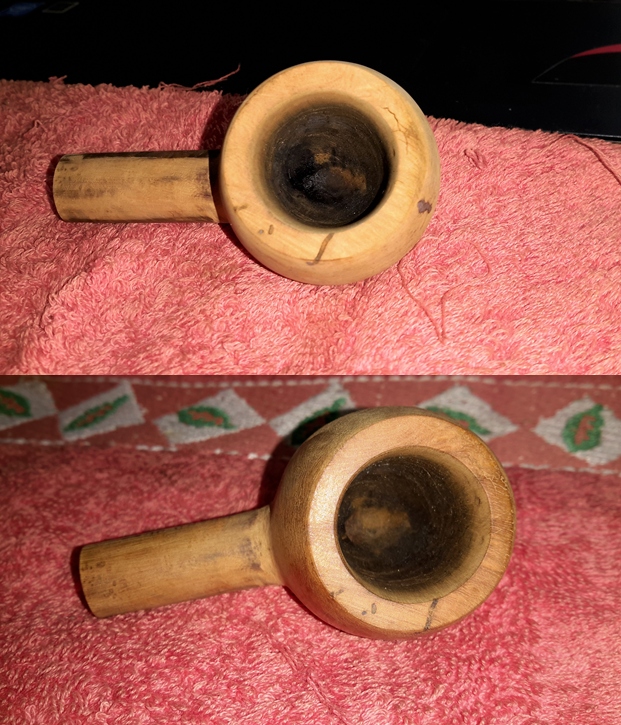
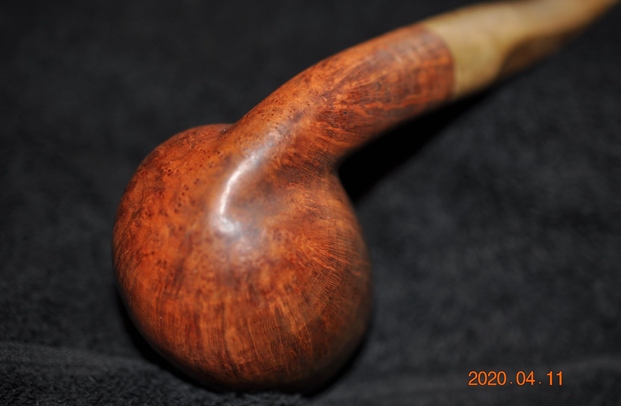
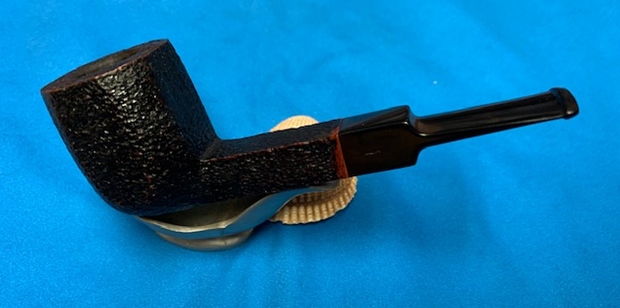
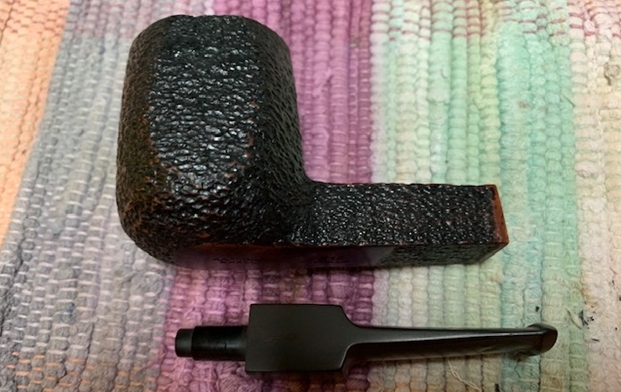
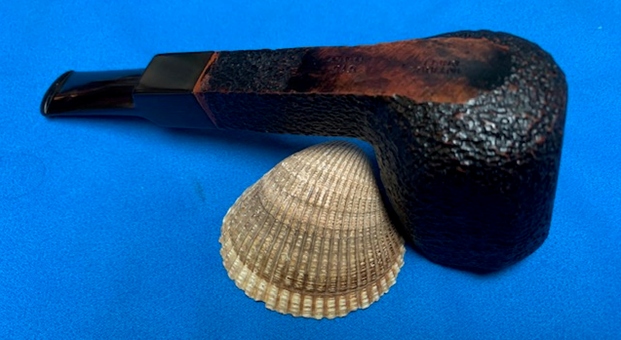
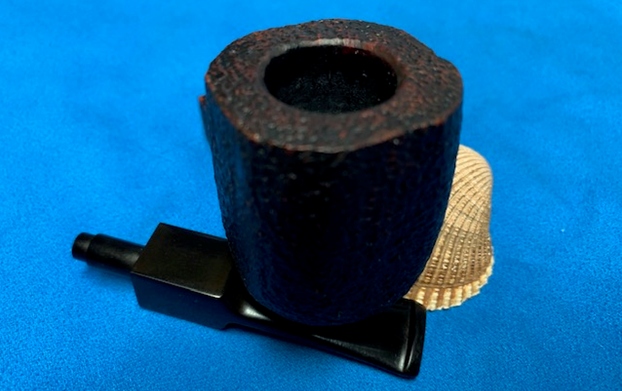
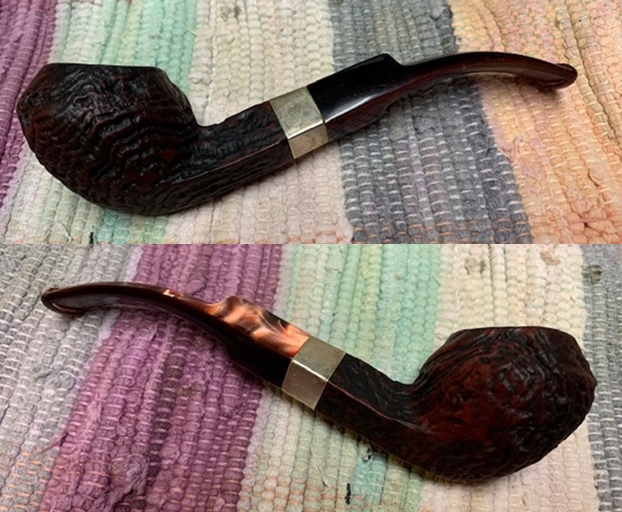
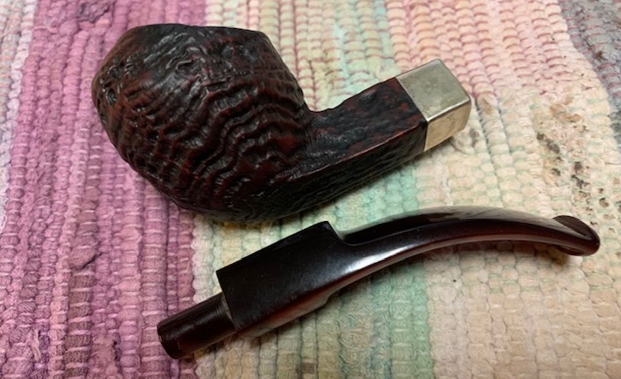
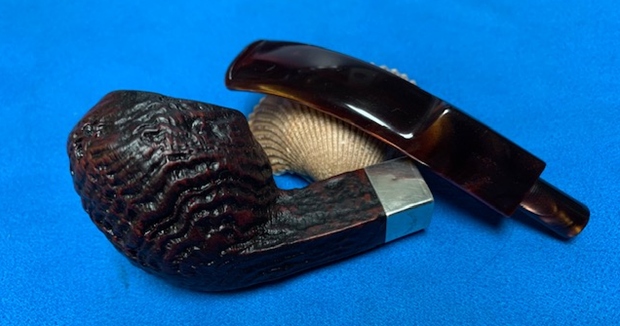
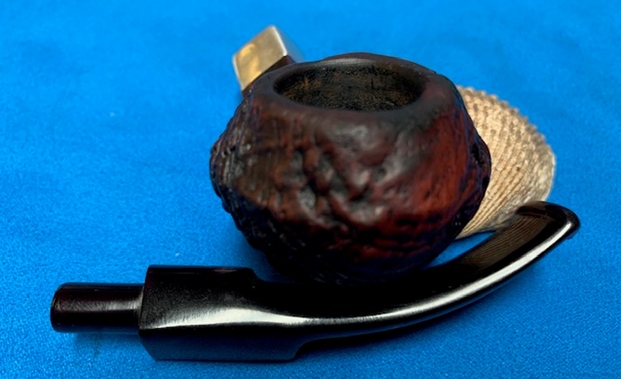
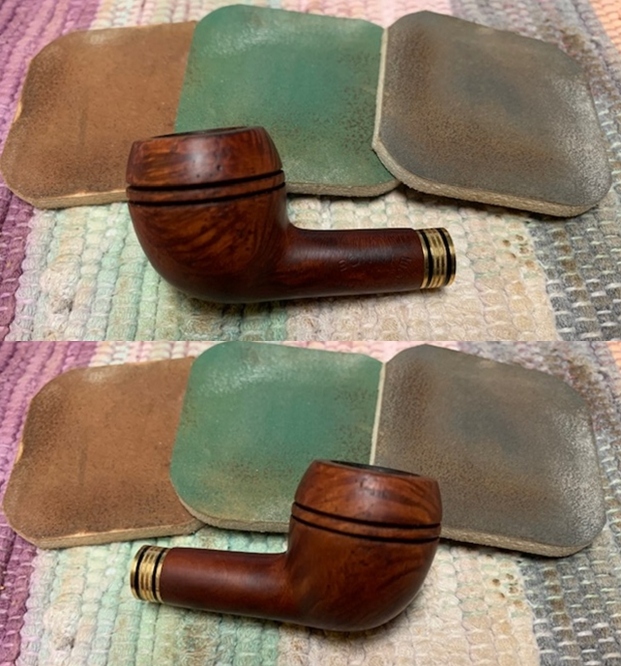
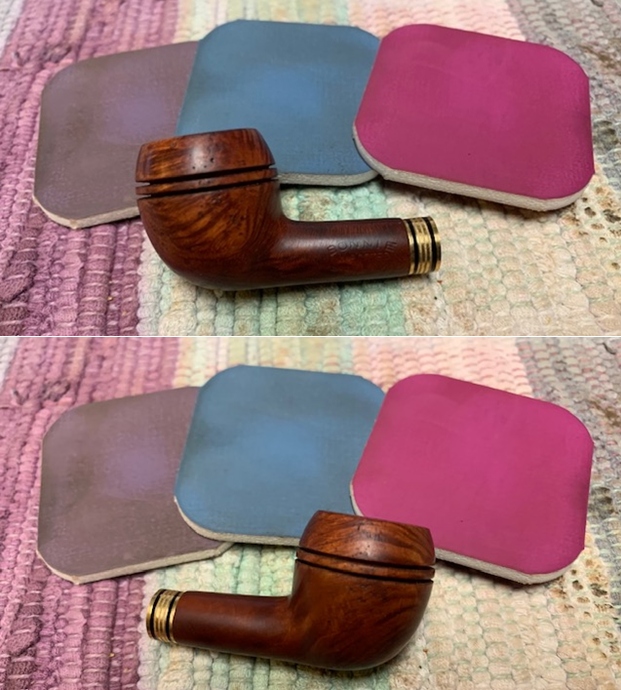
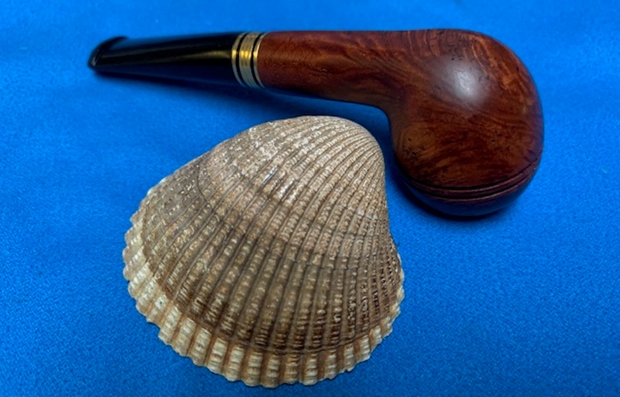
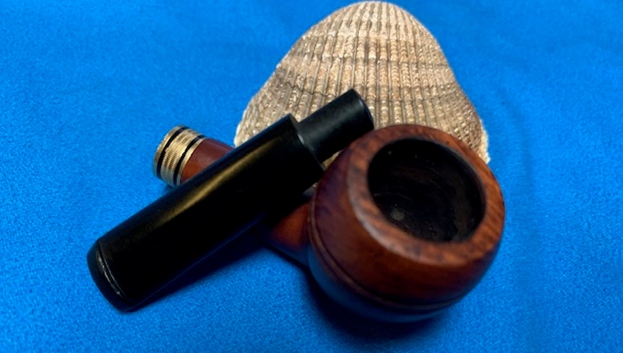
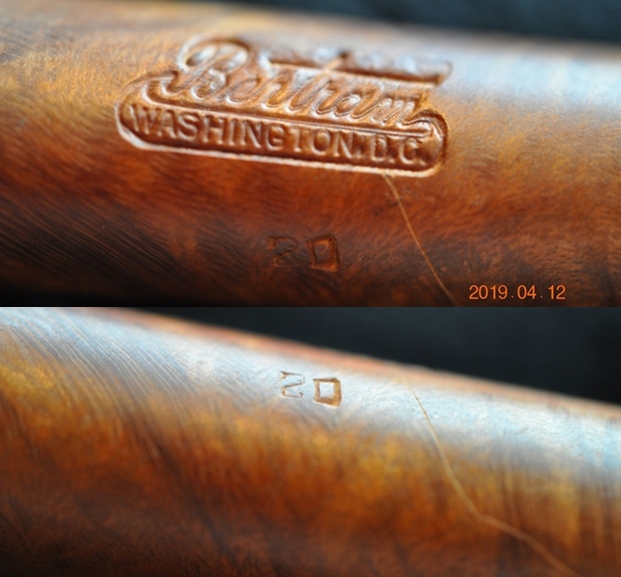
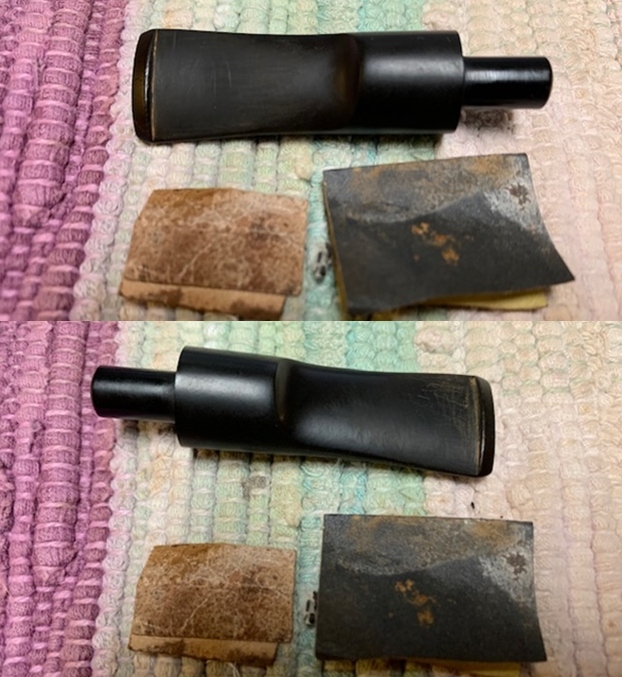
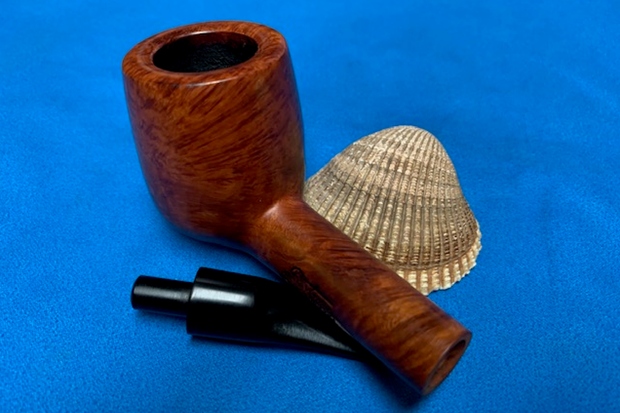
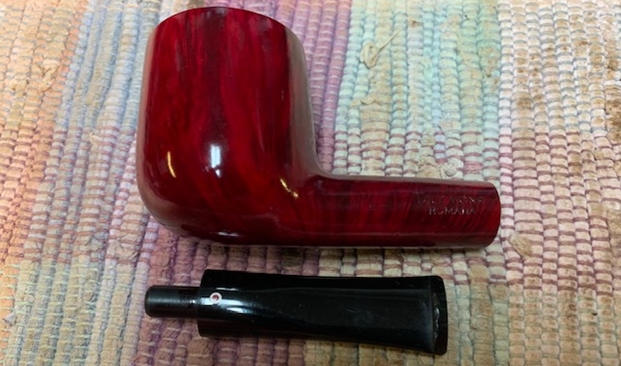
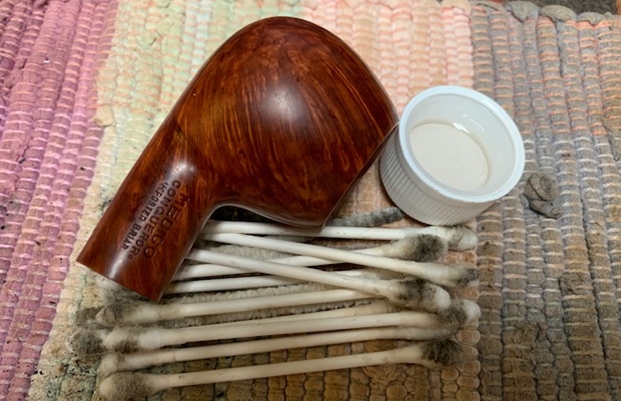
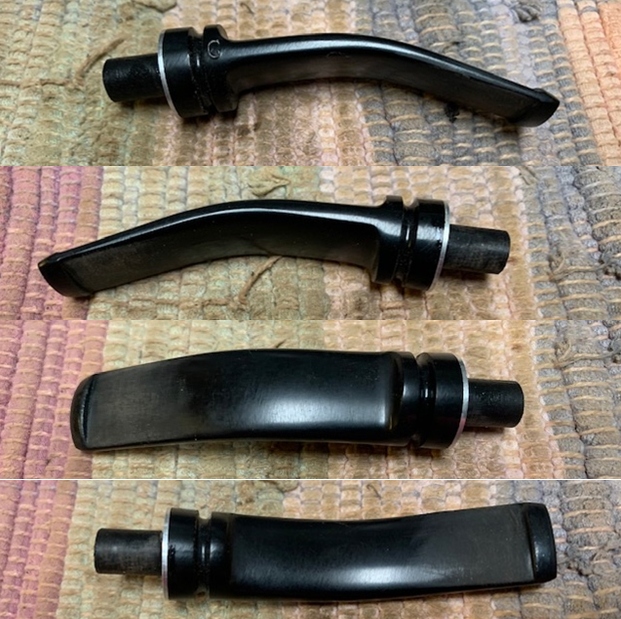
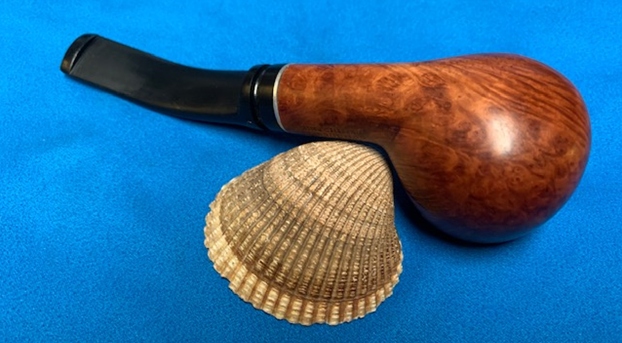
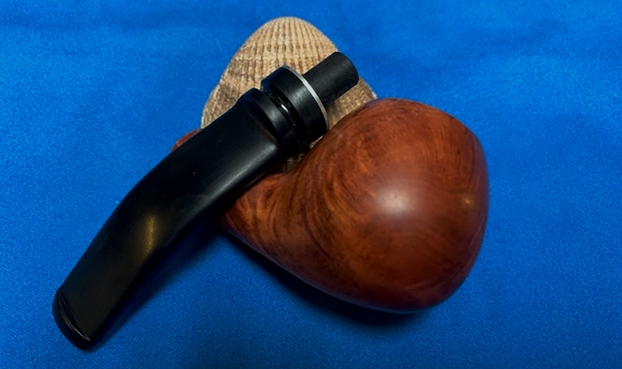
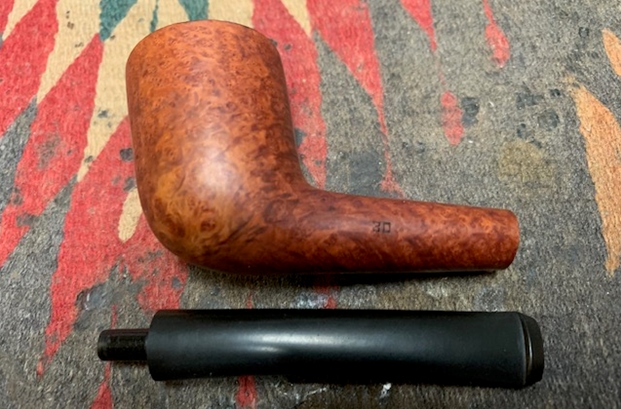
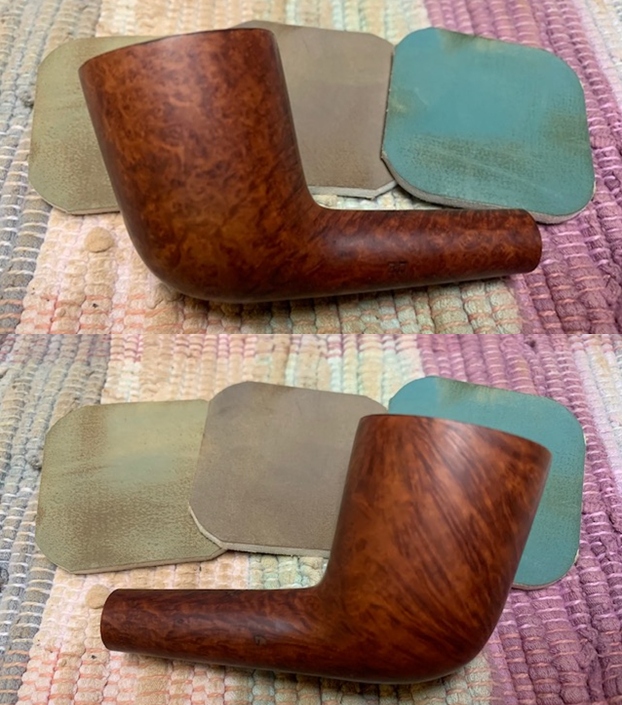
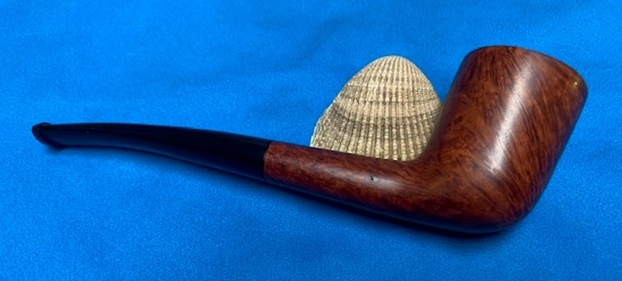
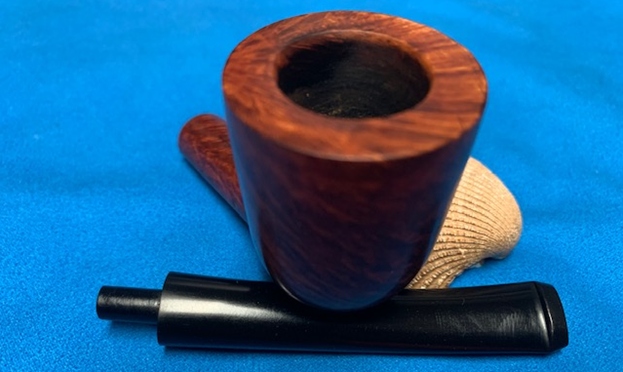
 The next pipe on the work table came to us from a fellow in Michigan, USA. It is a nicely shaped author. It has a taper vulcanite stem and beautiful grain showing through the grime around the bowl. It has the usual Malaga Oil Curing. I have worked on quite a few Malaga pipes throughout the years and have always found the fit and finish very well done. This pipe is stamped on the left side of the shank and reads M-2 which is the stamp or a Malaga Second. There is a thick cake in the bowl and a thick overflow of lava on the back rim top. It appears that there is some damage to the inner edge of the rim in that area as well. The outer edge of the bowl looks very good. The taper vulcanite stem was oxidized, calcified and had light tooth marks and chatter on both sides of the stem near the button. The pipe looks to be in decent condition under the grime. Jeff took photos of the pipe before he started his cleanup.
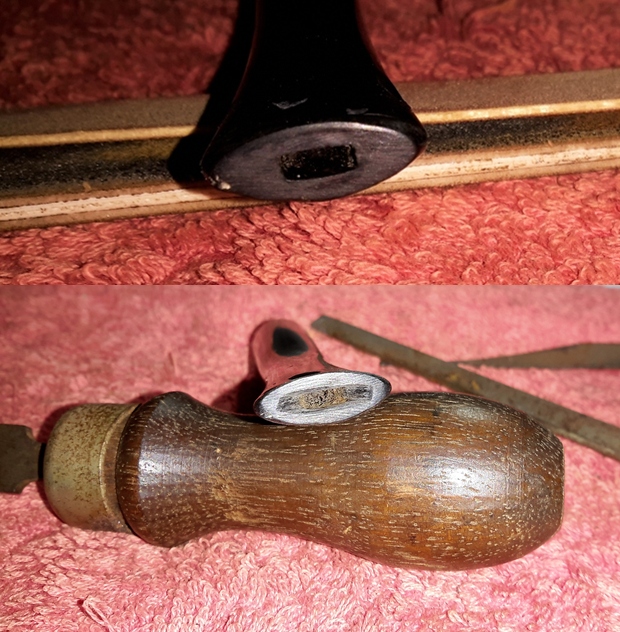
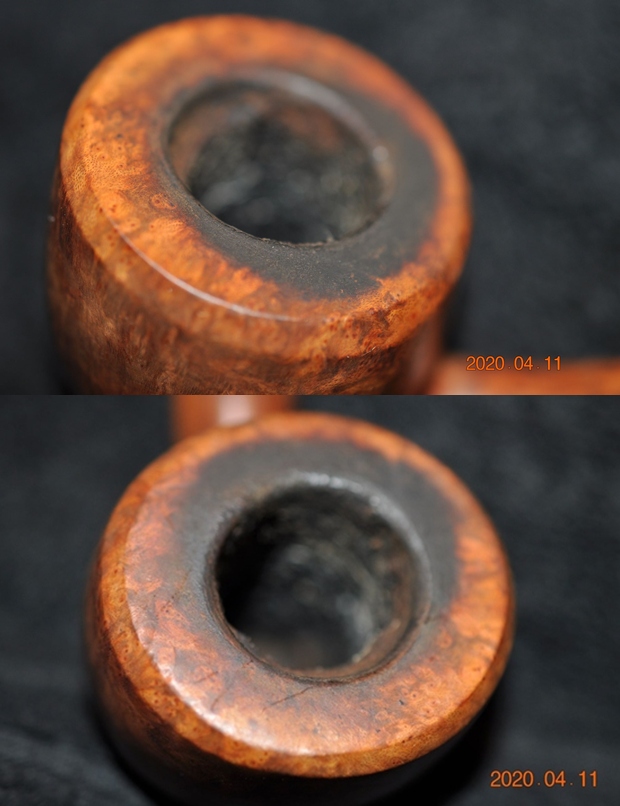
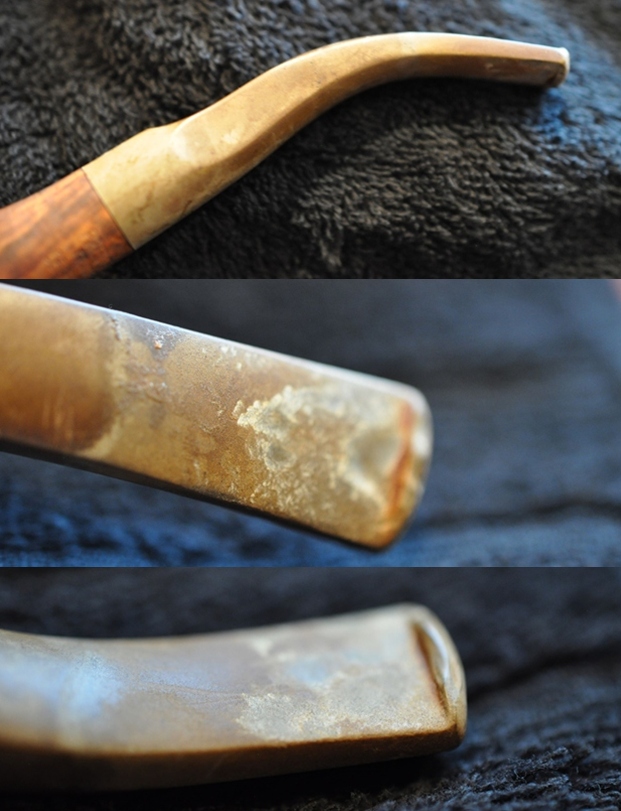
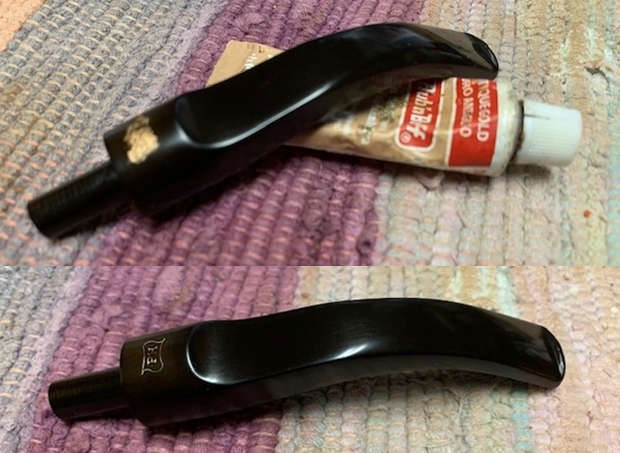
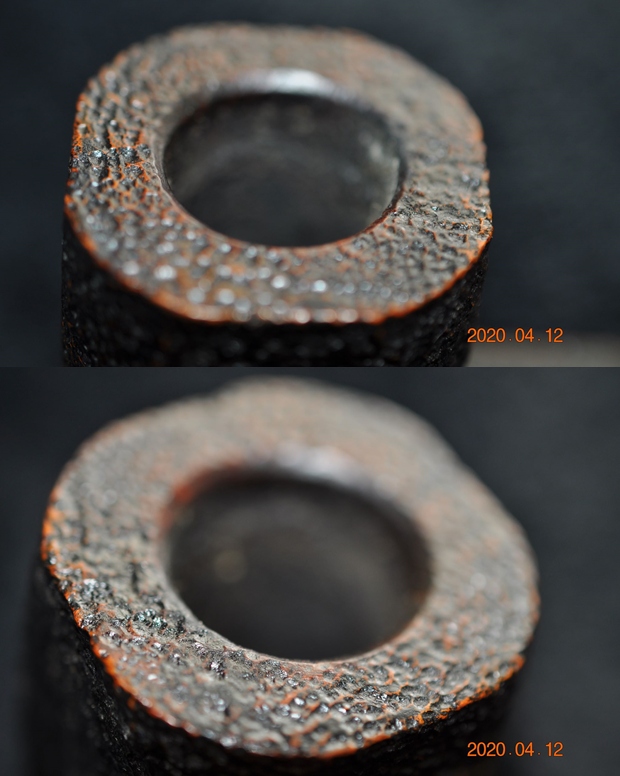
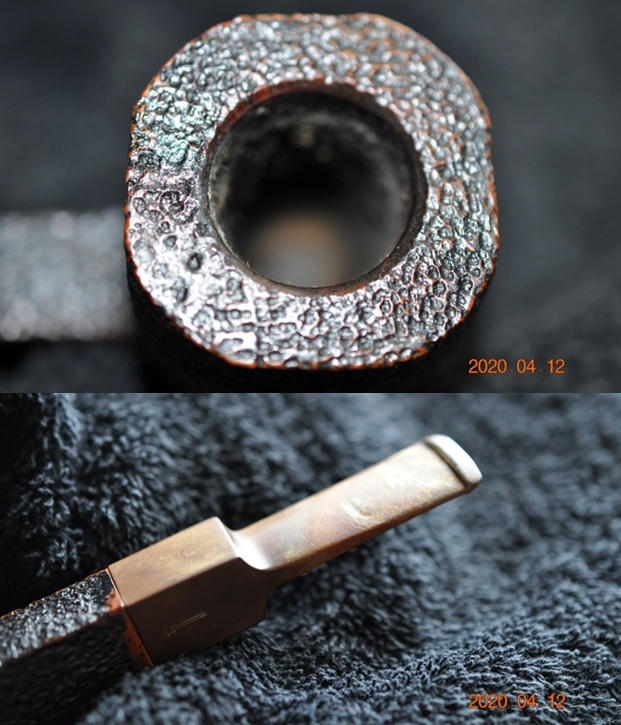
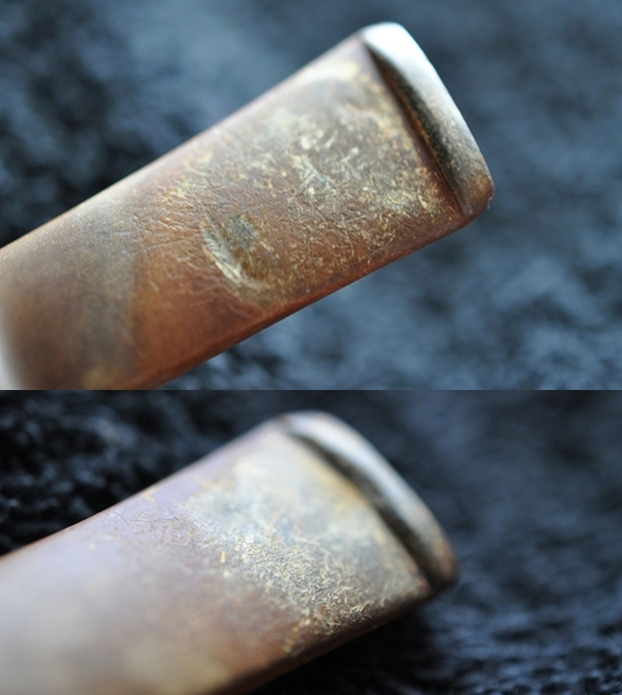
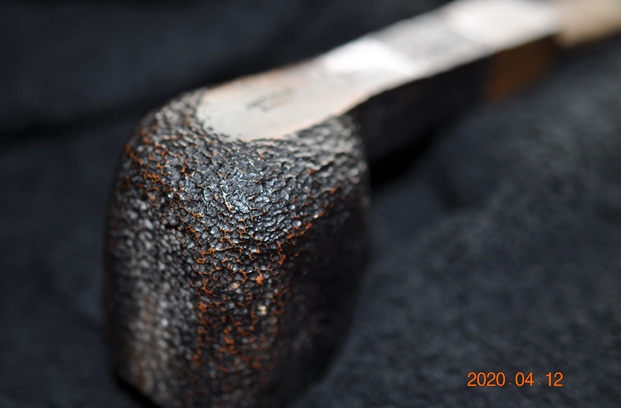
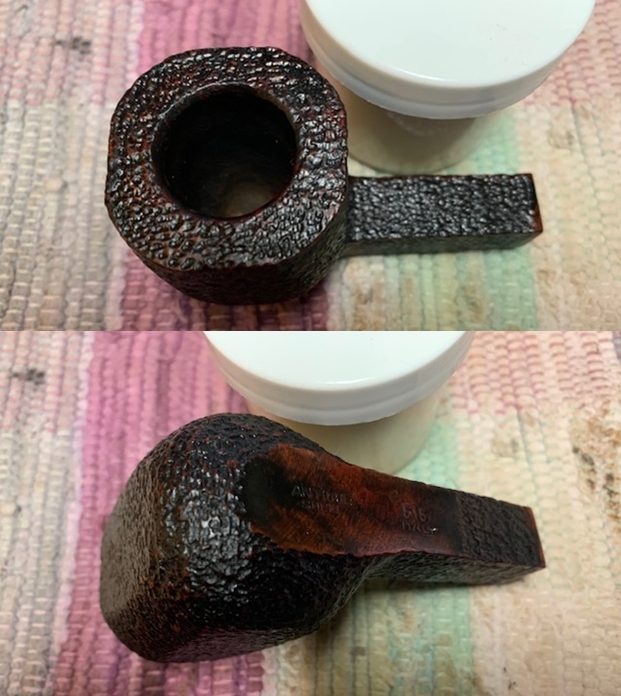
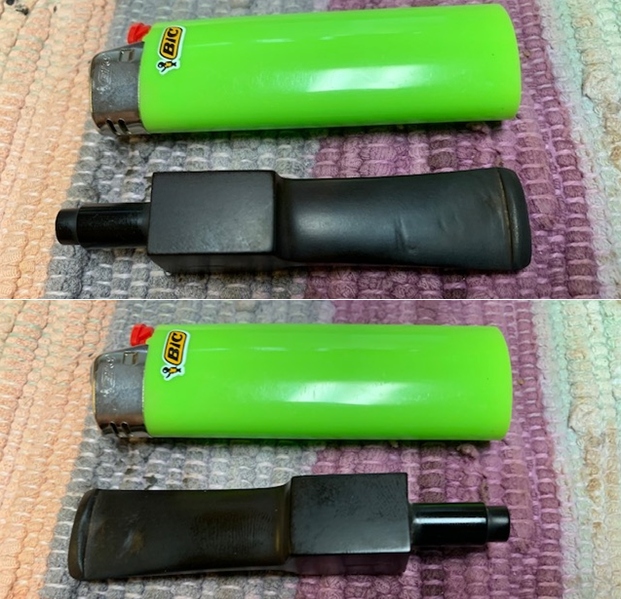
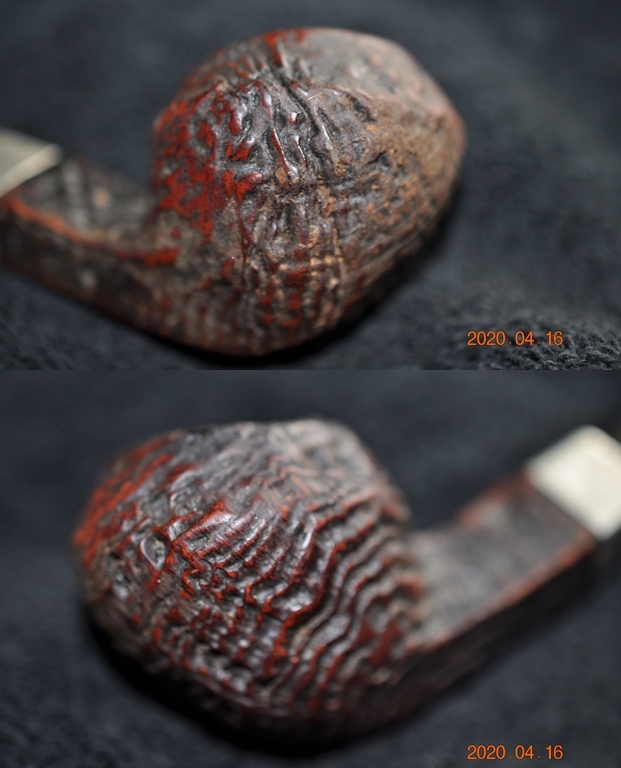
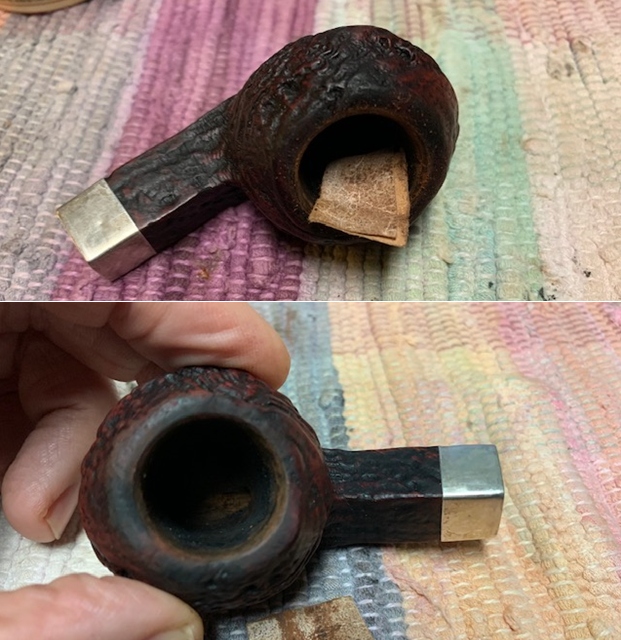
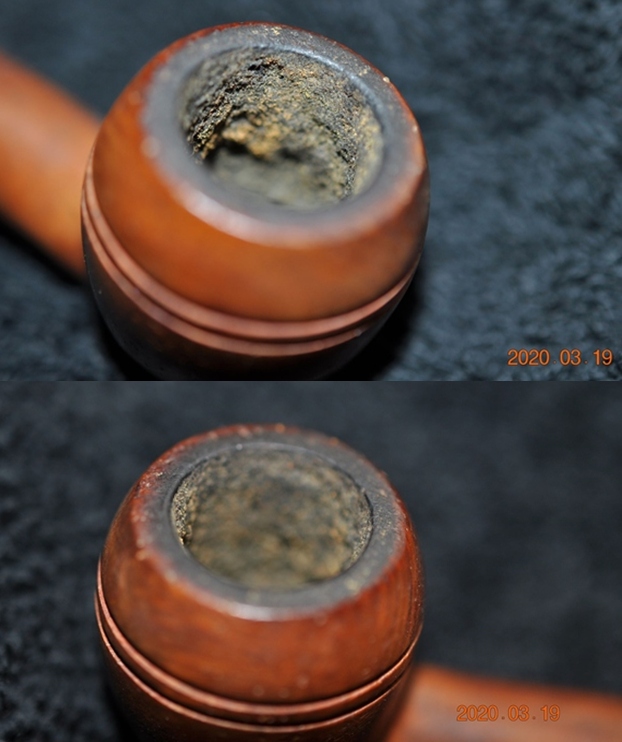
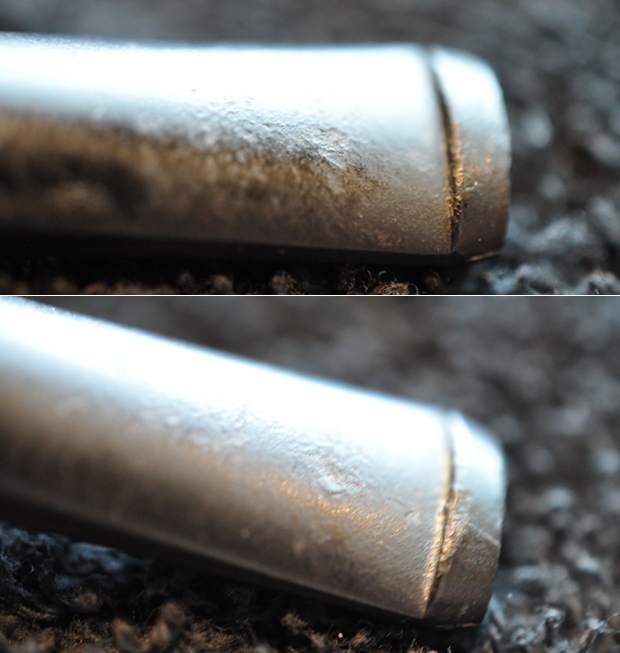
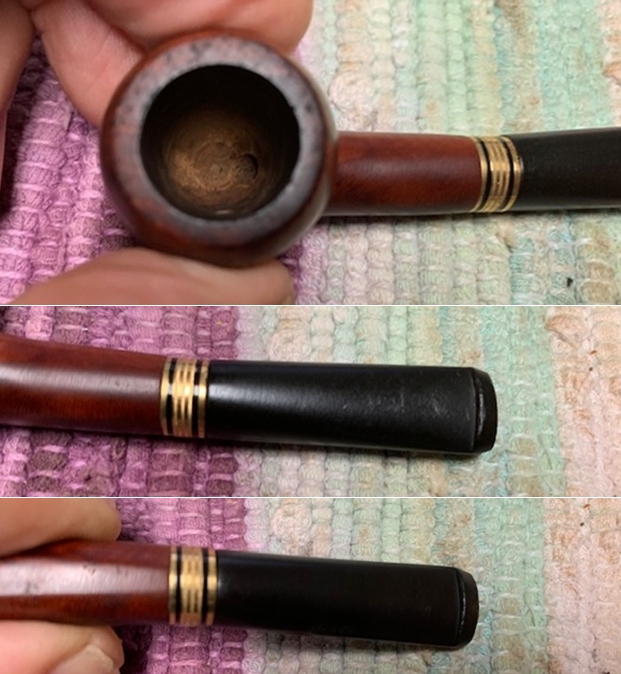
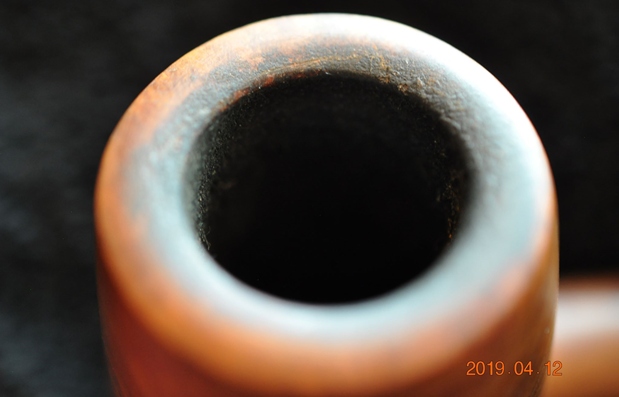
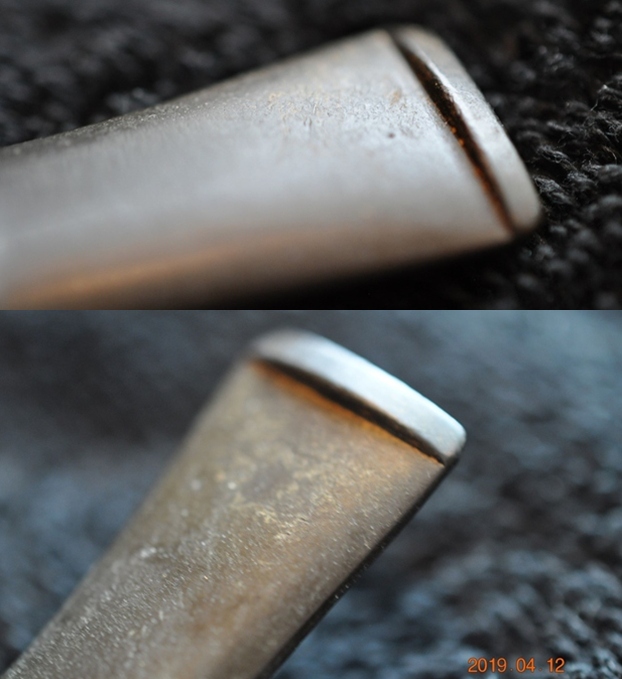
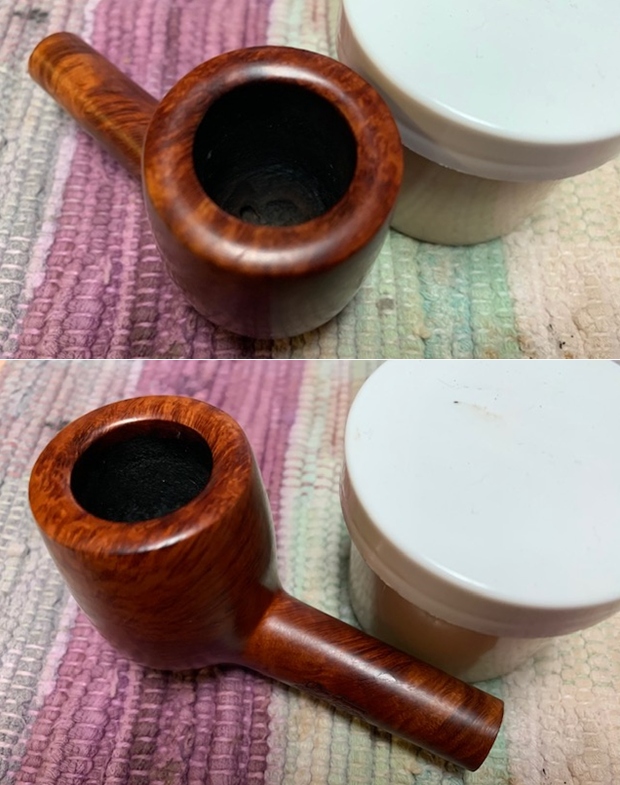
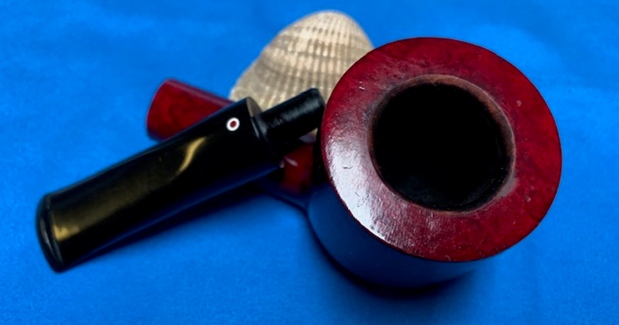
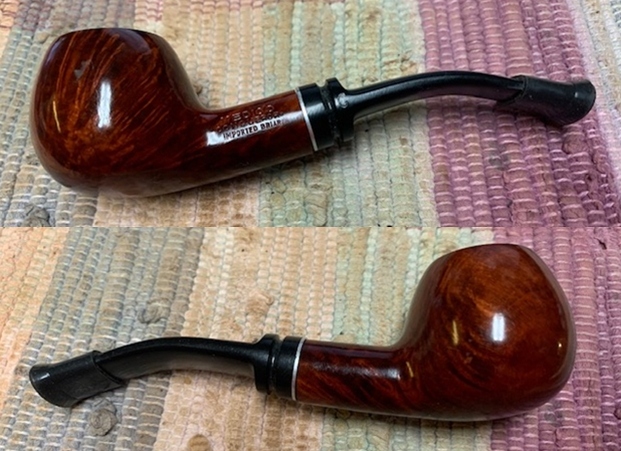
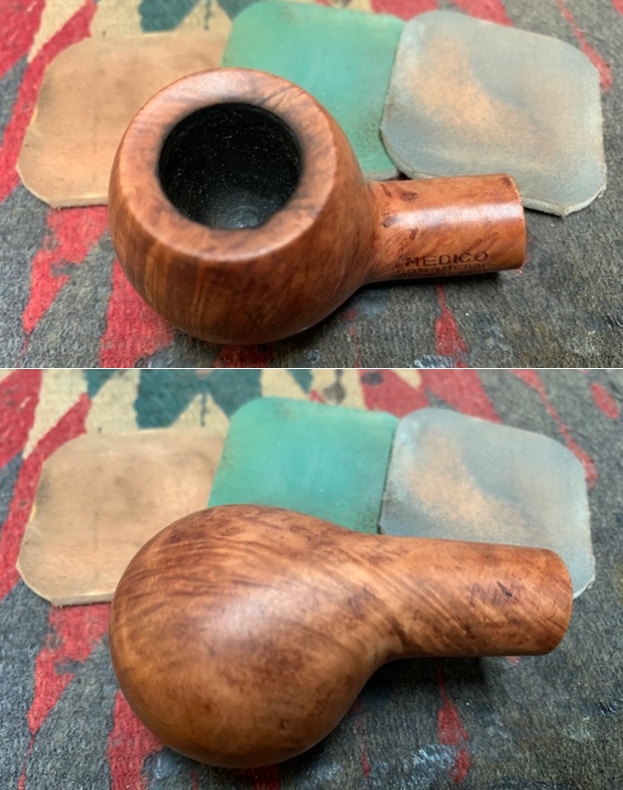
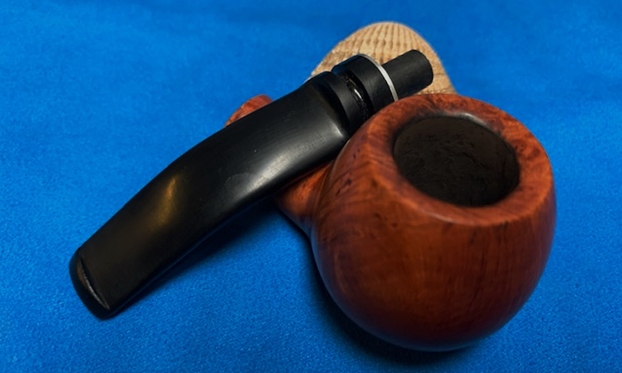
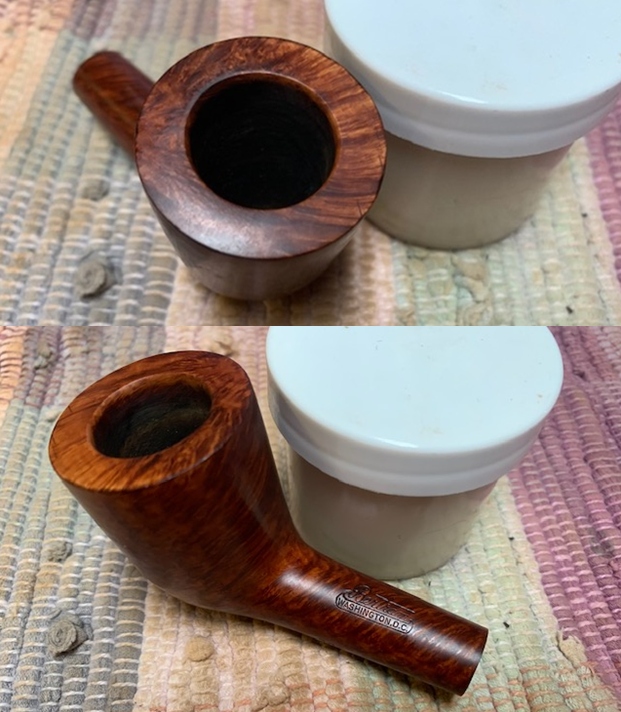
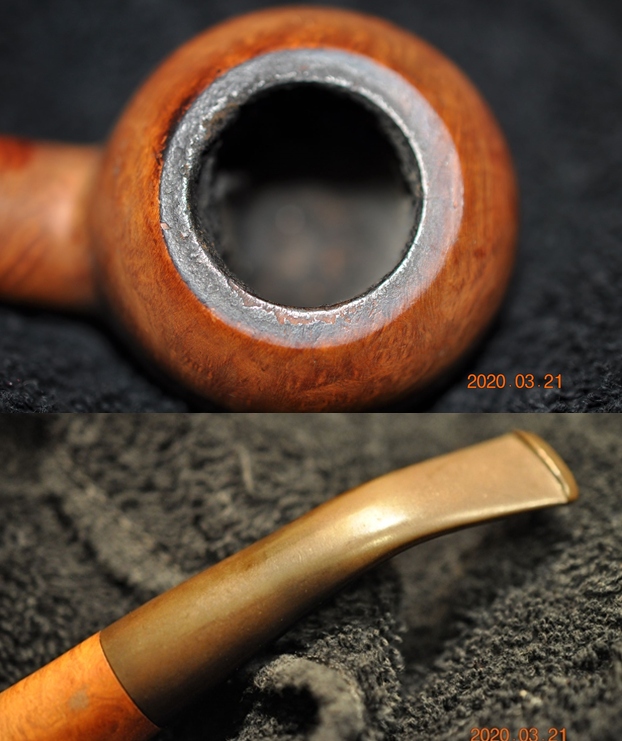
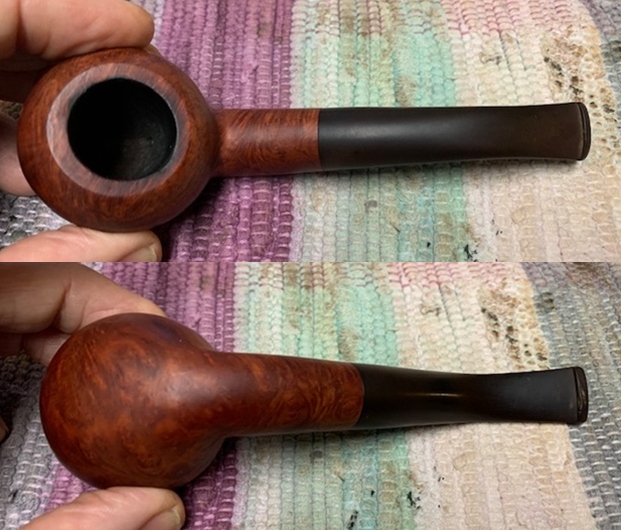
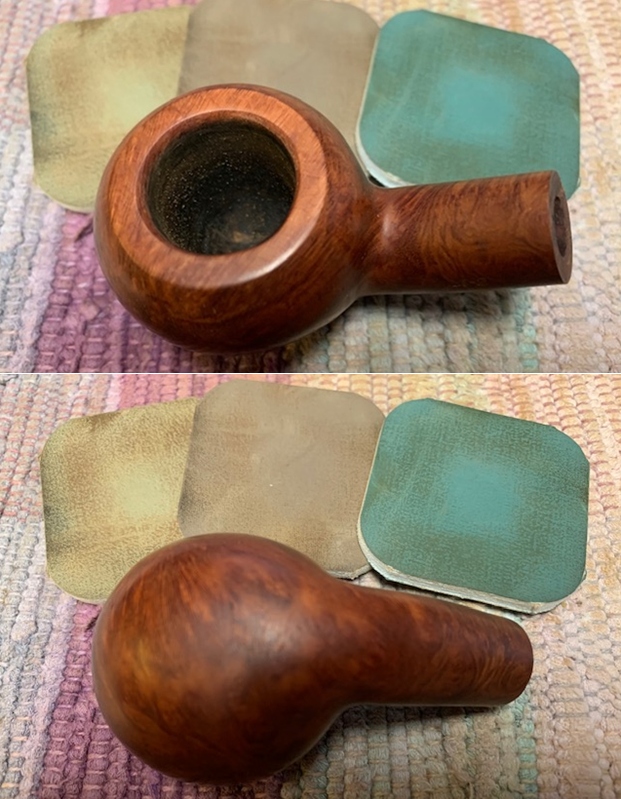
  He took photos of the rim top to show the cake and the lava coat. It is another dirty pipe. He also captured the shape of the stem and the deep tooth marks and chatter on the top and underside of the stem near the button.
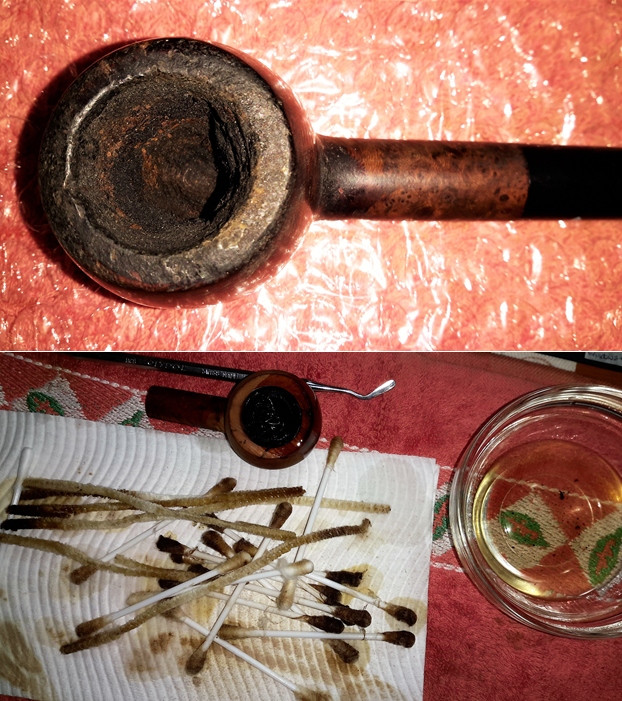
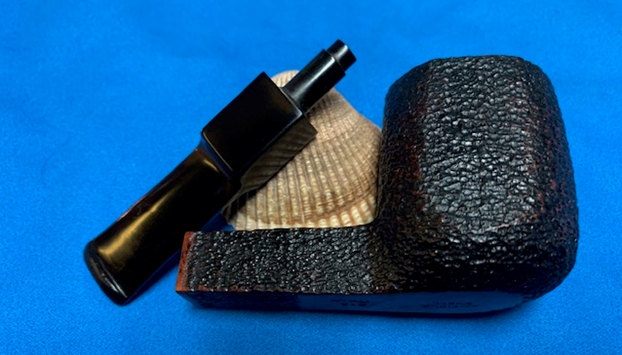
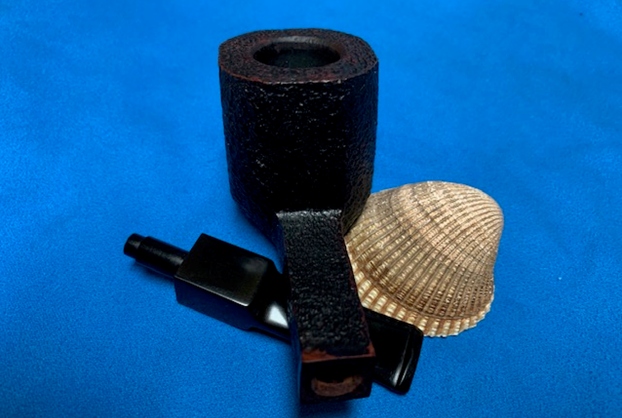
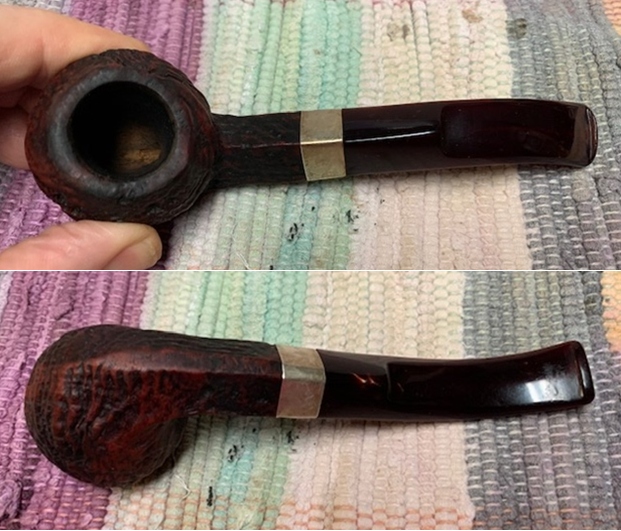
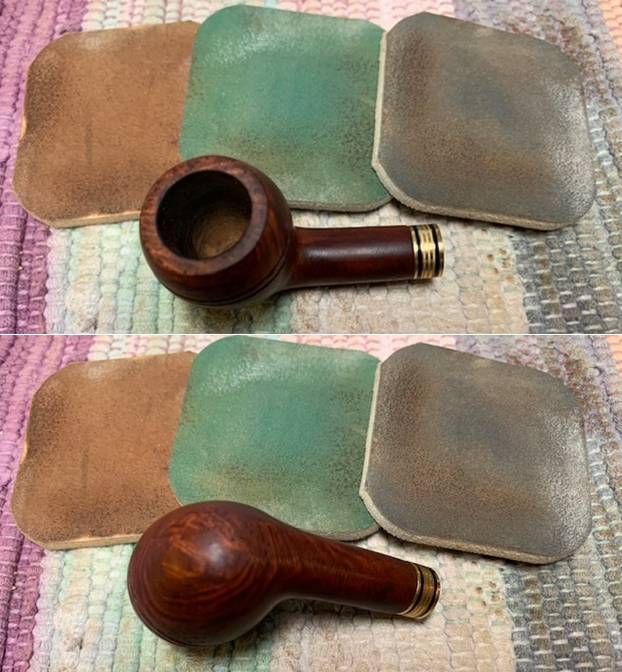
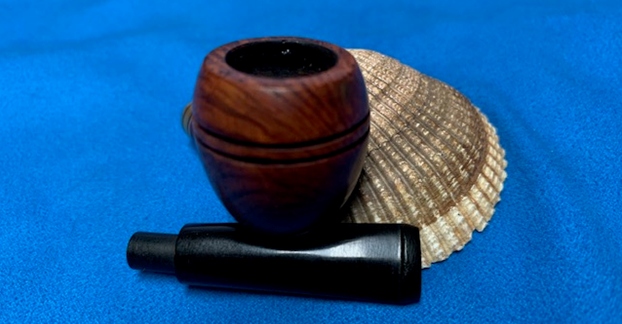
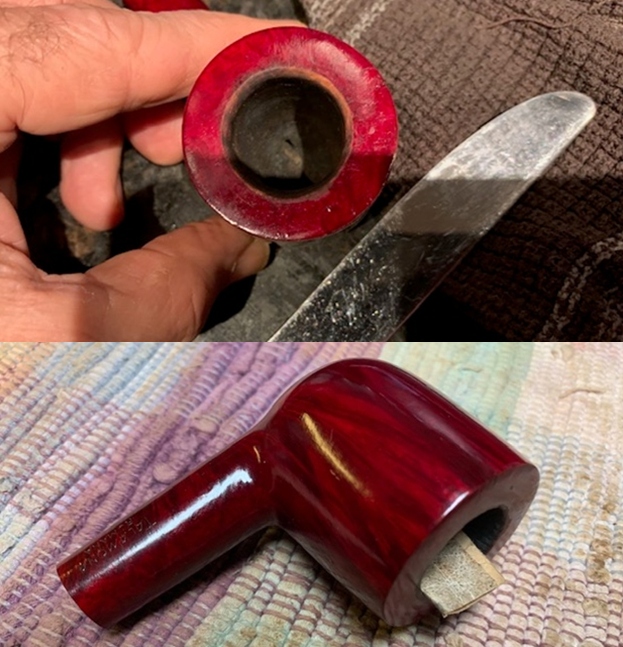
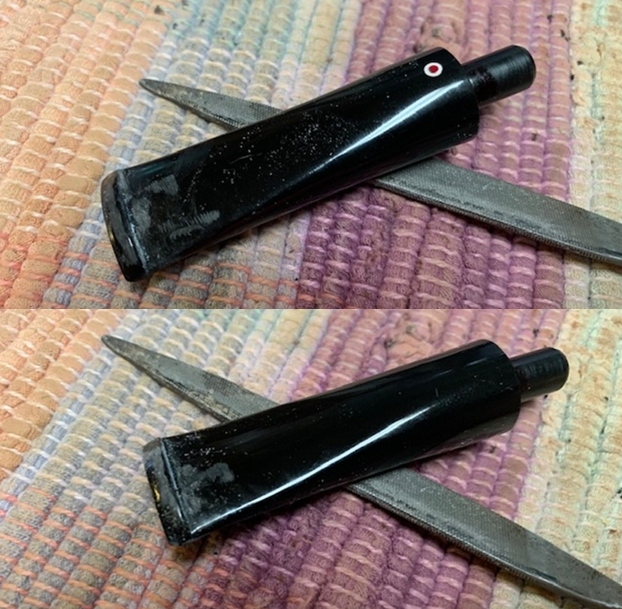
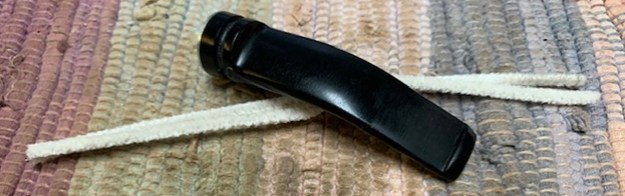
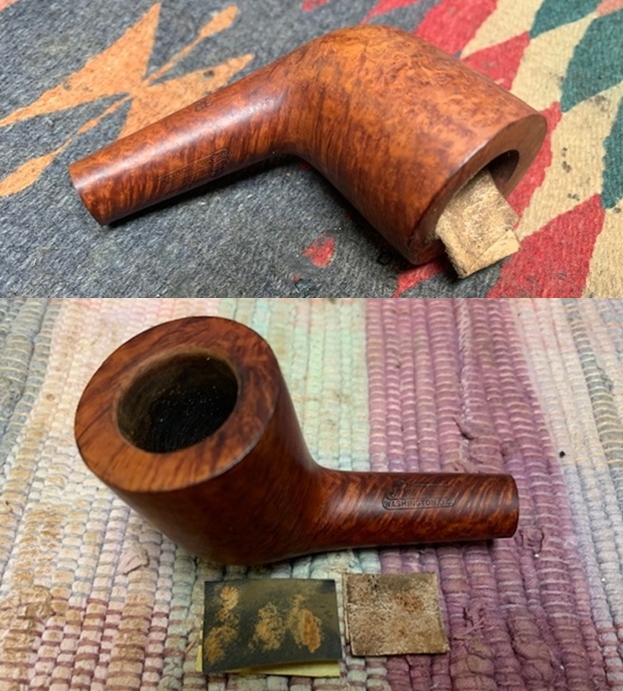
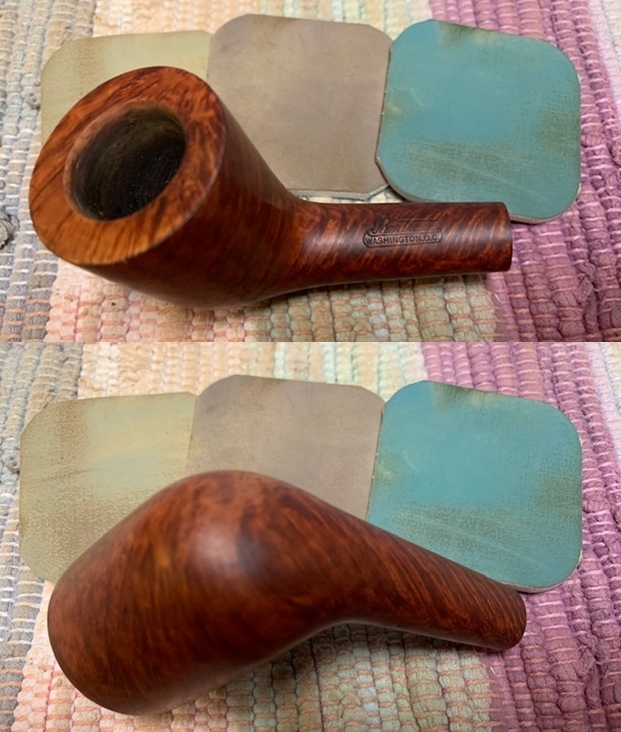
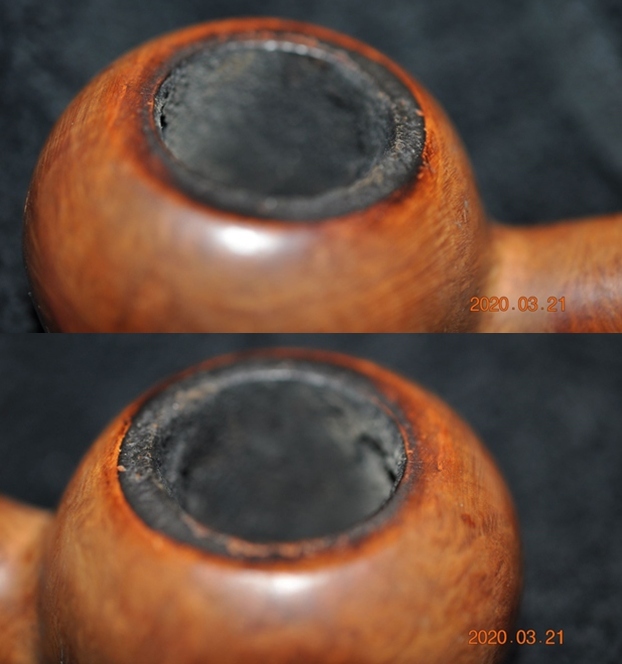
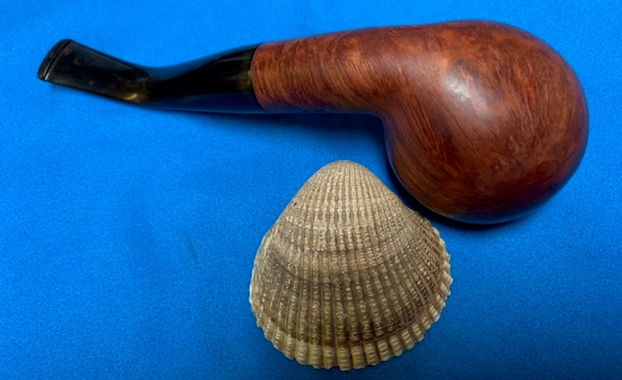
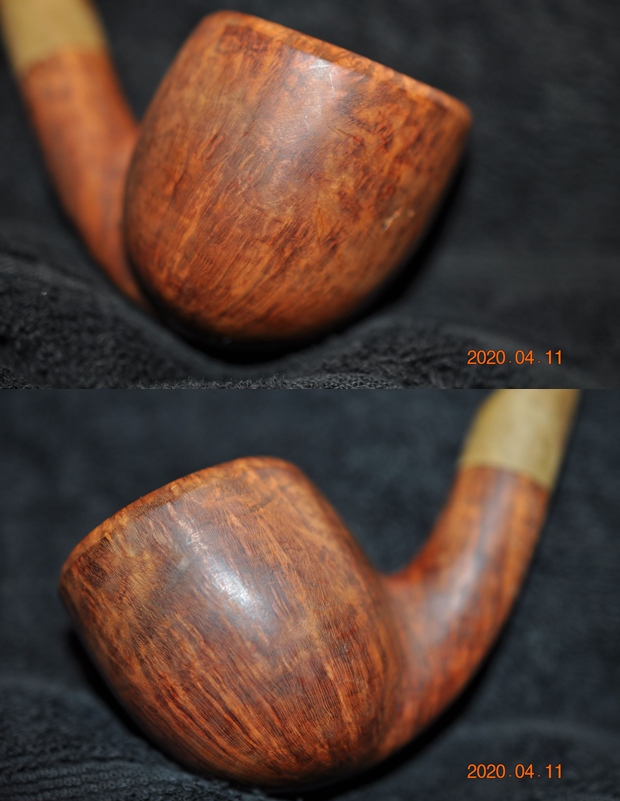
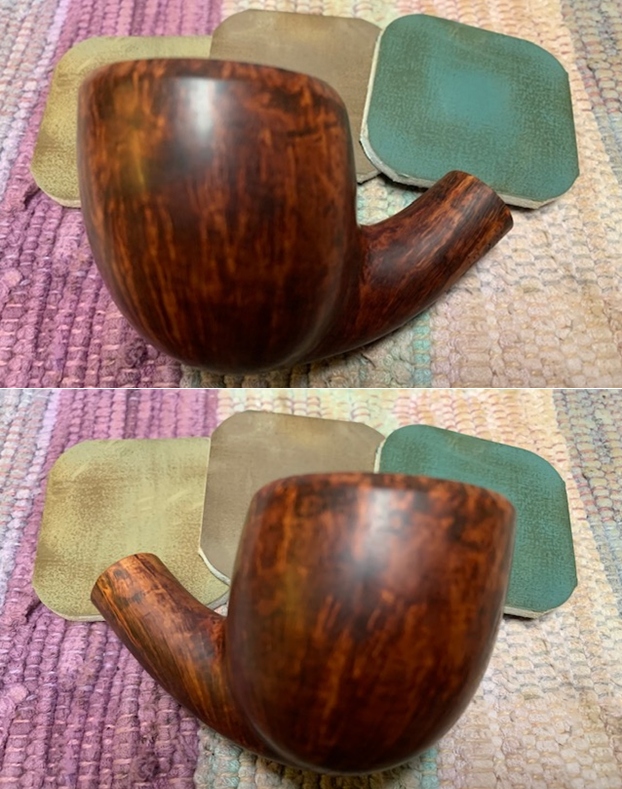
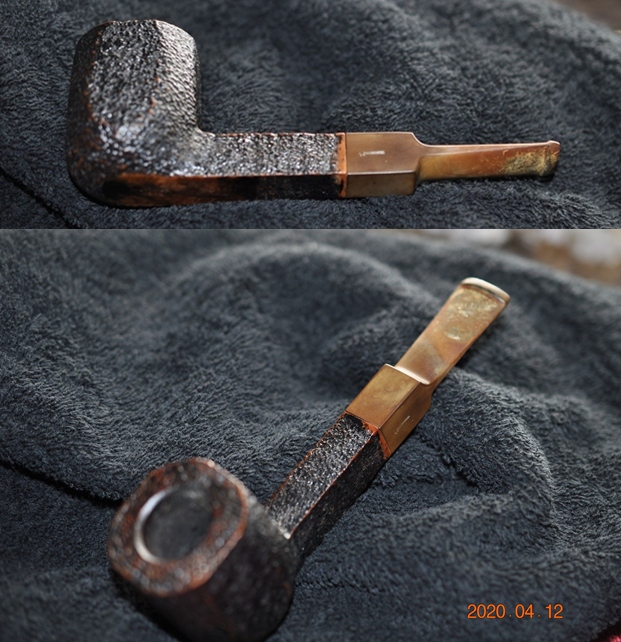
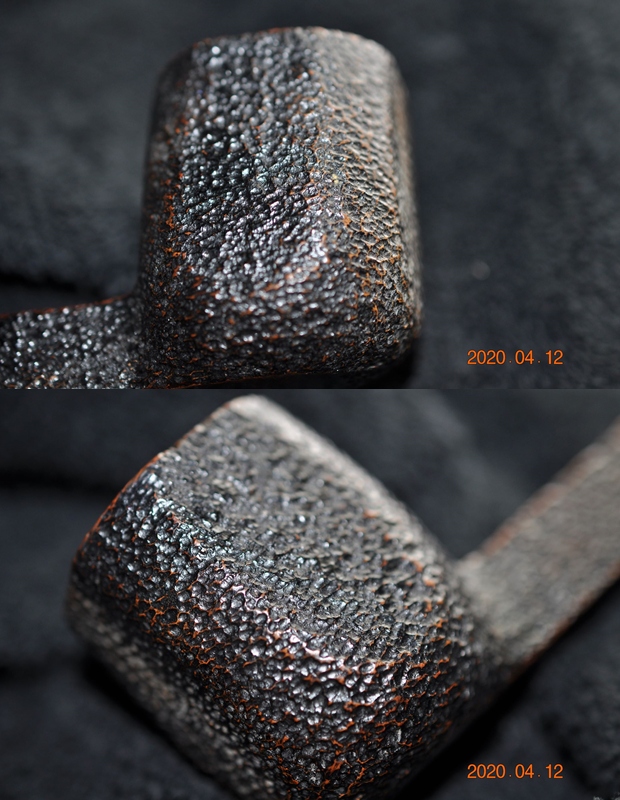
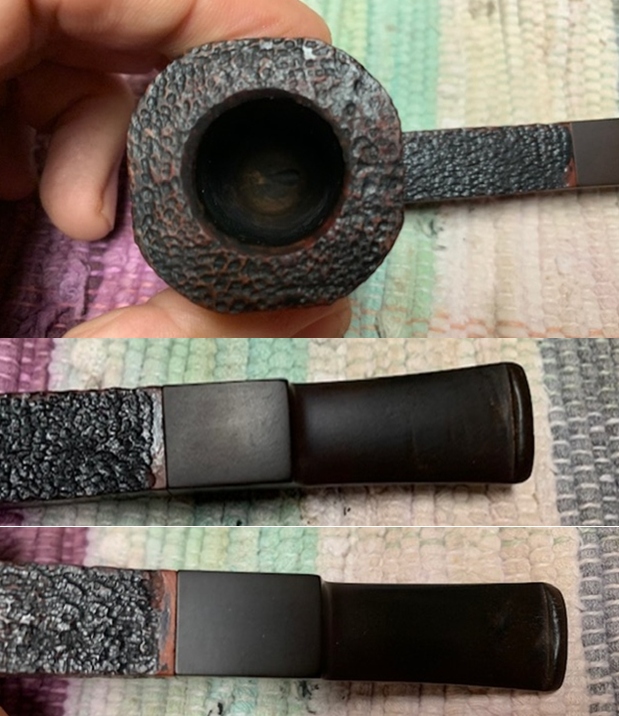
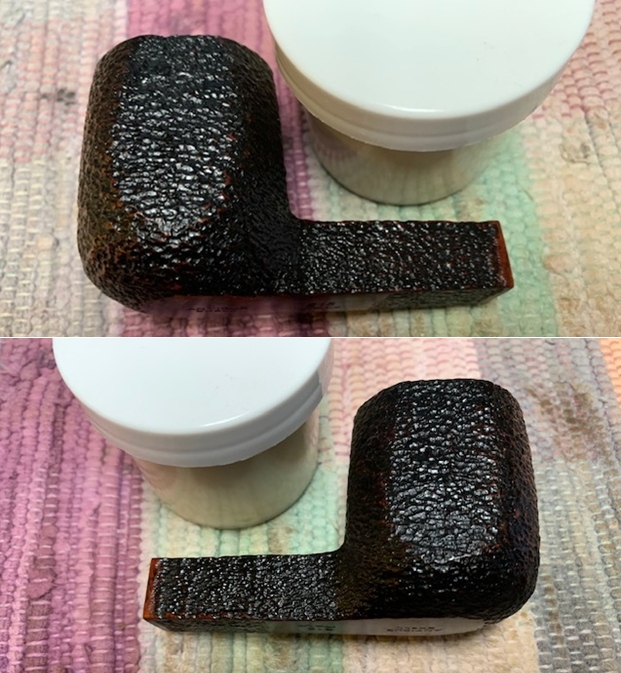
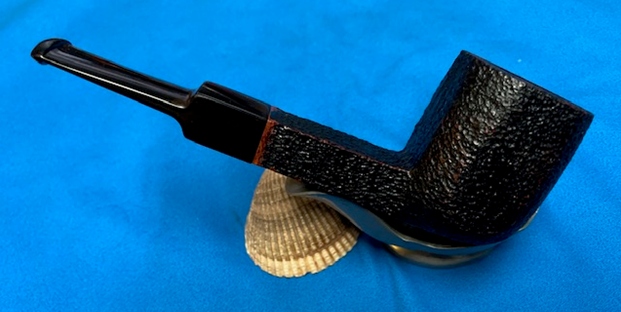
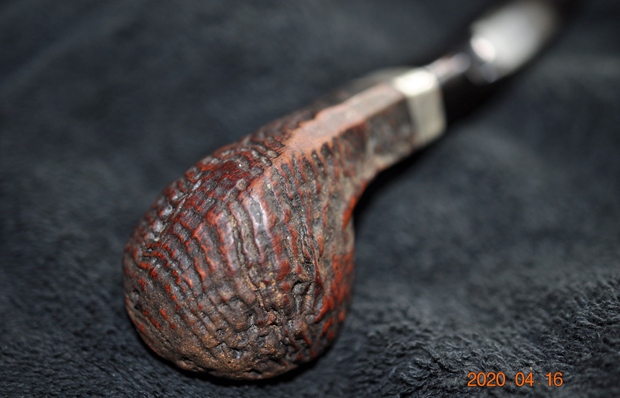
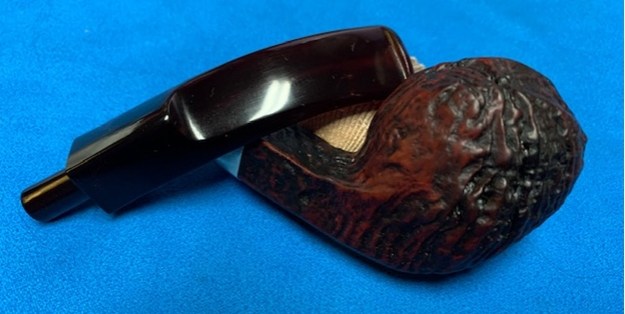
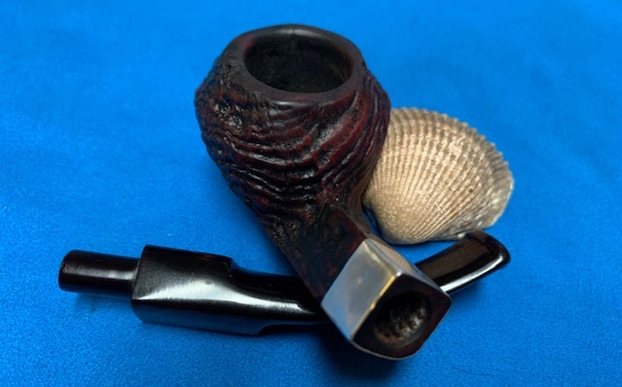
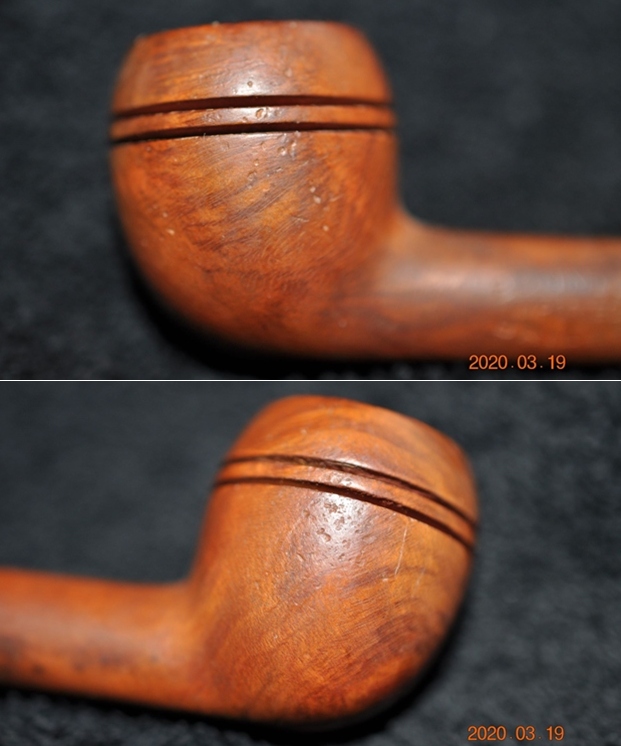
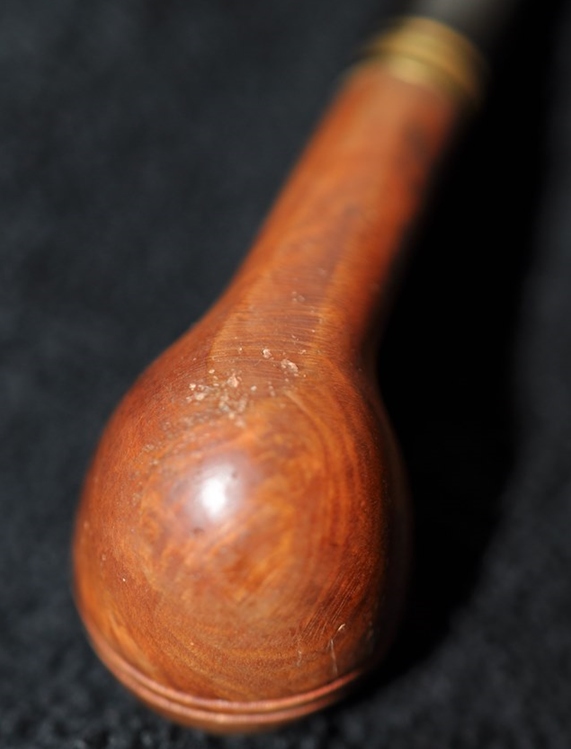
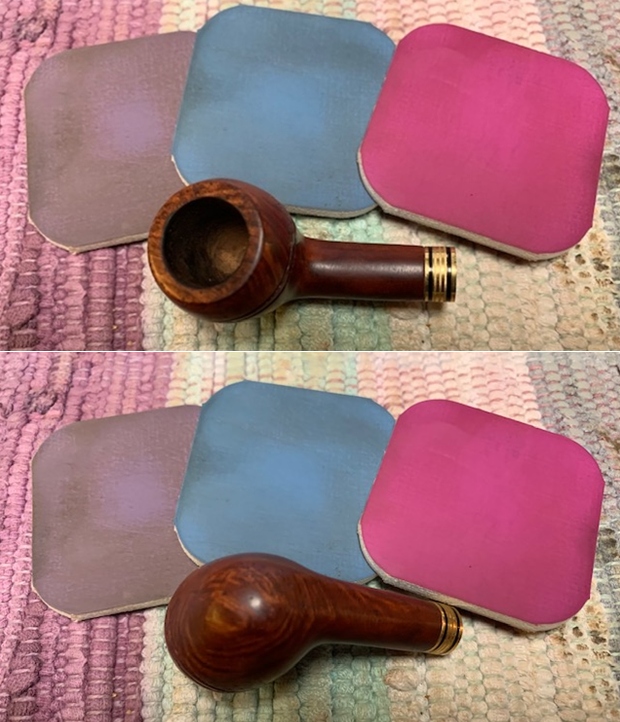
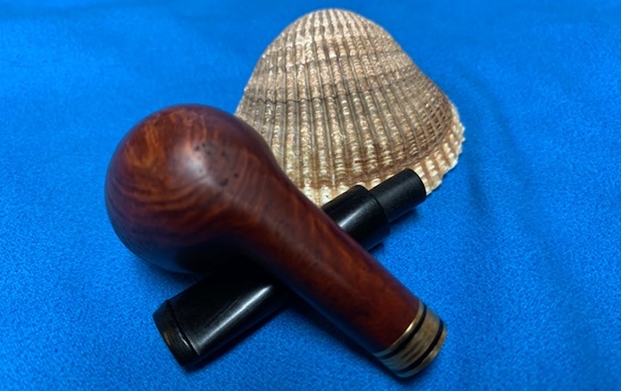
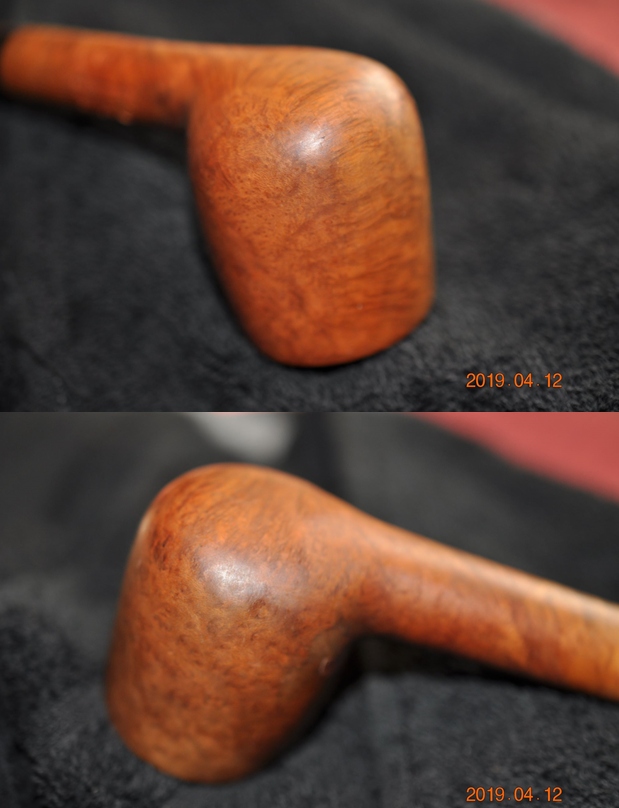
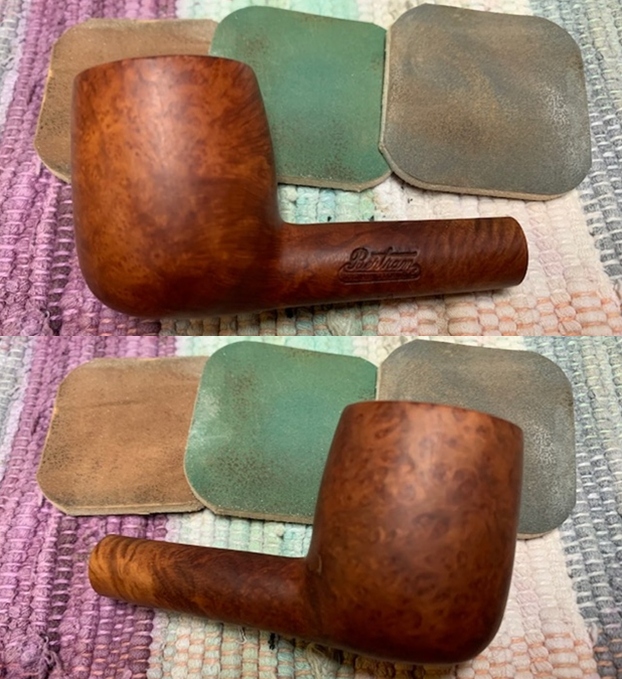
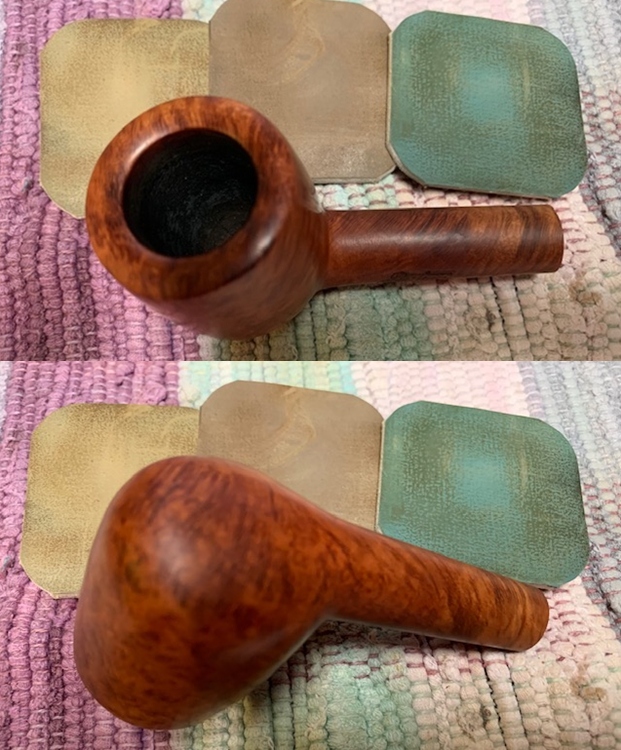
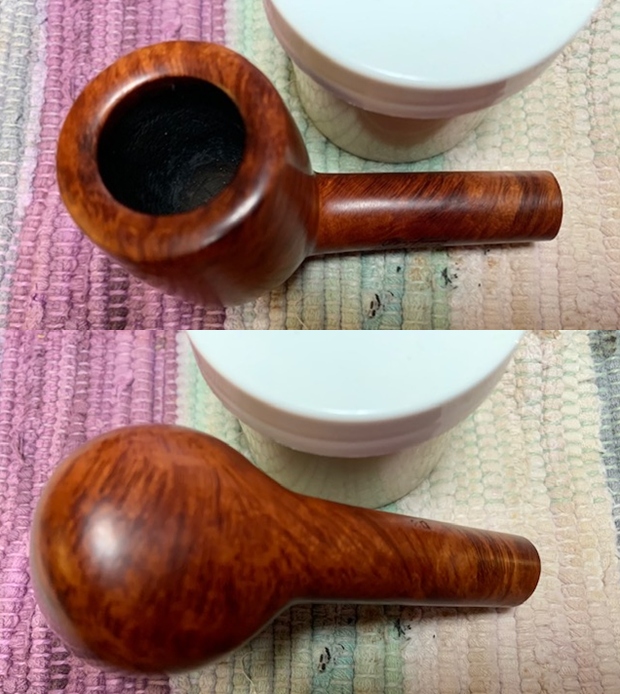
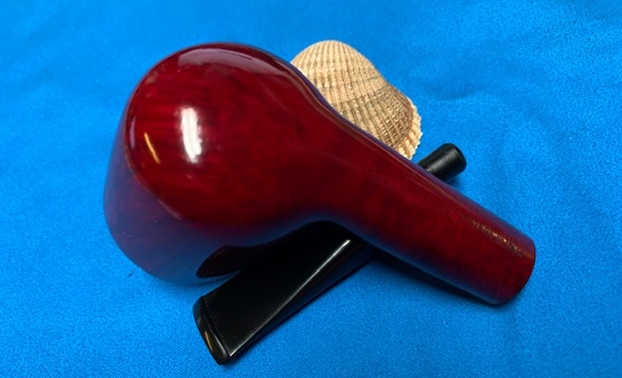
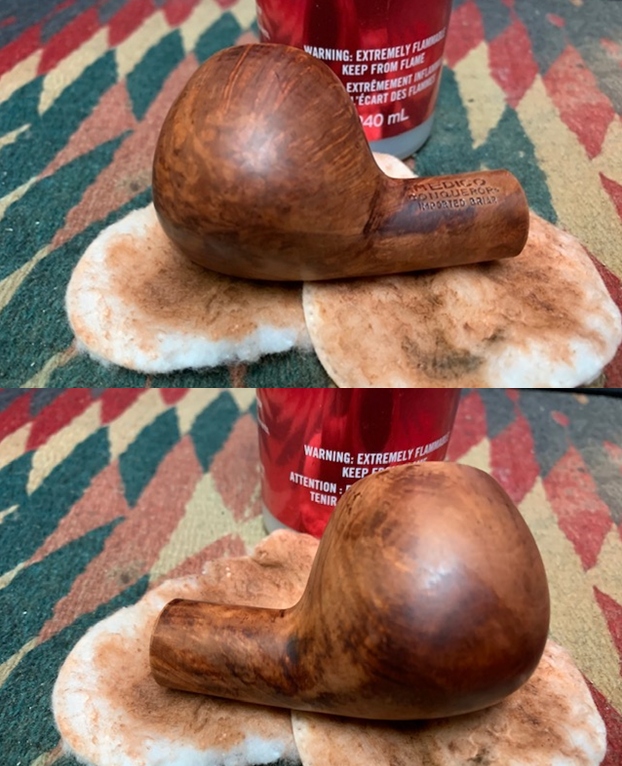
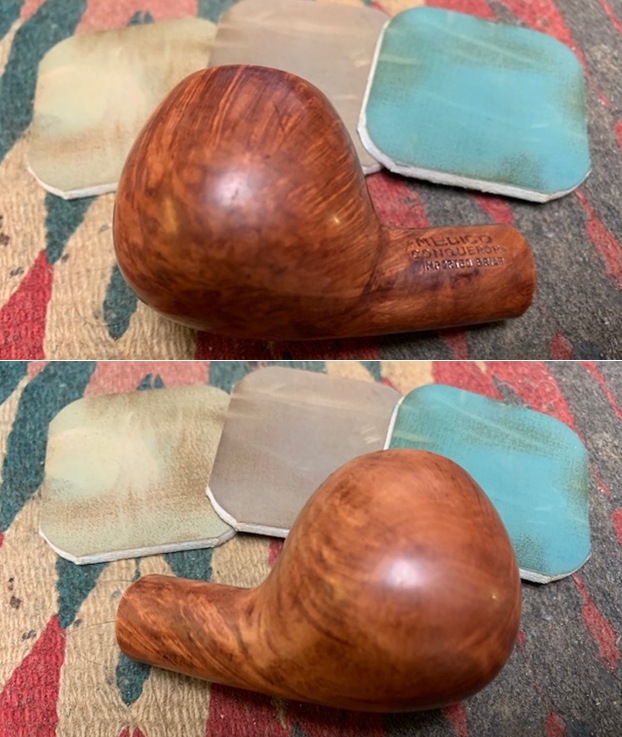
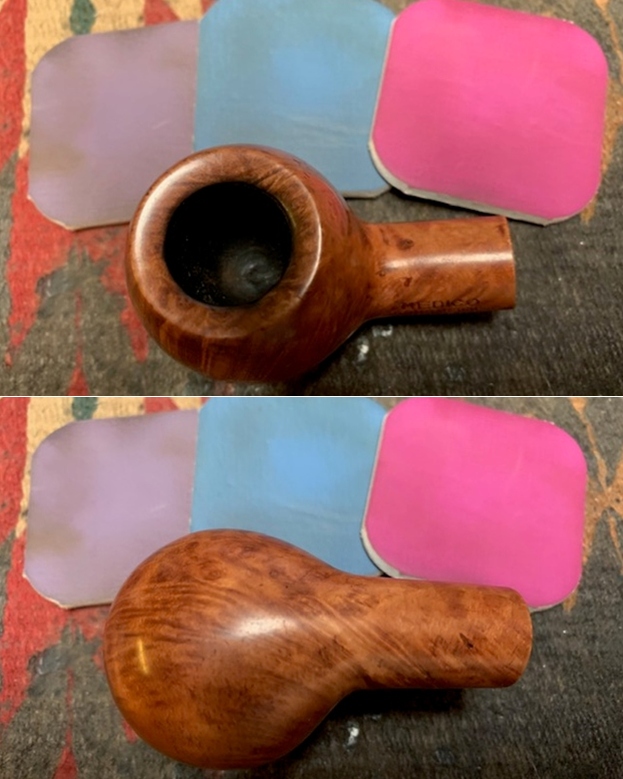
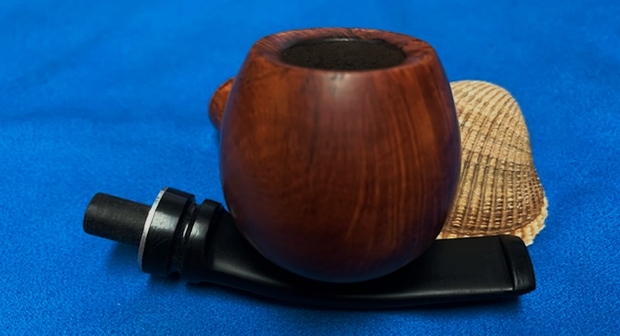
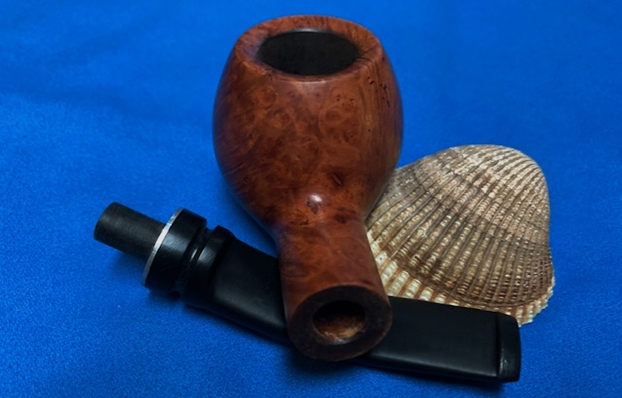
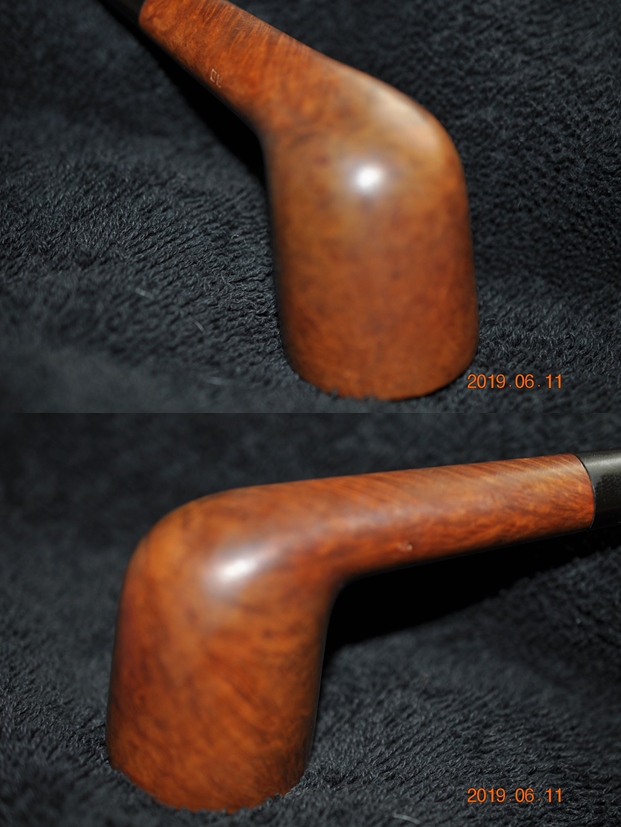
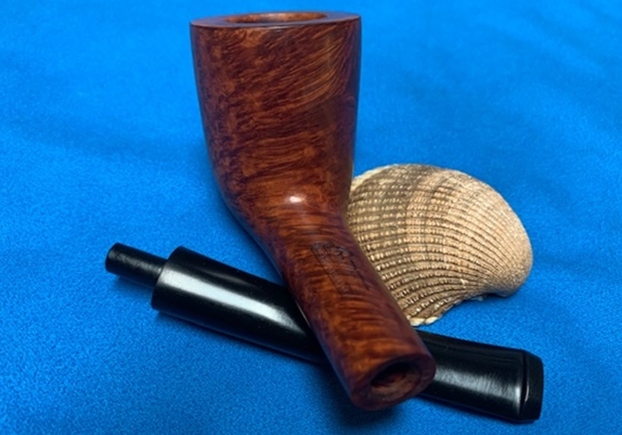
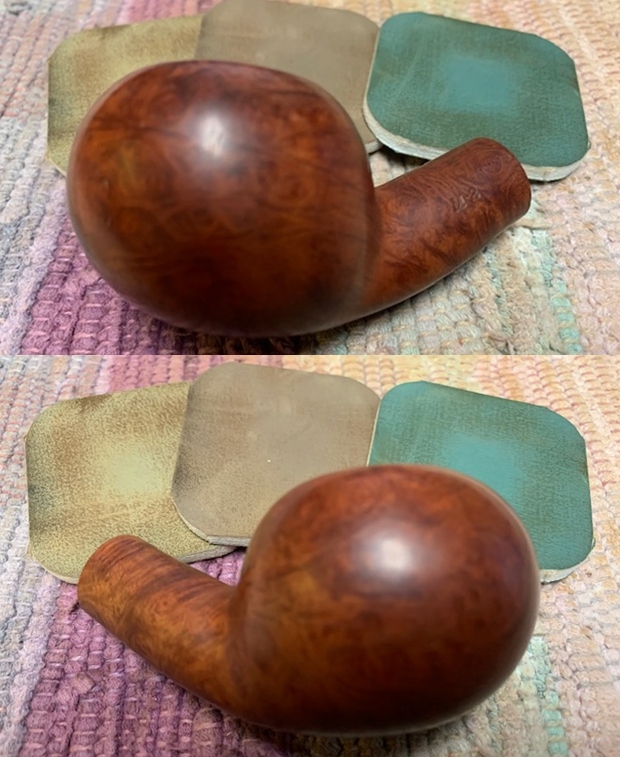
 He took photos of the sides and heel of the bowl to show the beautiful grain around the bowl and the amount of grime ground into the surface of the briar.
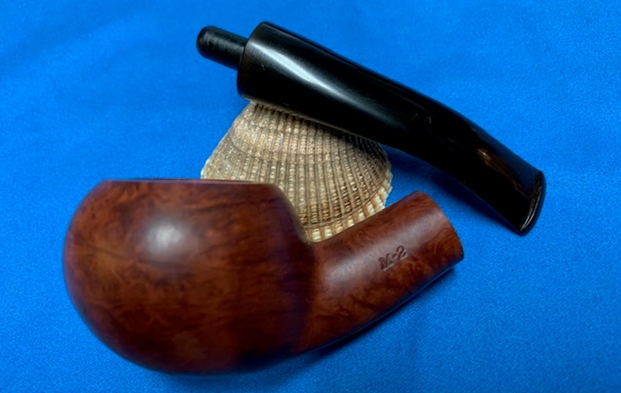
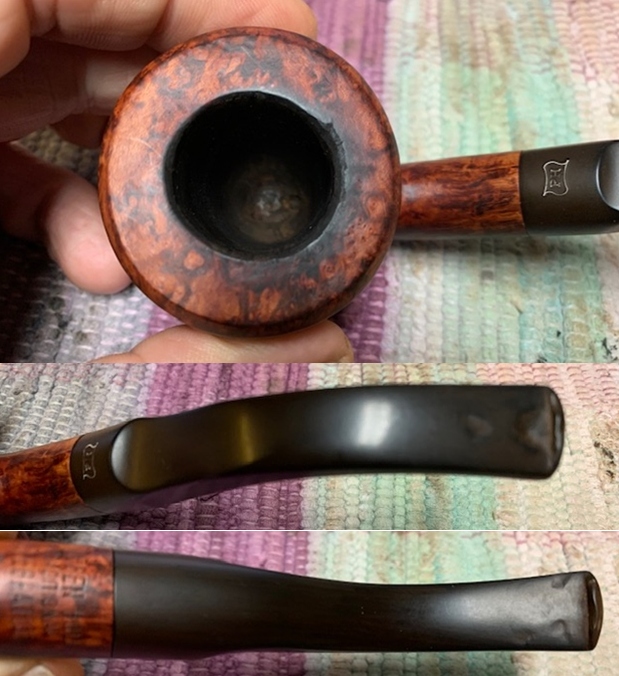
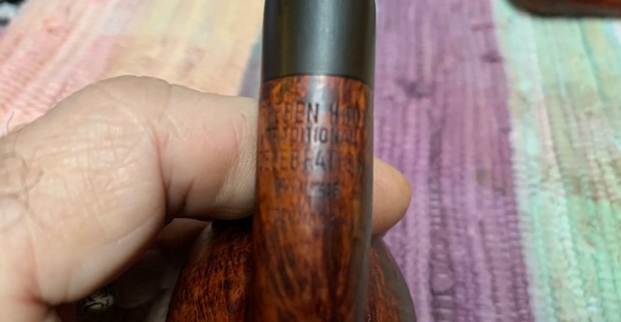
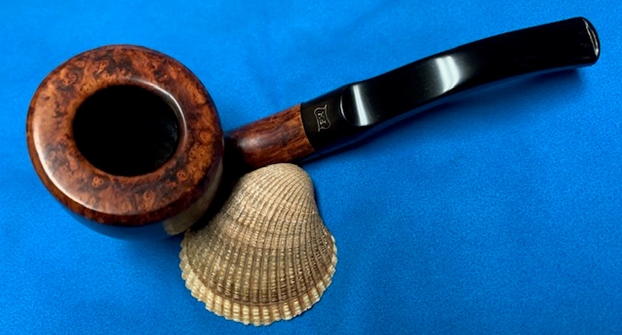
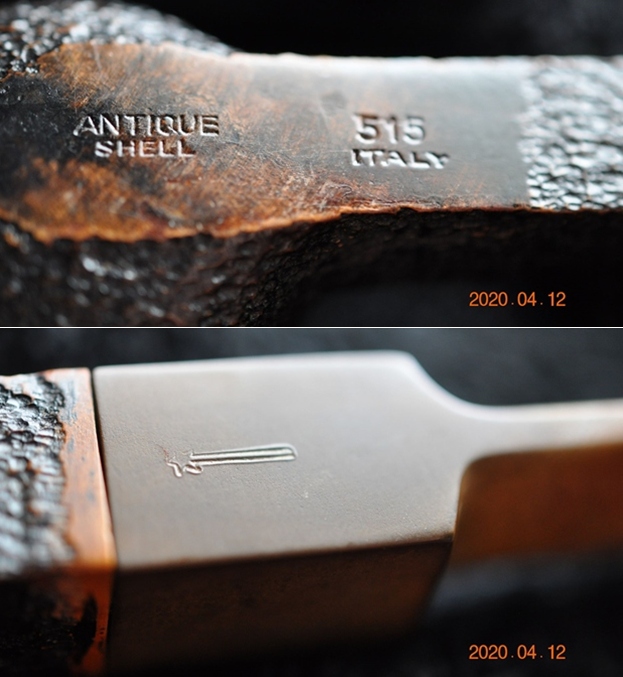
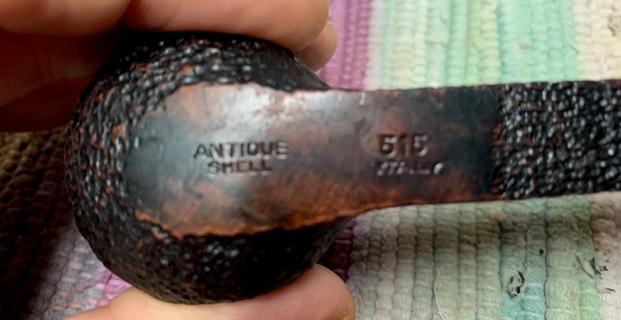
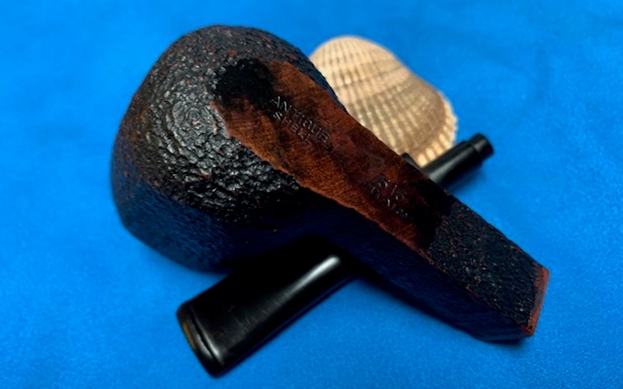
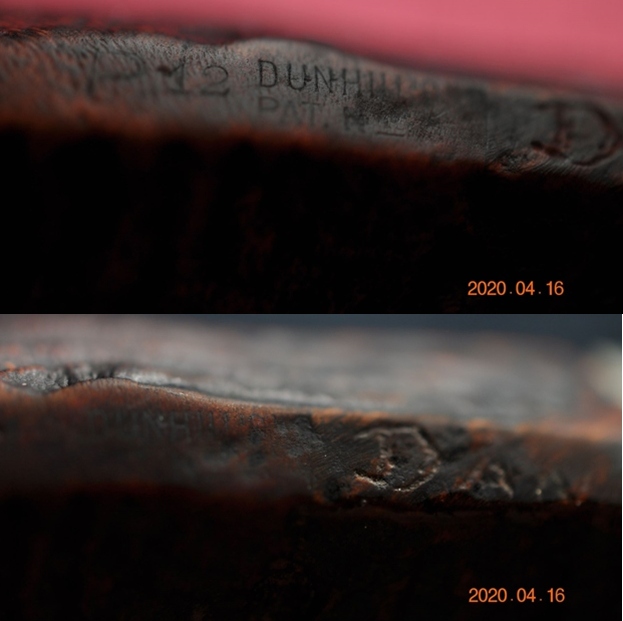
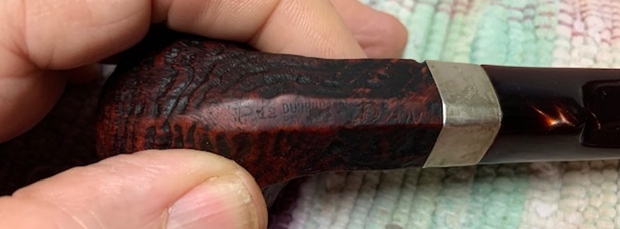
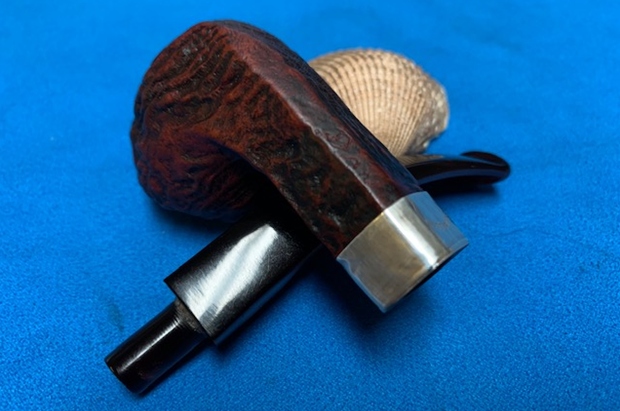
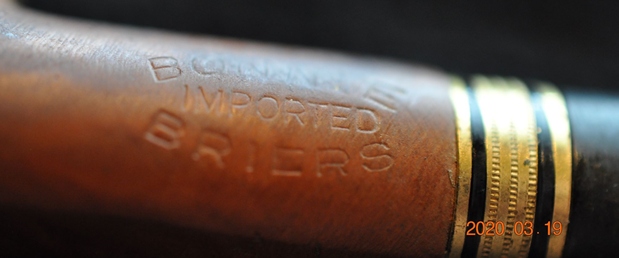
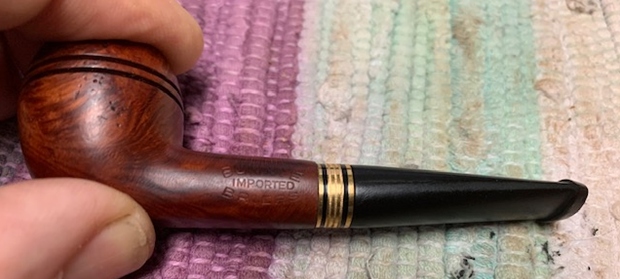
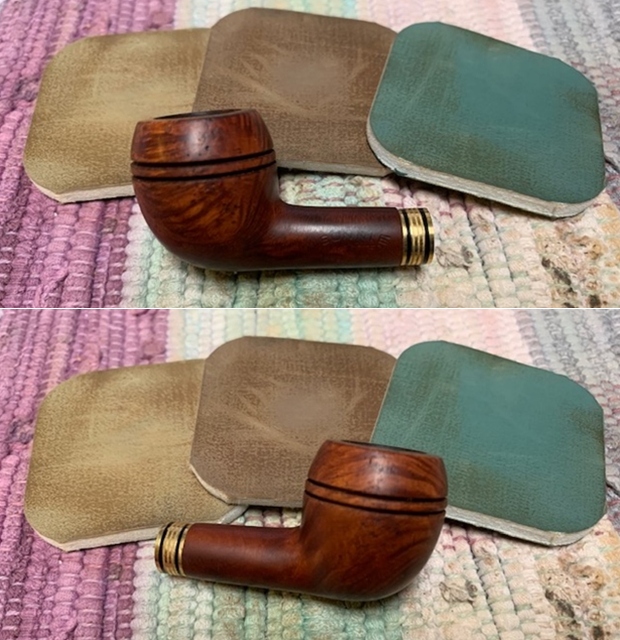
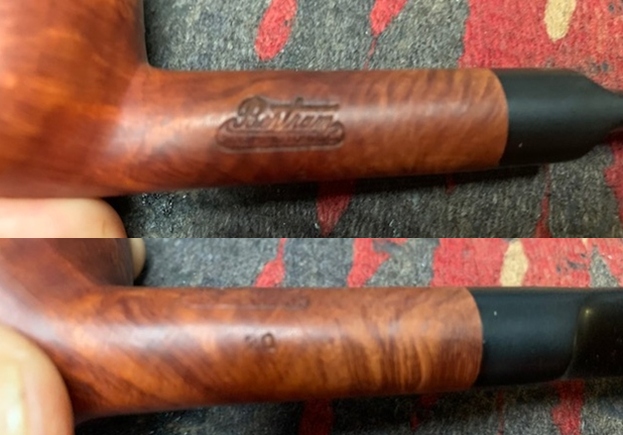
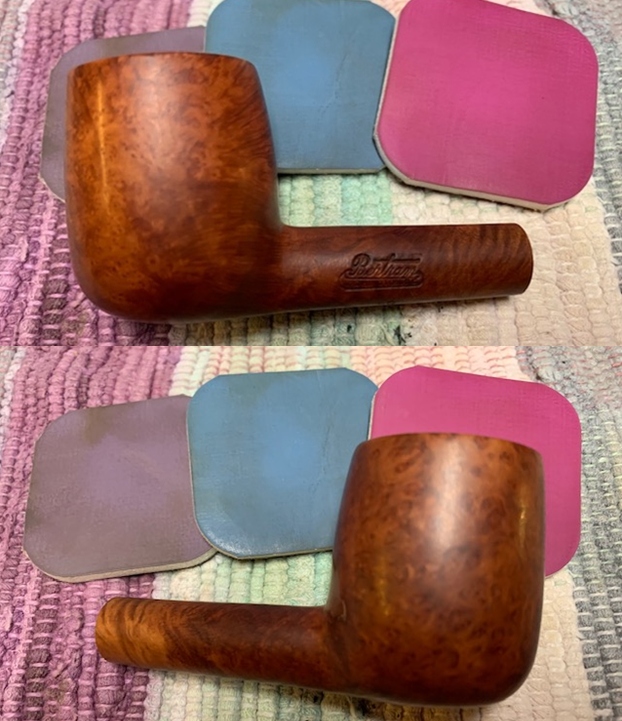
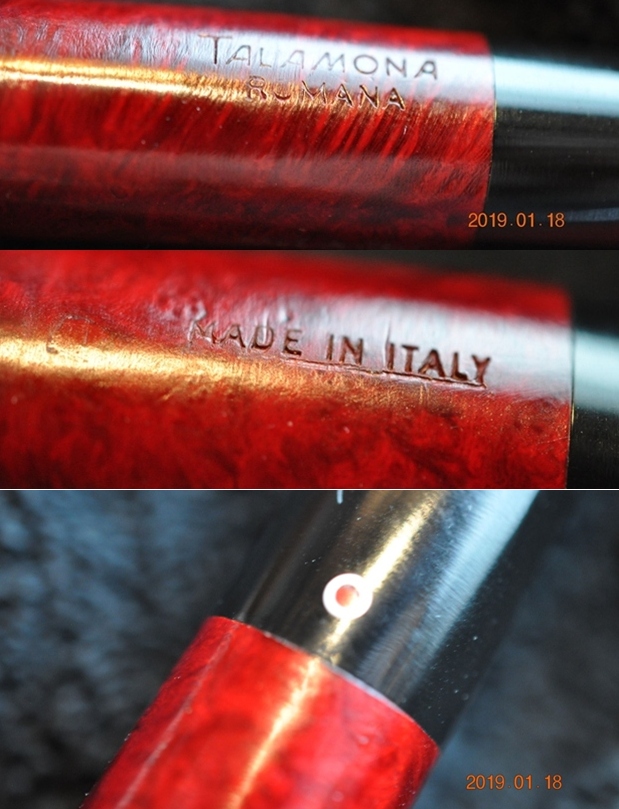
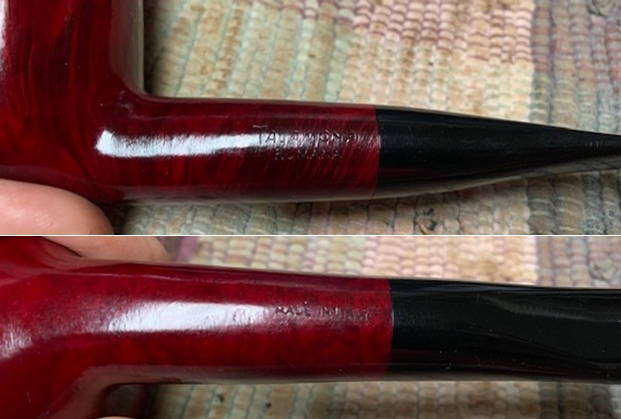
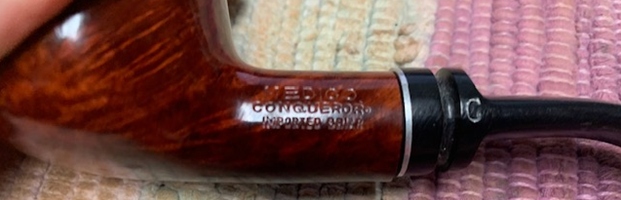
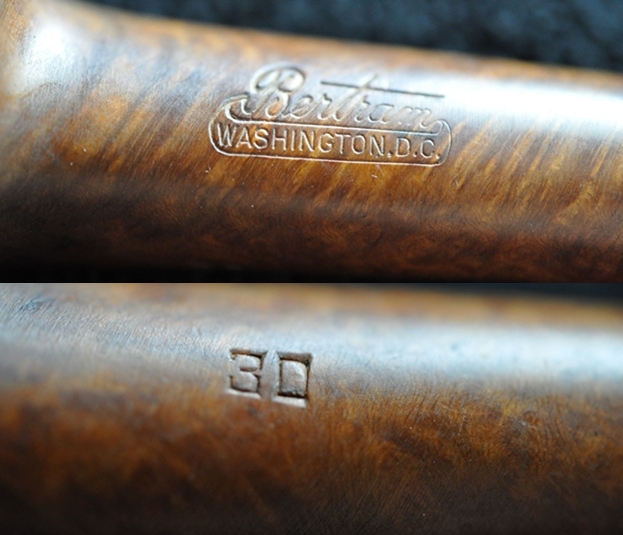
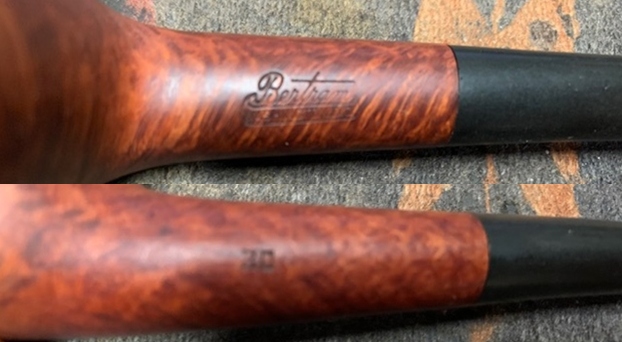
 He took a photo of the stamping on the left side of the shank and it is clear and readable as noted above.
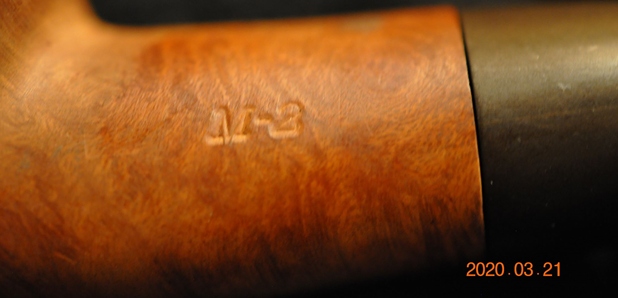 I am also including the link to a blog that I wrote that gives some of the history of the Malaga brand and the Malaga Pipe Shop in Royal Oak, Michigan in the USA. I have written an earlier blog to give a little history of the Malaga Brand and the pipemaker, George Khoubesser. Here is the link – https://rebornpipes.com/tag/malaga-pipes/. That blog also includes links to a catalogue and the history of the pipemaker George Khoubesser. Follow the link to get a feel for the brand and the pipemaker.
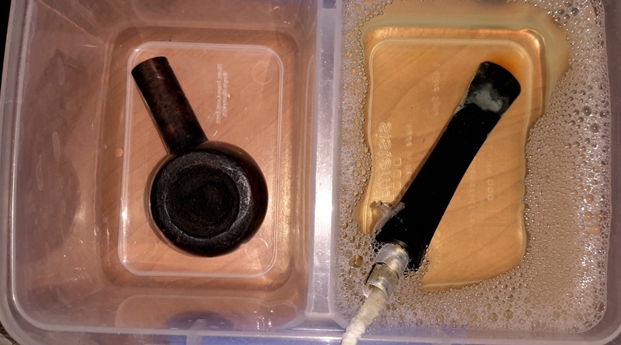
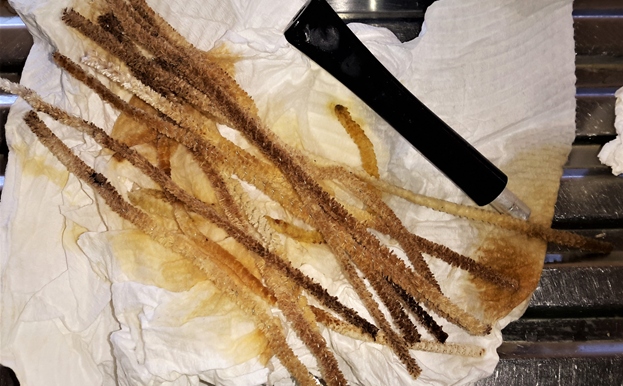
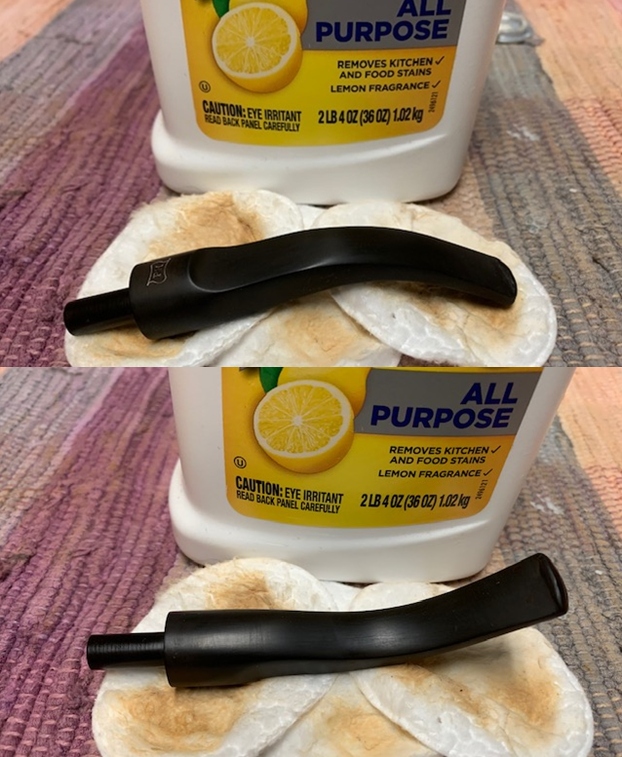
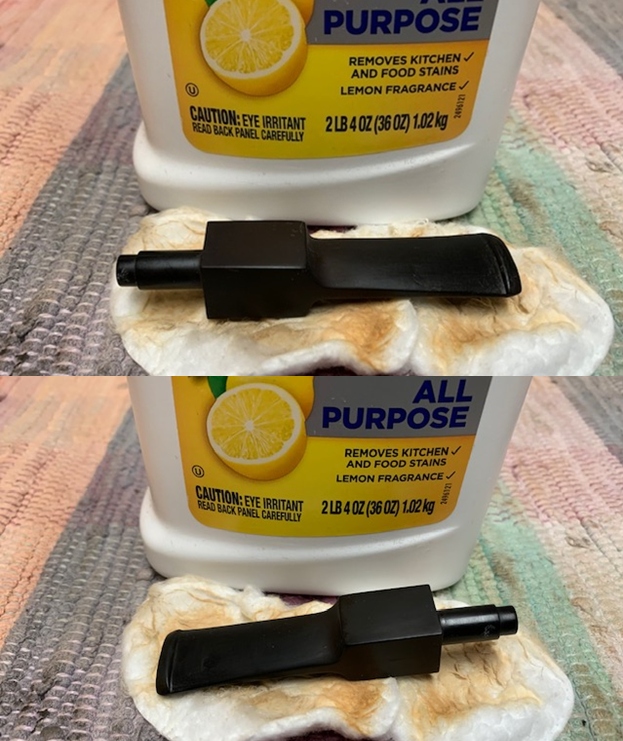
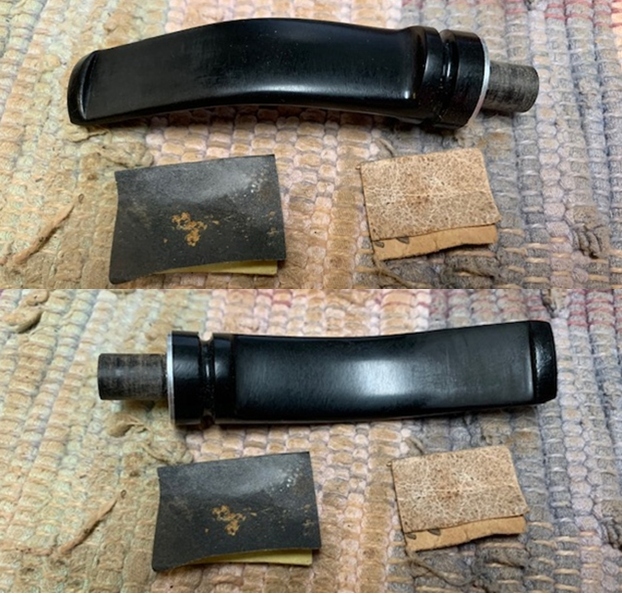
Jeff had done his usual thorough cleanup on the pipe. He reamed the bowl with a PipNet pipe reamer and followed up with a Savinelli Fitsall pipe knife to remove the cake. He scrubbed out the mortise and the airway in the shank and the stem with alcohol, cotton swabs and pipe cleaners. He scrubbed the exterior of the bowl, rim, shank and stem with a tooth brush and Murphy’s Oil Soap to remove the oils and tars on the rim and the grime on the finish of the bowl. He rinsed it under running water. He dried it off with a soft cloth. He cleaned the internals and externals of the stem with alcohol, pipe cleaners and cotton swabs. He soaked the stem in Before & After Deoxidizer and rinsed it off with warm water and cleaned out the airway in the stem with alcohol. The pipe looked very good. 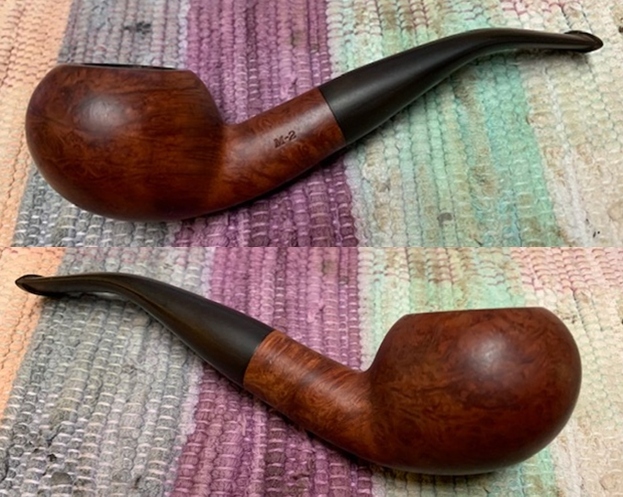
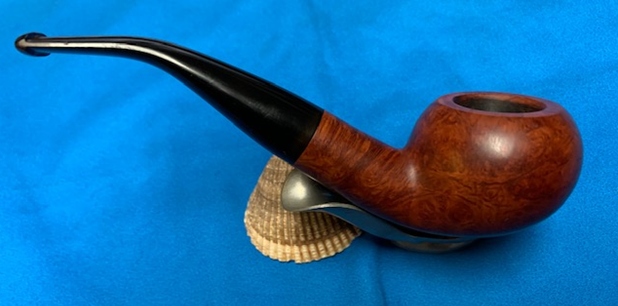
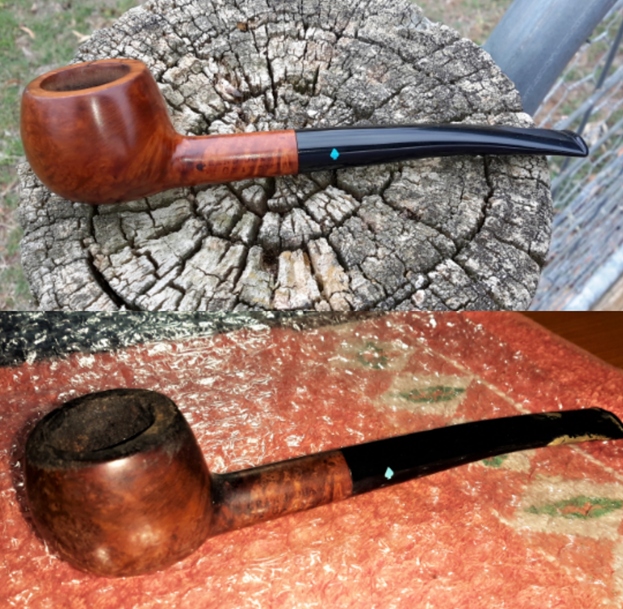
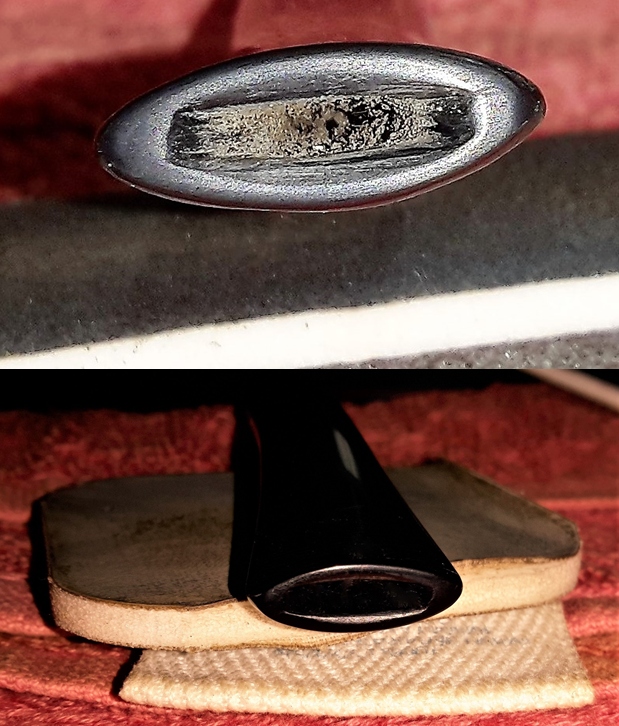
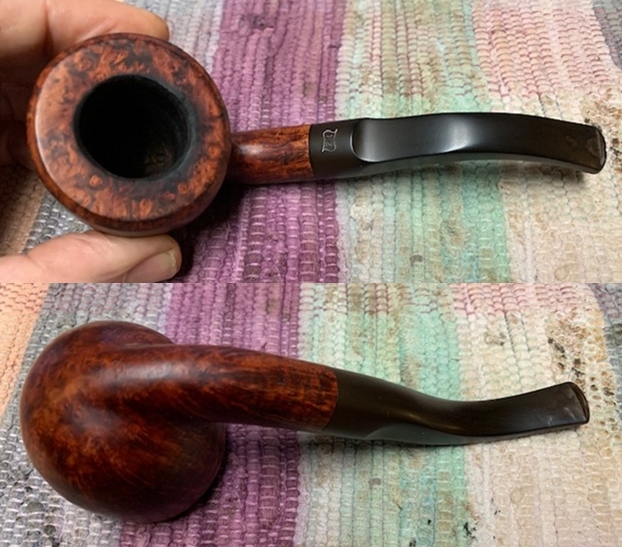
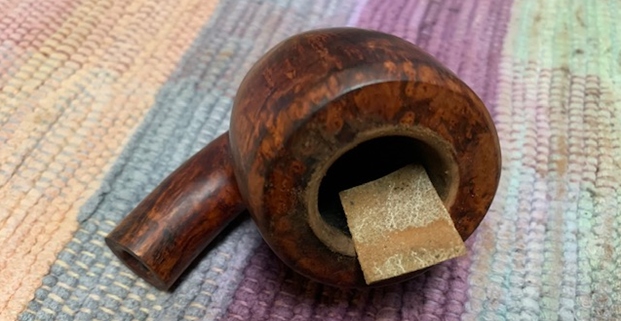
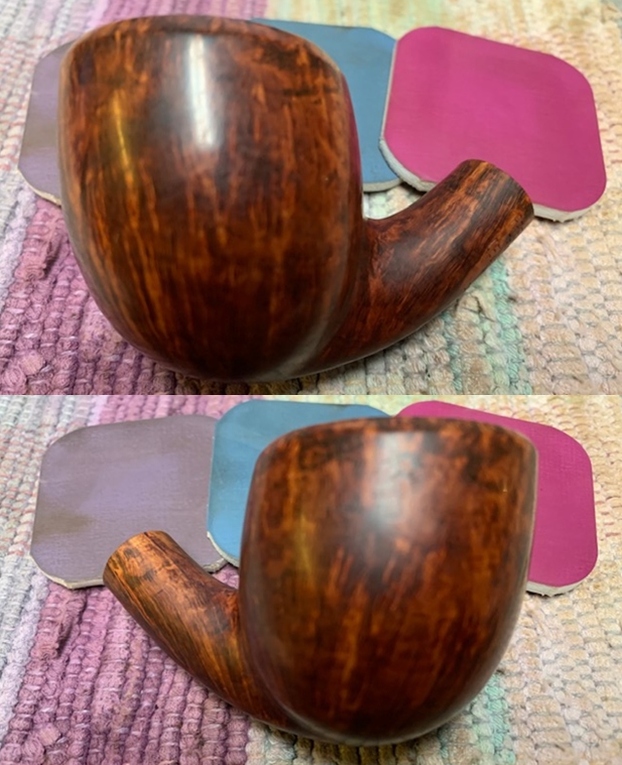
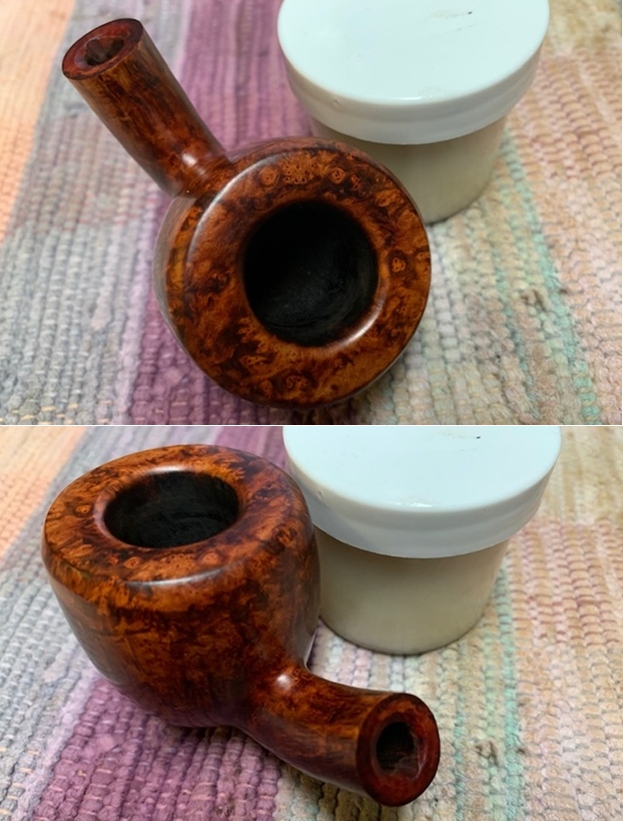
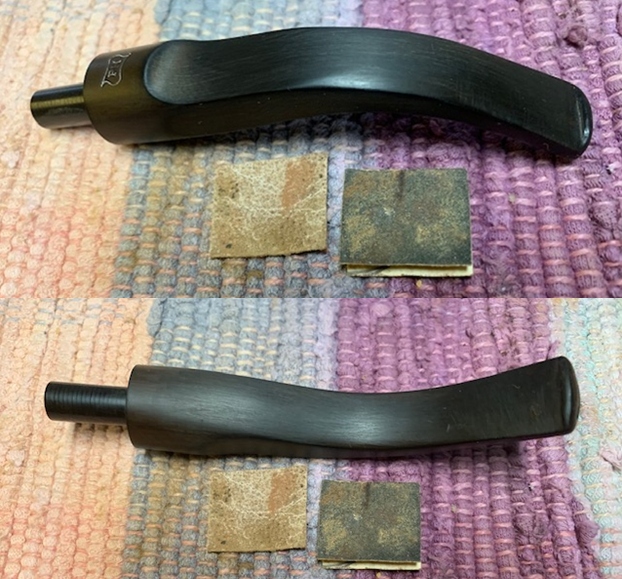
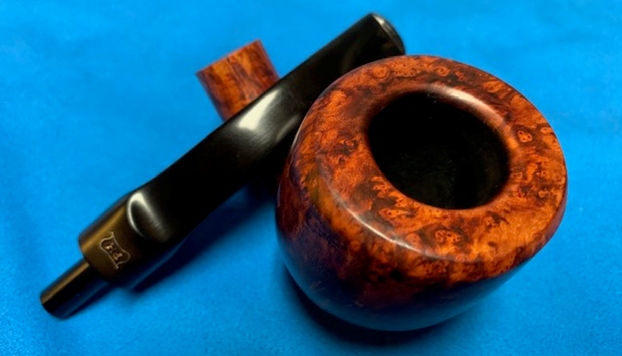
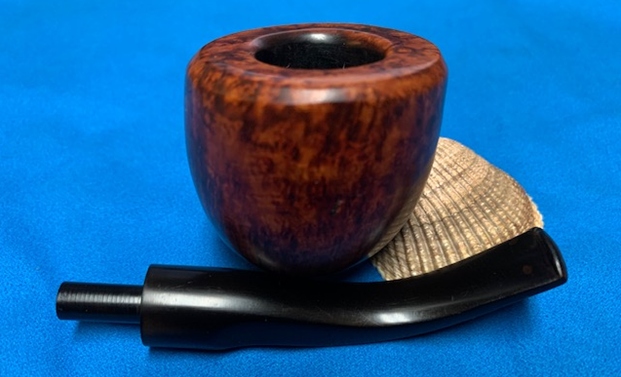
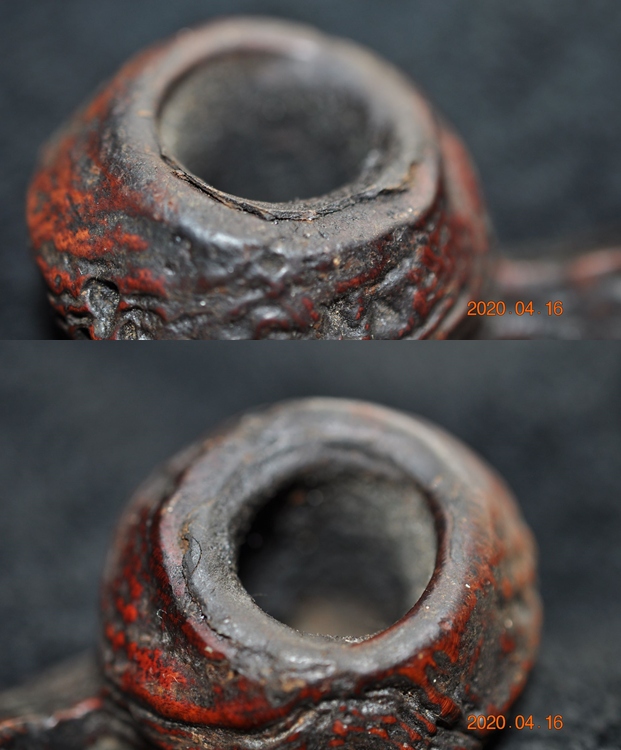
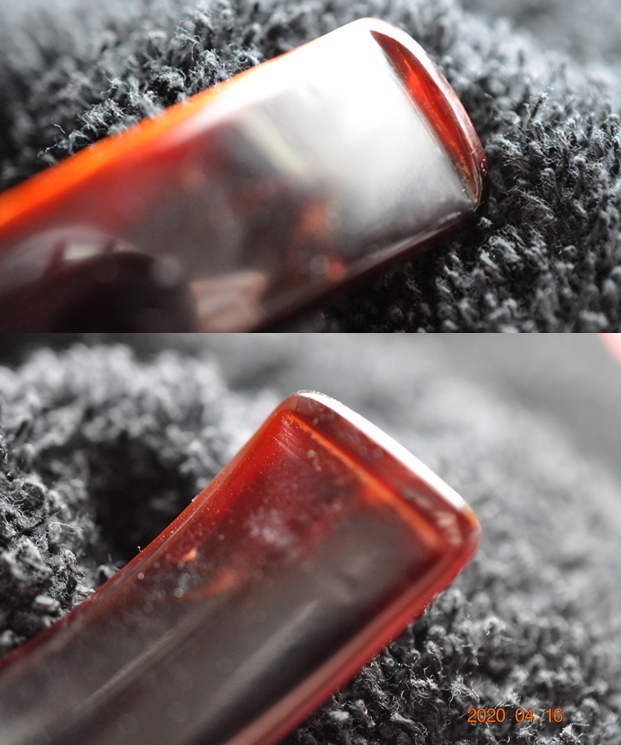
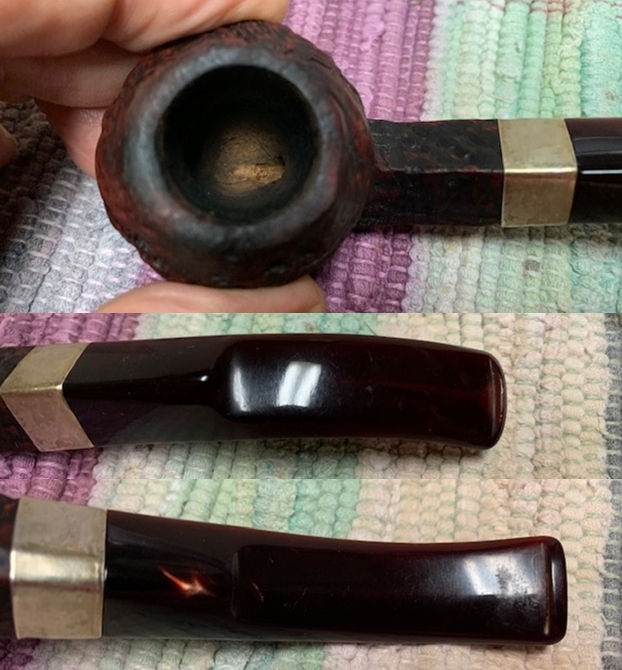
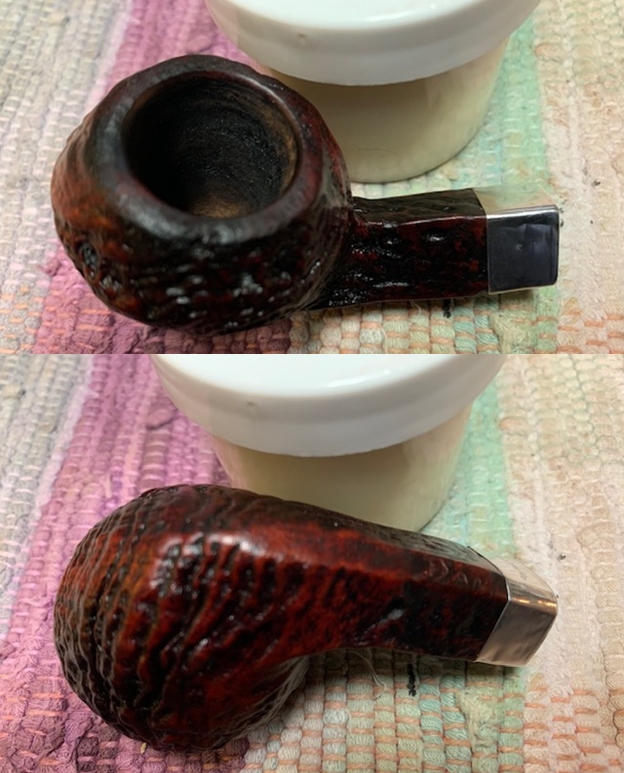
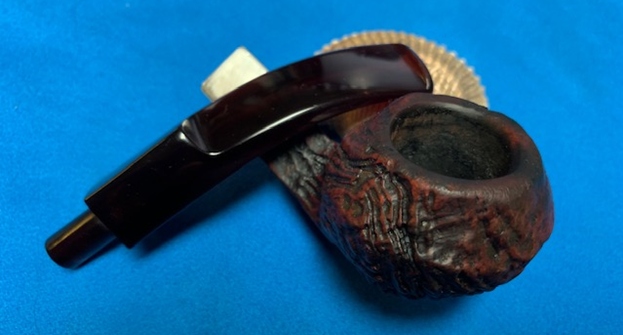
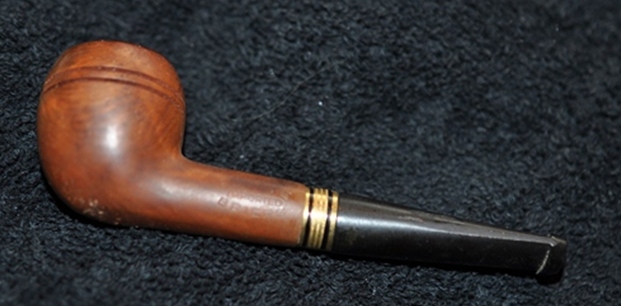
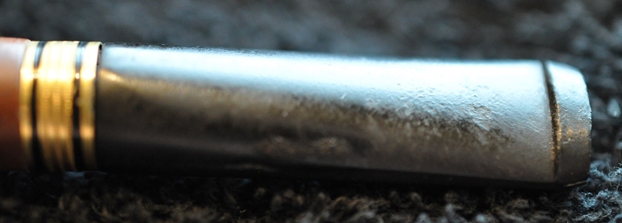
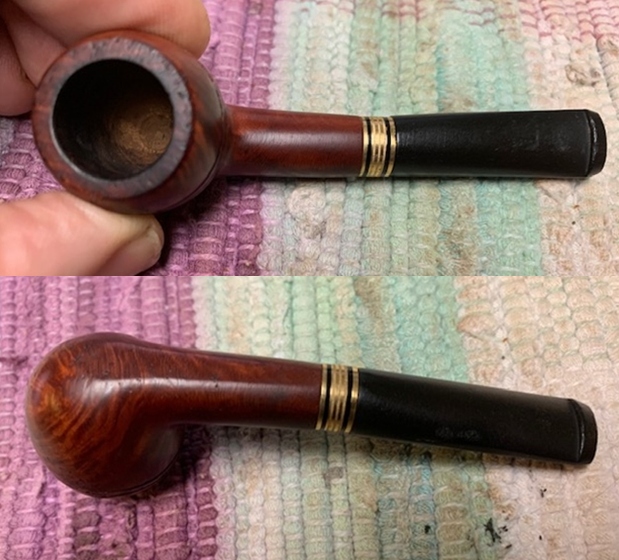
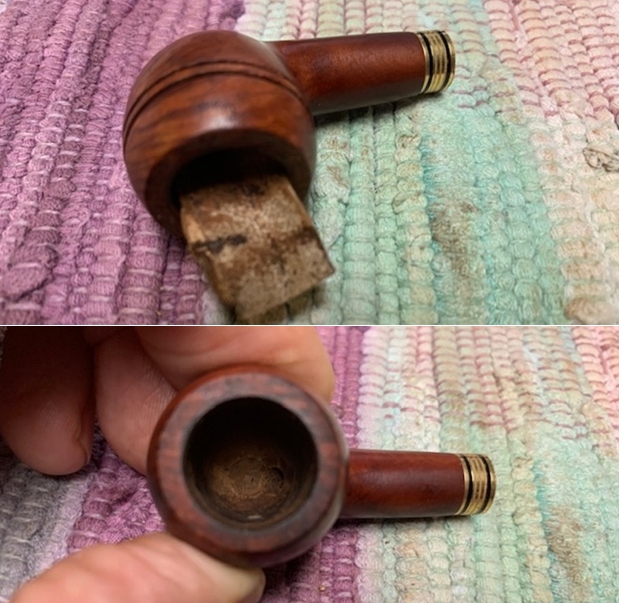
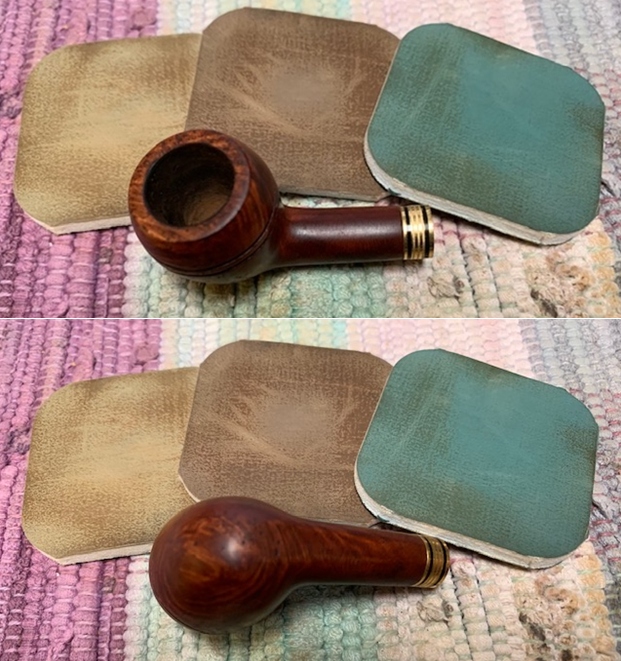
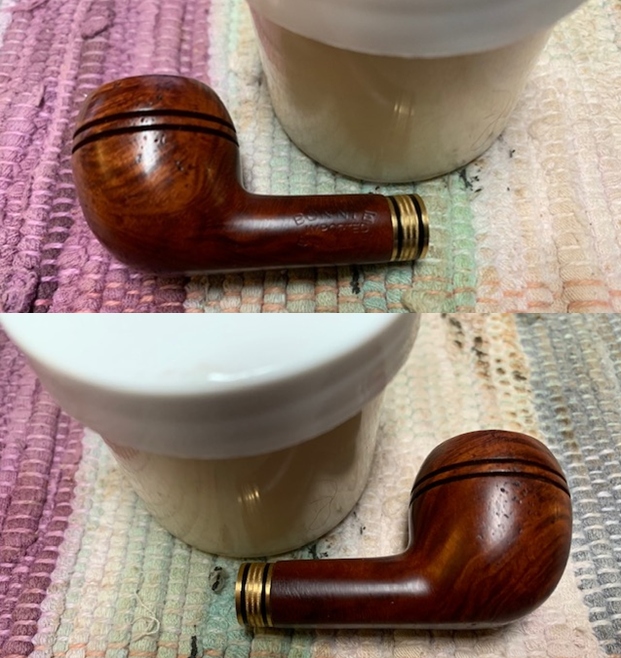
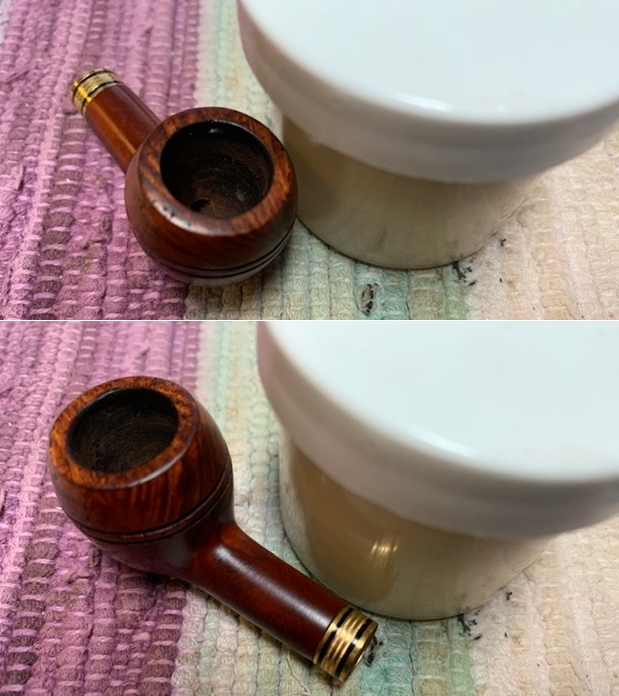
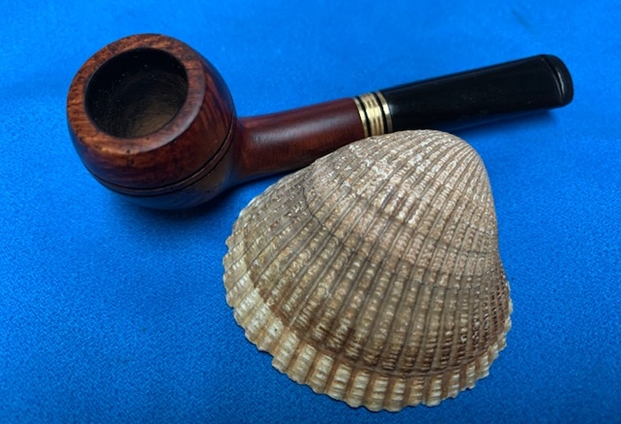
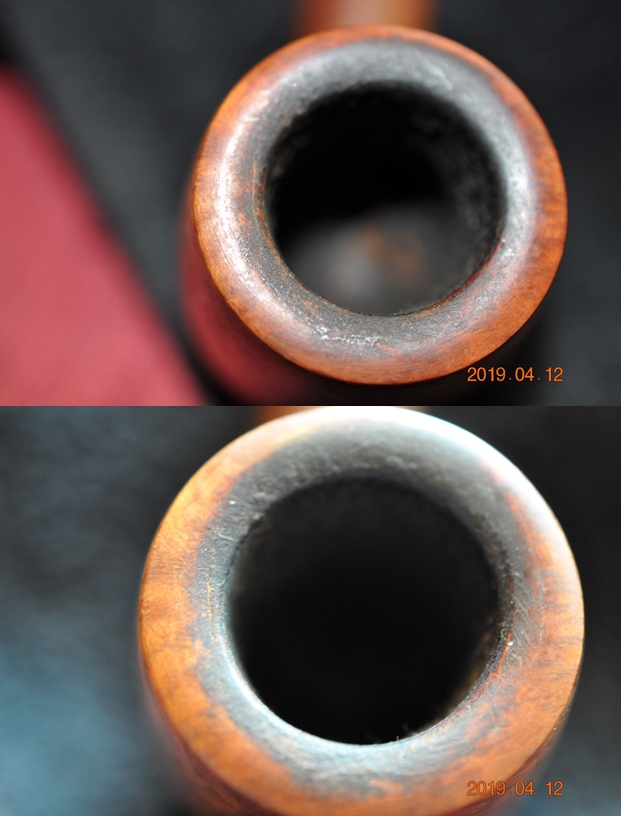
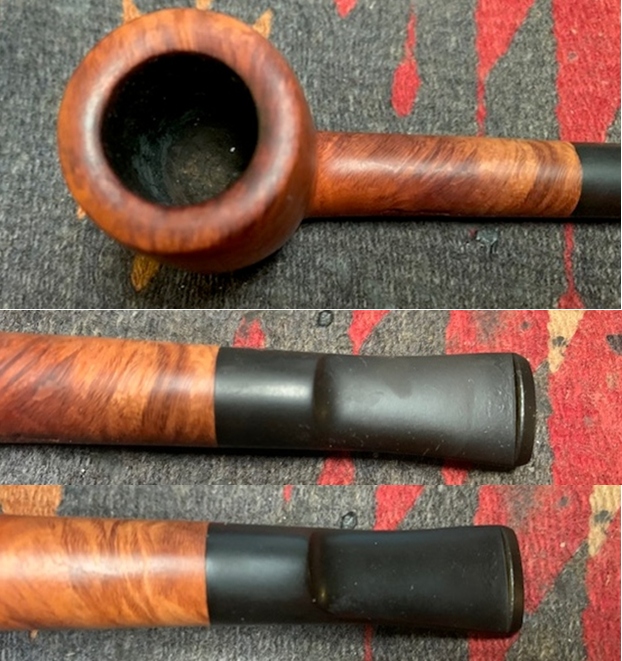
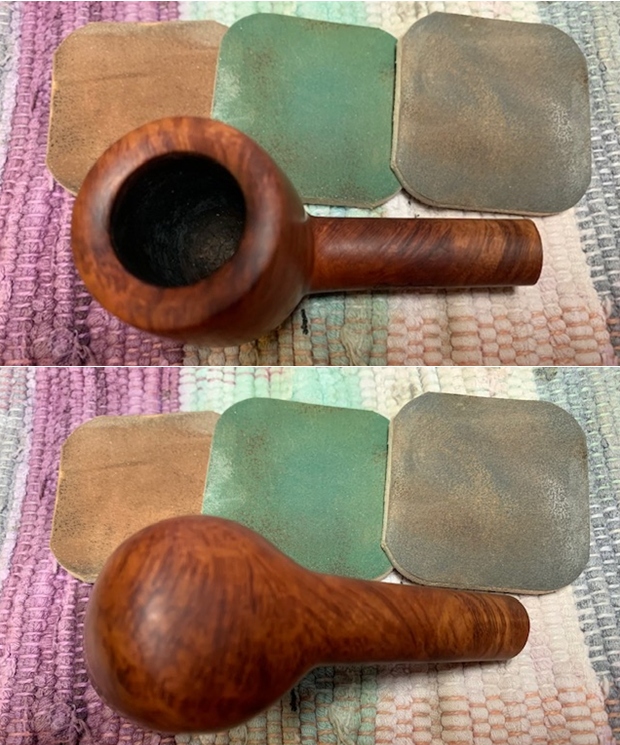
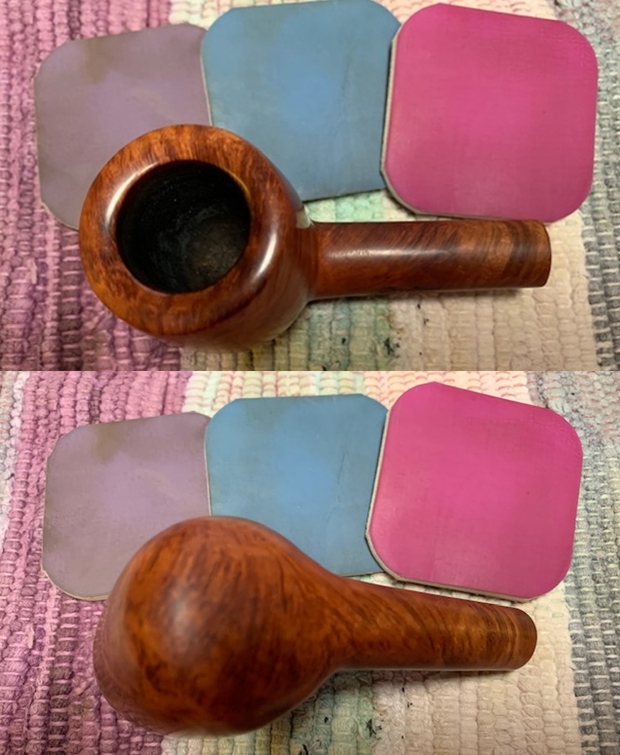
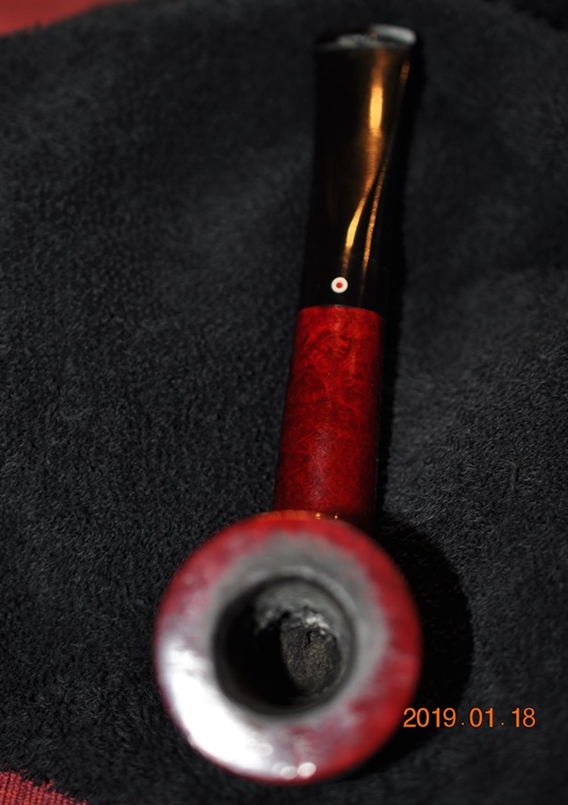
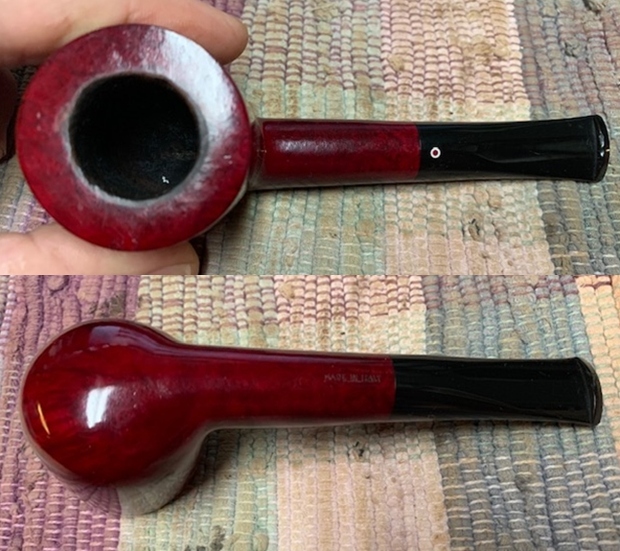
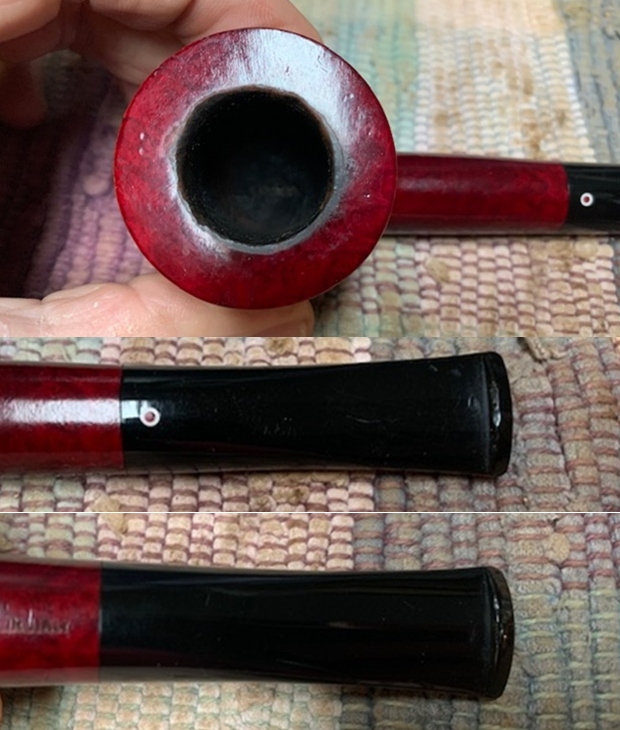
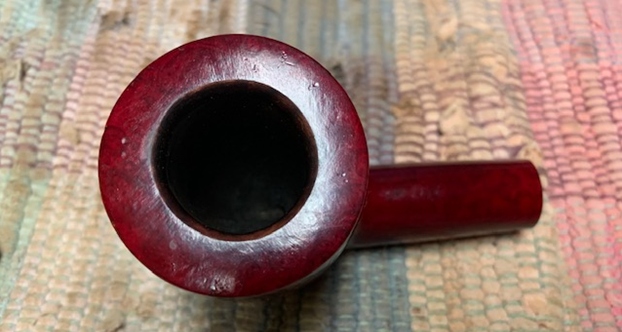
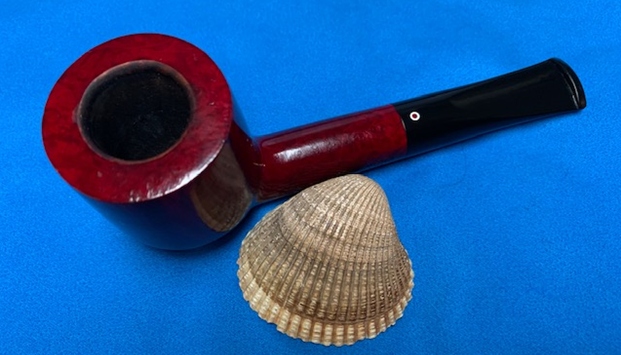
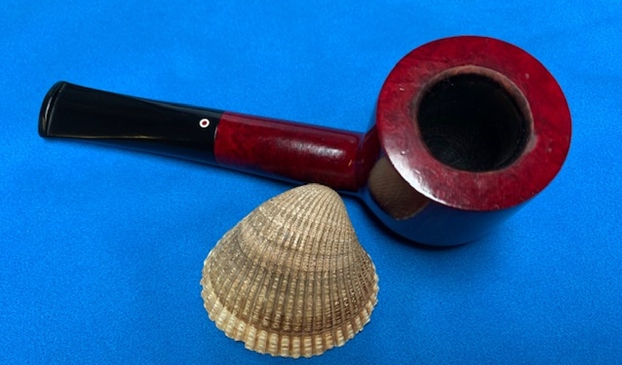
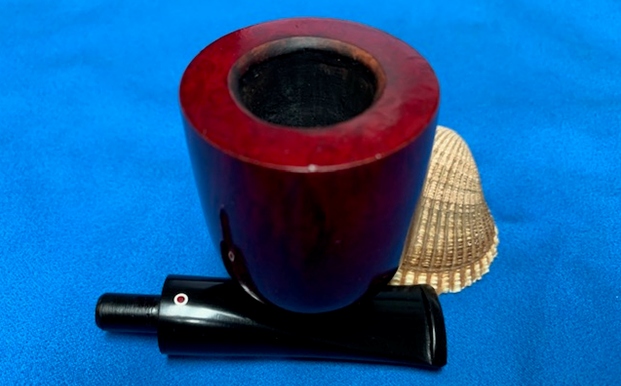
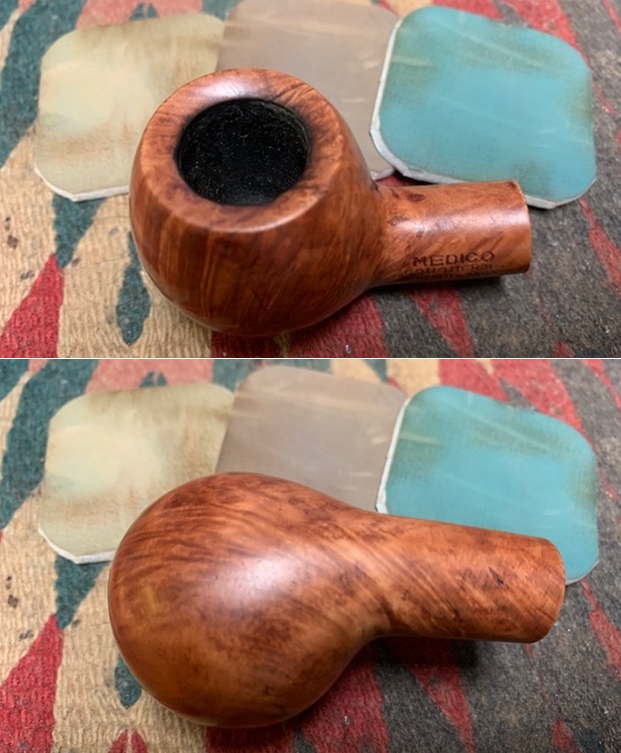
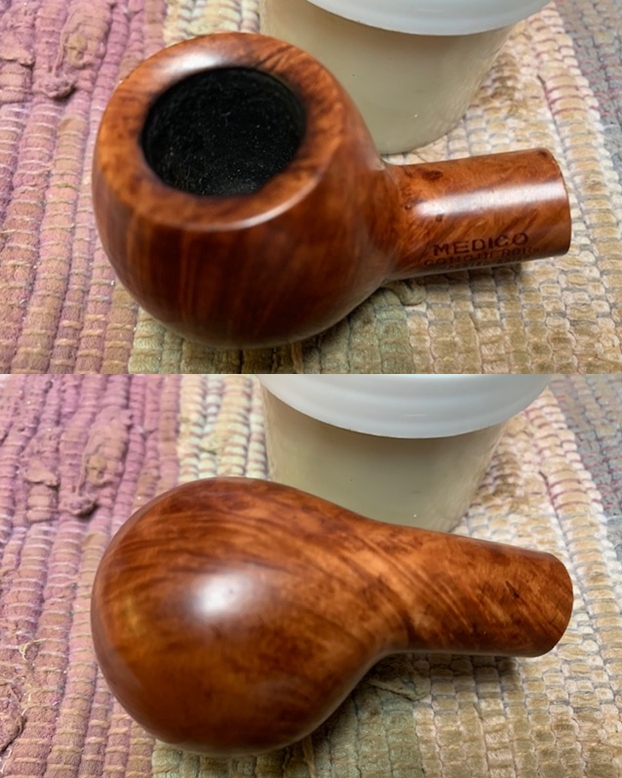
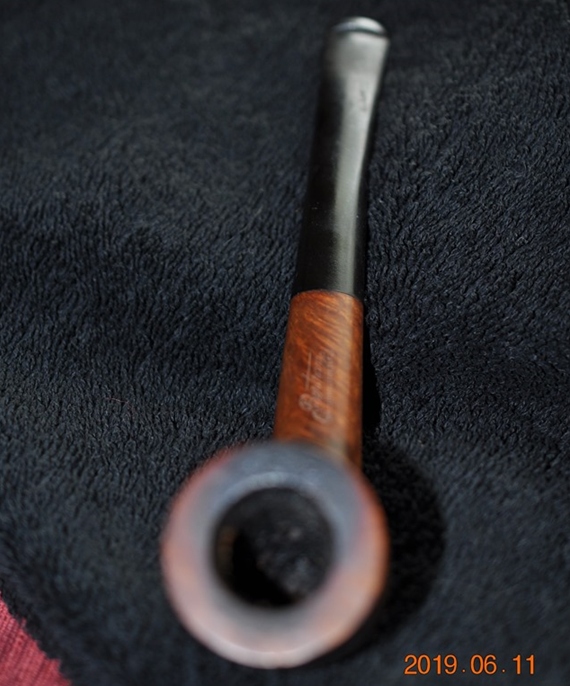
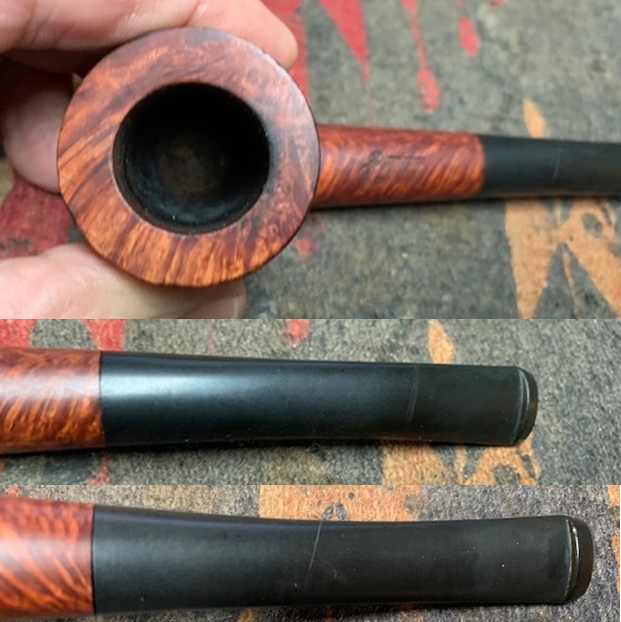
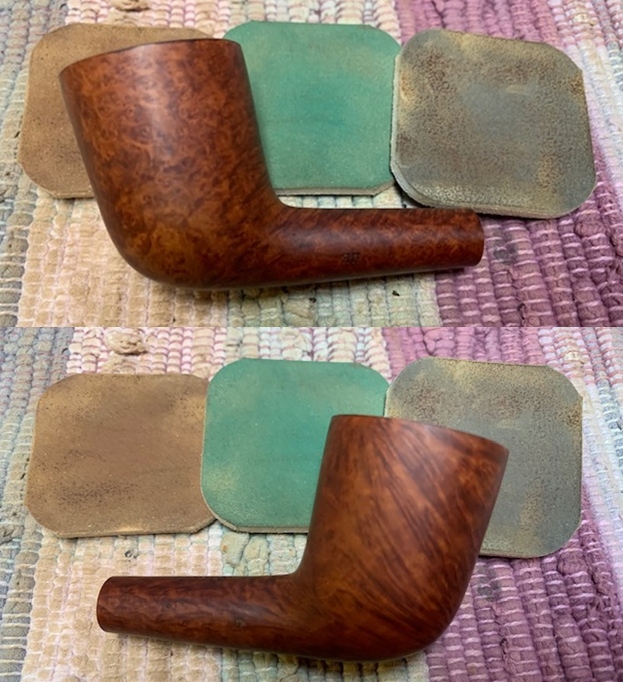
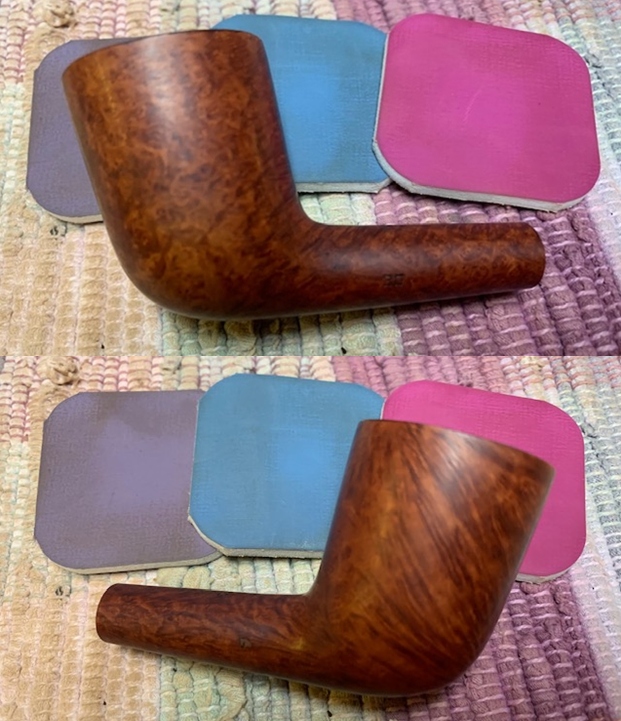
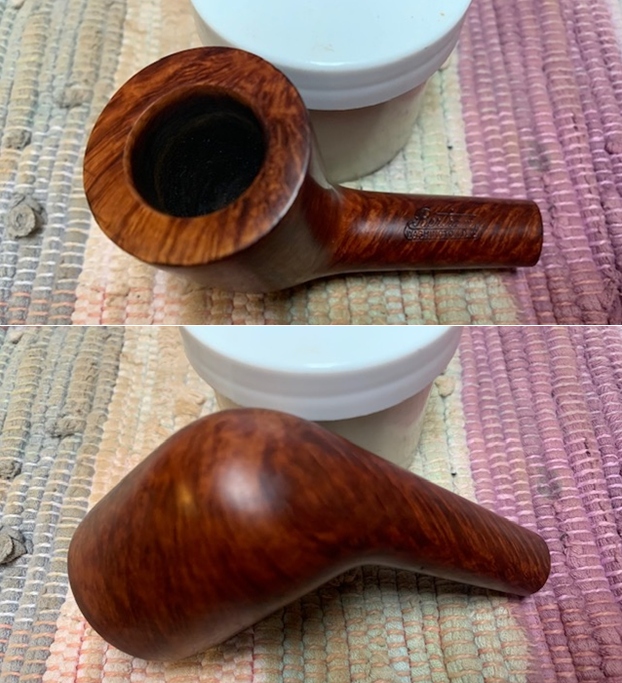
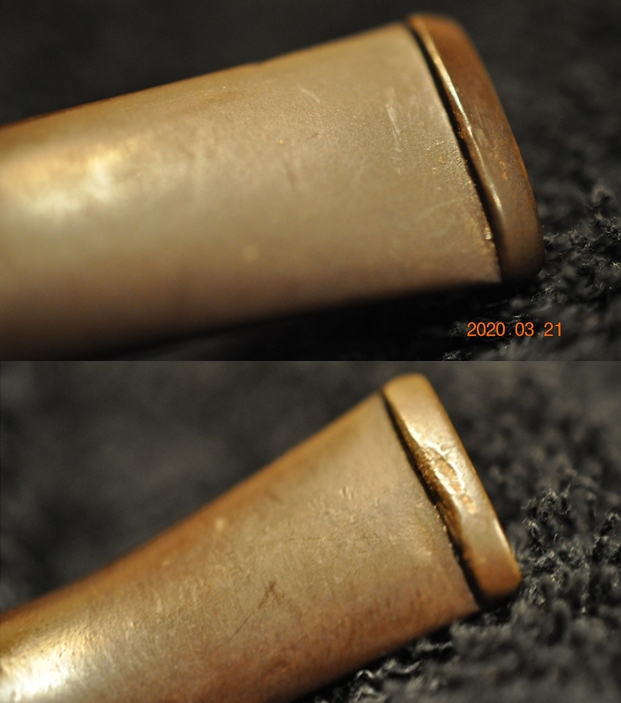
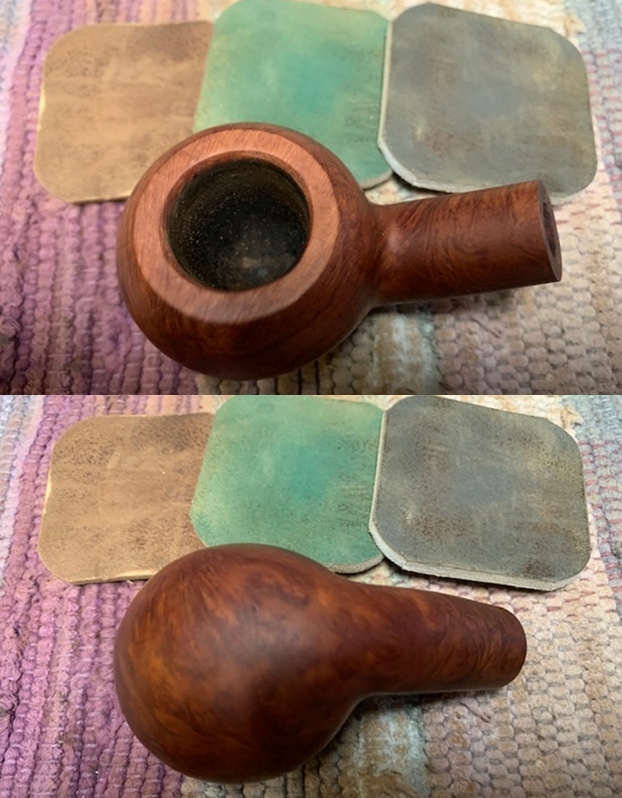
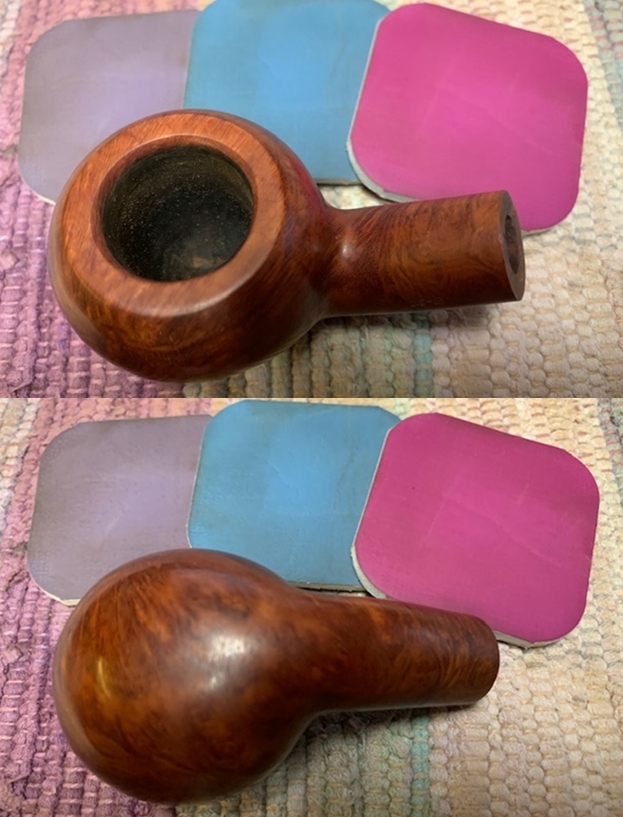
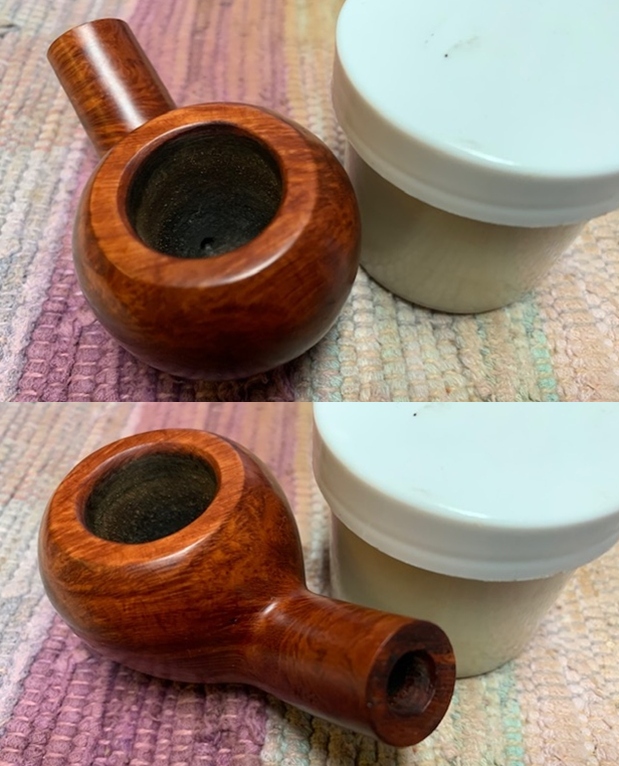
 I took a photo of the rim top and stem to show the condition. They cleaned up really well and the top of the rim looked very good. The inner edge of the bowl showed chipping and burn damage on the back inner edge. The vulcanite stem had light tooth chatter and marks on both sides ahead of the button and on the button edges.
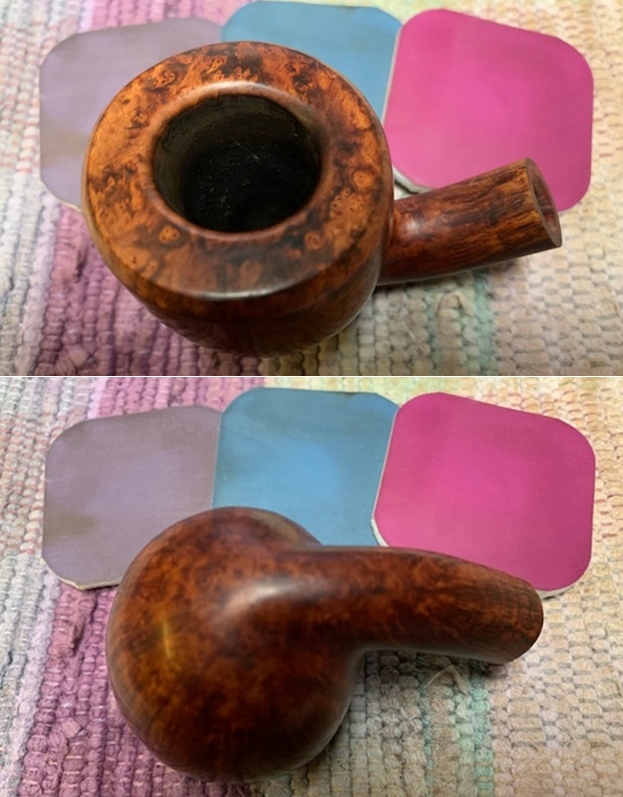
  I took a photo of the stamping on the left side of the shank. It read as noted above.
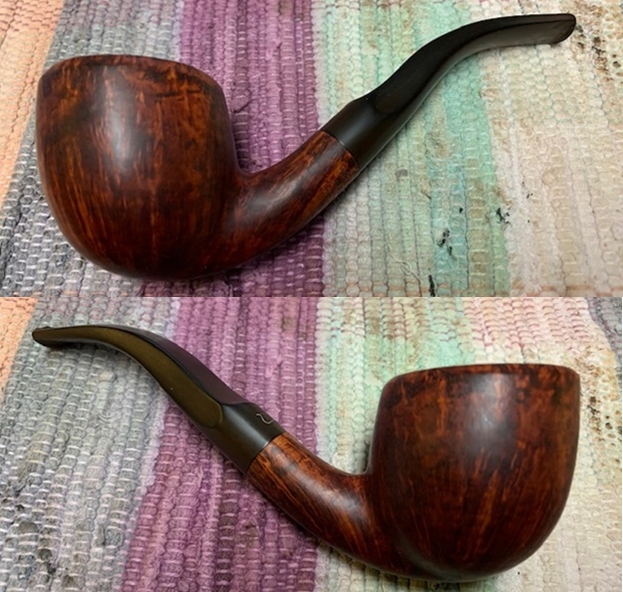
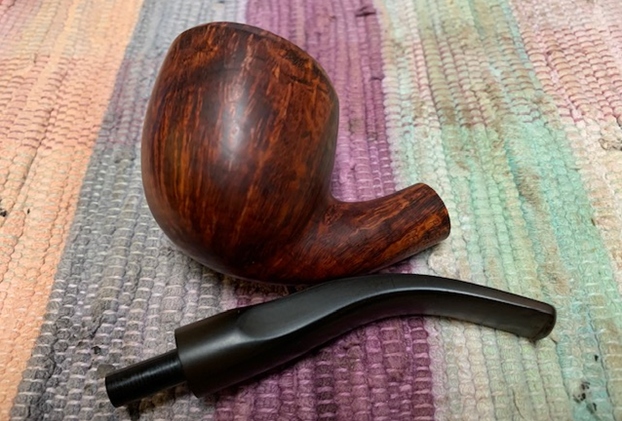
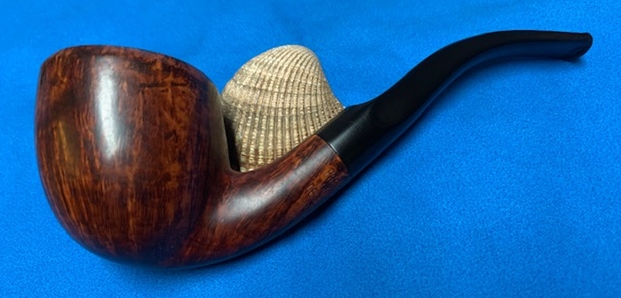
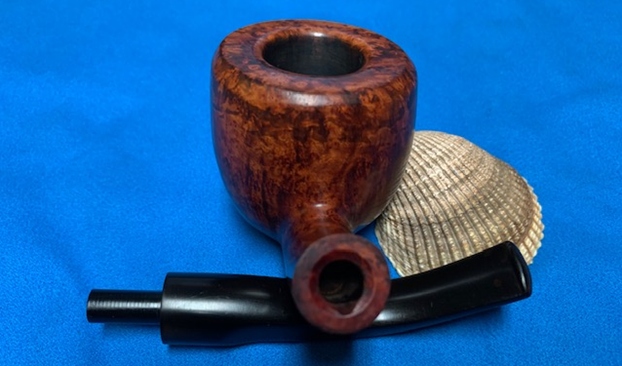
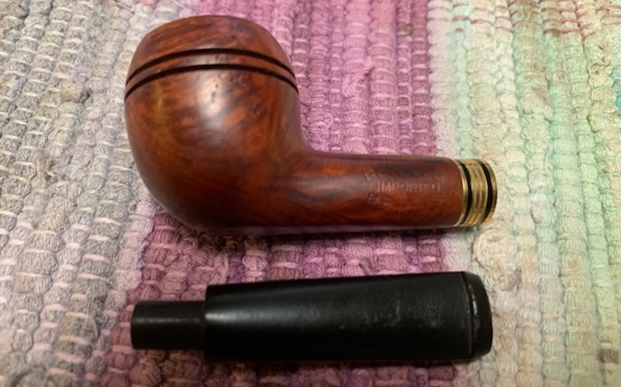
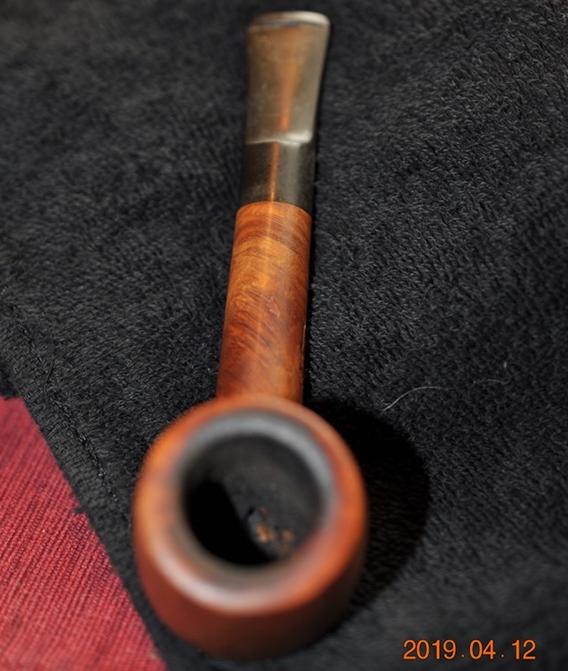
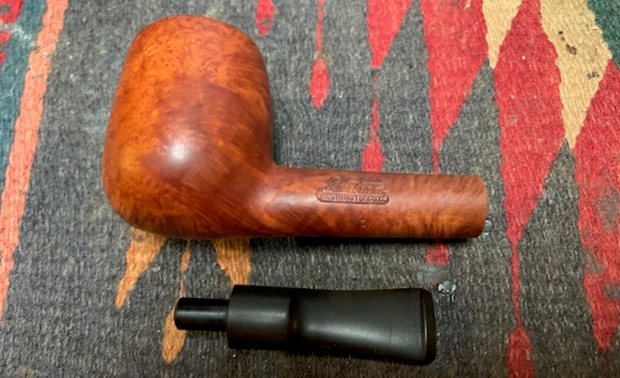
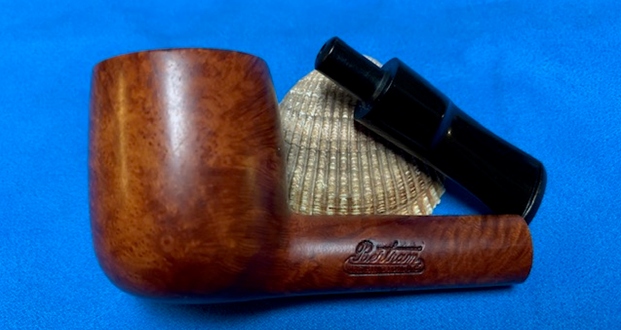
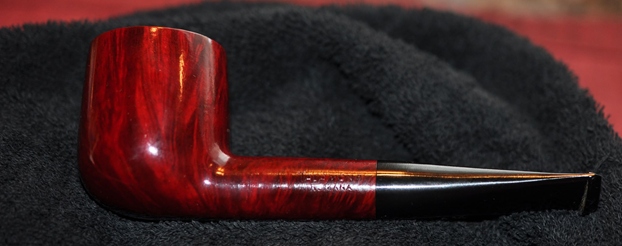
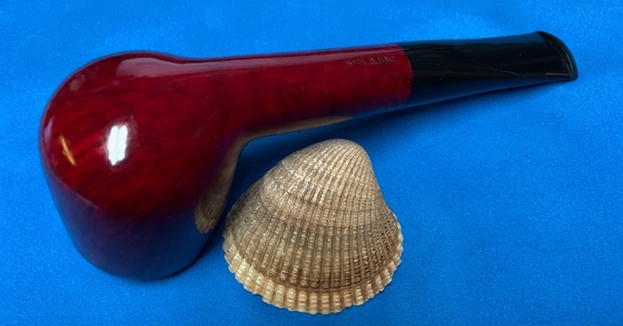
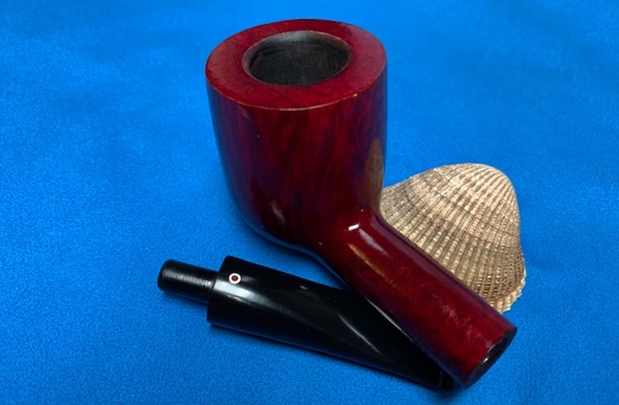
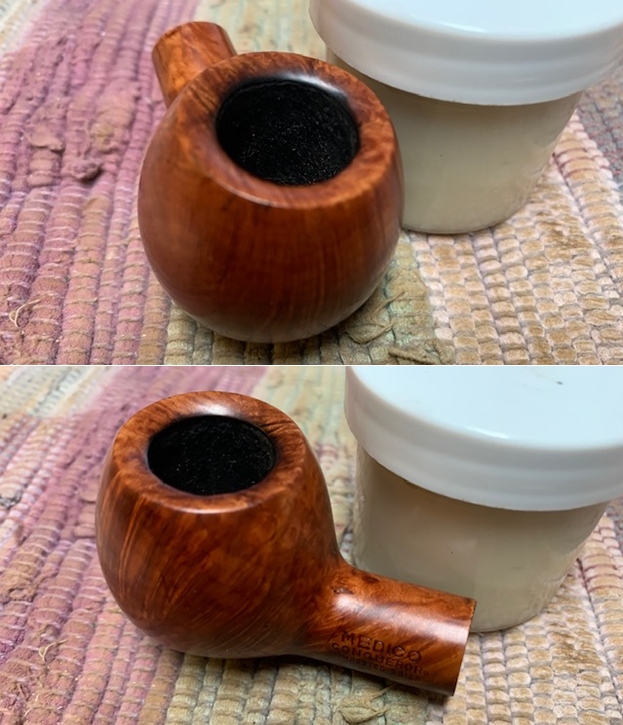
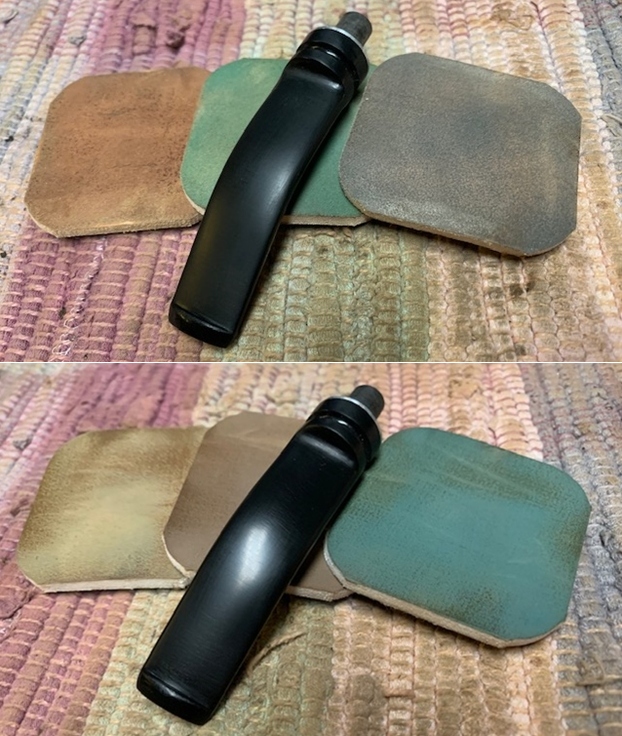
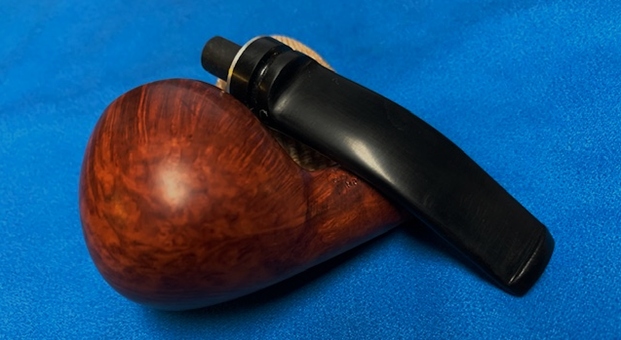
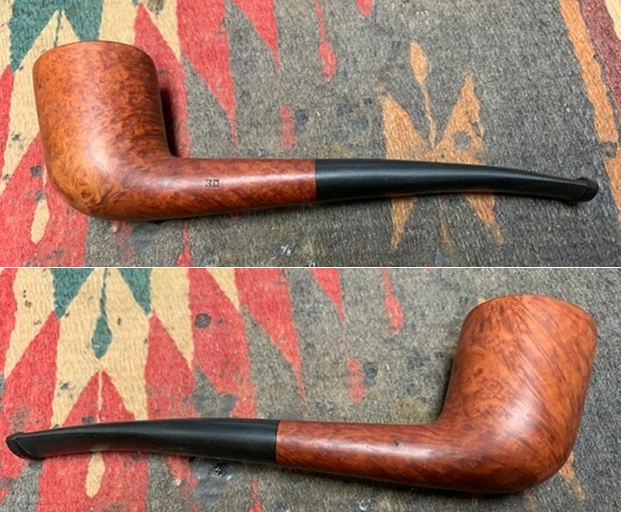
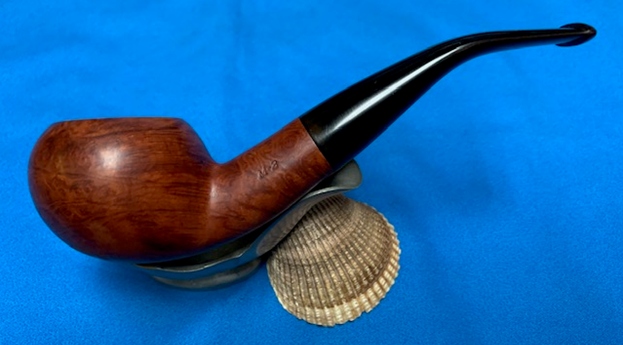
  I removed the stem and took a photo of the pipe to give a sense of the whole. It is a well shaped Author that looks great.
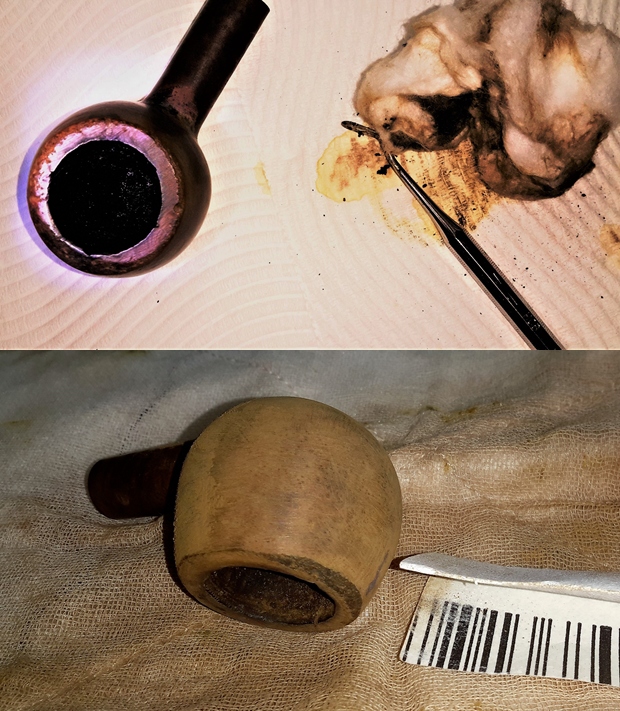
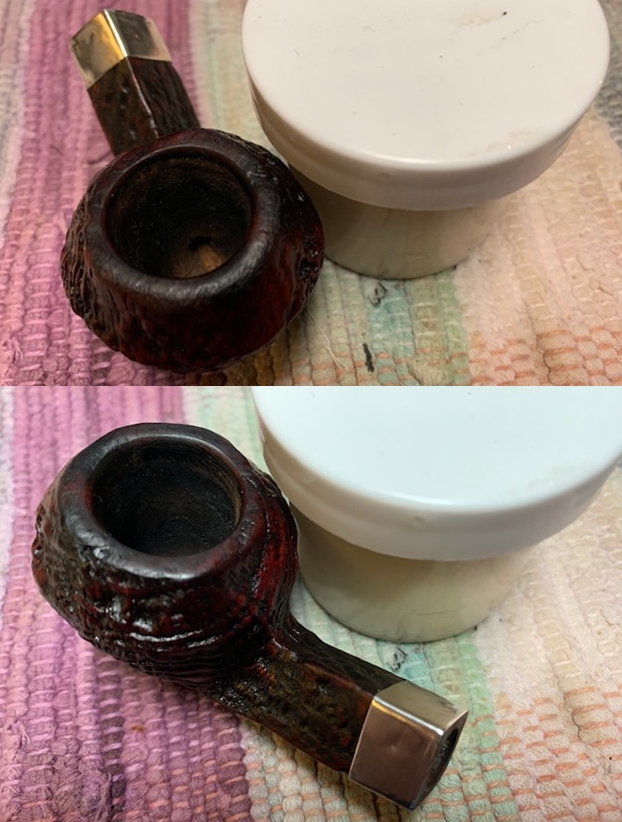
  Now it was time to do my work on the pipe. I started by working over the damage from the burn on the inside rim. I used a folded piece of 220 grit sandpaper to give the inner edge a bevel to take care of the burn and clean up the edges of bowl. I topped the bowl on a topping board with 220 grit sandpaper to smooth out the damage to the rim surface. (I took a photo of the cleaned up rim top but it was too blurry to include. The bevel will be very visible in the polishing photos.)
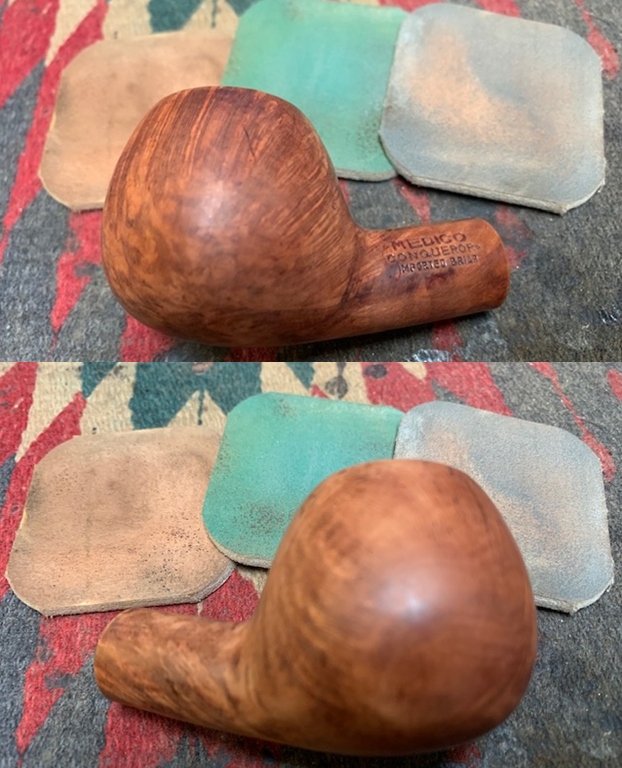
 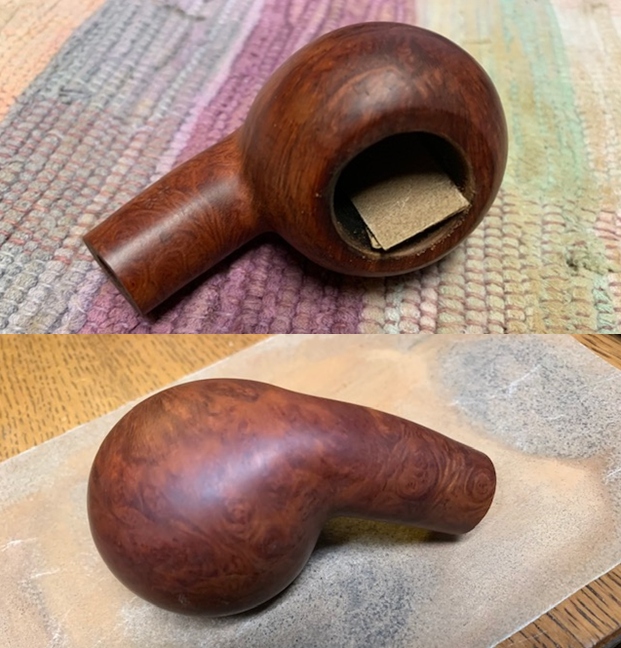 I polished the briar with micromesh sanding pads – wet sanding with 1500-12000 grit pads and wiped down the bowl after each sanding pad.
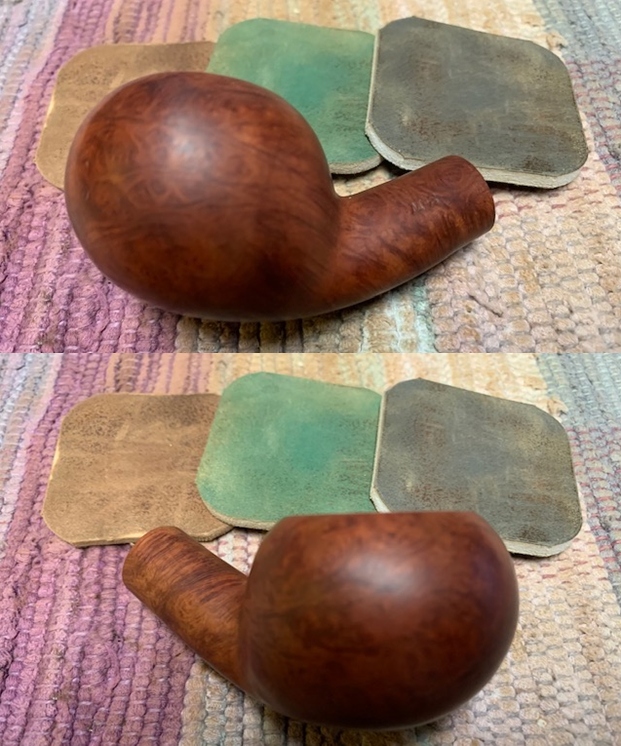

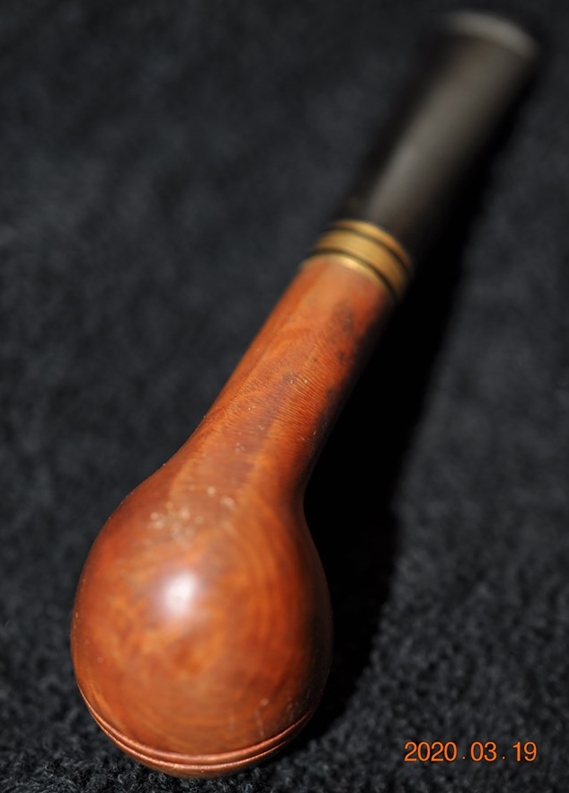
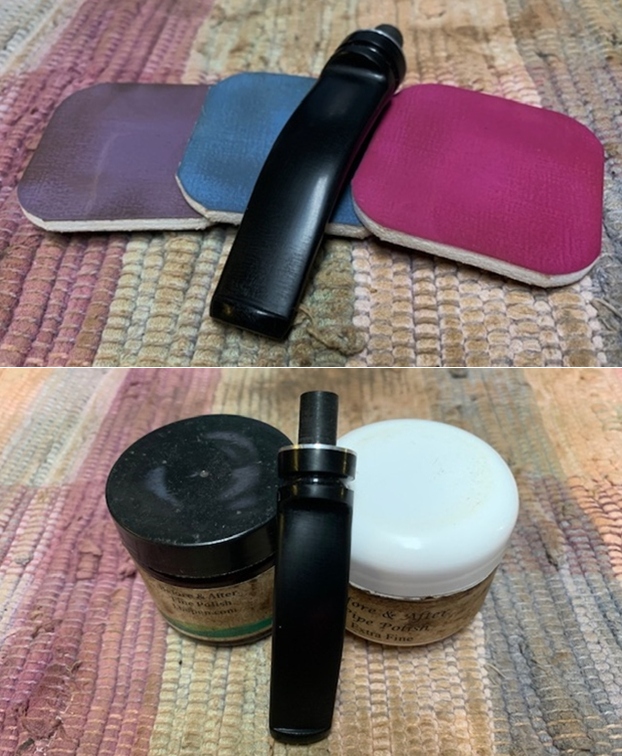
 I rubbed the bowl and shank down with Before & After Restoration Balm. I worked it into the surface of the bowl and shank with my fingertips to clean, enliven and protect the briar. I let the balm sit for a little while and then buffed with a cotton cloth to raise the shine. The Balm did its magic and the grain stood out.
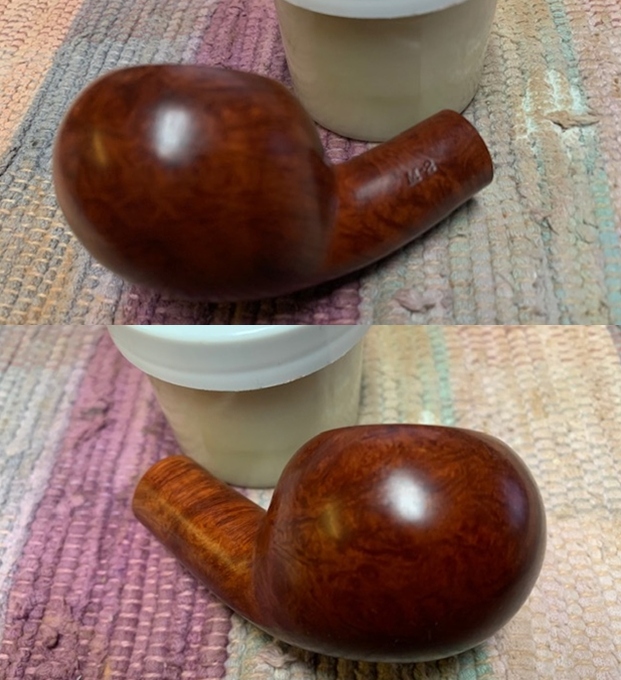

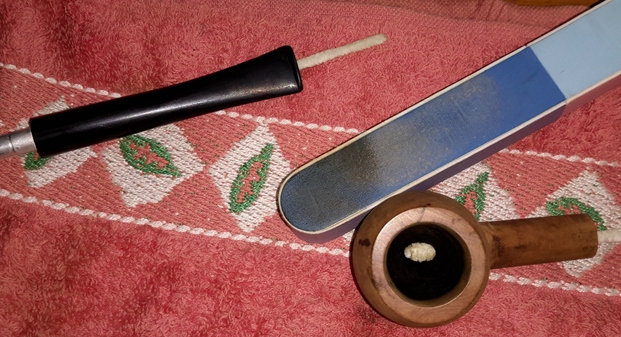
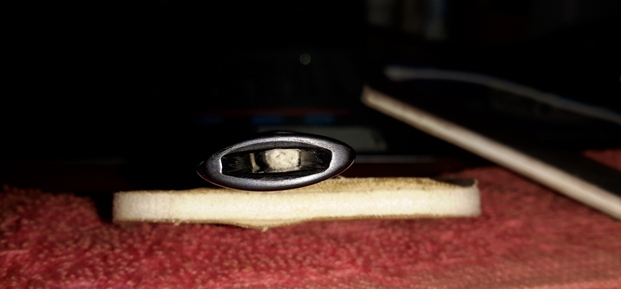
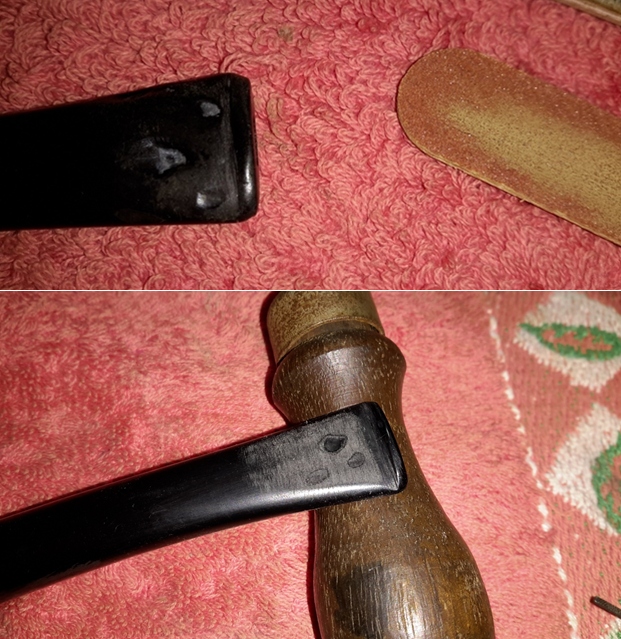
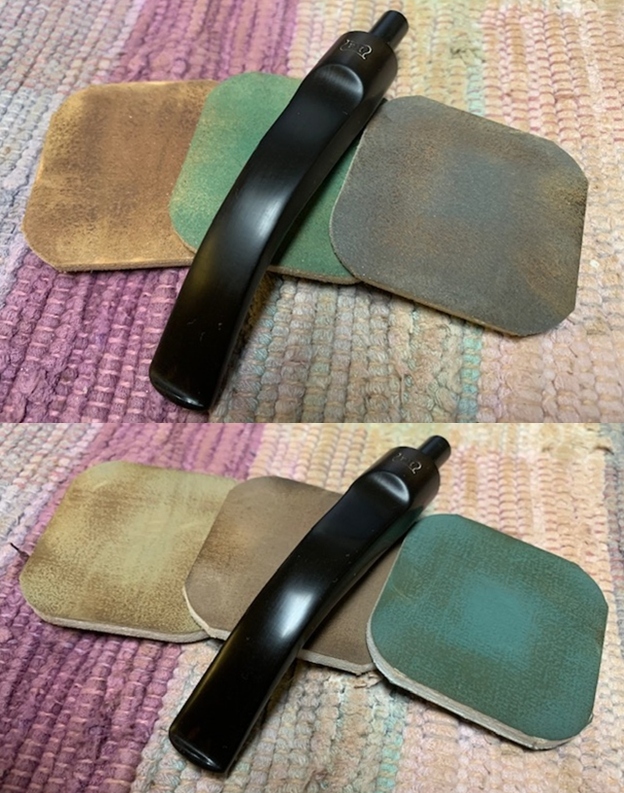
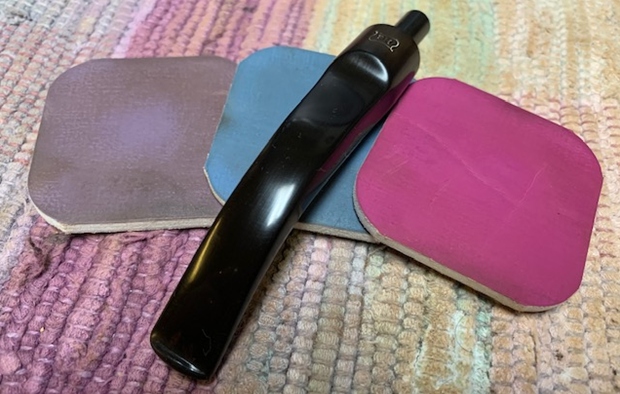
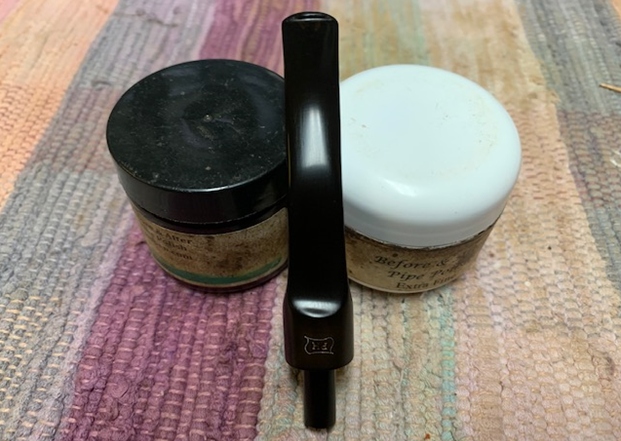
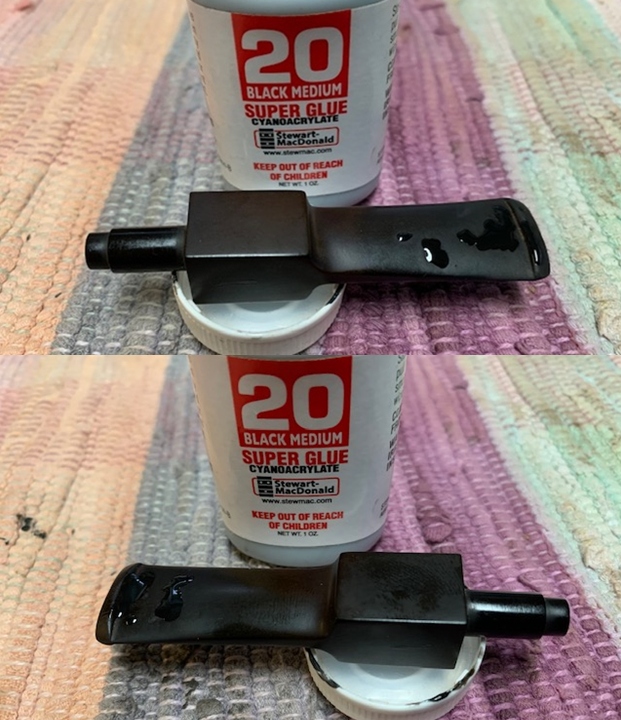
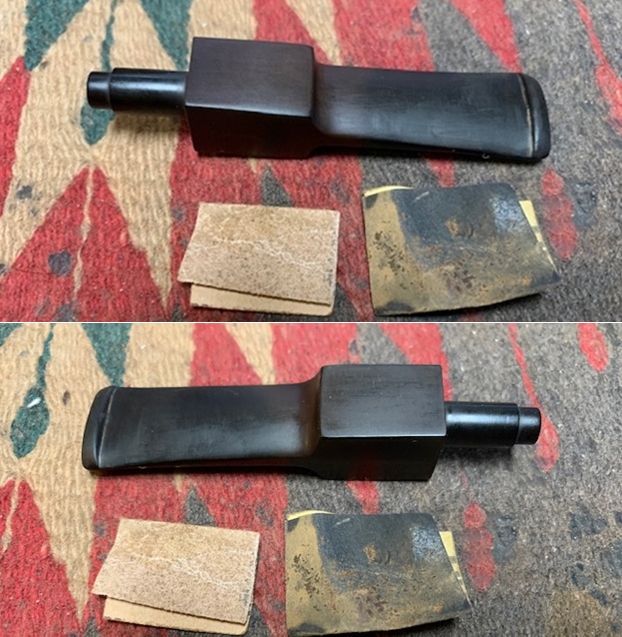
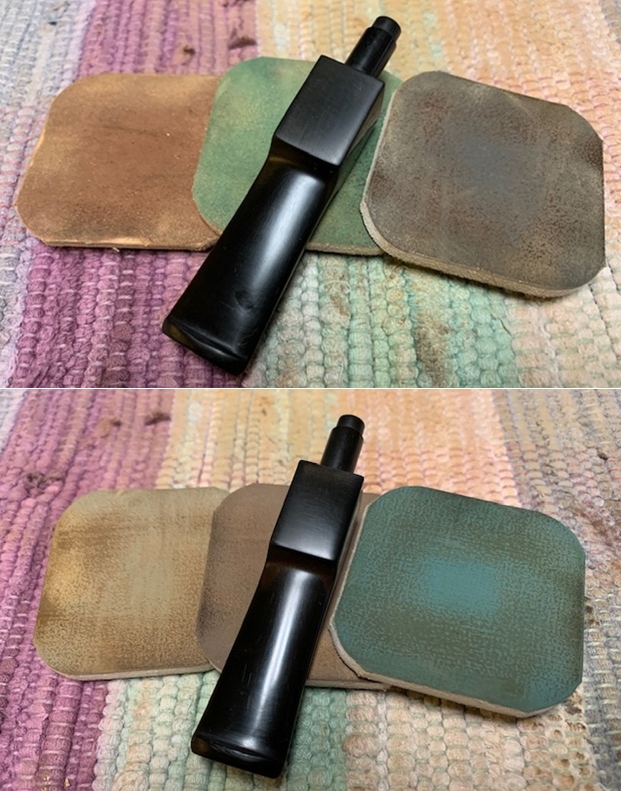
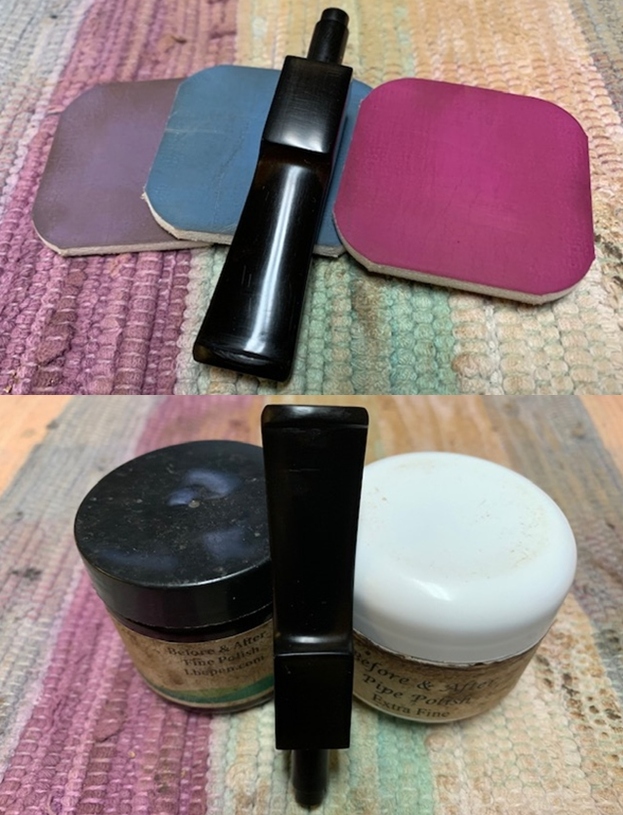
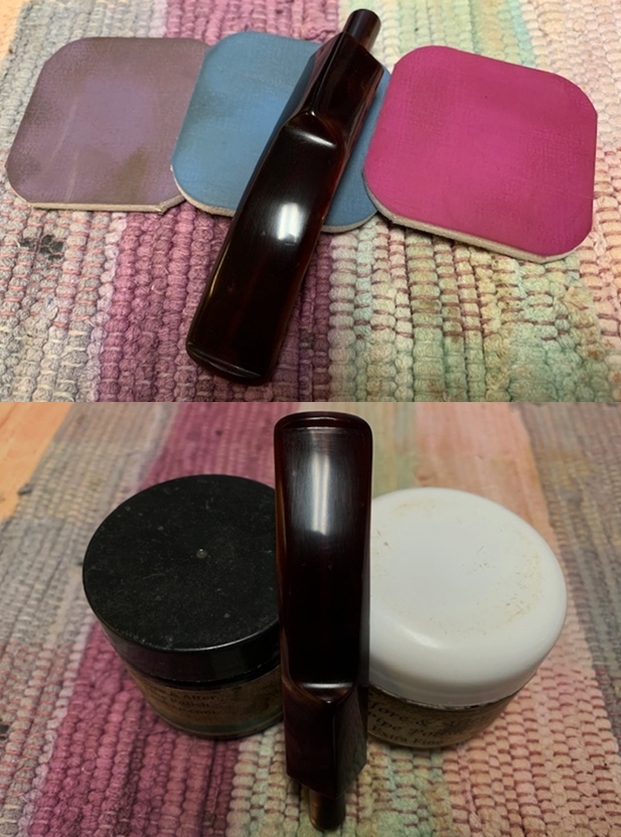
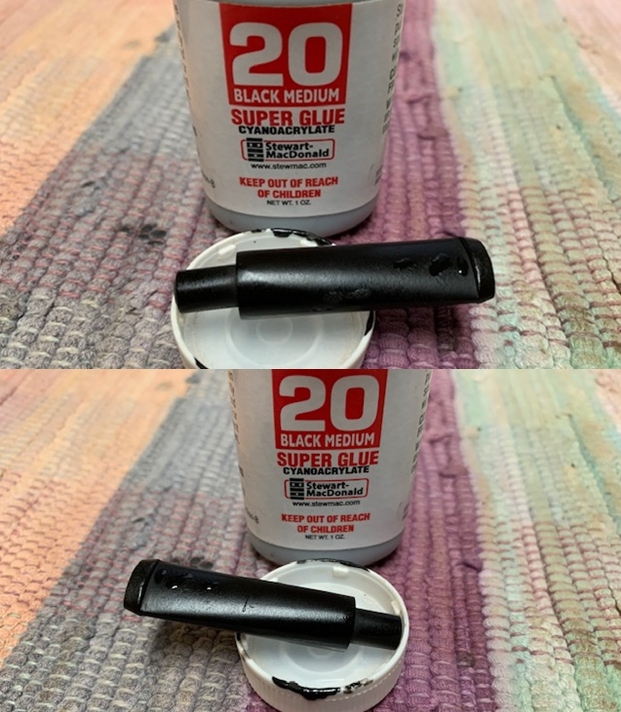
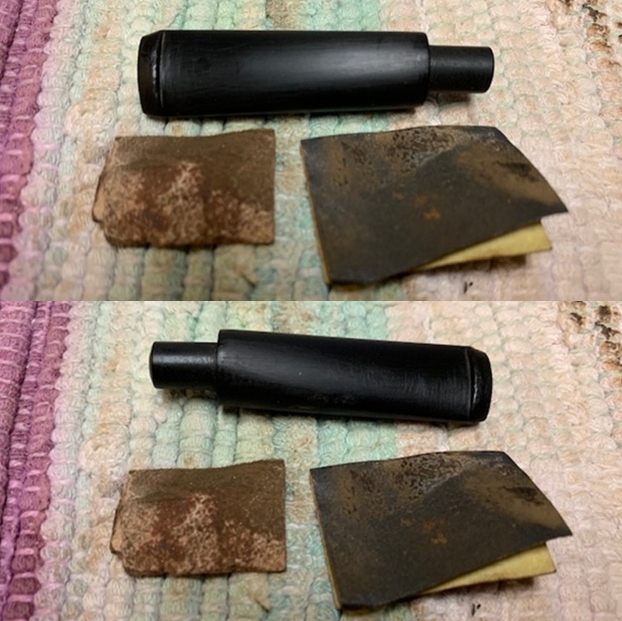
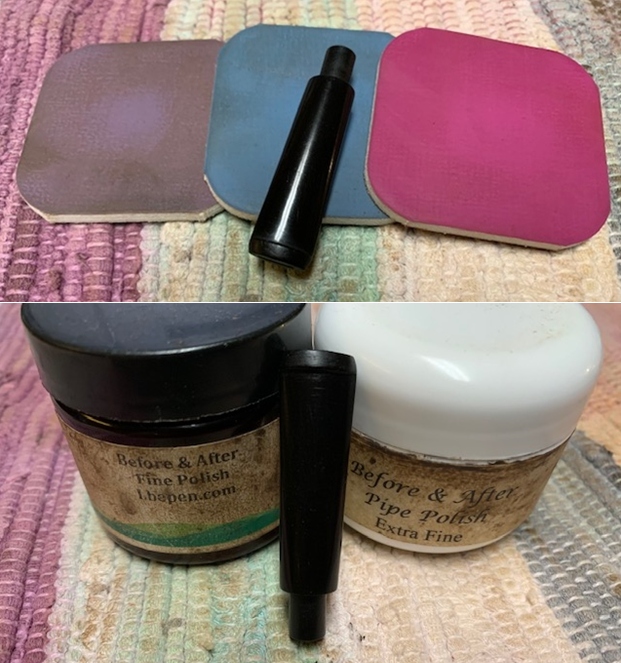
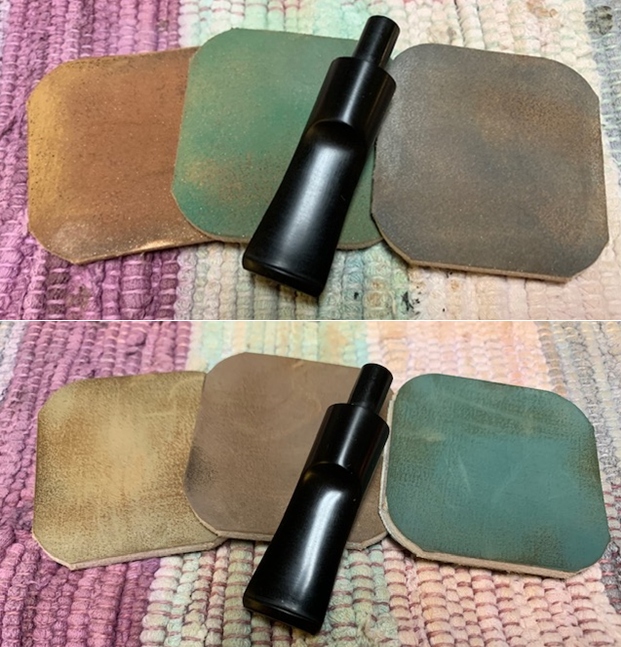
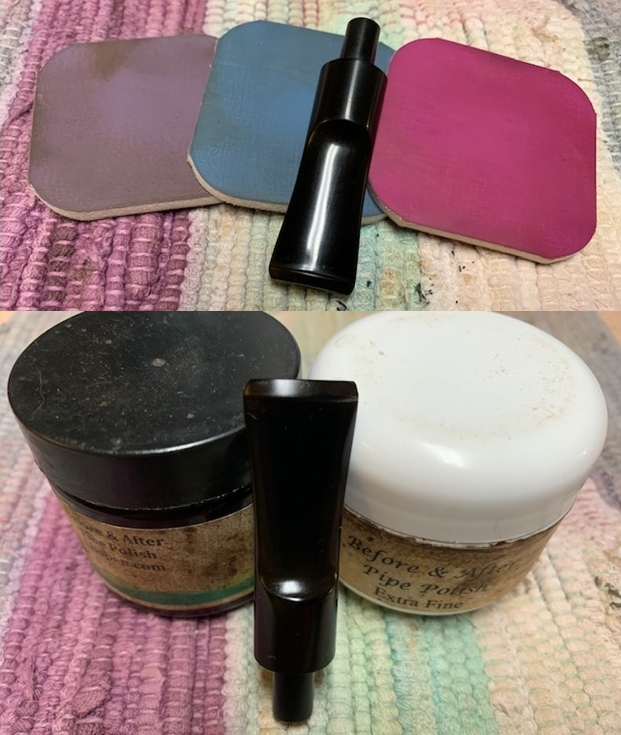
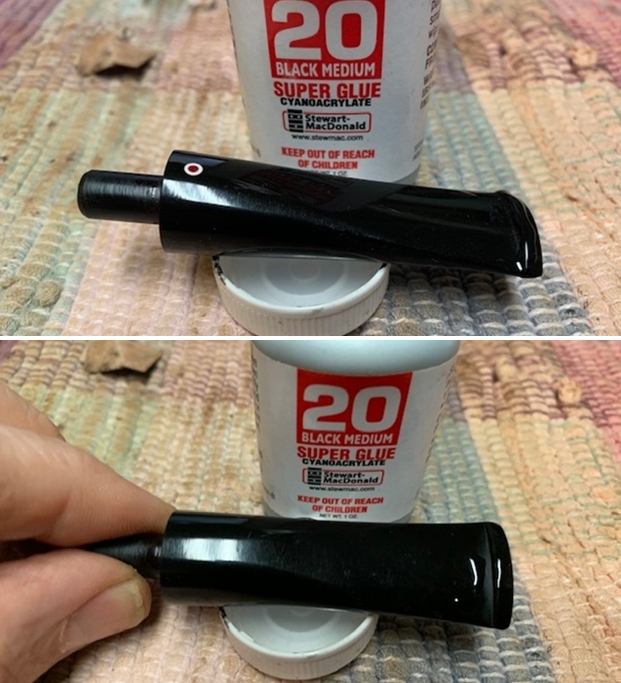
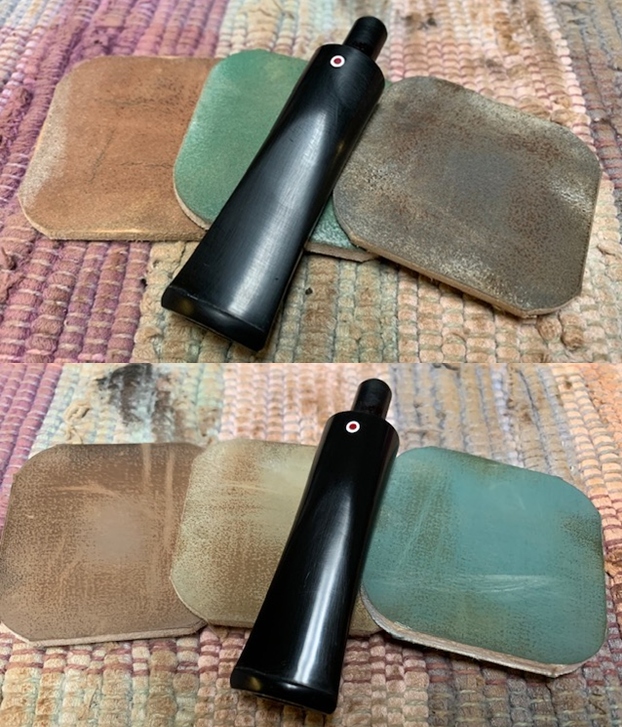
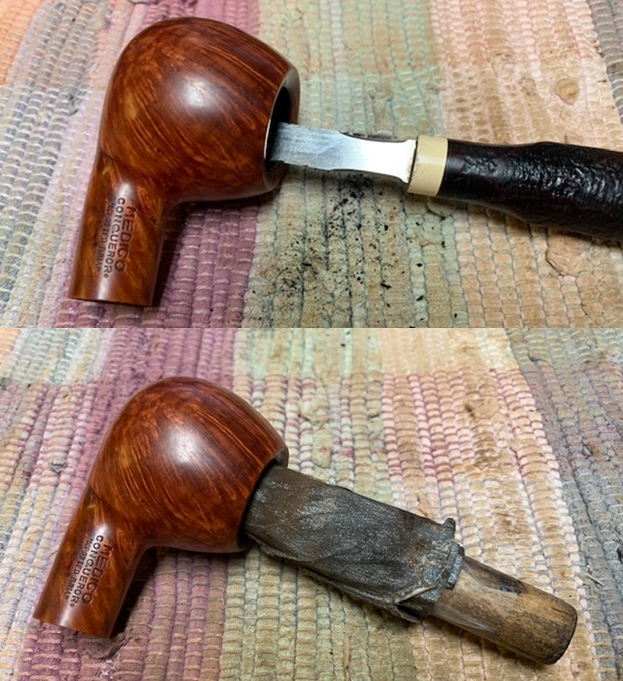
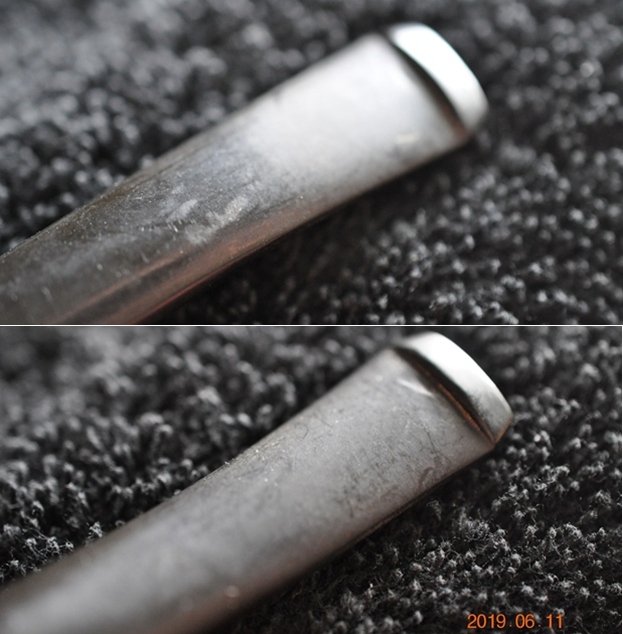
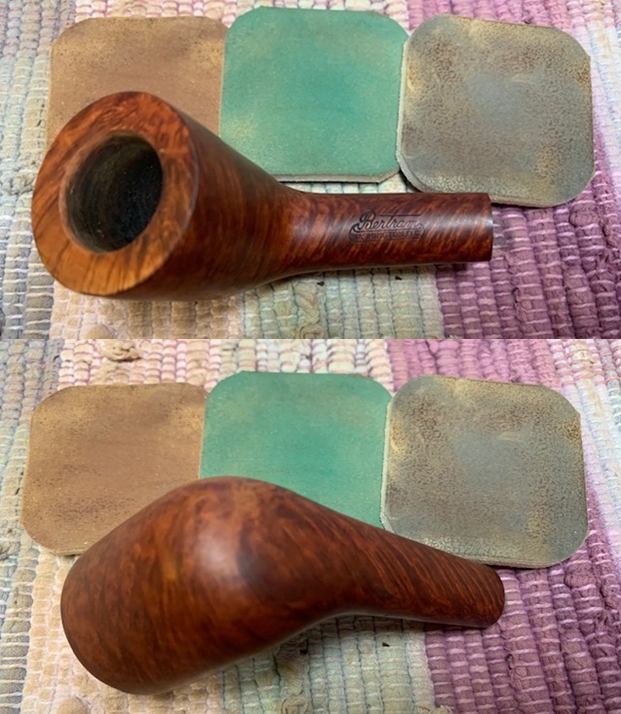
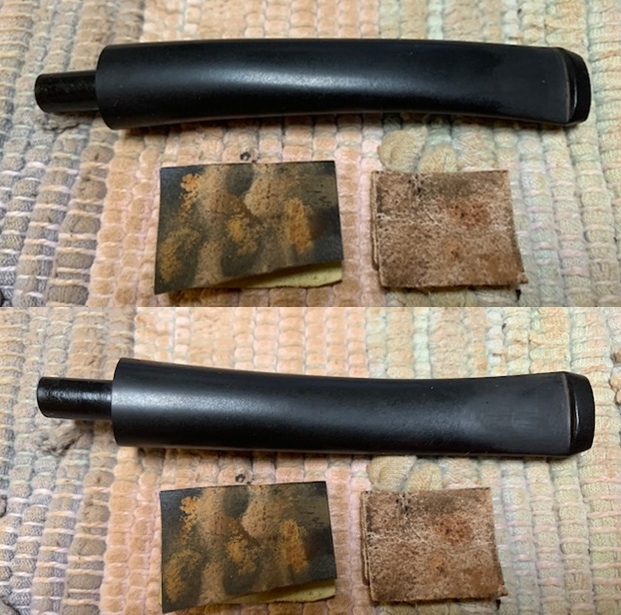
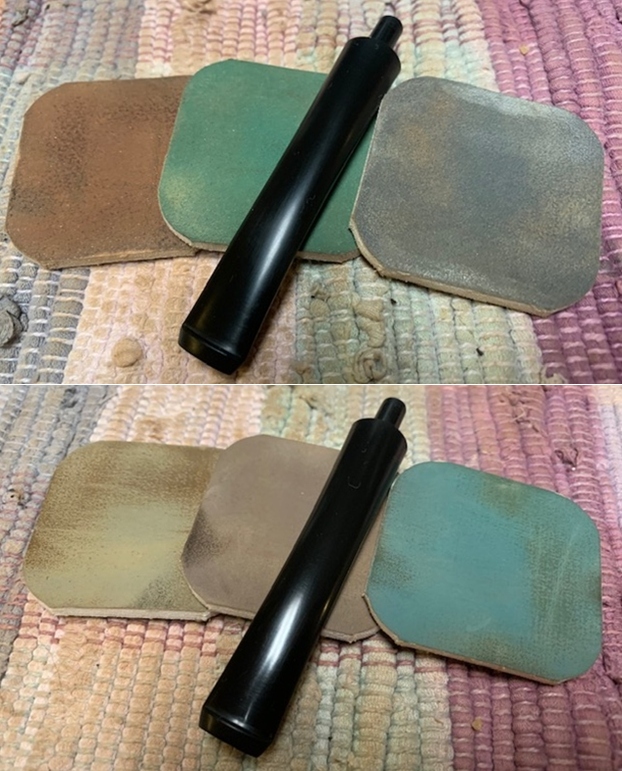
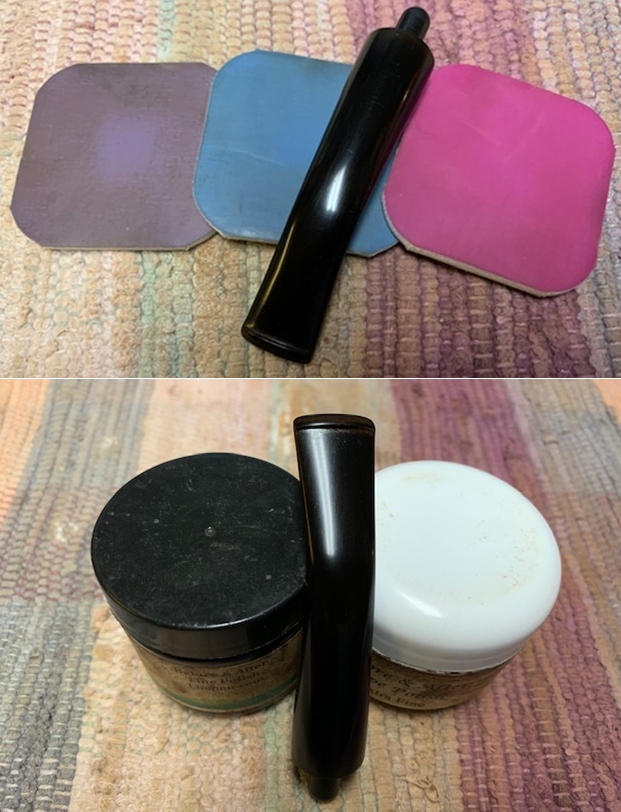
 I set the bowl aside and turned my attention to the stem. I polished the vulcanite stem with micromesh sanding pads – 1500-12000 grit pads. I wiped it down with Obsidian Oil after each sanding pad. I used Before & After Pipe Polish – both Fine and Extra Fine to further polish the stem. The photo below shows the polished stem.
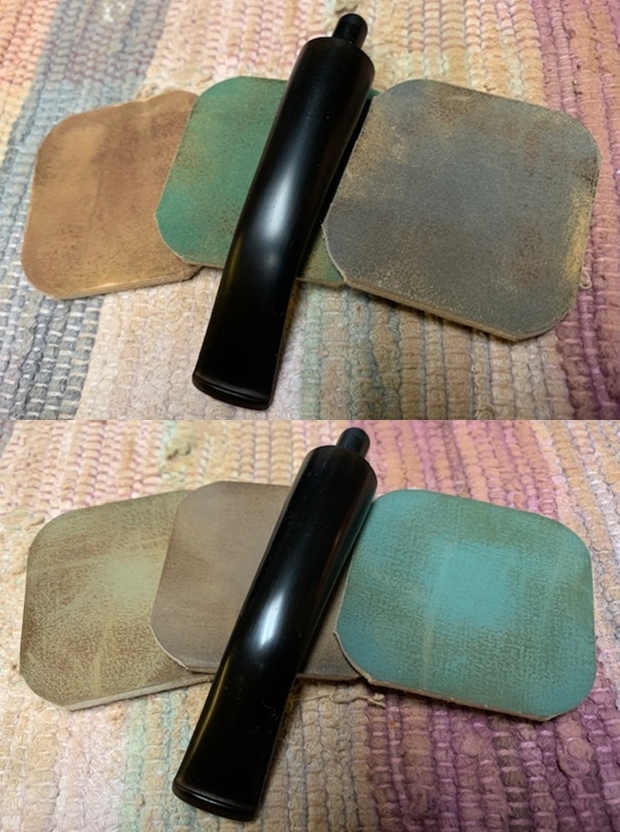
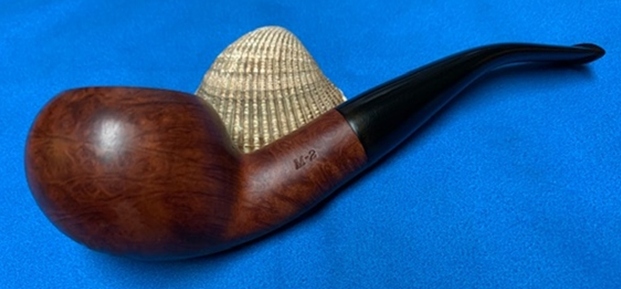
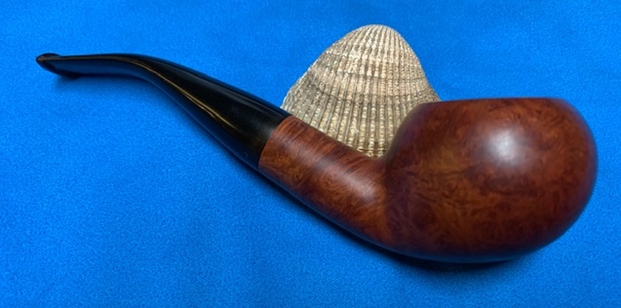
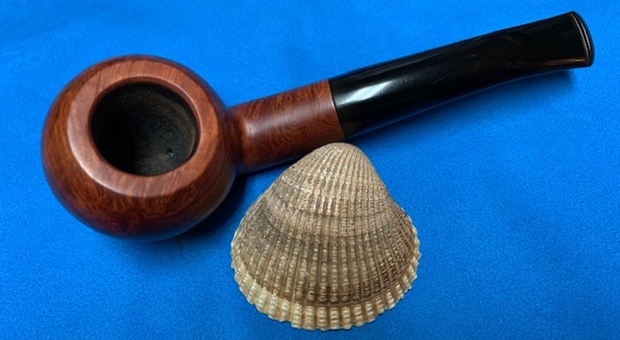
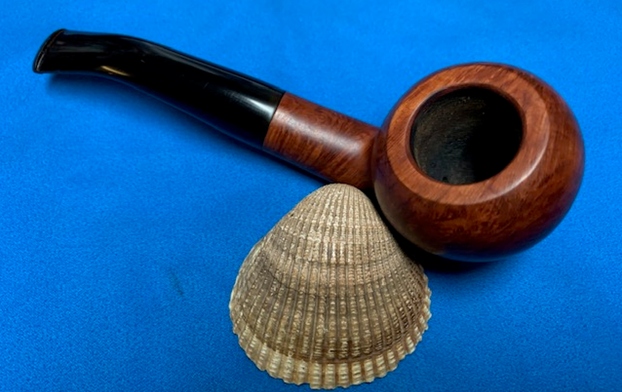
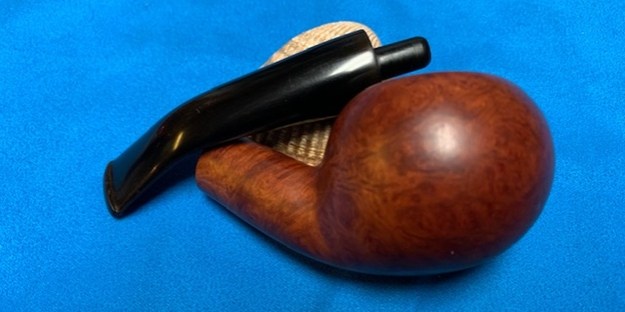
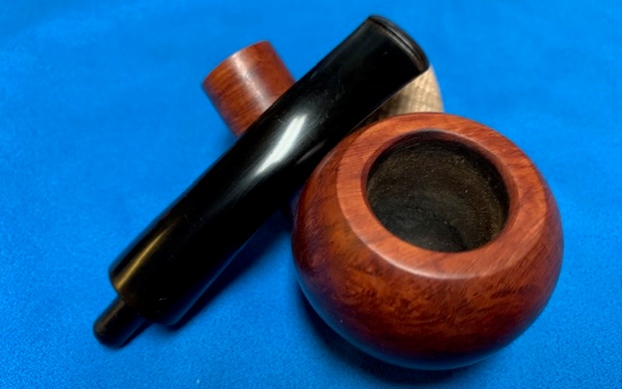
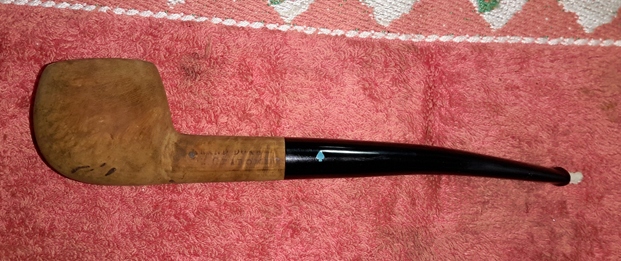
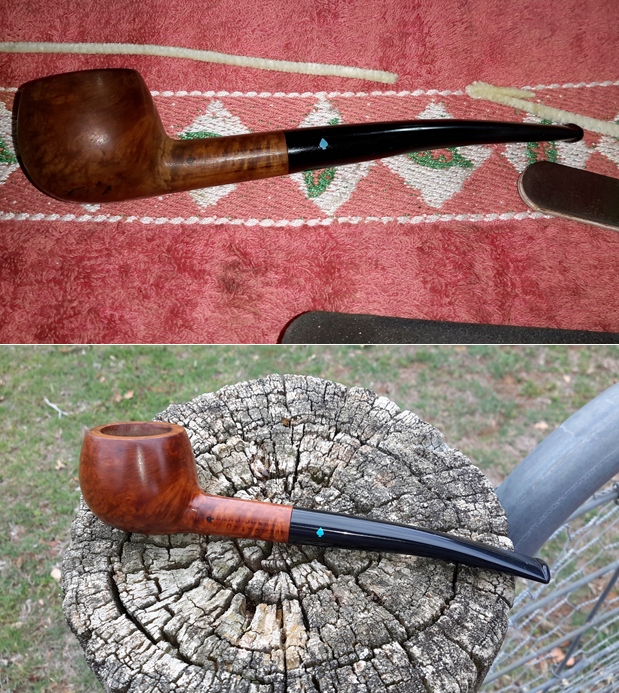
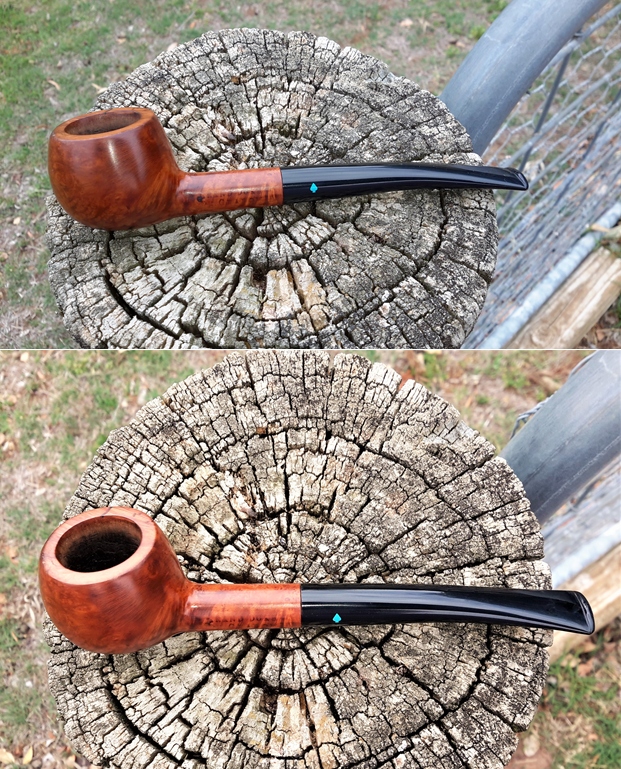
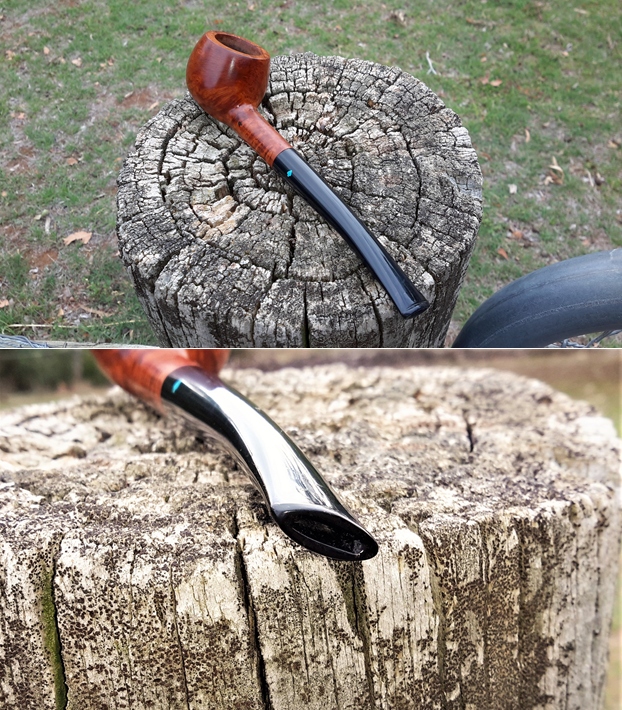
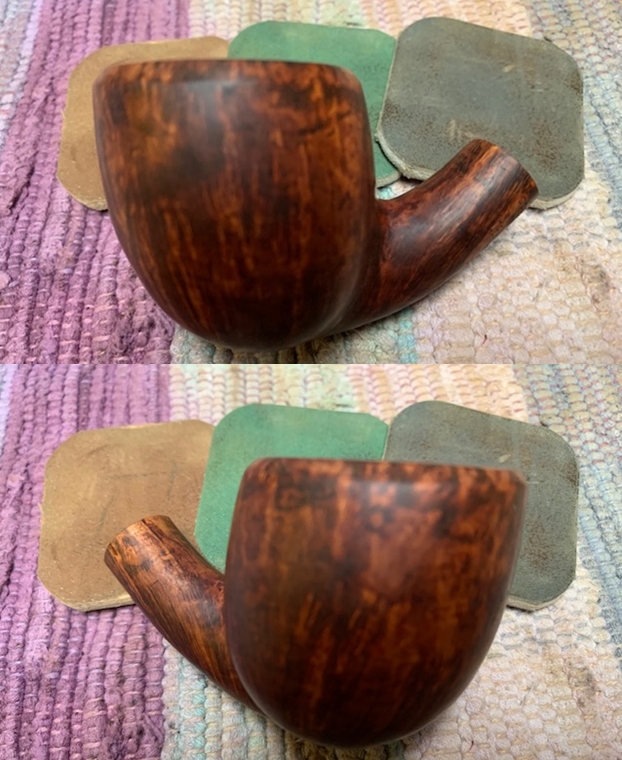
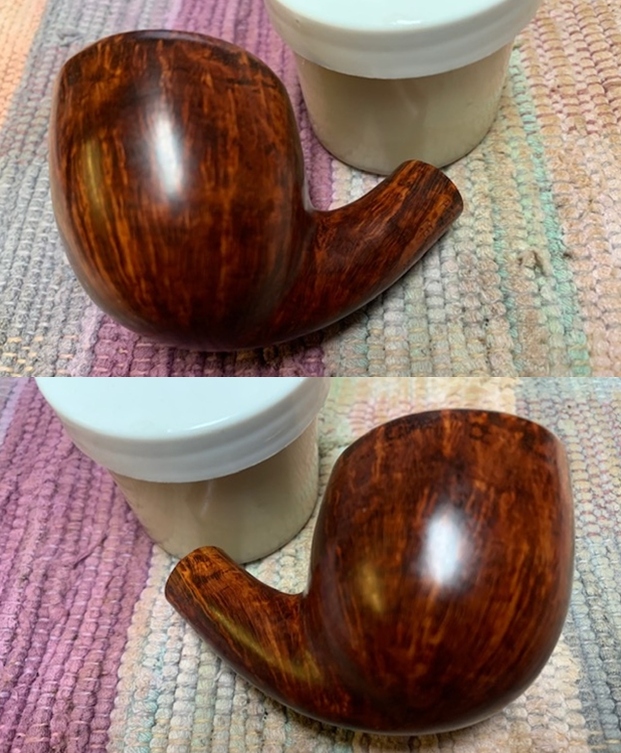
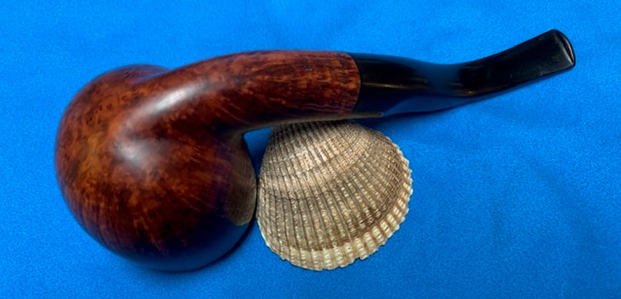
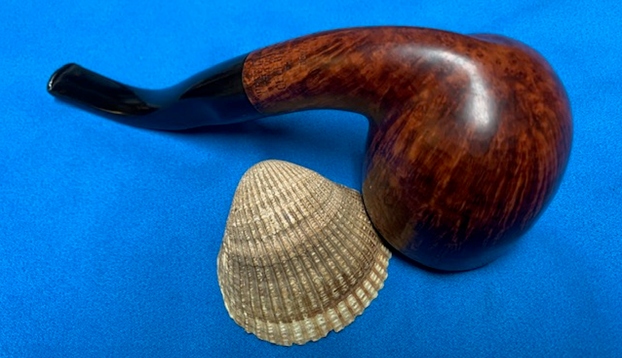
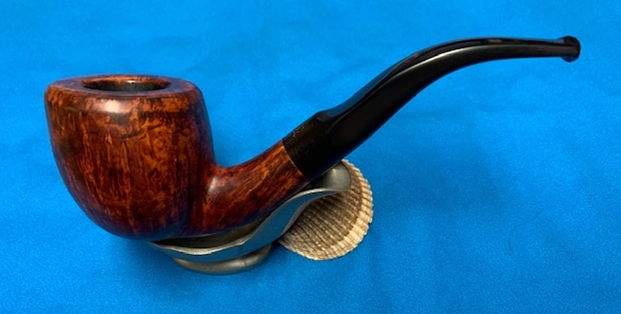
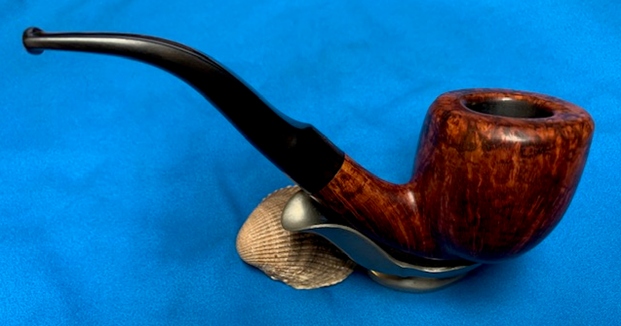
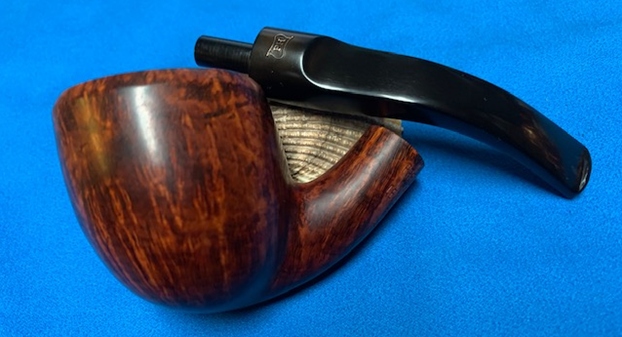
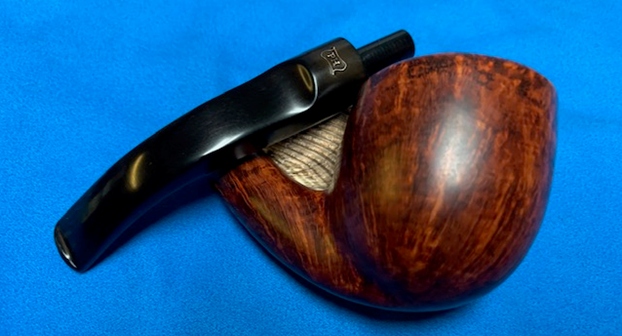
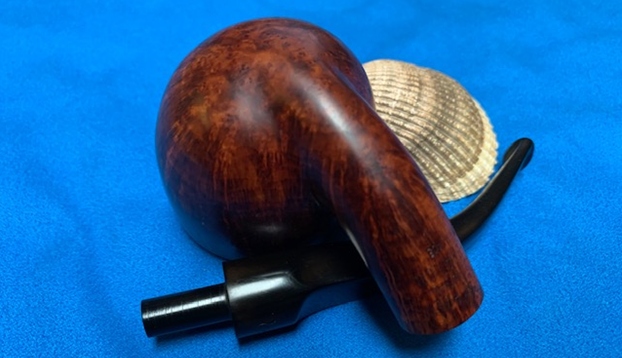
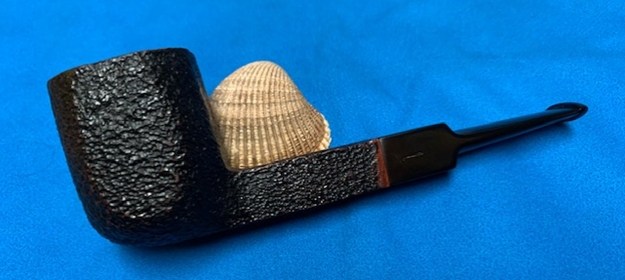
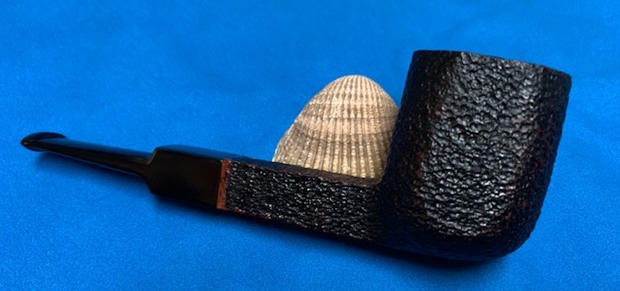
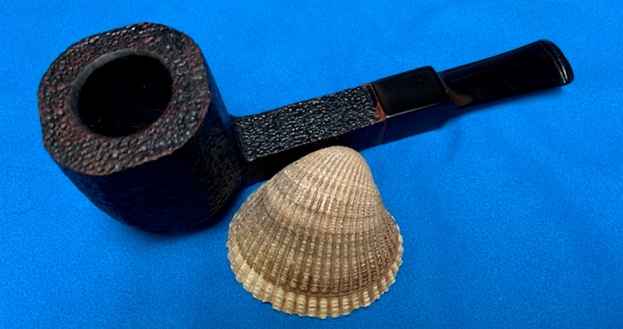
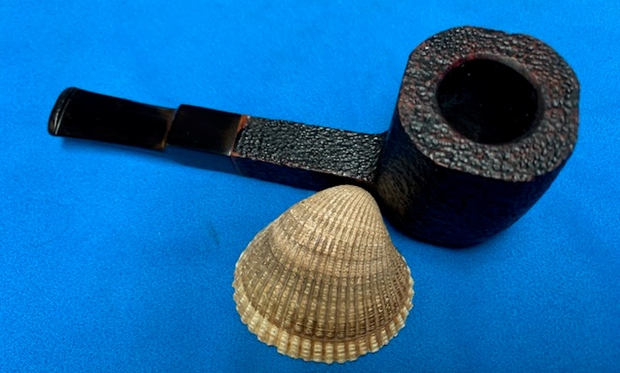
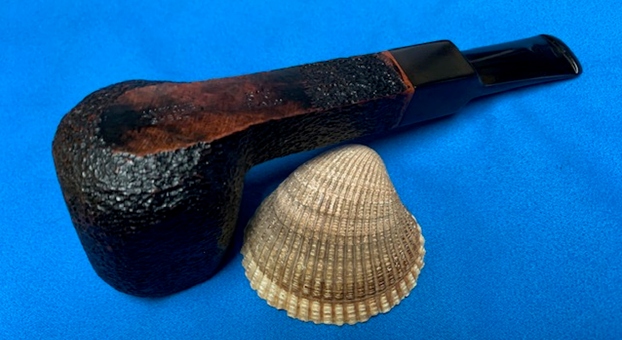
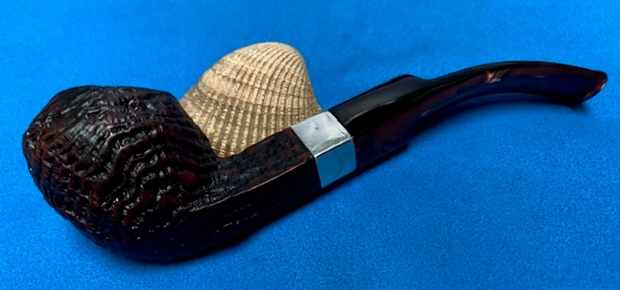
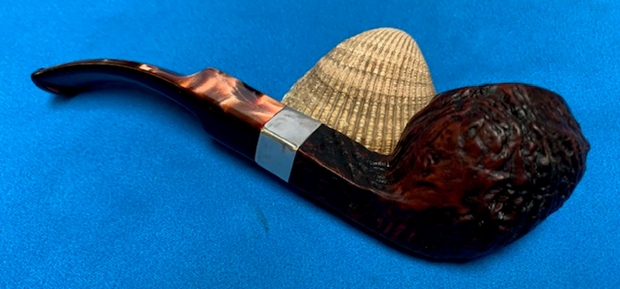
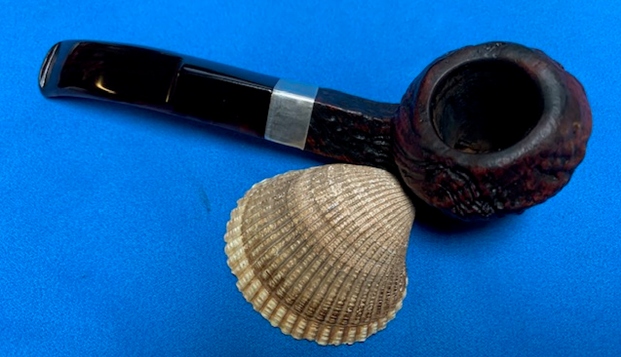
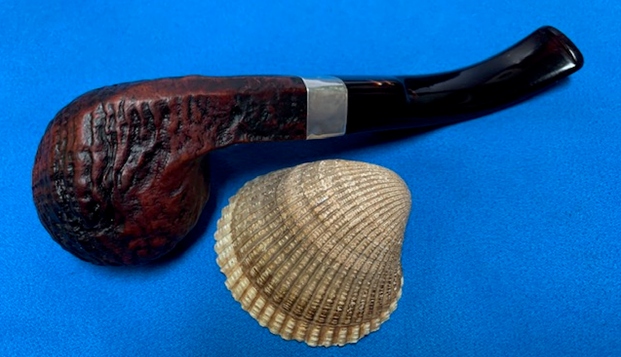
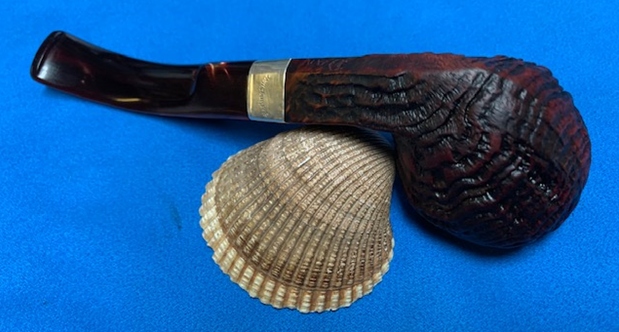
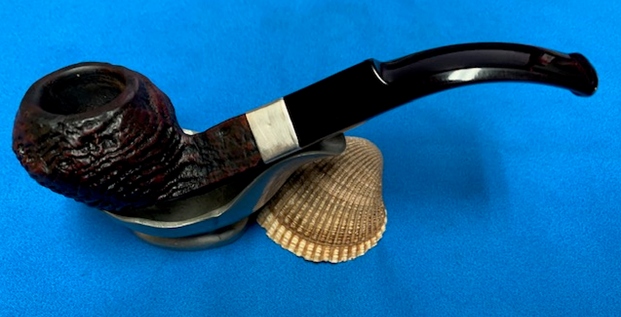
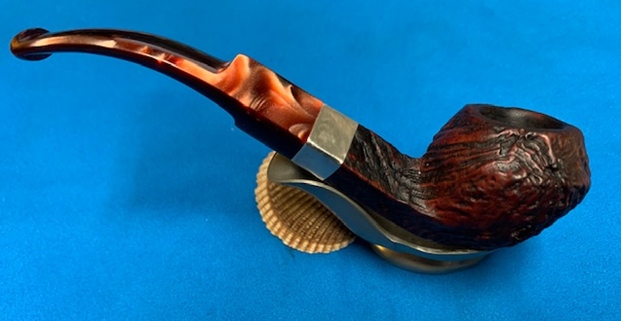
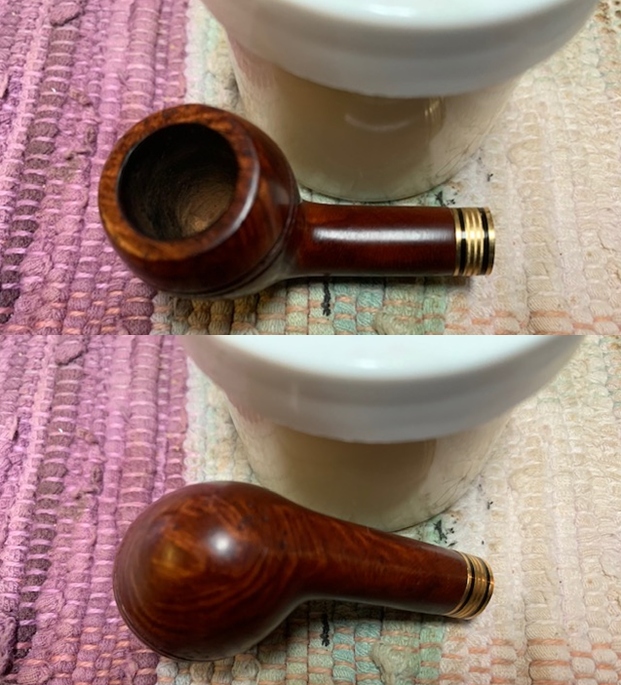
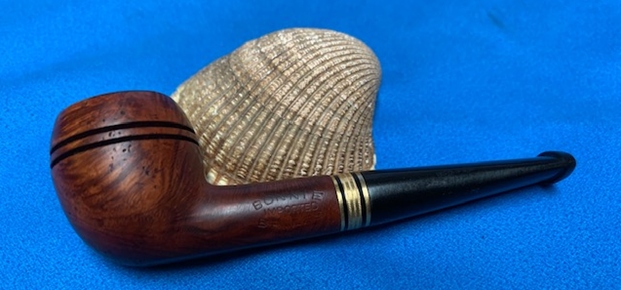
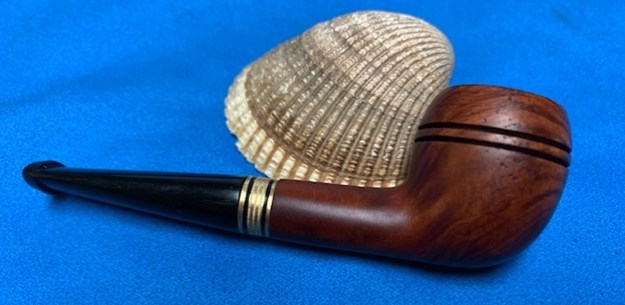
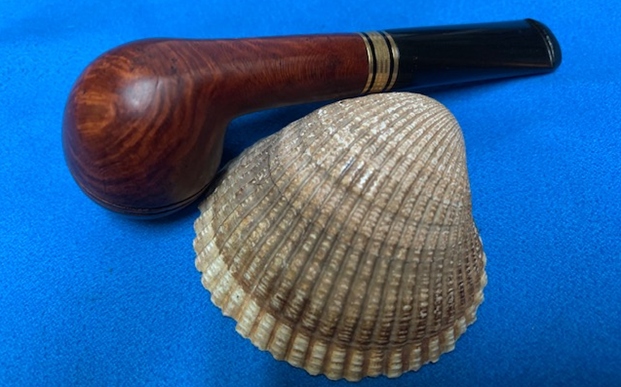
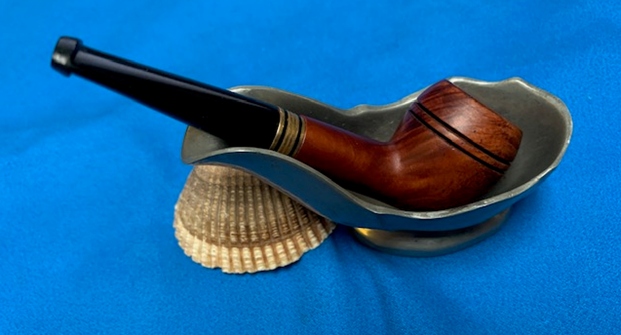
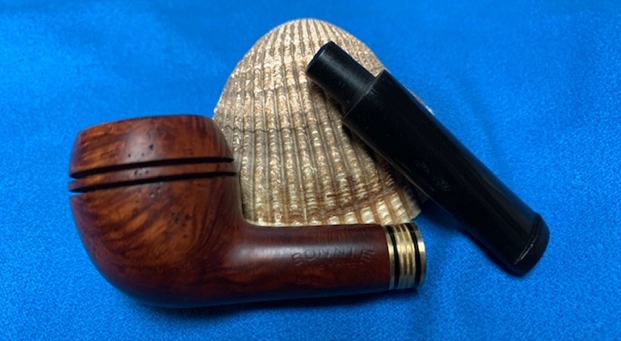
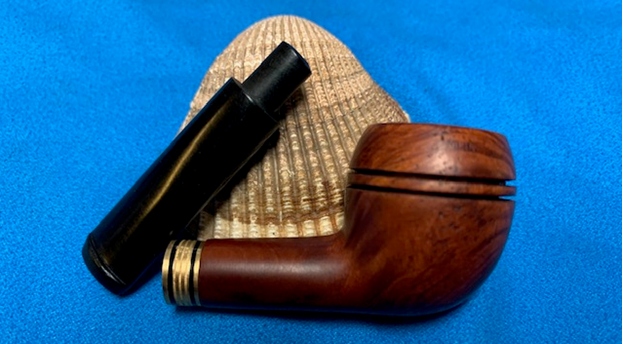
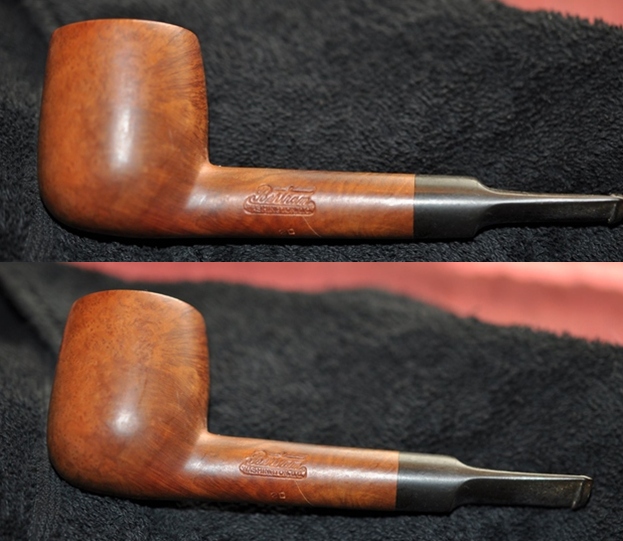
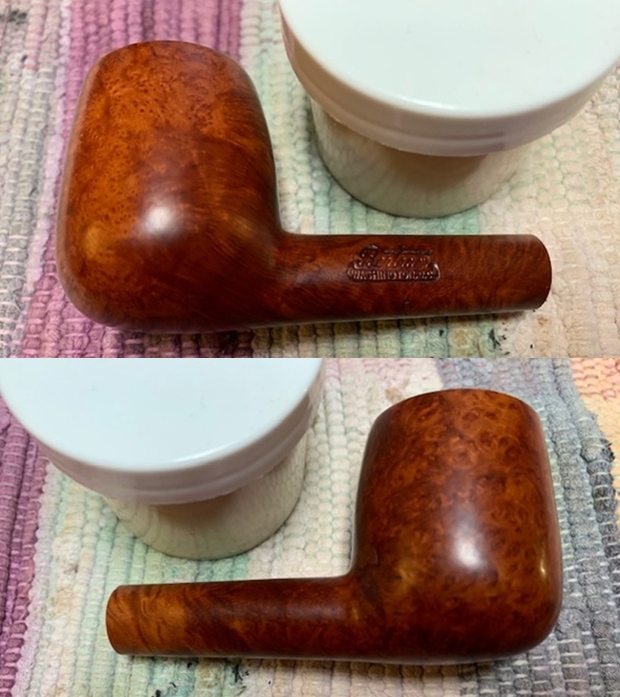
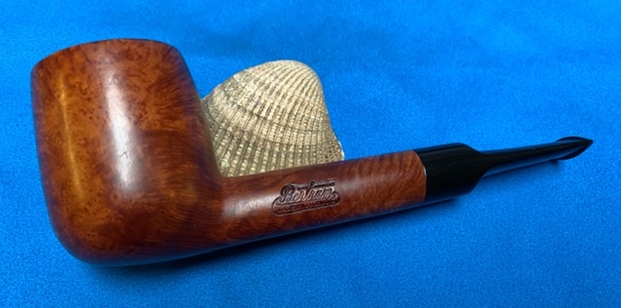
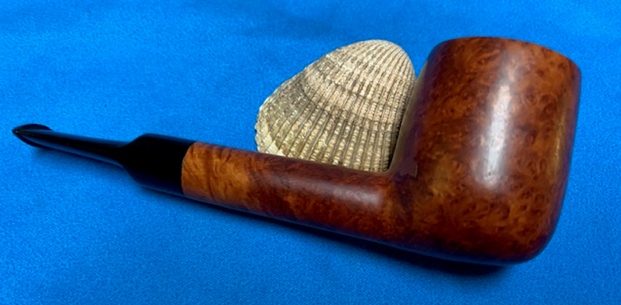
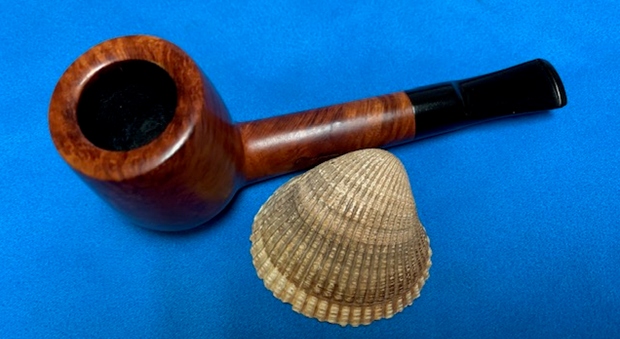
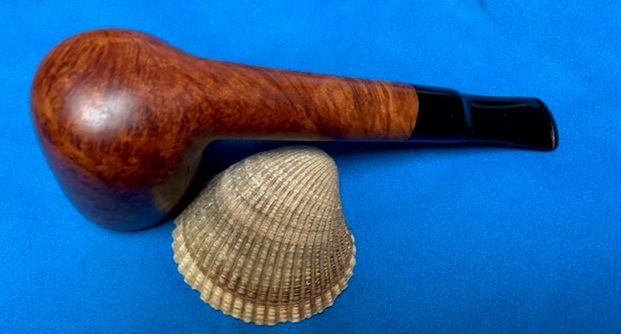
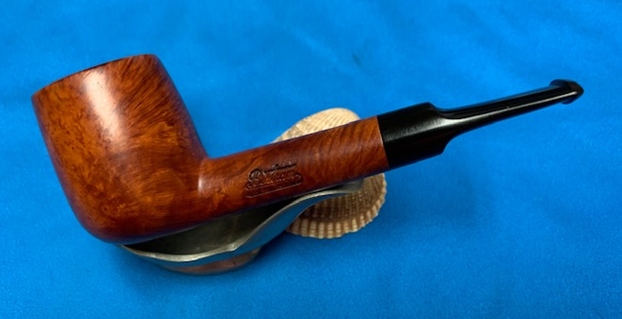
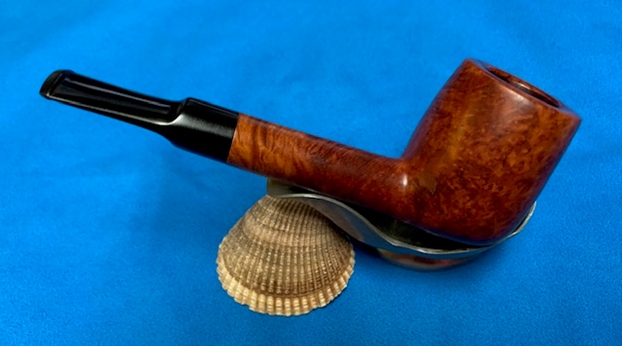
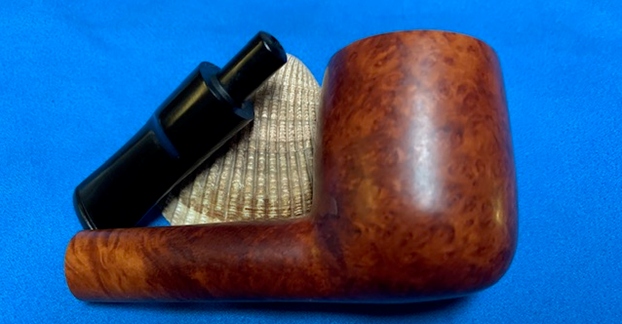
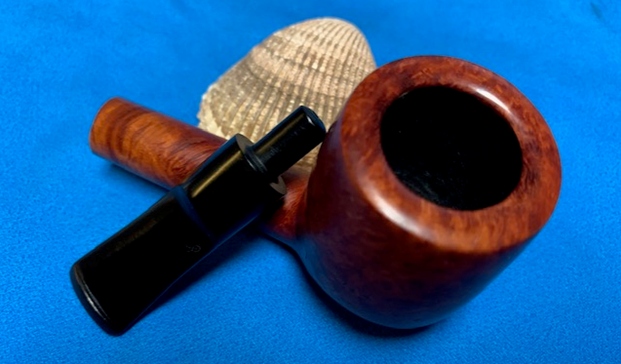
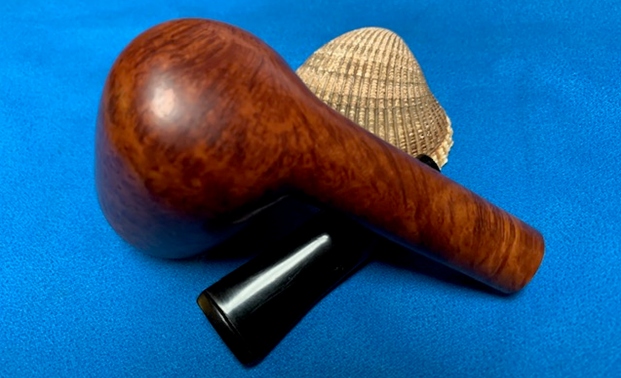
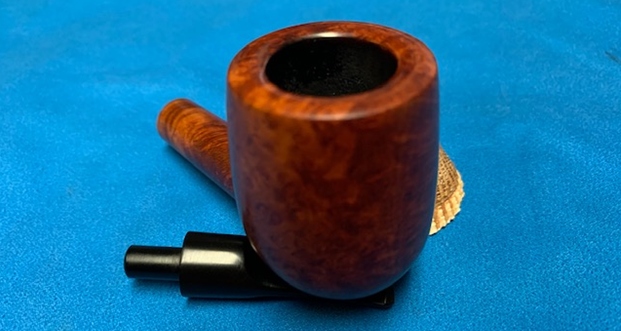
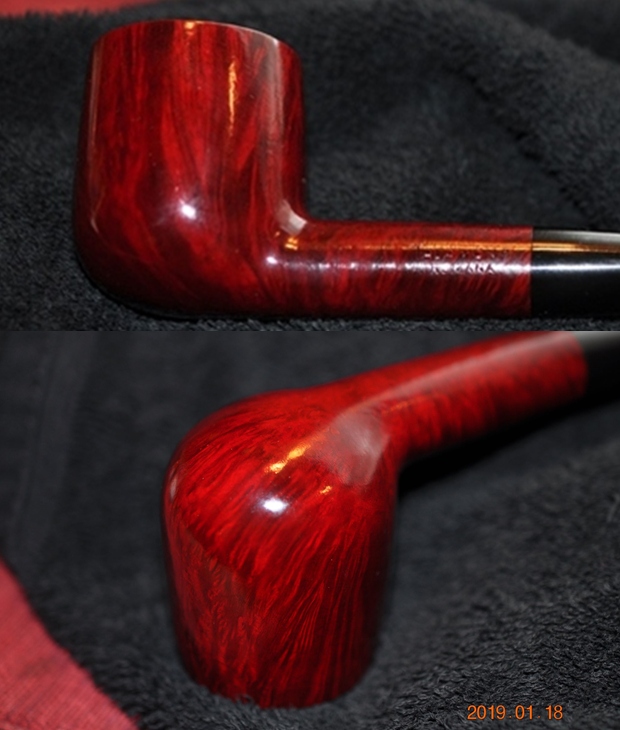
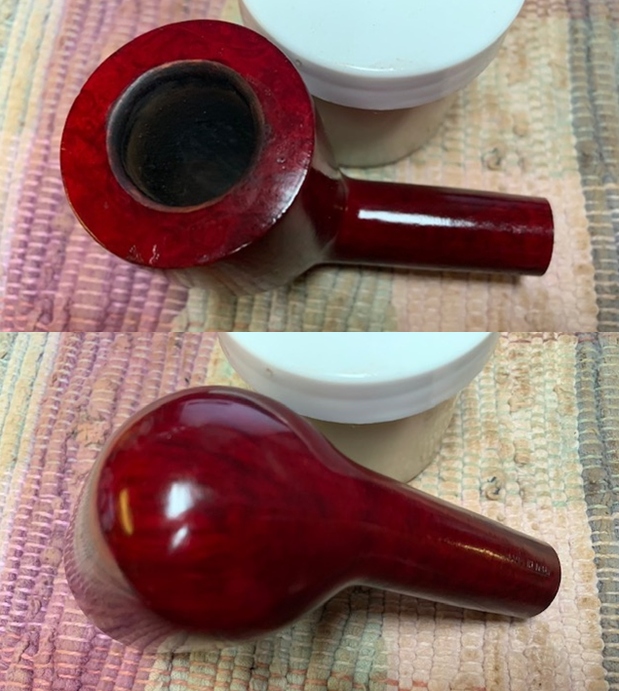
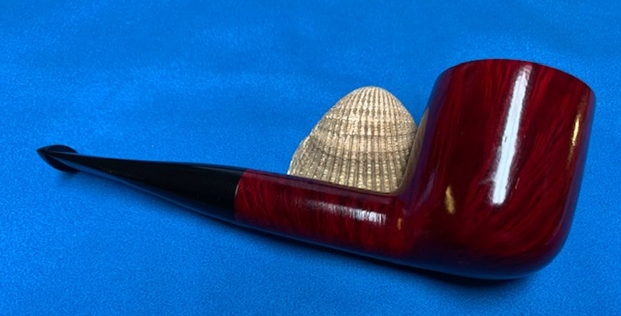
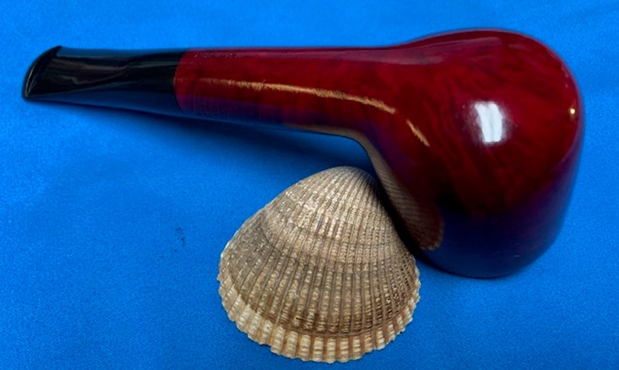
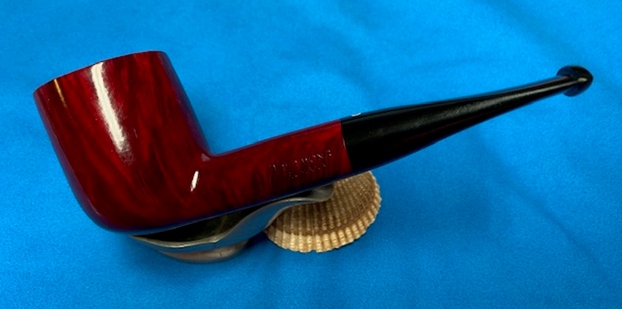
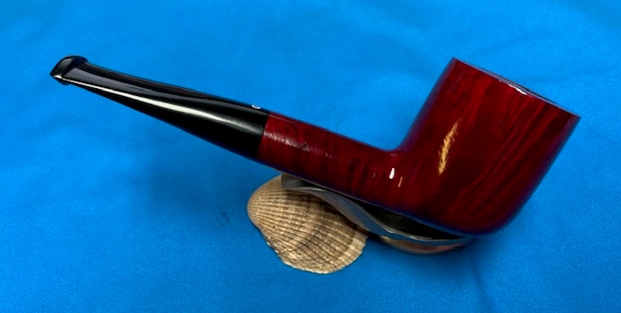
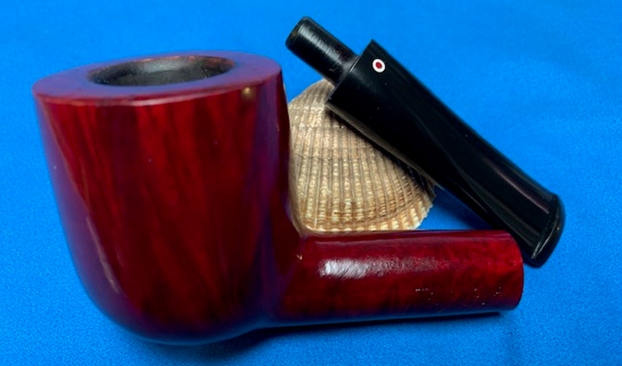
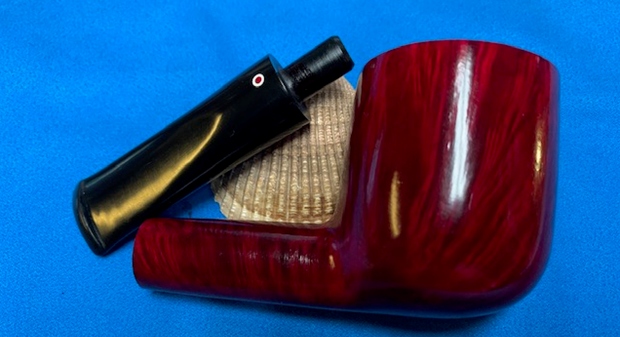
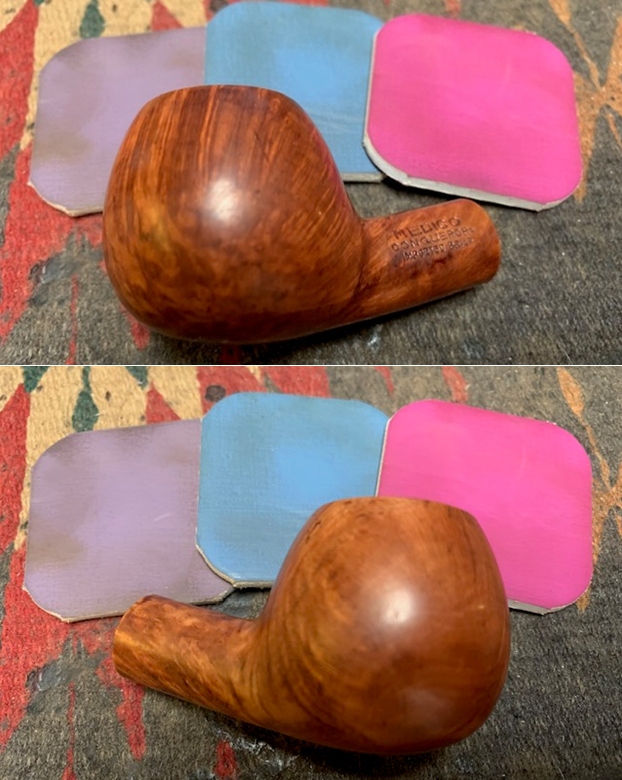
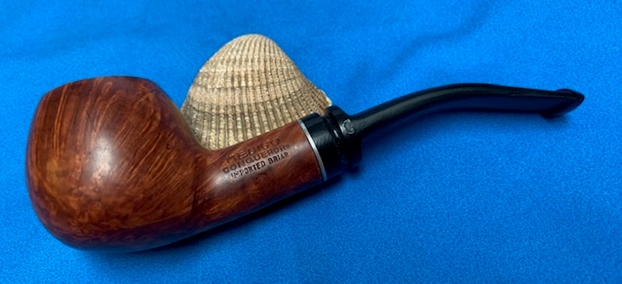
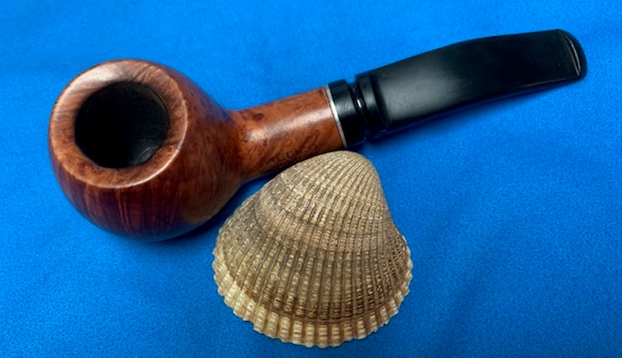
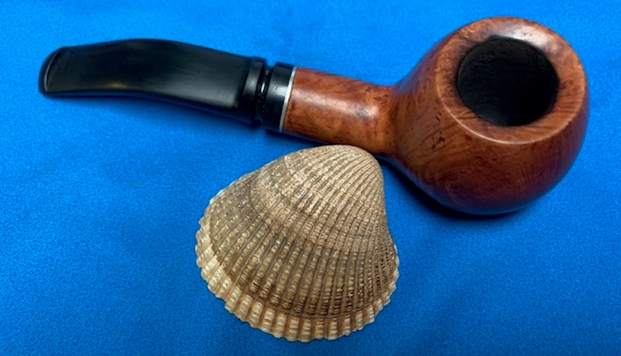
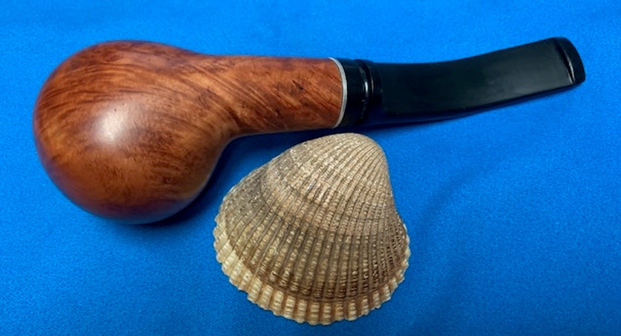
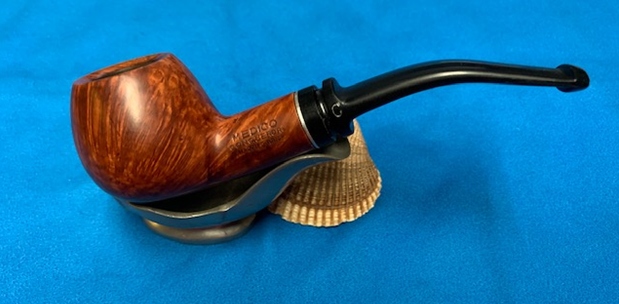
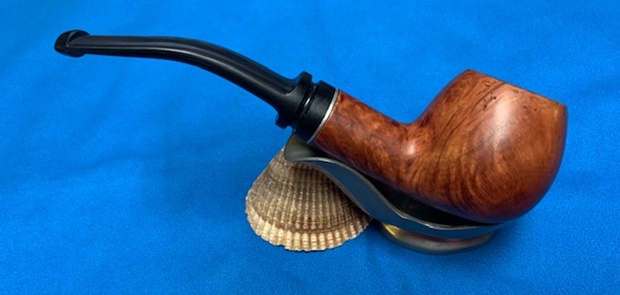
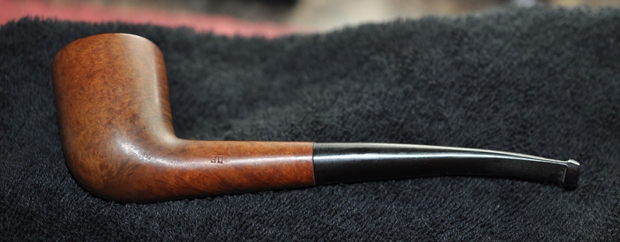
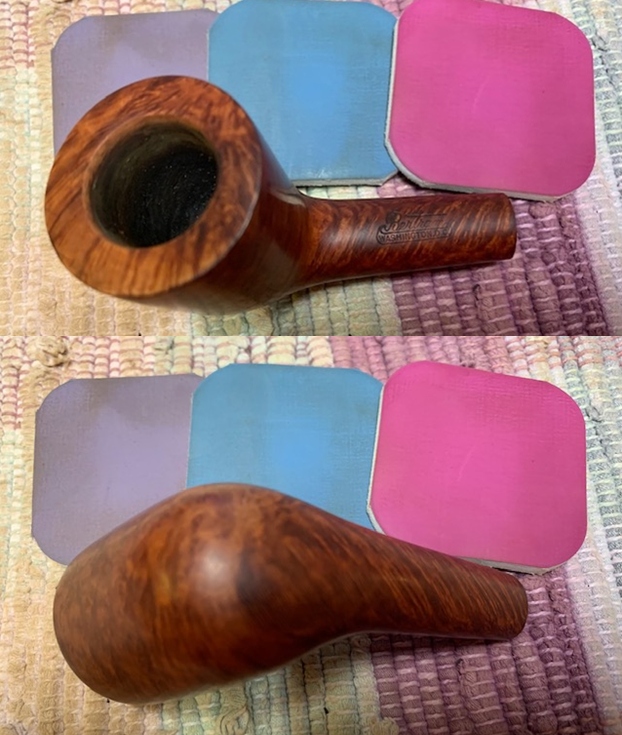
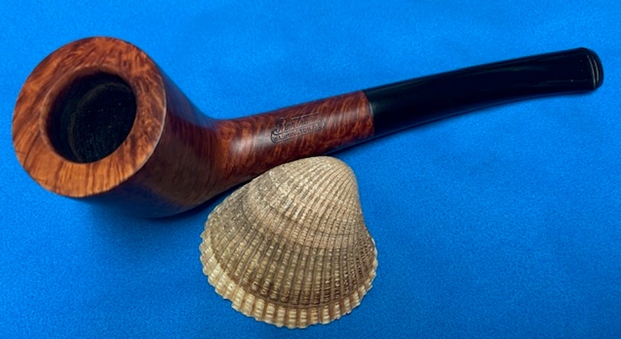
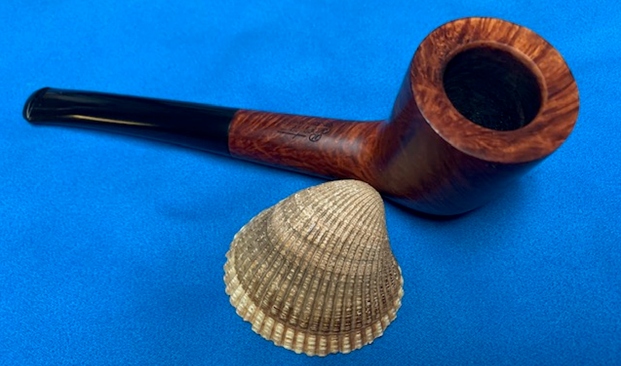
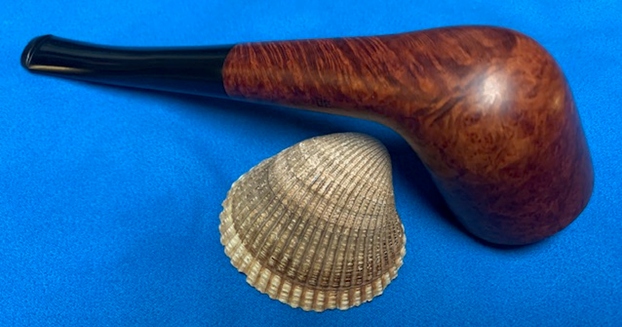
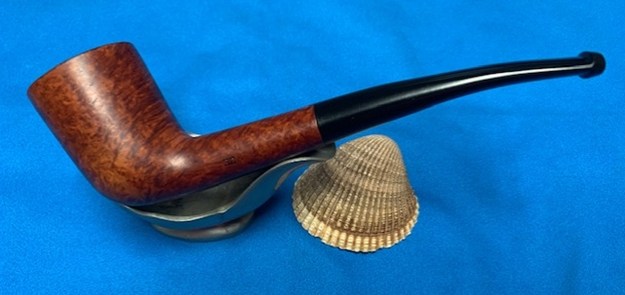
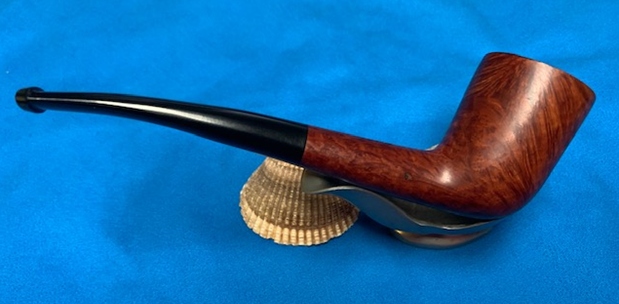
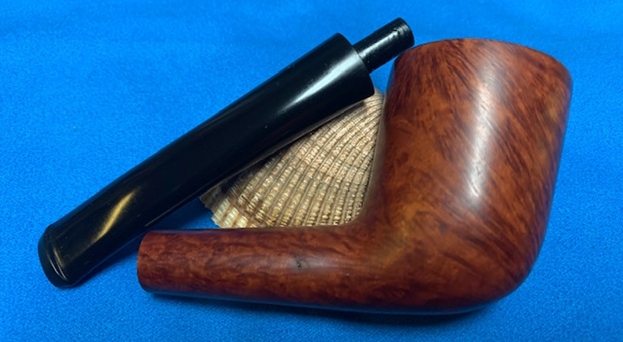
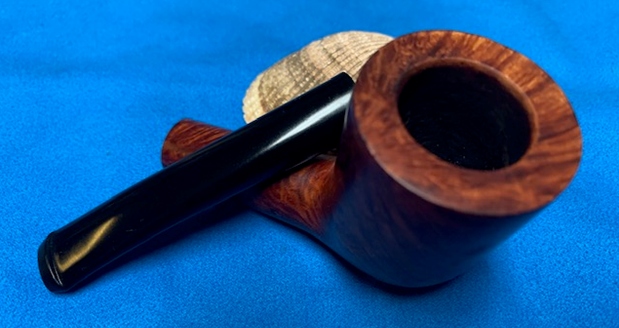
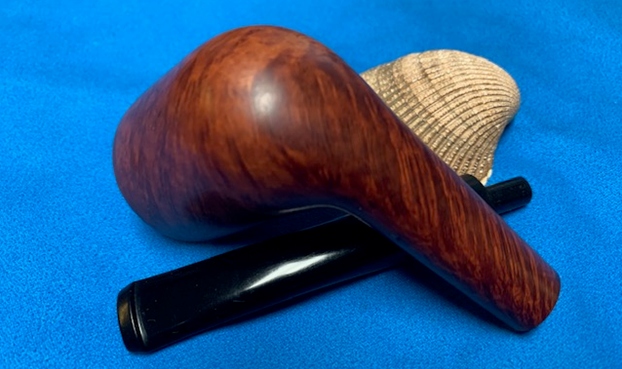
 This nicely grained Malaga Second M-2 Author with a vulcanite taper stem is a great looking pipe now that it has been restored. The rich oil cured finish came alive with the polishing and waxing. The grain really popped. I put the stem back on the bowl and carefully buffed the pipe with Blue Diamond on the buffing wheel using a light touch on the briar. I gave the bowl and the stem multiple coats of carnauba wax on the buffing wheel. I buffed the pipe with a clean buffing pad to raise the shine. I hand buffed the pipe with a microfiber cloth to deepen the shine. The finished M-2 Author is a beauty and fits nicely in the hand and looks very good. Give the finished pipe a look in the photos below. The dimensions of the pipe are Length: 6 inches, Height: 1 ½ inches, Outside diameter of the bowl: 1 ½ inches, Chamber diameter: 7/8 of an inch. Thanks for reading this blog and my reflections on the pipe while I worked on it. There are many more to come!