Blog by Steve Laug
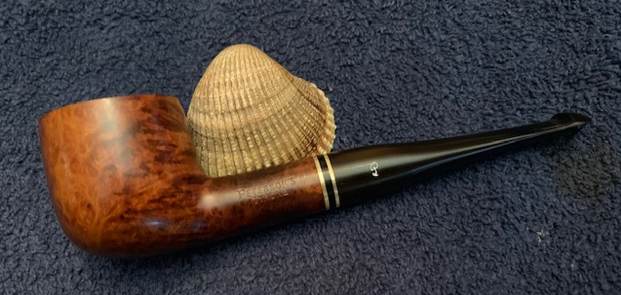
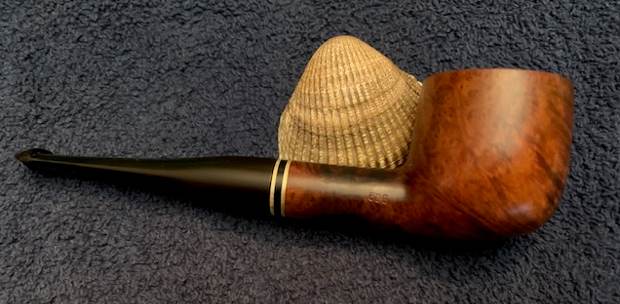
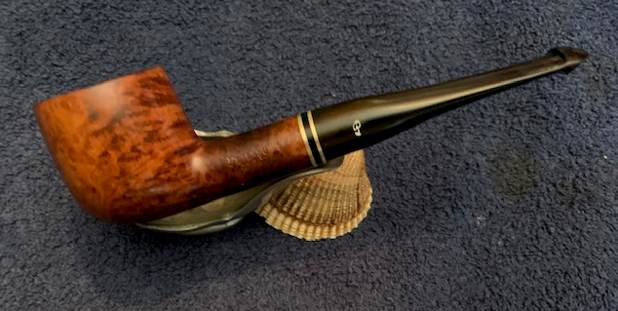
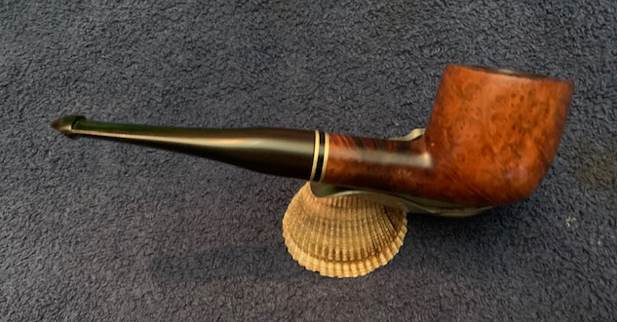
When ever either Jeff or I are pipe hunting we tend to pick up pipes that we like and want to restore. These have included a lot of different pipes of different brands. If you have followed us for long you know that some of these have included Peterson’s, Dunhill’s, and a wide range of Danish and English pipes. The next pipe I chose to work on is another Peterson’s Pipe – a nicely grained Pot shaped pipe. It is stamped on the left side of the shank and reads Peterson’s [over] Tyrone. On the right side of the shank it is a stamped with the shape number 606. There is a triple band shank extension – two brass bands separated by a black acrylic spacer. The bowl was heavily coated with varnish that was shiny under the dirt and grime. There was a heavy lava coat on the rim top and a moderate cake in the bowl. The stem was heavily oxidized and calcified with heavy tooth marks and chatter on both side of the stem and button. It was a nice looking pipe with some great grain around the bowl. I think that once it was cleaned up the grain would really stand out. I took photos of the pipe before I started my clean up work. 
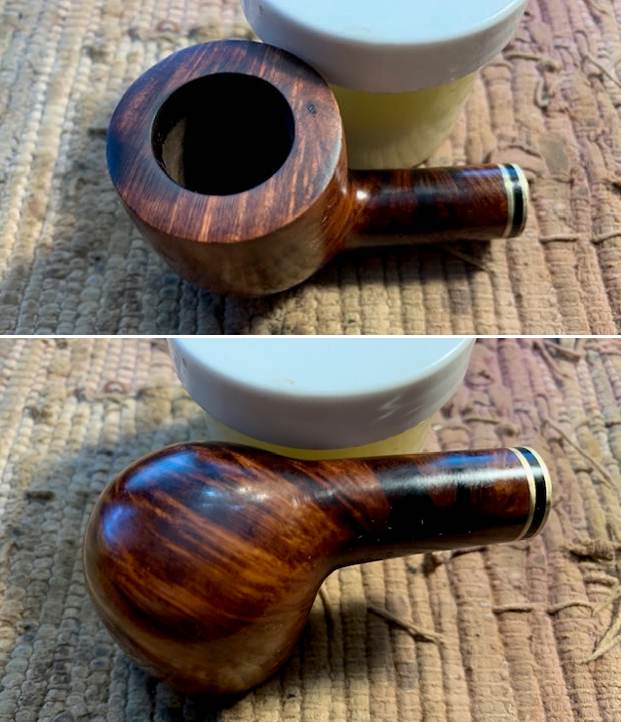
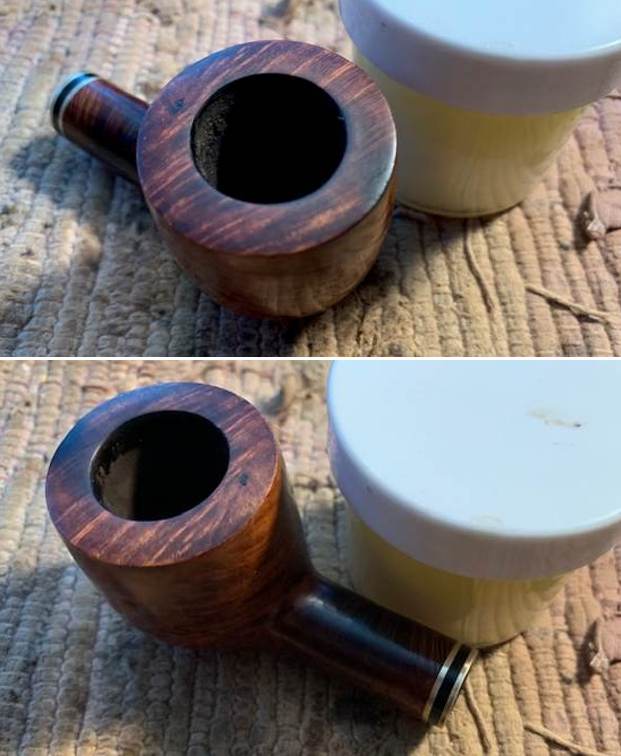
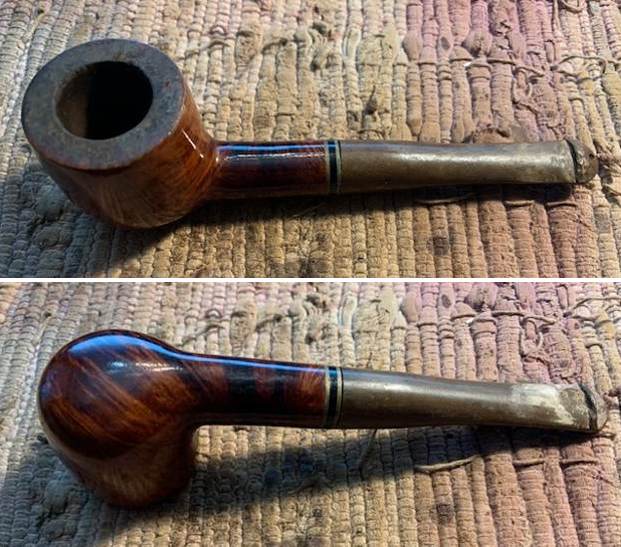 I took some close up photos of the rim top and also of the stem surface. The rim top had a thick coat of lava protecting the rim top and the cake in the bowl covered the inner edges of the bowl. The outer edges of the bowl appear to be good condition. I would guess that there was some darkening and damage under the lava on the top. It should clean up really well. I also took close up photos of the stem to show oxidation, calcification and tooth marks and chatter on both sides of the stem and button.
 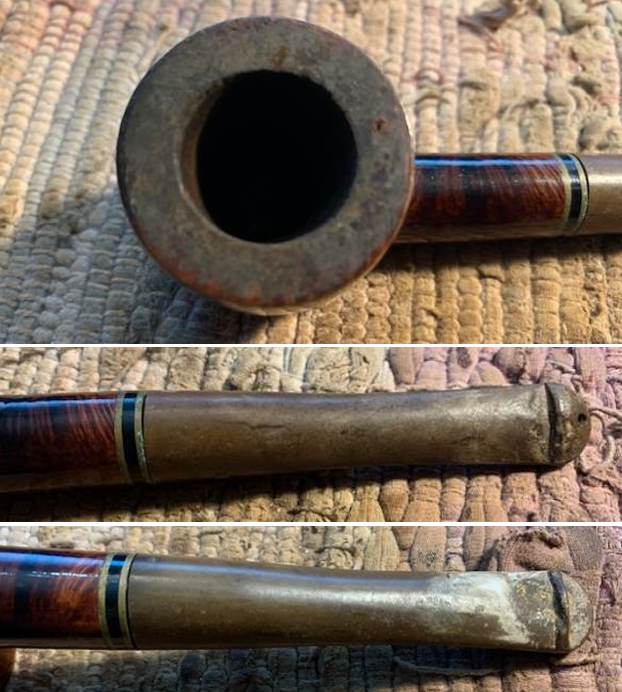 I took photos of the stamping on the sides of the shank and on the “P” logo on the left side of the stem. It is readable as noted above.
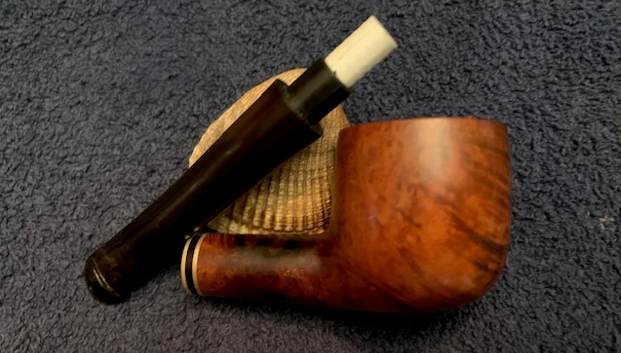
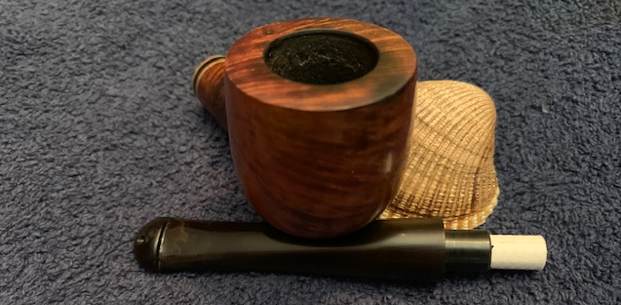
 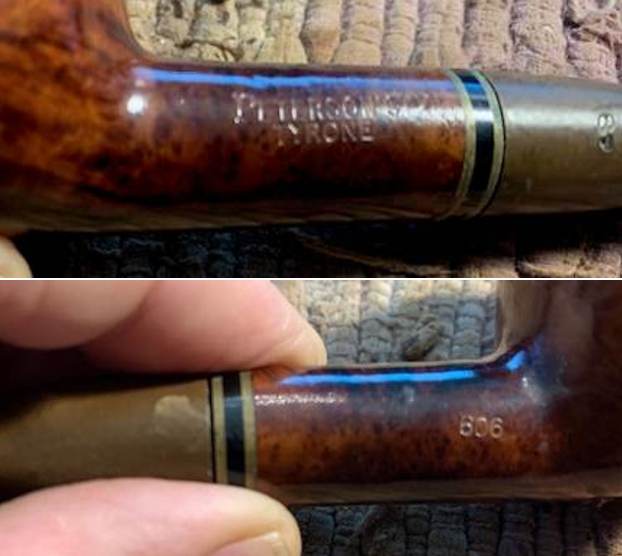 I removed the stem and took a photo of the pipe to have a look at the parts and overall look. The tenon on the stem was made for a 9mm filter and actually looked quite good.
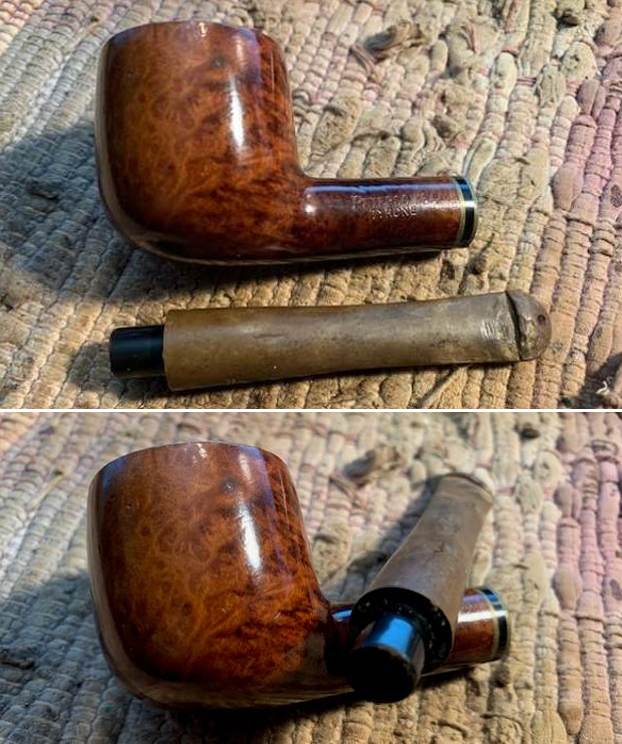 I am including the link to the Pipedia’s article on Peterson pipes. It is a great read in terms of the history of the brand (https://pipedia.org/wiki/Peterson).
I turned to “The Peterson Pipe” by Mark Irwin and Gary Malmberg to get some background on the Peterson’s System Line. On page 315 it had the following information.
Tyrone (c.1991)- Smooth finish, walnut stain line with brass band with black acrylic inlay, gold hot-foil P stamped on P-lip or fishtail mouthpiece.
I followed some links to Mark Irwin’s Peterson Pipenotes where Mark had written something on the line (https://petersonpipenotes.org/2021/07/10/236-the-new-tyrone-line/). I quote from the article below and have included to pictures that Mark used. The first a brochure and the second a shape guide.
The original iteration of the Tyrone line debuted c. 1991 and was first seen in the early Dublin era’s1992 “Hand Made” brochure. As you can see, the walnut finish has a satin finish revealing quite a bit of grain beneath. The Black Catalog of 1997 gives a better glimpse of the stain, finish and original alternate mounting styles. The last appearance of this version of the Tyrone in the ephemera was in the 2010 Burgundy Catalog, although it was doubtless in production for a few years afterwards.
 For the Identification Guide:
Tyrone (c. 1991–c. 2012; 2021–) smooth finish, walnut stain line with shank decoration of black acrylic between 2 brass rings, gold hot foil P stamped on mouthpiece, P-Lip or F/T. Relaunched July 2021 in Heritage finish (smooth dark brown) with original shank decoration and gold hot foil P on elongated F/T acrylic mouthpiece.
That information helps me date the pipe on hand as one of the original pipes from the line introduced between (c.1991-c.2012) rather than the later iteration of the line that came out in July of 2021 in the Heritage Finish. The first Tyrone came out with a smooth walnut stained finish the same as this one. It is a pretty looking pipe in a Pot shape.
Now it was time to work on the pipe. I started working on it by stripping off the thick varnish coat with acetone and a cotton pad.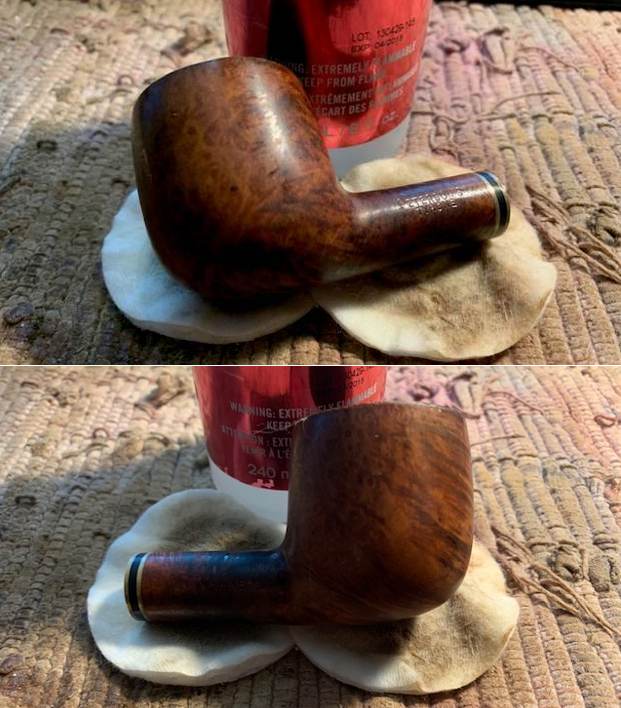
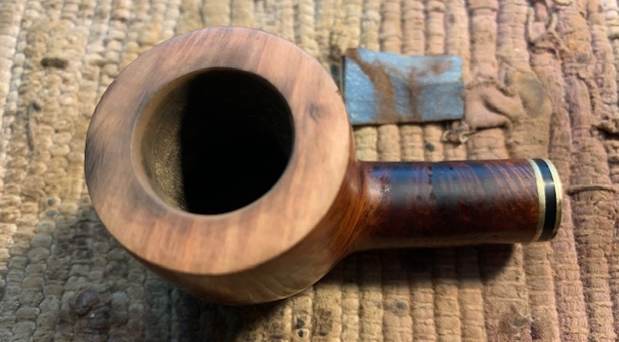
 I reamed the pipe with a Savinelli Fitsall Pipe Knife and cut back the cake back to the bare briar. I sanded the walls of the bowl with a piece of dowel wrapped with 220 grit sandpaper to smooth them out and clean them further. The bowl walls were in excellent condition.
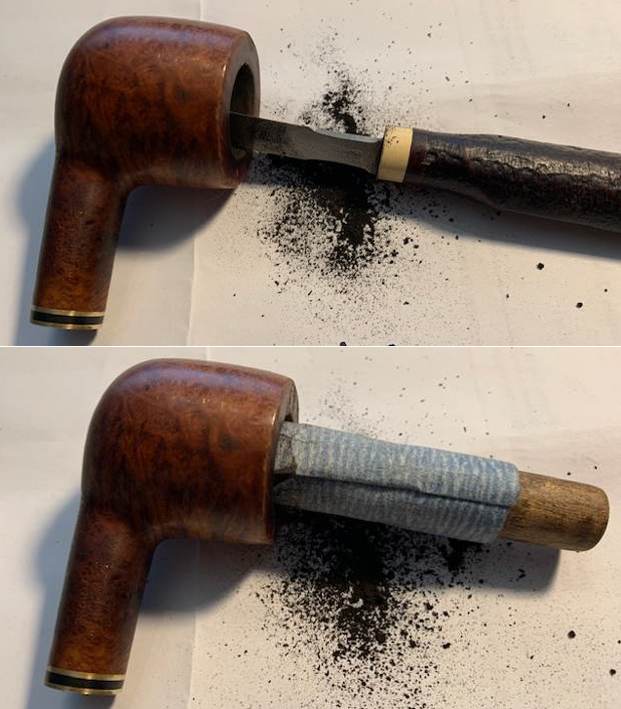 I topped the bowl with 220 grit sandpaper on a topping board to remove the marks and damage on the rim top. I carefully cleaned up some of the darkening and burn marks on the front rim top and edges. I used a folded piece of 220 grit sandpaper to give the inner edge of the bowl a slight bevel to minimize the darkening and damage and blend it into the surrounding briar.
 I restained the sanded rim top with a Walnut stain pen to match the bowl sides and shank.
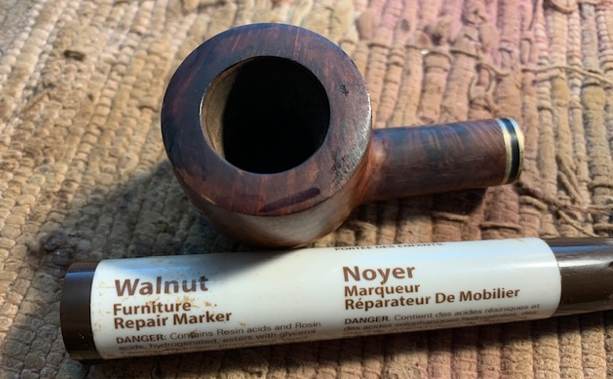 I cleaned out the mortise and airway in the shank with cotton swabs, pipe cleaners and isopropyl alcohol until they came out clean. (I would work on the airway in the stem when I removed it from the soak.)
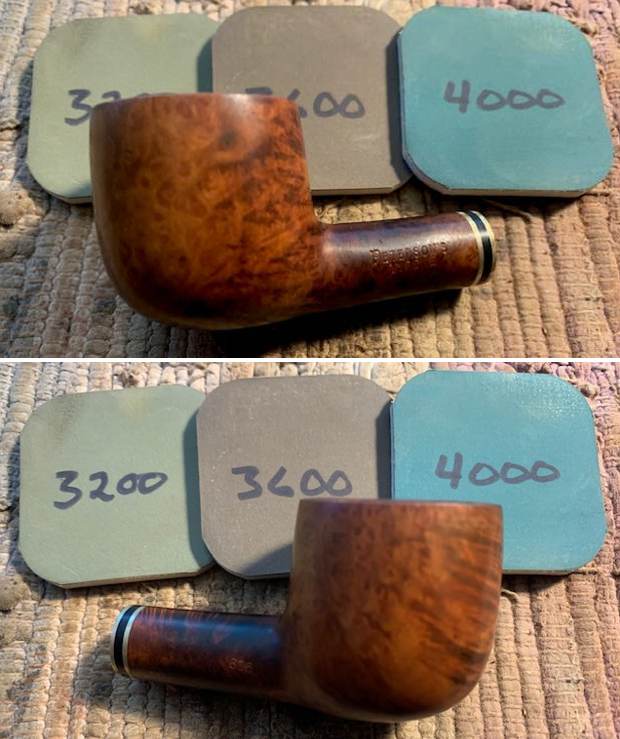
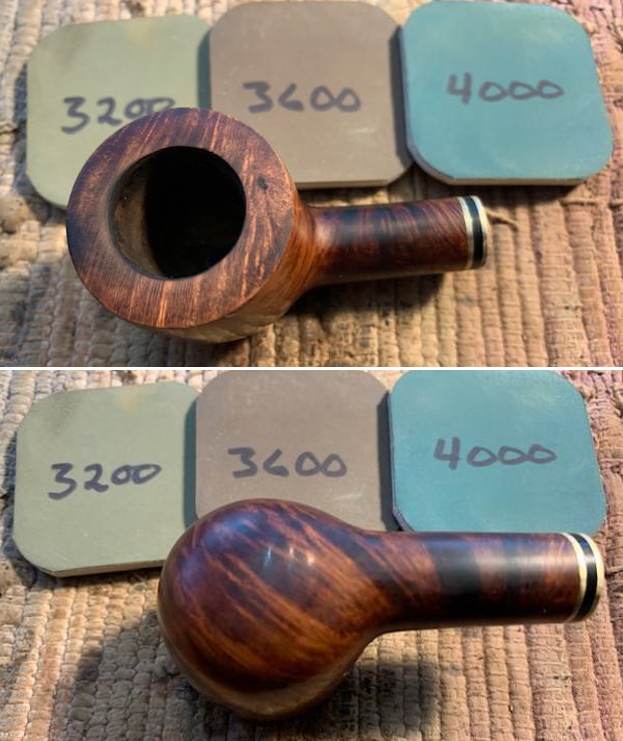
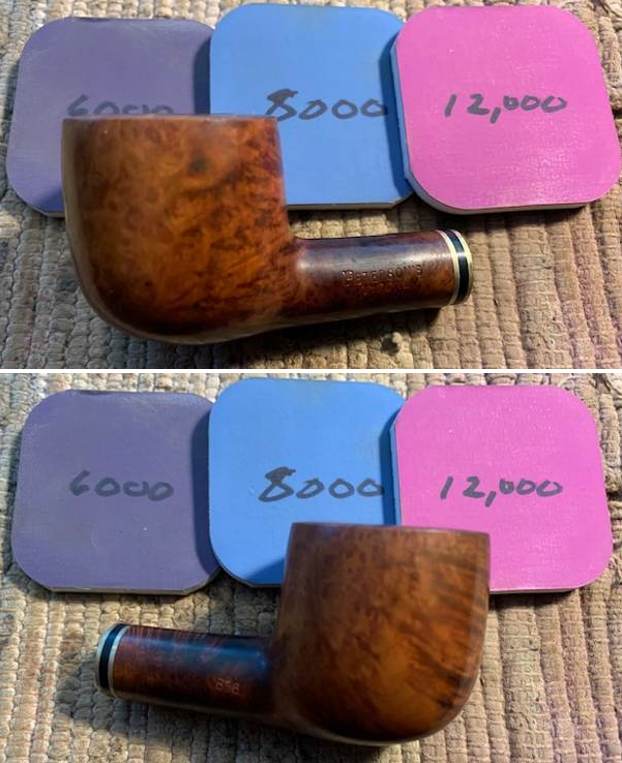
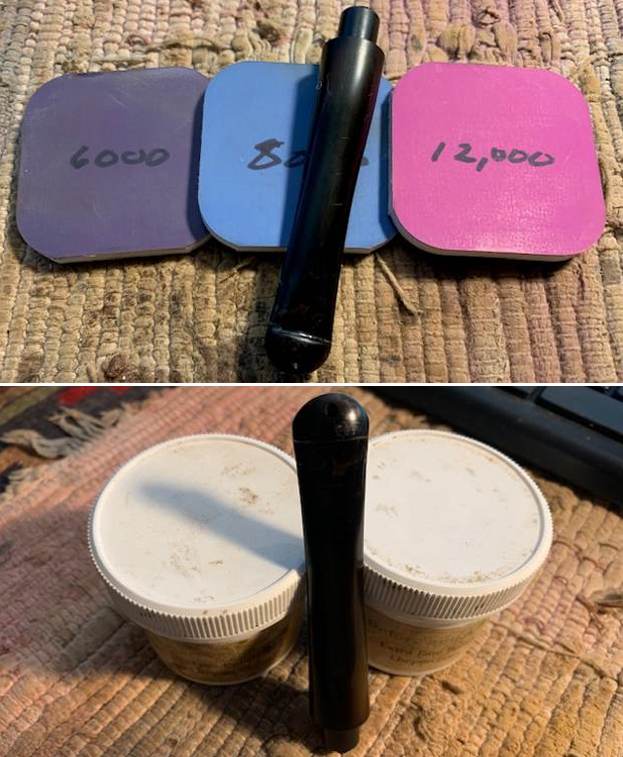
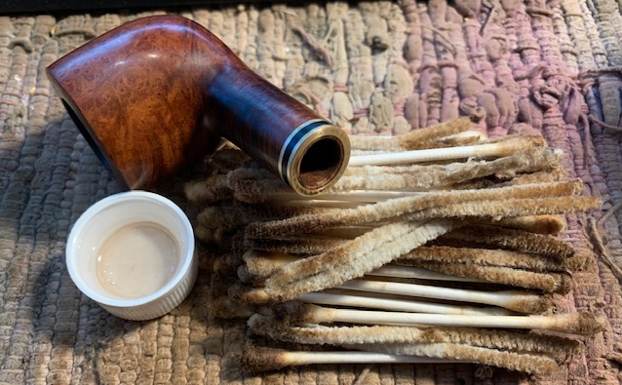 I polished the briar with micromesh sanding pads – dry sanding with 1500-12000 grit sanding pads. I wiped the bowl down with a damp cloth after each sanding pad.
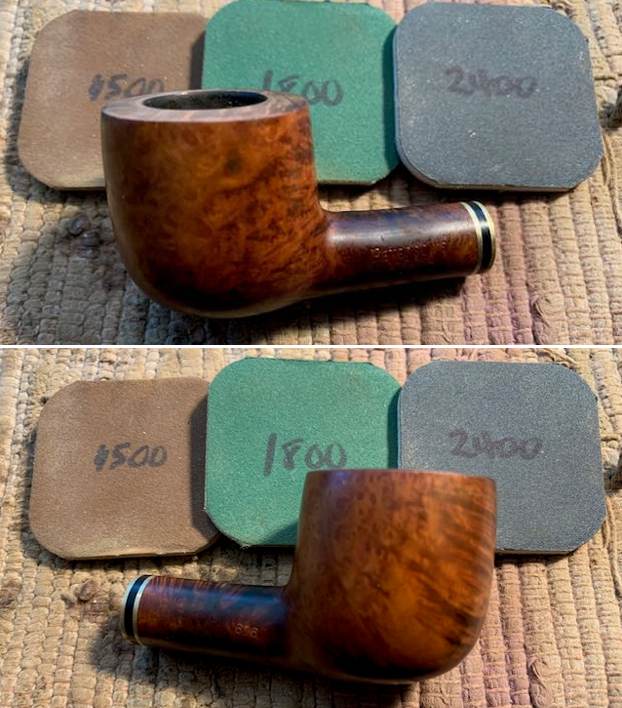

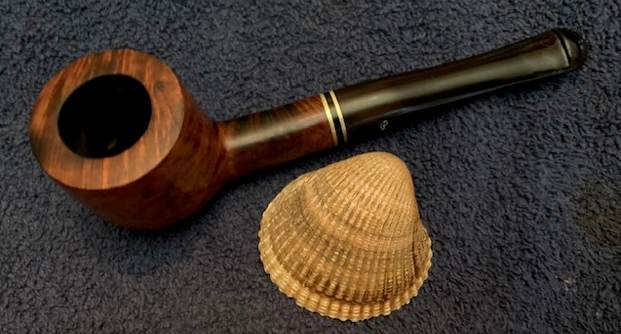
 The polishing of the rim top and inner edge brought the rim top colour to match the rest of the bowl. I did not need to stain the rim at all. I worked some Before & After Restoration Balm into the surface of the briar with my fingertips to clean, enliven and protect the briar. I let the balm sit for 15 minutes and then buffed with a cotton cloth to raise the shine. The photos show the bowl at this point in the restoration process.
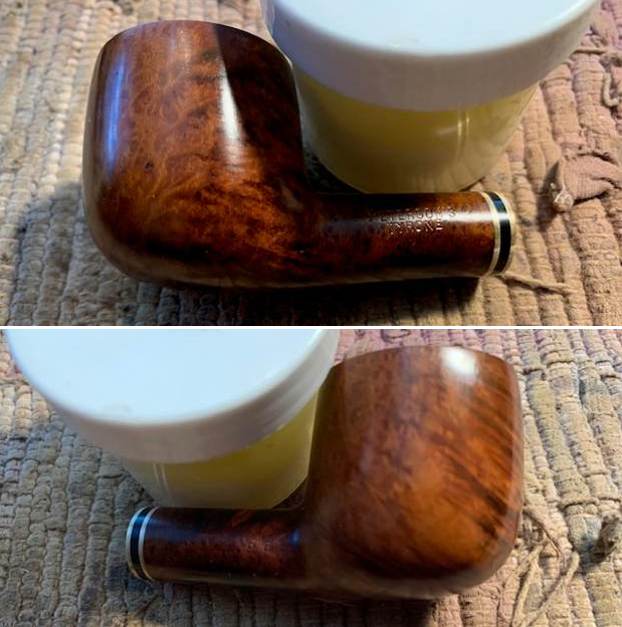
 I set the bowl aside and put the stem in the Briarville Pipe Stem Deoxidizer overnight and took a break to enjoy a movie. When I took it out of the bath the next morning the dip had removed the oxidation and calcification. I rinsed it off with warm water and dried the stem with a coarse cloth to remove the surface oxidation. It looked very good and the tooth marks were very visible.
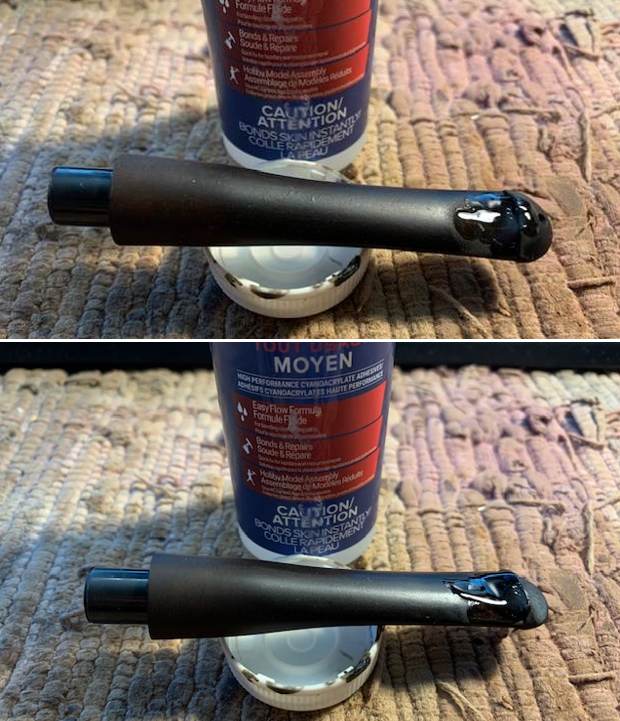
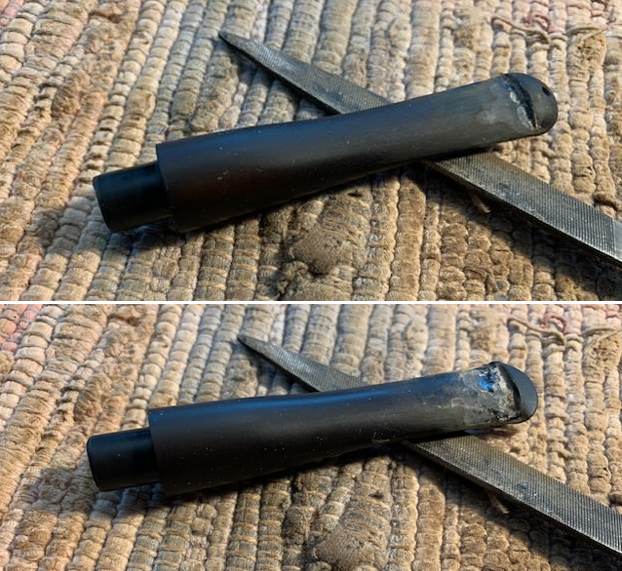
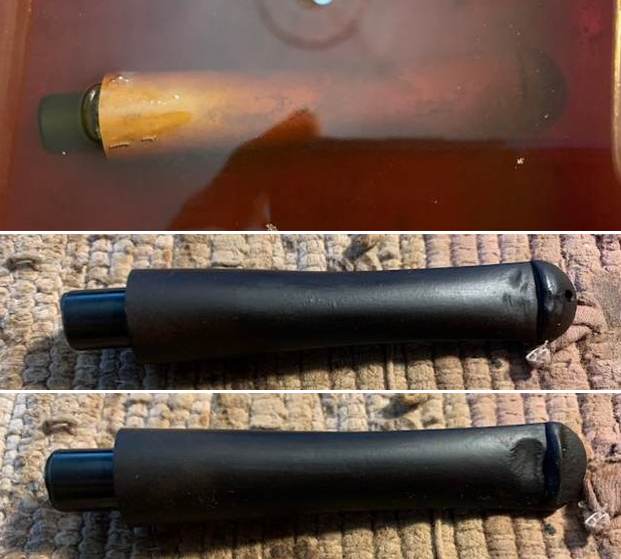 I “painted” the surface of the stem with the flame of a lighter to lift the tooth marks on both sides. It lifted them considerably. I filled in what remained with clear CA glue. Once the glue cured I used a small flat file to flatten the repairs and recut the button edges. I sanded the stem with 220 grit sandpaper to blend them into the surface. I started polishing the stem with 400 grit wet dry sandpaper.
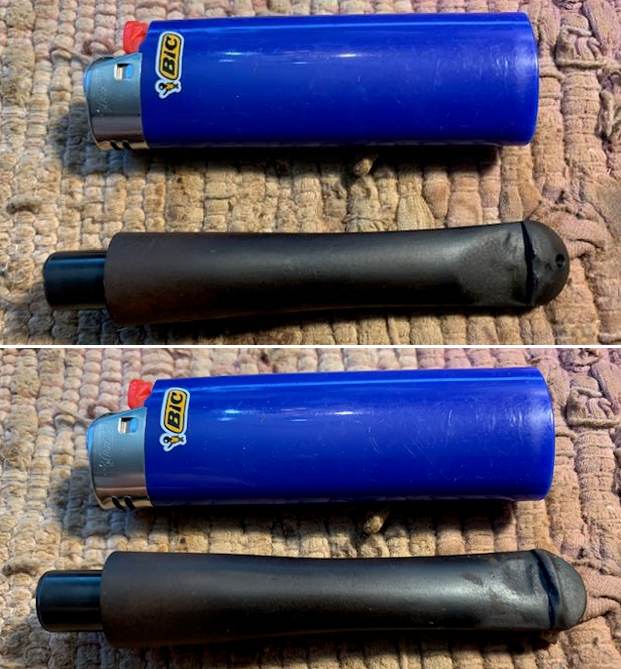
 I cleaned out the filter tenon and the airway in the stem with pipe cleaners, cotton swabs and isopropyl alcohol.
 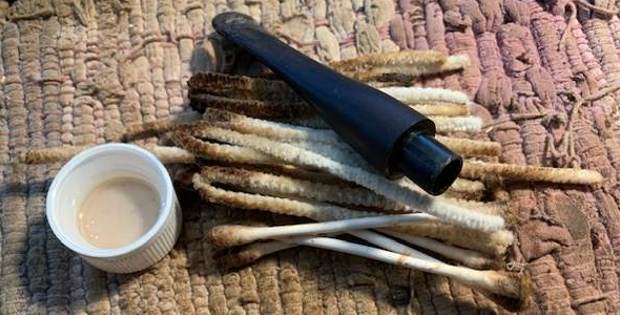 I touched up the P stamp on the left side of the taper stem with Antique Gold Rub’n Buff. I applied it and worked it into the stamp with a tooth pick. Once it cured I scraped off the excess. It is definitely better though the stamp is faint in some spots. Strangely the stamping has a white tinge to it.
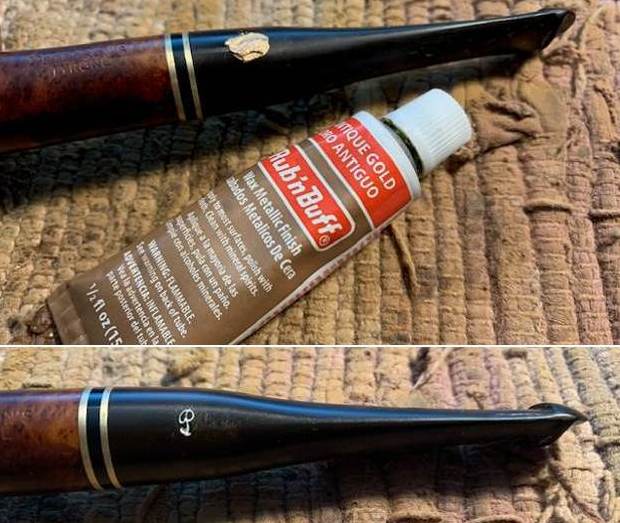 I polished the stem with micromesh sanding pads – wet sanding with 1500-12000 grit sanding pads. I wiped it down after each sanding pad with Obsidian Oil. I polished it with Before & After Pipe Stem Polish – both Fine and Extra Fine.
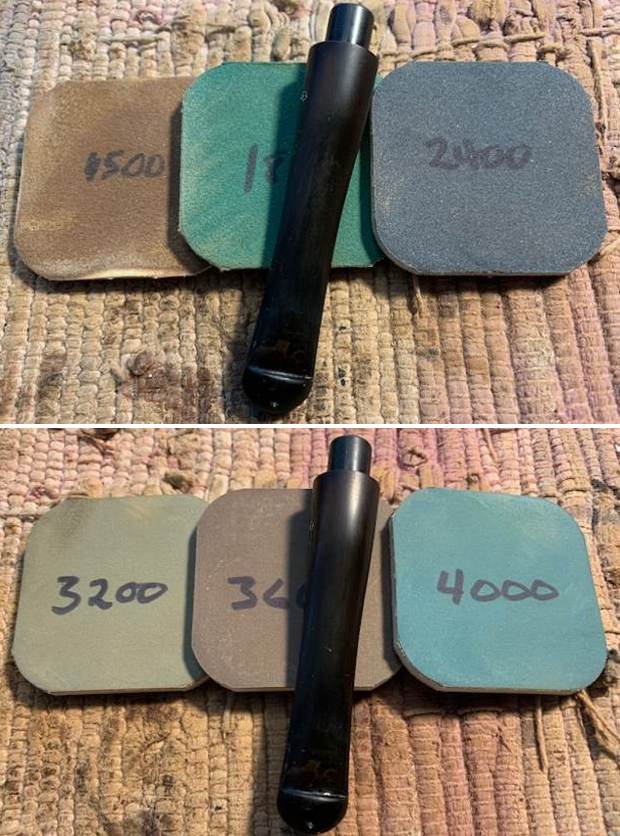
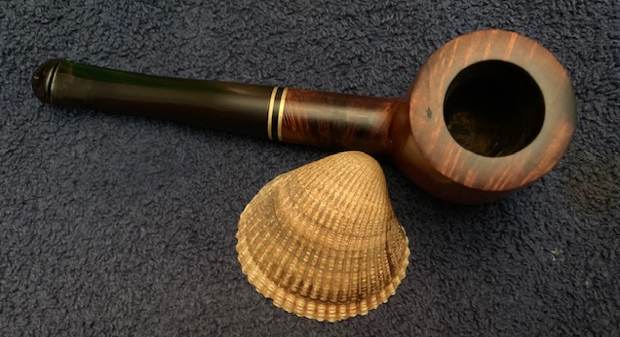
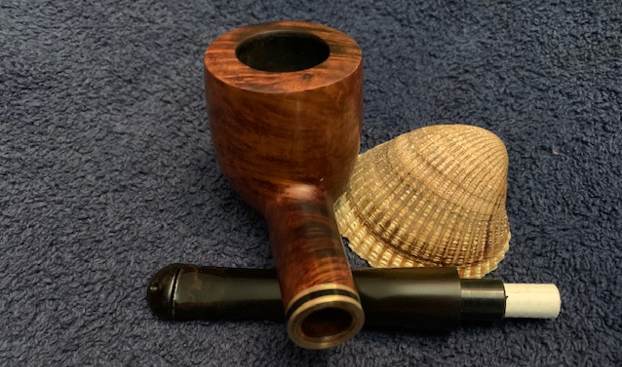
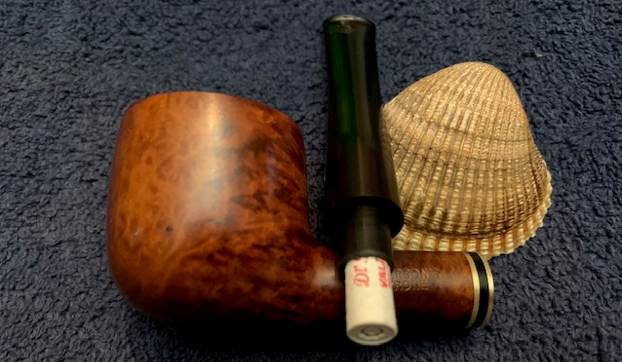
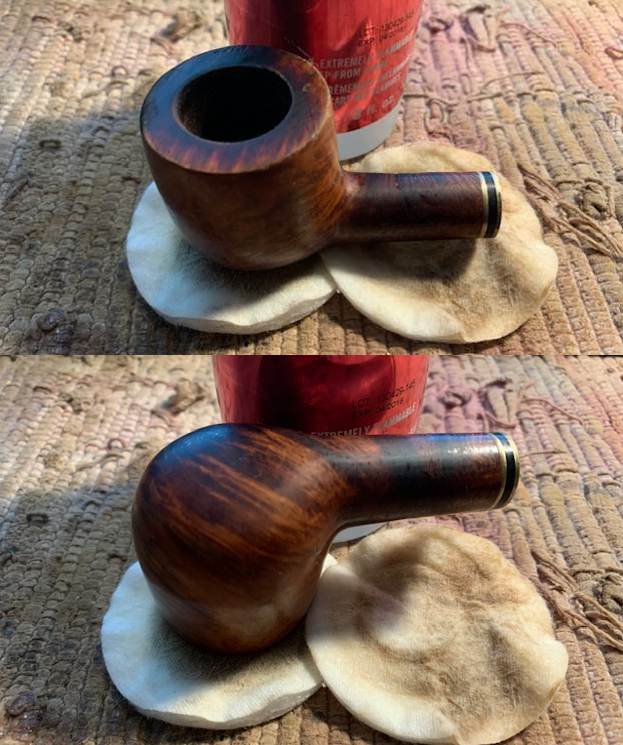
 I am excited to put the final touches on this Peterson’s Tyrone 606 Pot with a 9mm Filter stem. I put the pipe back together and buffed it with Blue Diamond on the buffing wheel. I gave the bowl and the stem multiple coats of carnauba wax. I hand buffed the pipe with a clean buffing pad to raise the shine. It is fun to see what the polished bowl looks like with beautiful mixed grain all around it. Added to that the polished black vulcanite stem combined with the bowl and made a stunning pipe. This smooth Classic Peterson’s Tyrone 606 Pot is great looking and the pipe feels great in my hand. It is light and well balanced. Have a look at it with the photos below. The dimensions are Length: 6 inches, Height: 1 ½ inches, Outside diameter of the bowl: 1 ½ inches, Chamber diameter: 7/8 of an inch. The weight of the pipe is 43 grams/1.55 ounces. It is a beautiful pipe that I will soon be putting on the rebornpipes store in the Irish Pipe Makers Section. If you are interested in adding it to your collection send me an email or a message. Thanks for walking through the restoration with me as I worked over this pipe. Thanks to each of you who are reading this blog.