Tag Archives: Oxidation

Dressing up a no name Walnut Billiard


Blog by Steve Laug

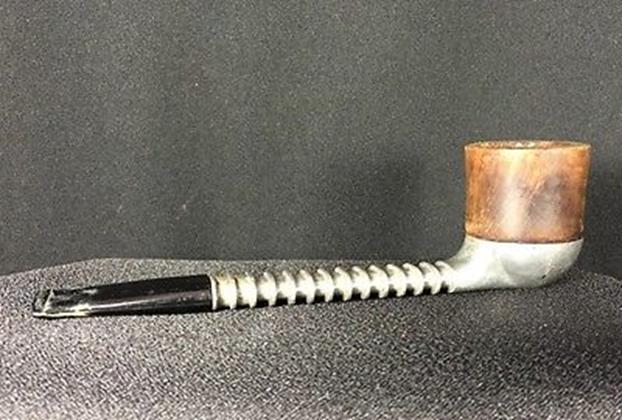
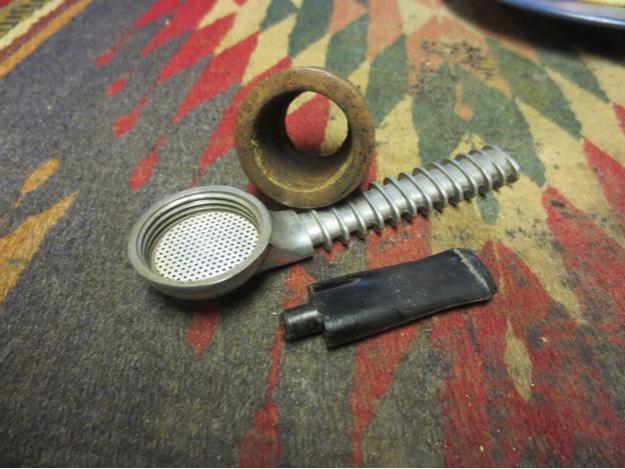
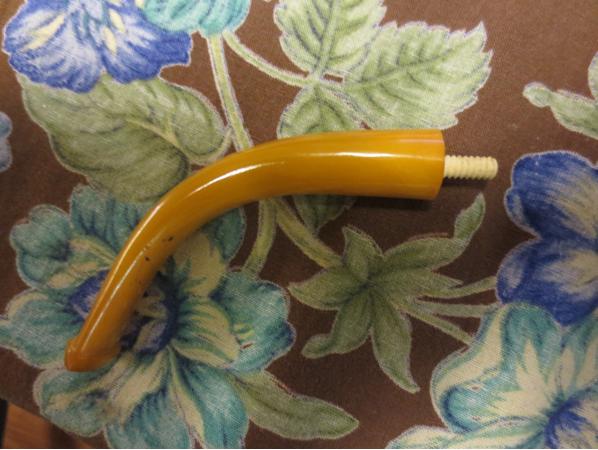
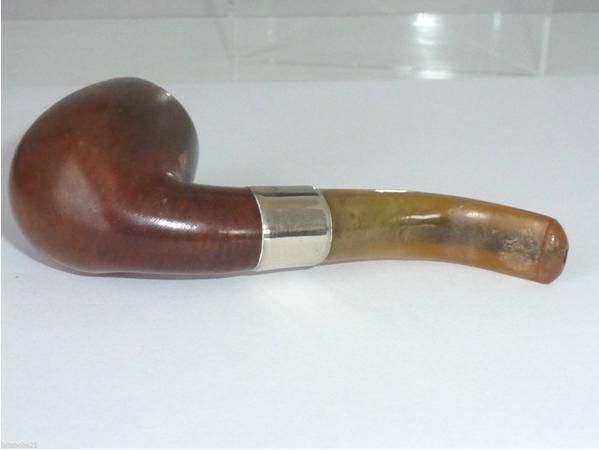
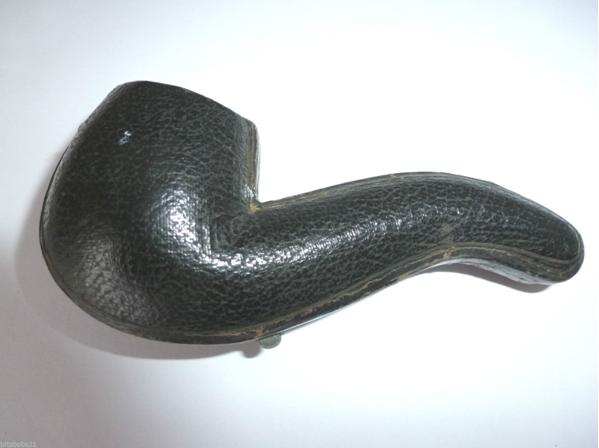
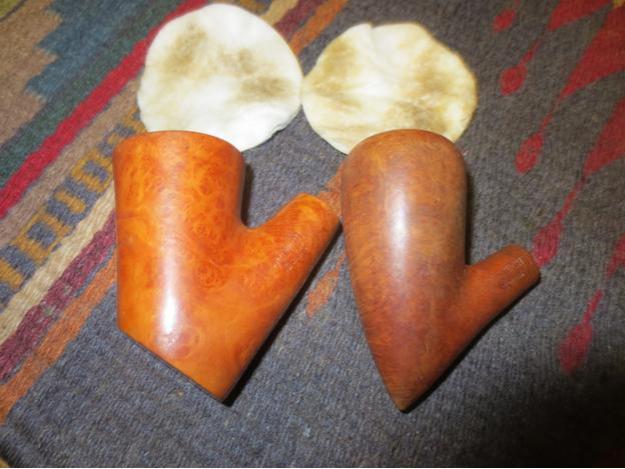
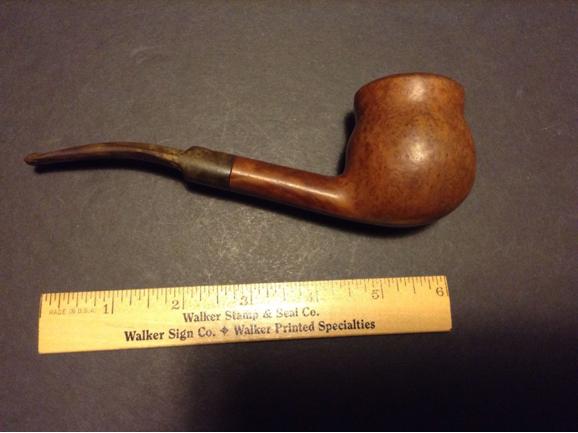
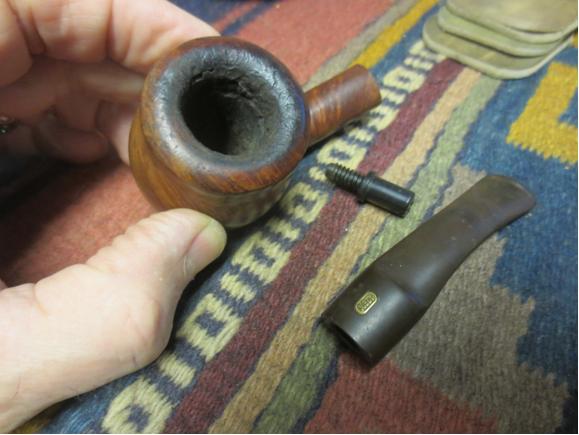
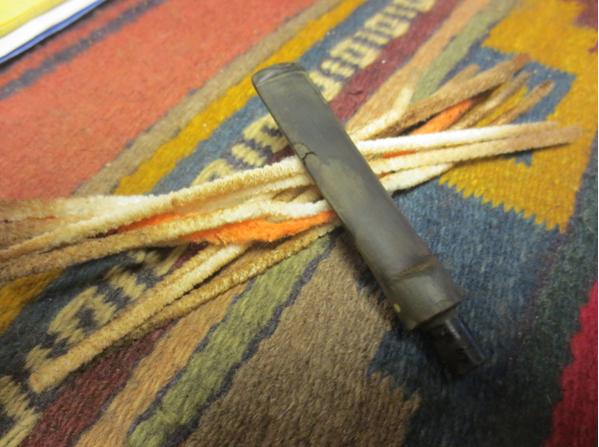
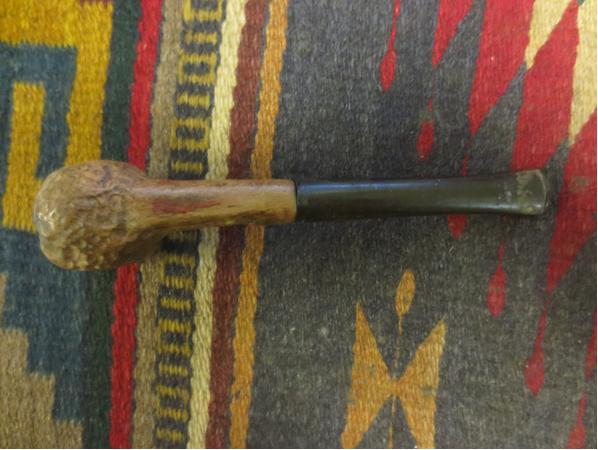
My brother Jeff found this homemade no name Walnut Billiard on eBay and was drawn to it. He has sent me more panel pipes than I have ever bought myself… the funny thing is that I am starting to really like them. This one is quite unique and almost a folk-art piece. It is a panel but the carver did not worry about making things symmetrical. All of the sides are different sizes. The rustication is quite nice and I like it – almost like the surface of a golf ball. The rim is smooth and the bowl is almost round. The pipe had a little cake building but not enough to keep. The pipe was stained with a bland tan coloured stain but there appeared to be remnants of red stain in some places. The sanding on the smooth parts was a little rough and there were scratch marks left behind by a file or some carving knife. The stem was good quality vulcanite and there was some buildup around the button and some oxidation. The fit of the stem to the shank was not good as the end of the shank was cut at an angle. The stem was also too large for the shank and neither the shank nor the stem was round. The tenon was also not round – it looked as if it had been sanded and was a little conical. The concept for the pipe was good but the execution left a lot of unfinished angles and left a mediocre handmade pipe.Bill1 Bill2 Bill3 Bill4
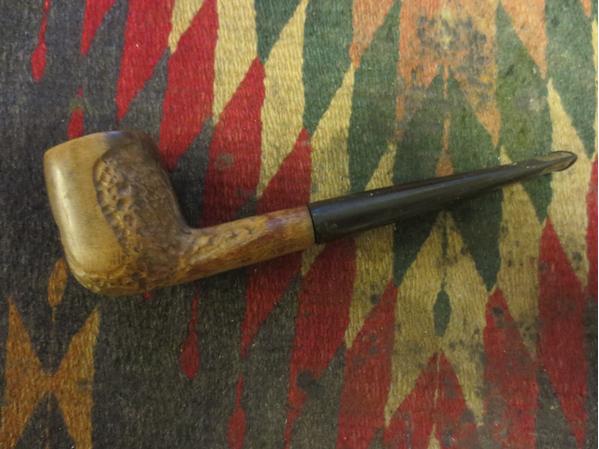
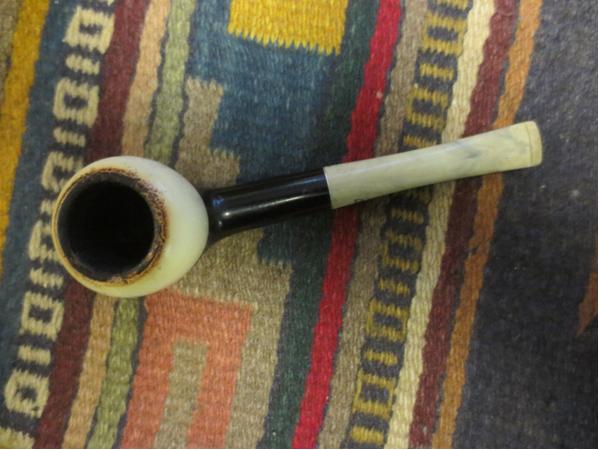
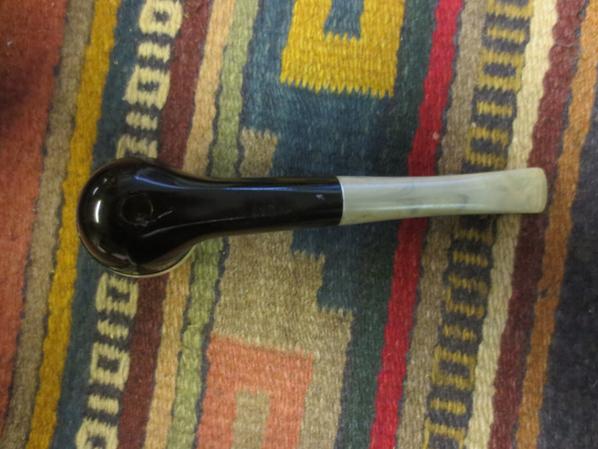
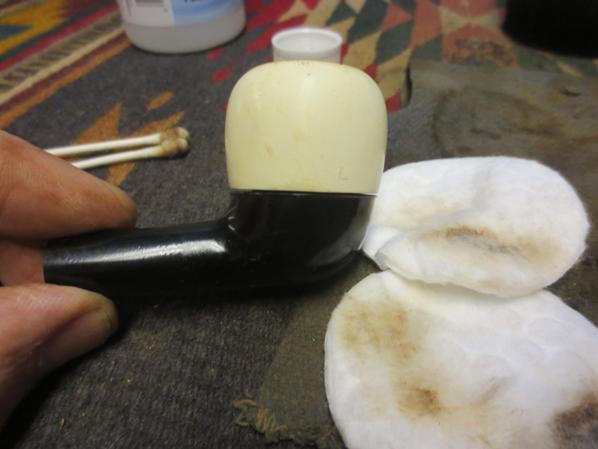
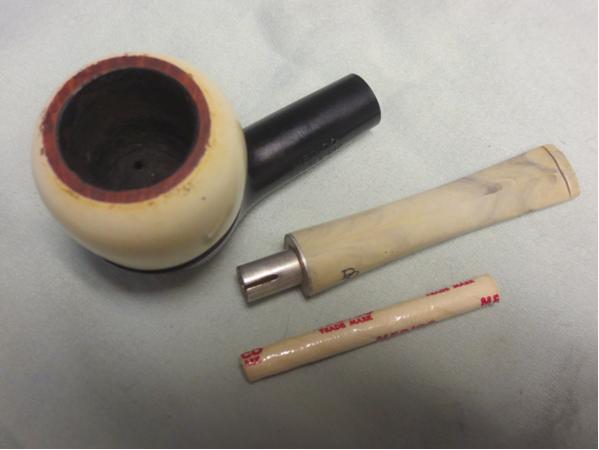
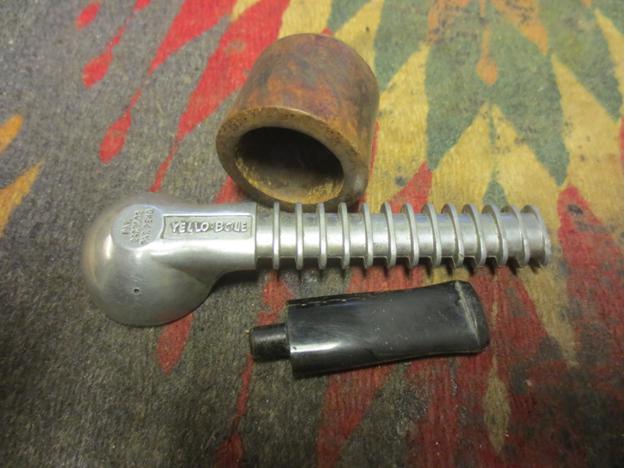
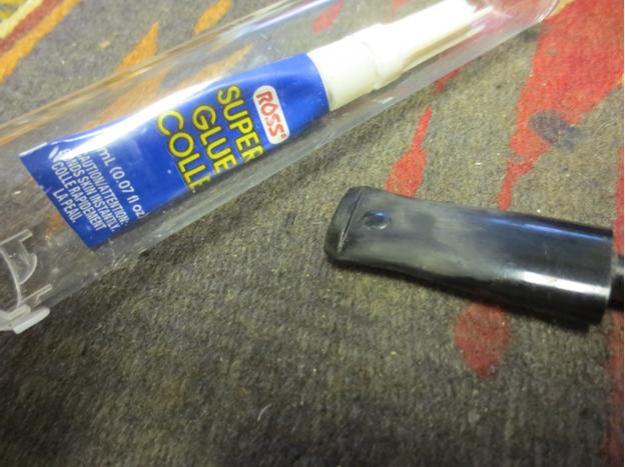
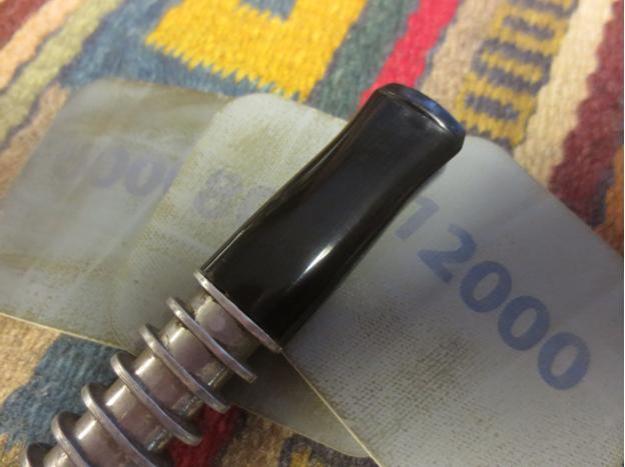
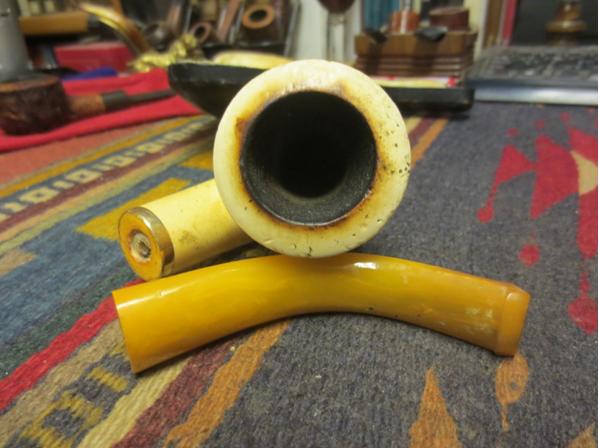
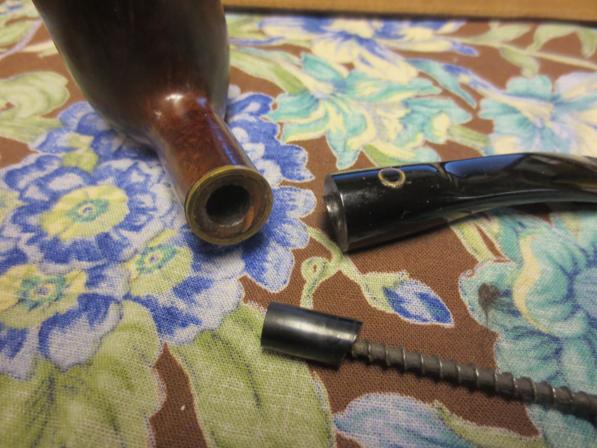
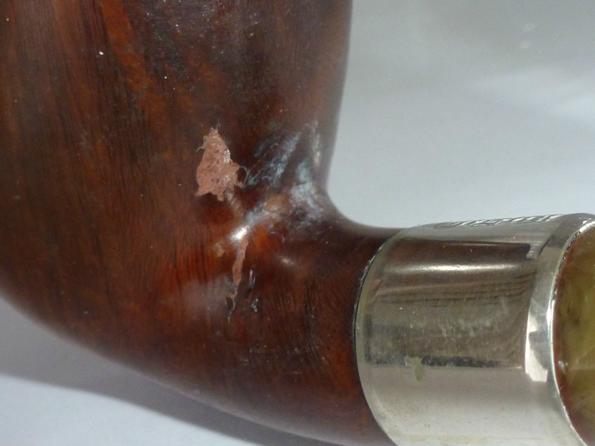
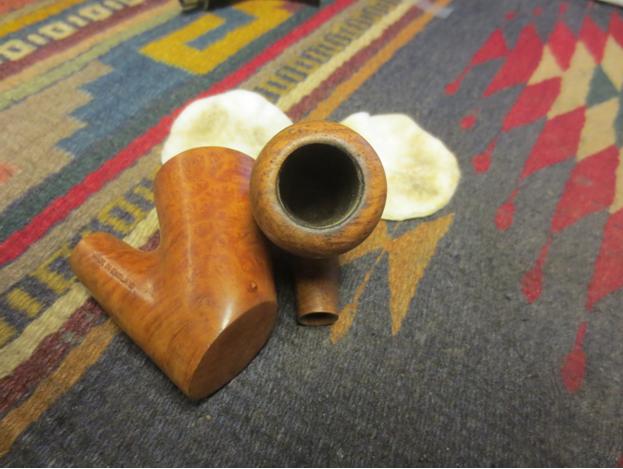
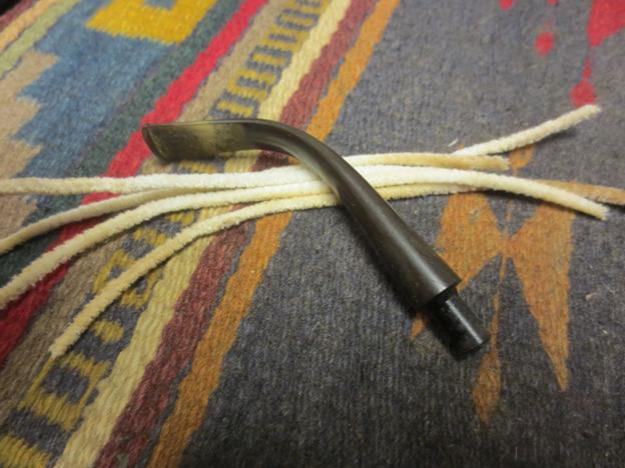
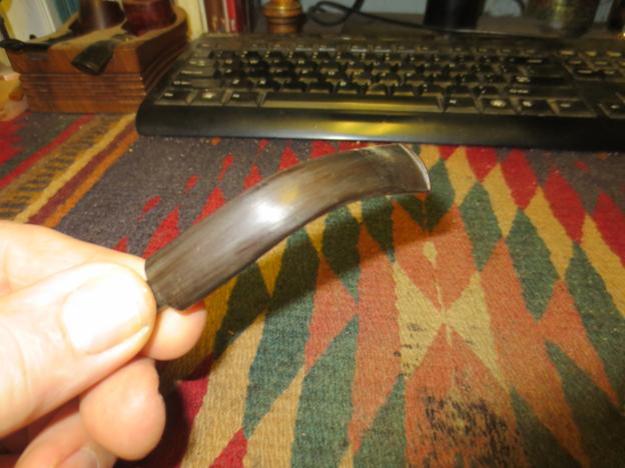
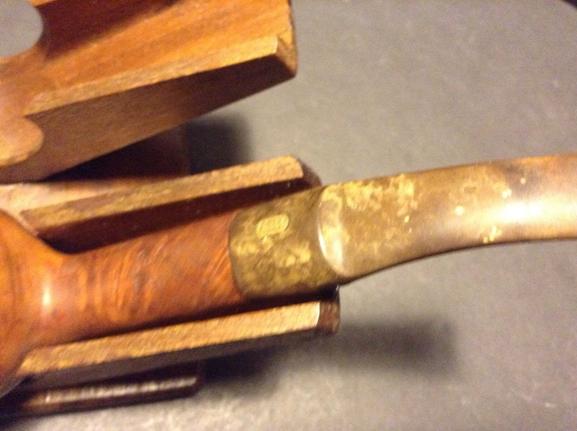
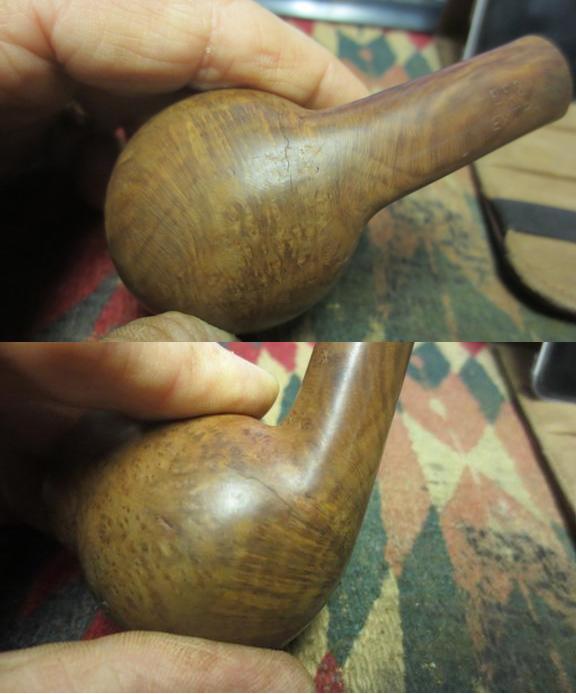
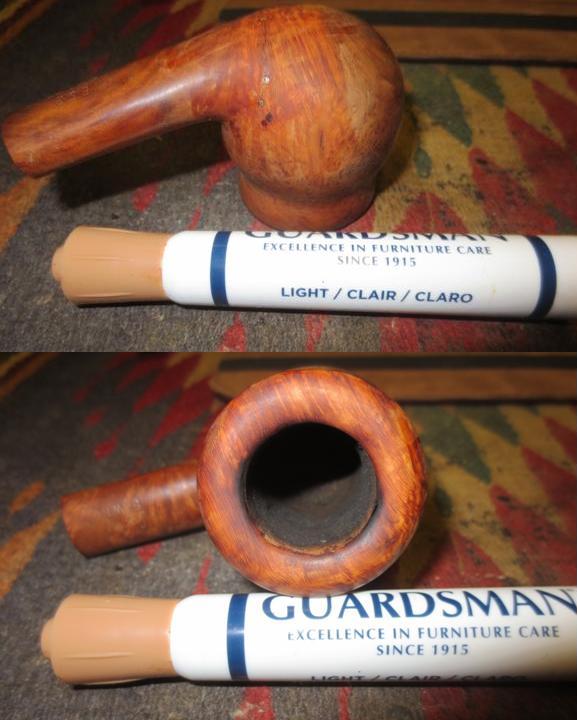
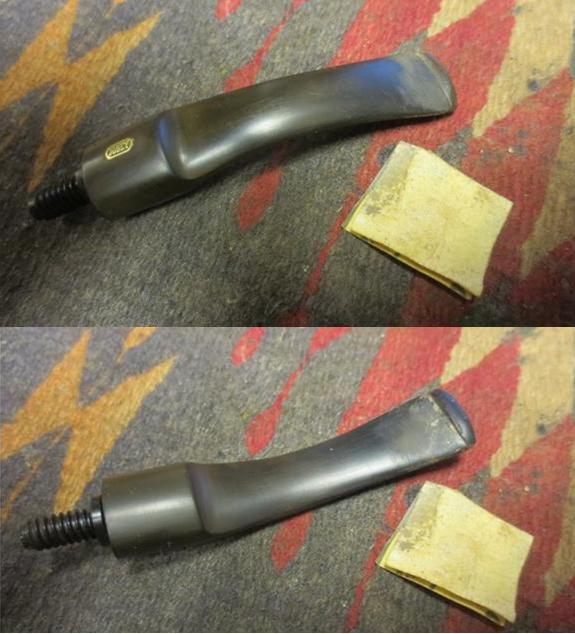
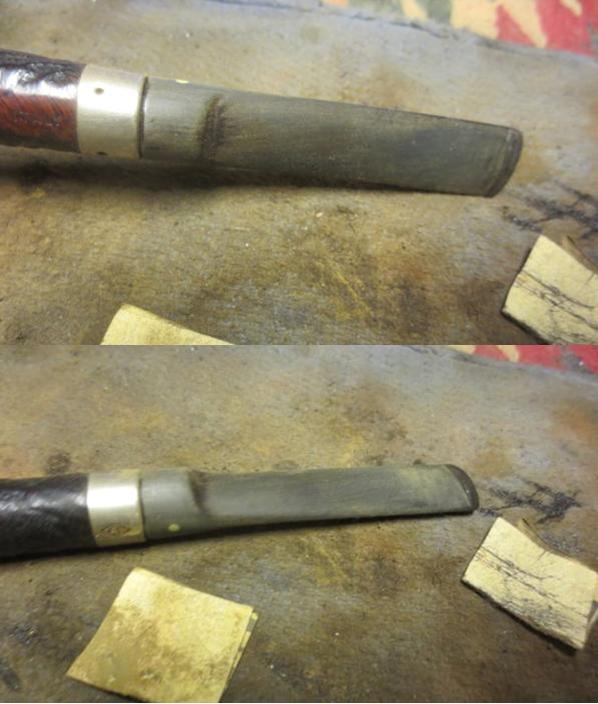
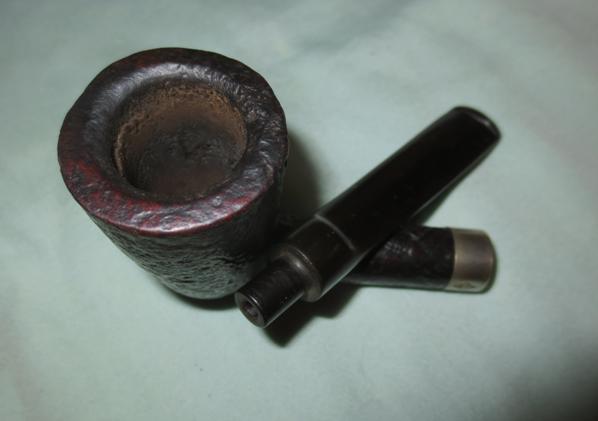
I took a close up photo of the shank/stem union to show what I am talking about when I say that they do not match.Bill5
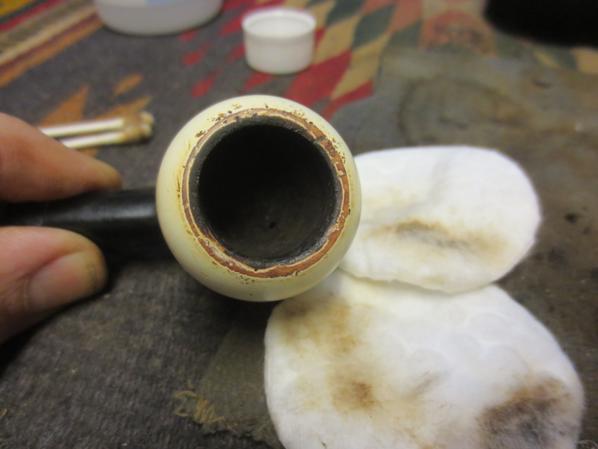
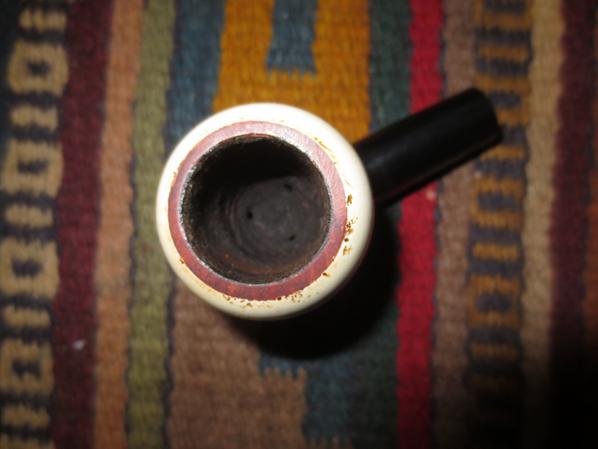
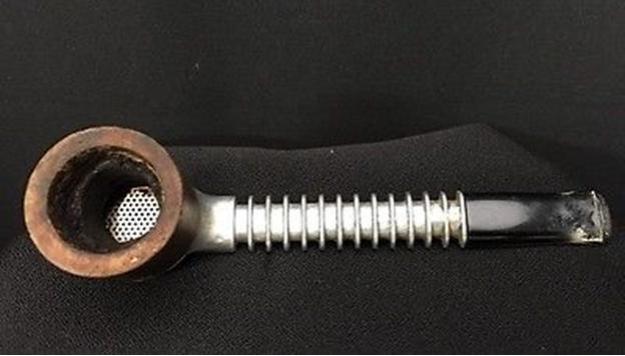
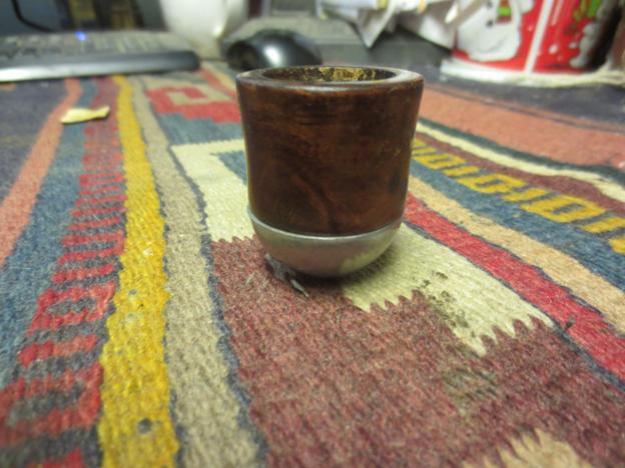
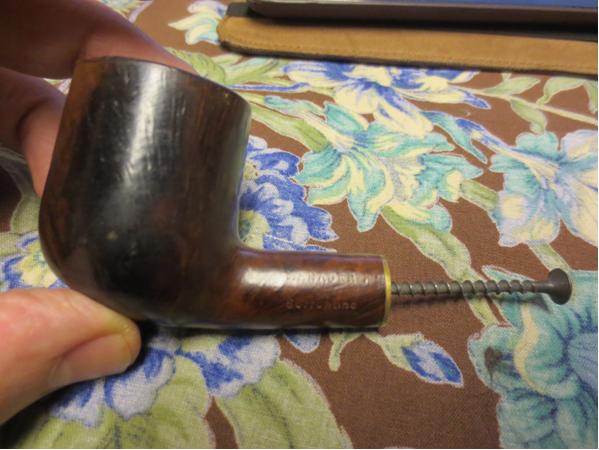
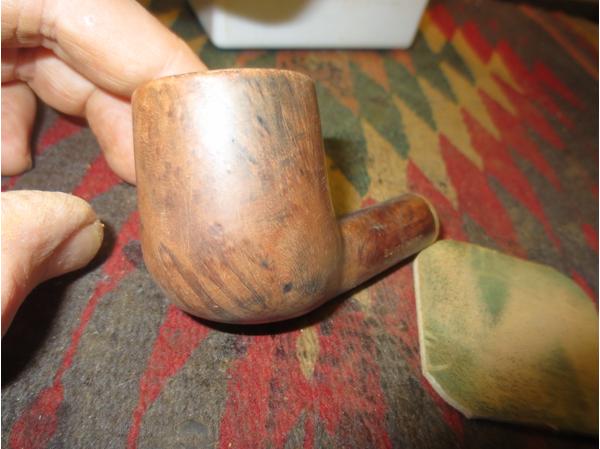
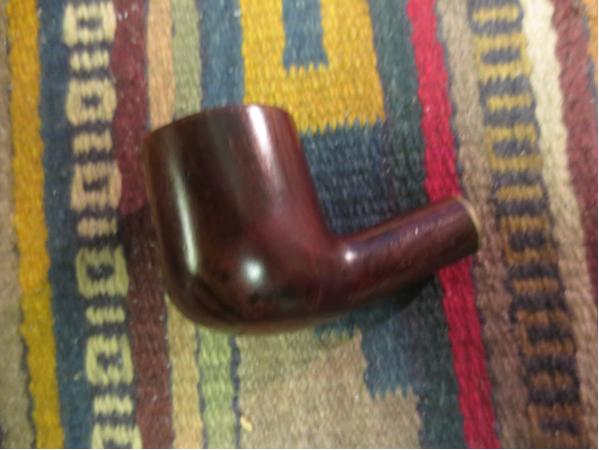
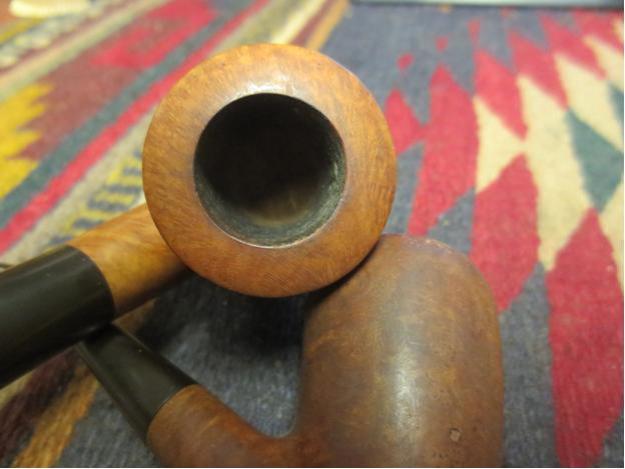
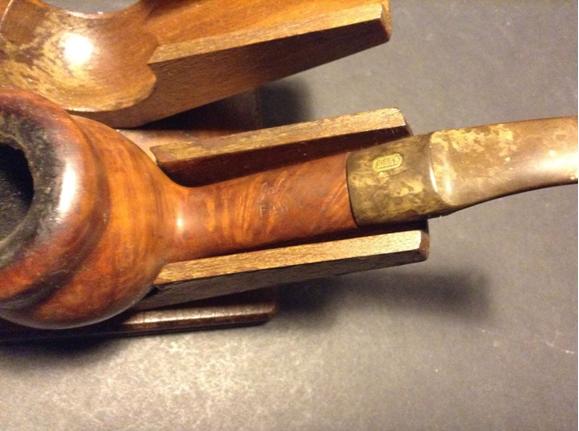
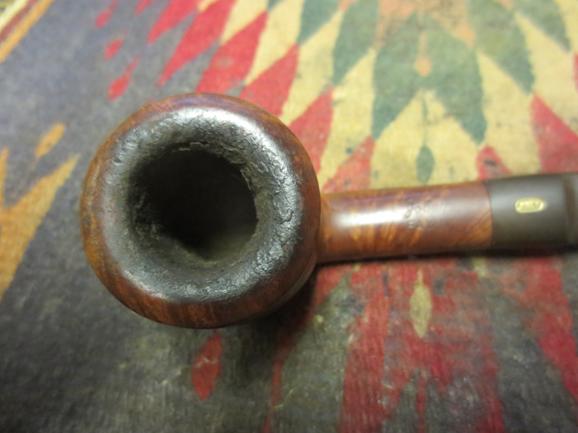
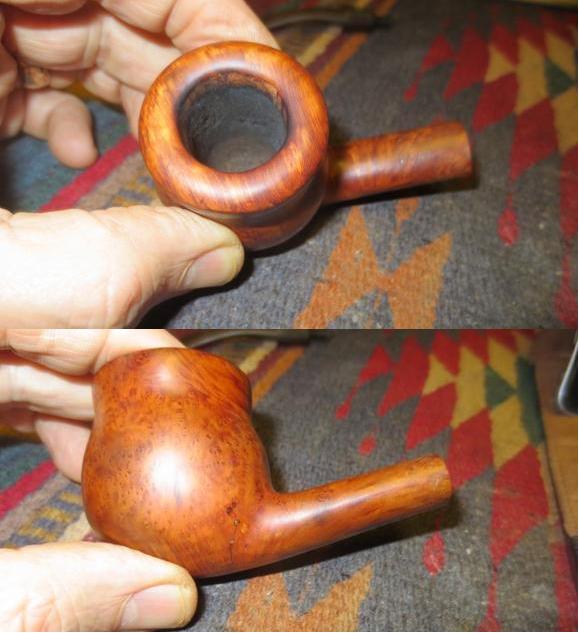
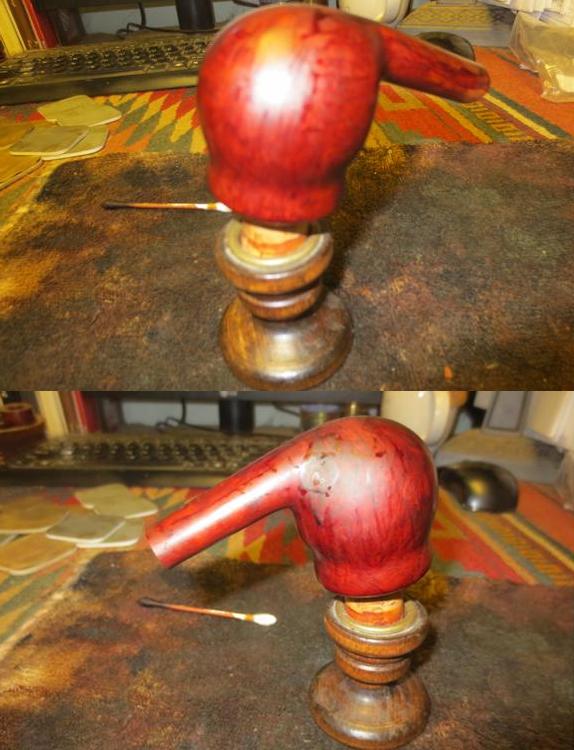
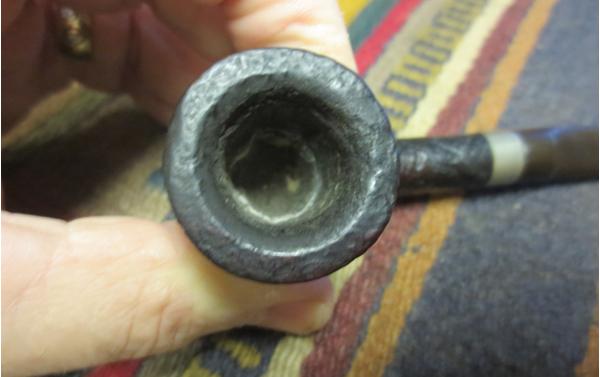
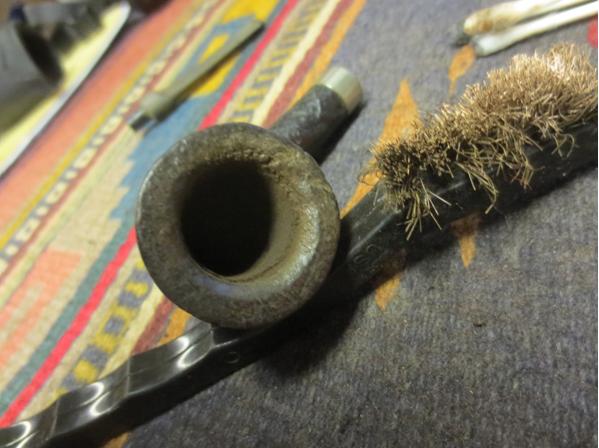
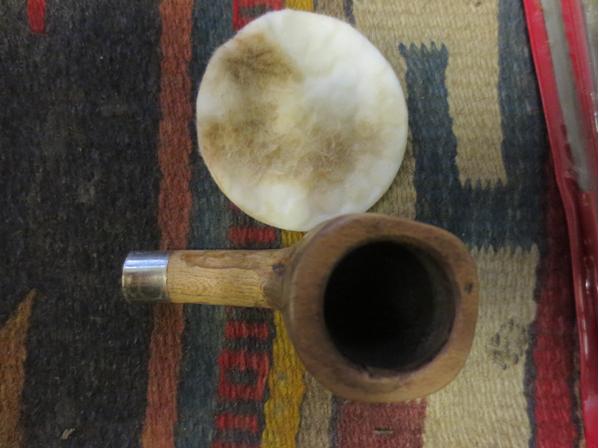
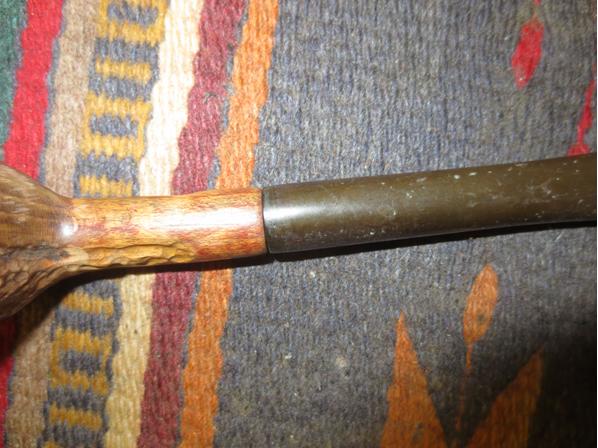
I have also included a photo of the bowl to show the “almost round” bowl. It looked as if the carver had tried to bevel the inner edge of the rim.Bill6
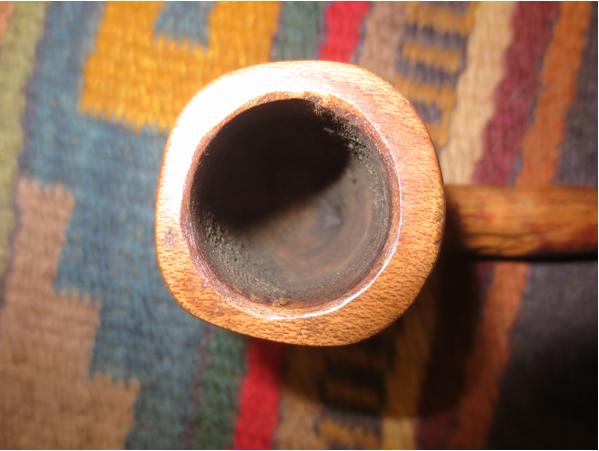
The stem was oxidized and had some spots and build up on the surface. At the stem/shank union it was rough and there were some deep scratches.Bill7
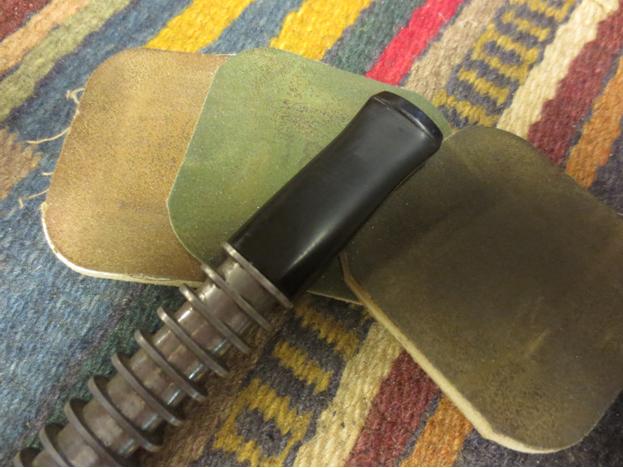
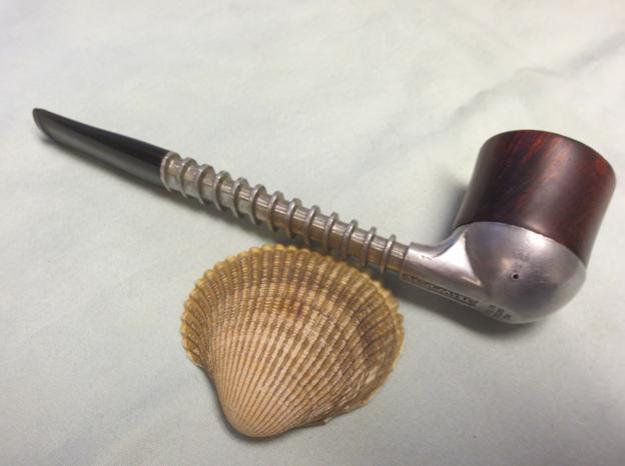
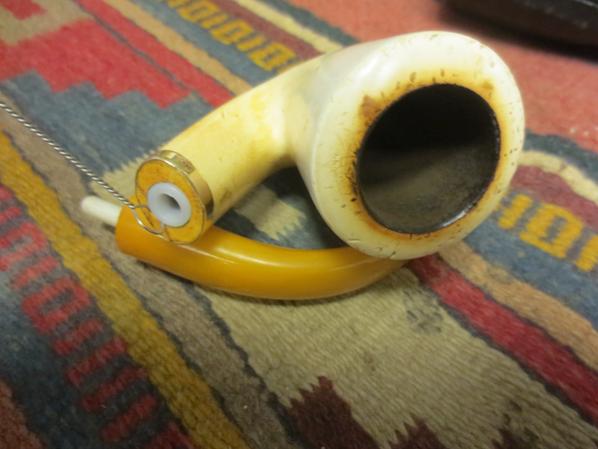
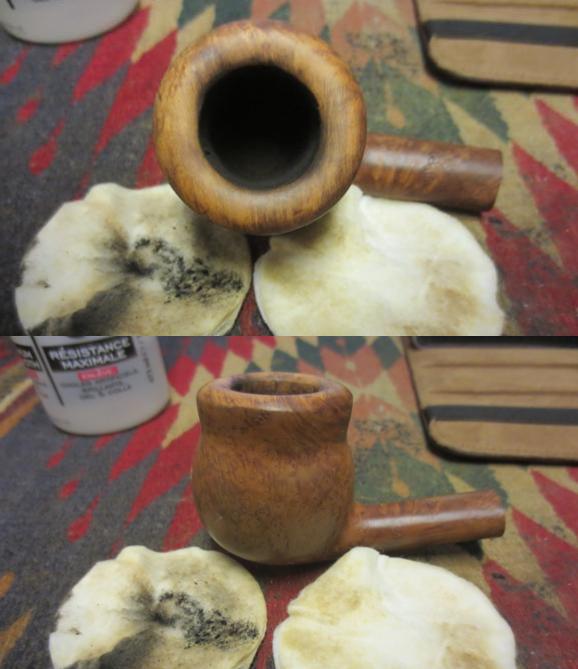
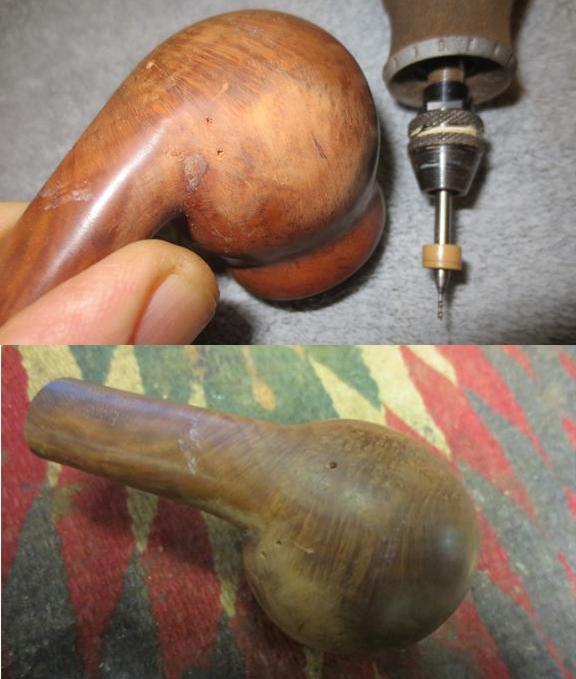
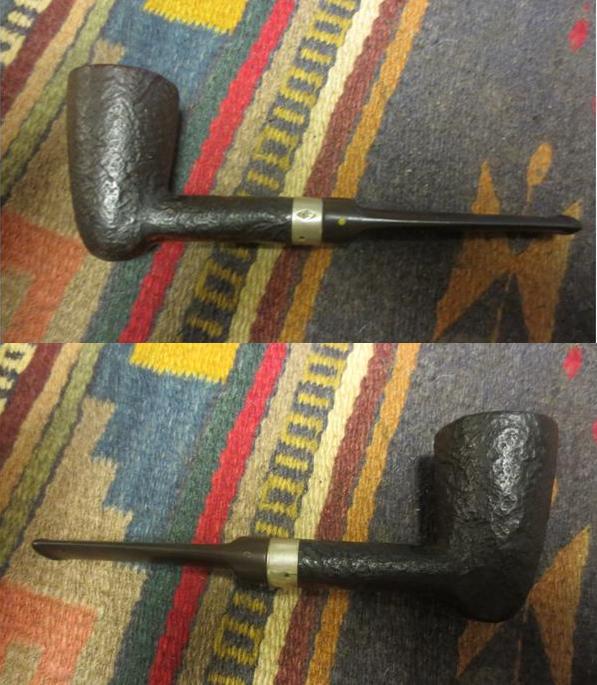
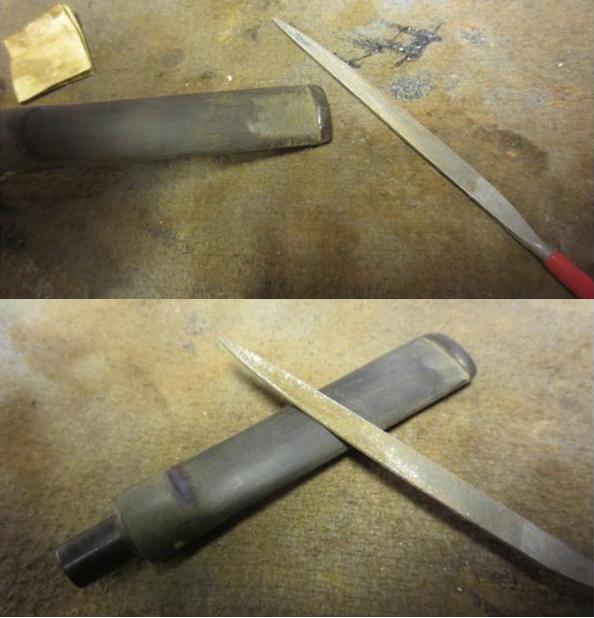
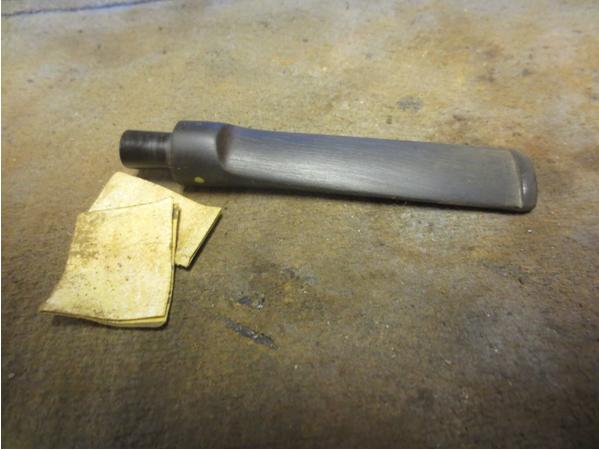
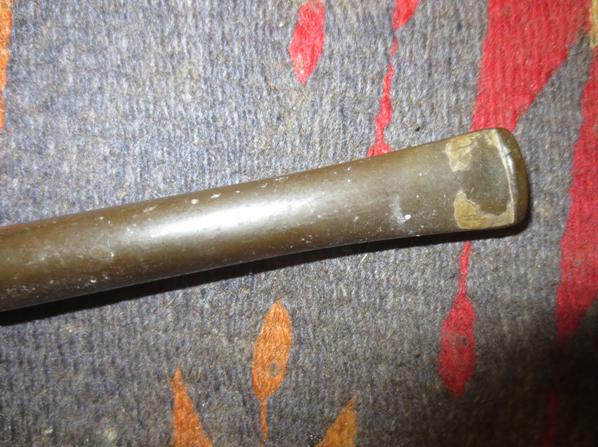
To take care of the bad angle on the shank I used the topping board to face the end. It squared up pretty neatly. The out of round shank and stem required something a little different. I decided to use a nickel band to break up the shank and stem union and give me a round edge to bring the stem against. That way I could at least make the stem round and clean up the junction. I used the Dremel and sanding drum to round out the shank enough to take the band. I smoothed out the flow of the shank to the bowl and round the top of the shank. Once I had the area sanded for the band I pressed the band lightly onto the shank and then heated the band with a heat gun. Once it heated and expanded I pressed it into place on the shank.Bill8 Bill9 Bill10 Bill11
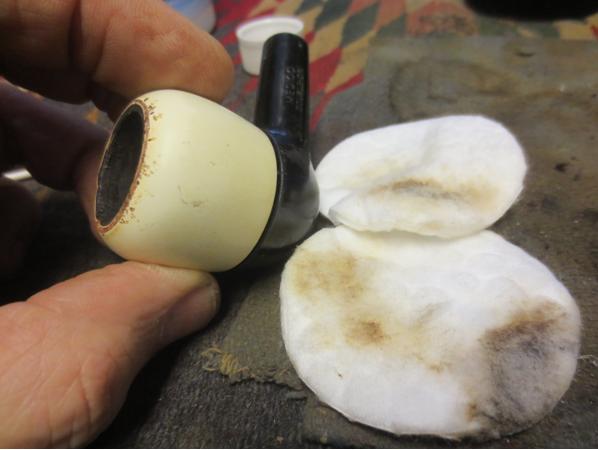
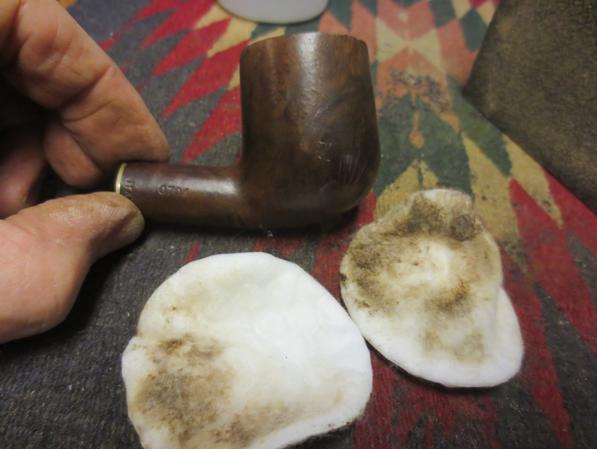
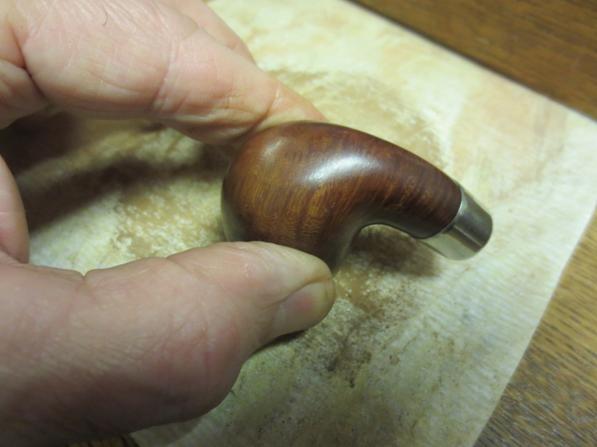
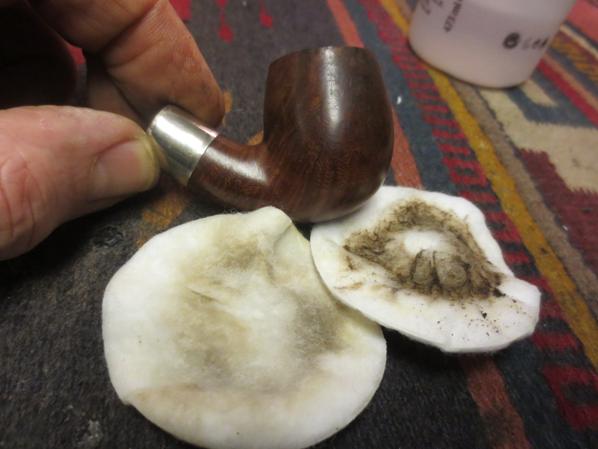
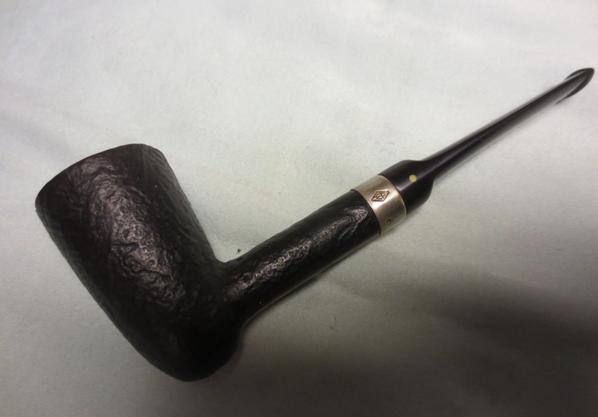
The band fit well with the shank and actually dressed up the pipe. I wiped the bowl down with acetone on cotton pads to remove the finish and prepare the bowl for a contrast stain.Bill12 Bill13 Bill14 Bill15I used a black Sharpie pen to colour/stain the rustication on the whole pipe. I wanted that portion of the pipe to contrast with the smooth portions of the walnut.Bill16 Bill17 Bill18
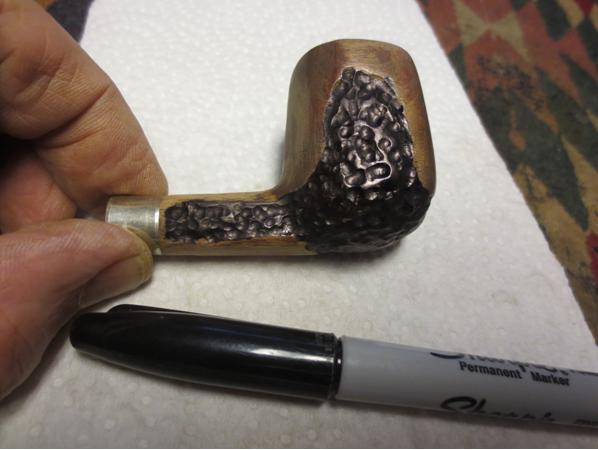
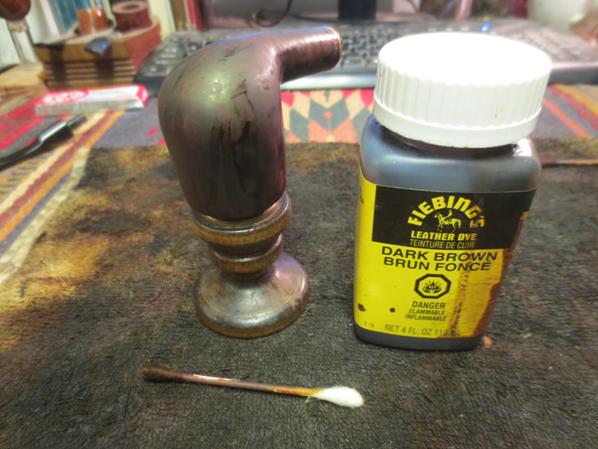
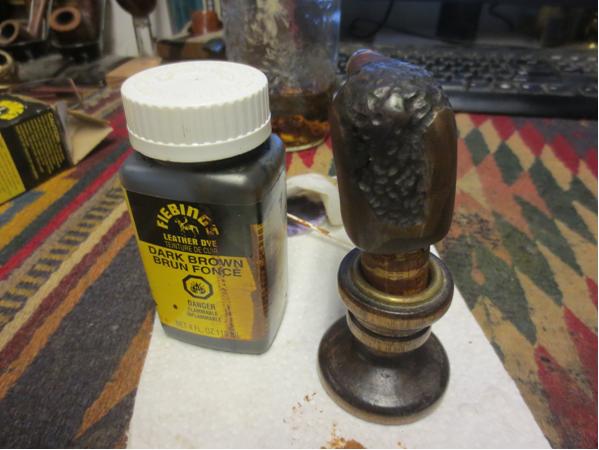
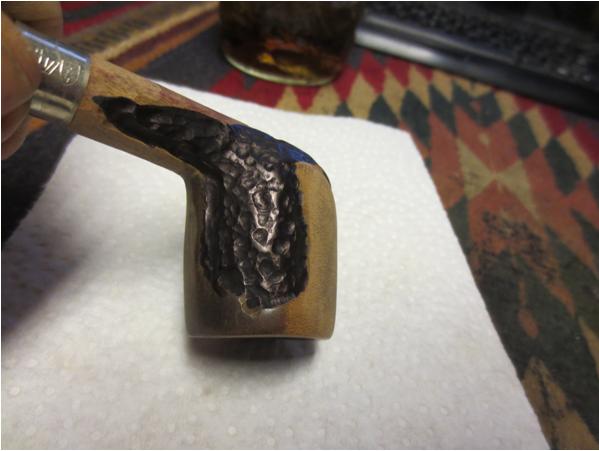
I wiped the bowl down with alcohol on cotton pads to lighten the shiny black of the Sharpie and dull it slightly. I then stained and flamed the bowl with a dark brown aniline stain mixed 50/50 with alcohol to make it more of a wash. I stained the entire bowl including the black portion to make sure to get stain into all of the grooves.Bill19 Bill20 Bill21
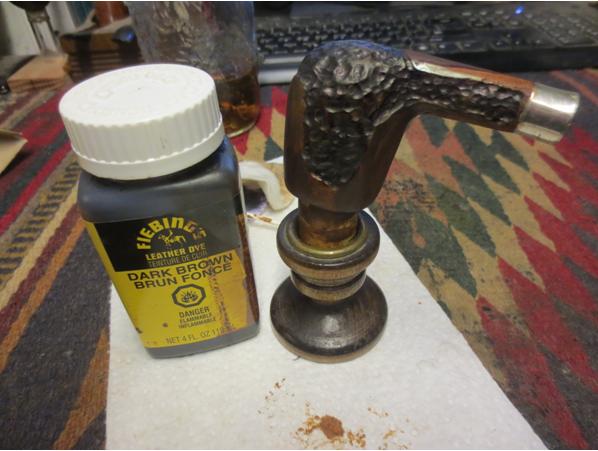
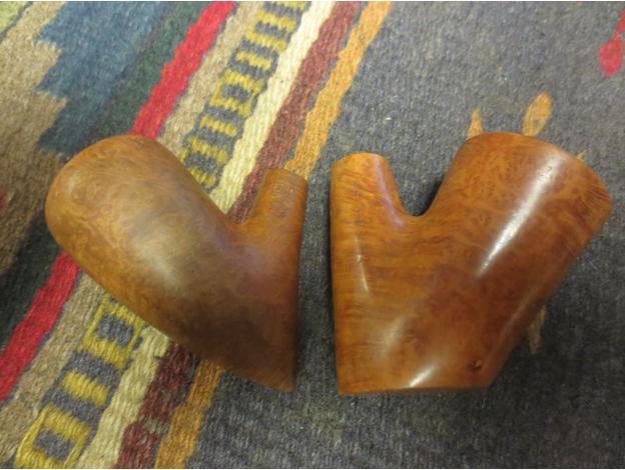
I buffed the bowl with Blue Diamond on the wheel paying particular attention to the smooth portions of the bowl. I wanted the contrast to be stark between the rusticated parts and the smooth parts.Bill22 Bill23 Bill24 Bill25 Bill26
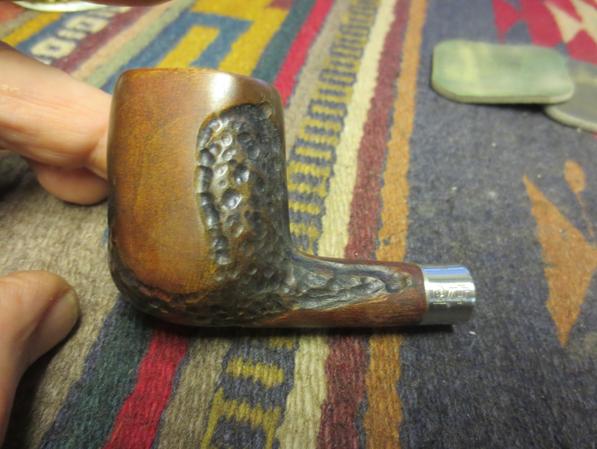
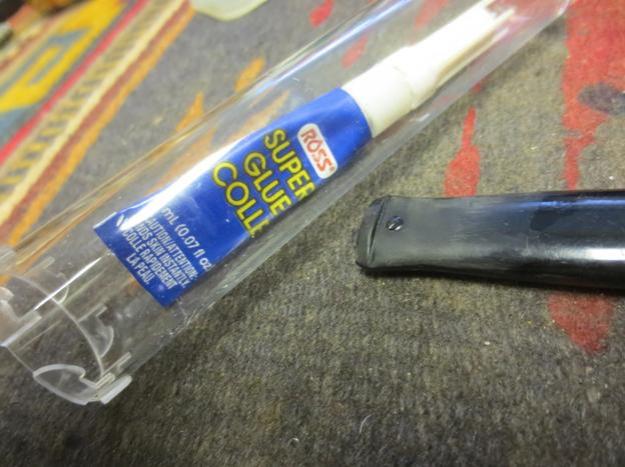
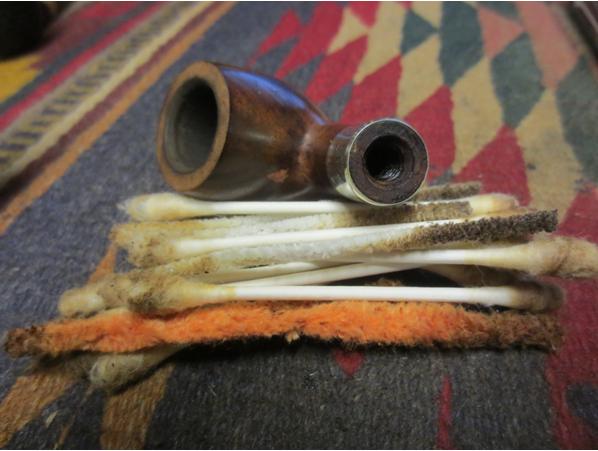
I cleaned out the airway in the stem with pipe cleaners and alcohol. I was surprised with how clean it was.Bill27
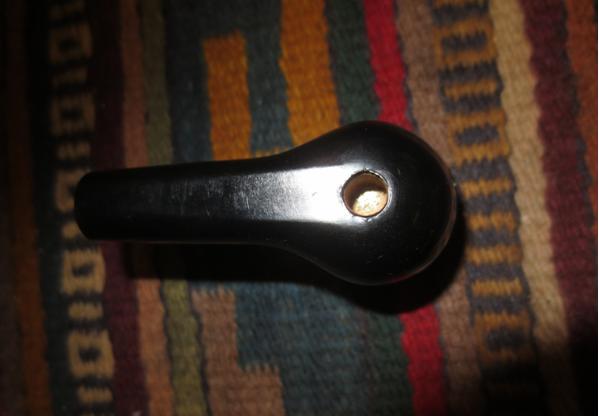
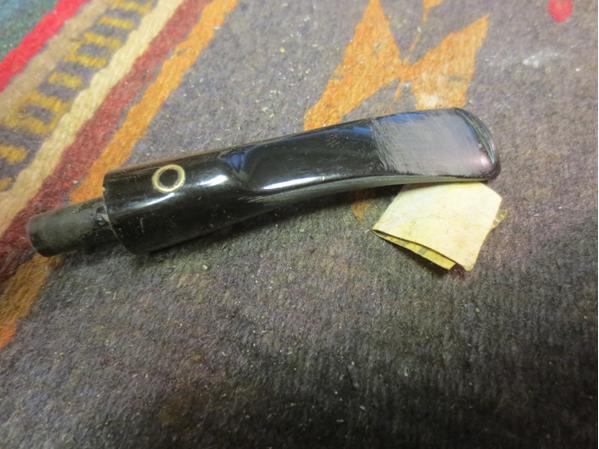
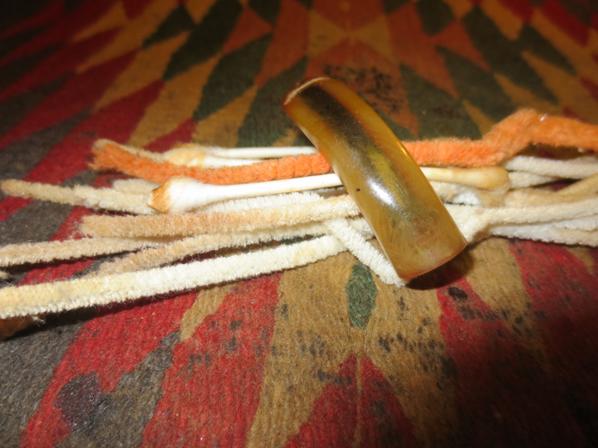
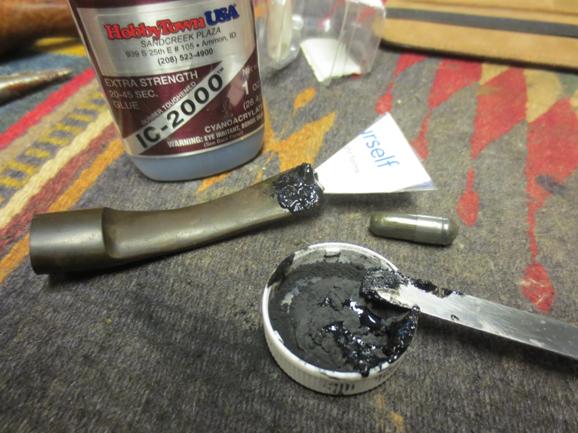
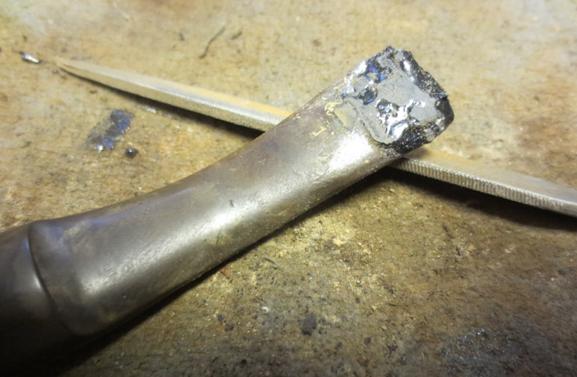
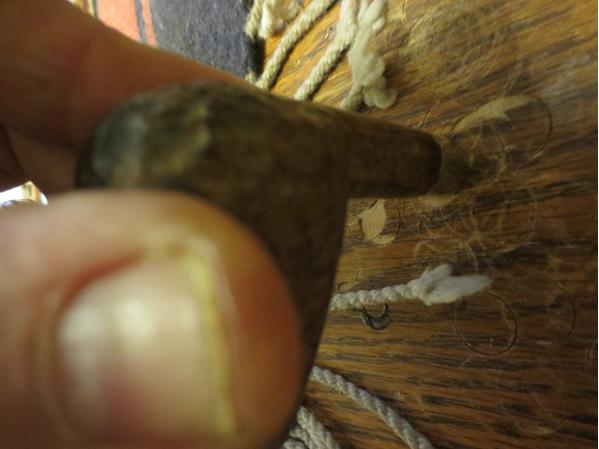
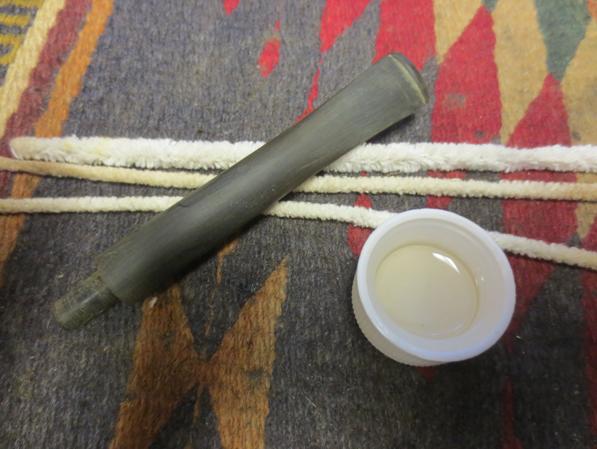
The carver who had fit the stem to the pipe had not finished working on the slot. It looked like he had started by using a small cutting wheel to cut a line across the airway in the end of the stem. That was all that had been done to the slot at this point.Bill28
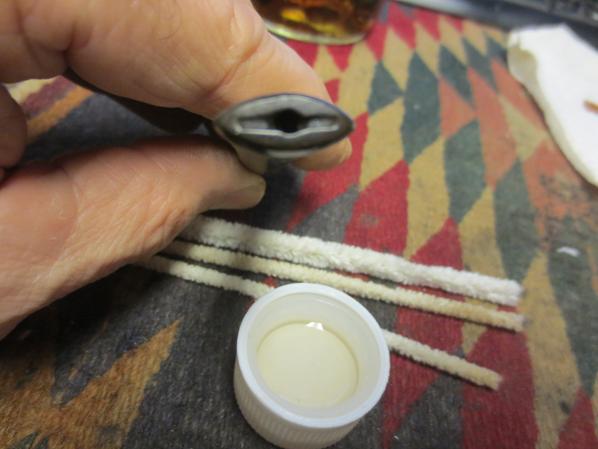
I used needle files and sandpaper to open up the airway and shape the slot. I smoothed out the transition from the cut to airway and made the entire slot more oval. The general shape of the airway is a Y with it following the curve of the button and creating an open airway. A pipe cleaner slides easily into the airway with the new open end.Bill29
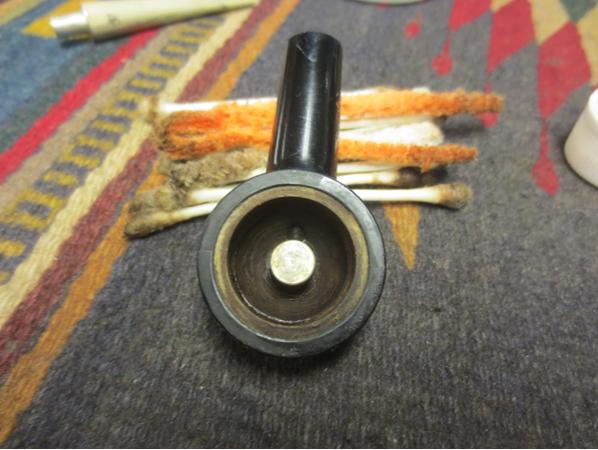
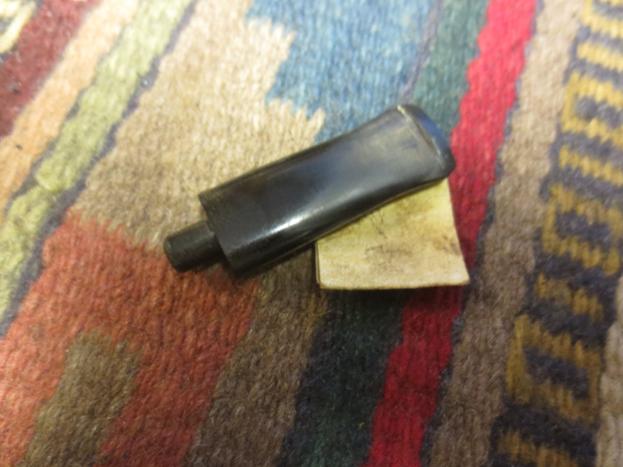
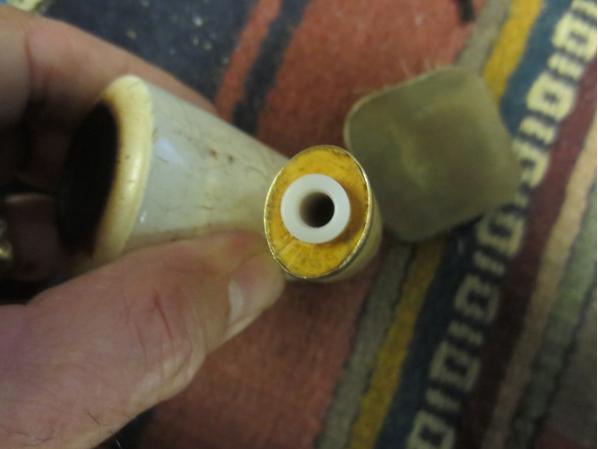
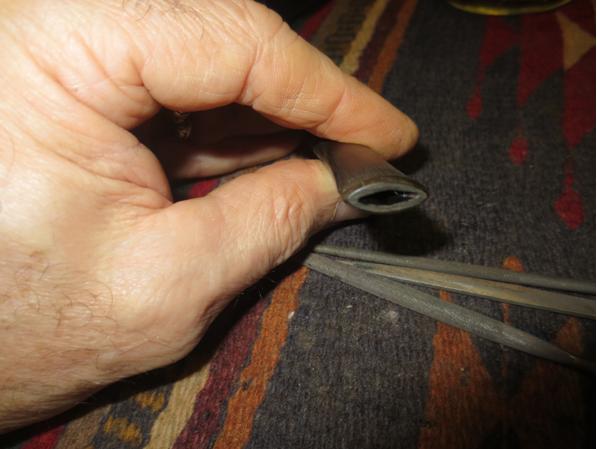
To prepare the mortise to accept the curve of where the tenon met the stem, I beveled the inside edge of the mortise with a knife. I also beveled the end of the tenon into a funnel while I had the knife out. When I pushed the stem into the shank it fit snugly against the end of the tenon.Bill30
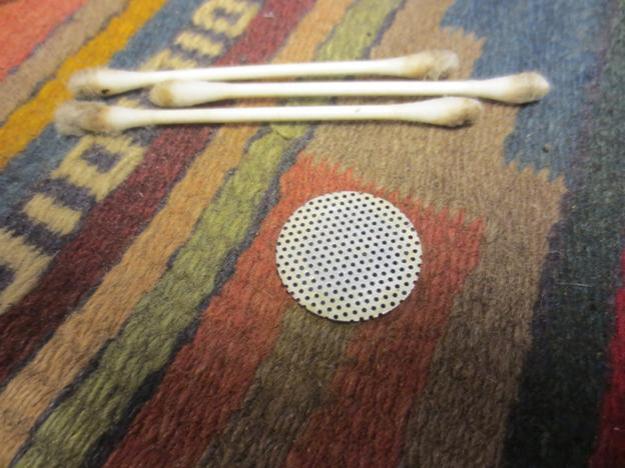
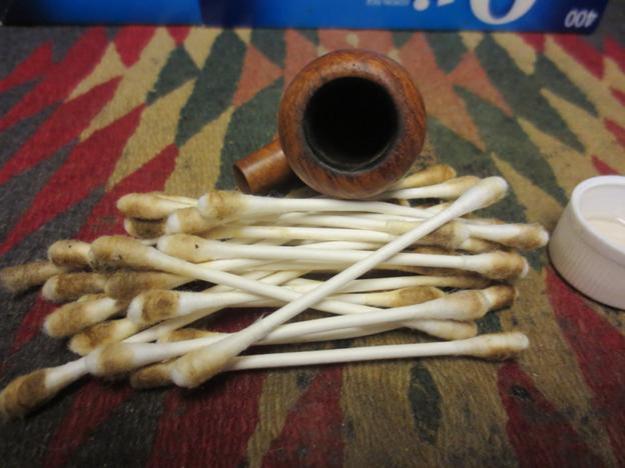
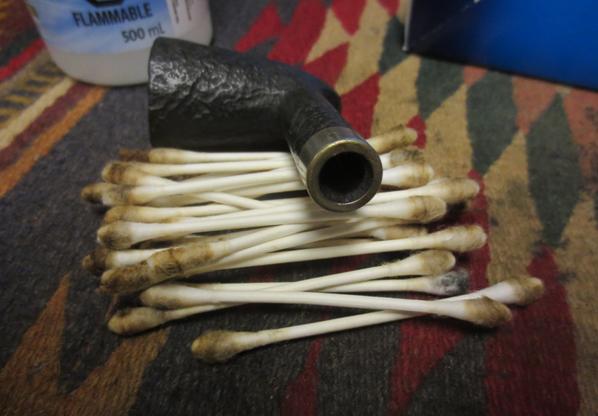
I took out the stem and cleaned out the airway to the bowl and the mortise with pipe cleaners, cotton swabs and alcohol. I scrubbed it until it was clean.Bill31
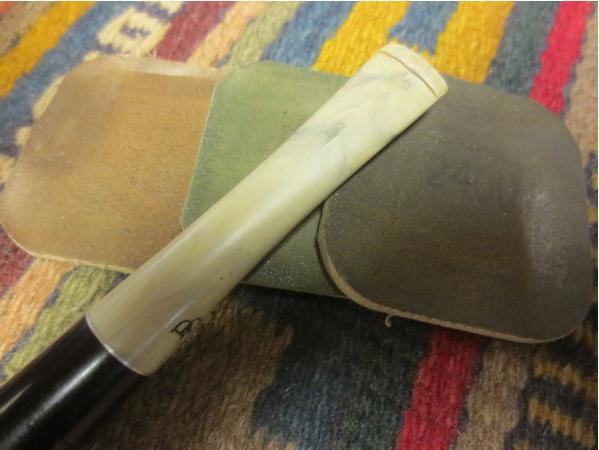
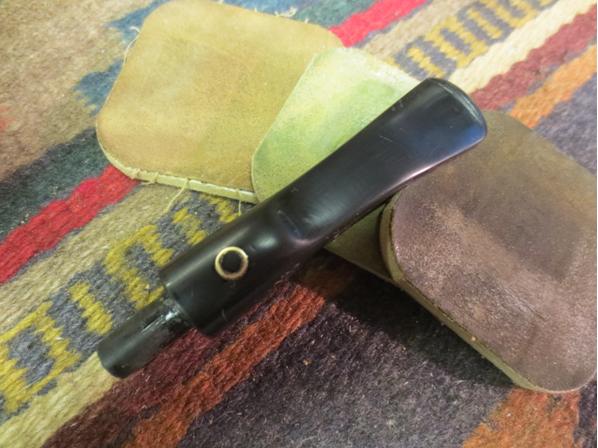
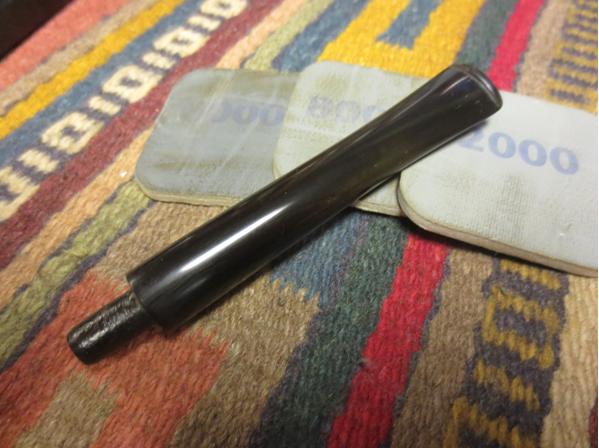
I sanded the stem with 220 grit sandpaper to break up the oxidation and also to remove some of the dings and marks on the stem surface. I wet sanded the stem with 1500-2400 grit micromesh sanding pads. I rubbed the stem down with Obsidian Oil and then dry sanded it with 3200-4000 grit pads. I gave it another coat of oil and then finished sanding with 6000-12000 grit pads. I gave it a final coat of oil and let it dry.Bill32 Bill33 Bill34
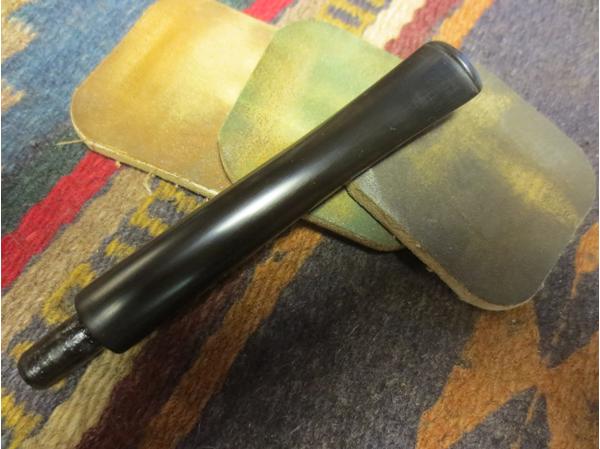
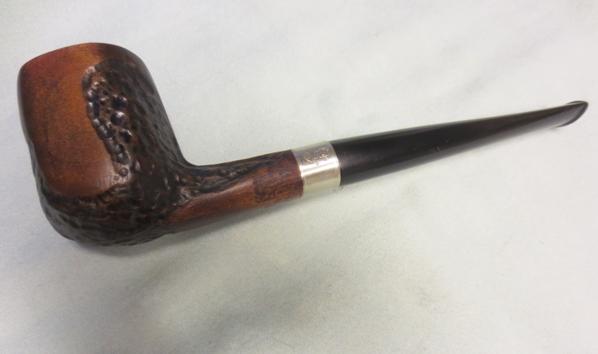
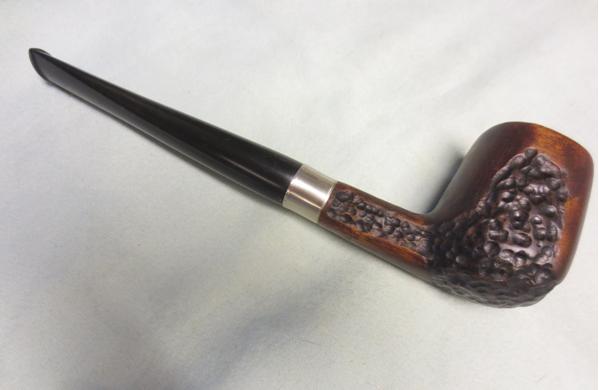
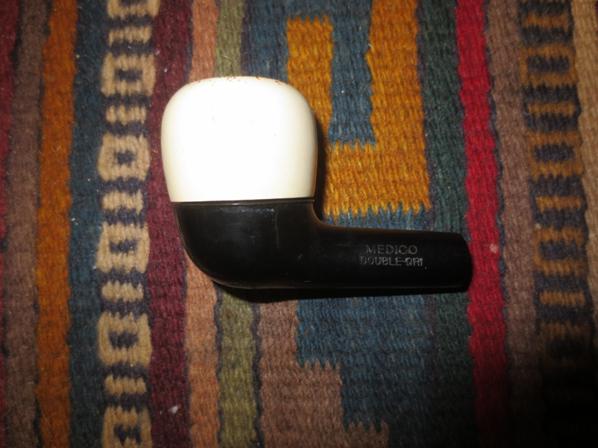
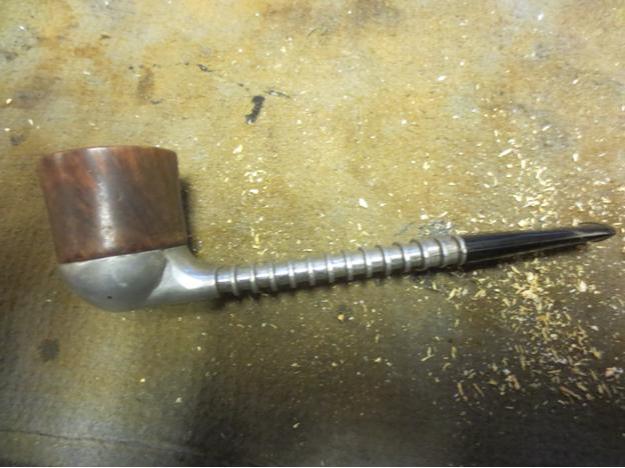
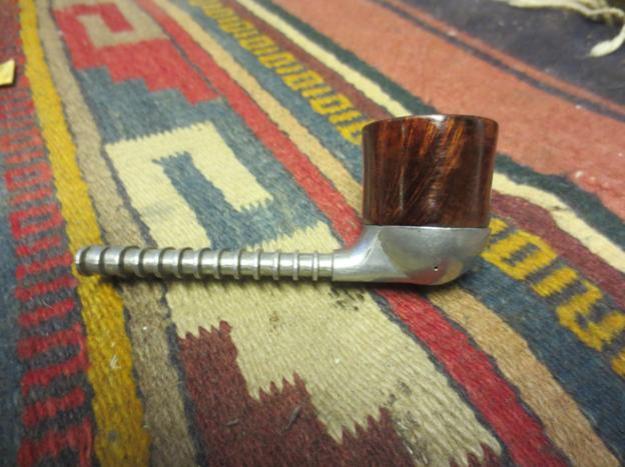
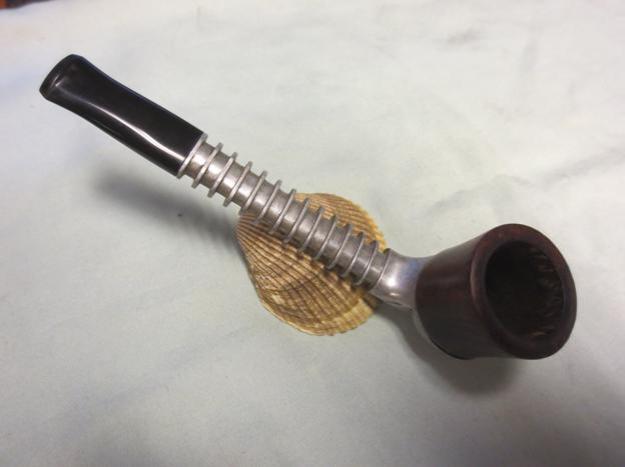
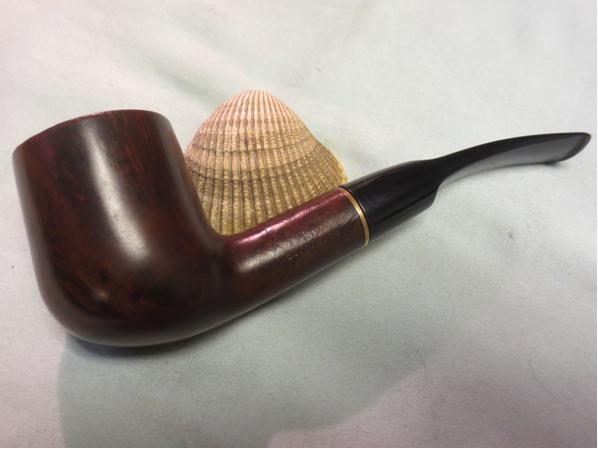
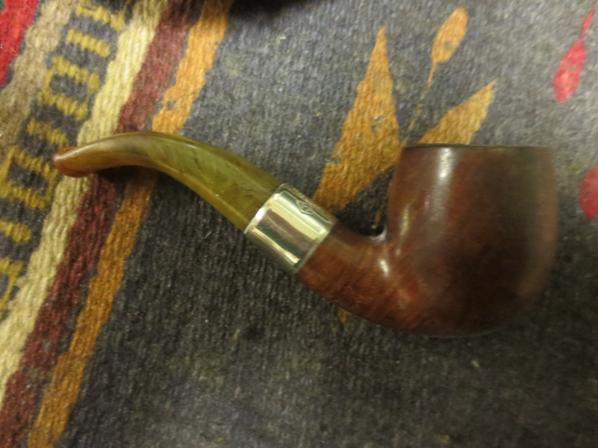
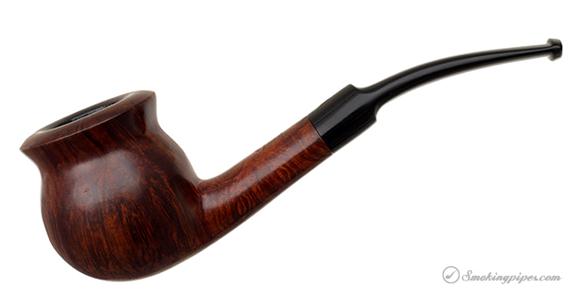
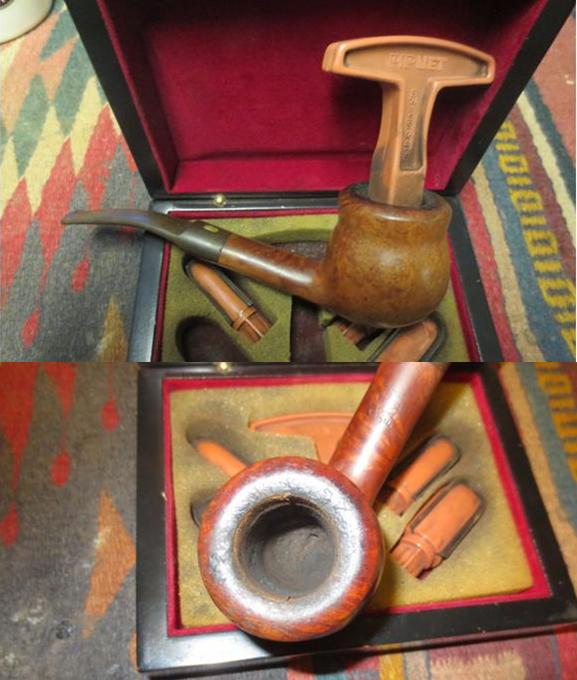
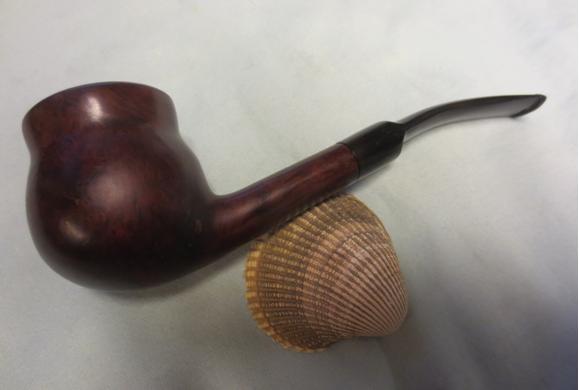
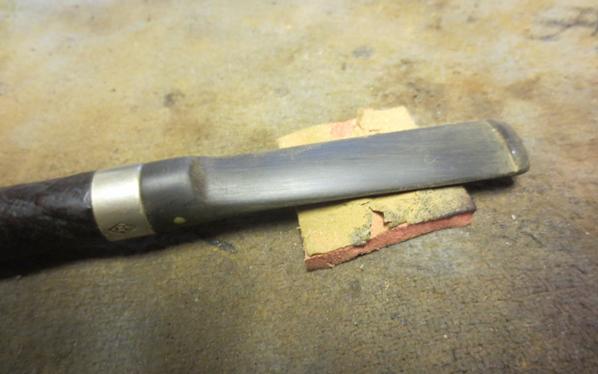
I sanded the smooth portions of the bowl with micromesh sanding pads to lighten the stain there. I lightly buffed the bowl and buffed a bit harder on the stem with Blue Diamond on the buffing wheel. I gave the stem multiple coats of carnauba wax and buffed it with a clean buff. I applied some Conservator’s Wax to the bowl and hand buffed it with a shoe brush. The finished pipe is shown in the photos below. It came out pretty well with the adjustments and tweaks that I added. The band sets off the bowl and stem. The contrast stain works with the walnut. The smooth and the rusticated finish go well with the stains I chose. It is now a better looking workable pipe. Thanks for looking.Bill35 Bill36 Bill37 Bill38 Bill39 Bill40 Bill41 Bill42 Bill43

Restoring A Medico Double-Dri Bakelite Pipe


Blog by Steve Laug

In the ongoing adventure of discovery of the quest for the drier smoking pipe I keep finding new ones that intrigue me. This latest addition that my brother Jeff picked up is unique even if it was not part of that adventure of discovery. It is stamped Medico over Double-Dri and it is unusual to say the least. The base of the pipe I believe is made of Bakelite. The bowl is painted briar or at least looks to be. The bowl is friction fit into the base and is held in place by a cork or composition ring around the edges of the base. The bottom of the bowl is a hard clay or ceramic material. The bowl is U shaped and has three holes in the bottom of the bowl that angle outward toward the edge of the external bottom of the bowl that fits in the base. The bottom of the base has a raise metal pillar that sits in an indentation on the bottom of the bowl once it is in place. Double-dri3

This directs the airflow into the rounded bottom of the base and the airway on the back of the pipe. There is a Medico paper filter that sits in the shank of the pipe and the tenon of the stem to further dry out the smoke. Thus there are two traps for moisture so that the smoke that is drawn into the mouth of the smoker is Double Dry. The stem on the one I have is made of a multi-coloured white/grey and has a raised interlocking DD logo. The white/grey nylon looks quite nice with the dark of the base and the white of the bowl.

The pipes seemed to come in a variety of colours and bowl configurations and materials from meerschaum to briar and painted briar. The bases also came in a variety of colours as did the stems. I found the next photo on the web that gives some idea of the wide variety of choices in this 50’s era pipe. Double-Dri1Charles Lemon at Dadspipes wrote about one he did a refurb on and it got my attention so I have had an eye out for one. Here is his write up http://dadspipes.com/2015/10/30/1041/ He wrote that the “Double-Dri was Medico’s foray into the field of removable and interchangeable bowls, though where the Falcon pipe used aluminum for its shank, the Double-Dri used another 1950’s Space Age material, Nylon, for both shank and stem. Press-fit bowls were available in briar or the more expensive meerschaum.”Double-dri2

There was not much information on the brand. The PipePhil site just had the brand and a few photos of two different pipe configurations. The Smoking Metal site gave the name and a picture of the pipe put together and taken apart. There was nothing that I could find that spelled out what Charles spoke of in terms of the base and stem being nylon. It appeared to me that he was right about the stem on the one I had. It was nylon. The base however was exactly like earlier Bakelite pipes that I have in my collection. I know there is a way to check that but the look and feel certainly makes me think I am right in that assessment.

Like Charles I also found a few advertisements in 1950s era magazines that sold the pipe. I could not resist using the one to the left.It is a Medico advertisement in the March 1955 edition of Popular Mechanics magazine. The language of the advert makes for great reading. It says that it is the Best Looking Pipe and the Best Smoking Pipe. It smokes 35 degrees cooler. The Double-Dry system is shown in the line drawing as made up of three parts – Condensation, Radiation and Filtration. If you buy the press on this pipe you will wonder why it is not still being sold 60+ years later. (I would love to get a hold of a copy of the folder that is mentioned at the bottom of the advertisement if any of you have one around.)

When the pipe arrived I brought it to the worktable I took a few photos to show what the condition was when I started the clean up. It was in decent shape. The bowl was caked and the holes in the bottom of the bowl were clogged. I could not see how the airflow worked with the bowl and base from looking inside the bowl. The bowl had some nicks and damage on the top edge and had a thick coating of tars. The bowl exterior was also dirty and there were some black marks on the sides of the bowl. The base was dirty and caked with hardened tars and oils. The inside of the shank and airway were black and the airway into the base was reduced in size. The stem had a lot of tooth chatter on the top and the bottom sides near the button and the contrasting grey and white of the stem material were dull. The double DD on the stem looked to be in excellent shape.Double-dri4 Double-dri5 Double-dri6 Double-dri7I took a close up photo of the rim to show the damage that would need to be dealt with. I also did a close up photo of the bottom of the base to show the inset up into the bowl base.Double-dri8 Double-dri9

I took two photos of the base and the bowl – one looking at it from the top down and the other with the bottom side of the bowl showing.Double-dri10 Double-dri11

I removed the stem from the pipe and the old paper Medico Filter was present.Double-dri12

I cleaned out the inside of the base with cotton swabs and alcohol and cleaned out the airways in the shank and stem with pipe cleaners, cotton swabs and alcohol.Double-dri13 Double-dri14

The bowl had a rounded bottom so I used a PipNet reamer and reamed the bowl to remove the cake and enable me to see the airways in the bottom of the bowl.Double-dri15 Double-dri16

I used a paper clip to break through the airways from the underside of the bowl.Double-dri17I scrubbed the bowl exterior and rim with cotton pads and alcohol. I was able to remove most of the grime from the bowl and a fair bit of the lava from the rim. I could see that the rim was actually unpainted briar.Double-dri18 Double-dri19 Double-dri20 Double-dri21I sanded the bowl with 1500-2400 grit micromesh pads to remove some of the pieces of tar and oil that were stuck to the surface of the bowl. I also sanded the base with the micromesh to give it a shine.Double-dri22 Double-dri23I lightly topped the bowl to clean up the outer edge of and the top of the rim. I sanded the inner edge of the rim to smooth that out as well. I followed up on it by sanding it with 1500-2400 grit micromesh pads.Double-dri24I sanded the tooth chatter and marks out of the stem with 220 grit sandpaper and then wet sanded it with 1500-2400 grit micromesh sanding pads. I dry sanded it with 3200-12000 grit pads and the shine came back to the stem. The contrast of grey and white really began to stand out.Double-dri25 Double-dri26 Double-dri27I gave the nylon stem several coats of Conservator’s Wax and hand buffed the stem with a microfibre cloth. I put the pipe back together piece by piece including a new Medico paper filter in the stem.Double-dri28 Double-dri29 Double-dri30I gave the entire pipe another coat of Conservator’s Wax and hand buffed the pipe to a shine. The finished pipe is shown in the photos below. Other than the damage on the curve of the bowl the pipe looks very good. Thanks for looking.Double-dri31 Double-dri32 Double-dri33 Double-dri34 Double-dri35

Bringing New Life to a Yello-Bole Metal


Blog by Steve Laug

My brother found this older Yello-Bole metal pipe. It is a lot like the older Grabow Vikings but the bottom of the bowl is different from the Grabow. Between the bowl and the metal base there is a flat perforated screen or disk that the tobacco sits on. It acts as the bottom of the bowl. The wooden bowl itself is a threaded tube that screws into the base. There are two pin holes on the sides of the base (one on each side about mid base below the bowl). These serve as openings to draw air into the bowl. This one was in decent shape and would take a little work to clean up. The photos below were provided by the eBay seller and show the state of the pipe. From the first two photos below you can see the wear on the stem and the white calcification that generally builds up under a rubber softee bit. The finish on the bowl is shot. There is nothing but bare briar showing. The outer edge of the rim looks good. YB1 YB2The next two photos give a top and underside view of the pipe. You can see the ring of cake in the bowl around the middle and lighter on the top and bottom edges. You can see the metal disk in the bottom of the bowl. I have purchased a few of these over the years and almost all of them were missing the metal disk that sat in the base between the bowl and base. The stem shows some tooth marks on the top and underside.YB3 YB4The final photo included by the seller showed the stamping on the underside of the base. It read Yello-Bole horizontally along the bottom of the shank. It also gave the patent number on the bottom of the base. It read PAT. over 2467002 over PAT. PEND. That was enough data to do a patent search on the US Patent Information site. http://www.uspto.gov/patents-application-process/search-patents. From there I copied the patent drawing and included it below.YB5The diagram and the accompanying documents show the conceptual and descriptive narrative of what the pipe was about and what its maker hoped to achieve with his design. The inventor was a Samuel Laurence Atkins of New York. He filed his patent application on July 14, 1945. The patent was granted April 12, 1949. The pipe that I have is stamped Patent Pending thus it is easy to extrapolate that it was made between the dates July 14, 1945 and April 11, 1949 which are the dates before the patent was granted. That makes this pipe between 67-71 years old. It is in pretty decent shape for a pipe of that age.YB6 YB7I took the following photos when the pipe arrived. The seller’s photos were pretty good at showing the issues with the pipe. All the things noted above were correct.YB8 YB9 YB10 YB11The pipe was quite easy to take apart. I unscrewed the bowl and tapped out the disk in the base. The stem came out of the shank with little effort. I took the photo below to show the parts. The second photo shows the cake in the bowl.YB12 YB13I started the clean up with reaming the bowl. I used the PipNet reamer and the largest cutting head to ream from the top of the bowl. I used the second head to ream the bowl from the bottom. I reamed it back to bare briar. There was still some of the signature Yello-Bole bowl coating showing near the top just below the rim.YB14 YB15I scrubbed the bowl base with a brass bristle brush to loosen up the dried tars and oils in the base. I used a dental pick to clean out the threads. I also scrubbed the disk with the brush. YB16 YB17I used pipe cleaners, cotton swabs and alcohol to clean the surface of the disk and the inside of the base and airway.YB18 YB19

I scrubbed the interior and exterior of the stem with alcohol and pipe cleaners to remove the build up on the outside and the oils on the inside.YB20With the cleanup finished I set the parts on the table and took a few photos of the cleaned up pipe. Now it was time to restore it.YB21 YB22I wiped down the bowl with cotton pads and acetone to remove the grime and the remaining finish on the bowl.YB23

I stained the bowl with a dark brown stain pen.YB24 YB25I buffed the bowl with red Tripoli to spread and polish the stain. I buffed it with Blue Diamond and rubbed the bowl down with a light coat of olive oil. At this point in the process the bowl and the metal base was complete. I took the following photos to show the state of the progress thus far.YB26 YB27 YB28 YB29 YB30I cleaned the stem and used a clear super glue to repair the deep tooth marks in the top and underside of the stem near the button.YB31 YB32I sanded the repairs with 220 grit sandpaper to blend it into the surface of the stem. YB33 YB34I worked on the stem with micromesh sanding pads. I wet sanded with 1500-2400 grit sanding pads and then rubbed the stem down with Obsidian Oil. I wet sanded with 3200-4000 grit pads and gave it another coat of oil. I finished by dry sanding with 6000-12000 grit pads. I gave it a final coat of oil and let it dry.YB35 YB36 YB37I buffed the bowl and stem with Blue Diamond on the wheel and then gave both multiple coats of carnauba wax. I buffed it with a clean buffing pad and then by hand with a microfiber cloth. The finished pipe is shown in the photos below. Thanks for looking.YB38 YB39 YB40 YB41 YB42 YB43

Replacing a Threaded Mortise/Tenon system with a Push Mortise/Tenon System in a Meerschaum Pipe


Blog by Steve Laug

When I received this meerschaum pipe the sender said that it needed to have the tenon replaced. It looked like it would be a simple repair so I left it until last. I restemmed the other little meerschaum that I posted earlier and put a new tenon on an Italian pipe for him and figured that this would be an easy fix. I unscrewed the stem from the broken tenon – it was split and half of it was missing. The stem came off with no problem. I had a perfect replacement tenon available to me so I screwed it into the stem and then looked at the broken tenon in the shank. Still the problem seemed quite simple. I used my wood screw and threaded it into the airway and tried to pull the tenon – either unscrewing it or at least wiggling it free. It did not move at all. I looked at it with a lens and saw that there were remnants of epoxy around the portion of the tenon that showed. Now I was in trouble. What had originally been an easy fix now was complicated.Meer1Meer2Meer3 Meer4Before I drilled out the tenon I took a few photos of the bowl to show the condition of the meer. It was worn and scratched but had some beauty that shown through the grime and the scratches. The rim was dirty and pitted but the edges were sharp. The bowl interior was lightly caked and the pipe smelled of strong aromatics.Meer5 Meer6 Meer7 Meer8I drilled out the tenon in the shank of the pipe starting with a bit slightly larger than the airway. No problem with that first step. I increased the size of the bit and drilled it again. It was my hope to have the glued tenon break free with the drilling. I increased the size of the bit yet again, this time to almost the same size as the threaded tenon. No luck. The tenon was absolutely stuck to the insert in the shank. I increased the bit size once more and this time the tenon broke. I tried to pick out the remaining pieces but they were solidly glued in place. I looked at the insert with a lens and could see that the glue and tenon had damaged the internal threads on the insert. This was turning into a real pain. I would have to drill out the entire insert and replace it. Once I had the tenon free I figured this would be easy as well. Again I was wrong. The insert was also glued in place. I increased the size of the bit several times until I had removed the insert itself. This old pipe was turning into a head ache.

I finally was able to remove the insert. I examined the inside of the shank. The original drilling of this pipe was fascinating. It was obviously drilled in several stages stepping down the mortise to the airway. I wrote to the owner and asked if it would be okay to replace the threaded tenon and mortise set up with a push tenon. I figured why complicate things. He confirmed that he was okay with that replacement. I started work on the stem and shank for that set up. I drilled the airway on the stem slightly bigger to take the push tenon. I cleaned out the inside of the stem to remove the debris and the tars. I checked the fit of the tenon in the stem and it was a good fit. I would need to countersink the airway to accommodate the rim on the tenon.Meer9 Meer10 Meer11I cleaned out the shank and airway on the bowl as well. I fit the insert in the shank. The fit was good but I would also need to countersink it to make a flat surface for the stem to sit against.Meer12I used a slightly larger drill bit to create the countersink on the shank and pushed the insert in place. The fit was perfect. Due to the damage on the shank from all of the glue I would need to use glue to hold the insert in place but I wanted to clean up the fit before I set the glue in place. In the photo below the new system can be seen. The mortise insert is in place and the push tenon is on the stem.Meer13I cleaned out the shank one more time and then mixed a two part epoxy for the insert. I applied the mixture to the insert and pressed it into place. I aligned the airway and the stem so that things would be straight once it dried and set the bowl aside so the epoxy could cure.Meer14I used a drill bit to countersink the rim on the tenon into the stem. I threaded it in place to make sure the fit was correct.

I sanded the bowl with micromesh sanding pads to smooth out the roughness and bring back some of the shine of polished meer. I wet sanded it with 1500-2400 grit pads and was able to bring back a lot of the life in the meerschaum. I dry sanded with 3200-4000 grit pads to polish it further. The photos below show the pipe after I had sanded it. When I am working on an older meerschaum I do not like to remove all of nicks and scratches as they add character to an old pipe. They are like battle scars and each of them has a story to tell. I clean up the surface damage and highlight the patina but leave the pipe clean but looking its age.Meer15 Meer16 Meer17I let the epoxy set over night and then this morning pushed the stem into the new mortise. The fit was a little tight and I could see some light between the stem and the shank end. I needed to finesse the fit of the stem and shank.Meer18 Meer19 Meer20 Meer21I carefully sanded the end of the mortise with the Dremel to make sure the insert was flush against the meerschaum end of the shank. I also worked on the countersink of the tenon in the stem with a sharp knife to give it a wider and sharper bevel to accommodate the rim around the middle of the tenon. I polished the newly sanded and cut areas with micromesh sanding pads to smooth out the fresh work. I polished the stem and the bowl lightly with some soft white Beeswax and then buffed the pipe by hand with a microfibre cloth to raise the shine. The finished pipe is shown in the photos below. Soon I will pack up the threesome of pipes and send them back to the pipe man who sent them to me. They are all functional now and to me actually look and work better than they did before. Thanks for looking.Meer22 Meer23 Meer24 Meer25 Meer26 Meer27 Meer28 Meer29

Replacing a Tenon and Doing a Restoration on a Sorrentino Manager 0704


Blog by Steve Laug

I received this one from a fellow who wanted the tenon replaced but being the way I am I could not just replace the tenon and leave the pipe looking tired and worn so I wrote and offered to clean it up for him. It took more work than I had originally thought it would but the added effort made for a beautiful looking pipe. It is stamped on the left side of the shank MANAGER over SORRENTINO. On the right side it says 0704 which is the shape number and Italy. The briar was really in need of some work. The left side was stained with a dark patch that ran from the top to the bottom of the bowl. The finish was also rough to the touch over that section. On the bottom, front and right side of the bowl there was a lot of dents and dings like the pipe had been dropped. The rim had a coat of lava and the bowl had a very uneven cake with more on the left side of the bowl than the right. The finish was basically shot. The stem came with lots of tooth chatter and a broken tenon. The tenon snapped right at the shank and was stuck in the shank. The brass band on the shank was loose. The pipe was tired and needed some TLC. Here is what it looked like when I started.Briar1 Briar2 Briar3In the photos above I had already turned the wood screw into the broken tenon. I use that to pull a broken tenon and it never disappoints in effectiveness. Note the state of the bowl in the photos.Briar4I used a Dremel and sanding drum to flatten out the remnant of the broken tenon on the stem. Once it was flat it was time to drill the stem to take the new tenon. I started with a bit slightly larger than the airway to center the drilling and turned the stem onto the bit by hand. I find that though it is harder to do it by hand, turning it by hand and not drilling it gives me more control of the stem. I worked my way up to a ¼ inch bit and then cleaned it out with a needle file. I had a Delrin tenon I purchased from Tim at JH Lowe and I roughed up the surface of the portion that would go into the stem and gave it a coat of two part slow drying epoxy to hold it in place.Briar5 Briar6 Briar7I lined up the stem in the shank and then set it aside to let the epoxy cure over night. While it dried I worked on the bowl. I stripped off the remaining finish with acetone and cotton pads. I sanded the dark stain mark on the left side of the bowl with 220 grit sandpaper to remove the damaged briar and smooth things out. I scrubbed that side with acetone to finish.Briar8 Briar9I reamed the bowl with a PipNet reamer to even out the cake that had been there. I decided to strip it back to bare wood. I wanted to check out the inside of the bowl walls. The interior was sound and there was no damage on the bowl walls. Briar10 Briar11I sanded the bowl with 1500-2400 grit micromesh sanding pads to clean up the scratches left behind on the briar by the sand paper and by the wear and tear of age. The stripped and sanded bowl was looking pretty good.Briar12 Briar13 Briar14I sanded the inner bevel of the rim to clean it up and prepare the bowl for staining. I wiped it down a final time with isopropyl alcohol. I stained the bowl with a dark brown aniline stain. I flamed it and restained it with a second coat of the stain. I flamed it again.Briar15 Briar16Before setting the bowl aside to dry I wiped it down with alcohol on a cotton pad to smooth out the stain and lighten it slightly. I wanted the grain to show through.Briar17I buffed the bowl with Blue Diamond on the buffing wheel and gave it several coats of carnauba wax to seal and preserve the finish. I buffed it with a clean buffing pad to raise the shine. (Forgive the poor focus on the first photo below. It is blurry but still gives you an idea of how the dark area had been reduced.)Briar18 Briar19 Briar20 Briar21With the bowl finished I set it aside and worked on the stem. I sanded the tooth marks and chatter on the stem with 220 grit sandpaper until they were smoothed out. I was able to easily remove most of the tooth damage to the stem. There was one small tooth dent on the top of the stem that I left as it is minimal and I did not want to thin the stem.Briar22 Briar23I wet sanded the stem with 1500-2400 grit micromesh sanding pads. I dry sanded it with 3200-4000 grit pads. I finished with 6000-12000 grit pads. I buffed the stem with Blue Diamond on the wheel.Briar24 Briar25 Briar26 Briar27I put the pipe together and lightly buffed it with some more carnauba wax to finish it. I hand buffed it with a microfibre cloth for the final buffing. The photos below show the finished pipe. Hopefully when it is returned to the pipeman who owns it he will be pleased with the finished pipe. Thanks for looking.Briar28 Briar29 Briar30 Briar31 Briar32 Briar33 Briar34

An LHS Purex Patented Lovat that showed promise


Blog by Steve Laug

My brother showed me a link on eBay that showed this older LHS Lovat. It was stamped LHS in a diamond. Next to that was stamped PUREX over the patent number, PAT.No1587048. Under that was stamped REAL BRIAR. The shape number 12 was stamped on the underside of the shank. LHs2The pipe looked decent. There was some damage to the rim but the bowl was nice other than the usual dirtiness and dents. The shank also looked good. There did not appear to be any fills in the bowl or shank. There was very little cake in the bowl and it appeared that it had been recently reamed. The finish was in okay shape though there were paint flecks on the sides of the bowl near the rim. lhs3 LHS4 LHS5The seller included a close up photo of the rim to show the extent of damage. It looked to me that the outer rim was the roughest. It was rounded and the defined sharp edge was gone. The front edge had more damage than the back. The inner edge showed damage and would take some work to round it out. The top of the rim was pretty beat up from what I could see in the photos.LHS6The stem was in rough shape with lots of tooth chatter and wear. It was oxidized and also had a thick coat of some substance that appeared to be flaking or peeling. The dots on the stem were probably white and red though the photos showed the white dot as almost yellow. I was pretty sure that the coat on the coat on the stem accounted for that.LHS7 LHS8I weighed the work it would take to bring it back to life and we put in the only bid on the pipe. It did not take too long for the seller to send it to my brother and for him to send it to me. Even with the double postage it is cheaper to send it to him in the US and then to me in Canada than to ship it directly to Canada. When the pipe arrived in Canada I was able to see that the seller’s photos had shown the condition of the pipe very well. The only thing not shown was that the stem was quite plugged from the slot to the metal threaded tenon. I was not able to push a pipe cleaner through it. The other thing was that the patented stinger apparatus was missing. I have included a picture of the missing apparatus from the patent information.LHS1I went through my collection of tenons and I did not have one like the one shown in the drawing above. I took the next photos to show the state of the pipe from my perspective before I started on the refurb.LHS9 LHS10 LHS11 LHS12I found that the stem was slightly underclocked and needed to be rotated. The first photo below shows the turn of the tenon when it arrived. I heated the tenon with a Bic lighter to soften the glue in the stem. Once it was softened I was able to turn the stem straight. The second photo shows the corrected stem.LHS13 LHS14I took a close up photo of the rim and the bowl interior. There was still some cake in the bowl that needed to be scraped off.LHS15I reamed the bowl with the PipNet reamer and took out the remaining cake.LHS16 LHS17I cleaned out the shank with pipe cleaners, cotton swabs and alcohol. This was one dirty shank and mortise. I would need to use the retort to clean it out. I cleaned out the airway in the stem. It was clogged so I used a dental pick to open the slot area and then I was able to push a thin pipe cleaner through the airway. It took quite a few pipe cleaners to open the airway. I scrubbed the metal tenon with a brass bristle brush and then with alcohol and cotton pads. It was stained but all of the debris was cleaned.LHS18 LHS19I set up my retort, filling the test tube with isopropyl alcohol and then putting the stopper in place in the tube. I put a cotton ball in the bowl and the slid the rubber end of the retort over the stem. I lit a candle and heated the alcohol to boil through the bowl and shank. I boiled two test tubes of alcohol through the airway in the stem and shank before the alcohol came out clean. Once it was finished I ran pipe cleaners and cotton swabs through the mortise and airway to clean out the remaining alcohol and debris. Once I was finished the pipe smelled clean.LHS20 LHS21It was time to address the rim top. I topped it on the topping board using 220 grit sandpaper to remove the damage to the surface and sharpen the inner and outer edges of the rim. Fortunately I did not need to remove much of the surface to clean up the rim surface and edges.LHS22 LHS23I scrubbed the finish with acetone on cotton pads to remove the sticky surface of the finish and the dirt and grime of the years.LHS24 LHS25I sanded the stem with 220 grit sandpaper. I removed the “varnish” coat or whatever the substance was as well as the oxidation and tooth marks.LHS26 LHS27Once I had the surface clean of oxidation and tooth marks I wet sanded it with 1500-2400 grit micromesh sanding pads. I gave the stem a rub down of Obsidian Oil. I dry sanded it with 3200-4000 grit pads and gave it another coat of oil. I finished by sanding it with 6000-12000 grit pads and then gave it a final coat of oil.LHS28 LHS29 LHS30I sanded the rim with 1500-3200 grit micromesh sanding pads to smooth out the scratches left behind when I topped the bowl. I used a light brown stain pen to match the rim to the rest of the finish. I gave the pipe a light wipe down with olive oil and then buffed it with Blue Diamond plastic polish on the wheel. I gave it multiple coats of carnauba wax and buffed it with a clean buffing pad. I took it back to the table and gave it a final hand buff with a microfiber cloth. The finished pipe is shown in the photos below. I have no idea how old the pipe is but the patent number at least gives me a post 1926 date as a starting point. I don’t know how long LH Stern included the Pat.No. stamping on the shank but my thinking is that the pipe is from the mid to late 30s. Thanks or looking.LHS31 LHS32 LHS33 LHS34 LHS35 LHS36 LHS37 LHS38 LHS39

A Restoration Project – A Small Bent Billiard from a Past Era


Blog by Steve Laug

When I saw this pipe on Ebay I decided I wanted to have it in the collection. The seller said the stem was amber and it may be though I am thinking it is more of an Amberoid. The bowl had a fill on the back left side at the shank bowl junction. The band on the shank was rotated to the right and a little loose. The finish was worn and dirty. The rim was covered in tars and lava and the bowl was caked and half filled with the last unfinished bowl of tobacco. There was no information from the seller as to stampings or markings on the bowl or shank. It appeared to be a no name pipe. The seller thought the stem was horn or amber but it did not look like that to me. The stem looked to be in decent shape though it had tooth marks on the top and the underside near the button. The stem was very dull in appearance and the airway was black. The case was in decent shape with a lot of ash and detritus from the years. All in all the pipe was tired but it looked to be easily restorable. The photos below came from the seller.amber1 amber2 amberr3The next two photos show the stem damage. It does not appear to be extensive more chatter than any deep bite marks. The way the marks look on the stem it looks to me that the stem is amberoid or Bakelite not amber or horn.amber4 amber5The pipe is diminutive – a small one all the way around. It is well proportioned but is 4 inches long with a bowl height of 1 ½ inches. The inside diameter of the bowl is 5/8 inches.amber6The seller also included several close up photos – one of a large fill on the back left side of the bowl. It appeared to be tight and smooth but I would know more once I cleaned up the bowl. The other photo was of the metal band. It was stamped with faux hallmarks and an EP in a diamond that signified that the band was electroplated.amber7 amber8The case was in decent shape for a pipe this age.amber9When the pipe arrived I unpacked it and took it out of the case and took a few photos of my own to confirm my assessment from the seller’s photos. The pipe was solid and clean. The finish was worn and tired – dirty but would clean up nicely. The lava on the rim and the damage to the rim edges would need some work. The stem was not amber or horn but amberoid or Bakelite. It had some interesting swirls and would clean up nicely. The material on the inside of the case had a lot of ash and was dirty but intact.amber10 amber11 amber12 amber13 amber14I removed the stem from the shank and was surprised that I was able to unscrew the bone tenon from the stem. It was a little sticky but with a bit of wiggling it came free.amber15With the stem out I worked on the inside of the stem. The airway was almost black with tars and oils. I wanted to clean out the stem as much as possible and bring it back to a clean airway that blended with the stem material. I used alcohol, pipe cleaners and cotton swabs. The photo below shows the first stage of the cleaning. Following the scrubbing I also used Barkeepers Companion with pipe cleaners dipped in it and using that to scrub out the airways. I was able to clean out the majority of the stains.amber16 amber17I reamed the bowl with a PipNet reamer and took the cake back to bare briar. amber18 amber19To clean up the rim I topped it with 220 grit sandpaper. I was able to take off all of the lava and cleaned up the edges of the rim. I sanded the inside edge of the rim with a folded piece of sandpaper. I cleaned up the rough edges and the inside of the bowl.amber20 amber21 amber22I scrubbed the exterior of the bowl with acetone on cotton pads. It removed the finish and the grime from the bowl.amber23 amber24 amber25I removed the loose band and cleaned the outside of the shank. I reglued the band with Wellbond white all purpose glue.amber26I cleaned out the inside of the mortise and airway with cotton swabs, pipe cleaners and alcohol.amber27I used a black Sharpie to hide the fill on the back of the bowl and then stained the pipe with Dark Brown aniline stain. I flamed it and restained and reflamed it.amber28 amber29 amber30 amber31I sanded the tooth chatter with 220 grit sandpaper to remove it. I wet sanded the stem with 1500-2400 grit micromesh sanding pads to begin the process of polishing the stem. I rubbed it down with Obsidian Oil and then dry sanded it with 3200-4000 grit pads. I gave it another coat of oil and then sanded it with 6000-12000 grit pads. I gave it a final coat of oil and let it dry.amber32 amber33 amber34I lightly buffed the stem and bowl with Blue Diamond and then gave the pipe several coats of carnauba wax. I buffed it with a clean flannel buffing pad and then with a microfibre cloth. I brushed out the inside of the case with the shoe brush to remove the dust and ash. The finished pipe is shown in the photos below.amber35 amber36 amber37 amber38 amber39 amber40 amber41 amber42 amber43This is a great old pipe and one that will hold a spot in my collection. I will keep it in trust, using it and caring for it until I pass it into the hands of the next pipe man. Thanks for looking.

A Rare Find – A Pair of Fieldcraft Dulwich Quaints


Blog by Steve Laug

My brother found this pair of Dulwich Quaints – one a sitter, kind of bent poker and the other a kind of pickaxe shape. The shape and the look of them were unique and there was something about them that immediately drew me to them. They are not big pipes but they have full sized bowls. The stems were made out of very good vulcanite. The briar was quite nice even though both pipe sported a few fills. The bent poker is stamped DULWICH over Quaint on the left side of the shank and Made in England on the right side. On the underside of the shank it is stamped Fieldcraft and the shape number 102. The pickaxe is stamp DULWICH over Quaint on the left side and Made in England on the right and on the underside it has the shape number 126. I have hunted high and low for information on the brand using the Dulwich moniker as well as the Fieldcraft one. Both take me nowhere. One of the earlier pipes I repaired was stamped with the Fieldcraft name and the shape number was clearly a Orlik Pipe Shape. In this case I have no idea who the maker was. Both are interesting old pipes.Dulwich1 Dulwich2The poker shaped sitter had hardly been smoked with over half of the bowl undarkened briar. The stem had some tooth chatter on the underside near the button but other than being oxidized it was a clean pipe. The finish on it was also pretty decent with a few small fills toward the bottom of the bowl on the left side and the front. There was some scratching in the briar as well particularly on the bottom of the bowl. The pickaxe was in rougher shape all the way around. It had a thick cake in the bowl with lava on the rim. The front right rim edge and top had been badly beaten against something that left the briar very rough. The stem was oxidized and had a line of calcification. There was tooth chatter on both the top and bottom sides near the button.Dulwich3 Dulwich4 Dulwich5I took a close up picture of both rims to show what they looked like when I started the refurb. The poker had a slightly crowned rim that is undamaged and has no lava or tars. The pickaxe is another story.Dulwich6 Dulwich7I reamed the bowl of the pickaxe with a PipNet reamer using the smallest cutting head. I took the cake back to bare briar so that I could repair the rim damage.Dulwich8 Dulwich8aI wiped both bowls down with acetone on cotton pads to remove the finish and the grime that was particularly prevalent on the pickaxe.Dulwich9 Dulwich10I sanded the rim of the pickaxe with 220 grit sandpaper to remove the damage to the surface of the front edge and top. I sanded it with a medium and a fine grit sanding sponge and then with micromesh sanding pads – 1500-24000 grit. I wiped the rim down with acetone.Dulwich11 Dulwich12I buffed both bowls with White Diamond on the wheel to get a natural shine.Dulwich13 Dulwich14 Dulwich15 Dulwich16I cleaned out the mortise and the airway on both pipes with cotton swabs, pipe cleaners and alcohol.Dulwich17 Dulwich18I cleaned out the airways on both stems with alcohol and pipe cleaners.Dulwich19 Dulwich20I sanded the stems with 220 grit sandpaper to clear the surface of the oxidation and the calcification on the pickaxe stem. I scrubbed the bite marks on the underside of the stem and used black super glue to repair them.Dulwich21 Dulwich22I sanded the poker stem with 220 grit sandpaper and removed the tooth marks on the underside of the stem near the button.Dulwich23 Dulwich24I rubbed the stems down with some Obsidian Oil and put them back on the bowls to get a quick look at how the work was coming along.Dulwich25I scrubbed the stems with Meguiar’s Scratch X2.0 Fine scratch and blemish remover. It worked really well on the pencil stem on the pickaxe and not as effectively on the thicker stem of poker.Dulwich26I wet sanded the stem of the pickaxe and the stem on the poker with 1500-2400 grit micromesh sanding pads and then rubbed the stem down again with the Obsidian Oil. I dry sanded the stems of both with 3200-4000 grit micromesh and then gave them another coat of the oil. I finished sanding them with the 6000-12000 grit micromesh pads and gave them a final coat of oil and set them aside to dry.Dulwich27 Dulwich28 Dulwich29 Dulwich30The briar was naturally finished so I did not stain either bowl. I gave them a light coat of olive oil and then buffed the stems and bowls of both pipe with Blue Diamond on the wheel. I gave them both several coats of carnauba wax. I buffed them with a clean flannel buffing pad and then by hand with a microfiber cloth. The finished pipes are shown in the photos below. Do any of you who are reading this have any information on either Fieldcraft or Dulwich pipes? I have seen and repaired several over the years and so far have been unable to identify them beyond the initial one that was an Orlik made pipe. Thanks ahead of time for any help that you may have.Dulwich31 Dulwich32 Dulwich33 Dulwich34 Dulwich35 Dulwich36 Dulwich37 Dulwich38 Dulwich39 Dulwich40 Dulwich41 Dulwich42 Dulwich43 Dulwich44

More than met the eye: Would I be able to bring this Jobey Fawn Cauldron back to life?


Blog by Steve Laug

My brother sent me the Ebay link to this Jobey Cauldron and I was hooked. It was in pretty worn shape in terms of the finish and the rim. There was a thick cake in the bowl and some serious lava had overflowed the rim. There were nicks around the outer edge of the rim and the bevel on the inner edge was pretty well covered with lava. There were scratches in the sides of the bowl and it was truly filthy. The stem was oxidized and spotty on the stop side and the saddle. Underneath it was missing a large triangular chunk from the button forward. It was a Jobey so it had the Jobey link tenon that screwed into the shank and the stem fit over the tenon. It was made for a quick and easy replacement. The photos below are from the Ebay seller and clearly show the state of the pipe he was selling. We bid on it and won. Little did I know that what I saw in terms of issues with this pipe were only part of the problems that I would need to deal with in restoring it. Cauldron1 Cauldron2 Cauldron3The seller included a few close up photos to show some of the damage to the pipe. The oxidized and spotty stem is shown in the first photo and the second shows the state of the rim and bowl.Cauldron4 Cauldron5The next two photos show the stamping on the pipe. The top of the shank is stamped Jobey in script over FAWN. The underside is stamped E52 over EXTRA.Cauldron6 Cauldron7The seller also included the following photos to give a clear picture of the profile of the pipe and the damage to the underside of the stem. He gets full props for full disclosure of the issues with this pipe (at least those that were visible through the grime and build up on the briar and stem).Cauldron8 Cauldron9 Cauldron10I went online and searched for a photo of what the pipe had originally looked like and found this one on Smokingpipes.com. Looking at it gave me hope for the repairs and restoration of the one we purchased.Cauldron11When the pipe arrived I put it in my box of pipes to be refurbed and it sat for several months. When I took it out and looked it over I found that the stem was not aligned. I tried to unscrew it from the shank and it would not turn. I tried to wiggle the stem free from the shank and in the process heard that awful cracking sound which refurbishers the world over have come to dread. The tenon snapped off. Great! Now I added one more issue to the refurbishing process on this old pipe. Fortunately, I was able to clear the broken end out of the stem with very little problem but the one in the shank took a bit more ingenuity. I finally was able to remove it by hand turning a drill bit into the broken end and then turning it free of the shank. I cleaned out the shank with pipe cleaners, cotton swabs and alcohol, and then put the parts aside. Since I had no Jobey Link tenons in my kit I would need to wait until I could get some. I called Tim West at JH Lowe and put in an order for tenons. Even that turned out to be far more of an issue than I expected – they came in five sizes and the one I had was so shattered that I was unable to get the measurements. I could estimate the measurements but not get an accurate diameter on either the threaded end or the insert. So I had to order one of each of the three sizes that Tim had in stock. I was hoping that when they arrived that one of them would fit the stem and the shank. Now I would have to wait for their arrival.

It did not take too long of the package to come from Tim. I took out the various Jobey Links that he included and breathed a sigh of relief when the middle sized link was a perfect fit in the shank. The end of the tenon is slotted so that it can be screwed into the shank and unscrewed with a slotted screw driver. In this case it turned into the shank with no issues. The stem did not fit over the end of the tenon but the measurements were correct so I cleaned out the end of the stem and was astonished at the amount of grit that came out of it. I used cotton swabs and alcohol to scrub it clean. Once it was clean the stem fit snuggly over the end of the tenon and all parts aligned perfectly.Cauldron12 Cauldron13 Cauldron14 Cauldron15With the stem fit completed and the new tenon in place it was time to clean up the pipe and see what I was dealing with underneath the grime and dirt. I took some close up photos of the bowl and the stem issues and a complete set of photos of the pipe from multiple angles to show what it looked like when I started.Cauldron16 Cauldron17 Cauldron18 Cauldron19The bowl on this pipe is quite large. I reamed it with the two largest cutting heads on the PipNet pipe reamer and took the cake back to bare briar. I cleaned up the ridges and edges of the broken cake shown in the second photo below with a pen knife and the bowl inside was smooth and clean.Cauldron20I lightly sanded the rim with 220 grit sandpaper to cut through the thick lava on the rim and the inner edge of the bowl. I was able to remove most of it with the sandpaper and finished by scrubbing the bowl down with acetone on cotton pads. The next photo shows the beauty of the rim that lay beneath the lava flow.Cauldron21Once I had removed the grime and the finish I examined the bowl to look for issues that I would need to deal with. Sadly I found that there was a hairline crack where the shank connected to the bowl. It was on the underside of that junction and went up the left side. It was about an inch long. This Jobey Cauldron was turning out to be far more work than I originally imagined when my brother and I had looked at the Ebay photos.Cauldron22This crack, though not deep and pretty cosmetic at this point, would need to be dealt with so that it would not become a bigger issue. I used a micro drill bit on the Dremel and drilled both ends of the crack. I examined it with a lens and saw that it went a little further than I had expected originally and redrilled the end of the crack on the side of the bowl.Cauldron23I decided to also drill some small holes along the crack to make sure that I could seal it further.Cauldron24I pressed some briar dust into the drill holes with a dental pick and then put drops of super glue into the filled holes. I pressed some more briar dust into the surface of the holes to deal with expected shrinkage as the patches dried. At this point the repair always looks ugly and over done but I have found if I skip the last step I have to repeat the process to ensure that the holes are filled.Cauldron25I sanded the repairs with 220 grit sandpaper and then with a medium and fine grit sanding sponge.Cauldron26I stained the repair area and the top of the rim with a light brown stain pen to blend it into the colour of the bowl and shank. This would not be the final colour of the bowl but I wanted to minimize the difference between the sanded areas and the rest of the bowl and shank when I gave it a final stain coat.Cauldron27

I buffed the bowl with Blue Diamond to even out the stain. While the repairs showed through the stain at this point I intended to darken the stain later and it would blend in the repairs a bit more.Cauldron28 Cauldron29With the bowl basically finished at this point I worked on the stem. The missing chunk in the stem end was the expected major repair that needed to be addressed. I mixed up a batch of black super glue and activated charcoal powder to make a paste. I put a wedge of cardboard wrapped in packing tape in what remained of the slot in the stem and applied the paste to the hole in the stem with a dental spatula. At this point I was more interested in getting a good thick coat of the paste in place than in making it look pretty. Shaping and smoothing would be done once it cured.Cauldron30 Cauldron31Once the patch had cured I used a file to define the edge of the button and to smooth out the surface of the stem. I used the topping board to smooth out the end of the stem.Cauldron32It took a lot of filing with needle files to clean up and define the button and then sanding with 220 grit sandpaper to blend the patch into the surface of the surround stem. I used a round, an oval and a flattened oval needle file to open up and shape the slot on the bottom side to match that of the top side.Cauldron33I continued to sand the stem surface with 220 grit sandpaper to shape the blade and the button. The stem was beginning to take shape. The new button and the repair to the bottom of the stem were complete.Cauldron34I wanted to make sure to stain the bowl before I called it a night so I set the stem aside for a bit and stained the bowl. I gave it several coats of dark brown aniline stain and flamed it between to set the colour in the briar. The darker colour would bring the pipe to a similar colour to the one that I found on Smoking pipes.com (shown above).Cauldron35In the morning I worked some more on the stem. I wet sanded it with 1500-2400 micromesh sanding pads. I gave it a coat of Obsidian Oil and then dry sanded it with 3200-4000 grit pads. I gave it another coat of oil and then finished sanding it with 6000-12000 grit pads. I gave it a final coat of Obsidian Oil and set it aside to dry. Cauldron36 Cauldron37 Cauldron38At this point in the process you can see the scratches on the underside of the stem. No matter how much I sanded them with the micromesh pads these still remained. I started over the process of sanding with the pads – beginning with 1500 grit I worked my way through them until I had finished with 12000 grit. Finally I was able to remove the scratches. I buffed the stem and bowl with Blue Diamond on the wheel and then gave both the bowl and stem several coats of carnauba wax. I buffed it with a clean flannel buff and then with a microfiber cloth before taking the photos below. The finished pipe is shown in the photos below. The repairs to the hairline crack and the stem repair though still visible under scrutiny blend in well with the rest of the bowl and stem. The darker stain covers the repairs on the bowl and look quite natural. The bowl has been brought back to life and I like the rich colour of the buffed and polished dark brown stain. Thanks for looking.Cauldron39 Cauldron40 Cauldron41 Cauldron42 Cauldron43 Cauldron44 Cauldron45 Cauldron46

Restoring a Genuine Sandblast Silverknight Dublin


Blog by Steve Laug

Going through the box of pipes to refurbish I came across this interestingly shaped pipe. I would describe it as a Dublin but the rounded bottom extending below the bottom of the shank gives it a very unique look. It is a tall pipe with a sandblast finish. The sandblast is not deep and craggy but it is shallow and lot of swirls. The finish was dirty and lots of dust was in the grooves of the finish. The rim was dirty with a build up on the inner bevel of the rim. The outer edge was in pretty good shape with a light rustication. The bowl was lightly caked and there was some dried white wax in the bowl from whoever had given the pipe a buff before selling it on Ebay. There was a silver band on the shank for decorative purposes. It is stamped with an EP in a diamond. The EP stands for Electro Plated. On the underside of the shank there is a smooth un-sandblasted portion that is stamped GENUINE SANDBLASTED over SILVERKNIGHT. At the end of the shank it is stamped Italy. The brand is not one that I have seen before and I could not find it in any of my usual sources. The stem was oxidized and had some tooth marks and chatter on the top and bottom sides. The button was worn on both the top and the bottom. It had an interesting dot on the stem that looked like a white spot. The closer I looked I could see that it was a pale yellow spot.Blast1 Blast2I took some close-up photos of the rim and the bowl to show the interior of the bowl and the rim condition. There was some tar and oil build up on the top of the rim.Blast3The next two photos show the tooth marks on the stem.Blast4I reamed the bowl with a PipNet reamer to take the cake back to bare briar. I wanted to remove the white material in the bowl. Once I had it on the reamer it was clear that it was wax.Blast5 Blast6I used a brass tire brush to scrub the top of the rim and the inner bevel. The brass bristles do not scratch the finish but they loosen the tars and oils on the rim.Blast7I scrubbed out the interior of the mortise and airway into the shank with pipe cleaners, cotton swabs and alcohol to remove the tars and oils. I scrubbed until the cleaners came out white.Blast8I worked on the stem. I sanded it with 220 grit sandpaper to remove the tooth marks and tooth chatter. I sanded the whole stem to remove the oxidation on the surface of the stem.Blast9I cleaned out the airway on the stem with pipe cleaners – both regular and bristle ones – and alcohol. Once they came out clean the stem interior was finished.Blast10I redefined the button on the top and bottom sides of the stem with a needle files to give it a sharper more distinct edge.Blast11I sanded the file marks with 220 grit sandpaper to remove the file marks.Blast12I sanded the stem with a medium and a fine grit sanding sponge to minimize the scratches.Blast13I wetsanded the stem with 1500-2400 grit micromesh sanding disks to begin the process of polishing it. I rubbed it down with Obsidian Oil and then dry sanded it with 3200-4000 grit pads. I gave it another coat of oil and then finished sanding it with 6000-12000 grit pads. I gave it a final coat of the oil and let it dry.Blast14 Blast15 Blast16I buffed the pipe and stem with Blue Diamond on the wheel. I lightly buffed the bowl and gave the stem a bit more pressure. I gave the stem several coats of carnauba wax and buffed the bowl and the stem with a clean buff. I brought it back to the work table and gave the bowl a light coat of Conservator’s Wax and buffed it with a shoe brush. The finished pipe is shown in the photos below. It is cleaned and ready to smoke.

Do any of you have any idea who may have made this pipe? It is light weight and well made. The draught on it is perfect and the conical bowl is in really good shape. Thanks for looking.Blast17 Blast18 Blast19 Blast20 Blast21 Blast23Blast22