Tag Archives: micromesh sanding pads

A Journey from Oxidation to Shine – Refurbishing a Wally Frank Meerlined Billiard


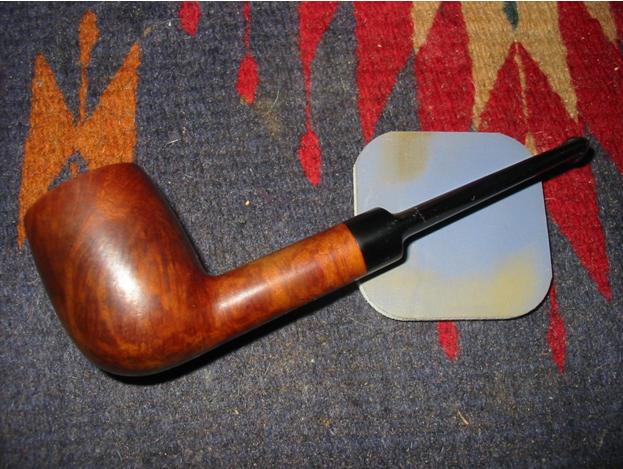
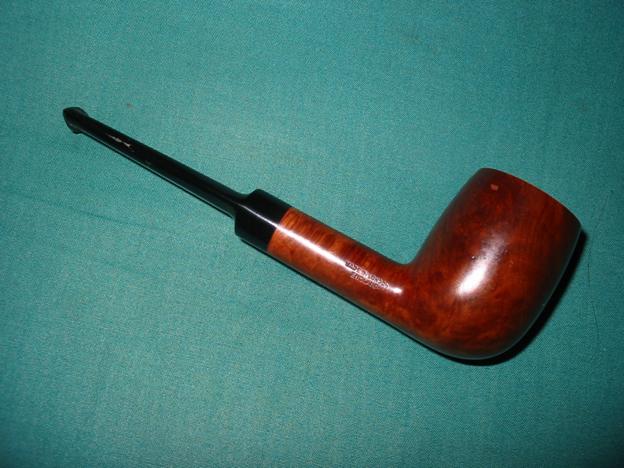
I have had this old meerlined billiard in my box for refurbishing for quite awhile. The stamping on it says Made in London England on the right side of the shank. On the underside of the shank it is stamped Wally Frank Limited. The finish on the bowl was cloudy from many coats of wax and there was a gummy substance on the front of the bowl from a sales label. The rim was dented and the inner edge of the meer lining was damaged. There was a heavy buildup of cake on the meer. The stem was badly oxidized.
ox1
ox2
ox3
ox4

ox5 I decided to work on the interior first so I used a plumbers wire brush (used for smoothing the edges of a newly cut pieces of pipe or tubing). It is a ¾ inch brush (see the photo to the left of this text) and I have found that if it is used carefully it is good at removing the initial cake build up on the interior of a meerlined bowl. I say carefully because too much and the brush scratches the meer lining. In this case I ran it through one time and then dumped out the ash and carbon buildup. The two photos below show the brush inserted in the bowl and give an idea of the tool itself.
ox6
ox7

Once the brush has done its work I use a blunt edge letter opener/knife to smooth out the rest of the cake that is still present. The next photo gives a clear picture of the pipe bowl after I have used the brush in it and just inserted the knife. There was still some stubborn cake left that I used the knife to scrape away. The second photo below shows the bowl after I have finished with the knife. Once the bowl was at this point it was time to use sandpaper in the bowl to smooth out the edges and rough spots.
ox8

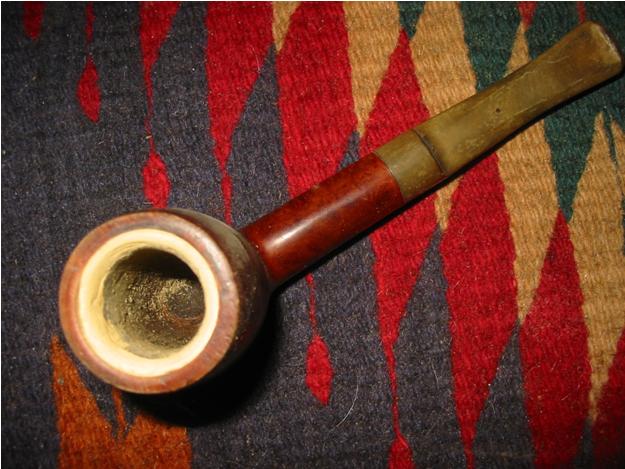
The next photo shows the bowl after the initial sanding on the cake. I had lots more to sand at this point but I wanted to document the process. At this point in the process I removed the stem and put it in a jar of Oxyclean to soak and soften the oxidation while I continued to work on the bowl.
ox9

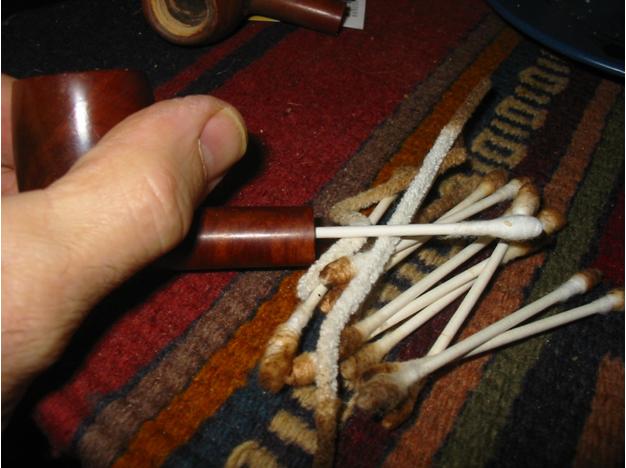
I used many cotton swabs on the inside of the bowl to remove the sanding dust and to clean out the inside of the shank once the stem was removed. The mortise had a thick coating of tars and the airway into the bowl was constricted with tars as well. It took many swabs and about the same number of pipe cleaners to get the interior clean. I dipped the swabs and pipe cleaners in 99% Isopropyl alcohol and washed out the inside. The first swabs came out almost black with the tars. I did some more sanding on the rim and the inner edge of the rim and meer lining. The rim was quite dented and had some chunks missing so I topped it lightly using the methods I have written about in other articles on the blog. I also used a folded piece of sandpaper to bevel the edge of the meer lining inward to take care of the damaged edge of the meer.
ox10

Once the bowl was finished I wiped it down with some acetone on a cotton pad to remove the wax buildup and give me a clean surface to work with. I took the stem out of the soak and went to work on it. I wiped it down with a soft cotton cloth to dry it and to remove the softened oxidation. I then filled a cup with warm water and began to work on the stem with the micromesh sanding pads 1500-12,000. I took pictures of each successive micromesh pad and the result of using it to show the progression of the polishing.

The first four pictures below show the stem after wet sanding with the 1500 rust coloured sanding pad. You can also see the inner rim and bowl top after my work on them as well. The first sanding took what remained of the majority of the oxidation off the stem and gave it a dull matter finish. I wet the sanding pad down and sanding with it wet. I repeated the sanding of the stem repeatedly until the oxidation was gone. Then I wiped it down before the picture to show the progress.
ox11

ox12

ox13

ox14

Once I was satisfied that the majority of the oxidation was gone I move on to the green 1800 grit micromesh sanding pad. I also used this pad with water and wet sanded the stem repeatedly. You can see the remaining oxidation still showing up on the wet sanding pad in the two photos below. The two photos show the stem after multiple sanding. I wiped it down with a soft cloth to dry it off and wipe away the grime left behind by the wet sanding. The stem is beginning to take on a bit of a shine. The matte finish of the 1500 grit is getting a polish.
ox15

ox16

The next two photos show the 2400 grit micromesh disk (grey coloured). I used this pad without water to polish and shine away some of the scratches. I found on the left side of the stem near the button there was a fairly deep scratch on the edge. I used some 280 grit sandpaper to remove this scratch and then repeated the 1500 and 1800 grit micromesh sanding. Once finished I gave the entirety of the stem a sanding with the 2400 grit pads to smooth out the finish. I also used the pad to sand the top of the bowl and the edge of the meer lining.
ox17

ox18

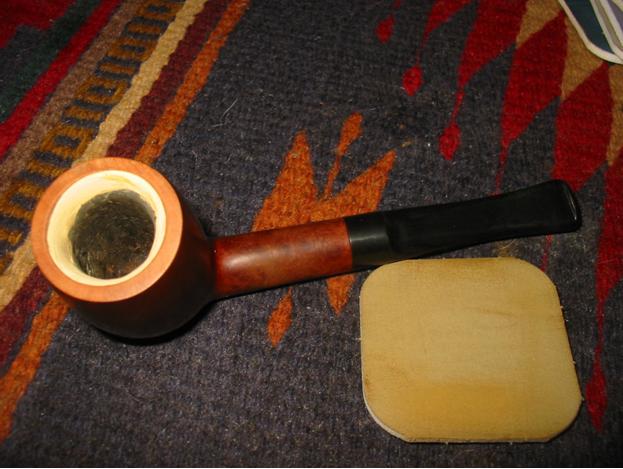
A 3200 grit micromesh pad (tan coloured) was used next. I also dry sanded the stem with this one the first few times I sanded it. The last time I wet sanded the stem. The next two photos show the stem after the sanding. I wiped it down with a soft cotton cloth to remove the dust and residue from the wet sanding.
ox19

ox20

Once I got to this point I decided to try some Mequiar’s Scratch X 2.0 fine scratch and blemish remover that I picked up at an auto parts store. It is used to polish headlight lenses. I applied the polish to the stem and let it dry a short time before wiping it down and polishing the stem with the cotton cloth. The first two photos show the application of the white polish. The last two show the result of the polish on the stems at this point in the process.
ox21

ox22

ox23

ox24

At this point in the process I decided to continue with the micromesh sanding pads. I wanted to take them through the 12,000 grit pad and document the progressive shine that comes alive in the stems. The next two photos show the wine/brown 3600 grit sanding pad and the results. I sanded the entirety of the stem repeatedly before wiping it down for the photos below. I dry sanded with this grit pad and also with the remaining micromesh pads.
ox25

ox26

A 4000 grit Teal coloured micromesh pad was next. I also dry sanded with this pad. The next two photos show the shine starting to come alive on the stem.
ox27

ox28

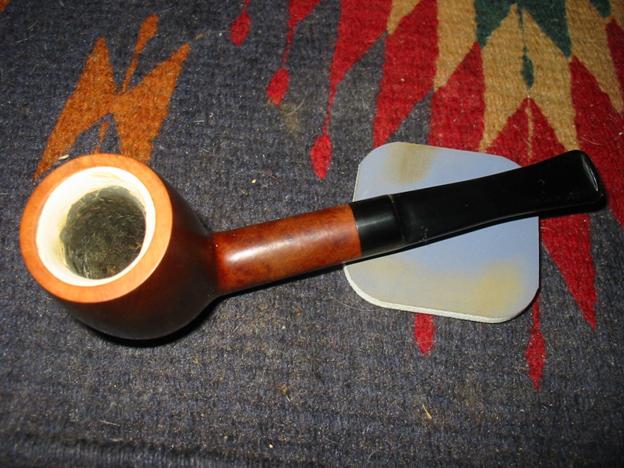
A 6000 grit Purple coloured micromesh pad was next. I dry sanded with this pad as well. The next two photos show the shine after I repeatedly sanded the stem.
ox29

ox30

An 8000 grit Royal Blue micromesh pad was the next in line to be used. The difference in shine between the 6000 and the 8000 grit is quite remarkable. The shine takes on a depth that the early grits did not bring out in the vulcanite. The next two photos show the stem after sanding several times with this grit pad.
ox31

ox32

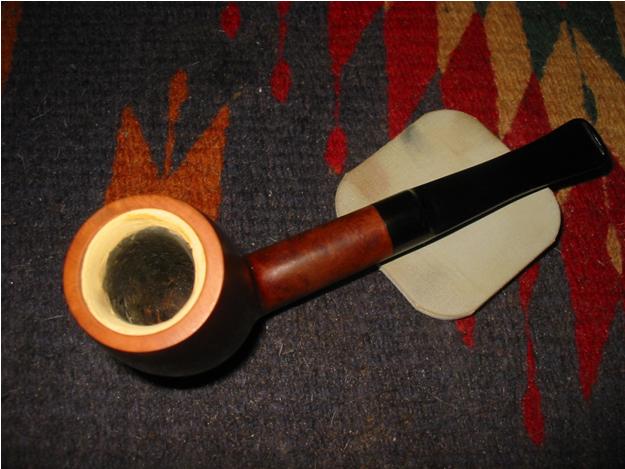
The final micromesh pad to be used was the Grey coloured 12,000 grit pad. I also dry sanded with this pad. I sanded the stem several times until the vulcanite shine had a depth that was visible. The two photos below show the result of the final sanding.
ox33

ox34

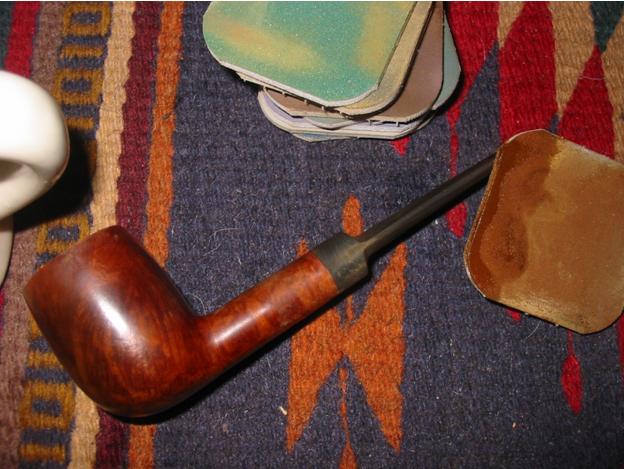
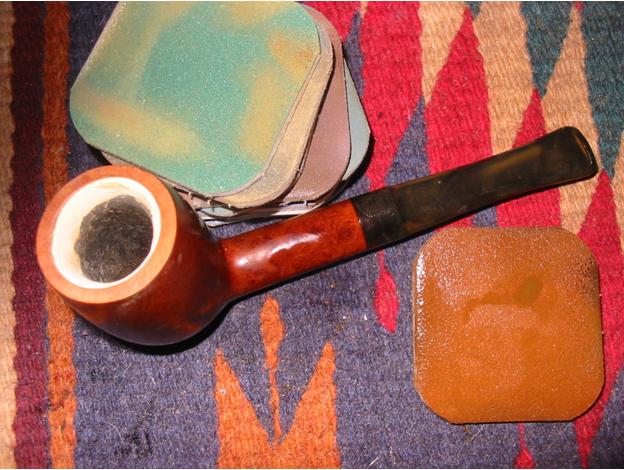
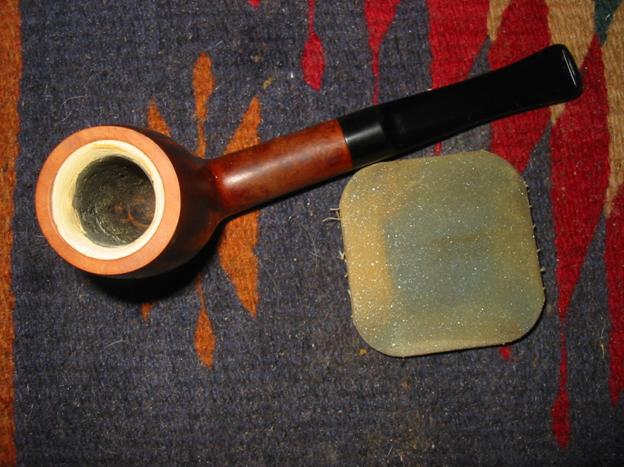
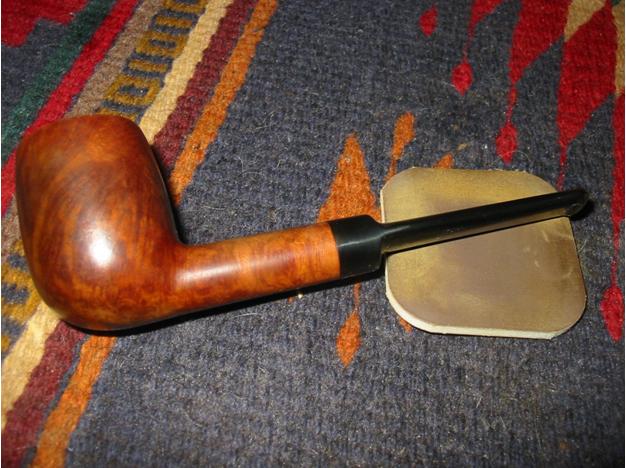
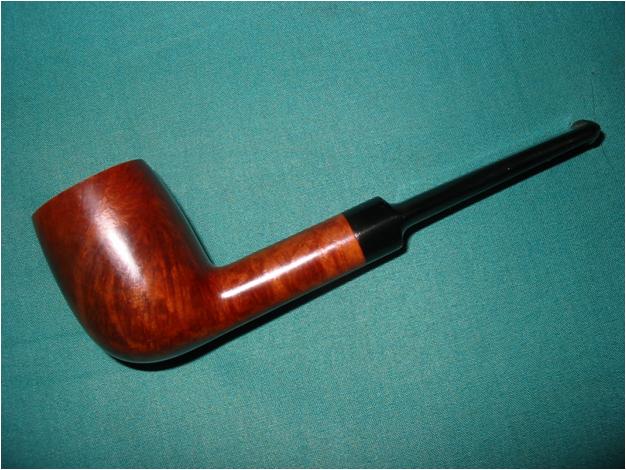
At this point in the process I once again wiped the stem down with the Meguiar’s polish and buffed it off by hand with a soft cotton cloth. I then took it to the buffer and gave it several coats of carnauba wax. I also buffed the bowl with White Diamond and then carnauba wax as well. The finished pipe is in the four photos below.
ox35

ox36

ox37

ox38

Refurb – A pair of Astleys 68s


Just finished the final buff on these two and thought I would post them. In researching the net for information on these pipes I found a 1968 catalogue that showed that they originally had saddle stems. I sorted through my stem box and found two saddle stems for these Astleys bowls. I fit these stems to the bowls. They are stamped Astleys 68 which is a pot shape. They also have the address on Jermyn Street London stamped on them. The bowls were reamed and cleaned. I then restained them with black stain, fired the stain to set it and then buffed with white diamond lightly before waxing with Halcyon wax.

The pipe with the band had a crack in the shank that I repaired and pressure fit with the nickel band. The blast on this pair is nicely done. Astleys called this their Crusty Briar line. Here are the pics. Thanks for looking.

ImageImageImage

Removing Oxidization on Vulcanite Stems


Blog by Steve Laug

In May 2011 I started a thread on Smoker’s Forums asking people how they dealt with oxidation on vulcanite stems. Many of the members of the Forums responded in the ongoing posts to that thread. Unfortunately that thread and others were lost when the Forums were attacked and decimated. I collected their answers and compiled them into the document that became the basis for this blog post.

For this blog I have rewritten the first document and clarified my explanations. I have followed the same format for reporting the various methods I gathered. I have arranged them according to the main component in the process. As you read them you will note that several of the categories overlap and are combined in the processes. I have found that there is no one method for removing oxidation. I have used one or all of the methods below in combinations to conquer the dreadful browning of the vulcanite stem. Hopefully this document will prove to be a helpful reference to those who venture into the realm of cleaning and polishing stems. Please remember that the methods below are to be used at the risk of the amateur pipe “refurbisher”!

The first step in breaking down the responses to my initial post involved organizing the respondents into two broad categories regarding the use of a presoak or not using a presoak. From there both groups went on to use micro mesh pads or sand paper in their work on the stems. There are two main pre-soaks that are used to begin the process of removing oxidation – Bleach and OxyClean. Interestingly there were also two additional pre-soaks that have been used by the respondents – Goo Gone and Simply Green. All of the methods have adherents that swear by their choice. In each of the categories below I will summarize the methodology and give a basic explanation of the process.

PRESOAKING

Bleach Soak
Mix bleach and water (50/50) to remove the oxidation. Use a pint jar or a bowl that allows you to reach in to remove the stem once it is finished. I insert a pipe cleaner in the stem and bend it into a hook that I can hang on the side of the bowl or jar. I then coat any stamping or logo symbols with Vaseline to protect them from the bleach. The stem is immersed in the mixture and allowed to sit for differing amounts of time until the oxidation is removed.  Note that this mix, no matter the strength, does cause pitting or roughening to the surface of the stem. Sand and buff the stem with Tripoli and White Diamond.

OxyClean Method
Mix a scoop of OxyClean in a pint jar of hot water, put the lid on and shake vigorously to mix the solution. The water should be deep enough to completely cover the stems that are put in the jar. Soak the stems in OxyClean and hot water for 30 minutes to 1 hour and then use micromesh pads to remove softened oxidation. Repeat this as often as necessary in the process. Then it takes a trip to the buffer. Note that the mixture does not remove the oxidation but merely softens it making it easier to remove with the buffer and sanding. I have tried various strengths of mixture and the single scoop seems to be a perfect mixture for how I use it.

Goo Gone Method
Goo Gone is applied to the stem either after soaking in bleach or OxiClean or is used without the prior soaking. Once the Goo Gone is dry the stems are sanded to remove the softened oxidation. Then the stems are taken to the buffer or are sanded to finish removing the oxidation. Once that is done wax is applied to protect the newly cleaned stem.

Simple Green Method                                                                                                         Simple Green is mixed with water and placed in a jar, placed in the jar full strength or wiped onto the stem with a cloth. If the stem is left to soak it usually soaks for an hour or more and then rinsed off and buffed. If wiped on it is wiped on and off until the oxidation is gone. The stem is resoaked or rewiped as often as necessary to complete the project. Once done the stem is buffed with Red Tripoli, White Diamond and then waxed to protect the newly cleaned surface.

NO PRESOAKING – STEM POLISHES

Others do not use presoaks but use a variety of stem polishes or cleaning polishes to remove the oxidization. These include cleaning kits as well as some other non-conventional polishes. I have included Mr. Clean Magic Erasers in this category though some might argue it should go with the Microfiber materials. I find though that it is in essence a polishing product and thus fits well in this category.

Walker Briarworks Stem Restore Kit
The Walker Briar Works Stem Restore Kit can be directly ordered from Walker Briar Works, an online pipe repair service http://www.walkerbriarworks.com/html/stem_restore_kit.html for $20 plus shipping. The kit comes with two jar each containing 1.5 ounces, enough for at least 50 stems. The first is a Deoxidizer and cleaner, the second is the Carnauba Wax/Polish/Sealer. Using a soft cloth, rub the Deoxidizer/Cleaner on a Vulcanite stem until it feels smooth. Then rinse the stem with warm water and let it dry. Once dry, apply the Carnauba Wax/Polish/Sealer by rubbing it on with a soft cloth.  Let it dry for about 10 minutes and then polish the stem.  Many have used it with success. Personally I find that it works well on stems that are less oxidized. Heavily oxidized stems do not seem to be affected by the application of this product.

Other Brand Name Stem Polishes
Other products such as Denicare Mouth piece polish, Outwest Pipe Stem Scrub, Brebbia Pipe and Mouthpiece Polish, Dunhill Mouth piece polish are used with varying degrees of success. All come in small tins or tubes and are applied by hand with a finger or a cloth, left to dry and then buffed off with a soft cloth. In my opinion they work well in maintaining a clean stem but are all less effective in removing the oxidization.

Flitz
Flitz is a polish that is similar in application to the Walker Briar Works Kit, but is a bit more effective according to those who use it regularly. It is said to be readily available in Hardware Stores and other convenience shops in the US, though I have not been able to find it here in Canada. Those who use it say that stems treated with Flitz will remain un-oxidized for approximately 18 months to two years before needing another treatment and buffing.

Toothpaste
Over the years I have read and heard about those who use tooth paste to clean oxidation on their pipe stems. I have tried Crest and Colgate toothpaste applied with a soft tooth brush and scrubbed until the oxidation is gone. The micro abrasives in the tooth paste work to remove the oxidation. Personally I have found that this takes a lot of hard scrubbing to get the kind of results that I am looking for. The plus to this method is that it removes little or no stem material and thus is relatively safe in maintaining the original shape and integrity of the stem. The method has been spelled out in the following step by step procedure:

1) Submerge offending stem into hot water (just off the boil), to bring all the oxidisation to the surface.

2) Apply a thin coating of toothpaste to the surface of the wet stem.

3) Rub vigorously with the rough side of a green plastic scouring sponge, (some use a soft bristle tooth brush instead).

4) Keep rubbing…and then some!! Apply more toothpaste as necessary

5) Finish by waxing the clean surface to protect it from further oxidation.

Magic Eraser: (polishing compound)
Mr. Clean Magic Eraser or generic brand eraser is wetted with water and used to scrub the stems. It removes oxidation without visible loss of material and without scratches. I have used this as a follow up to some of the above methods with good success. The magic eraser needs to be periodically rinsed and wrung out to remove the removed oxidation. It is a melamine micro abrasive and once it has been used and the stem is dried it should be followed by polish as the stem is left smooth but with a matte finish. Regular ebonite polish brings it to a good shine then quickly and easily.

Automobile Polishing Compound                                                                                       Others have used automobile polishing compound and rubbed it vigorously into the stem material to remove oxidation. It is used to remove the same on headlamps and plastic parts on the exterior of the vehicle so the logic is sound in using it on vulcanite stems. However, I have avoided that product as it does not seem like something that I want to put in my mouth.

HAND SANDING

Many who work to remove oxidation skip all the pre-soak, scrubbing and polishing and attack the problem head on with sandpaper and/or micromesh pads. Others use the soaks above and then proceed to the sanding. Many combine the processes and find that in the combination they have a tool that works for them.

Micromesh pads:
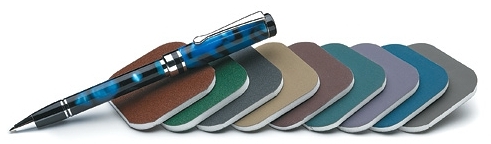
Micromesh pads have proven to be my tool of preference in my battle against oxidation in the old estates that I refurbish as well as in maintaining my own pipes. A variety of pads with the following grits – 1500, 1800, 2400, 3200, 3600, 4000, 6000, 8000, 12000 are all used. I find that for the most part I use these various pads up through 6000 and that they work extremely well. I keep a bowl of water next to me while I am sanding with them as they have a far better bit when they are wet. I sand and wet the pad and then sand and clean it in the water. I change the water between grits of the pads. While I keep the pad wet others suggest keeping the stem wet while working on it. It seems to me that both achieve the same purpose. Many people use all 9 grits for badly oxidized stems. Before moving on to the next grit pad be sure to dry the stem to see if it’s ready to move up to the next pad. Look for any vestiges of brown or green oxidation. Stay with the coarse grits until all the brown-tan-green is gone. Those who use the upper grits say that the change that occurs between the 6000 and 8000 with respect to shine is amazing. Each time I have ordered the pads on line the higher grits were out of stock. After finishing with the 12000 the only thing left is the buffer for carnauba or rubbed with a bit polish. Periodic maintenance of the stems can be done using the 2 finest grit pads rather than the buffer with white diamond.

Image

Sandpaper:
You can also remove oxidation with 400, 500 or 600 grit sandpaper, depending on the condition of the oxidization. Continue to sand the stem to remove scratches with consecutive grits up to 2500. These sandpapers are of the wet dry variety and work very well with a bowl of water nearby to keep the stem wet while it is being worked on. The same principle of drying the stem between grits as mentioned above is use with the sandpapers. Finish the process by waxing the stem to protect the newly cleaned surface.

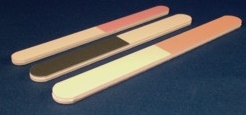
Sanding sticks are available from wood working suppliers and interestingly enough at beauty supply houses. Nail polishing files that have four grades of “sandpaper” on a thin bar of Styrofoam can be purchased there or in the cosmetics department of the local drug store. They can also be used to remove tooth marks and tooth chatter near the button. I have used these for years and always have a set in my refurb kit.

Image

POLISHING WITH POWER TOOLS

After the removal of the oxidation from the surface of the stem, whether by one of the above mentioned methods, one of your own or a combination of several of them, the stems are ready to be polished with power tools – buffers, drills with buffing pads or a Dremel. Some refurbishers do not feel this necessary after the use of the micromesh pads. But many still finish the job on a  buffer.

Dremel:
The variable speed hand held Dremel can be used with a 3 inch fibre wheel or a polishing pad loaded with red Tripoli and White Diamond polishing compound followed by a pad loaded with carnauba wax to give a final sheen to the stem. The drawback with the Dremel is that you must be extremely carefully in applying pressure to the stem surface or you will end up with wavy patterns in the vulcanite.

Buffer:
Personally, I use two bench grinders with two polishing wheels on each one. I removed the grinding stones and the protective shields over each wheel that was standard equipment and mounted 8 inch buffing pads on the spindles. My process is as follows:

– Polish with Tripoli, 8 inch stitched muslin buff
– Polish with White Diamond, 8 inch stitched muslin buff
– Wax with carnauba, 8 inch unstitched flannel/muslin buff
– Finish on a clean 8 inch flannel buff with no wax

Drill:
Buffing pads can also be mounted on a hand drill – cord or cordless. I have used a drill before I got my buffers. I anchored the drill in a bench vise so that I have both hands free to maneuver the pipe while polishing. I used four different 3 or 4 inch buffing pads my drill. I have not used it since picking up the two buffers.

Thanks to the many from Smokers Forums who responded to my initial thread on cleaning oxidized stems. Over the years many have contributed to my methodology on these processes.