Tag Archives: Mastercraft

New Life for a Mastercraft French Made Birdseye Grain Bent Bulldog


Blog by Steve Laug

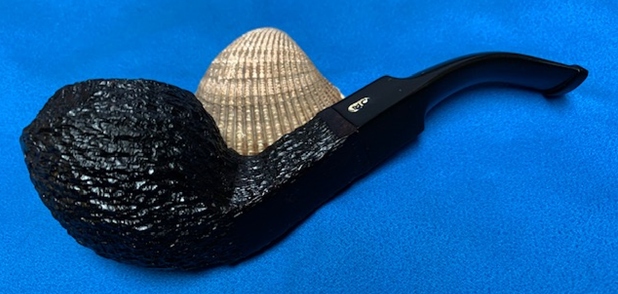
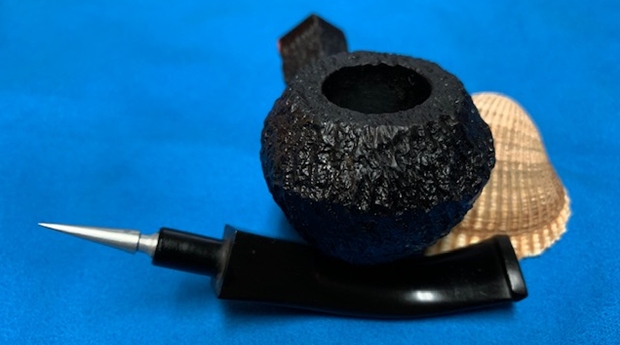
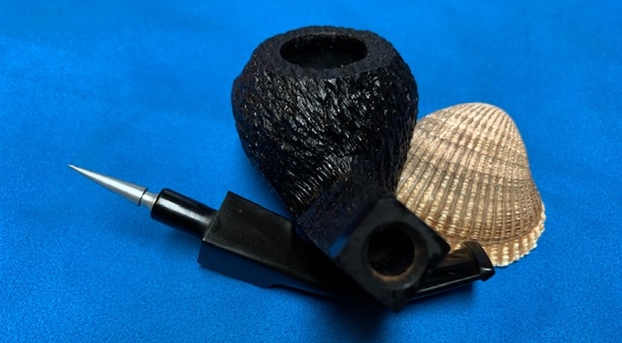
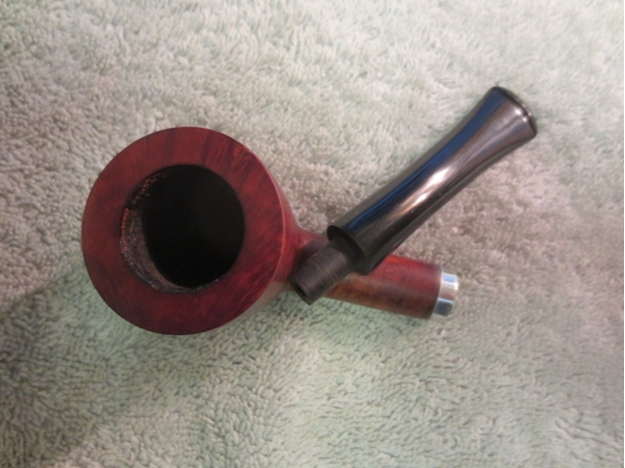
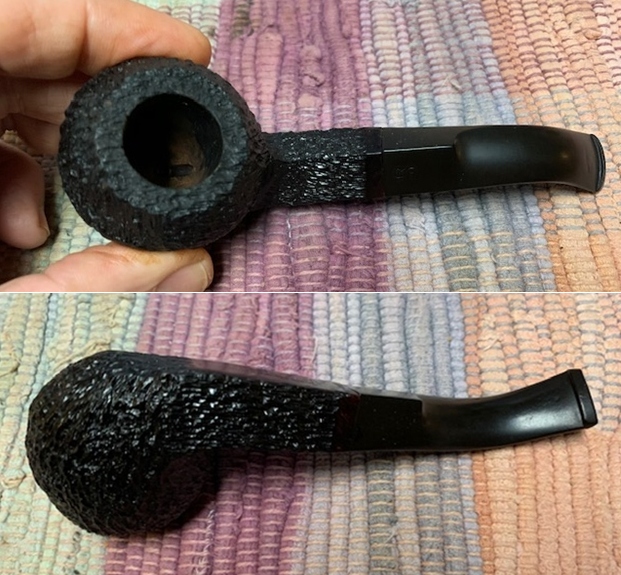
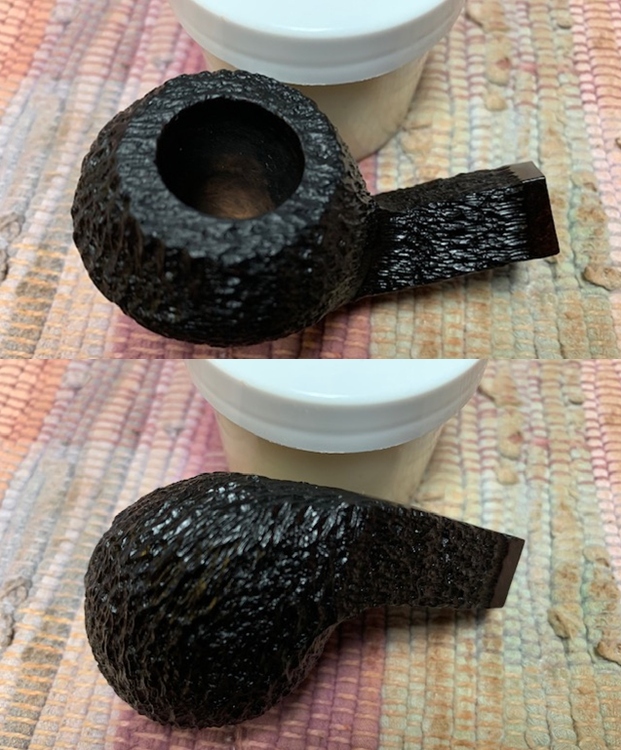
The next pipe on the worktable is from an American Importer and Distributor called Mastercraft. I will give more information on the brand later in the blog. This one is a classic rusticated finish Bulldog with a diamond shaped vulcanite saddle stem. It has a tight rustication pattern all the way around the bowl and shank. There is a smooth panel on the left underside of the shank. Jeff purchased from an antique store in Centerville, Iowa, USA. The pipe is stamped on the left underside of the shank and reads Mastercraft [over] Birdseye Grain. On the end of the shank on that smooth panel it is also stamped France. The left side of the saddle stem also has MC in and oval stamped into the vulcanite. The pipe is dirty with a thick cake in the bowl and a lava overflow and dusty in the rustication of the rim top. The inner edge of the rim looks very good. The finish was dusty with grime ground into the finish around the sides of the bowl. The black vulcanite stem is oxidized, calcified and has tooth marks and chatter on the top and underside near the button. Jeff took some photos of the pipe before he started his cleanup work. 
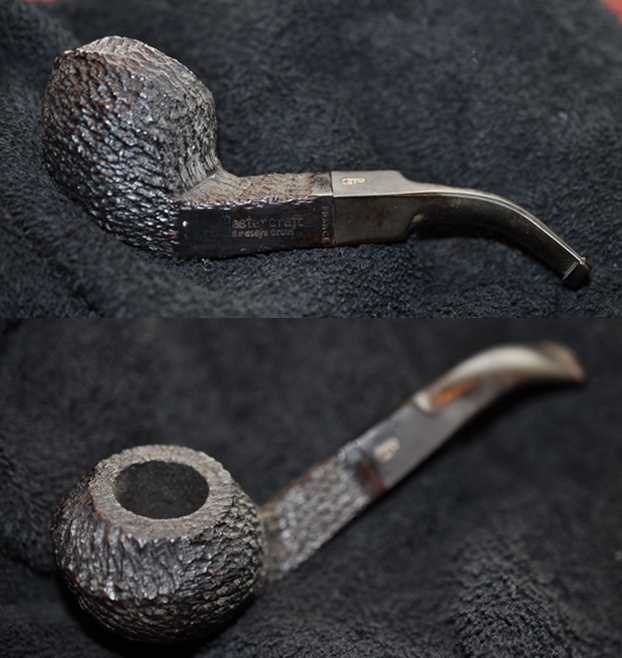
He took a photo of the bowl and rim top to show their general condition. You can see the lava on the rim top and the thick cake in the bowl. There is damage on the rear inner edge of the bowl. The stem is oxidized, calcified and has tooth marks and chatter on both sides near the button. 
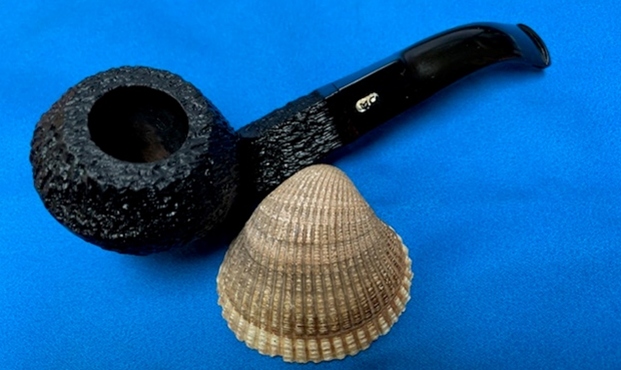
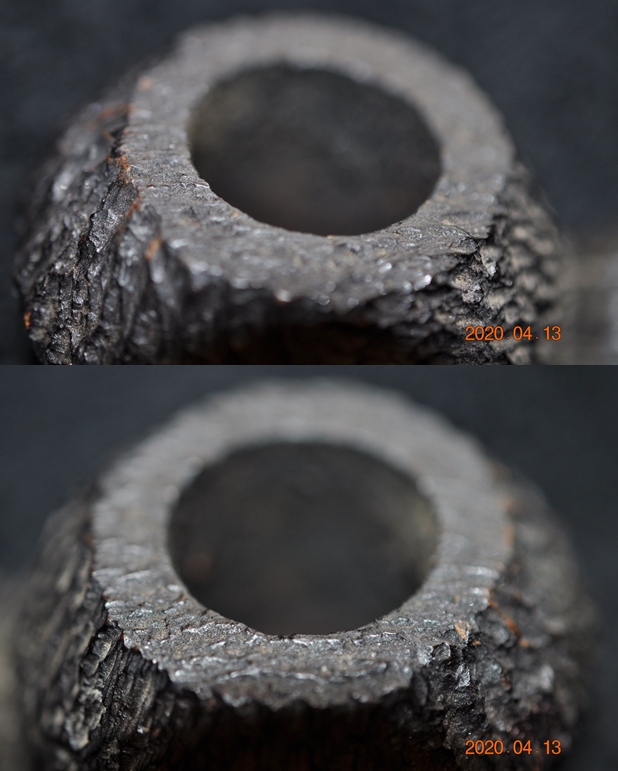
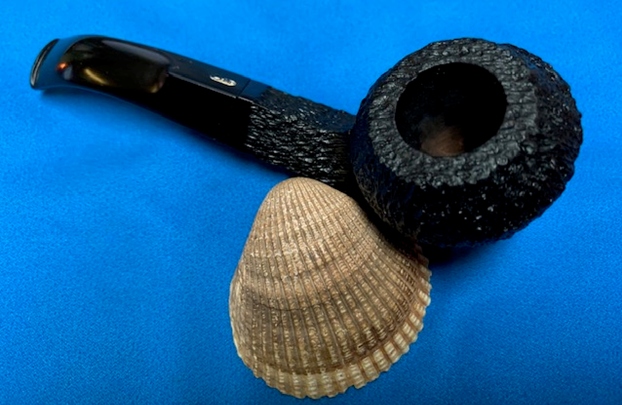
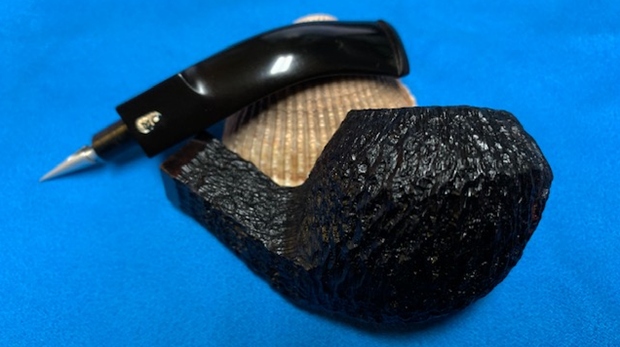
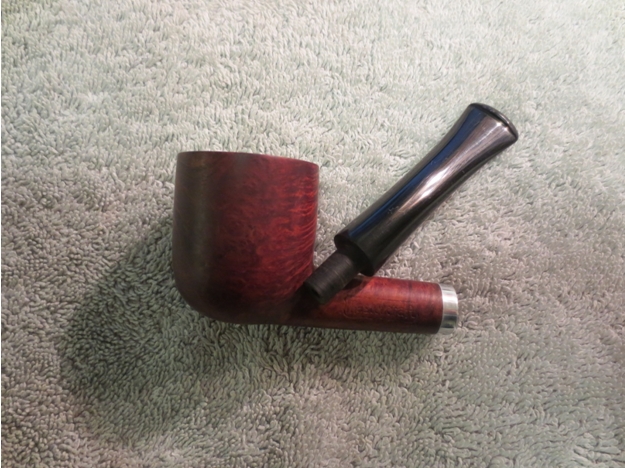
Jeff took some photos of the sides and heel of the bowl to give an idea of the tight rusticated finish around the bowl. I cannot wait to see what it looks like once it is cleaned and polished.   
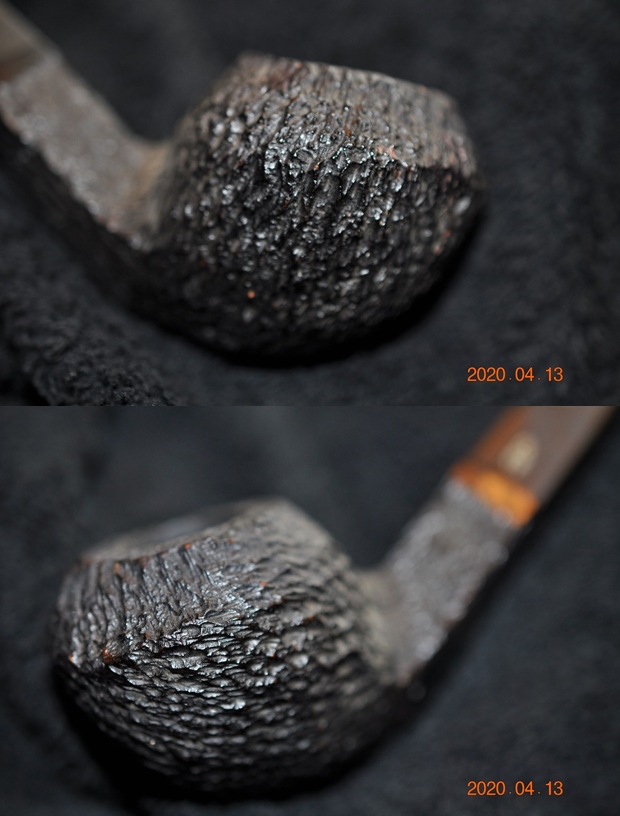
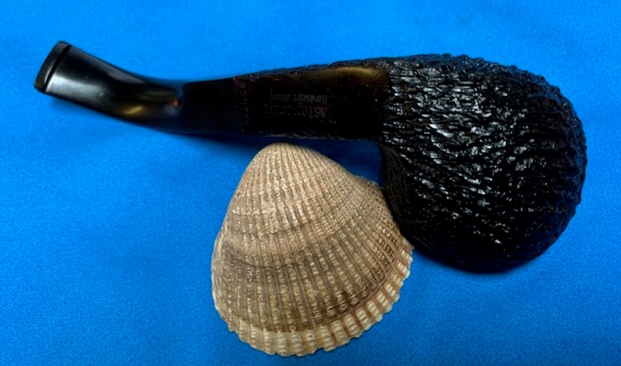
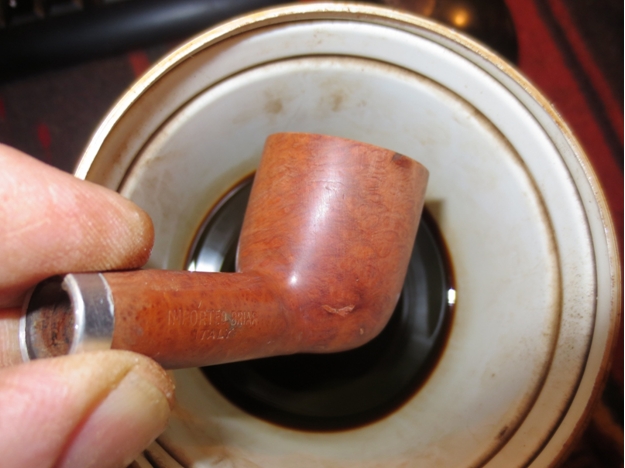
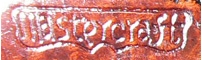
He took a photo of the stamping on the sides of the shank to capture it for me. It is clear and readable. 
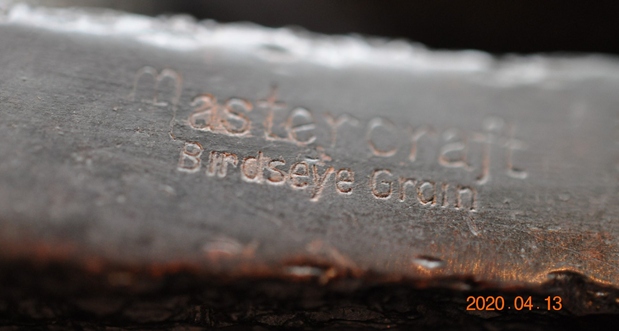
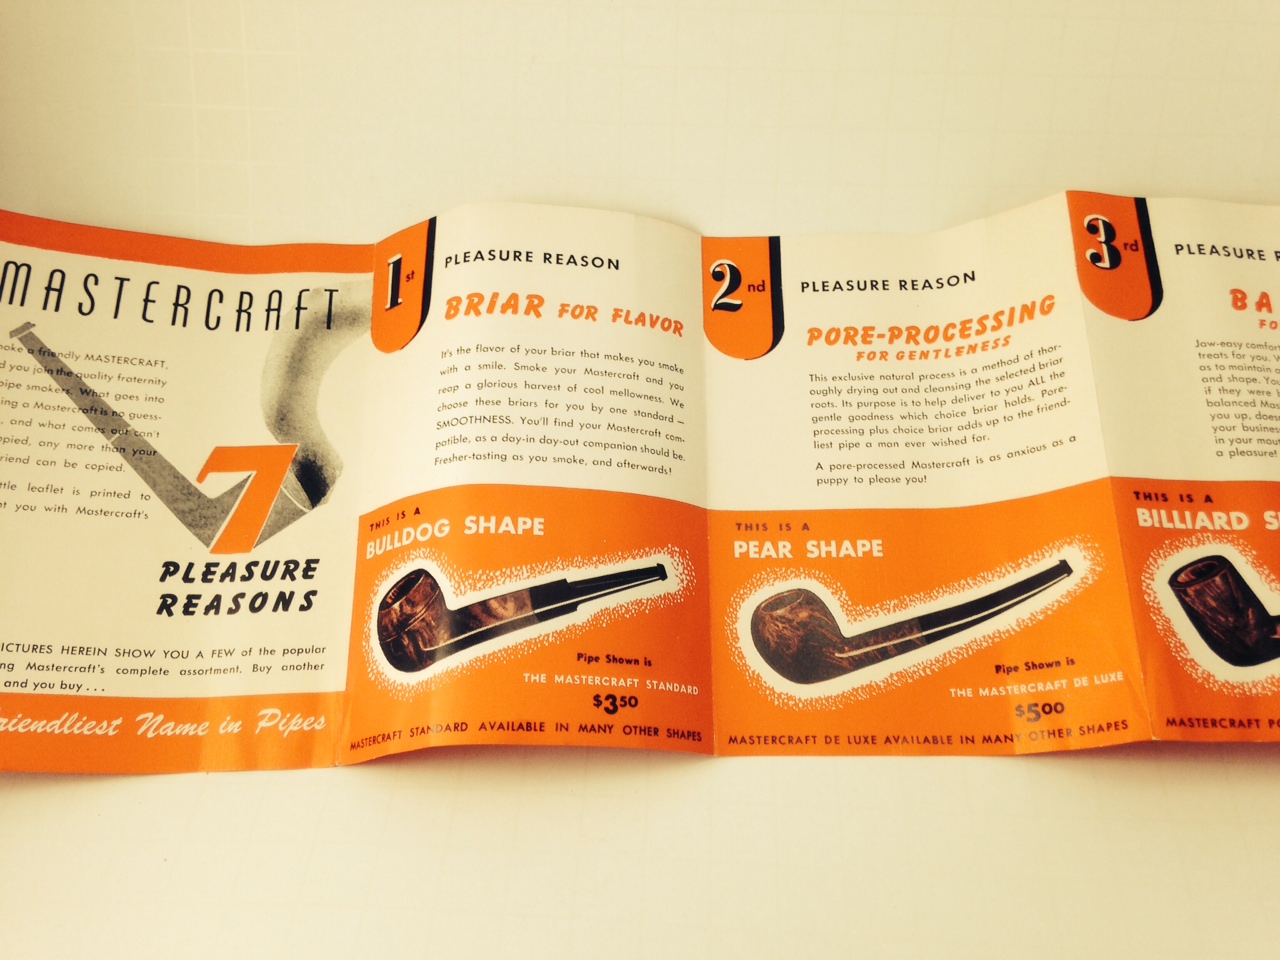
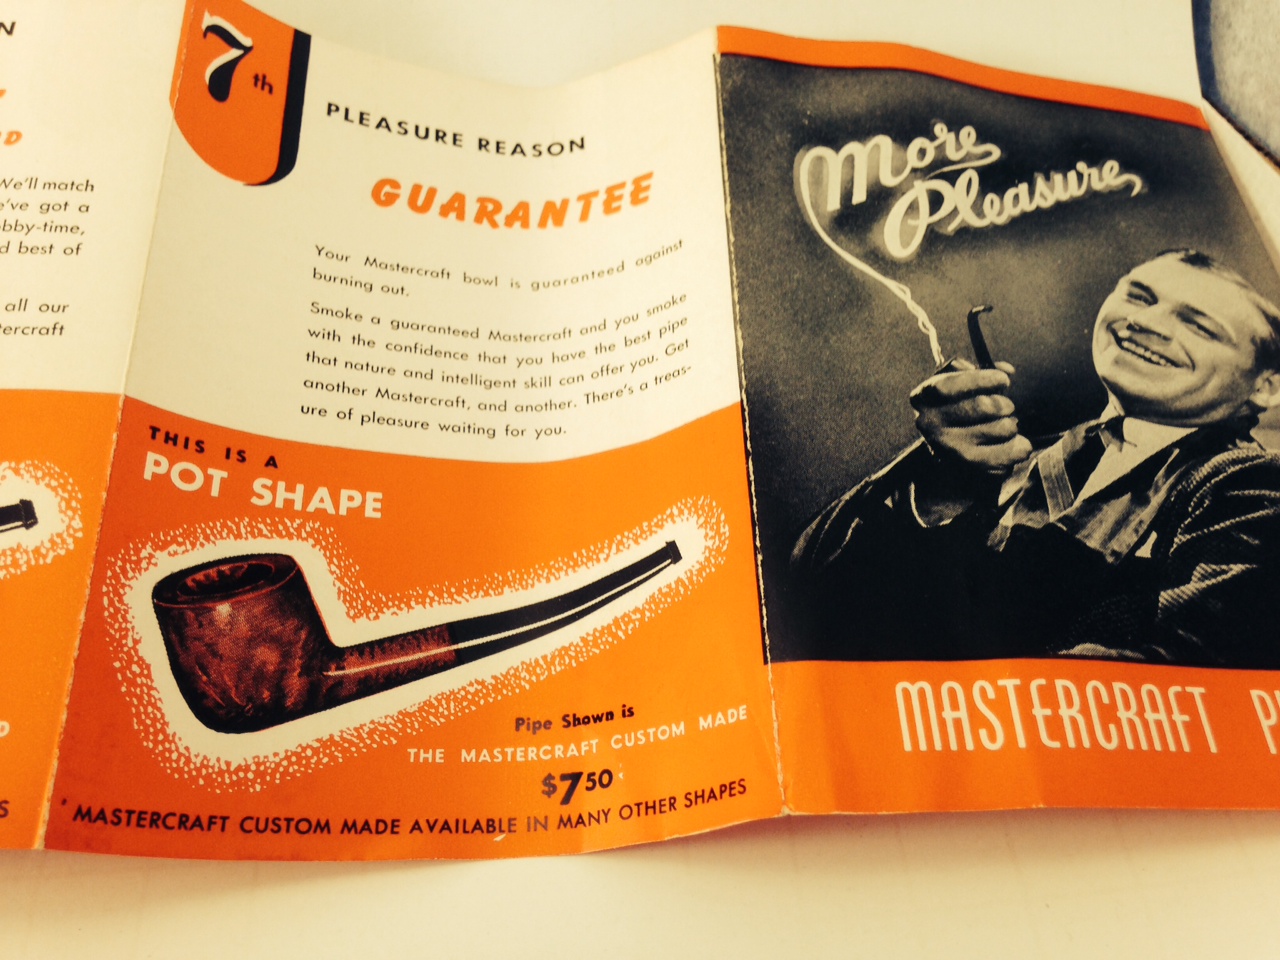
I turned to Pipephil to get a feel for the history of the brand and have included a screen capture of the pertinent section on the site below (http://www.pipephil.eu/logos/en/logo-m3.html). I quote: Mastercraft started in 1941 and belongs to Lane Ltd. Group.I turned to Pipedia for any additional information (https://pipedia.org/wiki/Mastercraft). The article gave and expanded history of the brand. For all intents and purposes Mastercraft was an importer of pipes and pipe related merchandise rather than a maker. I know that the stamping on the pipe identifies it as French made but I am not sure of the manufacturer.

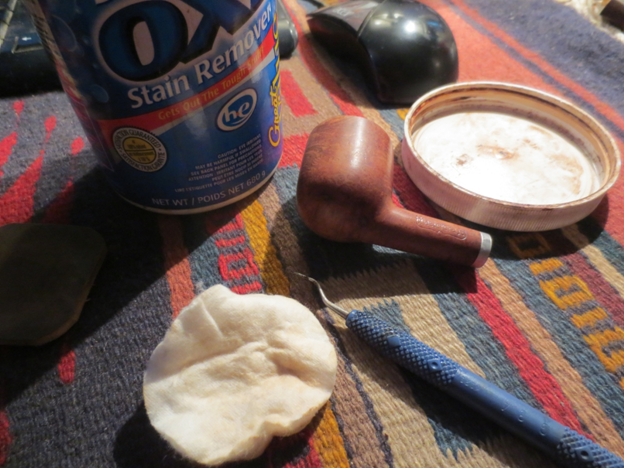
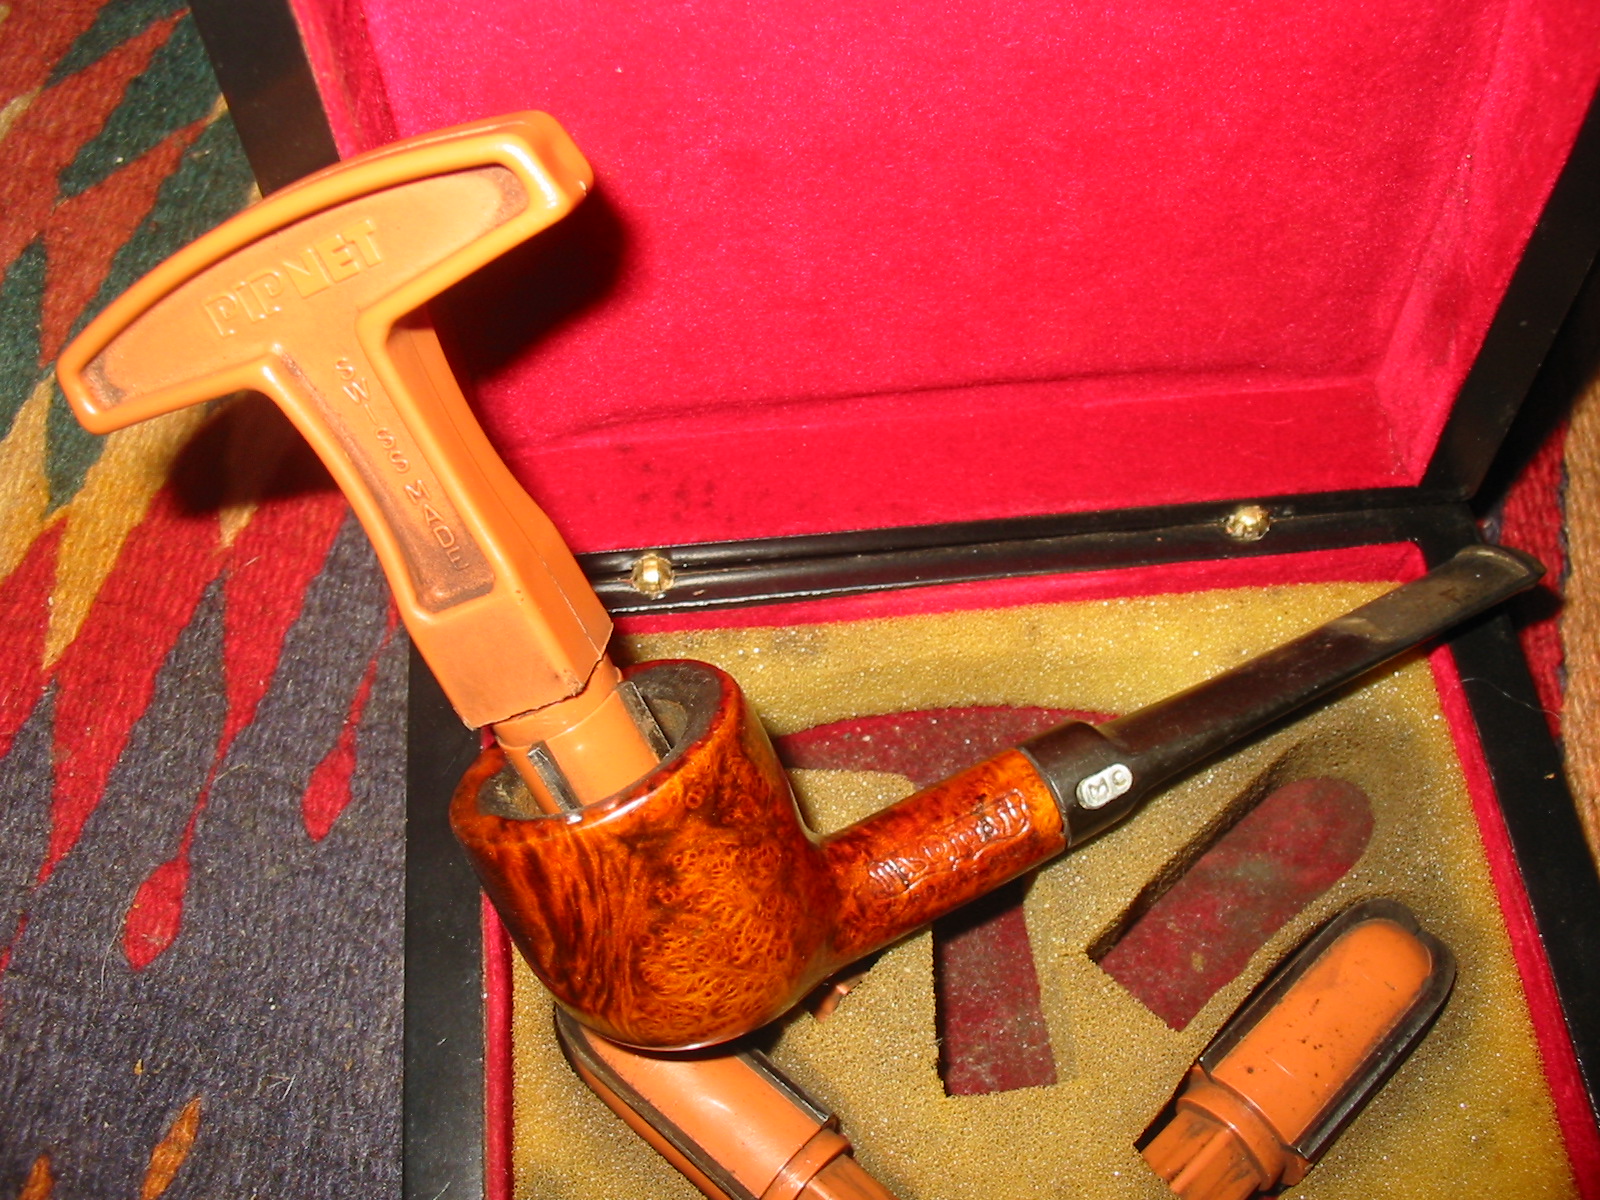
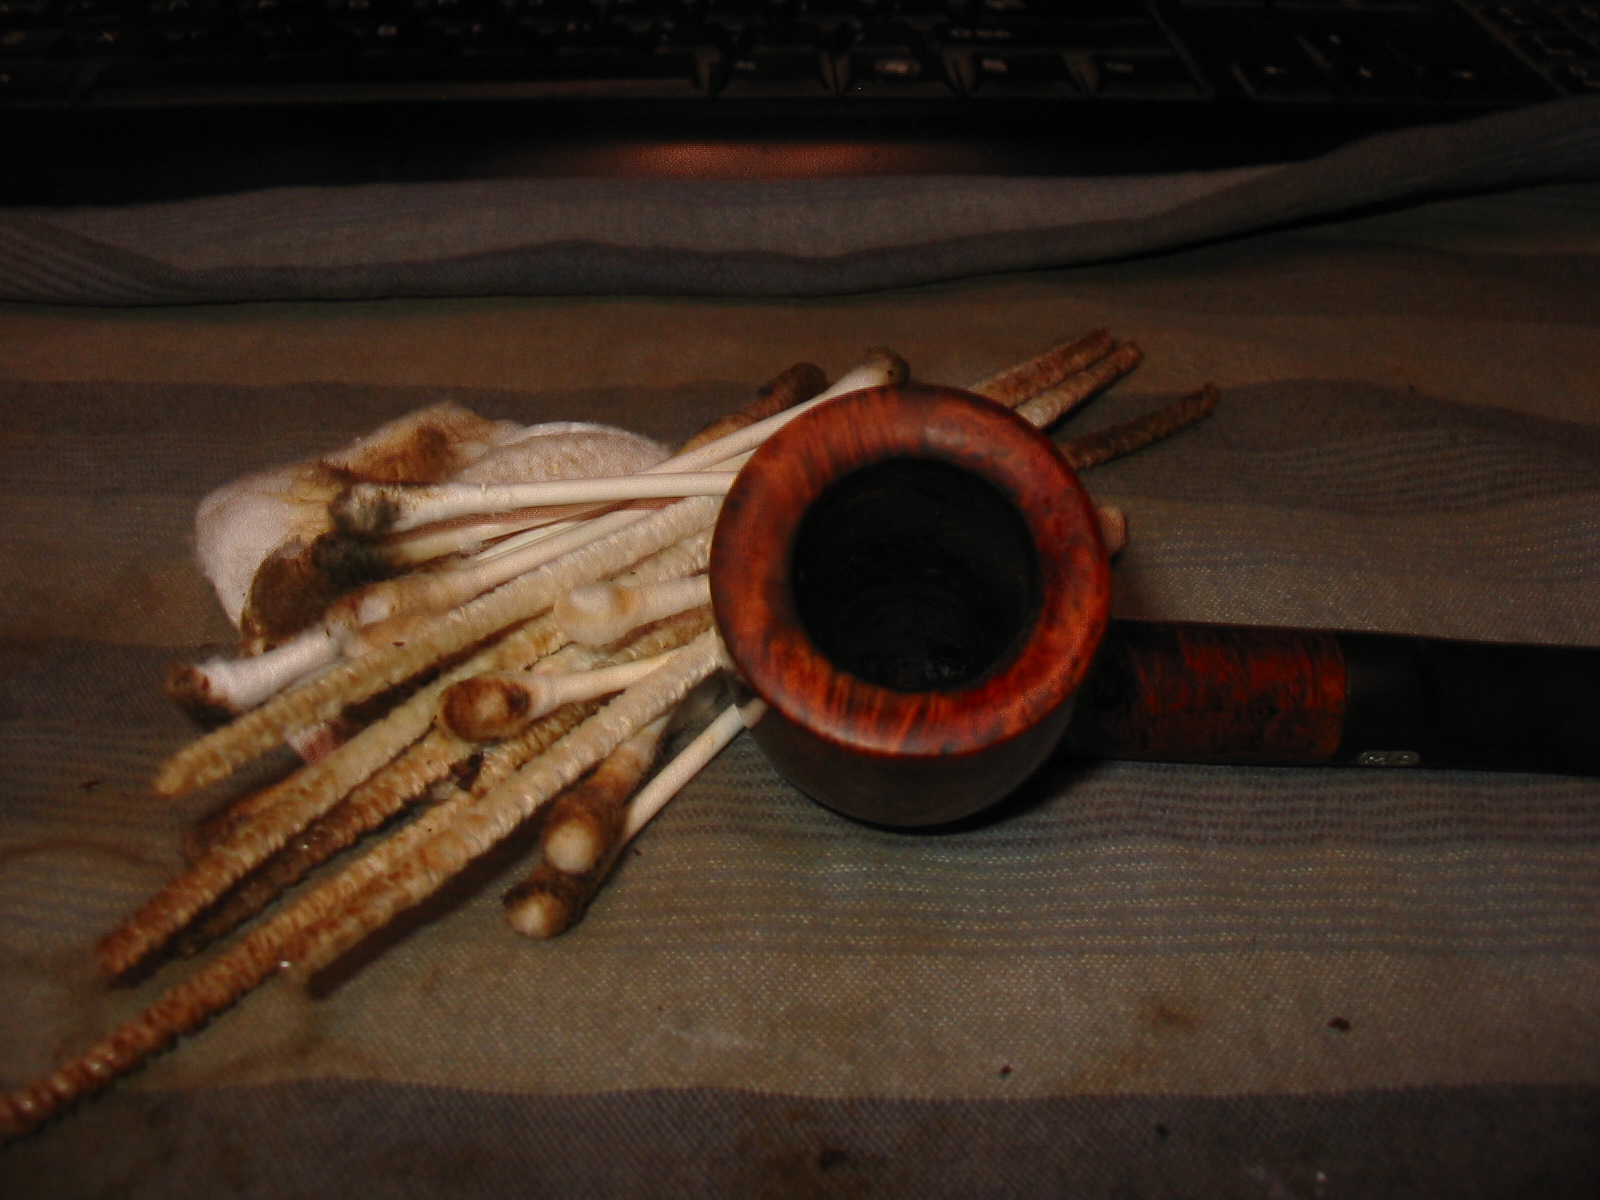
Now I had a pretty good idea of how the pipe was stamped and made. With that information I moved forward to work on the pipe itself and see what I had to do with it. Jeff had done an amazing job in removing all of the cake and the lava on the rim top. He had reamed the bowl with a PipNet Pipe Reamer and cleaned up the remnants with a Savinelli Fitsall Pipe Knife. He took the cake back to bare briar so we could check the walls for damage. He scrubbed the exterior of the bowl with Murphy’s Oil Soap and a tooth brush to remove the grime on the bowl and rim and was able to remove the lava and dirt. He cleaned out the interior of the bowl and shank with pipe cleaners, cotton swabs and alcohol until they came out clean. He cleaned the stem with Soft Scrub to remove the grime on the exterior and cleaned out the airway with alcohol, cotton swabs and pipe cleaners. He soaked the stem in Before & After Deoxidizer and rinsed if off and recleaned the inside of the stem with alcohol and pipe cleaners. I took photos of the pipe before I started my part of the restoration. 
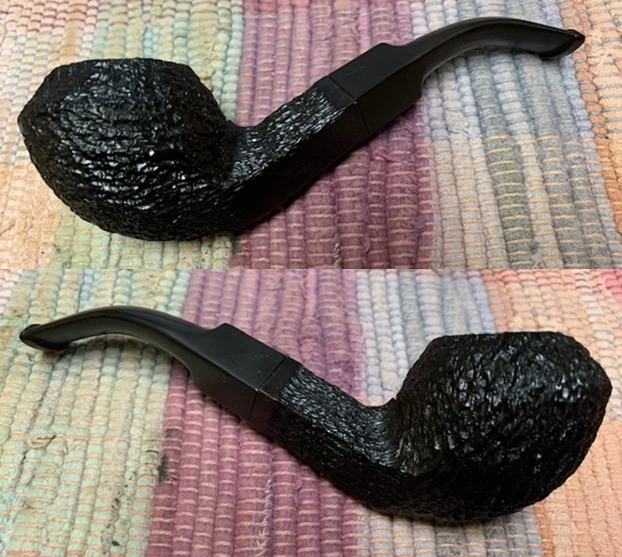
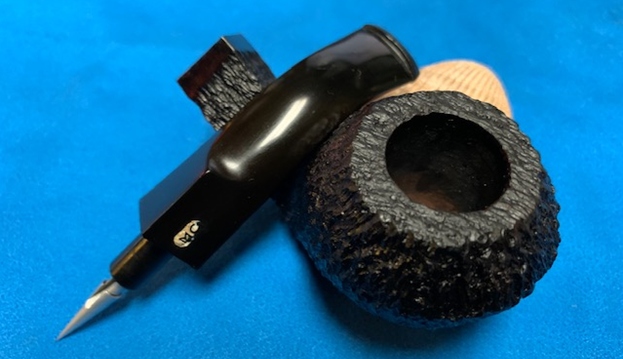
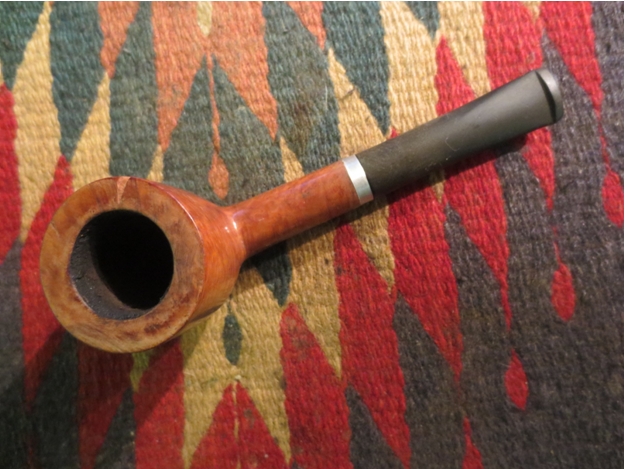
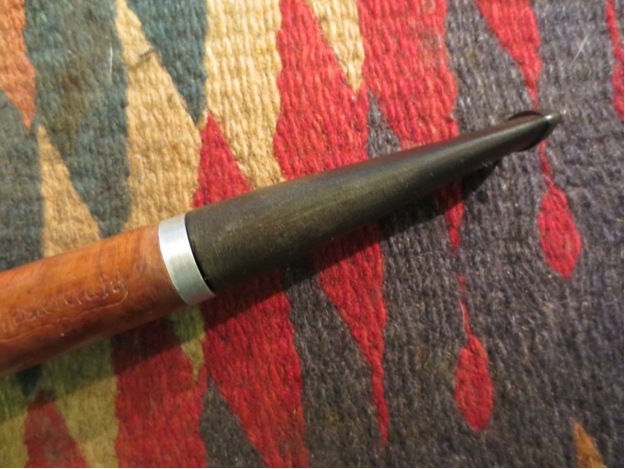
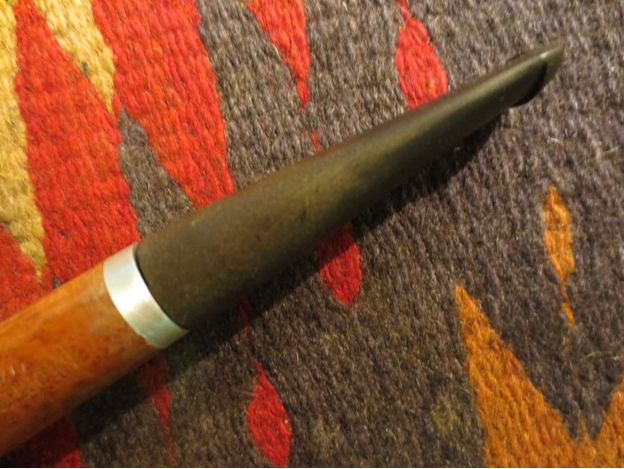
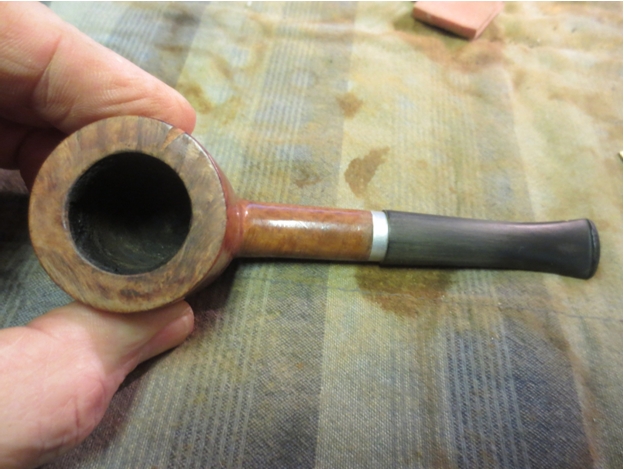
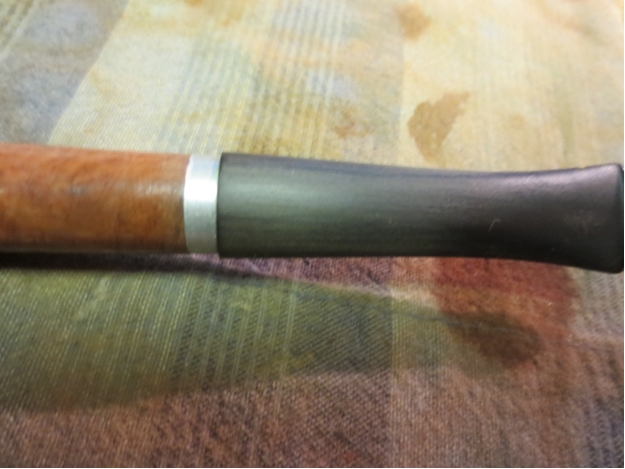
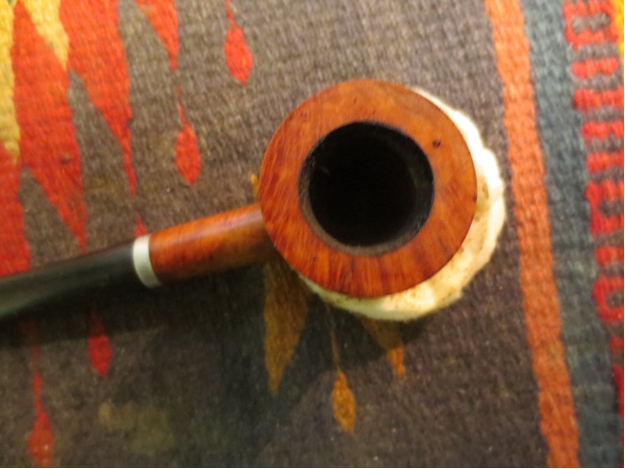
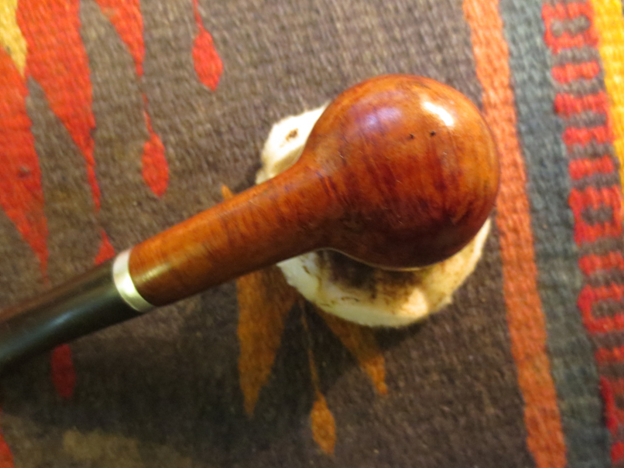
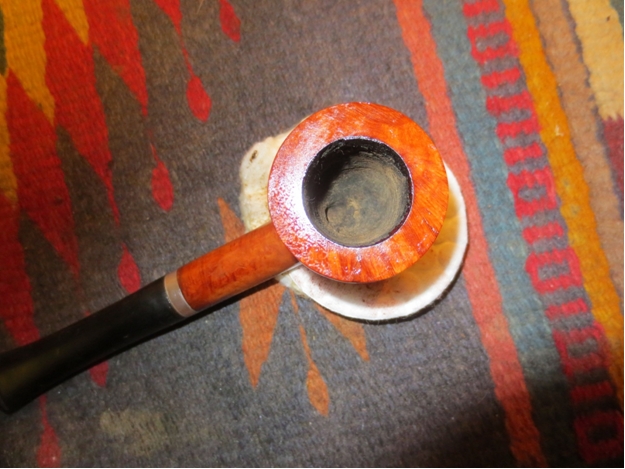
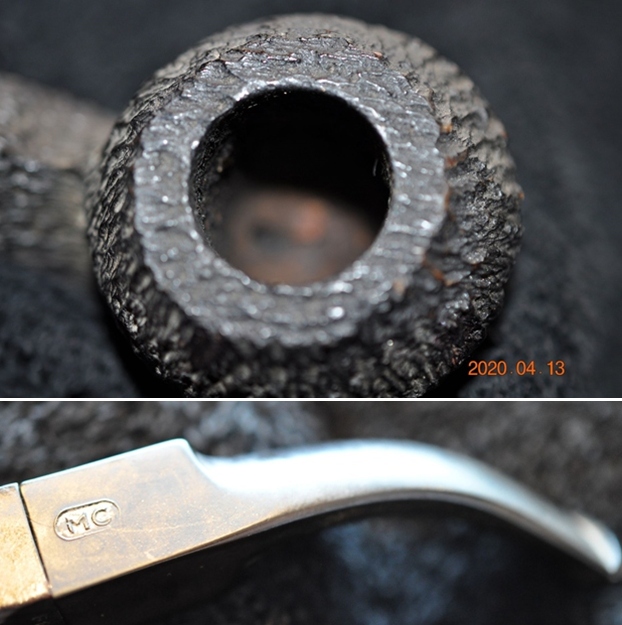
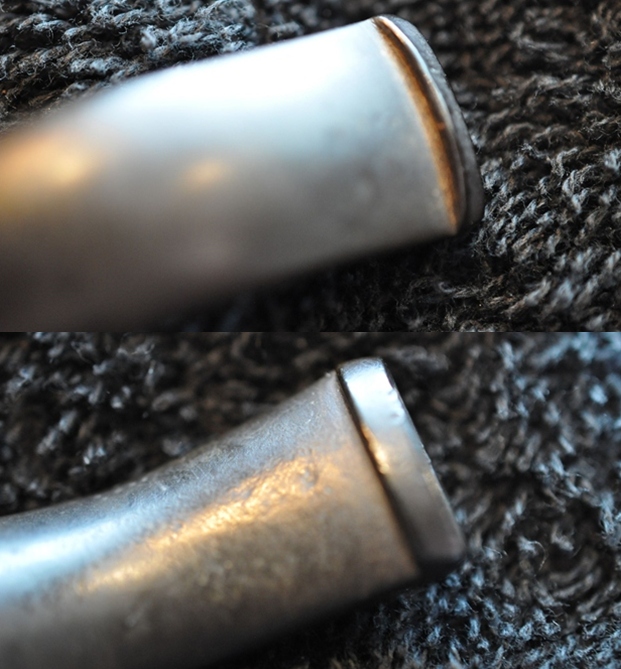
I took some photos of the rim top and stem. The rim top and inner edge of the bowl looks very good. The close up photos of the stem shows that there are tooth marks and chatter on the top and underside of the stem near the button.  
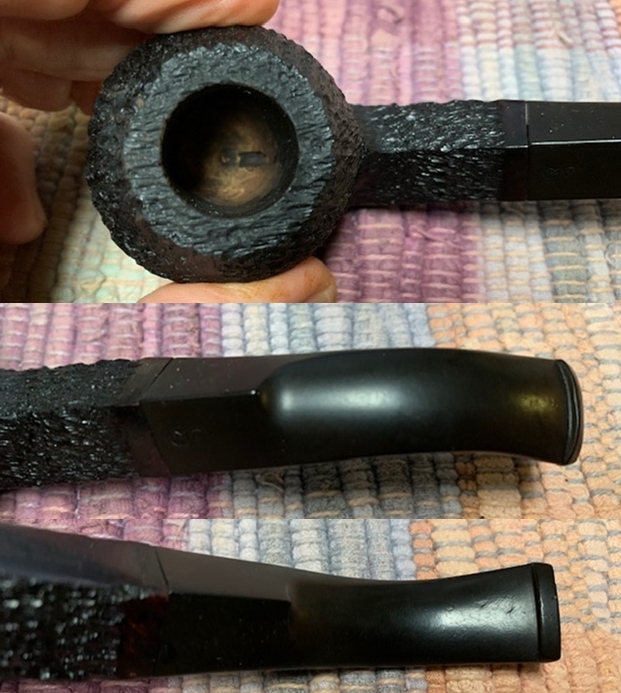
I took a photo of the stamping on the underside of the shank to show the stamping. It is clear and readable. The second photo shows the MC logo on the left side of the saddle stem.  
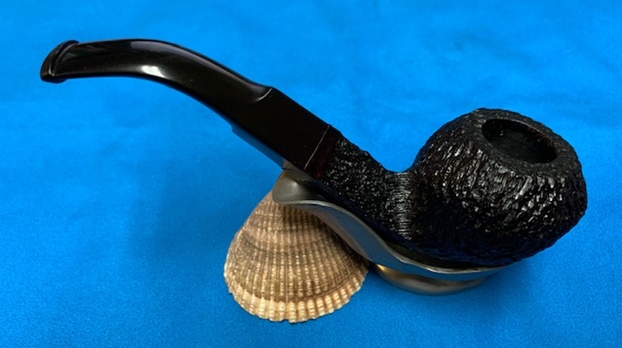
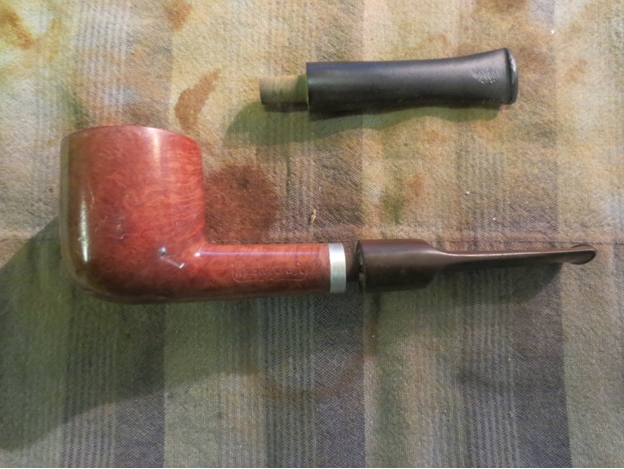
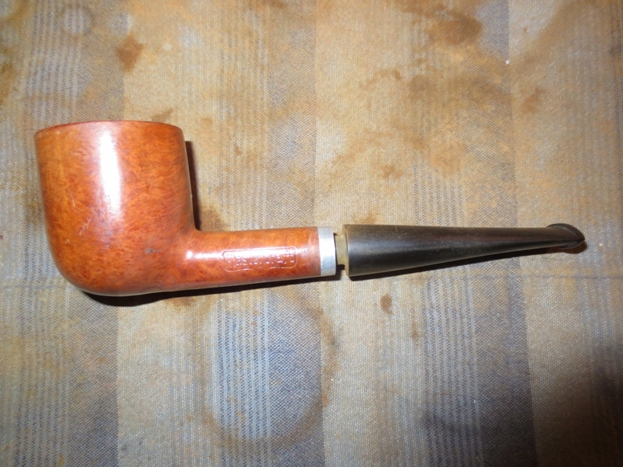
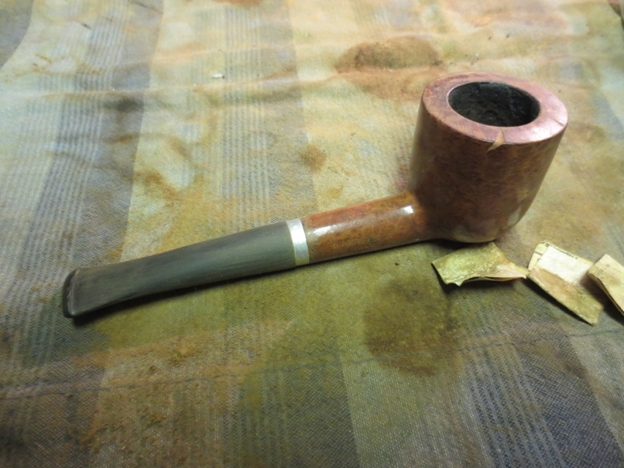
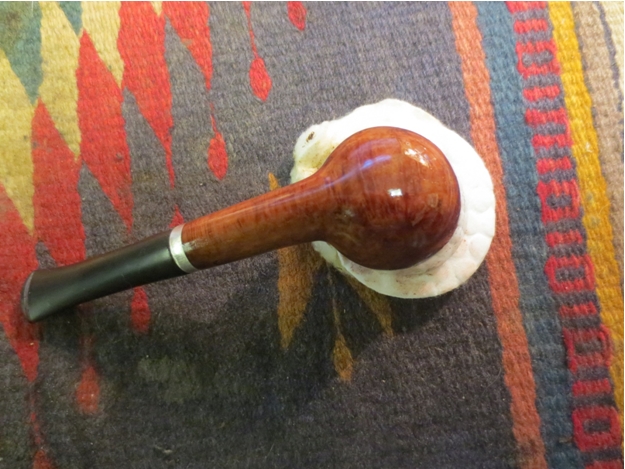
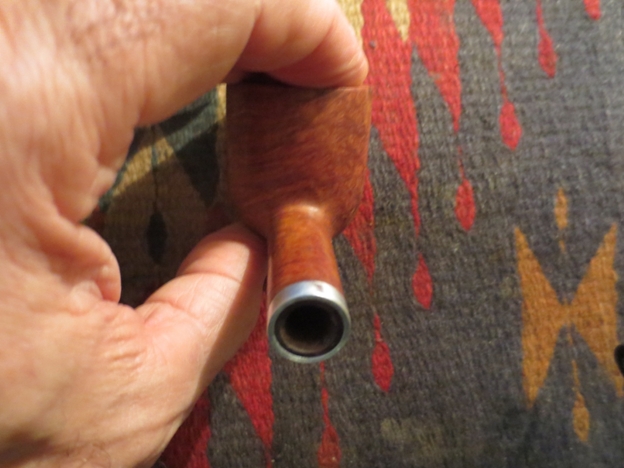
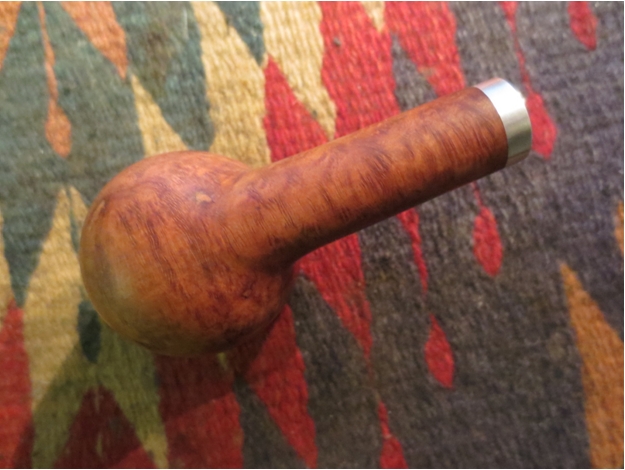
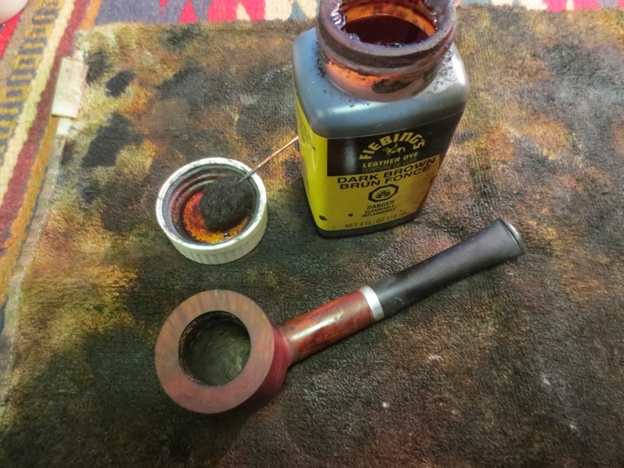
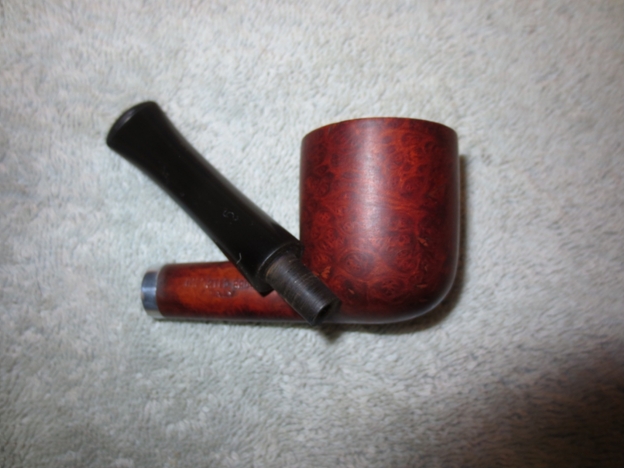
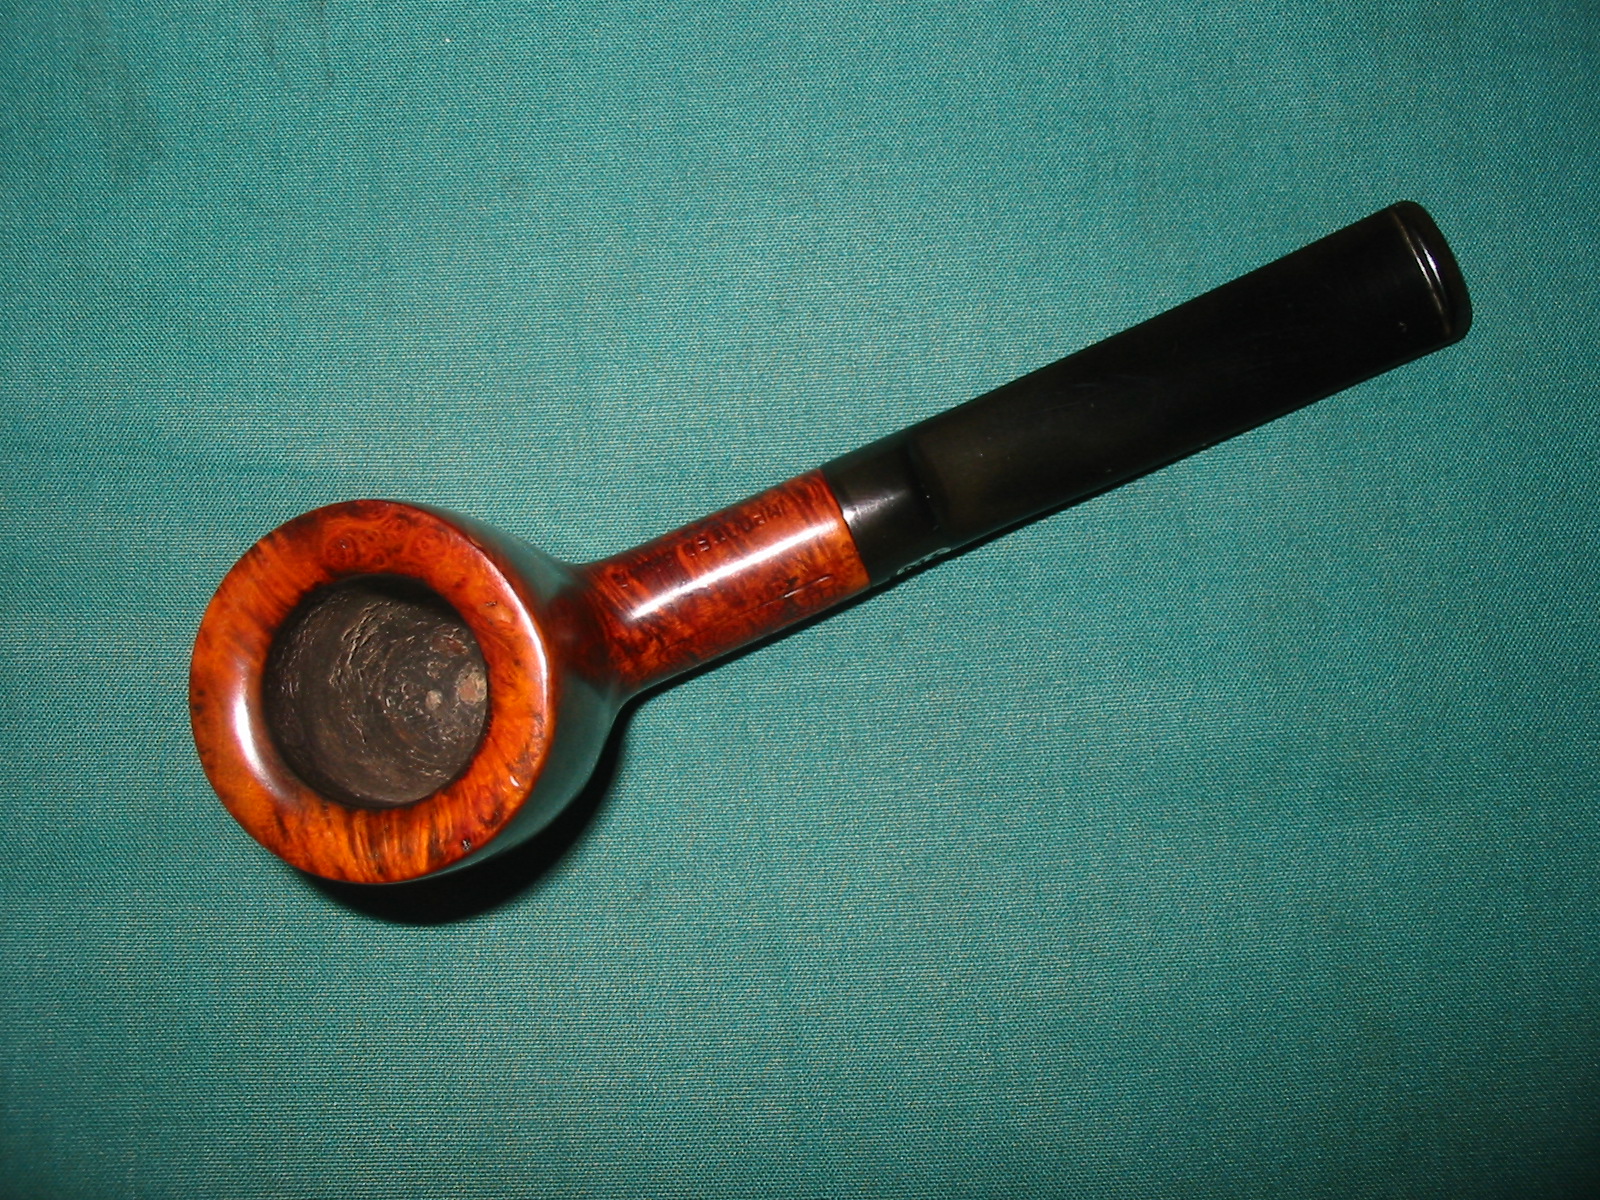
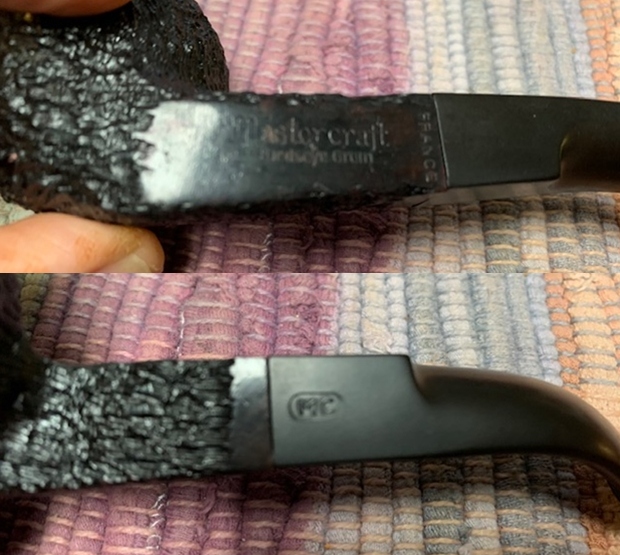
I removed the stem from the shank and took a photo of the pipe at this point. You can clearly see the condition, size and shape of the pipe.
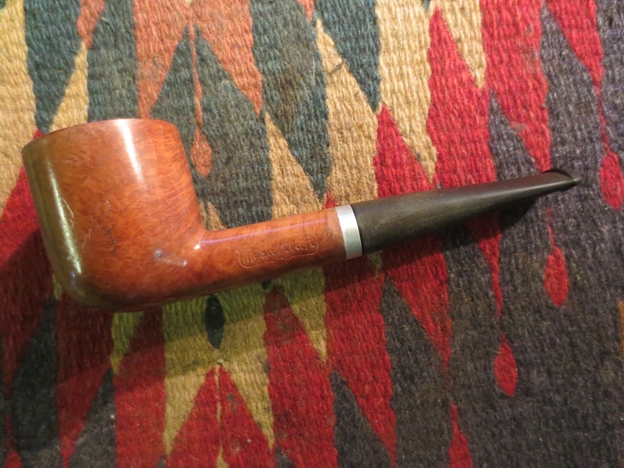
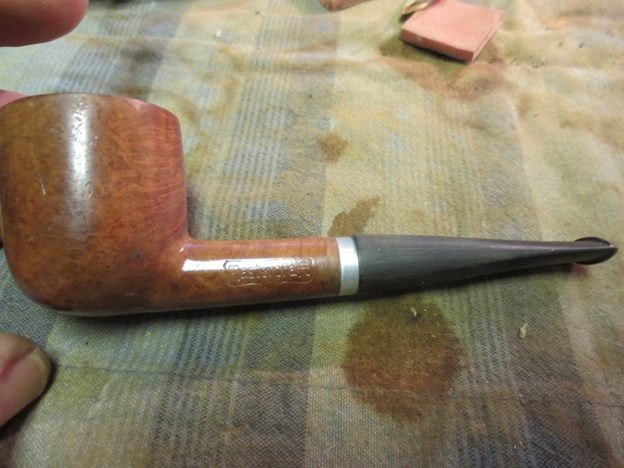
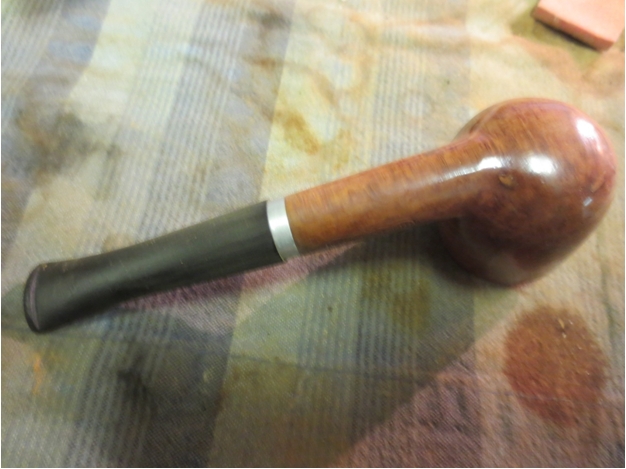
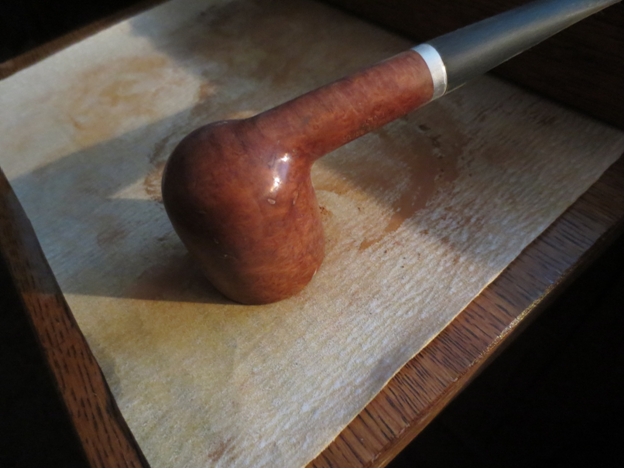
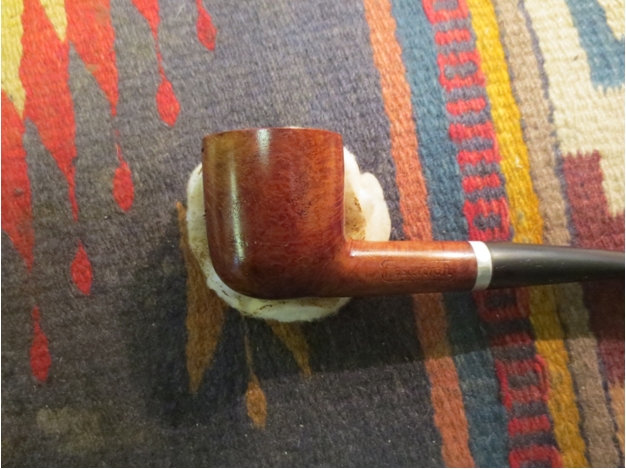
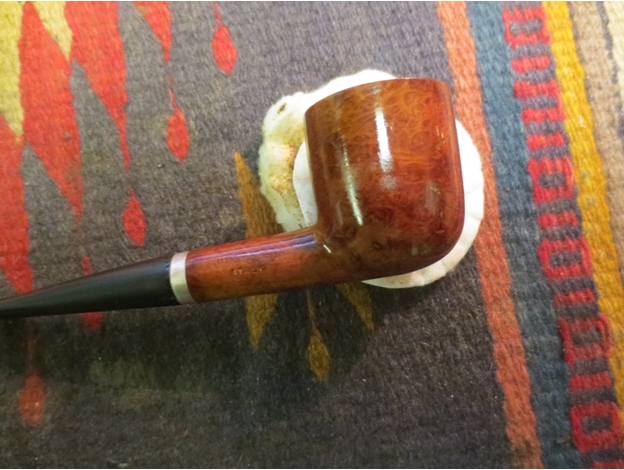
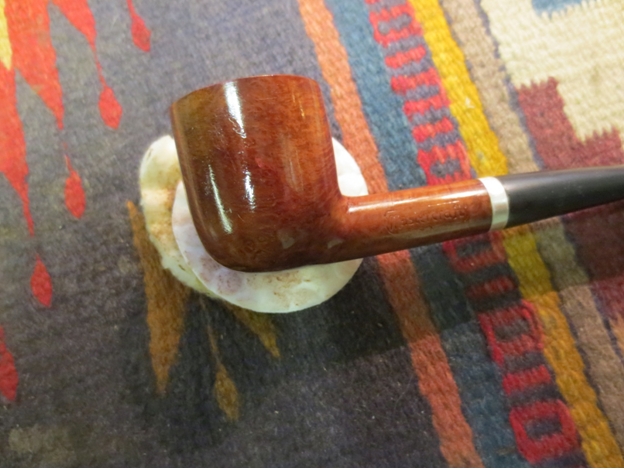
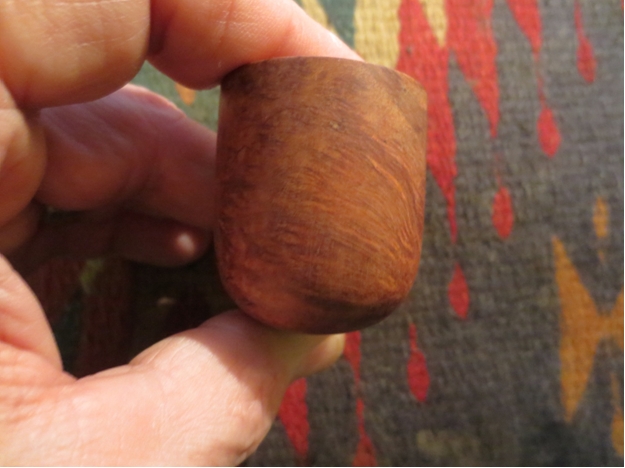
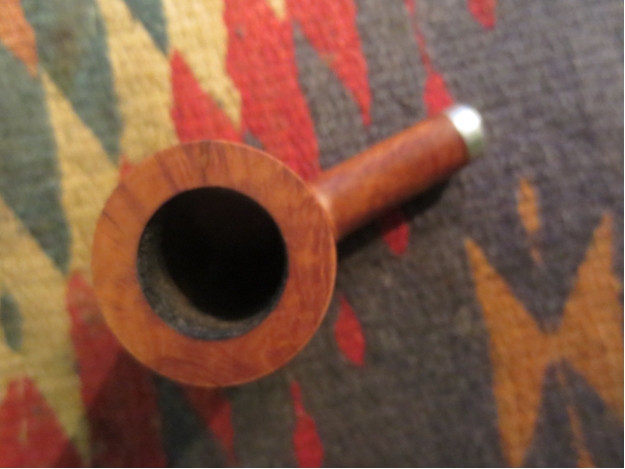
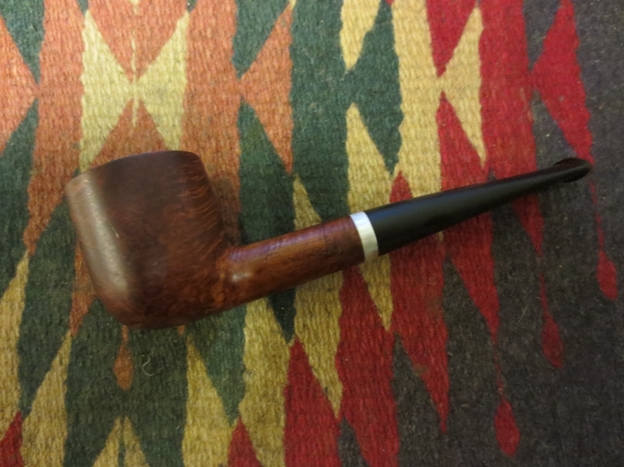
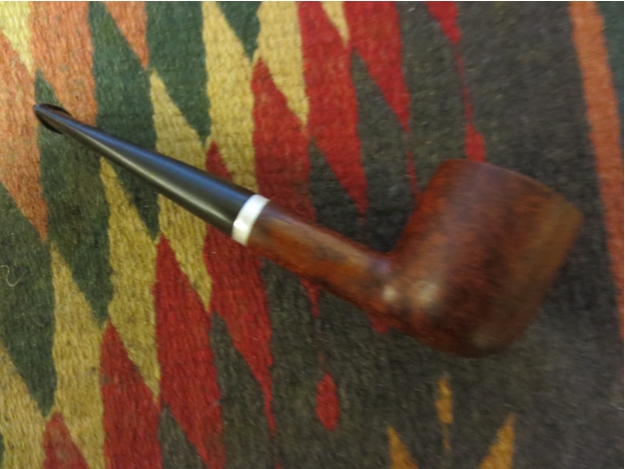
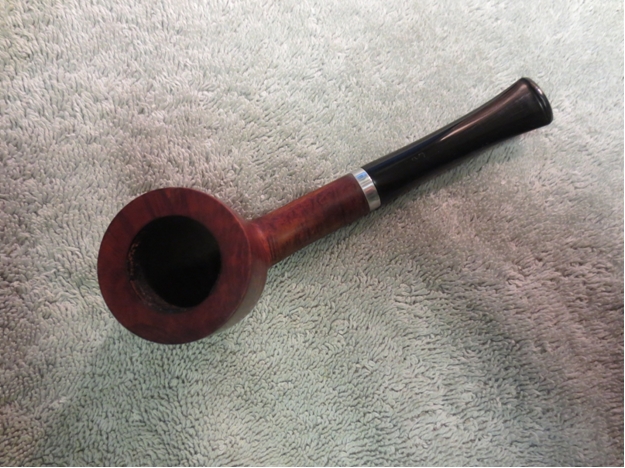
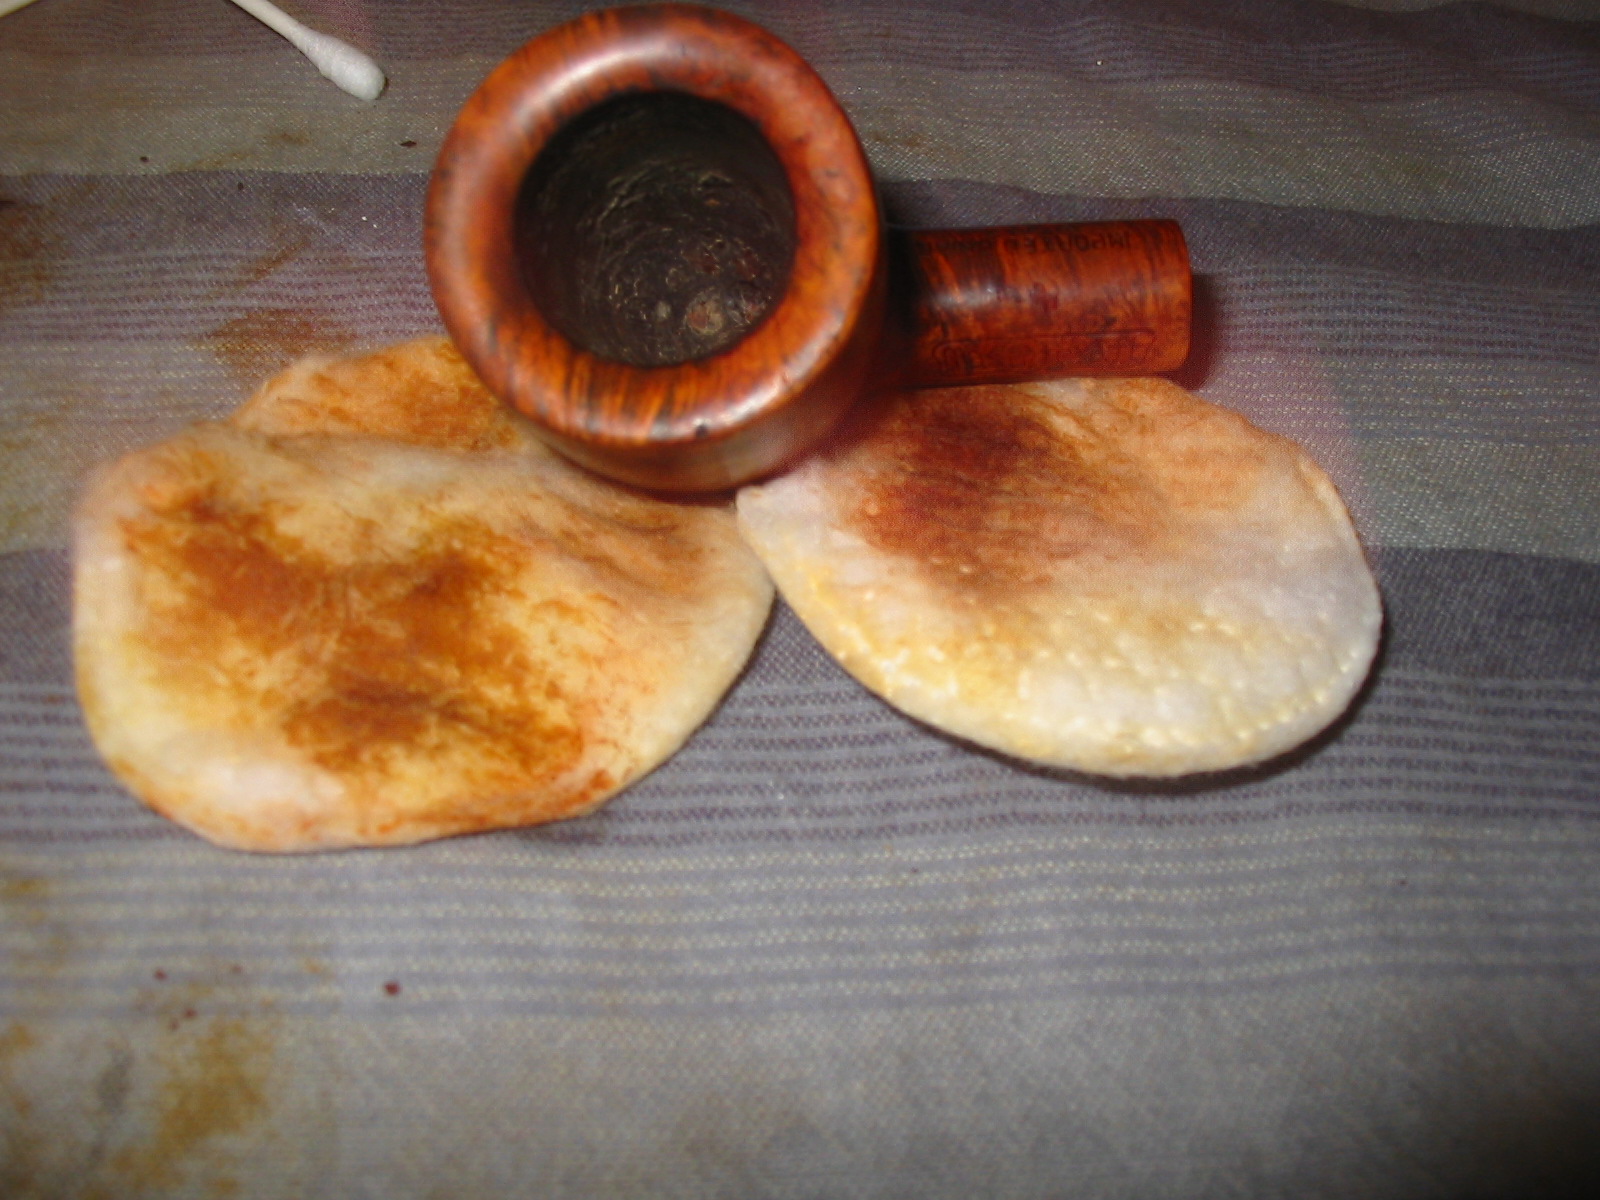
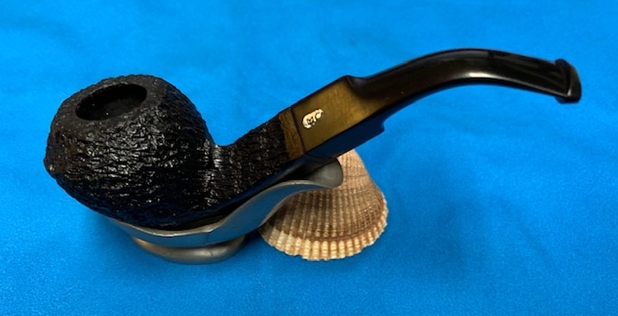
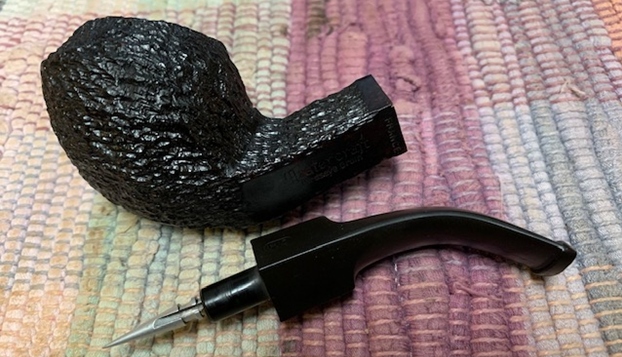
The bowl was in excellent condition as was the finish of the bowl after Jeff’s cleanup. I started my cleanup by working some Before & After Restoration Balm into the surface of the briar with my fingertips and a horsehair shoe brush to clean, enliven and protect the briar. I let the balm sit for about ten minutes and then buffed with a cotton cloth to raise the shine. The photos show the bowl at this point in the restoration process.   
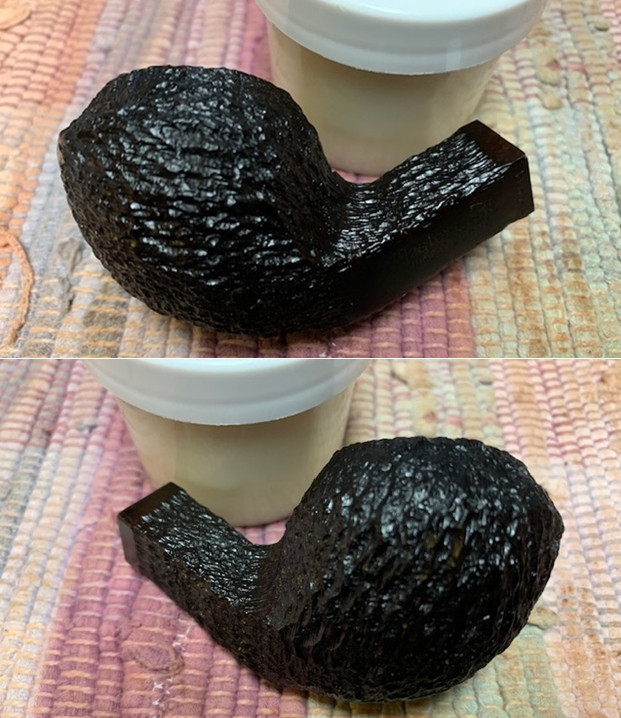
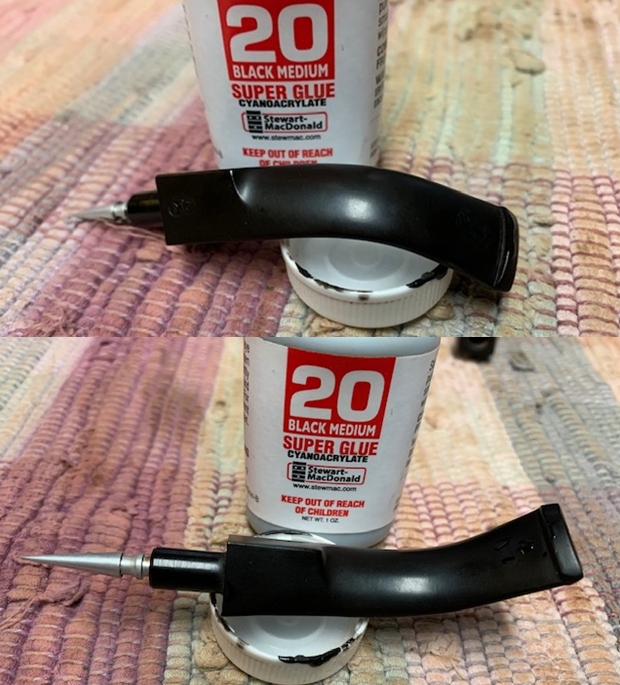
I set the bowl aside and turned my attention to the stem.  I “painted” the surface of the vulcanite with the flame to lift the tooth marks in the top and underside. I was able to lift many of them. I filled the remaining tooth marks with black super glue and set it aside to cure.    
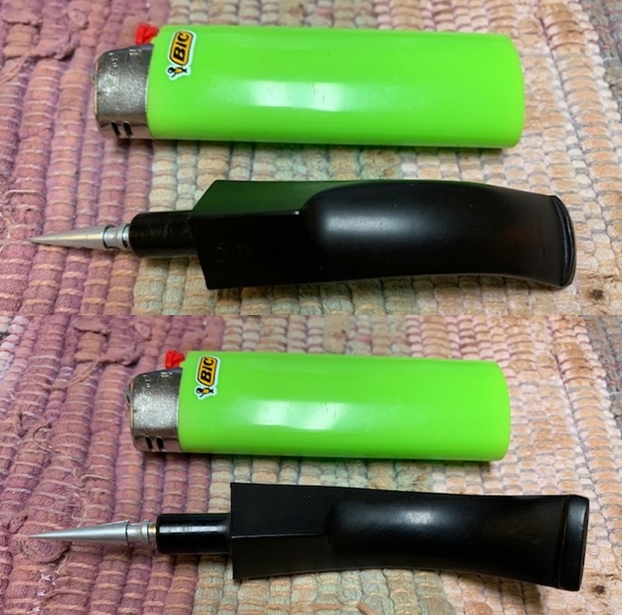
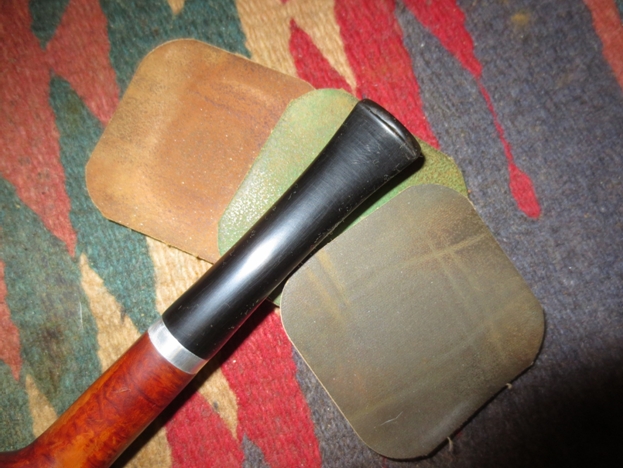
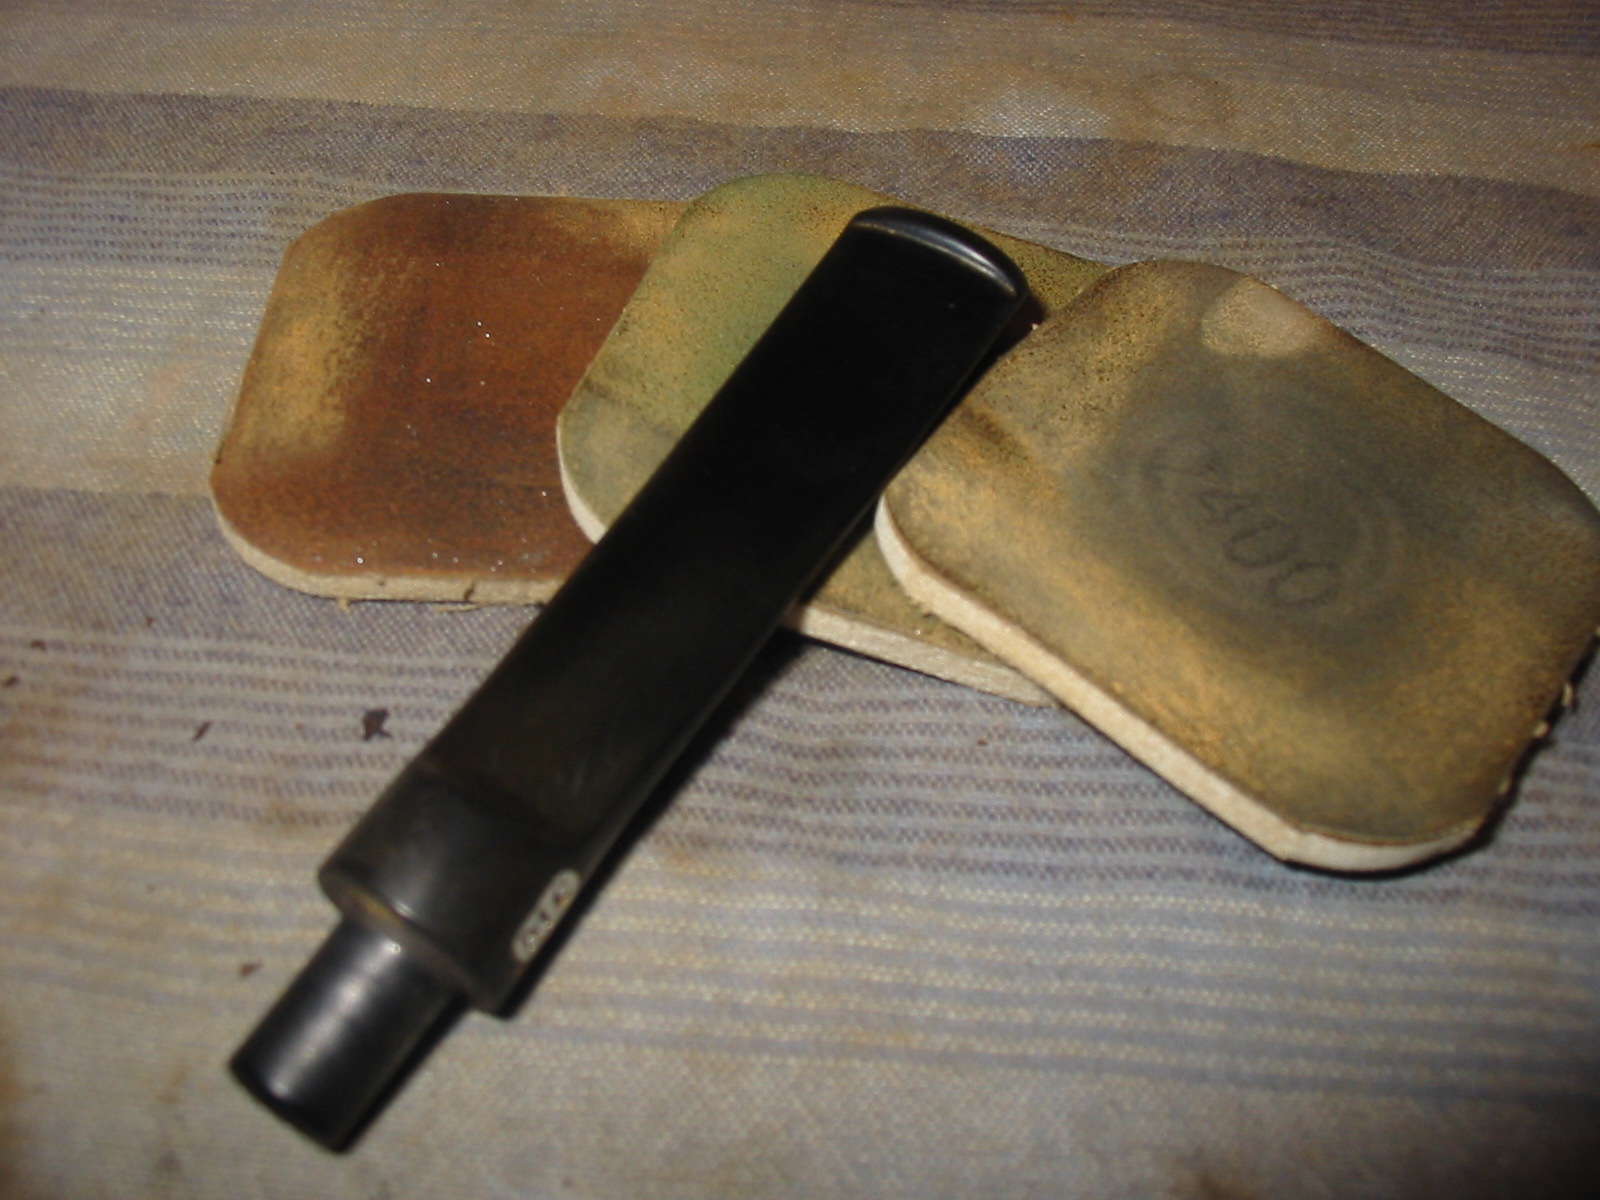
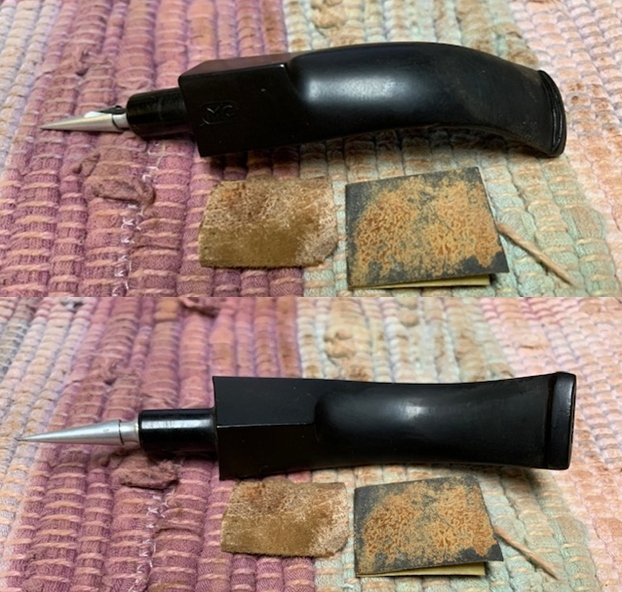
I used a needle file to smooth out the repairs. I blended it into the surface of the vulcanite beginning with the file. I followed that up with 220 grit sandpaper and started the polishing with 400 grit wet dry sandpaper. 
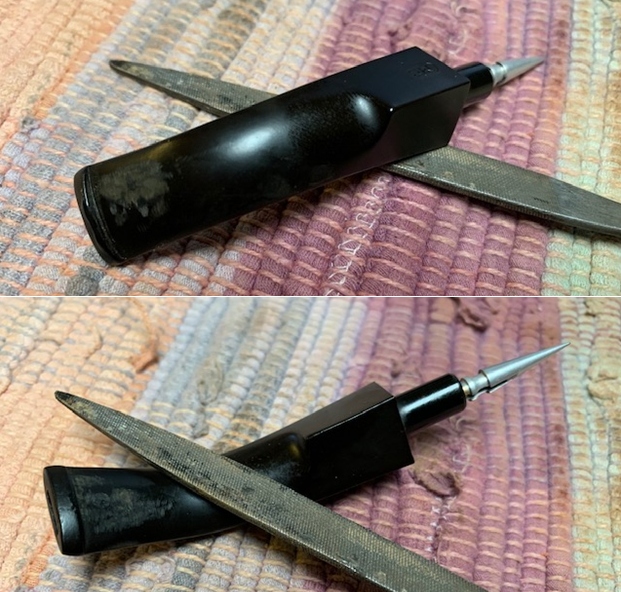
I used some liquid paper to touch up what remained of the stamp on the saddle stem. The MC was readable though the oval surrounding it was damaged.
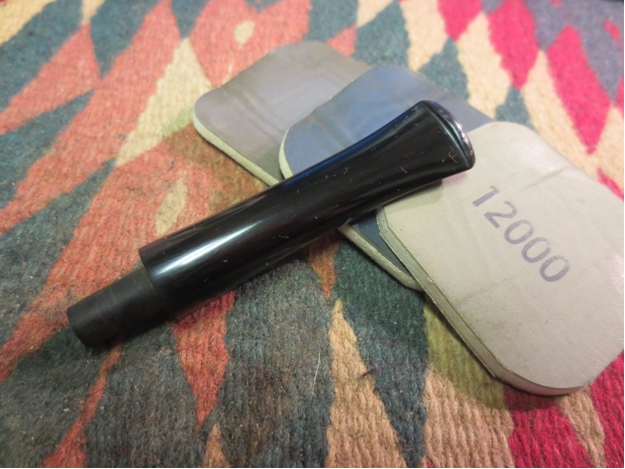
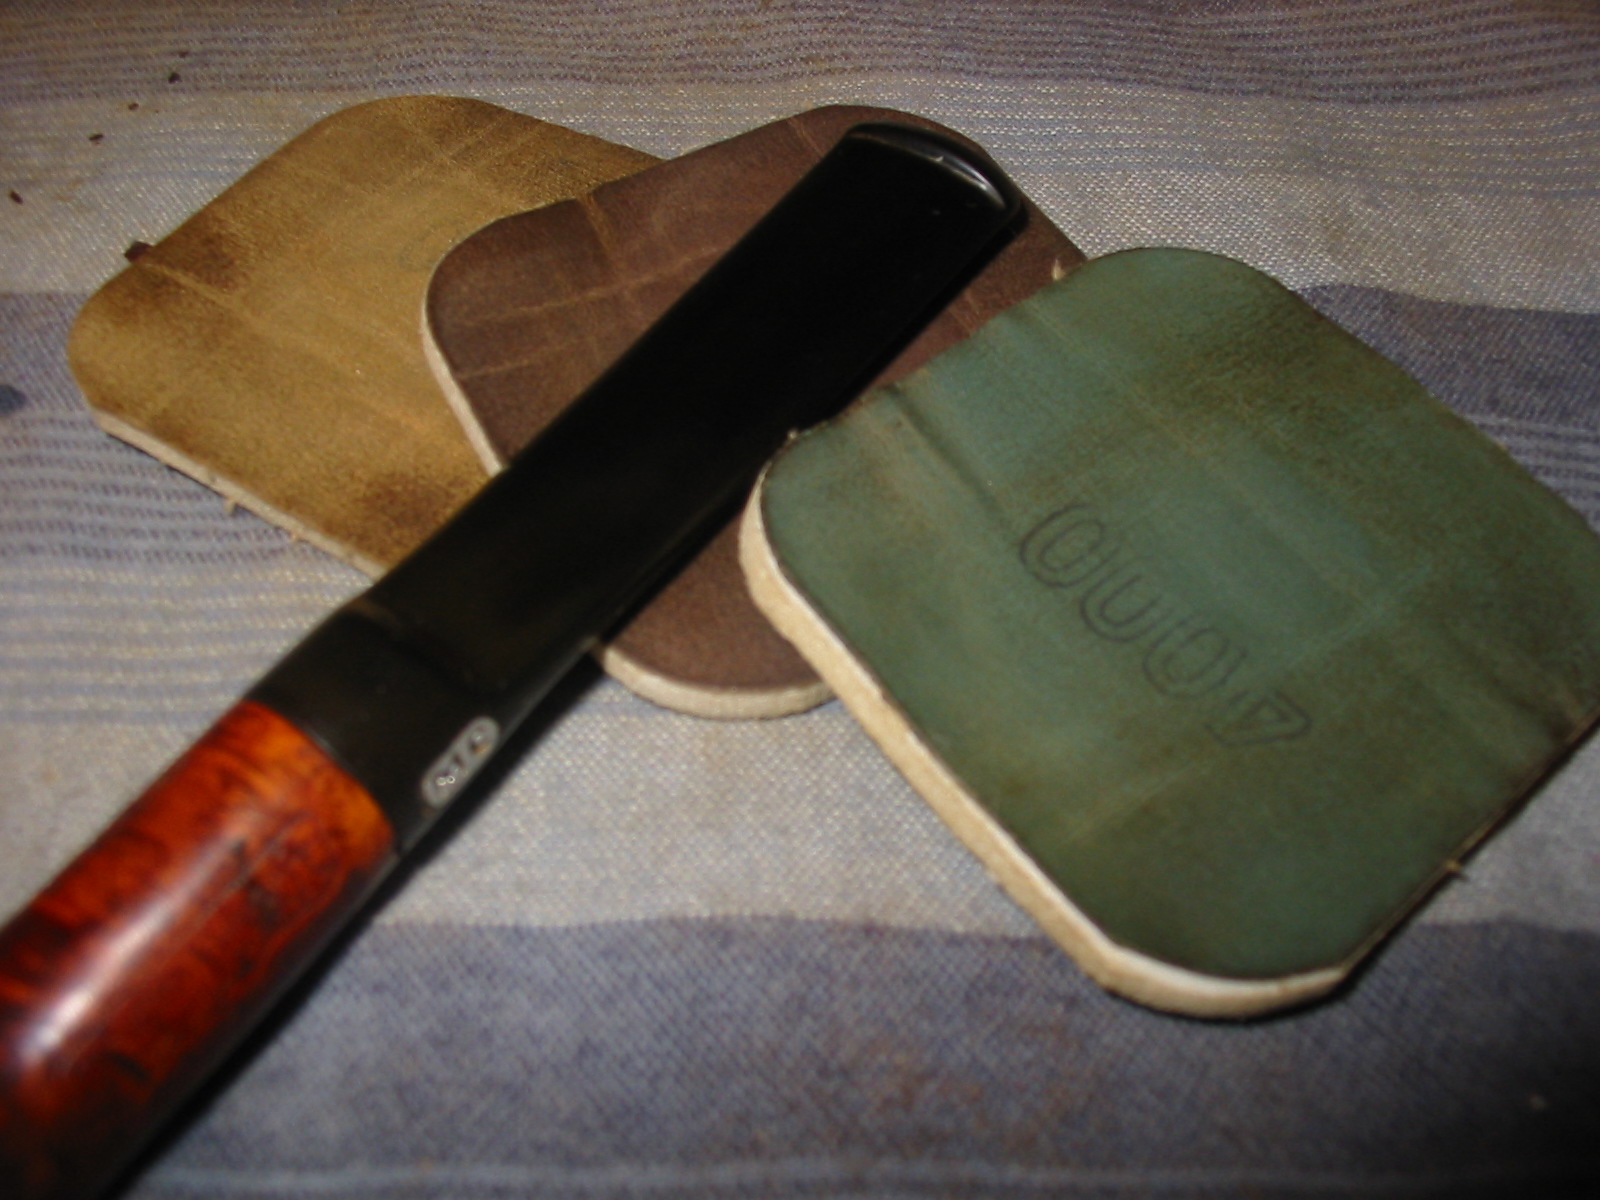
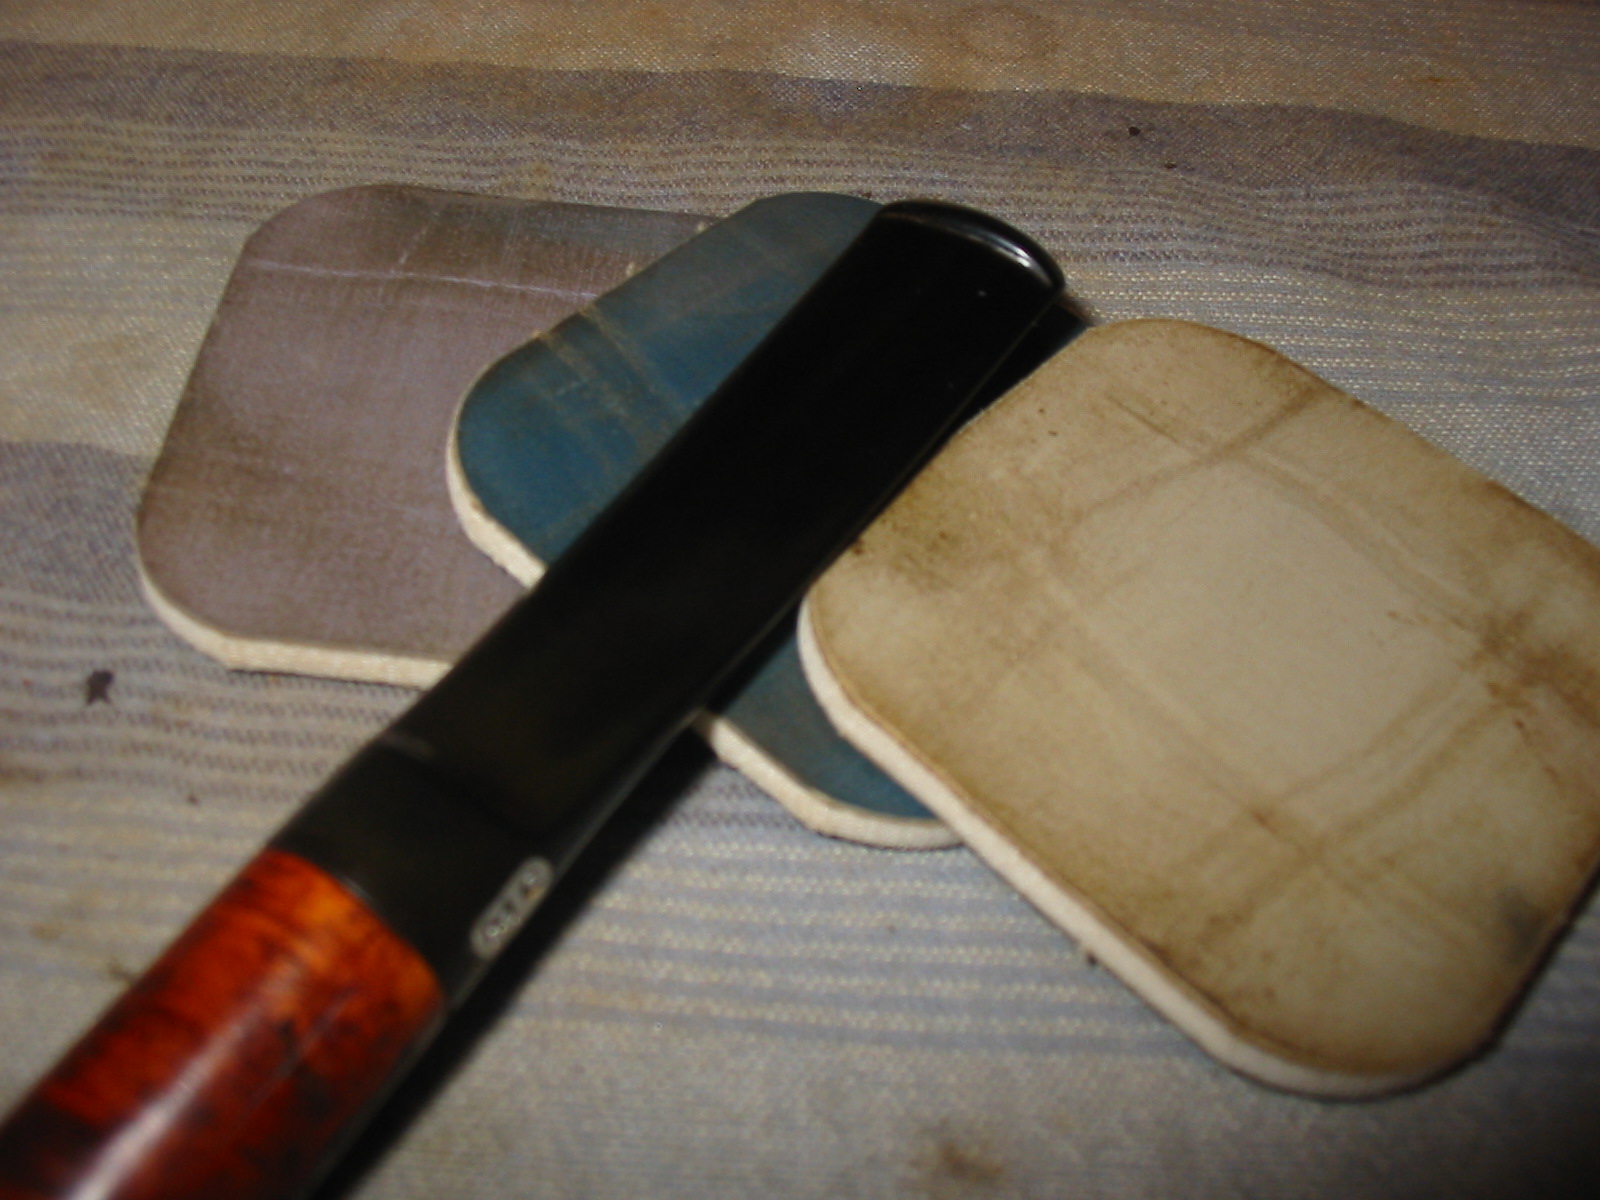
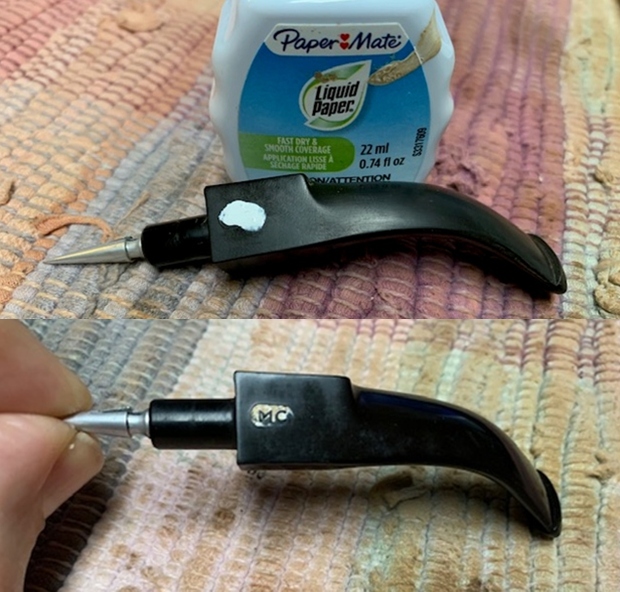
I polished the stem with micromesh sanding pads – dry sanding with 1500-12000 grit sanding pads. I wiped it down after each sanding pad with a cloth containing some Obsidian Oil. I finished polishing it with Before & After Pipe Stem Polish – both Fine and Extra Fine and buffed it off with a cotton cloth.   
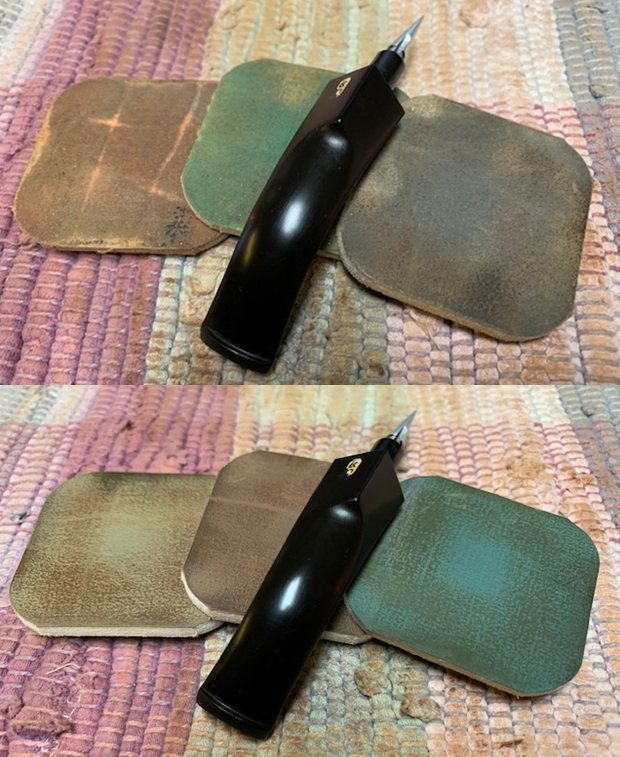
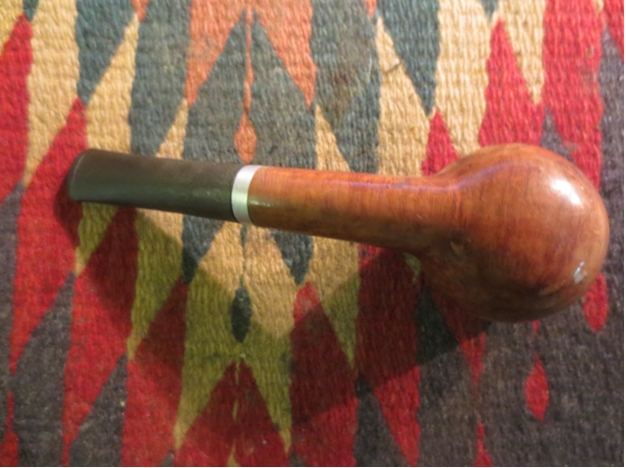
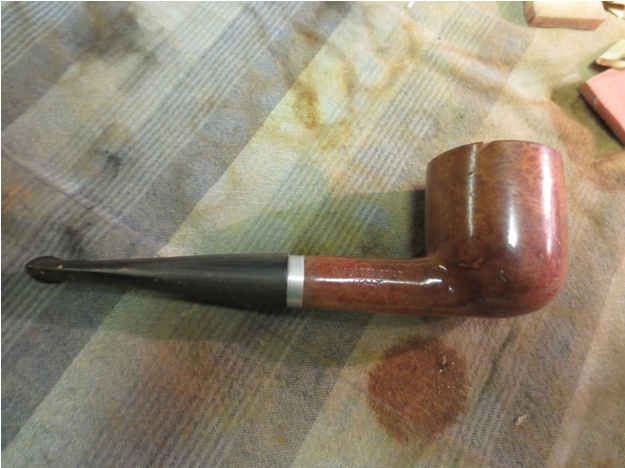
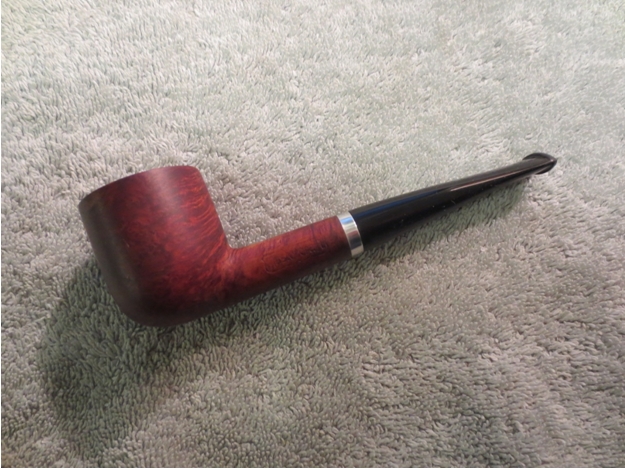
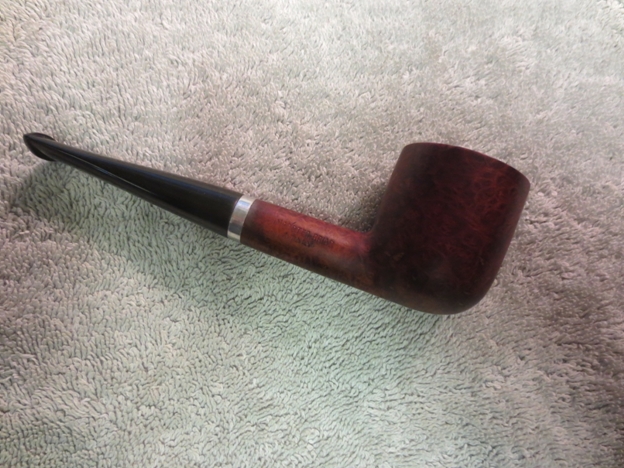
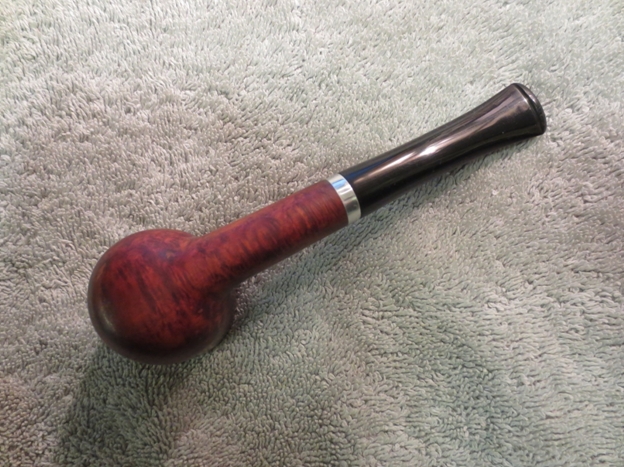
This Mastercraft Birdseye Grain Rusticated Bulldog is a nice looking pipe. The finish looks very good and the rustication is tight and sharp. I put the stem back on the bowl and buffed the pipe lightly with Blue Diamond on the buffing wheel. I carefully avoided the stamping on the shank sides during the process. I gave the bowl multiple coats of Conservator’s Wax and the stem multiple coats of carnauba wax on the buffing wheel. I buffed it with a clean buffing pad on the buffer. I hand buffed the pipe with a microfiber cloth to deepen the shine. The finished pipe is an excellent example of the tightly rusticated Mastercraft pipes from France that was distributed by Mastercraft. The rustication follows the shape very well. Give the finished pipe a look in the photos below. I can only tell you that it is much prettier in person than the photos capture. The dimensions of the pipe are Length: 5 ½ inches, Height: 1 ¾ inches, Outside diameter of the bowl: 1 ½ Chamber diameter: ¾ of an inch. This interesting MasterCraft Bent Bulldog that is stamped Birdseye Grain is a great looking pipe in excellent condition. Thanks for walking through the restoration with me as I worked over another beautiful pipe. I will be adding it to the rebornpipes store soon. If you want to add it to your collection send me an email or a message! Thanks for your time.

Restemming & Working on New Staining Techniques on a Mastercraft Pot


Blog by Steve Laug

The next pipe from the gift box is a Mastercraft Pot. It is stamped Mastercraft in a shield on the left side of the shank and Imported Briar over Italy on the right side. There are no shape numbers. There are a lot of fills on the bottom of the bowl and the right side of the bowl. The finish is a thick coat of what appears to be urethane – almost plastic looking. Someone had previous started refurbishing it – to bowl had been carefully reamed and the bowl topped. There was a large fill on the rim that was loose that ran from the middle of the right side of the bowl almost all the way across the rim. This pipe would be a great one to experiment with using different stains to blend the fills and highlight the grain. The urethane coat would prove a challenge to remove completely but once gone it would prove a perfect candidate for the new staining techniques I wanted to learn. The band on the shank is aluminum and is oxidized and dull. The stem is a replacement that is poorly fit. It is loose in the shank and does not fit against the shank well. The tenon is very short and almost conical in shape. I will break the work on this pipe into two parts: Part 1: Fitting a Stem and Part 2: The Staining Experiment and a Conclusion called Finishing Touches.Mas1

Mas2

Mas3

Mas4 I took a few close-up photos of the rim and the stem. These will help to give an idea of the state of affairs when I brought the pipe to the work table.Mas5

Mas6

Mas7

Mas8
Part 1: Fitting a Stem

I removed the stem and found two possible replacements in my stem can. The original replace in the one at the bottom of the photo below. The two options were a longer taper and a saddle stem. Both of them worked well with the length of the shank. They looked better than the one the pipe arrived with.Mas9 I tried the bowl with each of the stems to get an idea of the look of the pipe. I made a decision for the taper once I had seen them both in place in the shank.Mas10

Mas11 The taper stem was slightly larger in diameter than the shank so I would need to adjust the diameter. I cleaned out the shank and the stem with pipe cleaners, cotton swabs and isopropyl alcohol to remove the tars and oils from the shank. Because someone had already started the process on this pipe it was not a long clean. It took very few cleaners before the shank was clean.Mas12

Mas13

Mas14

Mas15 I sanded the stem with 220 grit sandpaper to start and then decided it was taking too much time. I used the Dremel with a sanding drum and quickly removed the excess material.Mas16

Mas17 I brought it back to the work table and sanded it with 180 and 220 grit sandpaper to smooth out the marks left by the sanding drum. I needed to fine tune the fit but it was working with the bowl.Mas18

Mas19
Part 2: The Staining Experiment

To prepare the bowl for staining I needed to do the repairs and remove the old finish. I decided to re-top the bowl to remove some of the damage and smooth out the area around the fill on the right side top and edge. I wanted to bring the top down to lessen the area that the fill intruded on.Mas20 I wiped the bowl down with acetone to remove the finish only to find that it did not work to cut through the finish. Before I intruded on the finish with my next measure I decided to repair the fill on the outer edge of the rim on the right side. I used briar dust and super glue to repair the fill on the side and top of the rim. Most of the fill had been smoothed out on the top but there was some of the fill missing on the edge of the rim. I cleaned and sanded the repair to blend it into the finish. When that was smoothed out I sanded the bowl with a medium grit sanding sponge to break the gloss of the finish and then dropped it into the alcohol bath.Mas21 When I took it out of the bath the finish was dulled but still not broken. This top coat was a real bear to remove. I needed to do quite a bit more sanding on the coating to remove the finish.Mas22 Once the finish was gone and I was at bare wood I decided I would use a three part staining process to try to hide the fills and blend them into the briar. I wanted to try something new as well with the staining of this pipe. I wiped it down a final time with acetone to clean off the dust and any remnants of finish, scrubbing hard around the stamping on the shank. I stained it with a medium walnut stain, flamed it and buffed it.Mas23

Mas24

Mas25

Mas26 When the stain dried I gave it a light buff with a cloth and a shoe brush and then gave it the second coat of stain. This time I gave it a coat of oxblood coloured stain. I wanted to bring out the grain on the sides and front and back of the bowl and try to blend the fills more. I stained it and flamed the stain.Mas27

Mas28

Mas29

Mas30 When that stain dried I buffed the bowl with White Diamond and wiped it down with isopropyl to even out the stain coat. I hand buffed it afterwards with a soft cloth. The bowl was beginning to take on the colour I wanted from these first two coats of stain.Mas31

Mas32

Mas33

Mas34

Mas35

Mas36 Then it was time for the third coat of stain. I stained the pipe with a dark brown aniline stain. I applied it and flamed it and repeated the process until I had good coverage on the pipe. The dark brown looked opaque when first applied.Mas37

Mas38

Mas39 I buffed the pipe with White Diamond on the wheel and gradually the grain began to show through the finish. The combination of stains gave the pipe precisely the colour I was wanting – a warm reddish brown with dark highlights in the grain patterns. The fills though still present, did not stick out as badly and seemed to blend into the finish.Mas40

Mas41

Mas42

Mas43
Conclusion: Finishing Touches

With the finish on the pipe completed I worked on the stem. I sanded it with a fine grit sanding sponge and then with micromesh sanding pads. I also sanded the band on the shank with the micromesh pads at the same time. I wet sanded with 1500-2400 grit pads and sanded the band without the stem present. You have to be careful with the pads when polishing metal as they will leave a dark stain on the briar and the vulcanite.Mas44 I rubbed the stem down with Obsidian Oil and dry sanded the stem with 3200-12,000 grit pads. I polished the band with the same and also with a silver polishing cloth. After each set of three pads I rubbed the stem down with the oil. When I had finished the stem I gave it a final coat of the oil and then let it dry.Mas45

Mas46 The next photos show the finished pipe. It is a rich brown/red colour that has warmth and depth to it. The silver band and the new stem make the pipe look quite rich. I figure it is at least as nice or nicer than when it left the Mastercraft warehouse.Mas47

Mas48

Mas49

Mas50

Mas51

Mas52

Mas53

Every man has a right to a Mastercraft Pipe – A Mastercraft Pipe Catalogue


I recently posted a blog about cleaning up a Mastercraft De Luxe billiard and received an email from Andrew Selking telling me that he had a Mastercraft catalogue from the 1930’s and he sent it to me as an attachment. We both thought it would be great to post it here for the ongoing information of refurbishers who like to know a bit of the history of the pipes they are working on. Here is the brochure for your enjoyment. Thanks Andrew.MC 2 (4)

MC 2 (1)

MC 3 (2)

MC 3 (3)

Learned a bit of American Pipe History – Mastercraft Executive Choice Pot Restored


Blog by Steve Laug

Another pipe I picked up along with the two pairs I have written about lately is a nice little Mastercraft Pot. I am generally not taken by the pot shaped bowl but this one has a nice bevel to the rim that shows off the grain on the rim. It has some nice grain on the sides, back and front. It is stamped on the left side of the shank Mastercraft in a shield. mastercraft4bUnderneath it is stamped Executive Choice. On the right side it is stamped Imported Briar over Italy. The stem bears the MC silver oval inserted in the side of the stem on the left side.mastercraft1aThe bowl was heavily caked and the beveled rim was covered with tars and buildup. The finish was in good shape. There were no deep scratches or dents. There were several fills but they were dark and did not stand out. The bowl was shiny but worn in some places. The stem was not too badly oxidized but it was dirty and seemed to have has a rubber bit guard on it at sometime in its life as it had left a line behind on the stem. There were no tooth marks or chatter on the stem.IMG_6900IMG_6901IMG_6902IMG_6903I have cleaned up quite a few Mastercraft pipes over the years but did not really know anything about their history. I assumed that they were American made. I had heard somewhere that Bing Crosby owned stock in the company and smoked their pipes but I was not even sure of that. So I went to work digging into the background on the internet. The first thing I found was this old advertisement for the pipes with the old crooner himself.
6mh04k9nm8qo8q I continued through the Google list for Mastercraft and one of the next listing was in Pipedia. http://pipedia.org/wiki/Mastercraft

In the article the author wrote the following: “Bing Crosby smoked Mastercraft pipes and can be seen in their magazine ads from the fifties. That isn’t a lot of info so I went looking and found a thread with posting by “Ted” — the former Exec VP of Grabow/Mastercraft http://drgrabows.myfreeforum.org/viewtopic.php?t=155&start=0

It doesn’t appear it was ever a manufacturer and bought pipes from multiple factories — mostly French and English. It survived briefly the post war recovery and then was acquired by Grabow.

The following is quoted from the thread: First a confession. From 1974 till 1984 I had several positions with Mastercraft including Executive Vice President. I also worked for Grabow from 66 till 74 and from 84 till I retired in 91. In 91, with retirement, I was President and COO for the corporation that was called “Sparta Industries”. I have seen both sides of the “fence”, and even though I never left the “employ” of Grabow, my loyalties for 10 years were with M/C.

United States Tobacco(UST)(Skoal and Copenhagen) bought Grabow in 69′ from the Lavietes family. In 74′ they bought M/C from Bernard Hochstein and moved it into the EXACT facility Grabow occupied. I was named “operations manager” and we were in the basement of a 4 story building in Sparta, NC.

M/C was STRICTLY an importer of pipes and pipe related merchandise. In 74′ when M/C moved from NYC to NC the inventory of finished goods was stored in a facility in Winston Salem, NC. Lentz Moving and Storage. Stacked 10 feet high the inventory covered 180,000 square feet….FINISHED. In my time at Grabow I had never seen that much finished stock, and the shapes, manufacturers, finishes. Heaven for a pipe smoker…..Damn right. You would have had to slap me really hard to get the grin off my face.
I’ll just list a few Manufacturers/names of the inventory. England ….Parker/Hardcastle(Dunhill) …Orlick…France…Jeantet…Jima…Cherrywoods…Italy…GIGI pipe…Radica…Rossi…Federico Rovera…Emilio Rovera…Santambrogio.Brebbia..Meerschaums from Austria…. Strambach… Lighters from Japan…Pouches and accessories from Hong Kong…and the Israeli pipes from Mr. Hochstein’s sons. Trust me…this is only a small sample of the things M/C had, and bought into inventory.
Now the connection. Since M/C and Grabow shared a building, and I was an employee of Grabow we compared notes. Grabow copied a BUNCH of M/C items fully with my help and some skills I had developed.
First was Omega…A copy of a well pipe made by Federico Rovera (FERO.com)….Freehand by the Alpha/Shalom factory…Meerschaum Lined from M. Gasparini, and later GIGI PIPE. These were originally imported by M/C for Grabow and stamped Grabow, but also stamped ITALY. Later models…better finish were made in the USA. Bucko…copied from M. Gasparini… (Gasparini, to my knowledge is the only maker of leather covered pipes in the world). If you buy a leather covered pipe it was, most assuredly covered by M/G. And you thought the wood in the Grabow COLOR was bad…..oughta unwrap one of these scrappers. There is a lot more. Questions will be answered following the presentation.

Now the other way. Grabow to Mastercraft. M/C never really had a source of continuing supply. The foreign manufacturers would make a line for a while and then quit. Never do it again, no matter how well it sold, no matter the demands we put on em’. Grabow gave M/C a source of stability and a nice profit for both companies. A lot of these you will not have heard of, but maybe….Seville, for M/C all smooth, for Grabow all rustic Hillcrest…. Freehand, For M/C Andersen and (a few Mastersen), for Grabow, Freehand with a DRB tampon. New finishes… New shapes, New bits…..Mastercraft showed Grabow how to use LUCITE for stems… Royalton…Again, these are just examples.

Ted also said: Several years before UST bought Mastercraft, M/C had acquired Marxman Pipes. A wonderful kind man, Bob Marx was still working as a salesman in NYC, and I was fortunate to make a few sales calls with him. You all remember Charles Atlas? Bob Marx was about 76 and had just been awarded the (I think) Atlas Award for being the finest specimen of manhood over 70 years old in NYC, or maybe the state.

M/C had some inventory of Marxman stuff, but not a lot. I know very little about Marxman. Did they make, import, or both?

M/C was included in all the major Christmas catalogues…Sears… Spiegel… Penney… Ward… Aldens. This was from about 70′ till 80′. We usually would have a 2 pc. Massa (pressed) Meerschaum sets from Robert Strambach, A water pipe from Brebbia, a huge Well pipe (saw one on e-bay a few days ago), and various odds and ends to fill about 6 – 8 spaces.

Let me also say one more thing about the 180,000 sq. ft. That wasn’t all pipes. It included display cases for our sets, which were made in England, and took up lots of space. Regular boxes, bags, and display material were a part, and pouches and accessories took up quite a bit.

In about 78′ UST put together a “premium products” sales force. They sold, mostly to pipe shops, products that UST owned. Tobacco from a plant in Richmond, Don Tomas cigars from Honduras, House of Windsor cigars from Red Lion PA., and M/C pipes. I think the force was 11 or 12 men and this was the heyday for M/C. What we had what EVERYONE in the pipe business wanted.

After the sales force was disbanded, M/C struggled some. This is about the time that Grabow and M/C realized what an asset we were to each other. Sales stayed pretty good for a while because of the relationships Judy Weinberger (NYC sales office and VP Mastercraft) and I had developed with the pipe shop owners.

Most of the Mastercraft pipes I have seen/bought at the bid place have an Algerian Briar stamping which makes them an attractive buy in this era. They are very reasonable and everyone has been well made with a nice draw and fine centering.”

I continued to look through various links on the web and followed this link to Pipesmokers Forum. http://pipesmokersforum.com/community/threads/mastercraft-pipes.3773/
This post from the same Ted as above appeared there. In it he confirmed some of the same information as he did in the extended post on Pipedia. He wrote: “To most pipe smokers Mastercraft Pipes are small cheap pipes, signified by the oval aluminum “MC” on the shank. Absolutely nothing special.

But Mastercraft was much more. As an importer of finished pipes M/C worked with many of the world’s foremost pipe makers and had in inventory finished product from the likes of… England, Hardcastle and Orlik. France, Ropp, Jeantet, Jean LaCroix. Italy, Lorenzo, Gasparini, Federico Rovera, Emilio Rovera, GIGI Pipe, Brebbia, Santambrogio, Fratelli Rossi. Israel, Shalom and Alpha. Plus all the tools, pouches and lighters from Hong Kong and Japan. The list of suppliers is enormous, but these are the ones I can remember after 30 years, and very few of these great pipes were ever stamped Mastercraft (some from Rossi).

Please don’t discount the importance of Mastercraft in this wonderful hobby we enjoy. Mastercraft, like Grabow, made many of our fathers pipe smokers. We all carry on the tradition…Thanks…Ted”

I also found some older RTDA Almanac pages on Chris’ Pipe Pages site. http://pipepages.com/index.html The first of these shows the address of the Mastercraft Pipe Company in New York before the move and purchase that Ted mentions above. It is a listing of different brands sold by the pipe company. I clipped this image from the 1949 RTDA Almanac. It is an early catalogue listing since the brand was created in 1941.
mc The next two photos were clipped from the 1969 RTDA Almanac. I included these as they show a list of various MC pipe lines. Note the inclusion in this list of the Executive line. It is the fifth pipe in the list below and sold for $4.95. I am assuming that the Executive Choice could be a subset of this line. The one I have is Italian made and imported to the US. The time frame fits the pipe that I refurbished so it may well be a 1969 pipe. The Italian pipes were made for Mastercraft by such Italian pipe makers as: Lorenzo, Gasparini, Federico Rovera, Emilio Rovera, GIGI Pipe, Brebbia, Santambrogio, Fratelli Rossi.

mc2 mc3
Now that I had found out some of the history of the Mastercraft brand I was intrigued. I went to work on the pipe with a new interest. I find that often a bit of history of the brand fuels my clean up and restoration work. The photo below shows the cake and the tars buildup on the rim. The rim itself was beveled inward and appeared to be unharmed under the tars. The grain was quite nice on the bevel.

IMG_6904I reamed the bowl with a PipNet reamer. For this bowl I used three of the reaming heads to take the cake back to bare briar so that I can build up a hard and even cake.
IMG_6905
I scrubbed the tar on the rim with Murphy’s Oil Soap to soften and remove it. It took a lot of scrubbing to break through the tar and hard carbon buildup. I put the oil soap on cotton pads and worked them against the bevel of the rim. After much scrubbing the rim was finally clean. The photo below shows the finished rim. I scrubbed down the rest of the bowl to remove the grime on the surface.
IMG_6906
I cleaned out the shank and the bowl with pipe cleaners, cotton swabs and isopropyl alcohol. I scrubbed out the stem at the same time. Once the pipe was clean inside and out I found that the finish was covered with a thick varnish coat in a rather surprising way.
IMG_6907
I decided to do a bit of touching up the rim edges and bevel with a dark brown aniline stain. It went on spotty and when I flamed and hand buffed it things did not feel or look right with the rim. I wasn’t sure what the issue was, the bowl had been quite shiny when I started but with the oil soap it had dulled slightly.
IMG_6908
I found that the finish was covered with a thick varnish coat. I did not figure that out until I did a touch up stain on the rim and took it to the buffer to polish the rim. I gave the entire bowl a buff with red Tripoli. As I buffed it the finish began to bubble and peel. I have to tell you this was very frustrating and irritating at the same time. The photo below shows the bubbling of the finish on the back side of the bowl. It appears almost white in the photo.
IMG_6909
I took the pipe back to the work table to remove the varnish coat. I wiped the bowl down with acetone on cotton pads to remove the finish. Thankfully it was a varnish and not a urethane based finish. It came off quite easily with a little scrubbing of the bowl, rim and shank. The next series of four photos show the bowl after the finish was removed. I decided I liked the colour of the bowl at this point so I did not restain it once it was clean. The rim and the bowl matched so it became unnecessary.
IMG_6910

IMG_6911

IMG_6912

IMG_6913
I sanded the stem with 220 grit sandpaper, medium and fine grit sanding sponges to remove the buildup on the stem. I then went on to sand it with micromesh sanding pads. I wet sanded it with the 1500-2400 grit pads and dry sanded with the 3200-12,000 grit pads.
IMG_6914

IMG_6915

IMG_6916
I rubbed the stem down with Obsidian Oil and when it had dried I took it to the buffer and buffed the bowl and stem with White Diamond. I was careful in the buffing on the shank as I did not want to damage the stamping. When the bowl and stem shone I gave them multiple coats of carnauba wax. I gave it a final buff with a soft flannel buffing pad. The finished pipe is shown in the photos below. The first photo is a close of the beveled rim. I find that feature of this pipe to be one of its most beautiful features. The final series of four photos show various views of the finished pipe. It turned out to be a beautiful pipe with interesting grain and once the varnish was removed a more natural finish. The pipe is now ready to enter the next phase of its journey in time and be smoked by me until I pass it on to whoever comes next in its life.
IMG_6921

IMG_6917

IMG_6918

IMG_6919

IMG_6920