Tag Archives: Lorenzo Pipes

A Large Sandblast Lorenzo Ravenna Studio 826 Italy Lovat Style Stack


by Steve Laug

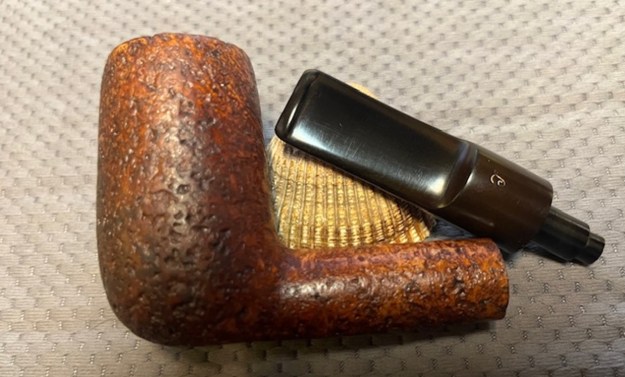
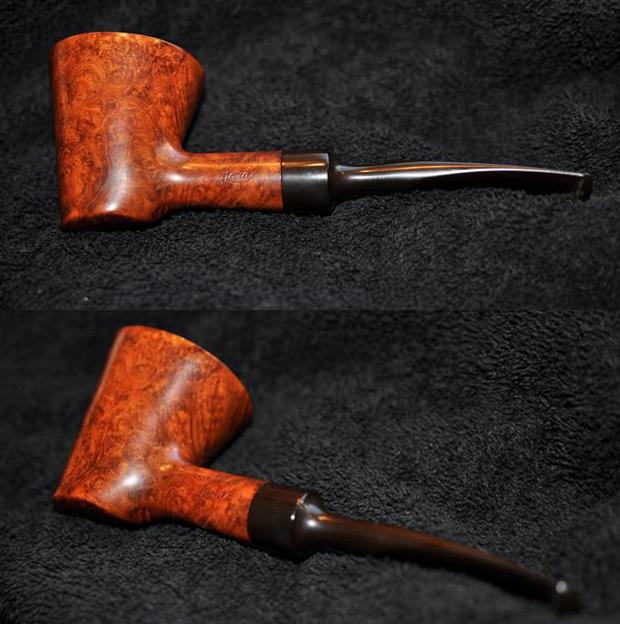
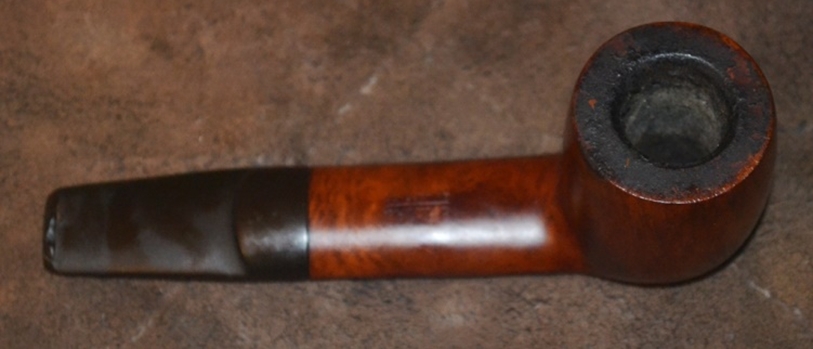
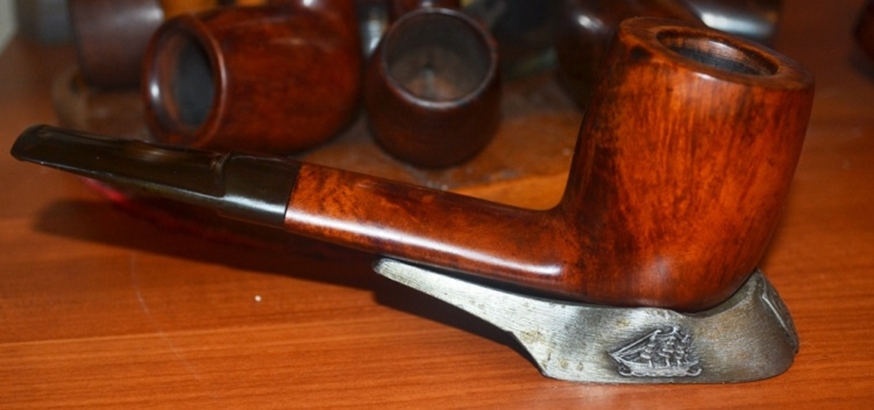
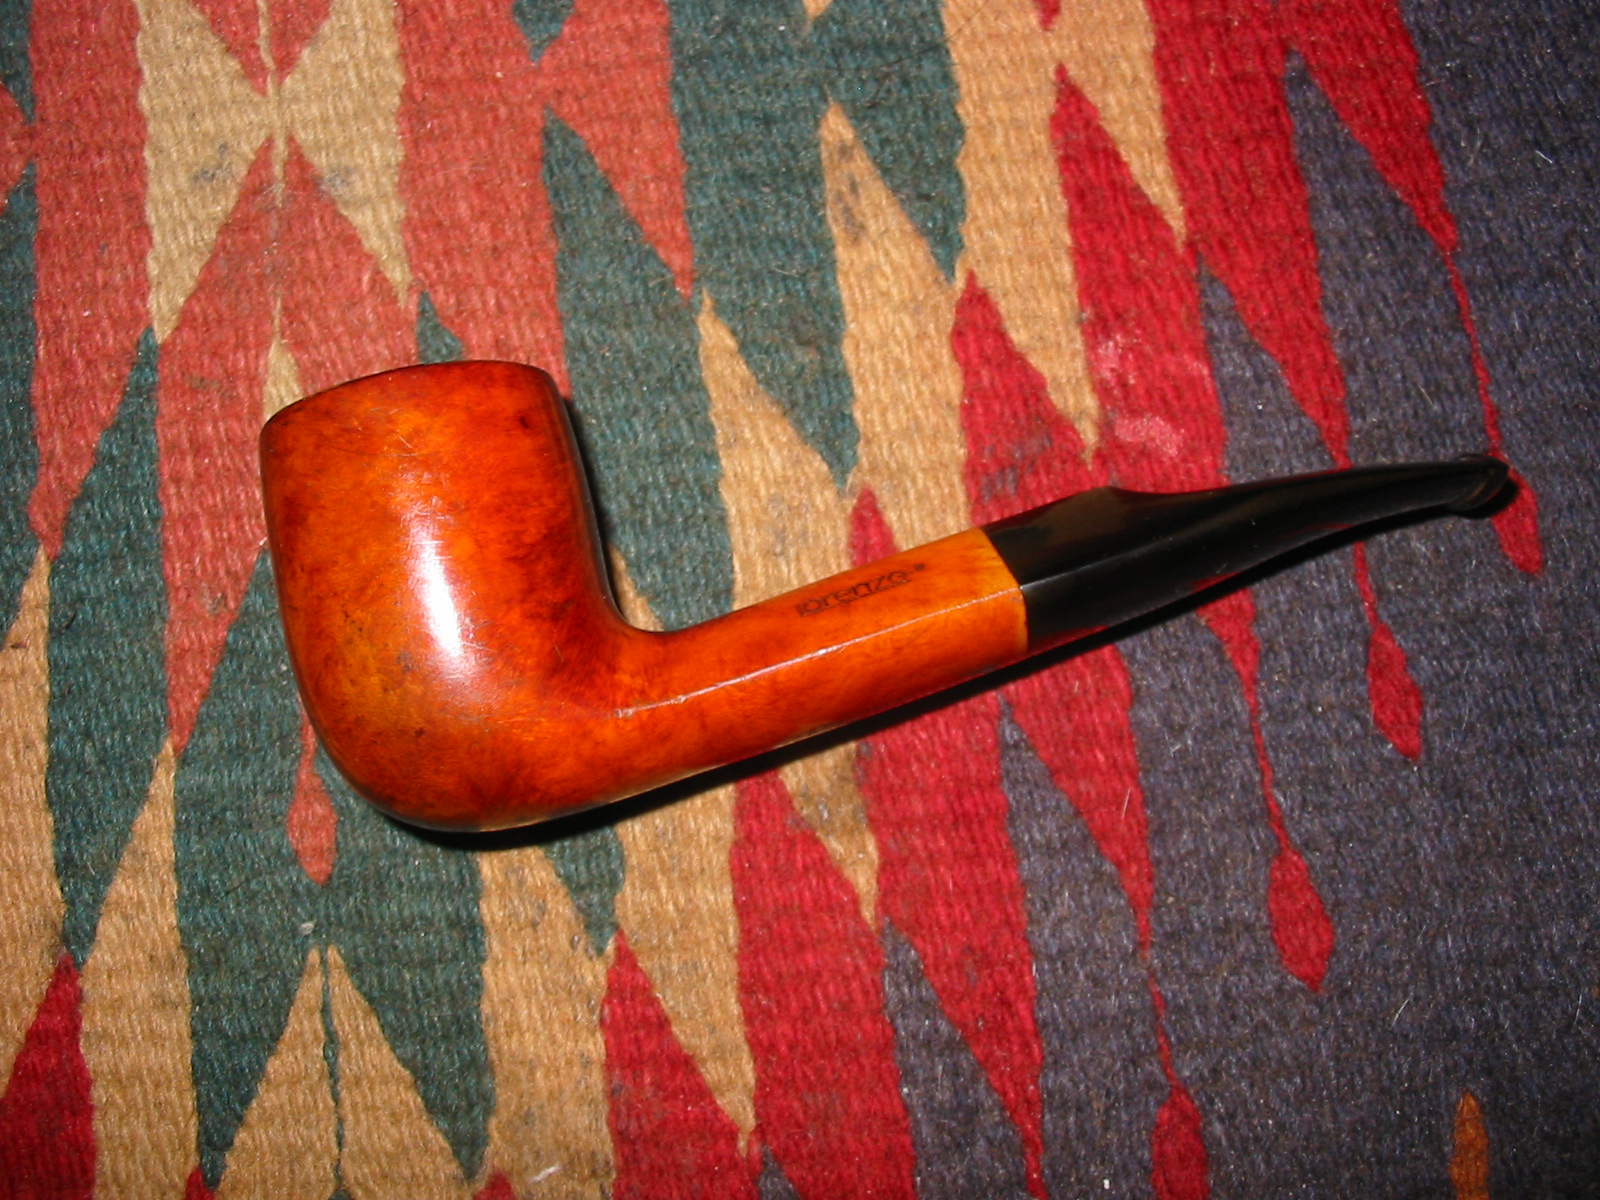
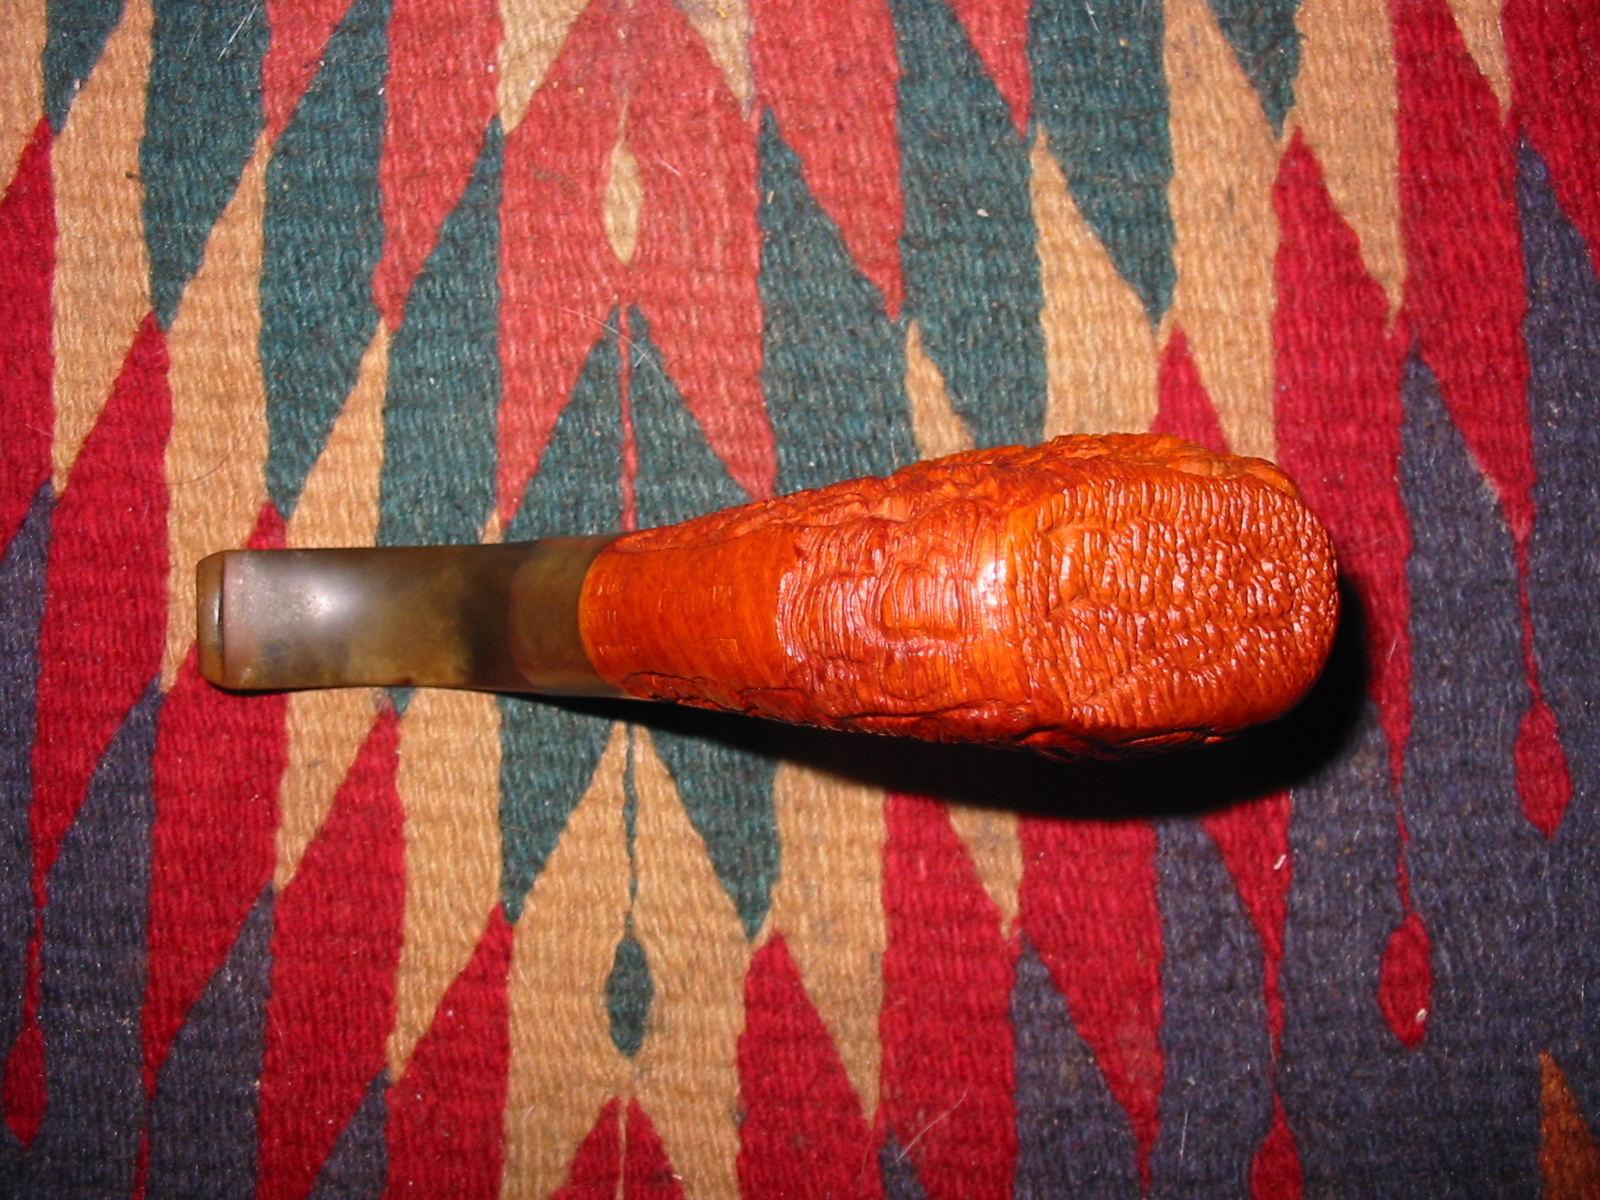
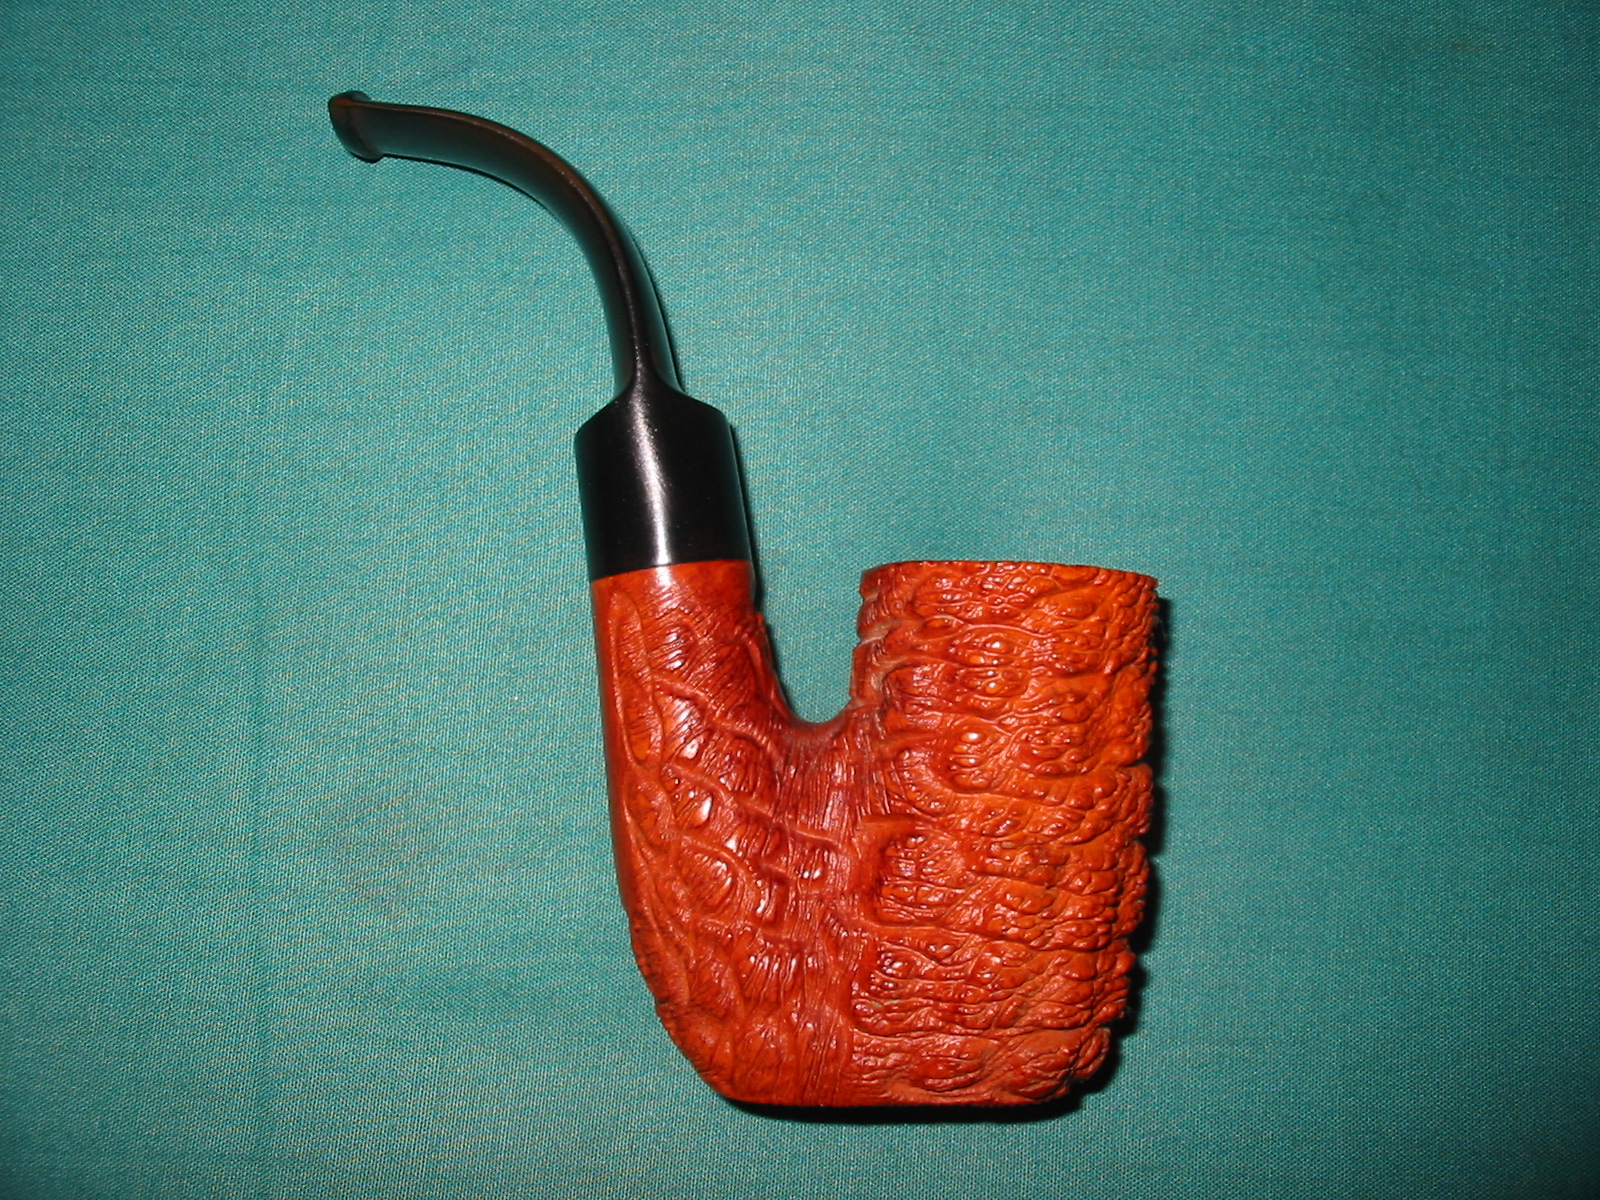
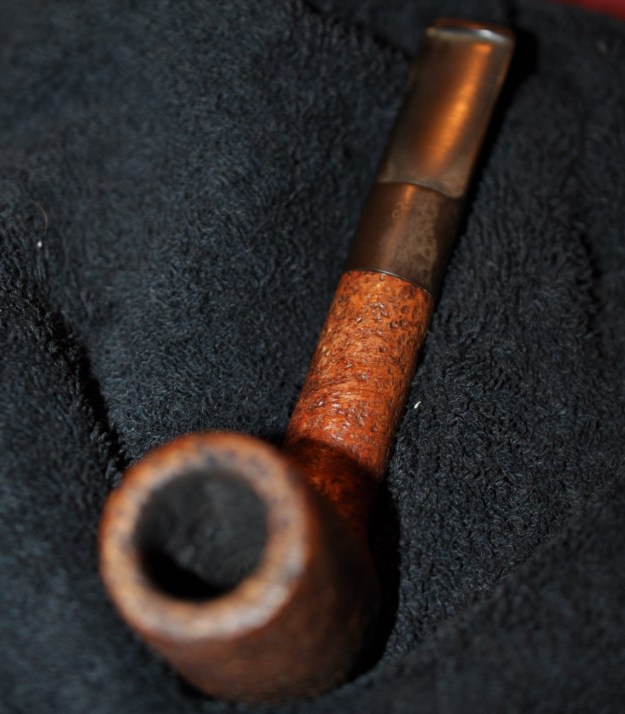
We picked some older pipes to work on next. The second of these is a Lorenzo larger Lovat Stack with the light sandblast and polished finish. We purchased this one on 01/22/2024 from Jordan, Minnesota, USA as part of a lot on eBay. Just one more piece of evidence that, contrary to my own opinion, there are still some good finds at good prices to be found on that site. The pipe is a tall, large Lovat that is stamped on a smooth band on the underside of the shank and reads Lorenzo [over] Ravenna followed by Studio [over] 826 followed by Italy. The pipe was well used. The finish was dirty with dust and debris in the sandblast. The bowl had a thick cake in it and some lava on the rim top and the inner edge. There was also some roughening to the inner edge of the bowl. The vulcanite saddle stem was oxidized and had some tooth marks on the surface ahead of the button. Jeff took photos of the pipe before he started his cleanup work.  
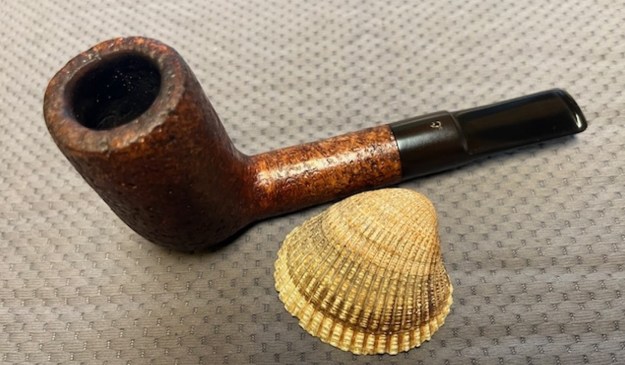
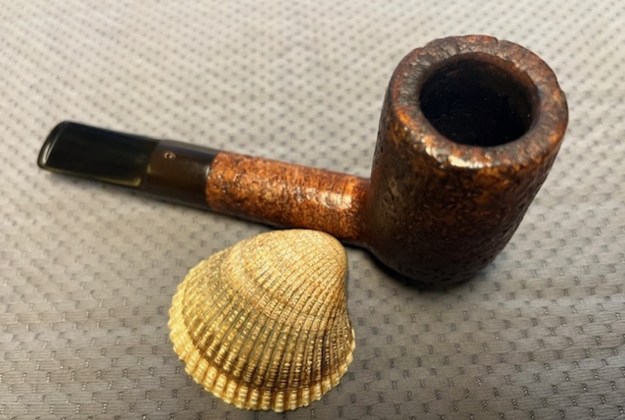
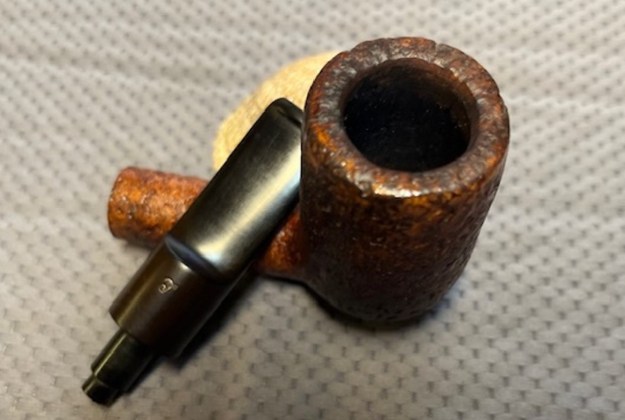
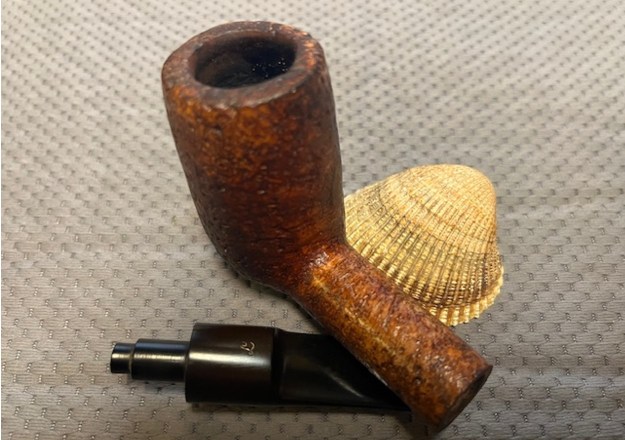
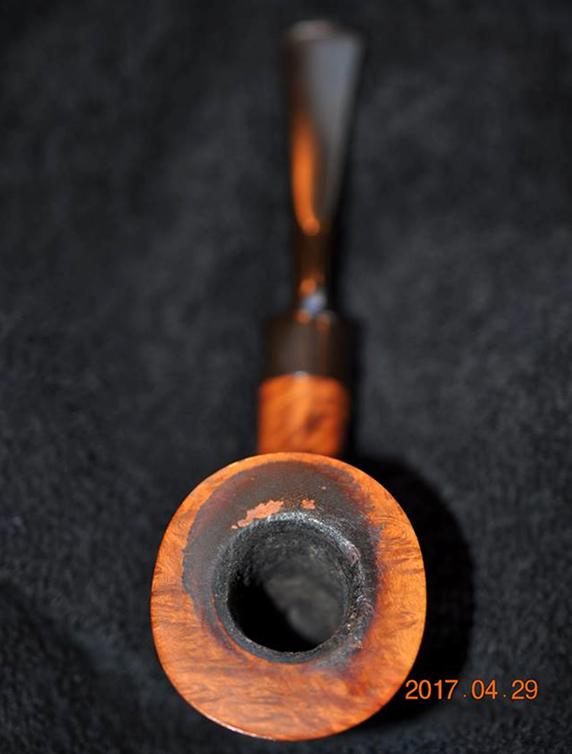
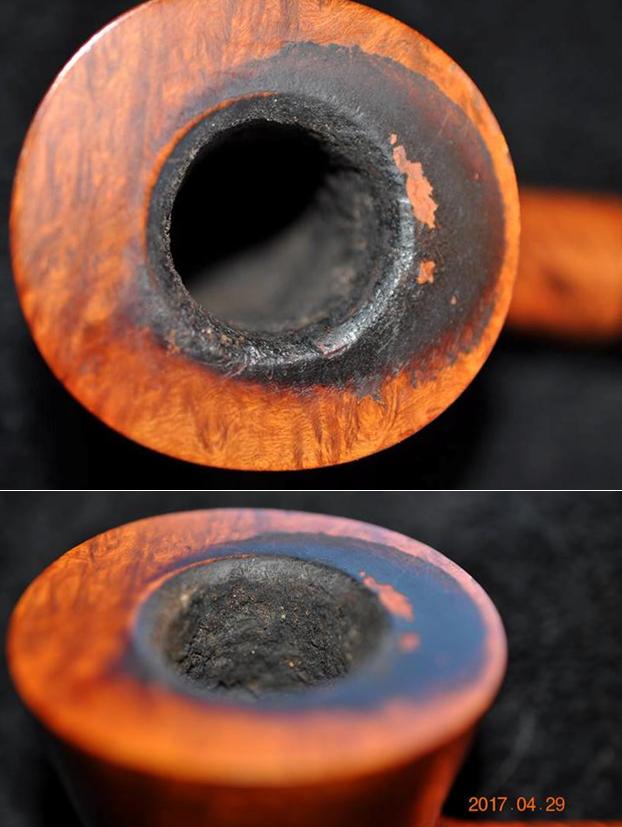
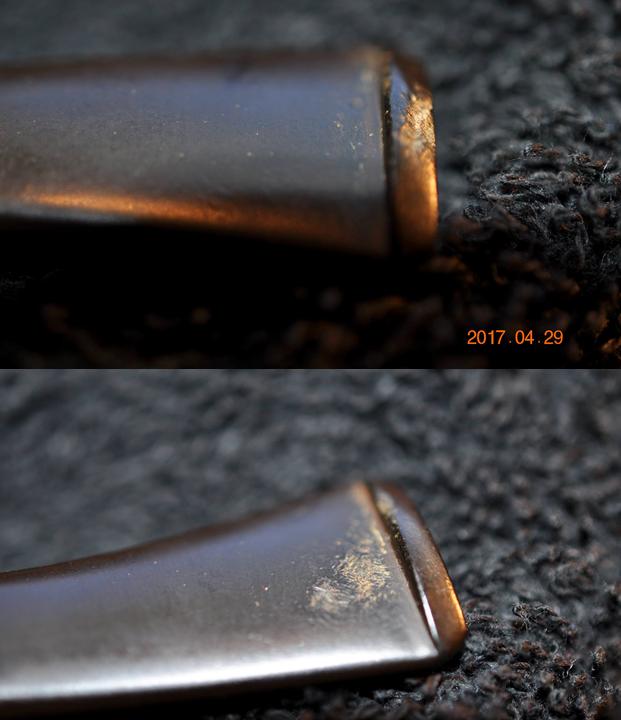
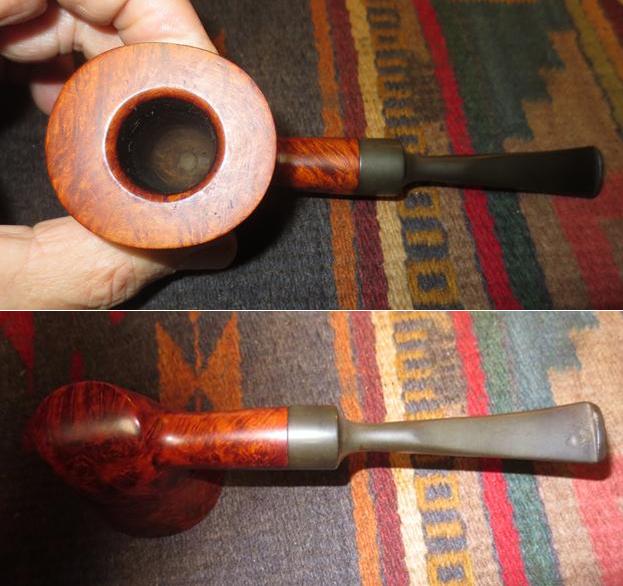
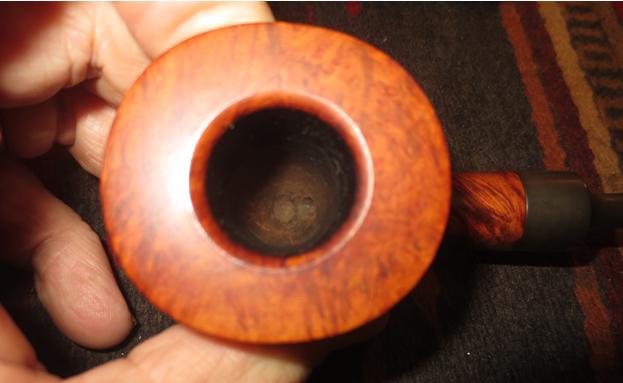
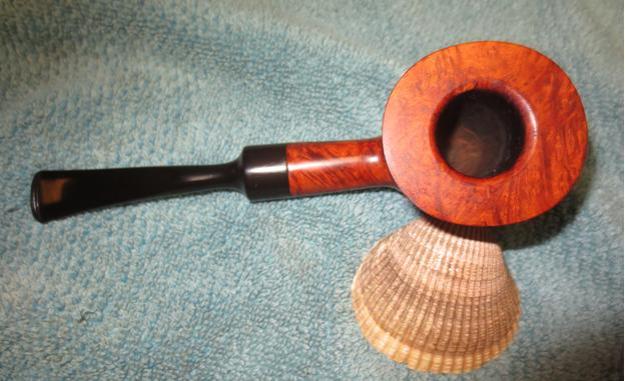
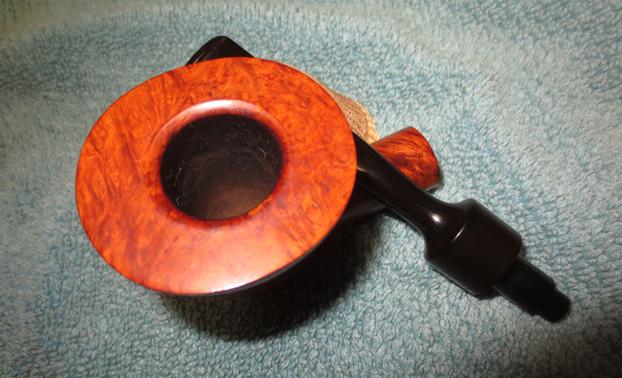
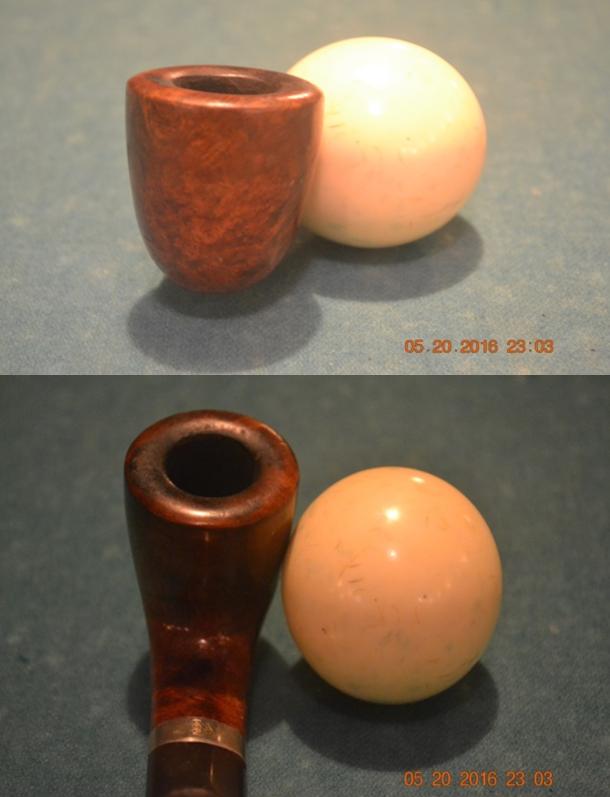
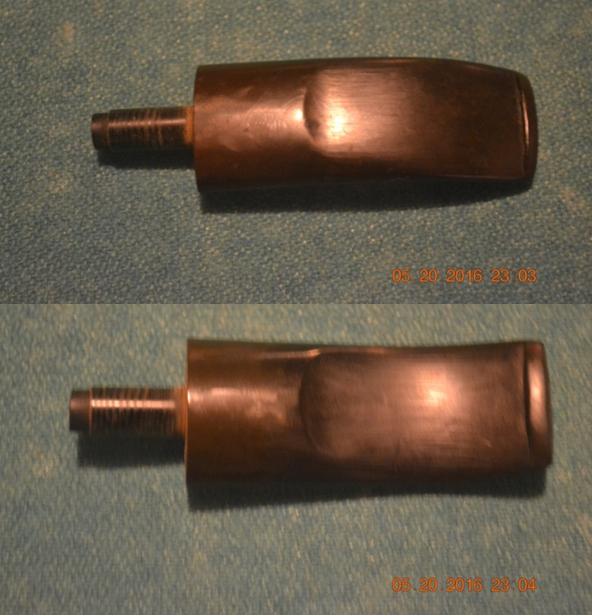
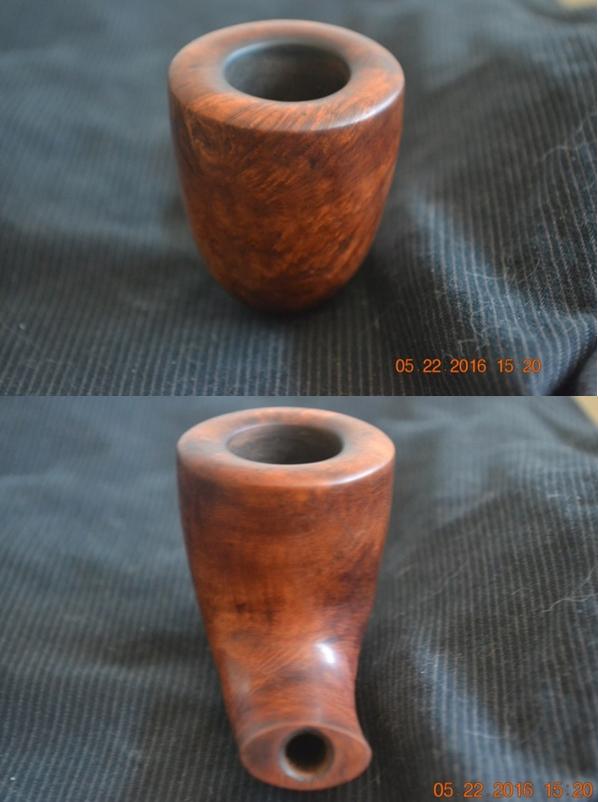
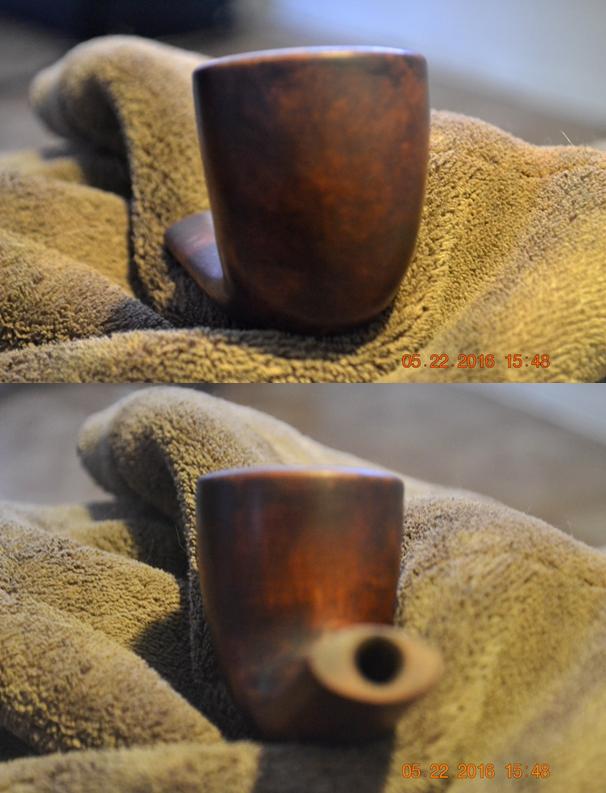
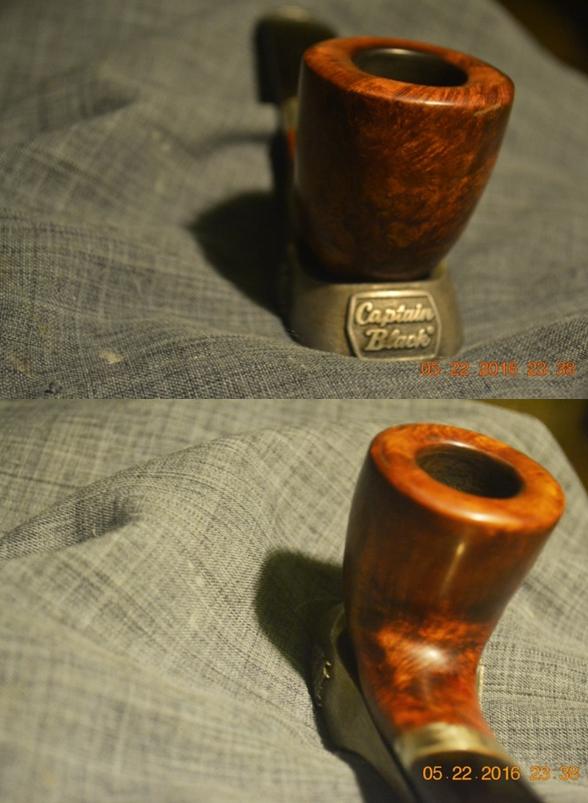
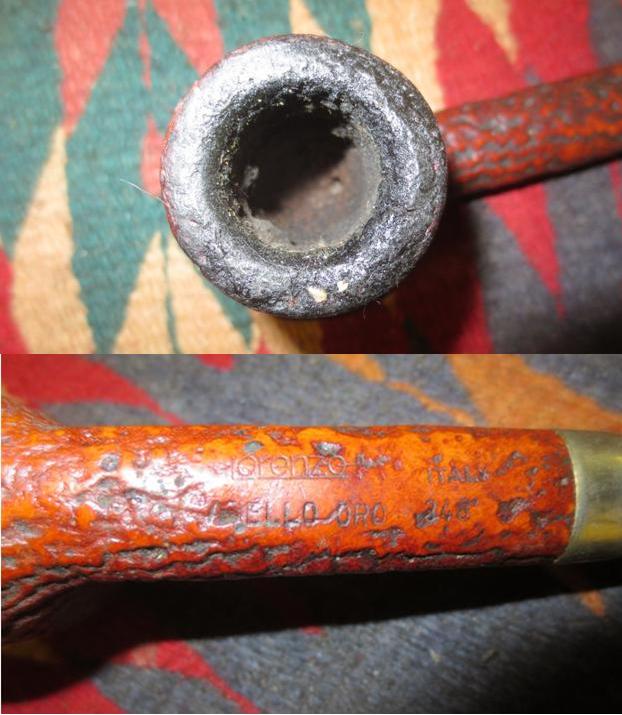
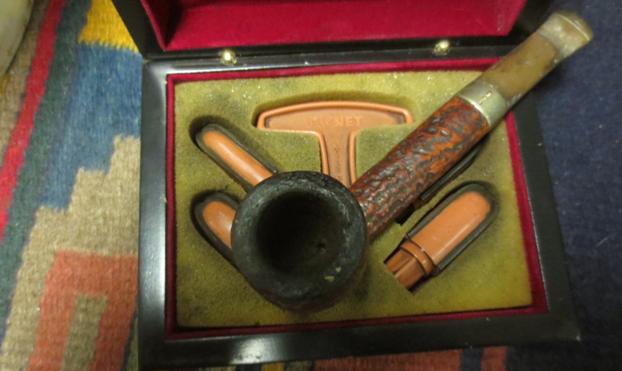
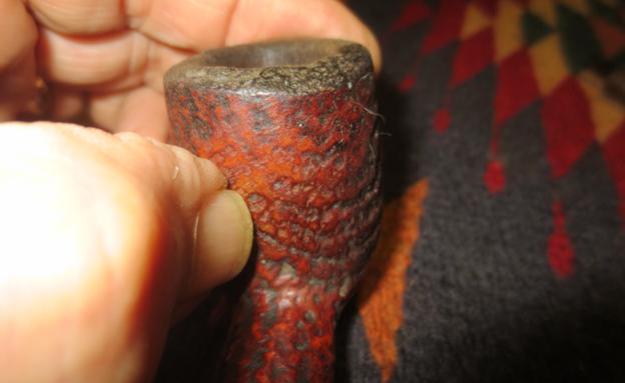
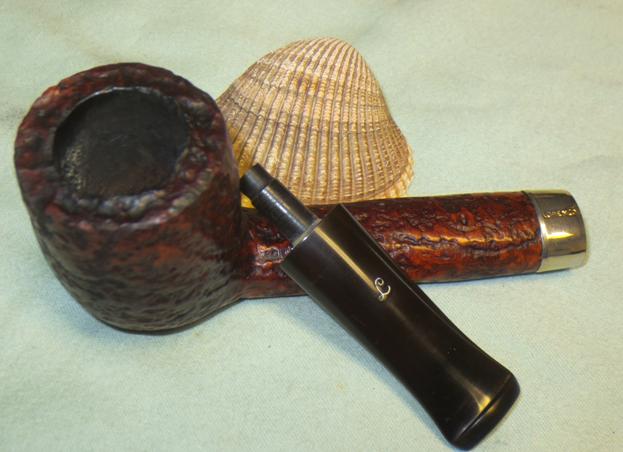
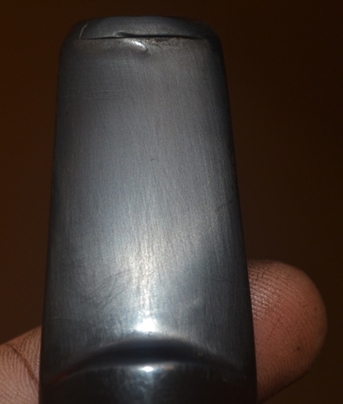
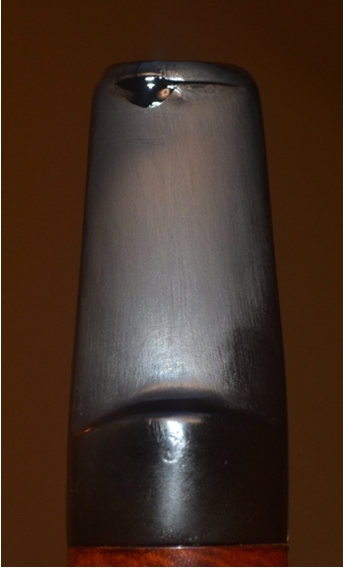
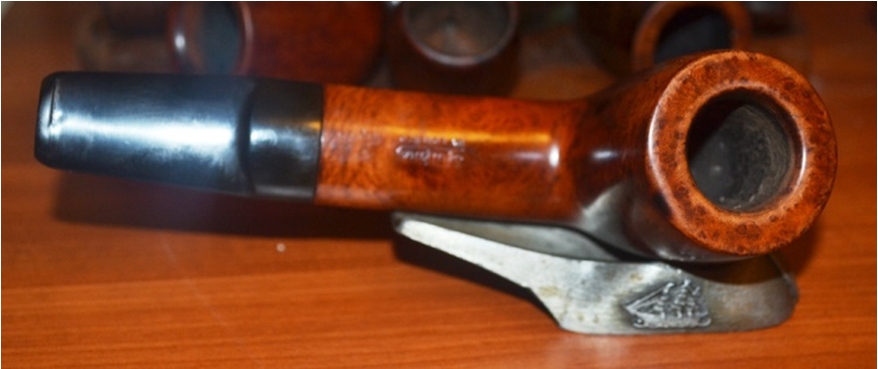
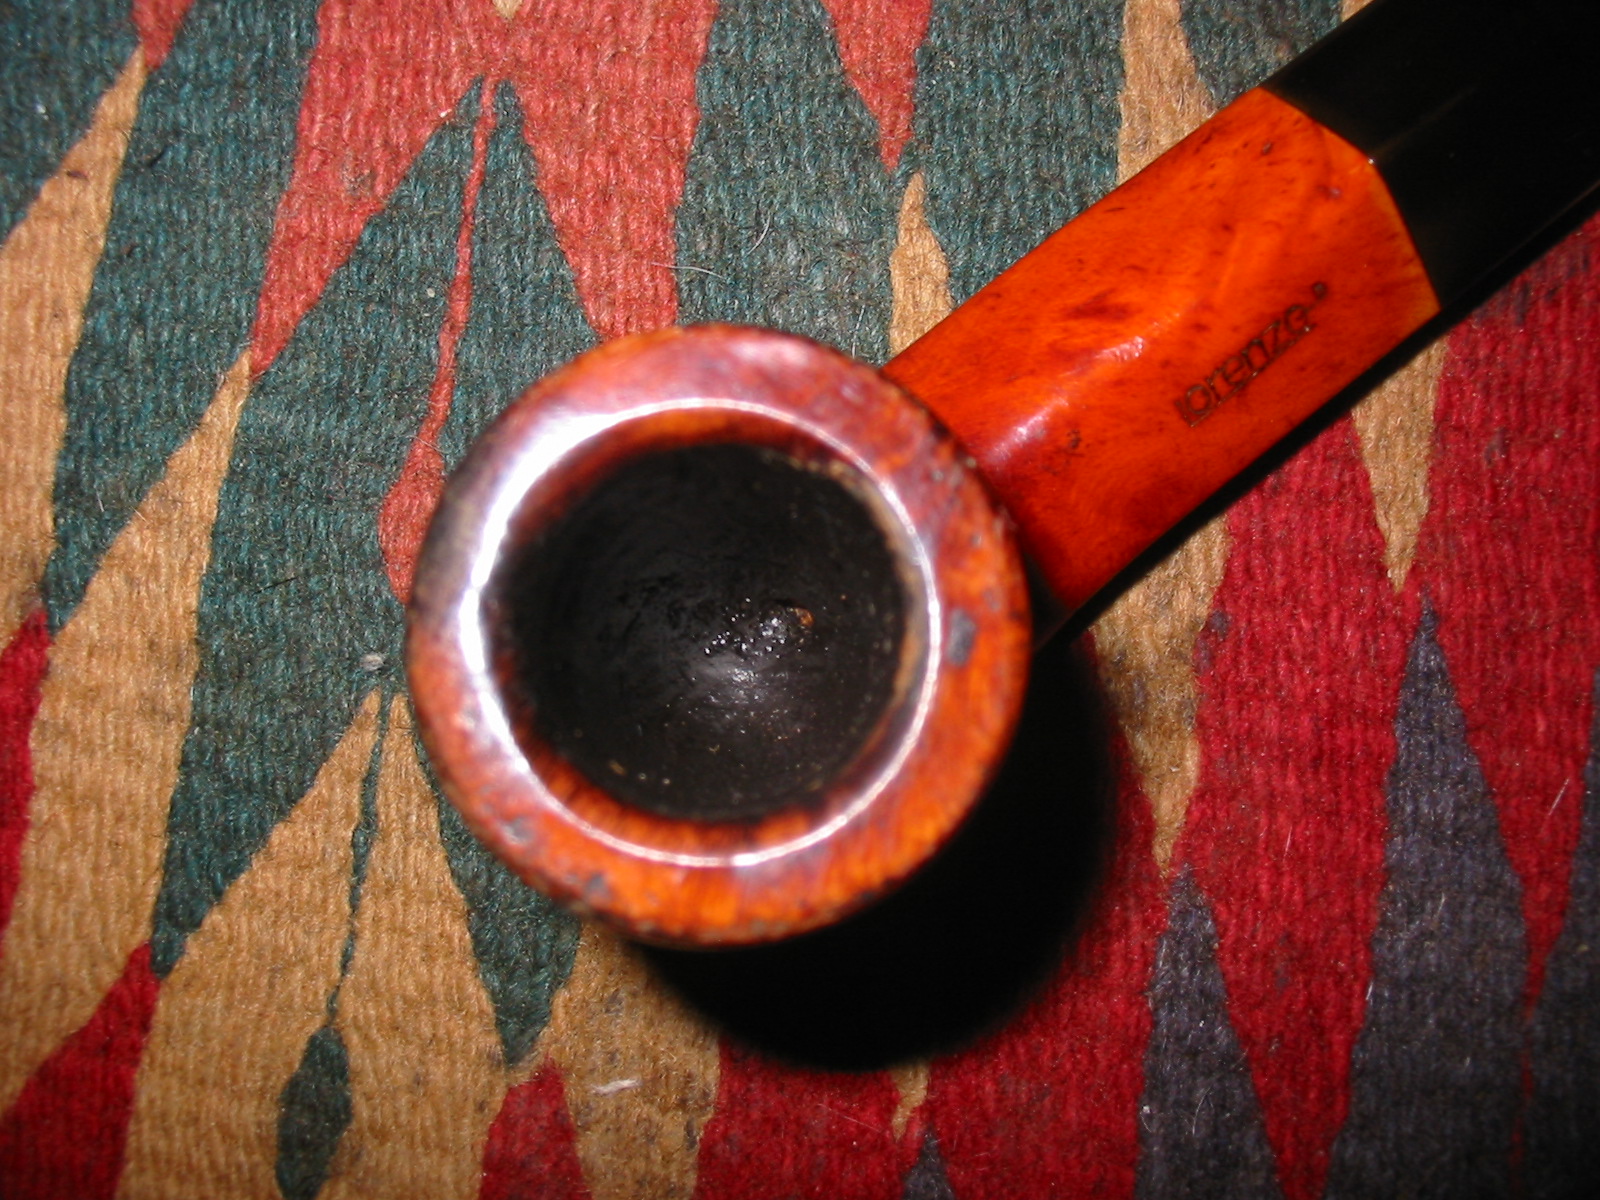
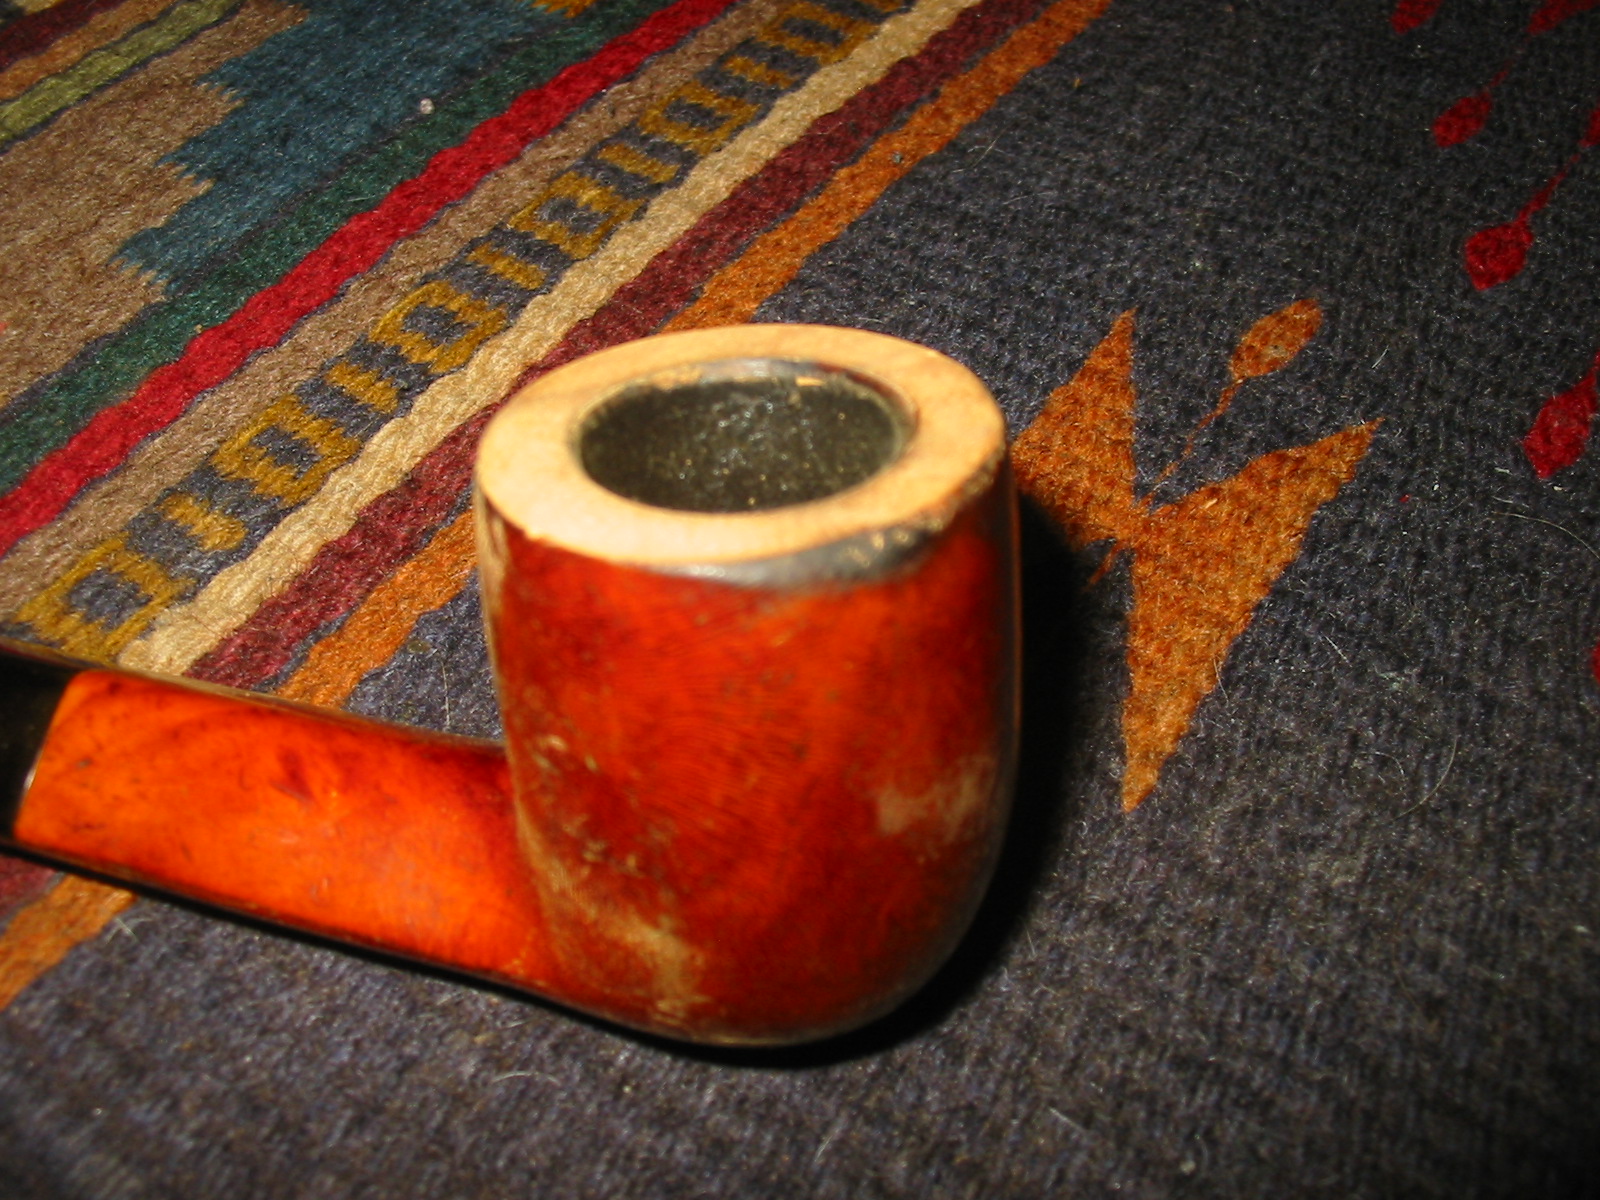
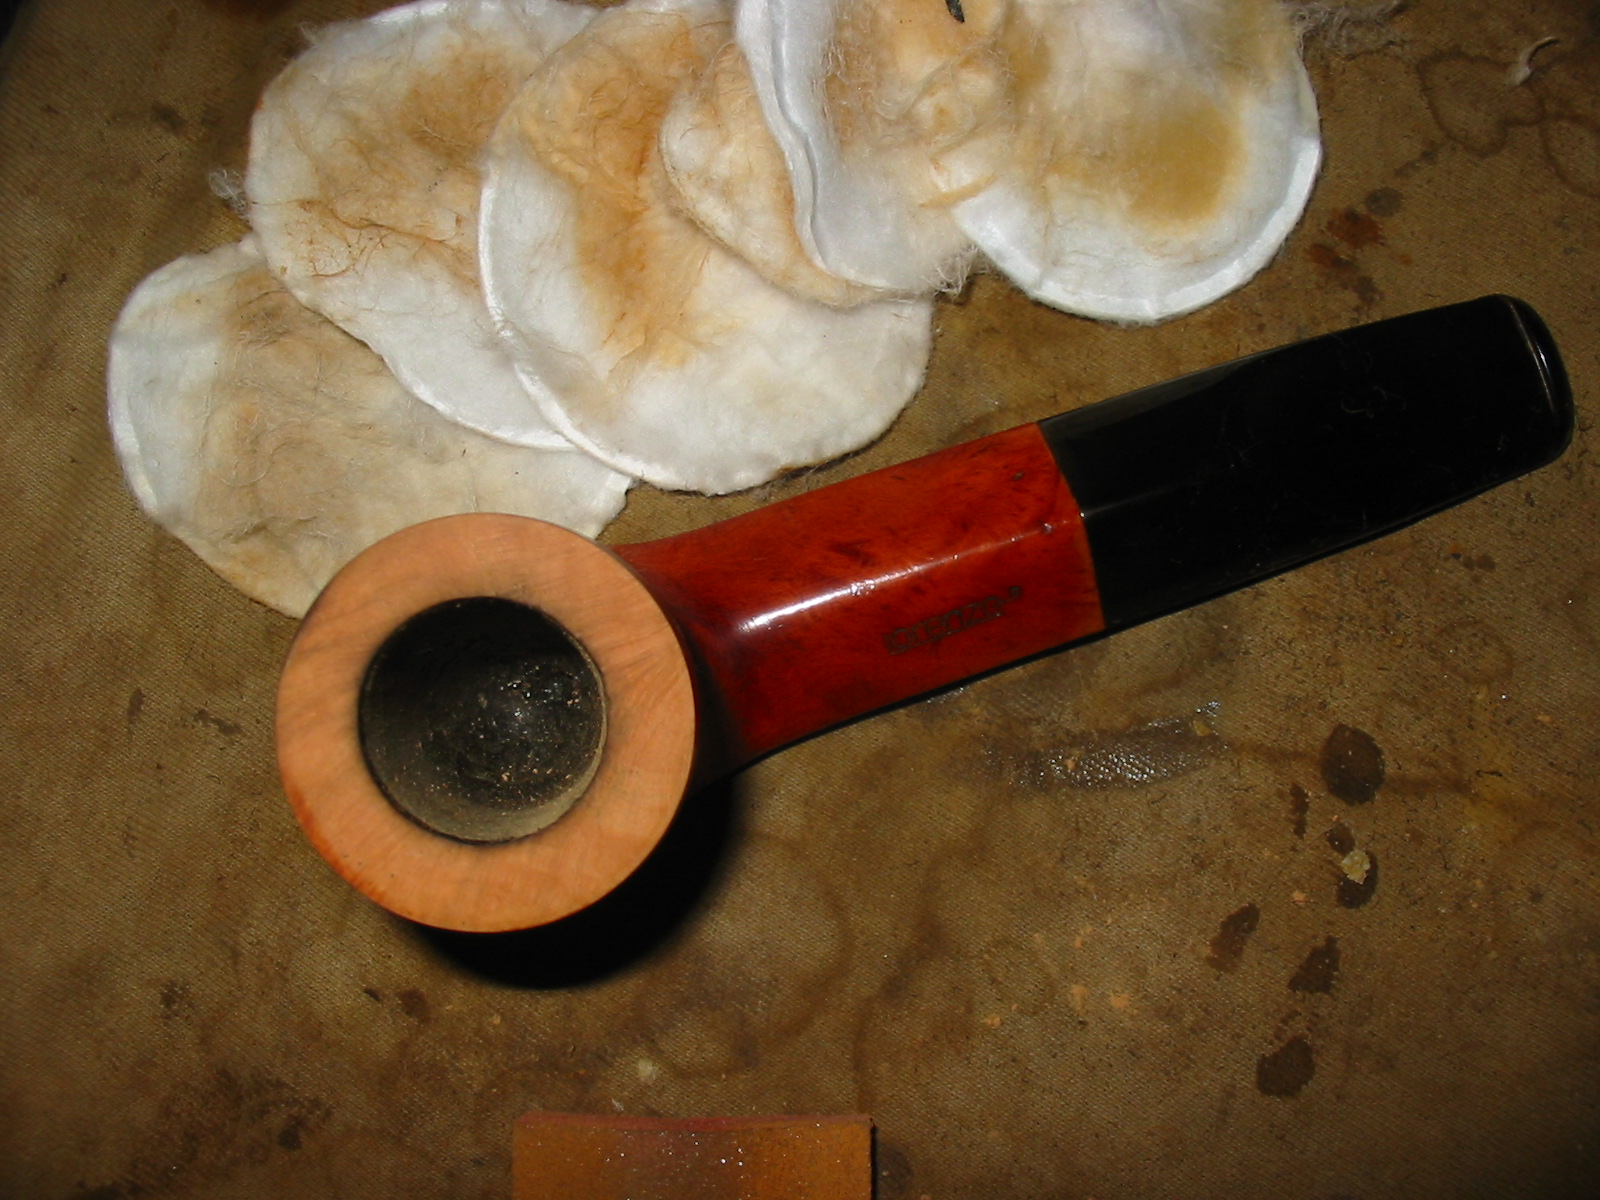
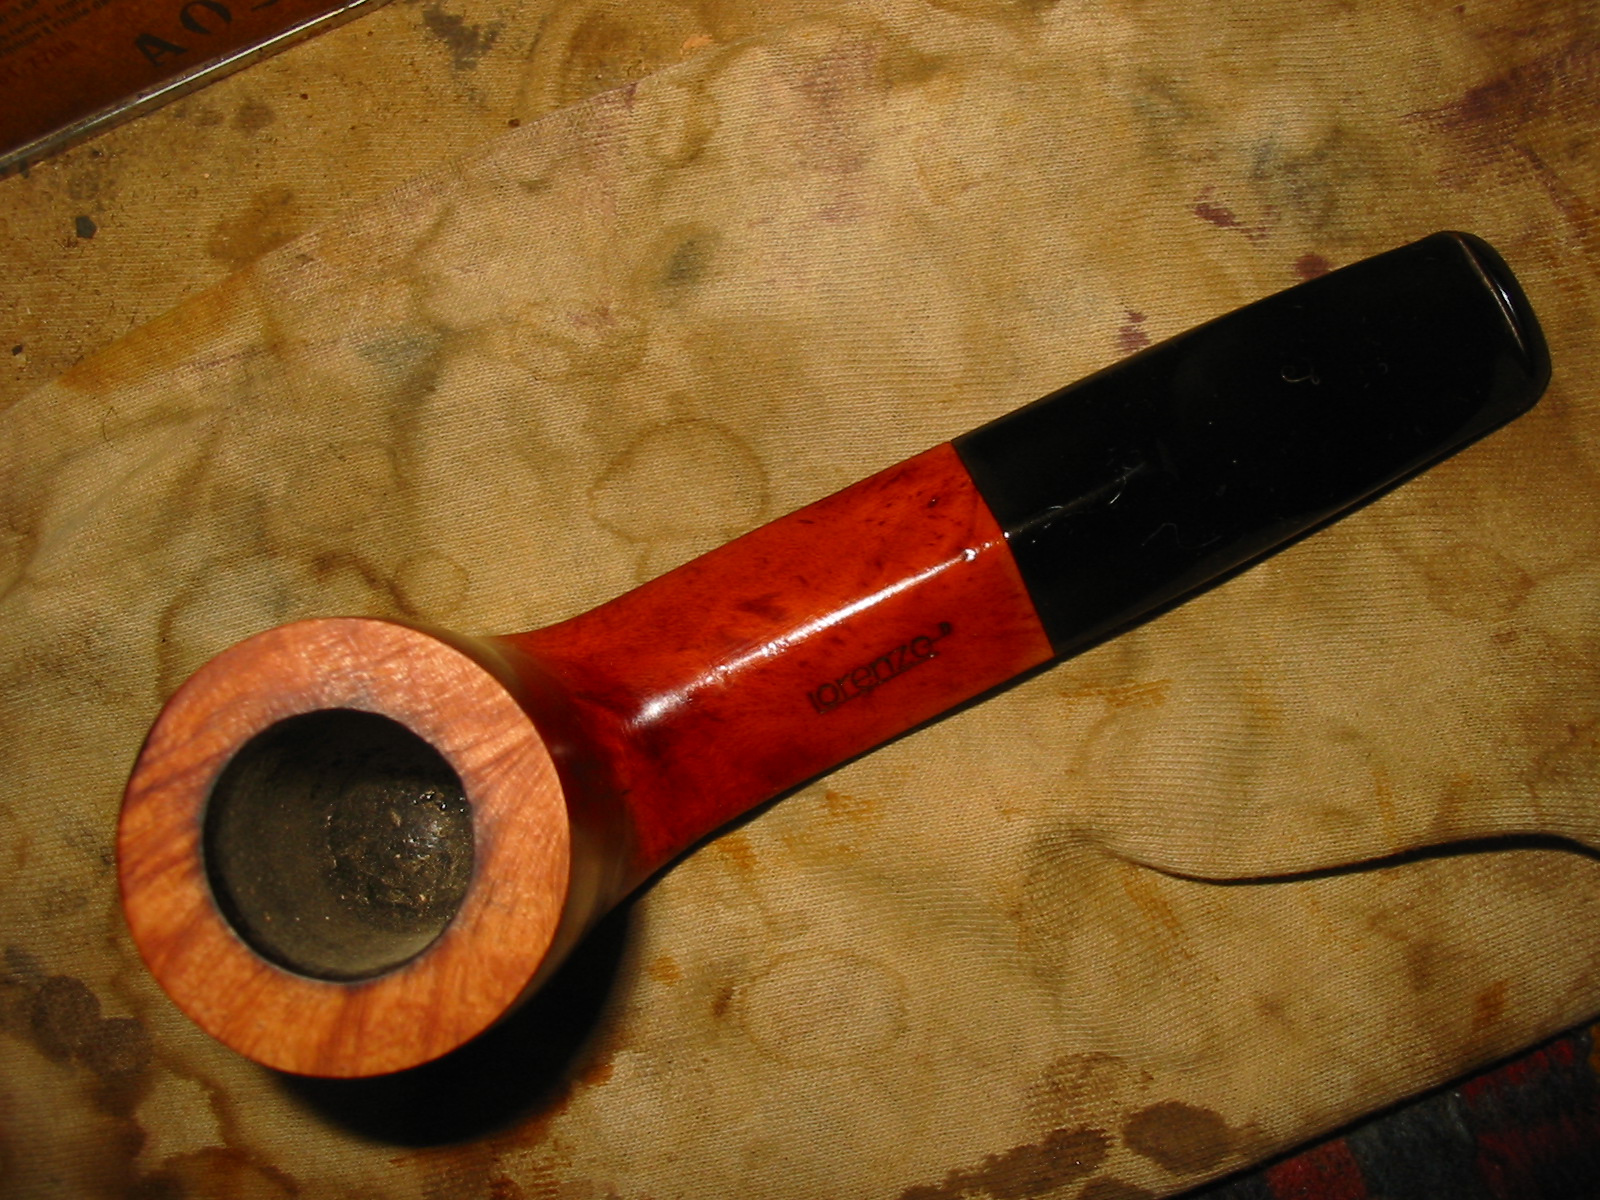
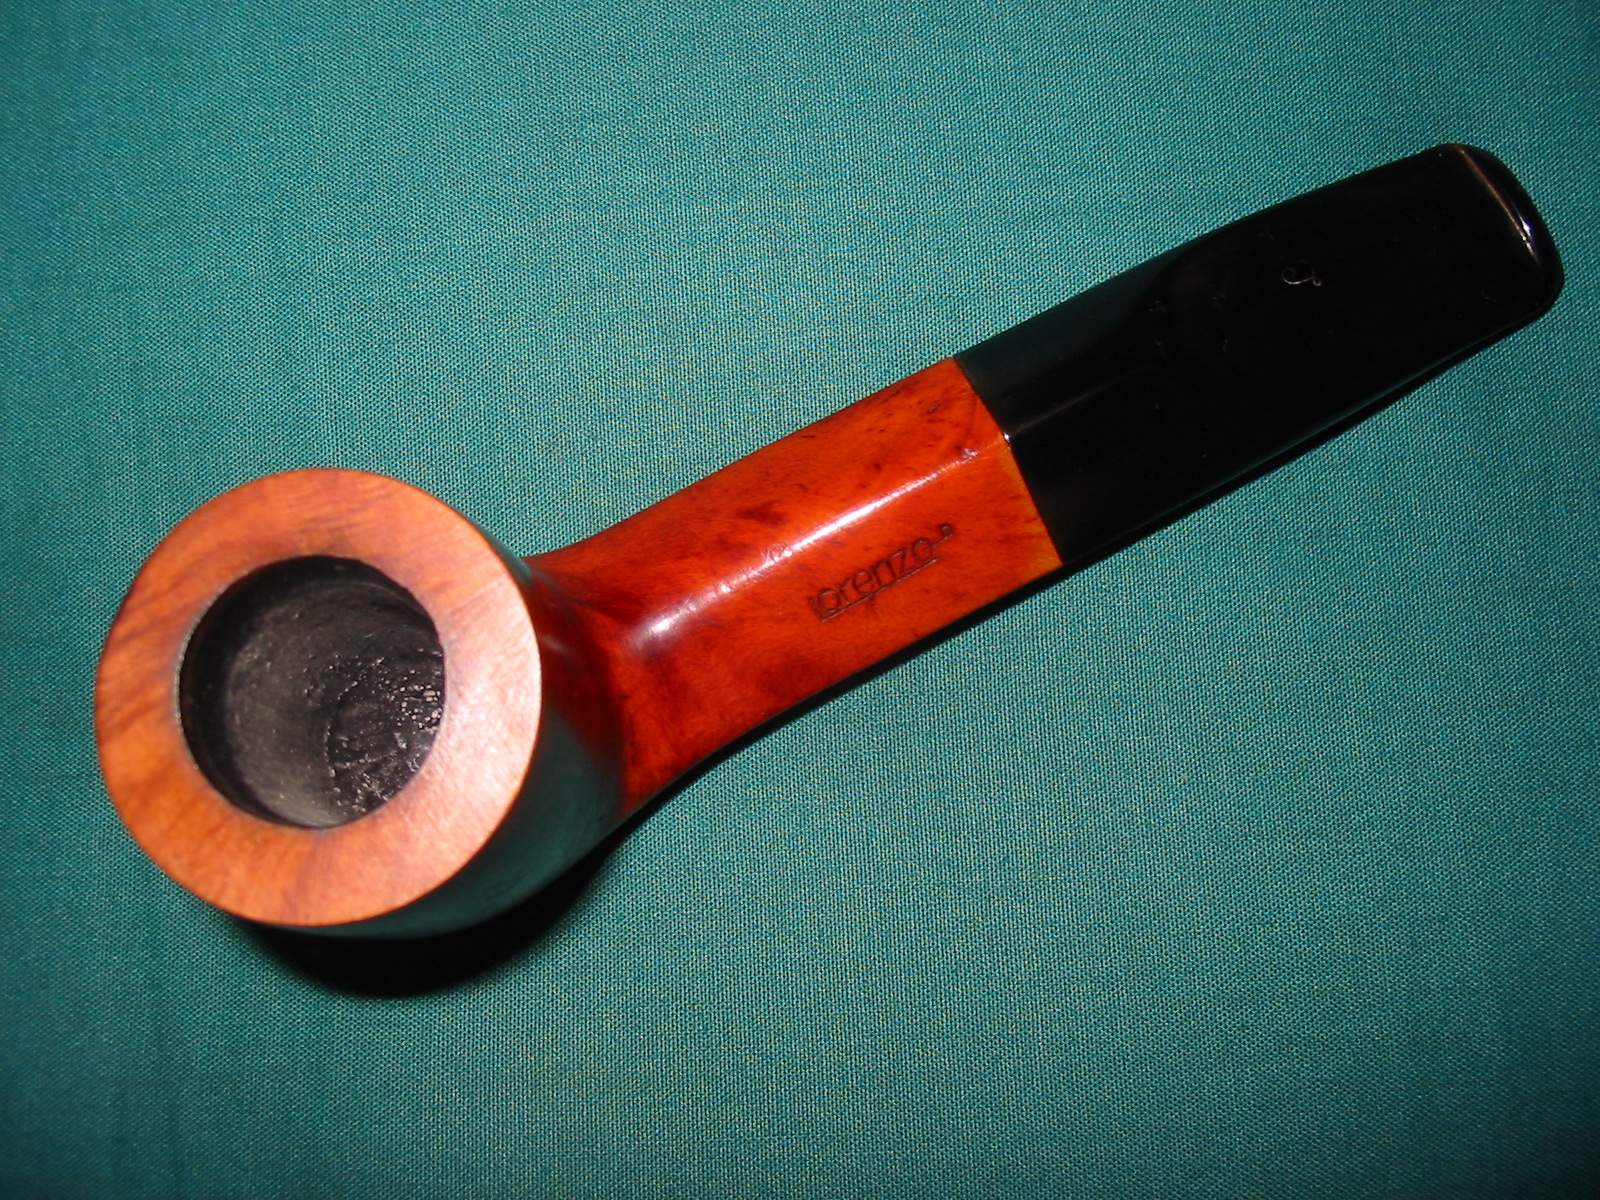
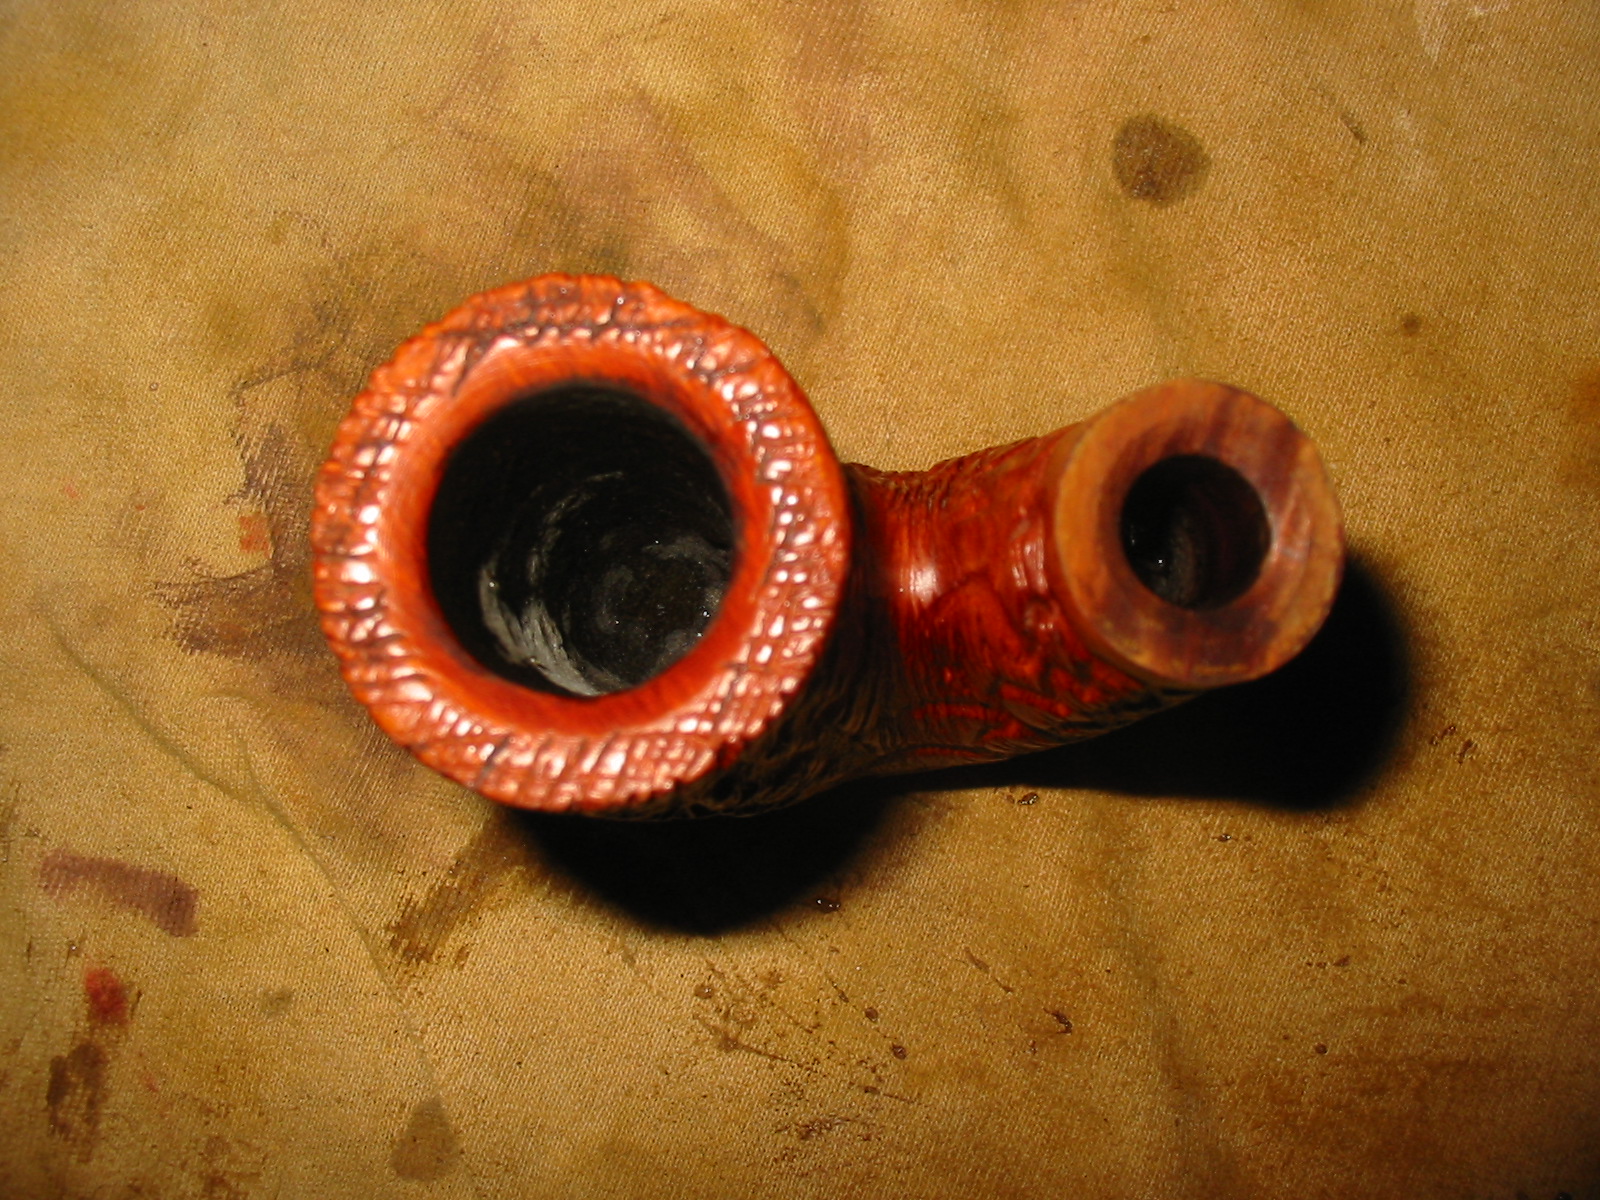
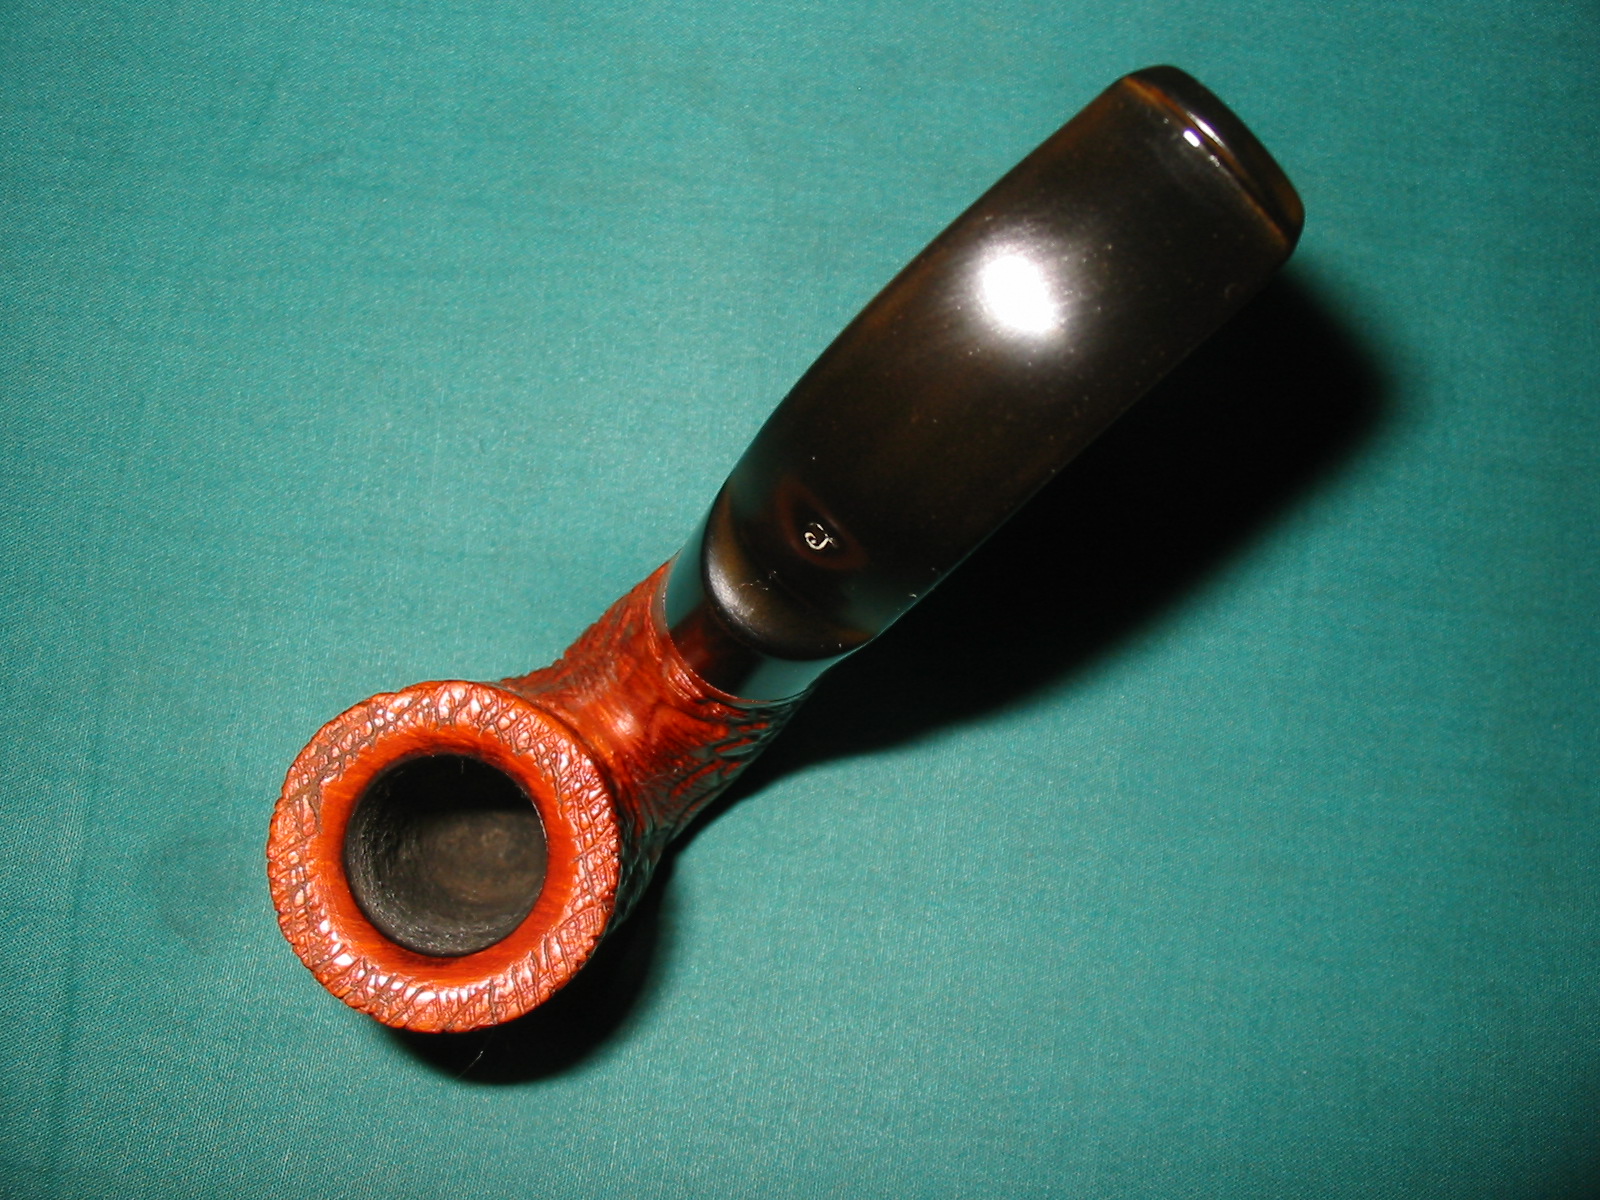
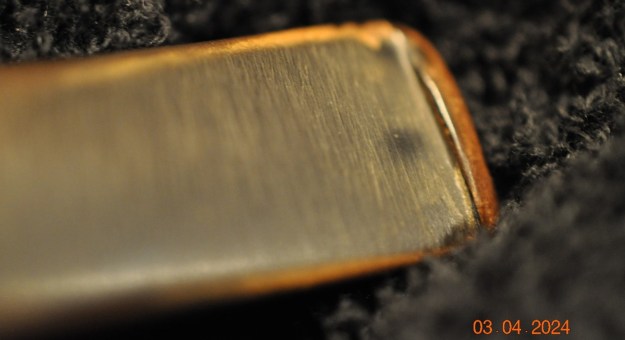
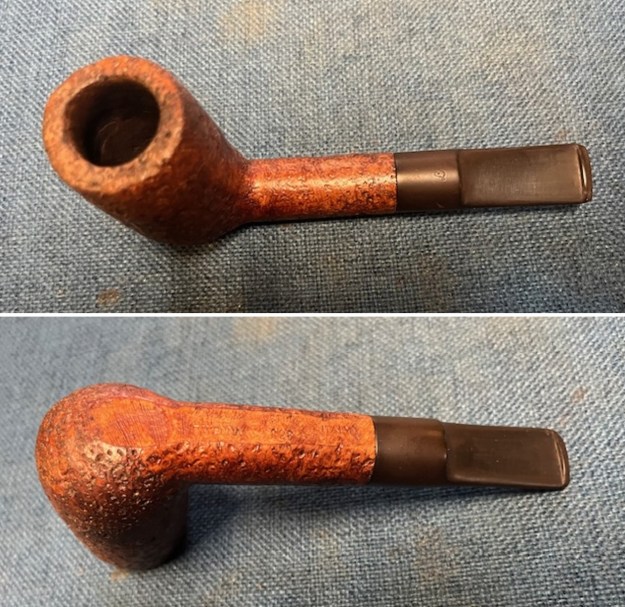
He took some closer photos of the rim top and bowl to show the condition. You can see the thick cake in the bowl and the debris on the rim top and lava on the inner edge. It is hard to know for certain but it looks like there is some roughening on the back inner edge. He also took photos of the stem to show its condition. You can see the oxidation, calcification and tooth marks. 
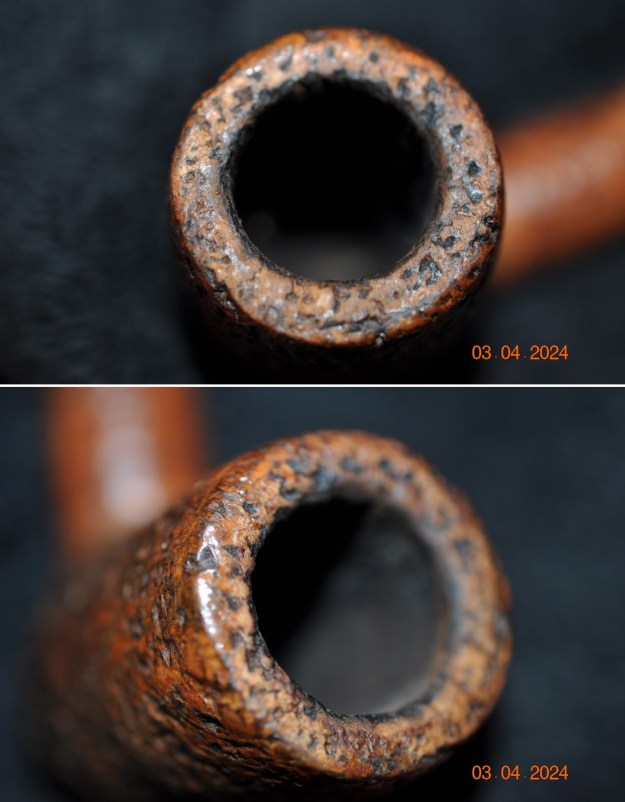
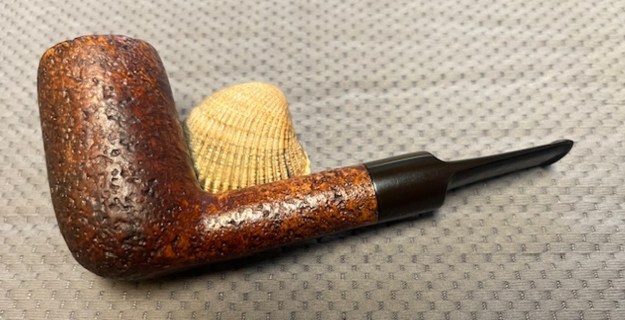
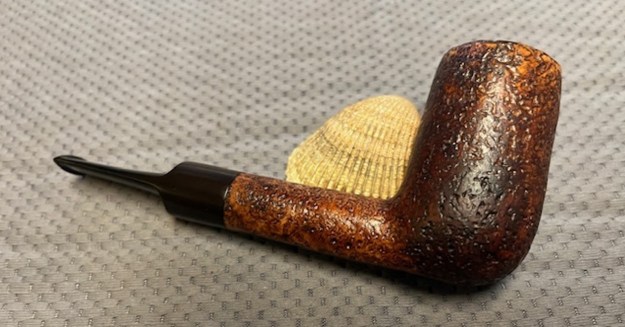
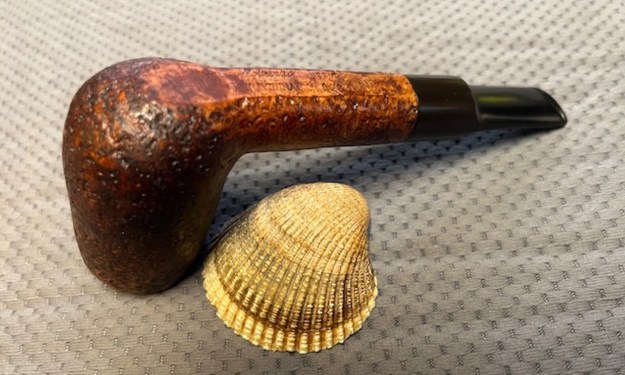
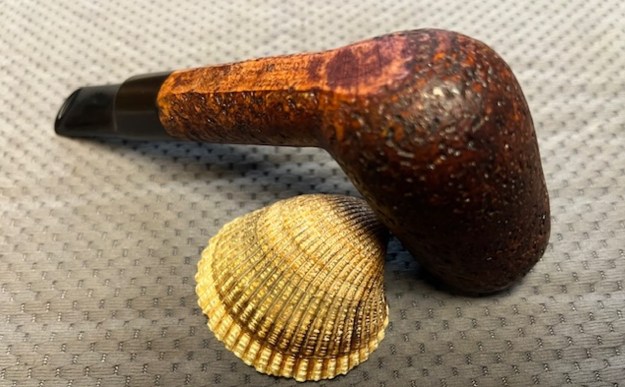
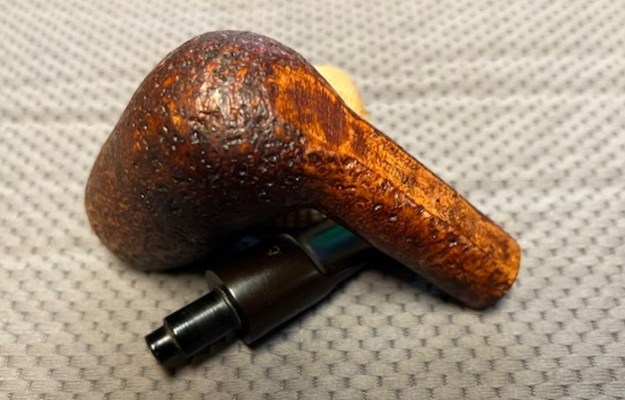
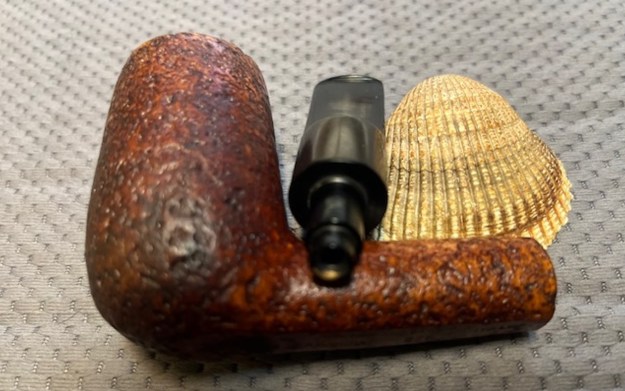
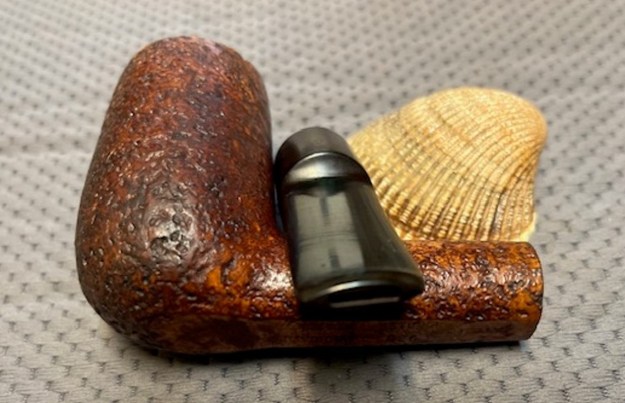
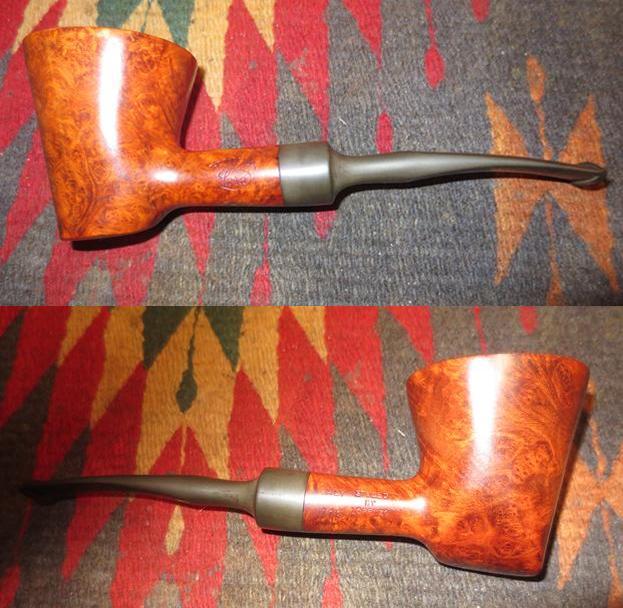
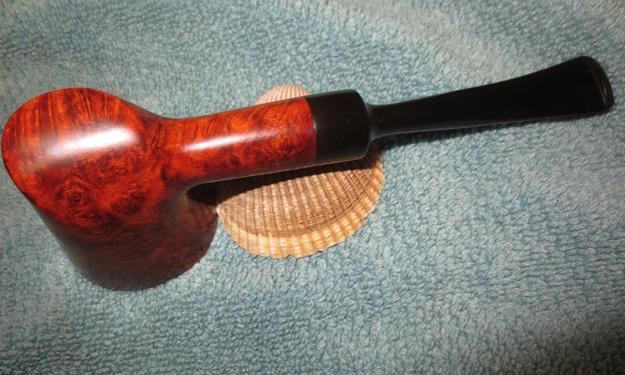
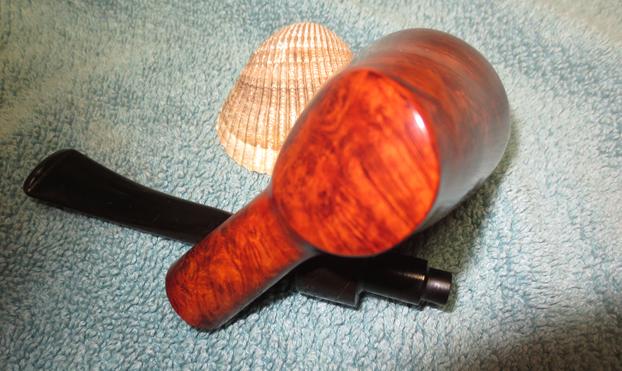
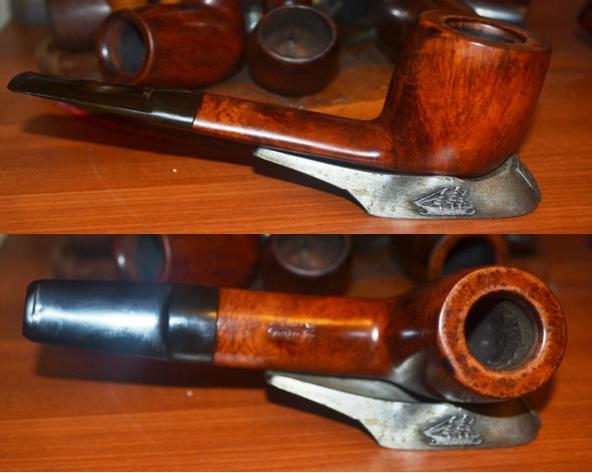
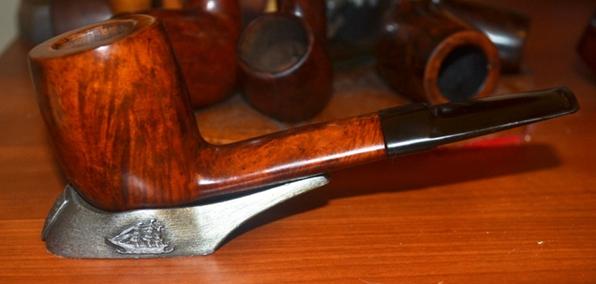
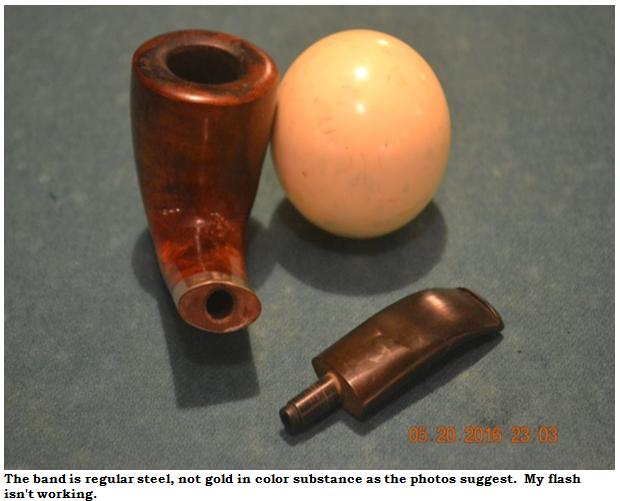
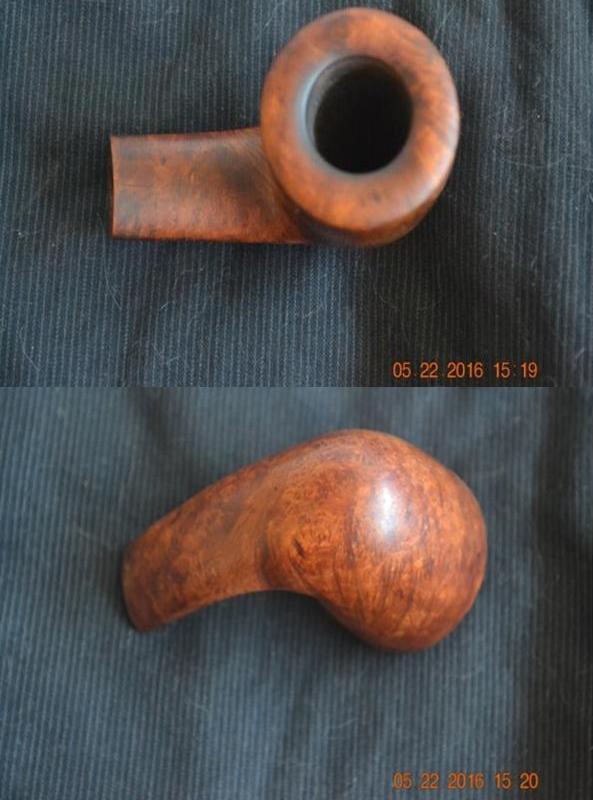
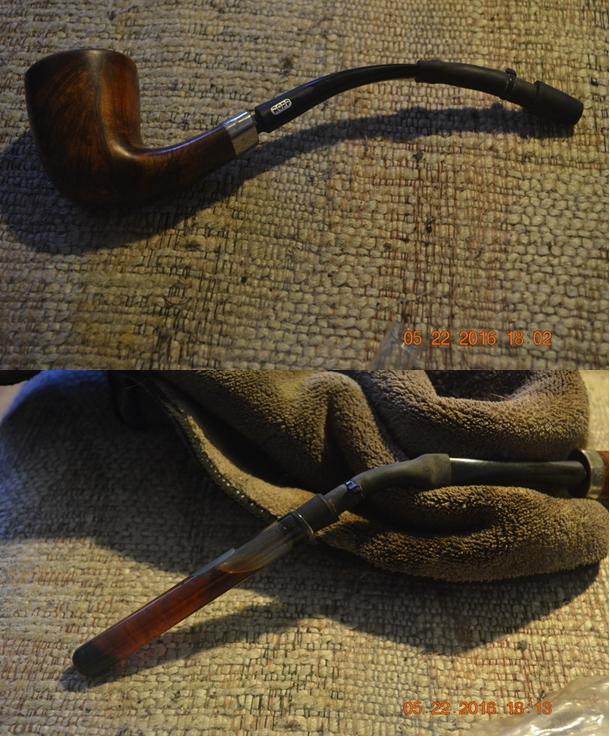
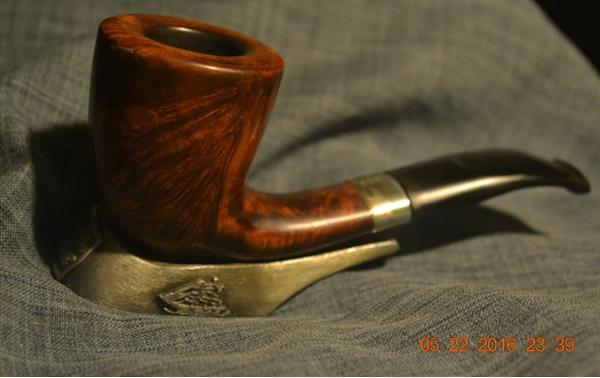
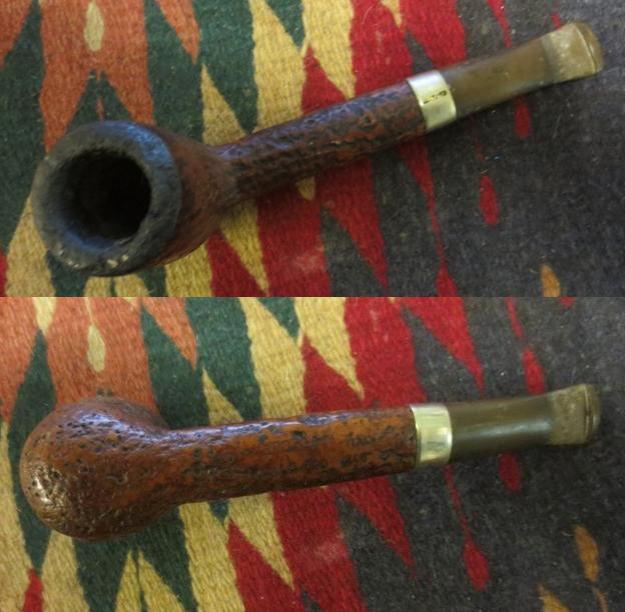
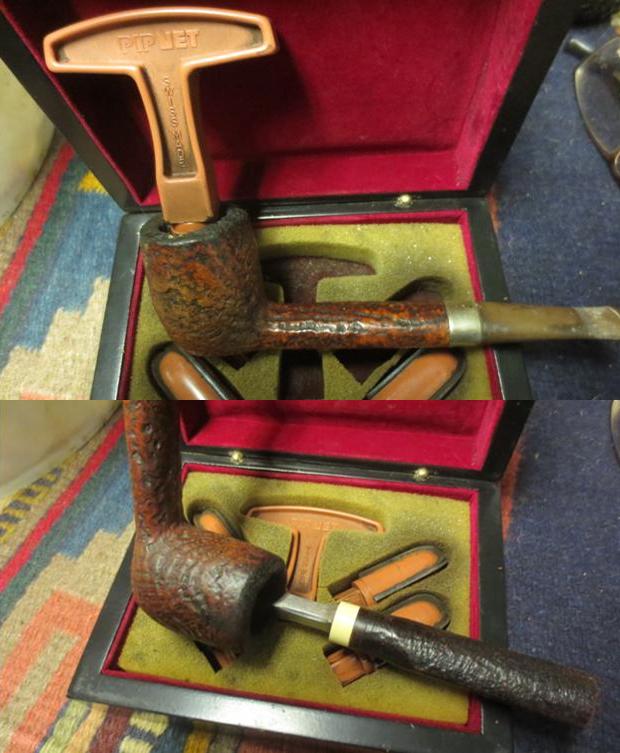
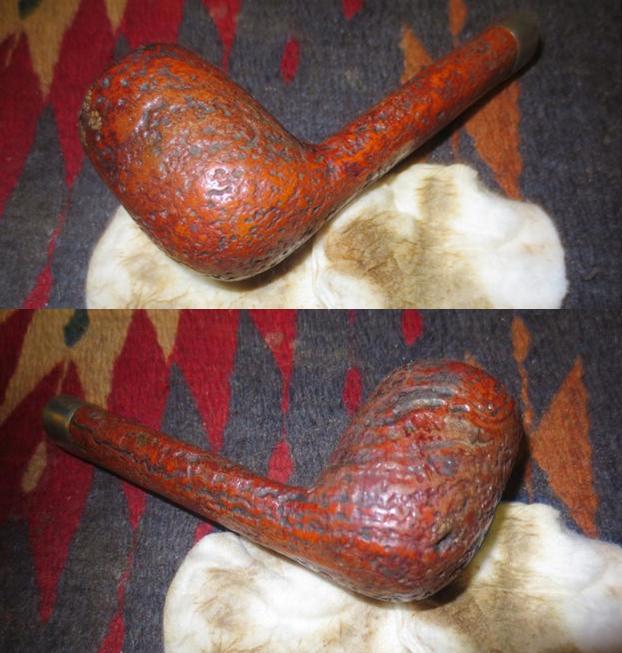
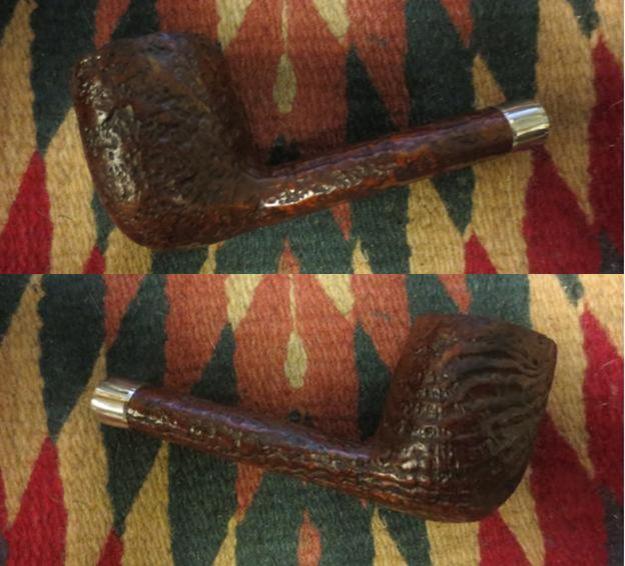
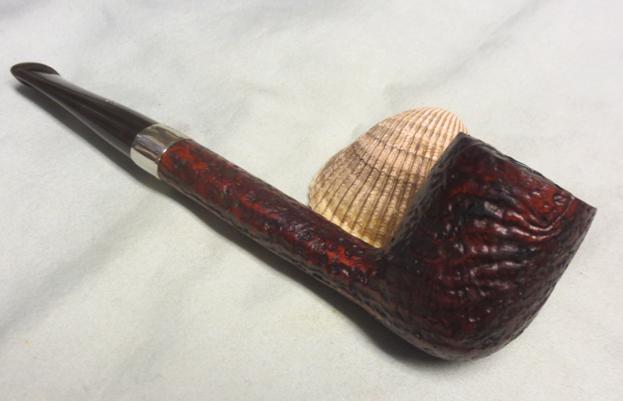
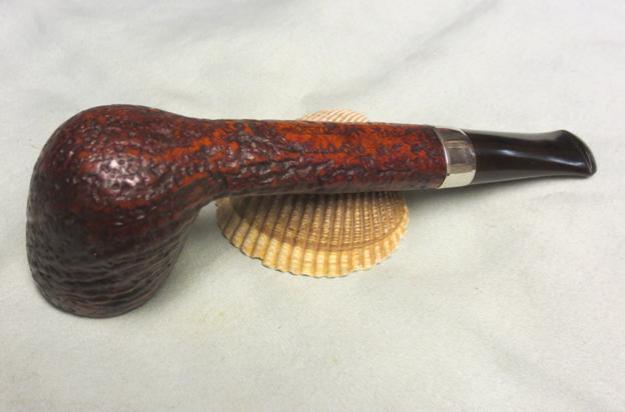
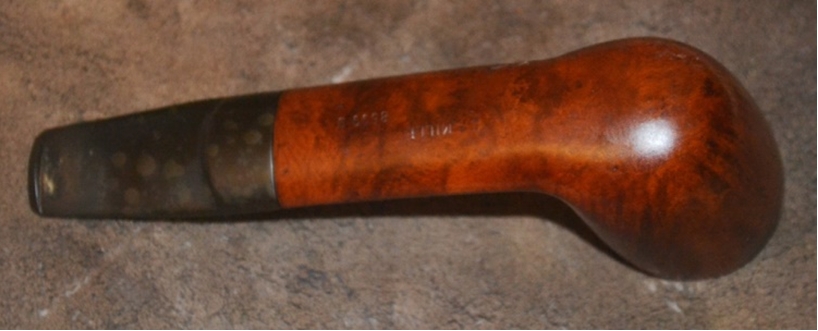
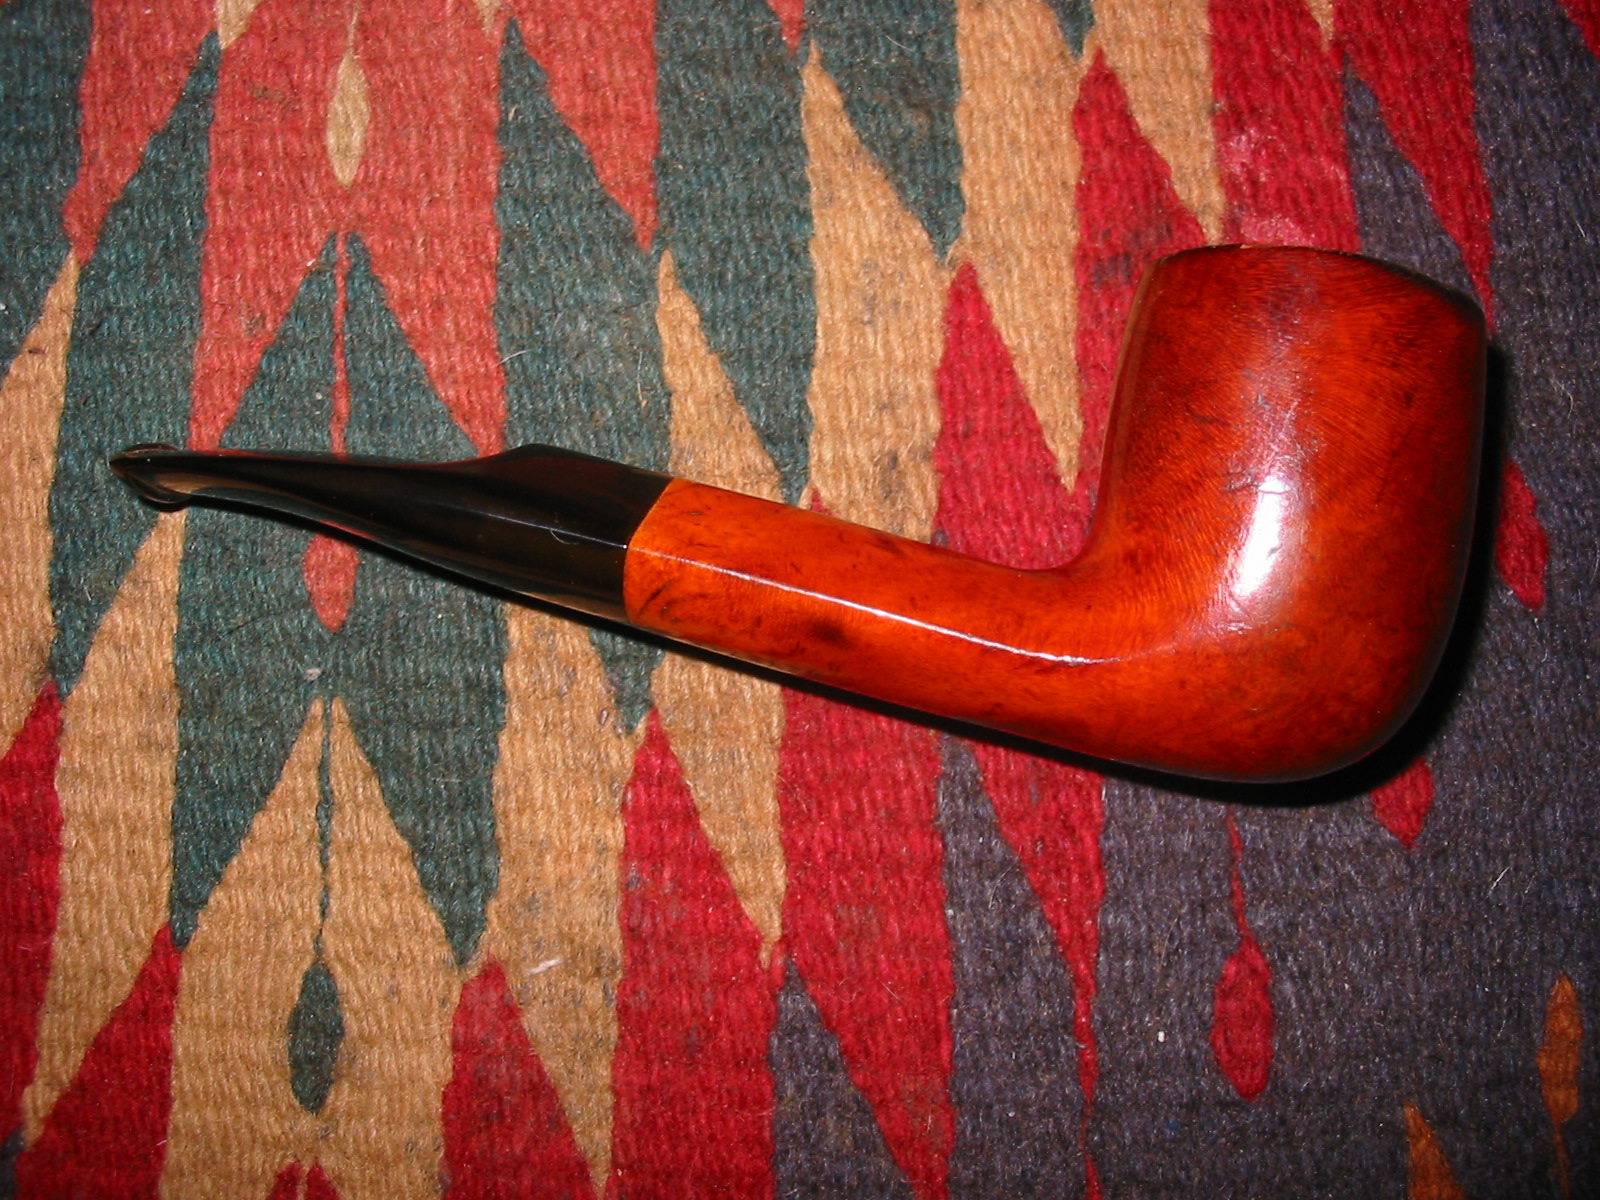
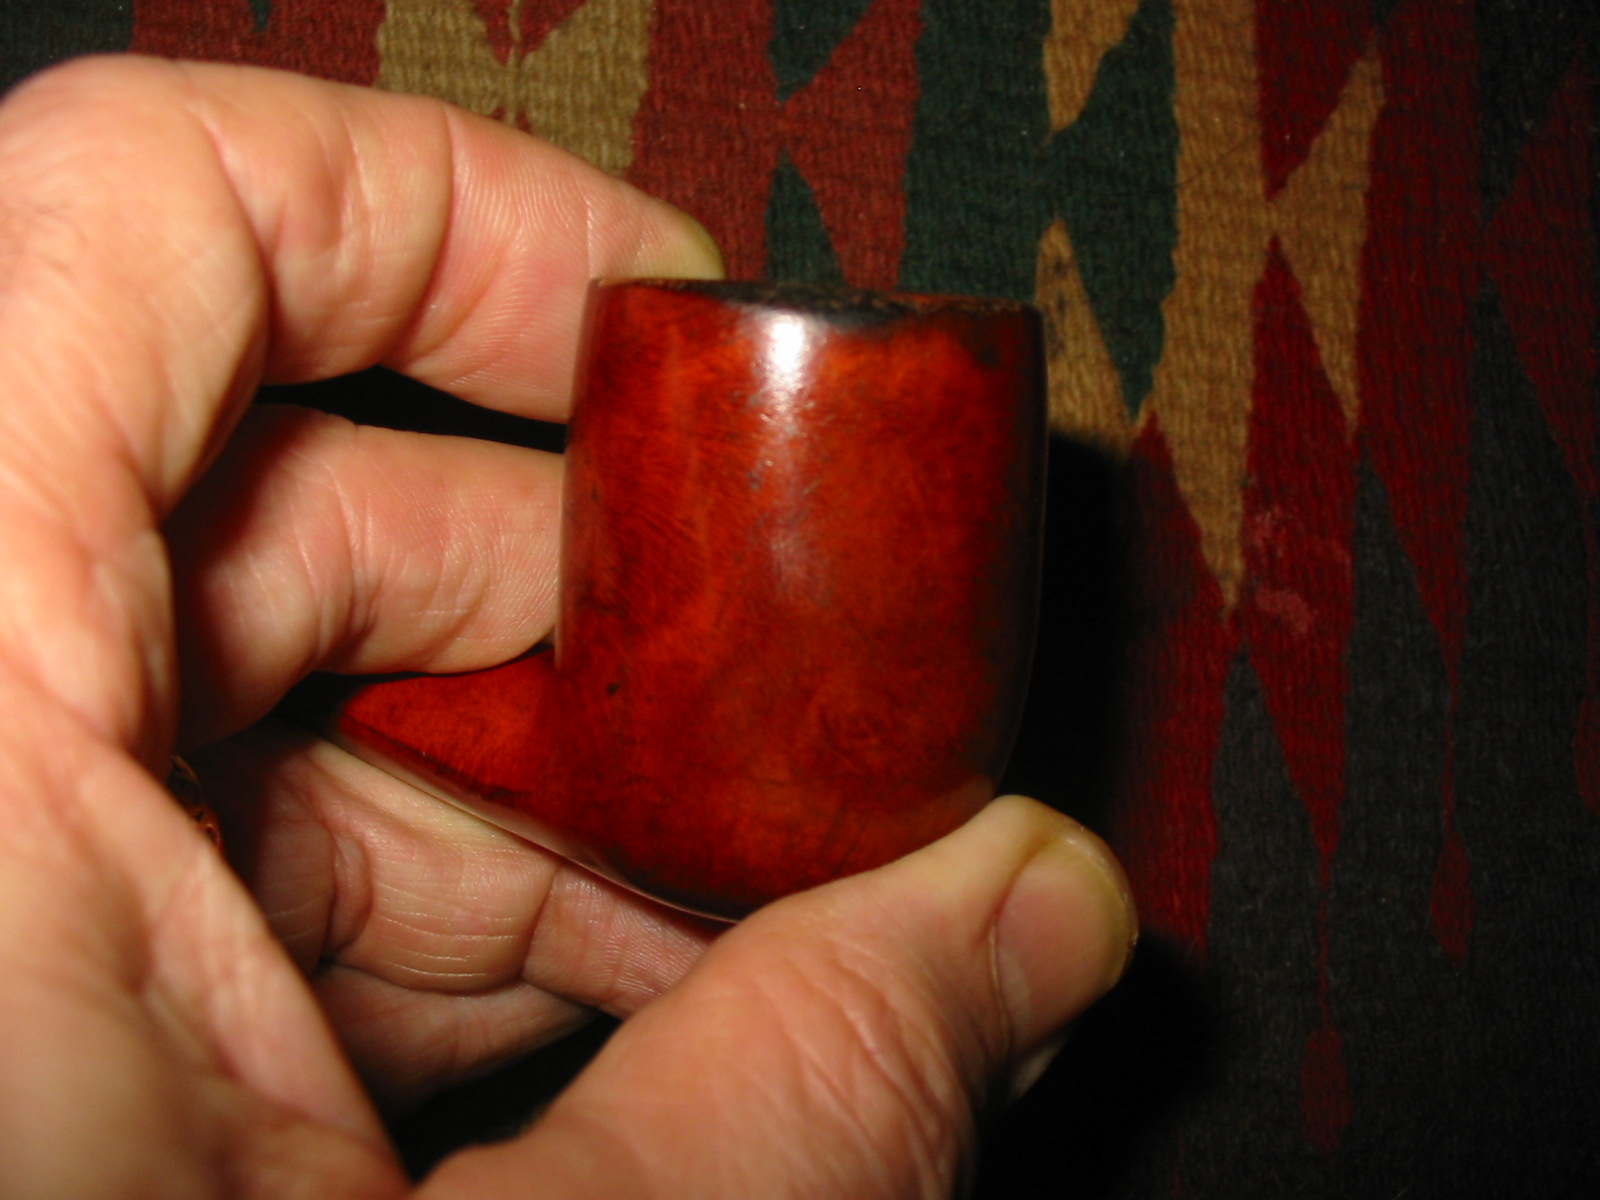
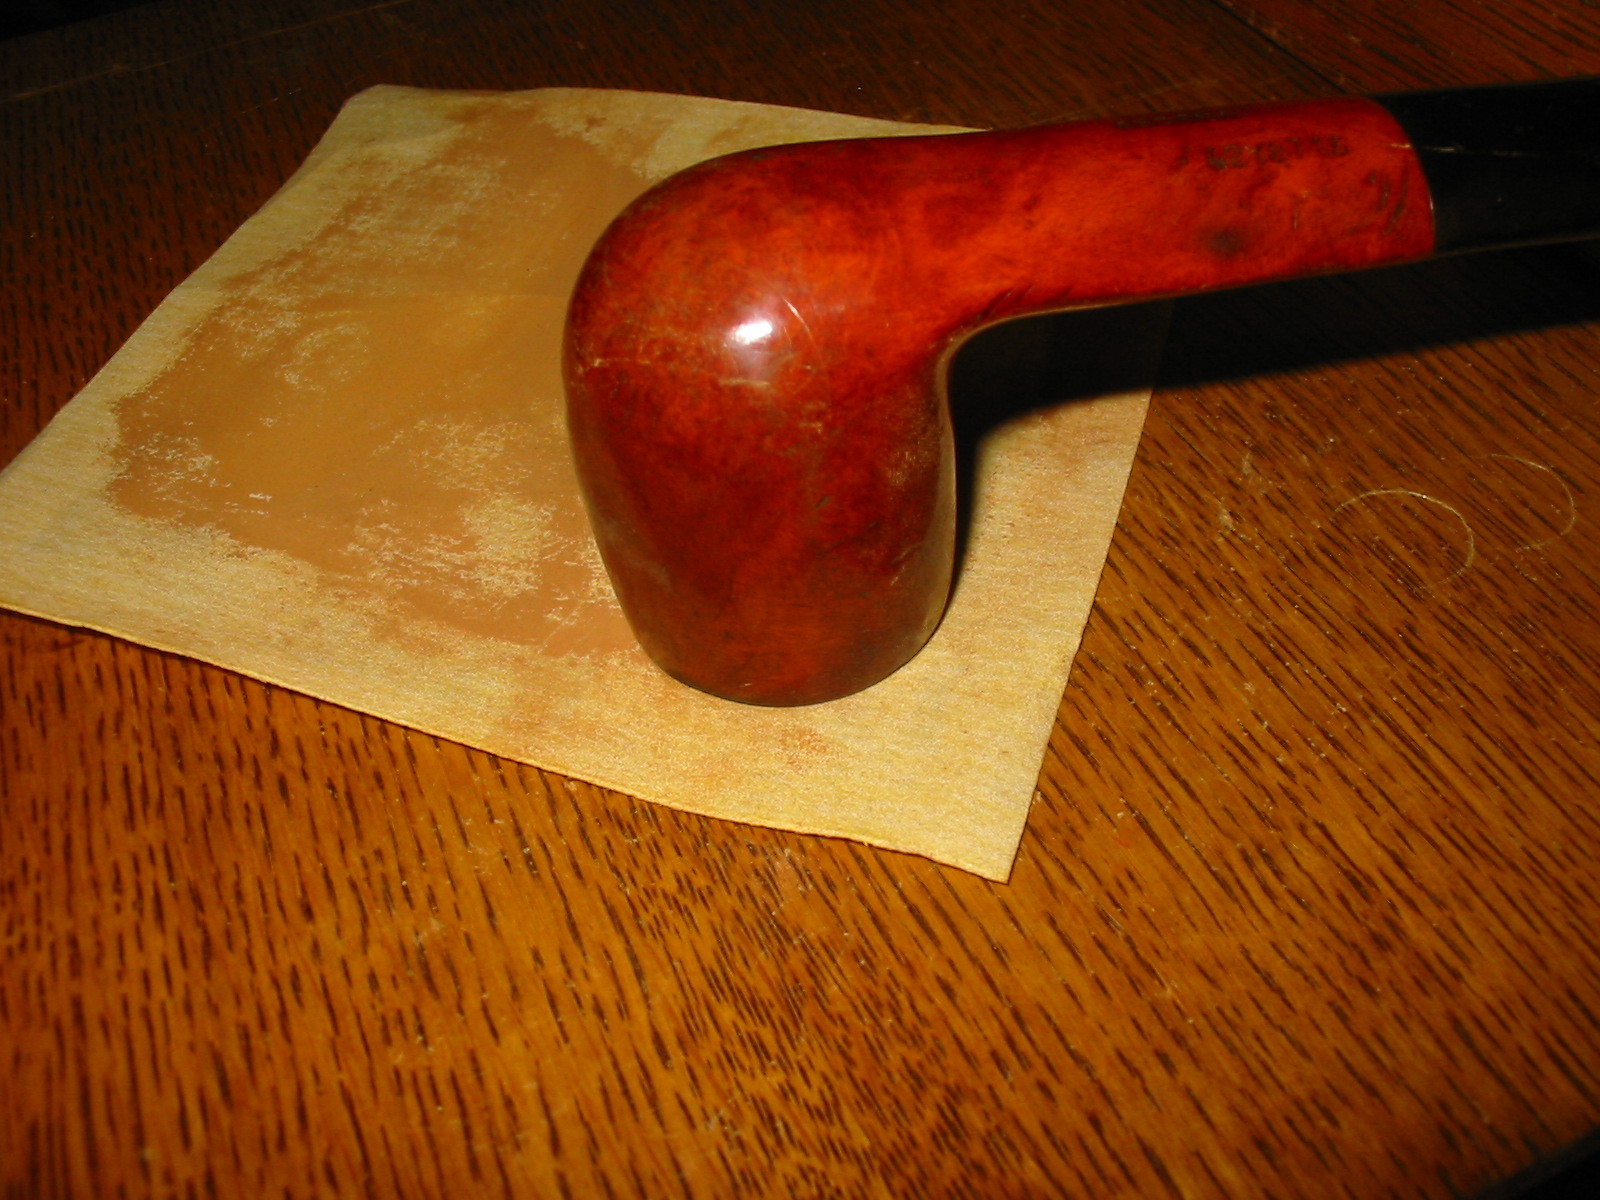
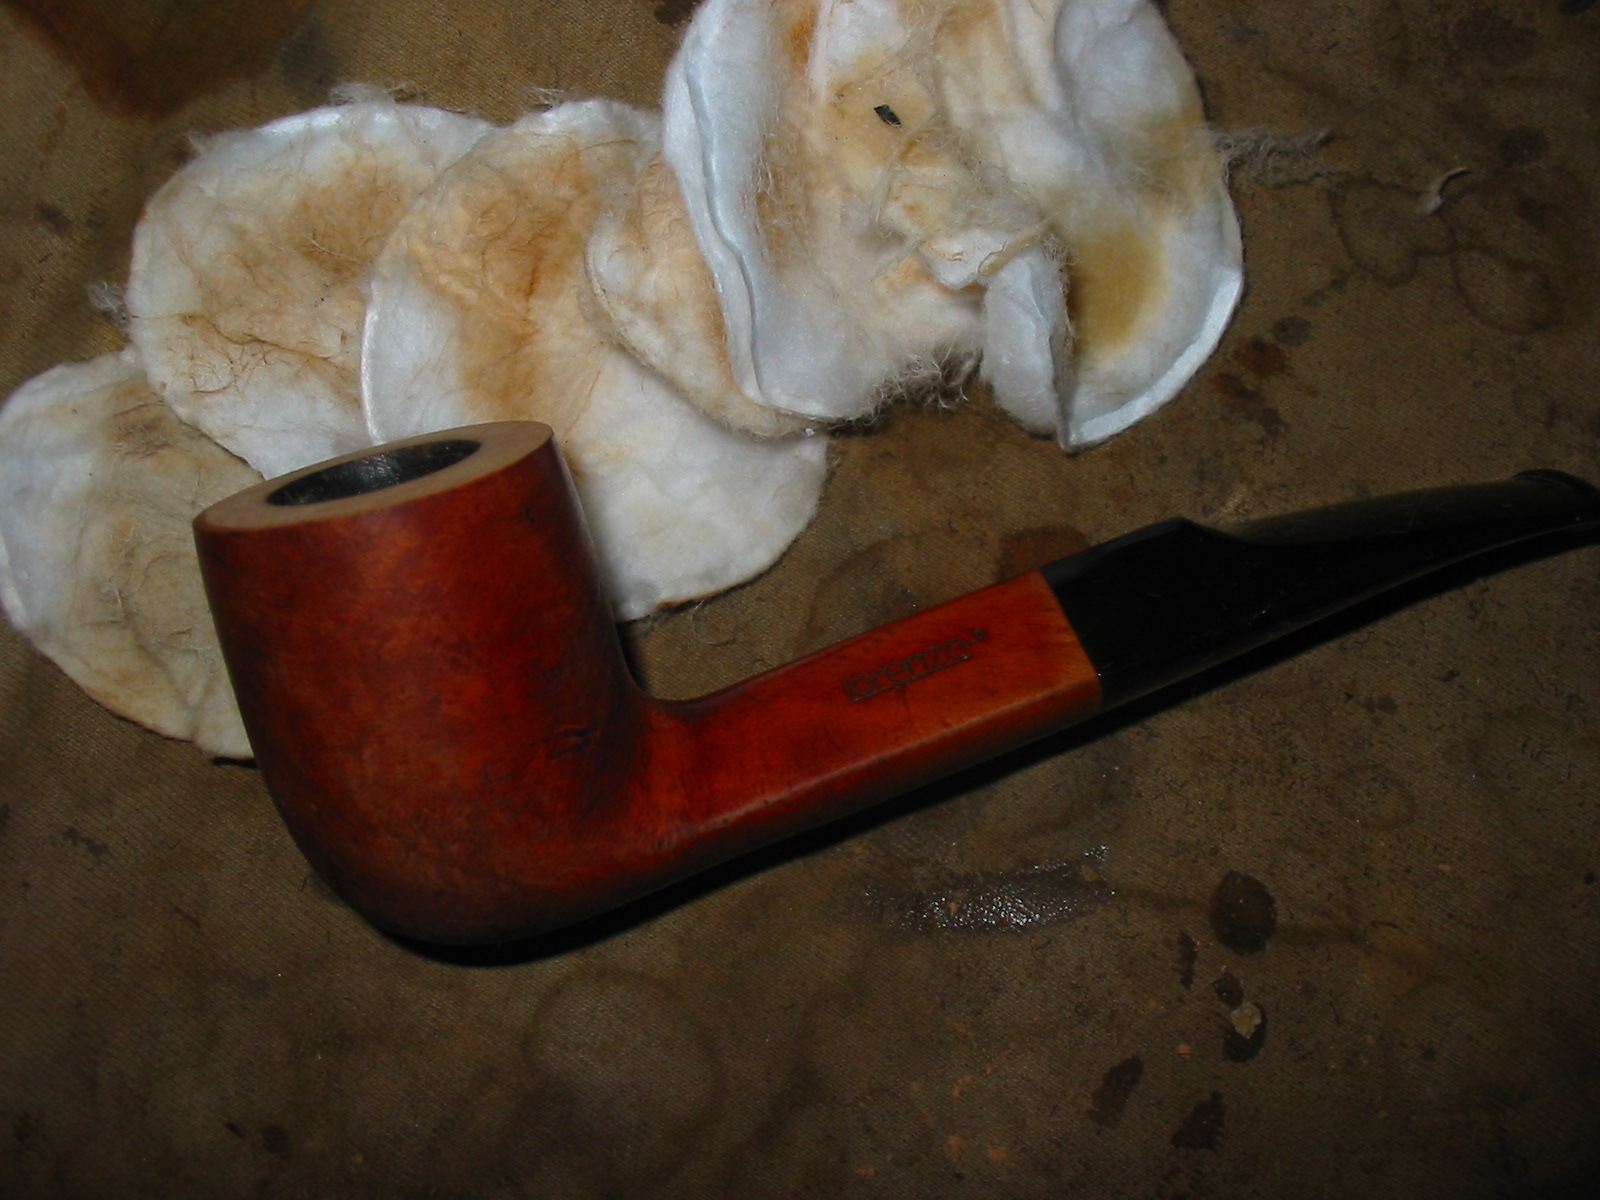
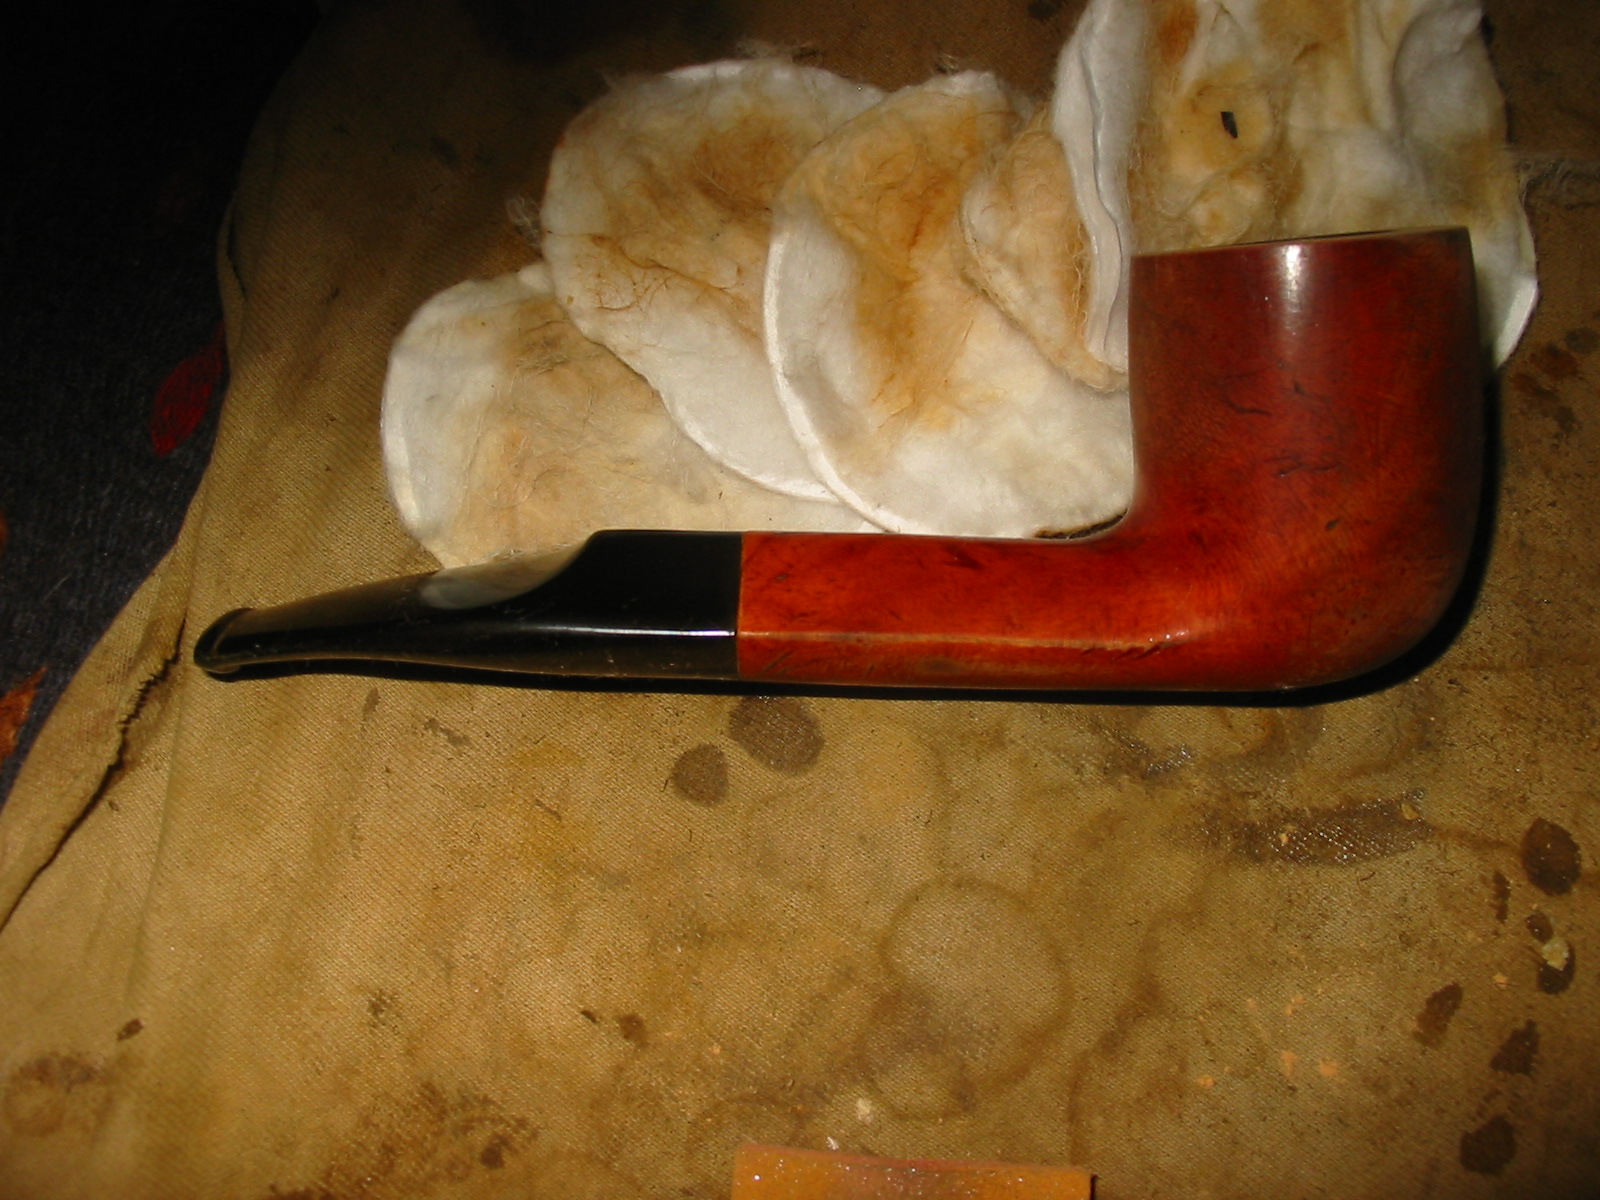
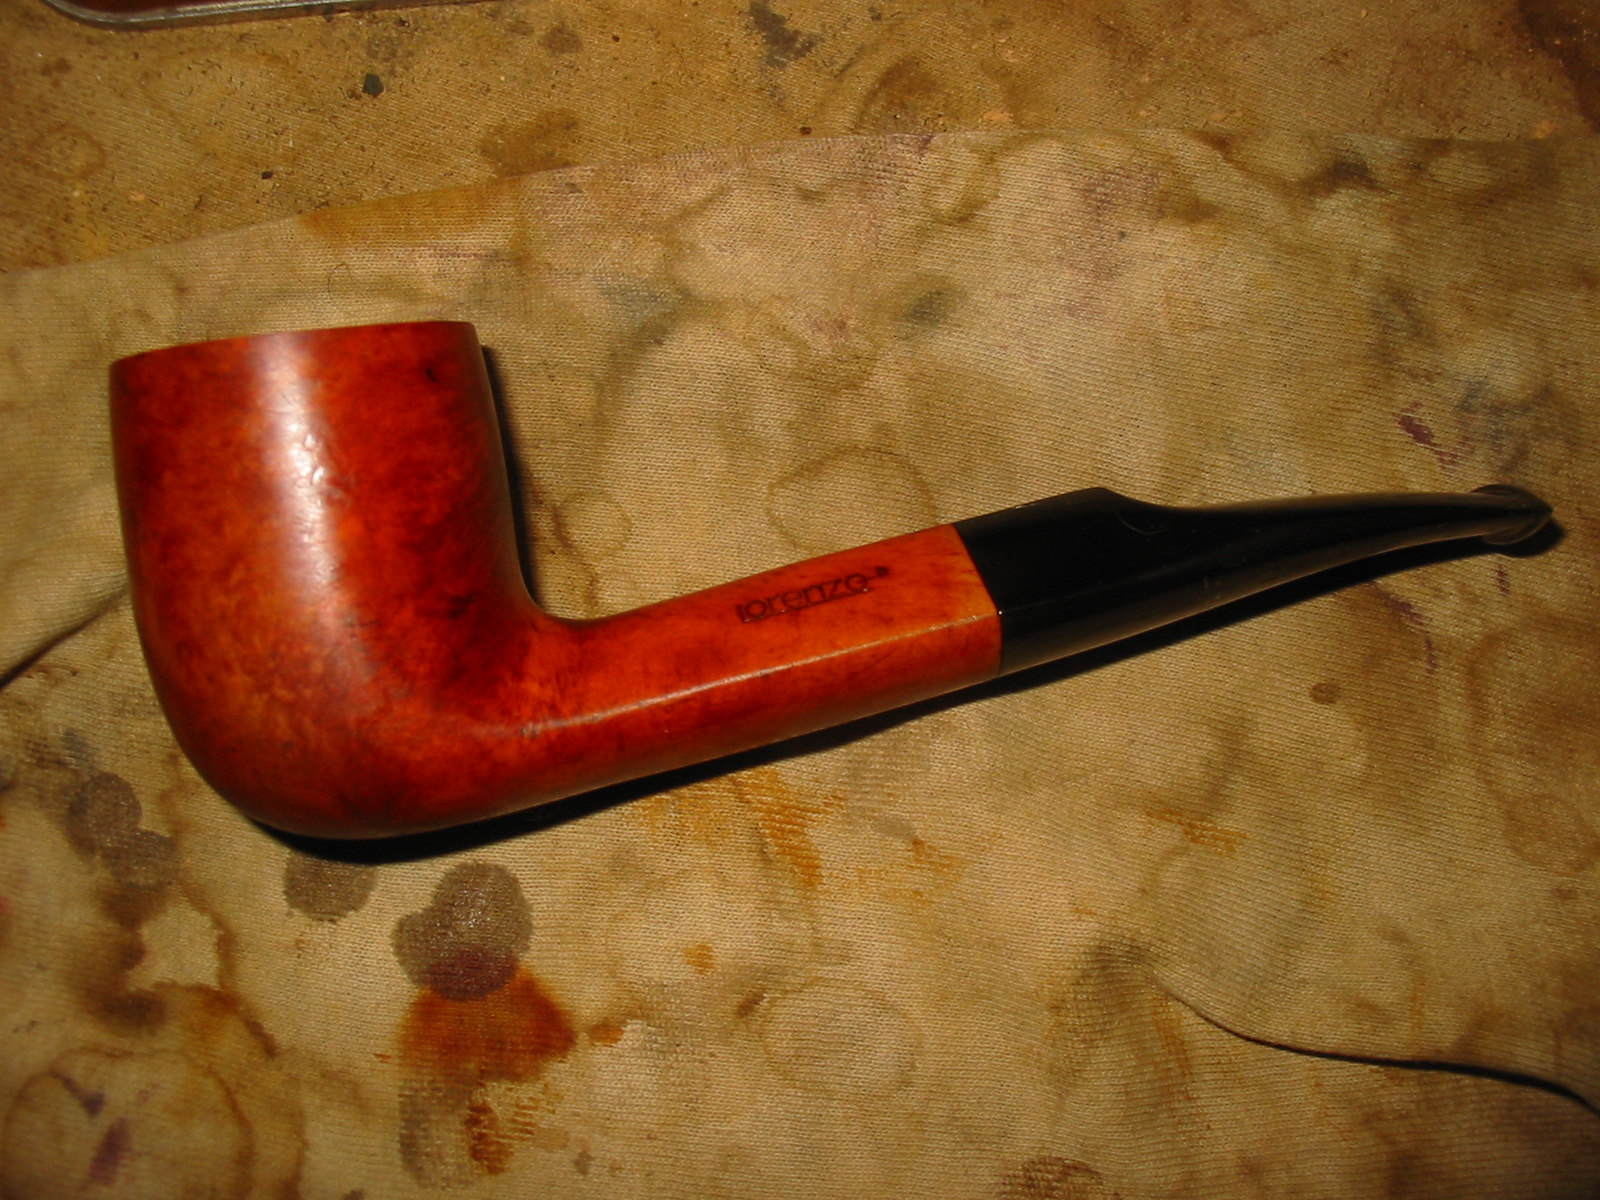
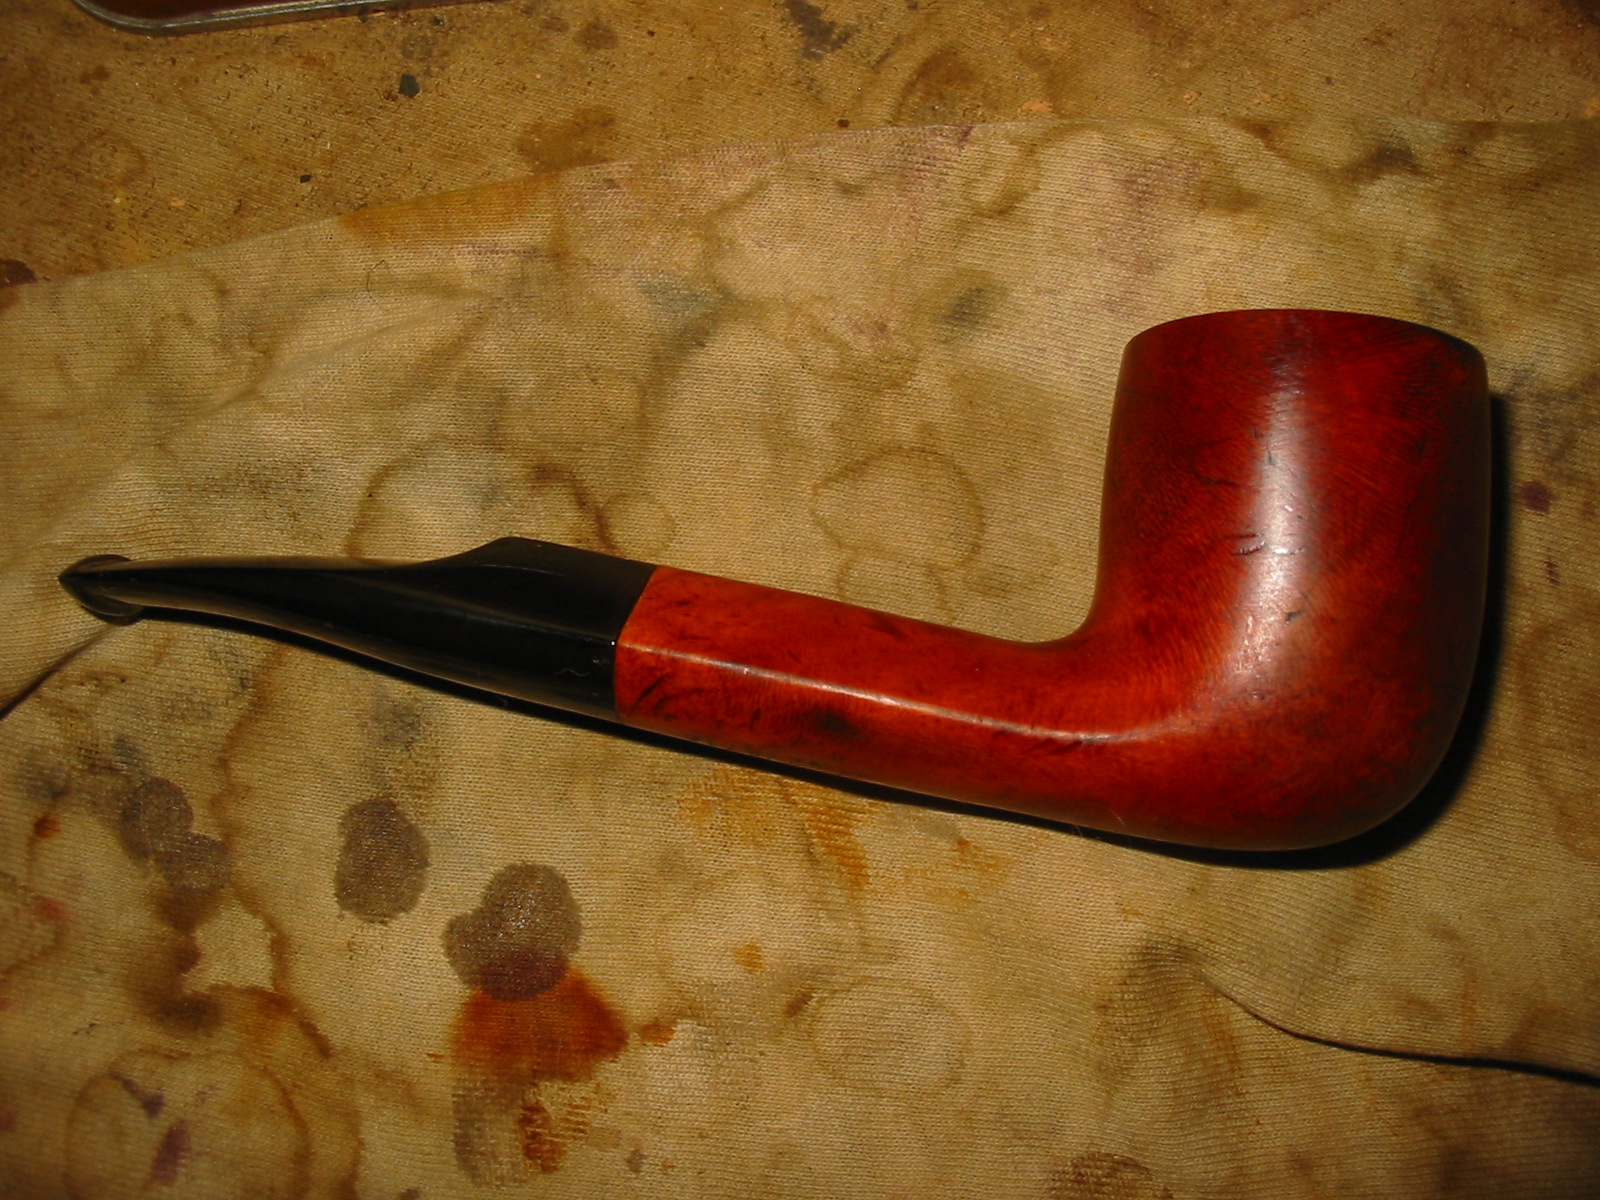
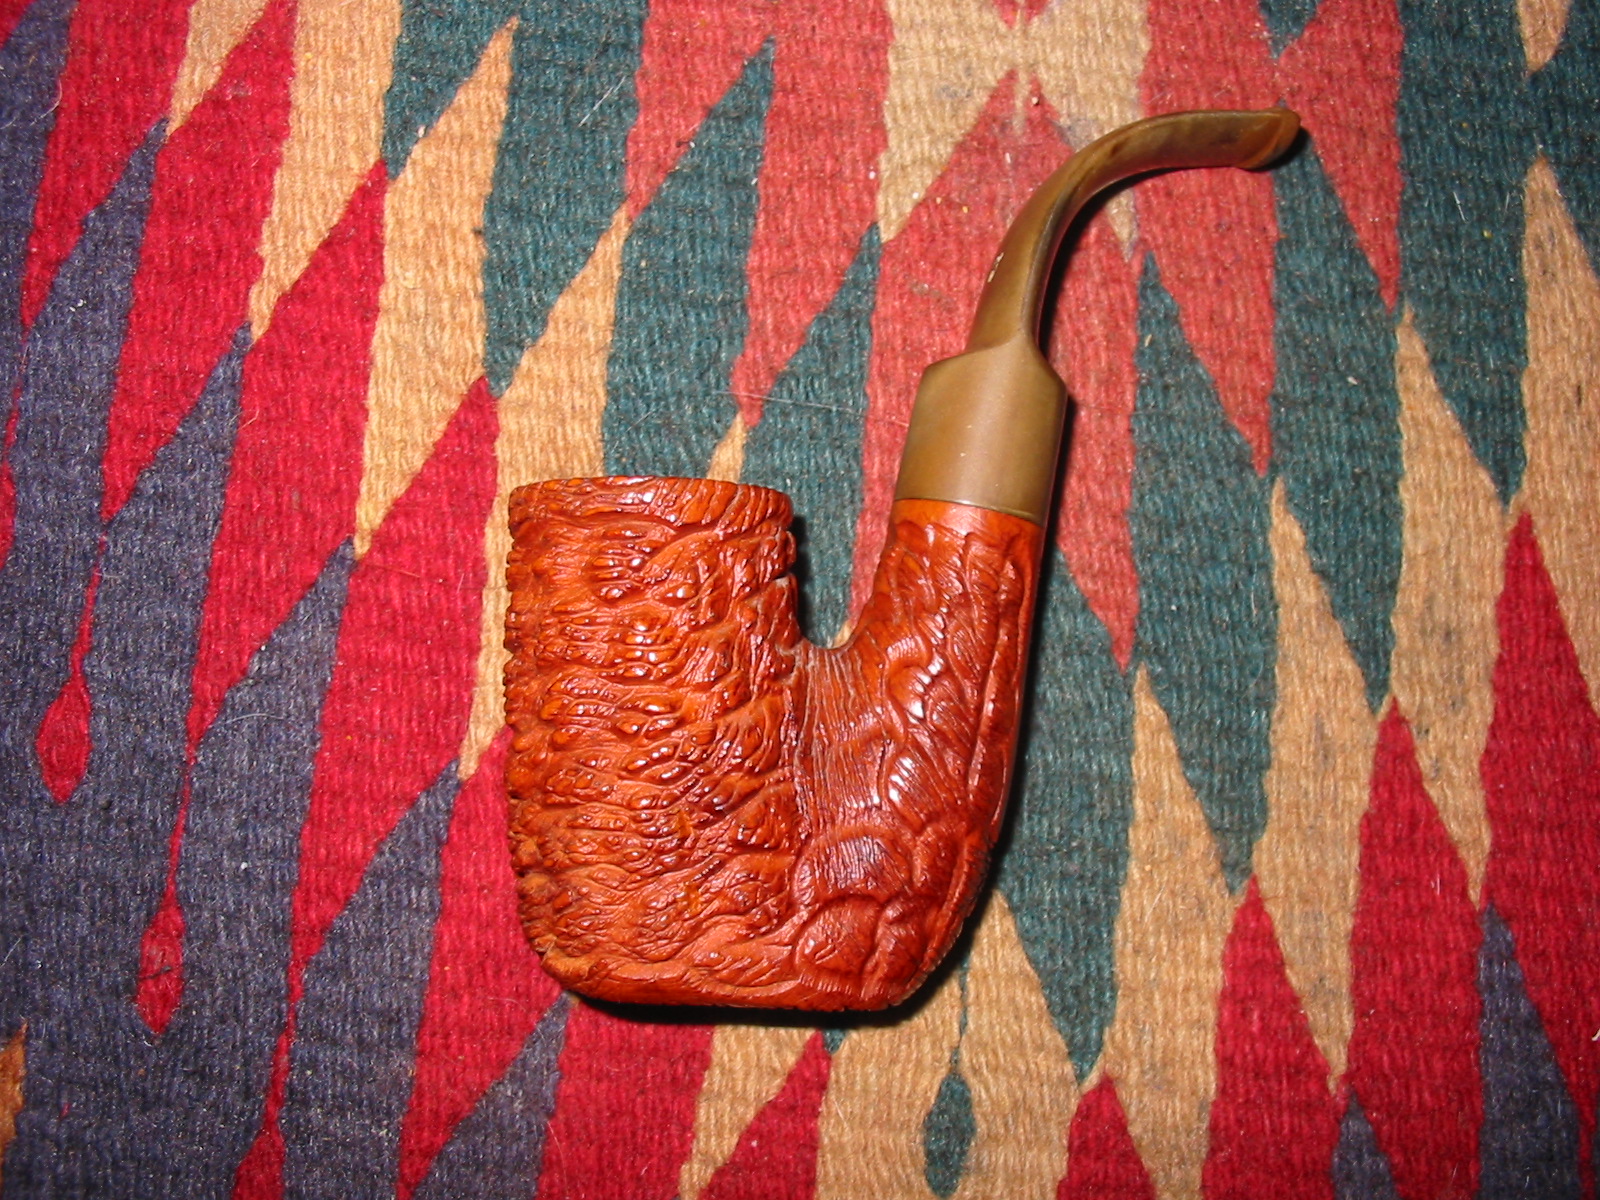
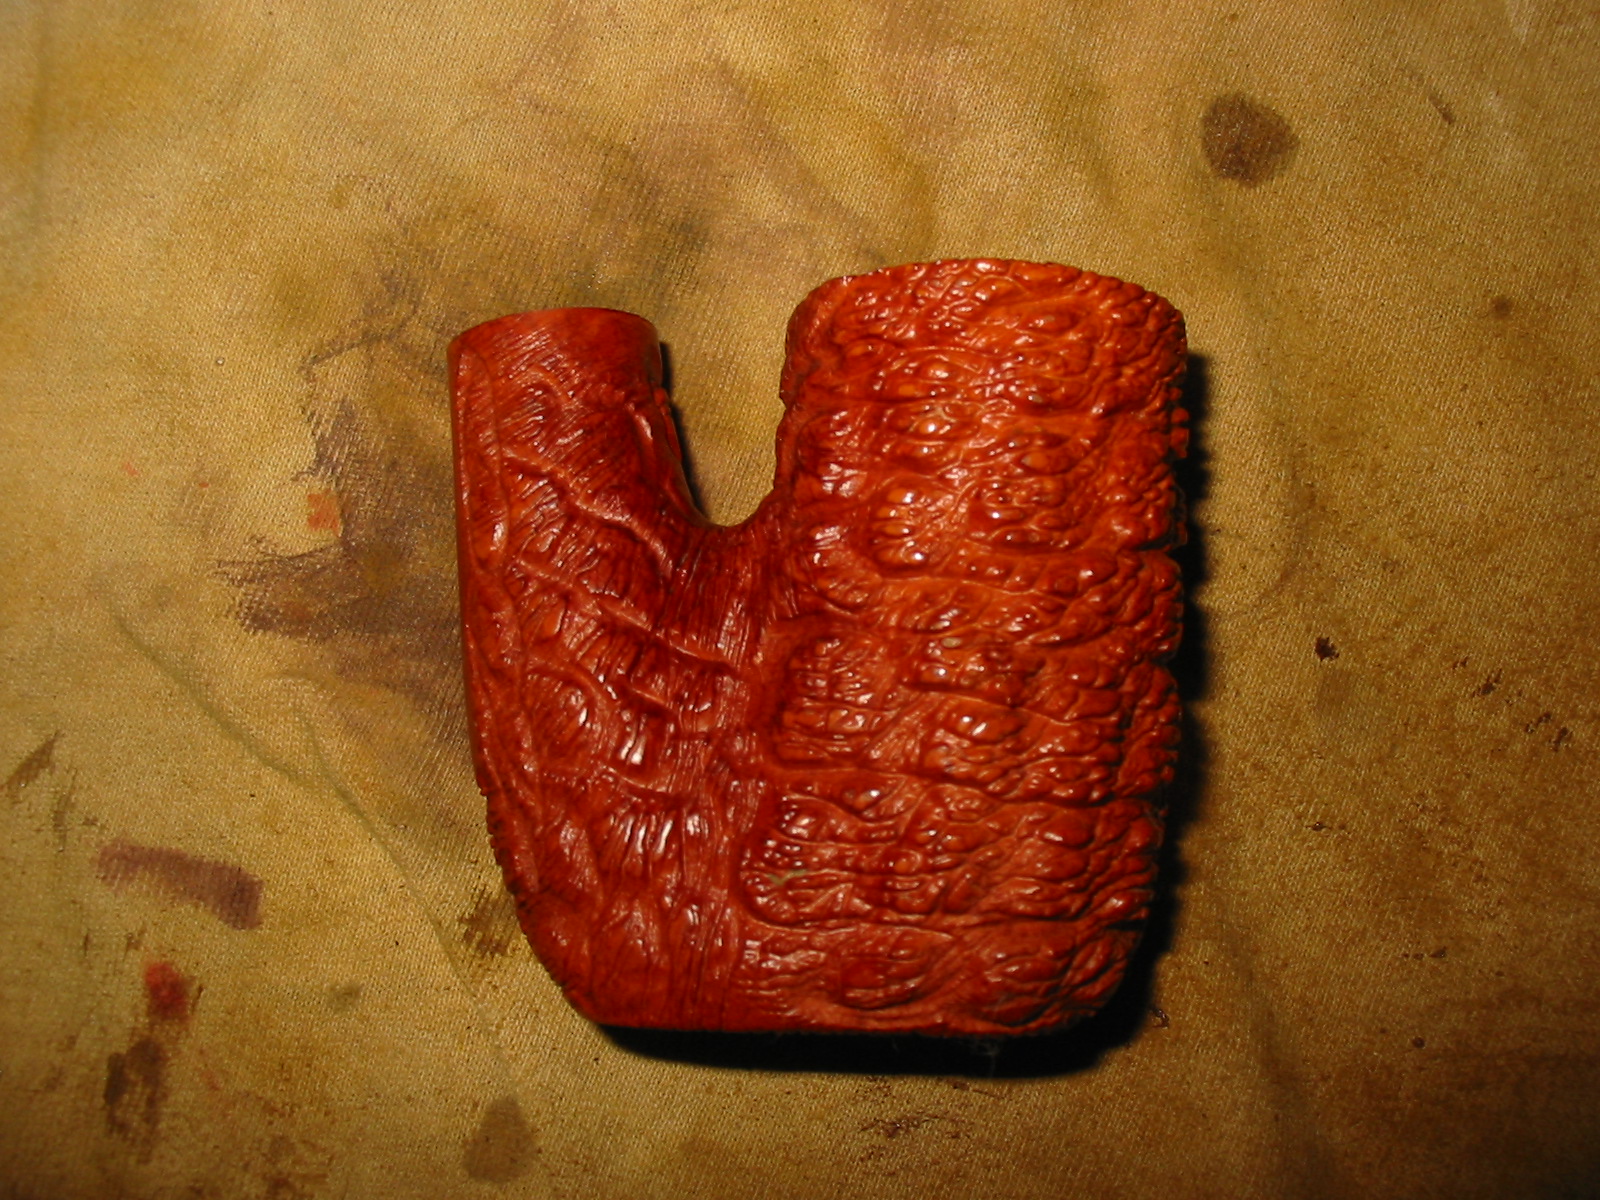
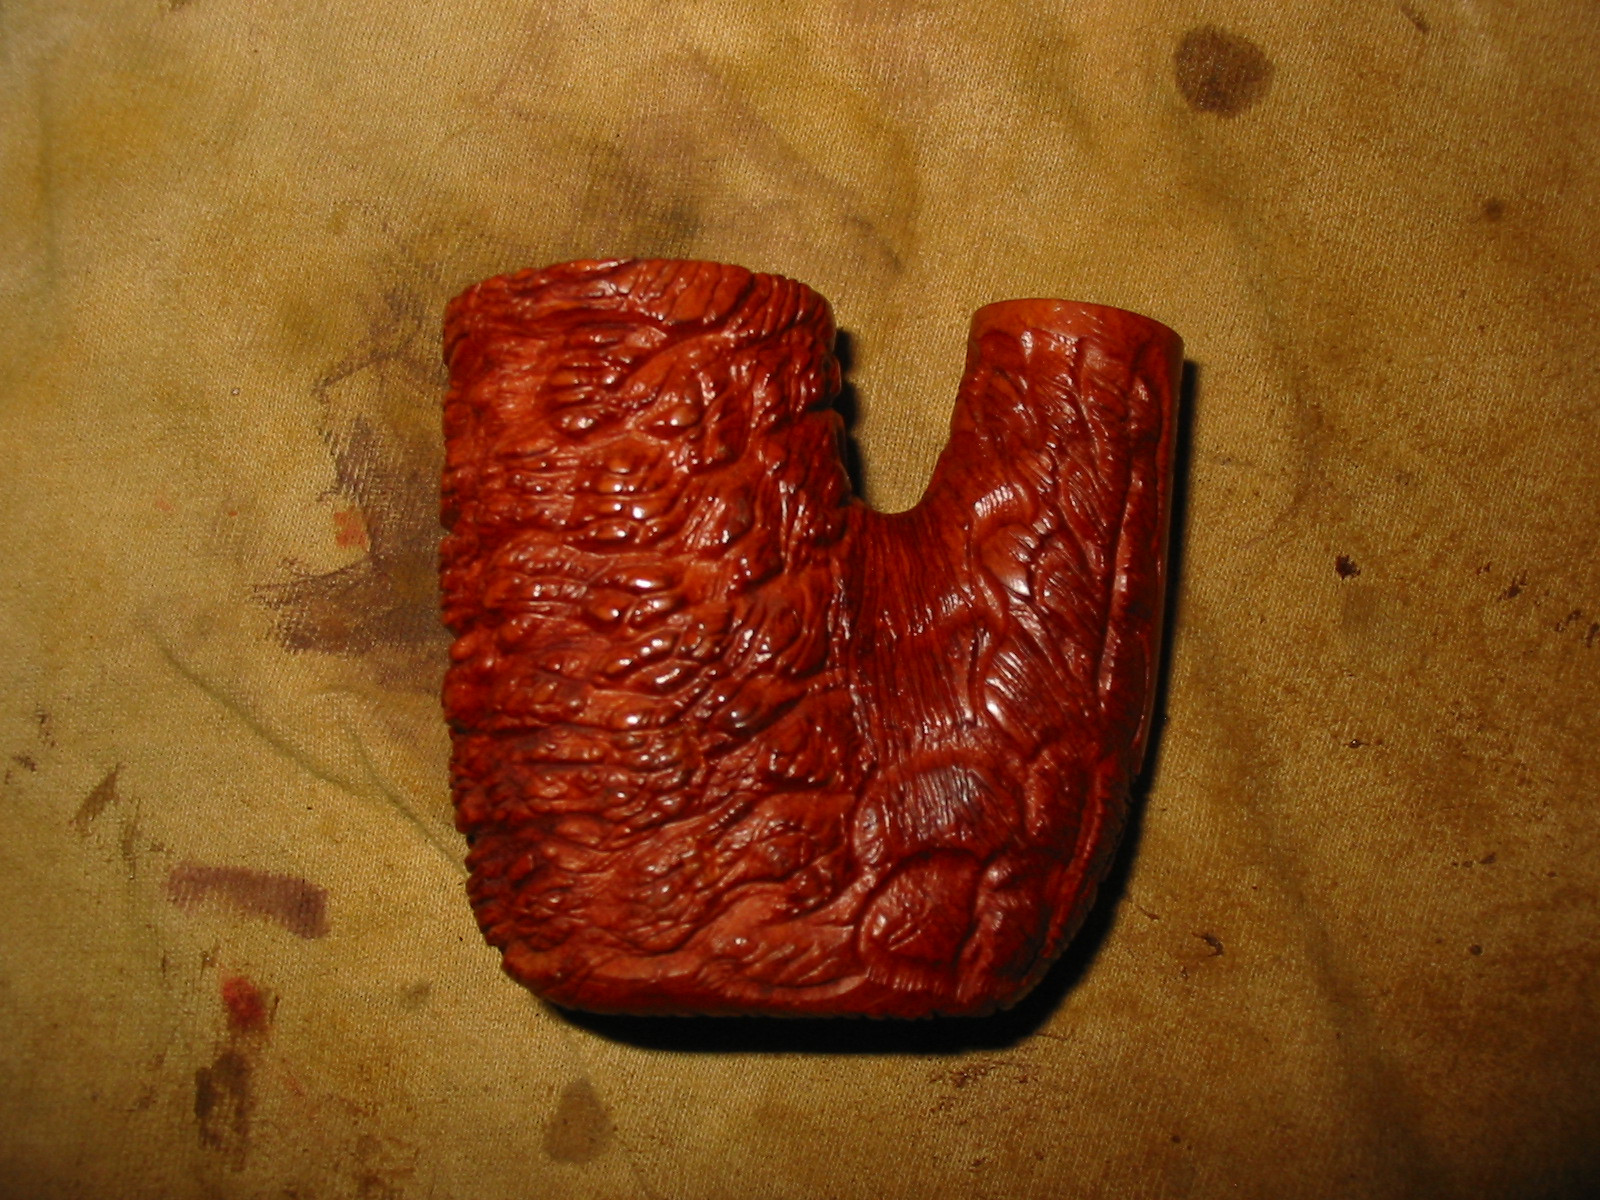
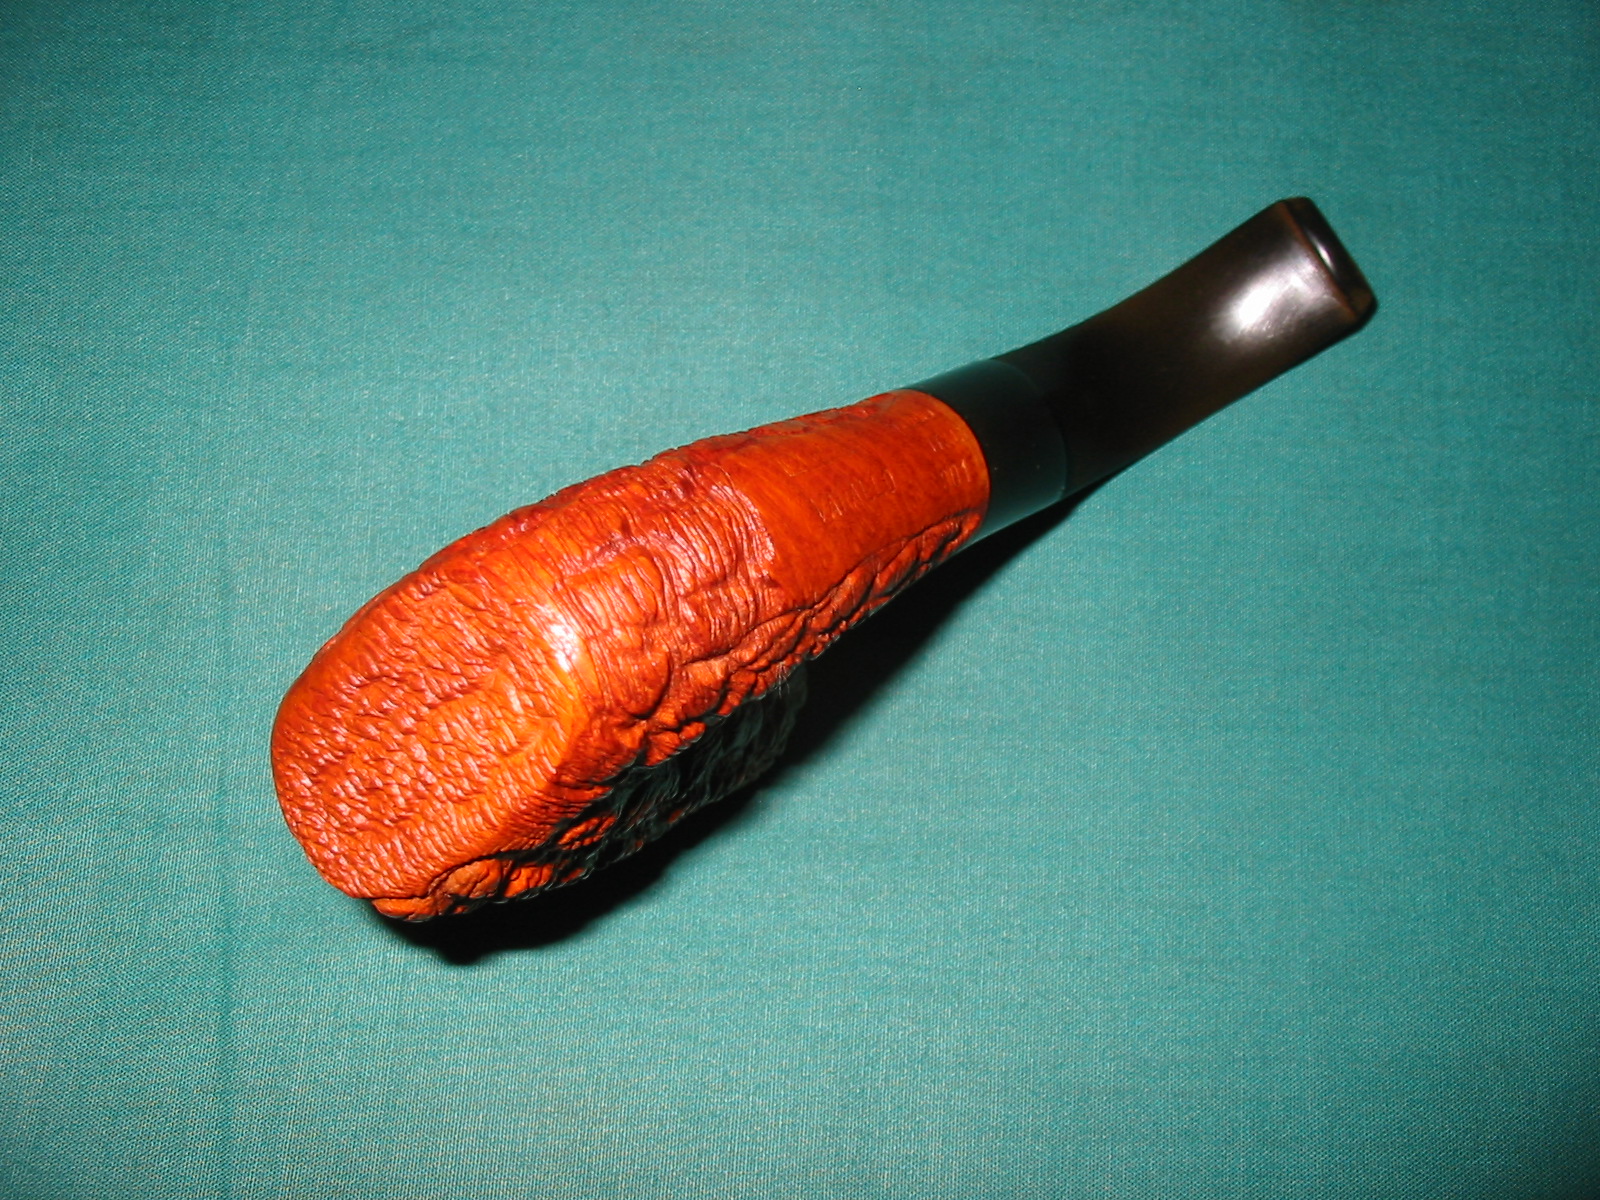
Jeff took some photos of the sides and heel of the bowl to show the sandblast and the condition of the finish around the bowl and shank. It is a great looking pipe. 
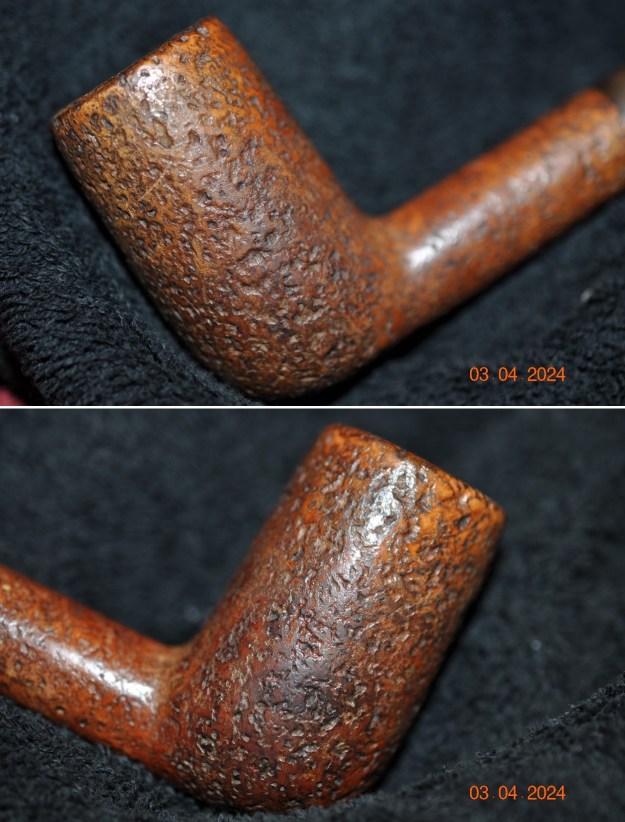
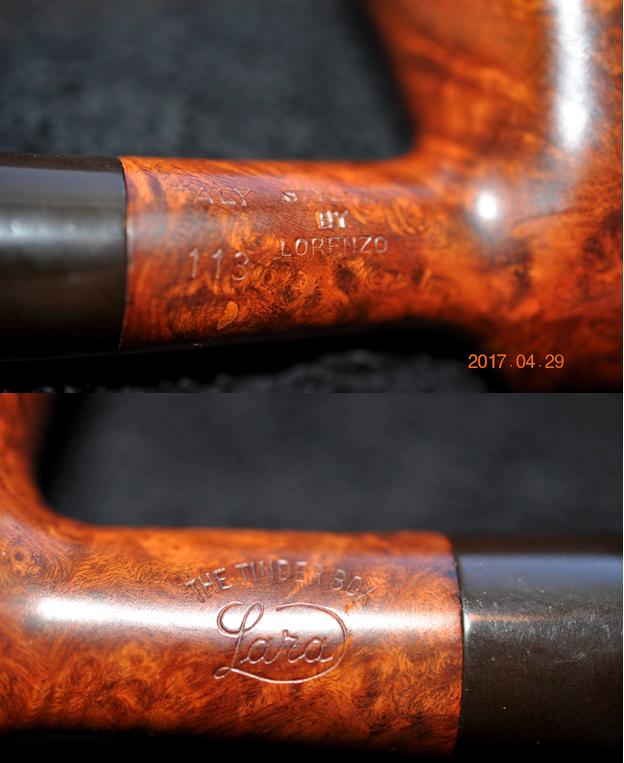
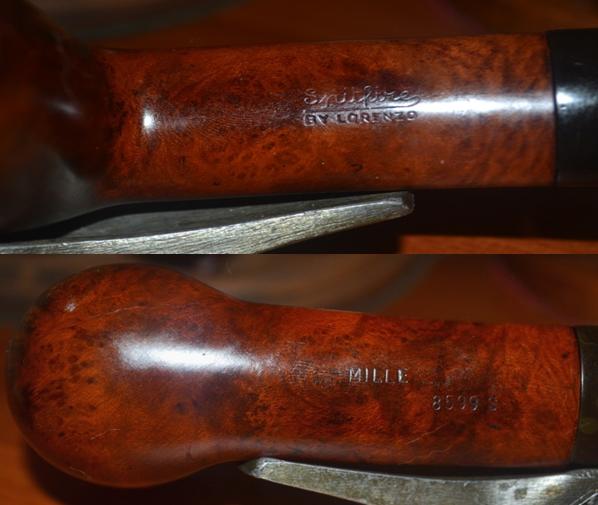
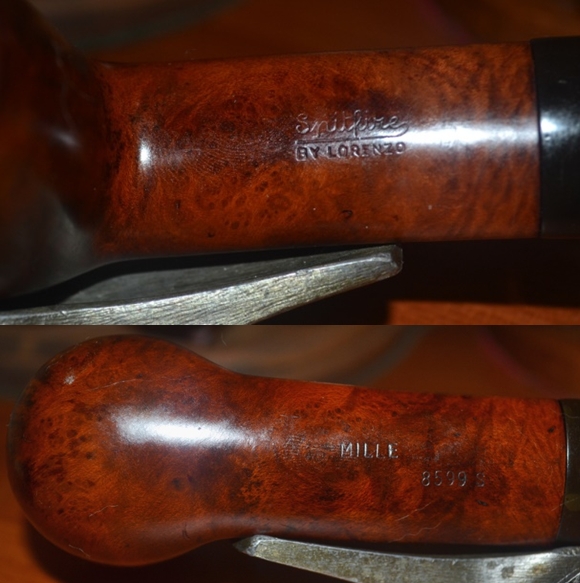
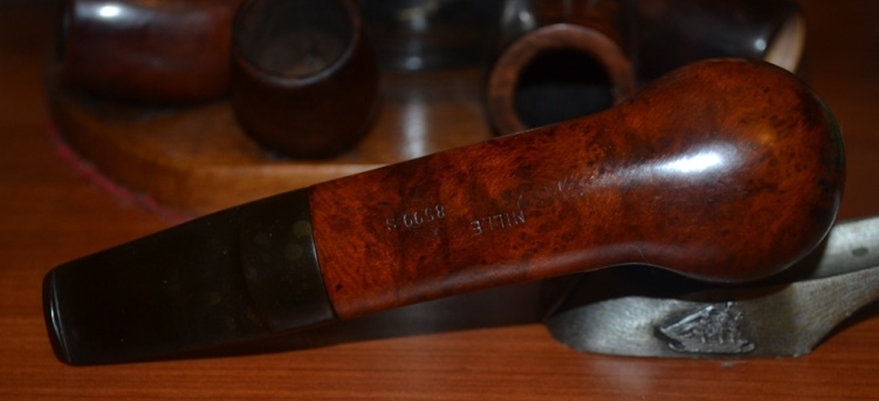
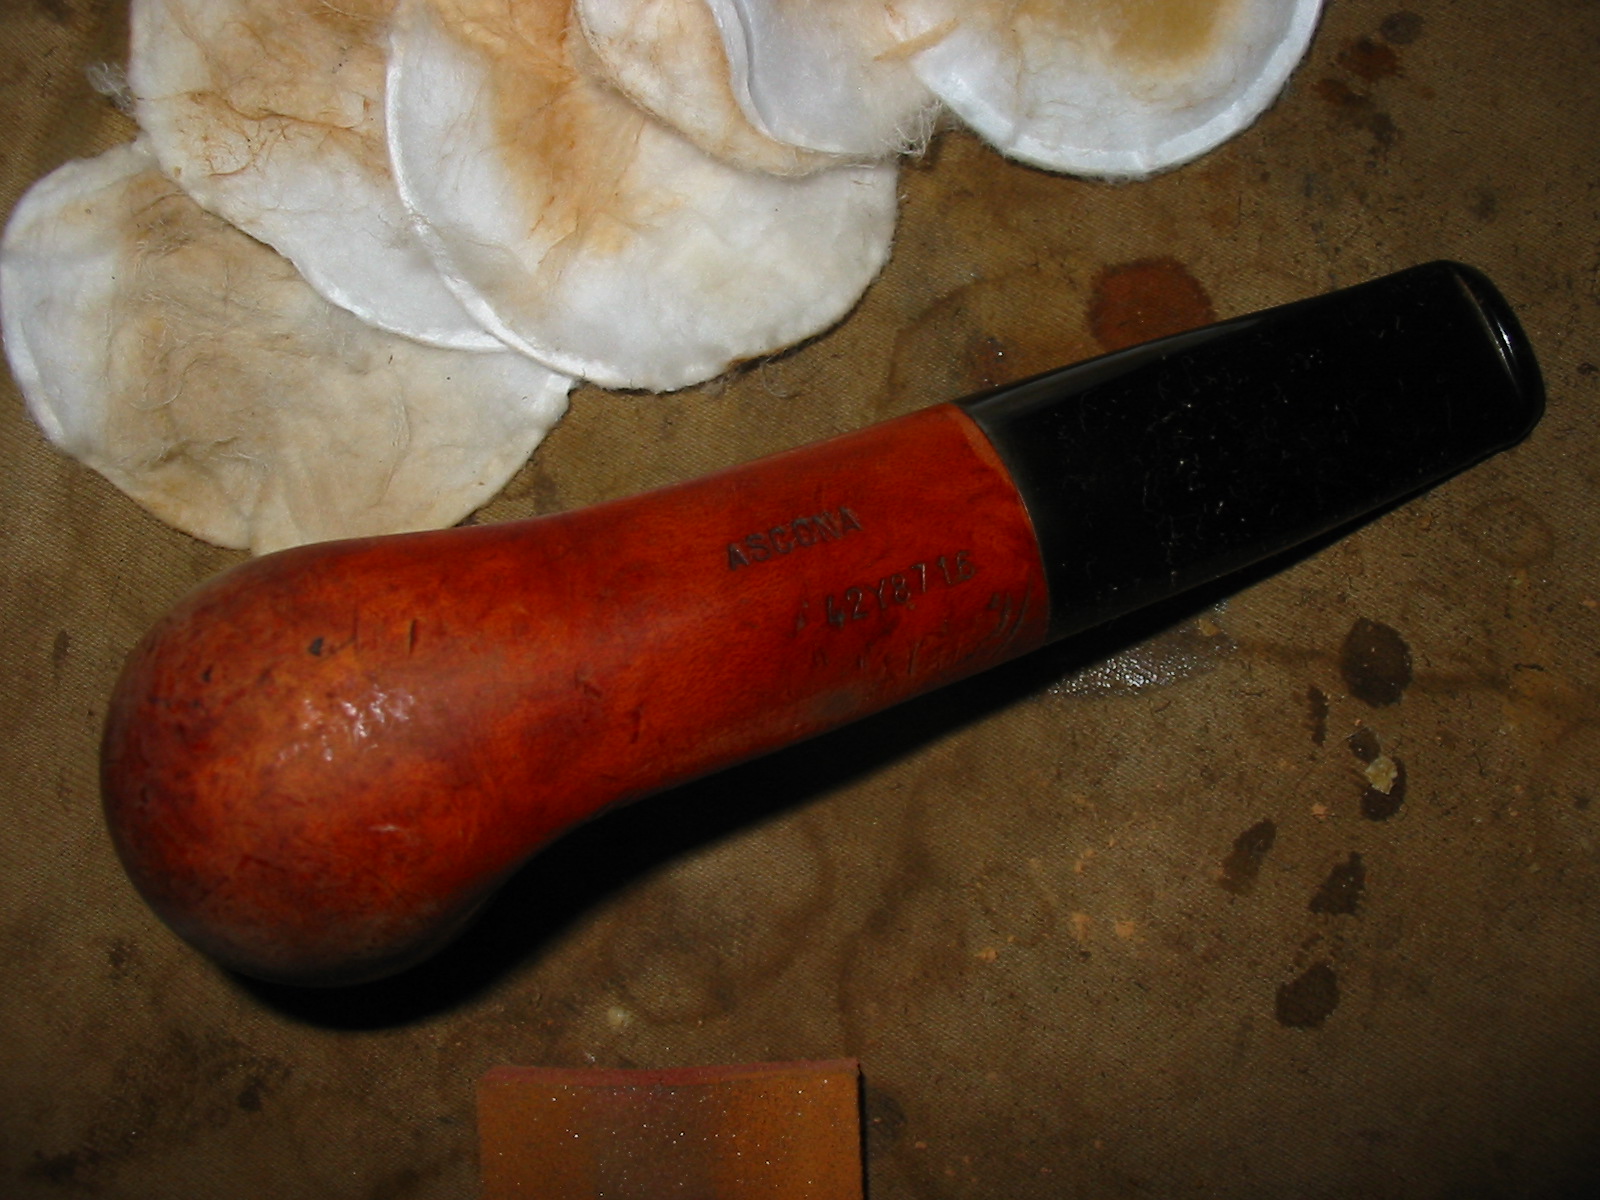
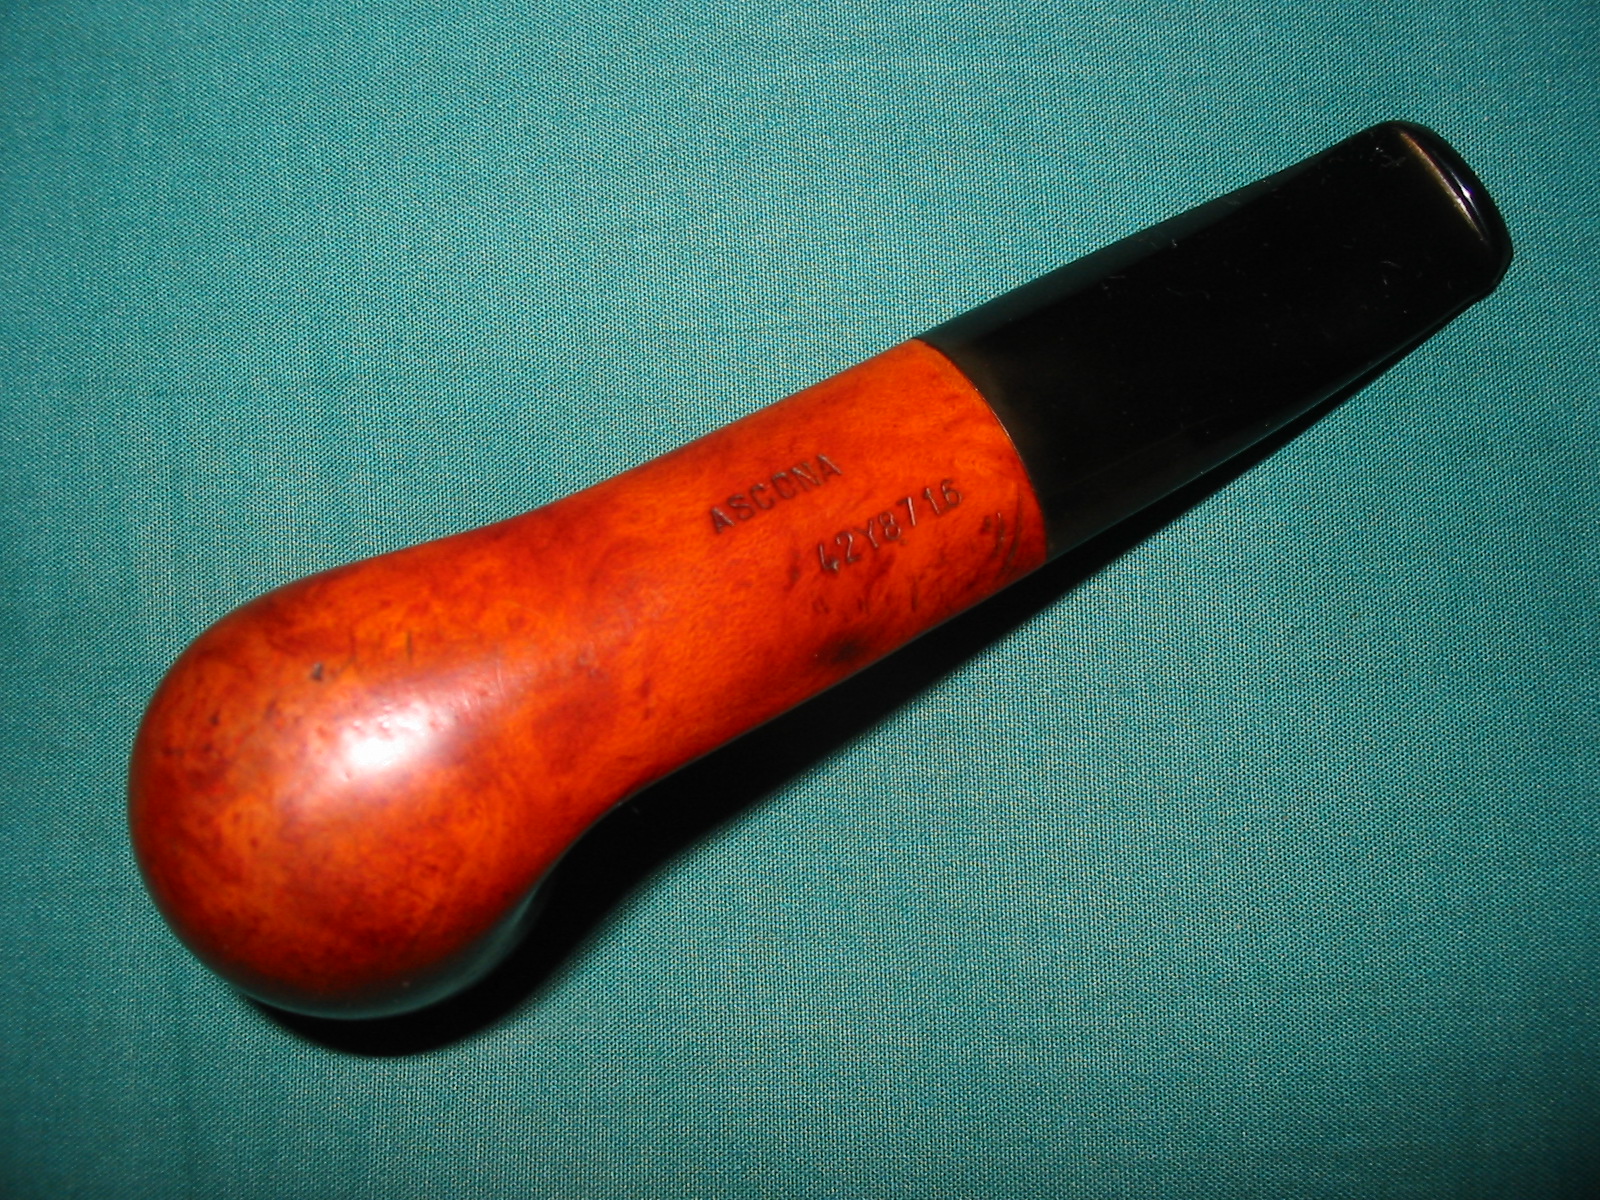
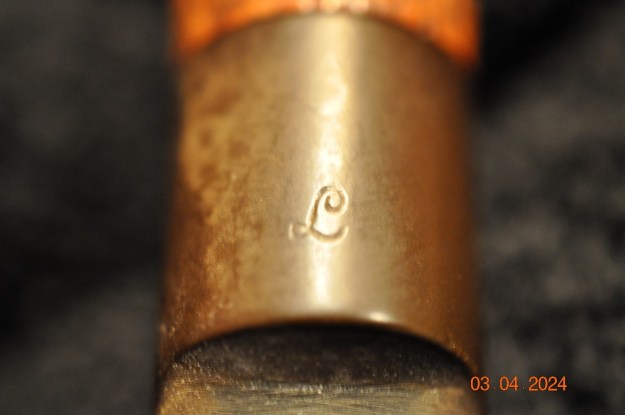
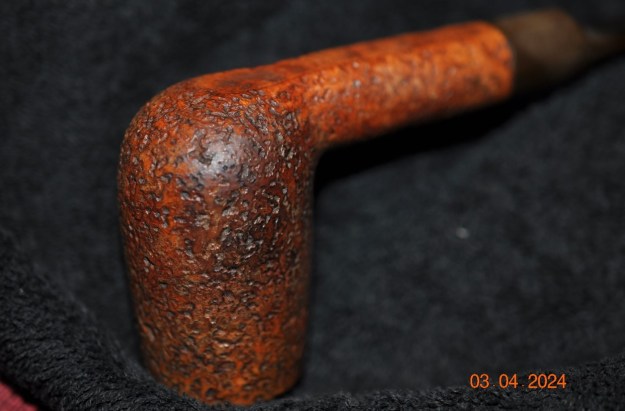
He captured the stamping on the underside of shank. It reads a noted above. It is interesting to the length of the stamping on the smooth panel. There is also the stylized cursive L on the top of the saddle stem. 
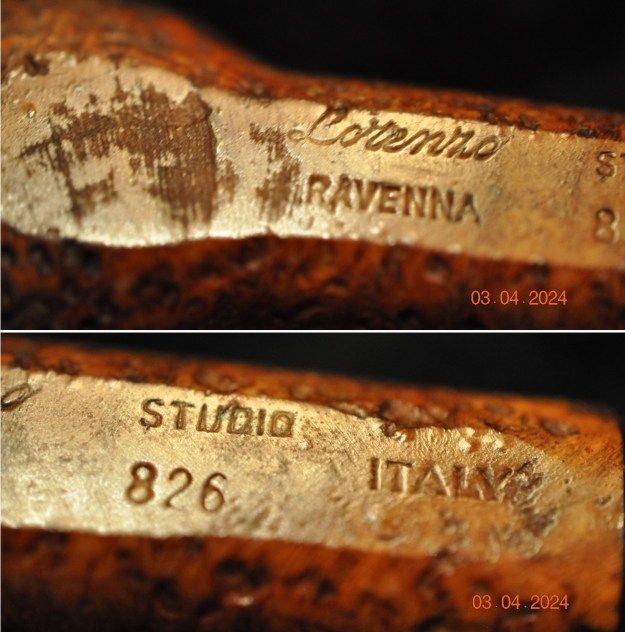
I turned to Pipephil’s site (http://www.pipephil.eu/logos/en/logo-l6.html) to have a look at what was there on the Lorenzo brand. I did a screen capture and included the side bar info below.
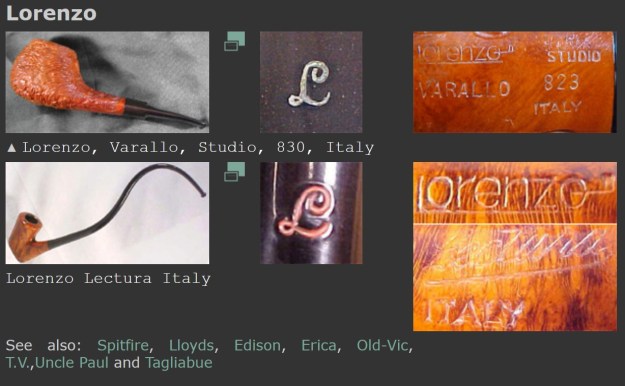
Brand created in 1946. In 1969 Lorenzo Tagliabue began to manage the company and ran it until 1987. After the death of L. Tagliabue, Riccardo Aliverti bought the brands rights in 1988. His son Massimo Aliverti succeeded him as manager in 1991.

From there I turned to Pipedia (https://pipedia.org/wiki/Lorenzo) to read the details on the brand. It is quite interesting to read about. I have actually spent time in Varese so it is fascinating to see that location noted below. I included a portion of that article below.

Following Rossi (1886 in Barasso) and Ceresa (1897 in Cassano Magnano) the third pipe manufacture in the Lombardian province of Varese was established in 1900 in the picturesque city of Gallarate by two brothers. Fratelli Lana (Lana Bros.) produced briar pipes for the Italian market under their own brand name.

In 1922 Fratelli Lana went into a close co-operation with the merchant’s family Tagliabue from Milano. Sales outside of Italy began immediately and the demand throughout Europe steadily increased. By 1939 the manufacture had grown to factory size with 120 persons employed – a considerable number for the time. The program remained unchanged for decades: cheap, unpretentious budget pipes for the mass markets. Most of them didn’t even have any stampings besides “Genuine Bruyere” or similar. A large share of the production emerged as fabrications for other firms so that an own style of the Lana pipes was hardly recognizable.

After WW II the world of the briar pipe wasn’t the same anymore and especially Italian firms suffered from the ravages. In 1946 Tagliabue took over Fratelli Lana and changed the name to Manufattura di Pipe Tagliabue. Shortly before 1950 Lorenzo Tagliabue became in charge of the company’s management. He had closely studied the first successful steps of the newly established Italian brands like Castello and Brebbia and began to design new models of his own in an unmistakable style. Simultaneously the previous segment of the cheap, cheaper, cheapest bulk pipes was left and pipes reflecting to more elevated standards were produced.

From 1969 on Lorenzo Tagliabue changed the brand’s name to Lorenzo Pipes. The reason currently quoted is another pipemaking firm named Tagliabue.

The newly issued Lorenzos mostly showed extremely strong forms in designs appealing greatly and massively. Thick, “beefy” walls of the bowls and broad and strong stems were significant for them. As contemporary ads said, these pipes were “Made for real men with strong hands”. Many had a flattened bottom to sit on the table. Next to the unusual shapes, the patina effect of the silk mat surface combined with a bold red or a bright orange staining gave the pipes their distinctive look. The most successful model was a big Oom Paul that was executed in numerous variations…

In 1983 Lorenzo Tagliabue came to bitter grief: his little daughter, the only child, died of cancer. He lost all interest in the business and retired still in 1983, leaving no heirs who wished to continue the business. Lorenzo Pipes was licensed for and continued for a shorter period by Comoy’s of London (Cadogan / Oppenheimer Group). Then Lorenzo Pipes almost disappeared and Lorenzo Tagliabue passed away in 1987.

But this wasn’t the end. In 1988 Riccardo Aliverti and his wife Gabriella purchased all rights to the Lorenzo trademark from the Tagliabue family and production of the renown Lorenzo Pipes resumed.

The Aliverti family is involved in pipemaking since Romolo Aliverti, the father of the current owners, joined the Lana Brothers in 1920. He later reached the rank of technical director. No wonder that his son Riccardo showed an interest in pipe making. Riccardo began learning the pipemaking trade in 1954 at the age of fourteen under his father’s watchful eyes and succeeded him as technical director upon his father’s retirement in 1973.

Today the third generation of the Aliverti family is working for the company. Massimo Aliverti, Riccardo’s son, has been with the company as sales director since 1991. He works closely with his father and knows all phases of production. Massimo has established a broad customer base for Lorenzo around the world.

As far as the informations are reliable, Lorenzo’s better lines (One Star, Two Star, Three Star, Moscato, Spumante and the Grand Canadian) are made in Italy while the cheaper ones (New Era – Riesling, New Era – Poggio, Angera, Angera Satinato, Cadry, Churchwarden, Filtro, Arena, Cadore, Sport PS and Garden) are made in Albania by Tomori to benefit from the rich deposit of briar in Albania.

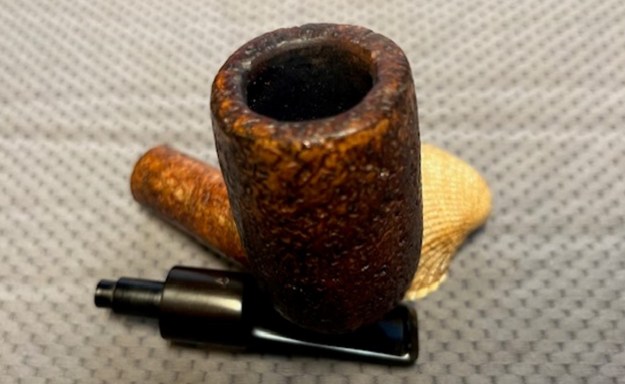
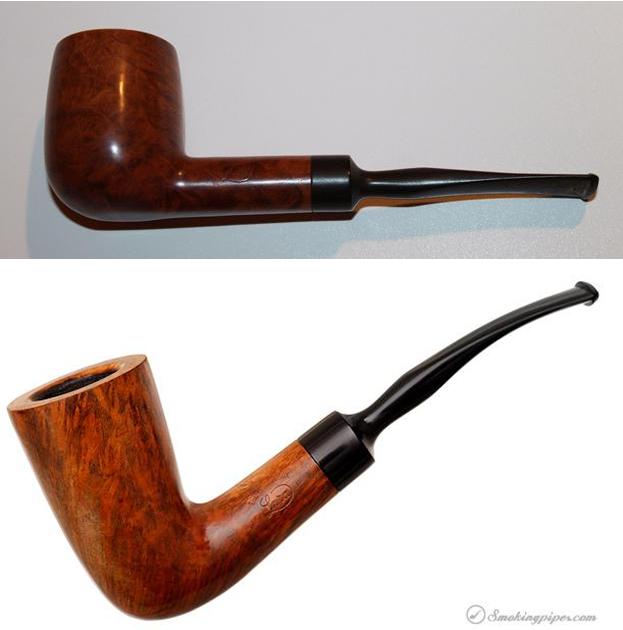
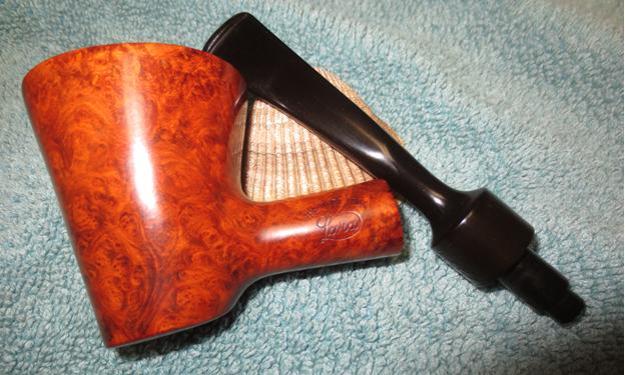
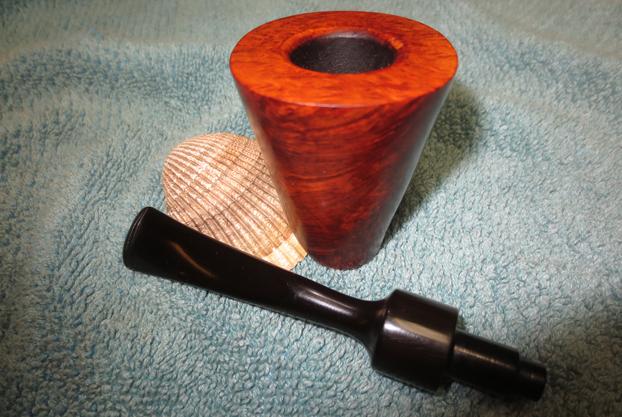
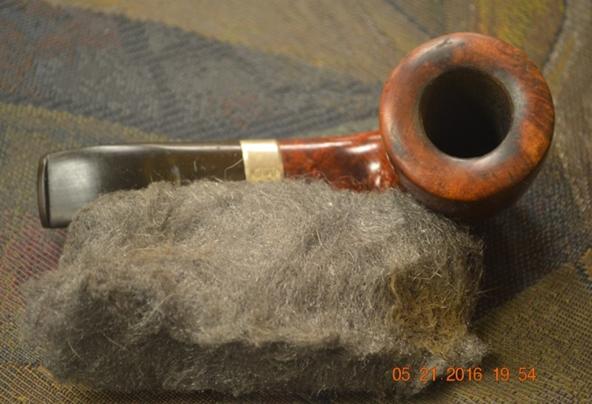
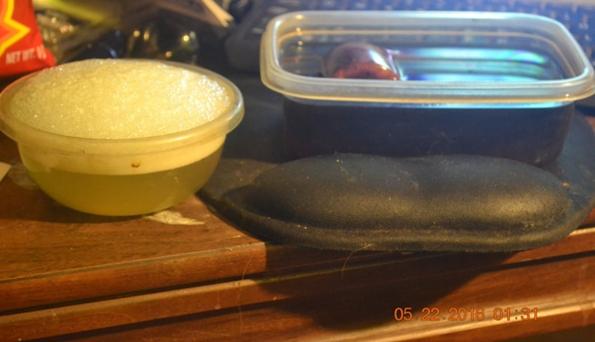
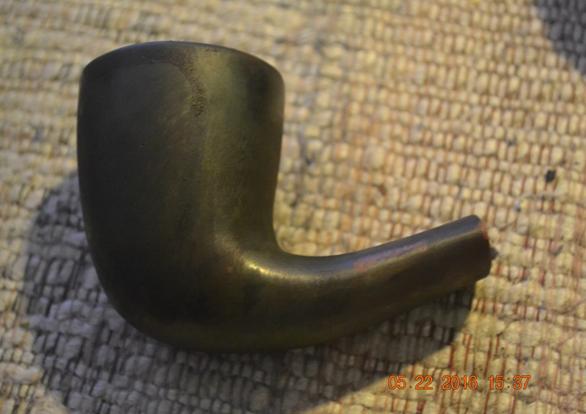
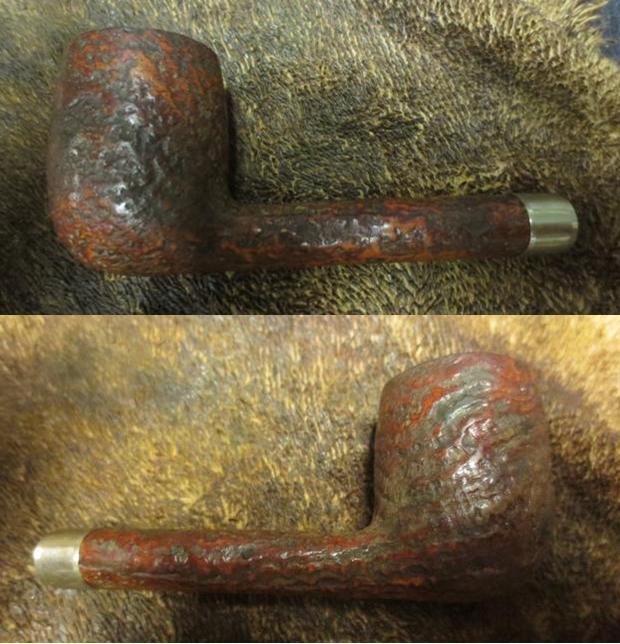
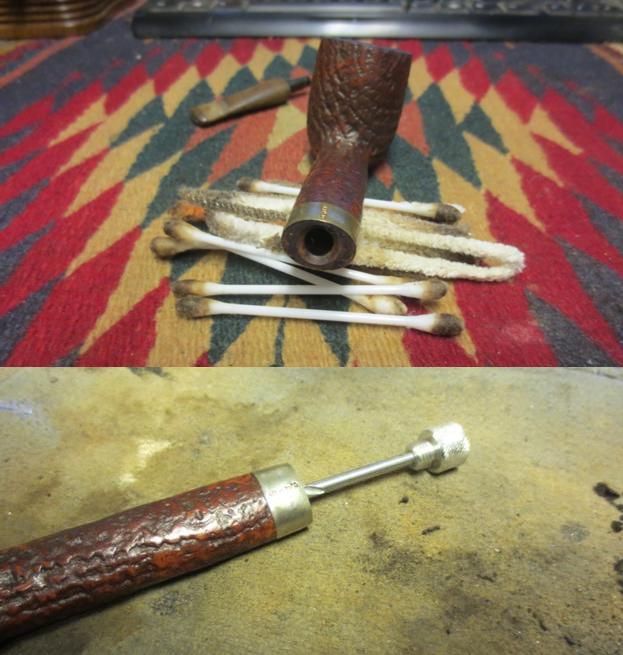
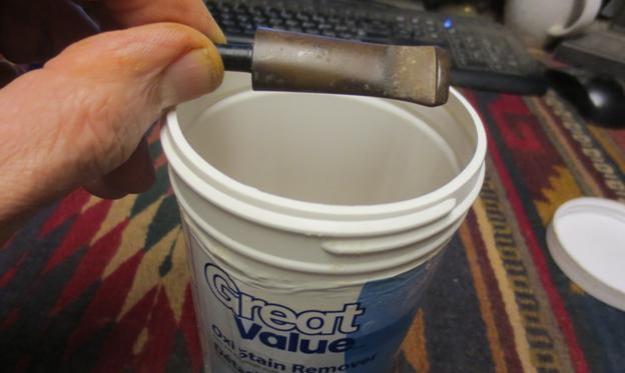
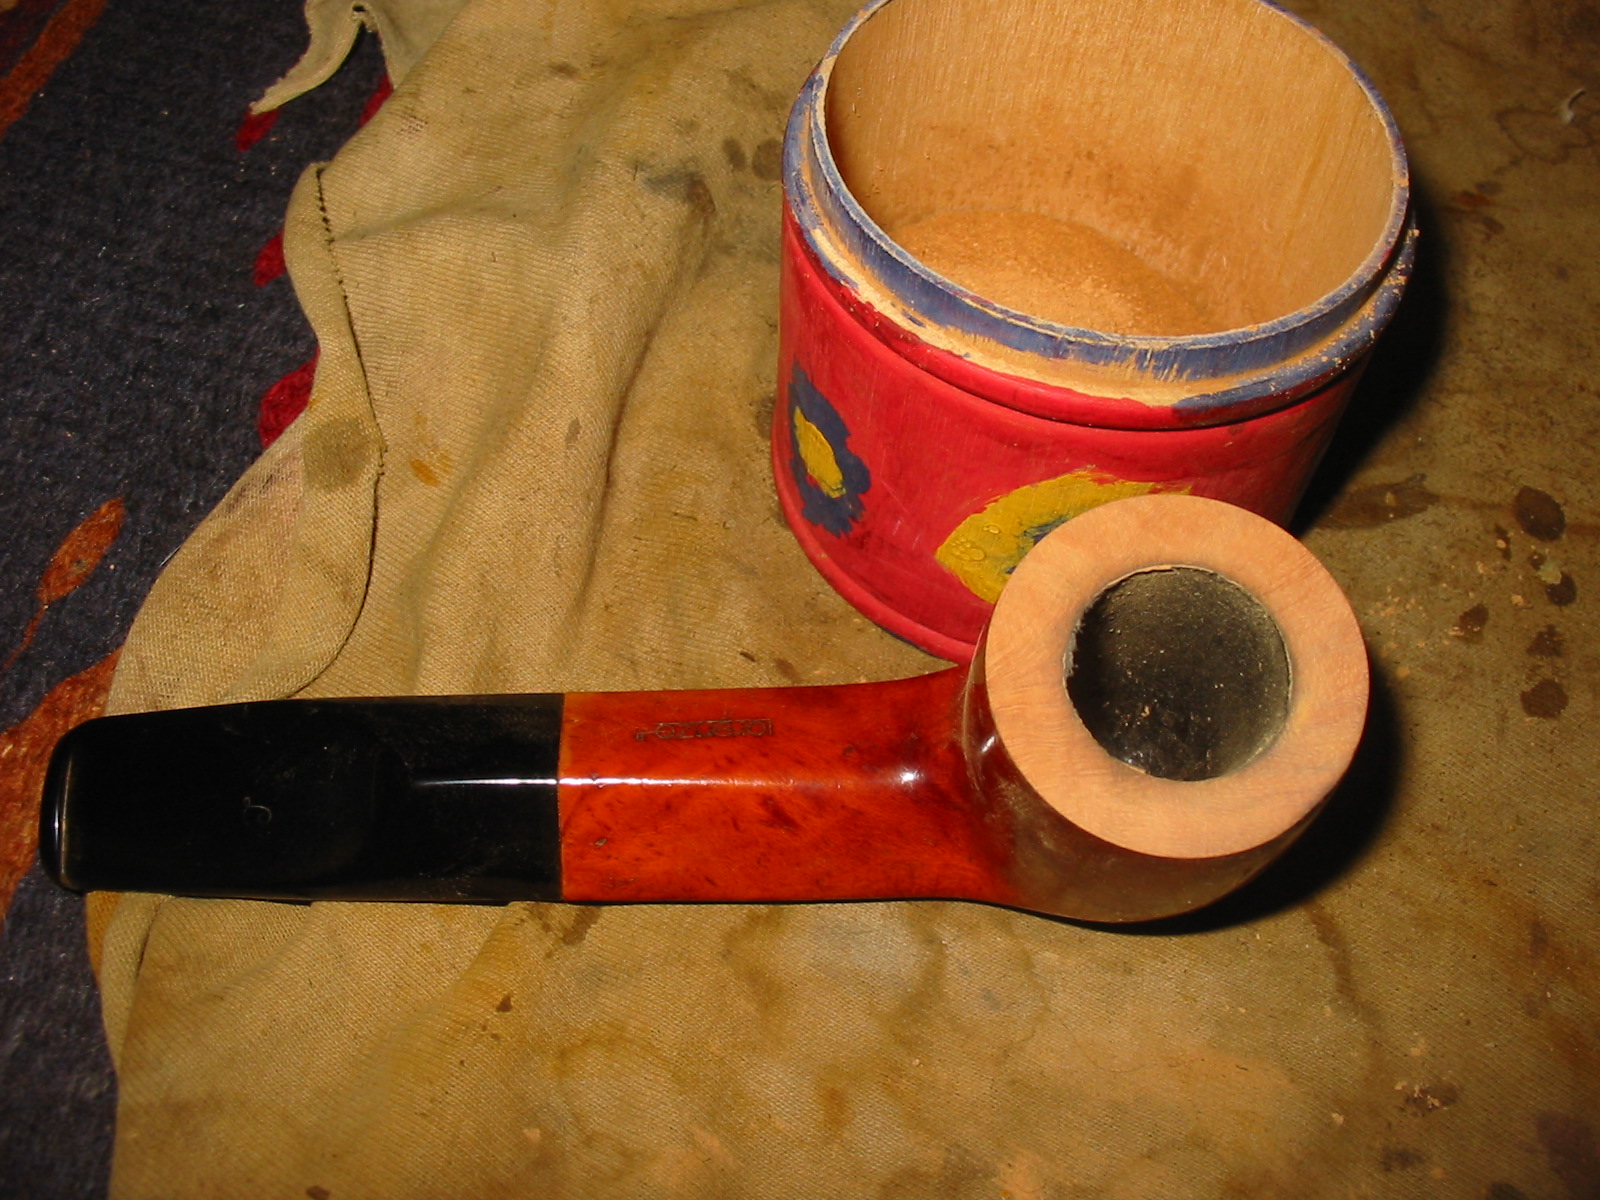
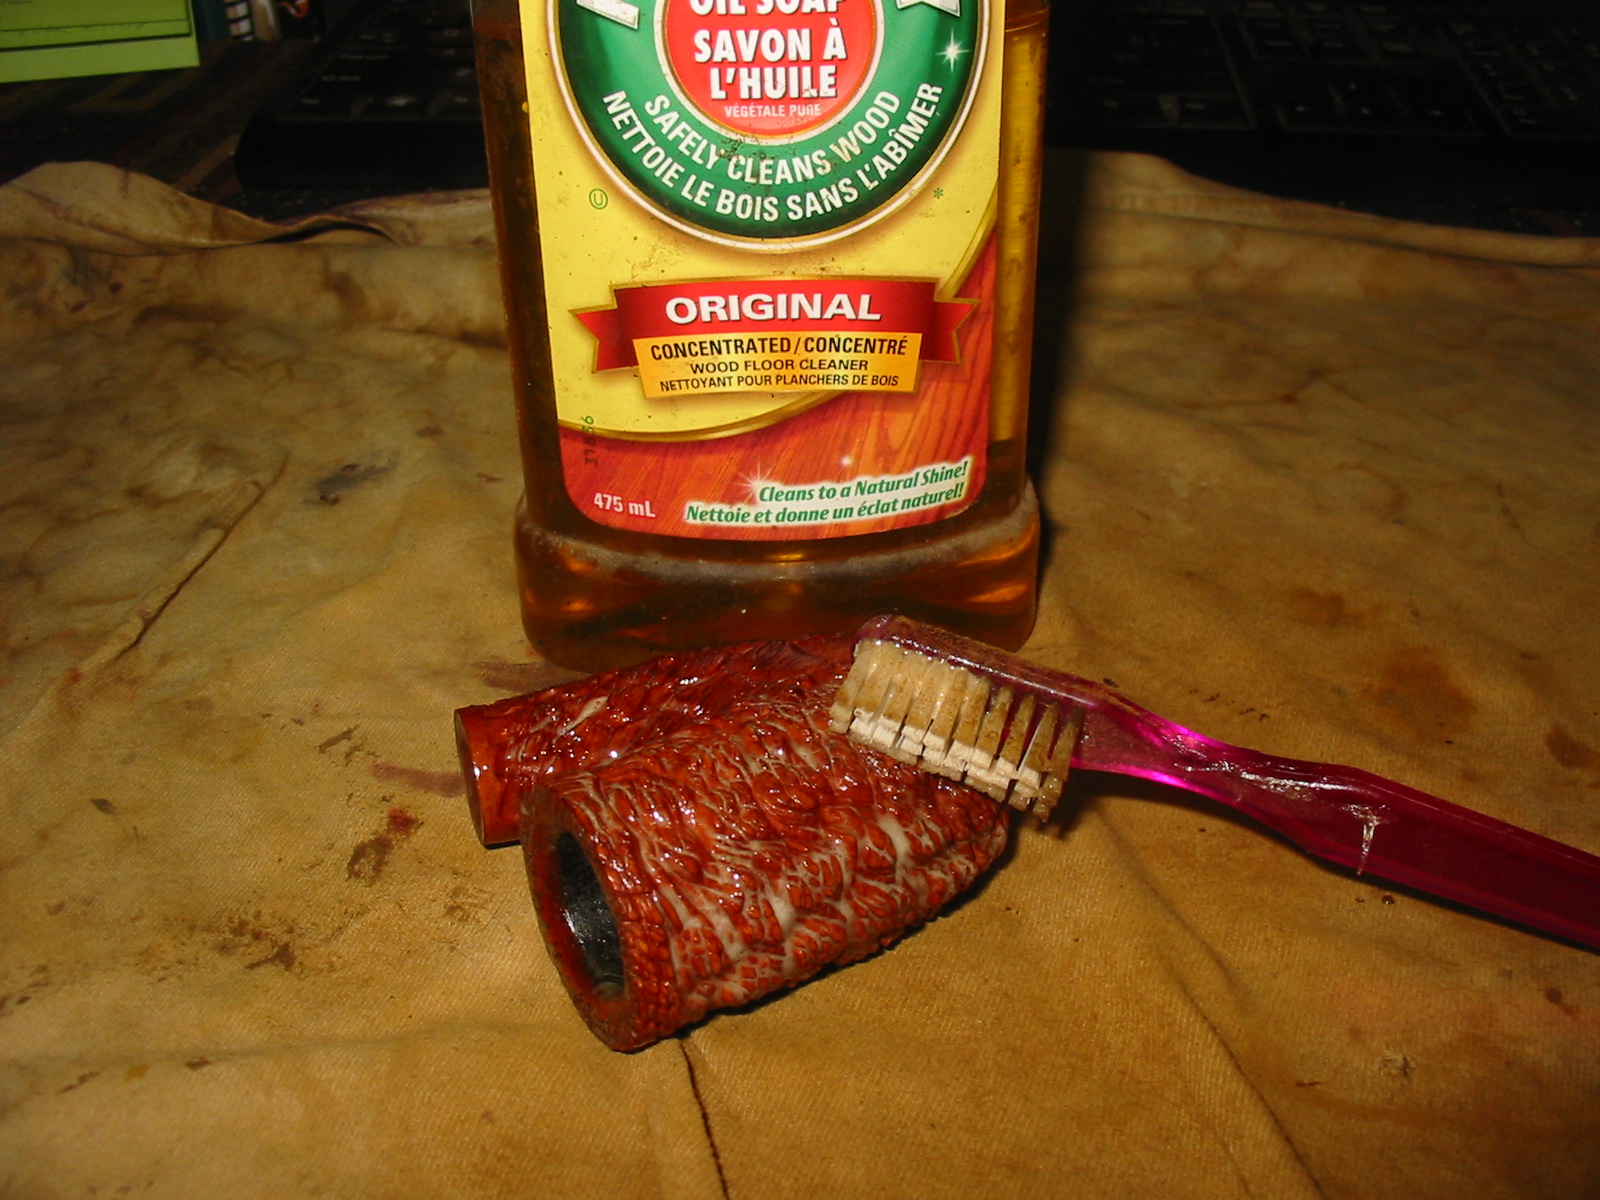
Armed with that information I turned to work on the pipe itself.  Jeff had cleaned up the pipe and it looked very good. He reamed the pipe with a PipNet pipe reamer and removed the rest of it with a Savinelli Fitsall Pipe Knife.  He scrubbed the bowl with undiluted Murphy’s Oil Soap with a tooth brush. He rinsed it under running warm water to remove the soap and grime. He cleaned out the inside of the shank and the airway in the stem with alcohol, cotton swabs, shank brushes and pipe cleaners. He soaked the stem in Briarville’s Stem Deoxidizer and rinsed it off with warm water. I took photos of the pipe before I started my part of the restoration work. 
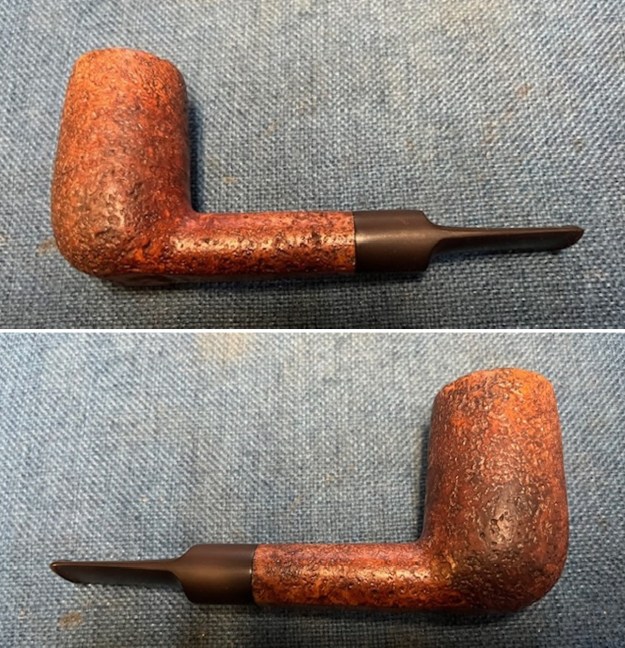
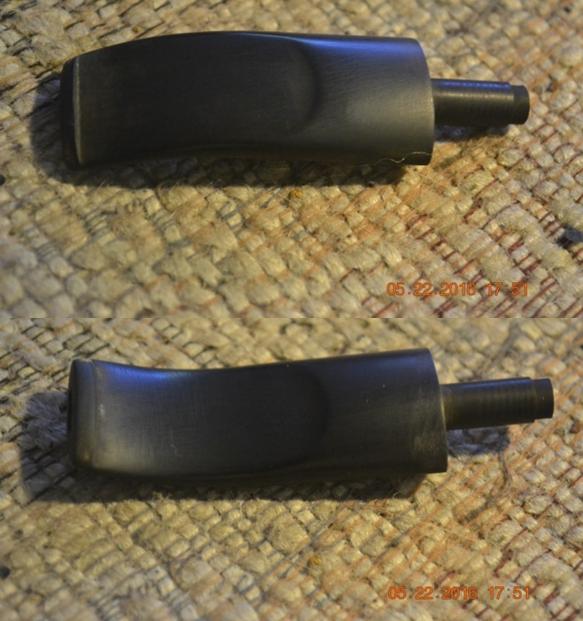
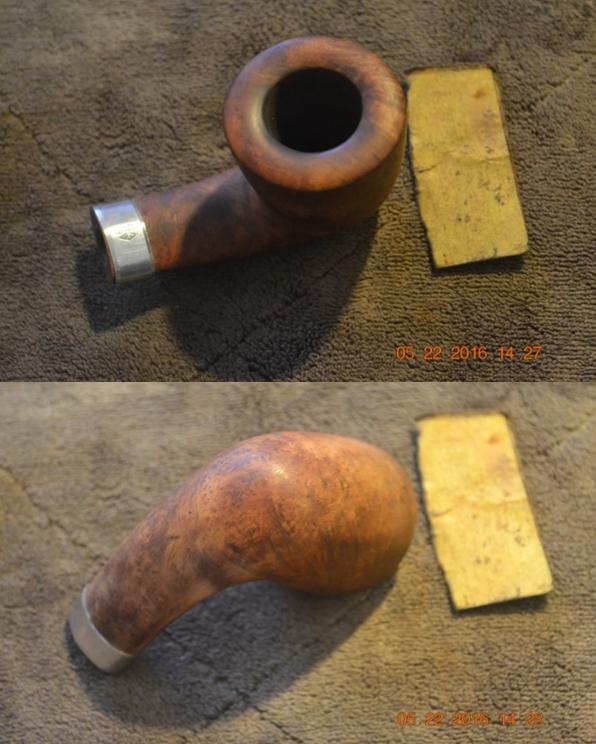
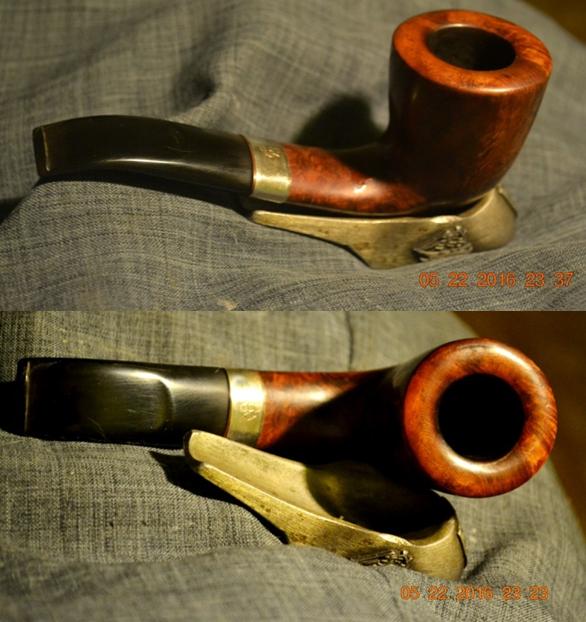
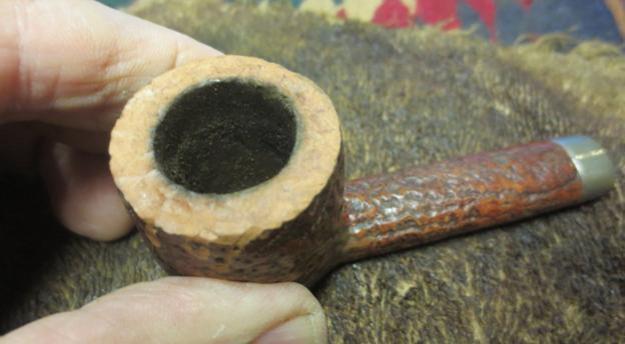
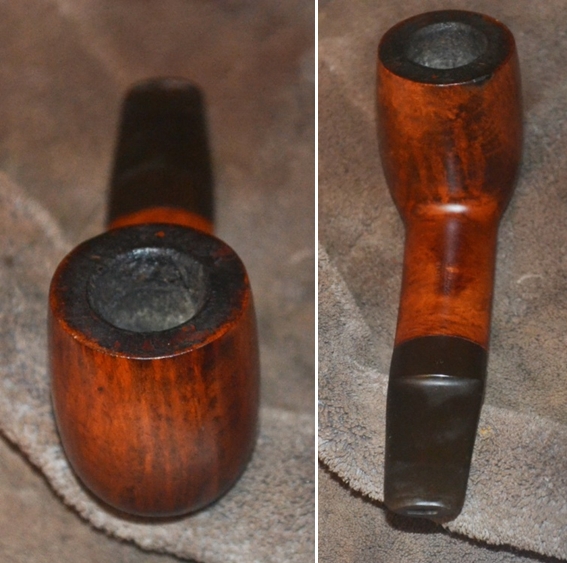
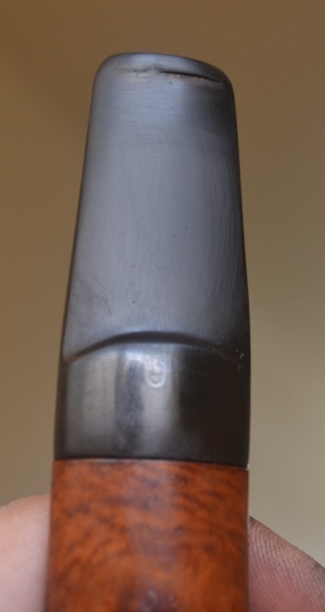
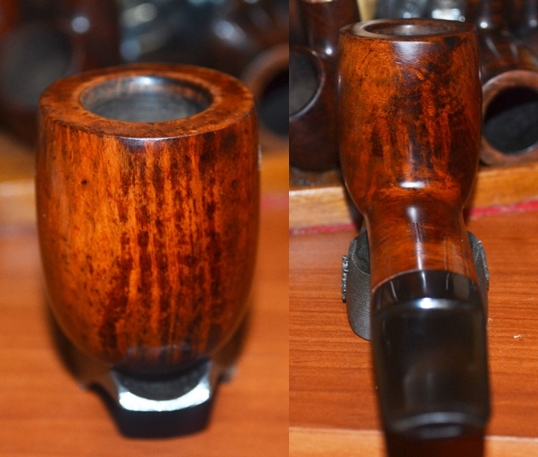
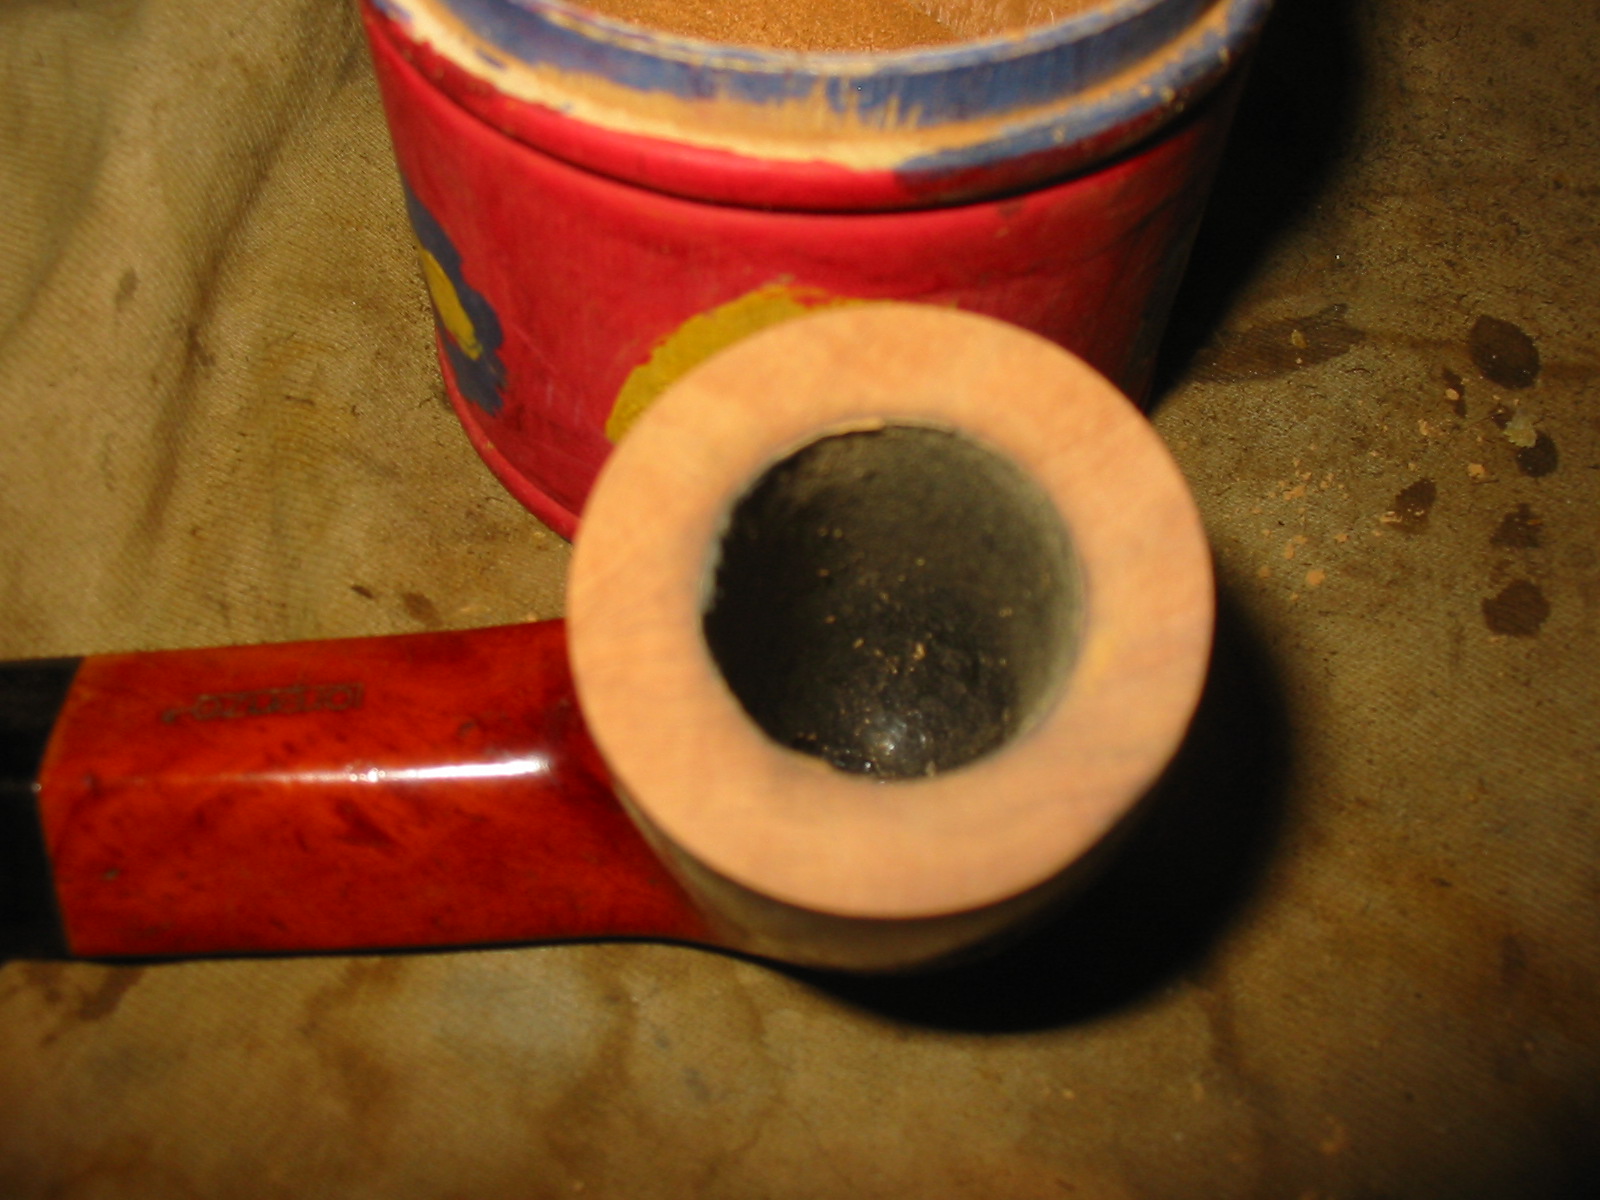
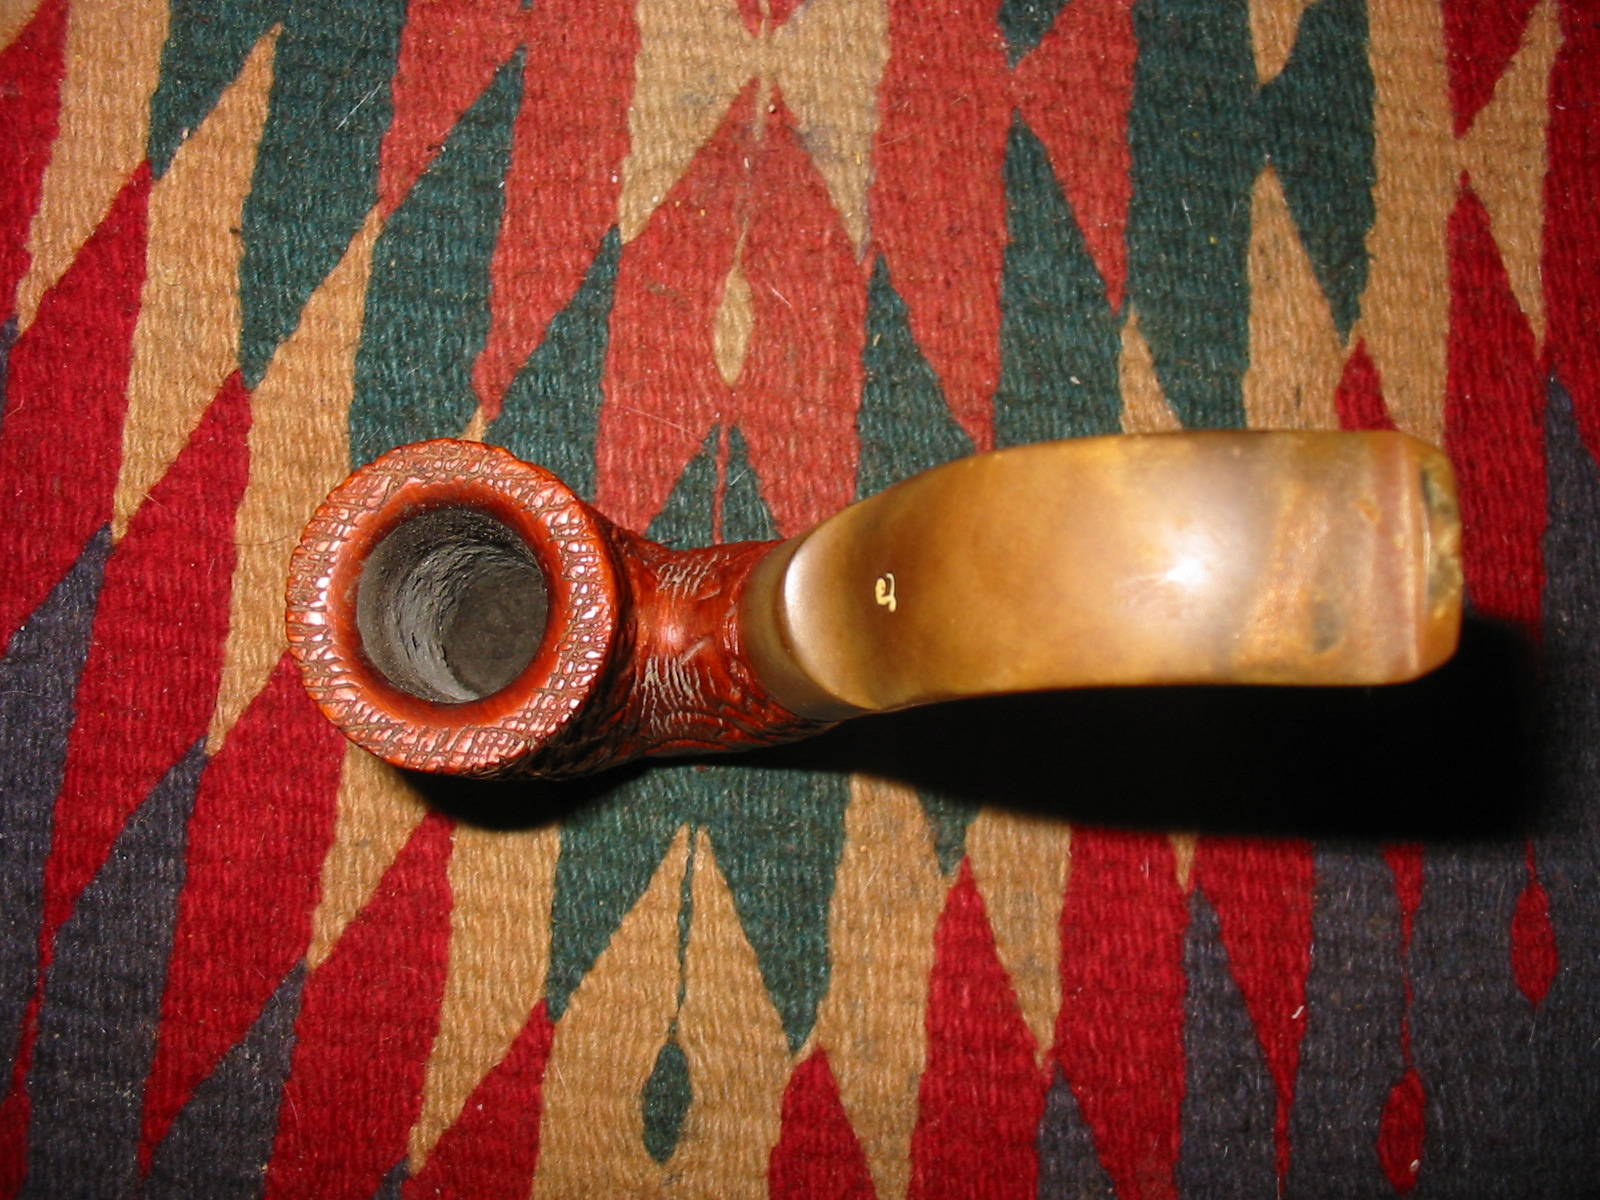
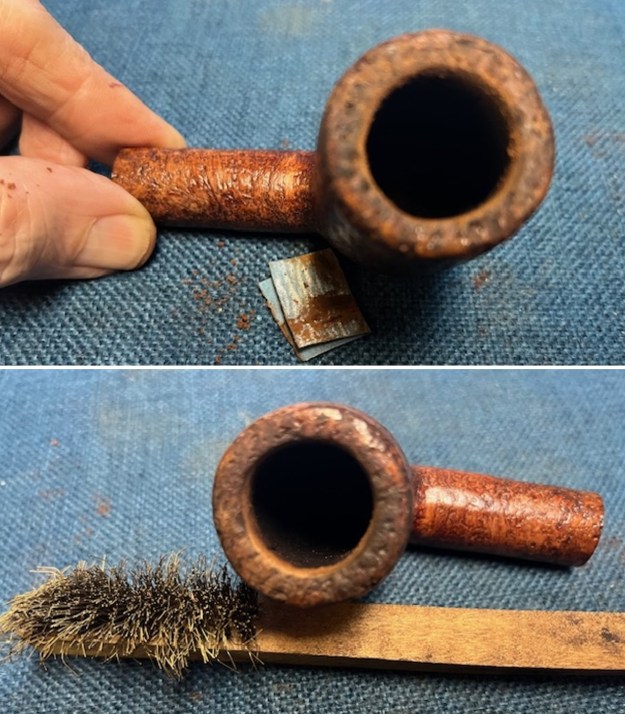
The rim top cleaned up really well. The rim top and outer edge of the bowl look very good. The inner edge has some damage. The stem surface was rough but the oxidation was lessened and calcification was gone. Overall it looked very good with a few light tooth marks and chatter on both sides near the button.
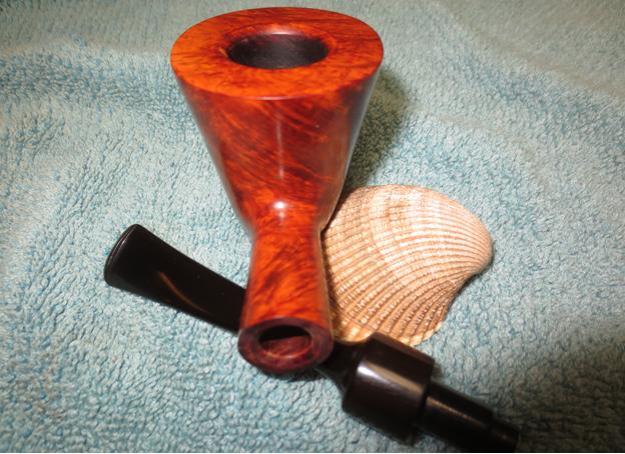
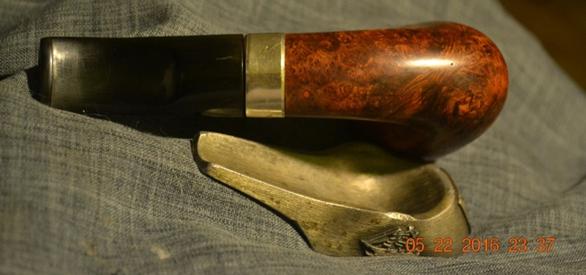
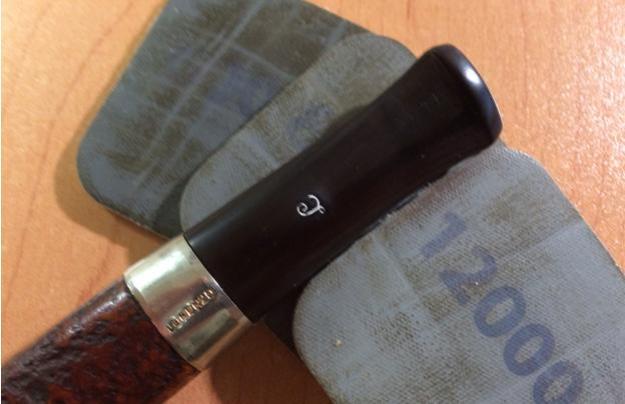
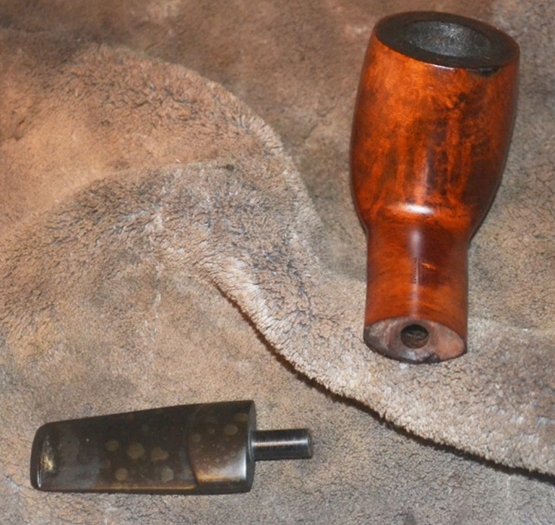
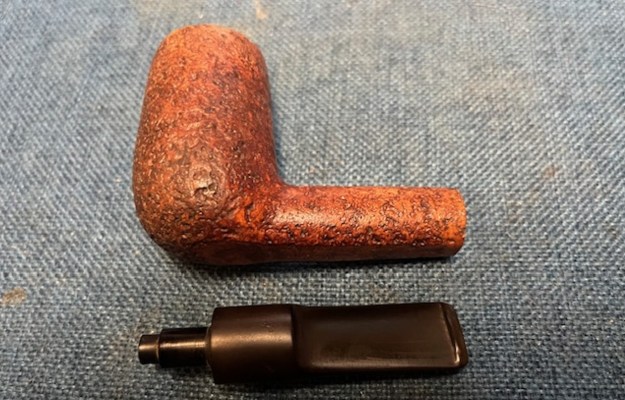
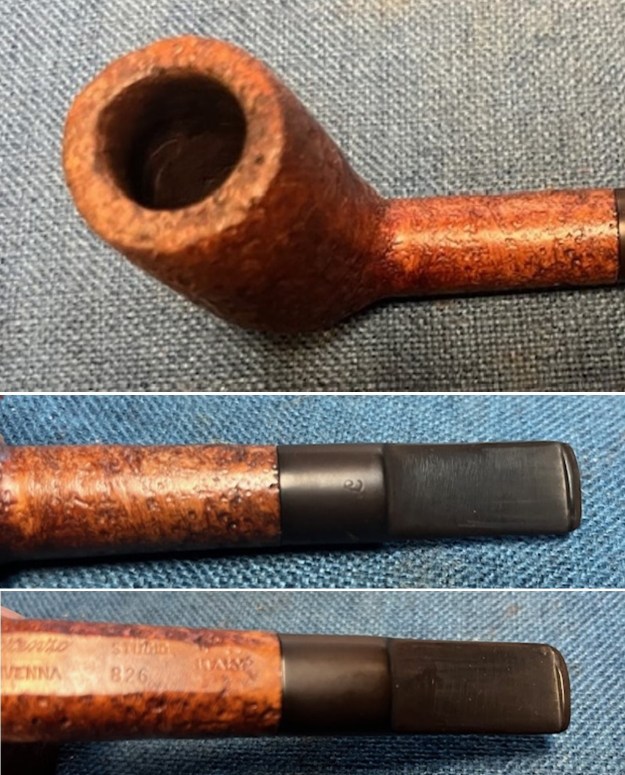
The stamping on and underside of the shank is clear and readable. It is stamped as noted above. The saddle stem is also stamped with the Lorenzo L logo on the top. I removed the stem and took a photo of the pipe to give a sense of the whole. 
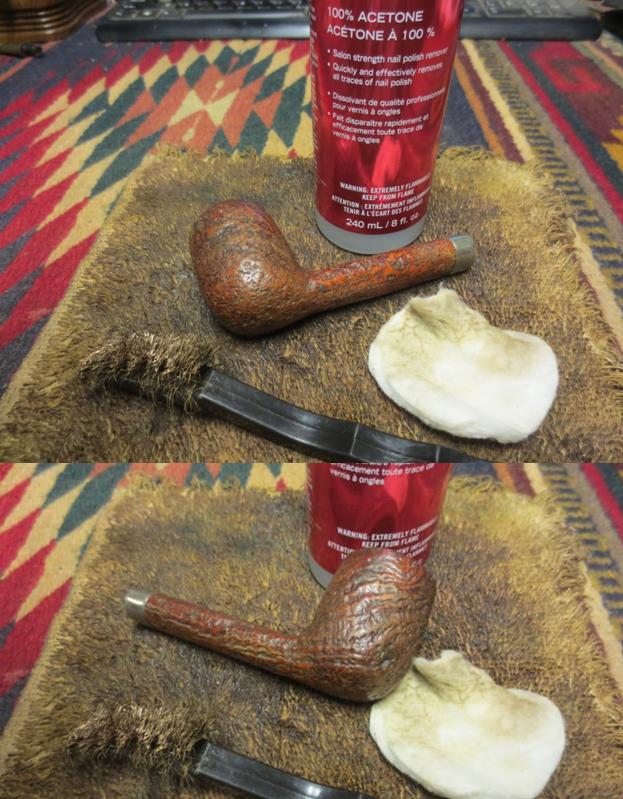
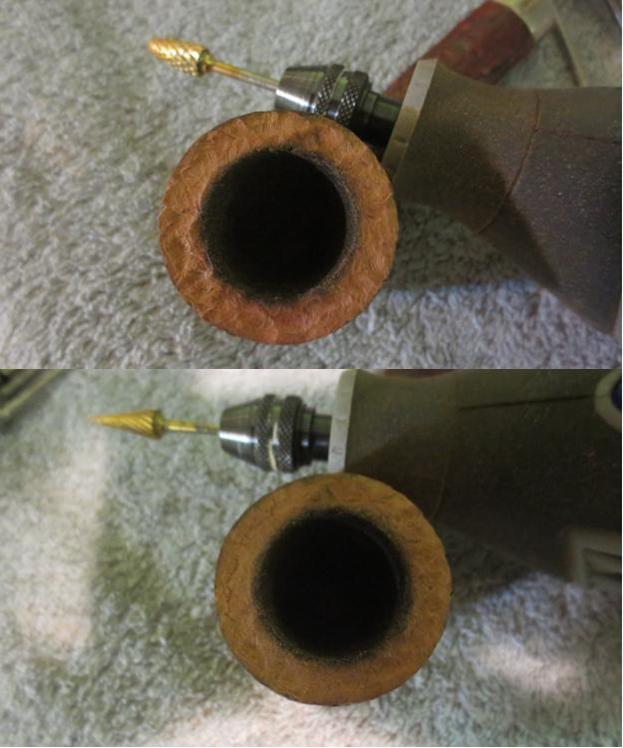
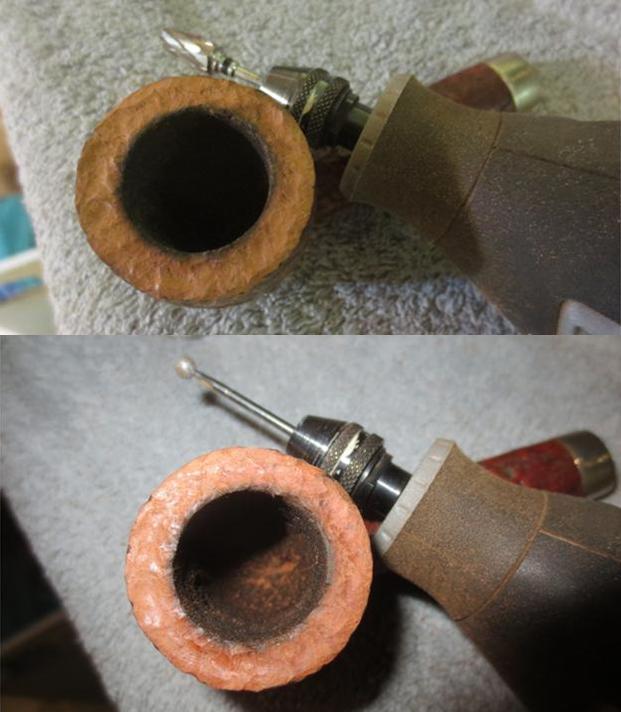
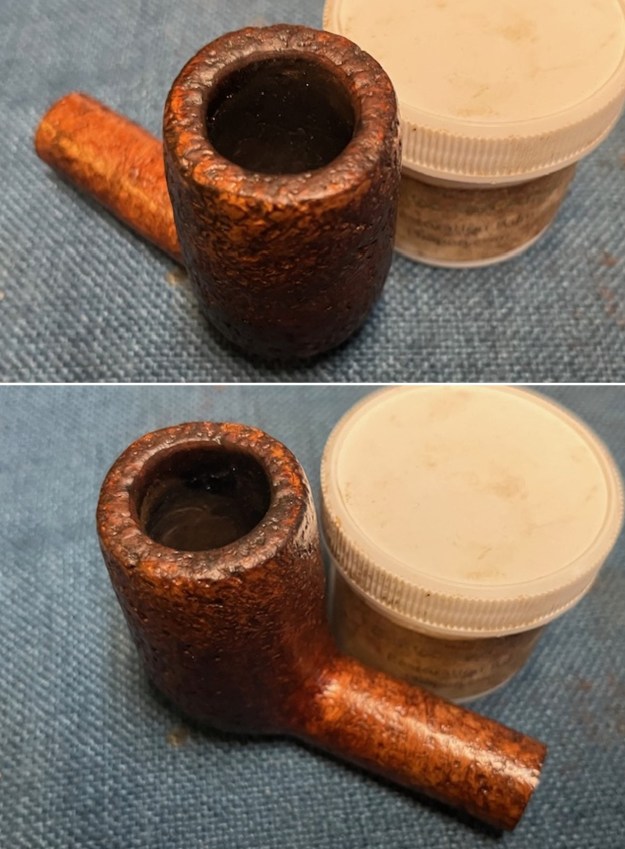
I cleaned up the inner edge of the bowl with a folded piece of 220 grit sandpaper to smooth out the damage. Once I had smoothed out the edge the bowl was ready. I worked over the sandblast rim top with a brass bristle wire brush to work out the debris. It looked better when finished. 
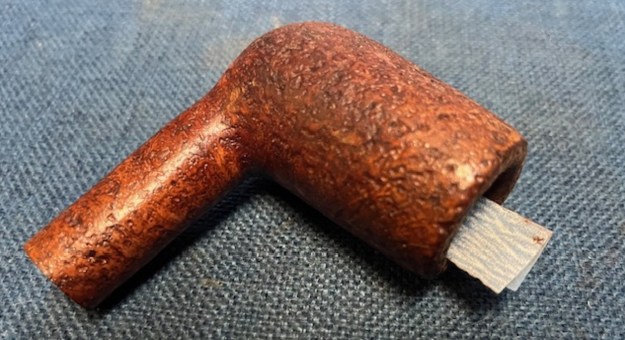
I rubbed the bowl and shank down with Before & After Restoration Balm. I worked it into the surface of the bowl sides and shank with my fingertips and a horsehair shoe brush to get it into the depths of the sandblast. It works to clean, enliven and protect the briar. I let the balm sit for 15 minutes and buffed with a cotton cloth to raise the shine. The sandblast took on depth and the pipe came alive. 
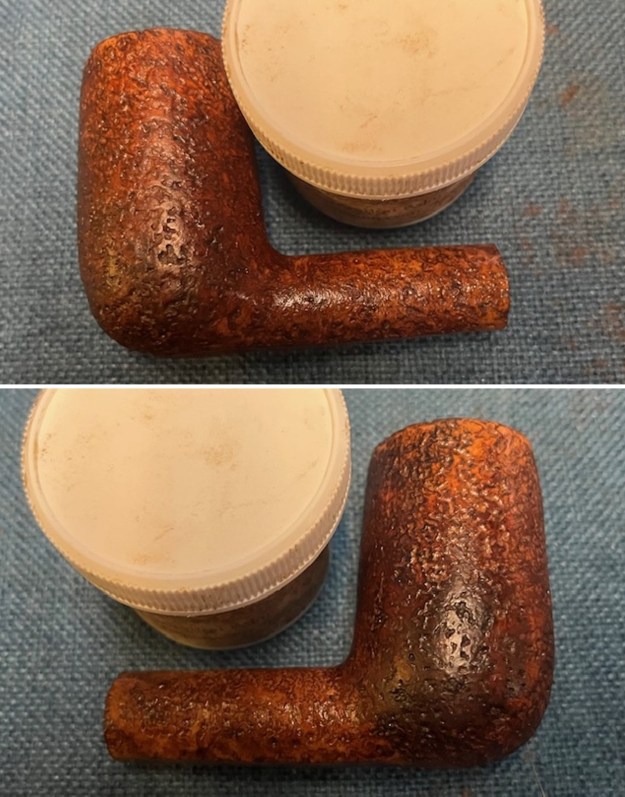
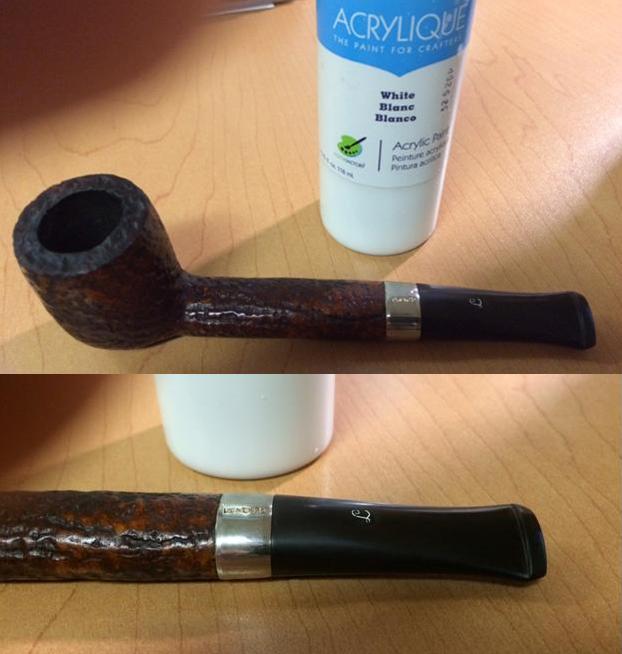
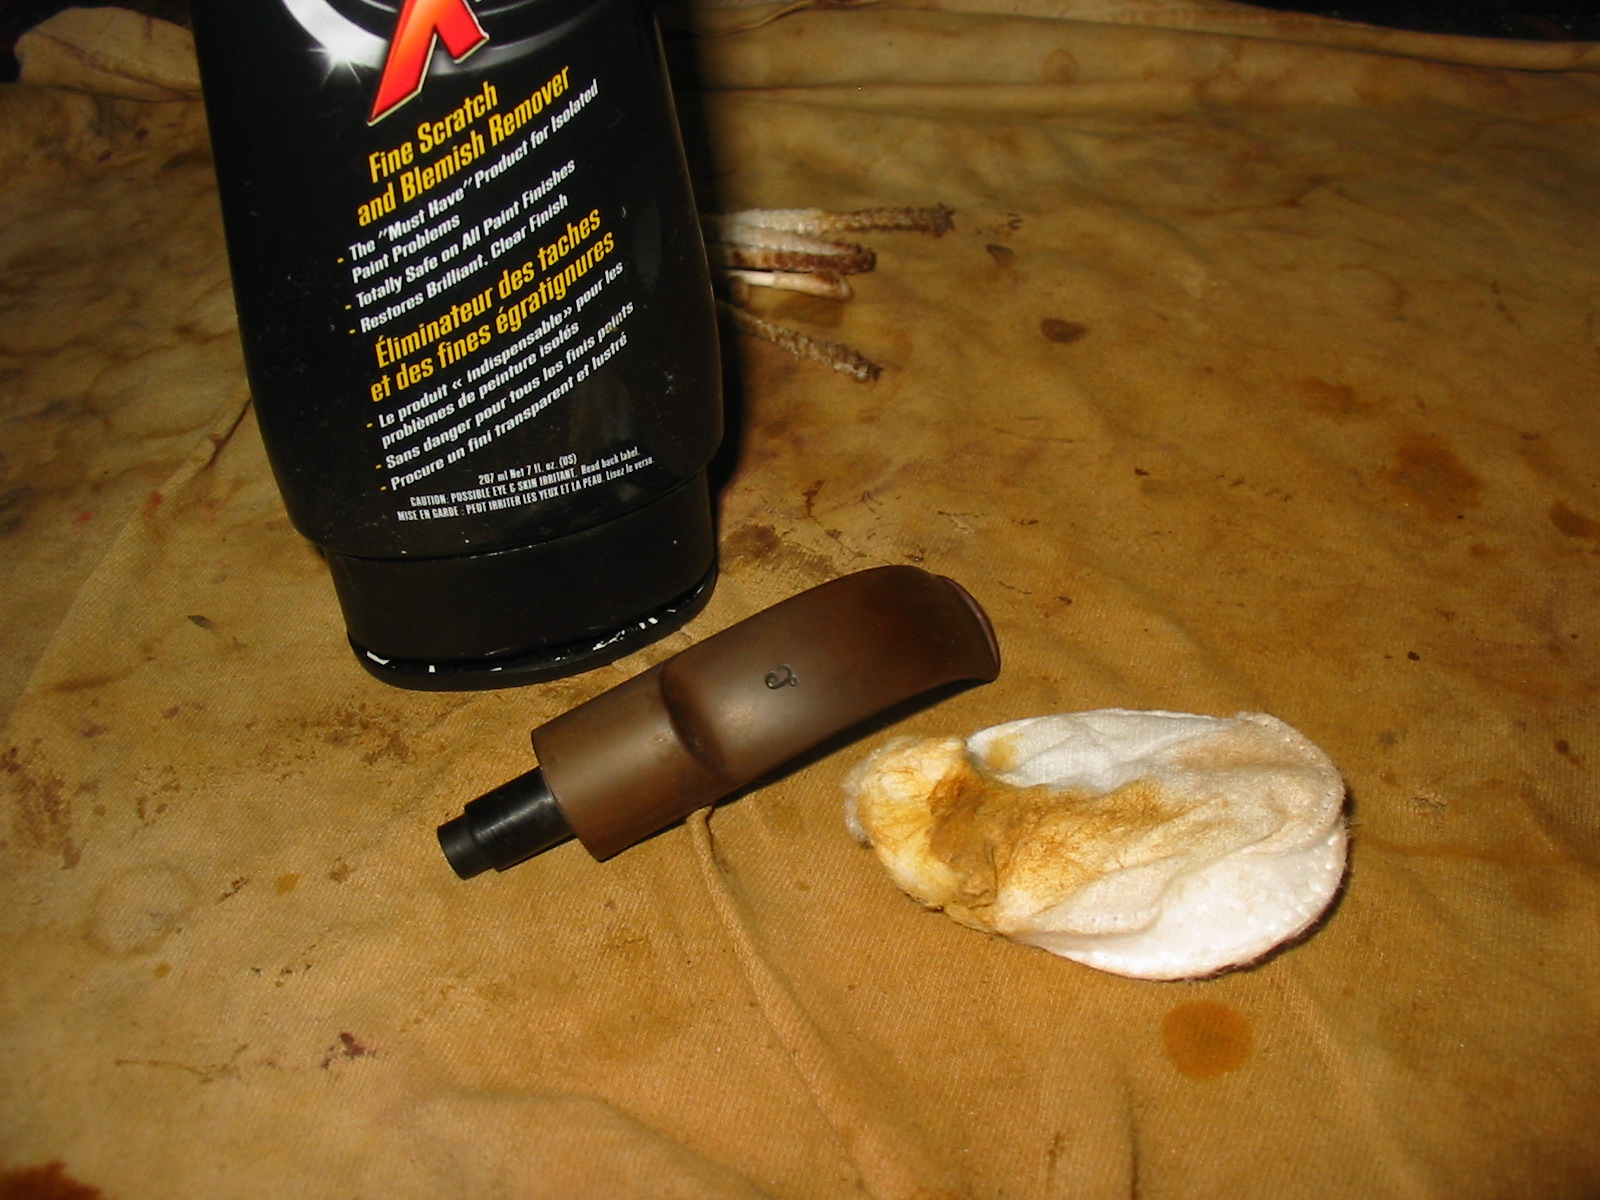
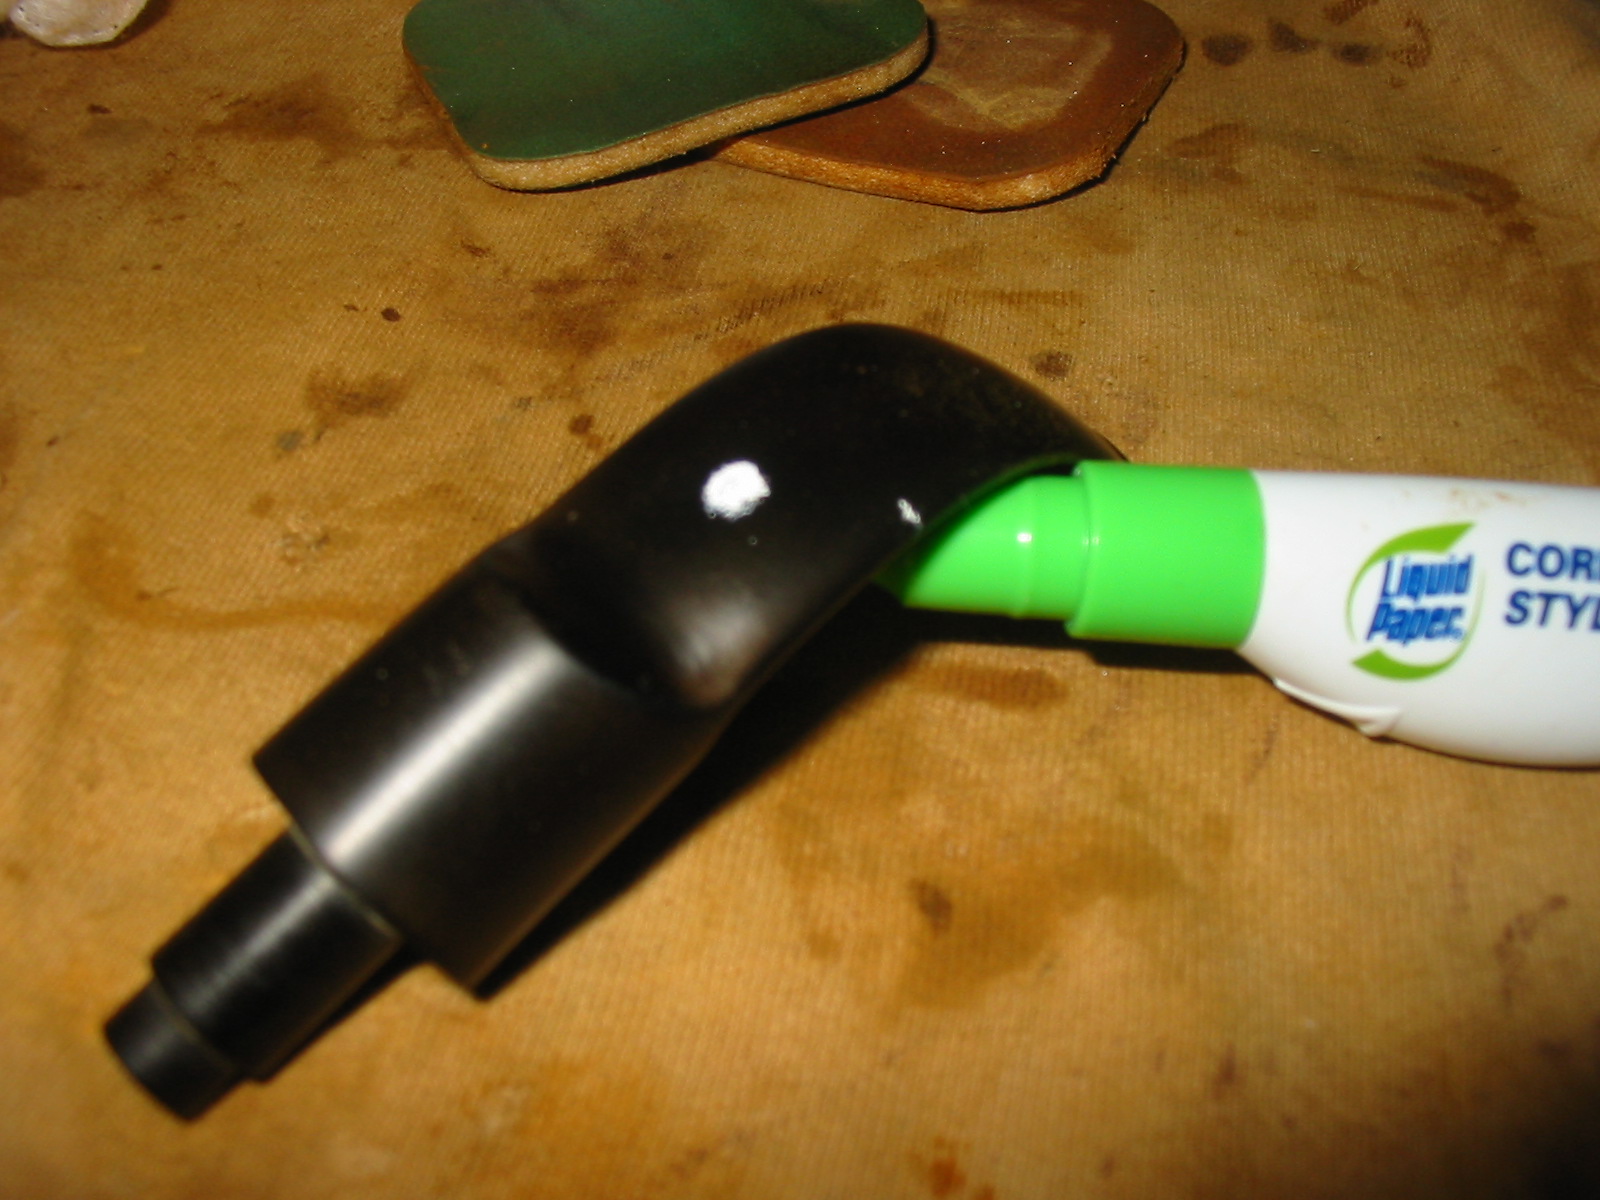
I set the bowl aside and turned my attention to the stem. The overall look of the stem was clean. I decided to touch up the L stamp on the top of the saddle portion of the stem. I used a folded pipe cleaner to work some Rub’n Buff Antique Gold into the stamp and then buffed it off with a soft cloth. It came out looking good.
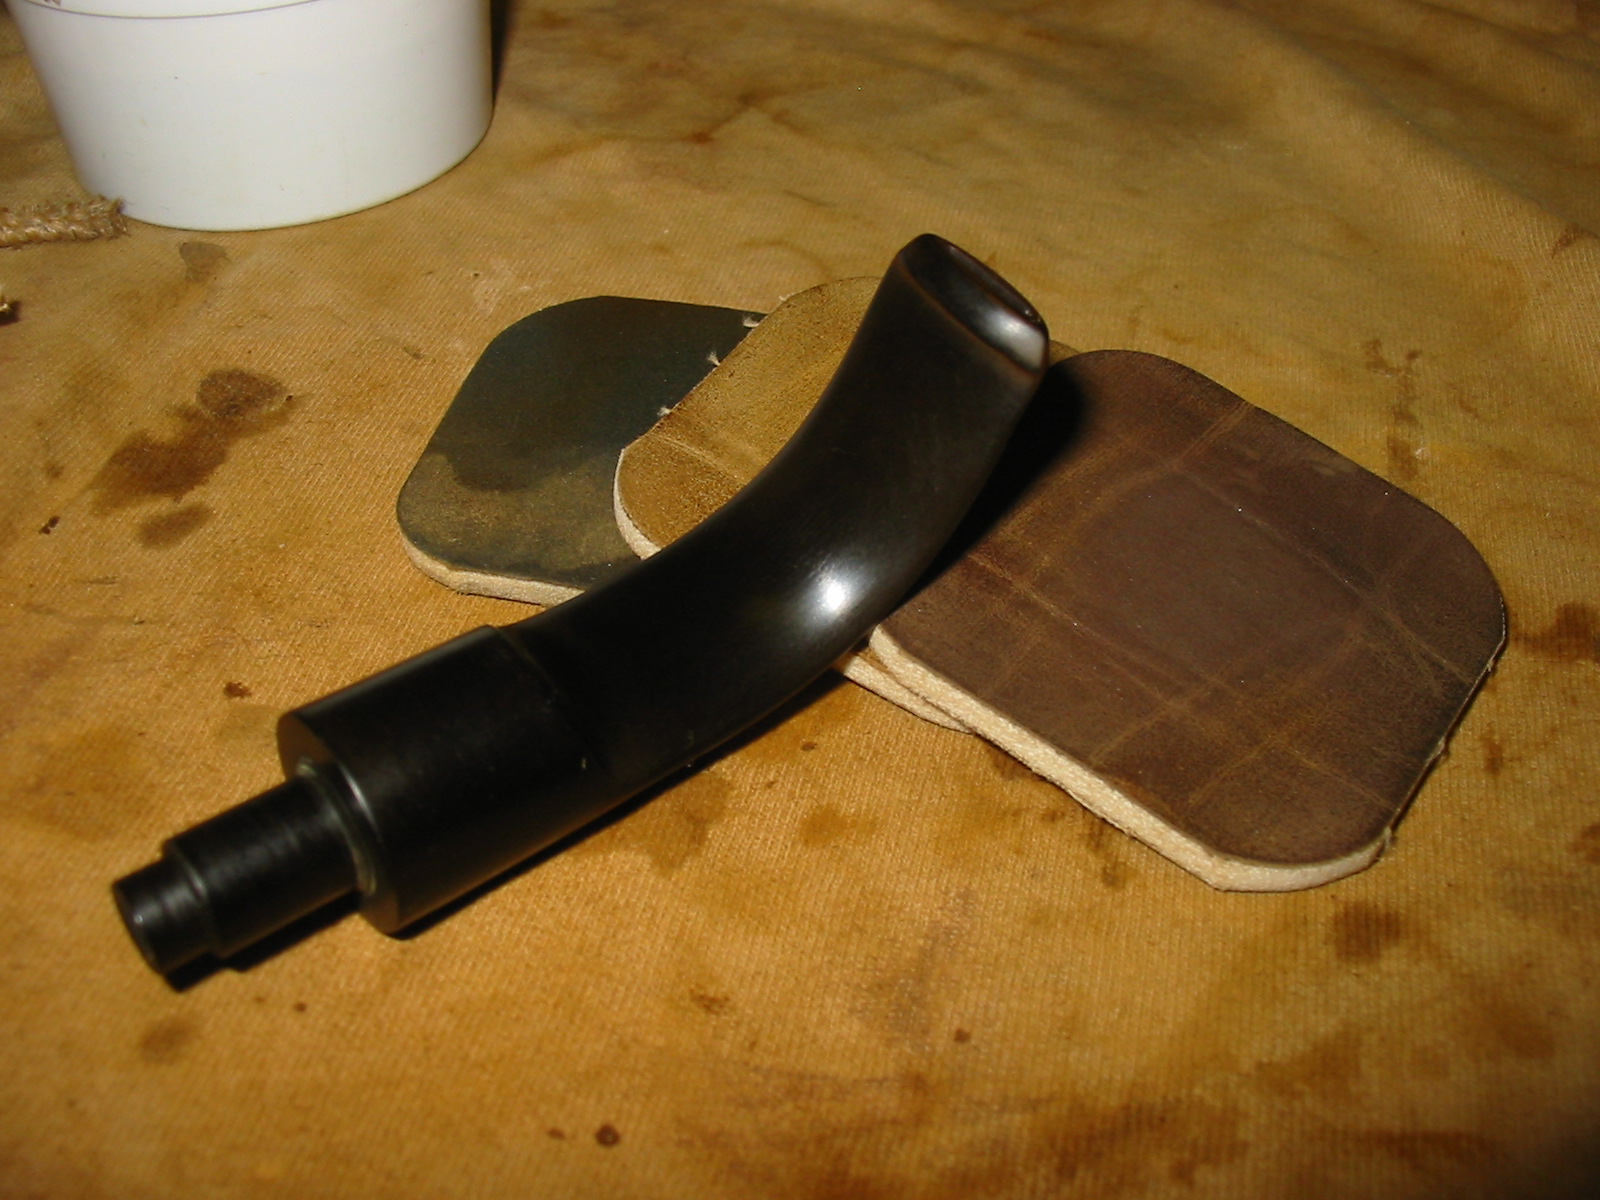
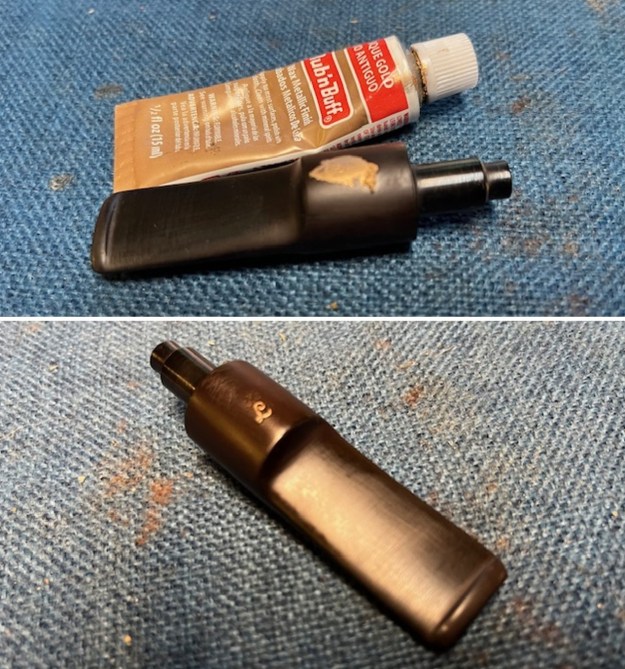
I started polishing the stem with 320-3500 grit sanding pads. I wiped the stem down after each sanding pad with an Obsidian Oil impregnated cloth. It removes the dust and also gives the sanding pads some bite. By the final pad it was looking quite good.
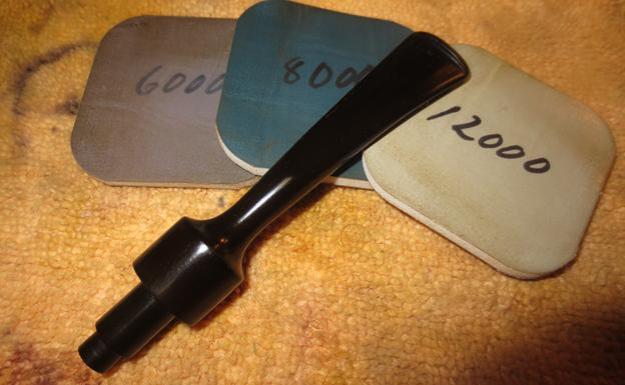
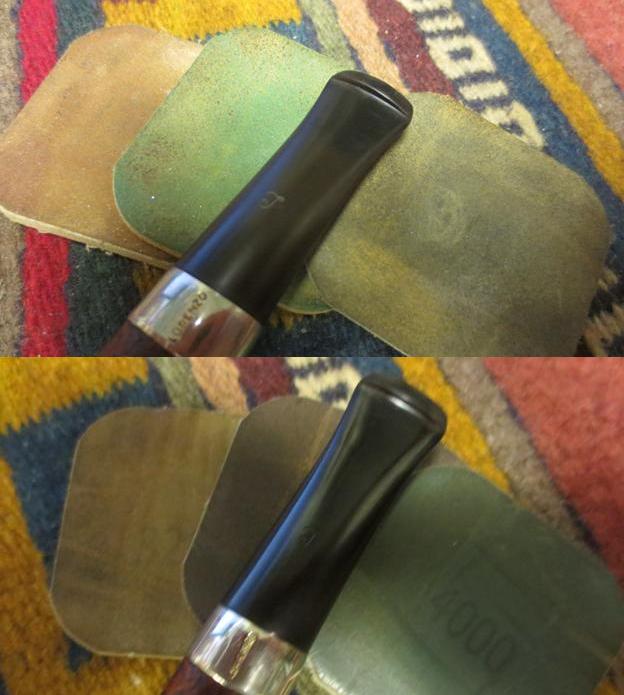
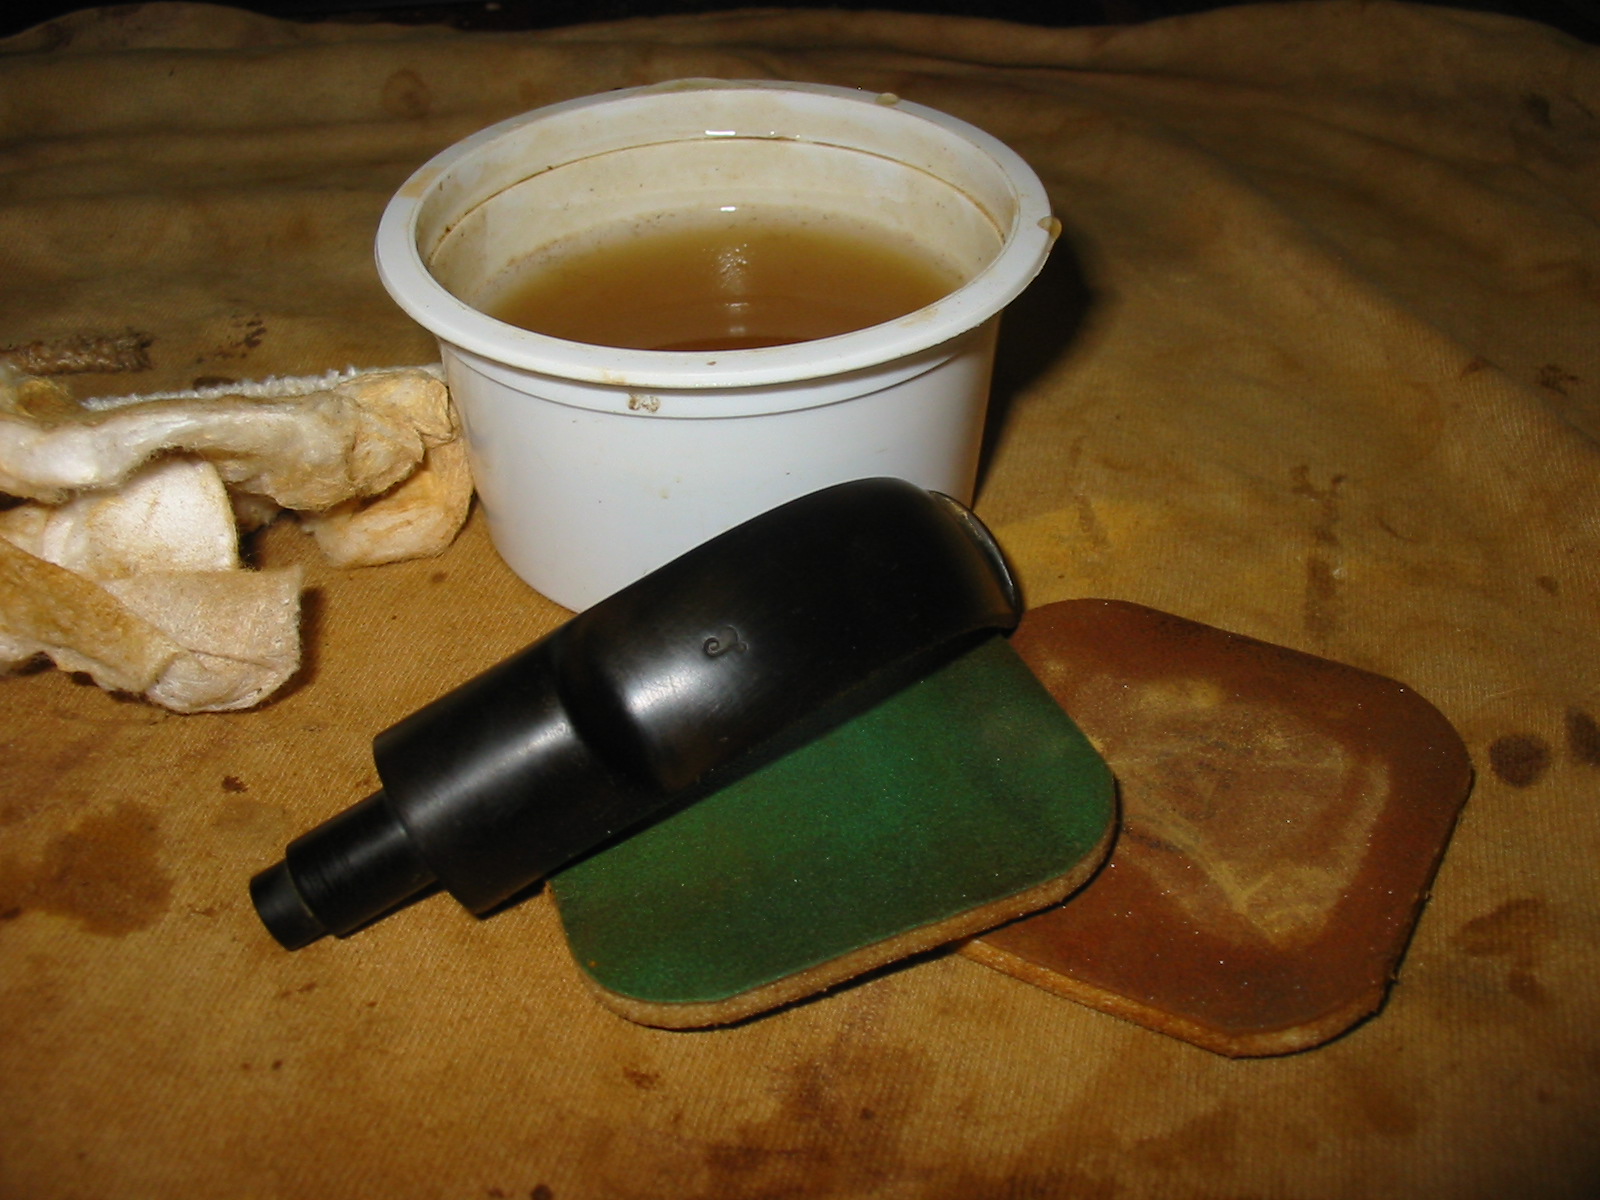
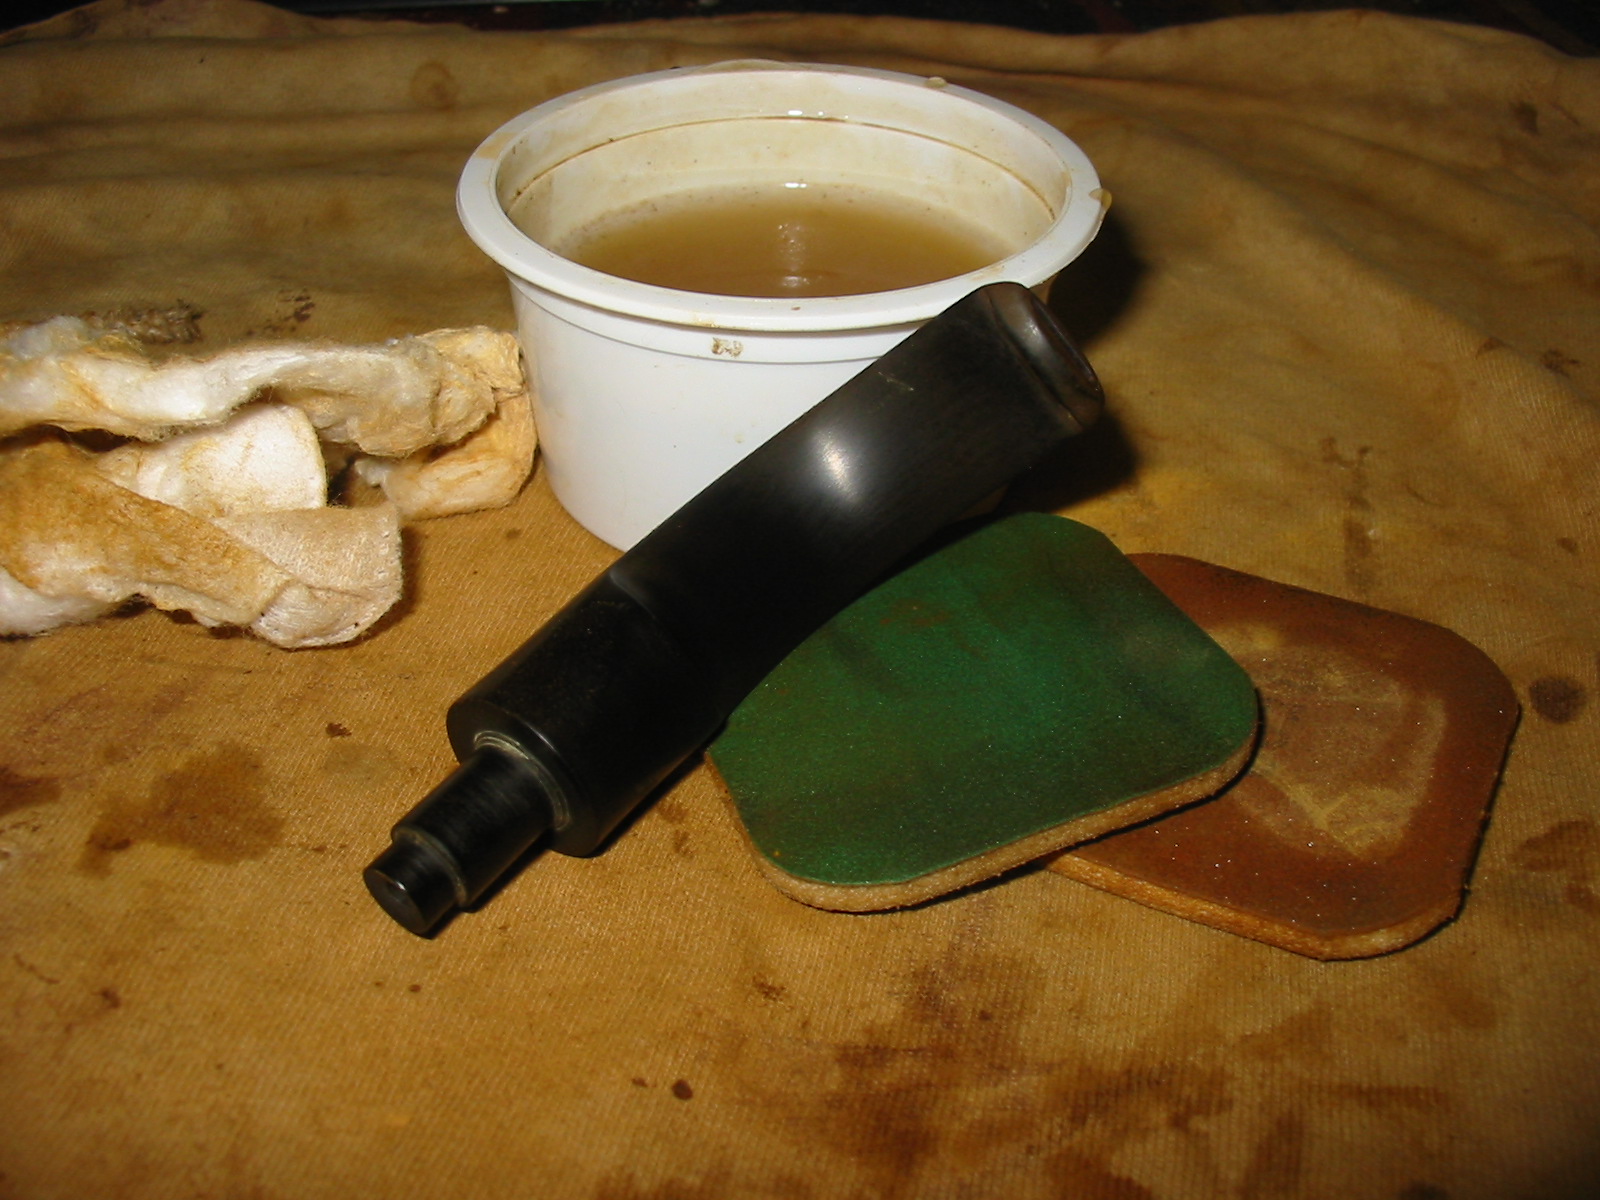
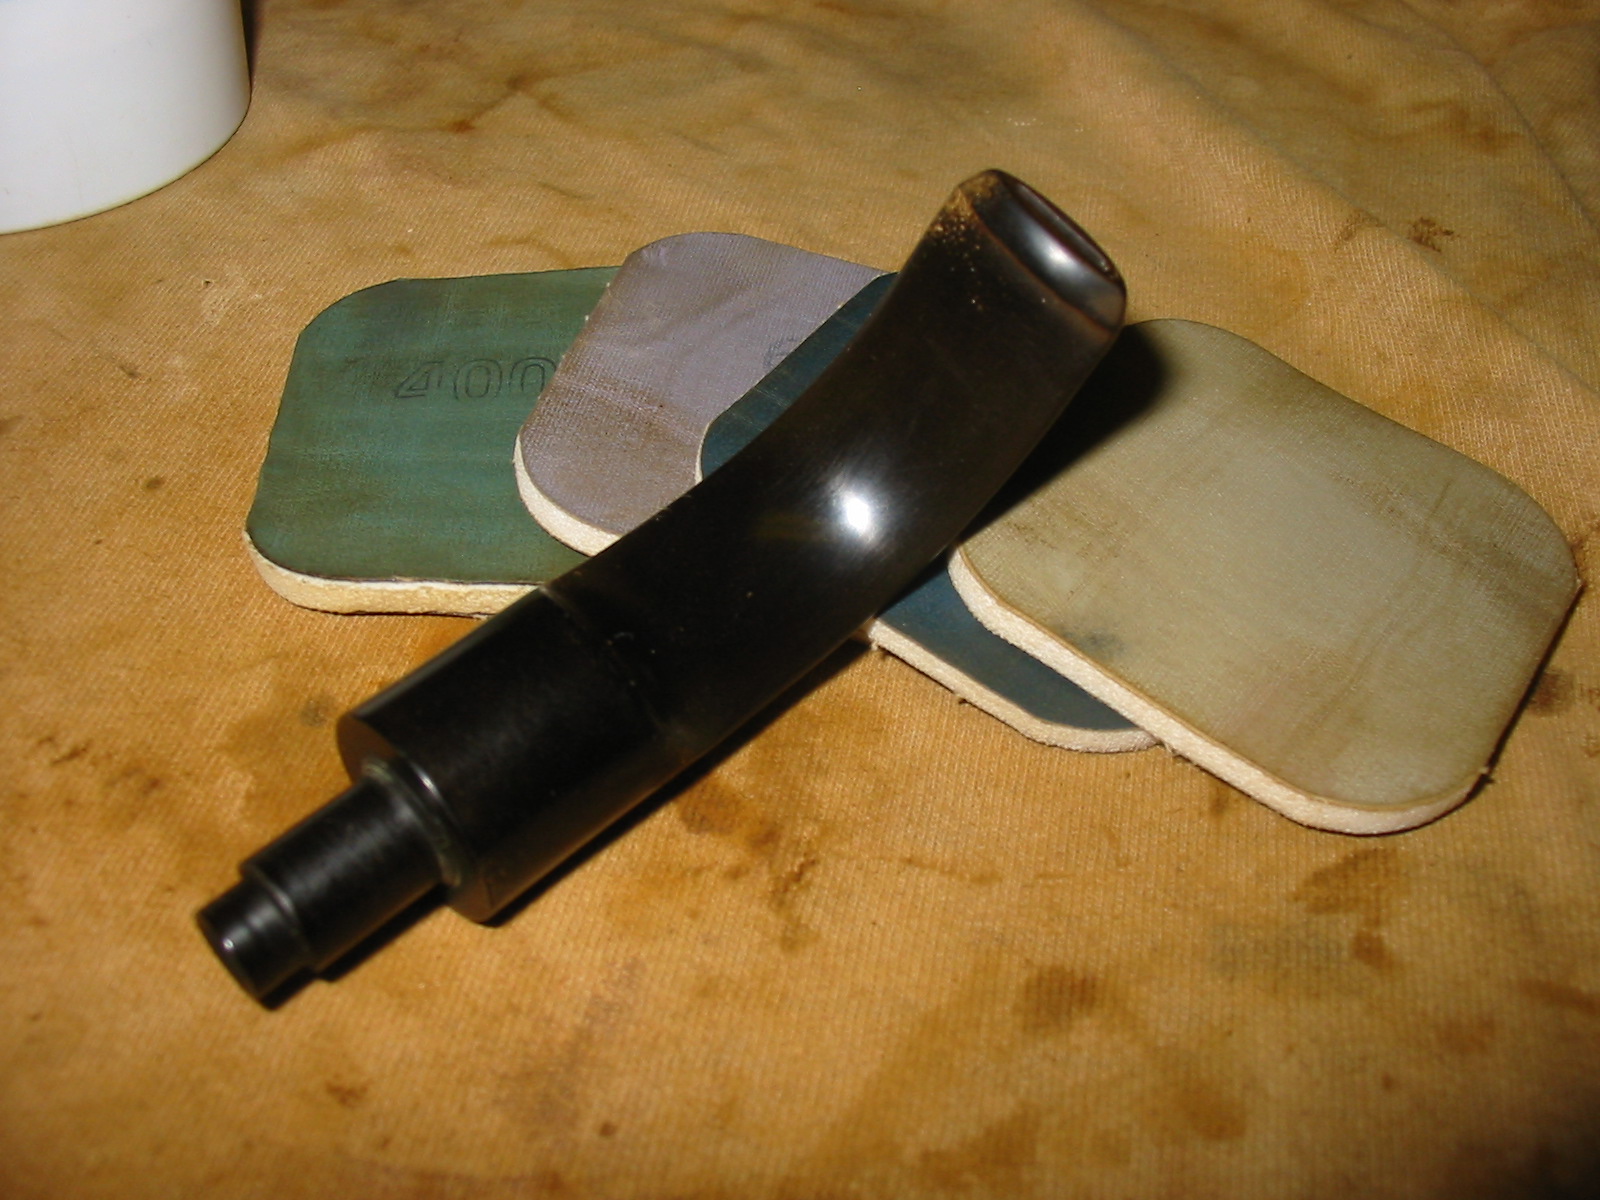
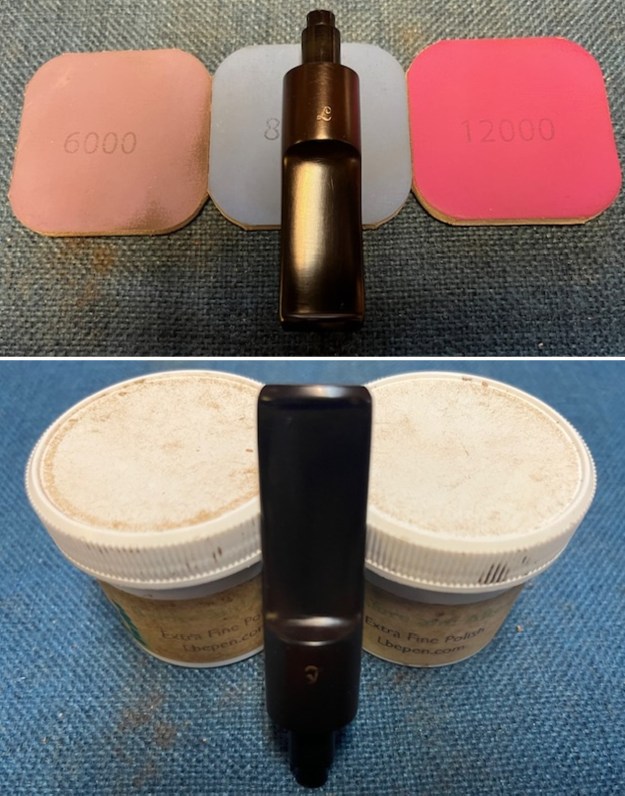
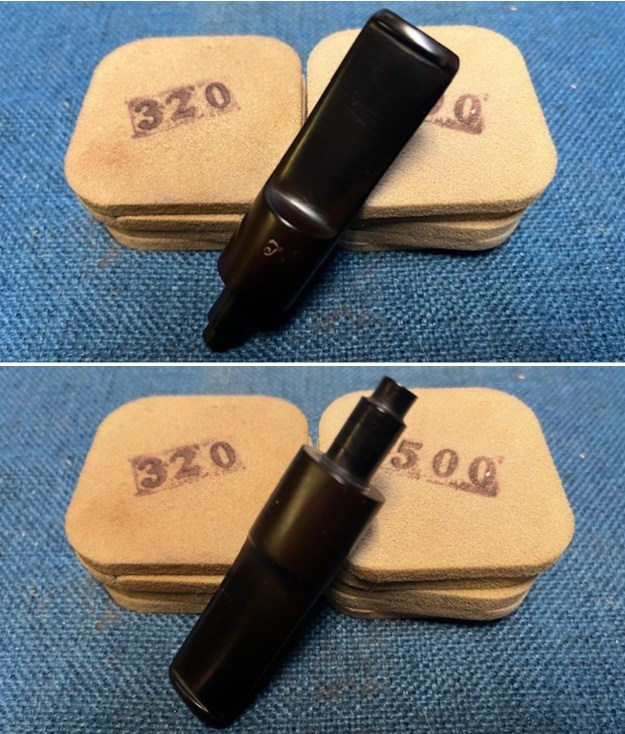
I polished the vulcanite stem with micromesh sanding pads – 1500-12000 grit pads. I wiped it down with Obsidian Oil after each sanding pad. I used Before & After Pipe Polish – both Fine and Extra Fine to further polish the stem. I rubbed it down with a final coat of Obsidian Oil and let it dry. 
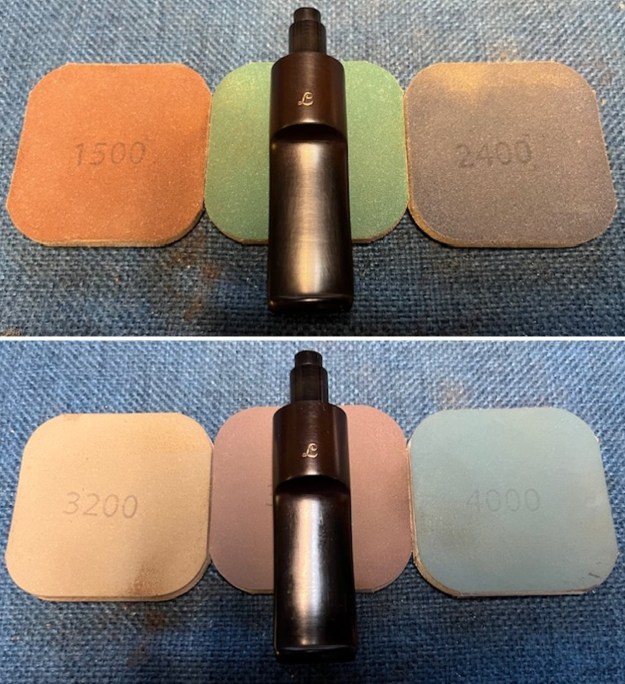
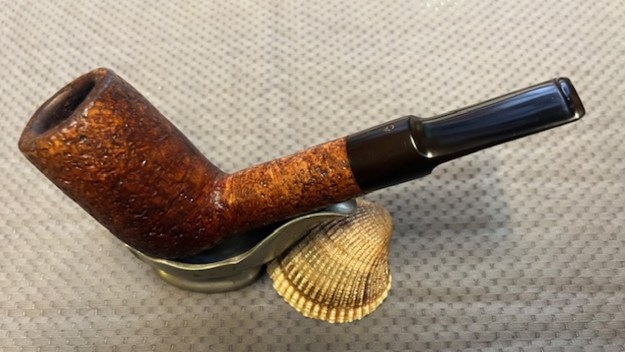
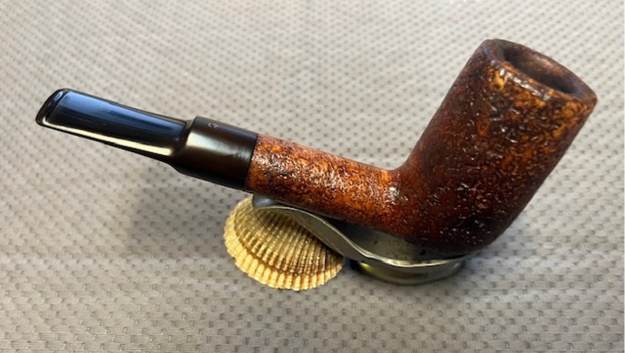
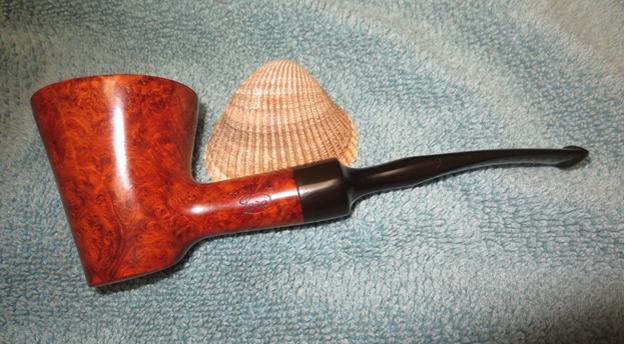
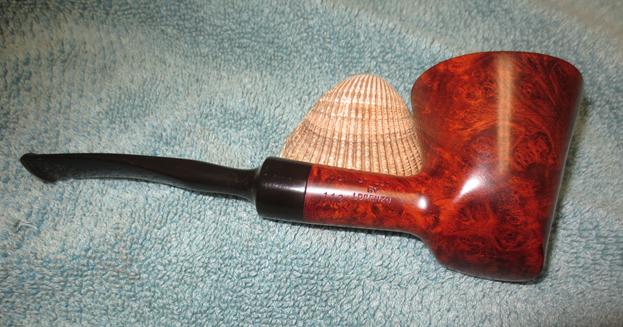
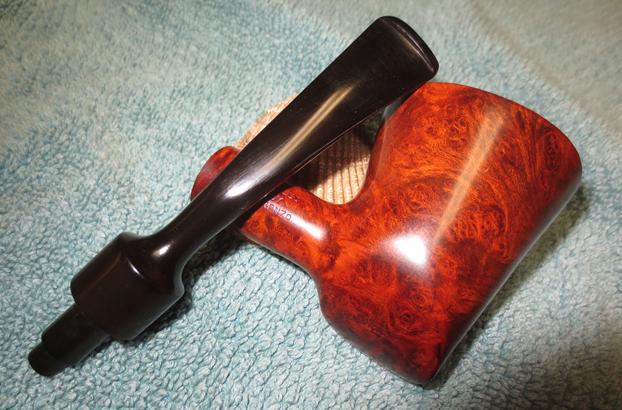
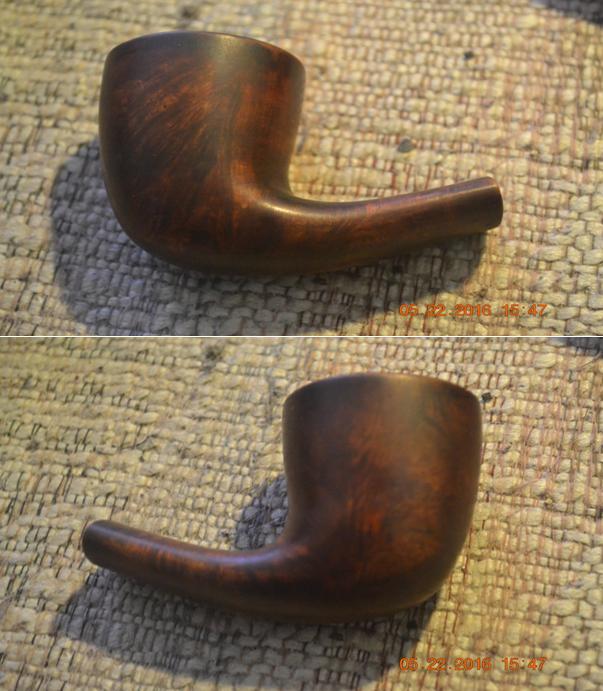
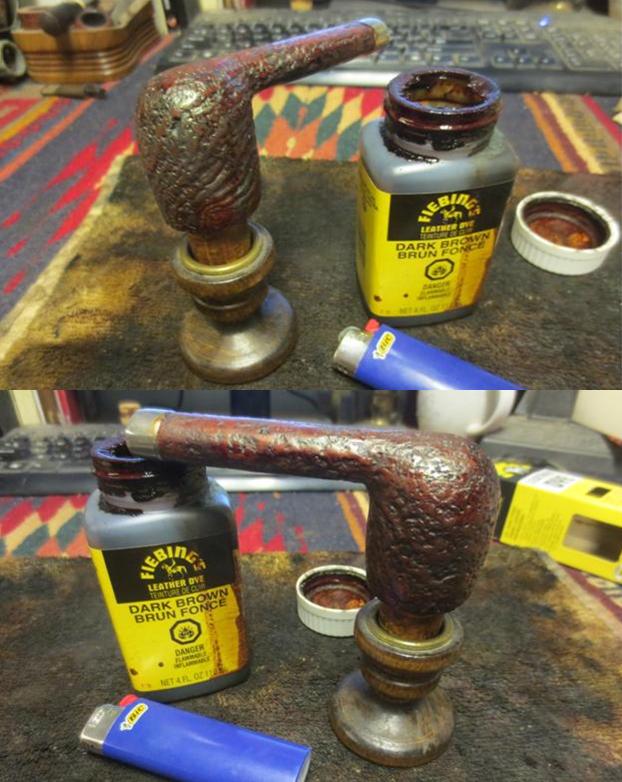
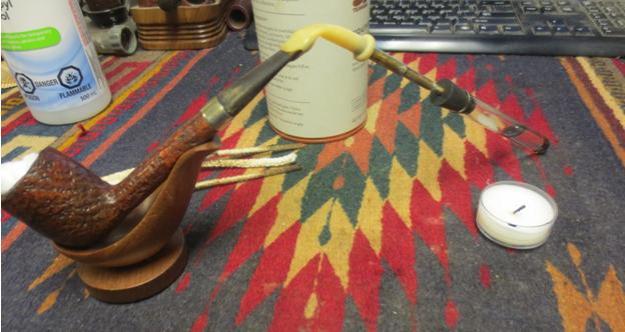
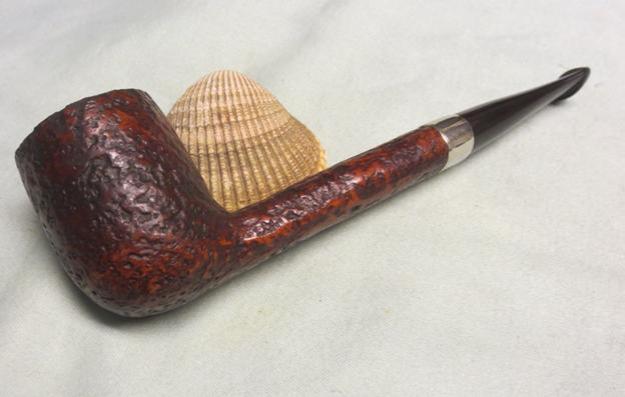
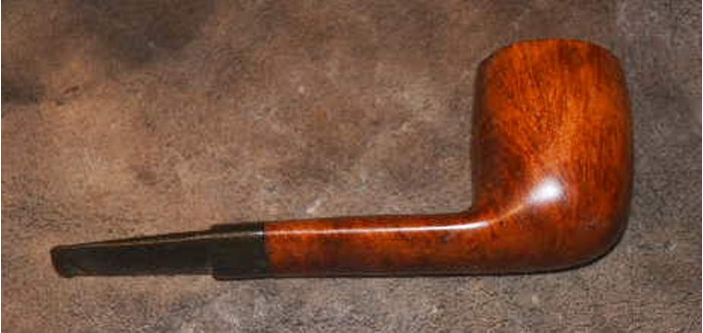
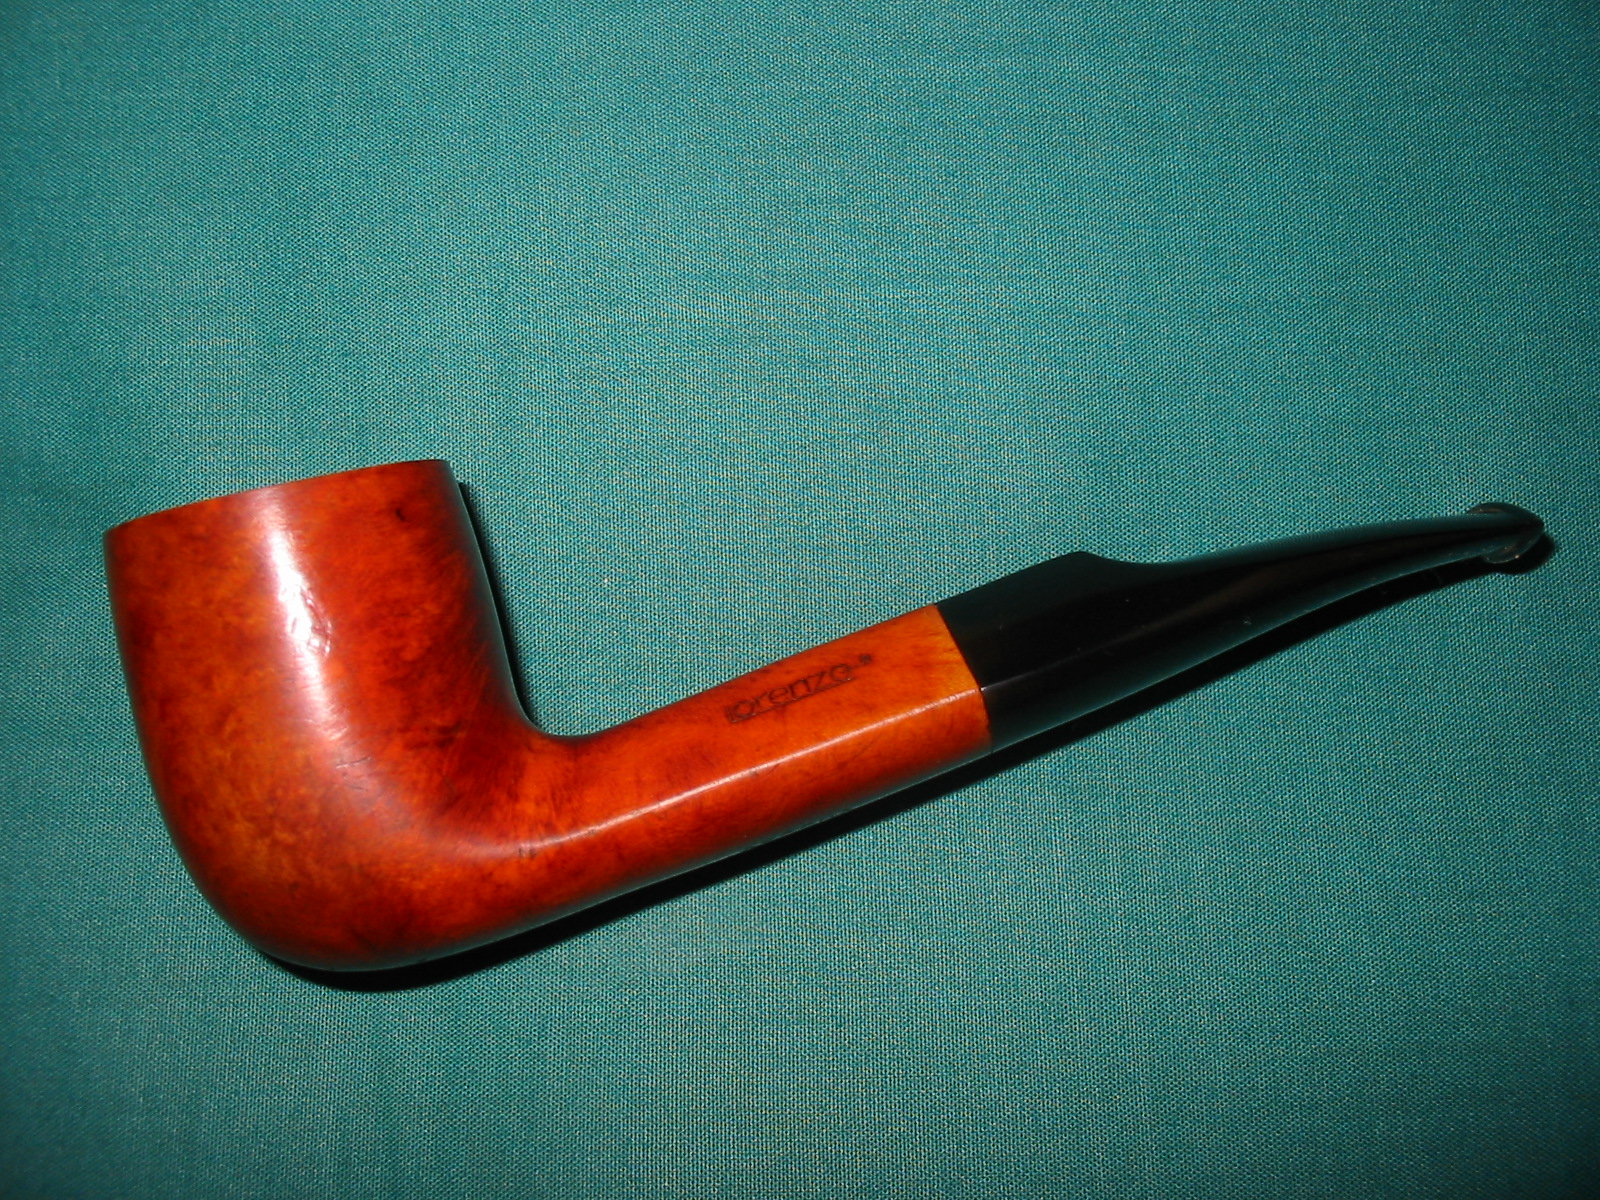
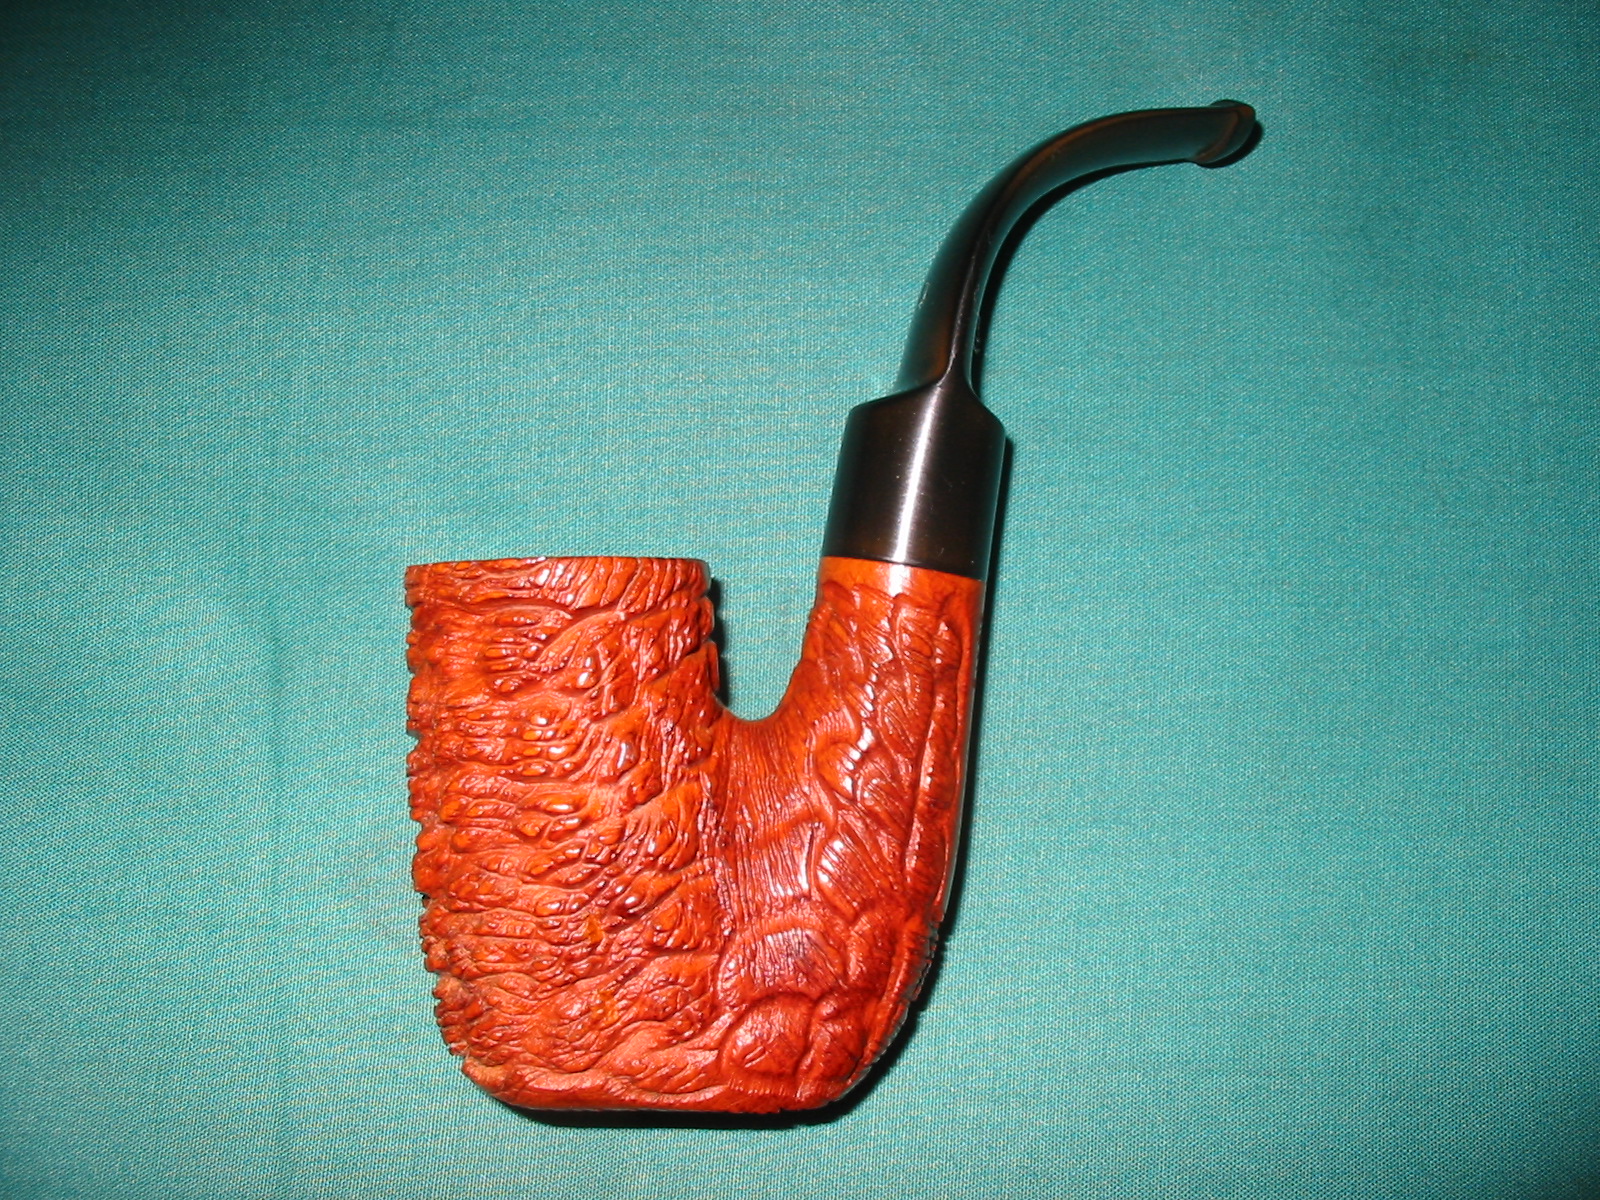
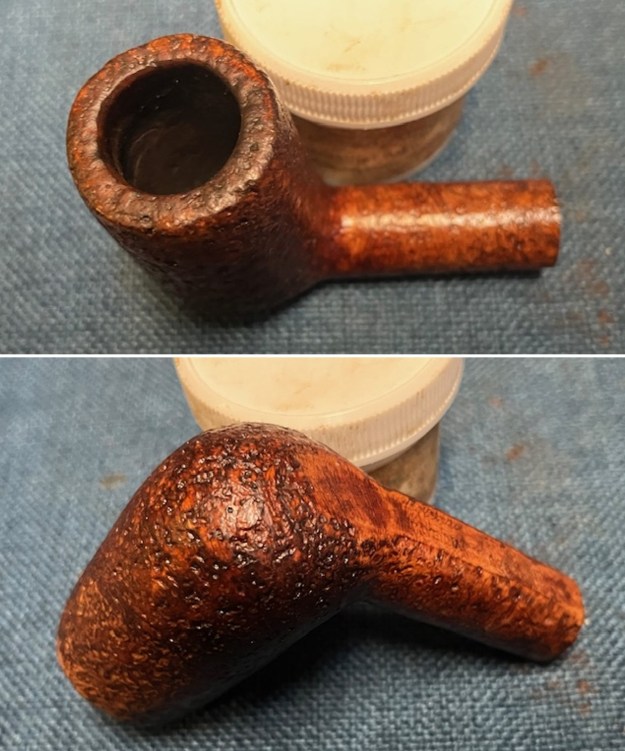
This Lorenzo Ravenna Studio 826 Tall Sandblast Lovat is a great looking pipe now that it has been restored. The shallow sandblast that is used around the bowl is quite beautiful and works well with both the shape and the polished vulcanite saddle stem. I put the stem back on the bowl and carefully buffed the pipe with Blue Diamond on the buffing wheel using a light touch on the briar. I gave the bowl and the stem multiple coats of carnauba wax on the wheel and followed by buffing the pipe with a clean buffing pad. I hand buffed the pipe with a microfiber cloth to deepen the shine. The finished Lorenzo Ravenna Studio 826 Lovat fits nicely in the hand and feels great. Give the finished pipe a look in the photos below. The dimensions of the pipe are Length: 5 ¾ inches, Height: 2 ½ inches, Outside diameter of the bowl: 1 ¼ inches, Chamber diameter: ¾ of an inch. The weight of the pipe is 52 grams/1.87 ounces. I will be putting it on the rebornpipes store in the Italian Pipemakers Section shortly. If you are interested in adding this pipe to your collection send me a message or an email. Thanks for reading this blog and my reflections on the pipe while I worked on it. I appreciate your support and time!

My Final Restoration from Bulgaria – A Find in Athens: Refreshing a Fun Lorenzo Carnevale San Remo Italy 8672 Apple


Blog by Dal Stanton

A personal note:  After living over 25 years in Europe and the past 14 in Sofia, Bulgaria, this restoration marks my final offering from Bulgaria as my wife and I transition to the US and will be basing in Denver, Colorado.  We will miss Bulgaria deeply and the work we have devoted our lives to.  Yet, after a hiatus for the move, I will continue to collect and restore pipes benefiting the Daughters of Bulgaria – women and girls who have been trafficked and sexually exploited.   

While living in Bulgaria, I’ve had the opportunity on several occasions to visit our neighbor to the south, Greece.  I was in Athens, Greece, a few years ago, and this story unfolded which I repeat here.  I was tooling through the Monastirski Market area at the foot of the Acropolis, next door to the Forum.  As I explored, I found one shop nestled on a tree-covered side street with a table set on the front sidewalk with all kinds of paraphernalia. It drew me like a bee to pollen!  Two congenial men were sitting behind the table conversing in Greek. I assumed they chatted about all manner of life, family, politics…, and what is usually the case, as I drew near, their conversation stopped, and the English began.  As I perused the table with strategic disinterest, I saw one pipe on the table that did not grab me too much.  The shop owner asked me if I was interested in pipes?  I said yes, and he said that he had many more that he didn’t know what to do with…. “Oh, my…” – my heart skipped a beat!  In his wonderfully, friendly, thick Greek accent and manner of hospitality, he said, ‘Come with me.”  As he pulled a chain out of this pocket a full ring of keys followed. He led me down a narrow, alley walkway along the side of the shop.  We stopped and he unlocked a side door that led immediately up the stairs to an ‘upper room’ where, as he explained with a subdued, secretive flourish, he seldom brought customers.  When we entered the room, I saw why.  It was his special place – family pictures were arrayed everywhere; icons of the Greek Orthodox Church were given special deference as they hung from places of honor. Many shelves full of his collections.  He pulled my attention away from the array to a slew of pipes displayed in a case hanging on the wall and arranged beneath on a cluttered table.

I took it all in.  He explained that his good friend, from Armenia, asked him to sell off his collection of pipes and he gave me a price for everything, including the wall-hanging display case.  With gratitude to him for his generous offer, I had to decline as I was flying back to Sofia and would have no room in my luggage for all of it.  I suggested to him that his friend could possibly make more money if he sold the pipes and case separately and he confided that he knew little about pricing pipes individually.  As we talked, I discovered that he was a board member of a foundation that assisted orphaned children Armenia – the home of his friend.  That opened the door for me to share that I too, was a board member of the Daughters of Bulgaria Foundation and I shared with him why I collected pipes – to restore and sell them to benefit the Daughters and their children.  He encouraged me to go through the collection and pull out pipes that interested me and make him an offer.  In Mediterranean culture, very much like Bulgarian culture – relationship is supreme, and we had talked of things near and dear to our hearts.  Pipes became the doorway to a deeper fellowship that we both understood and appreciated.   I left the shop owner with a firm handshake, a parting picture, and an appreciation for him and his journey.

I also left his shop with some special pipes and friendly prices 😊.  The Lorenzo Carnevale Sanremo of Italy (above), now on my worktable, a Savinelli Roley Pocket Pipe (below), and a sorry looking Bent Billiard (center) that appeared to have no name – at least in the dim light of the upper room, I could not see any, but later I discovered it was a Savinelli Oscar.

The Lorenzo Carnevale along with the other pipes, traveled back to Sofia with me and were posted in the For “Pipe Dreamers” Only! online collection where Nathan saw it and commissioned it along with 3 other pipes – Comoy’s Sunrise Volcano, Savinelli Dry System 3621 Blasted, and a French Pipstar Standard 06 026 Dublin Sitter.

The ‘fun’ Lorenzo Carnevale is the last of the four pipes commissioned by Nathan benefiting the Daughters of Bulgaria.  I call it ‘fun’ because it shows some entertaining attitude!  And here are pictures that got Nathan’s attention. The nomenclature is stamped on the underside of the shank amid the rusticated surface.  It is stamped with a fancy cursive ‘Lorenzo’ [over] CARNEVALE [over] SANREMO with ITALY offset to the right below.  The Lorenzo stem stamp is a classic cursive ‘L’ which appears to be gold lettering.“Carnevale” is the obvious Italian word for ‘carnival’ which sets the tempo for this rusticated Apple shaped pipe with a festive split two-toned slightly bent acrylic stem showing blues and reds. The pipe challenges you to smile!  Its diminutive size is length: 5 1/4 inches, height 1 1/4 inches, bowl width: 1 1/4 inches, chamber width: 7/8 inches, and chamber depth: 1 1/8 inches.

Not as familiar with Lorenzo as I am with other prominent Italian pipe makers, I was interested to read Pipedia’s Lorenzo article:

Following Rossi (1886 in Barasso) and Ceresa (1897 in Cassano Magnano) the third pipe manufacture in the Lombardian province of Varese was established in 1900 in the picturesque city of Gallarate by two brothers. Fratelli Lana (Lana Bros.) produced briar pipes for the Italian market under their own brand name.

In 1922 Fratelli Lana went into a close co-operation with the merchant’s family Tagliabue from Milano. Sales outside of Italy began immediately and the demand throughout Europe steadily increased. By 1939 the manufacture had grown to factory size with 120 persons employed – a considerable number for the time. The program remained unchanged for decades: cheap, unpretentious budget pipes for the mass markets. Most of them didn’t even have any stampings besides “Genuine Bruyere” or similar. A large share of the production emerged as fabrications for other firms so that an own style of the Lana pipes was hardly recognizable.

From 1969 on Lorenzo Tagliabue changed the brand’s name to Lorenzo Pipes. The reason currently qouted is another pipemaking firm named Tagliabue.

This next excerpt I found especially interesting because I had known that Lorenzo pipes tended to be on the ‘edgy’ side of things:

Lorenzo Pipes became cult throughout the 1970s and 1980s. In order to strive another cliche than the gentleman with the stronger statue: the pipesmoking university student of these years, clothed in turtleneck pullover and NATO-parka, can actually not be conceived without a Lorenzo! Well, to be sure he had to select his Lorenzo very carefully from the show-cases in order to find one with less than six blinking fills. Lorenzo dealt very generously with putty. All the same, the pipes smoked very good-natured, they were considered to be hypermodern and flamboyant and, perhaps best of all, they gave you the indispensable highbrow touch!

the Pipedia article describes also that after a family crisis in 1983, Lorenzo Tagliabue lost all interest in the company and it was acquired for a time by Comoy’s of London, but today it is under the ownership of the Aliverti family when in 1988 all rights were purchased to the Lorenzo trademark from the Tagliabue family and production of the renown Lorenzo Pipes resumed.

The nomenclature of the Carnevale mentions a city: Sanremo.  Not sure why a city was mentioned whether it had to do with the history of Lorenzo pipes or some other reason, but I did a quick search on the internet to find out.  It didn’t take long to understand the Carnevale name.  Sanremo is known in Italy for its annual ‘Carnival of Flowers’.    The Wikipedia article was very helpful.  This history of this annual festival in March goes back to 1904.  As a celebration of flowers, the main event is a parade made up primarily of ‘floral carriages’ or floats very reminiscent to me of California’s Rose Parade. (Picture: LINK)

With a better understanding of the pipe now on my worktable, the pipe itself seems to be in good shape.  It needs cleaning.  There is a shelf of cake in the upper chamber but then it seems to widen out going toward the floor.  The aft side of the rim is darkened from lighting the chamber.  The acrylic stem has little chatter but is rough.  Sanding should smooth it out.  Here are few pictures of the issues. I begin the refreshing by giving the pipe a general cleaning.  Starting with the stem, I clean the acrylic stem’s airway using pipe cleaners wetted with isopropyl 95%.  It takes one pipe cleaner to confirm a clean airway.Next, the chamber is cleaned using the Pipnet Reaming Kit.  I use 2 of the 4 blades available.  The cake is light.  I transition to the Savinelli Fitsall Tool to give the chamber walls a quick scraping.  Finally, the chamber is sanded with 240 grade paper wrapped around a Sharpie Pen.  After wiping out the chamber, an inspection confirms no heating problems. To begin the cleaning of the external rusticated surface of the Apple shaped bowl, undiluted Murphy’s Oil Soap is used with a cotton pad.  A bristled toothbrush also helps to clean the rusticated surface.  The brass bristled brush helps also to clean the darkened area on the rim. After a time of scrubbing, the stummel is transferred to the kitchen sink to start cleaning the internals. Using the shank brushes and anti-oil liquid dish soap I scrub the internal mortise and airway.  After a thorough rinsing, the stummel is back on the worktable.Next, to continue the internal cleaning, one cotton bud and one pipe cleaner wetted with isopropyl 95% confirm the internals are clean!  Nice for a change.With the rusticated surface, to clean the internal rim edge I use a roll 240 grade paper to address the darker area on the backside of the rim.  That is much better. Next, with the surface cleaned and the rim freshened, I apply Mark Hoover’s product, Before & After Restoration Balm to the rusticated Apple bowl.  I put a little on my fingers and I work it into the briar surface well.  It starts as a cream and then thickens to a wax-like consistency as it’s worked into the briar.  After applying the Balm, I put the stummel aside for 15 or so minutes for the Balm to be absorbed.  The picture shows this period.  Afterwards, I buff the bowl with a microfiber cloth to clear the excess and raise the buffed shine of the stummel.  I like what the Balm does.  The style of the rustication, more of a pitting, does not show a lot of grain but the Balm deepens the entire surface presentation. Turning to the stem, there is little tooth chatter but more of a roughness on the bit where there has been gentle use.I use 240 grade paper to sand out the bit. A flat needle file also refreshes the lines of the button.  The sanding is expanded with 240 paper to the edge of the saddle to address random scratches and to have a uniform treatment of the lower stem. From the 240 sanding paper, I now wet sand with 600 grade paper up to the saddle and then follow with an application of 000 steel wool.Moving now to the full regimen of micromesh pads, I wet sand the entire stem with pads 1500 to 2400.  Following this, I dry sand with pads 3200 to 4000 and 6000 to 12000.  Between each set of 3 pads, Obsidian Oil is applied.  I’m not sure it does anything for the acrylic, but I apply it anyway.  The micromesh process does a great job bringing out the acrylic ‘pop’! Now on the home stretch.  After reuniting the stem and stummel, a cotton cloth buffing wheel is mounted to the Dremel with the speed set at the lowest speed, Blue Diamond compound is applied to the stem only.  I set the Dremel to the lowest speed because I don’t want to risk overheating and having melted the acrylic with too much friction with the abrasive compound.  I keep the wheel rotating and don’t sit on one spot for long. I also don’t apply the compound to the rusticated stummel because I don’t want to fill all the rustication pits with compound dust!  That would not be easy to clean.After the compound, another cotton cloth wheel is mounted on the Dremel with the speed set at 40% full power.  Carnauba wax is then applied to both stem and stummel.  I’m not concerned about the wax on the stummel.  I keep the application light and I’m careful to spread and dissolve the wax into the briar with the buffing action of the Dremel.  After applying the wax, the pipe receives a hearty hand buffing to dispense wax that wasn’t assimilated and to raise the shine.This was an easy but fun restoration.  The Lorenzo Carnevale Sanremo Apple lives up to the Lorenzo reputation of producing pipes that are ‘edgy’.  The saddle tan rusticated Apple bowl is expressive and when tied to the two-toned red and blue acrylic stem, the pipe truly expresses the carnival theme of colors and flowers commemorating the well-known festival in Sanremo, Italy.  This fun pipe was a good conclusion to the 4 pipes Nathan commissioned from the For “Pipe Dreamers” Only offerings.  Nathan has the first opportunity to acquire the Lorenzo Carnavale Sanremo Apple from The Pipe Steward Store benefiting the Daughters of Bulgaria – women and girls who have been trafficked and sexually exploited.  Thanks for joining me!

New Life for a Lorenzo Lara Smooth (For Tinderbox) Unique 113


Blog by Steve Laug

As I looked through the box of pipes that my brother had picked up from the estate sale he went to recently I was looking for the next pipe to bring to my work table. I picked through a variety of apple shapes, bent billiards, Lovats and authors but none of them grabbed my attention. I wanted to work on something a little different. I picked up this interesting take on a poker – with a little bit of a Dublin look to it. I wrote my brother a message and asked about the before pictures. He sent them and wrote back that this pipe his favourite from the lot. The pipe is stamped on the left side of the shank The Tinder Box in an arc over a script text Lara with the curl of the L underlining the entire word and swirling up along the letter a. The right side of the stem is stamped Italy over 113 (shape number) and next to that it reads Styled By Lorenzo. My brother took the following photos to show the condition of the pipe when he brought it home from the estate sale. I have worked on a lot of Lorenzo pipes over the years and have always found them to be large and bulky. None of them did anything for me so I generally passed them on as either gifts or sold them on the store. This one however looked different from the others I have seen. Tinder Box seems to have ordered a line of pipes from Lorenzo to bear their store stamp. As I looked through photos on the web I found that the Lorenzo Lara pipes made for Tinder Box all had the same unique stem shape. I saved some of the photos below to show the variety of shapes that bear this unique stem shape. Jeff also took some close up photos to show the condition of the bowl and the rim top before he cleaned them up. There was a thick cake in the bowl that had overflowed on to the top of the rim and around the beveled inner edge of the bowl.The grain on the bowl sides was beautiful – a combination of swirls and birdseye that was captivating to look at. The finish was very clean on the rest of the bowl in comparison to the rim top.The stamping on the shank side was very readable and sharp on the left side and less so on the right. The next two photos show the stamping.The stem was in decent shape but had the by now familiar tooth chatter and marks on both sides near the button and on the button edge itself. They were a little deeper on the underside than the top but still very repairable. There was also some light oxidation on the vulcanite.My brother did a thorough cleaning of the pipe inside and out. He reamed the bowl and scrubbed out the mortise and airway in the shank and the stem with alcohol, cotton swabs and pipe cleaners. He scrubbed the rim top with Murphy’s Oil Soap and rinsed it with water. The finish really was in great shape and the soap took the rim build up off and left the pipe remarkably clean. When I received it and brought it to the worktable I took the next four photos to show what it looked like after cleaning. I took a close up photo of the rim top to show the amazing job that Jeff did in cleaning off the lava. The rim looked pristine and the inner edge bevel of the bowl was flawless. The rim top was beautiful and it had the same glossy look as the rest of the bowl.I took some photos of the stem to show the tooth marks. They came out more clearly after cleaning. The oxidation came to the surface and the tooth marks on the top and underside near the button are very visible in the photos.I sanded the stem with 220 grit sandpaper to remove the tooth marks and chatter and also to break up the oxidation on the stem surface.I sanded the stem with 320 grit sandpaper to minimize the scratches left behind by the 220 grit sandpaper. I polished the stem with micromesh sanding pads – wet sanding with 1500-2400 grit sanding pads and rubbing it down with Obsidian Oil. I dry sanded the stem with 3200-12000 grit sanding pads and giving a coat of Obsidian Oil between each pad. I gave it a final coat of oil after the 12000 grit pad. The following photos tell the story. The bowl was in such great shape that I only needed to polish it and wax it. I put the stem back in place on the pipe and buffed it with Blue Diamond on the buffing wheel. I find that Blue Diamond does a great job in polishing out the minute scratches in vulcanite and briar. I gave the pipe multiple coats of carnauba wax to protect it and buffed it with a clean buffing pad to raise the shine. A lot of people leave out this buff. To me it is critical to get a good shine on the pipe to use a clean pad. I hand buffed it with a microfibre cloth to deepen the shine. The finished pipe is shown in the photos that follow. The shape and the grain on the bowl make it a unique and attractive pipe. The dimensions of the pipe are Length: 6 inches, Height: 2 inches, Outer bowl diameter: 1 ¾ inches, Chamber diameter: ¾ inches. This pipe is available if you hear it calling your name. I will be posting it on the rebornpipes store shortly. You can email me at slaug@uniserve.com or send me a private message on Facebook if you want to add it to your rack. Thanks for looking.

I Believe I Found an Undercover Lorenzo of Some Sort


Guest Blog by Robert M. Boughton
Member, International Society of Codgers
Member, North American Society of Pipe Collectors
http://www.naspc.org
http://www.roadrunnerpipes.net/ (Opening soon)
http://about.me/boughtonrobert
Photos © the Author

INTRODUCTION
In late October of 2014, I wrote a blog here about a Lorenzo second with the name Spitfire Mille (Italian for thousand, just as Starbuck’s large drinks are designated by Venti, meaning 20 – for the number of ounces, including the ice in my With Room Raspberry Iced Americano right now).  Lorenzo, an Italian brand that has been around since 1946, makes an assortment of traditional shapes and styles but is, among my local pipe friends at least, best known for its lines of, well, enormous proportions.  Take this Spitfire, not all versions of which are so large.Lor1 Lor2 Lor3 Lor4 Lor5You can’t tell by these pictures, but although the length was near the limit of the norm at about 6”, the chamber diameter was something like 1” x 2” when I checked before adding the Spitfire to my old business website.  That’s about 6/8 (¾”) x 1” larger than usual.  Then I measured less common specifications, including the diameter of the entire rim across, bowl height and the top half of the shank leading into the bit.  Here is where the numbers became astounding: from one side of the rim to the other was a little under 2”; the height of the bowl was close to 3”, and the shank was 1” across.

If those numbers don’t sound impressive, consider three of my largest pipes, the Peterson 150th Anniversary smooth bent billiard, the Digby Six-Panel and the Soborg Danish Panel.Lor6 Lor7The Pete’s length is 7”; chamber diameter is ⅞” x 1¾”; the full rim is 1⅜”; the bowl height is 2¼”, and the shank is 1½”.  The Digby’s length is 5¾”; chamber 1” x 1¾”; rim 1½”; bowl height 2½” and square shank 1” at the halfway point.  The Soborg’s length is 7”; the chamber is ¾” x 1½”; total rim is 1¼”; bowl height is 2”, and the shank is 1”.

And so, it seems, not counting the length, the Spitfire is the overall “winner,” if size really counts.  All of this is to introduce the no-name Italian Dublin XM (by way of indicating extra monster, for lack of a better description).  This pipe without a name, perhaps the more so for that most unfortunate social status, has all the earmarks of a Lorenzo reject.  It looks like a Lorenzo; comports itself like the portlier brothers, sisters, uncles, aunts and so on and on of its fertile familia, and as it was stamped with the single word “Italy” to boot, so it must be a Lorenzo by birth if not legitimacy.

RESTORATIONLor8 Lor9 Lor10 Lor11Once again the troubles the marvelous pipe faced before it could be presented to a new owner who would cherish it were greater than met the casual eye.  The rim was just a tad crusty and therefore offered itself as the place to begin.  I chose super fine 0000 steel wool to commence the task.  Most times now I have at last embraced more popular techniques such as the wet micro mesh method, but on this occasion I did it with steel wool before I performed a little sanding with 320-grit paper with the goal of ridding the fair and rounded rim of scratches attendant to burning.  There are still other means to this end.  Yet with gentle ministration, I have found the finest steel wool an excellent first step in the process in some situations.  This was one of them.Lor12At that juncture of the growing adventure, I considered the dull state of the bit and the small but numerous scratches and dings through the original stain to the excellent Mediterranean briar beneath.  Perceiving an unusual thickness to the lovely red coating, I arrived at the clear and positive efficacy of an OxiClean bath for the bit and a concurrent but somewhat longer soak of the stummel in Everclear.Lor13 Lor14I slipped the bit and stummel into their respective Tupperware containers and the sequel to the prequel of the not only continuing but never-ending adventures of the Starship Enterprise (“Into Darkness”) in the desktop PC’s DVD player to watch – once again for me – with my new roommate.  He had somehow managed never before to see the movie, and we had some time to relax and smoke our pipes.  The roommate, Darren, became convinced by someone that he could give up the doubly negative costs of cigarettes with the far lesser expenses and greater merits of a good tobacco pipe.  Of course, he will gladly pay me tomorrow, figuratively speaking, for the pipe he savors today.

Furthermore, no less, his eyes became misty and enamored at the sight of the Albertson Belgian black rustic small bent billiard that is scheduled to be the culmination of my seven part series on ladies pipes and, despite his professions to the opposite, I knew he had to have it – oh, how I know that dewy look!  Picture this: a guy who looks and dresses and has tats like a gang banger, getting misty for a tiny little pipe that, although not specifically made for ladies, certainly fits the bill!  The fantastic sci-fi epic aside, I could only imagine what Darren must have thought of the no-doubt perplexing acts I surely appeared to be perpetrating against the once whole but weathered Dublin XM.

Here is the bit following its bath and then after sanding with 220-grit paper and wet micro meshing all the way from 1500-12000.Lor15 Lor16The stummel had the thickest stain I have ever encountered other than with some Chinese pipes on which I’ve labored.  It took longer than the 2 hr. 12 min. movie, with Darren or me (he’s decided he wants to learn about this esoteric occupation) flipping the big piece of briar over in the alcohol now and then to keep it soaking evenly, for the Everclear to eat through the barrier enough to sand the stummel lightly, also with 220.  I only found one small spot where a hole was filled.  In an email later, Steve, who had expressed some doubt that the pipe was a Lorenzo reject but suggested it might be a second, wrote that Lorenzo seconds are known for fills.  To me, given the similarity of style, stain and huge proportions of the ostensible Italian no-name (the single word ITALY was stamped almost flush with the steel band, on the underside), my theory of a Lorenzo connection was cinched in my mind at least. Lor17 Lor18 Lor19 Lor20By a stroke of good luck, as I always see it, the band came off at the end of the sanding, and I was able to make the area under it match the rest.  I got on with the next step, micro meshing from 1500-12000.Lor21 Lor22 Lor23This is where the real challenge came.  Forced to strip the stummel of its original stain to get at the scratches without creating more damage using sandpaper, I wanted to re-stain the wood as close as possible to the bright reddish tone it had, knowing that was impossible with the stains I had on hand.  I opted to mix Lincoln Marine Cordovan about three-to-one with Fiebing’s Brown alcohol-based boot dyes.  When flamed with a lighter or matches, the stain is fixed to the stummel without running as the light char is micro meshed off and again later with waxes and compounds buffed on.Lor24I also knew this combination, or even using only the burgundy color, would be so dark that none of the grain would show through.  Applying the mix liberally, I used a couple of good strong wooden kitchen matches from a box of 250 I bought at Walmart for about a dollar to flame the pipe, but the result was not the usual impressive blue flash I expected.  Still, it did the trick.  I think the alcohol in my liquid stains is evaporating with age.  I told Victor Rimkus, a successful pipe crafter/engineer here, how I needed to buy a new supply as well as other colors.  He said I could mix what was left with alcohol, which sadly only struck me as obvious when I heard the idea, or, as he does, buy the powder and mix it as needed with alcohol.  I had never heard of this powder stain before but found it online at a very affordable price.  There are even some great discounts for buying the complete kit with every color made – and the variety of colors and shades is staggering.  You know I can’t pass up a good discount.Lor25The light coat of residual char came off with 2400 and 3200 micro mesh.  Super fine 0000 steel wool gradually lessened the dark combination of stains until I concluded the color mix was still a bit off.  I deliberately took the stain down a notch lighter to add another quick layer of the brown, and when it cooled after flaming again I wiped off the char as before.  The result was much better.Lor26 Lor27 Lor28Lor29I used a couple of dabs of Super Glue spread thin around the inside of the band to reattach it.  In one of the emails I exchanged with Steve regarding the chance of this pipe being a Lorenzo relative, he pointed out that in the photo of the band I attached with a plea for help in identifying the hallmarks, the band had been placed unevenly.  Trying first to determine the meaning of the marks on my own, I had found a site that was clearly not the best.  The closest I came was a reference to a pair of brothers named Edwin and John Power, known naturally as Power Brothers, who ran a tobacconist shop and seem to have made pipes in 1900.  They marked their bands with an EP in an oval which, given the site’s other shortcomings, I considered might be – but given the year, likely was not – a misnomer for the diamond on this band.  Steve identified it as an Electro-Plate band that he thought could be an after-addition.  Studying the band and the one item of nomenclature on the bottom side of the shank – the block lettered word ITALY near the opening but above the band – I was doubtful it was indeed an afterthought.

But by that time, the restoration had progressed to the point where I had already corrected the problem.

The time to retort the odd Dublin had come, but looking at the wider than wide mouthpiece of the bit, I knew that of the three rubber tubes I have, none would work.  And so, as I have done in past situations like this, I rummaged around my spare bits until I found one from a Ropp natural cherry wood that matched the tenon size – at least halfway in.  As always, I was happy I retorted the pipe thoroughly, as this one had more than usual use on it.  I had to run six alcohol soaked regular cleaners through the shank before the last came out clean.Lor30 Lor31After buffing the bit with red and white Tripoli, White Diamond and carnauba, and the nice smooth reddish-brown wood with the same progression (I laid on a heavy coat of the red Tripoli to approximate the original color somewhat closer), here is the result.Lor32 Lor33 Lor34 Lor35
CONCLUSION
I have to say, this was nowhere near the most difficult restore I’ve ever done, but the research into Lorenzo, in my attempt to establish whether or not it is one of their rejects or a second of some sort, made the process one of the most exciting of my projects.  In my mind now, there is no doubt this conundrum of a pipe, is in fact a Lorenzo reject.  This conclusion is not based on an overwhelming desire to make the pipe more than it may be.  It is based on the evidence: the undeniable similarity of design between the Spitfire by Lorenzo Mille second; the identical color of each that has the appearance of being created specially by the maker, and the presence of somewhat erratic grain and even the single fill I found after stripping the original stain, given that Steve wrote of Lorenzo seconds tending to be known to present these defects.  Although, with due respect to Steve, I doubt this is a second because of the lack of any such nomenclature, the same standards would apply to outright rejects.  I did my best to make it once more the beautiful pipe it was when first created, but the grain certainly is less than perfect, and there is one place where briar shavings were mixed with some clear bonding element to fix a ding.  But now, neither of these facts detracts from the pipe’s allure and good fit in a large hand, which its new owner certainly has.

The Spitfire awaited a new home for months after I finished the restoration, and in the end was purchased by a New World gentleman, from Raymore, Missouri to be specific, who read my blog of another pipe and found the massive Lorenzo (second) on my site.  The lovely example of Italian flair and craftsmanship in this blog, on the other hand, was reserved prior to its restoration by a visitor to my pipe club’s monthly meeting.  His name is Evan, and here he is at the tobacco shop with his “new” pipe.  See how snug it is in Evan’s big mitt. Lor36When Evan, who resides in the much smaller town of Placitas about a half-hour’s drive from the relative metropolis of Albuquerque (close enough to commute to and from where he works here), talked to me alone in the big back room of the Moose Lodge where our official monthly pipe meeting is held, I asked if he had seen any of my pipes he found interesting.  I assumed he had not located one he wished to buy but also wanted to get an idea of what he looks for in a pipe, other than the Dunhill with its distinctive dot on the bit he enjoyed for the meeting.  I admit to thinking I might have something I put off restoring that I could perhaps expedite.

Evan was courteous enough to tell me the truth: none of the pipes I had displayed was big enough for his general taste.  That remark turned out to be the exact sort of intelligence I hoped to receive from my question, for I knew I had just what he was looking for, at my humble home and small business, waiting to be cleaned up.  I inquired if he had heard of Lorenzo pipes and added that I had restored and sold one but had another pipe like it that I believed was a reject by that company, although there was nothing wrong with its looks or quality.  Evan had not heard of Lorenzo but was intrigued by my description of the large pipe.

After getting a look at the photos I emailed to him showing the restored Spitfire and the no-name as it was before cleaning up, the good man replied with considerable enthusiasm.  In fact, considering the low price I offered him, he asked me to name the time and place he could pick it up!  I had the pleasure of presenting Evan with the finished Lorenzo or second or whatever it is Monday morning at the tobacconist shortly after the comfortable little shop opened at 10.  With any sale, online or in person, and in particular when the buyer has requested a pipe that was not yet restored, I always wonder if it – or, rather, I – will match the new owner’s expectations. I observed at once that Evan had pondered his reverse version of the same scenario from his reaction of unconcealed surprise.  In short, the pipe was just the kind he loves most – big enough to fit in his large hand, solid, possessed of an unusual shape and beautiful to behold.  I add the last part not to pat myself on the shoulder but due to Evan’s appraisal.  To my way of thinking, pipe restoration is very much the same as newspaper editing, with which I have had more experience than working on pipes: the flaws in the pipe or article are unimportant so long as all of the necessary information is there to put in order.  The best word to describe Evan’s reaction to his latest acquisition – which went on for close to a half-hour – is effusive.

SOURCES
https://www.smspipes.com/index.cfm/fuseaction/catalog.listProducts/catId/4/Lorenzo_Pipes.htm
http://vermontfreehand.com/product/powdered-dye/
http://www.pipes.ws/Lorenzo
http://www.silvercollection.it/DICTIONARYTOBACCONISTE.html Power Bros. hallmark

Something About This Lorenzo Canadian Caught My Eye


Blog by Steve Laug

A few weeks ago my family took my wife down to the US from Vancouver for her birthday. After a huge breakfast celebration the ladies went shopping and I hit a few favourite antique shops. I found a nice handful of old pipes. One of the lot was sandblast Lorenzo Canadian. It had a nice looking blast and I could see underneath the high gloss, grit and ruined rim what looked like a great pipe. It was in pretty rough shape. The bowl had a thick cake of sweet smelling aromatic tobacco. It was soft and crumbly but it was thick. There was a significant lava flow of tars over the rim to the point it was hard to see what the rim looked like. The back right outside edge of the rim was worn away, rough and rounded. The finish looked as if it had been coated in urethane as a sealer. It almost looked as if that had been done after the grime and build up on the bowl. It was a mess. There was a nickel band on the shank that was stamped Lorenzo across the top face. The underside of the shank was smooth and stamped Lorenzo in script over AMELLO-ORO (at least that is what it looks like as the blast goes across the stamping. There is also the shape number 348 below the stamp ITALY. The stem was oxidized and dirty but seemed to have a cursive L mid stem on the top side. I picked it up for $12 US. The photo below shows the five pipes I picked up that day. The Lorenzo is in the oval at the top of the photo.Lorenzo1I took the next series of photos to show the condition of the pipe when I brought it to the work table. It has clean lines but is in sad shape. Can you see the beauty under the grime on this one?Lorenzo2 Lorenzo3I took a close-up photo of the rim to give you a clear picture of the state of the bow and the rim when I started working on it. It needed a lot of work on the bowl and rim before it would be usable again. The second photo below shows the stamping on the pipe. You can see where the sandblast covered portions of the stamping.Lorenzo4I started by reaming the bowl with a PipNet reamer. I used the smallest cutting head and worked my way up to one that had the same diameter as the bowl. I finished cleaning up the inside of the bowl with a Savinelli Pipe Knife.Lorenzo5 Lorenzo6The rim was not only heavily covered with lava but also was worn down on the back right side of the outer edge.Lorenzo7I topped the bowl with 220 grit sandpaper on the topping board and took off the damage to the rim as much as possible without changing the profile of the pipe.Lorenzo8I wiped the bowl down acetone to try to break down the urethane top coat that had been applied. It the bowl had not been sandblasted it would have been easy to sand off the top coat. In this case it was going to be a combination of things that I would have to use to break through the coating and remove it.Lorenzo9While the acetone removed a lot of the coating I decided to let the bowl soak overnight in an alcohol bath. My experience was that what the acetone softened the alcohol bath loosened.Lorenzo10In the morning I took the bowl out of the bath and dried it off. The coating was definitely much less shiny and in many places was gone altogether.Lorenzo11 Lorenzo12I used a brass bristle wire brush to scrub the surface and get into the crevices and grooves in the blast. I wiped it down afterwards with acetone on cotton pads. I repeated the process until the finish coat was gone and I was left with the stain on the briar.Lorenzo13With the finish removed it was time to rusticate the topped rim to match the finish on the bowl more closely. I used an assortment of burrs with the Dremel to make a random pattern on the rim top. I wanted the grooves and cuts to be at different depths and in different styles to approximate the look of the sandblast on the bowl and shank. The photos below show the progression of the rustication and each burr that was used. Lorenzo14 Lorenzo15 Lorenzo16I used the brass bristle wire brush to knock off any loose pieces of briar and to further rusticate the rim surface. The finished rustication is shown in the photo below.Lorenzo17I used a black Sharpie pen to colour in the grooves and crevices in the rim and to add some depth to the finish. I stained over the top of it with a medium brown stain pen for contrast.Lorenzo18With the rim finished I restained the entire bowl with a dark brown aniline stain thinned by 50% with isopropyl alcohol. I applied it with a cotton swab and then flamed it to set it in the grain of the pipe.Lorenzo19I wiped down the bowl with alcohol on cotton pads to further thin it down and make it more translucent. I wanted the dark stain in the grooves and crevices of the blast to show through the top coat of stain and approximate the colouring I had done on the rim surface.Lorenzo20I scrubbed the interior of the airway and mortise with pipe cleaners, cotton swabs and alcohol to begin the cleanup. The condition of this pipe and the heavy aromatic tobacco that had been smoked in it demanded a more drastic measure. I used the drill bit that is part of the KleenReem reamer to clean out the airway from the mortise to the shank. A huge amount of thick tars and grit came out on the bit. It took quite a bit of push to get the bit through the buildup in the airway. It was virtually clogged. I twisted the bit in until the airway was clean and then used the retort on the pipe. I set up the retort and boiled three tubes of alcohol through the shank before I was able to get one tube that was clean.Lorenzo21 Lorenzo22I wanted to see how the stain on the bowl and rim looked at this point so I buffed the bowl with Blue Diamond on the wheel. I polished the metal band on the shank with a jeweler’s cloth to remove the oxidation on the surface and give it a shine. I liked the look of the finish and knew that with a little more effort I would be able to finish the pipe and have it look far better.Lorenzo23 Lorenzo24I dropped the stem in Oxyclean before I went to work and in the evening when I came home took it out of the bath. The oxidation had softened and risen to the surface. I used a coarse towel to scrub it off. The majority of it came off leaving the stem almost clean. Lorenzo25 Lorenzo26I sanded the stem with 220 grit sandpaper to remove the remaining oxidation on the stem and ran some pipe cleaners through the airway to clean it out. I was careful as I sanded around the cursive L on the stem face so as not to damage it. I went on to wet sand the stem with 1500-2400 grit micromesh sanding pads. I gave the stem a coat of Obsidian Oil and then dry sanded it with 3200-4000 grit pads. I gave it another coat of oil and finished sanding it with 6000-12000 grit pads. I gave it a final coat of oil and let it dry.Lorenzo27At this point in the polishing of the stem I paused to address the faded logo on the top of the stem. I used a small #4 artist’s brush and some white acrylic paint to fill in the cursive L logo. The white paint made the logo stand out and added a finishing touch to the stem.Lorenzo28I finished sanding the stem with 6000-12000 grit micromesh pads and gave it a final coat of Obsidian Oil. I set the stem aside to let the oil soak in and dry.Lorenzo29I buffed the pipe – lightly on the bowl and shank, normally on the stem with Blue Diamond polish on the buffing wheel and then gave the stem several coats of carnauba wax. I buffed the stem with a clean buffing pad. I gave the bowl several coats of Conservator’s Wax and buffed it with a shoe brush between each coat. I lightly buffed the bowl with a clean buffing pad and then hand buffed the whole pipe with a microfibre cloth. The finished pipe is shown in the photos below. It has definitely come a long way from the mess I started with but the “good bones” I saw when I picked it up at the antique shop proved to be truly present. The pipe is restored and ready for a long life. Thanks for looking.Lorenzo30 Lorenzo31 Lorenzo32 Lorenzo33 Lorenzo34 Lorenzo35 Lorenzo36

A Spitfire by Lorenzo Mille Billiard – My First Dabble with Black Super Glue – Robert M. Boughton


Guest Blog by Robert M. Boughton
Member, North American Society of Pipe Collectors
http://www.roadrunnerpipes.com
http://about.me/boughtonrobert
Photos © the Author

“There is nothing insignificant in the world. It all depends on the point of view.”
—Johann Wolfgang von Goethe (1749-1832), German author, playwright and poet
Robert head INTRODUCTION
Perspective is the key to everything, from the incredible diversity of the daily activities to the personal, often unique worldviews of everyone on the planet. Take, by way of an extraterrestrial example, the Sombrero Galaxy shown above, an edge-on spiral 50,000 light years from one side to the other (half the size of our own) and 28 million light years from Earth. Discovered hidden within the constellation Virgo in 1781 and named by French astronomer Charles Messier because of his point of view at the time, the Sombrero seen head-on would have a much different appearance. In other words, looks can be deceiving.

And so I present the initial side view (somehow I neglected to photograph the left side) of the Spitfire by Lorenzo Mille – which, compared to Starbuck’s Venti, meaning 20, translates in the same Italian to 1000 – that lives up to its name in terms of its huge size, and lasts far longer than any of the aforementioned coffee chain’s drinks.Robert1 The massive, gorgeous billiard (measuring 5-3/4″ x 2″ in length and height with an outer rim diameter of 1-3/8″ and chamber dimensions of 7/8″ x 1-7/8″), as seen in this photo side angle as I received it in a pipe lot I bought online, is nothing less than gigantic all around. Even the relatively flat shank leading into the stem is an inch across. But, as will be shown in the next part of this blog, from other angles the pipe, which at least on my screen is the actual size, had its share of problems.

RESTORATION
Here it was from those other views.Robert2 Robert3 Robert4 Robert5 The blackened rim and badly caked chamber were easy enough to fix. I started on the chamber with my reamer and took out the majority of the carbon buildup, then switched to 150-grit paper followed by 400 before finishing with 800. The rim came clean with super fine steel wool before 1500 micromesh, then 2400, 3600 and at last 8000. So far, that is the finest grade of micromesh I have used, and it worked well.

Most of the stem cleaned up with 1500 micromesh and some 400-grit paper on the lip followed by 1500 again, and then 2400 to smooth it out.Robert6 Still, the tooth marks remained, and since my recent order of Black Hyper Bond, a.k.a. Super Glue, had arrived, I was presented with my first opportunity to try it on a stem. The hard part proved to be not squirting out too much.Robert7 A couple of hours later, long after I had prepared the nice hunk of briar for buffing, I returned to the stem and tried 2400 micromesh to remove the dried glue bump. After that, I finished it with 3600. Robert8 As I noted, this was my first time filling in a hole, so the result is not perfect, but I think it looked much better than before.

Every inch of the wood, to my continuing amazement, was as pristine and unblemished as the first side angle shows. This is the only pipe I have ever restored that had not even a single scratch on it, except for the rim, which ended up fine as I described. This was also one of the few times (all of the others on meerschaum restorations) where I only needed to buff the rim to make it shine again with its natural color, not needing to re-stain it.

This brings me, with rather unusual speed, to the final buffing, which I accomplished using my standard methods: red and white Tripoli followed by White Diamond on the stem, and white Tripoli, White Diamond and carnauba on the fine, already lustrous wood just for the sake of it.Robert9 Robert10 Robert11 Robert12 Robert13 Robert14 CONCLUSION
I was a little giddy trying out the Black Hyper Bond to repair the bite mark in the stem, and as I wrote before, the result is not as well done as I hope to achieve in the future and returning to some of my previous restores that some of you with excellent memories may recall needed similar work. But from my perspective, it’s a good start – better than government work at least, as the saying goes.

Grazzie Mille for your time and patience!

Topping and Restaining a Lorenzo Ascona


Blog by Steve Laug

Yet another pipe from the Vancouver Pipe Club donation was this triangular shanked Lorenzo. It is stamped on the left side of the top of the shank Lorenzo and on the bottom of the shank it is stamped Ascona over a series of numbers and letters – 42Y8716. I have no idea what the numbers mean and have been unable to find any information on them. Over the years I have had quite a few old Lorenzo’s but they always seem to find new homes as they tend to be too large to my liking. This one is a bit different – it is probably a group 4 sized bowl with a large triangular shank and saddle stem. The stem was in very good shape and still bears the cursive L logo stamped on the blade of the stem. The bowl was in very rough shape. There was a coat of varnish on the pipe and the bowl had the usual black rubbery bowl coating. The finish was an orange stain that was breaking up under the varnish and leaving light spots in the finish. The rim was beat up and all the outer edges of the bowl either were scarred or burned. The briar under the varnish is quite scratched and there are dents in the briar. I did not take the time to remove any of those other than the ones that came out through my cursory sanding of the bowl. The marks that remain are like character reminders and I decided to leave them. IMG_4125 IMG_4126 IMG_4127 IMG_4128 The close up photo below, of the top of the pipe shows the damaged rim -the rough outer edges of the bowl and the burn marks. The second photo below shows the burn damage on the side of the bowl below the edge of the rim. IMG_4124 IMG_4129 I set up my normal topping tools – a flat board and a piece of 220 grit sandpaper and began to work on the top of the bowl. I wanted to remove as much of the damage as possible and sharpen the edges of the bowl. I wanted to reduce the burn damage on the front right side of the outer rim in the process as well. IMG_4131 IMG_4130 IMG_4132 IMG_4133 I wiped the bowl down with acetone on cotton pads to remove the varnish and the spotty orange stain coat. IMG_4134 IMG_4135 IMG_4136 IMG_4137 I stained it with two MinWax stains – I used a Medium Walnut first followed by a Red Mahogany stain. I wanted a reddish hue to the pipe that was thinned and lightened by the walnut stain. Once I had finished staining it I buffed the bowl with red Tripoli to smooth out the remaining scratches and even out the stain coat. IMG_4138 IMG_4139 IMG_4141 I rubbed the stem down with Obsidian Oil and when it was dry buffed the pipe one more time with White Diamond. I finished the refinishing by giving the pipe multiple coats of carnauba wax and buffing it with a clean flannel buff. The finished pipe is pictured below. It is ready to go back with the others that have been prepared for the Club to use as they choose. IMG_4142 IMG_4143 IMG_4144 IMG_4145

The Story of the Lorenzo Oom Paul – Gift from Bill Cumming


Blog by Steve Laug

When I returned home from a recent funeral I officiated for a good friend there was a package from Bill awaiting me in the mail box. It was oddly shaped so I was very curious what would be inside when I opened it. I carefully cut the tape on the end of the box that was shaped like a Toblerone bar and slid out the contents. The inside package was wrapped in a short letter that had a beautiful drawing attached to it (I have photographed the drawing and posted it here on the blog). Underneath that was another layer of bubble wrap that contained a stem for a bent bulldog and under that was a beautiful Lorenzo pipe – an Oom Paul with a Savinelli Capri-like finish that Bill had sent as a gift. I am floored by Bill’s thoughtfulness and generosity. Thank you, Bill.

The pipe is a classic example of an Oom Paul sitter. The finish is in excellent shape and the rim is perfect. The inner bevel of the rim is smooth and unblemished and the bowl is still perfectly round. The bottom of the bowl is flattened enabling the pipe to stand on its own – which it is doing now next to my keyboard as I write this post. The bowl is clean and smells of rich tobacco recently burned in its depths – a great smell in my opinion. The shank and well (sump) is also clean due to Bill’s creativity explained later in the letter from him I have included in this post. The stem has minor tooth chatter but no bite marks and is oxidized but will clean up nicely. The Upside down cursive L on the top of the blade of the stem is stamped and still bearing the white colour it had originally when it was purchased. This one will be a simple restore and I will soon be enjoying a bowl of tobacco in it.

IMG_1870

IMG_1872

Here is Bill’s letter to me that accompanied the pipe. It gives the story of the pipe and an interesting discovery Bill shares with regard to a trick for easing the gurgle that often is found in the Oom Paul pipes.

The Story of the Lorenzo Oom Paul – by Bill Cumming

I started smoking a pipe in Germany while in the US Army, as did some buddies. We all started with Dr. Grabow’s or basket pipes. The first quality pipe (no reflection upon Grabows!) was one my friend bought, a Savinelli Capri – he loved it, a real prize! Shortly after I found a Lorenzo Oom Paul, dark brown, more rusticated than sandblast… identical to the one I’m sending you, except yours is more red (very close to the stain on Capris, though they also come black).

I treasured this pipe! Bought in 1969, I still have it, it smoked as well as my friend’s Savinelli Capri and I’ve always felt same quality as a Capri … NOTE: I have 3 Capris.

I became an Oom Paul aficionado! I loved how they sit, how they look, how they “hang”, how they have a heritage, their noticed by others; they’re not all that common… I collected Oom Pauls: Savinelli Capri, Savinelli Estrella, Edwards, Caminetto, Savinelli Non-Pareil, even some nameless basket Oom Pauls. I also found two matching Oom Pauls to mine from Germany – a smooth and the red one I’m sending you. I still have my first (1969) and the smooth one. I “horse traded” some of the other Oom Pauls, but also still have some I won’t part with.

NOTE: Steve, I took them under my wing, with a real attachment from my first one. Sure, I knew the “rap” against them – gurglers and unable to pass a cleaner directly from stem into the bowl (inherent engineering) with one notable exception. The Savinelli Non-Pariel Oom Paul will send a cleaner straight through!

But, let me share with you a bit of a revelation. I always accepted the engineering of Oom Pauls and if they gurgled, I carefully removed the stem from a hot pipe to run a cleaner through the draft hole. I know that’s a “no-no”, but I’ve never cracked a shank.

• I started to realize most of the gurgling is in the stem, not the draft hole.

• I, later, became a big fan of Peterson Systems!

• It dawned on me, one day, this is fact… Oom Pauls are not (never were billed as) system pipes. Yet, their engineering is similar! A bit of a well, a cleaner goes into the well, not the draft hole; Peterson Systems have a military bit so it’s easy to remove the stem to run a cleaner into the bowl.

• So why couldn’t I incorporate the same little “trick” I use with Peterson Systems?

• Many folks seem to regard Sytems as too high maintenance! During the smoke, if you set the pipe down and it falls over (like spilling a cup of coffee), you’ve now sloshed the accumulated foul smelling liquid into the draft hole or up the stem!

• I took somebody else’s wonderful suggestion for Pete Systems… while preparing the pipe for a smoke, I roll up a small piece of tissue paper, or Kleenex, into a “pea” and push it down into the well with a pipe tool, making sure this “paper pea” is beneath the draft hole. BINGO! The “pea” absorbs all the moisture and juice, and is easily plucked out and discarded after the smoke. I’ve read some stories about horrible system estate pipes where the well was never dumped, never cleaned… ugh, like, how bad do you suppose it smelled? This “paper pea” is (for me) a mandatory integral part of enjoying System pipes.

• So, I thought, why not do the same thing with my Oom Pauls? BINGO again! I make a smaller “pea” (and nobody ever claimed an Oom Paul was a System Pipe) but his has given another dimension to smoking and enjoying my Oom Pauls! The engineering is no longer a problem. Gurgle? The moisture is in the stem (mostly) – run a cleaner through the stem (down) and you can easily fell the “softness” when it hits the “pea”!

•I never remove a stem anymore from a hot Oom Paul pipe.

Well, Steve, I don’t know your history with Oom Pauls, or other shapes. I’ve noticed a lot of your pipe work is on straight pipes. You mentioned you found most Lorenzo pipe to be too large. I don’t think the three Lorenzo Oom Pauls (the red one for you) are all that large. They are smaller than all my other Oom Pauls (Caminetto, Savinelli, Edwards).

It’s a narrow, but deep, bowl so fits well with certain tobacco. The rustication is identical to my original 1969 dark brown pipe. That one, the smooth one and the red one (yours) all smoke fine.
I like the little upside down L on the stem.

I’m downsizing some of my pipes, doing a bit of “horse trading” again, but I felt passing this Lorenzo Oom Paul to you would be a fitting “return gesture” for the unexpected gift from you.
I hope you’ll enjoy it (I’m sure you’ll clean it up a bit) especially maybe some cold fall or winter evening. Maybe my story has provided you another perspective on Oom Pauls! I guess we all remember our first love! 🙂 – Bill Cumming

Once again, thank you, Bill. What follows are the details of the clean up and refurbishing of your gift to me.

The next two photos show the pipe on the work table. The photos do not show the dust in the deep grooves of the bowl. They do show the overall good condition of the pipe.

IMG_1871

IMG_1873

I scrubbed the exterior of the bowl with Murphy’s Oil Soap and a fine bristle tooth brush. I use the Murphy’s undiluted as I have found that it does not remove the finish as easily. Once I had scrubbed all the nooks and crannies of the rustication I rinsed it under warm water until the soap was gone and then patted the bowl dry. I kept the water out of the bowl and the shank while I did the scrubbing and rinsing to keep the interior dry. The first photo below shows the soap on the briar. The second, third and fourth photos show the bowl after I had rinsed it with the warm water and dried it off.

IMG_1897

IMG_1899

IMG_1900

IMG_1901

I cleaned out the shank and the bowl with Everclear and pipe cleaners and cotton swabs until they came out clean and then coated the exterior of the bowl and shank with Halcyon II wax and hand buffed it with a shoe brush. The photo below shows the pipe after the waxing and buffing.

IMG_1903

I scrubbed the stem with a cotton pad and Meguiar’s Scratch X 2.0 polish. It is used for polishing plastic and removes oxidation and scratches to the finish of plastics. I have often used it as the first step in removing oxidation. I find that it quickly removes the surface oxidation and softens the deeper oxidation as well. I followed up the cleaning with the use of micromesh sanding pads from 1500-12,000 grit to remove the softened oxidation. I stopped after wet sanding with the 1500 and 1800 grit pads and used a liquid paper used in correcting typos in typed writing to re-whiten the stamping on the stem. I then continued to sand the stem with the remaining grits of micromesh pads until the oxidation was gone.

IMG_1904

IMG_1905

IMG_1906

IMG_1907

IMG_1909

IMG_1911

IMG_1912

IMG_1913

I then polished the stem with White Diamond on the buffing wheel and gave the bowl a good light buff as well. I took it back to the work bench and wiped the stem down with Obsidian Oil and let it dry then coated the stem with carnauba wax and hand buffed it until it shined. The four photos below show the finished pipe. It is cleaned, refurbished and ready to smoke.

IMG_1914

IMG_1915

IMG_1916

IMG_1917