Tag Archives: Kenneth Lieblich aritcles

Rethinking the Repair of Damaged Stems


by Kenneth Lieblich

Welcome to another installment of my Pipe Incident Reports. The idea, in general, is to provide a brief write-up – focusing on a particular pipe-restoration-related issue – rather than an entire restoration story. I’ve been blessed by a precious few God-given talents in my life, but innovation is not among them. I’m not usually able to come up with groundbreaking ideas to do things differently. Having said that, I do try and improve my repair/restoration skills, techniques, and procedures wherever I can. One can call it kaizen or whatever, but I try to find better ways of restoring pipes.Today, I am attempting to improve the process of repairing stem bite-throughs by incorporating steel mesh. Now, you might be thinking, ‘That’s not a sentence I ever expected to read’, and you are justified in that thought.

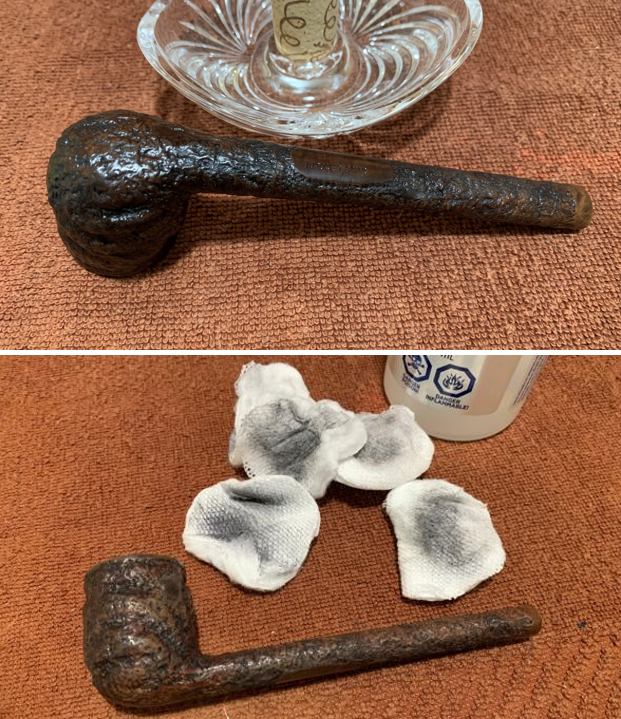
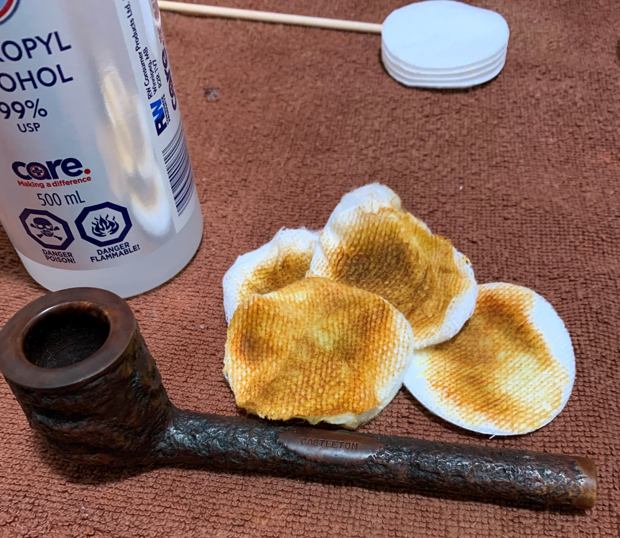
Many pipe repairmen have used various methods for repairing bite-throughs (holes) in vulcanite. Normally, this involves mixing cyanoacrylate adhesive with activated charcoal or powdered vulcanite. Some fellows have also tried some sort of epoxy to bring the stem back to life. In fact, when I started doing pipe repairs, I used that mixture of cyanoacrylate adhesive and activated charcoal. Then I discovered a black-tinted cyanoacrylate adhesive that came pre-mixed with rubber and charcoal. I introduced this product to Steve and it’s what he and I have been using ever since. However, I have always wondered about the durability of these repairs – especially against the bite of a man’s jaw. I wondered, could there be a better way?

Maybe. Read on, but please note: what I am proposing is NOT a complete solution. This is an idea that I hope someone will take and turn into a workable method.

I decided to test a pipe-stem repair with the aforementioned adhesive built around a stainless-steel wire-mesh structure. My thinking is that this would enhance the strength and durability of said repairs. For any engineers or scientists reading this article, please know that I have no scientific background and I am not equipped to conduct accurate tests of compressive or tensile strength. I am merely running an idea up the proverbial flagpole and seeing who salutes it. I hope that someone reading this will take the idea and, either, discredit it or expand upon it. The experiment I describe below is just that: an experiment. It is, possibly, a proof of concept – but certainly not the final step.

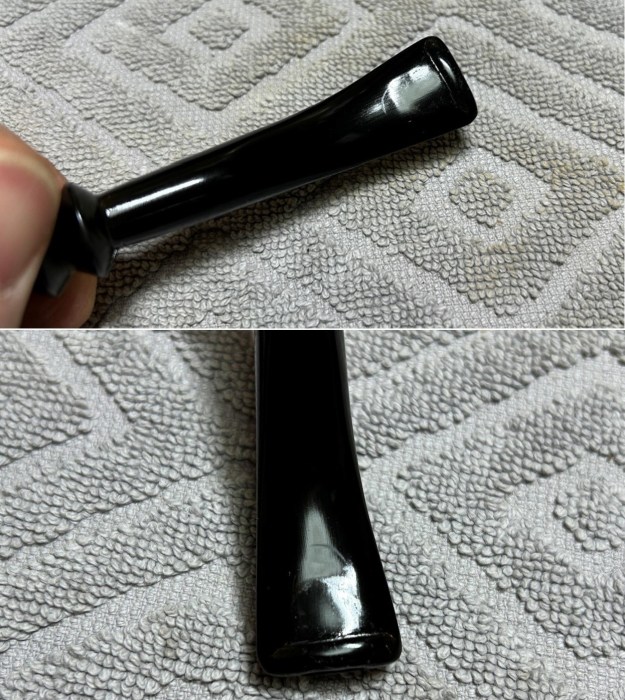
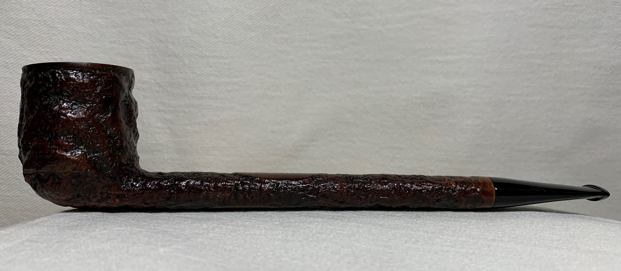
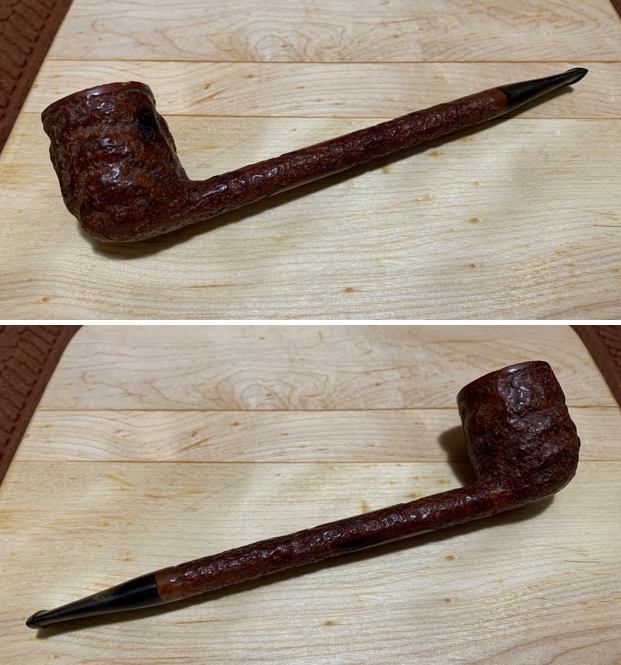
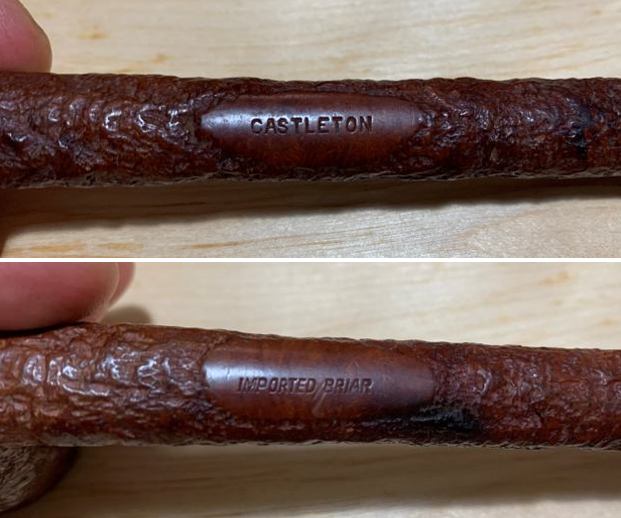
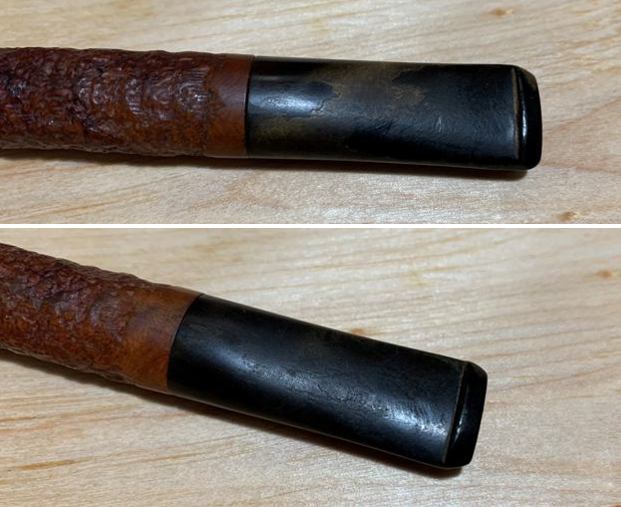
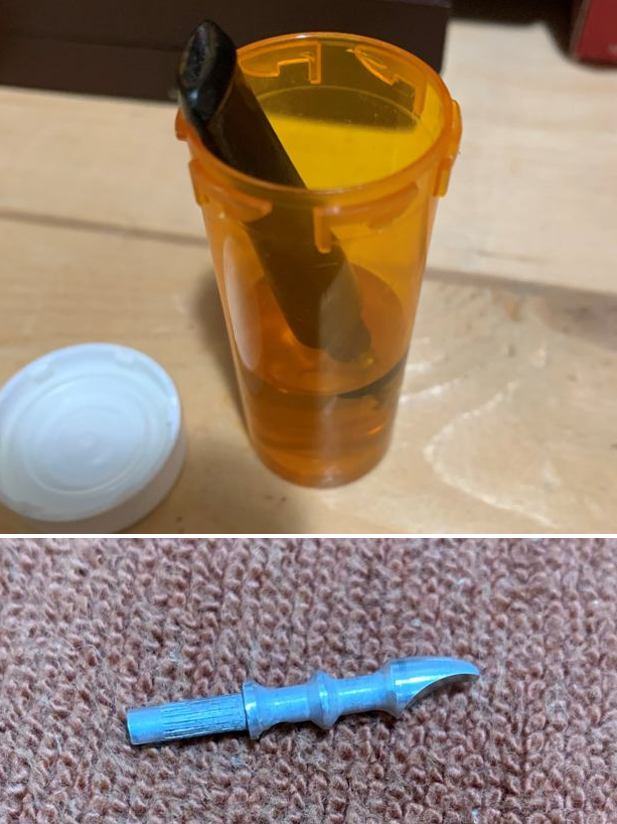
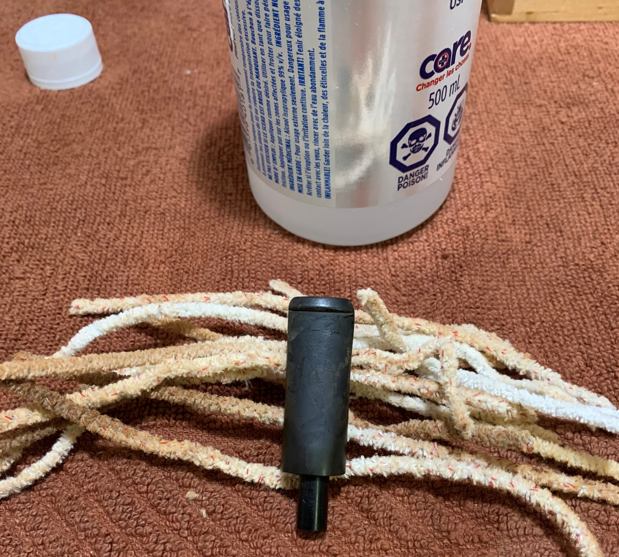
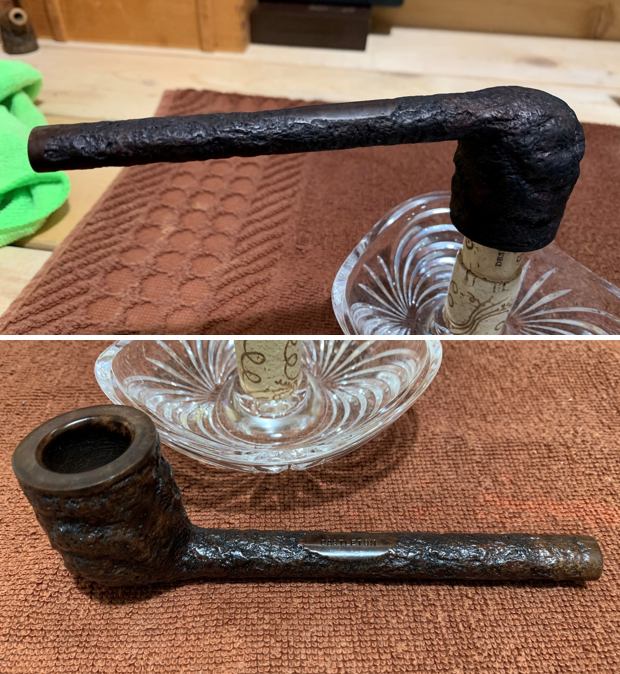
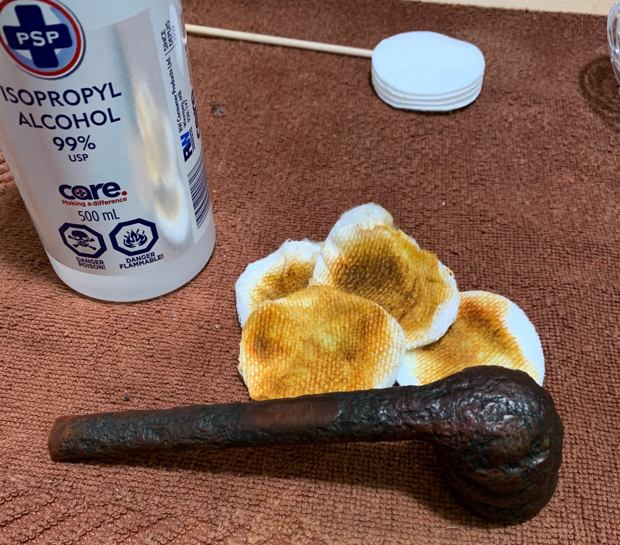
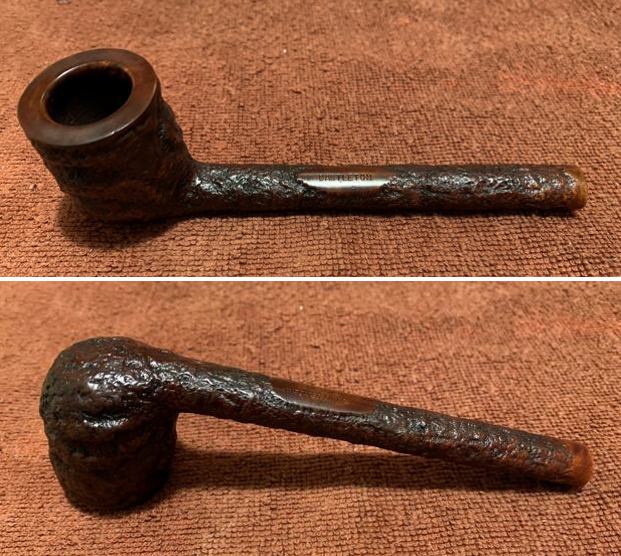
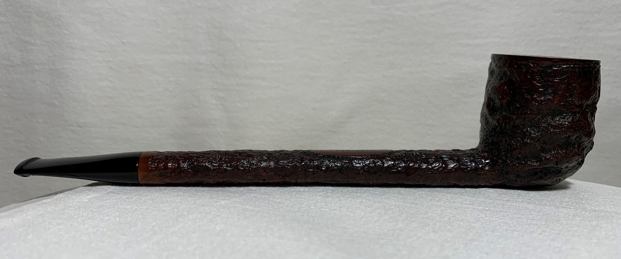
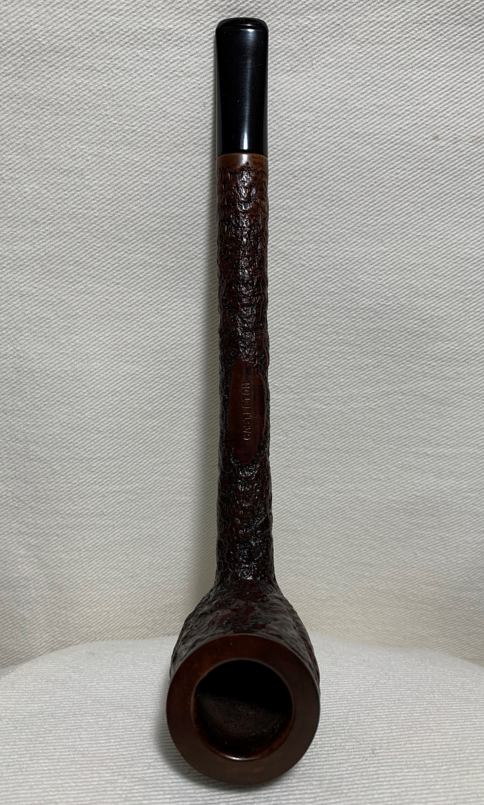
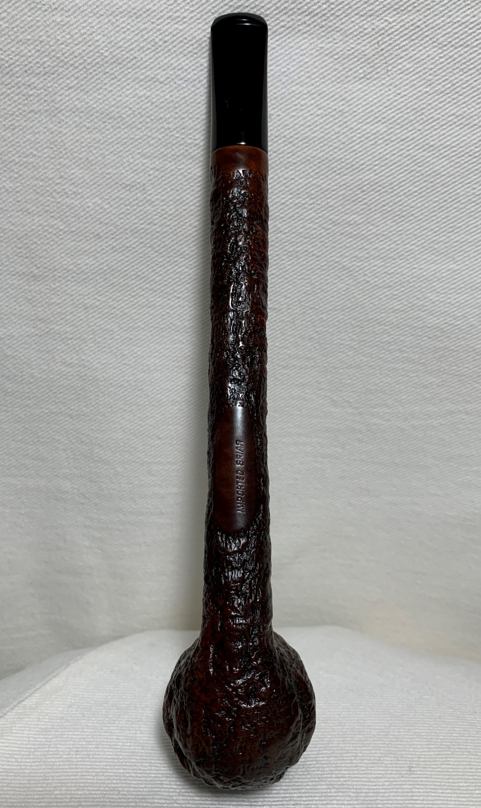
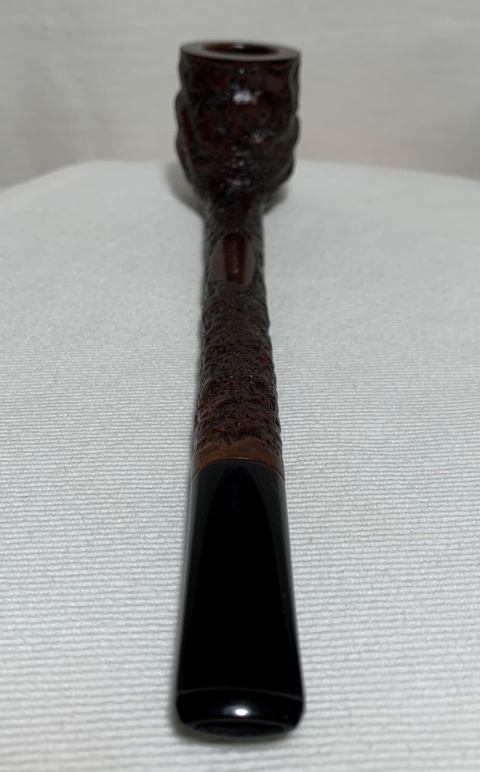
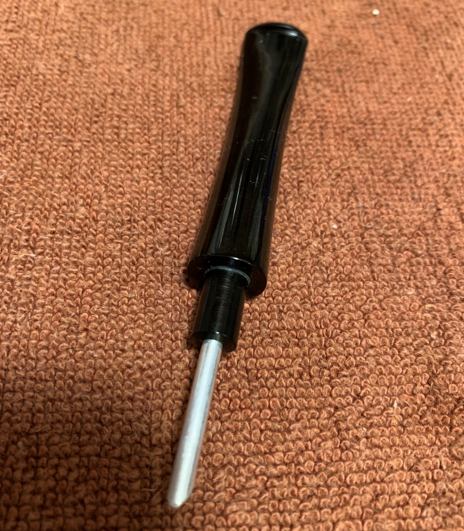
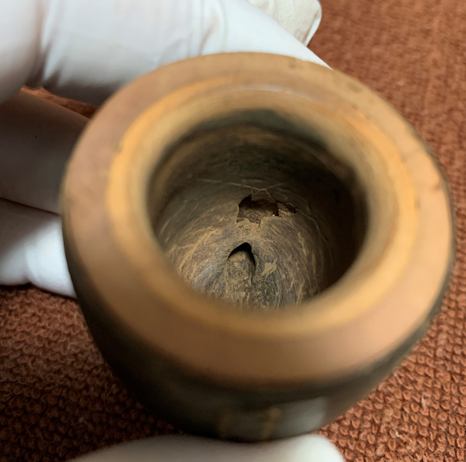
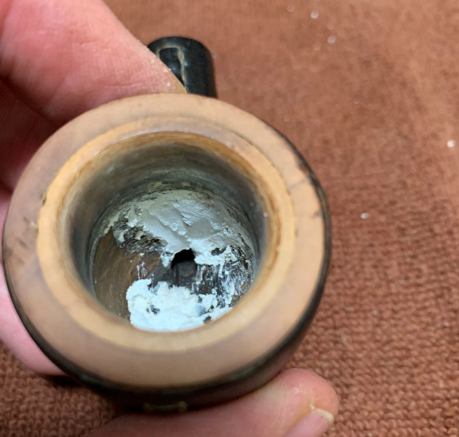
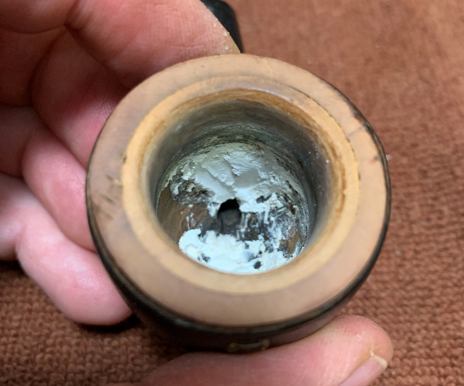
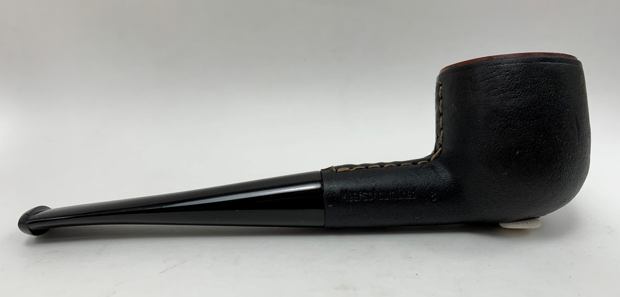
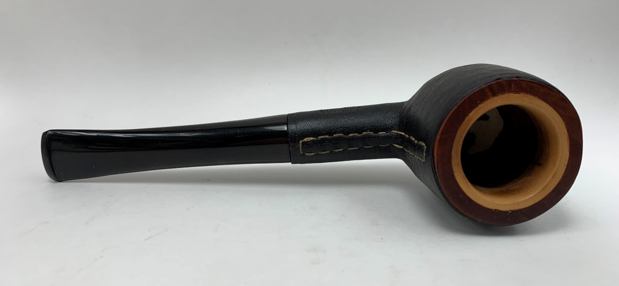
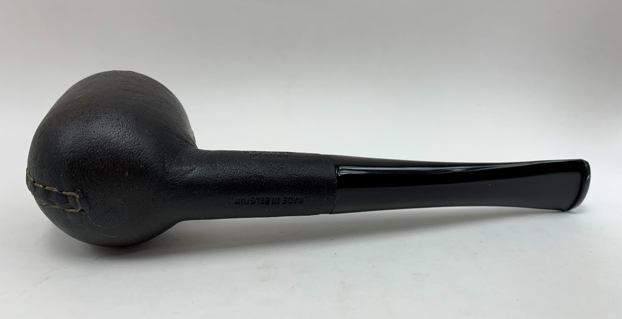
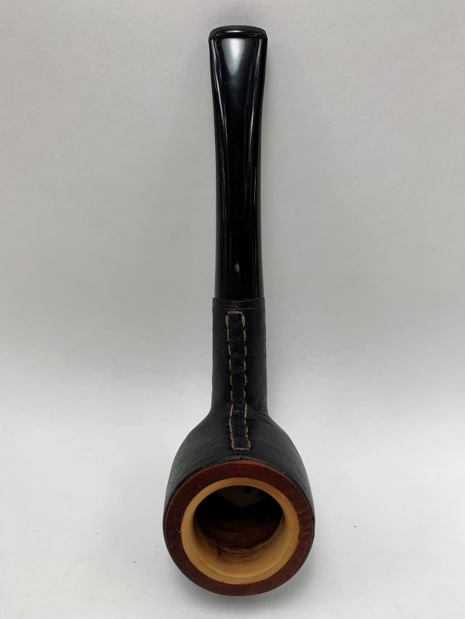
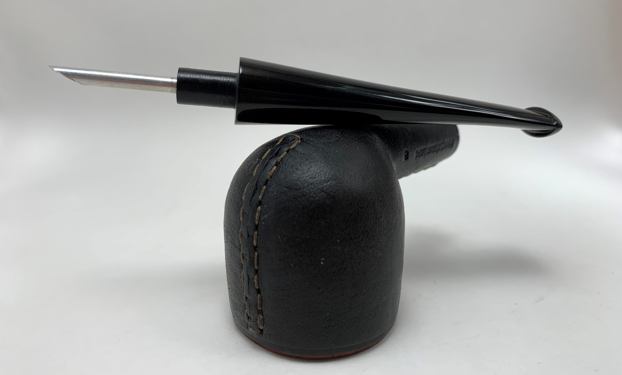
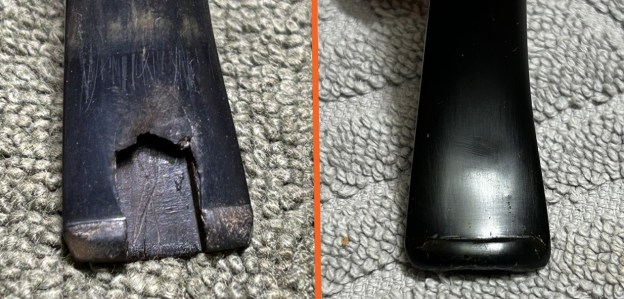
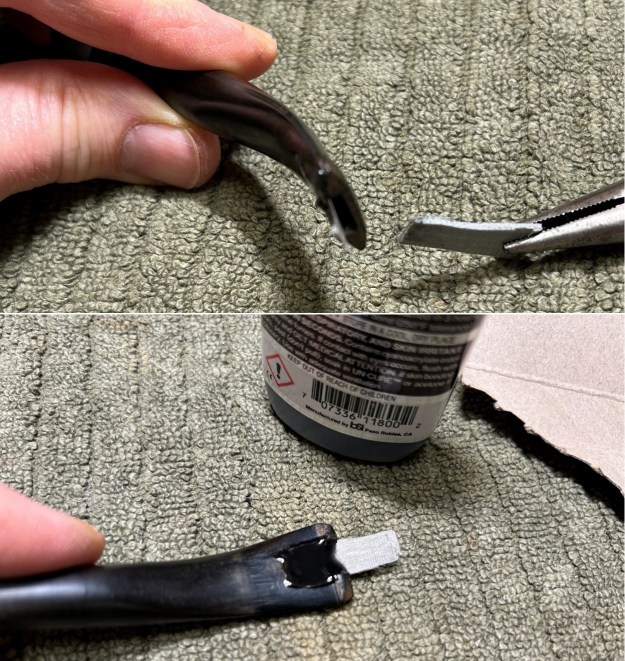
The idea came to me one day as I saw some sort of wire mesh being used in a concrete foundation. This mesh is used in construction to control cracking, to distribute stress, and add tensile strength. Perhaps it can be used, in like manner, where a large vulcanite repair is needed. My encounter with the concrete was providential because I had recently acquired a large lot of pipes, many of which had damaged stems. There was one stem in particular that stood out as a candidate for this experiment. Here it is: 
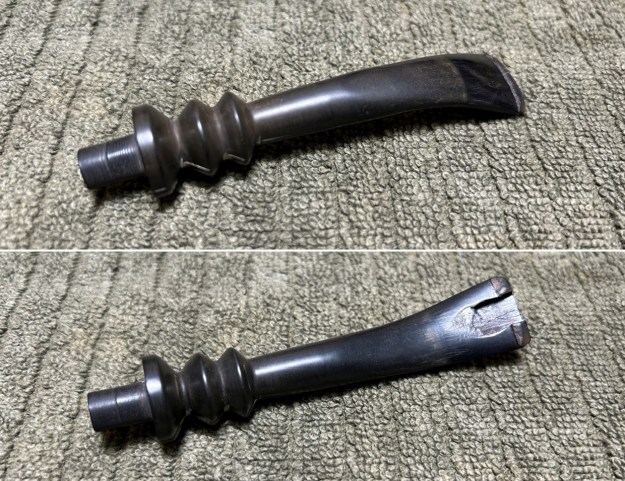
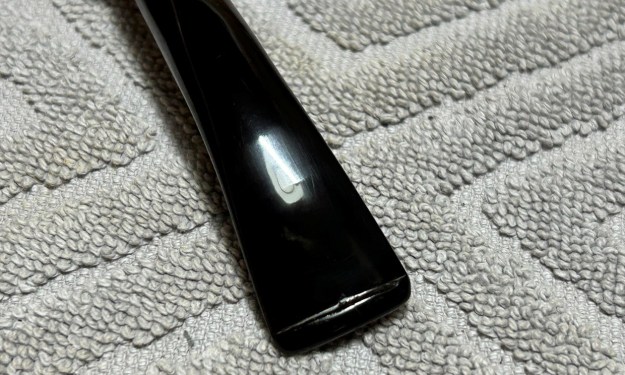
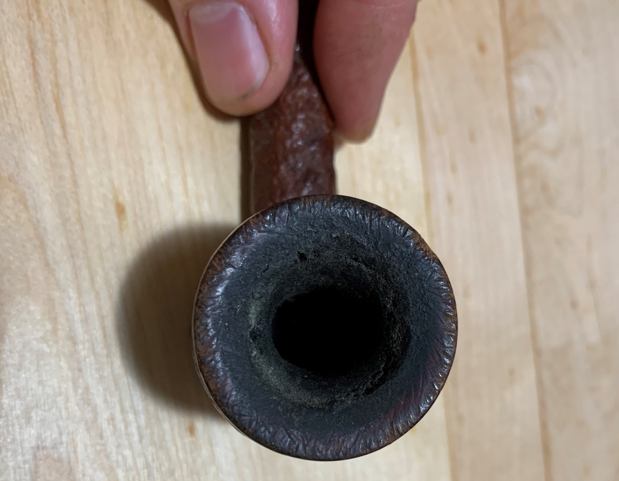
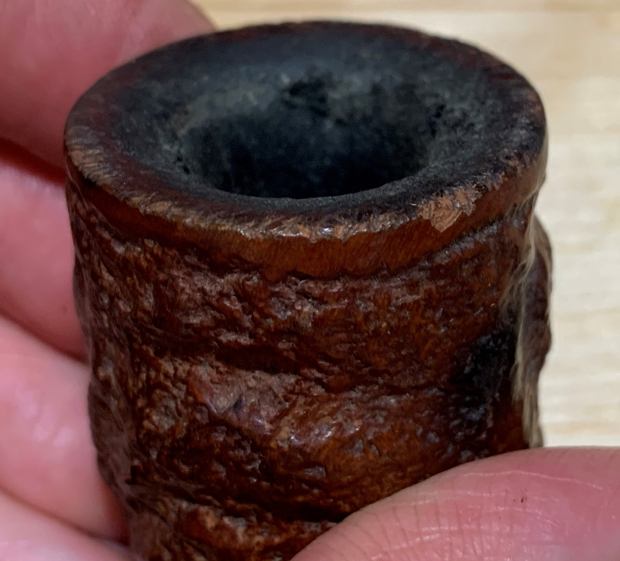
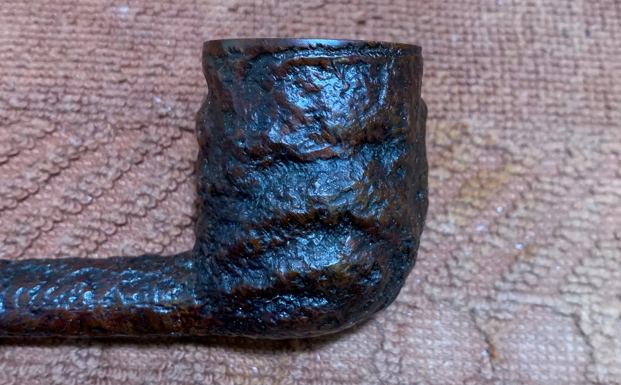
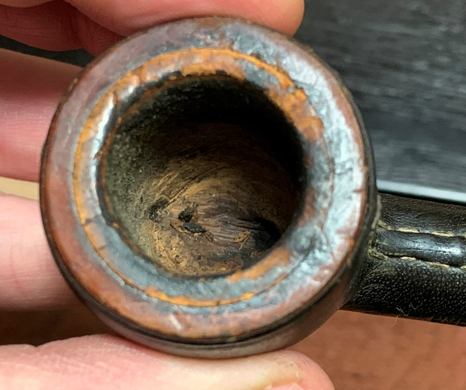
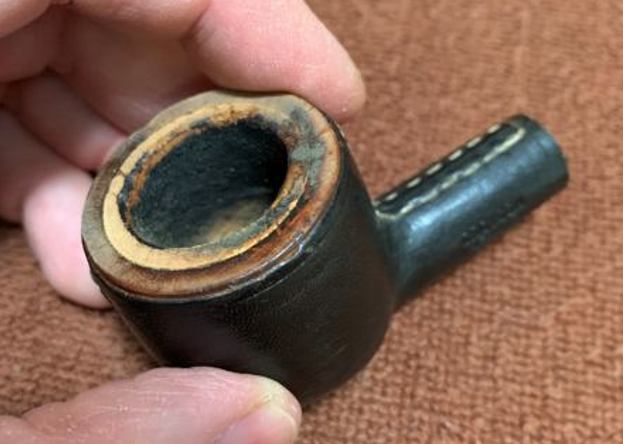
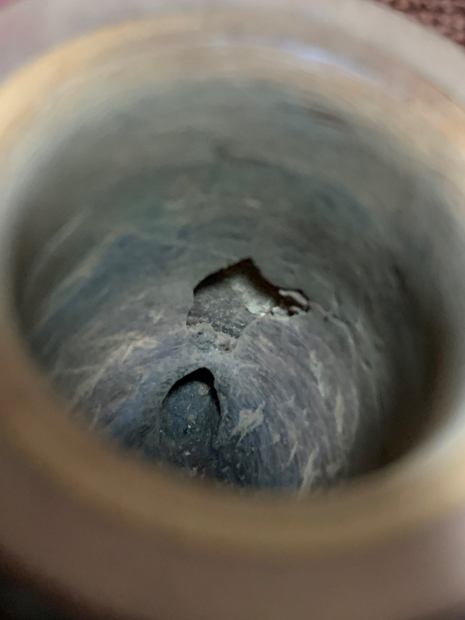
This is a stem that I would normally likely toss in the garbage, unless a customer specifically asked me to repair it. The damage is obviously serious. Ironically, this brutal damage actually makes this stem the perfect patient for this type of surgery.

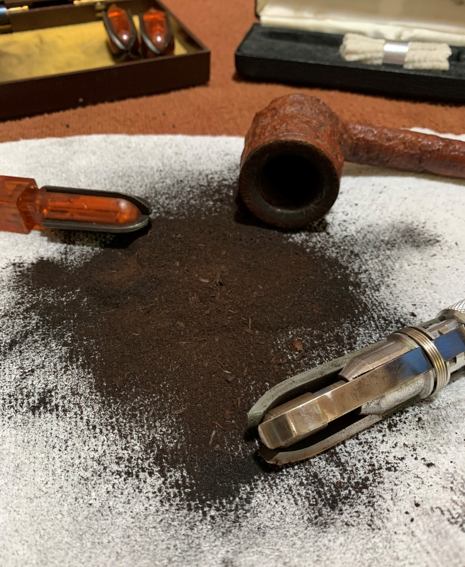
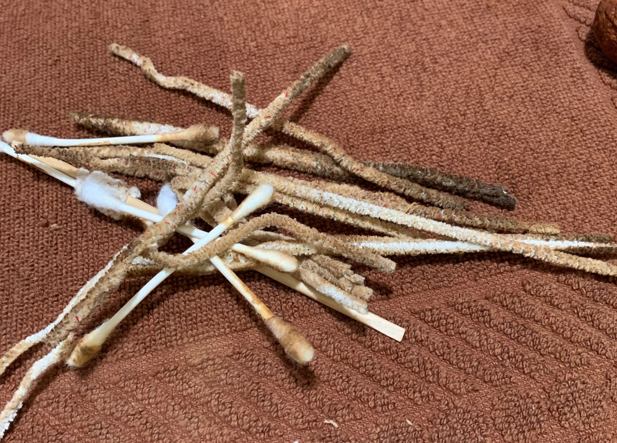
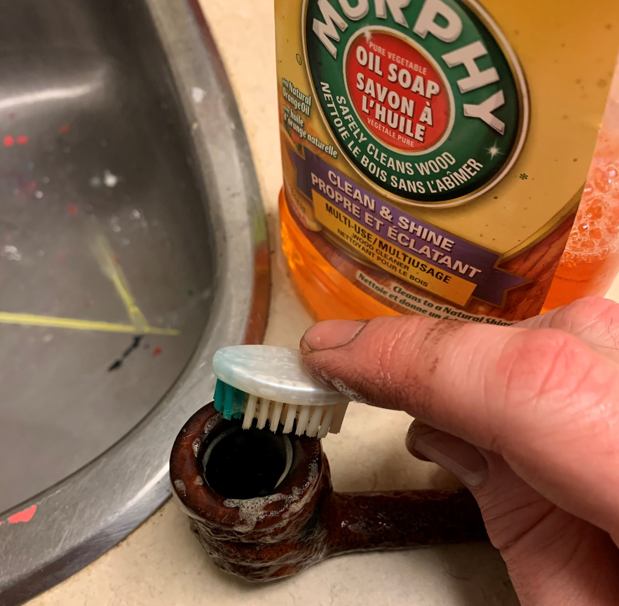
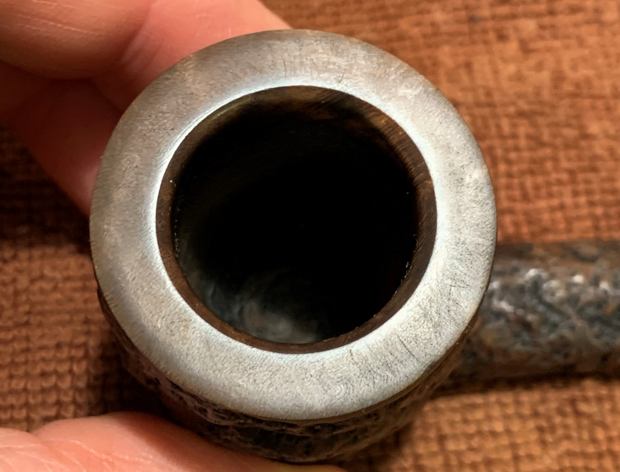
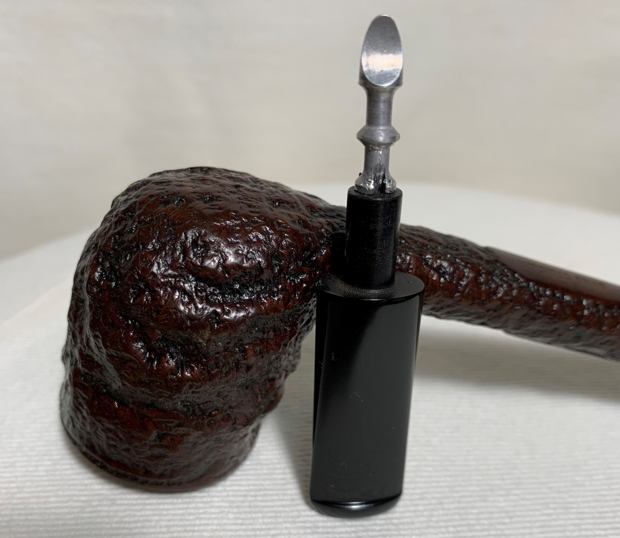
Here is the stainless-steel woven wire mesh. For those of you who know such things, this mesh has a mesh number of 200. It can be acquired inexpensively and comes in various mesh numbers. The larger the number, the finer the holes in the mesh. To be frank, my selection of 200 was pure guesswork. I didn’t really have a sense of what would be best – other than to say that it needed to be fine enough to prevent the adhesive from pouring straight through.On with the work! I first needed to create a platform upon which the adhesive and mesh could rest. This was obviously essential in order to maintain the draught hole in the bit. In the first photo below, you’ll see that I used cardboard, but I immediately abandoned that idea (I’ll explain why momentarily). I am displaying this photo in order to demonstrate my use of a pencil to scribe the precise shape of the missing section of vulcanite.
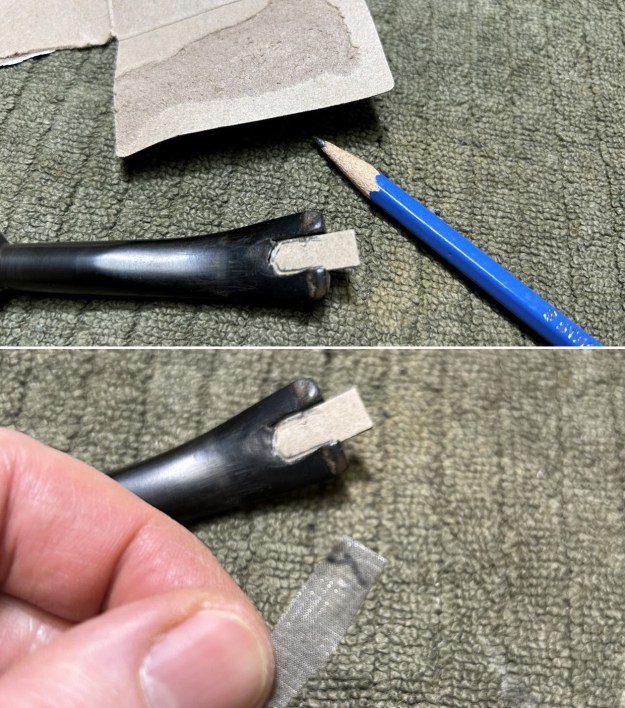
I quickly eliminated the cardboard idea because it just isn’t as useful a material for this purpose. Instead, I used several layers of duct tape as my substrate. I can still scribe a line on the duct tape, but – more importantly – cyanoacrylate adhesive doesn’t stick to it. In other words, once the work had fully cured, I could readily remove the duct tape without affecting the repair.

With my scribed line, I was able to transfer the pattern of the absent vulcanite on to the wire mesh and cut it to shape. Truth be told, it would probably be better to use welded wire mesh, but I have no idea where you acquire that in such a small mesh number. Anyway, before cutting the wire mesh, I took the critical steps of (1) gently sanding the mesh with sandpaper to provide a slightly rough surface to maximize the adhesive bond, and (2) cleaning the mesh thoroughly with acetone, to remove any sanding grit and any other substance that would inhibit a good adhesive bond.

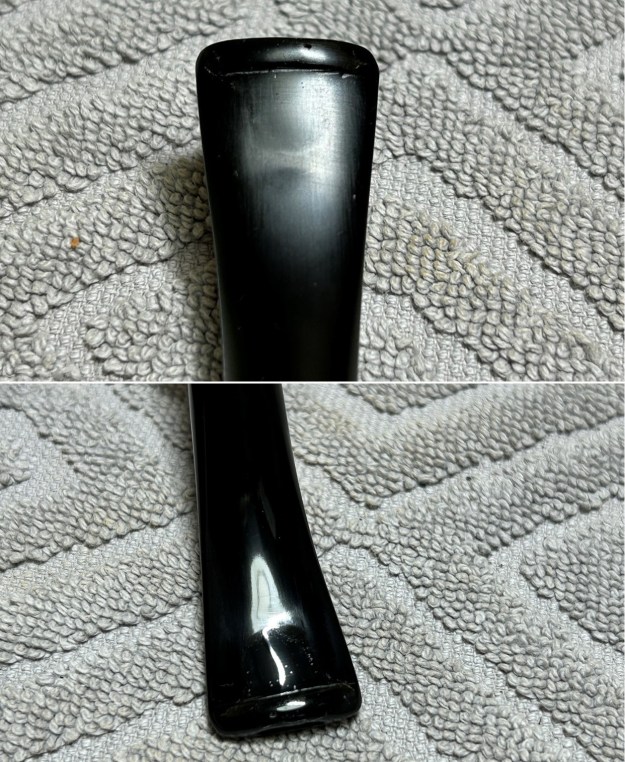
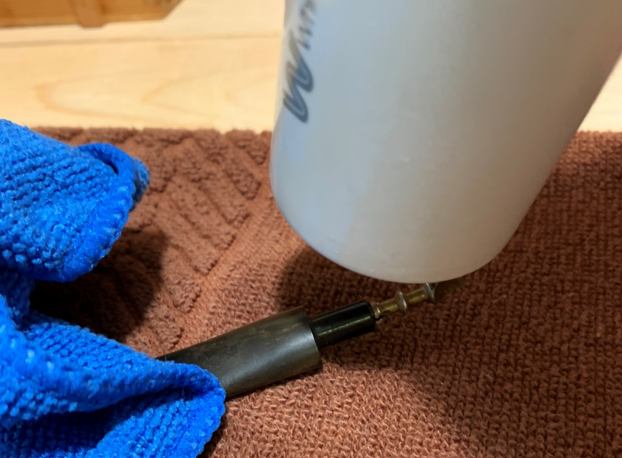
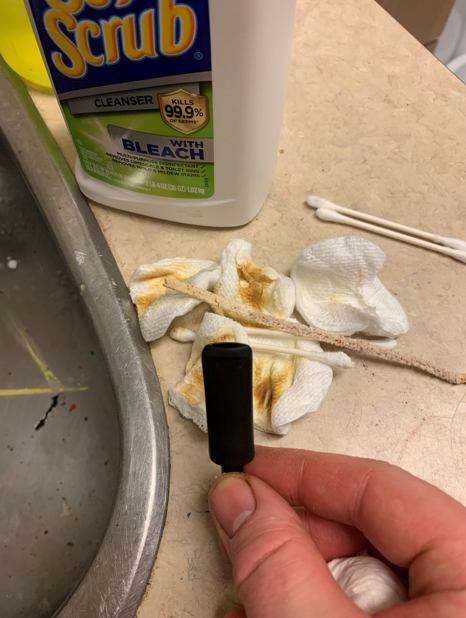
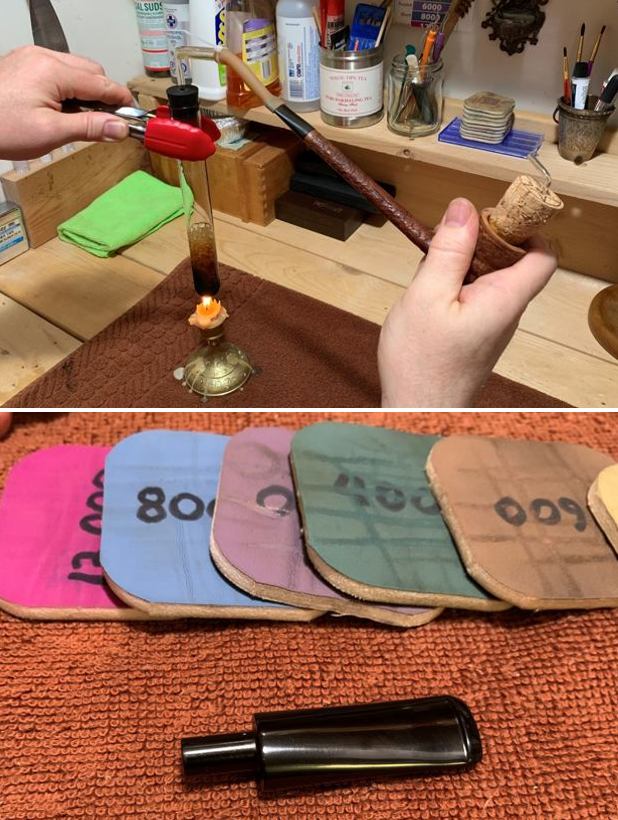
And away we go! It is important to apply the cyanoacrylate adhesive in thin layers, rather than one thick blob. I chose to apply a layer, spray it with an accelerator, apply another layer, etc. – until I was satisfied. Once complete, I left it to sit overnight and came back the next day. I freely admit that I am still concerned about the brittleness of this repair, but I think this is definitely a step in the right direction. 
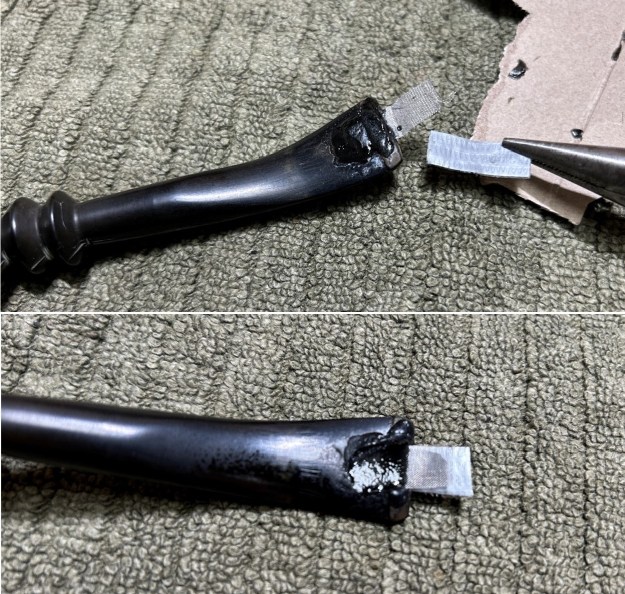
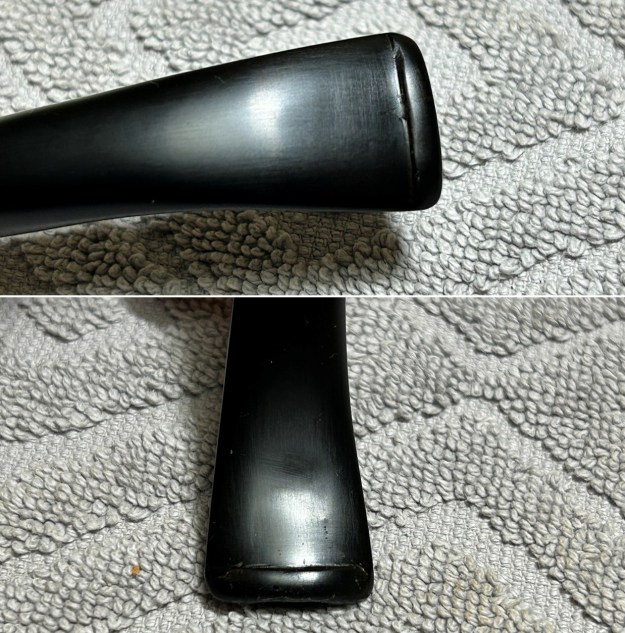
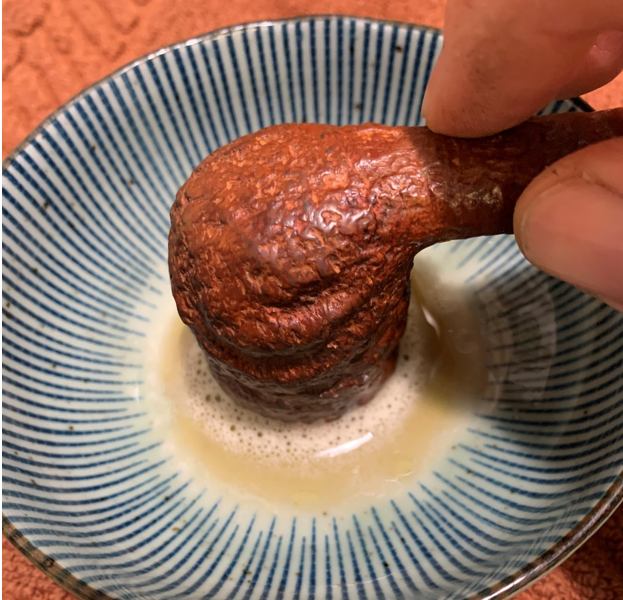
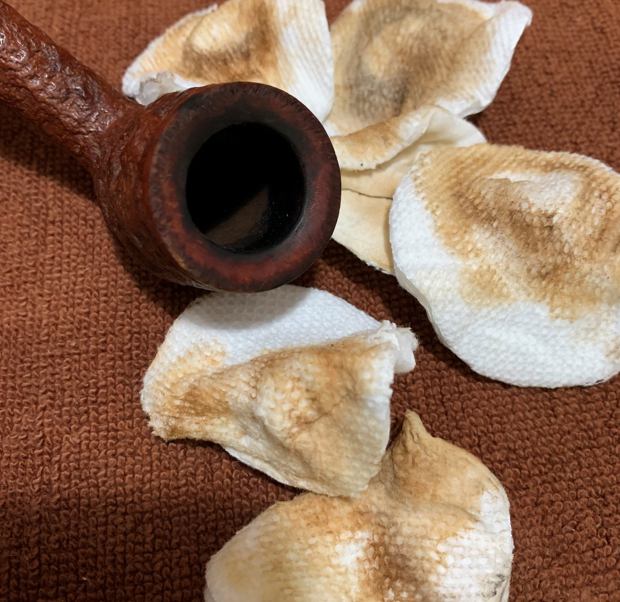
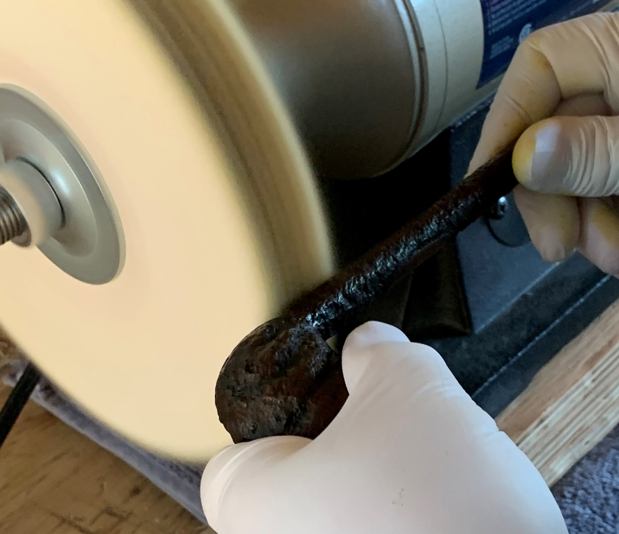
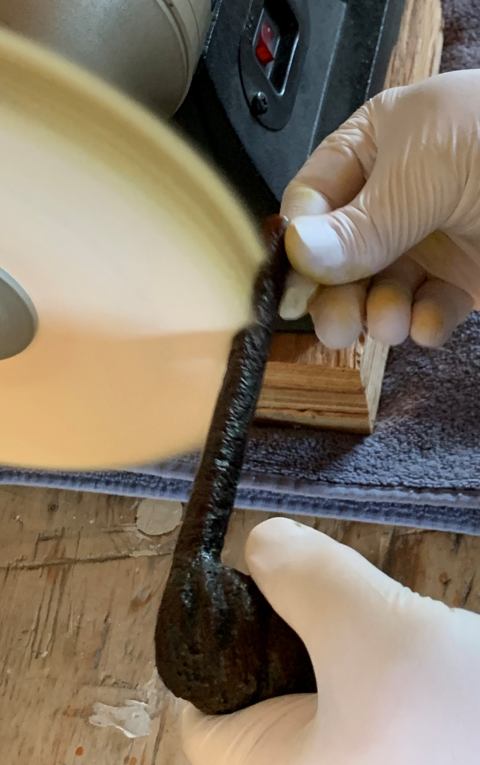
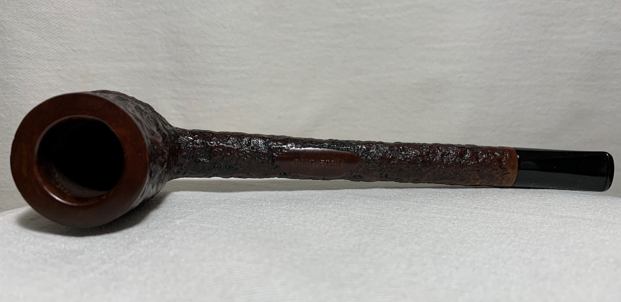
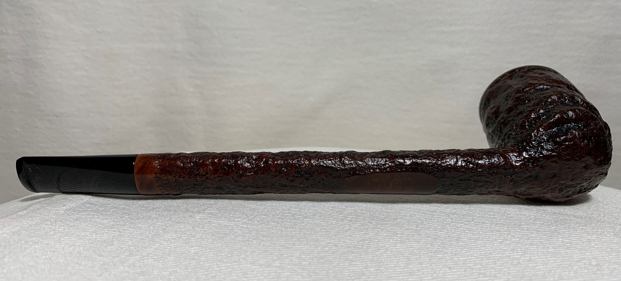
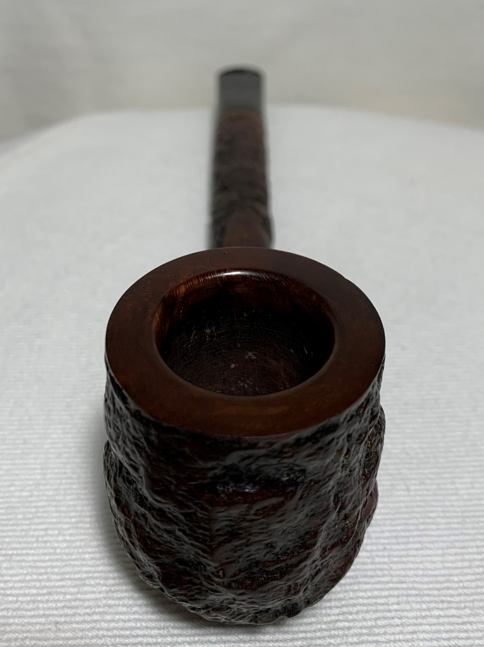
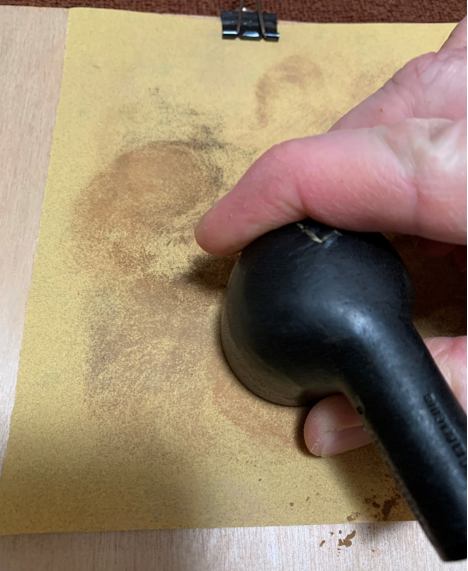
Naturally, shaping and sanding was the next step – and this took a while. I should emphasise at this point that I didn’t employ the same attention to detail on this stem, as I would on a stem for a customer. I just wanted to get this done and see if it would work. As I sanded with needle files and sanding pads, I shaped the button and melded the repair into the surrounding vulcanite. You can see the results below. It’s pretty good and I’m sure it would look even better if I was doing it for sale or for a customer.

Some final thoughts: I think there is a rudimentary idea here. I feel confident in saying that the repair itself is likely stronger and more resilient with the mesh than without. However, I am apprehensive about whether the brittleness of the cyanoacrylate adhesive is improved or not – and I’m not sure how to reasonably overcome that issue (other than trying epoxy). Another problem that still exists is that there is no direct connection between the mesh and the pre-existing vulcanite. This surely isn’t helpful. It is at the edges – where the adhesive meets the vulcanite – that the bond must be weakest. Next steps might include (1) embedding the wire mesh in an epoxy – this might be the best way of addressing brittleness; (2) overlaying the wire mesh on the original vulcanite to create a bridge structure (although this creates its own big problems); (3) developing a way of affixing the mesh to the vulcanite.

Now, over to you! What do you think of this idea? How would you improve it? What are the next steps? What colossal errors have I made? Please let me know what you think in the comments below. If you make use of the ideas from this experiment in your pipe work, please let me know how it goes. I hope you enjoyed reading this installment of my Pipe Incident Reports – I look forward to writing more. If you are interested in my work, please follow me here on Steve’s website or email me directly at kenneth@knightsofthepipe.com. Thank you very much for reading and, as always, I welcome and encourage your comments.

How Long Can A Canadian Be?


Blog by Kenneth Lieblich

Next on the chopping block is one of the longest pipes I have ever worked on (excluding churchwardens, etc.). It is a wonderful, rusticated Canadian-shape, with the name Castleton marked on it. Its strong, light, and rugged nature seemed to fit its Canadian moniker perfectly. I acquired a small collection of pipes from West Virginia off of Facebook a few months back and I am just beginning to work my way through them. There were a lot of very interesting pipes there and this one was certainly no exception. I like the look of Canadian pipes in general, and the length of this one was certainly notable– it is nearly eight inches long, yet incredibly light! As it turned out, this pipe ended up beautifully, but it required much more toil that I had initially anticipated. This pipe had only two markings: Castleton on top of the shank; and Imported Briar on the underside of the shank. No logos, nothing else. The name, Castleton, was a bit of a problem. Herb Wilczak and Tom Colwell’s book, Who Made That Pipe?, mentions the name, Castleton, in connection with Comoy’s. Pipedia also confirms that Castleton was a model of Comoy’s. The only problem is that I am fairly sure this pipe is not from Comoy’s. The pipe does not say Comoy’s and does not have the logo – nor does it have a Comoy’s feel about it. Sadly, Steve does not have a Castleton pipe listed on Reborn Pipes, so I did not have a reference there. There are several towns called Castleton – one in Ontario, one in Vermont, one in England (and doubtless others) – but these do not seem related to the pipe. However, Pipephil has a tantalizing bit of information on its site:The lettering of the word Castleton on Pipephil is identical to that on my pipe. Although the lettering of Imported Briar is not identical, the words themselves obviously are and the only difference in the lettering is the italicization on my pipe. Pipephil does not offer any information about this pipe’s country of origin. However, I did a little supplementary research (which I will not bore you with) which suggests that the pipe is probably of English origin, using French briar.Anyway, on to the pipe – and what an attractive pipe it was! However, it was not without its issues. The stummel had the following problems: lava on the rim, notable burns to the bowl and shank, plenty of cake in the bowl, a few scratches here-and-there, and lots of small gouges to the rim. The staining of the wood needed to be revivified too. Meanwhile, the stem had a few problems of its own: there was some oxidation and calcification, and minor tooth marks and dents. This pipe was going to require some considerable elbow grease, but I was particularly looking forward to working on this one. It is a pipe that still has many decades of use in it. The stem was first on my list. This stem has a stinger in it – and it was being quite stubborn about coming out of the tenon! I opted to warm the stem and stinger with a hair dryer and this provided just enough softening of the internal goo to allow me to pull it out. The stinger then went for a soak in some lemon-infused isopropyl alcohol. I let it set for several hours and then cleaned it off and it looks much improved. I wiped down the outside of the stem with Murphy’s Oil Soap on some cotton pads. Then, I cleaned out the insides with pipe cleaners and isopropyl alcohol. Once this process was done, the stem went for an overnight soak in the Before & After Hard Rubber Deoxidizer. The following day, I cleaned all of the de-oxidizing sludge off with alcohol, pipe cleaners, et cetera. The oxidation had migrated to the surface and would be fairly straightforward to remove. I scrubbed vigorously with SoftScrub on cotton pads to remove the leftover oxidation. Before I moved on to the Micromesh pads, I built up some tiny dents on the stem with cyanoacrylate adhesive and let it fully cure. I then sanded it down with 220-, 400-, and 600-grit sandpapers to meld seamlessly into the stem. I will come back to the stem in a bit, but there are other issues to be addressed first!This stummel was quite a mess. I first decided to ream out the bowl. I used both the PipNet Reamer and the KleenReem to remove the built-up cake and followed that with 220-grit sandpaper to eliminate as much as I could. I took it down to bare briar, as I wanted to ensure there were no hidden flaws in the walls of the bowl. Fortunately, there were none. I then proceeded to clean out the insides of the shank with Q-tips, pipe cleaners, and isopropyl alcohol. There was a lot of nastiness inside this stummel and – boy-oh-boy – it took a lot of cotton to get this thing clean! In fact, this pipe’s great length proved to be a problem because I could not get the pipe cleaners all the way down the shank (and I did not, at that time, have churchwarden pipe cleaners). So, channeling my inner MacGyver, I tried to build myself some contraptions which would allow me to clean all the way down the shank. Unfortunately, these worked with very limited success.I was not to be deterred. I decided to build my own pipe retort system. This system uses boiling isopropyl alcohol and a vacuum (a void space, not the household item) to clean the interior wood of a pipe. I won’t describe the whole thing, but you can read Steve’s article about it here. As you can see by the revolting colour of the alcohol, the retort worked very well. I managed to extract lots of otherwise inaccessible filth from inside the pipe. After the retort (definitely not before), I then used all nine Micromesh pads (1,500 through 12,000 grit) to bring out the lovely black lustre on the stem. I also used Obsidian Pipe Stem Oil in between each pad scrubbing.I then moved on to cleaning the outside of the stummel with Murphy’s Oil Soap on some cotton pads and also used a tooth brush to get into the crevasses. I actually soaked the rim in Murphy’s for a while just to loosen up the lava. I followed that up by cleaning the insides with some dish soap and tube brushes.As I mentioned earlier, there were many nicks on the rim of the stummel that also needed to be addressed. In order to remove the lingering bits of lava and fix the nicks, I “topped” the pipe – that is to say, I gently and evenly sanded down the rim on a piece of 220-grit sandpaper. This effectively removed the lava and the damage, without altering the look of the pipe.As I also mentioned, there was a burn on the side of the bowl and a burn on the shank that also needed to be addressed. I took some oxalic acid, used several Q-tips, and rubbed and rubbed. The burn did improve considerably but never fully disappeared. I gently poked at it with a dental tool in order to assess the wood. I took solace from the fact that the burn was very superficial and did not affect the integrity of the wood at all. A light application of Before & After Restoration Balm brought out the best in the stummel. What a difference that made! There is some beautiful wood under the grime!Since this pipe is rusticated, I was not going to sand down the stummel with my Micromesh pads, but I did do it to the small sections that were smooth (e.g. where the markings were located). In order to avoid disturbing the rusticated sections, I masked these areas off with painter’s tape. This simplified the process a great deal.On to another problem: the colour. During the course of its previous life and my vigorous cleaning, this pipe had lost some vibrancy of colour. So, in order to accentuate the external beauty to this pipe, I opted for aniline dye. In this case, I did it in two stages. I first applied some of Fiebing’s Black Leather Dye (diluted with isopropyl alcohol) with a dauber to act as a sort of “wash” for the pipe. I wanted the dark colour to remain in the recessed areas of the stummel to contrast with the primary colour. As usual, I applied flame from a BIC lighter in order to set the colour.The following day, I wiped down the stummel with cotton pads dipped in isopropyl alcohol to remove any blackness from the high points. I then applied some of Fiebing’s Medium Brown Leather Dye with a dauber and removed the excess with cotton pads dipped in isopropyl alcohol. Once again, I applied flame from a BIC lighter in order to set the colour and let it sit overnight. Oof – it is really looking good! The contrast in colours worked just as I had hoped. I applied more Before & After Restoration Balm and then it was off for a trip to the buffer. A dose of White Diamond and a few coats of Halcyon II wax were just what this pipe needed. The lovely shine made the wood very attractive. This Castleton was in need of a reminder of its original beauty. The pipe began its restoration journey looking as though it had been left for firewood. Now, it can show its true self – a very handsome Canadian pipe.This Castleton is back to its old glory and ready to be enjoyed again by the next owner. I am pleased to announce that this pipe is for sale! If you are interested in acquiring it for your collection, please have a look in the ‘British’ pipe section of the store here on Steve’s website. You can also email me directly at kenneth@knightsofthepipe.com. The approximate dimensions of the pipe are as follows: length 197 mm/7 3/4 inches; height 56 mm/2 13/64 inches; bowl diameter 34 mm/1 11/32 inches; chamber diameter 21 mm/3/4 of an inch. The mass of the pipe is 37 grams/1.30 ounces. I hope you enjoyed reading the story of this pipe’s restoration as much I as I did restoring it. If you are interested in more of my work, please follow me here on Steve’s website or send me an email. Thank you very much for reading and, as always, I welcome and encourage your comments.

Kenneth’s Pipe Incident Report #1


Blog by Kenneth Lieblich

Today, I thought I would try something a bit different. This is the first installment of what I am arbitrarily calling, Pipe Incident Report. My idea is to provide a brief write-up – focusing on a particular pipe-related problem and/or solution, rather than an entire restoration story. These reports will be intermittent and, hopefully, instructive. Please let me know what you think.

The pipe in question today is a leather-wrapped, meerschaum lined, pot billiard by Croydon. The pipe was made in Belgium, but, other than that, there is not a whole lot of information to be had about this company. Steve has restored a few over the years (and I checked his previous posts), but he had not gleaned any significant information either. The “incident” we will address in this report is some unexpected damage to the inside of the meerschaum bowl. We will get to that shortly – first some background. A friend of mine wanted this pipe – somehow, it spoke to him – so I was happy to bring it back to life for him. The pipe was in decent enough shape: the stem was well-used but not damaged, the leather was sound, the rim was a bit of a mess, and the bowl looked as though it had been reamed with a boat hook. Although it is difficult to make out in the photos, the bottom of the bowl was quite badly gouged and I wondered whether I should fill in the gouge or leave it as is. Steve had told me in the past about making a paste of egg white and chalk dust. Something for me to consider… Anyway, I began with the stem and inner tube, which I resolved fairly quickly. The leather enveloping the bowl was quite clean and in good shape, so that was also a quick fix. I then moved on to the rim of the pipe. As the photos show, it was filthy and slightly damaged.  I “topped” the pipe – that is to say, I gently and evenly sanded down the rim on a piece of 220-grit sandpaper. This was done with even greater care than usual, as I did not want to scuff the leather. I finished up the top with all nine of the MicroMesh pads to make a lovely surface and then used one of my furniture pens to liven up the colour of the rim. That done, I moved on to the inside of the bowl. Meerschaum does not do well with traditional reaming processes – it needed to be sanded. This was required – not just to clean things up – but also as there was a distinct aromatic ghost left behind. Well, I went sanding away happily, when – lo! and behold – a flaw or cavity appeared in the wall of the meerschaum bowl. Yikes!This is obviously a serious concern for this pipe. One is tempted to wonder: was there a manufacturing flaw? Not sure. Did I sand too hard and cause the breakage? Definitely not. Could there be other flaws? Not as far as I could tell, but it was difficult to be sure. This repair was going to need something more than egg white and chalk dust. After consulting with Steve, his recommendation was to repair both the gouge in the heel and the wall cavity with plaster of Paris. I agreed since plaster of Paris has the virtues of binding well to the meerschaum, resisting heat nicely, and (best of all) drying rock hard. I rushed out to buy some and started making my mix. In order to ensure that it works correctly in this context, the plaster of Paris must be much thicker than usual. Normally, the consistency would be something like thick pancake batter, whereas the mix I made was closer to cream cheese.As you can well imagine, actually applying the plaster of Paris properly to the inside of the bowl was a bit of a challenge. I used a dental spatula, which made the job much easier. First, I placed the plaster carefully in the gouge at the heel of the bowl. Next, I delicately filled in the cavity on the wall by inserting as much plaster as possible behind the intact areas of meerschaum. This would provide added strength and support to the repair. Finally, I filled in the hole itself and let all of the plaster harden overnight. On the morrow, the repair looked sound. The next step was to sand the plaster of Paris down to make it smooth and even with the surrounding meerschaum-lines bowl. I used 200- and 400-grit sandpaper to make this happen. I was very pleased with the way it looked in the end. As the photographs show, the plaster and meerschaum merged very well. I should add that the craze lines that you can see were also addressed, but I neglected to take a photo of that. In the end, the pipe was successfully restored and, what looked at first to be a fatal flaw in the meerschaum, turned out to be an educational and enjoyable repair. I was originally tempted to call this blog post “I got plastered in Paris”, but that seemed too cheeky in the end. It is a nice pipe and its new owner is very pleased with the results. I hope you enjoyed reading this first installment of Pipe Incident Report – I look forward to writing more. If you are interested in my work, please follow me here on Steve’s website or email me directly at kenneth@knightsofthepipe.com. Thank you very much for reading and, as always, I welcome and encourage your comments.