Tag Archives: GBD London Made pipes

Restoring a Newer GBD London Made C133 Billiard


Blog by Steve Laug

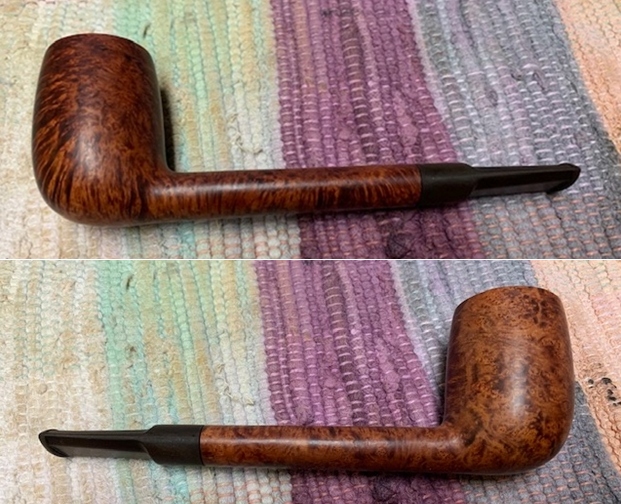
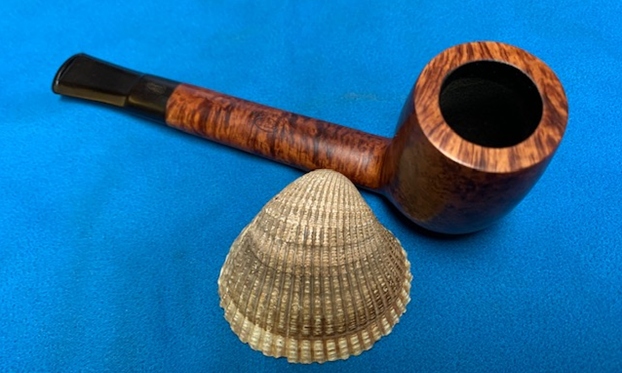
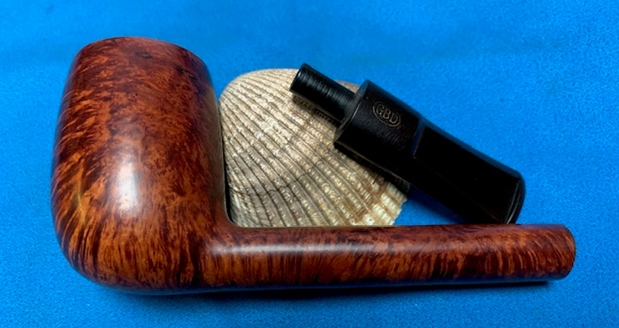
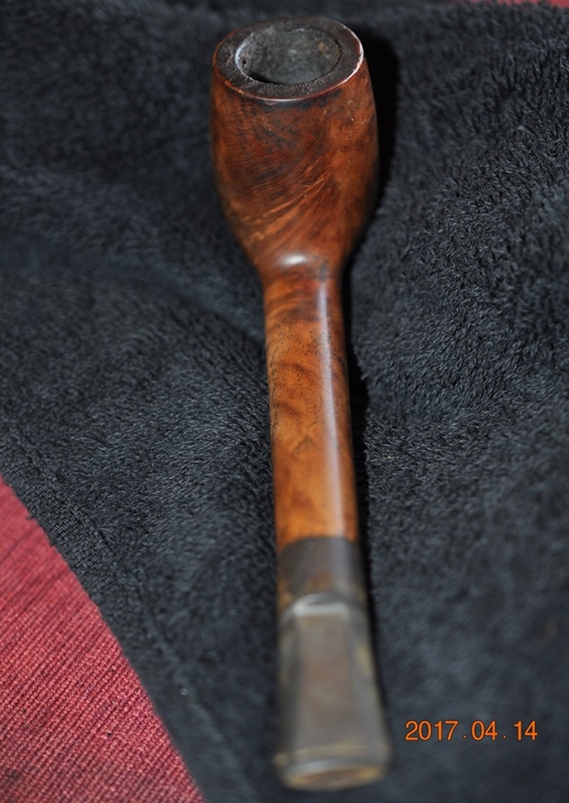
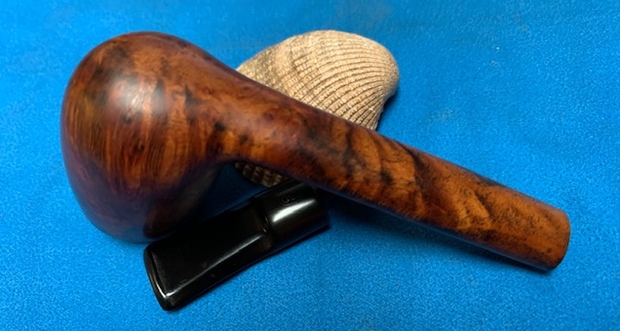
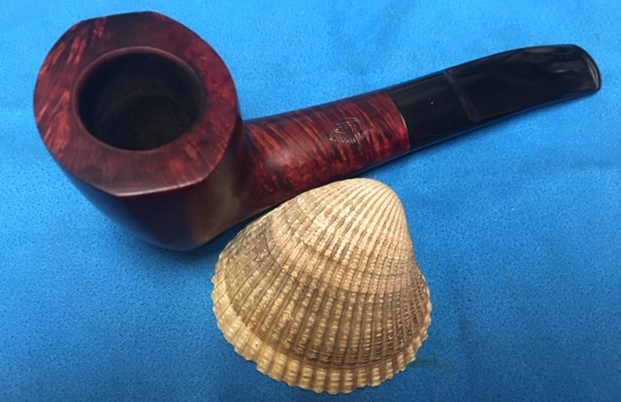
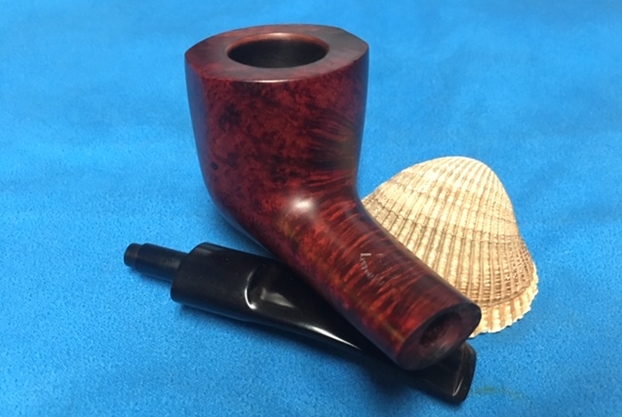
The next pipe on my work table a nice looking newer Cadogan era GBD pipe. It is stamped GBD in an oval [over] London Made on the left side of the shank. On the underside of the shank it is stamped with a K. On the right side of the shank it is stamped with the circular COM Stamp with MADE IN LONDON (“IN” is in the centre) and England stamped underneath that. The shape number C133 is stamped mid shank on the right side. The taper stem has an oval GBD logo stamped on the left side. The briar has a mix grain around the bowl and shank. This pipe was bought off eBay in January, 2017 from Greenville, New Hampshire, USA. The finish was dirty but the grain shone through well. The rim top had a thick lava coat on backside and the inner edge was also coated. There was a thick cake in the bowl and some tobacco debris. The shank and stem airway was very dirty. The stem was oxidized, calcified and had light tooth chatter on both sides ahead of the button. Jeff took photos of the pipe before he started his clean up. 
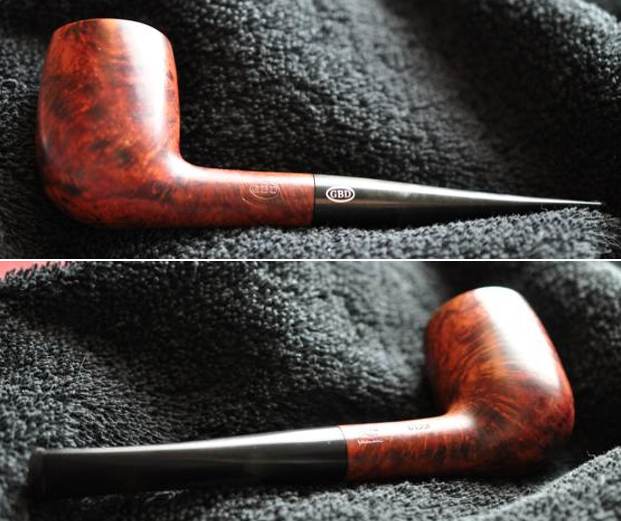
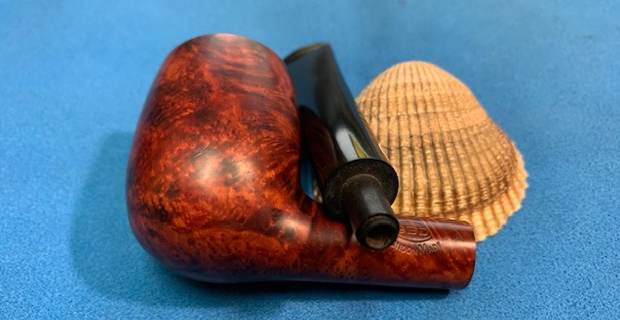
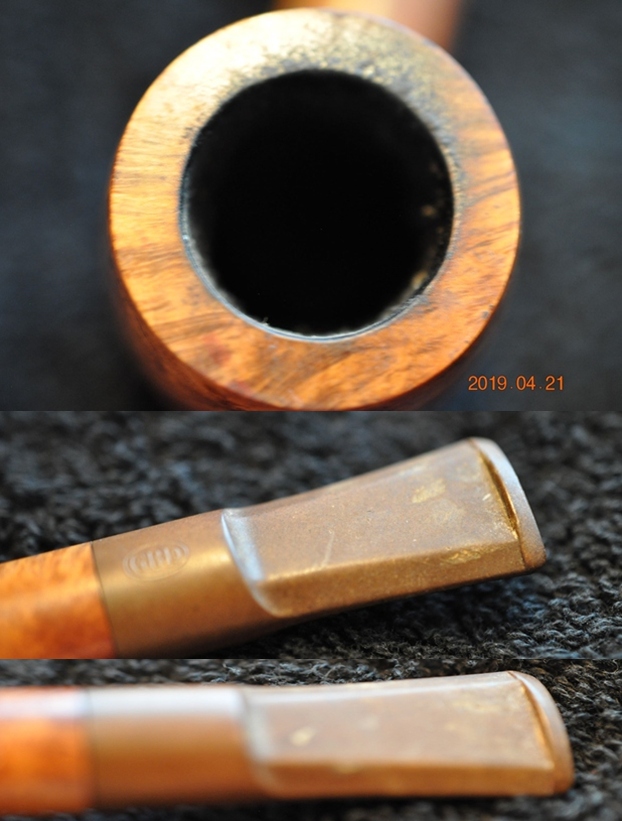
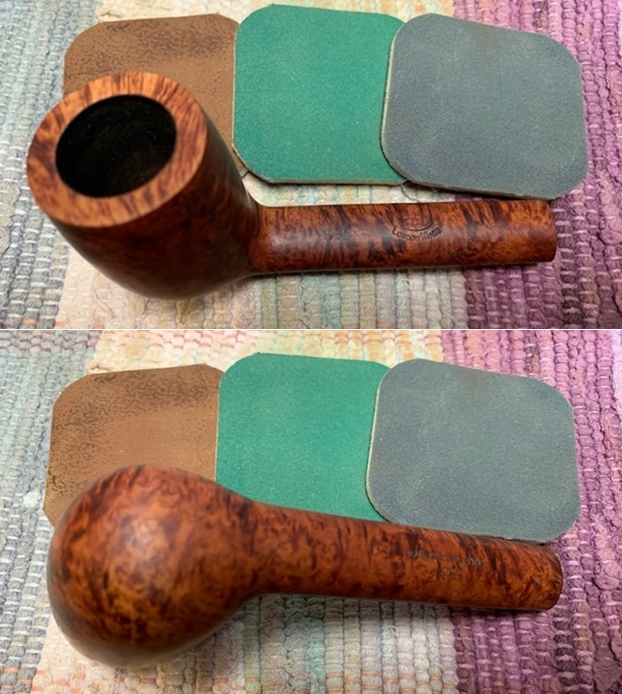
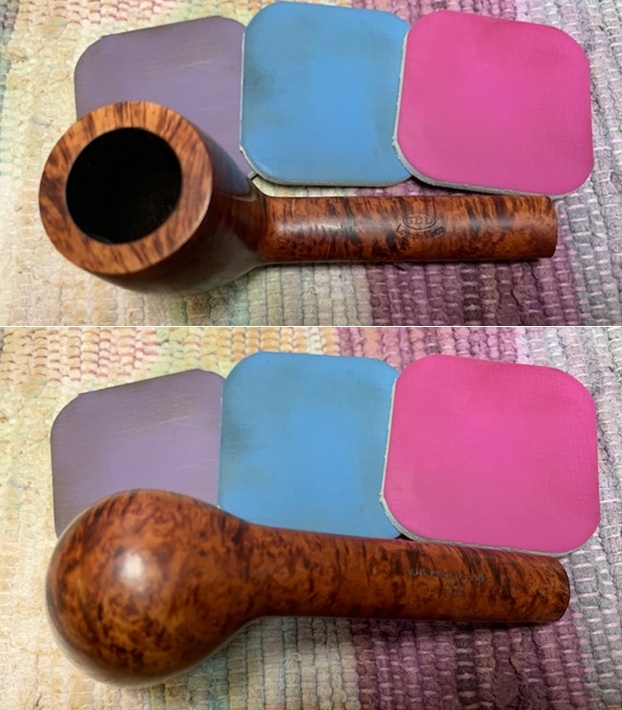
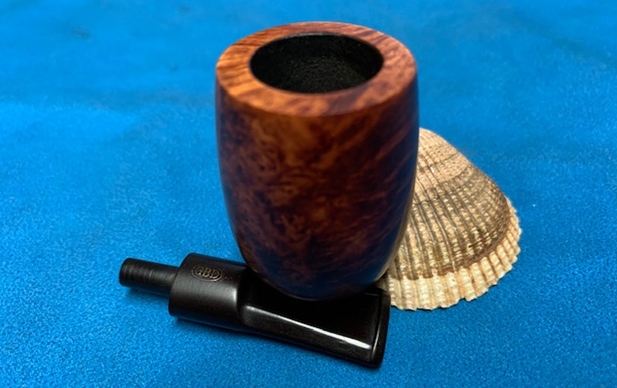
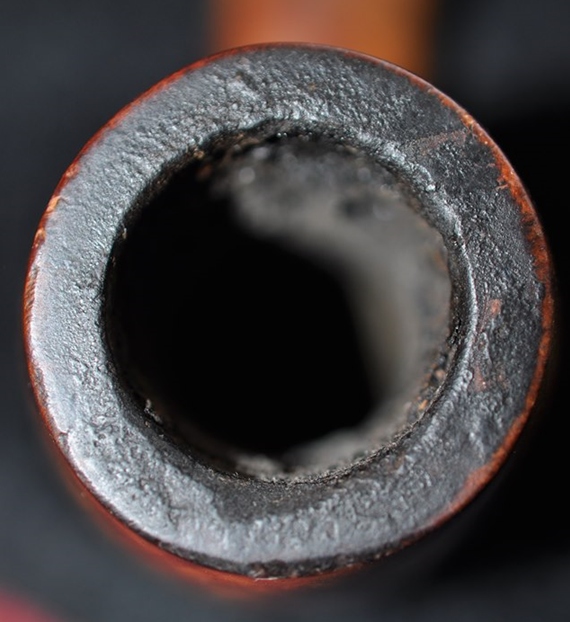
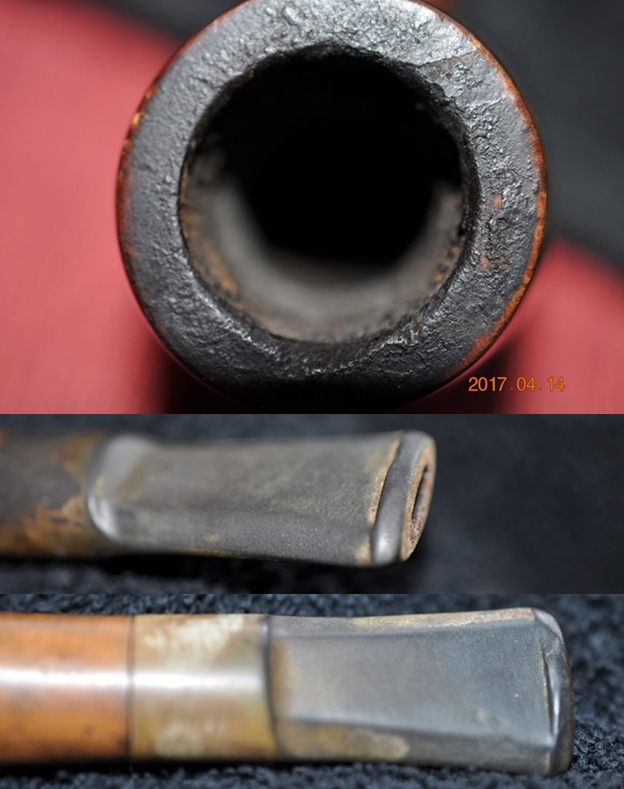
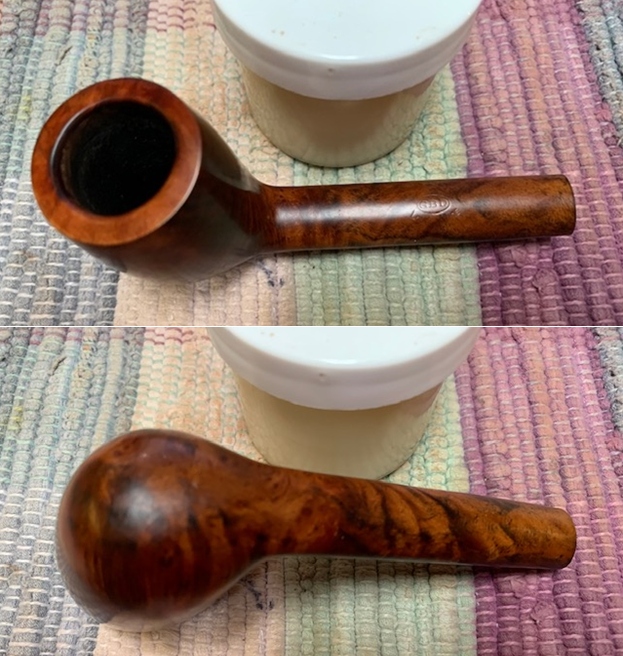
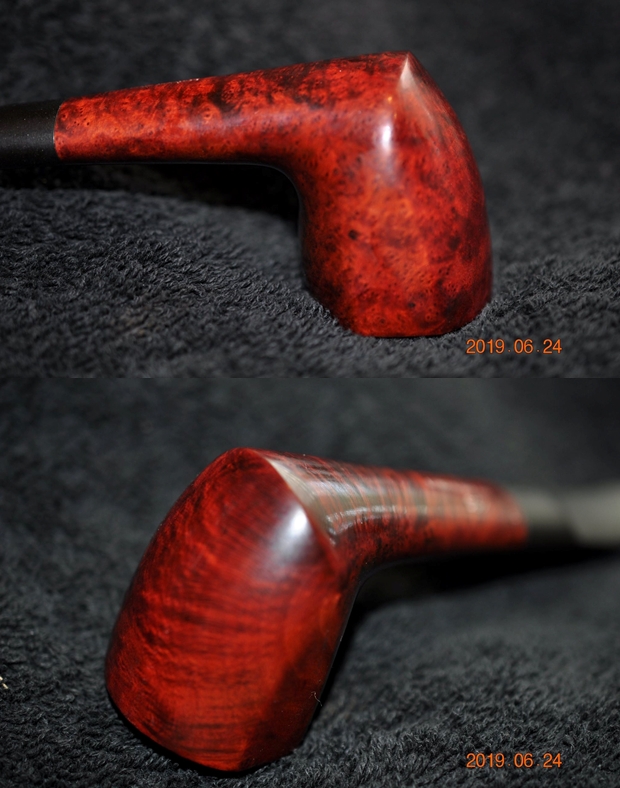
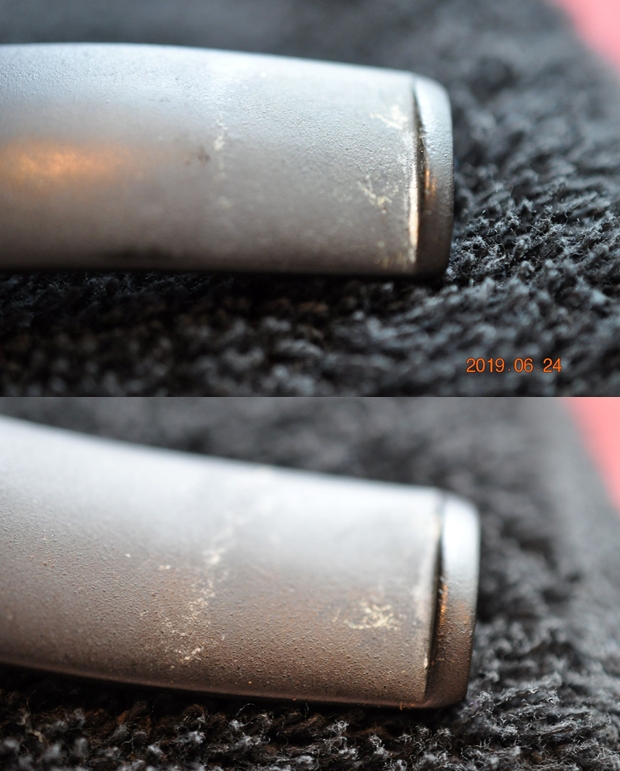
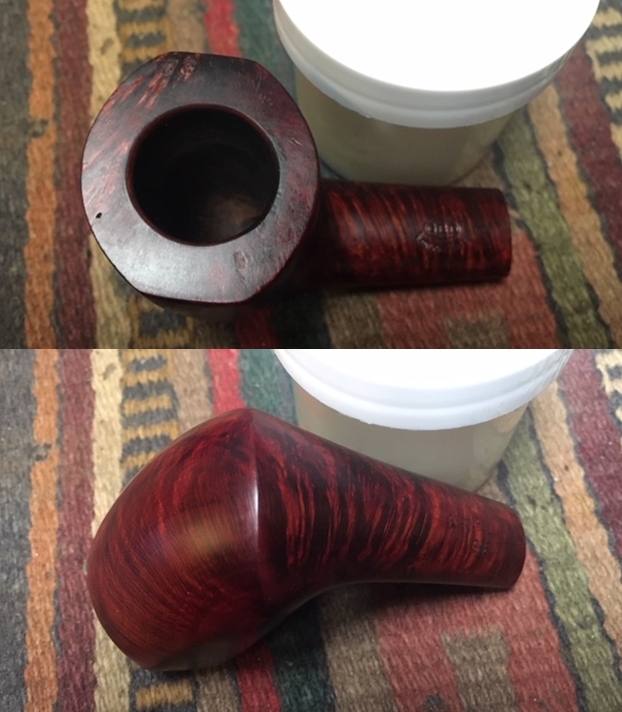
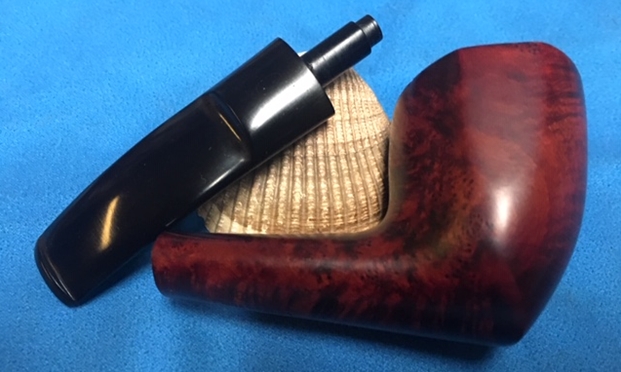
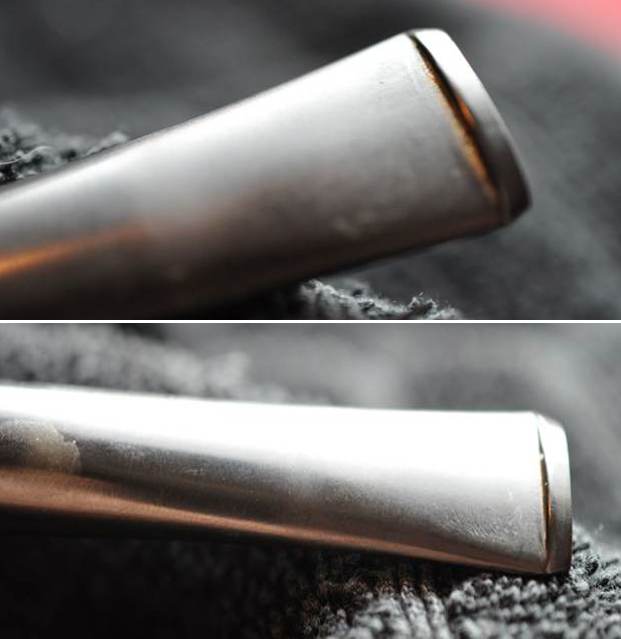
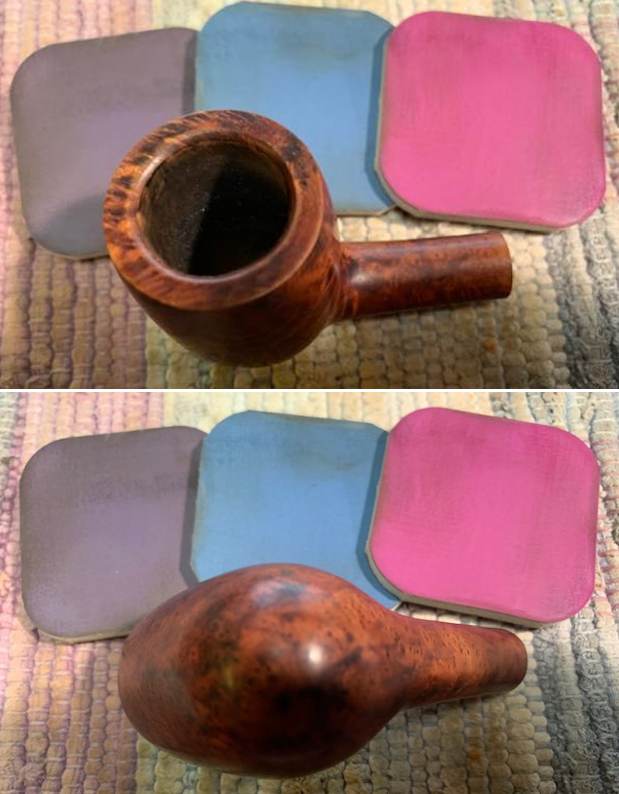
He took photos of the rim top and bowl to show the cake in the bowl (heavier on the back side of the bowl), the lava on the bevel and rim top. The edges look very good under the grime. The stem photos show the oxidation, calcification and tooth chatter very well. 
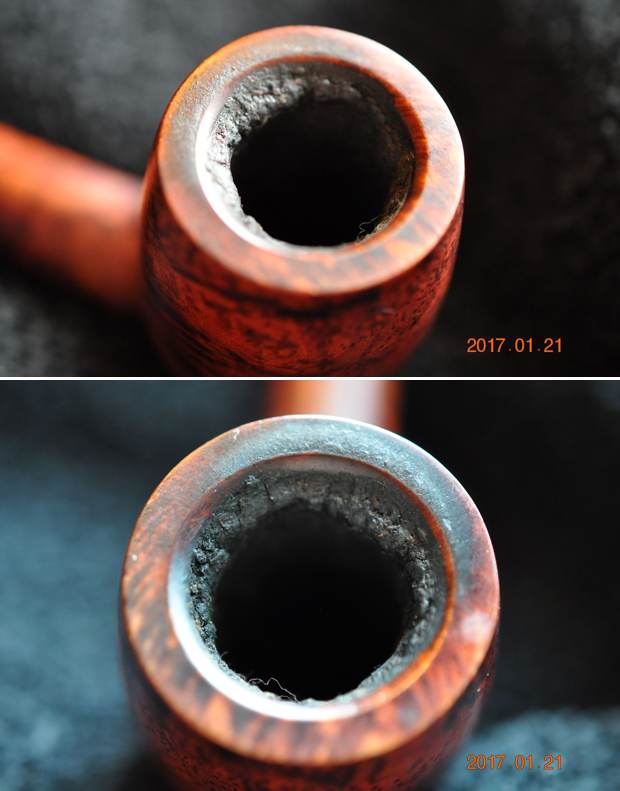
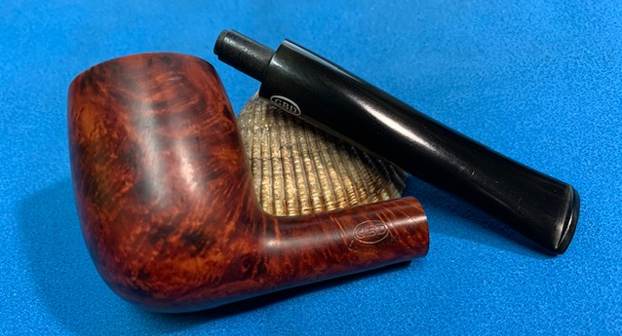
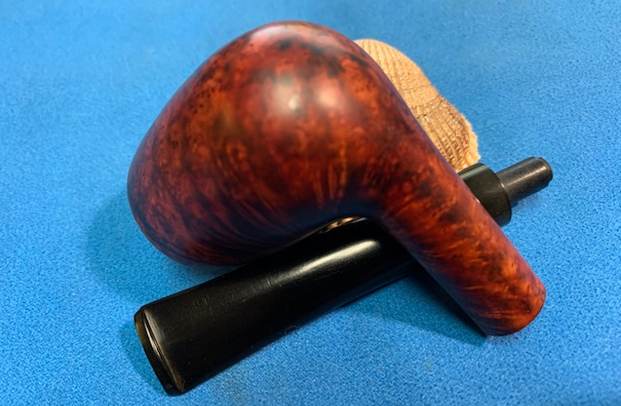
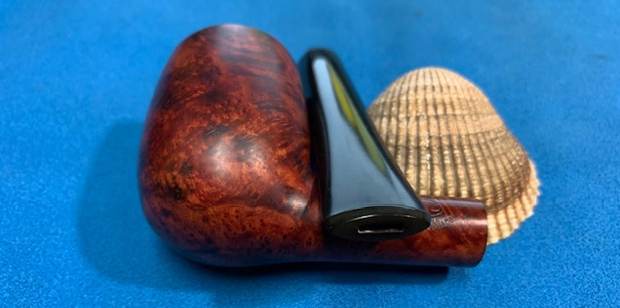
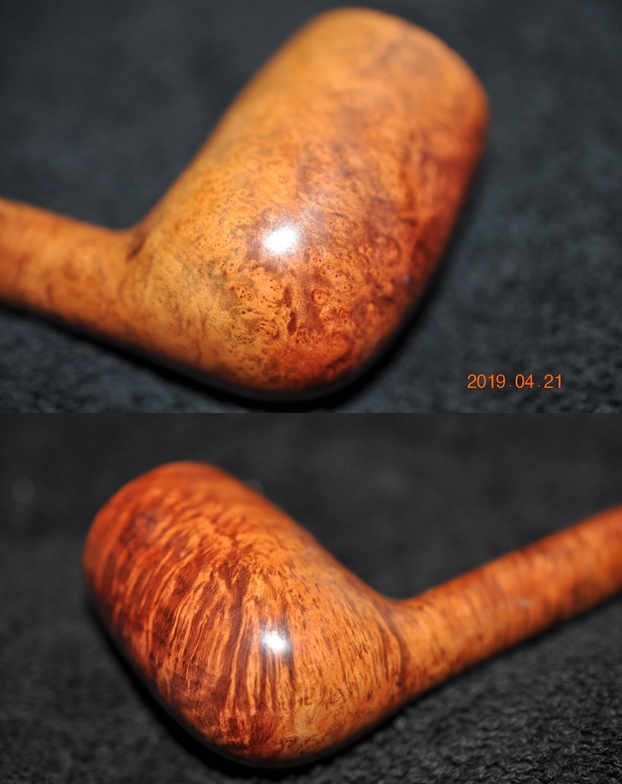
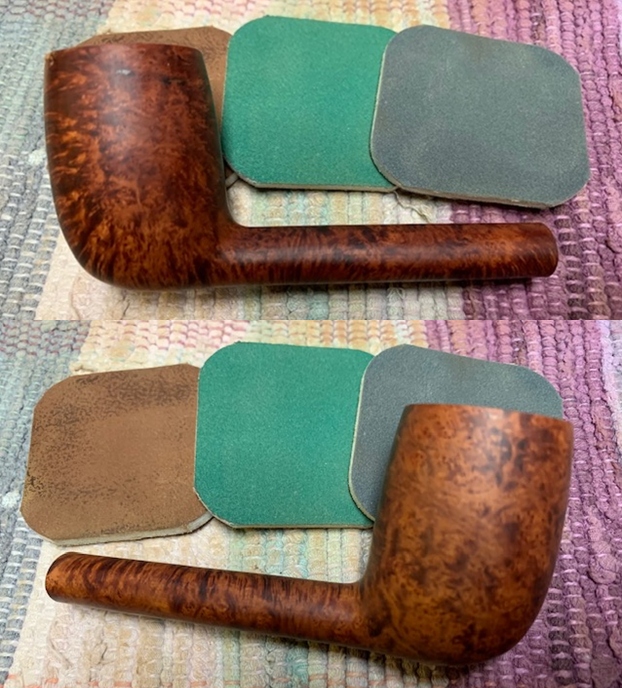
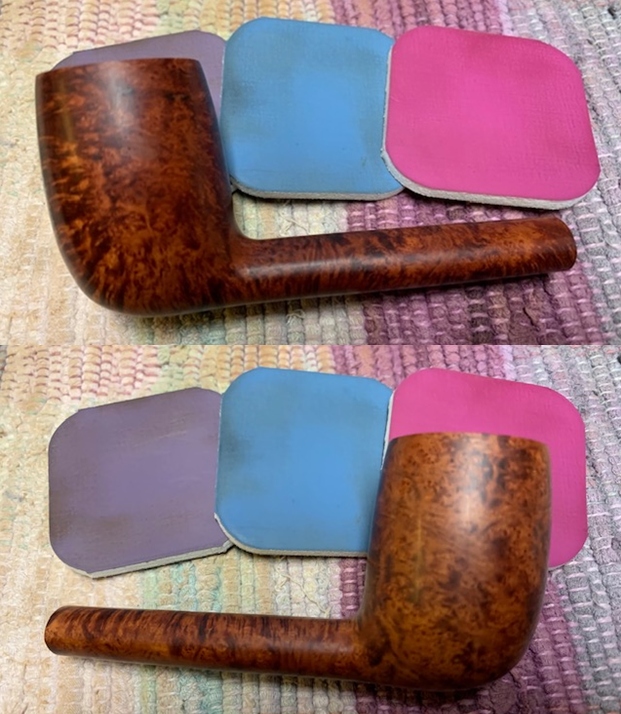
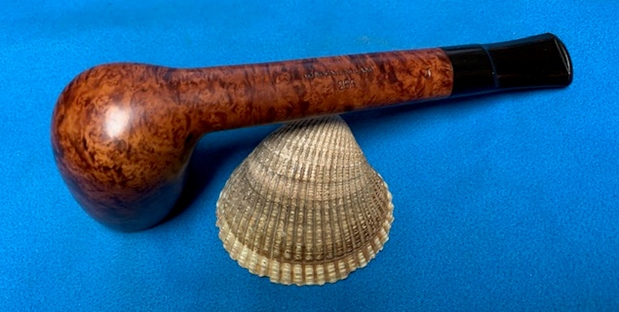
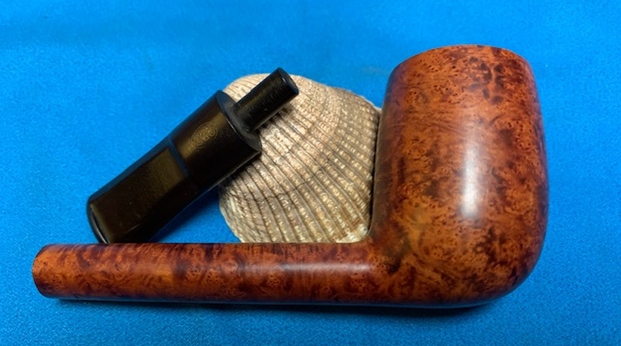
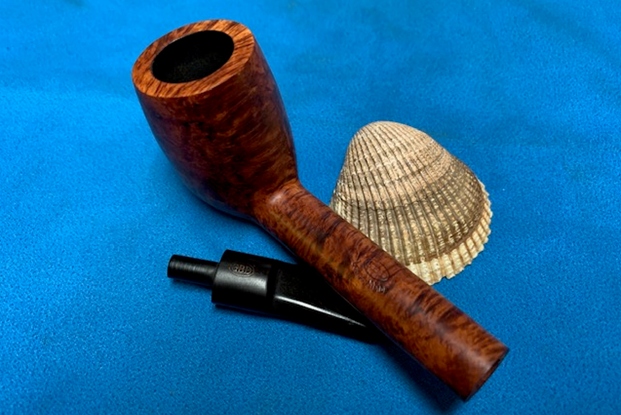
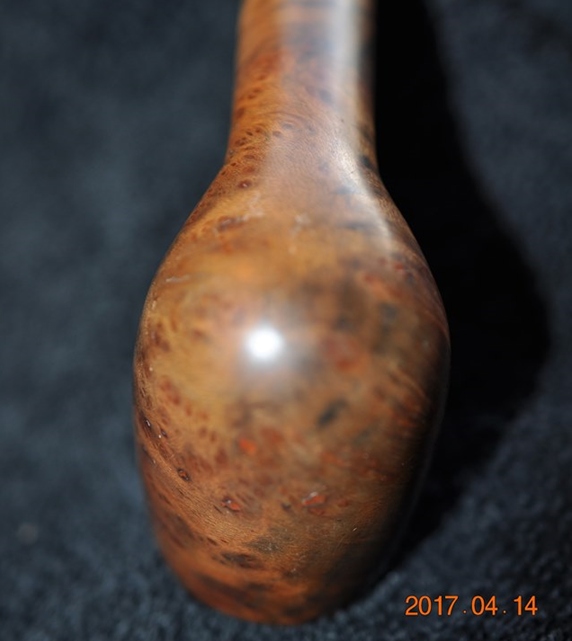
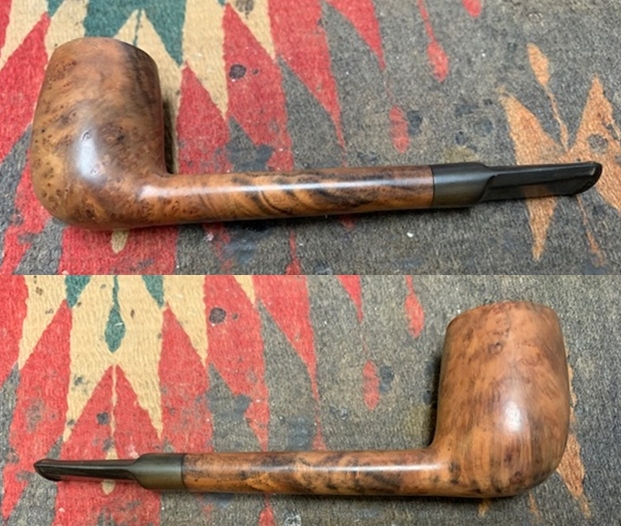
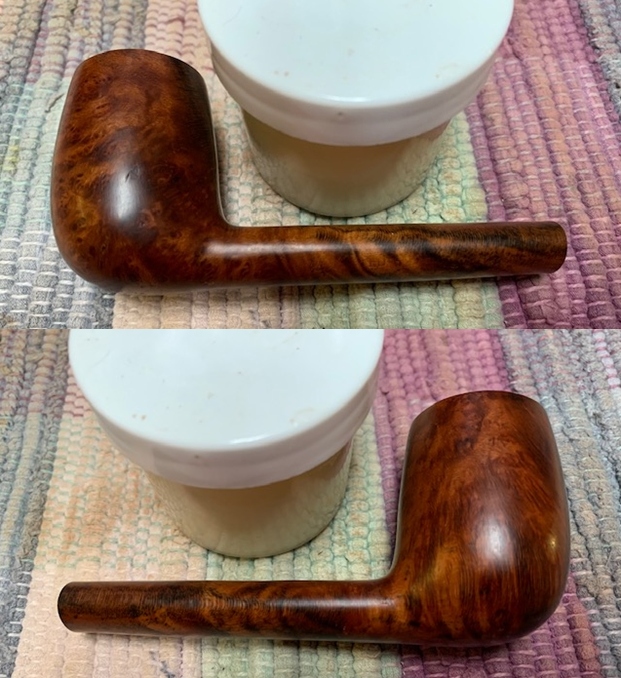
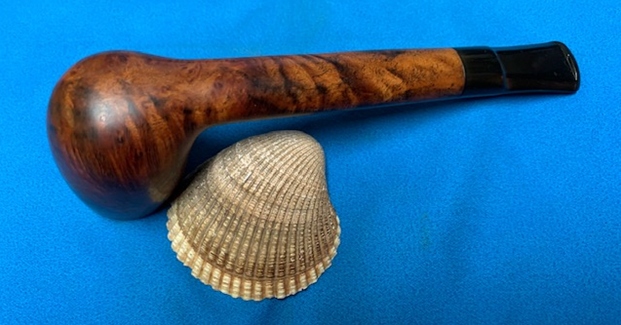
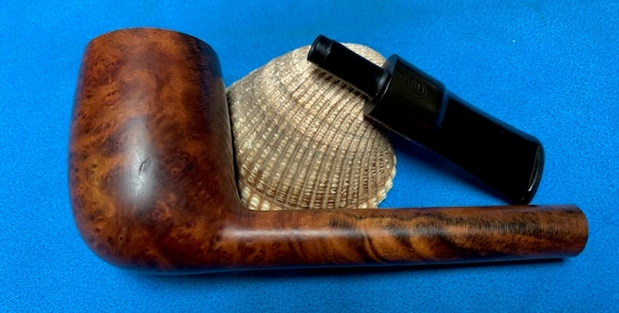
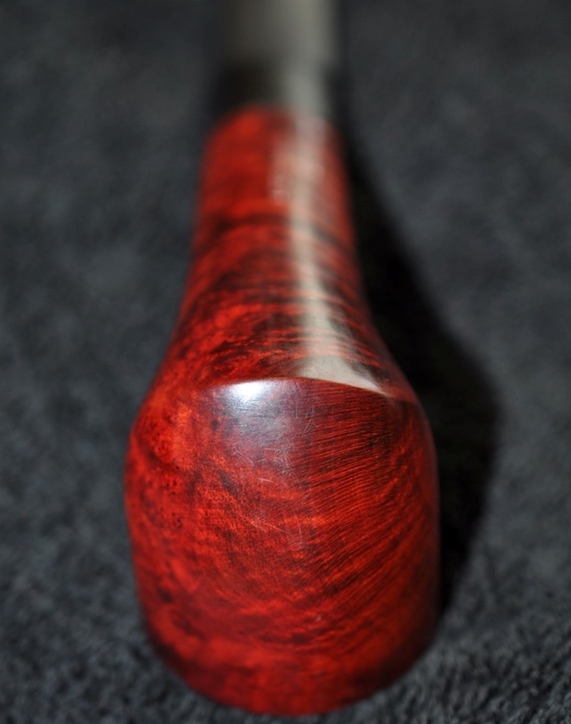
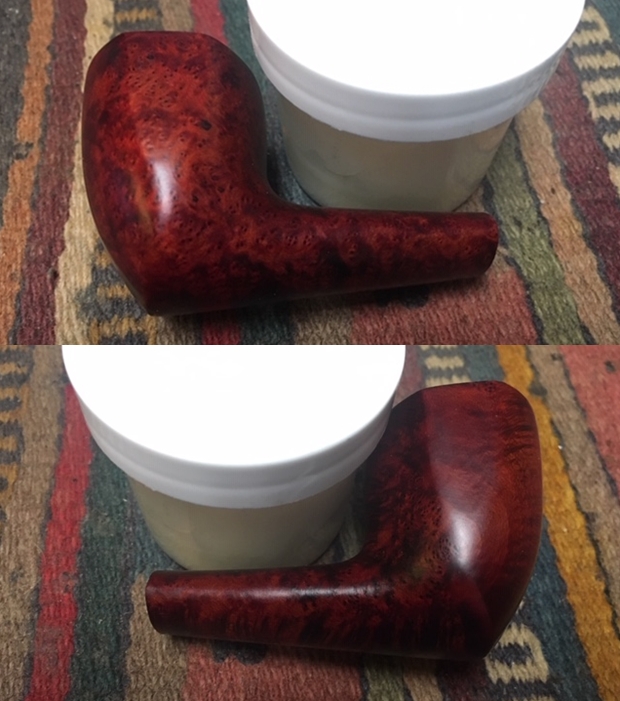
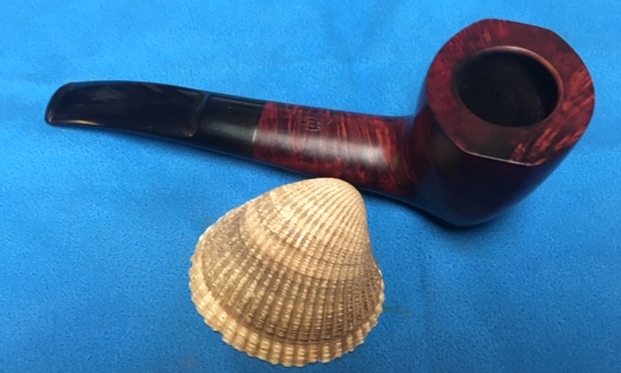
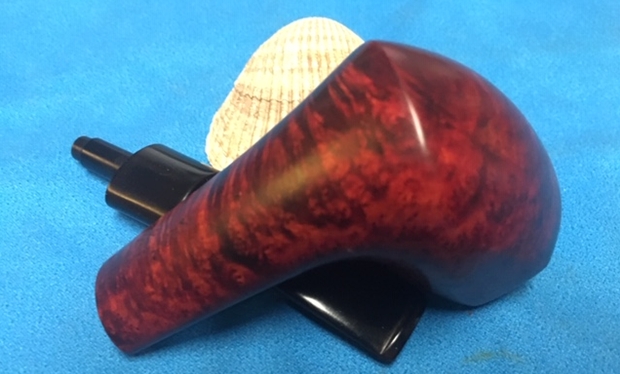
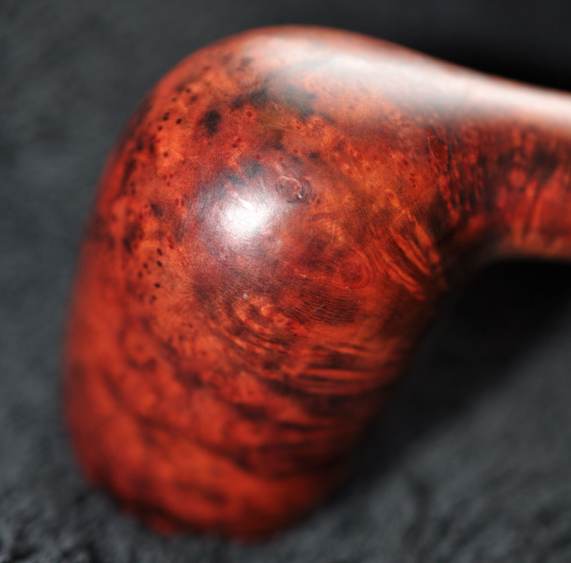
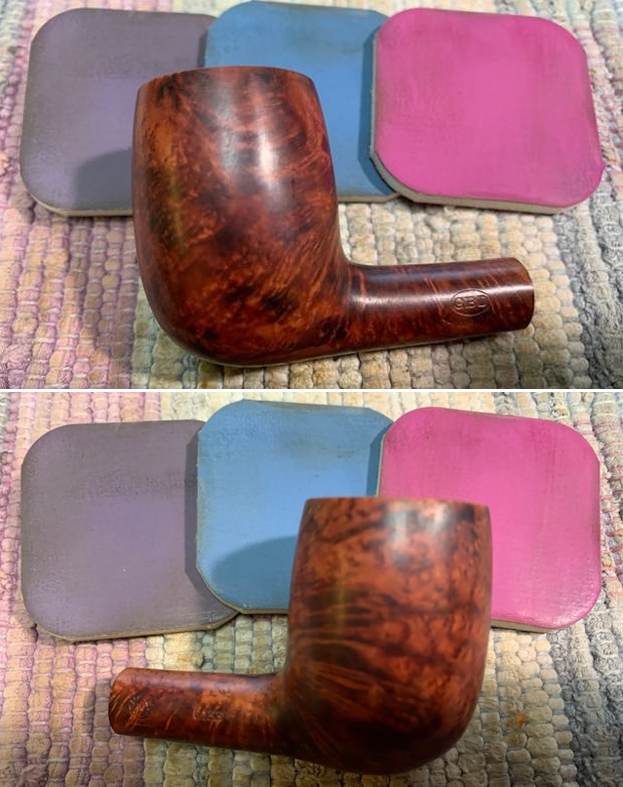
Jeff took photos of the sides of the bowl to highlight the grain around the bowl sides and base. 
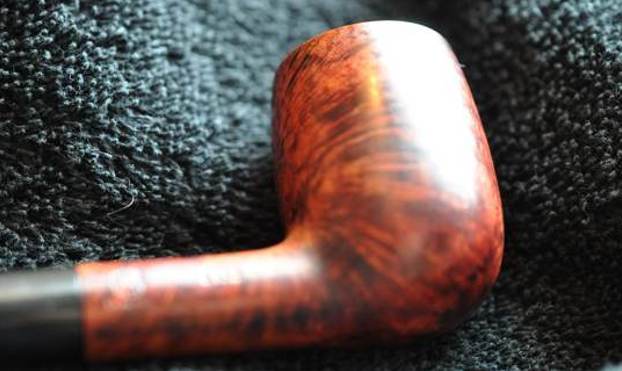
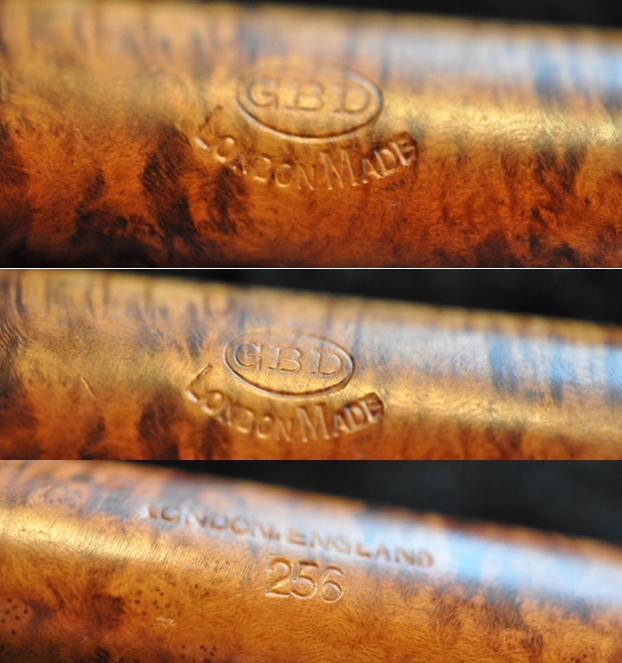
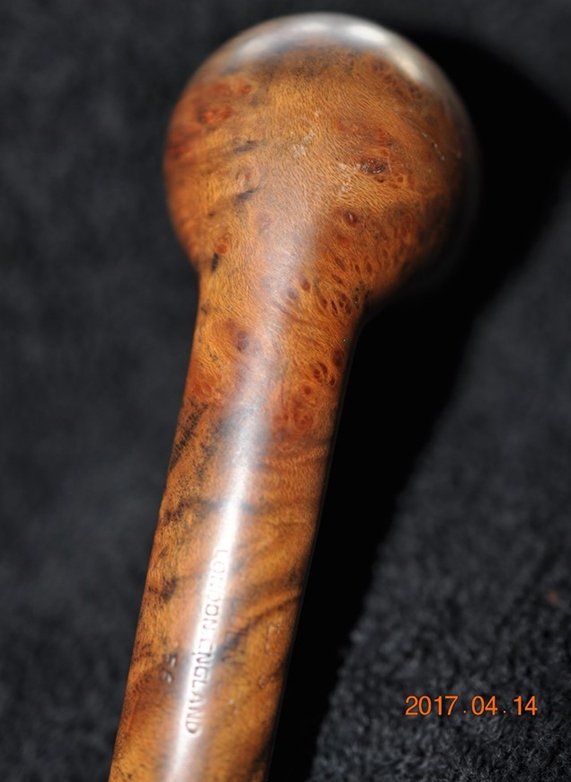
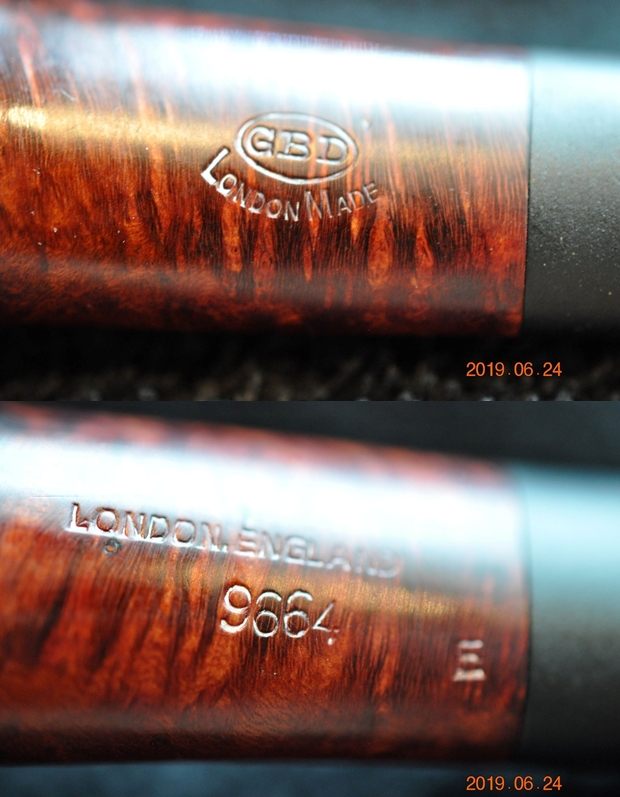
He captured the stamping on the shank sides in the next photos. They are clean and readable as noted above.I have worked on quite a few GBD London Made pipes in the past so I turned to a blog on one of them to read the background on the brand and remind myself how to understand the stamping on the shank. Here is the link (https://rebornpipes.com/2019/08/10/cleaning-up-a-gbd-london-made-9664/). I quote from the blog below rather than redo the research.

I turned to Pipedia’s article on GBD to see if I could find any information on the London Made. The article gives a lot in terms of the history of the brand and a list of various lines of GBD pipes (https://pipedia.org/wiki/GBD_Model_Information). I quote the section where I found the reference to the London Made.

London Made — Factory unknown: Some might not be marked with GBD logo and some with additional “house” stampings. Introduced in 1978(?) plain wax finished branded pipes” available in at least six stains. – catalog (1981)

With that information in hand I knew what I was dealing with in terms of the stamping and the age of this pipe. I knew from the information from the section quoted that the London Made originally came out in 1978 in a variety of colours. Now I had an idea of the age of the pipe and it was time to work on the pipe.

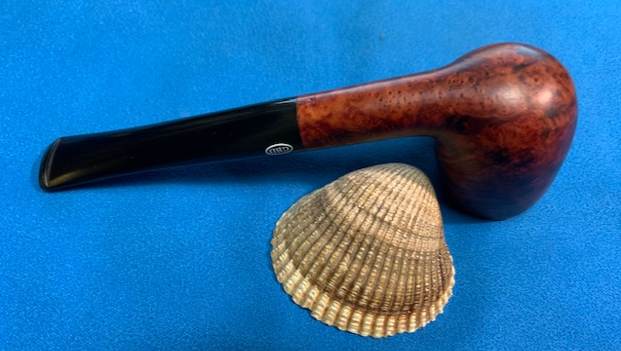
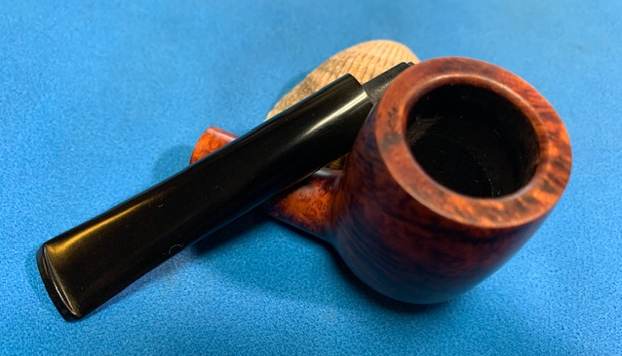
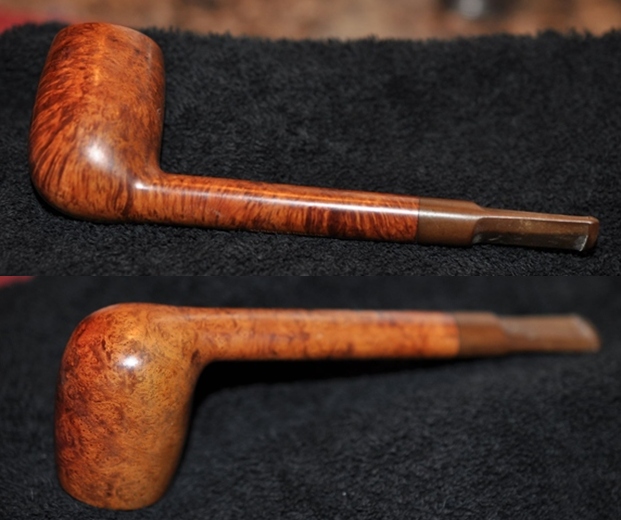
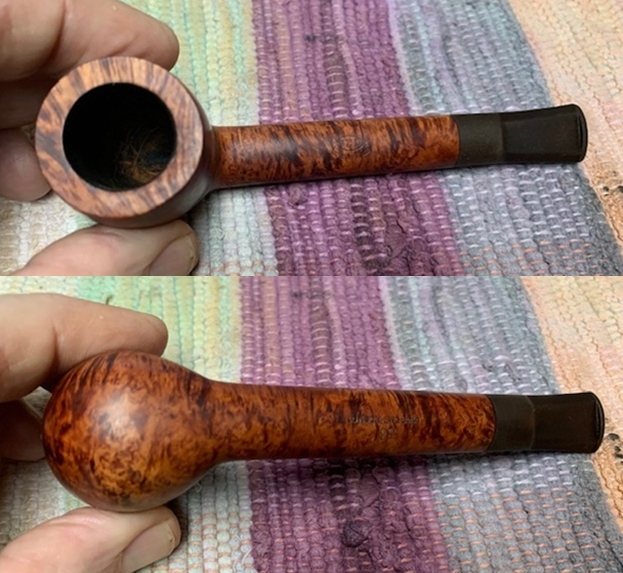
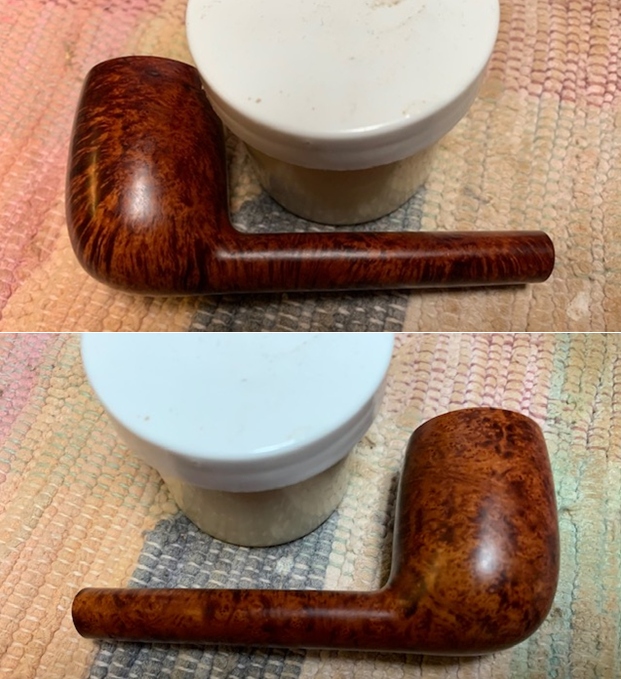
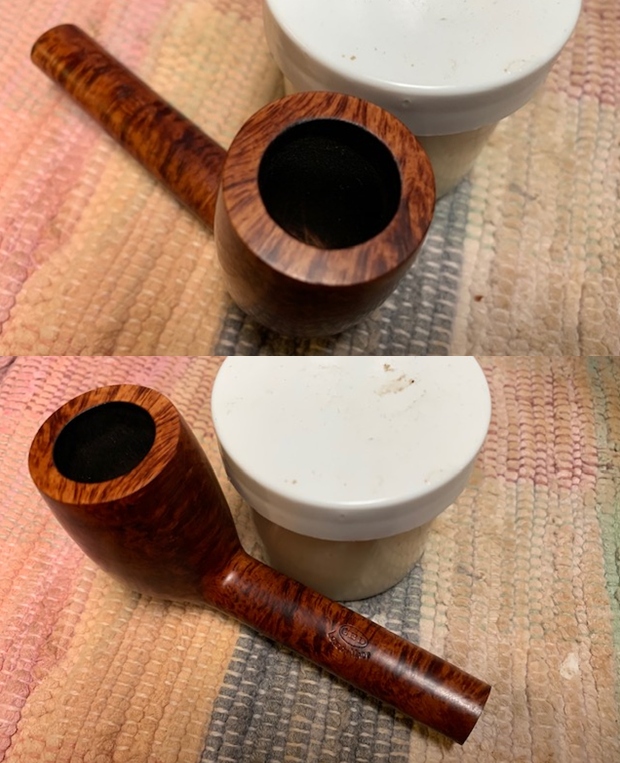
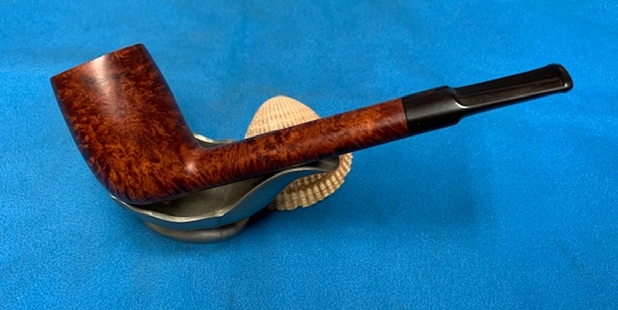
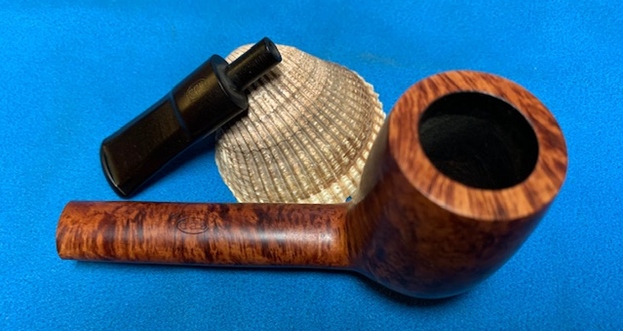
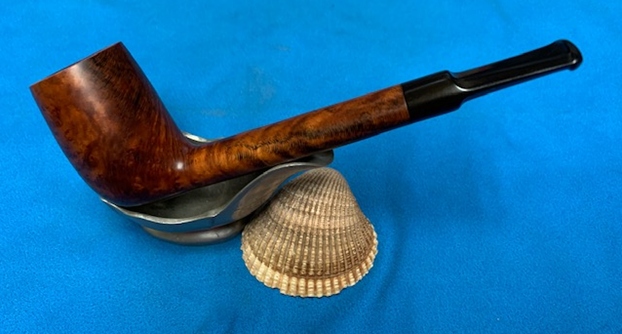
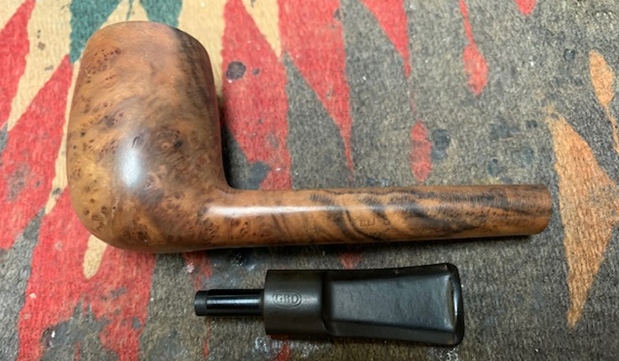
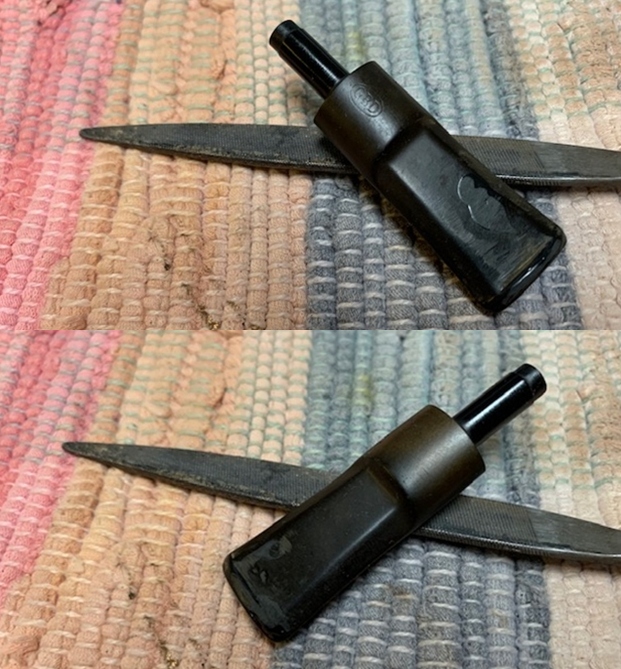
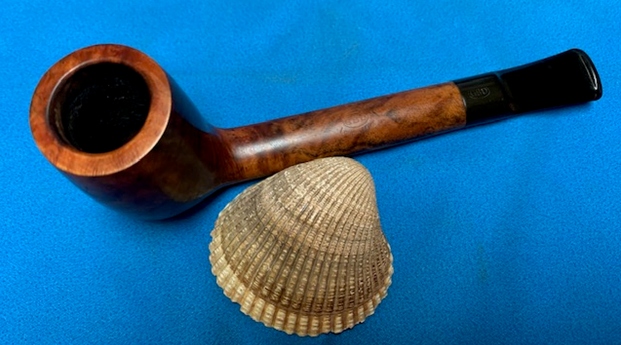
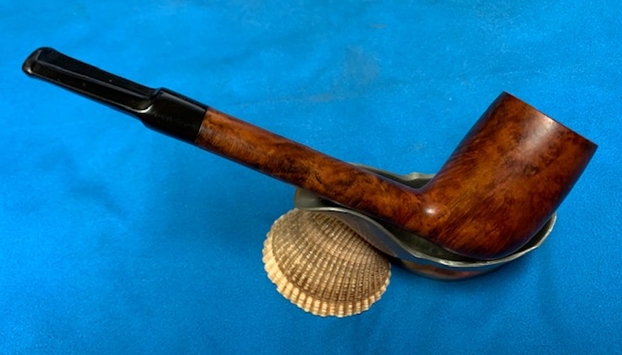
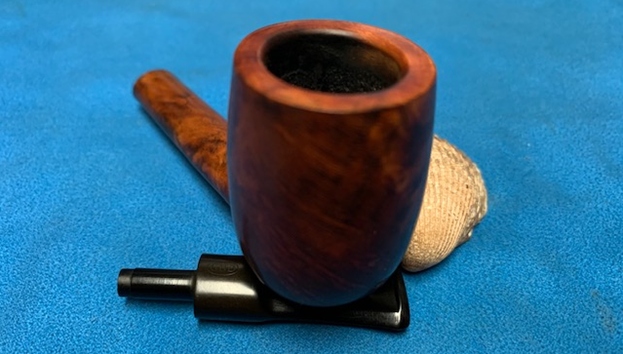
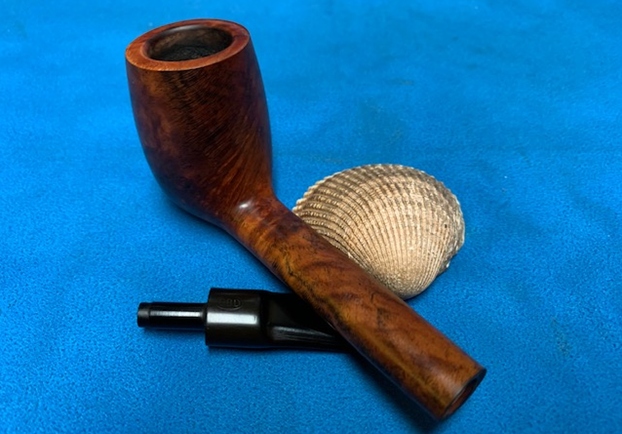
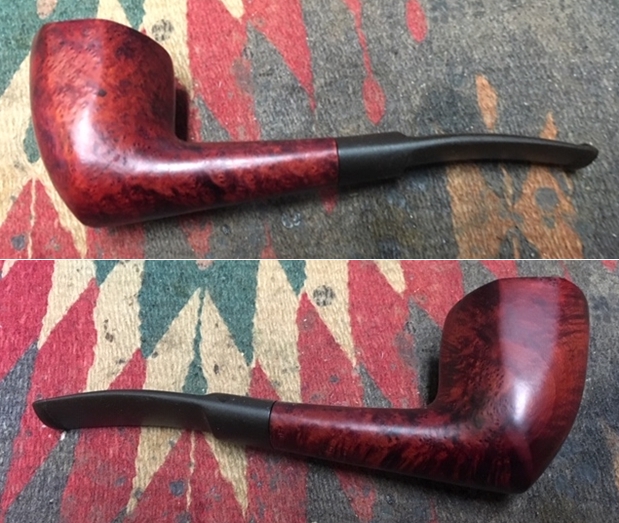
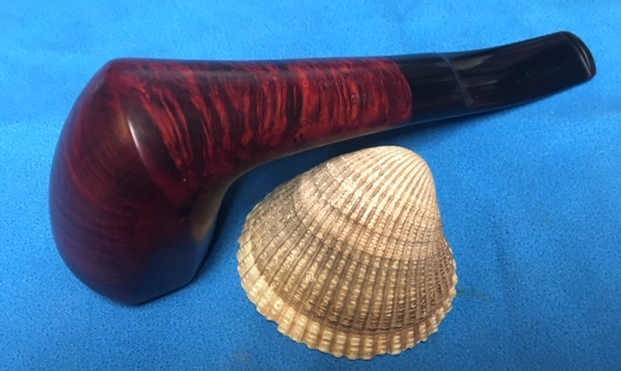
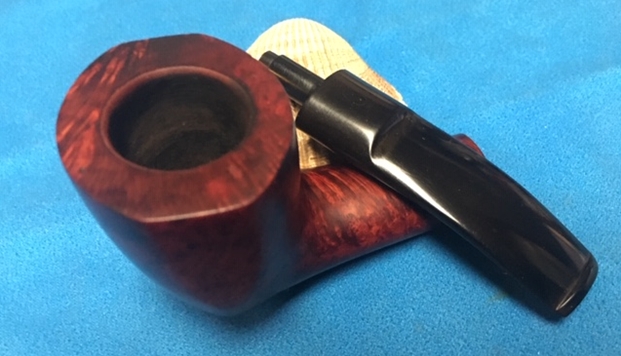
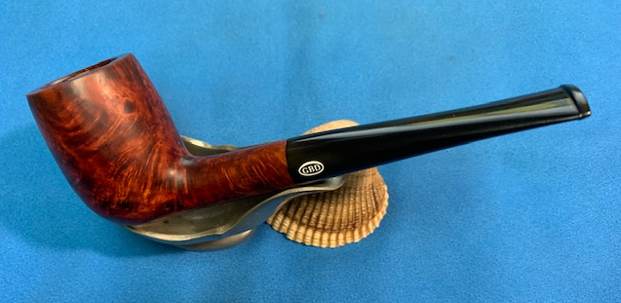
Jeff cleaned up the pipes with his usual thoroughness – reaming the bowl with a PipNet pipe reamer and cleaning up the reaming with a Savinelli Fitsall Pipe Knife. He scrubbed the internals of the shank and the stem with alcohol, cotton swabs and pipe cleaners. He scrubbed the exterior with Murphy’s Oil Soap to clean off the dust and grime on the finish. When he sent it the pipe was ready to restore. I could not believe how good the rim top looked in comparison to what it was when he started. I took photos of the pipe when I unpacked it. The briar was clean and the grain quite stunning. The finish looked dull and lifeless. 
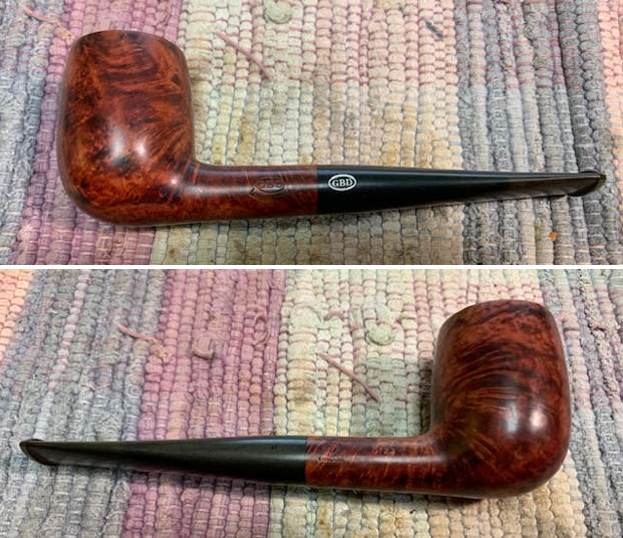
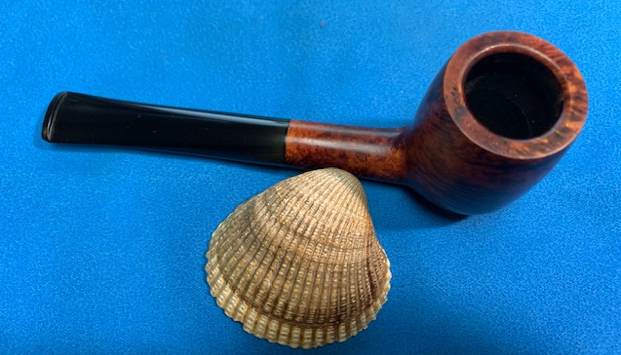
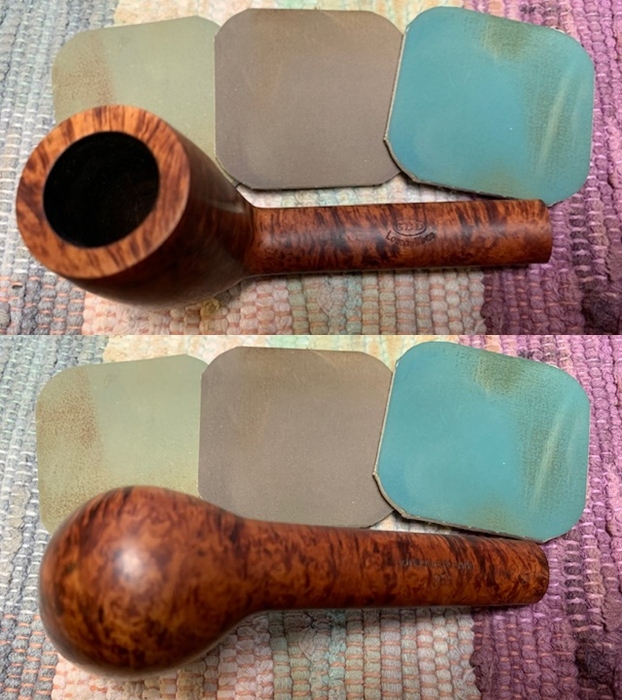
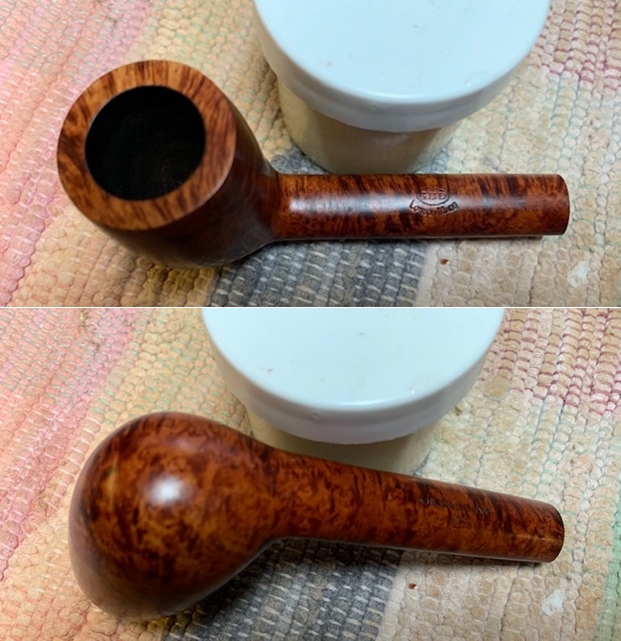
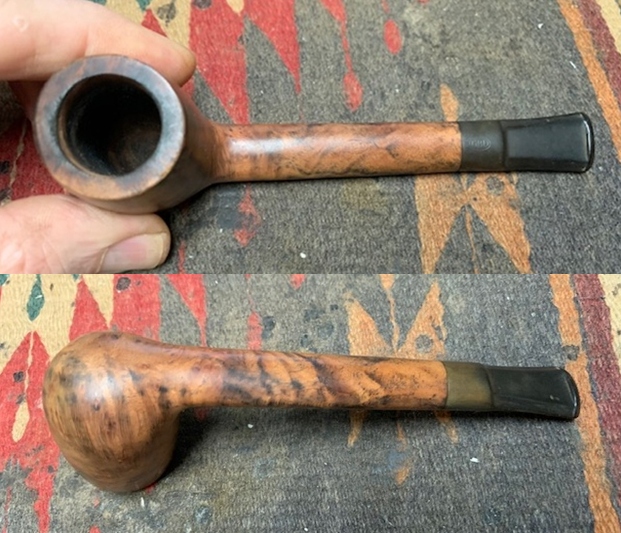
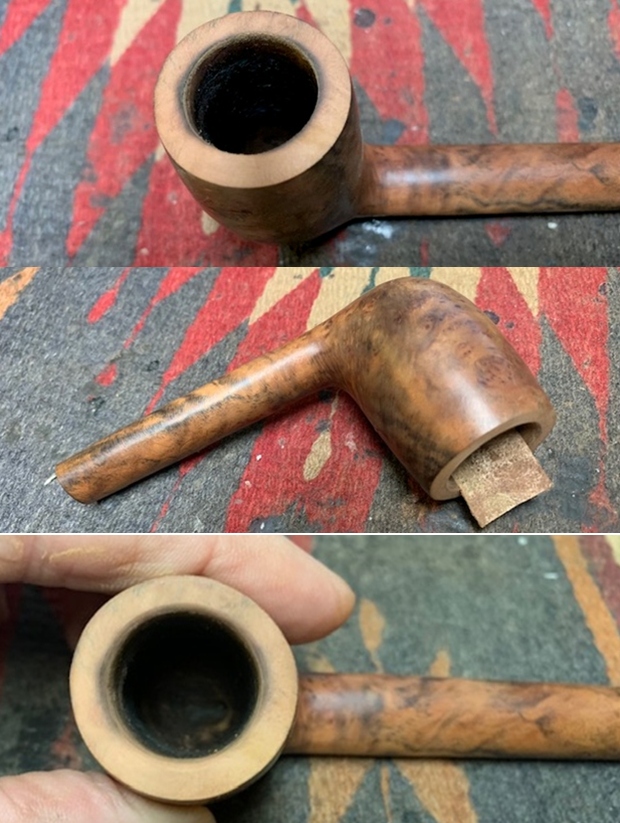
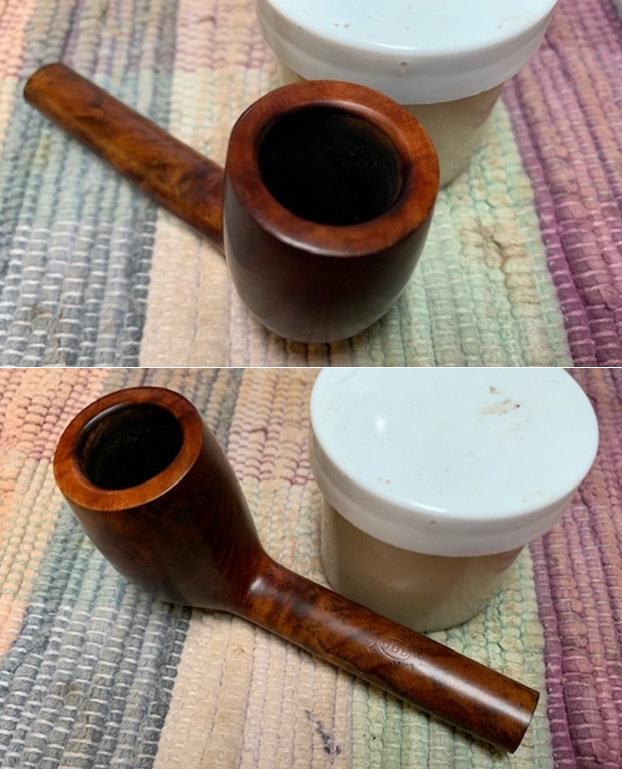
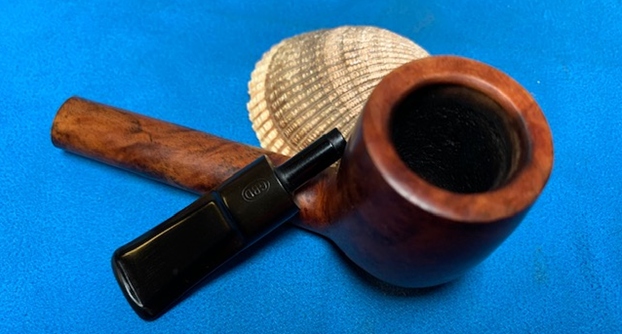
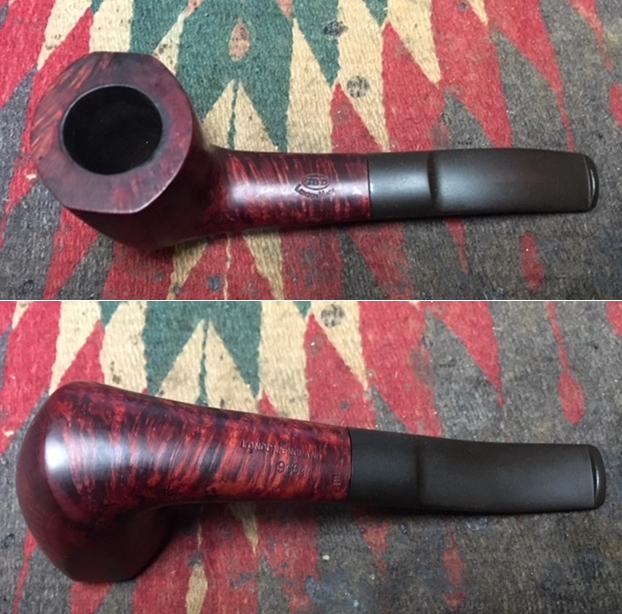
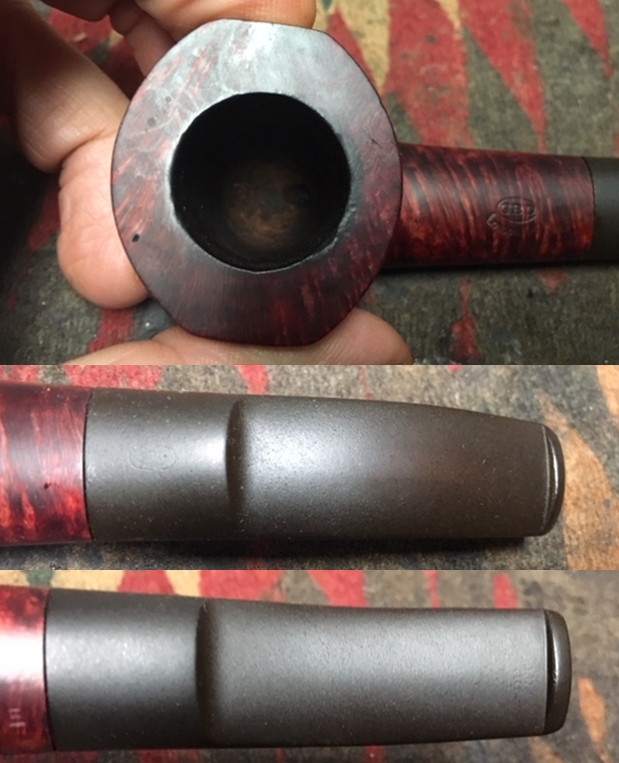
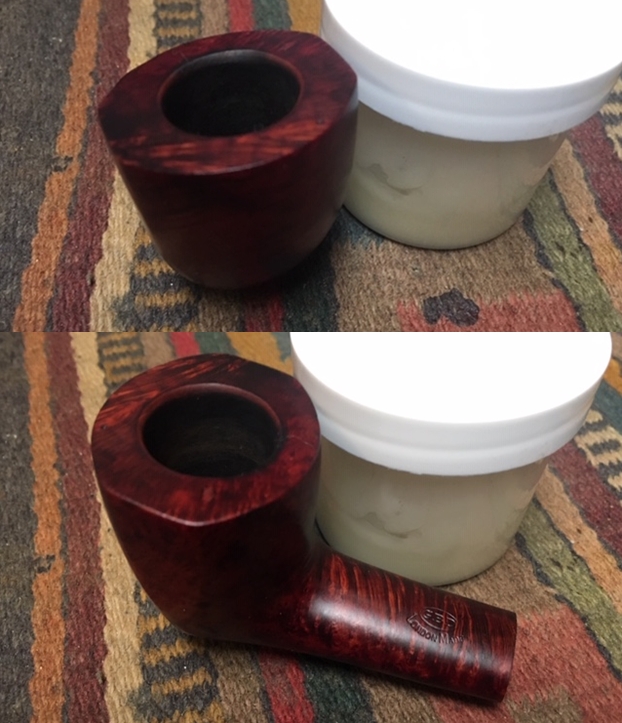
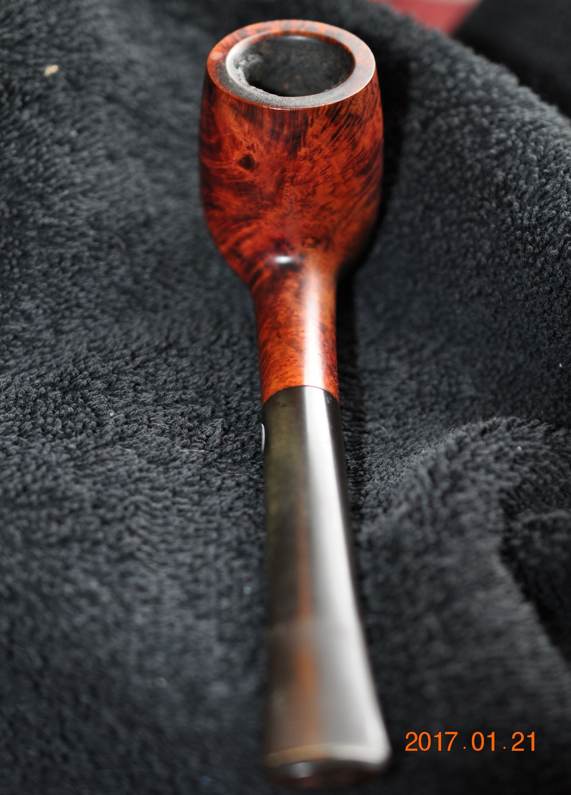
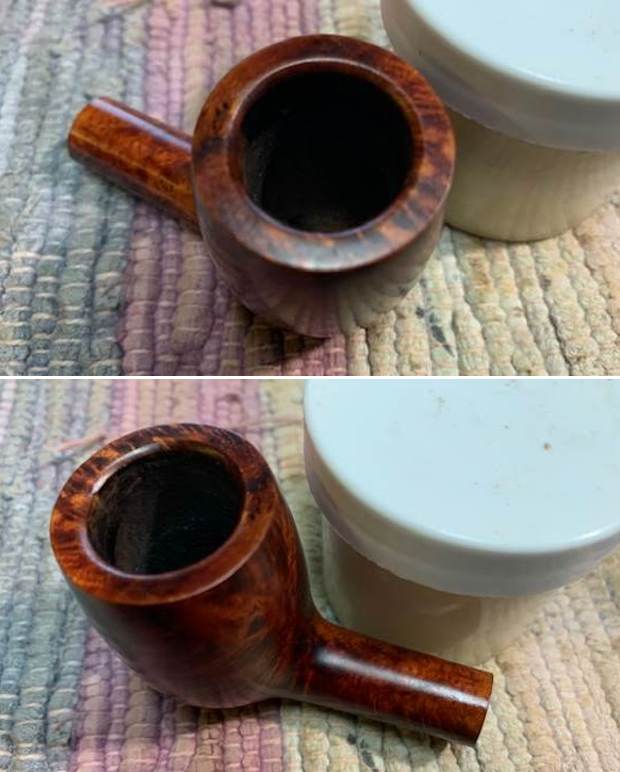
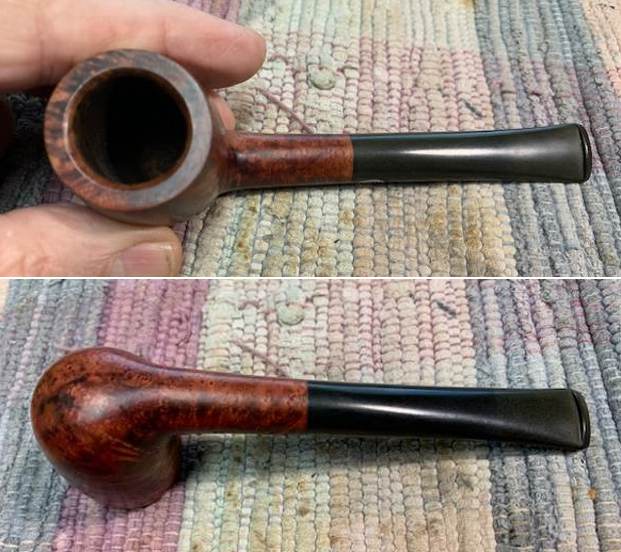
I took a close up photo of the bowl and rim top after Jeff had cleaned it up. The look of the rim top and edges is very good. He had been able to remove the cake and the lava very well. The bowl was spotless. The stem is also shown and was very clean but lightly oxidized. He had scrubbed it with Soft Scrub and then soaked it in Mark’s Before & After Deoxidizer. There was light tooth chatter still remaining.
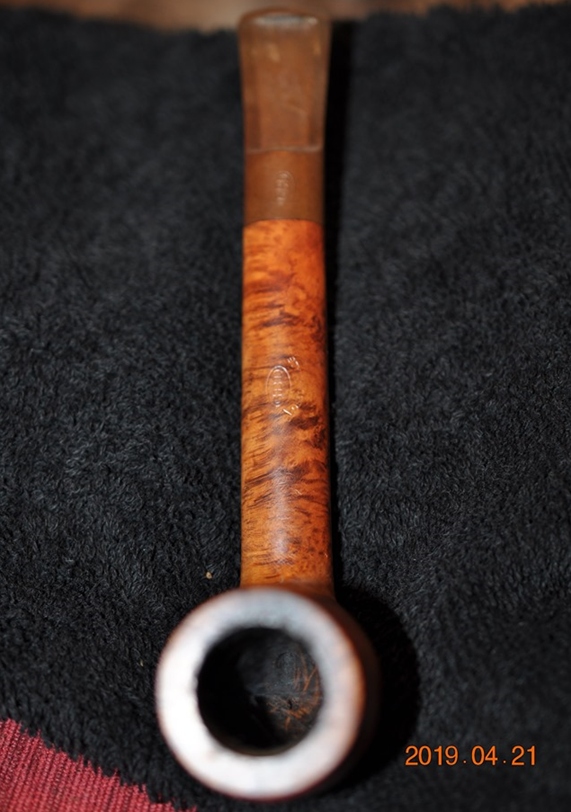
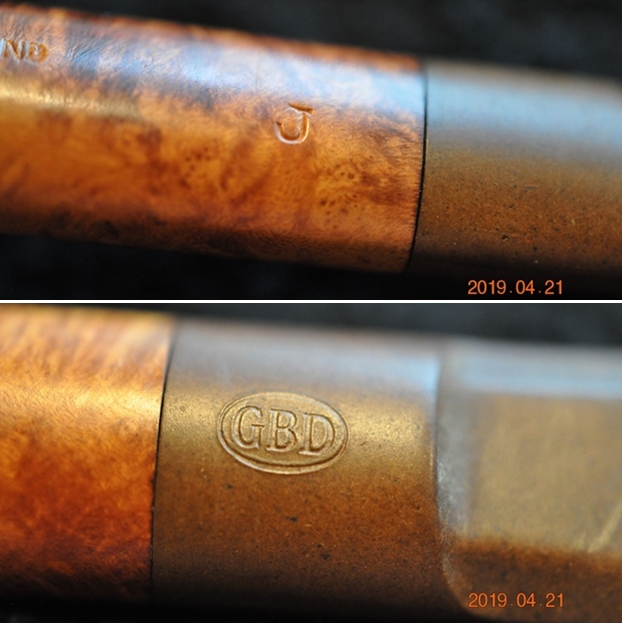
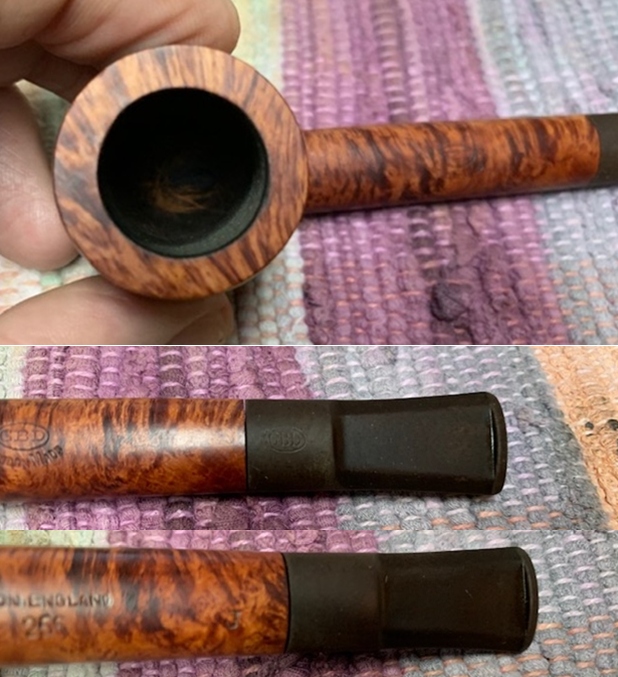
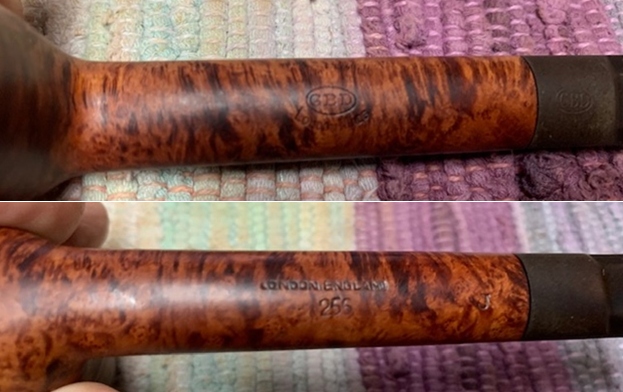
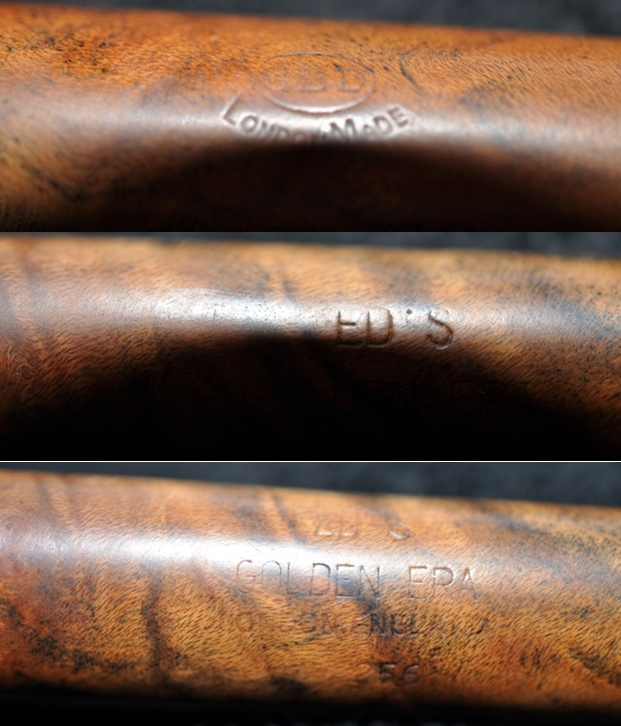
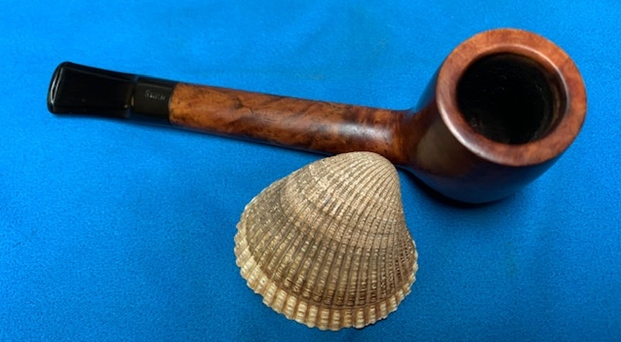
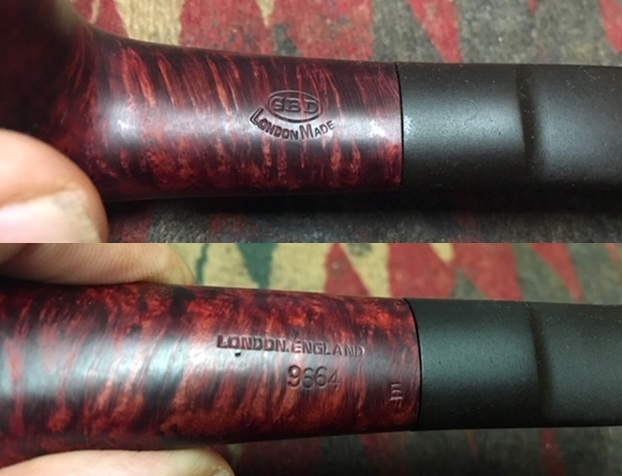
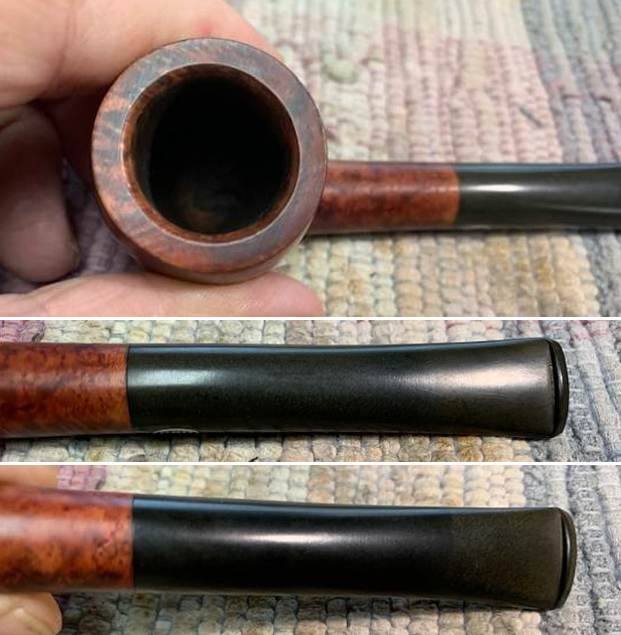
I took some photos of the stamping on the shank sides. The first photo shows the GBD in an oval [over] London Made stamp on the left side as well as the stamped GBD oval logo on the left side of the stamp. The second shows the COM stamp Made in London [over] England and the shape number C133 on the right side. The third shows the letter “K” on the underside of the shank near the shank/stem joint.
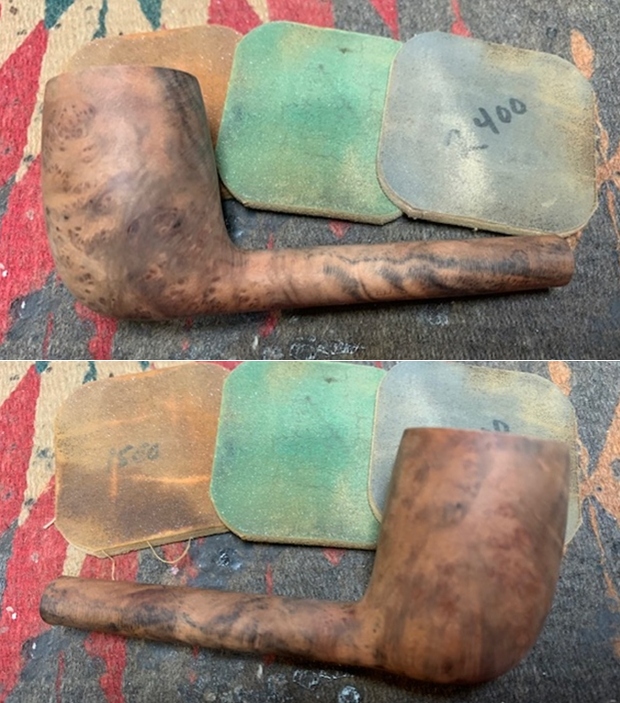
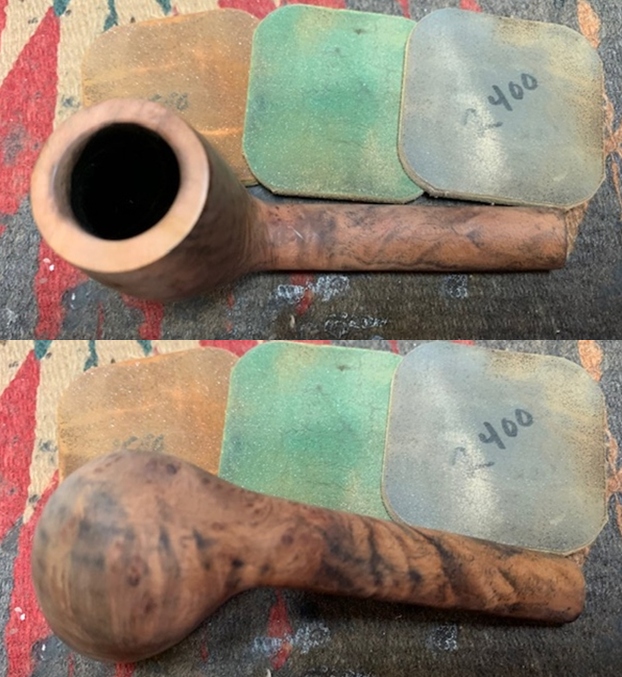
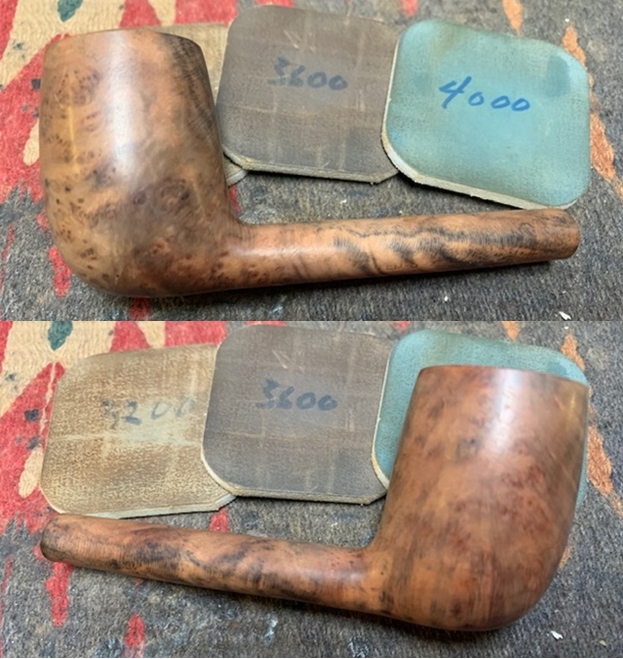
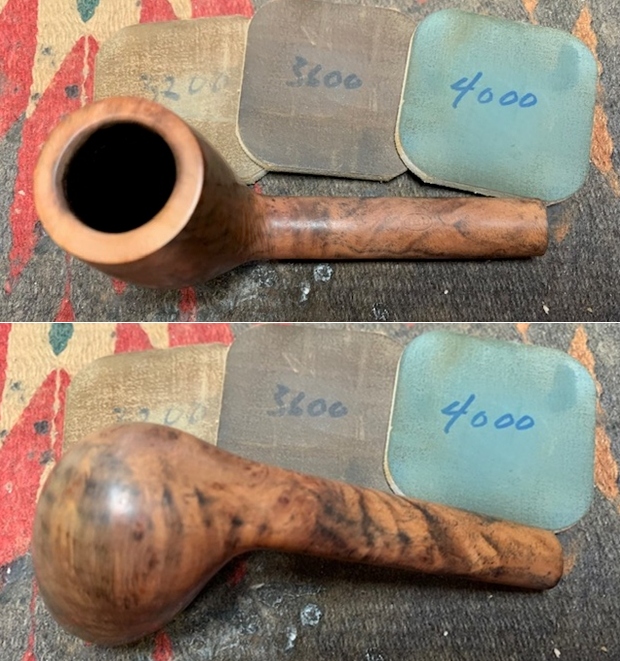
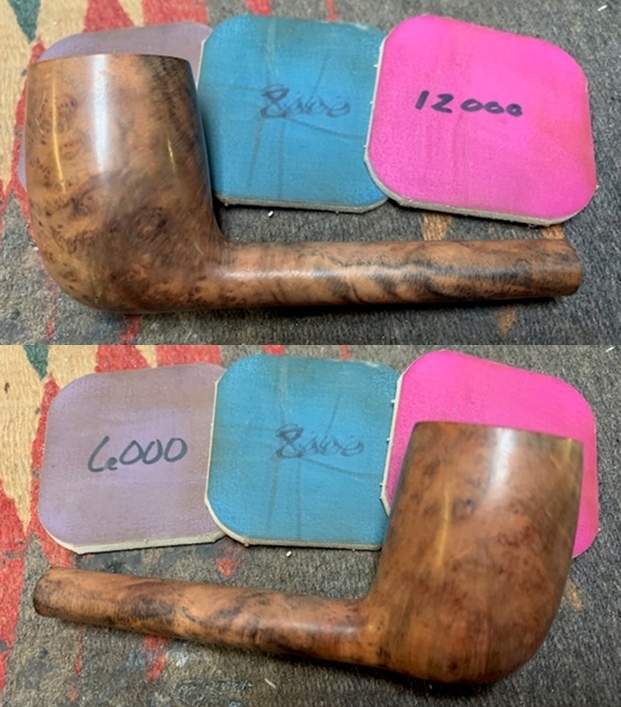
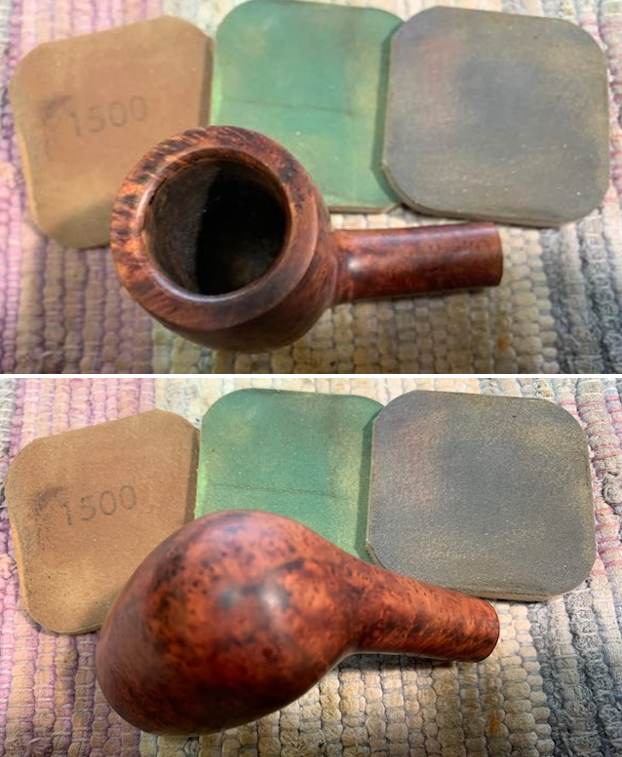
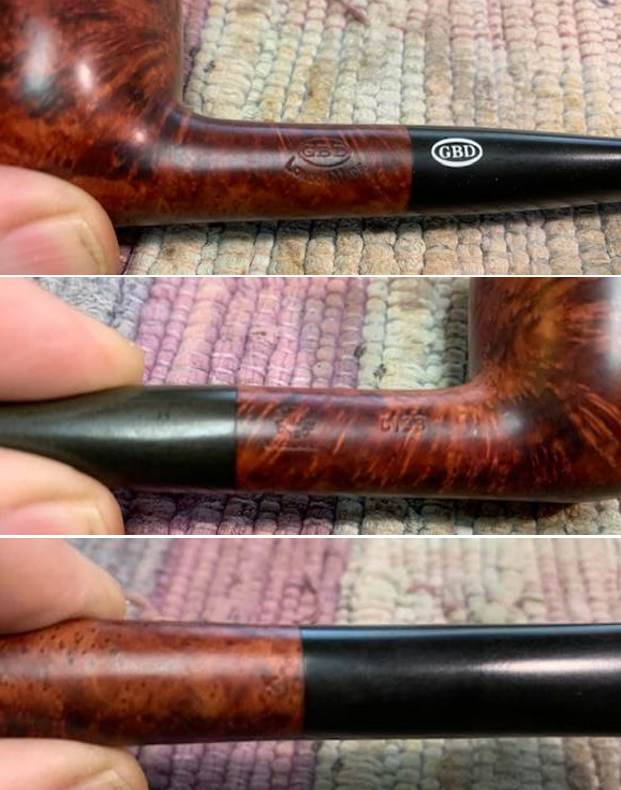
I polished the briar with micromesh sanding pads – dry sanding (carefully avoiding the stamping on the shank sides) with 1500-12000 grit pads. I wiped the bowl down with a damp cloth between each pad. The grain to take on a shine. 
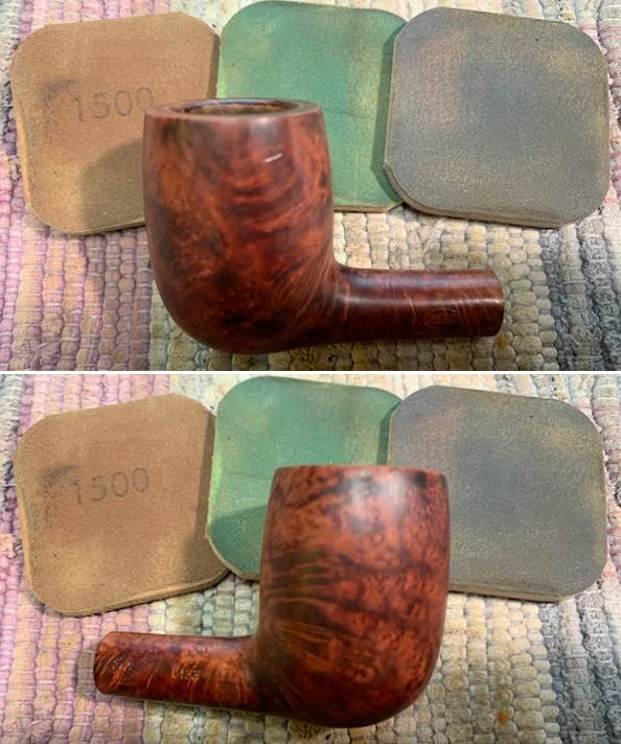
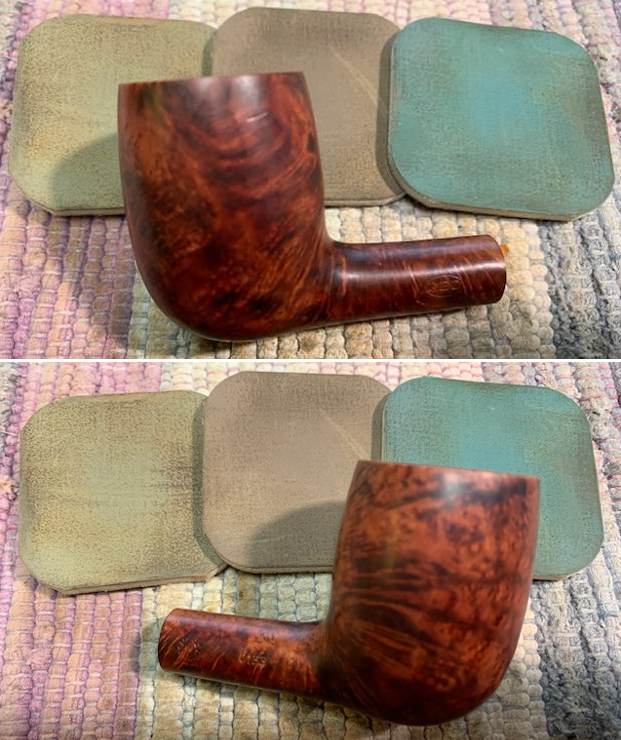
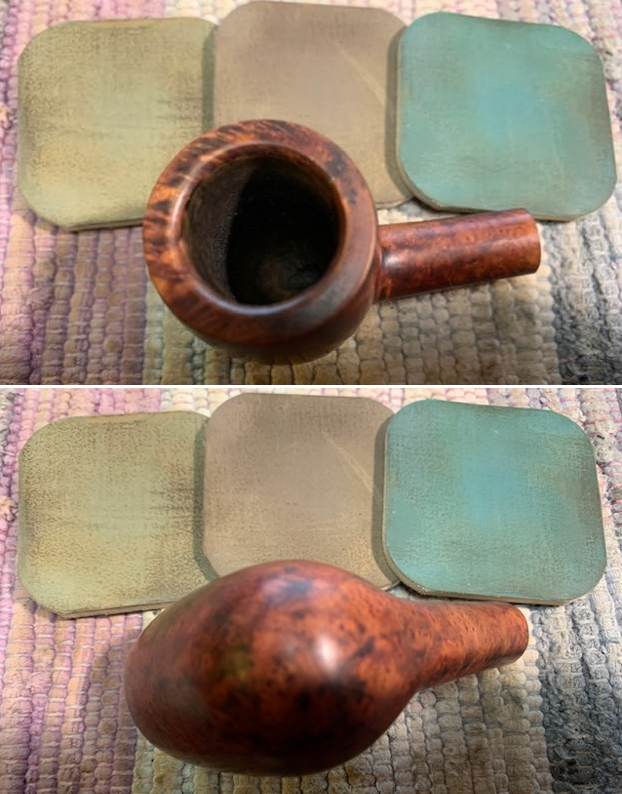
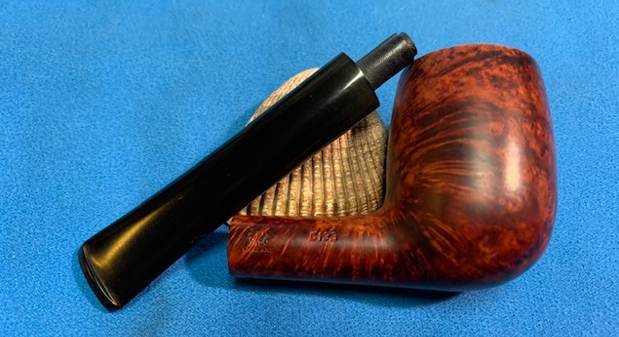
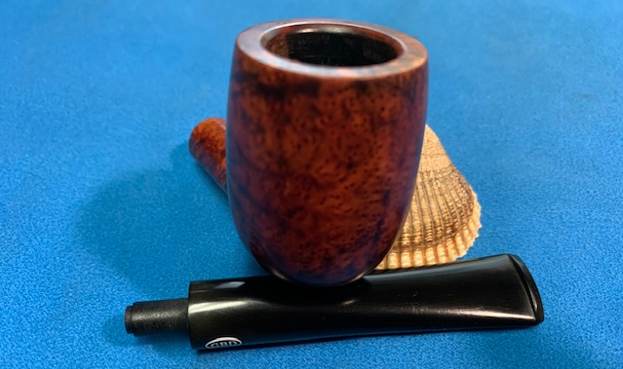
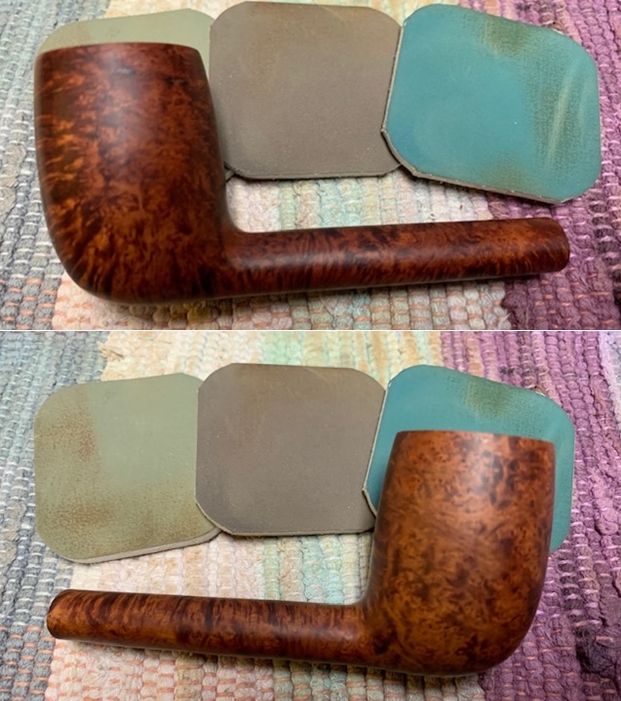
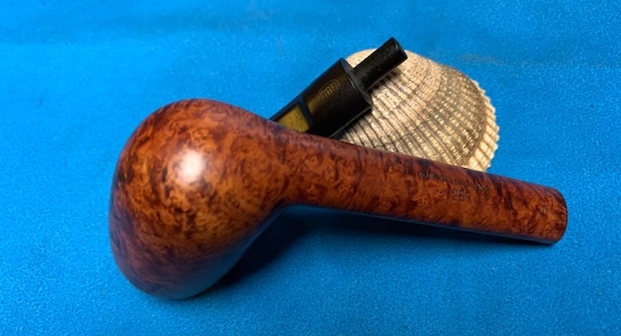
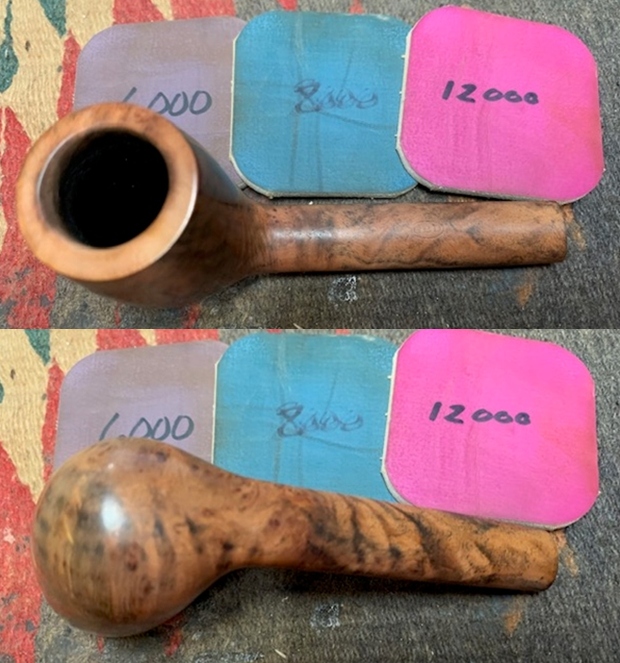
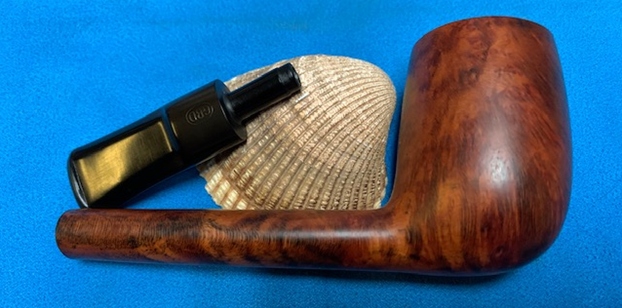
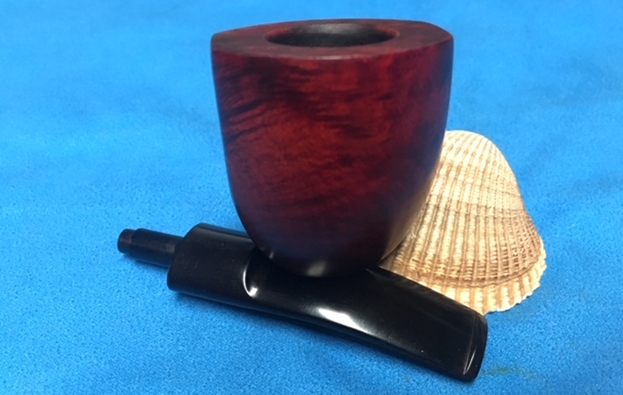
I rubbed the briar down with Before & After Restoration Balm. I worked it into the briar with my fingertips and let it do its magic. The product cleans, enlivens and preserves the briar. I let it sit for 10 minutes and then buffed it off with a cotton cloth. The bowl really is looking good at this point. 
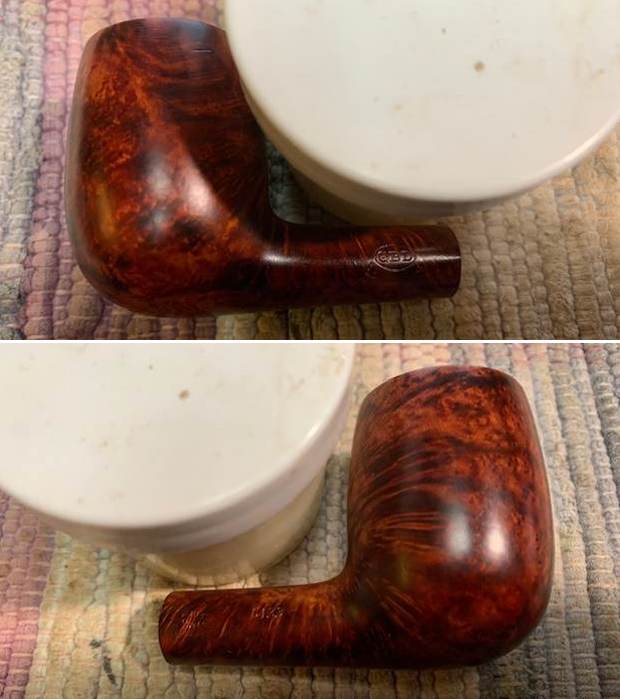
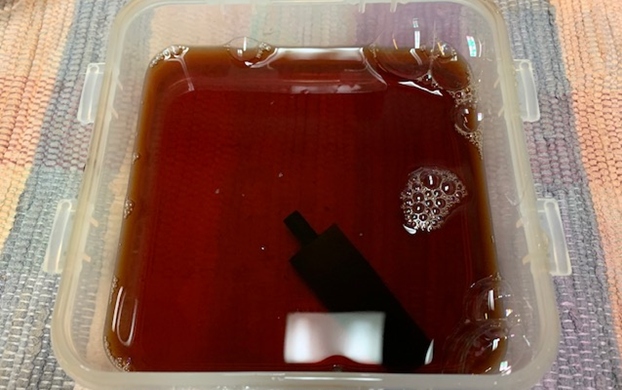
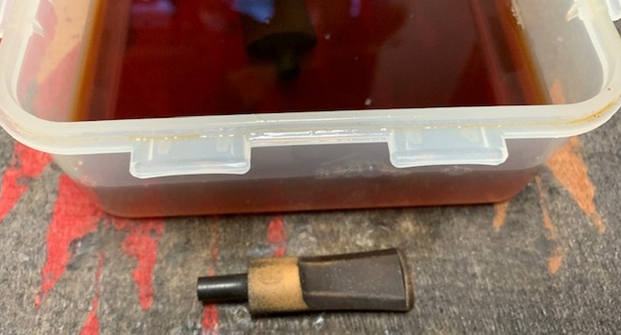
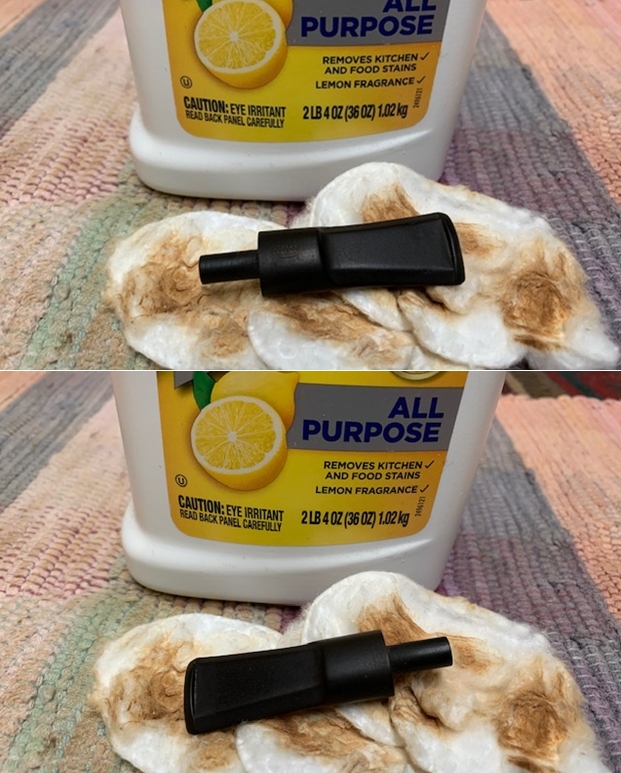
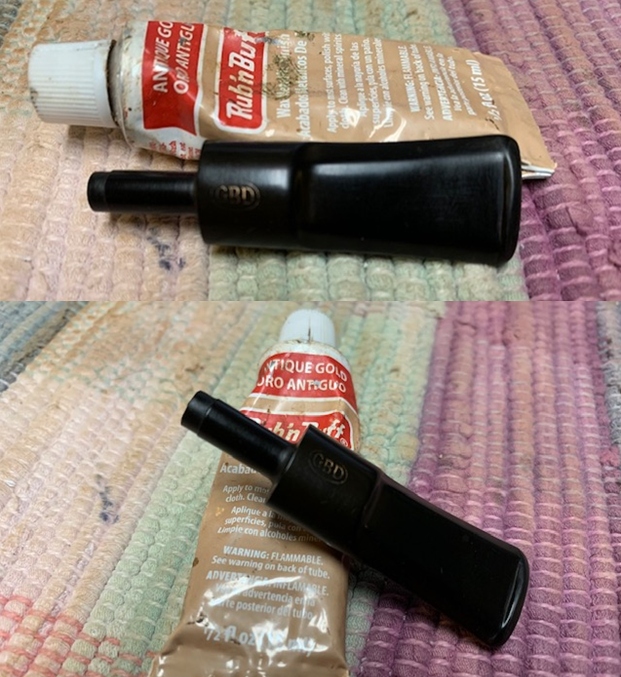
I set the bowl aside and turned my attention to the stem. I scrubbed it with Soft Scrub cleanser to remove the residual oxidation that remained on the surface of both sides. I find that when I let the pipe sit a long time before getting to it this light oxidation almost always happens.
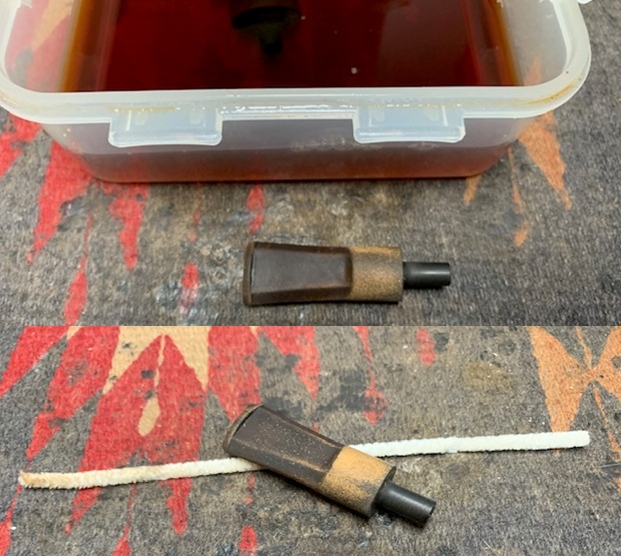
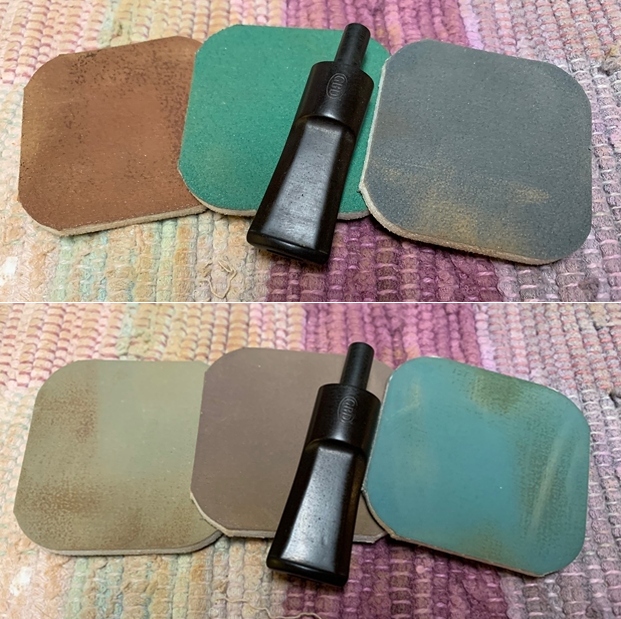
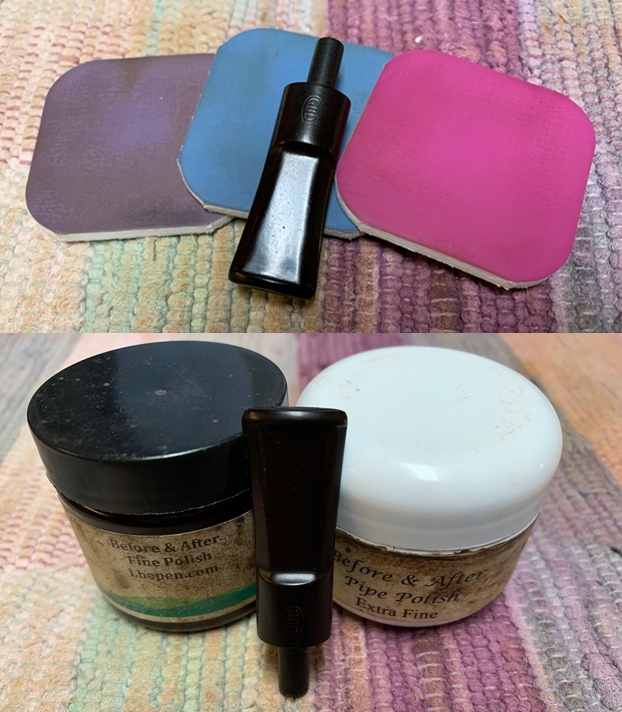
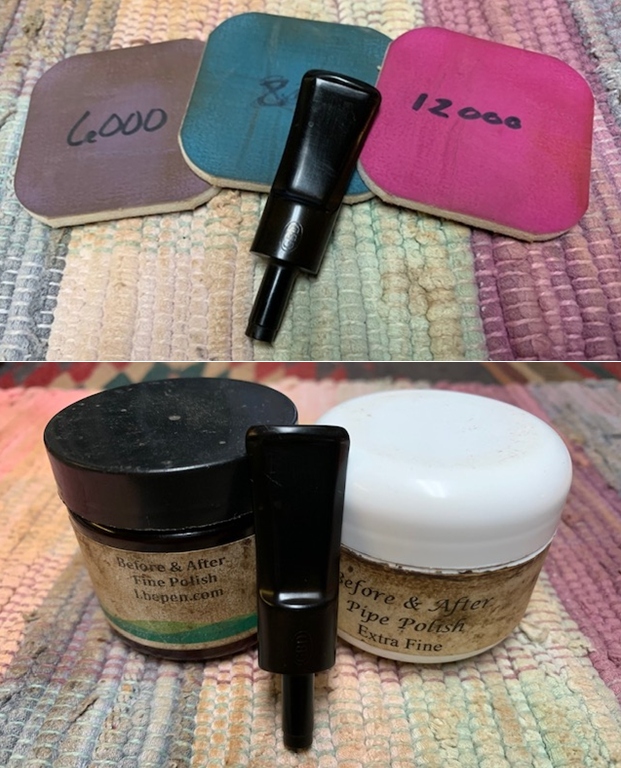
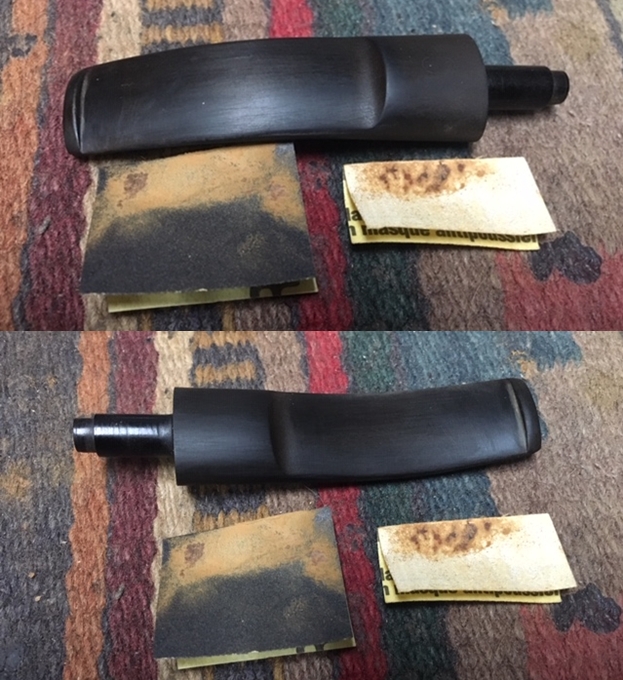
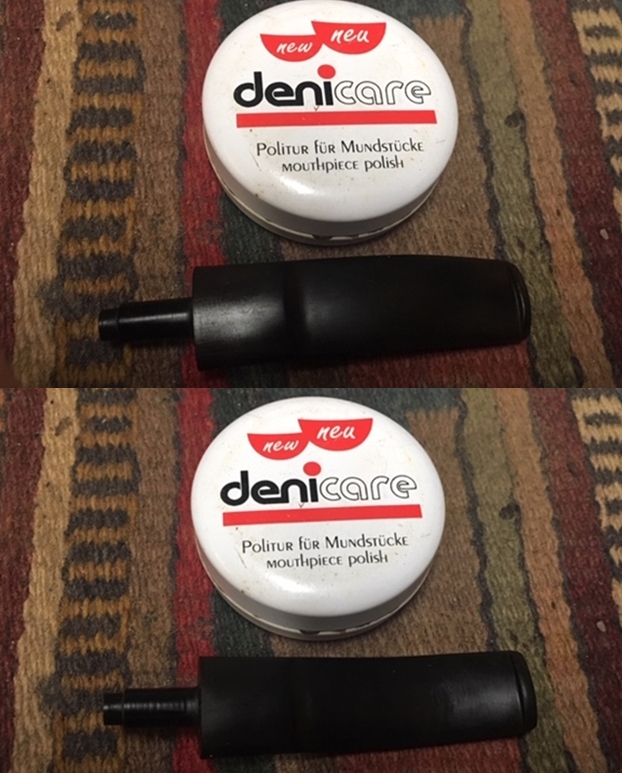
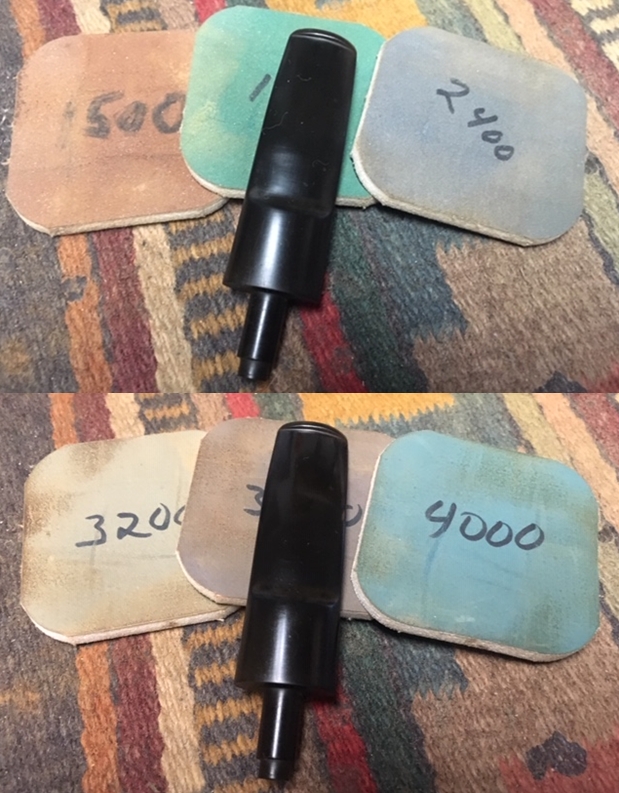
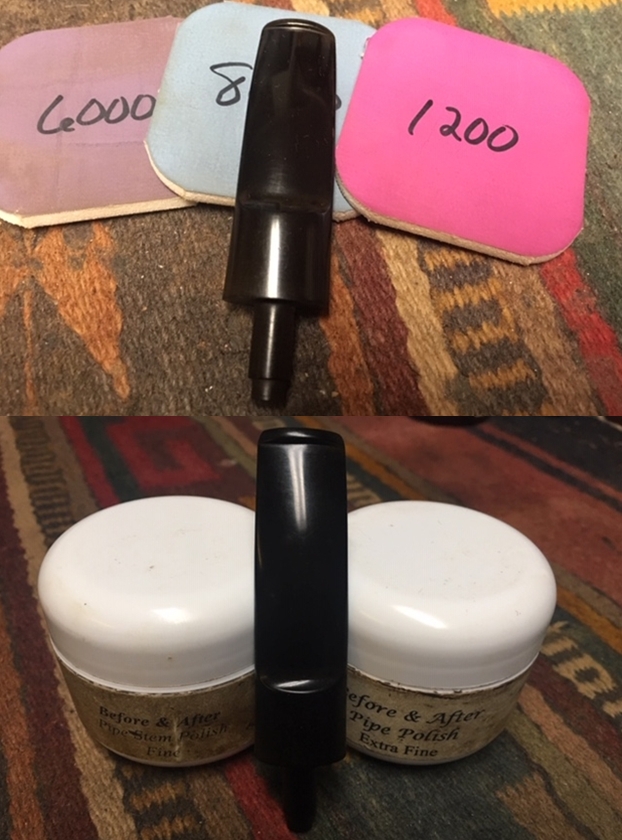
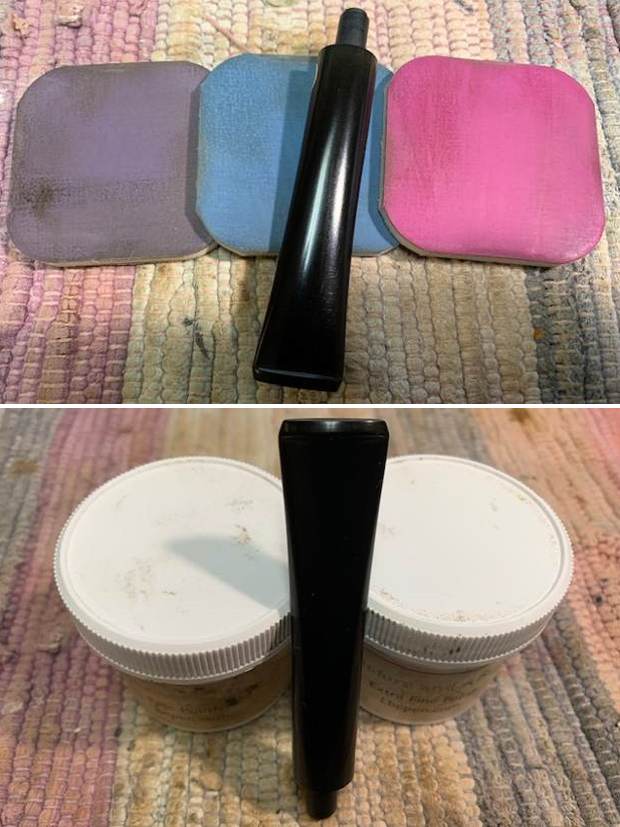
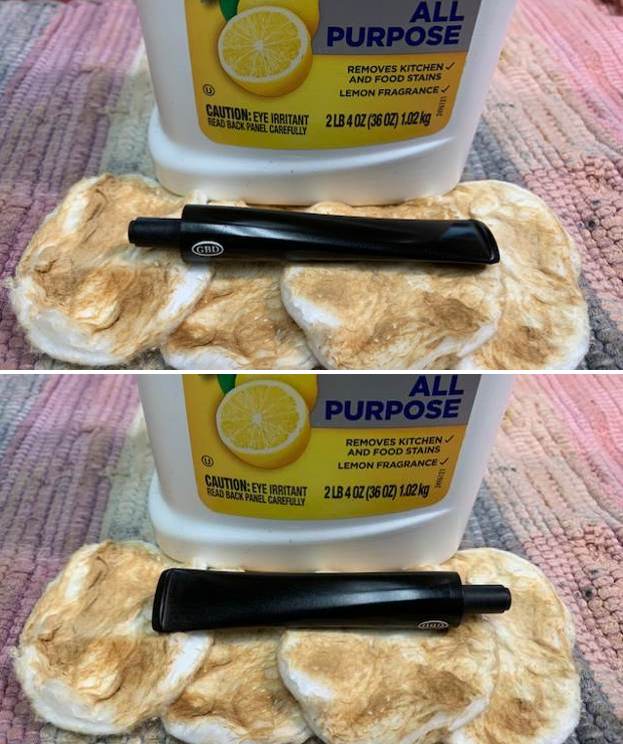
I polished the stem with micromesh sanding pads – dry sanding with 1500-12000 grit pads. I wiped the stem down after each pad with a cloth impregnated with Obsidian Oil. I polished it with Before & After Stem Polish – both Fine and Extra Fine then gave it a final coat of Obsidian Oil and set it aside to dry. 
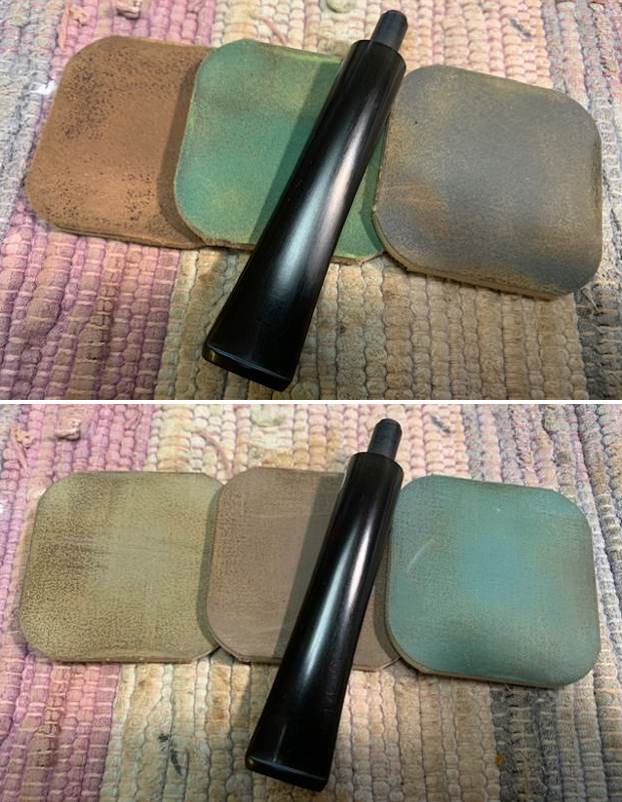
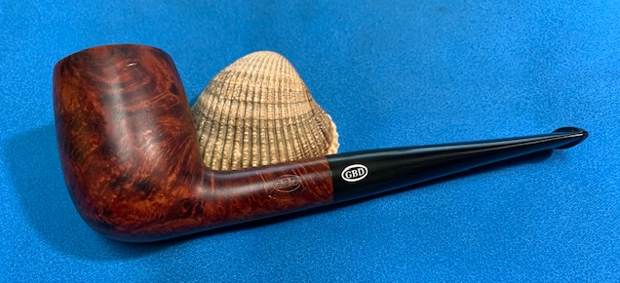
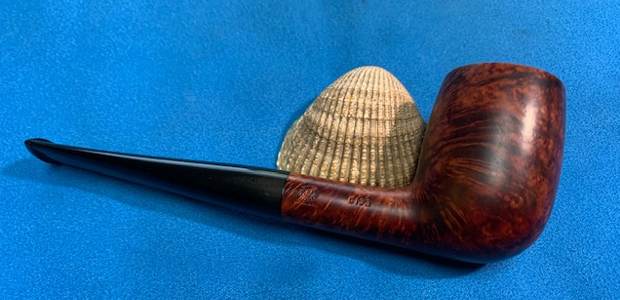
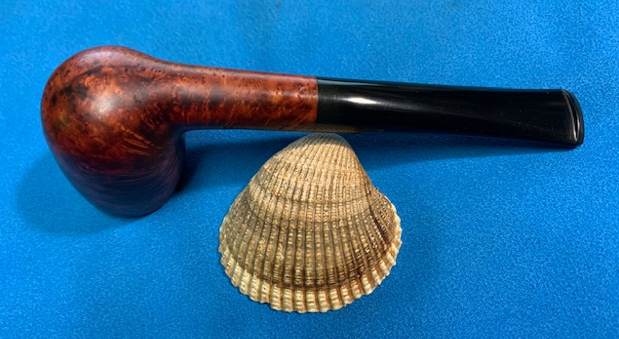
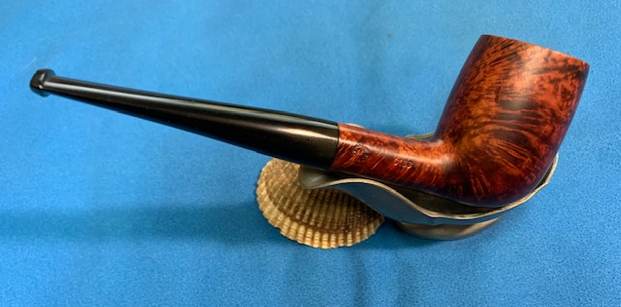
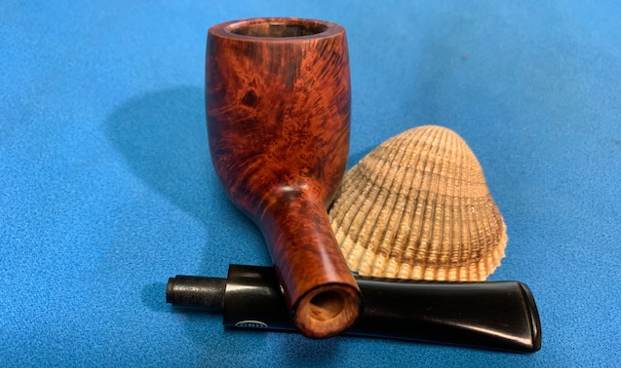
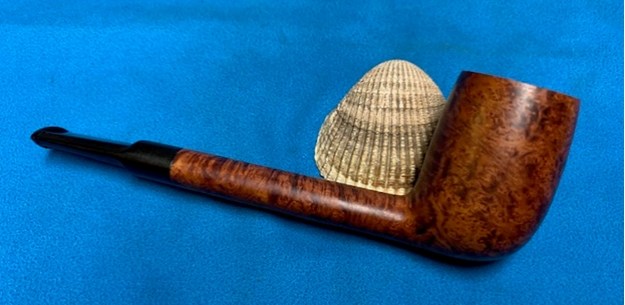
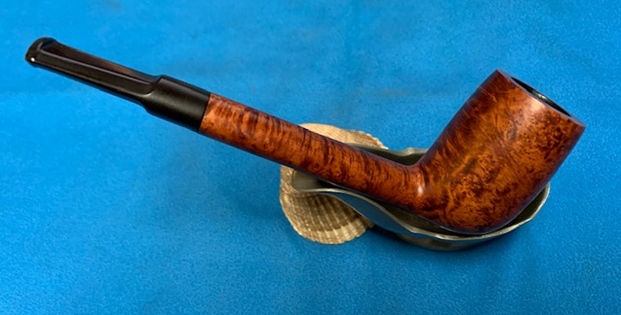
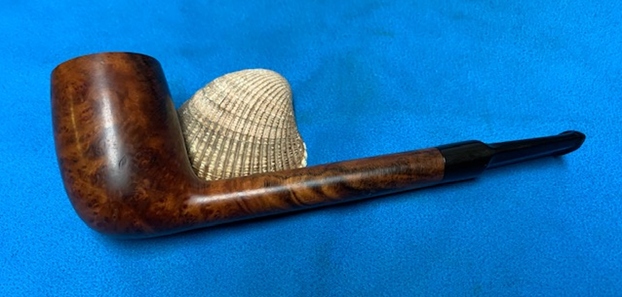
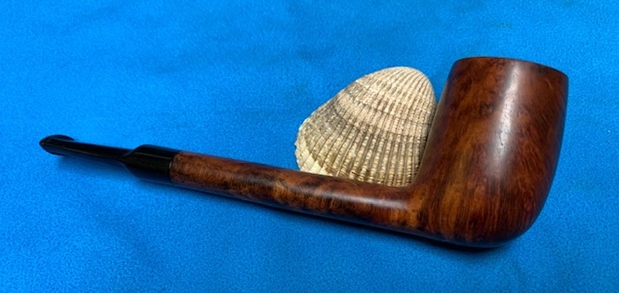
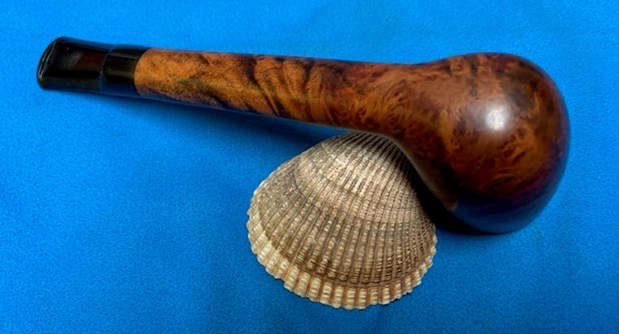
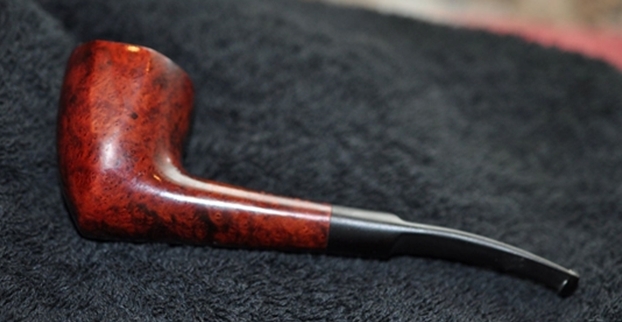
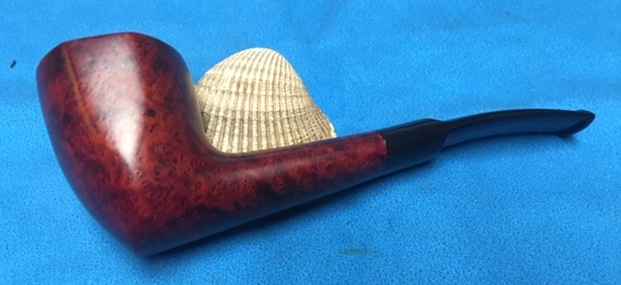
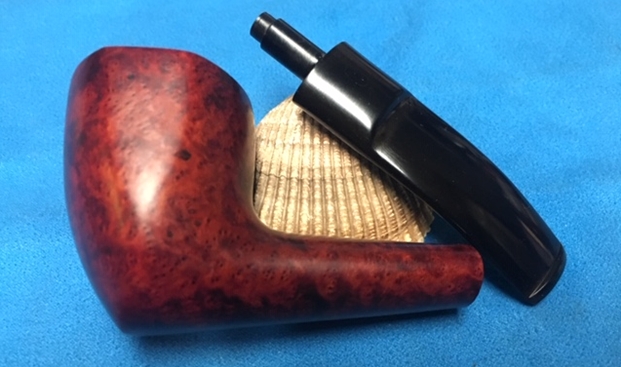
This is another beautiful pipe – this one is a GBD London Made C133 Billiard. It is made by Cadogan as can be seen from both the stamping on the stem, the shank. It would have come out after 1978. The grain on the pipe is quite nice and the few small fills are hidden in the stain and the finish. I put the stem on the shank and buffed the pipe with Blue Diamond on the wheel (being careful of the stamping so as not to damage that). I gave the bowl and stem multiple coats of carnauba wax and buffed the pipe with a clean buffing pad to raise the shine. I hand buffed it with a microfiber cloth to deepen the shine. The dimensions of this pipe are – Length: 5 ½ inches, Height: 1 ¾ inches, Outside diameter of the bowl: 1 ¼ inches, Chamber diameter: ¾ of an inch. The weight of the pipe is 1.31 ounces/37 grams. It is a great looking pipe and one that will be going on the rebornpipes store in the British Pipe Makers section. If you want to add it to your collection let me know via email to slaug@uniserve.com or by message. Thanks for walking through the restoration with me.

New Life for another GBD London Made Lumberman 256


Blog by Steve Laug

The next pipe on the work table came to me from one of our estate purchases. We picked up a second GBD 256 Lumberman early in 2019.  I wrote about the previous one in an earlier blog (https://rebornpipes.com/2020/08/05/this-is-one-i-have-not-seen-before-a-gbd-london-made-lumberman-256-with-an-unusual-stamp-on-the-shank/). I had been stamped Ed’d Golden Era on the underside of the shank. The stamping on this one is more regular than that. It is stamped on the top side and reads GBD in an oval with London Made arched around the underside of the oval. On the underside it is stamped London England [over] shape number 256. Next to the stem/shank junction it is stamped with the number J. The finish had a lot of grime ground into the smooth finish on the bowl and some darkening around the sides of the bowl. The grain however could not be hidden on this gem. The bowl was moderately caked and had an overflow of light lava on the top of the rim. The rim edges looked pretty good. The stem was calcified, oxidized and had tooth chatter and marks on the top and underside and on the surface of the button. There was a faint GBD stamp on the topside of the saddle stem. The pipe had promise but it was very dirty. Jeff took photos of the pipe before he started his cleanup work. He took photos of the rim top and bowl to give a clear picture of the thickness of the cake and the overflow of lava on the rim top. It appears that there is also some damage to the front inner edge of the bowl in the next two photos. He also took photos of the top and underside of the stem to show the oxidation, calcification, chatter and tooth marks. Jeff took photos of the sides and heel of the bowl to give a picture of what the briar around the pipe looked like. There is some stunning grain under the grime.     He took photos of the stamping on both sides of the shank. They are numerous and are faint but read as noted above. He also included a photo of the stamping on the top of the saddle stem.    I turned to Pipedia and followed a link to the GBD Model Information article to see if there was some help there (https://pipedia.org/wiki/GBD_Model_Information). I wanted some information on the London Made line. I include what I found below.

London Made — Factory unknown: Some might not be marked with GBD logo and some with additional “house” stampings. Introduced in 1978(?) plain wax finished branded pipes” available in at least six stains. -catalog (1981).

That article gave me some helpful information. I knew that the pipe line was often marked with additional “house” stampings. This one did not have any! I also knew that the 256 shape number tied back to a Canadian. Since Lumberman pipes were in essence Canadians with a saddle stem I was in the right ballpark. Still I had no idea what the J stamp referred to. Now to work on the pipe.

Since Jeff follows the same pattern of work in his cleanup we do not include photos but rather just a simple summary. Jeff reamed the bowl with a PipNet pipe reamer and followed up with a Savinelli Fitsall pipe knife to remove the cake. He scrubbed out the mortise and the airway in the shank and the stem with alcohol, cotton swabs and pipe cleaners. He scrubbed the exterior of the bowl, rim, shank and stem with a tooth brush and Murphy’s Oil Soap to remove the oils and tars on the rim and the grime on the finish of the bowl. He rinsed it under running water. He dried it off with a soft cloth. He was able to remove the lava build up on the rim top and you could see the damages to the top and edges of the rim. I think this pipe may well been before we worked with Mark Hoover’s Before & After Deoxidizer so he cleaned the internals and externals. The stem was clean but oxidized. I took photos of what the pipe looked like when I brought to my worktable. The rim top cleaned up really well with the lava coat removed. The inner edge of the rim showed some damage and burning on the front and back edges. There was also some damage on the rim top at the front.. The stem surface looked very good with some light oxidation remaining and a few tooth marks and chatter on both sides near the button and on the button surface itself.    I took photos of the stamping on the top and underside of the shank. It read as noted above.I removed the stem and took a photo of the pipe to give a sense of the whole. It is a well shaped Canadian.Now it was time to do my work on the pipe. I polished the bowl and the rim top, sides and shank with micromesh sanding pads – wet sanding with 1500-12000 grit pads and wiping it down after each pad with a damp cloth. I carefully avoided the stamping on the top and underside of the shank so as not to damage the already faint stamping. I rubbed the bowl and shank down with Before & After Restoration Balm. I worked it into the surface of the bowl sides and shank with my fingertips to clean, enliven and protect the briar. I let the balm sit for a little while and then buffed with a cotton cloth to raise the shine.   While I was working on the bowl the stem was soaking in a new product I received from Briarville Pipe Repair – Pipe Stem Oxidation Remover. It is a liquid of about the same consistency as apple juice. The stem sat in the mixture for 2 ½ -3 hours. I removed the stem from the bath, scrubbed lightly with a tooth brush and dried if off with a paper towel. There was some oxidation on the top of the saddle and on the edges of the stem remaining. The bath was dark with the removed oxidation of the previous 9 stems. I cleaned out the inside of the stem with alcohol and pipe cleaners. The nice thing about this new product is that it significantly softens the oxidation that is left behind making it easier to remove. I scrubbed the stem surface of the stem with Soft Scrub All Purpose cleanser to remove the remaining oxidation.  I polished the vulcanite stem with micromesh sanding pads – 1500-12000 grit pads. I wiped it down with a damp cloth after each sanding pad. I used Before & After Pipe Polish – both Fine and Extra Fine to further polish the stem.     I touched up the remnants of the GBD oval stamped logo on the stem top with Rub’N Buff Antique Gold. I rubbed the product on the top of the stem and pressed it in the stamping with a tooth pick. This gorgeously grained GBD London Made 256 Lumberman with a vulcanite saddle stem is a great looking pipe now that it has been restored. The rich browns of the contrasting stains came alive with the polishing and waxing. I put the stem back on the bowl and carefully buffed the pipe with Blue Diamond on the buffing wheel using a light touch on the briar. I gave the bowl and the stem multiple coats of carnauba wax on the buffing wheel and followed that by buffing the entire pipe with a clean buffing pad. I hand buffed the pipe with a microfiber cloth to deepen the shine. The finished GBD Lumberman is a beauty and fits nicely in the hand and looks very good. Give the finished pipe a look in the photos below. The dimensions of the pipe are Length: 5 ¾ inches, Height: 2 inches, Outside diameter of the bowl: 1 ¼ inches, Chamber diameter: ¾ of an inch. If you are interested in adding this pipe to your collection send me a message or an email. Thanks for reading this blog and my reflections on the pipe while I worked on it. There are many more to come!

This is one I have not seen before – a GBD London Made Lumberman 256 with an unusual stamp on the shank


Blog by Steve Laug

The next pipe on the work table came to me from one of our estate purchases. We picked up two GBD pipes from this seller that needed restoration. This first one is a nicely grained Lumberman shaped pipe with a vulcanite saddle stem. It has been here since the Spring of 2017. The pipe is a bit of a mystery in terms of the additional stamping but not the maker. It is stamped on the top side and reads GBD in an oval with London Made arched around the underside of the oval. On the underside it is stamped with stampings that I have not seen before on a GBD pipe. It reads Ed’s [over] Golden Era [over] London England [over] shape number 256. Next to the stem/shank junction it is stamped with the number 90. The combination of numbers and names is new to me. I am wondering if the pipe was not made by GBD for a pipe shop “Ed’s” and given the name Golden Era. I wonder if the second number 90 is the number of pipes made for the shop. I may never know! The finish had a lot of grime ground into the smooth finish on the bowl and some darkening around the sides of the bowl. The bowl was heavily caked and had an overflow of thick lava on the top of the rim. It was hard to know what the rim top and inner edge of the bowl looked like under the grime. The stem was calcified, oxidized and had tooth chatter and marks on the top and underside and on the surface of the button. There was a faint GBD stamp on the topside of the saddle stem. The pipe had promise but it was very dirty. Jeff took photos of the pipe before he started his cleanup work. He took photos of the rim top and bowl to give a clear picture of the thickness of the cake and the overflow of lava on the rim top. It appears that there is also some damage to the front inner edge of the bowl in the next two photos. He also took photos of the top and underside of the stem to show the oxidation, calcification, chatter and tooth marks. Jeff took photos of the sides and heel of the bowl to give a picture of what the briar around the pipe looked like. There is some stunning grain under the grime. He took photos of the stamping on both sides of the shank. They are numerous and are faint but read as noted above. He also included a photo of the stamping on the top of the saddle stem.   I looked on Pipephil’s site for information on the particular Golden Era Line and found nothing listed. I also went to the the GBD article on Pipedia and found nothing in the great historical article that was pertinent. I did follow a link to the GBD Model Information article to see if there was some help there (https://pipedia.org/wiki/GBD_Model_Information). It dawned on me then to look not at the Golden Era name but at the stamp on the top of the shank – London Made. With that flash or “insight” I found something helpful. I include it below.

London Made — Factory unknown: Some might not be marked with GBD logo and some with additional “house” stampings. Introduced in 1978(?) plain wax finished branded pipes” available in at least six stains. -catalog (1981).

That article gave me some helpful information. I knew that the pipe line was often marked with additional “house” stamping. So my initial think in the introduction were correct. The pipe was made for Ed’s and the shop gave it the Golden Era name. I also knew that the 256 shape number tied back to a Canadian. Since Lumberman pipe were in essence Canadians with a saddle stem I was in the right ballpark. Still no idea what the 80 stamp referred to. Since the pipe was introduced in 1978 could it be the year stamp? Ah well, I am not sure I will know. Now to work on the pipe.

Since Jeff follows the same pattern of work in his cleanup we do not include photos but rather just a simple summary. Jeff reamed the bowl with a PipNet pipe reamer and followed up with a Savinelli Fitsall pipe knife to remove the cake. He scrubbed out the mortise and the airway in the shank and the stem with alcohol, cotton swabs and pipe cleaners. He scrubbed the exterior of the bowl, rim, shank and stem with a tooth brush and Murphy’s Oil Soap to remove the oils and tars on the rim and the grime on the finish of the bowl. He rinsed it under running water. He dried it off with a soft cloth. He was able to remove the lava build up on the rim top and you could see the damages to the top and edges of the rim. I think this pipe may well been before we worked with Mark Hoover’s Before & After Deoxidizer so he cleaned the internals and externals. The stem was clean but oxidized. I took photos of what the pipe looked like when I brought to my worktable. The rim top cleaned up really well with the lava coat removed. The inner edge of the rim showed some damage and burning on the front and back edges. There was also some damage on the rim top at the front.. The stem surface looked very good with some light oxidation remaining and a few tooth marks and chatter on both sides near the button and on the button surface itself.    I removed the stem and took a photo of the pipe to give a sense of the whole. It is a well shaped tall apple shaped pipe.Now it was time to do my work on the pipe. I started by dealing with the rim top and edge damage. I topped the bowl on a topping board with 220 grit sandpaper to remove the damage on the rim top and minimize the inner edge damage. I reworked the rim edge giving it a bit of a bevel to smooth out the damaged areas. I polished the bowl and the rim top, sides and shank with micromesh sanding pads – wet sanding with 1500-12000 grit pads and wiping it down after each pad with a damp cloth. I carefully avoided the stamping on the top and underside of the shank so as not to damage the already faint stamping. I rubbed the bowl and shank down with Before & After Restoration Balm. I worked it into the surface of the bowl sides and shank with my fingertips to clean, enliven and protect the briar. I let the balm sit for a little while and then buffed with a cotton cloth to raise the shine. I set the bowl aside and turned my attention to the stem. I wiped off the stem surface with alcohol on a cotton pad and filled in the dents and built up the edge of the button on both sides with black Loctite 380 CA. I set the stem aside to let the repairs cure.     Once the repairs cured I recut the button edge and flattened out the repaired areas with a needle file to begin to blend them into the surface.     I sanded the stem with 220 grit sandpaper to further blend them in and followed that by starting the polishing with 400 grit wet dry sandpaper. I touched up the remnants of the GBD oval logo on the stem top with Rub’n Buff Antique Gold. I rubbed the product on the top of the stem and pressed it in the stamping with a tooth pick.      I polished the vulcanite stem with micromesh sanding pads – 1500-12000 grit pads. I wiped it down with a damp cloth after each sanding pad. I used Before & After Pipe Polish – both Fine and Extra Fine to further polish the stem.      This interestingly stamped GBD London Made 256 Lumberman with a vulcanite saddle stem is a great looking pipe now that it has been restored. The golden colours of the contrasting stains came alive with the polishing and waxing. I put the stem back on the bowl and carefully buffed the pipe with Blue Diamond on the buffing wheel using a light touch on the briar. I gave the bowl and the stem multiple coats of carnauba wax on the buffing wheel and followed that by buffing the entire pipe with a clean buffing pad. I hand buffed the pipe with a microfiber cloth to deepen the shine. The finished GBD Lumberman is a beauty and fits nicely in the hand and looks very good. Give the finished pipe a look in the photos below. The dimensions of the pipe are Length: 5 ¾ inches, Height: 2 inches, Outside diameter of the bowl: 1 ¼ inches, Chamber diameter: ¾ of an inch. If you are interested in adding this pipe to your collection send me a message or an email. Thanks for reading this blog and my reflections on the pipe while I worked on it. There are many more to come!

Cleaning up a GBD London Made 9664


Blog by Steve Laug

The next pipe I chose to work on has been sitting on my desk for a few weeks and since I just finished an older GBD Standard I decided to pick this GBD London Made up and work on it. It came in a recent box from my brother Jeff. He picked it up in one of the online auctions he frequents. It is interestingly shaped GBD – not even sure what I would call the shape as it is a bit of a Dublin and a bit of a pick axe. Very unique. The pipe is stamped on the top of the oval shank GBD in and oval London Made. On the underside of the shank it is stamped London, England over 9664 with a letter “E” stamped near the stem shank junction. The grain showing through the grime is a mix of swirls, cross grain and birdseye around the bowl sides and shank. It had a rich reddish brown stain but the finish was dirty and hard to see the colour well. There was a thick cake in the bowl and a light overflow of lava on the rim top. There was some darkening around the inner edge of the bowl and what looked like some damage toward the back edge. The stem was oxidized with light tooth marks and chatter on the top and underside near the button. The button was in excellent condition. Jeff took photos of the pipe before he started his cleanup work on it. Jeff took photos of the bowl and rim top to show the cake in the bowl and the lava build up on the edges of the bowl. The cake and edge speak to this being a good smoking pipe.Jeff took photos of the sides and heel of the bowl to show the condition of the finish – the pipe was dirty but the finish appeared to be in very good condition.  Jeff took photos of the stamping on the topside of the oval shank. The stamping was very readable – it read GBD in an oval over London Made. On the underside it read London, England over the shape number 9664 with the letter “E” near the shank/stem union.  Jeff took photos of the top and underside of the stem showing the scratching, oxidation and light tooth damage to the stem surface and slight wear to the edges of the button. I turned to Pipedia’s article on GBD to see if I could find any information on the London Made. The article gives a lot in terms of the history of the brand and a list of various lines of GBD pipes (https://pipedia.org/wiki/GBD_Model_Information). I quote the section where I found the reference to the London Made.

London Made — Factory unknown: Some might not be marked with GBD logo and some with additional “house” stampings. Introduced in 1978(?) plain wax finished branded pipes” available in at least six stains. – catalog (1981)

With that information in hand I knew what I was dealing with in terms of the stamping and the age of this pipe. I knew from the information from the section quoted that the London Made originally came out in 1978 in a variety of colours. Now I had an idea of the age of the pipe and it was time to work on the pipe.

Jeff cleaned the pipe with his usual penchant for thoroughness that I really appreciate. This one was a real mess and I did not know what to expect when I unwrapped it from his box. He reamed it with a PipNet pipe reamer and cleaned up the reaming with a Savinelli Fitsall Pipe Knife. He scrubbed out the internals with alcohol, pipe cleaners and cotton swabs until the pipe was clean. He scrubbed the exterior of the bowl with Murphy’s Oil Soap and a tooth brush to remove the grime and grit on the briar and the lava on the rim top. The finish looks very good with good looking grain around the bowl and shank. Jeff soaked the stem in Before & After Deoxidizer to remove the oxidation on the rubber. When the pipe arrived here in Vancouver for the second stop of its restoration tour it looked very good. I took photos before I started my part of the work. I took some close up photos of the rim top and also of the stem surface. I wanted to show the clean top and the damage to the inner edge. The back of the bowl had been charred and there was some roughening and darkening around the rest of the inner edge of the bowl. The inside of the bowl looked very good. I also took close up photos of the stem to show the remaining oxidation and the lack of tooth marks and chatter in front of the button on both sides. There is also a faint remnant of the GBD oval stamp on the top of the saddle.I also took photos of the stamping on the pipe on the top underside of the shank. It read as noted above.  I started my work on the pipe by addressing the burned area on the inner edge of the rim. I used a folded piece of 220 grit sandpaper to smooth out the damage and give the edge a very slight bevel to remove the damage.I worked some Before & After Restoration Balm into the finish of the bowl and the rim top with my fingertips to clean, enliven and protect it. I find that the balm really makes the briar come alive again. The contrasts in the layers of stain really made the grain stand out. I let the balm sit for a little while and then buffed with a cotton cloth to raise the shine. The pipe really looks good at this point. I am very happy with the results.  I set the bowl aside and started working on the stem. I sanded the stem with 220 grit sandpaper to blend the chatter and remaining marks into the surface of the stem. I started the polishing with 400 grit wet dry sandpaper. I wiped the stem off with Obsidian Oil to remove the dust and see where I was at with the stem. I rubbed the stem down with Denicare Mouthpiece Polish. I have a few tins of this laying around so I am trying to use them up. It does a pretty good job polishing the stem. I polished the stem with micromesh sanding pads – wet sanding it with 1500-12000 grit pads and wiped it down with Obsidian Oil. I polished it further with Before & After Pipe Stem Polish – both fine and extra fine. I finished by wiping it down with Obsidian Oil and set it aside to dry. I put the stem back on the bowl and polished the bowl and stem with Blue Diamond polish on the buffing wheel. I gave the bowl and the stem multiple coats of carnauba wax. I buffed the pipe with a clean buffing pad to raise the shine. I hand buffed it with a microfiber cloth to deepen the shine. The shine on it makes the variations of colour really pop. The pipe polished up really well. The polished black vulcanite stem seemed to truly come alive with the buffing. This uniquely shaped pipe feels great in my hand and when it warms with smoking I think it will be about perfect. It must have been a fine smoking pipe judging from the condition it was when we received it. There should be a lot of life left in this GBD London Made 9664E.  Have a look at it in the photos below. The dimensions are Length: 5 ½ inches, Height: 1 ¾ inches, Outside diameter of the bowl: 1 ½ inches, Chamber diameter: ¾ of an inch. This is one that will go on the rebornpipes online store shortly. If you want to carry on the pipe trust of this unique GBD London Made let me know. Thanks to each of you who are reading this blog. Remember we are not pipe owners, we are pipemen and women who hold our pipes in trust until they pass on into the trust of the next pipeman or woman.