Tag Archives: Cutting a button

Refurbishing another Old Pal – this time a Long Oval Shank Billiard


Blog by Steve Laug

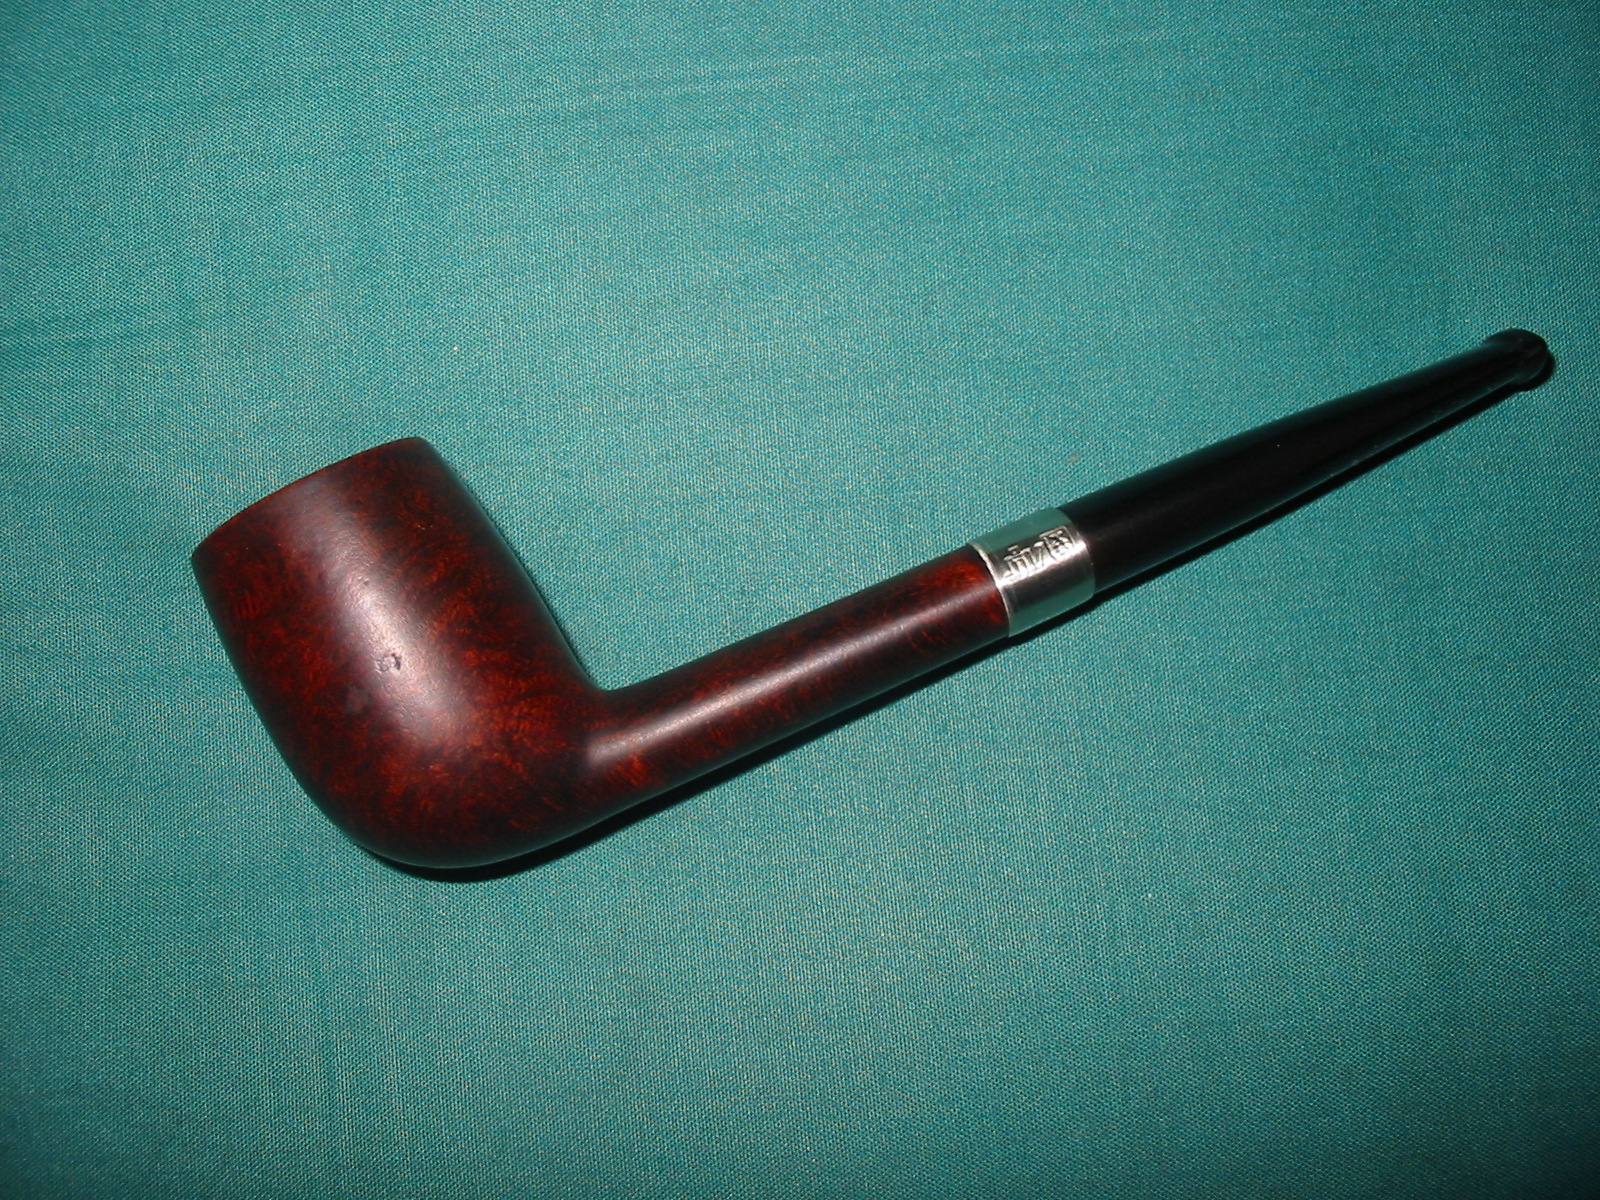
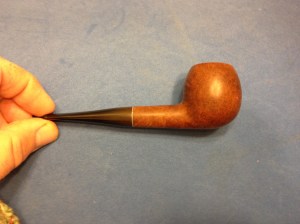
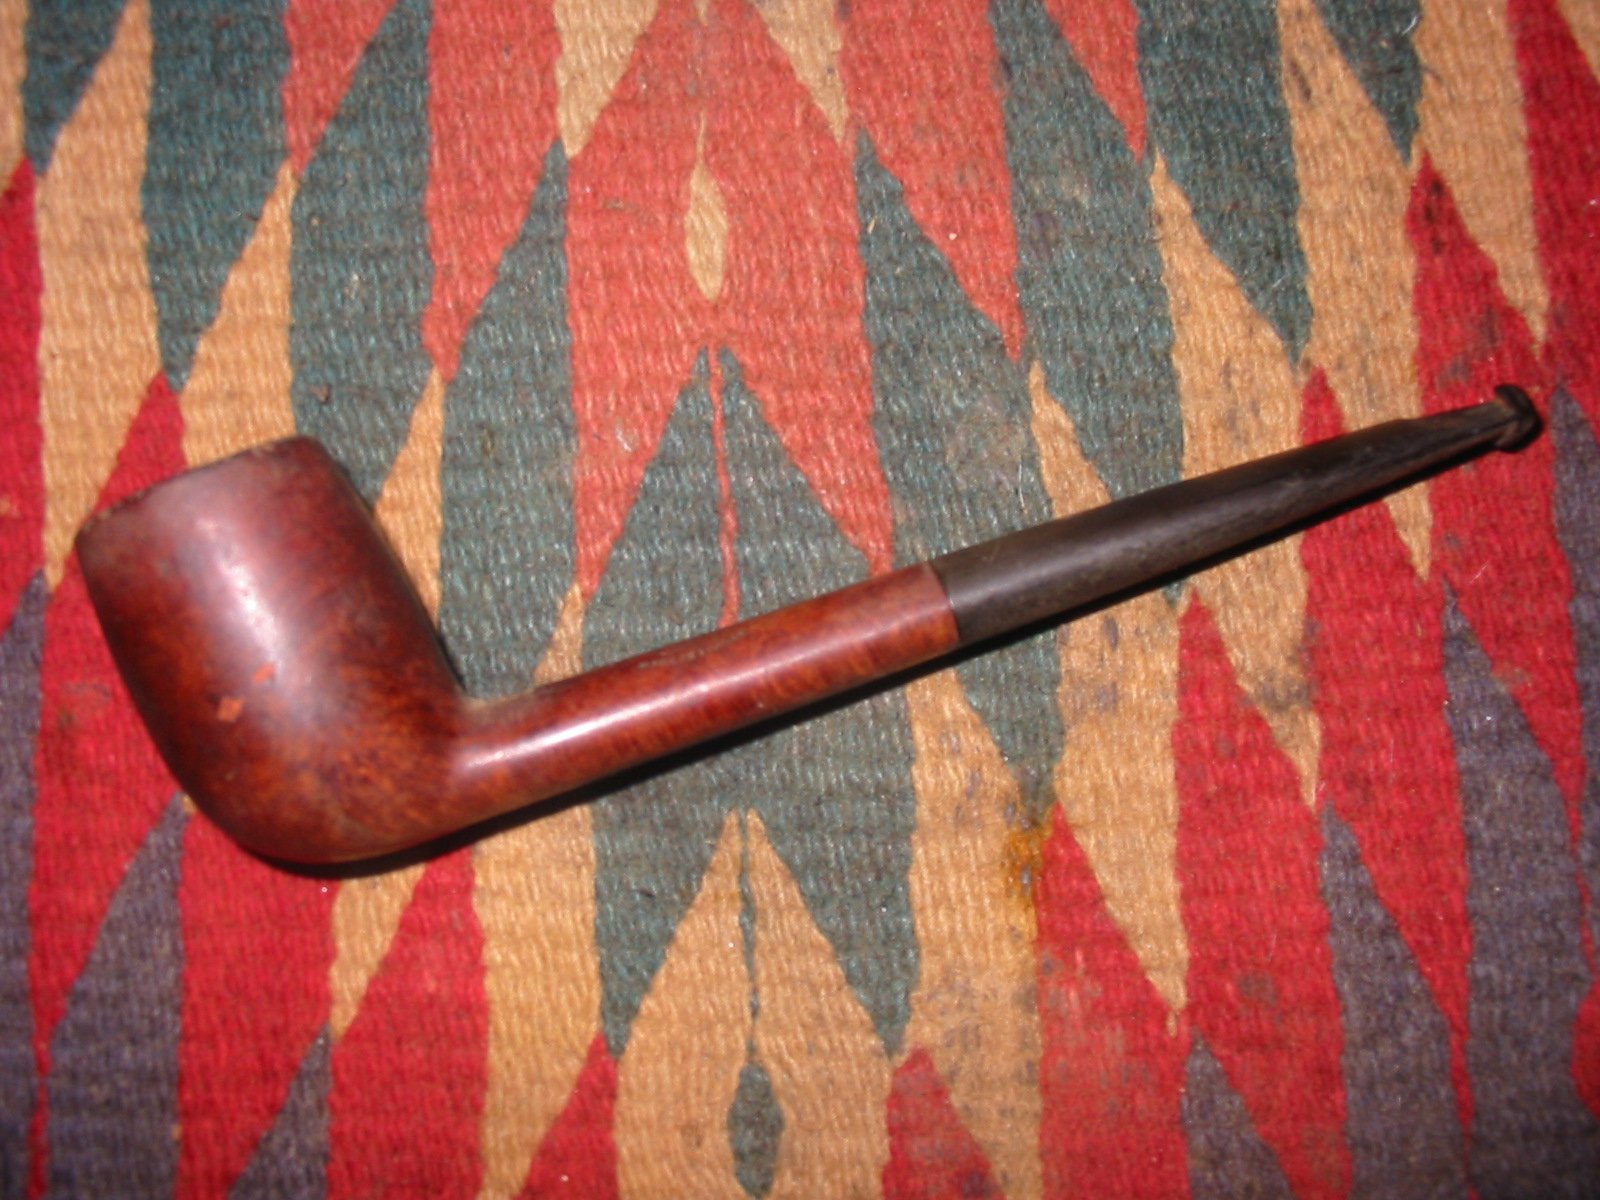
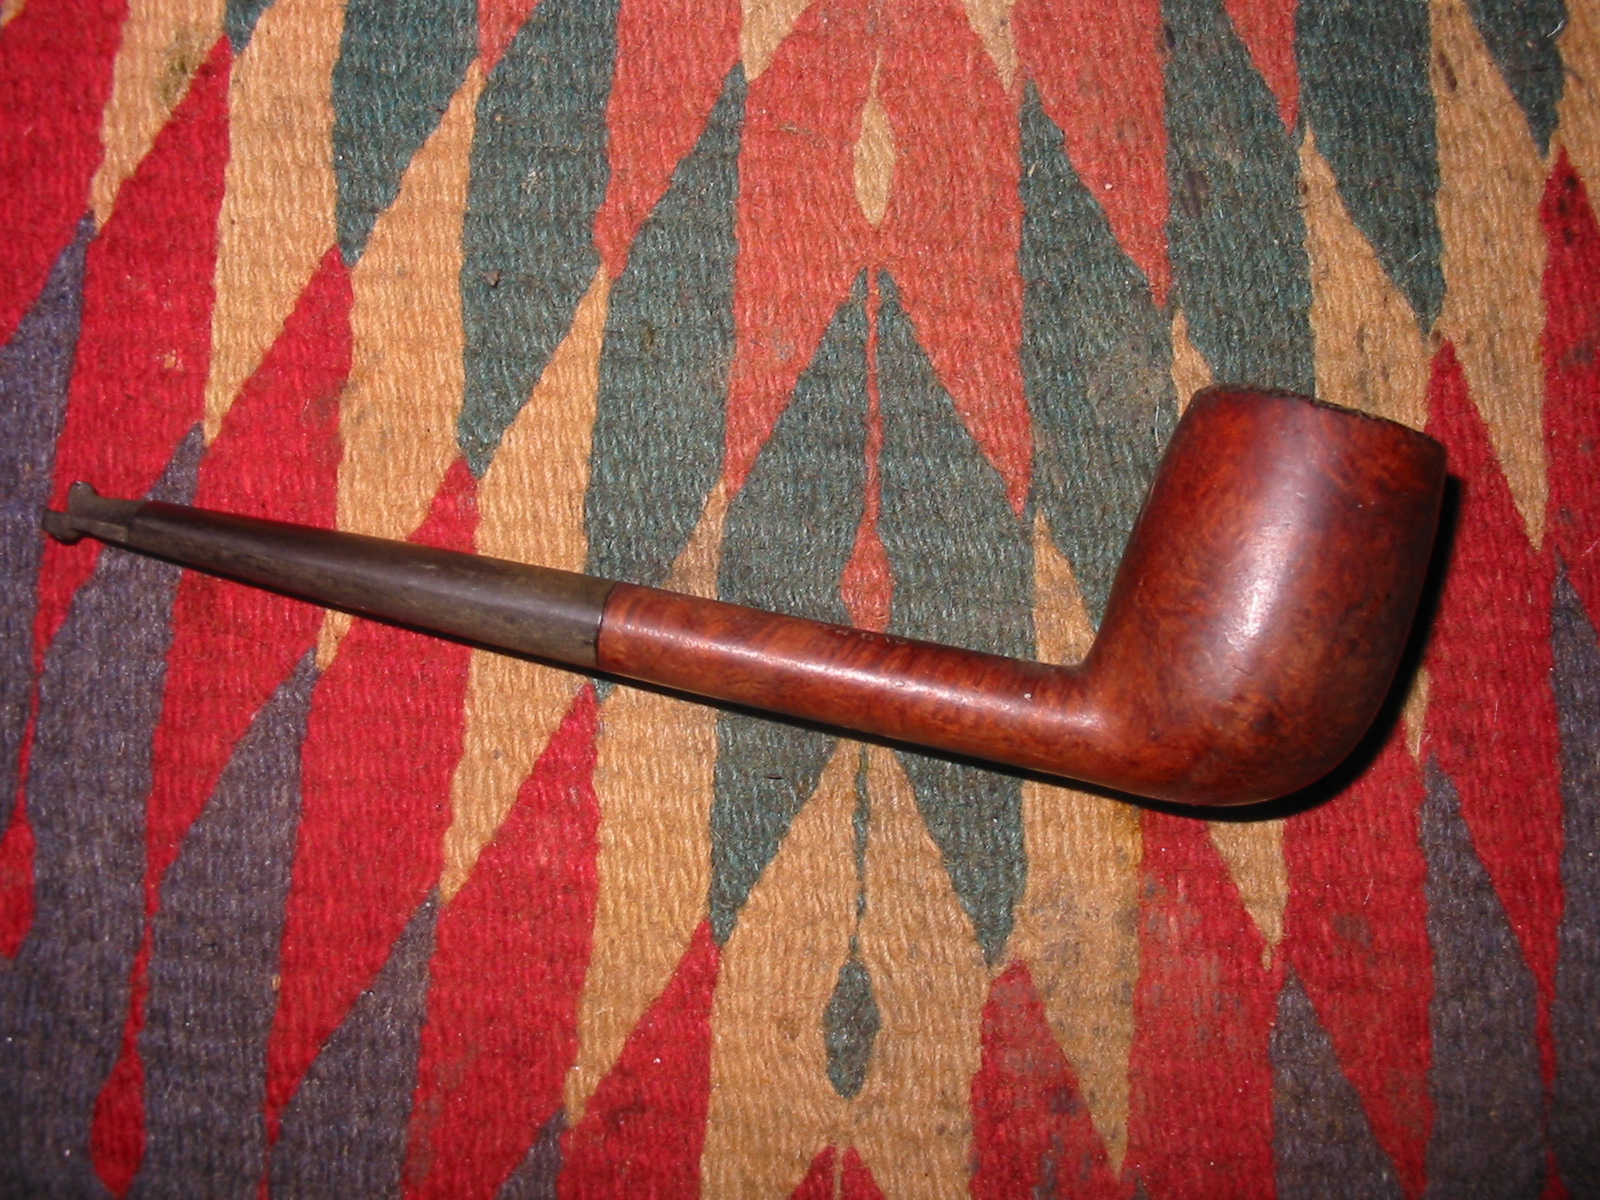
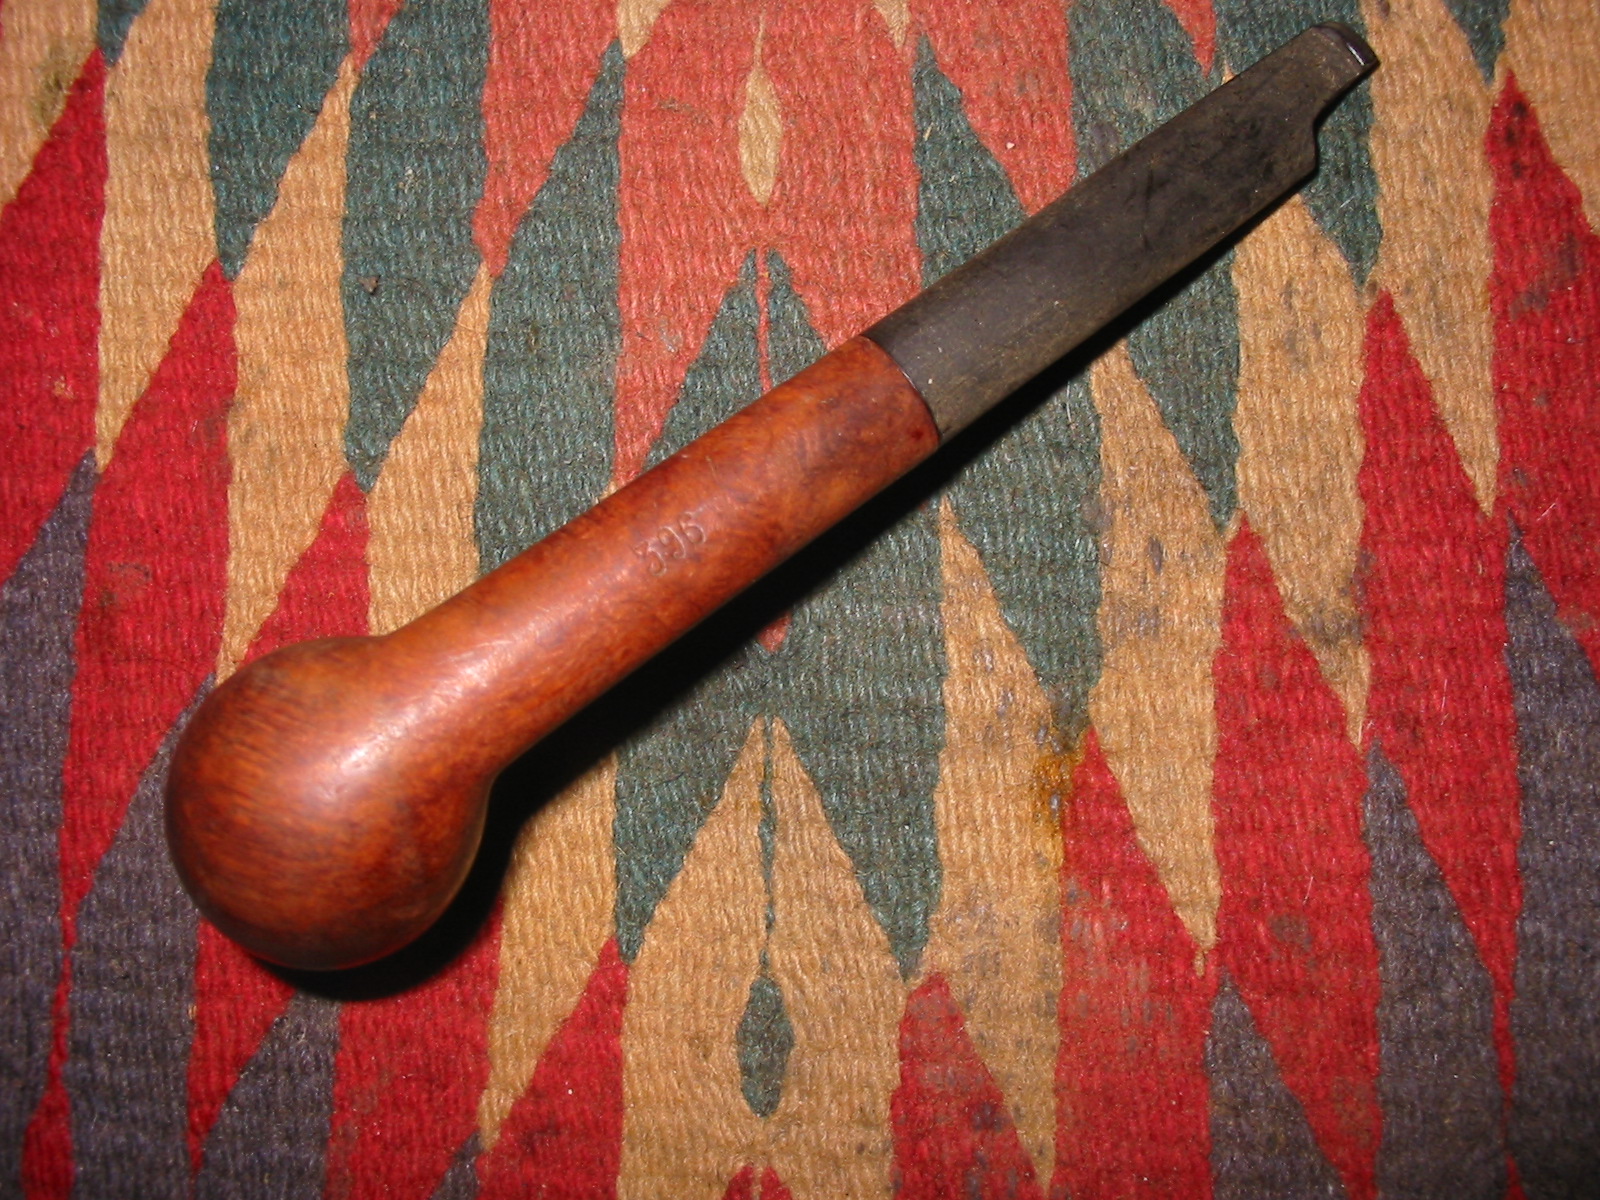
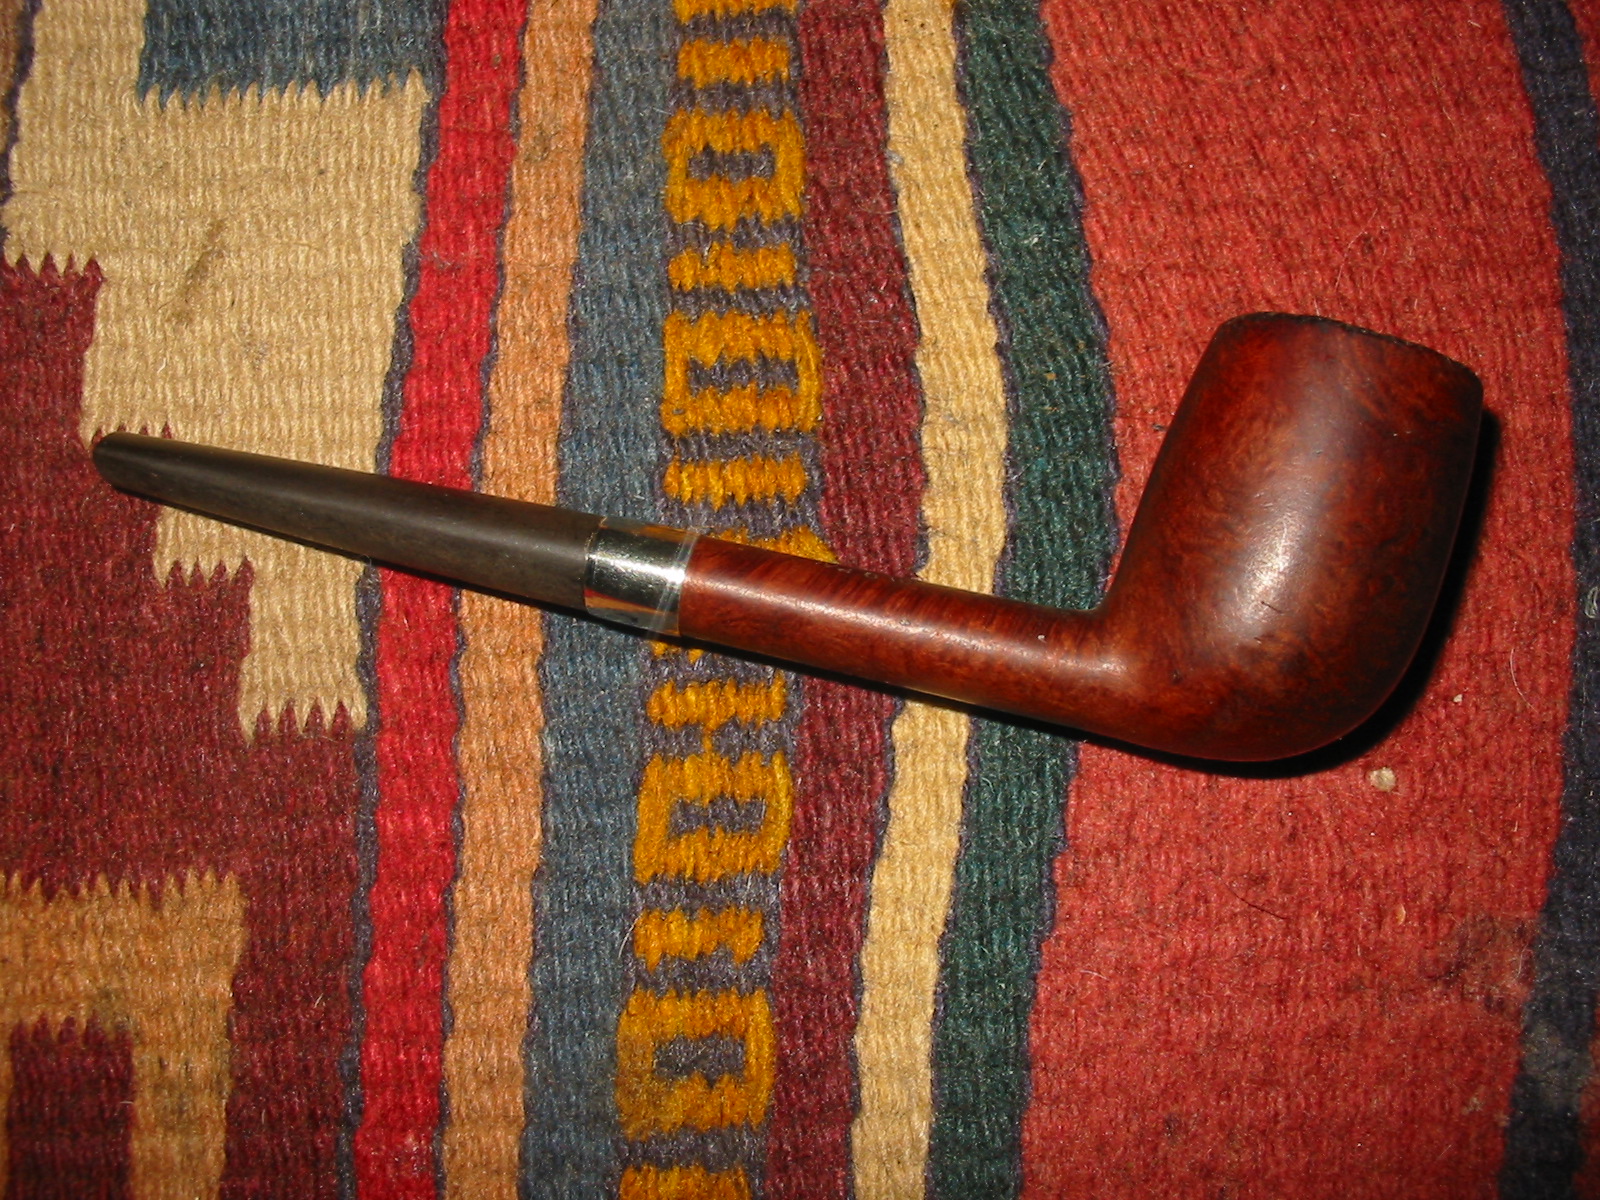
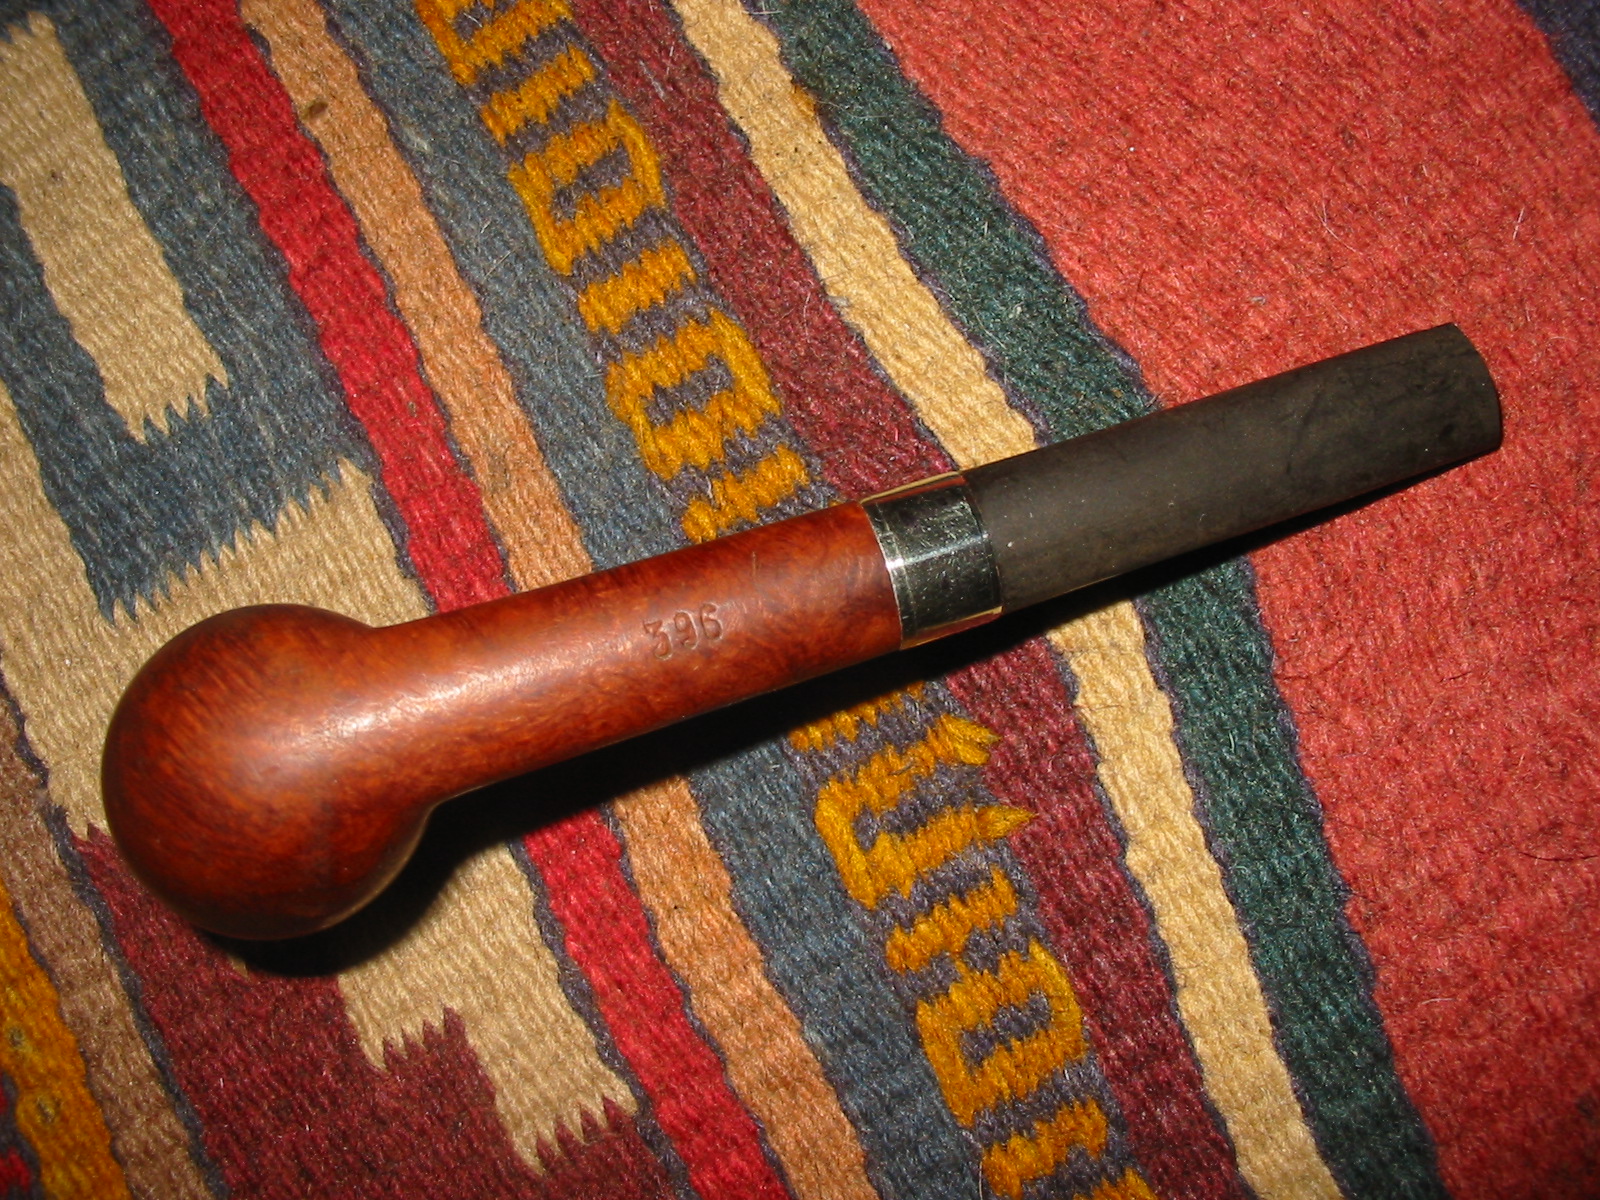
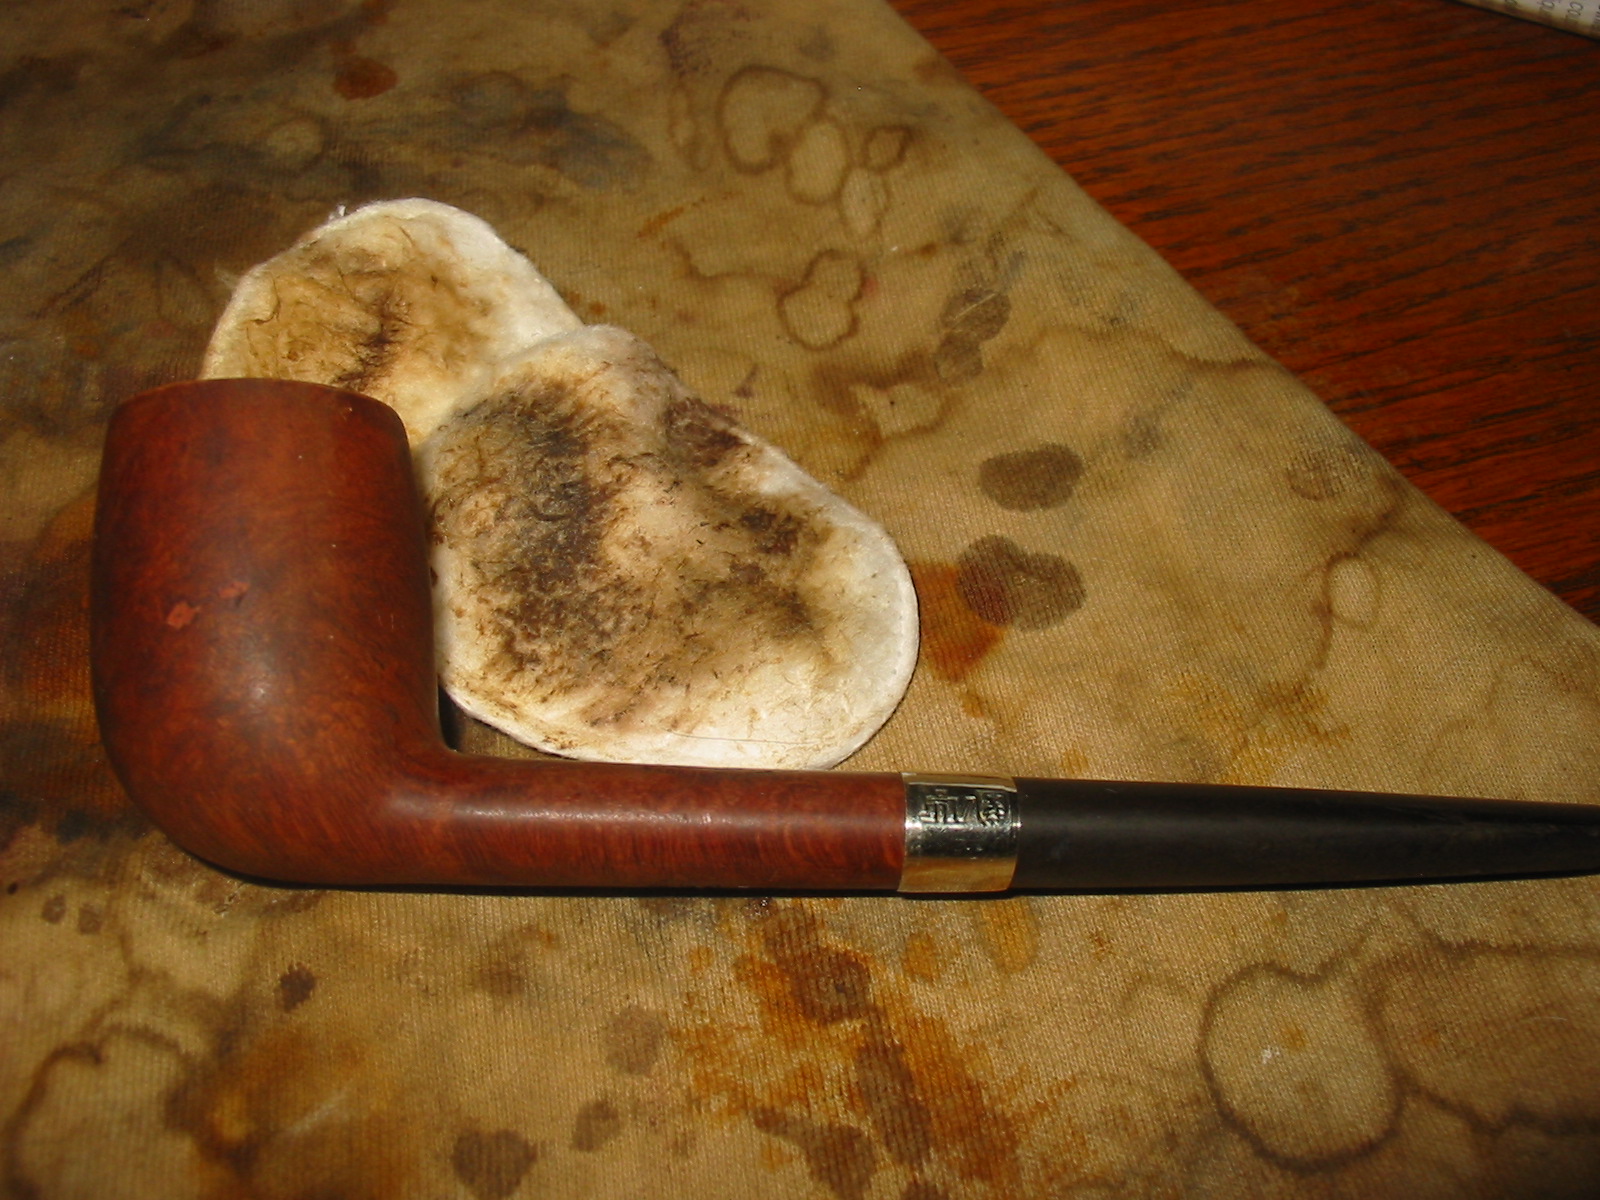
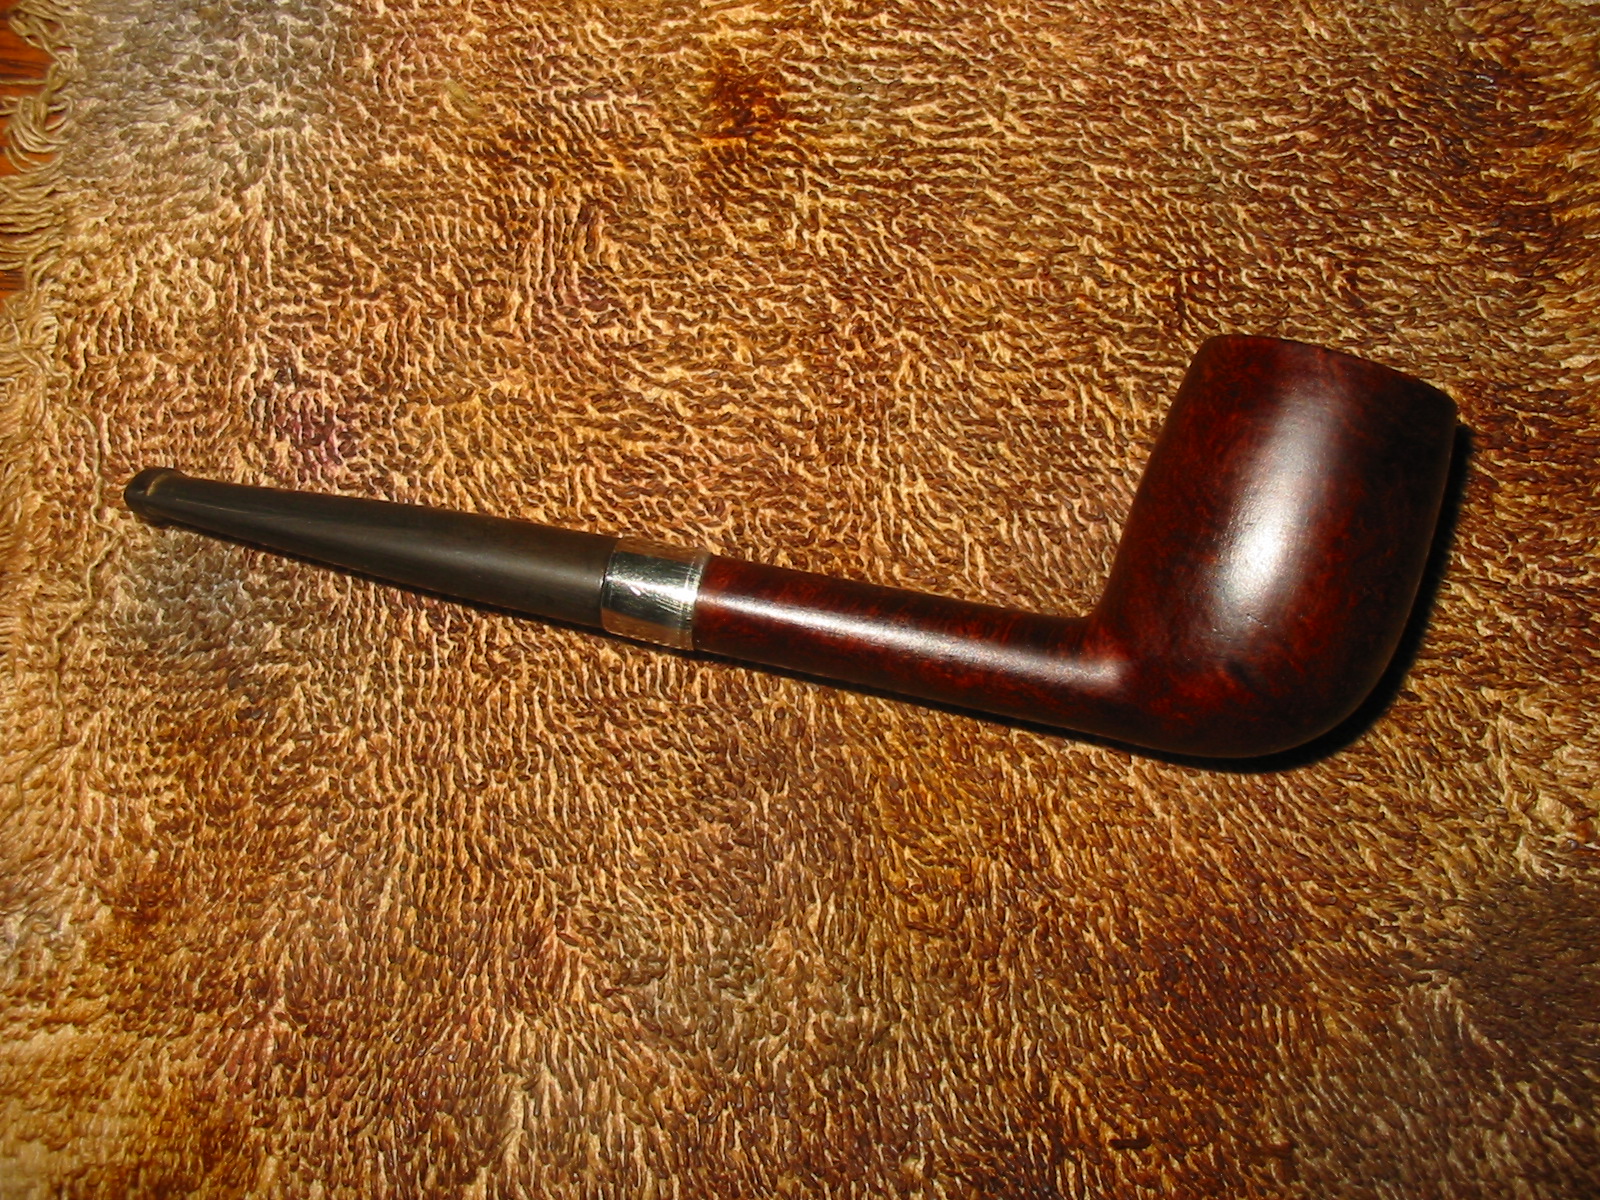
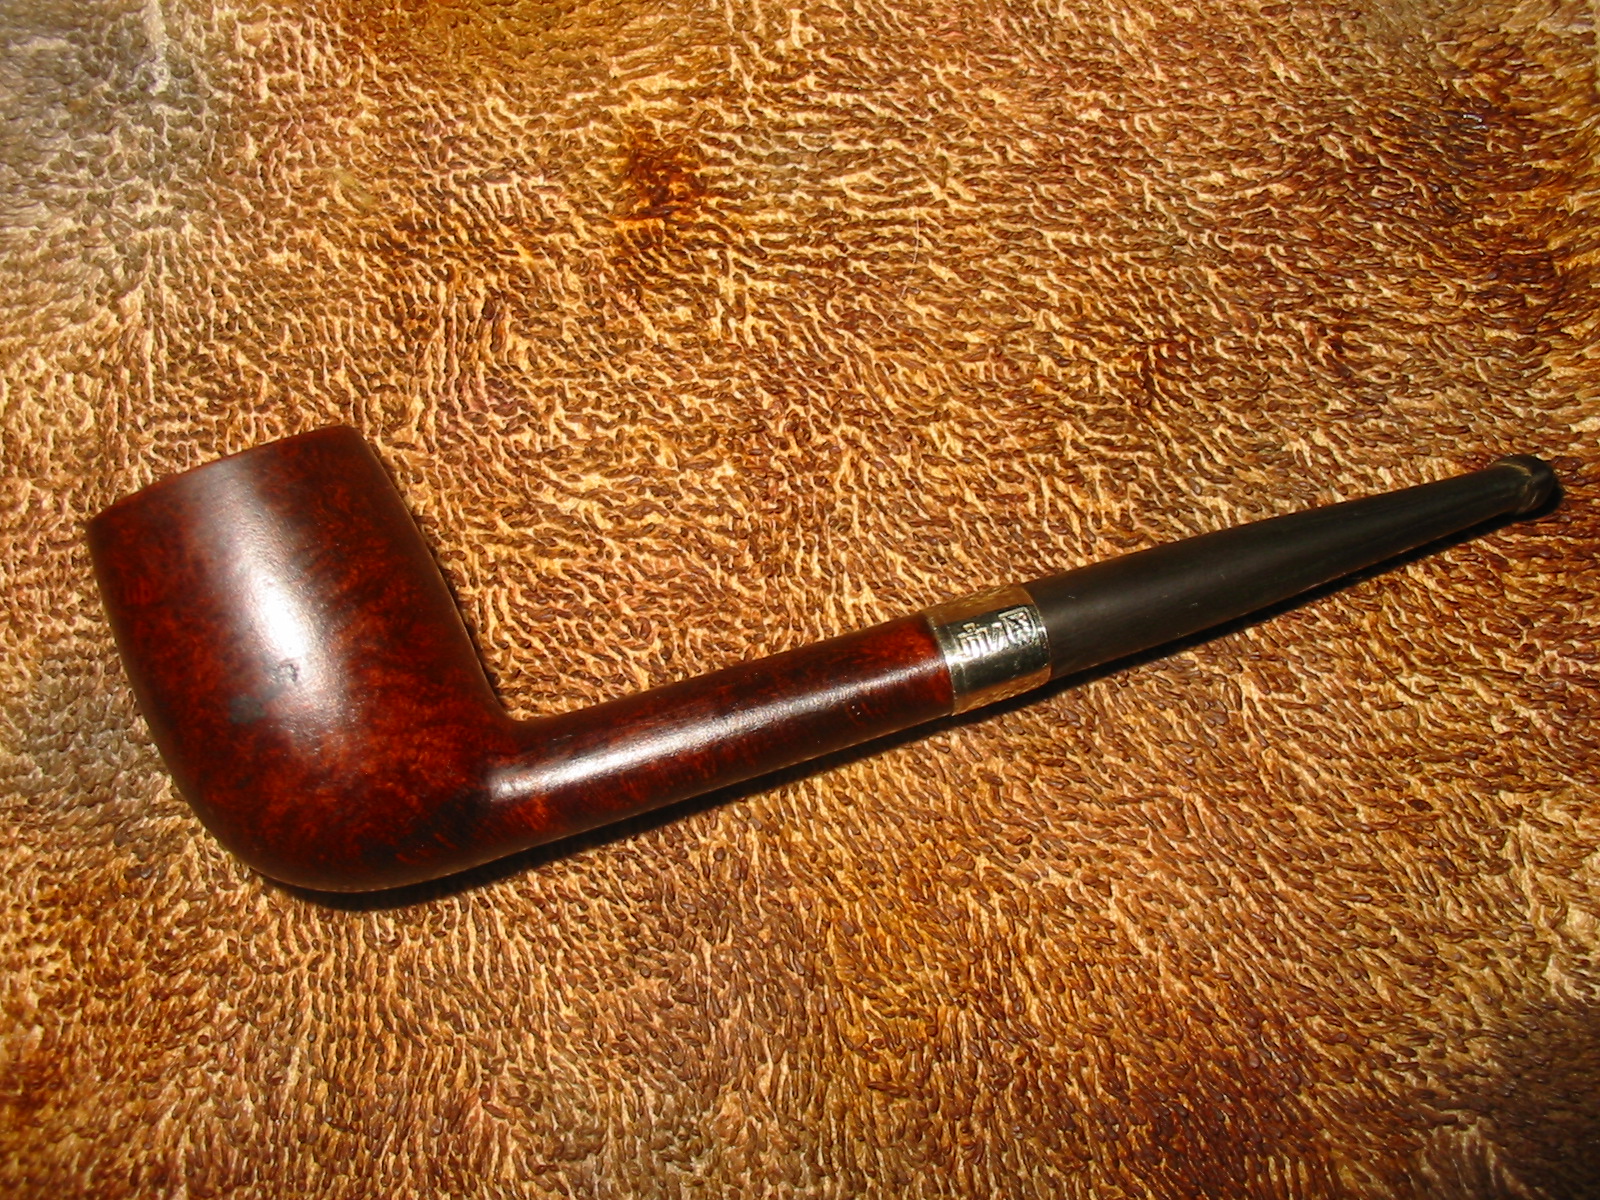
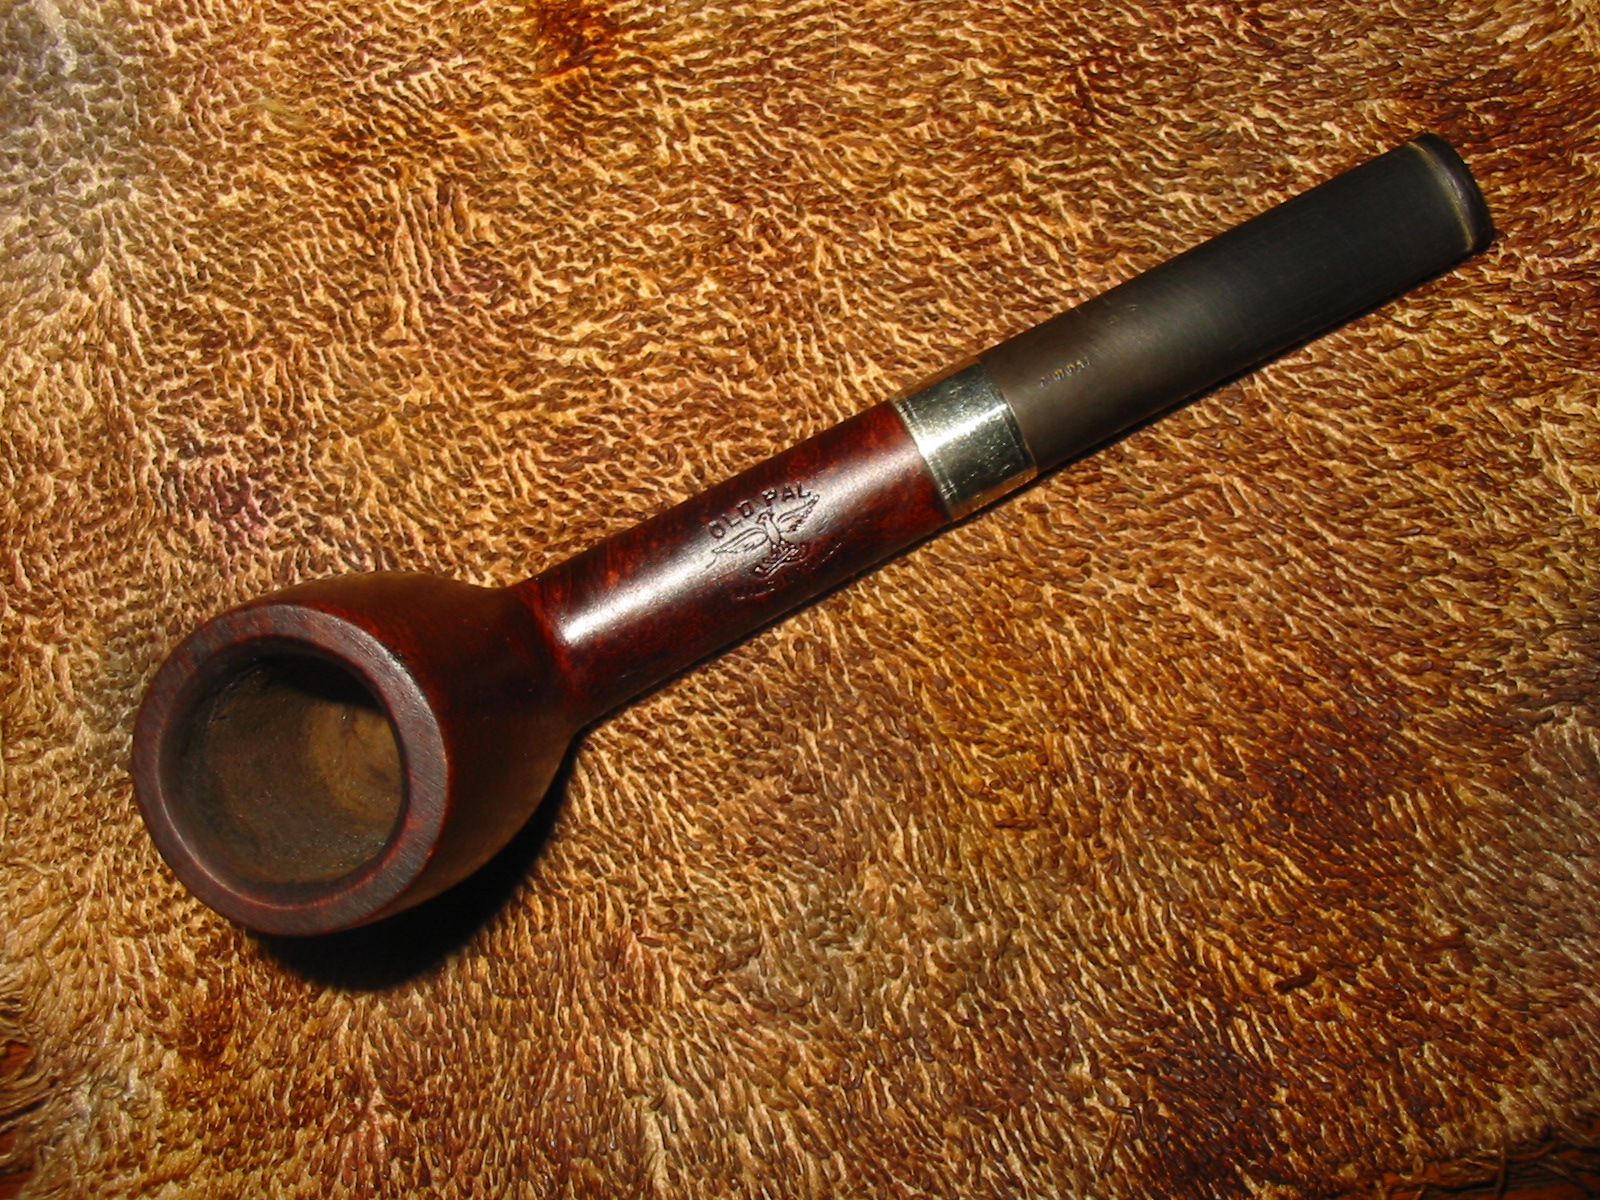
I just finished cleaning up another of the old pipes I picked up in my antique mall grab bag. It is a dainty pipe with an oval shank. When it came out of the grab bag it had a cracked shank and did not have a stem in the shank so I assumed it was a Canadian. When I went over the stems in the bag I found that one of them was stamped Old Pal. It fit the shank well and the look was quite unique. The stem was broken at the button with a large chunk on one side missing. The overall length is 5 ¾ inches and the weight is negligible. It is stamped on top of the shank in arc – Old Pal, over an Eagle with spread wings and then underneath Made in France.

op
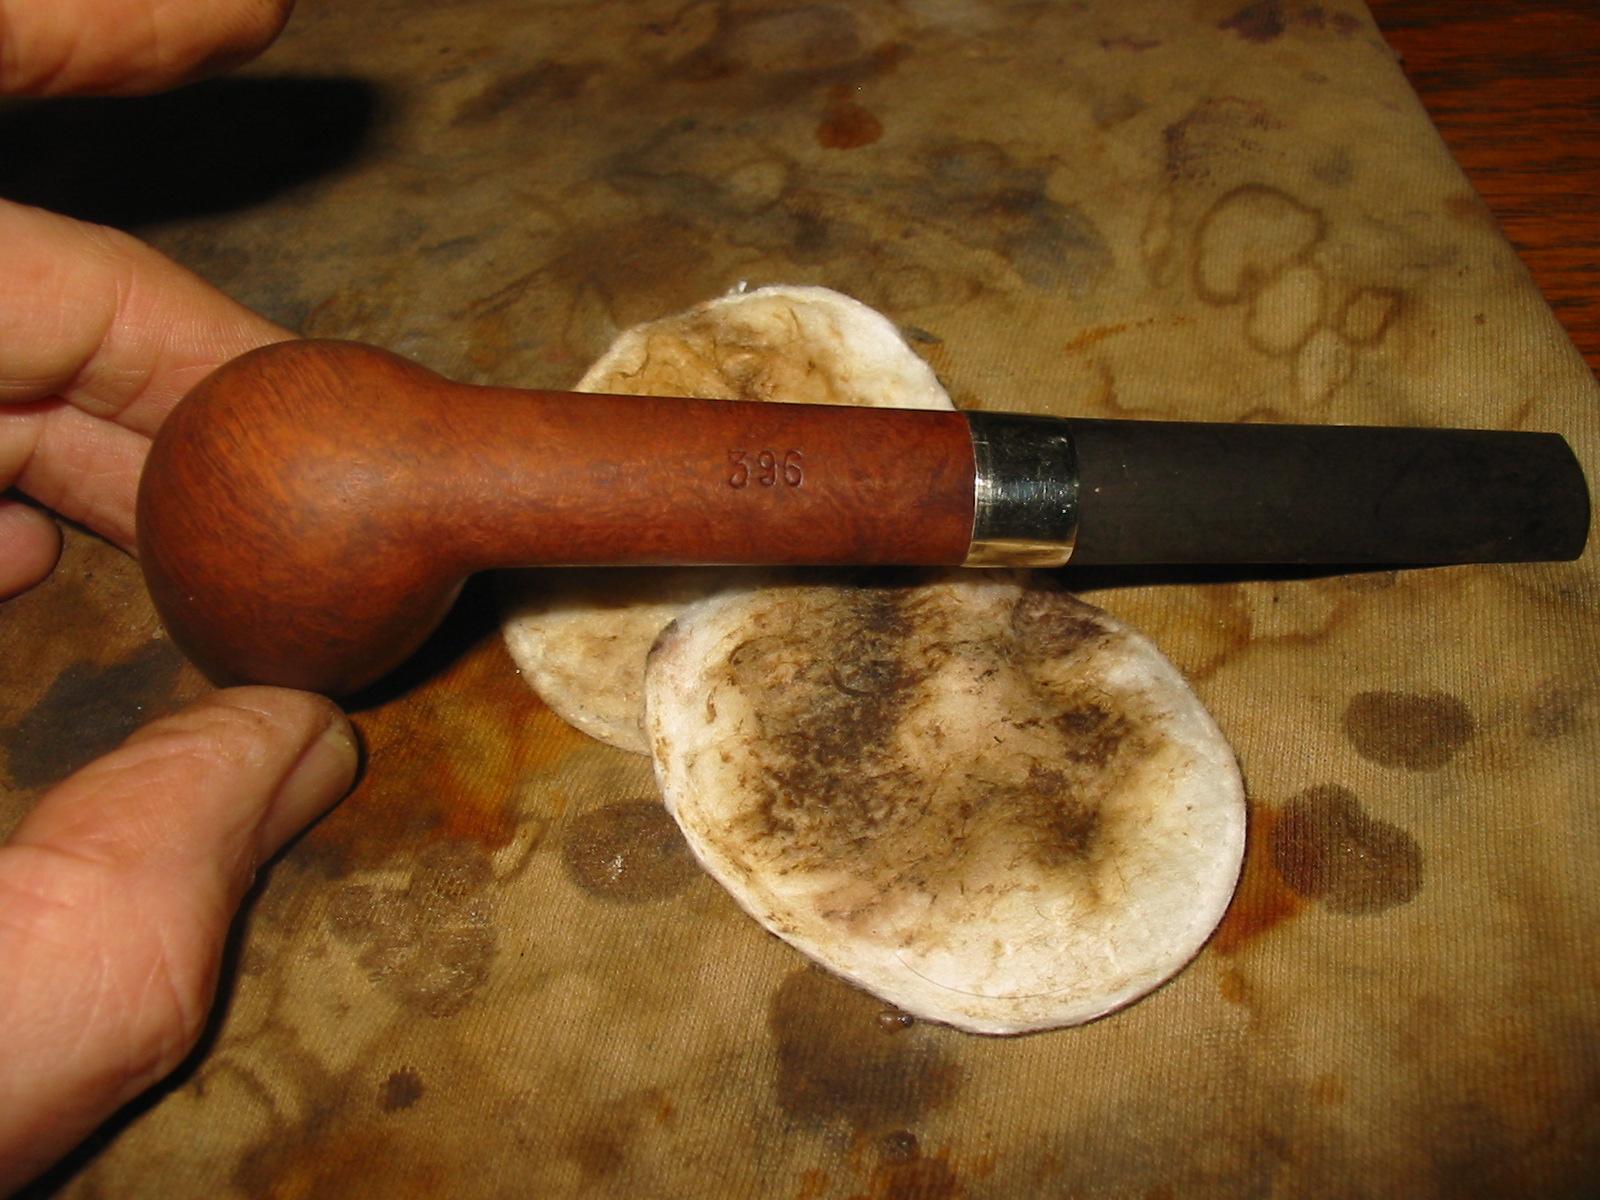
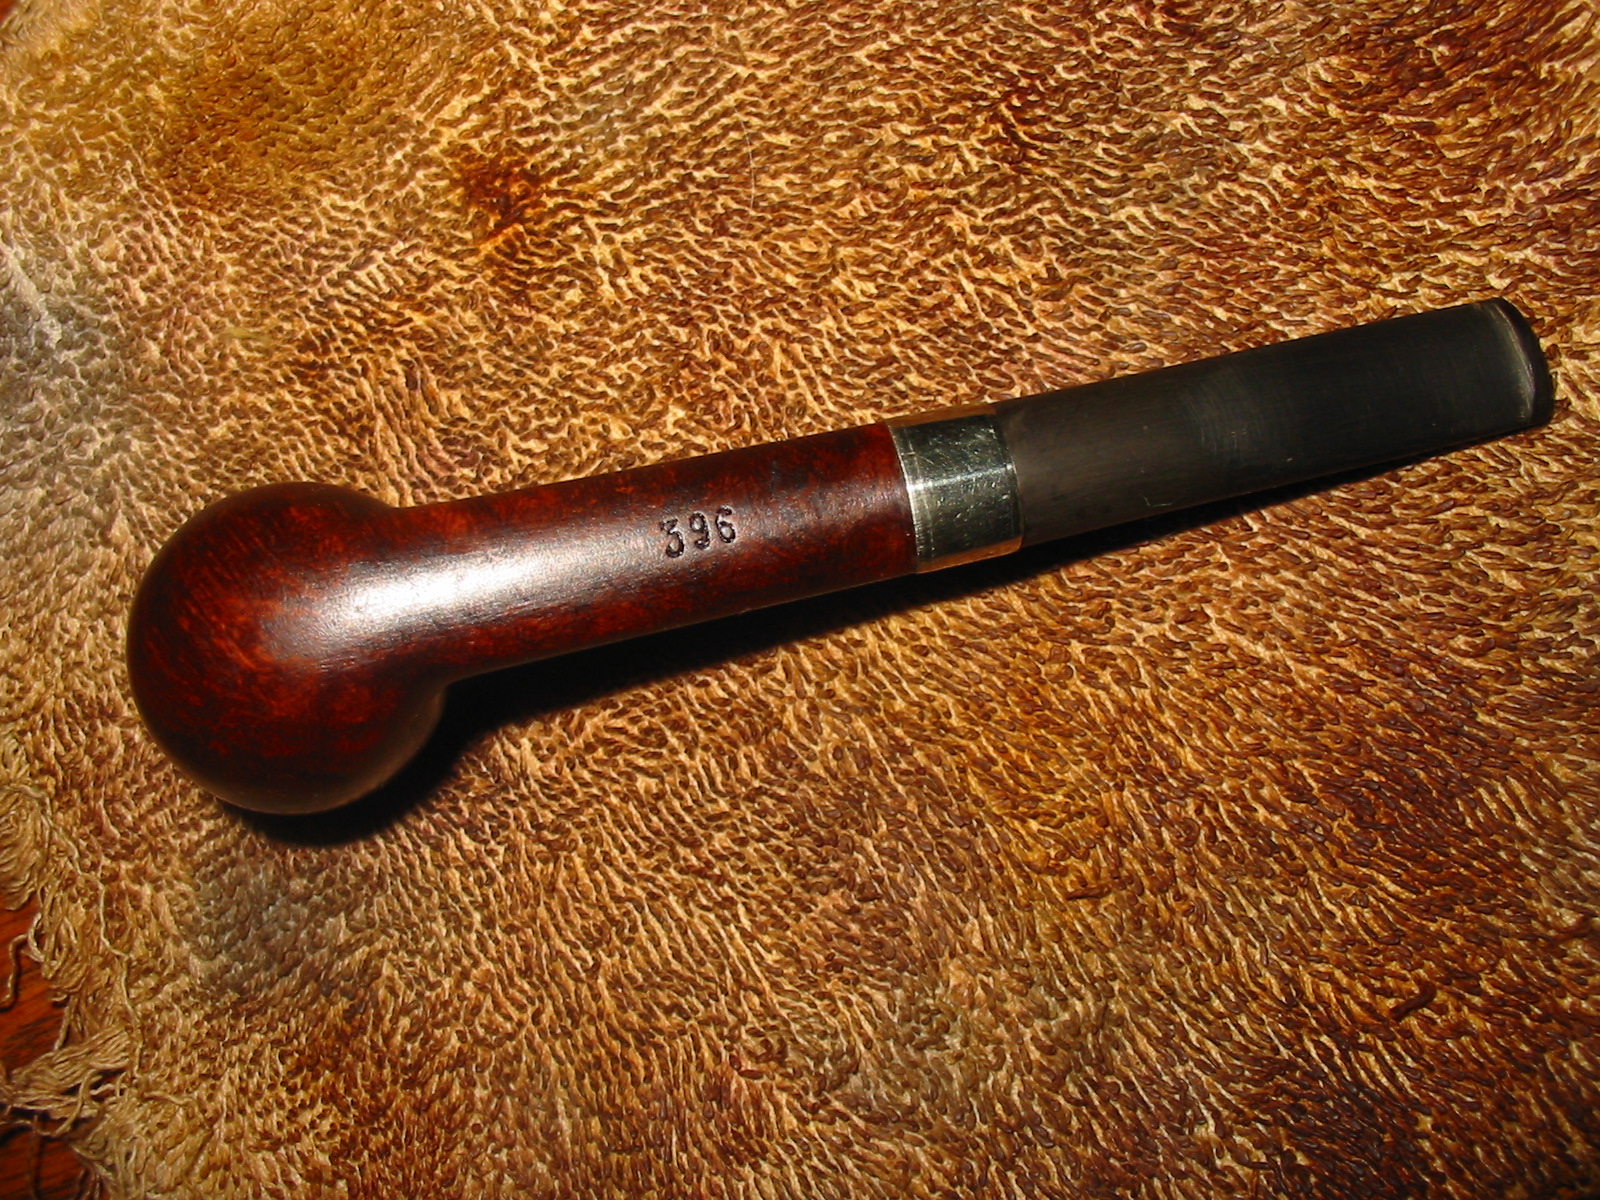
On the underside of the shank it is stamped 396 which I assume is the shape number. The shape number appears to be a GBD number but it is not included in the list on the Perdua shape number website. The stamping is faint but still readable. I wrote about the history of the brand in a previous post (https://rebornpipes.wordpress.com/2014/04/19/restemming-and-refurbishing-a-planter-opera-pipe/) But will summarize it again here for those who may not go back and read it.

“Who Made That Pipe” states that there were two French makers for Old Pal. The first of those is Marechal Ruchon and Cie. (Incidentally it is the company that owned the GBD brand). The second maker listed is Rubinovich & Haskell Ltd. The bird emblem is probably the key, but I can find no reference to it. My own thinking is that the brand was made by Marechal Ruchon & Cie. I was able to dig up this brief summary of the MR&C brand. Ganeval, Bondier and Donninger began making pipes in 1850 and rapidly gained prominence in briar pipe making. Of the three, Bondier survived the others by 30 years, but new partners took their places. The name of the company changed to Bondier Ulrich & Cie, then Bine Marechal & Cie and finally to A Marechal, Ruchon & Cie. August Marechal and Ferdinand Ruchon saw the firm into the 20th century, their names being used for the company for well over 50 years.

Prior to 1899, Marechal, Ruchon & Co. became A. Oppenhiemer’s sole agent for cigarette papers but still remained in the pipe making business. Then in 1902, Marechal, Ruchon & Co., owners of GBD and referred to as French pipe makers, merged with A. Oppenhiemer. In the 1915 London Directory of briar pipe makers one will find: “”Marechal, Ruchon & Co. – 38 Finsbury Sq. E.C.; London works, 15 & 16 Featherstone St. E.C. and Oppenhiemer, A. & Co. – 38 Finsbury Sq. E.C. listed separately.

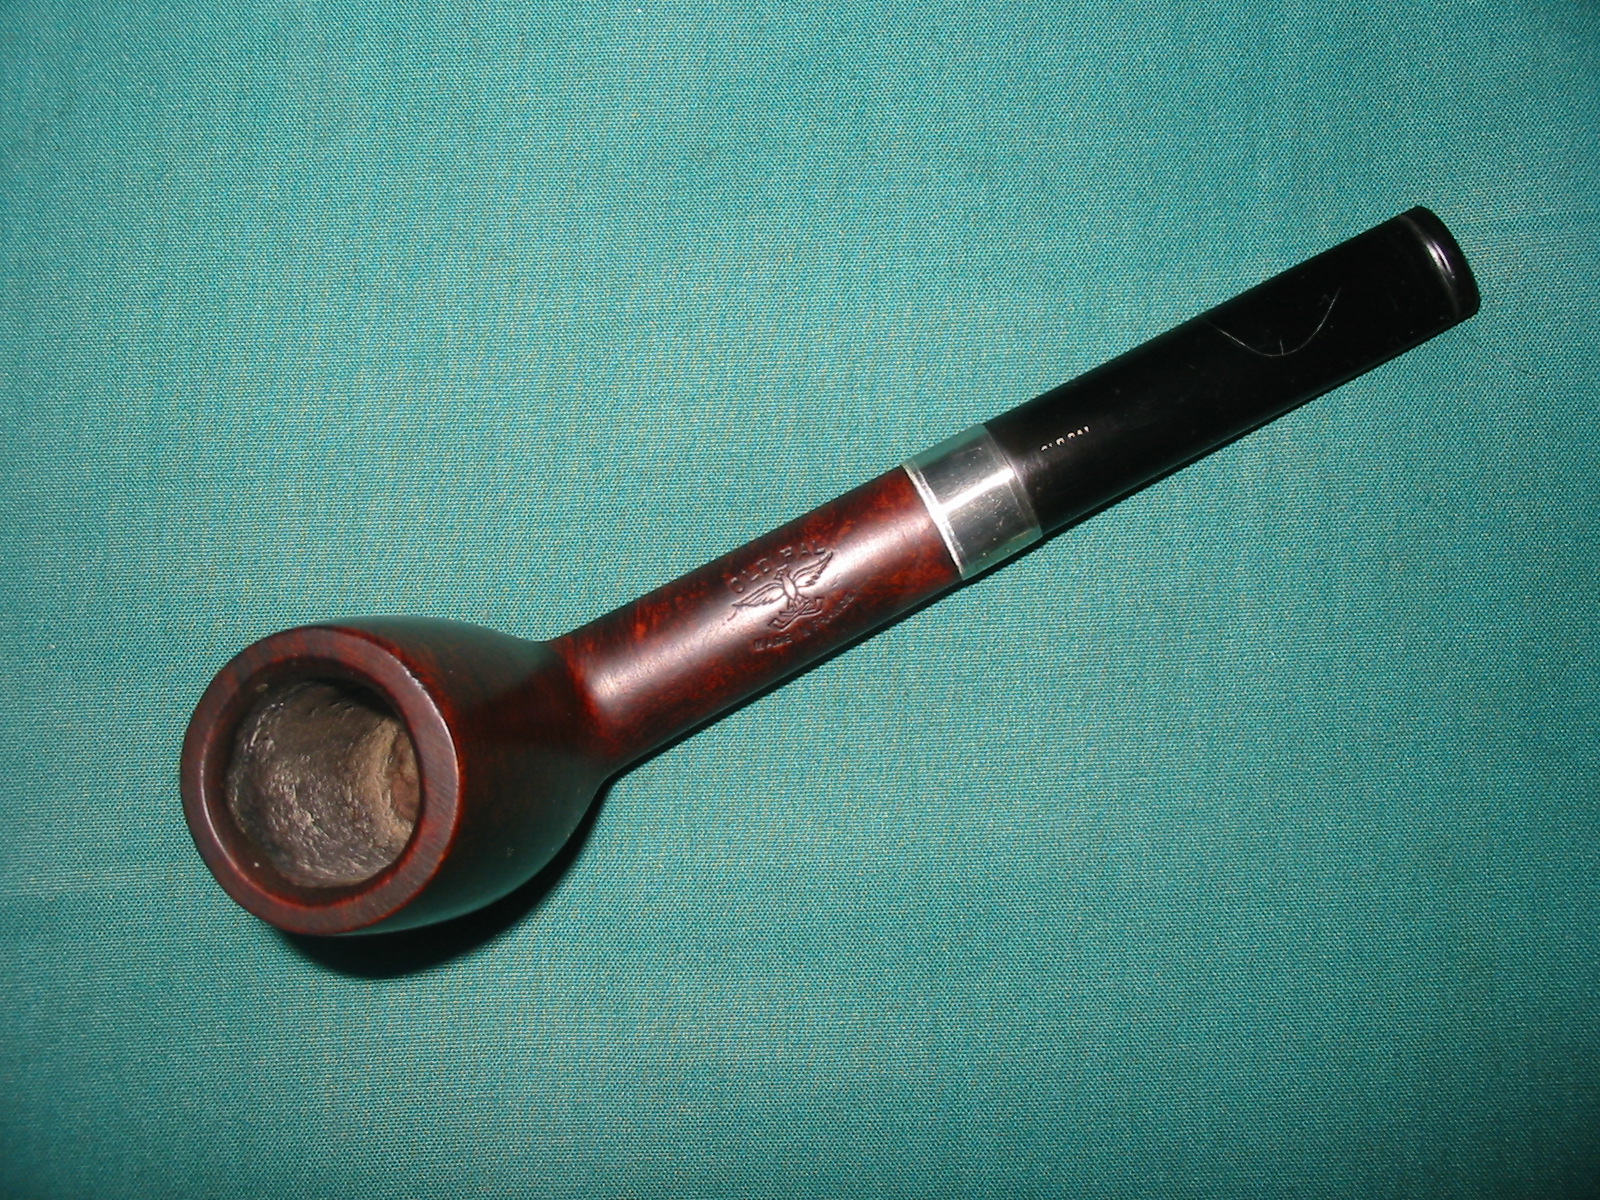
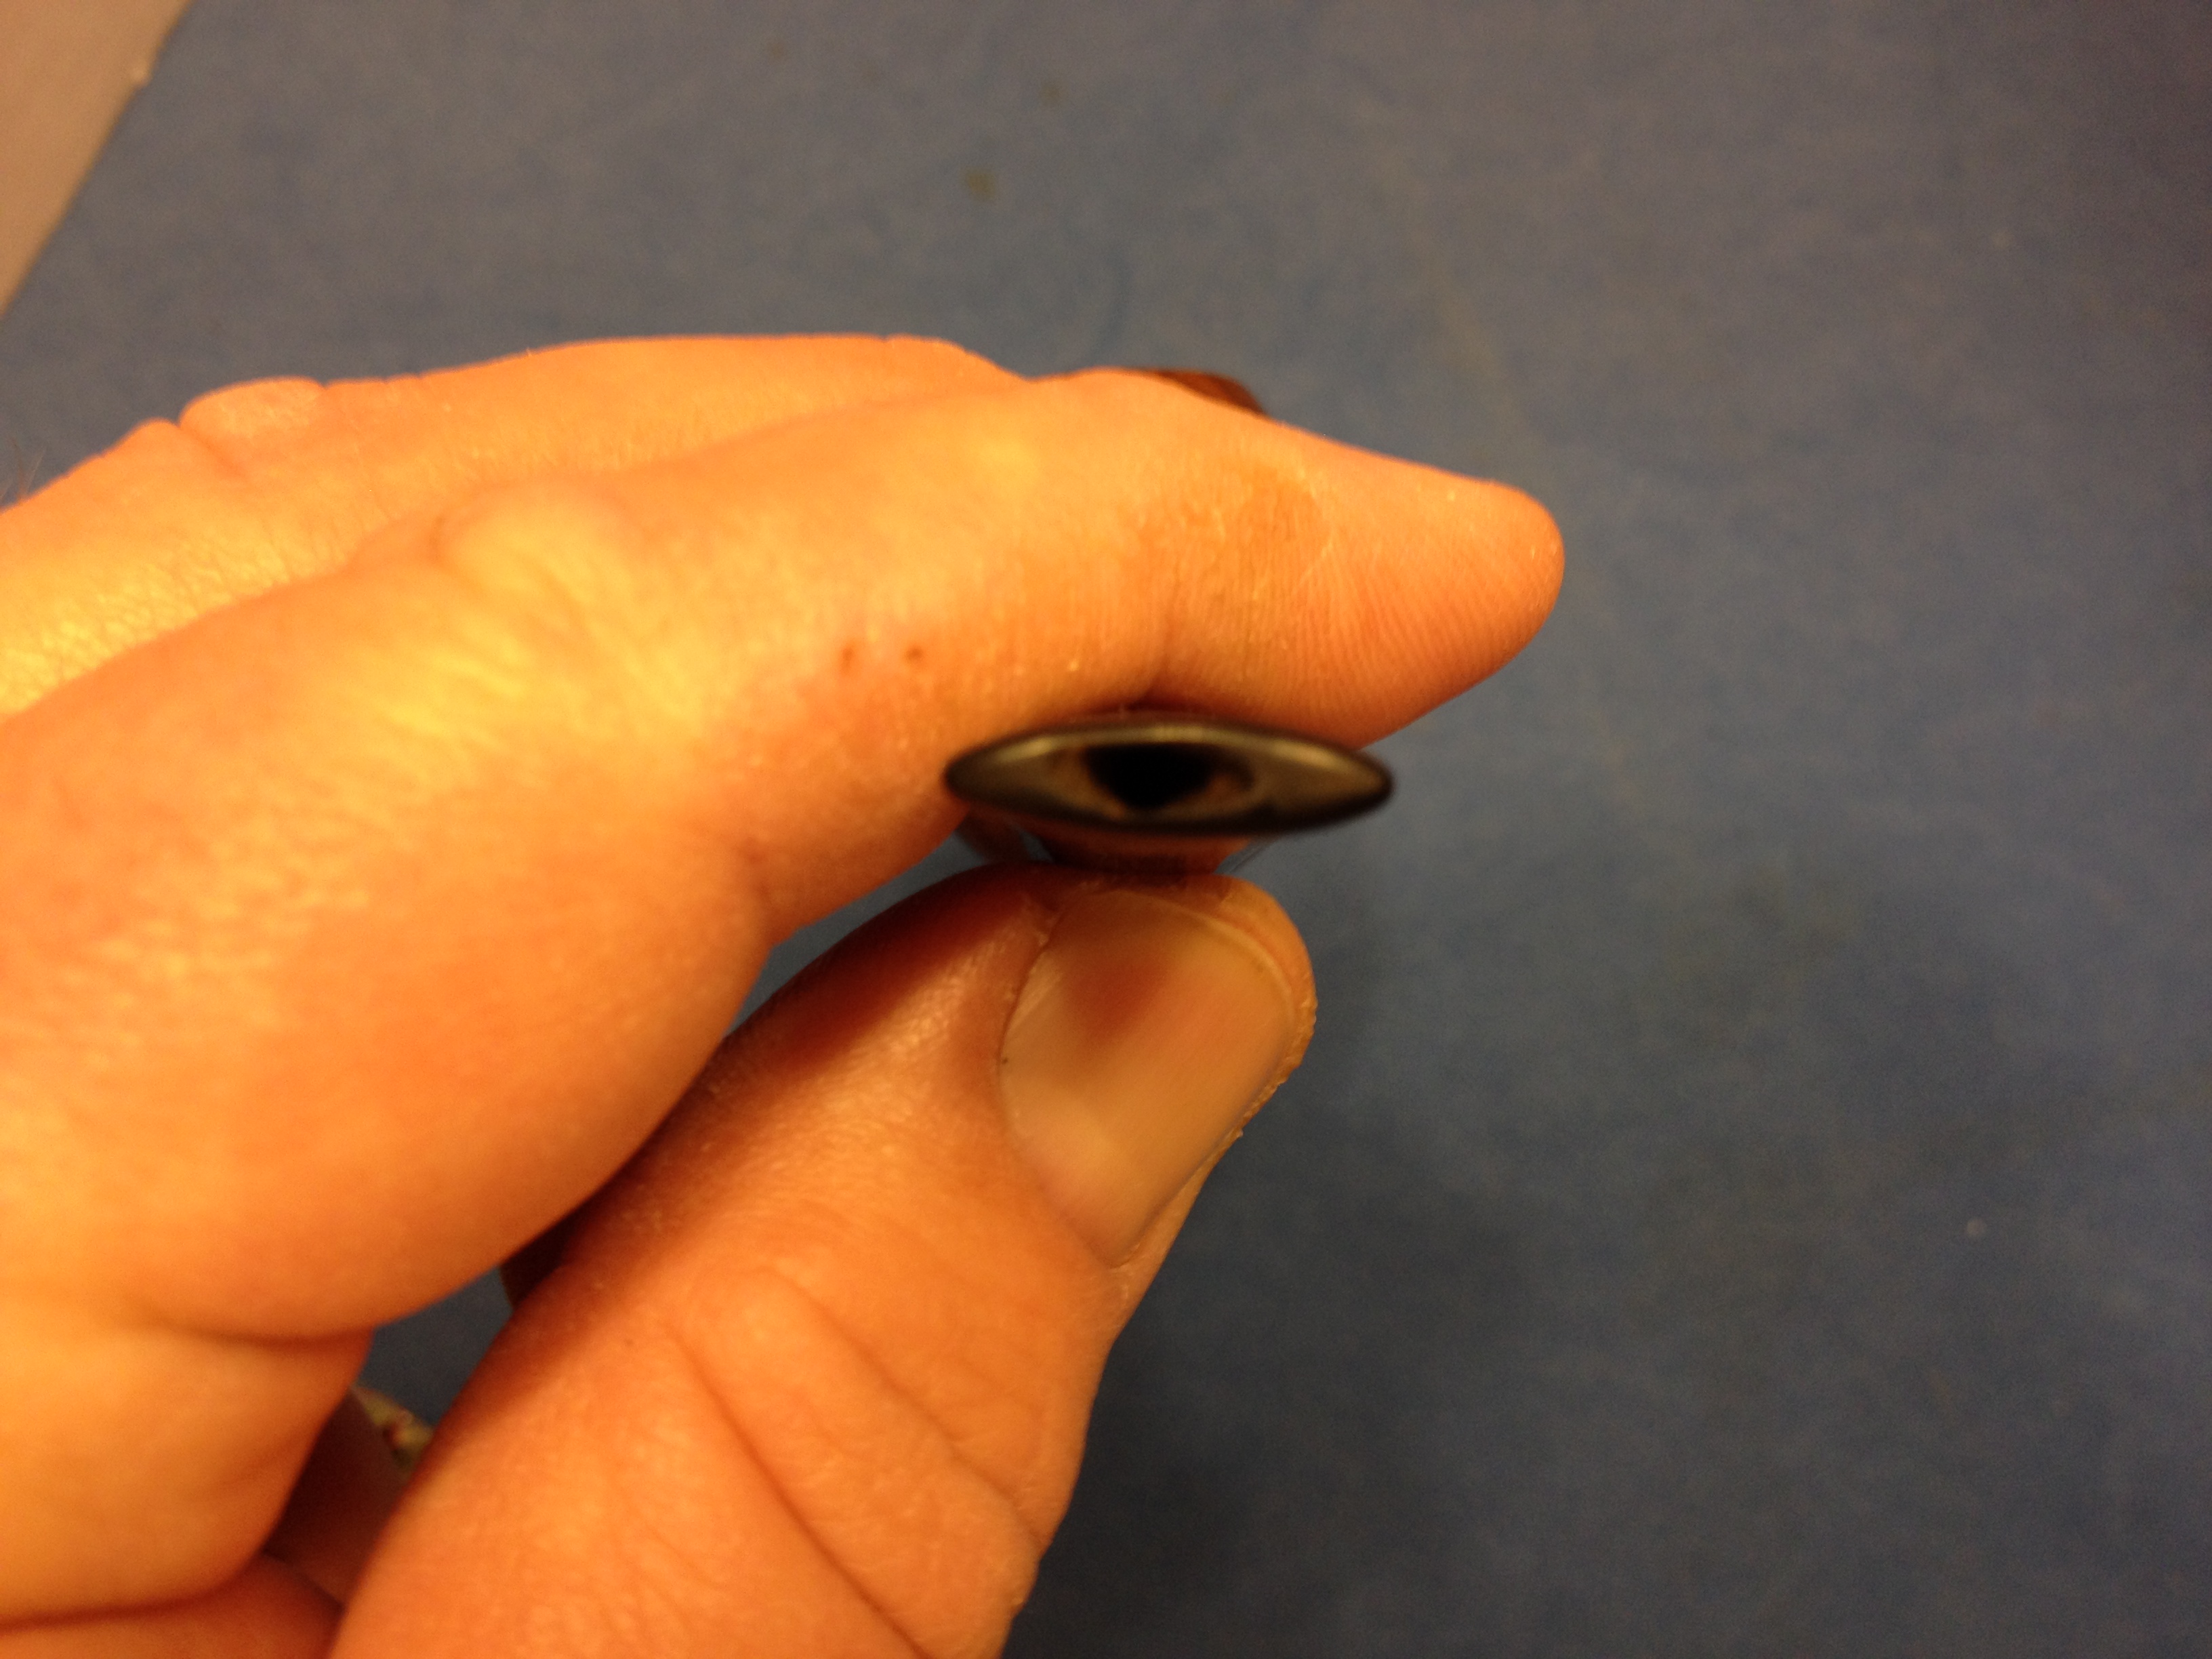
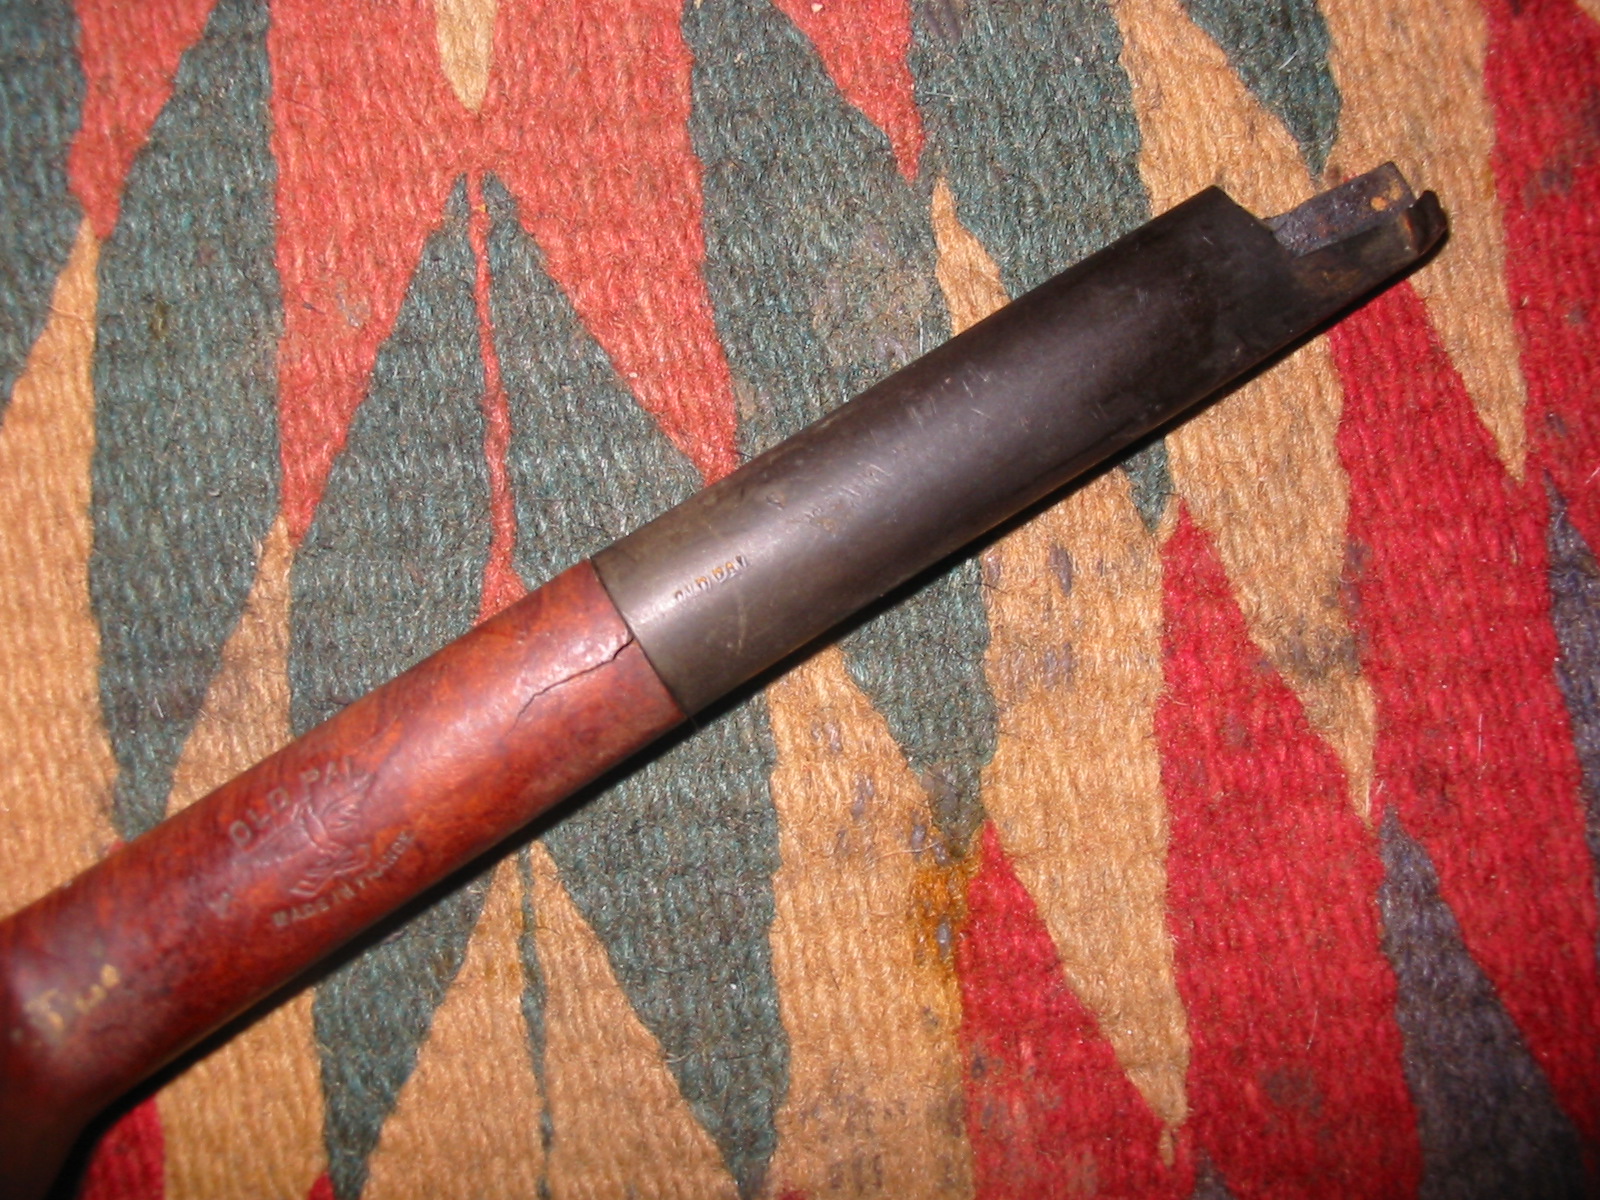
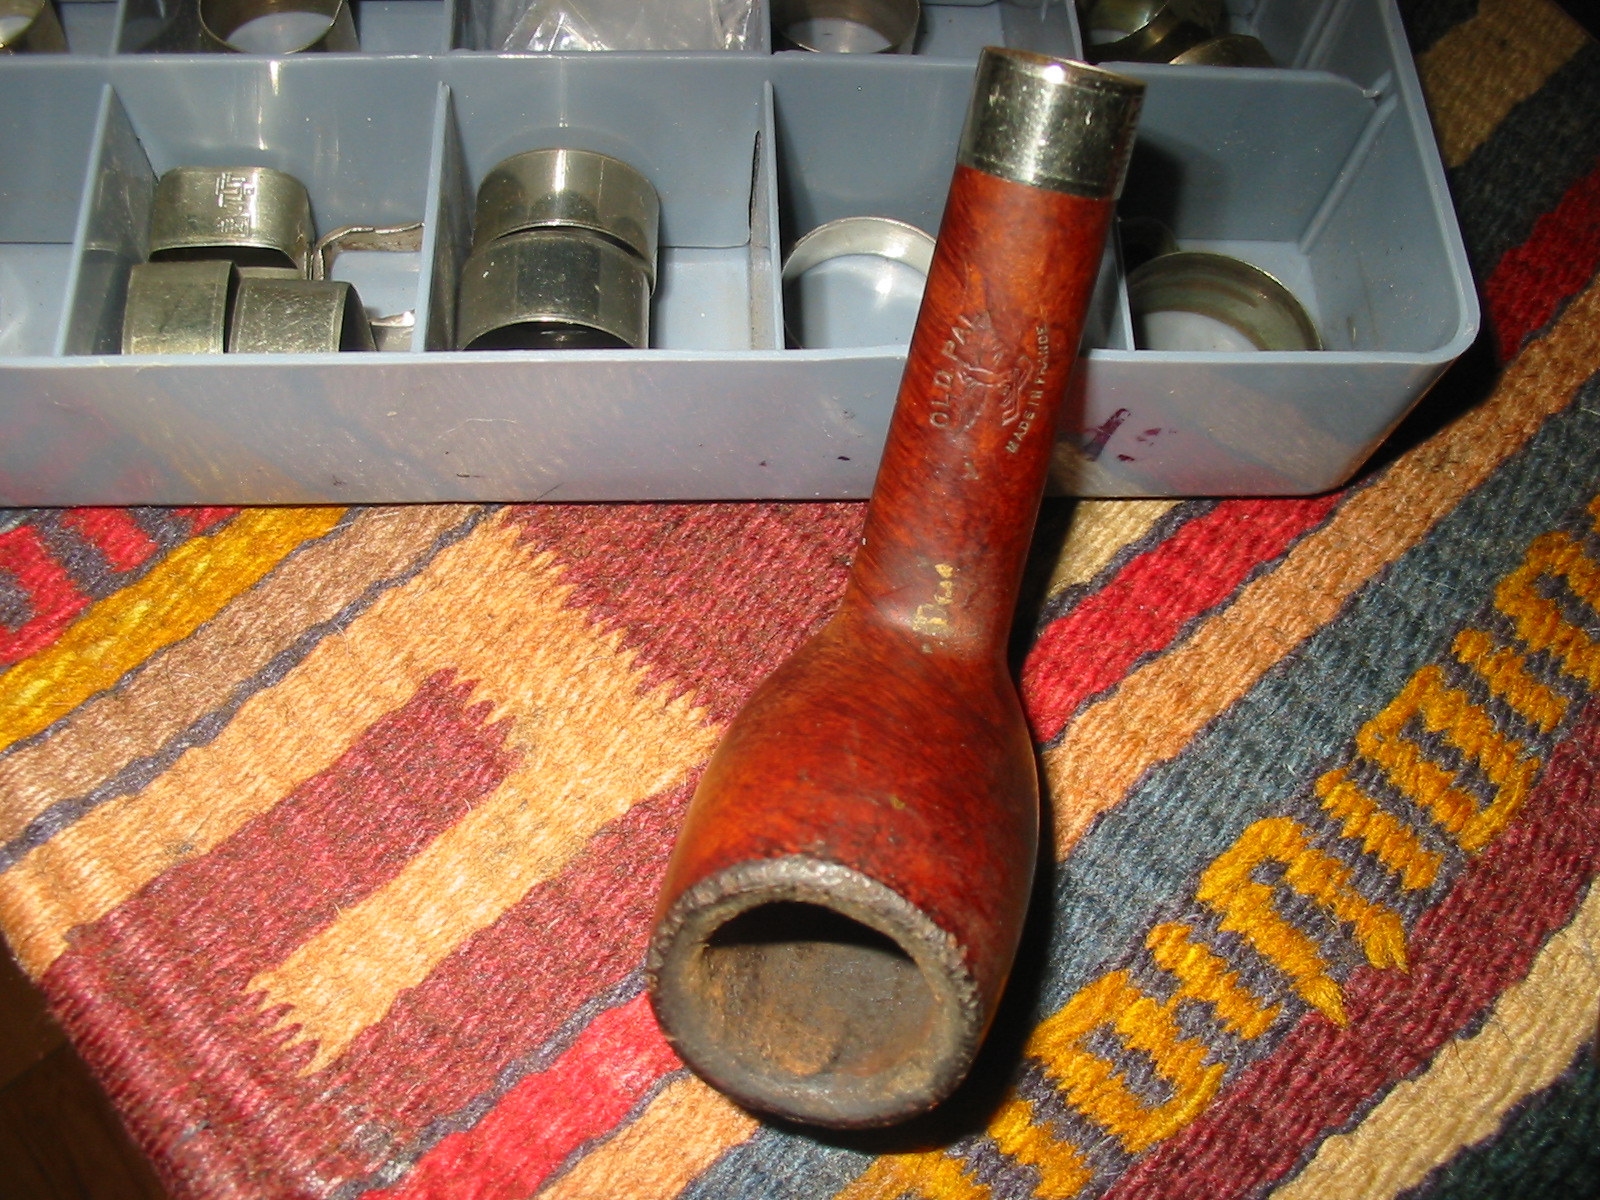
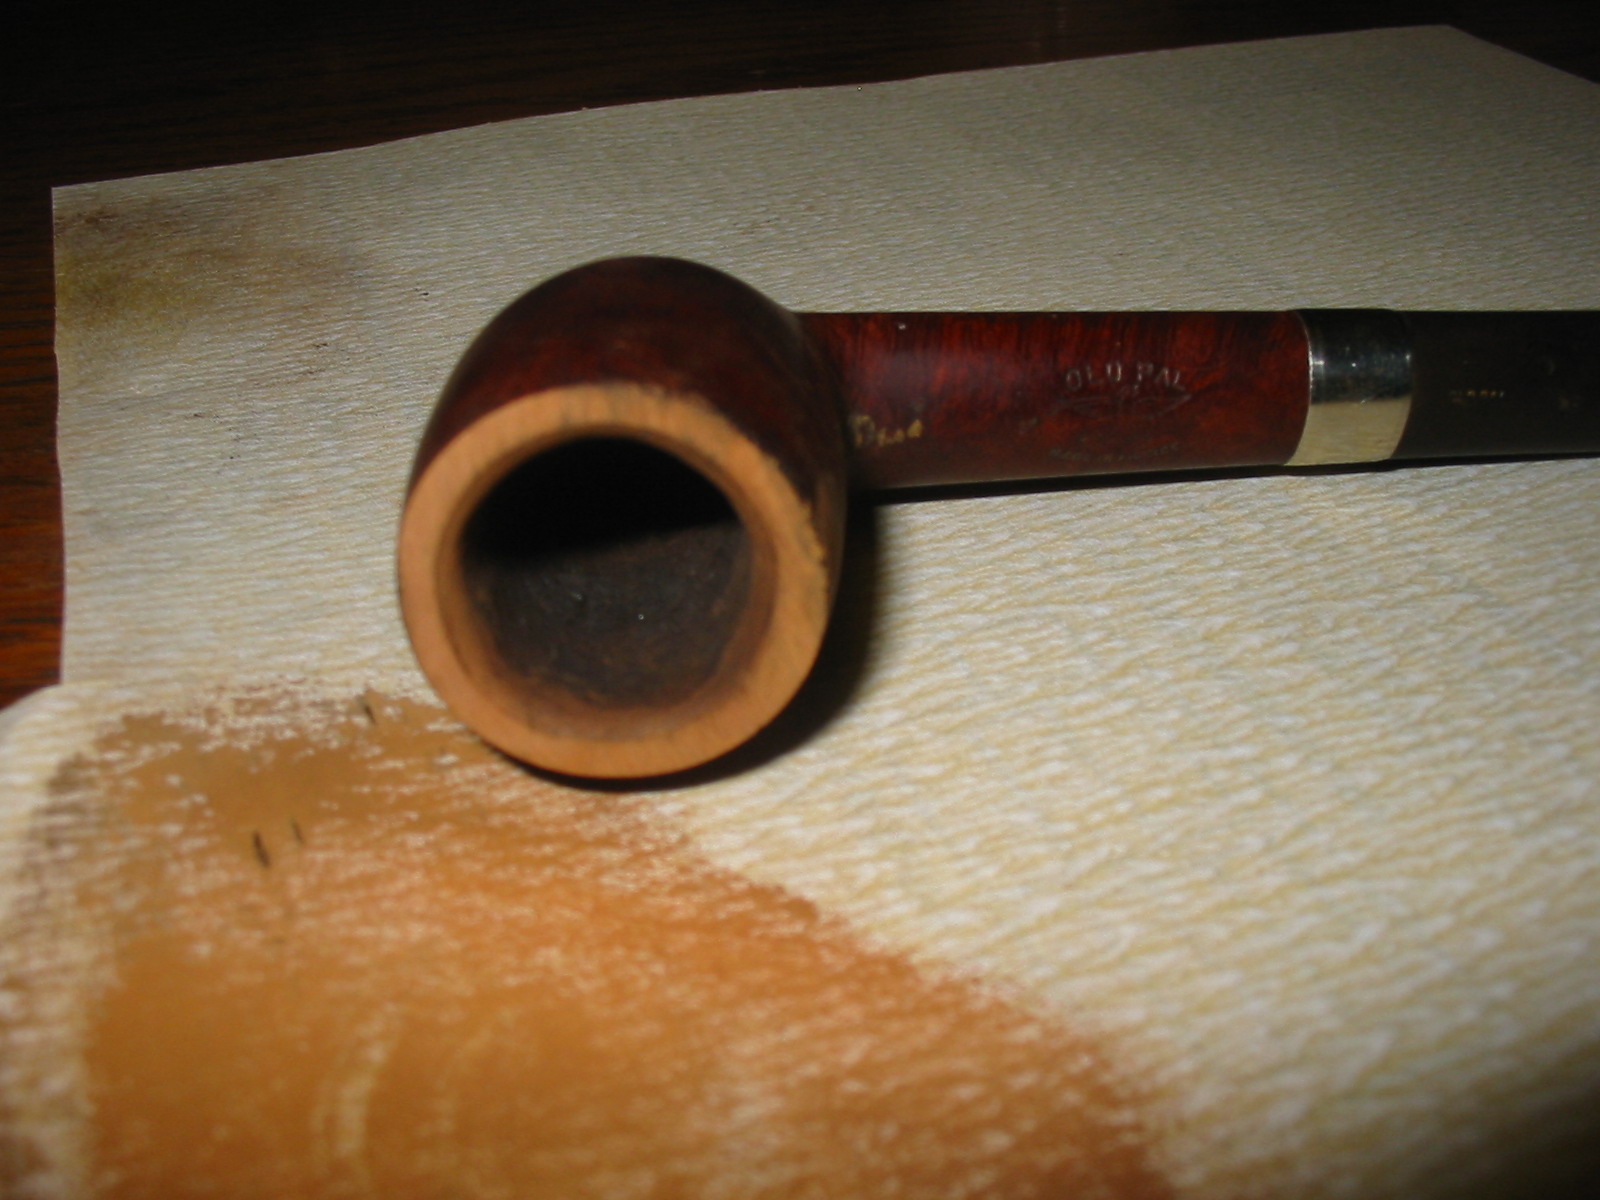
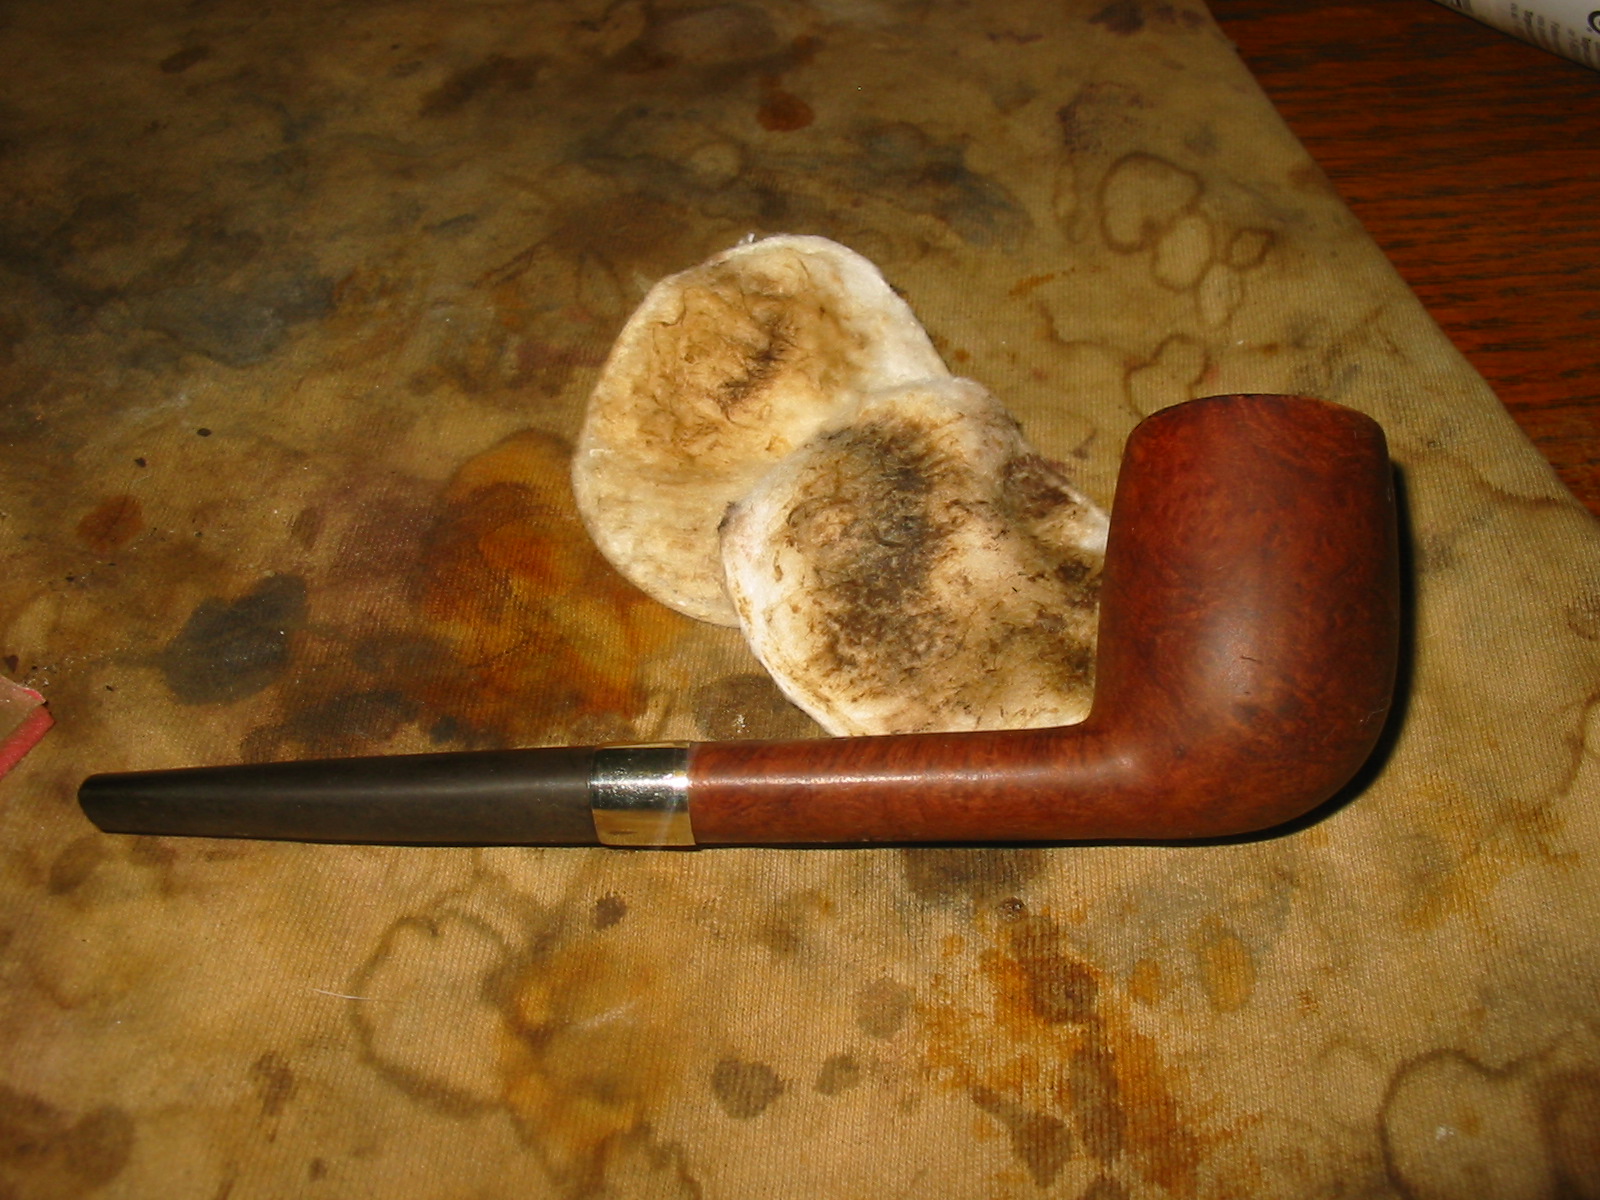
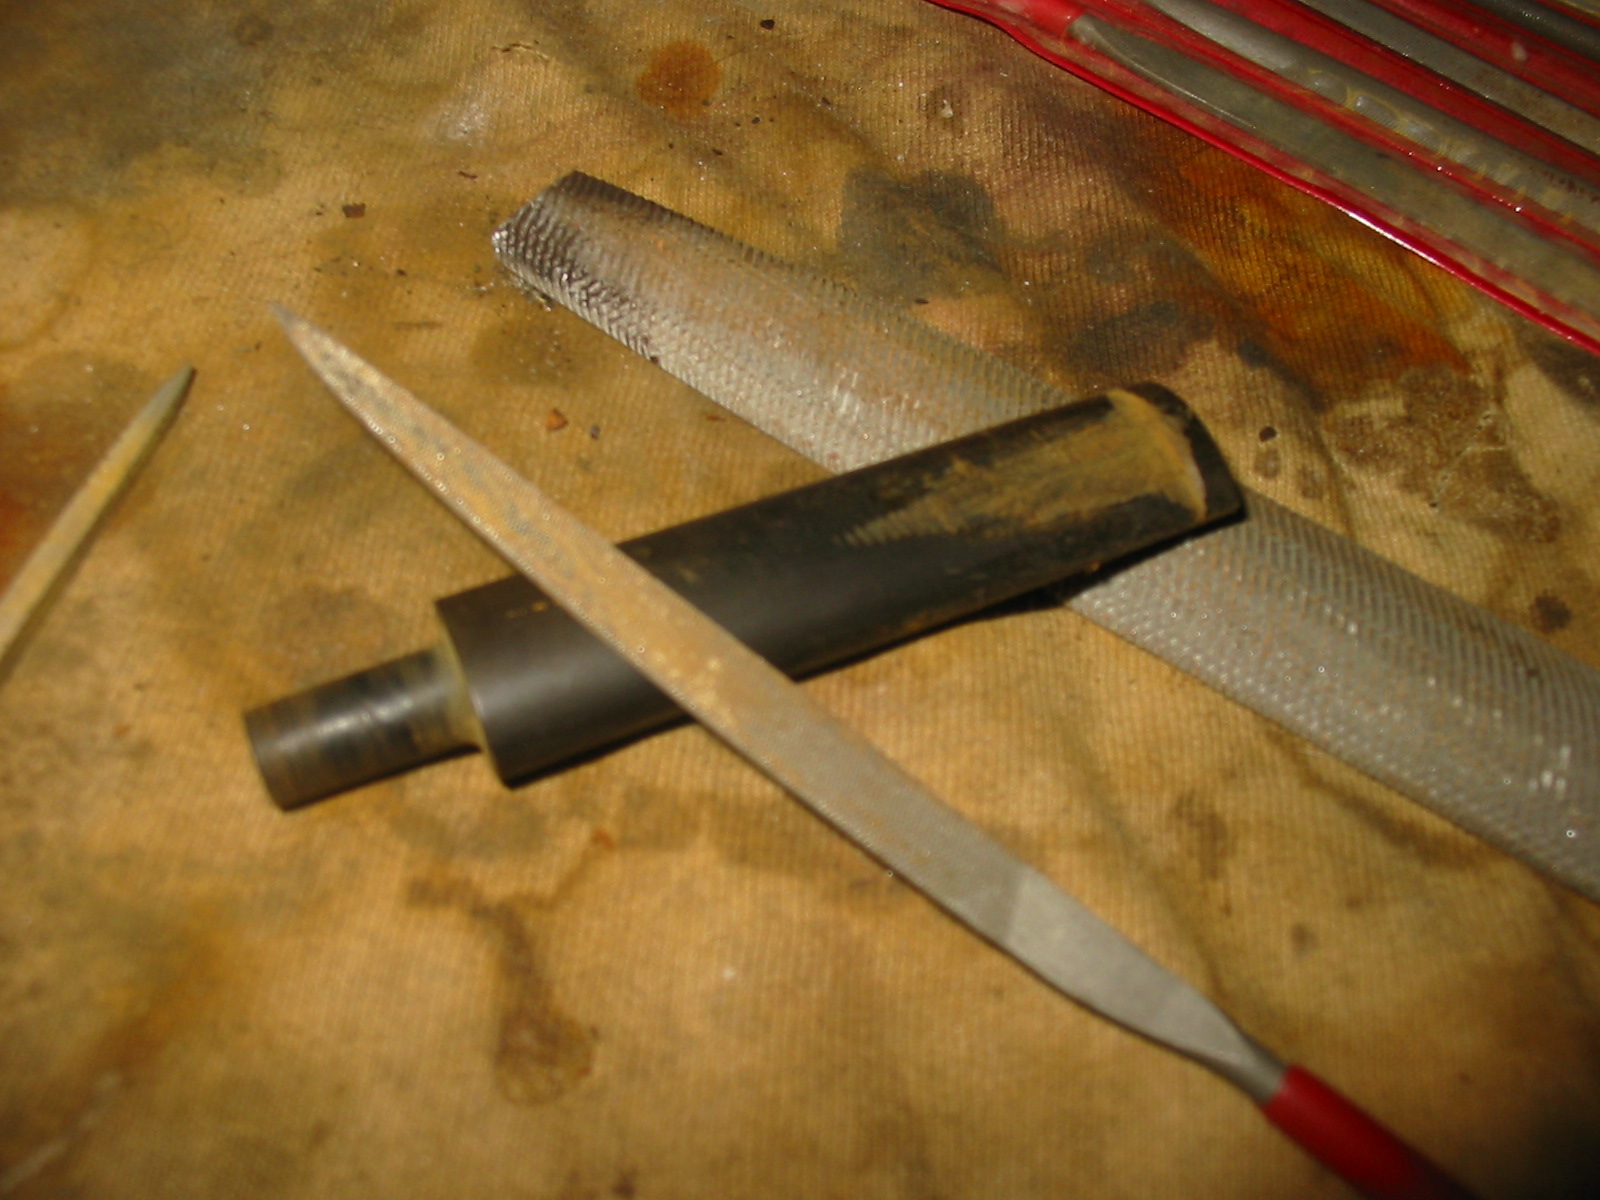
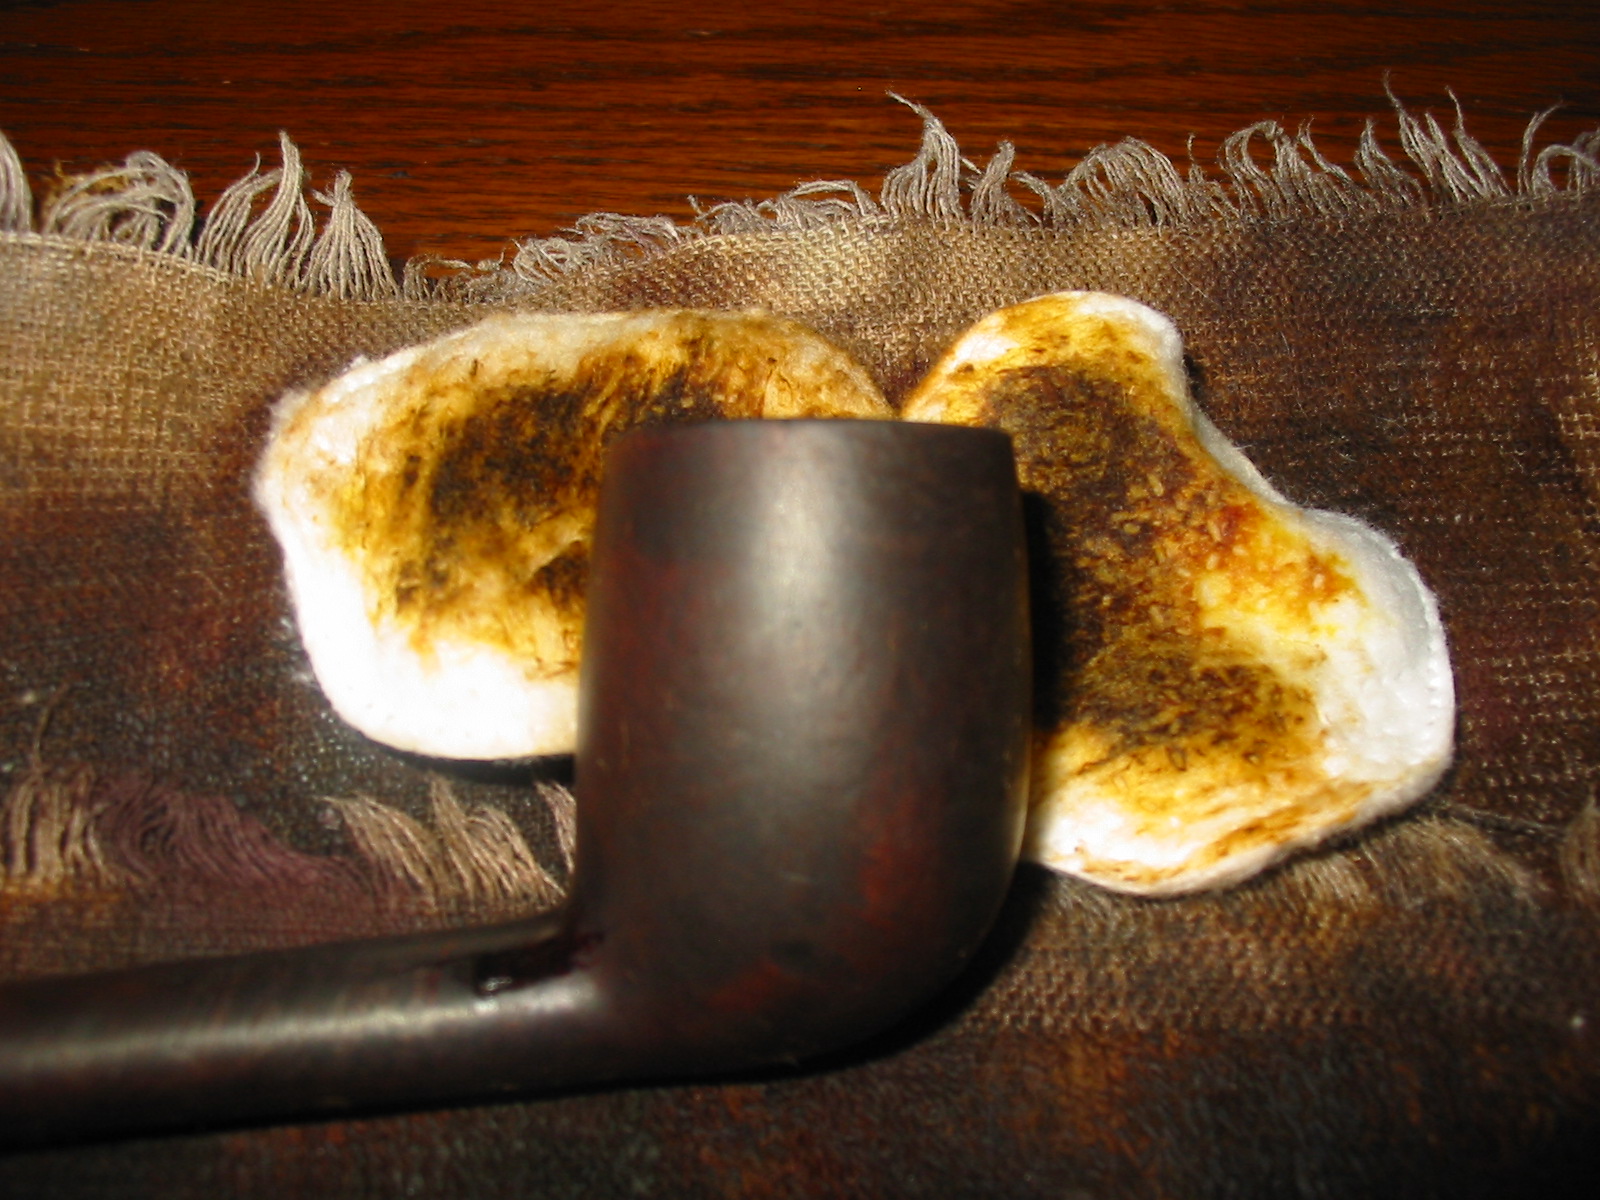
As before with that background information remembered I worked on this old pipe to clean it up and restore it. When I picked it up the bowl was badly caked. The rim was dirty and the outer edge had been knocked about pretty hard to remove the dottle of the past. The inner bevel was tarred but still in pretty good shape. The right side of the pipe had no fills or real damage. It was a nice birdseye under the grime. The left side had two fills of pink putty in the midst of some very nice grain. The grain on the rest of the bowl was a mix of cross grain and swirling grain. The finish was worn with some paint marks on the top of the shank. The stem was oxidized and had been broken with a large chunk missing at the button on the right side. The shank was cracked but the joint with the stem was smooth and tight. The tenon fit snug in the mortise with no gap in the junction. The shank and airway were dirty and tarry.
IMG_6262

IMG_6263

IMG_6265

IMG_6266
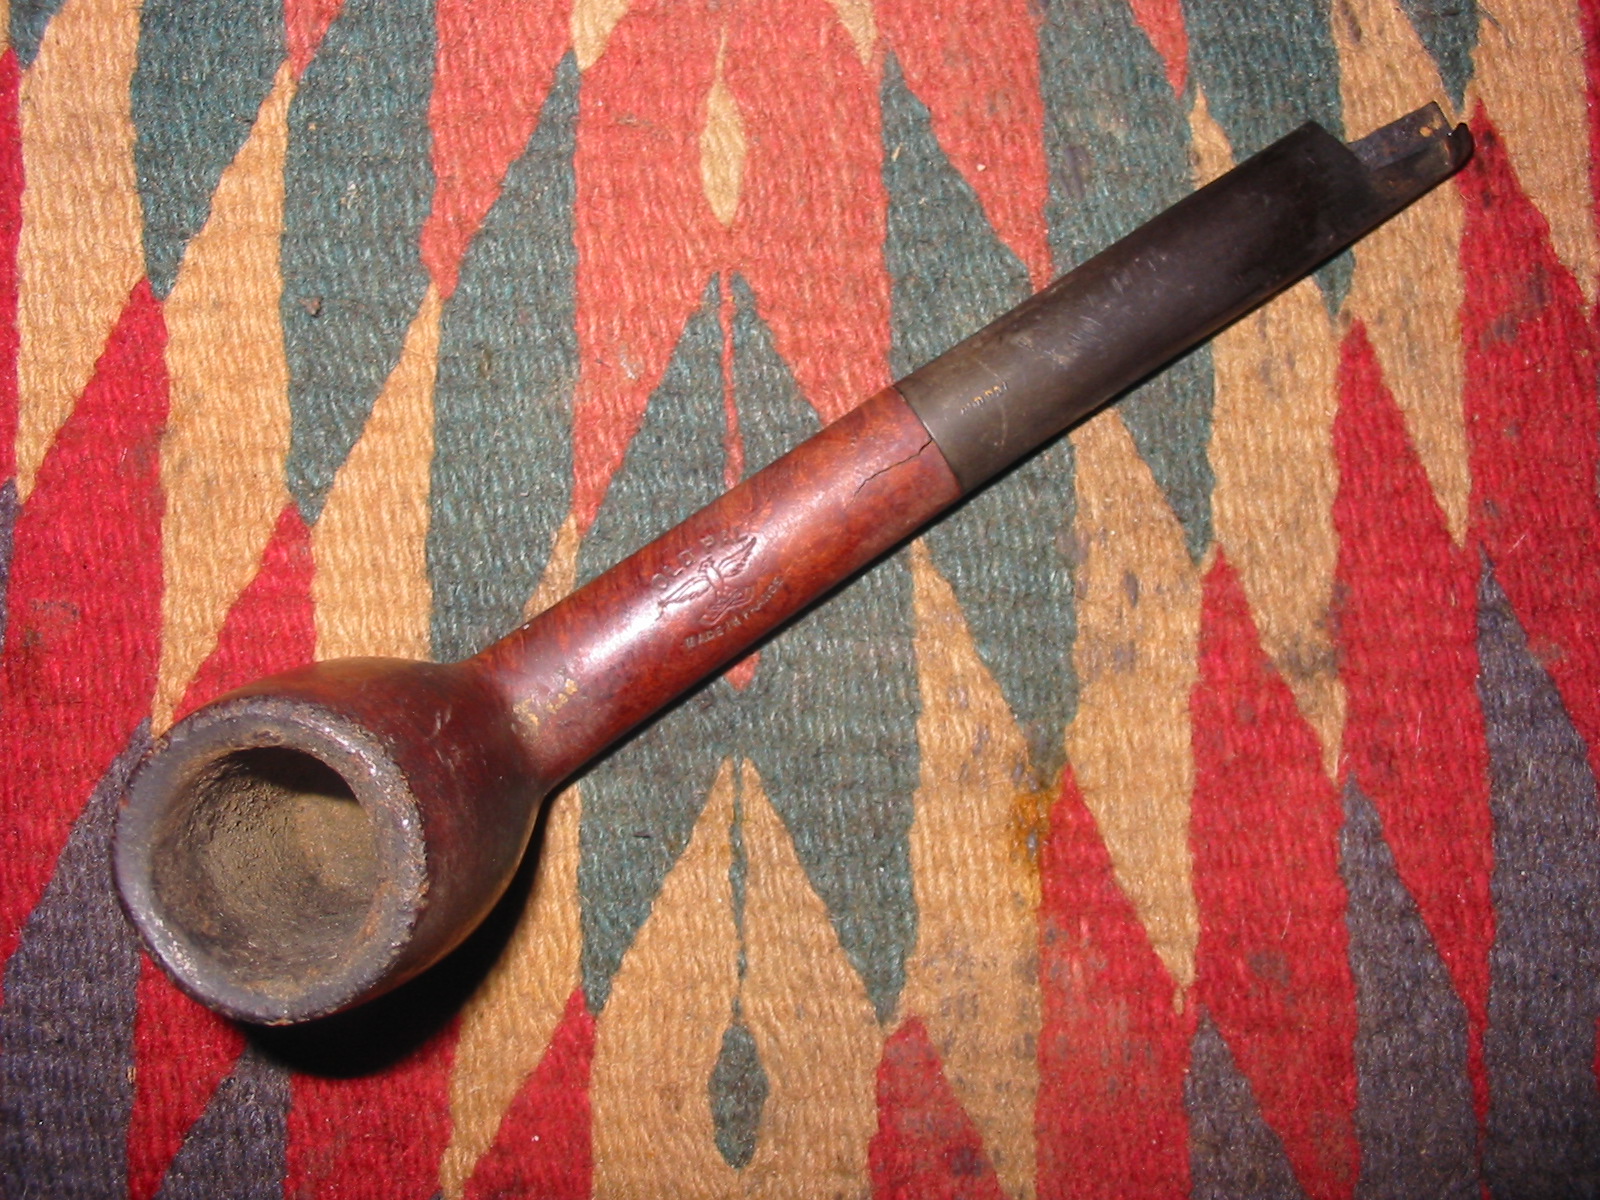
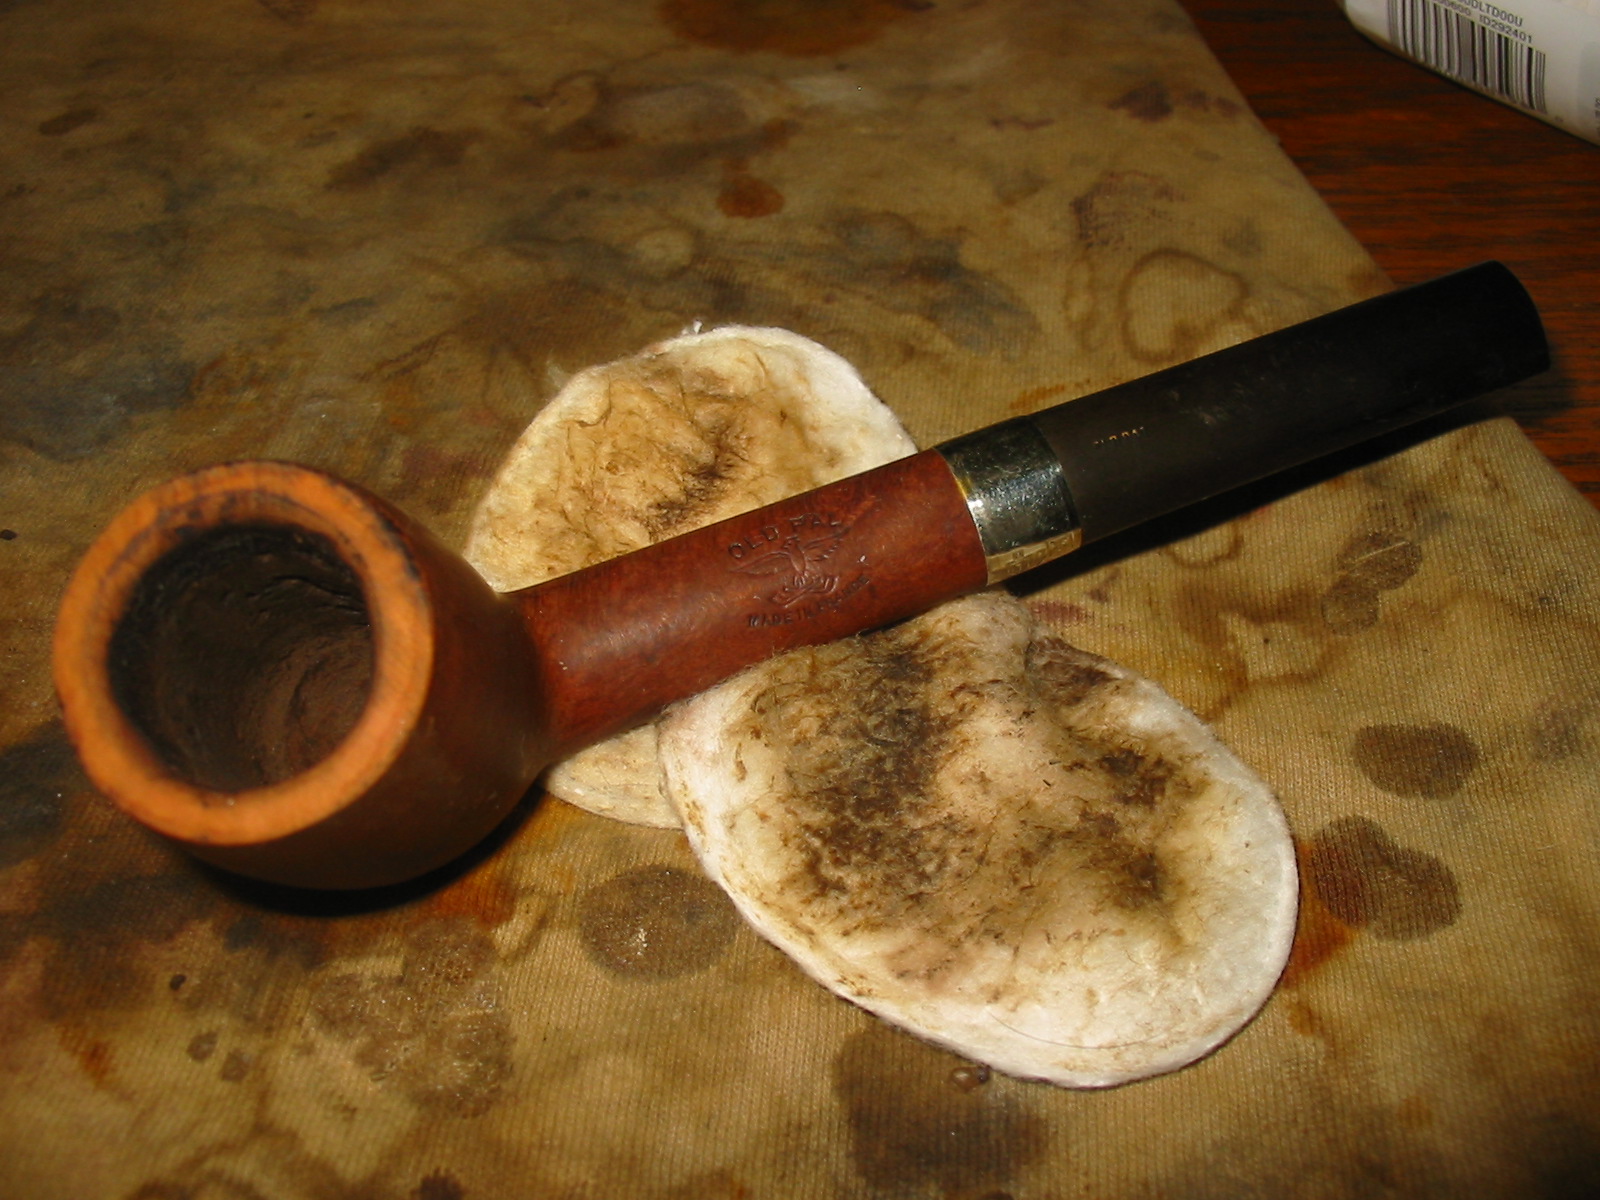
I have included the photo below as it clearly shows the crack in the shank, the broken stem and the stamping on the shank of the pipe.
IMG_6267
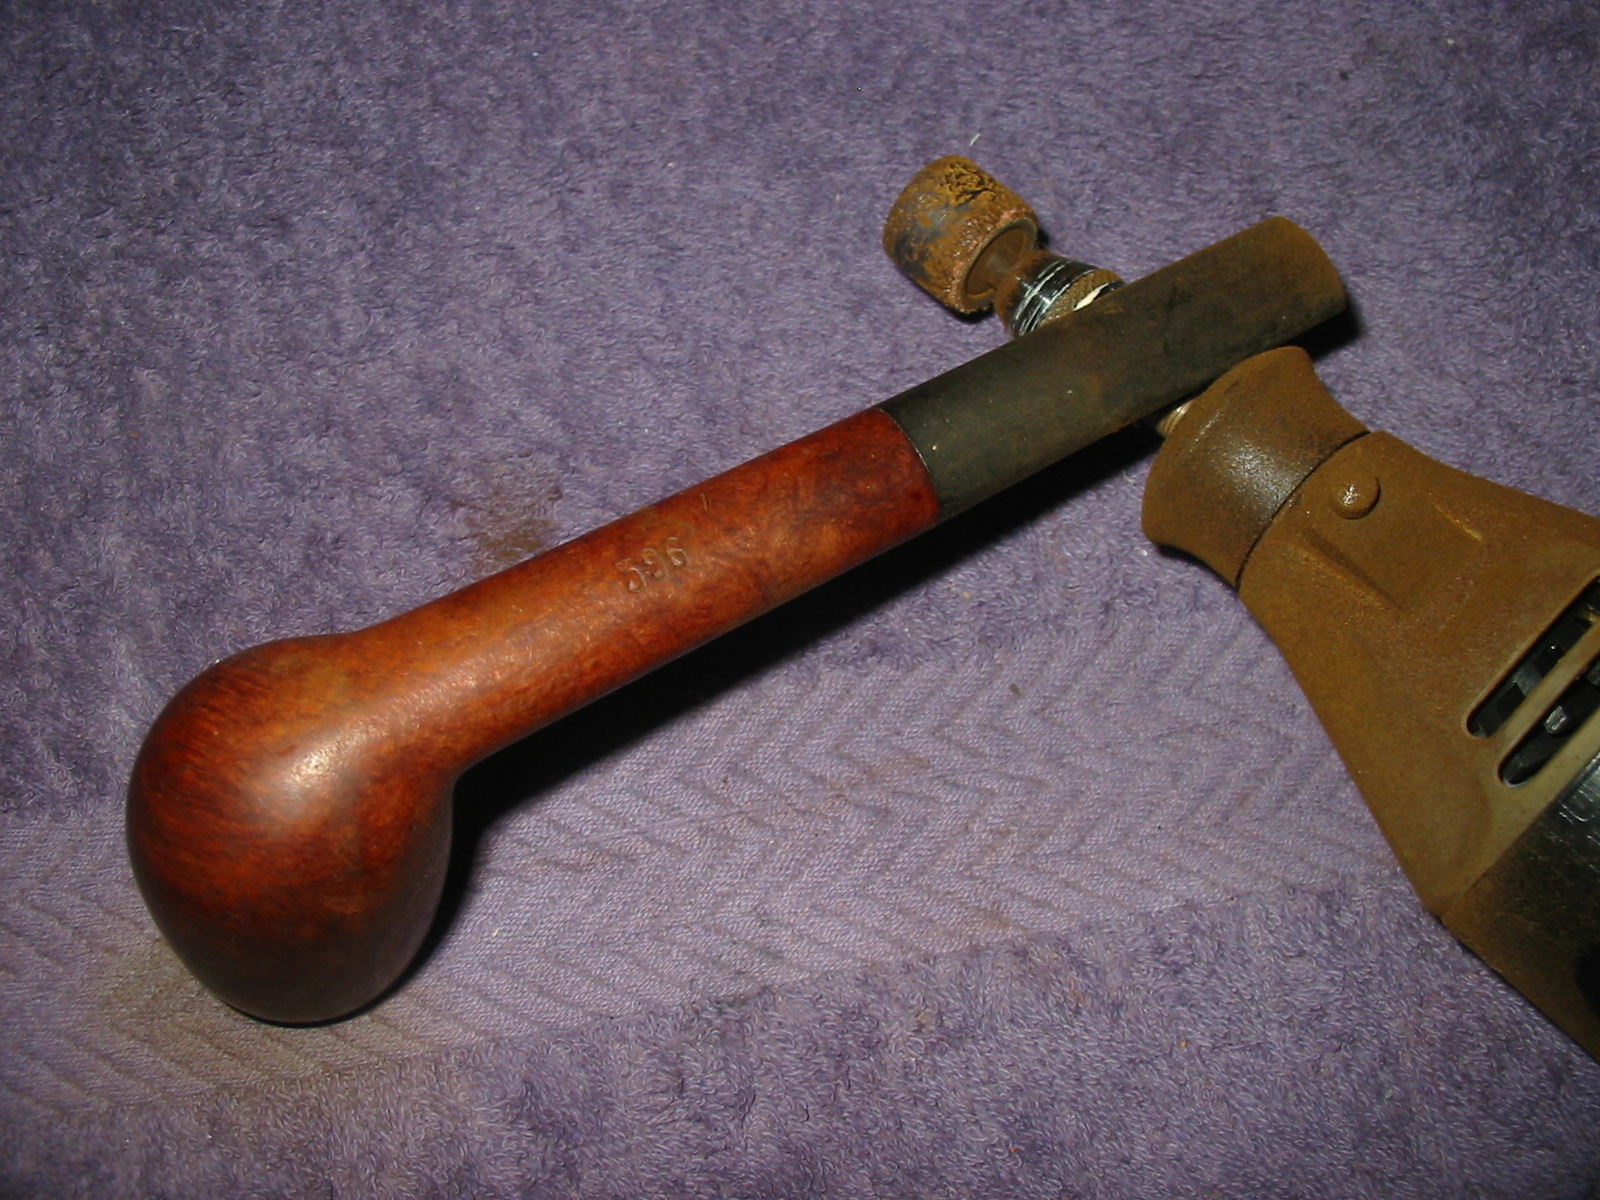
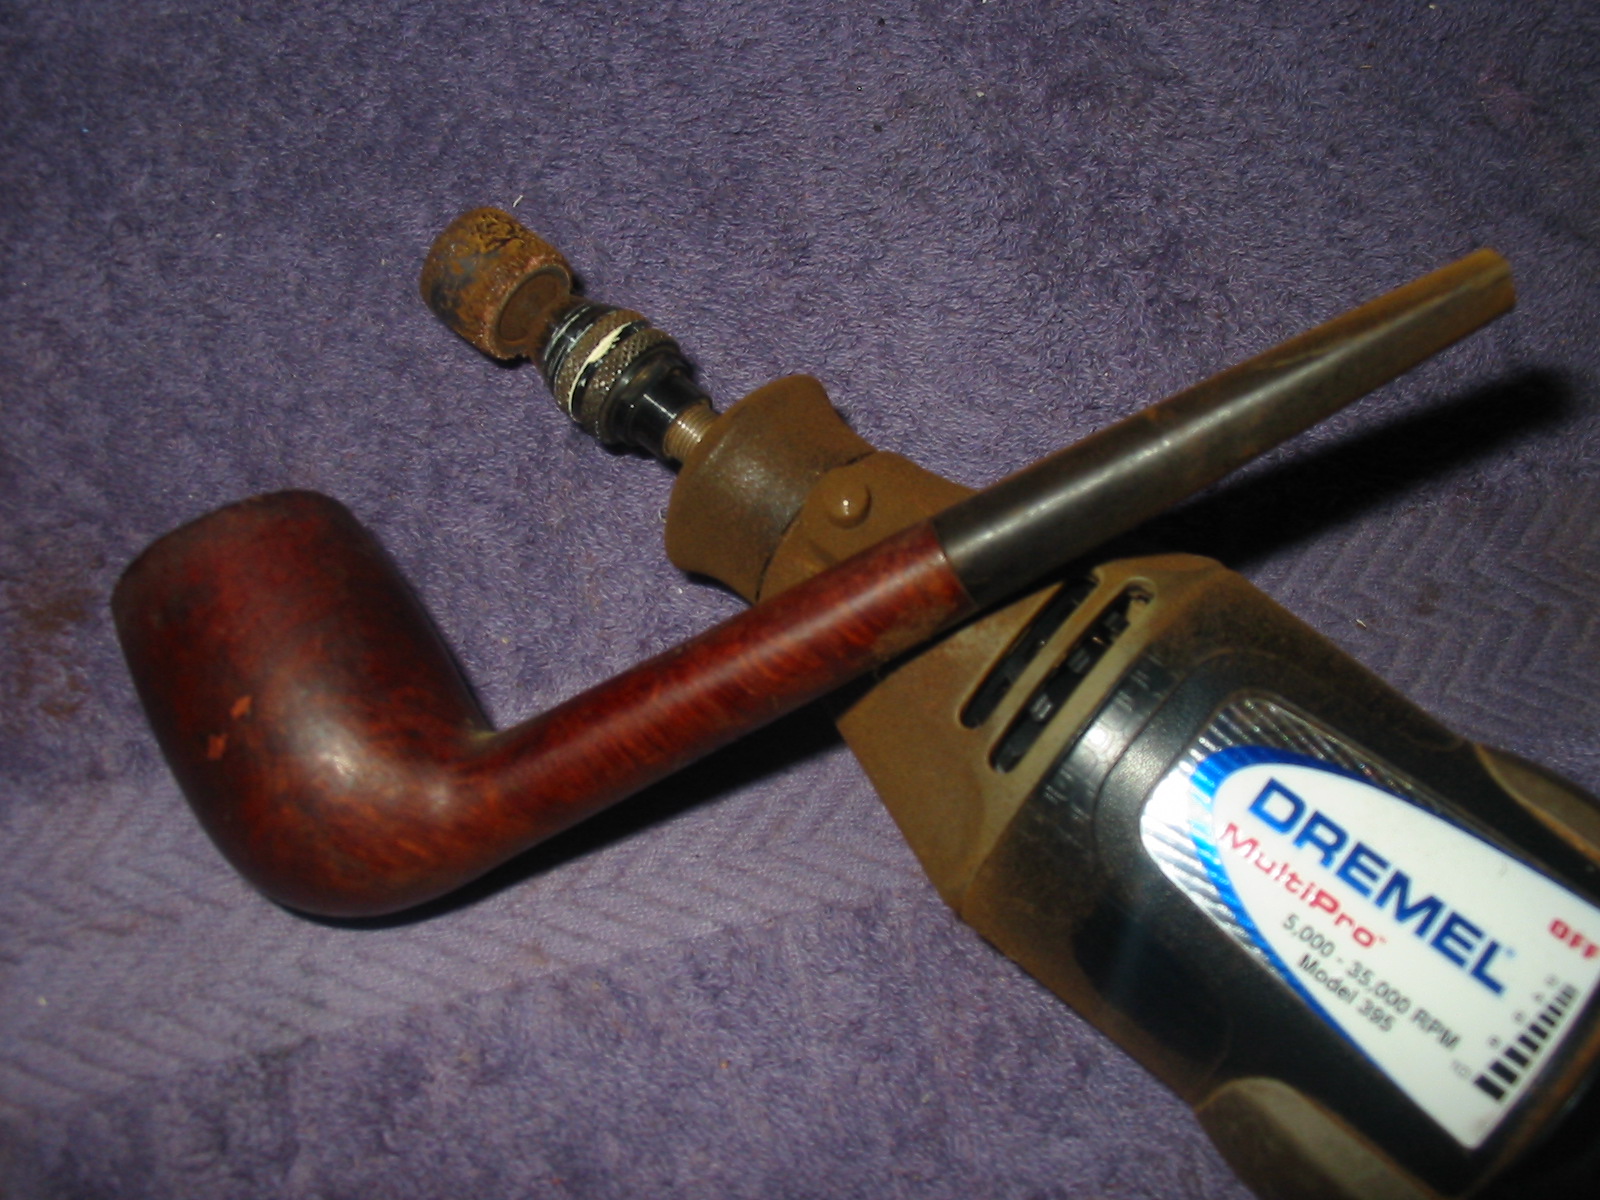
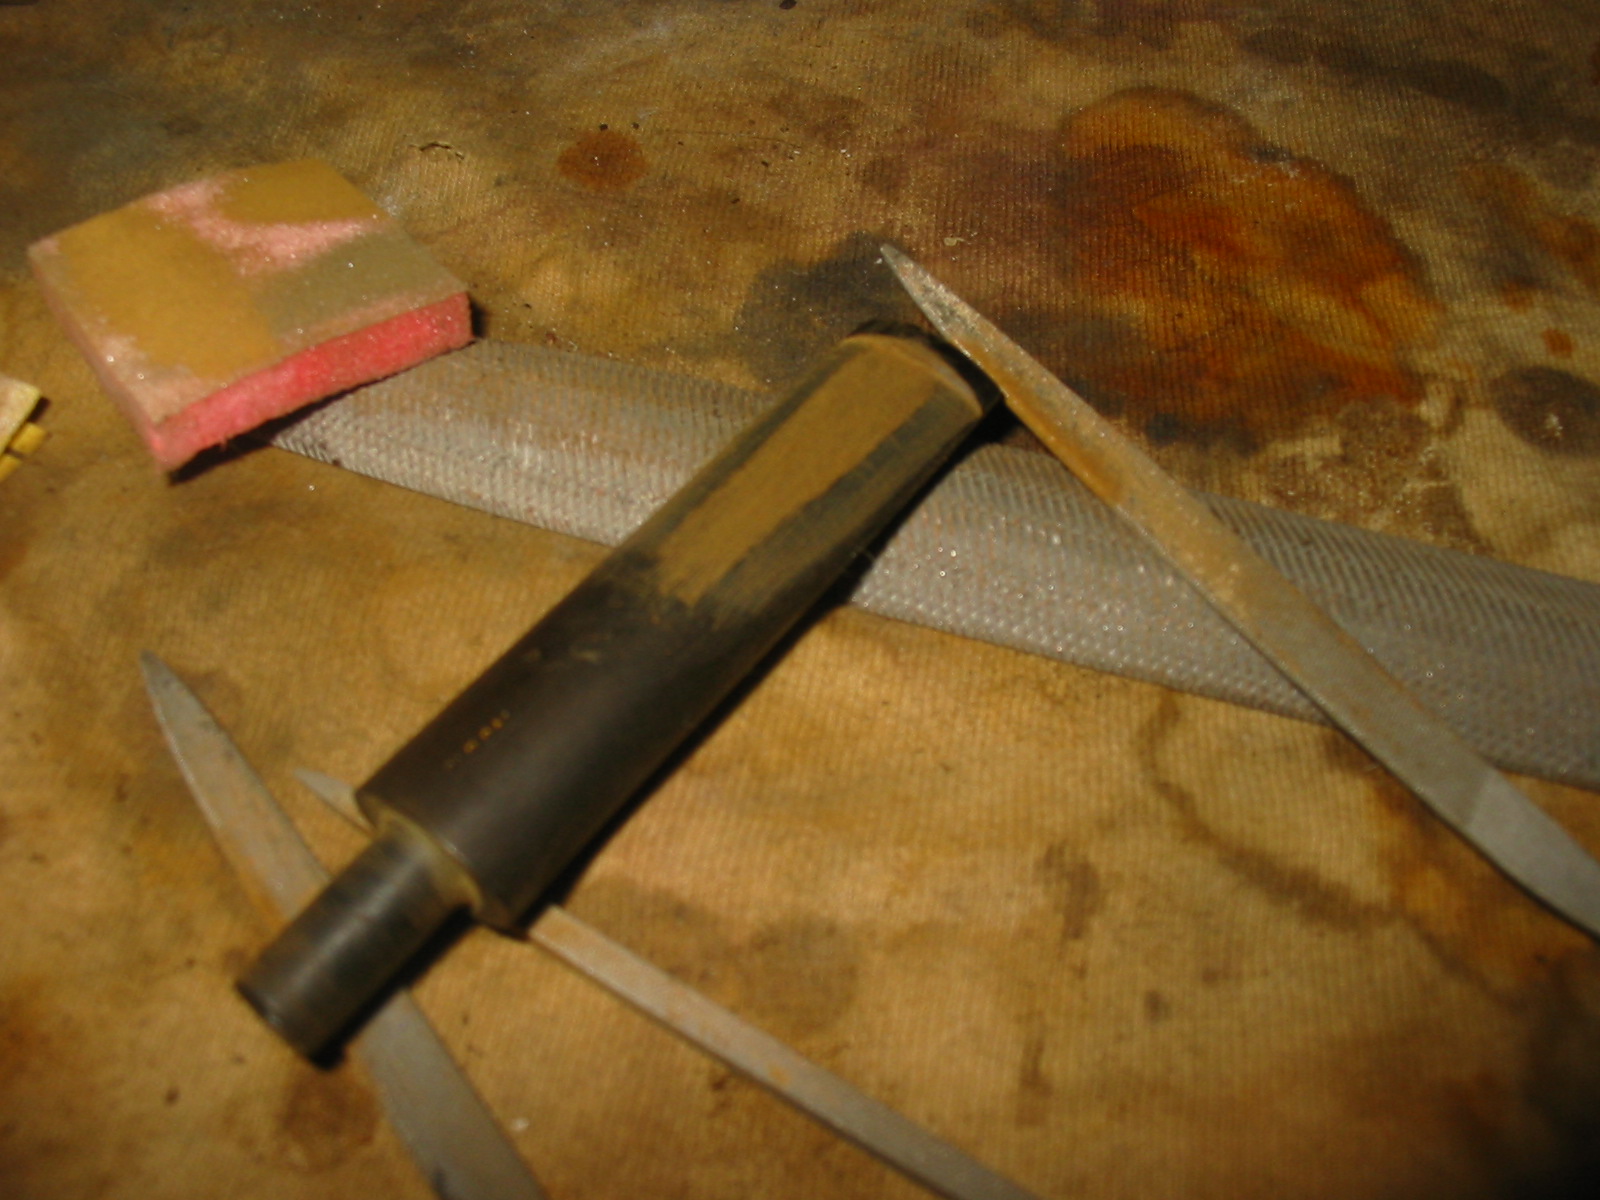
I debated whether to cut off the stem or to just restem the pipe with a Canadian stem. I looked at it with a small stem and then with this stem and decided to cut off the stem. I used a Dremel and a sanding drum to remove the broken part of the stem and even out the line of the end of the stem.
IMG_6268

IMG_6269

IMG_6270
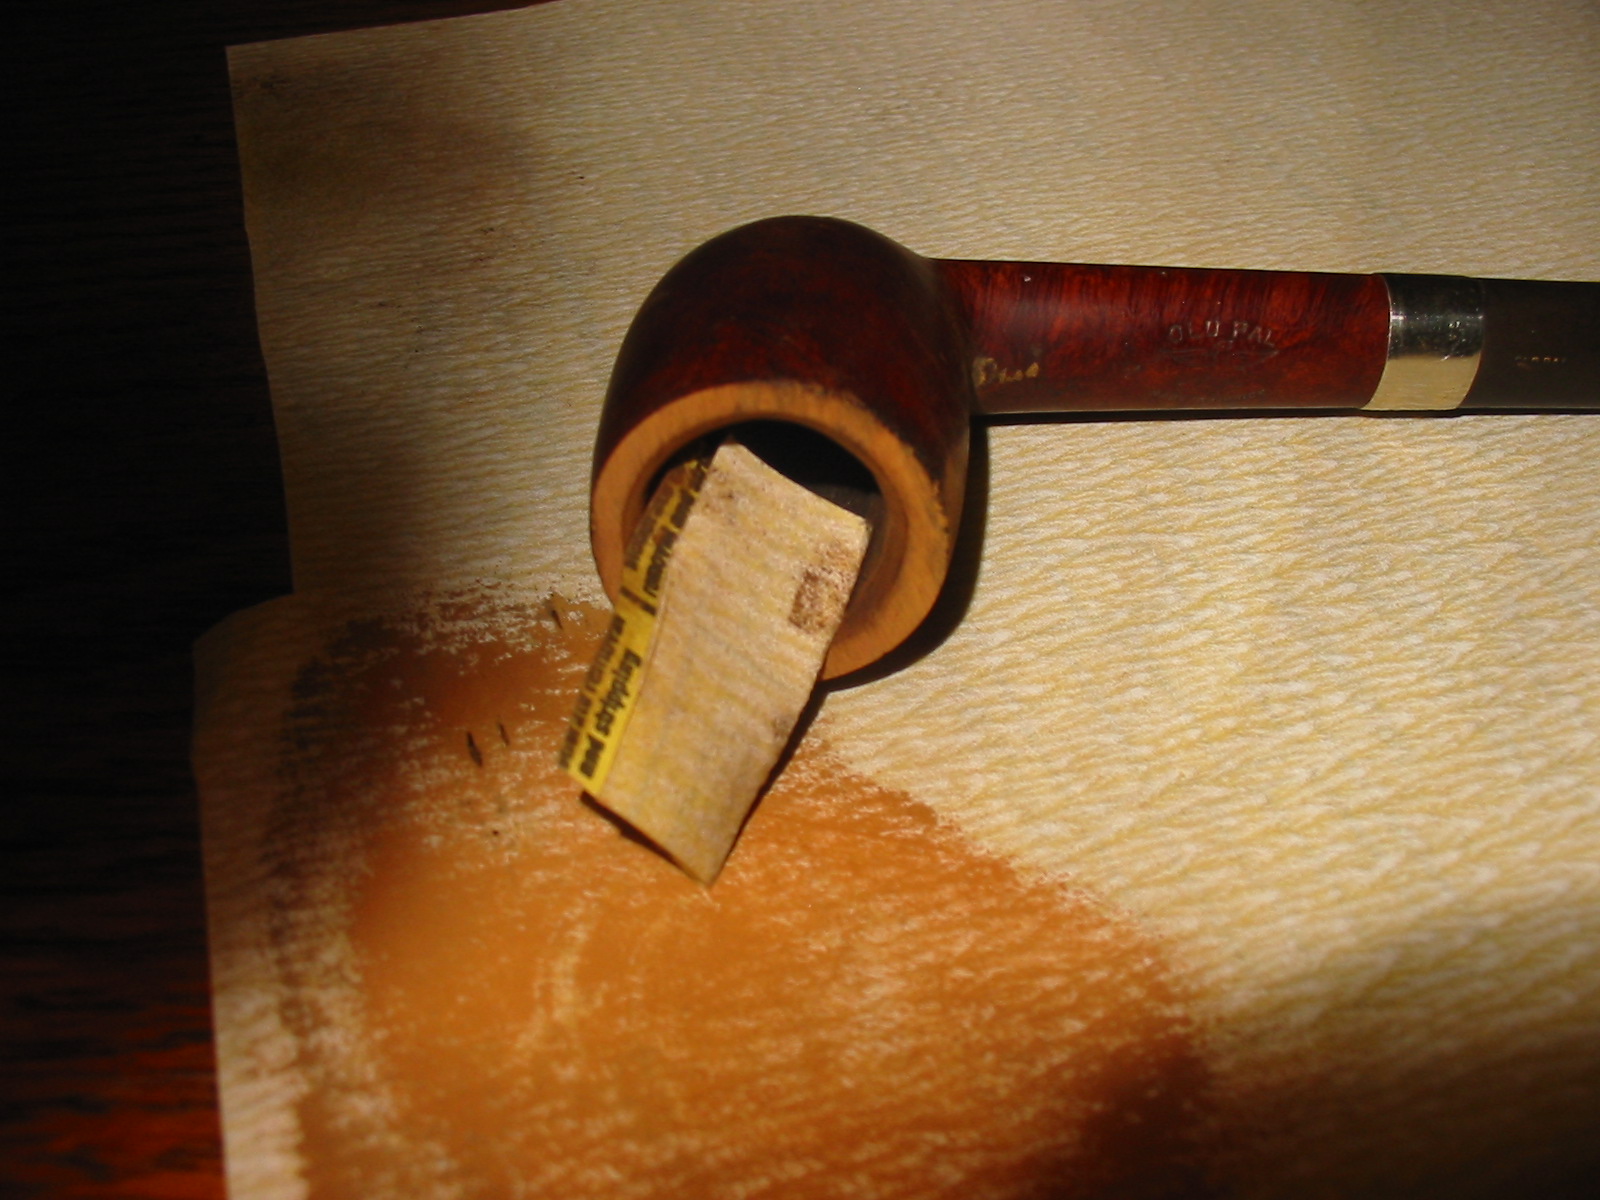
I took it back to the work table and reamed the bowl with a PipNet reamer. I reamed the cake back to bare briar so that I could work on the damage to the inner edge of the rim.
IMG_6271
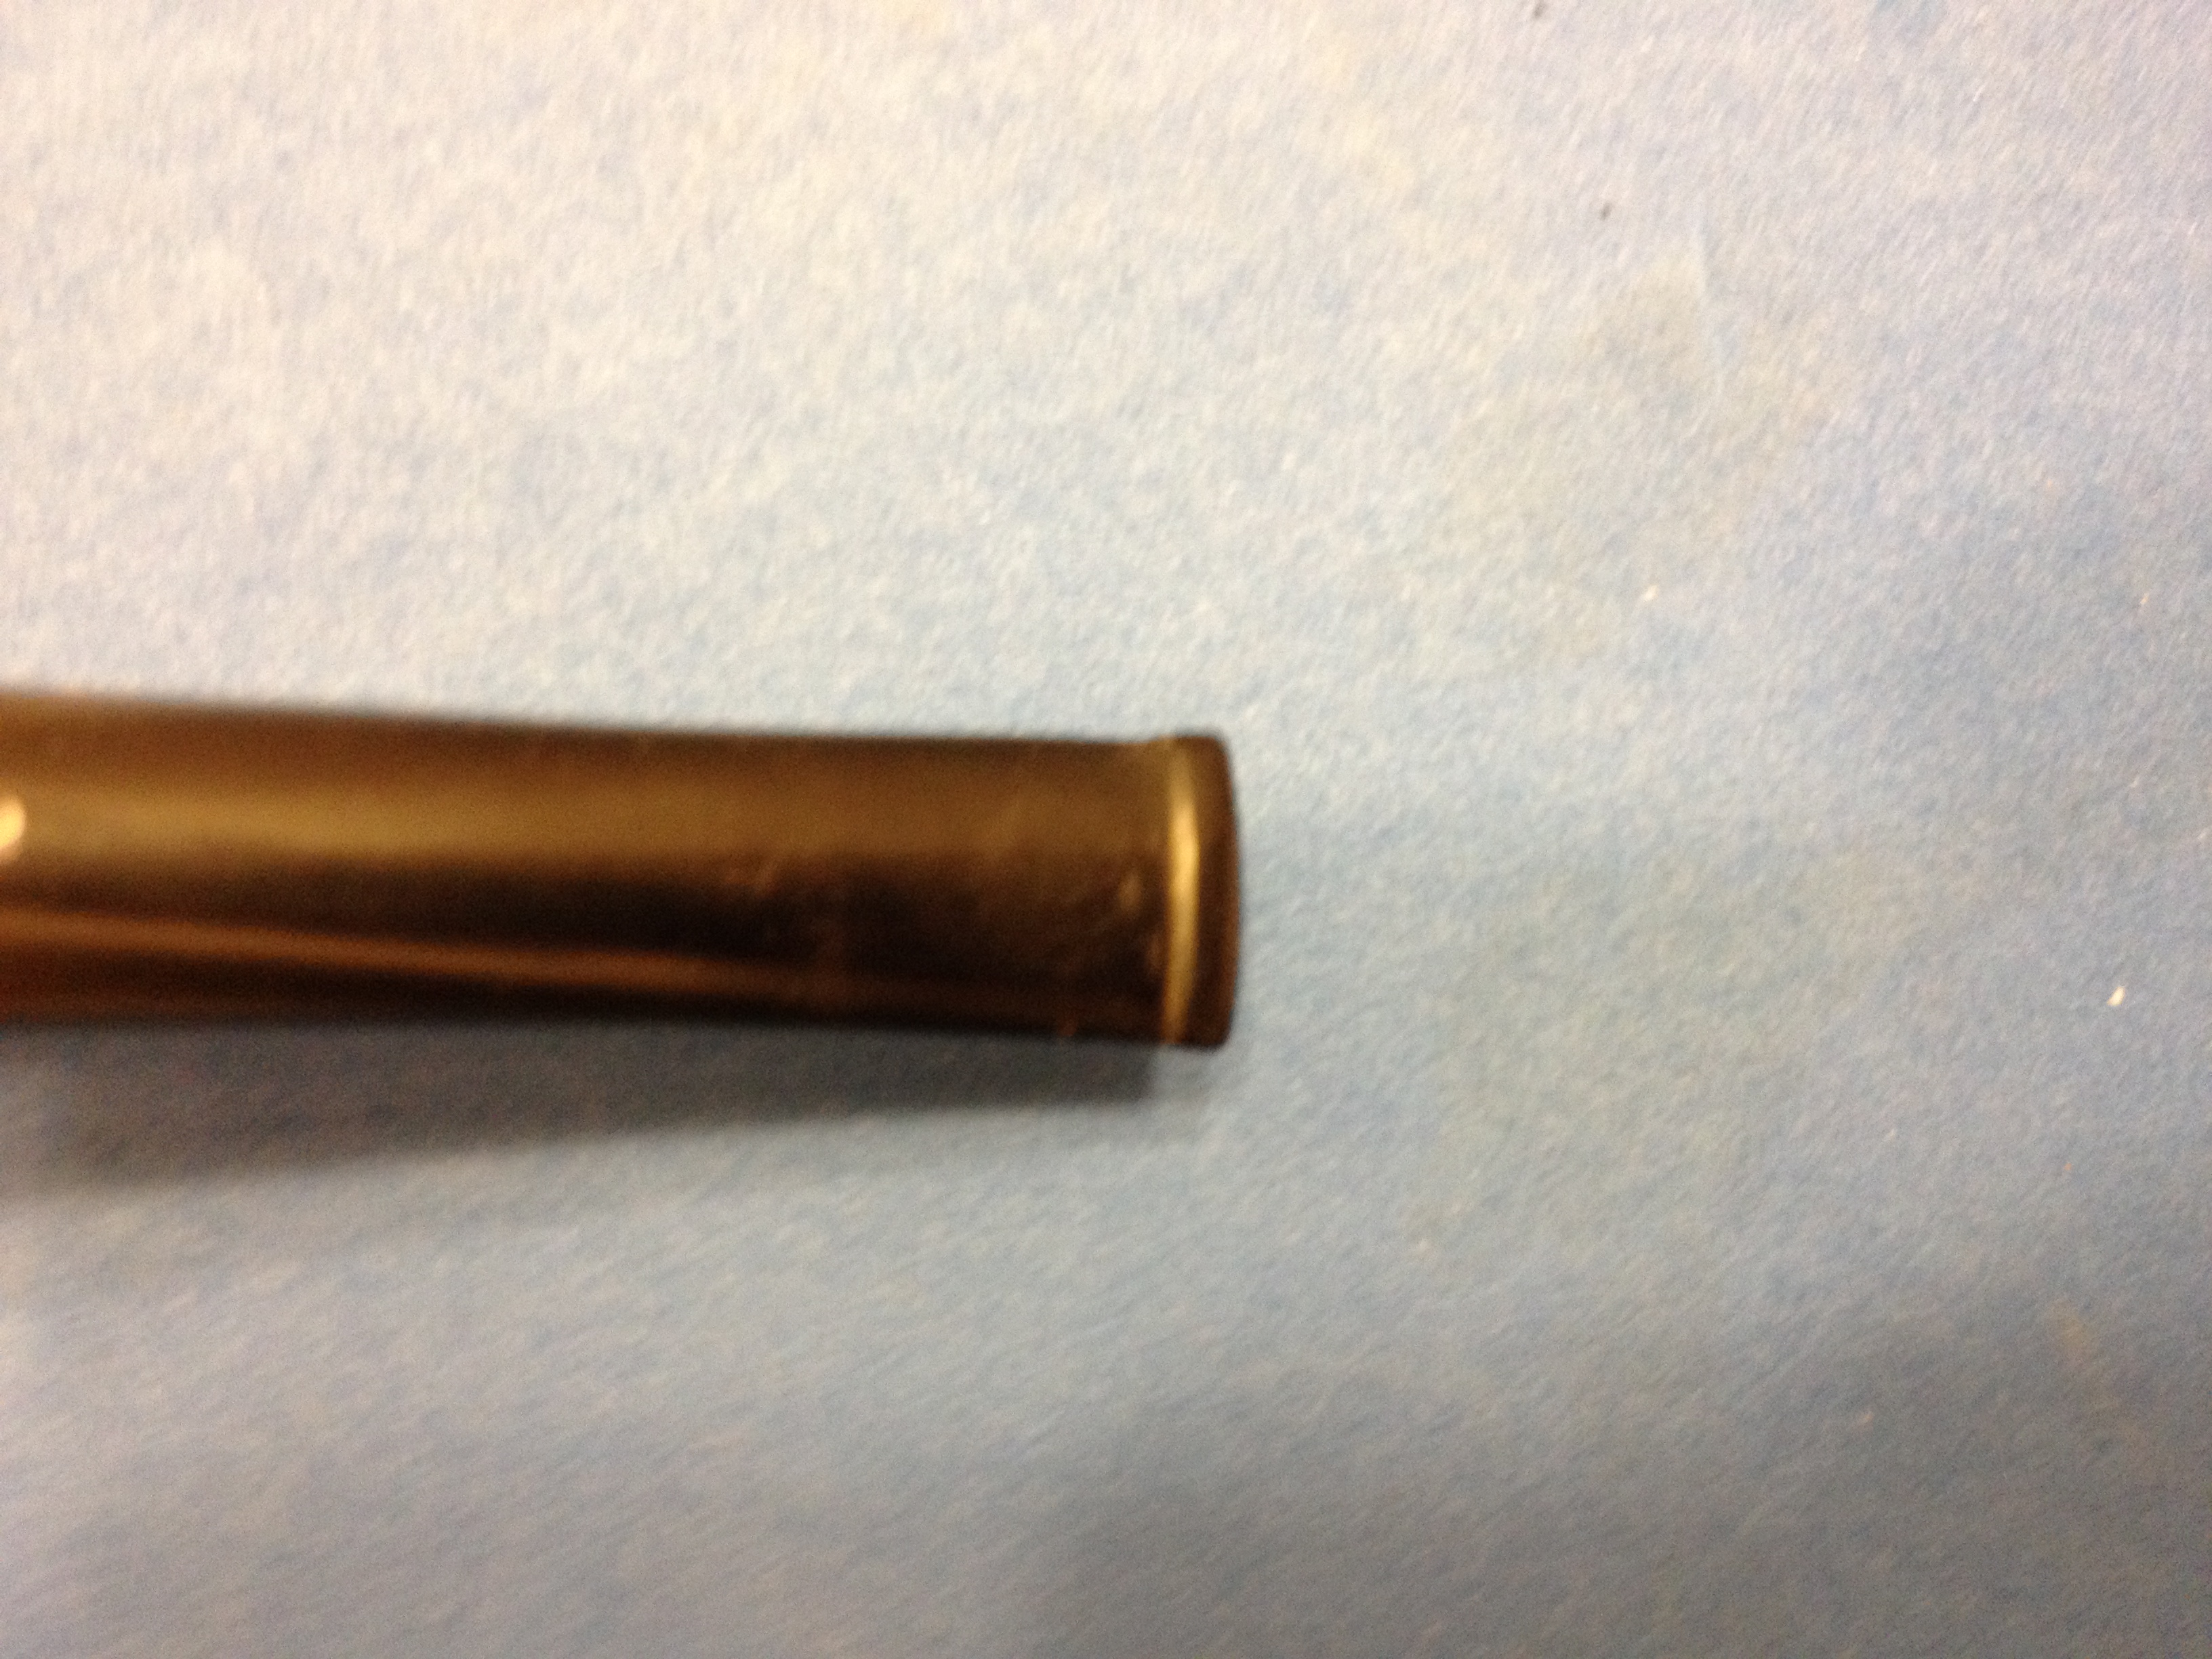
I took out my box of assorted nickel bands and found one that was the correct diameter and squeezed it until it was an oval. I dripped super glue into the open crack and pressed it together to dry. Then I heated the band with a heat gun and pressed it on to the cracked shank.
IMG_6272

IMG_6273
I used a folded piece of sandpaper to sand the tenon slightly so that it fit snugly in the shank. The fit of the stem to the band and shank looked good so that part of the job was finished.
IMG_6274

IMG_6275

IMG_6276

IMG_6277
I set up the topping board and the 220 grit sandpaper and topped the bowl to remove the damaged rim. I used a folded piece of sandpaper to bevel the inner edge of the rim inward like it had been originally.
IMG_6278

IMG_6279

IMG_6280
I wiped the bowl down with acetone to remove the finish and the spots of white paint that were on the top of the shank. I repeated the wash until the finish was clean and then wiped it down again with isopropyl alcohol.
IMG_6281

IMG_6282

IMG_6283

IMG_6284
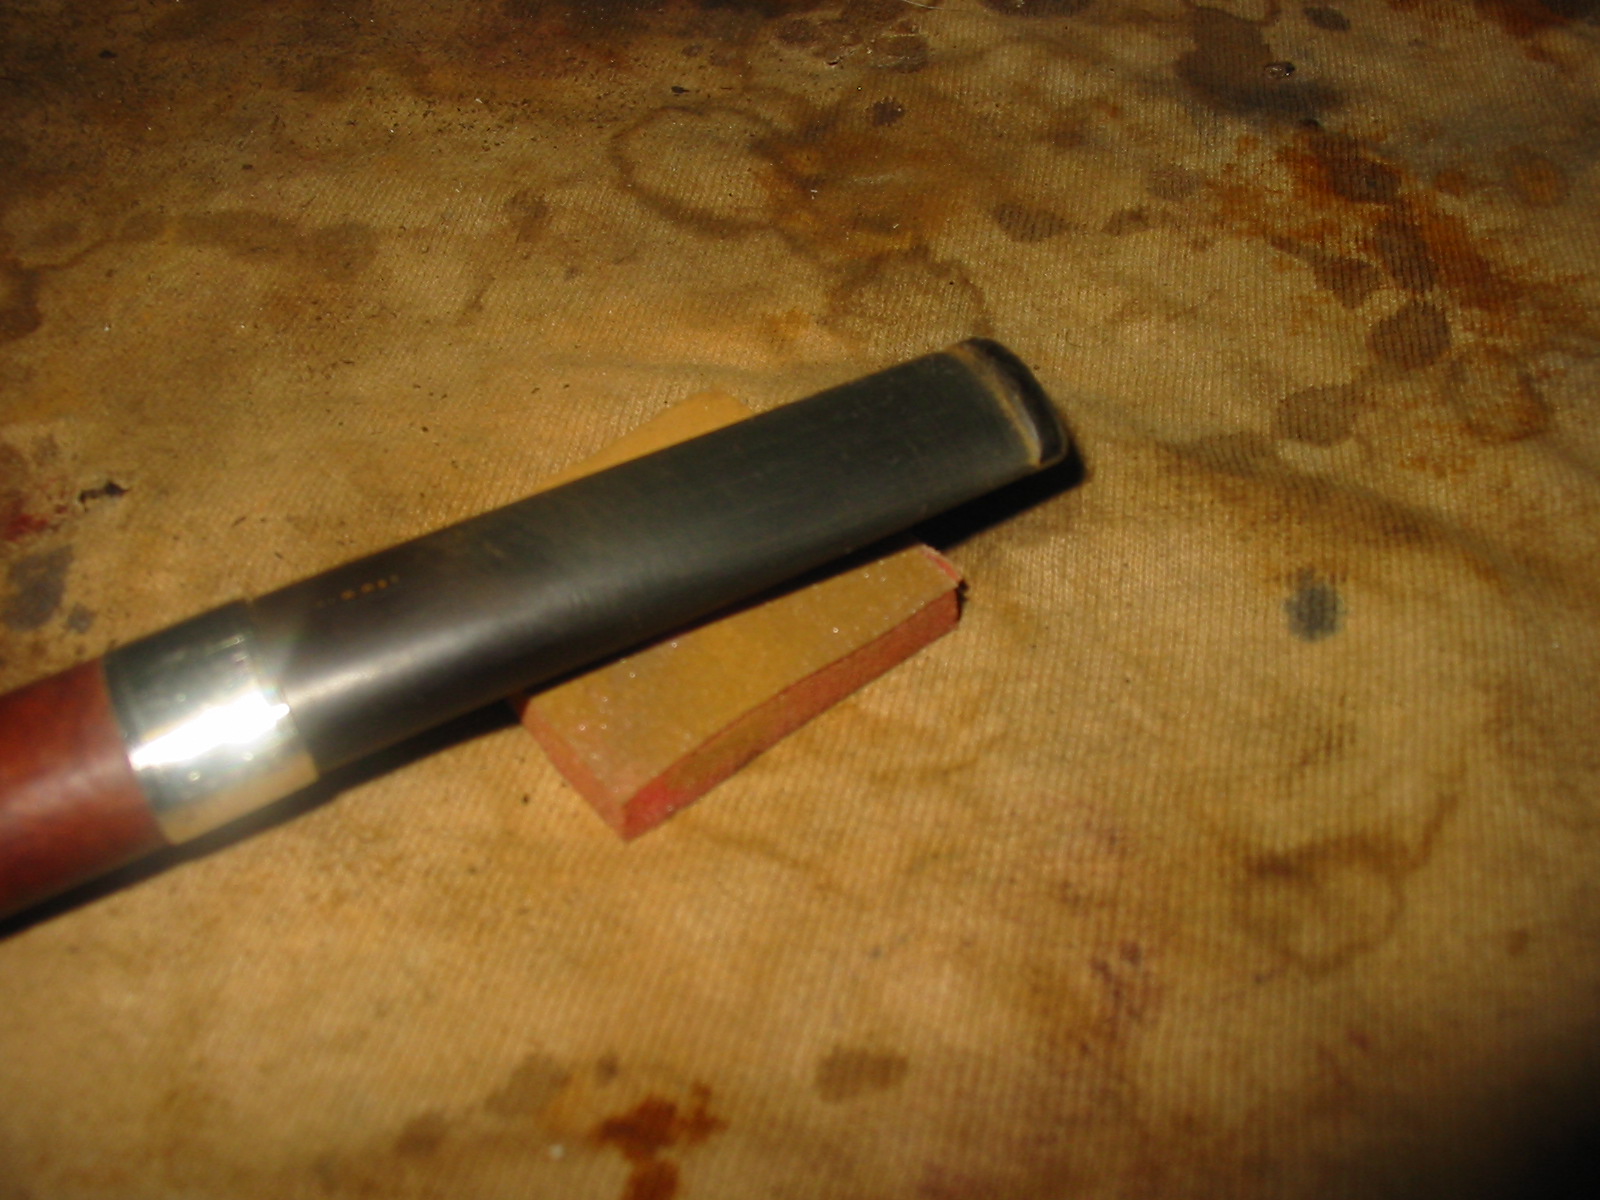
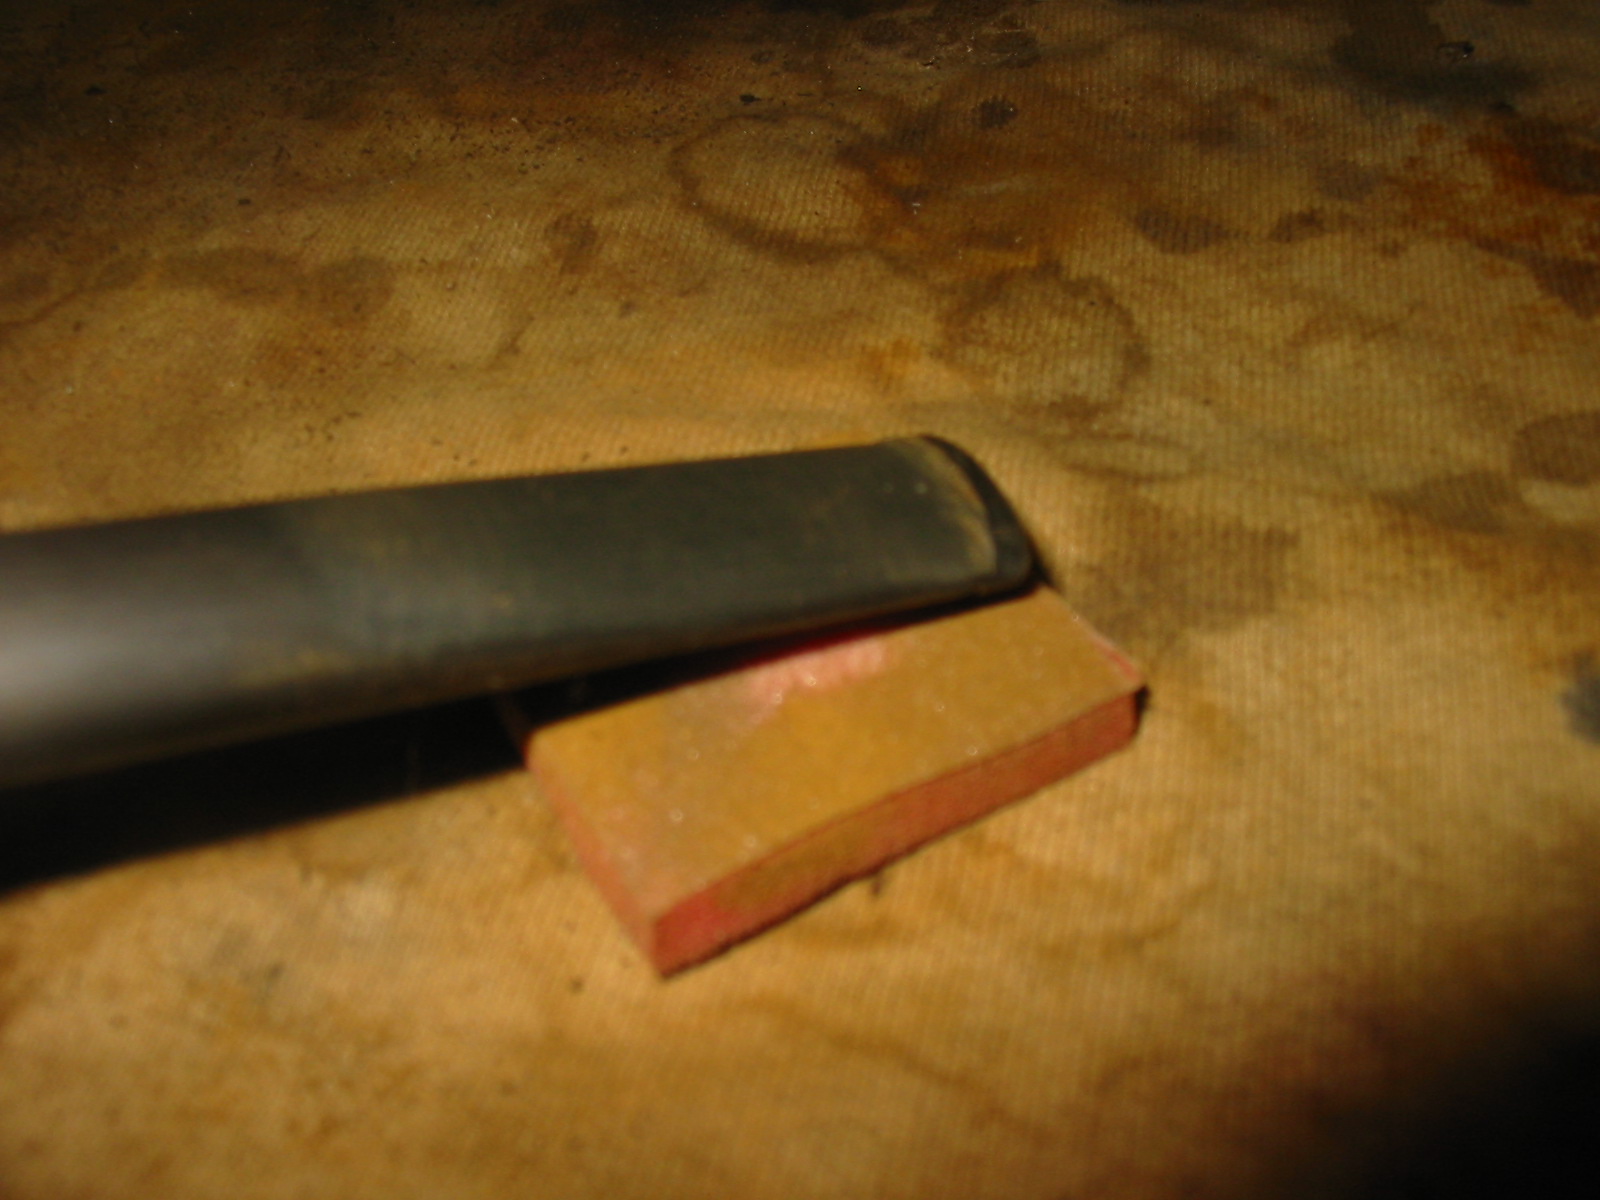
With work on the bowl at a good stopping point I decided to do some work on the stem. I had to cut a new button and taper the stem toward the new button. There would have to be shaping done as well opening the slot on the end of the stem. I used a rasp to cut the edge on the lip of the button and to sand down the taper of the stem. I used a series of needle files to further shape the button and the taper.
IMG_6285

IMG_6286

IMG_6287

IMG_6288
I cleaned up the taper and the button with a sanding board that I picked up at a beauty supply house. It makes the edge clean and works well to even the taper on the stem.
IMG_6289

IMG_6290
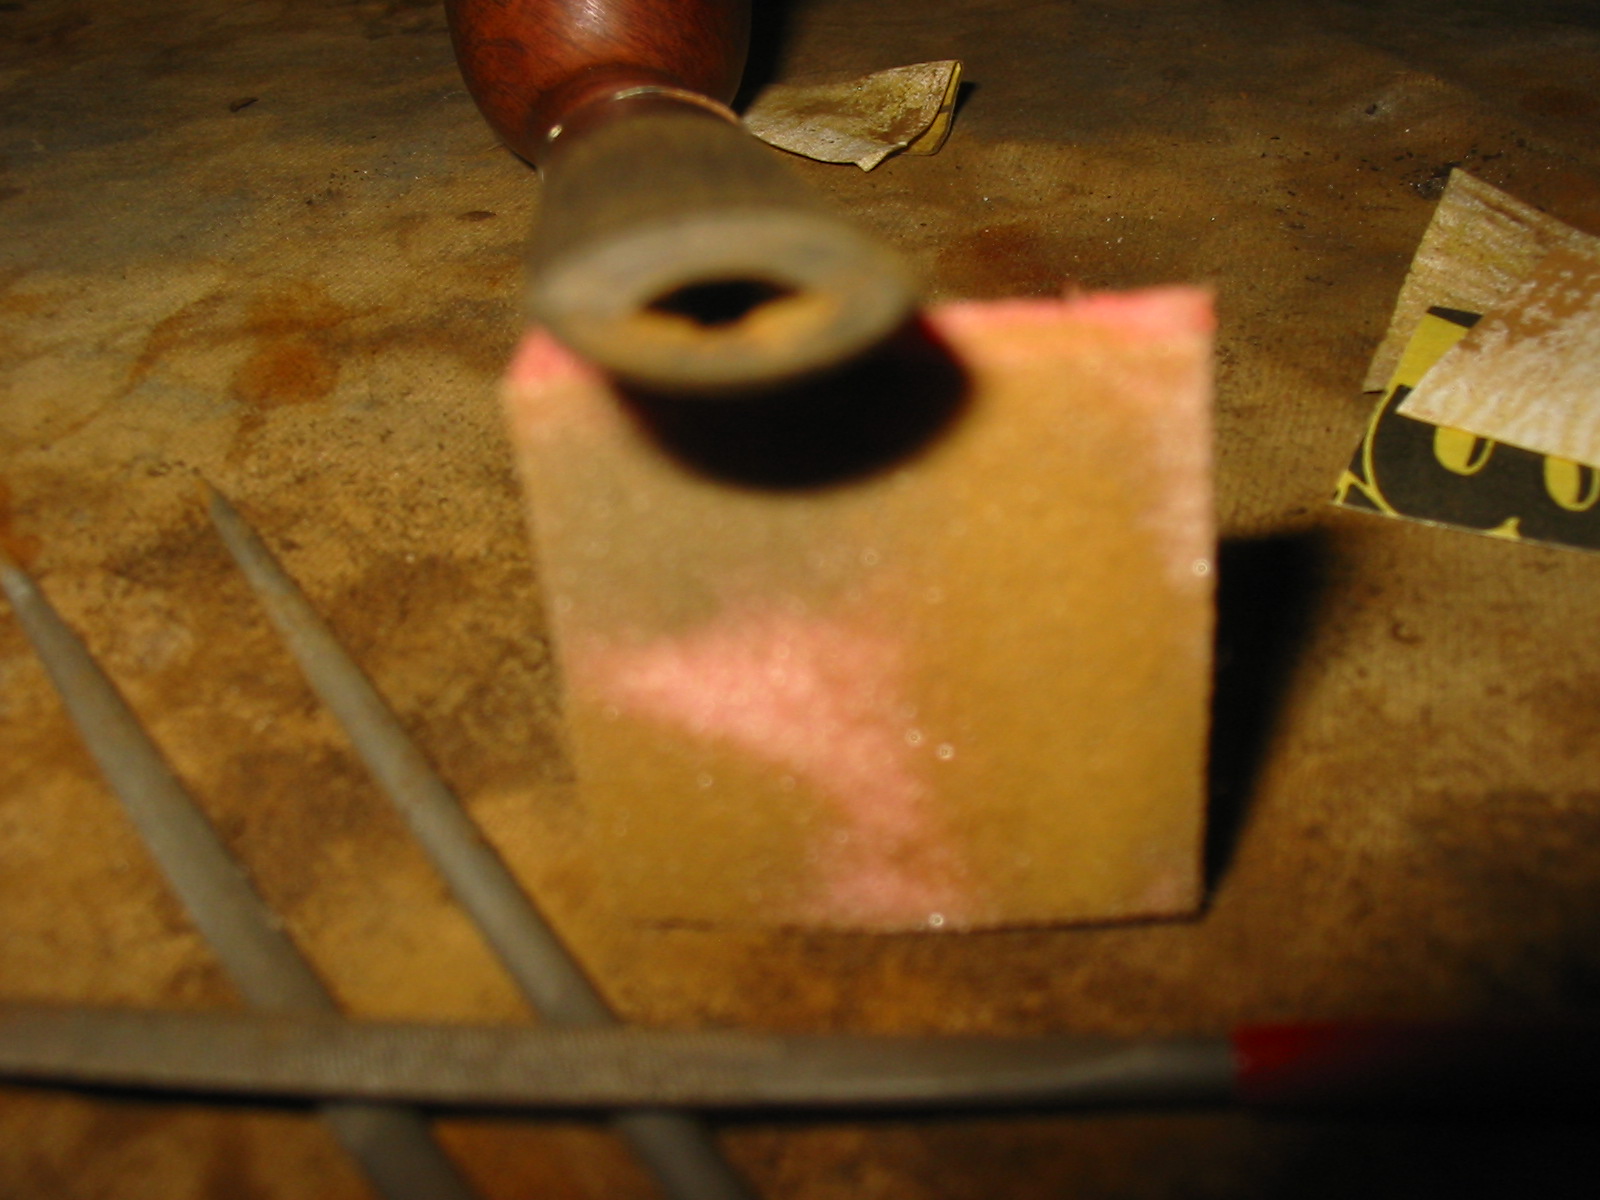
The hole in the end of the new button was elongated and oval but needed to be opened more and made into a “Y” shaped slot whose inner edges tapered toward the airway and the slot shaped like an eye – open enough to take a pipe cleaner without any difficulty. I used three different needle files to open the slot. The first was a round file, followed by an oval file and ending with a flat oval that worked well to cut the edges of the slot.
IMG_6291

IMG_6292

IMG_6293
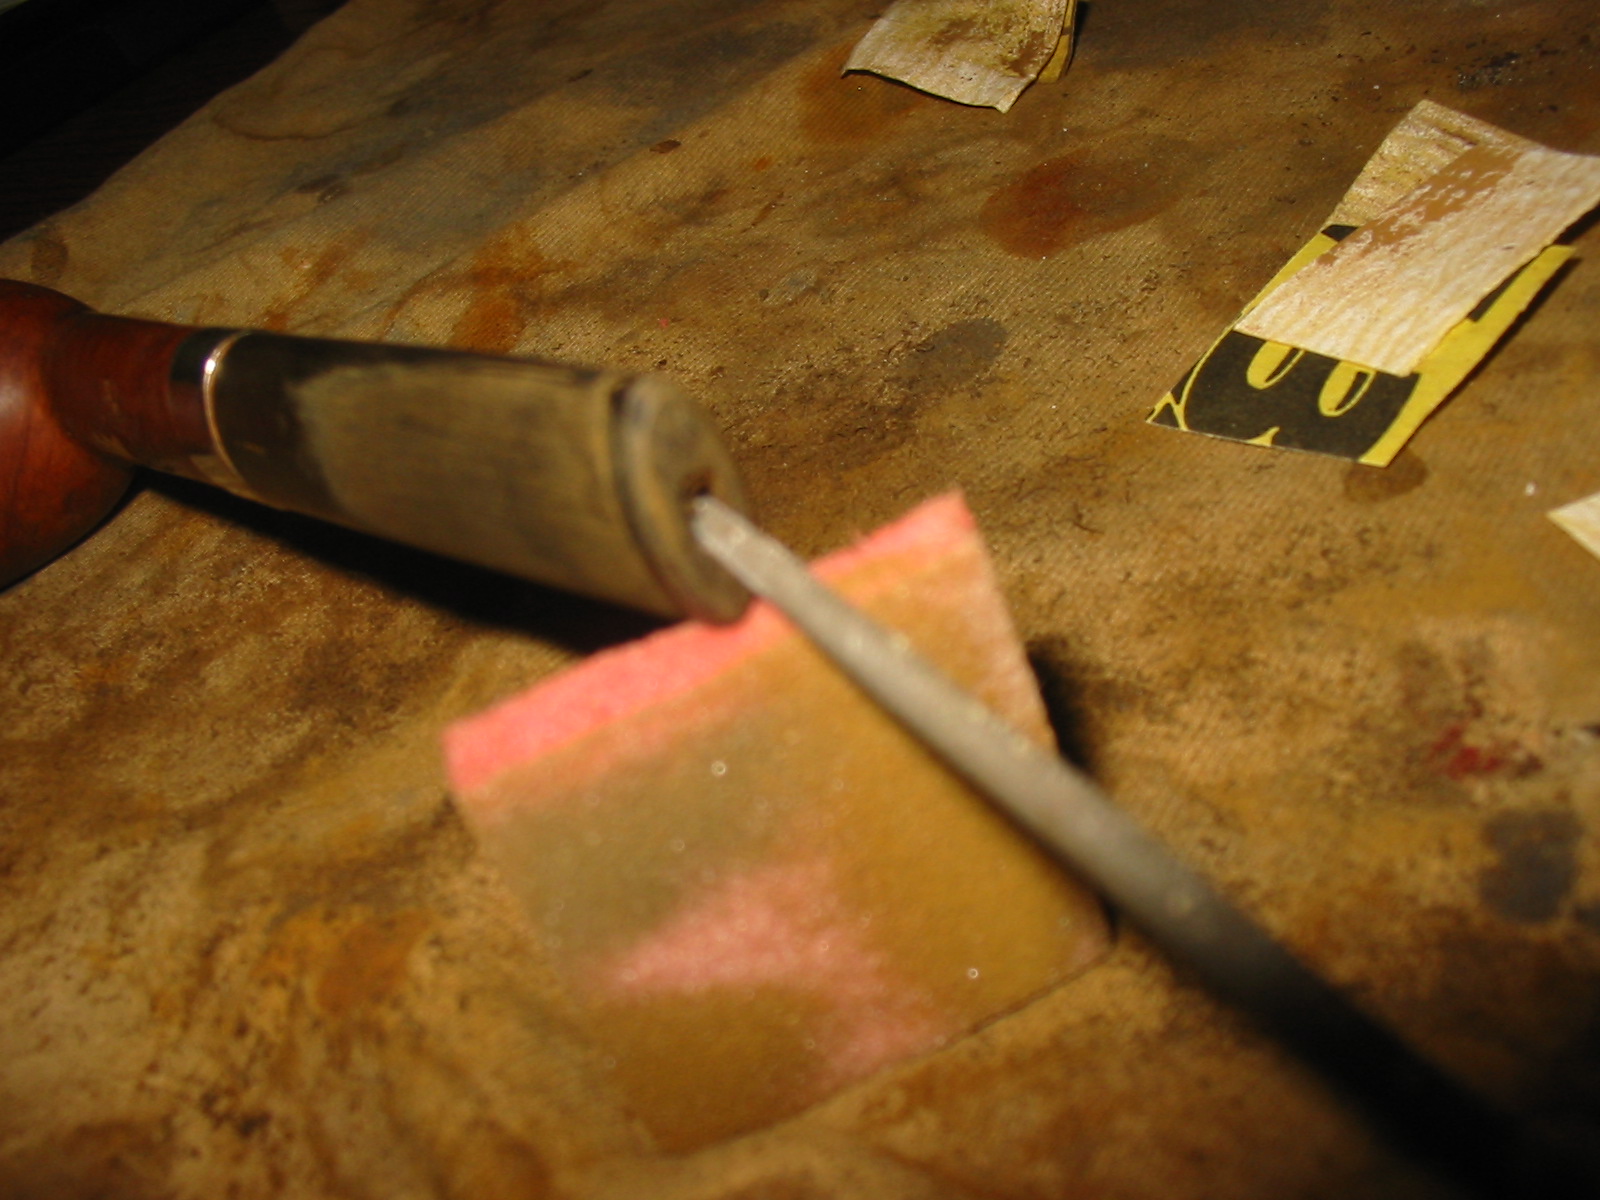
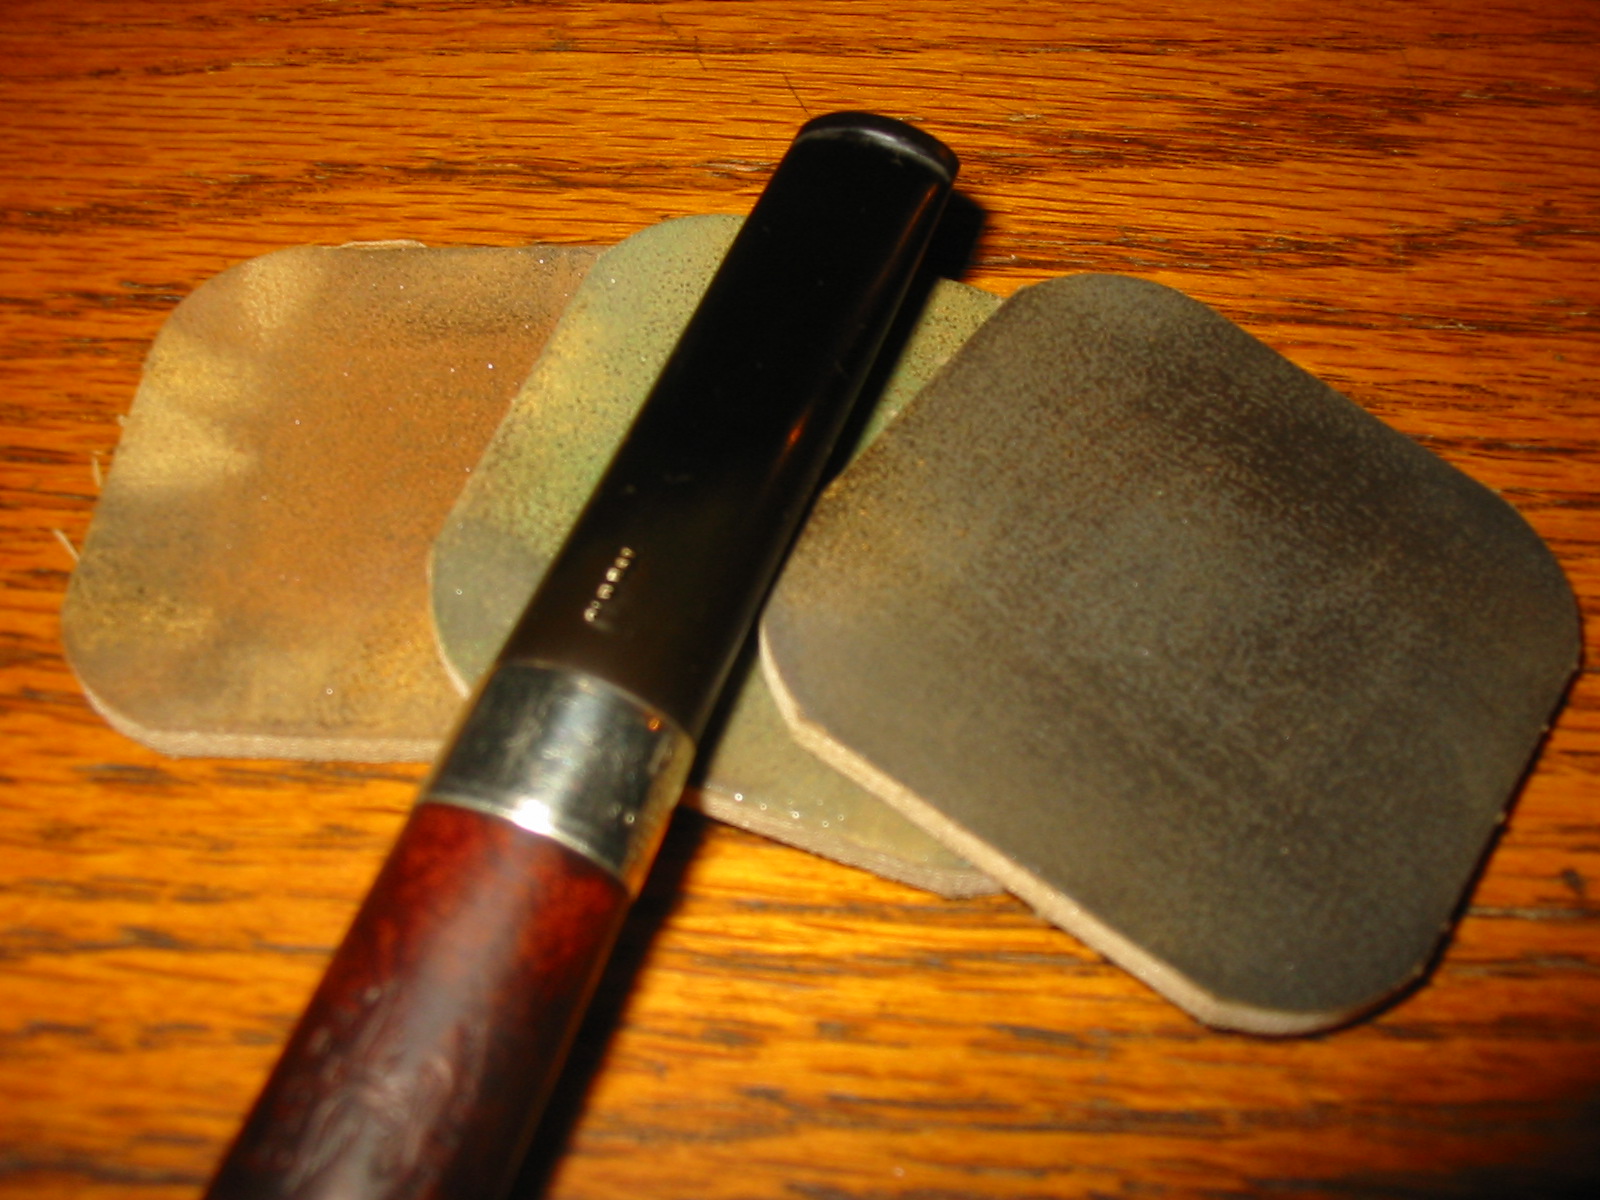
I sanded the stem with a medium and a fine grit sanding sponge to smooth out the surface on the stem and also to bevel the edge of the button toward the slot.
IMG_6294

IMG_6295
With the interesting grain pattern and the fills on the side of the bowl I decided to use a dark brown aniline stain. I applied it with a dauber and then flamed it. I applied it and flamed it a second time to make sure the coverage was even.
IMG_6297
When the stain was dry I wiped down the bowl and shank with isopropyl alcohol on cotton pads to remove the top coats of the stain and make it more transparent.
IMG_6299
I sanded the bowl with a fine grit sanding sponge and then wiped it again with the alcohol to clean off the dust. I gave it a second coat of a medium walnut stain as a top coat.
IMG_6300
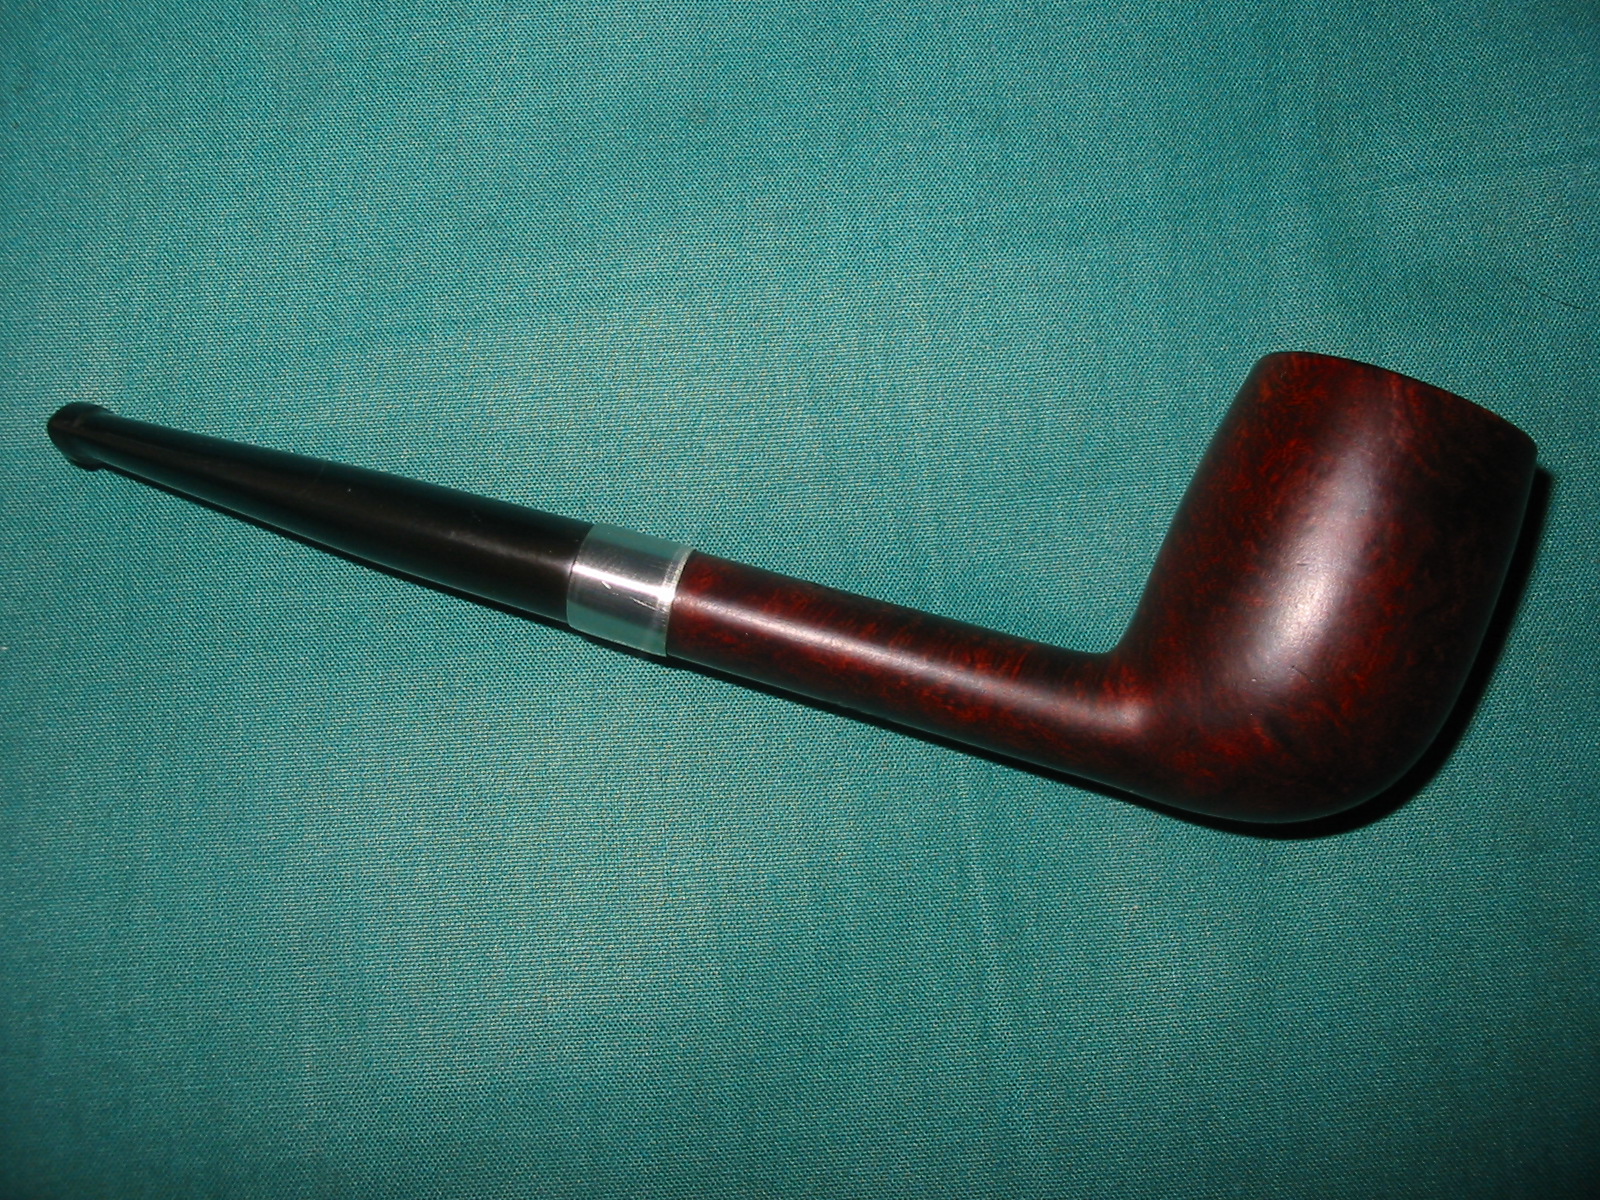
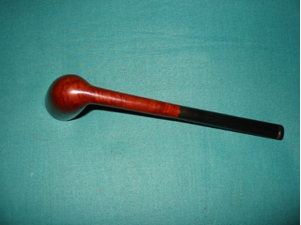
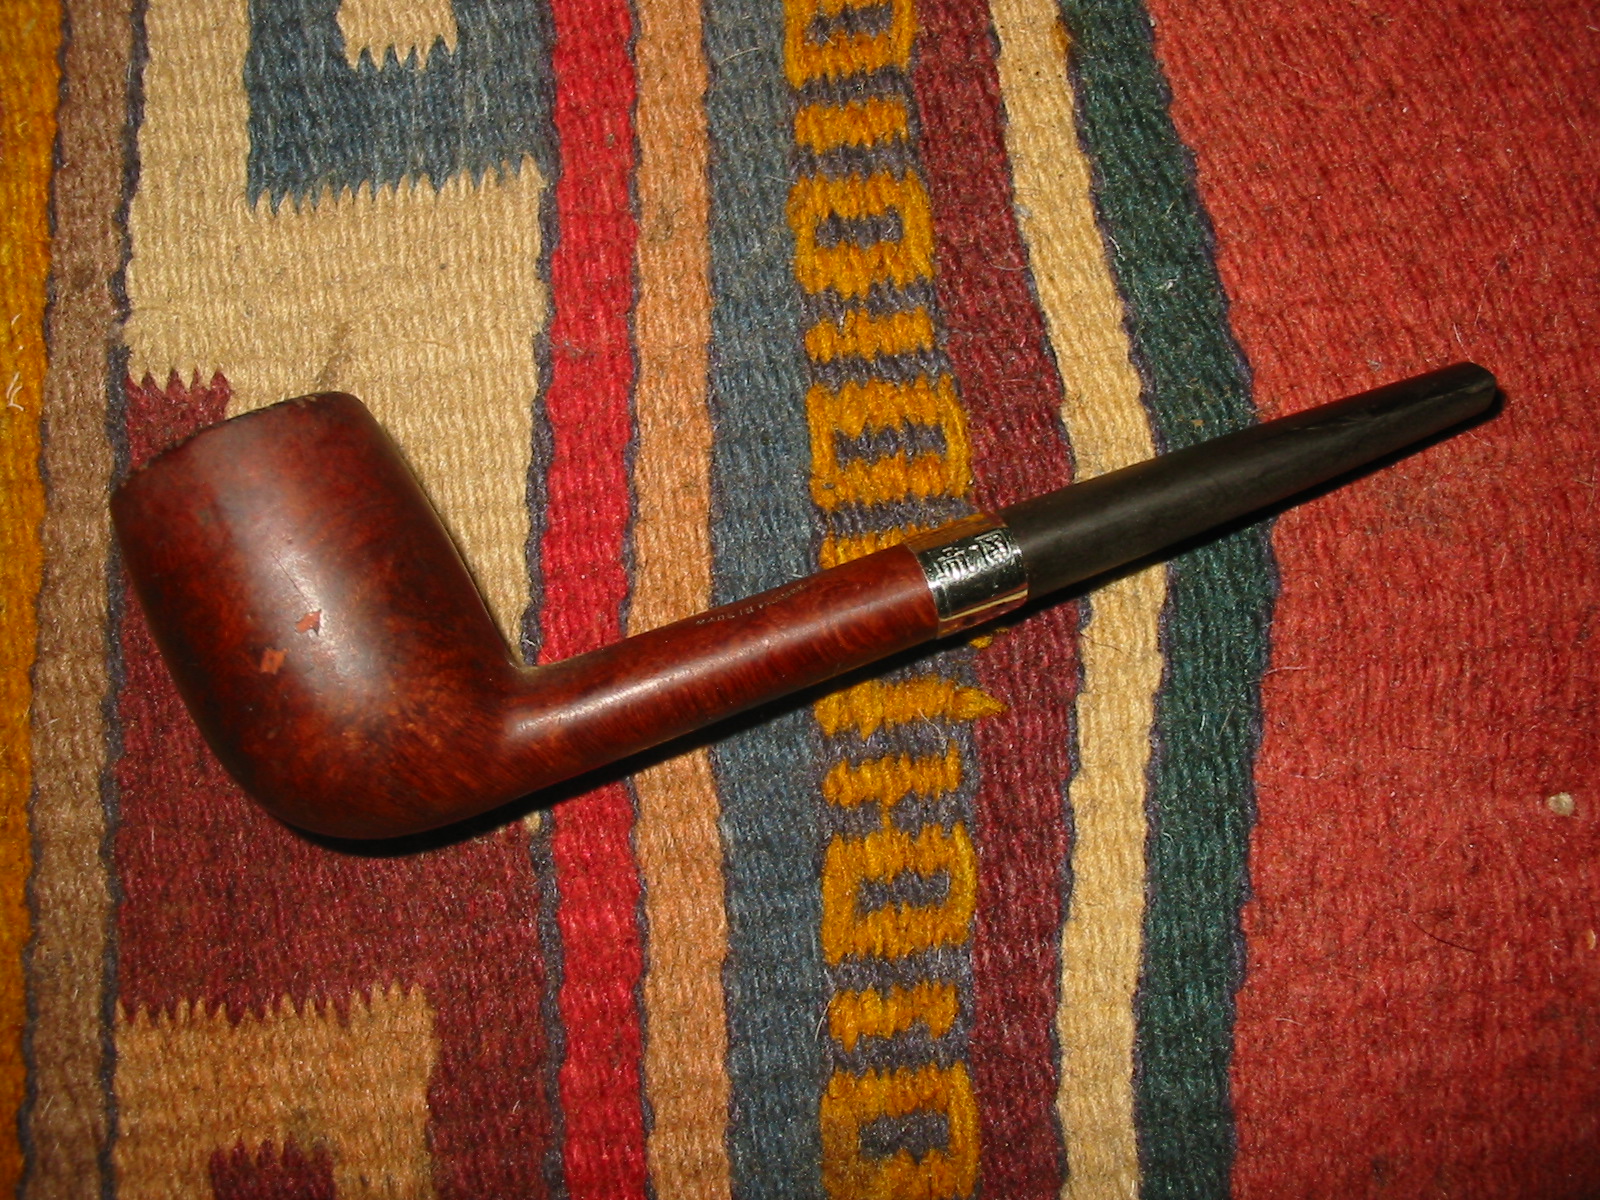
I buffed the top coat of stain with White Diamond and then brought it back to the work table and took the following pictures. The angles on the stem are looking good. The shape of the button and the taper of the stem worked well with the pipe.
IMG_6301

IMG_6302

IMG_6303

IMG_6304
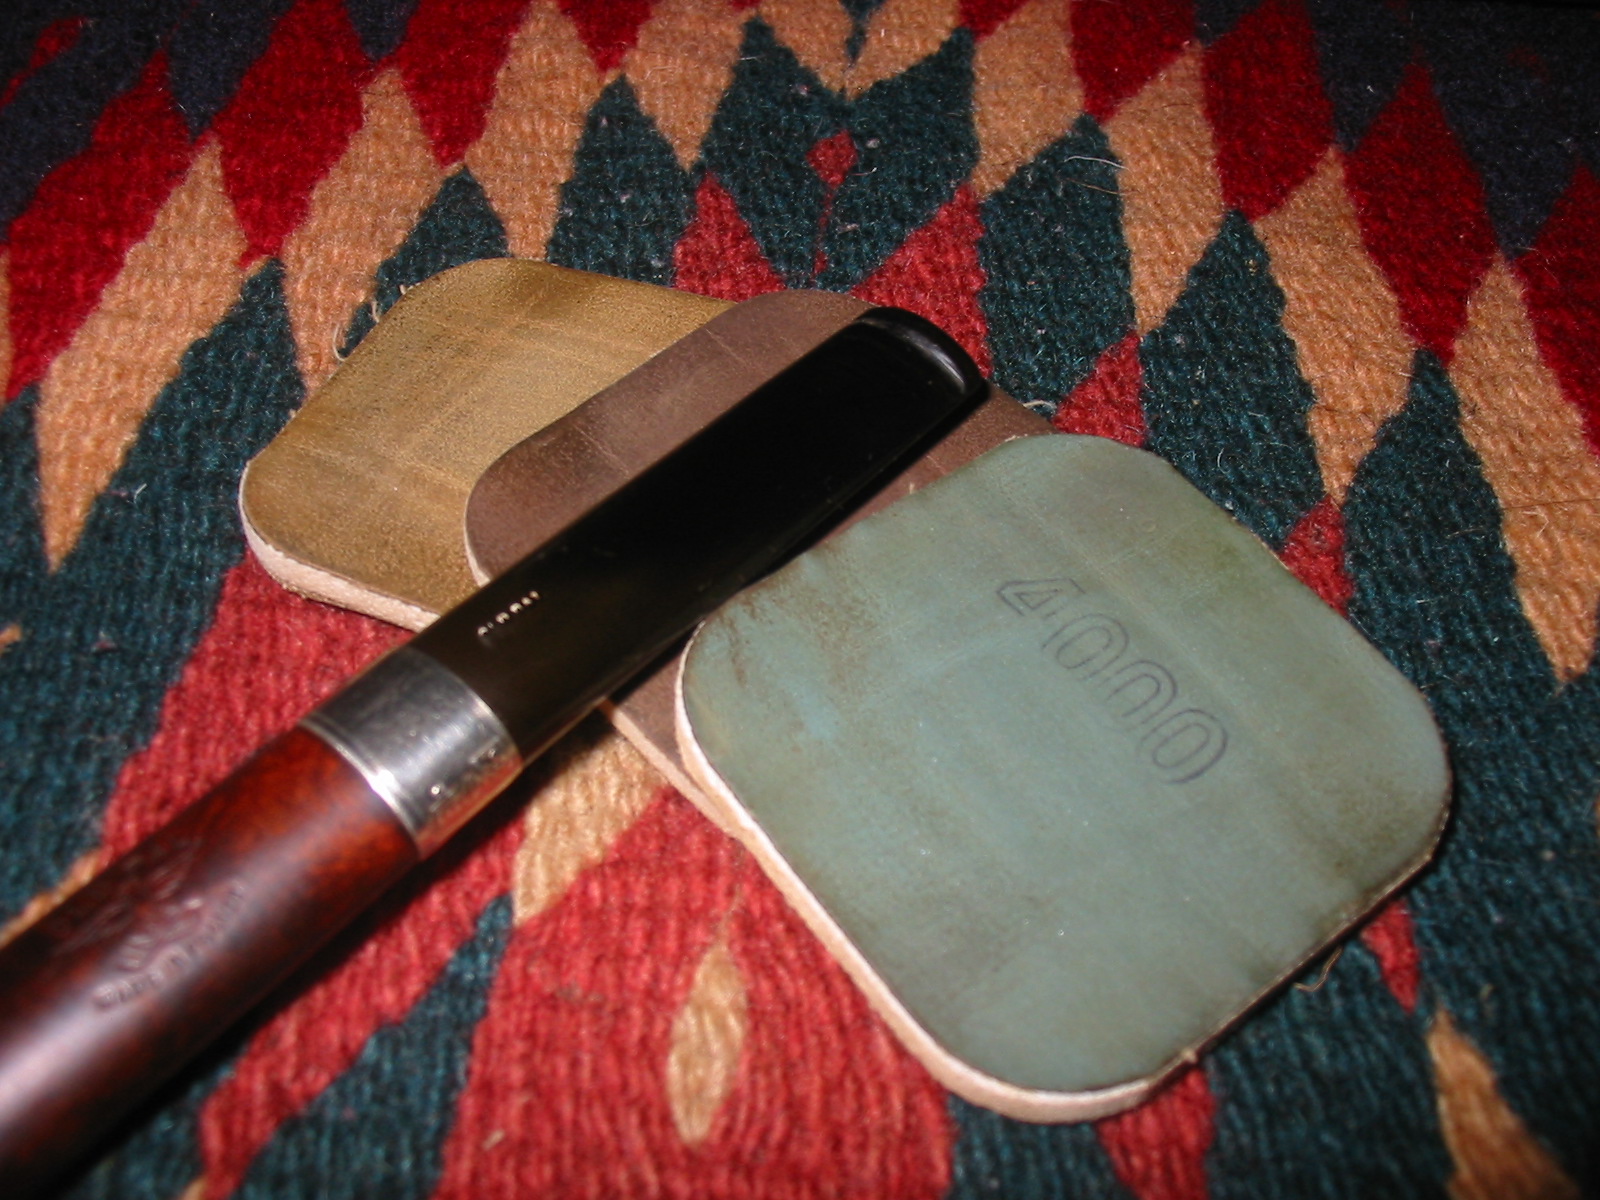
I sanded the stem with medium and fine grit sanding pads and then applied some liquid white out to the stamping on the stem to try to make it stand out more clearly. I sanded the stem with my usual array of micromesh sanding pads – wet sanding with 1500-2400 and dry sanding with 3200-12000 grit pads.
IMG_6306

IMG_6307

IMG_6308
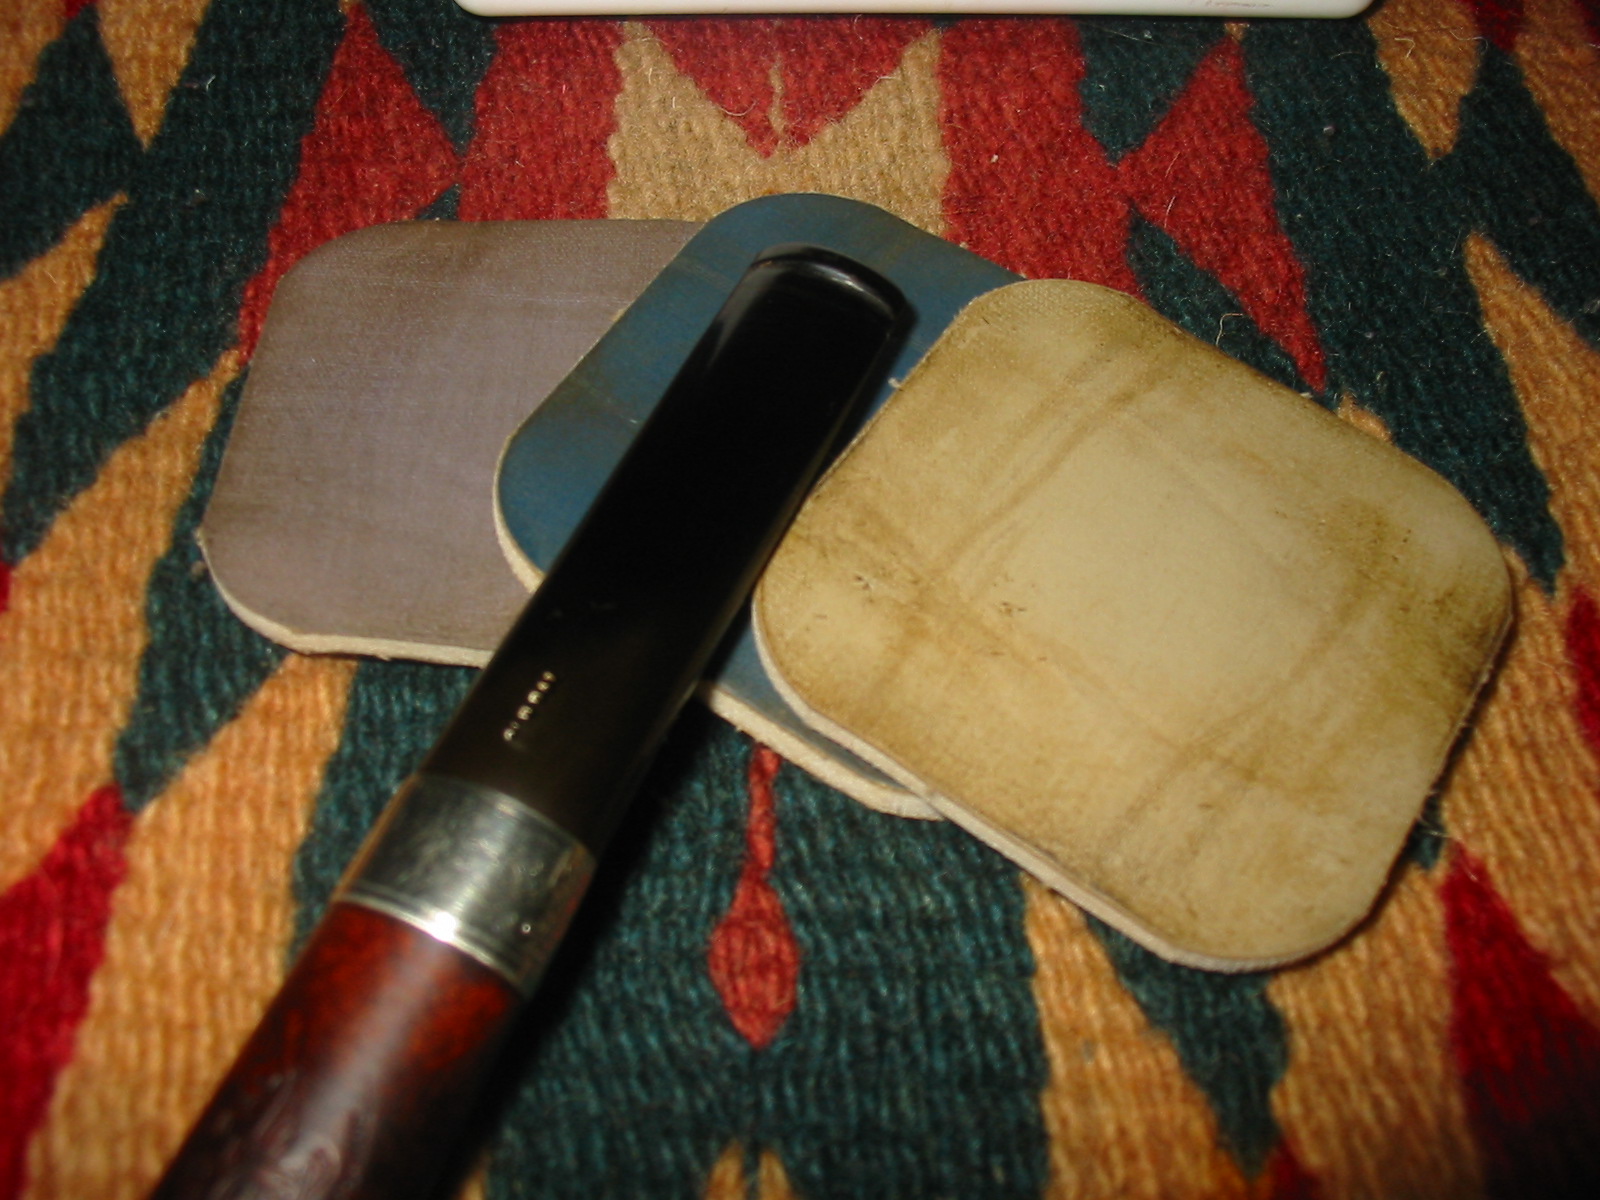
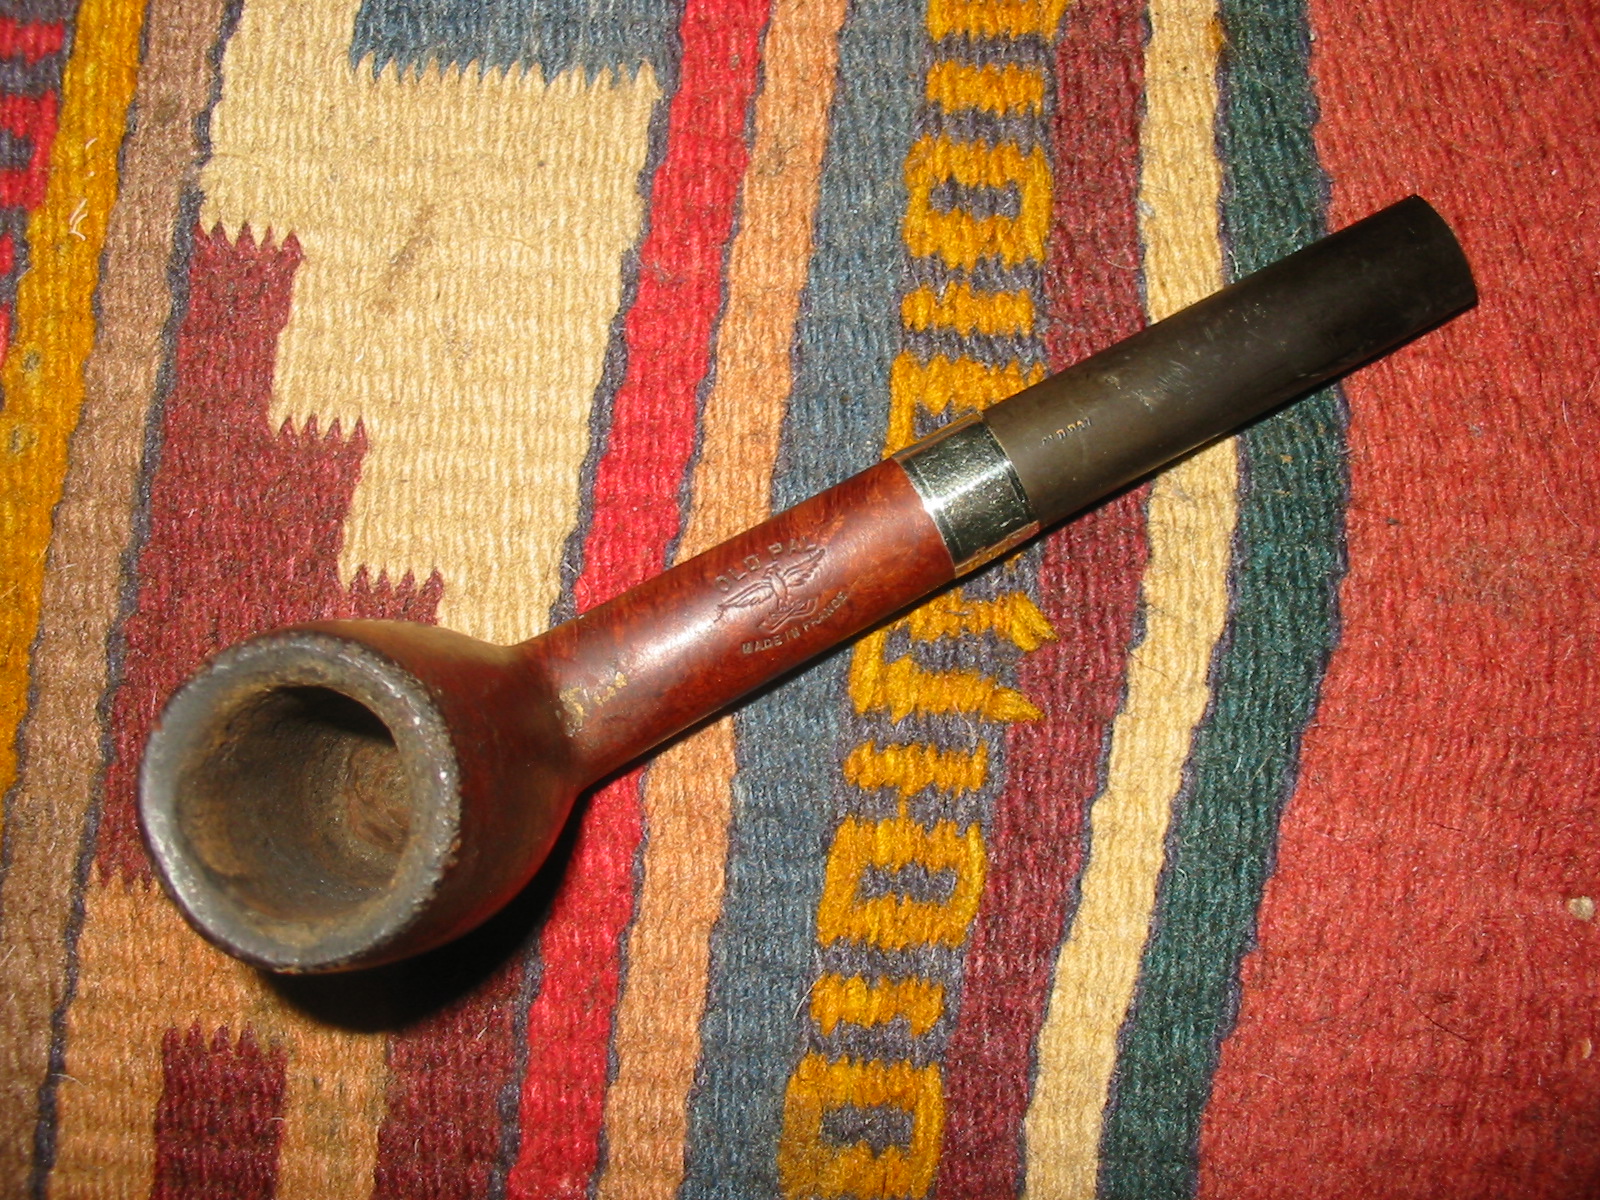
I rubbed the stem down with Obsidian Oil and when it was dry buffed the stem and bowl with White Diamond and gave it multiple coats of carnauba wax to protect and preserve it. I finished by buffing it with a soft, flannel buff. The finished pipe is shown in the photos below. The newly shaped stem came out fairly well. I like the overall look of the finish and the band on the pipe. It is ready to join the other Old Pal in the rack.
IMG_6310

IMG_6311

IMG_6313

IMG_6314

A Kaywoodie Reworked, with a Little Mystery!


Blog by Greg Wolford

This year has not been a banner one, so far, for me personally. The harsh weather, an accident, and a failure of one of my orthotics has had me mostly sidelined since the first of the year. My workshop is downstairs, in the garage, and it isn’t exactly the warmest, most comfortable place to work in the temperatures we’ve had, not to mention the difficulty of actually getting myself up and down the stairs … but I digress … so I’ve been able to do very little work on either of my hobbies so far in 2014.

Last week my wife had a little pity on me and allowed me to bring a few necessary tools and supplies up to the kitchen so I could work on a few old pipes; leather work is out of the question until the temperature and my body cooperate. I think she knew I was getting a bit restless, not being able to get into any of my projects. When I said she “allowed” it, she corrected me with “I didn’t say you could do that” but she didn’t send it all back down to the shop either, so I take that as permission I told her! LOL

Now, I must admit that my photographs, when I remember to take them (that’s a preview hint that I haven’t remembered as often as I should have), aren’t as good as I would like but I don’t have as good a set-up as I normally do. So, I ask you to bear with me on the quality and quantity of them.

Sometime back I acquired an older Kaywoodie model 33. It is an apple shape with a rounded bowl-top. The pipe was in pretty good condition other than the front edge was damaged from being knocked-out and the bottom of the stem had been bitten off. because of the stem damage I put off working on this pipe for months; I wanted to save the stem but didn’t have the black super glue yet, which I planned on using, to do the job. Here are a couple of photos (all I could find) of it before I started working on it.

Kaywoodie Apple (10) Kaywoodie Apple (11) Kaywoodie Apple (13)

Unfortunately all I can find are some photos that I used it as a “prop” in and one of the underside of the stem. You can see the pipe itself wasn’t too bad but the stem was another story.

Initially I tried to patch the chip with black super glue; I tried this three times: the first attempt the pipe cleaner I was using as a plug absorbed all the glue and the other two times, using different materials for the plug, the patch failed. It turned out that the chip was just too large for me to patch well so I decided to cut it off and file a new button since there seemed to be plenty of room to work with on this stem.

I used a hacksaw on a small frame to remove just behind the bite through. When I looked at the air hole I noticed two things, neither good: first I had closed off the airway accidentally with the glue and second the air hole wasn’t drilled center. I fixed the glue-plug problem quickly by drilling out the hardened glue with a pin vice and then picking out the small fragments that were left. One problem down – now onto forming a new button and slot.

I used various needle files to shape the new button, being timid about not getting it too thin. I recently bought a new set of Kobalt needle files, a big upgrade from my old ones, and found that this (only my second or third time making a whole new button and transition) went much smoother and faster than in the past. I also used the files and a bit of sandpaper to open and funnel the slot, again I was a bit timid in not going too thin; I have done that once and suffered a cracked bit afterward. This is a fair representation of what I ended up with:

Kaywoodie Apple (8)

Once I had the stem to my satisfaction I turned to the stummel.

I had at some time past already reamed the bowl lightly, it had very little cake, and cleaned the shank and stem. I now began by cleaning the stummel with acetone wetted cotton pads to remove the old finish and dirt. After the acetone I moved on to some alcohol wetted pads to lighten up the grime on the bowl top. When it was sufficiently clean I decided to use some 400 grit sandpaper to lightly smooth the edge damage. I didn’t know it at the time – because I failed to look first, a fault I have all too often – but the rim was supposed to be rounded. Luckily I liked the general look of the rounded top and thought it might be the way it was supposed to be so I wanted to keep it rather than topping the entire bowl. I personally like, in general, the less sharp lines on a bowl top so this was an easy choice – one that turned out to be a good one as well.

Once I had reduced the damage to the rim and front, keeping the shape as close to original/symmetrical as I could, I moved to micro mesh pads to sand and polish the bowl top. After getting through the first two grades I thought the entire pipe would look nice just polished with the micro mesh. At this point I reassembled the pipe and began to look for nomenclature to avoid during my polishing; this is when I discovered my “mystery”.

On the bottom of the stem, a origianl Kaywoodie, three-hole stinger with white clover logo, I saw something I had never seen before: there was stamping on the vulcanite “D-2”. This immediately intrigued me; I knew I would have to find out more about that … but lets’ wait a paragraph or two on that.

Kaywoodie Apple (9)

I polished the entire pipe with all of the micro mesh grits in order from 1500 – 12000, avoiding all of the stamping, including on the stem. I wet sanded the stem (only) through 4000, then polished the stem with plastic polish, before finishing the entire pipe through 12000 grit. I then applied Halcyon II wax to the entire pipe and hand buffed it. I was really pretty pleased with the results, considering I didn’t have access to my buffer and this was, more or less, my first experience with the Halcyon wax.

Kaywoodie Apple (2) Kaywoodie Apple (3) Kaywoodie Apple (5)Kaywoodie Apple (4)Kaywoodie Apple (6) Kaywoodie Apple (7) 

I missed some file marks on the stem, and the “bits” near the bit; I figure when I can properly buff the pipe I will get those taken care of, as well as put a better shine on it with some carnauba wax. But until then I am enjoying this old gal just as she is!

The stem still has oxidation near that stamping, which I began to research after I finished the work on the pipe. None of the other Kaywoodies I have, or have ever had, have any stamping on their stems like this one does. I scoured the ‘net and asked as many folks as I could think of to no avail … well, almost none. I am a member of the Kaywoodie Pipes Group on Facebook and one of the members there is Bill Fuerbach is as well. He saw my question that I posted about the stamping in that group and replied as follows:

Hey guys. I’ve seen this also on some older Kaywoodie stems. unfortunately at this time I don’t know what the significance is. :(:(

So unfortunately there is not yet an answer to what the stamping means or its significance is – and the mystery remains …  If by chance anyone what reads this knows the answer I would really appreciate it is you would leave a comment with the answers!

Edit

I received an email from Chris at PipePages about this question. He said in his personal opinion, and that it is only a guess, that it could be a factory replacement stem and the number was a style/guide for the repairman to know which stem to use. Although it is only a shot-in-the-dark type of guess, it seems like a plausible answer to me.

The Everyman Pipe from the 1920’s Era


Blog by Steve Laug

This featherweight cutty shaped pipe came from the 1920’s or earlier. I bought it in a lot of that era pipes on EBay and it arrived as pictured below. It is stamped The Everyman Pipe on the left side of the shank and Made in England in a Circle and shape number 195 on the right. When this arrived in the package of the other old timers it was pretty grimy. The bowl needed serious cleaning and the rim was dented and had rough spots. It needed to be topped as steaming it would not raise the broken spots that came from tapping it out. When the surface of the wood is actually broken and not just dented steaming will not raise the grain significantly and the only repair I know is to sand it off and make it smooth and crisp again. The challenge then is to match the stain so the bowl and rim blend.

I reamed and cleaned the bowl and the airway in the shank. The pipe cleaners came out very dark and tarry at the beginning. I decided to use a drill bit the same size as the airway to clean out the gunk before going back to the pipe cleaners. I use a T handle to turn the bit into the shank by hand to remove the tars and open the airway again. I finished cleaning the shank with fluffy pipe cleaners and isopropyl alcohol until they came out clean. I wiped down the bowl with acetone to remove the old wax and the grime from the bowl and then used my topping method – a hard, flat board and an anchored piece of 240 grit sandpaper – and topped the rim. (I have since learned from someone that a good way of doing it is to anchor the sandpaper on a Masonite clipboard and sand the rim that way. It works great.)

Image

The stem needed the most work as it was a round tube of vulcanite. I wonder if it was not made to be like a clay tavern pipe. The previous owner had notched the top of the stem to make it easier to hold with his teeth and keep it from rolling. The notch was a fairly deep V cut that was only on the top of the stem. I used needle files to cut a new button on it and then my Dremel with a sanding drum to taper the stem back to the button. The original had a slight bend in the stem so I left that. The button I shaped for the stem is rounded and crowned to fit the orific airhole like those found on pipes of a similar age. After cutting the button and shaping it, the stem needed a lot of sanding to remove the scratches and oxidation. I used 240 grit sandpaper on the entirety to clean up the deeper scratches and remove the oxidation. I then progressed through the wet dry sandpapers and the micromesh pads until I had a good smooth finish on the stem and a good clean button.

Image

I set the stem aside and restained the rim and bowl to match what appeared to be the original colour of the pipe. I used an oxblood undercoat and a dark brown top coat to get the richness of the original finish. I coated the stem with Obsidian Oil and then inserted it in the shank. Once it was dry I took the pipe to the buffer and used the White Diamond to give it a final buff before giving it several coats of carnauba wax.

The pictures below show the finished pipe with its newly shaped and polished stem:

ImageImageImageImage