Tag Archives: contrast staining

Reworking a Stetson Sport Zulu


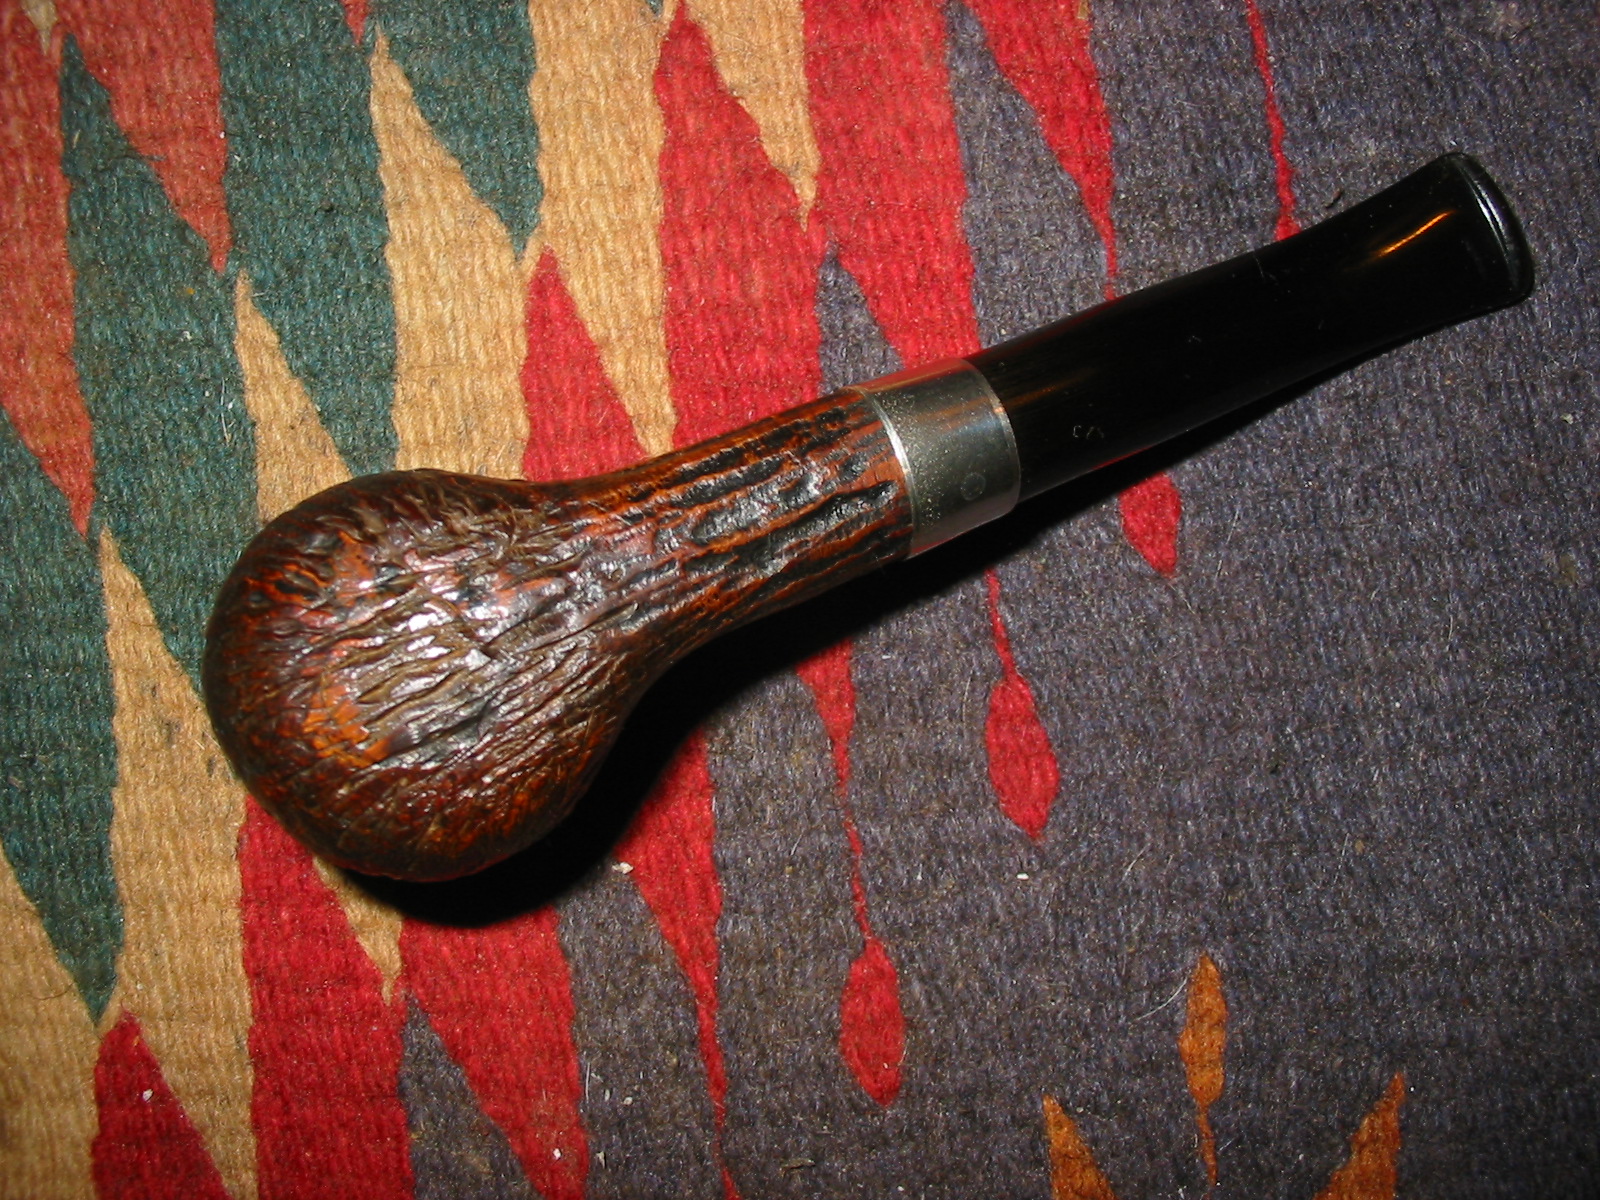
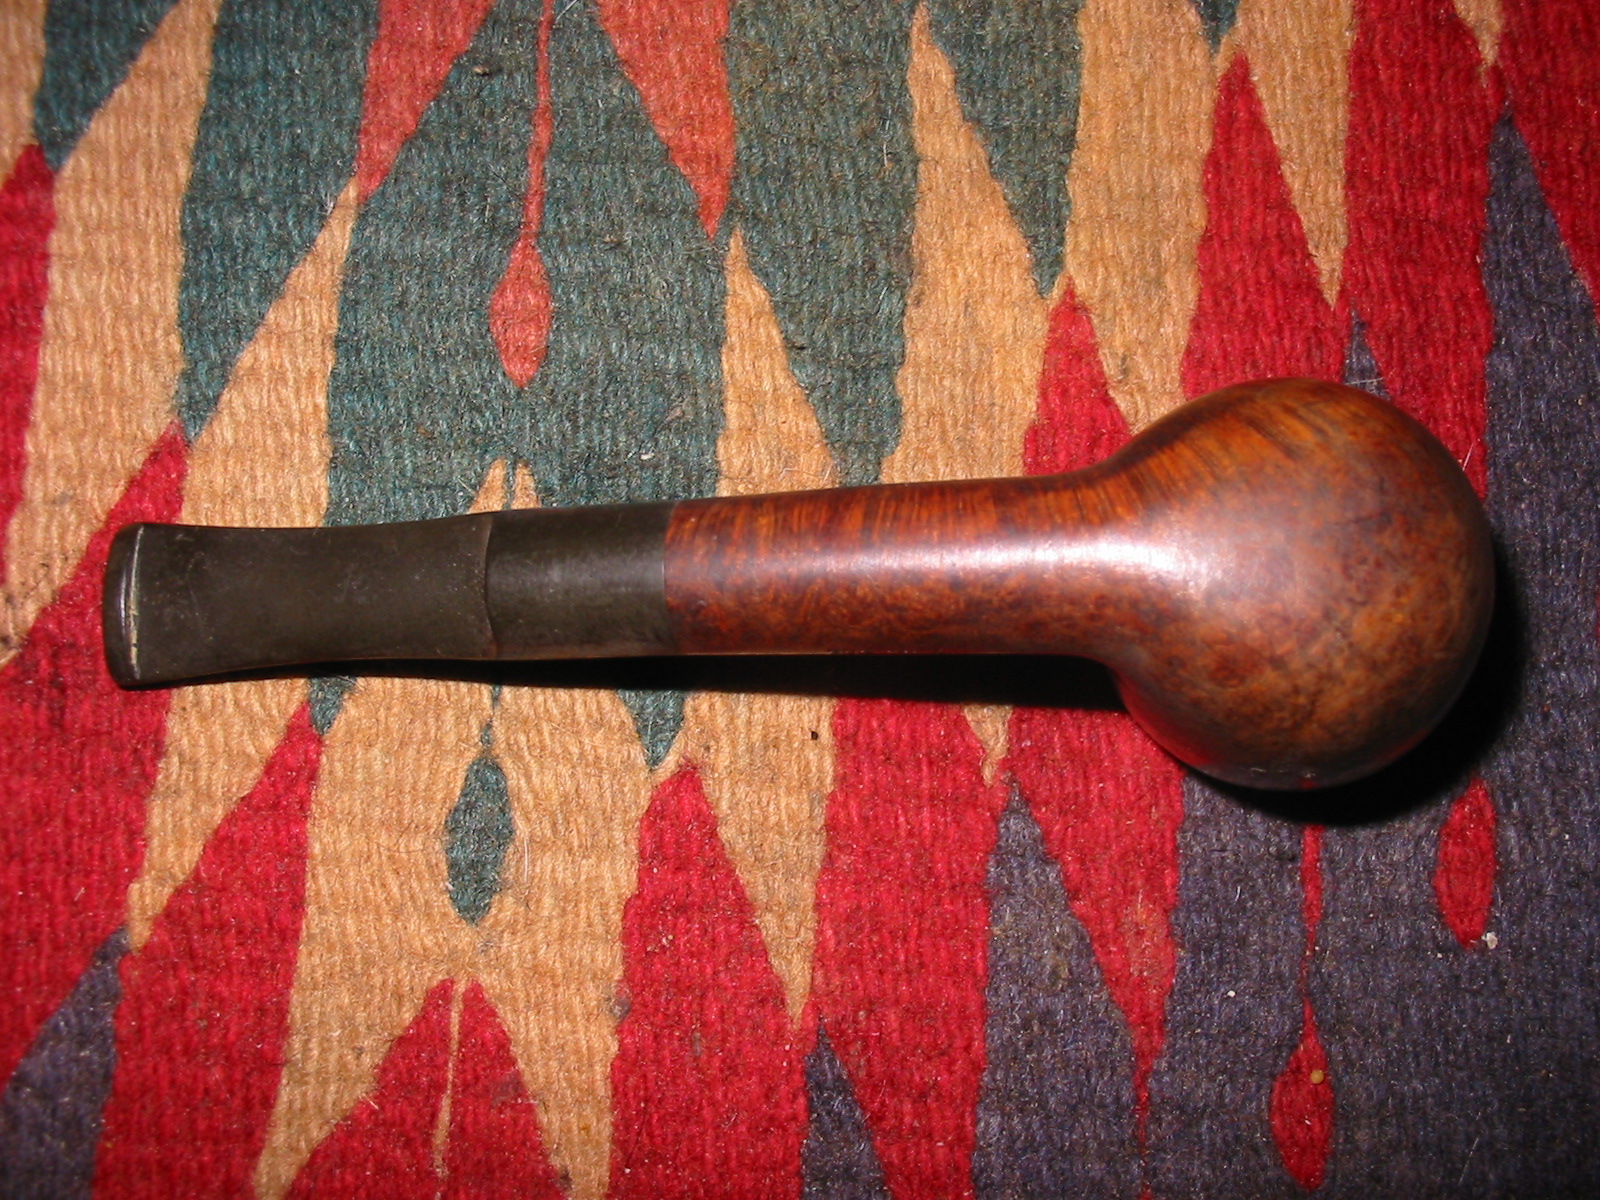
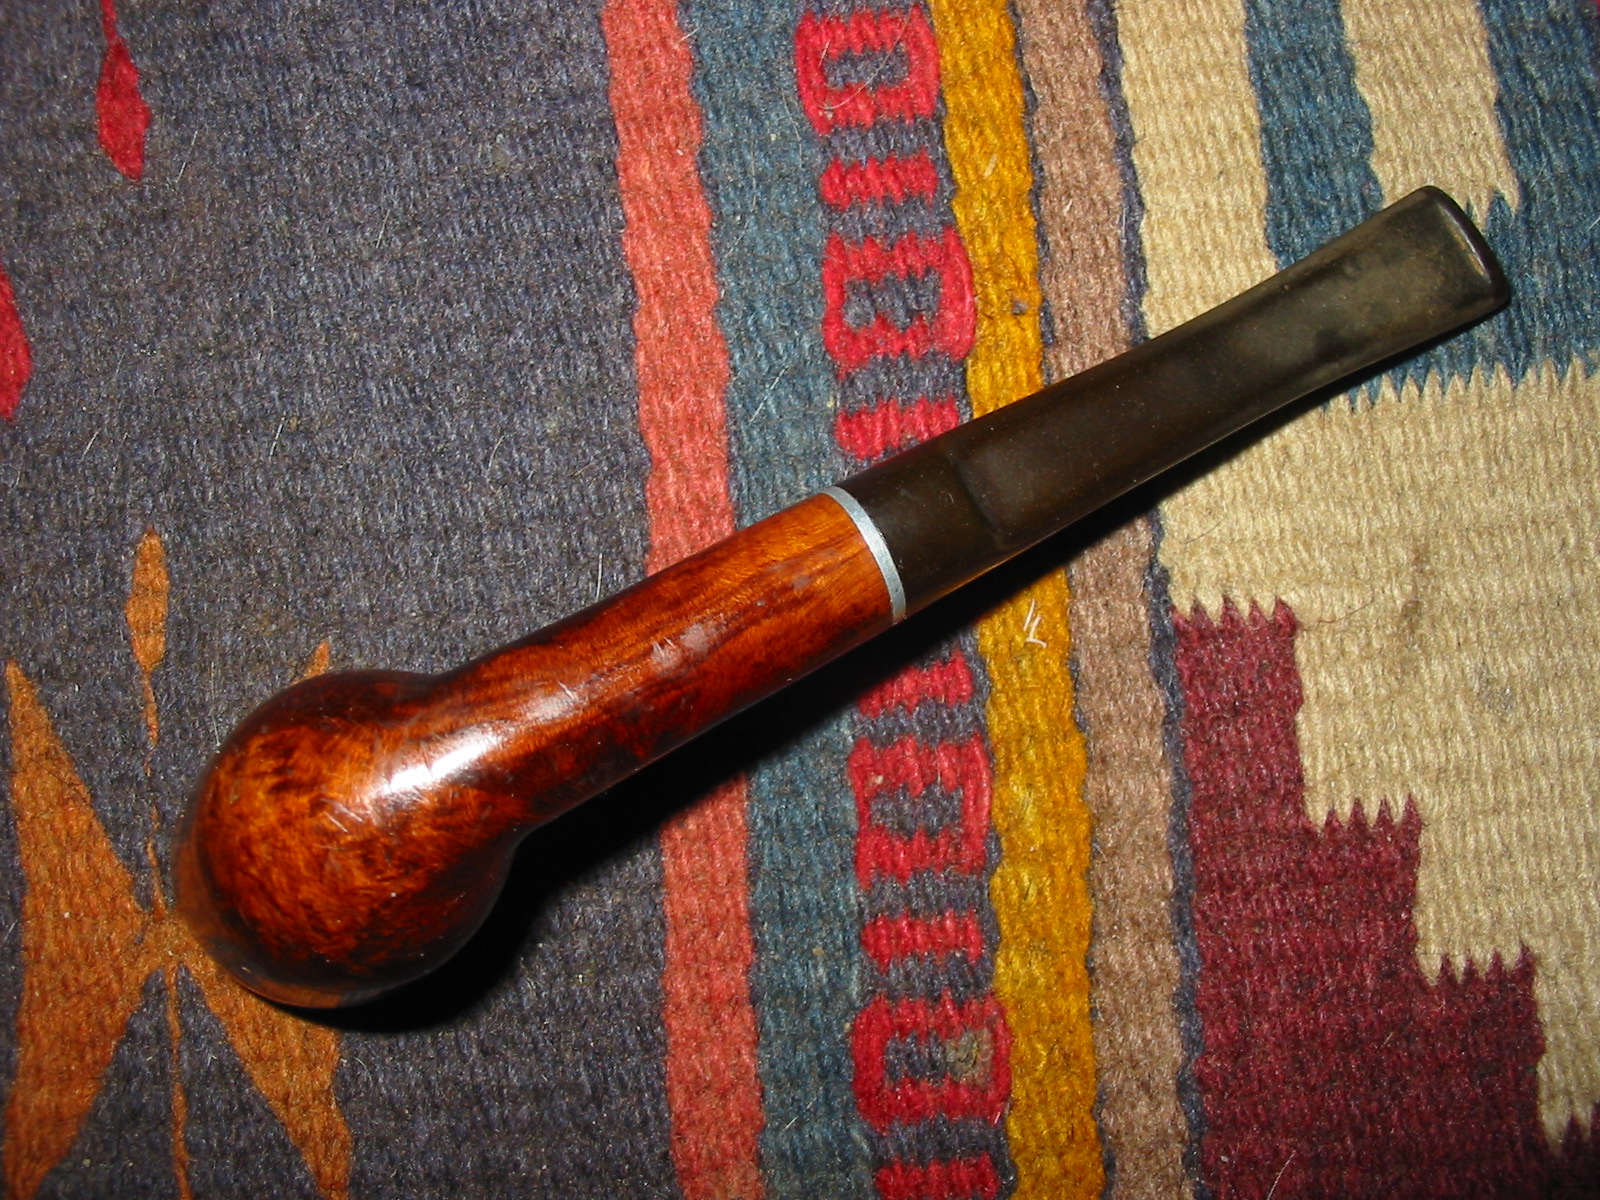
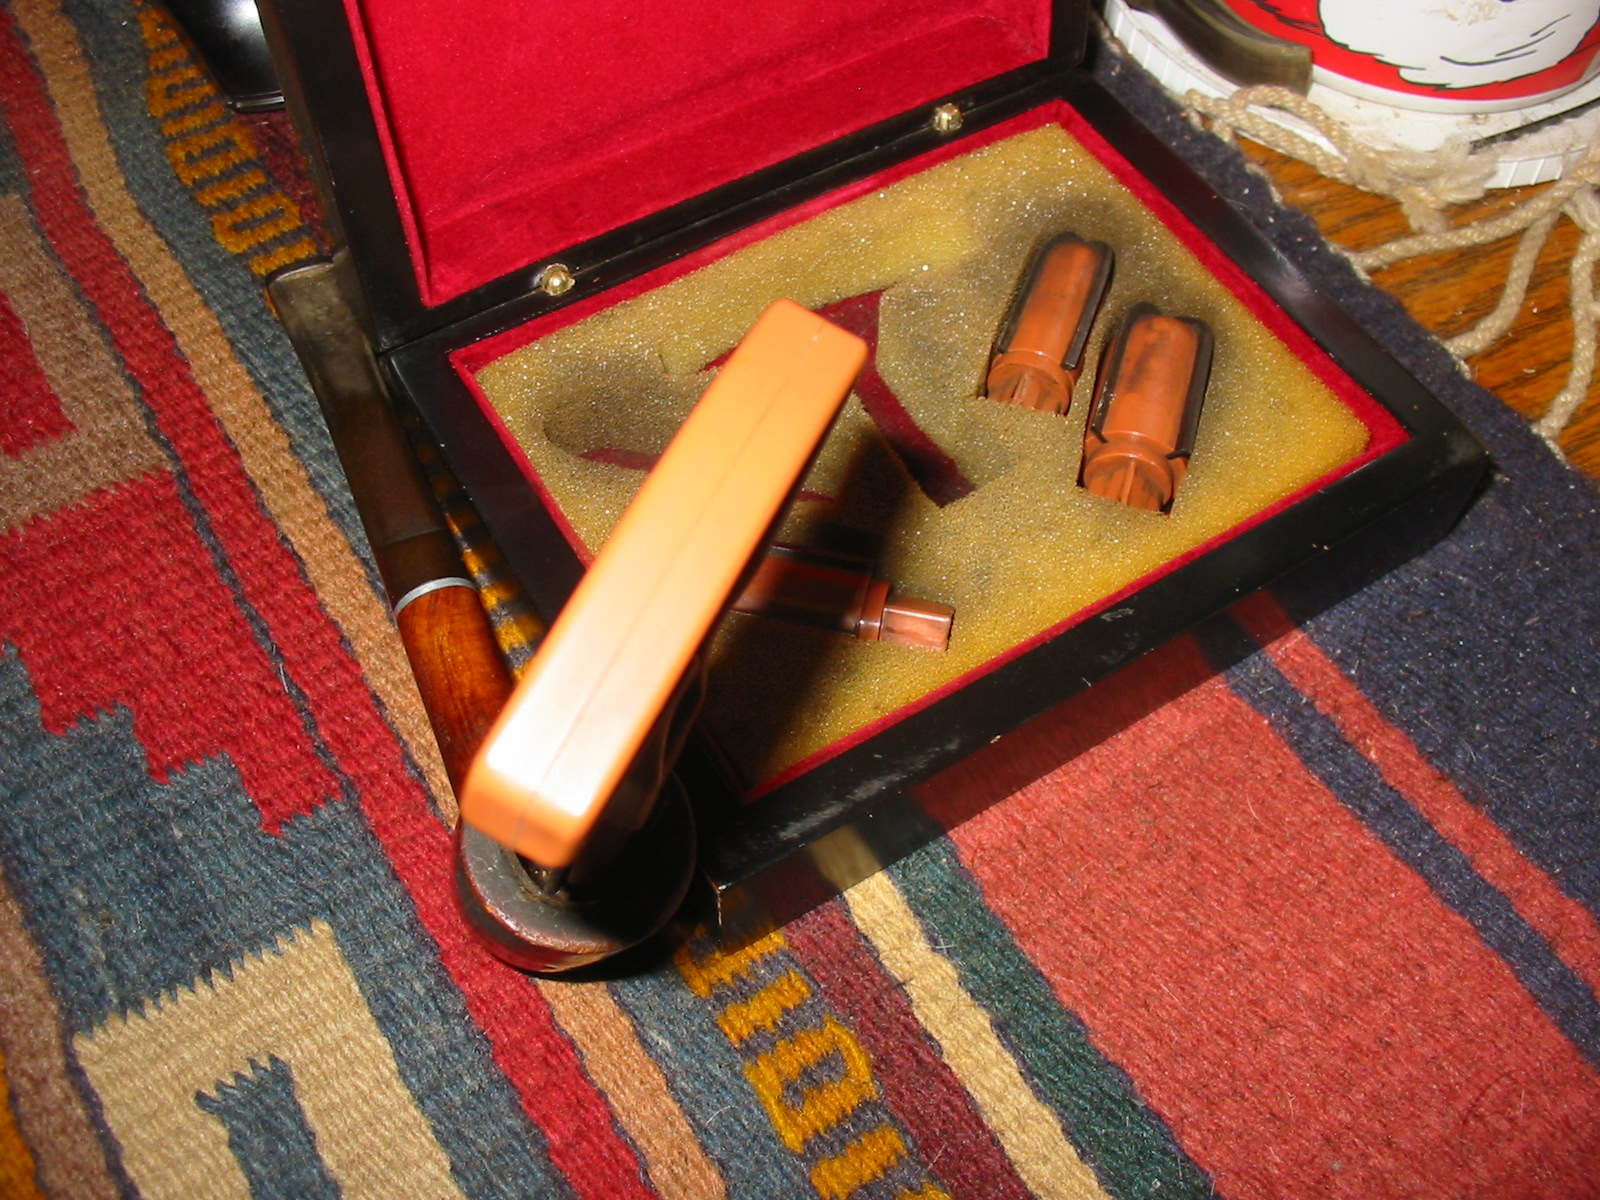
This pipe was gifted to me in exchange for a bit of stem work that I did recently for a friend of mine. It came in a box with the pipe to be repaired and two others. It was a brand that I knew absolutely nothing about. The pipe was obviously American made and had a coat of thick varnish on the bowl that was beginning to flake and peal. I decided to do a bit of research on the brand to see if I could find any information on it.
IMG_3100

I found a document online for the John B. Stetson Company. Stetson is the manufacturer of Western hats but I was not aware that they also made pipes. One source seemed to point to the fact that the pipes were made by Marxman Pipe Company and branded with the Stetson name.

The document was written as a brand page for the company in application for a trademark. I have included that document below as I find the historical detail quite interesting. The source of the information is this website: http://www.legalforce.com/stetson-78583631.html I quote the following information in part from that site.

John B. Stetson Company

Absorbent paper for tobacco pipes, ashtrays not of precious metal, chewing tobacco, cigar bands, cigar cutters, cigar humidifiers, cigar tubes, cigarette cases not of precious metal, cigarette lighters not of precious metal, cigars, cigarillos, hand-rolling tobacco, humidors, match boxes not of precious metal, match holders, matches, non-electric cigar lighters not of precious metal, pipe pouches, pipe tampers, pipe tobacco, tobacco, rolling papers…

This is a brand page for the STETSON trademark by John B. Stetson Company in Mt. Kisco, NY, 10549. Write a review about a product or service associated with this STETSON trademark. Or, contact the owner John B. Stetson Company of the STETSON trademark by filing a request to communicate with the Legal Correspondent for licensing, use, and/or questions related to the STETSON trademark.

On Wednesday, March 09, 2005, a U.S. federal trademark registration was filed for STETSON by John B. Stetson Company, Mt. Kisco, NY 10549. The USPTO has given the STETSON trademark serial number of 78583631. The current federal status of this trademark filing is ABANDONED – NO STATEMENT OF USE FILED. The correspondent listed for STETSON is BARRY A. COOPER of GOTTLIEB, RACKMAN & REISMAN, P.C., 270 MADISON AVE FL 8, NEW YORK, NY 10016-0601. The STETSON trademark is filed in the category of Smoker’s Products . The description provided to the USPTO for STETSON is Absorbent paper for tobacco pipes, ashtrays not of precious metal, chewing tobacco, cigar bands, cigar cutters, cigar humidifiers, cigar tubes, cigarette cases not of precious metal, cigarette lighters not of precious metal, cigars, cigarillos, hand-rolling tobacco, humidors, match boxes not of precious metal, match holders, matches, non-electric cigar lighters not of precious metal, pipe pouches, pipe tampers, pipe tobacco, tobacco, rolling tobacco, smokeless tobacco, smoking pipe cleaners, sm.”

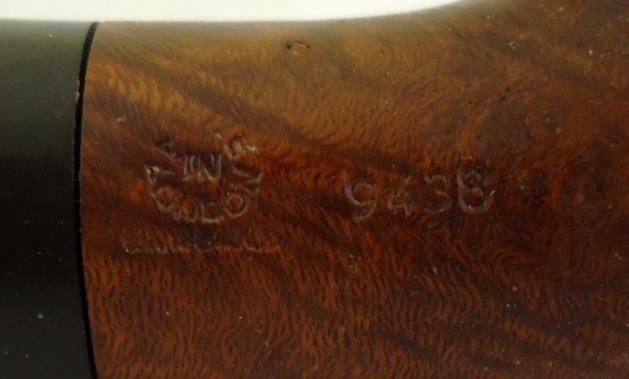
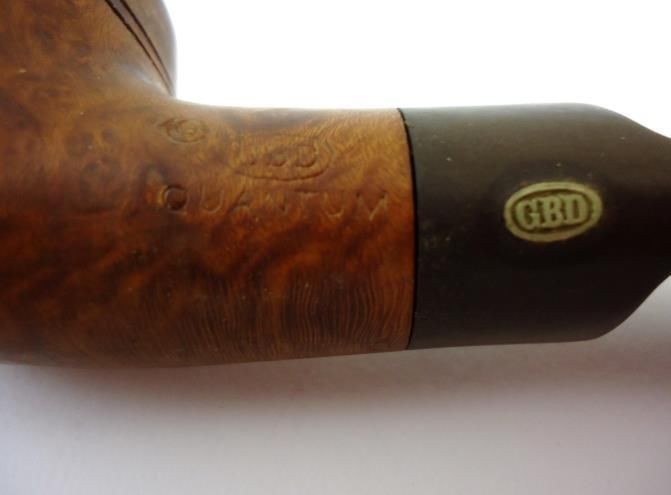
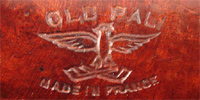
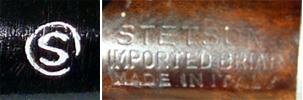
I also found the following stamping photos on Pipephil’s Stamping and Logos site: http://www.pipephil.eu/logos/en/logo-s12.html
Stetson

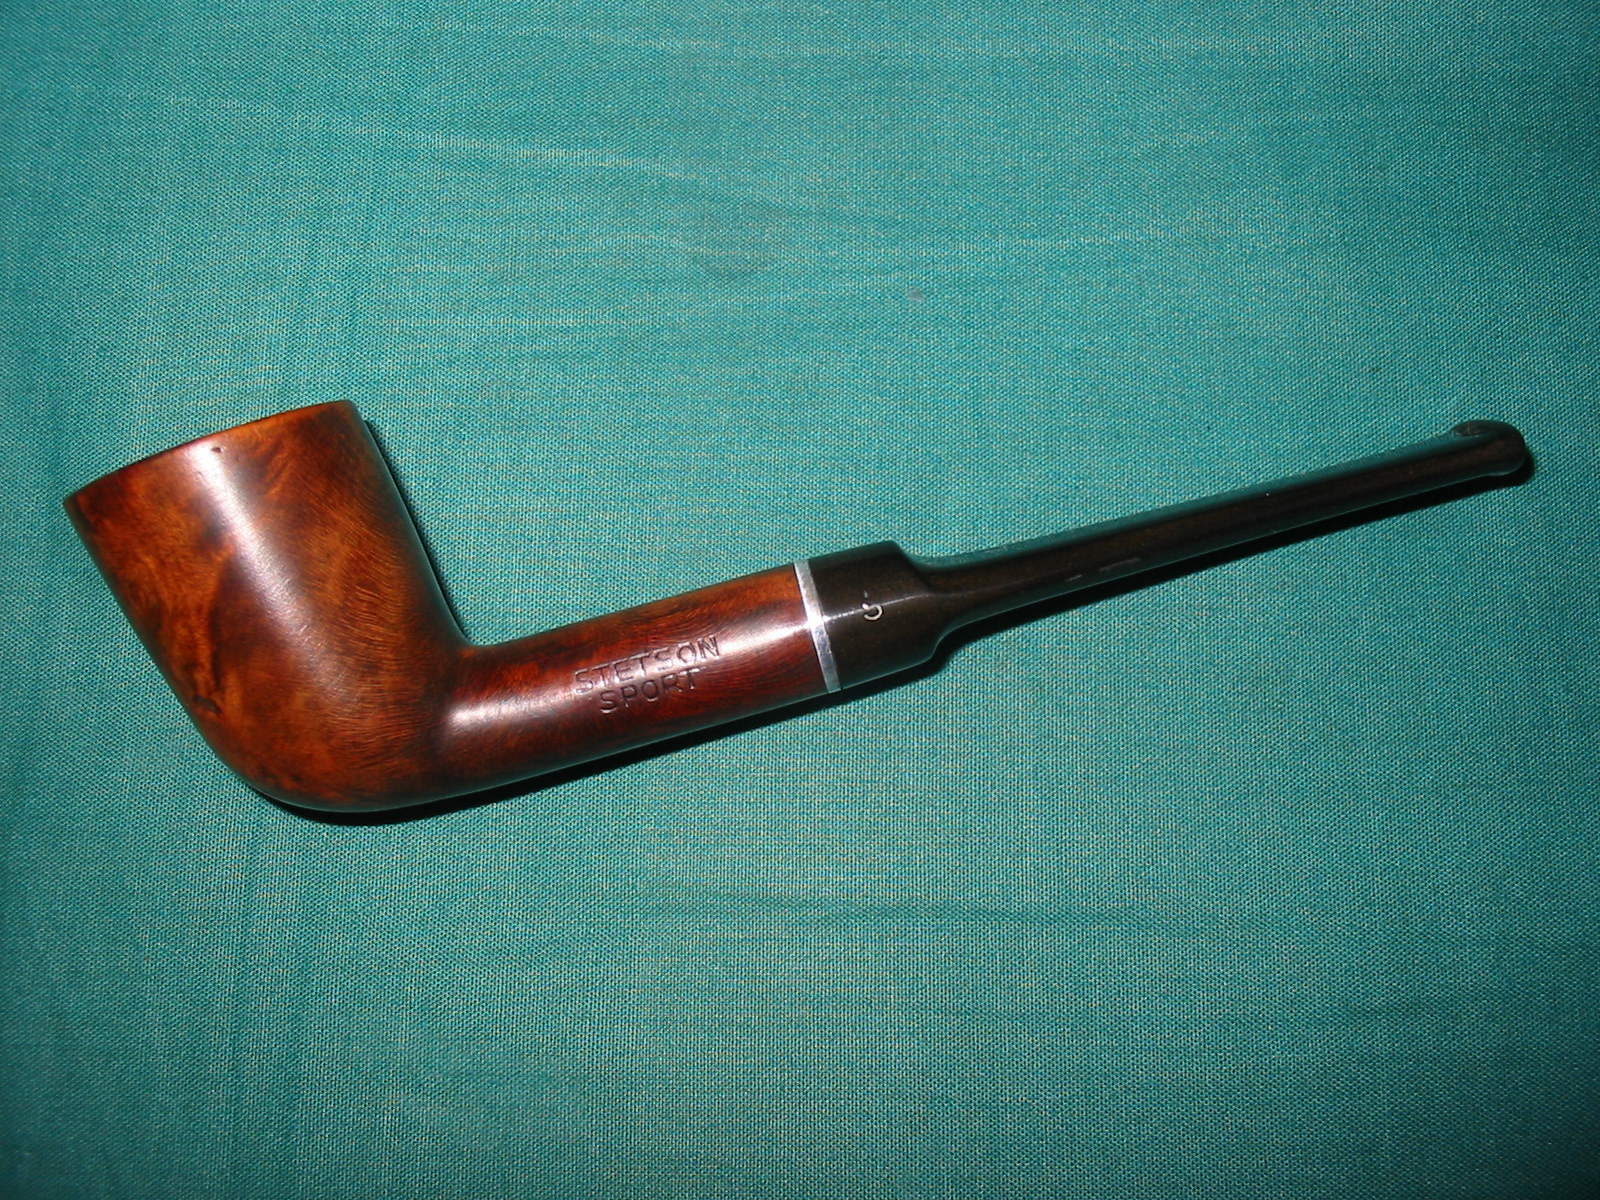
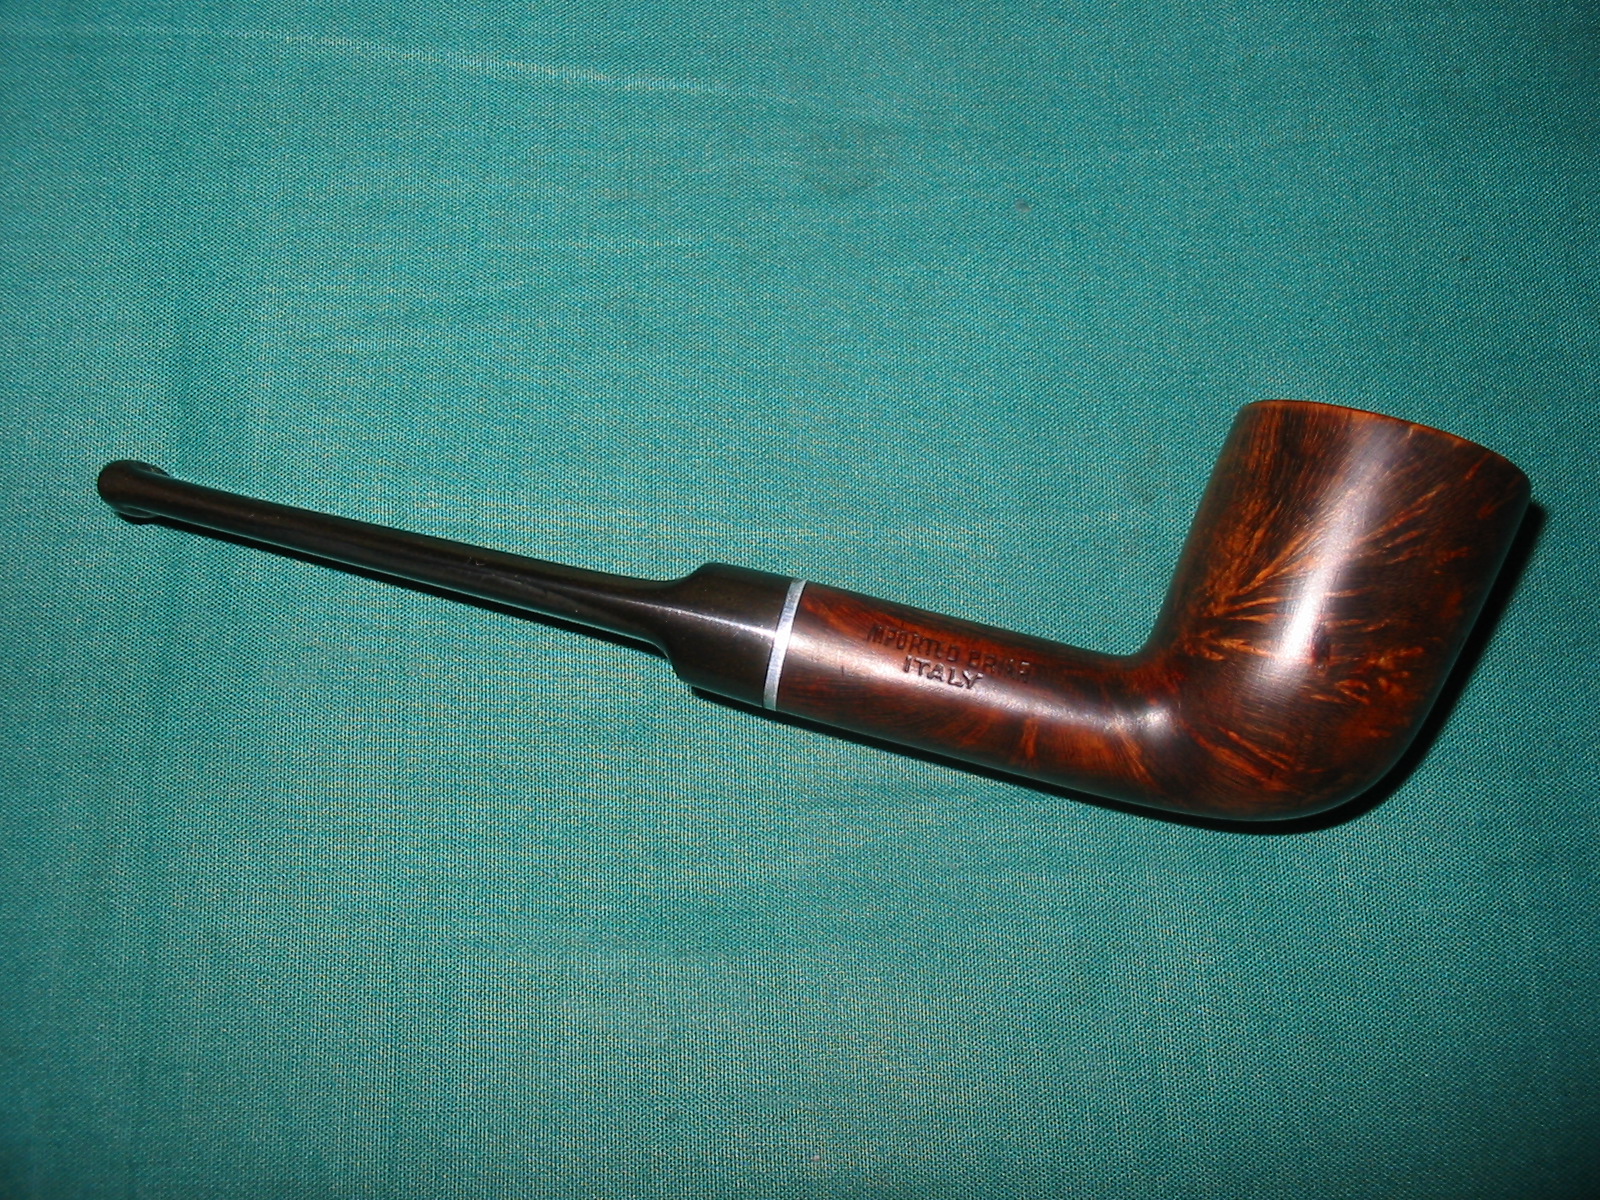
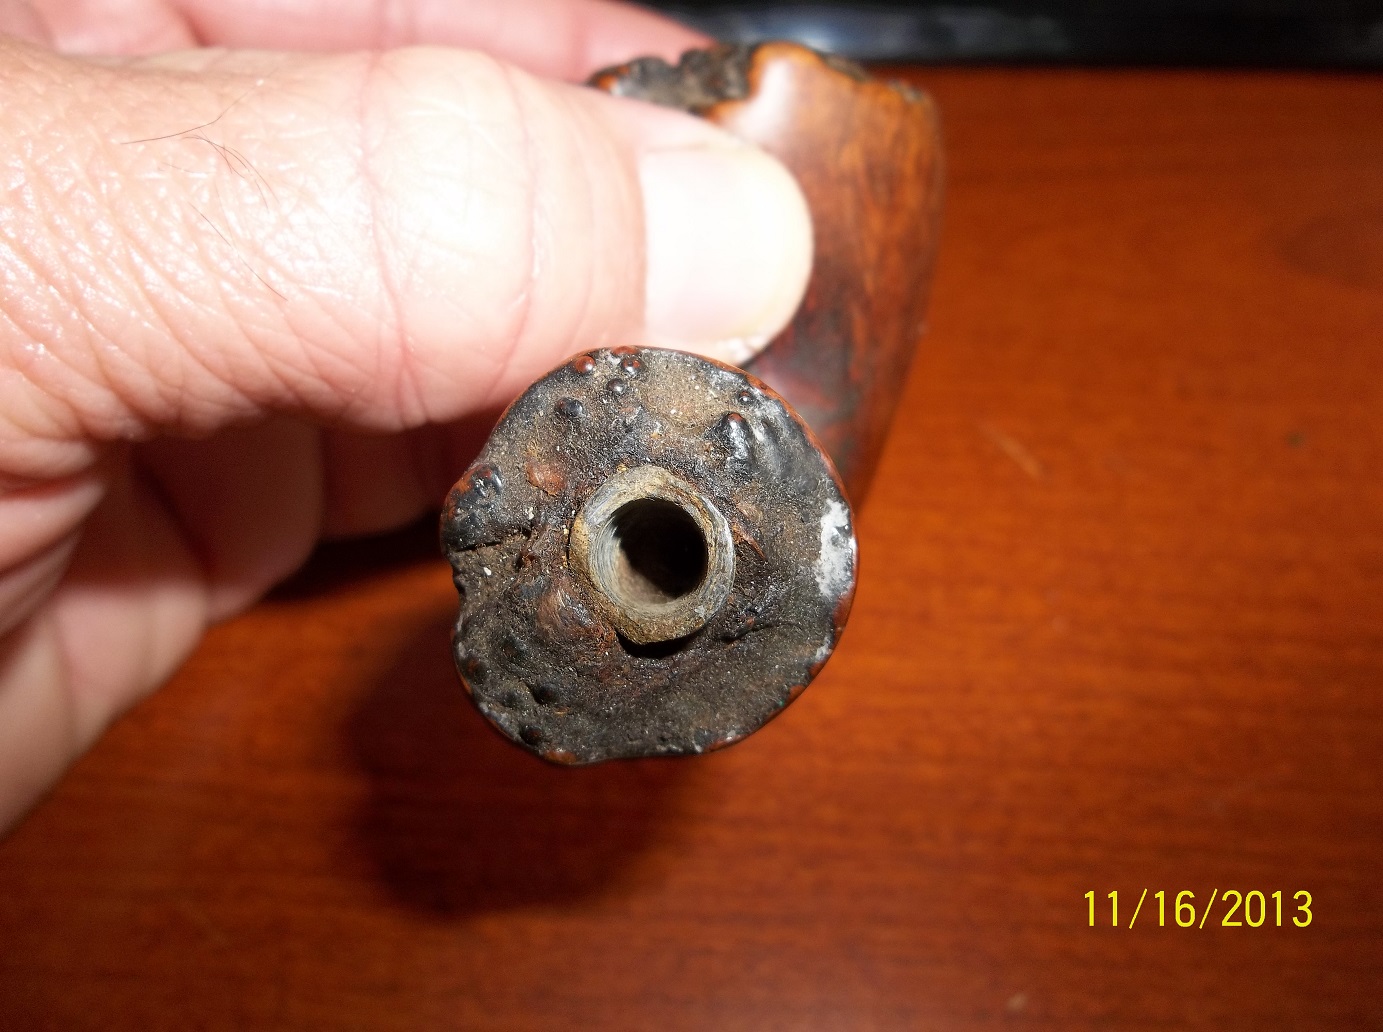
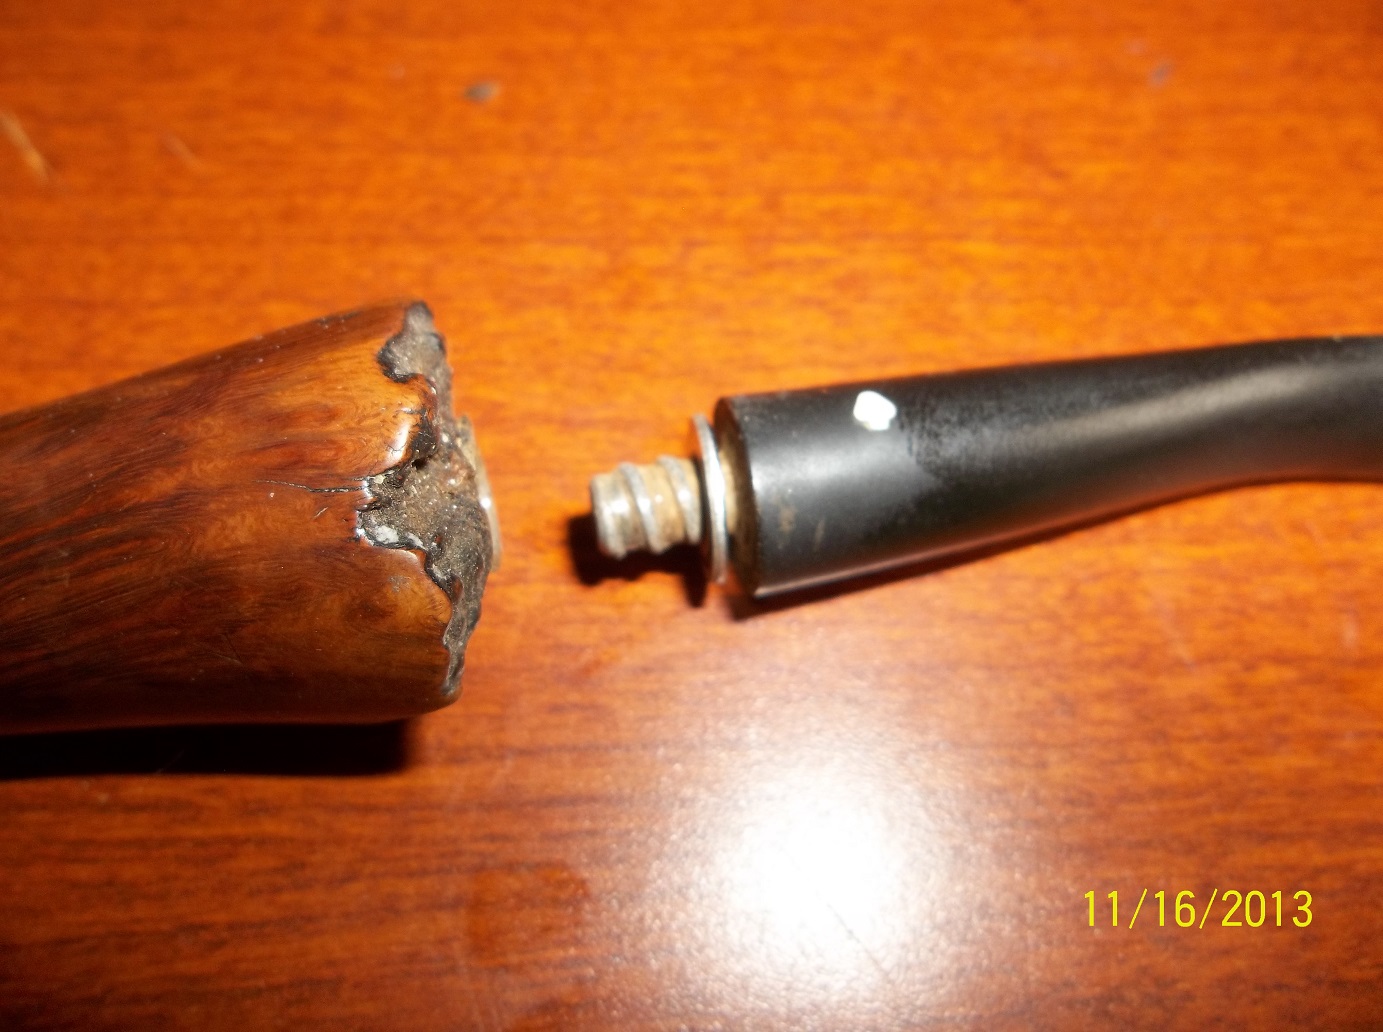
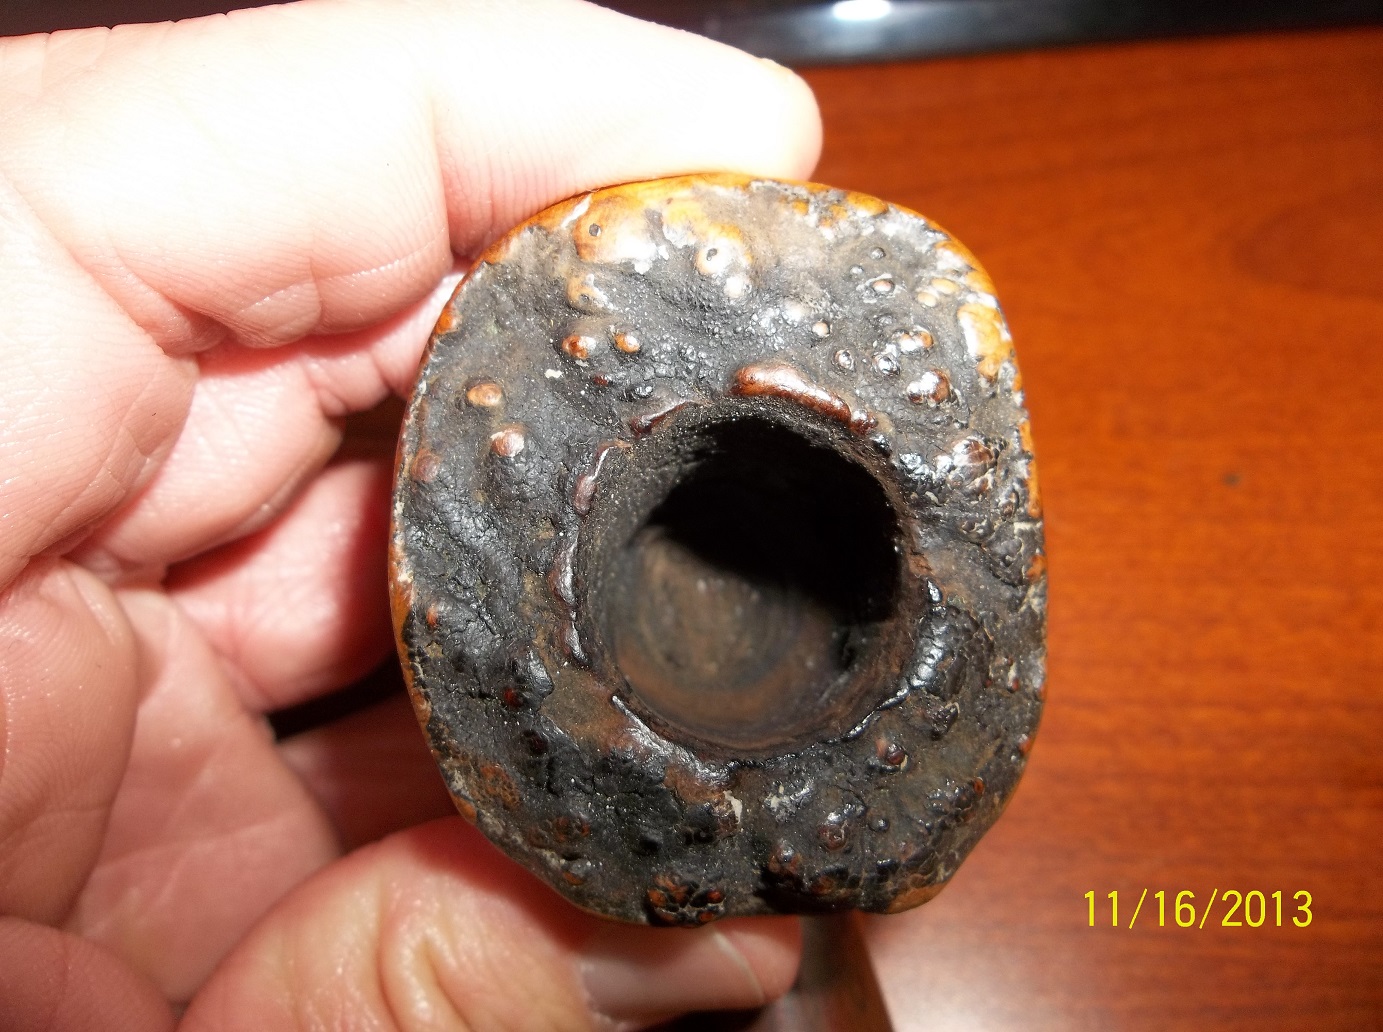
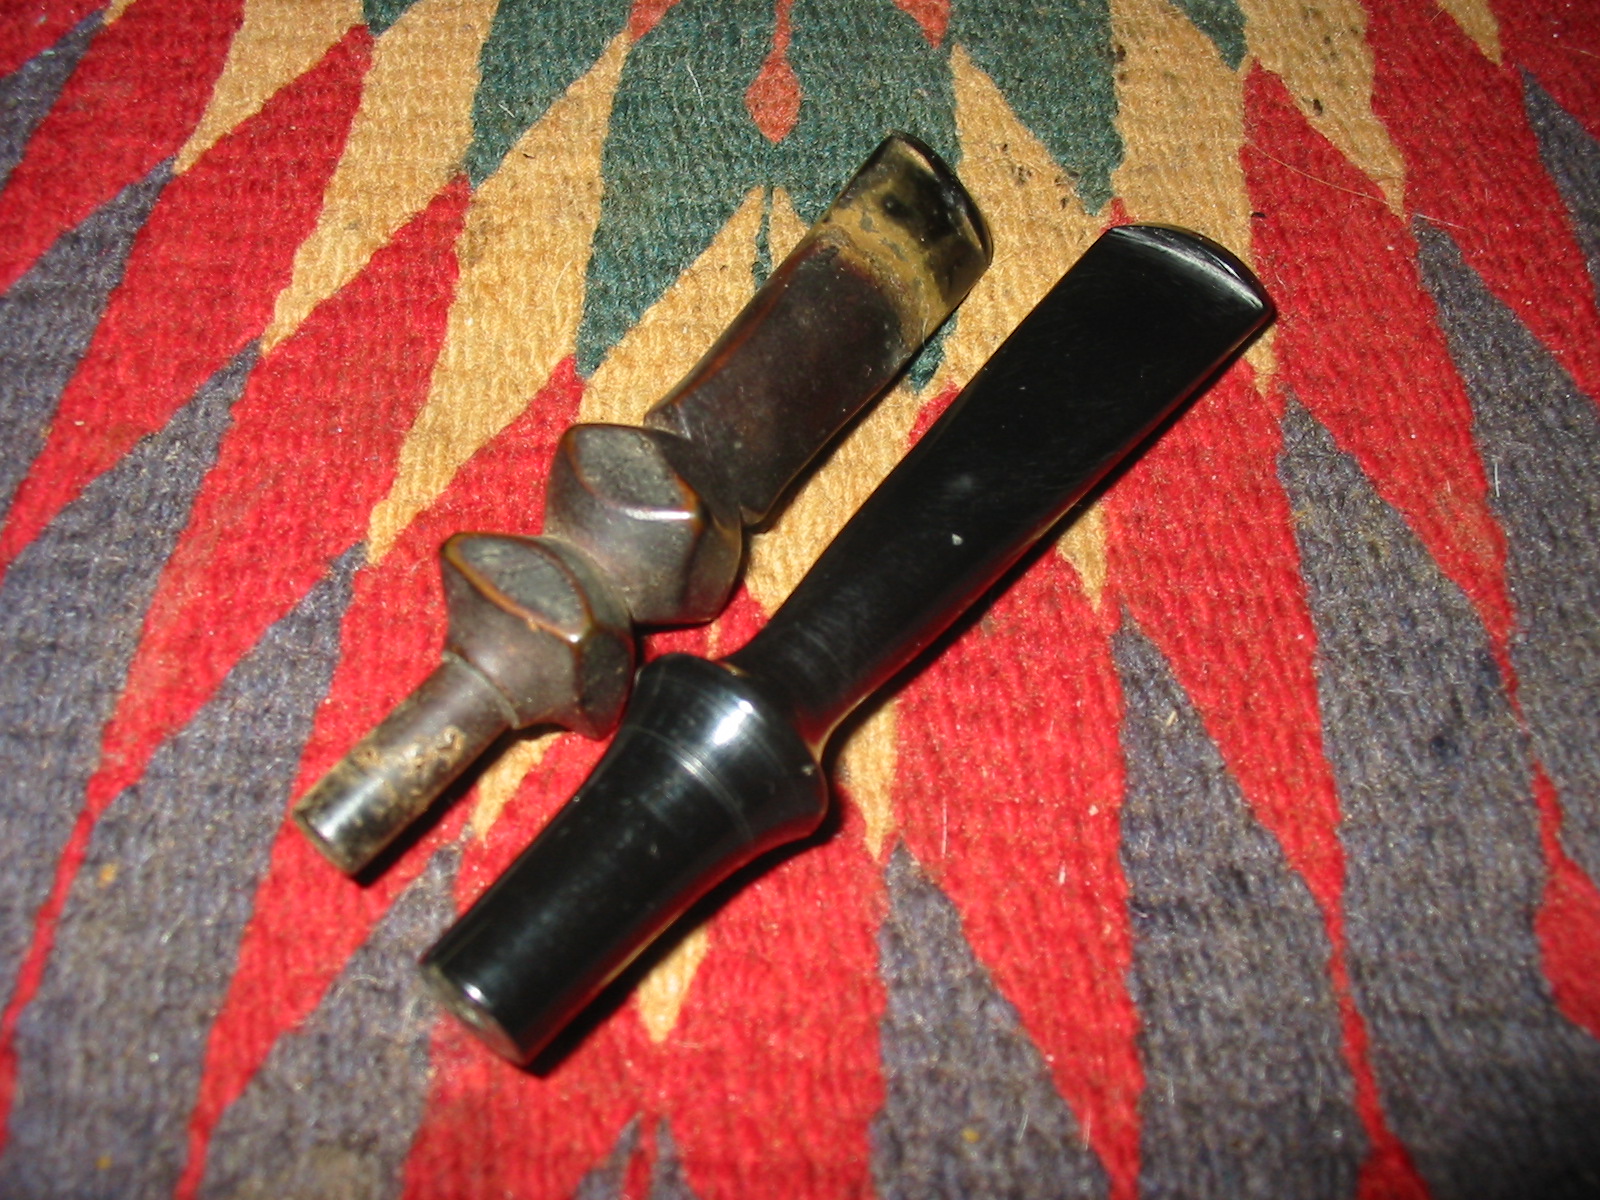
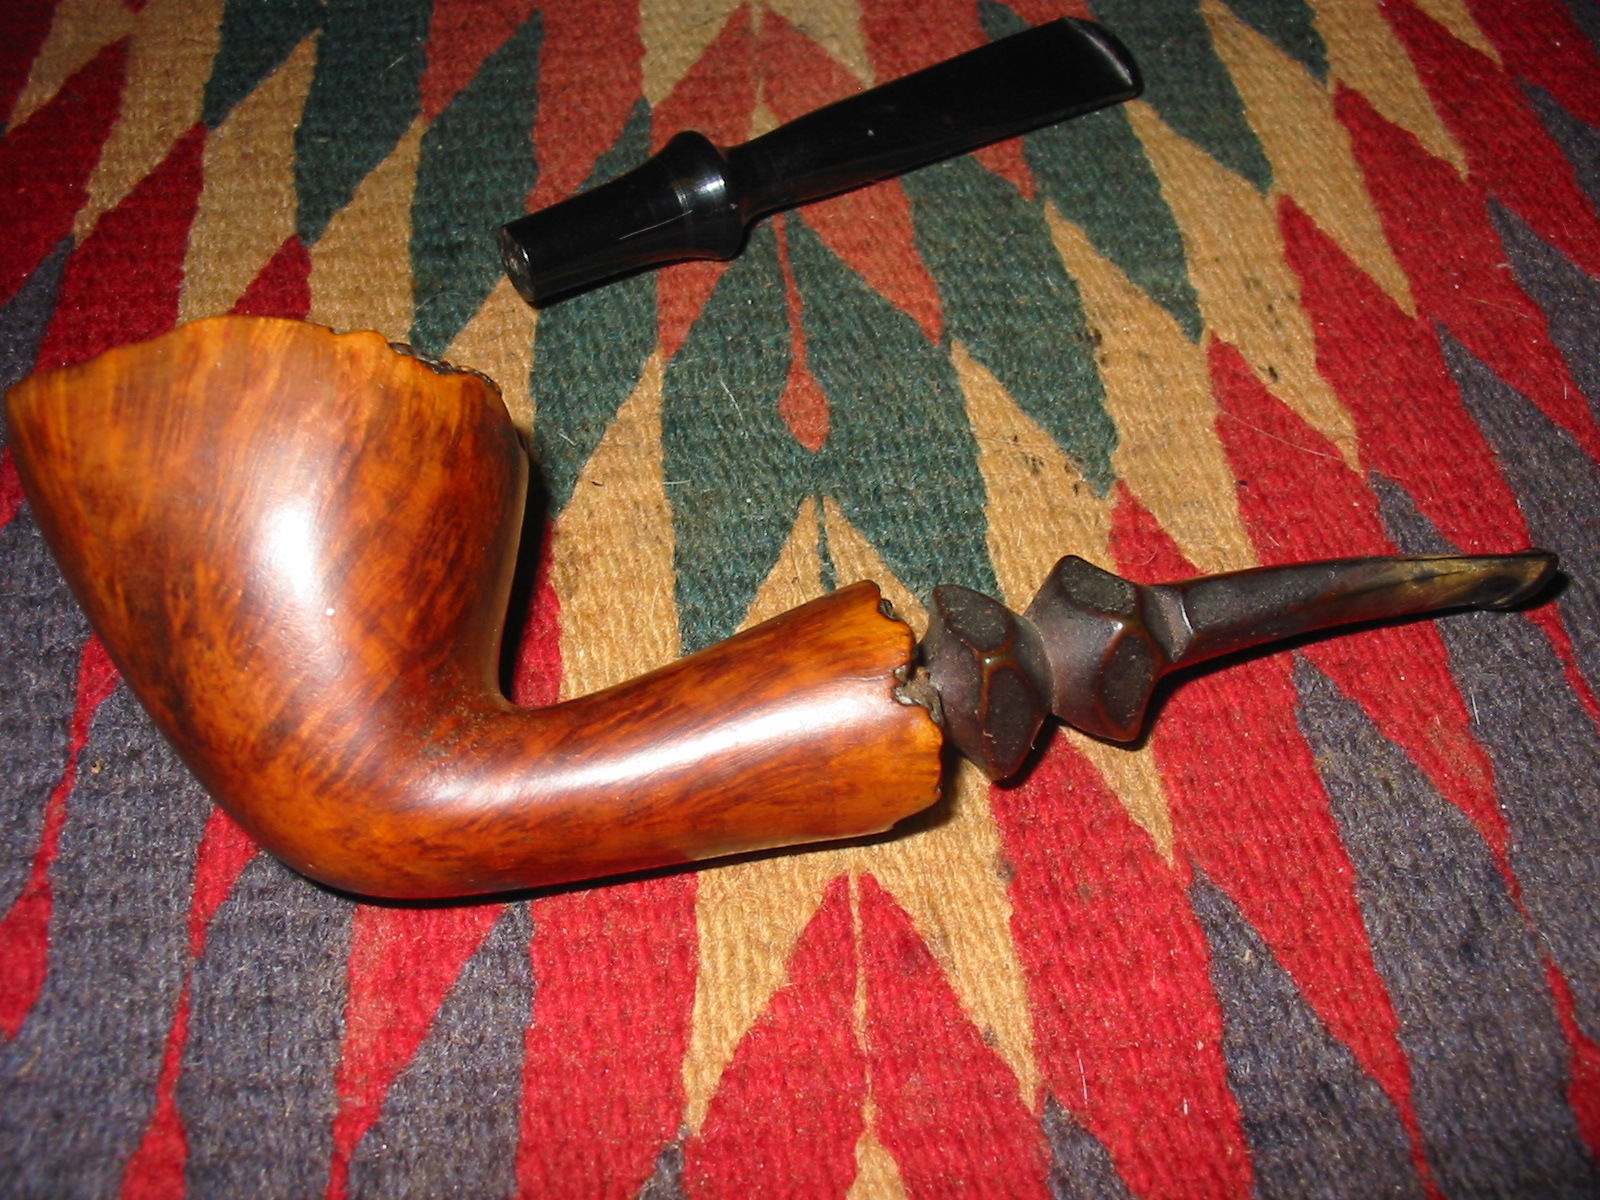
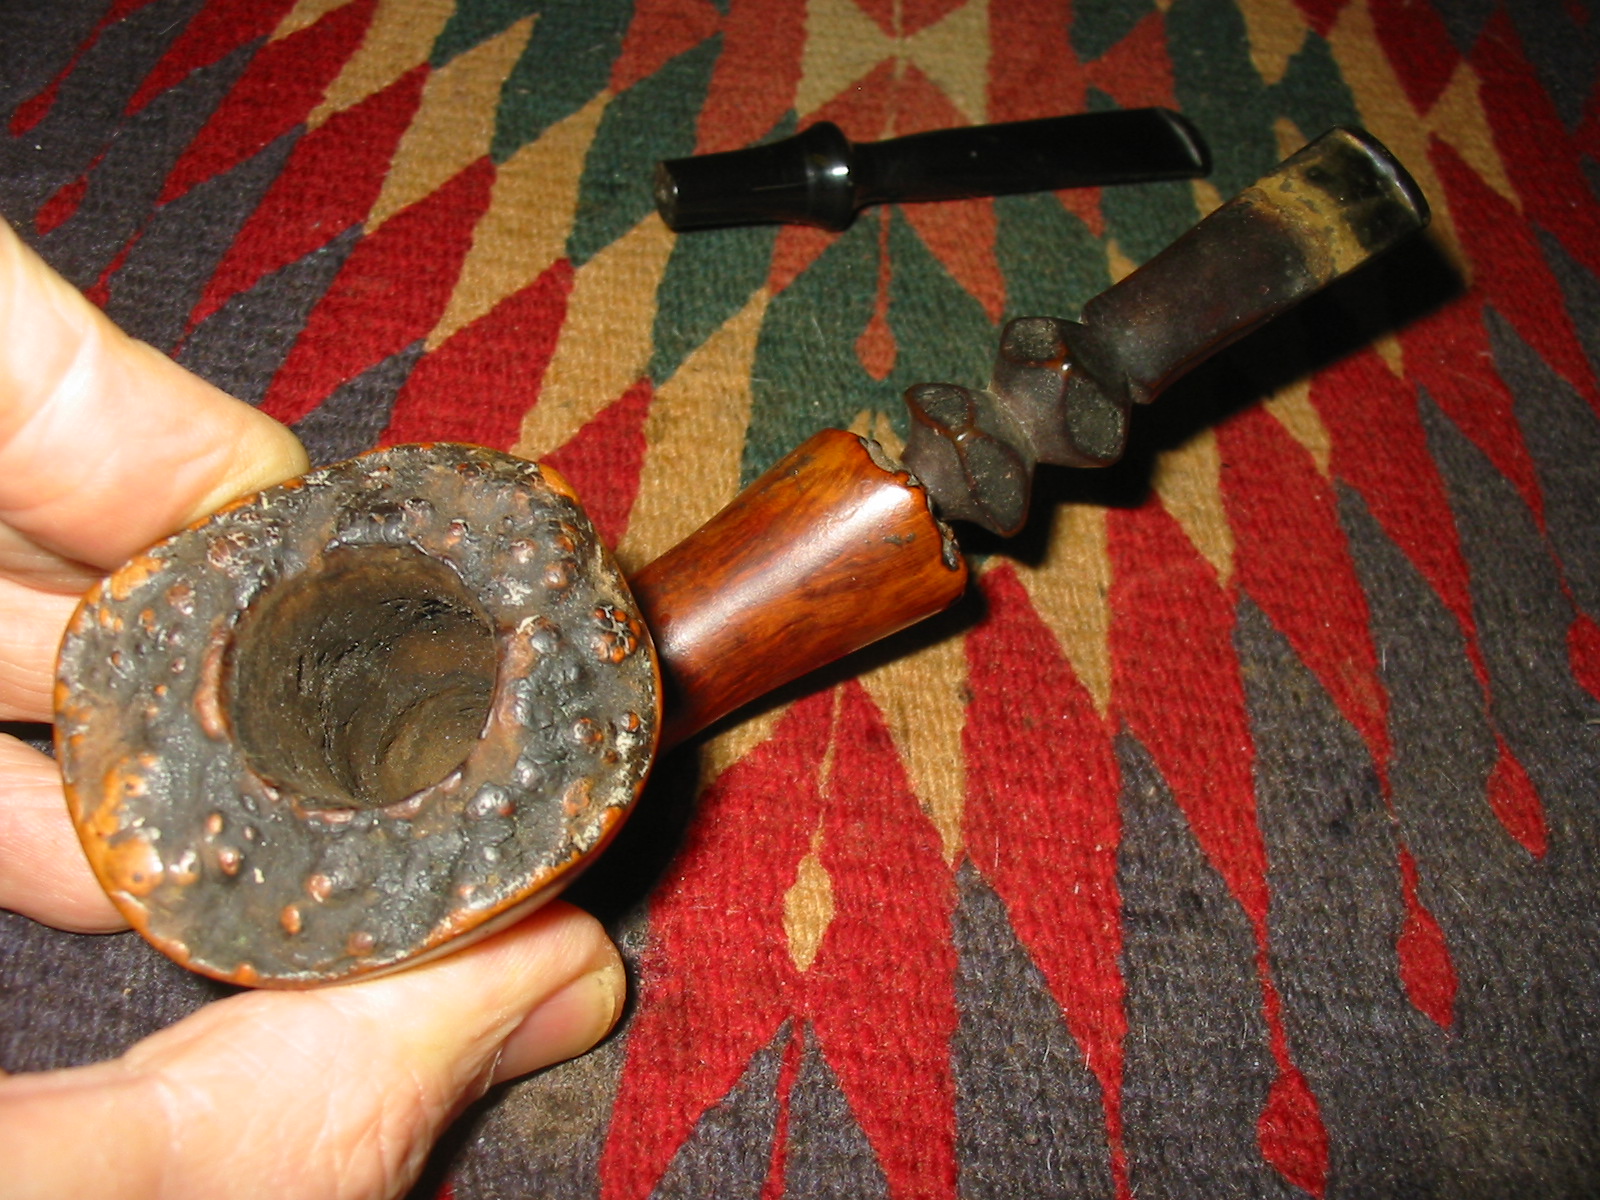
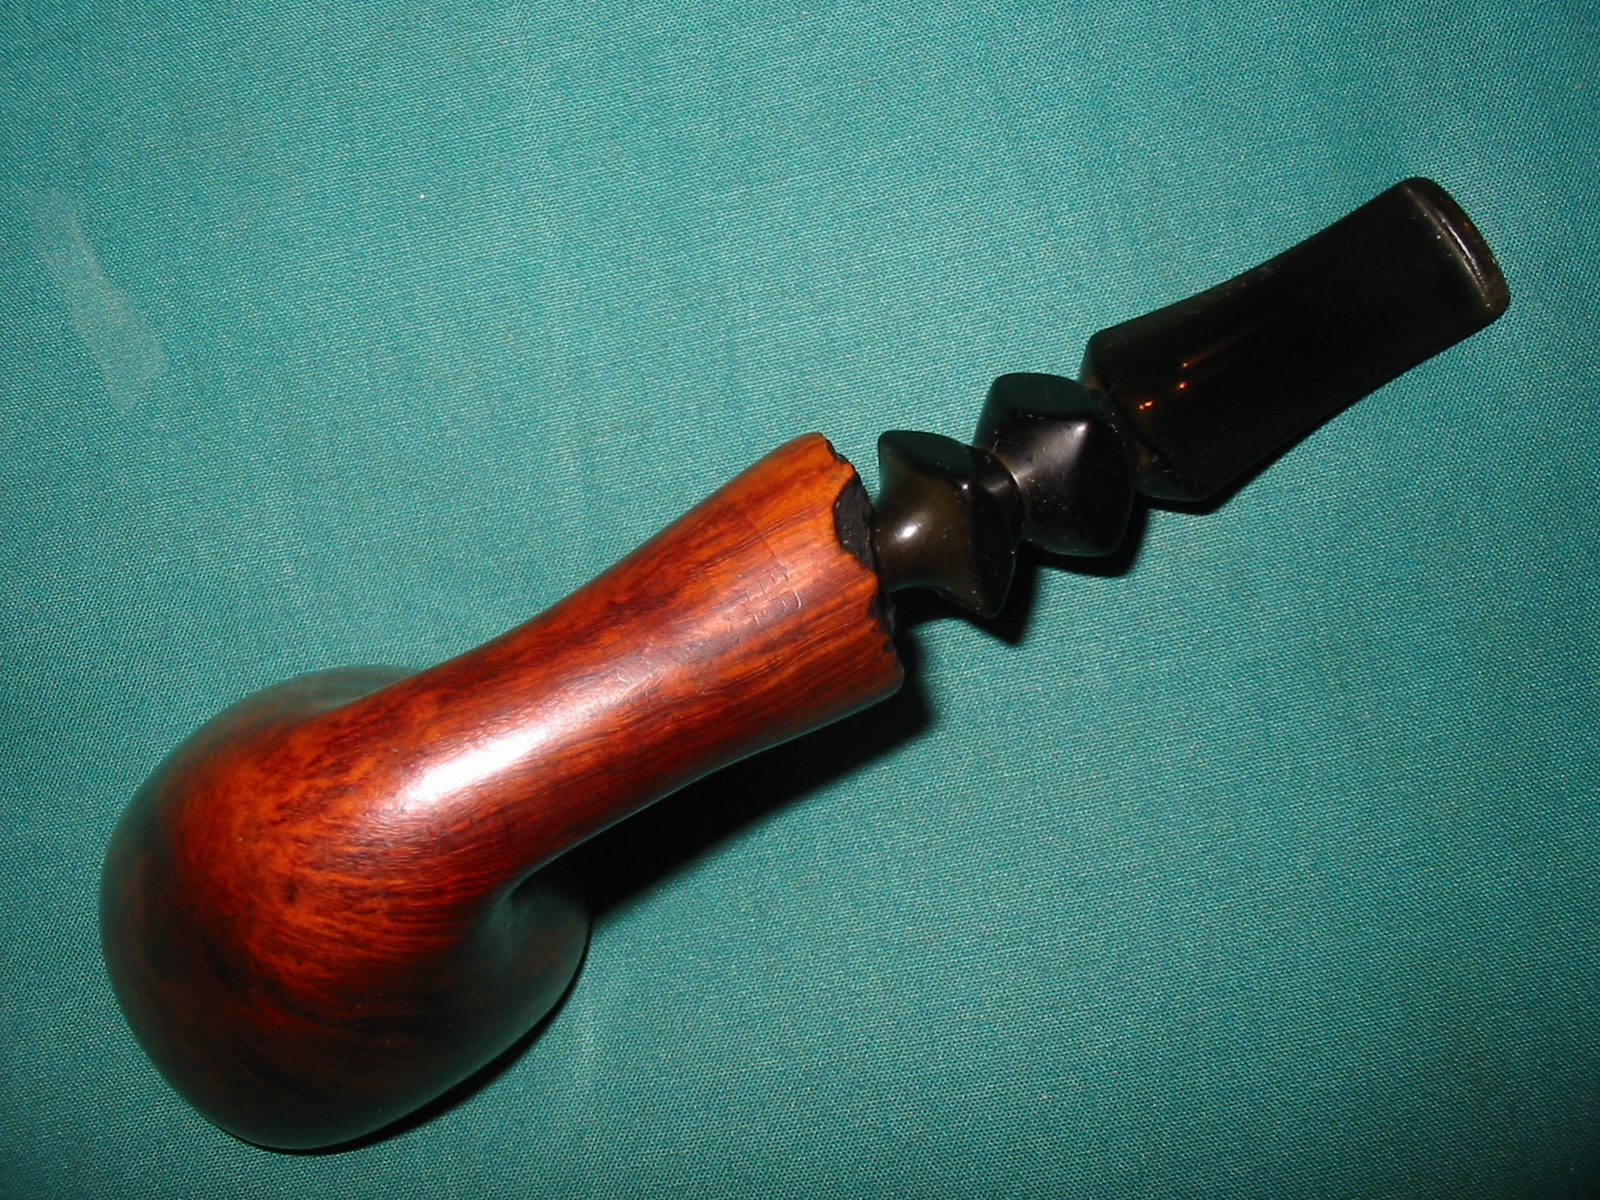
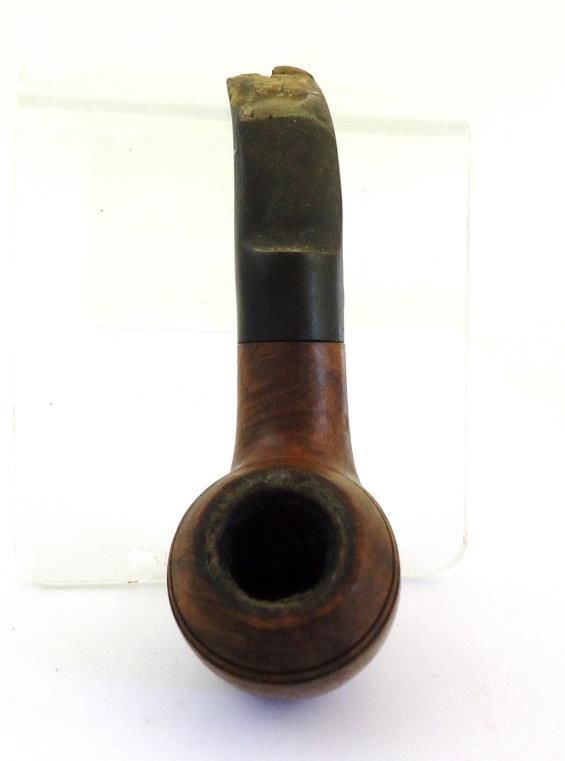
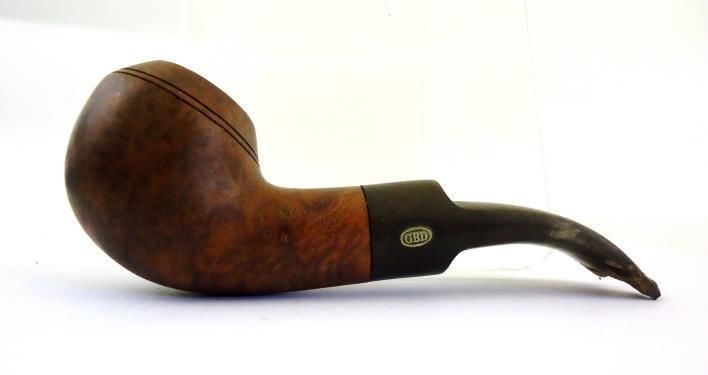
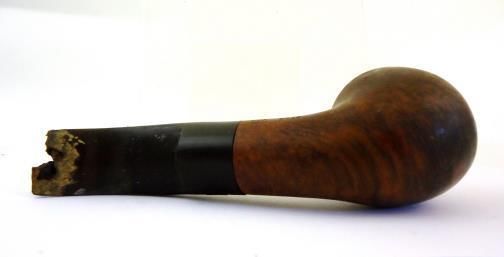
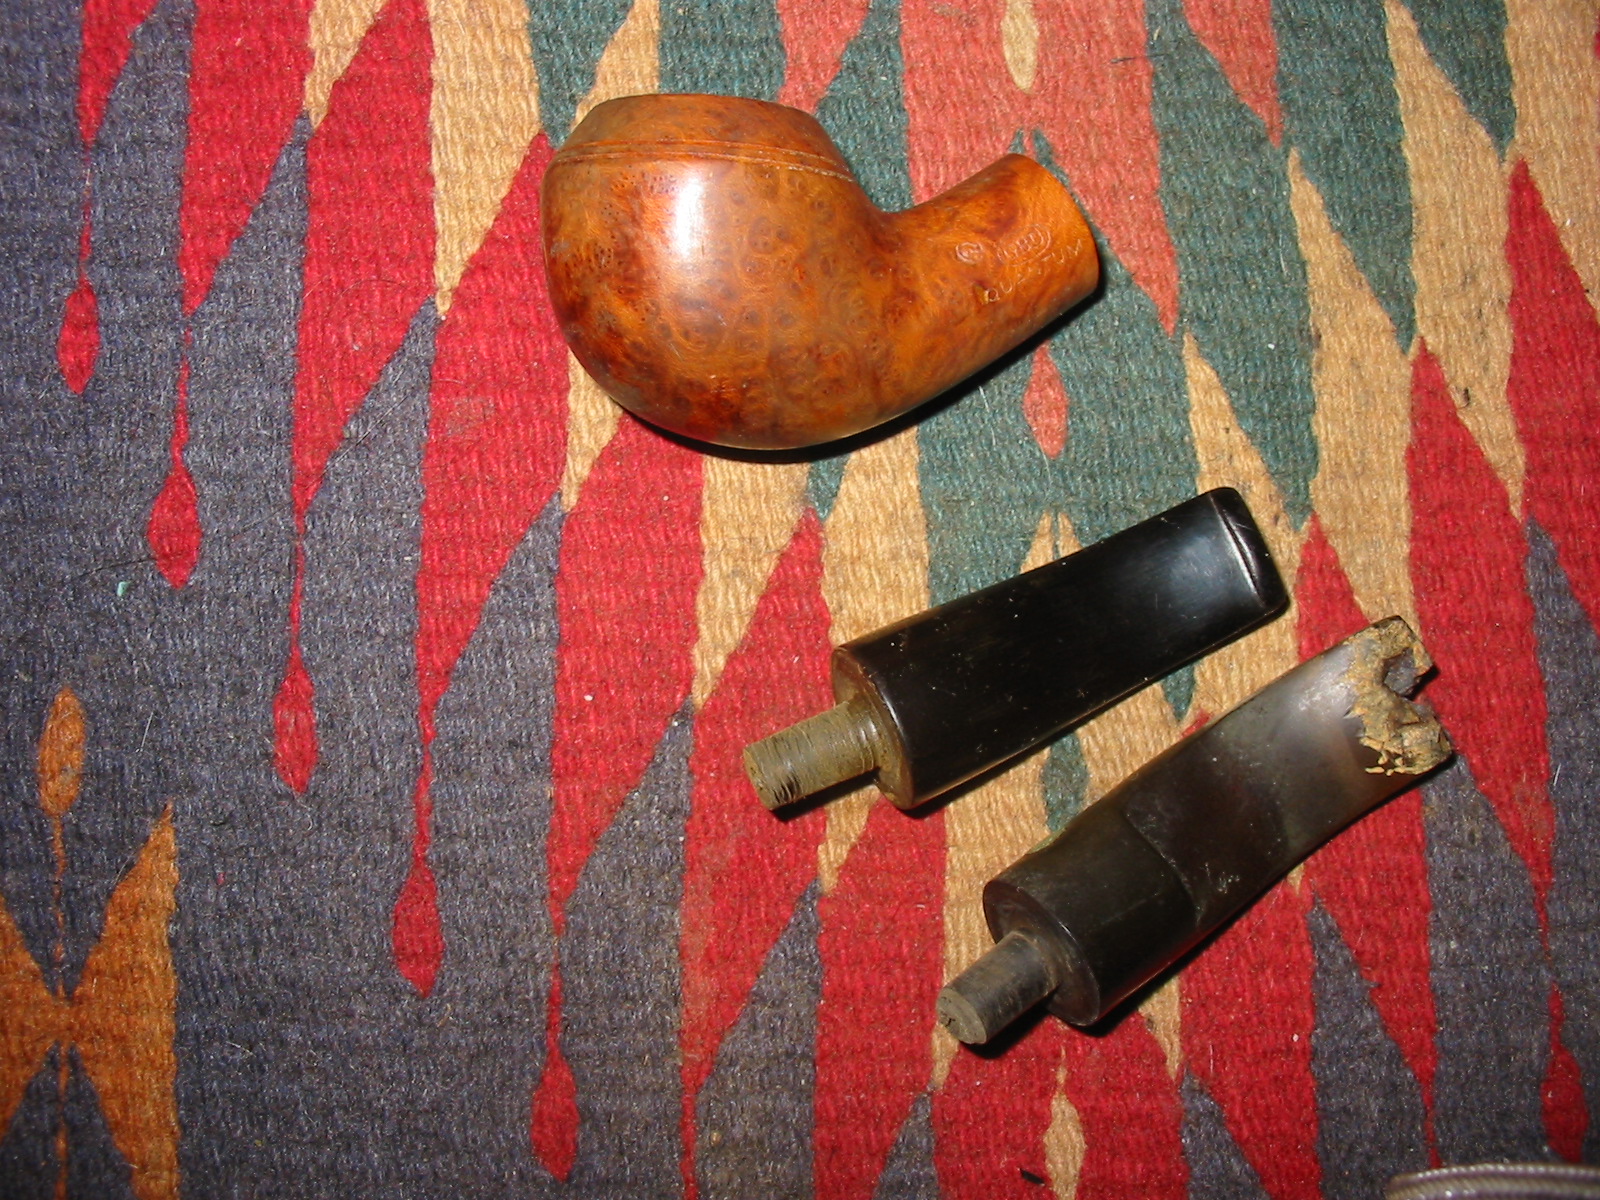
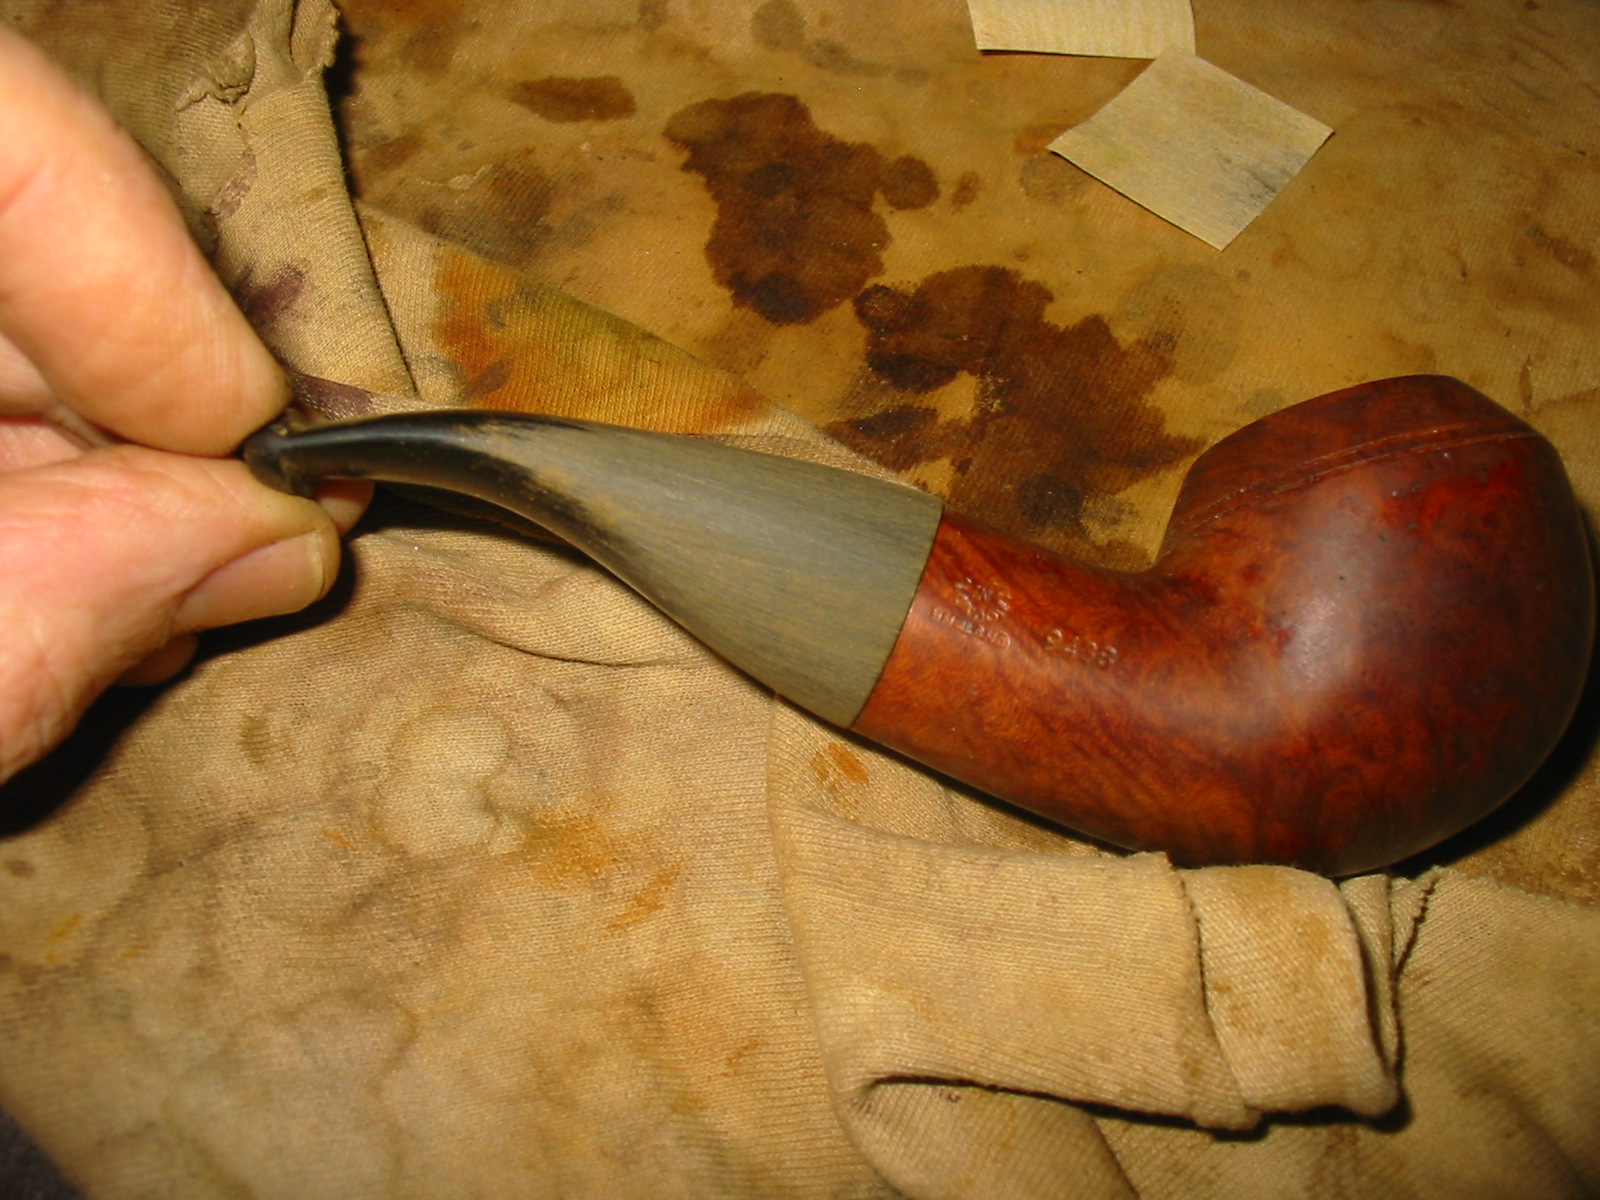
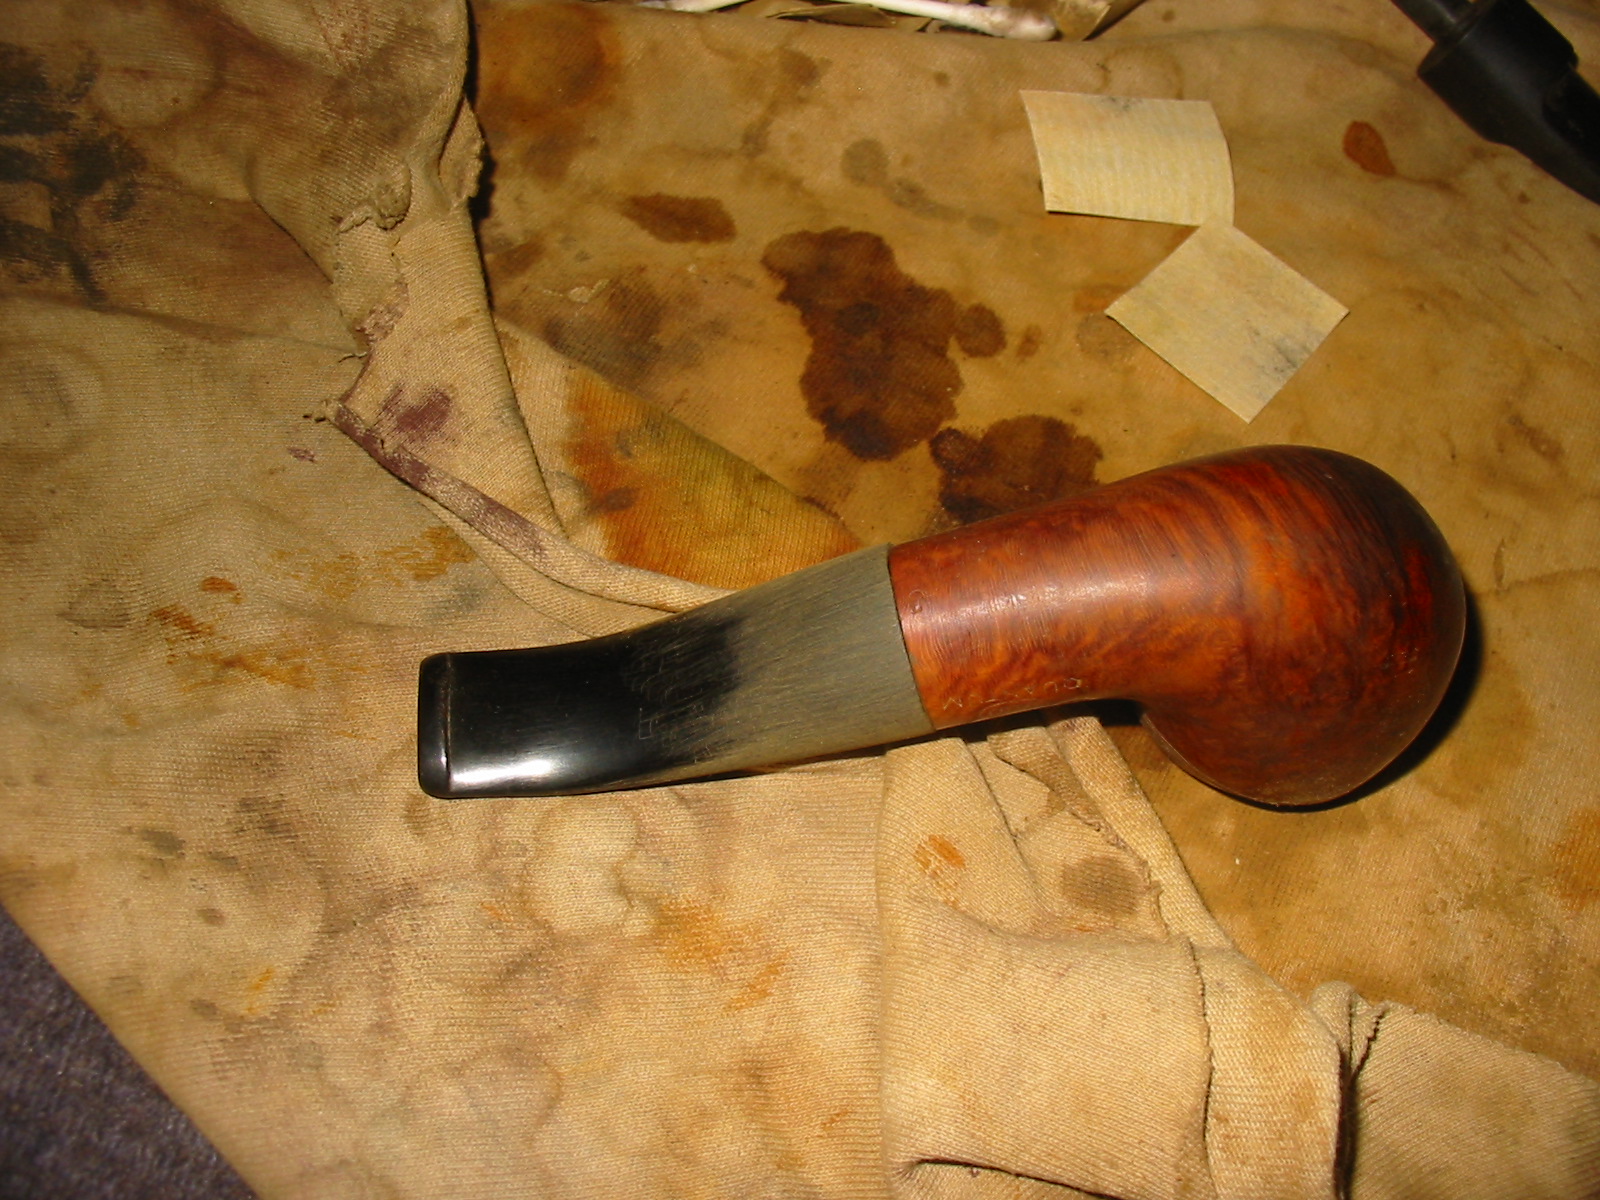
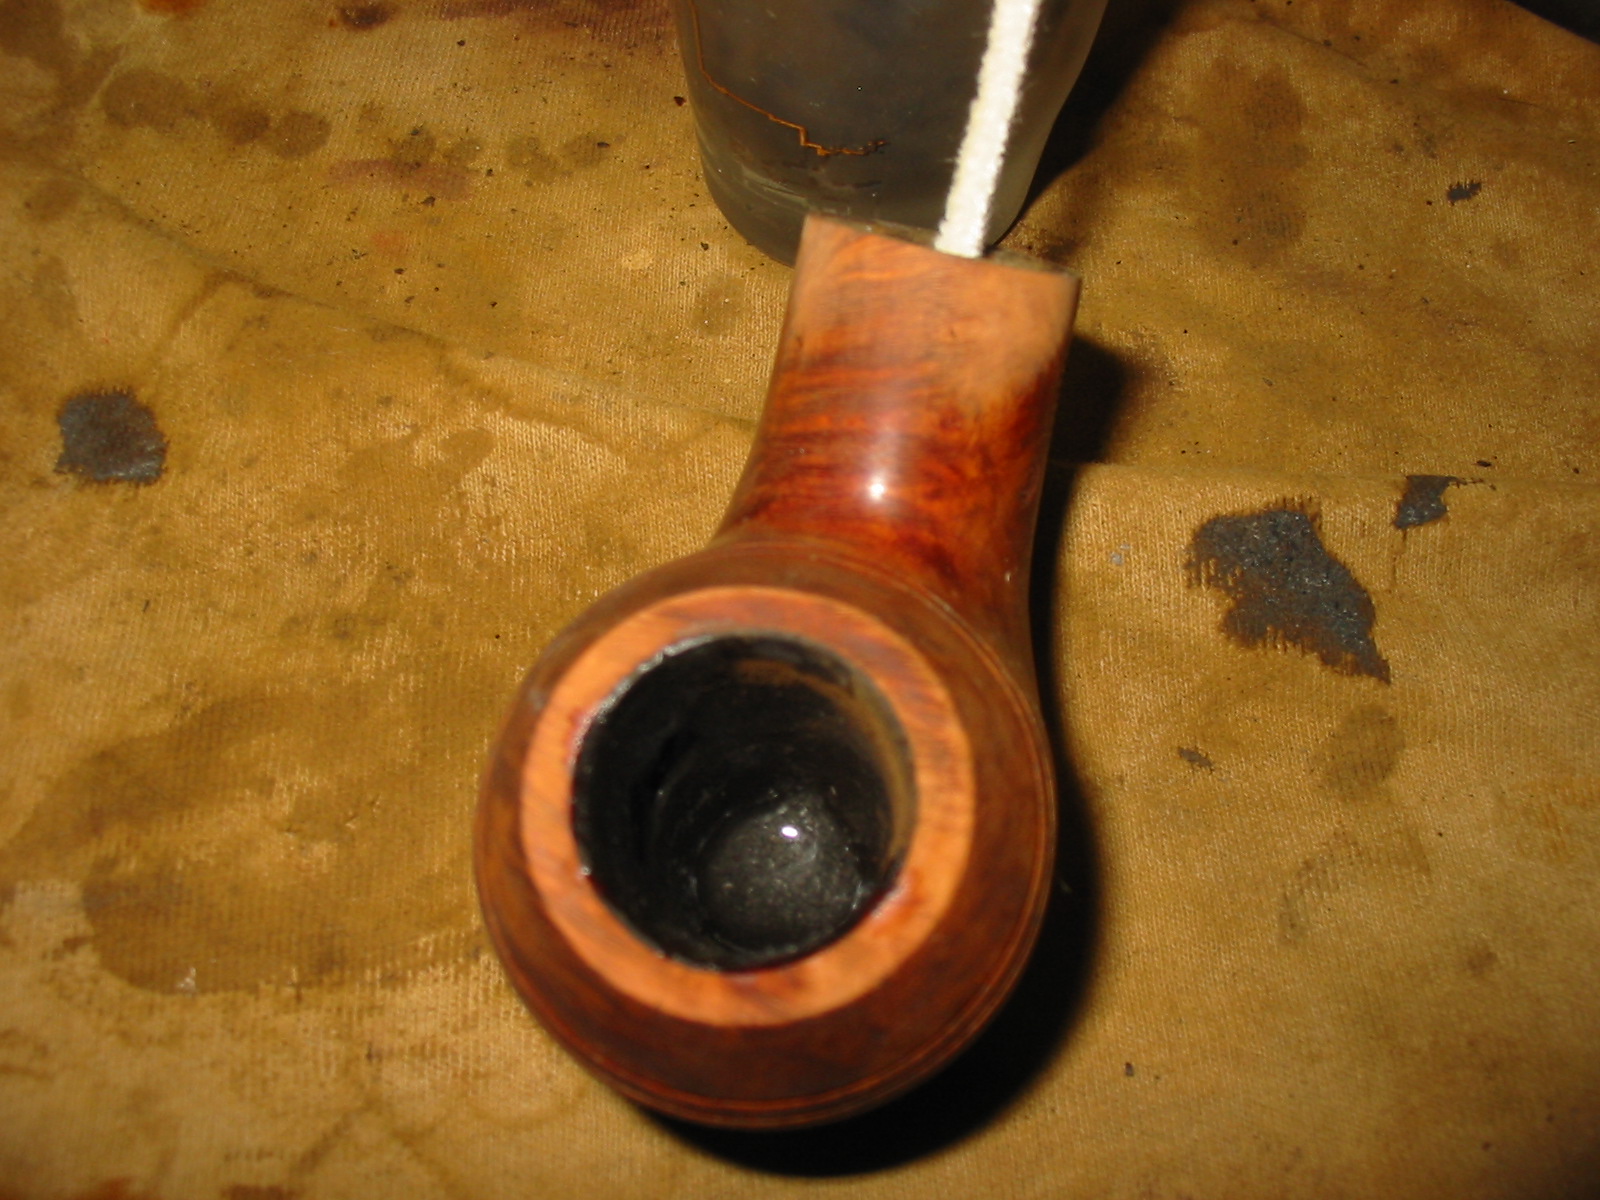
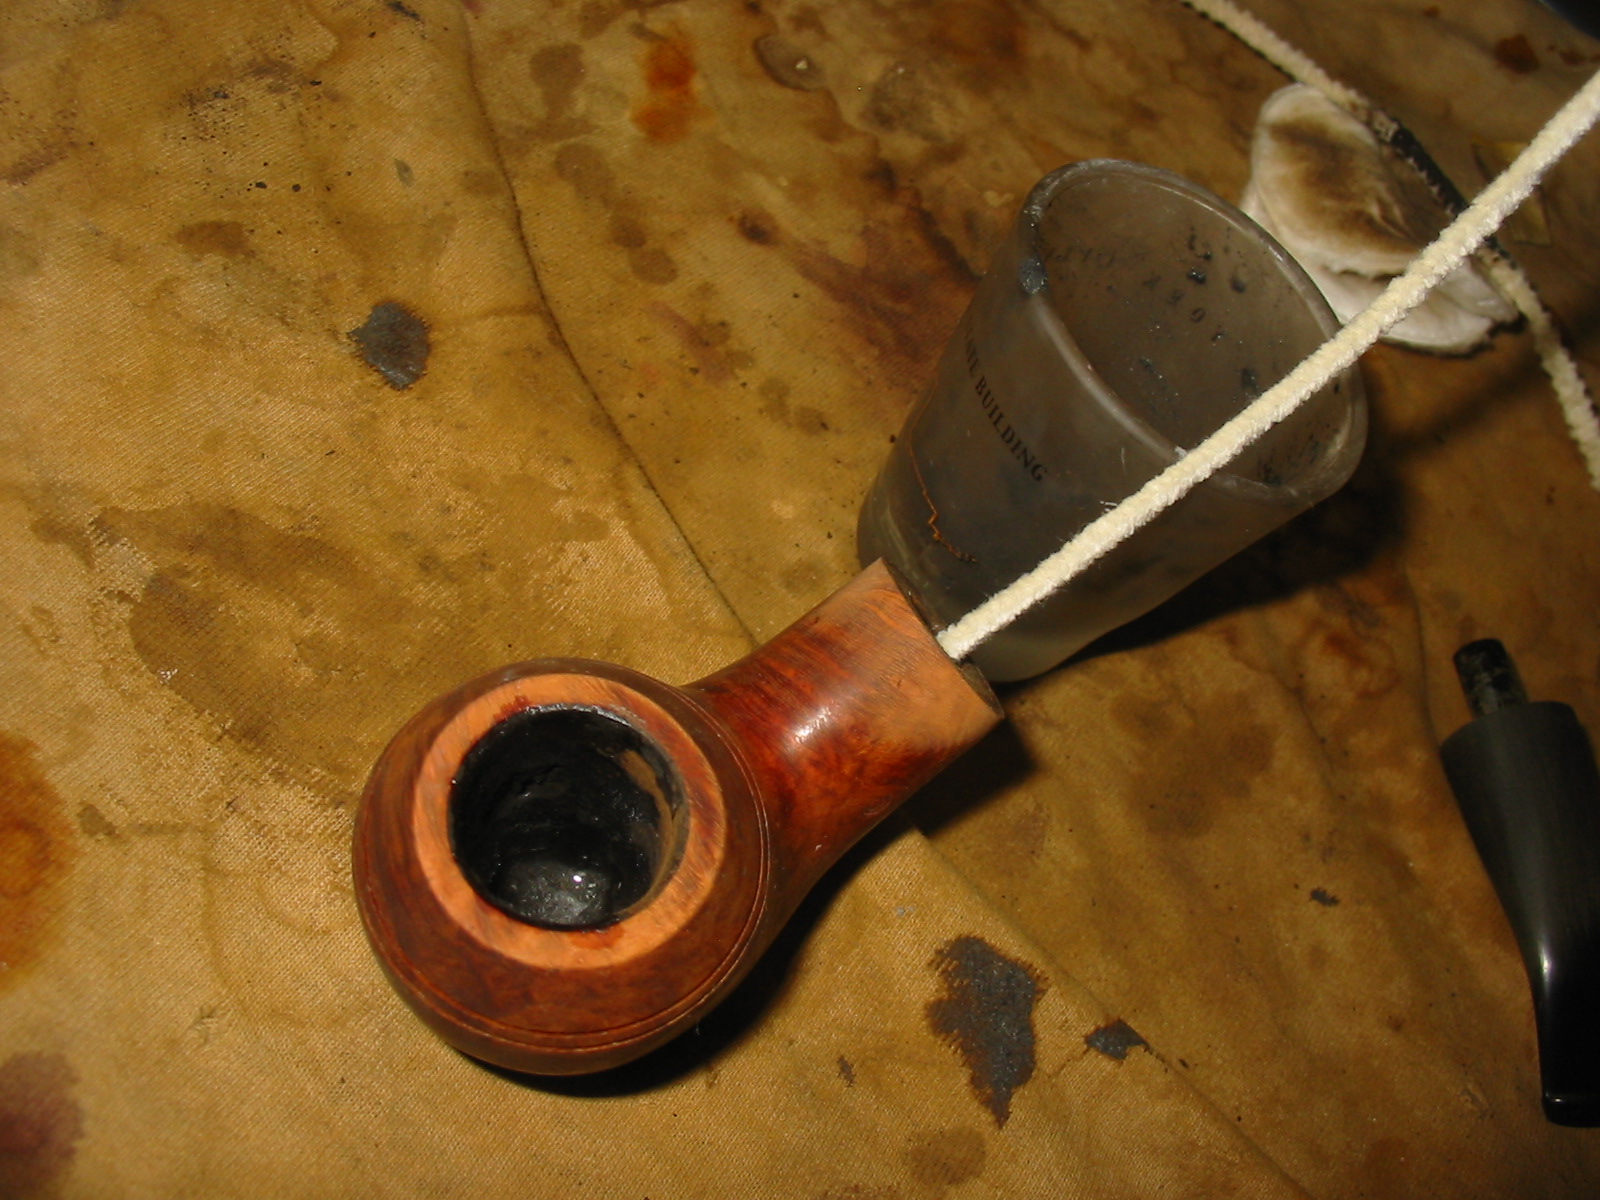
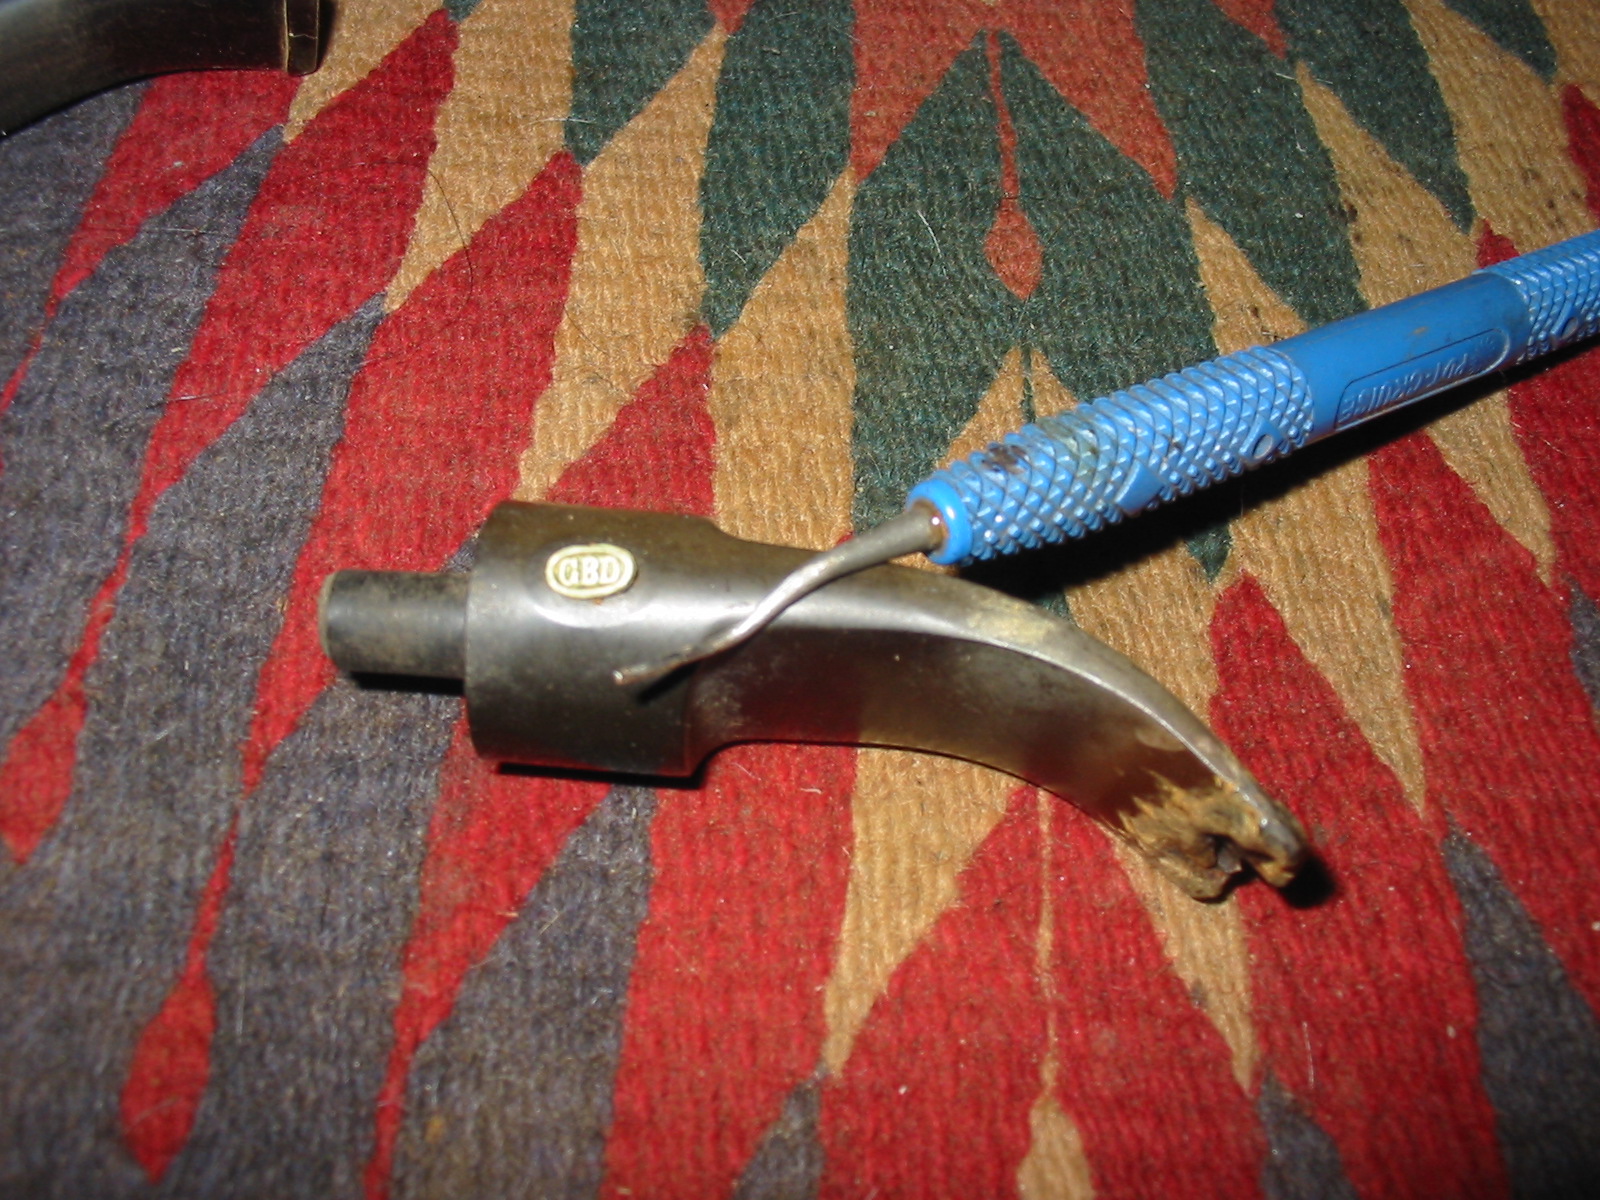
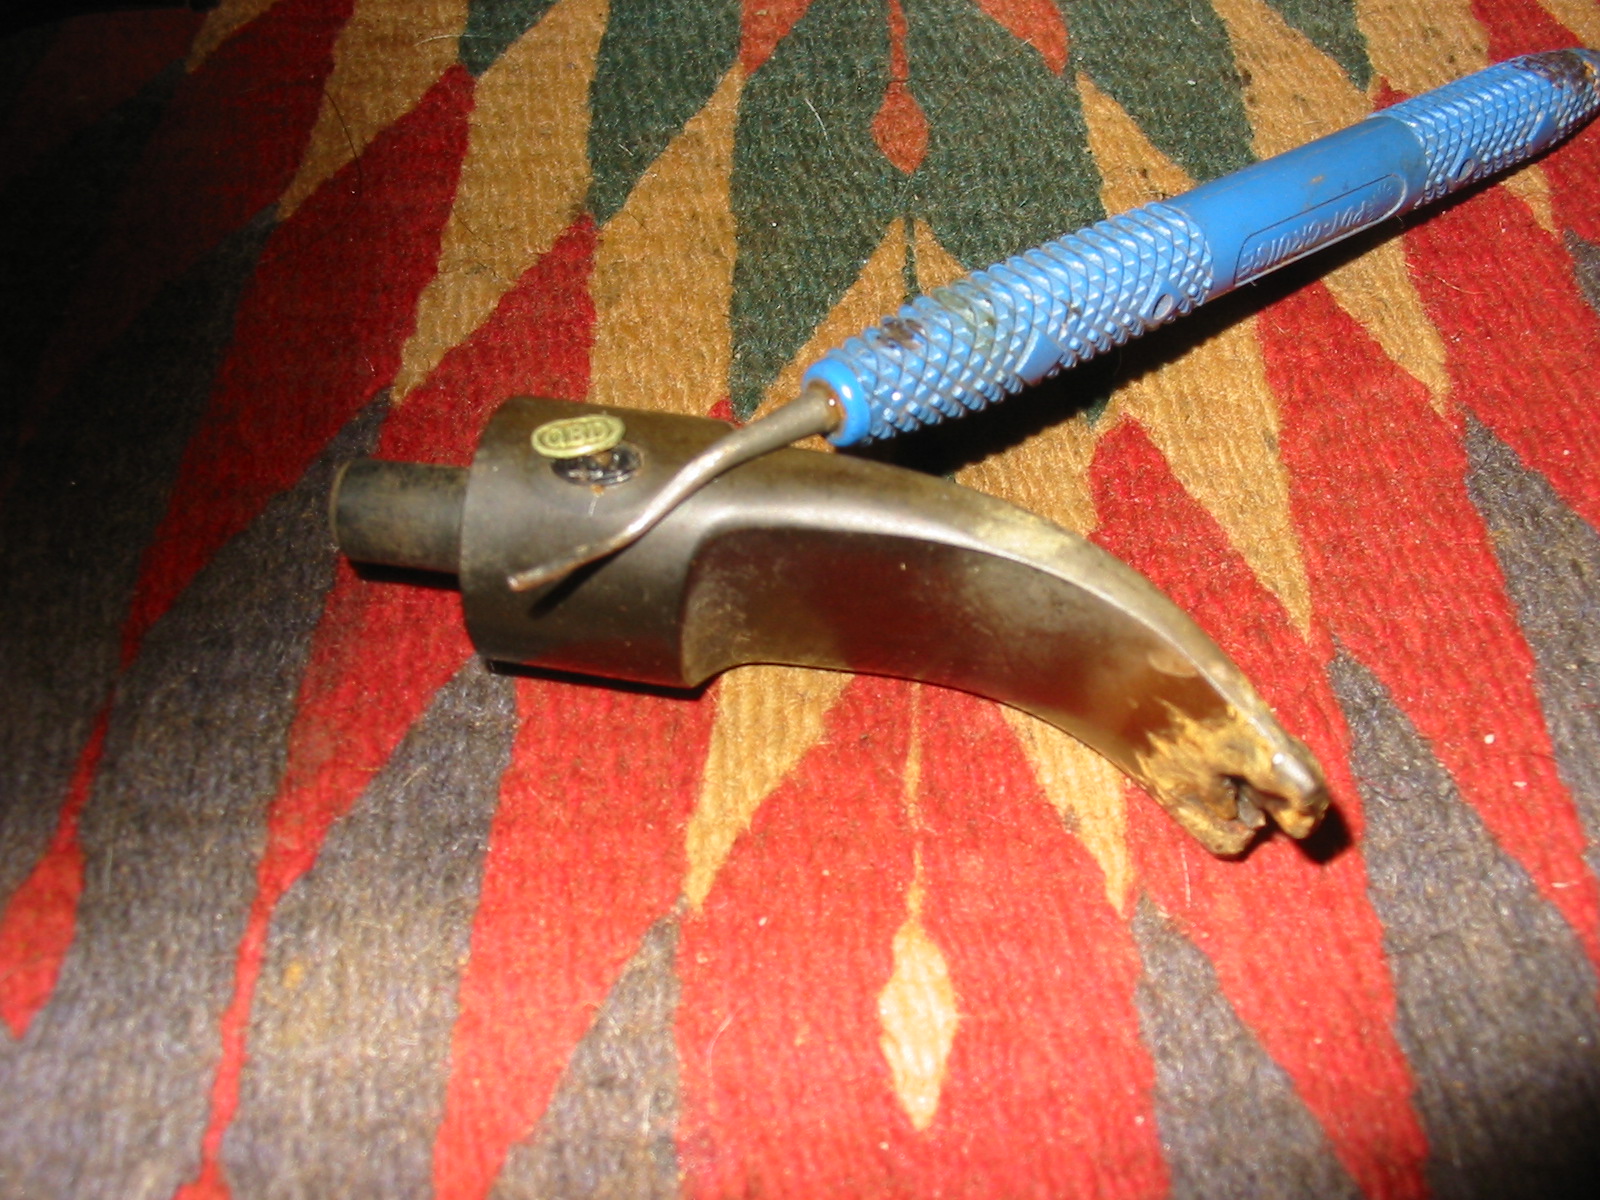
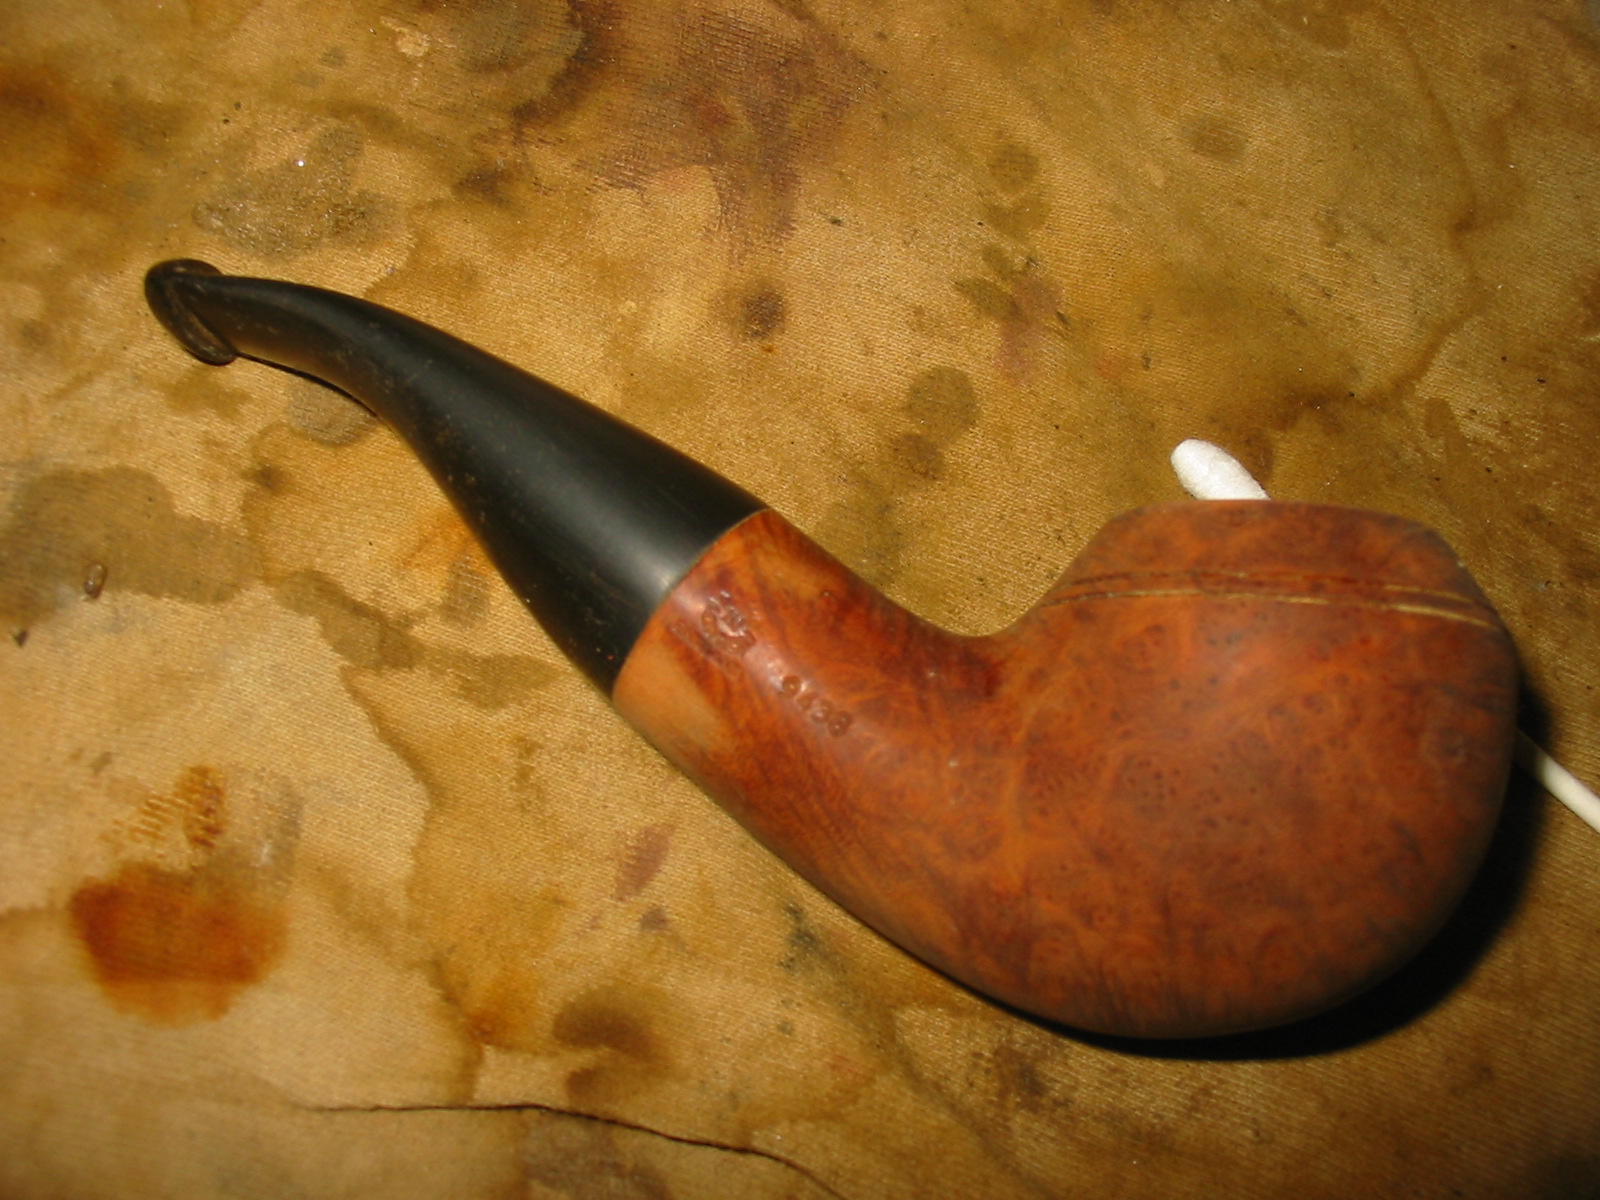
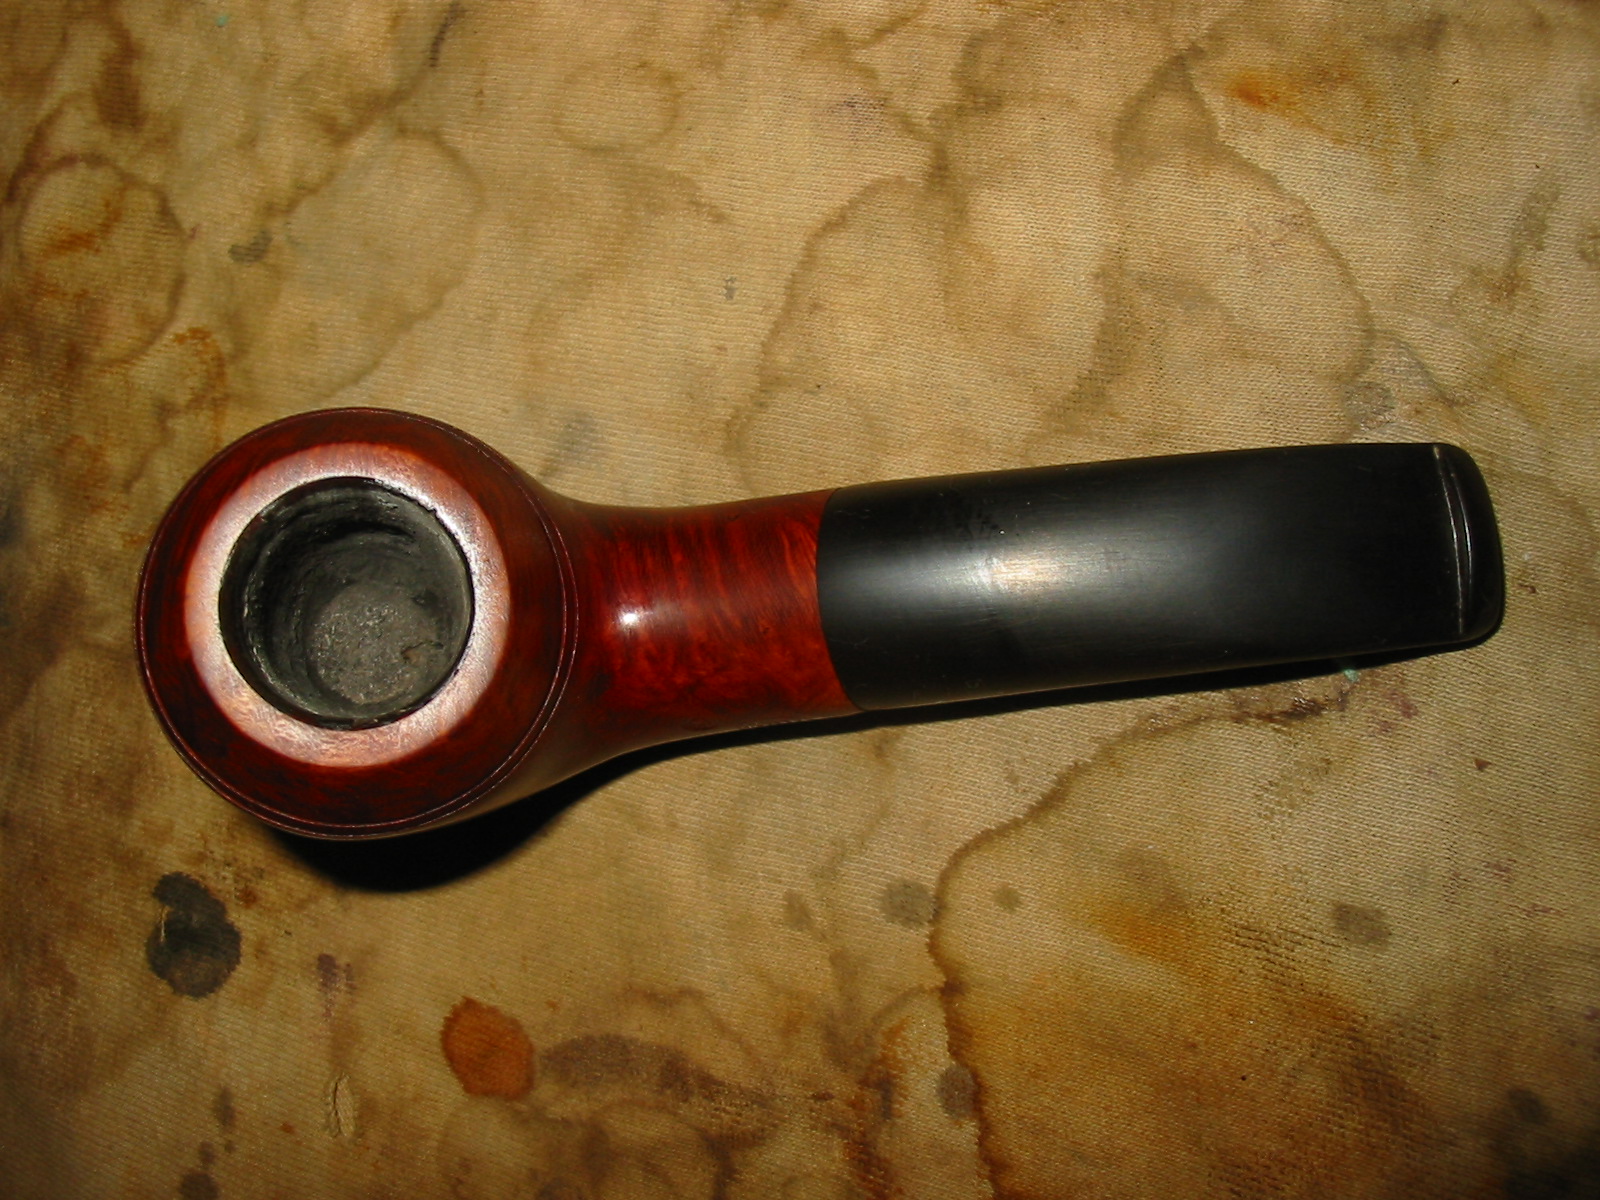
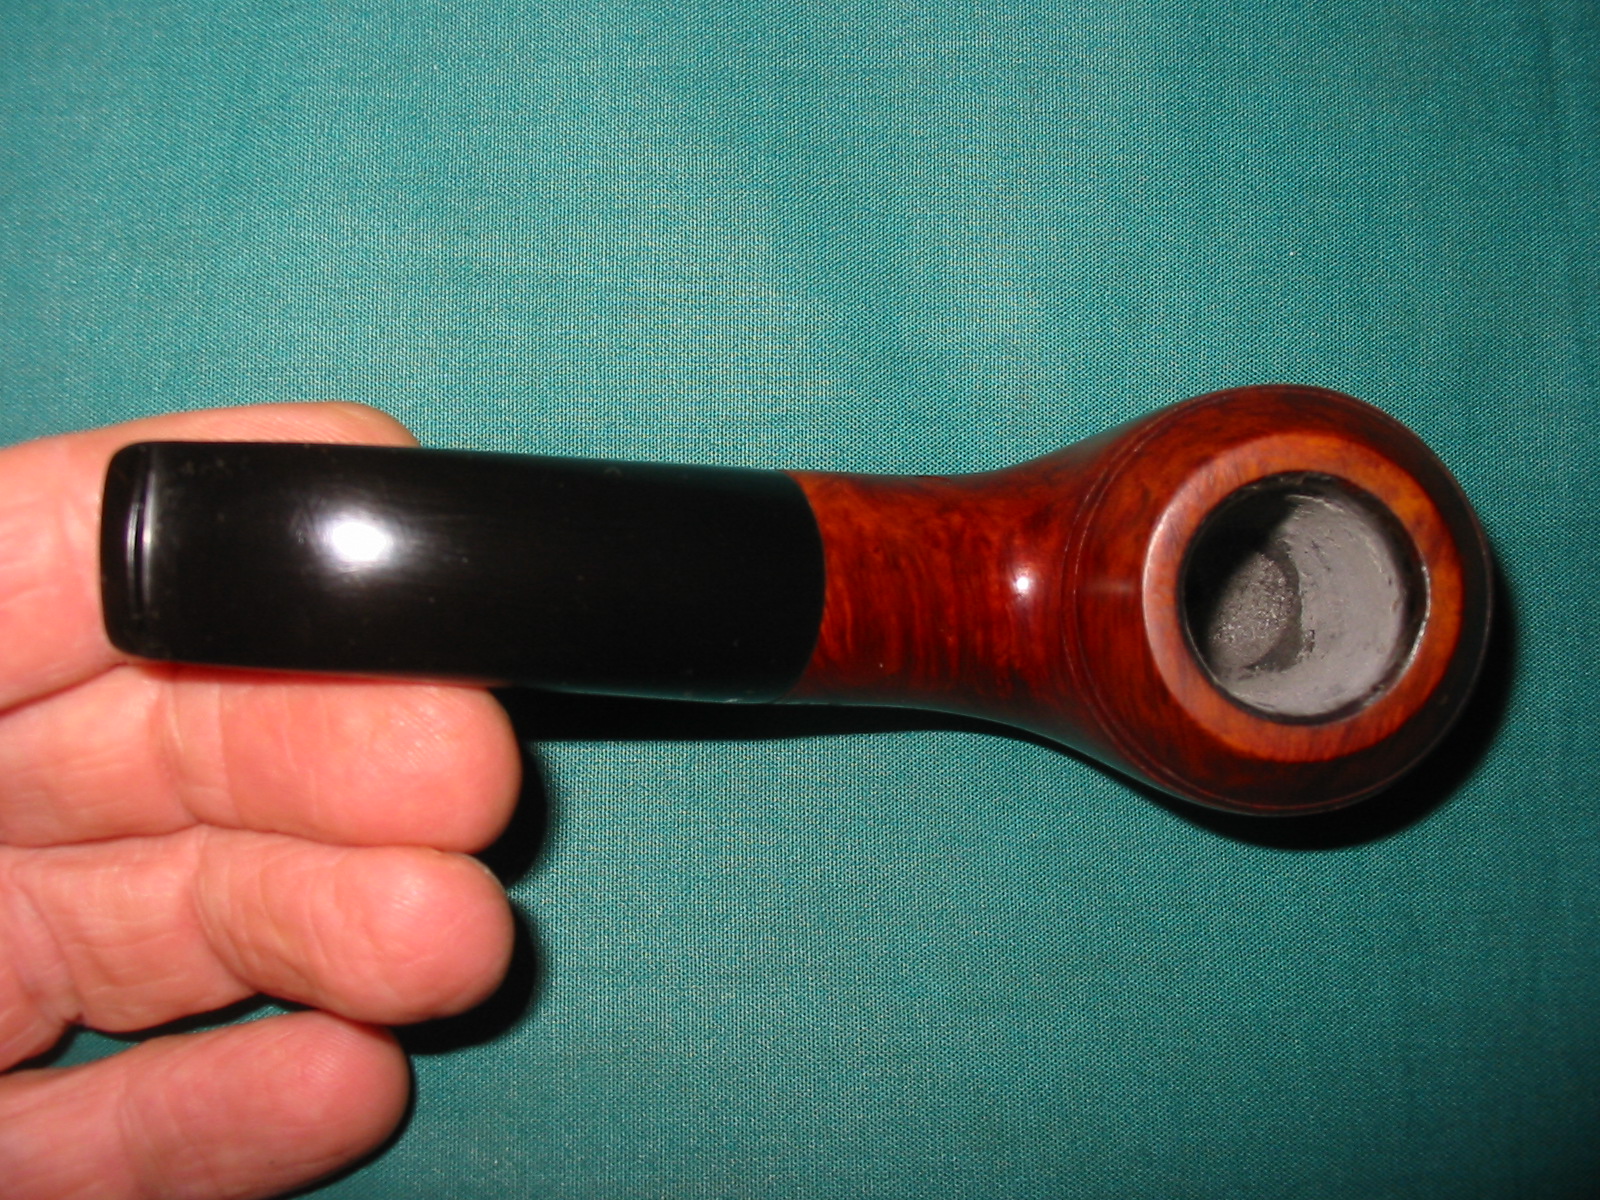
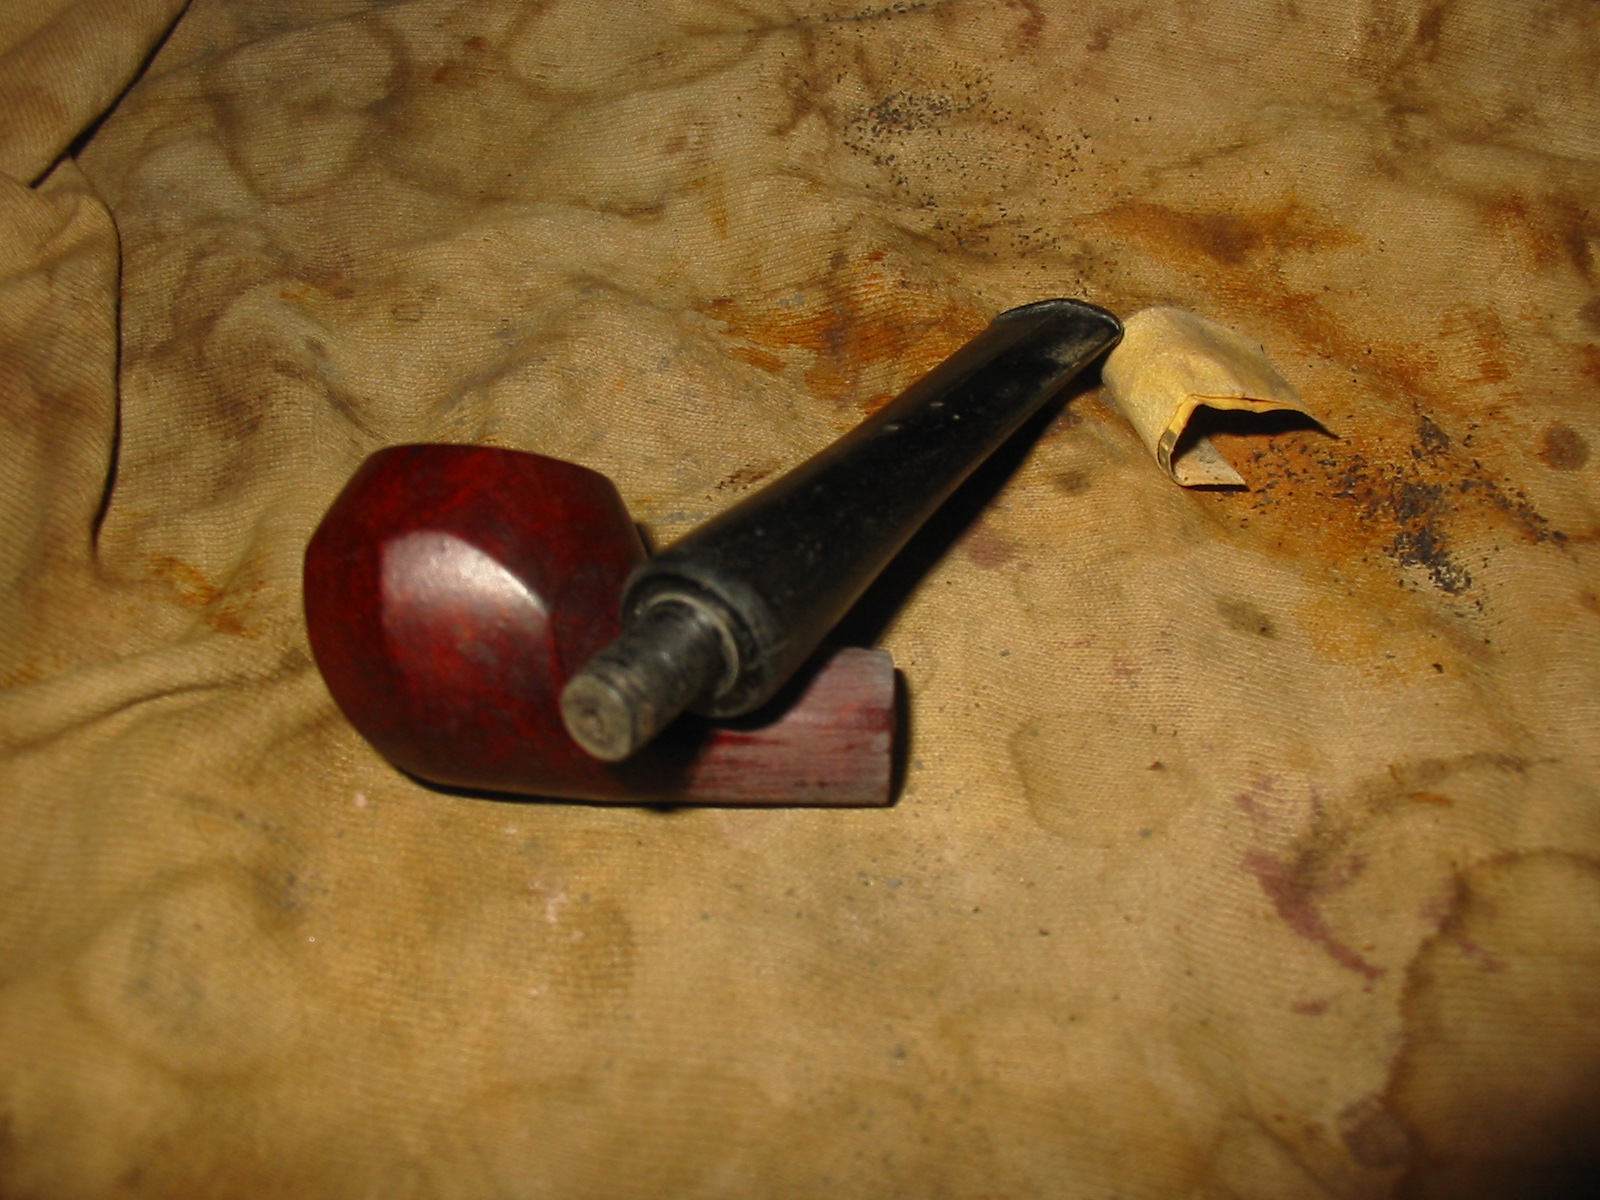
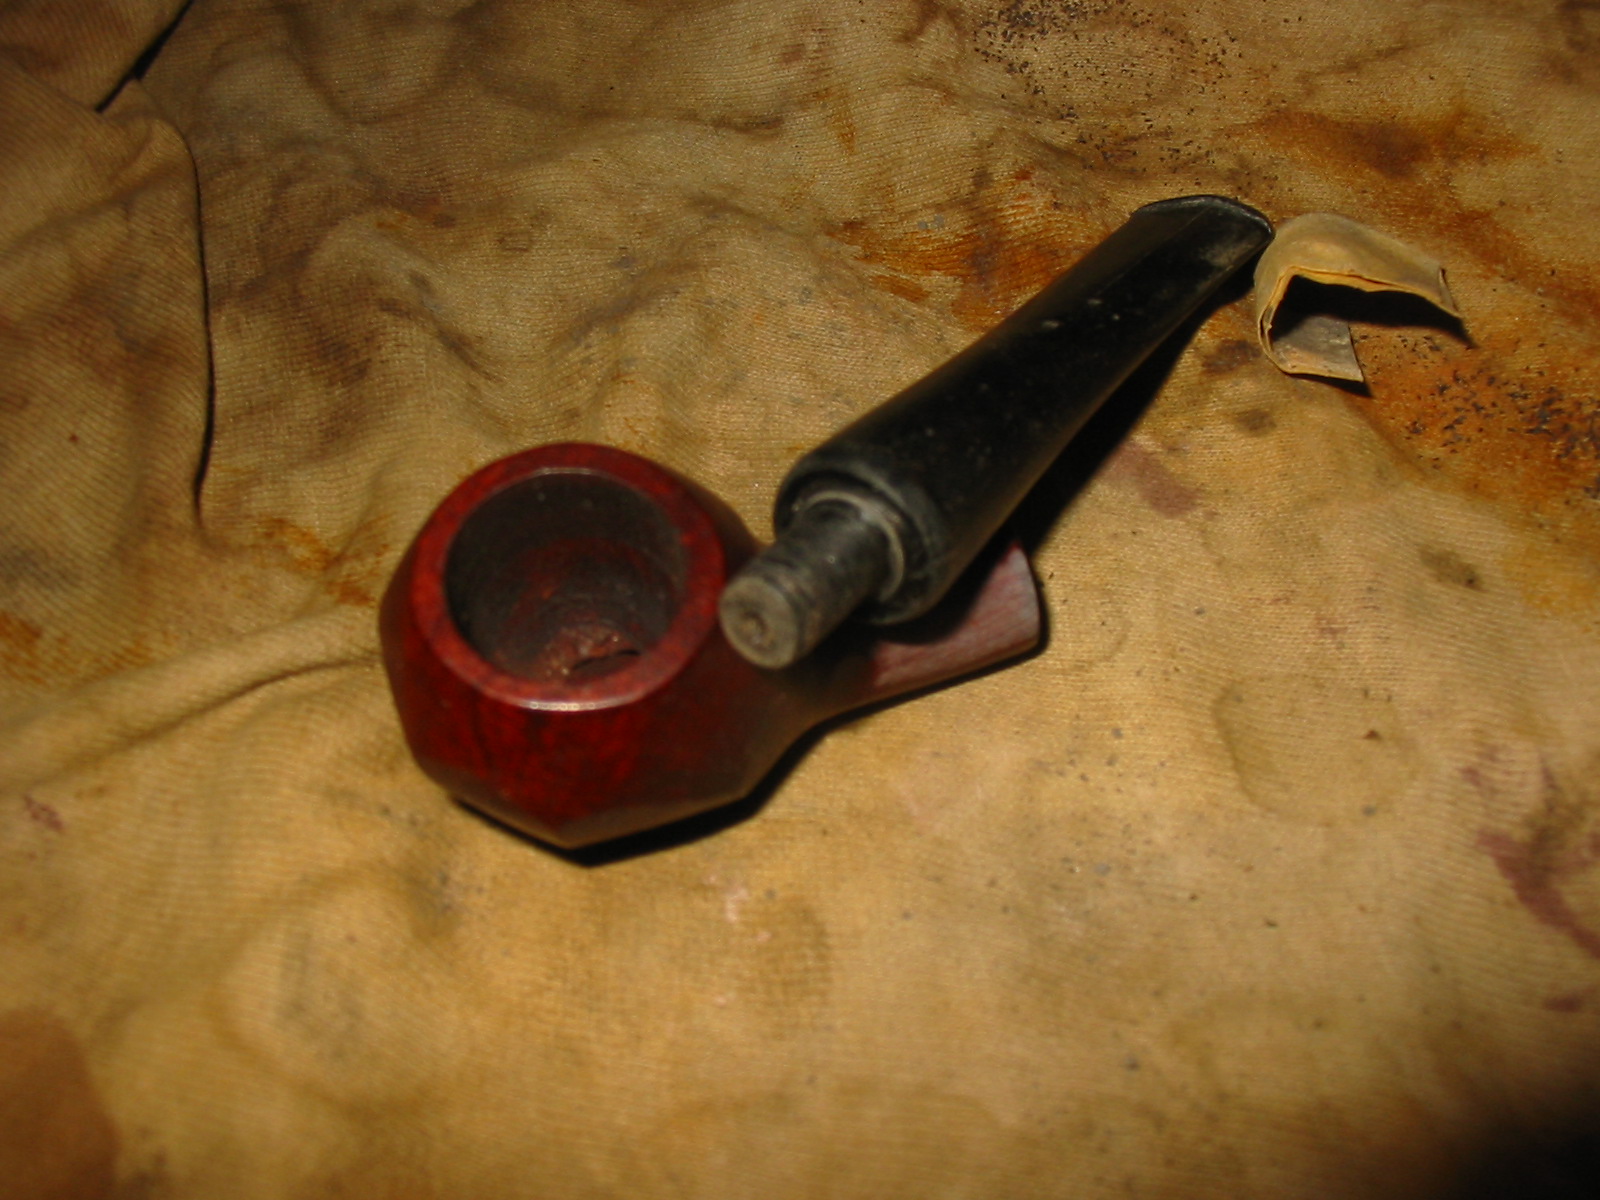
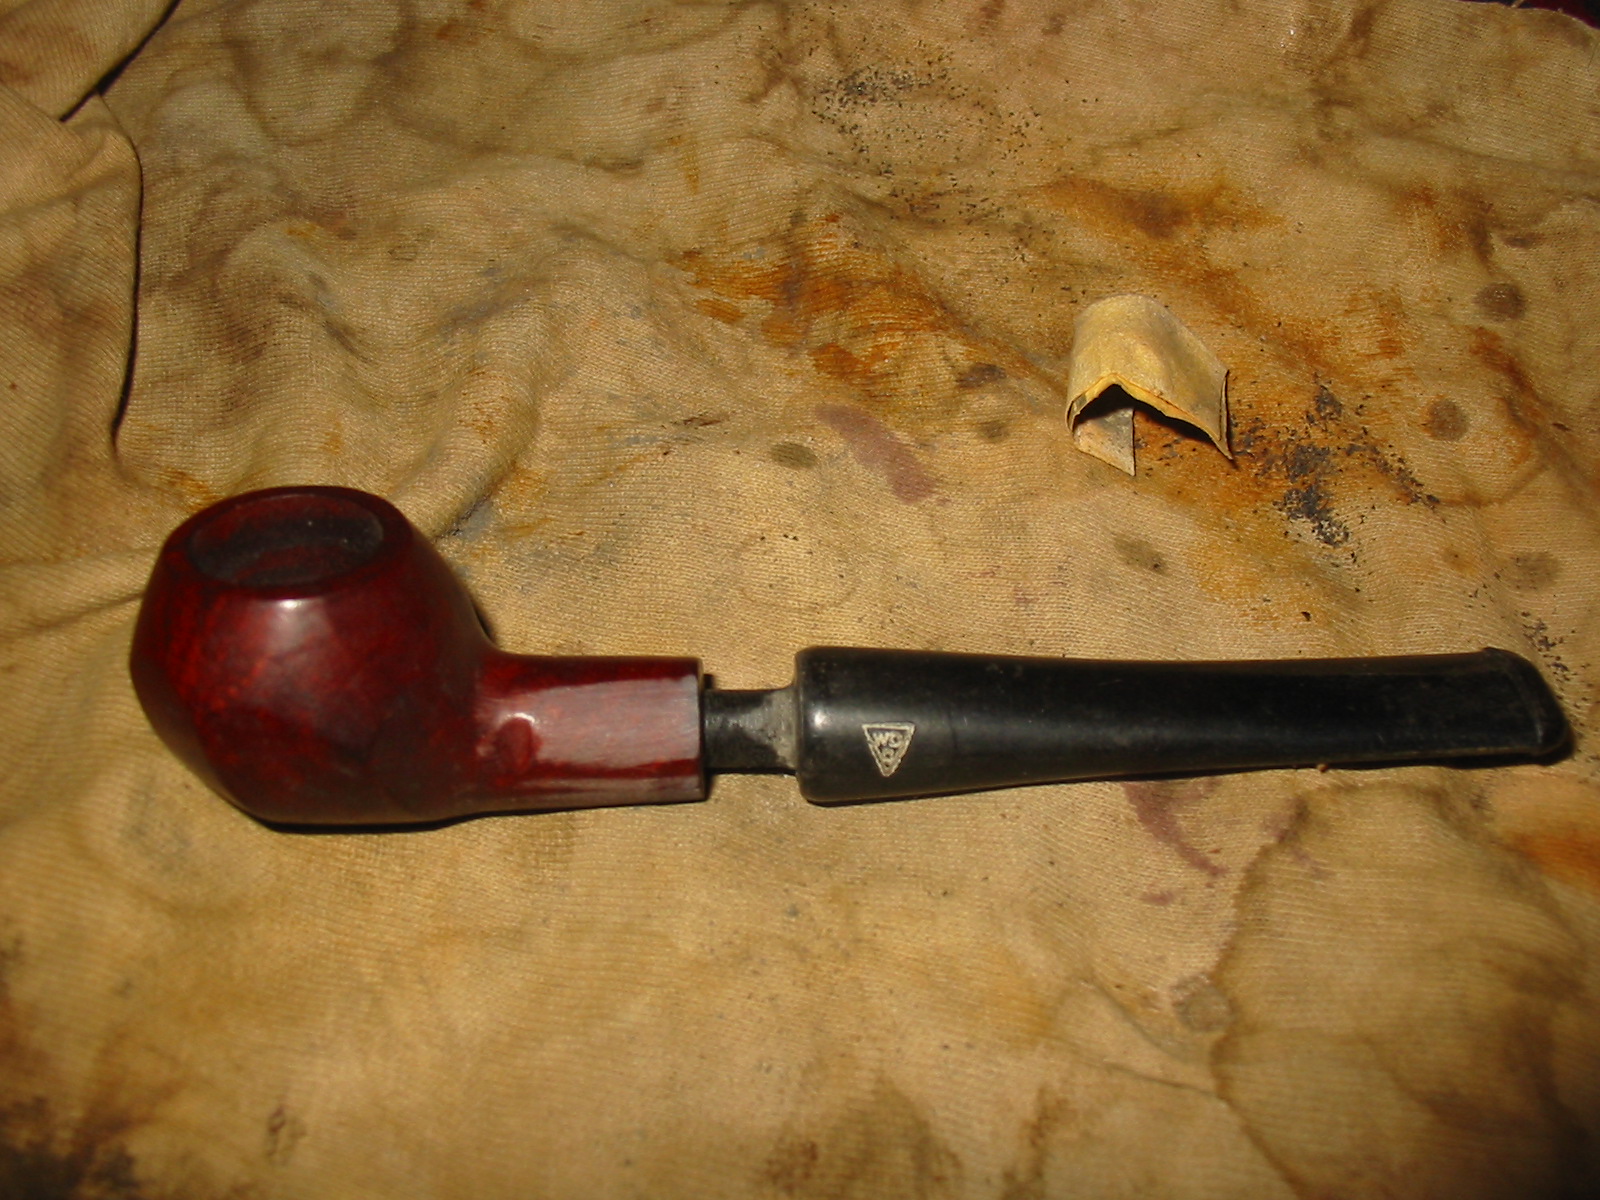
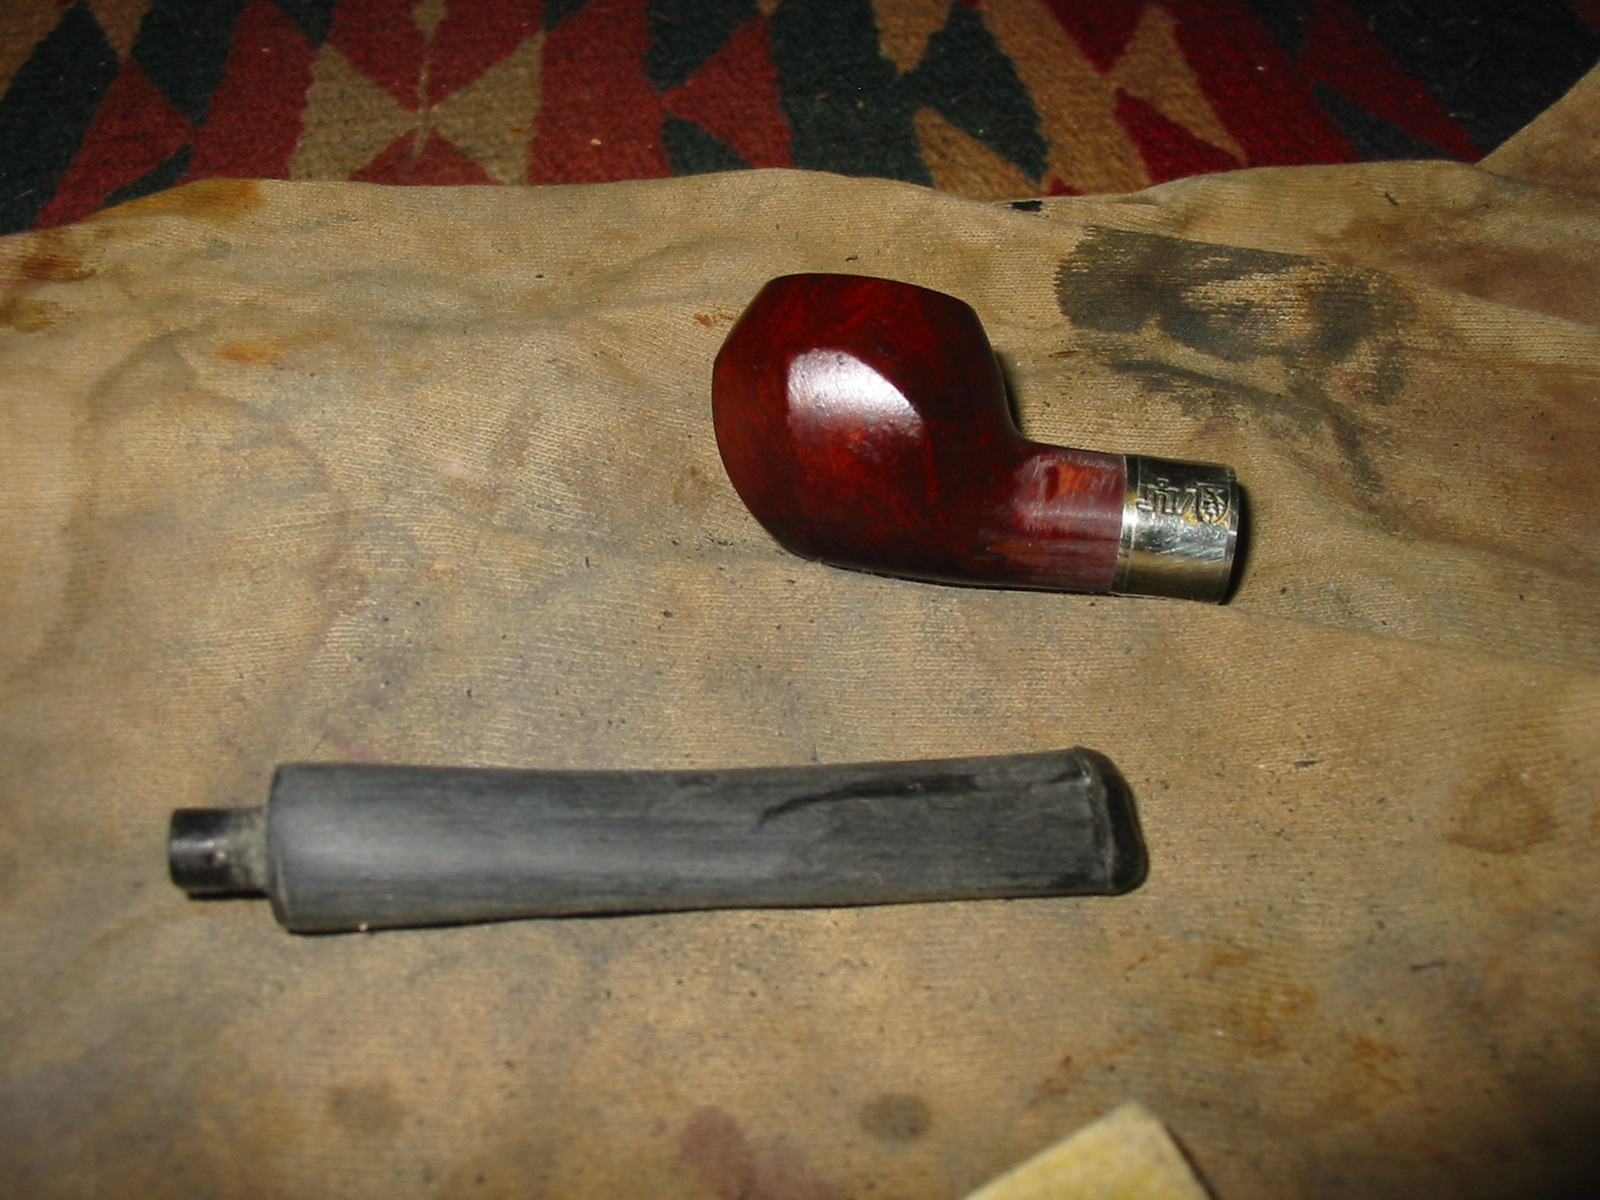
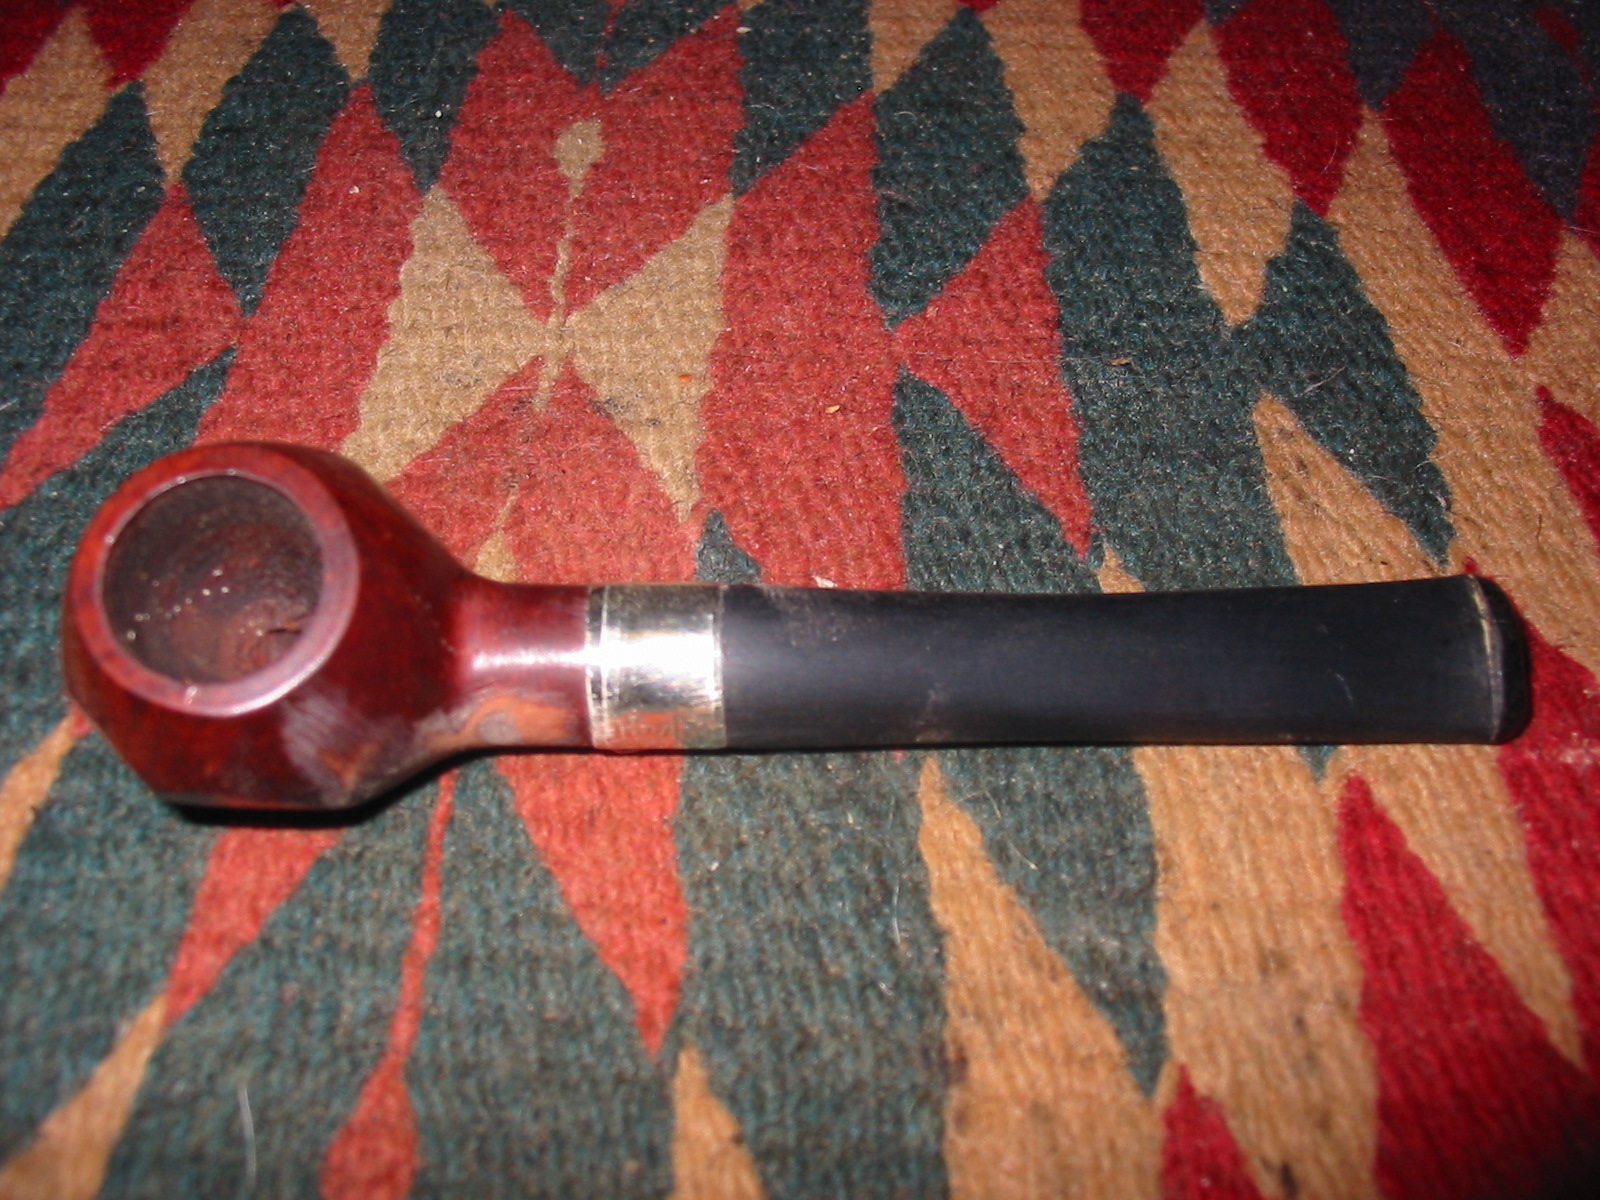
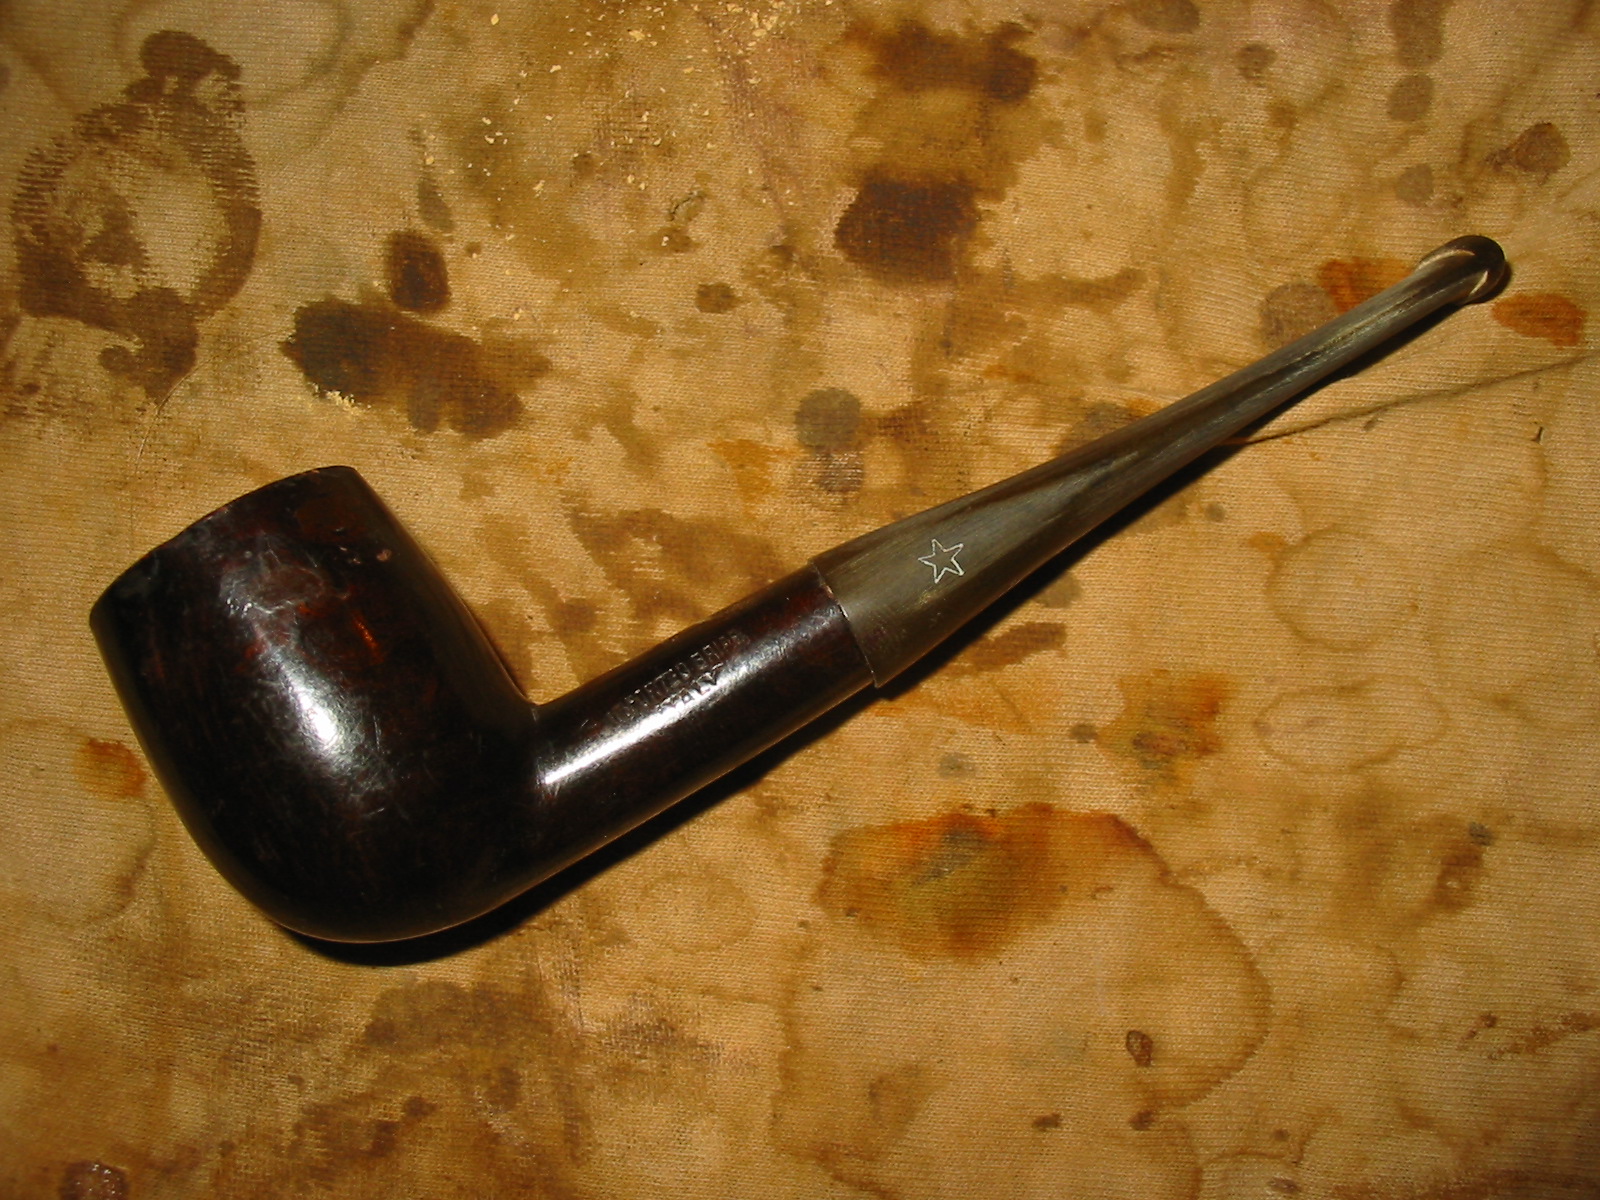
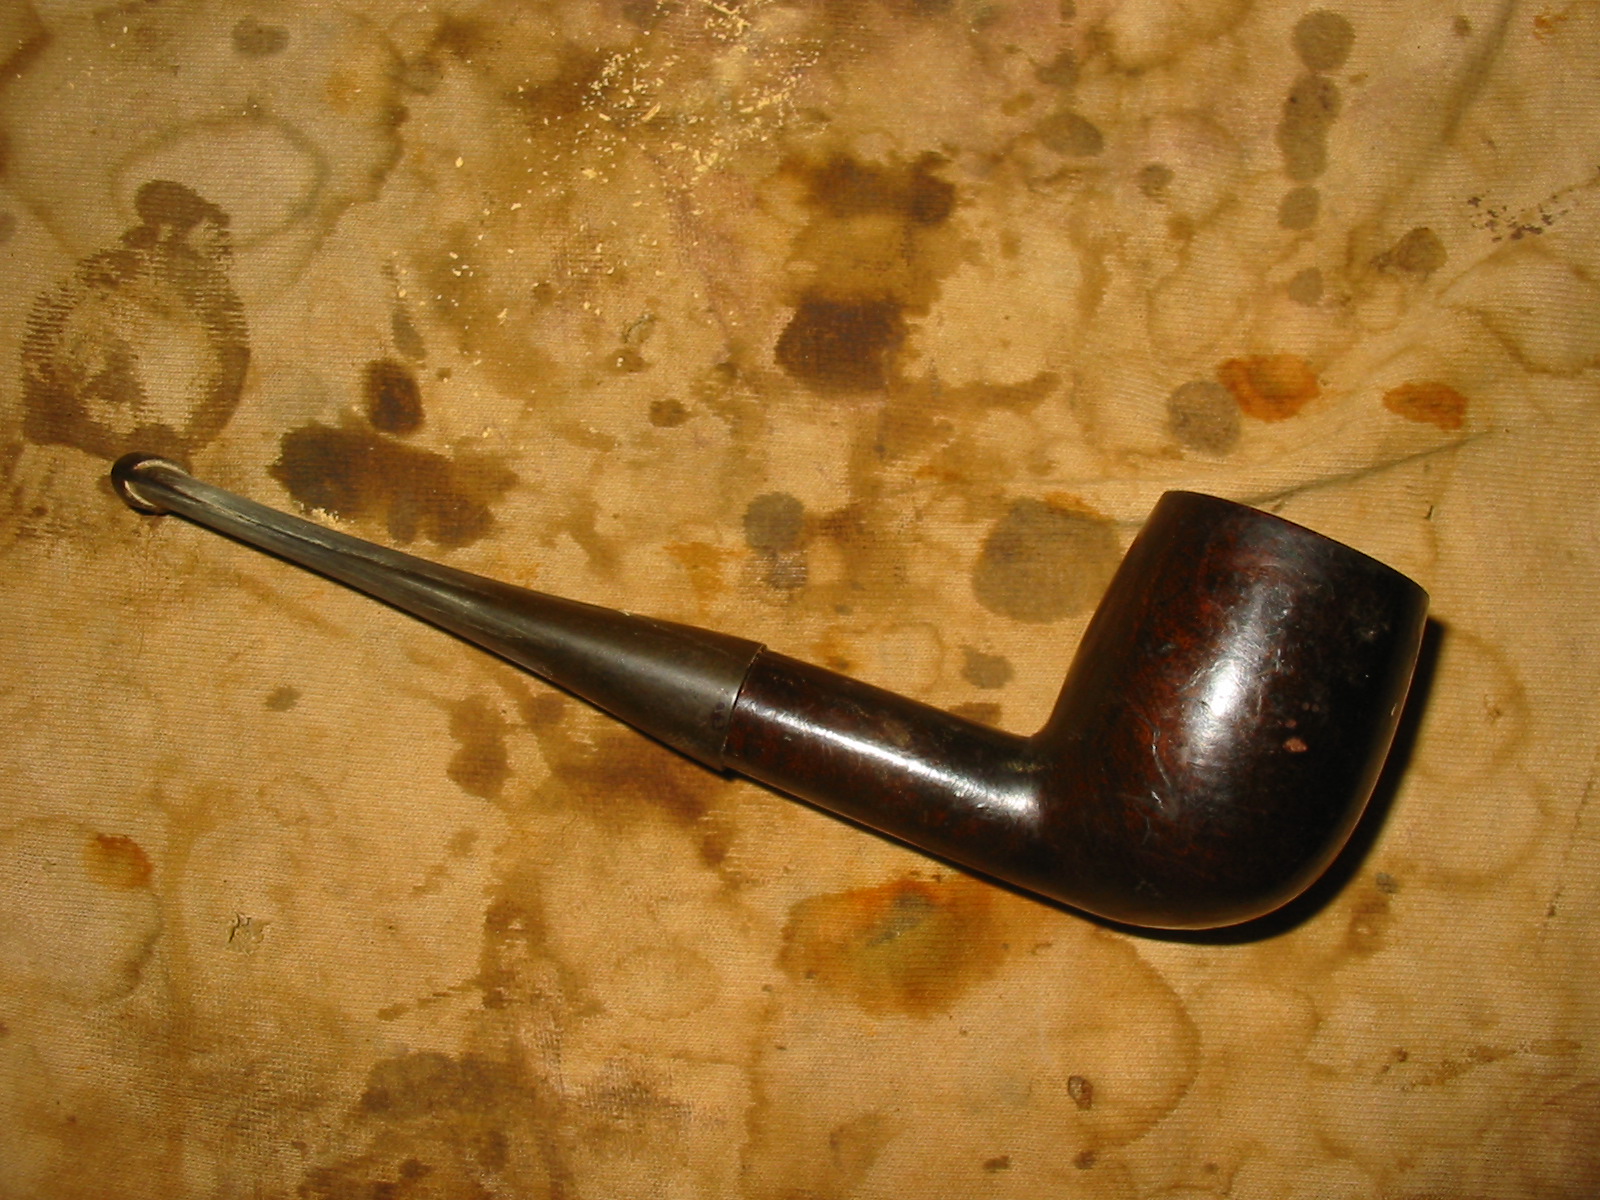
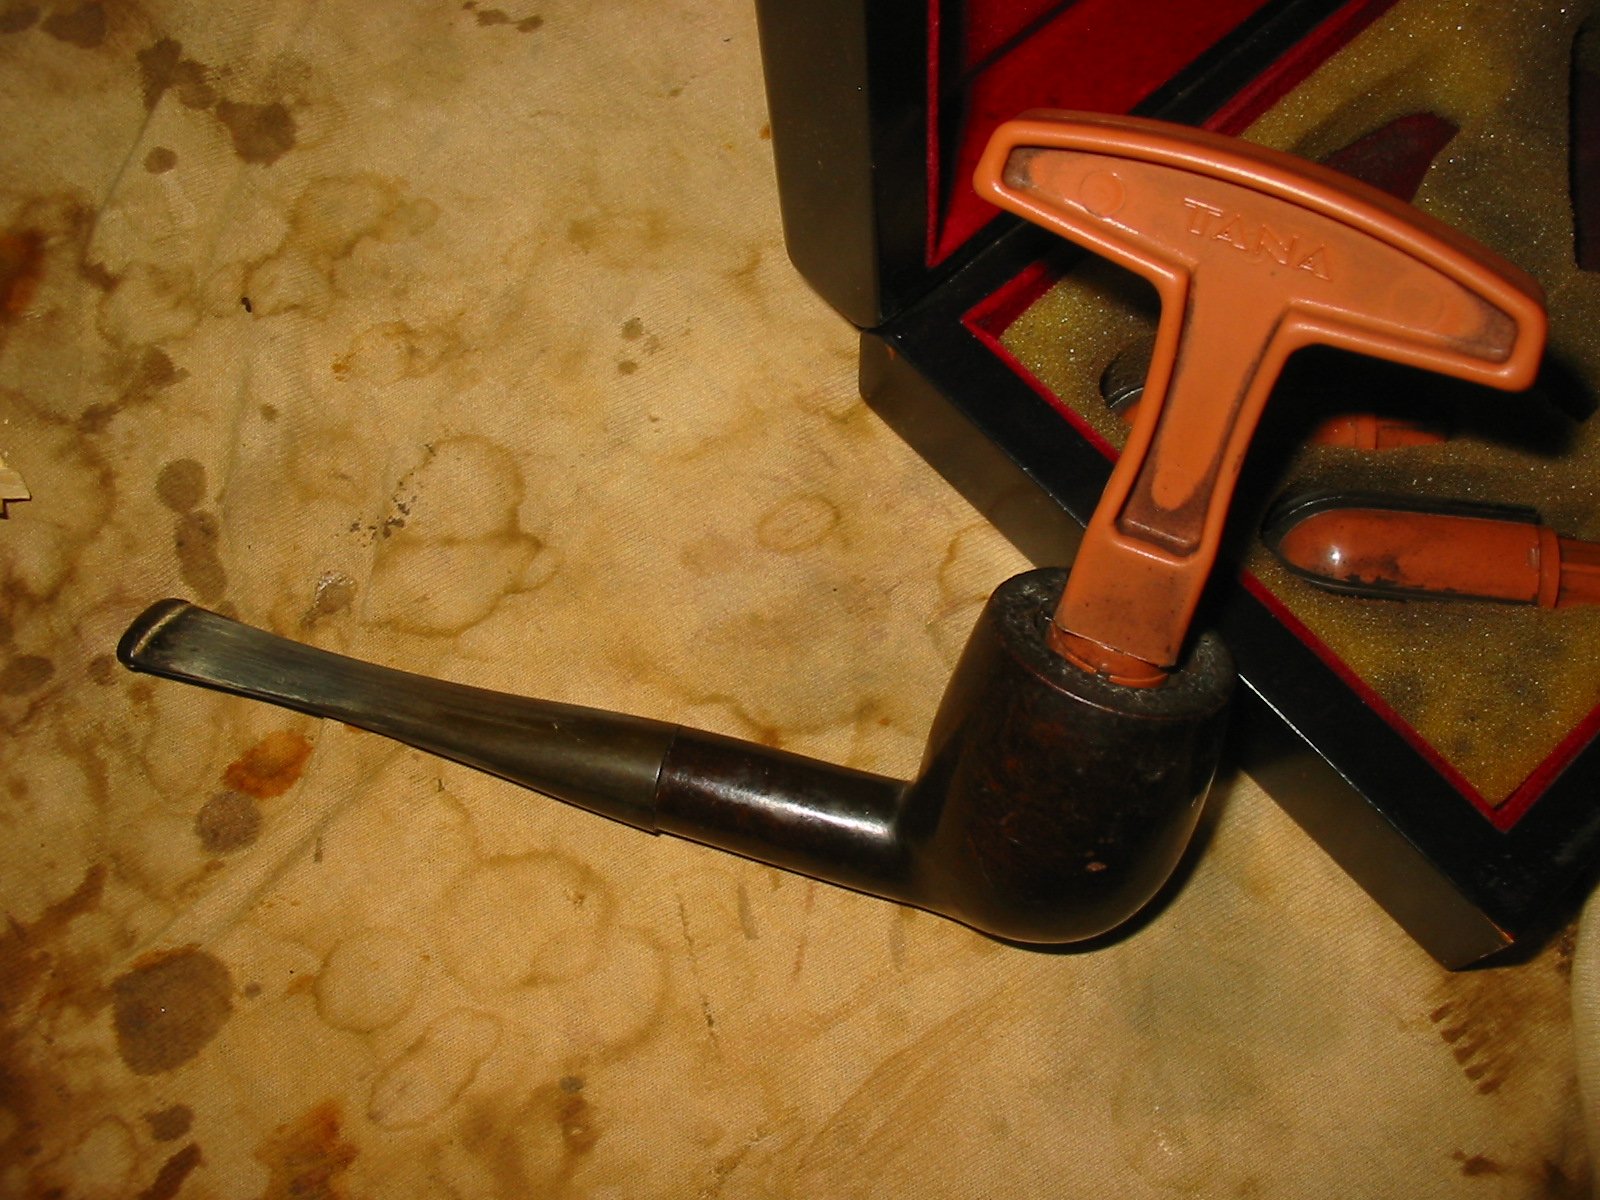
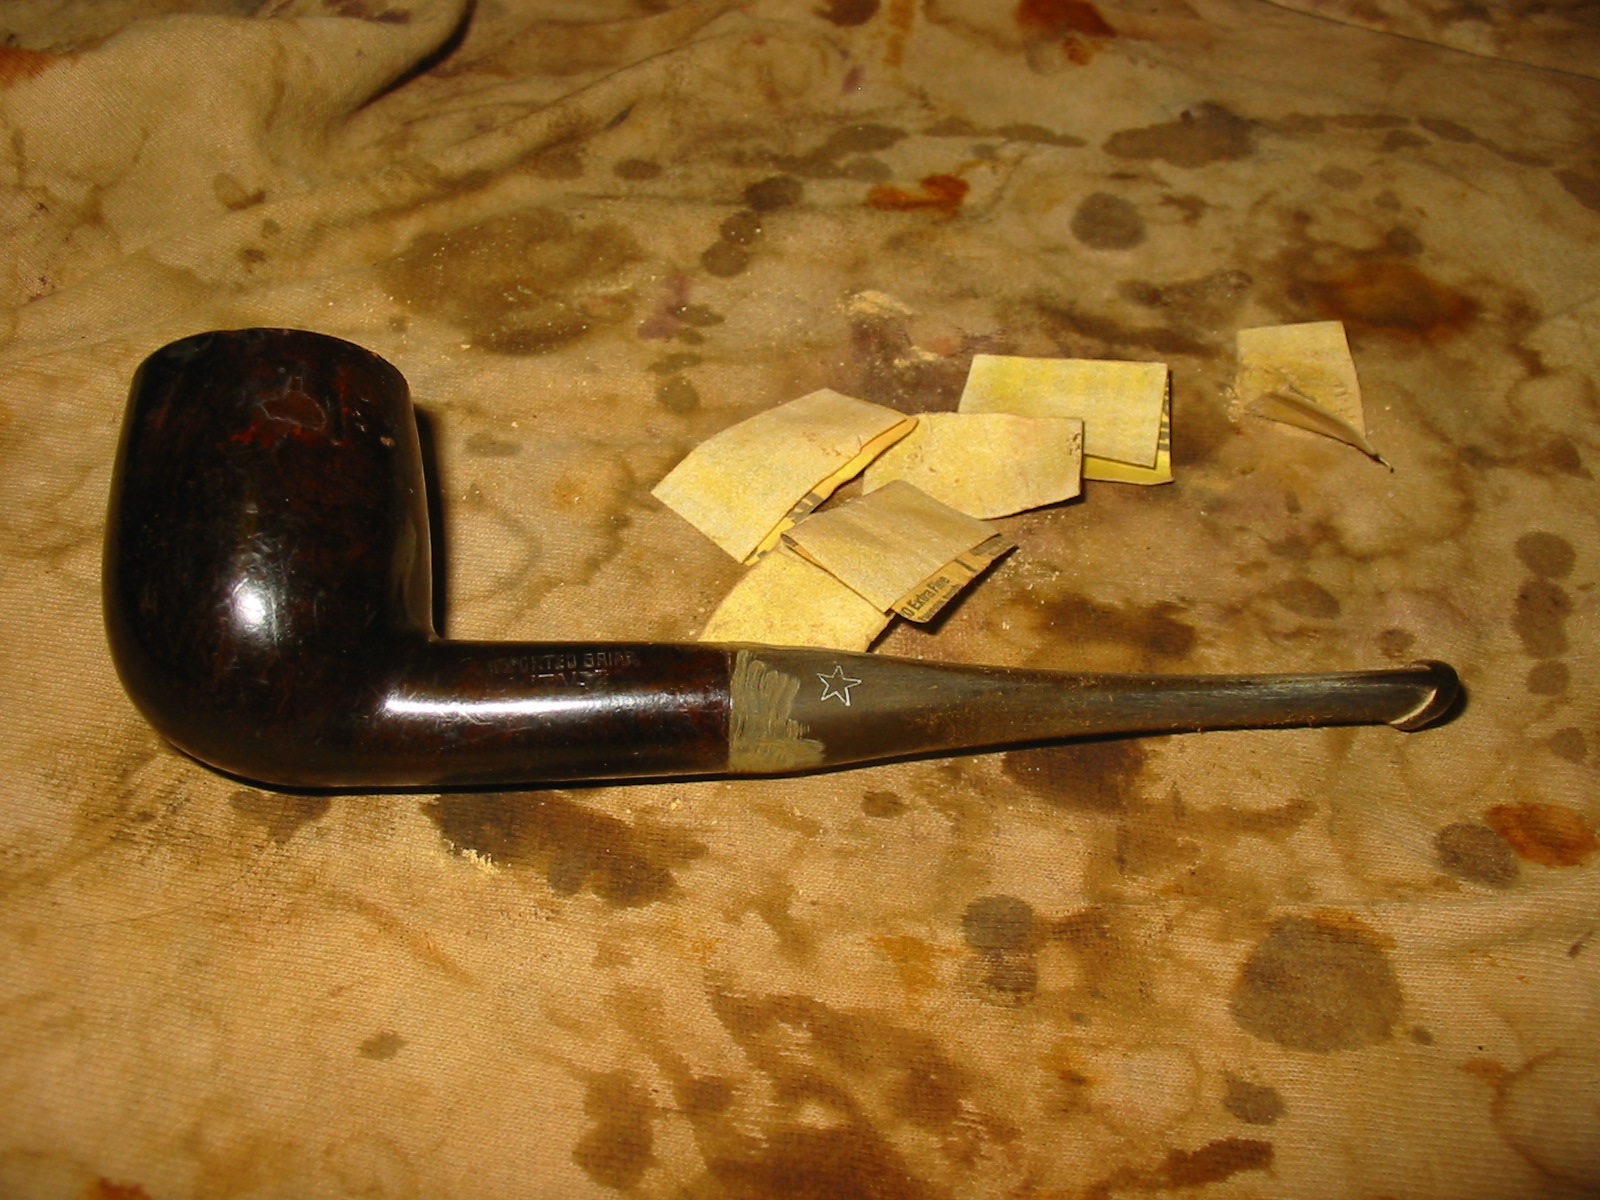
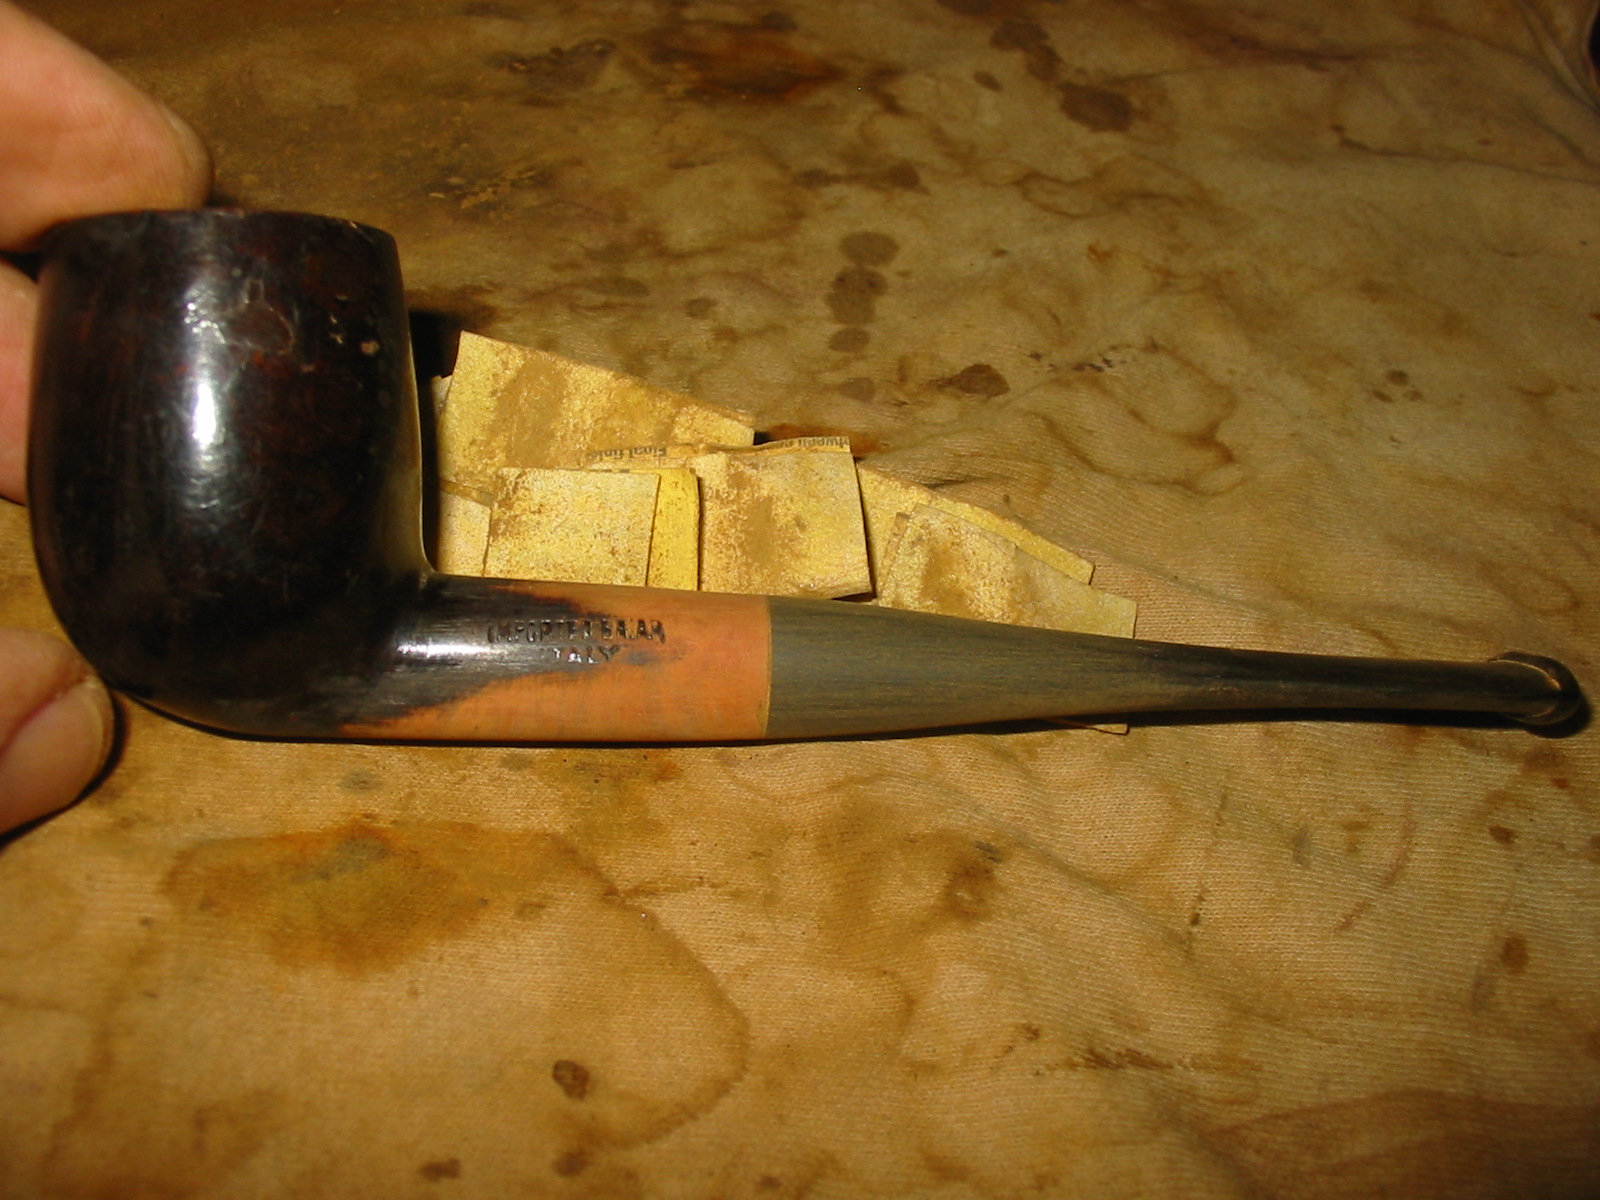
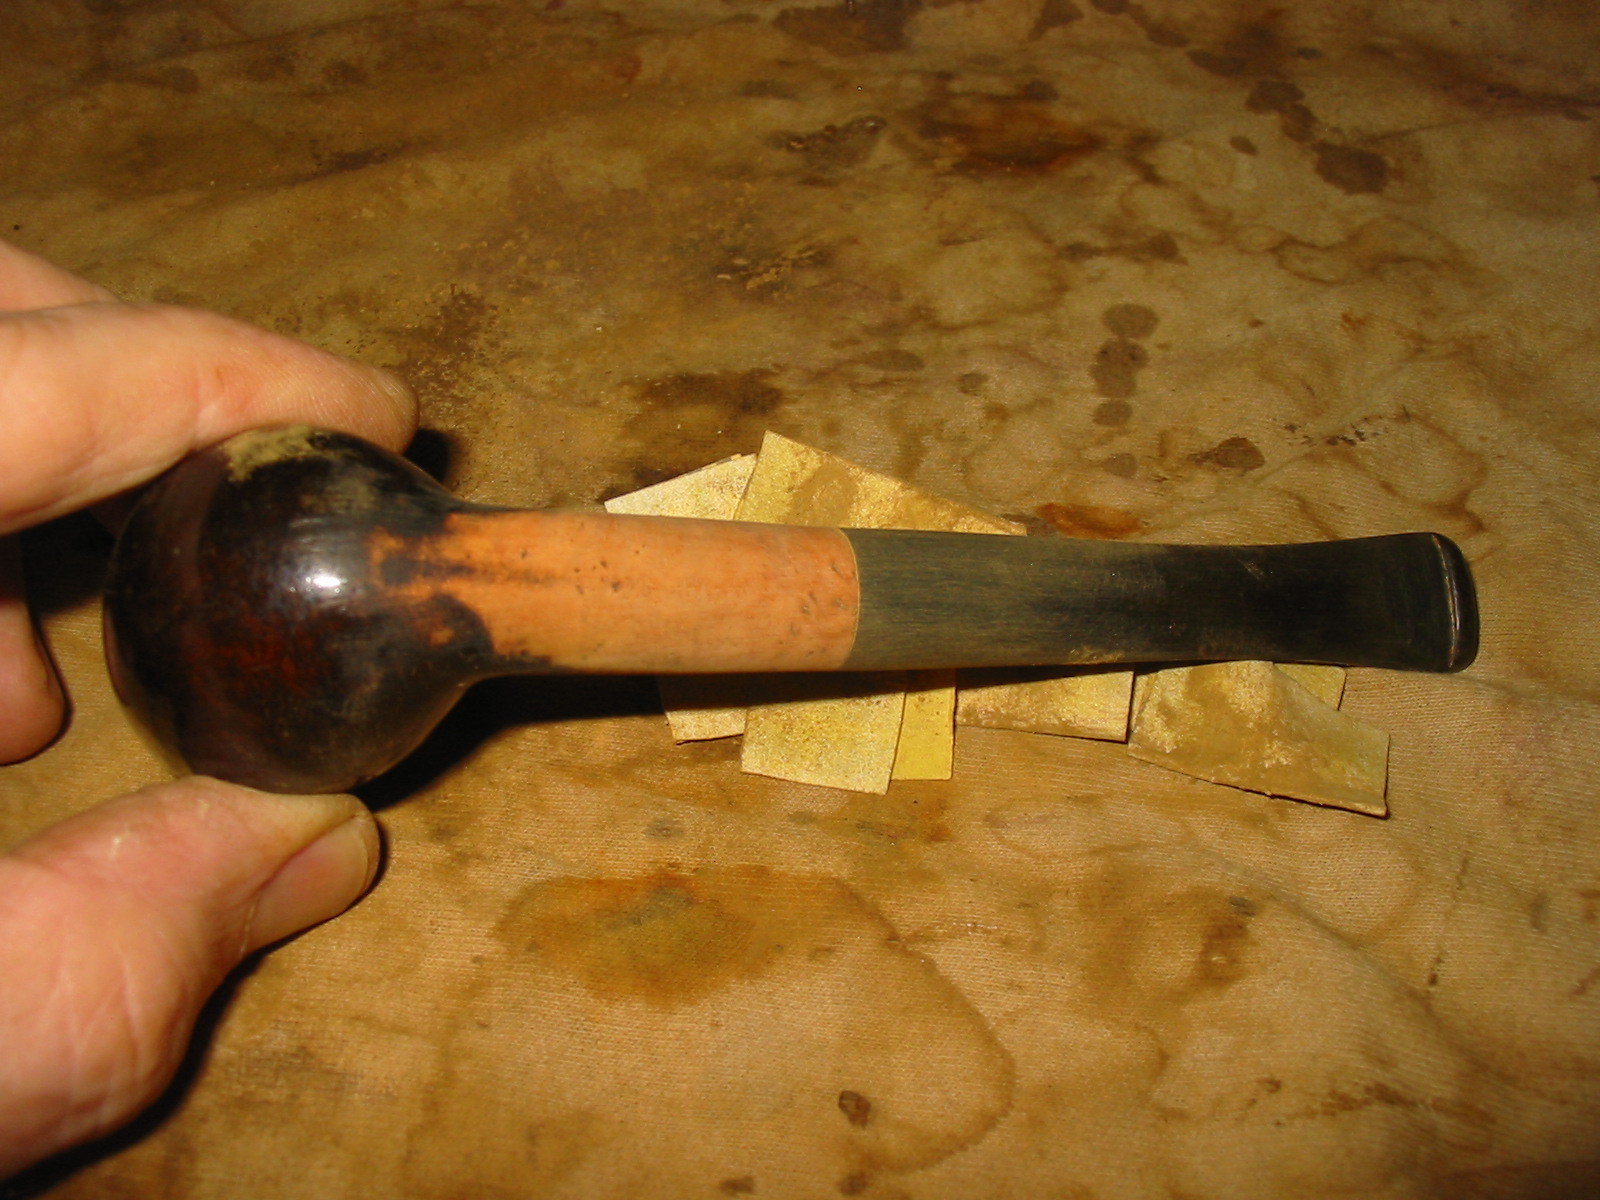
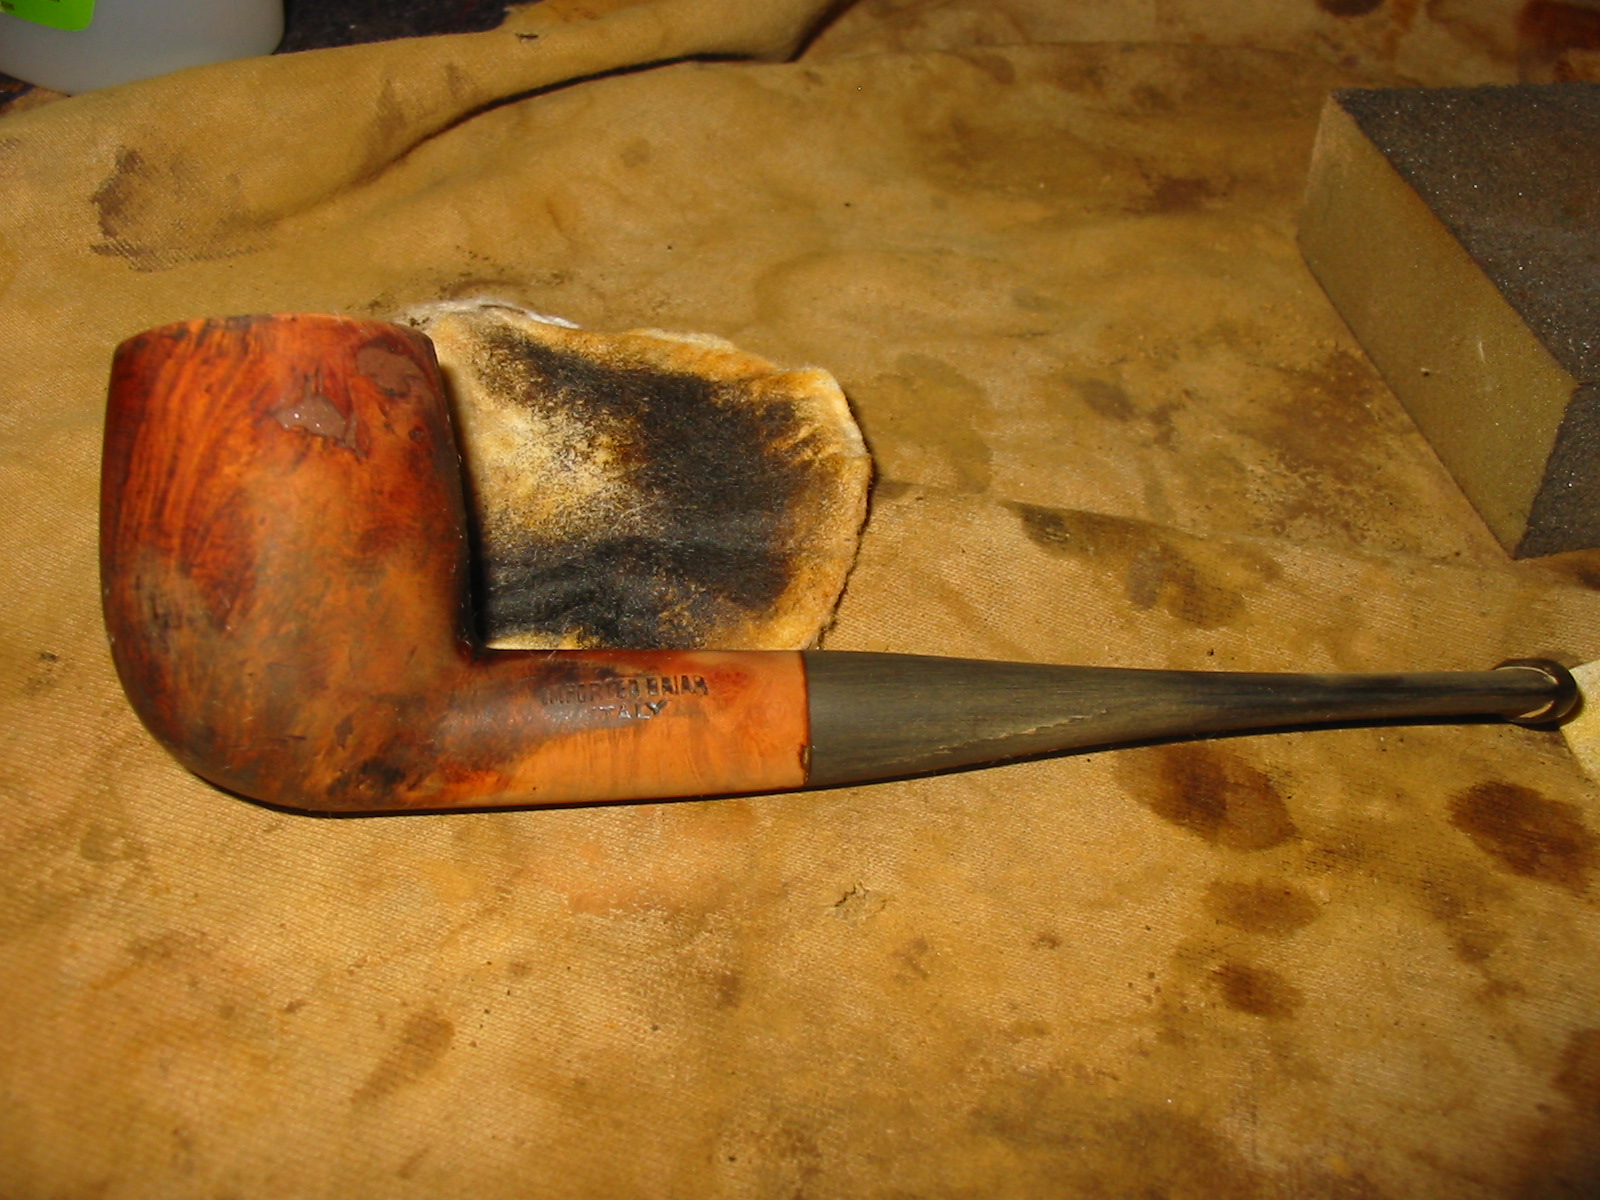
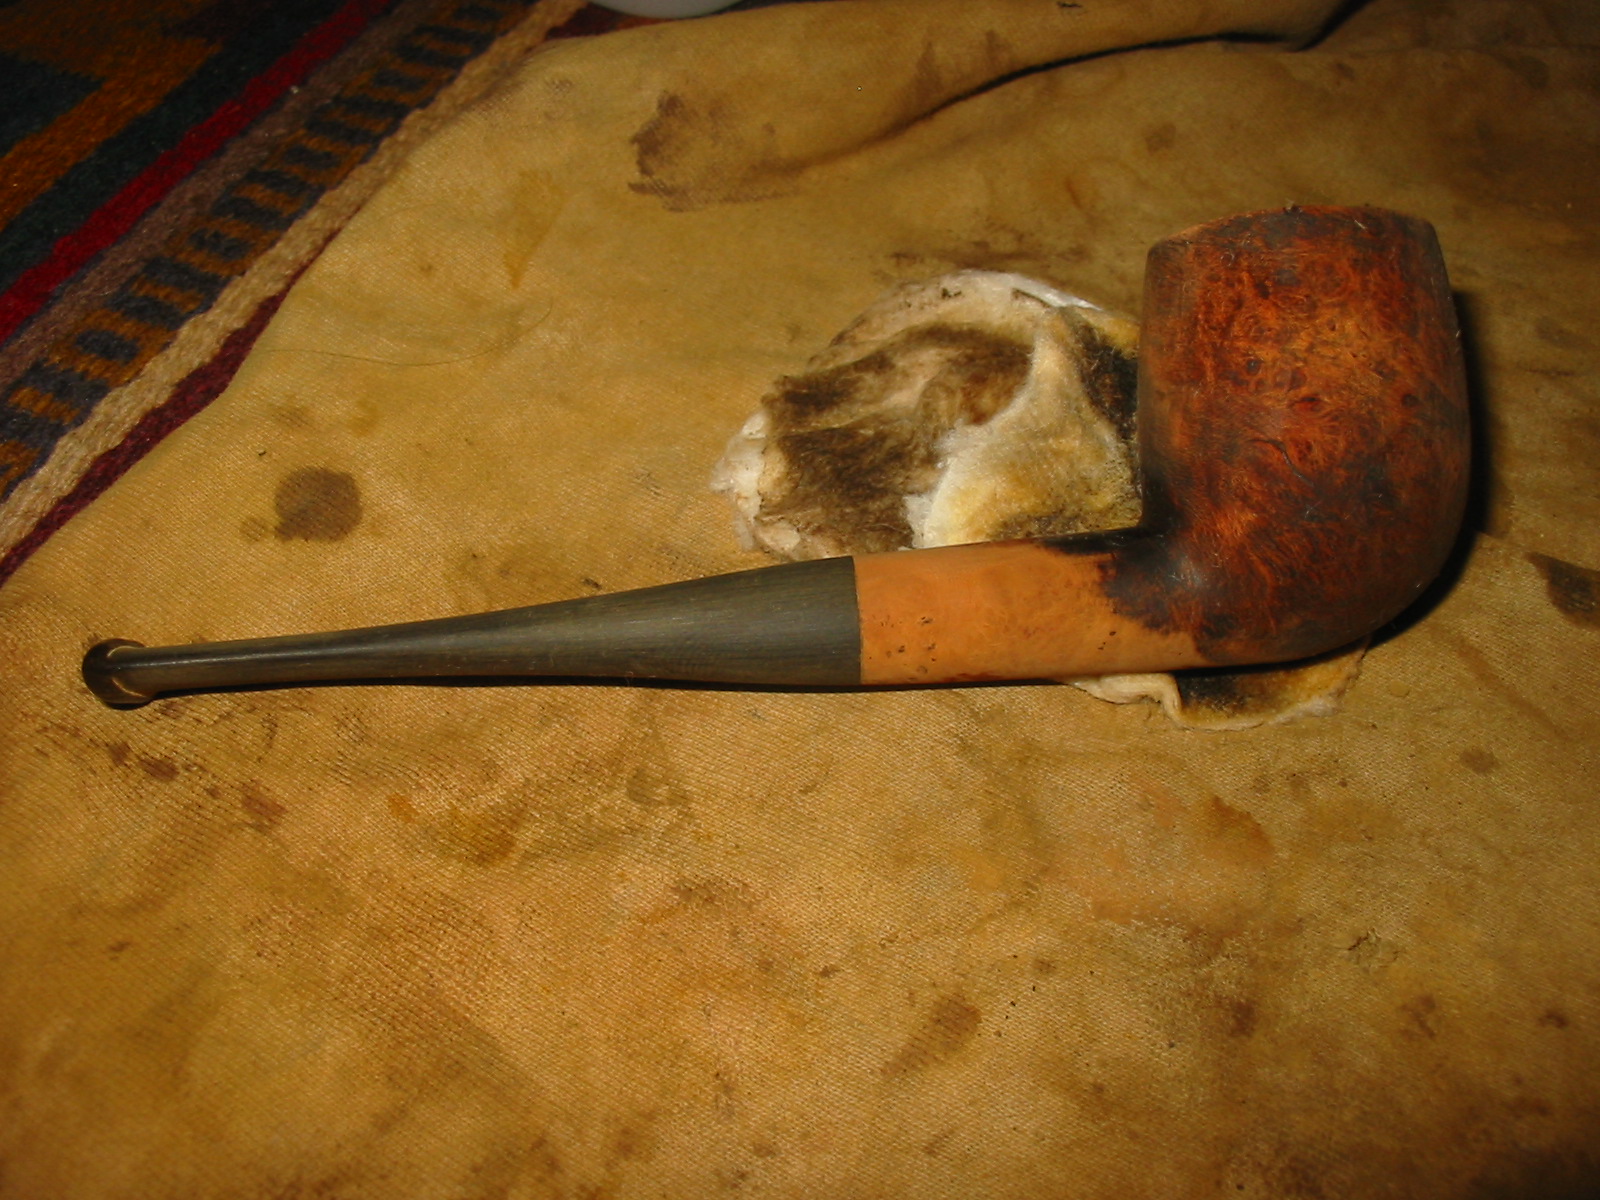
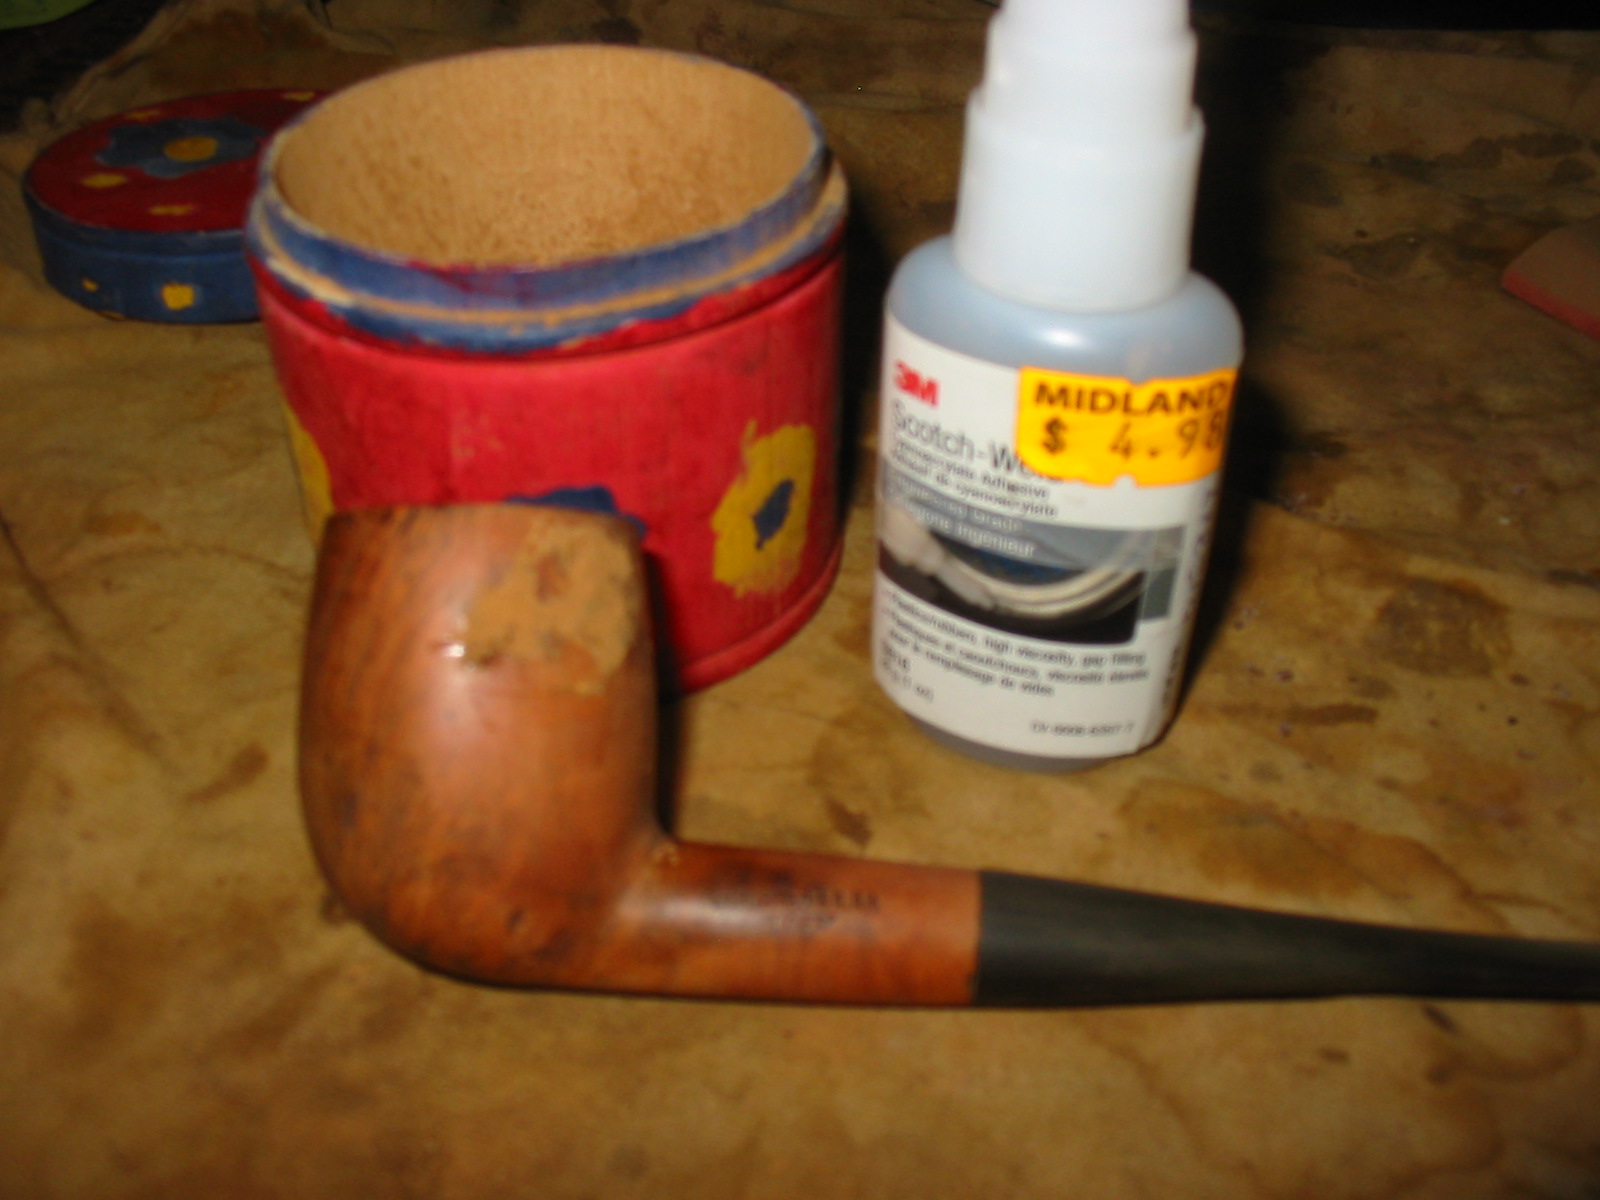
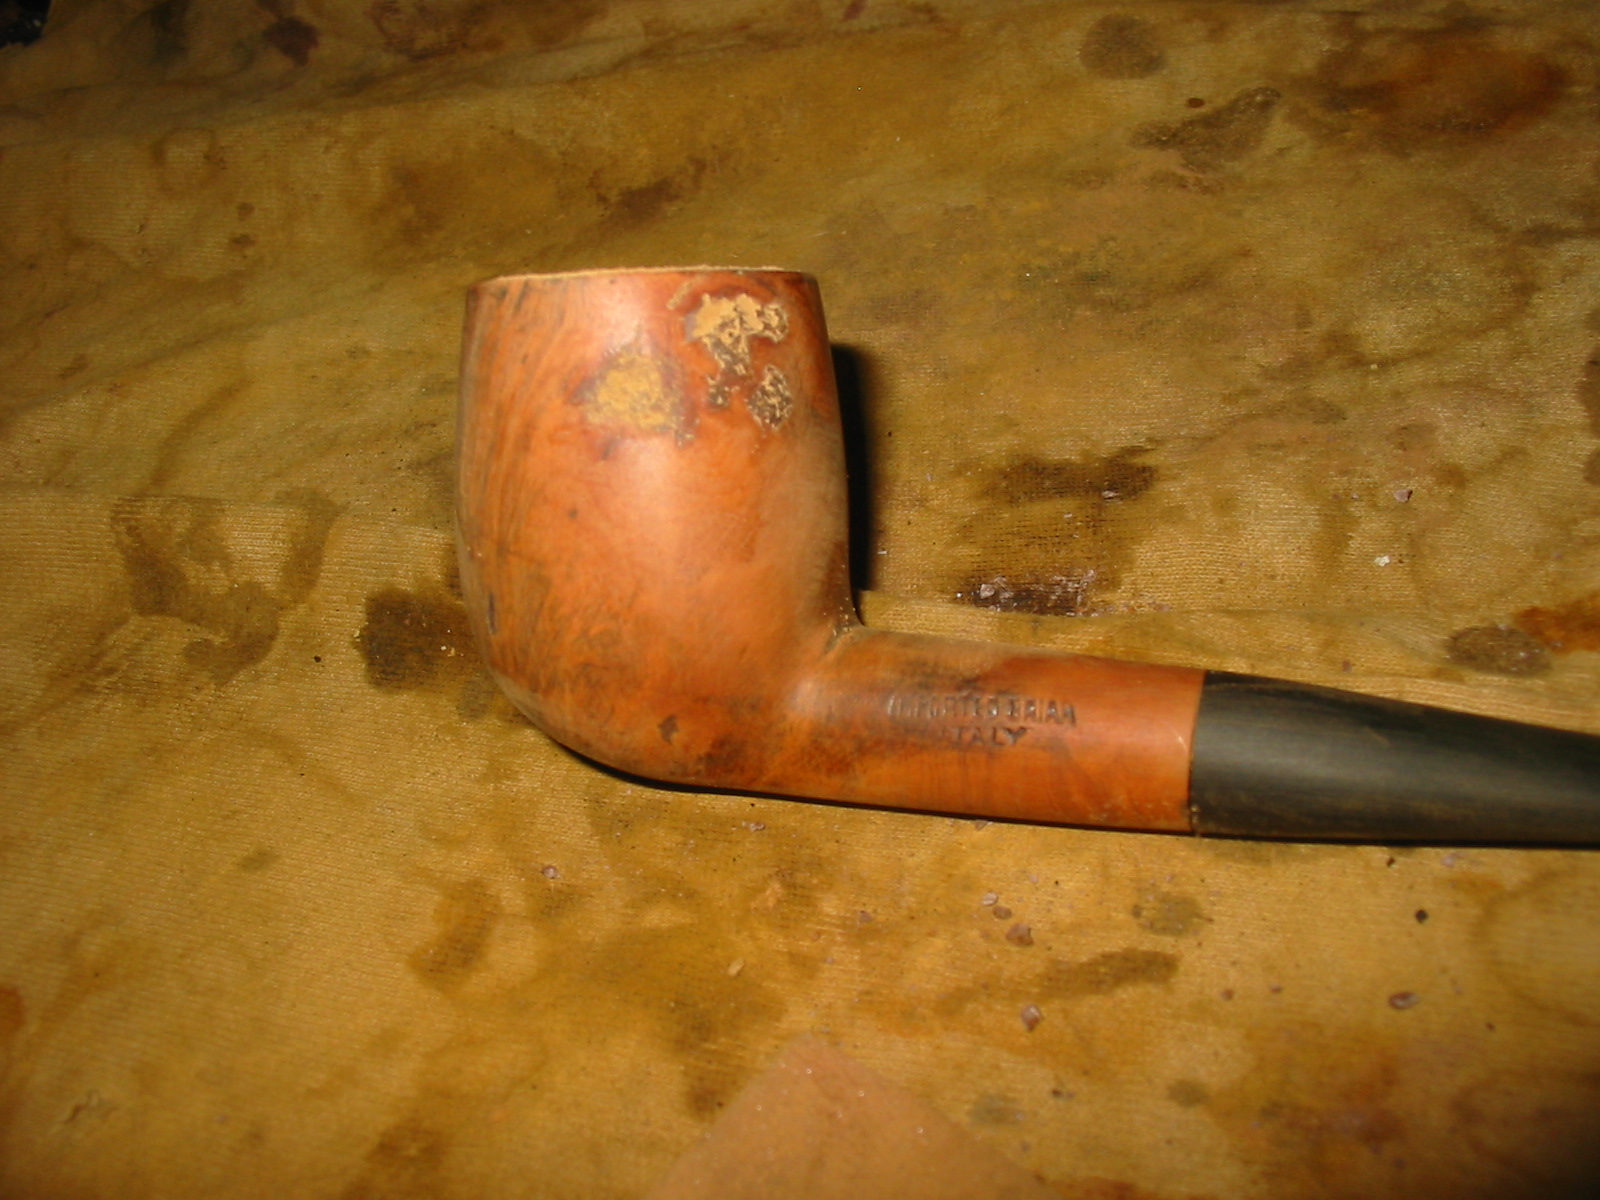
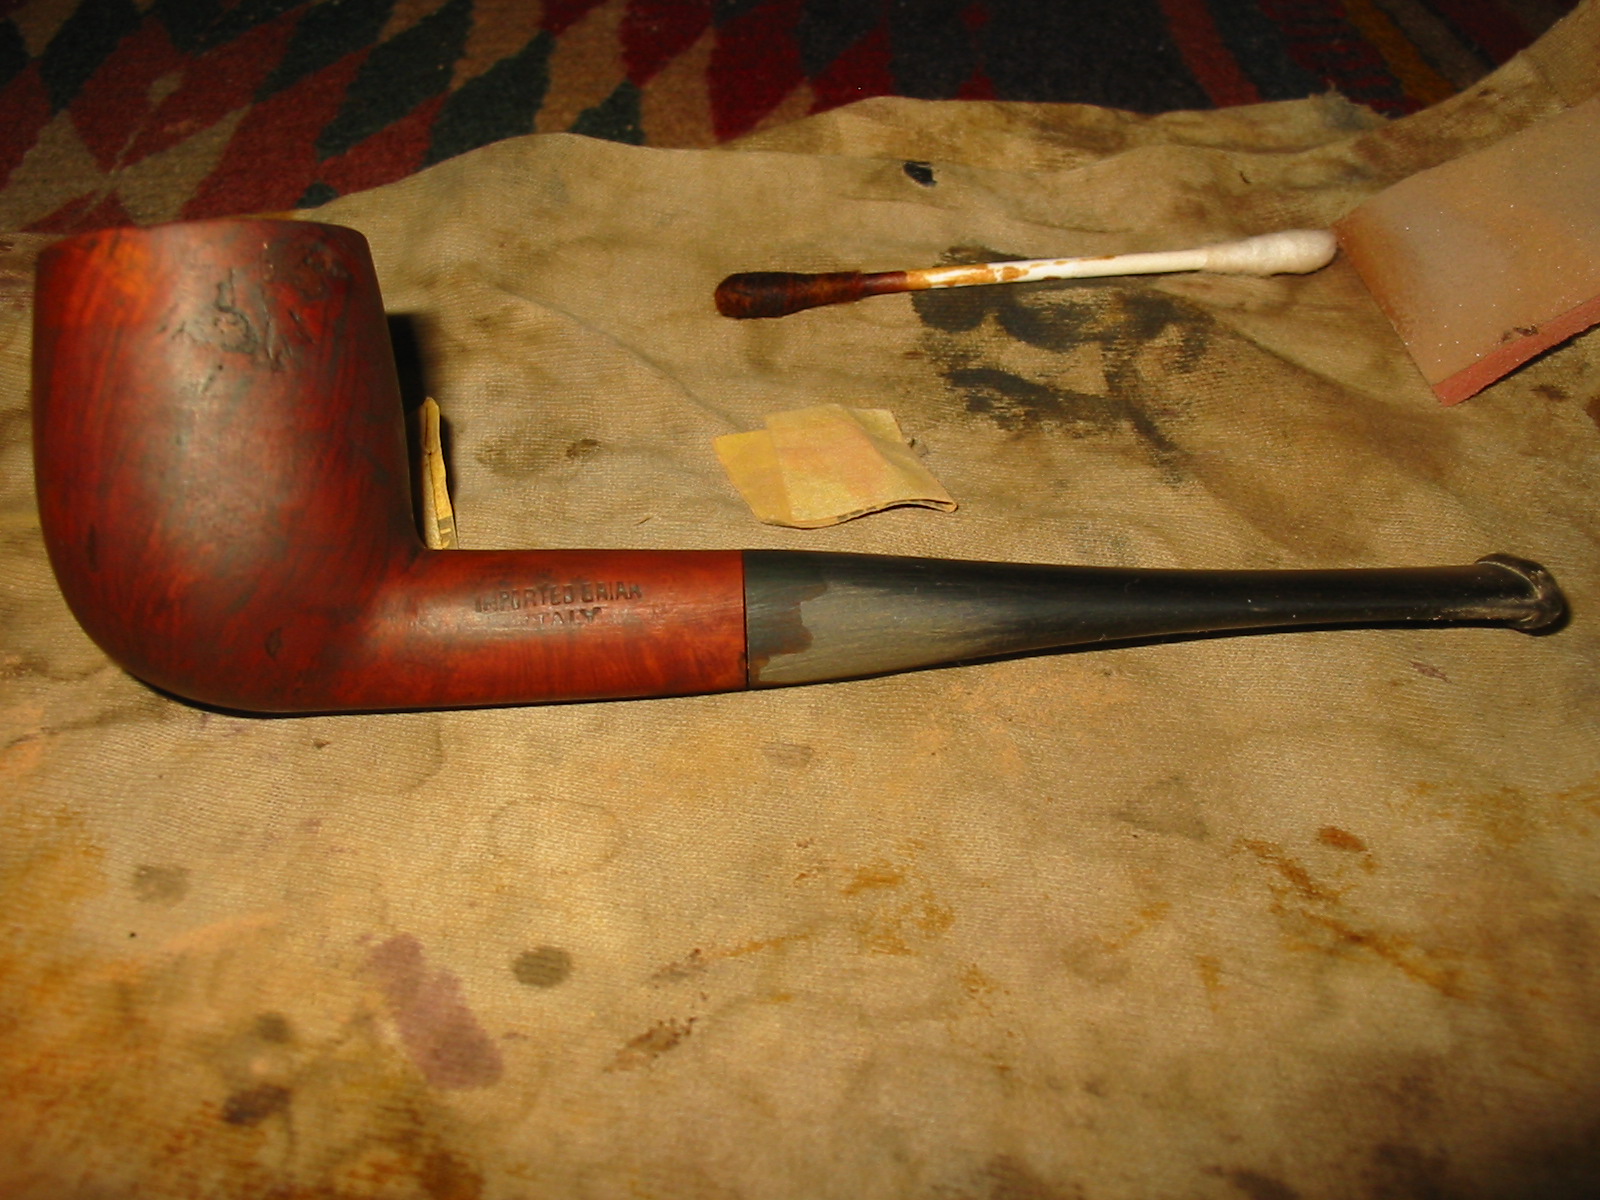
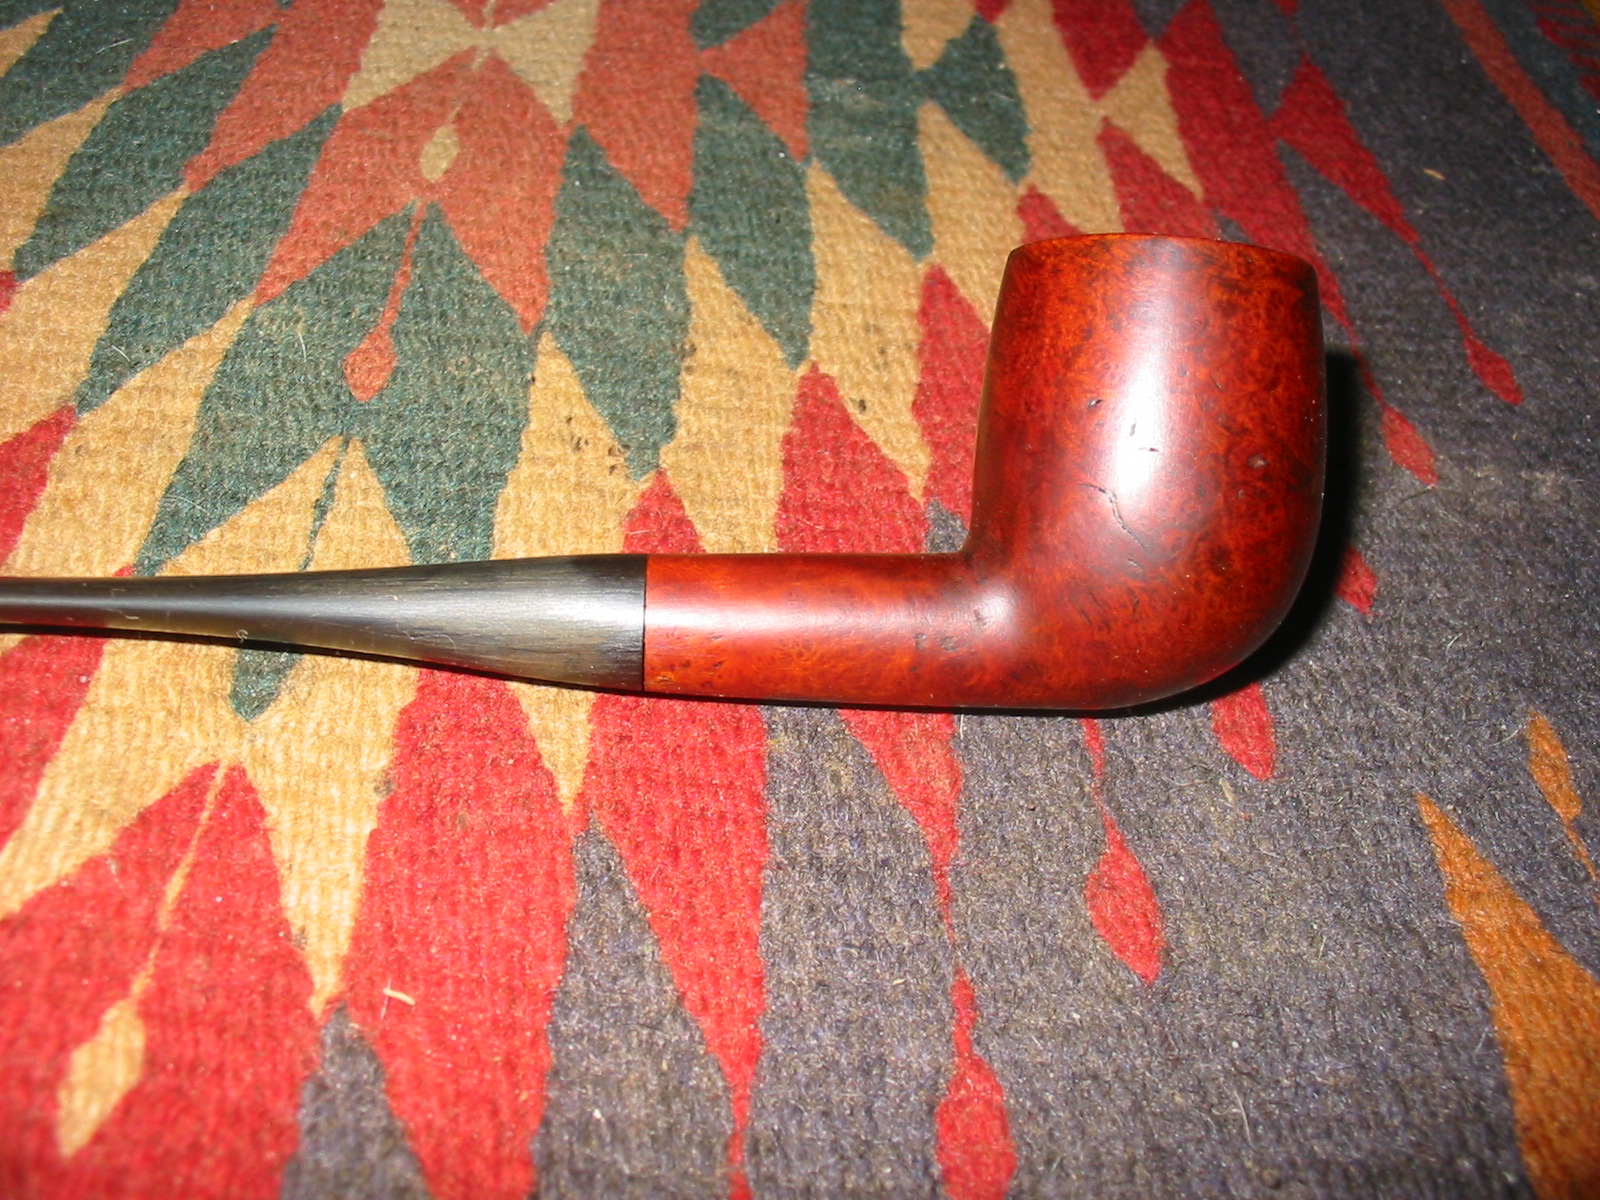
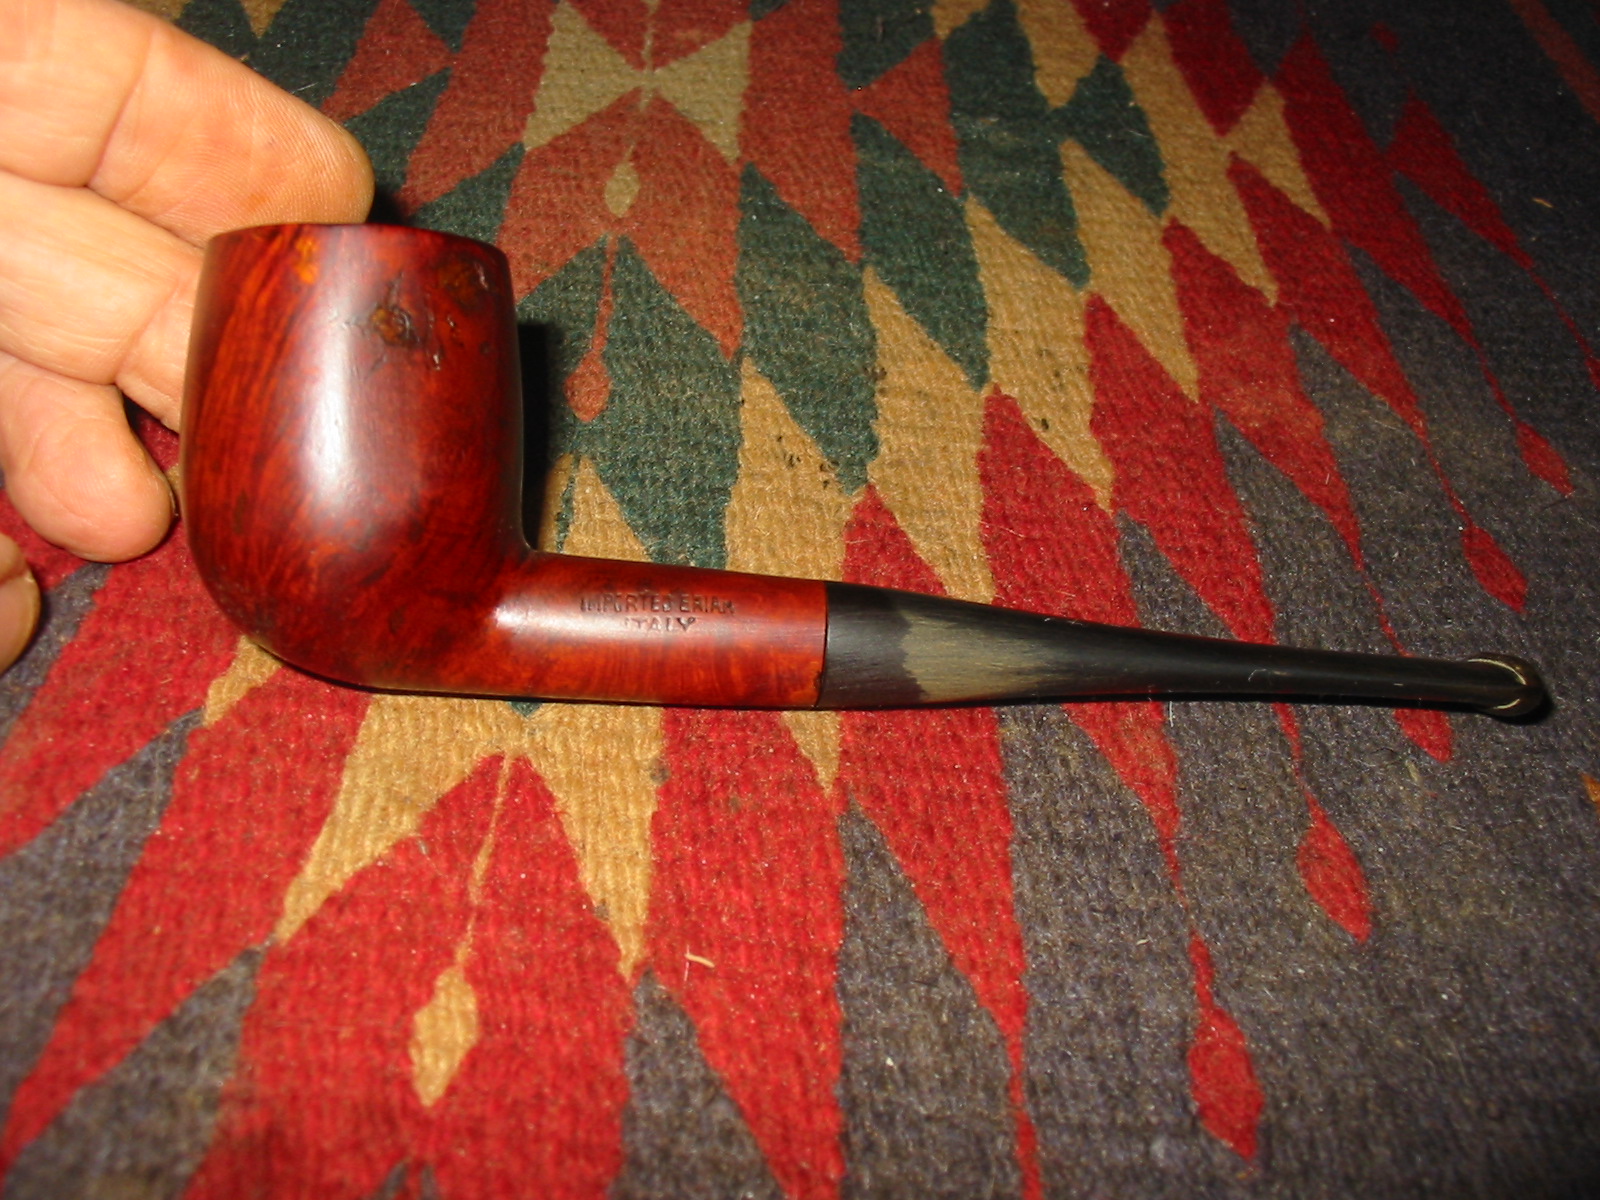
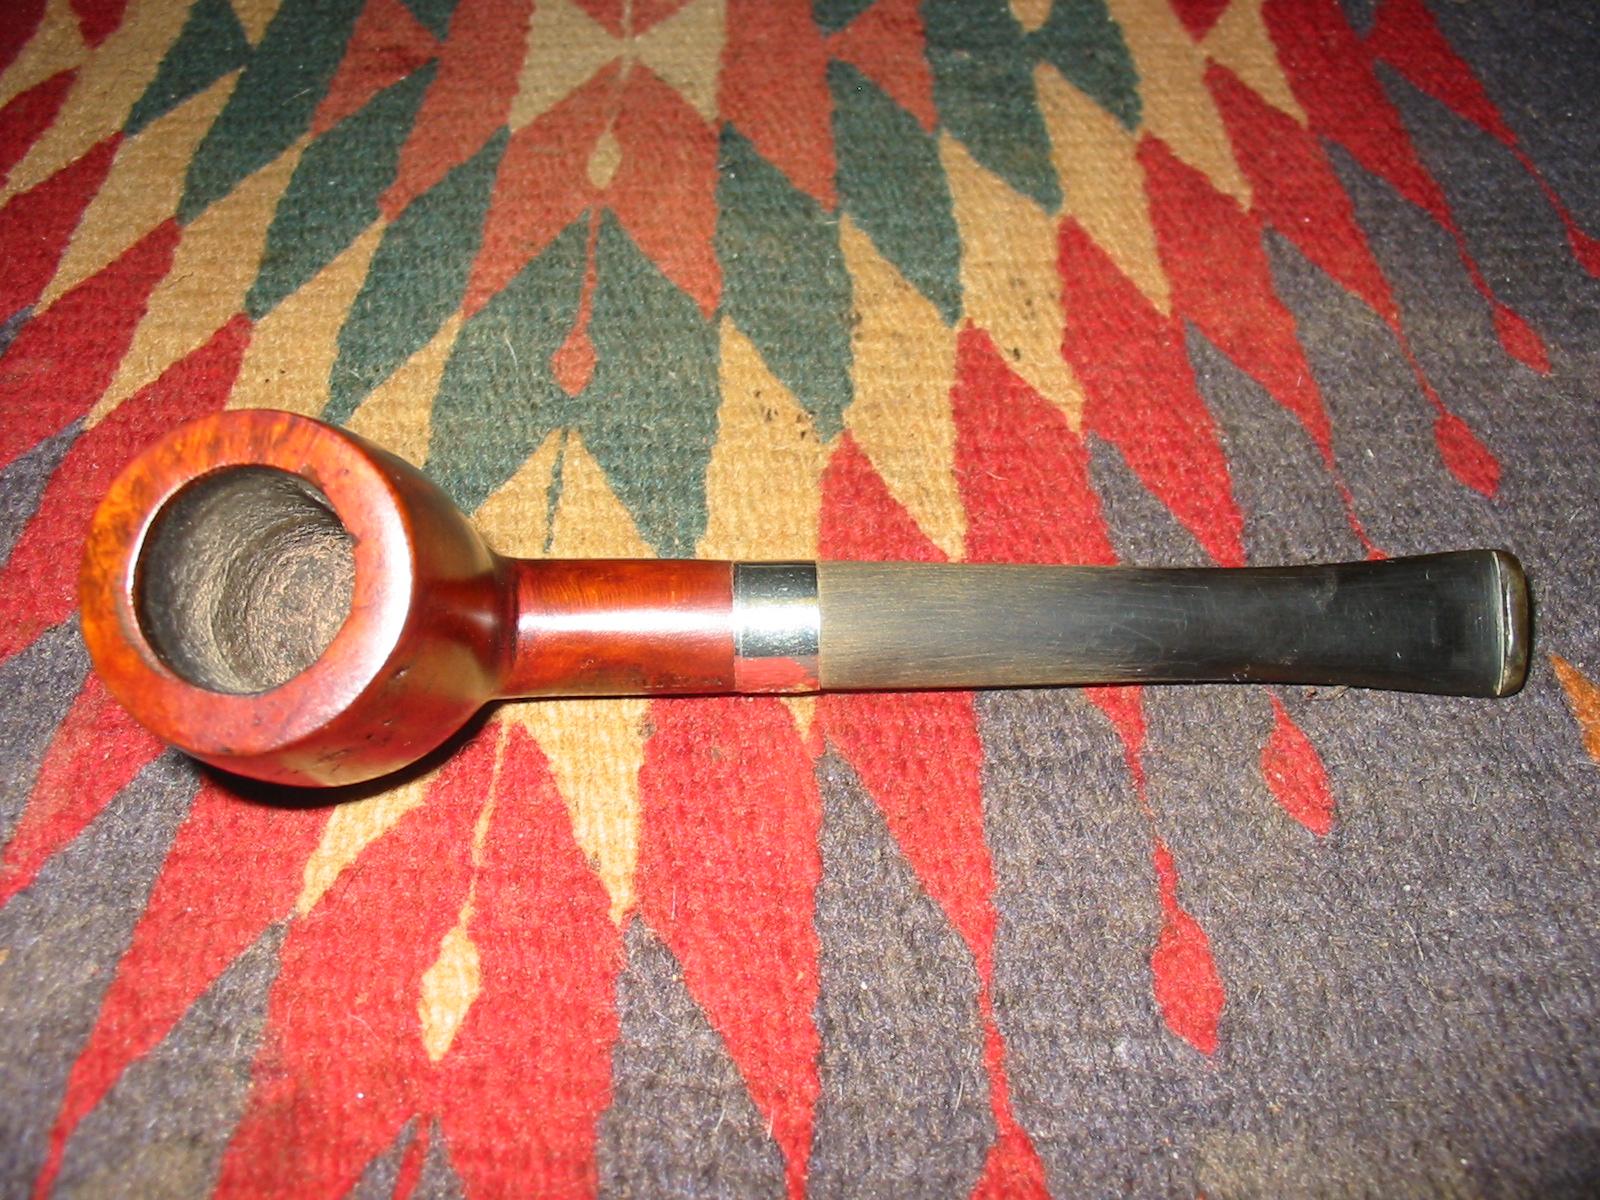
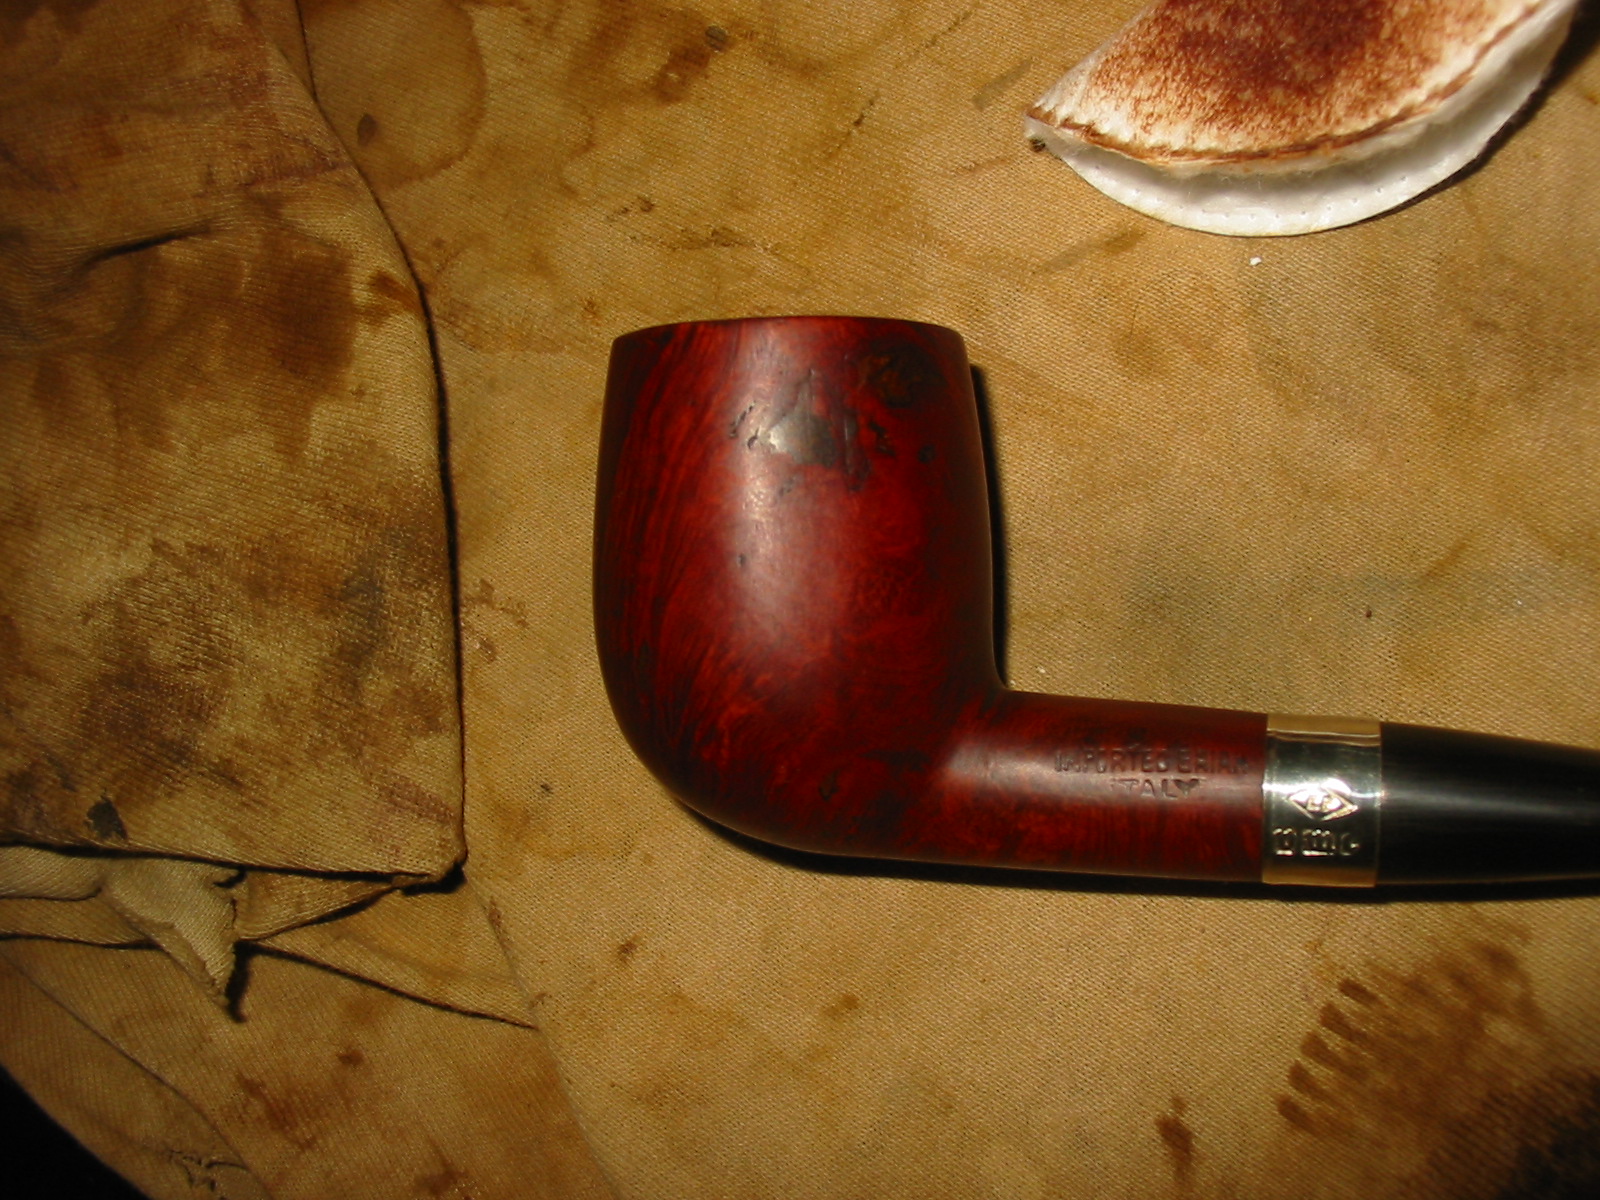
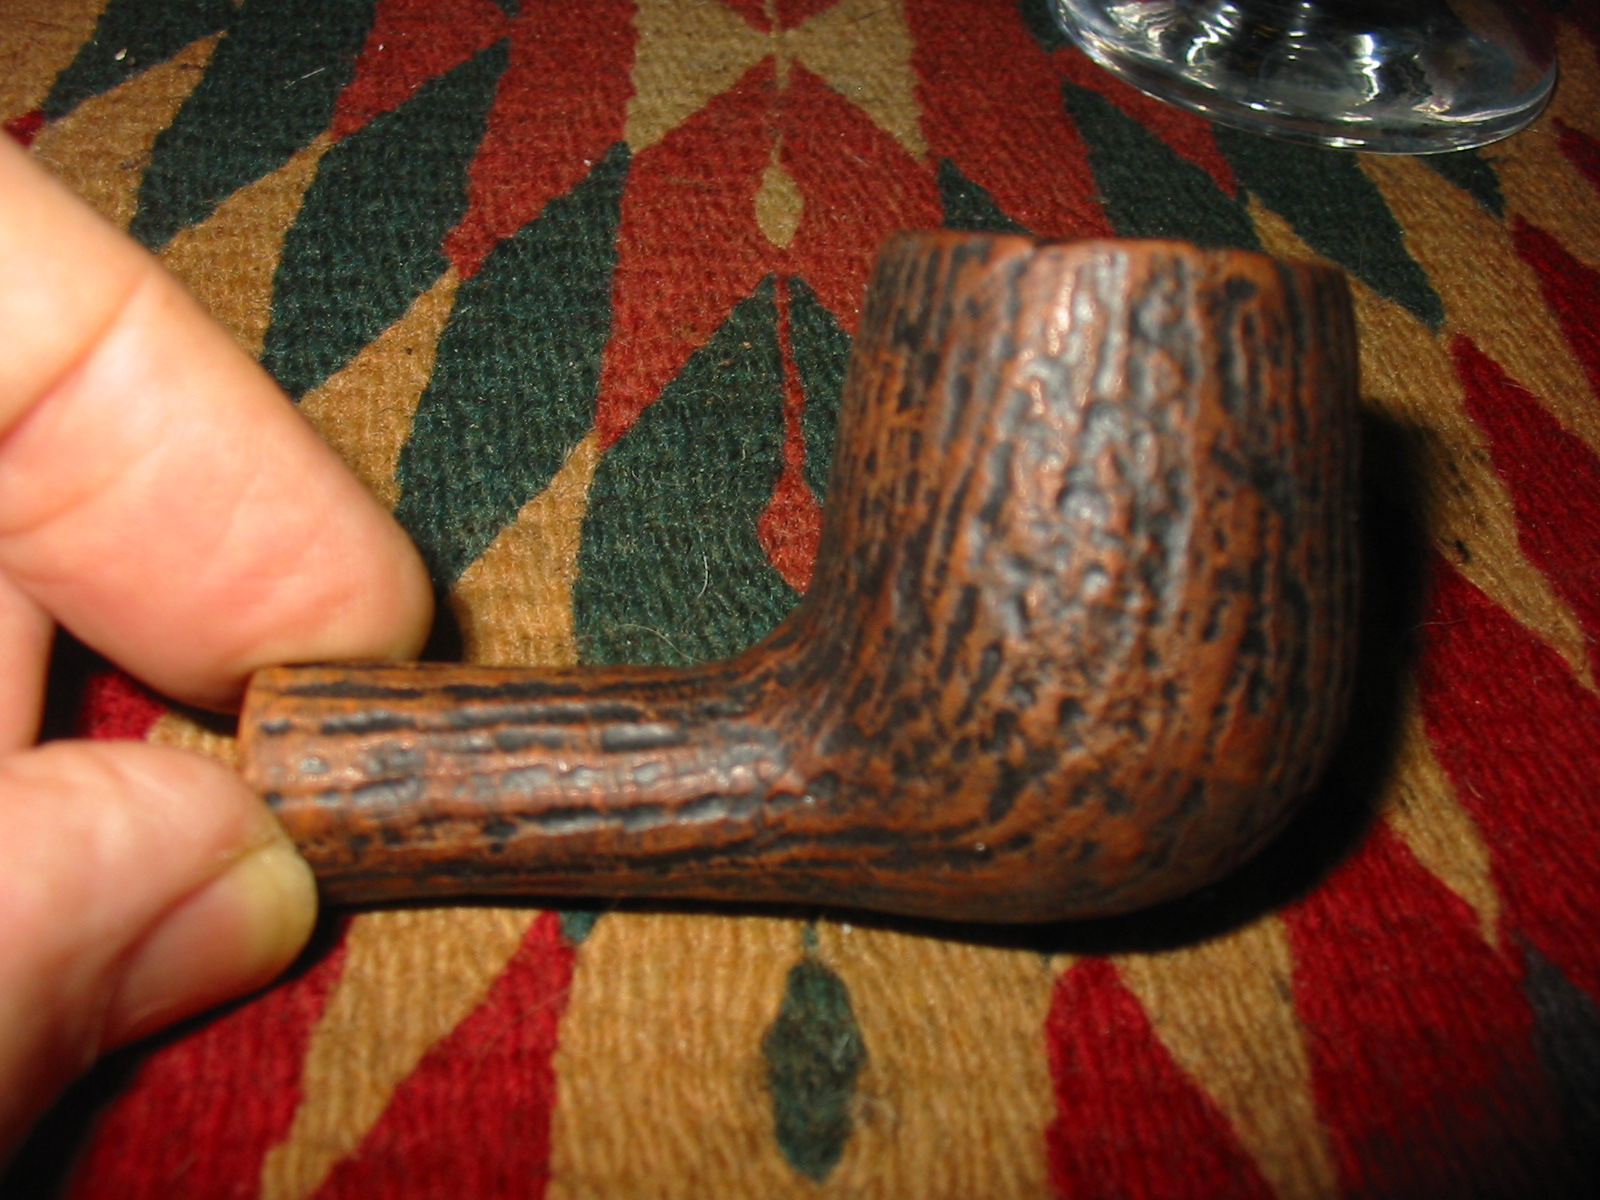
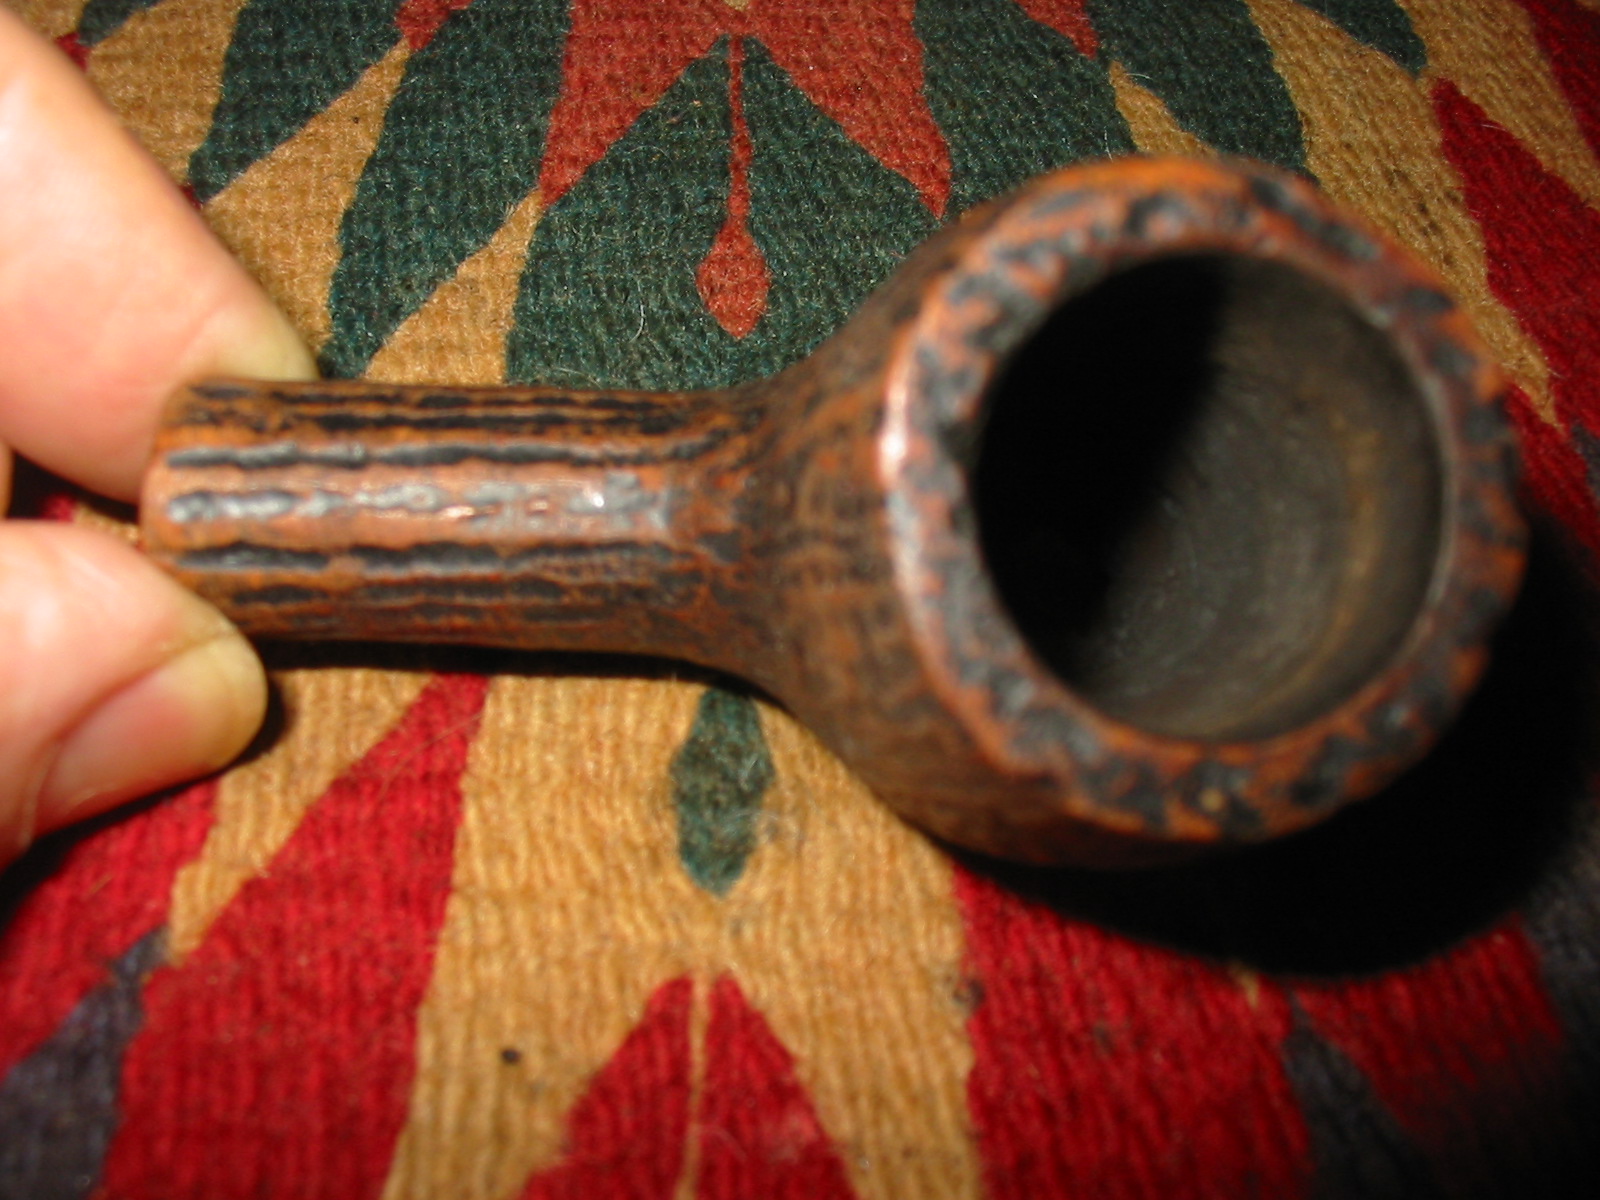
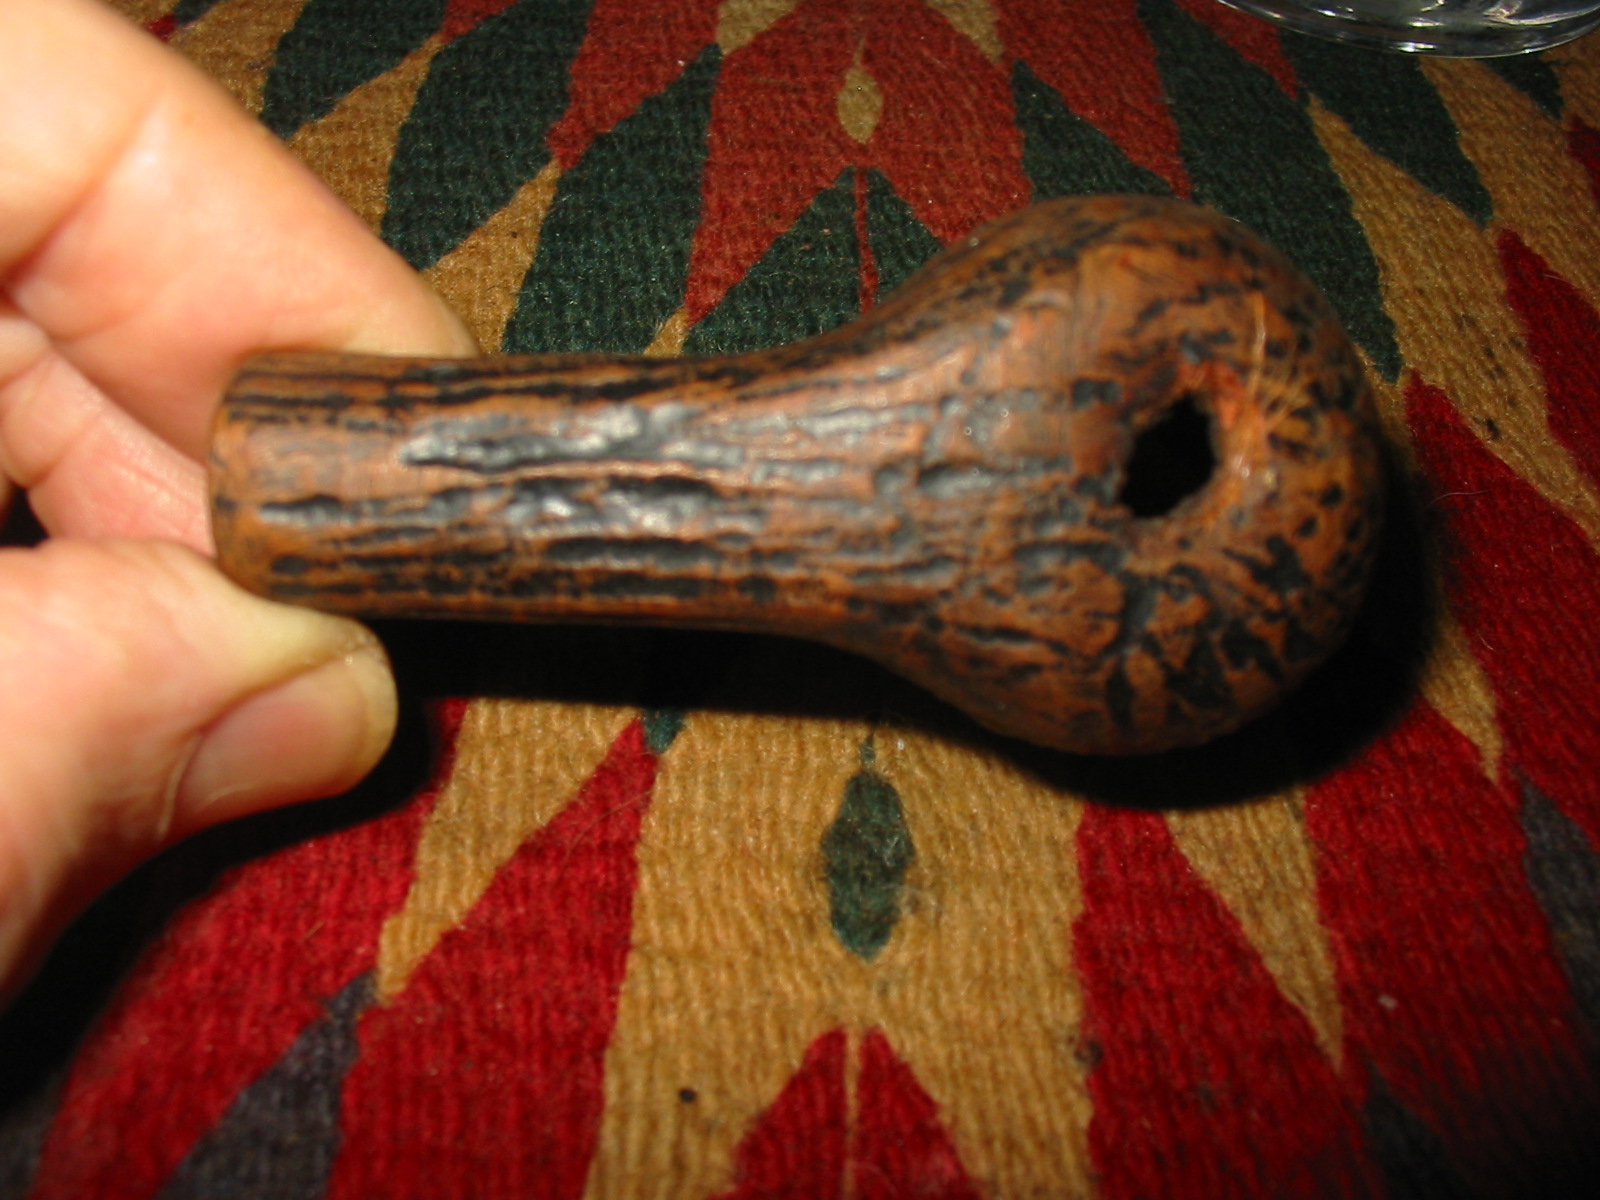
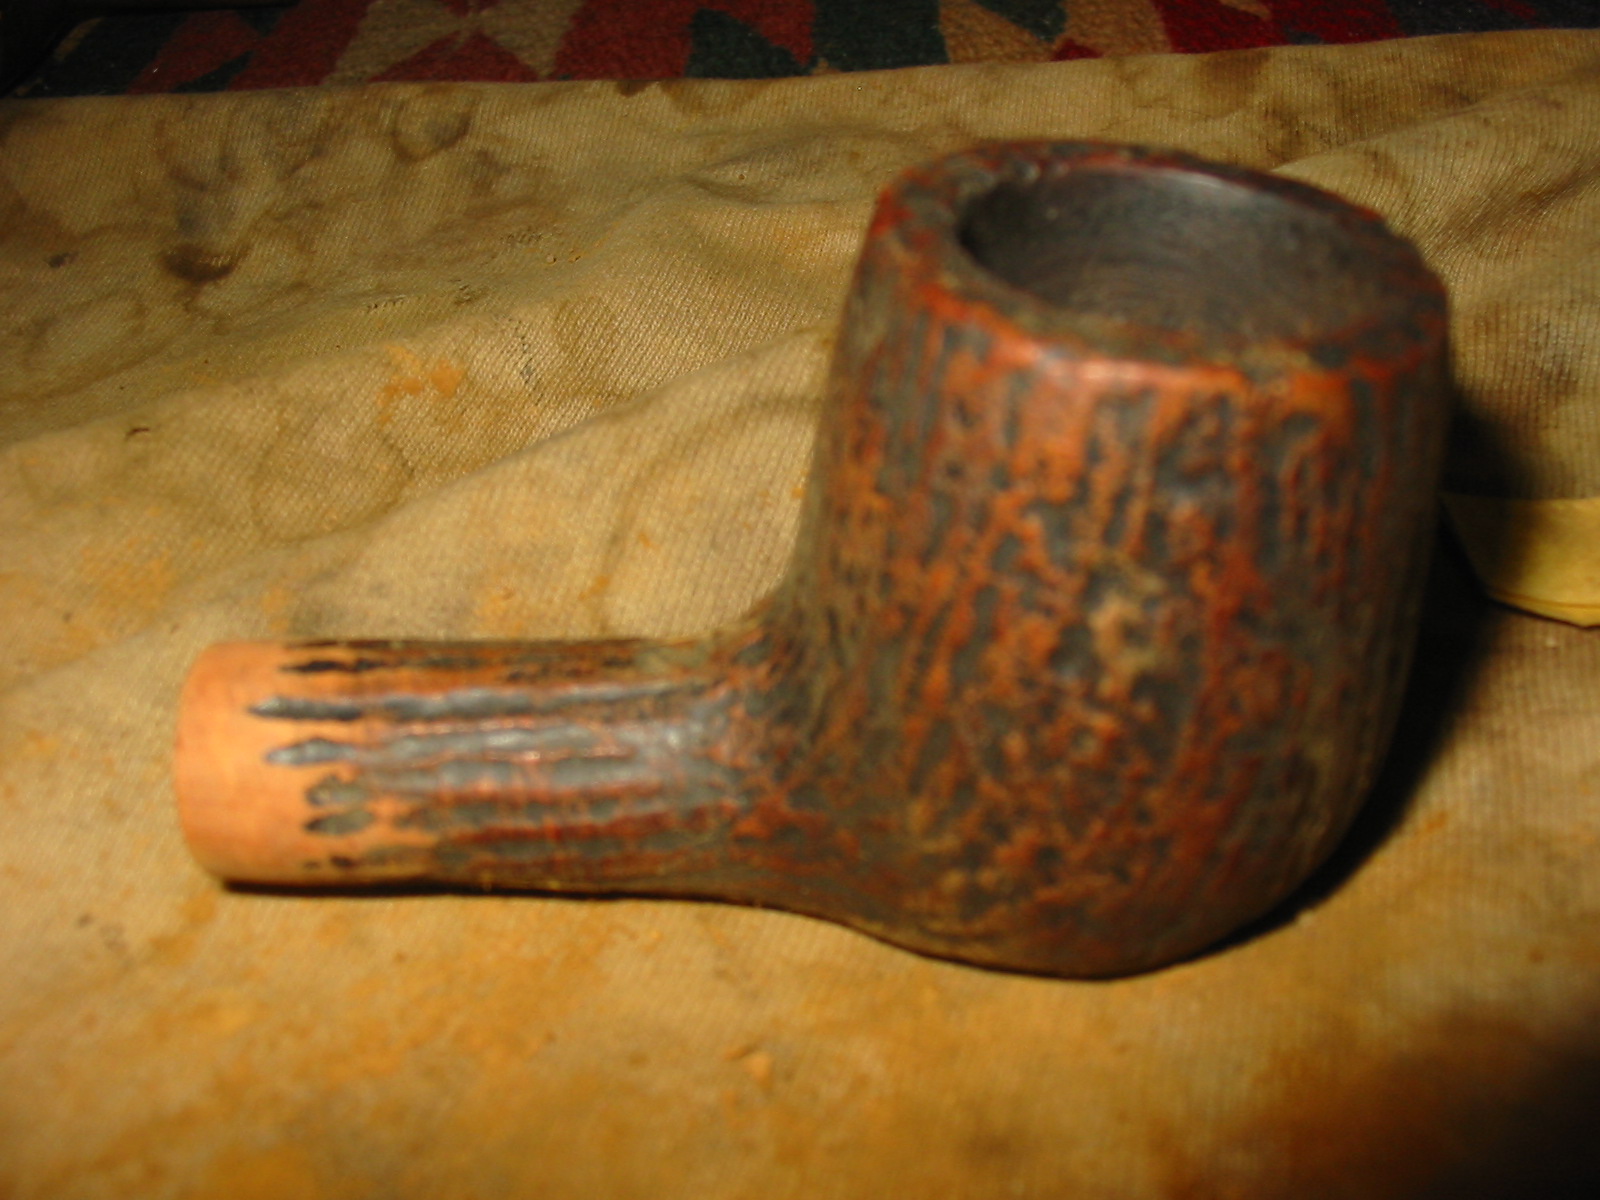
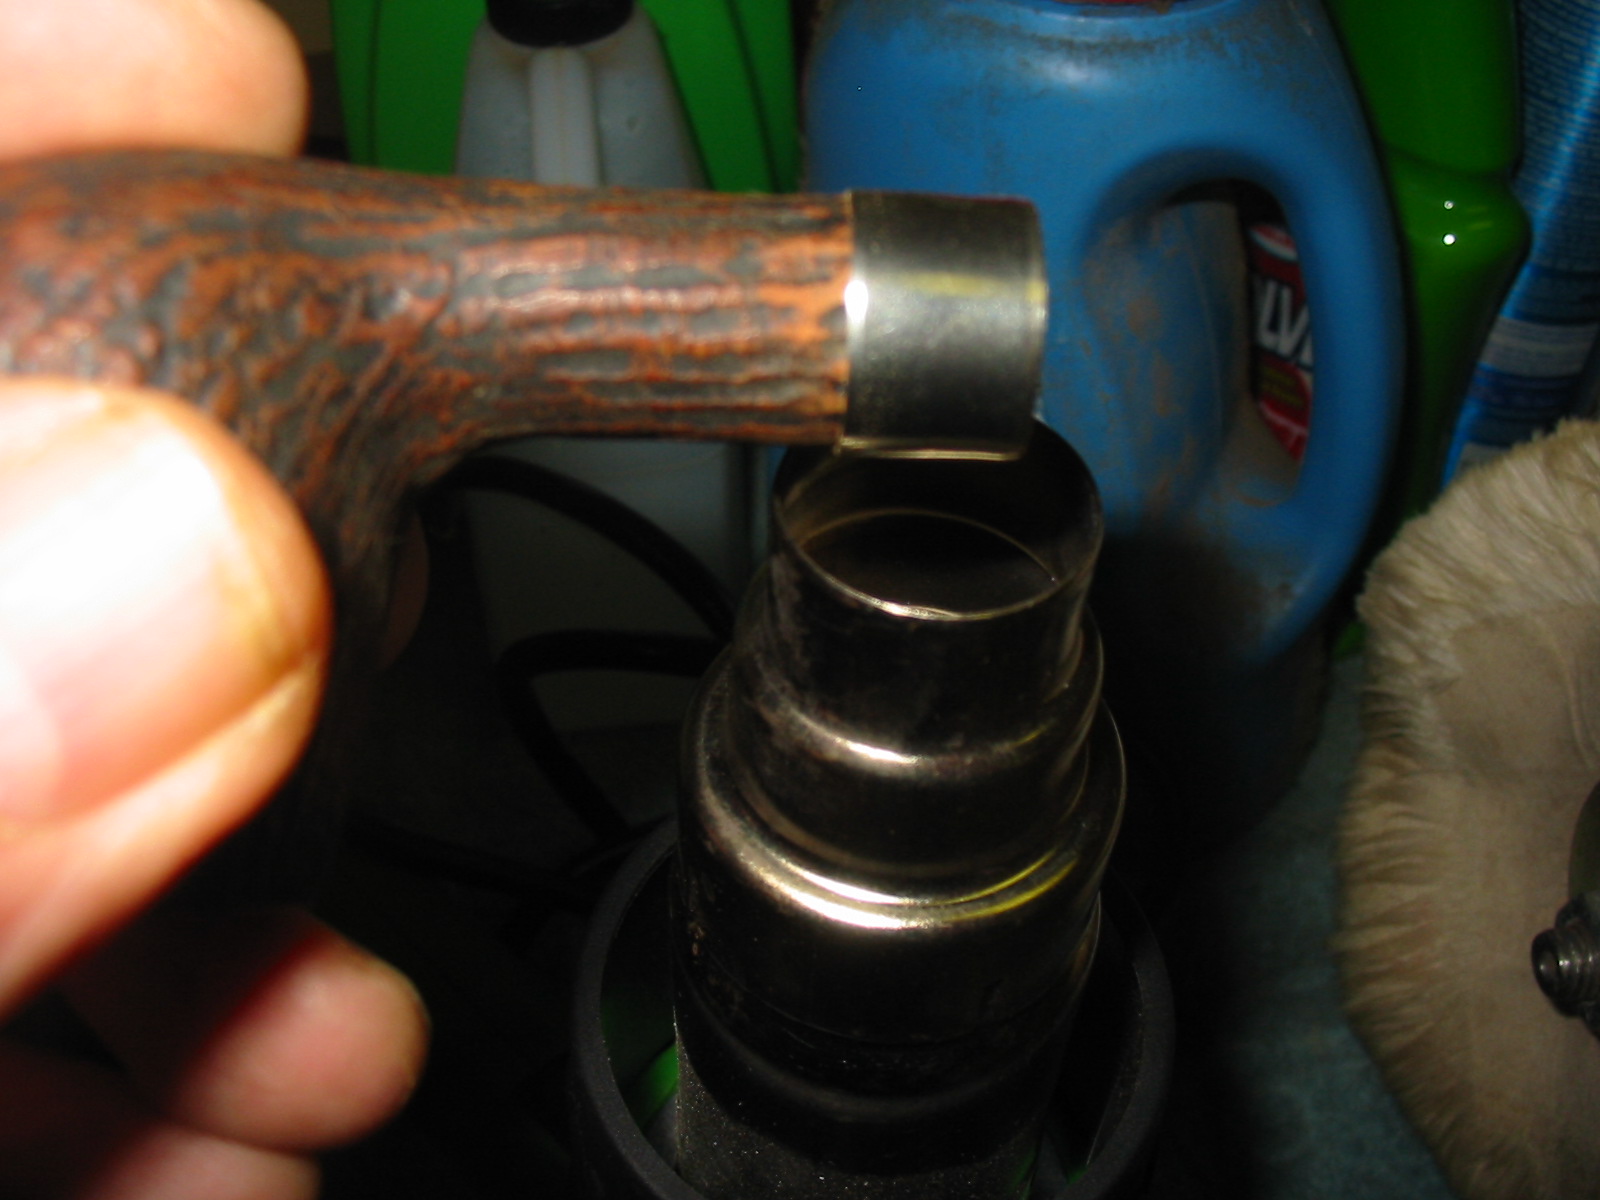
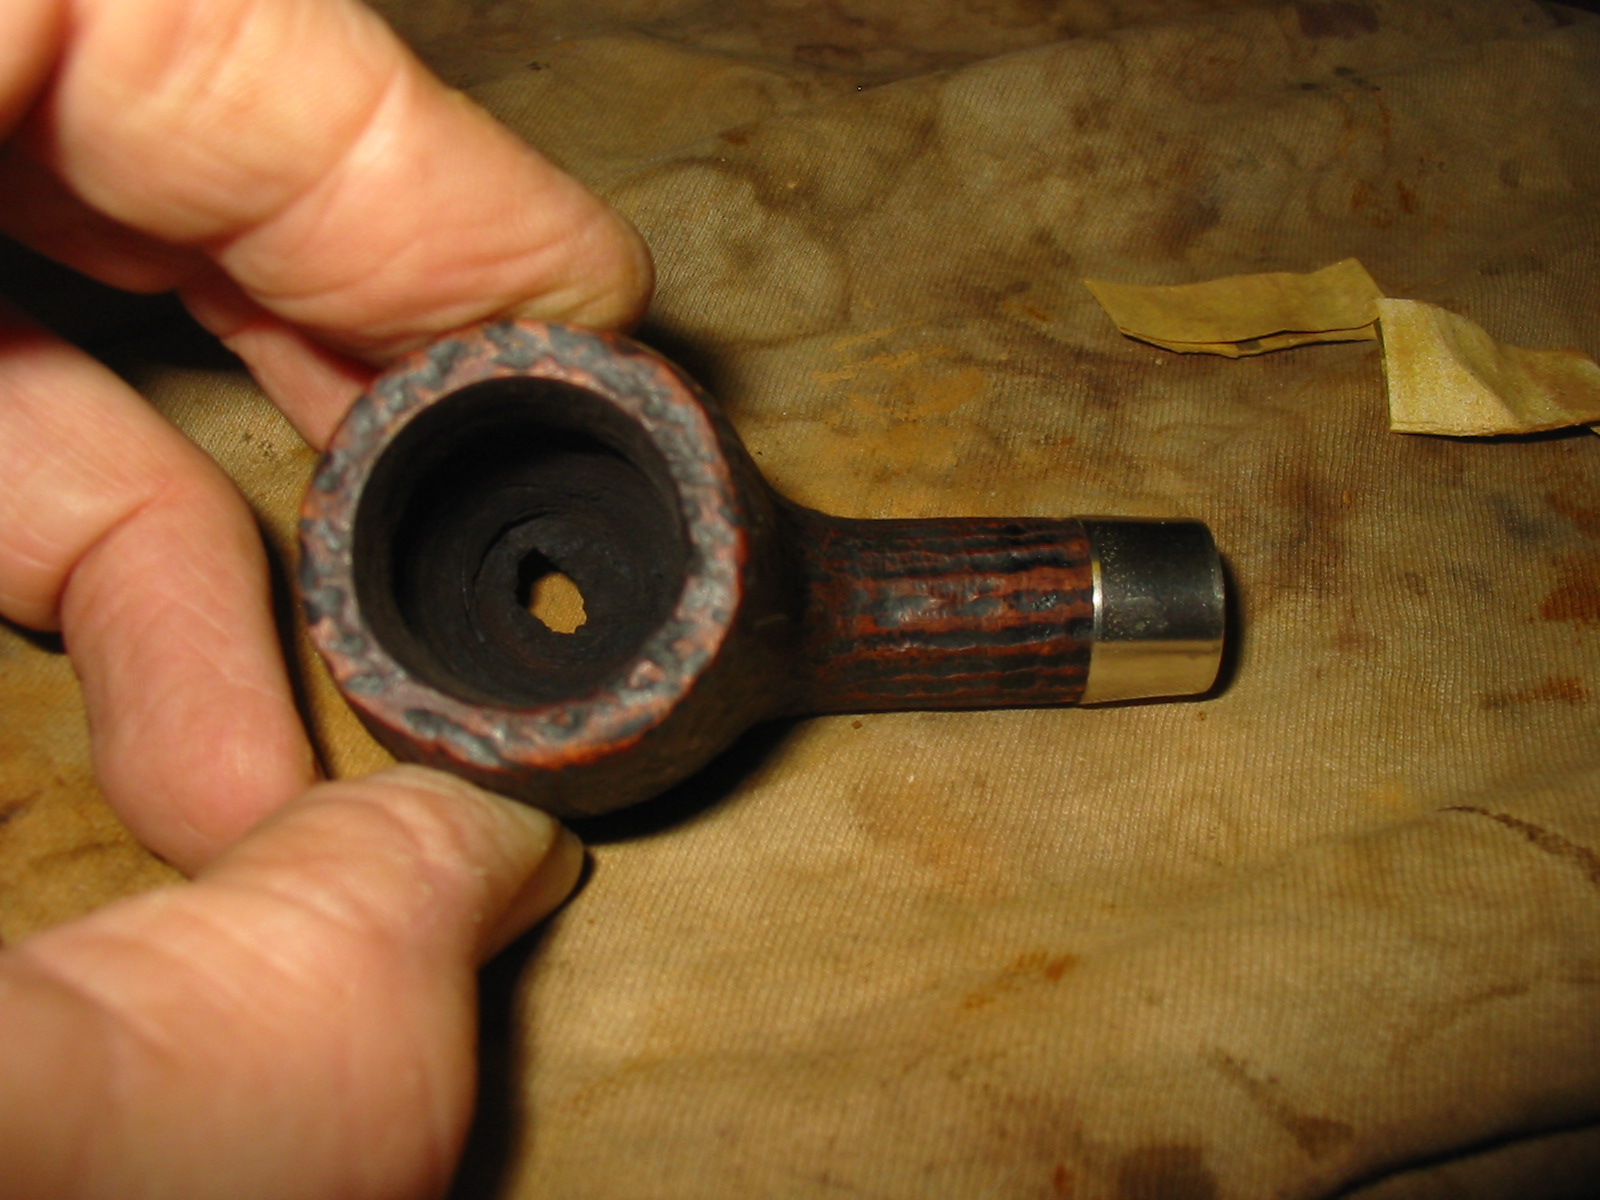
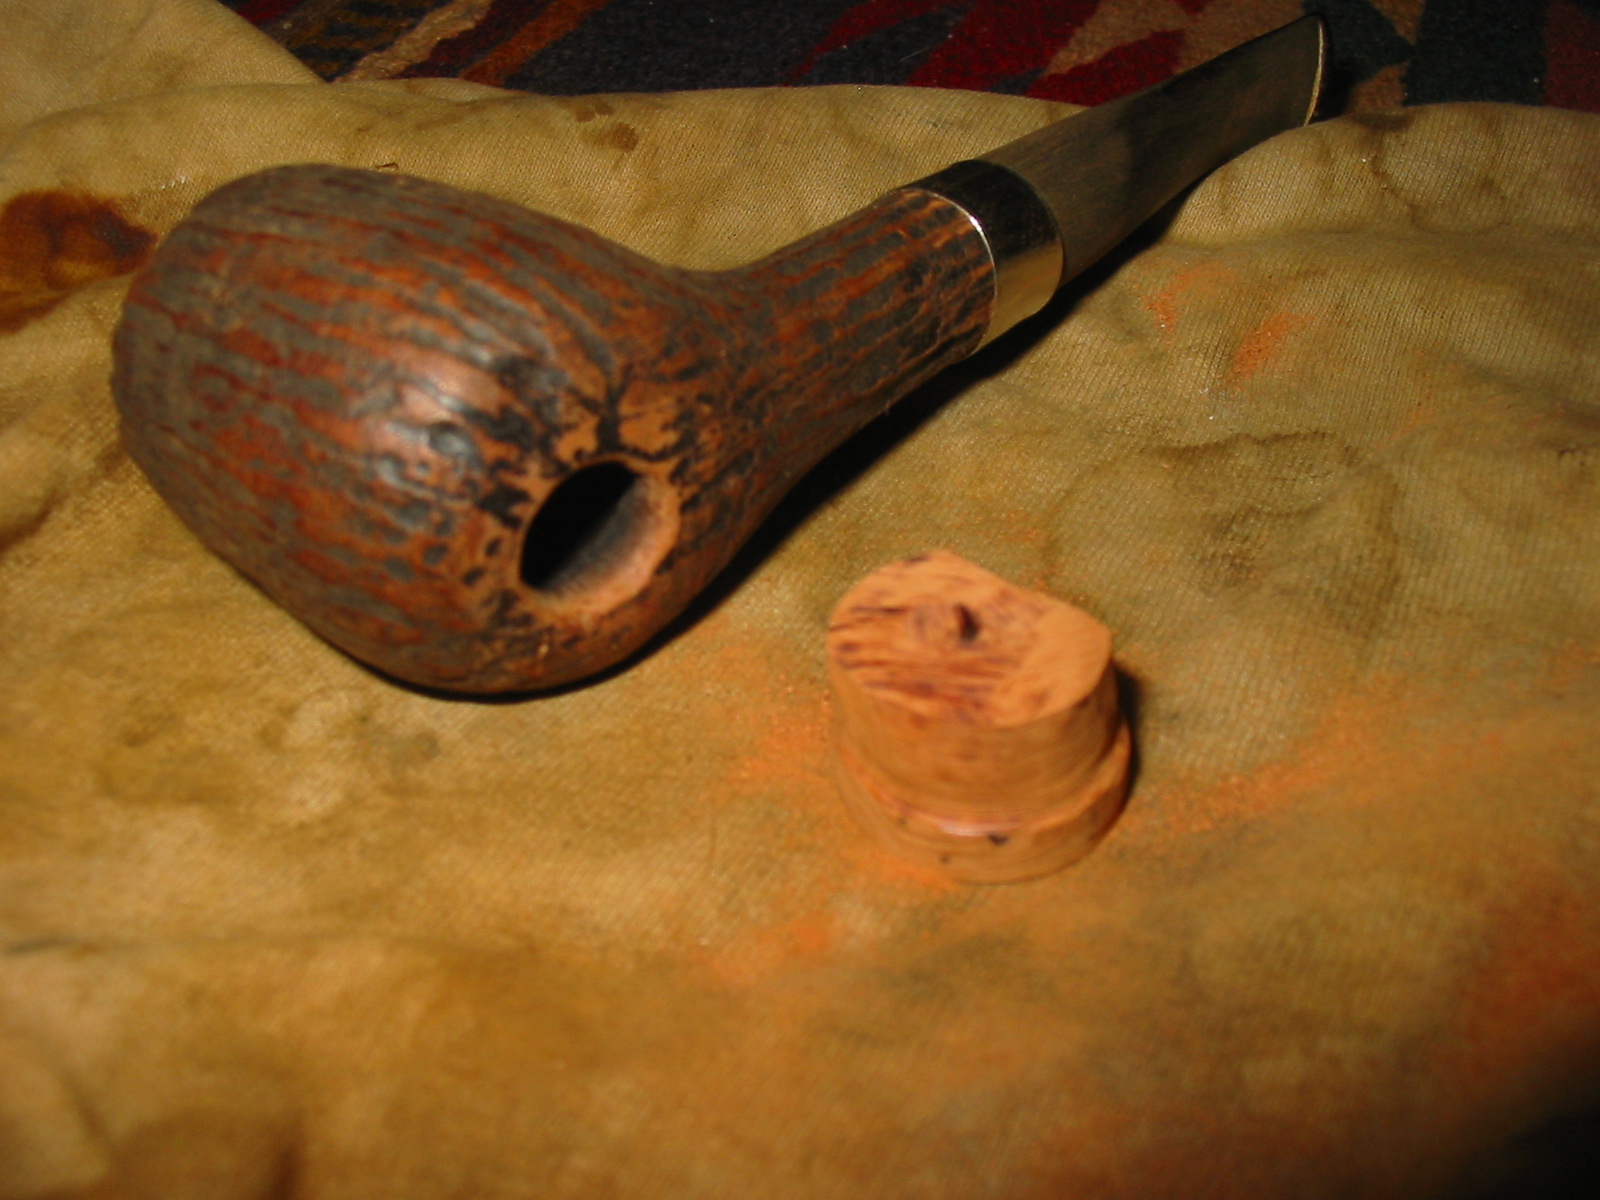
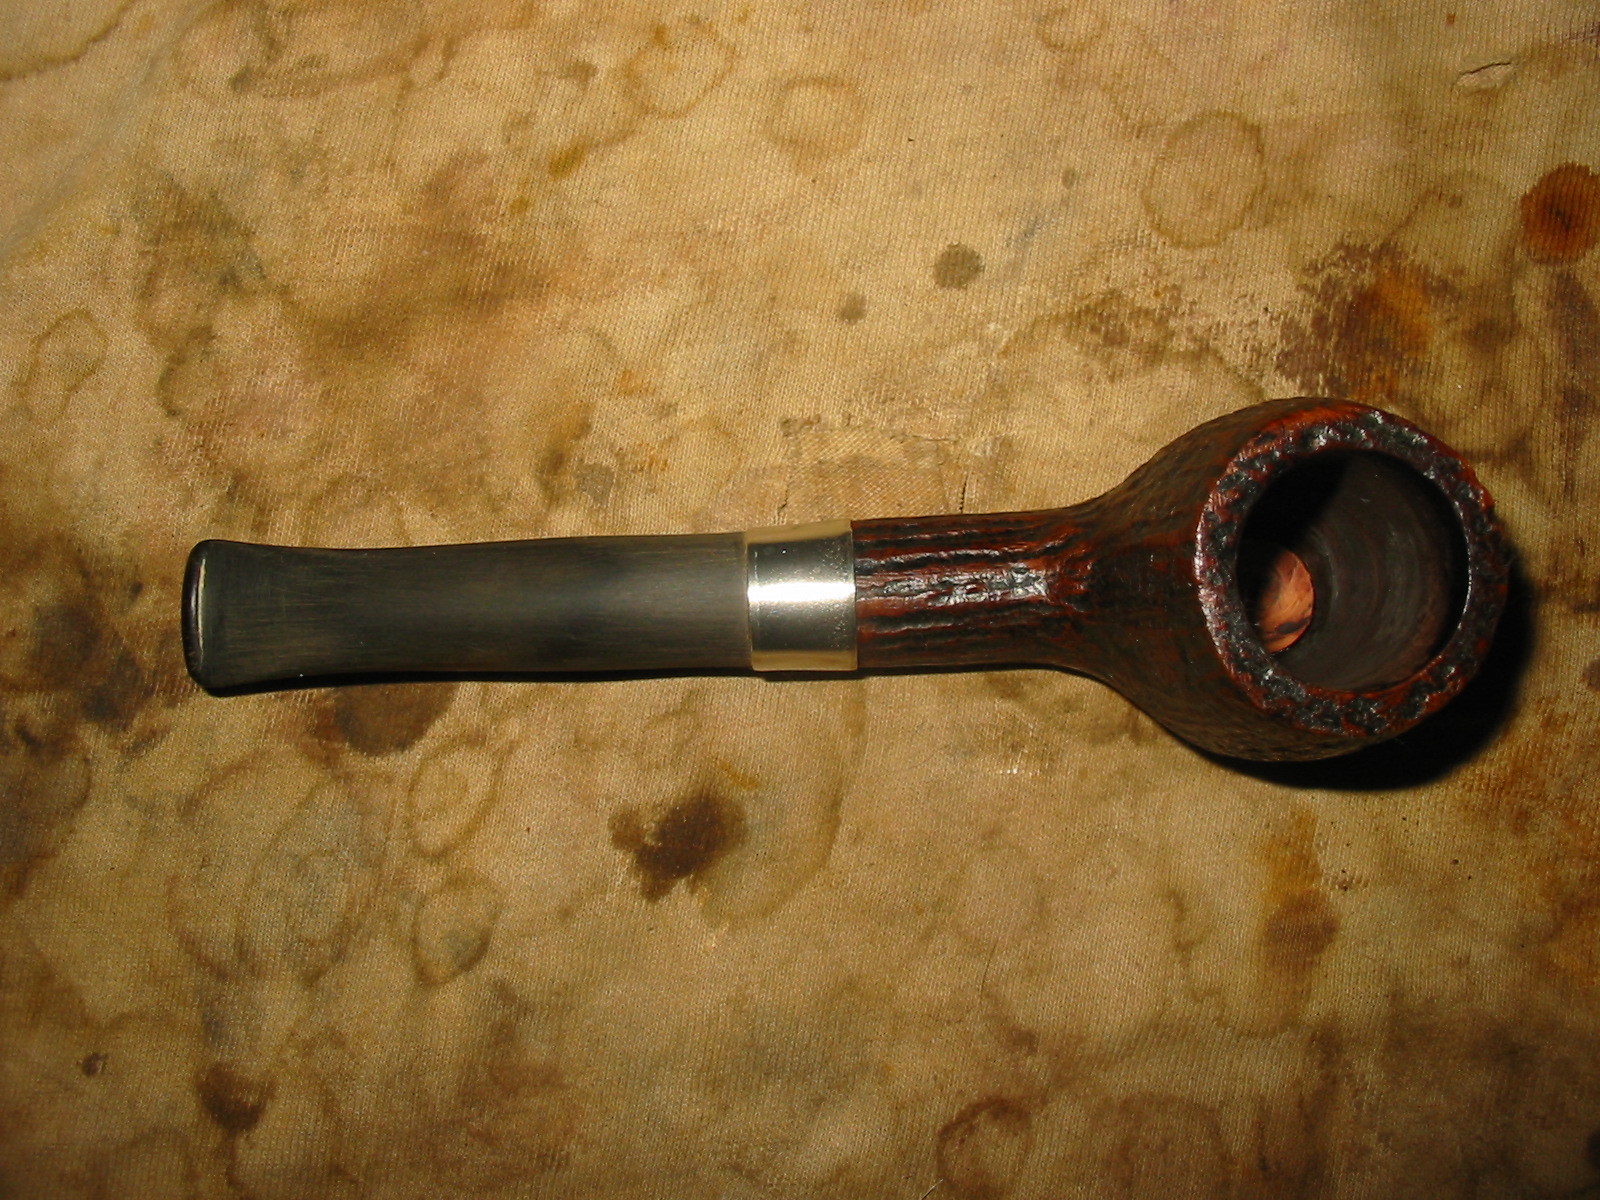
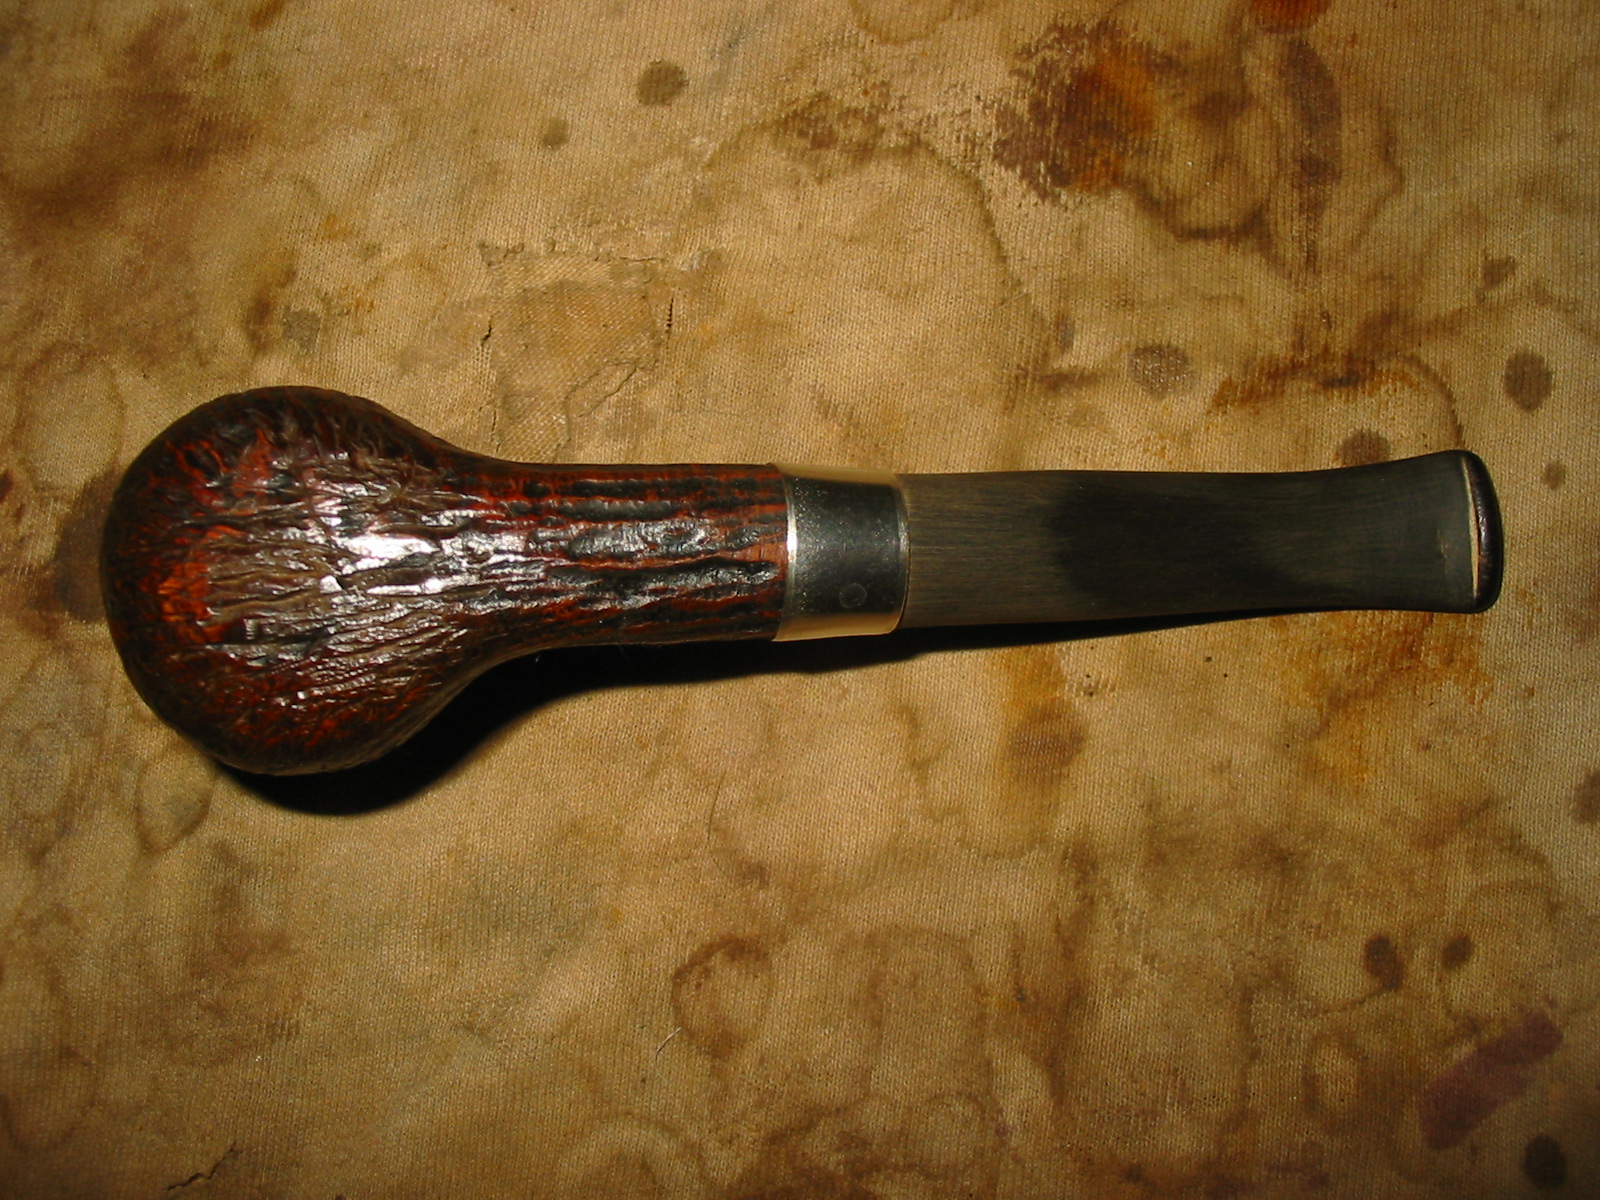
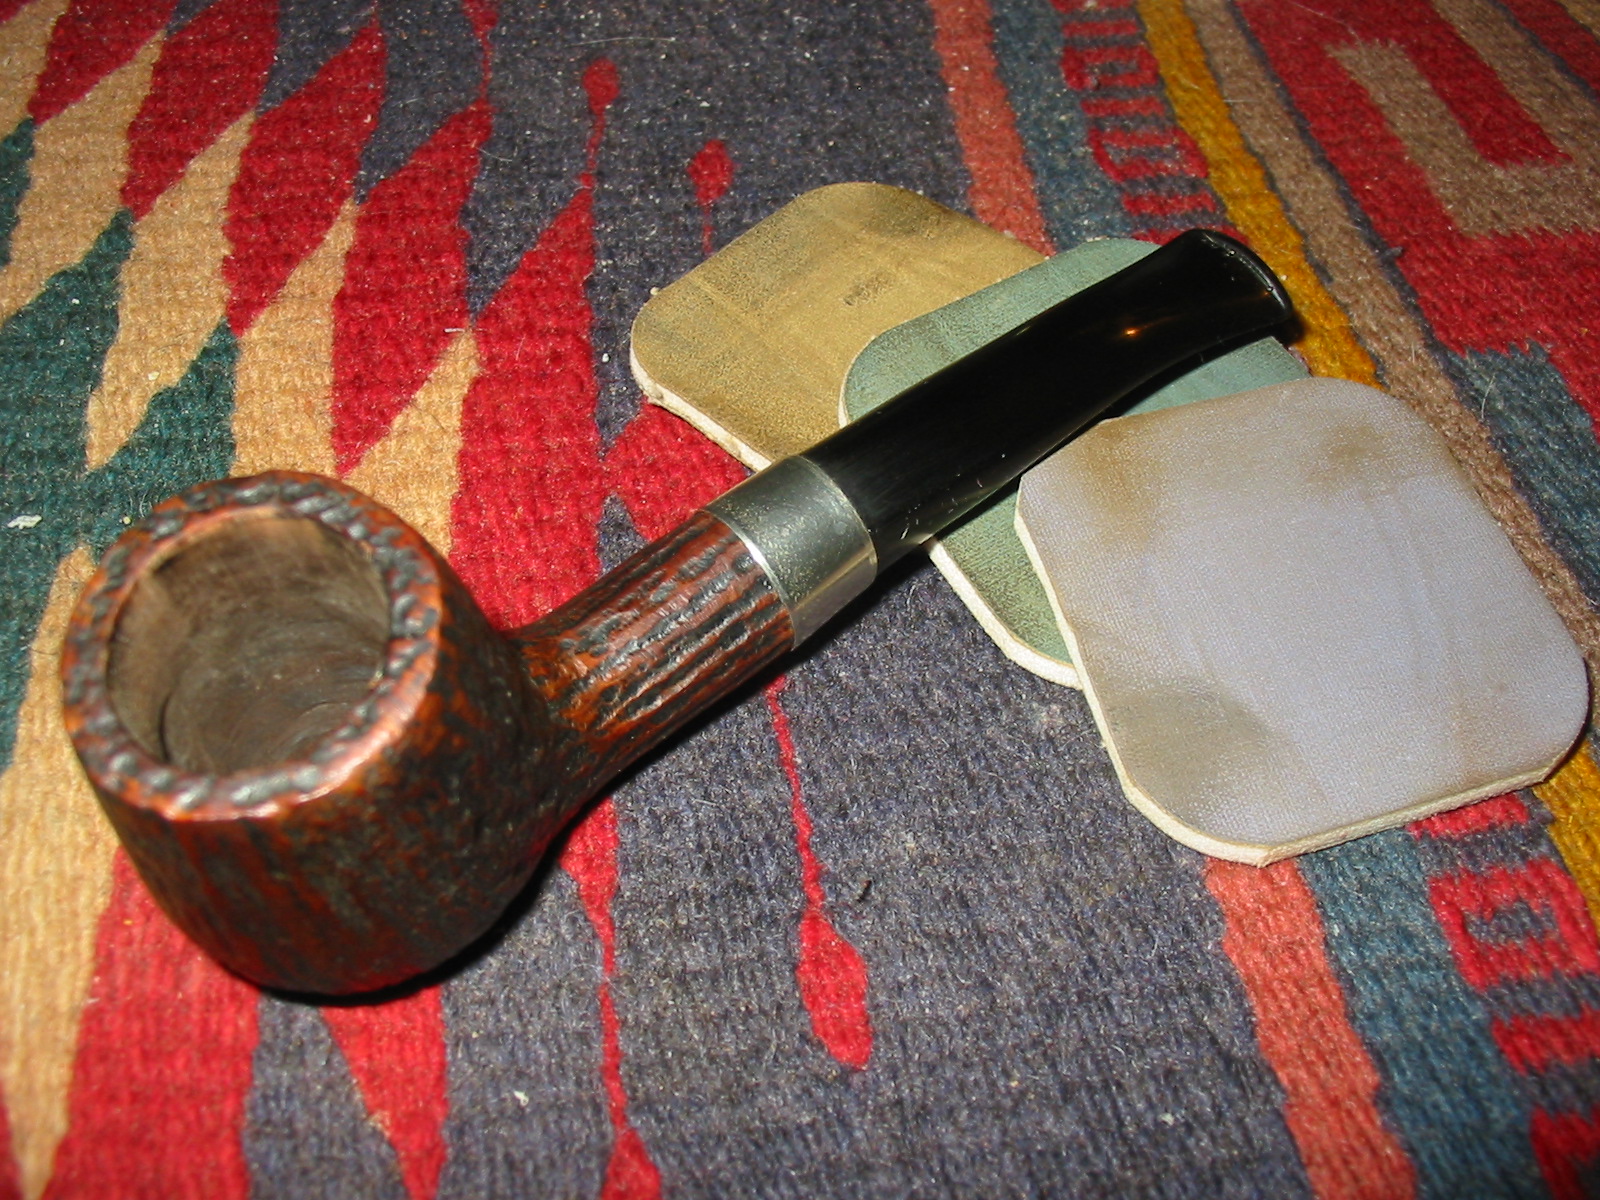
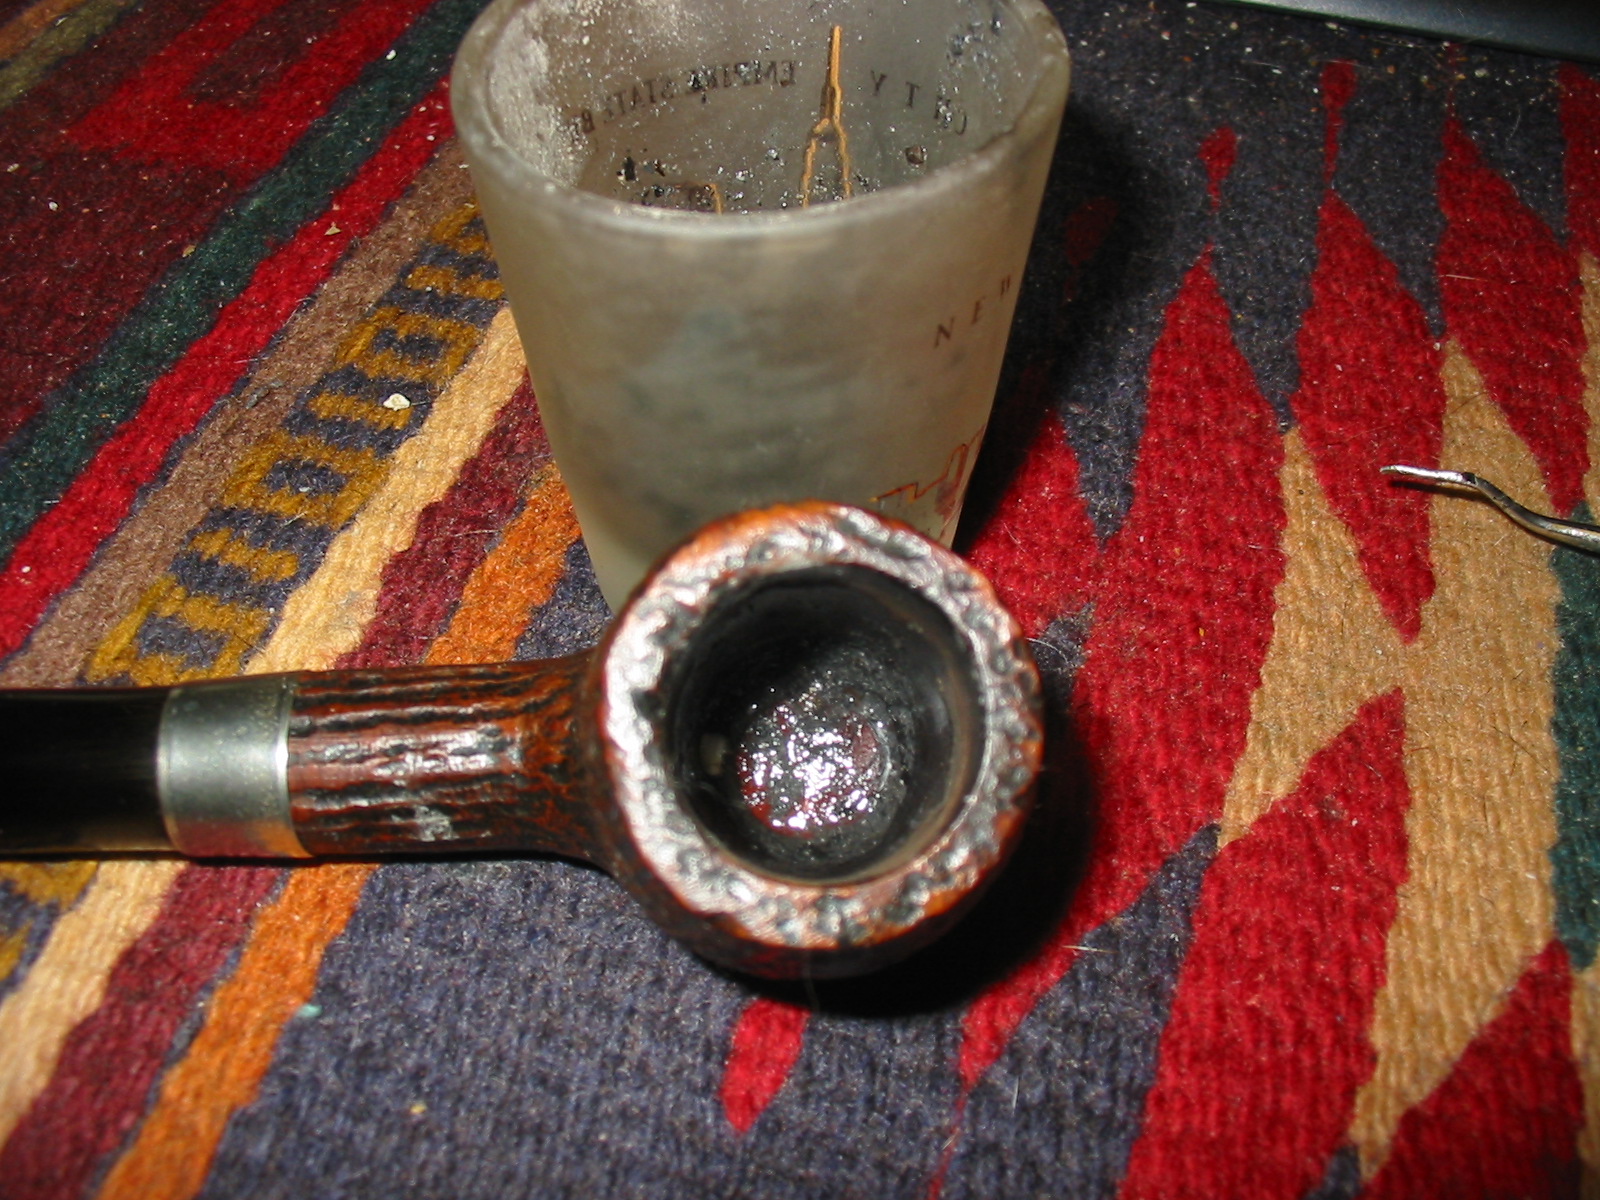
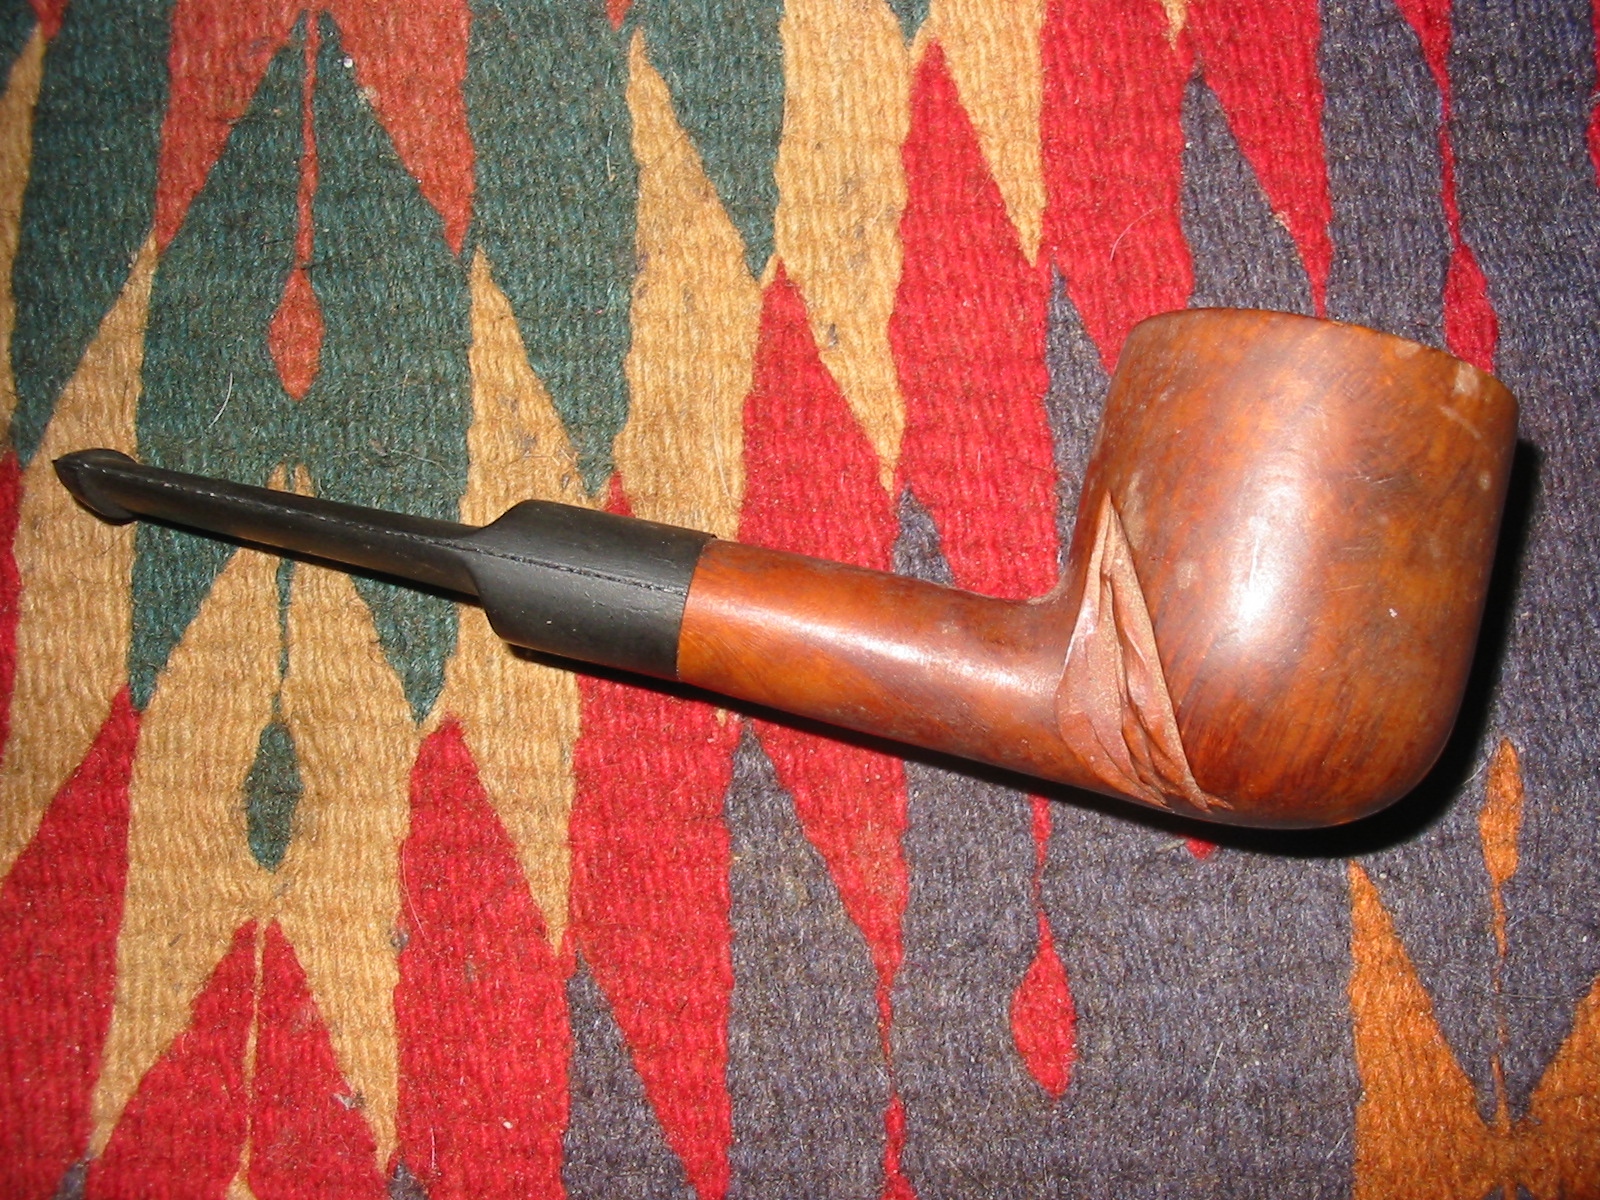
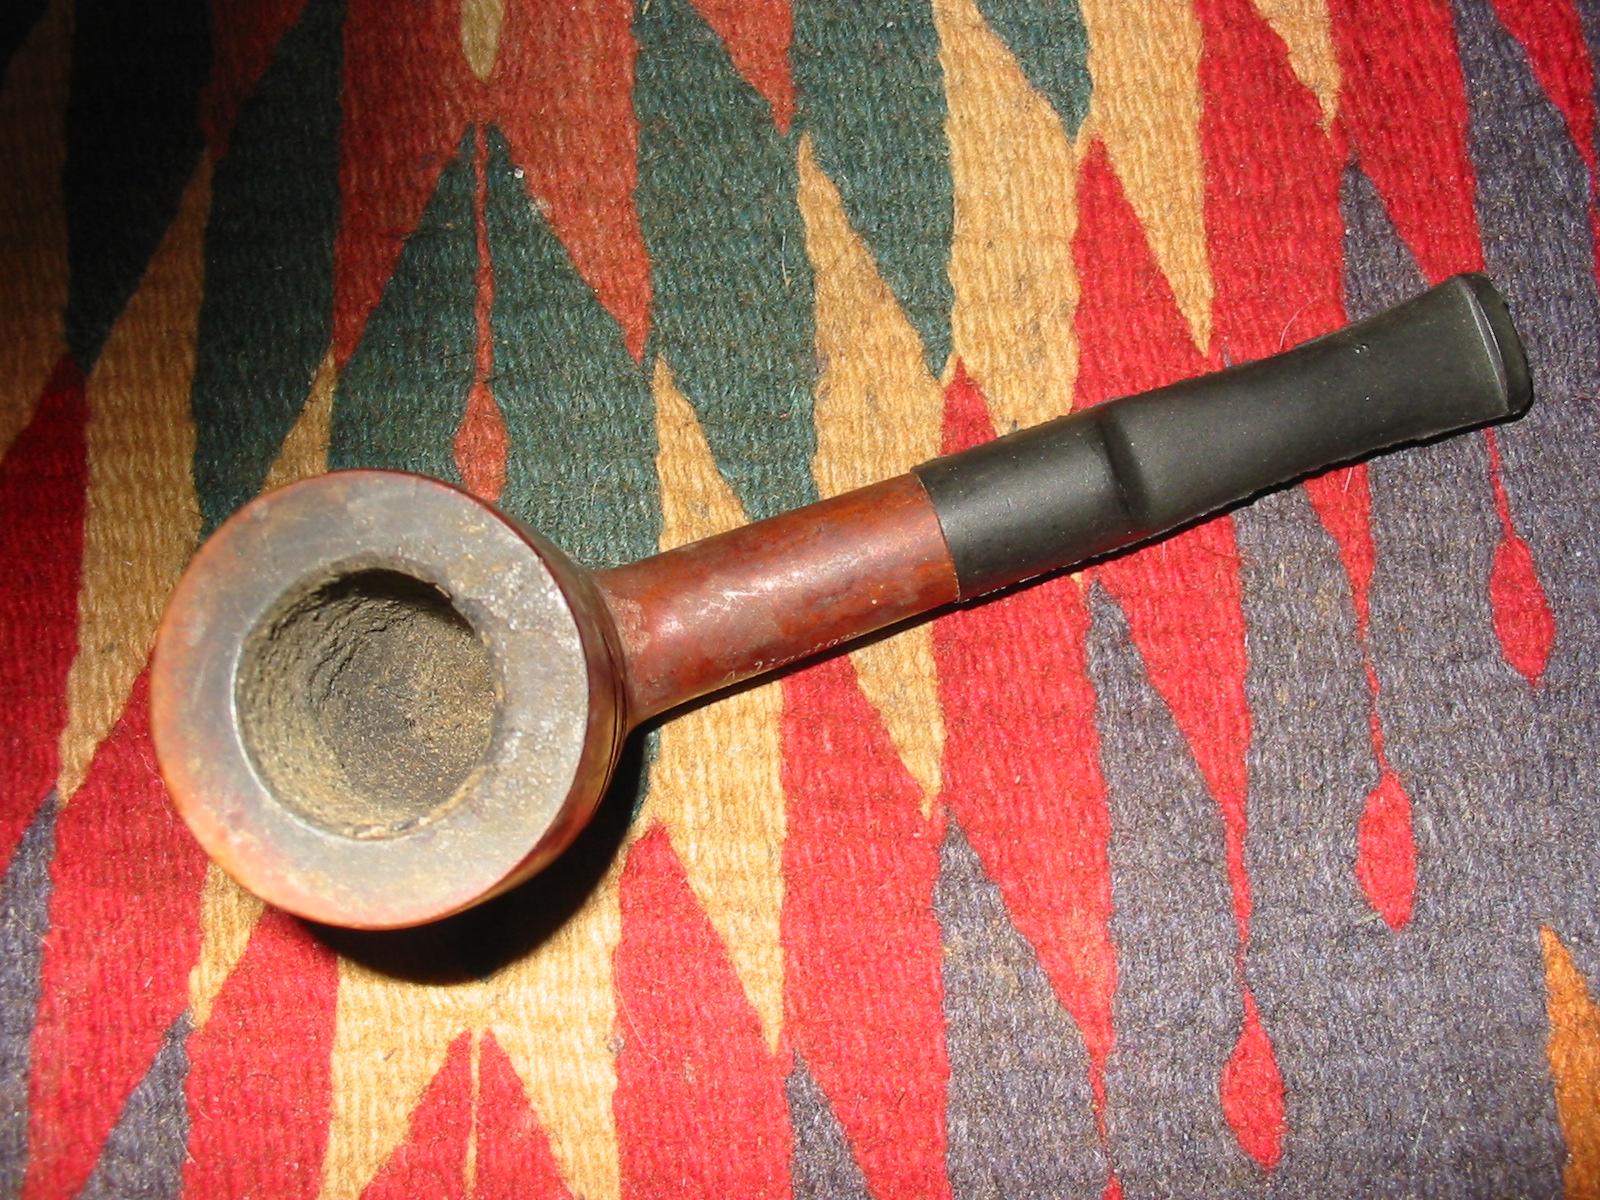
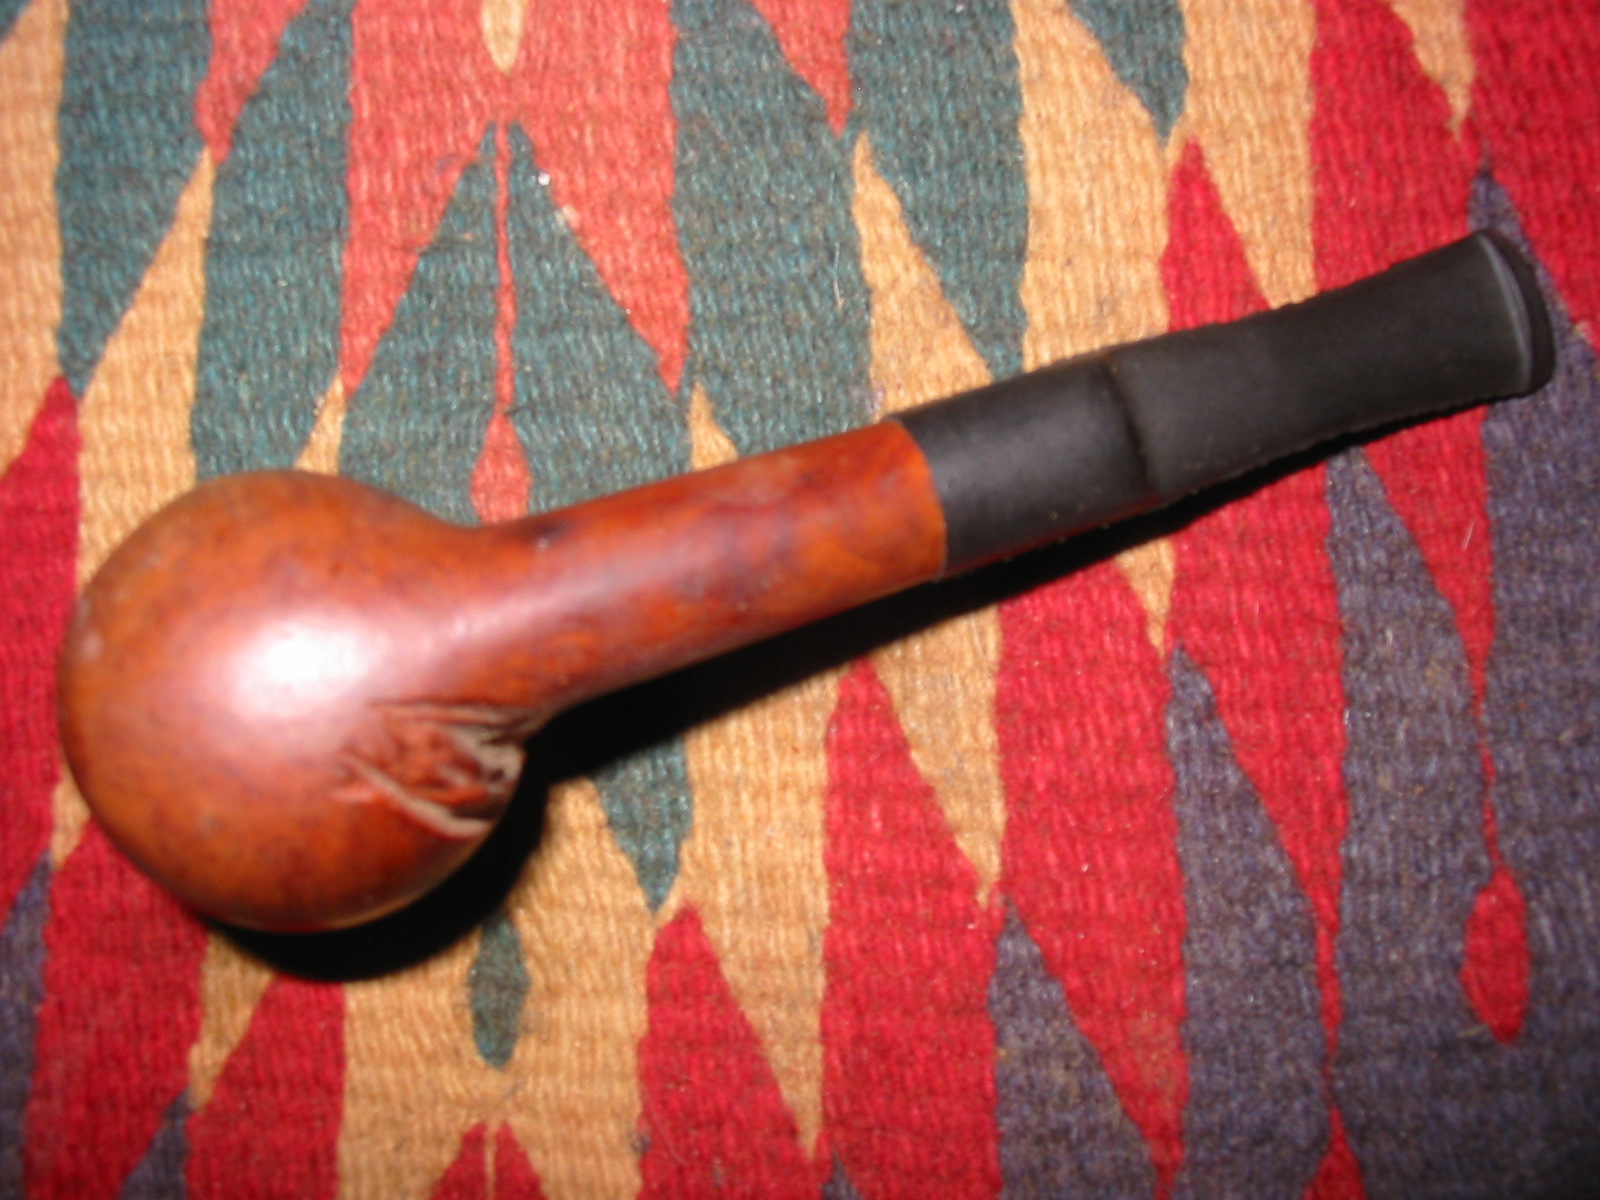
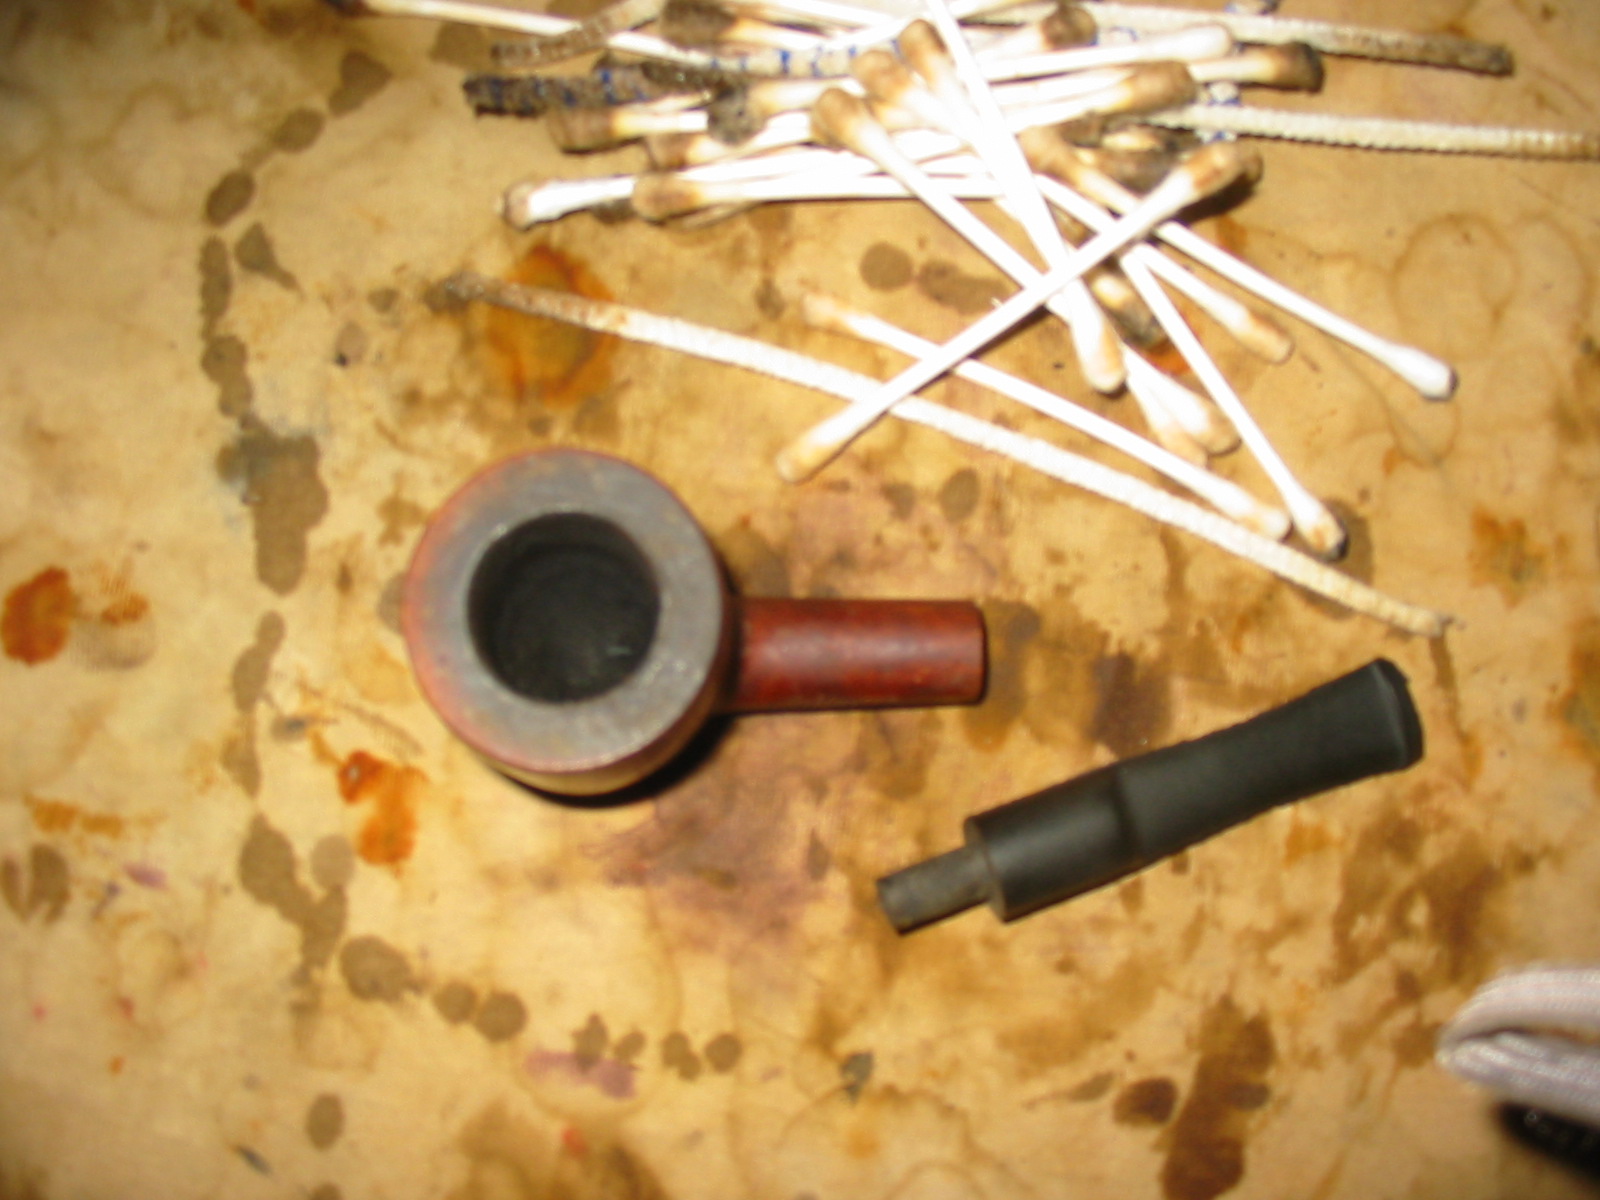
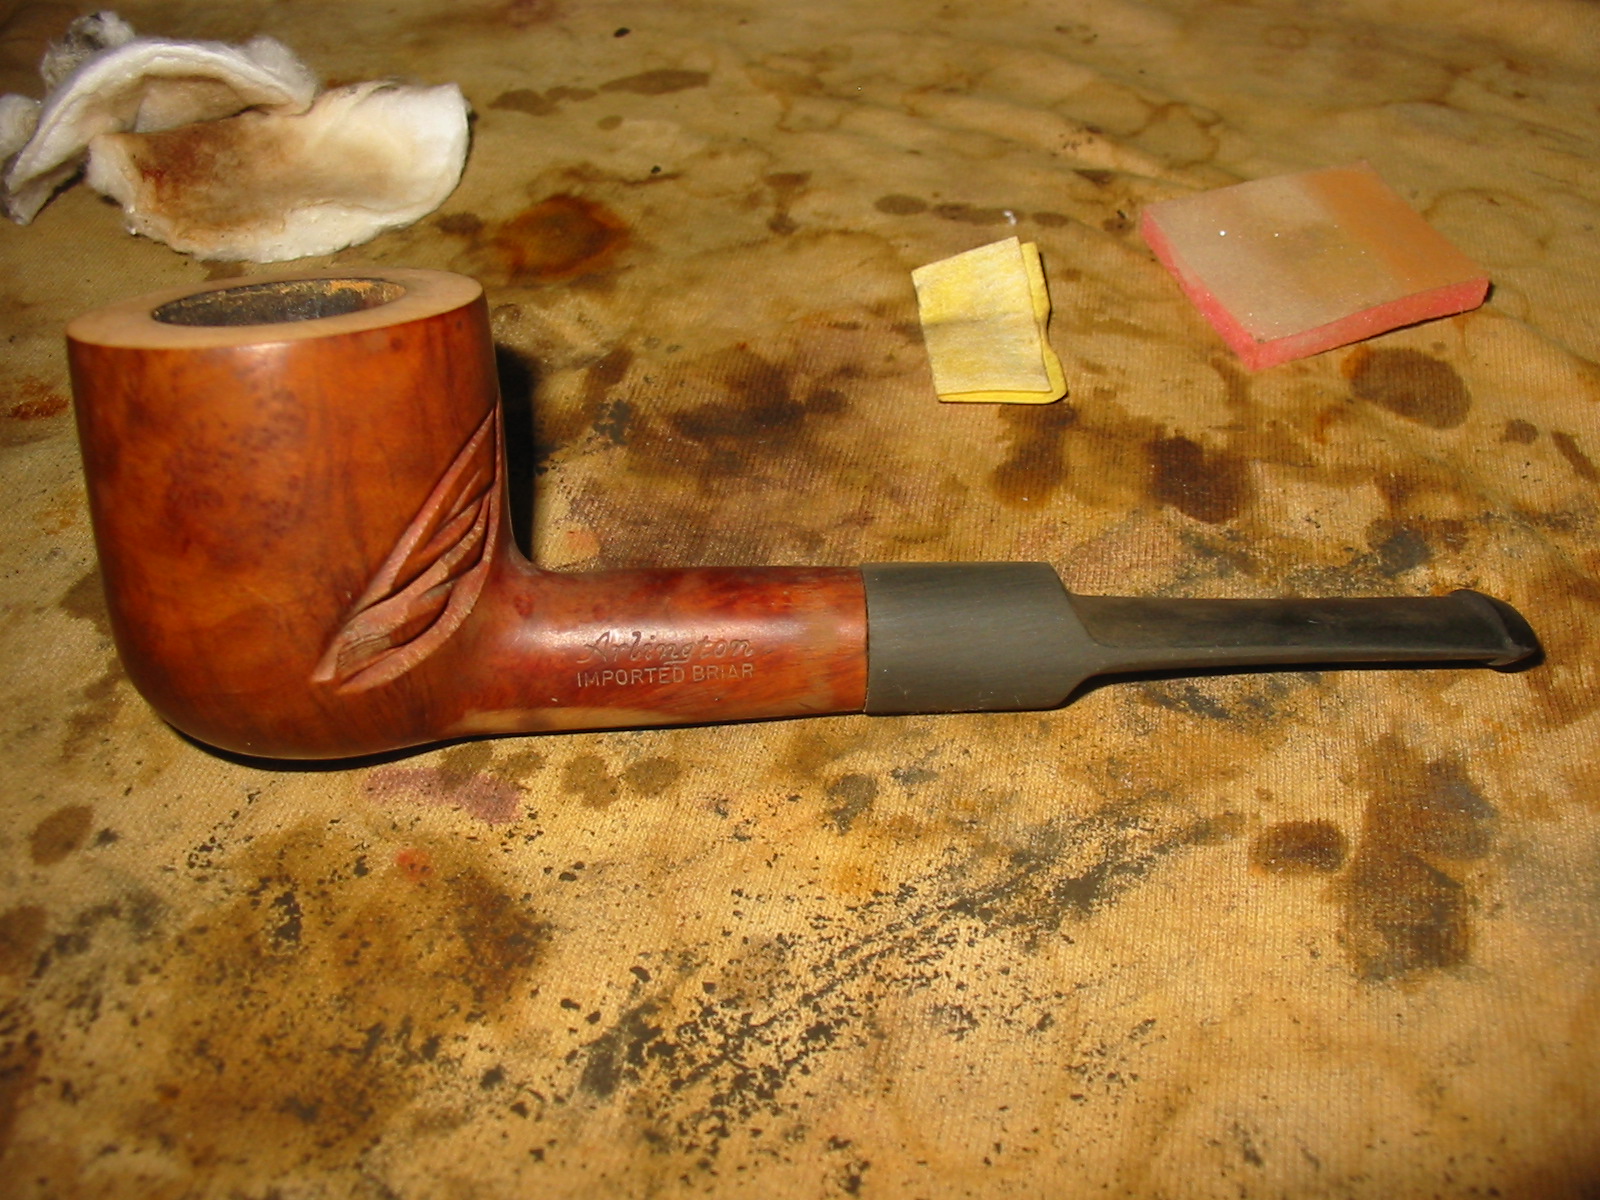
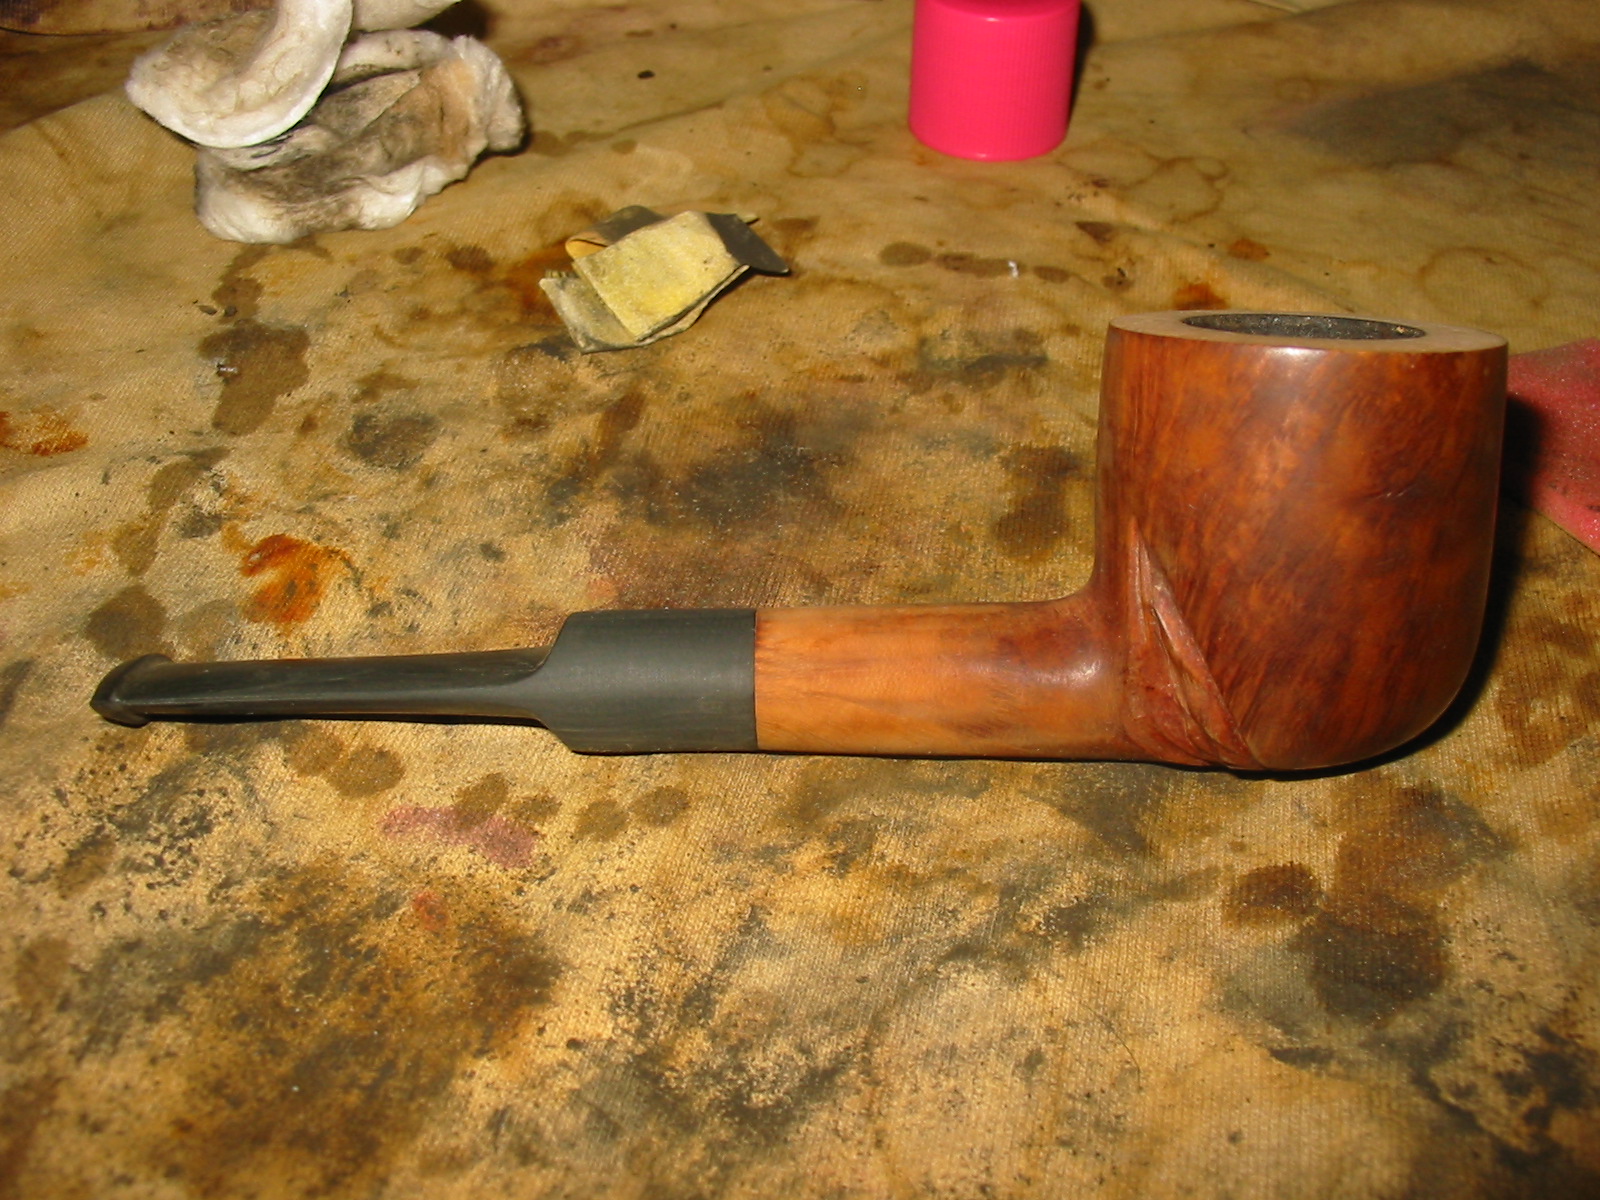
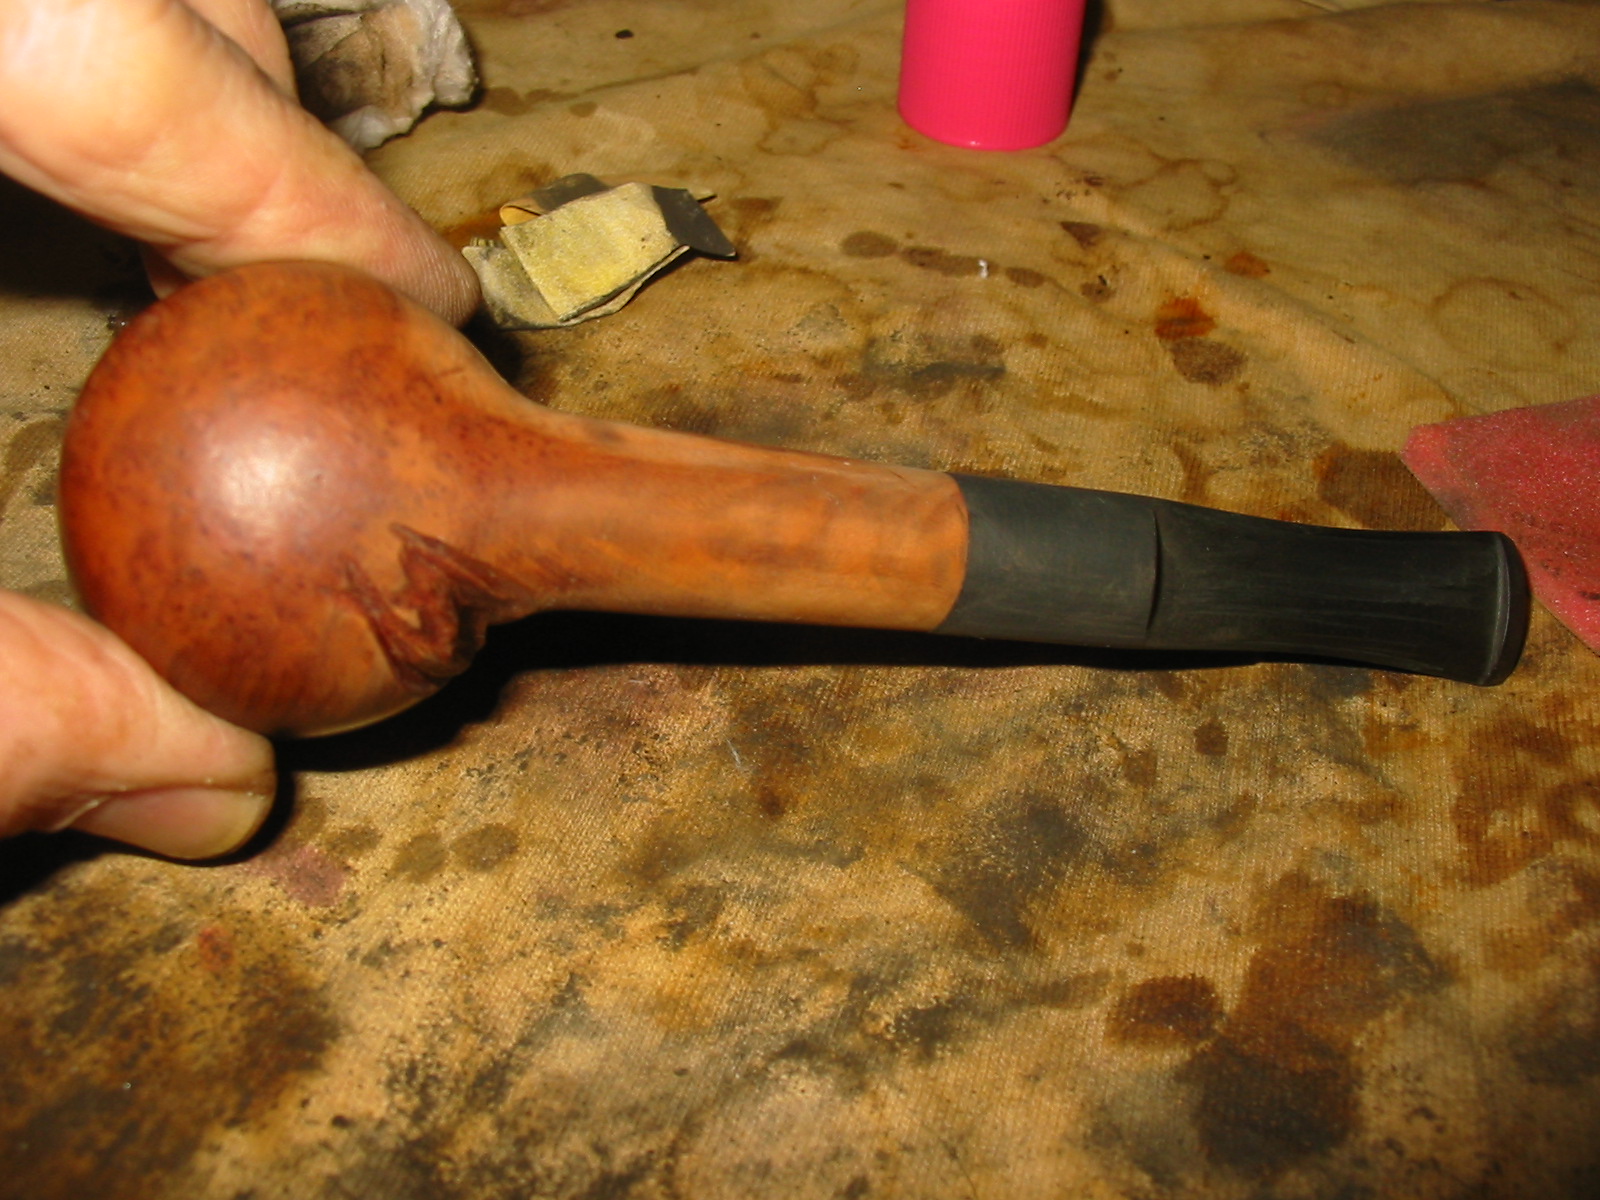
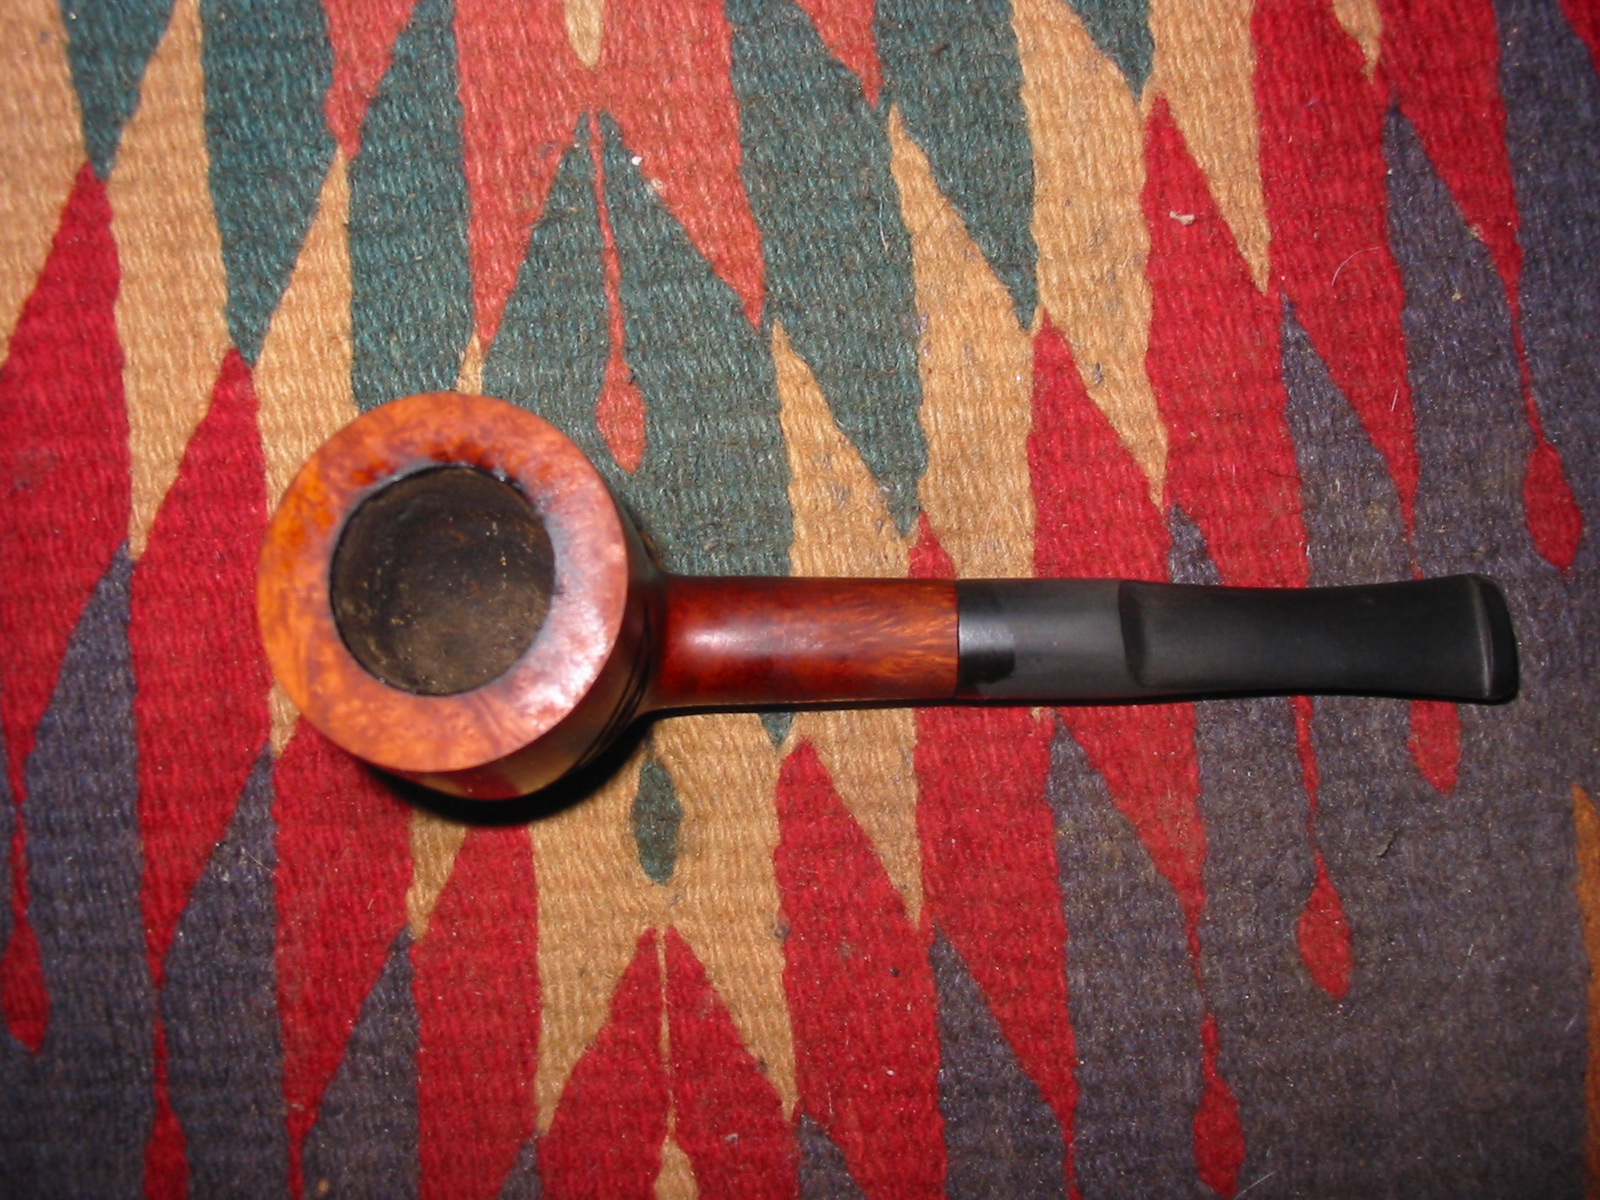
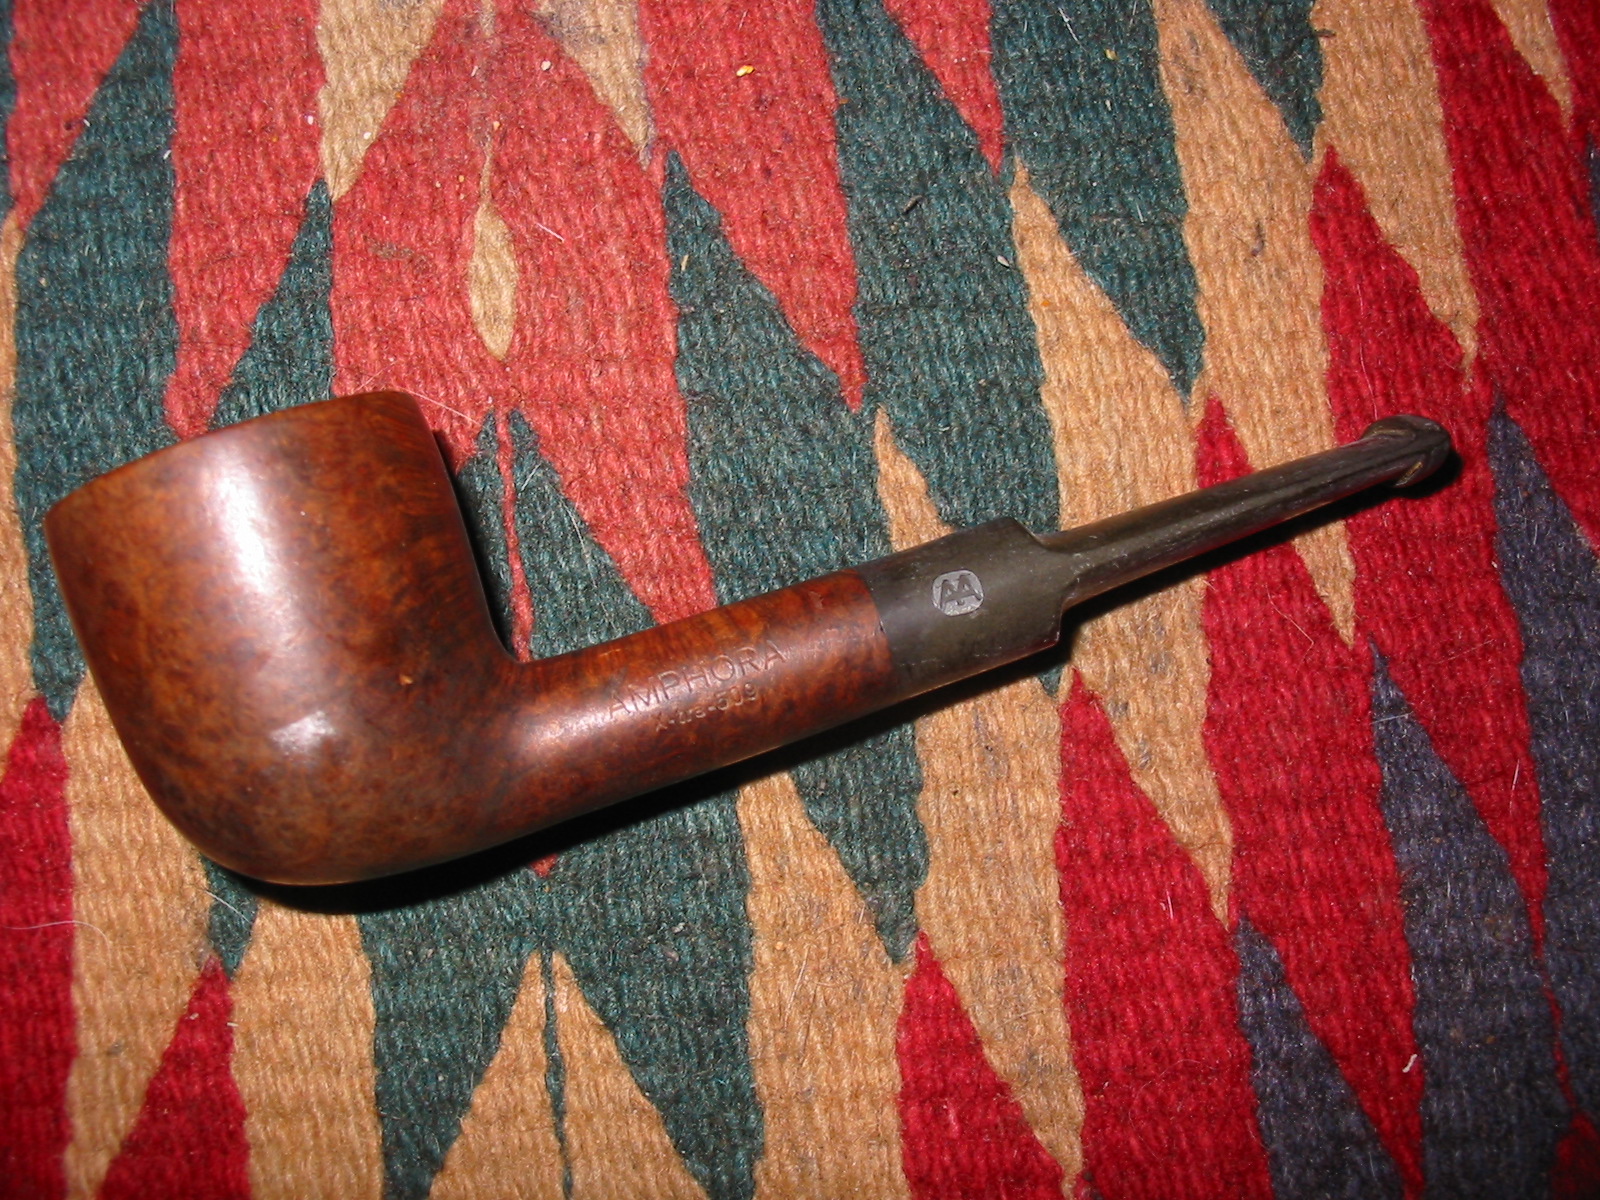
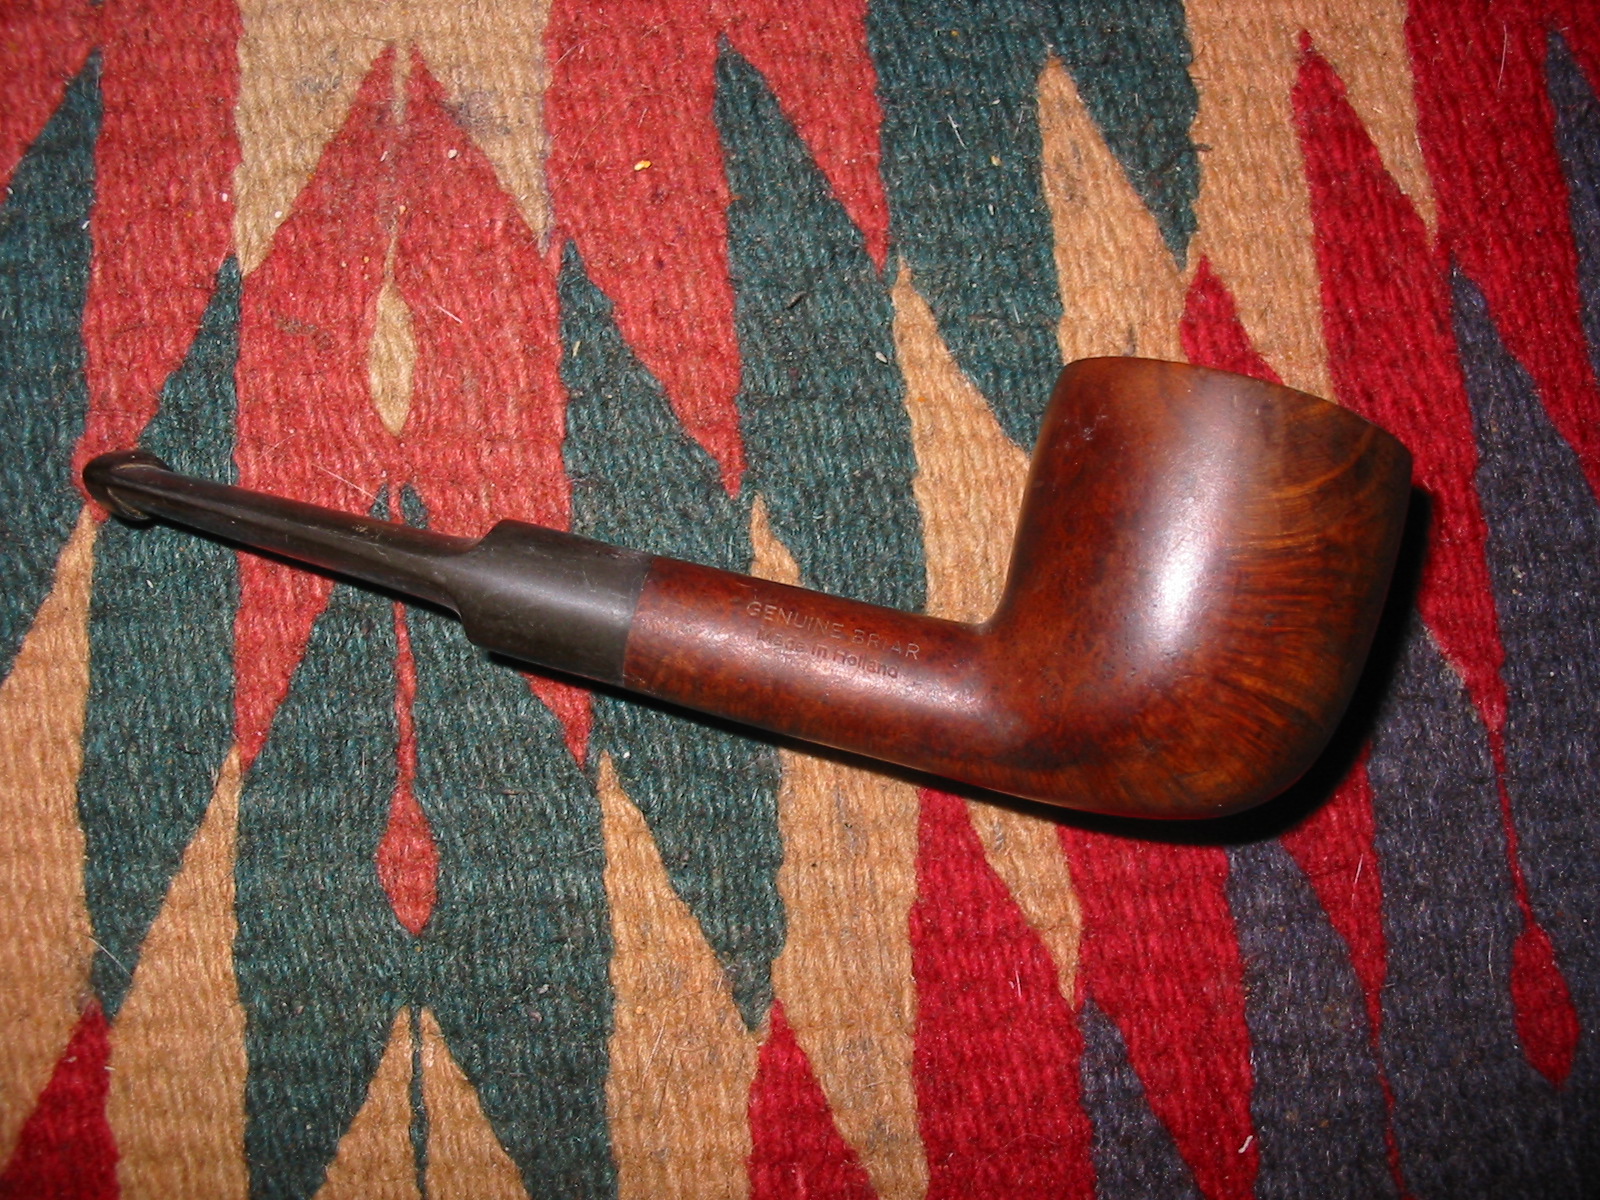
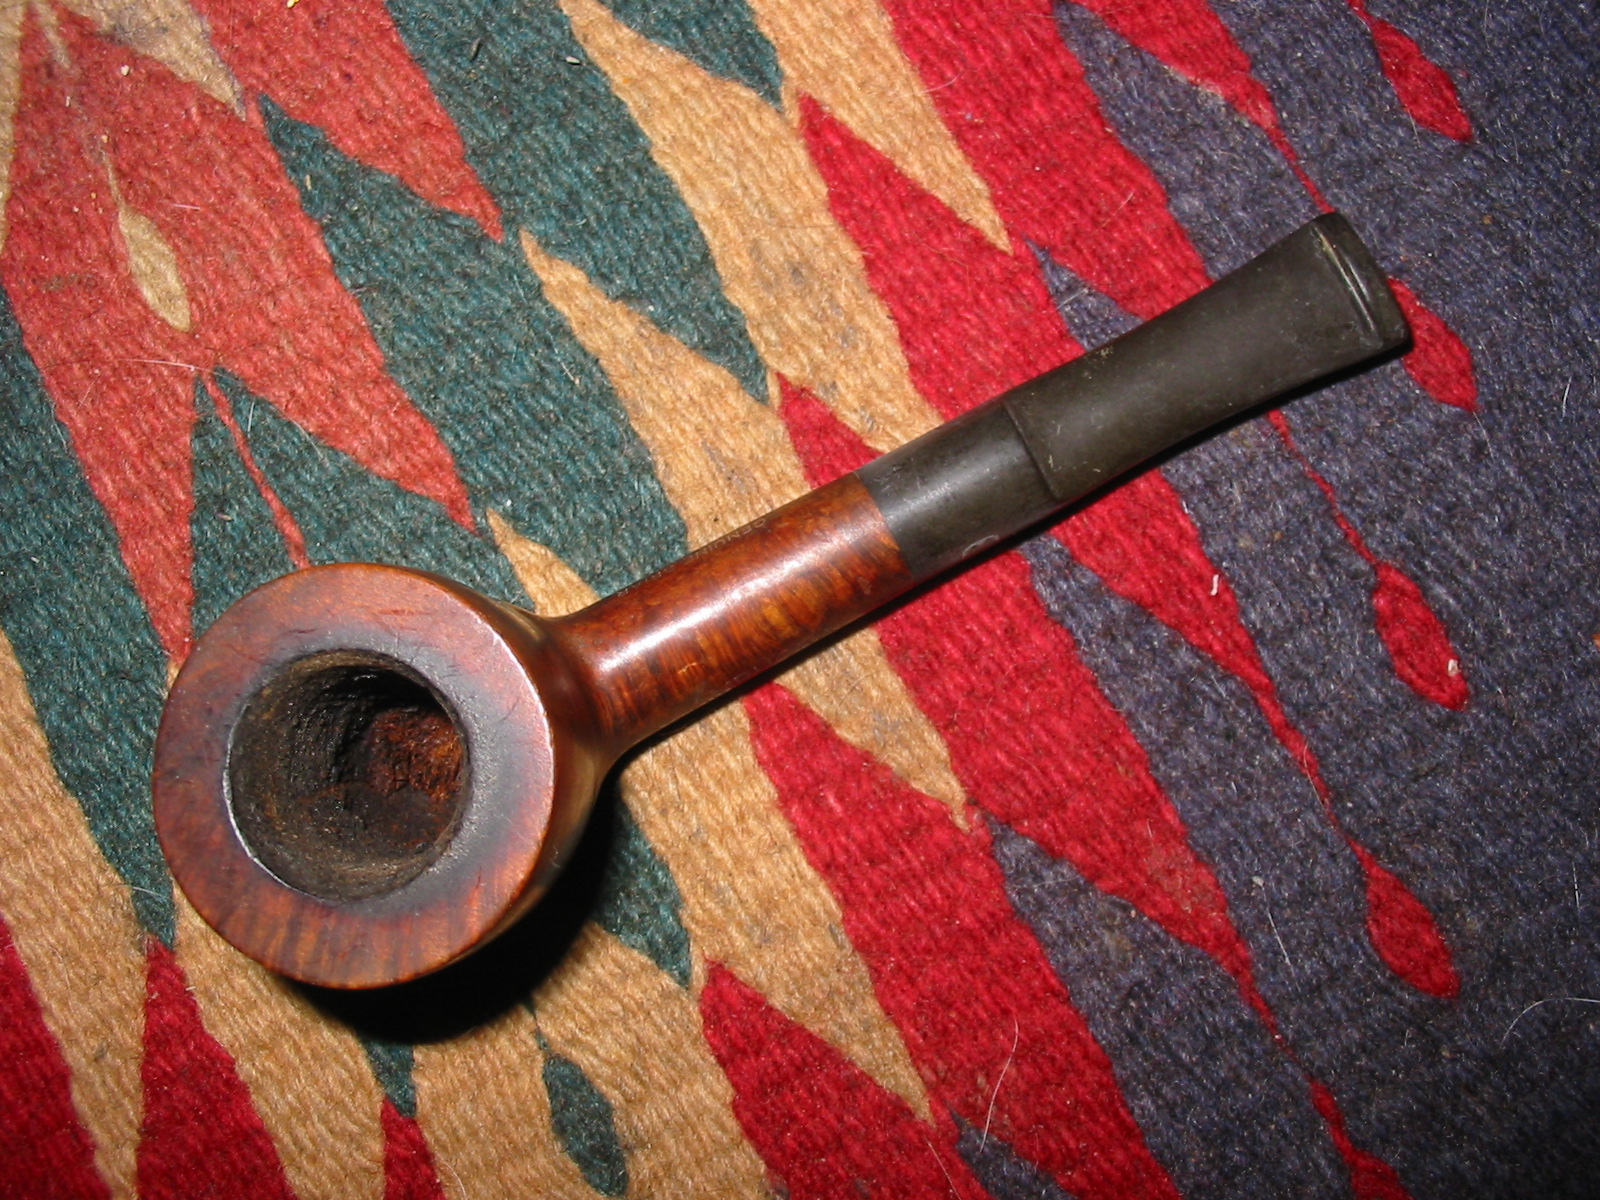
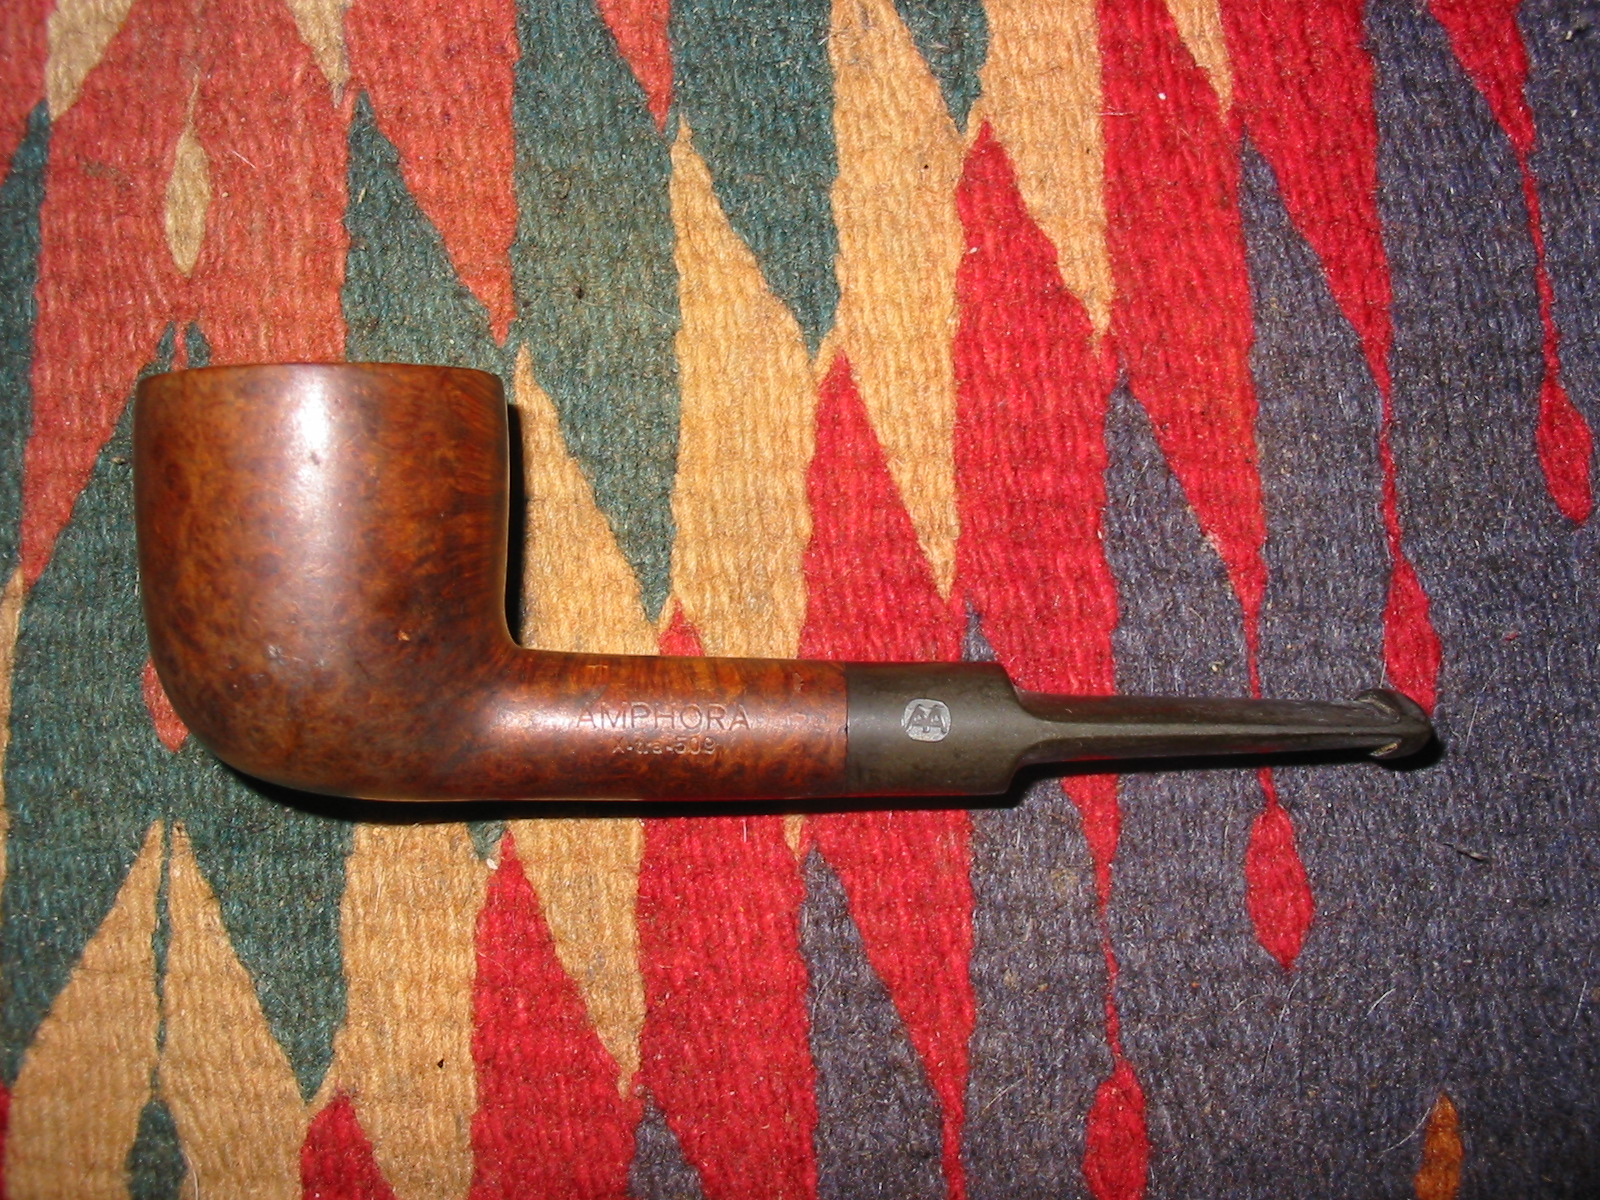
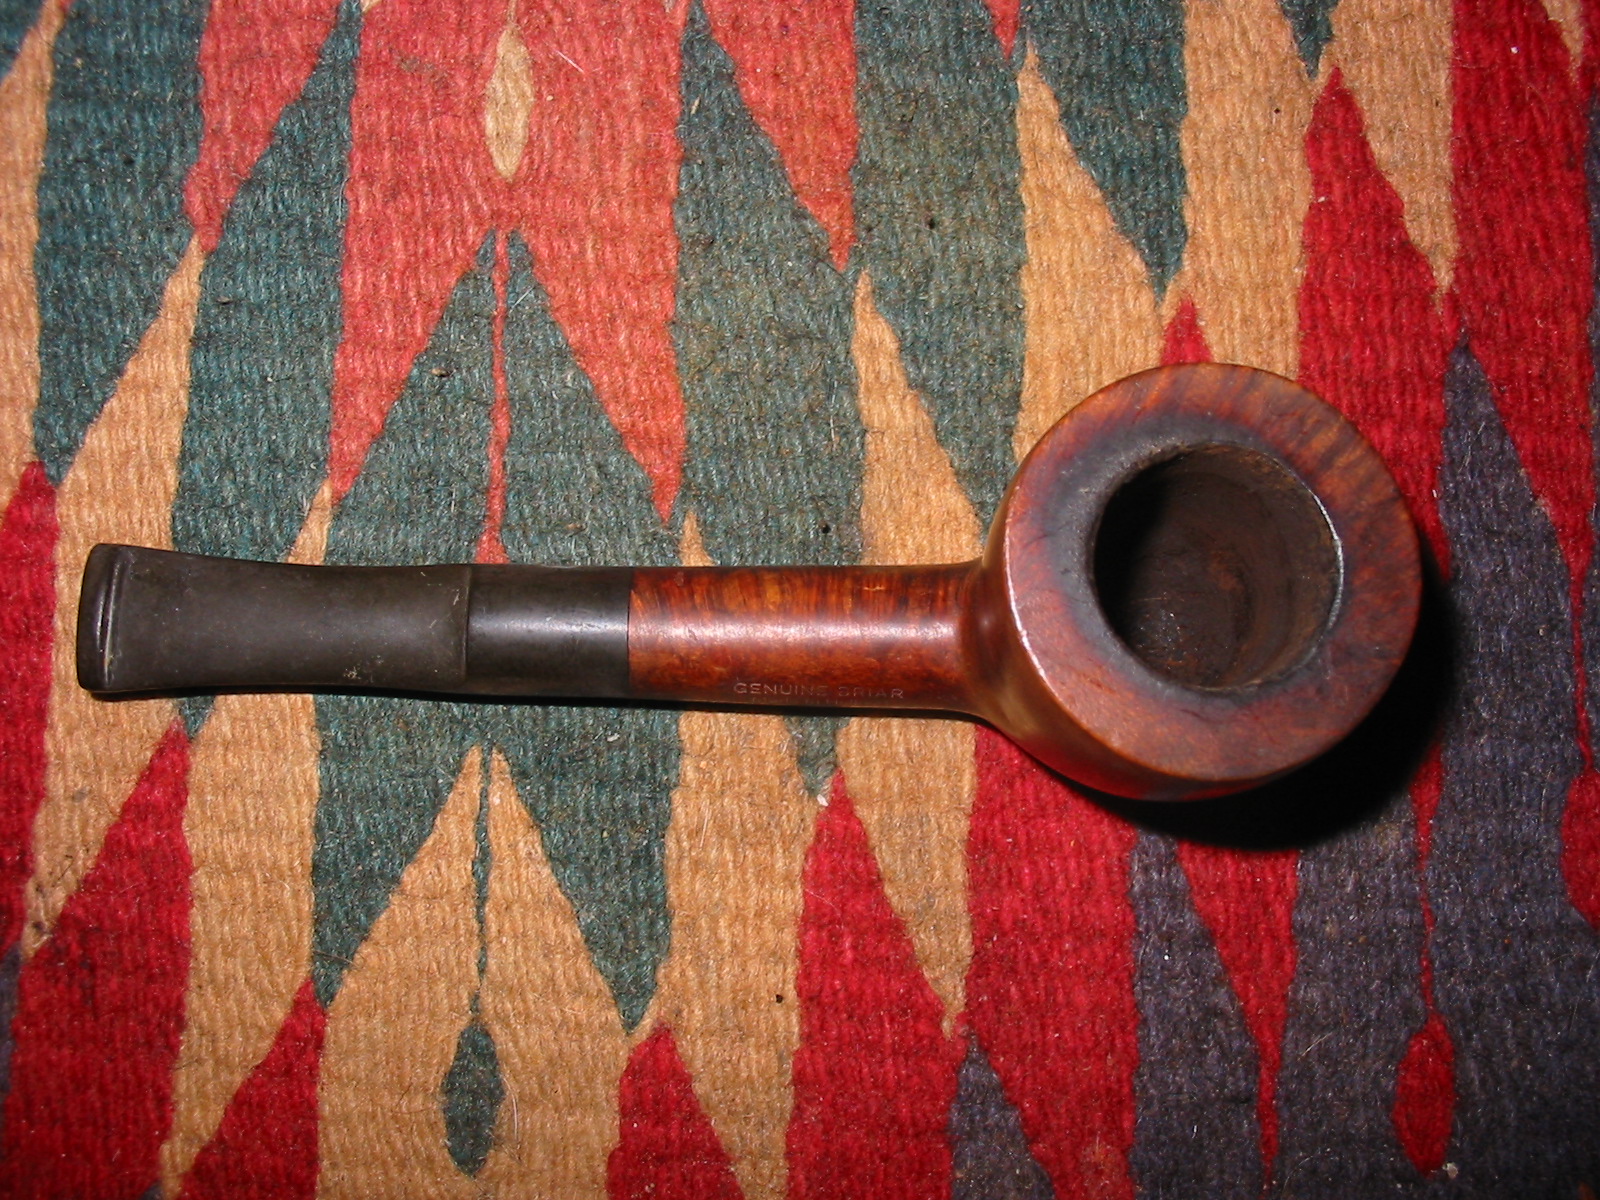
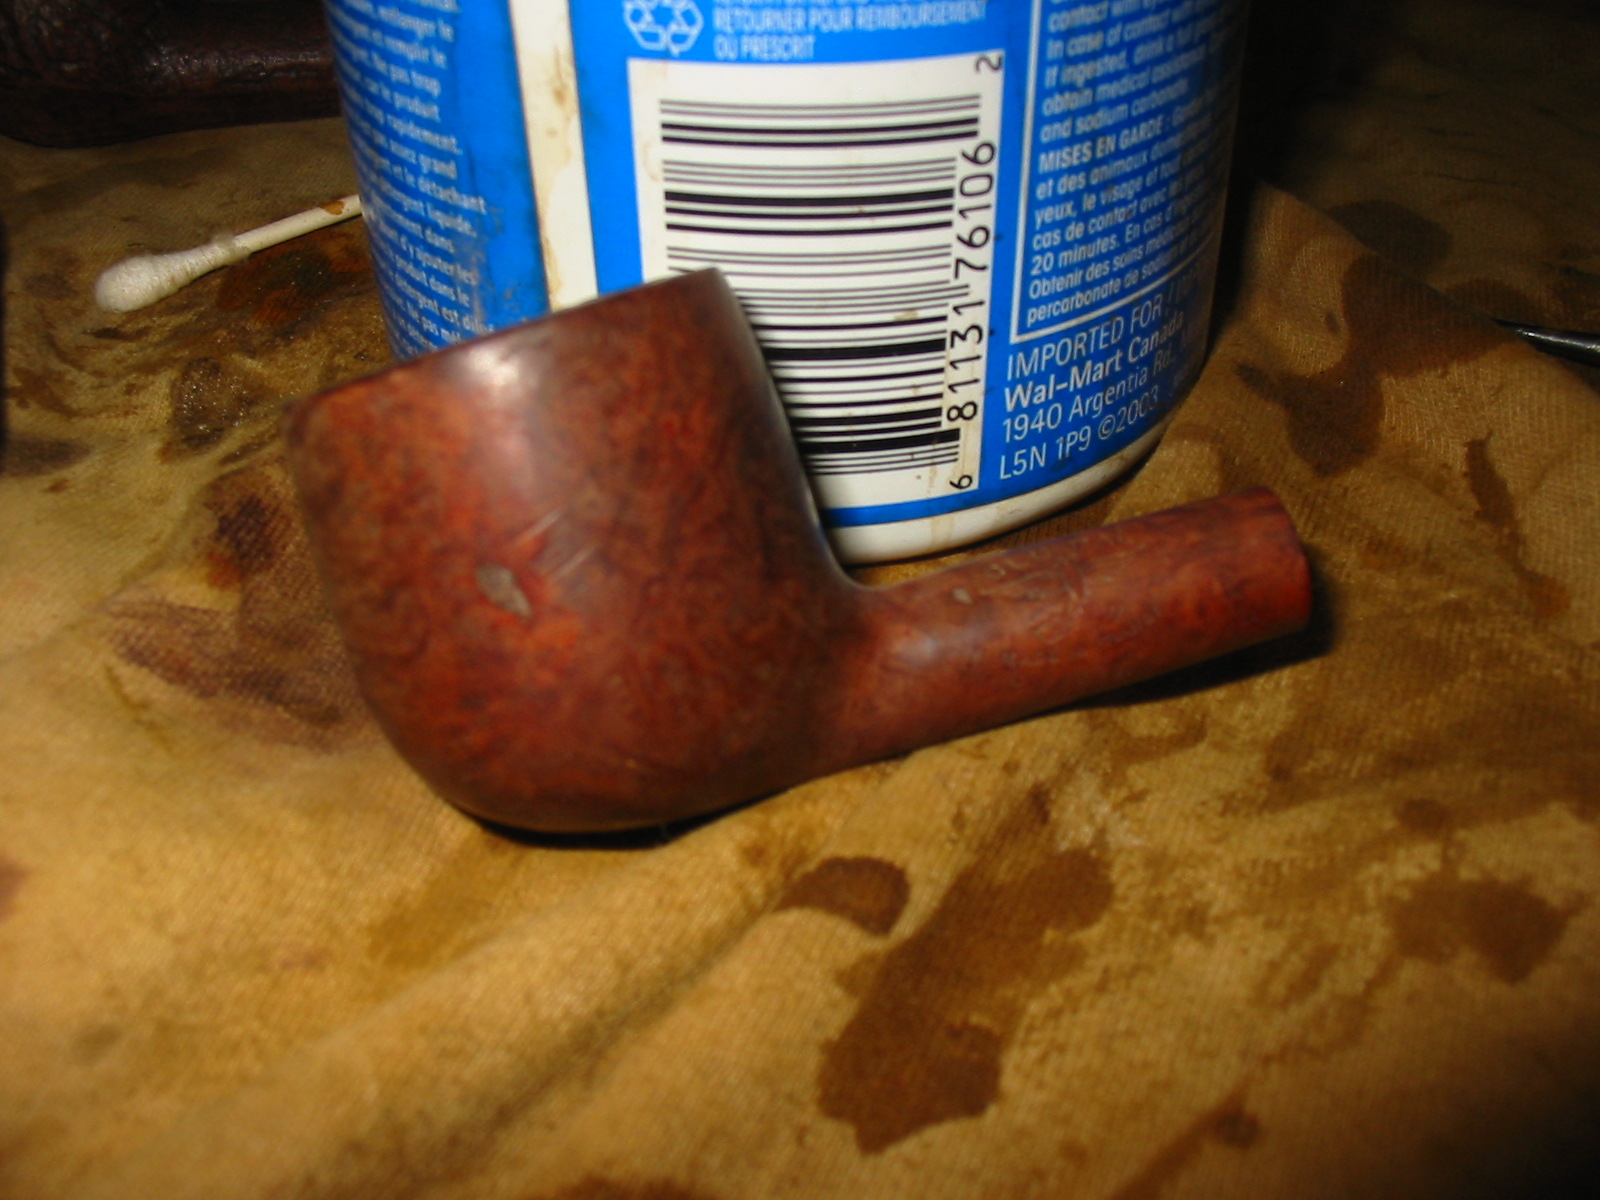
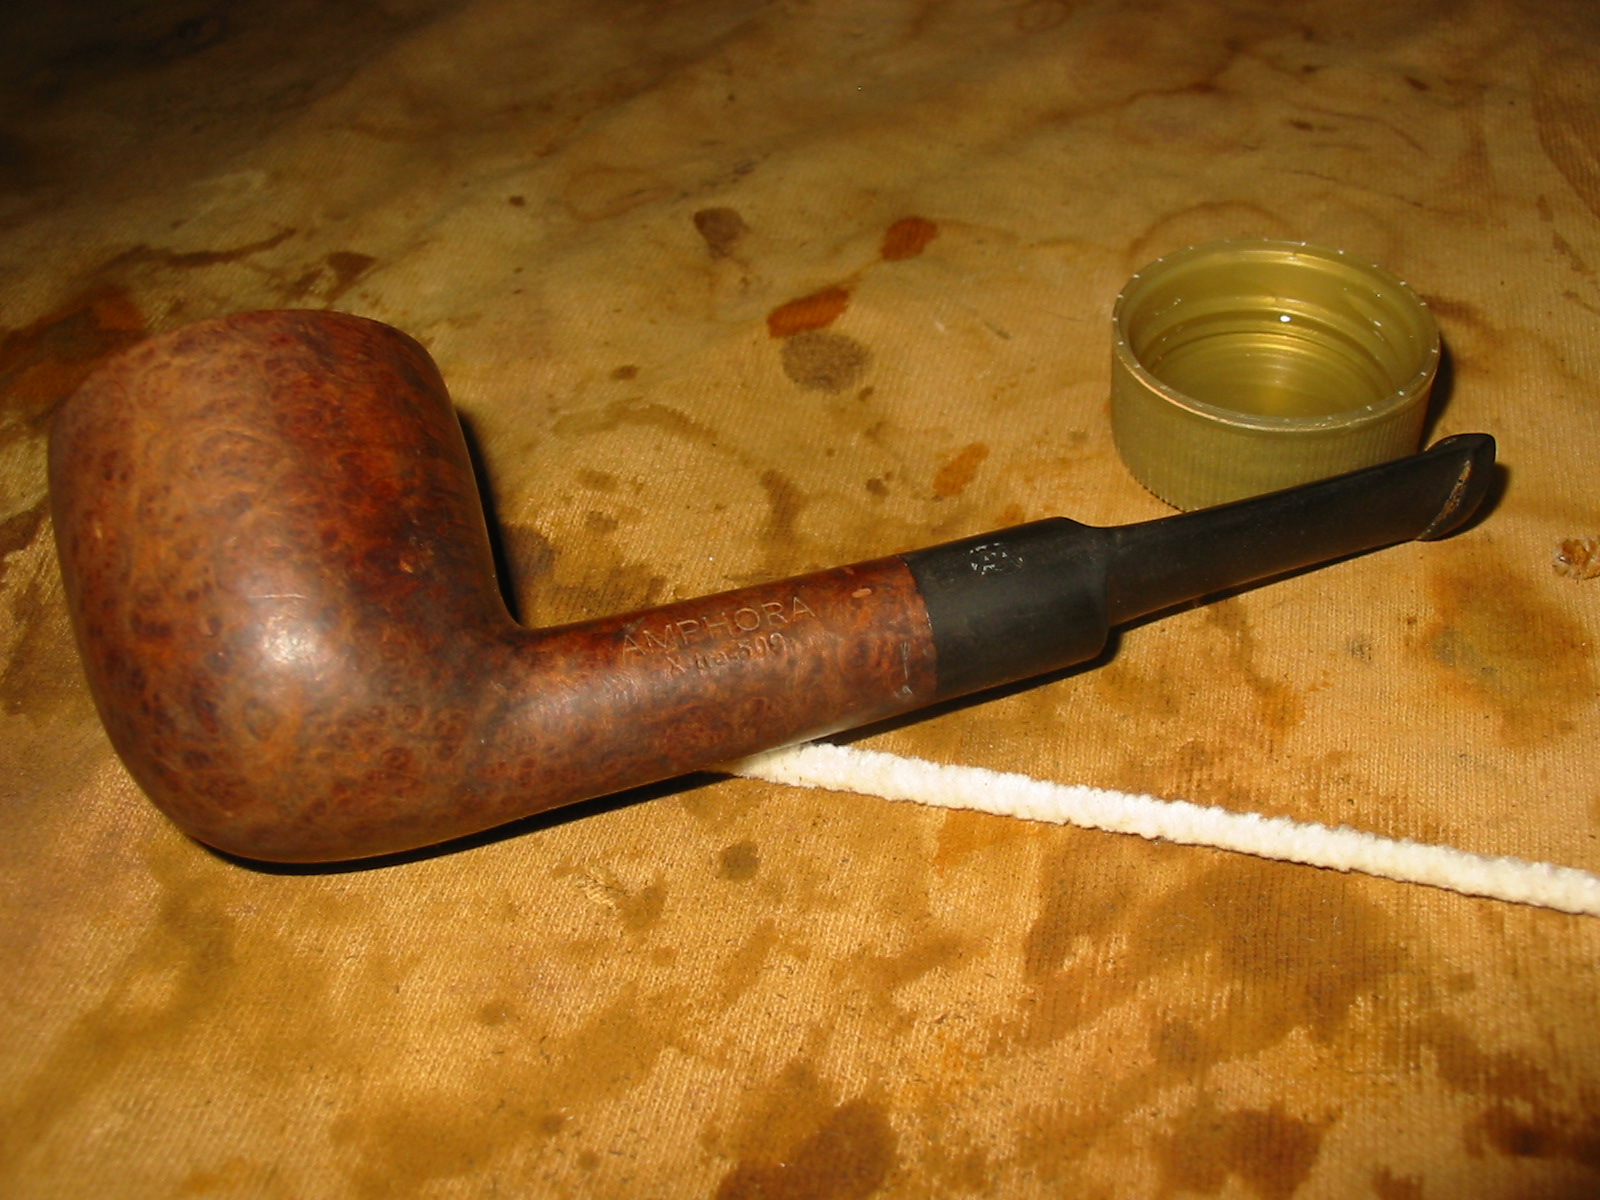
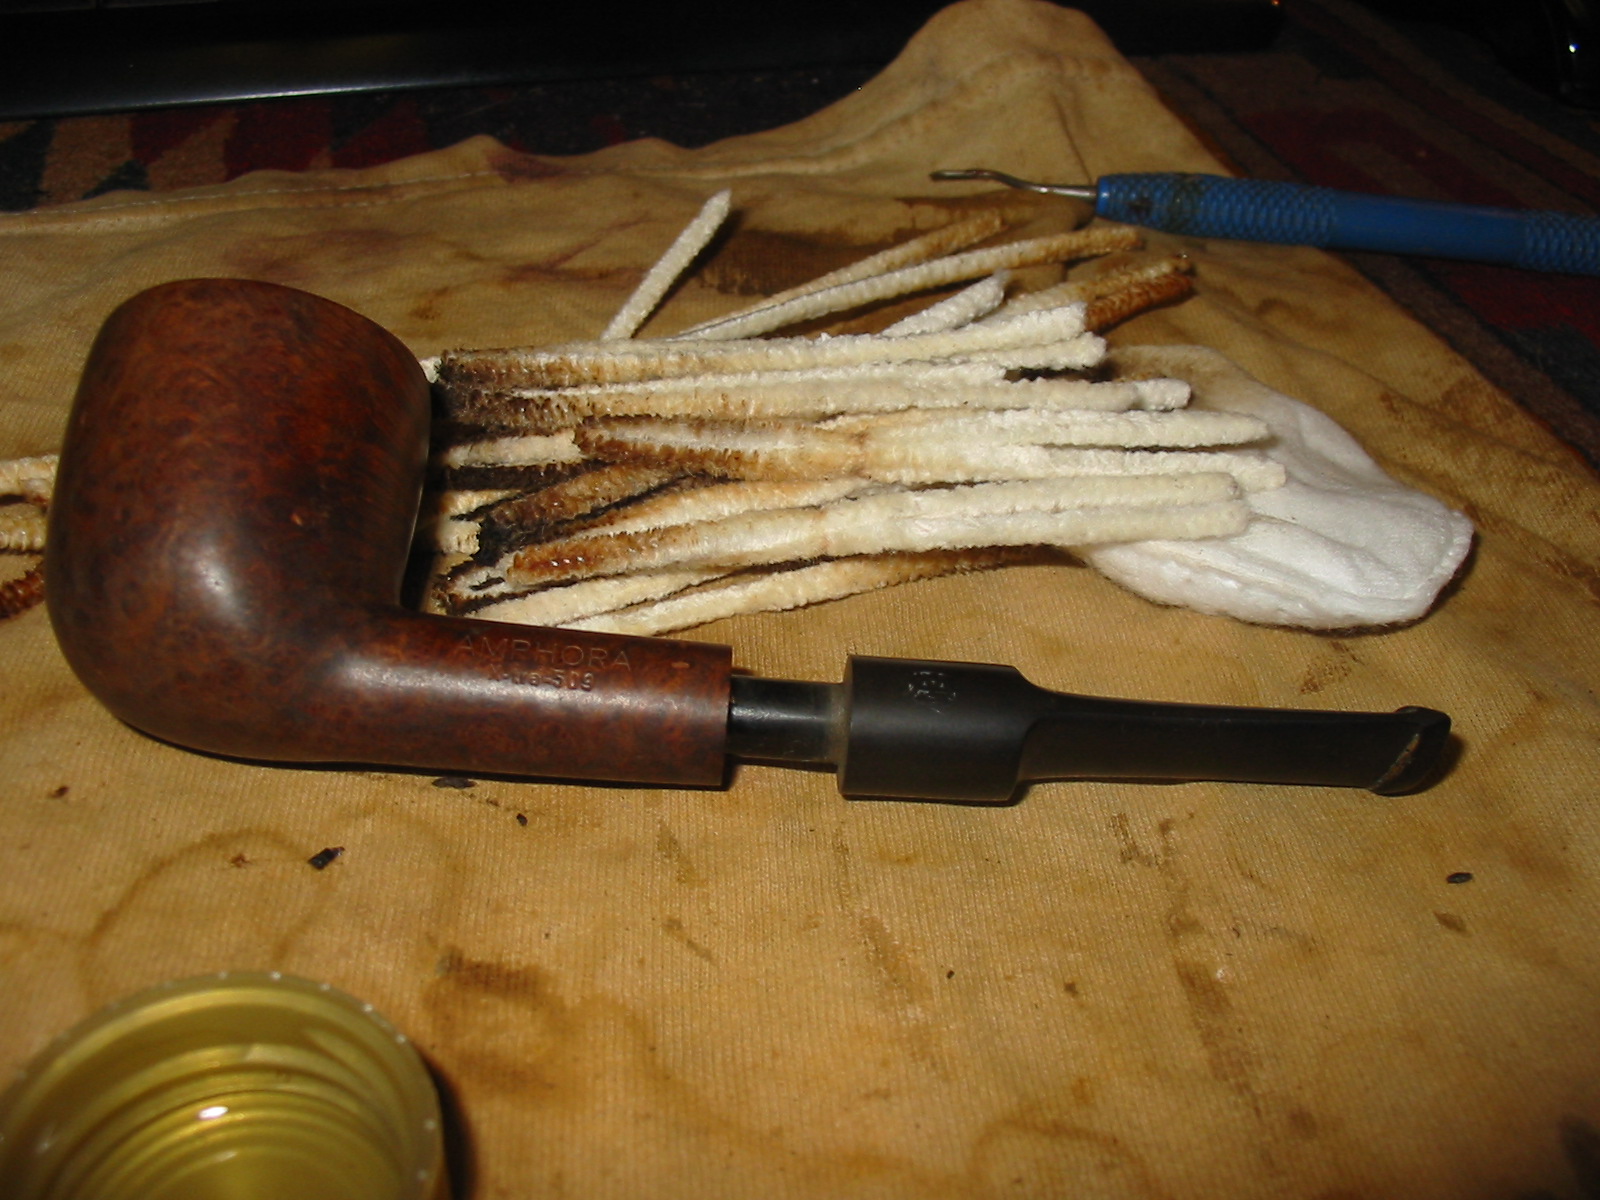
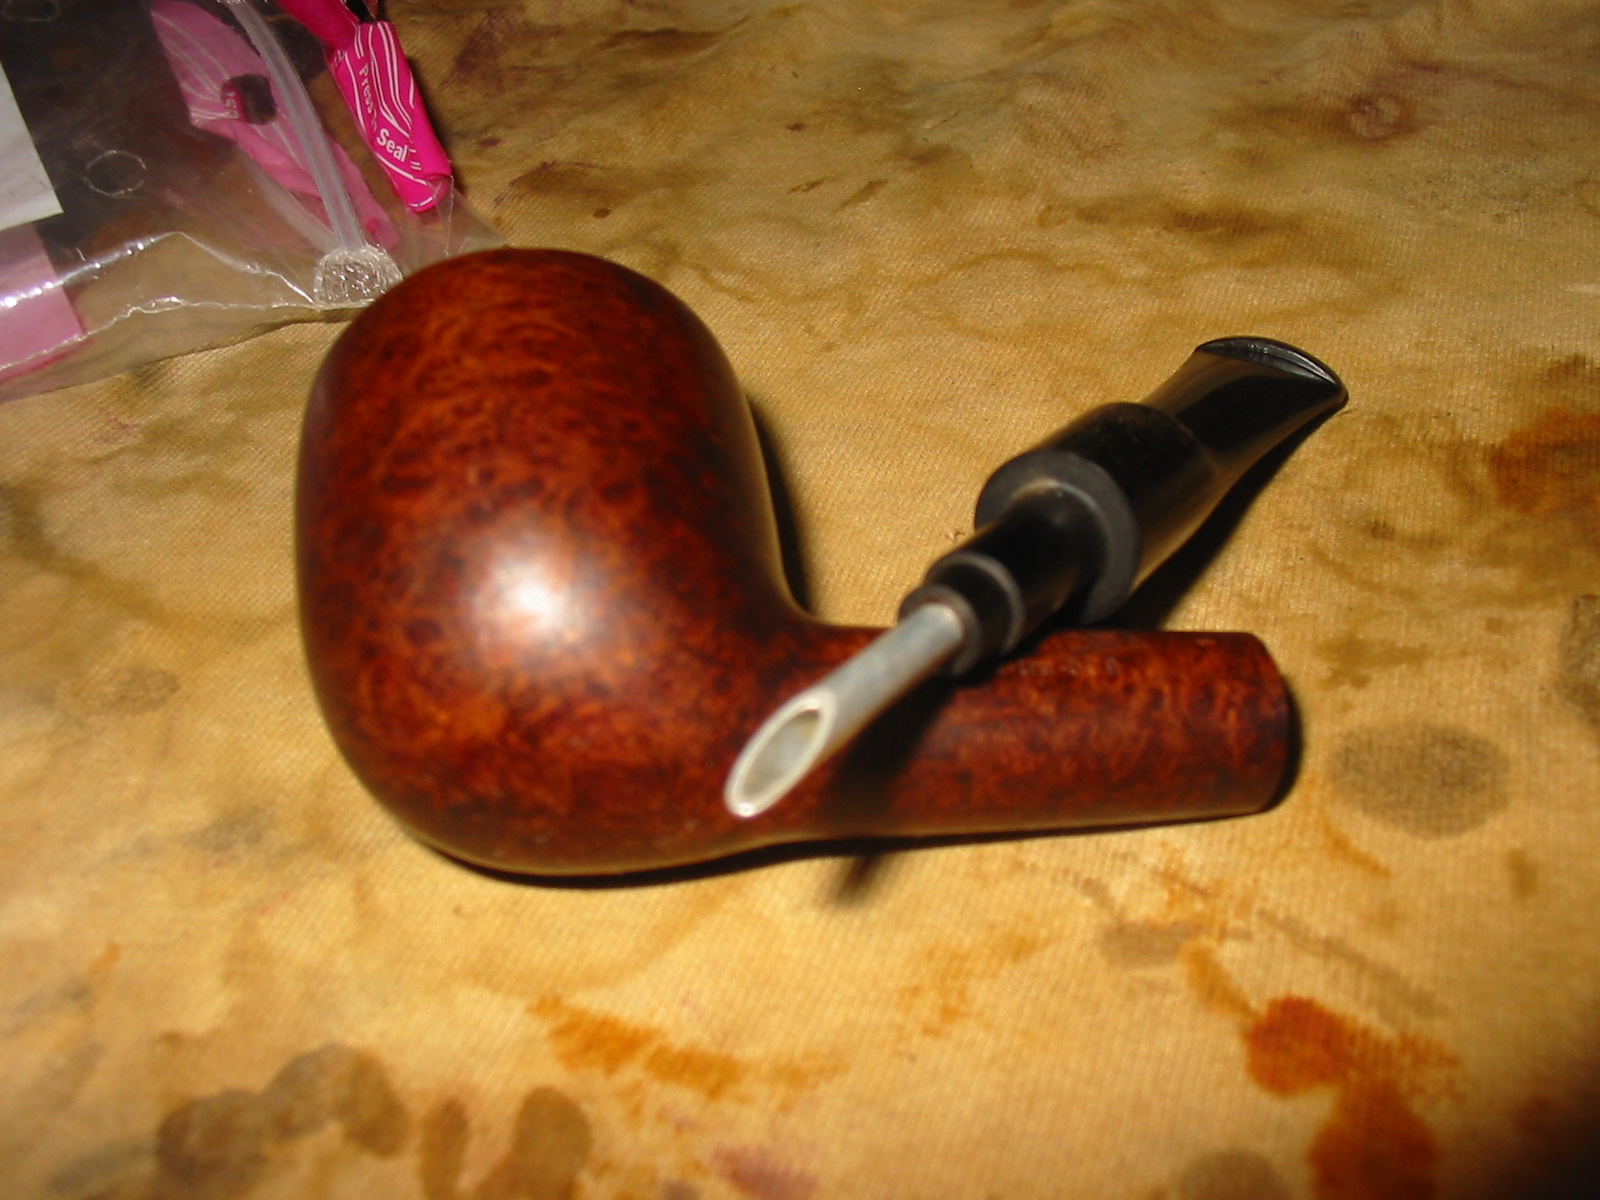
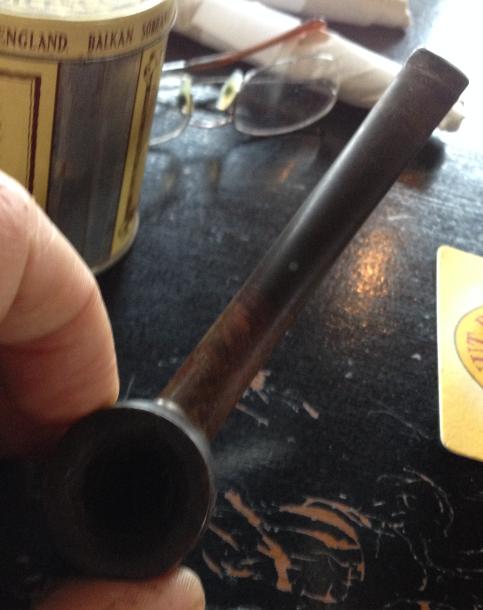
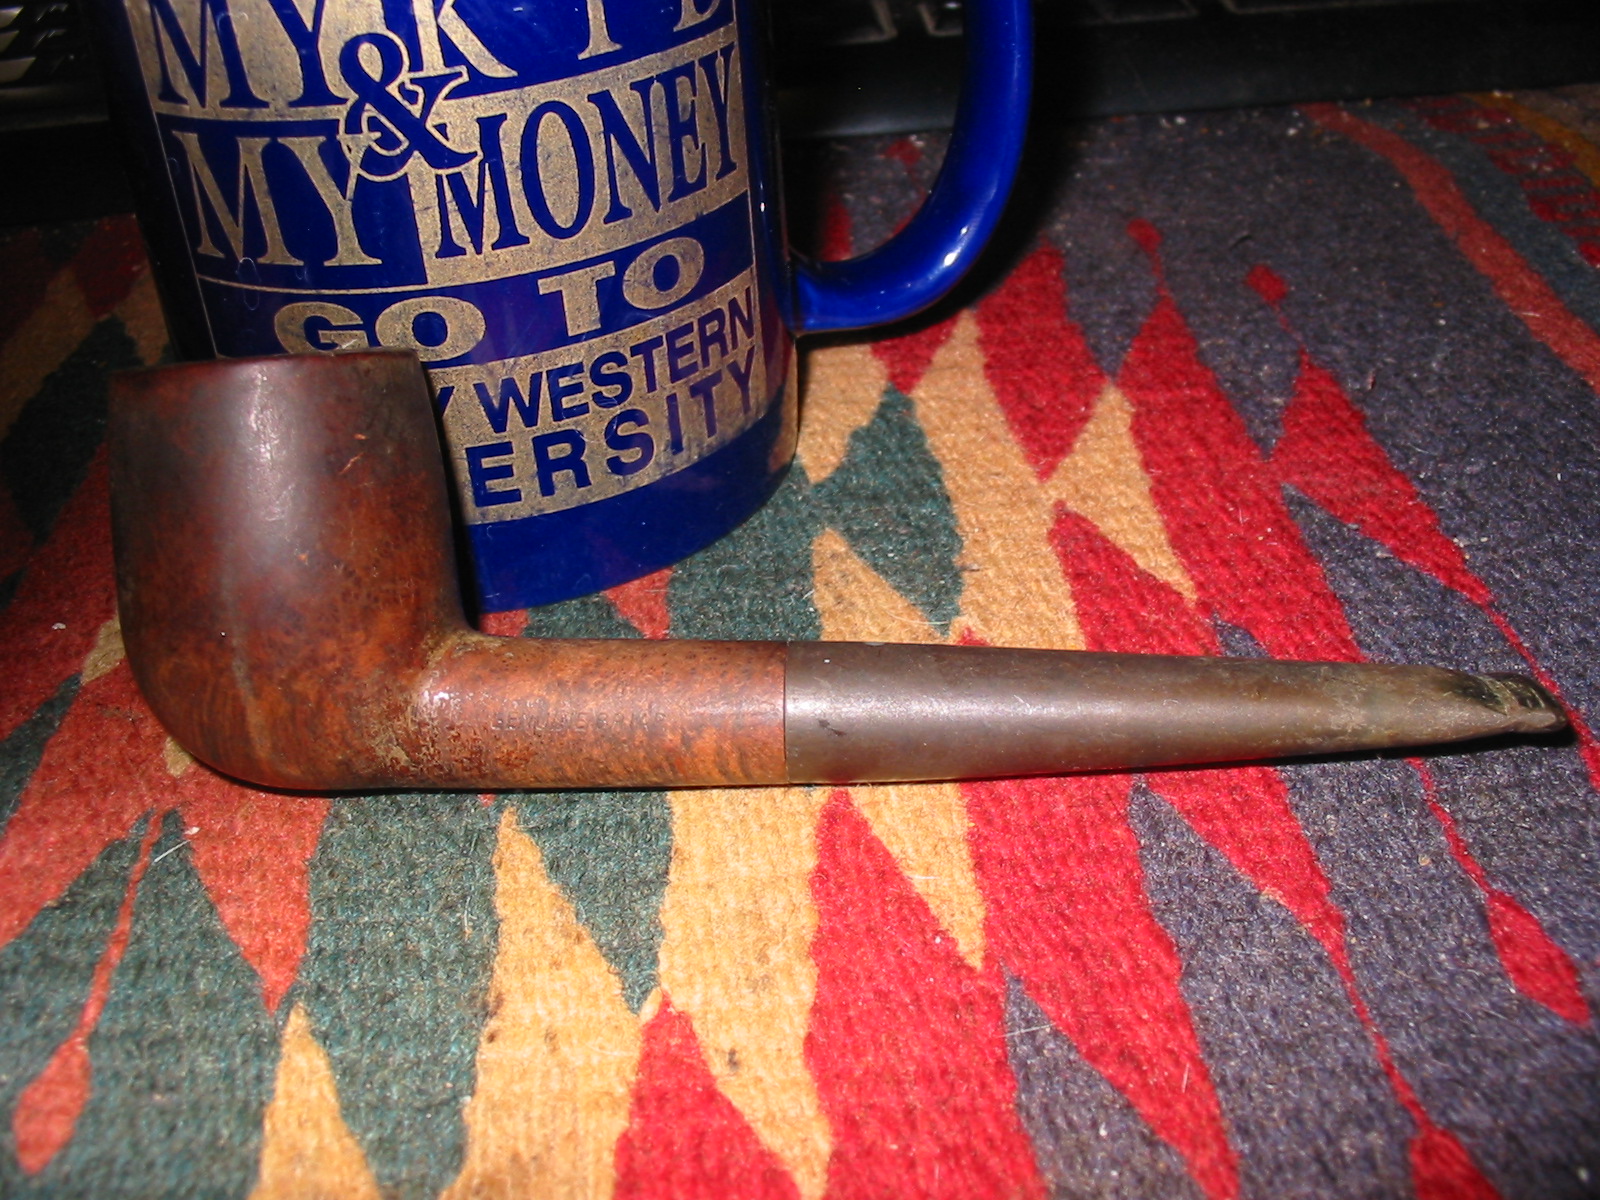
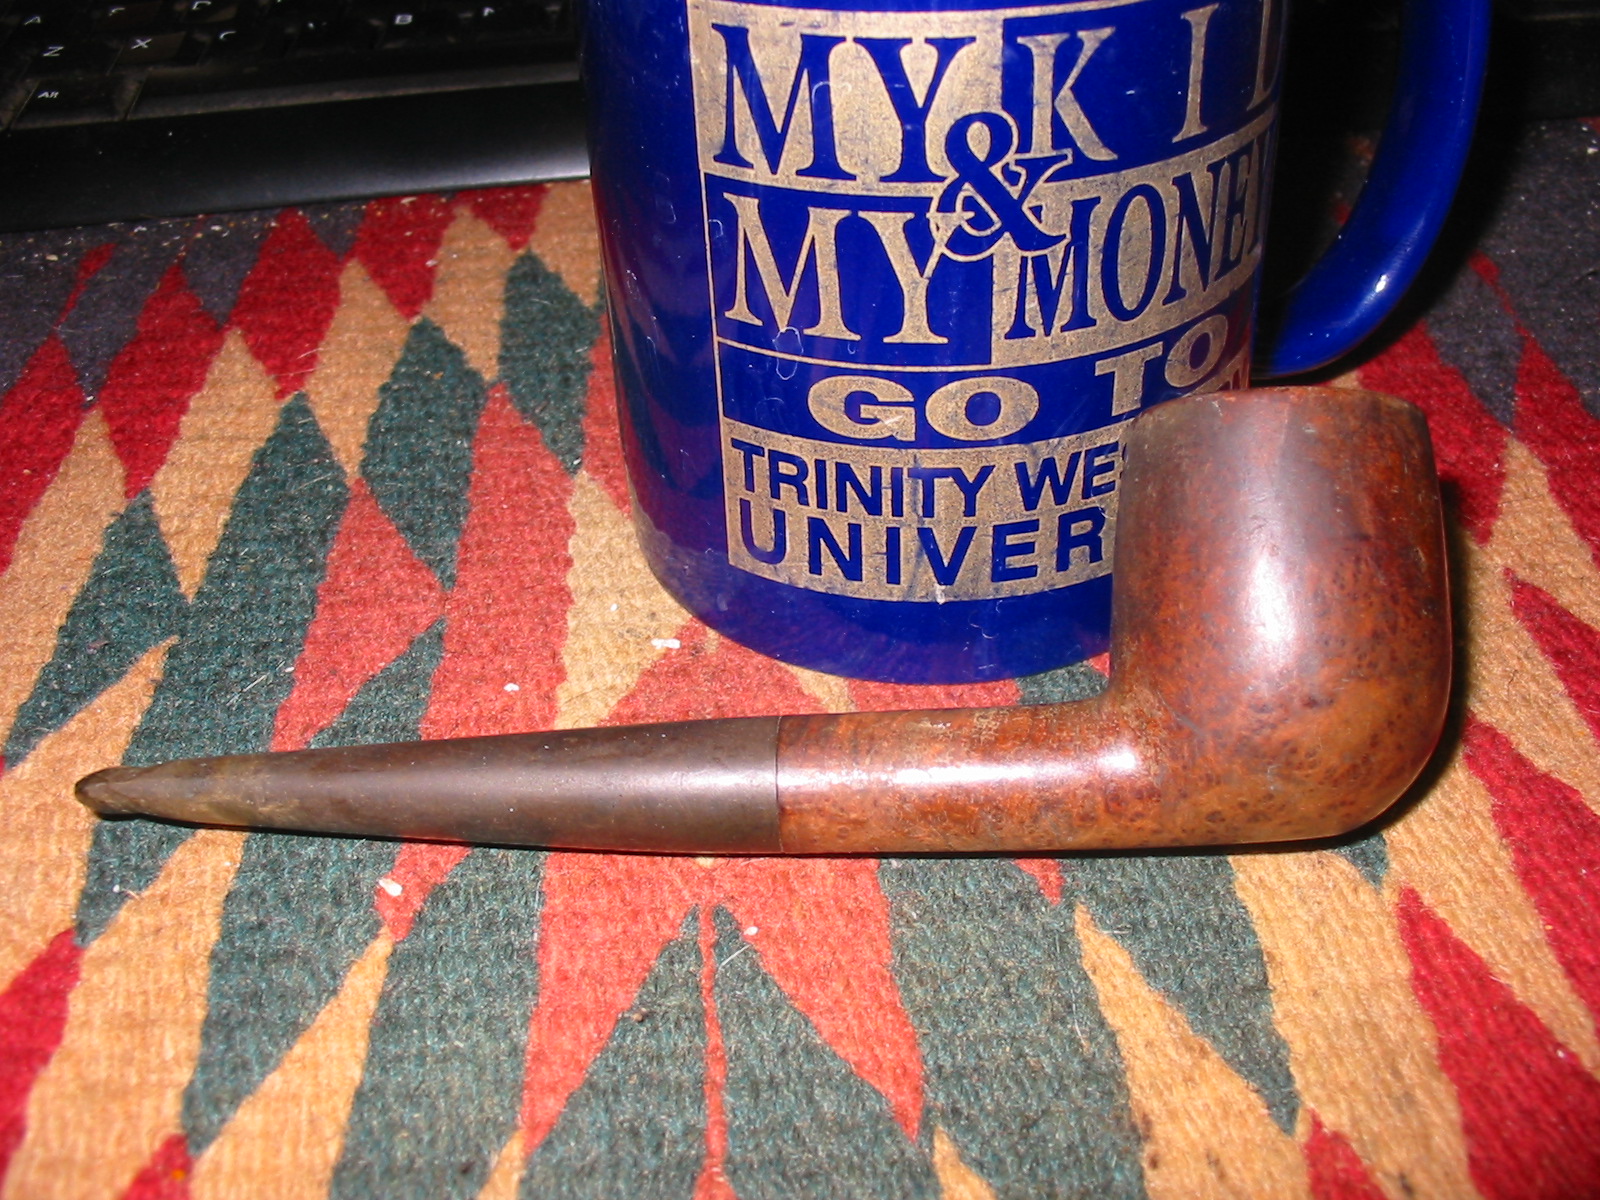
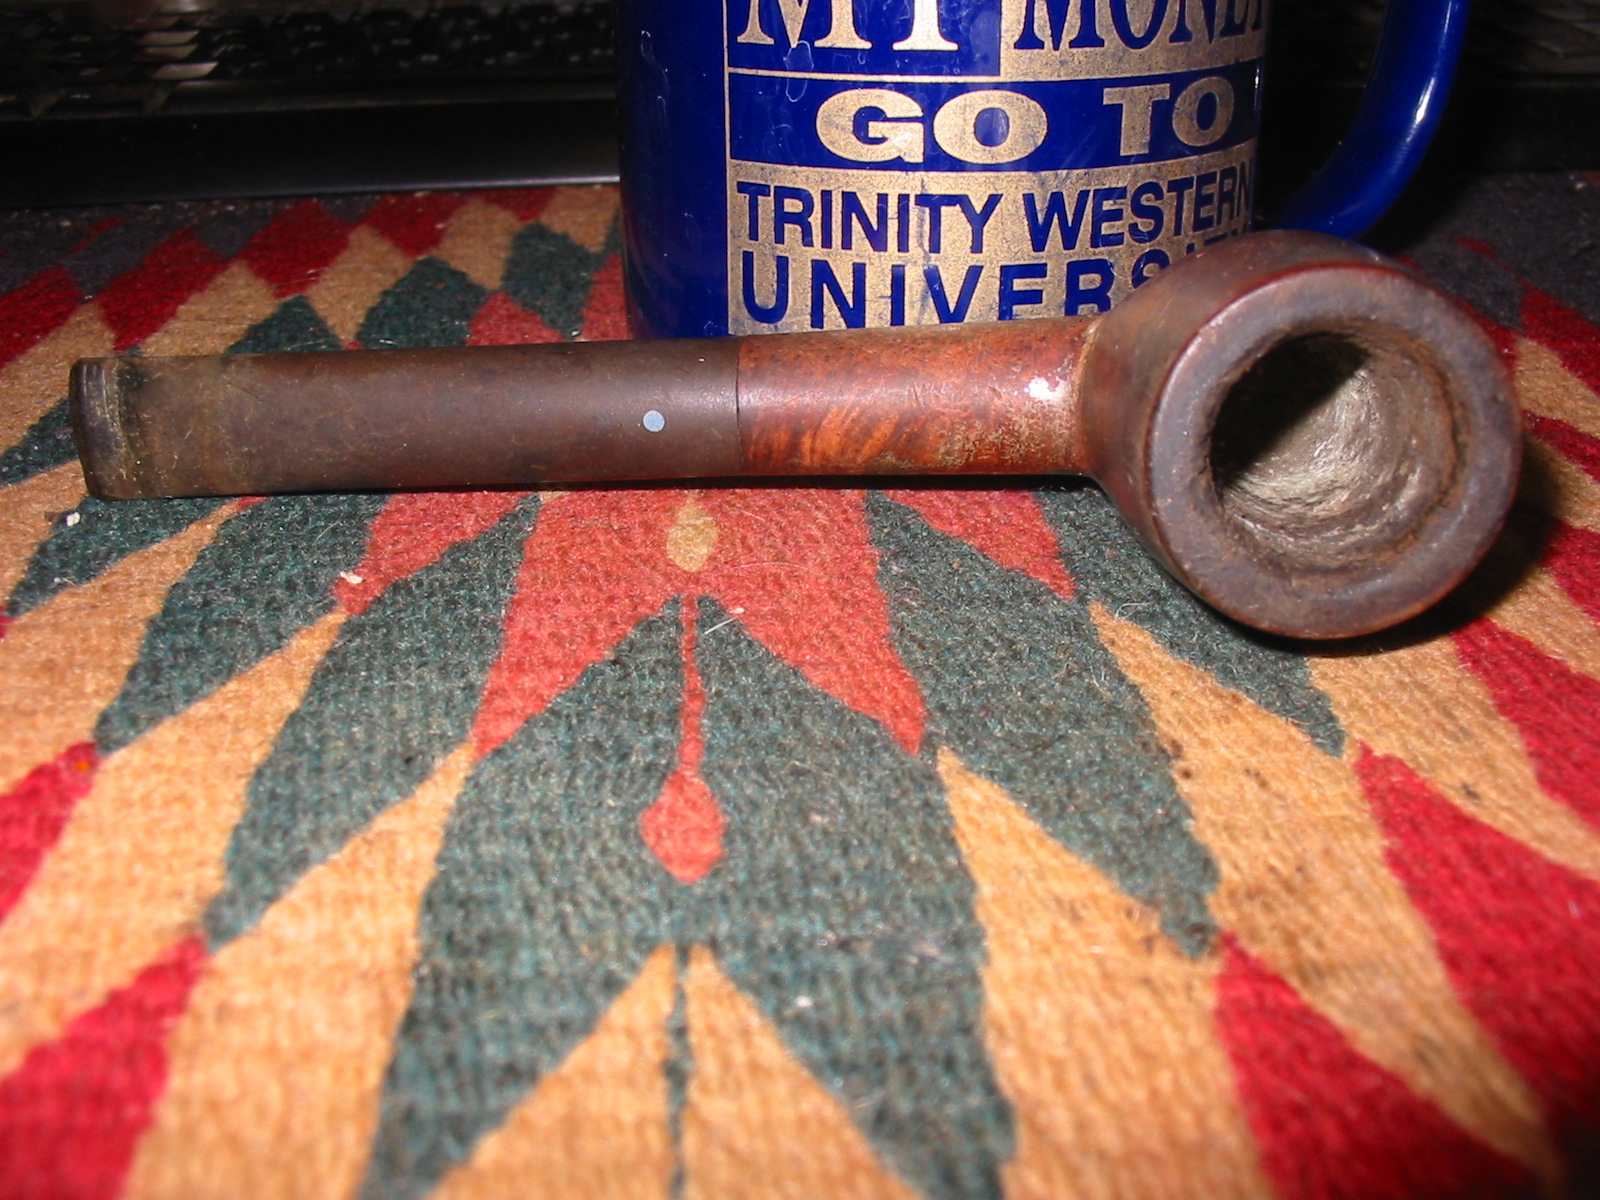
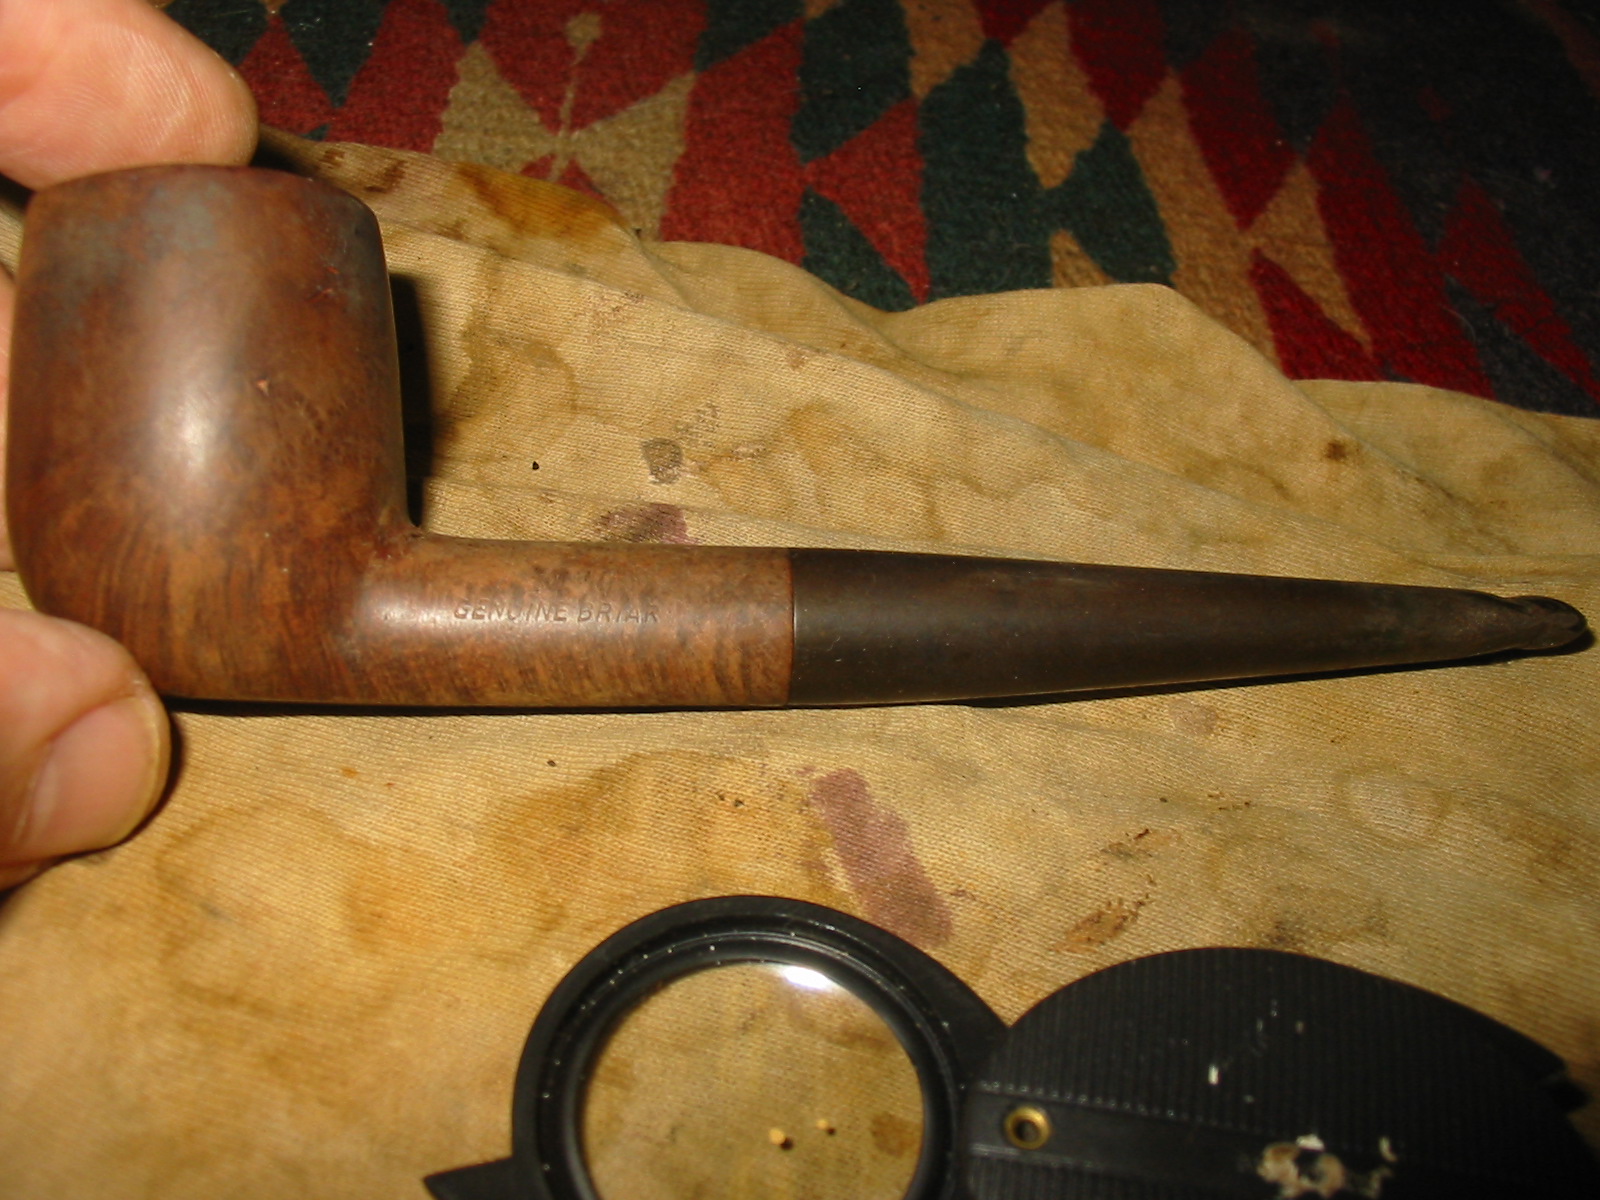
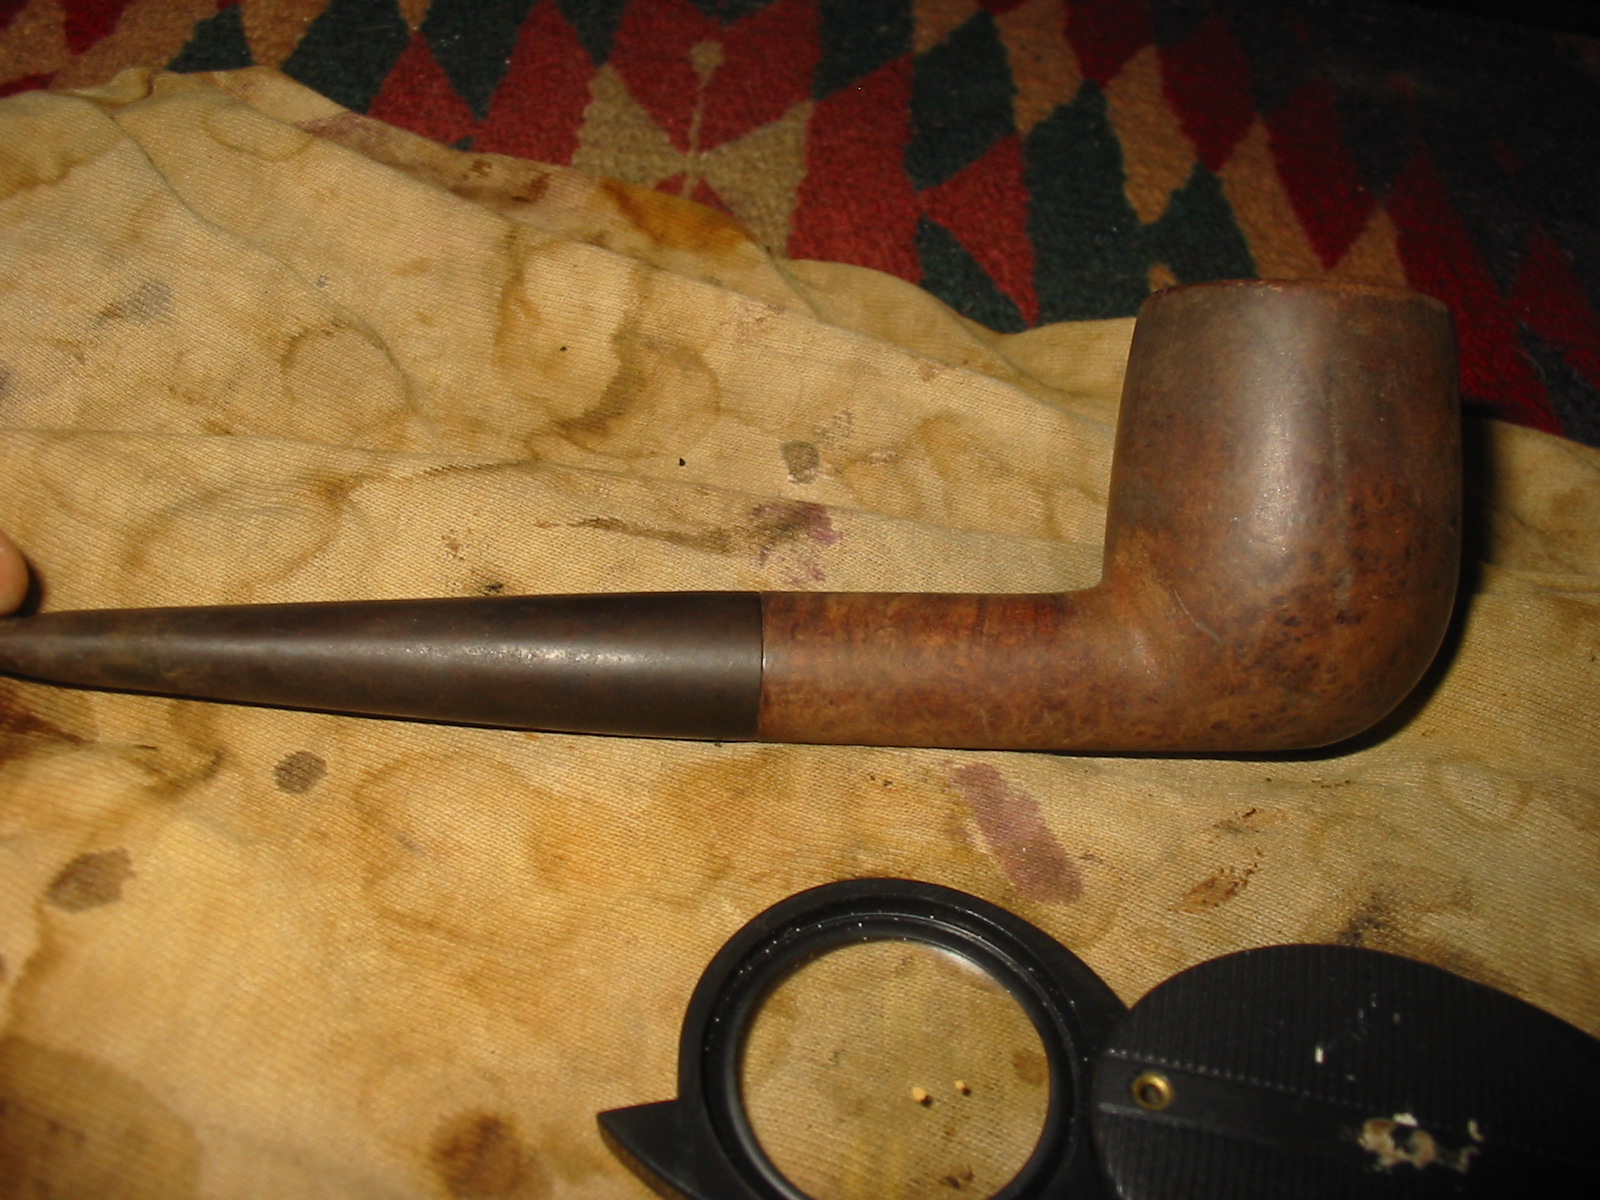
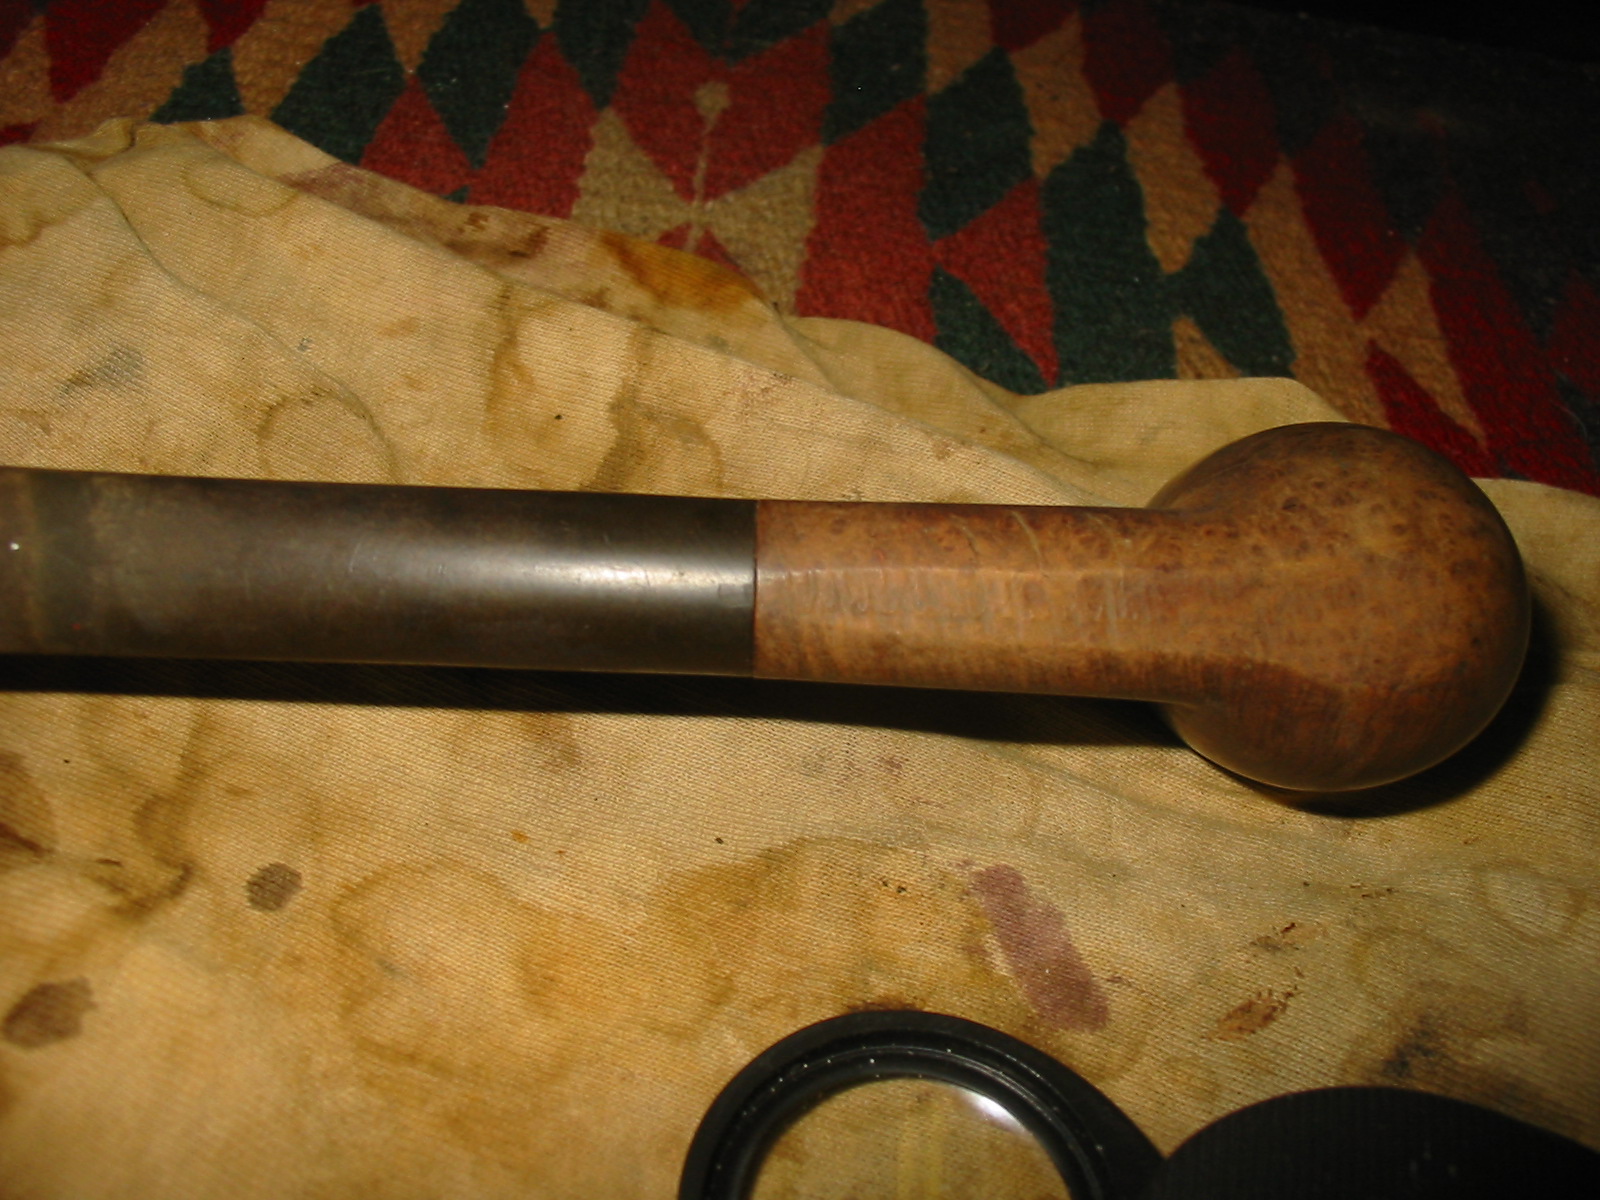
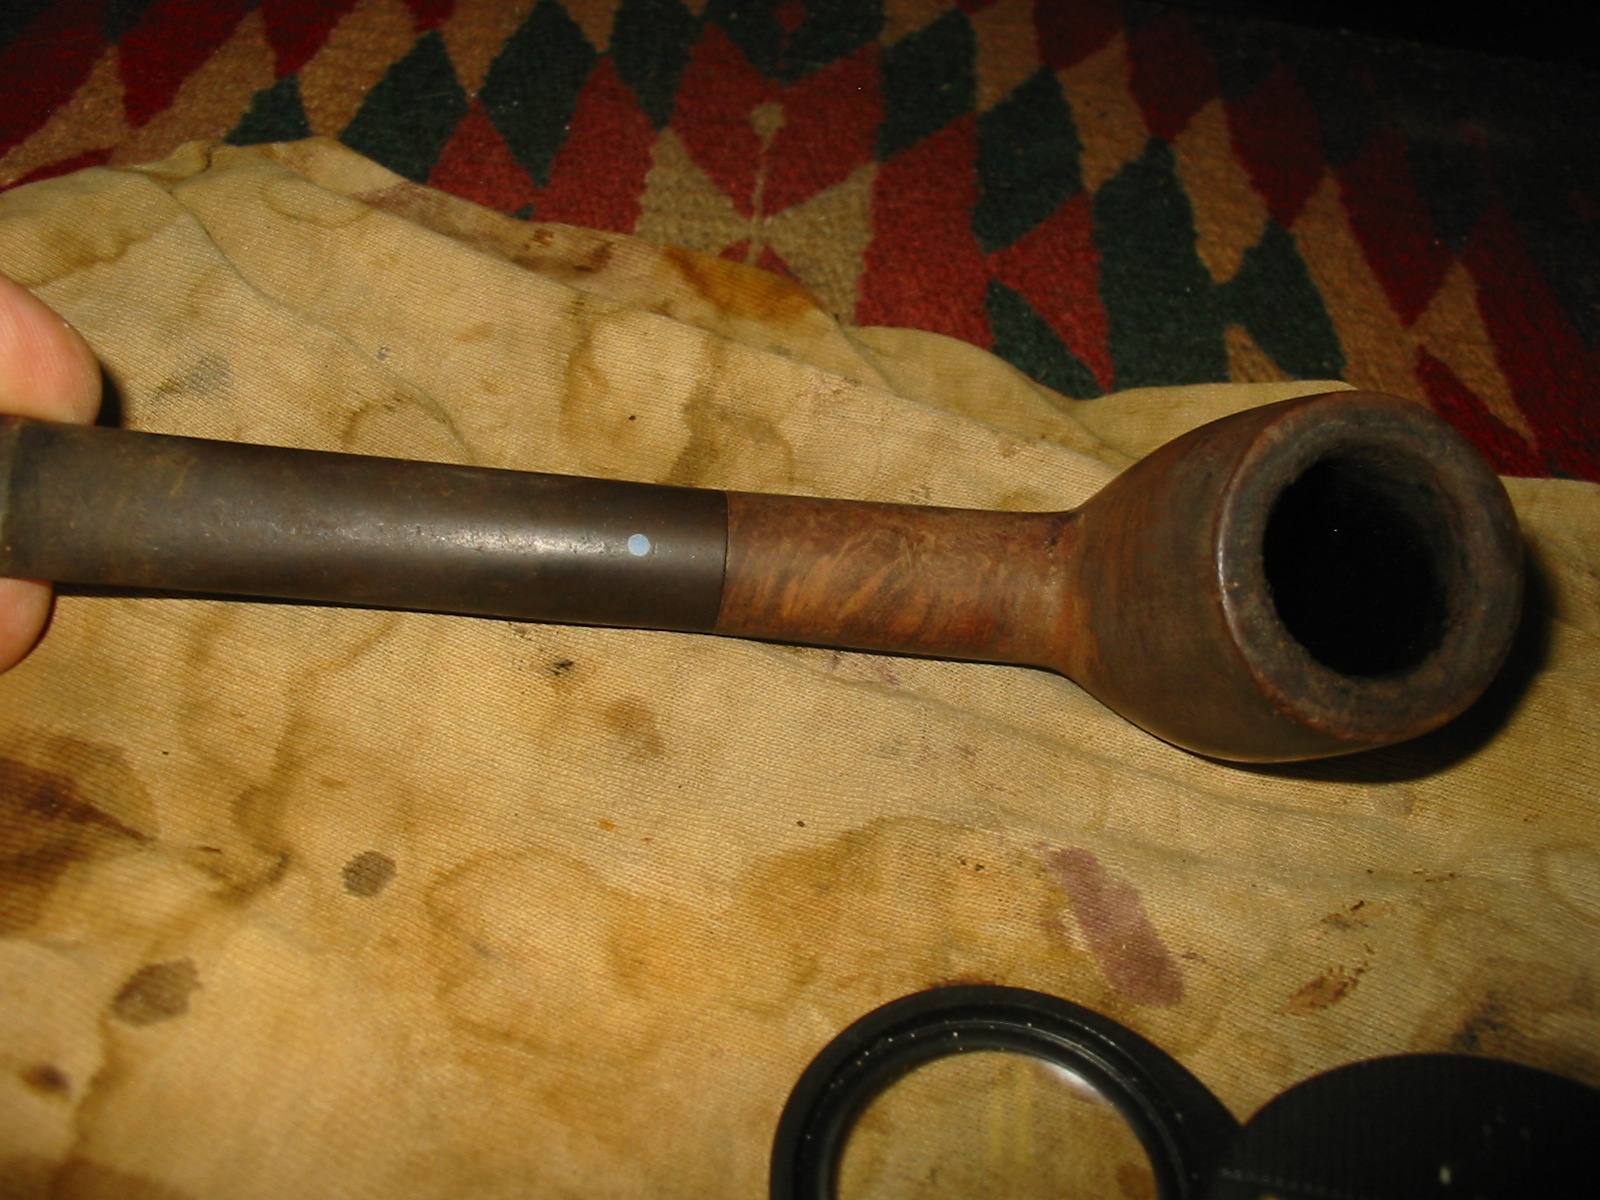
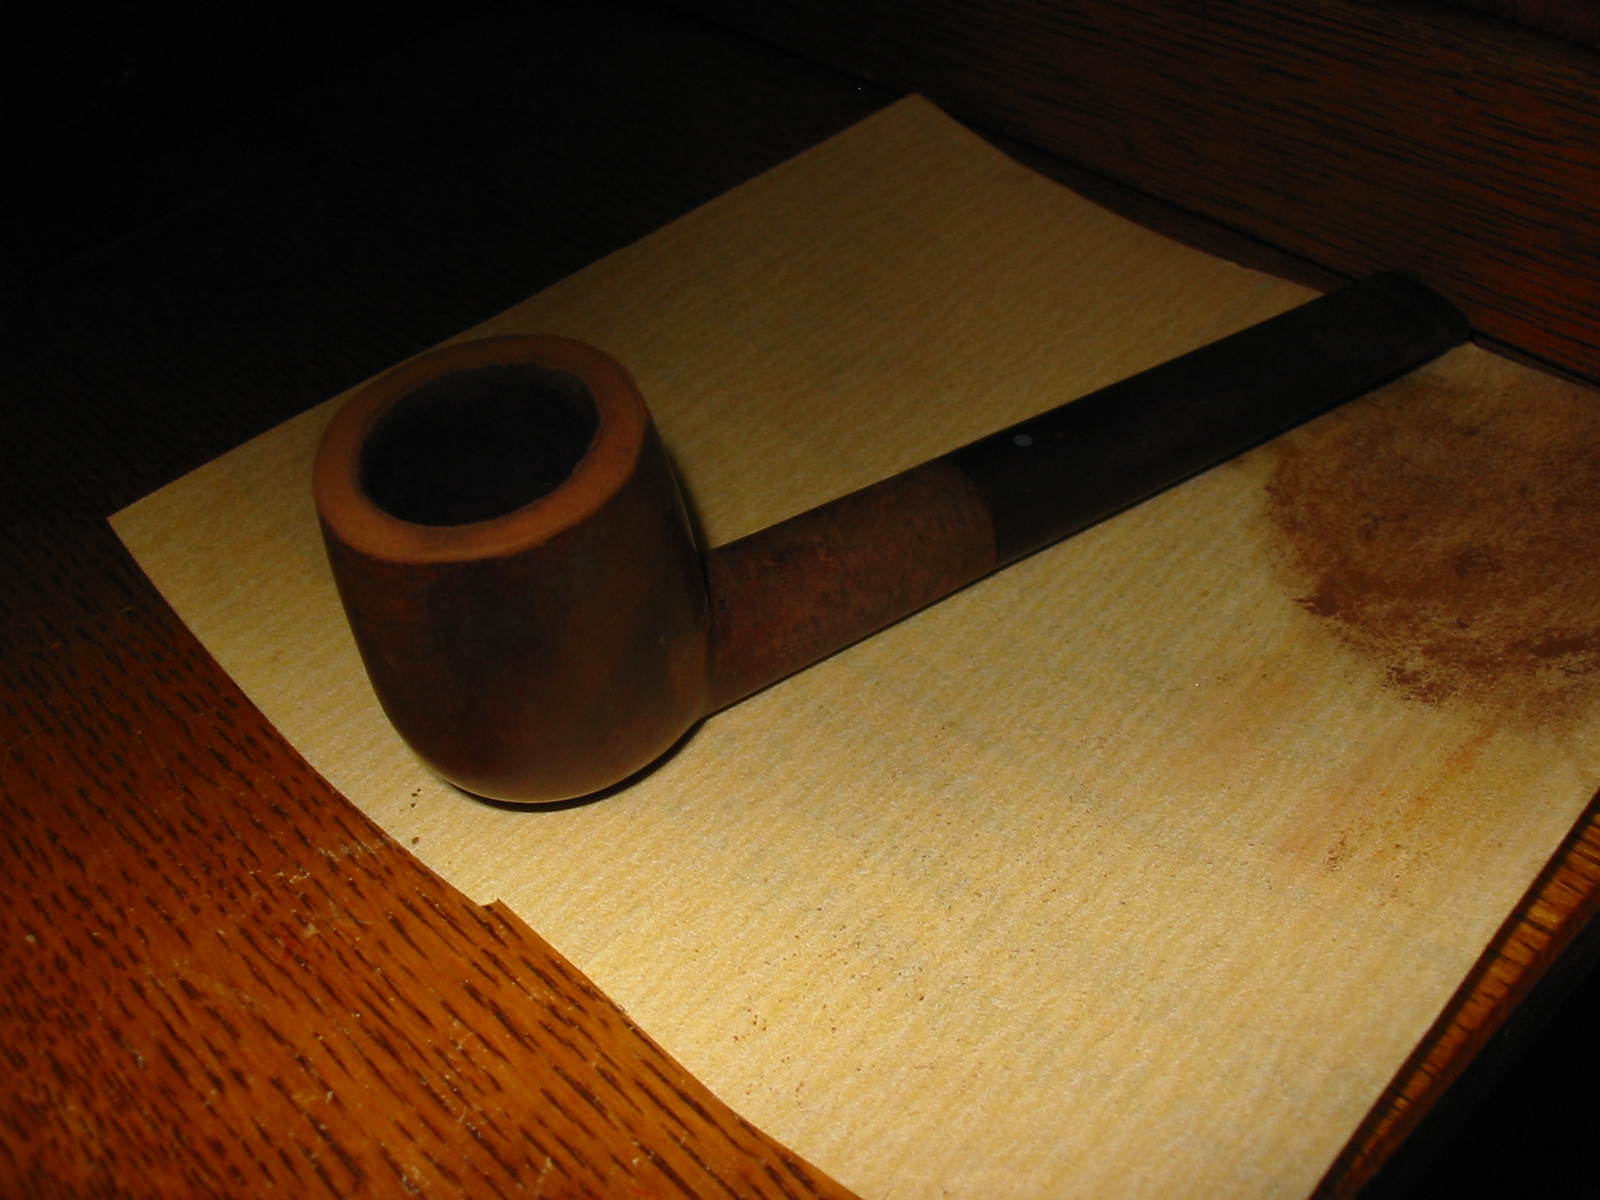
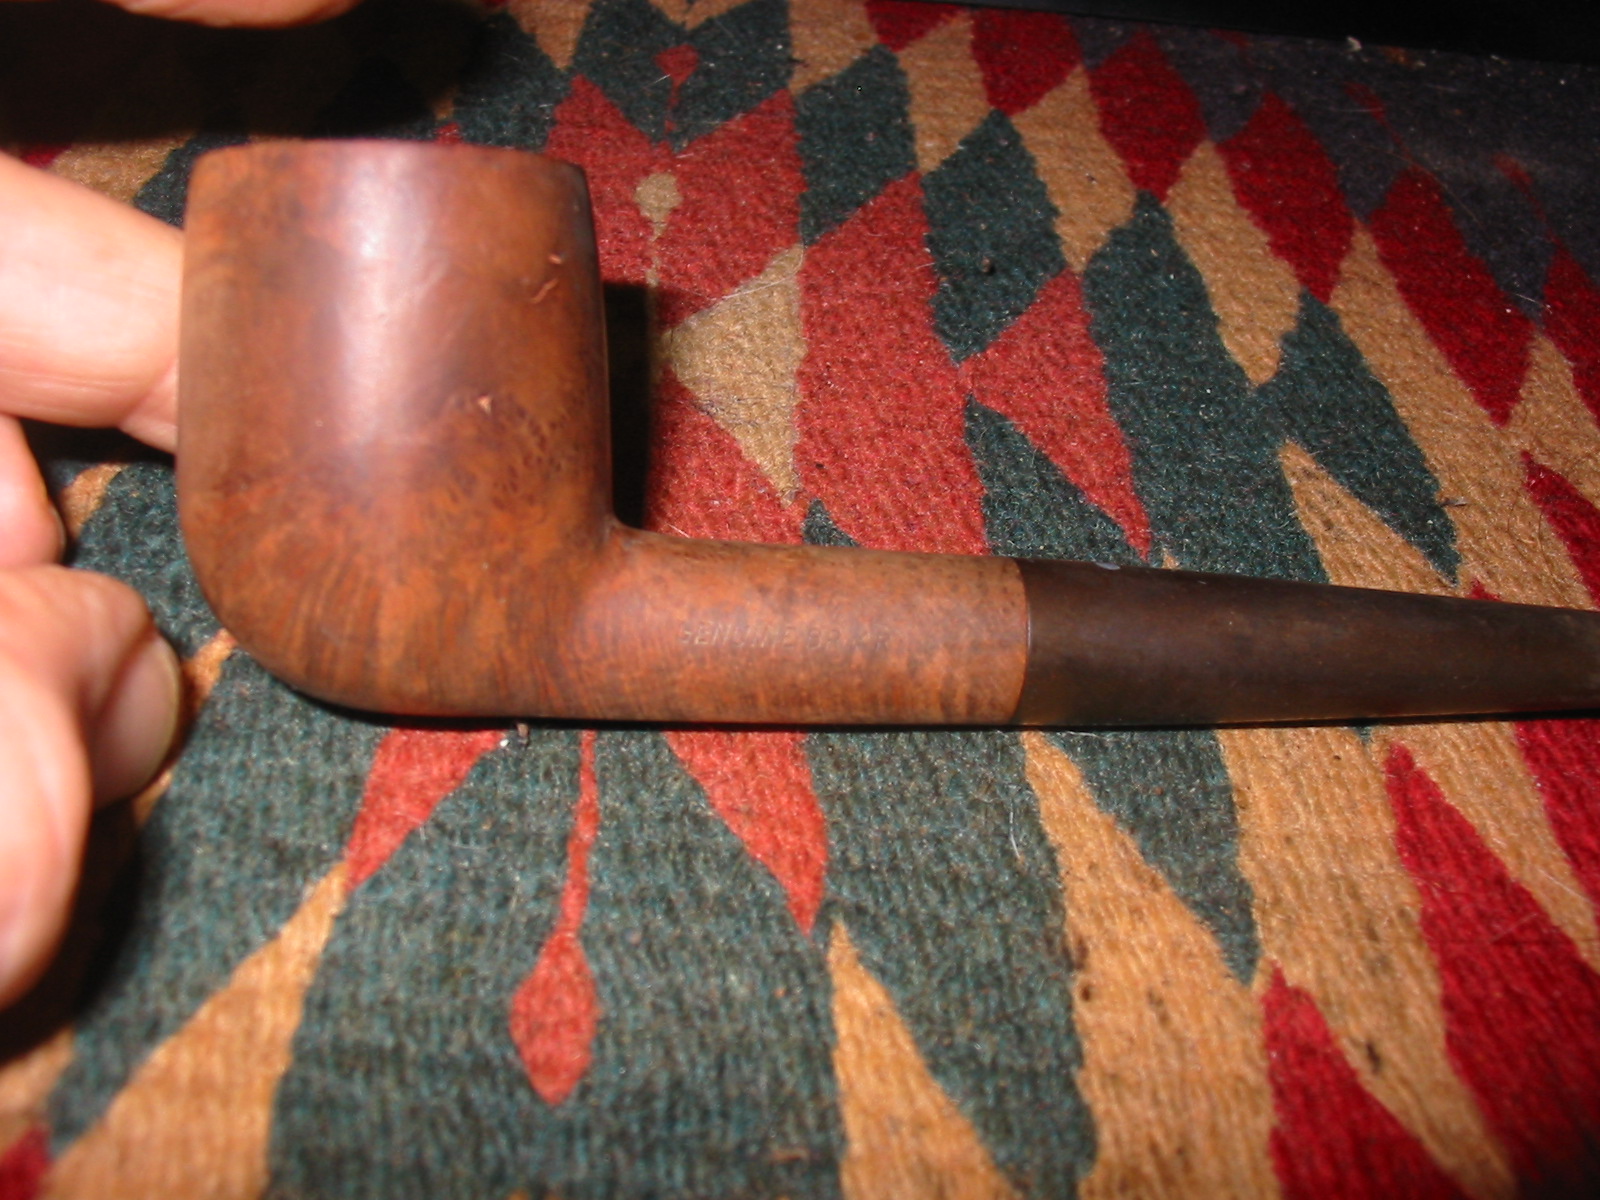
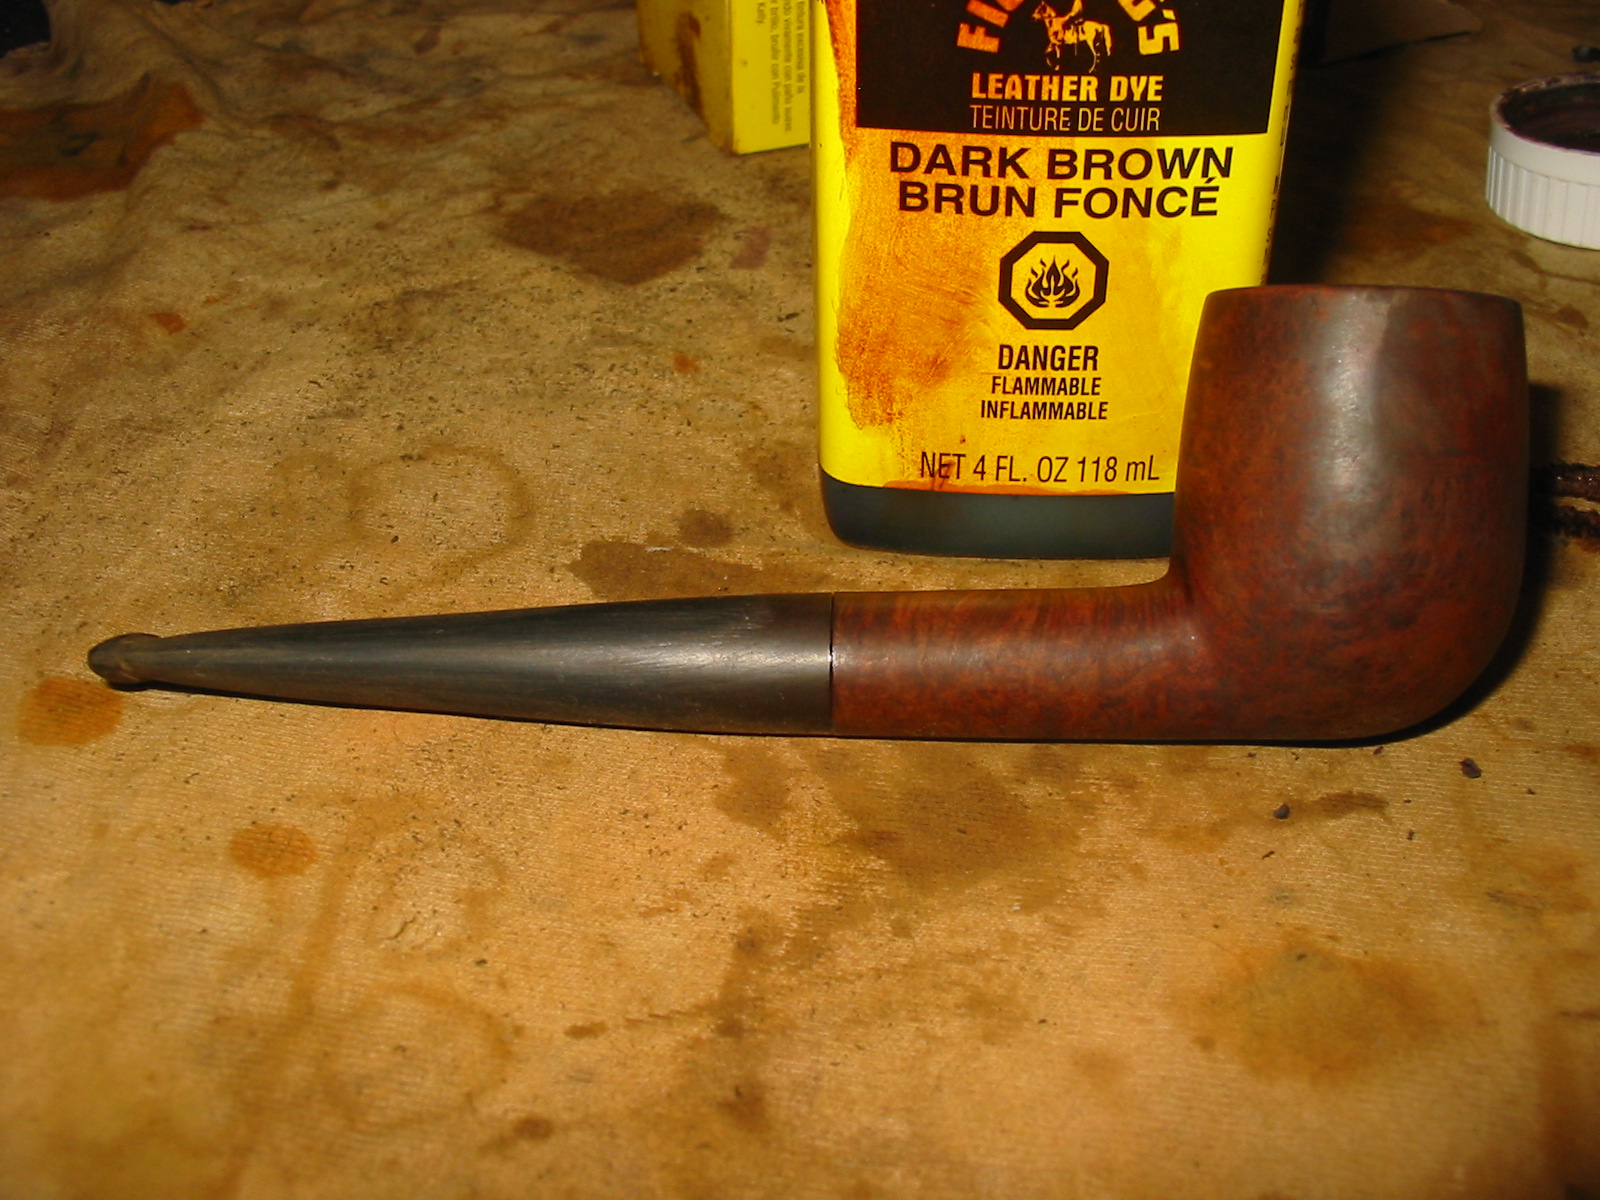
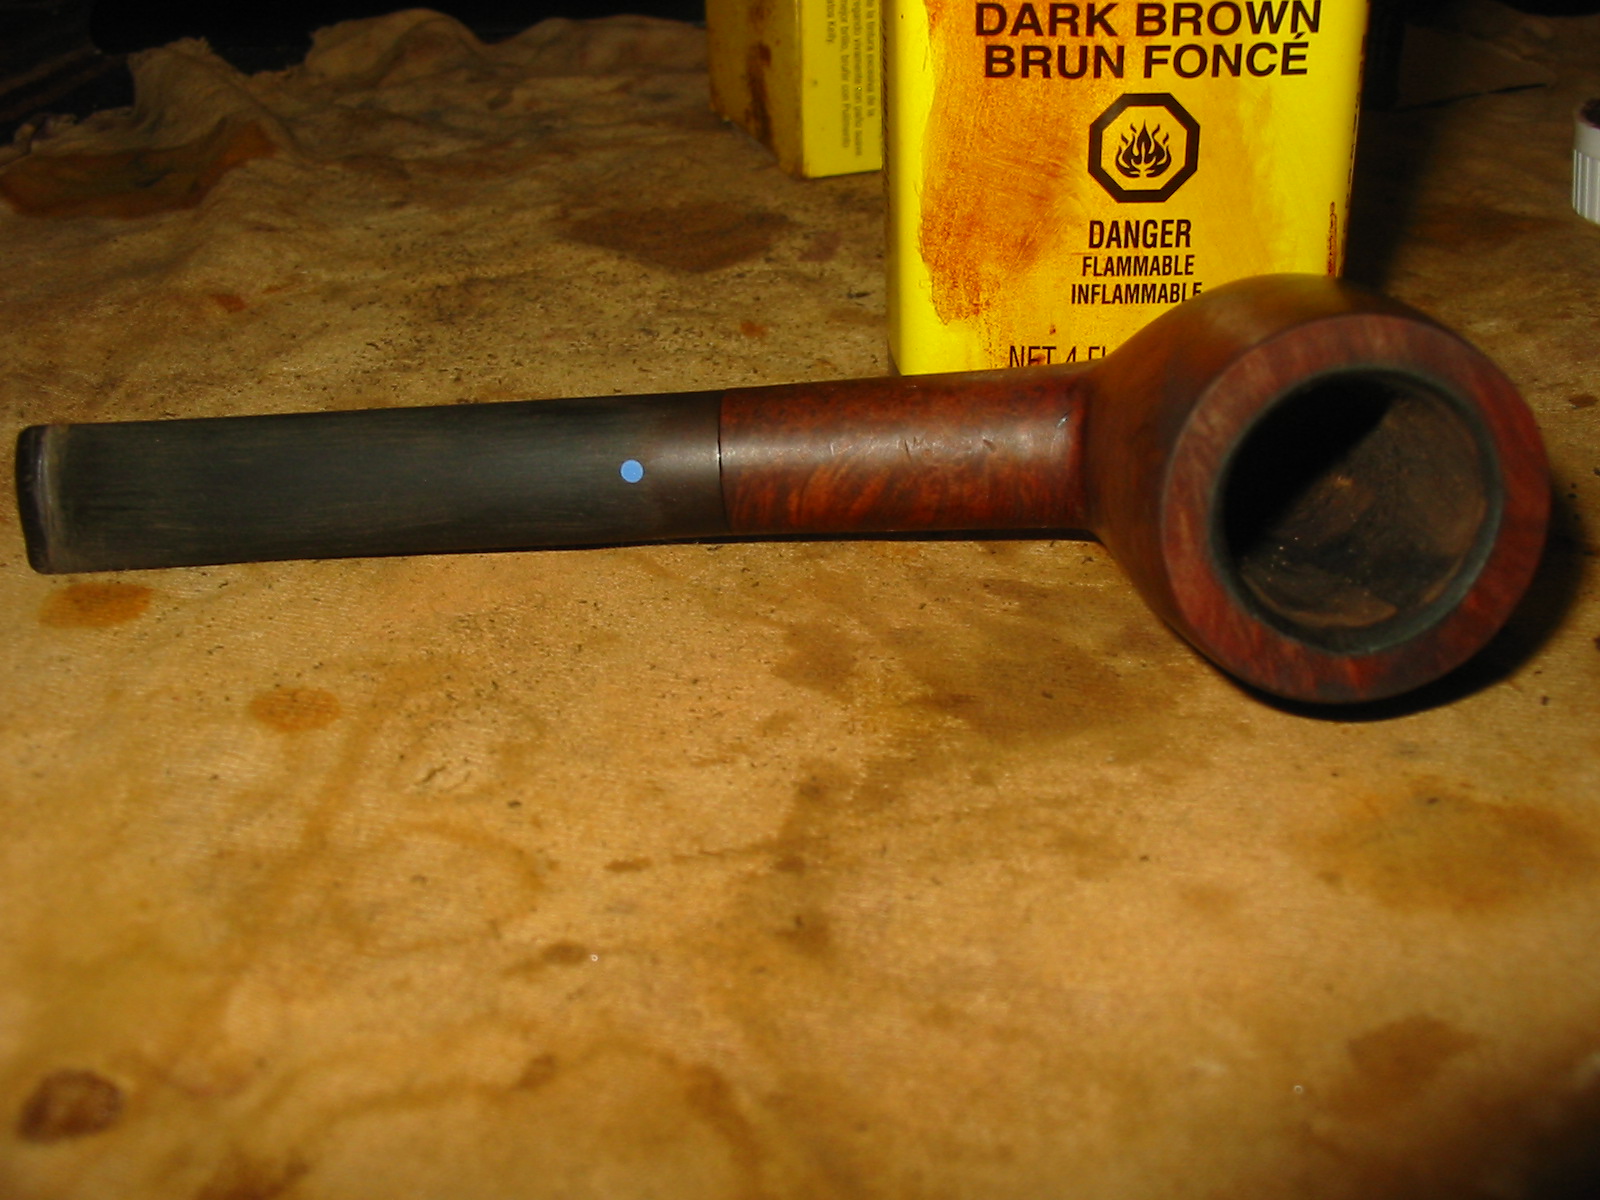
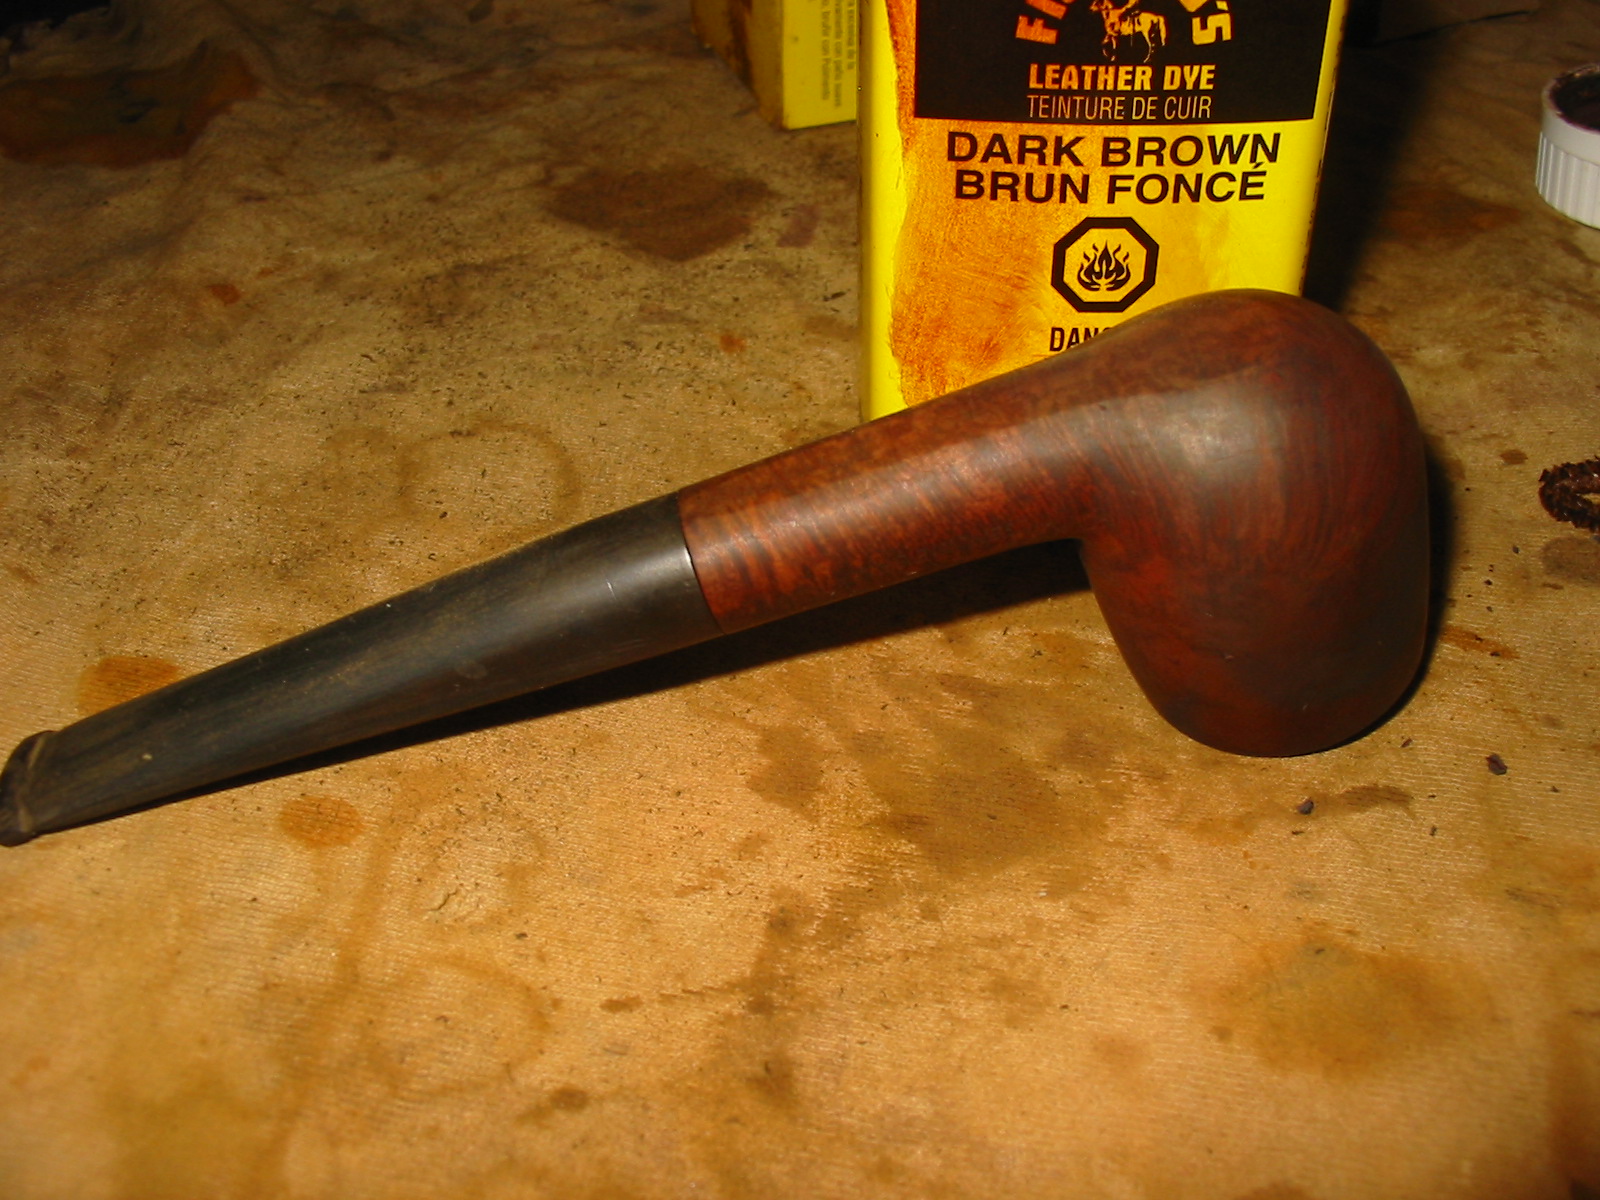
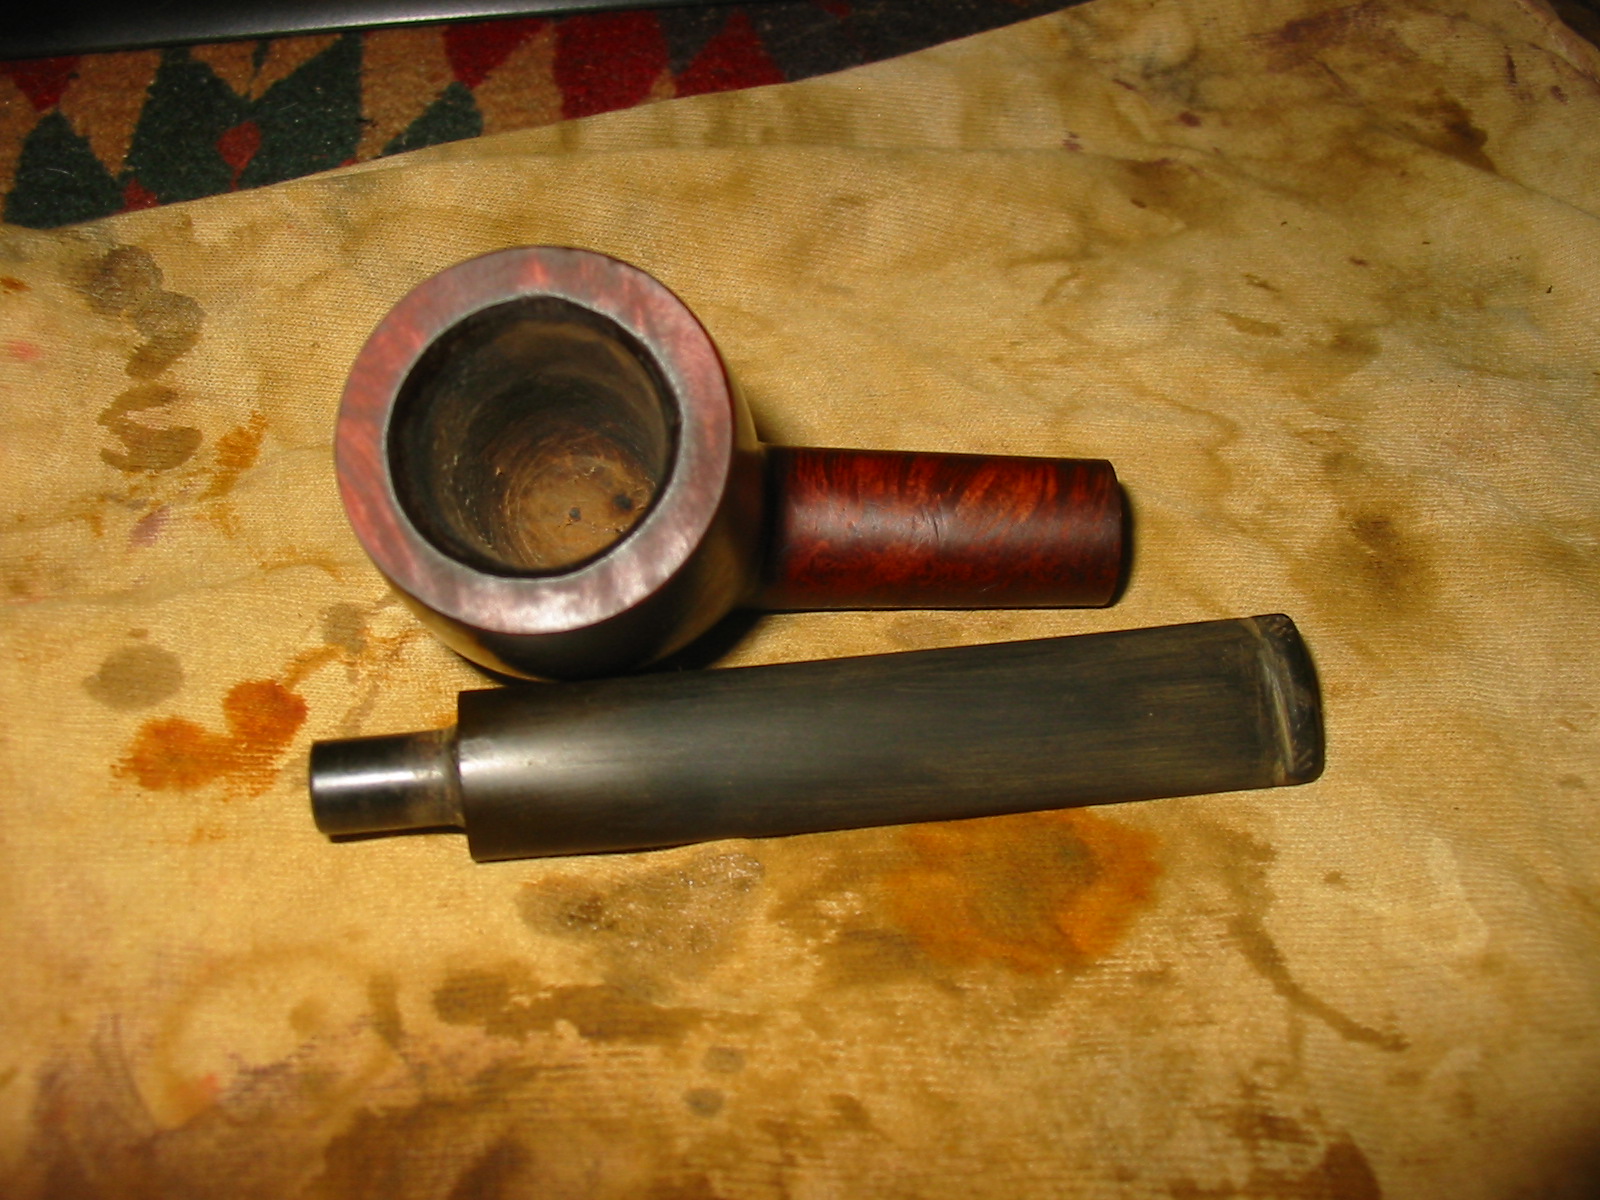
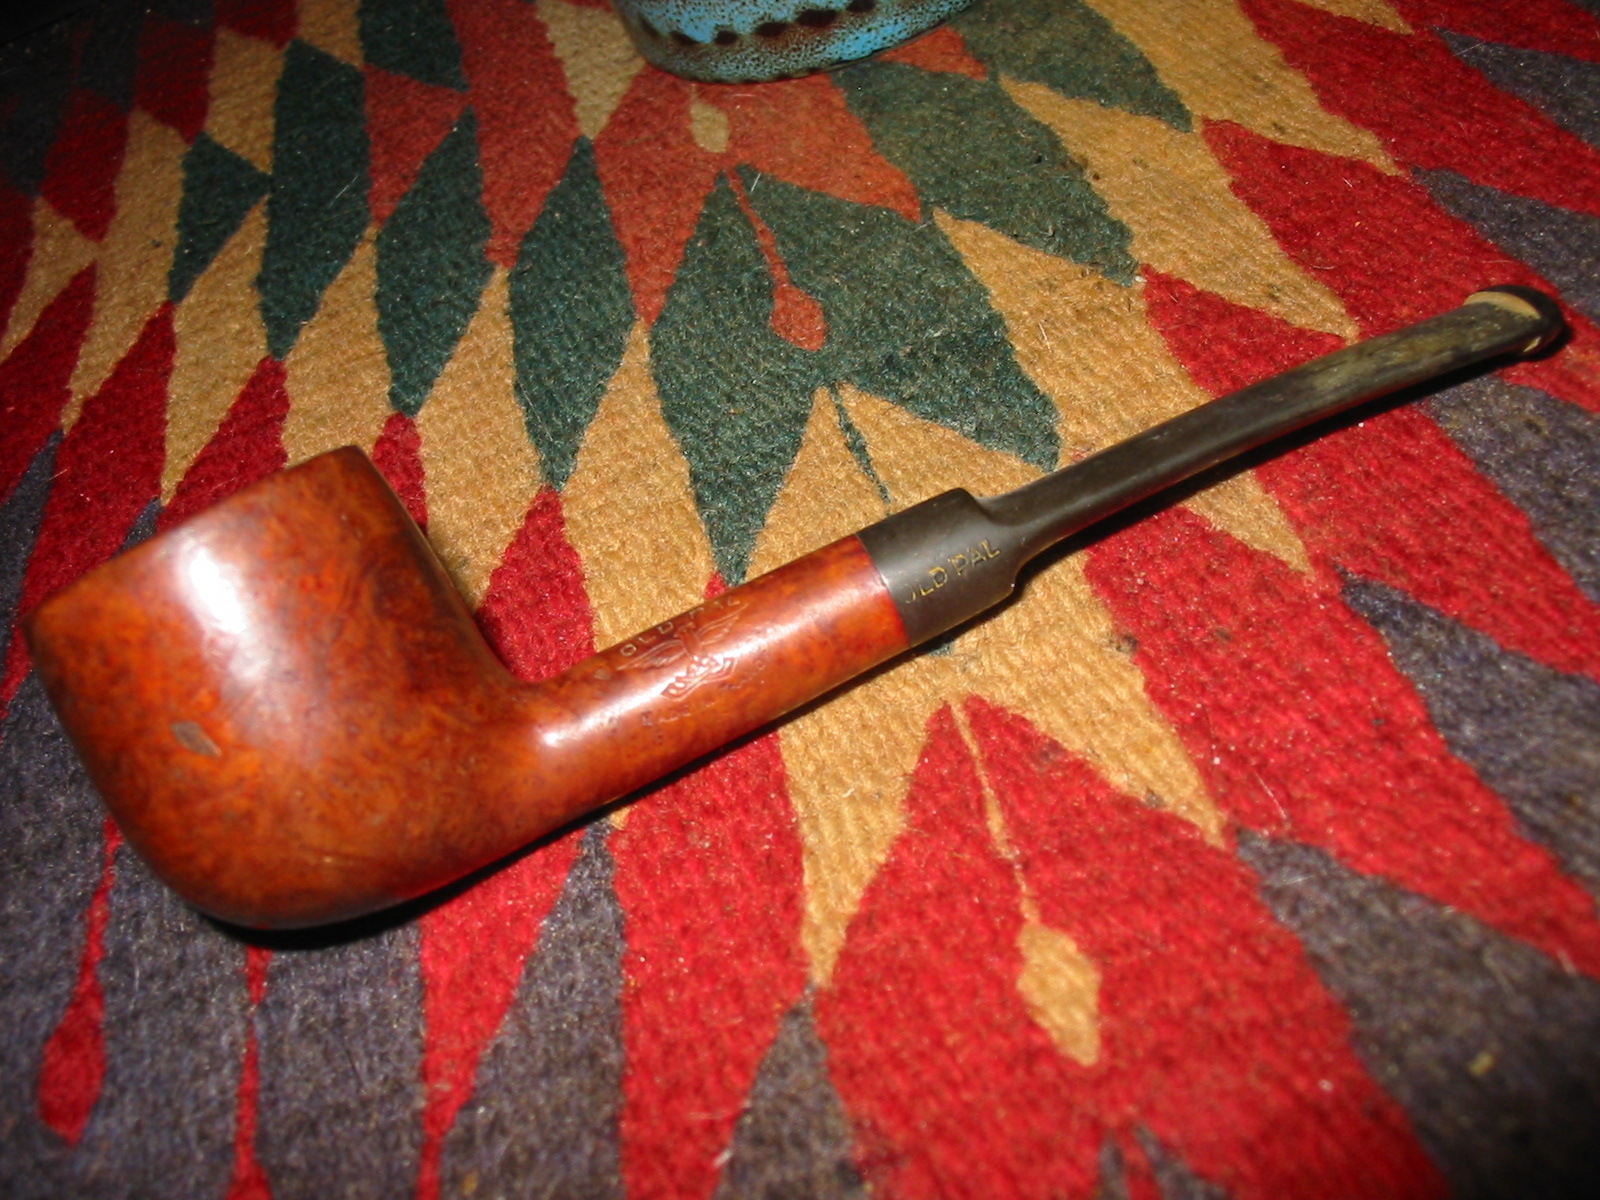
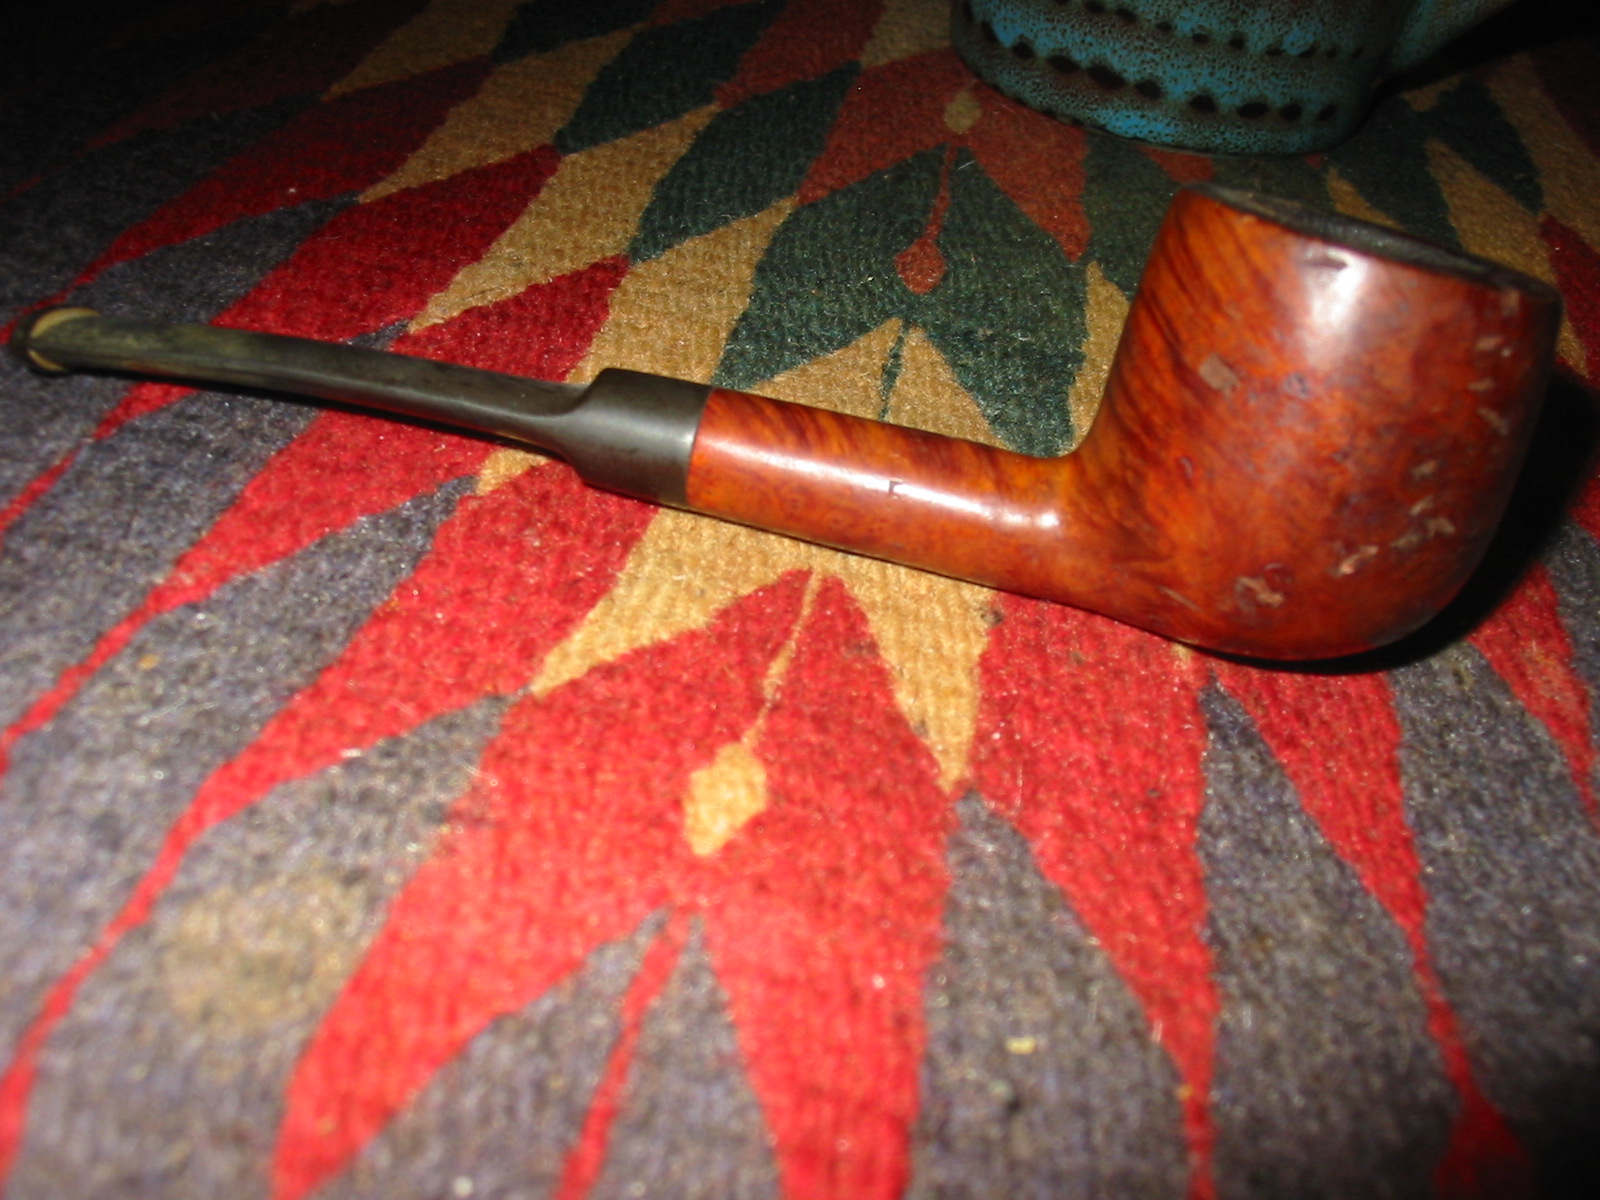
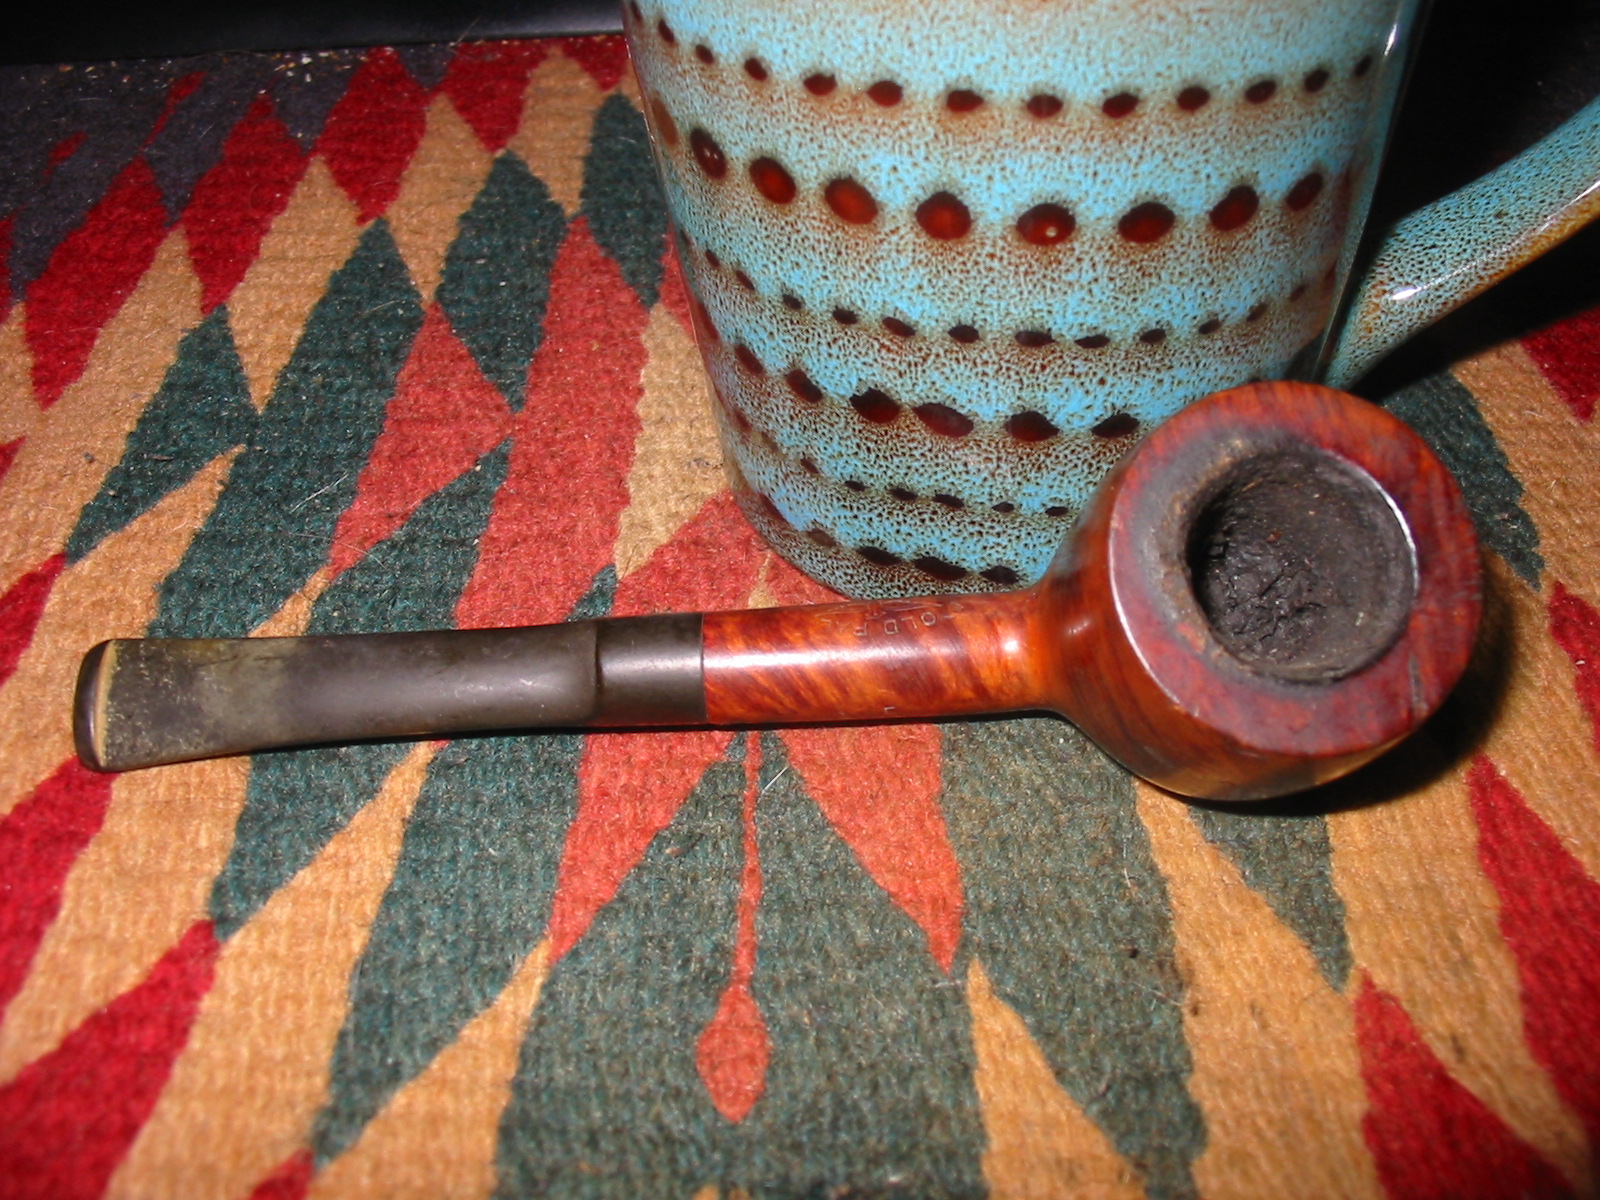
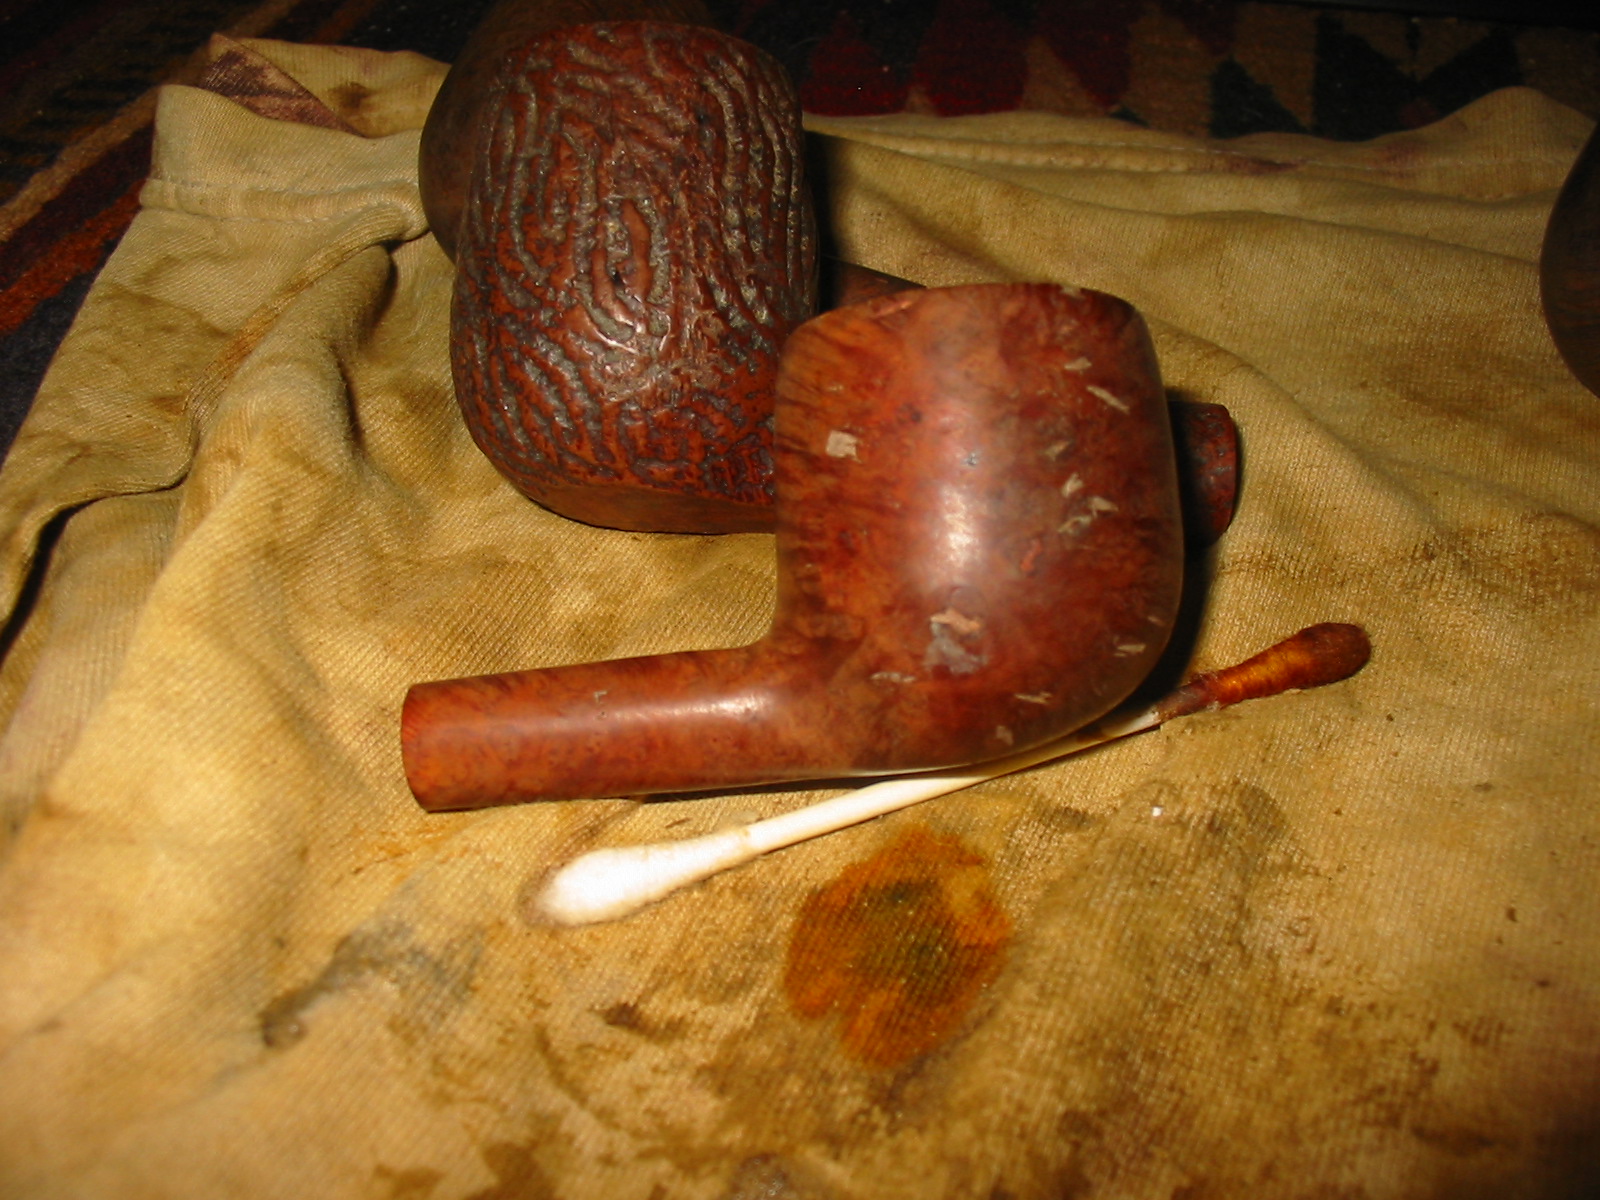
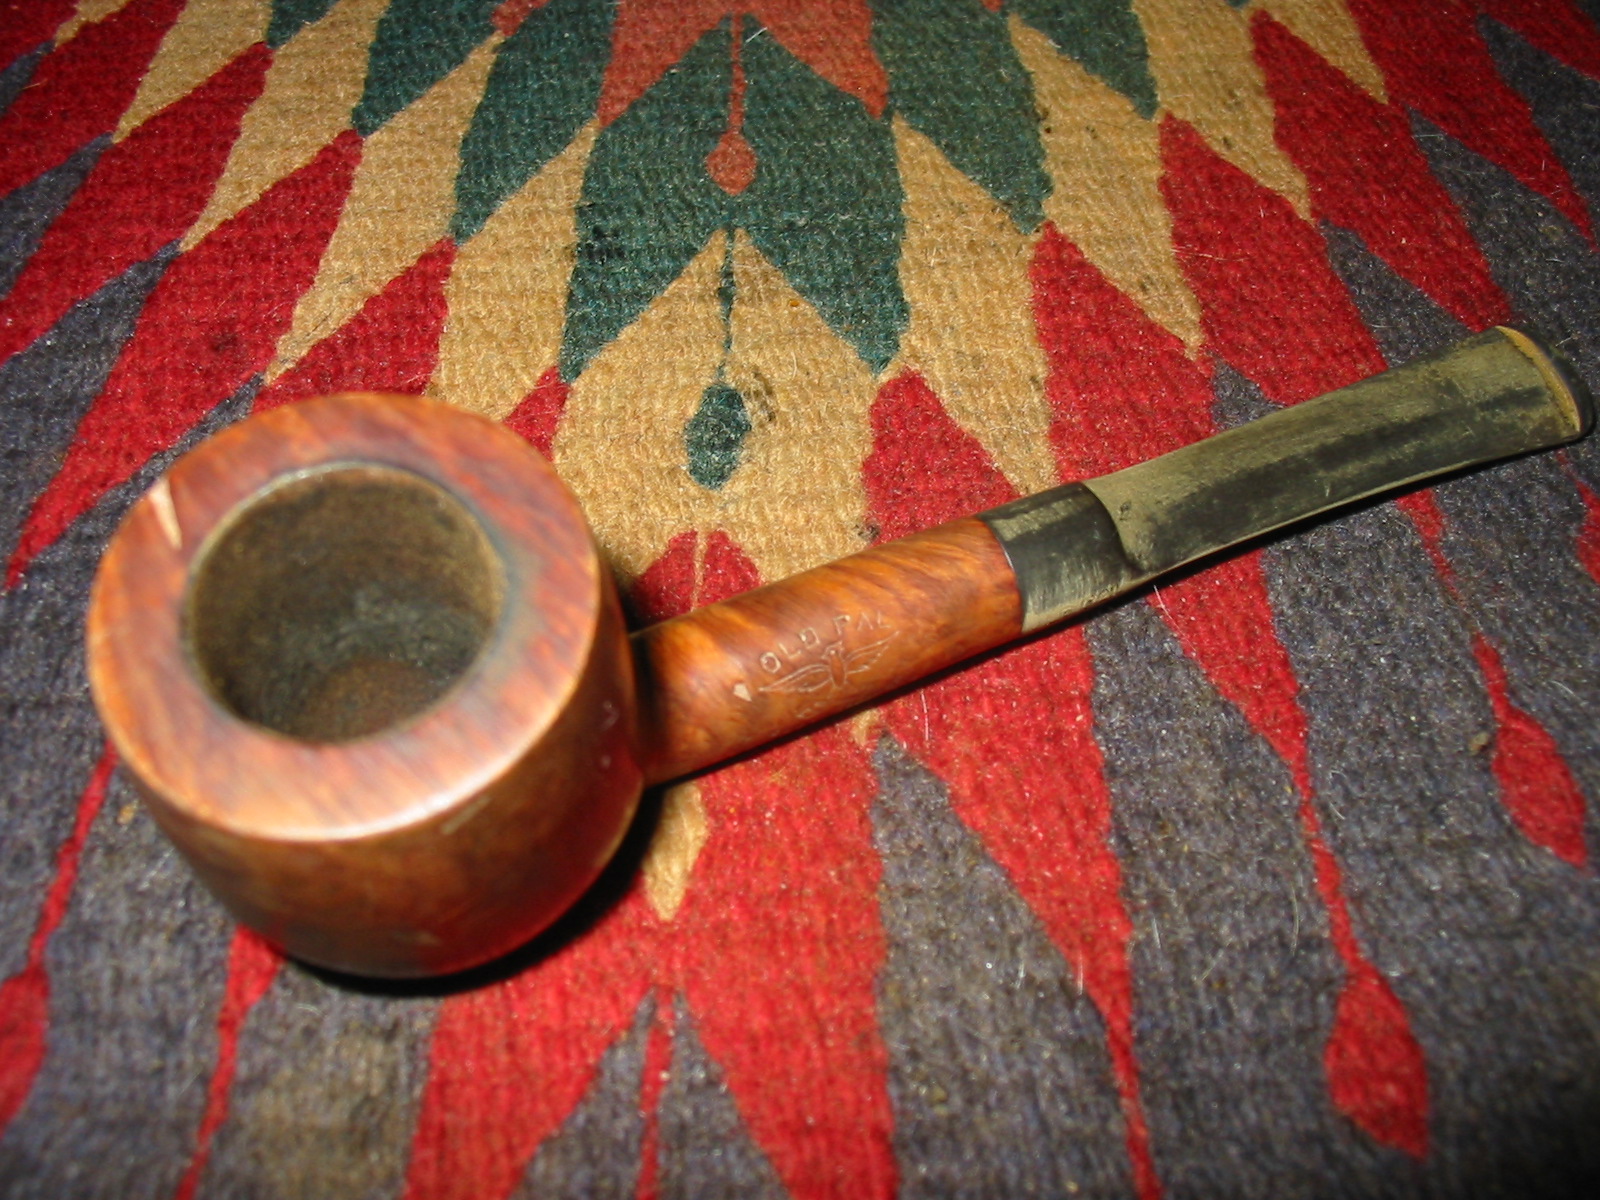
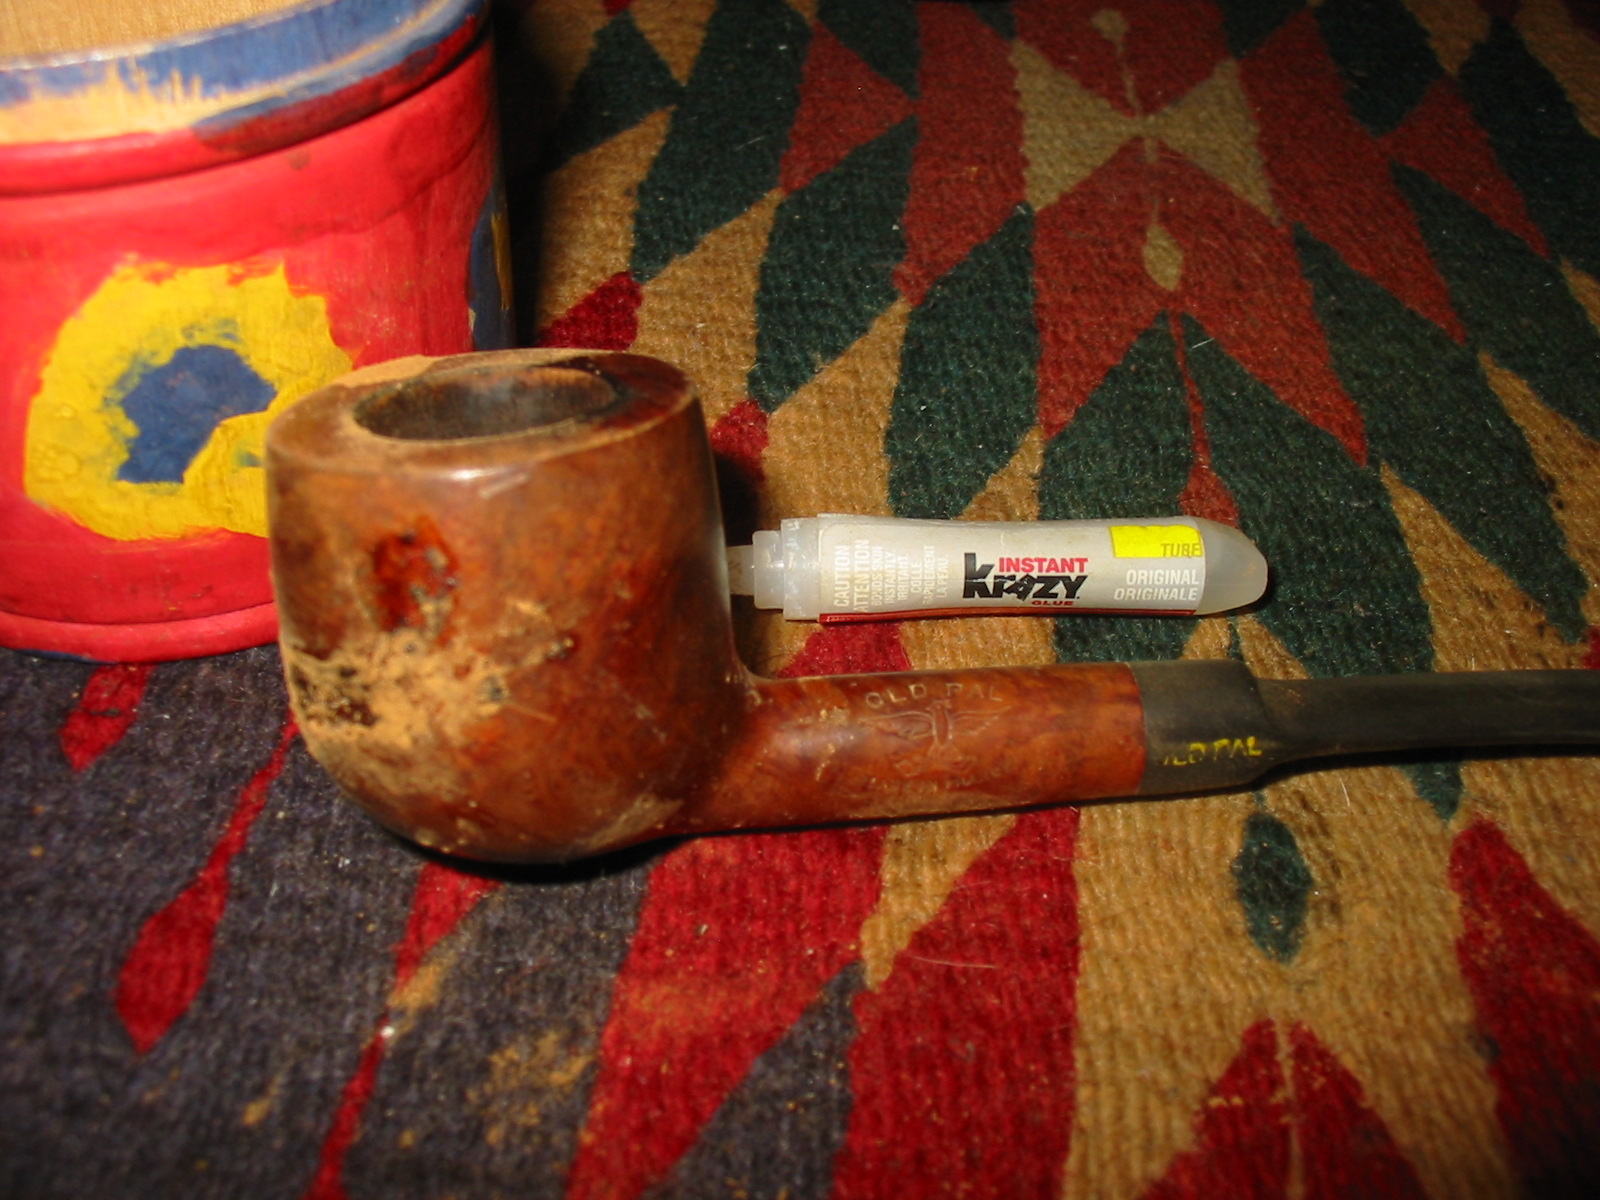
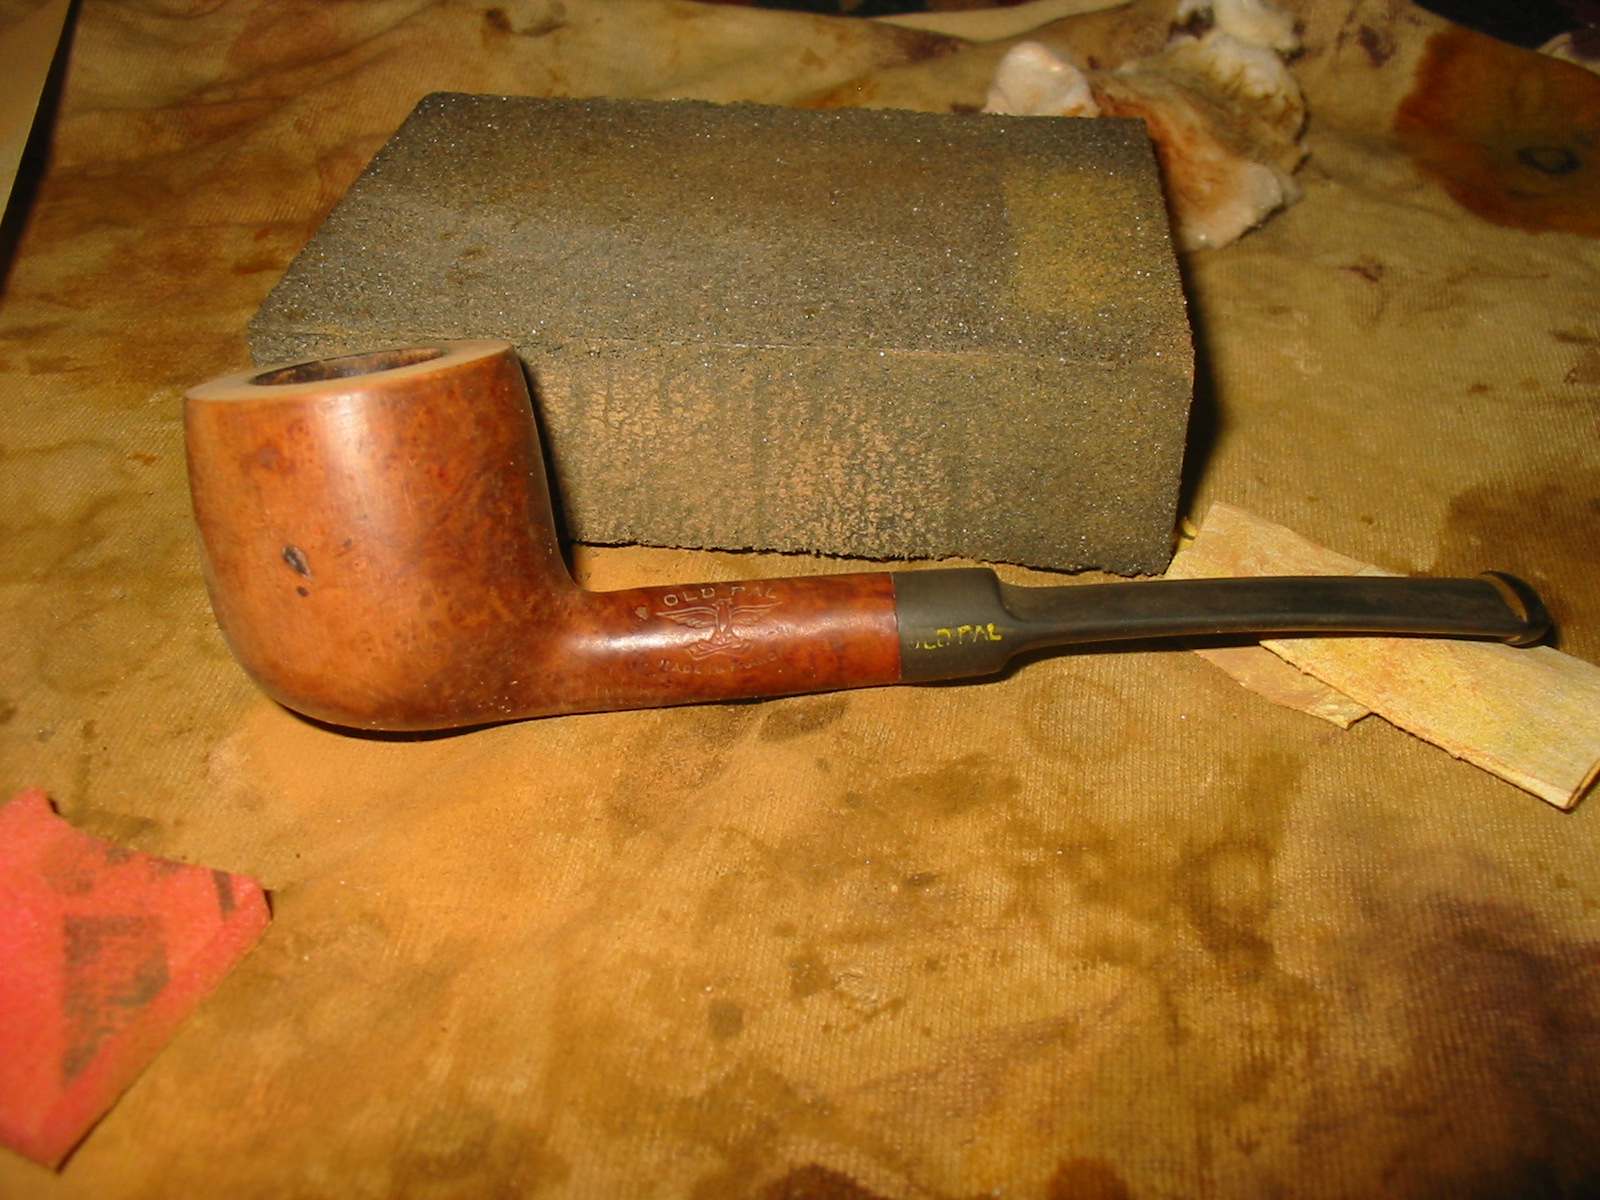
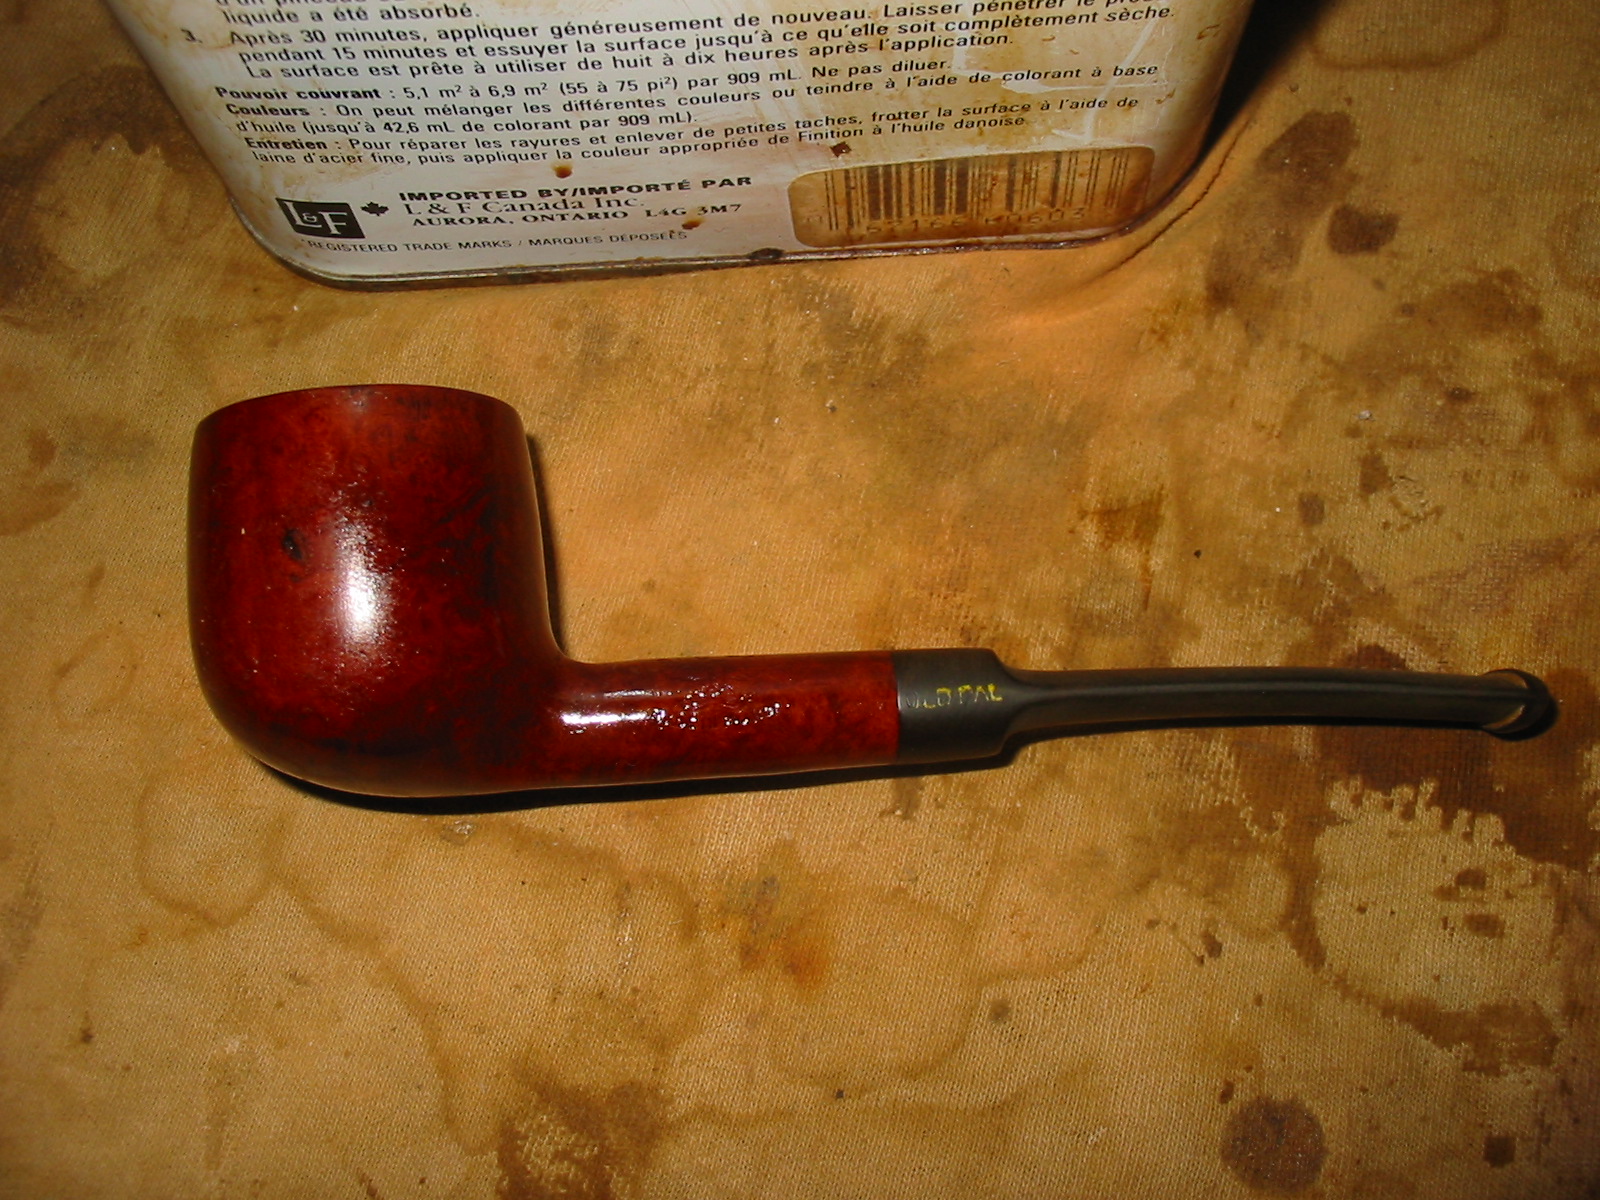
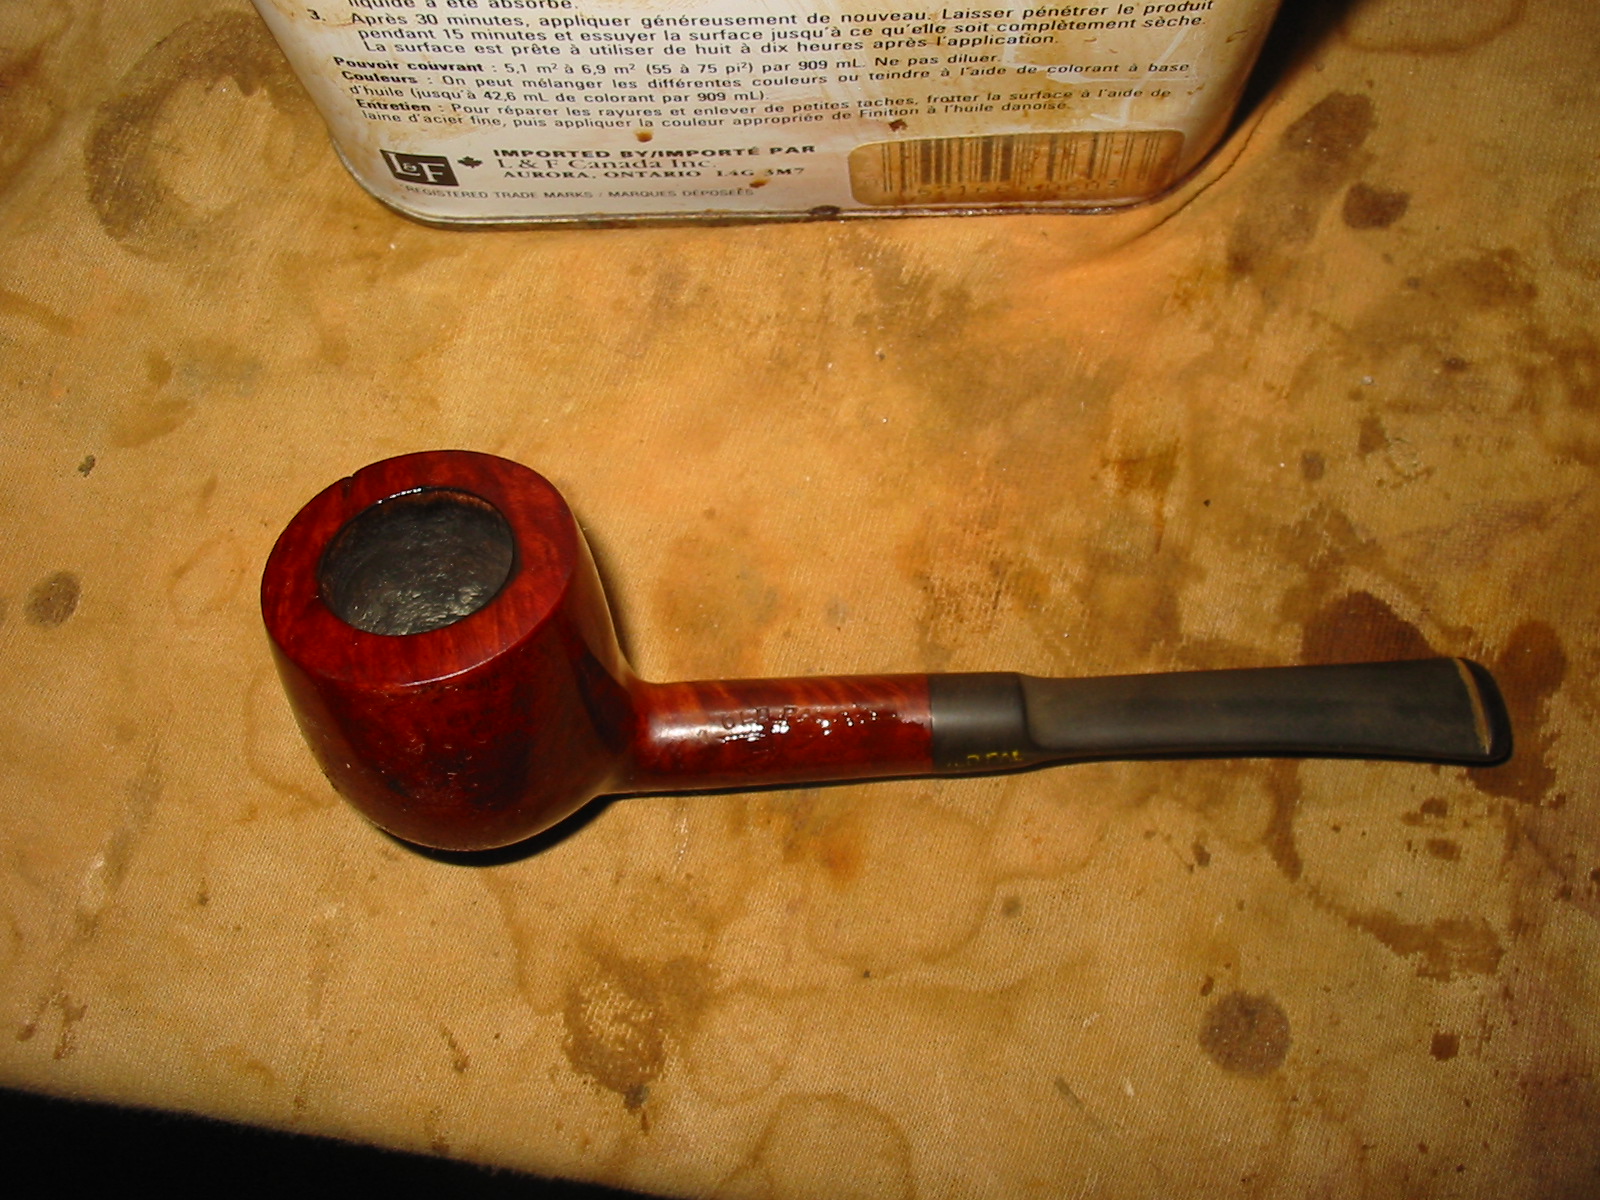
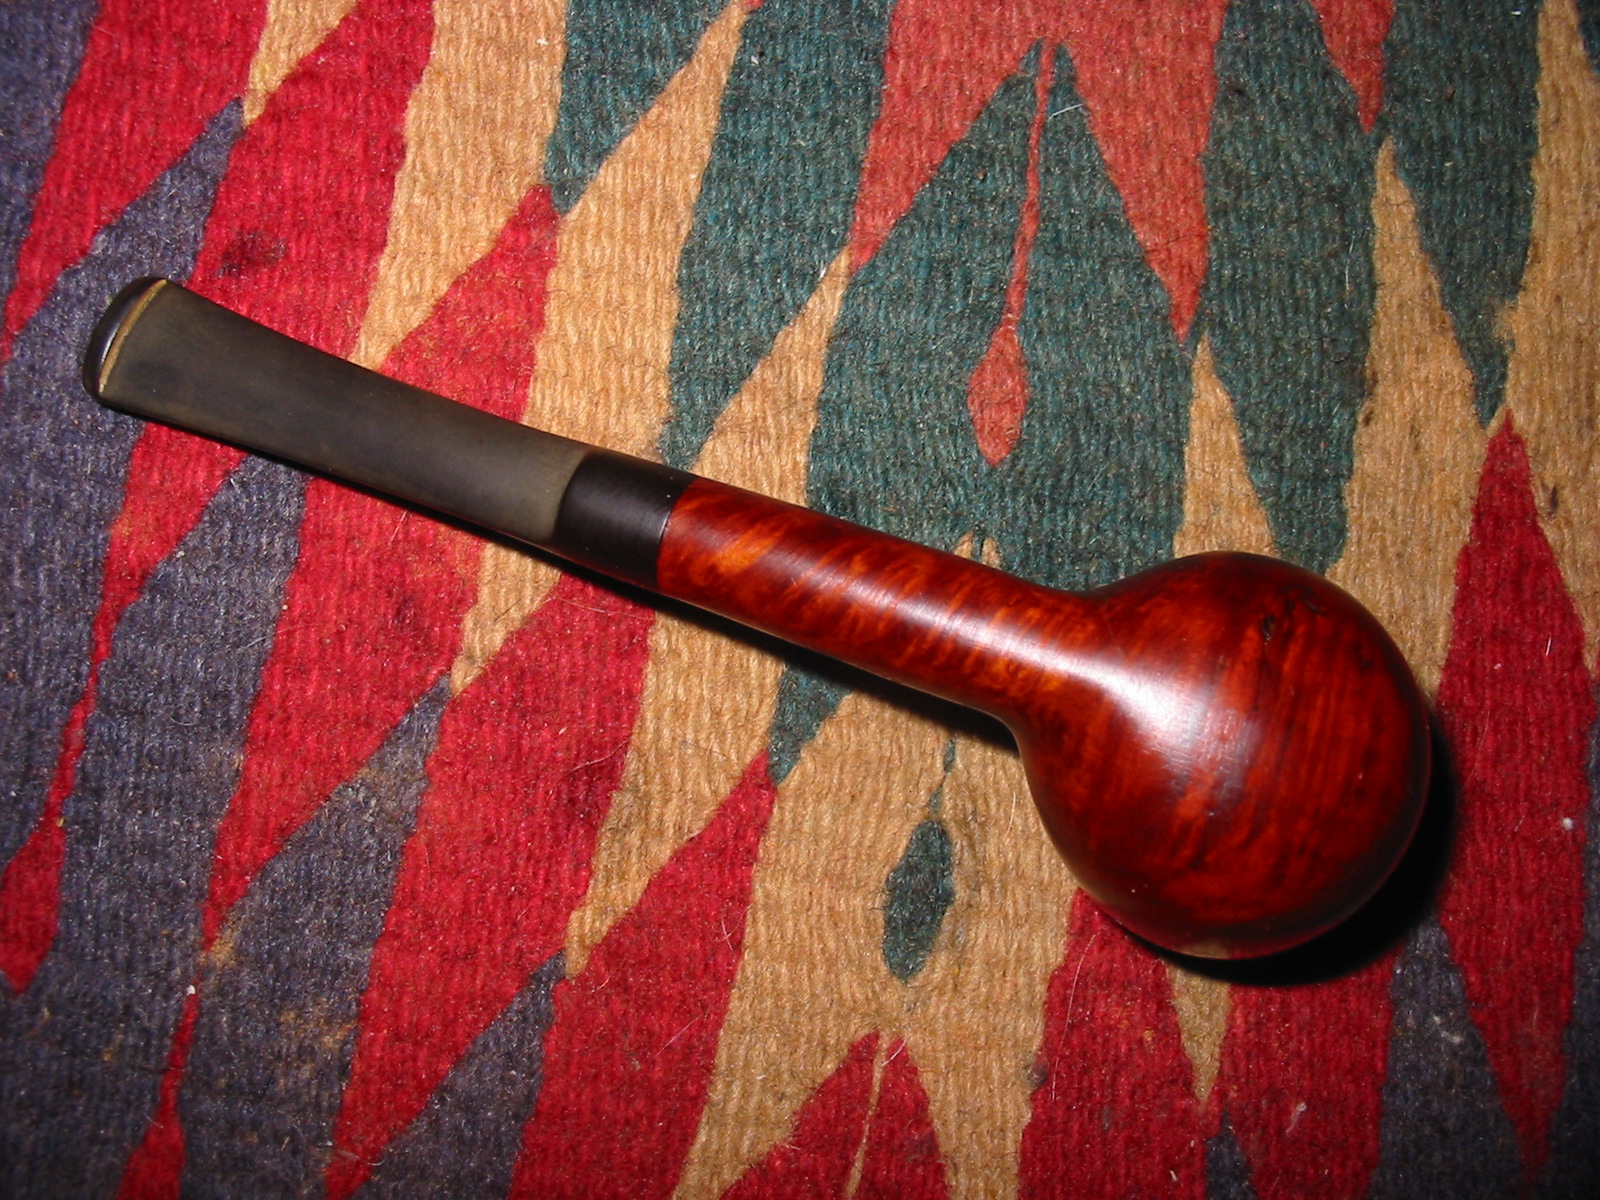
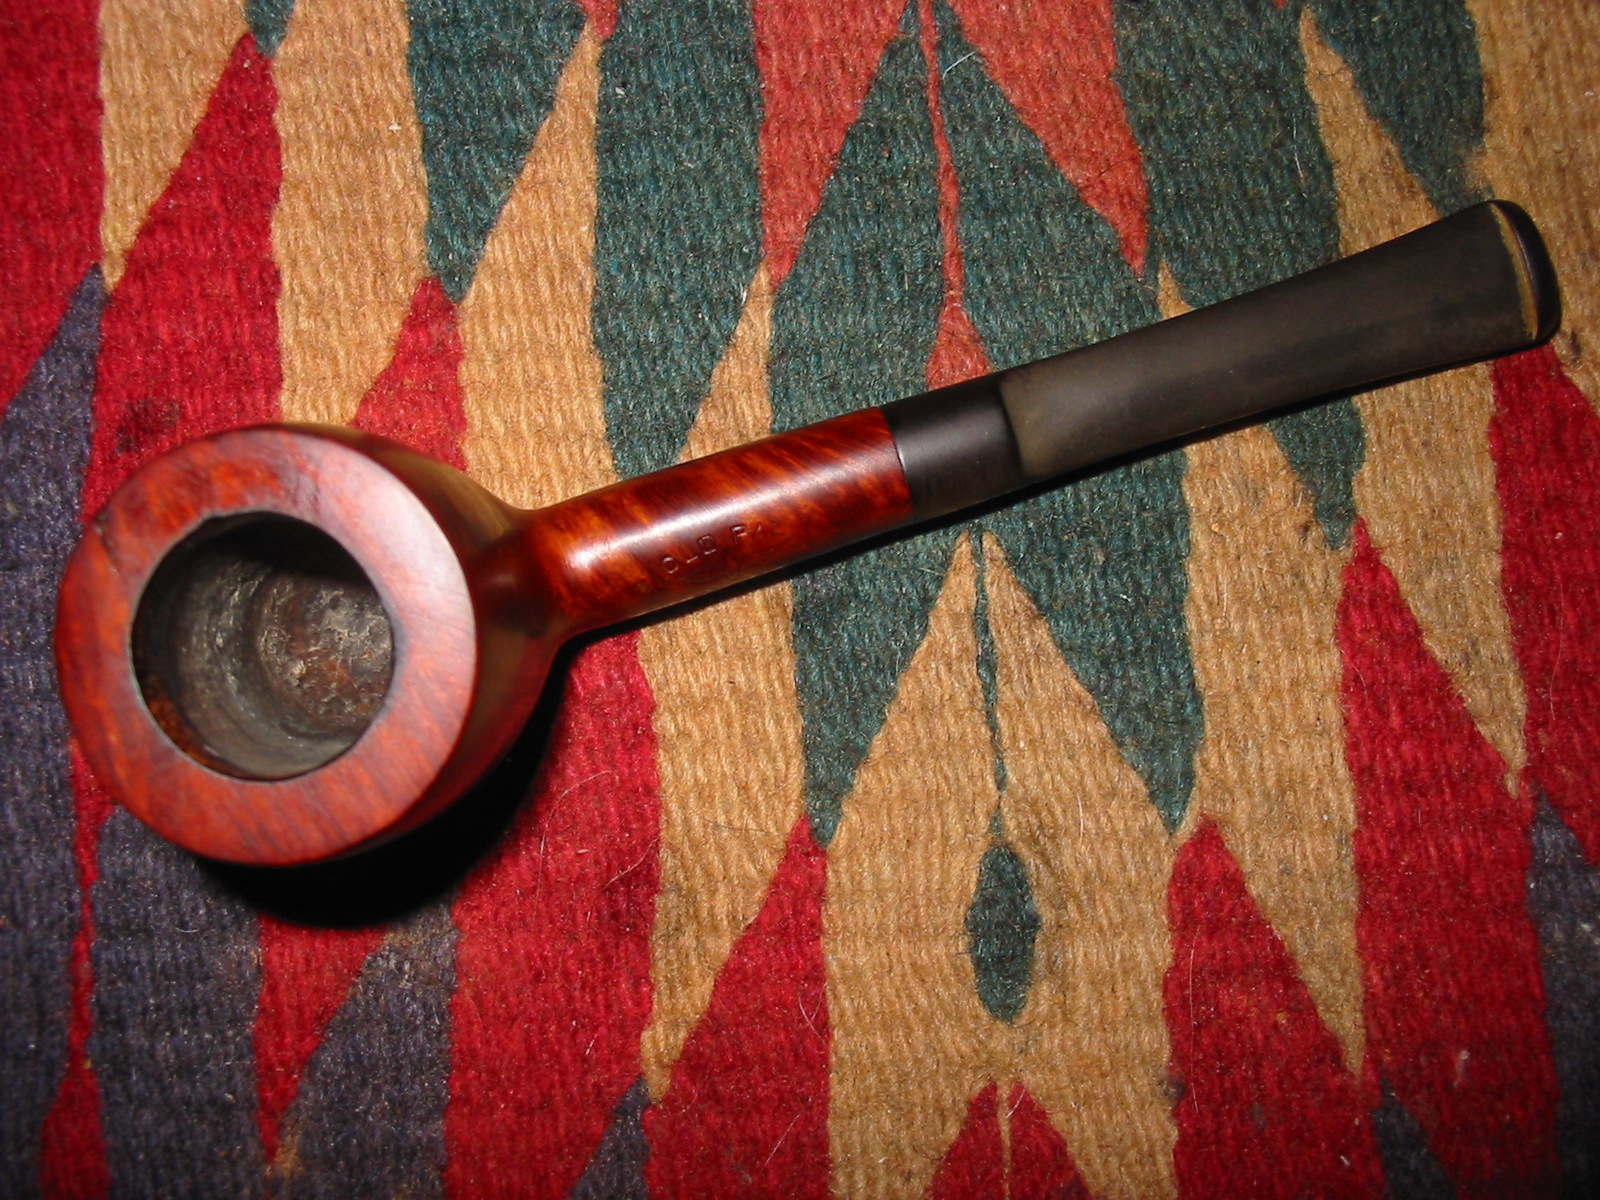
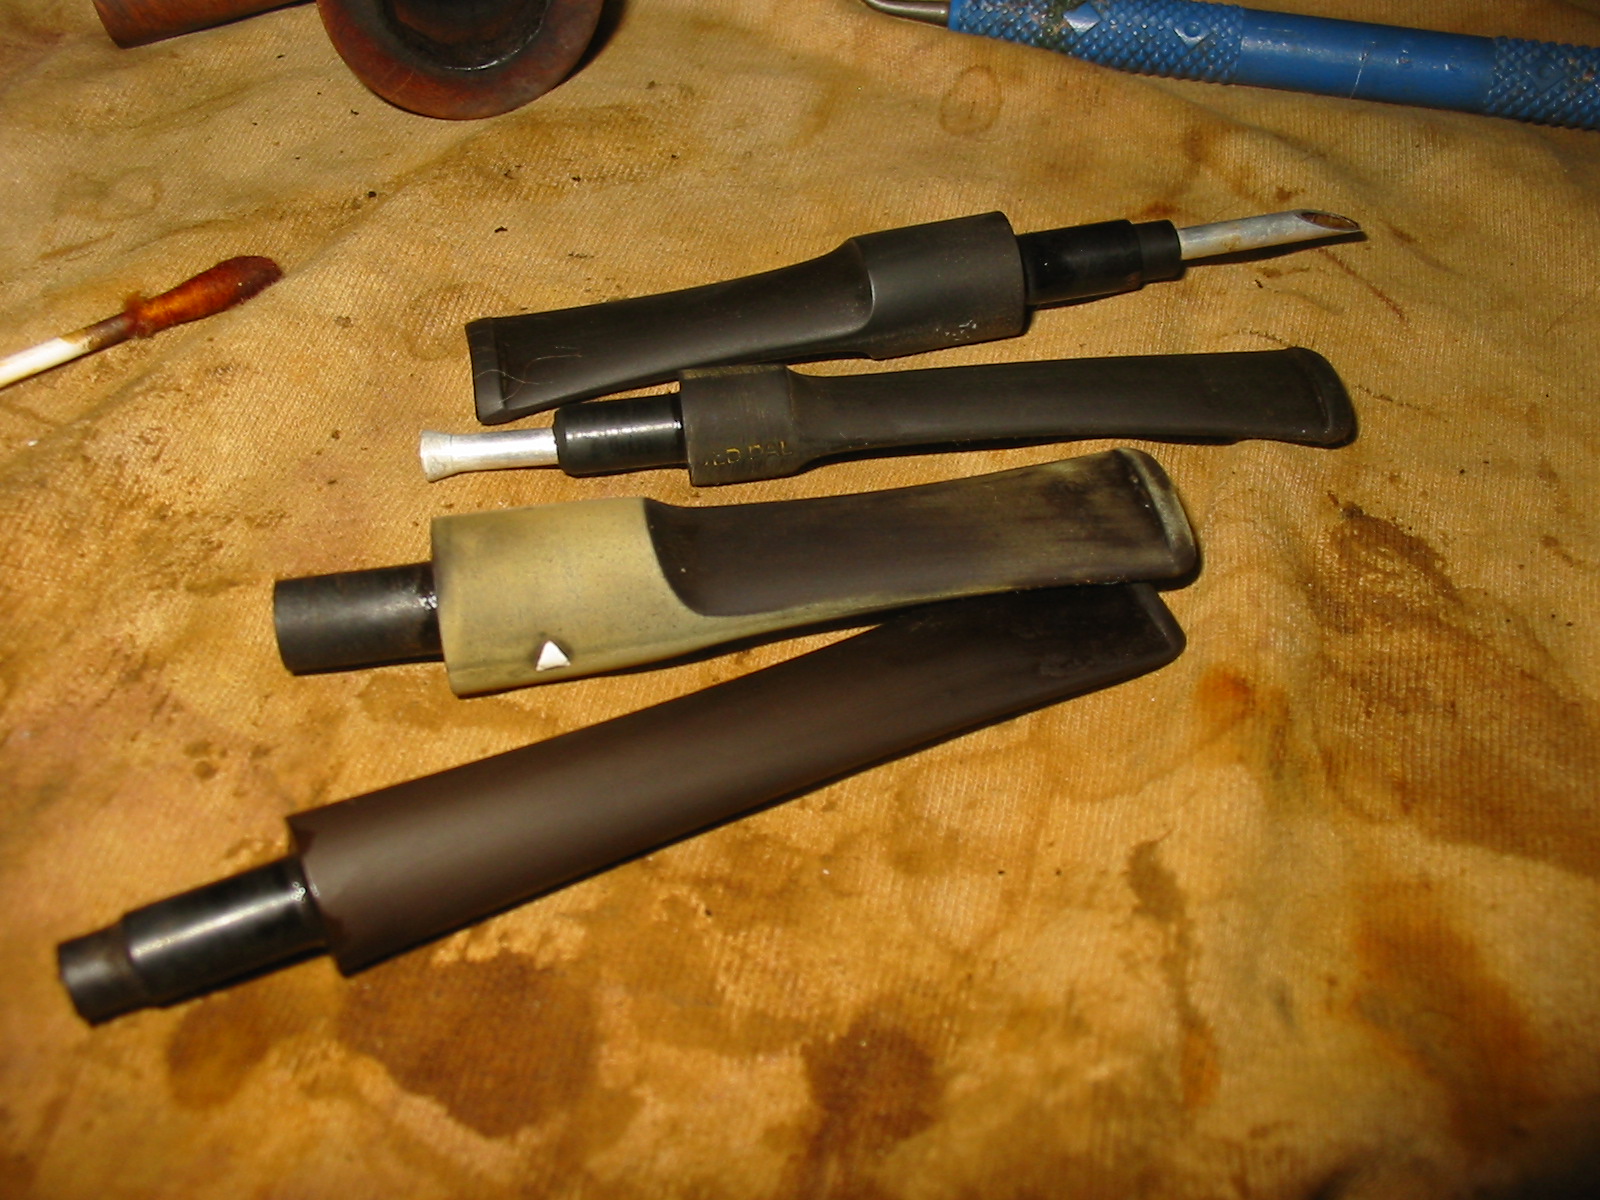
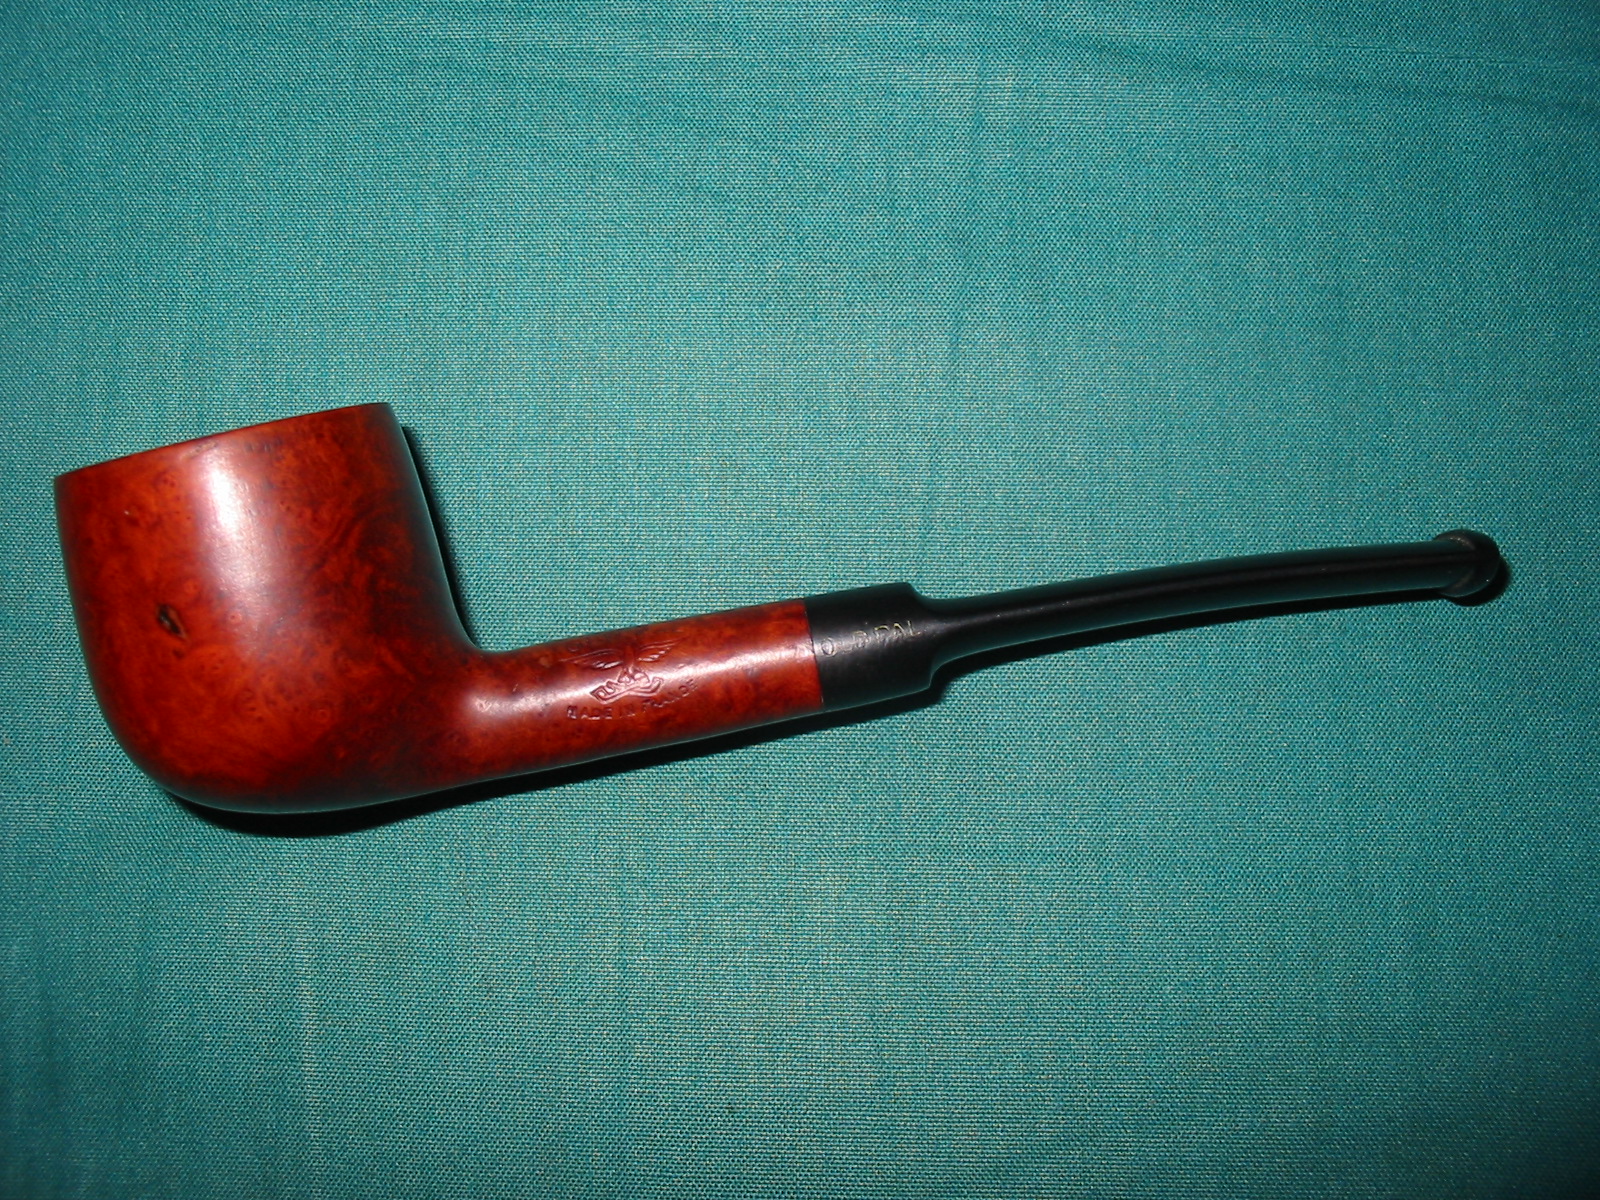
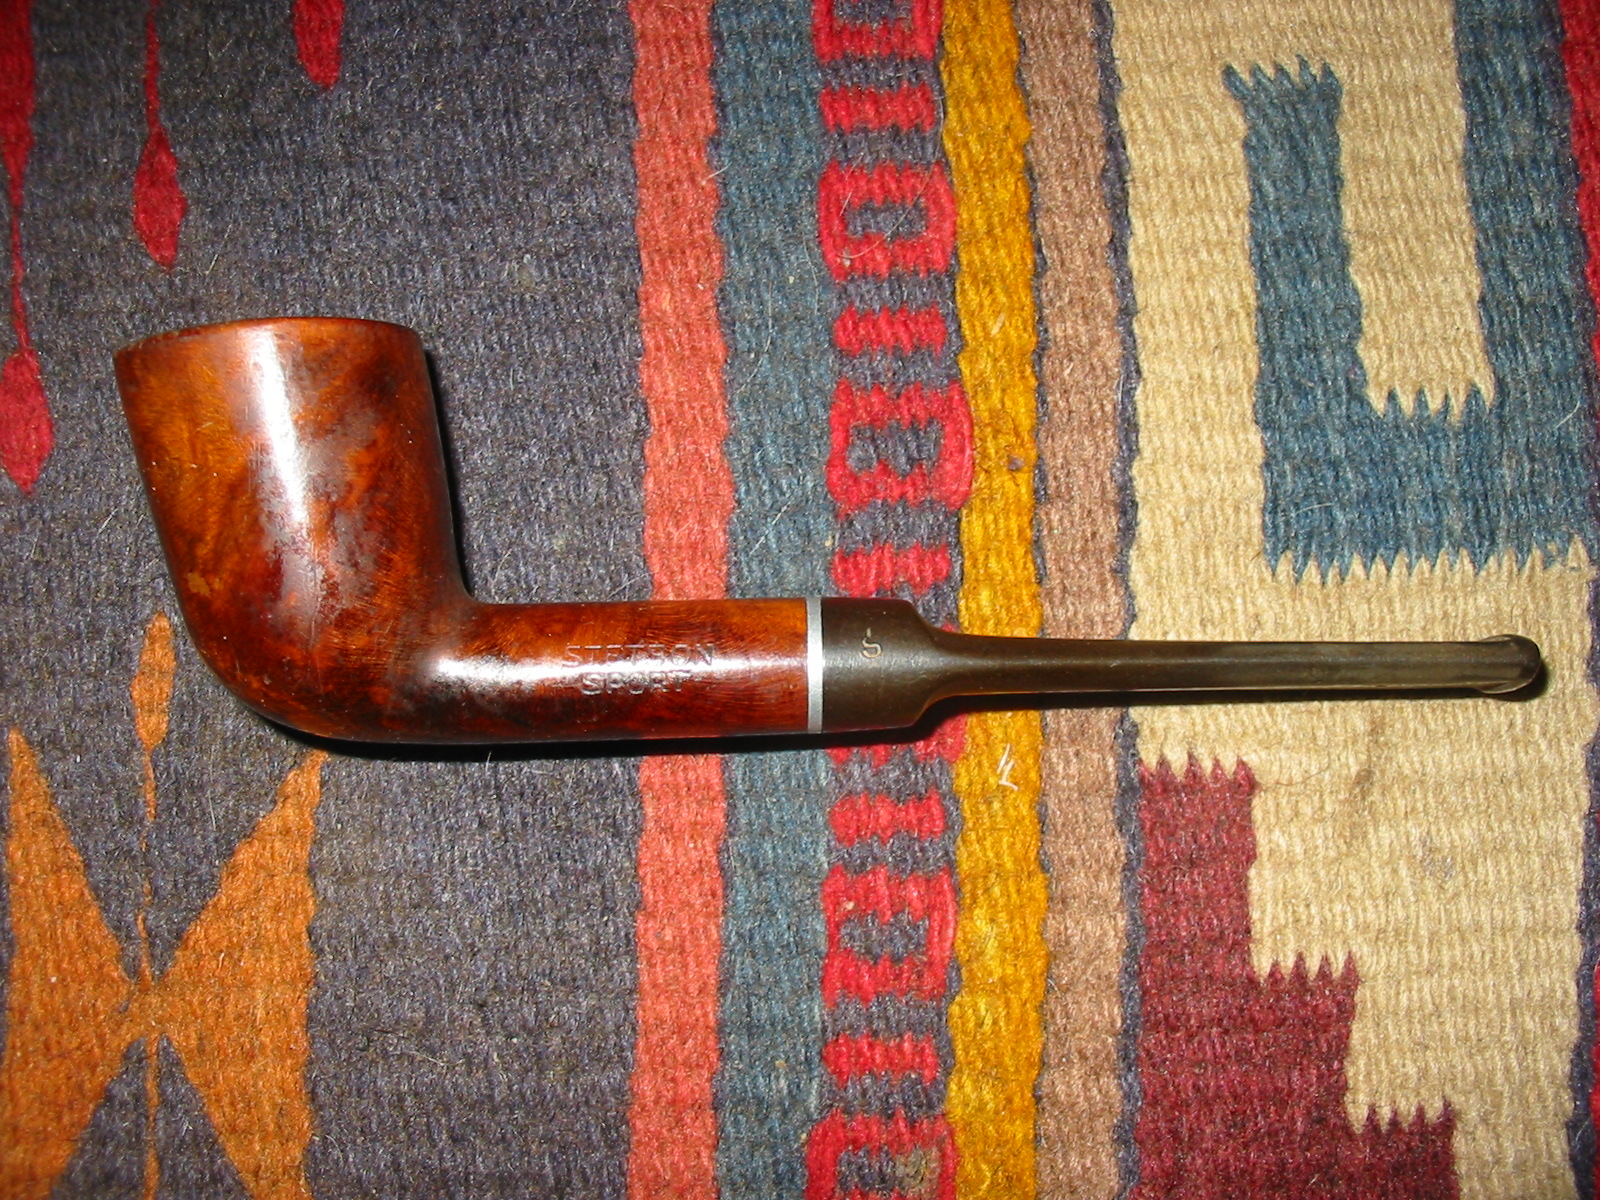
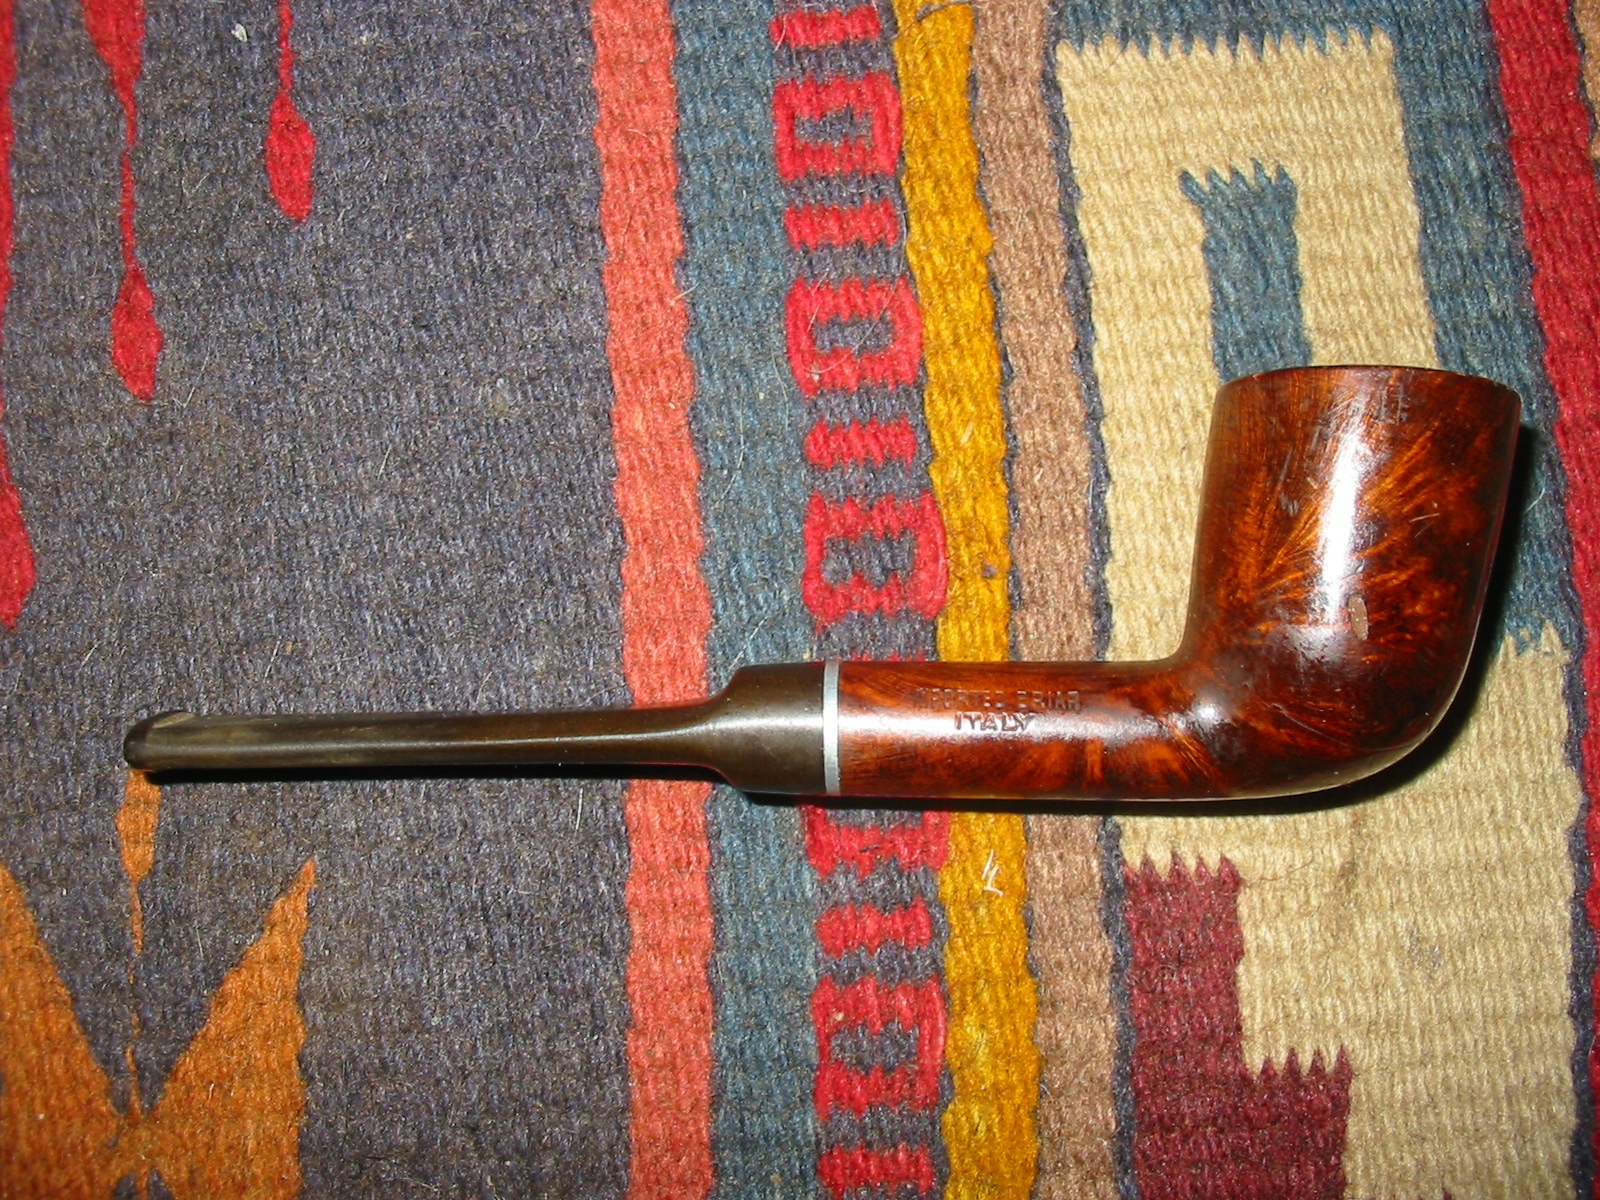
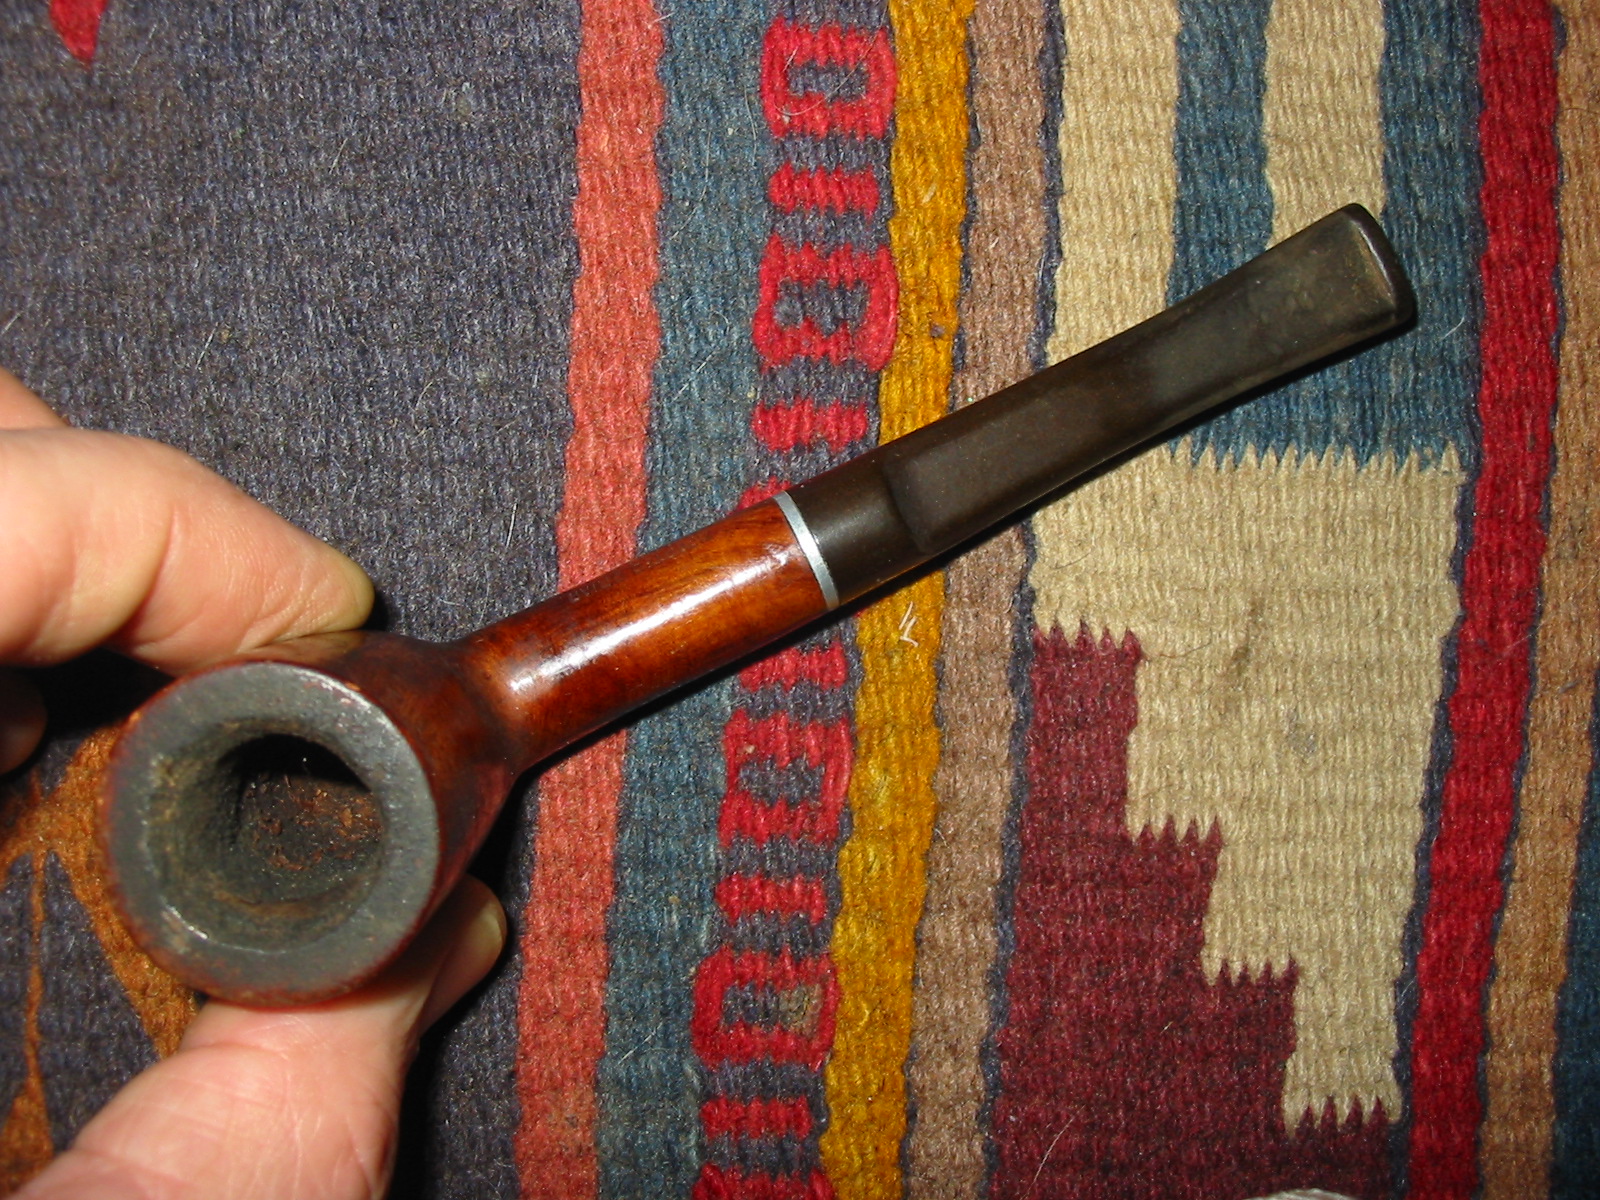
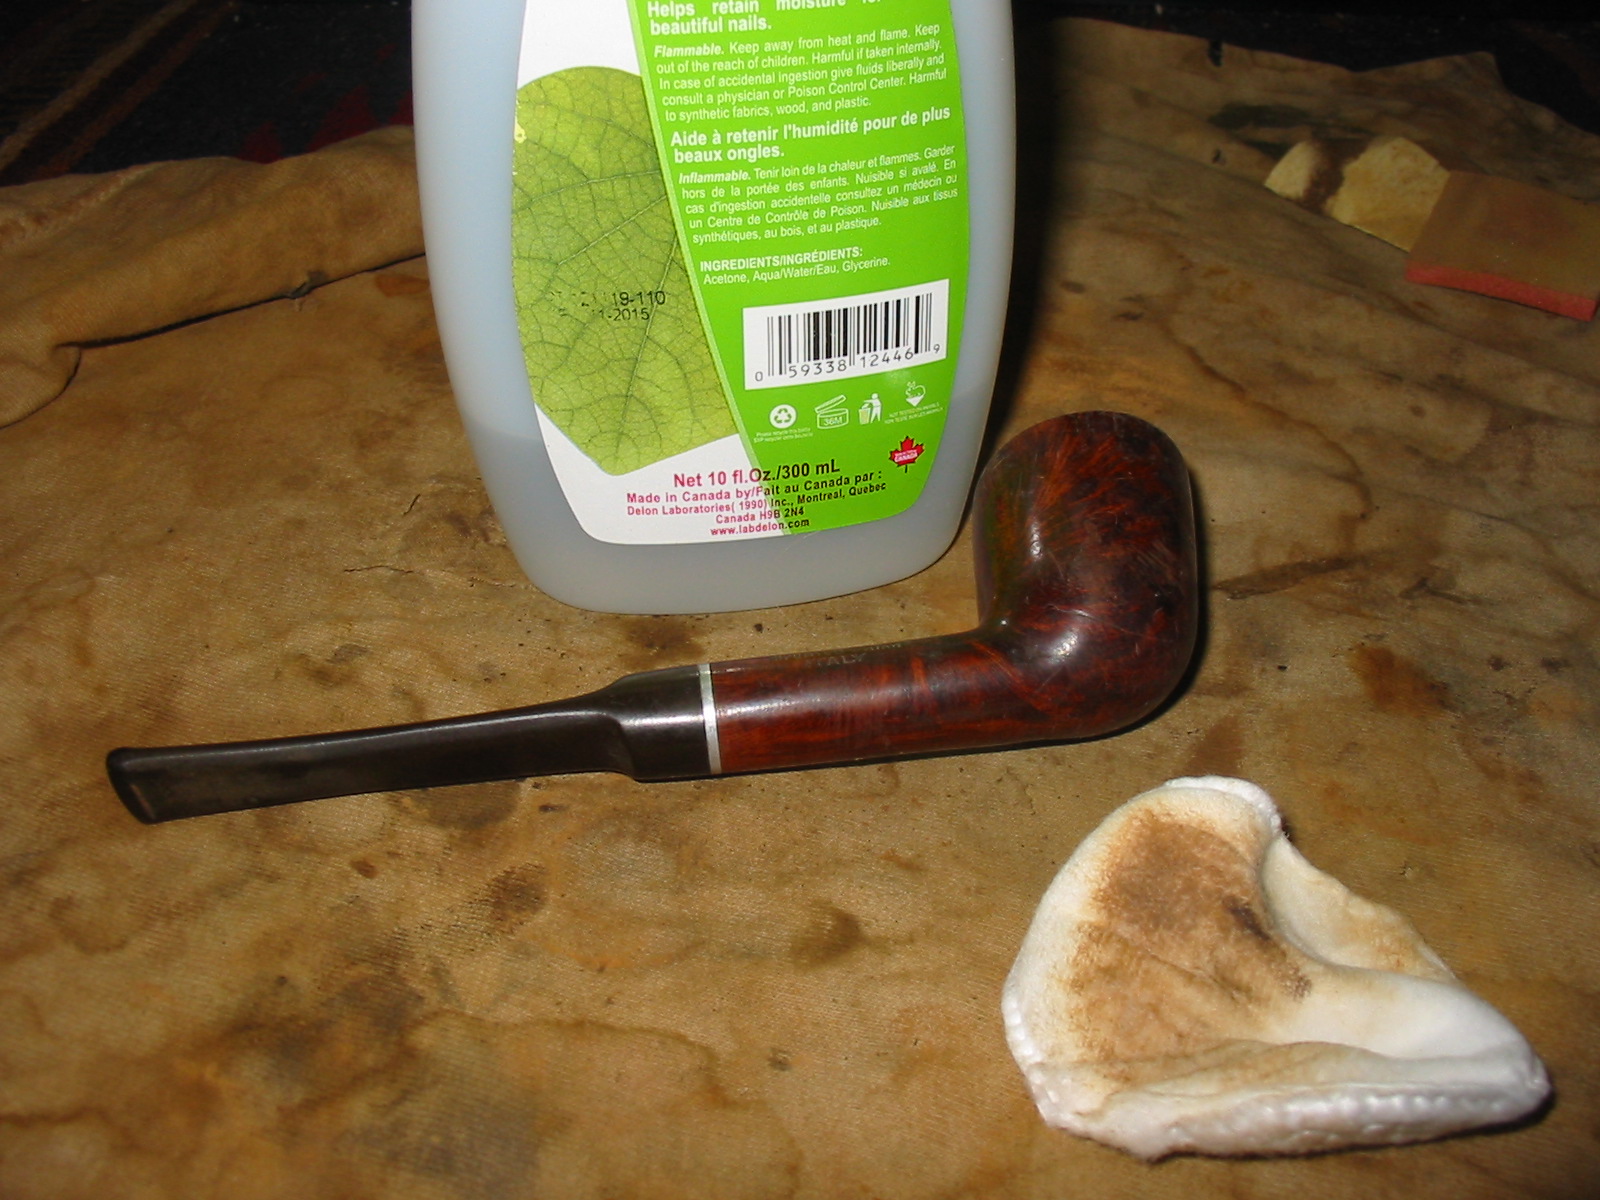
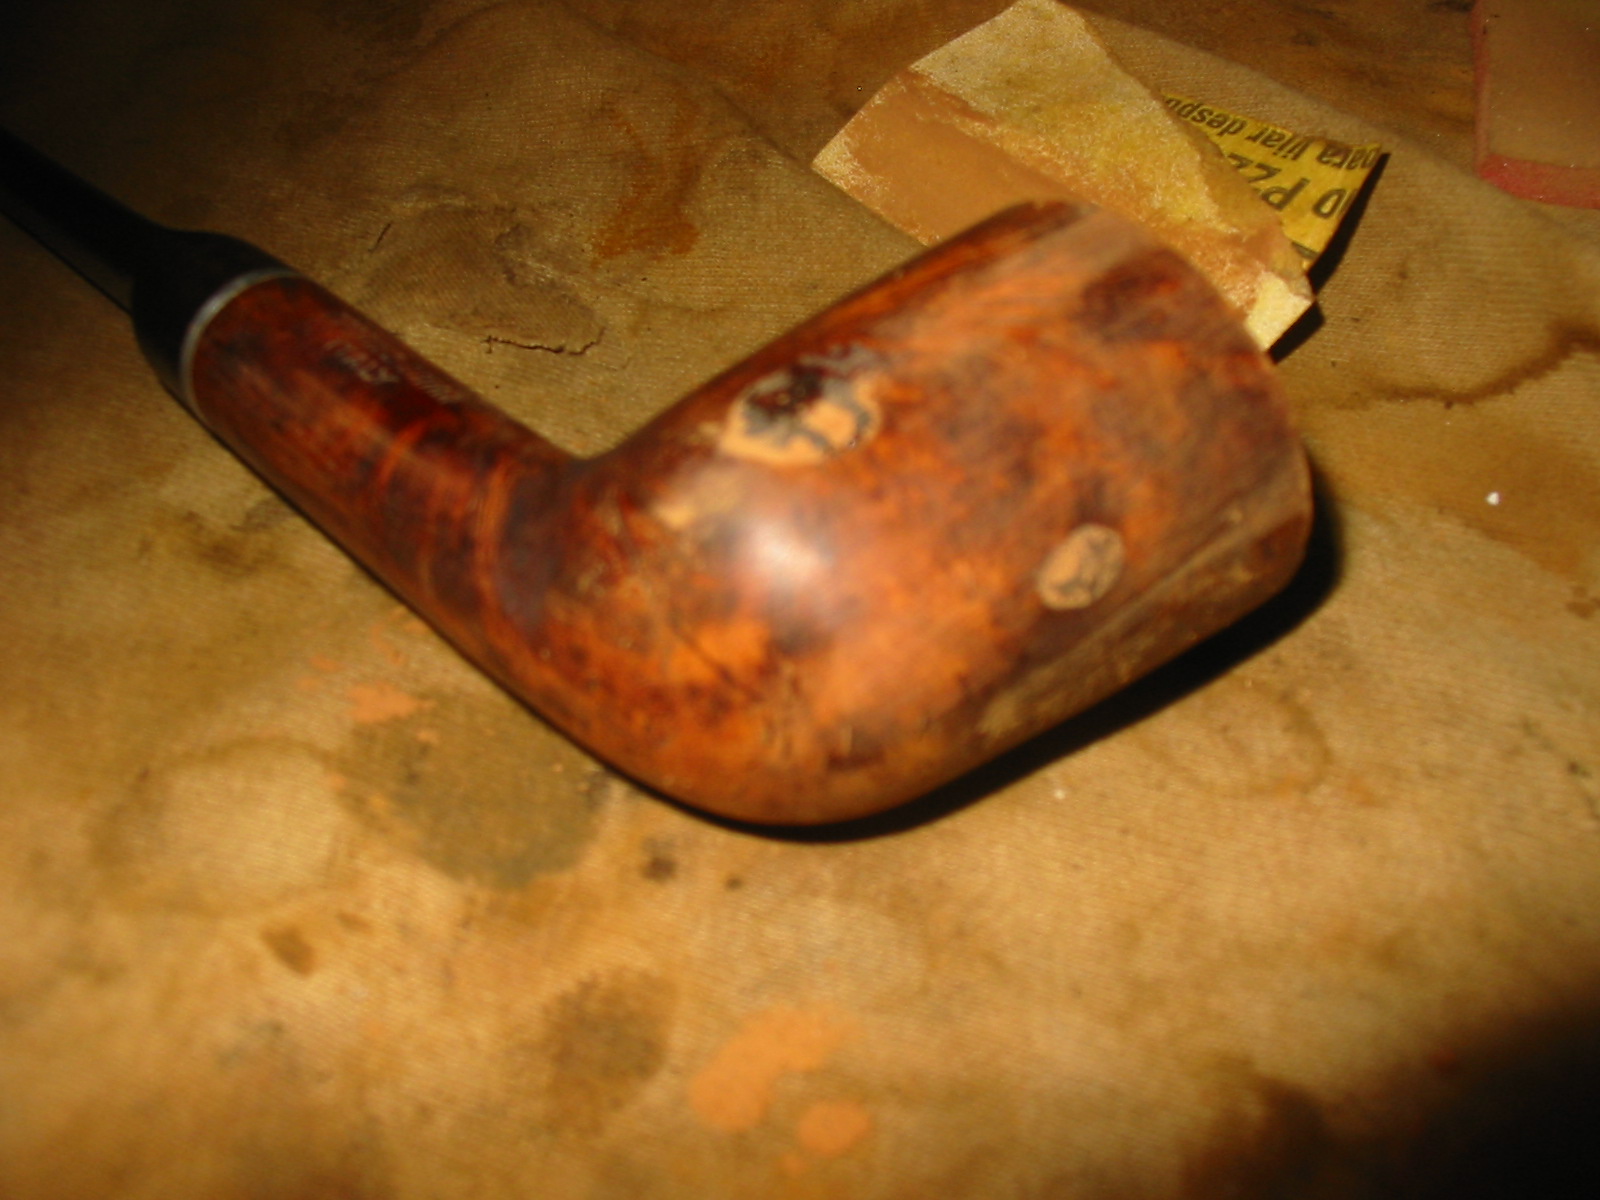
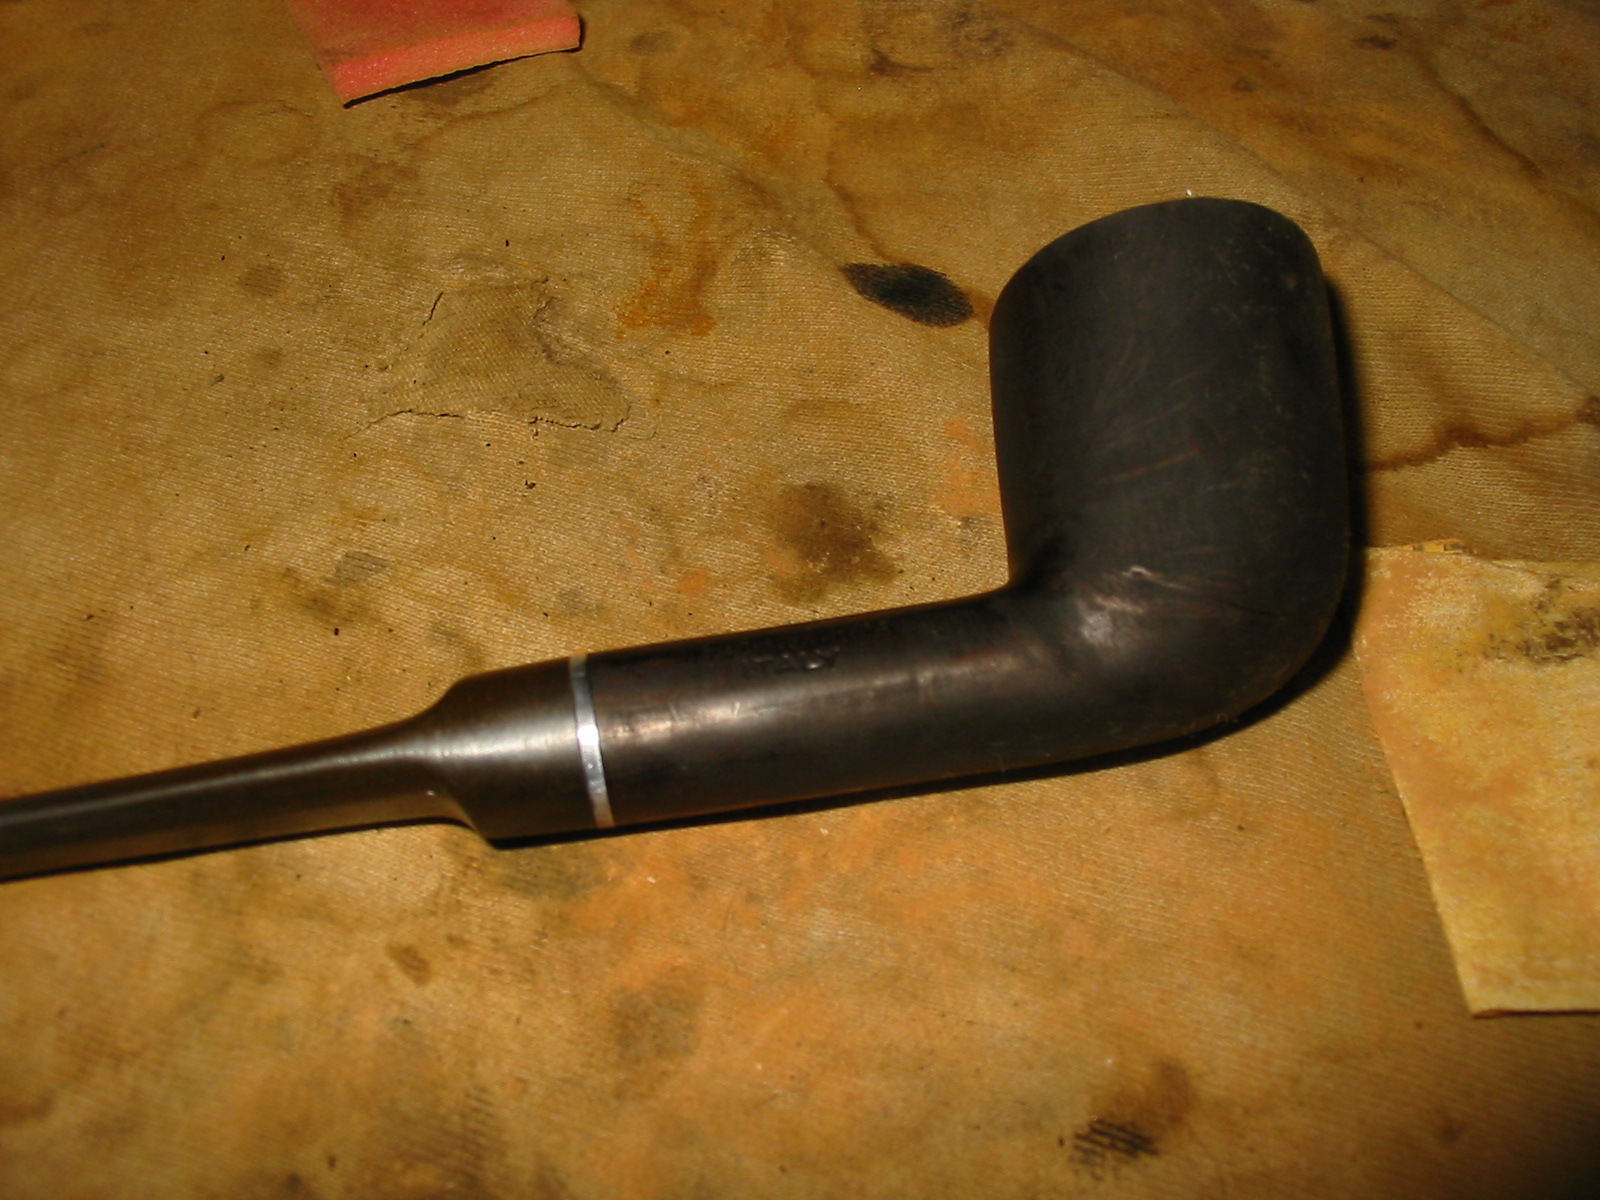
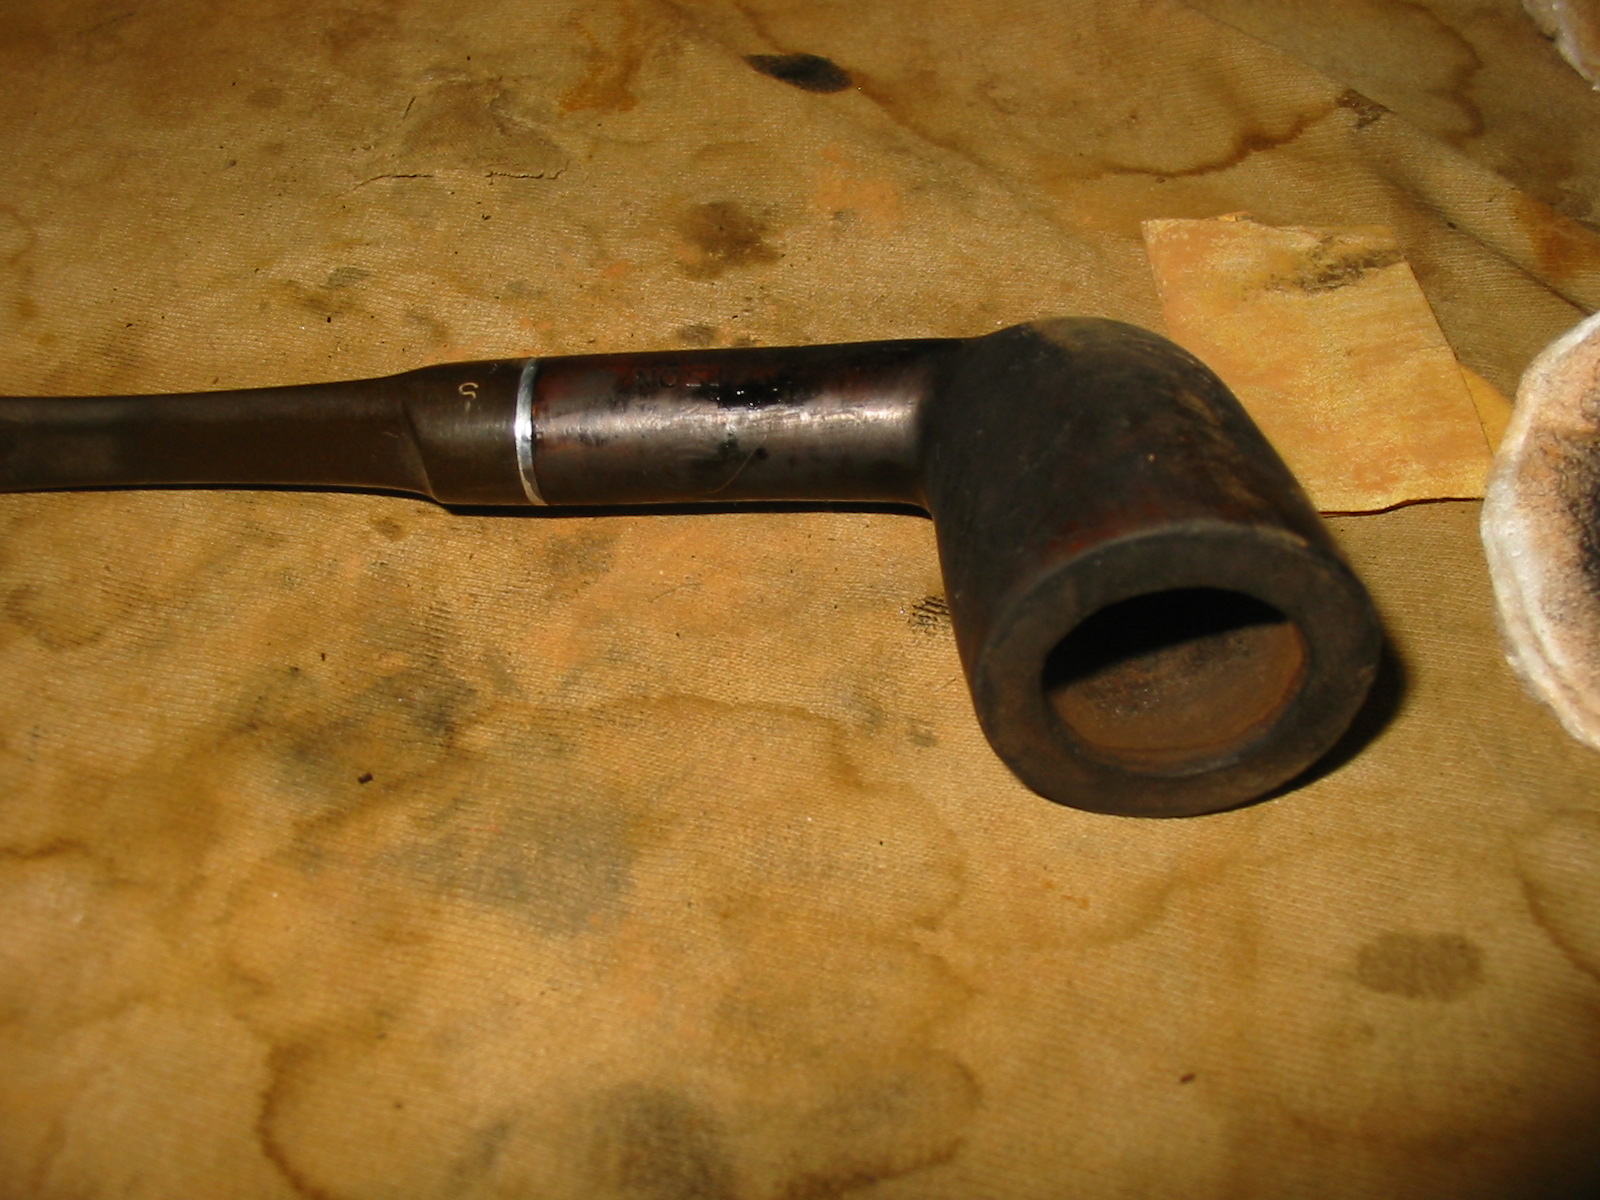
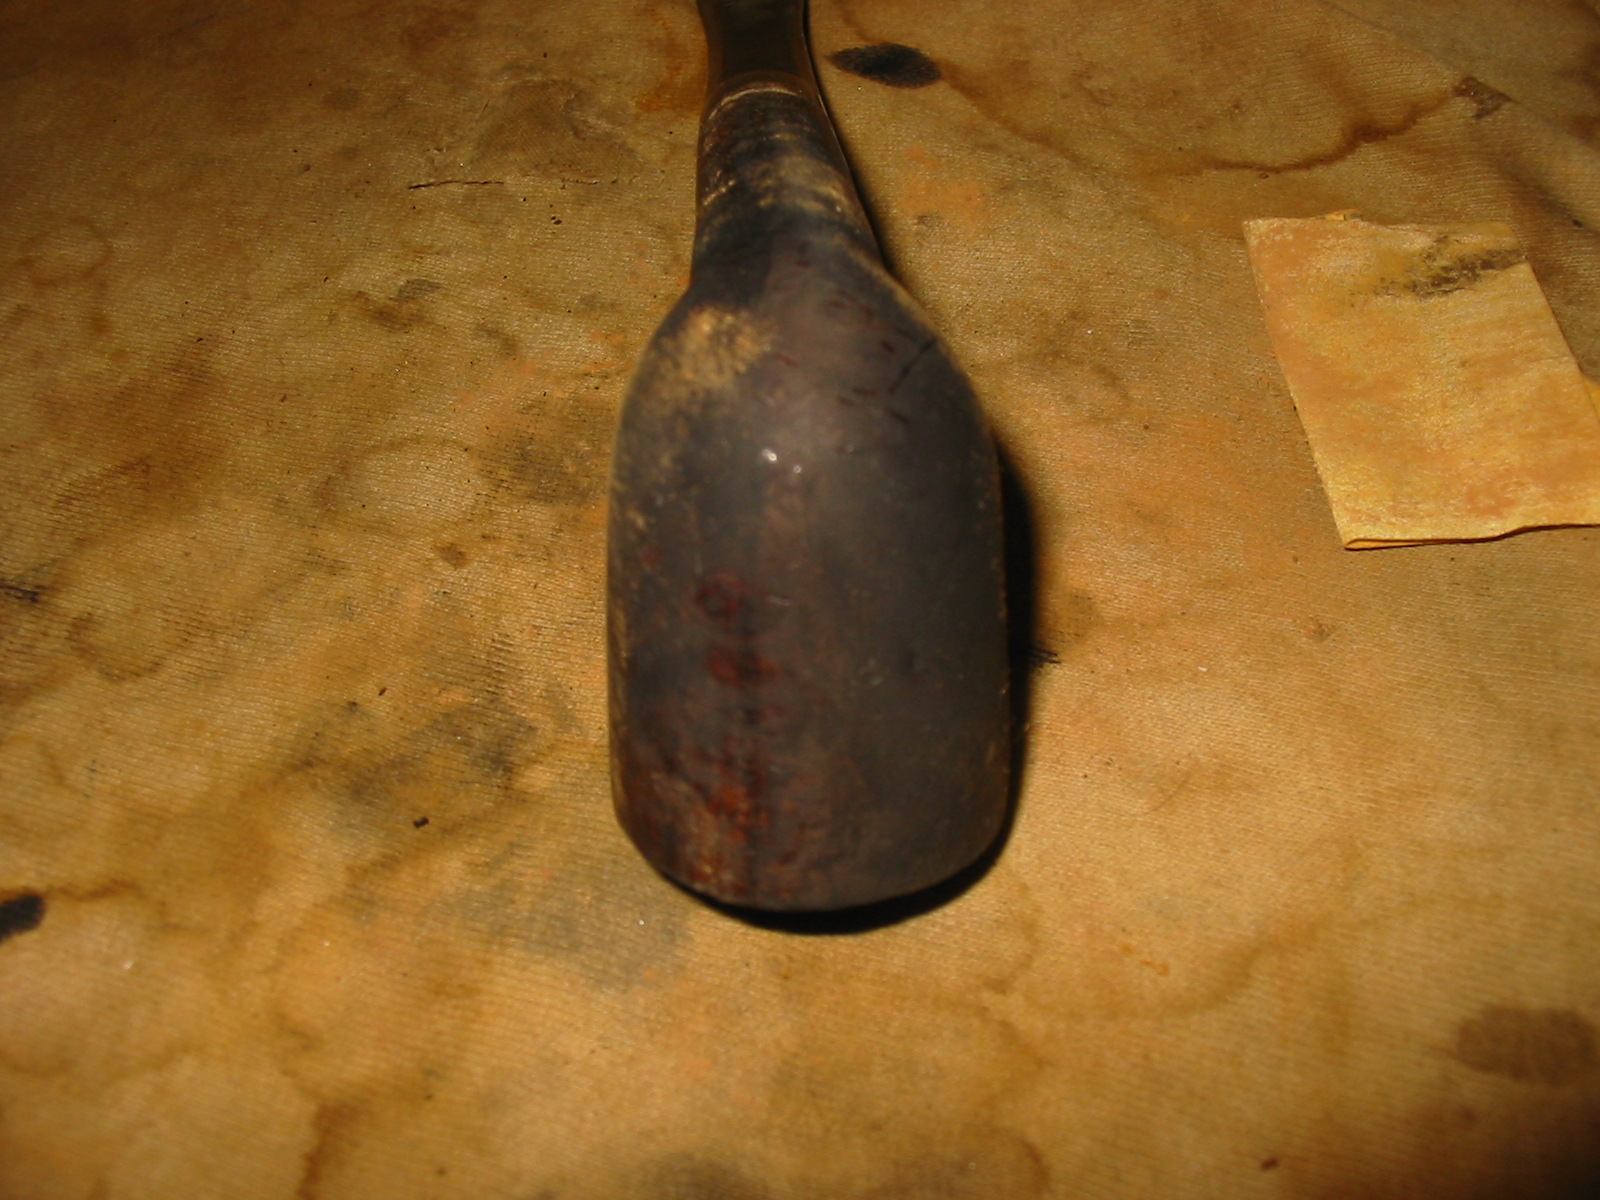
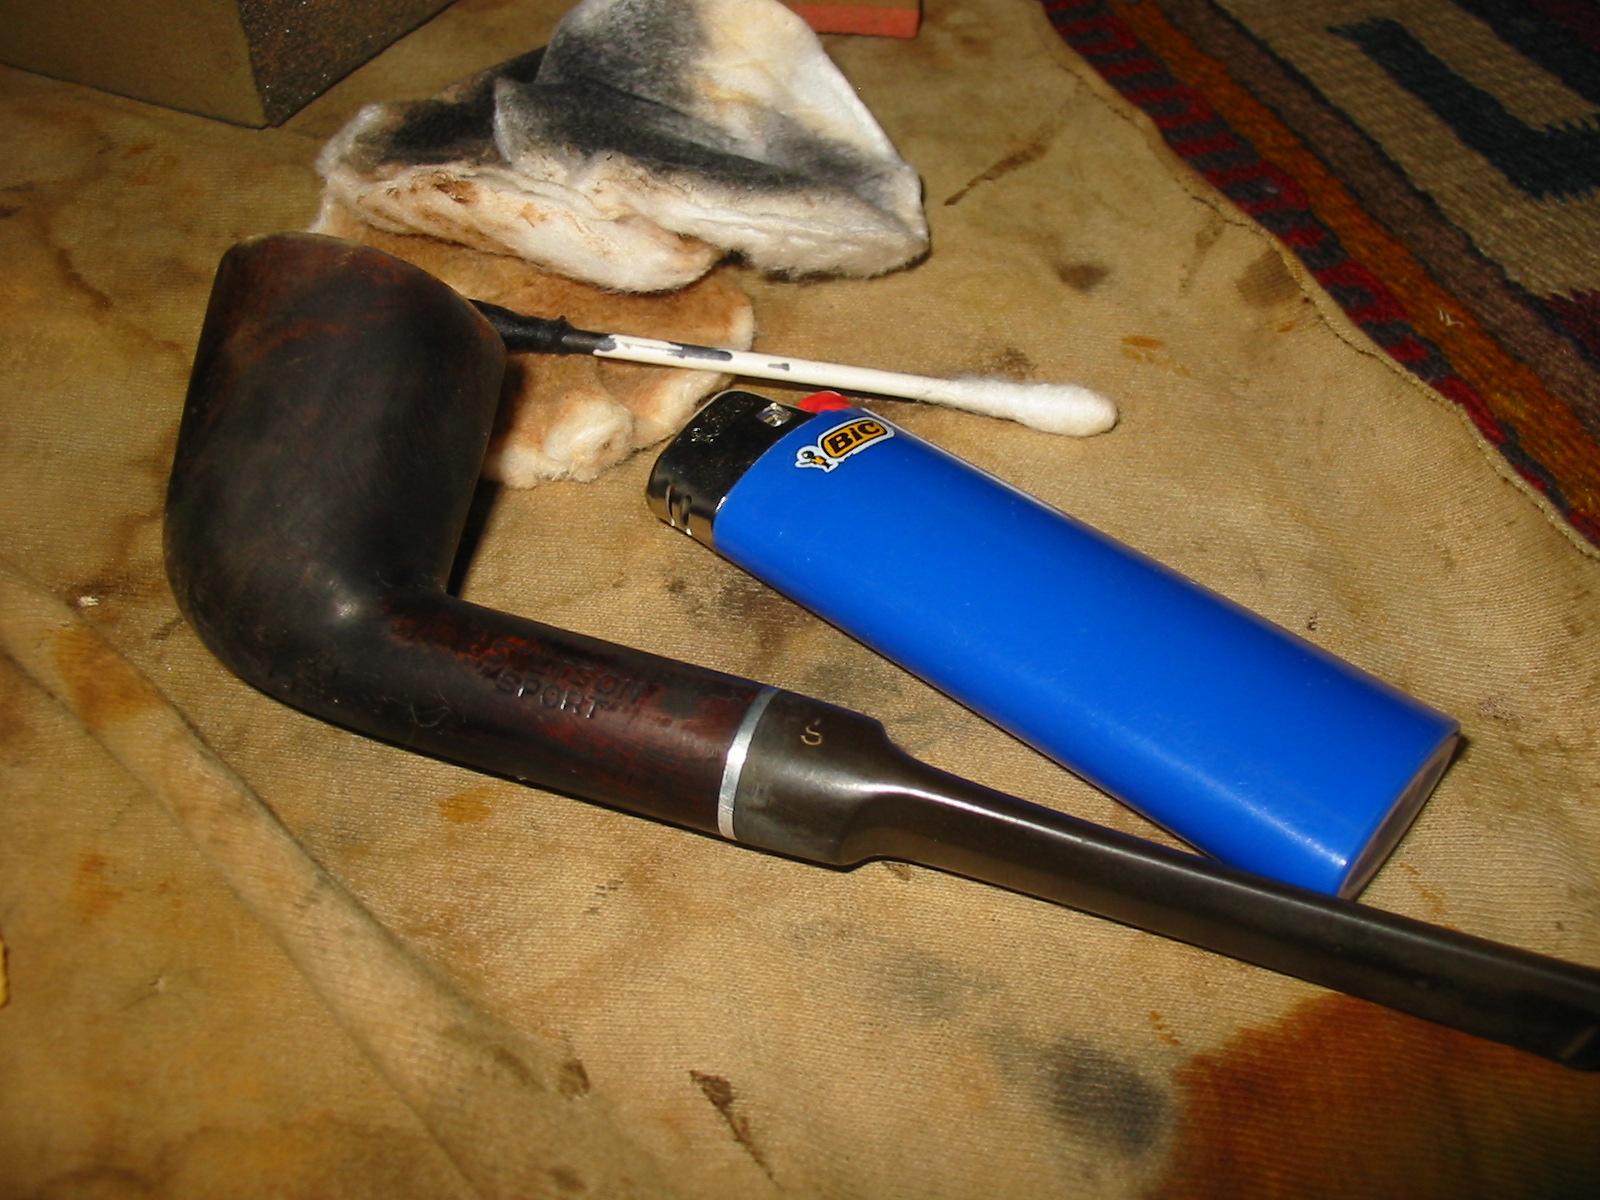
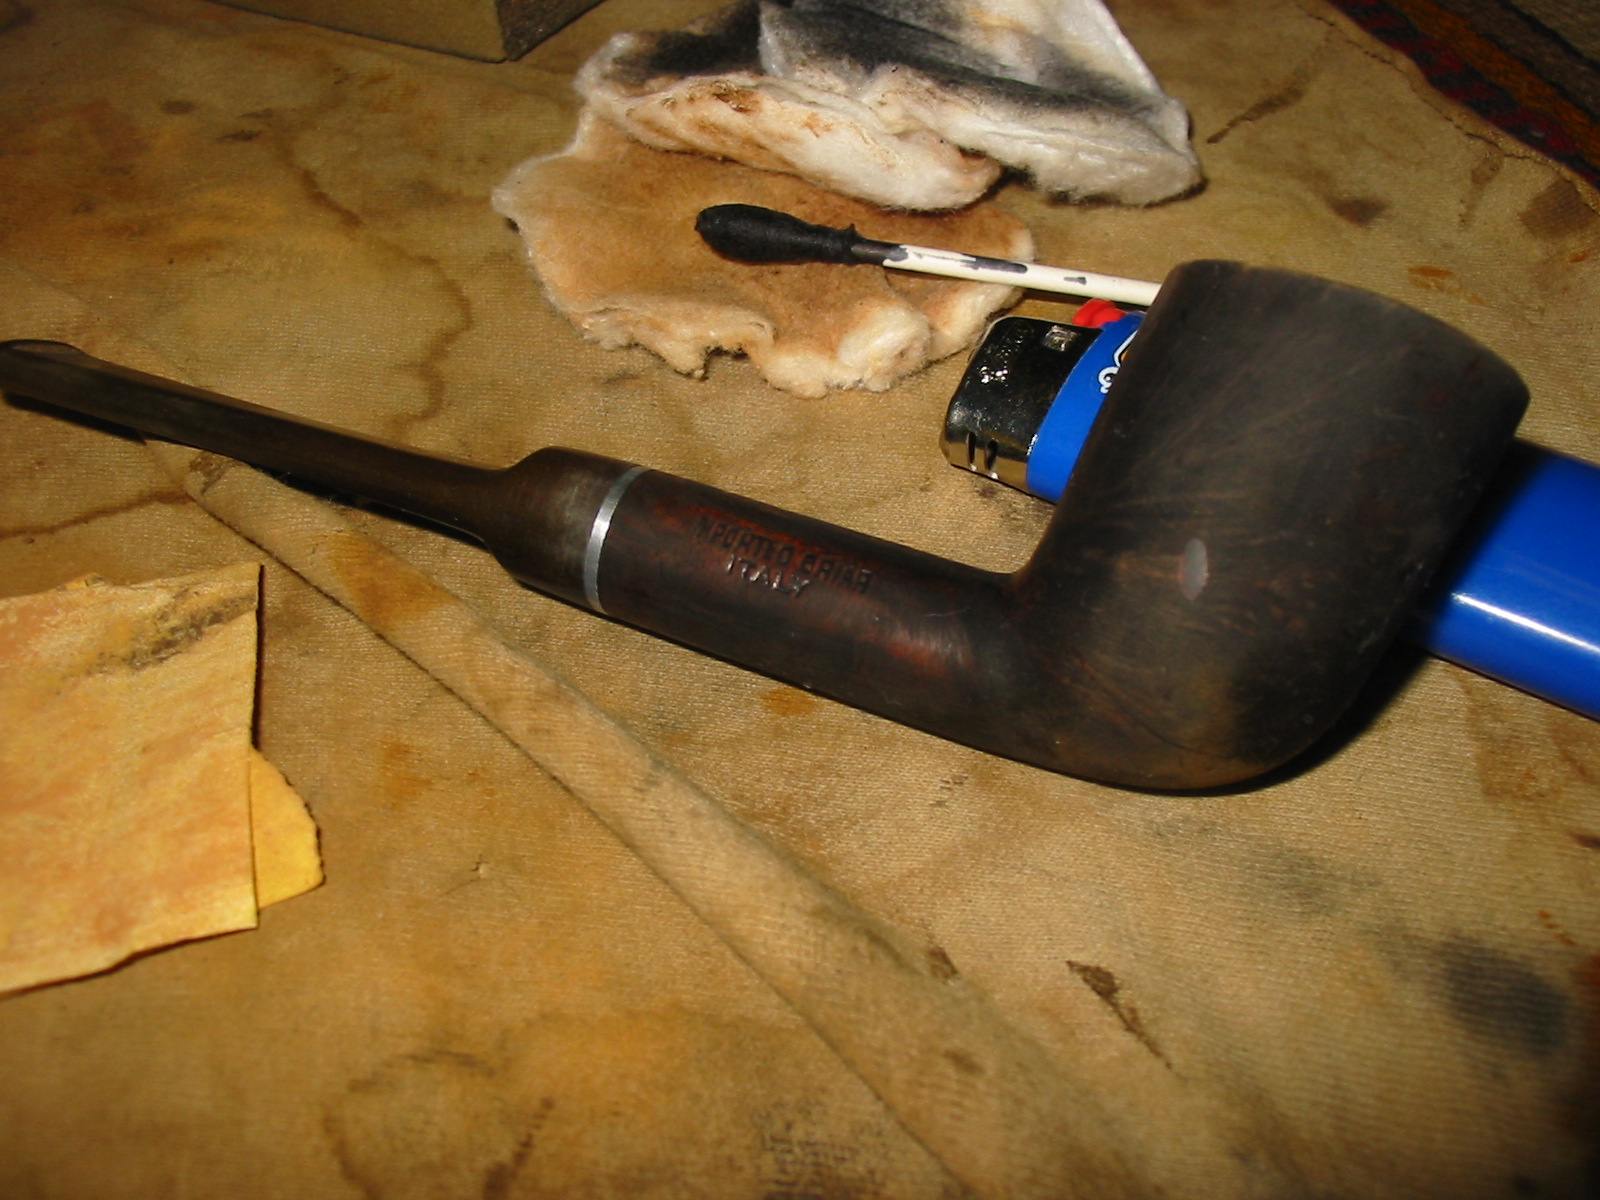
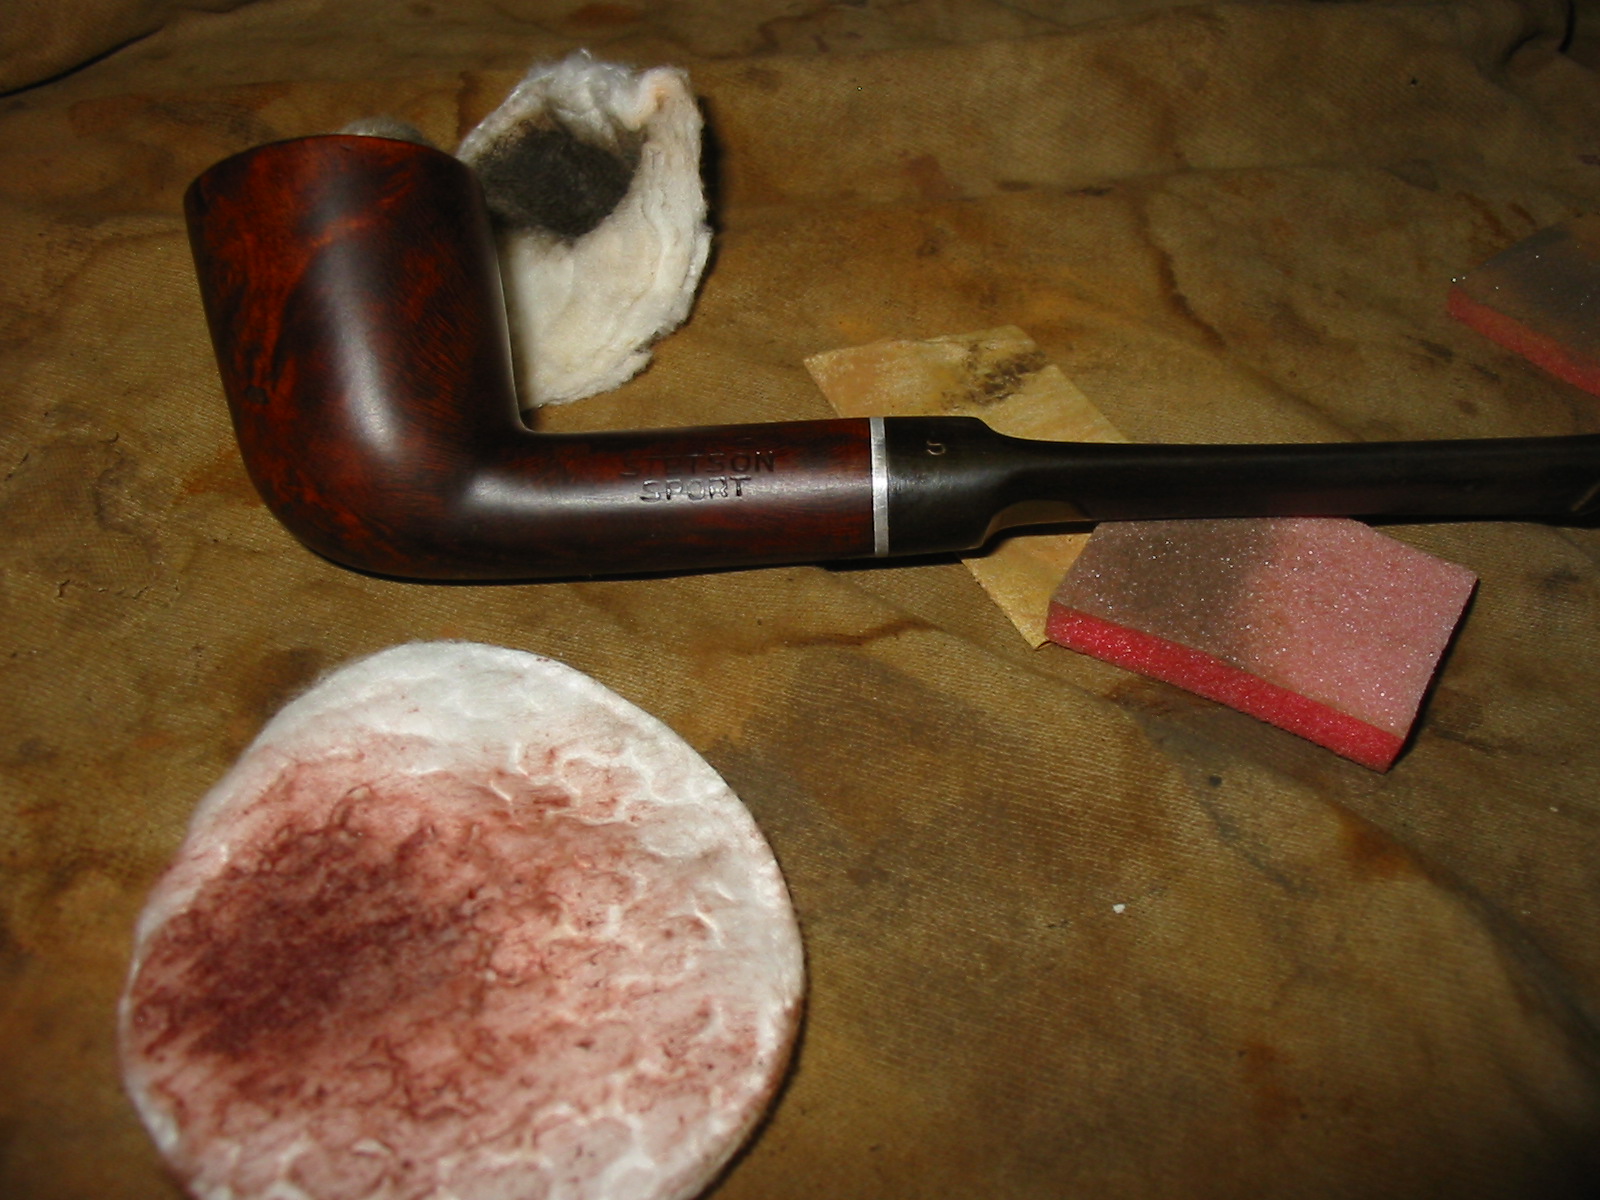
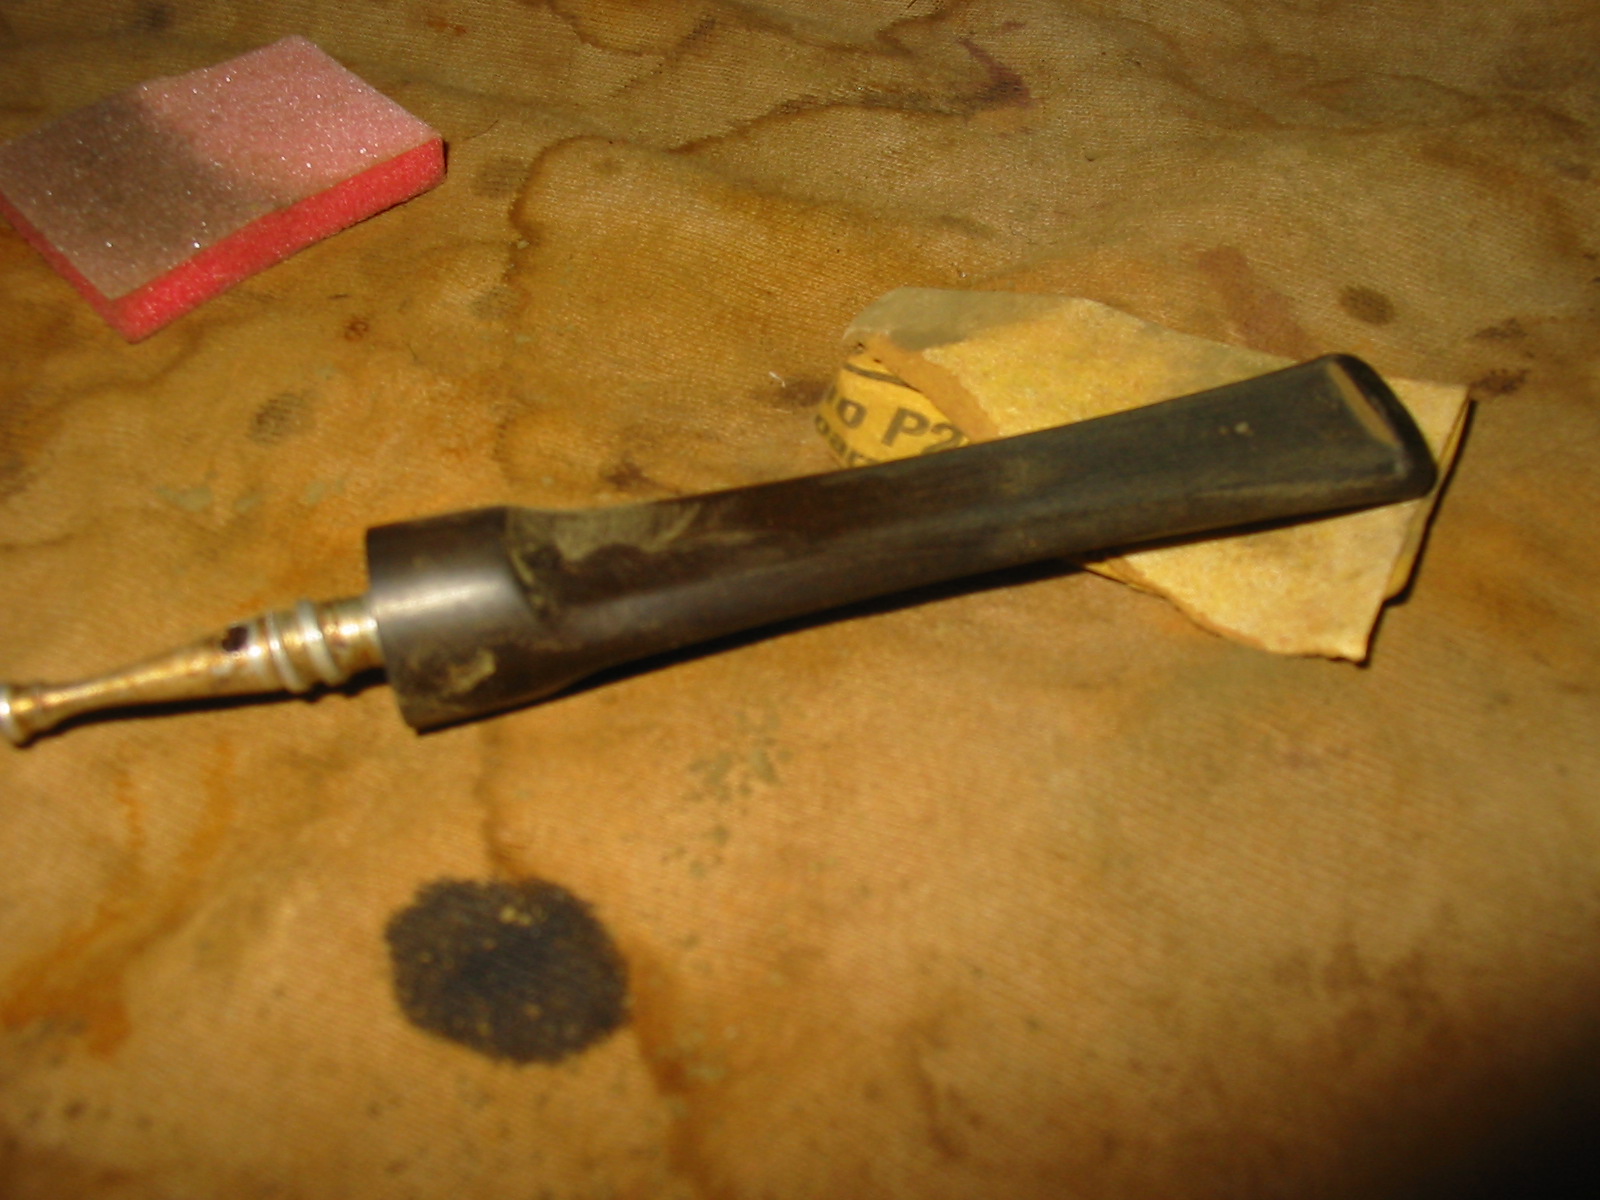
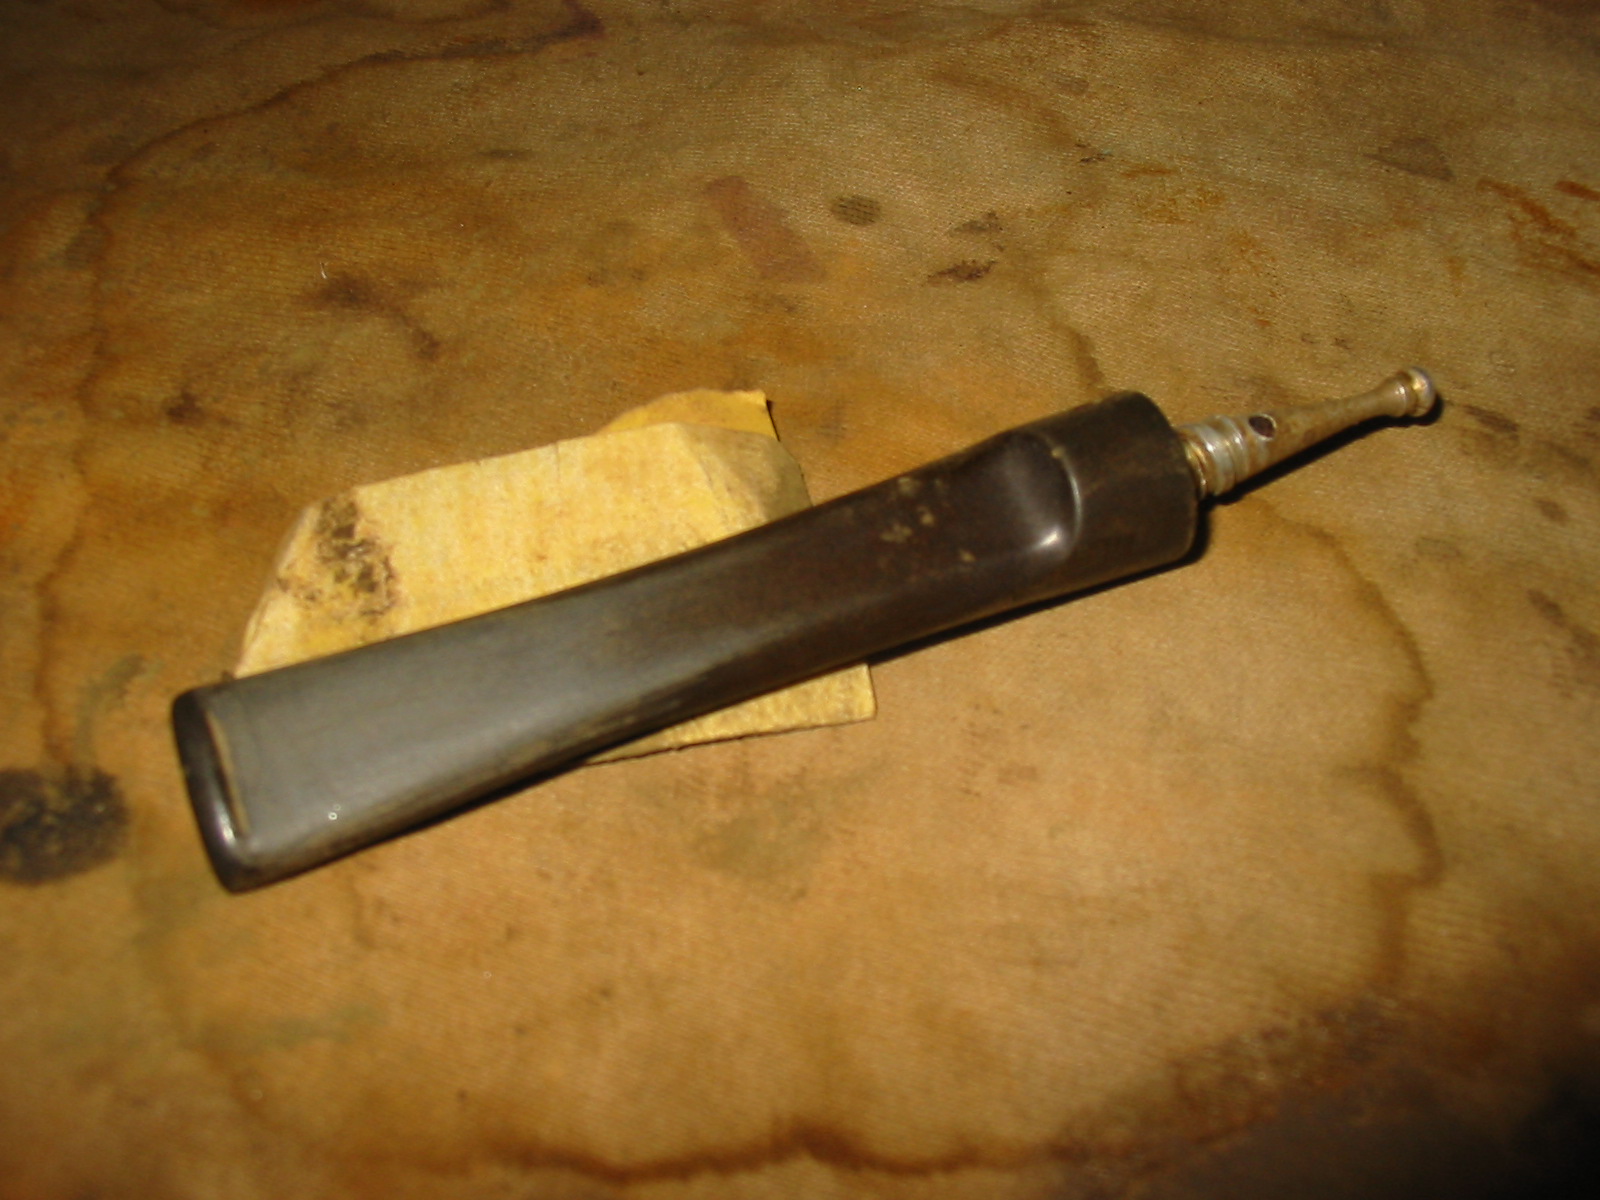
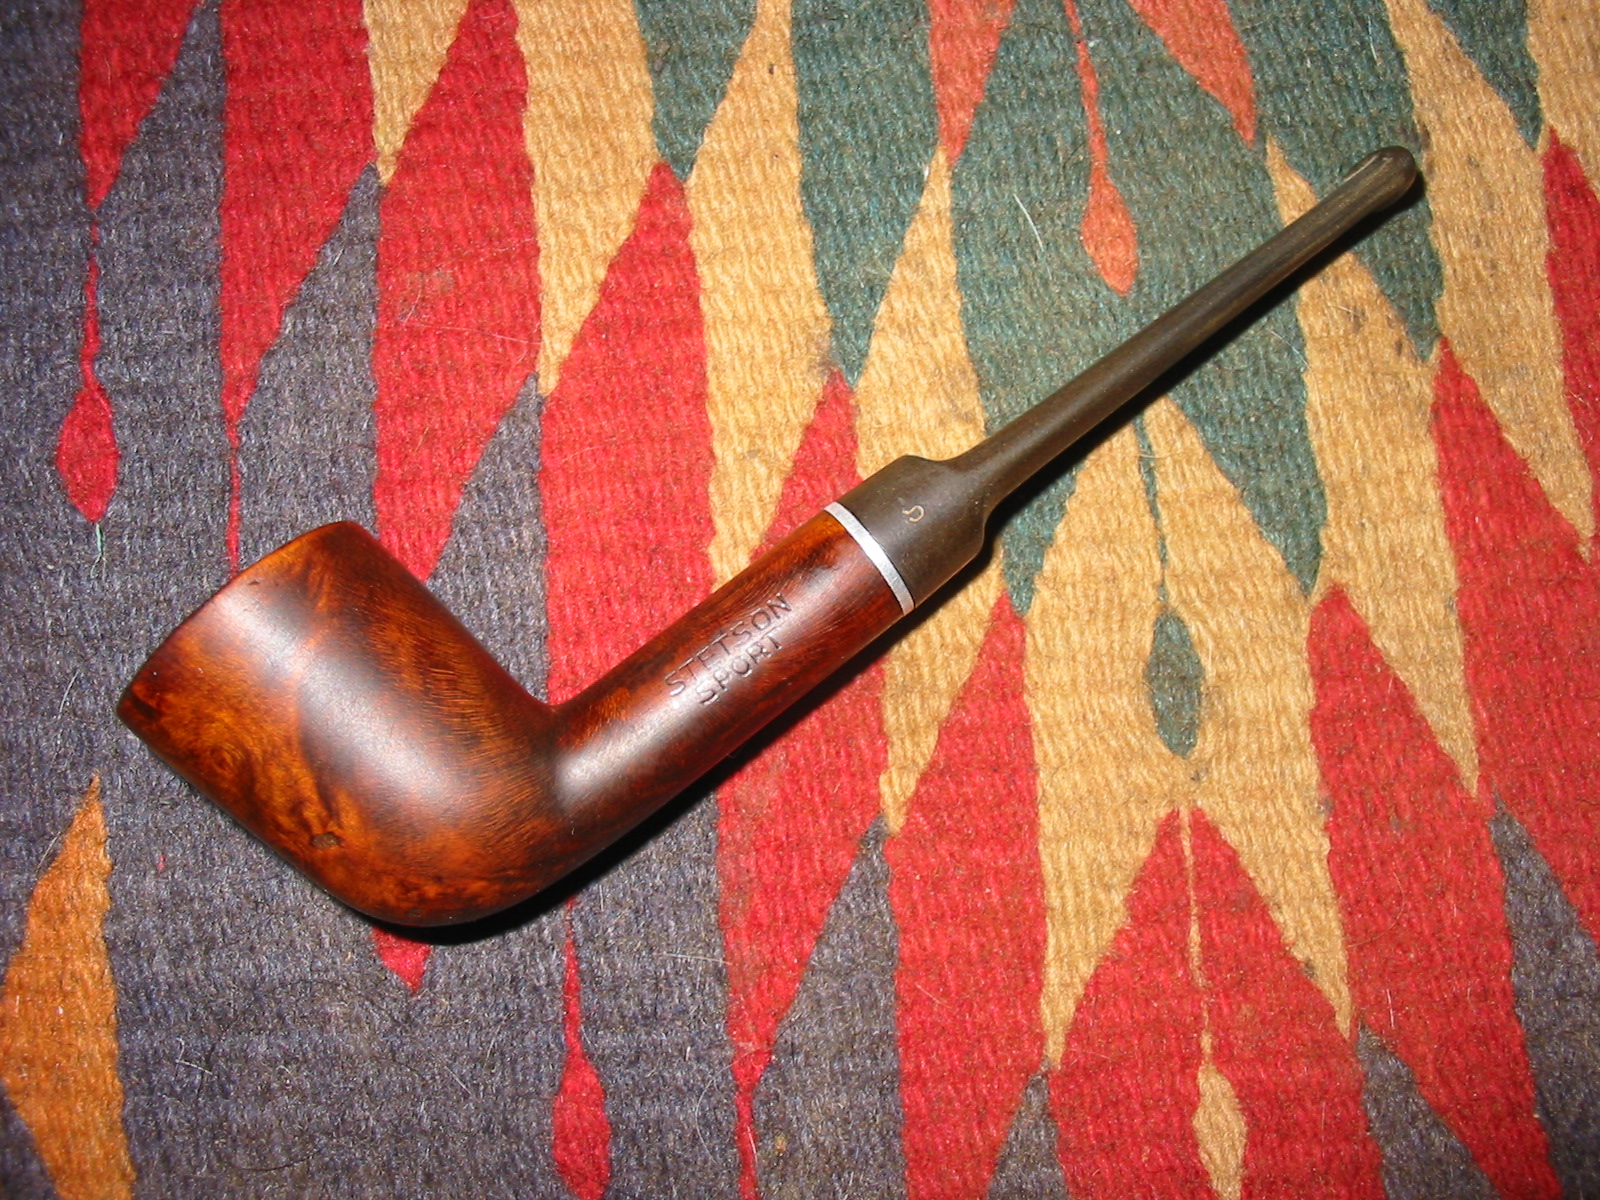
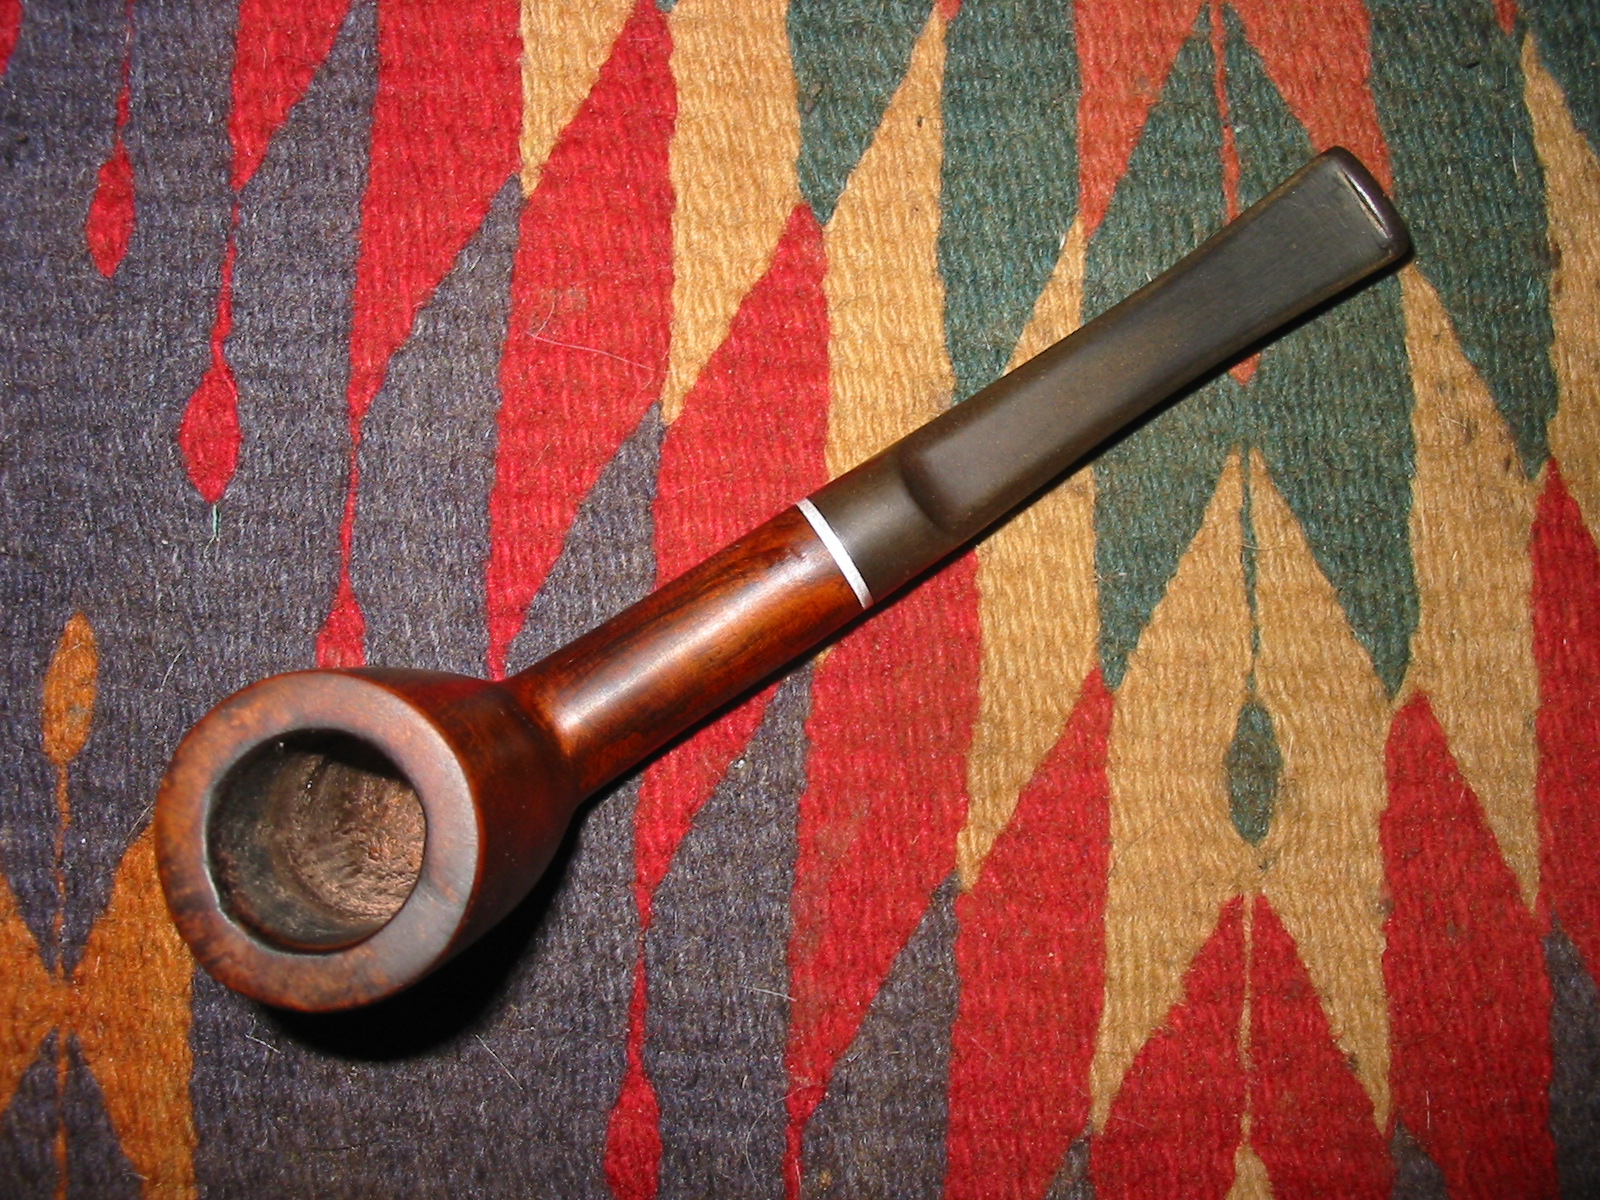
Armed with the information I found I tackled the cleanup and restoration of this American Pipe from John B. Stetson! The pipe is stamped Stetson over Sport on the left side of the shank and Imported Briar over Italy on the right side of the shank. The finish was very rough and peeling off the surface of the briar on the bowl where the hands held it. The rim had a thick cake of tars and oils. The inner edge of the rim was nicked and burned and was slightly out of round. The bowl was heavily caked with a soft carbon cake that was crumbling in places. The stem had screw on tenon and was over turned to the right. It had tooth marks on the top and the bottom side of the stem and oxidation on the entirety. There was an S logo stamped in the left side of the saddle. The stinger apparatus in the stem was tarred and dirty and the inside of the stem was slightly clogged with tars.
IMG_3099

IMG_3101

IMG_3102

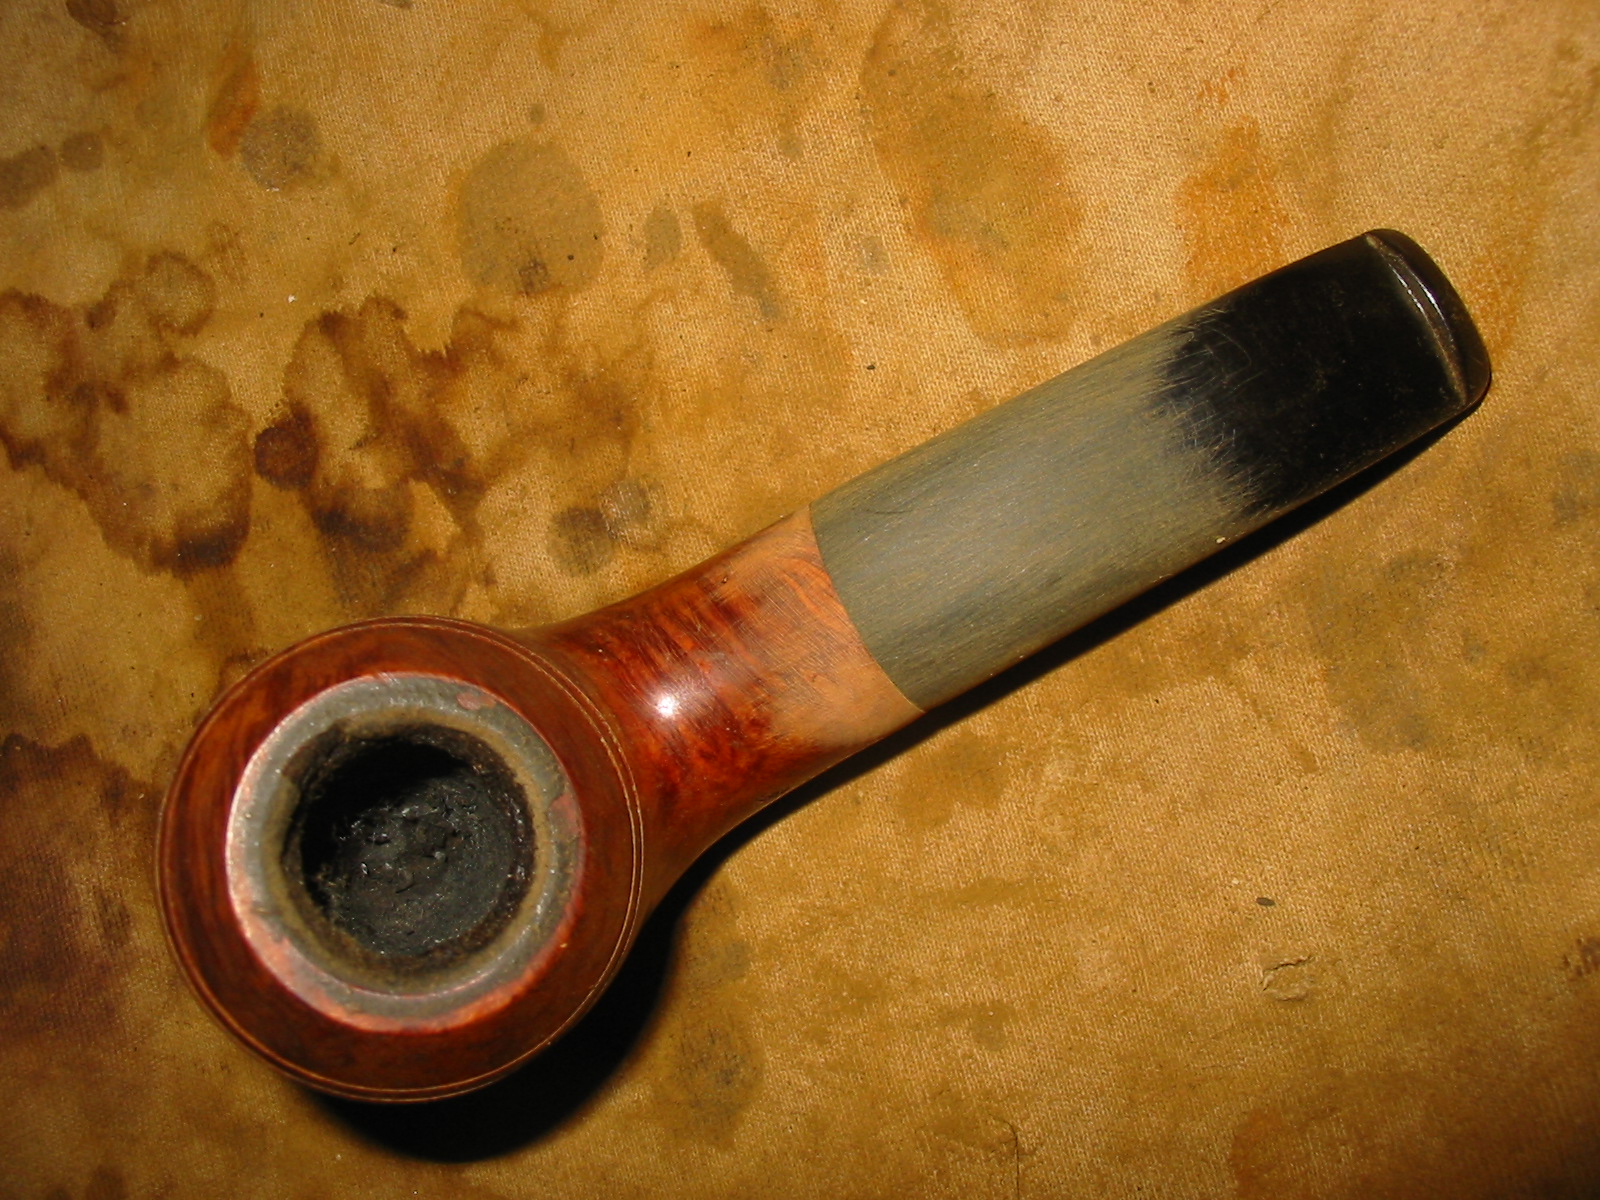
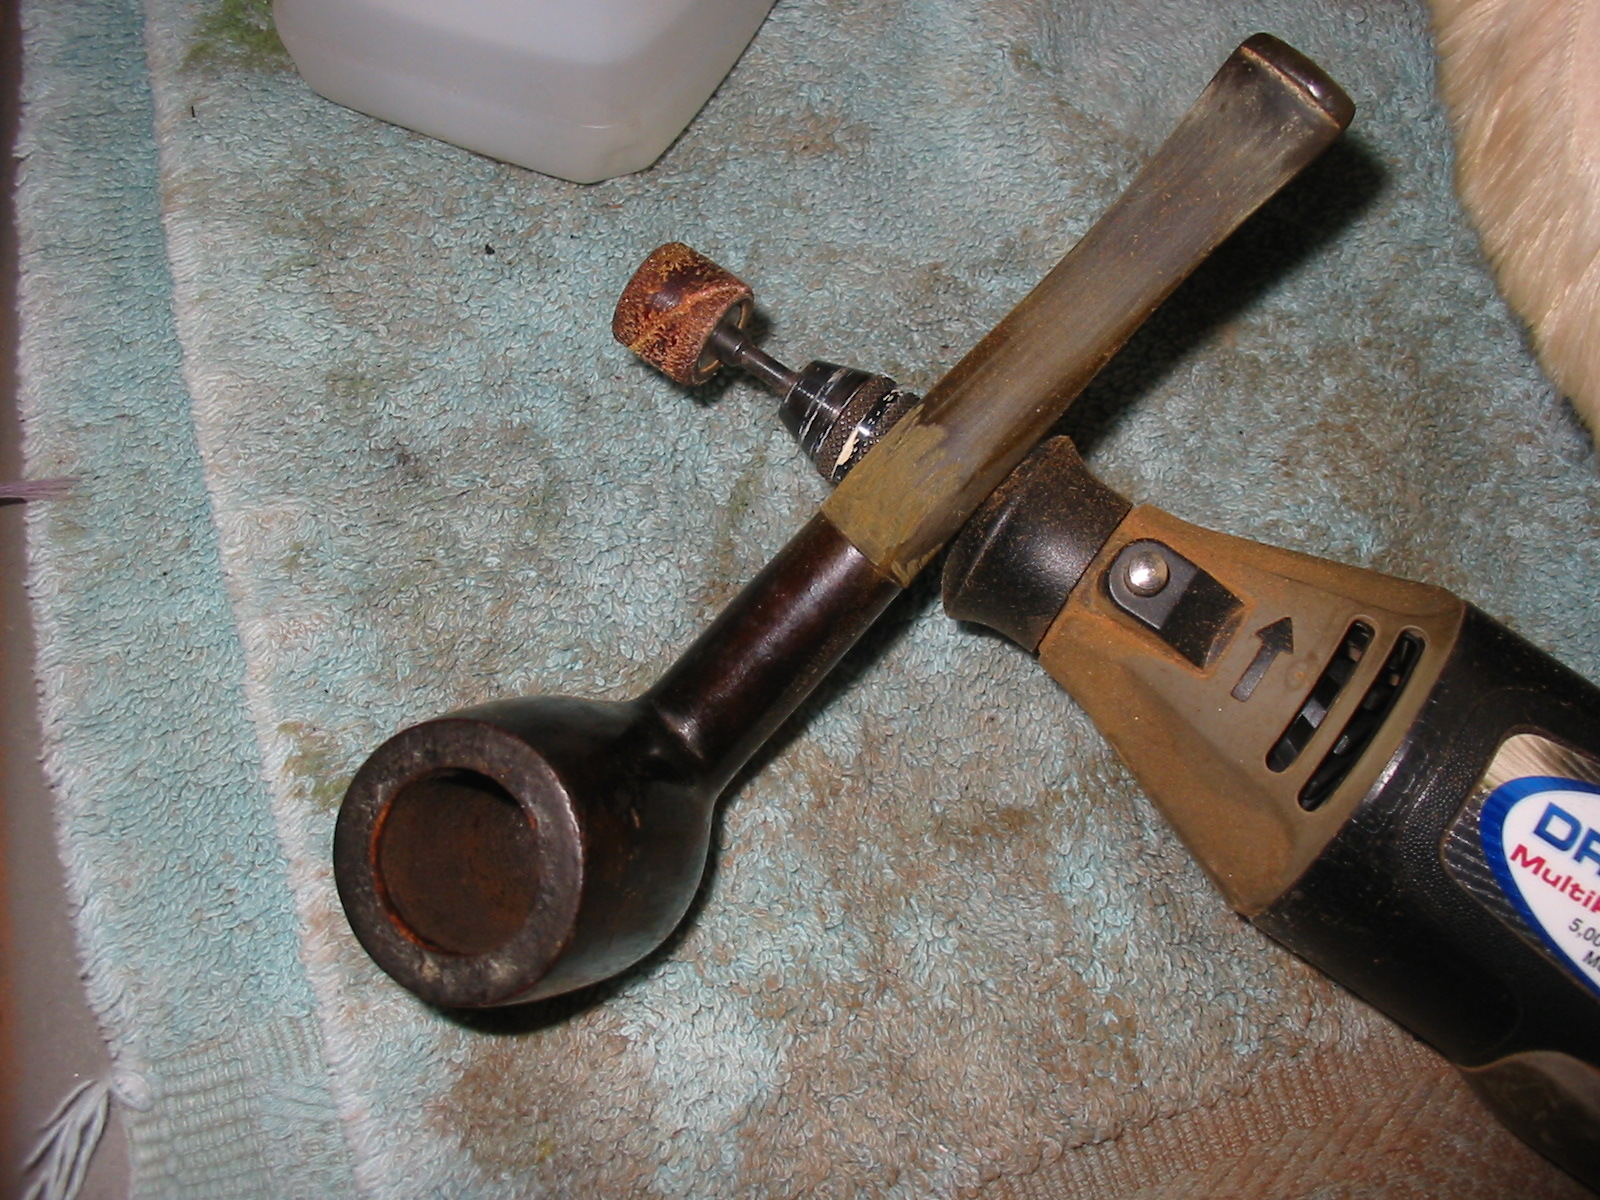
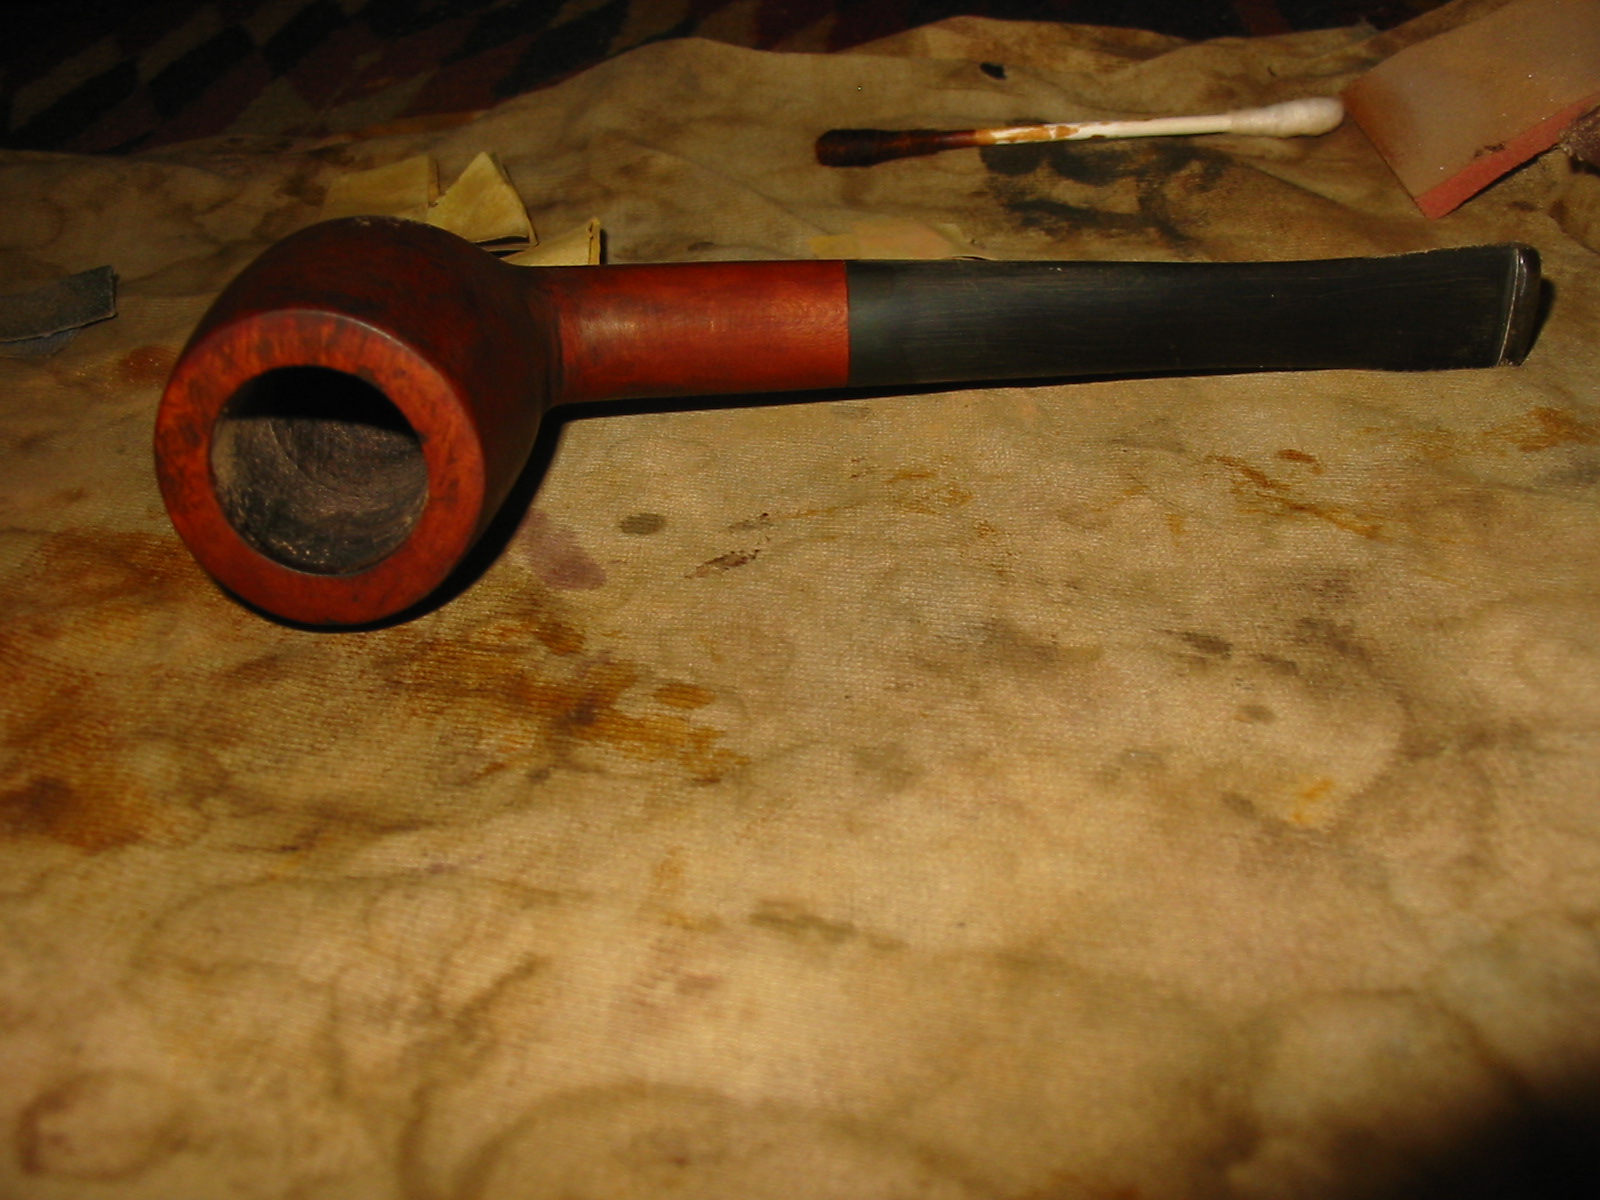
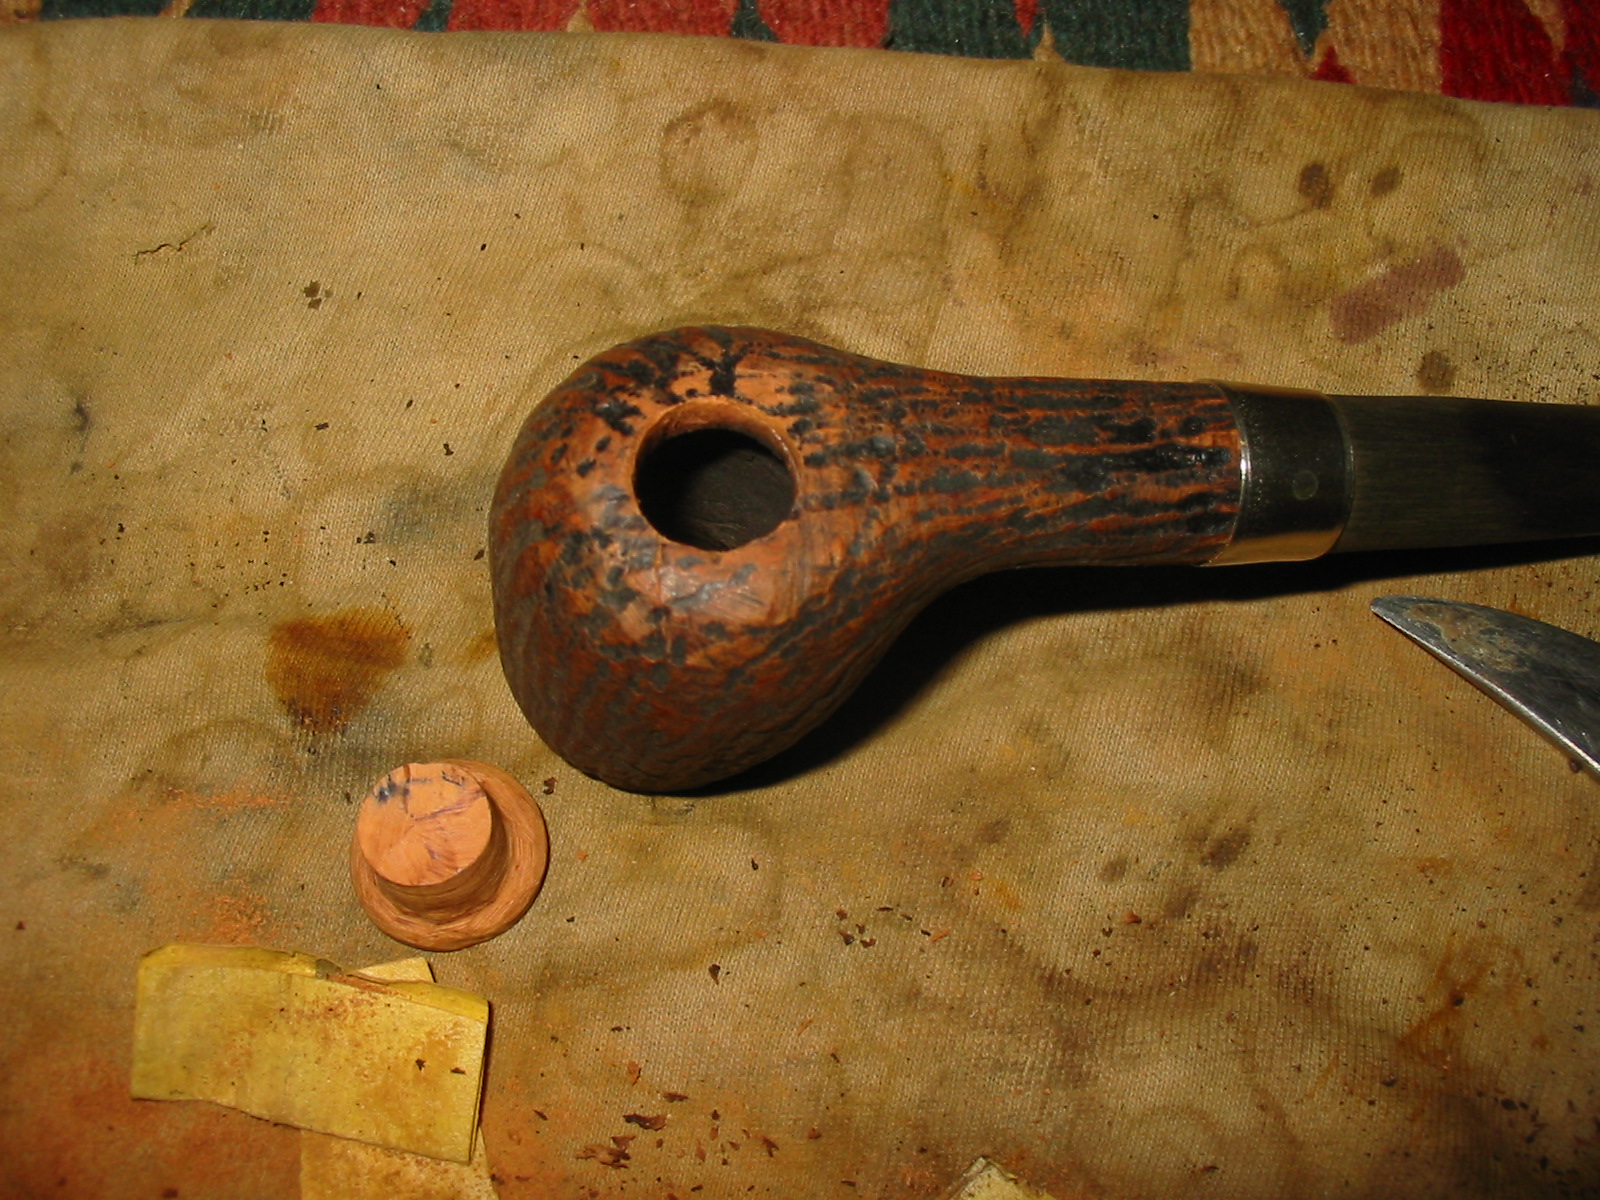
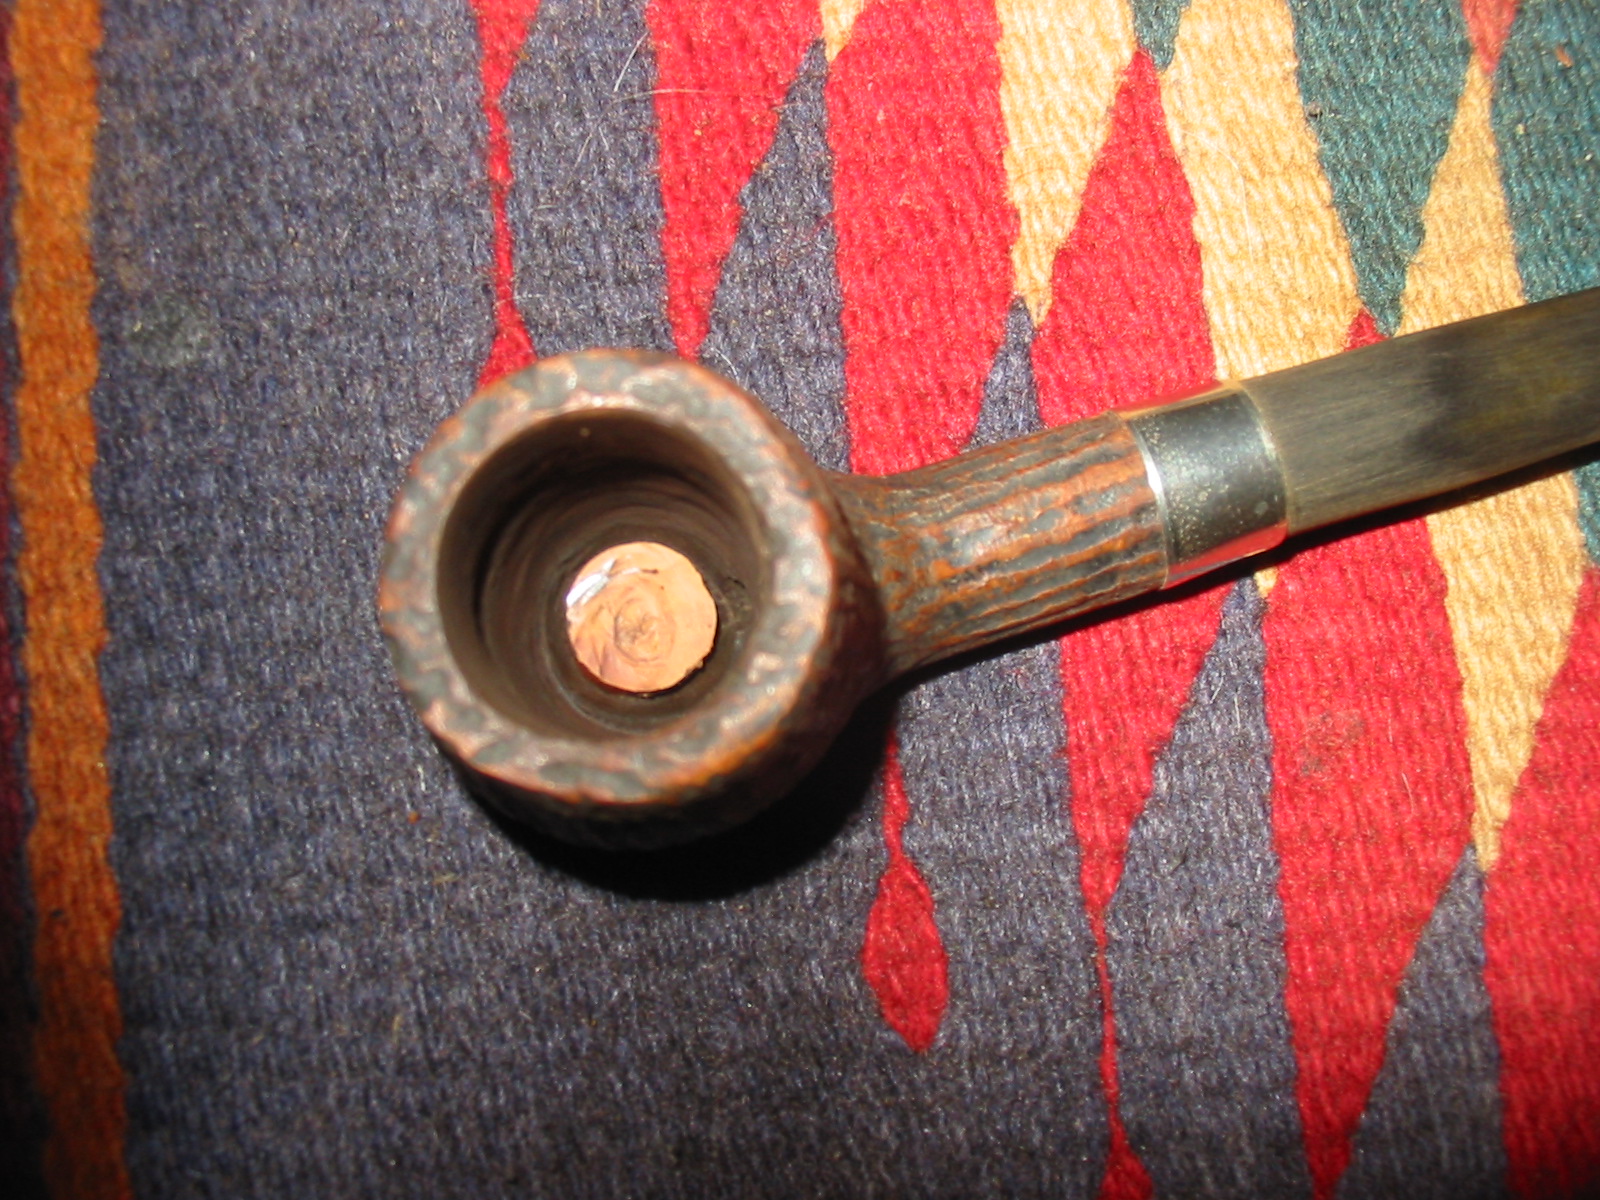
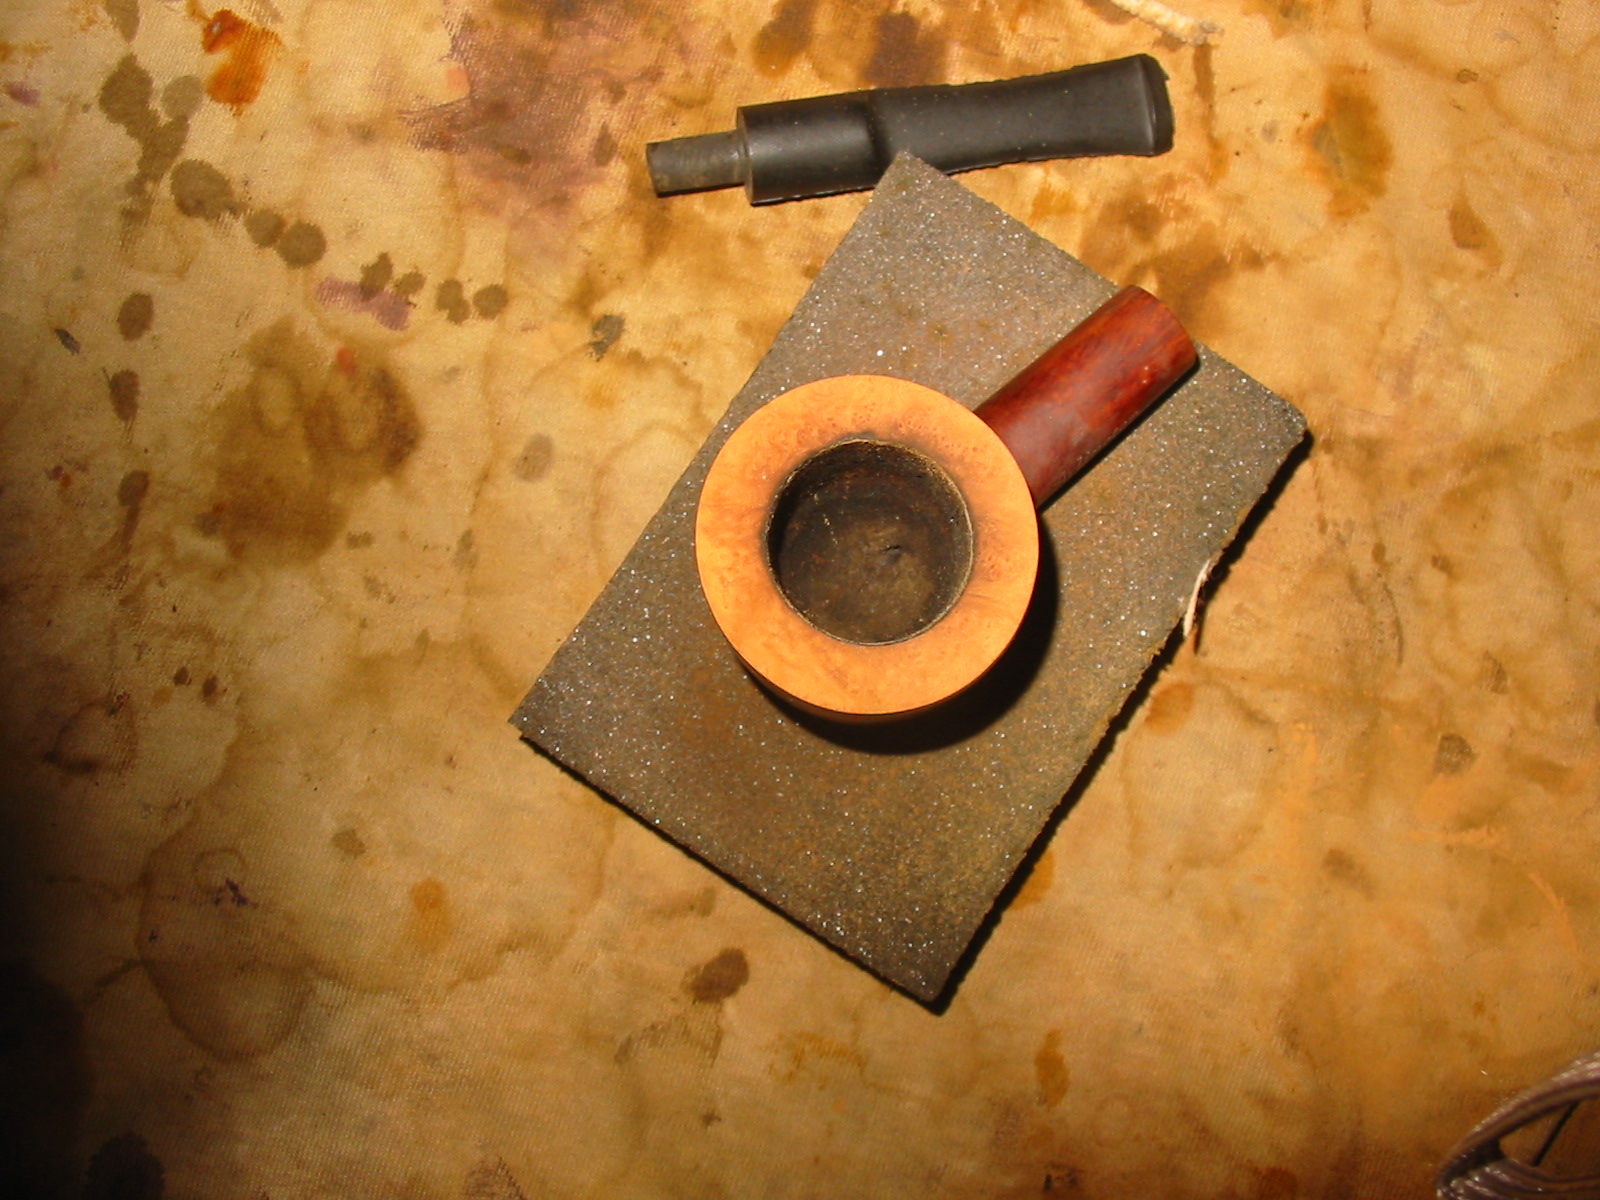
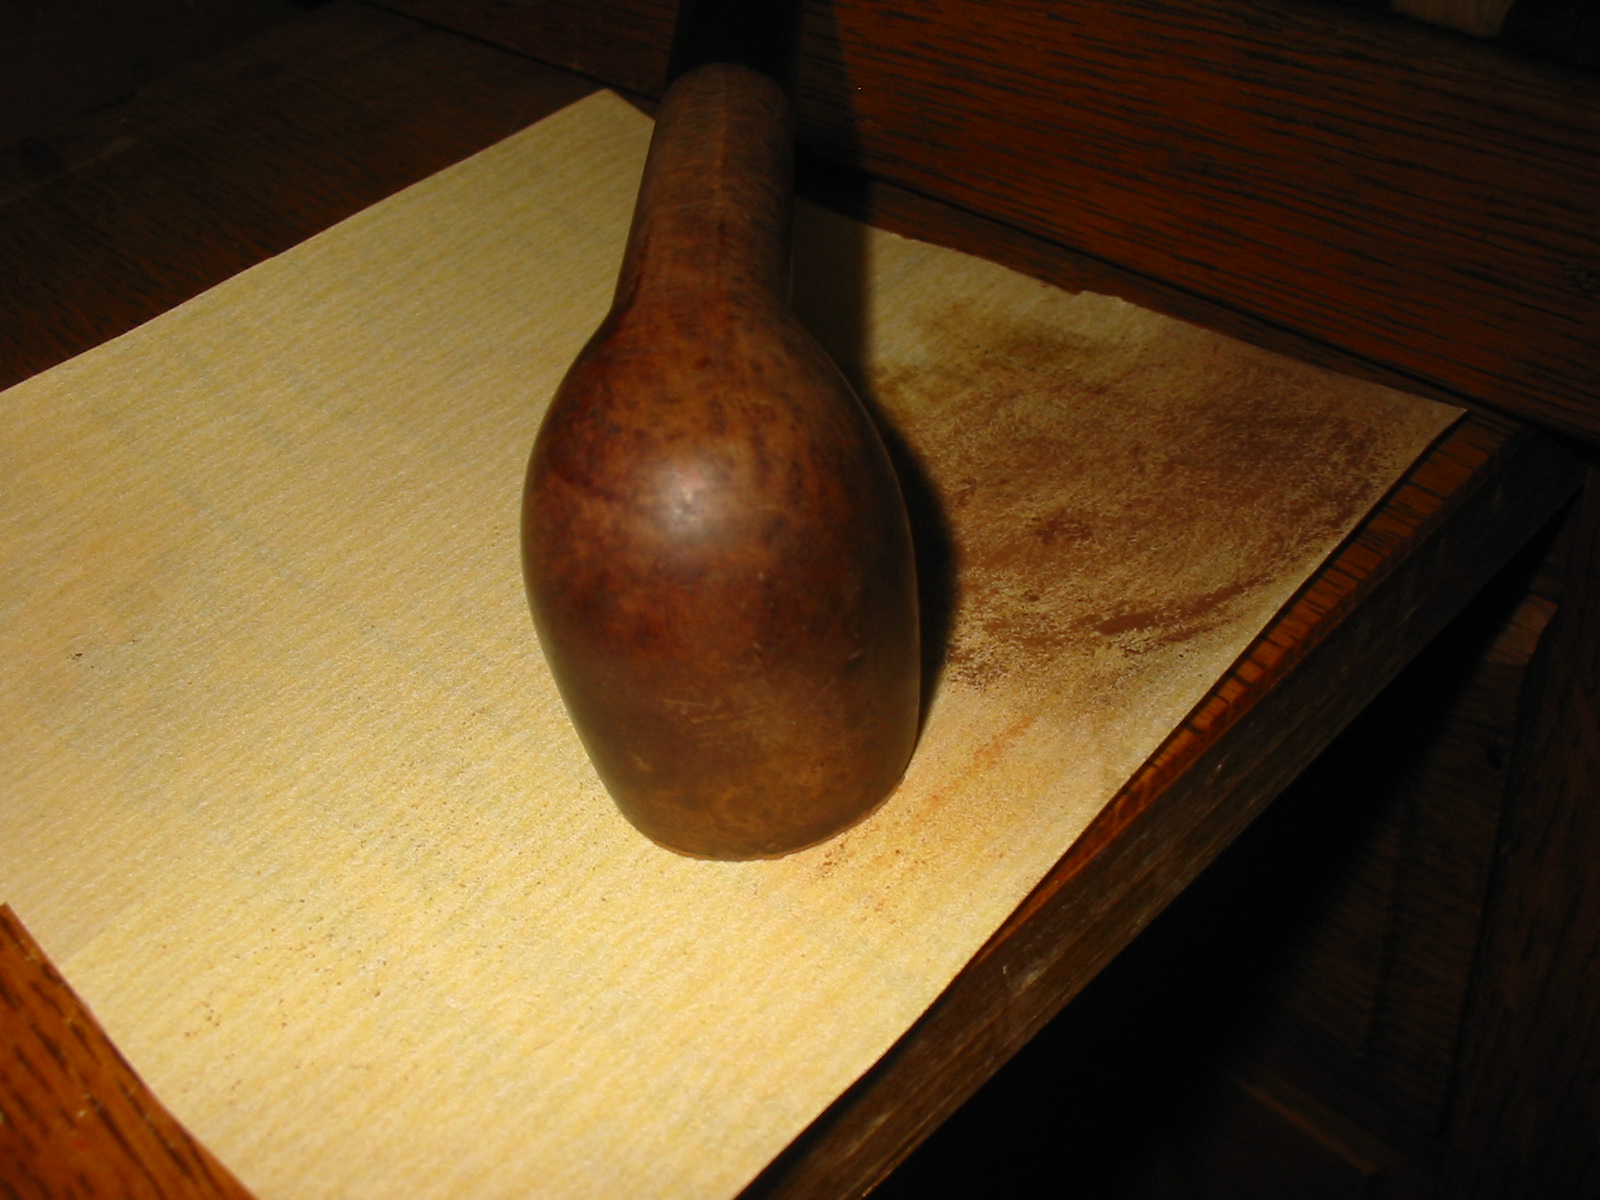
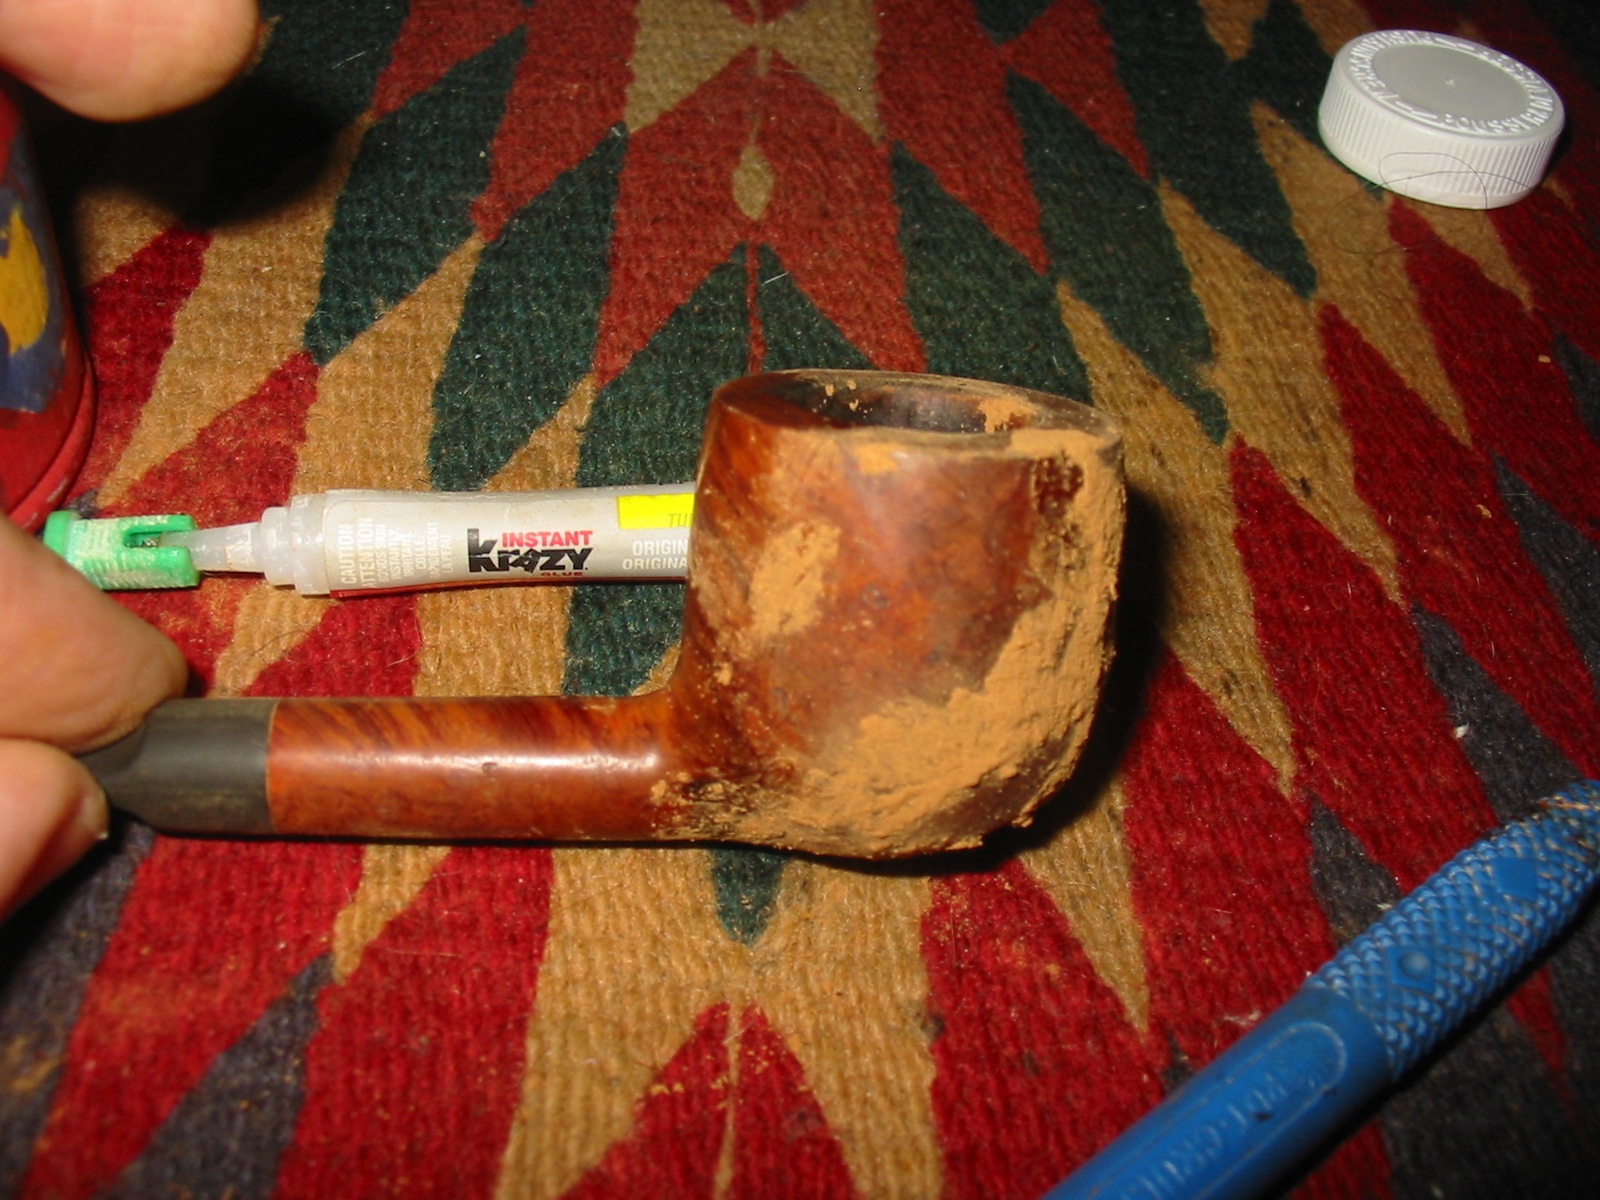
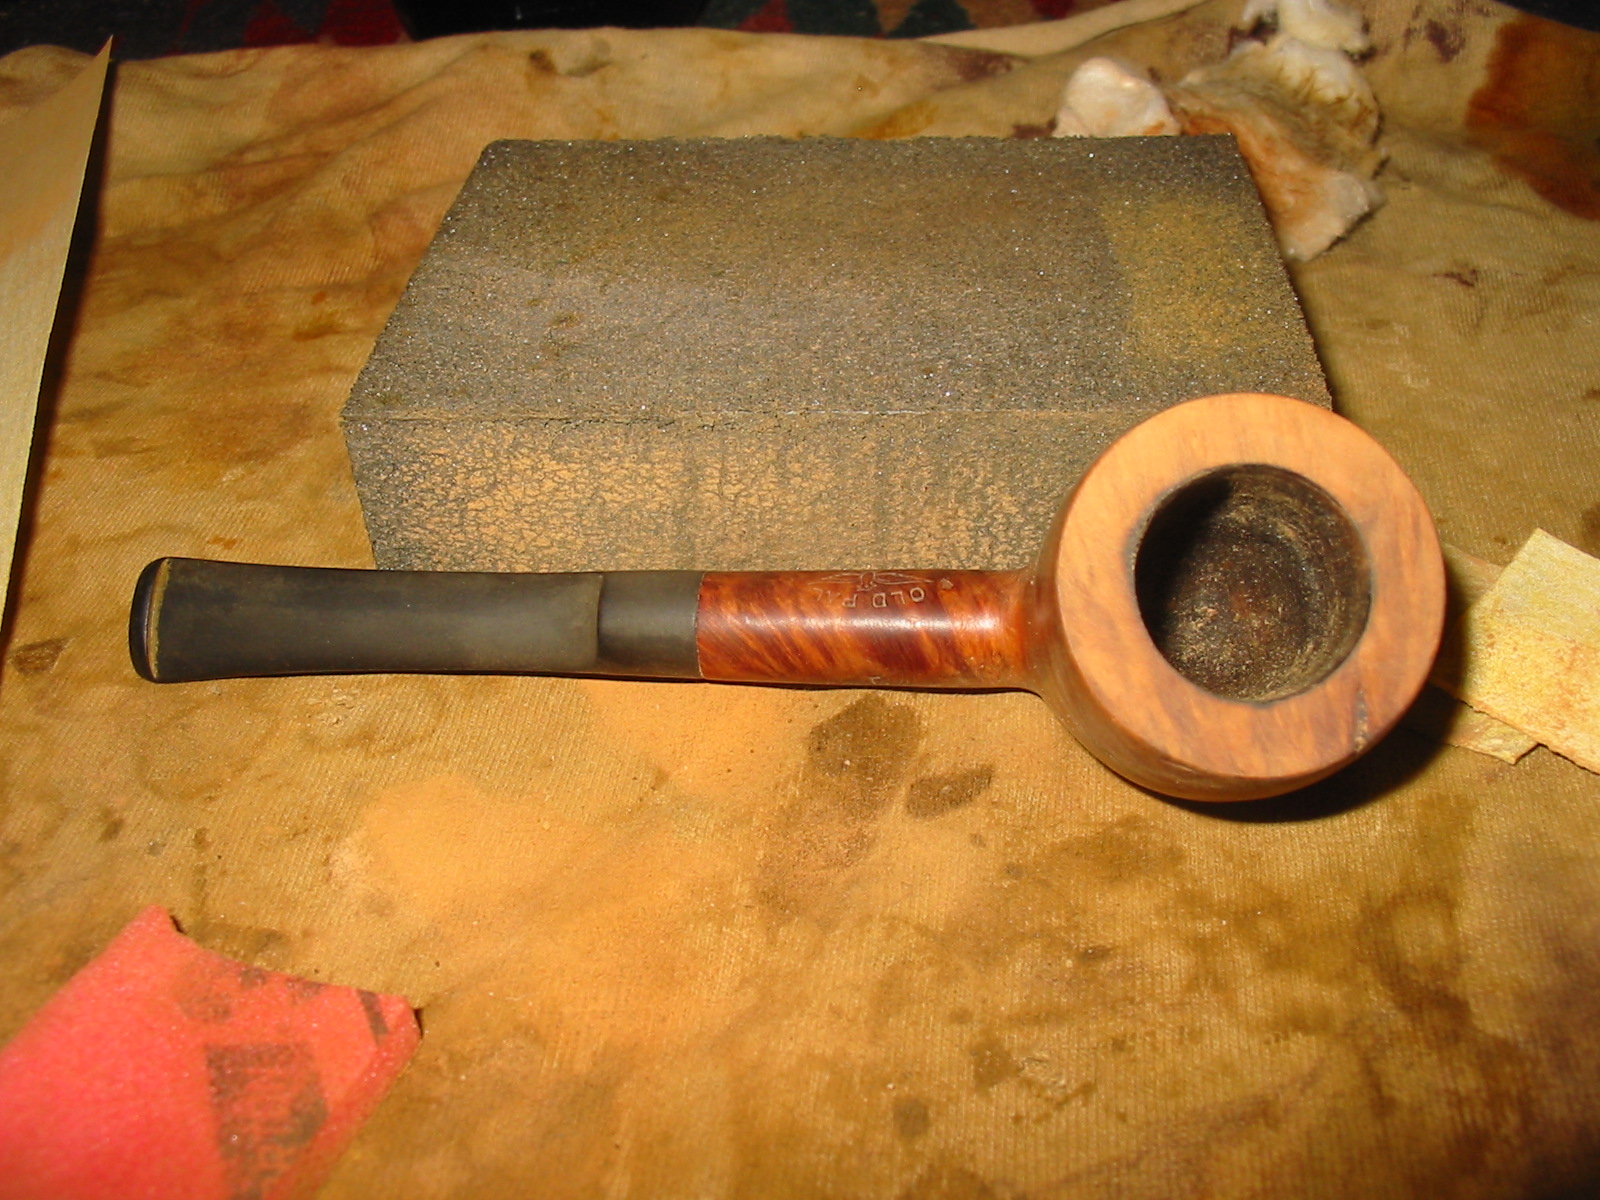
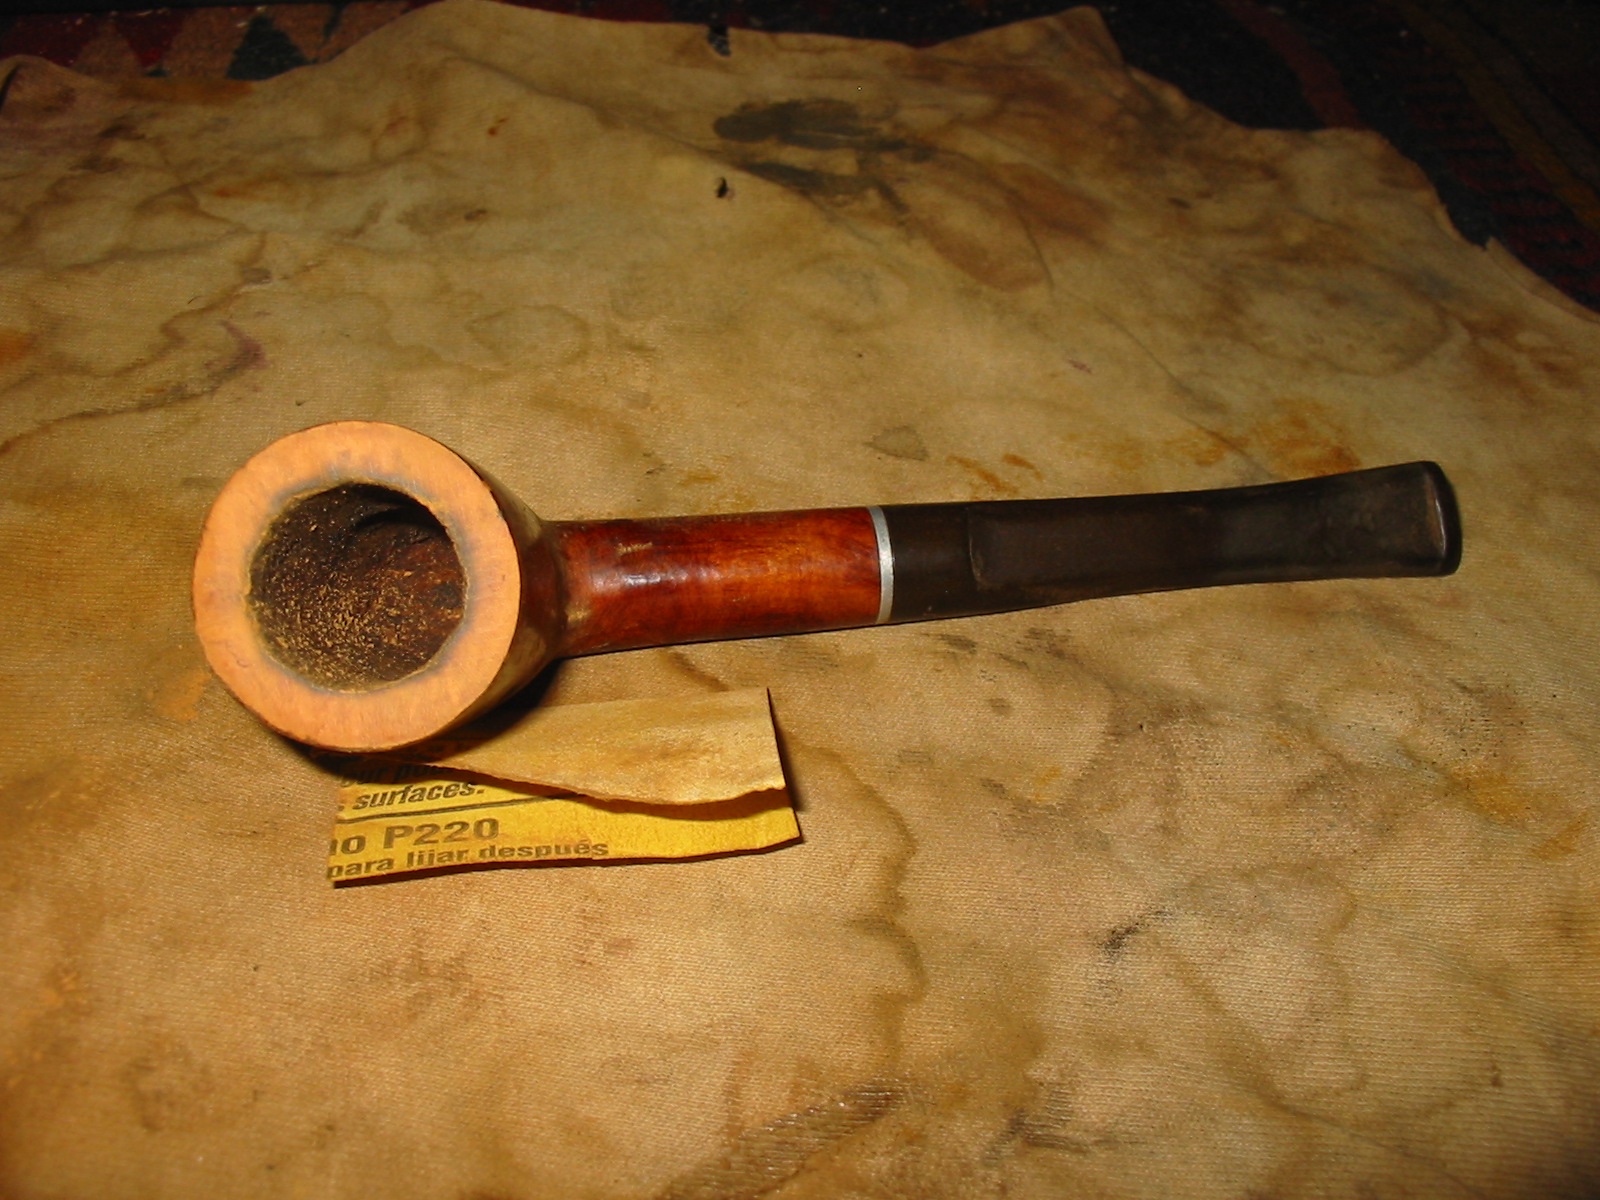
I reamed the bowl with a PipNet reamer to take the cake back to bare wood. The crumbling cake toward the bottom of the bowl made this necessary so that the next owner can build up their own hard cake.
IMG_3103

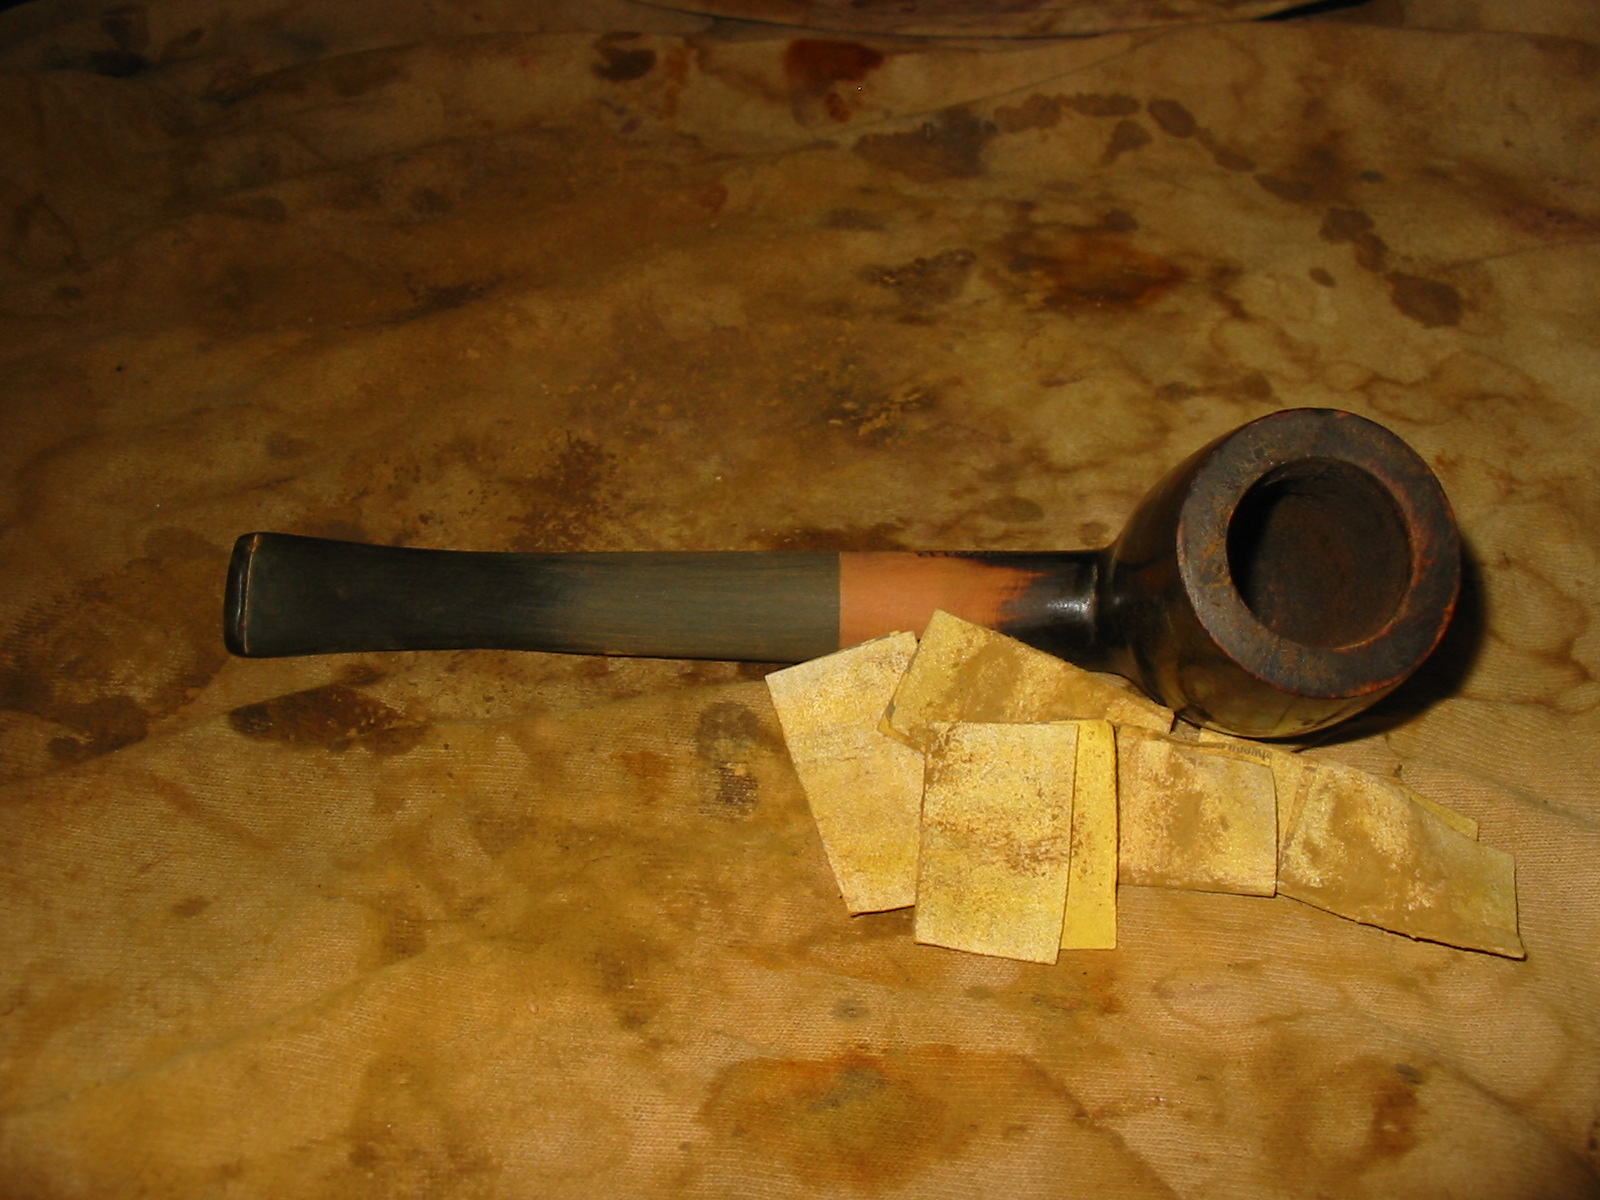
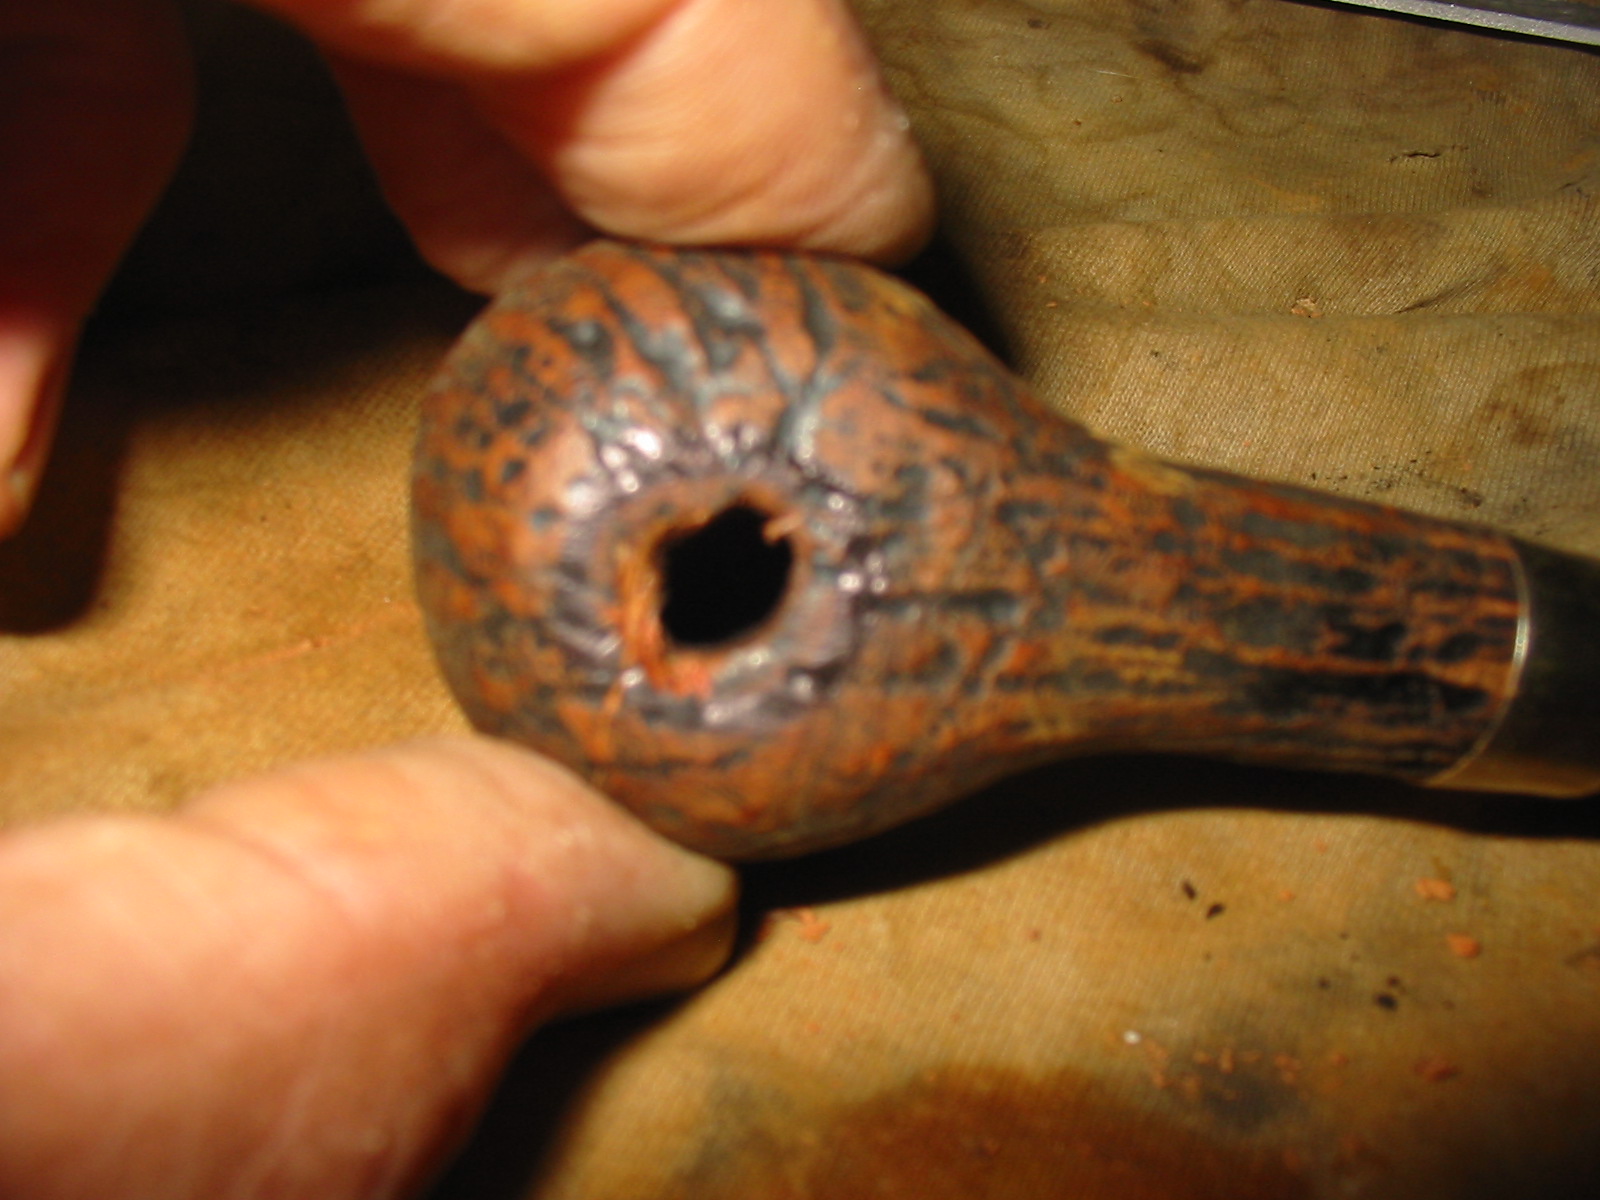
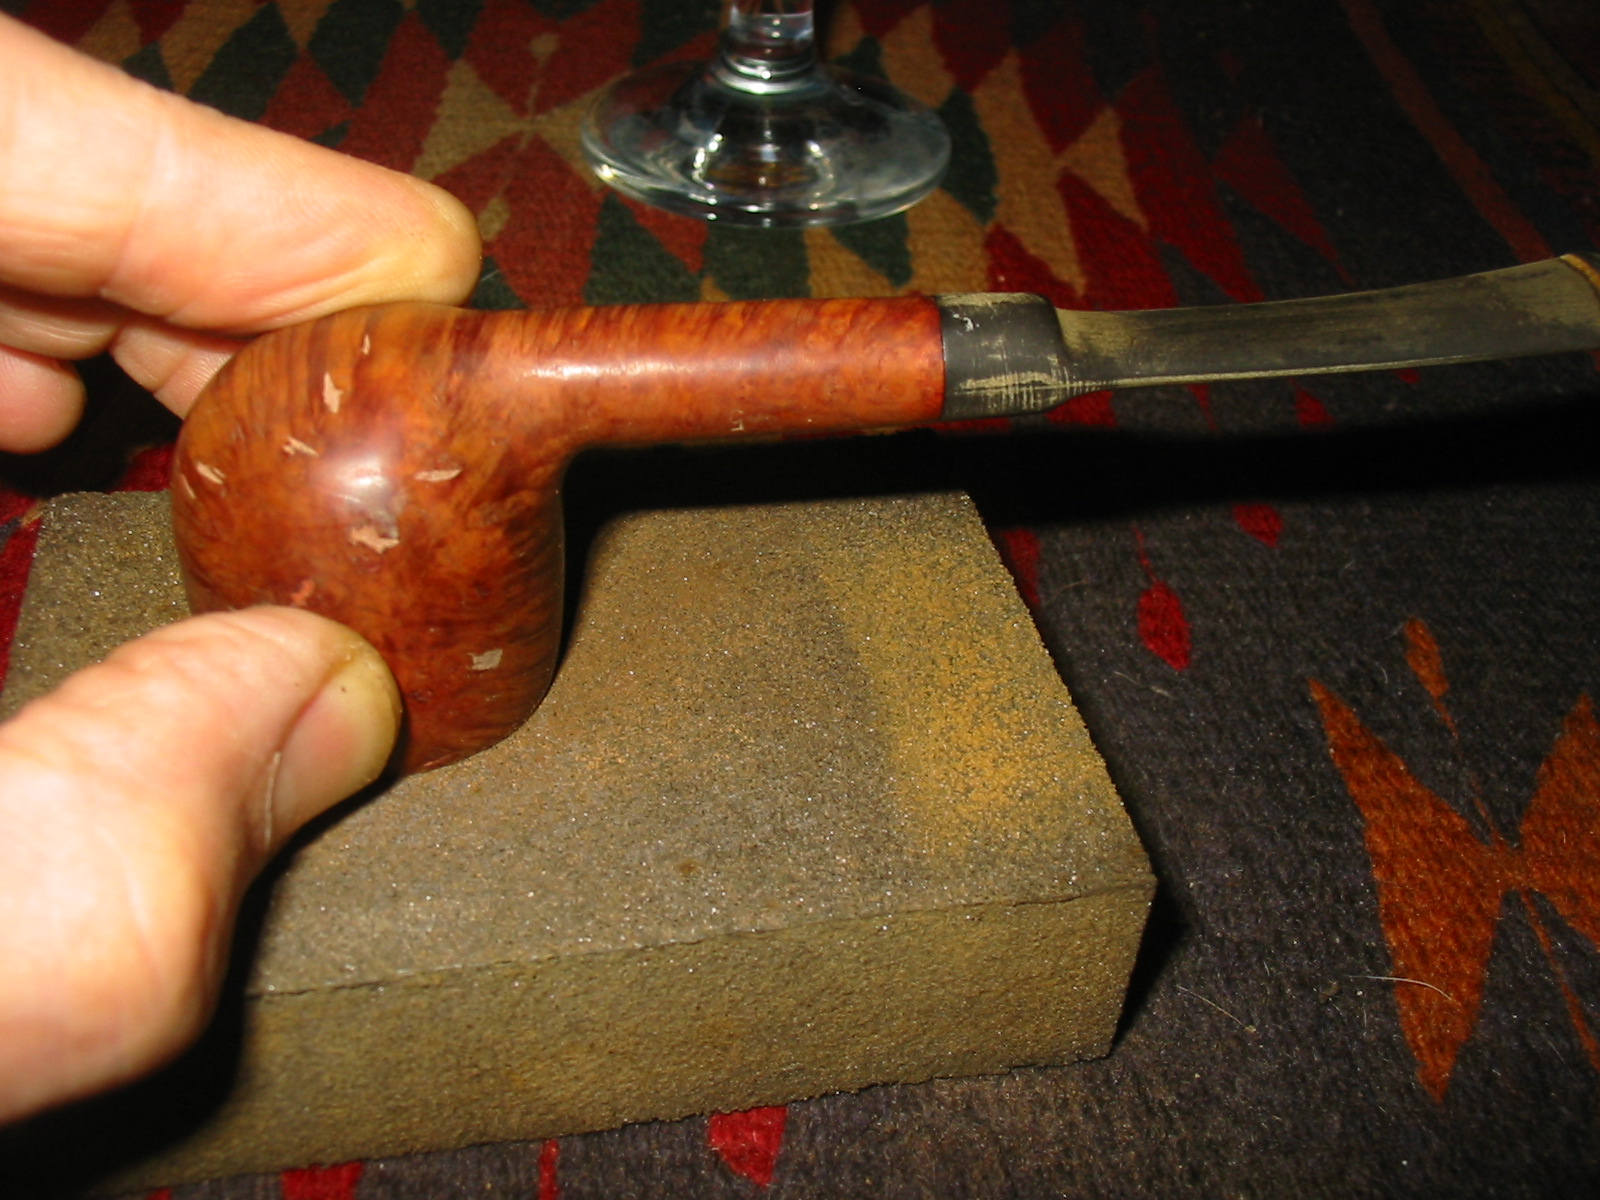
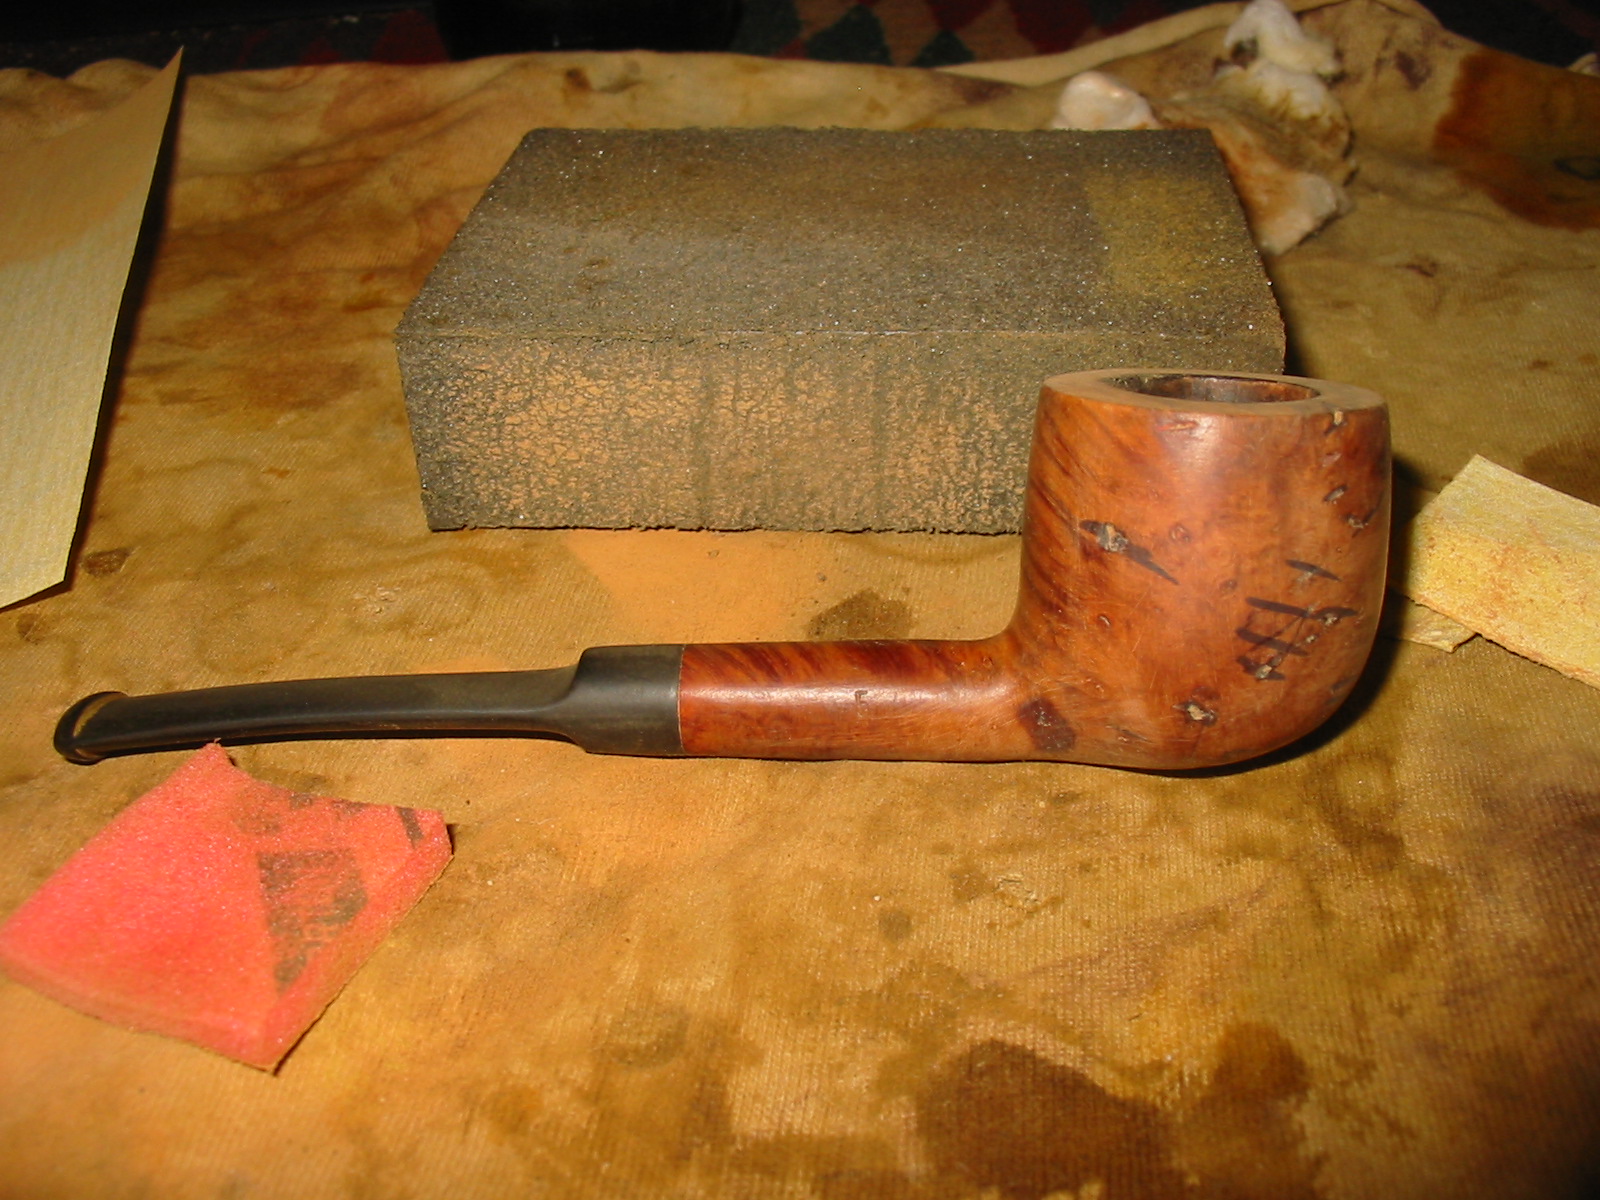
I topped the bowl with 220 grit sandpaper on a board and took off the damaged surface of the rim. I also cleaned up the inner edge of the rim with a folded piece of sandpaper. I wanted to smooth out the damage to the inner edge and repair the out of round shape of the bowl.
IMG_3104

IMG_3105

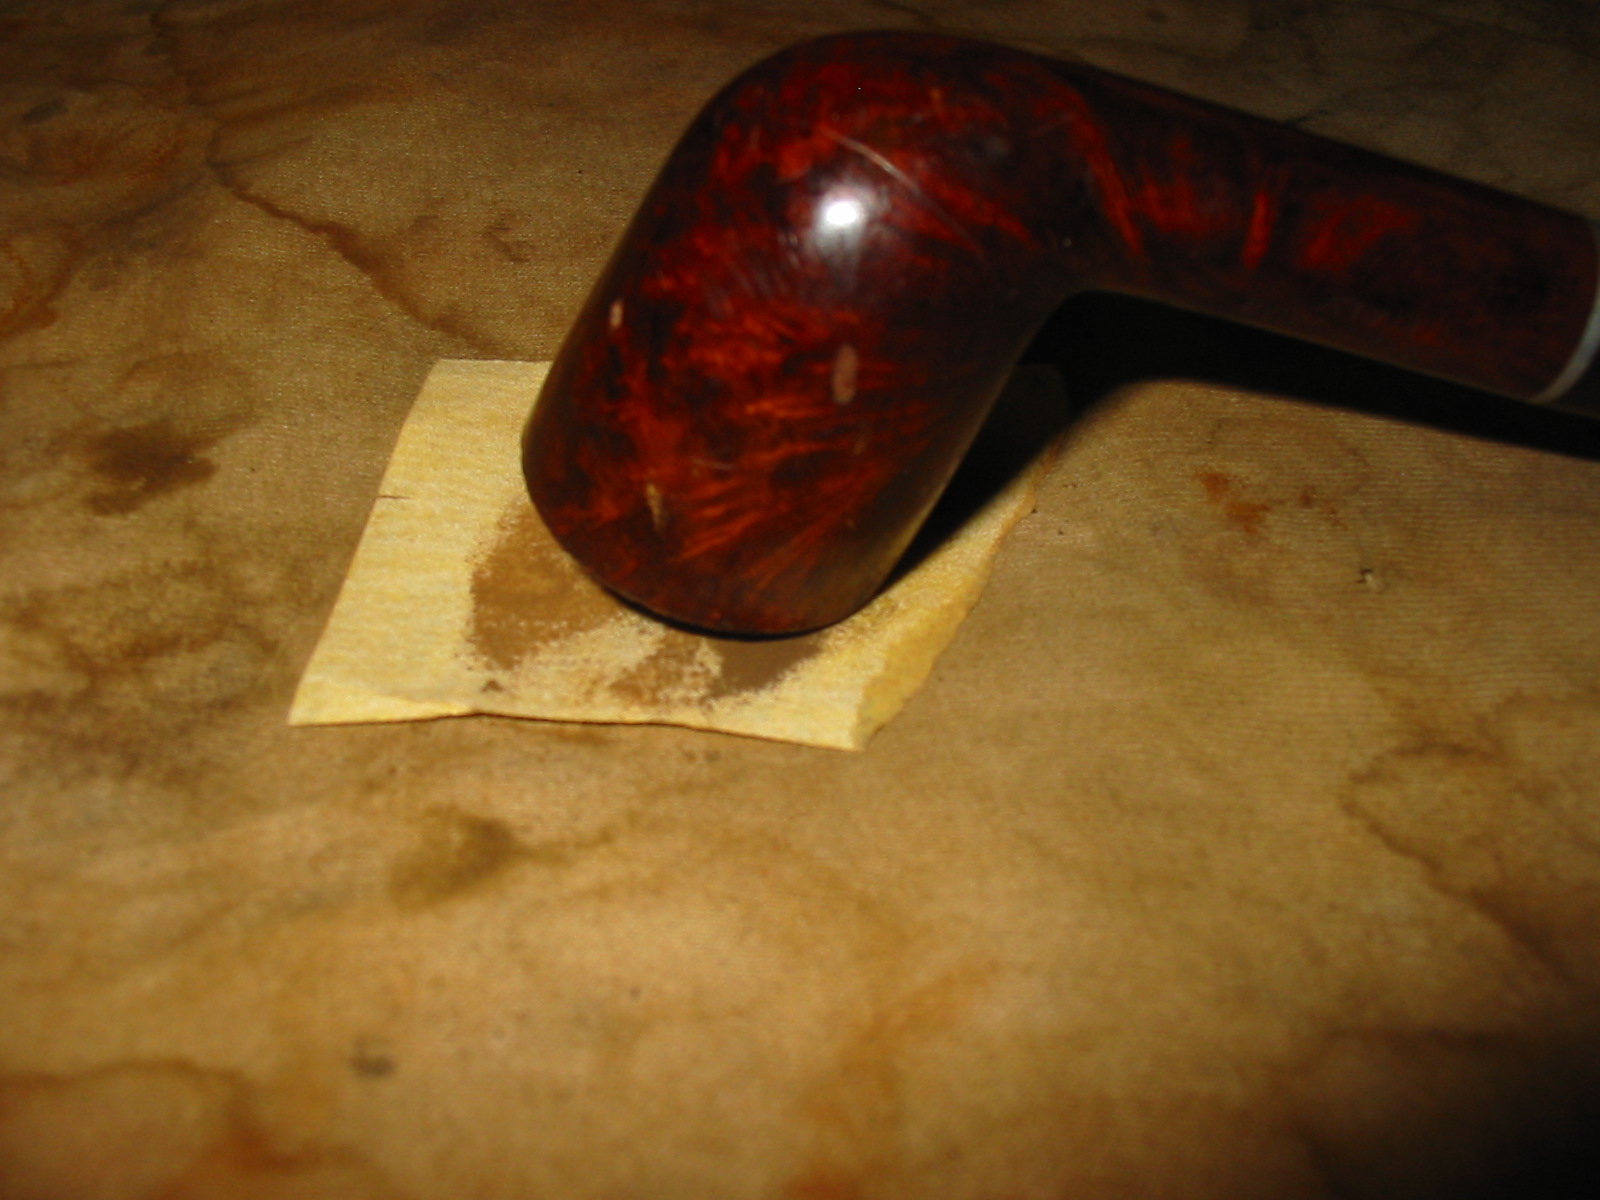
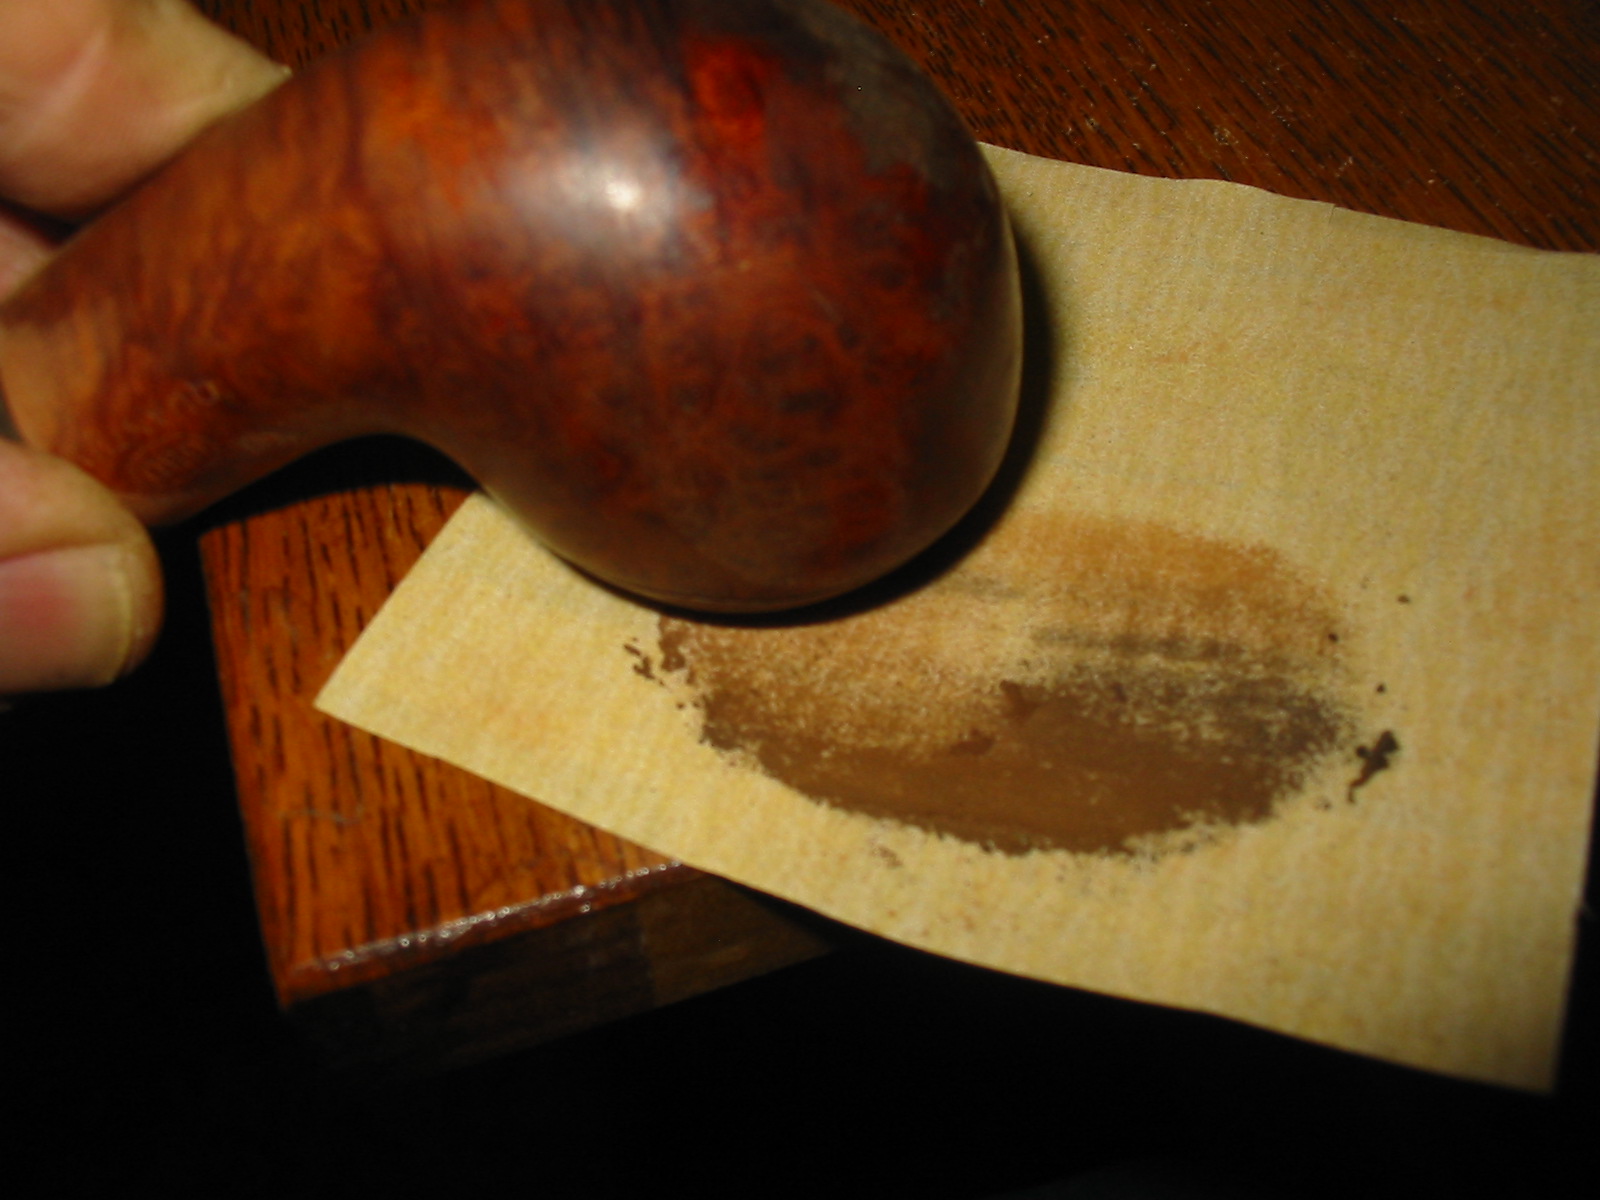
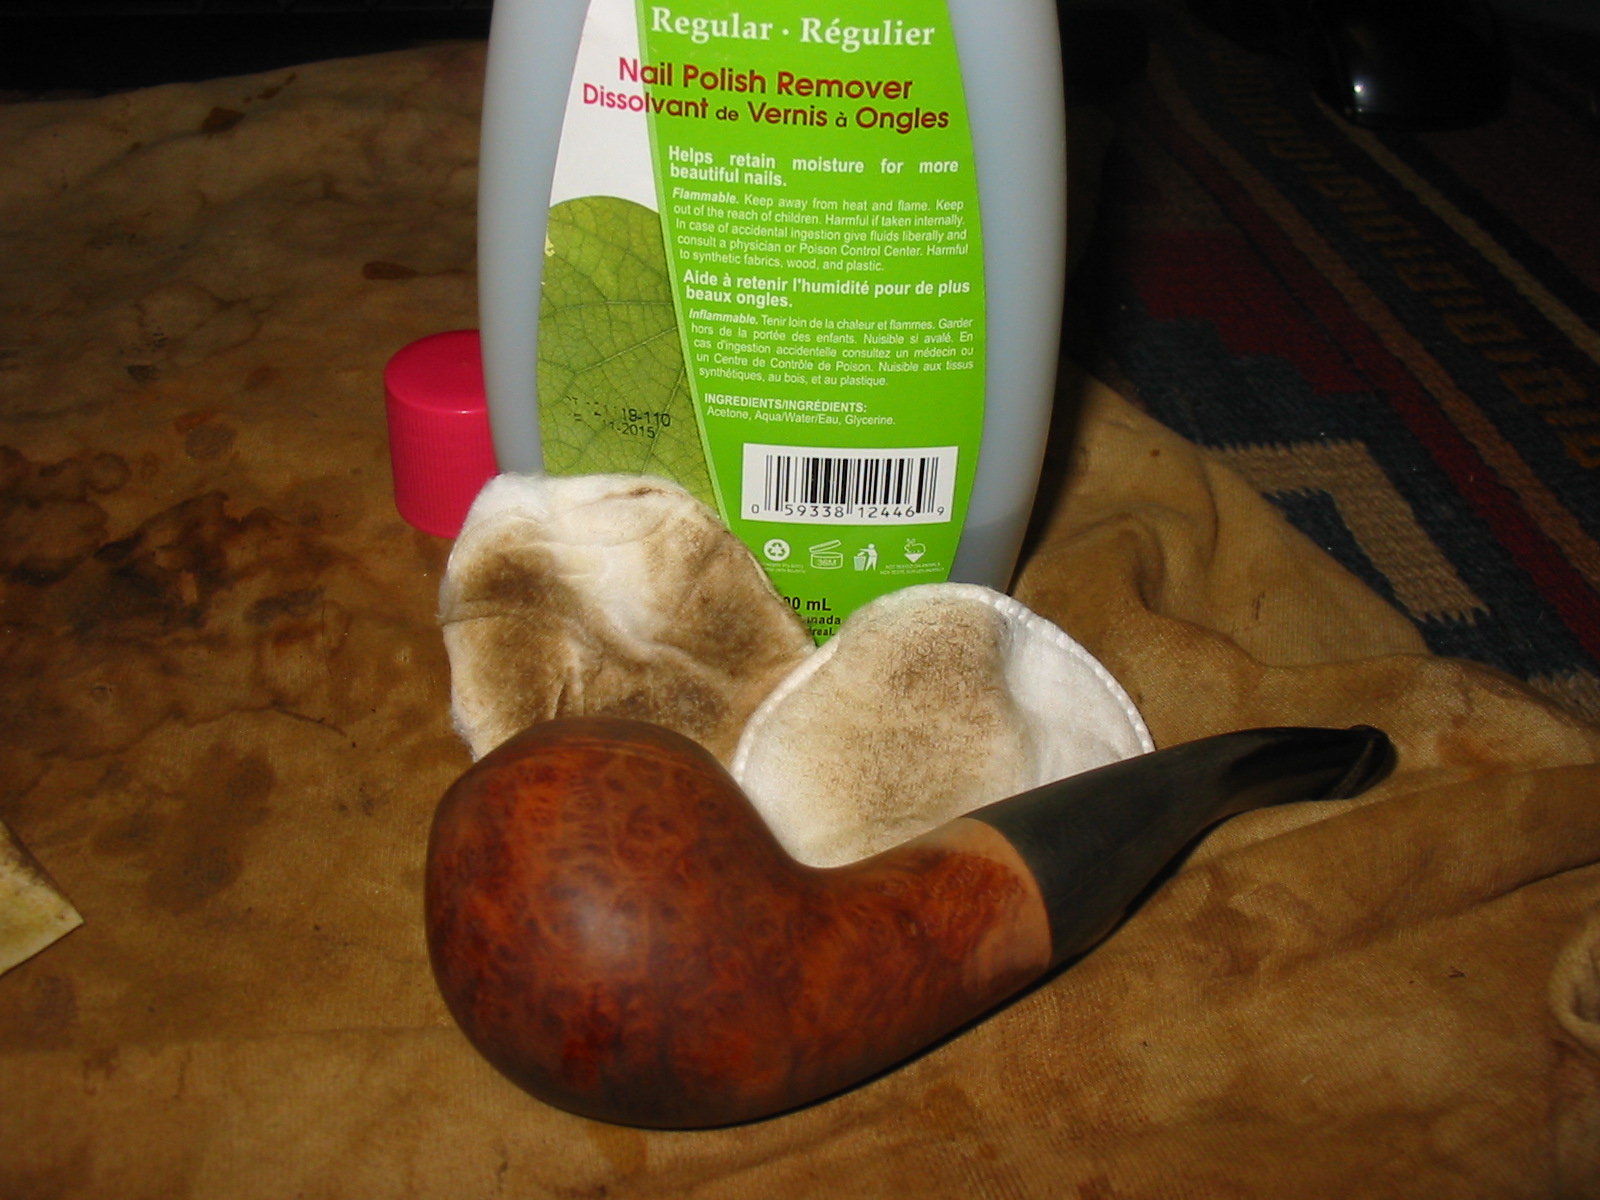
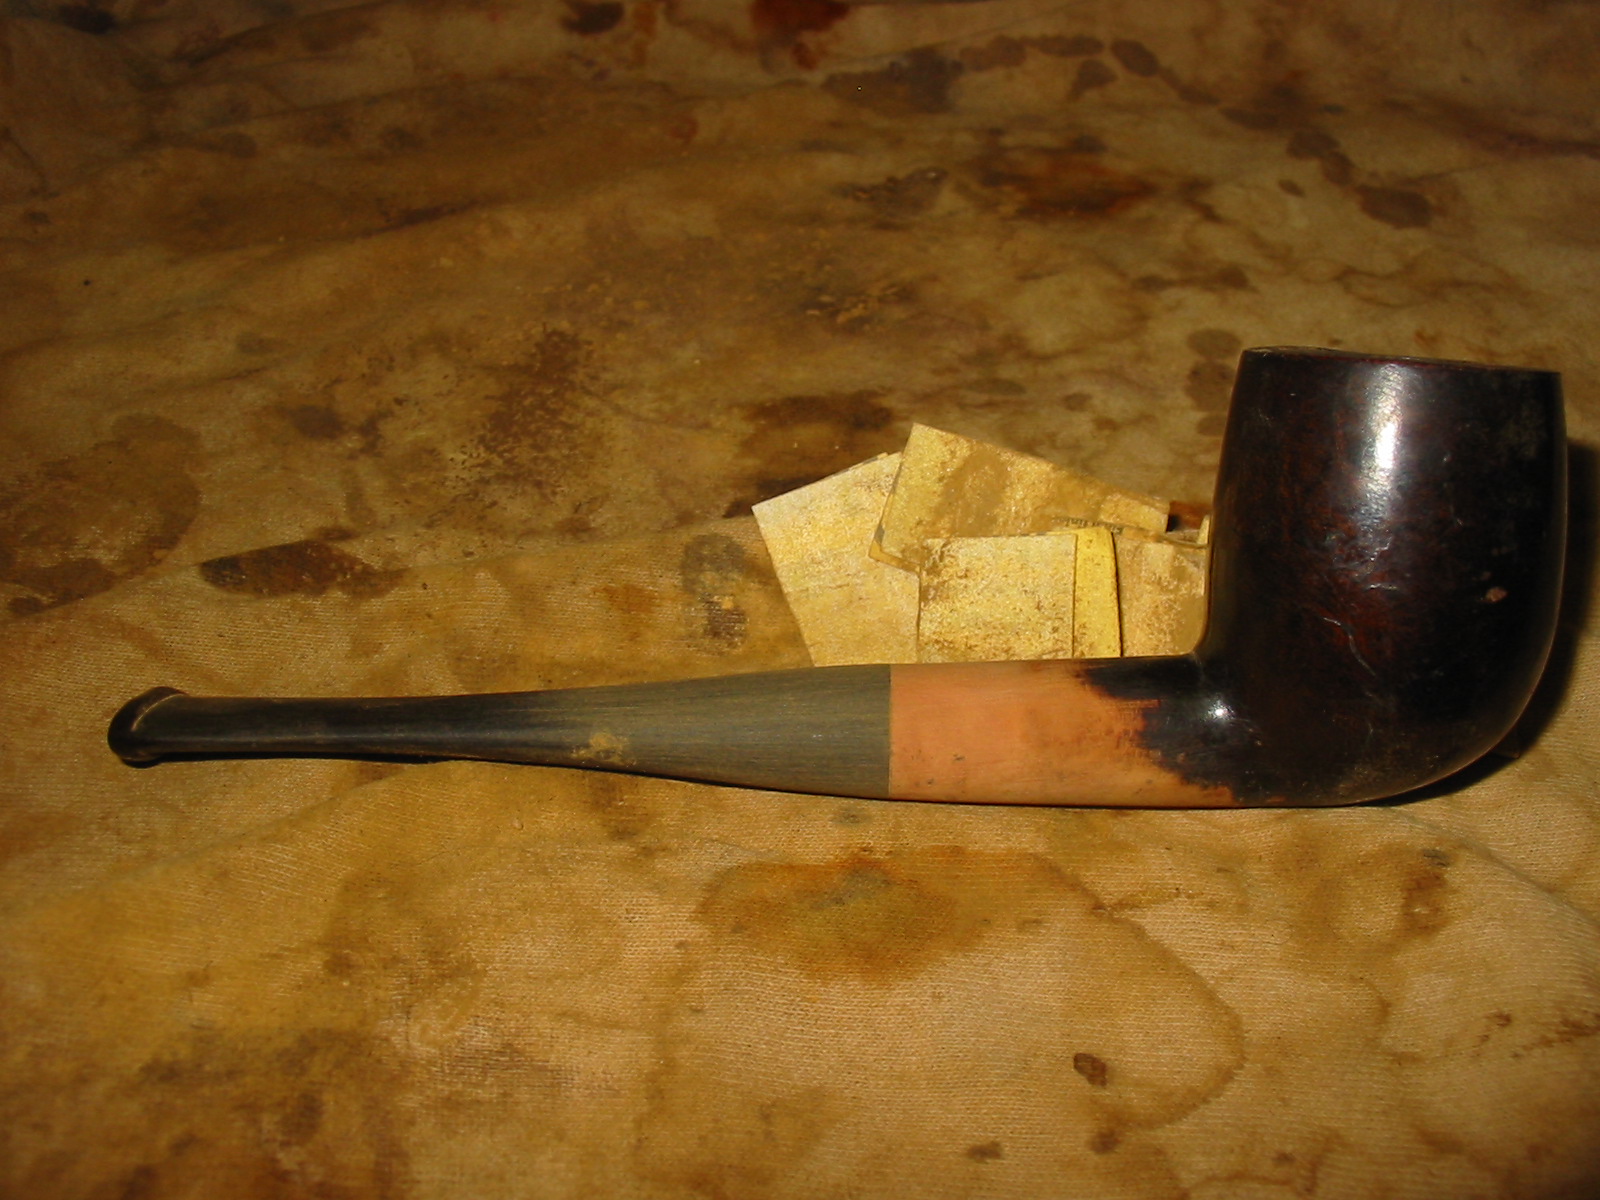
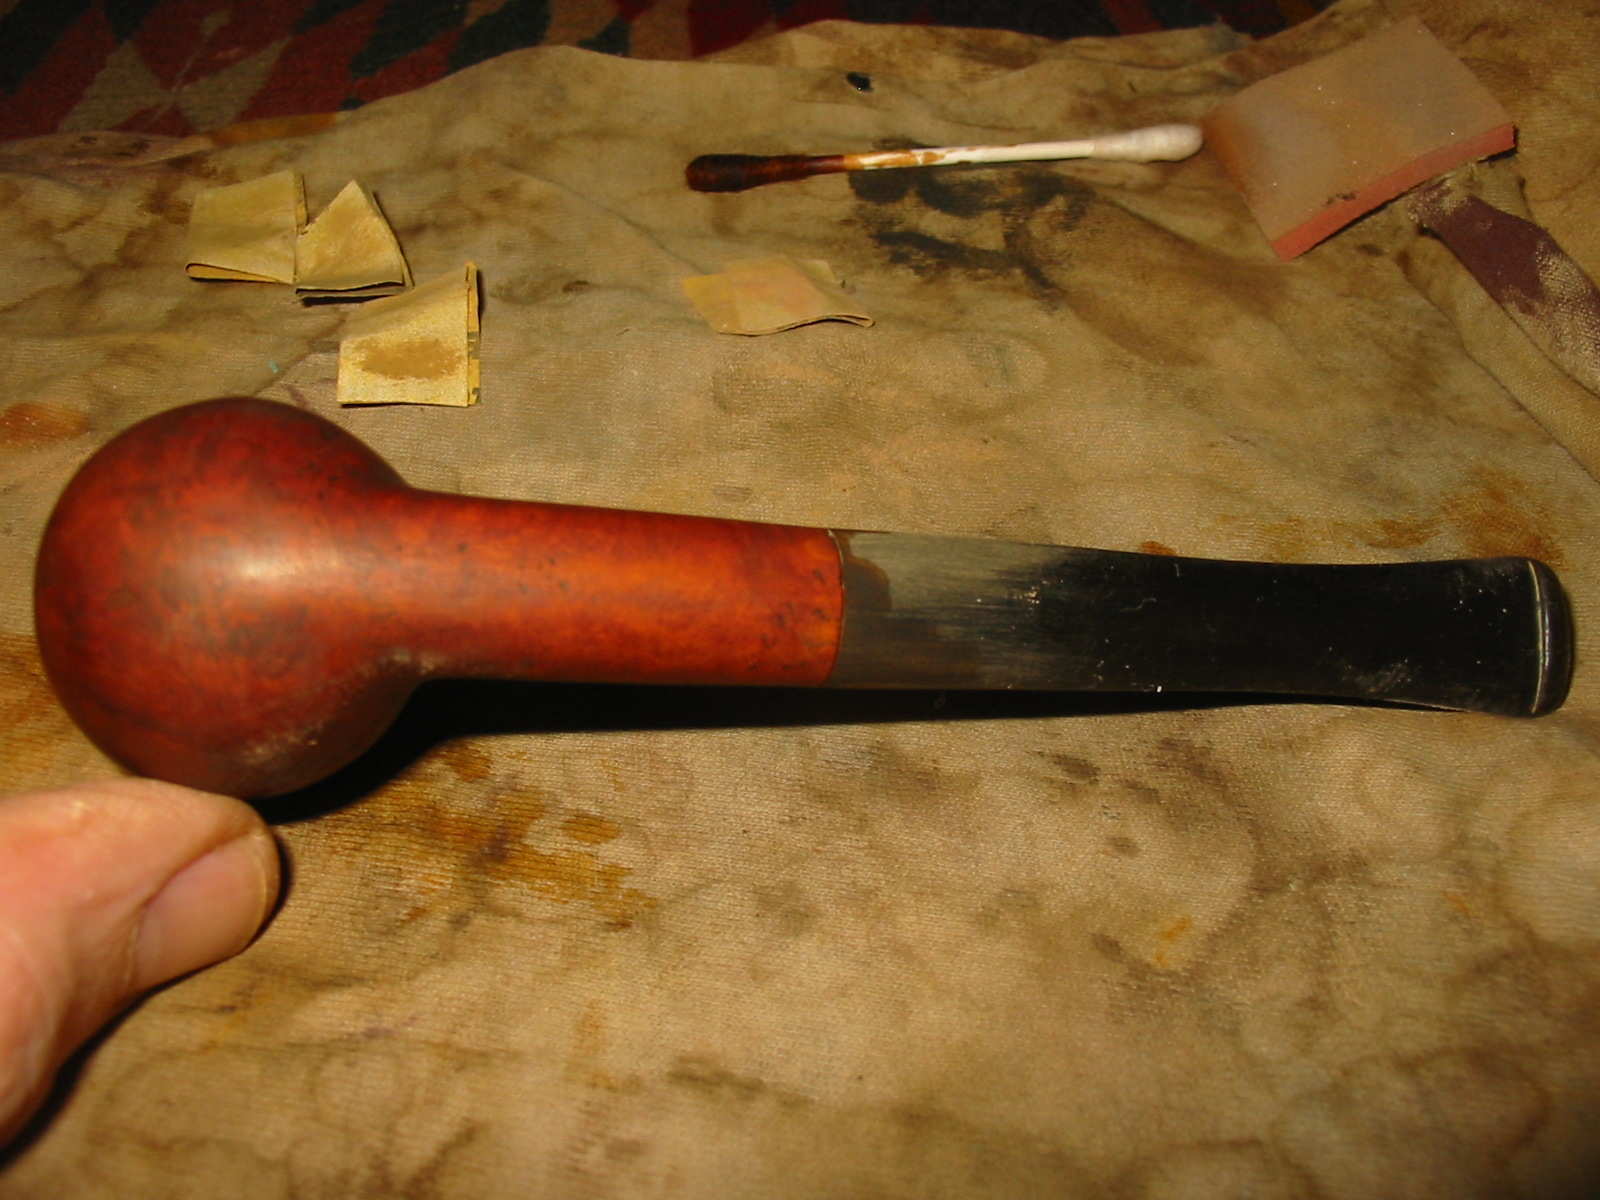
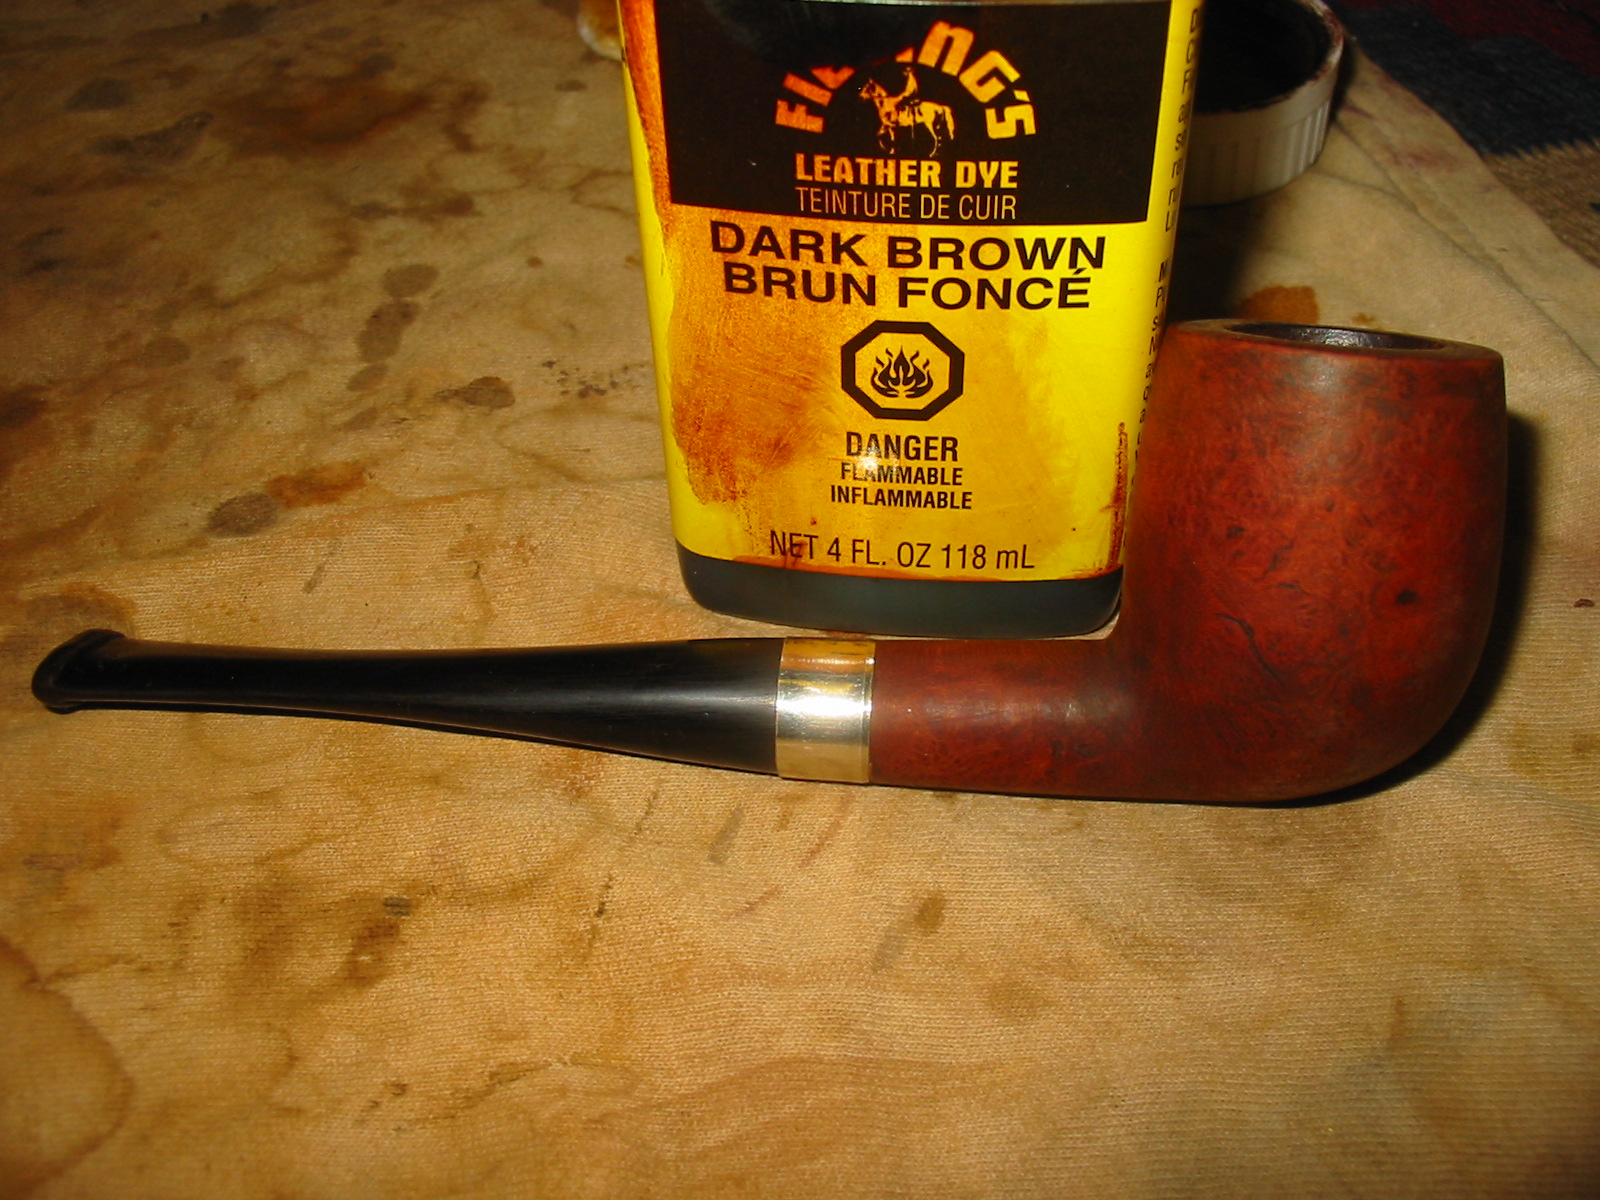
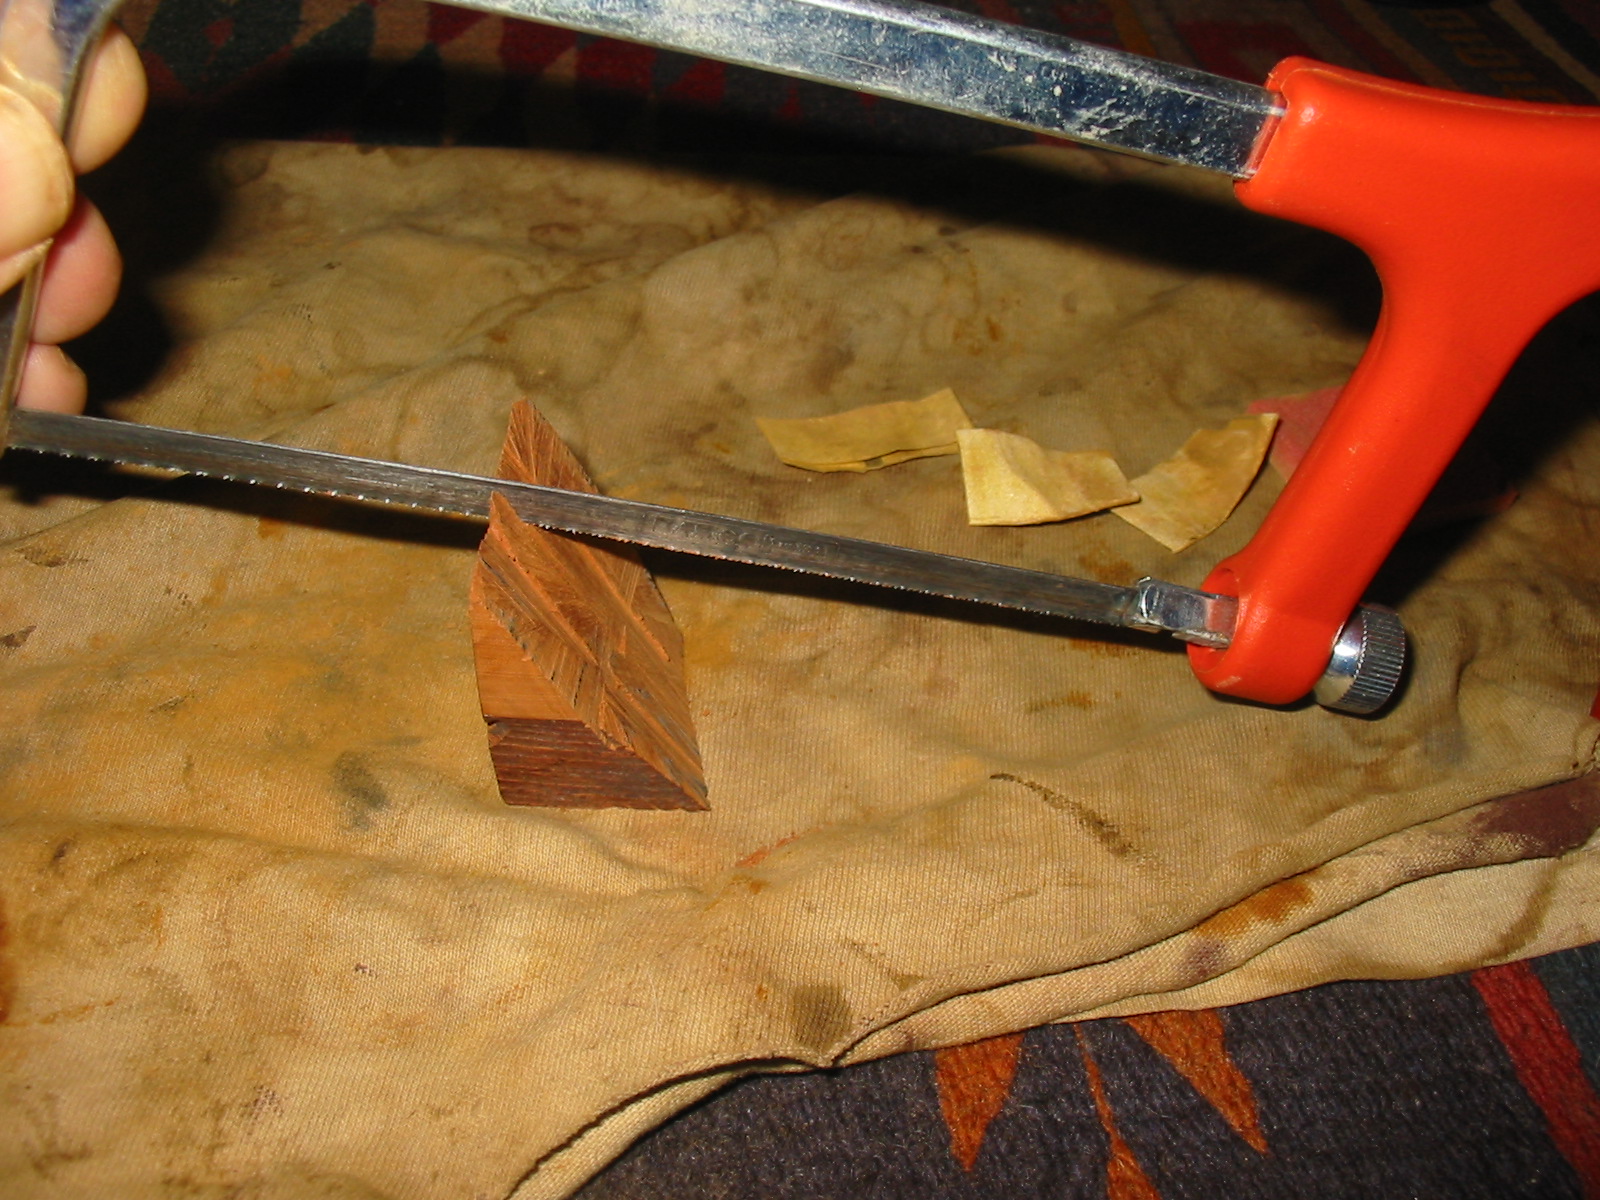
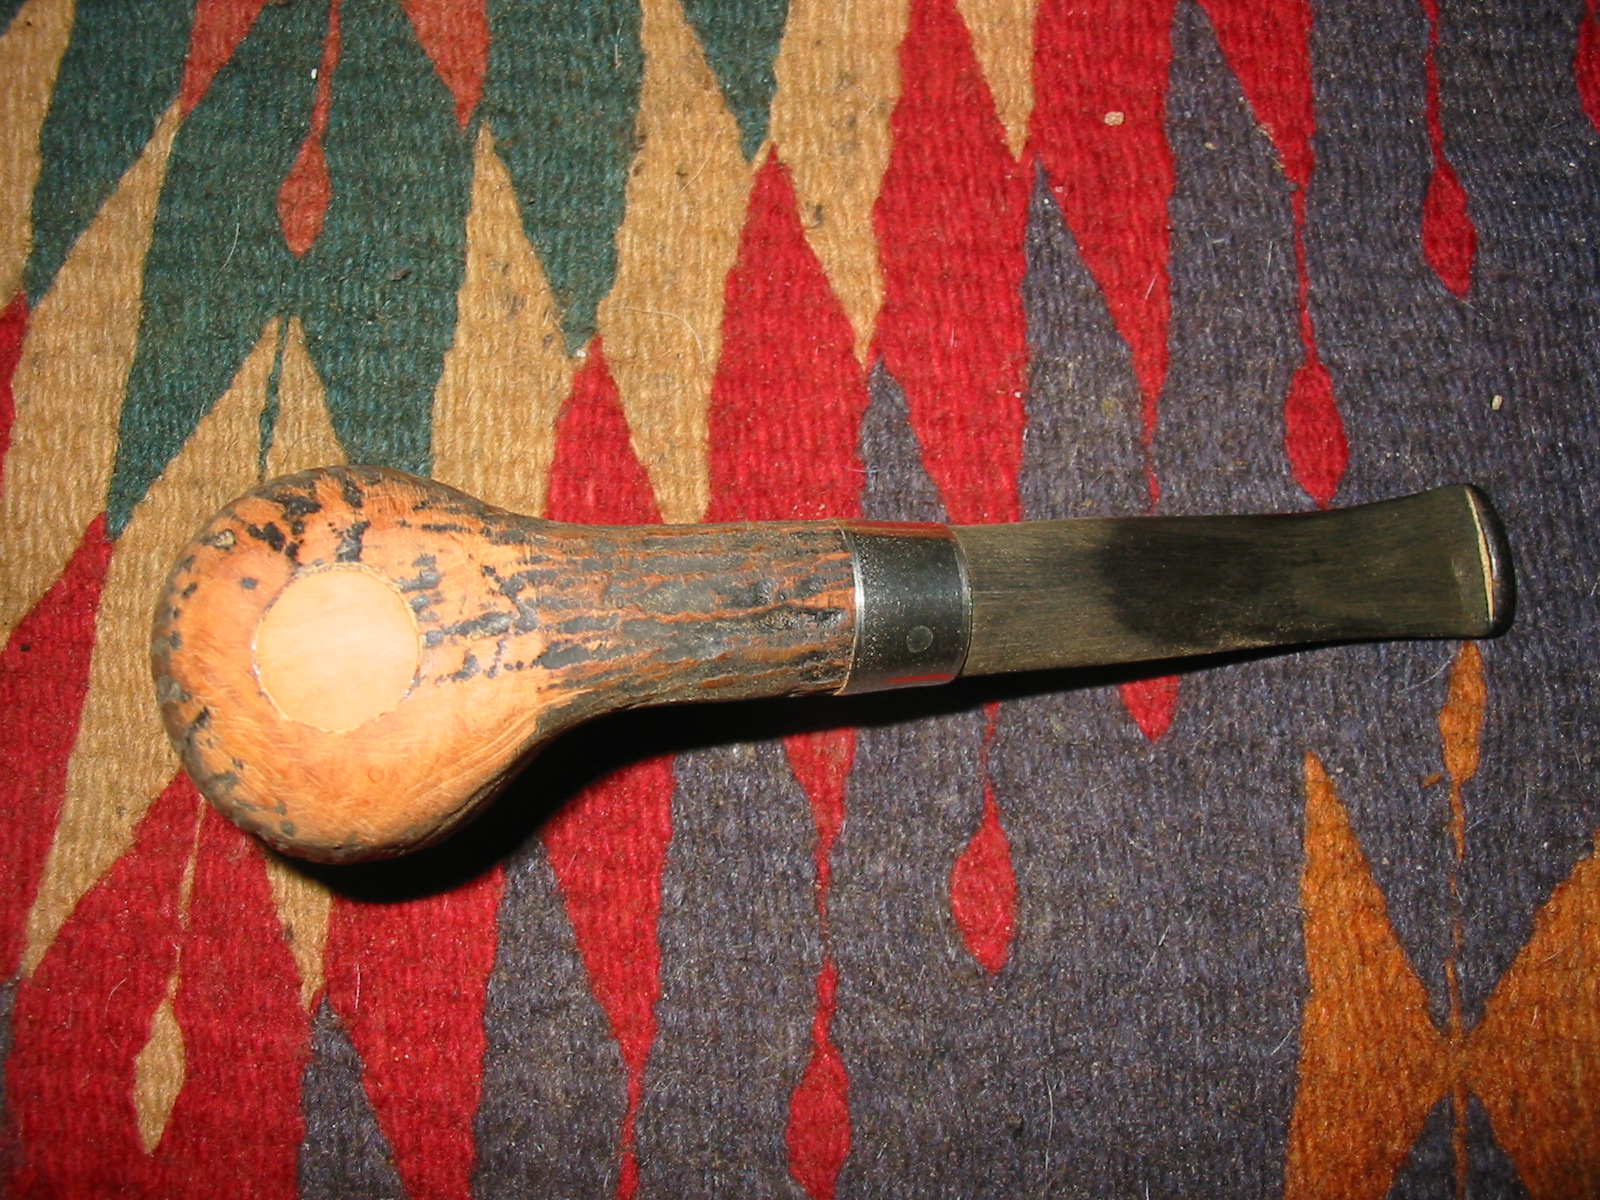
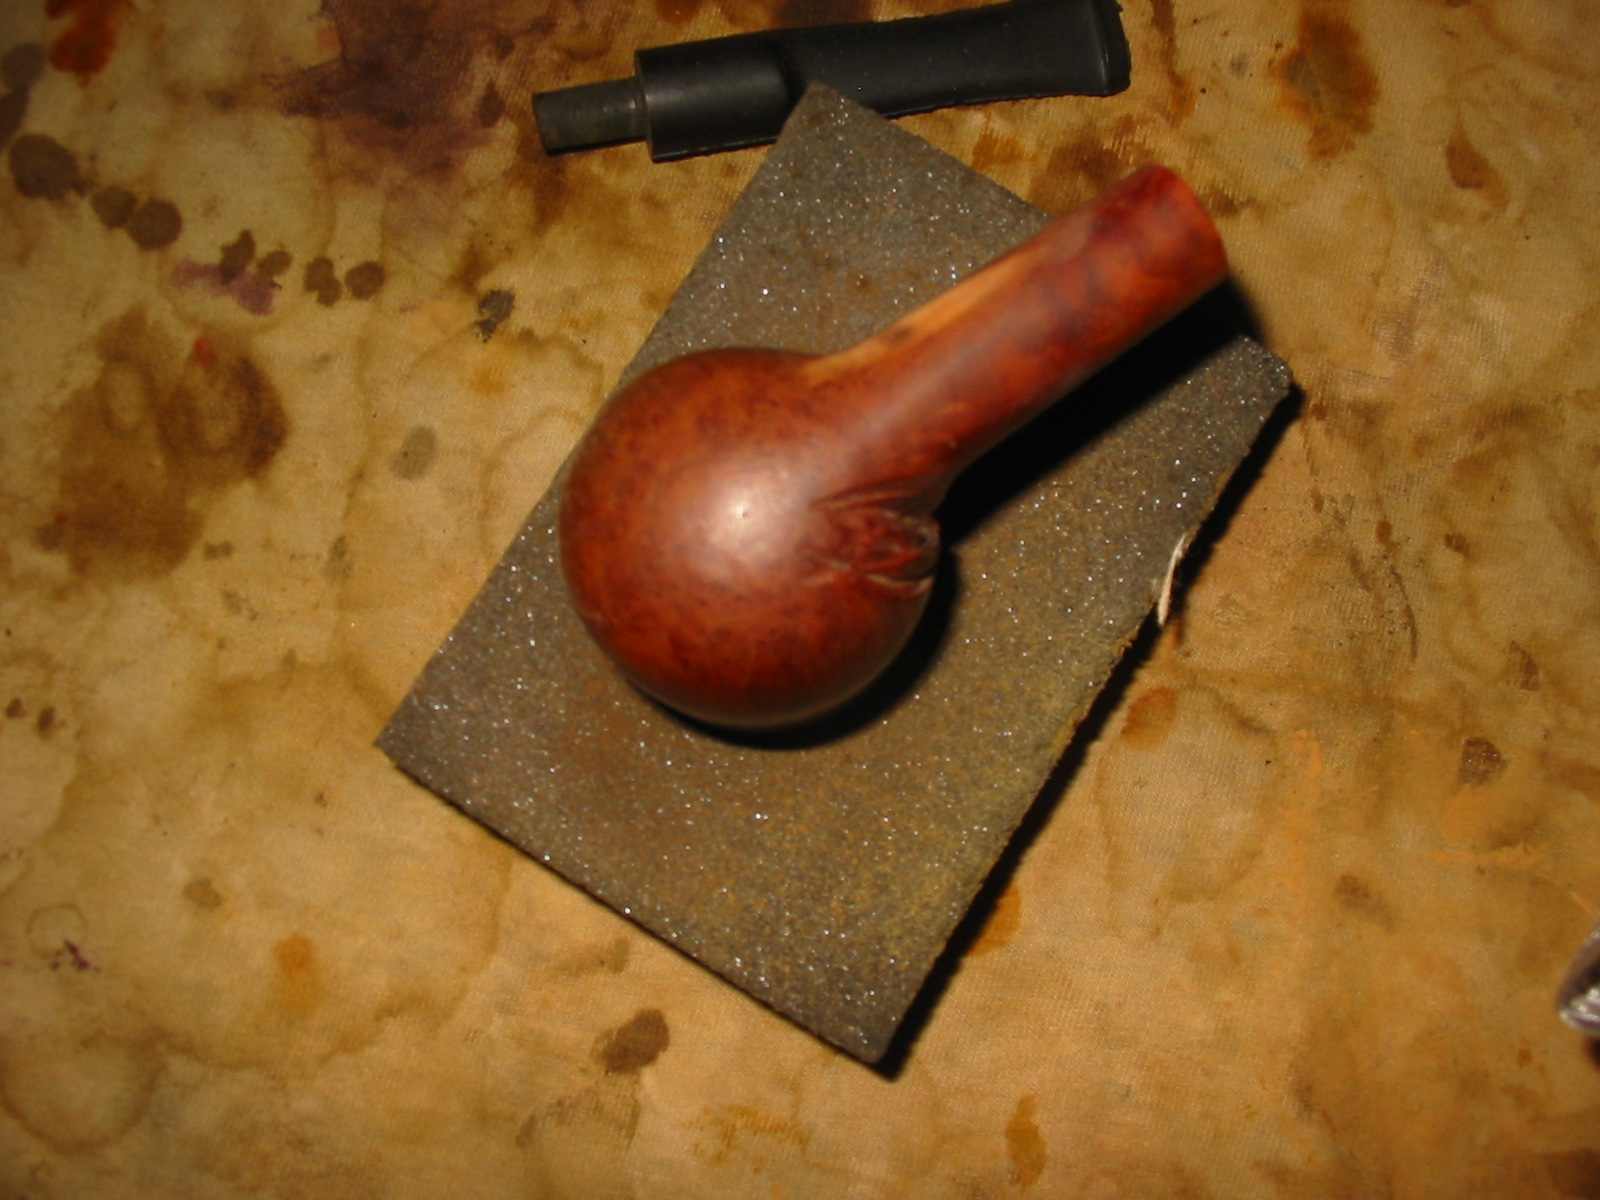
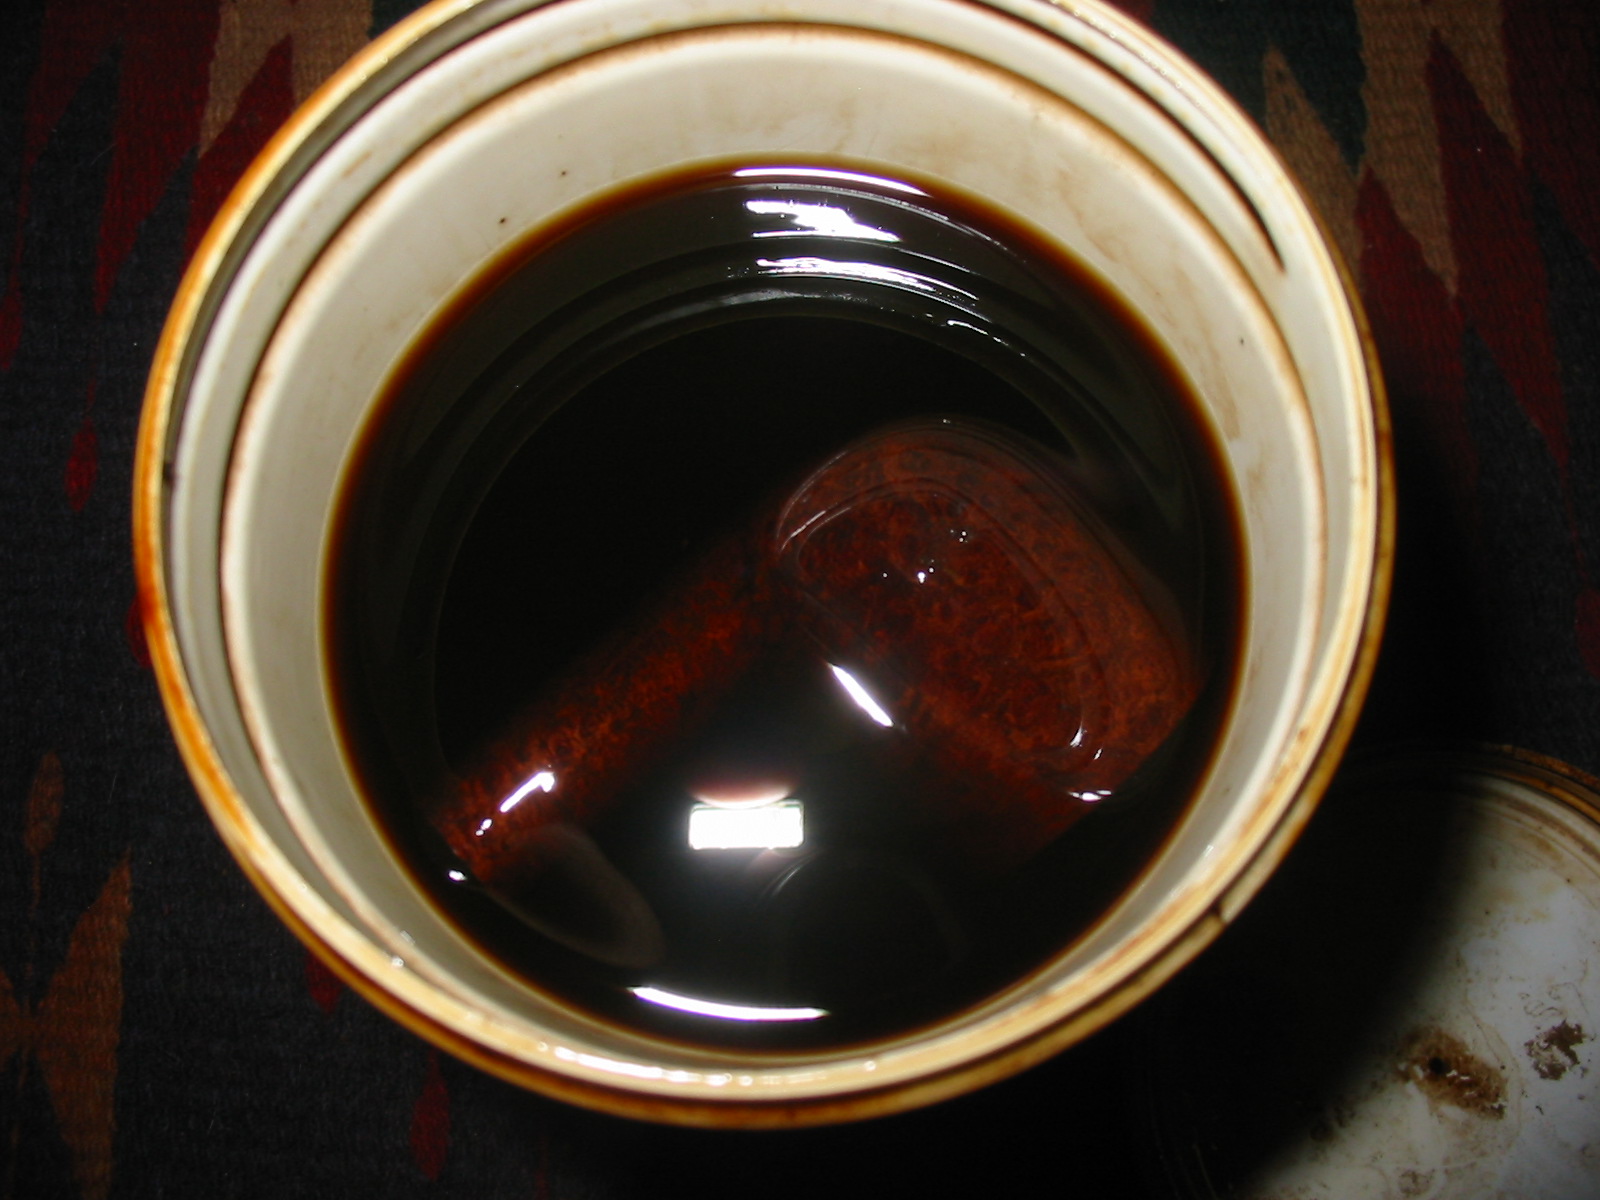
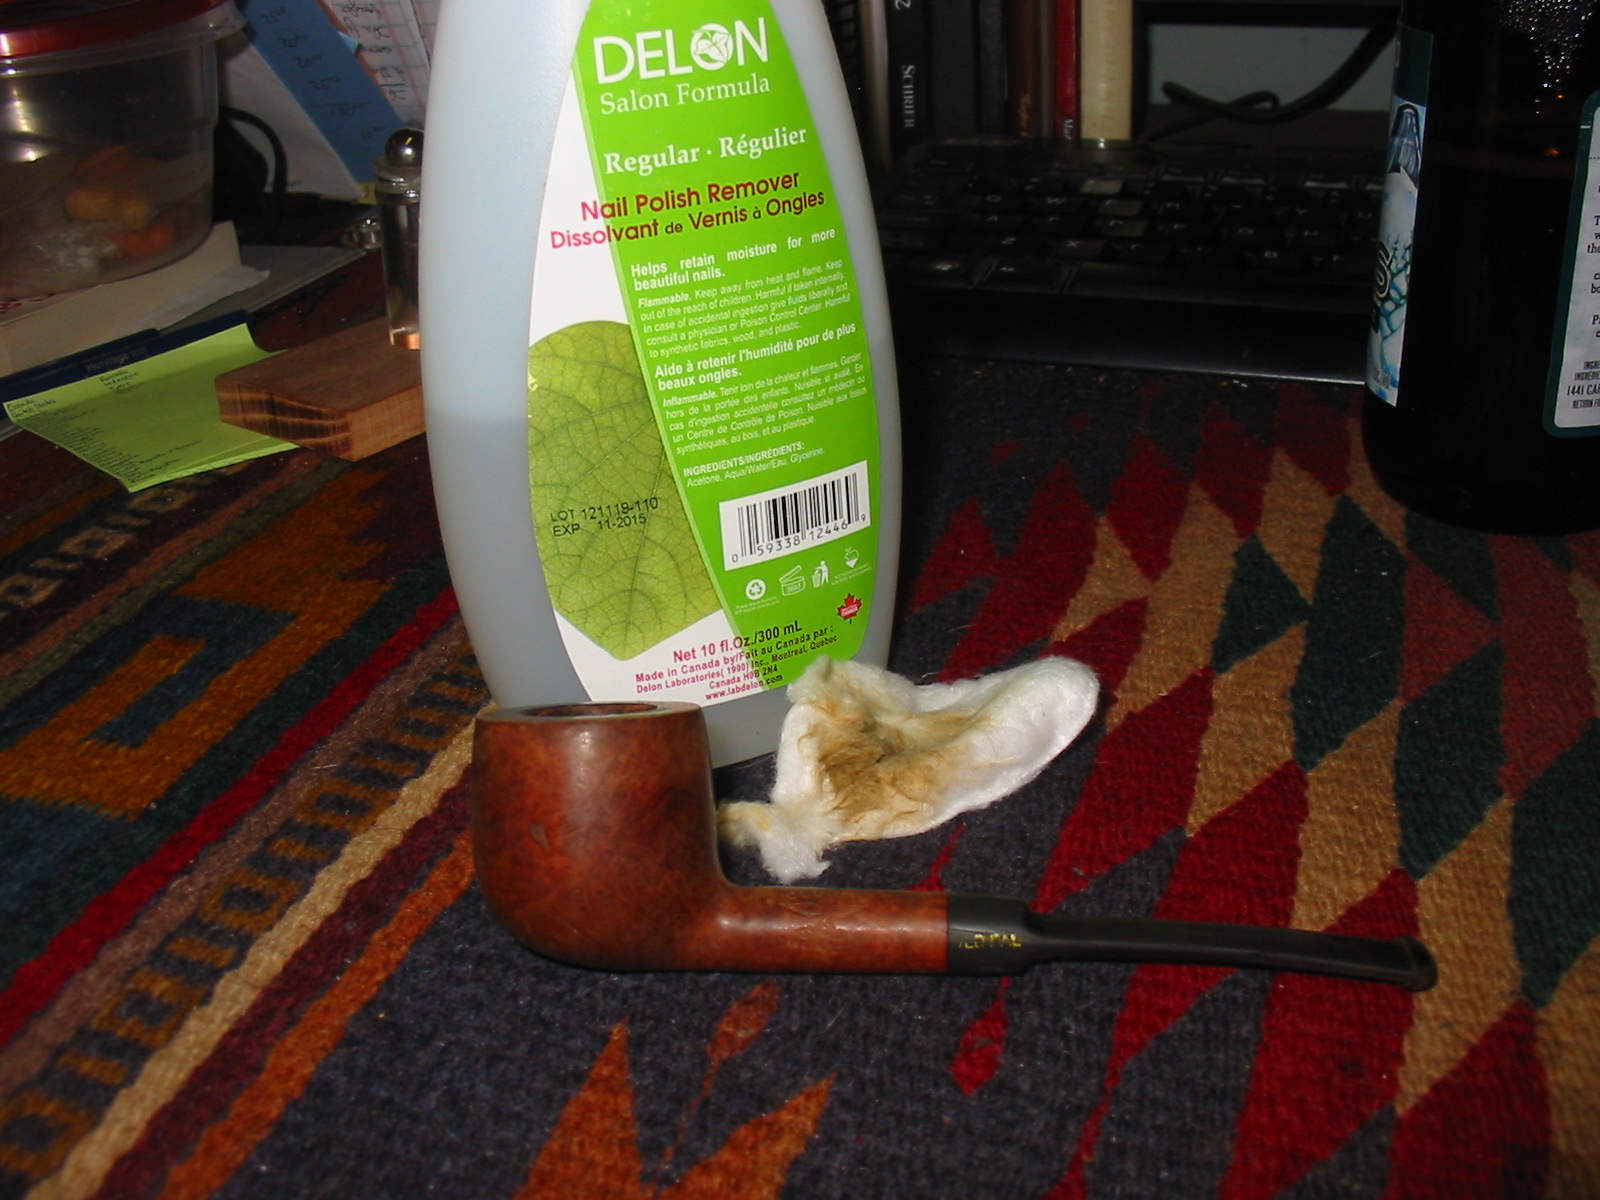
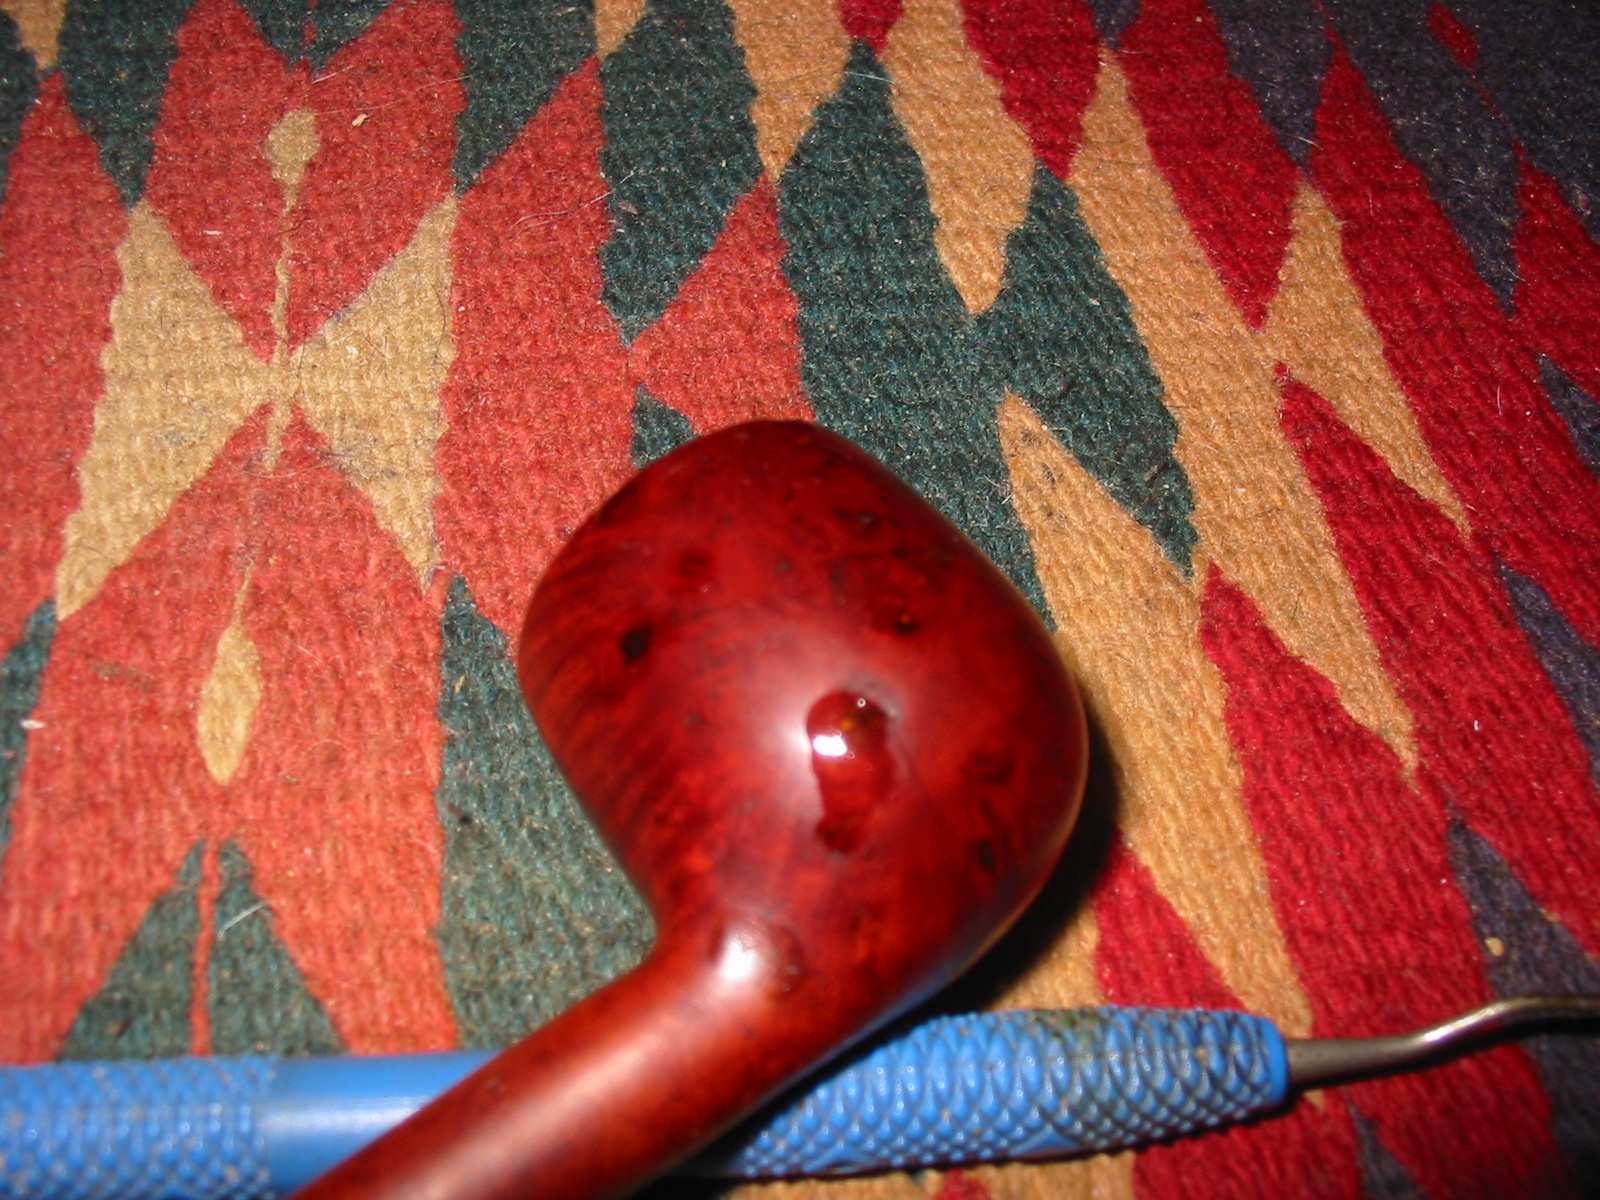
I wiped the bowl down with acetone on a cotton pad. The thick coat of varnish was hard to break down with the acetone. I wiped it until I had softened the varnish and then sanded the bowl and shank with the 220 grit sandpaper and then a sanding sponge. The putty fills were shrunken and formed small divots in the bowl. I filled these with superglue and briar dust and then sanded them down when I sanded the bowl. After sanding the bowl down I wiped it again with acetone to remove the sanding dust.
IMG_3106

IMG_3107

IMG_3108

IMG_3109

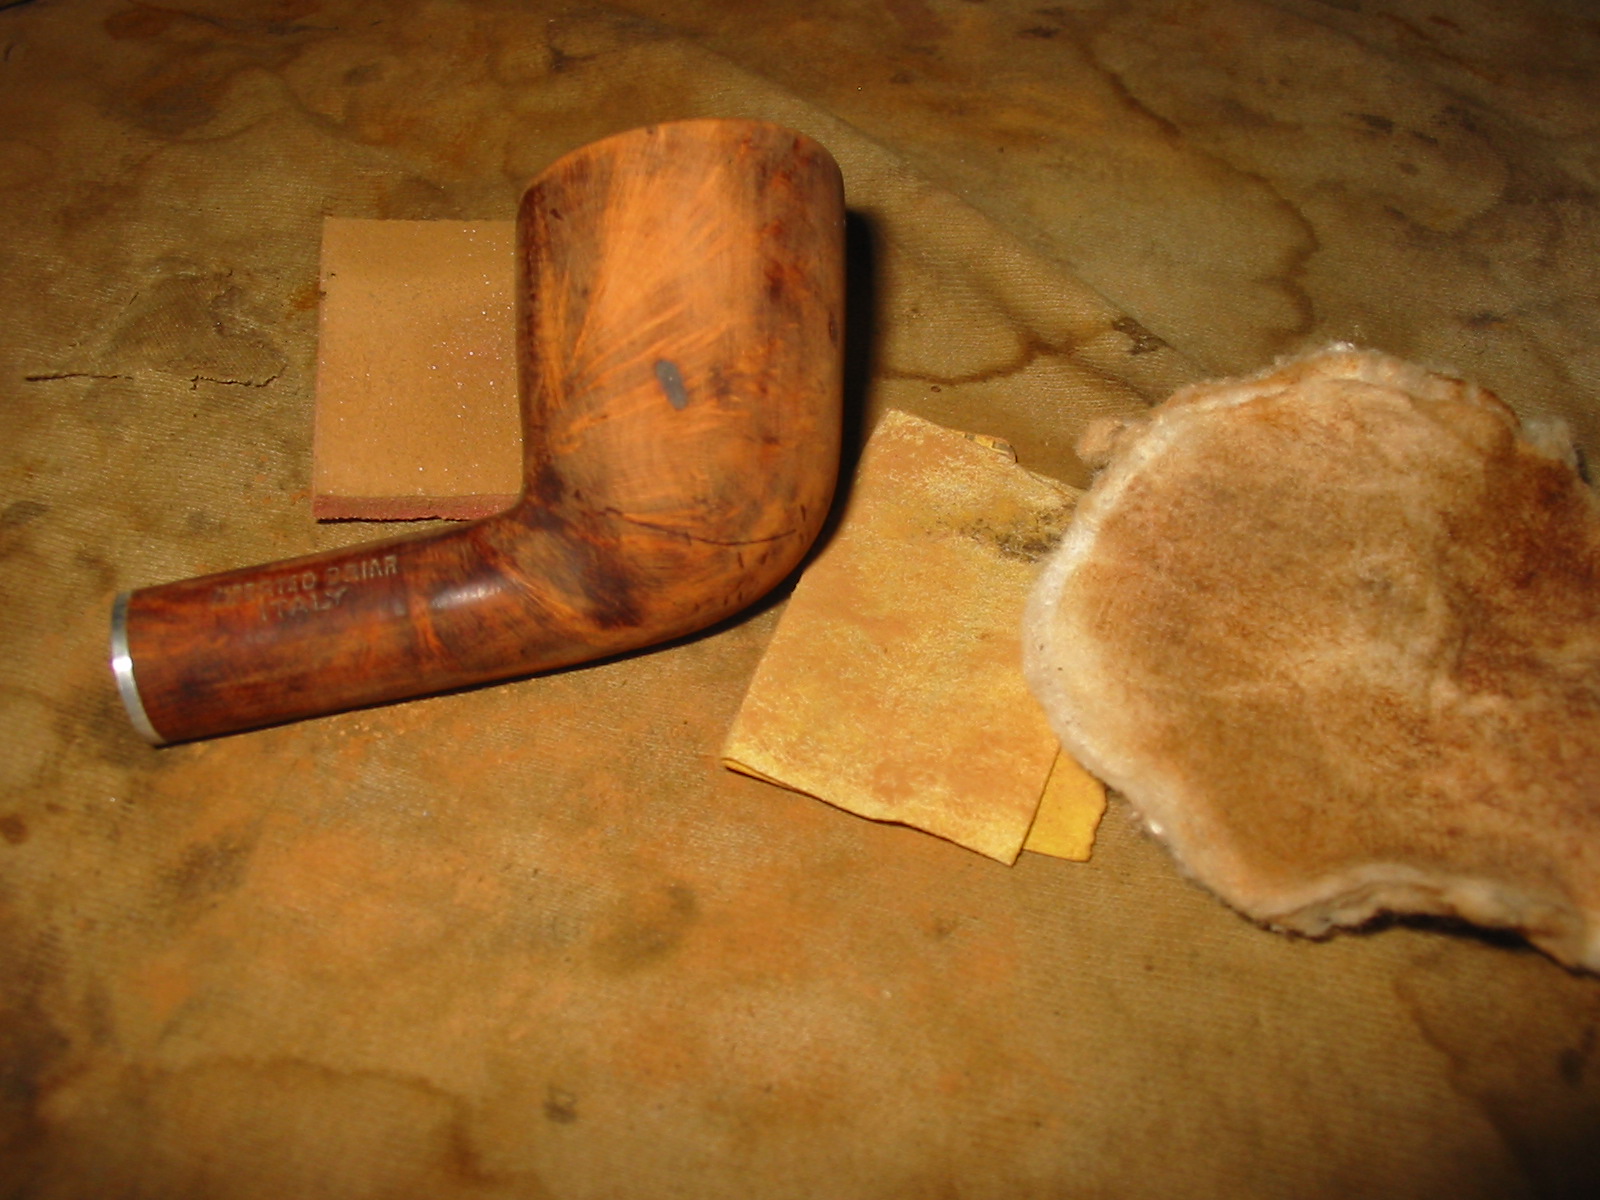
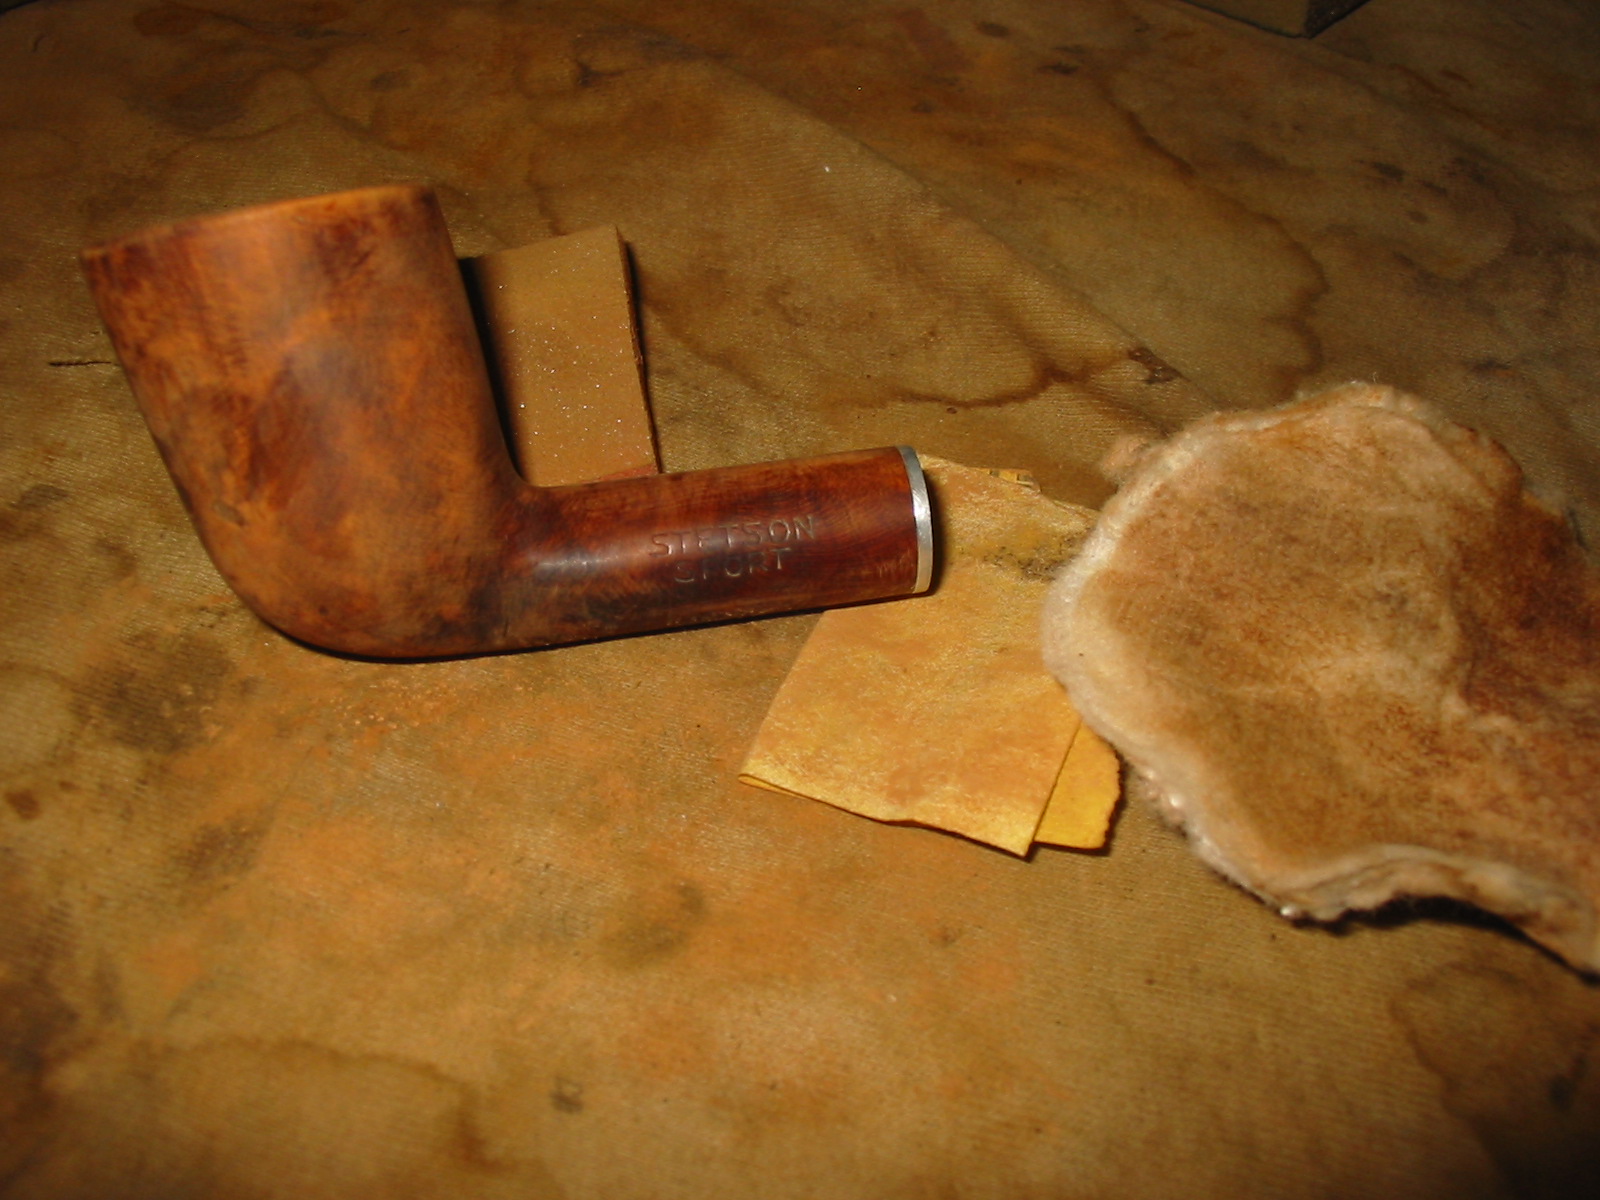
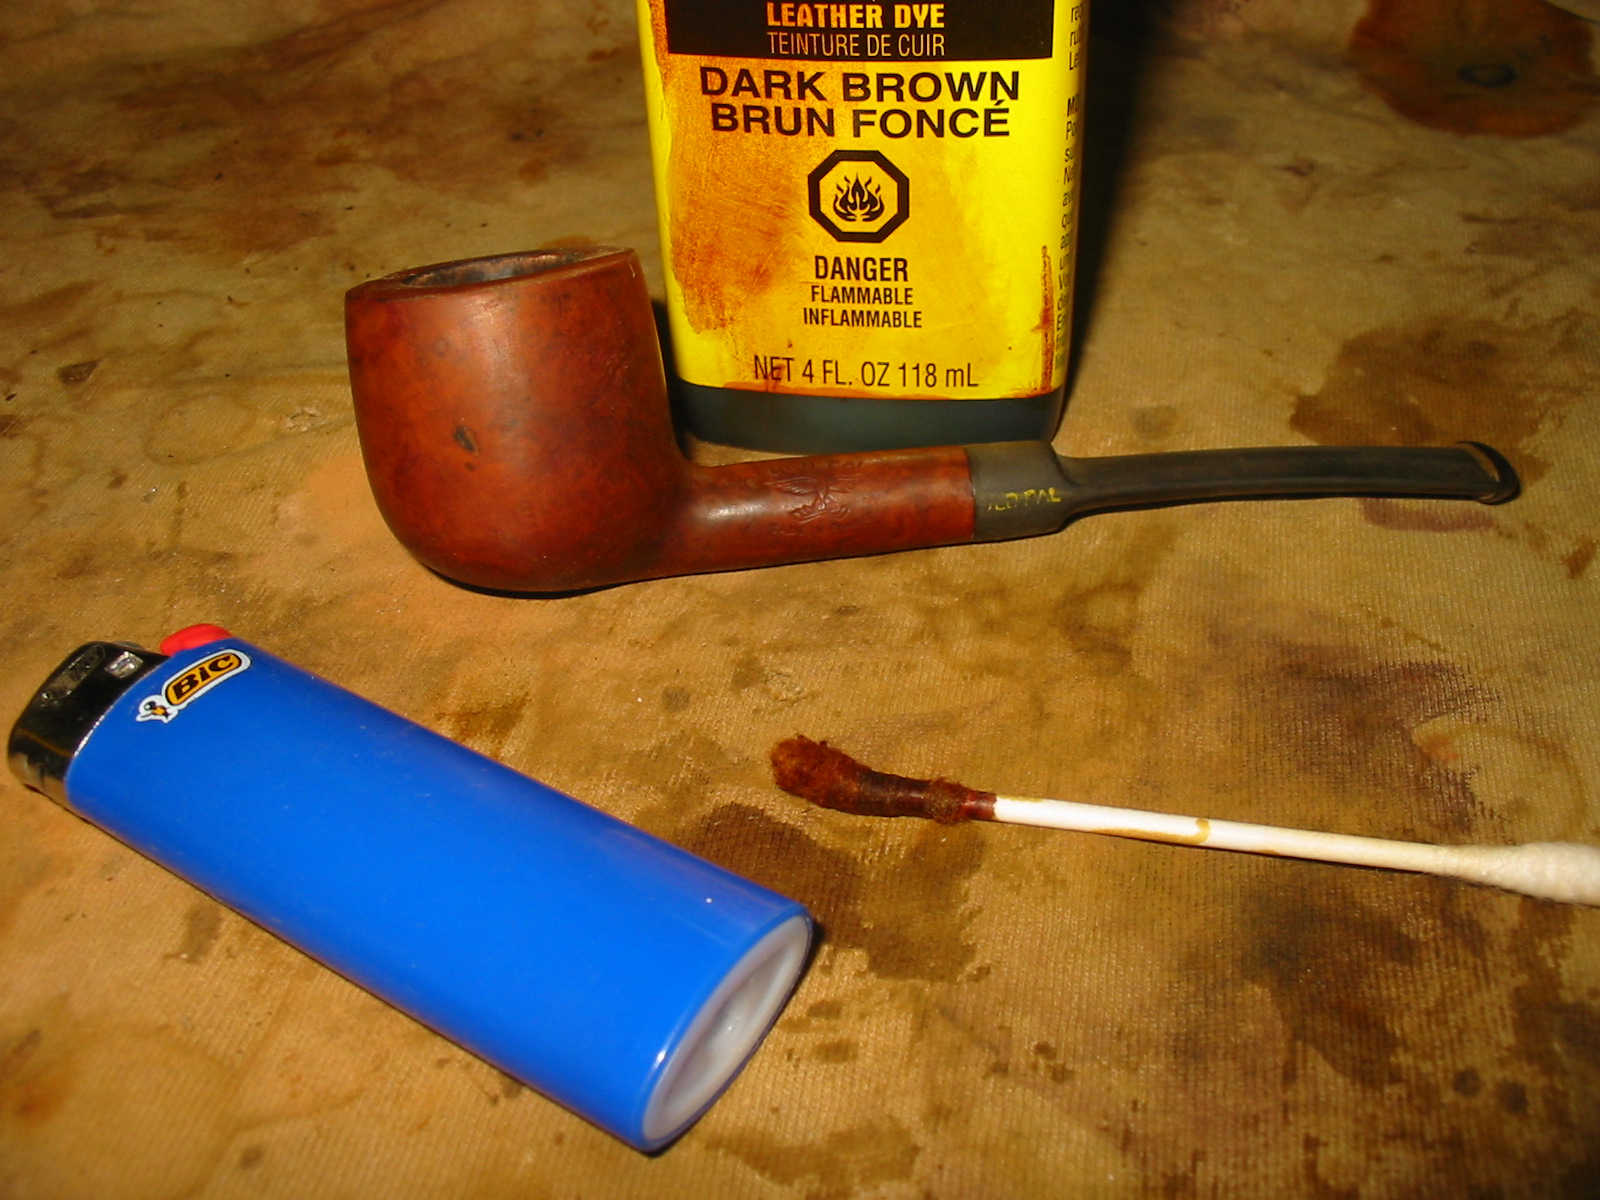
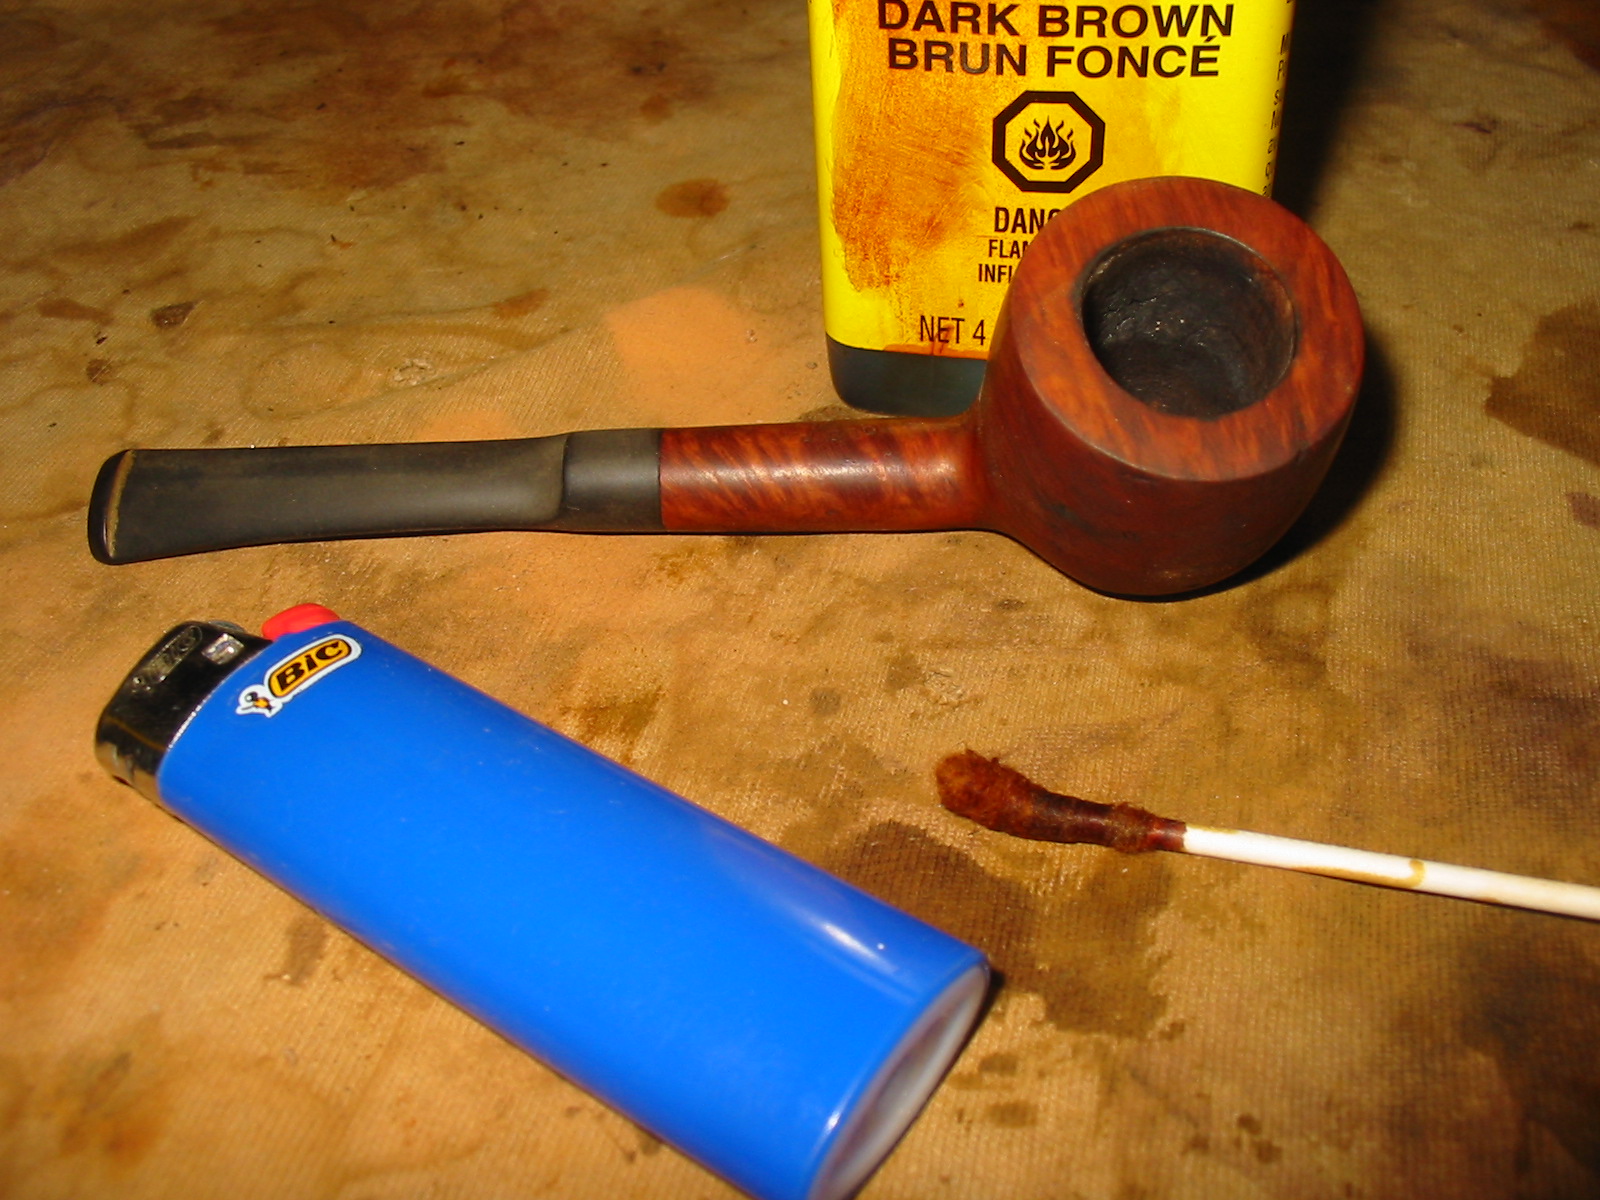
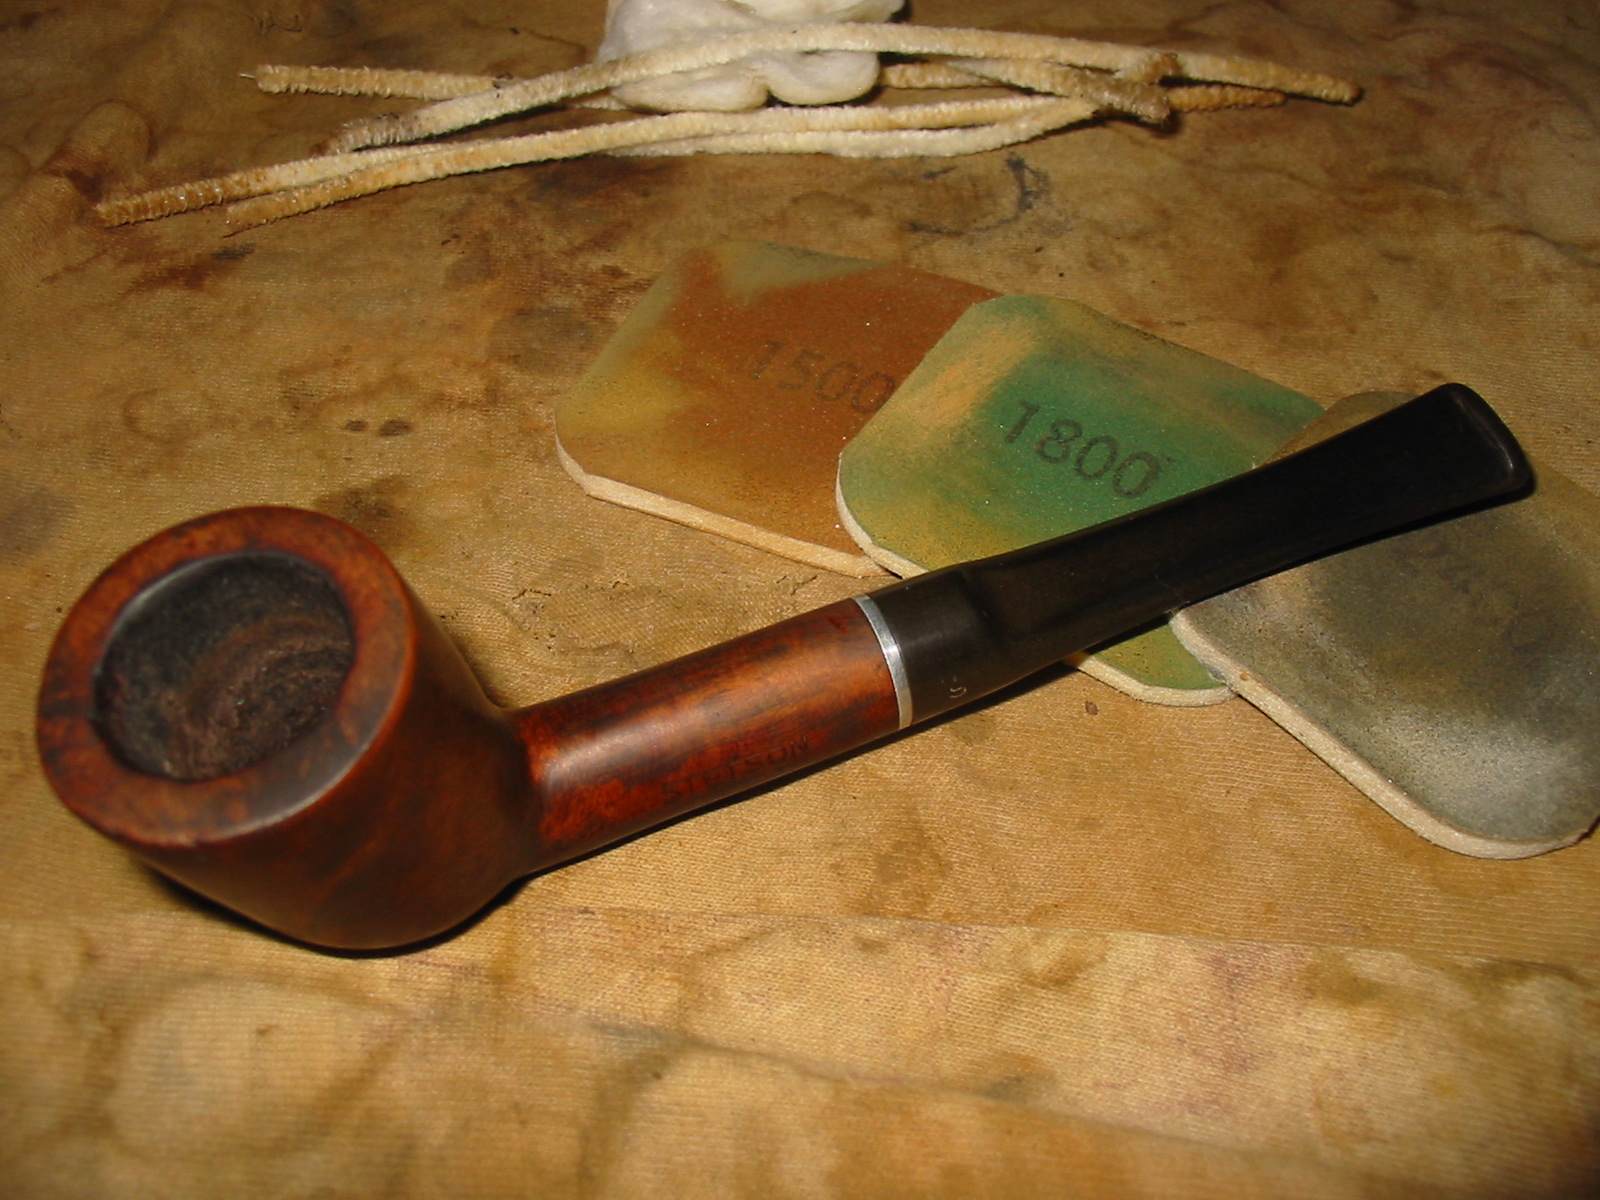
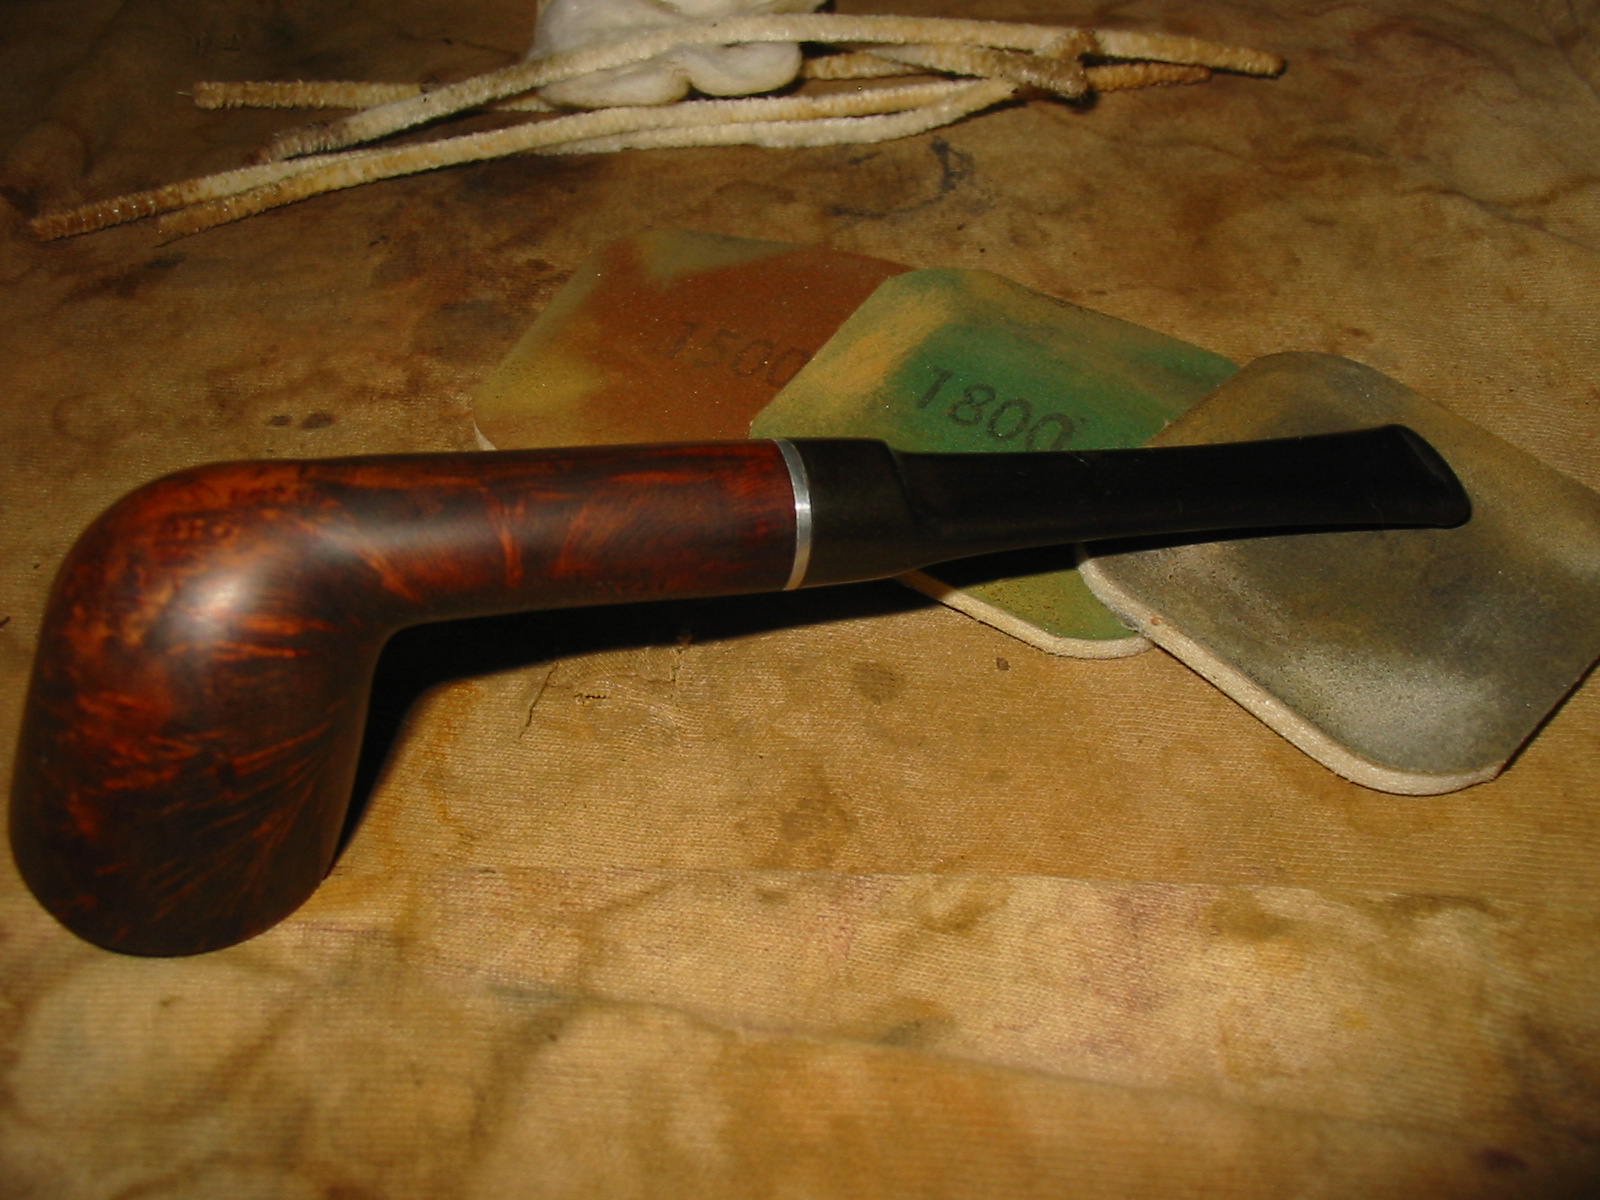
I sanded the bowl with a fine grit sanding sponge and then wet sanded it with 1500 and 1800 grit micromesh sanding pads. Once I had a smooth surface to work with I stained the bowl with a black aniline stain and then flamed it with a lighter. I wanted to set the stain deep in the grain.
IMG_3110

IMG_3111

IMG_3112

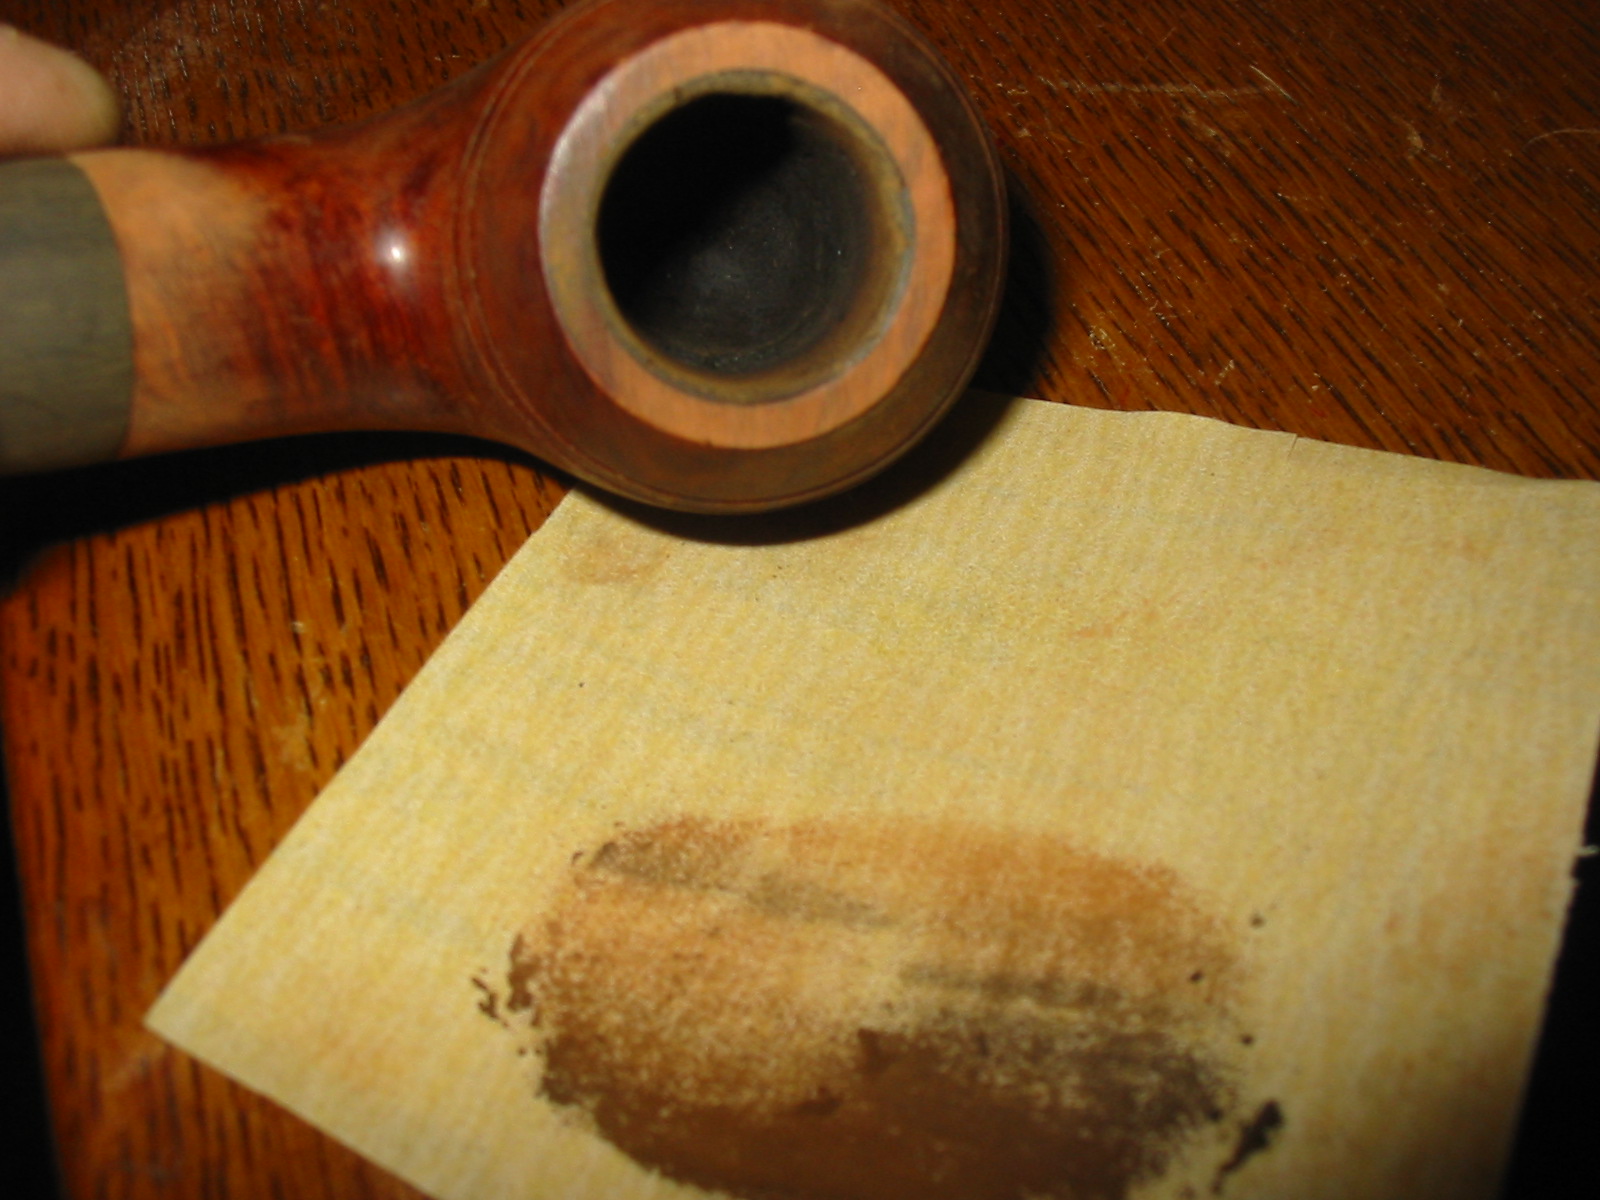
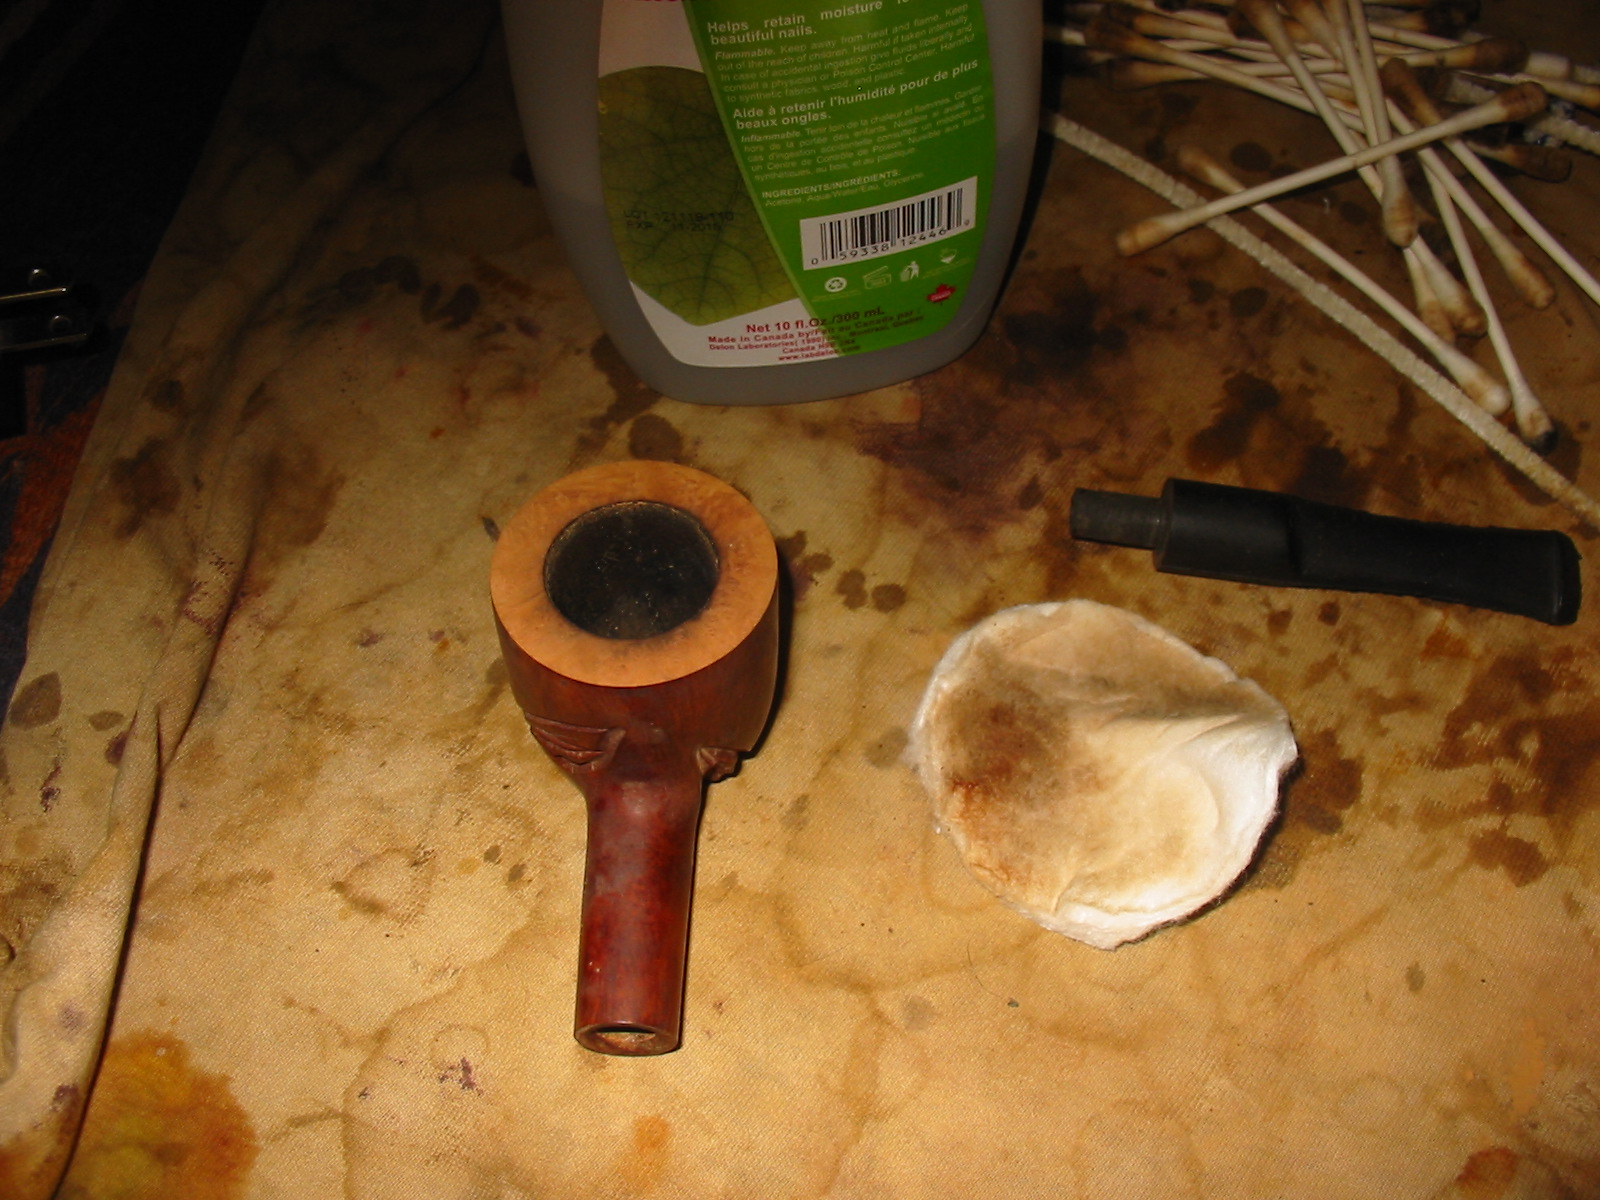
When the stain was dry I wiped the bowl down with acetone on a cotton pad to remove the excess stain. I wanted the black to remain in the grain and highlight that while masking the fills.
IMG_3113

IMG_3115

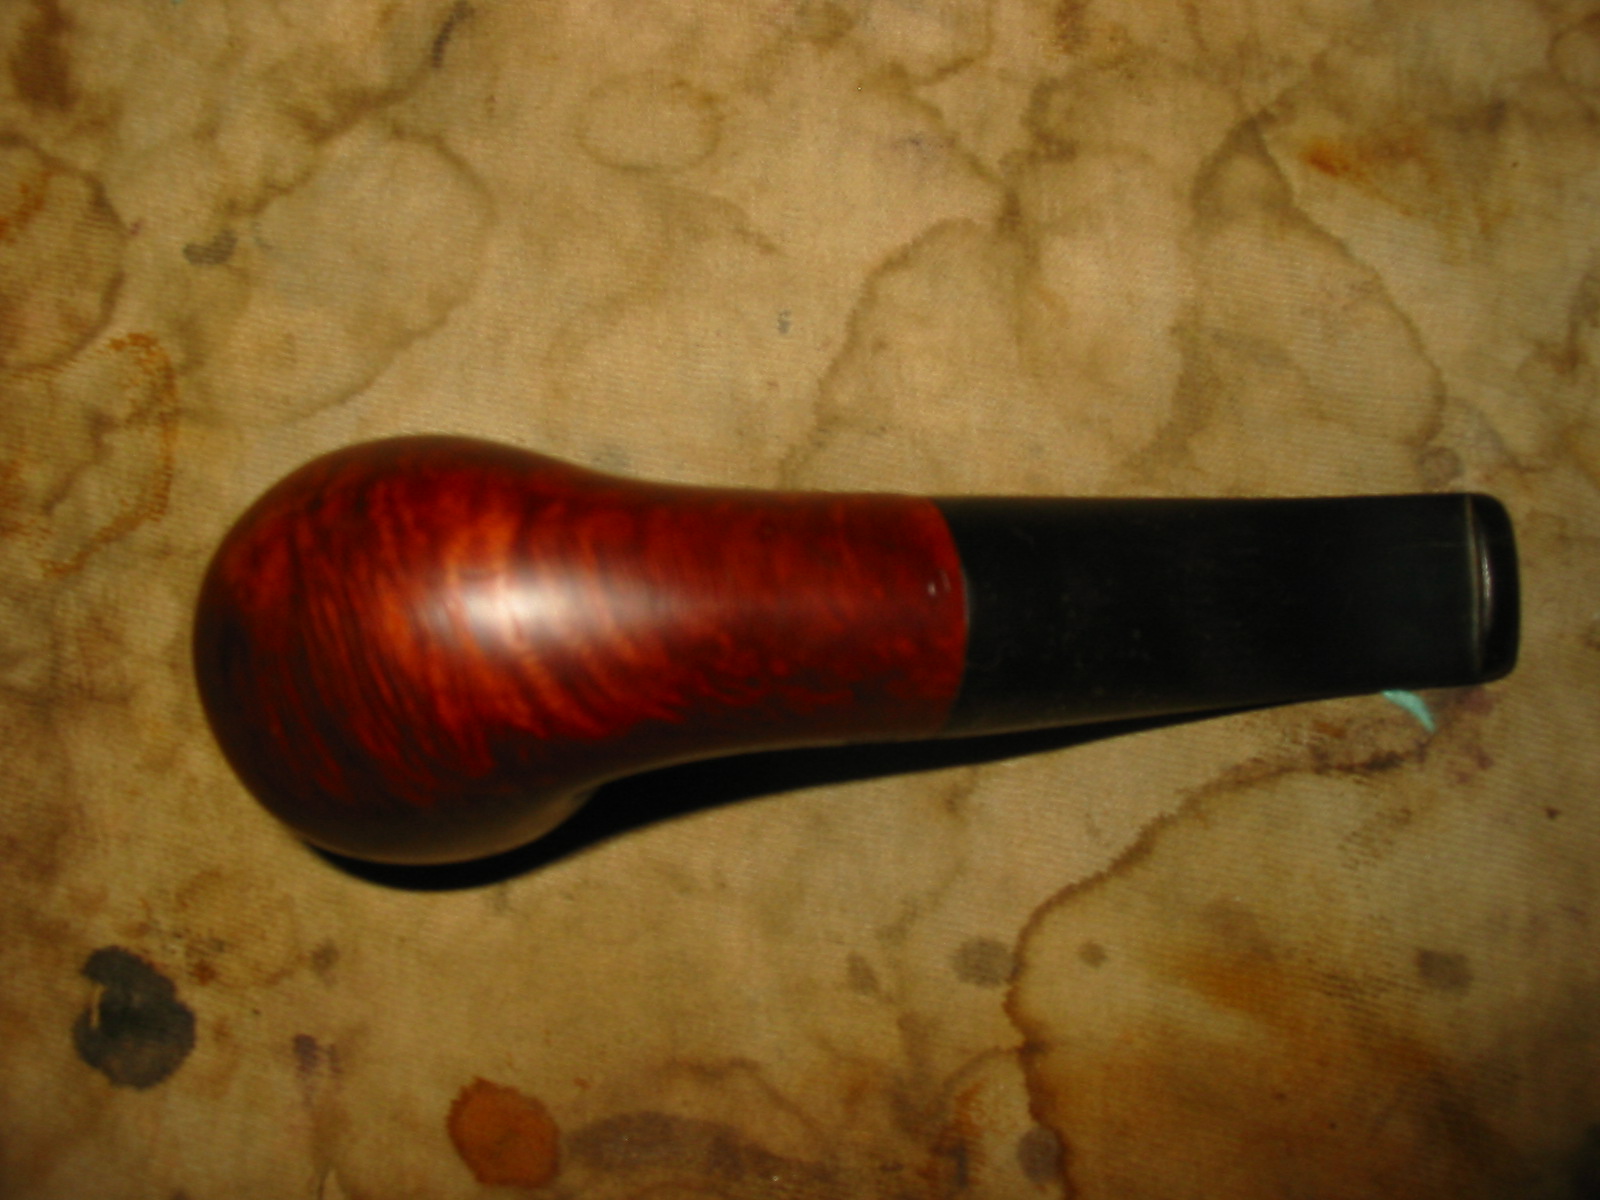
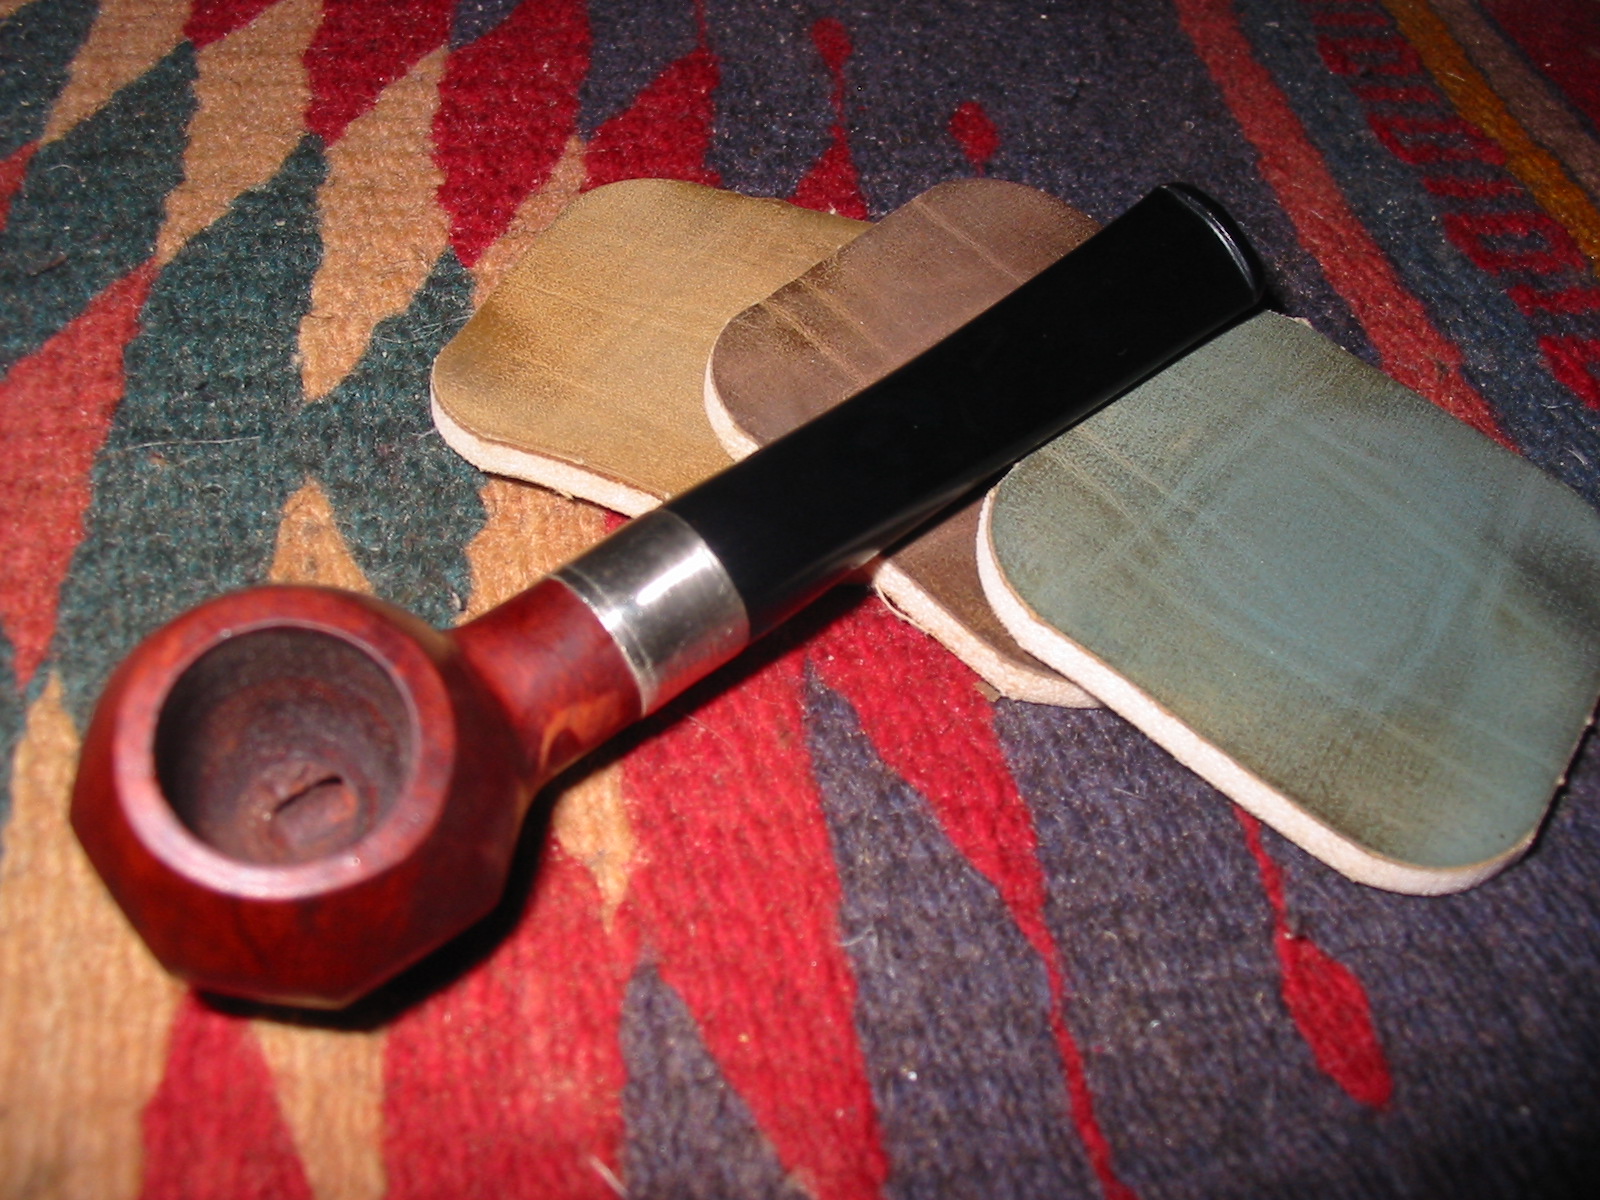
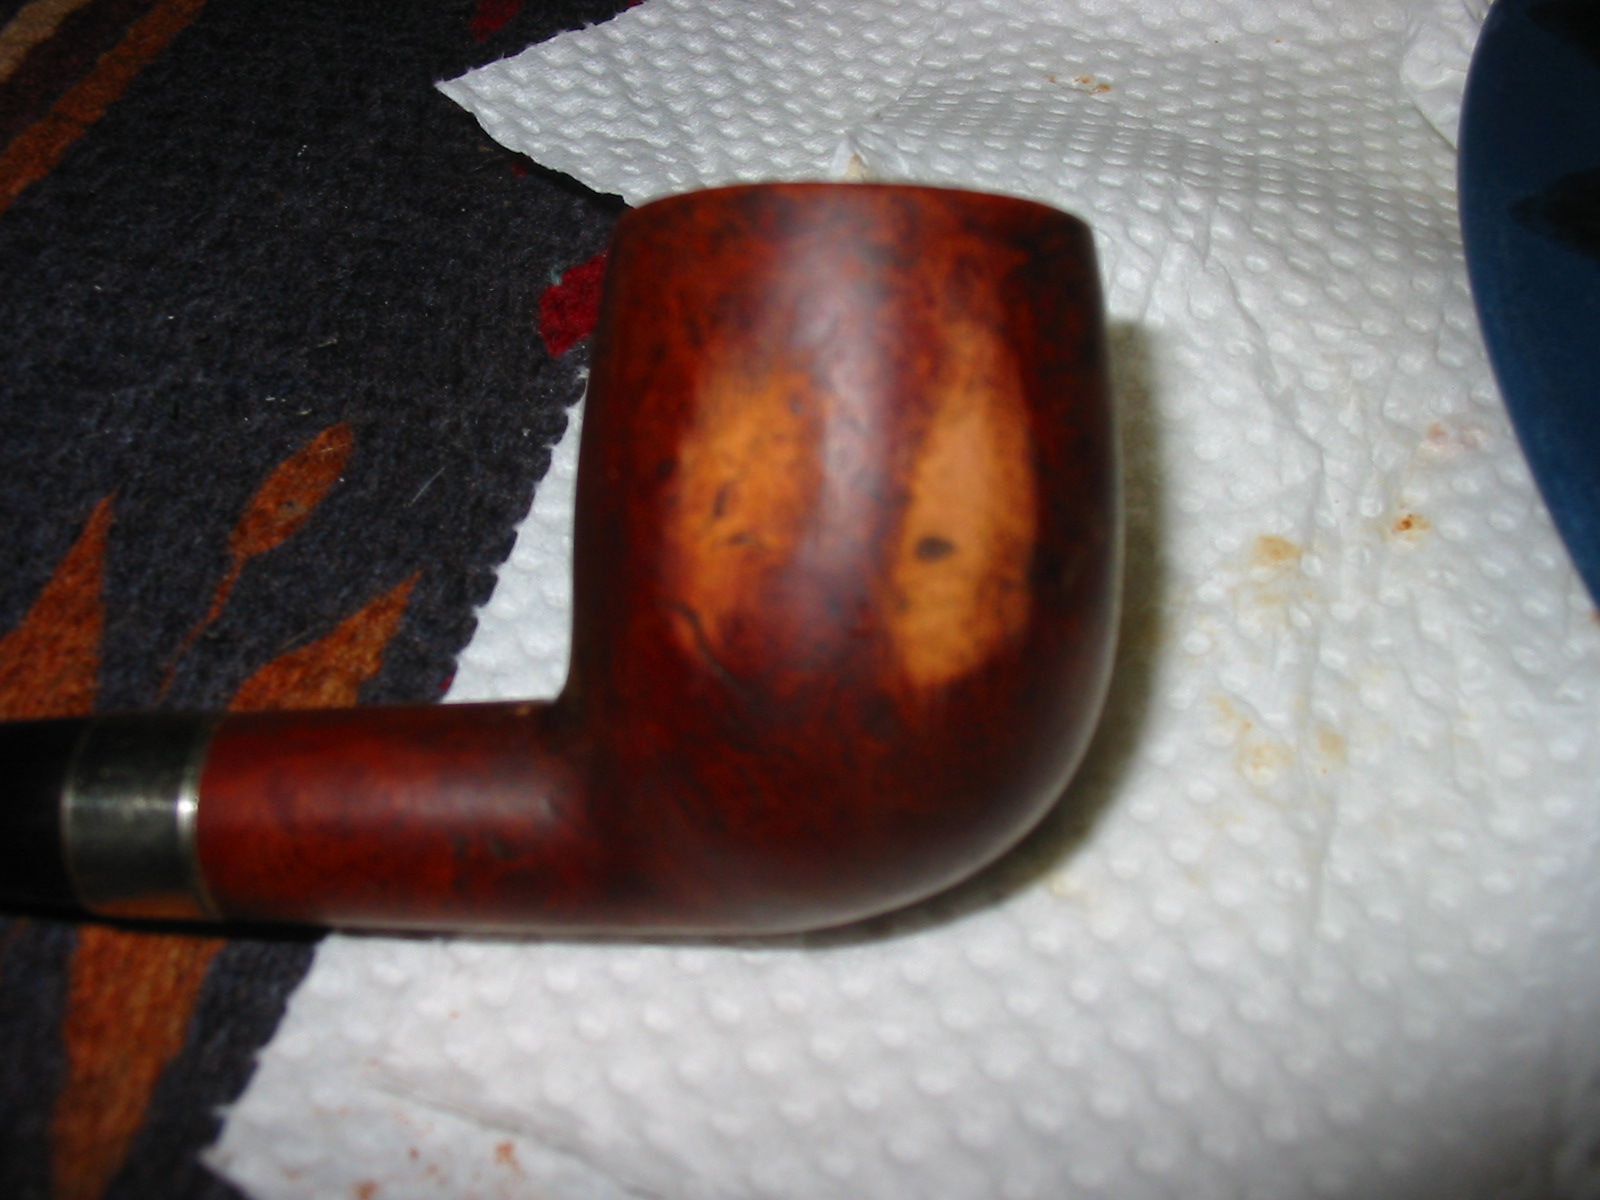
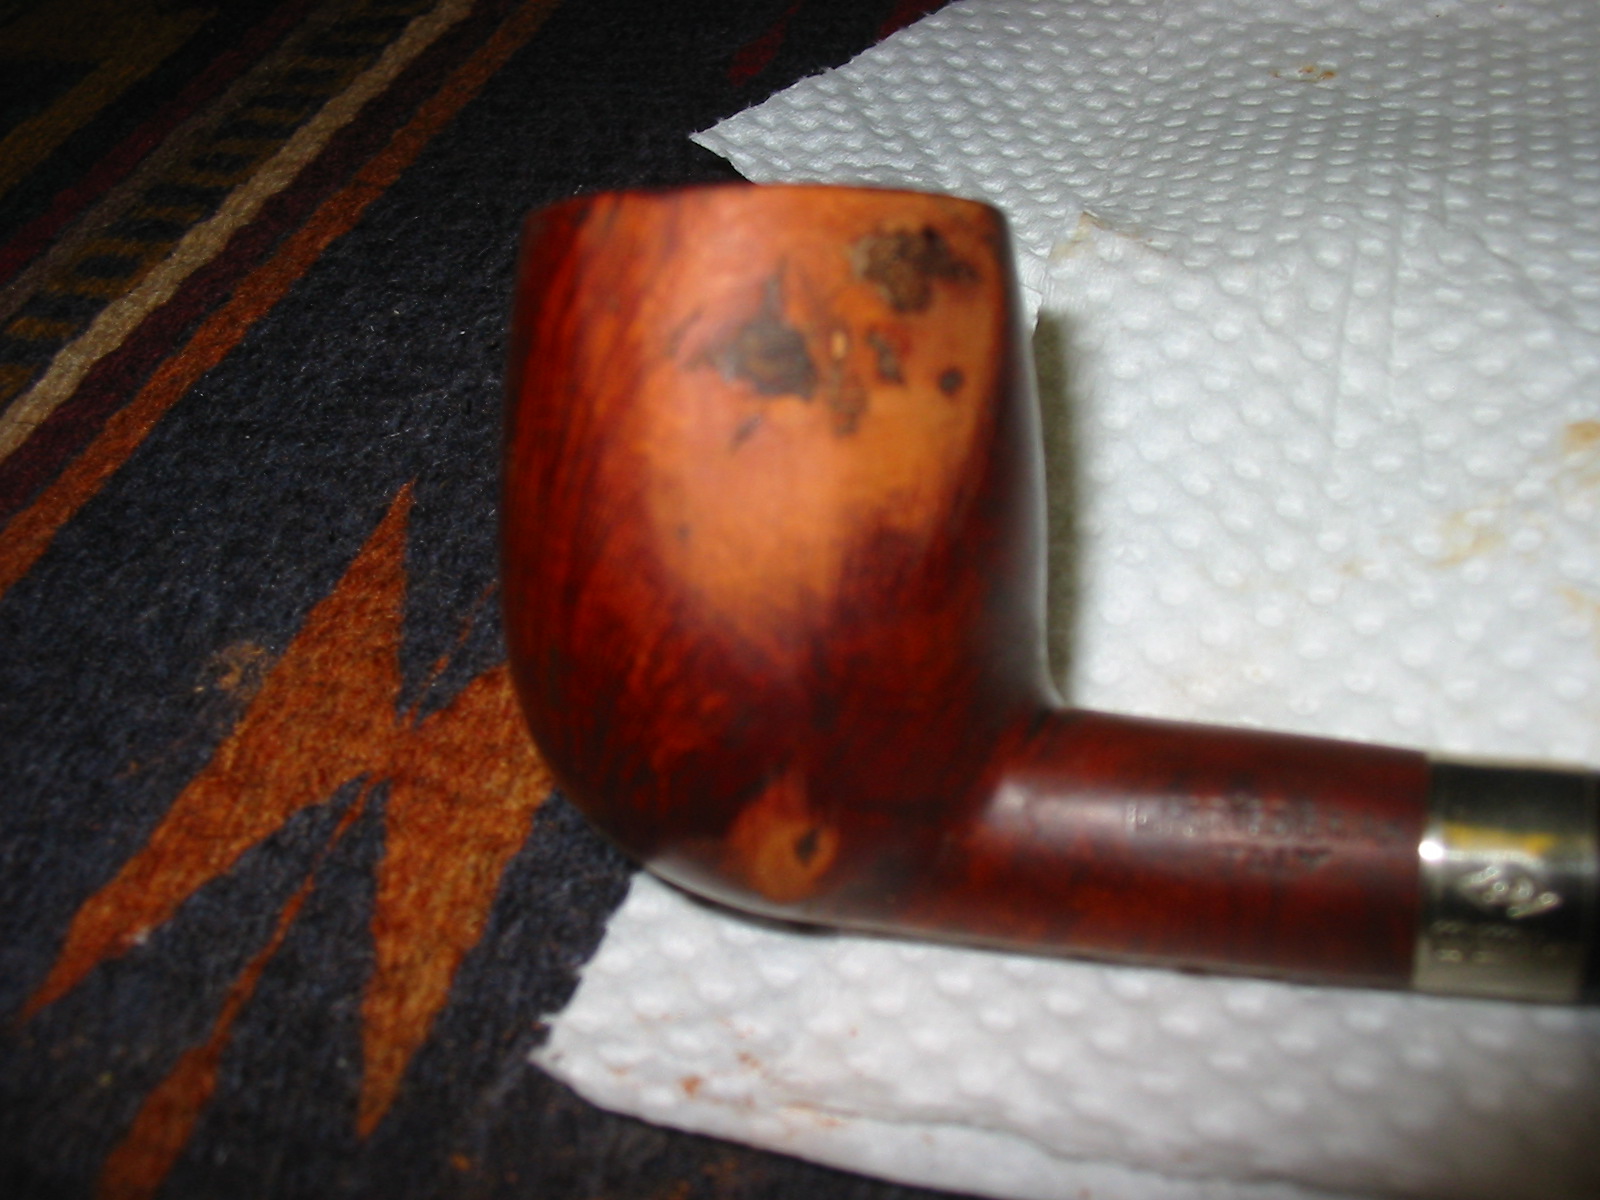
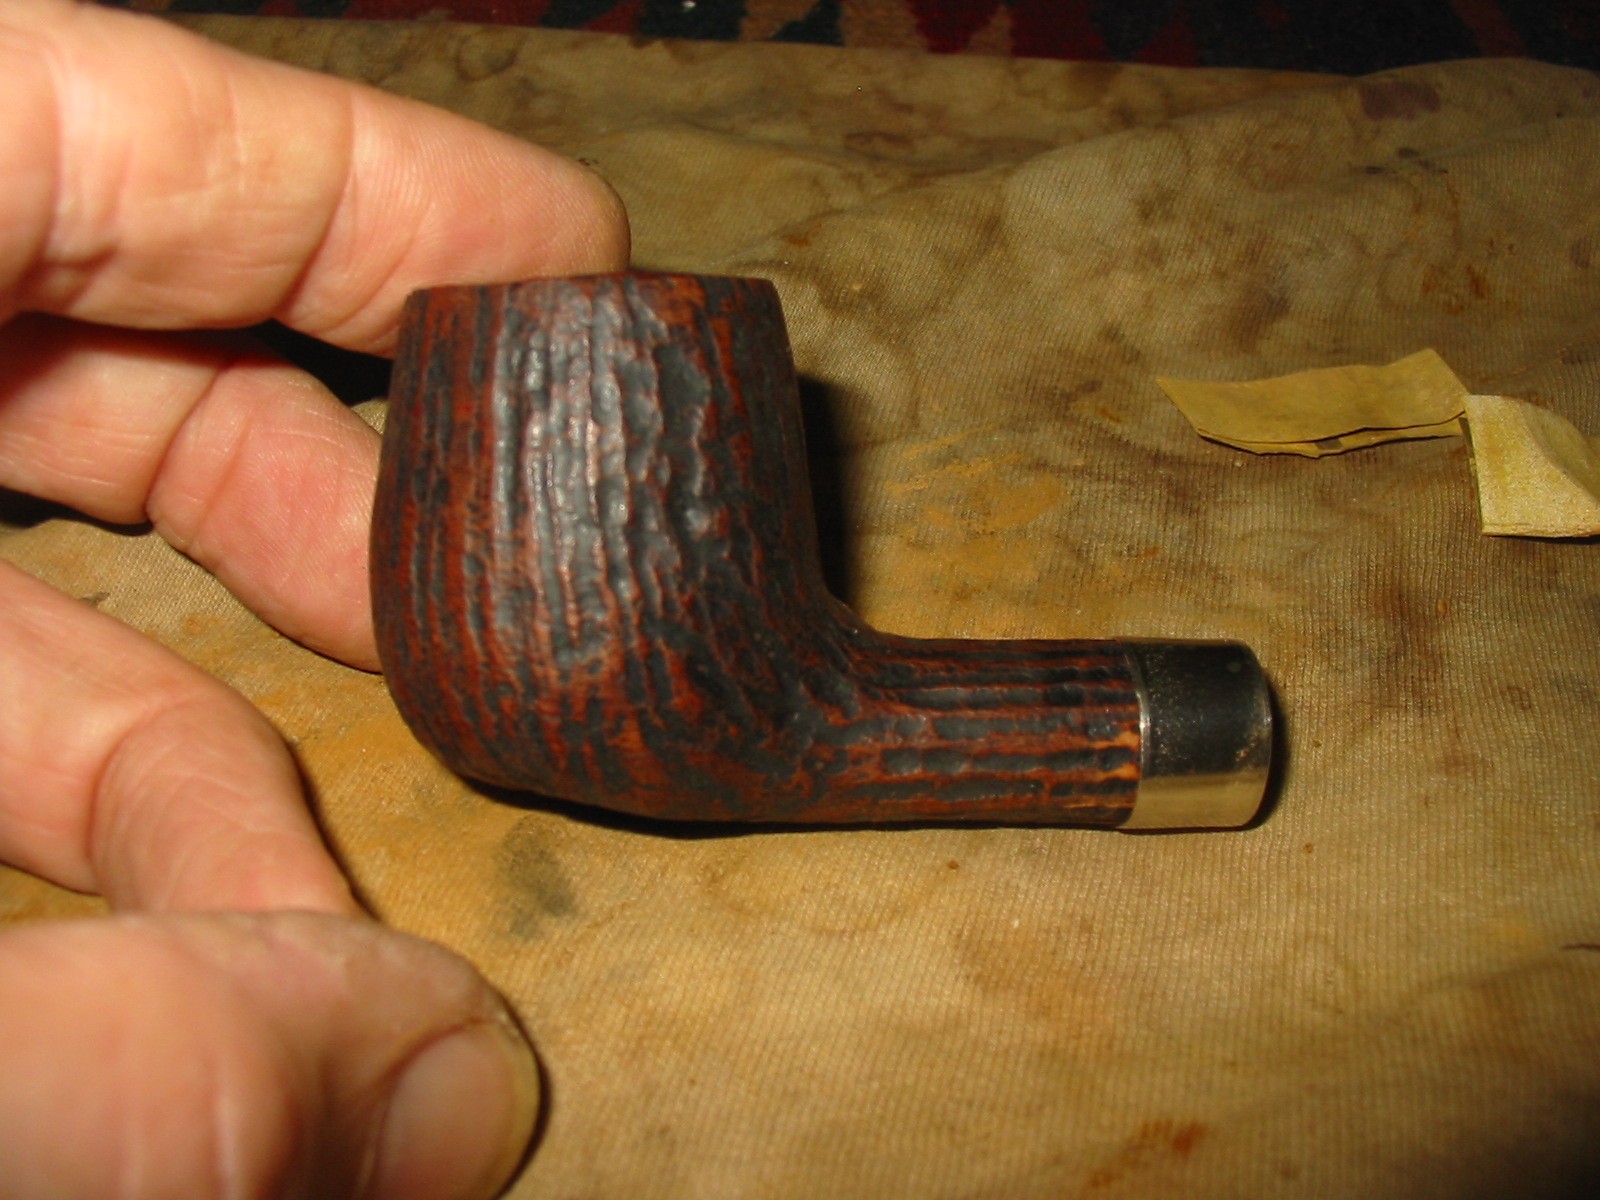
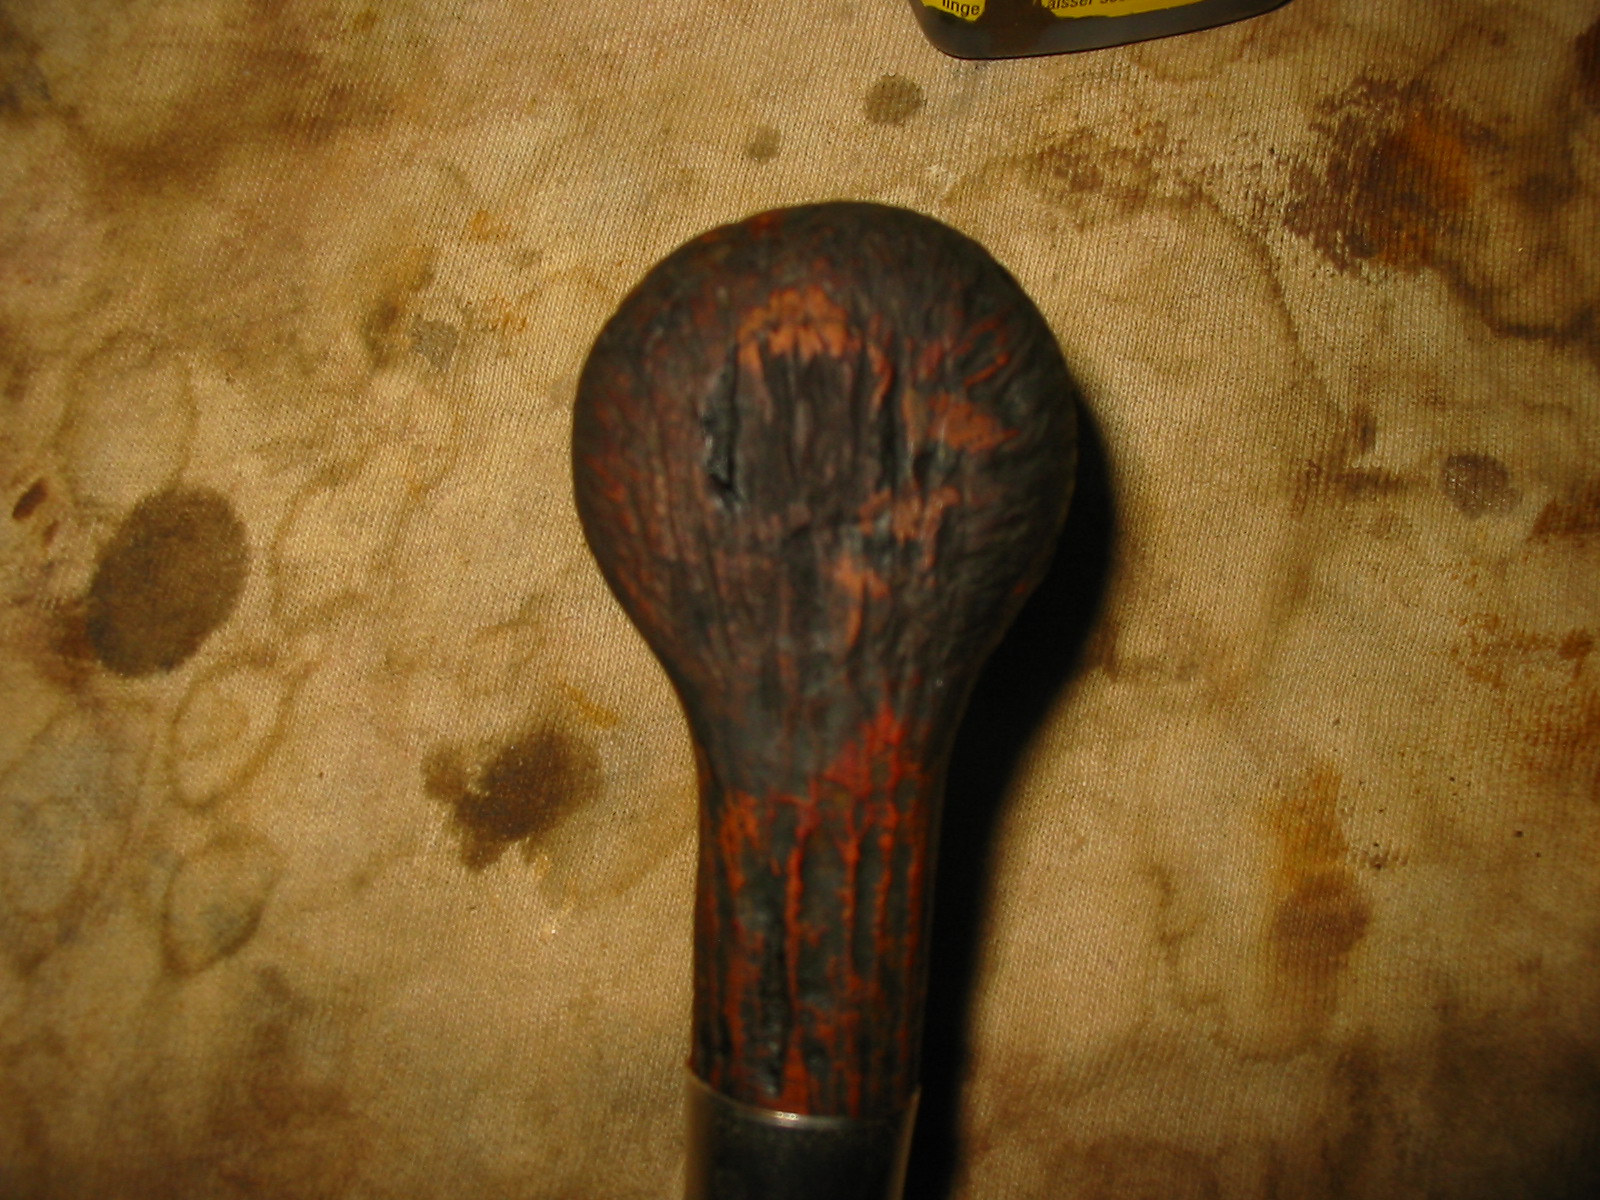
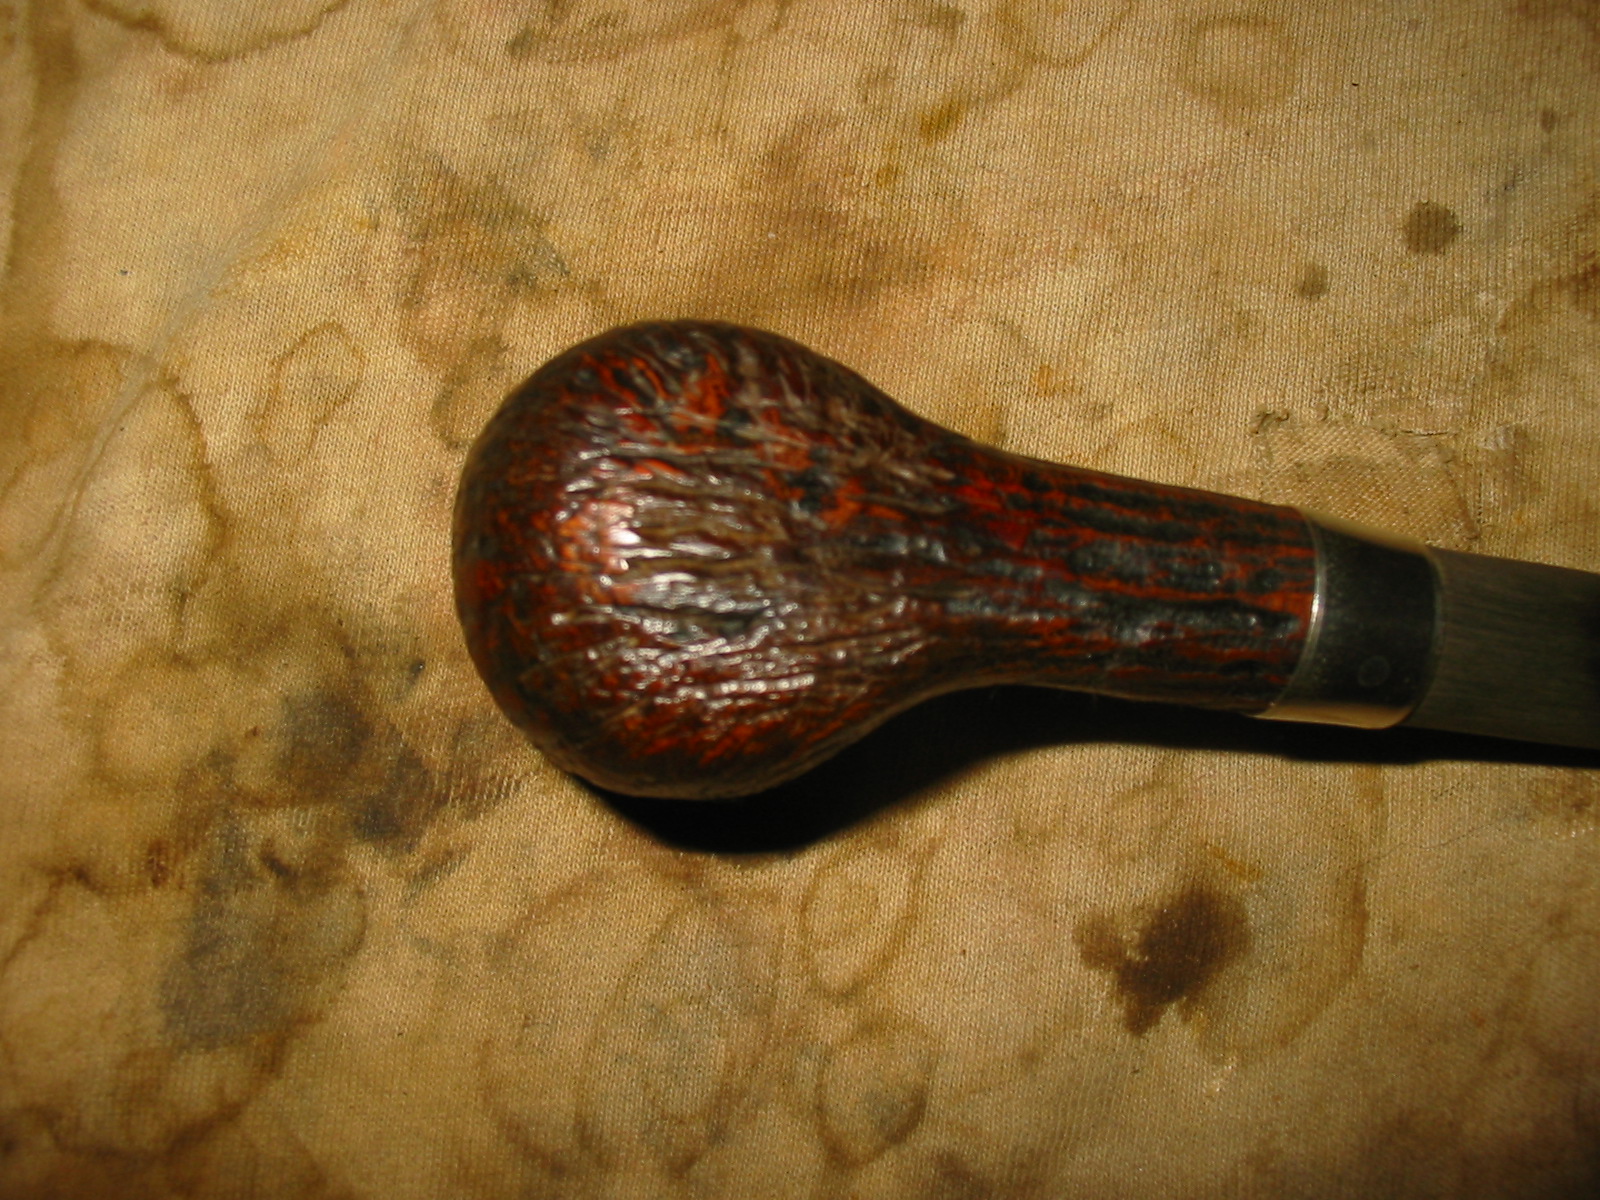
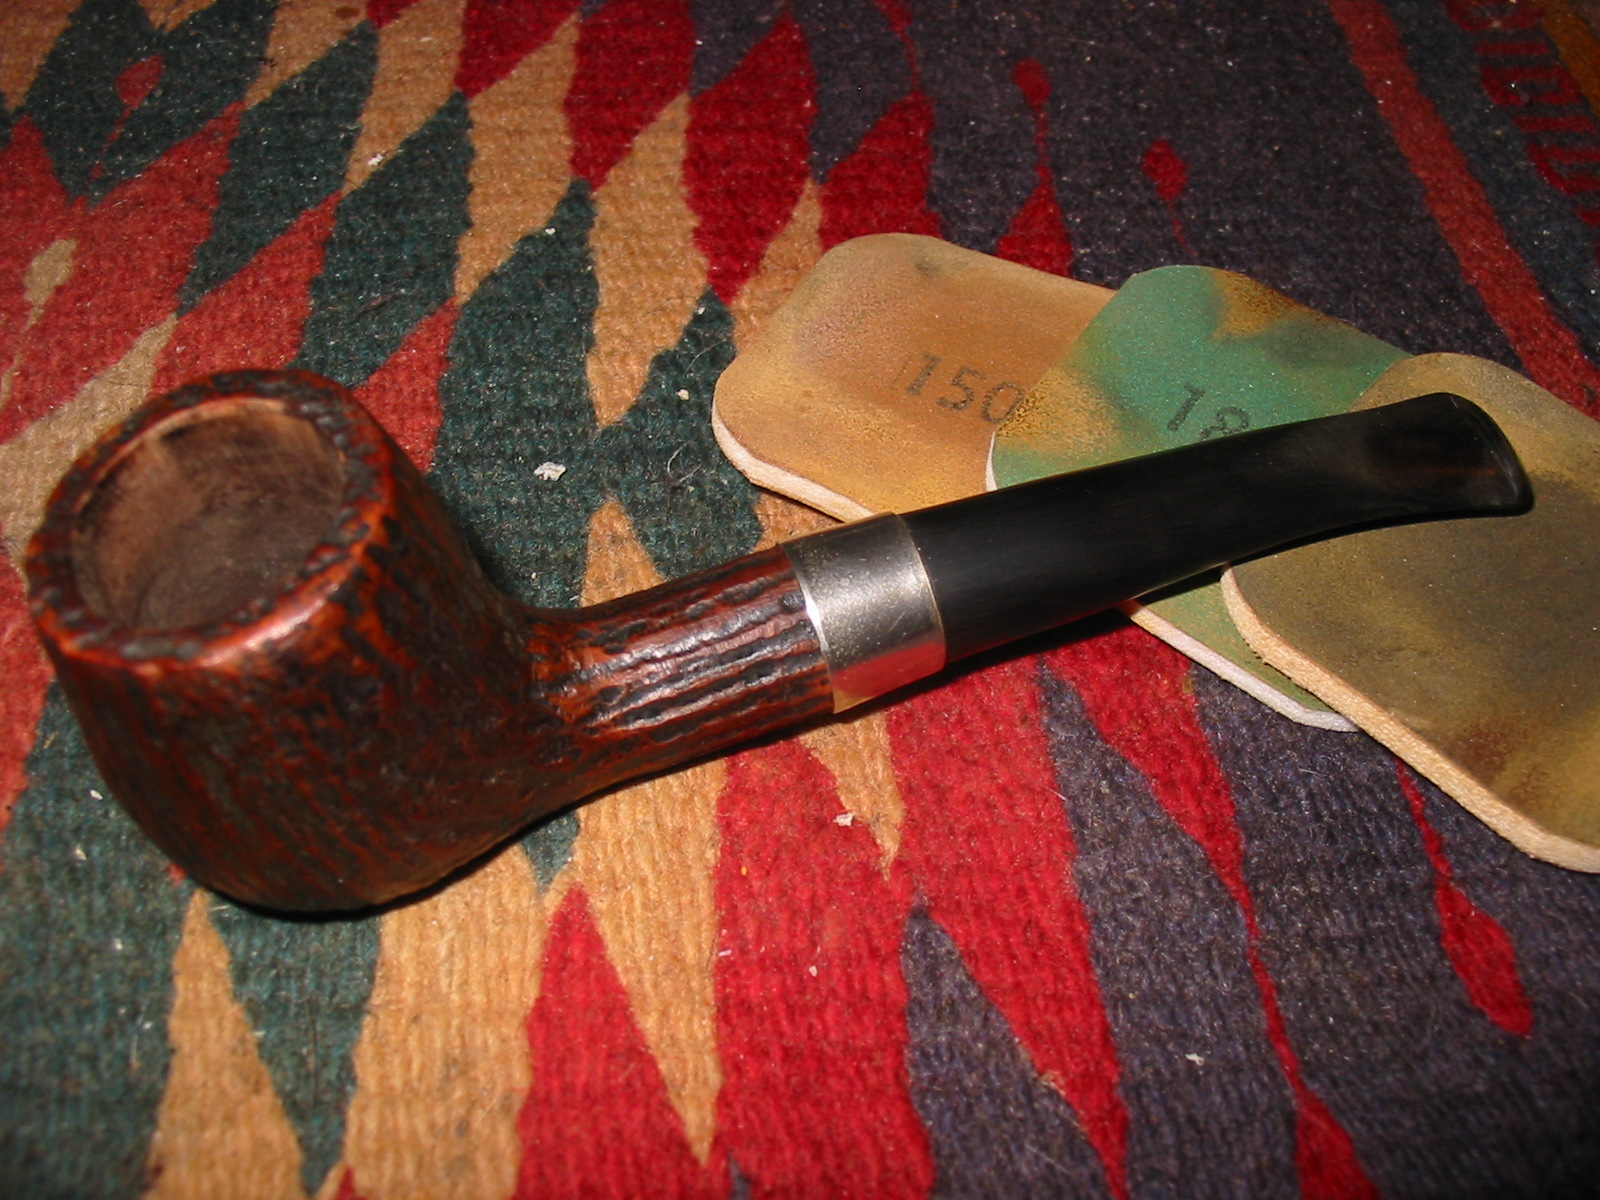
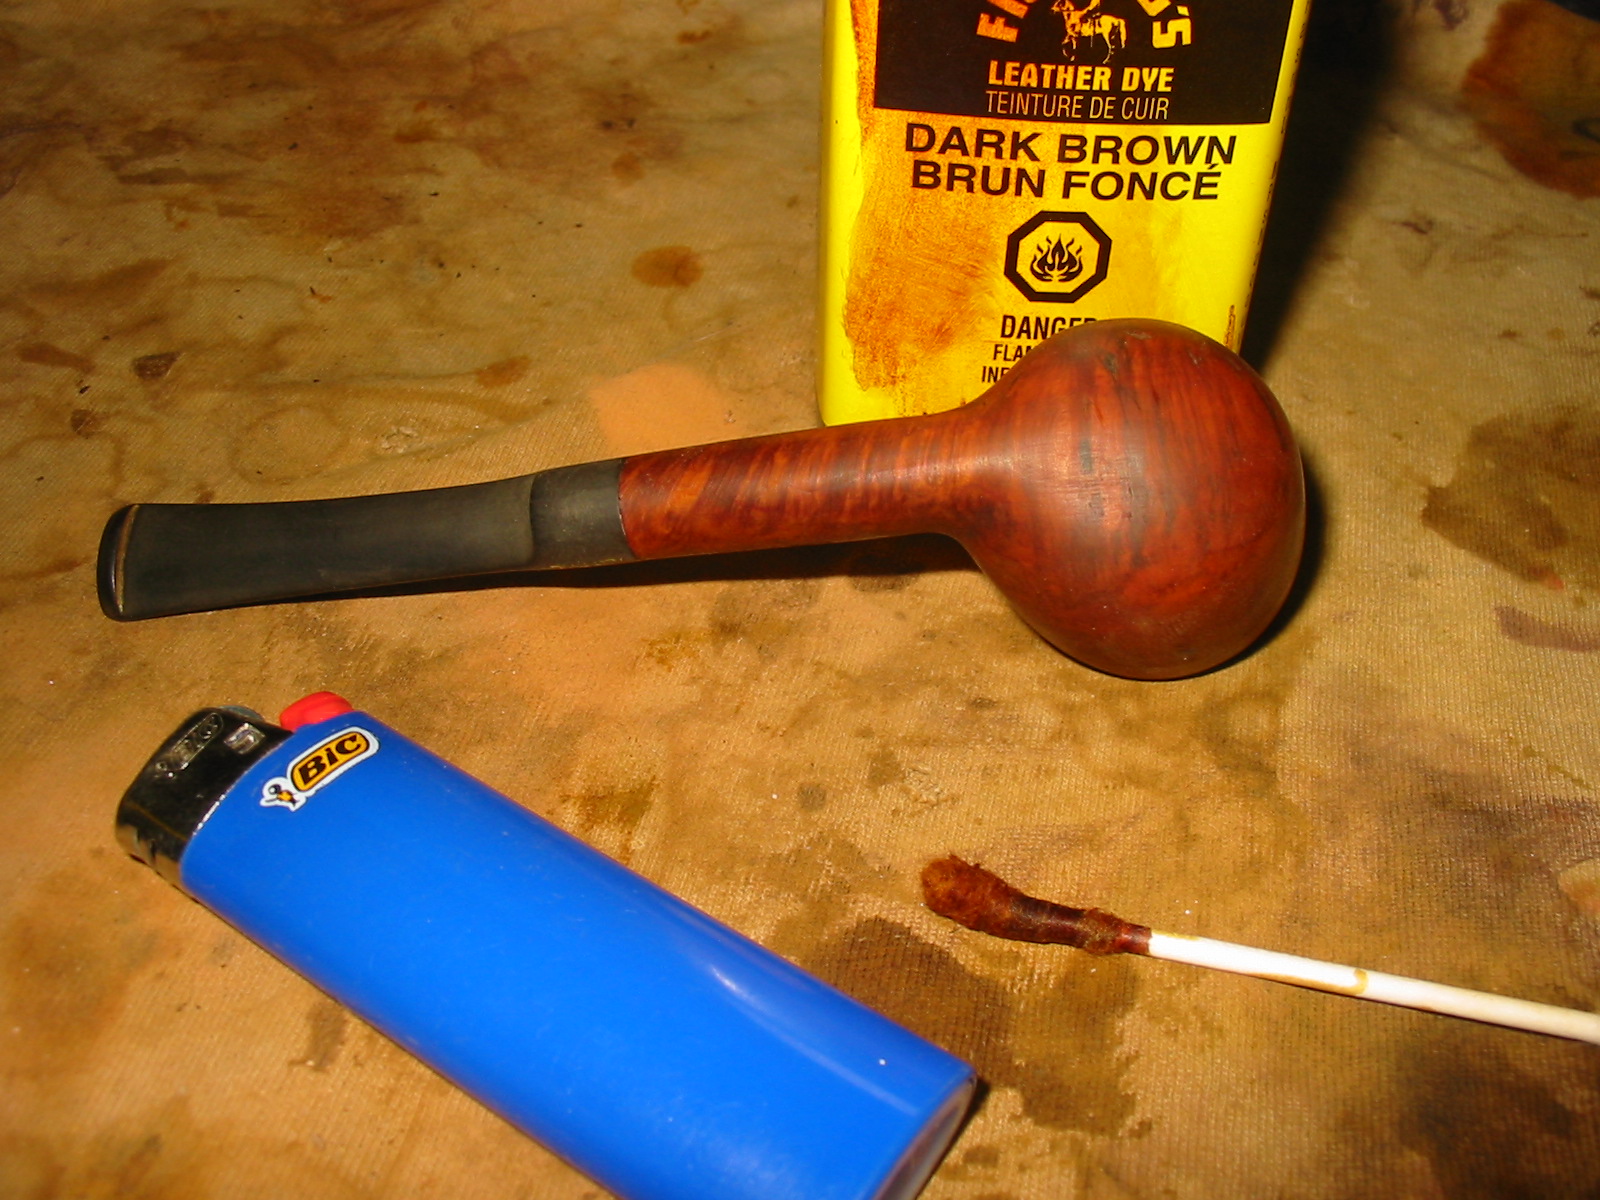
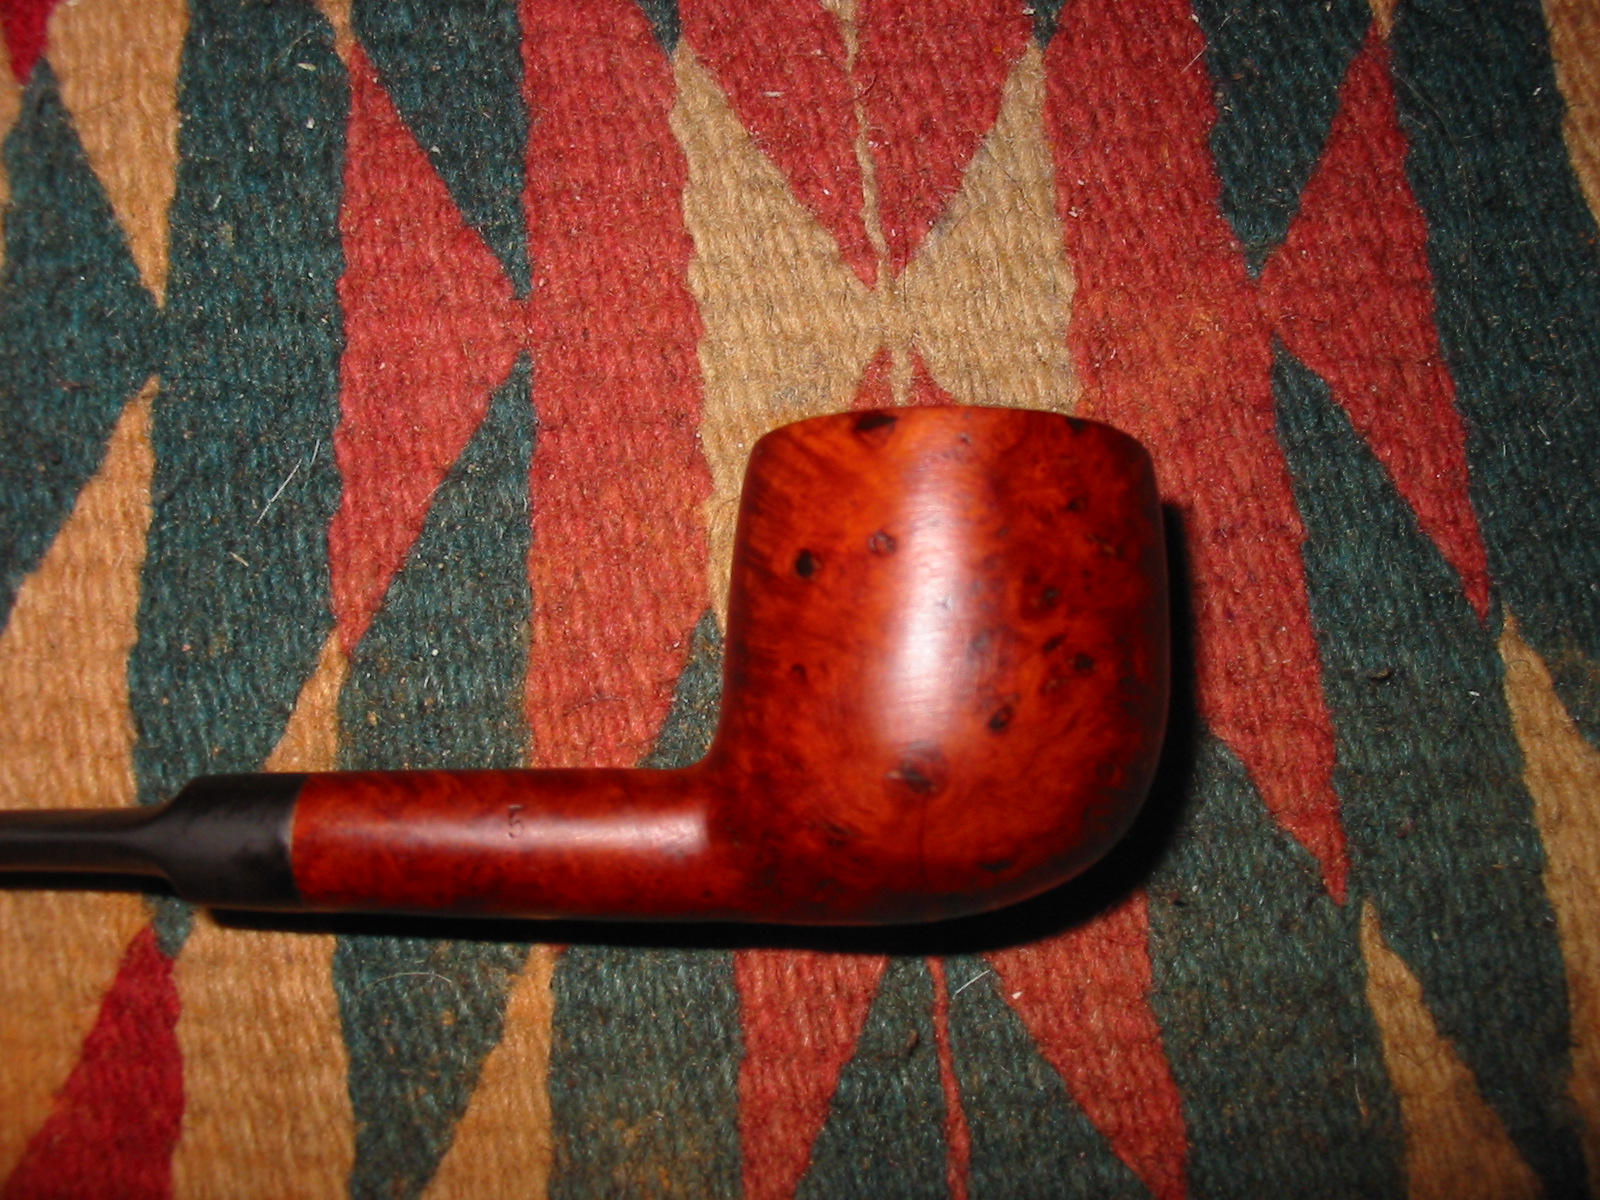
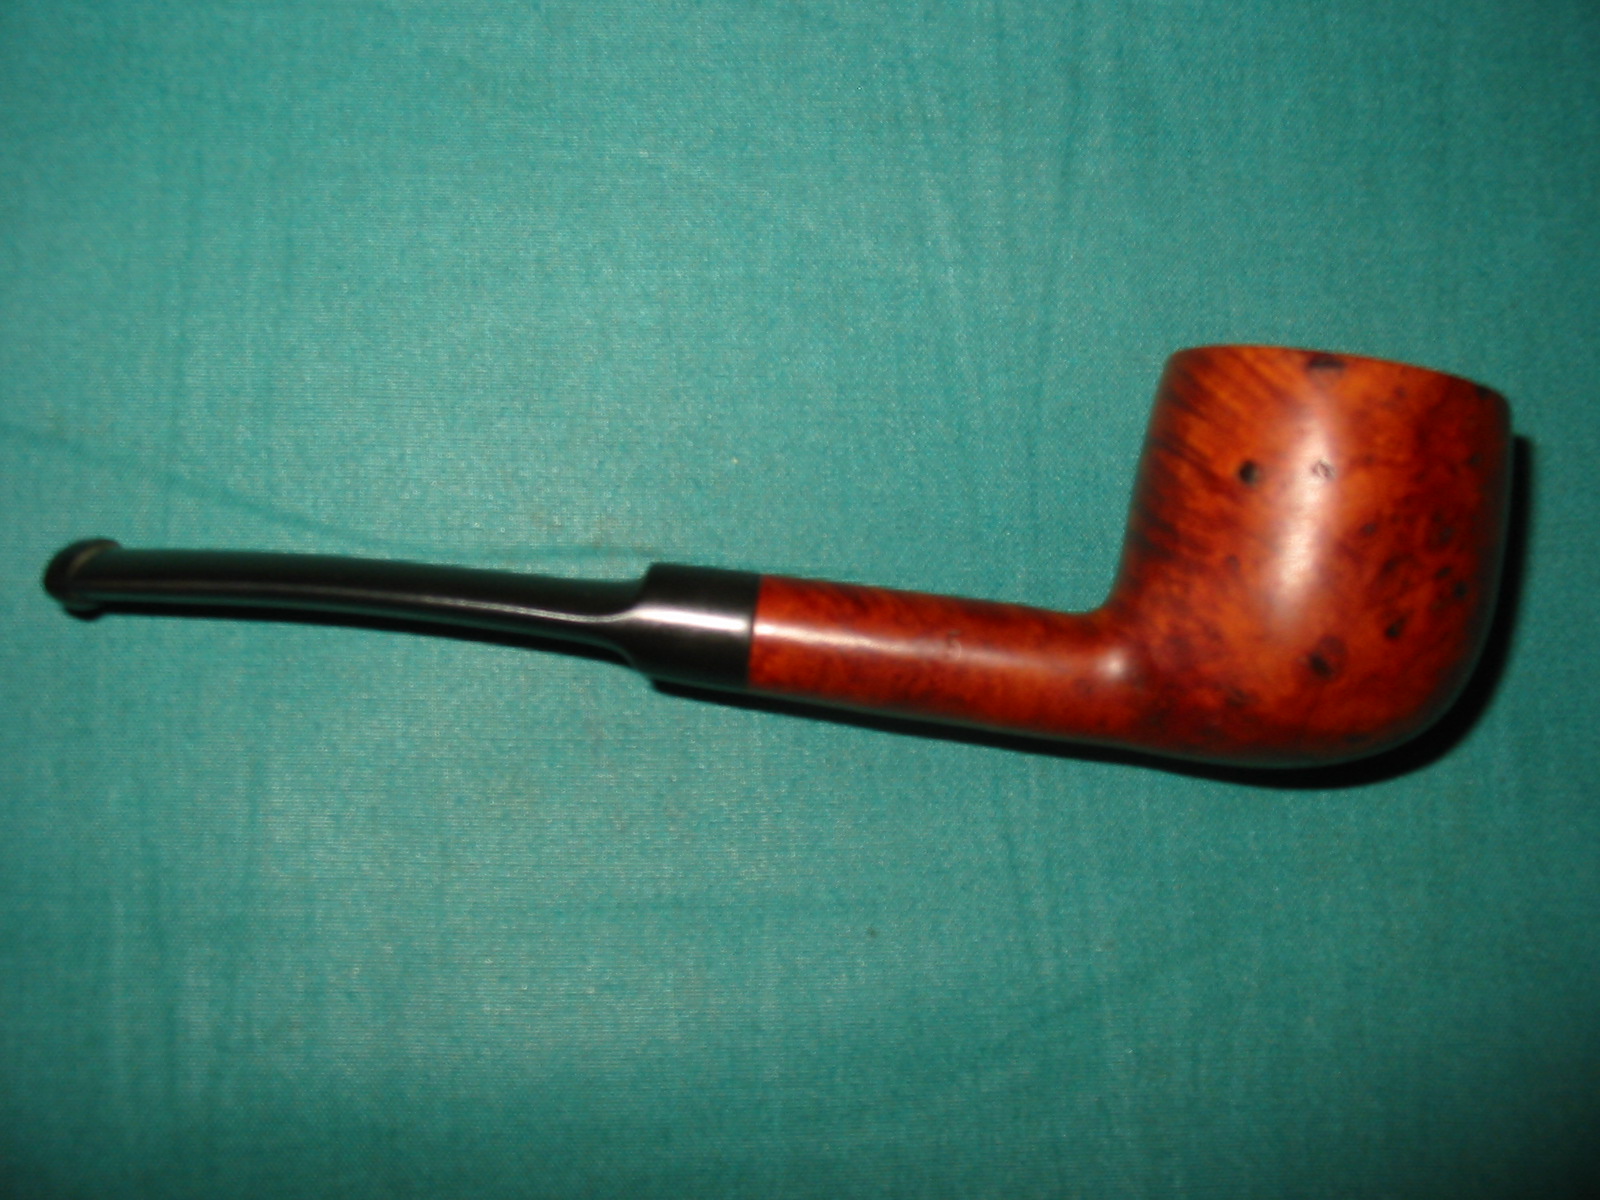
I sanded the stained bowl with a medium grit sanding sponge to remove the excess. The next two photos show the bowl after sanding and then buffing with red Tripoli and White Diamond. The grain is standing out nicely from the black stain.
IMG_3116

IMG_3117

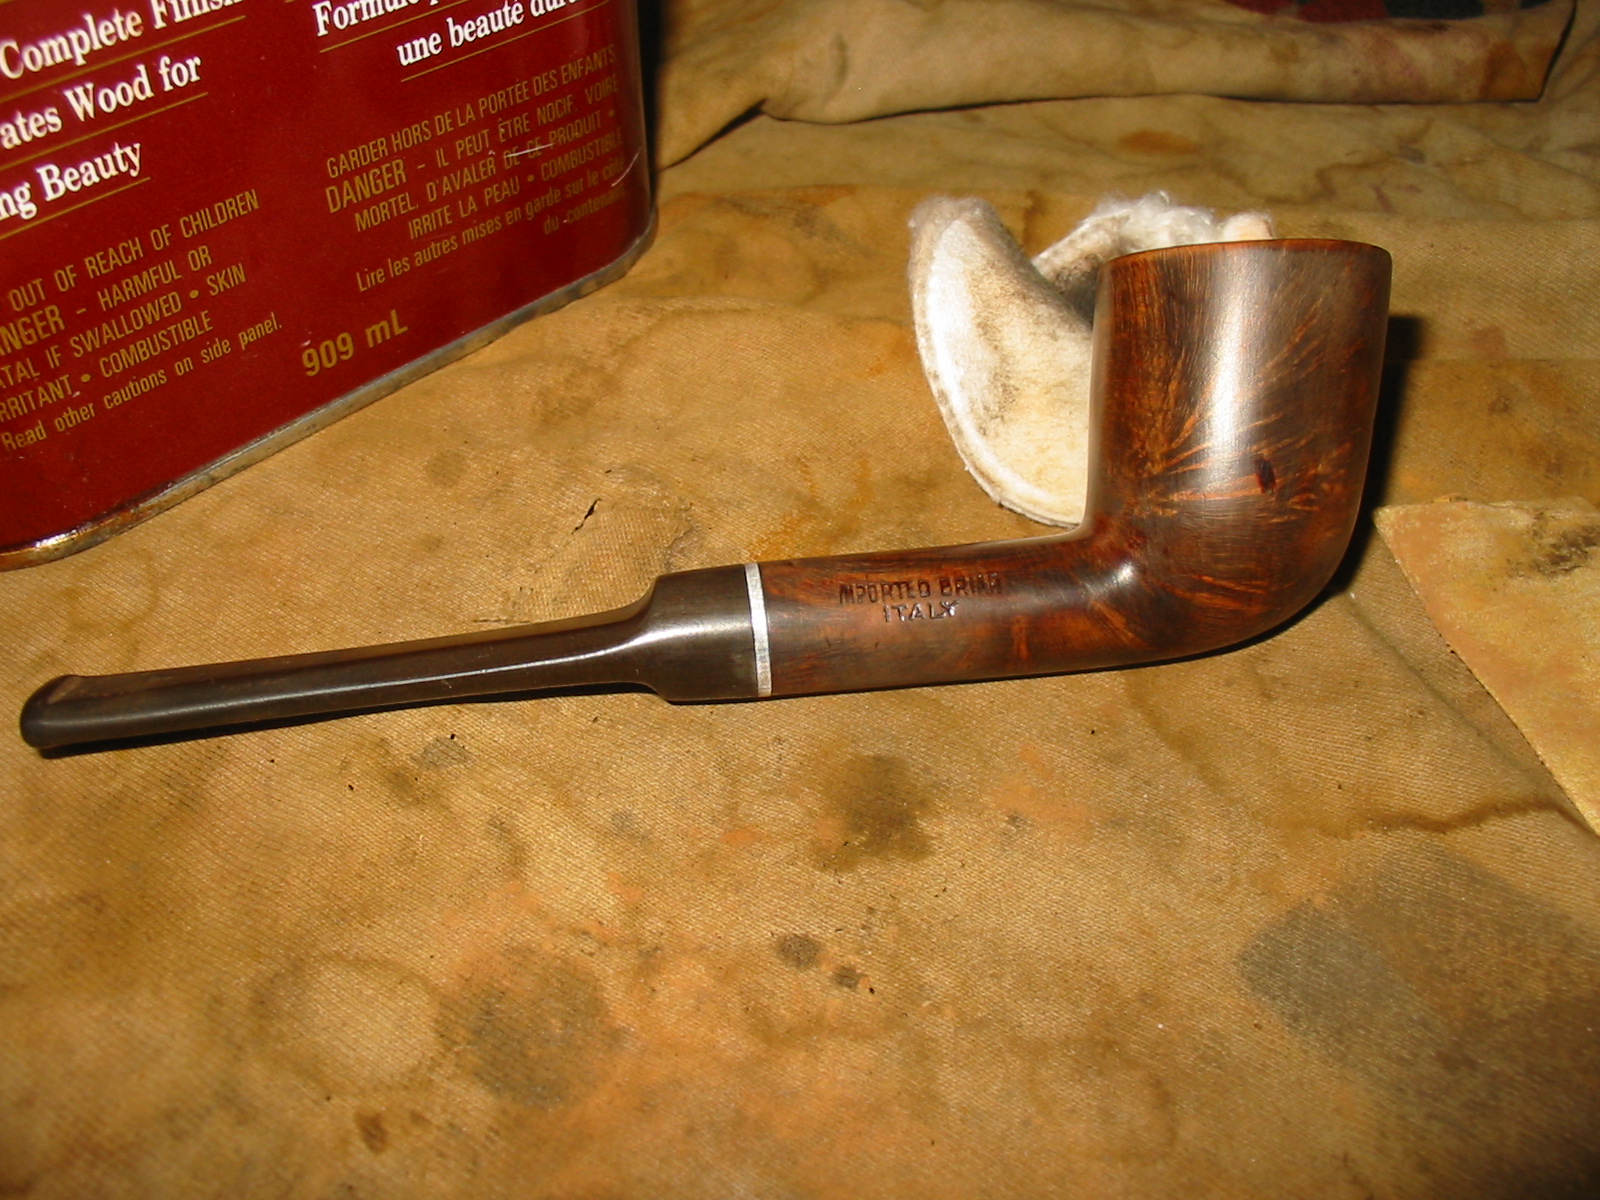
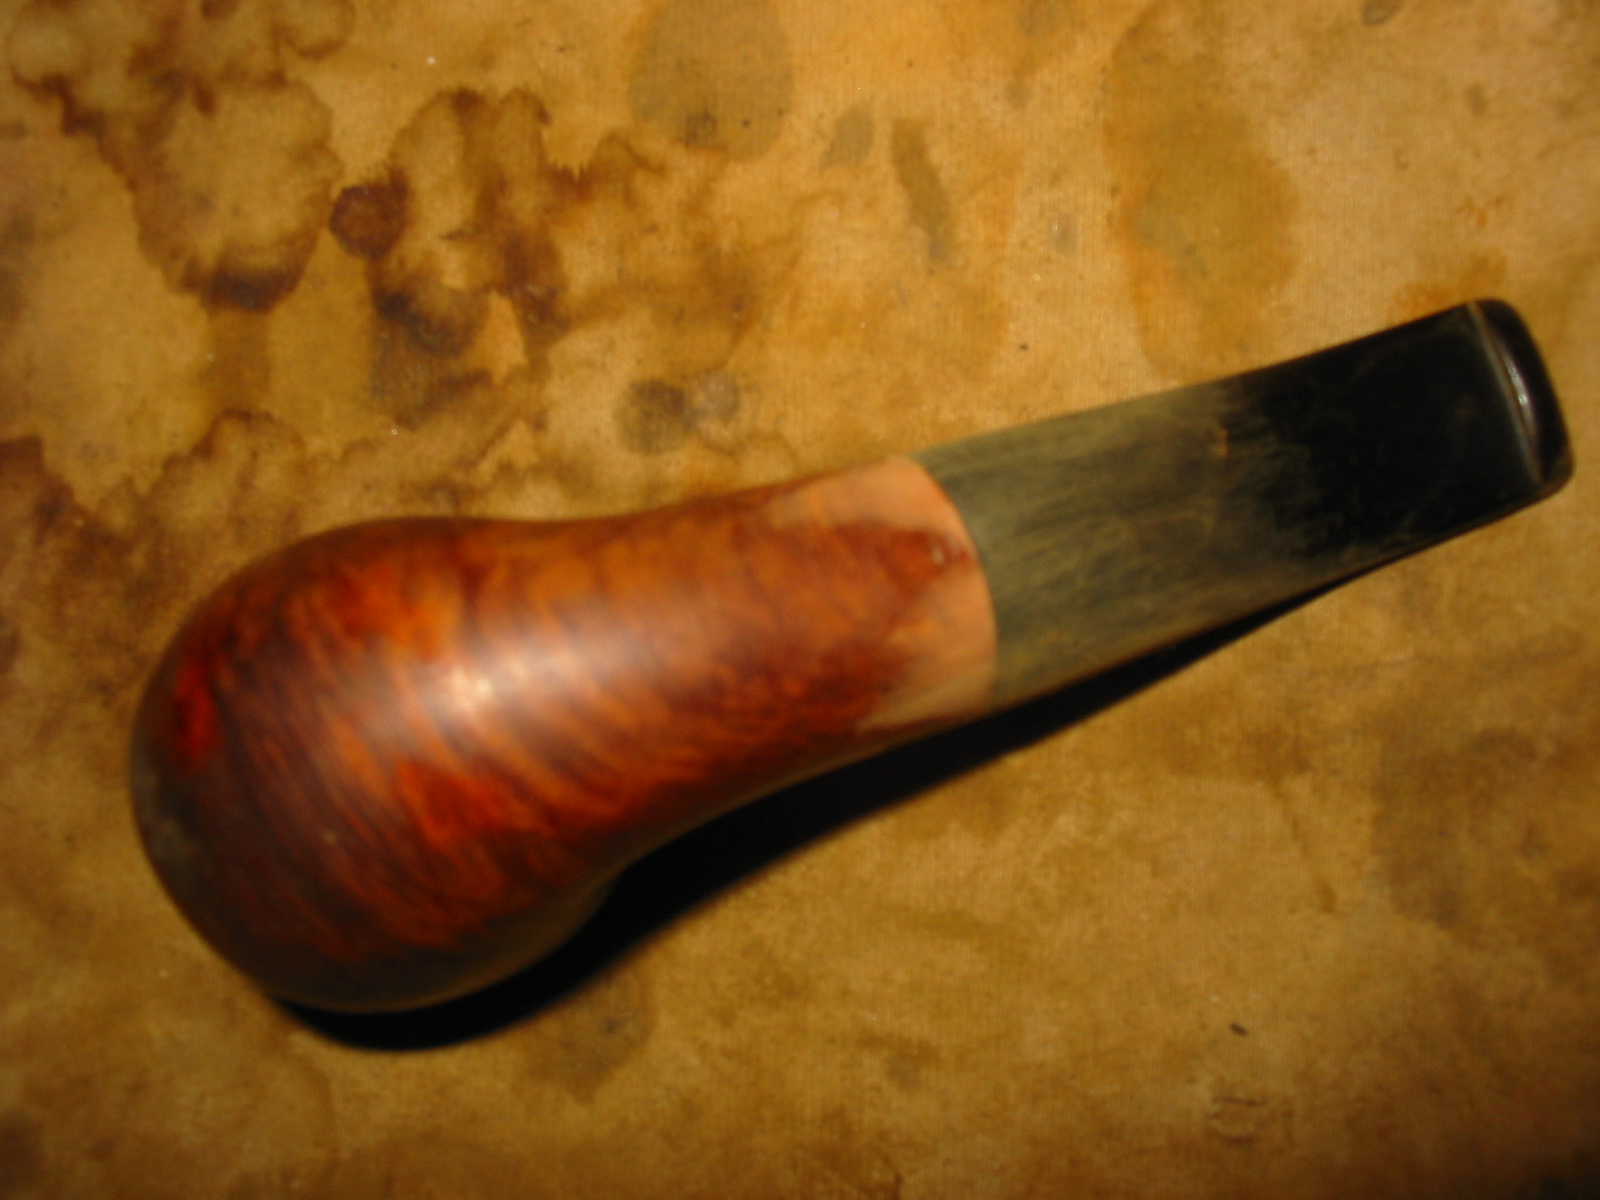
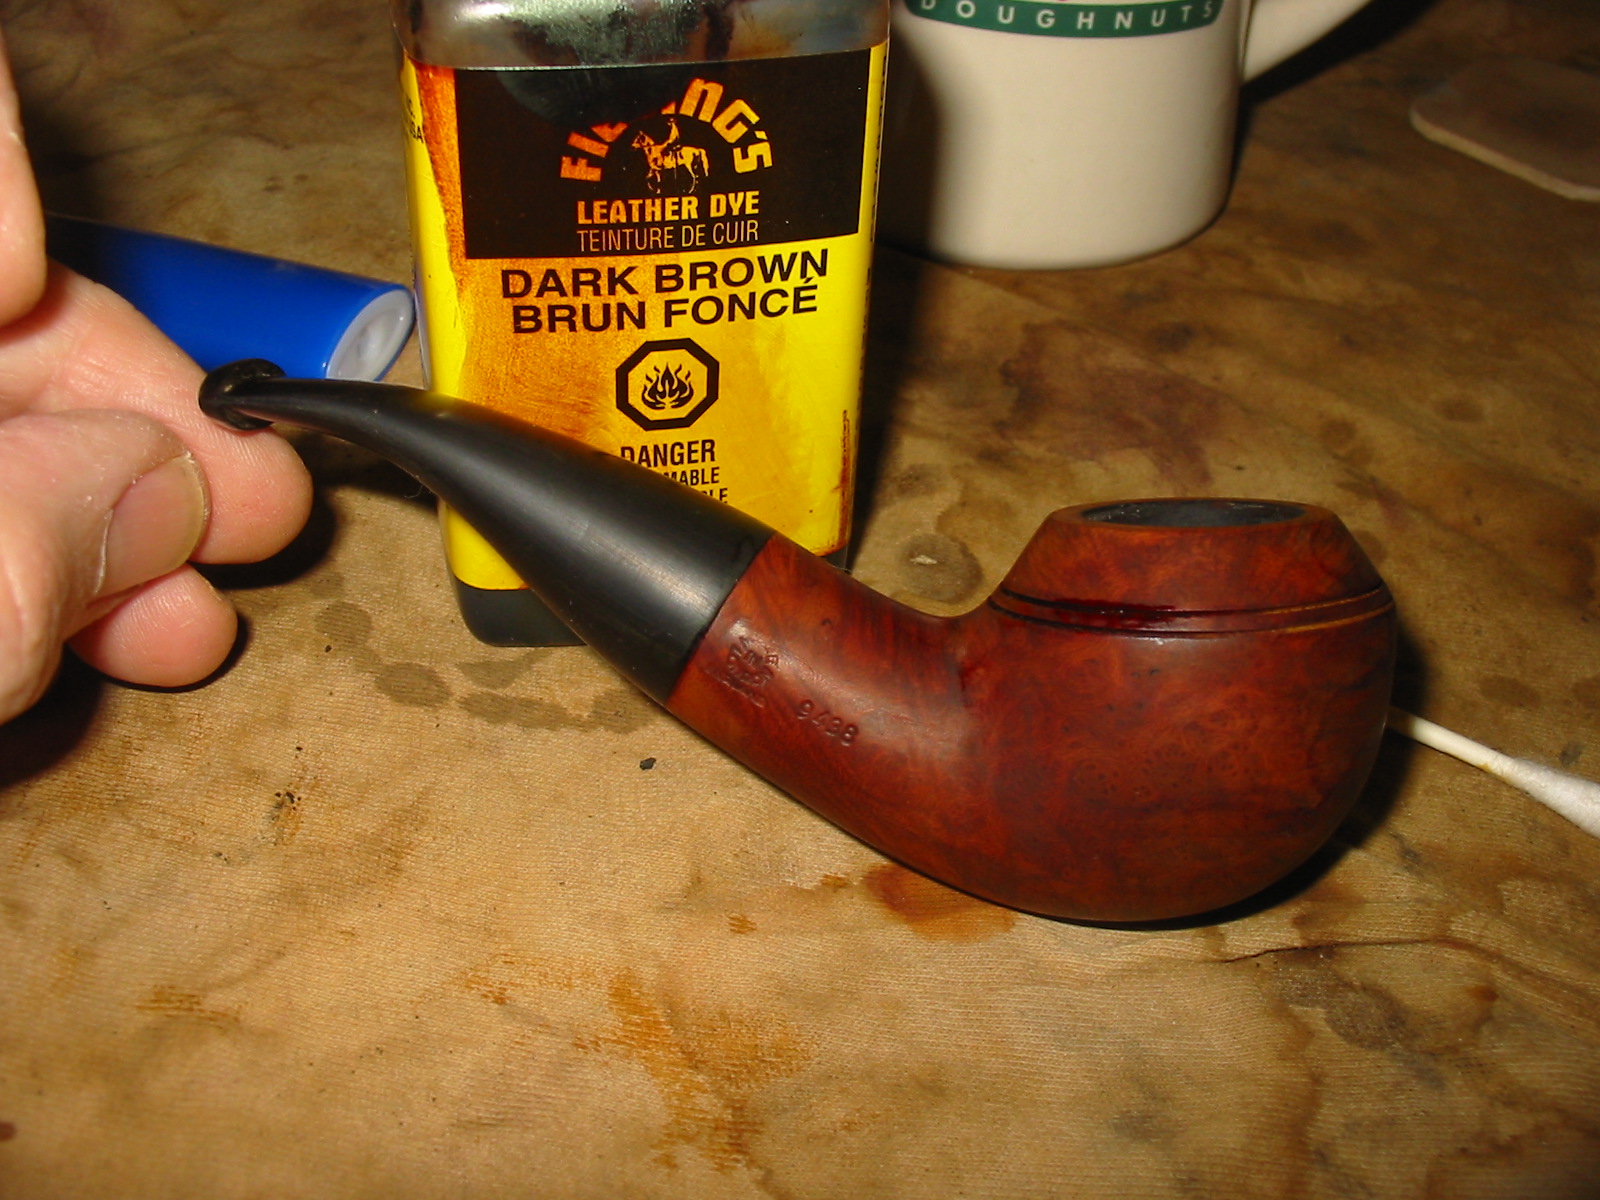
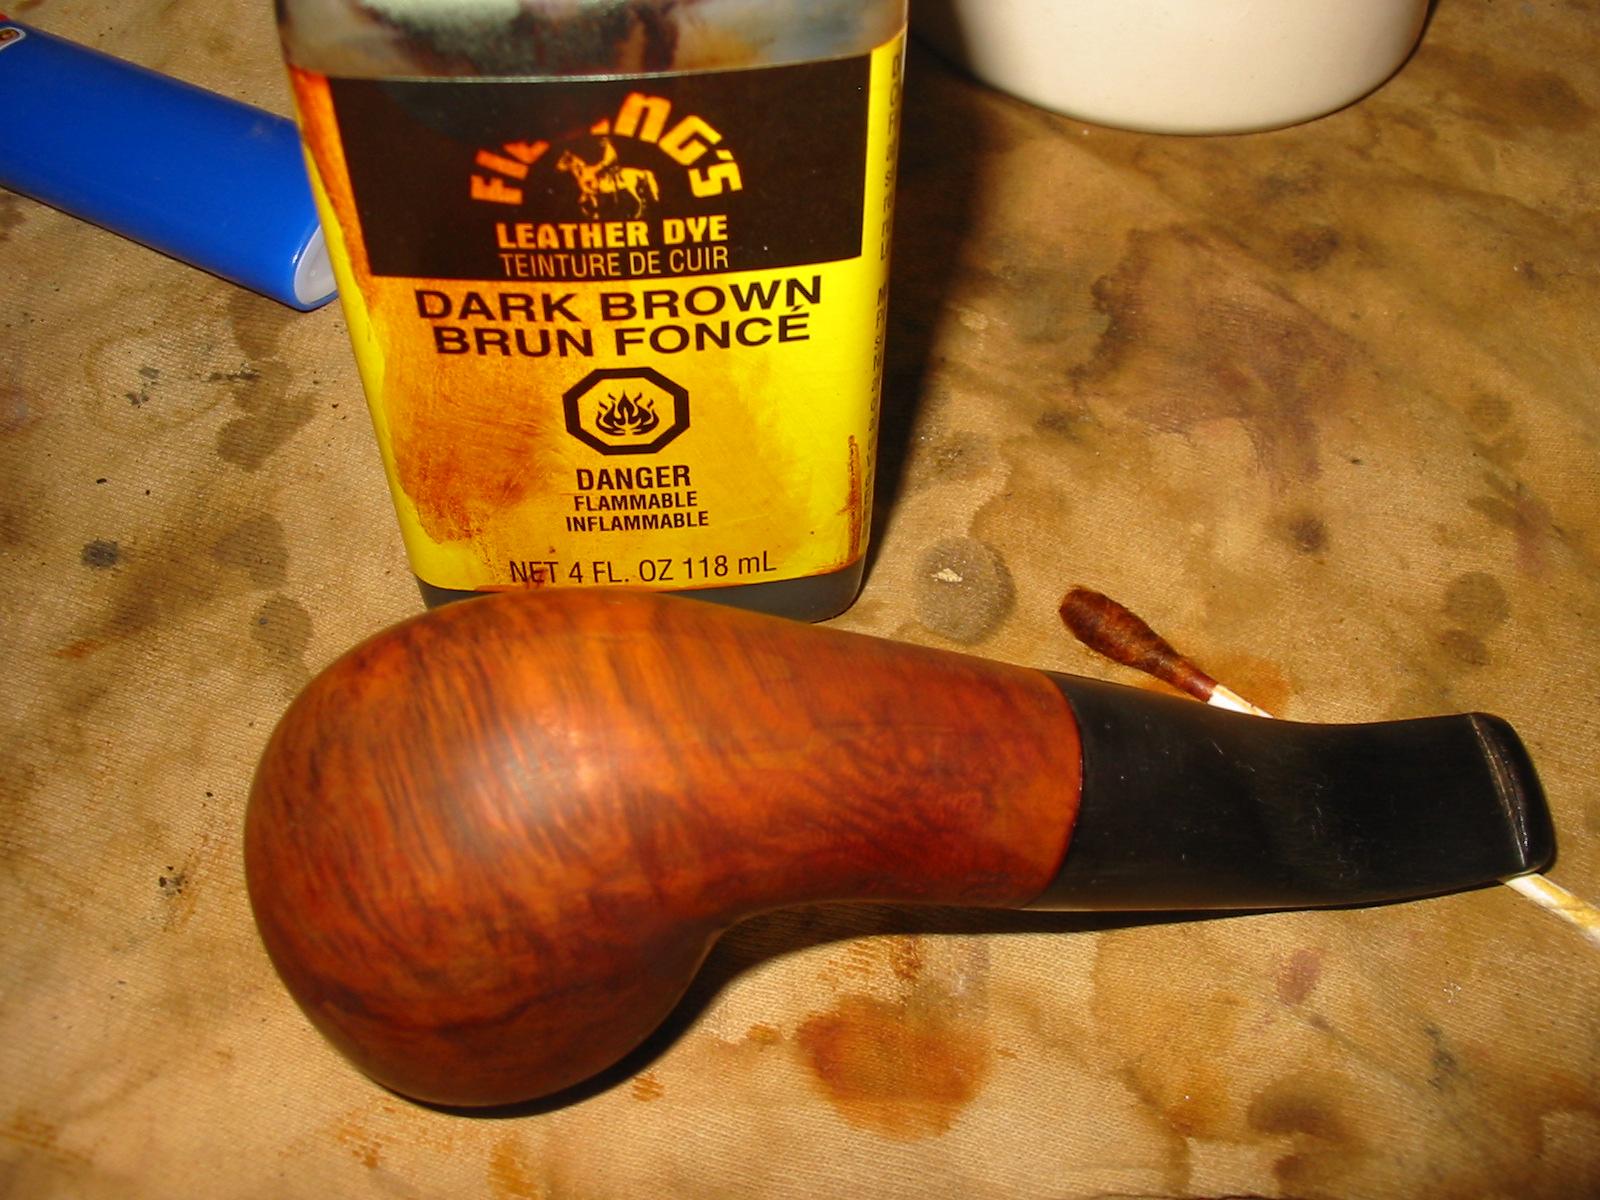
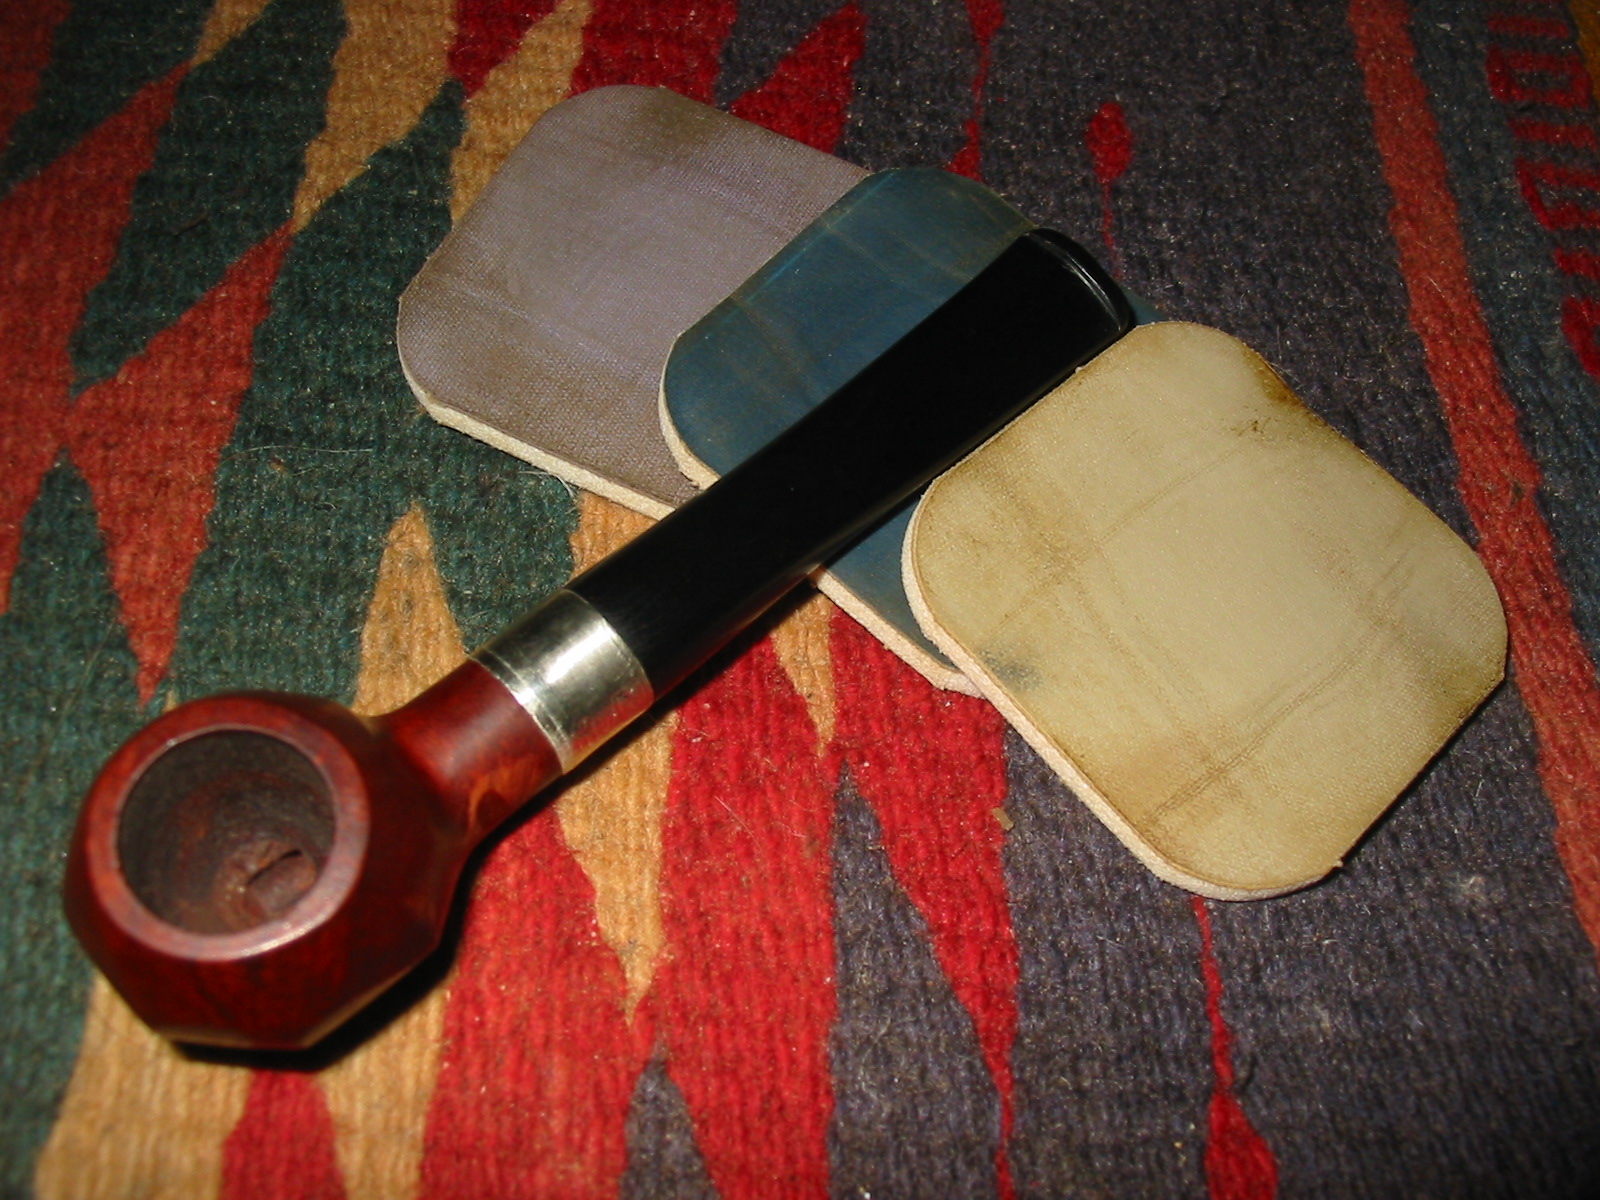
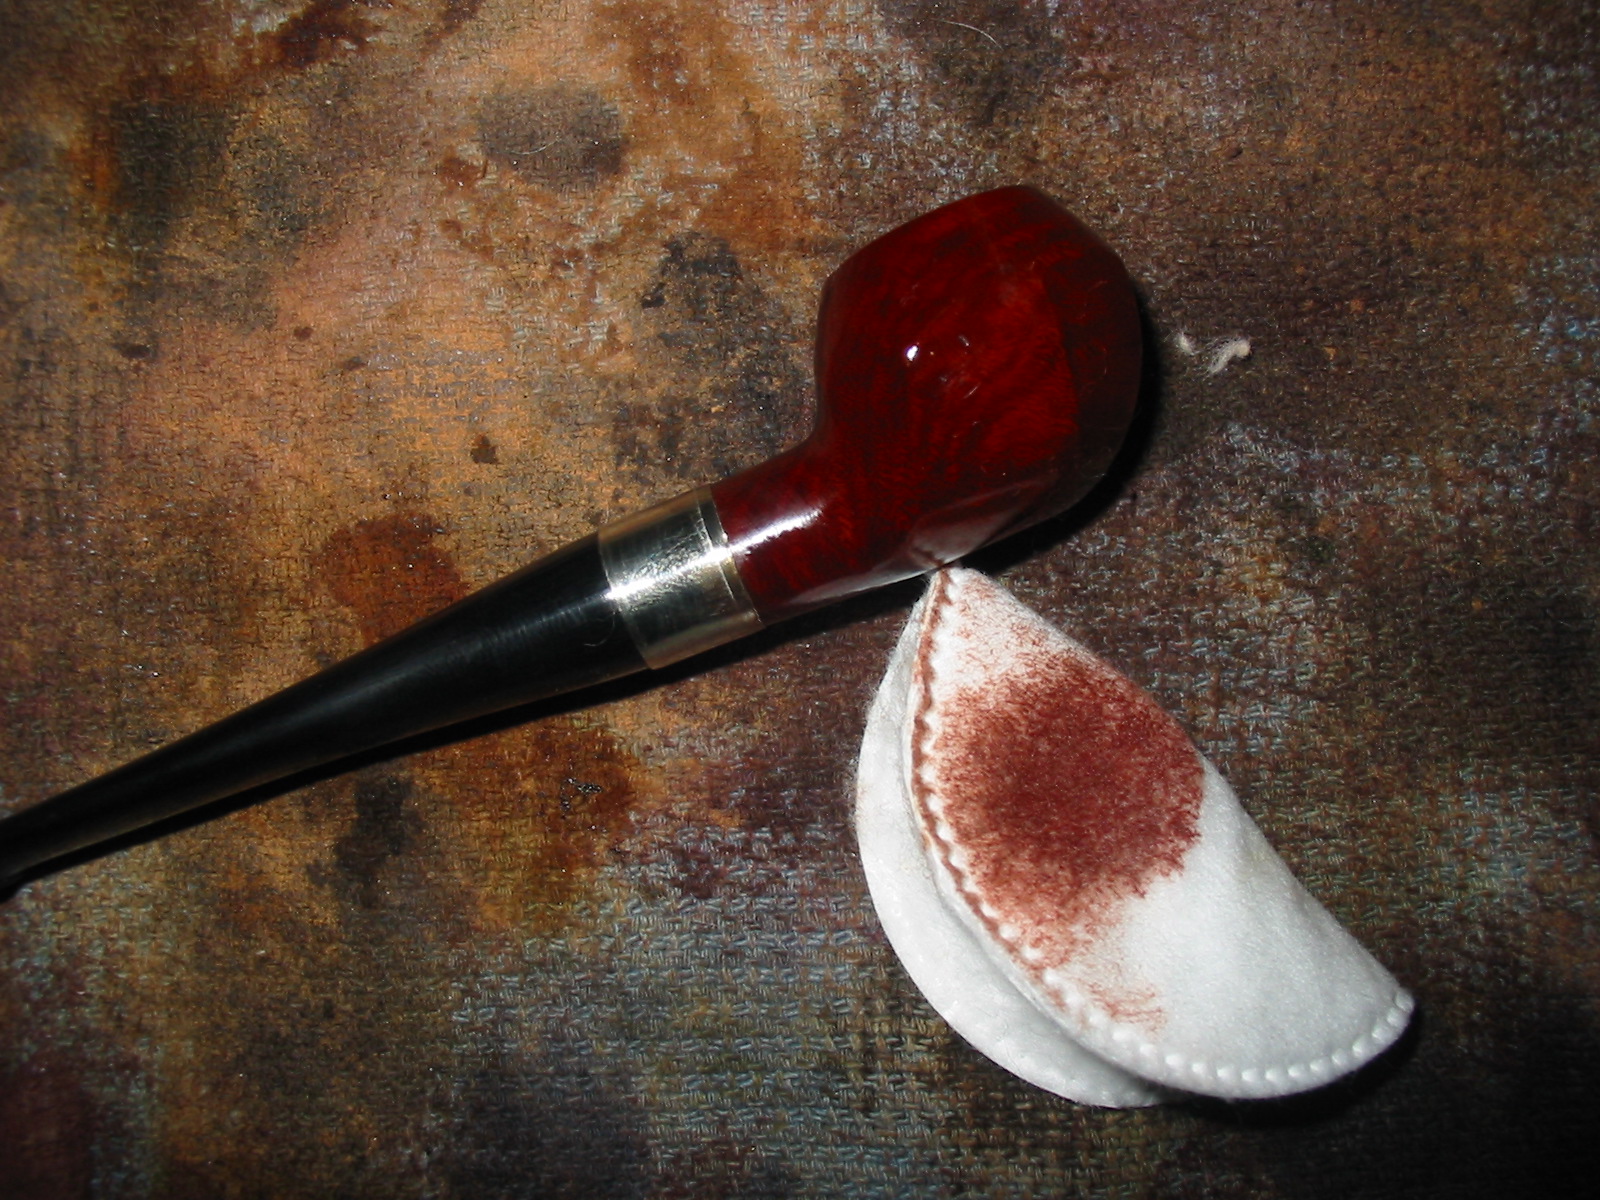
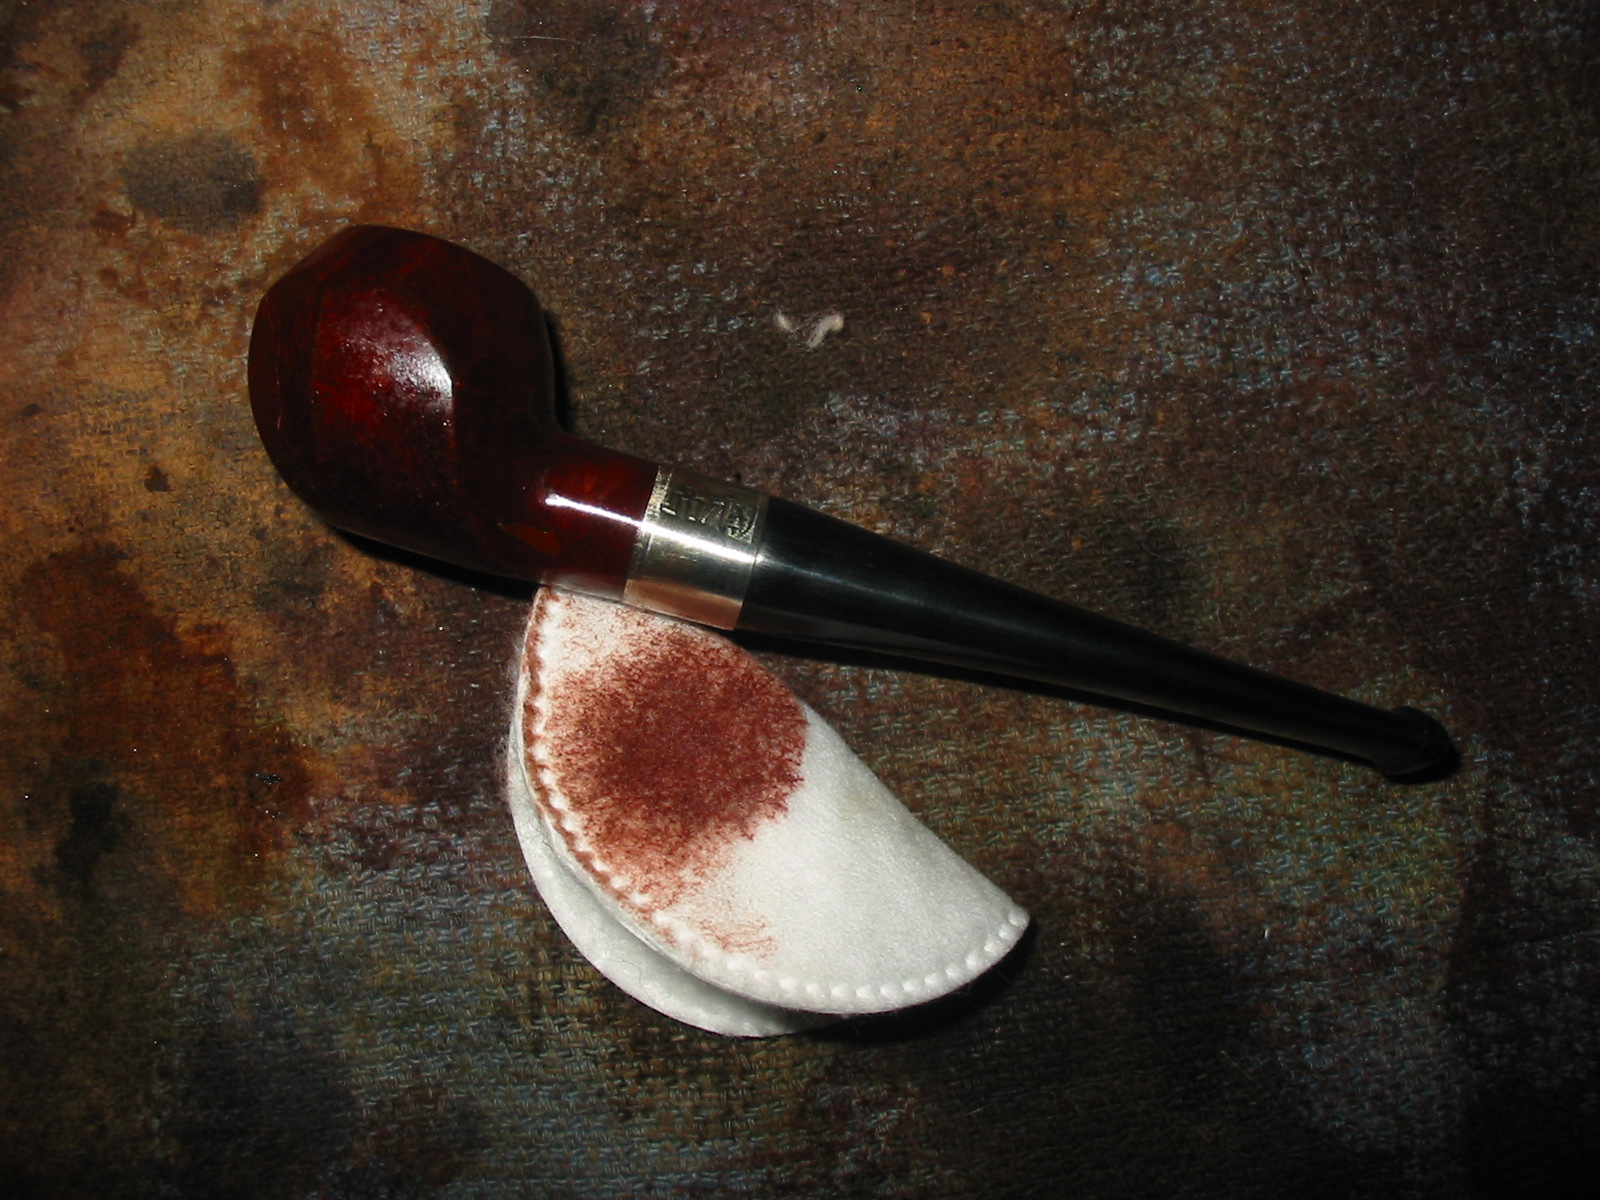
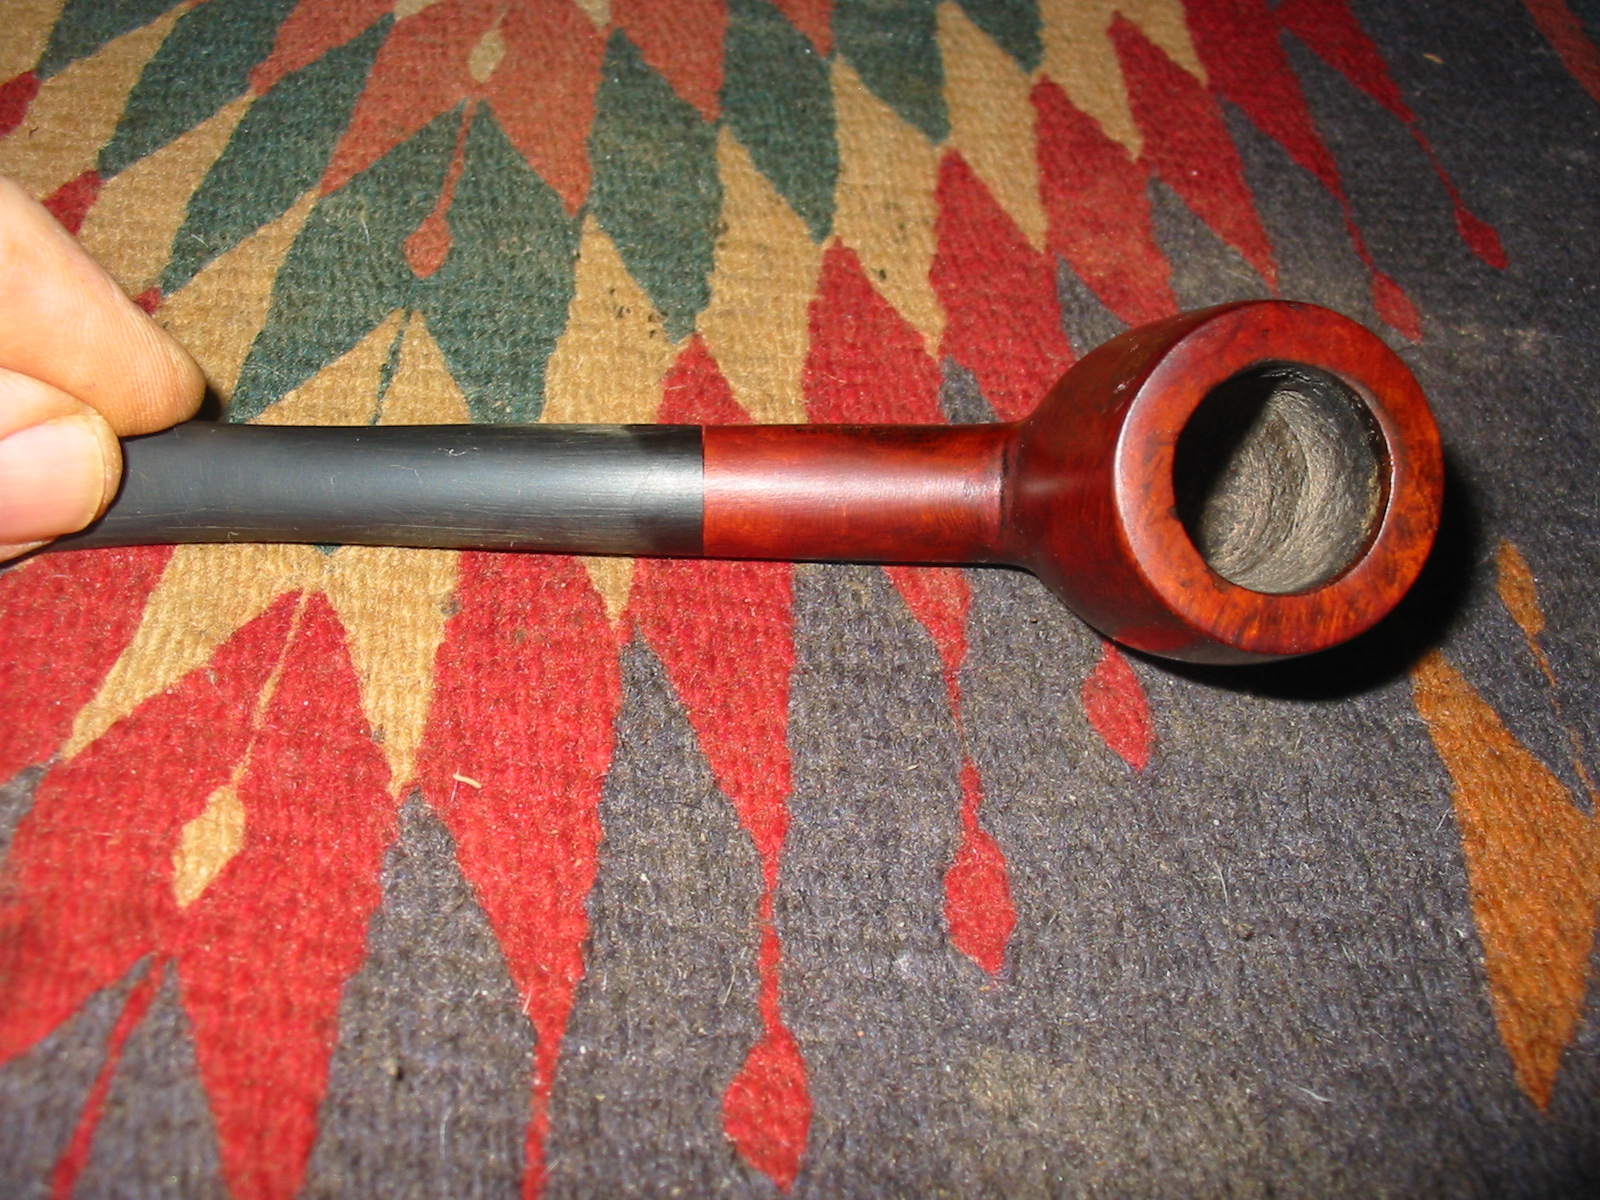
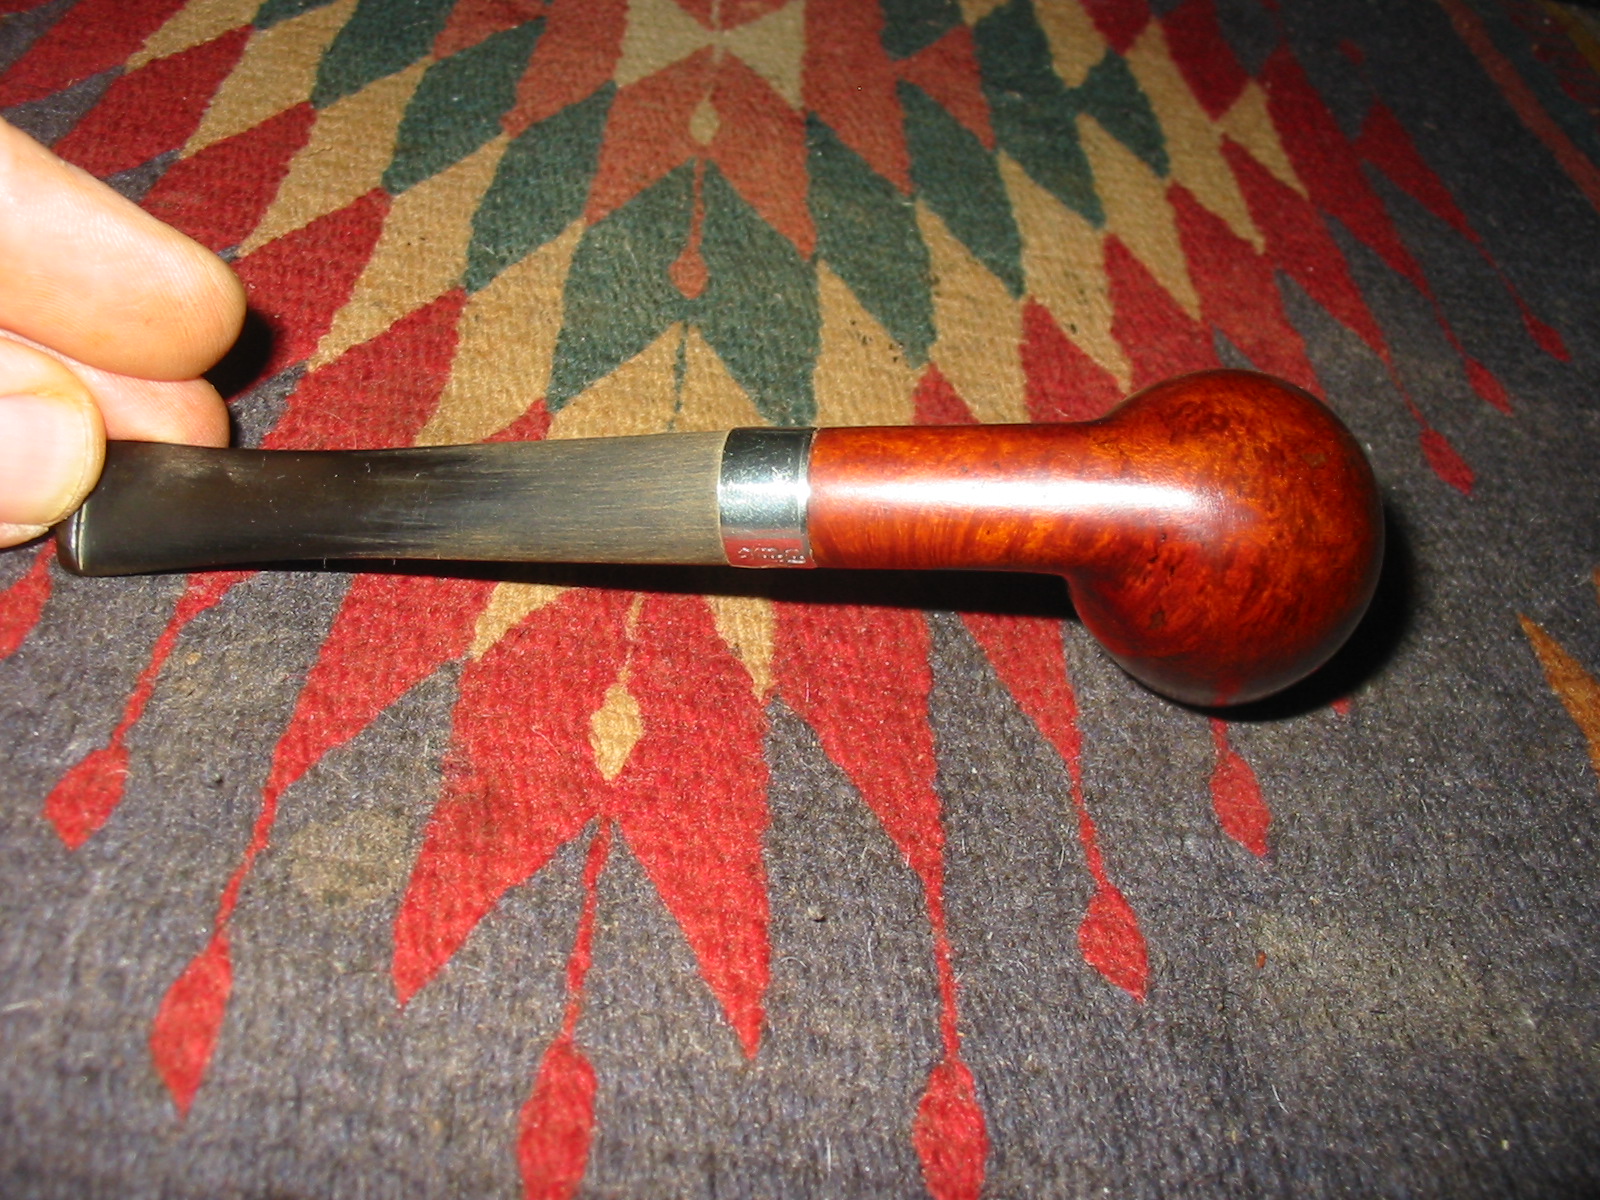
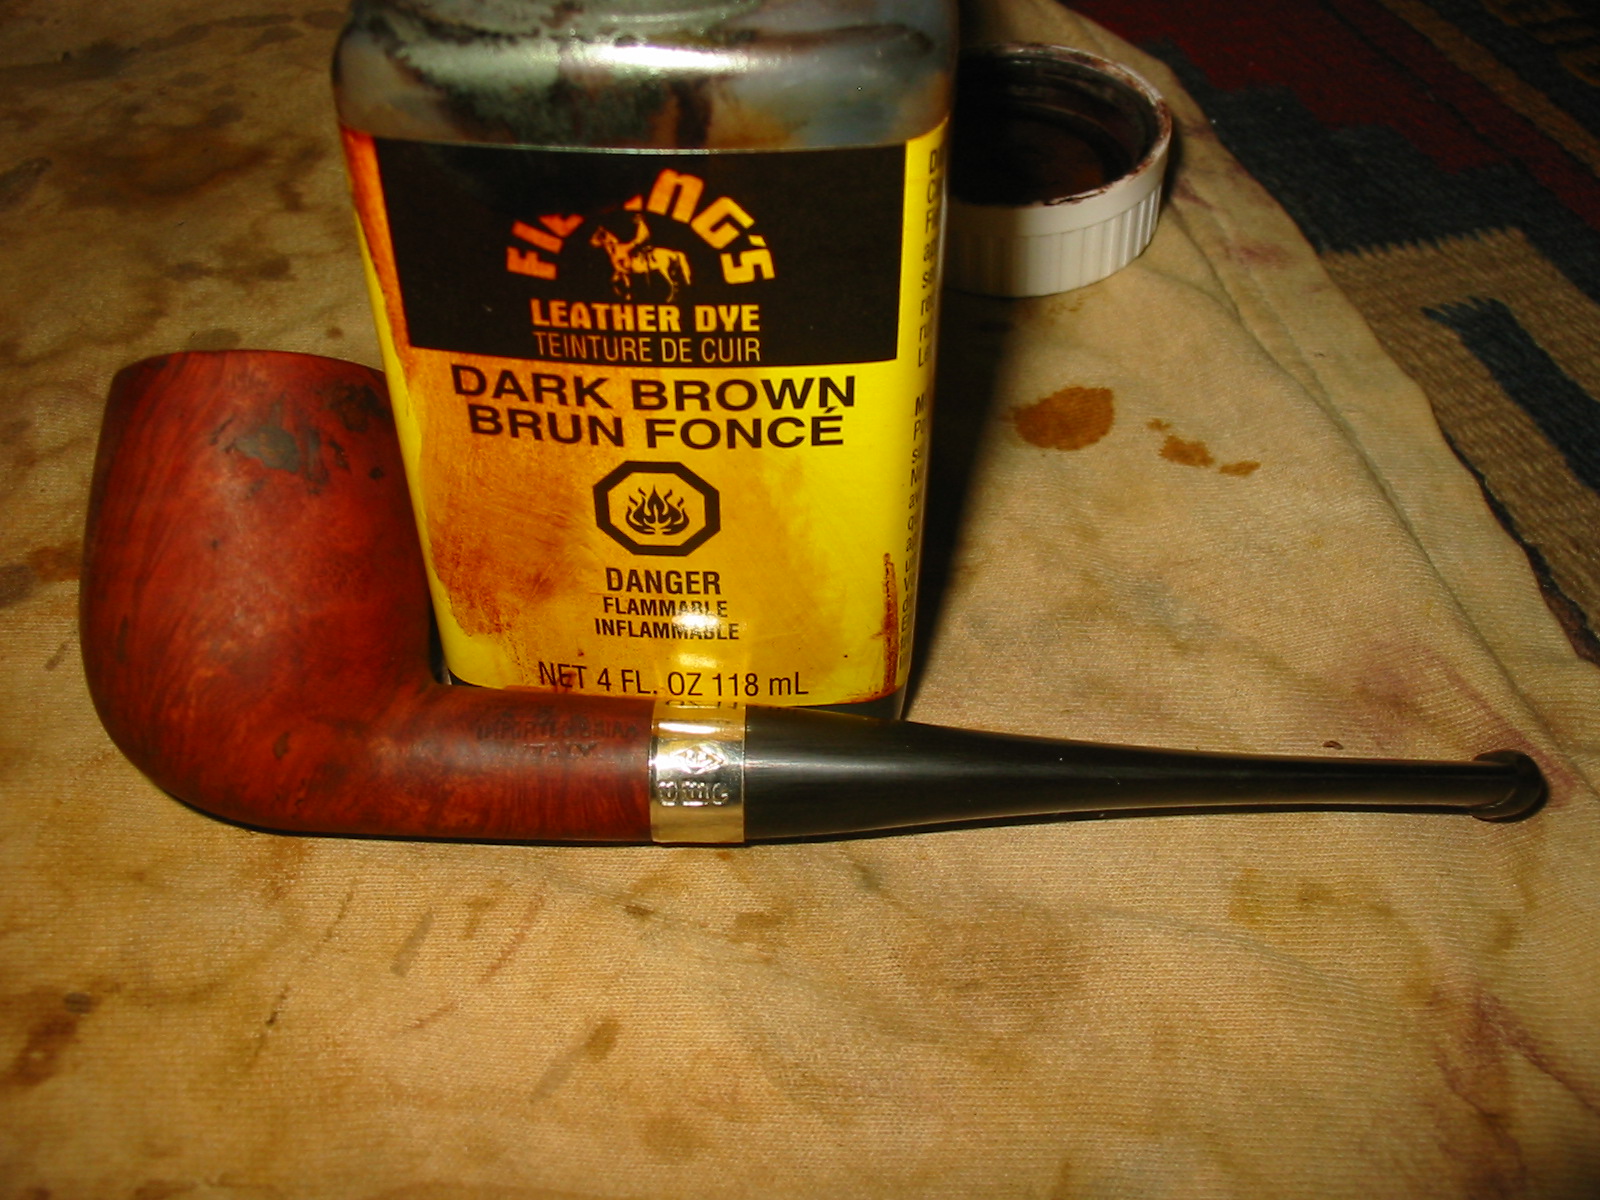
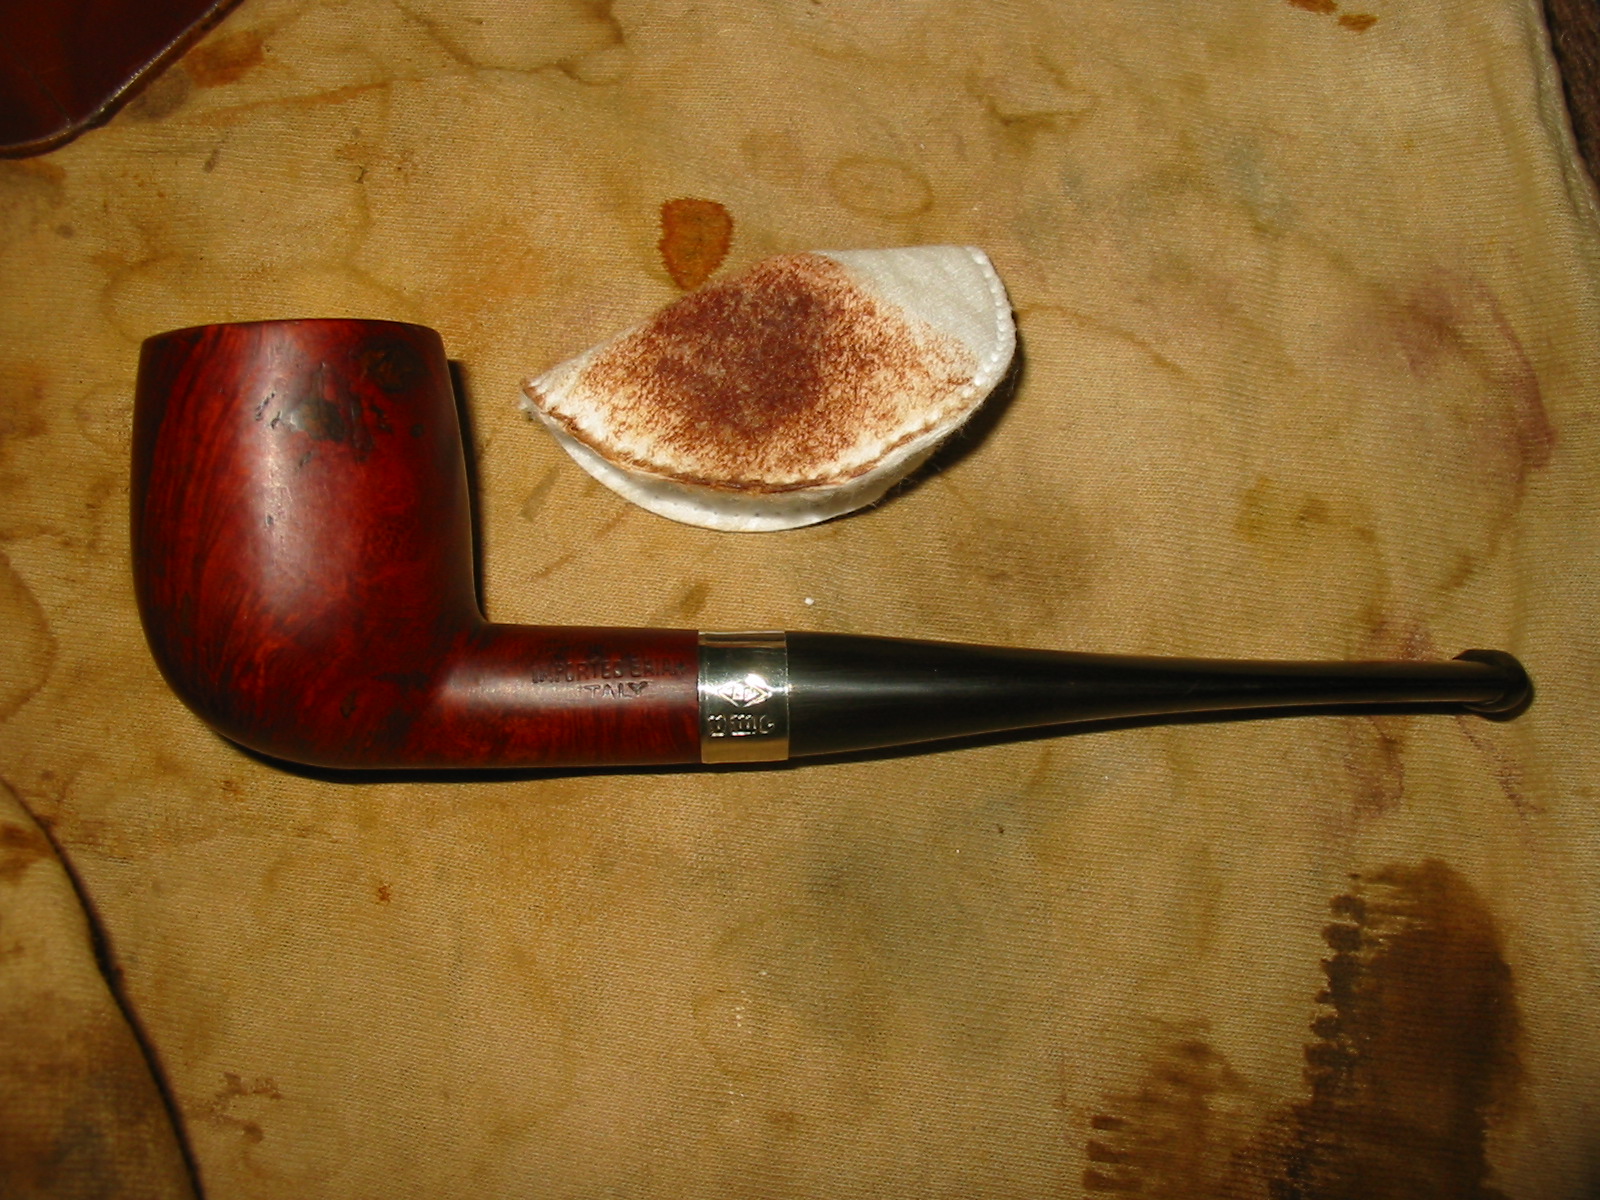
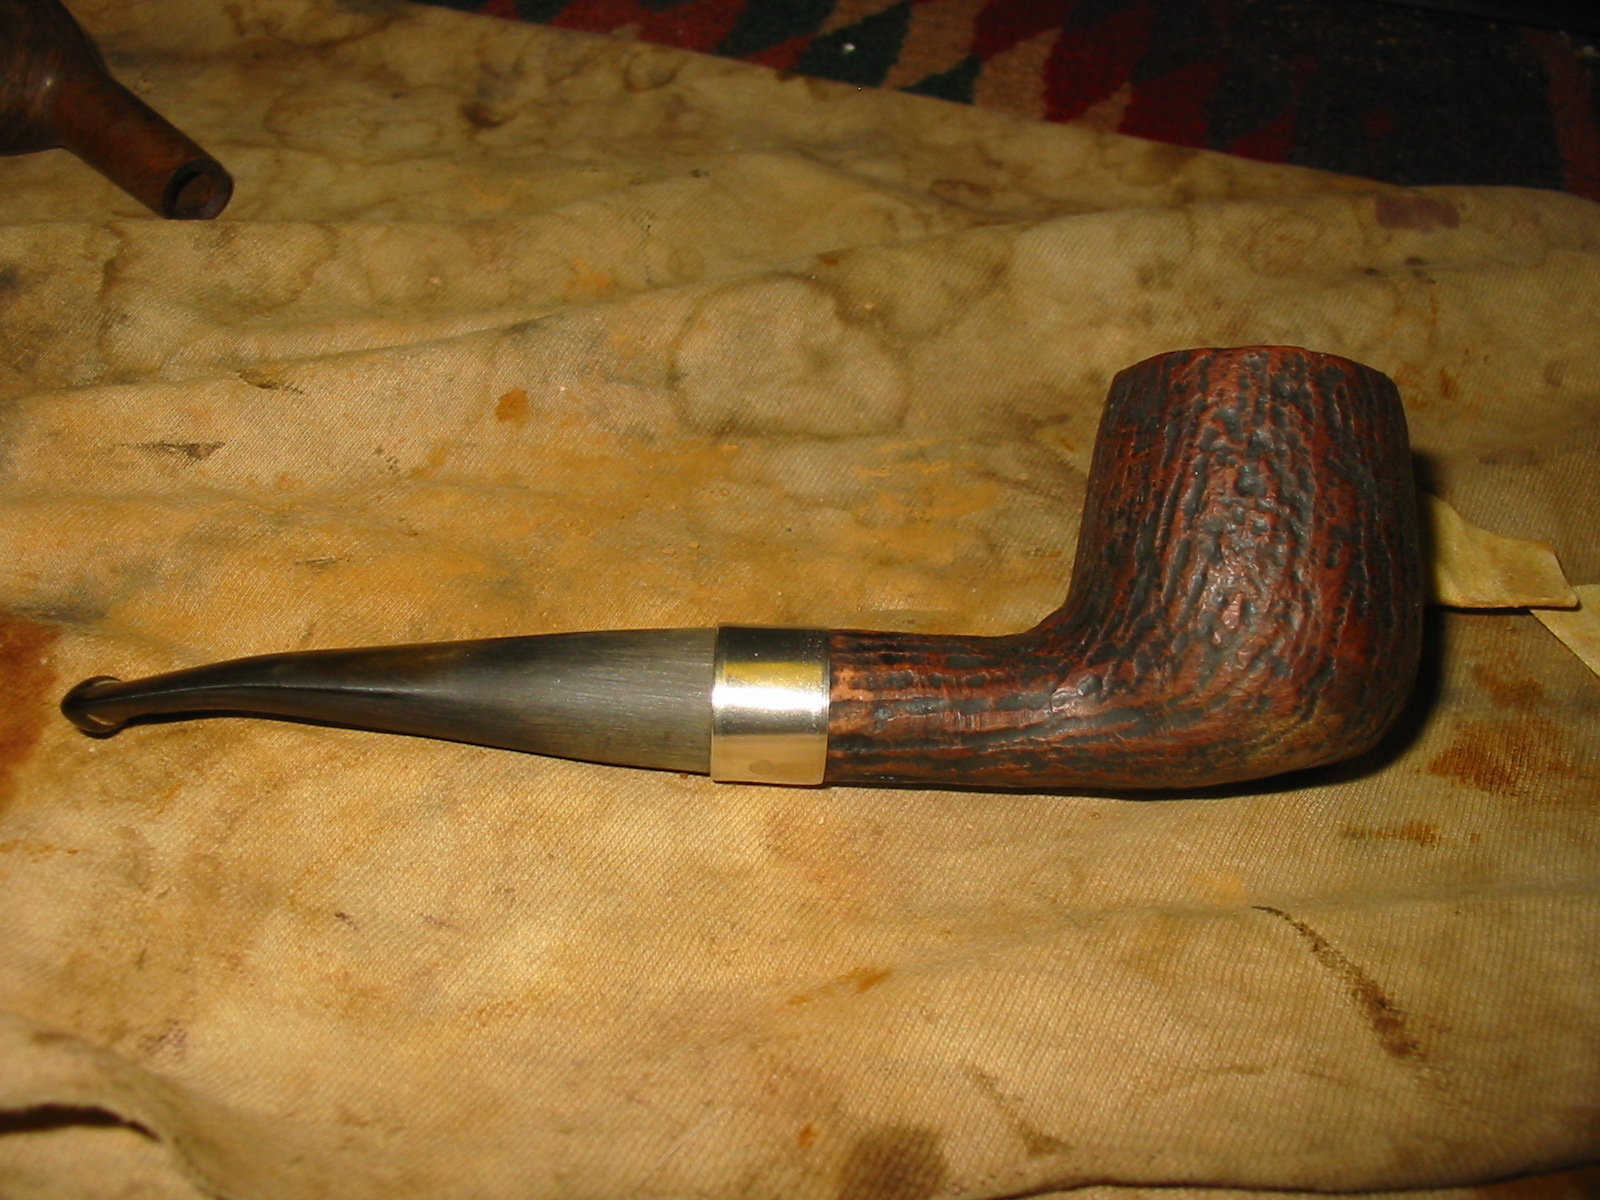
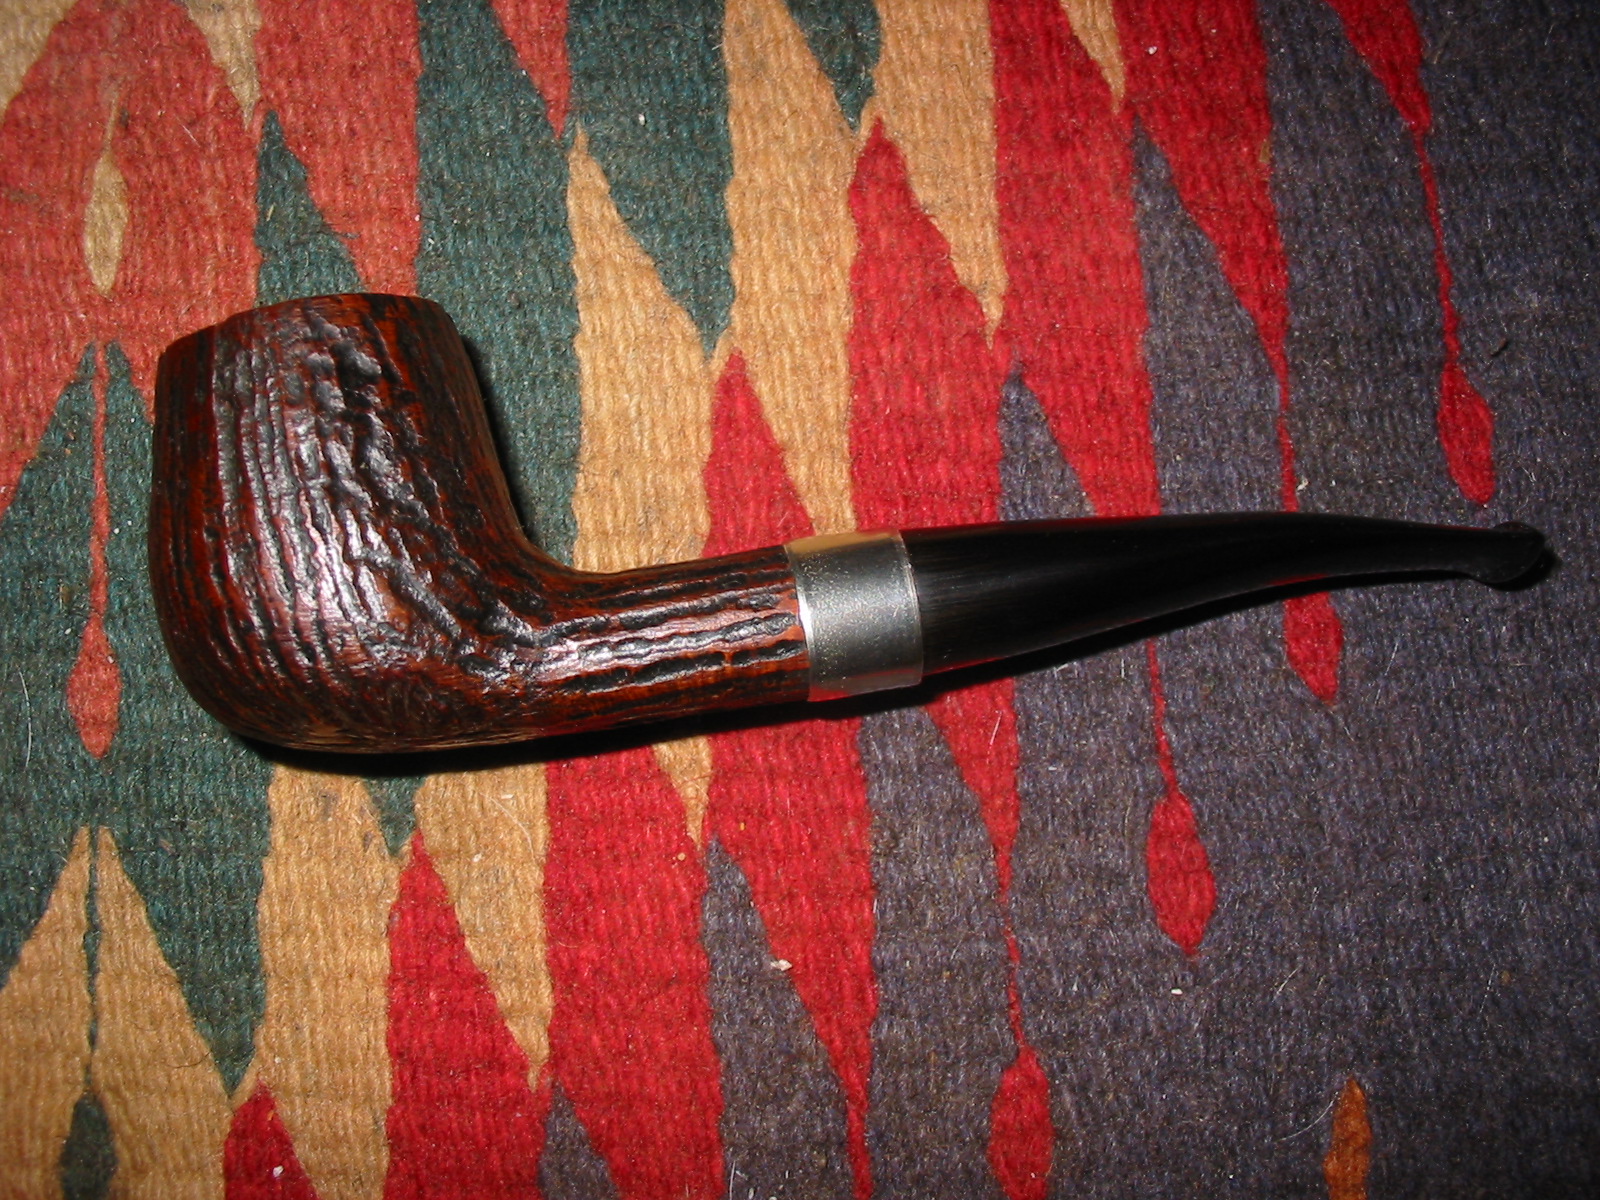
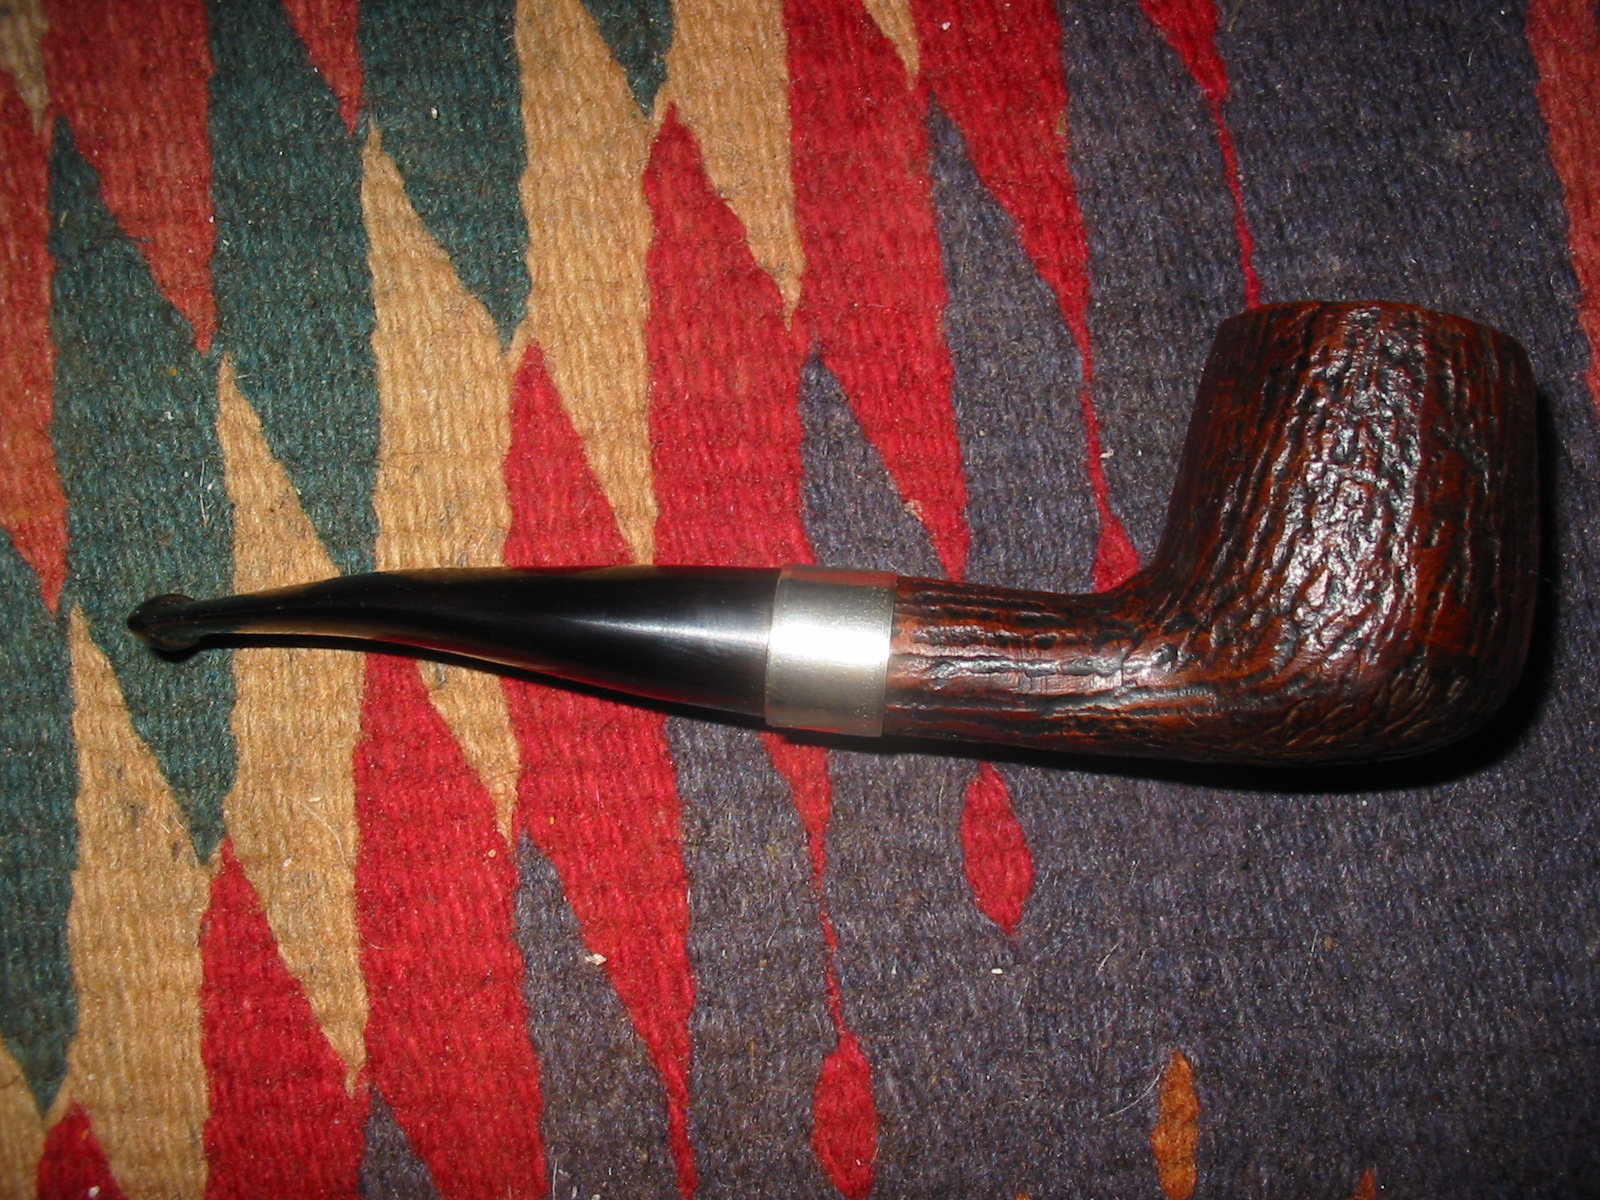
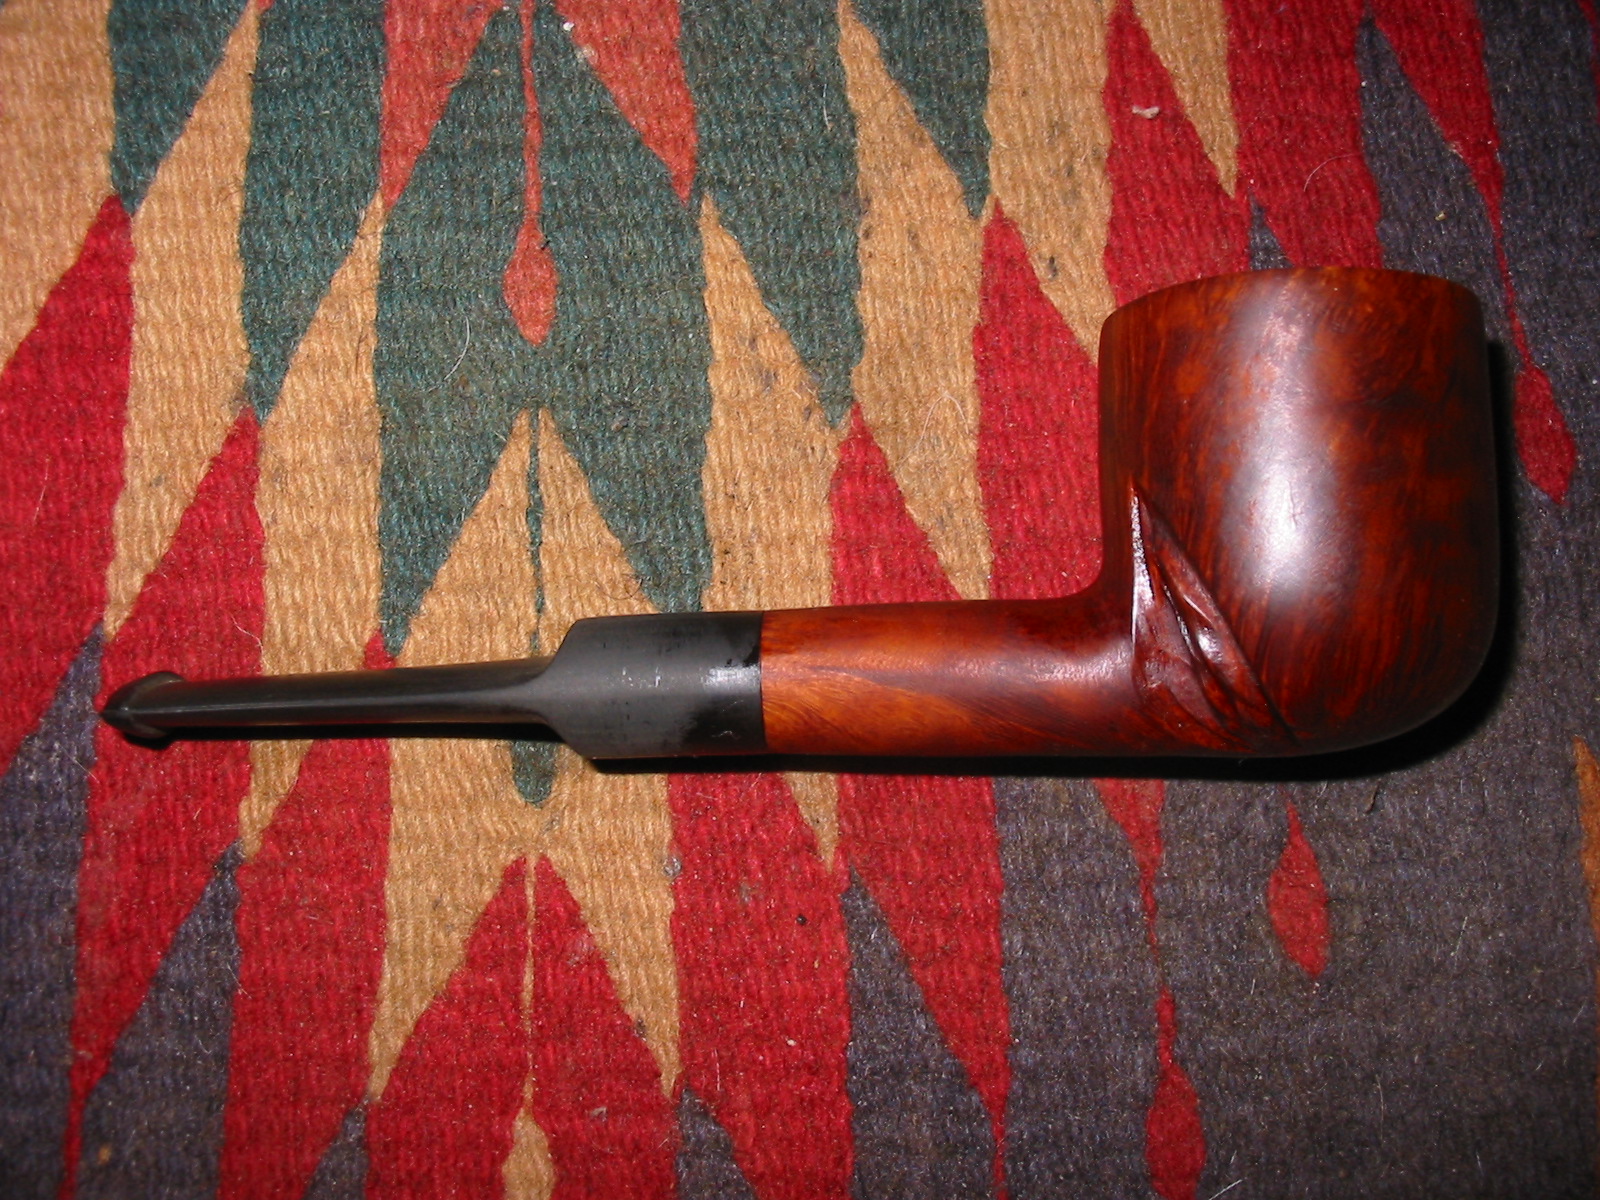
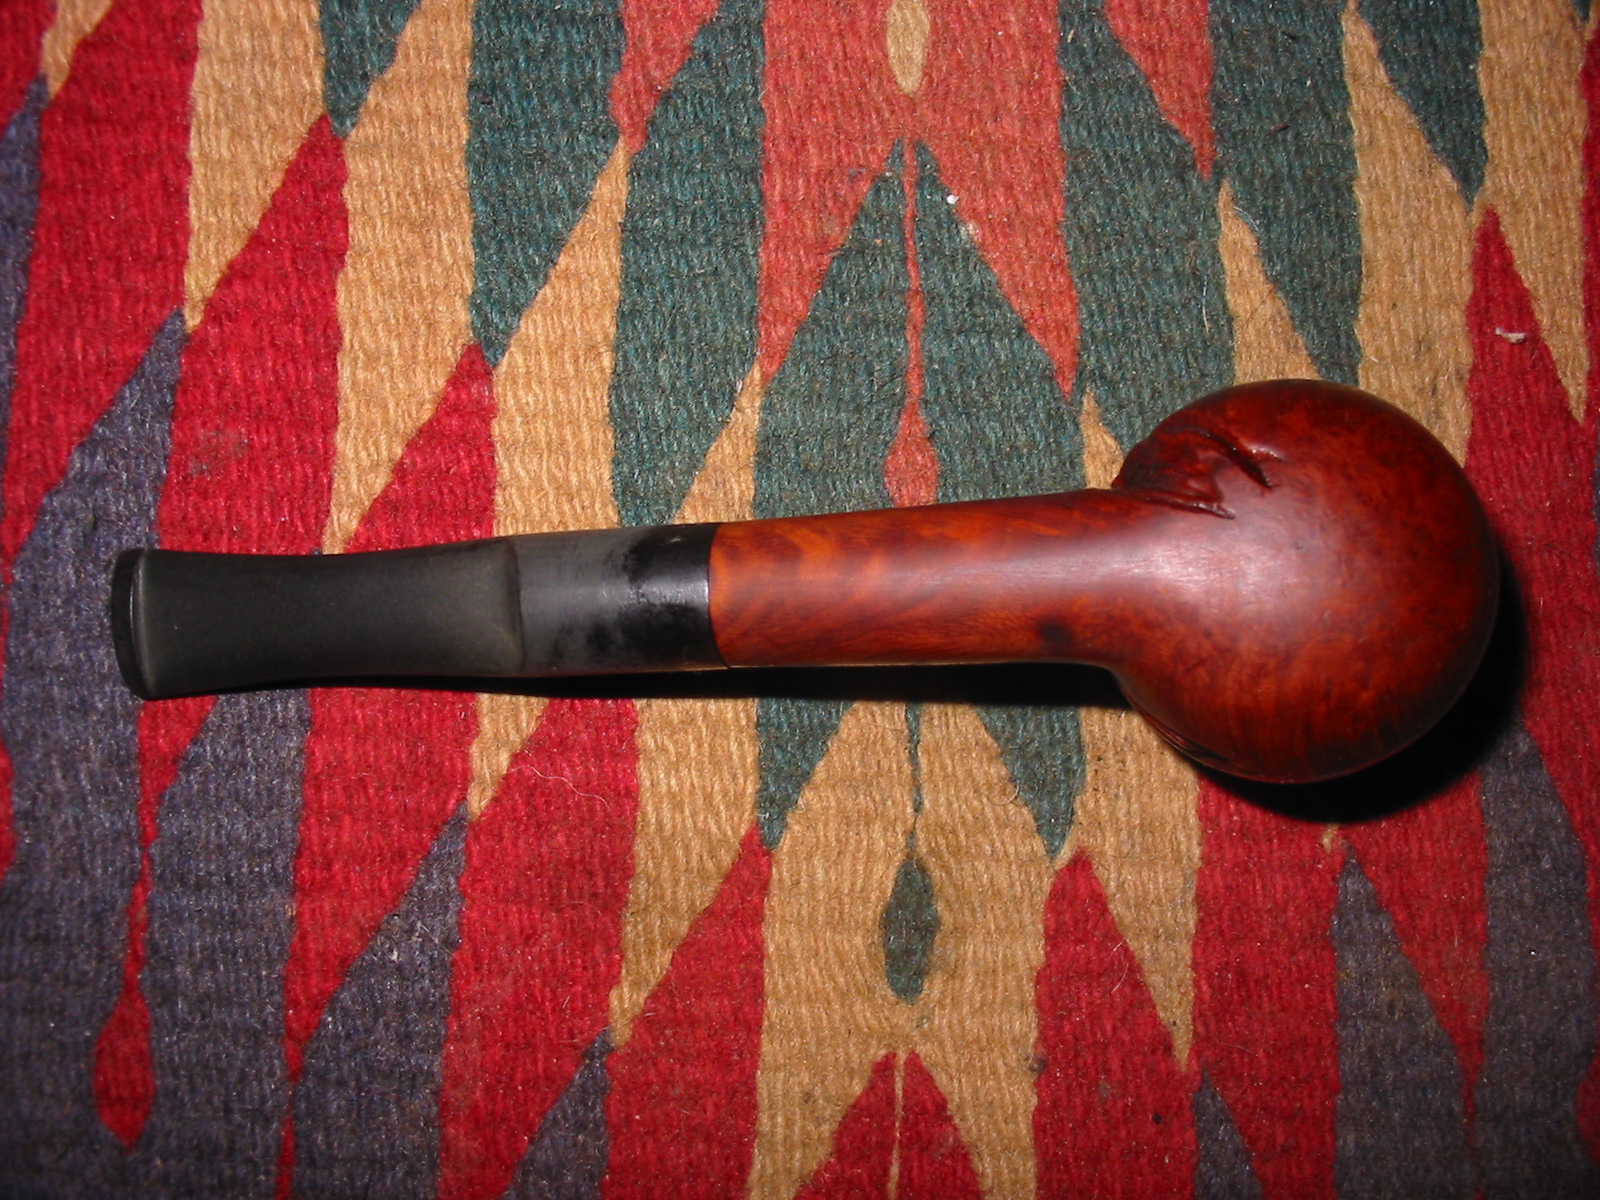
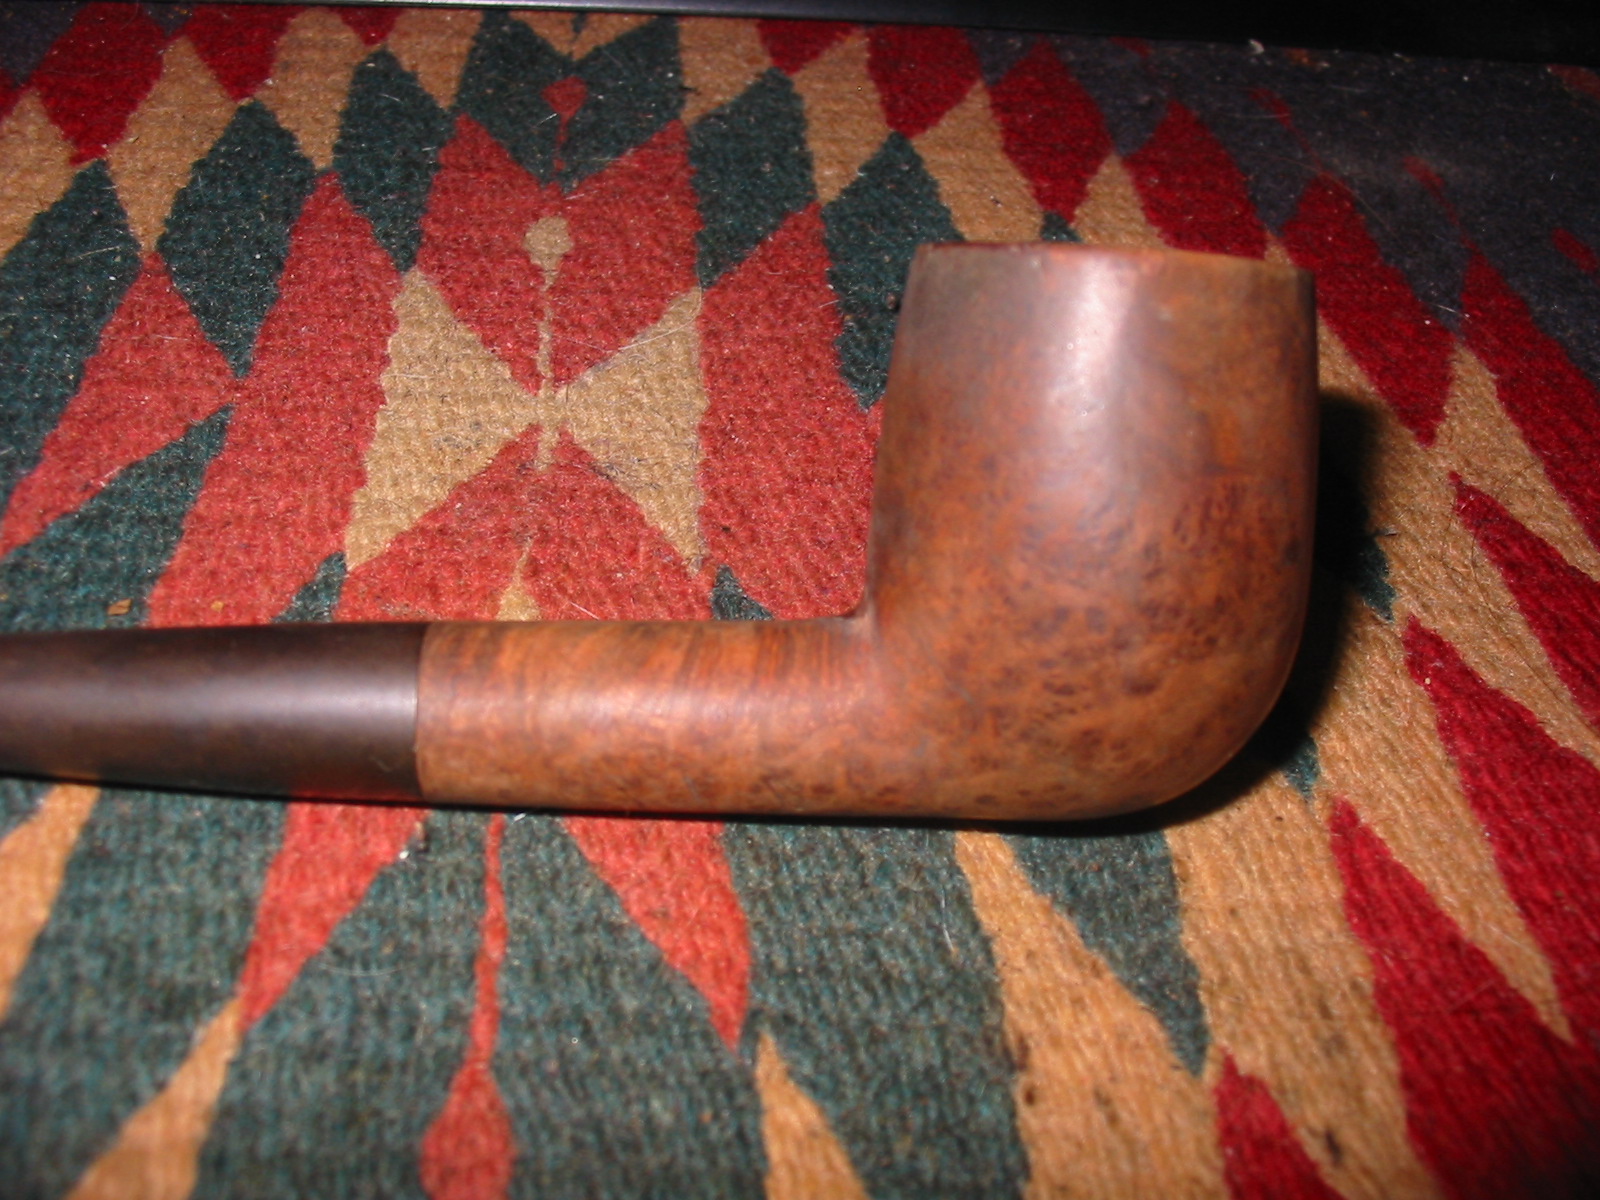
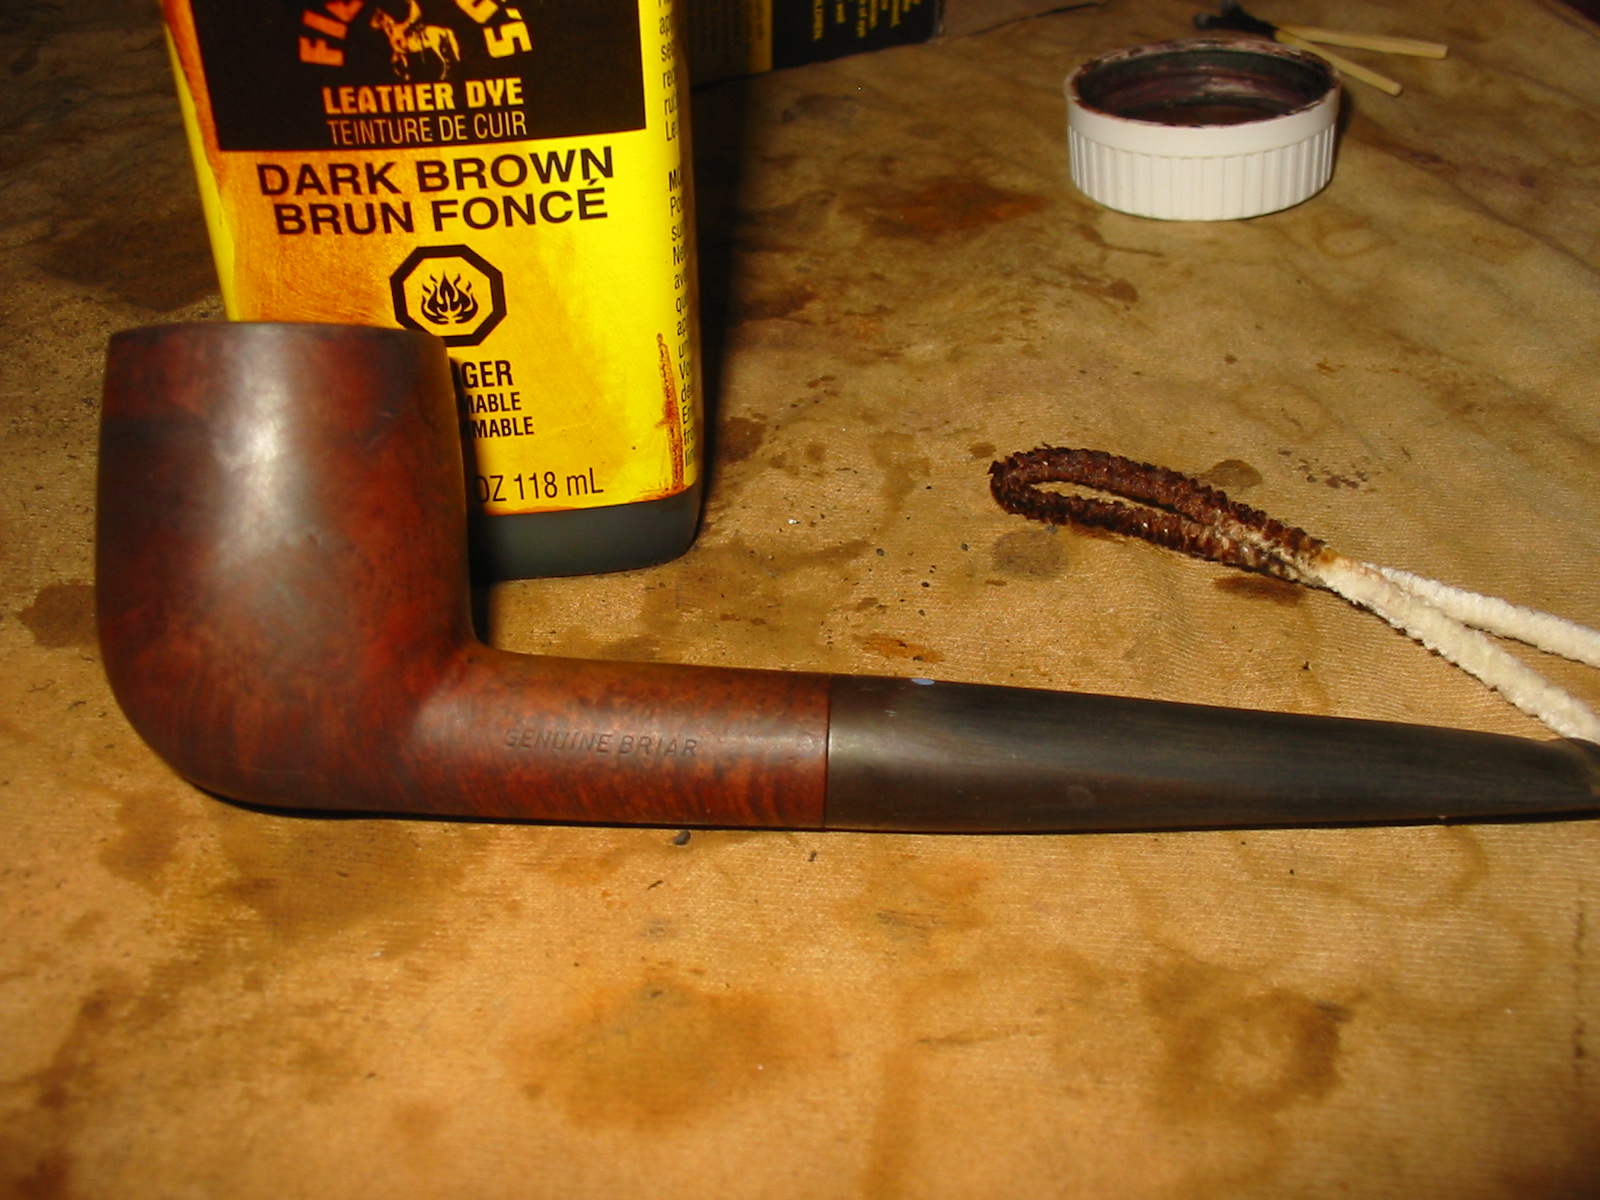
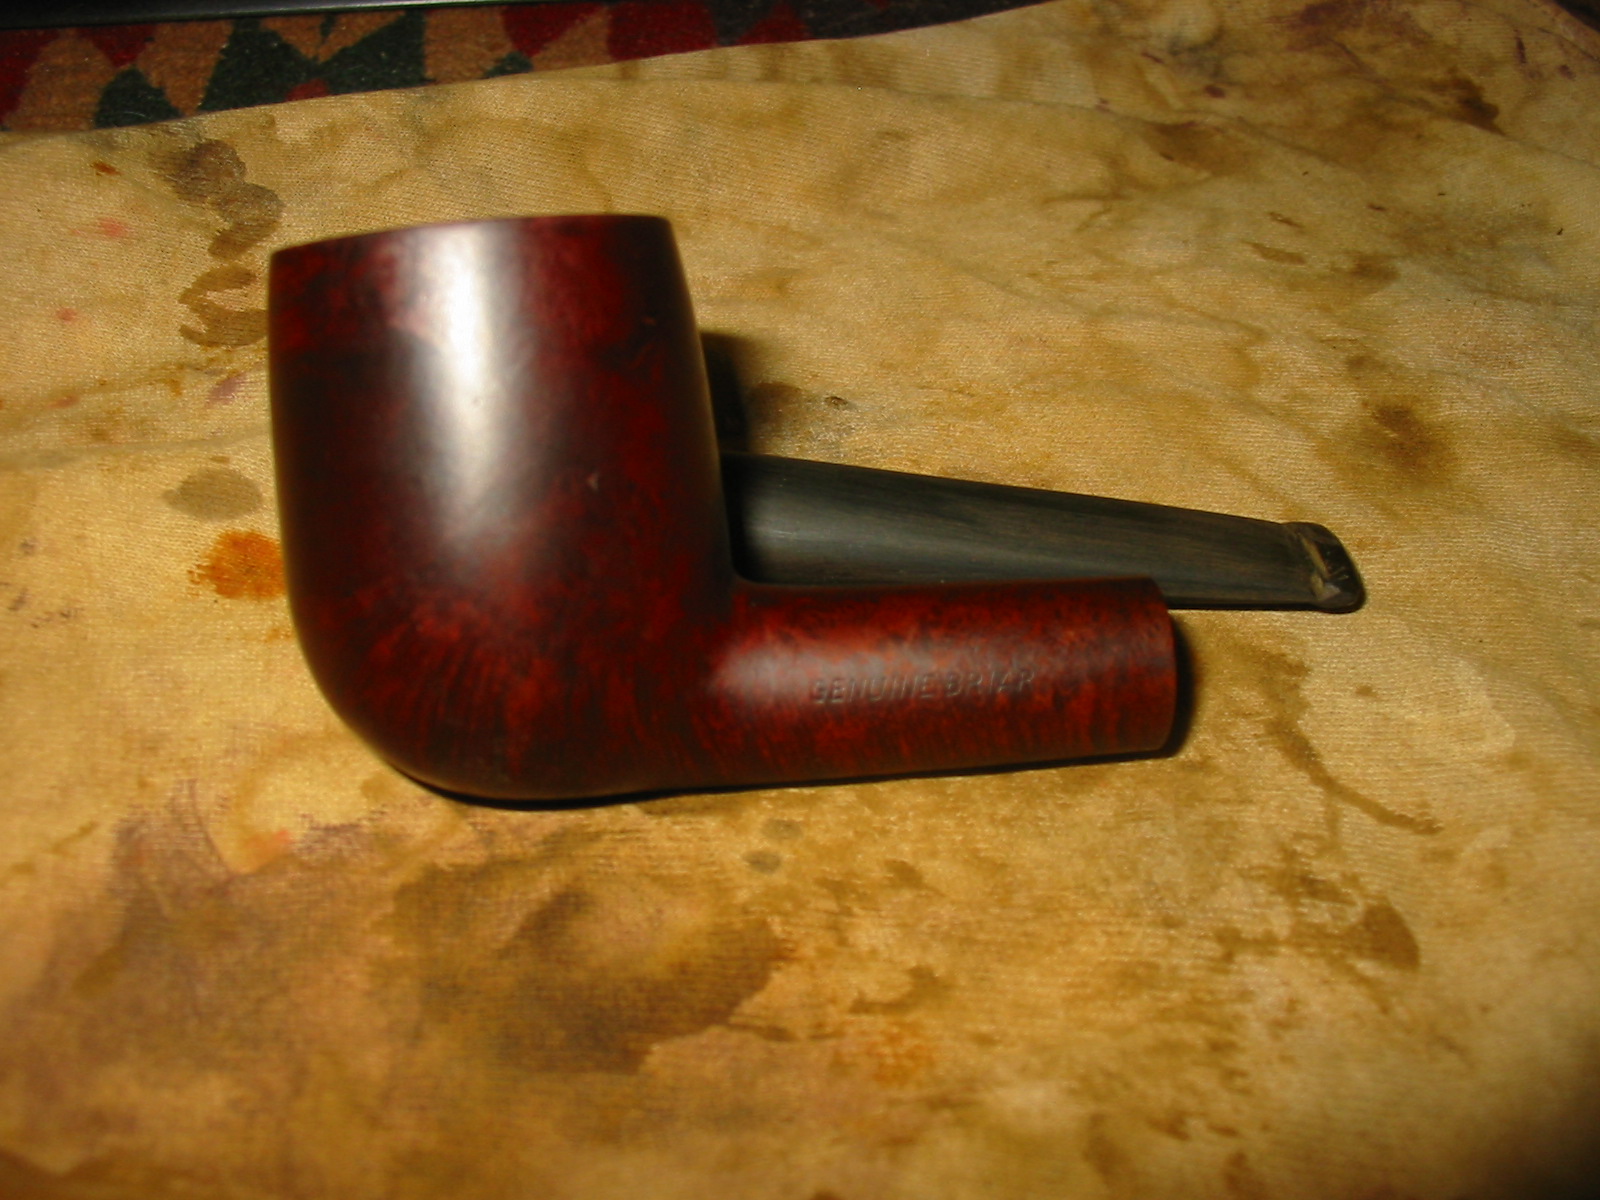
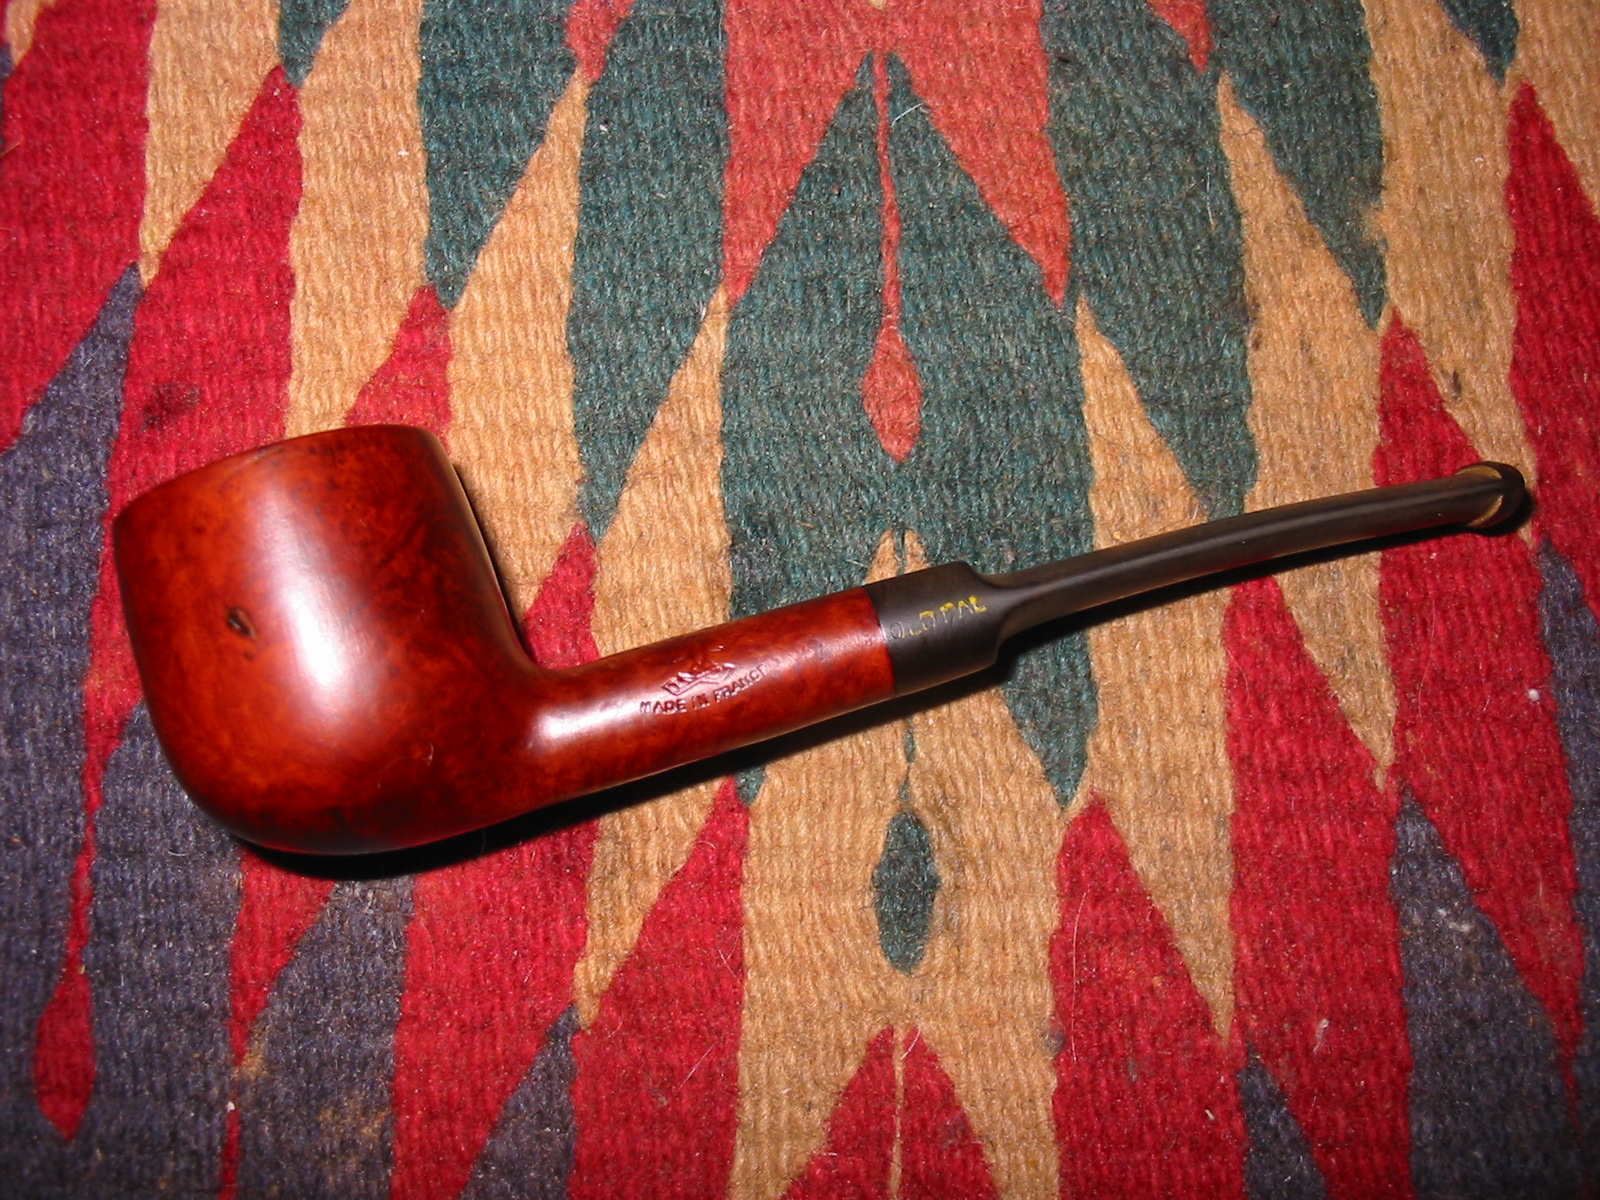
I restained the bowl with an oxblood coloured aniline stain and flamed it. I repeated the process until I had an even coverage on the bowl and shank. The next three photos show the bowl after staining with the oxblood.
IMG_3118

IMG_3119

IMG_3120

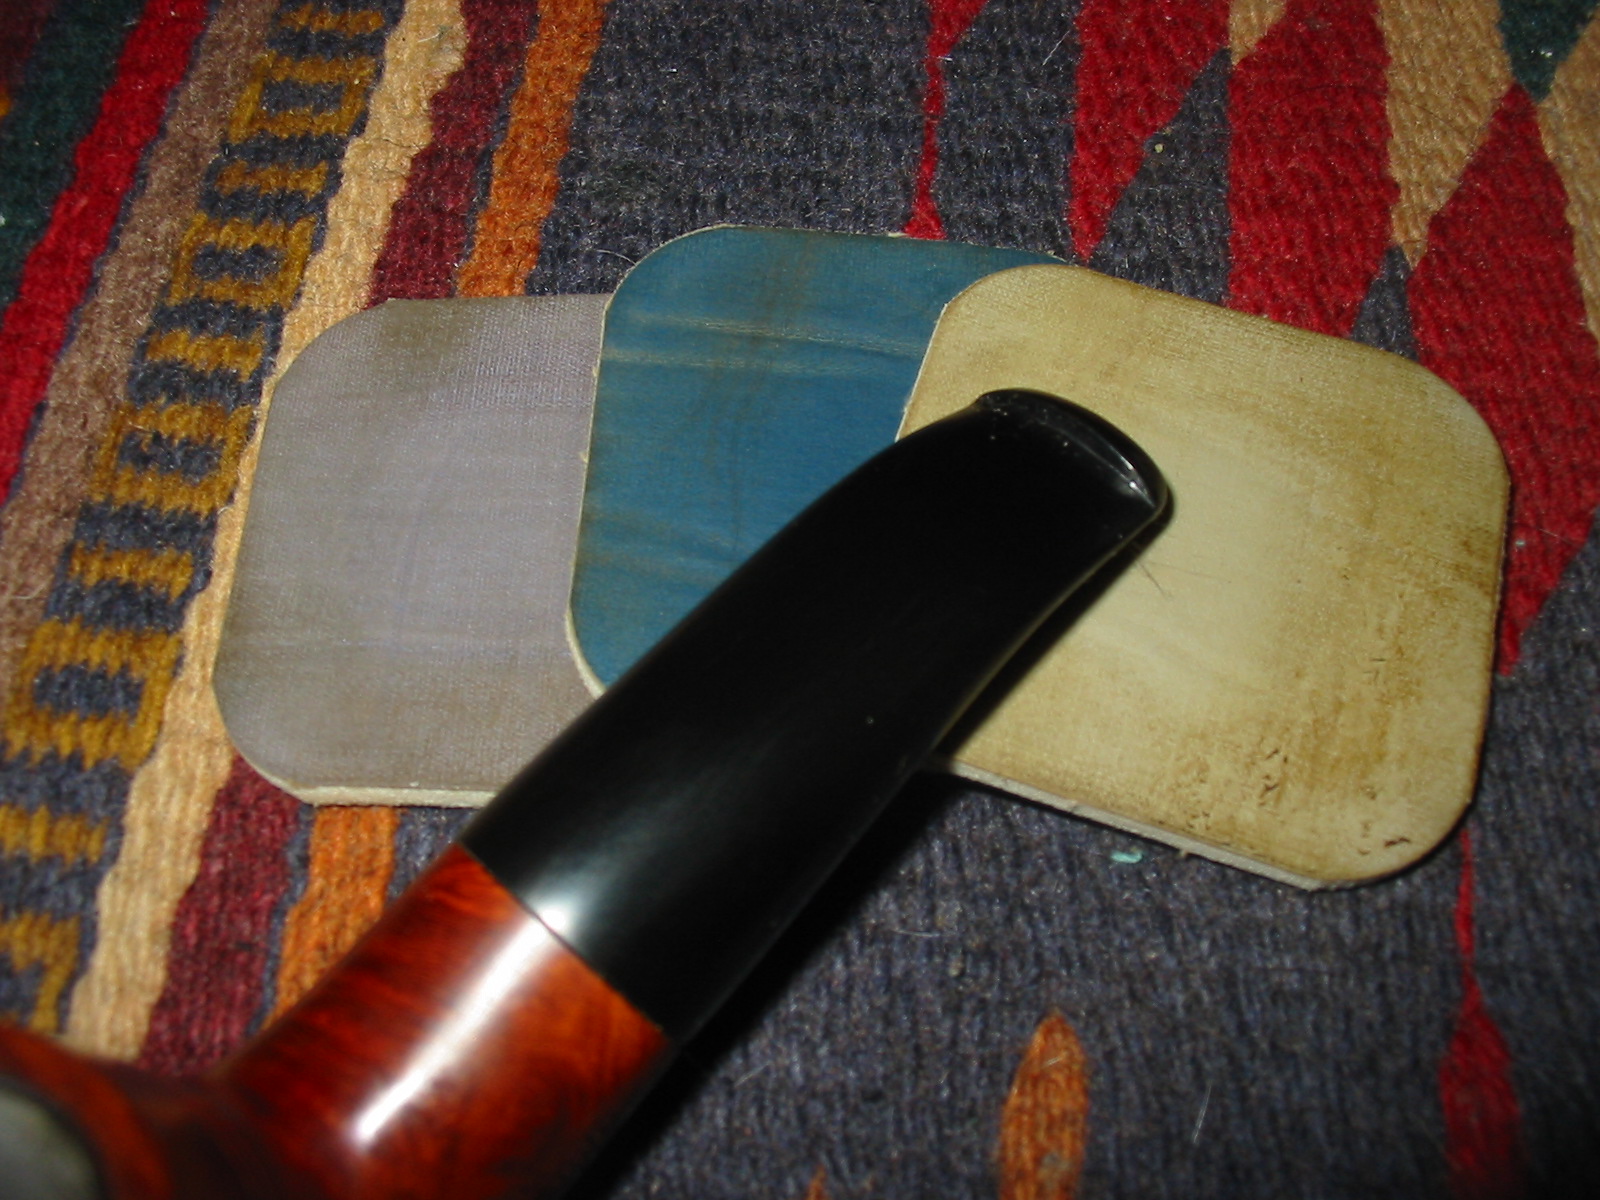
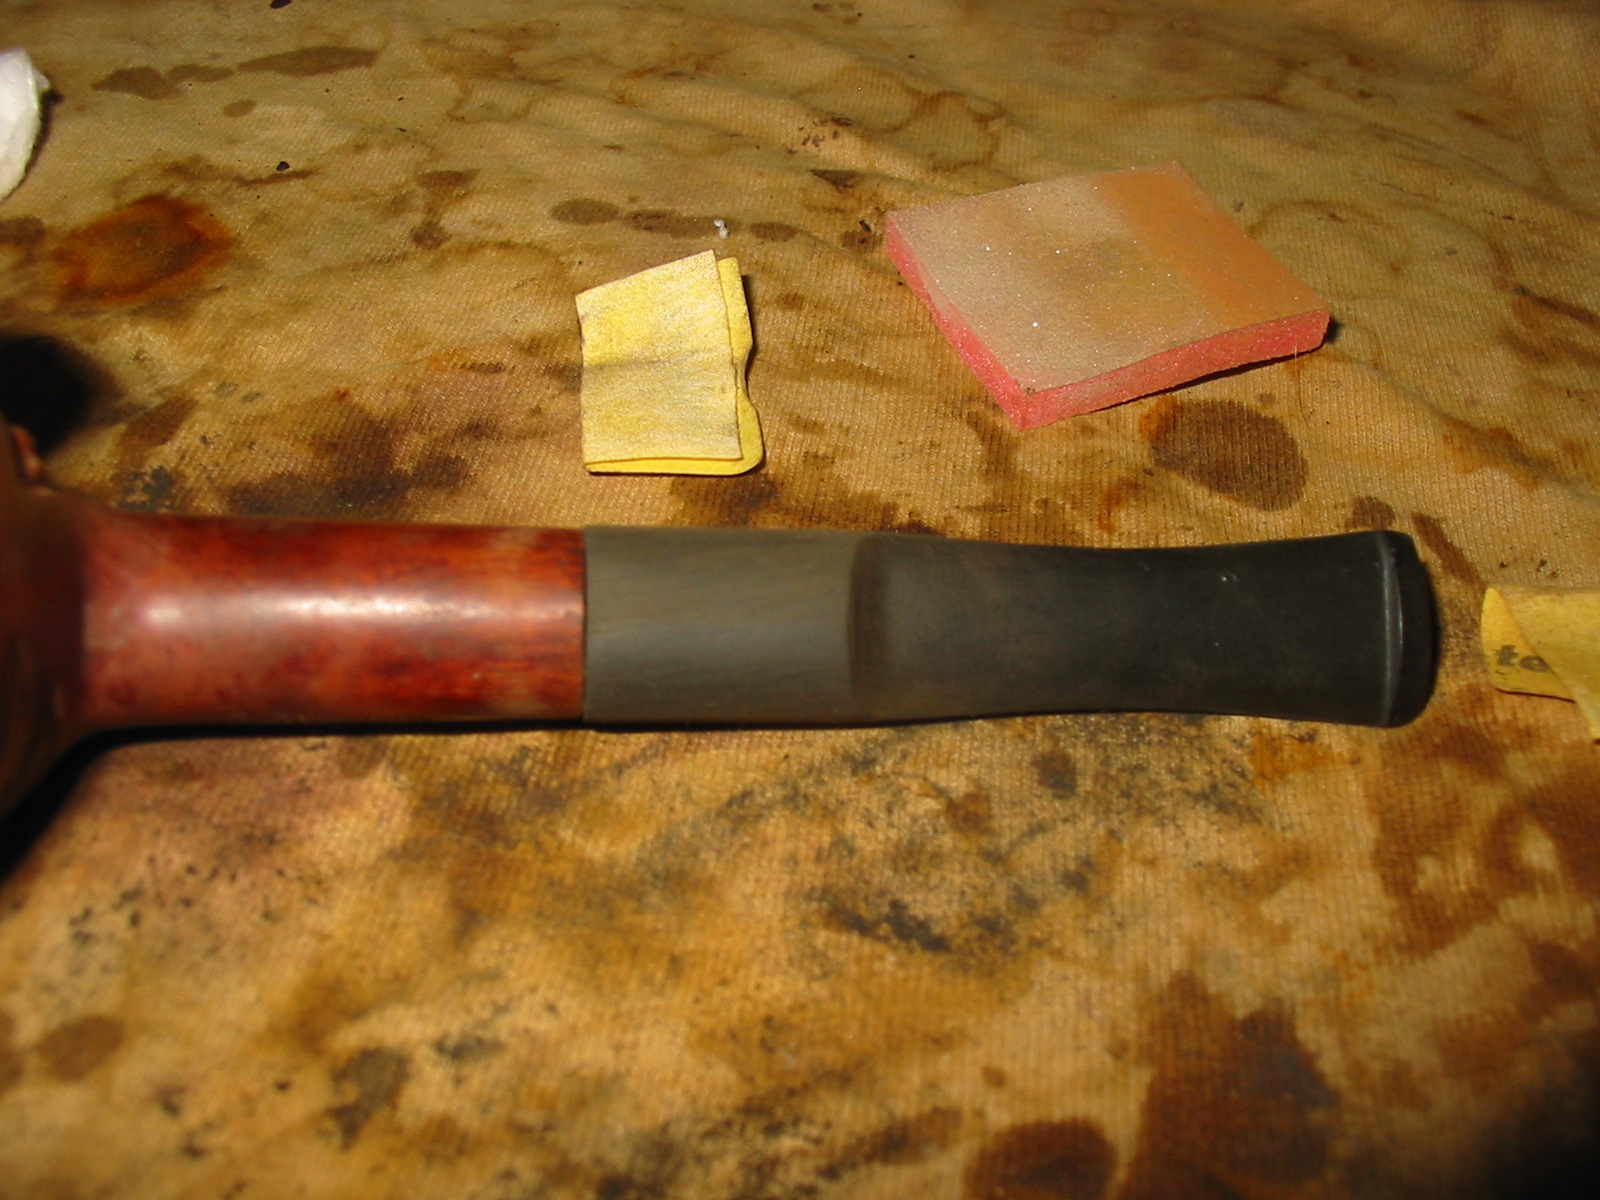
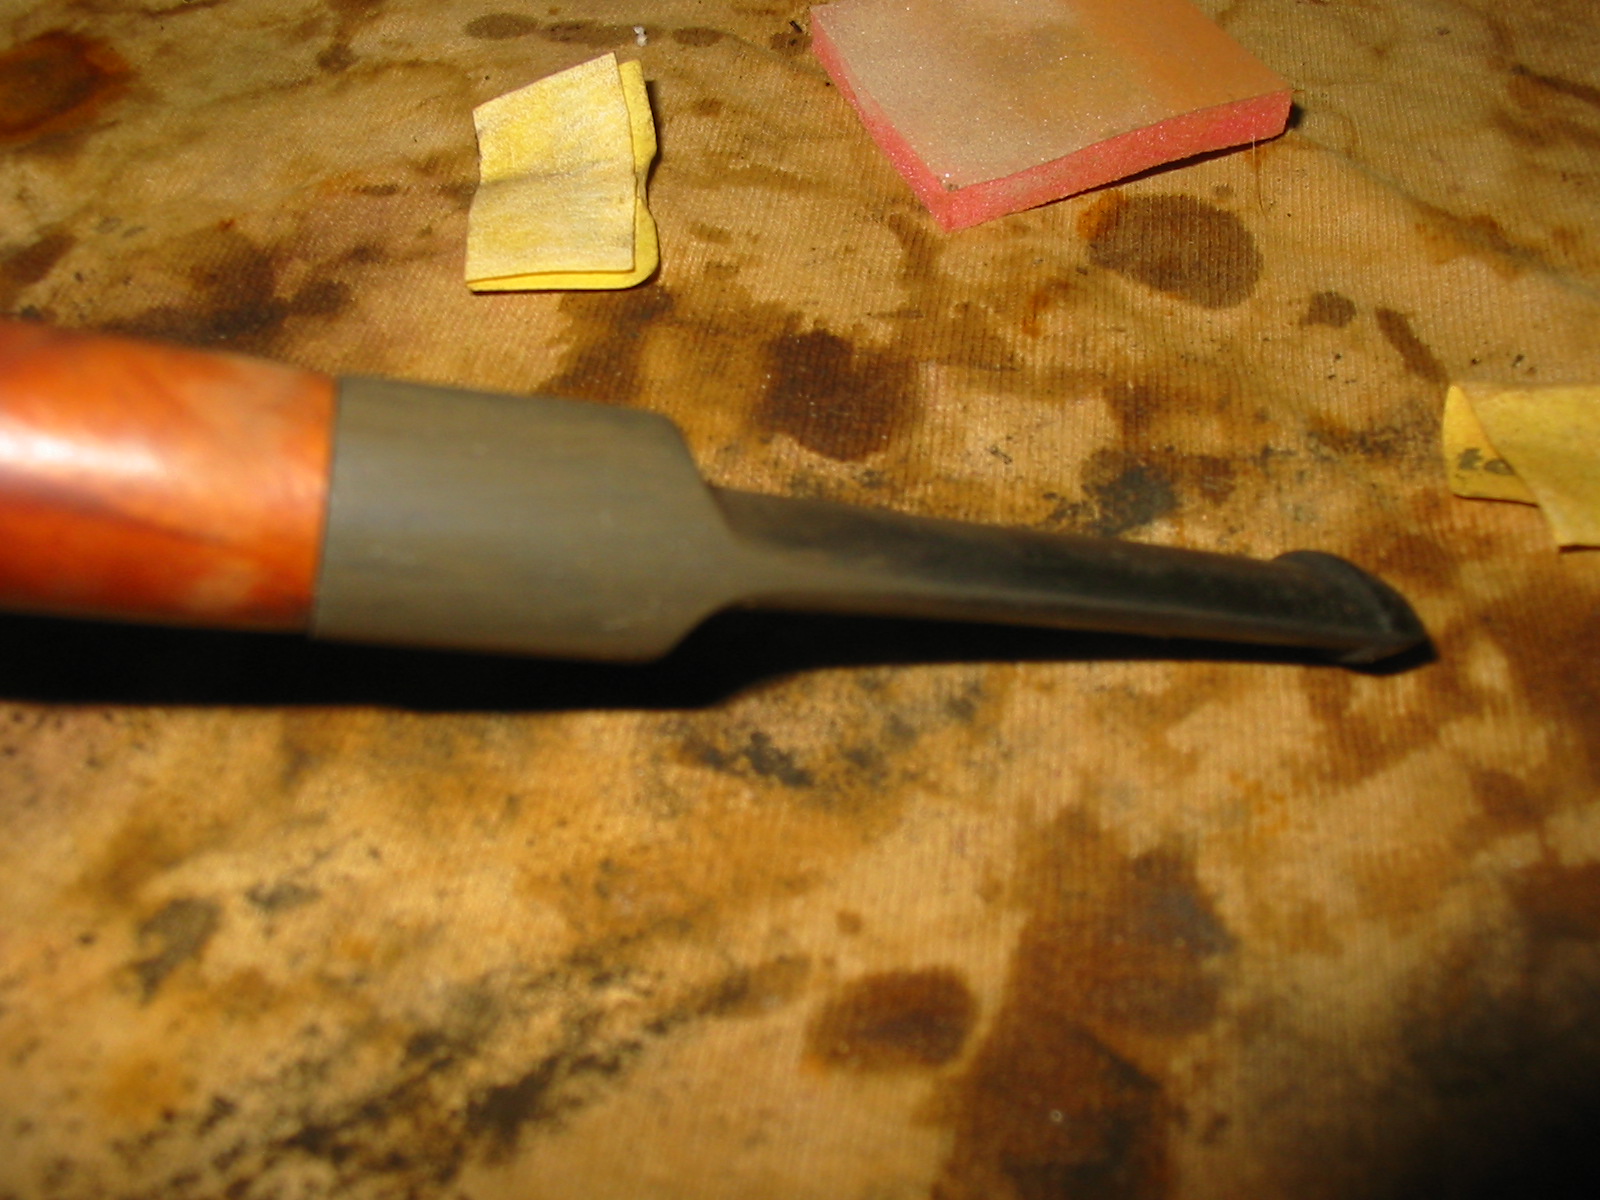
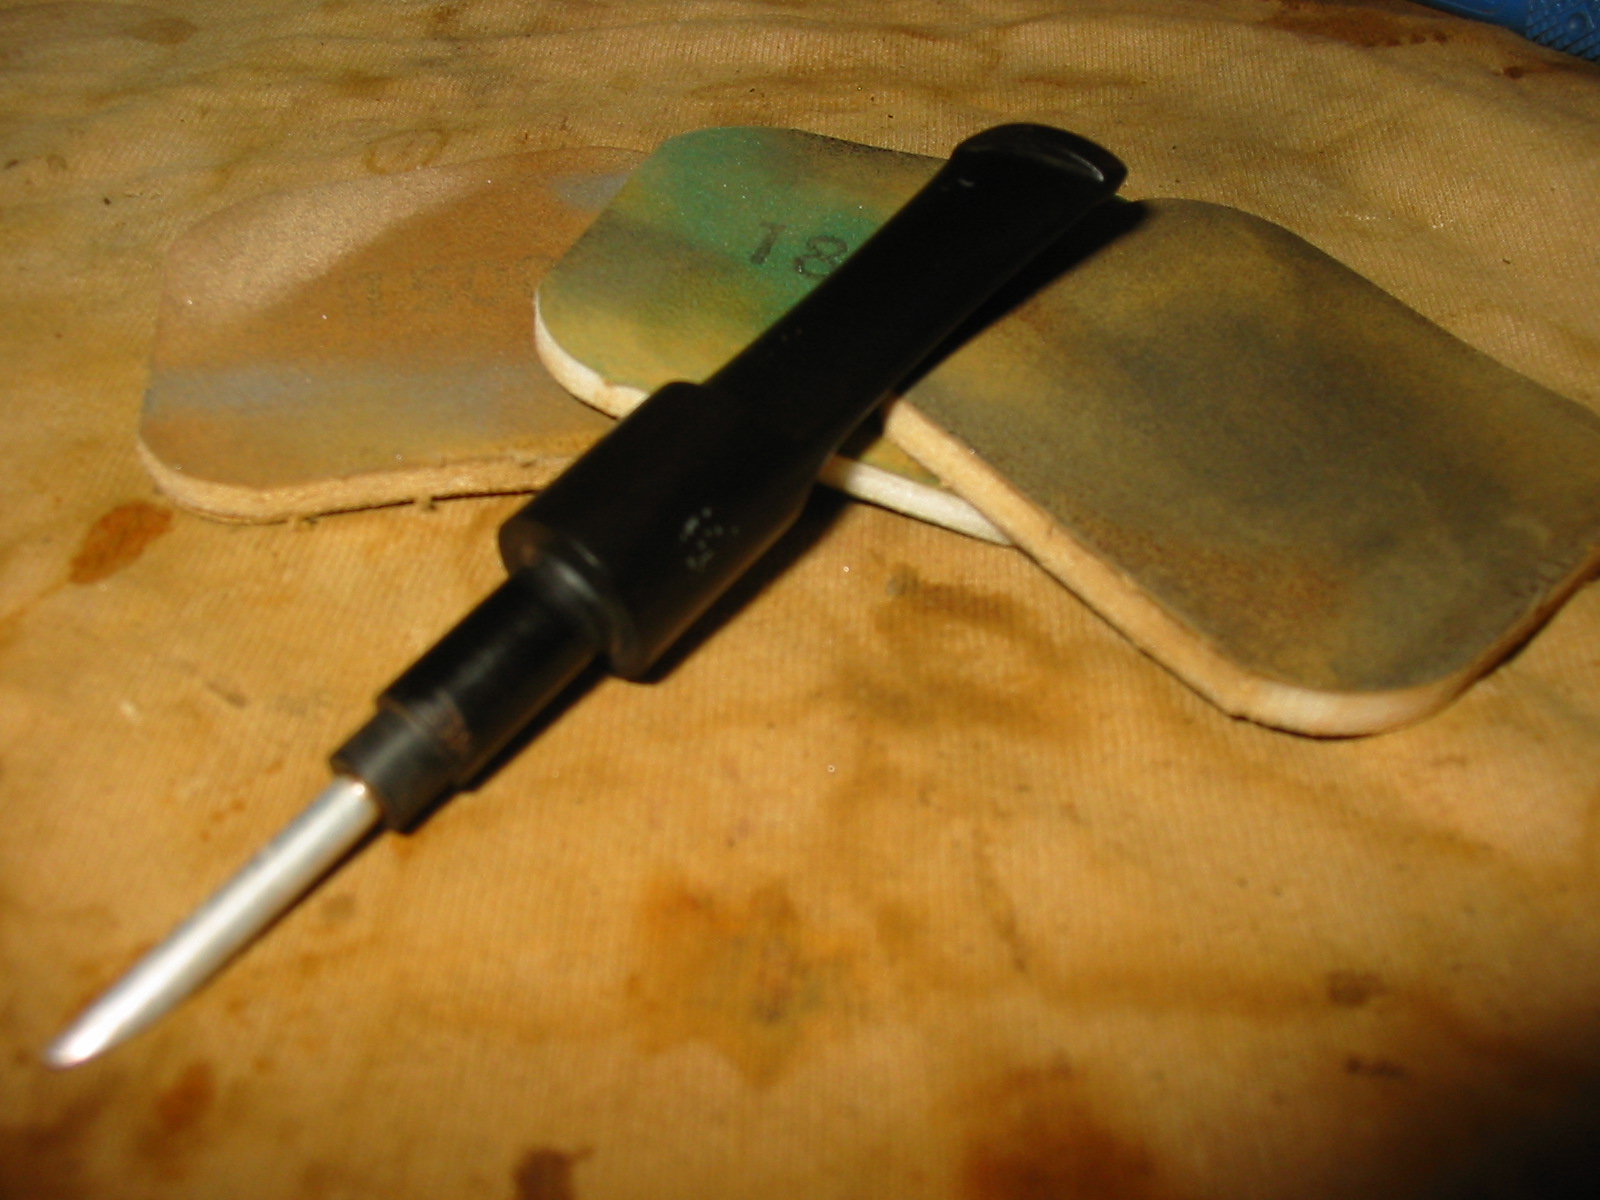
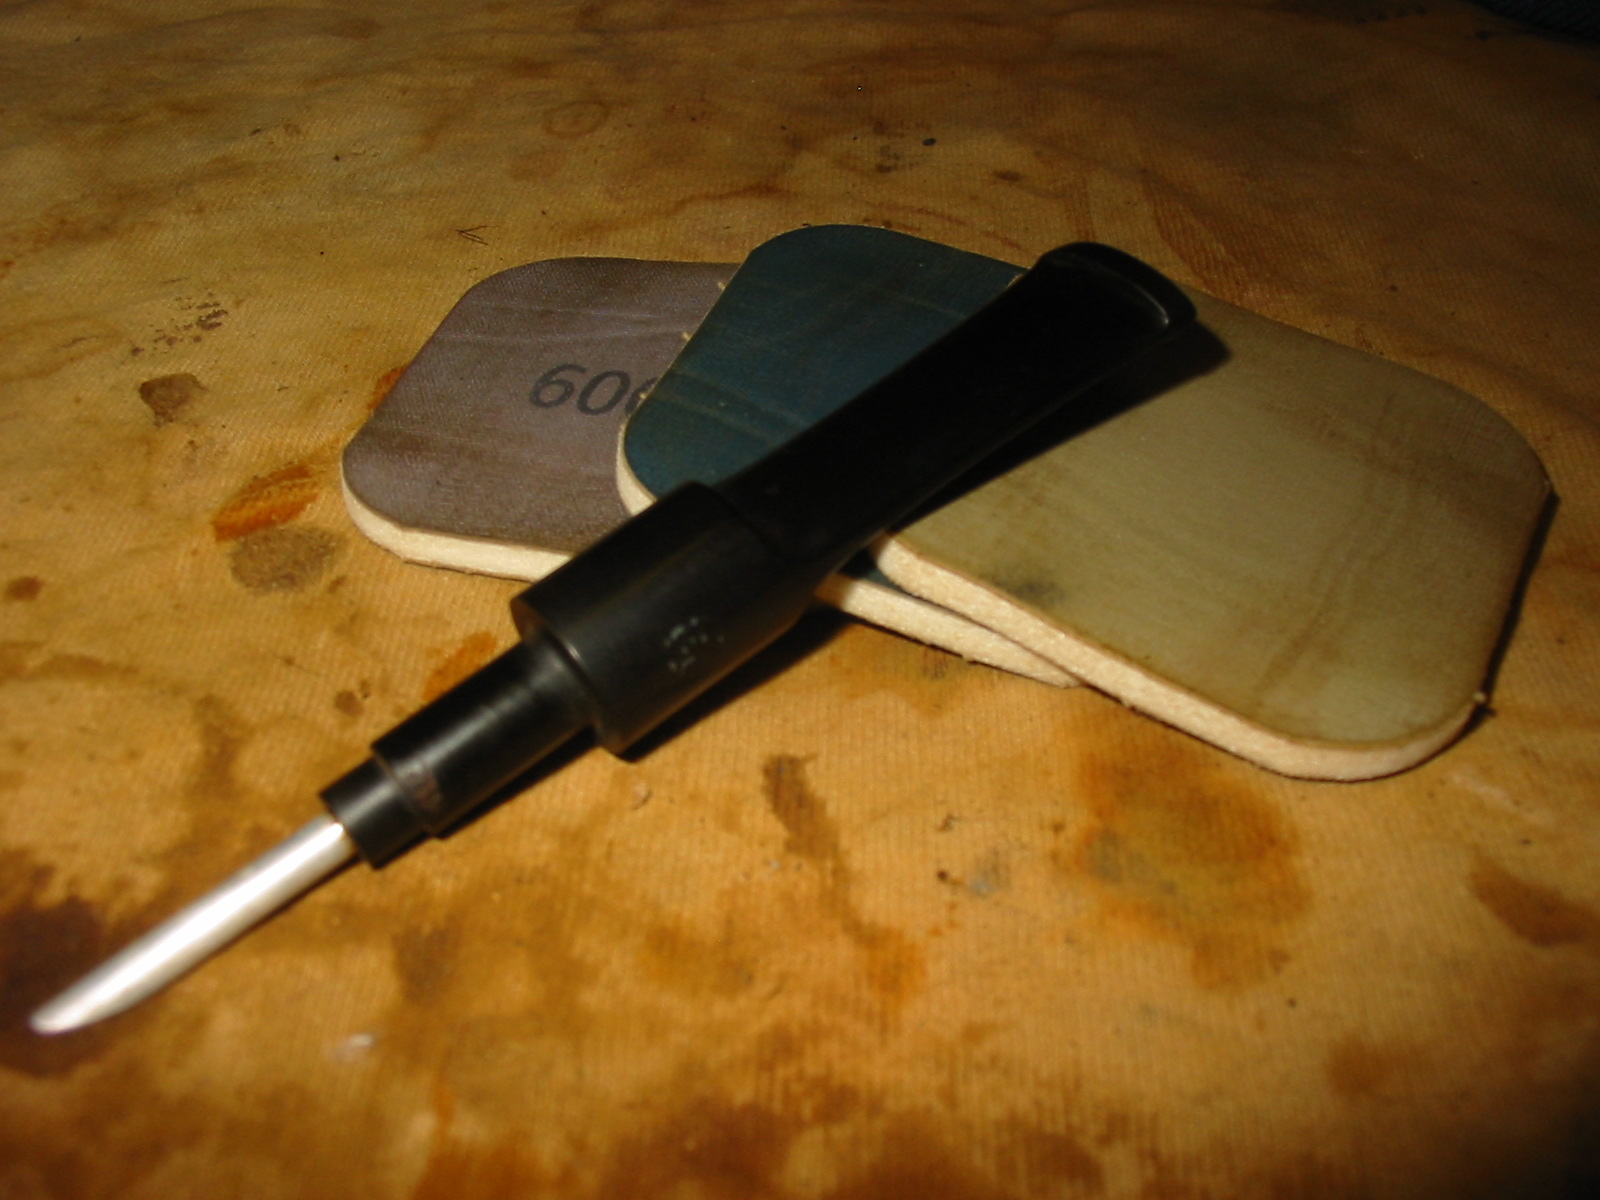
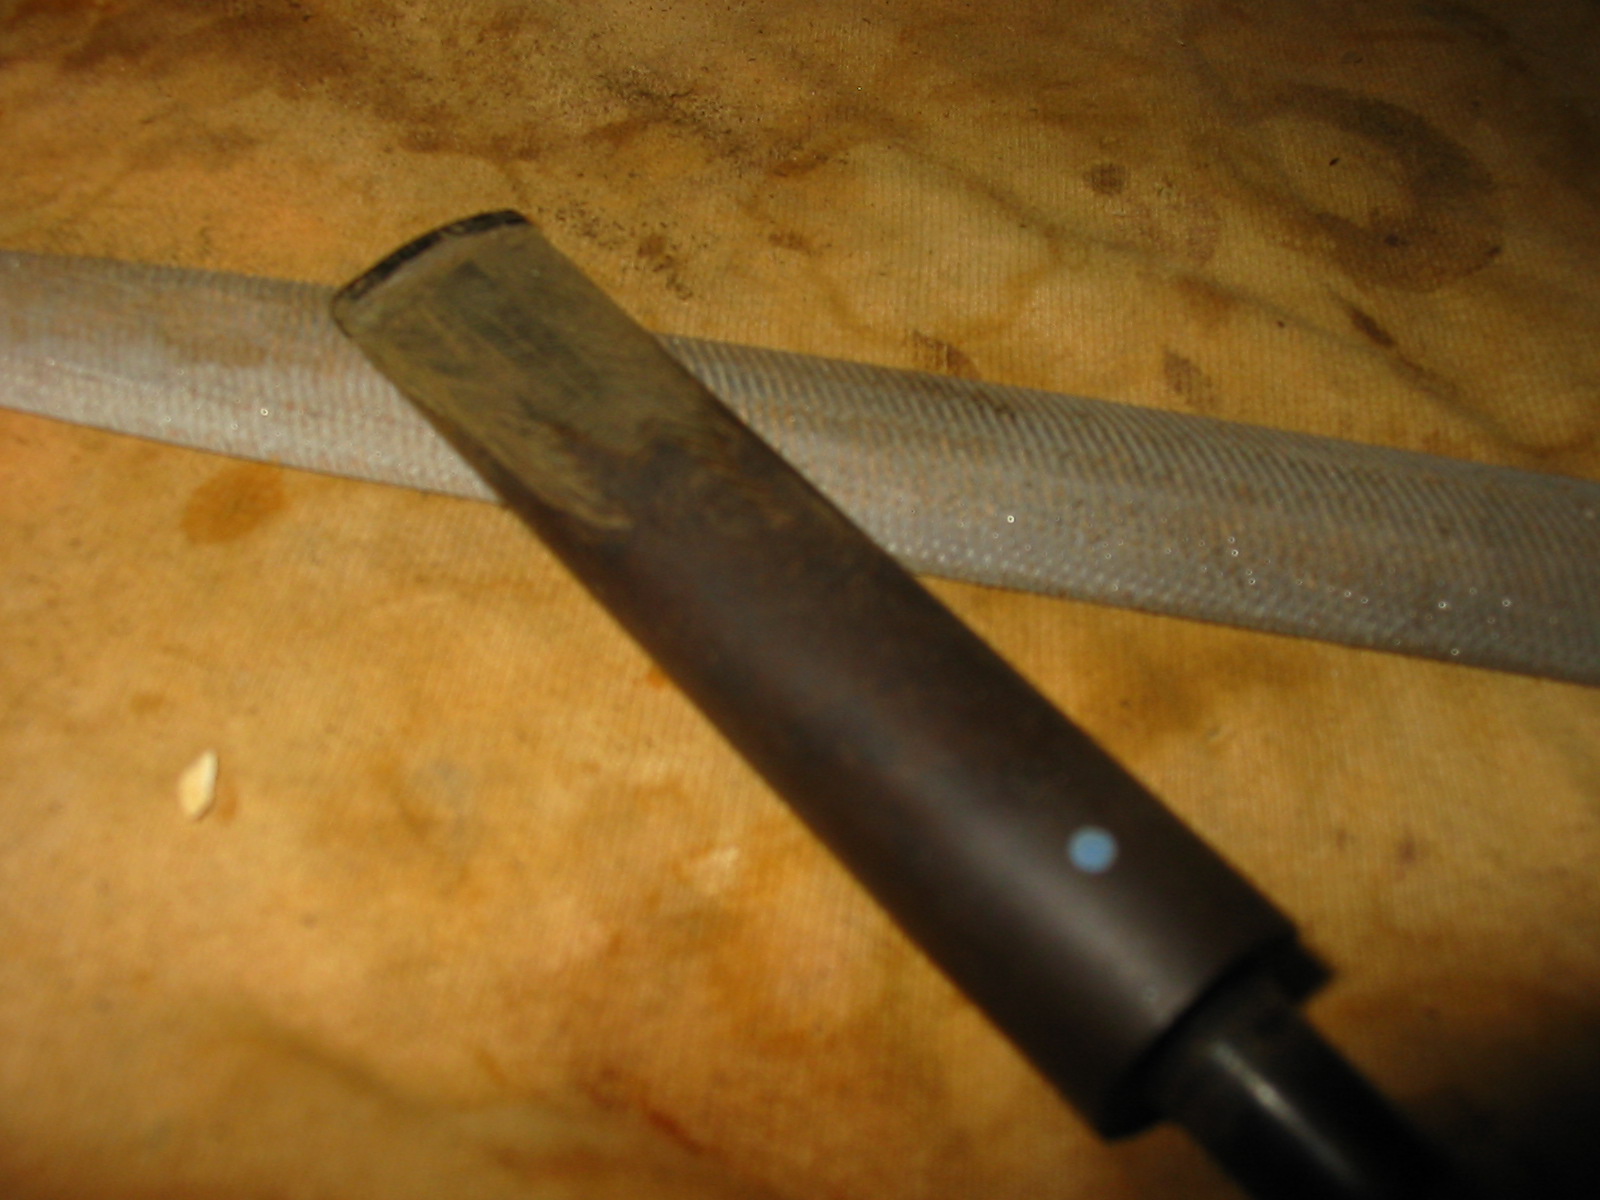
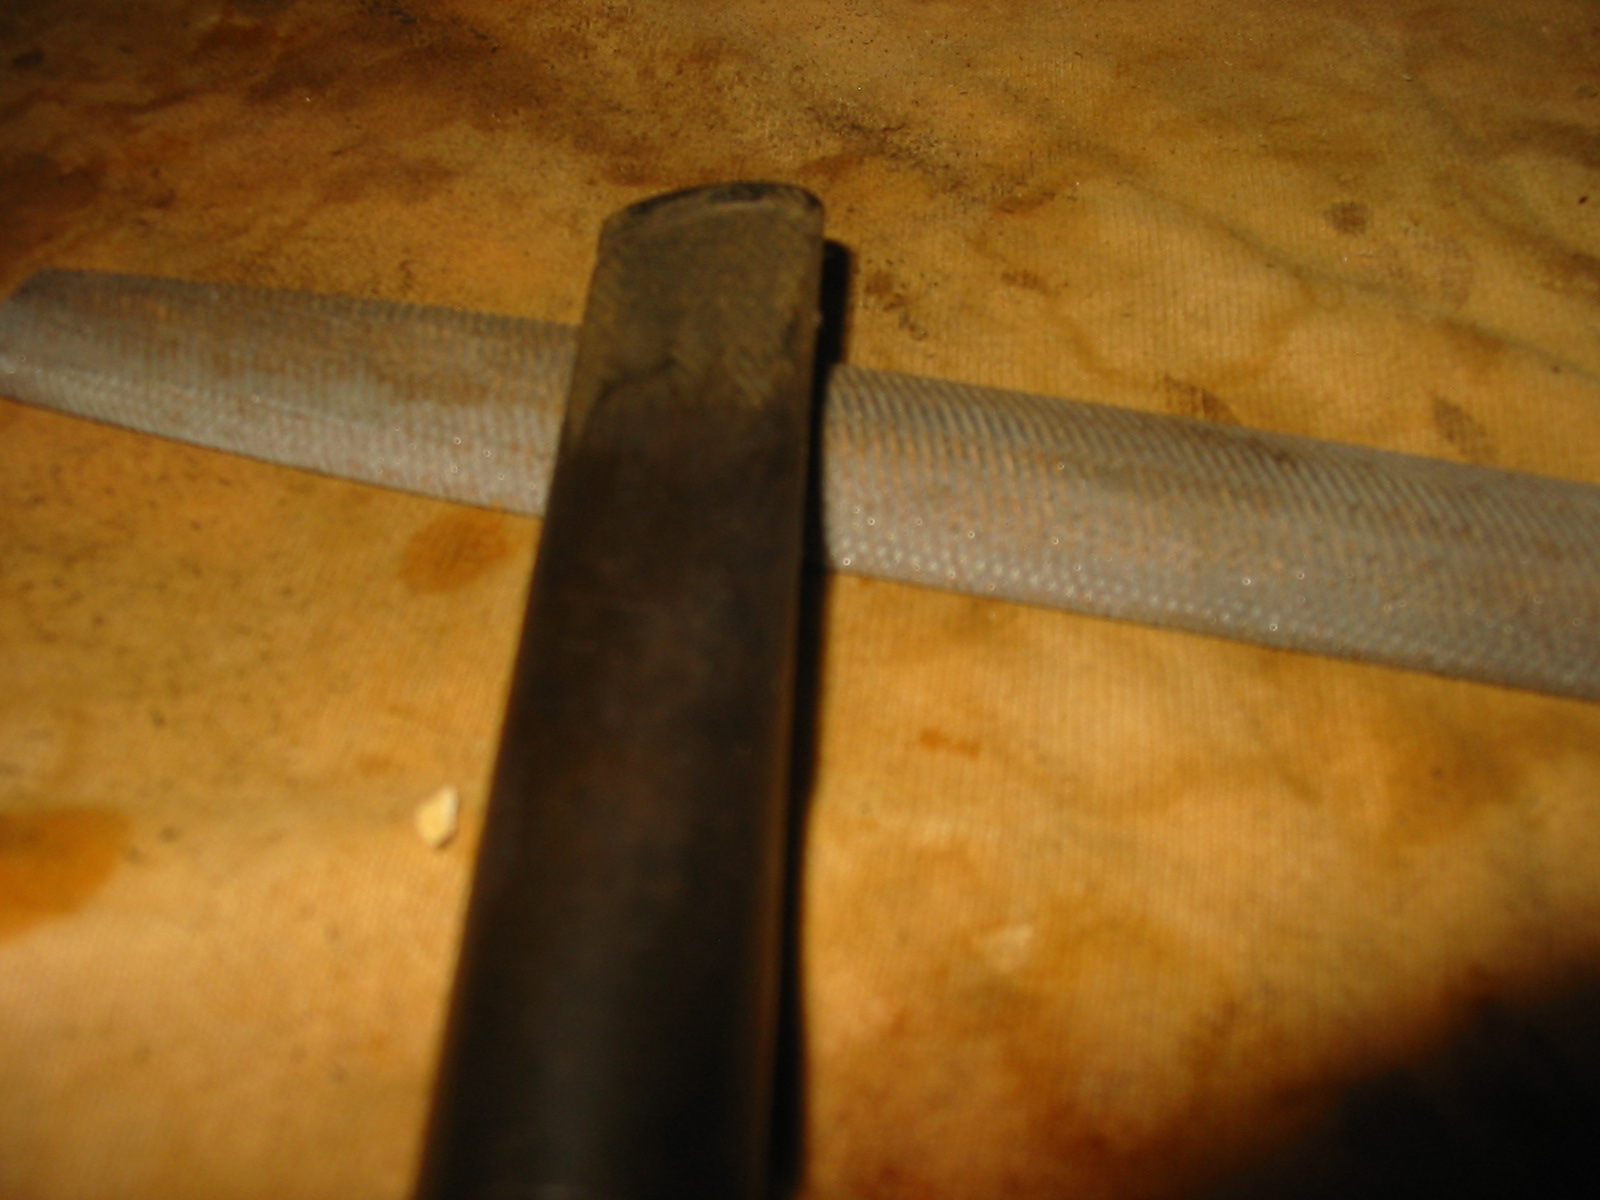
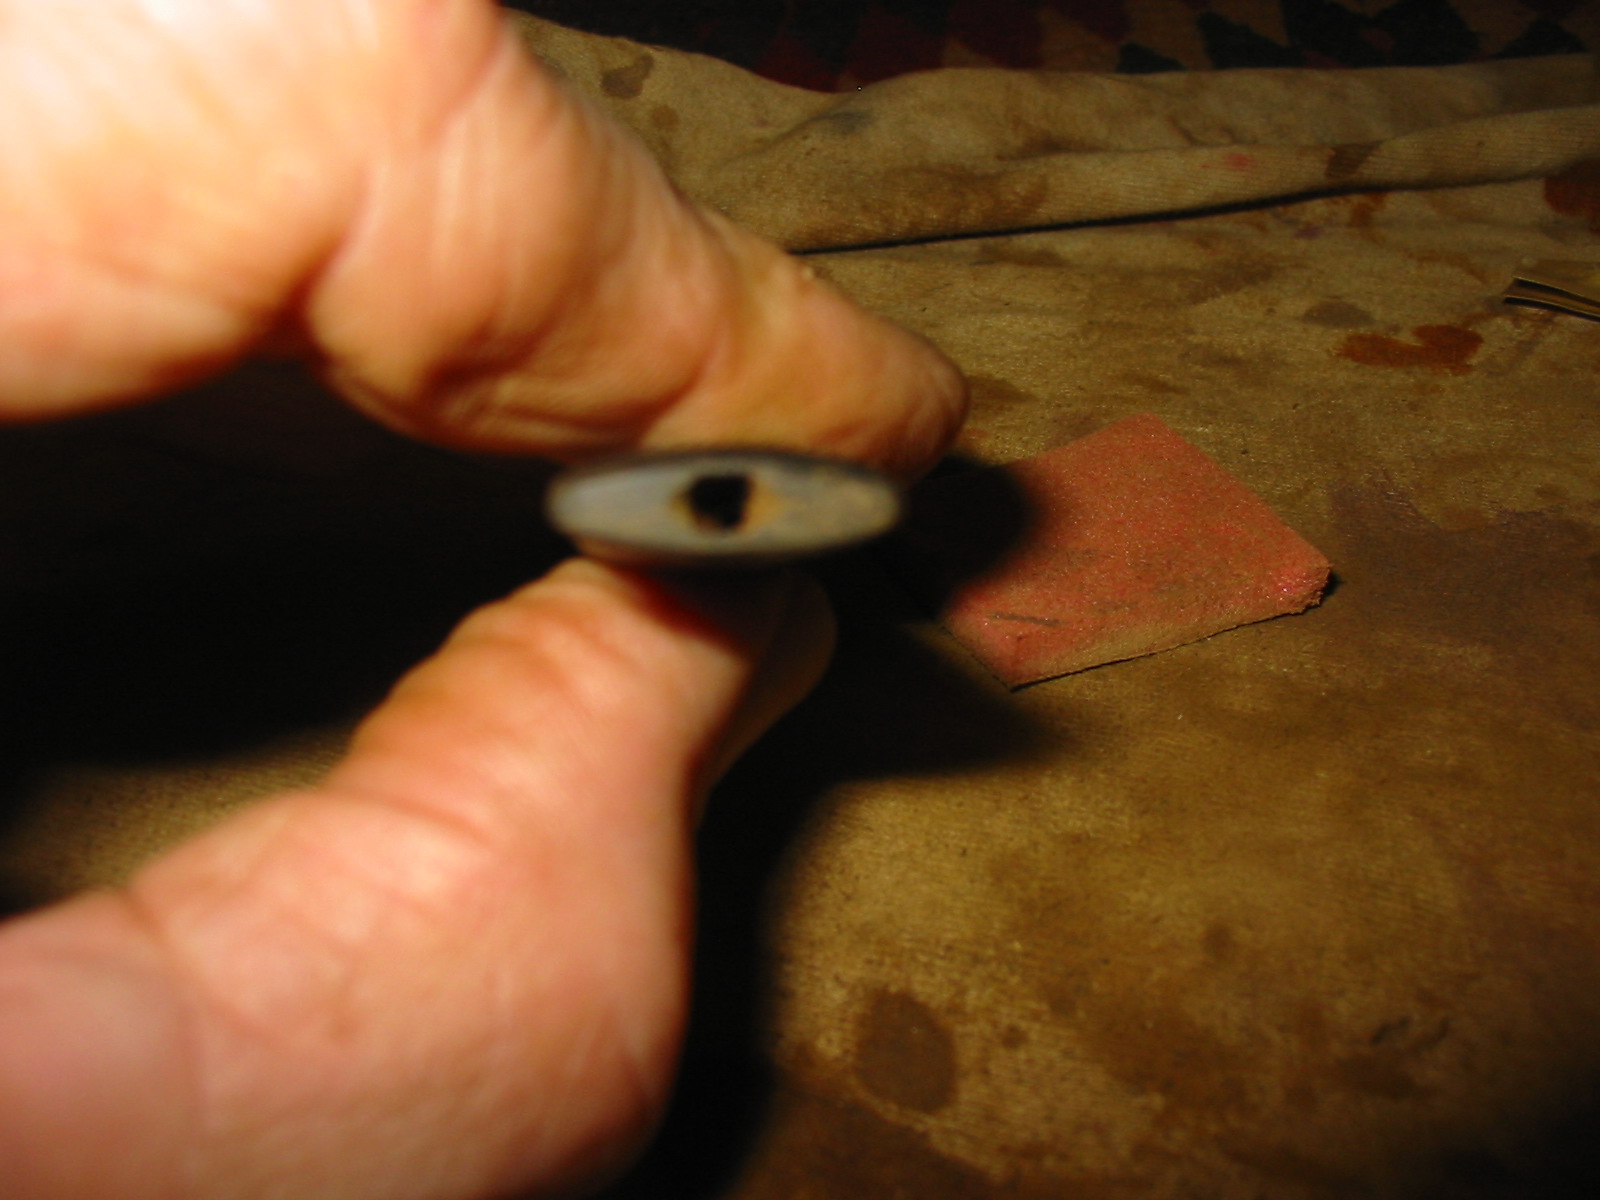
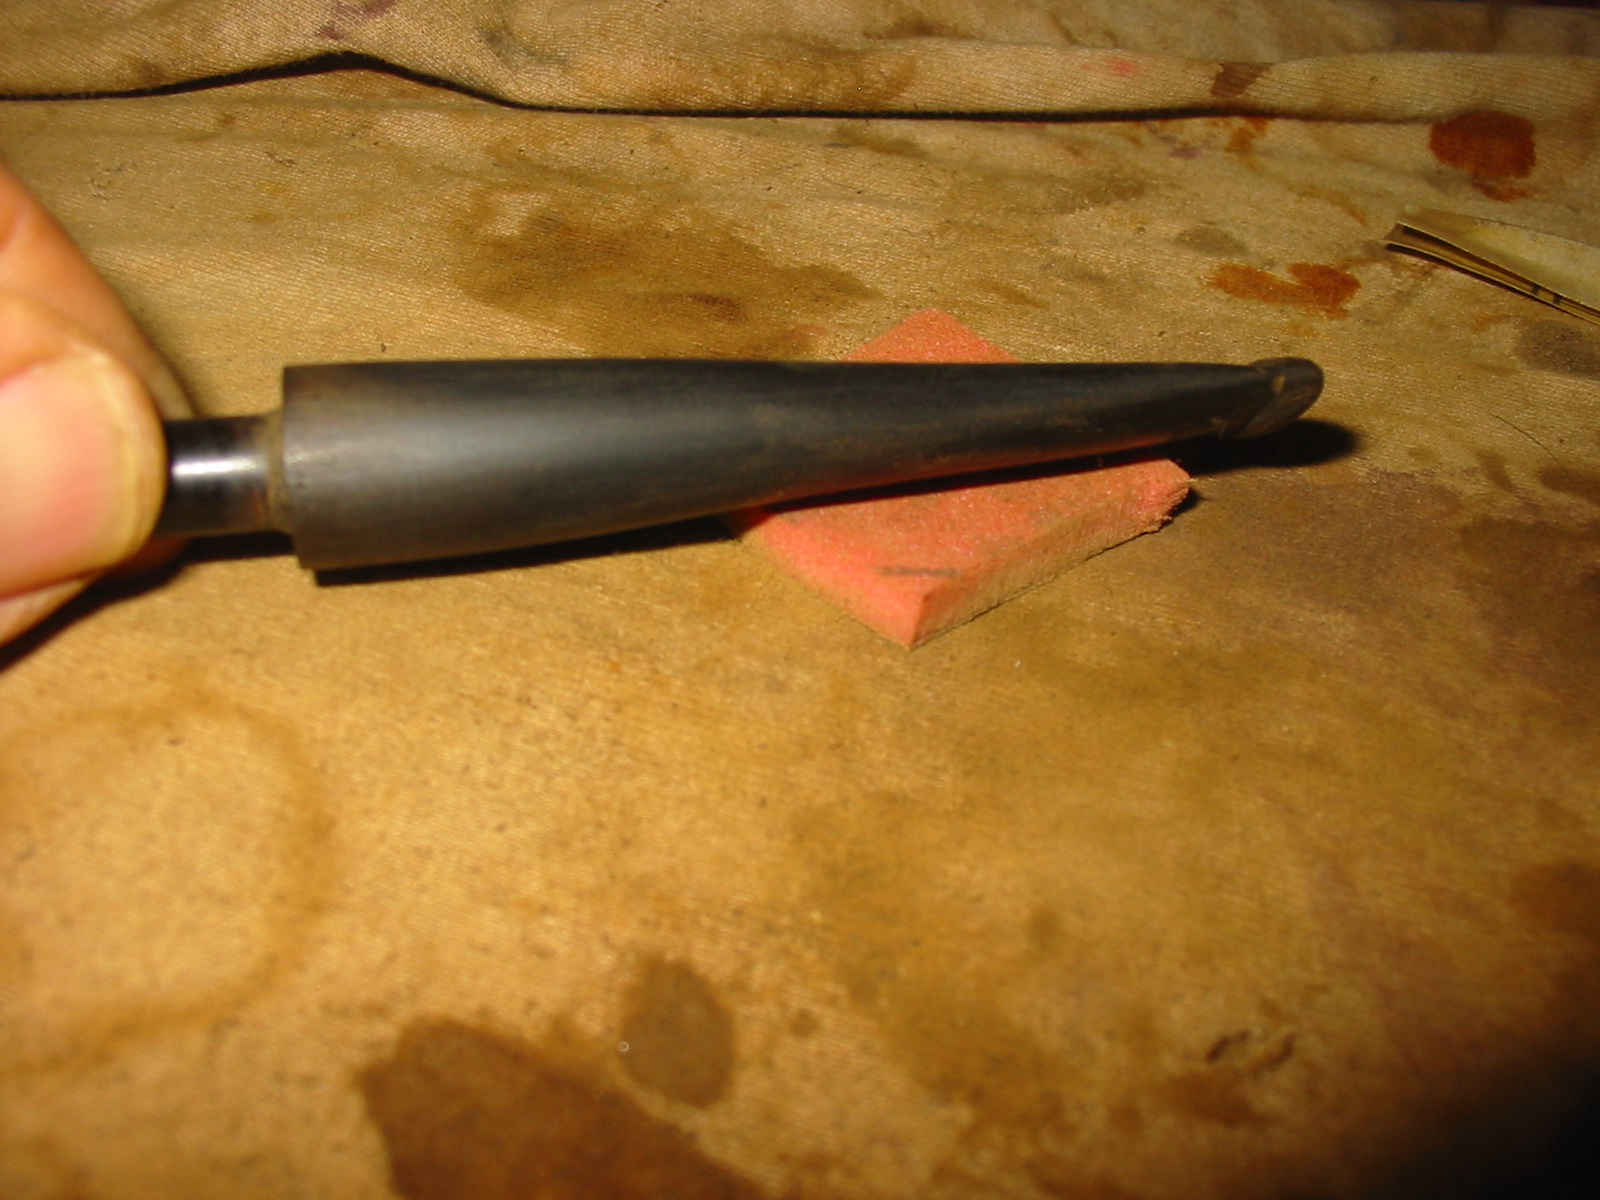
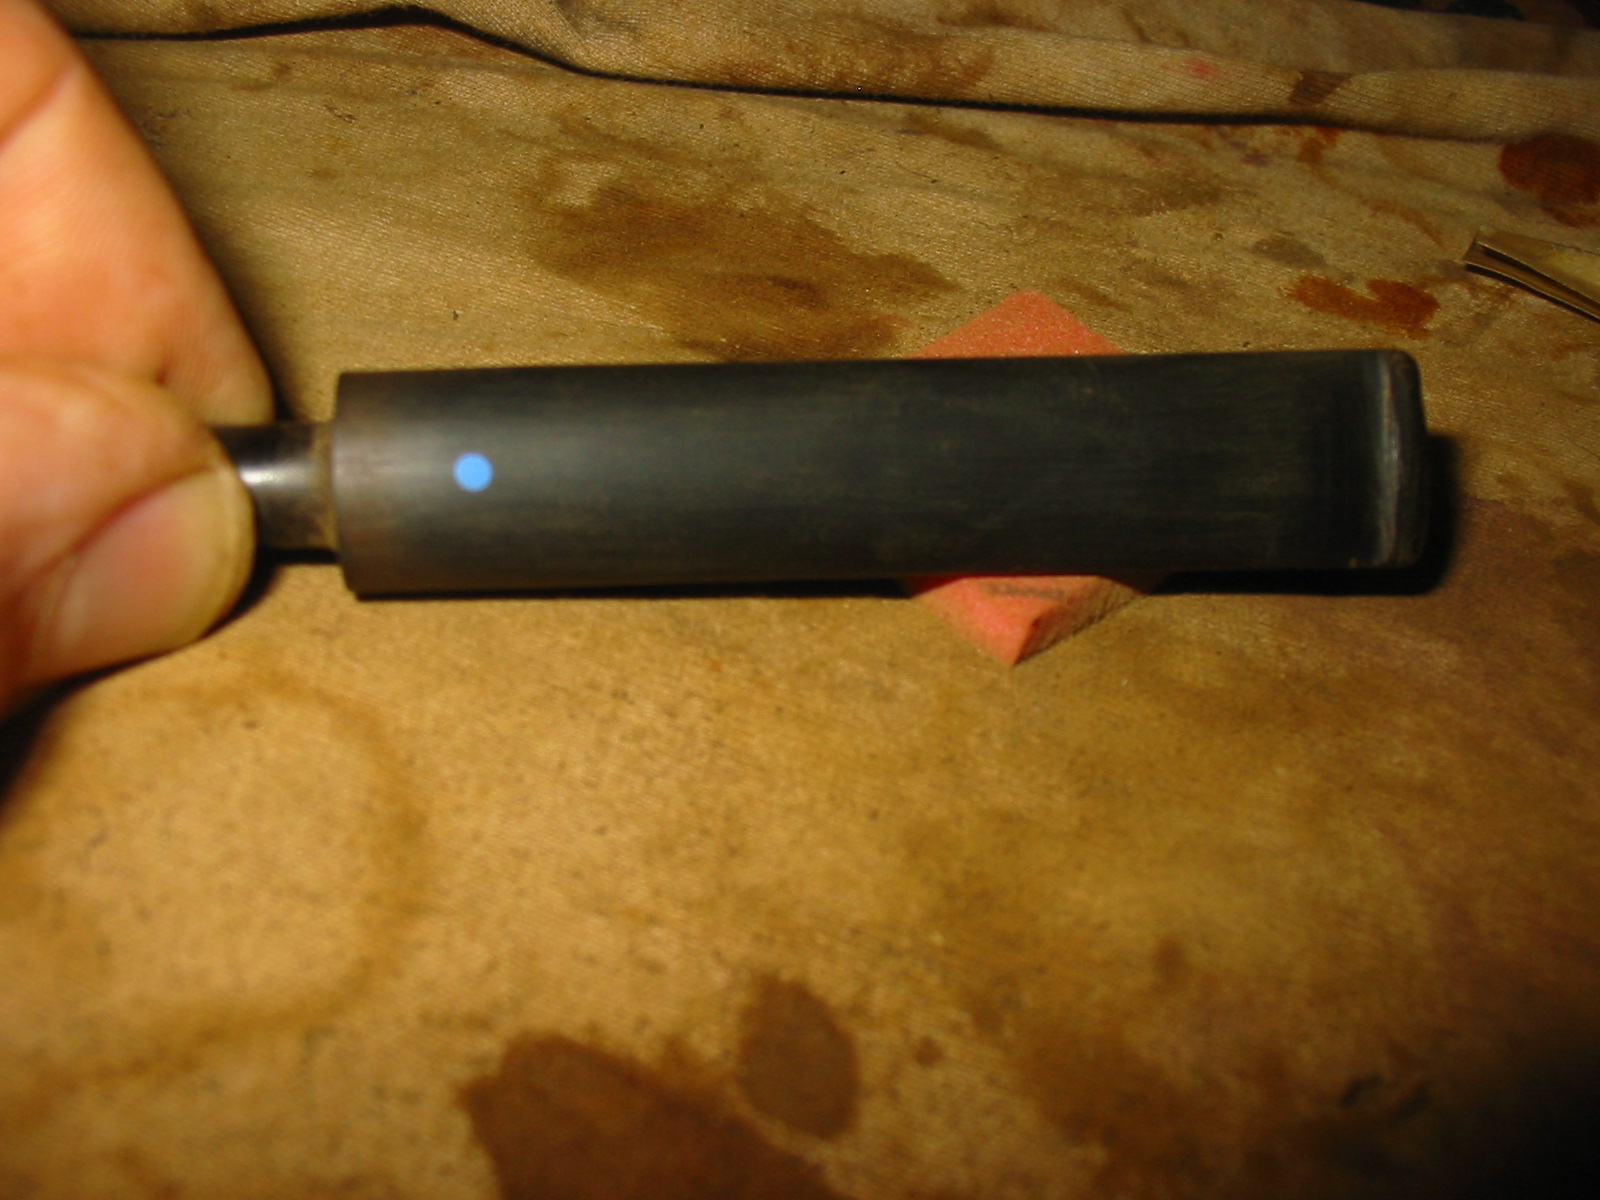
I sanded the stem with 220 grit sandpaper to remove the tooth marks on the top and bottom side of the stem. I followed that by sanding with a medium grit sanding sponge to remove the scratches left behind by the sandpaper.
IMG_3121

IMG_3122

IMG_3123

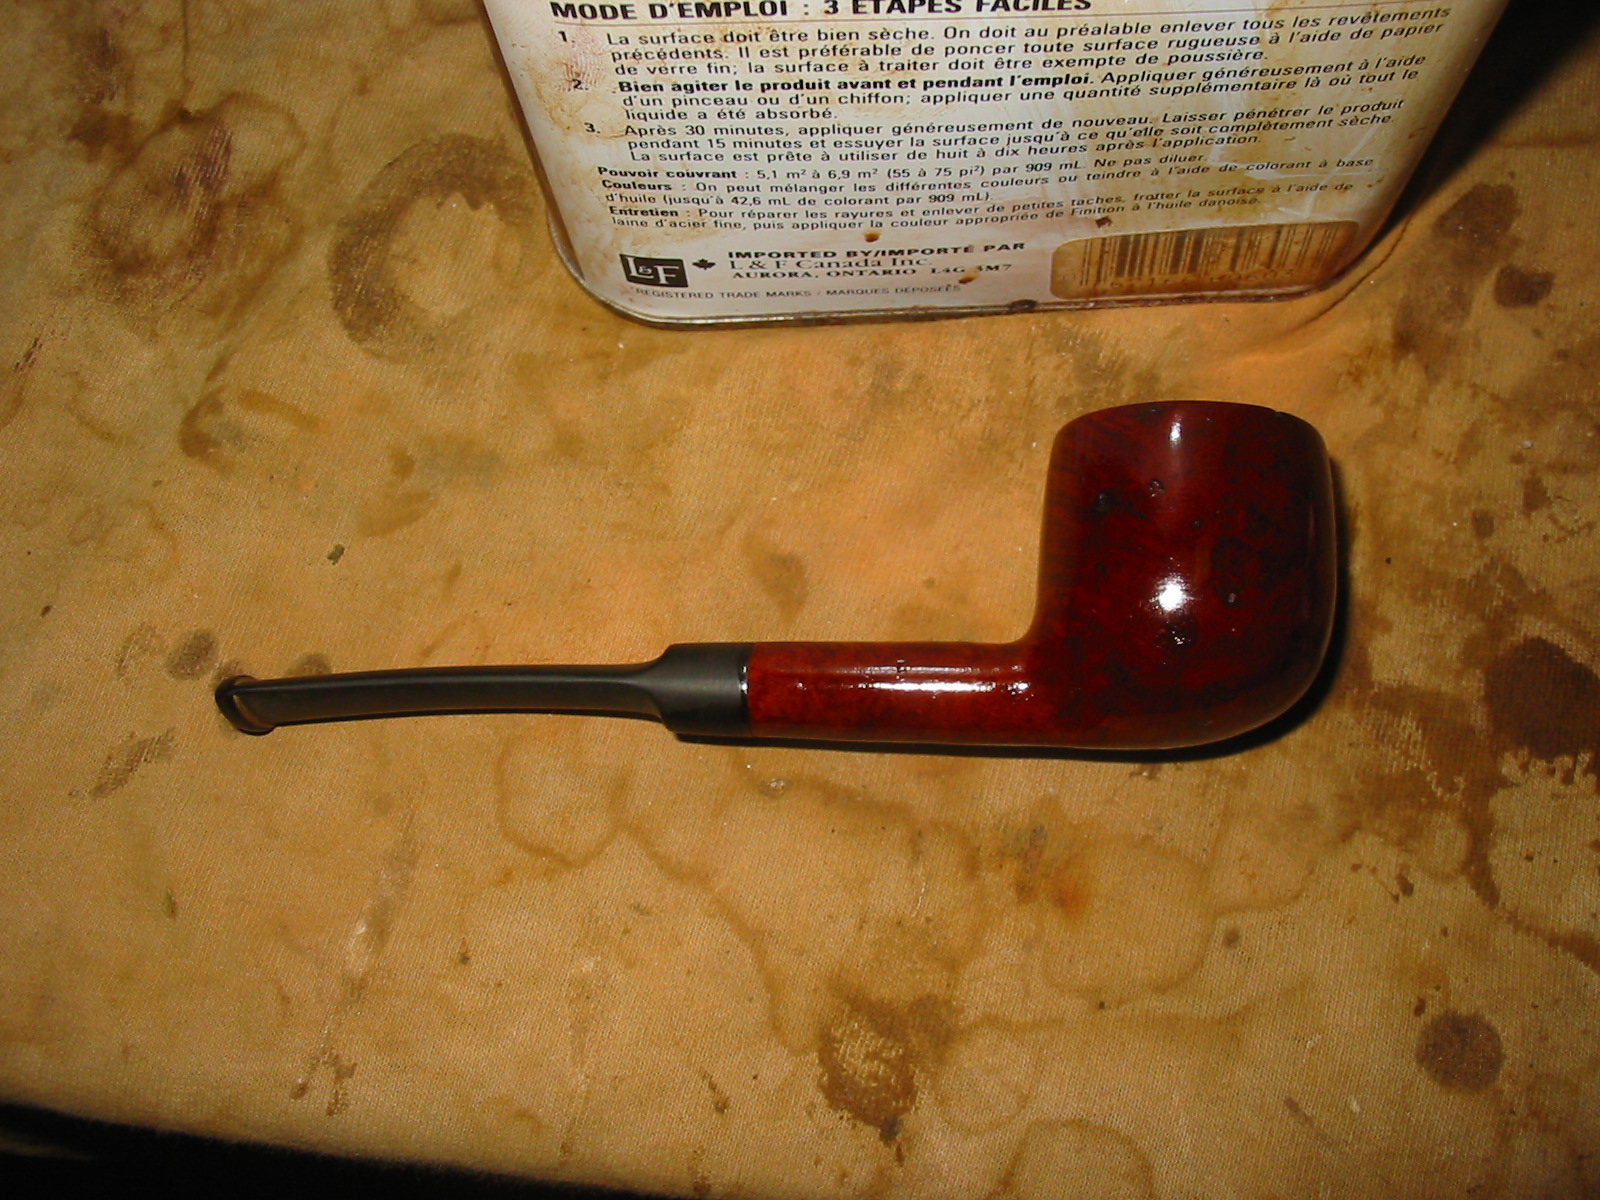
I put the stem back on the pipe and took it to the buffer and buffed it with Tripoli. I buffed the bowl and stem with White Diamond. The next photos show the pipe after the initial buffing.
IMG_3125

IMG_3126

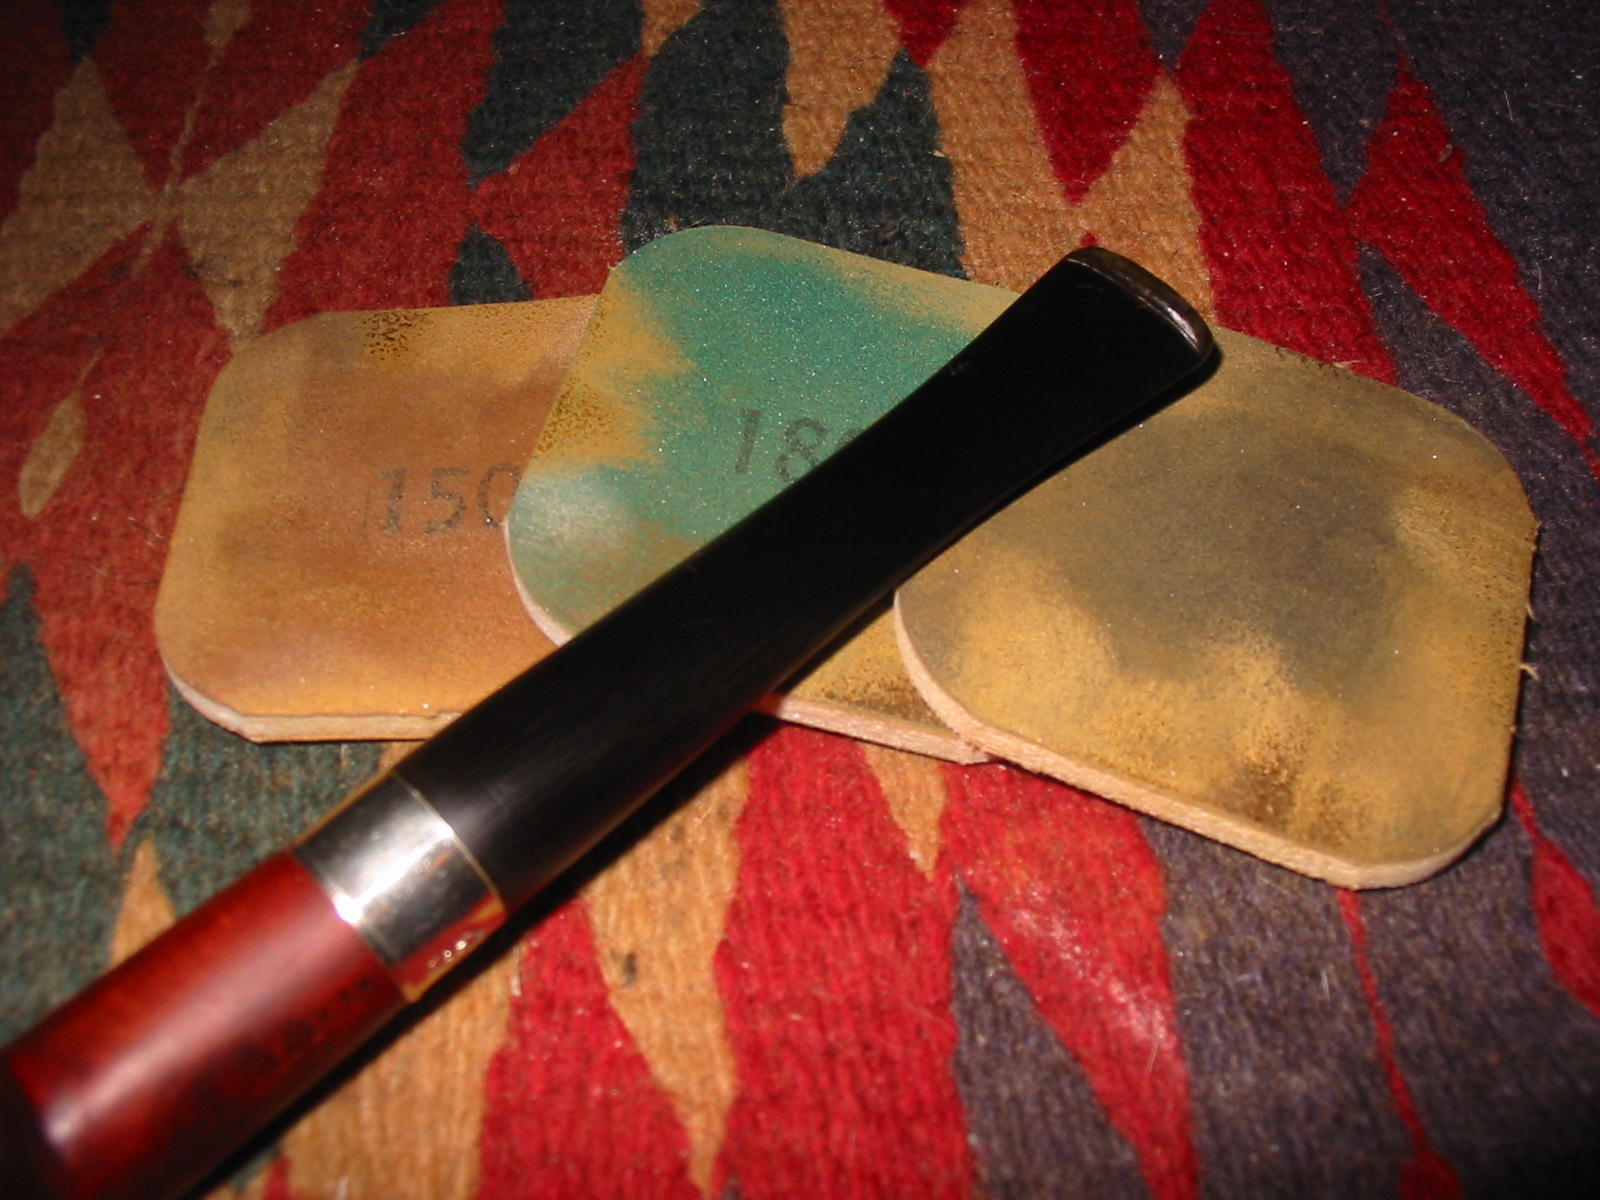
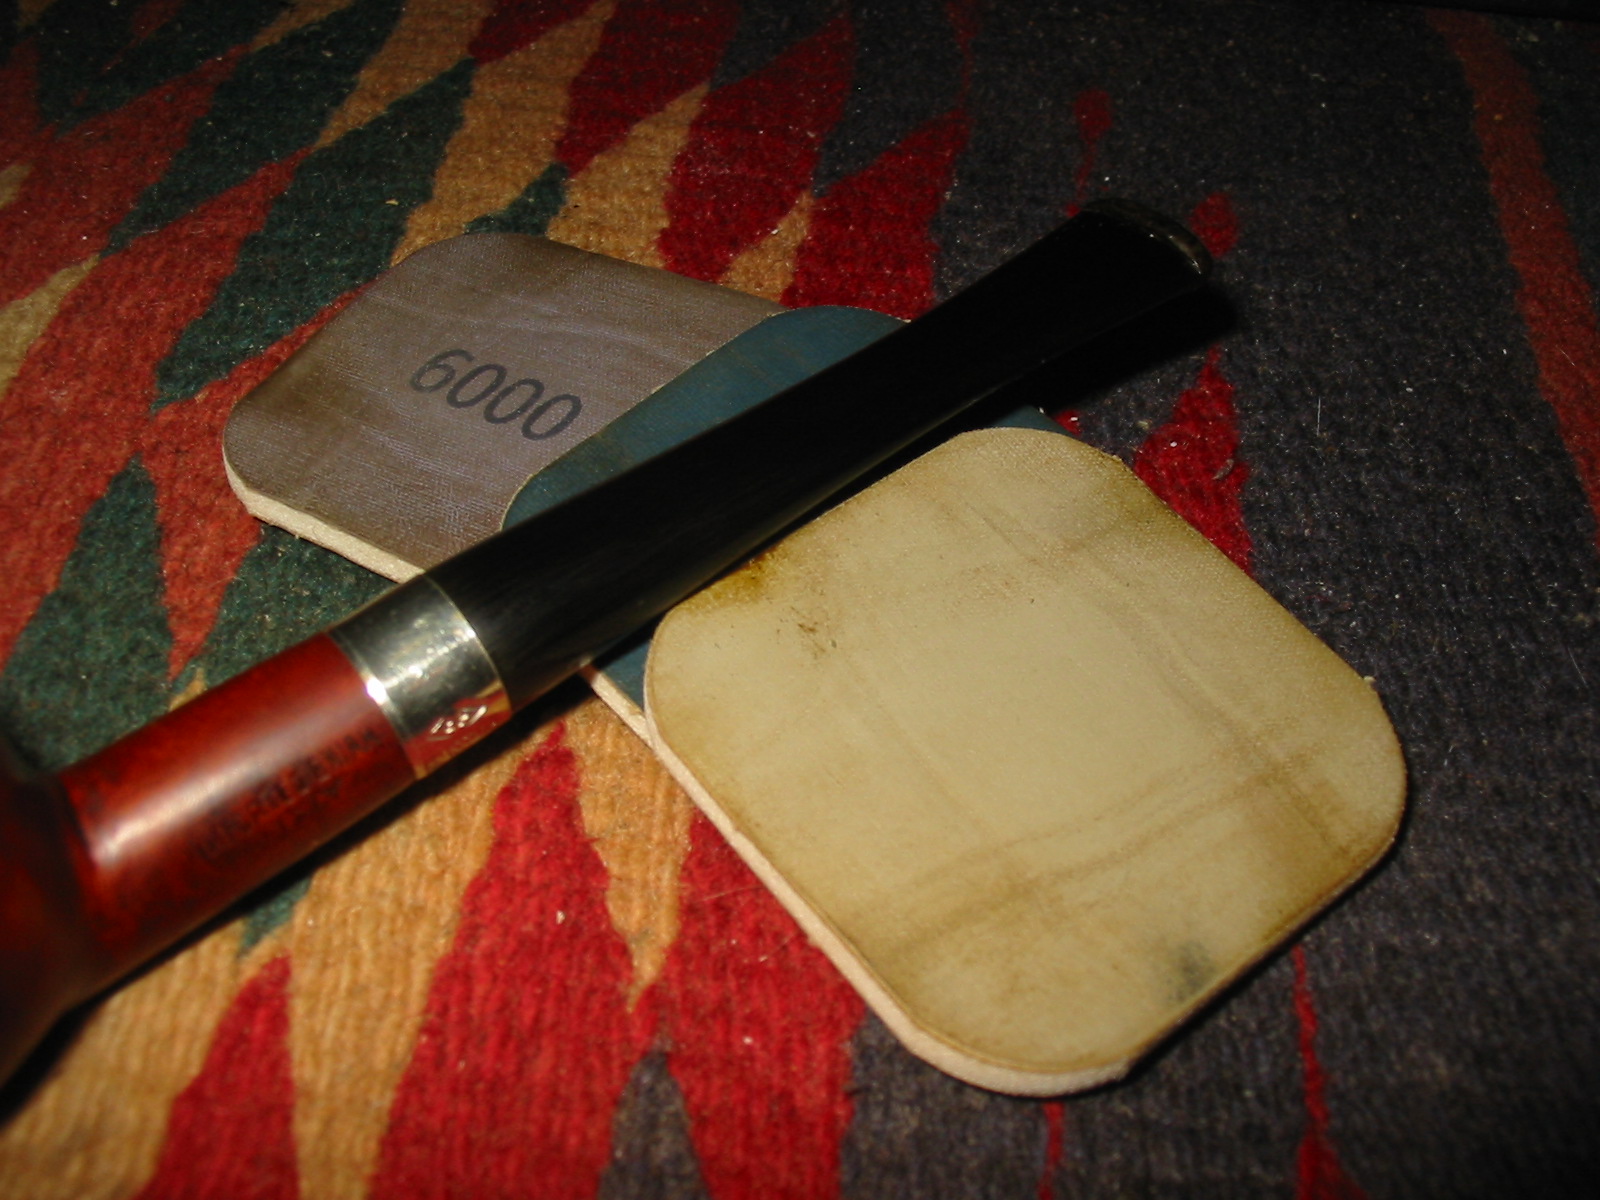
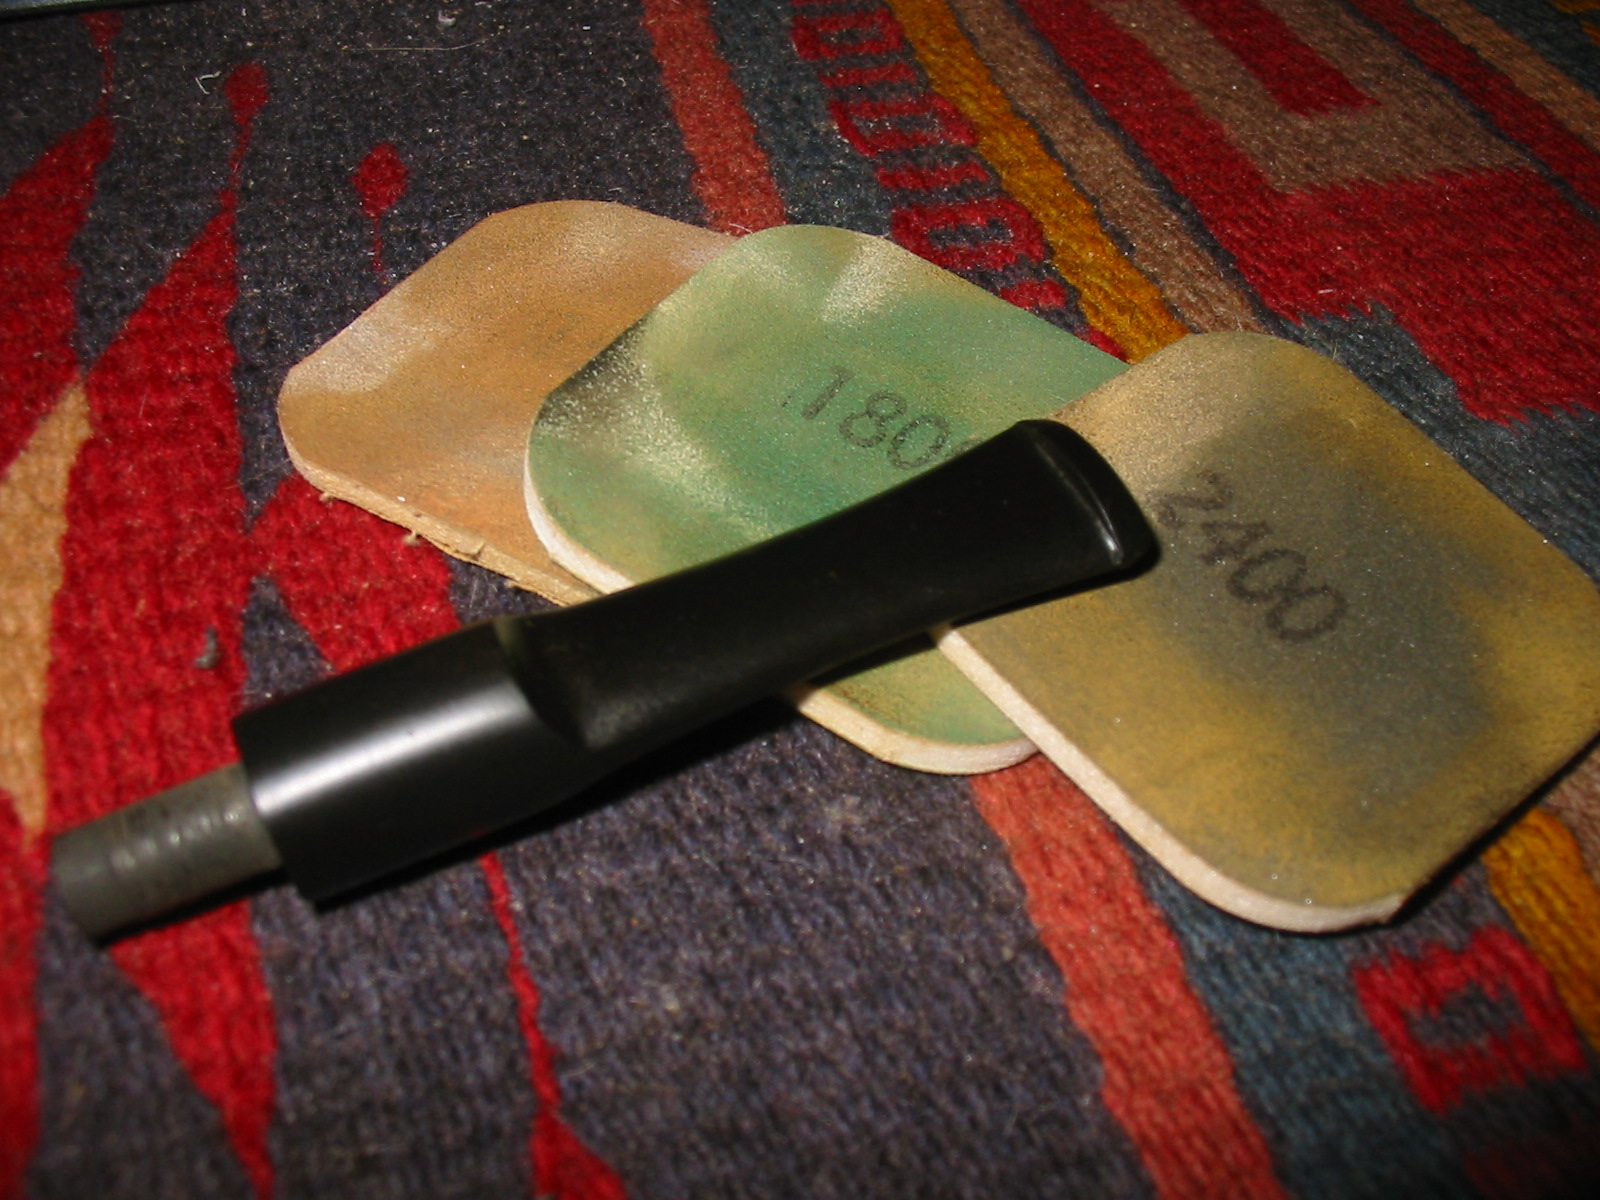
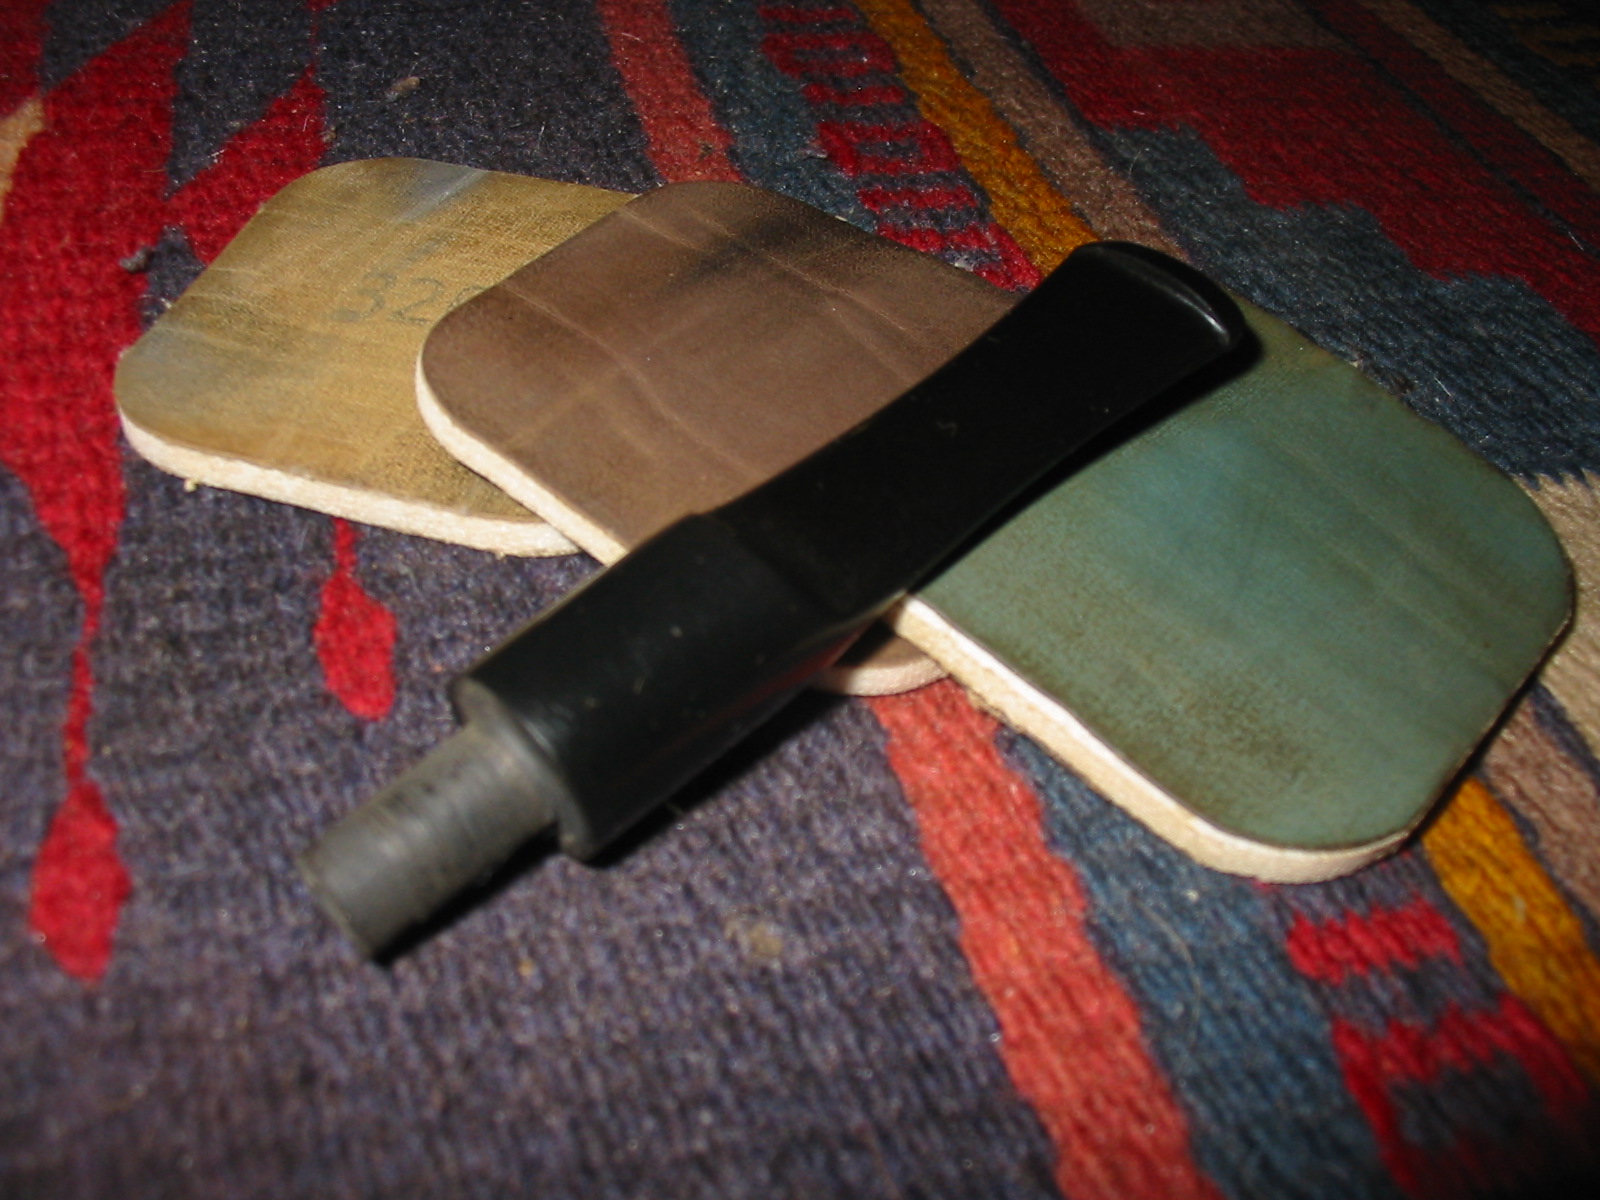
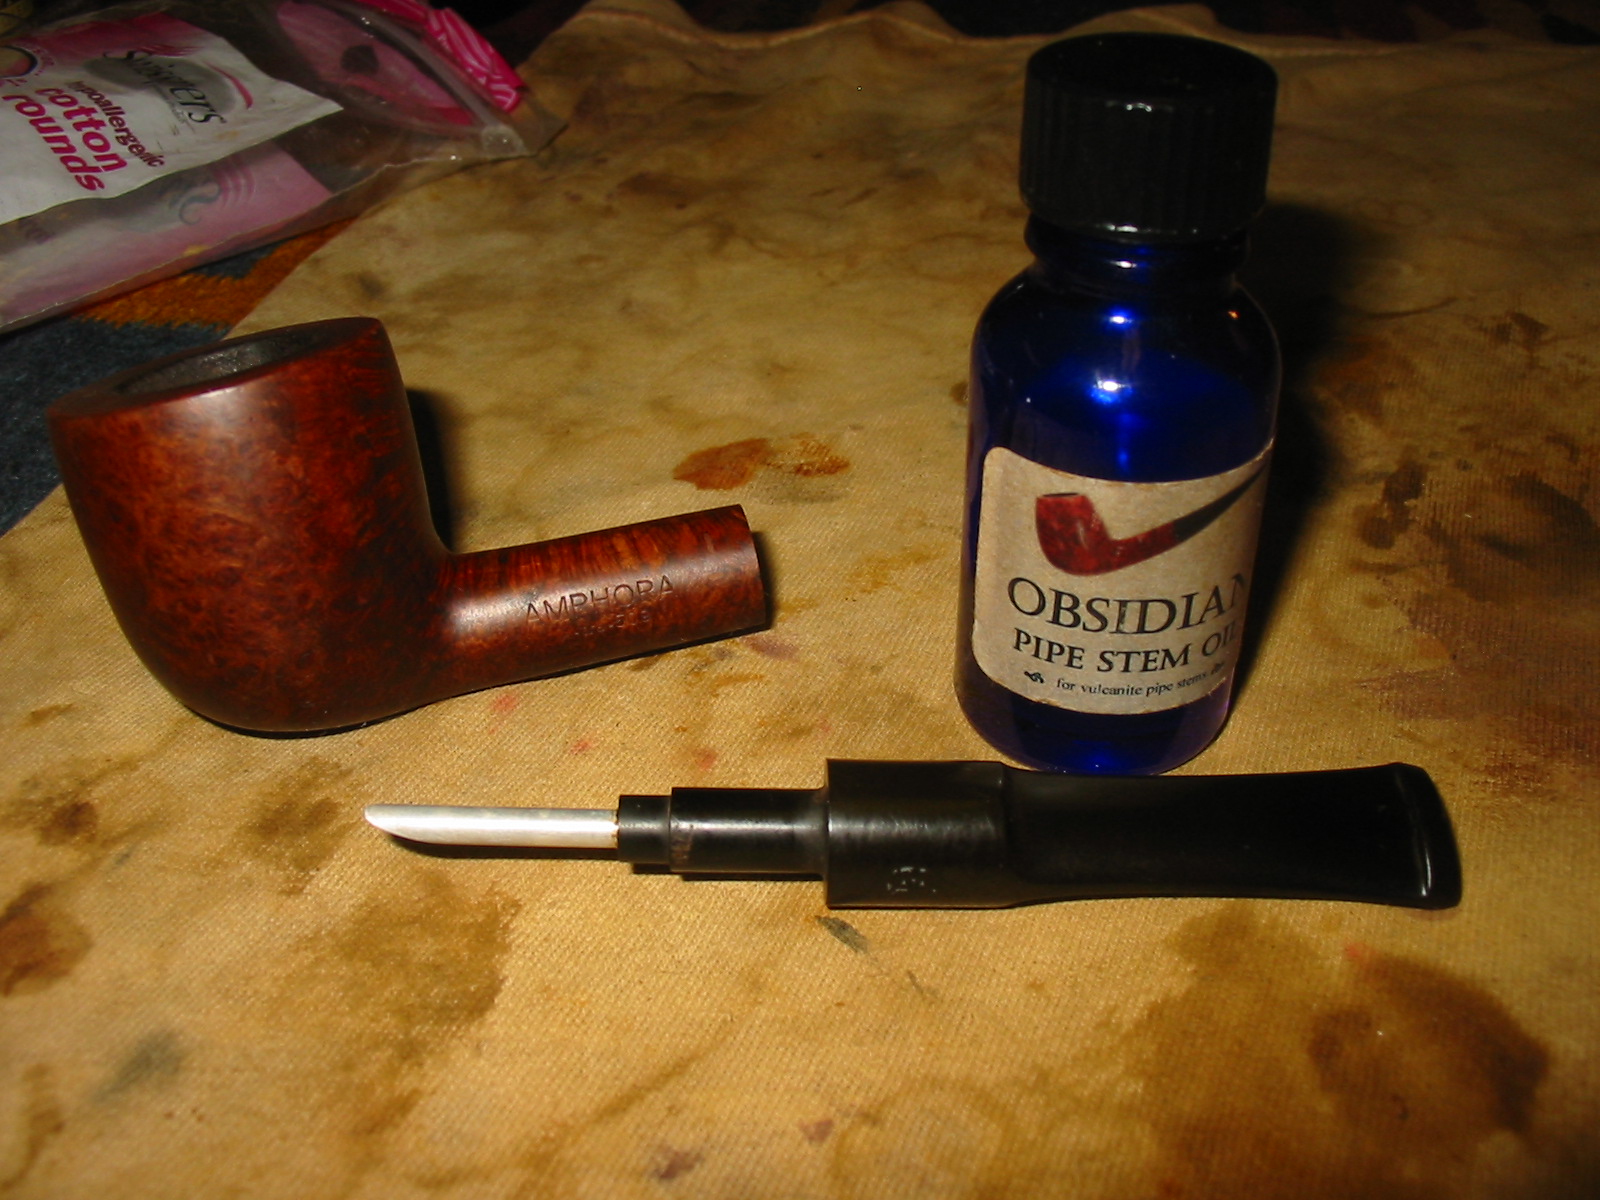
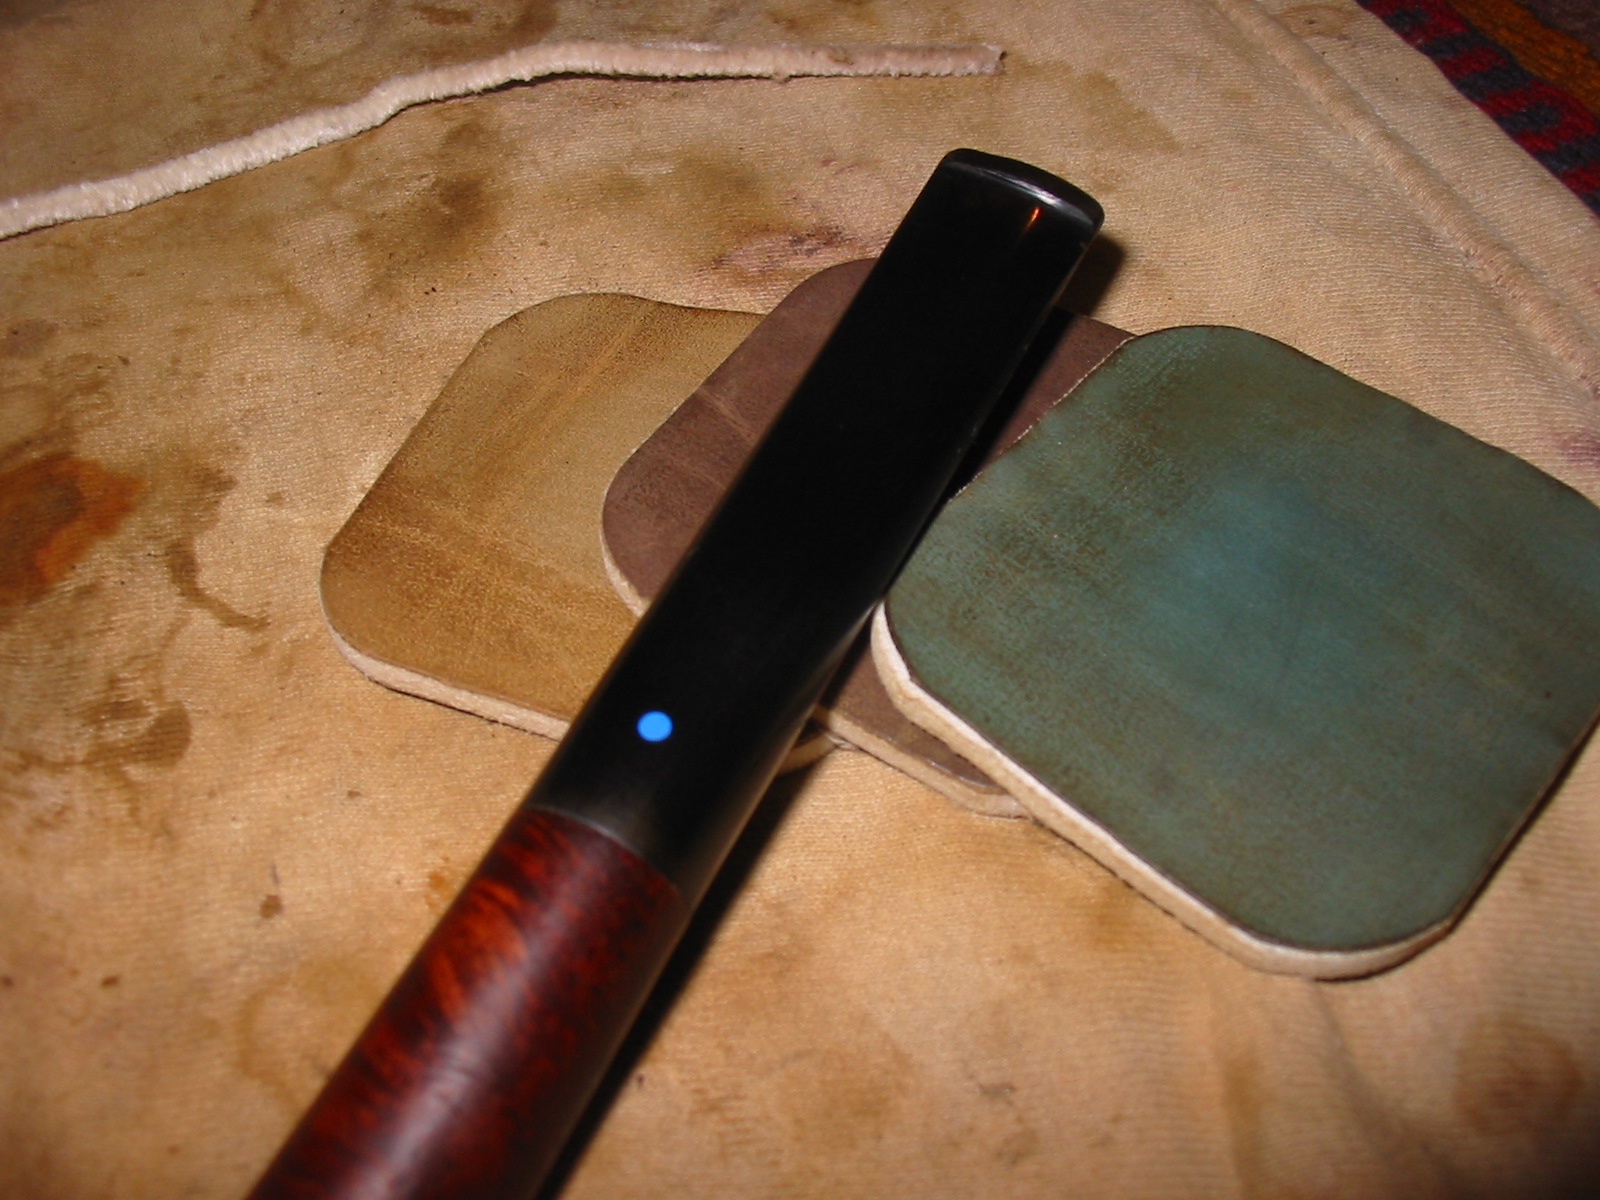
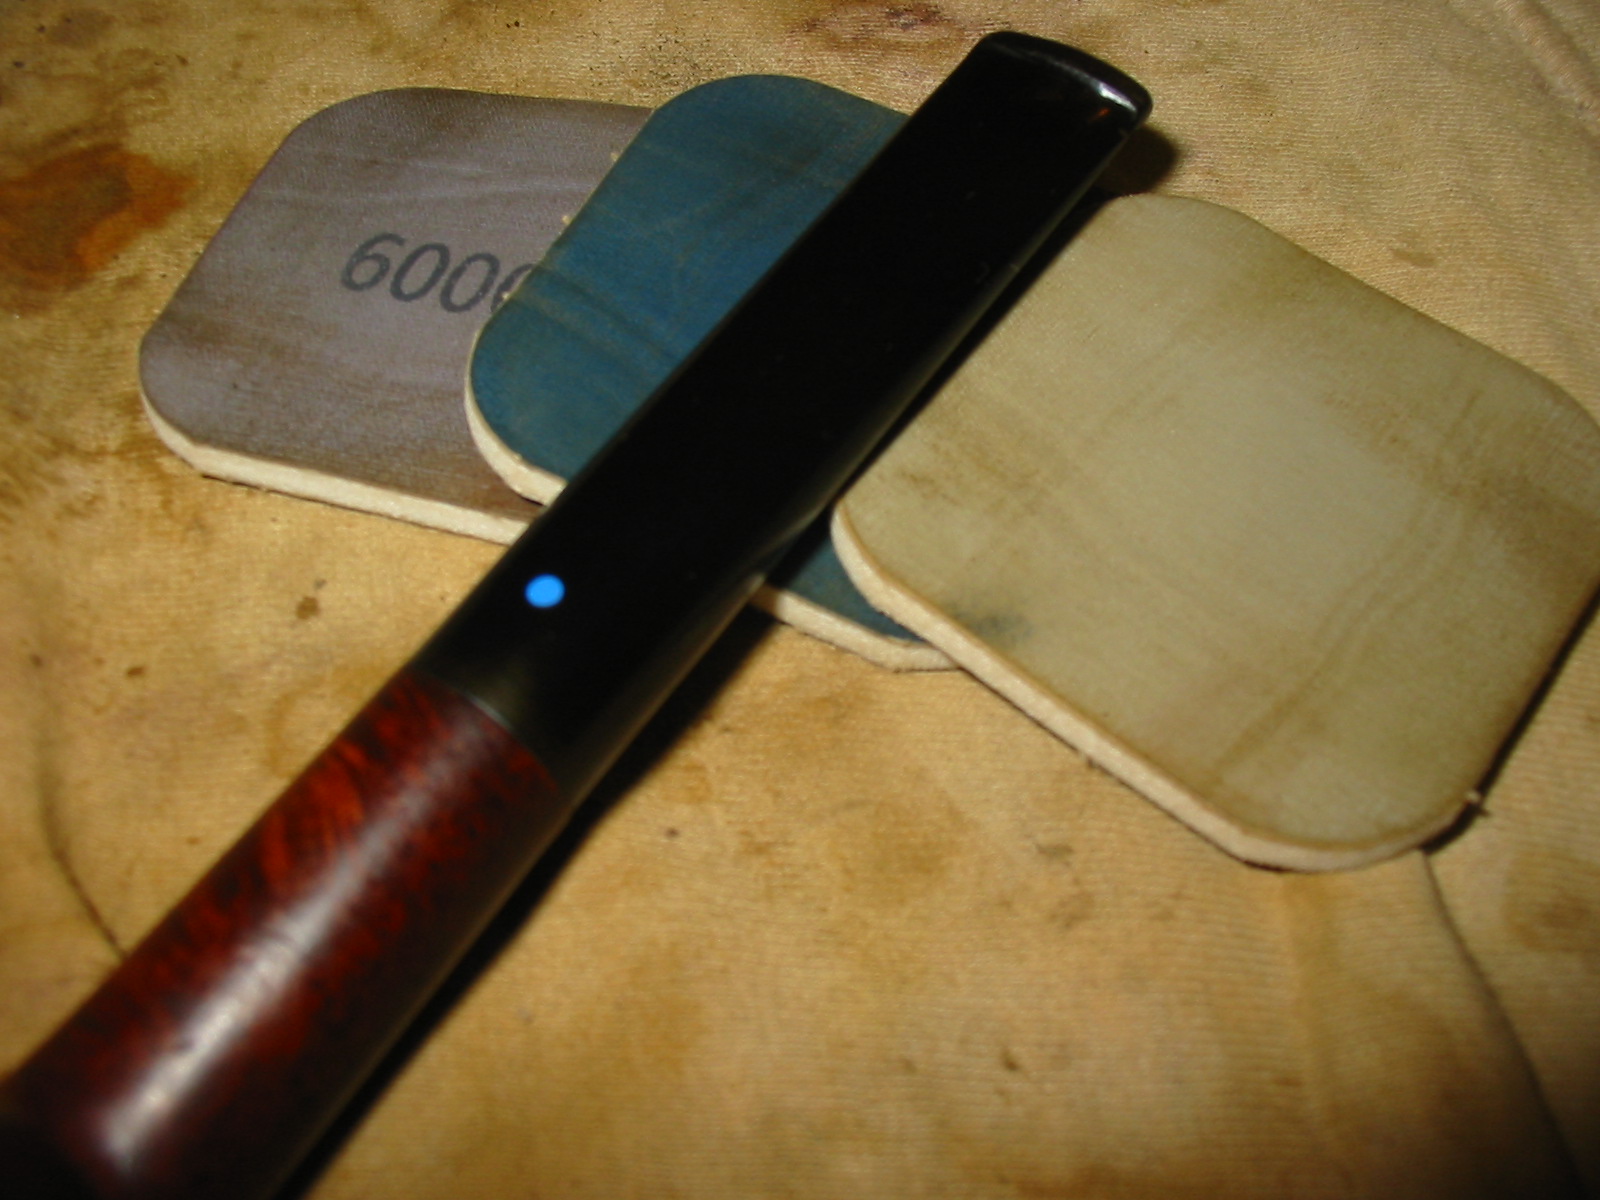
I wet sanded the stem with 1500, 1800 and 2400 grit micromesh sanding pads and then dry sanded with the remaining grits from 3200-12,000. I rubbed the stem down with Obsidian Oil and the waited for it to soak in. Afterwards I hand buffed with carnauba wax.
IMG_3127

IMG_3128

IMG_3129

IMG_3130

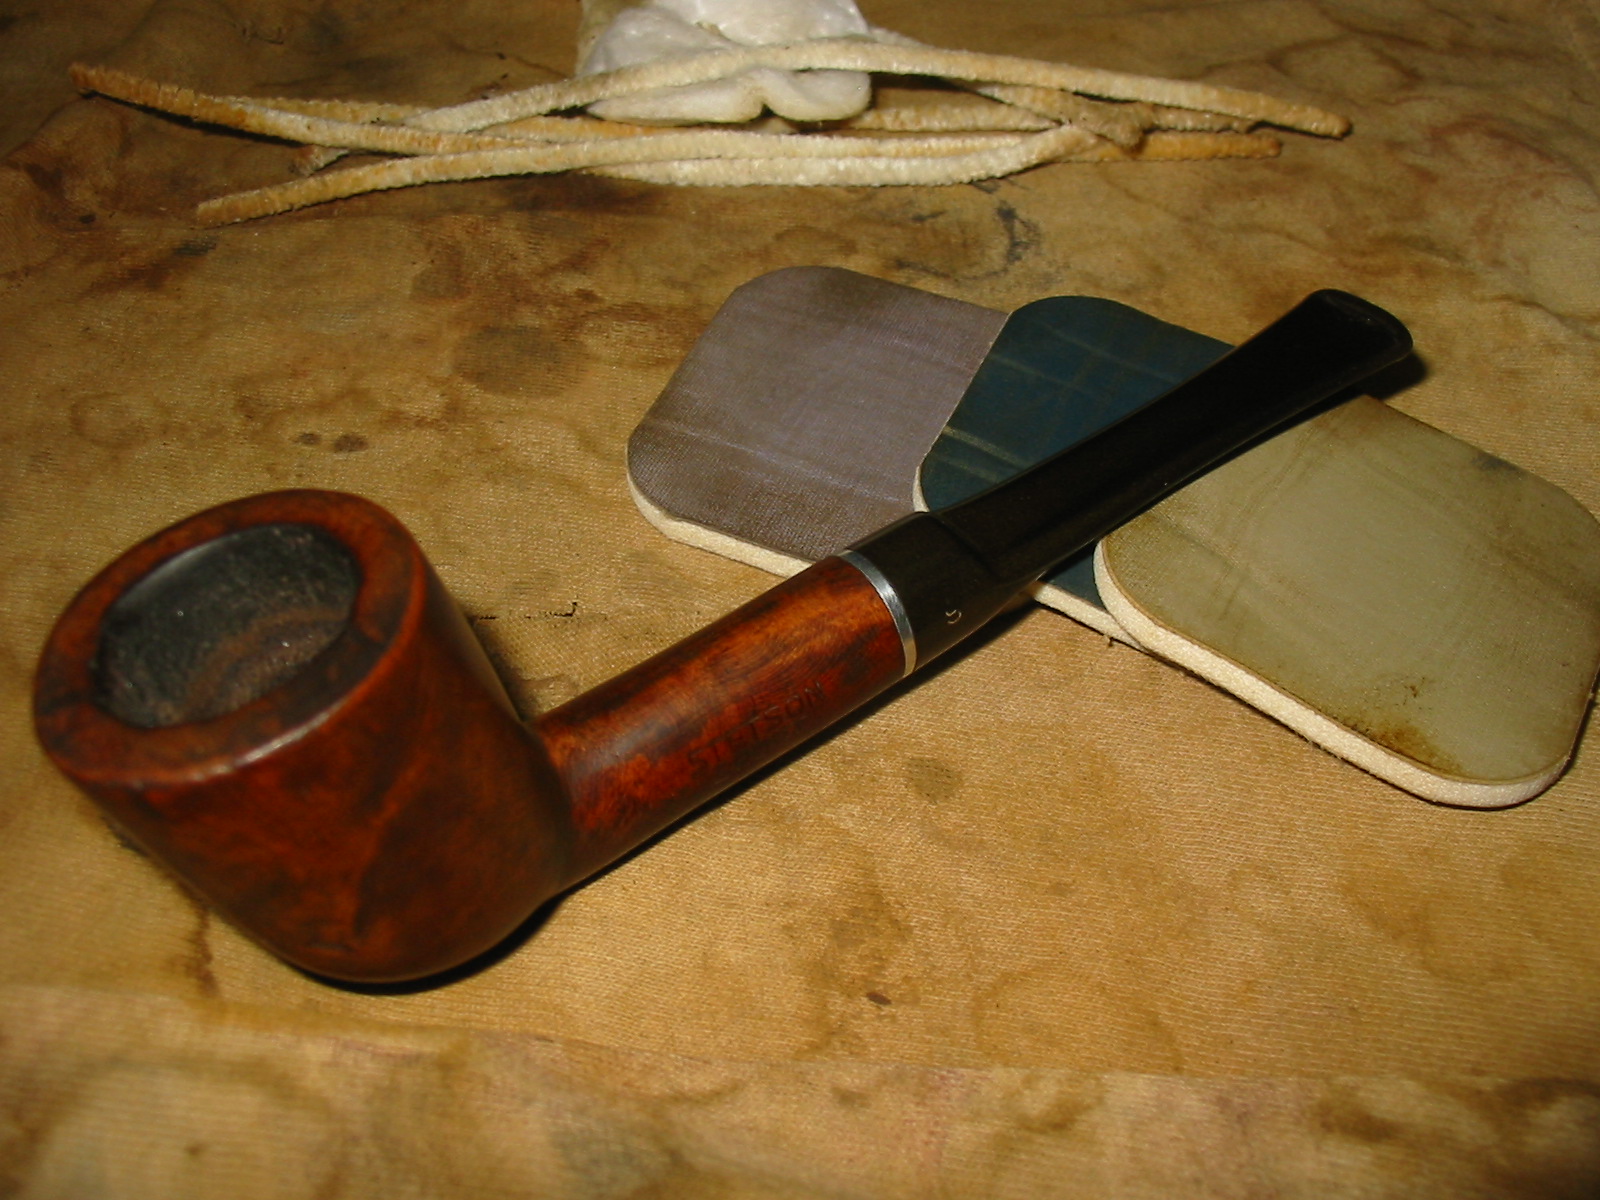
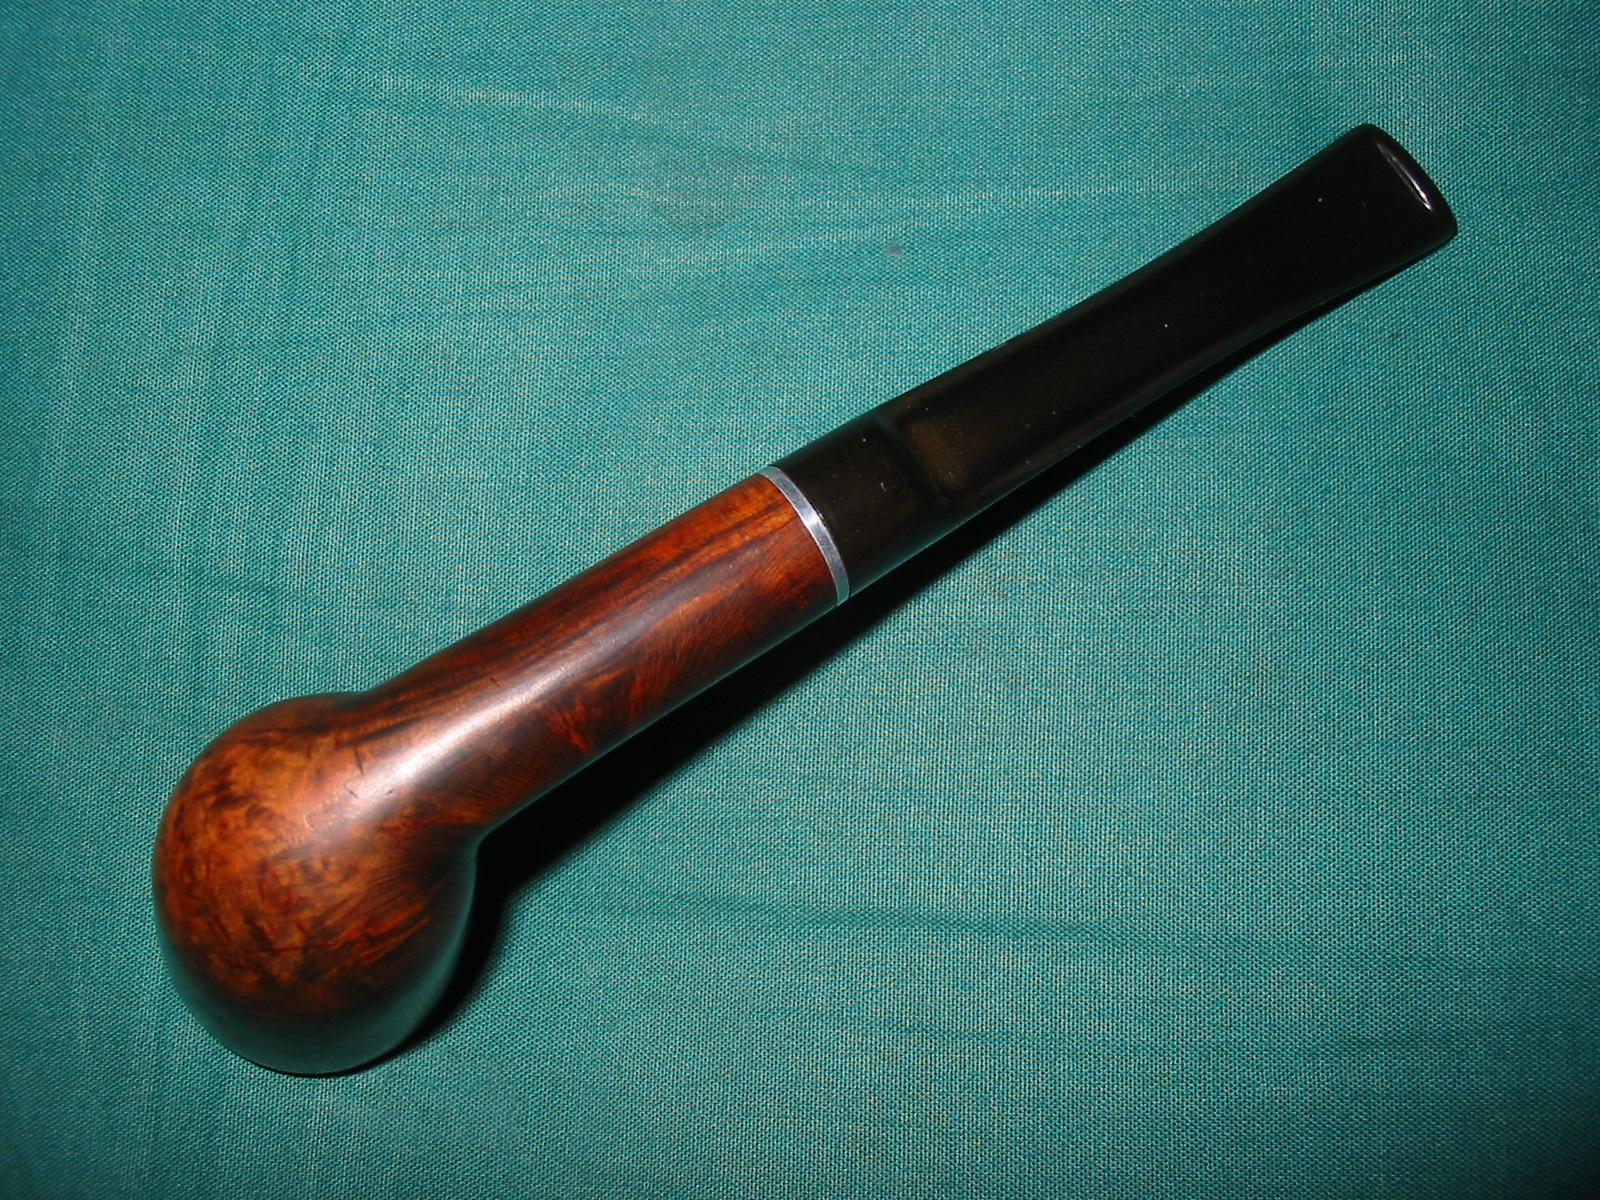
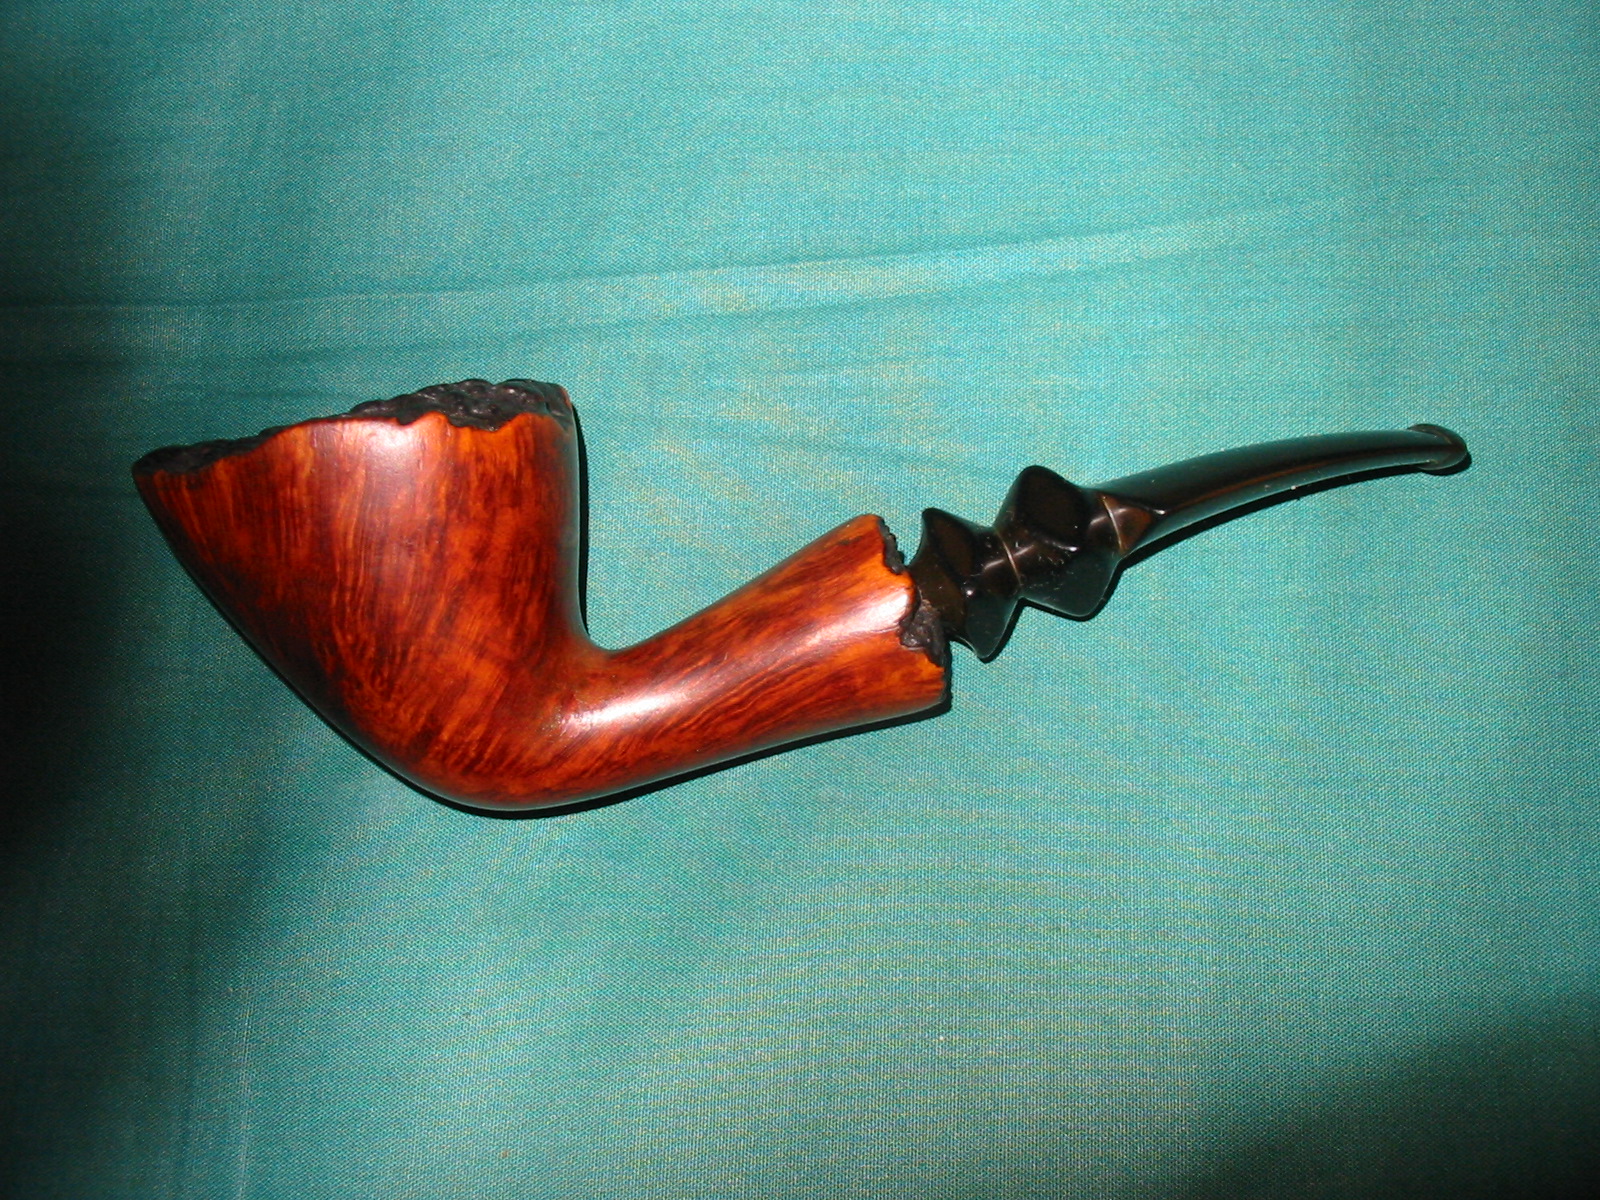
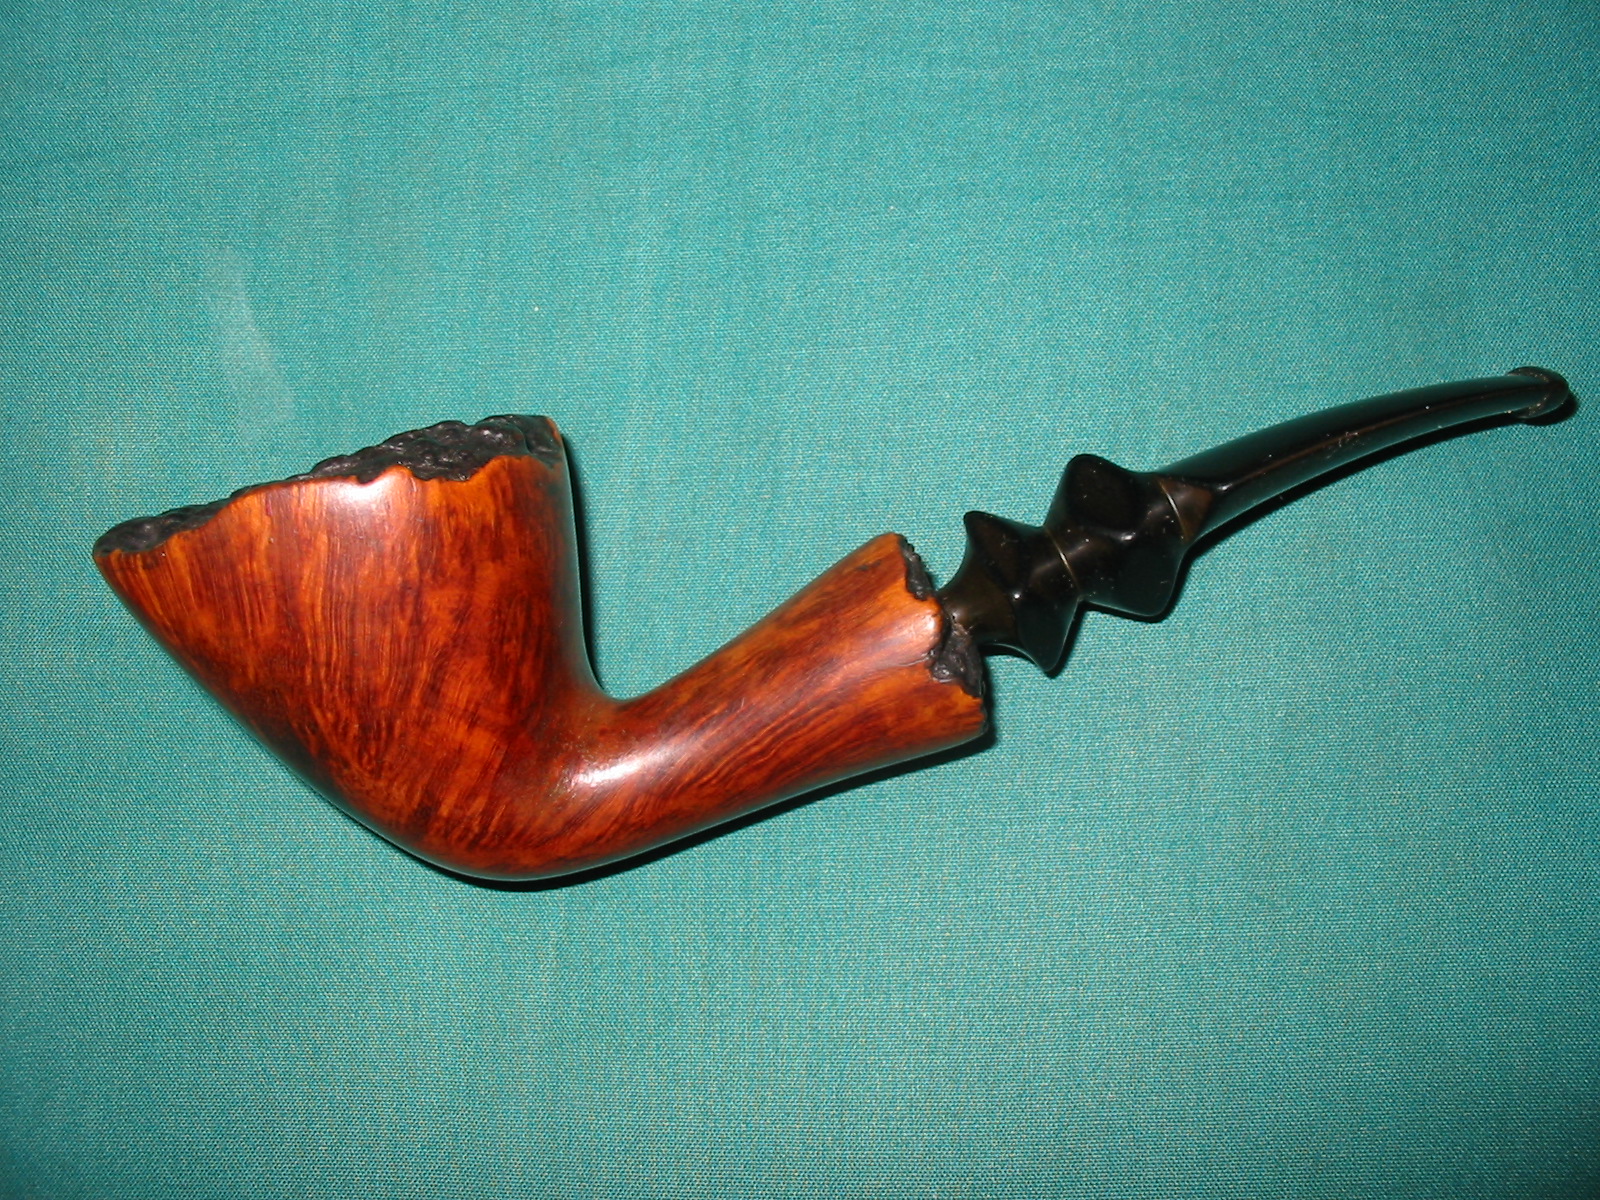
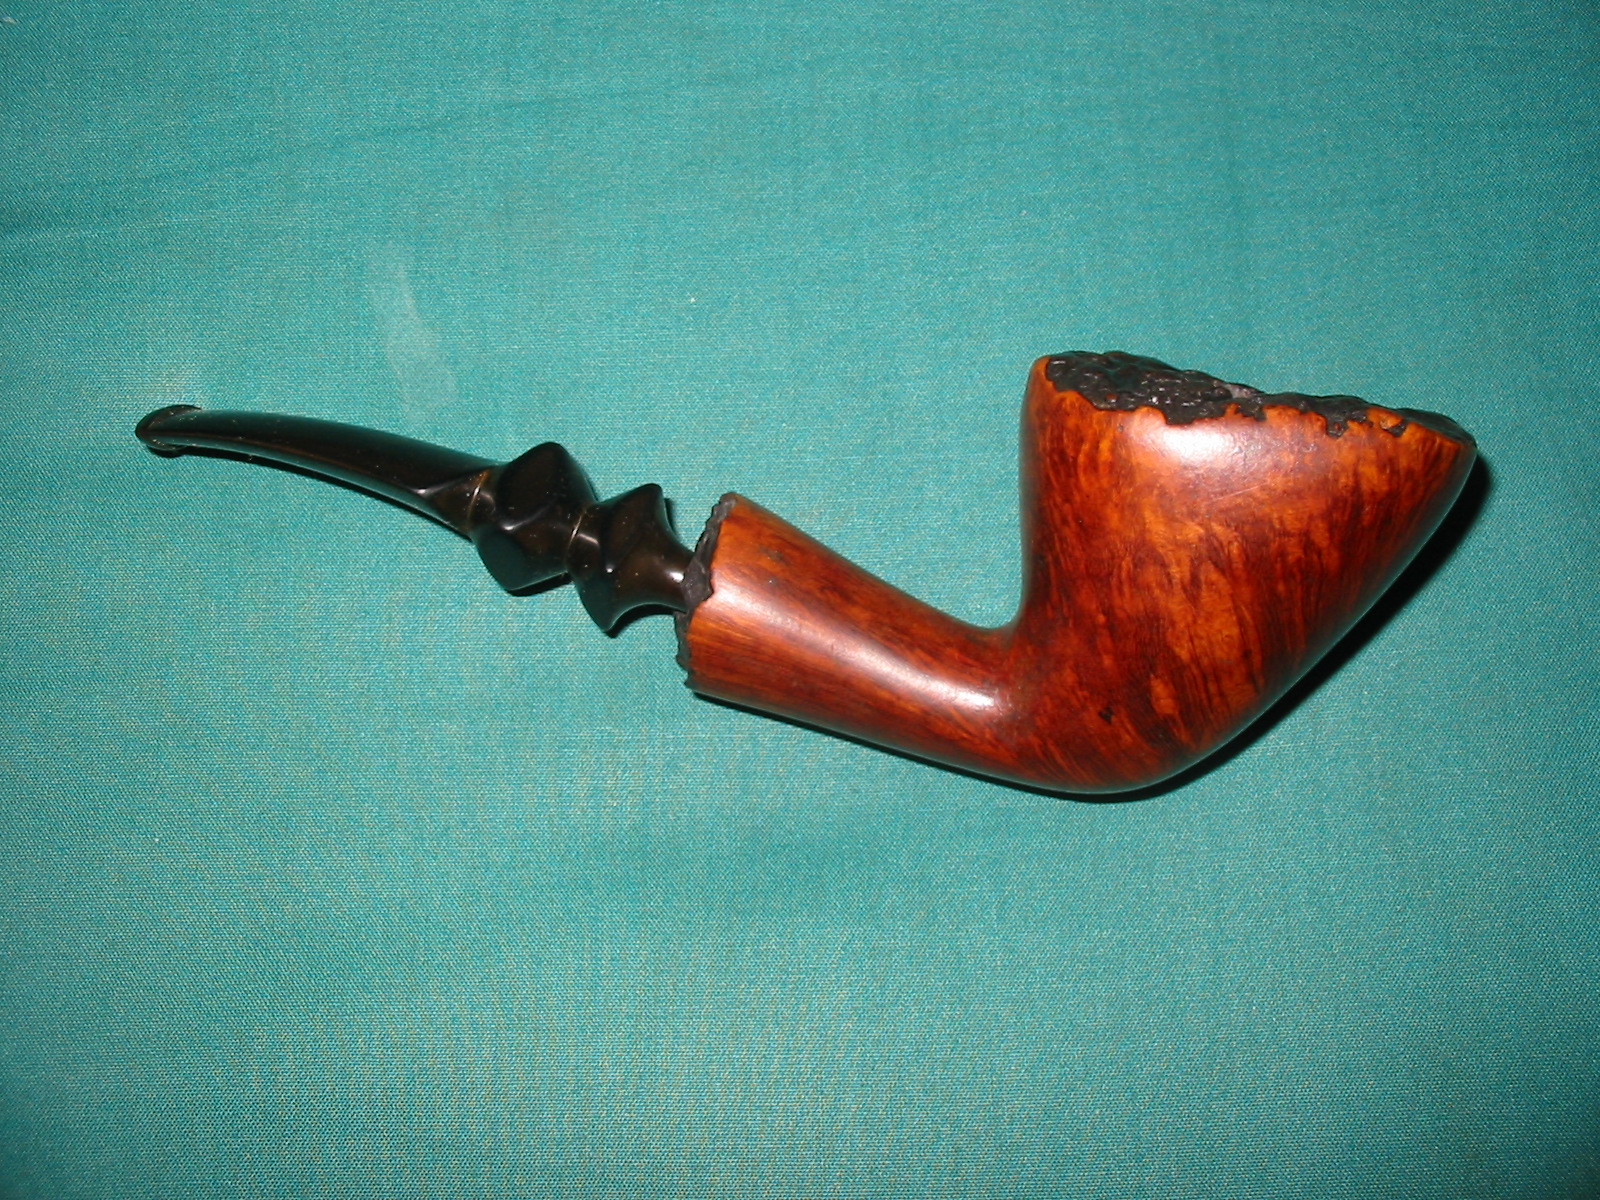
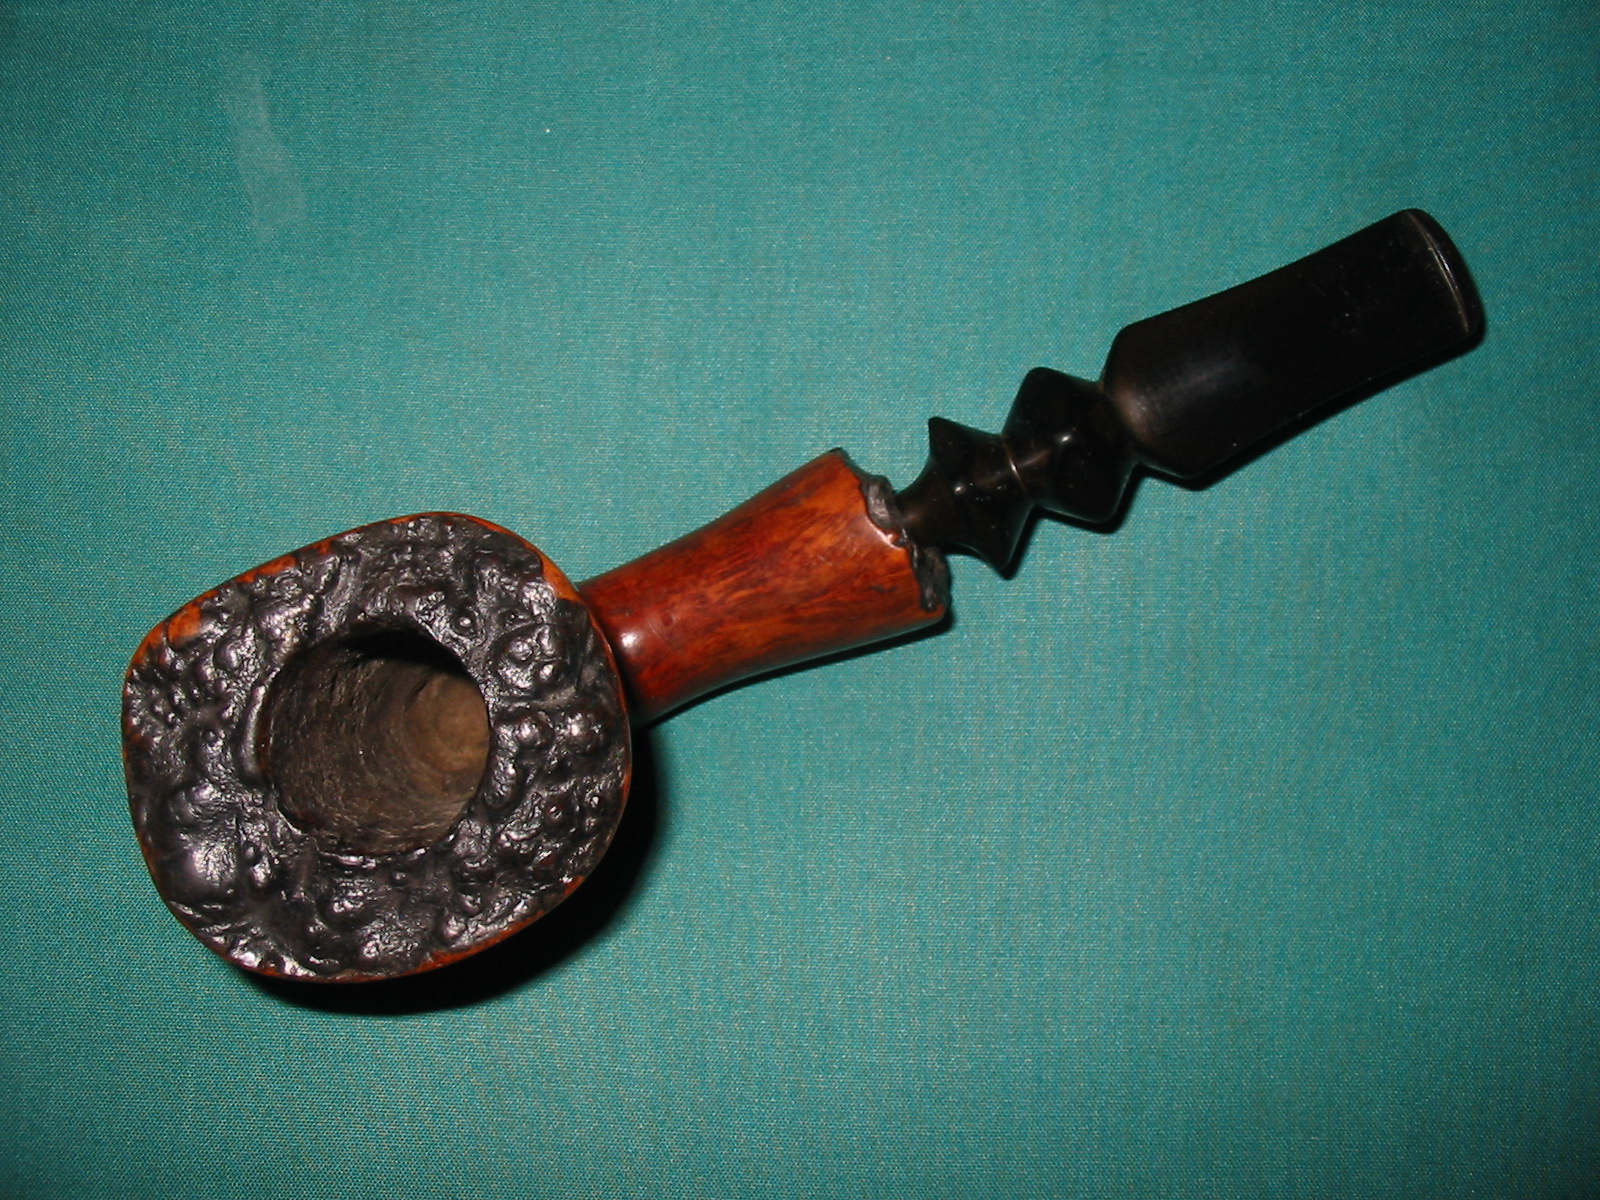
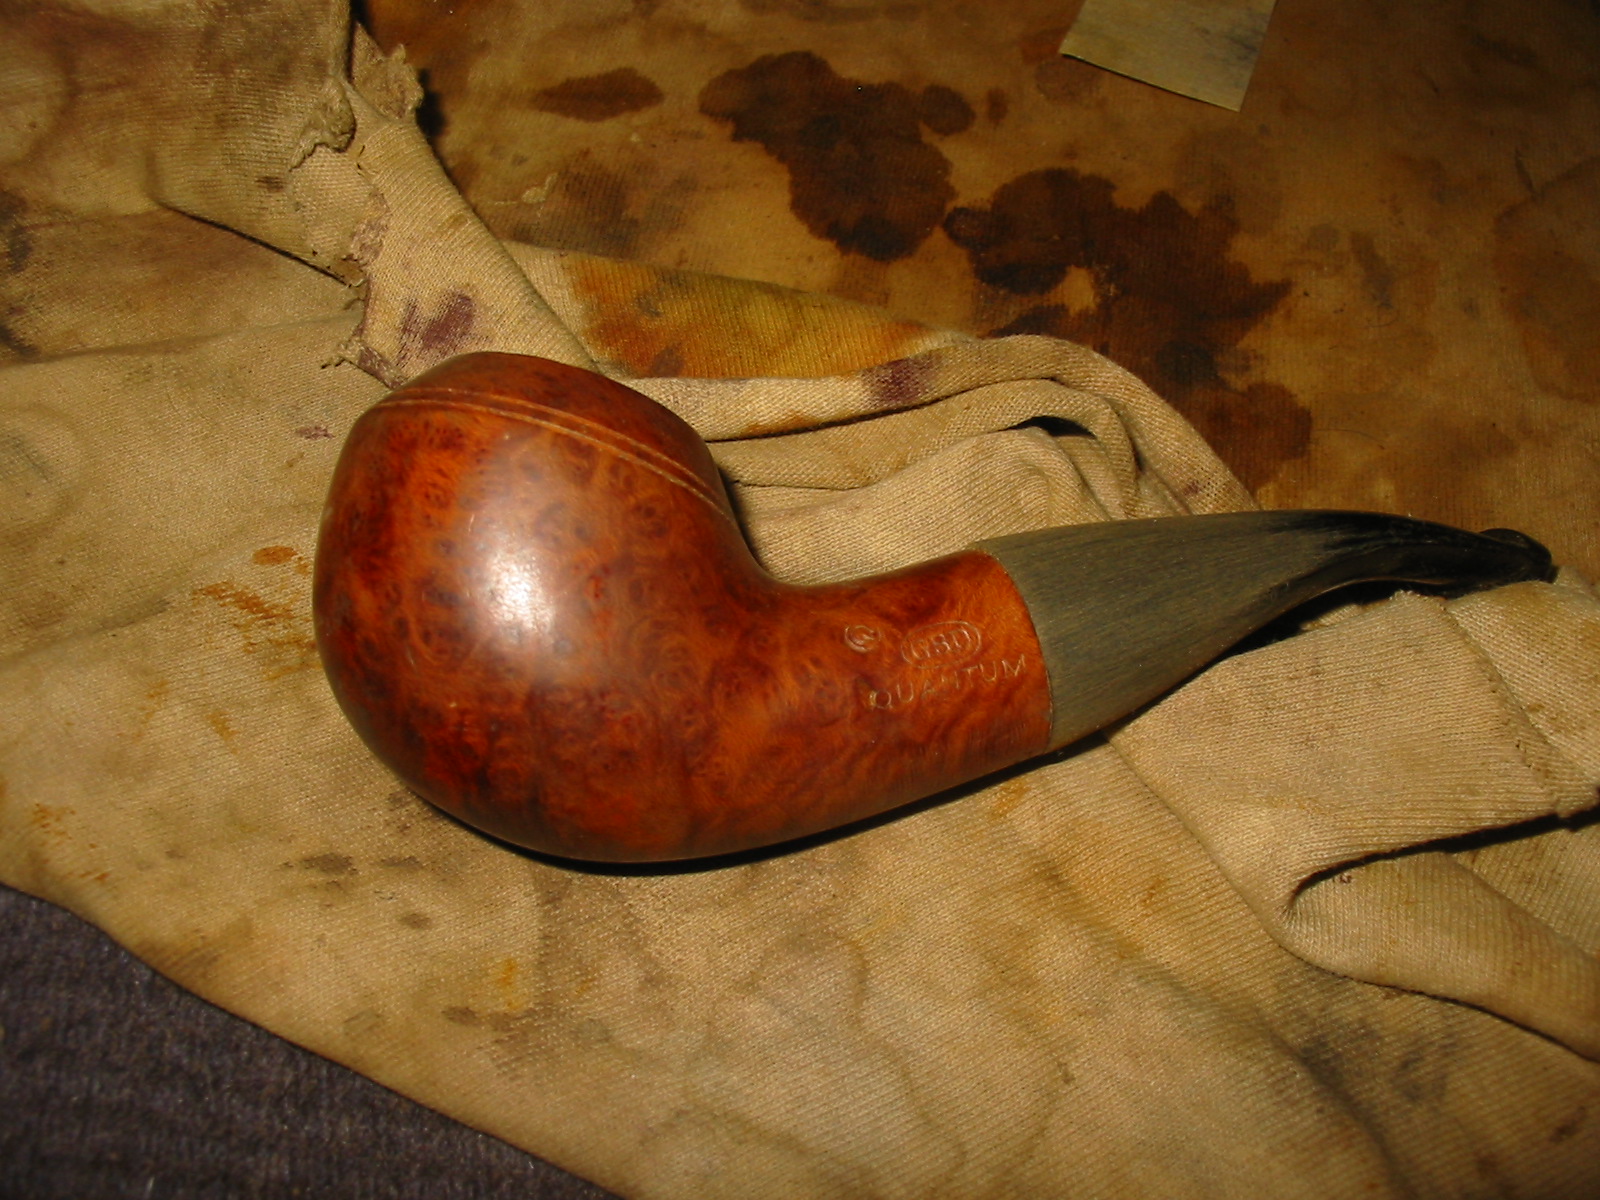
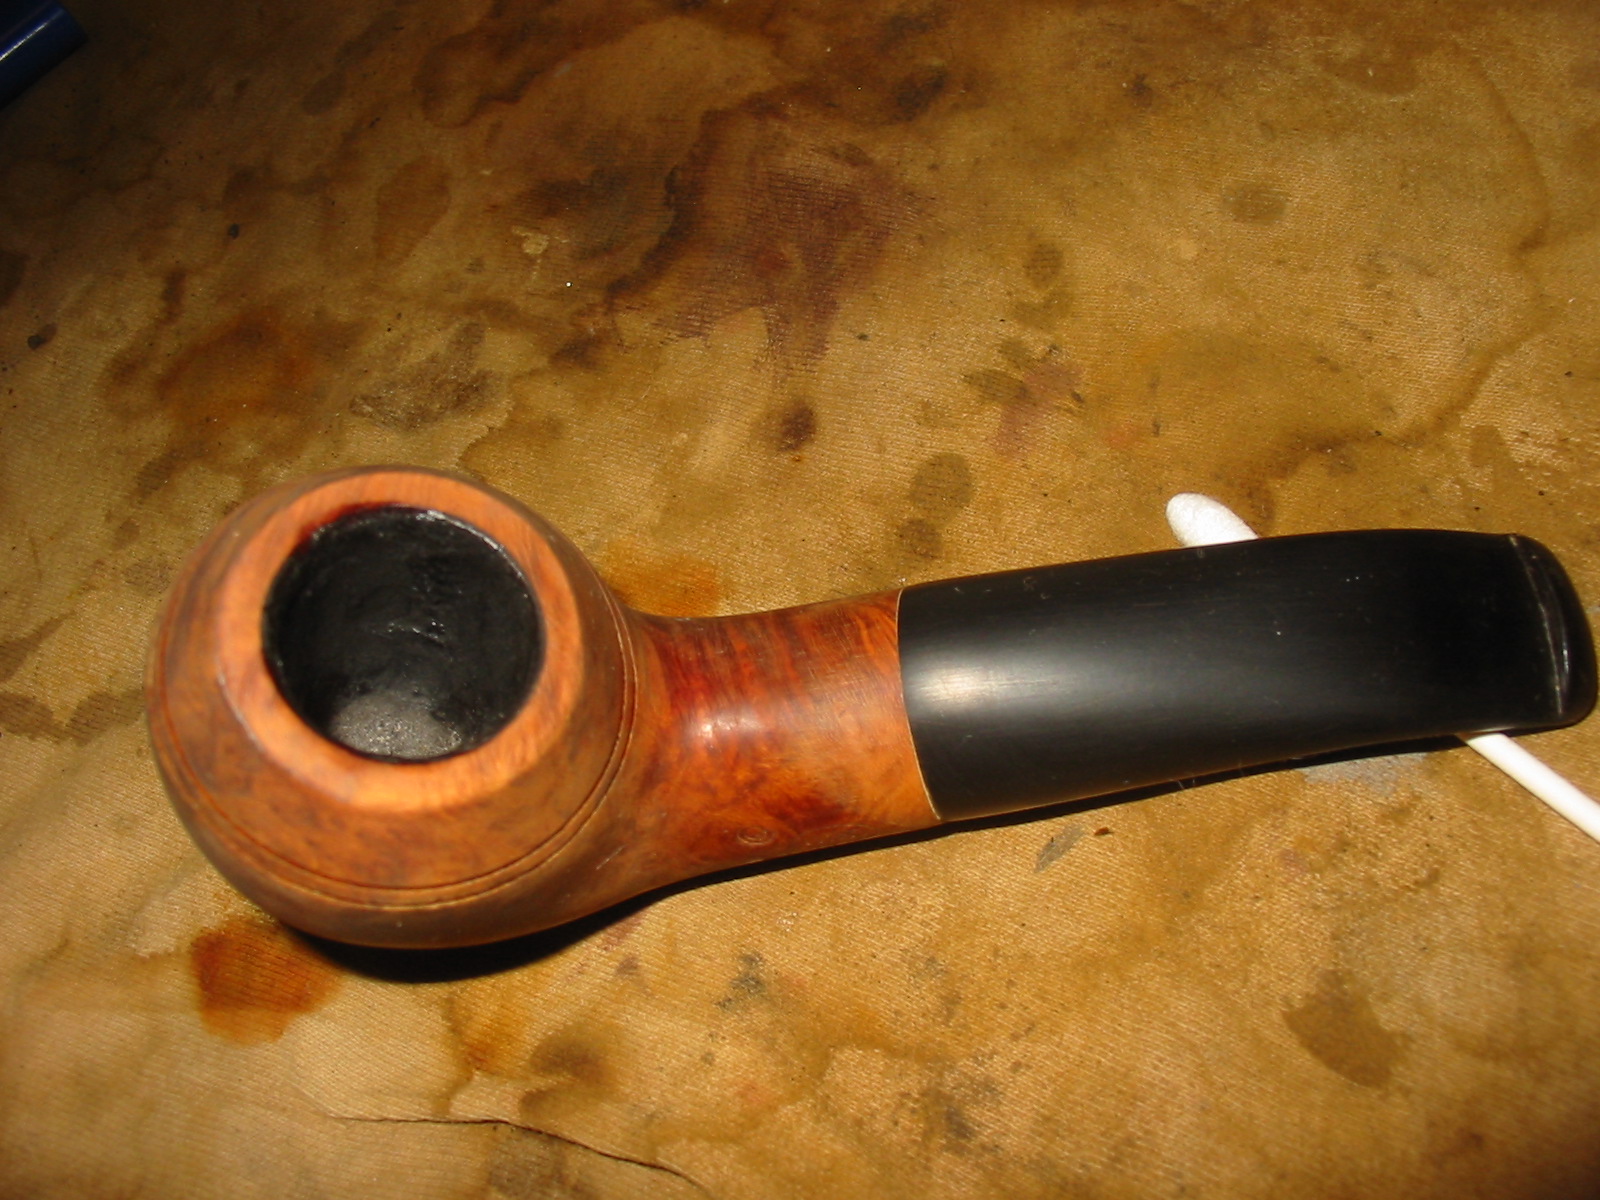
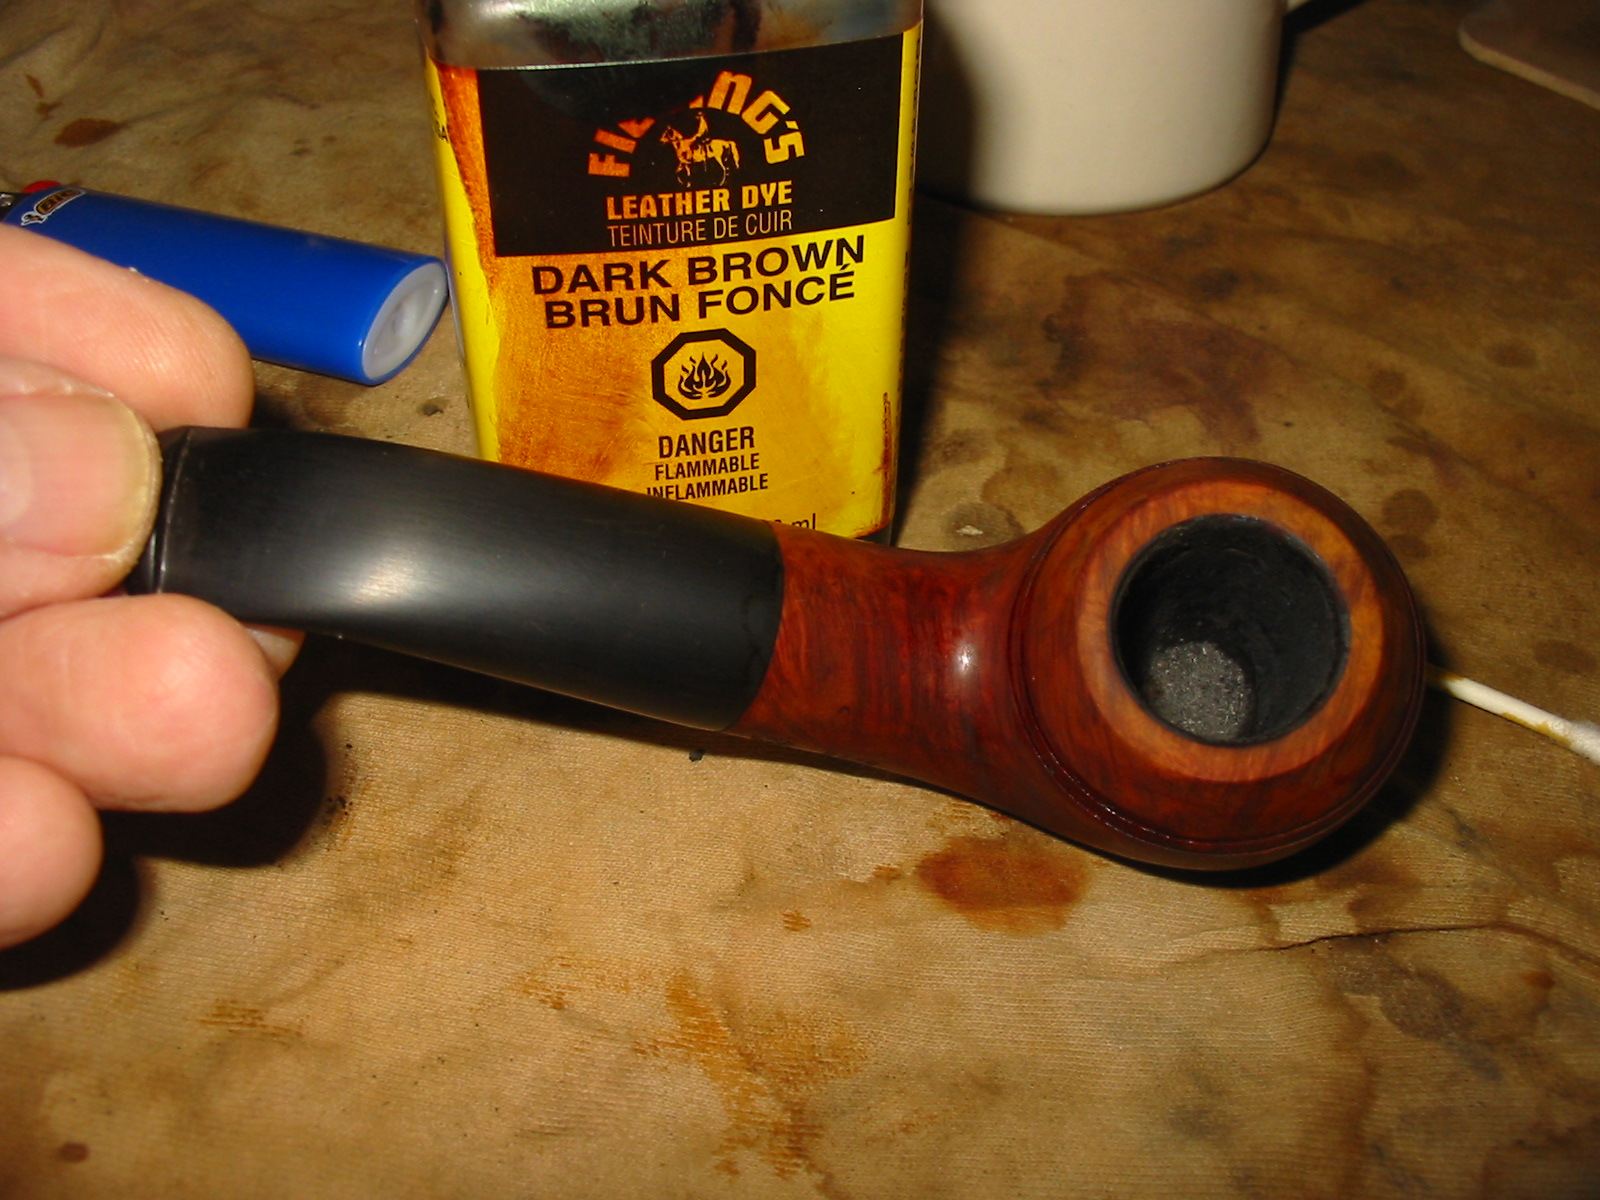
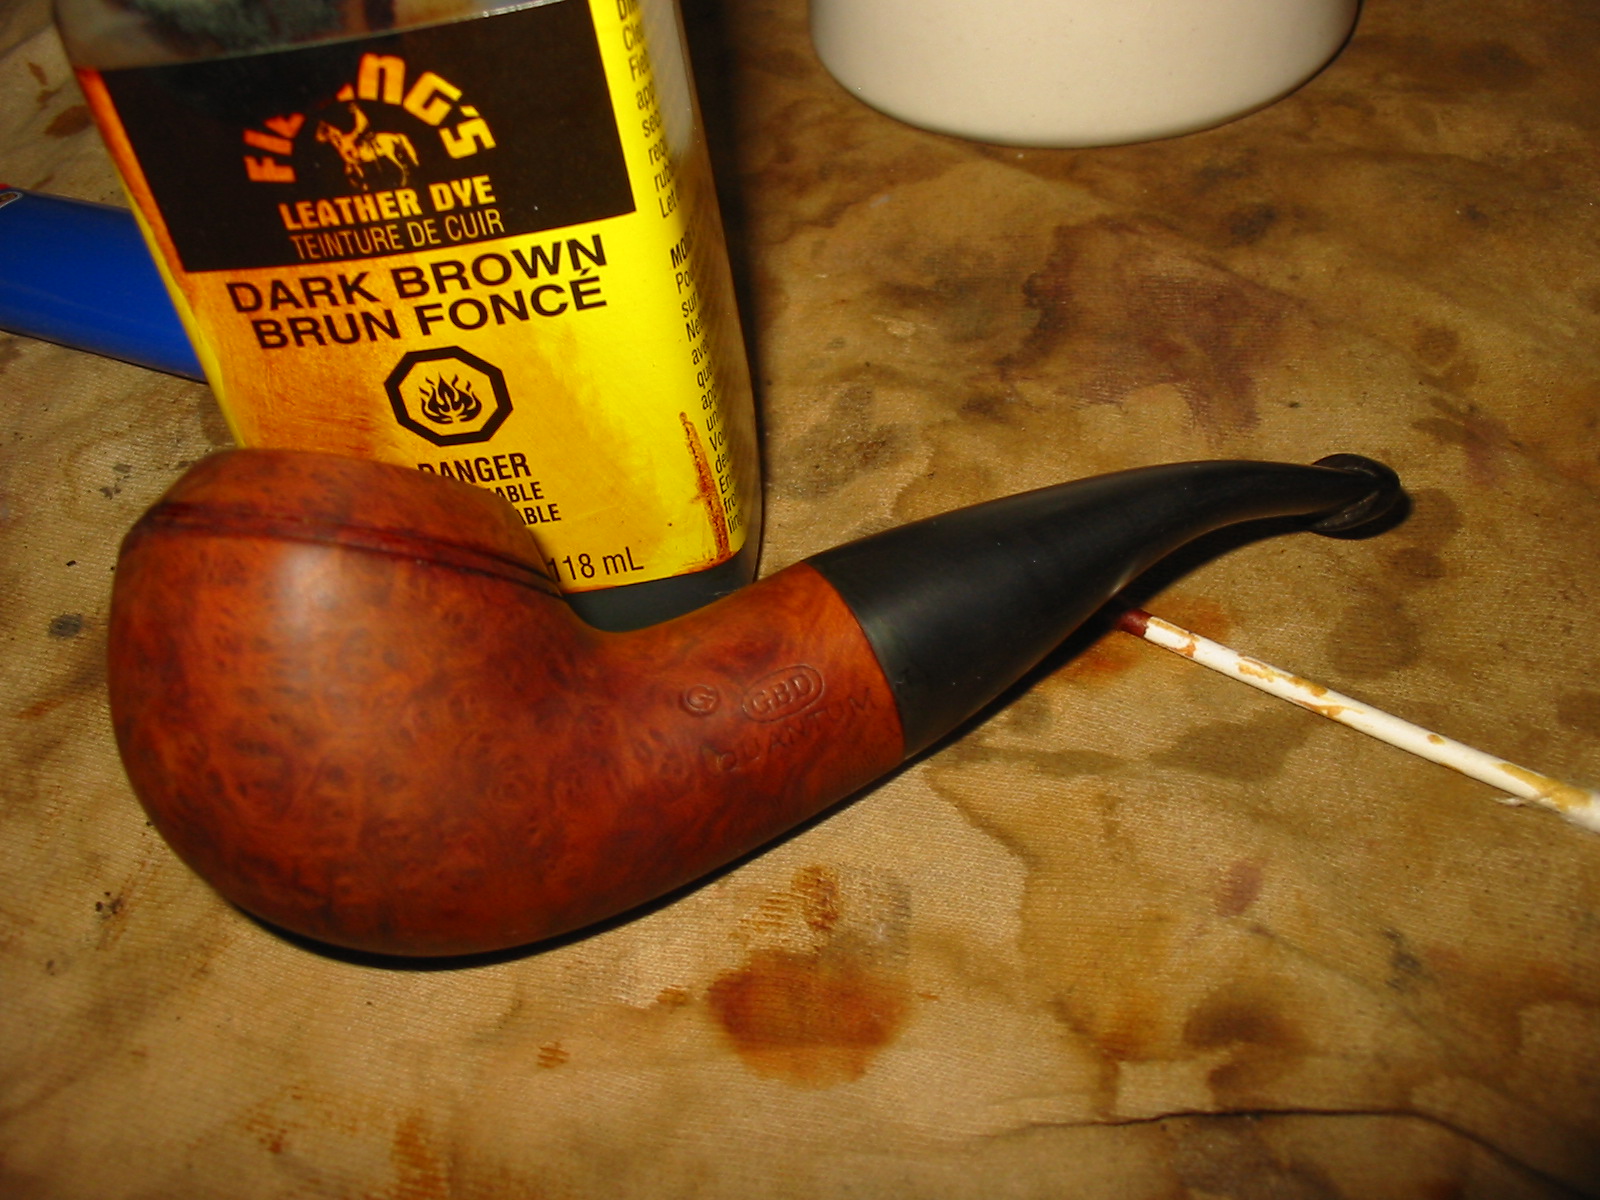
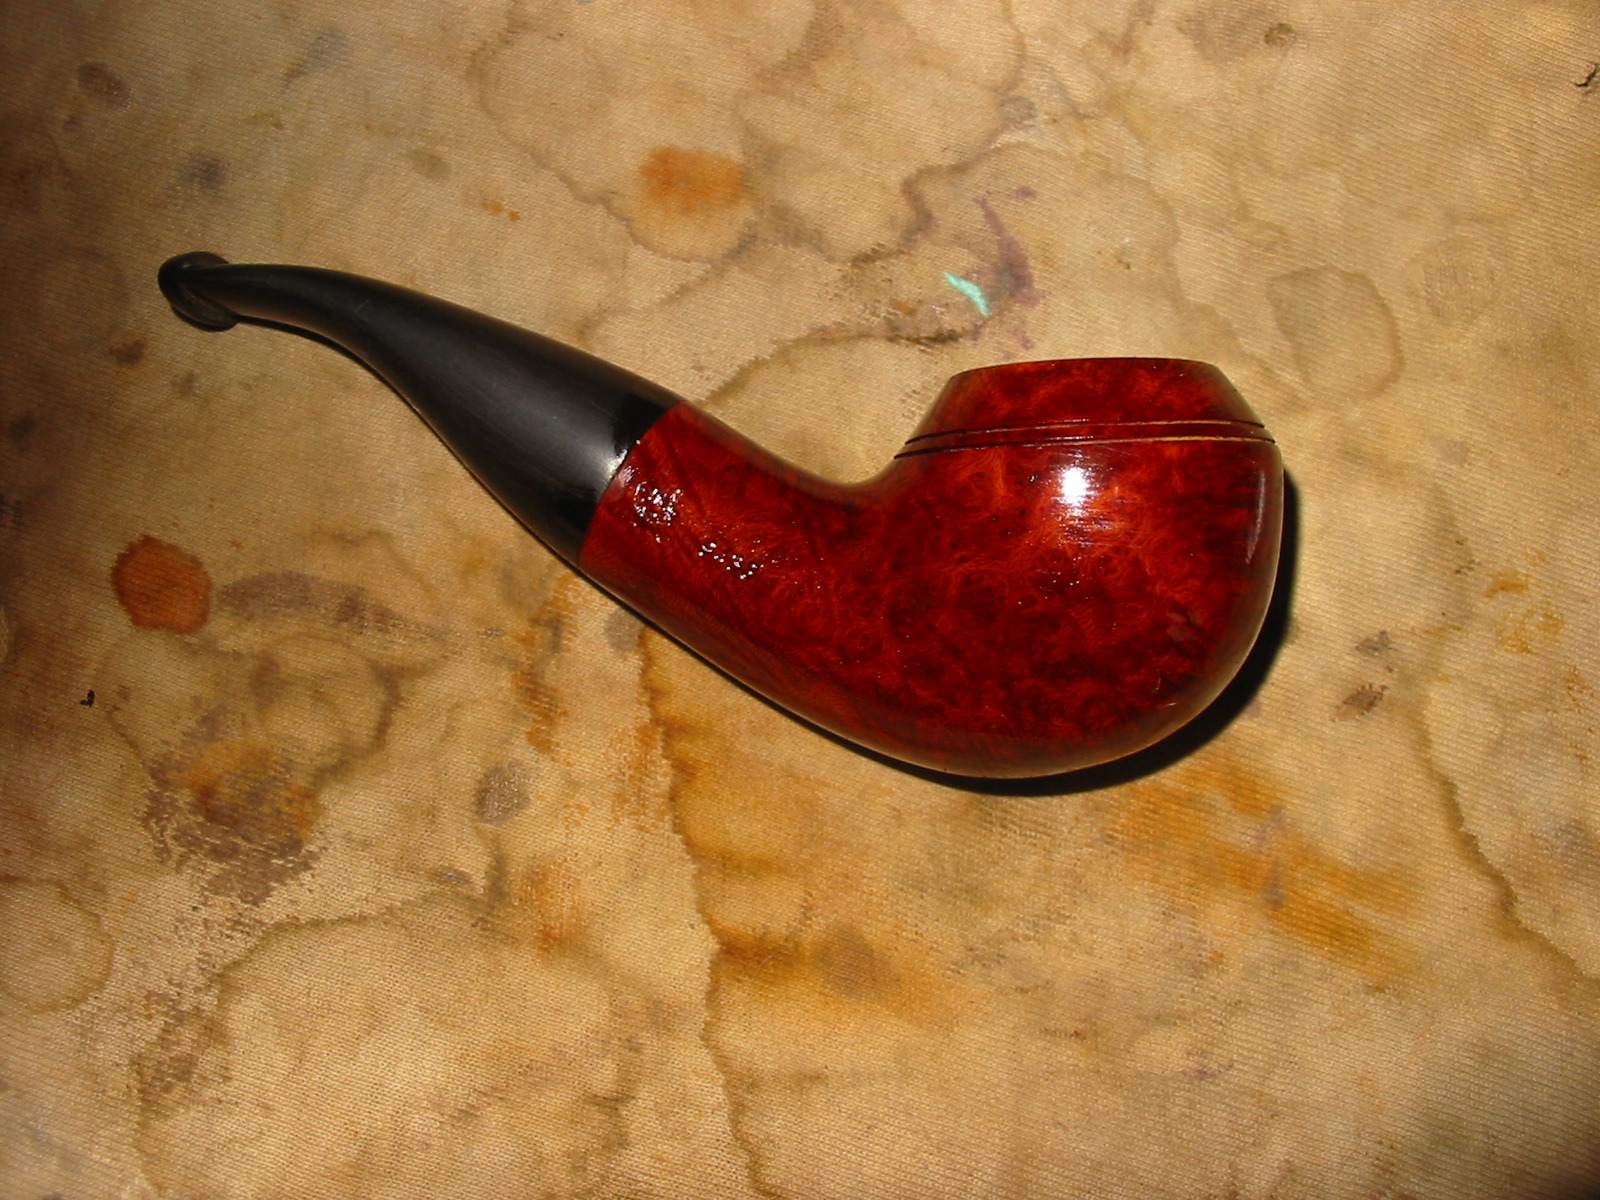
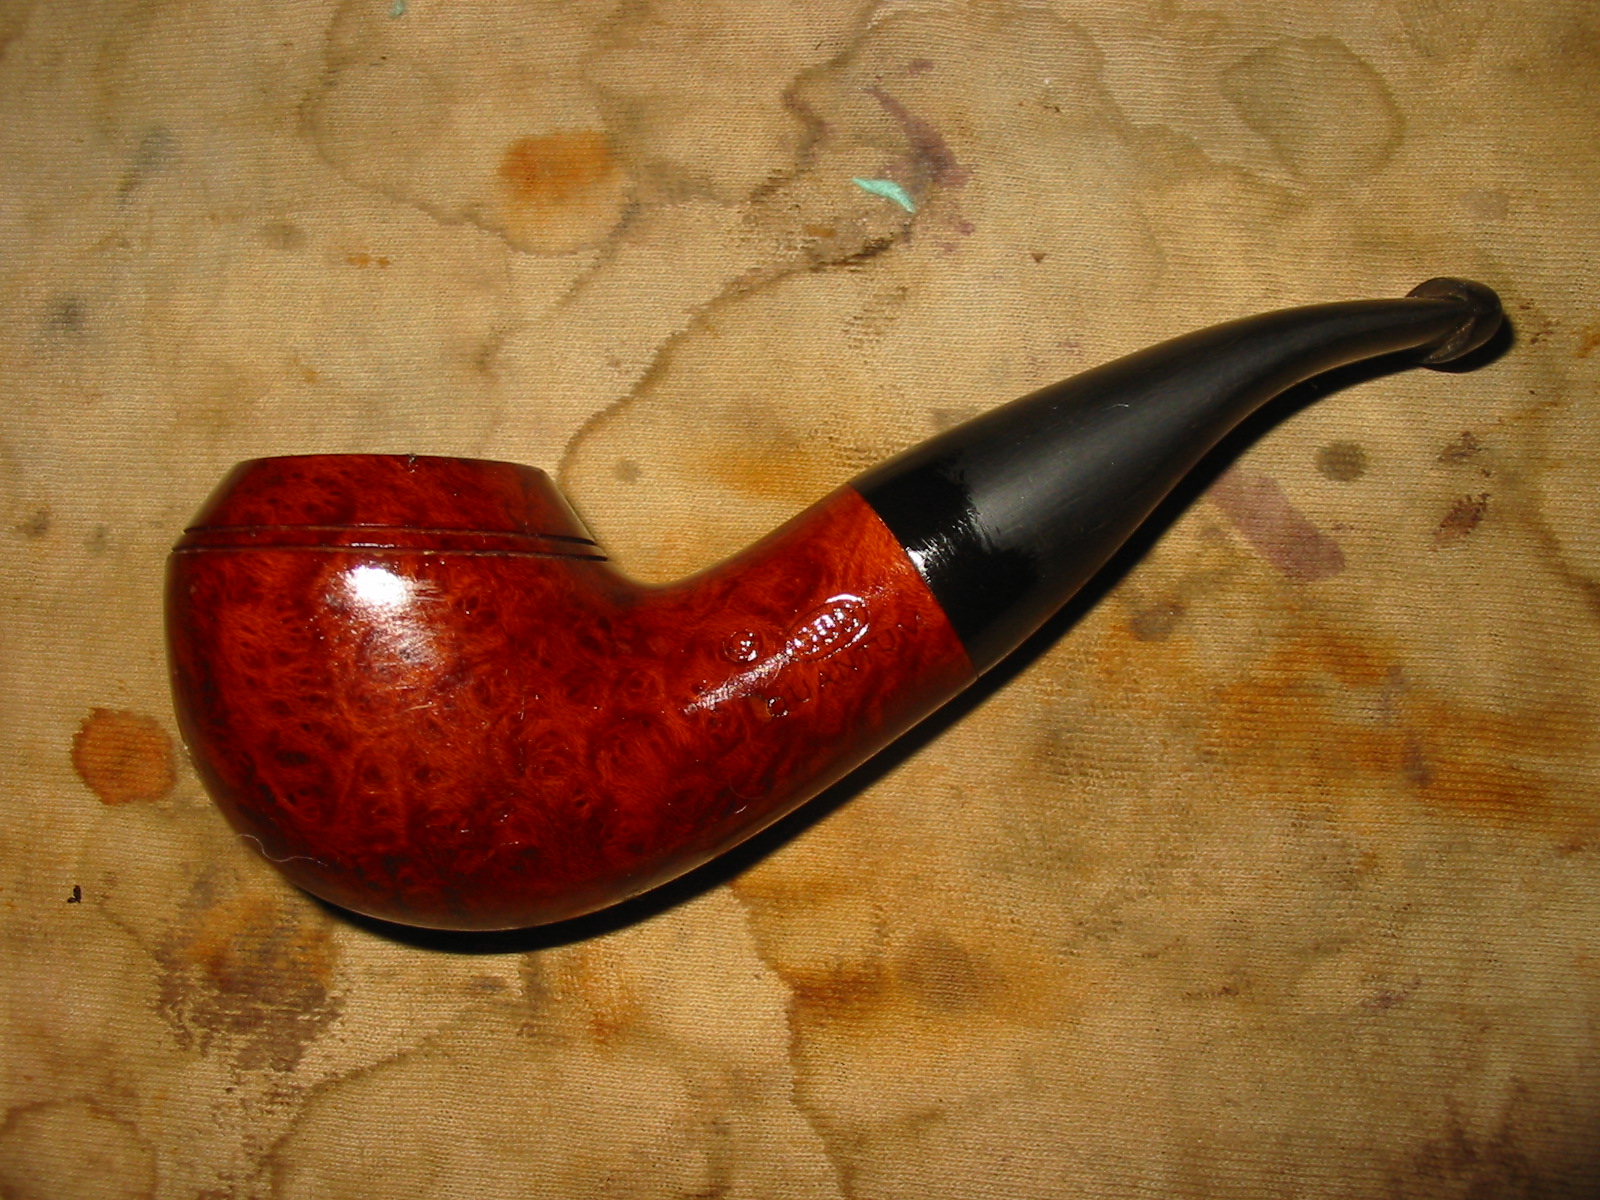
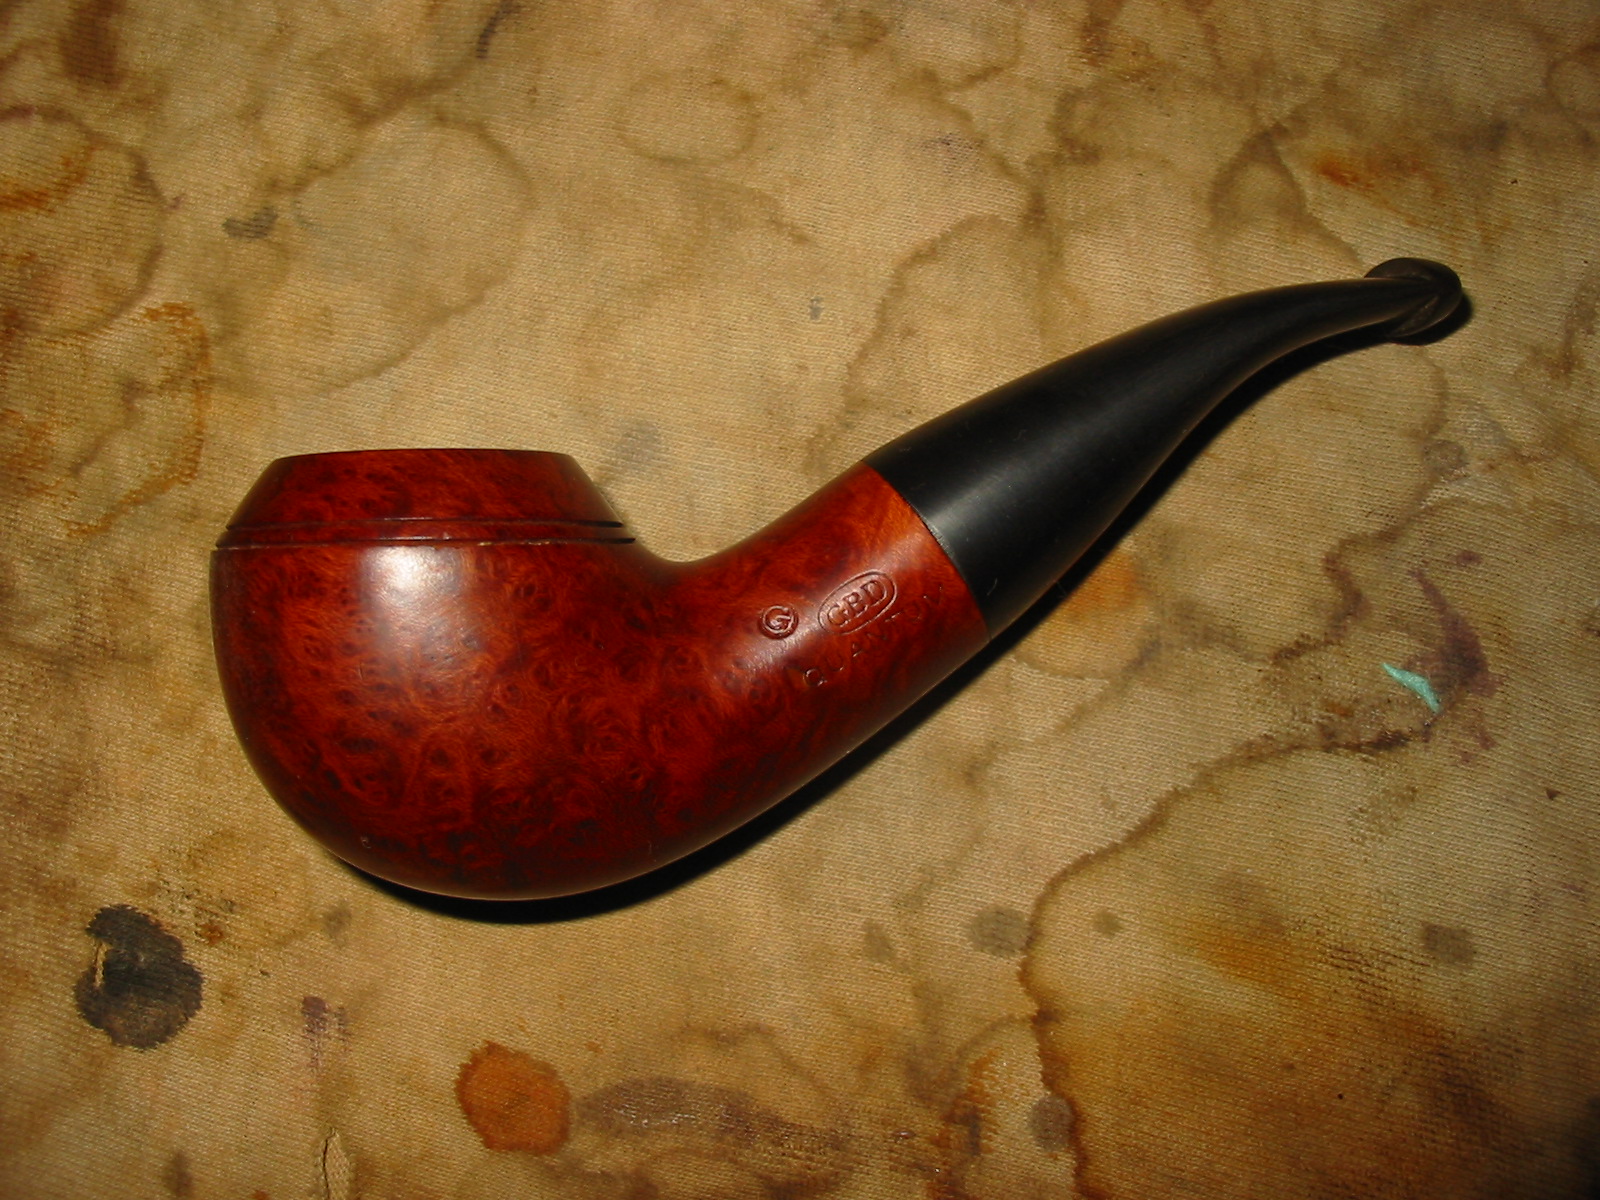
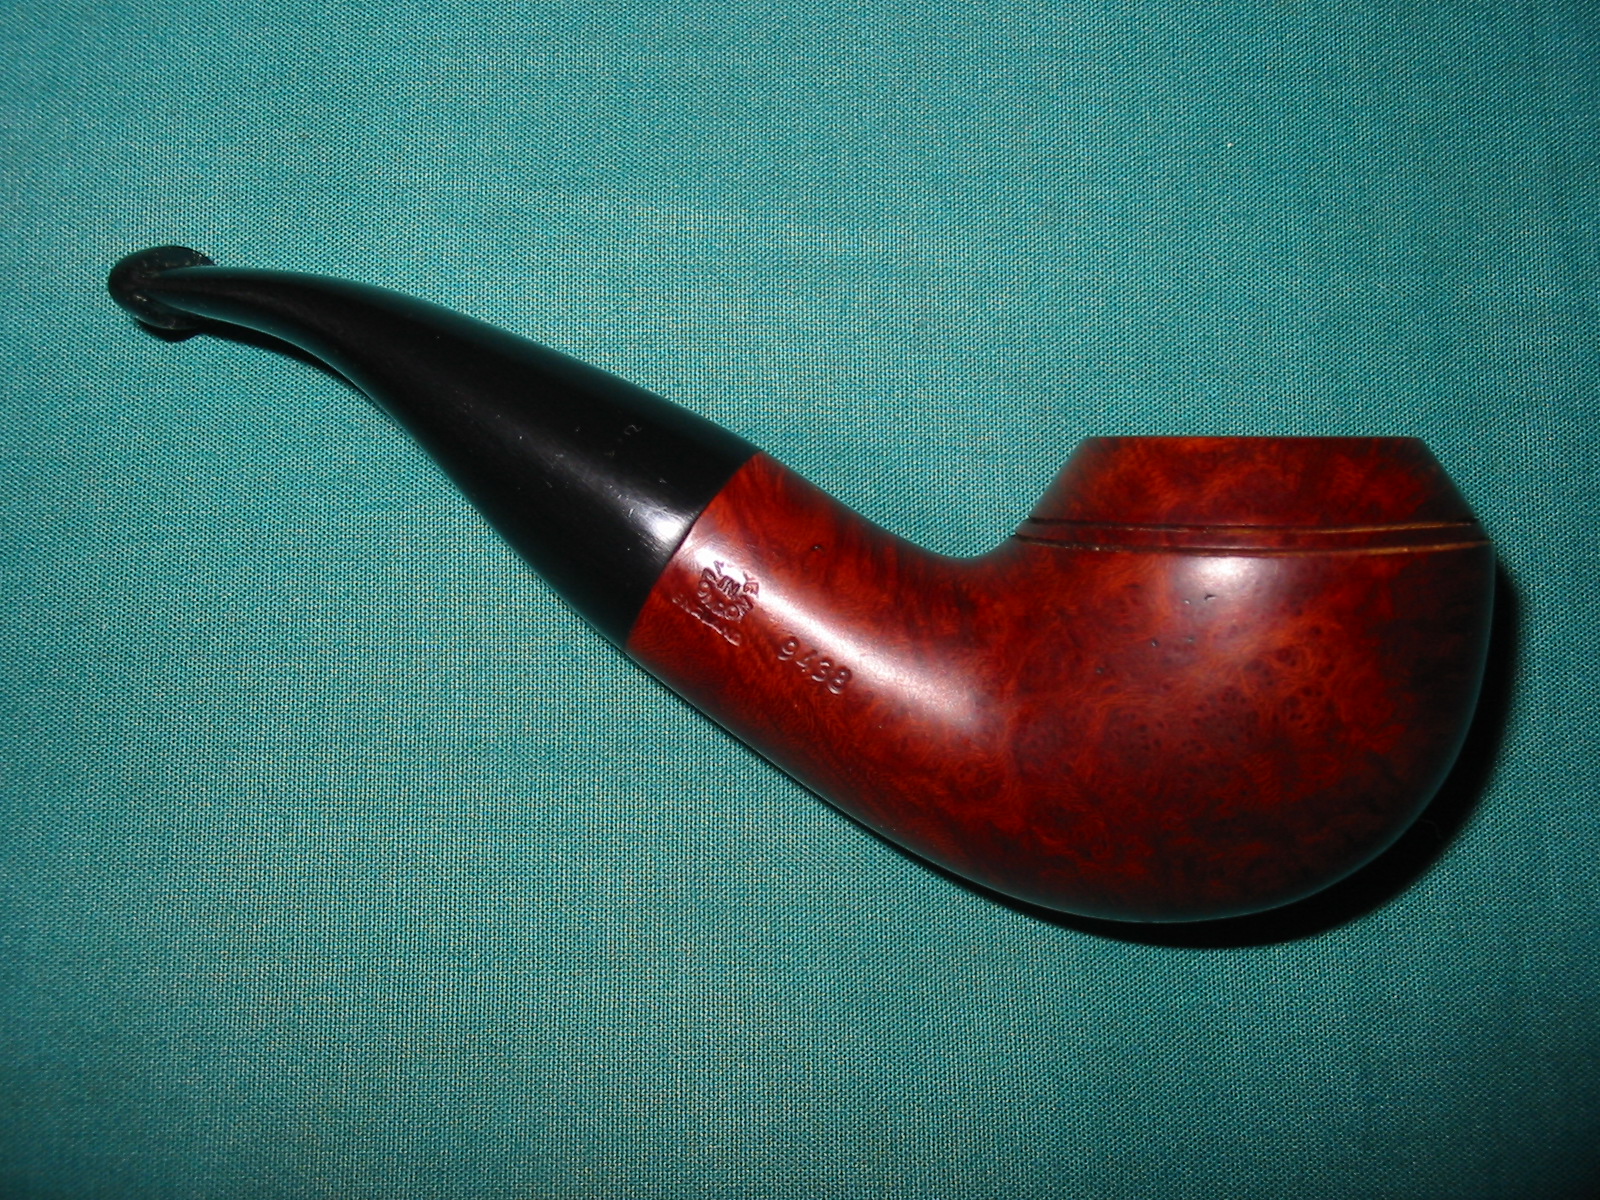
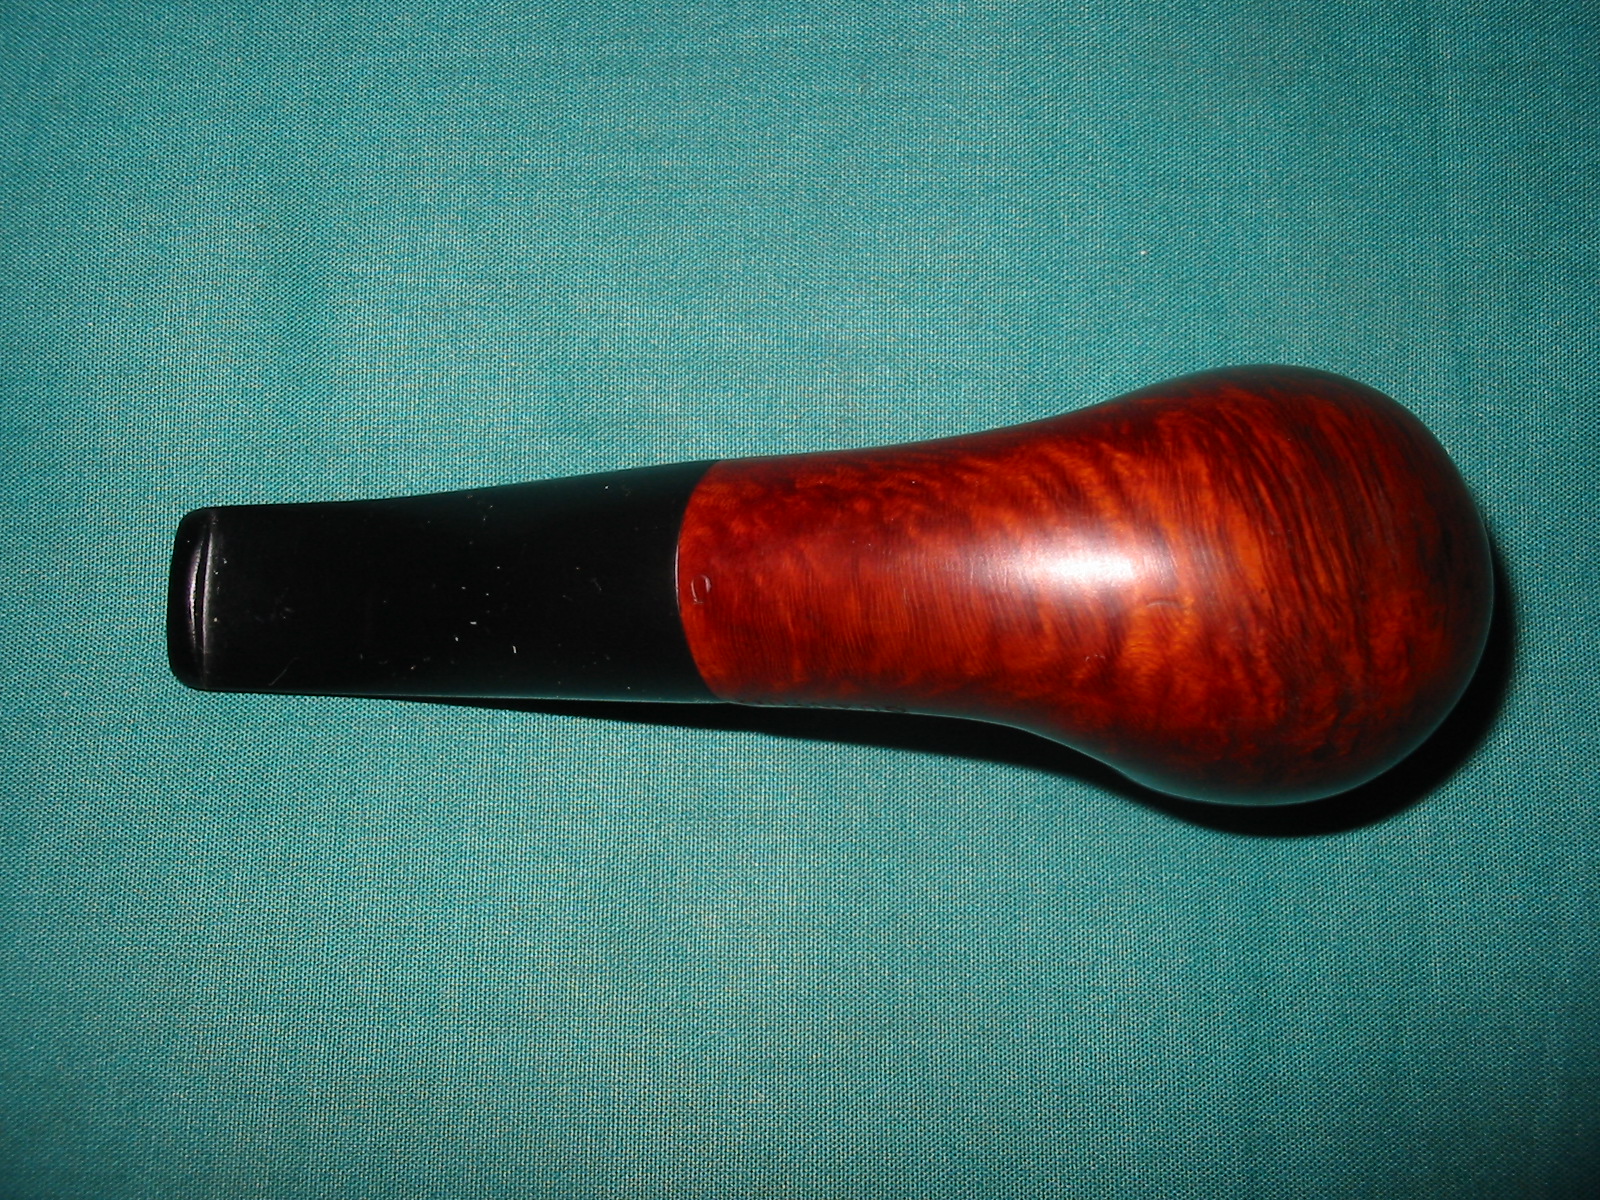
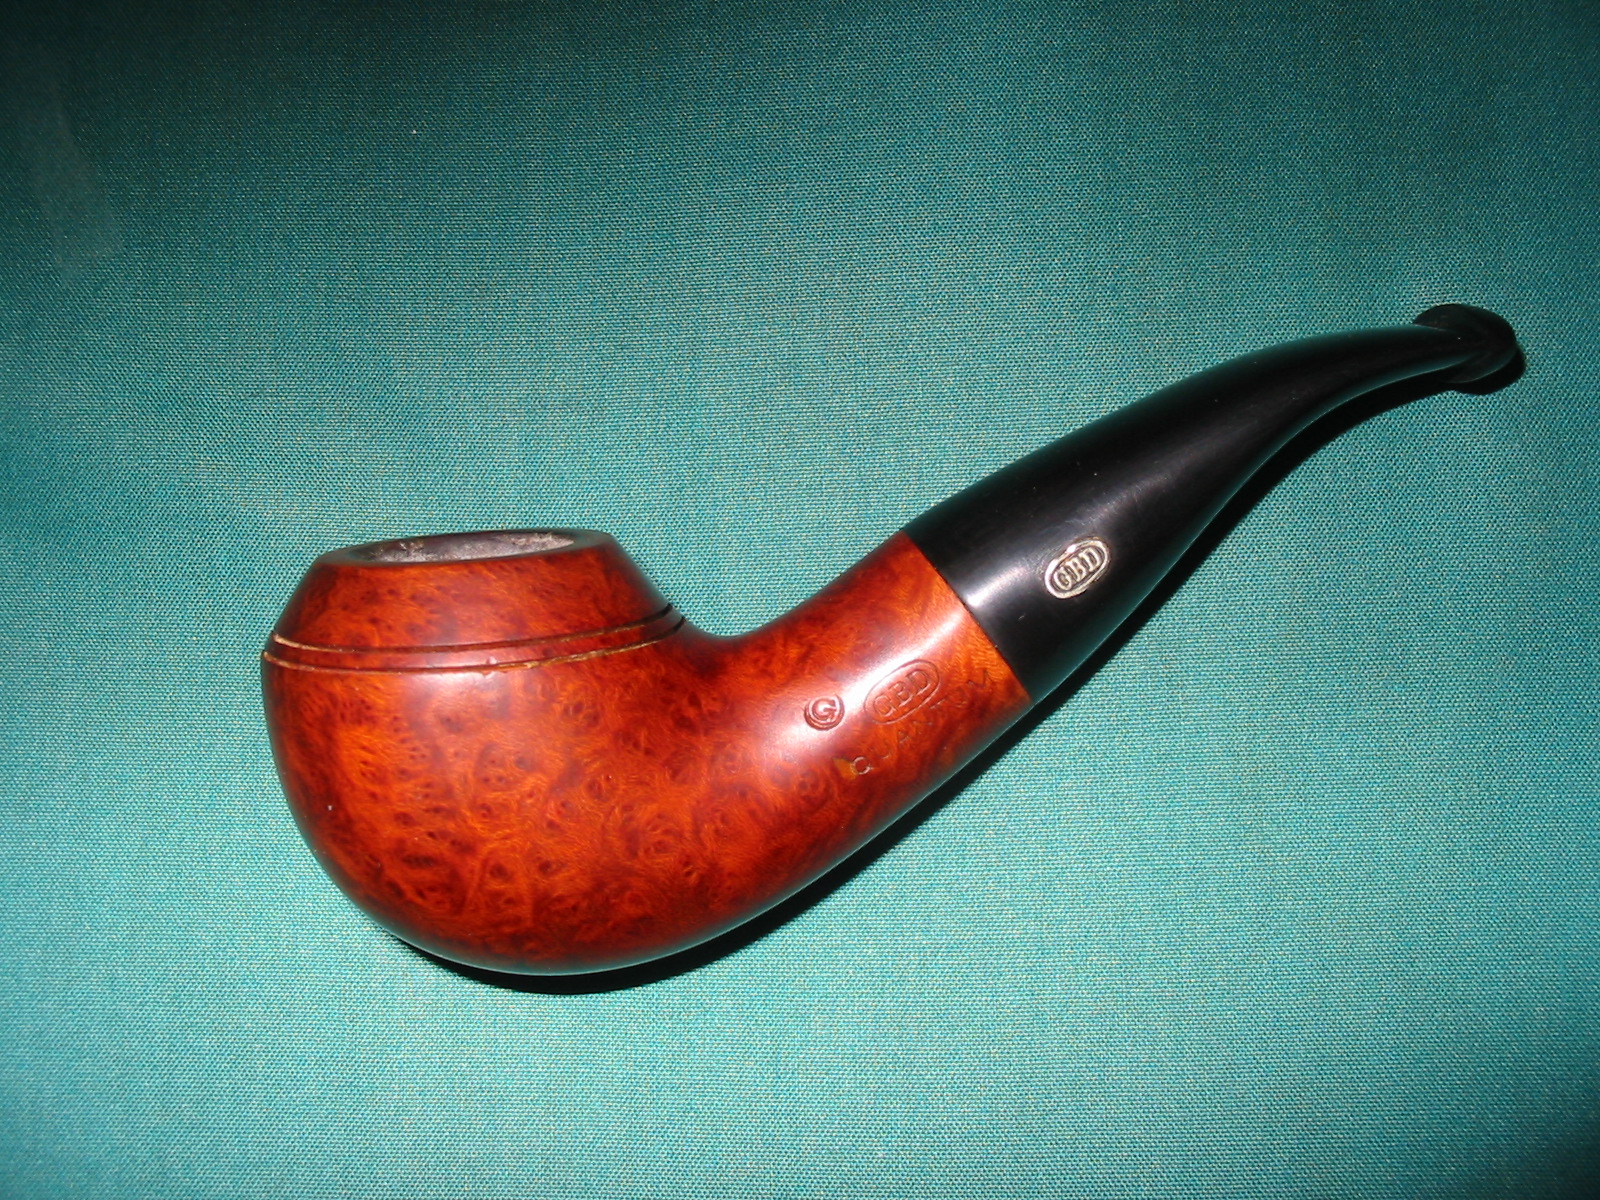
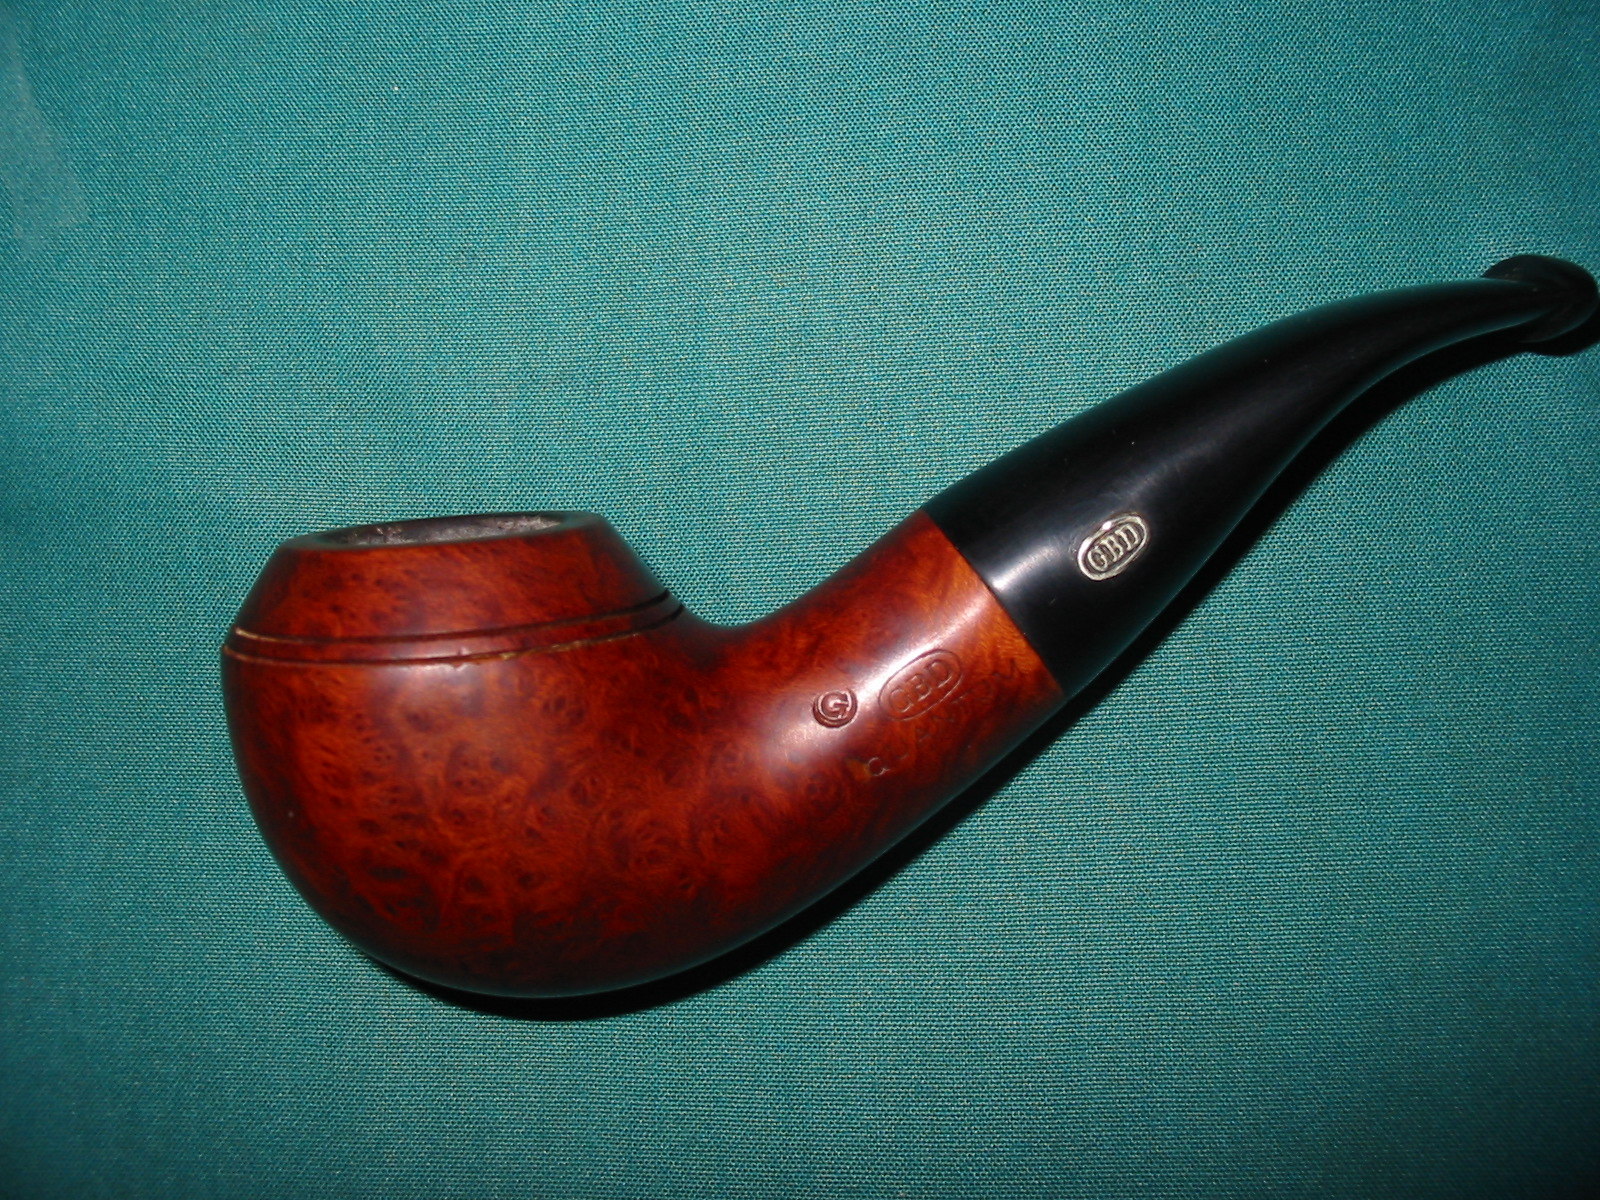
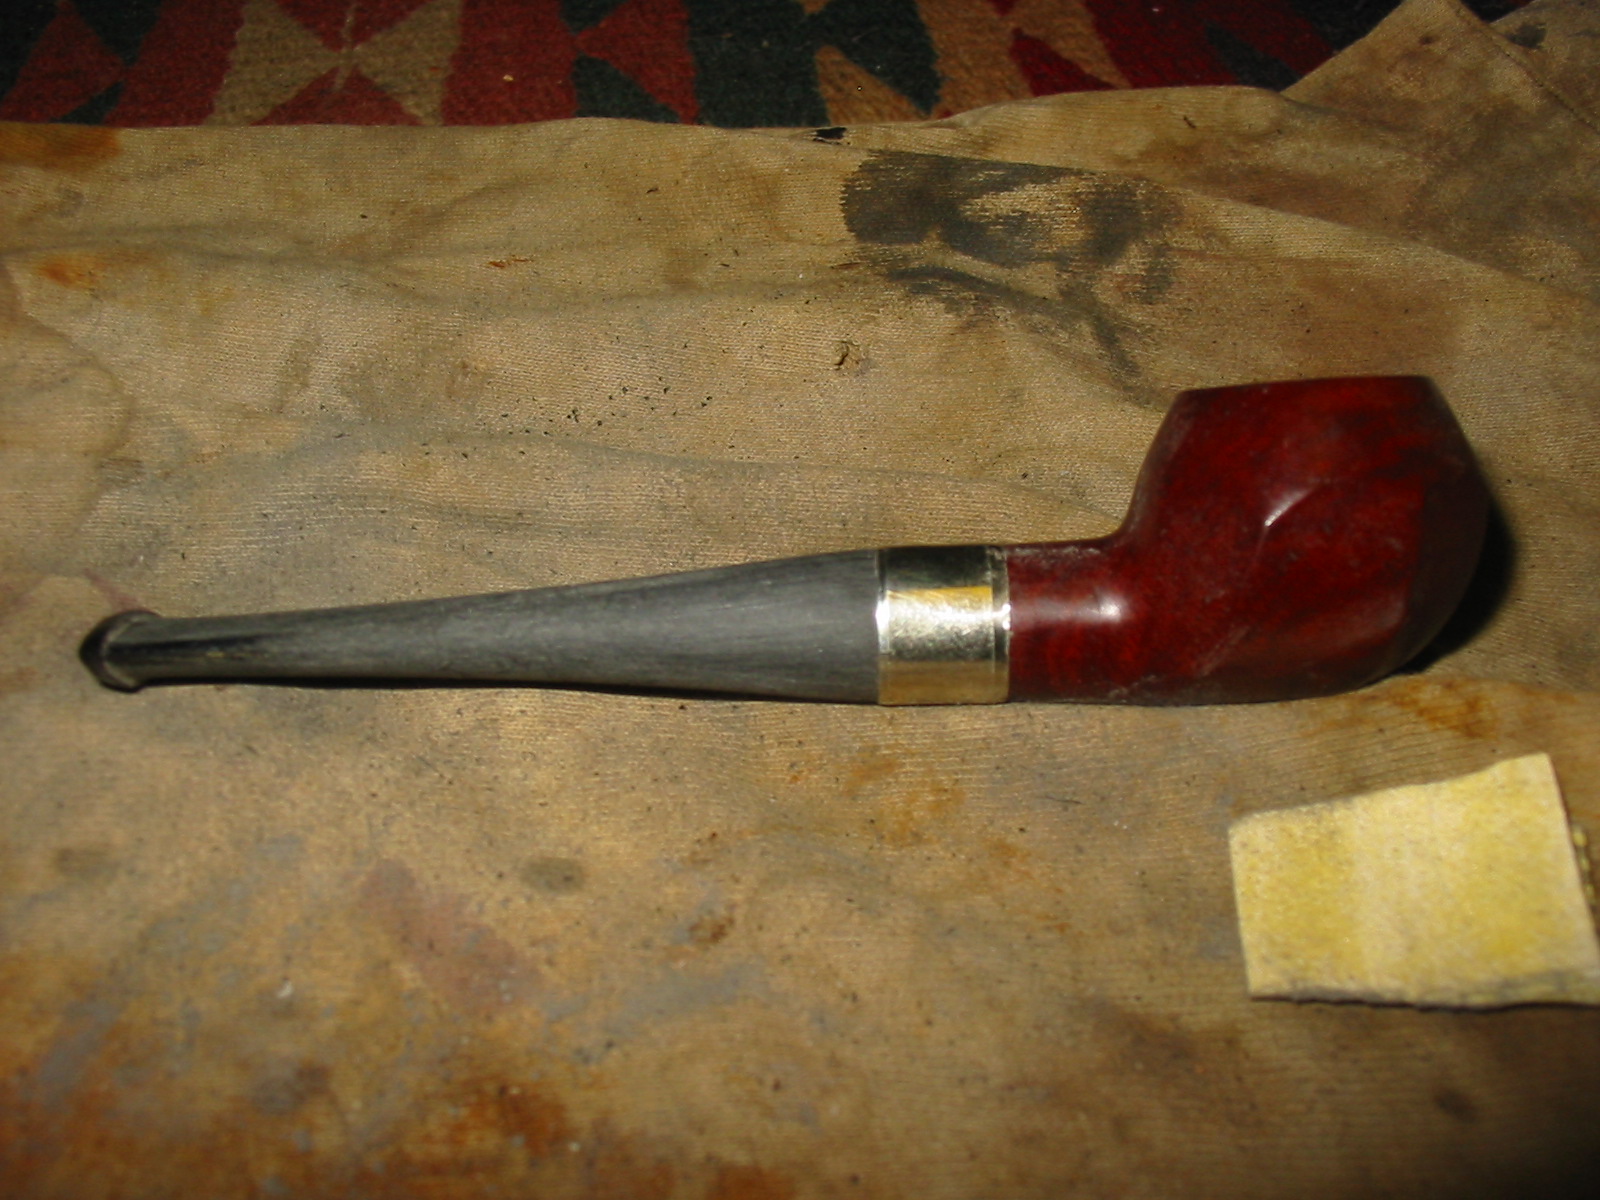
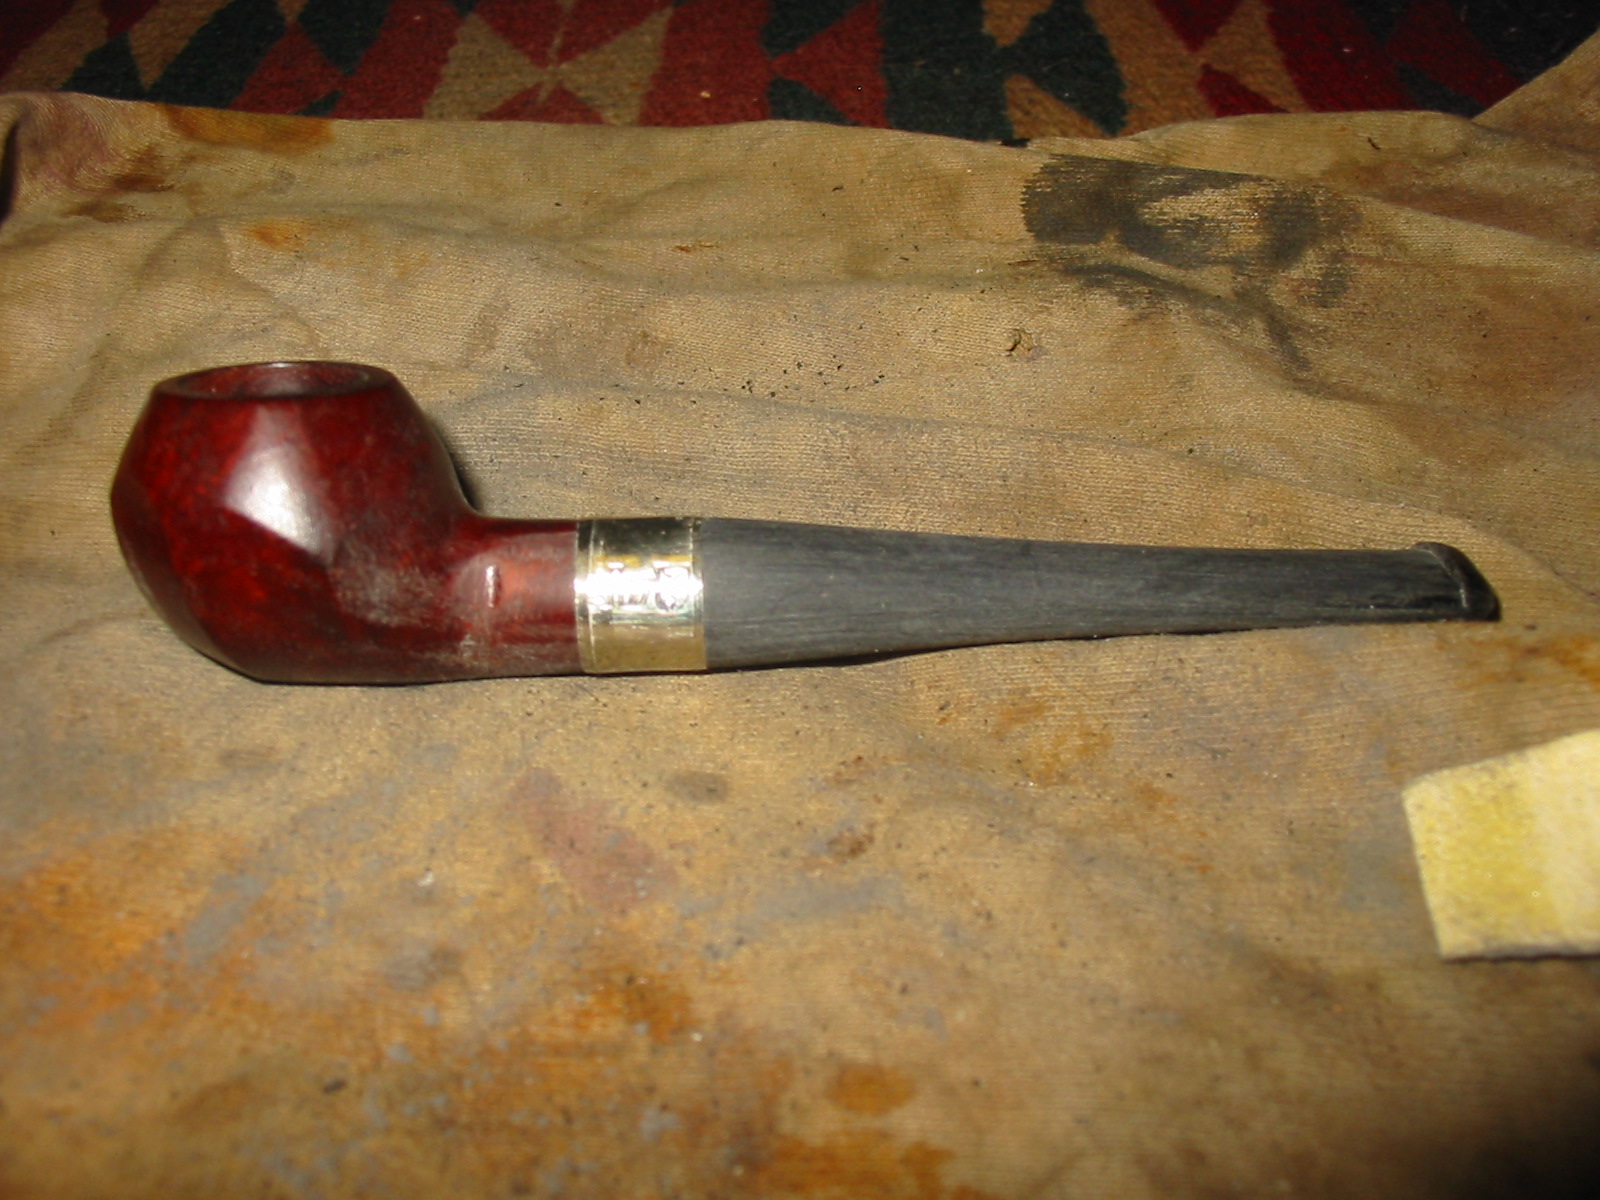
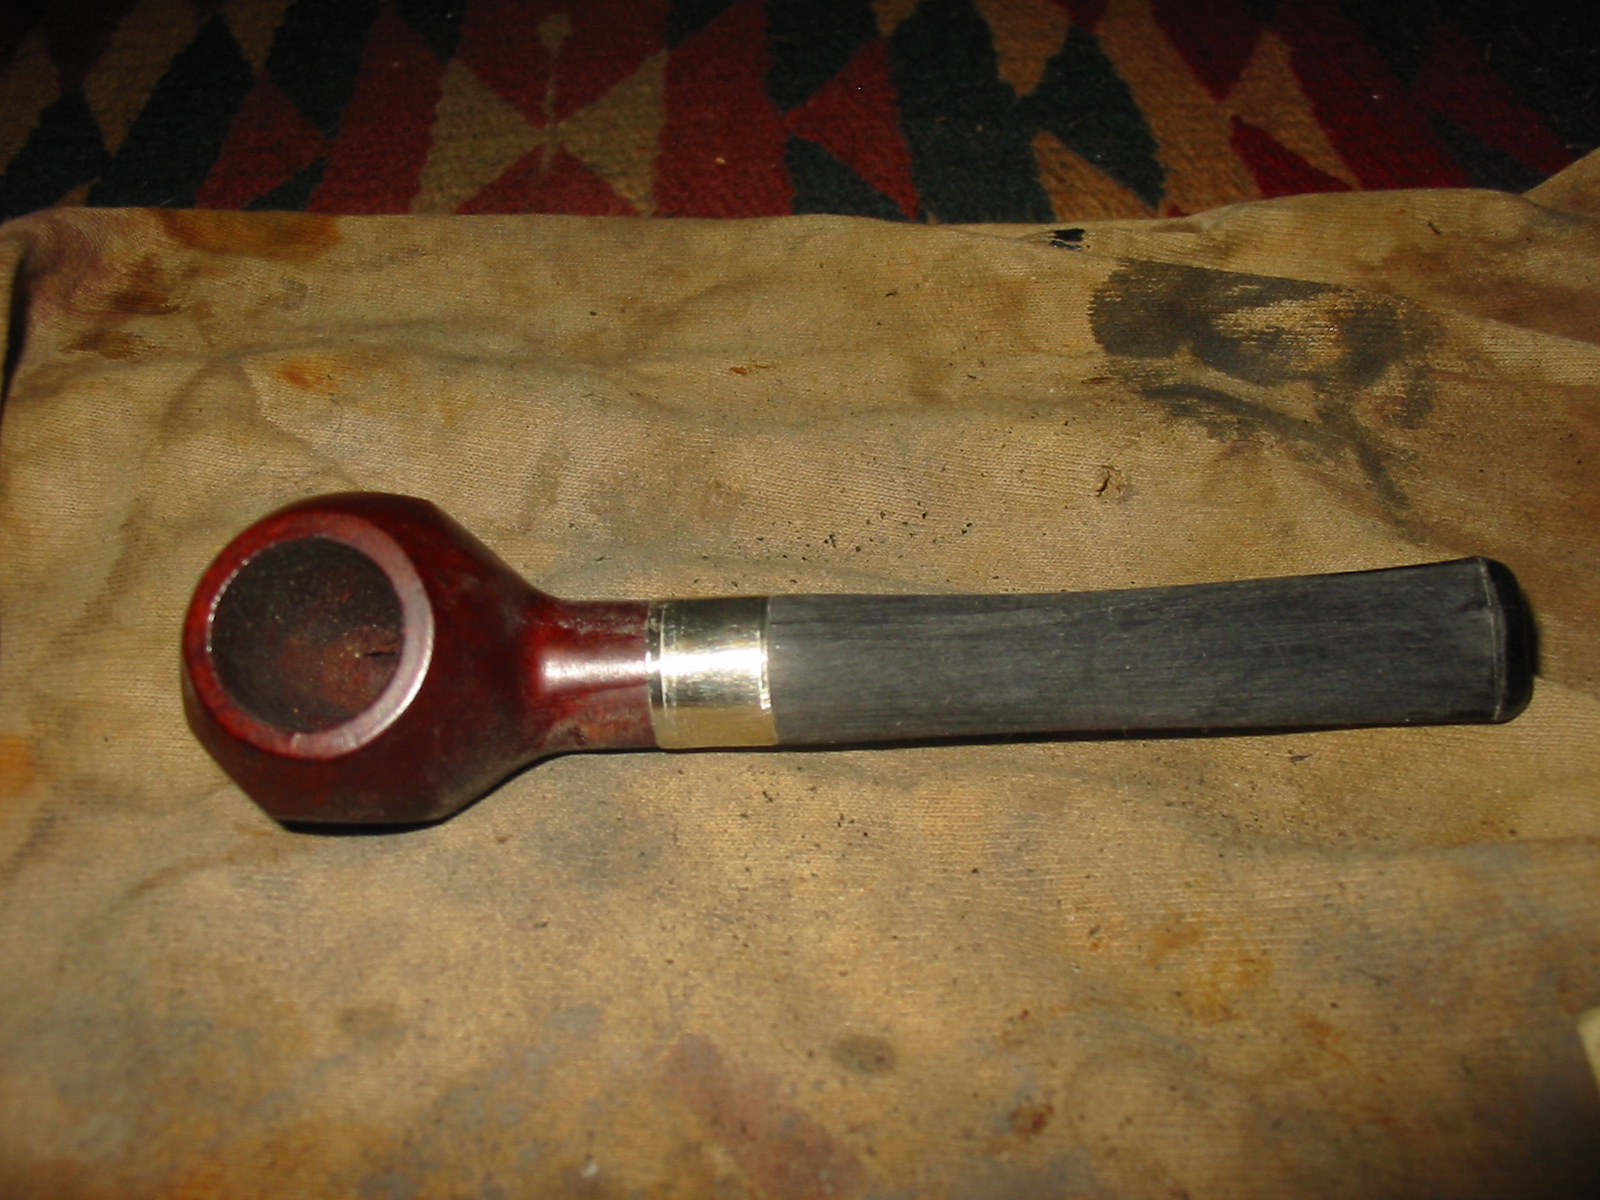
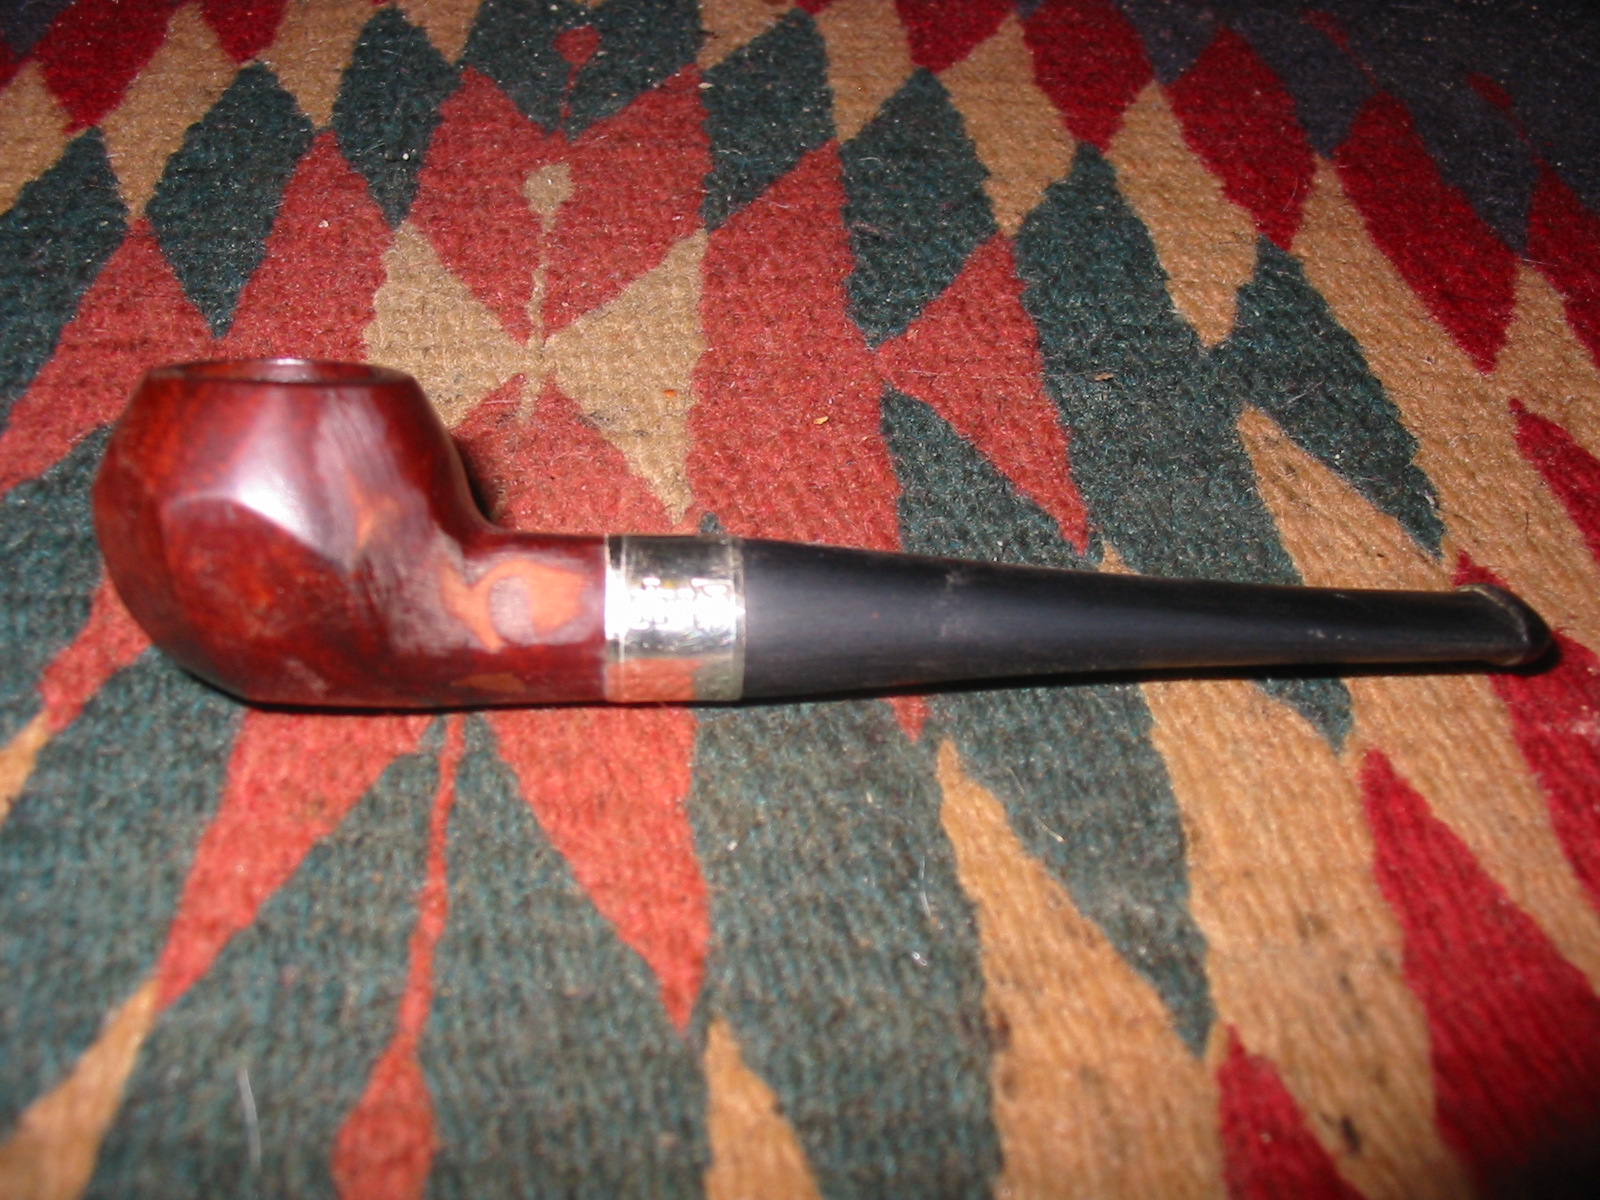
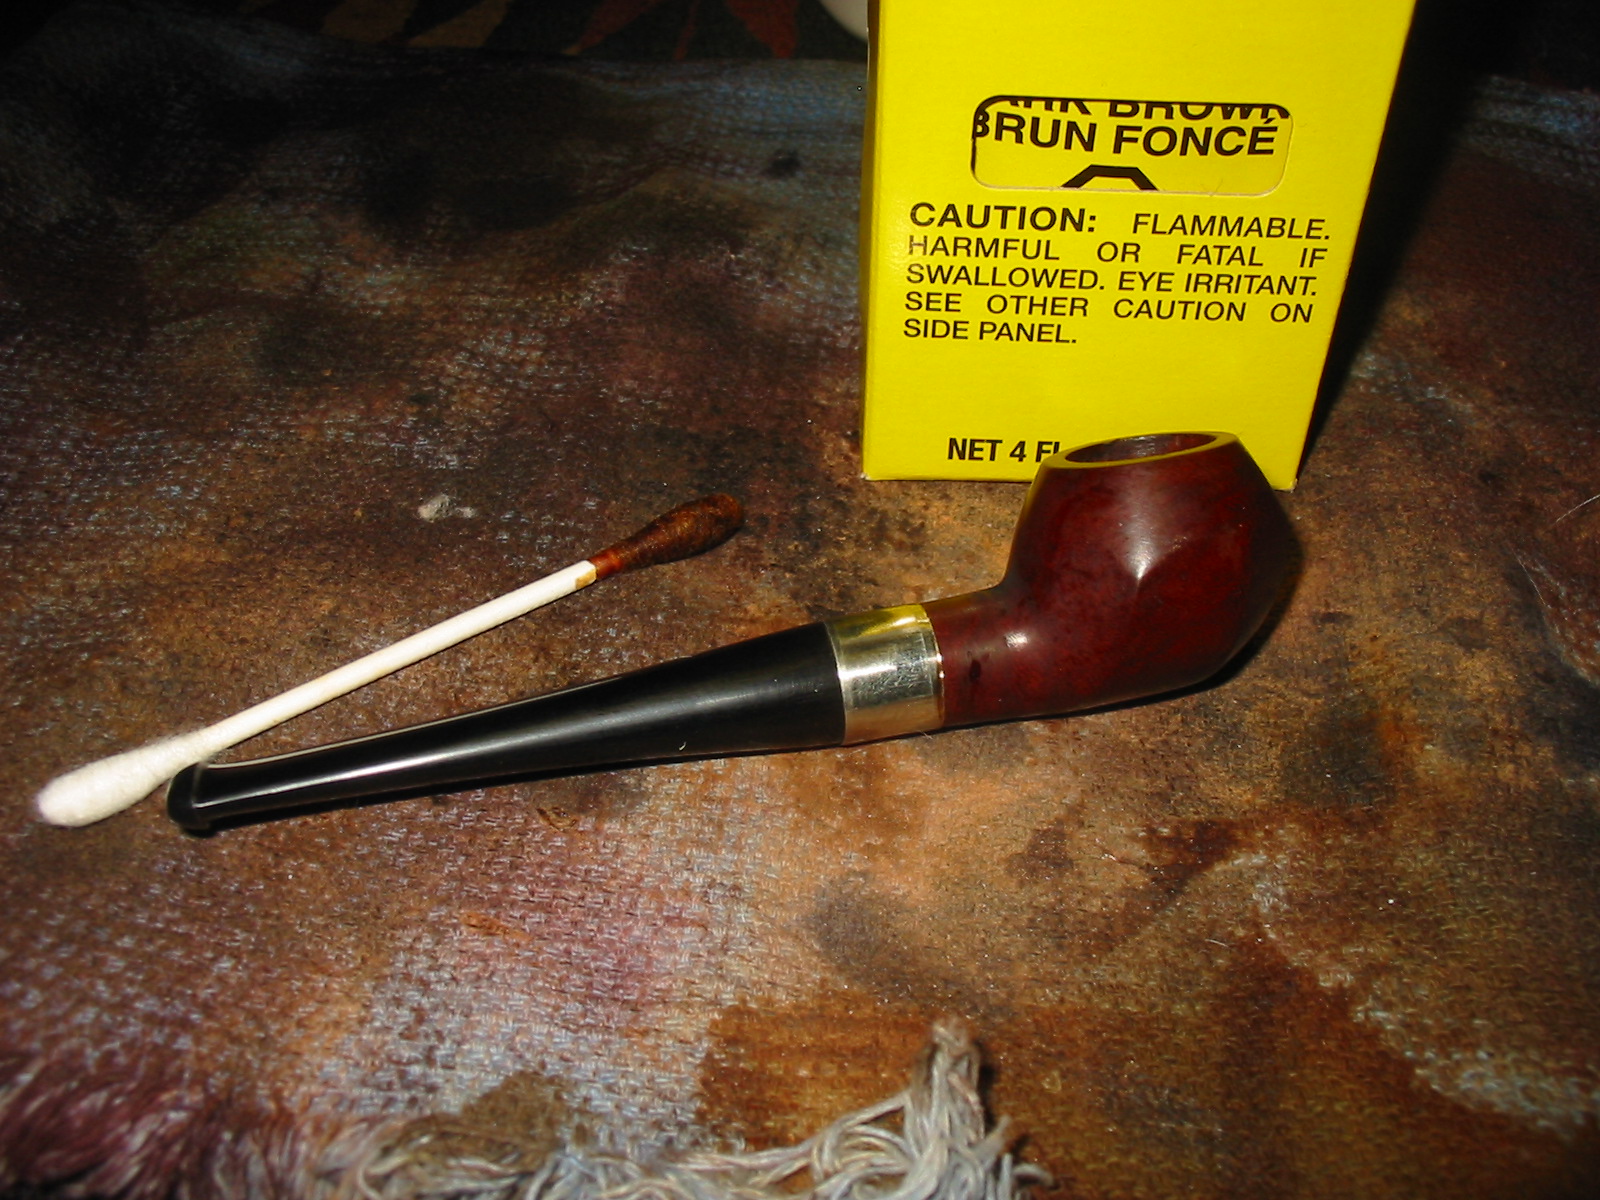
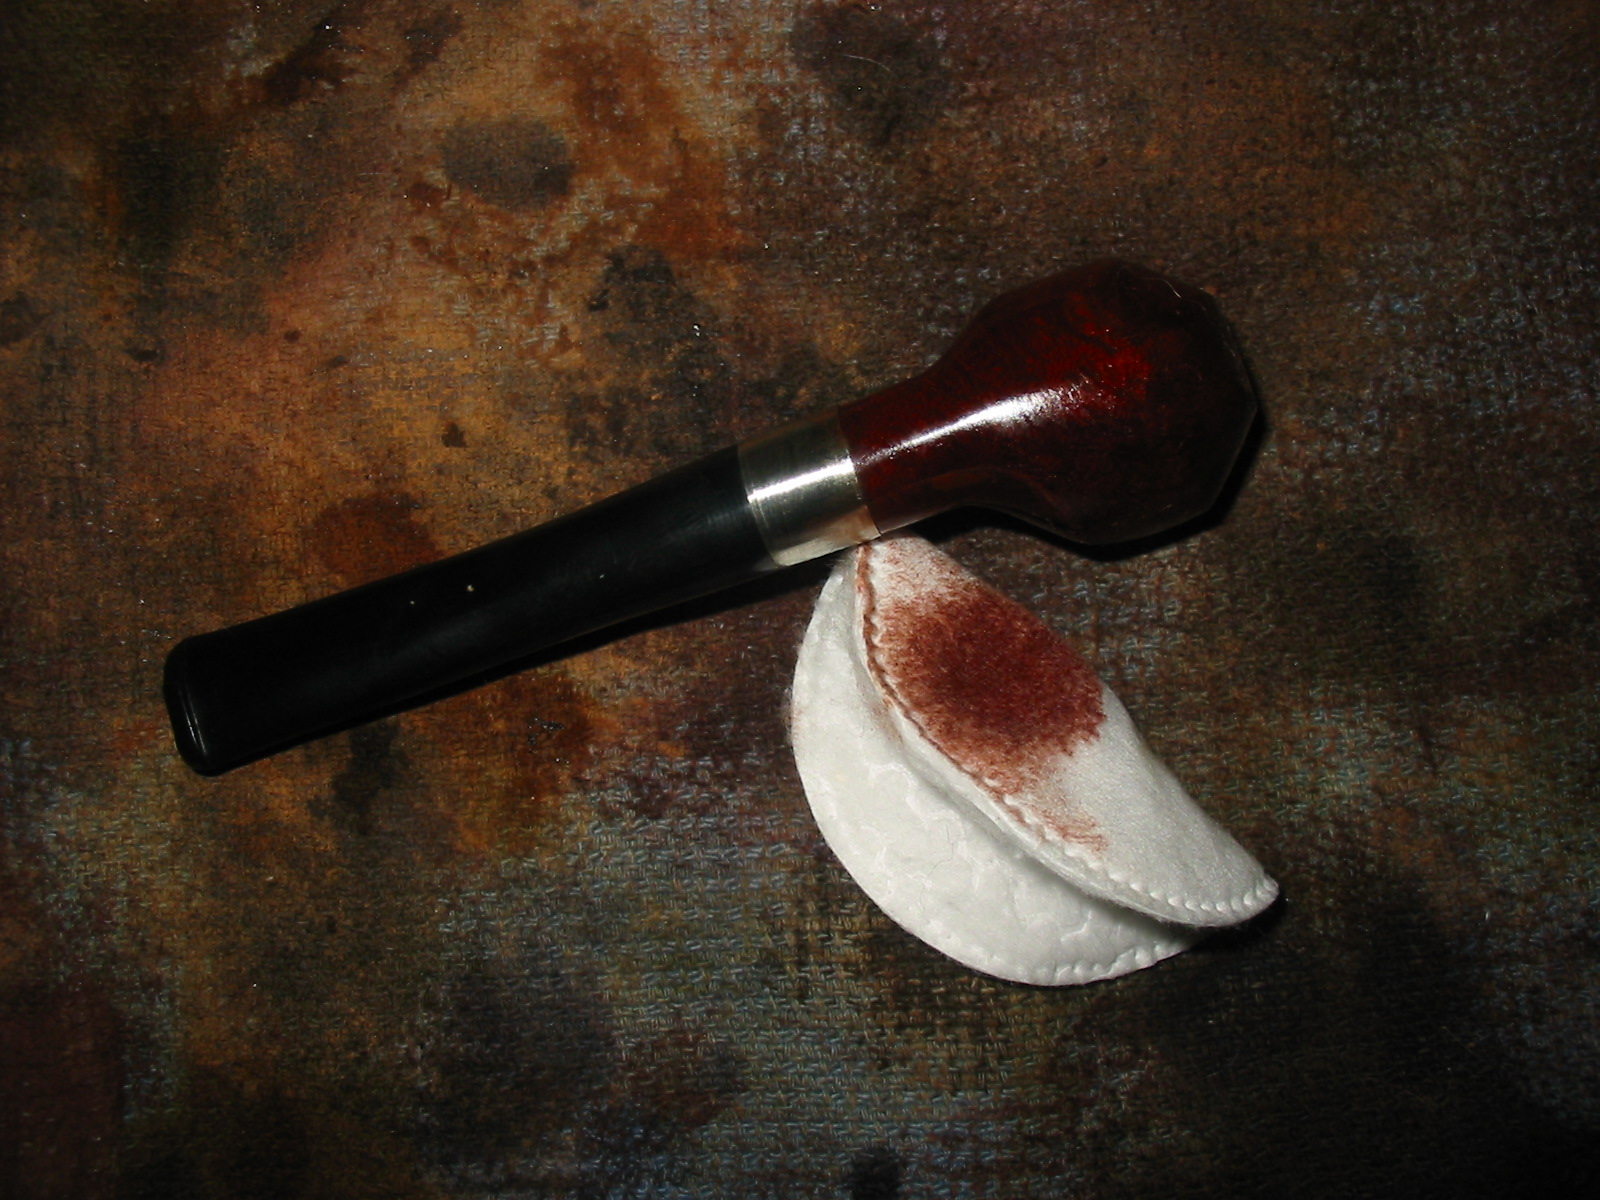
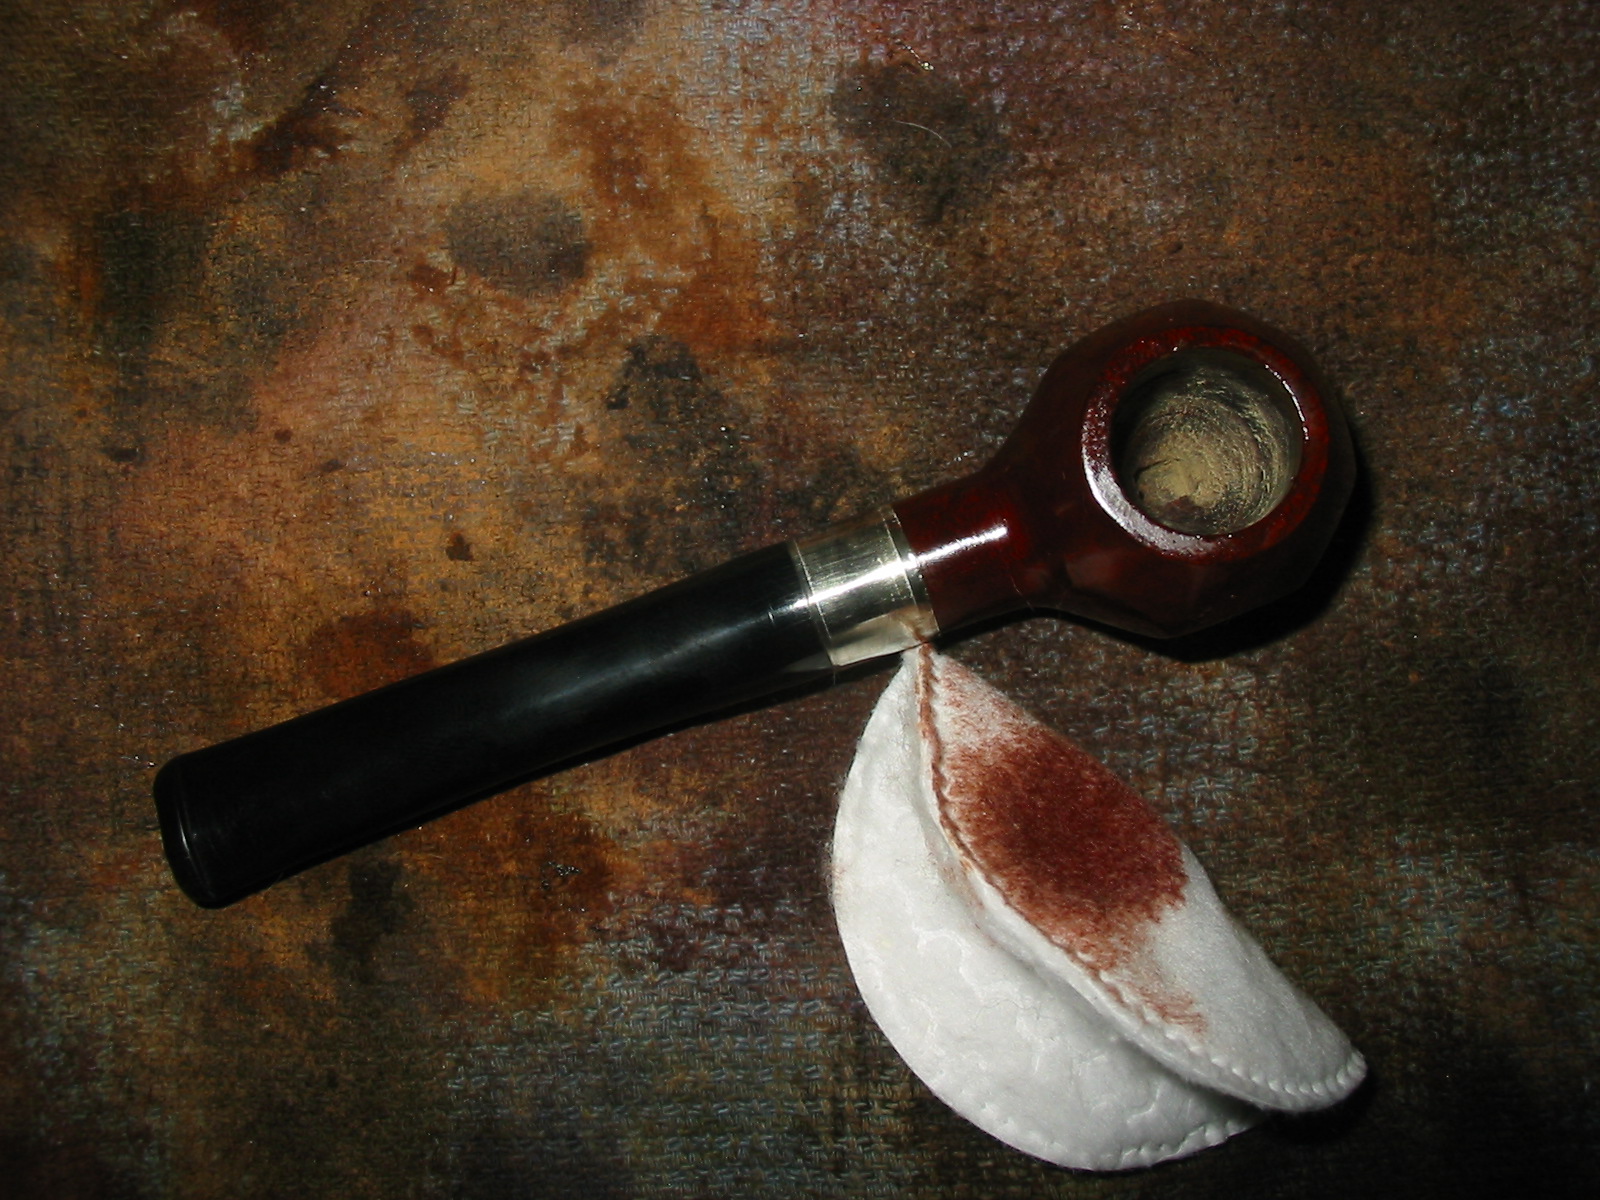
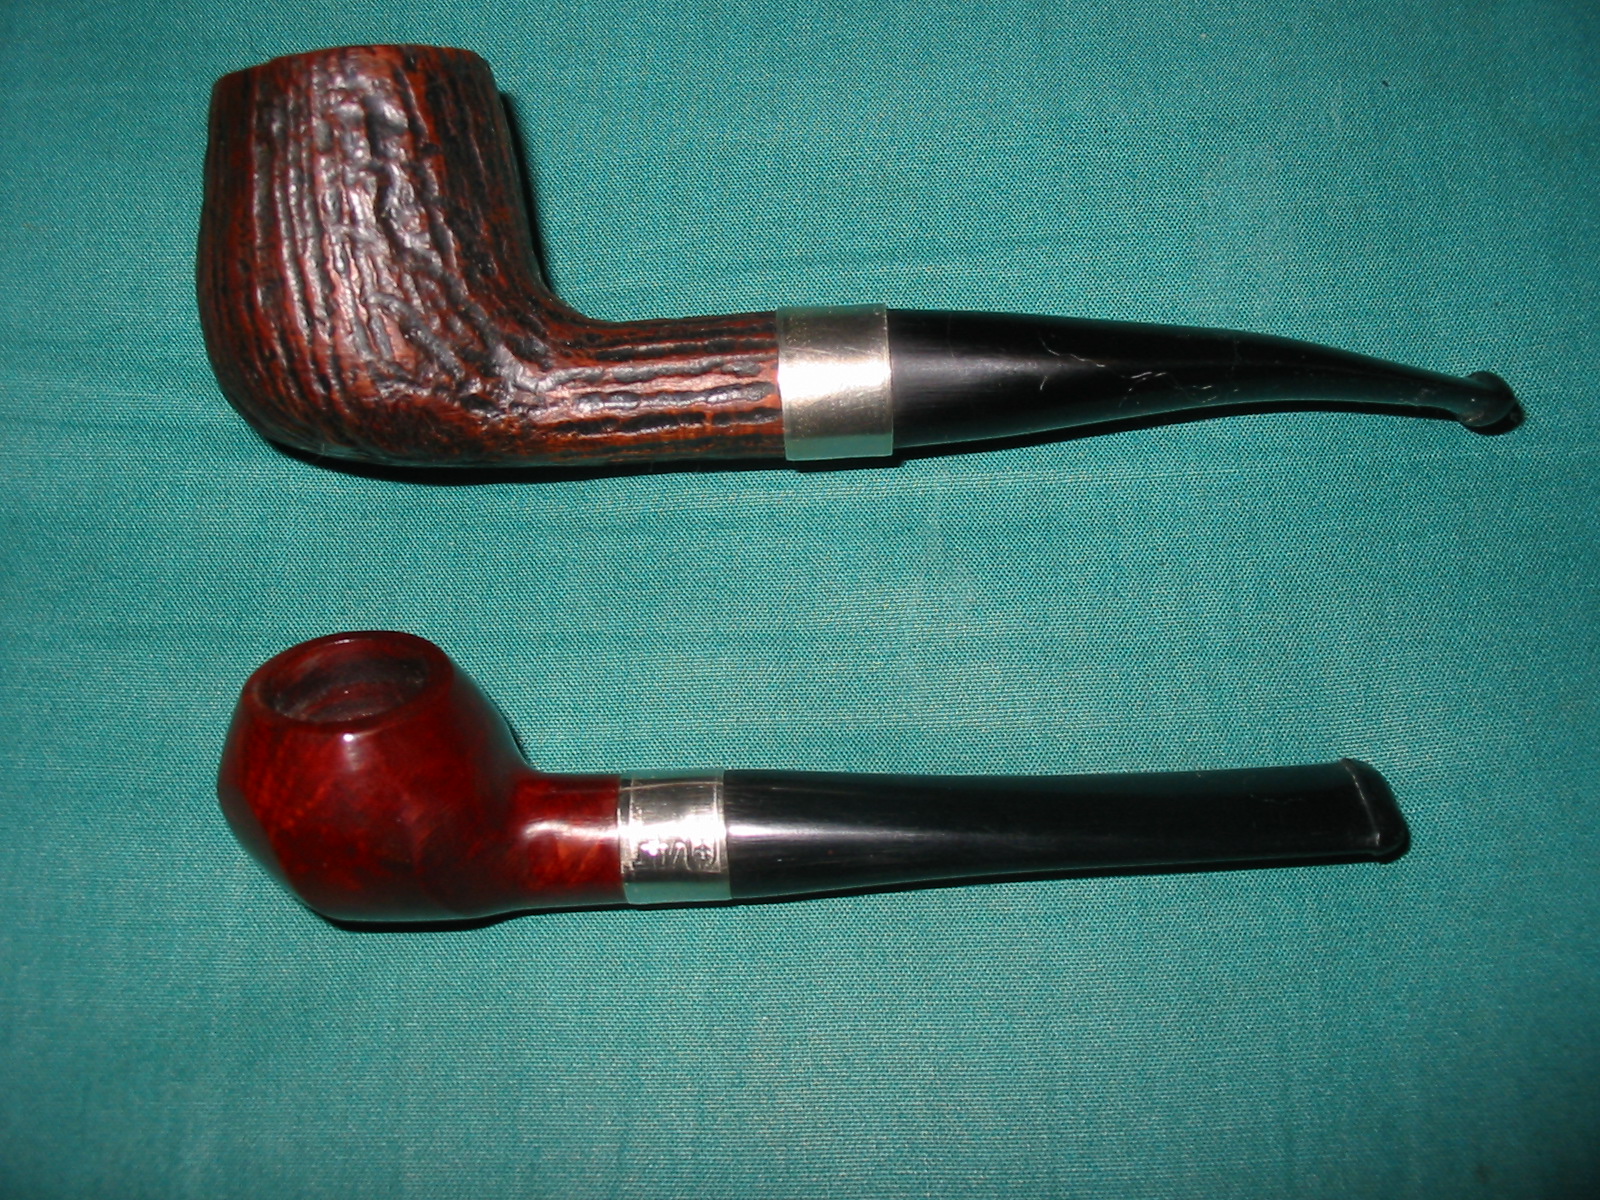
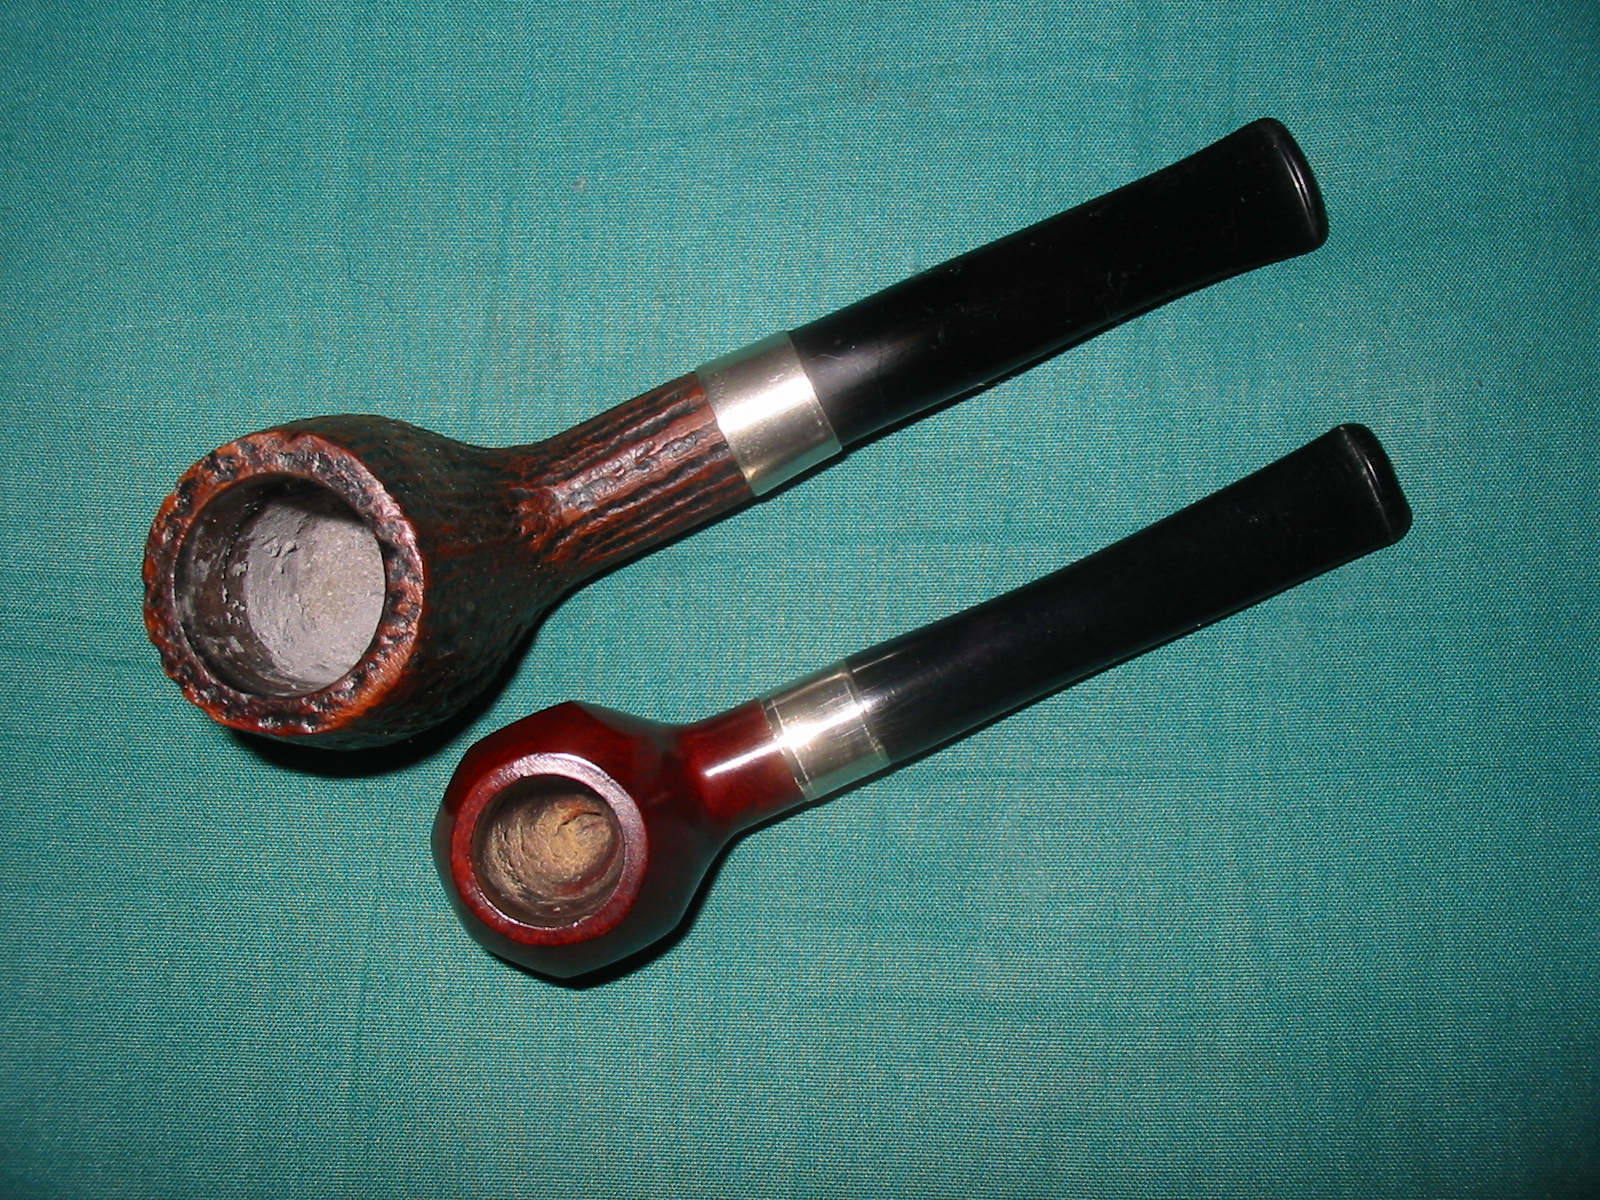
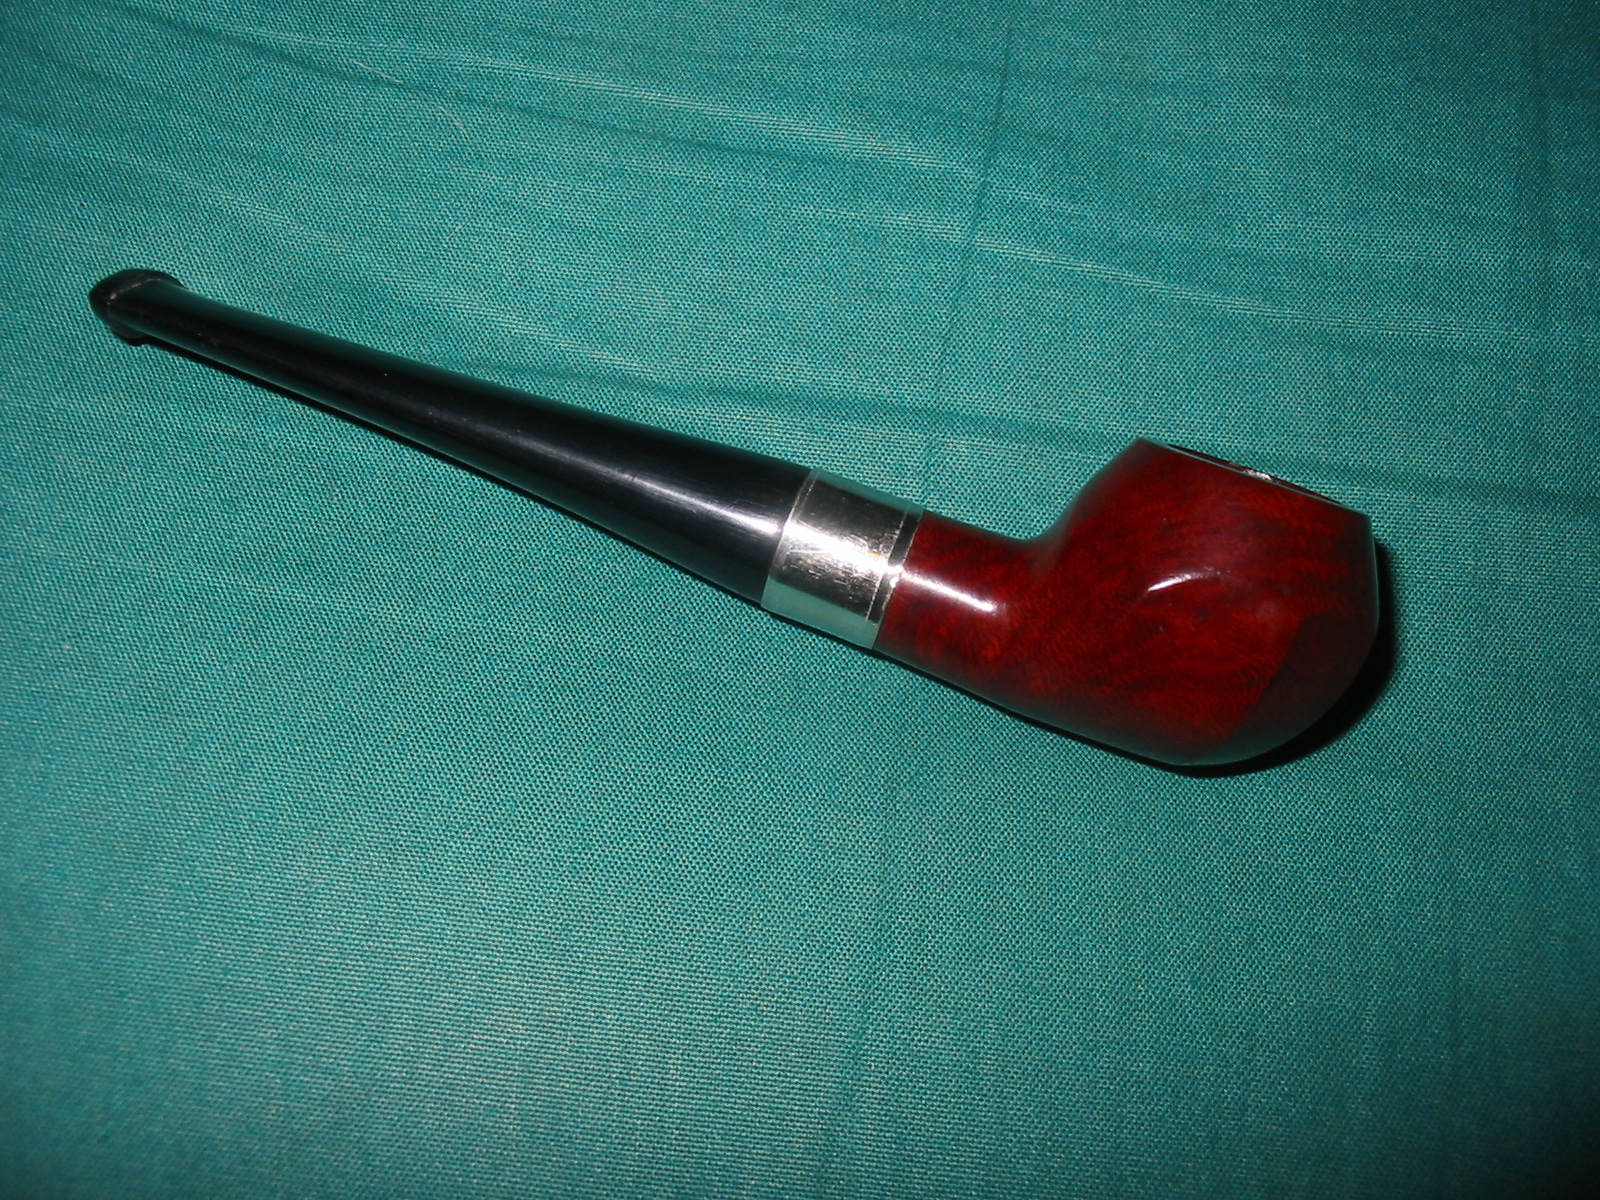
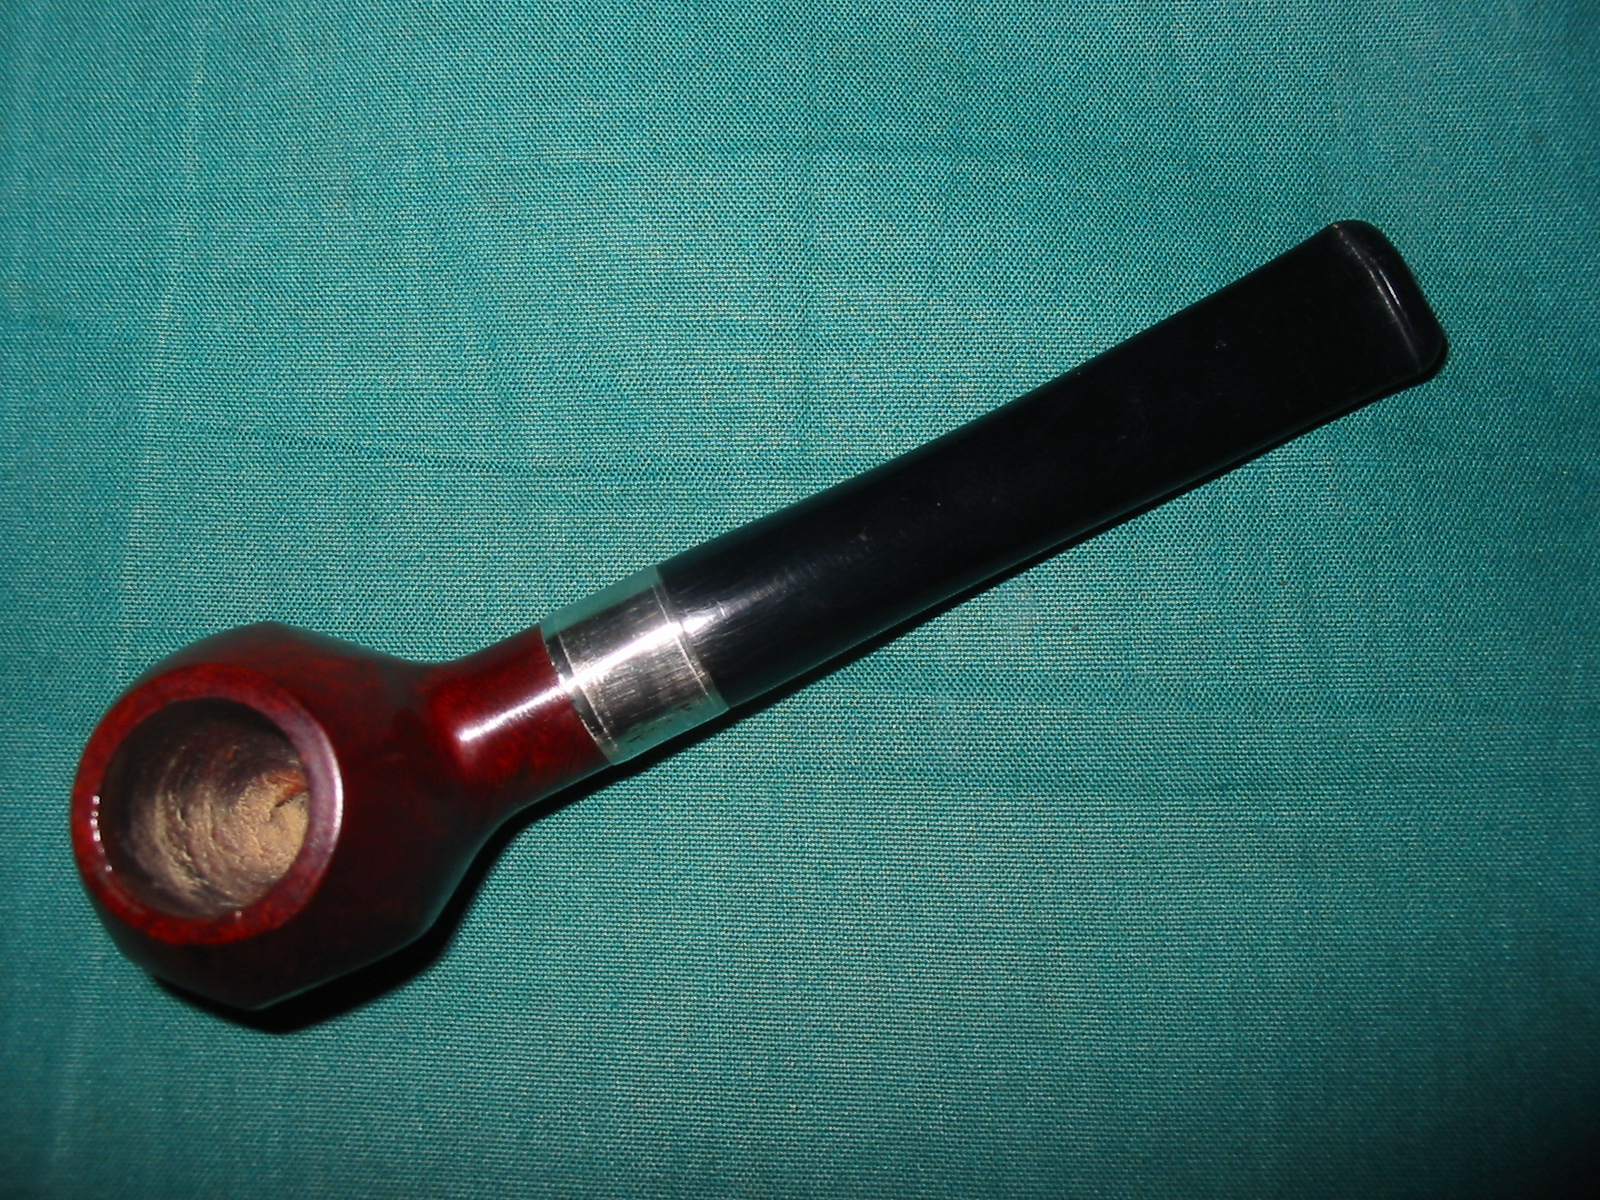
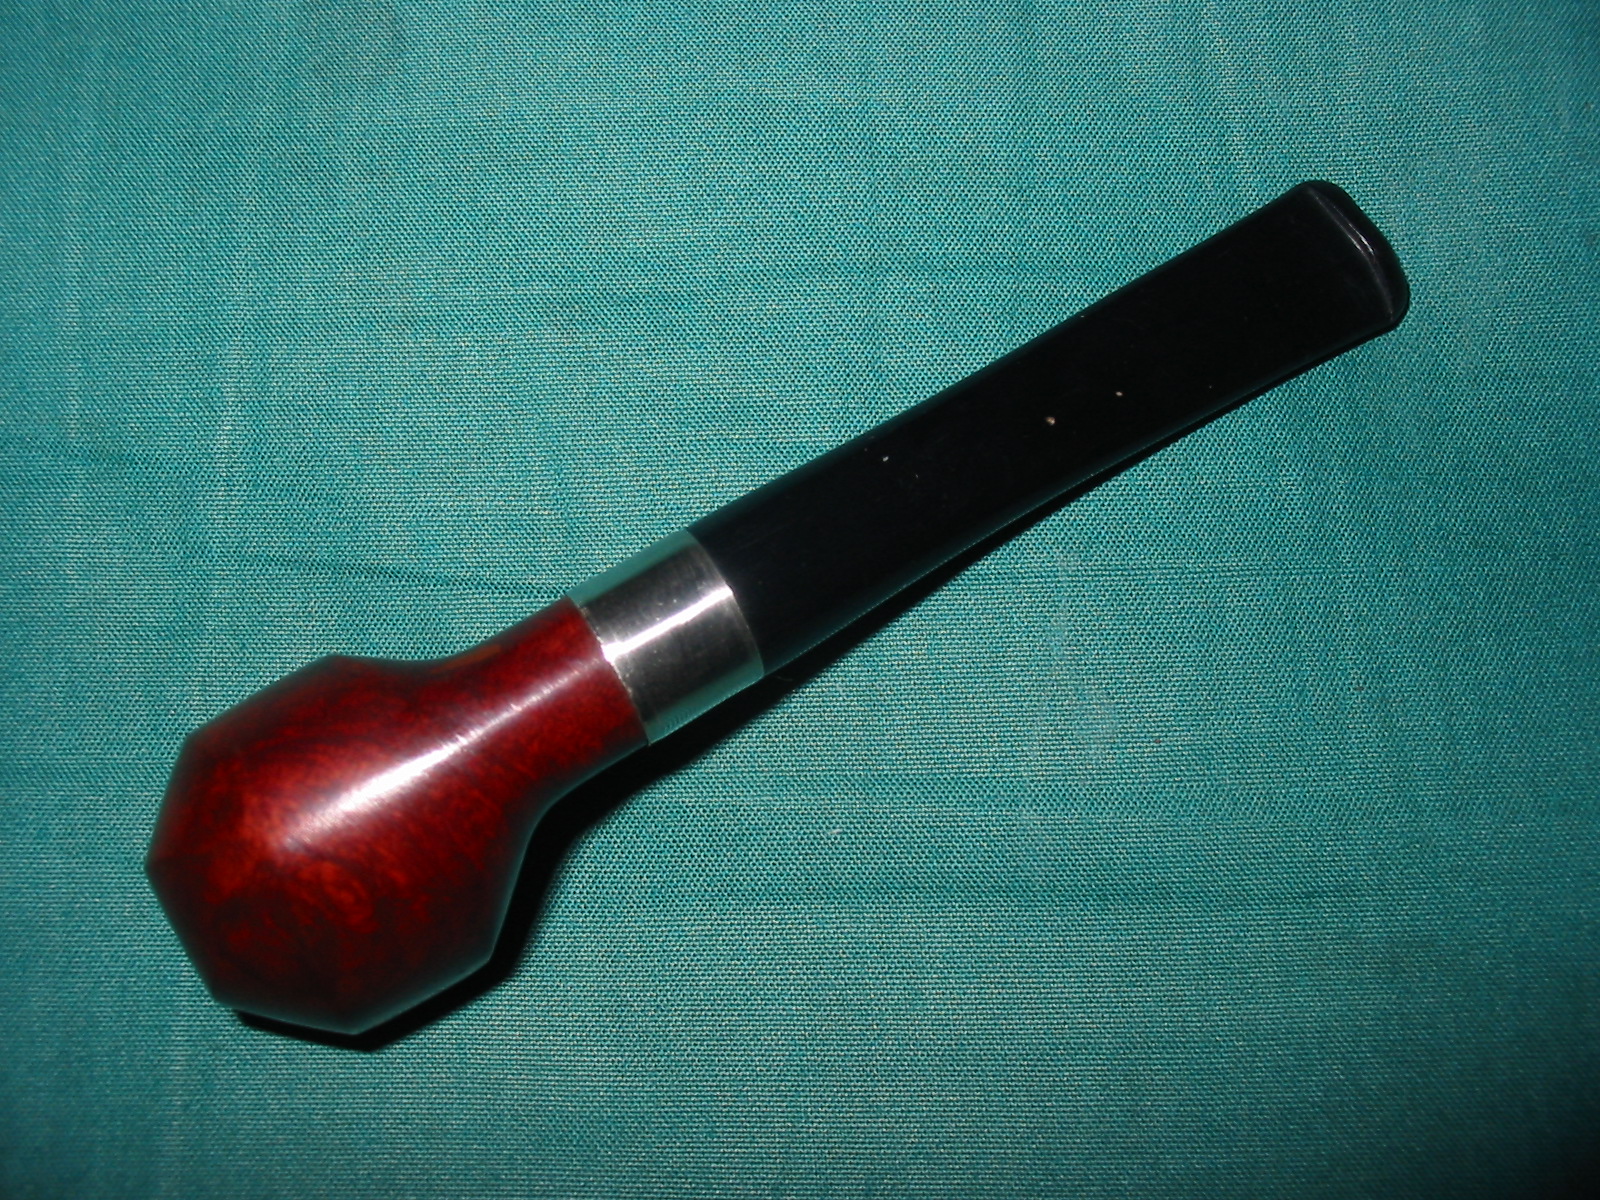
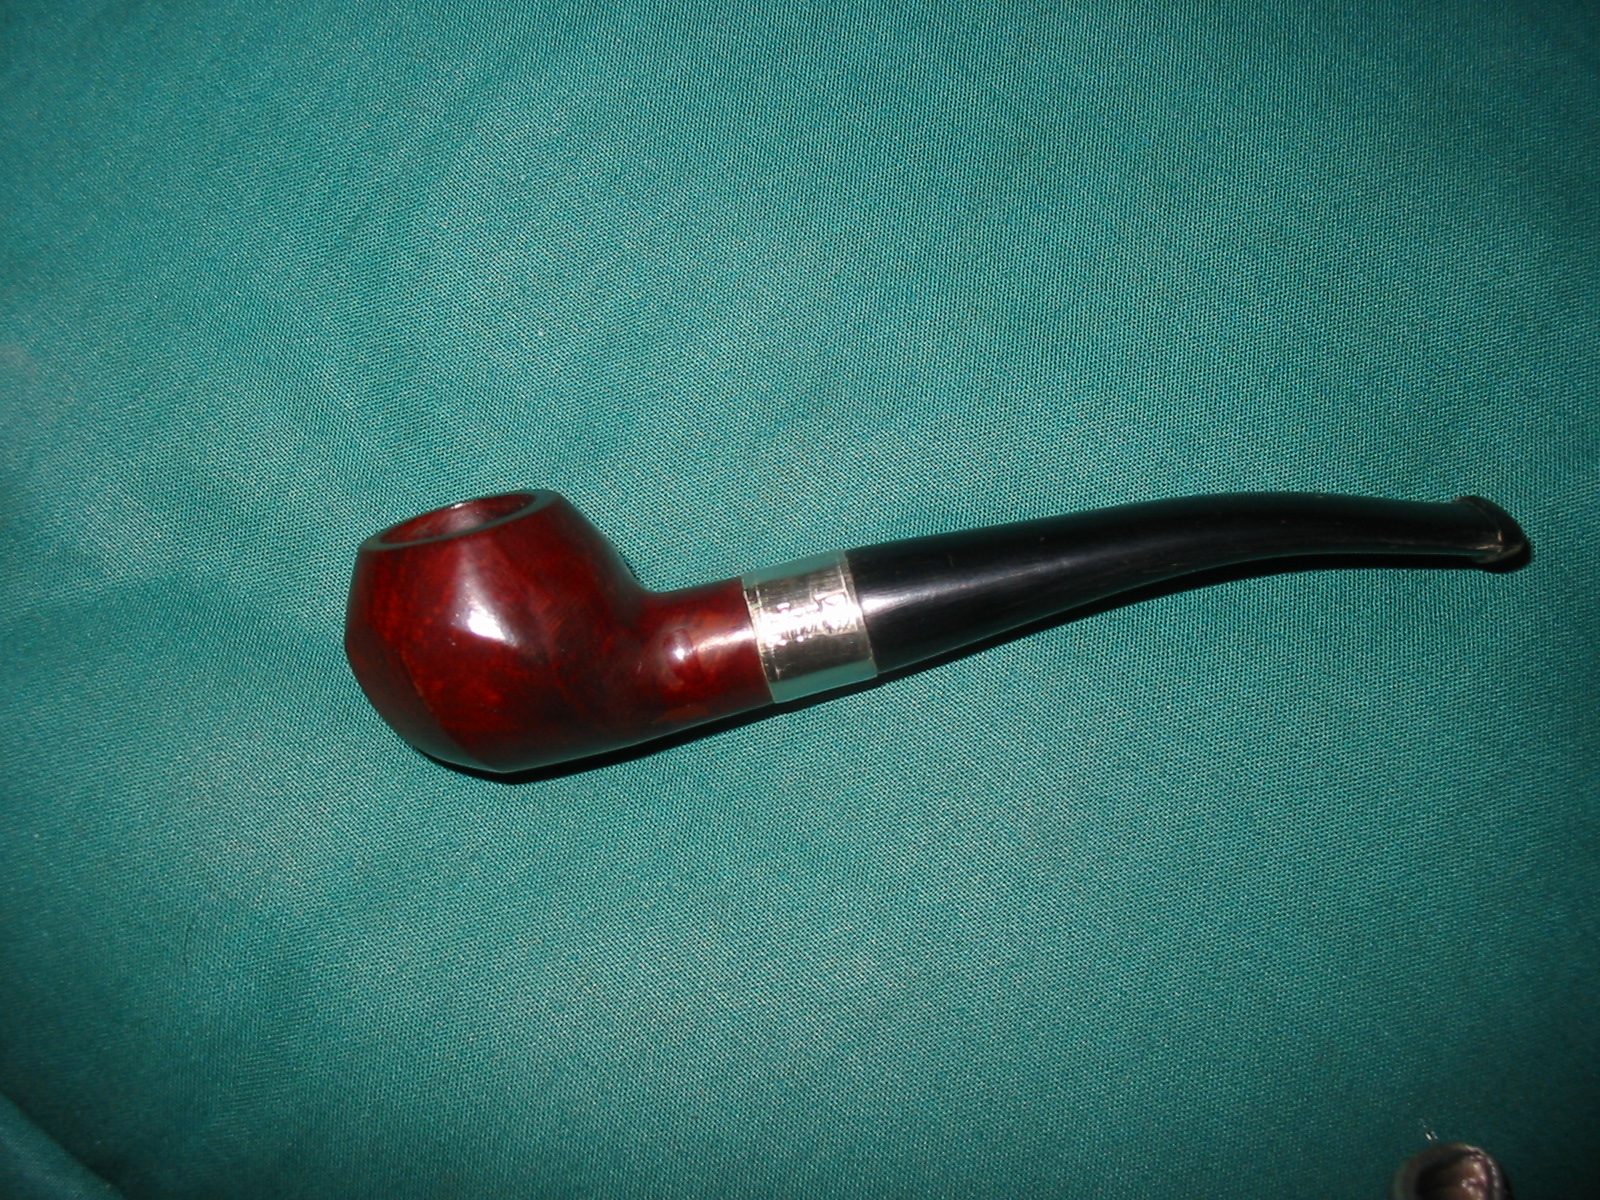
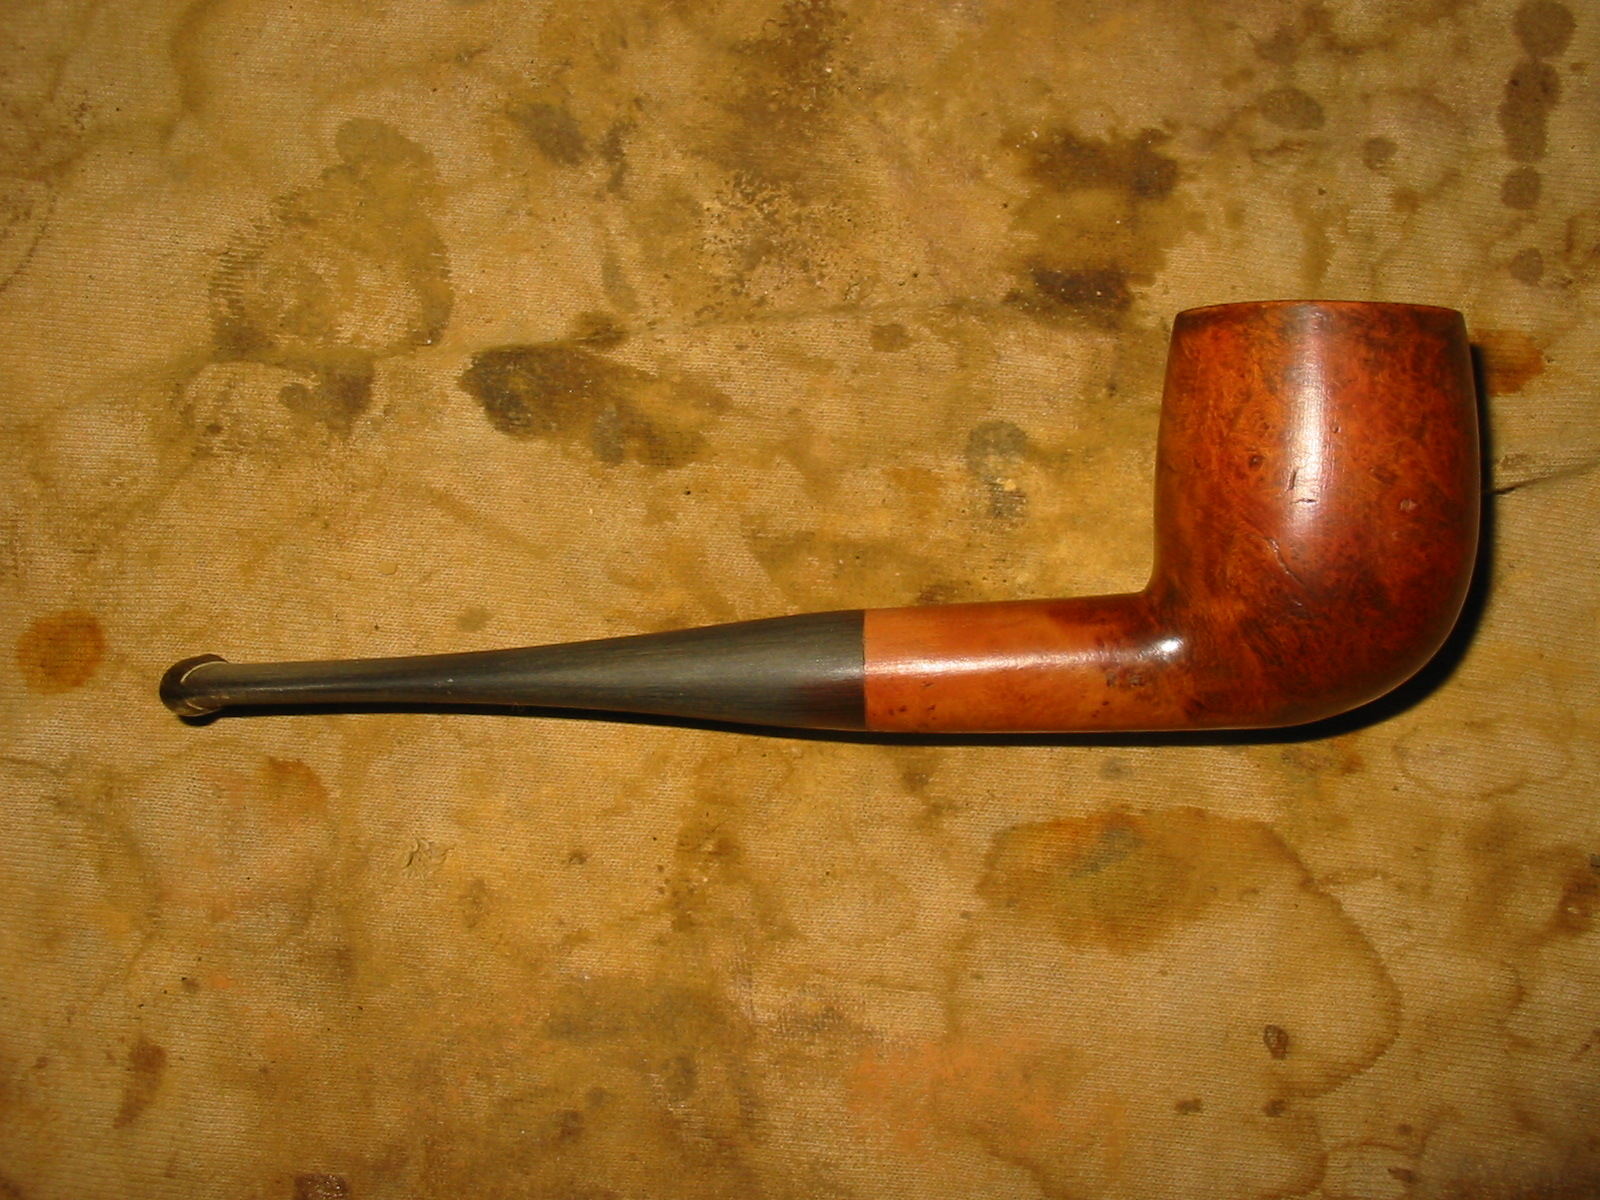
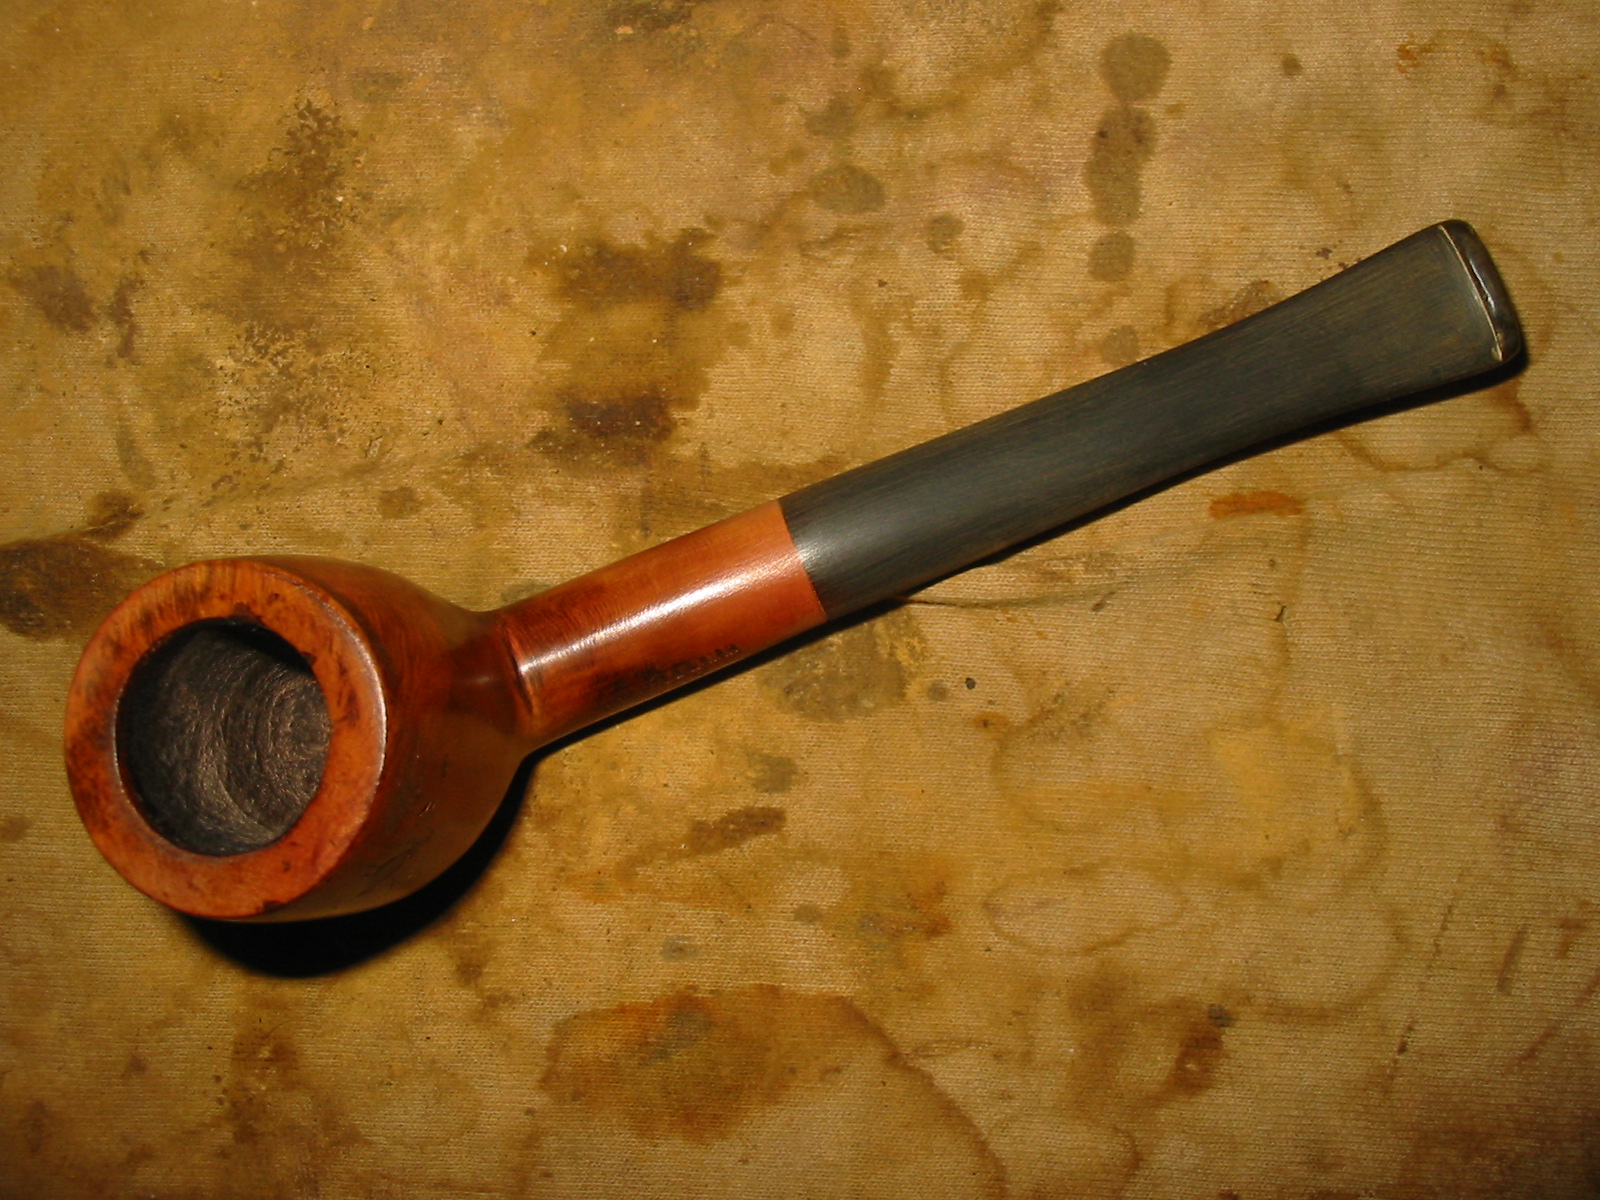
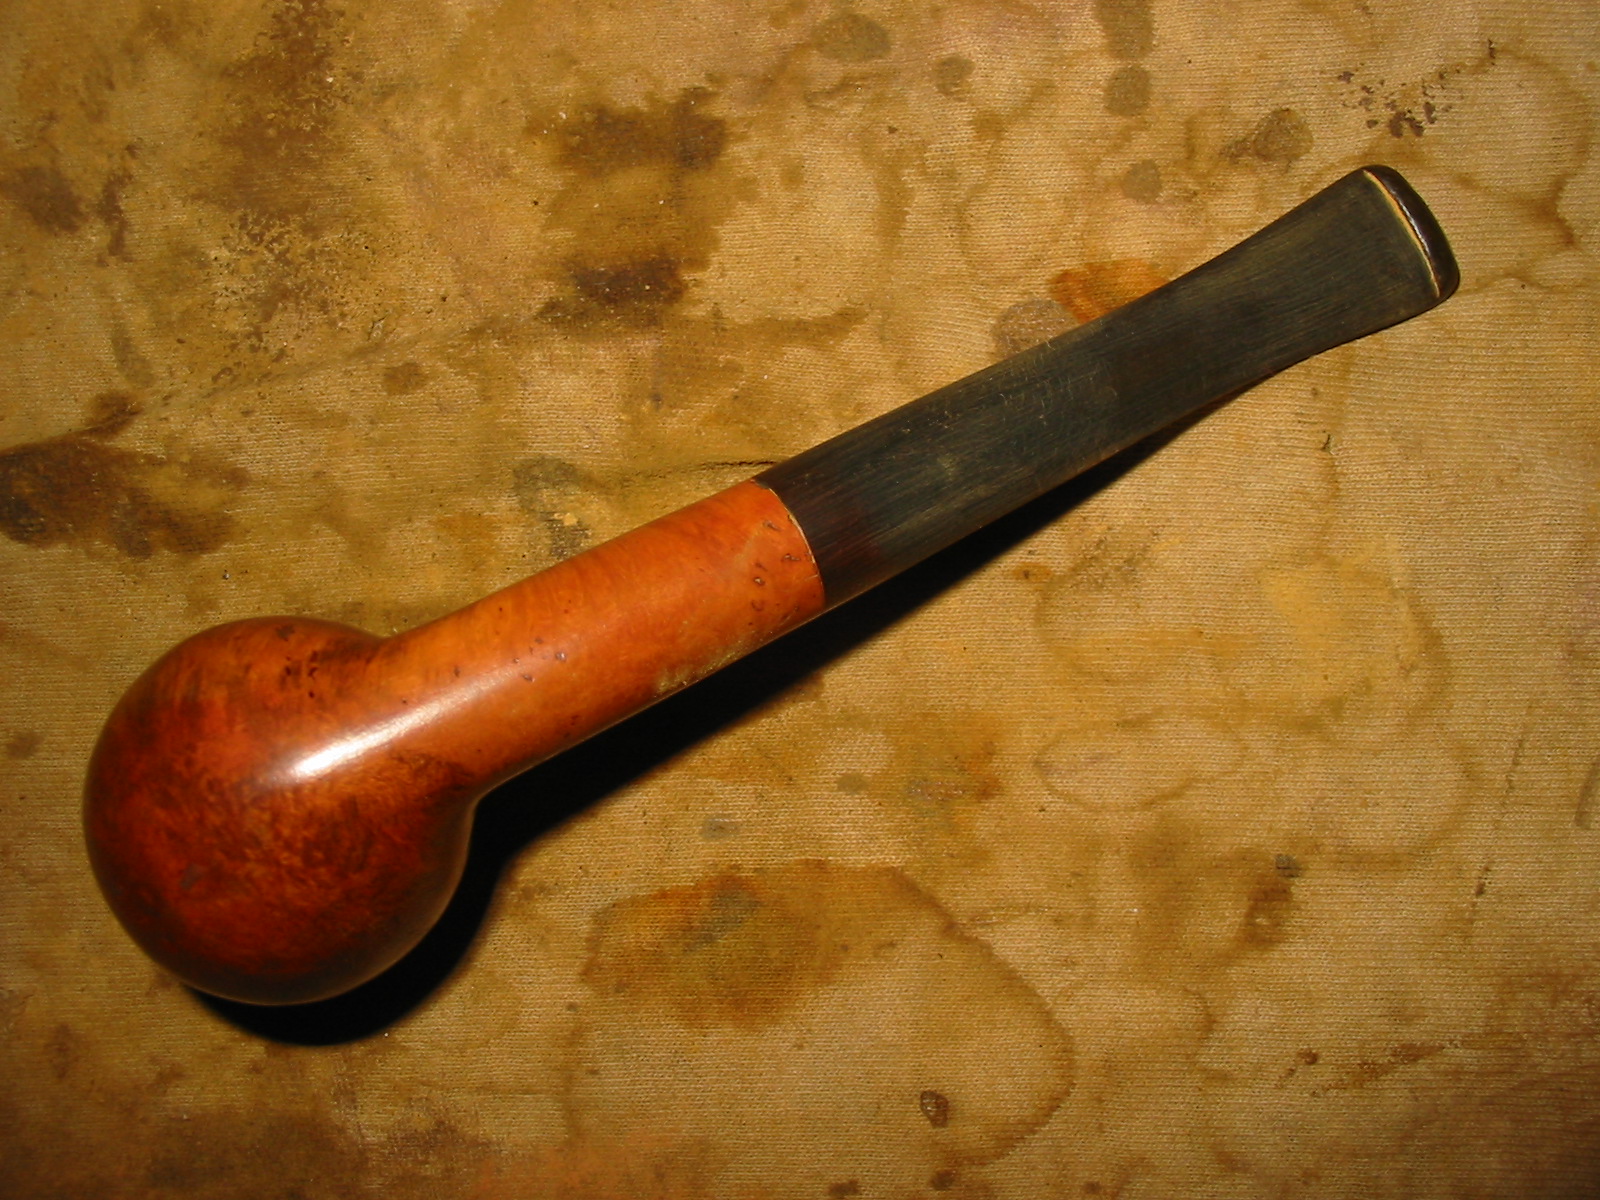
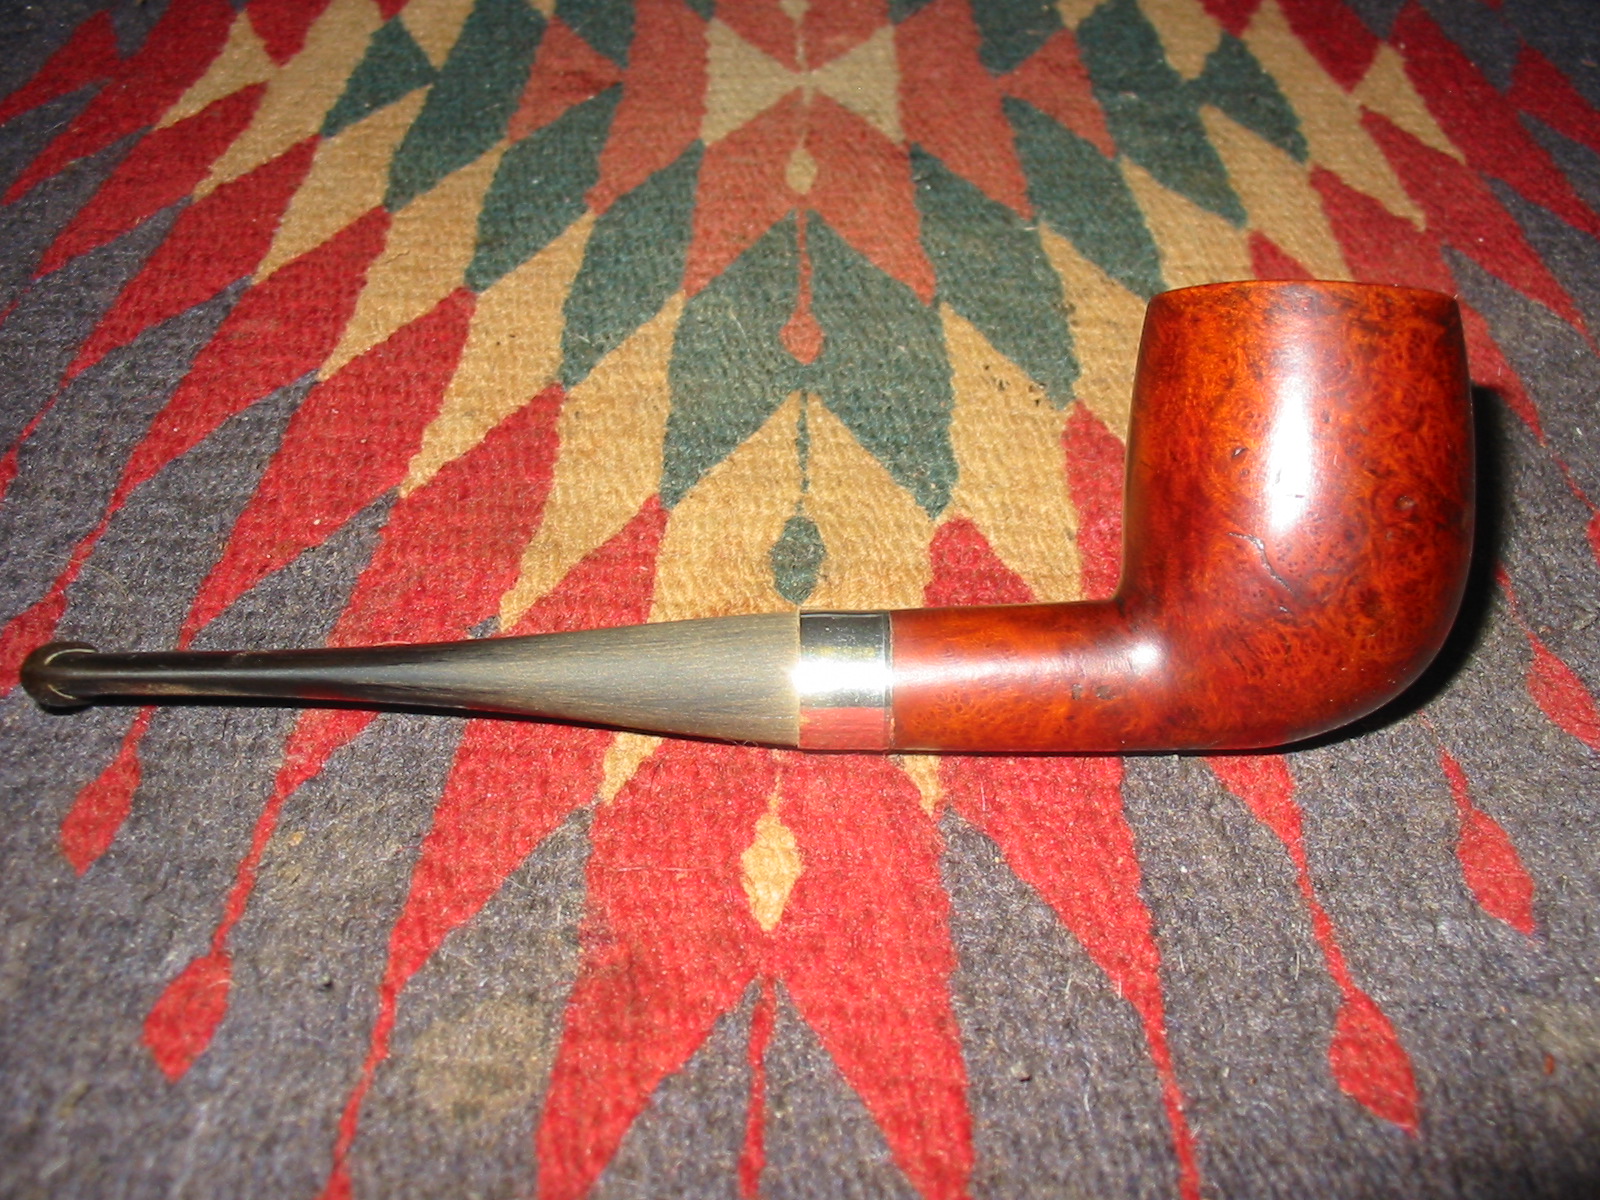
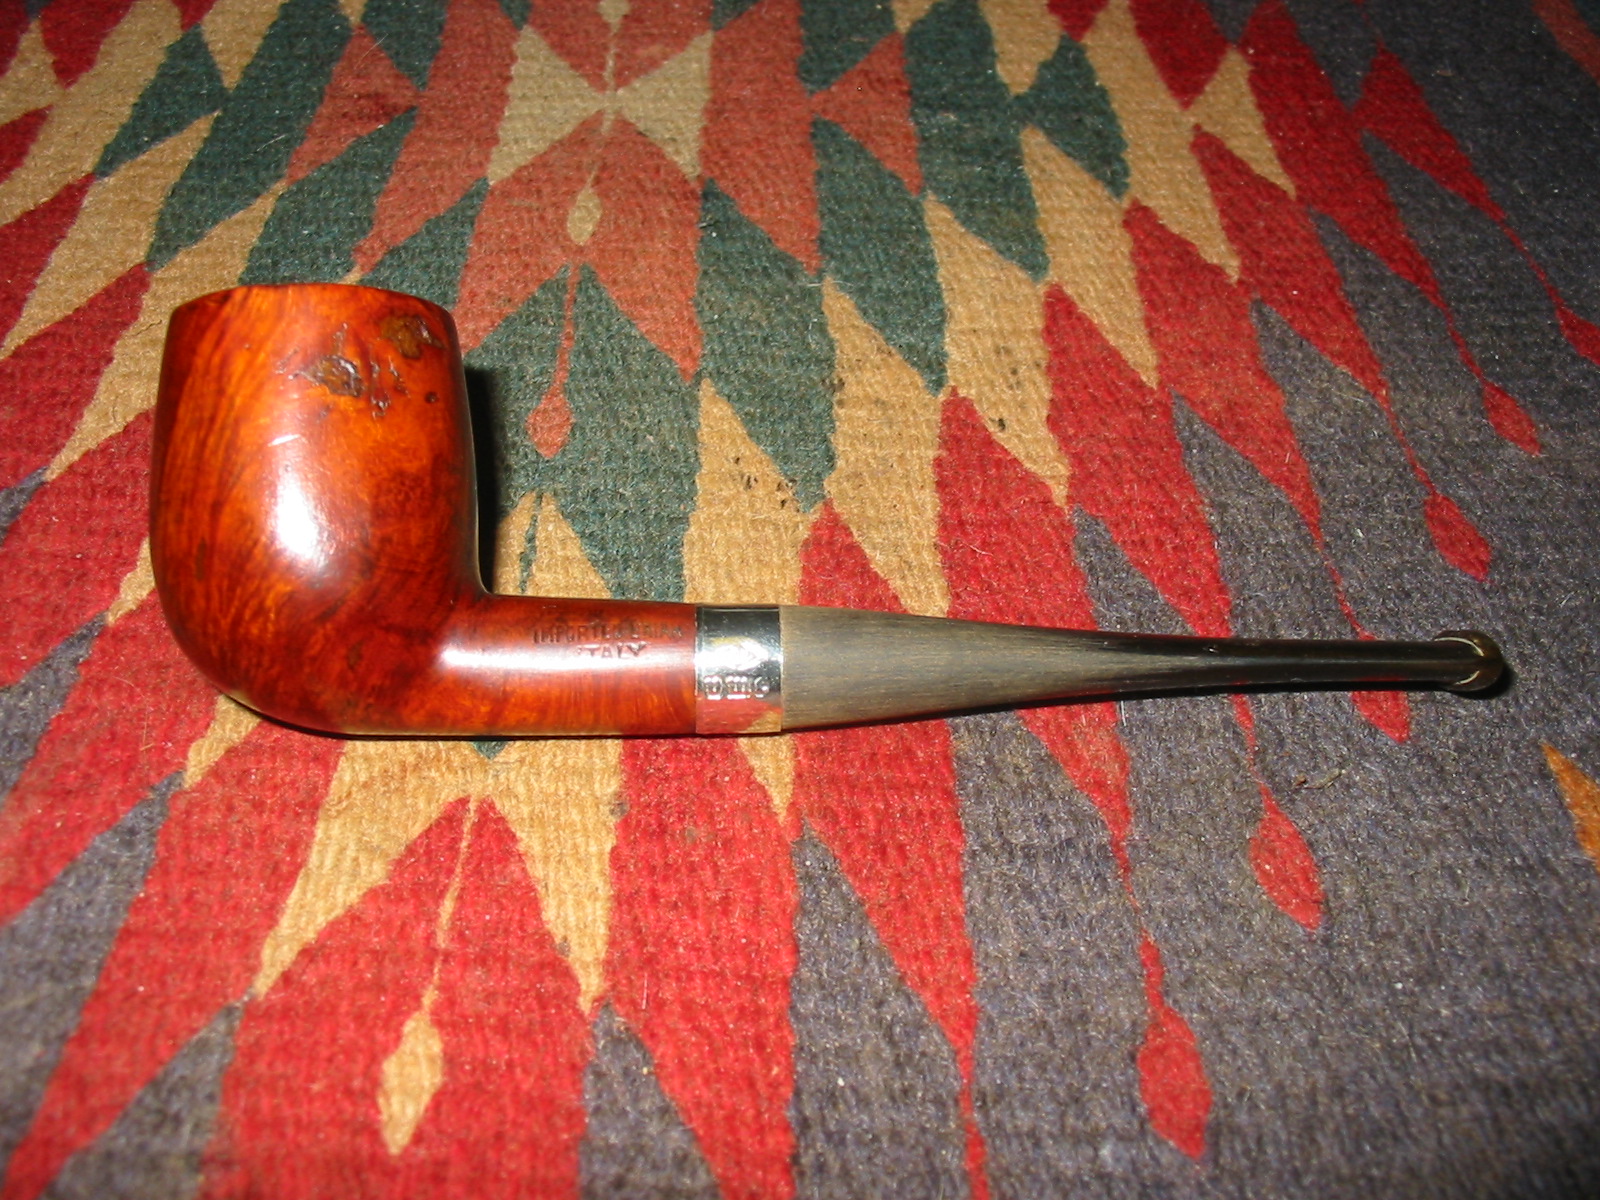
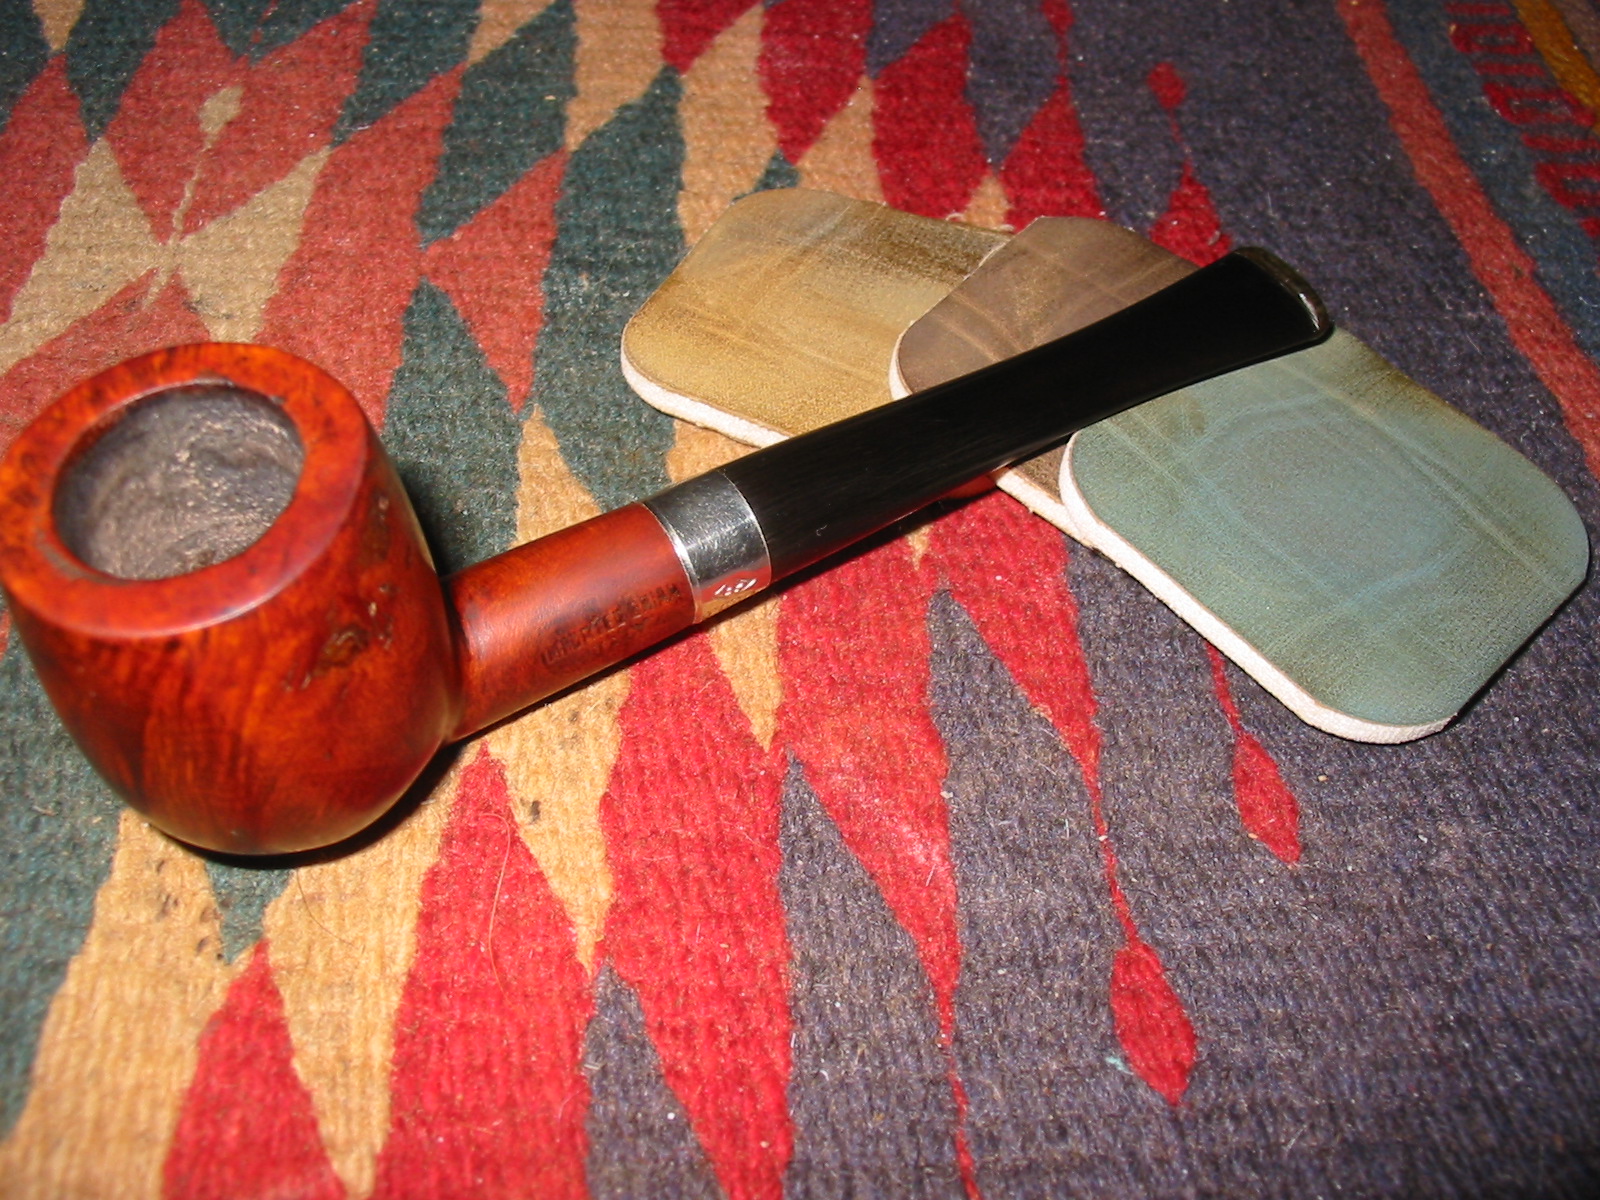
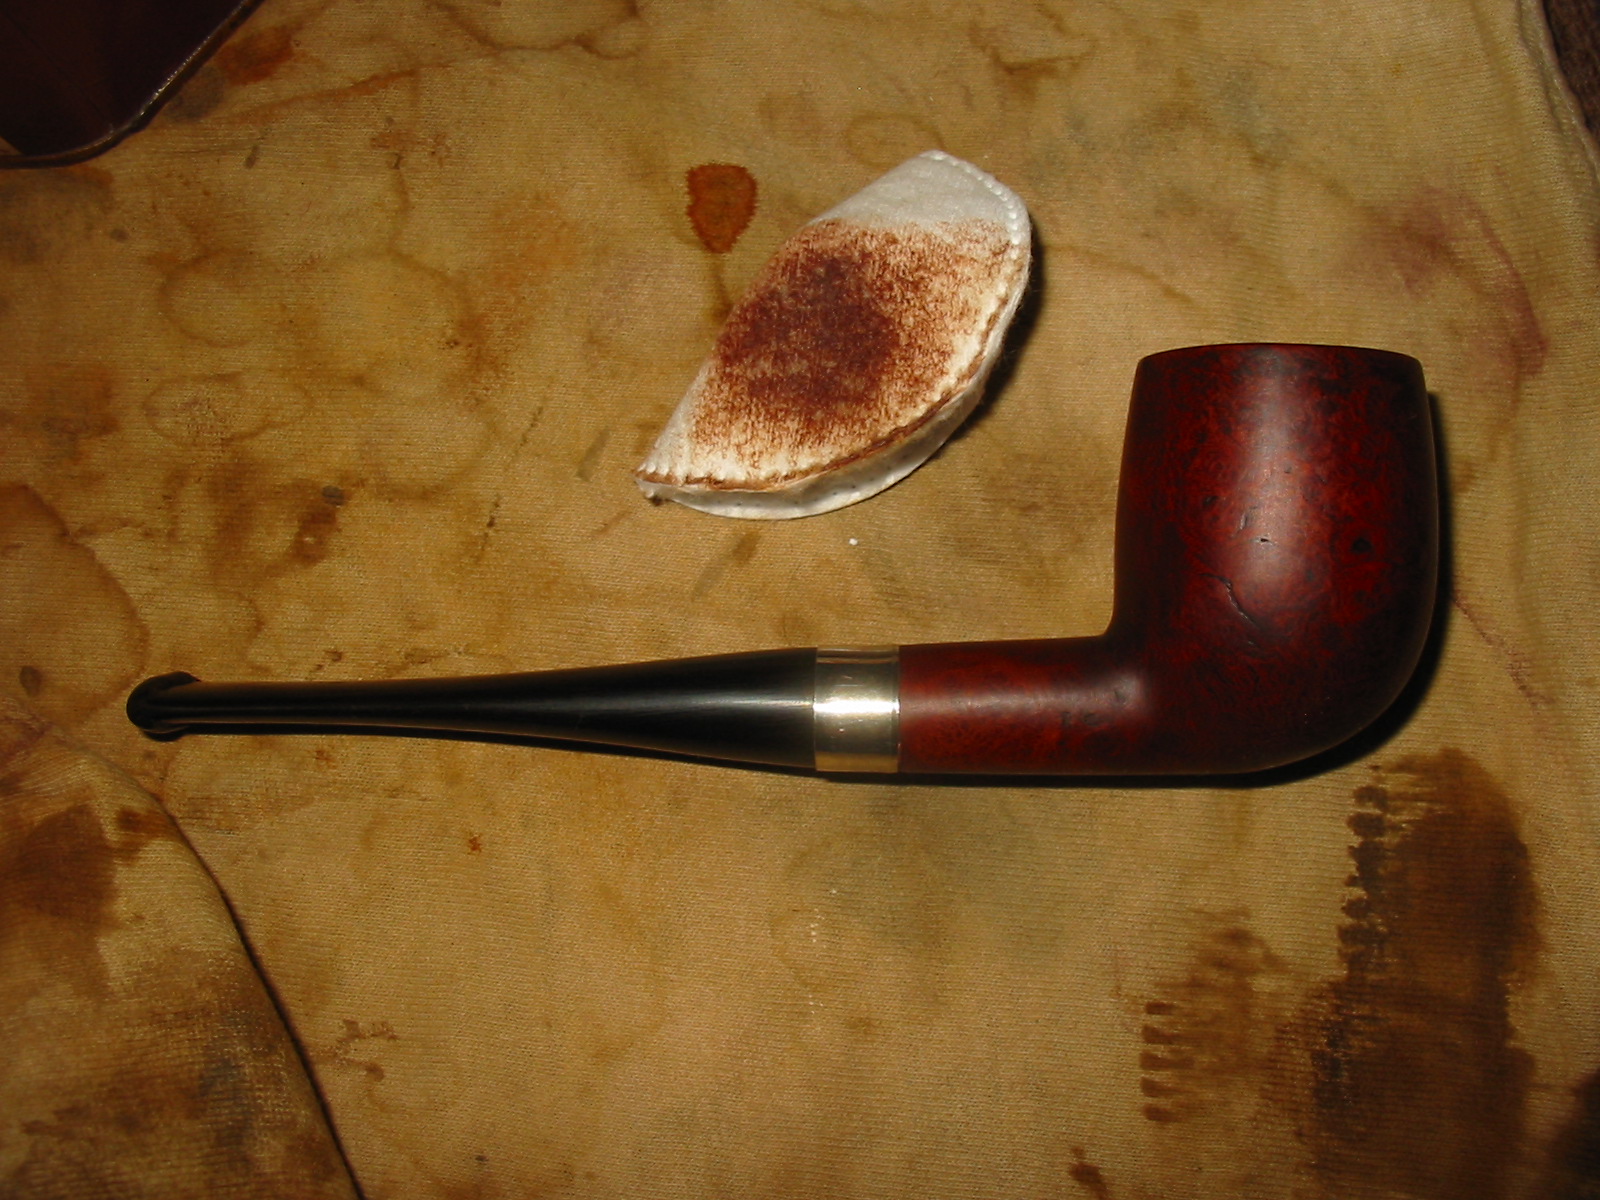
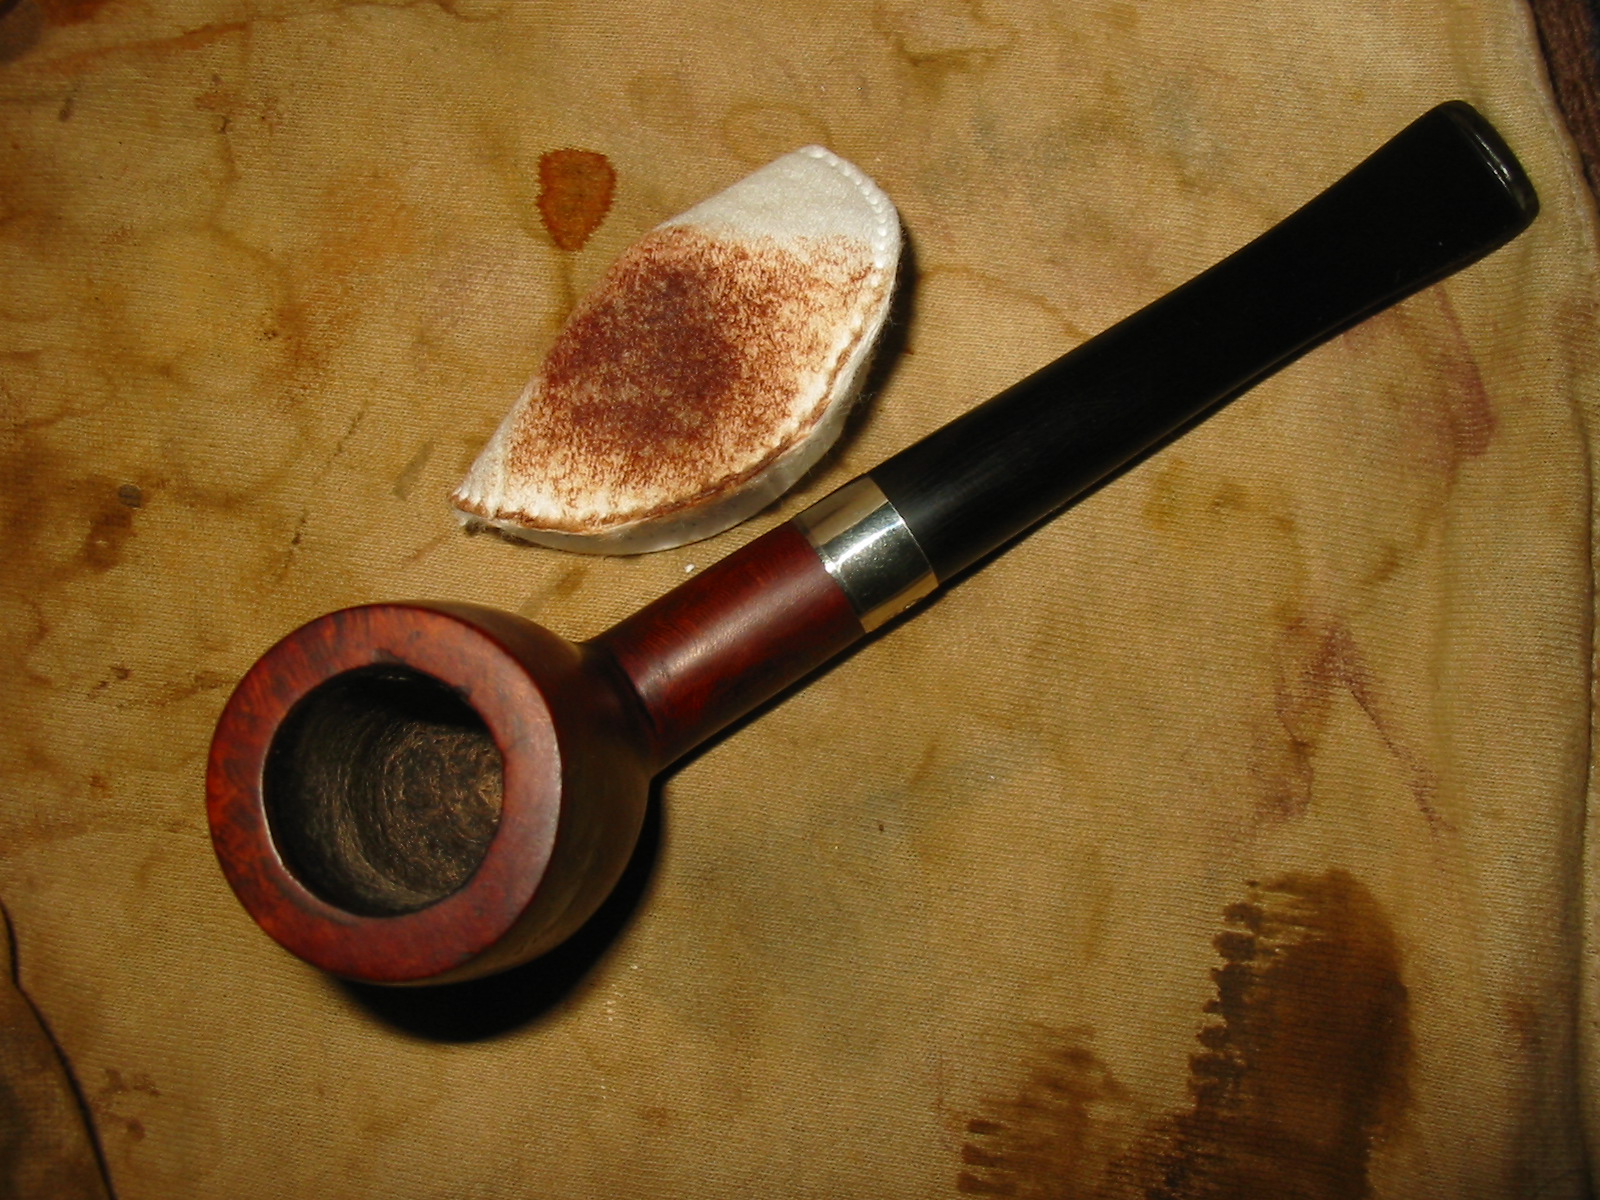
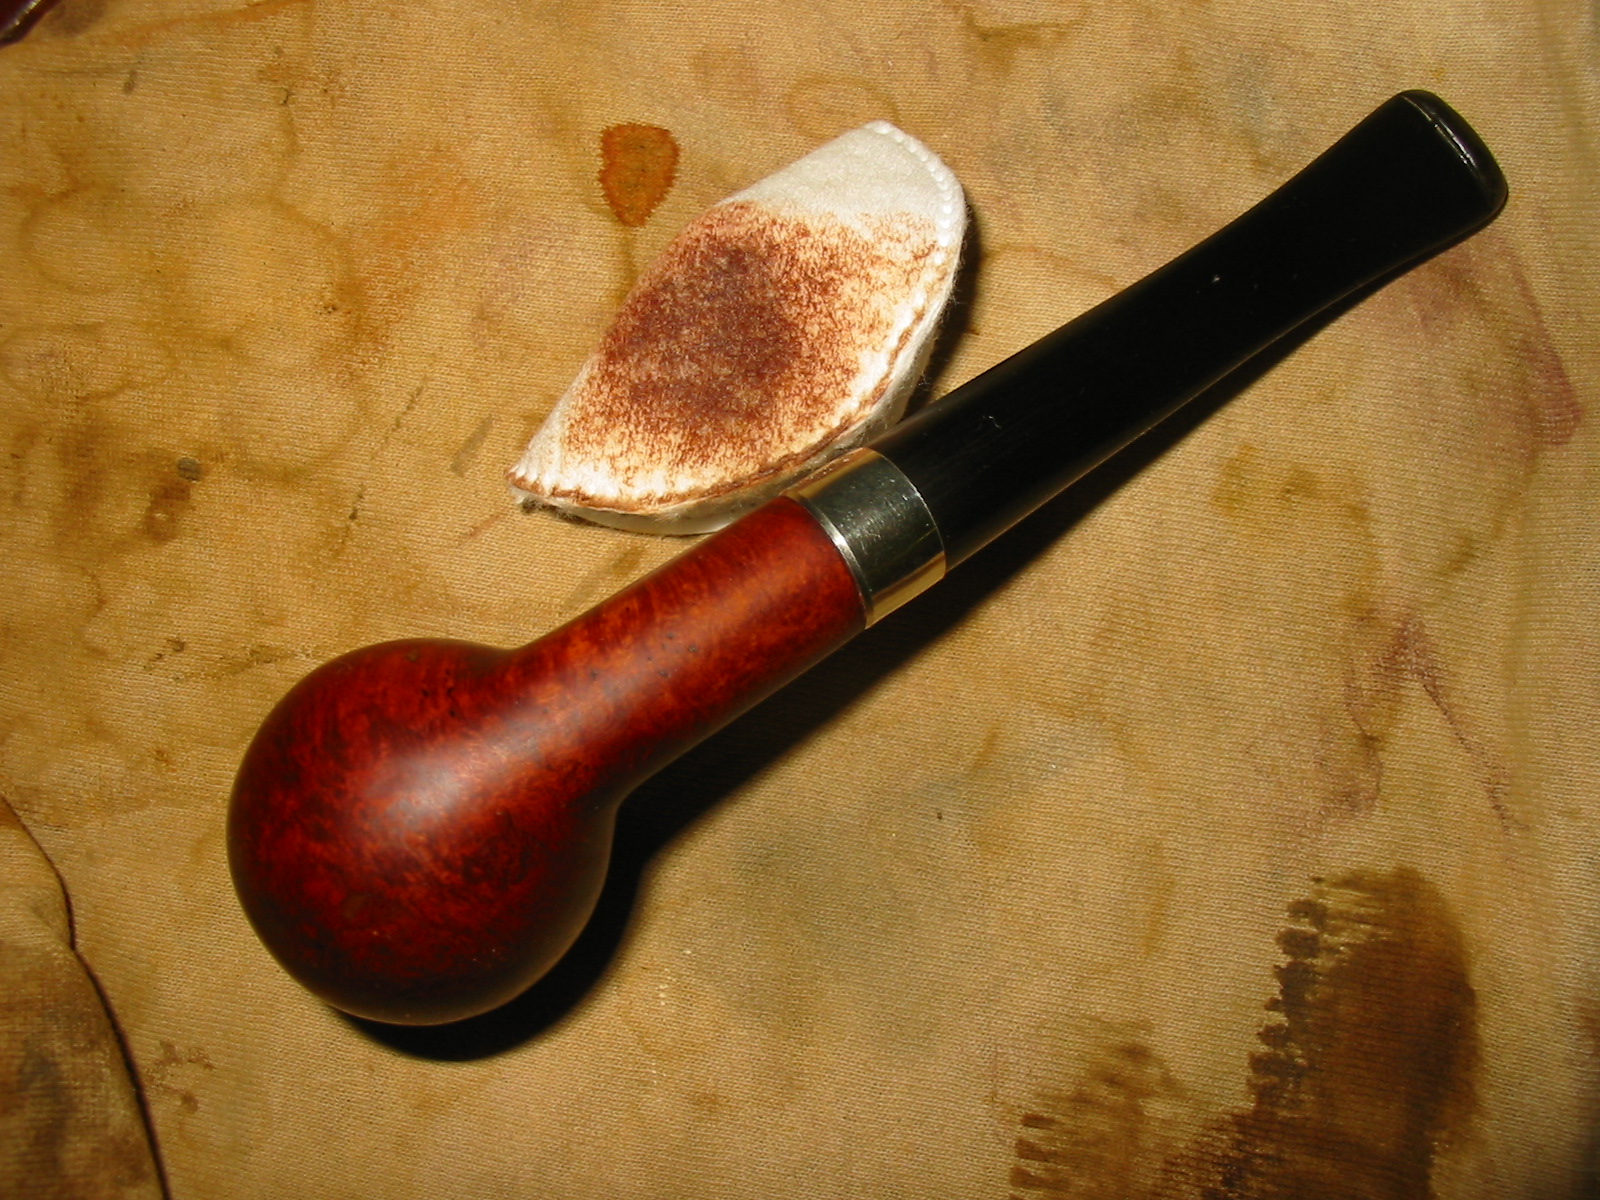
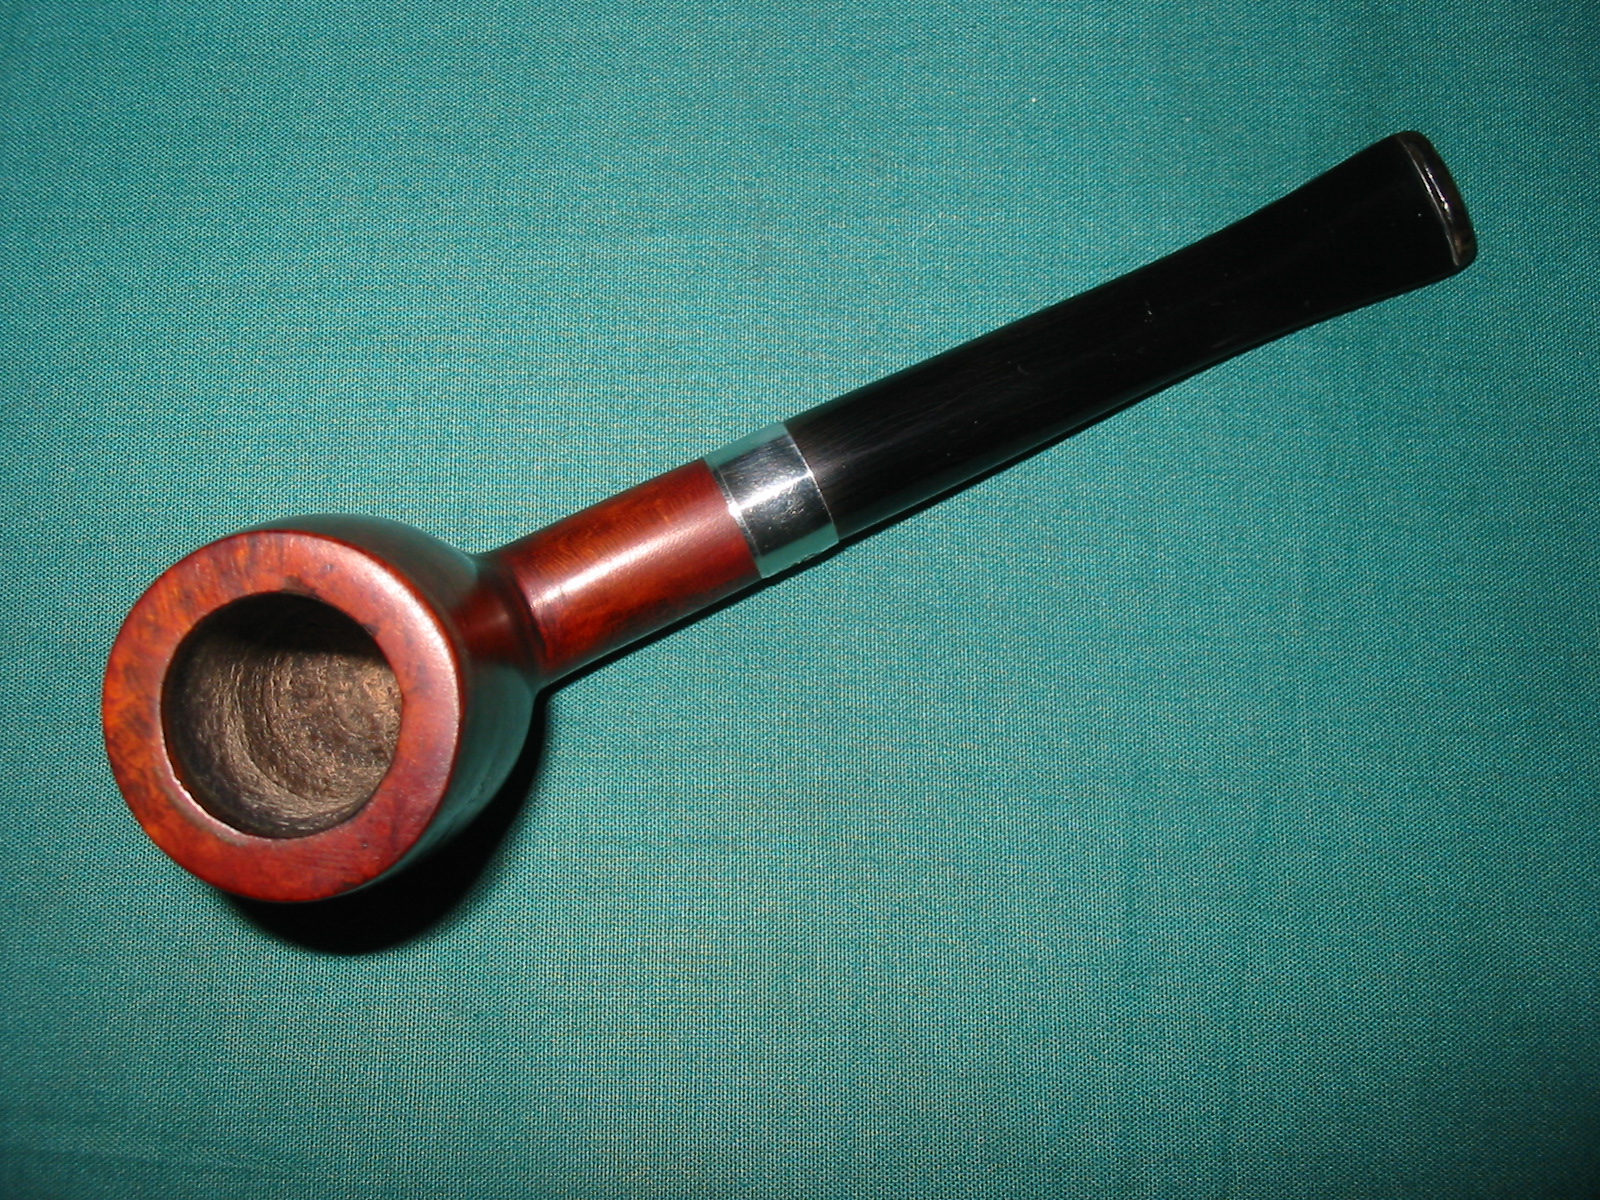
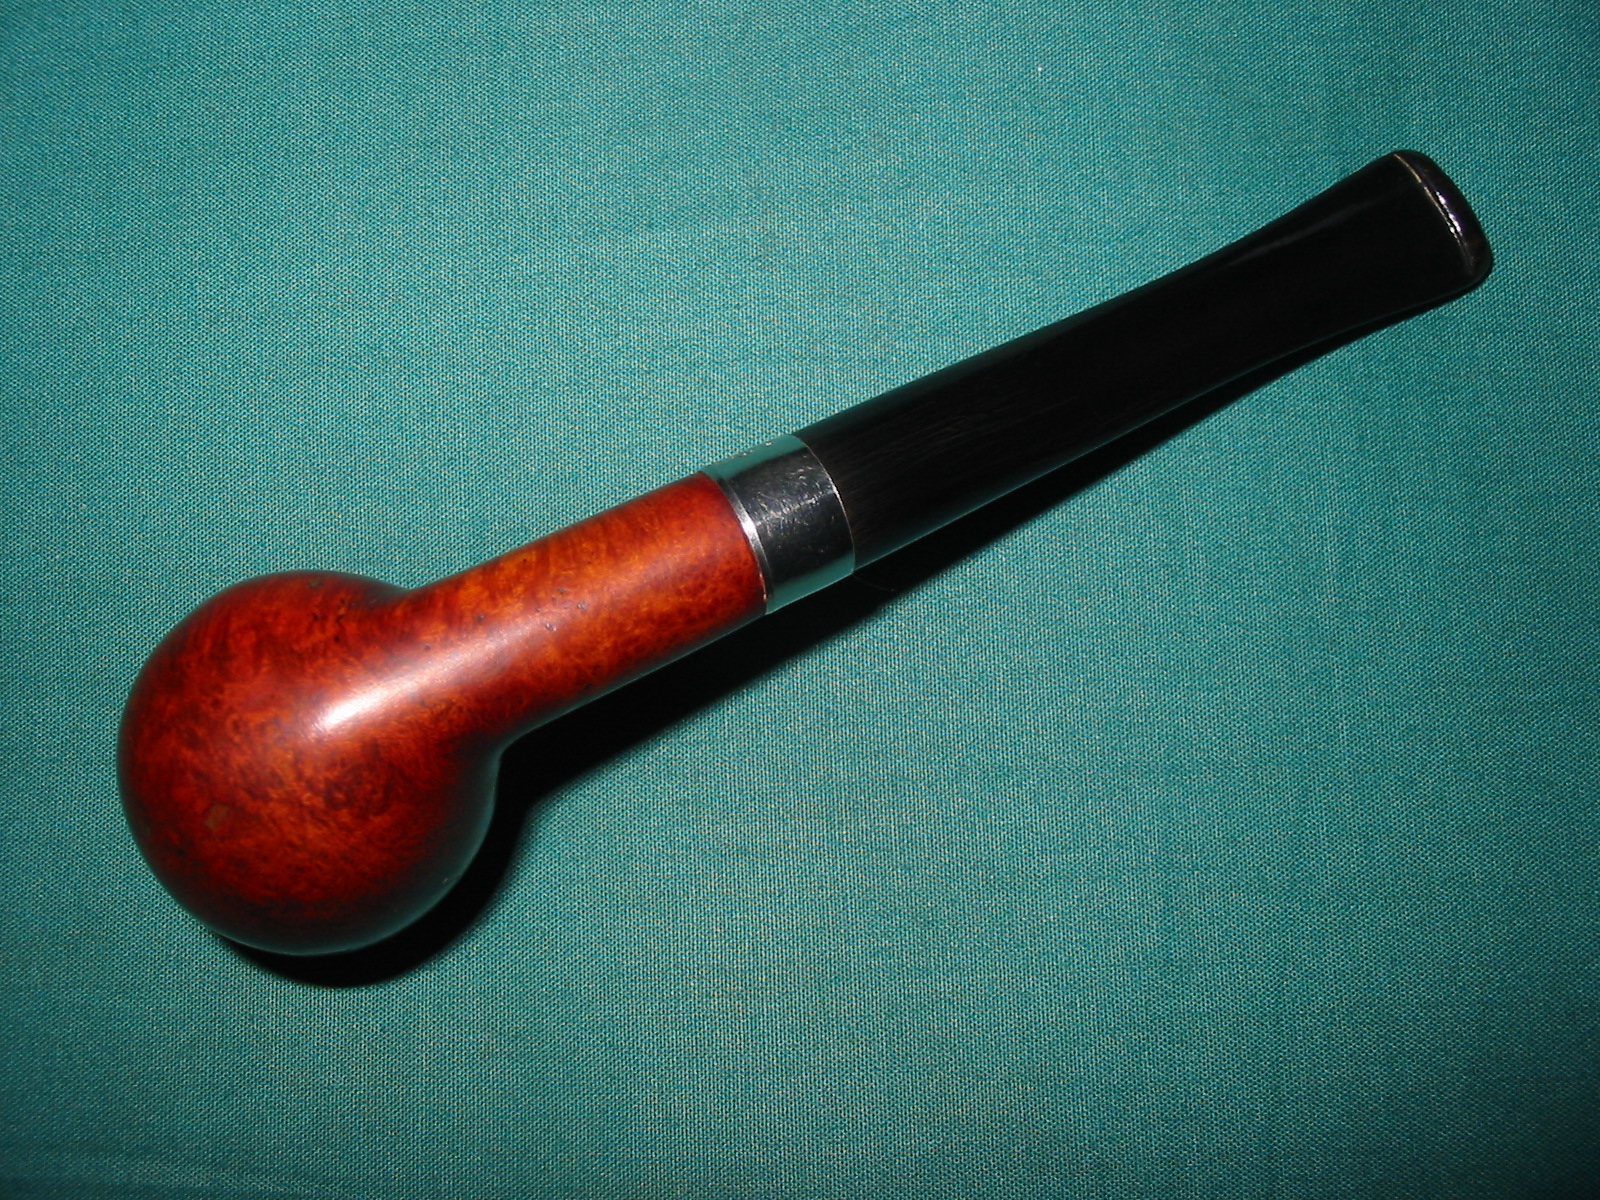
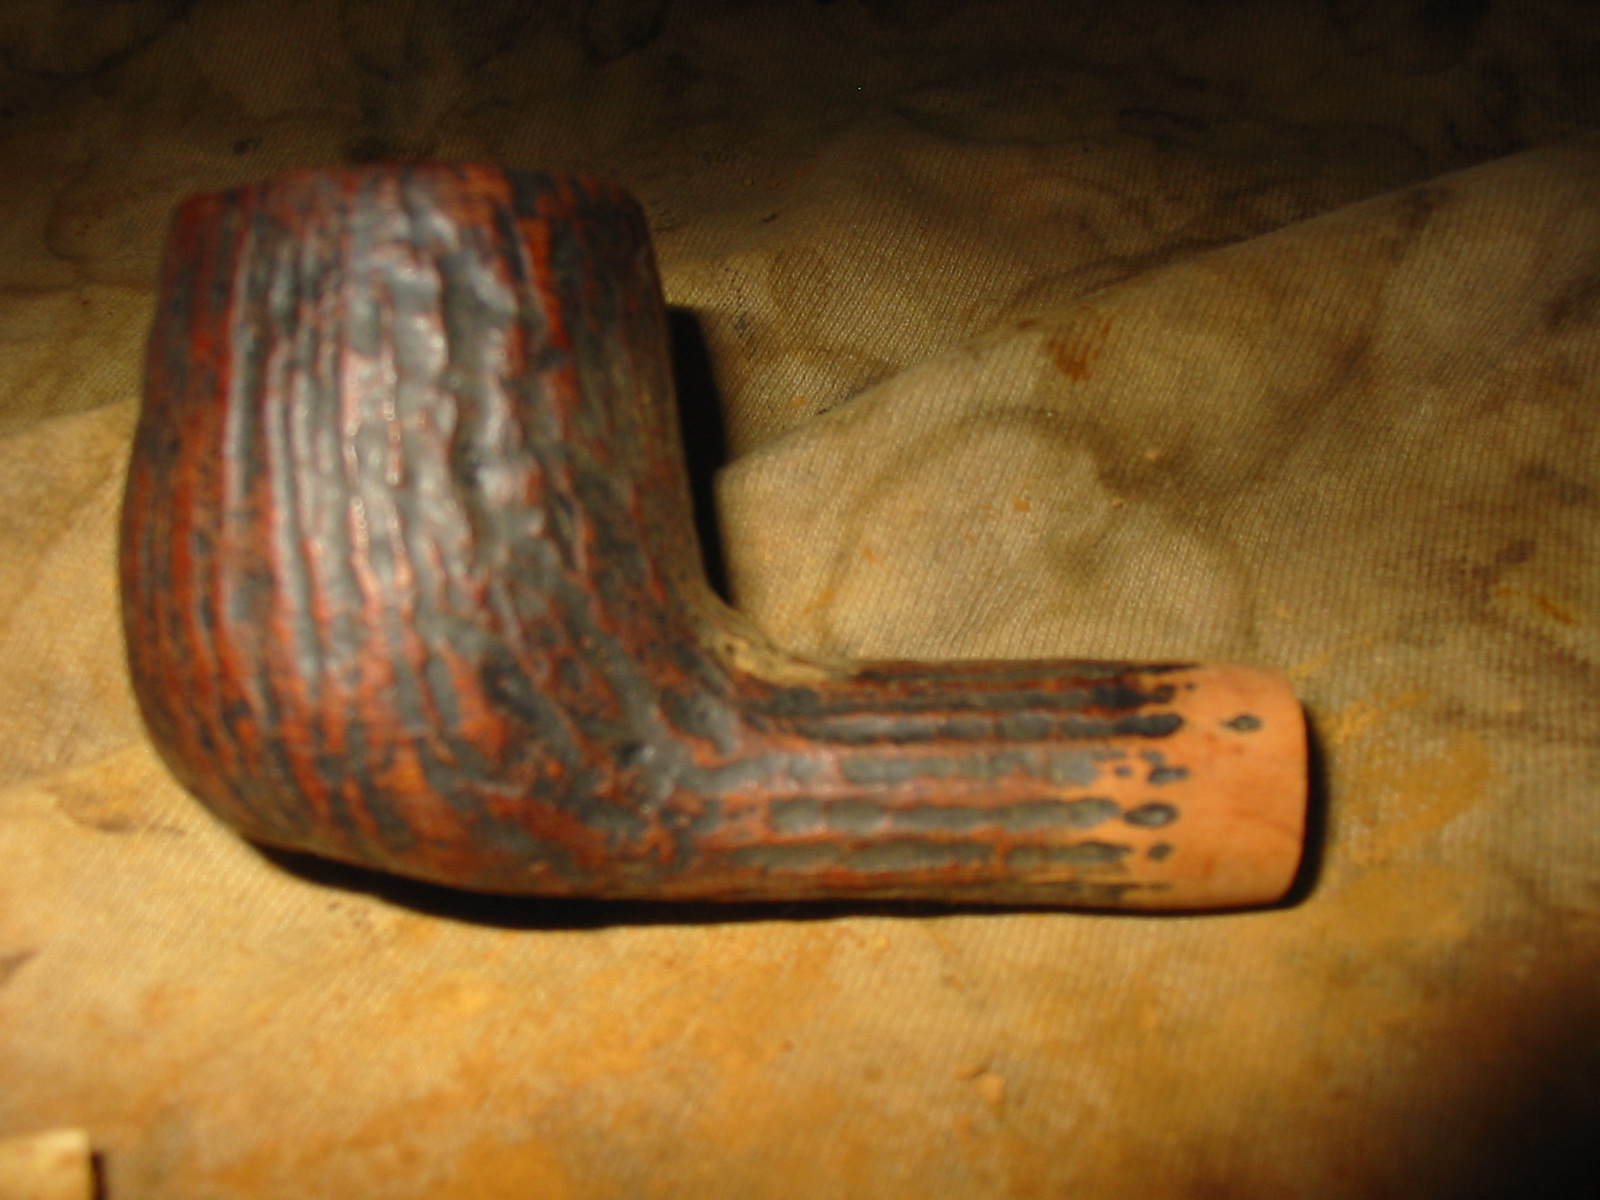
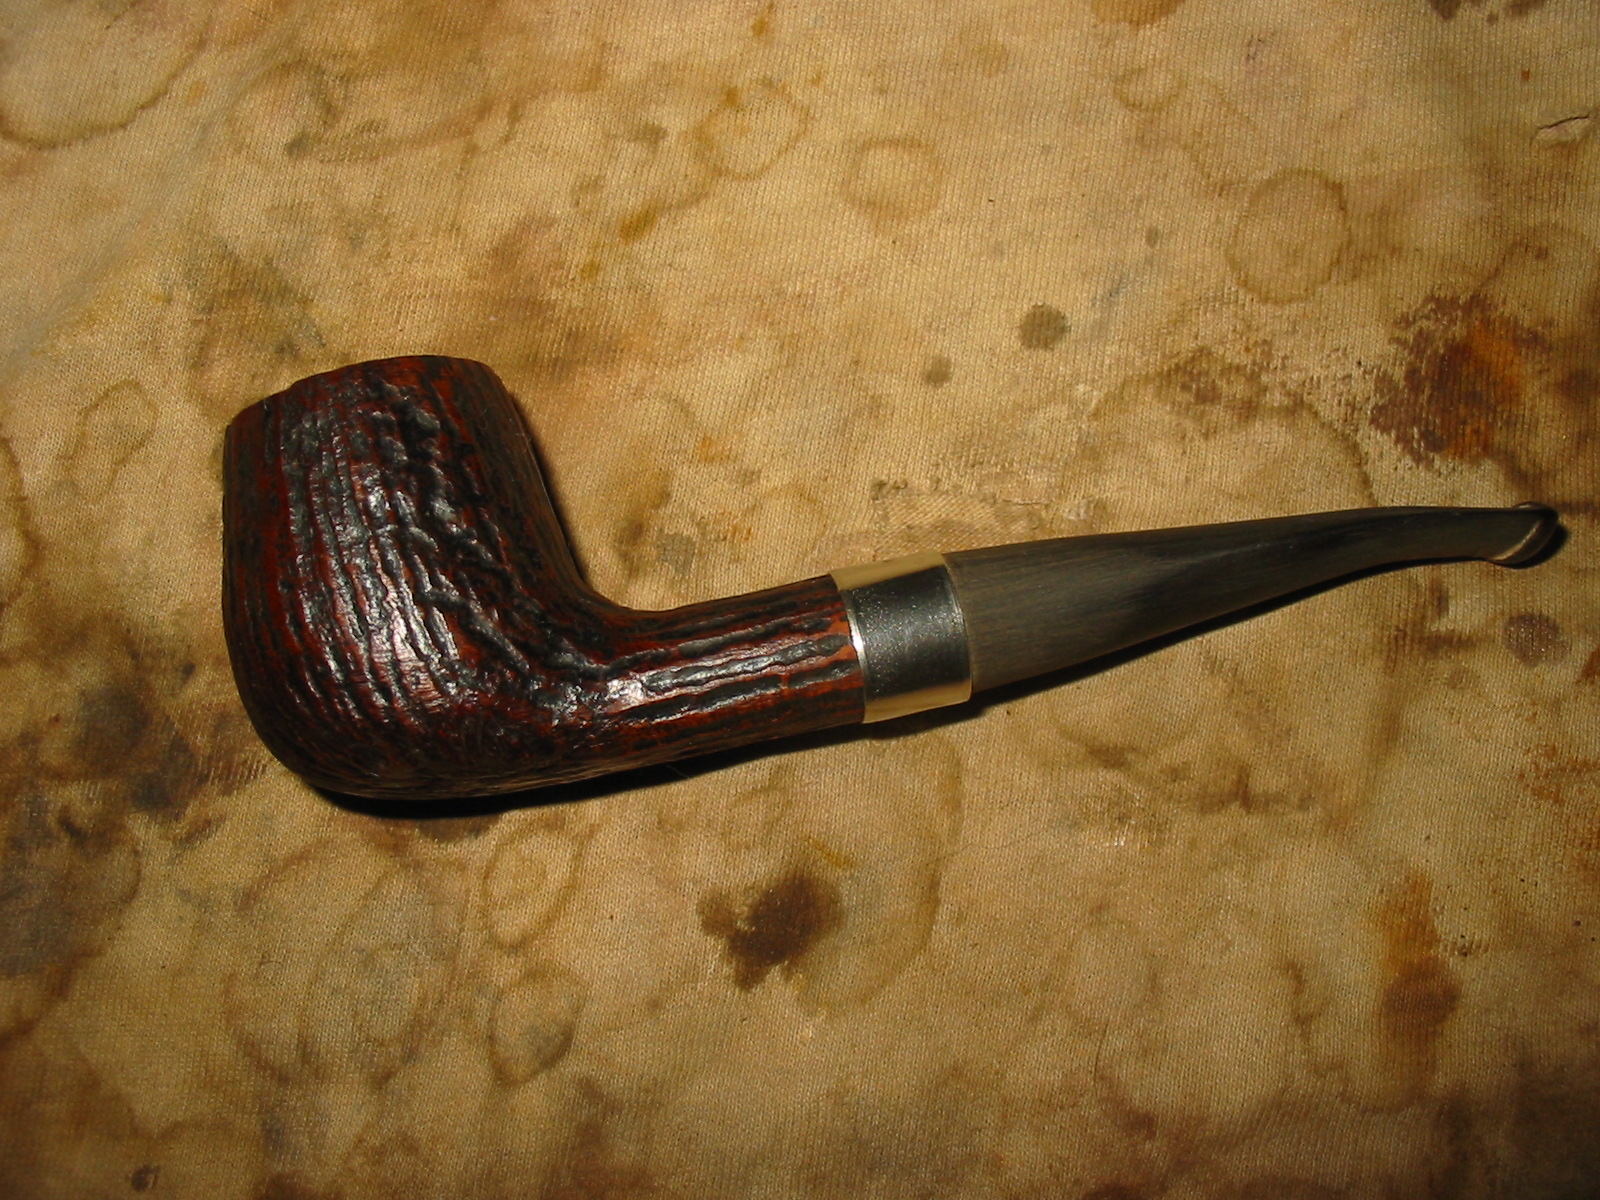
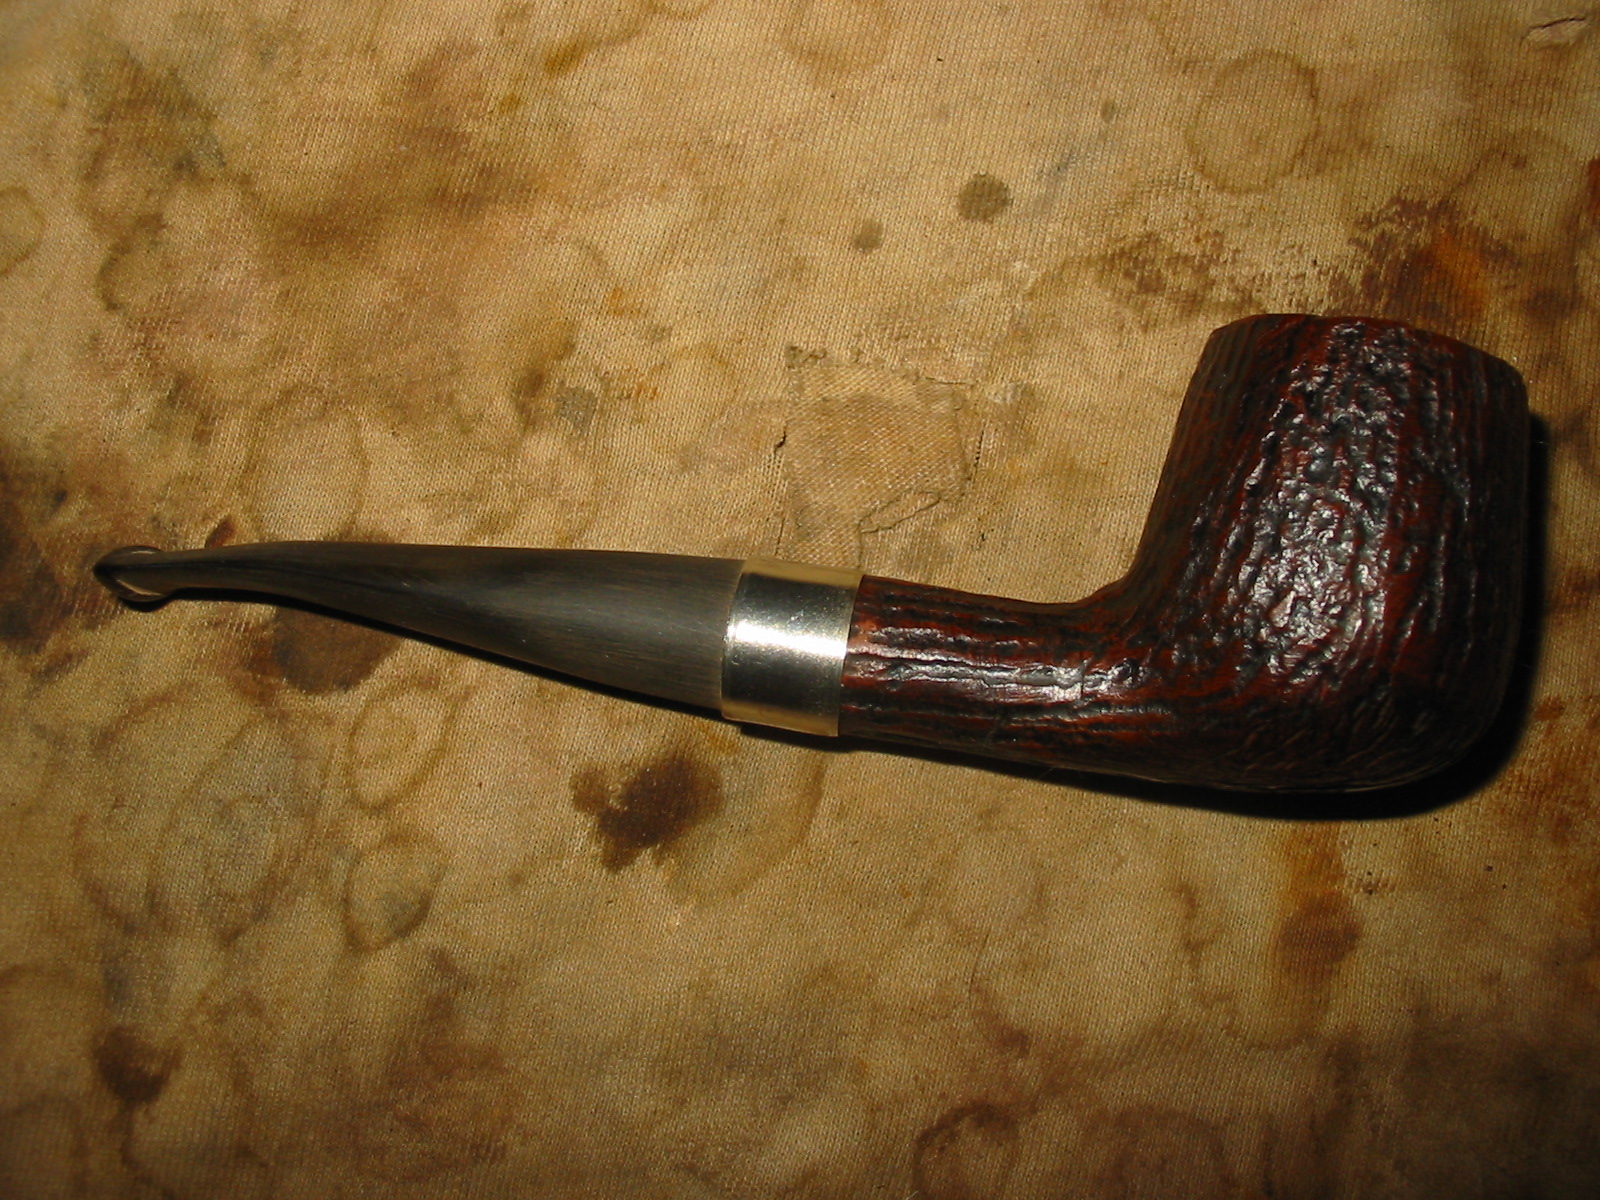
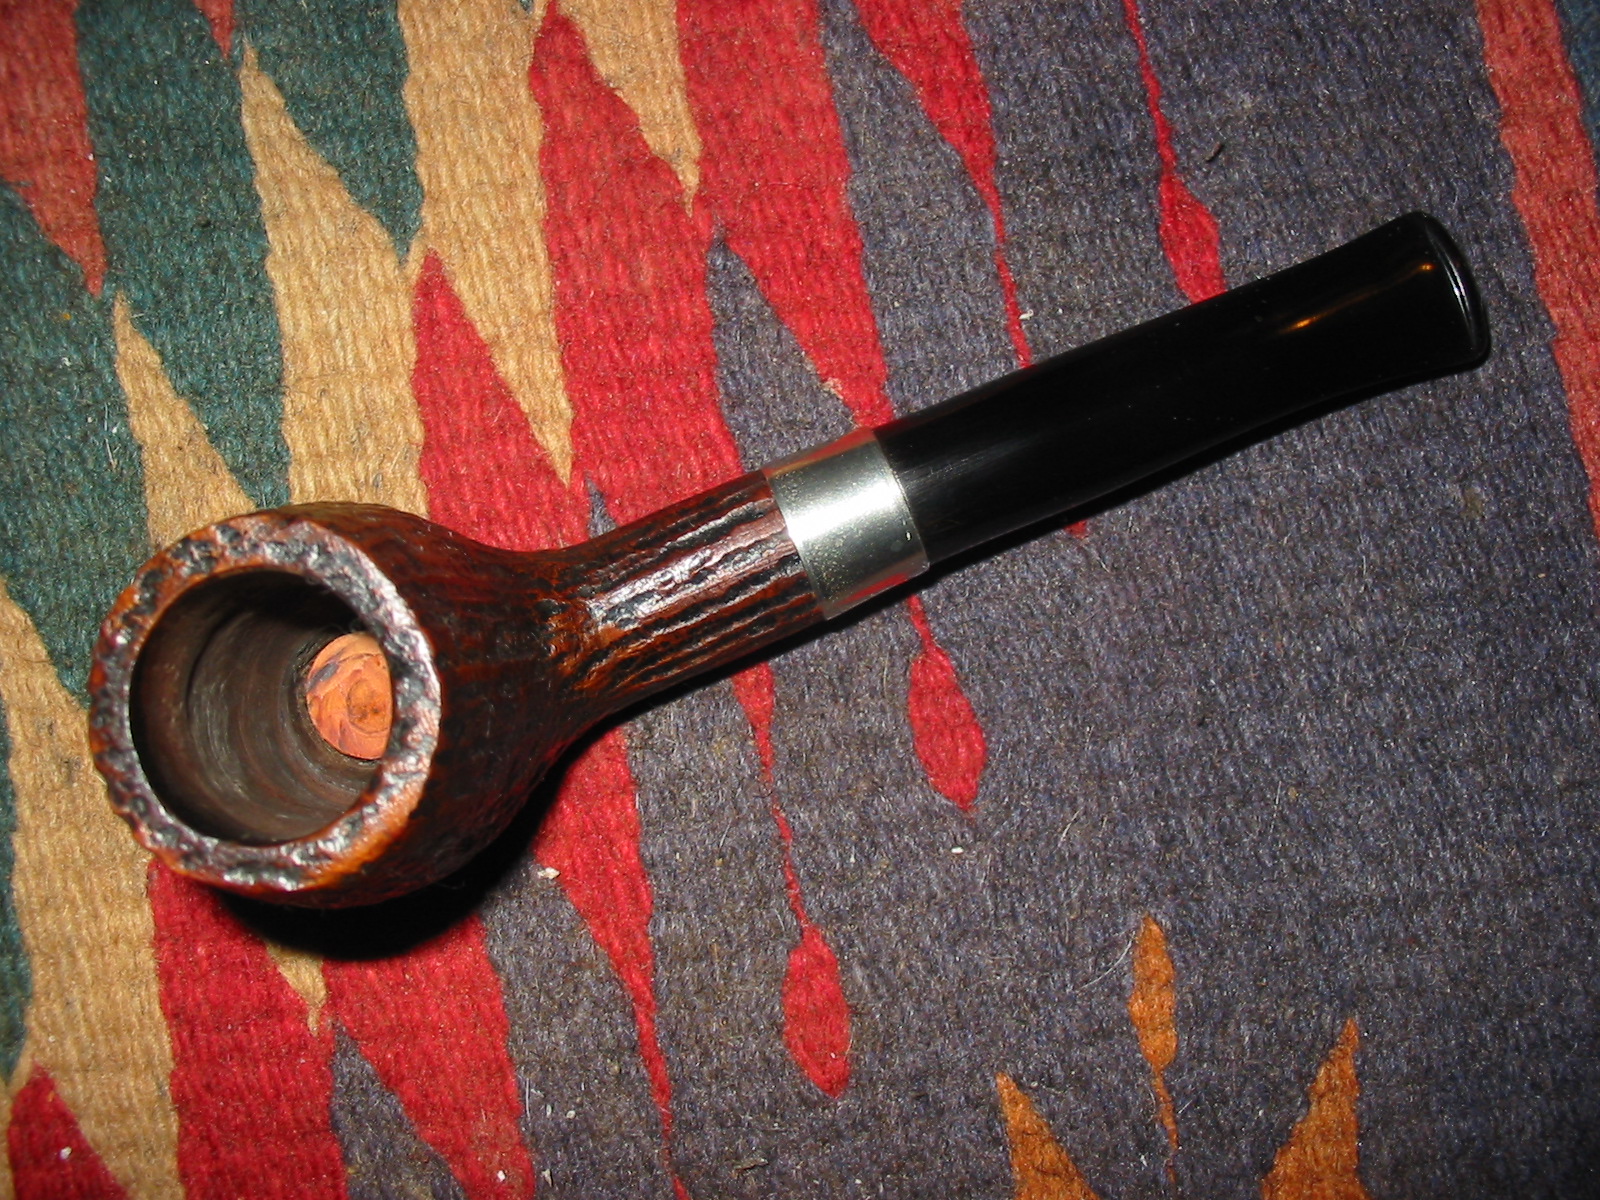
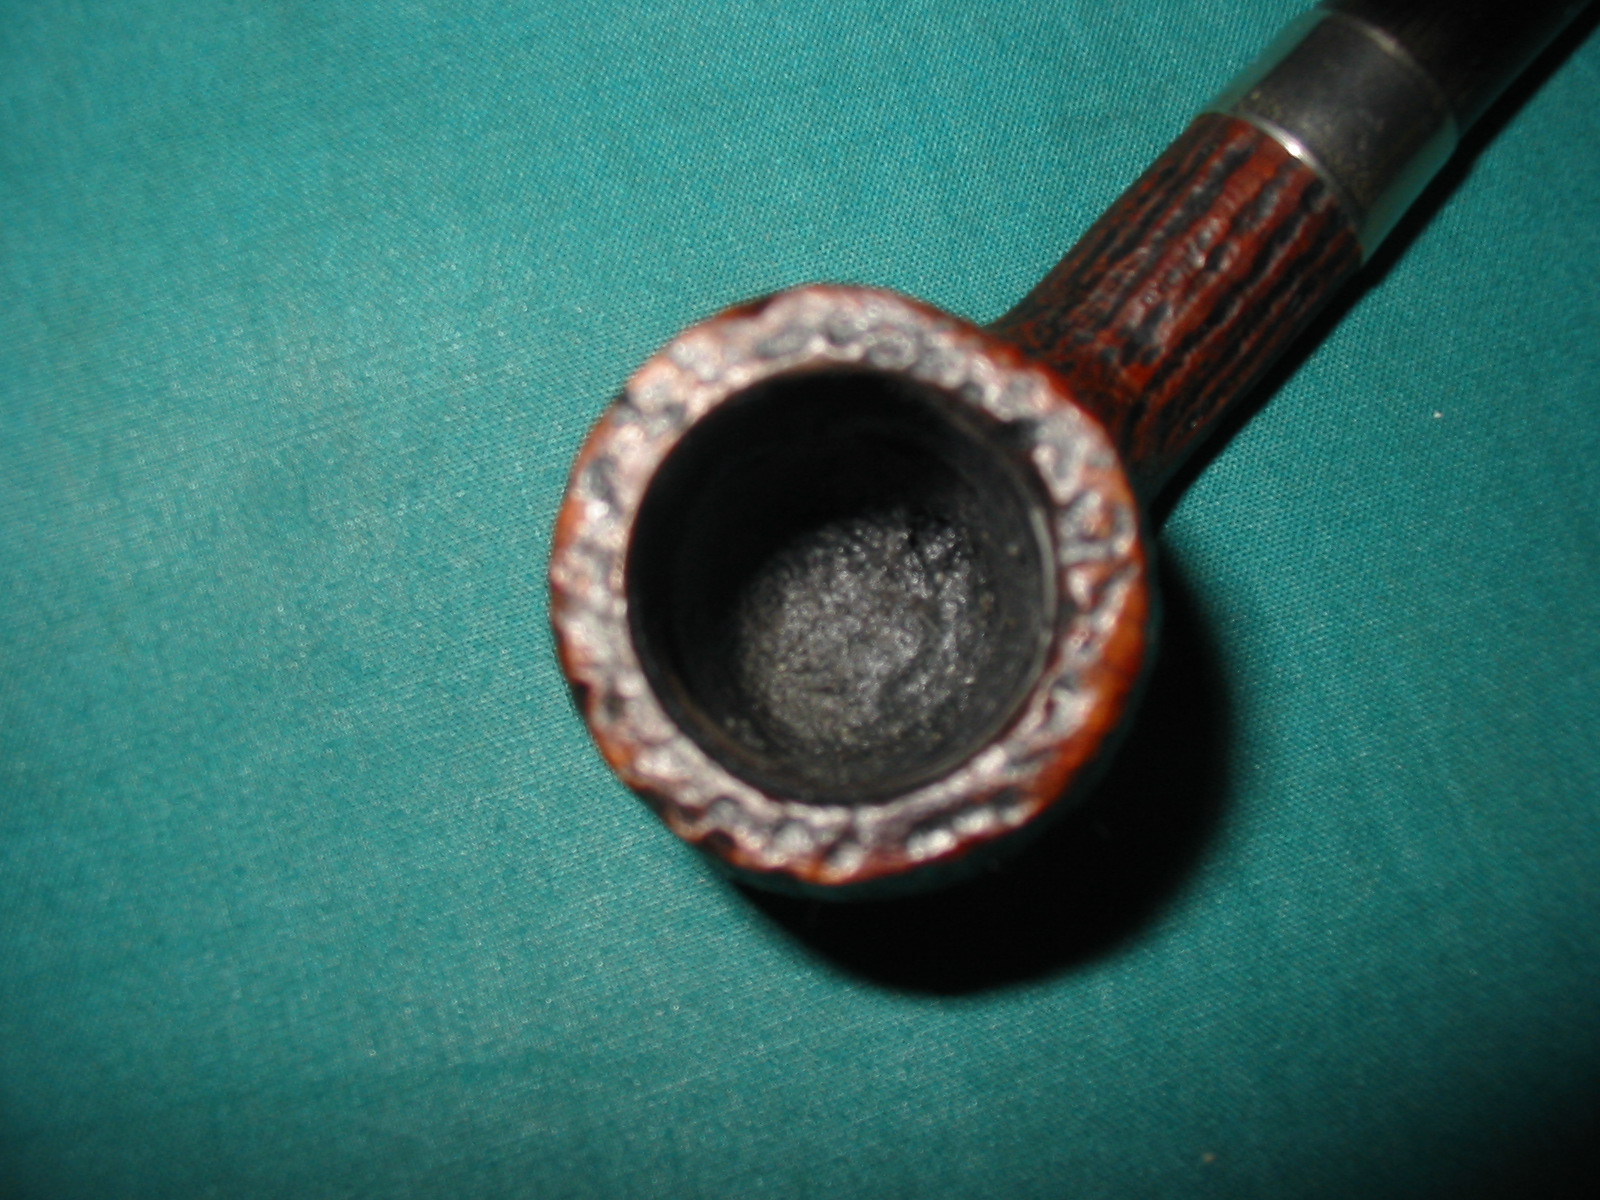
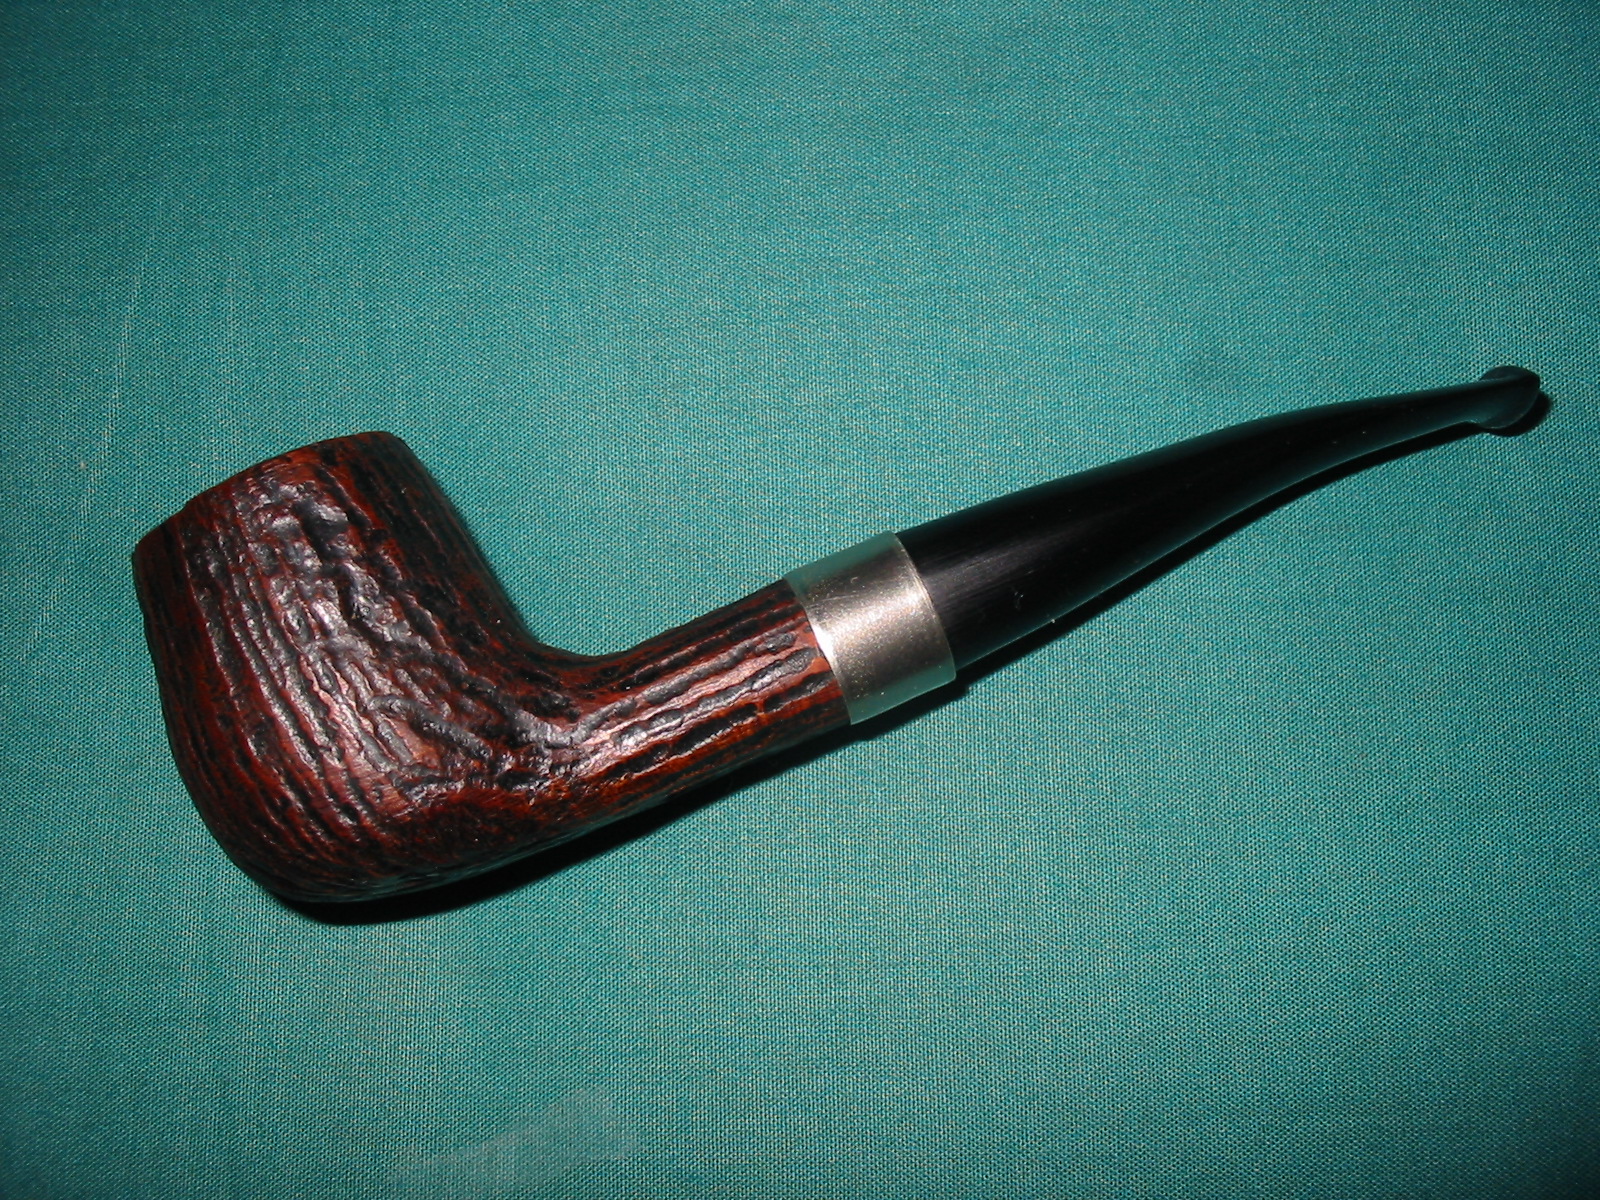
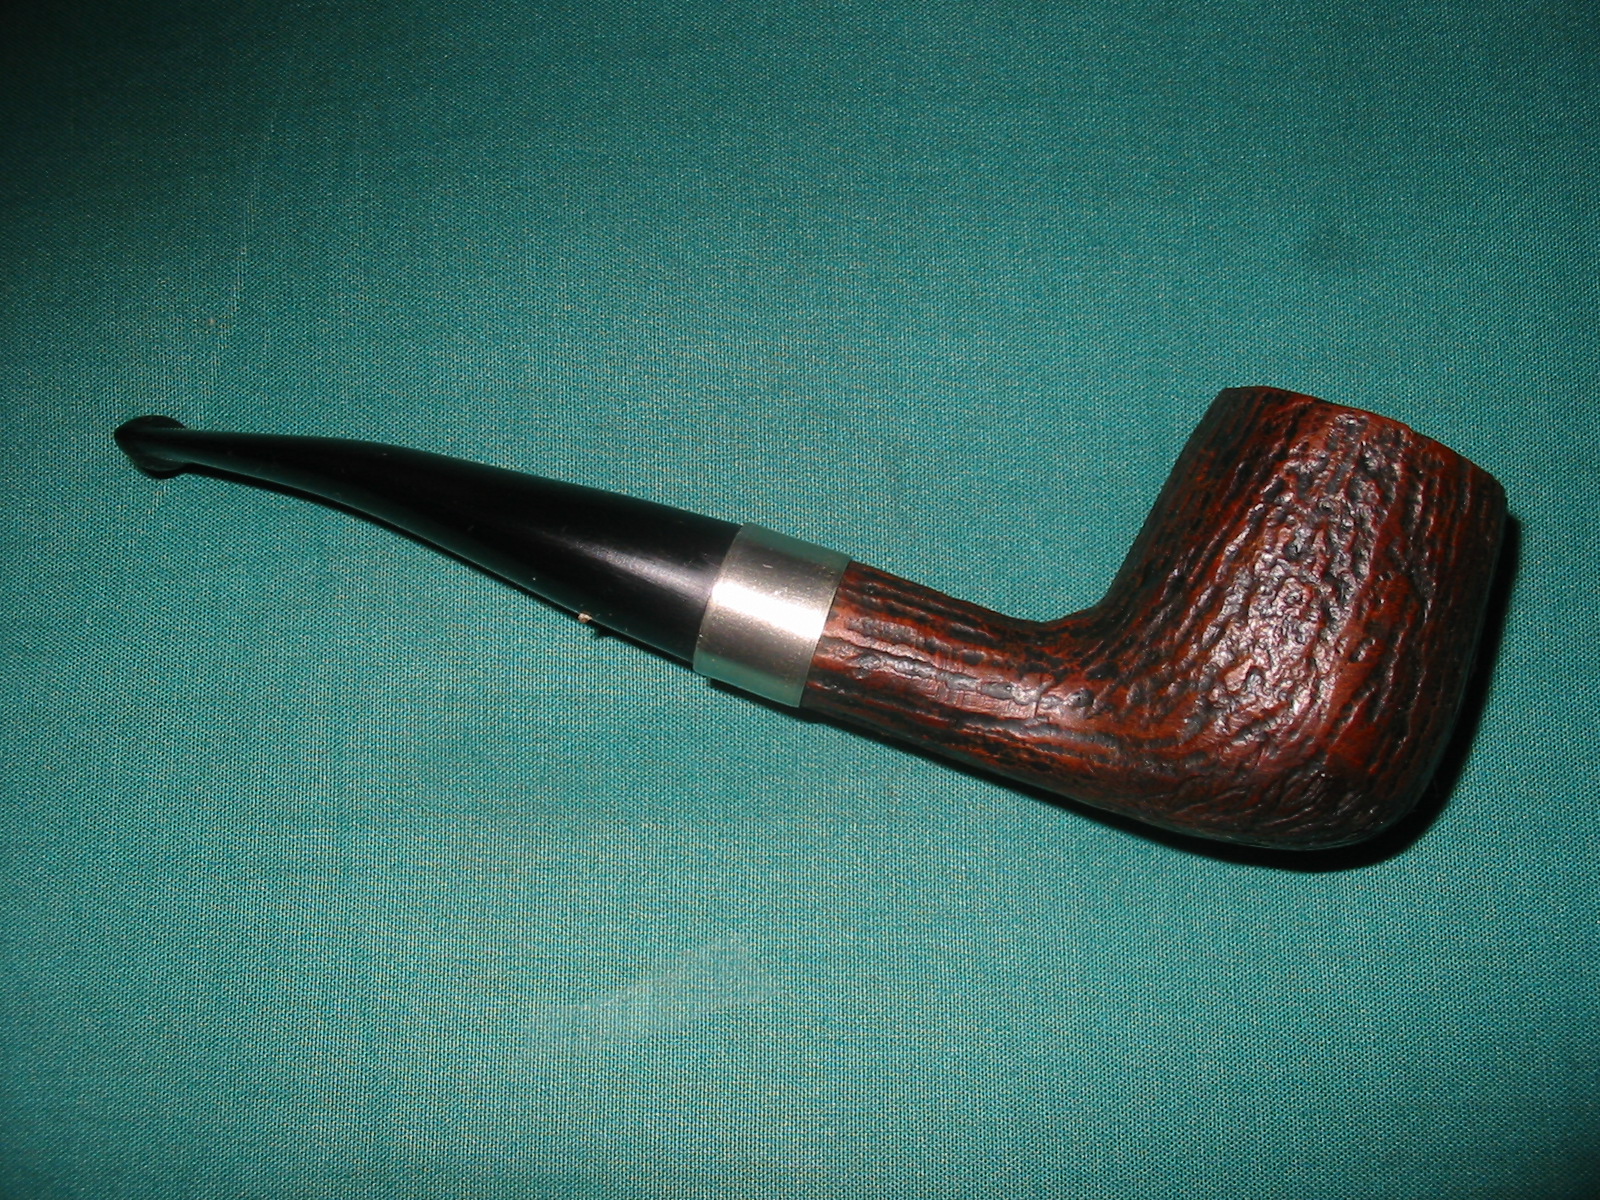
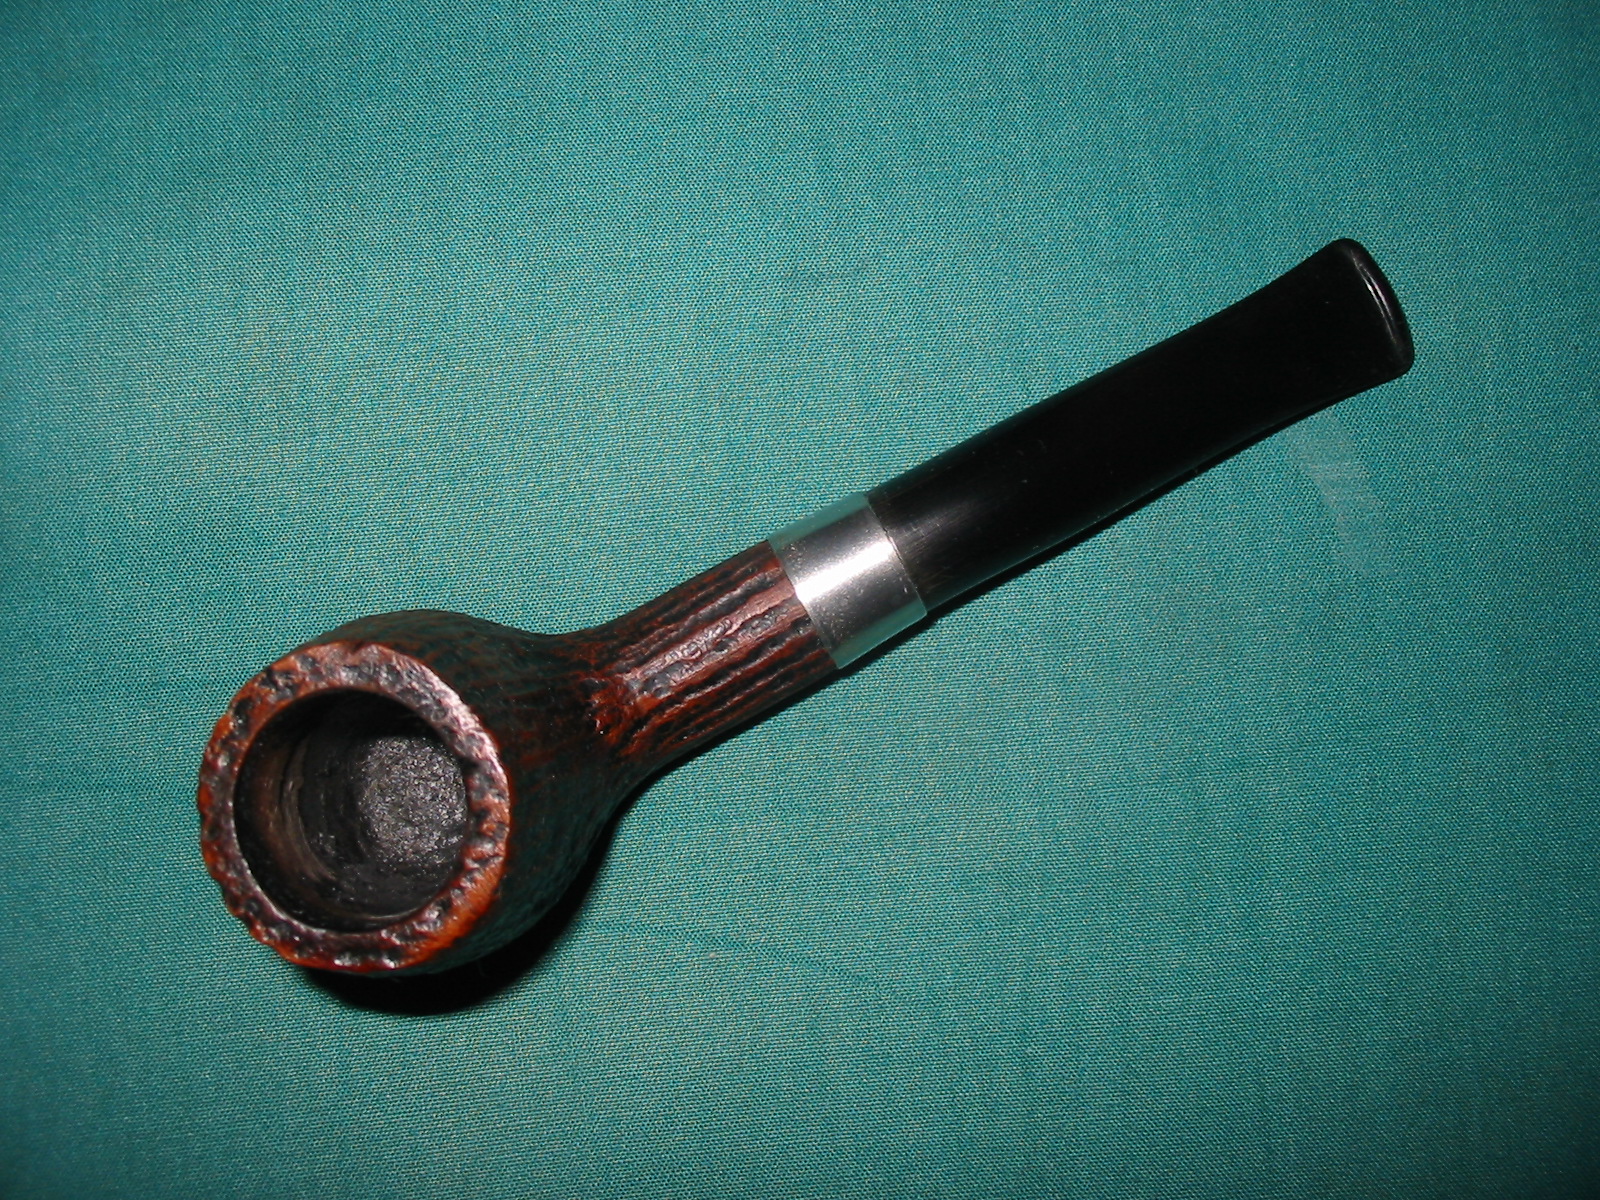
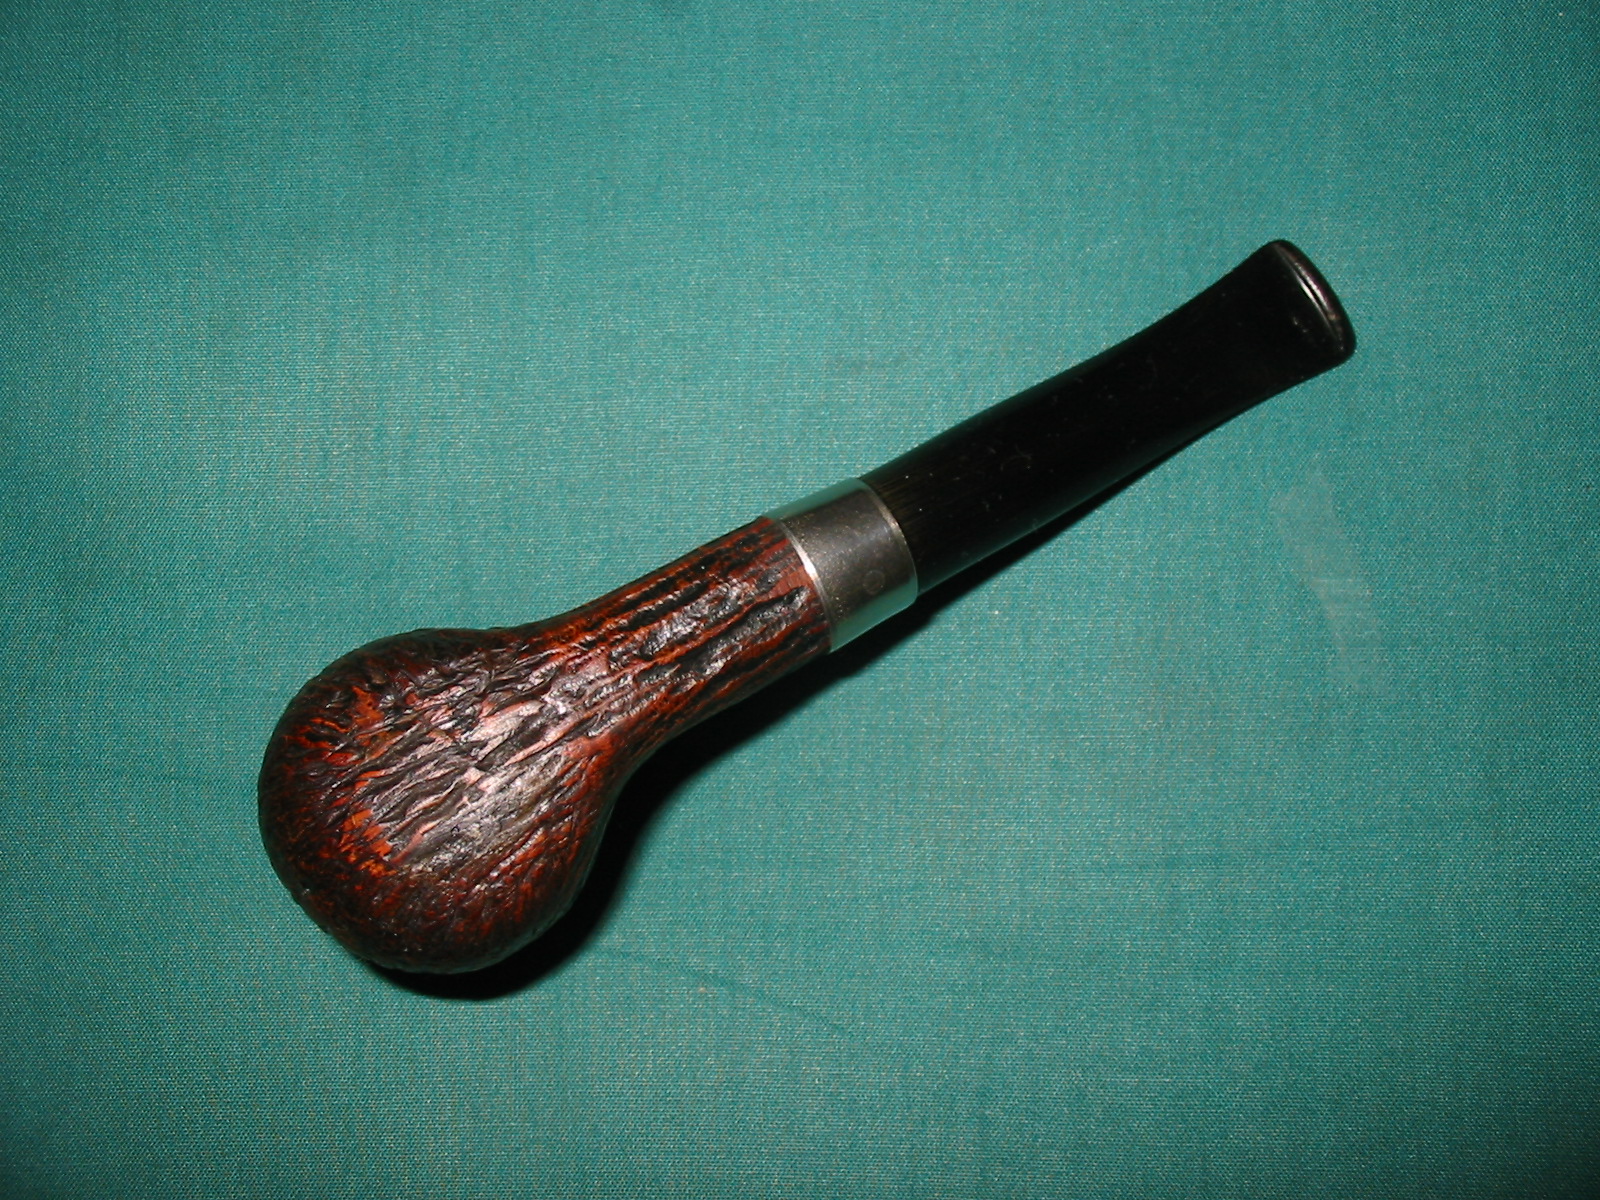
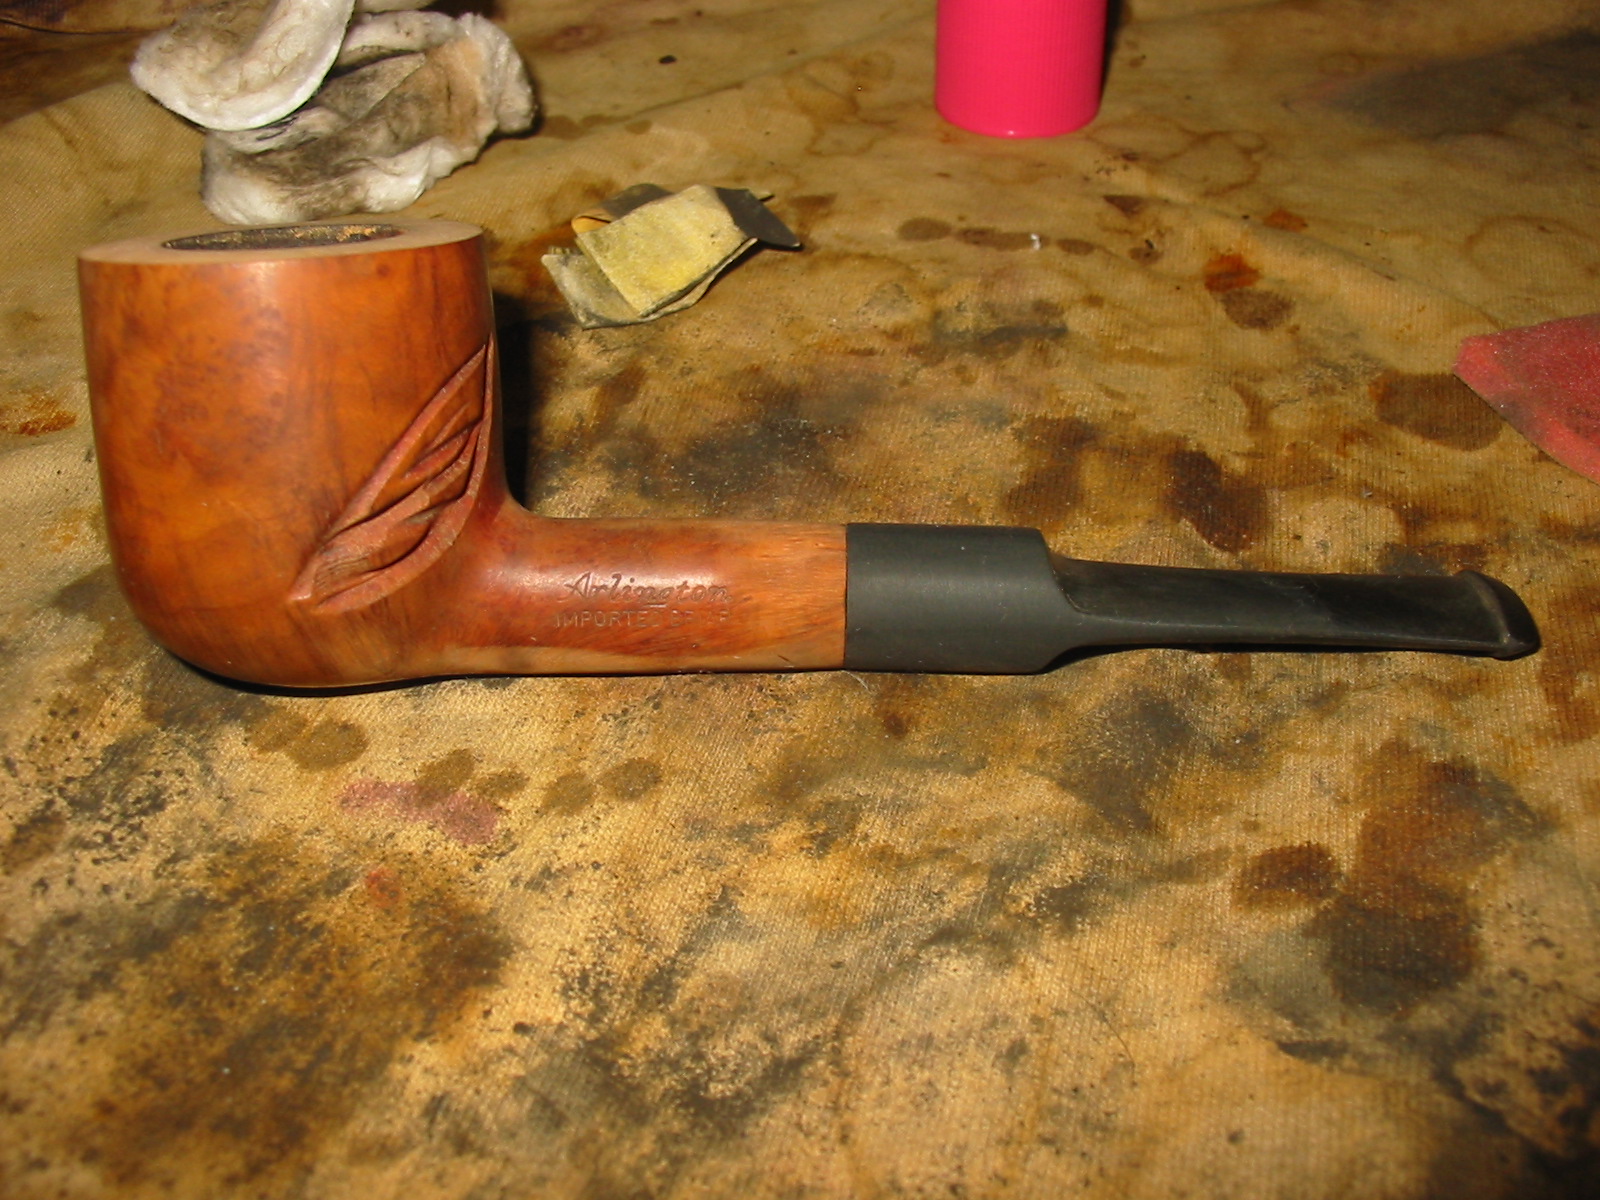
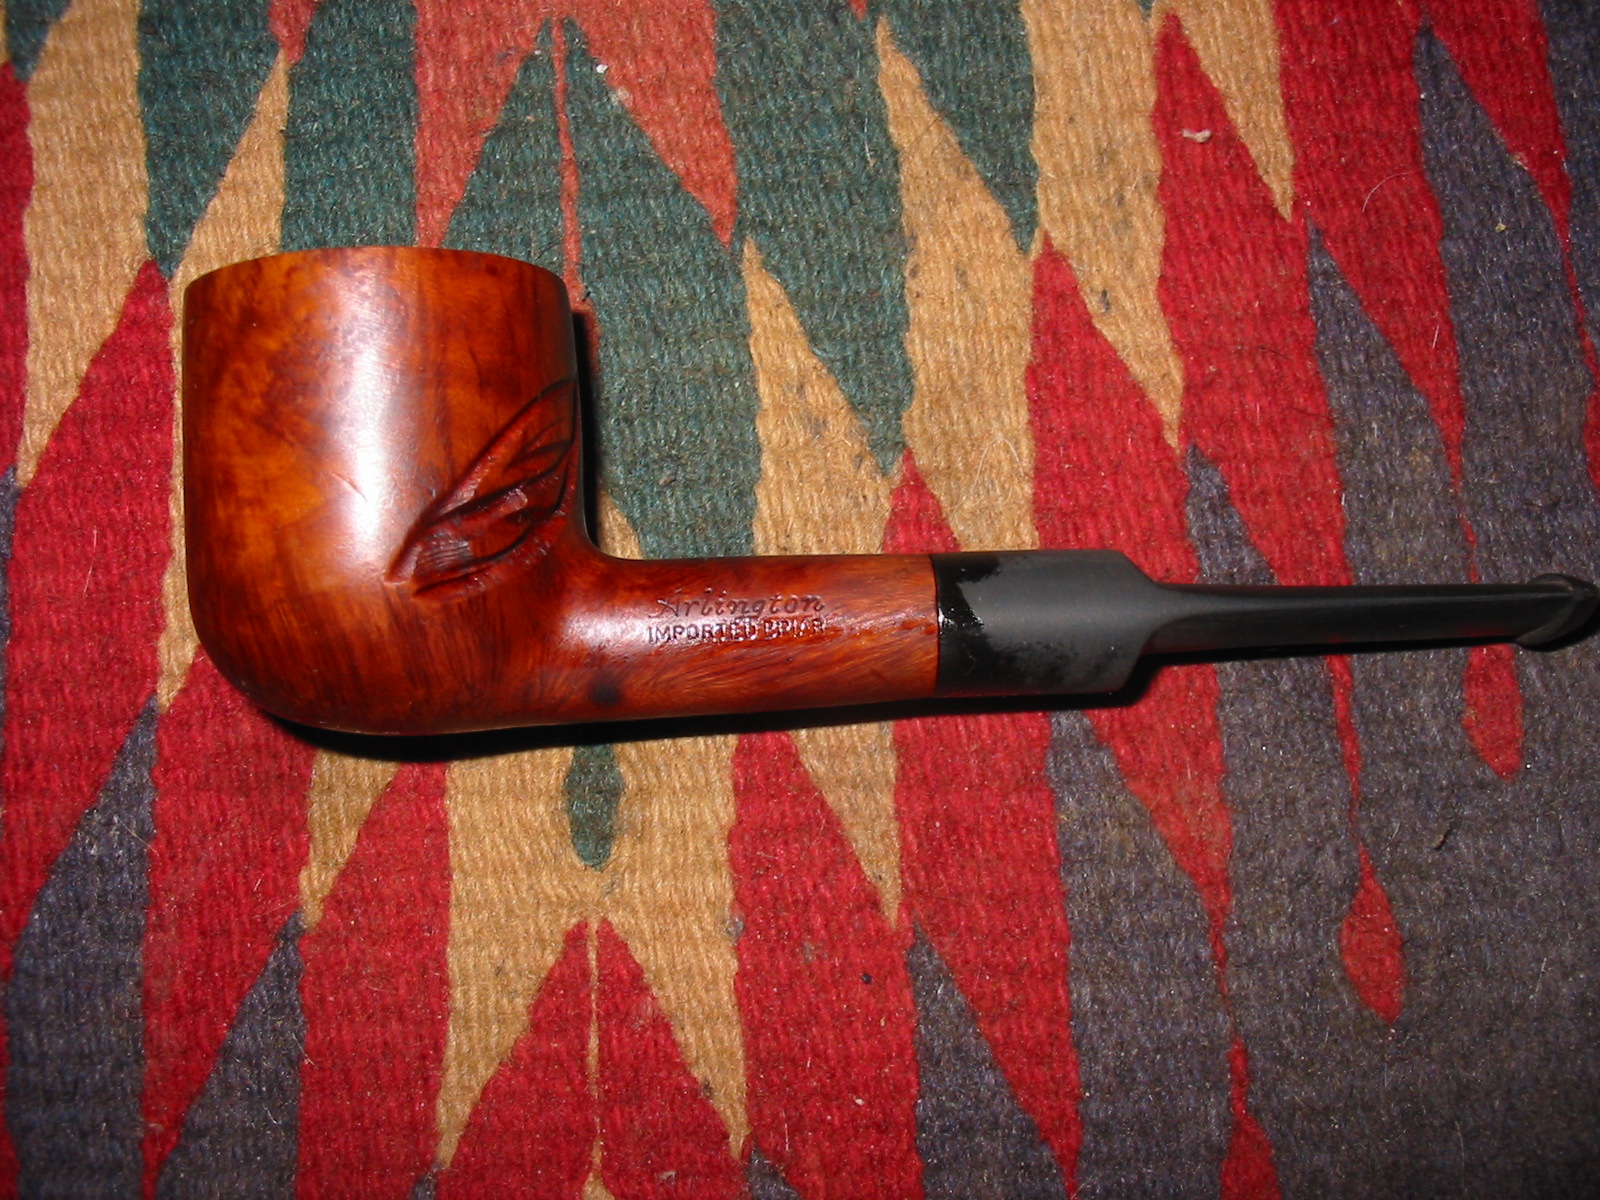
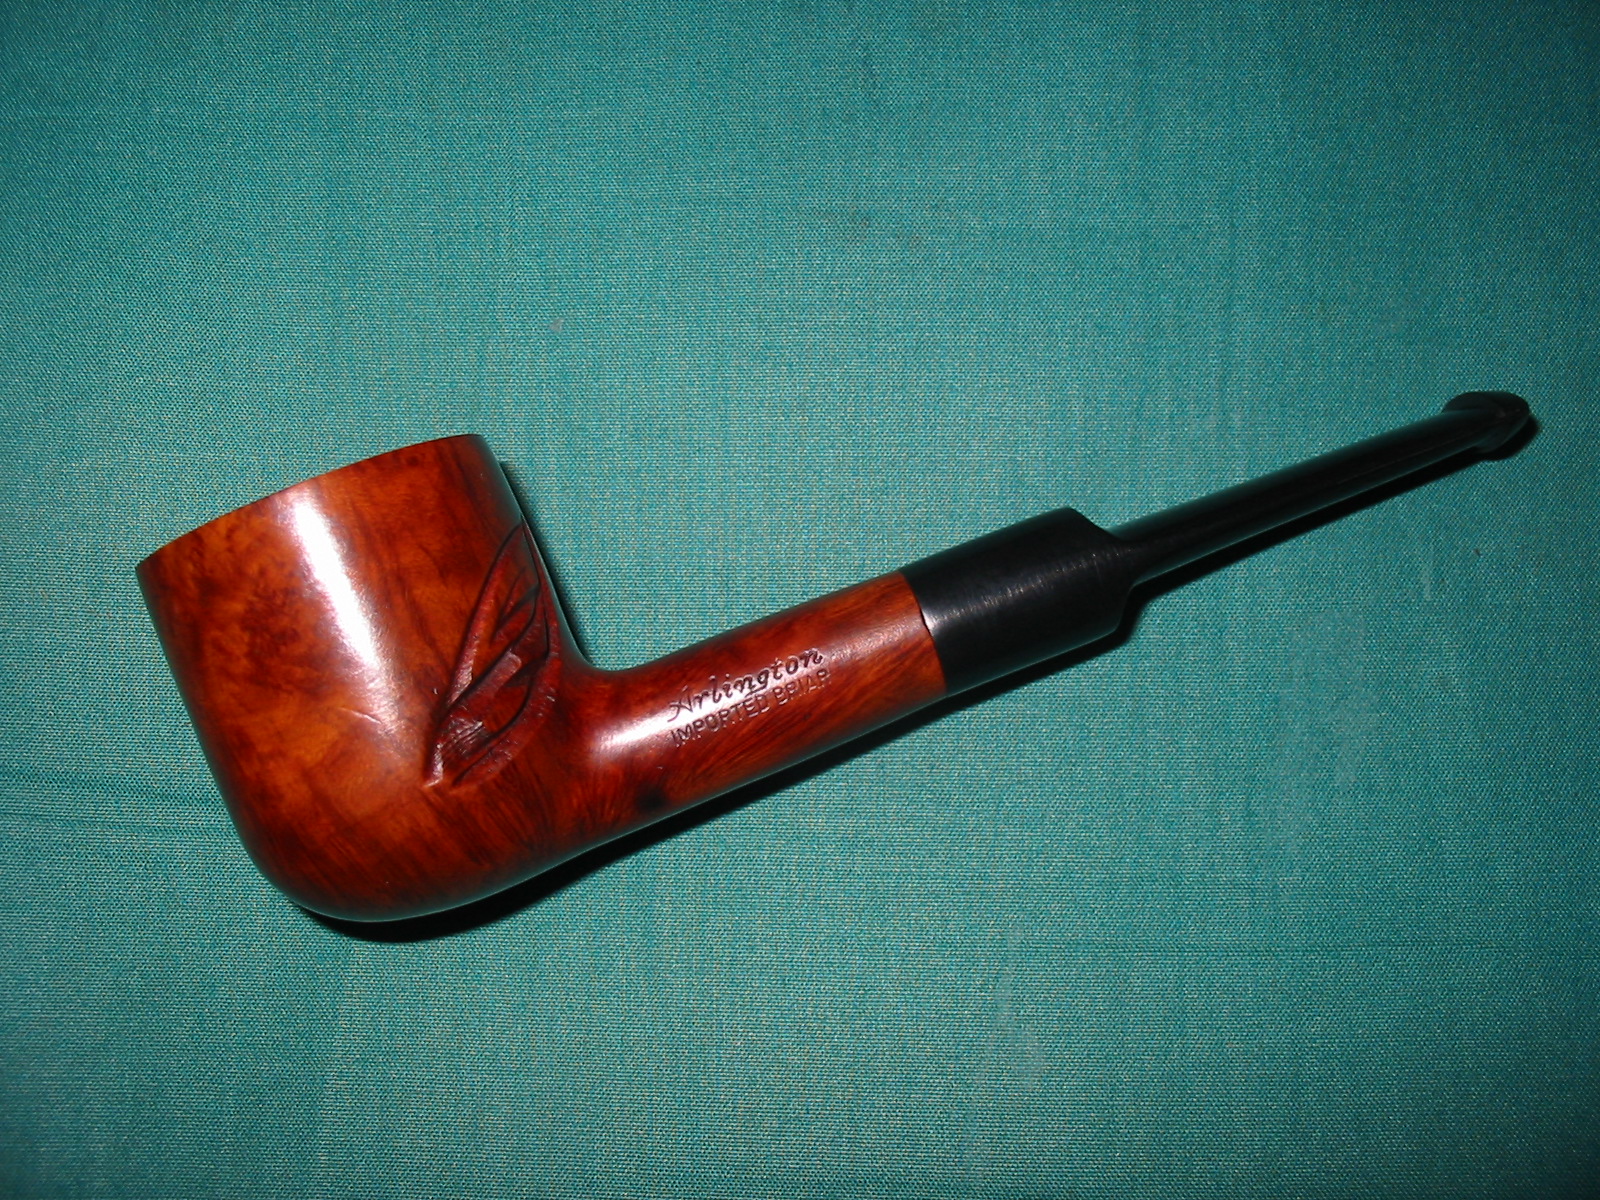
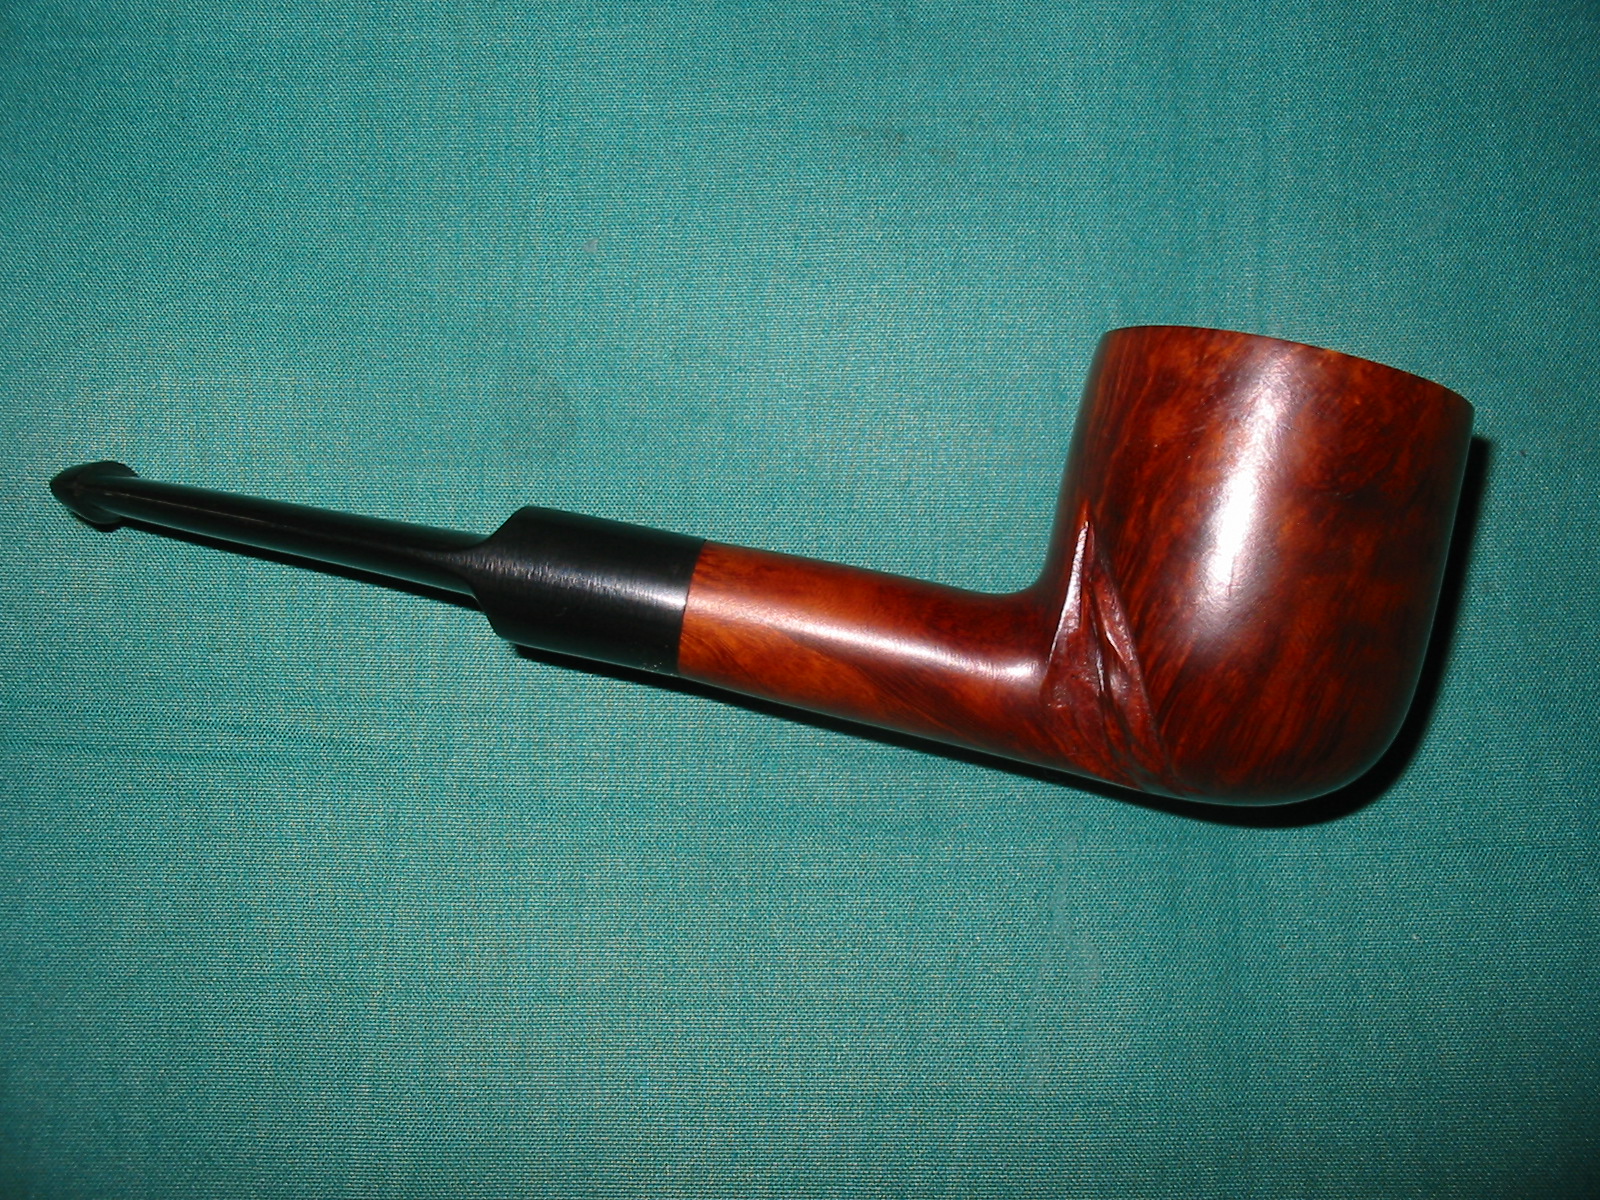
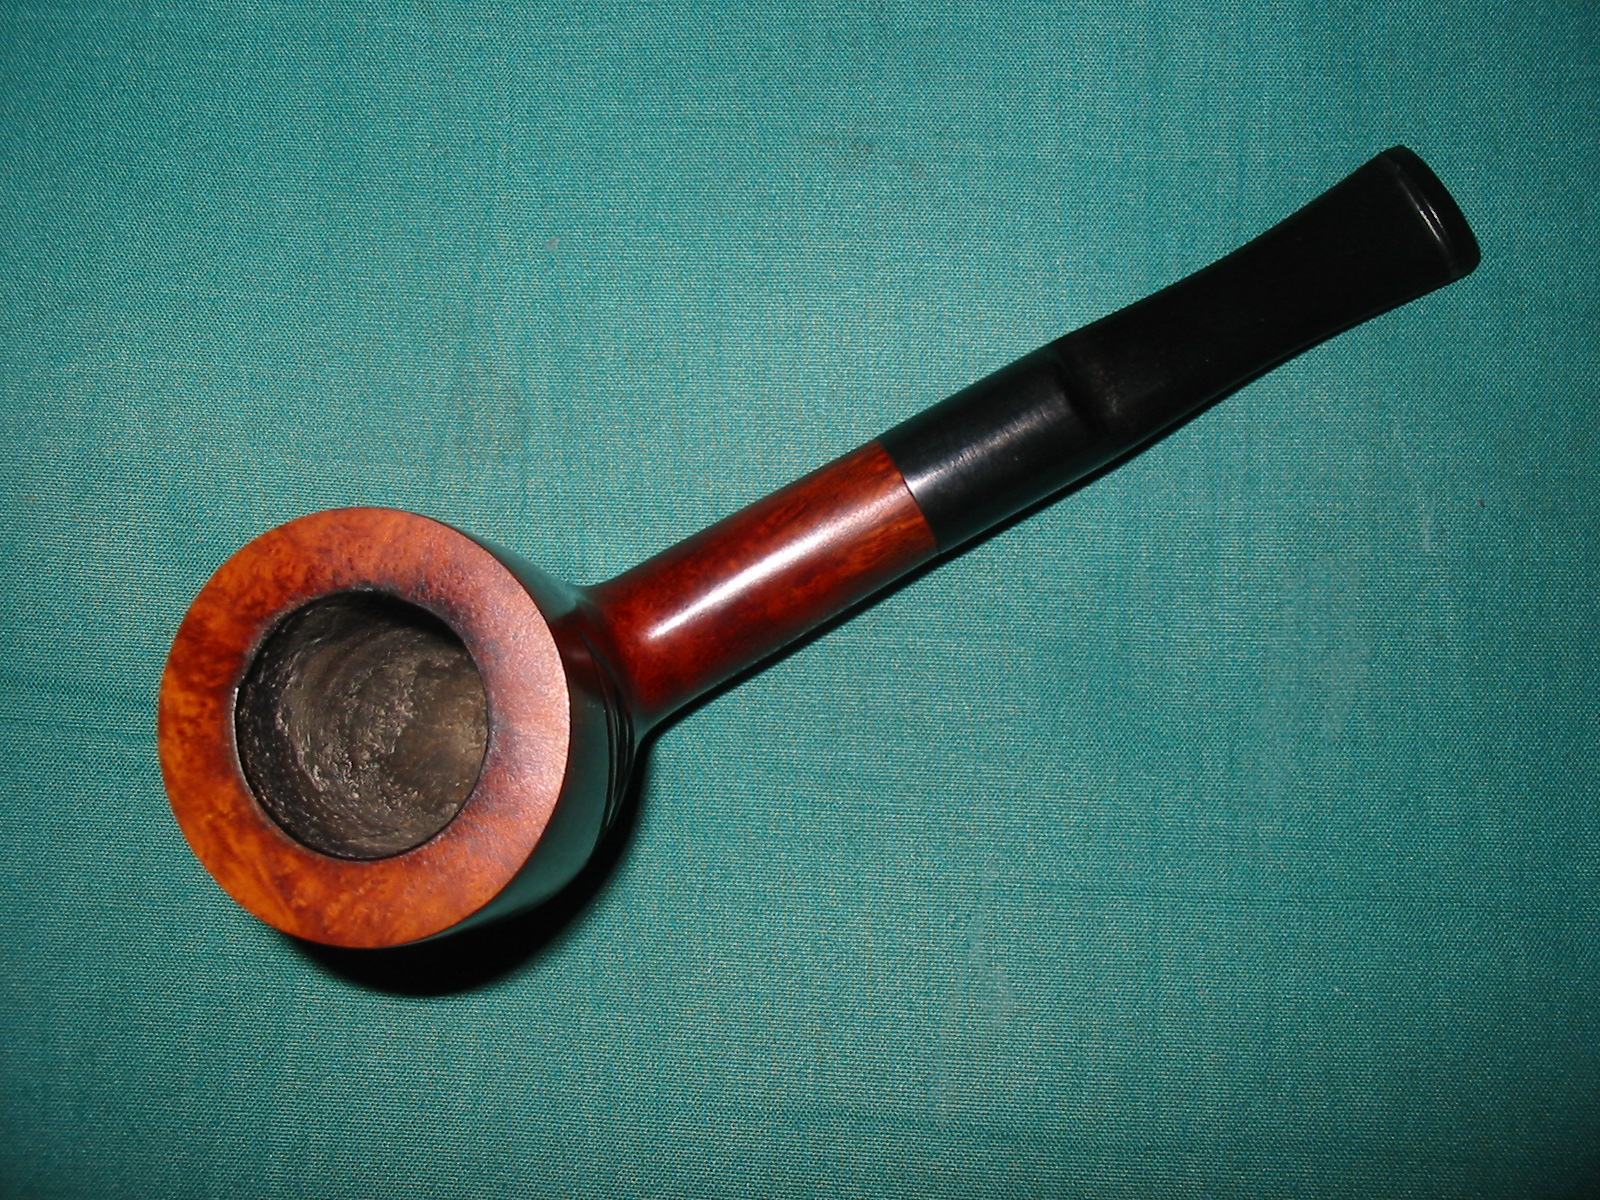
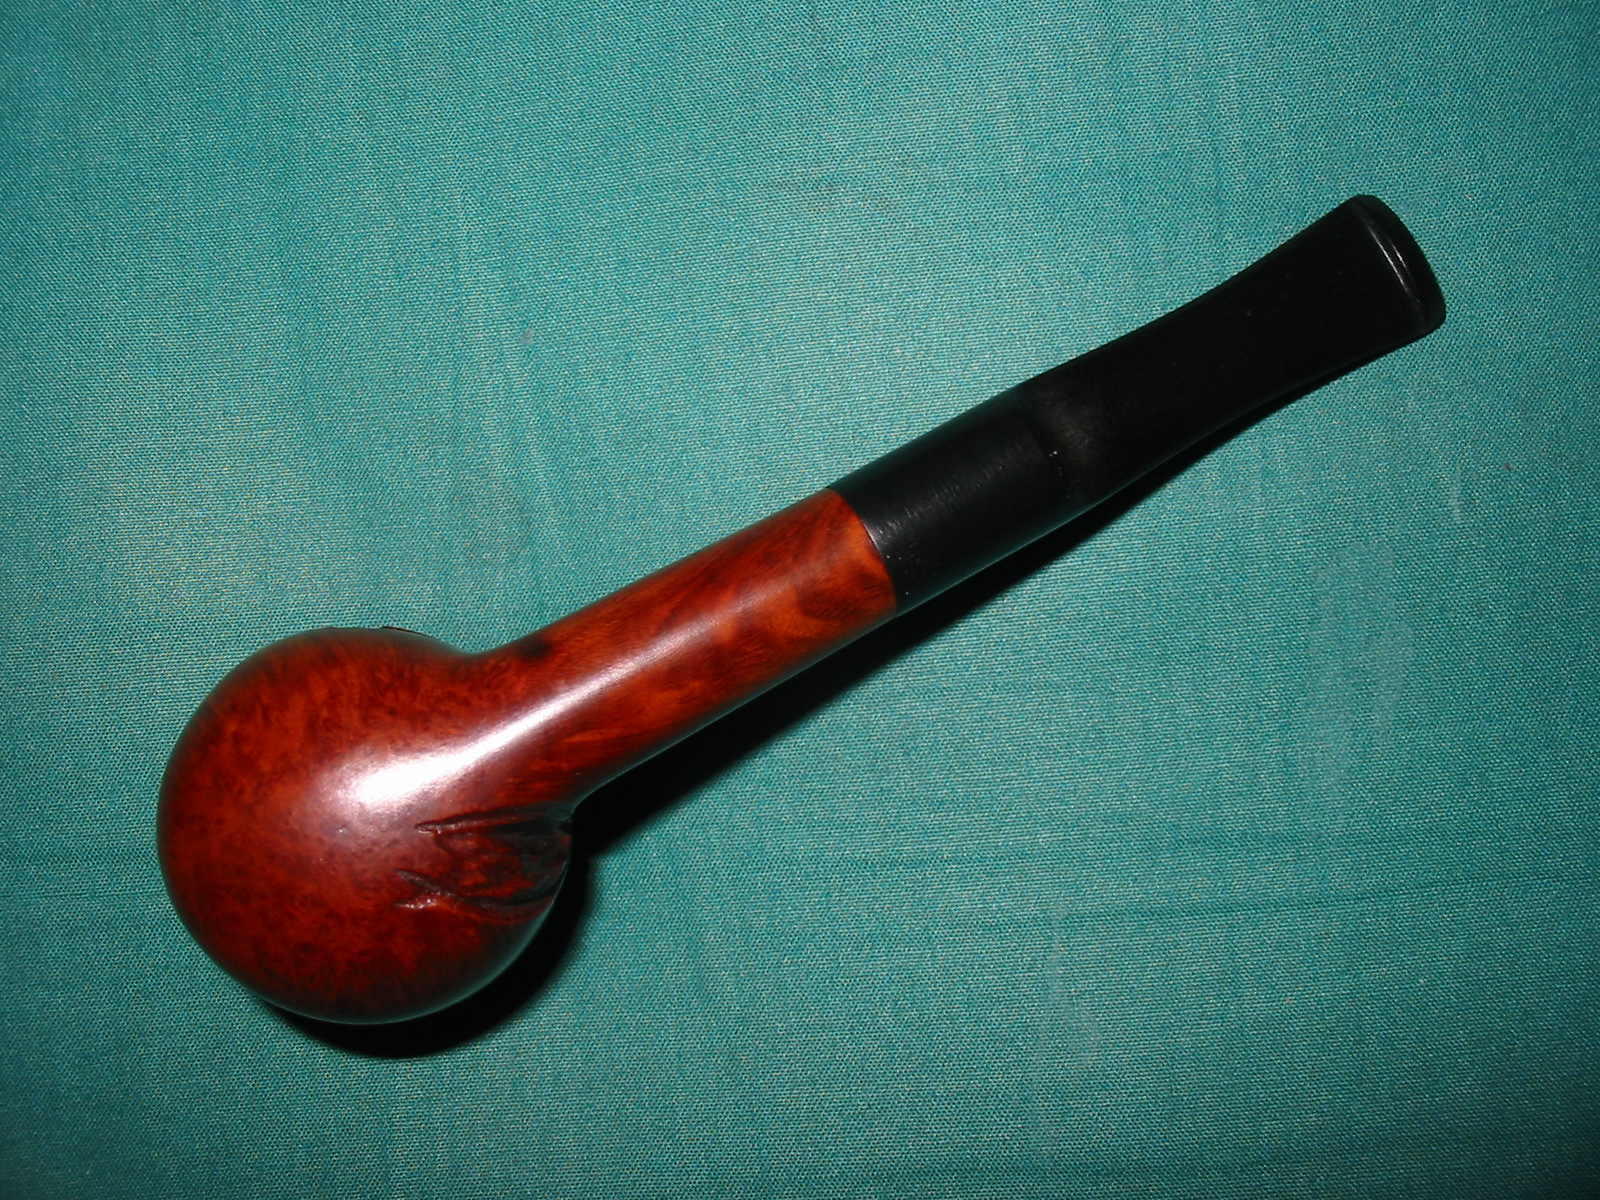
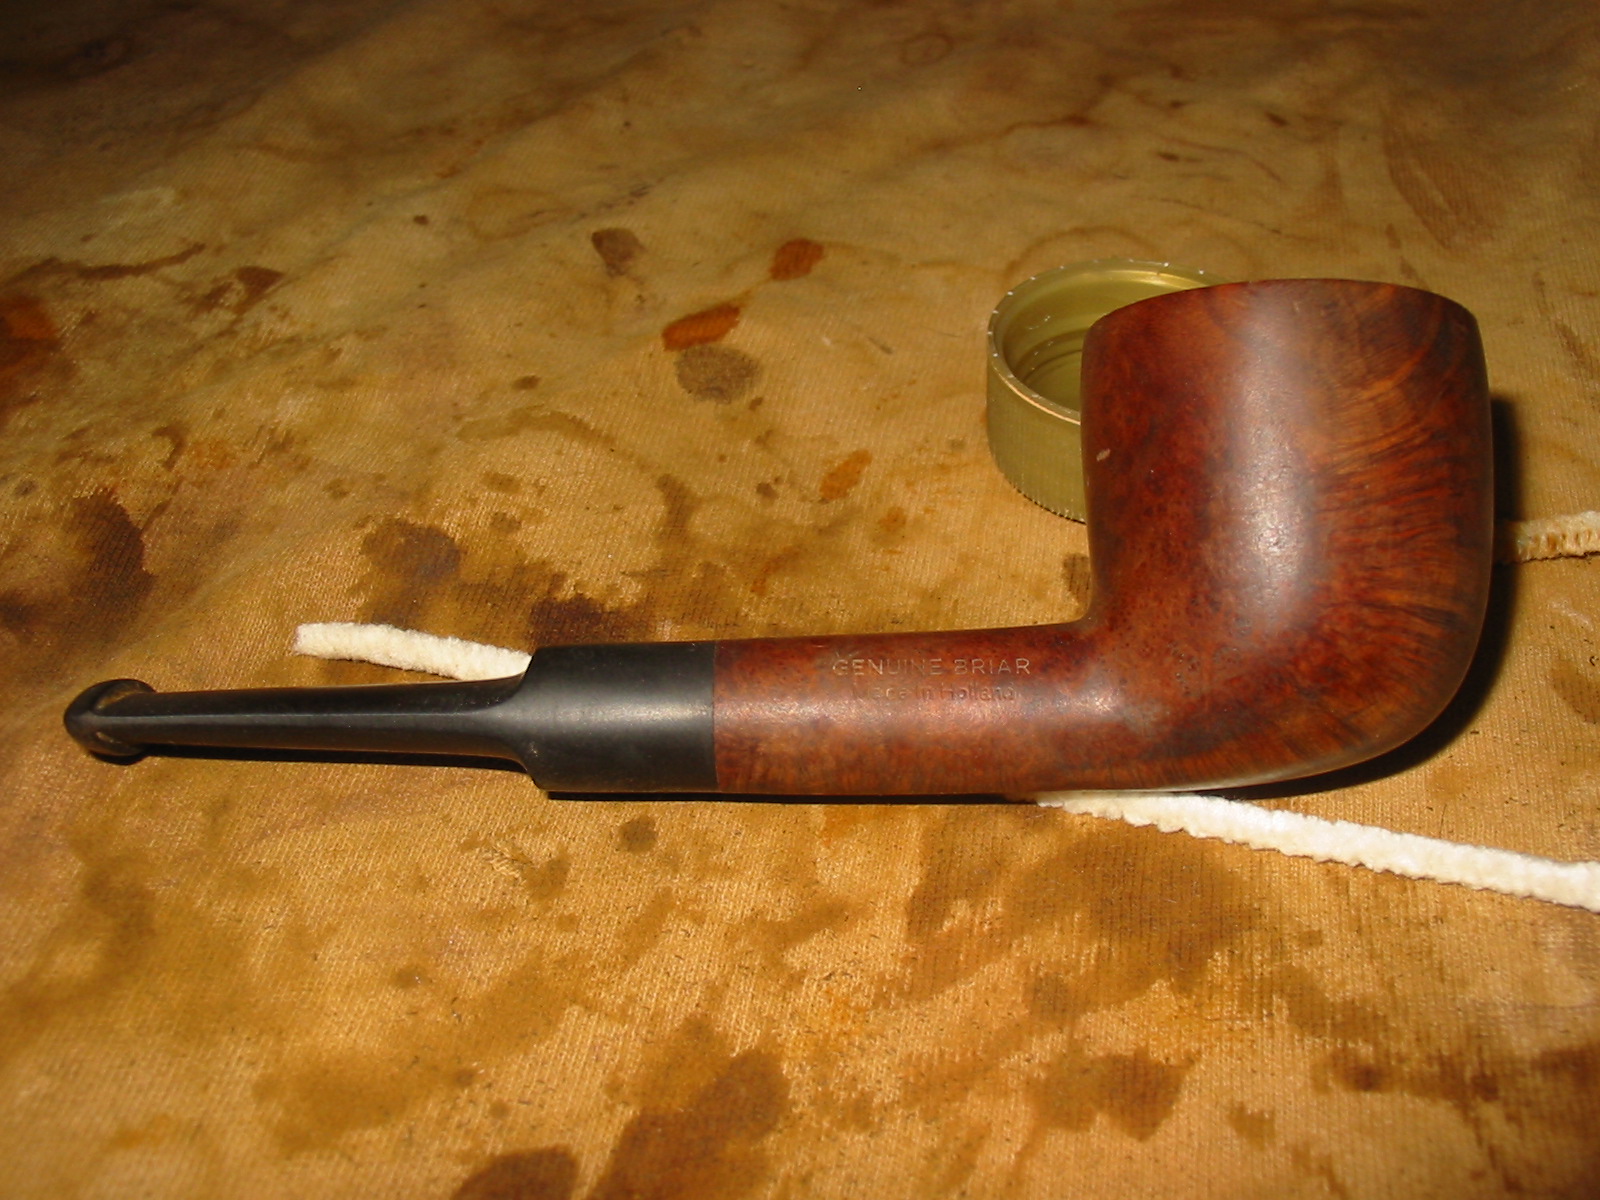
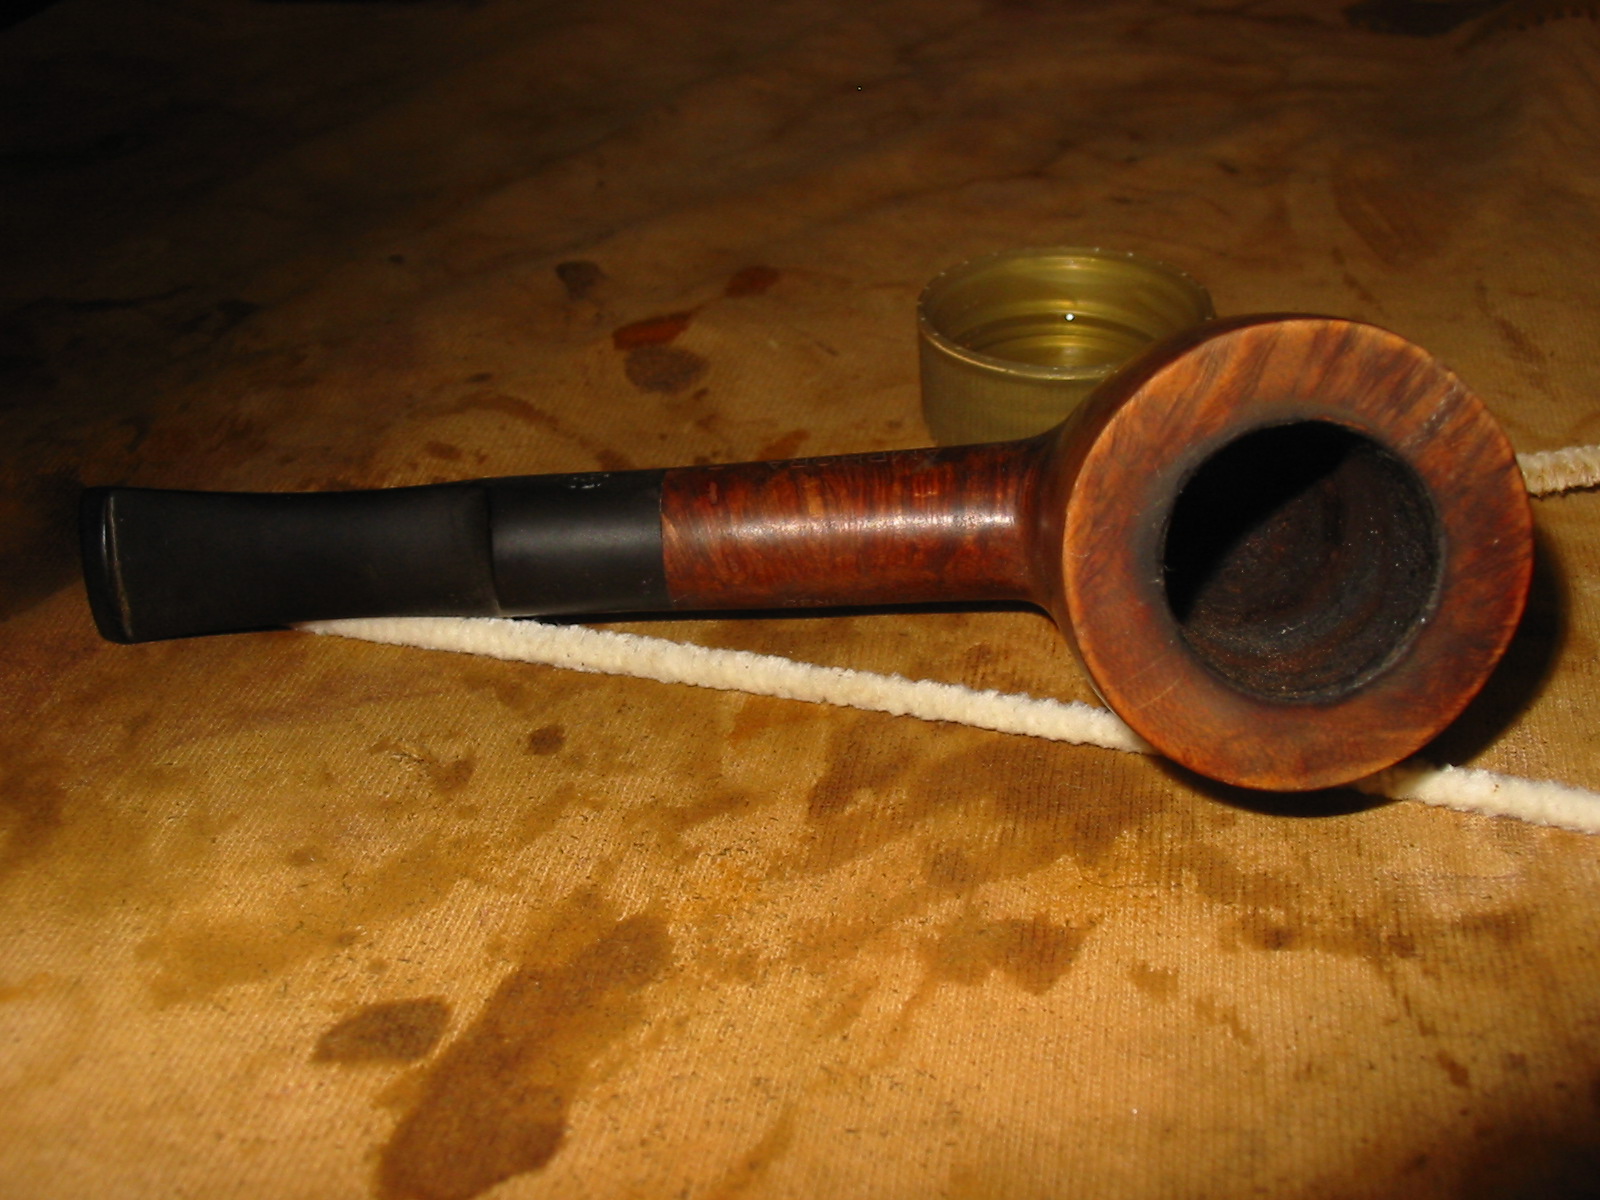
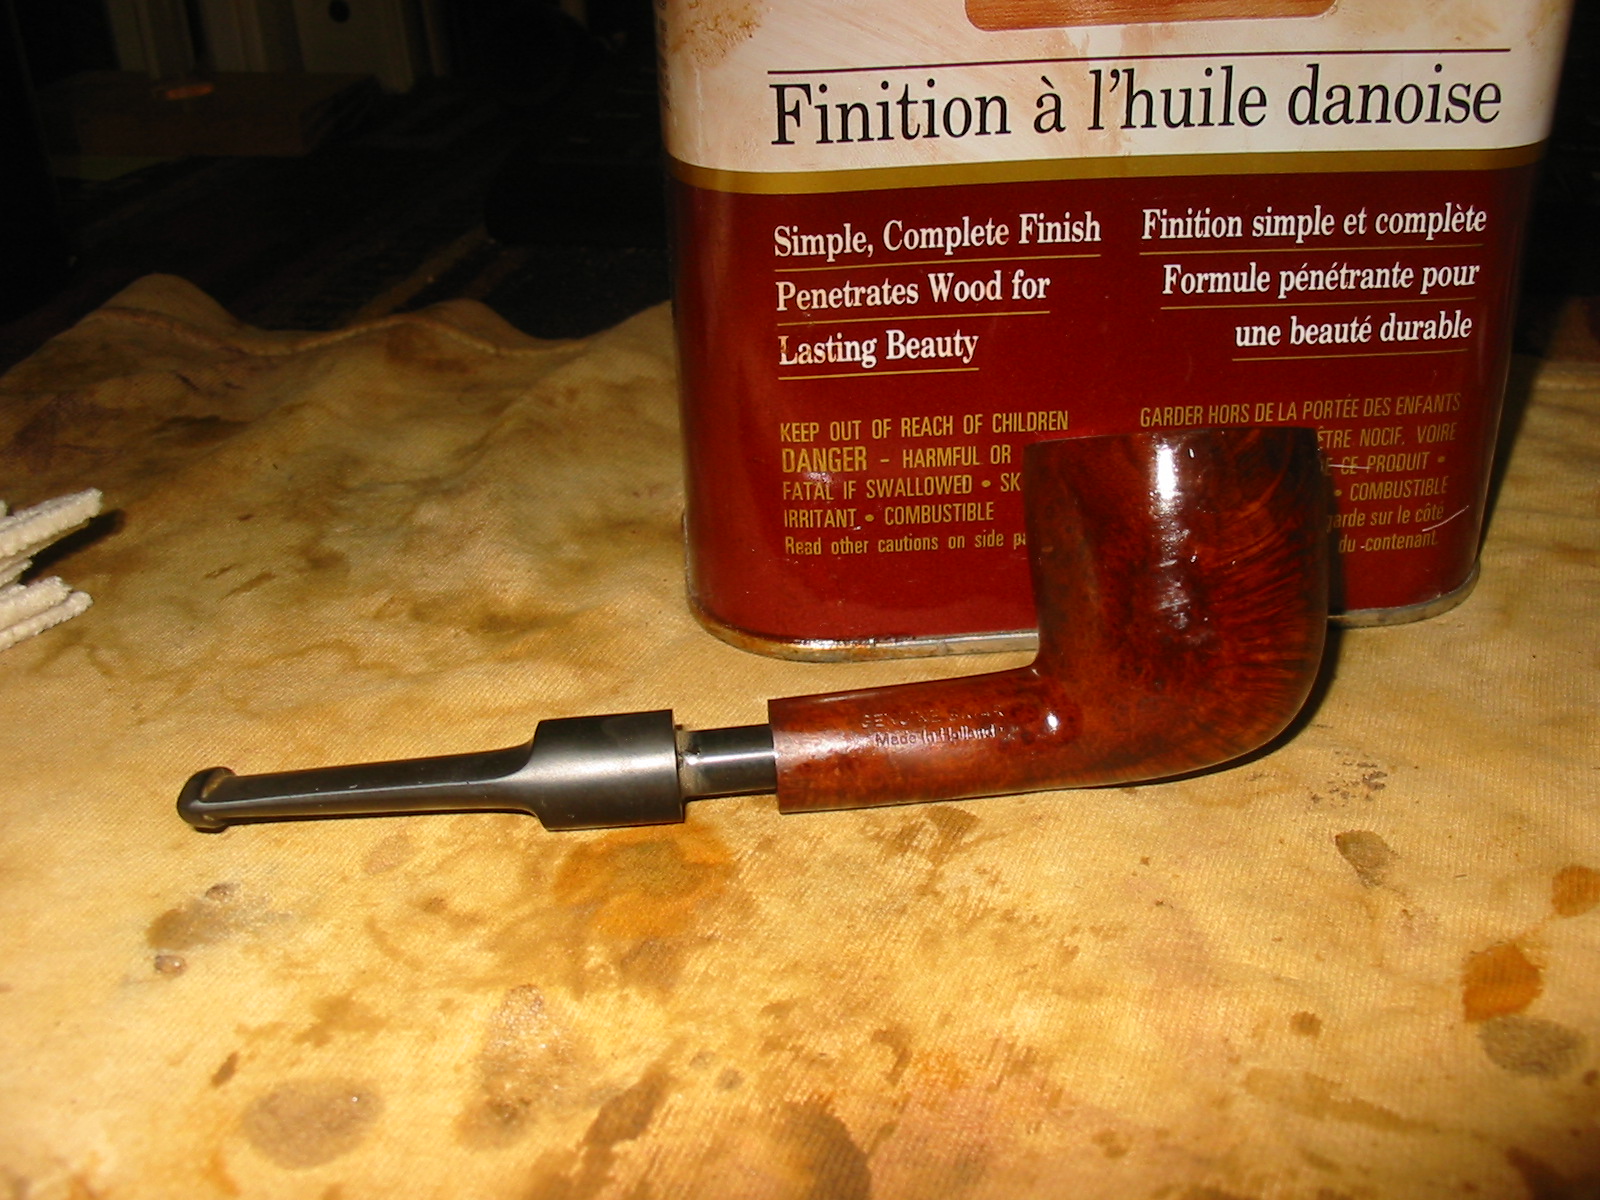
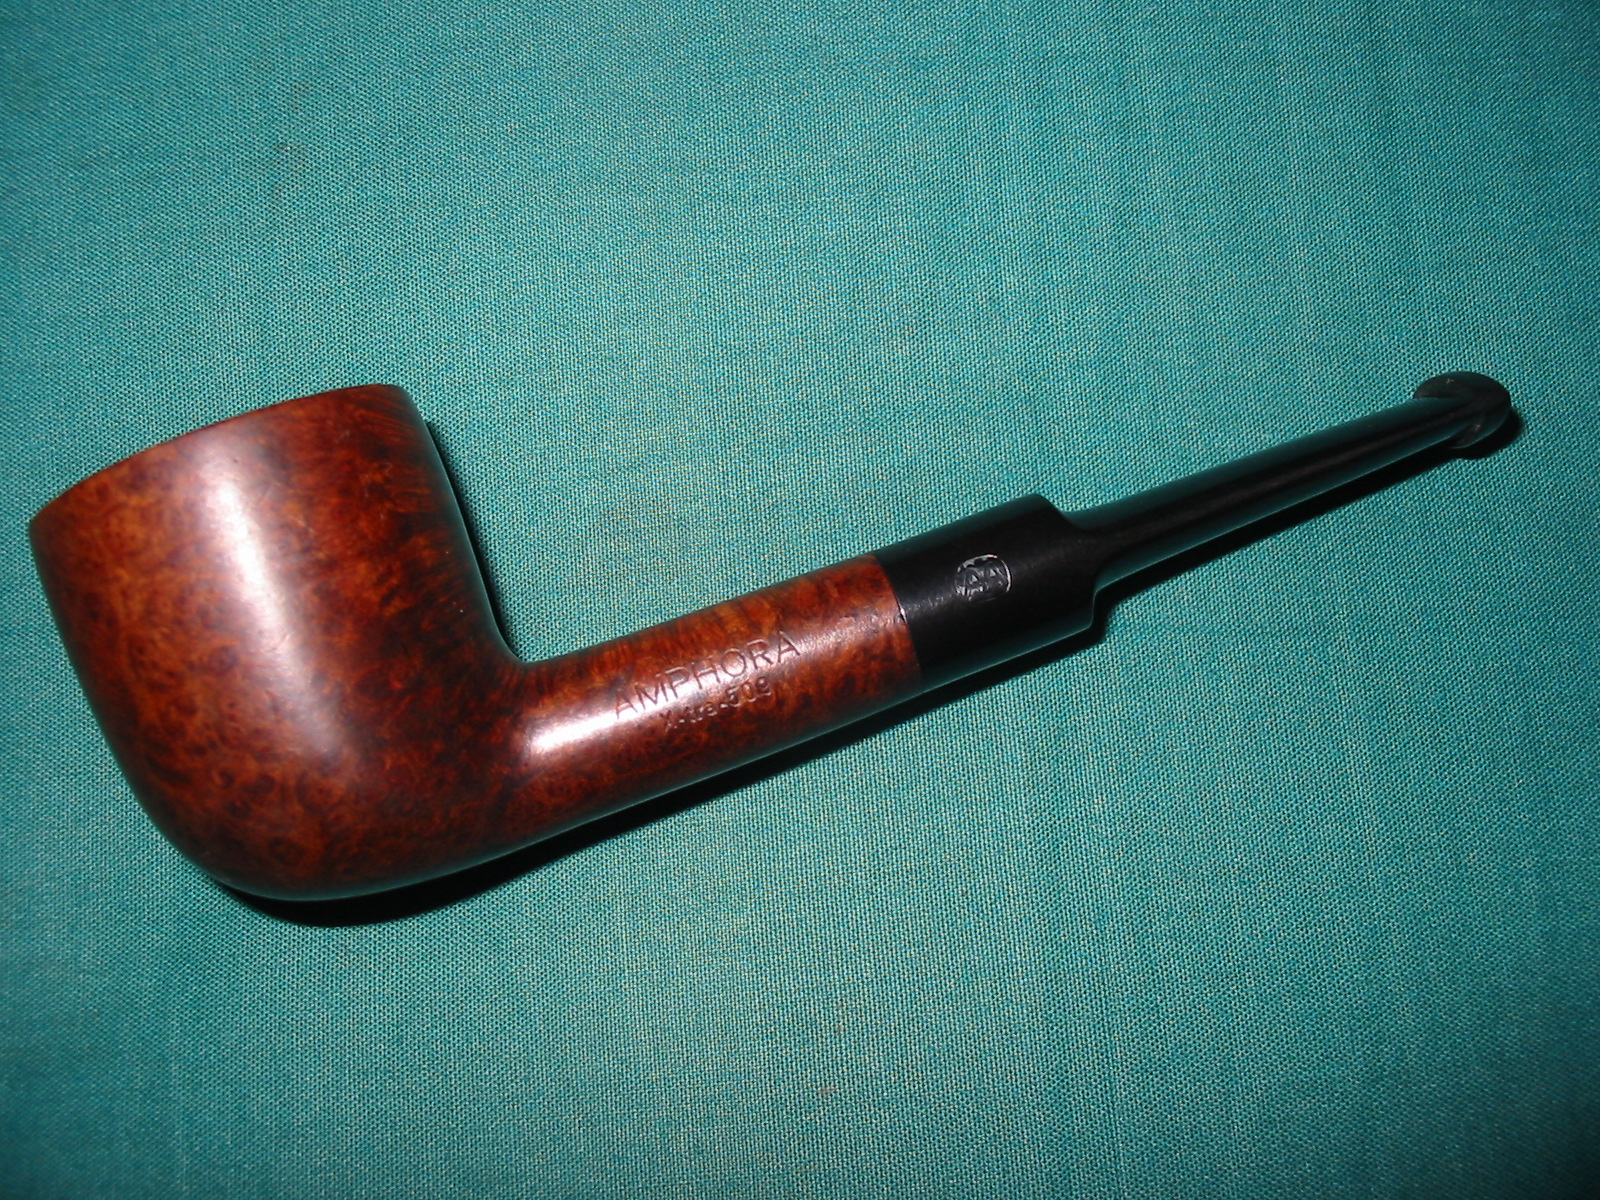
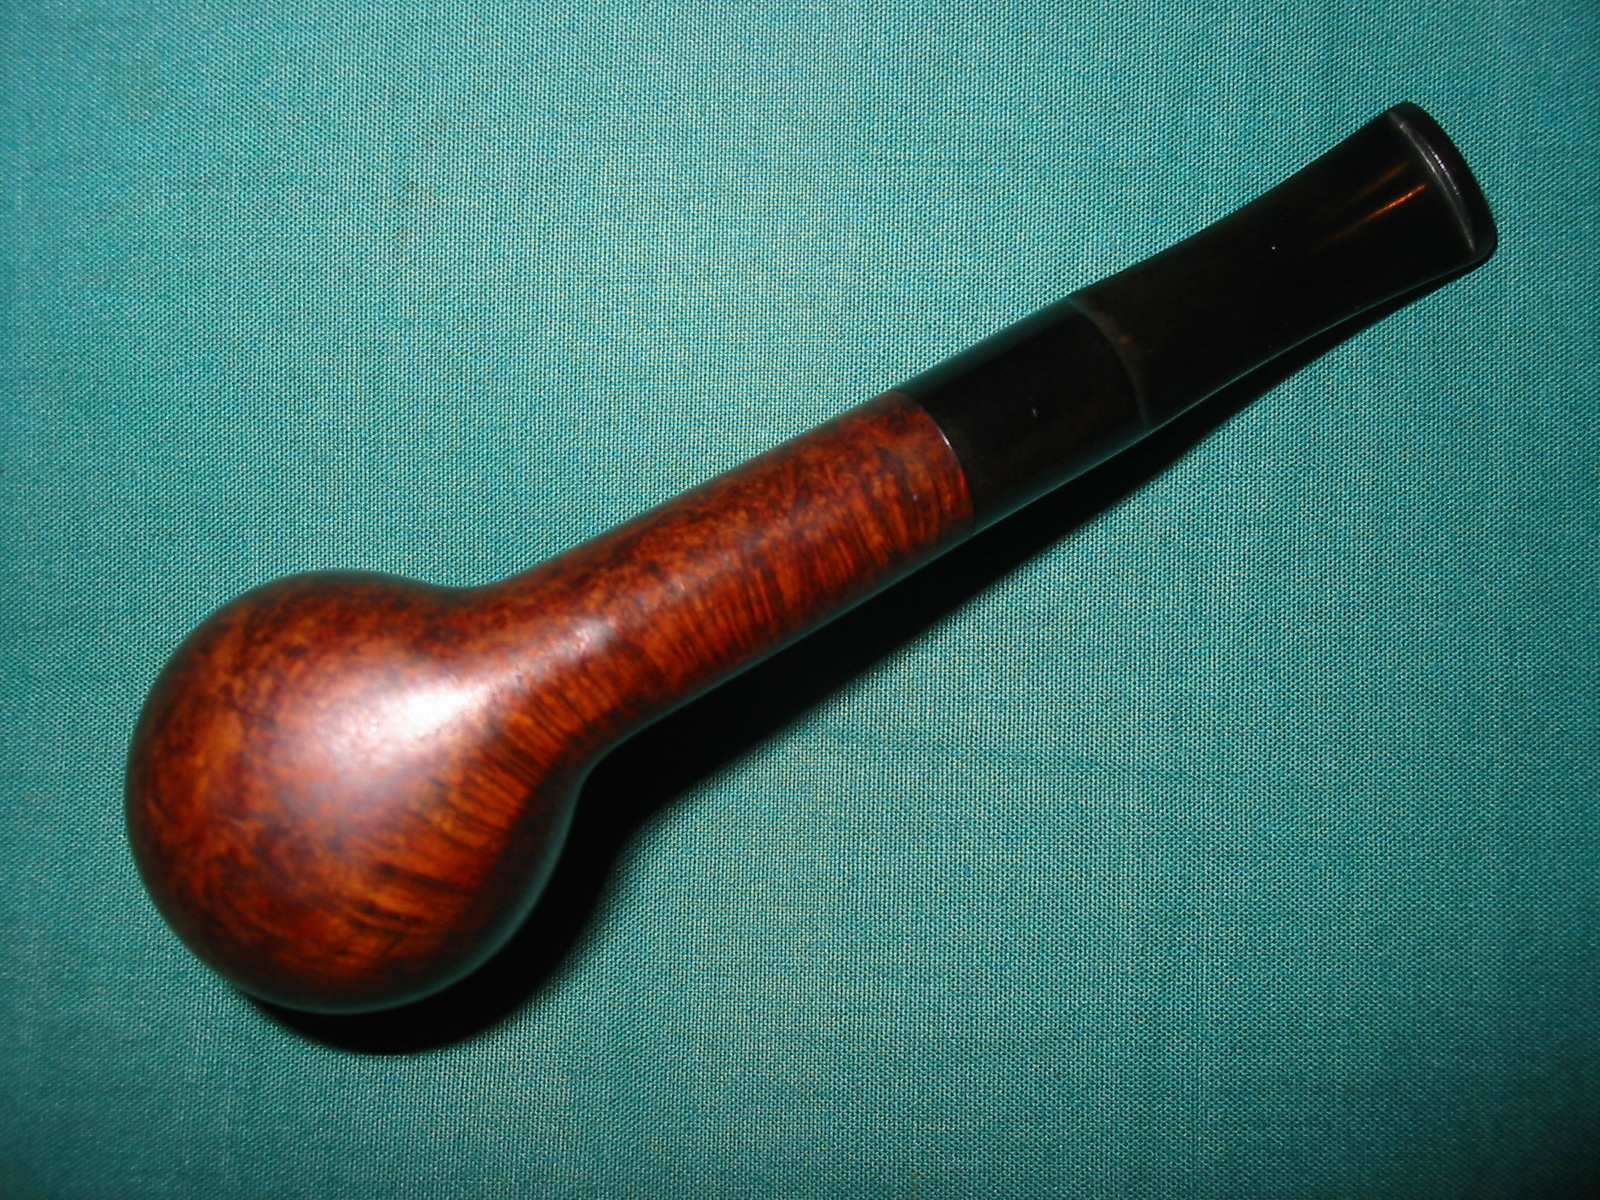
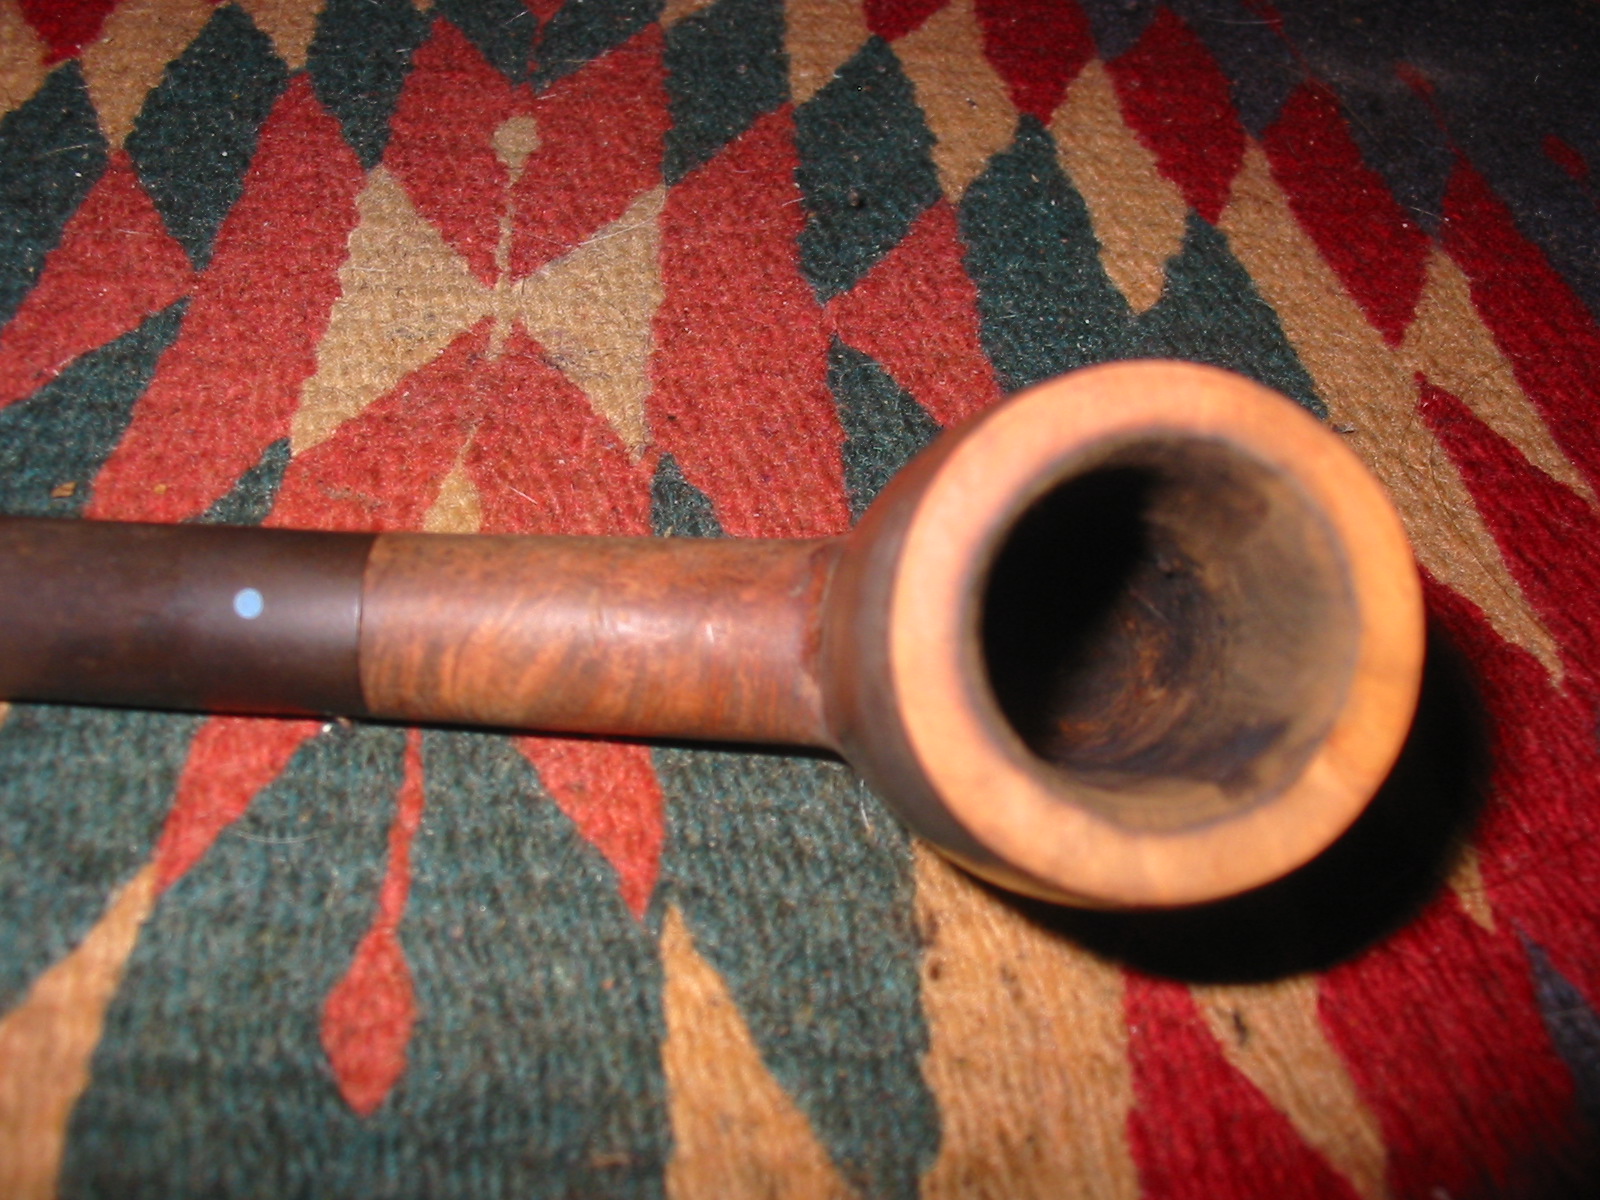
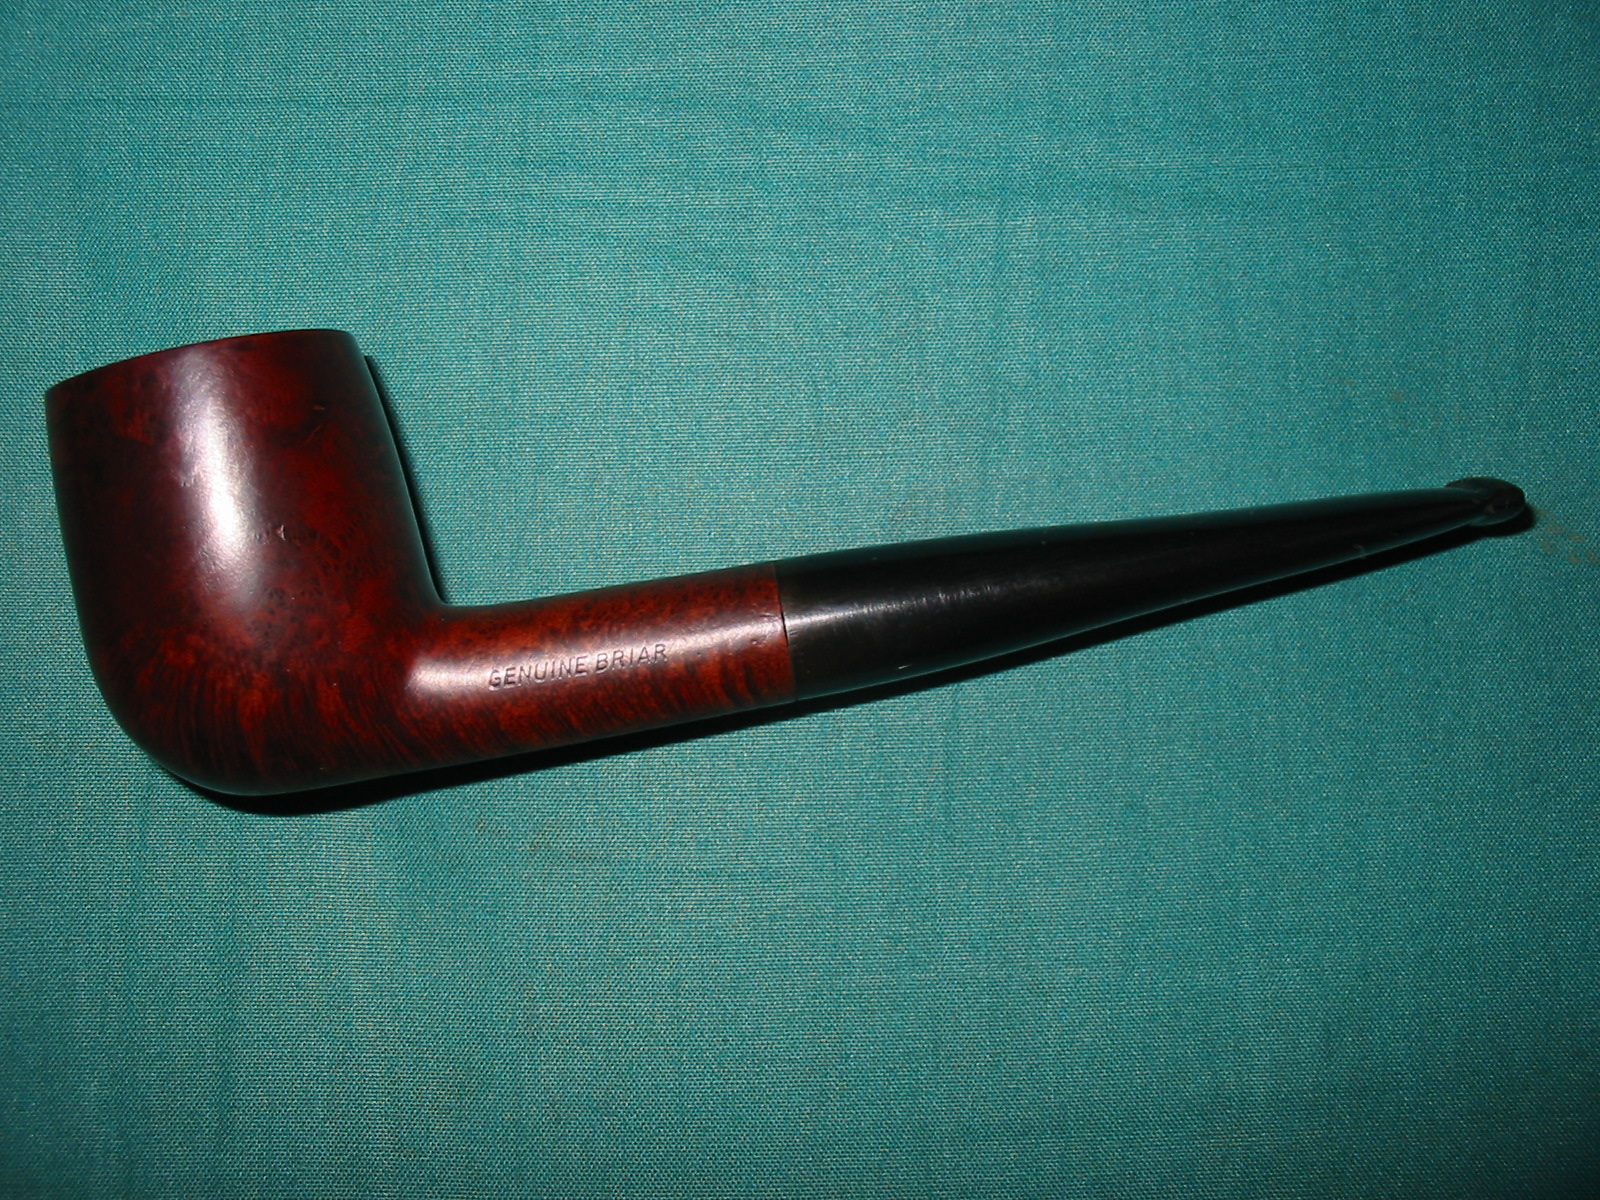
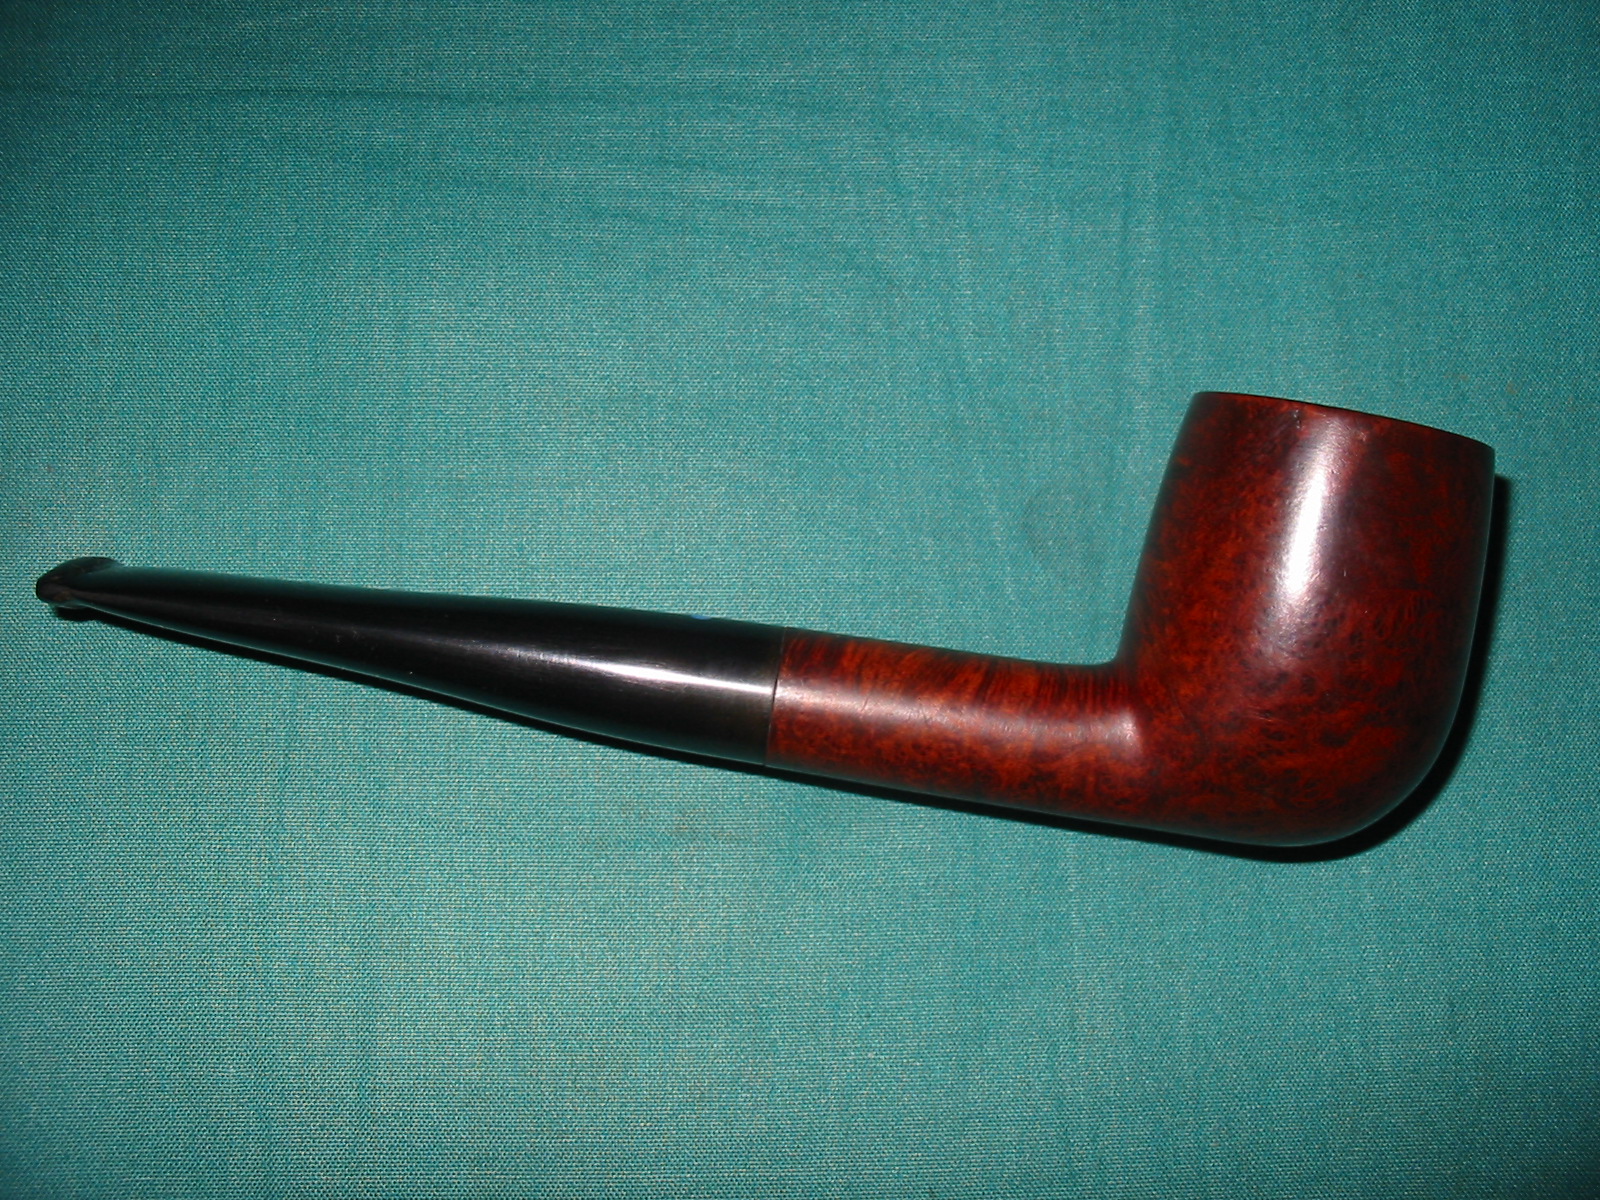
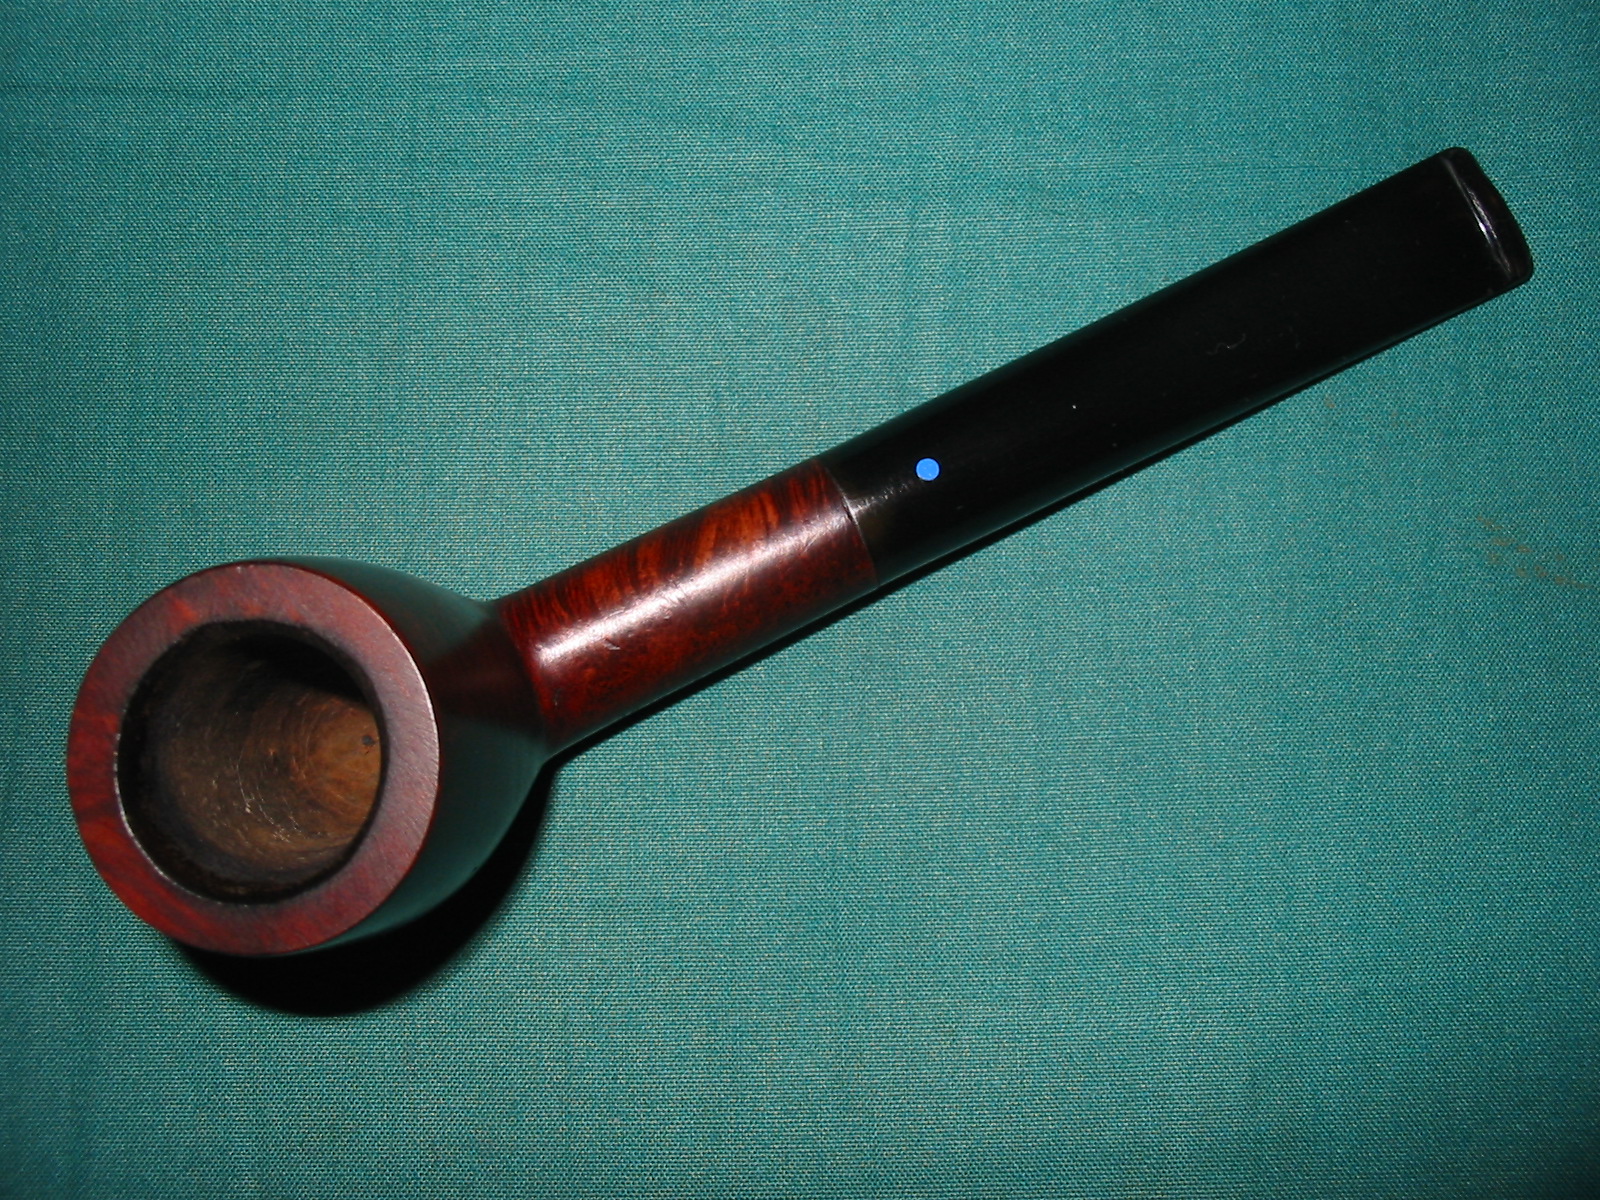
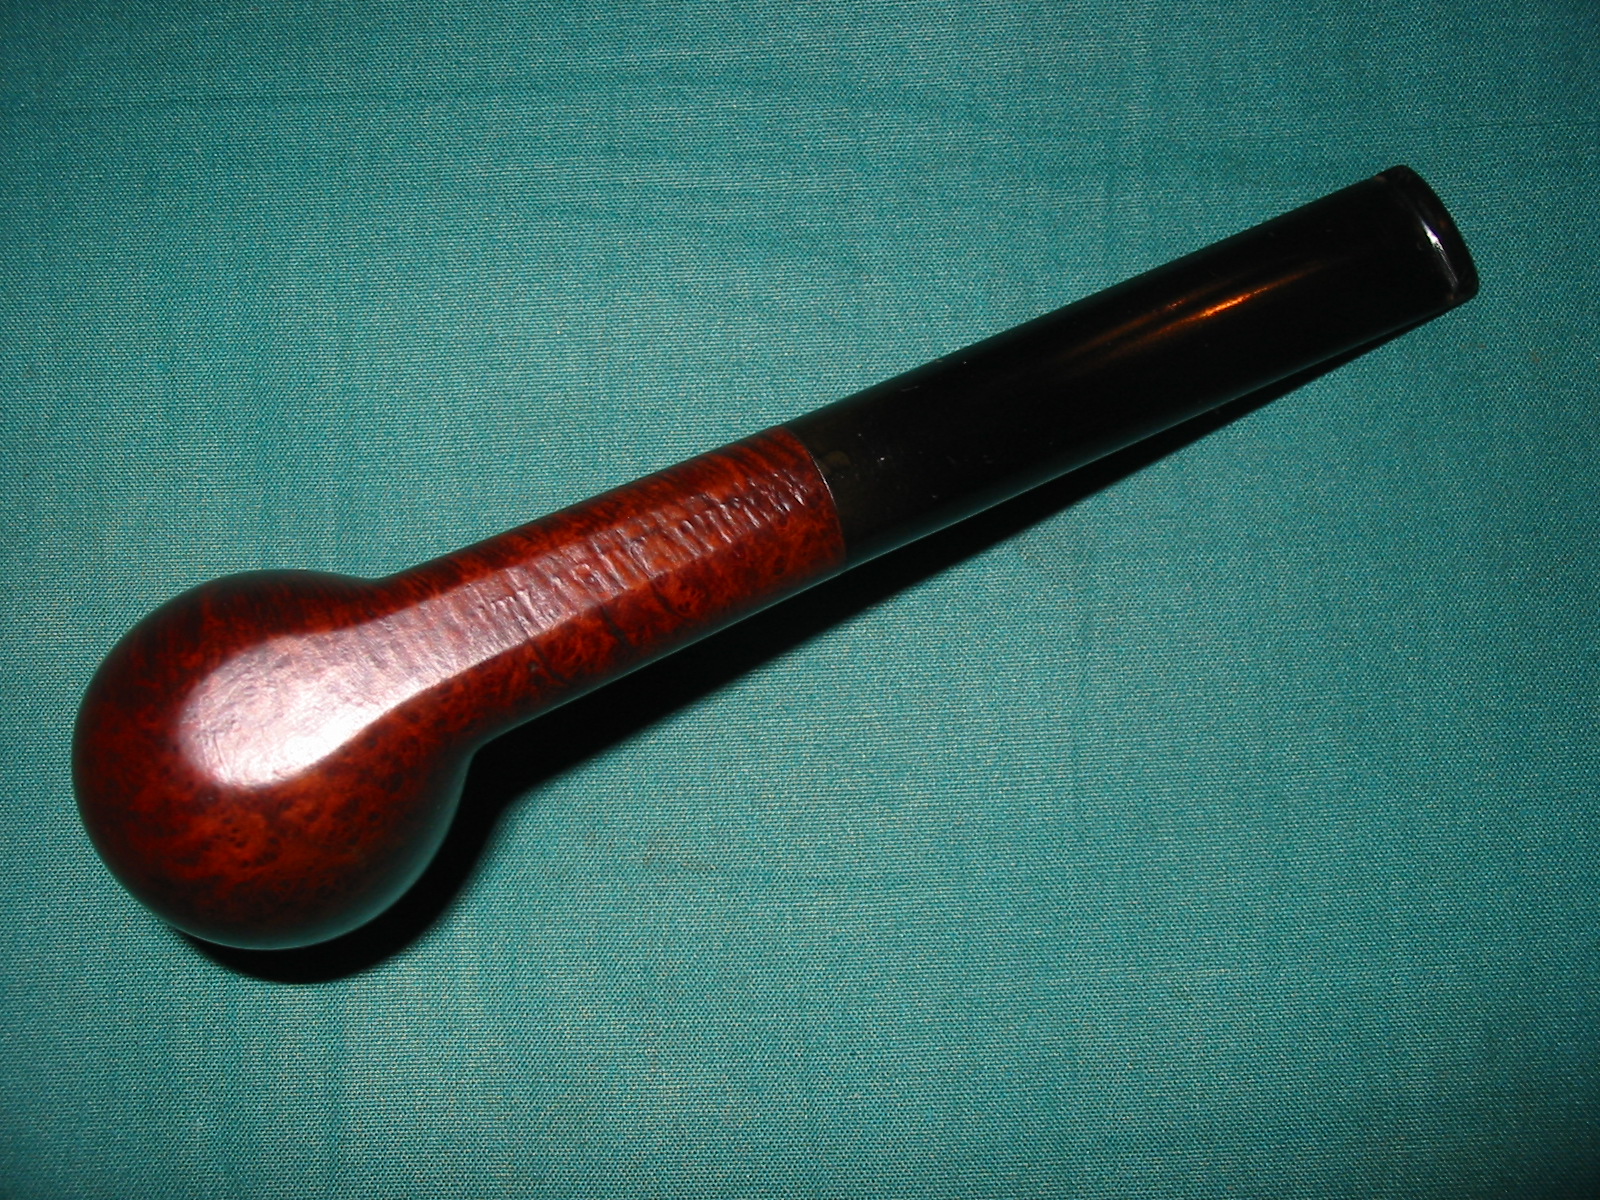
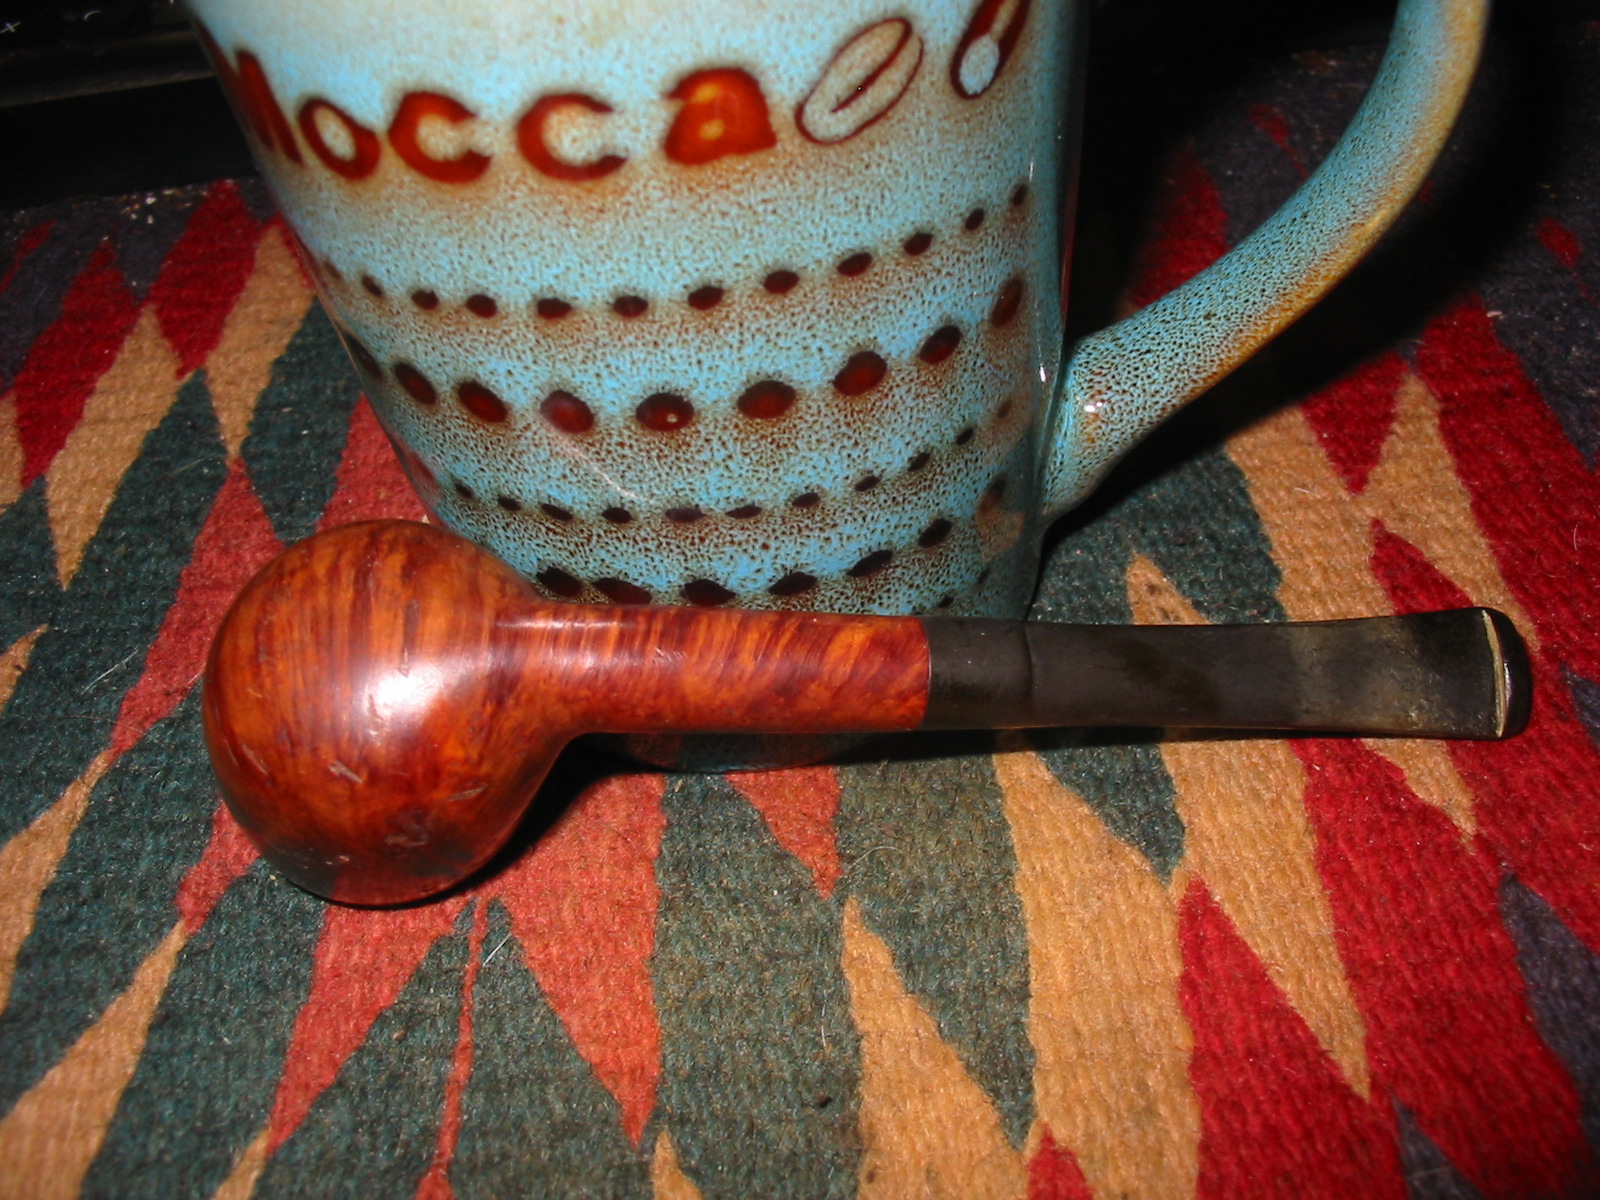
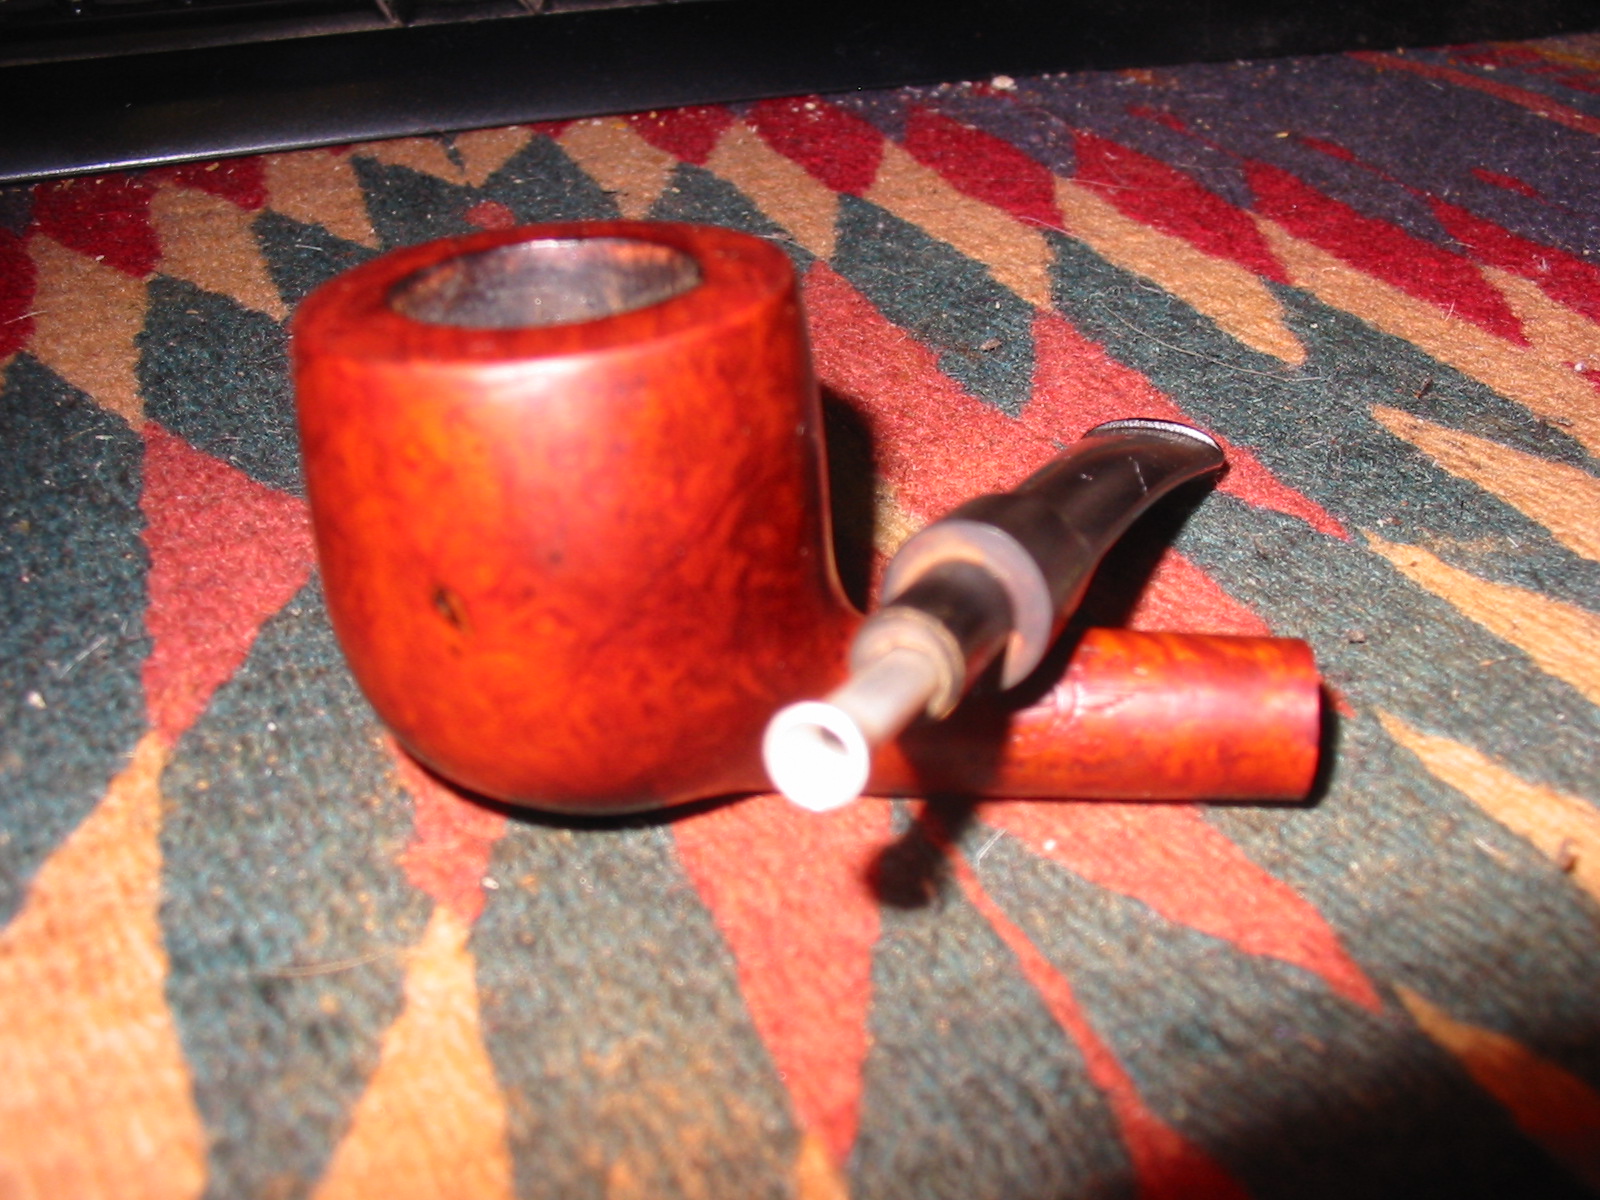
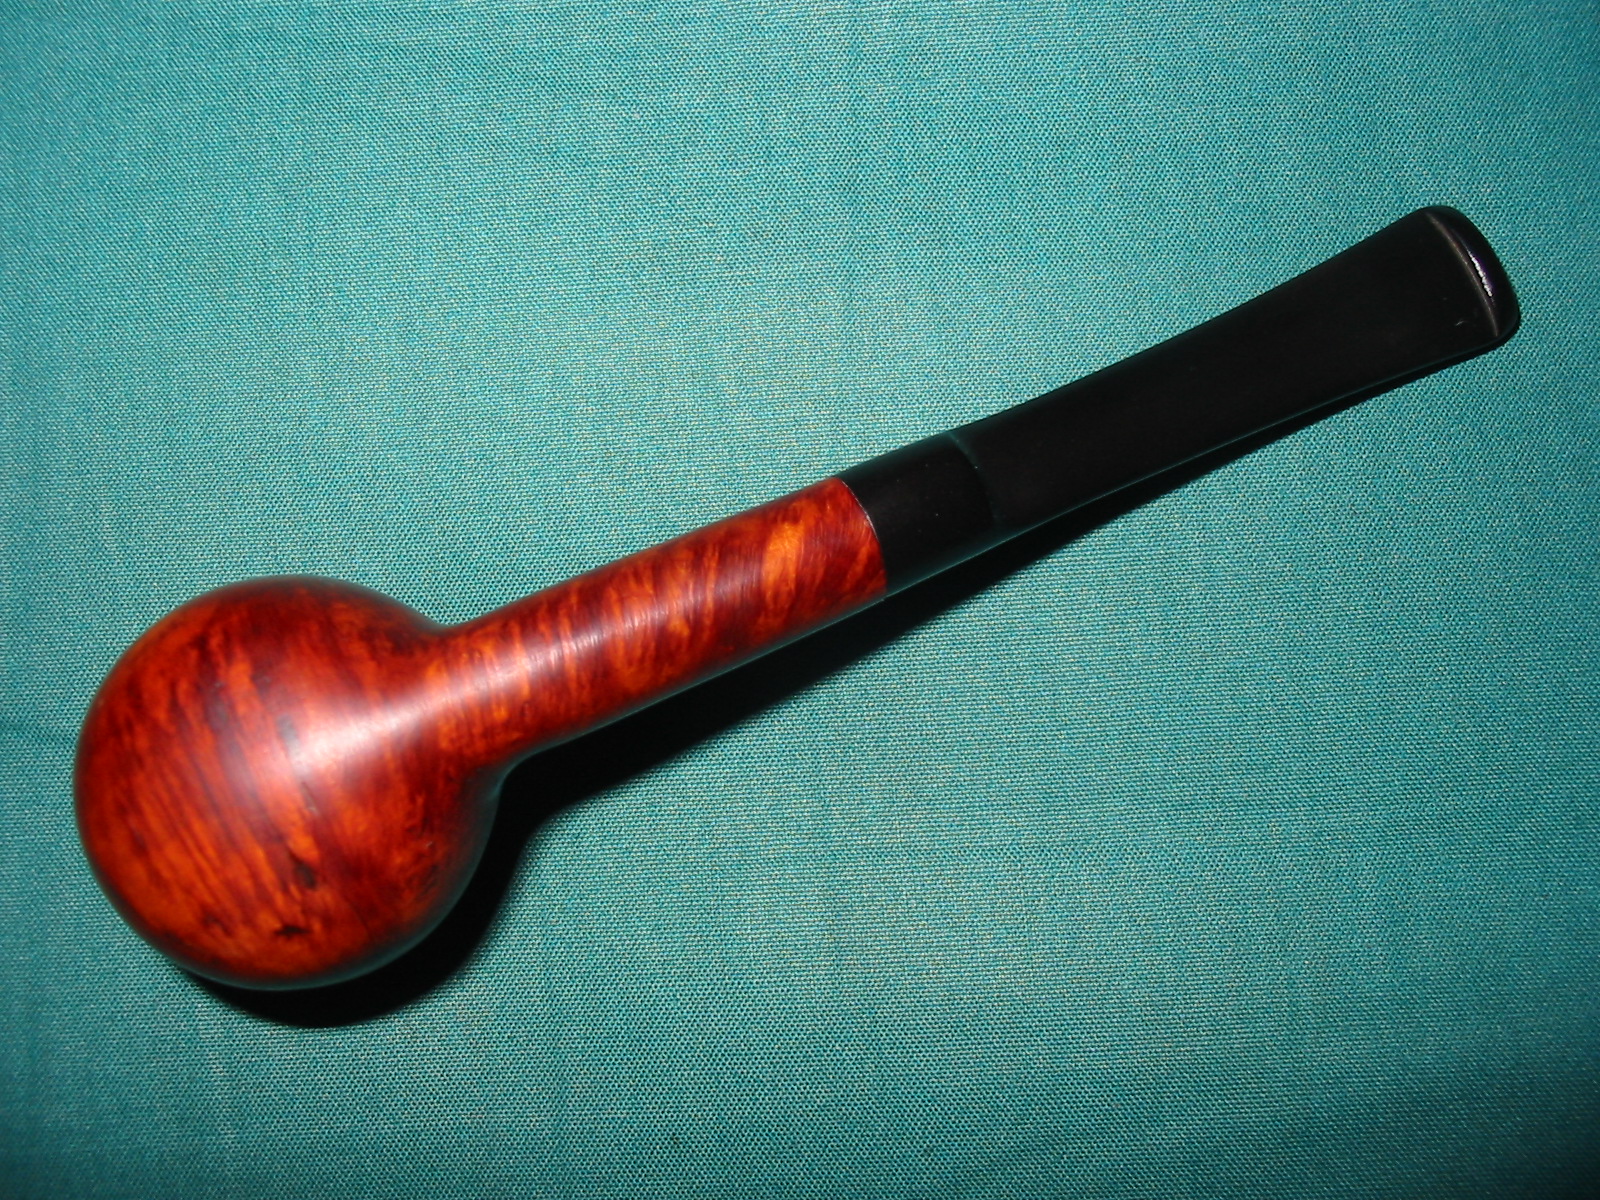
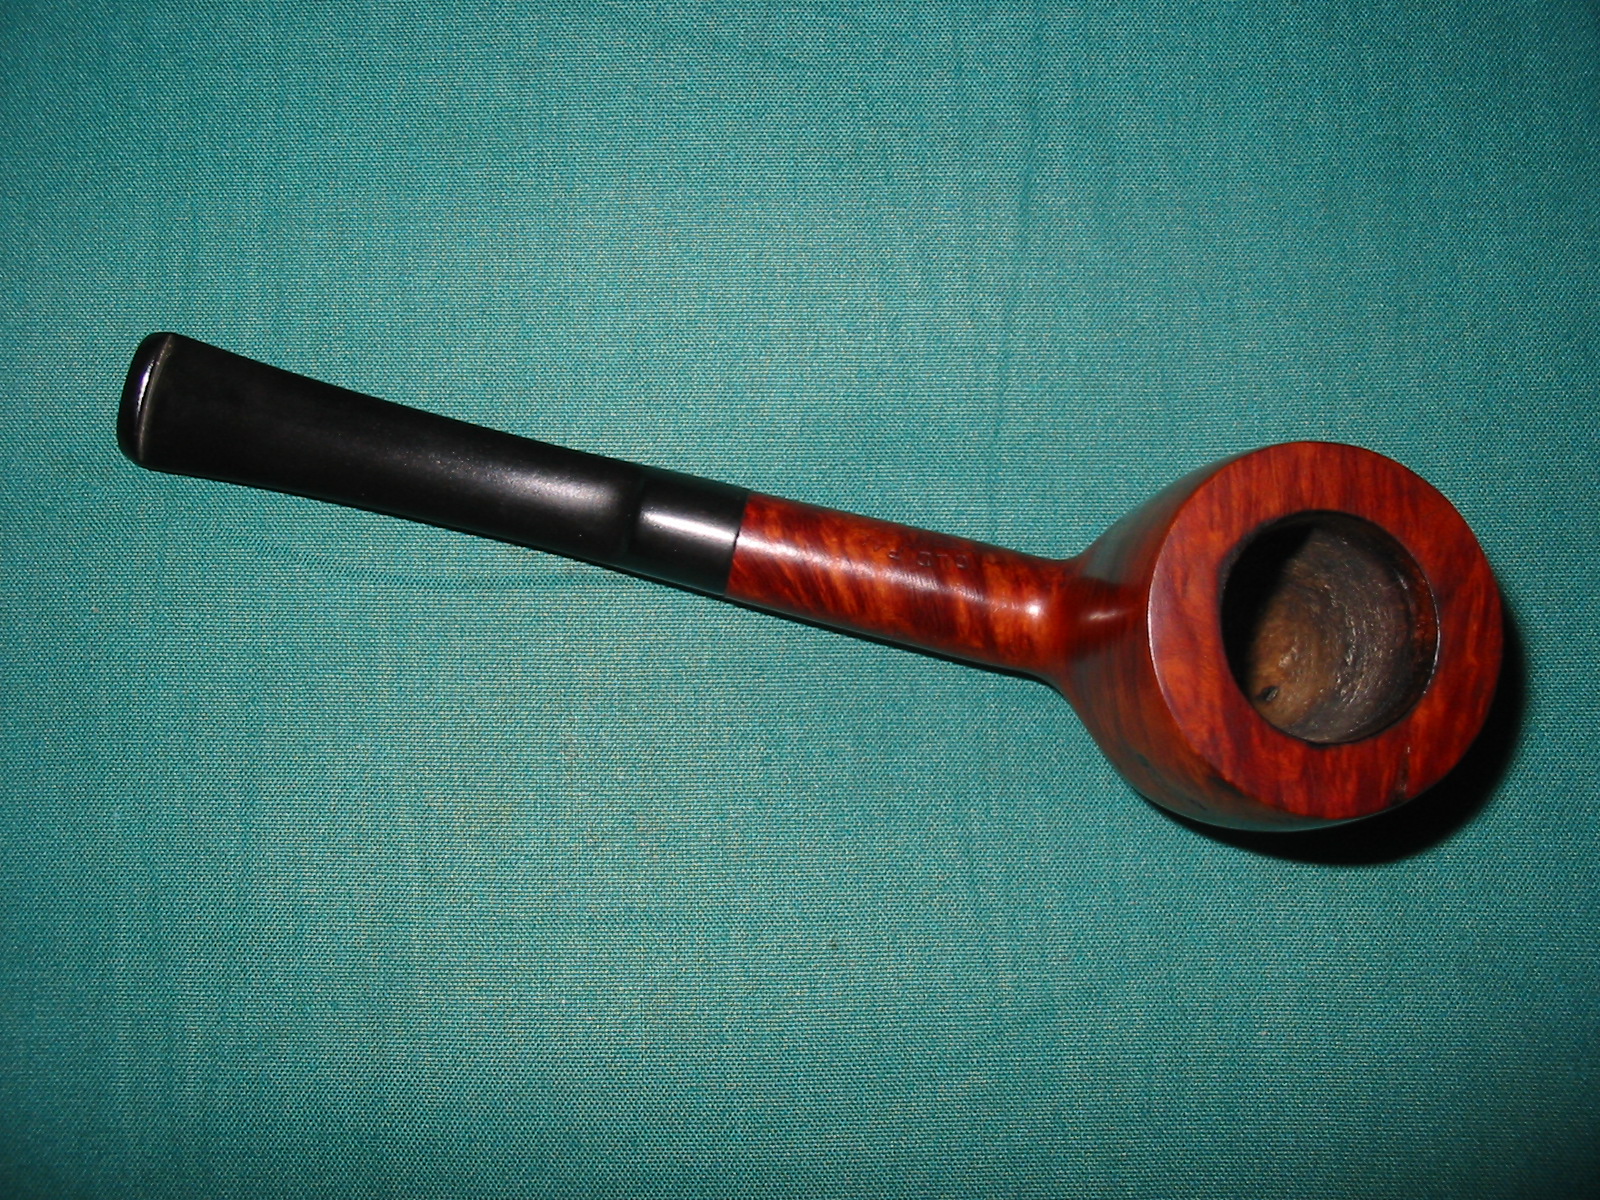
The next series of four photos show the finished pipe. The interior is shiny and new looking and the pipe bowl has a good contrast stain. The stem is shinier and the oxidation is pretty well gone. The photo of the stem looking down on the top shows a little oxidation around the saddle area. That area has been problematic on this pipe. In the daylight the stem looks better than this night photo with lights. My guess is that the oxidation is still there and in the glare of the flash it is very visible. This pipe will make a nice addition to someone’s rotation.
IMG_3131

IMG_3132

IMG_3133

IMG_3134

A Complete Reworking of a Zettervig Freehand


Blog by Steve Laug

I was chatting with a friend on one of the pipe forums that I frequent and he asked me about restemming an older 60’s vintage Zettervig freehand for him. I had a couple of stem possibilities sitting here so I figured why not. He sent the following pictures to show how the previous owner had pressed a Dr. Grabow metal mortise into the mortise of the Zettervig and then cut back a Grabow screw on tenon and added a metal washer as a spacer and screwed in the Grabow stem. He had reamed the pipe and done an internal cleaning before he sent it to me. But the externals looked pretty much the same as it does in the photos below. The plateau on the shank end was dirty and faded and the plateau on the rim was the same with a buildup tars that made the crevices and grooves in the plateau almost non-existent. It too was faded and worn looking.
Zettervig1 (1)

Zettervig1 (2)

Zettervig1 (3)

Zettervig1 (4)

I had no idea about the brand and not read anything about it. I did a bit of digging to see what I could learn about it. I am always curious about learning about brands that are unfamiliar to me. The following comes from Pipedia
“In the 1960’s and into the early 1970’s Ole Zettervig had a shop in Copenhagen, Denmark where he was carving high quality pipes equal to Stanwell, Larsen, Anne Julie, Thurmann, Bang and others. These early pipes were marked “Copenhagen” and are very collectible. He sold his shop at some point in the 70’s and moved to Kolding and continued to produce pipes as a hobby, but the quality of briar and workmanship is said to not equal the early production. The later pipes he now marked as Kobenhaven rather than Copenhagen, and these were sold by Ole at flea markets throughout Europe.” http://www.pipedia.org/wiki/Zettervig
When it arrived I drilled out the metal insert in the shank and cleaned up the shank with pipe cleaners and cotton swabs. I then sorted through my stems and found several possibilities. I sent him the following two photos of the stem options and he chose the one that is inserted in the pipe. It actually came from a Danish Freehand that I had here and restored. I like less chunky stems so this one went to the parts bin. He liked it so it was the stem that I would work on for this pipe.
IMG_2923

IMG_2924

IMG_2925

I gave the pipe a cleanup reaming with the PipNet reamer and cleaned out the shank one last time. I scrubbed the bowl and the plateau on the shank and rim with Murphy’s Oil Soap and a brass tire brush to break away the tarry buildup. I rinsed it under running water to remove the soap. I wiped the bowl down with acetone on a cotton pad to remove the remaining finish and then sanded the bowl and the shank with micromesh sanding pads 1500-2400 grit to polish the minute scratches that were present. I stained the plateau portions of the pipe with a black aniline stain and then wiped them down with a cotton pad wetted with Everclear to give the black a little transparency. I gave the rim and shank end a light buff with White Diamond. The newly stained plateau is visible in the photos below.
IMG_2927

IMG_2928

I also stained the bowl with an oxblood aniline stain. I applied and flamed it and reapplied and reflamed until I had the coverage that I wanted on this pipe. The photo below gives a side view of the pipe.
IMG_2926

I buffed the bowl and stem with White Diamond. I then took it back to the work bench and sanded the stem and the bowl with micromesh sanding pads from 1500-12,000 grit to give the finish on the stem and bowl a deep shine. Once I had finished that I took to the buffer and gave it multiple coats of carnauba wax to protect and shine it even more. The finished pipe is in the photos below. It is now on its way back to its owner.
IMG_2980

IMG_2981

IMG_2982

IMG_2983

A GBD Quantum 9438 Given a New Look and New Life


I am always on the lookout for Rhodesian shaped pipes and 9438s in particular. I have a few that I picked up before they became so sought after. So when I picked up this 9438 Rhodesian for $9.99 on Ebay recently I figured I had a deal. I am pretty sure that the reason for the low price was the condition of the stem and the look of the pipe in the photos on the sale. I was hoping that the bowl was actually in better shape than it looked. I knew that the stem was ruined and a real mess but the bowl looked like it had some life left in it. To me the price it was listed at made it worth bidding on and I won it. I had several possible solutions in mind for the pipe if the bowl was as salvageable as it looked. One possibility is that I have a terribly over reamed 9438 that I could salvage the stem from and utilize on this pipe. If that does not work, my second possibility is to make a new taper stem for it. At the moment I am leaning toward the taper stem. I have included the photos from the seller to give an idea of the pipe’s condition.
GBD1

GBD3

GBD5

GBD6

GBD7

When it arrived it was in worse shape than the photos alluded to, if that is possible. The bowl was badly caked and the rim was caked and slightly scorched. That part was actually not a big issue to me. I could easily take care of that. The finish was shot as expected so that was no surprise. But the stem was not only chewed and broken but also was quite brittle. It was almost as if it was rotted. To cut it off back to the solid material would make the stem very short and stubby. There were also no guarantees that the rest of the stem was not in the same condition once I removed the ruined portion. The shank was dirty and there was a lot of build up inside.

The stamping is actually quite unique. I have not seen a 9438 stamped this way. On the left side of the shank it is stamped with a letter G in a circle to the left of the GBD in the oval as normal. Underneath it is stamped QUANTUM, which is a line I am not familiar with in the GBD family. On the underside of the shank next to the stem is stamped with a J. On the right side it is stamped Made in London in a circle with the “in” inside the circle. Underneath it reads England. Next to that is the 9438 stamping. All of these stampings leave me with many questions. I know from previous study that the oval Made in London stamping, a Comoy’s like stamping, dates it as a Cadogan era pipe and that would likely put it in the 1980’s. The parts that leave me wondering are the G in a circle stamp on the left side and the line QUANTUM. I have never seen or heard of either of those stampings. I have included the next three photos to show the stamping on the shank for those of you who are interested.
GBD2

GBD4

GBD9

I checked my over reamed GBD 9438 to see if it would work on this pipe. It is a Perspex stem and would look quite nice. However, the stem was already a repair and the shank diameter was slightly smaller so that was a no go. I was left with my second option mentioned above – to fit a new taper stem on it. Since the pipe was already in need of a lot of work fitting a taper stem on it would not be an issue. I was pretty sure that I had a vulcanite taper stem that would be a close fit. I went through my stem box until I found the fat taper stem I was looking for. The tenon was too large so I turned it with the PIMO Tenon Turning Tool until it was a close fit to the shank and then took it back to the work table to hand sand it to a snug fit. The two photos below show the new stem. The first photo shows the new stem alone and the second one shows it in comparison with the damaged stem. It is slightly shorter and the shape of the end of the stem tapers more than the original chewed one.
IMG_2932

IMG_2934

The diameter of the stem at the shank was slightly larger than the shank so I sanded it with 220 grit sandpaper to get a good fit between the shank and the stem. I carefully sanded the shank to clean up the fit and make a smooth transition. I wanted to avoid all of the stamping to leave it as pristine as possible.
IMG_2935

IMG_2936

IMG_2938

IMG_2939

IMG_2940

IMG_2941

IMG_2942

IMG_2943

The next two photos show the extent of damage to the old stem. I wanted to have those photos for comparison purposes and to give an idea of how short I would have to cut back the original stem to remove the damage.
IMG_2944

IMG_2945

I reamed the bowl with the PipNet reamer until it was bare wood. In doing that I found that underneath the cake, on the right side about half way down the inside, there was some charring on the wall. It was the beginning of a burn through in that area. I cleaned up around the area with sandpaper and picked at it with the dental pick. In doing so I found that it was still solid and not too deeply damaged. It would require some damage control and protection so I coated it with some pipe mud. The airway entered the bowl a bit high as well so I raised the bottom of the bowl with the pipe mud at the same time. I may well give it a bowl coating to further protect it but will decide that in the future.
IMG_2946

IMG_2950

IMG_2951

The rim also needed to be lightly topped to remove some of the damage there that I could not steam out or repair. I did that with a piece of sandpaper on a board and lightly sanded the rim until it was smooth and the damage minimized. I used a folded piece of sandpaper to bevel the inner edge of the rim to match what remained in the undamaged portion of the rim.
IMG_2947

IMG_2948

I wiped the bowl down with acetone on a cotton pad to clean up the finish and remove the remaining stain. I have found that when I am planning to restain a bowl it is easier blend the sanded portions and the remainder of the bowl when I wash down the finish with acetone before restaining.
IMG_2949

I removed the GBD oval from the old stem with a dental pick. I am still deciding whether to insert it on the new stem or to save it for later use on another old pipe in need of one. Time will tell. I always scavenge as much as is usable before discarding old pipe parts.
IMG_2954

IMG_2955

I washed the pipe down with acetone another time to further clean it up and prepare it for staining. This final wash removed the rest of the finish nicely and I sanded the bowl with micromesh sanding pads 1500-2400 grit to further prepare it.
IMG_2957

IMG_2958

IMG_2959

I warmed the briar with a heat gun and then stained it with a dark brown aniline stain. I flamed it and reapplied the stain and reflamed it until it had an even coat of the brown stain. I mixed the aniline stain with isopropyl alcohol – 2 parts stain to 1 part alcohol. I wanted the grain on the pipe to show through the stain and I also was using it as the undercoat before giving it a slightly darker topcoat.
IMG_2960

IMG_2961

IMG_2962

IMG_2963

I buffed the pipe with White Diamond and then applied a Danish Oil Walnut stain as the top coat. It is a mixture of stain and linseed oil and gives a great finish when put over the top of the previous stain coat. The first three pictures below show the pipe while the stain is still wet. I wiped it down with a soft cotton cloth and hand buffed it to give it an initial shine (Photos 4-7).
IMG_2964

IMG_2965

IMG_2966

IMG_2968

IMG_2969

IMG_2970

IMG_2971

Once the bowl was finished I put it aside and worked on the stem. I had already sanded it with a fine grit sanding sponge so now it was time to sand with the micromesh sanding pads. I wet sanded with 1500-2400 grit pads and dry sanded with 3200-12,000 grit pads. Each successive grit of micromesh deepened the shine in the vulcanite.
IMG_2973

IMG_2974

IMG_2975

I wiped it down with Obsidian Oil, rubbed it down afterwards when it had dried and then buffed it lightly with White diamond. I reinserted it in the shank and then buffed the entire pipe with White Diamond and gave it multiple coats of carnauba to protect and give it a shine. I gave the bowl a second coat of pipe mud on the damage section to fill the shrinkage that had occurred as the pipe mud dried. It is drying and curing now but I look forward to firing up a bowl soon. I like the new look of the pipe and definitely like the taper stem. The shorter stem gives it a stubby look but it actually less than ¼ inch shorter than the saddle stem on my other 9438s.
IMG_2976

IMG_2977

IMG_2978

IMG_2979

Here are a couple of photos with the rondelle inserted in the stem and a bit more of a bend applied to the stem.
IMG_2991

IMG_2992

A Tiny Rhodesian Restored and Restemmed


Here is another pipe from the bottom of the refurbishment box. It is a little Rhodesian that I had ignored for a while. It measures 4 3/8 inches long stem included. The bowl is 1 ¾ inches long and 1 inch tall. The inner diameter of the bowl is ½ inch and the bowl depth is ¾ inch. The bowl was in pretty decent shape and was unsmoked. There was a fill on the left side of the bowl and a slight divot on the shank next to the bowl. The end of the shank had some pretty deep nicks in it and would make a tight fit between stem and shank impossible. Half the battle in restemming these small pipes is finding a stem that will work and then turning the tenon to fit the small mortise. This one was no exception. I had a stem that would work it was 2 5/8 inches long and was made out of nylon. It was an old WDC pipe stem. The shoulders were well rounded and the tenon was short.
IMG_2894

IMG_2895

I reduced the diameter of the tenon with a sanding drum on a Dremel. I laid the sanding drum against the surface of the tenon and let it ride around the tenon until the diameter was close. Then I sanded it until the fit was snug. The mortise was not that deep due to the size of the pipe so I needed to shorten the tenon to the same depth as the mortise. I used the Dremel and sanding drum to achieve that as well.
IMG_2896

Once I had a good tight fit on the stem I sanded down the bowl and wiped it down with acetone on a cotton pad to remove the finish. I pressure fit a small nickel band on the shank to provide a smooth transition between the bowl and stem and to cover the deep nicks or gouges on the end of the shank. I sanded the stem with 220 grit sandpaper to remove the excess material on the diameter and make a good fit against the end of the tenon.
IMG_2897

IMG_2898

IMG_2899

IMG_2900

IMG_2901

I sanded the area around the divot in the shank and cleaned it with acetone. I then filled the divot with clear superglue and sanded it again once the glue had dried. I wanted to have a smooth transition between the bowl and shank without the divot showing. I sanded it with 220 grit sandpaper and then with a medium grit sanding sponge. I also sanded the stem at the same time and then wiped the entirety down with acetone.
IMG_2902

IMG_2903

I sanded the bowl and the stem with micromesh sanding pads. I wet sanded with 1500-2400 grit pads and dry sanded with the 3200-12,000 grit pads. When finished I rubbed it down with Obsidian Oil and then took it to the buffer and lightly buffed the stem with White Diamond. I say lightly because I have learned that a heavy hand on the buffer will make a mess out of a nylon stem and you will have to start over with the sanding process.
IMG_2904

IMG_2905

IMG_2906

I took the pipe back to the worktable and stained it with a dark brown aniline stain. I applied the stain and flamed the pipe several times until I had an even coverage on the sanded areas and they blended in well with the rest of the pipe.
IMG_2907

IMG_2908

I buffed it with White Diamond and then gave it a top coat of oxblood stain. I have found that the combination of the two stains helps hide the fills that were present as well as the repairs that had been done with superglue.
IMG_2909

IMG_2910

IMG_2911

IMG_2912

I buffed the entire pipe again with White Diamond and then gave it multiple coats of carnauba wax to bring the shine out on the pipe. In order to help you appreciate the small size of the pipe I have included the next two photos. The top pipe in the photos is group 4 sized. In contrast, the tiny Rhodesian is a group 1.
IMG_2921

IMG_2922

The finished pipe is pictured below and I think it will be a nice little flake pipe for the Virginia smokers in the lot.
IMG_2913

IMG_2914

IMG_2915

IMG_2916

I received two comments below about giving the stem a slight bend so this morning I did just that. Below is a photo of the new look! Thanks Greg and Chiz.
IMG_2930

A New Look for an Italian Made Billiard – Restemmed and Reworked


This is yet another bowl from the bottom of the box of pipes for refurbishing. This one is an Italian made no name basket pipe. The stamping merely says Imported Briar Italy. The finish was spotty and peeling from the bowl. It almost looked like a dark brown opaque stain coat and then a thick varnish coat over that. The bowl was badly caked, the shank was filthy and the rim caked and peeling. There were some large fills on the left side of the bowl that were coming out of the holes and were peeling around the edges. The bowl did not have a stem so I found one in my box of stems that fit with a little adjustment to the tenon.
IMG_2826

IMG_2827

IMG_2828

IMG_2830

I reamed the bowl with a PipNet reamer to take the cake back to bare briar. The bowl and shank smelled heavily of aromatics with a fruity overtone and I wanted to remove that so that the new owner could form a cake of his/her own choice.
IMG_2831

The stem was too large in diameter at the stem shank junction. So I sanded it back with a sanding drum on a Dremel. I have found that a Dremel run a medium speed can be carefully used to take back the diameter of a stem to almost match the shank with the stem in the shank. Care must be exercised so as not to nick the briar of the shank with the sanding drum.
IMG_2832

IMG_2833

IMG_2834

IMG_2835

I took the pipe back to the work table and sanded it until it fit well with 220 grit sandpaper. I also decided to sand the shank with the sandpaper as well to achieve a good flow from shank to stem. I also wanted to remove the heavy black/brown finish on the pipe so removing it from the shank was not problematic.
IMG_2837

IMG_2838

IMG_2839

IMG_2840

IMG_2841

Once I had sanded the transition smooth I wiped the bowl down with acetone on a cotton pad to remove the remainder of the finish on the bowl.
IMG_2842

IMG_2843

IMG_2844

After wiping it down I gave it a buff with red Tripoli on the buffing wheel to remove the remainder of the finish and give me an idea of what would still need to be done with the bowl.
IMG_2845

IMG_2846

IMG_2847

IMG_2848

I sanded the bowl with a medium grit sanding sponge and then picked out the large broken fills on the left side of the bowl. I wiped it with acetone to clean it one more time before packing the fills with briar dust. I packed in the briar dust with a dental pick and then tamped it down with flat head tamper to make sure the pack was good and tight. I dripped some superglue gel into the briar dust and then more briar dust on top of the glue. I tamped it another time to get a good solid fill. I sanded the excess briar dust superglue mixture with 220 grit sandpaper and then a medium grit sanding sponge.
IMG_2849

IMG_2852

IMG_2854

I stained the pipe with a dark brown aniline stain thinned 2:1 with isopropyl alcohol as the undercoat on the pipe. I stained and flamed the stain repeatedly until the coverage was even and solid over the entire pipe. The patch on the side is still visible but in no longer flaking and falling out the fill. The surface remains slightly rough but I will continue to sand it before giving it another coat of stain.
IMG_2855

IMG_2856

IMG_2857

IMG_2858

I buffed the bowl with Red Tripoli and then with White Diamond in preparation for the next coat of stain. I sanded the fill area with a fine grit sanding sponge and then sanded the bowl with micromesh sanding pads 1500-2400 grit. I then restained the bowl with a oxblood stain as the second coat on the bowl. I applied it and flamed it until the coverage was even. Then buffed it with White Diamond.
IMG_2859

IMG_2860

IMG_2861

IMG_2862

During this second staining I removed the stem and examined the end of the shank and saw small hairline cracks in several places. They did not go through to the surface of the shank but they were troublesome enough to me that I decided to band the pipe. There were also several nicks in the outer edge of the shank that made a tight fit relatively impossible to attain. I heated a nickel band with a heat gun and pressure fit it in place on the shank. I had to reduce the tenon slightly to get a good fit on the stem. I also sanded the stem around the junction so that it would fit properly against the banded shank.
IMG_2863

IMG_2865

IMG_2866

IMG_2867

The fills still needed more work but for the time being I worked on the stem some more. I sanded it with micromesh sanding pads. I wet sanded with 1500-2400 grit pads and dry sanded with 3200-12,000 grit pads. I rubbed the stem down with Obsidian Oil and I took it to the buffer and buffed it with White Diamond and gave it multiple coats of carnauba wax.
IMG_2868

IMG_2869

IMG_2870

I decided to do some more work on the areas of the fills. I sanded the areas of the fills down with 220 grit sandpaper and then a medium grit sanding sponge. I then sanded the entire bowl and shank with a fine grit sanding sponge to remove the finish. I wiped it down with a cotton pad and Everclear to remove the last of the finish and also the sanding grit. I used superglue to refill the fills and even out the surface and dips that still remained after the first reworking. I then sanded the spots with 220 grit sandpaper, a medium grit and a fine grit sanding sponge to remove the scratches and blend the fills into the surface of the bowl.
IMG_2876

IMG_2877

IMG_2878

I stained the bowl with a 2:1 mixture of aniline dark brown stain and isopropyl alcohol. I applied the stain with a cotton swab and flamed it. I reapplied and reflamed it several times until I had a good even coverage on the bowl and shank.
IMG_2879

IMG_2880

I buffed the pipe with White Diamond to smooth out the surface of the bowl and then gave it a top coat of oxblood stain. I wiped the stain on with a cotton pad and flamed it repeating the process until I was happy with the coverage on the bowl. I was much happier now with the fills as they were smooth to the touch and there were no more pits or divots in them.
IMG_2881

IMG_2882

IMG_2883

IMG_2884

IMG_2885

I took the pipe to the buffer and buffed the bowl and stem with White Diamond one more time. It brought a deep rich shine to the bowl and the stem. I then gave the bowl and stem multiple coats of carnauba wax to protect and polish the pipe. The four photos below show the finished pipe. It is ready for someone to load it and fire it up. It should provide a reliable and lightweight pipe for someone’s rack.
IMG_2890

IMG_2891

IMG_2892

IMG_2893

Repairing a Burned Through Bowl


Blog by Steve Laug

There are many times I take on the challenge of repairing a pipe totally for the learning experience. When I begin working on it there is nothing of redeeming value in the pipe itself. It is not beautiful or worthy of keeping. Rather it provides a unique learning opportunity for me to work on a skill in my refurbishing hobby. The pipe below is exactly that kind of pipe. Mark Domigues sent it to me along with other bowls when I was working on the shank repair on his old Peterson pipe. It is a no name pipe with a rustication pattern that I did find particularly attractive. In fact I put off working on it as it just did not appeal to me. I can’t tell you how many times I picked the bowl up and carried it to the recycle bin (a bin I used for briar parts) and then carried it back to the “to be refurbished” box.
pipemud1

pipemud2

pipemud3

Finally, Monday the challenge called me. I took the bowl out of my box and looked it over. As I looked at it, the shape kind of grew on me. It is a brandy glass shape and the shank actually has a flare to it as well. The rustication is a bit striated but as I cleaned up the exterior it is a lot like tree bark. The stain is a contrast stain – a black undercoat in the grooves and a brown top coat. It was worn but could be salvaged. The shank stem junction was also worn but a band would clean up that part of the pipe. The interior bowl sides were clean and solid. The rim was in good shape. But the glaring problem is visible in the photo below – a large, ½ inch diameter burnout on the flat bottom of the pipe. The surrounding briar was solid. The burnout was very focused. The burn did not extend into the rest of the bottom of the pipe. In fact the wood around the edges of the hole was clean and solid. There was none of the darkening around edges of the burnout or on the bottom of the bowl. It looked like it might be a great candidate for practicing a repair. I have done one other repair on a burn out which involved inserting a briar plug and this looked like it was another candidate for that repair. The difference in this one was the solidness of the briar around the hole.
pipemud4

As I worked up the chutzpah to tackle this repair I decided to work on the shank. I sanded the shank smooth in preparation for the band. I like to have a smooth surface under the band rather than a rusticated pattern. I find it gives a good smooth fit to the band. I sanded out the rustication to the width of a nickel band. Once it was sanded smooth, I heated a band over a heat gun and then pressed it into place. I liked the finished look of the band.
pipemud5

pipemud6

pipemud7

pipemud8

pipemud9

pipemud10

I am sure that you can tell at this point that I am procrastinating in addressing the main issue of the bowl with all of the other random work on the pipe but that went on a little longer. I found a stem in my stem box that fit the shank quite well. The mortise had originally had a screw in fitment so it was threaded. The threads were well worn so I decided to use a regular style push stem. I sanded the tenon to get a good tight fit on the stem and then sanded the stem to get a good fit against the shank and band. The slight bend in the stem looked good but it was a bit crooked so I would address that issue later. The finished look of the stem and band with the bowl was quite nice…maybe there was something redeemable about the bowl after all.
pipemud11

pipemud12

I have a few pieces of scrap briar that I have scavenged from pipe maker friends that I had put away for this kind of repair. So I found one that had enough briar left that I could carve it into a plug for the bottom of the bowl. I trimmed it with a hack saw to reduce the size of the plug.
pipemud13

In the first photo below you can see what the hole looked like after I had cleaned it up with a pick and Everclear. I had also reamed the inside of the bowl to remove all of the cake from the sides and the bottom of the bowl. The second photo shows the hole after I had drilled it out. I used a cordless drill with a ½ inch drill bit to round out the damage area and remove any further damage around the burnout. I chose the ½ inch bit as that was the diameter of the hole at the widest part of the hole.
pipemud14

pipemud15

I shaped the briar plug with a Dremel and sanding drum. The next series of photos show the progress of the shaping. I took the rough briar from a wedge to a circular plug and then shortened it to a round plug. I shaped a cap on the plug to the inner diameter of the bowl. Also originally I envisioned pushing the plug through from the inside of the bowl and then cutting off the portion that extended beyond the bottom of the bowl. I would then redrill the airway to finish the repair.
pipemud16

pipemud17

pipemud18

pipemud19

I continued to reduce the diameter of the plug until it was the same size as the hole in the bowl. The inside bowl bottom was hard to match with the cap of the plug. I continued to shape it until it was cup shaped. It seemed no matter how I shaped it however, it would not fit in the bowl bottom as the burnout was not centered in the bowl bottom. It was toward the front of the bowl bottom. I finally decided to use a different tact. I would forgo inserting it from the inside and go the other direction. I would insert it from the outside in. I measured the thickness of the bowl bottom (which was actually in good shape other than the burned portion). I then shortened the plug until it was relatively flush with the bottom of the airway. I coated the plug with superglue gel which gives me a bit more time before it sets and pushed it into the drilled hole. I pressed it against the table top to get the plug in place solidly.
pipemud20

pipemud21

Once the glue set I sanded away the excess briar with a Dremel to match the surface of the bowl. I was not worried about the rustication as I would duplicate that after I finished working the plug into place. The next two photos show the plug and the bowl surface are smooth and the plug is tightly in place.
pipemud22

pipemud23

The next photo shows the interior of the bowl. The plug is even with the entrance of the airway. There is difference in bowl depth around the left edge. I plan to give the bottom of the bowl a thick coating of pipe mud to both protect the new plug and to even out the slight trough on the left front edge of the plug.
pipemud24

I rusticated the bottom of the bowl with the Dremel to match the tree bark look of the rustication on the bowl (Photo 1 below). I stained it with a dark brown aniline stain and then also gave the bottom of the bowl a second coat with black stain to emulate the effect of the stain coat on the rest of the bowl (Photos 2 and 3 below).
pipemud25

pipemud26

pipemud27

I stained the rest of the bowl with the dark brown stain to freshen it up and blend in the stain on the bottom of the bowl. I buffed it with red Tripoli and White Diamond to raise a shine and then gave it several coats of carnauba wax on the buffer. The finished exterior is visible in the first close up below and the following four photos of the pipe.
pipemud28

pipemud29

pipemud30

pipemud31

pipemud32

With the repair finished on the exterior of the pipe I worked on the stem. I sanded it with 220 grit sandpaper and then with a medium grit sanding sponge to clean up the oxidation and scratches on the vulcanite. I heated the stem with a heat gun to straighten it and then rebent it over a rolling-pin to give it a slight bend. I set the bend under cool water and then gave the stem a quick buff with Tripoli before taking it back to the work table to further sand the stem.
pipemud33

pipemud34

I continued to sand the stem with micromesh sanding pads from 1500-12,000 grit to bring a shine to the vulcanite. I wet sanded with 1500-2400 grit pads and dry sanded with 3200-12,000 grit sanding pads. When I finished sanding with the pads I rubbed the stem down with Obsidian Oil and let it dry then buffed it with White Diamond and gave it multiple coats of carnauba wax.
pipemud35

pipemud36

pipemud37

pipemud38

pipemud39

pipemud40

pipemud41

With the externals repaired and finished it was time to make up some pipe mud to coat the bottom of the bowl and give a protective coat over the bowl plug. I sacrificed a nice little Cohiba Cuban cigar for the purpose of making the mud of the ash. When the cigar was finished I had a nice bowl of clean ash.
pipemud42

I mixed the ash with a small amount of water to make a paste. I inserted a pipe cleaner into the airway and then applied it to the bottom of the bowl, tamping it into the crevices around the plug and building up the bowl bottom. As the pipe mud dried I added additional layers of mud to the bottom of the bowl and around the lower sides of the bowl. The next series of three photos show the progressive build up of the mud in the bottom of the bowl.
pipemud43

pipemud44

pipemud45

When the mud had dried to touch I buffed the pipe a final time with White Diamond and then gave the entire pipe several coats of carnauba wax to protect and give it a shine. I then used a clean flannel buff for the final buffing. The restored pipe is pictured below. I will let the pipe mud cure and harden for a few days before loading up the pipe and smoking the inaugural bowl.
pipemud46

pipemud47

pipemud48

pipemud49

Restemming and Refurbishing an Arlington Imported Briar Pot


Blog by Steve Laug

I have a box with a few pipe bowls in it that need restemming. When I get low on pipes for refurbishing I take one of these bowls and restem it. Generally they are not even midrange pipes. Rather they are an odd assortment of no name bowls or low end bowls that I have picked up along the way somewhere. Each of these provides me with something to practice on in terms of staining, bowl topping, repairing fills, rustication or restemming. The one I worked on last evening is stamped Arlington over Imported Briar on the left side of the shank and no other numbers. The bowl was dirty and tarred with a thick and crumbly cake. The rim was tarred and dented but no roughening from hitting against something. The shank was full of tars and even a few cobwebs. The rustication was deep on the bowl toward the bottom at the bowl shank junction. The finish was gone and the briar was dirty.

There is not much information available on the brand. A search on Google did not turn up much other than some information from Pipedia. The Brooklyn, New York Company known as Arlington Briar Pipe Corporation mainly operated as a sub-contractor for other brands. Jobey pipes are said to be made by Arlington at an unknown point of time. Arlington’s own pipes are seldom seen. The article also included the following advertisement from the RTDA Catalogue.
Arlington_01

I used the PIMO tenon turning tool to fit a tenon on a stem blank that I had in my can of stems. I fine-tuned the fit with sand paper until it fit well.I took the next series of four photos to show the state of the pipe before I worked on it.
IMG_2597

IMG_2598

IMG_2599

IMG_2600

I cleaned the inside of the shank and bowl with cotton swabs and pipe cleaners dipped in Everclear. The alcohol removed the grime from the shank. I reamed the bowl with a PipNet reamer. The bowl is quite large – so I used the largest cutting head on the reamer. I wiped down the tars on the rim with alcohol wetted cotton pads to clean off the buildup as much as possible.
IMG_2602

To clean up the rim damage I lightly topped the bowl with a medium grit sanding block. I also sanded the burn spot on the side of the shank to try to minimize it and see how deeply the damage went. It was still hard and not too badly damaged but to remove it I would change the profile of the shank so I left it as a character mark.
IMG_2603

IMG_2604

After topping the bowl I wiped the entirety down with acetone on a cotton pad. I wanted to remove as much of the remaining finish as possible to make a match between the rim and the rest of bowl easier to achieve.
IMG_2605

I then sanded the stem to bring the diameter to match the shank. I also wanted to remove the entire casting overflow on the sides and the end of the stem. I used a Dremel with a sanding drum to remove the initial excess and to bring the diameter close to that of the shank. Then I used 220 grit sandpaper to finish the fitting. I cleaned up the scratches left behind by the sandpaper with a medium grit sanding sponge and then finally used a sanding block to sand the shank and stem to good smooth fit and flow. The next seven photos show the progress to a proper fit of the new stem.
IMG_2606

IMG_2607

IMG_2608

IMG_2609

IMG_2610

IMG_2611

IMG_2612

I stained the bowl with a medium walnut stain in a linseed oil base. I rubbed it on the bowl with a cotton pad and then wiped it off with a soft cloth. I reapplied the stain until I had good coverage to the bowl. The bowl has some great grain in places and the deep grooves looked good with the new stain coat. Once the stain was dry to touch I buffed it on the wheel with White Diamond and set it aside to work on the stem.
IMG_2613

IMG_2614

IMG_2615

IMG_2616

I sanded the stem with my usual stack of micromesh sanding pads from 1500-12,000 grit. I wet sanded with the first three grits of micromesh and dry sanded with the remaining grits. Once I had finished the sanding I gave the stem a coat of Obsidian Oil and rubbed it into the vulcanite.
IMG_2618

IMG_2619

IMG_2620

When I had finished with the stem I reinserted it in the shank and took the pipe to the buffer again. I buffed the pipe and stem with White Diamond and then gave the entirety multiple coats of carnauba wax. I buffed it with a clean flannel buff to give it a shine. The next four photos show the finished pipe.
IMG_2621

IMG_2622

IMG_2623

IMG_2624

Restoring an Old Amphora X-tra 509 Pot


Blog by Steve Laug

This is the last of the lot I found while on a recent trip in Northern Alberta, Canada. It is stamped Amphora X-tra 509 on the left side of the shank and on the right side it is stamped Genuine Briar over Made in Holland. The stem has an AA in a circle stamped on it (not a stamping for Amphora pipes I was familiar with). The pipe was in good shape. The rim was dirty and had a slight bit of build up on the surface. The bowl had a thin cake that was crumbly. The outside of the bowl was soiled and had some white paint on the surface. The stem was dirty and very slightly oxidized. There were no teeth marks on it so it was just dirty. The insides were also dirty. The inside of the shank and the stem were caked with a tarry buildup. There was an inner tube inserted in the tenon that extended into the shank almost as far as the airway at the bottom of the bowl.
IMG_1889

IMG_1890

IMG_1891

I used a PipNet reamer and started with the smallest cutting head and took back the cake. I followed that with the next size of cutting head and took the cake back to the bare wood in the bowl. The bottom of the bowl had some gouges in it and looked like someone had done a reaming with a knife.
IMG_2067

IMG_2054

IMG_2057

IMG_2056

IMG_2055

I removed the stem and dropped the bowl into an alcohol bath to soak overnight.
IMG_2066

I mixed a batch of Oxyclean and put the stem together with others I was working on into the bath of Oxy clean to soak at the same time.
IMG_2068

In the morning I took out the bowl and dried it off with a soft cloth. The finish was clean and the surface of the bowl free of the paint and grime that was present when I placed them in the bath. I took the stems out of the bath of Oxyclean and dried them off as well. The oxidation on the stem was softened and the stem was dark (it is the top stem in the second photo below).
IMG_2071

IMG_2080

I wiped down the bowl with acetone on a cotton pad to clean off the remaining finish. In the photo above of the bowl it appeared to have a fill on the bowl side. As I scrubbed it the surface cleaned up and the area was not a fill. The piece of briar has some great birdseye grain and a some cross grain on the front right side and the top of the bowl and shank. I also cleaned out the shank and the stem with pipe cleaners and Everclear. I scrubbed the rim to remove the tars and buildup.
IMG_2260

IMG_2261

IMG_2262

IMG_2264

I wanted to highlight the grain on this one so I decided to stain it using some Cherry Danish Oil which is Linseed oil and stain. I rubbed on the stain, rubbed it off and rubbed it on a second time. I set it aside to dry. Once it was dry I buffed it with White Diamond.
IMG_2265

While it was drying I used micromesh sanding pads from 1500-12,000 grit to work on the stem. I worked around the double AA on the stem logo. It is faint but still visible. Once I had finished sanding I rubbed it down with Obsidian Oil and let it dry. When it was dry I rubbed it with a soft cloth to buff it by hand.
IMG_2266

IMG_2267

IMG_2268

IMG_2269

I polished the aluminum inner tube with 0000 steel wool to remove all grime that was remaining on the aluminum. I gave it a coat of wax and polished it off with a clean soft cloth.
IMG_2270

I buffed the pipe and stem with White Diamond and then gave it multiple coats of carnauba wax and then with a soft flannel buff to give it a shine. The final photos below show the finished pipe.
IMG_2272

IMG_2273

IMG_2274

IMG_2275

When I saw it I thought it was a Sasieni one dot billiard


I came across this little billiard in an antique shop last weekend and when I saw the blue dot on the stem and saw the classic English shape of the bowl I truly thought I had found an elusive Sasieni one dot pipe. Lots of things about it seemed to signal that is what I had. The stamping was hard to see under the grime but there were i’s and an e. I was hopeful and I guess also wishful in my thinking. The pipe was dirty as can be seen below. The stem had obviously been damaged and cut off by the previous owner and a new button filed into the stem. The bowl was badly caked and the rim was damaged with dents and chips. I took the picture below while I was relaxing in a pub near the shop and looking over the finds of the afternoon.
IMG_0489

When I got home I took it to the basement and wiped down the bowl with acetone on a cotton pad to remove some of the grime. Once the outside was wiped down I tried to read the stamping with a magnifying lens. I could not make out the stamping – it was too faint. There was no stamping on the right side of the shank. On the underside it appeared that there had been stamping but it was no longer visible. The next three photos give a good idea of what the pipe looked like before I did a cleanup on the bowl and stem.
IMG_2192

IMG_2193

IMG_2194

I reamed the bowl with a PipNet reamer and took it back to bare wood. I picked at the inside of the bowl to check out the solidity of the walls and to check for potential burns. Everything looked and felt like it was solid so I dropped the bowl in an alcohol bath to soak over night.
IMG_2066

The next day I took it out of the bath and dried it off. The bath had removed the old finish for the most part. I finished by once again wiping it down with acetone on a cotton pad. After soaking part of the stamping had become visible. I was disappointed that it appeared that the pipe was not a Sasieni. The stamping that showed up after it was dry read Genuine Briar, which seemed to point to an American made pipe post WW2. I believe it is post war as that is when it became necessary to identify genuine imported briar in contrast to the Manzanita and other alternatives used by American manufacturers during the war years due to a shortage in briar. The briar was a nice piece – birdseye on one side, nice grain on other parts of the pipe and a clean shape to the bowl. I knew it would clean up nicely.
IMG_2217

IMG_2218

IMG_2219

IMG_2220

I topped the bowl using my normal method of anchoring a piece of sandpaper on a flat board and twisting the top of the bowl into the sandpaper until the top is smooth. I started with 220 grit sandpaper and then used a medium and fine grit sanding block to smooth out the rim.
IMG_2221

IMG_2222

When I had finished topping the bowl I wiped it down with acetone and a soft cotton pad to remove the sanding dust and the grime from the topping process.
IMG_2223

IMG_2224

IMG_2225

The stem had a poorly cut button on the end and the button as well as the taper on the stem needed to be reworked. I used a rasp and file to shape the taper on the stem and to take out the pinched look of the angle to the 90 degree cut on the button. The button was also not straight and not squarely cut so I also straightened out the flat edge of the button while I worked with the rasp and files. The next three photos show only the initial work on the stem and not the finished work. I removed quite a bit of the material and smooth out the slope of the taper so that it flowed evenly into the button on both the top and the bottom of the stem.
IMG_2226

IMG_2227

IMG_2228

I sanded the newly shaped stem with 220 grit sandpaper and a medium grit sanding sponge to remove the scratches left by the rasp and files. Once I had the basic shape in place I decided to restain the bowl. I warmed the briar and then gave it several coats of a dark brown aniline stain thinned 1:1 with isopropyl alcohol. I flamed it between each coats to set the stain. The rim took extra coats to match the colour of the rest of the bowl.
IMG_2240

IMG_2241

IMG_2242

IMG_2244

I buffed the newly stained bowl lightly with White Diamond and then gave it a coat of a light cherry coloured Danish Oil. Once dry I buffed it by hand and then also gave it a light buff with White Diamond to polish it.
IMG_2245

IMG_2246

IMG_2247

I then removed the stem and worked on the slot in the button. When the end of the stem had been cut off some of the flair of the original airway remained leaving the end of the button with a small rectangular opening. I used needle files to open the flair and widen the slot into more of an oval that extended the width and height of the button end.
IMG_2248

IMG_2251

IMG_2252

Once I had the slot opened the way I like it I sanded the inner edges with a folded piece of sandpaper to smooth it out. I also did some more shaping with files to the taper of the stems. I sanded it with 220 grit sandpaper until I had the slope well-defined from the tenon back to the button. I also shaped the externals of the button to clean up the angle at the point the button and stem taper met. I also sanded it with a medium grit sanding sponge to remove the scratches left behind and to also remove the oxidation at the stem shank junction.
IMG_2249

IMG_2250

When I had the scratches removed as far as possible with the sanding sponge I went on to sand the stem with micromesh sanding pads. I wet sanded the stem with 1500, 1800 and 2400 grit sanding pads and the dry sanded with the remaining grits.
IMG_2253

IMG_2254

IMG_2255

I rubbed the stem down with Obsidian Oil and rubbed it into the surface of the vulcanite. I took it to the buffer and buffed the stem with White Diamond. I gave the bowl and the stem multiple coats of carnauba wax and polished the pipe with a clean flannel buff to bring up the shine. The finished pipe is pictured below. I still wish I knew what the stamping says in full. That blue dot certainly is a symbol of some unknown to me brand of pipe. The mystery remains but in the mean time I have a great little billiard to enjoy.
IMG_2256

IMG_2257

IMG_2258

IMG_2259

Reworking an Old Pal Pencil Shank Pot


I just finished cleaning up another of the old pipes I found on my trip. It is a petite pot shaped pipe with a pencil shank. The overall length is barely over 5 inches and the weight is negligible. It is stamped on the left side of the shank in arc – Old Pal, over an Eagle with spread wings and then underneath Made in France.
oldpal2b
On the right side of the shank it is stamped 5 which I assume is the shape number. The stem is also stamped with the words OLD PAL on the left side of the saddle portion. On this particular pipe it is faint. In checking on the background information on “Who Made That Pipe” I found that it had two French makers for Old Pal listed. The first of those is Marechal Ruchon and Cie. (Incidentally it is the company that owned the GBD brand). The second maker listed is Rubinovich & Haskell Ltd. The bird emblem is probably the key, but I can find no reference to it. My own thinking is that the brand was made by Marechal Ruchon & Cie. I was able to dig up this brief summary of the MR&C brand. Ganeval, Bondier and Donninger began making pipes in 1850 and rapidly gained prominence in briar pipe making. Of the three, Bondier survived the others by 30 years, but new partners took their places. The name of the company changed to Bondier Ulrich & Cie, then Bine Marechal & Cie and finally to A Marechal, Ruchon & Cie. August Marechal and Ferdinand Ruchon saw the firm into the 20th century, their names being used for the company for well over 50 years.

Prior to 1899, Marechal, Ruchon & Co. became A. Oppenhiemer’s sole agent for cigarette papers but still remained in the pipe making business. Then in 1902, Marechal, Ruchon & Co.. owners of GBD and referred to as French pipe makers, merged with A. Oppenhiemer. In the 1915 London Directory of briar pipe makers one will find: “”Marechal, Ruchon & Co. – 38 Finsbury Sq. E.C.; London works, 15 & 16 Featherstone St. E.C. and Oppenhiemer, A. & Co. – 38 Finsbury Sq. E.C. listed separately.

With that background information I worked on this old pipe to clean it up and restore it. When I picked it up the bowl was badly caked and packed full. The rim was dirty and tarred with what appeared to be a fill on the top of the rim right side. The entire right side of the pipe was full of fills of various sizes and shaped. There was one fill on the left side as well. The grain on the bowl was mixed and the finish was pretty beat up. The fills were shrunken and they left small pits in the surface of the pipe. The stem was oxidized and had tooth chatter on both sides near the button. The shank and airway were dirty and tarry. When the stem was removed there was an interesting flared tube that extended into the shank from the end of the tenon. The end looked like the bell of a horn. This was badly tarred and the inside of the tube was packed with debris.
IMG_2048

IMG_2049

IMG_2051

IMG_2052

I separated the stem and the bowl. The bowl was reamed with a PipNet pipe reamer back to a thin cake. Then I dropped the bowl in an alcohol bath to soak away the grime and to soften the fills. I drop the stem in an Oxyclean bath to raise the oxidation and soften it. I scrubbed both while in their respective baths to loosen the grime and buildup on the surfaces. I removed the bowl from the alcohol bath after two hours of soaking. I cleaned out the inside of the shank and the bowl as well as the inside of the stem. The trumpet like tube came out of the tenon and I cleaned it inside and out and reset it in the tenon. It is an interesting contraption as it is flared and the flared end rests against the end of the mortise directing the smoke directly into the mouthpiece. I have not seen that design before (see the photo below after the stem cleanup paragraph).
IMG_2067

IMG_2053

IMG_2066

IMG_2068

IMG_2071

I used a dental pick to dig out the fills that had softened in the bowl. My objective was to remove them altogether and replace them with a briar dust and superglue fill that turns black and gives a different look than the red putty fills.
IMG_2079

After removing the fills I wiped down the bowl with acetone on a cotton pad to remove the finish from the bowl and to remove extraneous dust from the holes where the fills used to be. I repeated this process until the bowl was clean. Once finished I used a drop of superglue in each pit and then pressed briar dust into the holes using a dental pick. I repeated the process until the fills were repaired. I then sanded the bowl to remove the excess briar and superglue fill material with 220 grit sandpaper, medium grit sanding sponges and a fine grit sanding block.
IMG_2081

IMG_2082

IMG_2089

IMG_2090

IMG_2091

IMG_2092

IMG_2093

The black marks on the right side of the bowl highlight the fills in the bowl. I have often used a permanent black marker to blend in the fills to the grain. I decided to try that with this pipe as well.
IMG_2094

IMG_2095

I gave the bowl several coats of dark brown aniline stain mixed 1:1 with alcohol. I applied the stain, flamed the bowl, reapplied and reflamed until the colour was even over the entire surface. I then took it to the buffer and buffed the bowl with red Tripoli and White Diamond to polish the stain. I also wanted to see how well the fill material was working. I have found that as it dries it can still shrink.
IMG_2098

IMG_2099

IMG_2100

IMG_2101

I brought it back to the work table and gave it a coat of linseed oil.
IMG_2102

IMG_2103

IMG_2104

The fills had shrunk and left divots in several spots so I reapplied the superglue and briar dust (less this time around). I sanded the bowl with a sanding sponge and a fine grit sanding block to smooth out the surface. I reapplied the stain and the linseed oil and then buffed the bowl.
IMG_2105

IMG_2110

IMG_2109

IMG_2108

IMG_2107

IMG_2106

I took the stem out of the bath and wiped it down. The majority of the oxidation wiped off with a damp cloth and then I polished it with Meguiar’s Scratch X2.0 and wiped it off the stem. I wiped the stem down with a polishing cloth and buffed it with White Diamond.
IMG_2080

IMG_2111

I applied a coat of Obsidian Oil and when dry rubbed it off. I reinserted the stem and buffed the stem with multiple coats of carnauba wax. I took the pipe to the buffer and buffed the entirety with carnauba wax and a soft flannel buff to a shine. The following pictures show the finished pipe.
IMG_2112

In the bright flash of the camera the fills on the right side of the bowl appear to stand out more than they do in the natural light. They tend to look dark spots in the birdseye of the grain. They do not stick out as badly as they appear in the photo below.
IMG_2113

IMG_2115

IMG_2114

The final picture I have included is one of the Old Pal pipe with a package of Old Pal Pipe Cleaners that I picked up at an antique shop in Edmonton. The two form a nice complement to one another.
IMG_2117