Robert M. Boughton
Member, International Society of Codgers
Member, North American Society of Pipe Collectors
Member, Facebook Gentlemen’s Pipe Smoking Society
https://www.facebook.com/roadrunnerpipes/
http://about.me/boughtonrobert
Photos © the Author except as noted
Pipe: a primary masculine symbol with authoritarian overtones but also indicative of reliability and contentment.
— The Dictionary of Visual Language, 1980, by Philip Thompson and Peter Davenport
INTRODUCTION
Never before or since has a definition been more right in both parts yet presupposed in the one as that stated above. Nobody who enjoys and defends the pleasures derived from placing tobaccos into instruments known as pipes, igniting the leafy concoctions and drawing the resulting flavorful smoke into the mouth to taste, contemplate and above all savor, in most cases without inhaling, would deny the latter point. But the former – which should be noted uses the strict adjective primary, meaning before all else in importance, rather than the more lenient adverb primarily, or for the most part – affirms the societal perception that no normal woman should want to partake of the same practice. After all, why on God’s green earth would any decent _________ (insert little lady, gal, chick, babe, bird, girl, lass or whatever term comes to mind and makes most women grit their teeth) want to trespass on what might be the last bastion of manly domination on the planet?
The source of the definition – printed once in hardback and then again, in 1983, in softcover, both times by British publishers – is an excellent collection of iconic symbols assembled with scientific soundness. Its authors called it “The Dictionary of Graphic Clichés,” a far more apt title than that which they were compelled to choose by the original publisher, under the false notion that the book should have a more agreeable name. This decision may very well be the reason the astute study has been out of print for 33 years. Nevertheless, used hardbacks still start at $469 and paperbacks at $96 on Amazon, suggesting a work of genuine and lasting significance. But the likelihood of many takers at those prices is more doubtful than that the book would still be generating far more royalties if it continued to be available in general circulation at a reasonable cost to the average consumer.
The truth is th at many more women than may ever be known are as devoted to pipes and the blissful indulgence of those wonderful devices’ every facet: the astonishing variety of makers, shapes, styles, materials and sizes; the like availability of diverse tobaccos for every taste, and tobacciana. Women are just as prone as men to the same acquisition compulsion in these categories. Female artisans craft pipes, for their own use or sale. The owner of my favorite local tobacconist is a woman. Clubs and other associations exclusive to females devoted to the overall shared and altogether personal experience of pipes can be found in every corner of the world.
Indeed, searching online for this last aspect of pipe equality yields the greatest proof of the ubiquitous presence of female connoisseurs, who seem to avoid the male-dominated and likewise -biased haunts of the mainstream pipe establishment, and for good reason. Only one woman is a member of my pipe club. I know of but a single woman on the membership roster of the Smokers Forums UK, although old-timers recall in a vague way a past when there were “some more.” And Jeff Knoll of the North American Society of Pipe Collectors reported, as I recall, that of the 1000+ members of the NASPC, only 10 are not men. That’s about one percent, a woeful ratio.
I embarked upon my seven-part series of blogs last May 4. My specific intentions were two-fold: to reveal and give recognition to the far greater number of women pipe smokers than is acknowledged by most of those who are, and no one disputes in all probability will remain, in the majority, and to promote acceptance of the formidable minority. My more general desires were to foster an exploration and discussion of the contributions women make to the relaxing activity/hobby; to open a dialog between the segregated camps. A side story that crossed my perhaps naïve mind was the idea of discovering possible differences in approach to pipes between their male and female devotees that might be of interest to all involved in the activity that is, after all, a love affair of sorts. With one installment after this left before the series is complete, I believe I have gone still further than I expected but hope to wrap up some loose pieces before the end, whether most of my readers, or lack thereof, like it or not.
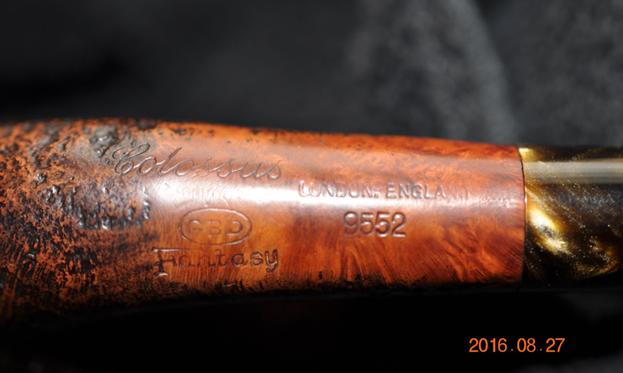
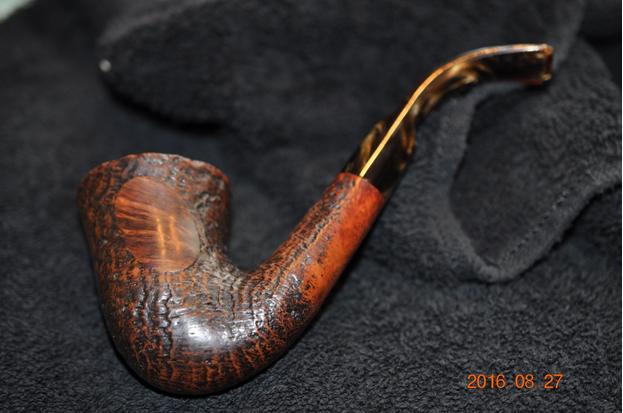
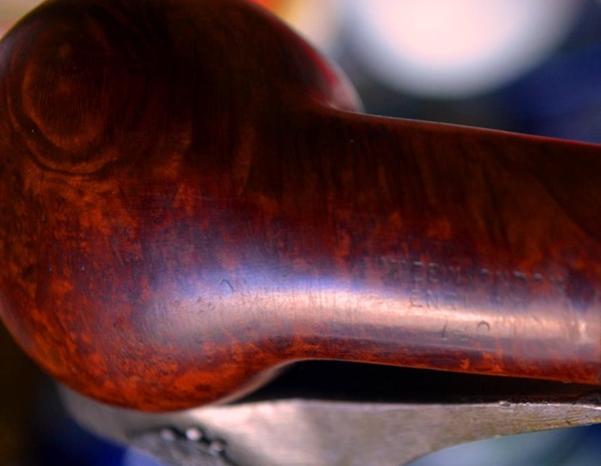
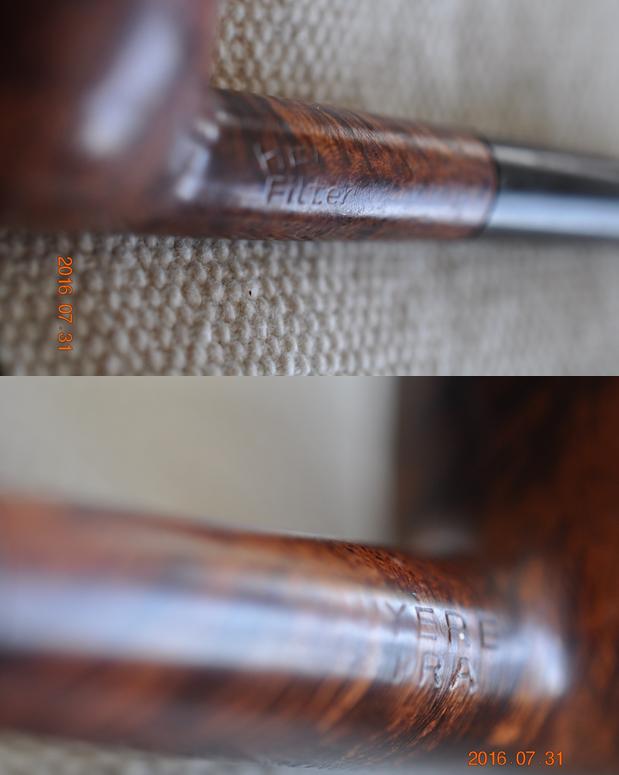
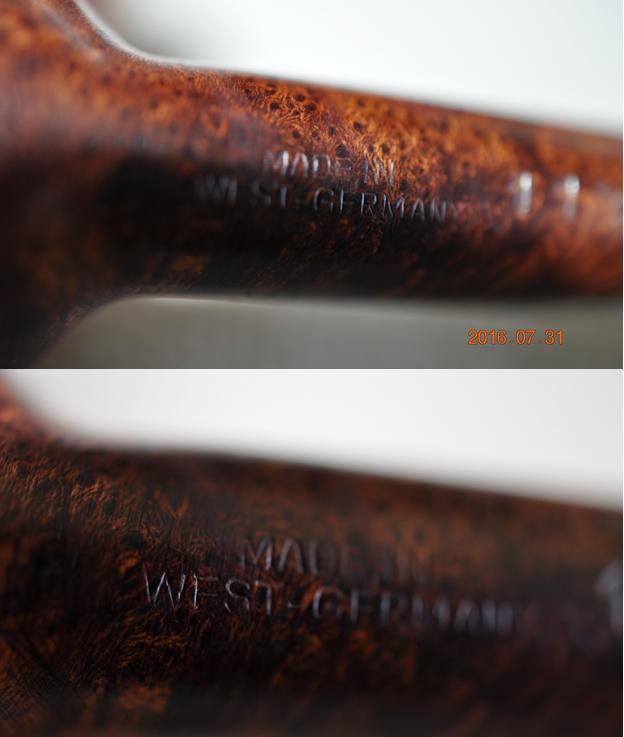
The sixth installment will show the refurbishing of a small Albertson easy bent sandblasted brandy from Belgium. Hard information on the Albertson line is difficult to come by to an inordinate degree. Through an incredible stroke of good fortune, I happened upon a font of factual information on the pipe’s real origin. First I had to navigate past Pipephil and Pipedia, whose sketchy claims proved to have little substance and were parroted throughout the cyber world.
Pipephil describes Albertson as a brand “made at Hilson’s Factory,” then in the Hilson description refers readers to Albertson as a second. About Hilson, Pipephil’s entry is muddled but notes its genesis was in 1846, when a German pipe crafter named Jean Knödgen started producing clay pipes in the town of Bree, Belgium. As it turns out, that limited intel is about all that is accurate. Jean Hillen, Knödgen’s son-in-law, bought and ran the business until his two sons took over. After World War II, when briar was scarce, Albert Hillen, the brother in charge of production, created Hilson (a combination of Hillen and son). Although I anticipate the exact time period in which Albertson pipes were made, from the one person who would know beyond a doubt, I do not expect it to arrive any time soon. I suspected its name also was formed from a combination, of Albert and son, and later confirmed the guess. With the Hilson brand, Hillen became independent of other countries, taking full control of pipe production.
Here’s the scoop, based upon the singular knowledge and much appreciated contribution of Arno van Goor, a Dutch pipe smoker and historian.** The patriarch of the family-run pipe giant known today as E. Gubbels B.V., Johannes Henricus Gubbels, began in 1870 with a modest mercantile business in Roermond, a town in the southeastern area of the Netherlands. Gubbels’ first products were diverse and included umbrellas, walking canes, toys and smoking accessories. Knödgen was one of Gubbels’ suppliers of the last category.
Johannes Gubbels died in 1911, and his second wife carried on the business until 1924, when their two children, Antonia and Elbert, established A&H Gubbels, a wholesale trader specializing in pipe accessories. After World War II, as the sole owner of the family business and because of the scarcity of supplies as well as the impossibility of importing them, Elbert did as Hillen had before him, going independent in every respect.
With the informal name EGRO (for Elbert Gubbels Roermond), Gubbels had no brand name. Then, in 1956, when Gubbels bought De Rijk & Zonen of Amsterdam – a small company that was floundering – Gubbels not only acquired a brand but more machines than the two he had and more employees than the three. But the most significant changes were his decision to convert from a wholesale to an export business with a very popular brand of pipes at the time, known as Big Ben. The Big Ben pipes had been made in England and sold by De Rijk, and Gubbels began producing them as his own brand. The result was an exponential increase of sales in Europe, the USA and Canada.
At the same time, Hillen’s Hilson brand faced severe financial problems despite its high reputation and value as far as the cost to consumers was concerned. When Gubbels bought Hilson, he was able to move into a bigger factory. To the Hilson and Big Ben lines was added a very small nose-burner called the Pipo, designed by one of Elbert’s two sons named Alfons who was then in charge of production. The Pipo, although an unknown style of pipe at the time, was highly successful and sold worldwide. By 1972, Queen Juliana of the Netherlands bestowed upon Gubbels the honored title “Royal,” and the house of Gubbels became Elbert Gubbels en Zonen – Koninklijke Fabriek van Tabakspijpen (Elbert Gubbels and Sons – Royal Dutch Pipe Factory).
After increasing its production and sales at a steady rate through the 1970s, the demand for the “luxury items” fell, and so did Gubbels’ Royal Dutch Pipe Factory (RDPF) as investors backed out. One of the biggest misconceptions online and elsewhere is that Gubbels and the RDPF were separate entities. On March 3, 2012, De Limburger daily newspaper in Maastricht, Netherlands reported the bankruptcy of that name, and the “news” that the last pipe-maker in the Netherlands was out of business echoed on pipesmagazine.com, and thence round the world.
It seems the rumors of the death of the venerable pipe-maker were greatly exaggerated. Yes, the Gubbels-RDPF name was gone, but the family persevered with capital of its own, reducing the company staff from 28 to 20 employees. Today, and not just according to the masthead of the History page of its own website, “E. Gubbels B.V. in the Netherlands, established in 1870, is a globally acclaimed and leading manufacturer of fully hand-made briar-root tobacco pipes.”
RESTORATION


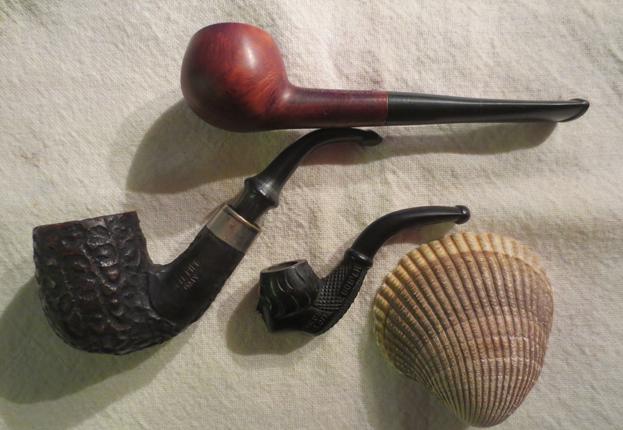
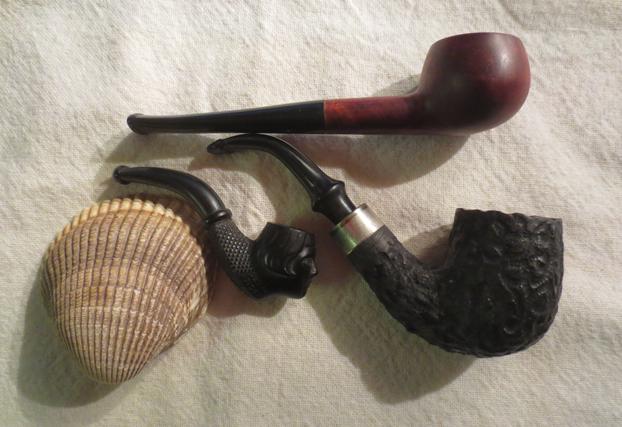
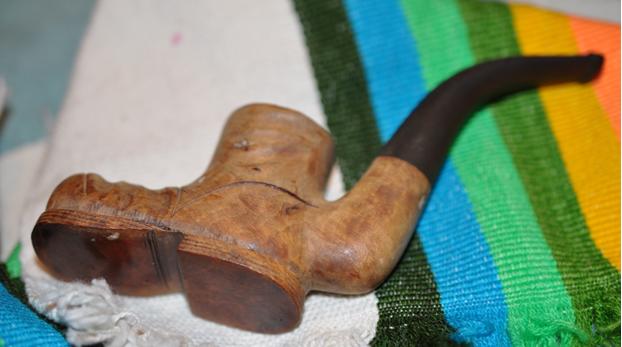
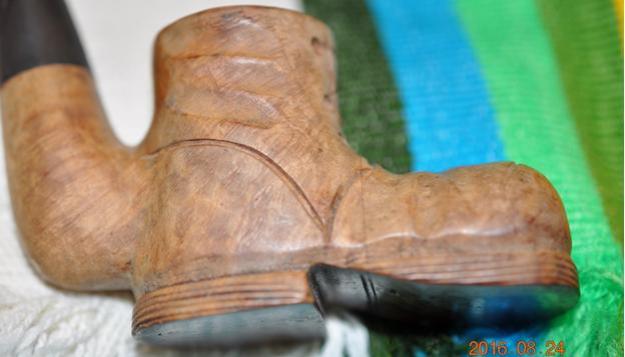
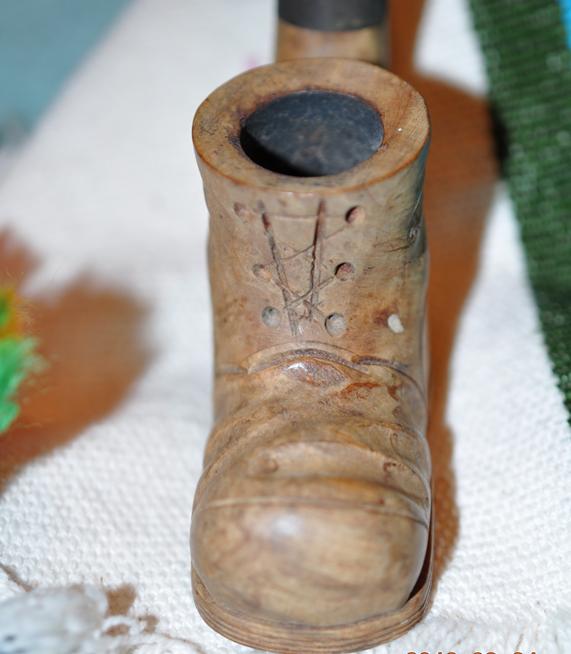
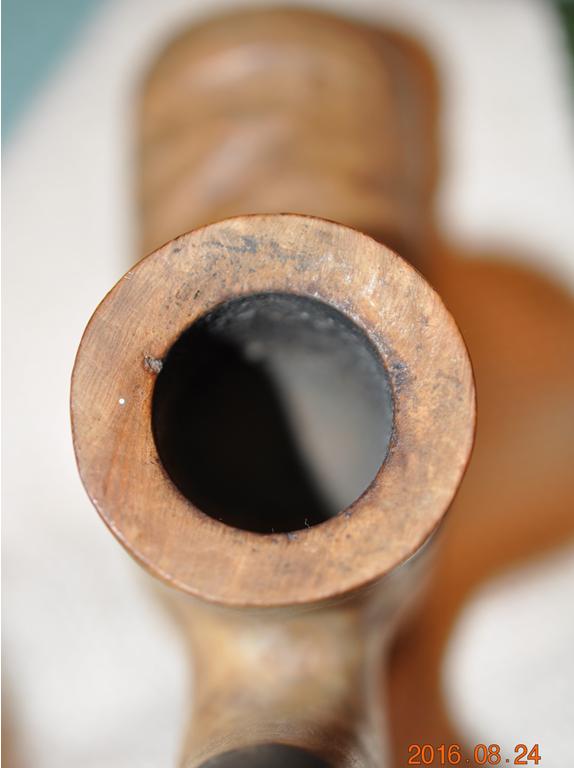
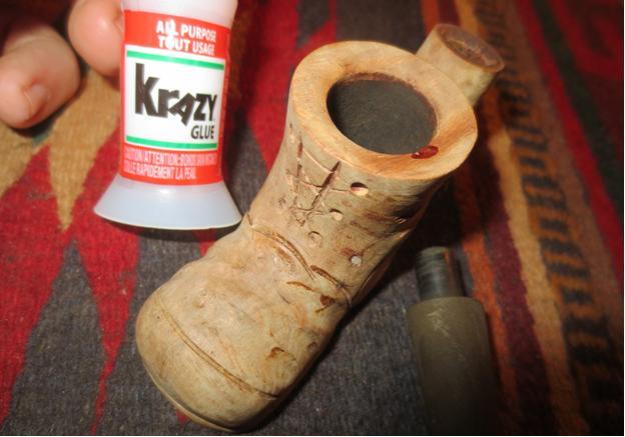
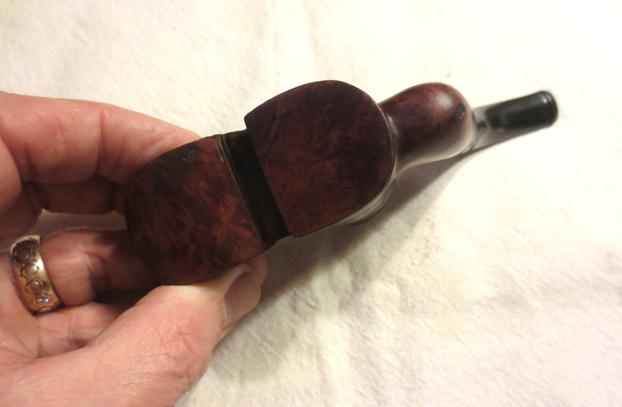
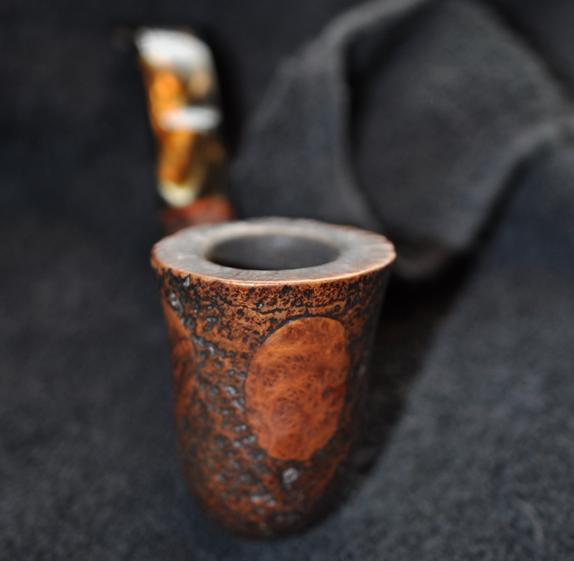
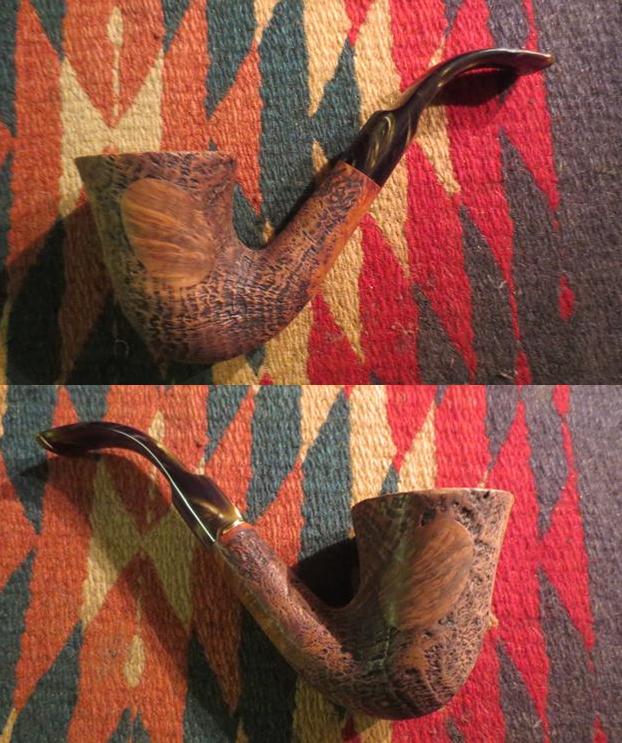
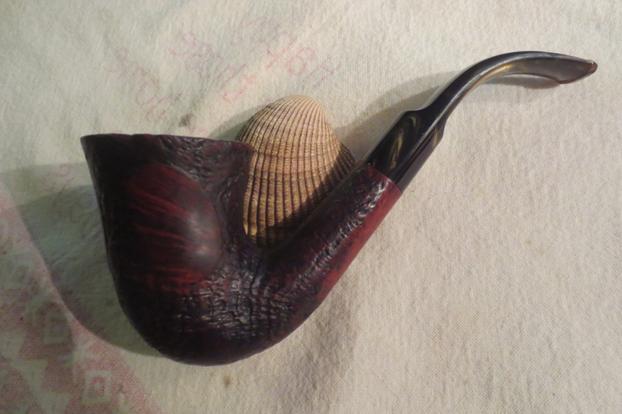
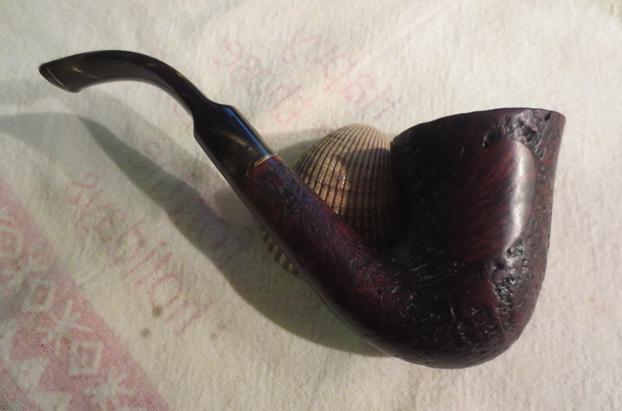
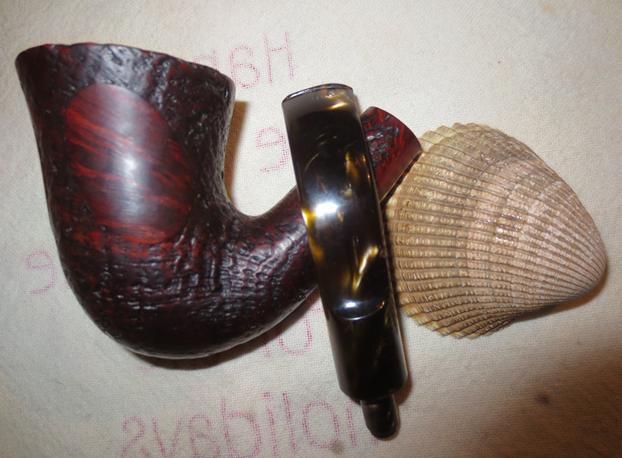
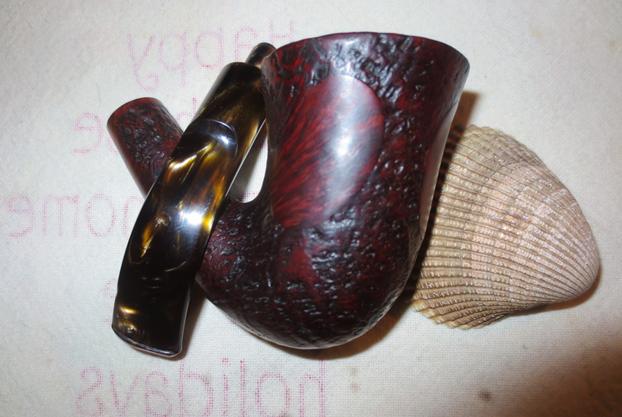
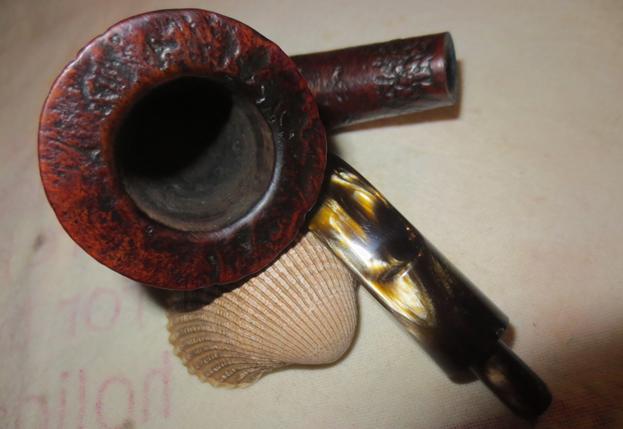
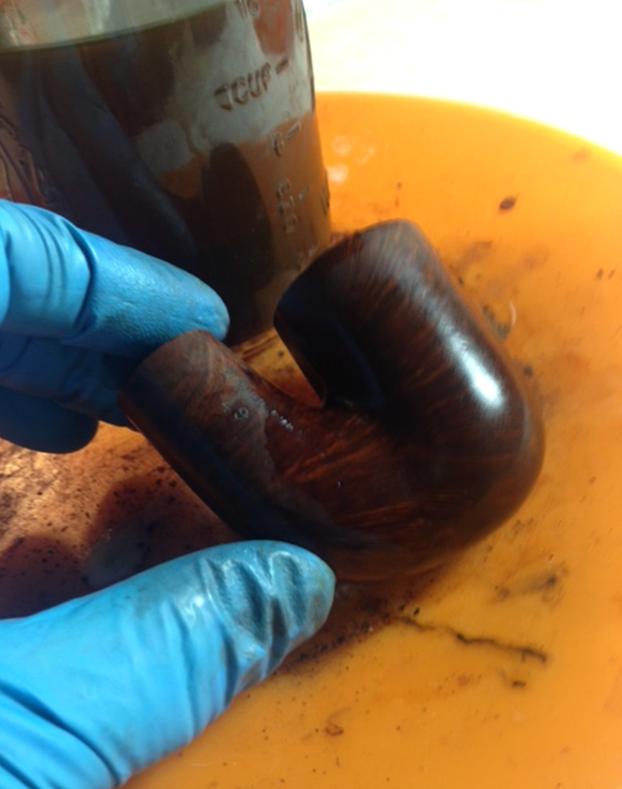
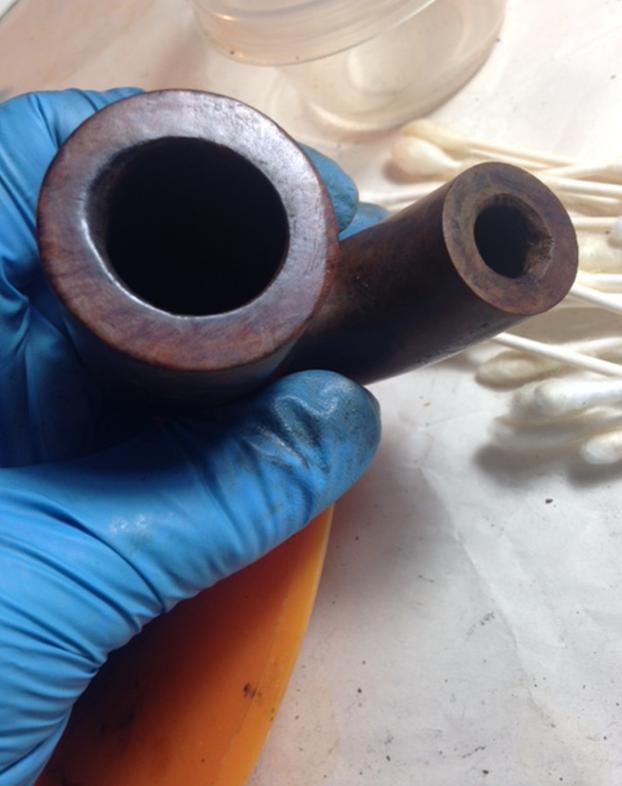
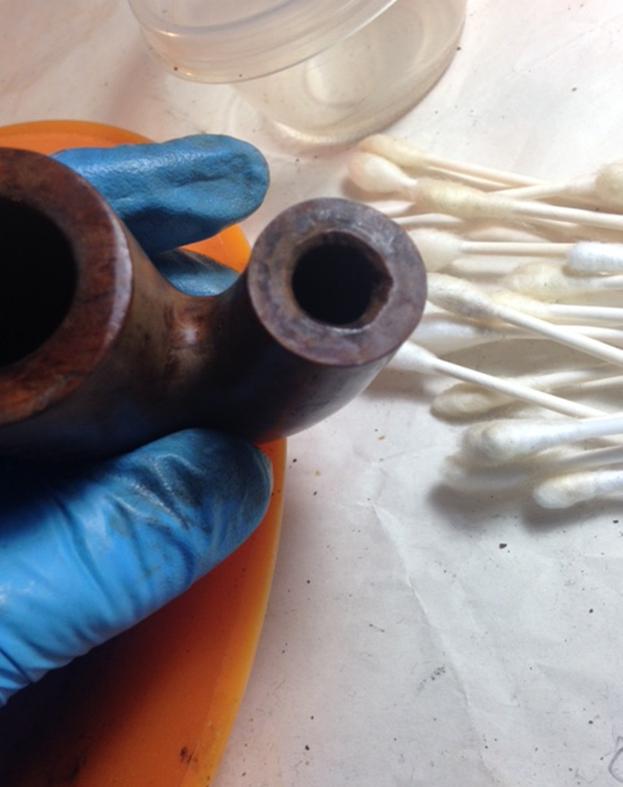
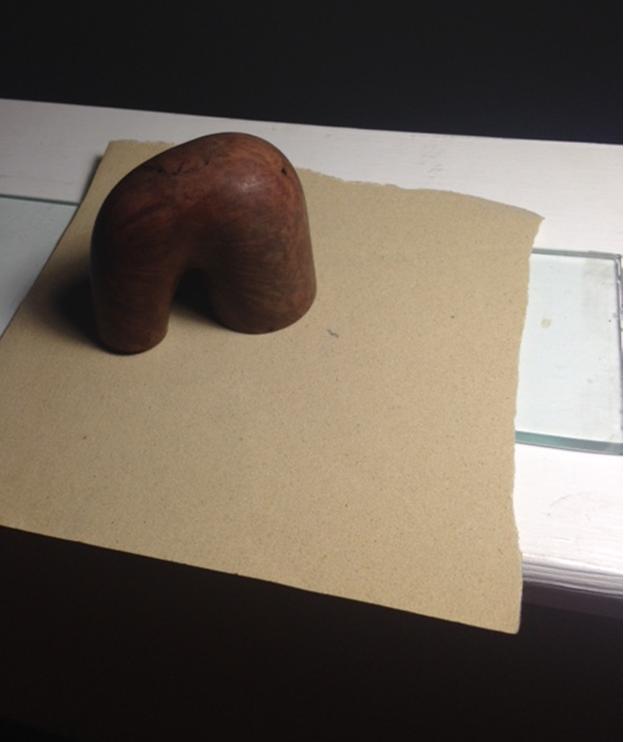
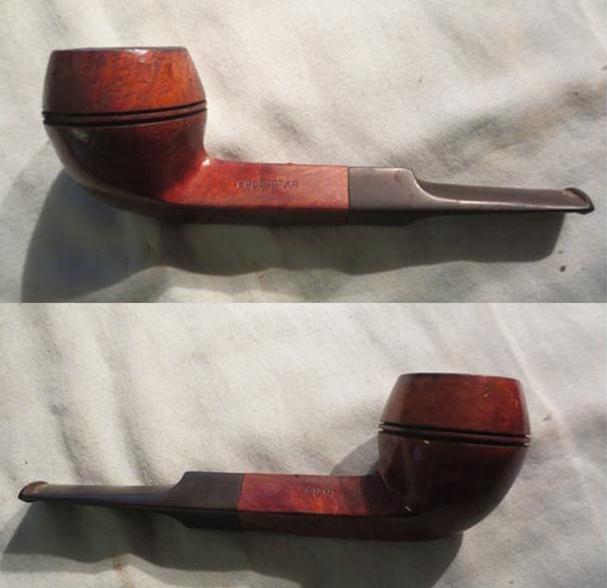
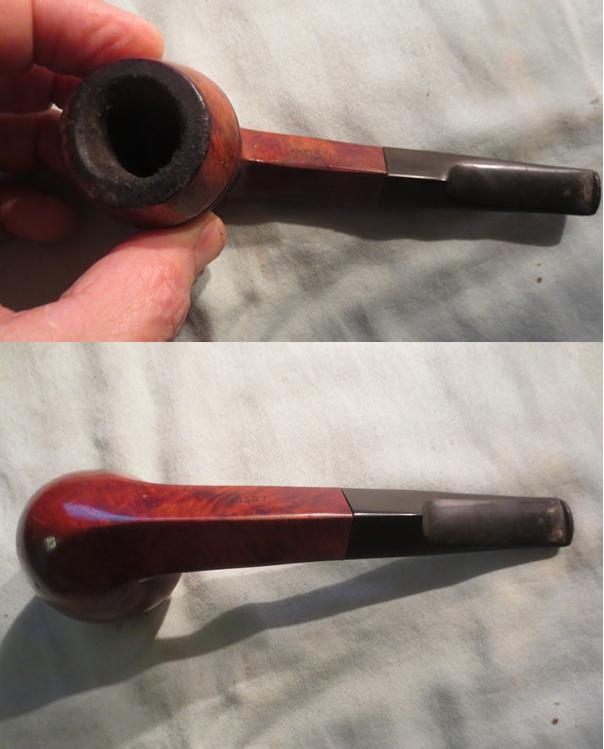
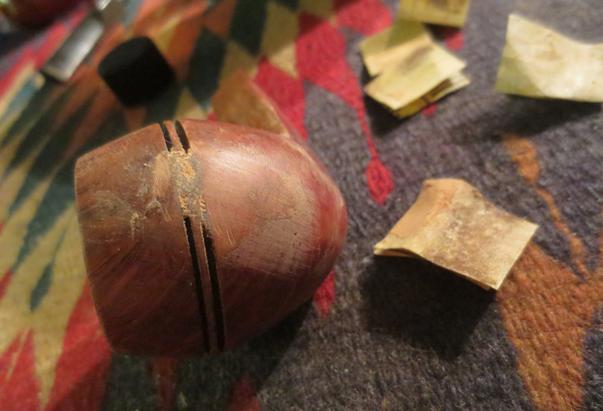
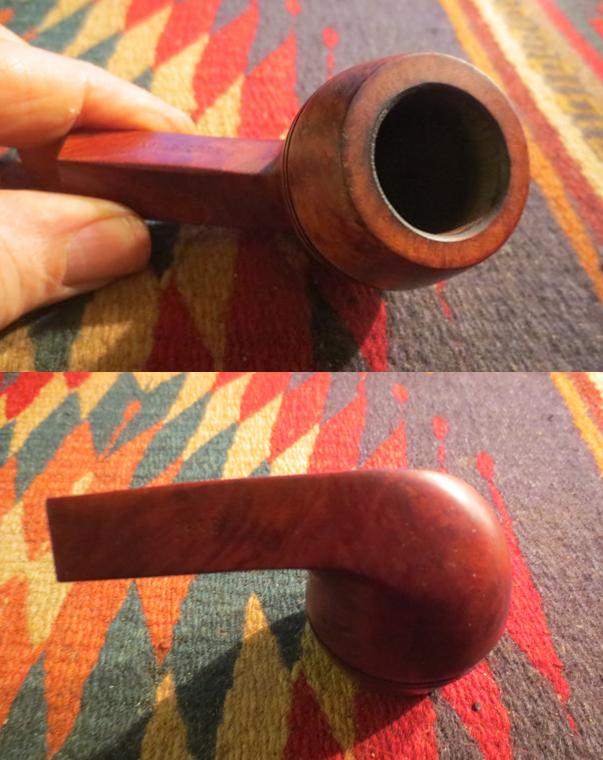
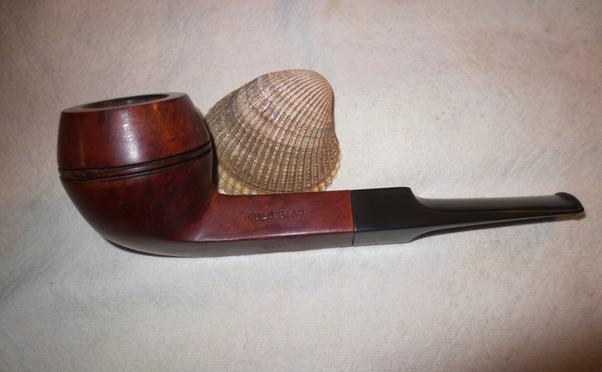
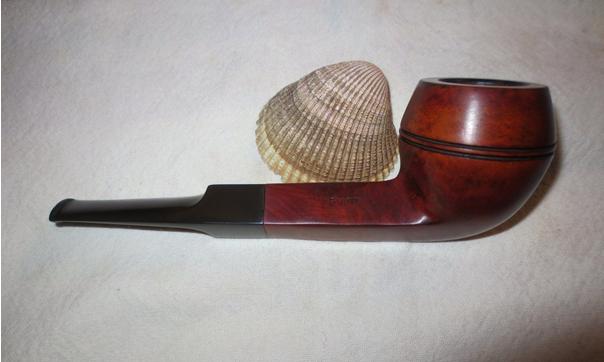
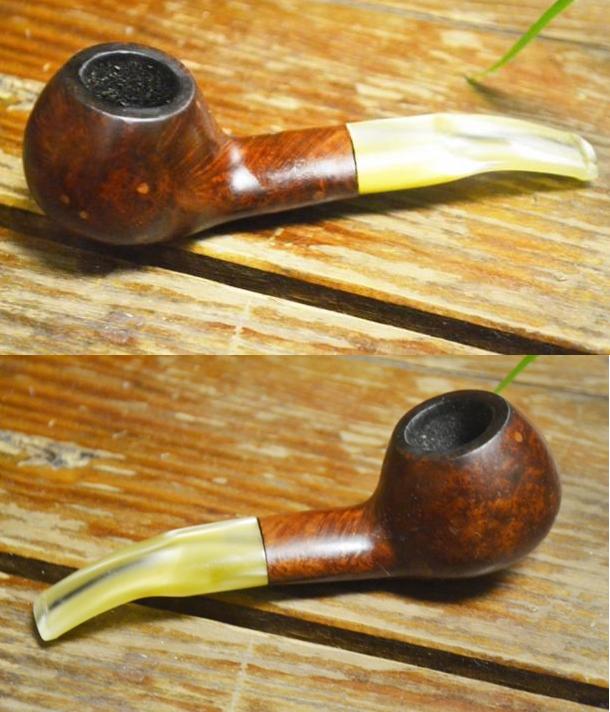
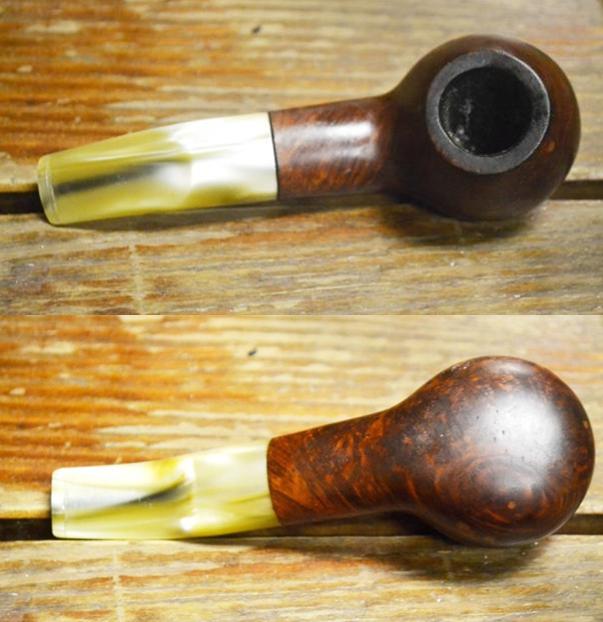
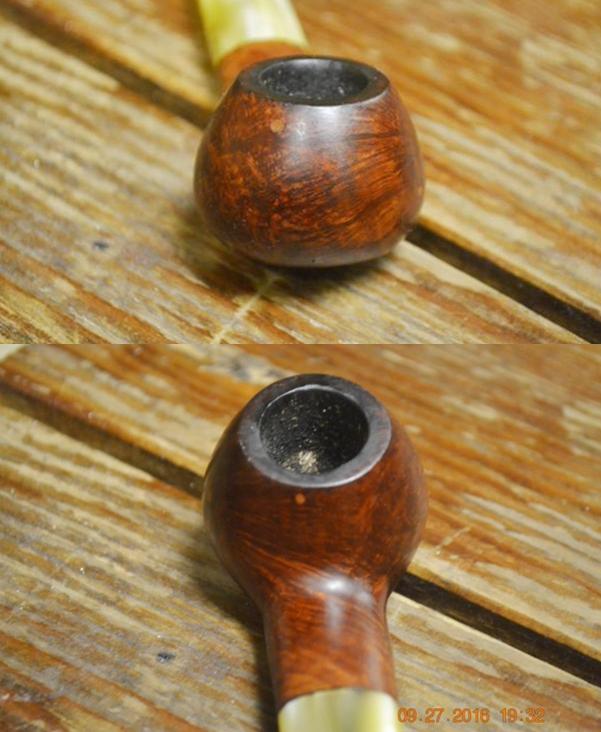
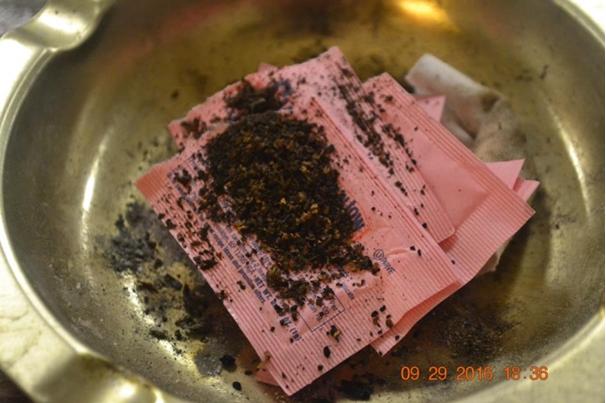
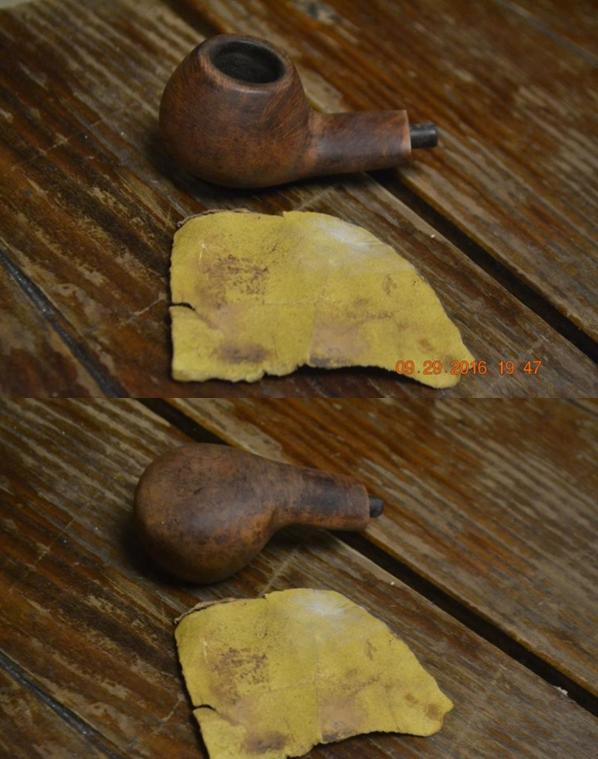
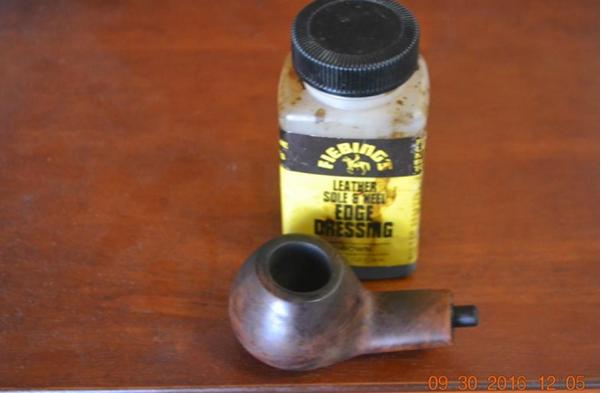
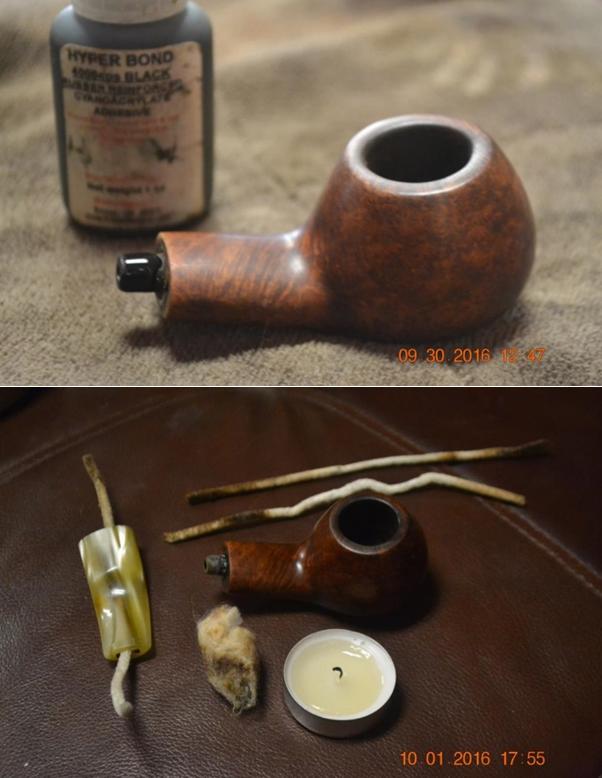
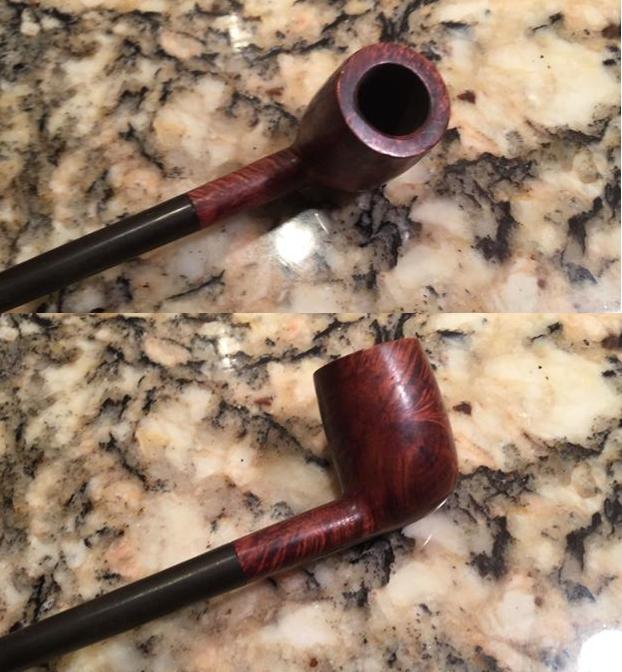
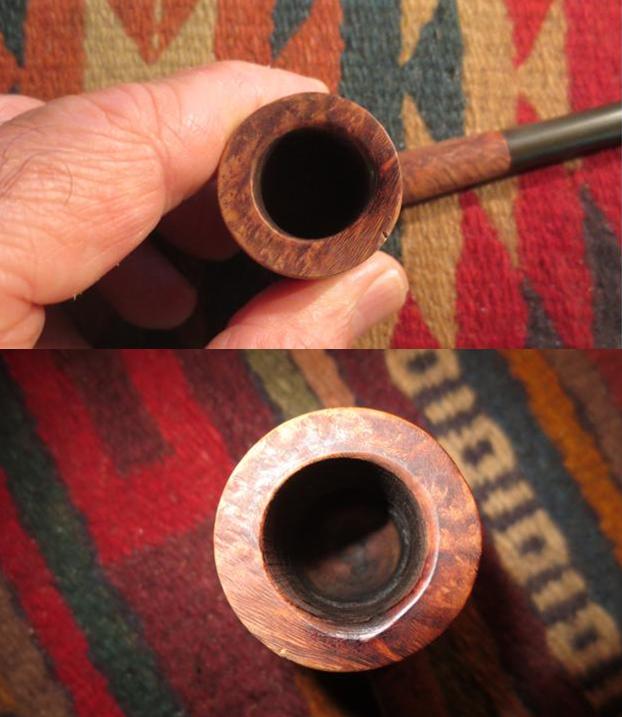
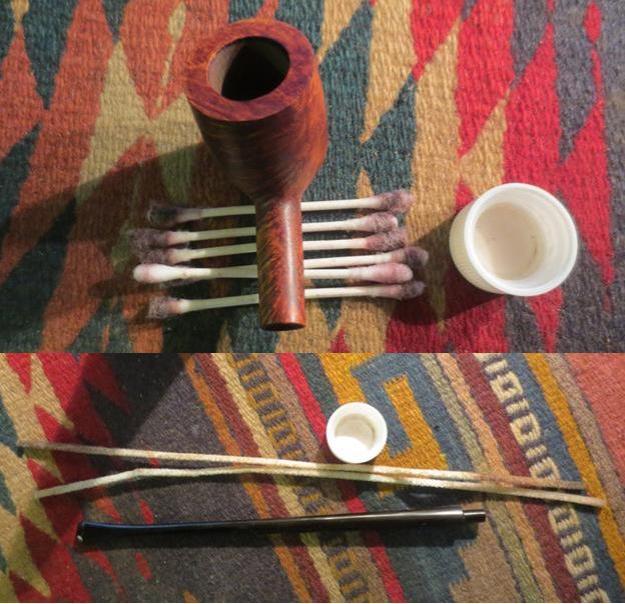
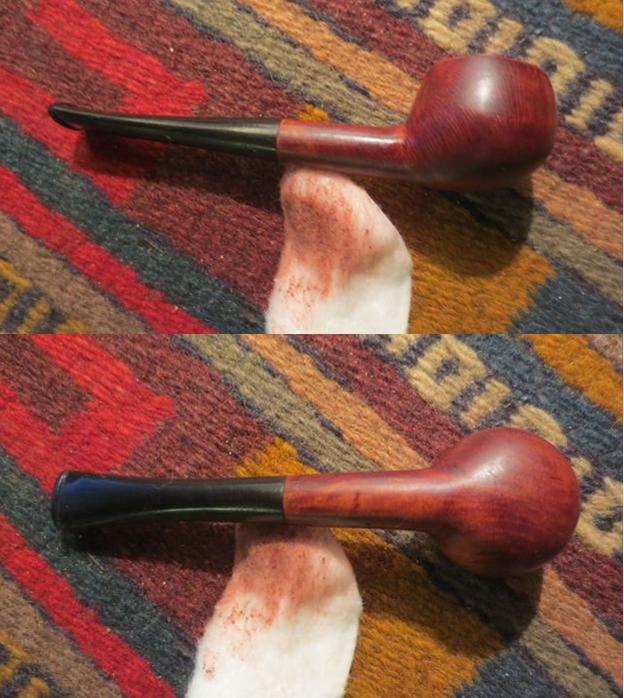
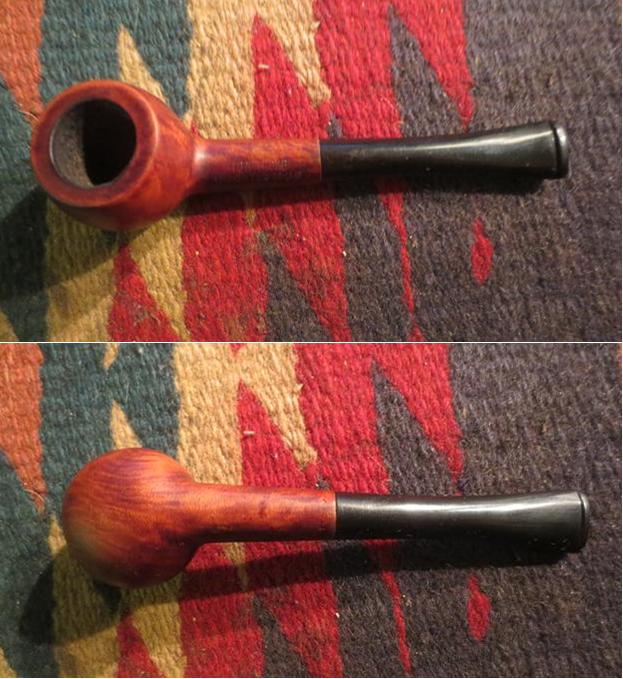
 The little brandy could have been touched up and cleaned much faster if I had felt like leaving well enough alone. Of course, I did not. A close look at the photos above shows two minor scrapes, one on the middle front of the bowl and the other near the bottom, that cut to the wood and gave me an idea. The refurbish therefore began with a long soak, about five hours, in Everclear. I have some black sandblast and rustic pipes that I love the way they are, but for the most part, in restoring at least, I prefer to end up with some of the natural rusty color of the briar showing, but not because of dings and whatnot.
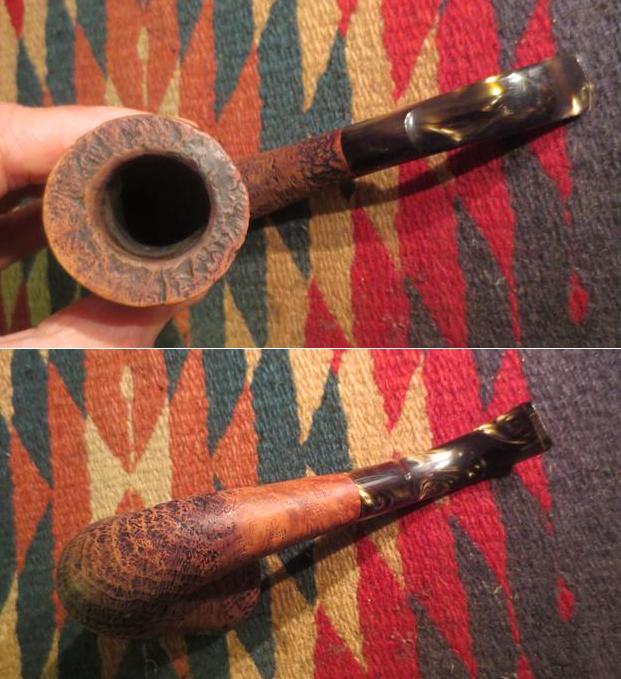
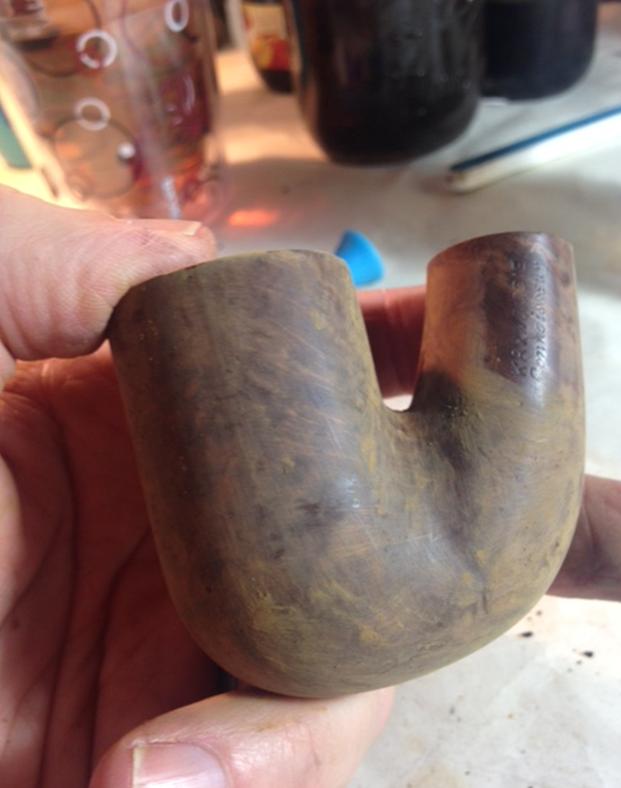
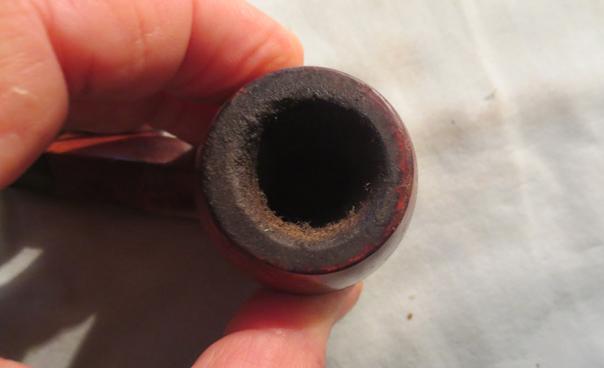
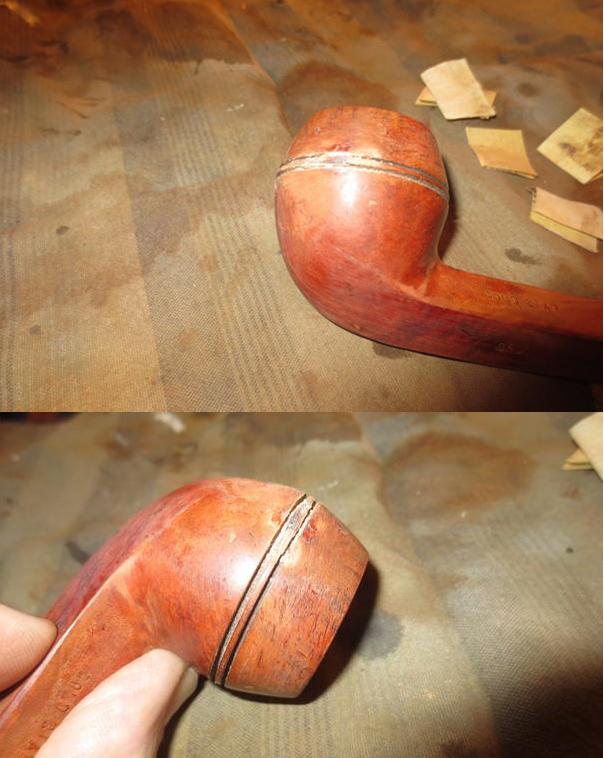
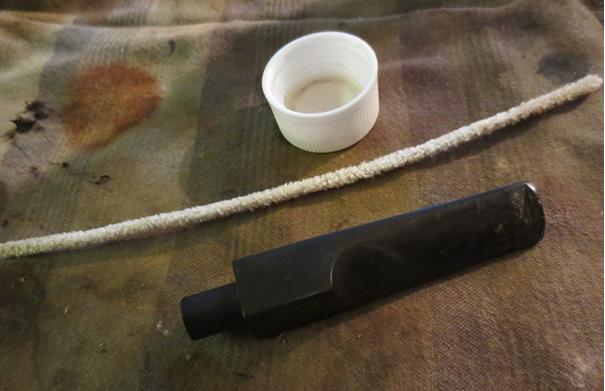
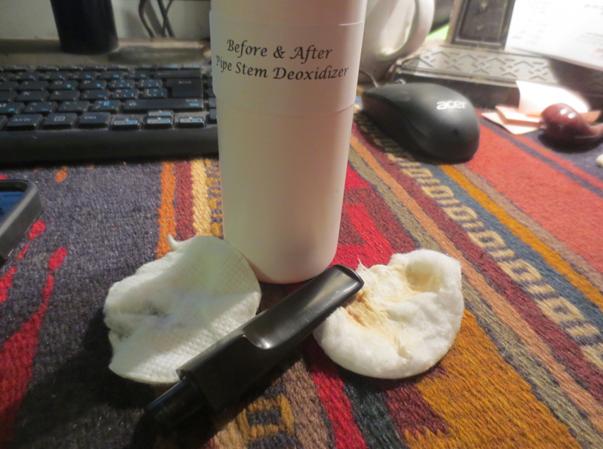
 When the initial stripping was finished, I was not surprised to see much of the black stain still holding tight. I rubbed off the alcohol and some more of the blackness with some small cotton gun cleaner squares and swabbed the chamber with more, then went at the surface of the stummel with 150- and 220-grit sandpaper. While I was at it, I ran an alcohol-soaked cleaner through the bit, which shows how well-used was the dainty pipe. Even after that, a second Everclear soak was in order.


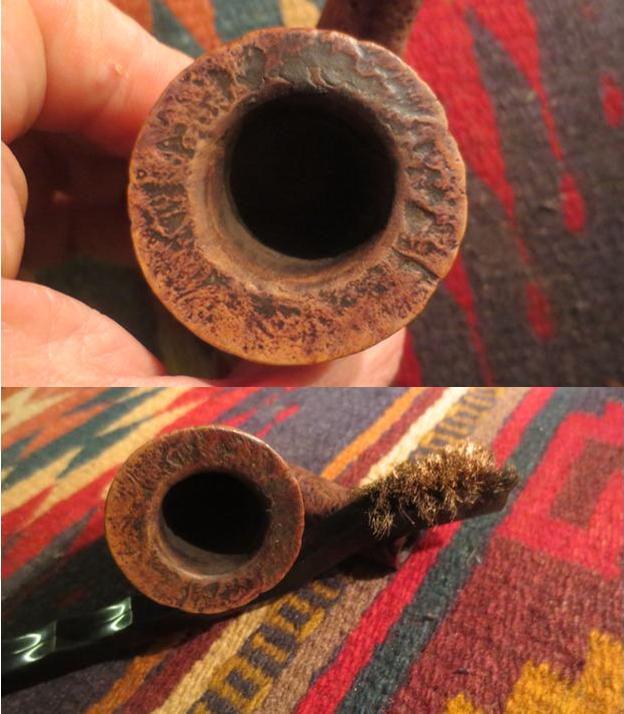
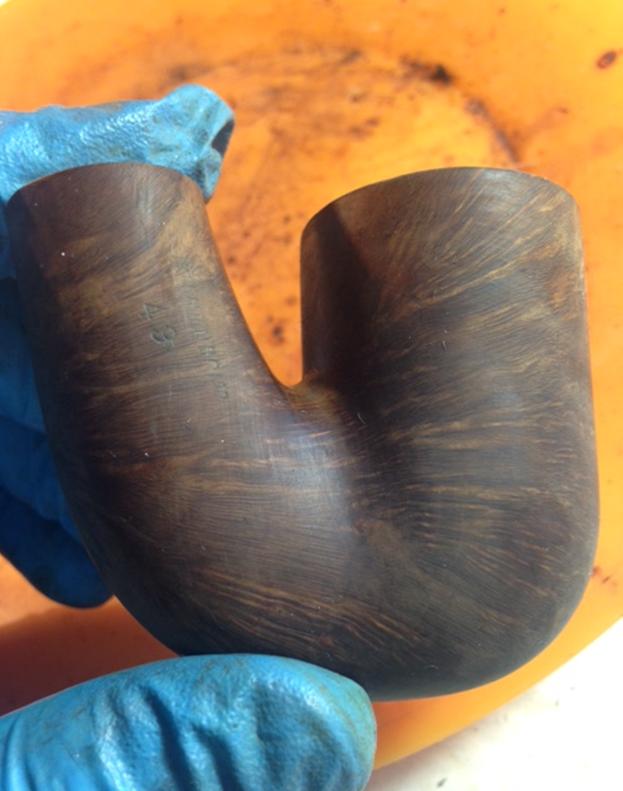
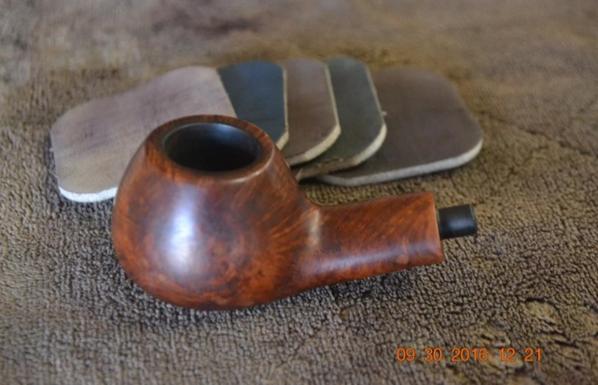
 Repeating the aftermath of the previous alcohol strip, except for using super fine “0000” steel wool instead of paper, I eliminated more of the old black stain. The next pictures don’t show the focused work I did on the crevices.

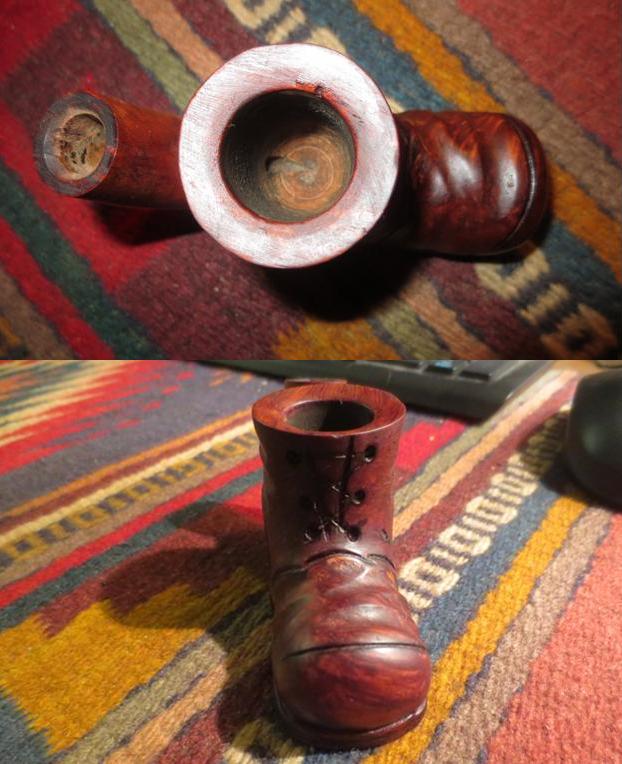
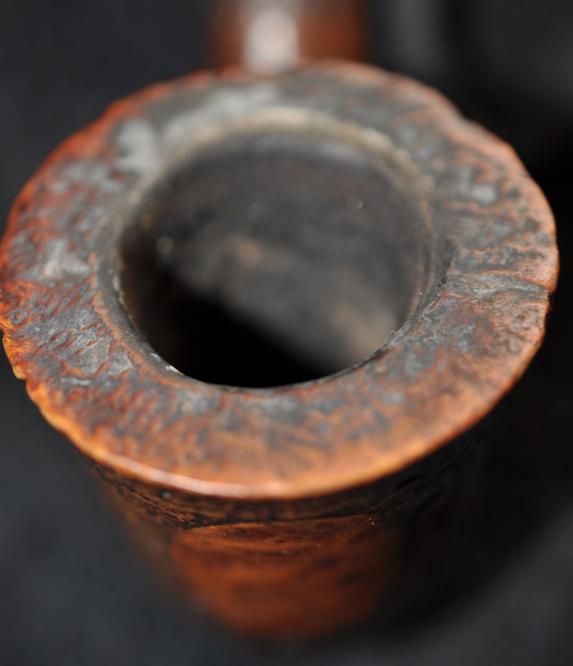
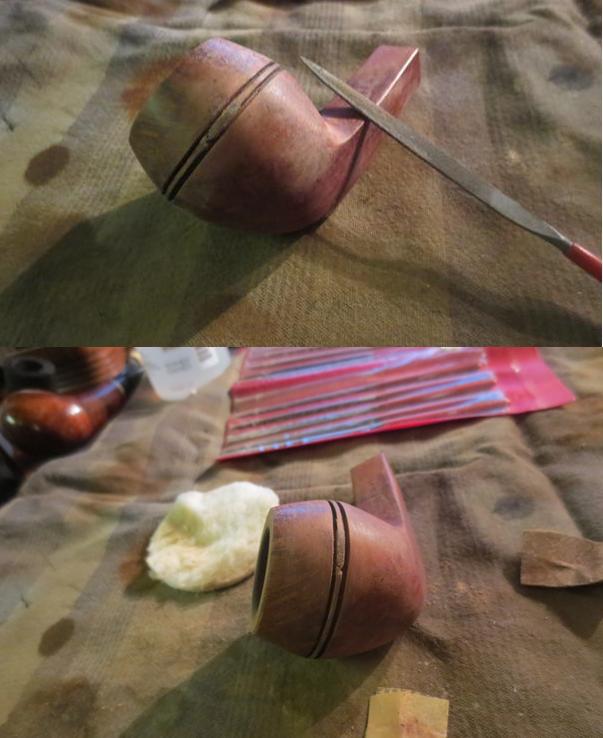
 A few choice turns of the Senior Reamer in the chamber followed by 220-grit paper made the retort easy after the two soaks in Everclear, the more serious paper work in the chamber and several regular cleaners as well as the wire brush type through the shank.
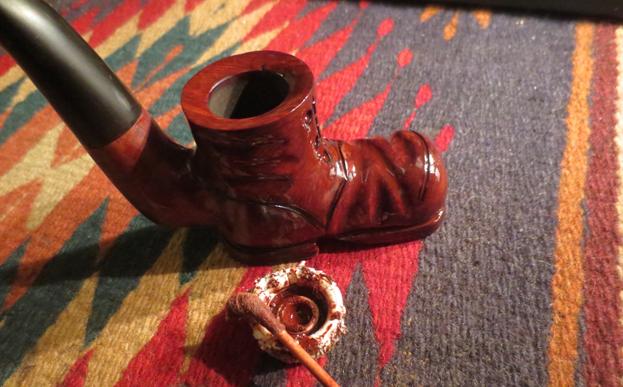
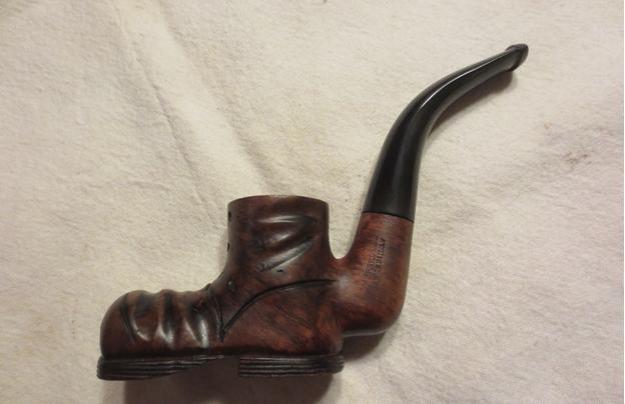
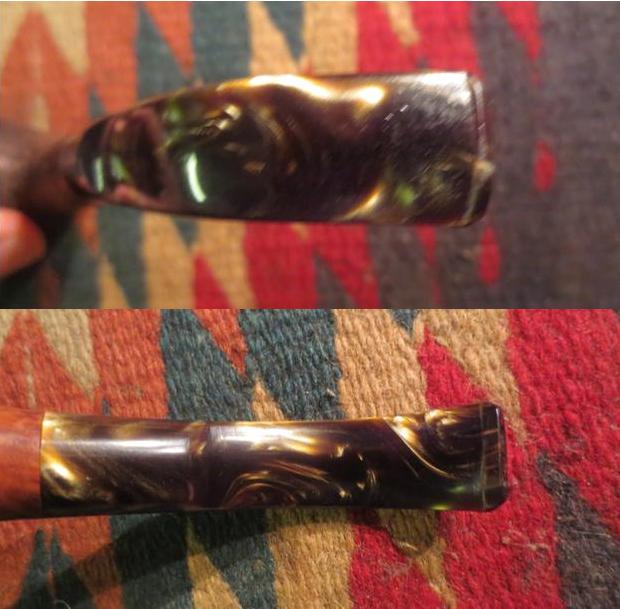
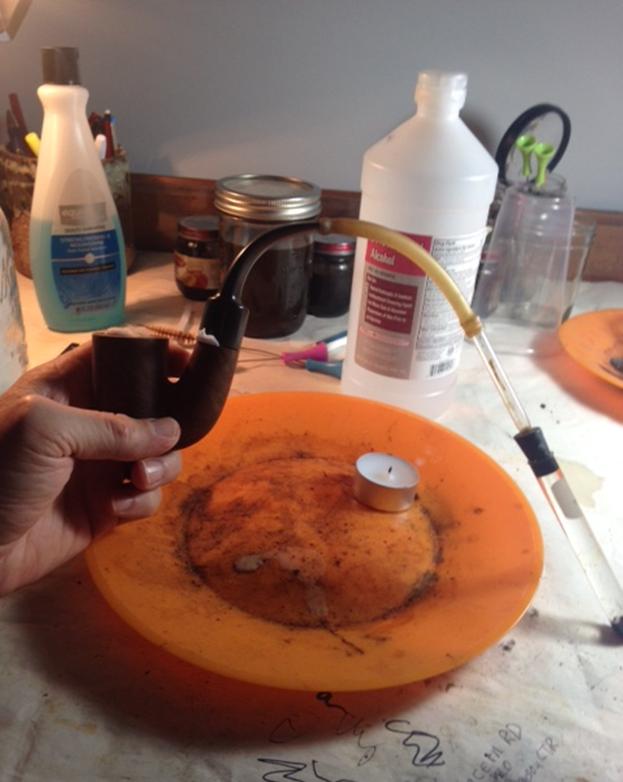
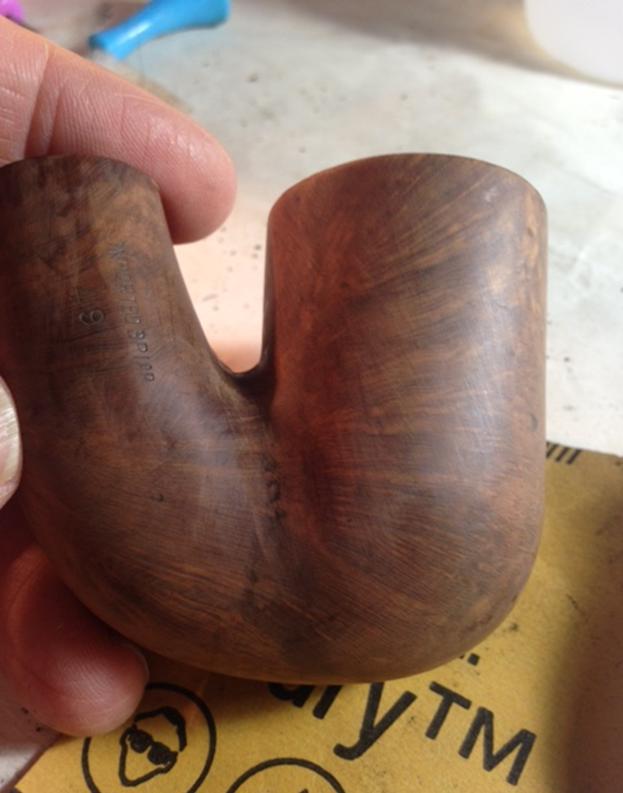
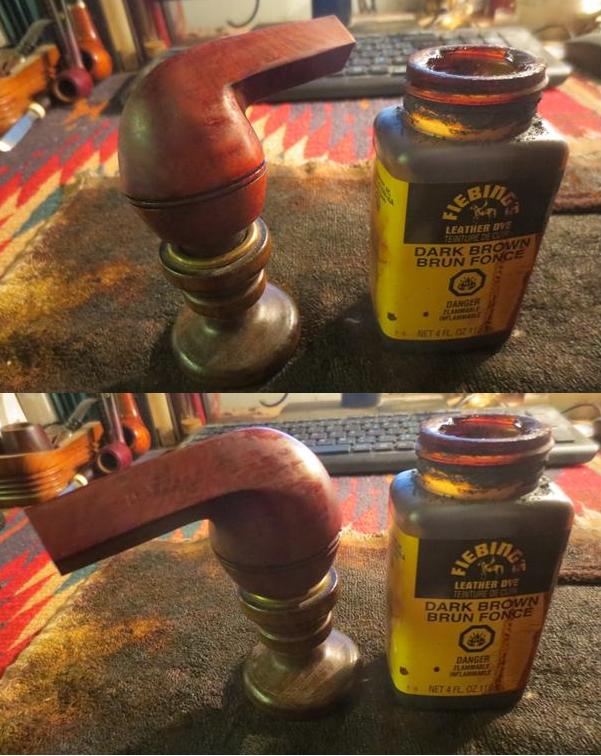
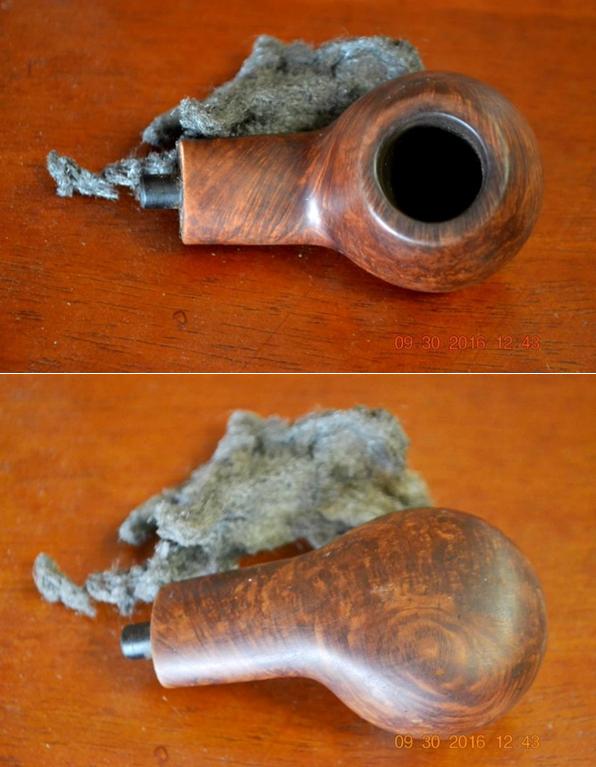
 To re-stain the stummel, I used Lincoln Marine Cordovan, or dark maroon, alcohol-based boot conditioner. You know I flicked my Bic to flame out the alcohol. Afterward I buffed the residual char off with a micro mesh pad of some high number and used the steel wool to take off the excess stain to the point where I was happy.


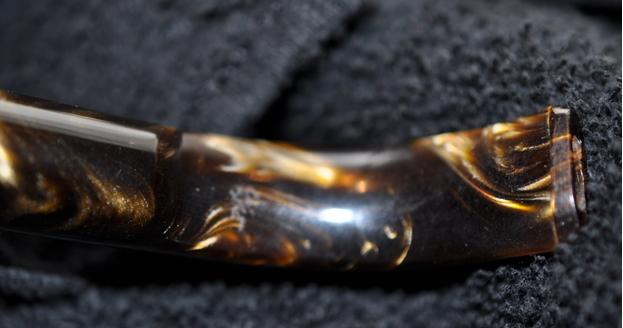
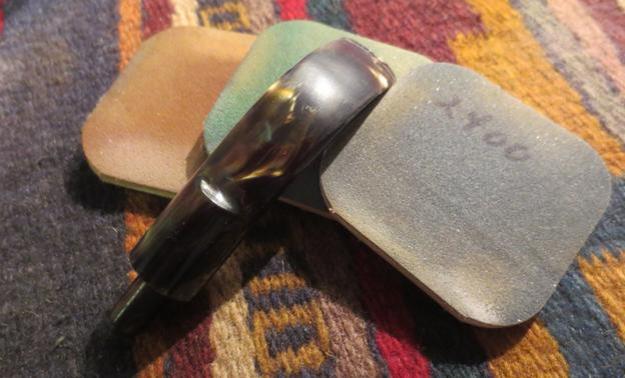
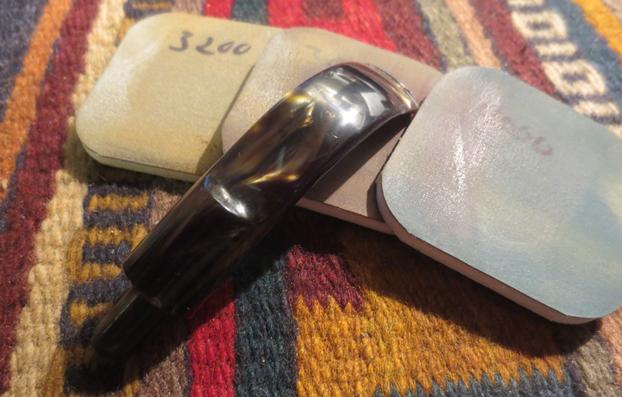
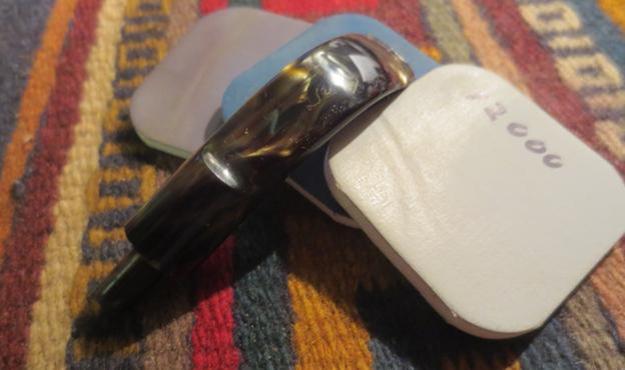
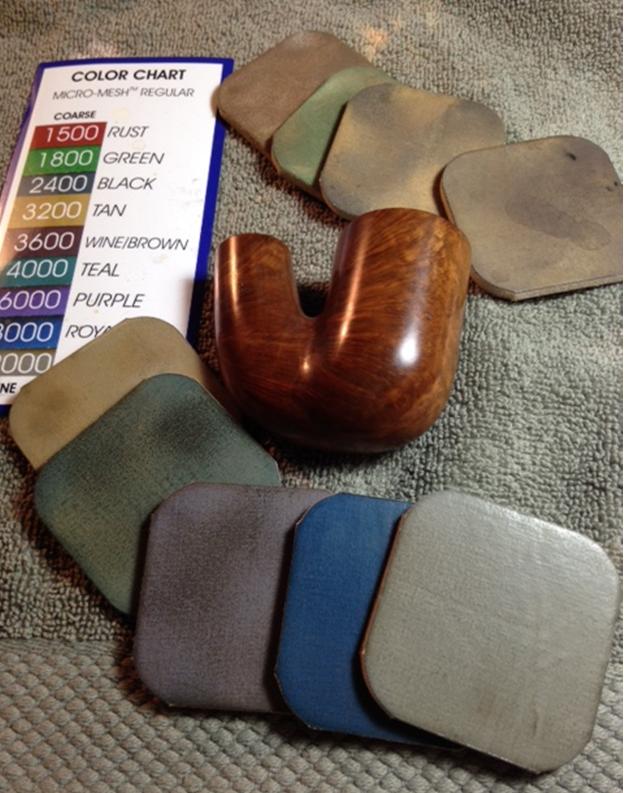
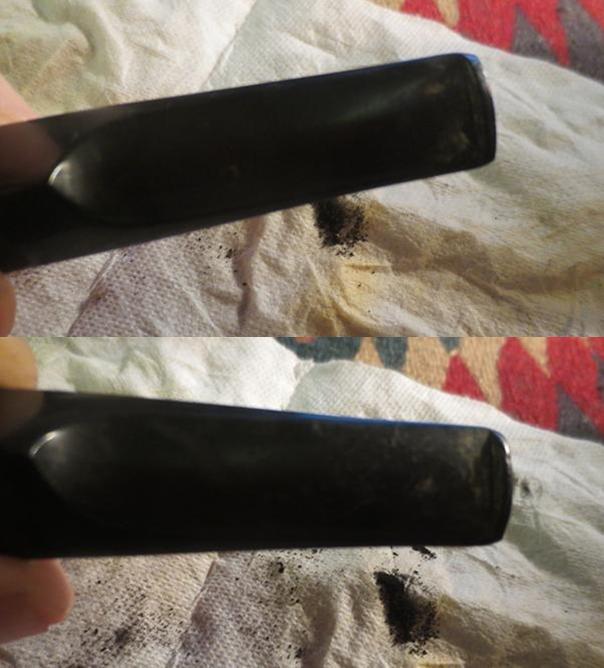
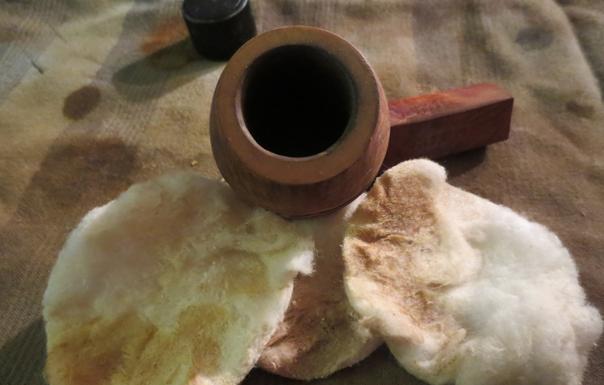
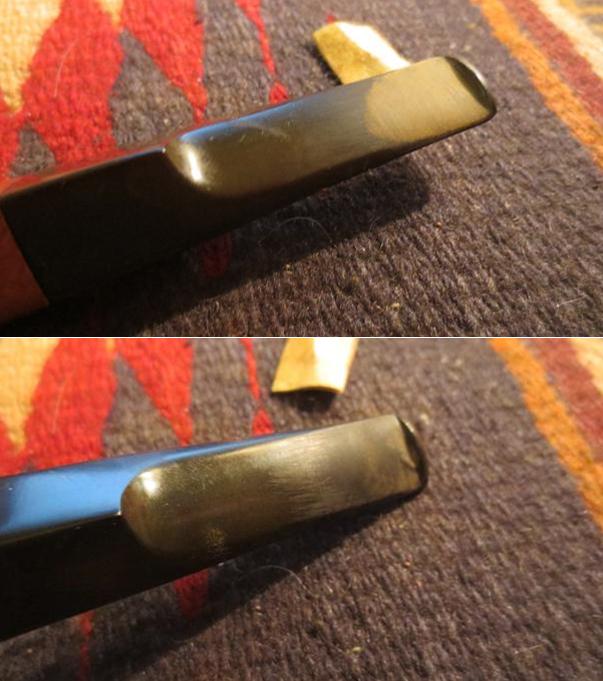
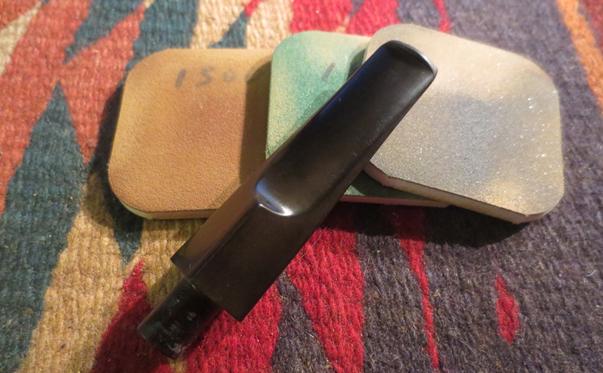
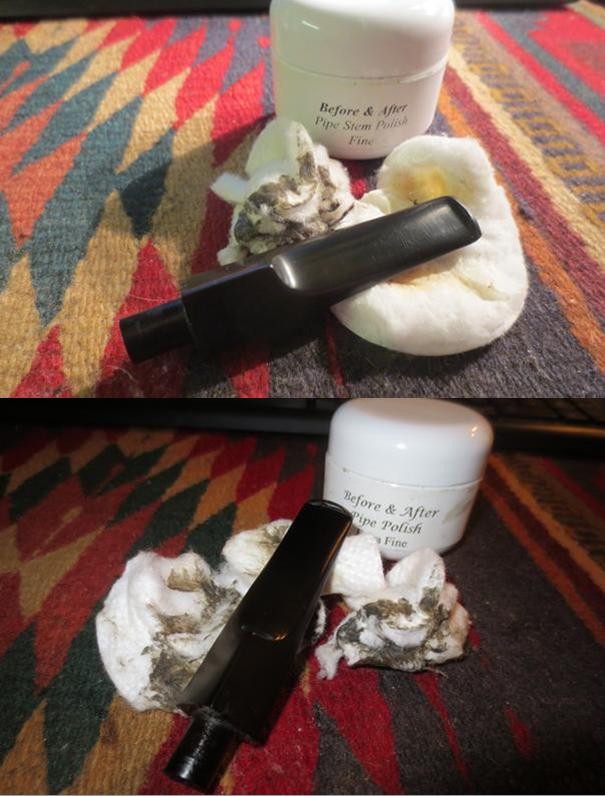
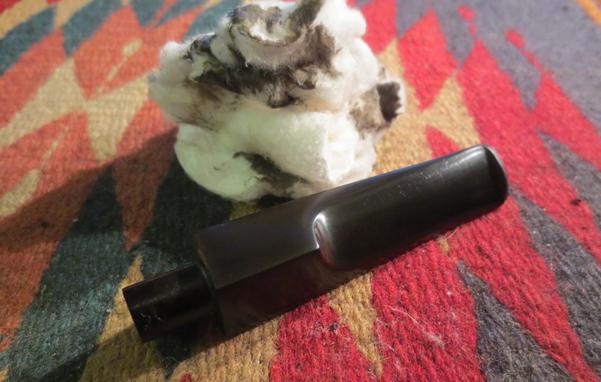
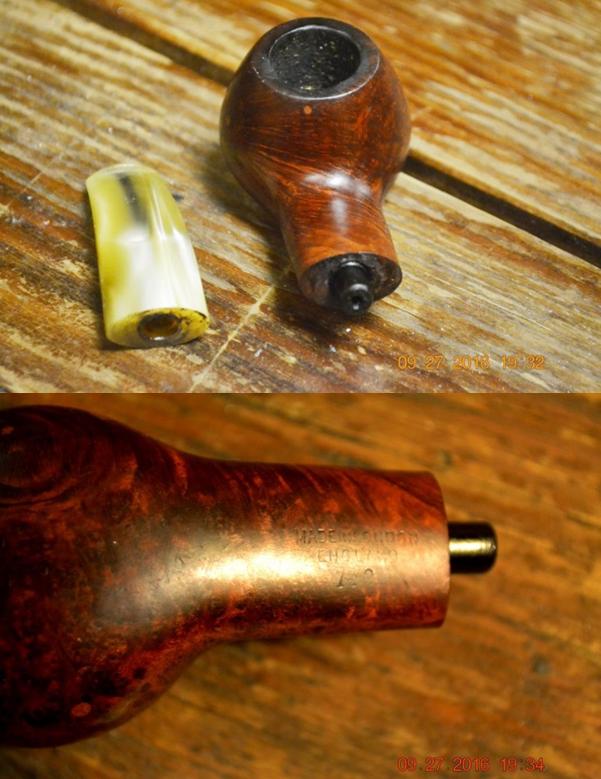
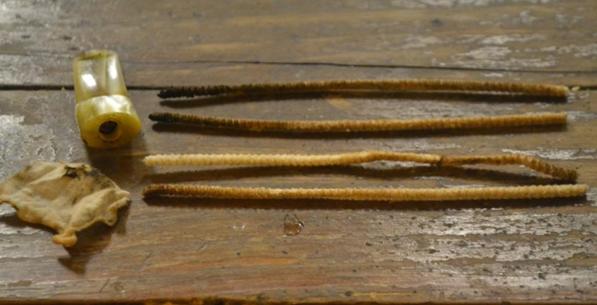
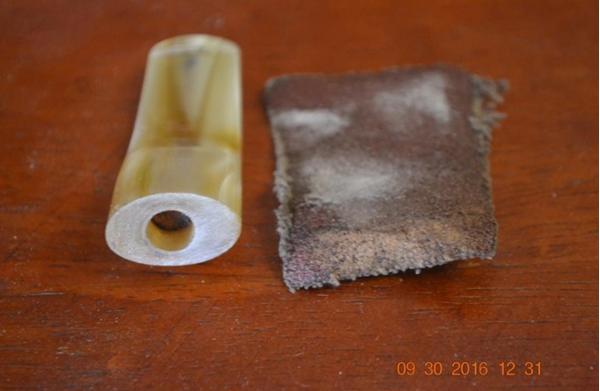
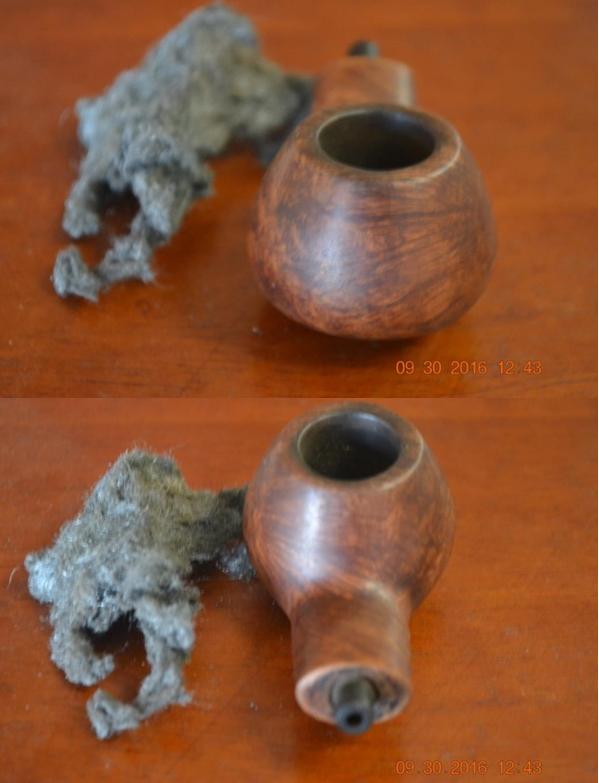
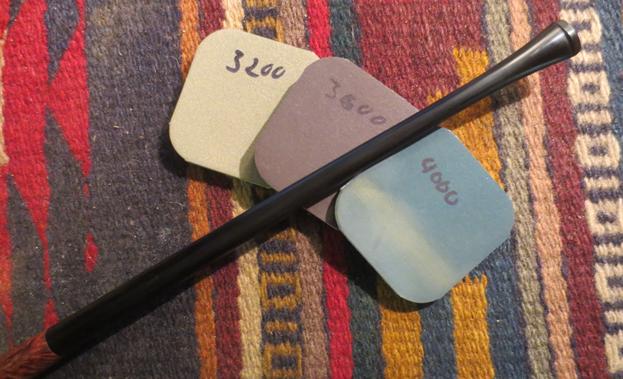
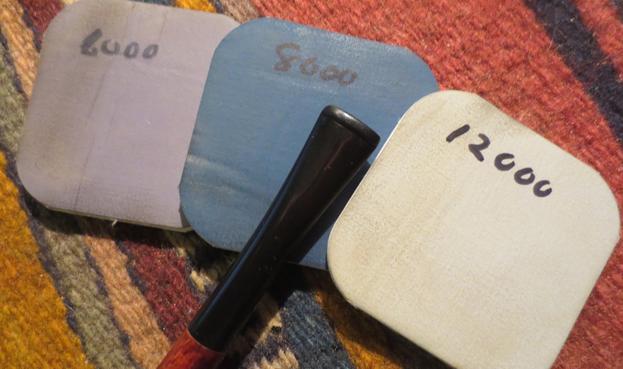
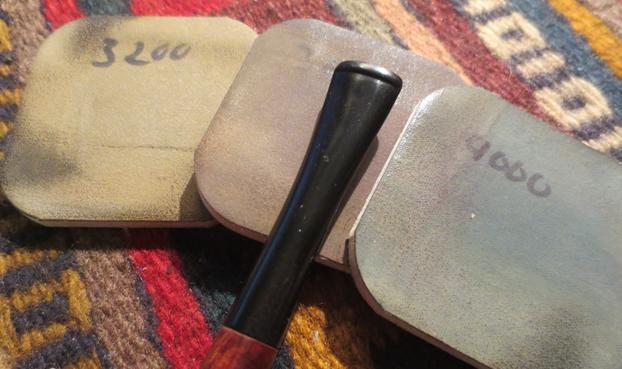
 While the Halcyon II wax soaked in, I considered the bit with its peculiar stinger that seemed to be designed for extra use as a tobacco pick. The peculiarity is the same as those in Dunhill pipes – it is an inner tube. This was often used in pipes by Gubbels. The tube extended into the bottom of the bowl the longer side sat in the bowl bottom and the angled shorter side faced upward. I went over the bit with wet micro mesh from 1500-12000.

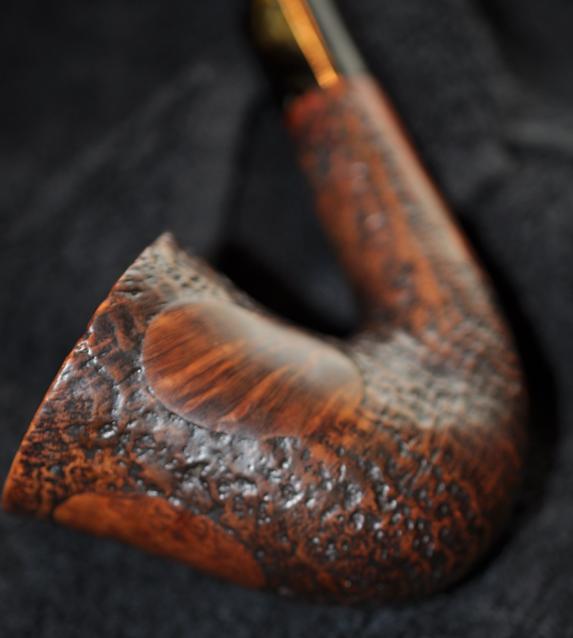
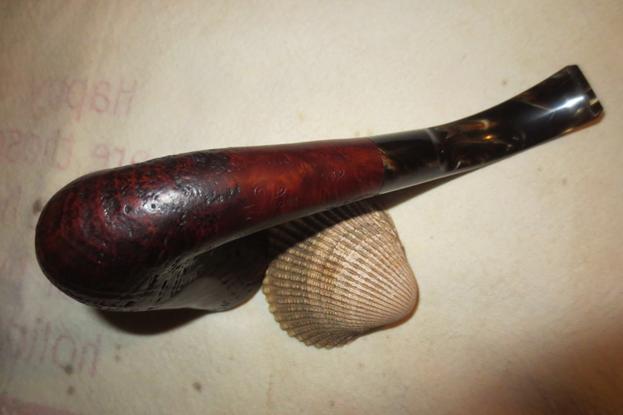
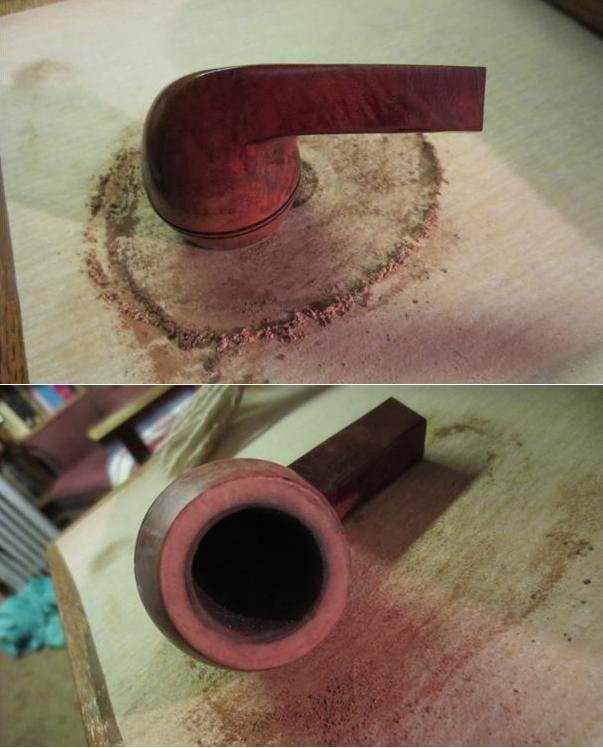
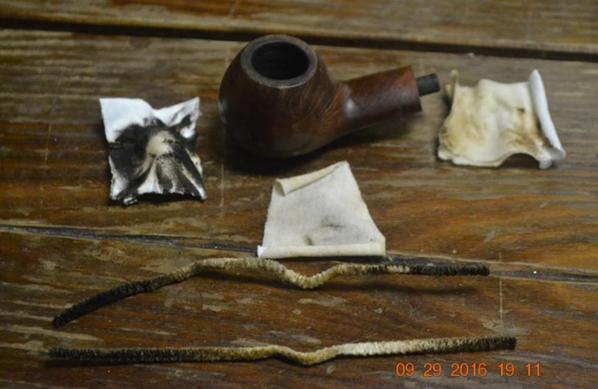
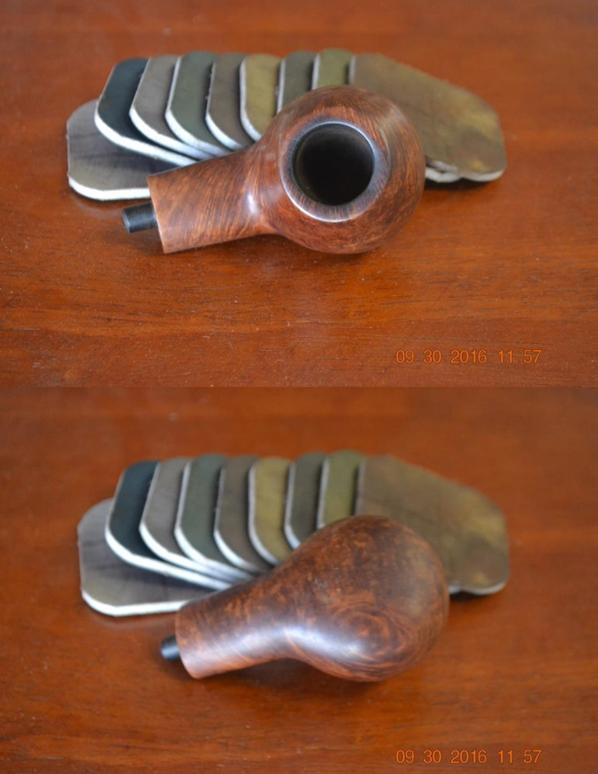
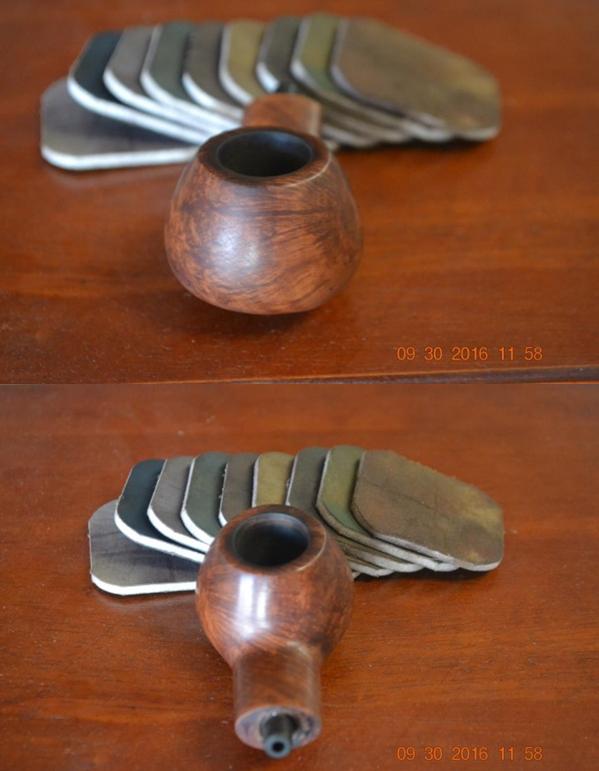
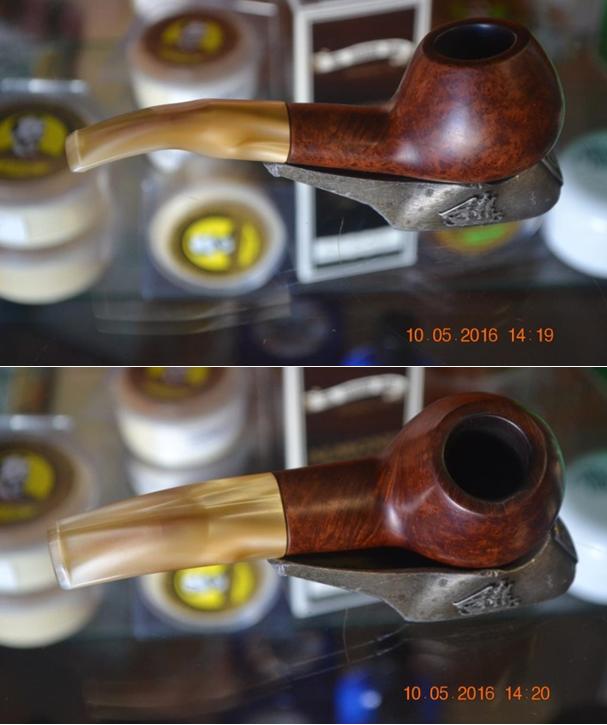
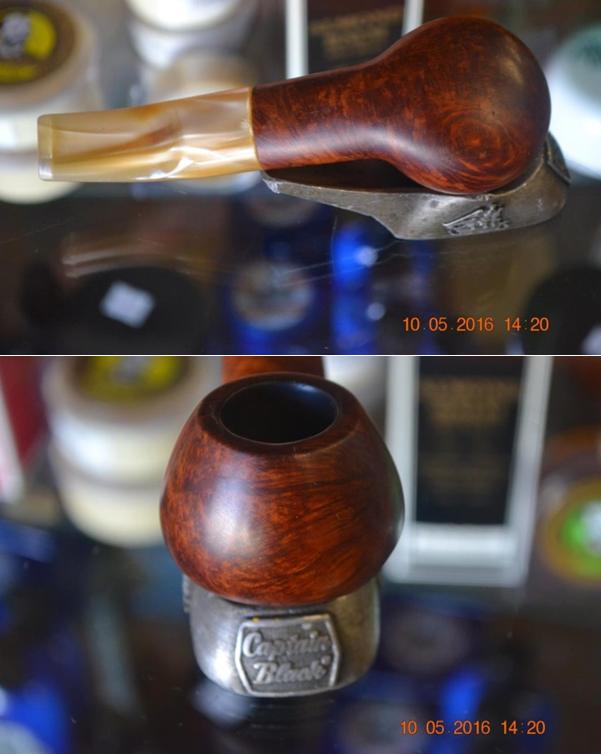
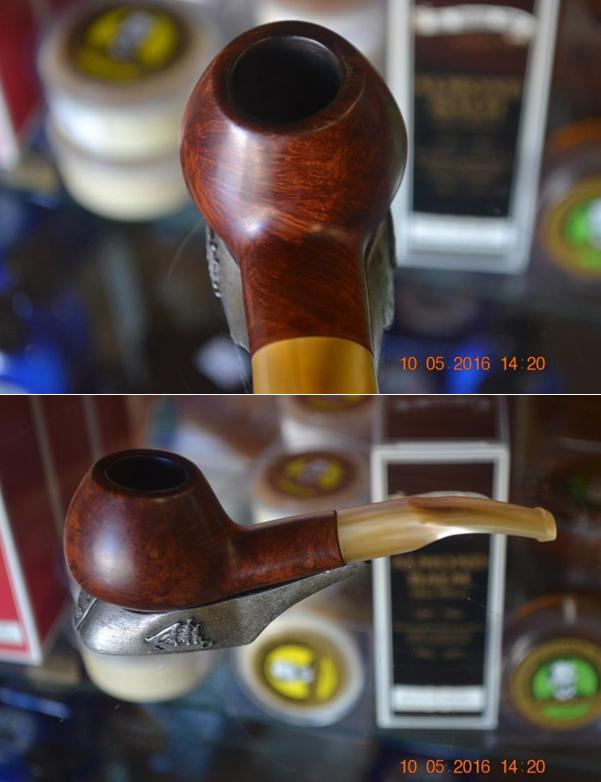
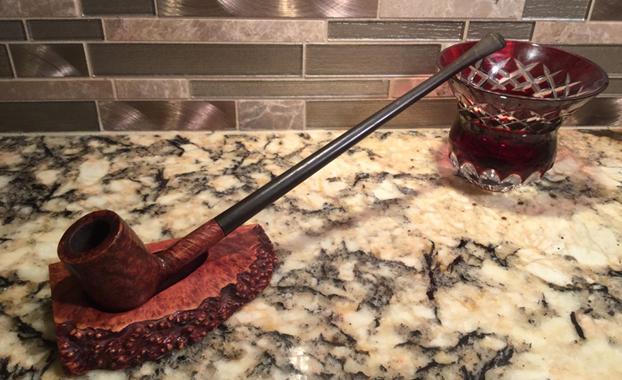
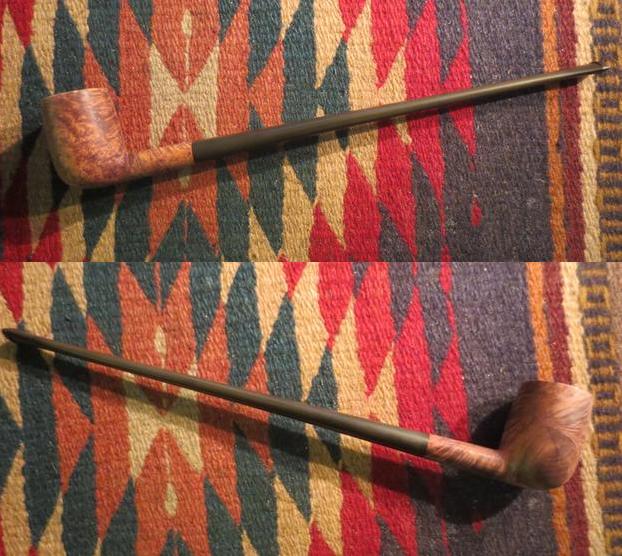
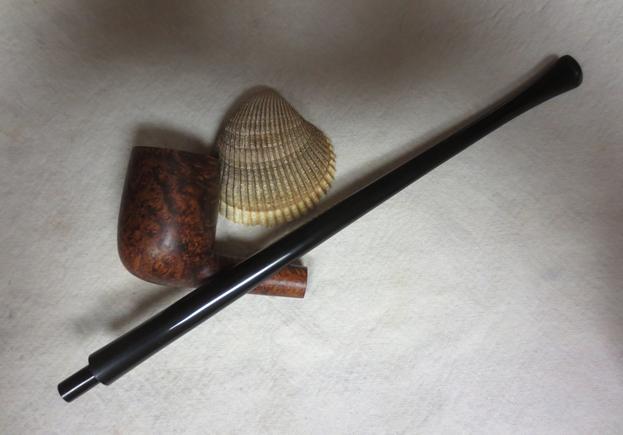
 Using red and White Tripoli and White Diamond on the bit with the electric buffer and just the clean buffer on the wood, the Albertson brandy was finished.


 Photos taken on the front case at Stag Tobacconist
CONCLUSION
Anyone who doubts the high standing of the Gubbels name, consider this. Some left-over Big Ben Barbados natural bent Dublin pipes with exquisite grain, crowned for the occasion with special metal rim fittings, were the 2015 Year Pipes of the Dutch/Belgian Pipe Smokers Forum (PRF, for Pijprokers Forum, the Dutch translation of something that should be obvious). Dhr. van Goor, the fortuitous source of all of my factual information concerning Gubbels and a member of PRF, wrote in the second blog below: “Just over 60 pipes were available and when forum-members could order them they all were gone in no time! To be perfectly honest, I did not apply for one. I simply did not like the shape, but came to regret it later.” And for some of the ladies, there are these Big Ben Pipes, averaging 5” long and very stylish.
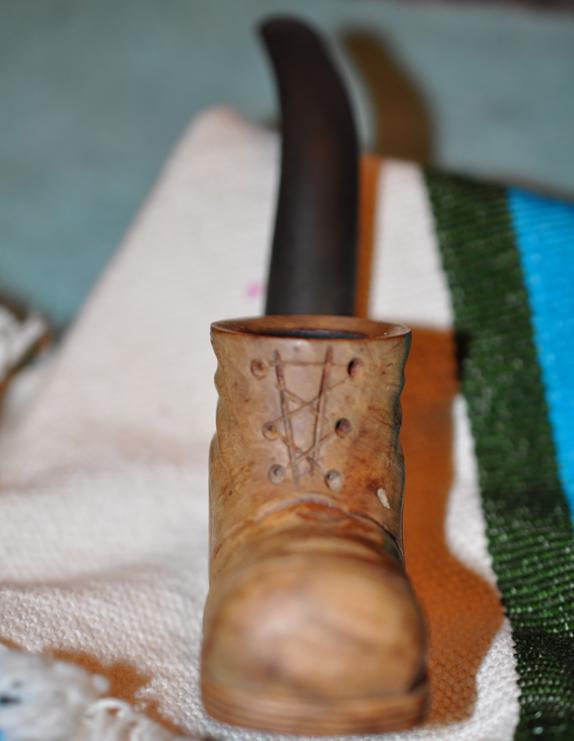
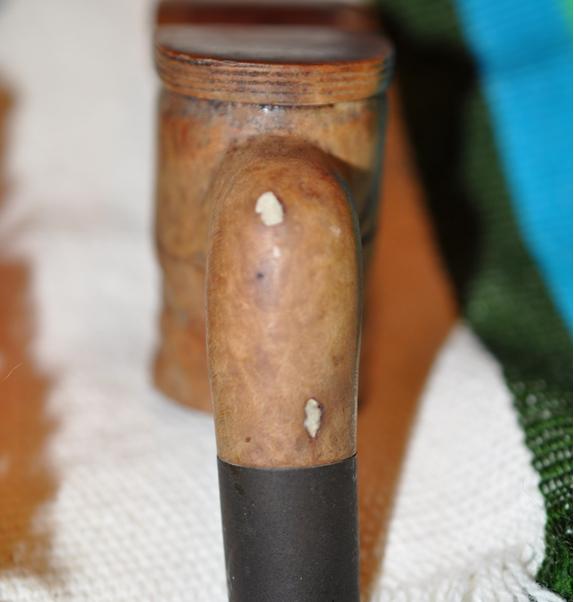
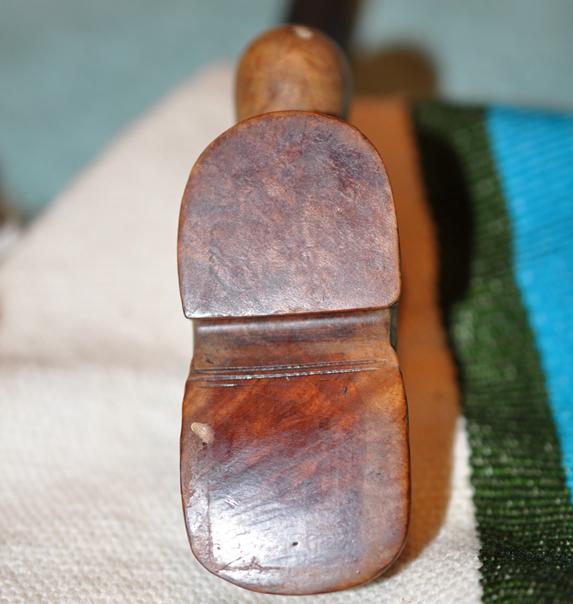
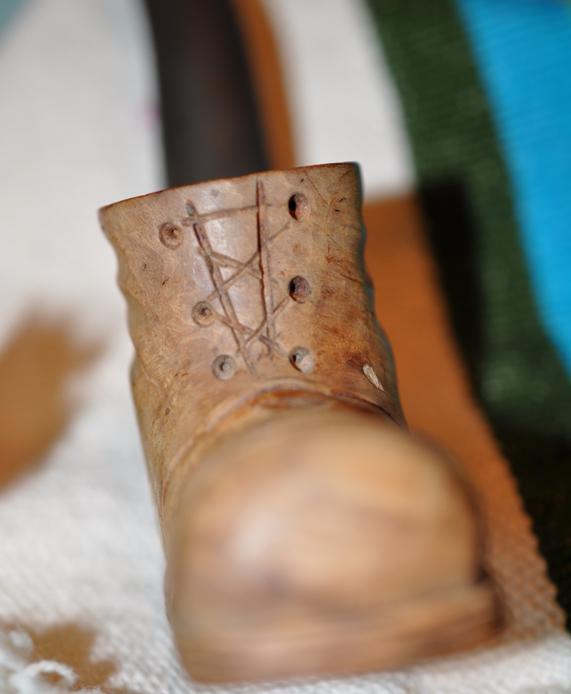
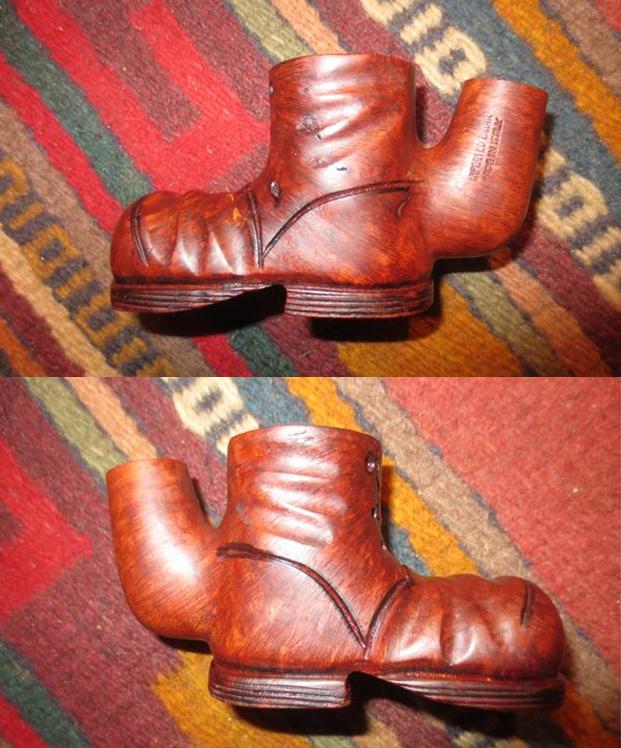
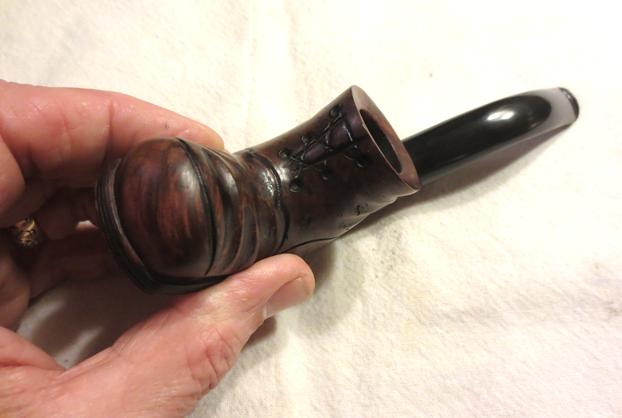
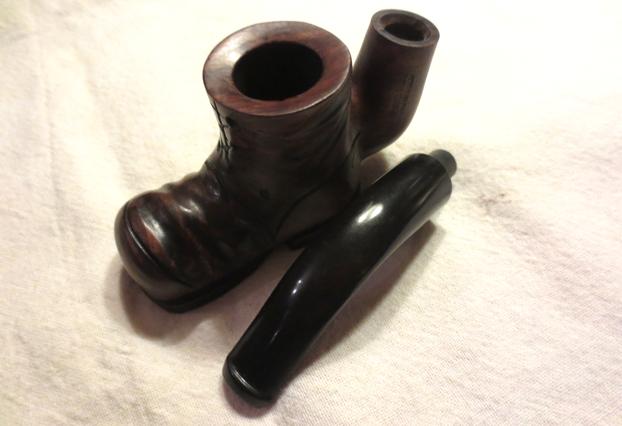
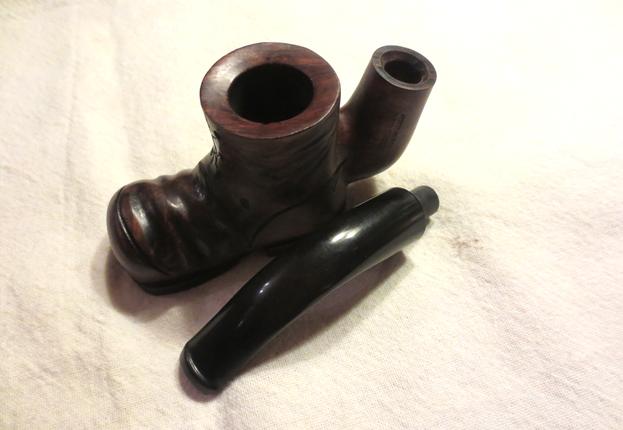
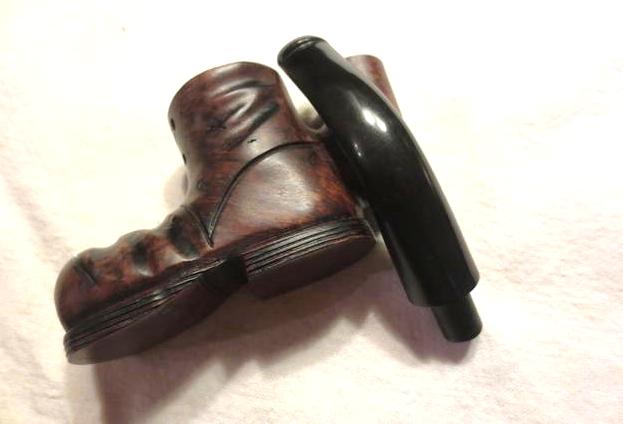
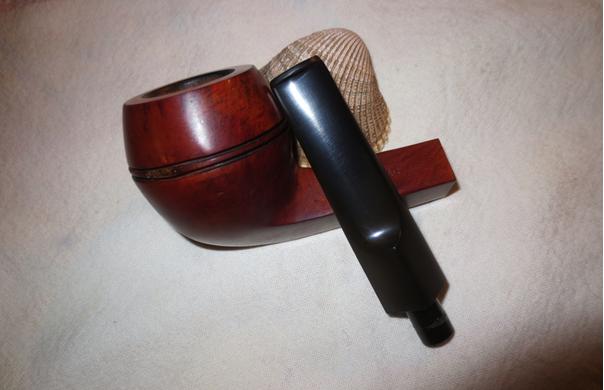
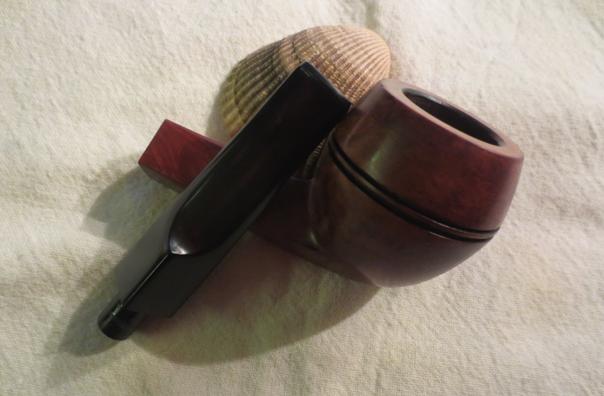
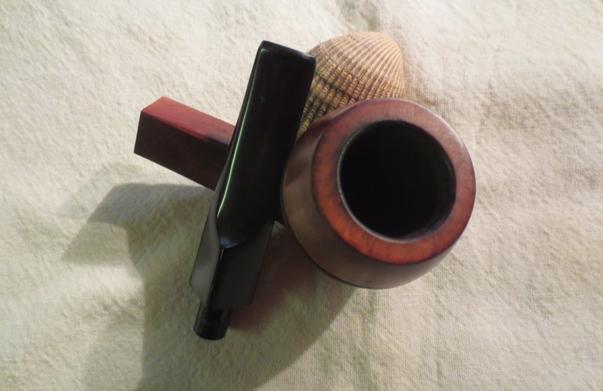
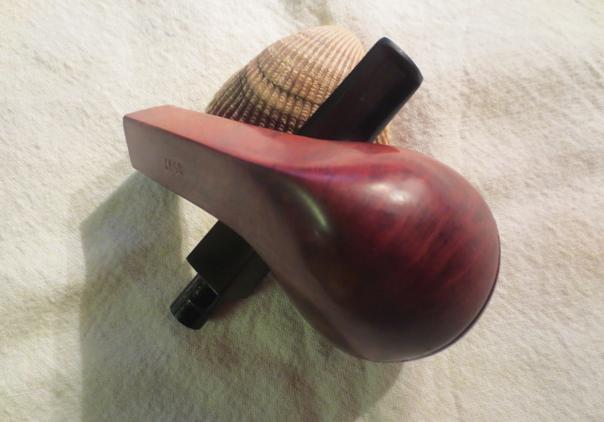
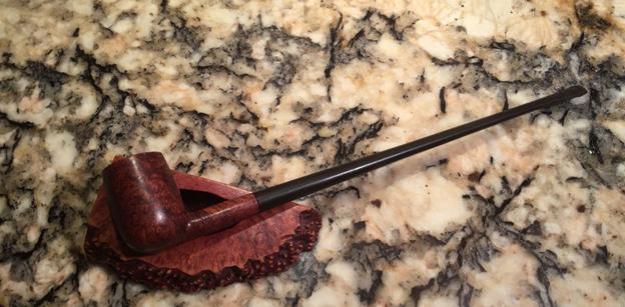
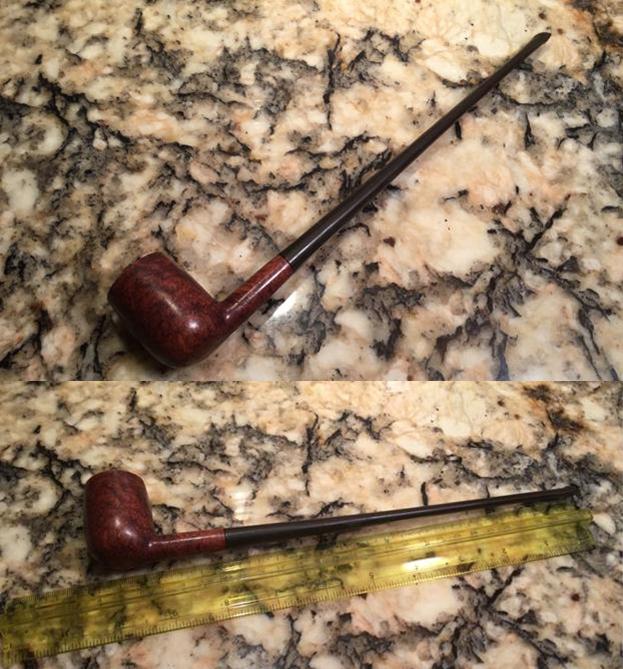
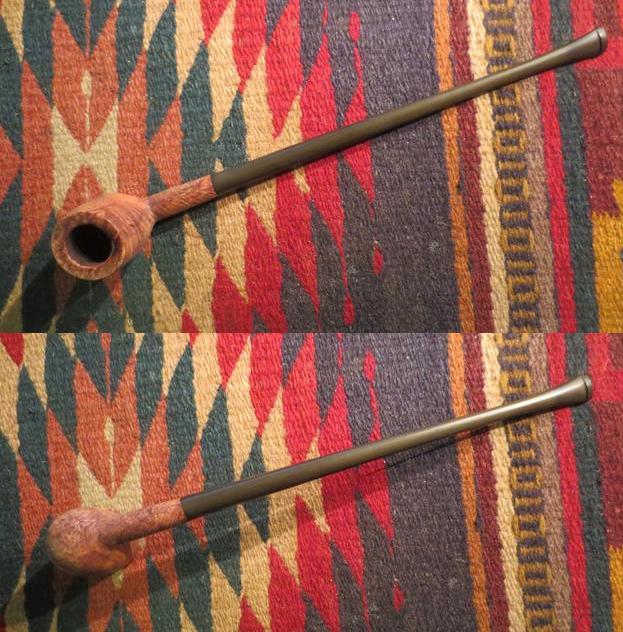
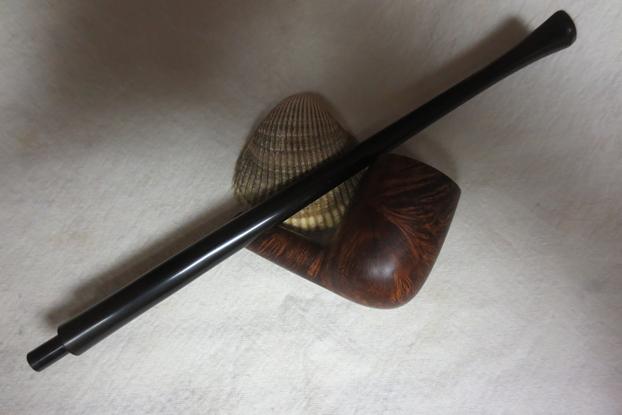
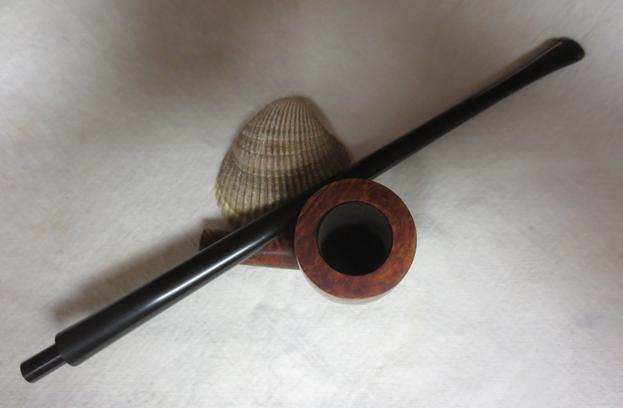
 On the other hand, if you prefer something of still smaller proportions, there is the Albertson brandy described above, which is the smallest conventional tobacco pipe I have ever owned. It measures 4¼” long; the bowl is 1½” high; the rim is 1” across, and the chamber diameter is ¾” x 1⅞”. In other words, perfect for the female pipe aficionado who prefers a petite and light yet elegant pipe. And it’s for sale on my new webstore noted above!
SOURCES
http://www.eyemagazine.com/feature/article/the-dictionary-of-visual-language
https://www.amazon.com/The-Dictionary-of-Visual-Language/dp/0140511172
http://www.pipephil.eu/logos/en/logo-a3.html
http://www.pipephil.eu/logos/en/logo-h3.html#hilson
https://pipedia.org/wiki/Albertson
http://www.gubbelspipes.com/
http://pipesmagazine.com/blog/pipe-news/maker-of-big-ben-porsche-hilson-pipes-declares-bankruptcy/
**https://dutchpipesmoker.wordpress.com/tag/gubbels/
**https://dutchpipesmoker.wordpress.com/2014/12/16/2015-prf-pipe-made-by-big-ben/
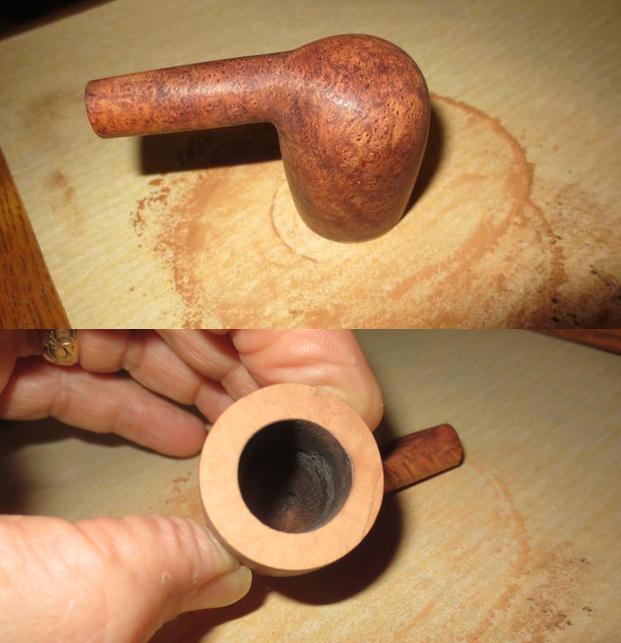
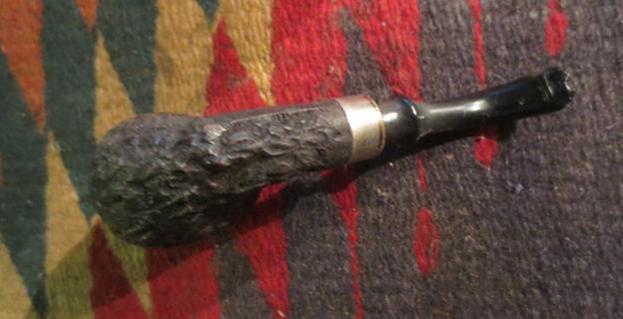
 The first pipe, the Well Pipe was a fascinating little fellow. It is 3 ½ inches long, 1 ½ inches tall and the diameter is 1 inch. The chamber diameter is ½ inch. Proportionally, the pipe is very nicely done. The metal rim is oxidized. The bowl had a light cake that my brother had taken out. The stem was cast rubber with a typical P-lip type stem though the airway is directly in the end. The stem was chewed and there was a chunk out of the side of the stem below the button on the left side.
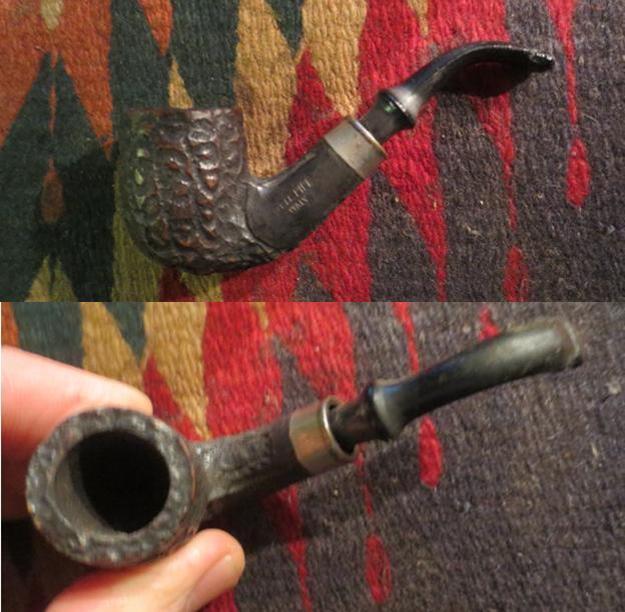
 I took some close up photos of the stamping on the side of the shank and the condition of the stem. The bowl and stamping were in great shape. The nickel band was dirty and oxidized. The stem has a chunk missing out of the end of the stem. I have circled it in in red.
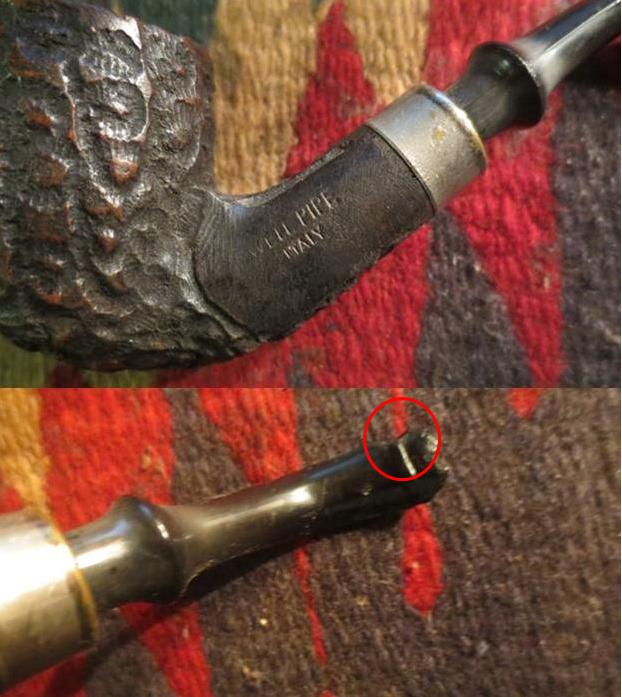 The second pipe, the Tom Thomb prince was in decent shape. The bowl had a light cake that my brother reamed before sending it to me. The finish was peeling off the bowl on the right side and the bottom of the bowl. The rim had a tar buildup and some cake over flow. It is 4 inches long, 1 inch tall and the diameter is 1 inch. The chamber diameter is ½ inch. Proportionally, the pipe is very nicely done. The vulcanite stem was oxidized and there were two blisters on the top and bottom left side ahead of the button.
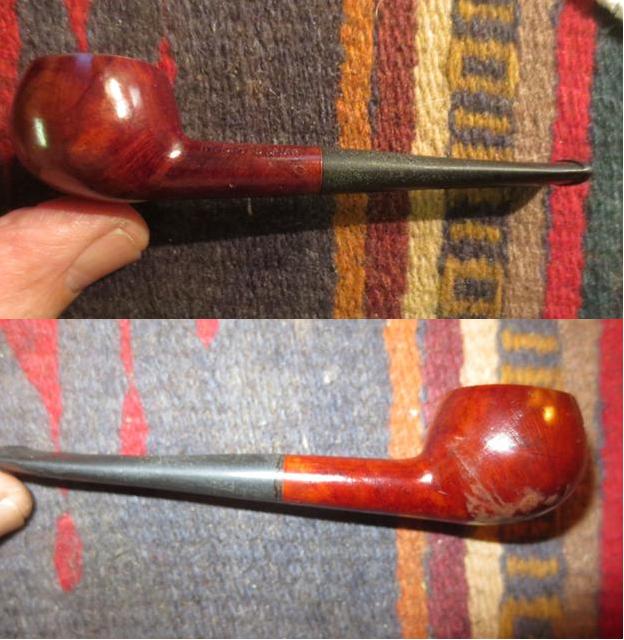
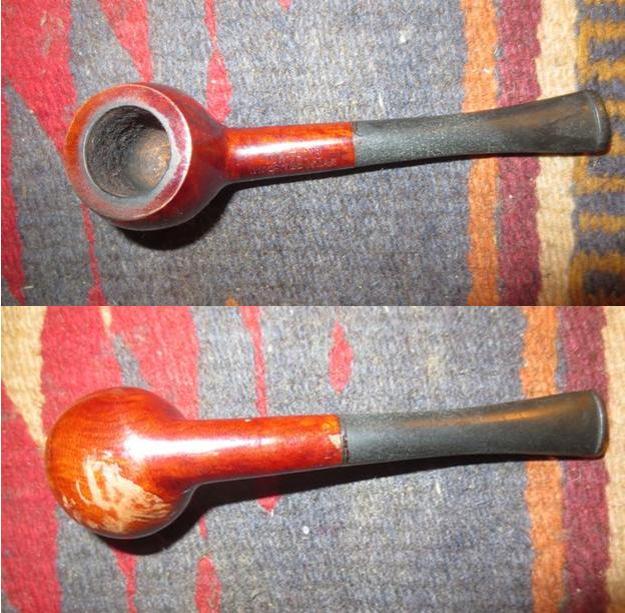 I took a close up photo of the rim to show the condition and the stamping to show its location on the shank. You can also see the oxidation in the vulcanite stem.
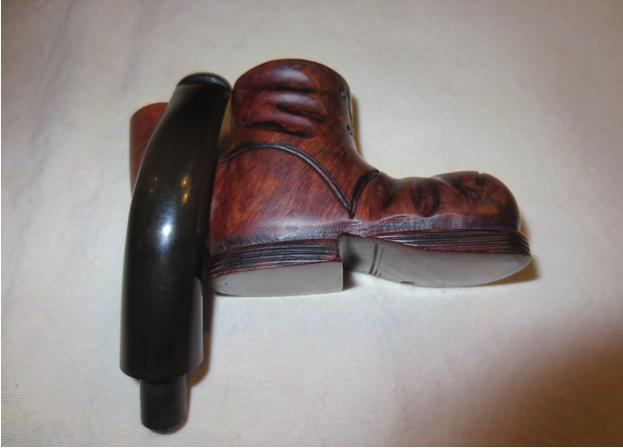
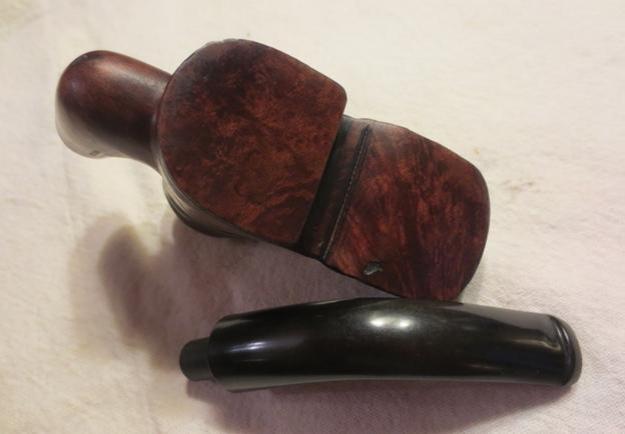
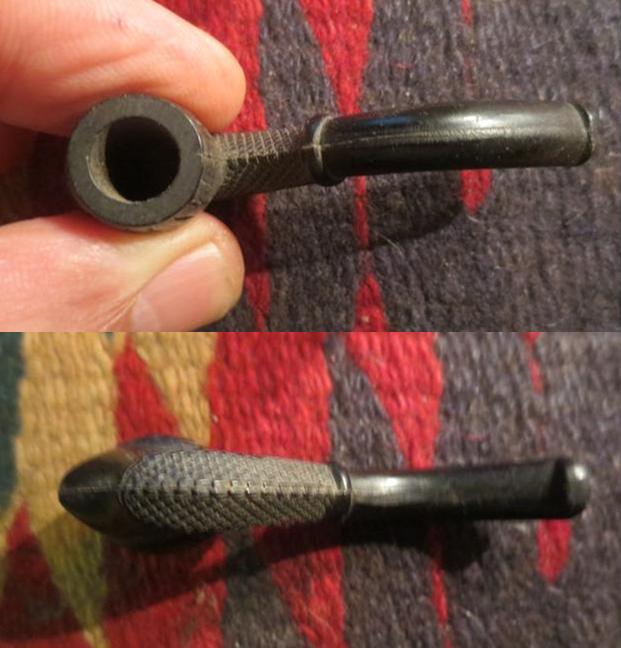
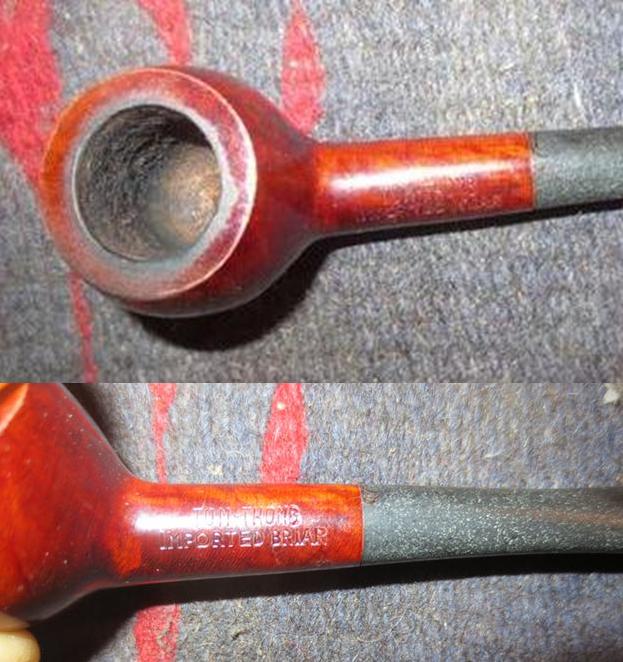 The third pipe was the unique pipe Bakelite figural head of a man. The carved face is quite well done. It is a cast as the pipe has a seam on the top of the stem across the bowl and down the front and underside of the bowl and shank. It is 2 1/2 inches long, 3/4 inch tall and the diameter is 1/2 inch. The chamber diameter is 1/4 inch. The stem and bowl are pristine. The bowl is unsmoked. There is a cross hatched pattern on the shank. The casting is quite well done.
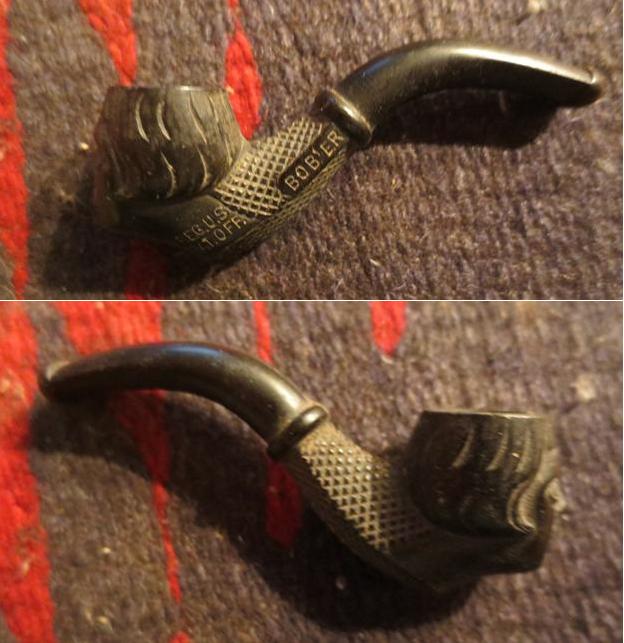
 I took some close up photos of the stamping on the pipe. The first photo shows the left side shank stamp shows up clearly as Bob’er. The second photo shows the stamping on the left side of the neck and chin of the figural. The Reg.US.Pat.Off. stamping is very clear. The final photo shows the stamping on the right side neck and chin. Again the Des.Pat. 71062. is very clear.
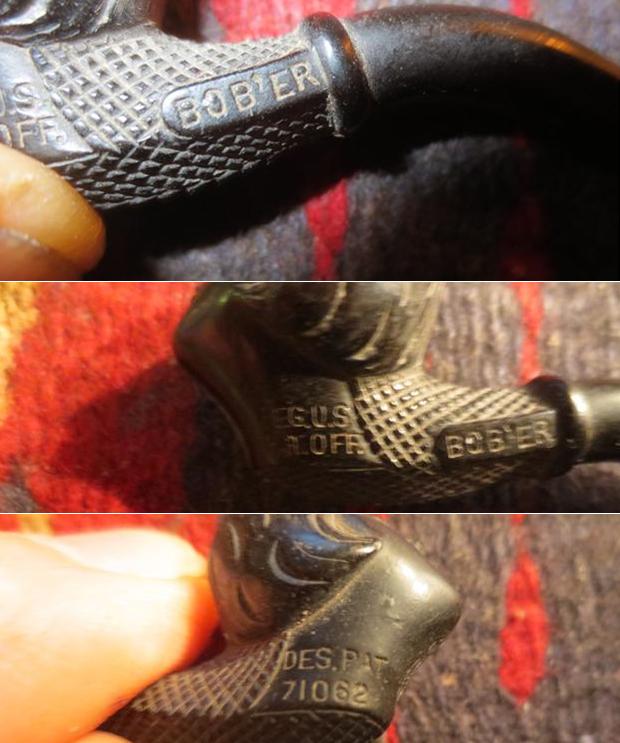 I wiped down the bowls with alcohol on cotton pads. I scrubbed the prince with acetone on a cotton pad. I was able to remove the grime and build up on the Well and the Bob’er. The acetone barely dented the surface of the peeling finish on the Tom Thomb.
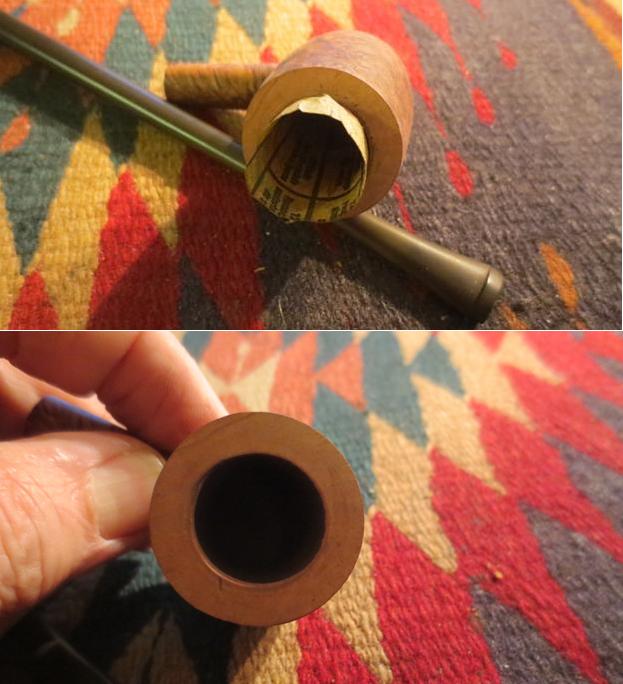
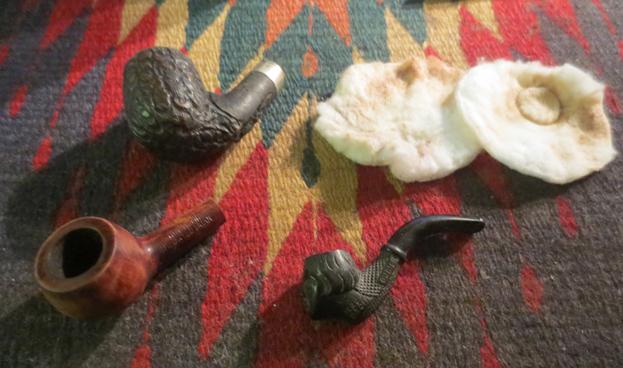 I started working on the stem of the Well pipe. I took a photo of the missing chunk. I cleaned the area with alcohol and then filled it in with black super glue using a tooth pick to place it in the divot.
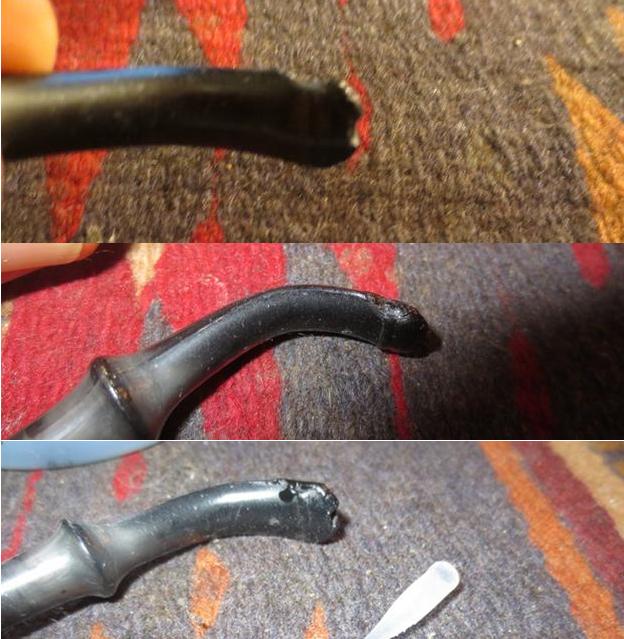 Once the repair had cured I sanded it with 229 grit sandpaper and shaped it with a needle file. I wanted it to match the right side of the stem and look like it had originally. I also shaped the P-lip on the top and bottom sides.
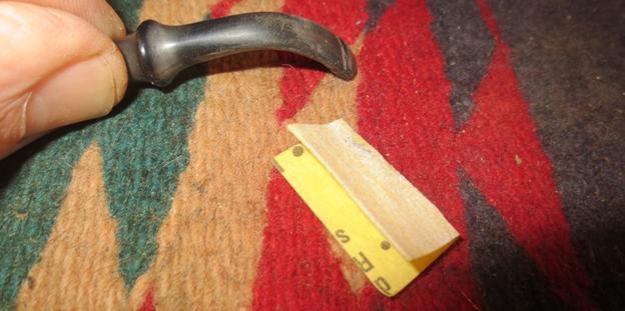 I wet sanded the stem with 1500-2400 grit micromesh sanding pads and dry sanded it with 3200-12000 grit pads. After each set of three pads I rubbed the stem down with Obsidian Oil. After the final sanding of the 12000 grit pad I gave it a final coat of oil and set it aside to dry.

 I buffed the stem and the bowl with Blue Diamond and gave them multiple coats of carnauba wax. I buffed it with a clean buffing pad and then by hand with a microfibre cloth. The finished Well pipe is shown in the photos below.
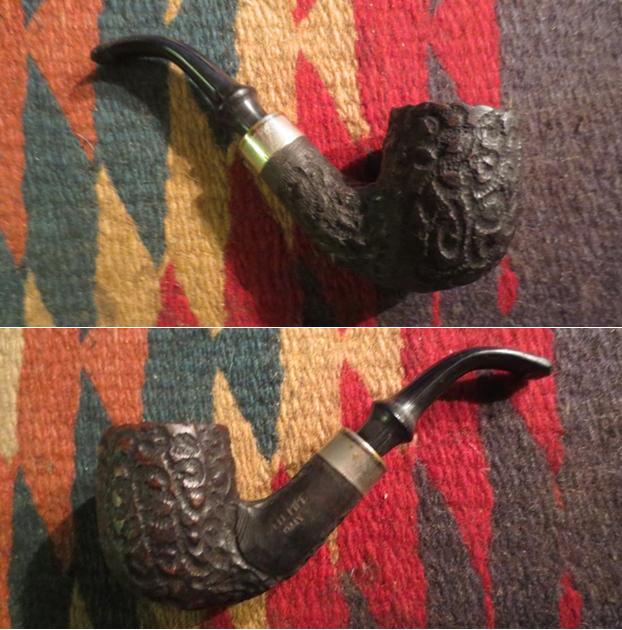
 With the Well Pipe finished I focused on the Tom Thomb prince. I started by sanding out the blisters on the stem. On both the top and the bottom there were blisters on the left side near the button. I forgot to take a photo of the bubbles but after I had started sanding it with 220 grit sandpaper I took the next photo. I sanded out the bubbles and then wet sanded the stem with 1500-2400 grit micromesh sanding pads. I dry sanded it with 3200-12000 grit sanding pads. I rubbed it down with Obsidian Oil after each set of three pads and let it dry after the last pad.

 I sanded off the finish on the bowl and shank avoiding the stamping. I wiped it down with acetone on cotton pads to remove the remaining finish. I stained the pipe with Danish Oil and Cherry stain.
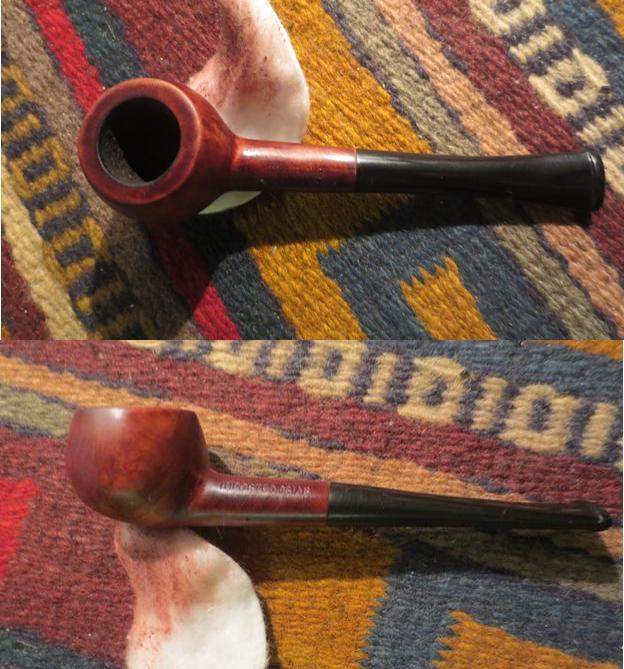
 I buffed the pipe and stem with Blue Diamond on the wheel and gave it multiple coats of carnauba wax. I buffed it with a clean buffing pad and then by hand with a microfibre cloth. The finished Tom Thomb pipe is shown in the photos below.
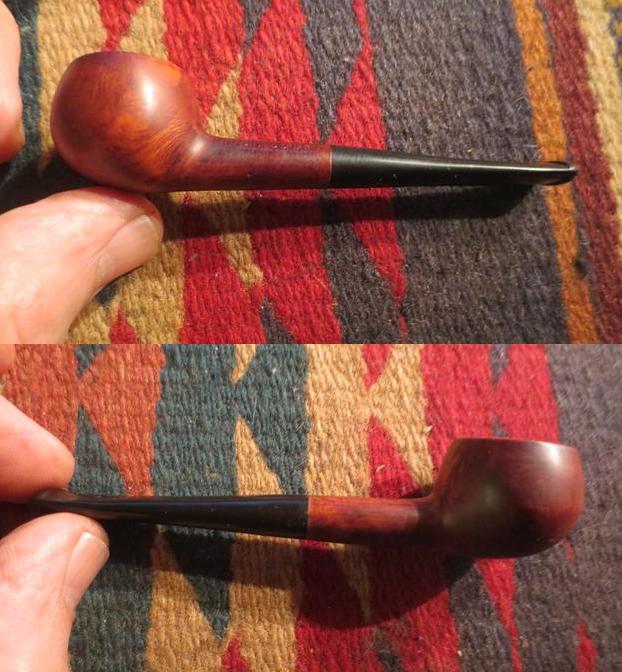
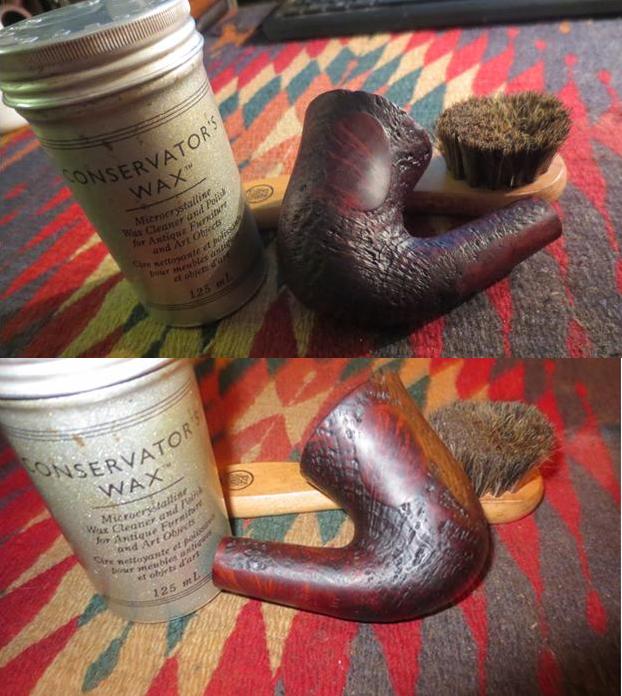
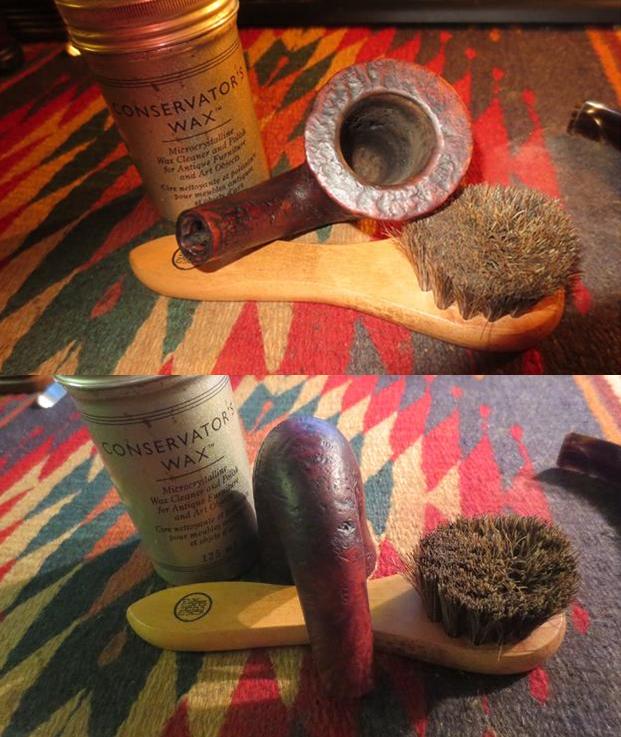
 The last pipe, the Bakelite pipe did not take a lot of work. I gave it a coat or Conservator’s Wax and hand buffed it with a shoe brush and a microfibre cloth. The finished pipe is shown in the photos below.
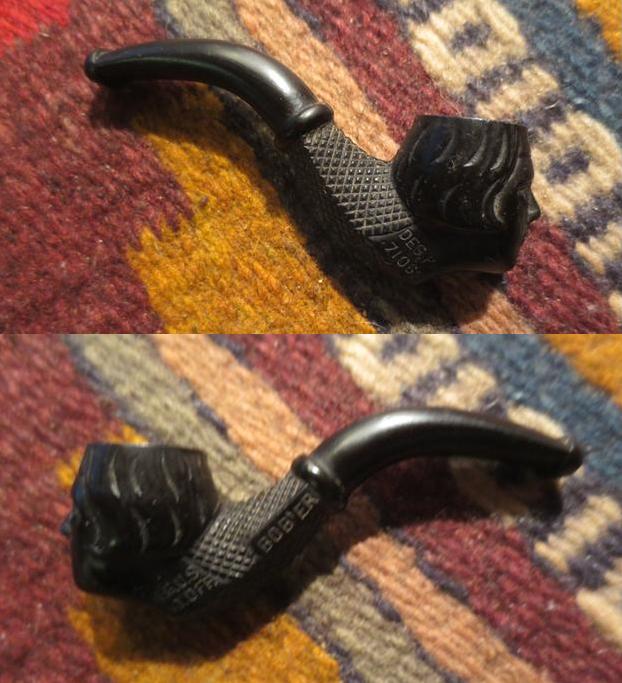
 I thought I would take some photos of the finished lot. The tiny pipes shine with a new sparkle. As I look at them I wonder if this is what they looked like when the salesmen carried to the pipe shops to sell orders for year’s pipes. Thanks for looking.