Tag Archives: Comoy’s The Everyman London Pipe

Fresh Life for The Everyman London Pipe 215 Bent Billiard


Blog by Steve Laug

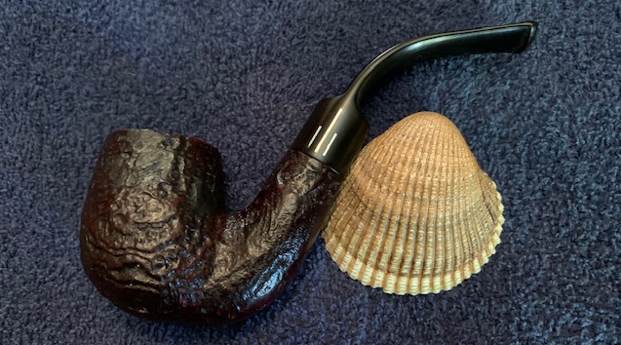
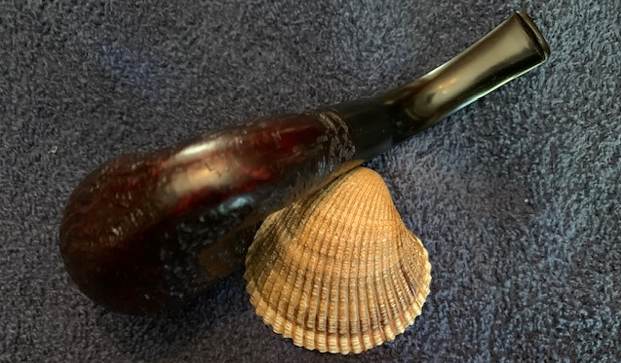
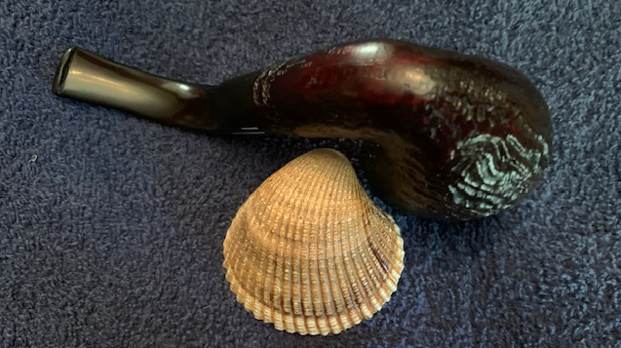
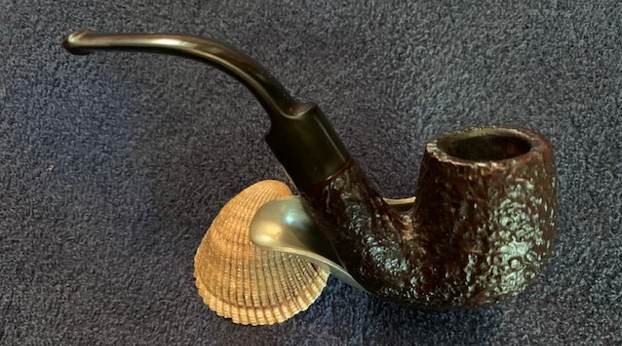
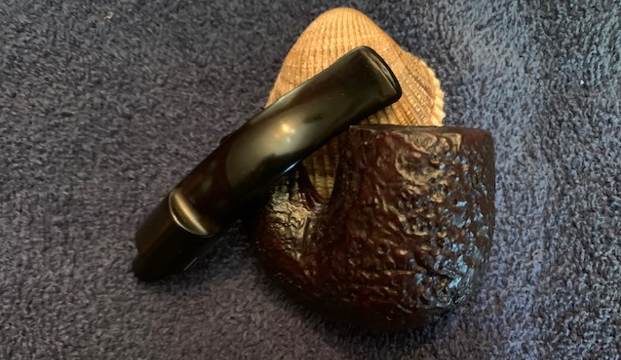
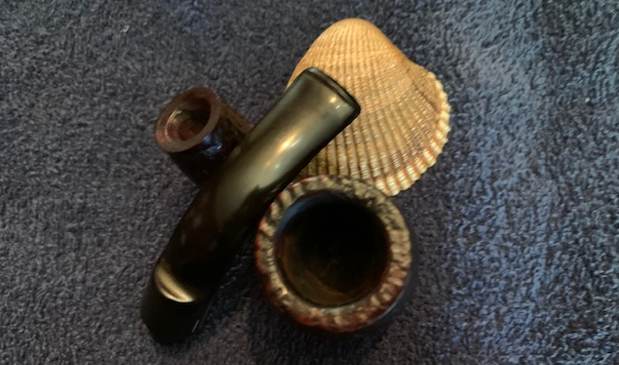
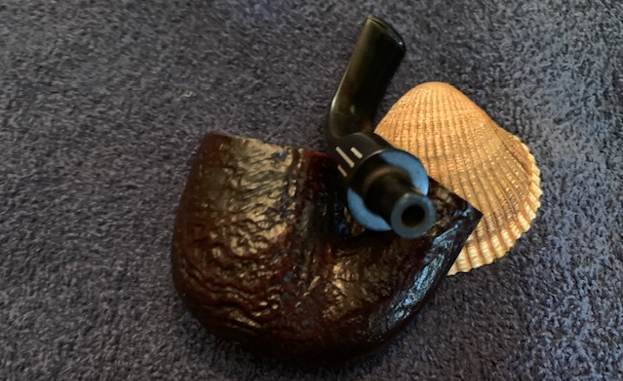
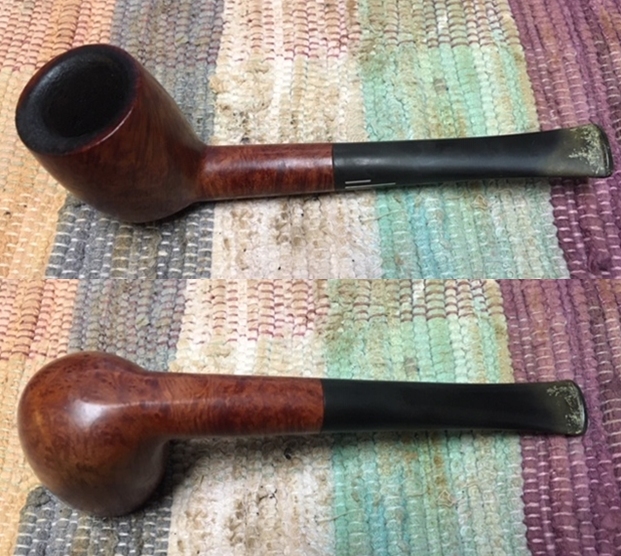
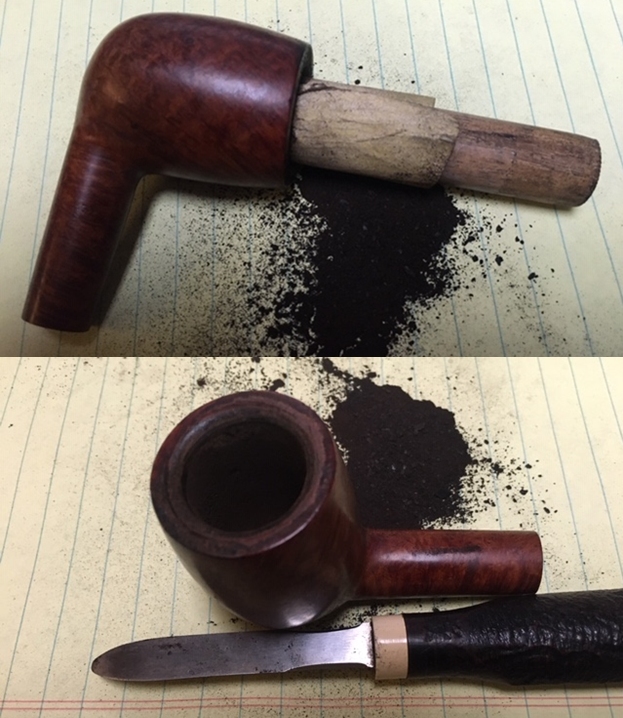
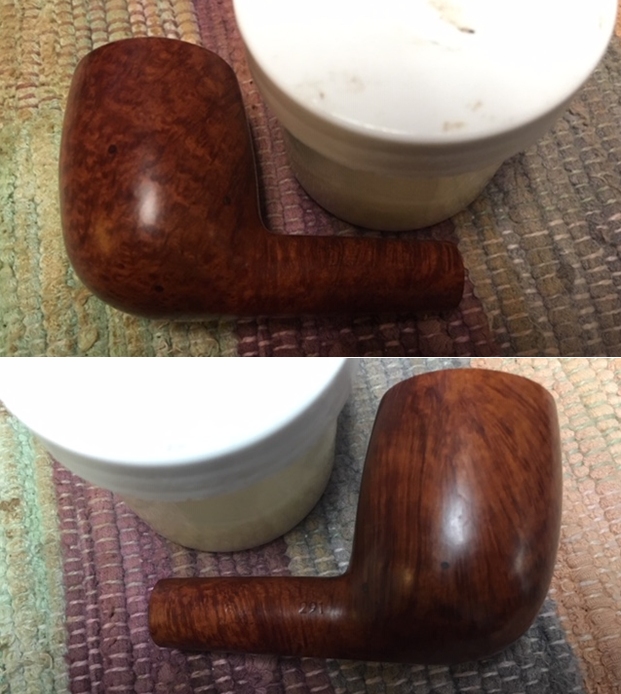
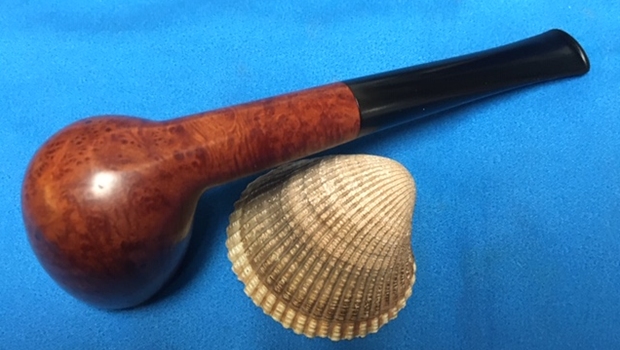
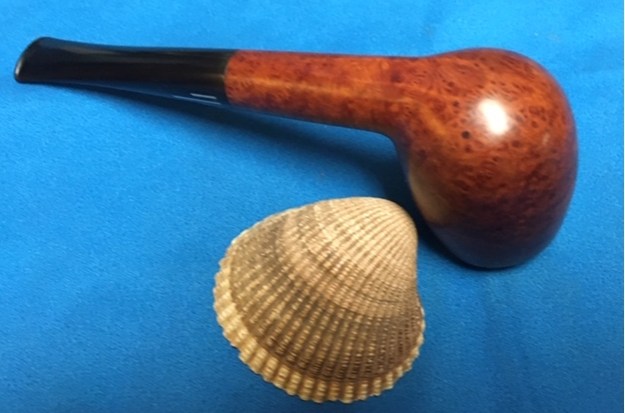
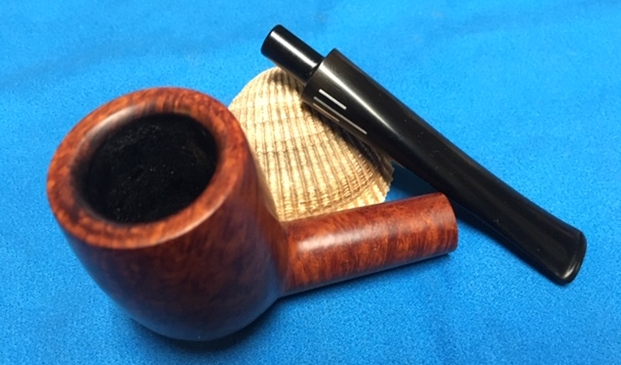
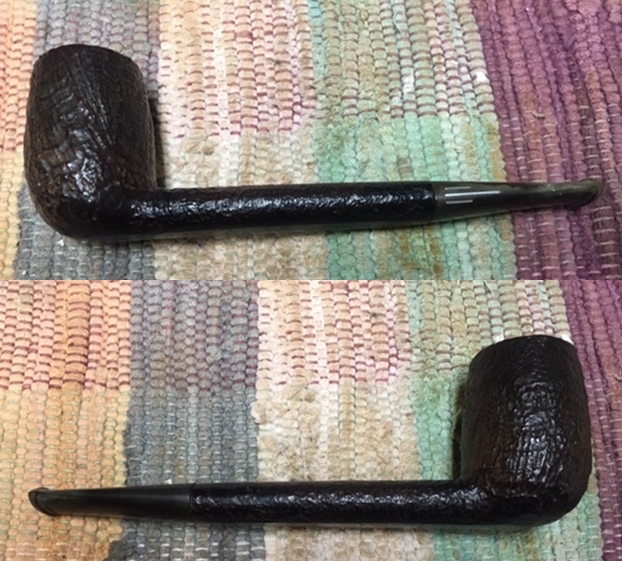
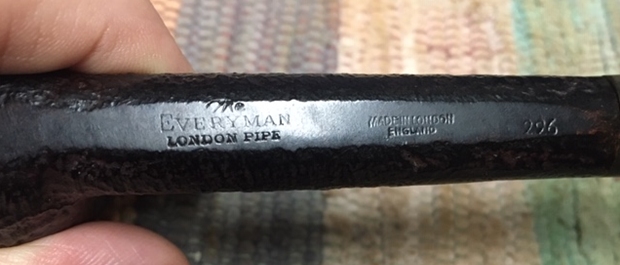
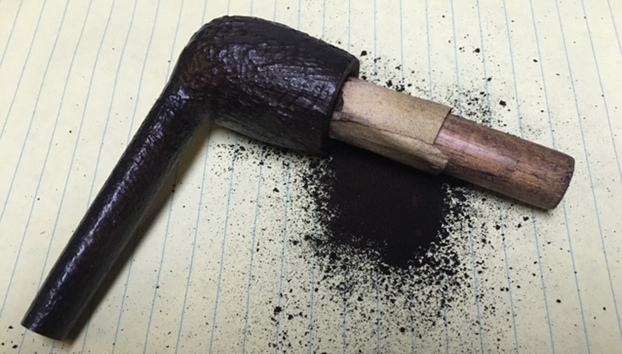
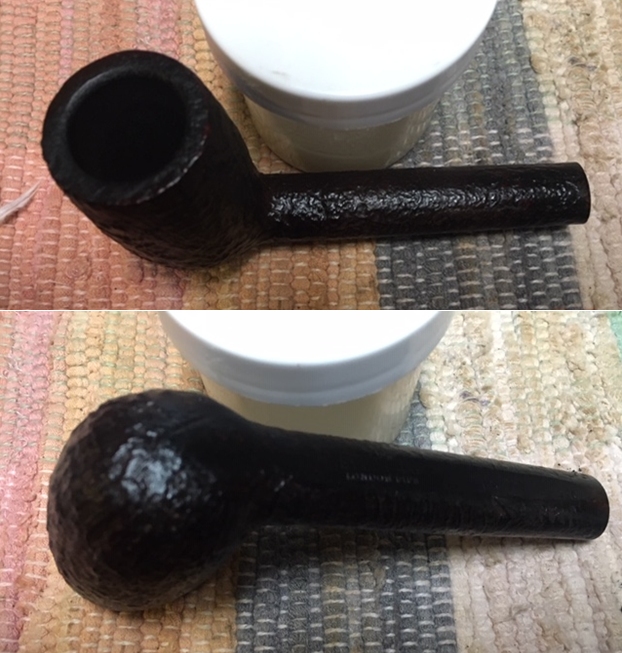
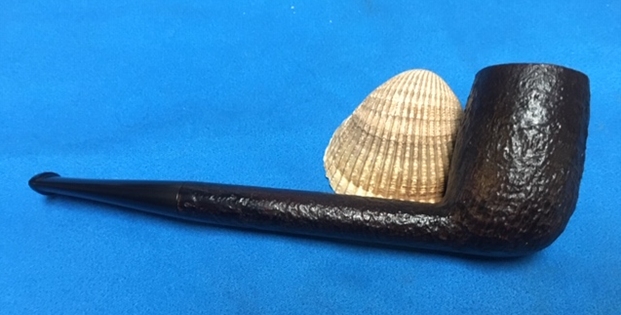
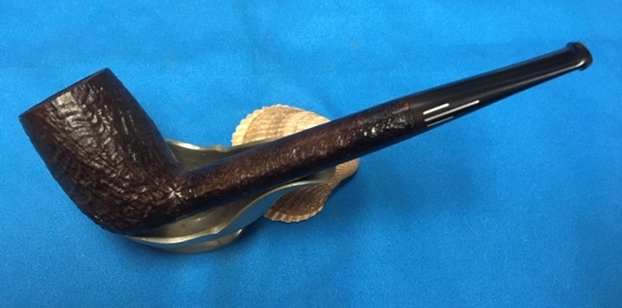
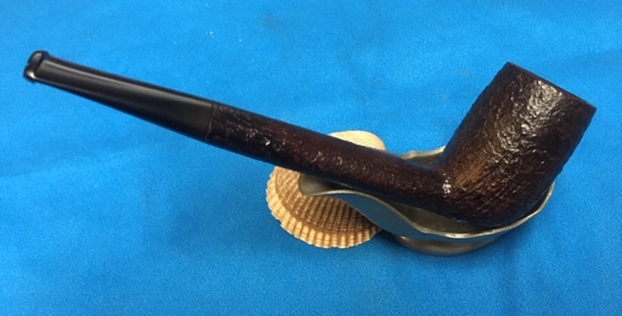
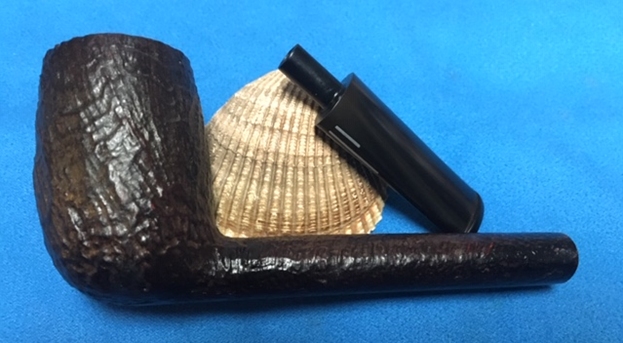
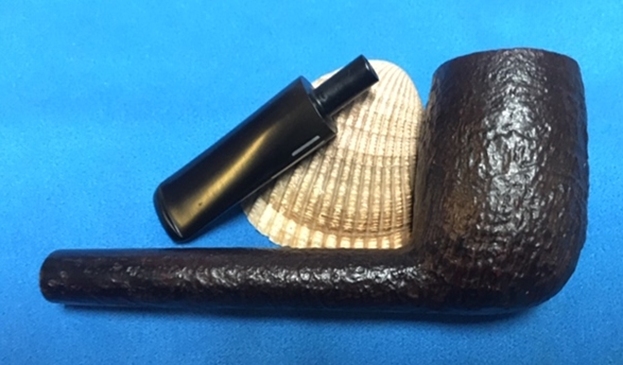
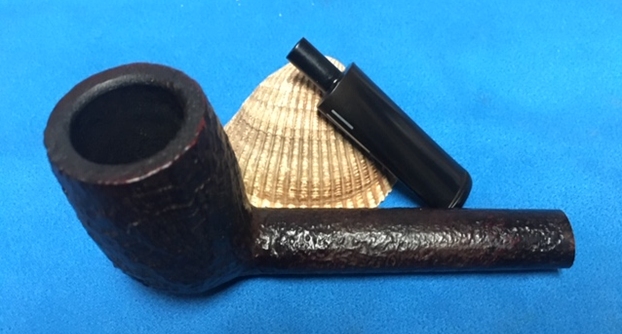
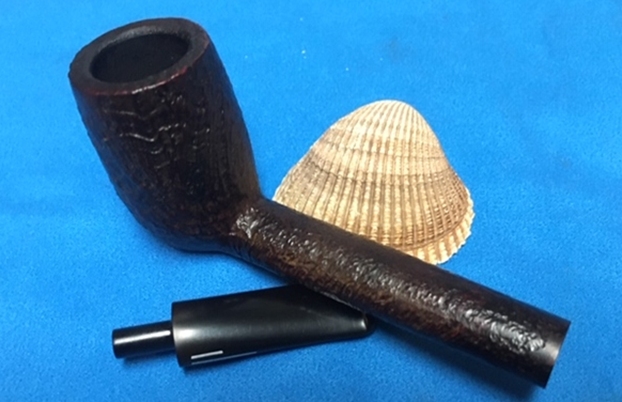
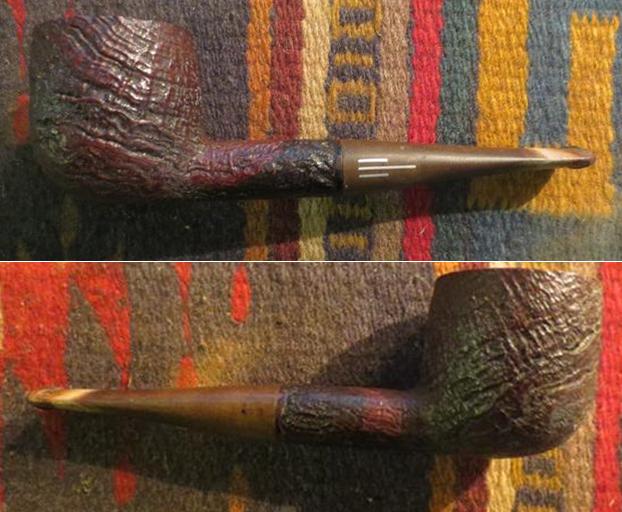
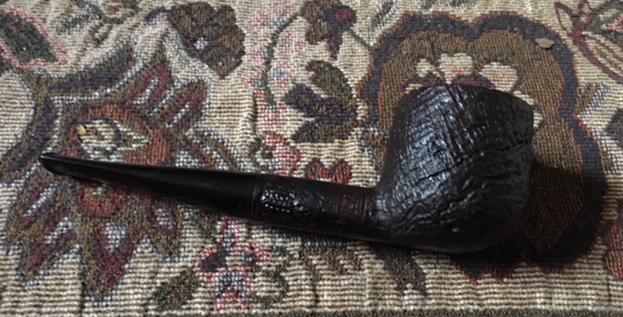
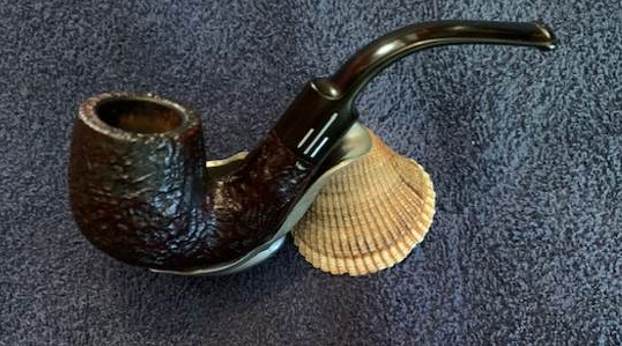
This next pipe is another that has been here for a very long time. I have no idea where I purchased it or whether it came to me in a trade for labour. I don’t remember. I have worked on quite a few of these Comoy’s made The Everyman Pipes over the years and find that they are well made and quite nice. The pipe is stamped on the underside and reads The [over] Everyman [over] London Pipe [over] the shape number 215. That is followed by Made in London [over] England. This  particular pipe has a rugged and deep sandblast around the bowl and shank. It has been stained with a dark brown stain. The bowl had been well reamed but there was some lava on the rim top blast. It was slightly out of round with some damage on the back inner edge of the bowl. Internally it smelled like an aromatic tobacco like Half and Half. The stem was oxidized, calcified and had some tooth chatter and marks on the top and underside ahead of the button. I took some photos of the pipe to give a sense of what I saw before I started my clean up work.   
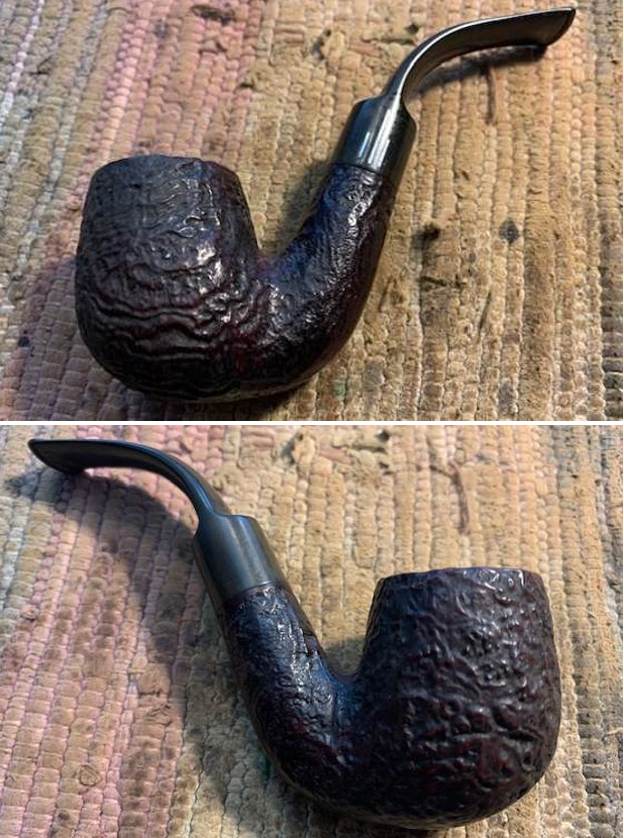
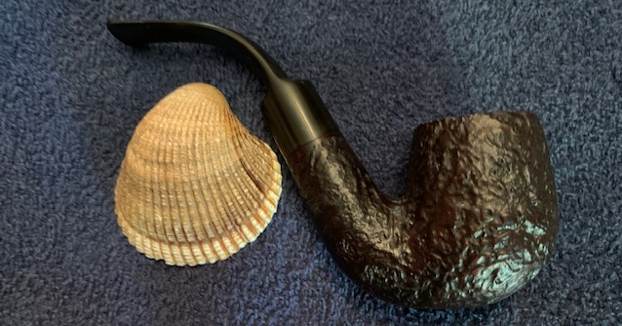
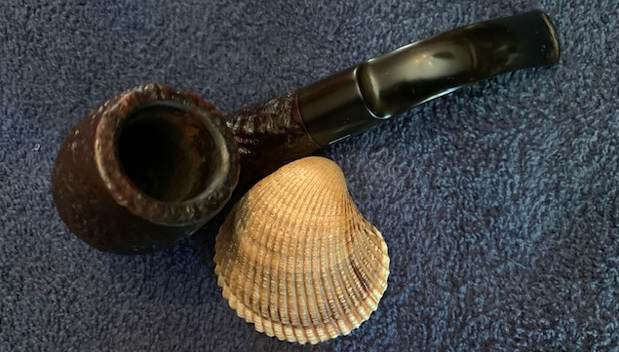
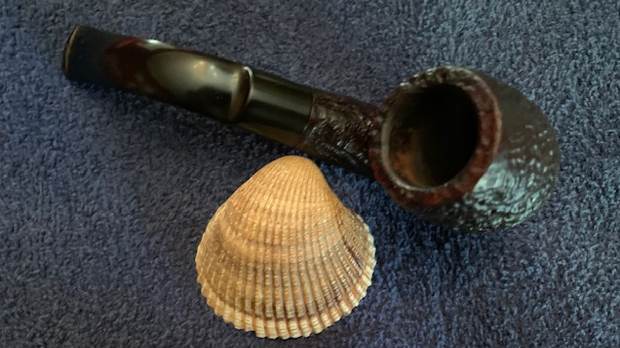
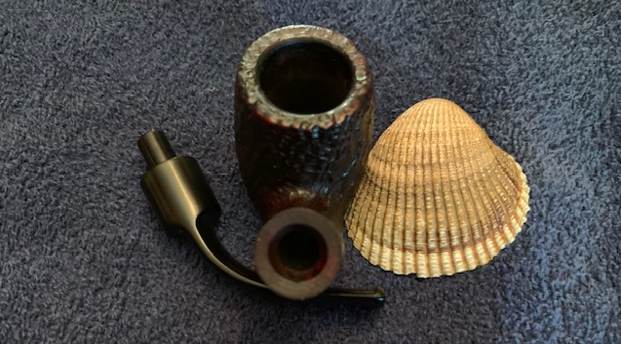
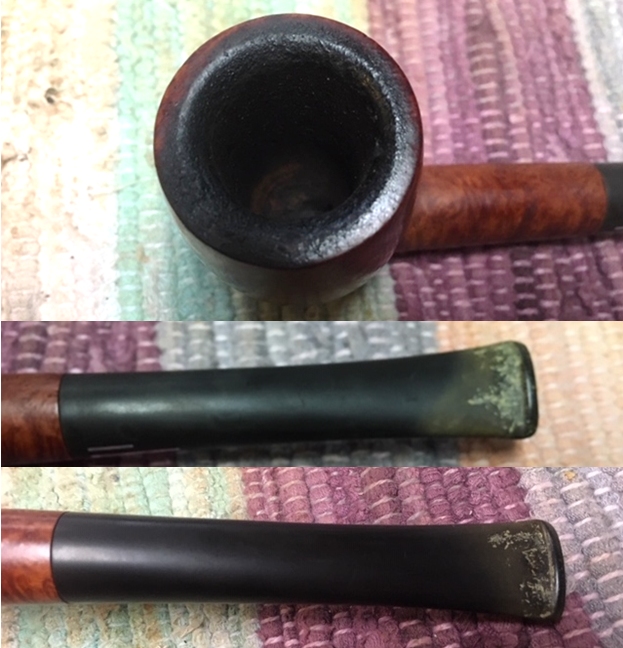
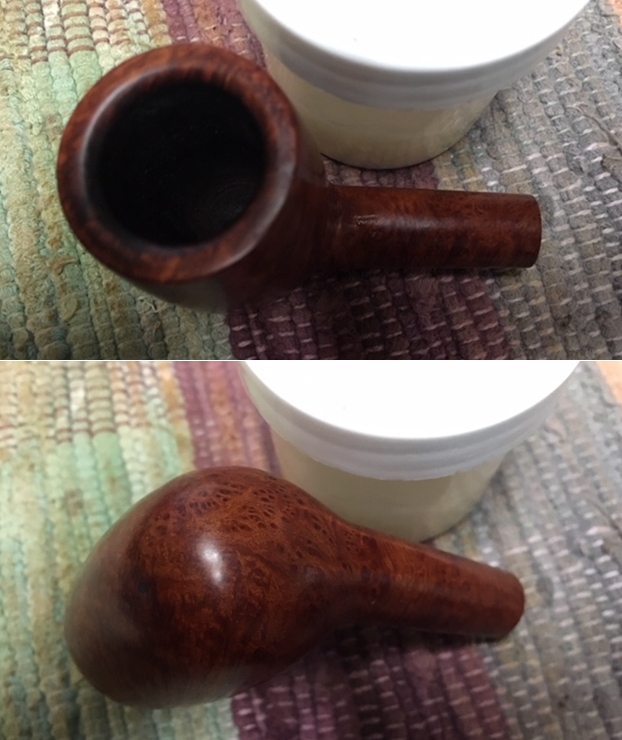
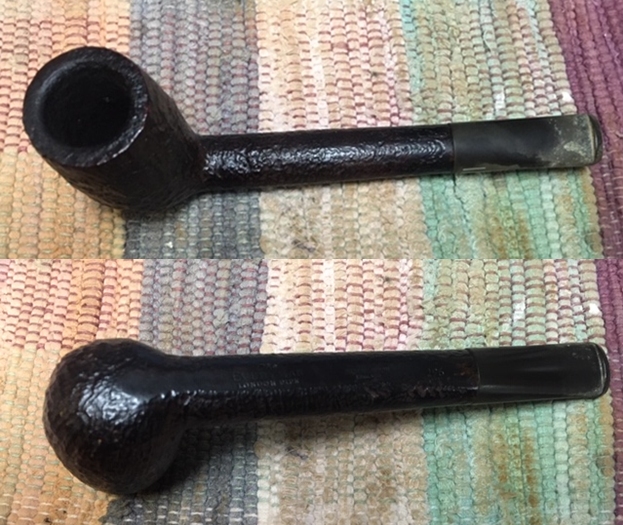
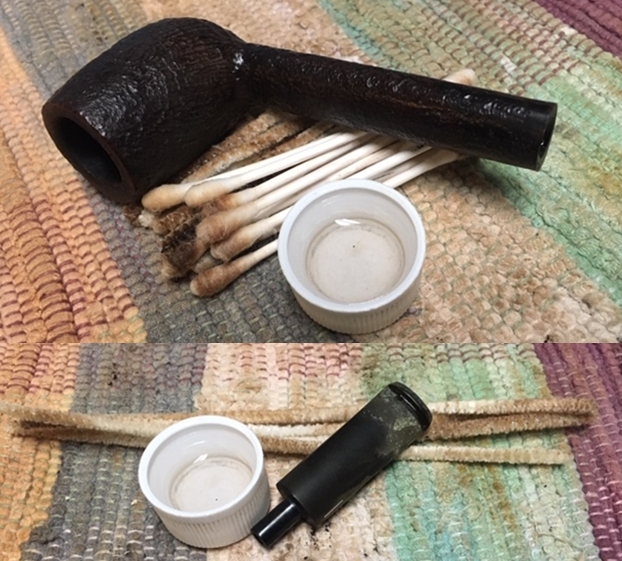
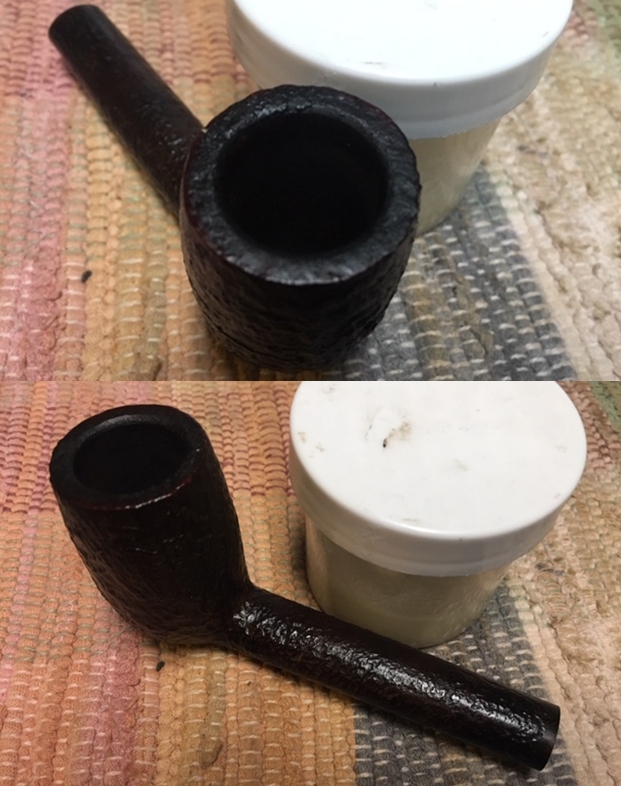
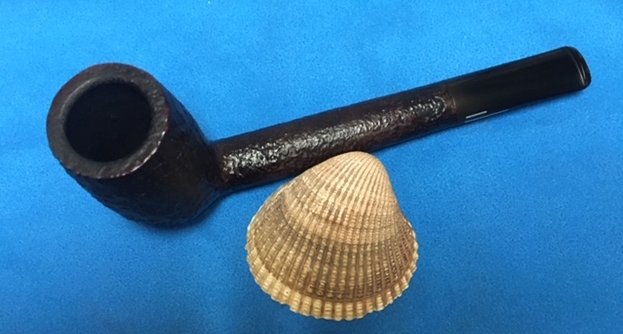
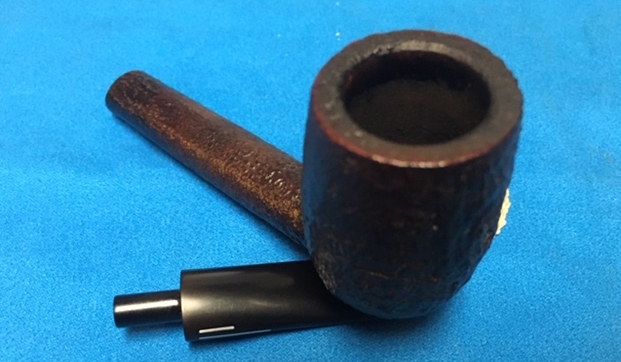
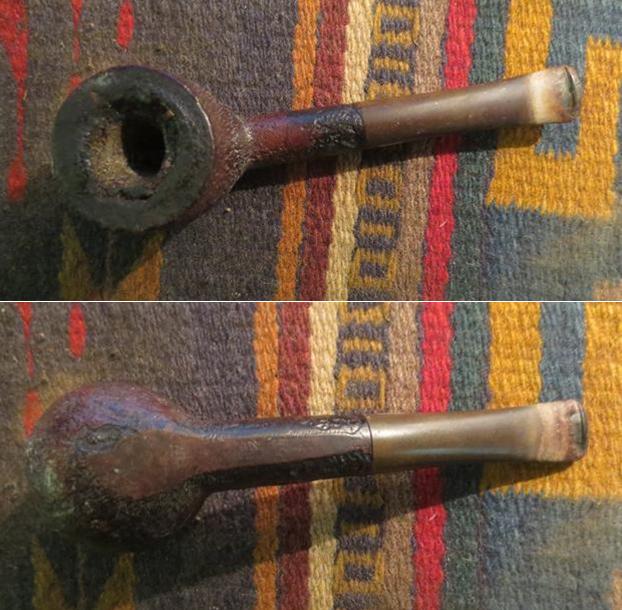
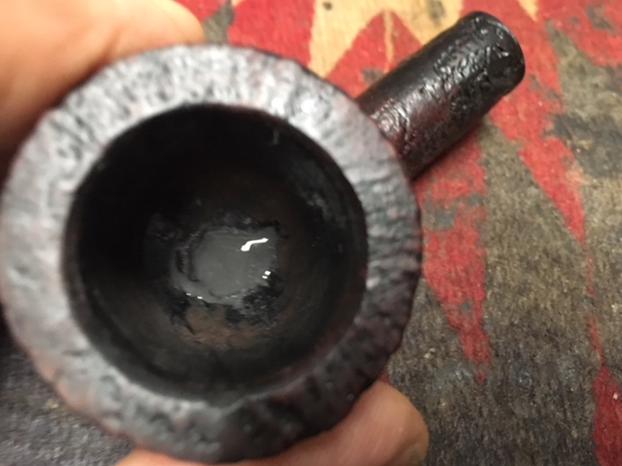
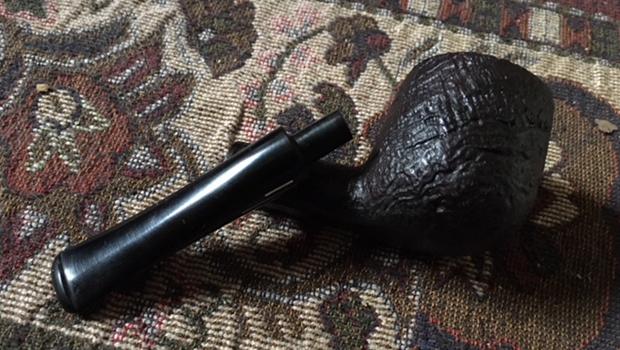
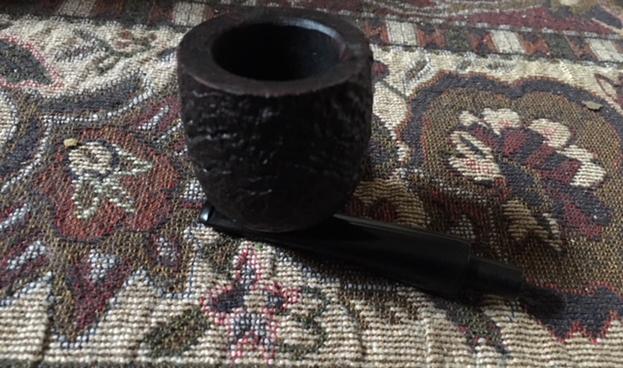
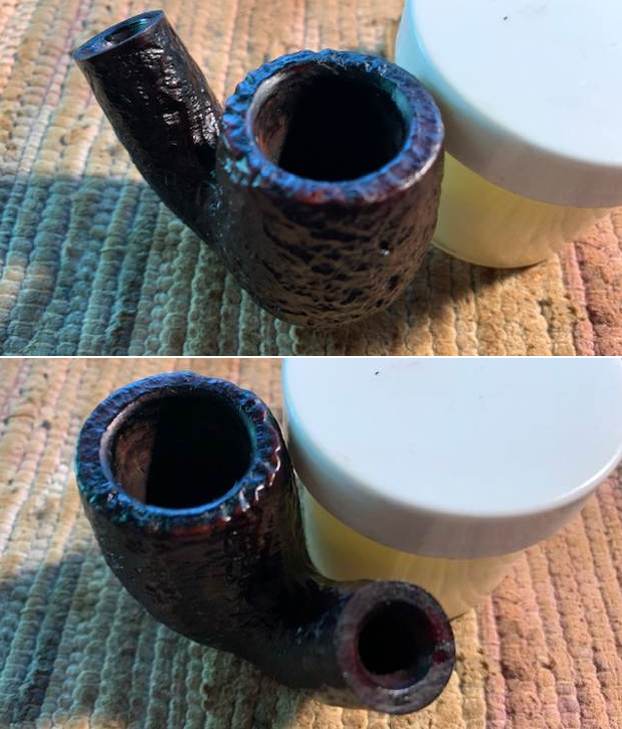
I took photos of the rim top and inner edge of the bowl to show the lava coat in the sandblast rim top and some burn damage and darkening on the inner edge of the bowl. The photos of the stem show the oxidation, calcification and the tooth marks and chatter on both sides ahead of the button. 
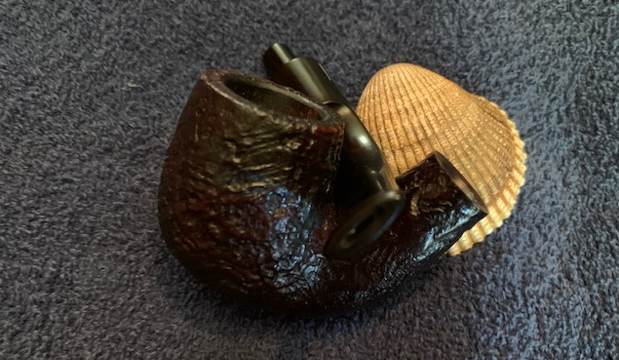
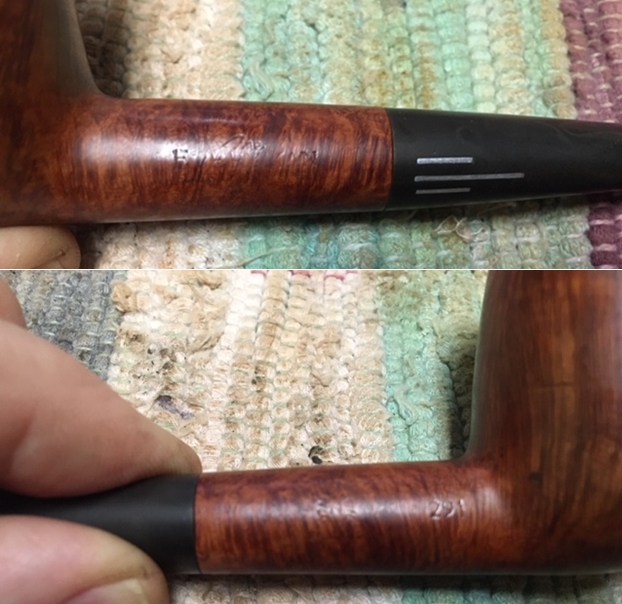
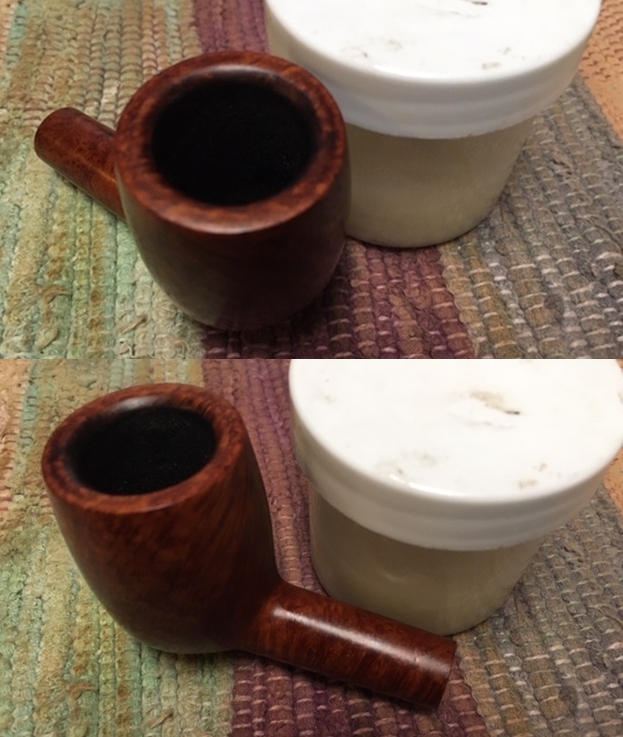
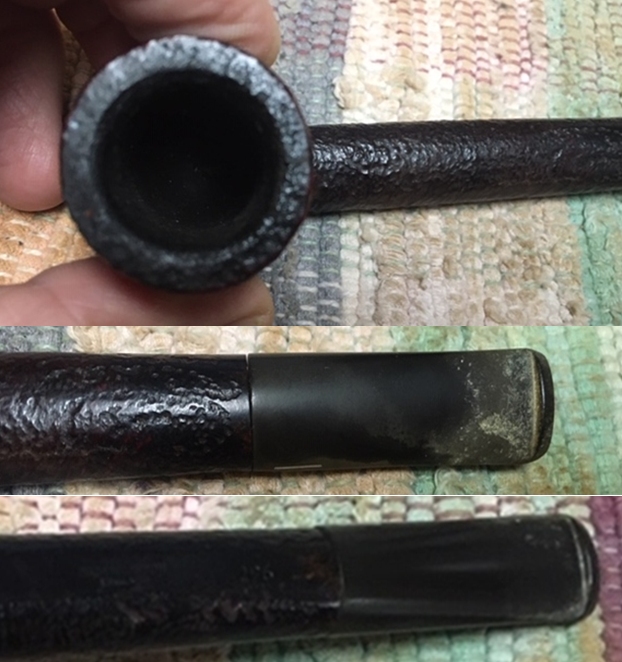
I took a photo of the stamping on the underside of the shank. It is clear and readable as noted above. 
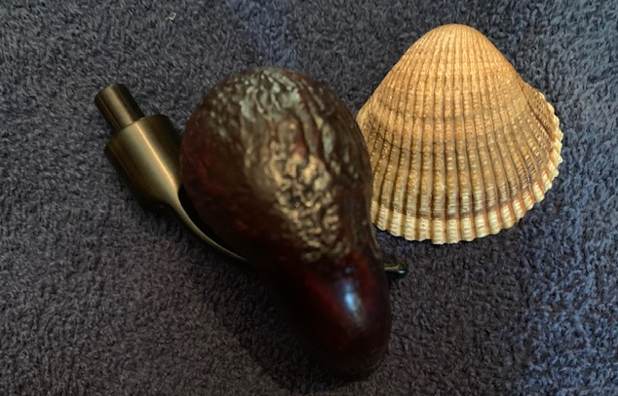
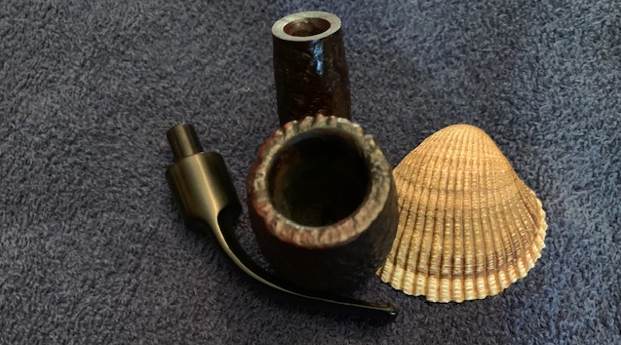
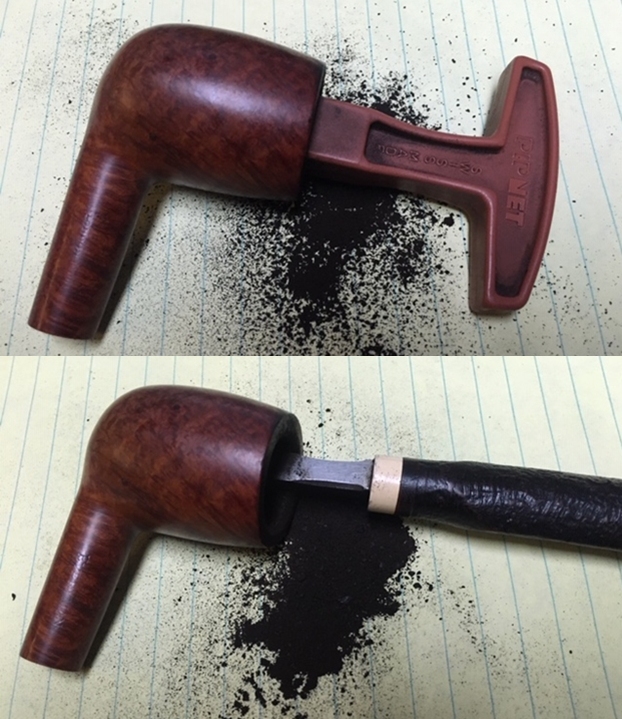
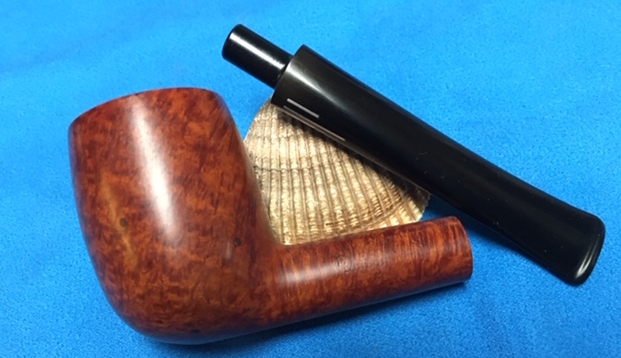
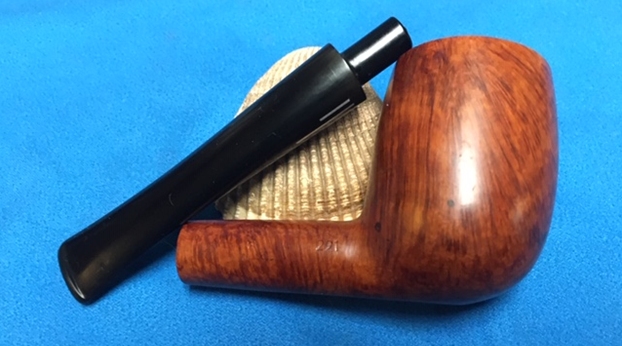
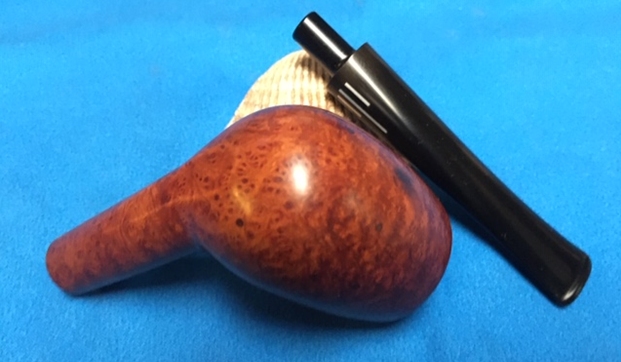
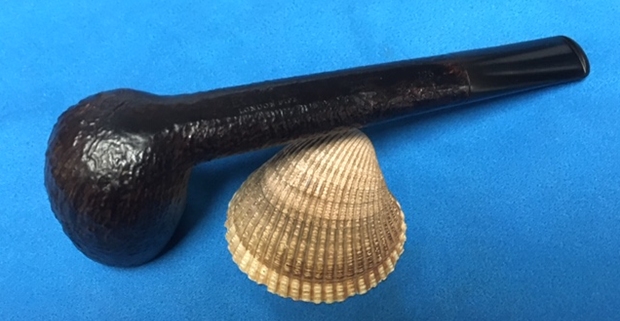
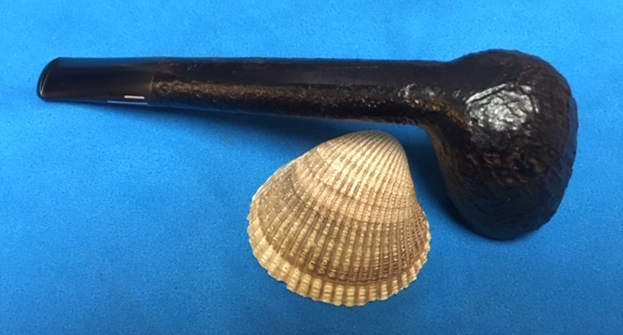
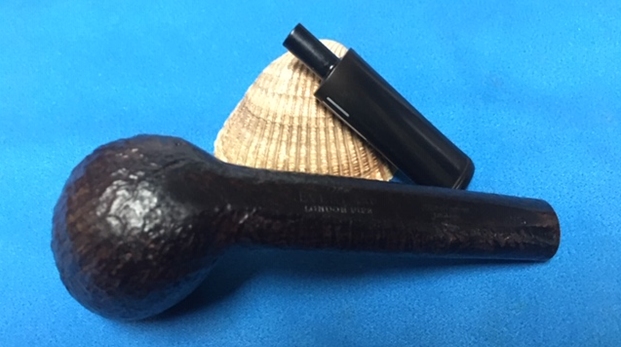
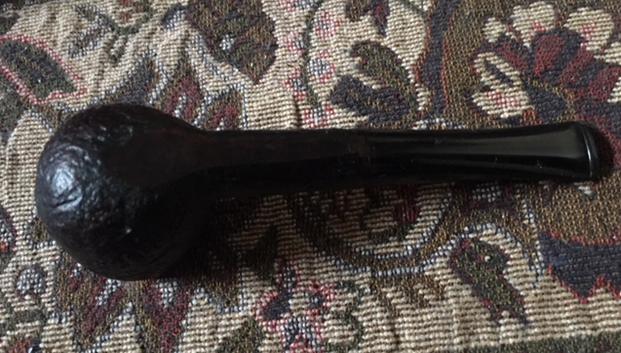
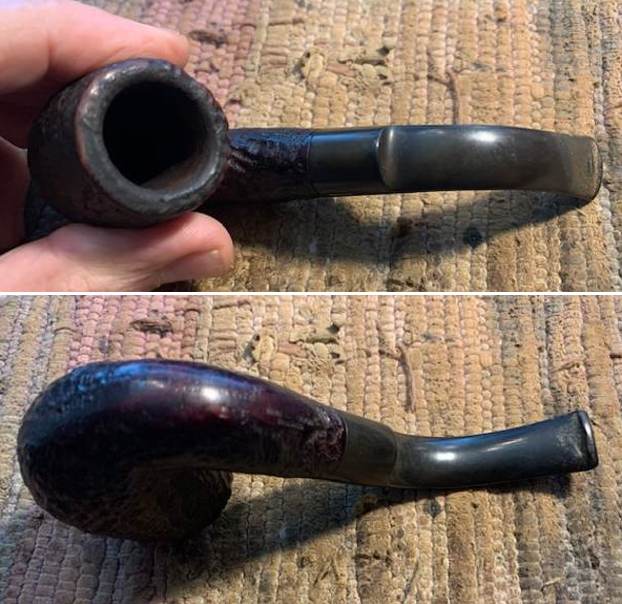
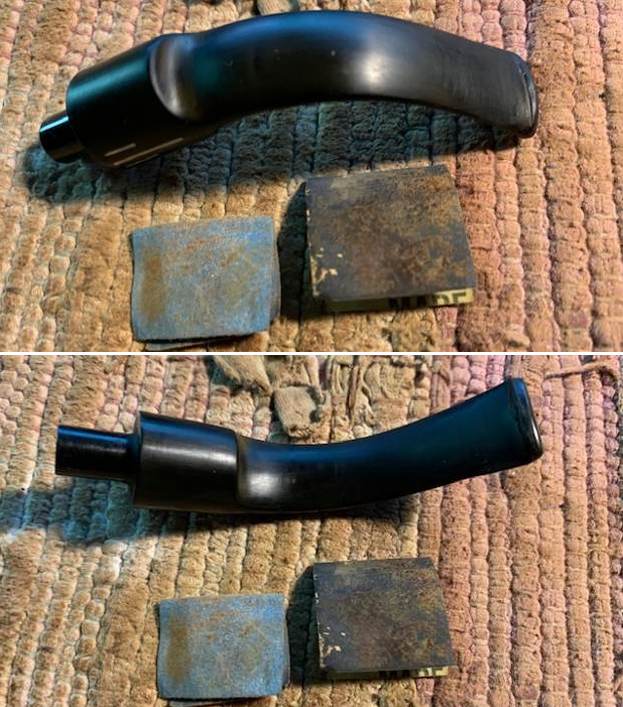
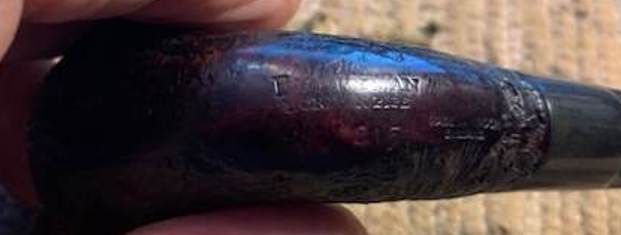
I removed the stem from the shank and took a photo of the pipe to give a sense of the proportion. 
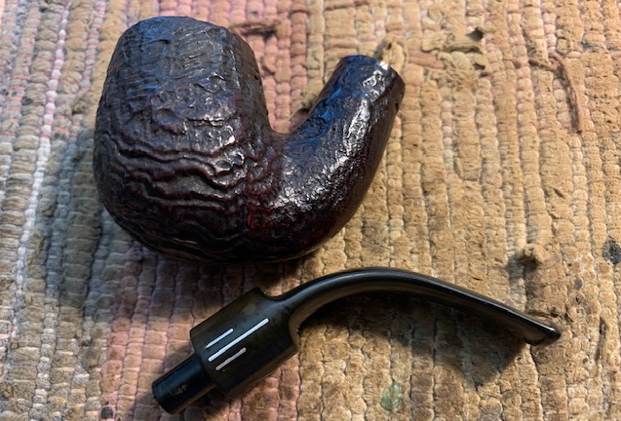
Before starting my cleanup work on the pipe I turned my favourite go to sites on background of brands. The first is Pipephil’s site (http://www.pipephil.eu/logos/en/logo-e4.html). There I looked up The Everyman brand and confirmed what I remembered about it being made by Comoy’s. From there I turned to Pipedia (https://pipedia.org/wiki/Comoy%27s). I went directly to the section on Comoy’s pipes. At the bottom of the article I found links for a shape list and also a shape chart. I have included both of them below. The shape number 215 is shown as a small ½ Bent Billiard.I have circled the 215 shape in the Comoy’s shape chart below.
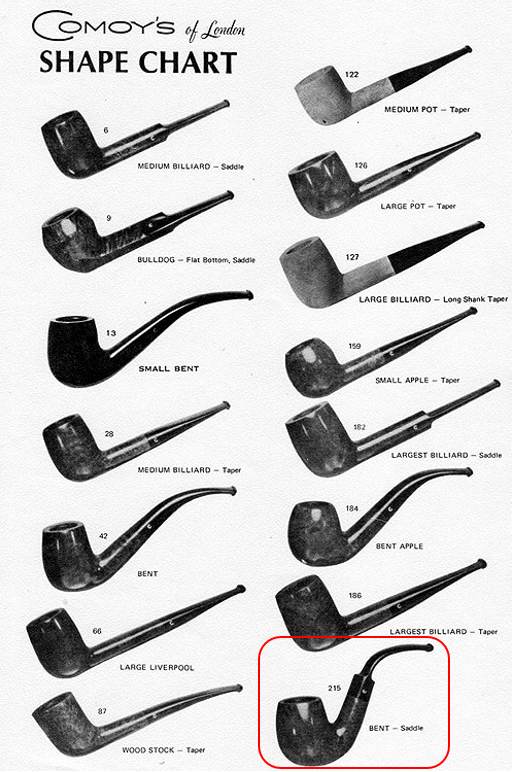
Now it was time to work on the pipe. I decided to address the stench in the pipe first so I could work on a clean pipe. The pipe bowl had been reamed and it was quite clean so I turned to clean the mortise and the airway in the shank and stem. I scrubbed the out with pipe cleaners, cotton swabs and Isopropyl 99% alcohol. Many pipe cleaners and much time passed and the draught was clean and open in both the stem and the shank.  
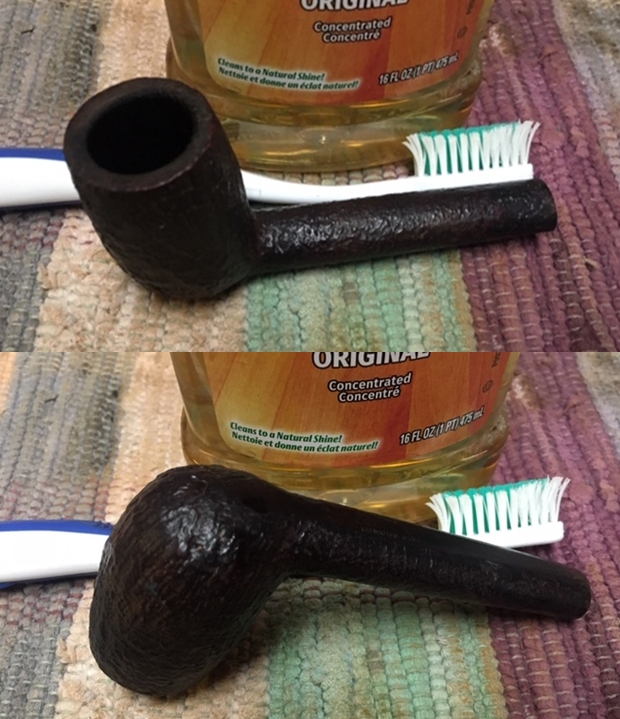
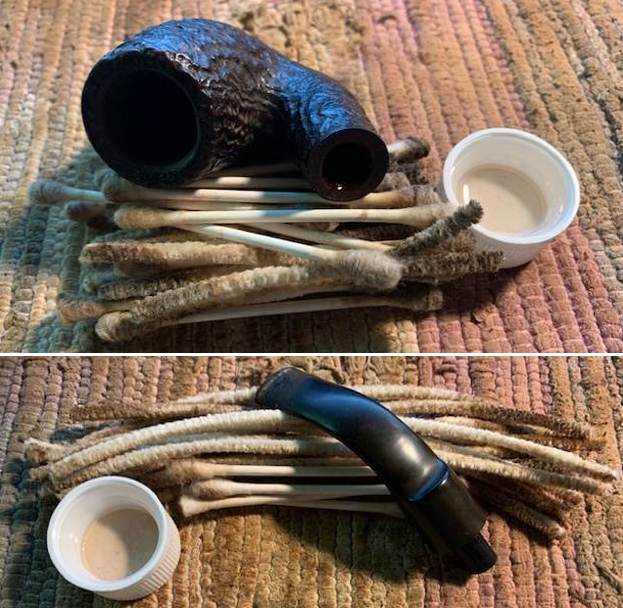
With that done I worked on the lava build up on the rim top and the burn damage and darkening on the inner edge of the rim. I worked over the rim top with a brass bristle wire brush and two dental picks to clean out the grooves of the sandblast. I rusticated the sandblasted rim to further rough up the surface and remove the tars. I used a small conical burr to remove the damaged areas and reshape the rim top.   
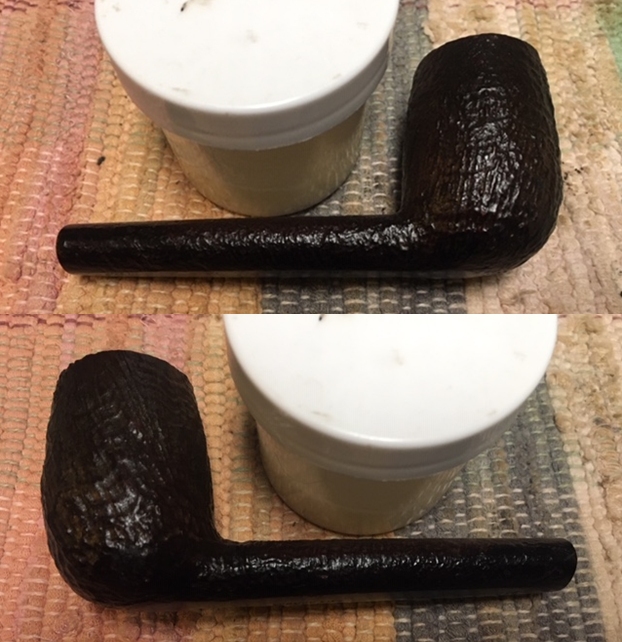
I used a Walnut Stain pen to stain the rim top rustication to match the other parts of the blasted rim top. I actually looks quite good. I used a folded piece of 220 grit sandpaper to give the edge a light bevel to minimize the damage and bring the bowl back to round.   
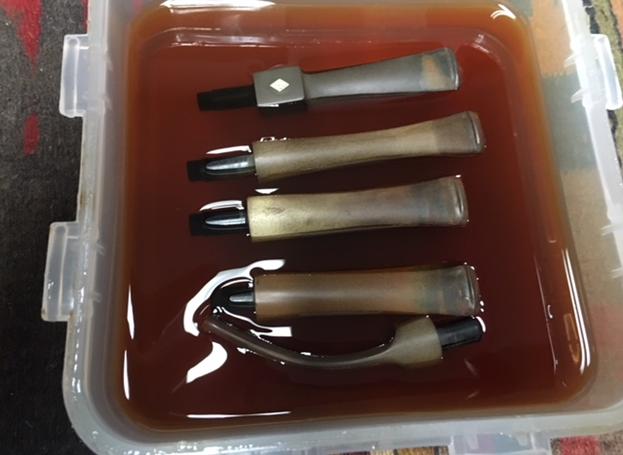
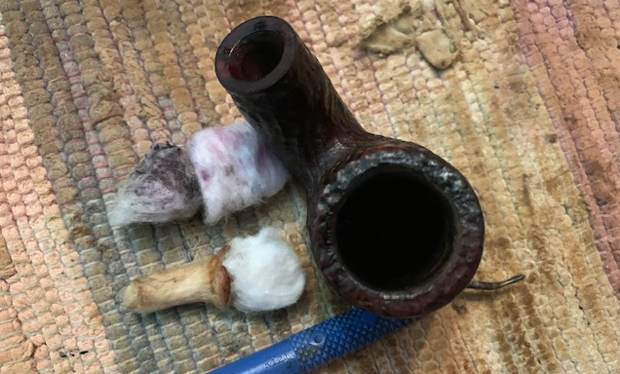
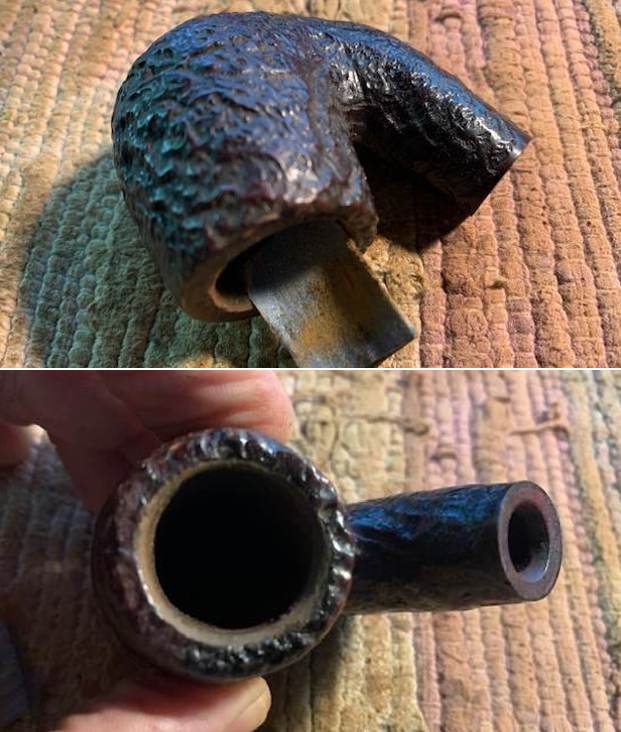
With that part of the work done I decided it was time to address the ghost in pipe with alcohol and cotton bolls. I stuffed the bowl with cotton bolls and twisted one into a plug that I pushed into the shank end. I set the bowl upright in an old ice cube tray and filled it with alcohol using an ear syringe. I set it aside to do its work over night.    
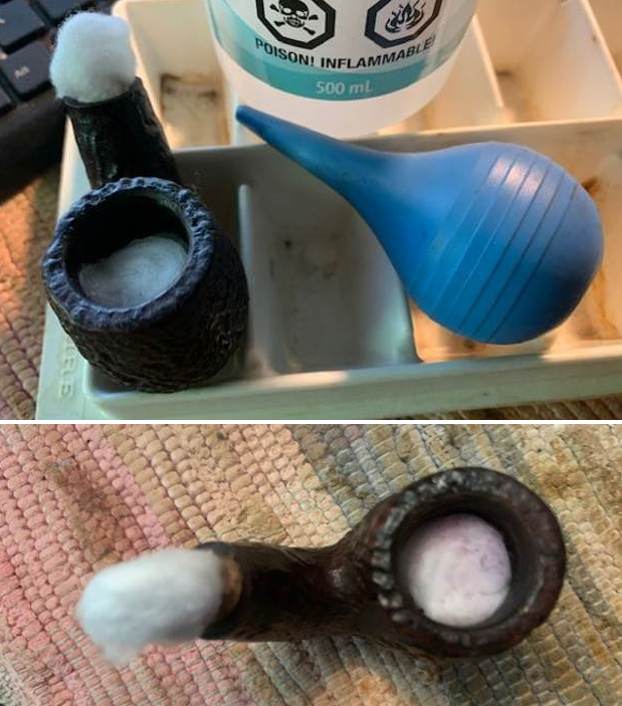
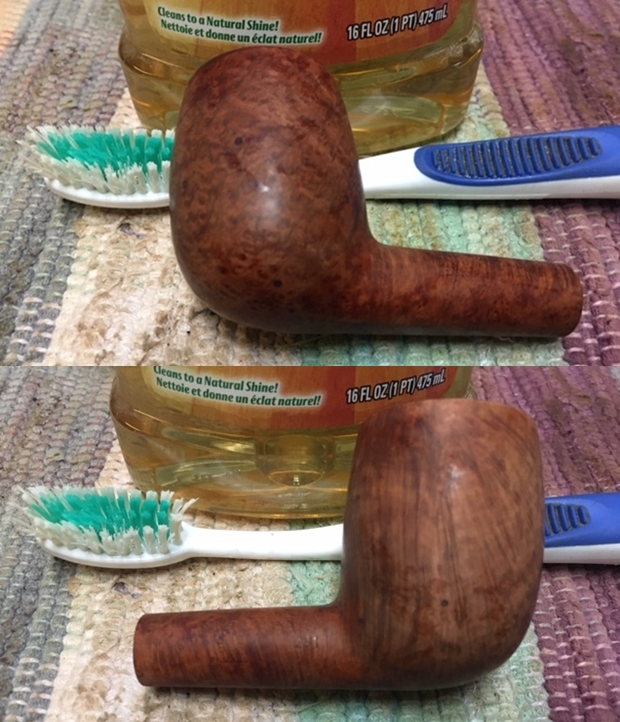
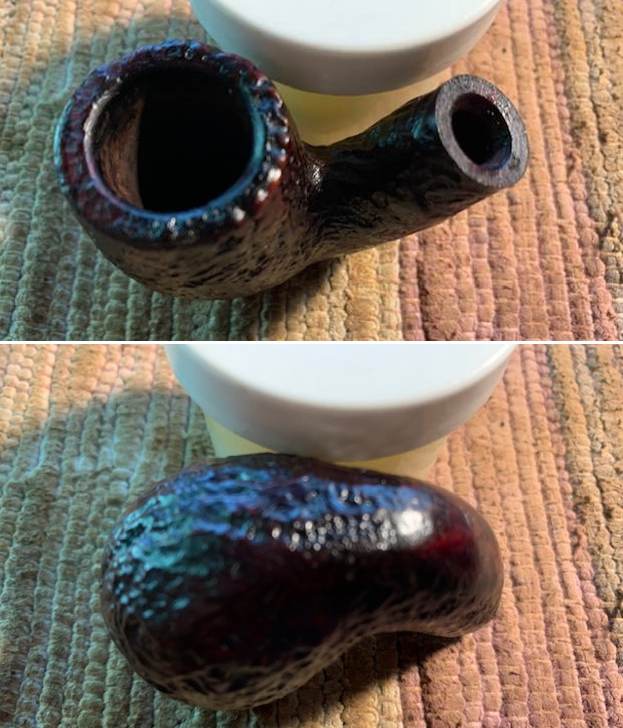
I worked some Before & After Restoration Balm into finish of the briar with my fingertips to clean, enliven and protect it. I let the balm sit for a little while and then buffed with a cotton cloth to raise the shine. The Restoration Balm really makes the grain stands out beautifully.   
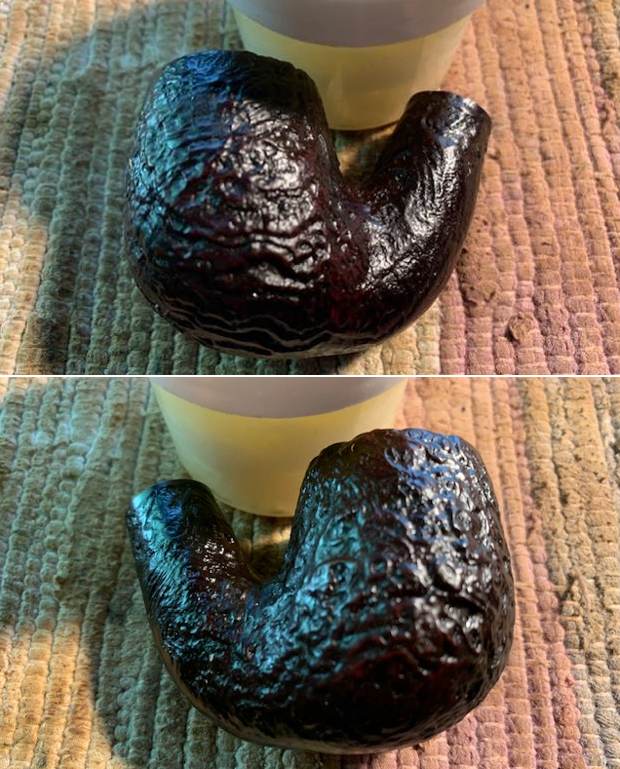
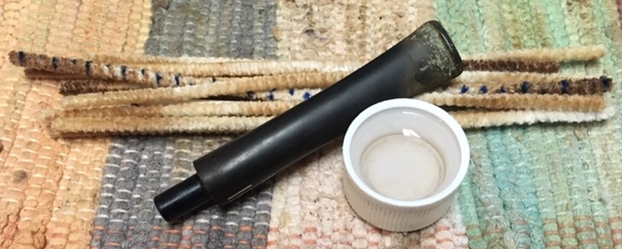
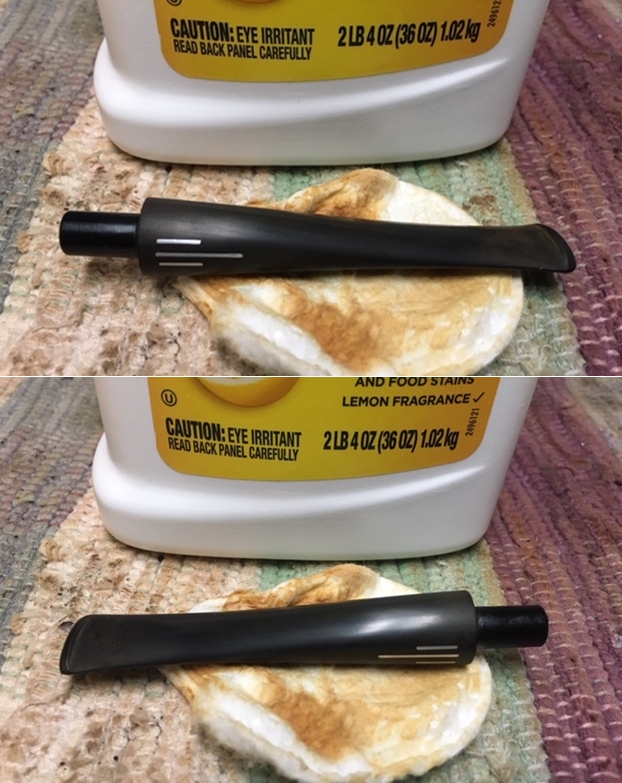
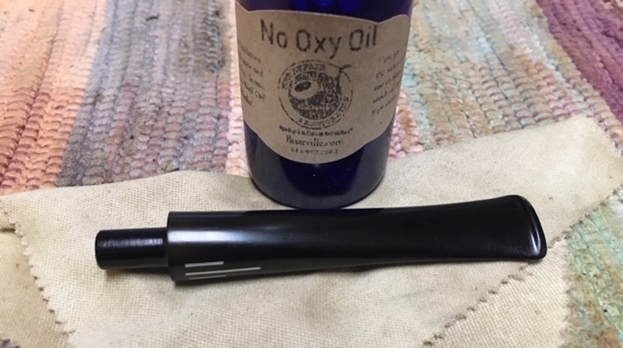
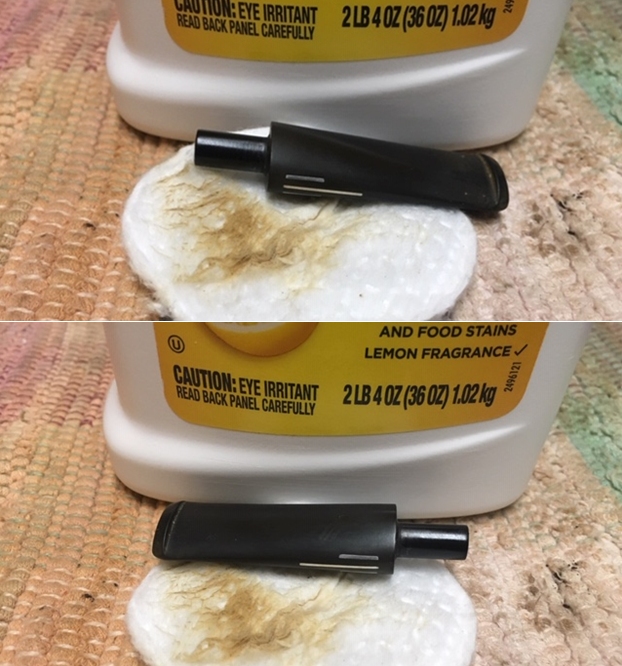
I cleaned the exterior of the stem with some Soft Scrub All Purpose cleanser and cotton pads. I was able to remove a lot of oxidation and calcification from the stem surface. 
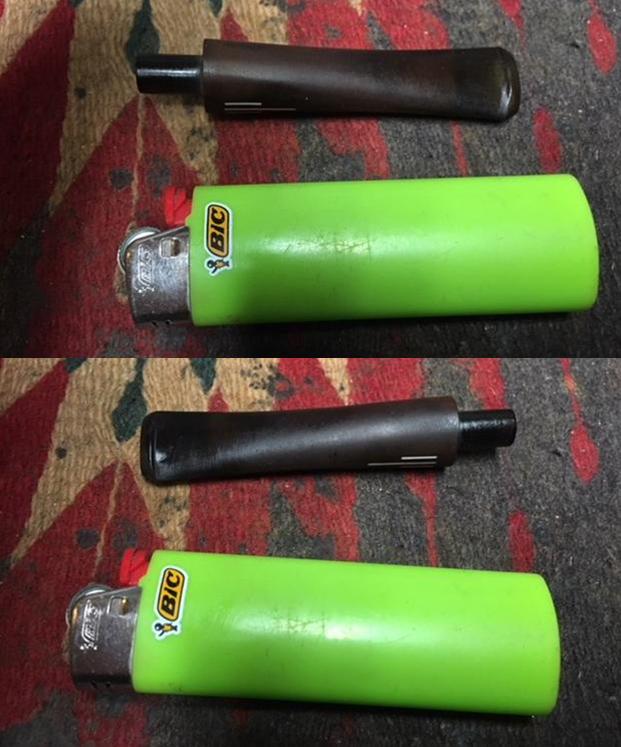
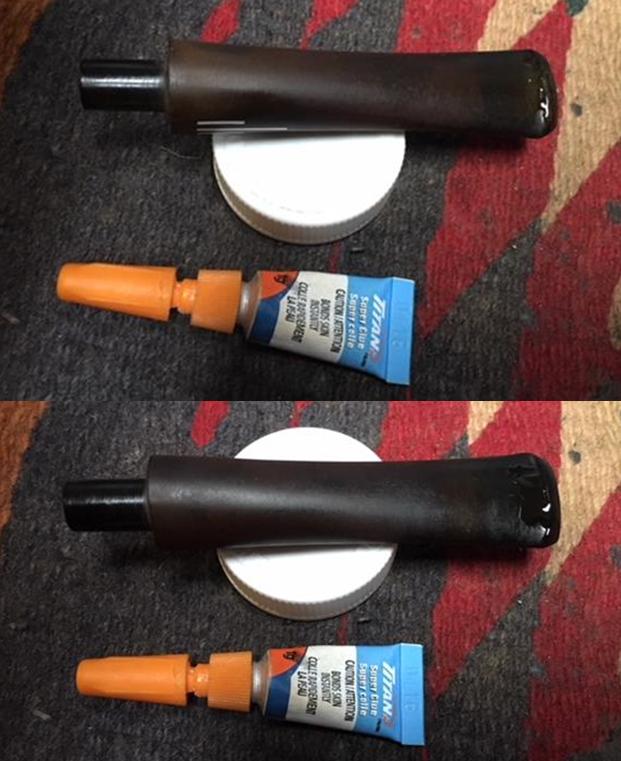
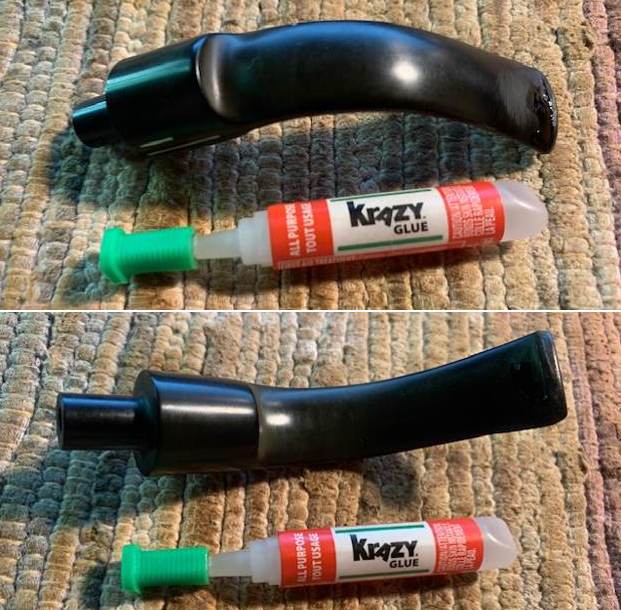
I set the bowl aside and turned my attention to the stem. I used the flame of a Bic lighter to “paint” the surface of the stem to lift the tooth marks on both sides of the stem. The heat lifted many of the marks. I filled in what remained with clear CA glue and set it aside to harden.  
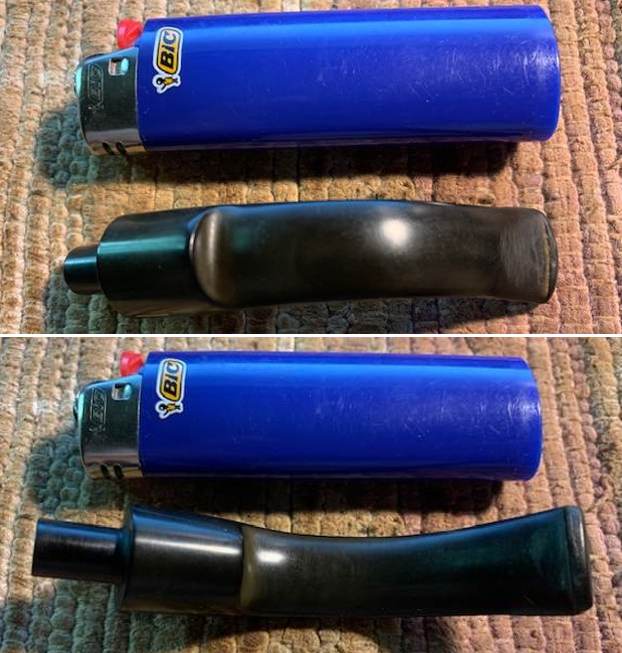
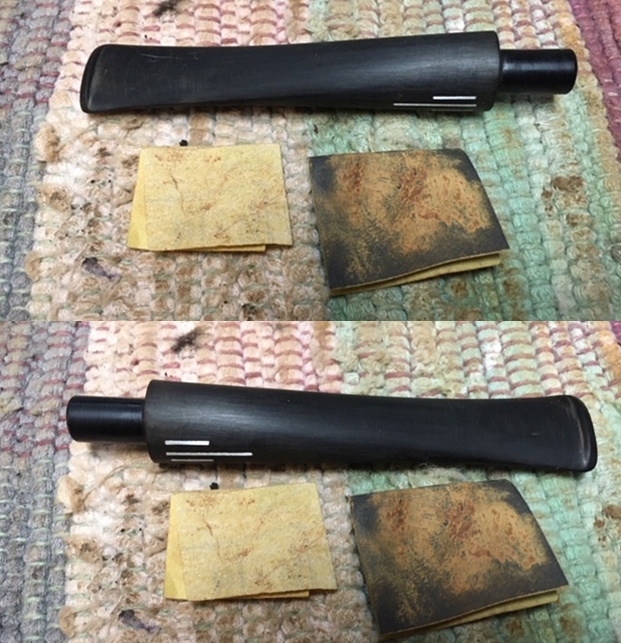
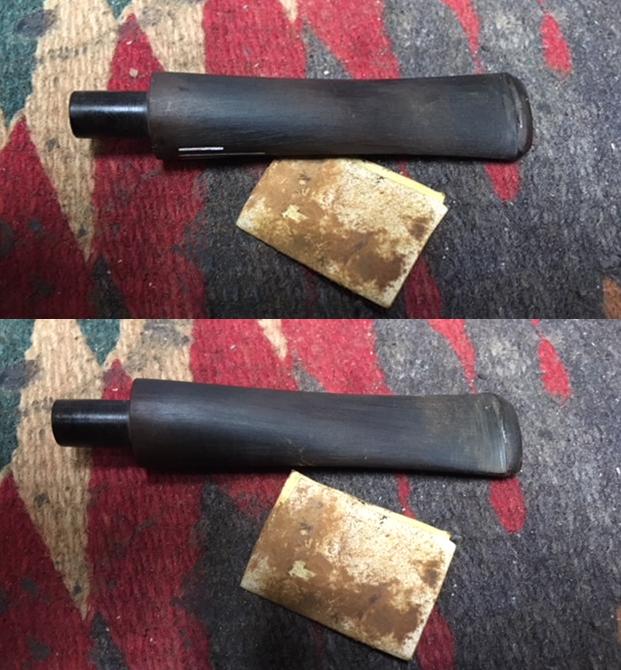
Once the repairs cured on the top and underside of the stem I filed them flat and recut the button edge with a small file. I sanded them with a folded piece of 220 sandpaper. I started polishing the stem with 400 grit wet dry sandpaper. 
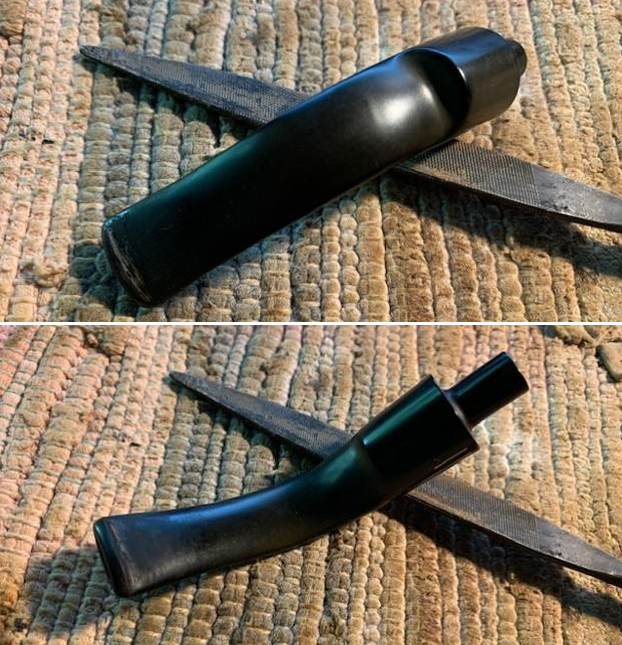
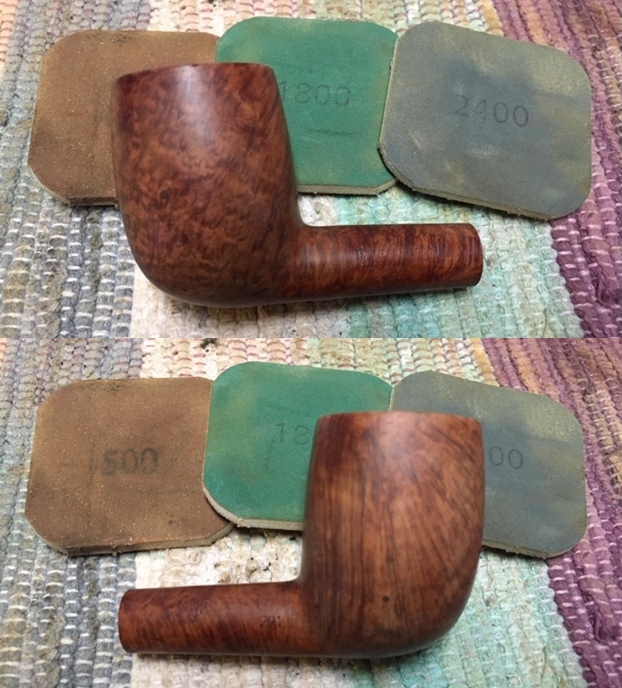
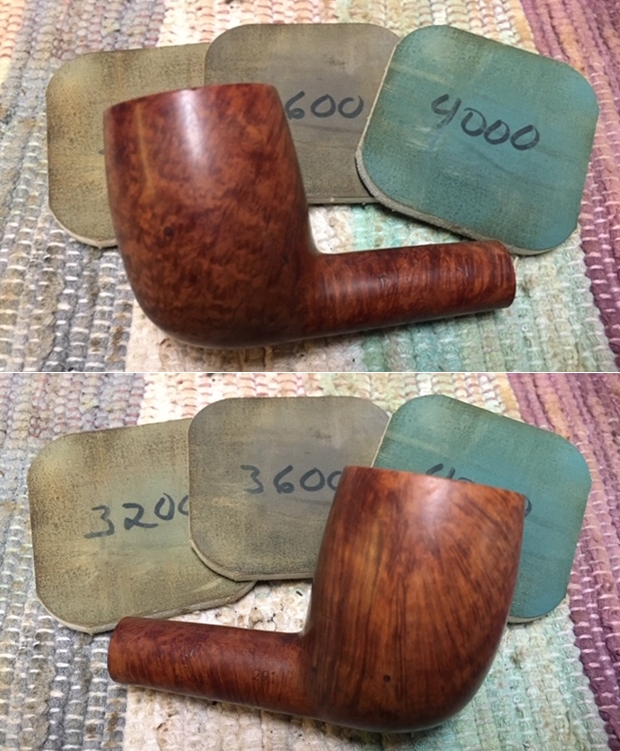
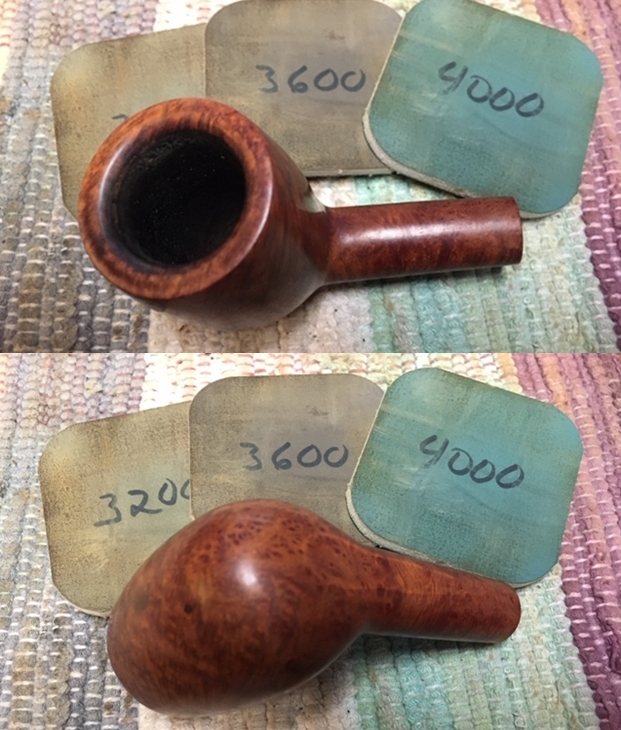
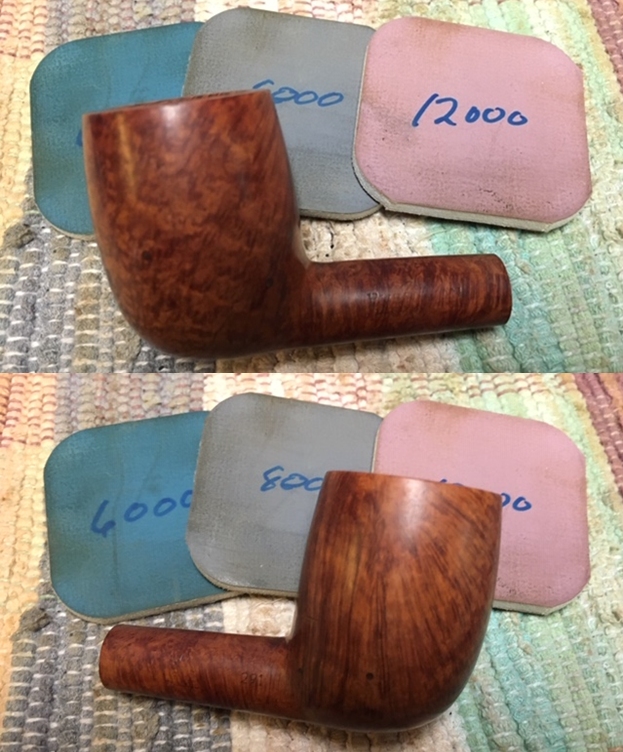
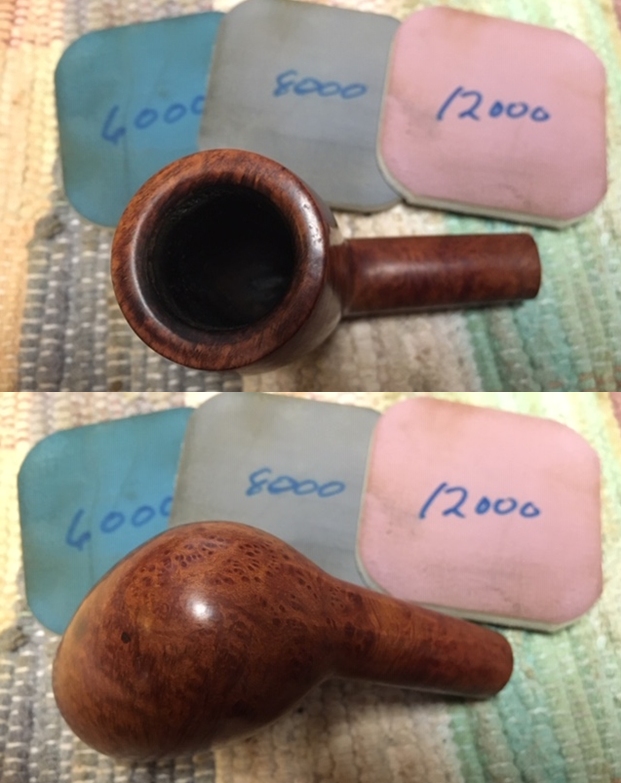
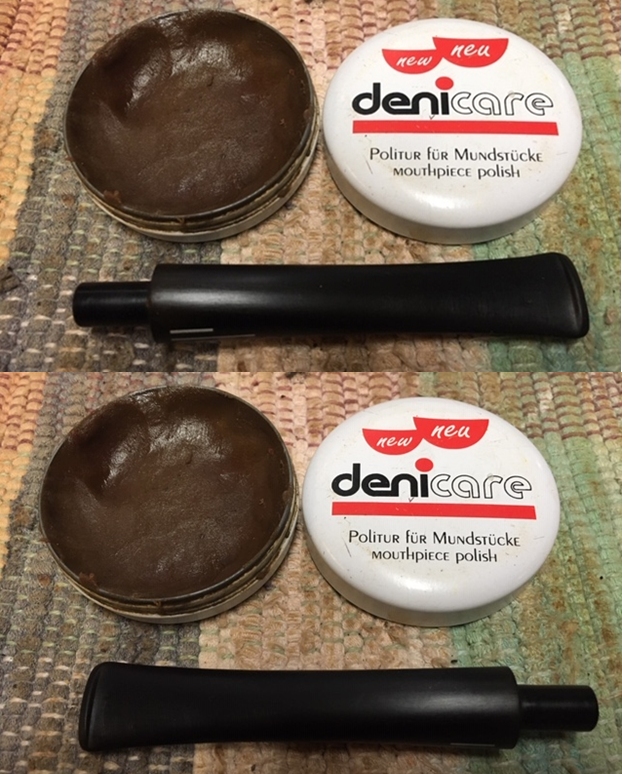
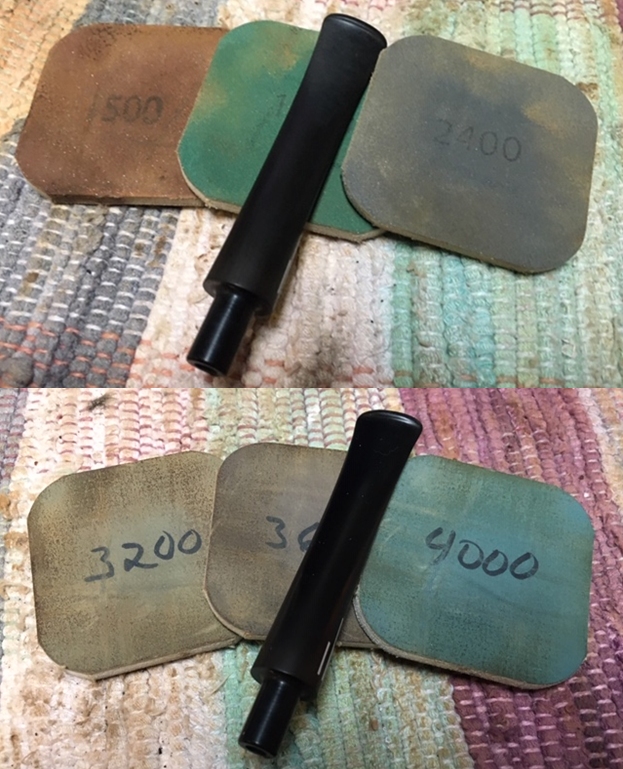
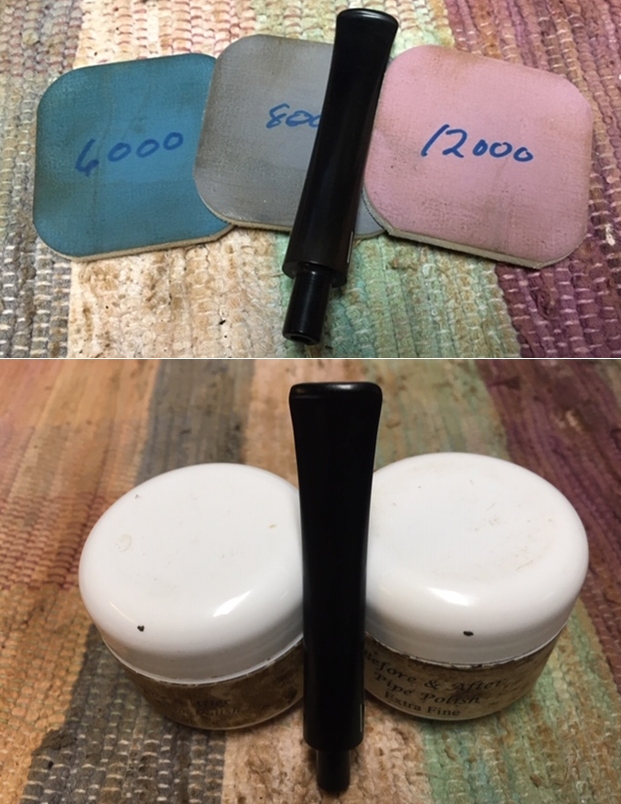
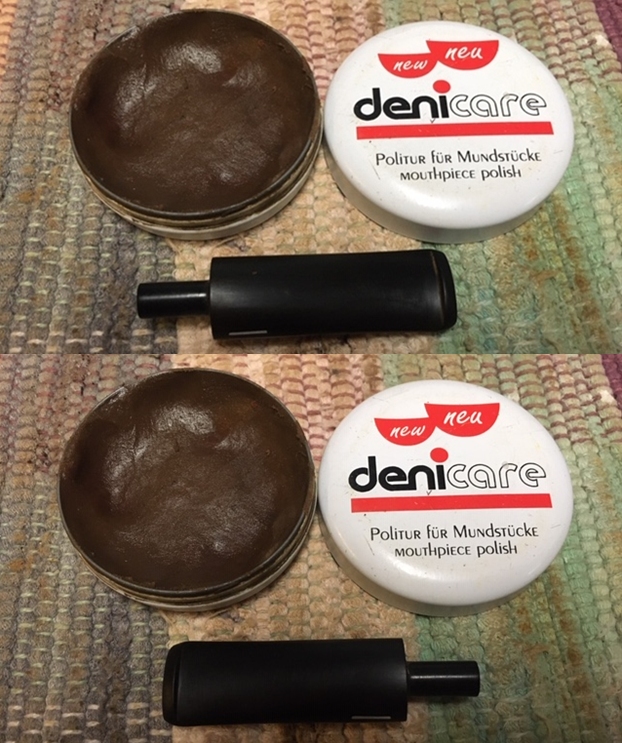
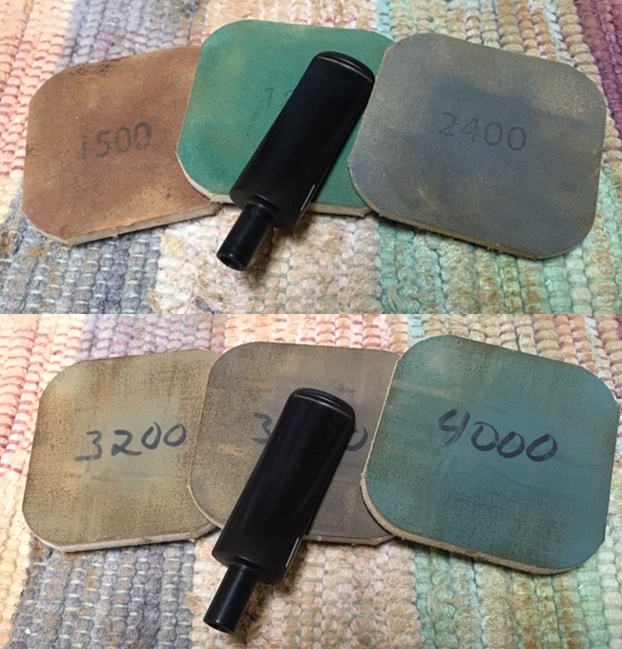
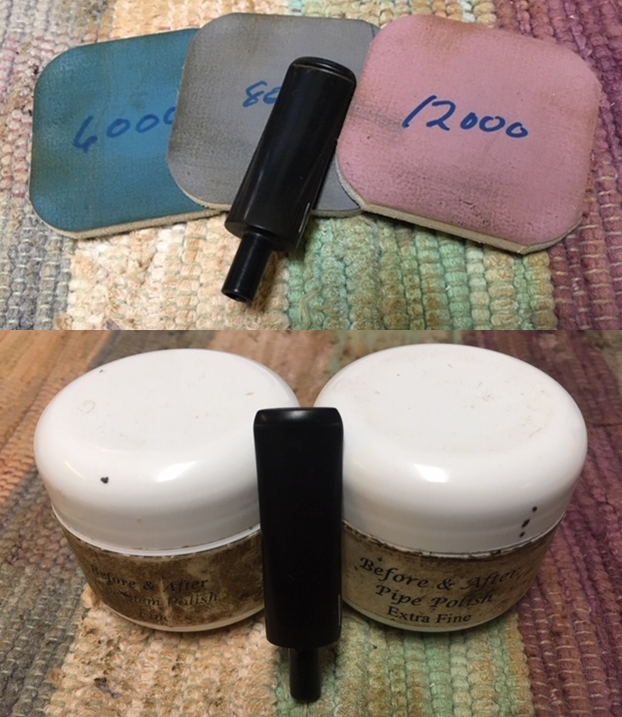
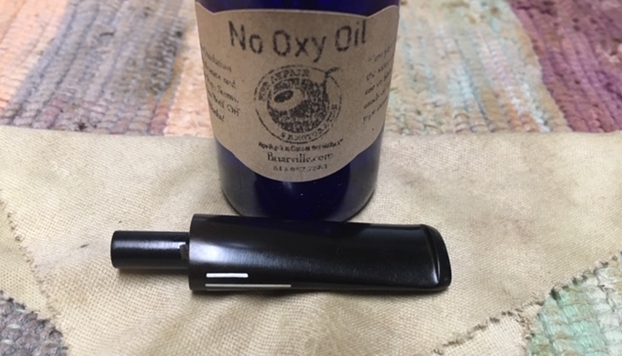
I polished the stem with micromesh sanding pads – wet sanding with 1500-2400 grit pads and dry sanding with 3200-12000 grit pads. I wiped the stem down after each pad with Obsidian Oil. I polished it with Before & After Pipe Stem Polish – both fine and extra fine and buffed it with a cotton pad. I gave it a final coat of Obsidian Oil and set it aside to dry.  
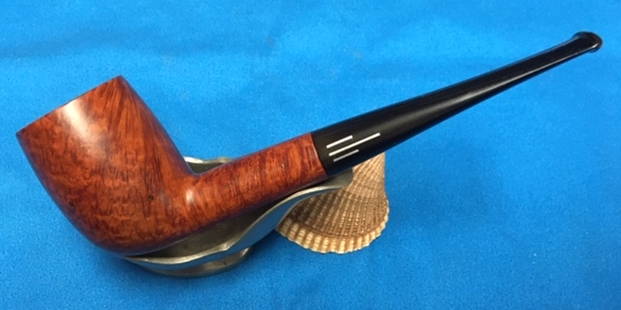
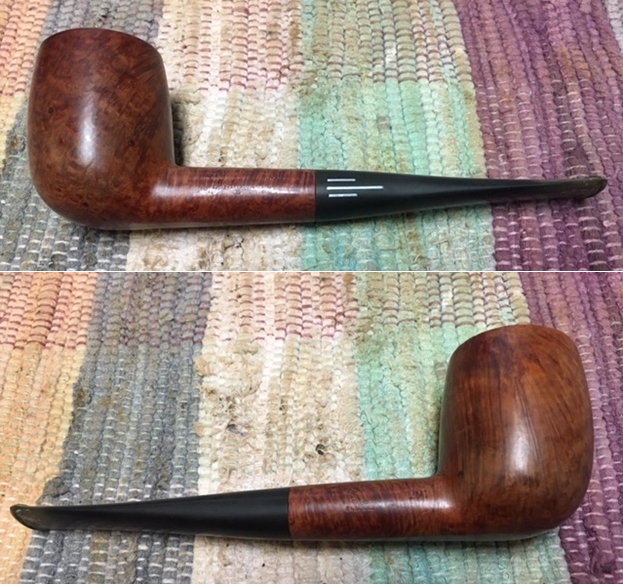
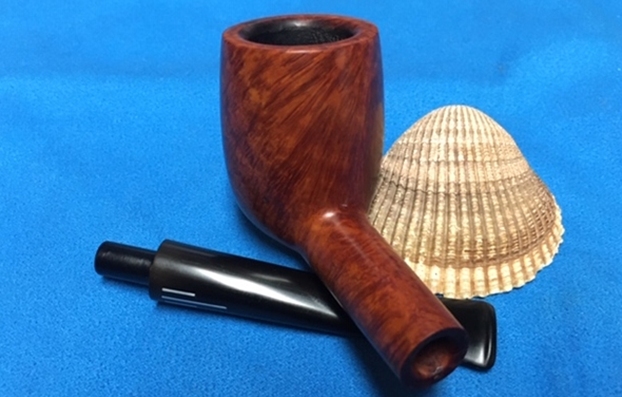
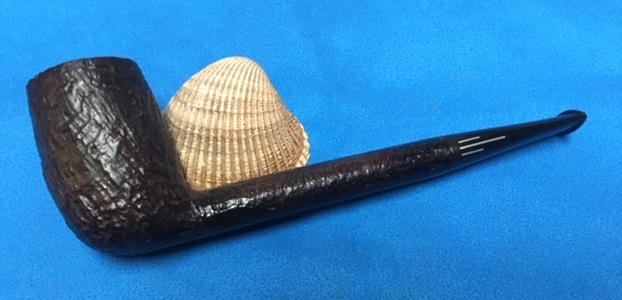
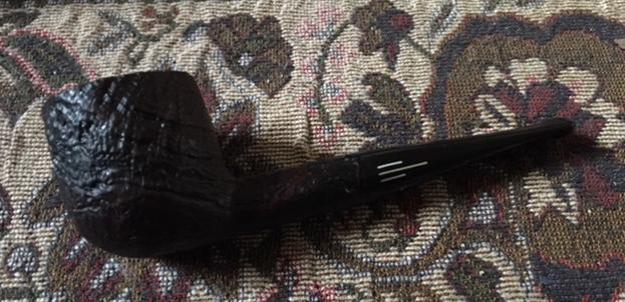
The Everyman London Pipe 215 Bent Billiard was finished. I polished the bowl and stem with Blue Diamond to polish out the remaining small scratches. I used a very light touch so as not to damage the stamping on the shank. I gave the bowl multiple coats of Conservator’s Wax and the stem multiple coats of carnauba wax. I buffed the pipe with a clean buffing pad to raise the shine. I hand buffed it with a microfiber cloth to deepen the shine. The pipe polished up pretty nicely. The depths of the sandblast came alive with the buffing and works well with the polished black vulcanite saddle stem. Altogether the pipe has a rich look. The finished pipe is shown in the photos below. The shape, finish and flow of the pipe and stem are very well done. The dimensions are Length: 5 inches, Height: 1 ¾ inches, Outside diameter of the bowl: 1 ¼ inches, Chamber diameter: ¾ of an inch. The weight of the pipe is 1.55 ounces/45 grams. I will be putting it on the rebornpipes store in the British Pipemakers Section soon. If you are interested in adding it to your collection let me. I have one of these and they are a cool dry smoke. Thanks for walking through the restoration of this fine old Comoy’s made pipe. It was a pleasure to work on.

A Truly Stunning Comoy’s Made The Everyman London Pipe 188 Stack


Blog by Steve Laug

The next pipe is a really neat looking tall Comoy’s Made Stack with a vulcanite taper stem. The tall bowl and chunky looking shank was made to hold in your hand. It is quite light weight for its size and the blade on the stem is thin and looks comfortable. We picked up this pipe from an antique dealer in 2018 from Naples, Florida, USA. Jeff cleaned the pipe in 2019 and now I am working on it in 2021. It is stamped on the left side of the shank and reads The [over] Everyman [over] London Pipe. On the right side it is stamped with the Comoys circular COM Stamp – Made in London[over] England, followed by the shape number 188. The exterior of the bowl looked amazingly clean and shiny. There was a heavy cake in the bowl and an eruption of thick lava on the rim top and beveled inner edge of the bowl. It was hard to know the condition of the rim top and rim edges because of the grime and thickness of the cake and lava. The cleaning would make it very clear! The stem was dirty and lightly oxidized with light tooth marks and chatter on both sides but nothing like what I was expecting from the condition of the bowl. Jeff took photos of the pipe to give a clear picture of what we were up against with this pipe. He captured the cake in the bowl and the thick eruption of lava on the rim top and edges exceptionally well in the next photos. It was very clear that it was an exceptional smoker! The stem is lightly oxidized and shows the tooth marks and chatter on both sides ahead of the button. Jeff captured some of the beauty of the shape and the grain in the next photo. It is quite stunning.He took photos of the stamping on the left and right sides of the shank. It is clear and readable as noted above.I turned to Pipephil’s site (http://pipephil.eu/logos/en/logo-e4.html) to confirm what I knew about the brand being made by Comoy’s. It did but did not give a whole lot of other information.I turned then to Pipedia (https://pipedia.org/wiki/Comoy%27s). I found a catalogue page there that listed the Everyman. It reads: “This wonderful moderate priced pipe is the largest selling branded English pipe in the world.”I turned to the shape chart that was also linked on the Comoy’s article to see how they describe a 188 (https://pipedia.org/index.php?title=Comoy%27s_Shape_Number_Chart). I have included the line from the chart below. It reads 188 – Stack – Straight – XL.Now it was time to work on the pipe. It is really a beautiful piece. Jeff had done a great cleanup on the pipe. He reamed the bowl with a PipNet pipe reamer and followed up with a Savinelli Fitsall pipe knife to remove the cake. He scrubbed out the mortise and the airway in the shank and the stem with alcohol, cotton swabs and pipe cleaners. He scrubbed the bowl exterior with a tooth brush and Murphy’s Oil Soap to remove the grime on the finish of the bowl and the lava from the rim top. He rinsed it under running water. One of the benefits of this scrub is that it also tends to lift some of the scratches and nicks in the surface of the briar. He dried it off with a soft cloth. He cleaned the internals and externals of the stem with alcohol, pipe cleaners and cotton swabs. He soaked the stem in Briarville’s Pipe Stem Deoxidizer and rinsed it off with warm water and cleaned out the airway in the stem with alcohol, pipe cleaners and cotton swabs. I took photos of the pipe as I saw it when I put it on the table. I took photos of the rim top and stem to show the condition. The rim top and beveled edge looked amazing. The stem was vulcanite and there were light tooth marks and chatter on both sides ahead of the button.The stamping on the left and right sides of the shank are clear and readable. It reads as noted above. The three silver coloured inset bars on the left side of the taper stem are also visible.I removed the stem from the shank and took a photo of the pipe to give a sense of the proportions of the bowl and stem.Because the pipe was in such amazing condition after the clean up I started my work on it by rubbing the bowl and shank down with Before & After Restoration Balm. I worked it into the surface of the bowl sides and shank with my fingertips to clean, enliven and protect the briar. I let the balm sit for 10 minutes, then buffed with a cotton cloth to raise the shine. The Balm did its magic and the grain stood out on the briar. I set the bowl aside and turned to the stem. I sanded out the tooth marks and chatter with  200 grit sandpaper and started the polishing with 400 grit wet dry sandpaper.I polished the stem with micromesh sanding pads – 1500-12000 grit pads. I wiped it down with Obsidian Oil after each sanding pad. I finished the polishing with Before & After Polishes – both Fine and Extra Fine. I gave it a final rub down with Obsidian Oil and set it aside to dry. This Comoy’s Made The Everyman London Pipe 188 Stack with a vulcanite taper stem is a beautifully grained pipe with a flowing shape that looks great . The rich browns of the contrasting stain makes the grain come alive with the polishing and waxing. I put the stem back on the bowl and carefully buffed the pipe with Blue Diamond on the buffing wheel using a light touch on the briar. I gave the bowl and the stem multiple coats of carnauba wax on the buffing wheel and followed that by buffing the entire pipe with a clean buffing pad. I hand buffed the pipe with a microfiber cloth to deepen the shine. The finished The Everyman London Pipe Stack really is a beauty and fits nicely in the hand and looks very good. Give the finished pipe a look in the photos below. The dimensions of the pipe are Length: 5 ¾ inches, Height: 2 ¼ inches, Outside diameter of the bowl: 1 ¼ inches, Chamber diameter: ¾ of an inch. The weight of the pipe is 1.66oz./46grams. This pipe will soon be on the British Pipe Makers section of the rebornpipes store if you would like to add it to your collection. Thanks for reading this blog and my reflections on the pipe while I worked on it. There are many more to come!

Another Change of Pace – The Everyman London Pipe 291 Smooth Billiard


Blog by Steve Laug

I decided to work on another pipe from the fellow in Kitchener, Ontario who sent me some pipes he needed cleaned up. He had been referred to me by my local pipe and cigar shop. While I am not currently adding more pipes to my queue of repairs I have made a commitment to the shop to work on pipes for their customers. Generally they have one or two pipes that need a bit of work. This fellow sent me the following email:

I just came across my smoking pipes that I’ve had in storage for about 40 years. I’m wondering what you’d charge to have them refurbished. There are 17 in total (11 are Brighams and 6 are various).

It turns out he said he had 17 pipes. That was certainly more than I expected but I communicated that there was a large queue ahead of him and I would have to fit them in as I could. He was fine with whatever time it took. He sent me the following photos of his collection that he wanted restored. The first photo shows his eleven Brigham pipes – all very interesting shapes. The second photo shows the six various pipes in the collection – A Republic Era Peterson’s System 1312 (Canadian Import), A Bjarne Hand Carved Freehand, a Comoy’s Everyman London smooth billiard, a GBD Popular Dublin 12, an English made Kaywoodie Rustica 72B, a Kriswill Bernadotte 60 with a broken tenon. When the box arrived there were two additional pipes included for a total of 19 – a Ropp 803 Deluxe Cherrywood Poker and a Comoy’s Sandblast Everyman Canadian 296. It was a lot of pipes! I have been randomly choosing the next pipe to work on and chose The Everyman London Pipe 296 Canadian that was not included in the photos of the collection that he sent me. It was a surprise when it arrived.

When I unwrapped it the pipe it was a smooth finish Billiard. It was stamped on the left side of the shank and read The Everyman London Pipe. On the right side of the shank it was stamped with the circular Made in London England COM stamp. Near the shank bowl junction on the right side it also had the shape number 291. The finish was dull and dirty looking but had nice grain under the grime. The rim top had some darkening on the top and the beveled inner edge. There was also a lava overflow from the cake in the bowl. The tapered stem was oxidized and had tooth marks and chatter near the button on both sides. There was also some calcification for about an inch up the stem. The stem also had the standard Everyman three silver bars on the left side.     I took close up photos of the bowl and rim top to show the condition of the bowl and thick lava on the top and the beveled rim edge as well. You can also see the cake in the bowl. It is hard and quite thick. I also took close up photos of the stem to show its condition as mentioned above.      I took photos of the stamping on the sides of the shank to show what I was speaking about above. It is very faint but readable. It reads The Everyman London Pipe on the left side and Made In London, England in a circular COM Stamp on the right. That is preceded by the shape number 291. There is some nice grain around the bowl and shank.    I am including the information I also included on the sandblasted Canadian I just finished (https://rebornpipes.com/2020/03/06/time-for-a-change-of-pace-the-everyman-london-pipe-296-canadian/). I turned my favourite go to sites on background of brands. The first is Pipephil’s site ( http://www.pipephil.eu/logos/en/logo-e4.html). There I looked up the Everyman brand and confirmed what I remembered about it being made by Comoy’s. From there I turned to Pipedia (https://pipedia.org/wiki/Comoy%27s). I went directly to the section on Comoys pipes. I found this shape chart. The shape number 291 is shown as a Basic Billiard. I  have drawn a green rectangle around it in the photo below. (The red boxed pipe in the photo below was The Everyman London Pipe Canadian that I had finished prior.With this pipe I am working on another of this pipe man’s non-Brigham pipes from the nineteen pipe installment. I went to work on it immediately.I reamed the bowl with a PipNet pipe reamer using the second and third cutting head to take the cake back to bare briar so I could inspect the walls. I cleaned up the remnants with a Savinelli Fitsall Pipe Knife. I sanded the bowl walls with 220 grit sandpaper on a piece of dowel to smooth them out and further examine them. I was happy that the walls looked very good.  I also scraped off the lava on the rim top and edges with the Fitsall Knife to begin the cleaning process. I scrubbed the surface of the bowl with undiluted Murphy’s Oil Soap and a tooth brush to remove the grime and grit from the briar.      I cleaned out the mortise area and airway to the bowl and shank as well as the airway in the stem with pipe cleaners, cotton swabs and alcohol. I scraped it with a dental spatula and followed up with the cleaners. It was obvious that this had been another one of his favourite pipes as it was heavily smoked.  I used a folded piece of 220 grit sandpaper to clean up the darkened rim top and beveled rim edge. I was able to remove the darkening and the remaining lava.     I polished rim top and sides of the bowl with micromesh sanding pads – wet sanding with 1500-12000 grit pads. I wiped the bowl down after each sanding pad to remove the dust and debris from the sanding. The bowl was looking very good after the final polishing pad. I rubbed the bowl and shank down with Before & After Restoration Balm. I worked it into the surface of the briar with my fingertips and a horse hair shoe brush to clean, enliven and protect it. I let the balm sit for a little while and then buffed with a cotton cloth to raise the shine. Mark Hoover’s Balm is a product that I have come to appreciate and one I use on every pipe I have been working on. It really gives depth to the sandblasted finish on the briar. I set the bowl aside and turned my attention to the stem. I rubbed the stem down with Soft Scrub on with a cotton pad and it removed the oxidation and the calcification build up. It looked a lot better. I sanded out the remaining tooth chatter and oxidation with 220 grit sandpaper and started the polishing with 400 grit wet dry sandpaper.      I rubbed down the stem with Denicare Mouthpiece Polish, a red gritty paste and a cotton pad to remove the remnants of oxidation and to blend in the sanding. The stem is starting to show promise at this point in the process.      I polished the stem with micromesh sanding pads – wet sanding it with 1500-12000 grit pads. I wiped the stem down after each sanding pad with a cotton pad to remove the sanding debris.  I finished polishing the stem with Before & After Pipe Stem Polish – both fine and extra fine. I finished by wiping it down with Briarville’s No Oxy Oil and buffing it to a shine.   I finally feel like I am making progress on this 19 pipe lot from Eastern Canada. With the completion of this one I have finished 12 of the pipes. I put The Everyman London Pipe Billiard back together and buffed it with Blue Diamond on the buffing wheel. I gave the bowl and the stem multiple coats of carnauba wax. I hand buffed the pipe with a clean buffing pad to raise the shine. It is fun to see what the polished bowl looks like with the grain on both sides and rim standing out with stark clarity. Added to that the polished black vulcanite stem with the shining silver coloured bars was beautiful. This nicely grained The Everyman 291 Billiard is nice looking and feels great in my hand. It is another light and well balanced pipe. Have a look at it with the photos below. The dimensions are Length: 5 ¾ inches, Height: 1 7/8 inches, Outside diameter of the bowl: 1 ¼ inches, Chamber diameter: ¾ of an inch. Once again I am looking forward to what the pipeman who sent it thinks of this restoration. Only 7 more of these pipes to do in this lot! Thanks to each of you who are reading this blog. Remember we are not pipe owners; we are pipemen and women who hold our pipes in trust until they pass on into the trust of the next pipeman or woman.

Time for a Change of Pace – The Everyman London Pipe 296 Canadian


Blog by Steve Laug

The next pipe I picked out is also from the fellow in Kitchener, Ontario who sent me some pipes he needed cleaned up. He had been referred to me by my local pipe and cigar shop. While I am not currently adding more pipes to my queue of repairs I have made a commitment to the shop to work on pipes for their customers. Generally they have one or two pipes that need a bit of work. This fellow sent me the following email:

I just came across my smoking pipes that I’ve had in storage for about 40 years. I’m wondering what you’d charge to have them refurbished. There are 17 in total (11 are Brighams and 6 are various).

It turns out he said he had 17 pipes. That was certainly more than I expected but I communicated that there was a large queue ahead of him and I would have to fit them in as I could. He was fine with whatever time it took. He sent me the following photos of his collection that he wanted restored. The first photo shows his eleven Brigham pipes – all very interesting shapes. The second photo shows the six various pipes in the collection – A Republic Era Peterson’s System 1312 (Canadian Import), A Bjarne Hand Carved Freehand, a Comoy’s Everyman London smooth billiard, a GBD Popular Dublin 12, an English made Kaywoodie Rustica 72B, a Kriswill Bernadotte 60 with a broken tenon. When the box arrived there were two additional pipes included for a total of 19 – a Ropp 803 Deluxe Cherrywood Poker and a Comoy’s Sandblast Everyman Canadian 296. It was a lot of pipes! I have been randomly choosing the next pipe to work on and chose The Everyman London Pipe 296 Canadian that was not included in the photos of the collection that he sent me. It was a surprise when it arrived.

When I unwrapped it the pipe it was a sandblast finish Canadian. It was stamped on the flat underside of the oval shank. It was stamped The Everyman London Pipe followed by Made in London England and the shape number 296. It had a rugged sandblast finish on the bowl and shank with a smooth panel on the heel and the shank. The rim top had a light lava overflow from the medium cake in the bowl. The bowl was in good condition and the beveled inner edges of the bowl were in good condition. It was a dirty pipe but the finish appeared to be in okay condition under the grime. The short, oval tapered stem was oxidized and had tooth marks and chatter near the button on both sides. There was also some calcification for about an inch up the stem. The stem also had the standard Everyman three silver bars on the left side.     I took close up photos of the bowl and rim top to show the condition of the bowl as well as the cake and lava overflowing onto the rim top. I also took close up photos of the stem to show its condition as mentioned above.    I took a photo of the stamping on the underside of the shank to show what I was speaking about above. It is very clear and readable. It reads The Everyman London Pipe, Made In London, England and the shape number 296.Before starting my clean up work on the pipe I turned my favourite go to sites on background of brands. The first is Pipephil’s site ( http://www.pipephil.eu/logos/en/logo-e4.html). There I looked up the Everyman brand and confirmed what I remembered about it being made by Comoy’s. From there I turned to Pipedia (https://pipedia.org/wiki/Comoy%27s). I went directly to the section on Comoys pipes. I found this shape chart. The shape number 296 is shown as a Large Canadian. I  have drawn a red rectangle around it in the photo below.With this pipe I am taking a break to work on this pipe man’s non-Brigham pipes from the nineteen pipe installment. I went to work on it immediately.I reamed the bowl with a PipNet pipe reamer using the second and third cutting head to take the cake back to bare briar so I could inspect the walls. I cleaned up the remnants with a Savinelli Fitsall Pipe Knife. I sanded the bowl walls with 220 grit sandpaper on a piece of dowel to smooth them out and further examine them. I was happy that the walls looked very good.    I cleaned out the mortise area and airway to the bowl and shank as well as the airway in the stem with pipe cleaners, cotton swabs and alcohol. It was obvious that this had been one of his favourite pipes as it was heavily smoked.     I scrubbed the surface of the bowl with undiluted Murphy’s Oil Soap and a tooth brush to remove the grime and grit from the briar.      I rubbed the bowl and shank down with Before & After Restoration Balm. I worked it into the surface of the briar with my fingertips and a horse hair shoe brush to clean, enliven and protect it. I let the balm sit for a little while and then buffed with a cotton cloth to raise the shine. Mark Hoover’s Balm is a product that I have come to appreciate and one I use on every pipe I have been working on. It really gives depth to the sandblasted finish on the briar.  I set the bowl aside and turned my attention to the stem. I rubbed the stem down with Soft Scrub on with a cotton pad and it removed the oxidation and the calcification build up. It looked a lot better.      I sanded out the remaining tooth chatter and oxidation with 220 grit sandpaper and started the polishing with 400 grit wet dry sandpaper.I rubbed down the stem with Denicare Mouthpiece Polish and a cotton pad to remove the remnants of oxidation and to blend in the sanding. The polish is a red gritty paste that works wonders on removing stubborn remnants of oxidation in the crease. The stem is starting to show promise at this point in the process.       I polished the stem with micromesh sanding pads – wet sanding it with 1500-12000 grit pads. I wiped the stem down after each sanding pad with a cotton pad to remove the sanding debris.  I finished polishing the stem with Before & After Pipe Stem Polish – both fine and extra fine. I finished by wiping it down with Briarville’s No Oxy Oil and buffing it to a shine.      I finally feel like I am making progress on this 19 pipe lot from Eastern Canada. With the completion of this one I have finished 11 of the pipes. I put The Everyman London Pipe Canadian back together and buffed it with Blue Diamond on the buffing wheel. I gave the bowl multiple coats of Conservator’s Wax and the stem multiple coats of carnauba wax. I hand buffed the pipe with a clean buffing pad to raise the shine. It is fun to see what the polished bowl looks like with the deep sandblast high spots and crevices showing through multi coloured brown finish. Added to that the polished black vulcanite stem with the shining silver coloured bars was beautiful. This sandblast finish The Everyman 296 Canadian is nice looking and feels great in my hand. It is light and well balanced. Have a look at it with the photos below. The dimensions are Length: 6 inches, Height: 2 inches, Outside diameter of the bowl: 1 ¼ inches, Chamber diameter: ¾ of an inch. Once again I am looking forward to what the pipeman who sent it thinks of this restoration. Only 8 more of these pipes to do in this lot! Thanks to each of you who are reading this blog. Remember we are not pipe owners; we are pipemen and women who hold our pipes in trust until they pass on into the trust of the next pipeman or woman.

Fresh Life for a Comoy’s The Everyman 126 Sandblast Pot


Blog by Steve Laug

The next pipe on the work table is another pipe that came to me from the estate of a Vancouver pipe smoker whose widow left them with a local Pipe Shop after he died. I was asked to clean them up and sell them for the shop as it has since closed. The photos below show the pipe as it was when I brought it to my work table. It is a nicely shaped sandblast pot shaped pipe – with a a really nice looking grain pattern in the blast under all the grime. The bowl was heavily caked with a lava coat on the top of the rim. It was hard to tell how the inner and outer edge of the rim actually looked until the bowl was reamed. The bowl was dirty and the finish was almost filled in with the grime. The stem had the same deep tooth marks and chatter on the top and underside near the button as the rest of the pipes in this estate. There was calcification on the first inch from what looked like a Softee bit. From the three bars on the left side of the stem and the stamping it was clearly a Comoy’s product. In this case it was stamped on a smooth band on the bottom of the bowl and shank with the words The Everyman London Pipe. Next to that it is stamped Made in London England followed by the 126 shape number next to the shank/stem junction. I took photos of it before cleaning to show that even though it was dirty the pipe showed promise.   When I went back to the States after Christmas to visit my parents and brothers I took a box of these pipes with me so that I could have Jeff clean them for me. When they came back to Canada they looked like different pipes. He reamed the bowl with a PipNet pipe reamer and cleaned it up with a Savinelli Fitsall Pipe Knife. He scrubbed the exterior with Murphy’s Oil Soap and a tooth brush to clean off the grime on the finish and the heavy overflow of lava on the rim top. He cleaned up the internals of the shank, mortise and stem with pipe cleaners, cotton swabs and alcohol to remove all of the oils and tars in the pipe. When it came back to Vancouver it was a quite different pipe. I took photos of it before I started the restoration. I took photos of the rim top and the stem to show their condition. Jeff was able to clean out the bowl completely and the rim top. He removed the tars and lava and left behind a clean top that would need some stain touch ups. The stem was oxidized, though less so where the Softee bit had been. There were scratches, tooth chatter and marks on both sides near the button and on the surface edges of the button itself.I decided to work on five of the pipes from this estate at the same time so I put all of the stems in a bath of Before & After Pipe Stem Deoxidizer to soak. I submerged all of the stems in the bath and let them soak overnight to break down the oxidation.I took all of the stems out of the bath at the same time and rinsed them under warm water to rinse off the mixture. I blew air through the stems and ran water through them as well to rinse out the mixture there as well. Each of the stems still had varying degrees of oxidation but it was all on the surface of the stems. The photos below show the Everyman stem after rinsing and drying.I painted the surface of the stem with the flame of a Bic lighter to lift the tooth marks. One of the benefits of the lighter is that it burned off the sulfur on the surface of the stem. The top side of the stem came out very well as the tooth chatter and marks lifted. A little sanding would smooth it out well. On the underside it was a bit less successful. There were still two deep tooth marks present that would need to be repaired.I filled in the tooth marks and the dents on the top and bottom sharp edges of the button to smooth things out using clear super glue. Once the repair cures, I will sand it smooth and blend it into the surface on each side.While the repair was curing I turned my attention to the bowl. I touched up the faded areas on the rim top and around the sides of the bowl and shank with a Walnut stain touch up pen. It blended in very well with the colour of the rest of the bowl. The bowl had a hollow spot below the entrance of the airway. It was as if the bowl had been reamed with a knife and damage had been done to the bottom of the bowl. It was quite deep and rough. Since it was below the entrance of the airway I mixed a batch of JB Weld to apply to the deep gouge and build up the bottom of the bowl to the same height as the airhole. I applied it with a dental spatula and pressed it into the bottom of the bowl with a piece of wooden dowel. I rubbed down the briar with Before & After Restoration Balm. I worked it into the nooks and crannies of the sandblast finish to clean, enliven and protect the new finish. It also evened out the stain coat and gave the stain a multidimensional feel. I let the balm sit for a little while and then buffed it with a horsehair shoe brush. I buffed the bowl with a cotton cloth to raise the shine. At this point the bowl is pretty well finished. I still need to wax and buff it but that will wait for the stem. The repair on the stem had cured so I turned back to work on the stem. I used a file to recut the sharp edge of the button and then sanded it with 220 grit sandpaper until I had blended the repairs into the surface of the stem. I also worked on the remaining oxidation with the sandpaper until I removed that as well.I polished out the scratches in the vulcanite with 400 grit wet dry sandpaper and with micromesh sanding pads. I wet sanded with 1500-2400 grit pads and dry sanded with 3200-12000 grit pads. I wiped the stem down after each pad with Obsidian Oil. After sanding with the 12000 grit pad I polished the stem with Before & After Pipe Stem Polish – both Fine and Extra Fine. With the stem polished I put it back on the pipe and lightly buffed the bowl with Blue Diamond. I buffed the stem with a more aggressive buff of Blue Diamond. I gave the bowl several coats of Conservator’s Wax and the stem several coats of carnauba wax and buffed the pipe with a clean buffing pad to raise the shine. I hand buffed it with a microfiber cloth to deepen the shine. The pipe polished up pretty nicely. The finished pipe is shown in the photos below. I will be posting it on the rebornpipes store very soon. It should make a nice addition to your pipe rack if you have been looking for a reasonably priced Comoy’s The Everyman Pipe. The sandblast finish looks really good in person with depth and texture. It should be a great smoking pipe with a good hand feel. The dimensions are Length: 5 1/2 inches, Height: 1 1/2 inches, Outside diameter of the bowl: 1 1/2 inches, Chamber diameter: 7/8 inches. Thanks for walking through the restoration with me as I worked over this estate Comoy’s.