Blog by Steve Laug
Back in November of 2019 I received an email from a fellow pipe man and restorer who I regularly communicate with regarding a C.P.F. pipe. He keeps an eye out for these as he knows that I have a love of the old American brand. He sent the email below and piqued my interest in the pipe.
Steve, I just picked up a CPF pipe that needs some TLC. Will send to you if you are interested. No strings attached. Marked French Briar CPF with some Brass fitments. Half-3/4 bent bulldog shape. Bowl looks solid from the outside but can’t really tell what it looks like from the inside. Might have an amber stem that is pretty much shot – complete, but has problems that probably cannot be repaired – holes near button, crack near shank. – Curtis
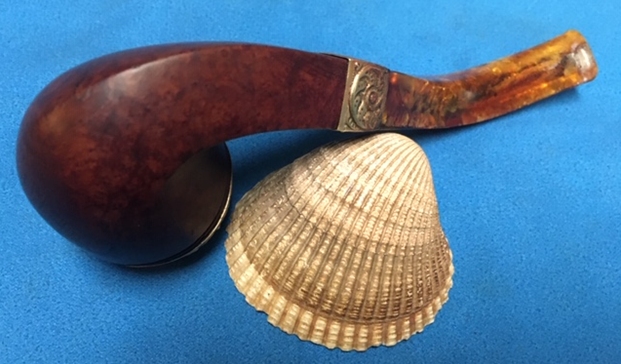
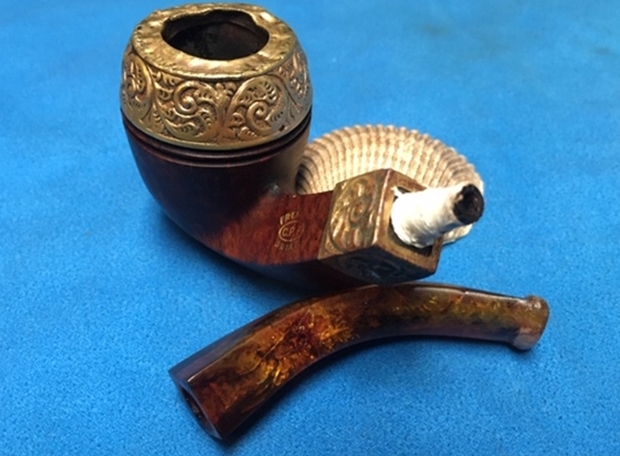
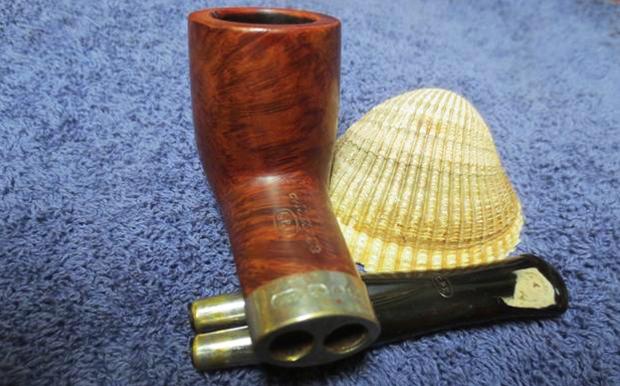
I asked him to send me some photos of the pipe but he had already put it in the mail to my brother Jeff. He did however send the photos from the EBay seller that I have included below. Curtis certainly has a gift for understatement… TLC is definitely not all that will be needed with this old timer. But I have a soft spot for hopeless old pipes and this was a C.P.F. as well so it would need to get some attention. At least it could be an ongoing project for me to fiddle with while working on pipes for others. It would be one that stayed in my C.P.F. collection so there was no rush.
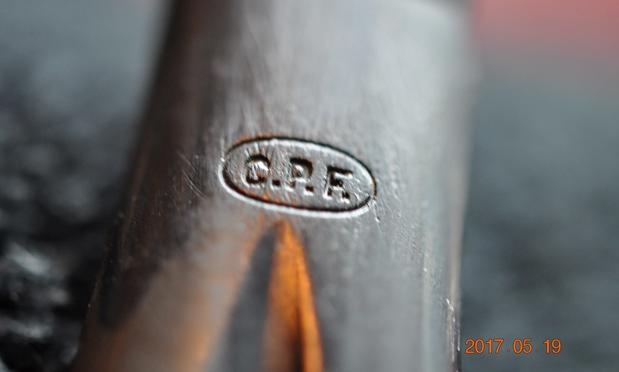
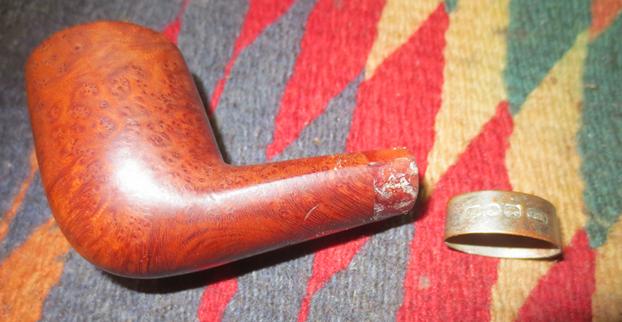
You can see some of the issues that came with this old pipe in the photos below. The rim cap and shank end cap are brass and they were oxidized and the grooves and filigree of the pieces were filled in with grime and some rust as well. The rim cap had been hammered almost completely out of shape which will show up later in the photos Jeff took when he received the pipe. The bowl itself had a thick cake in it and an overflow of lava onto the rim cap. The finish was tired and dirty with many small scratches. The C.P.F. oval with French Briar around the oval was still readable but worn. The issues with the stem were many. First appearances show that it is held onto the tenon with thread wound around the tenon. The amber is crystallized and cracked. There is a split on the right side of the shank end. There are two bite throughs – one on the top and one on the bottom. These bite throughs do not align. Patching them will be a challenge. The button itself is worn as well with chips and nicks. The airway is filled with tars that have caused it to turn black. This old pipe will need a lot of work but I can see potential.
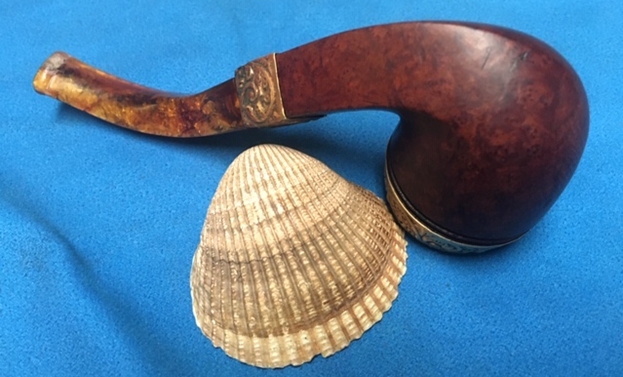
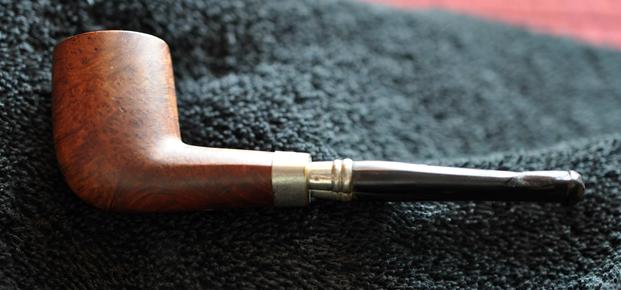
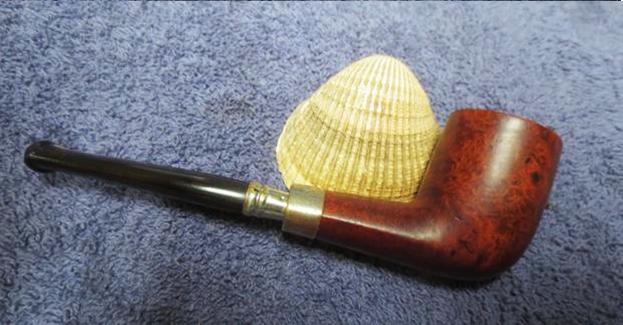
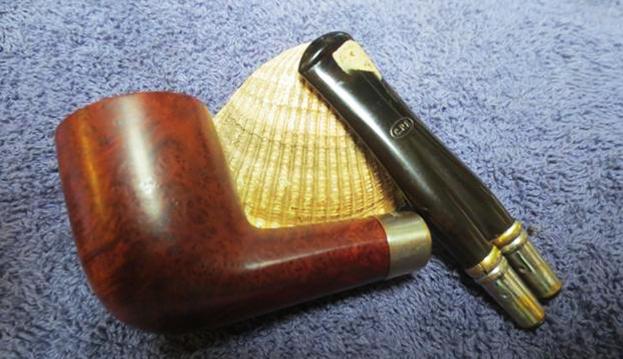
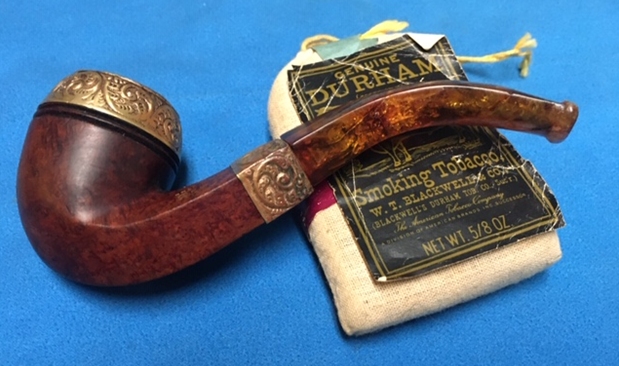
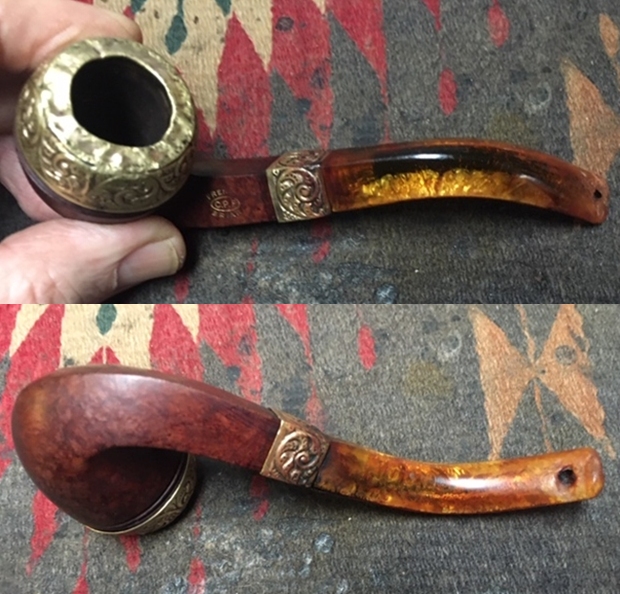
 Curtis shipped it to Jeff so that he could do the cleanup work on it before sending it on to me in Canada. Jeff took photos of the pipe to give me a better idea of the condition before he started his cleanup. The first photo shows the look of the pipe and for me shows the promise I saw in the tired old timer.
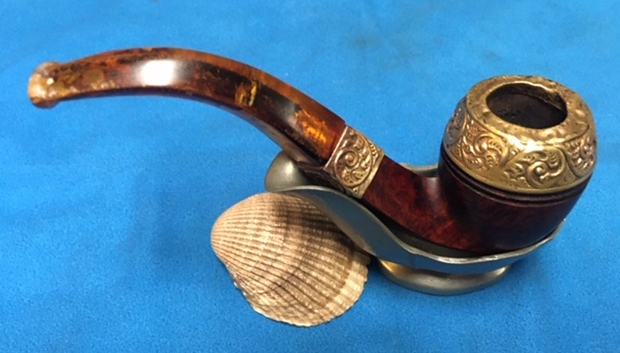
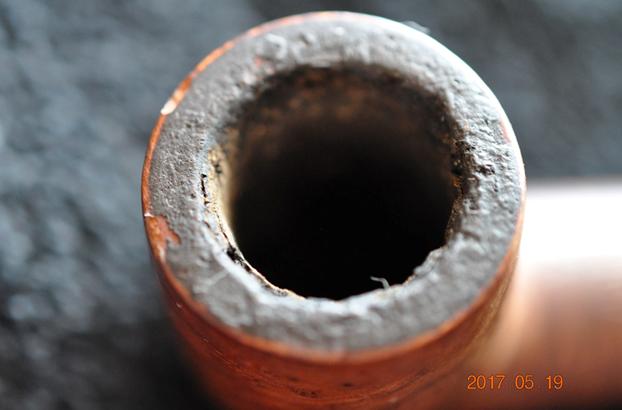
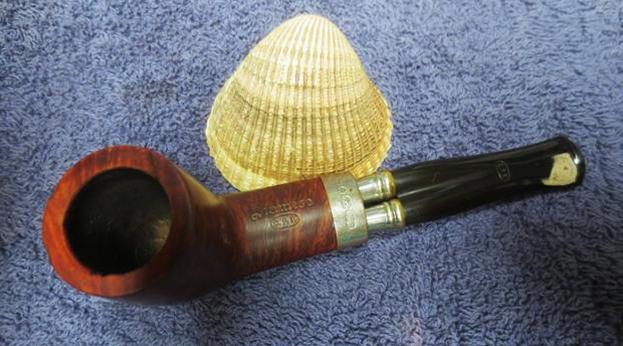
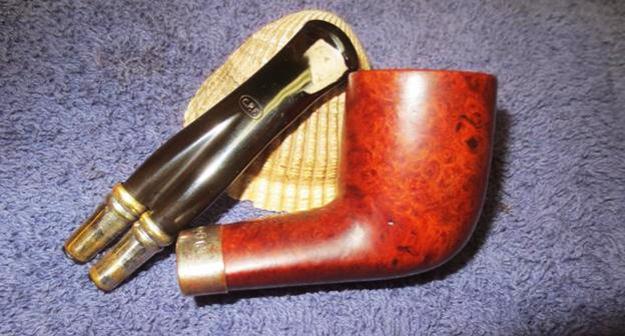
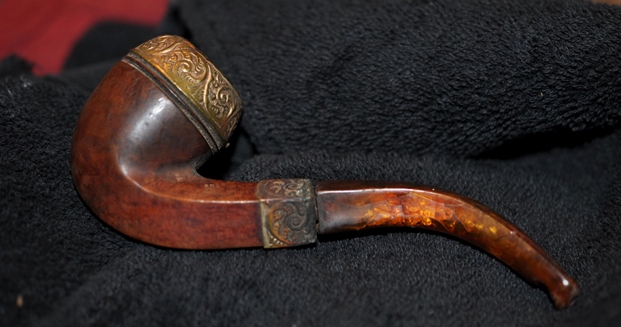 Jeff also took a photo of the rim top and bowl to show the thick cake and the damage to the brass cap. The second photo shows the bone tenon in the shank and the stem with the string wrap removed to show the issues with the size of the airway into the stem that would have originally been threaded to accommodate the tenon. The threads were long gone and the opening was now cavernous.
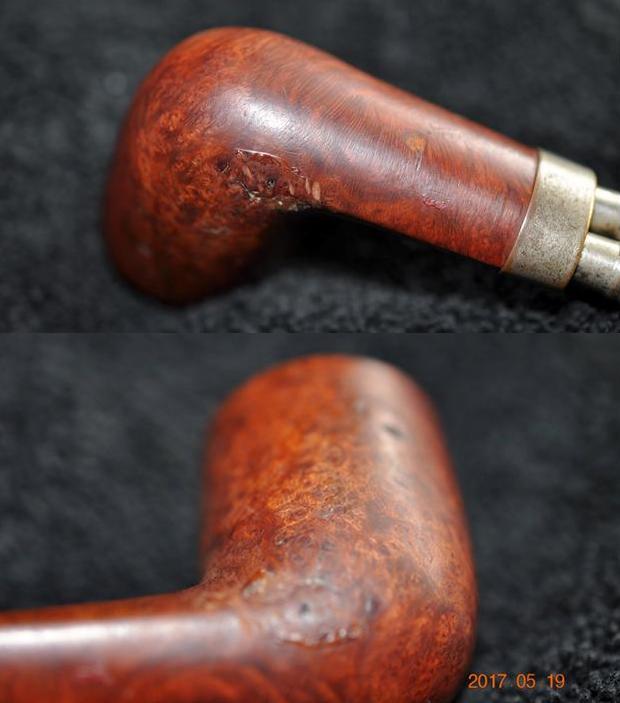
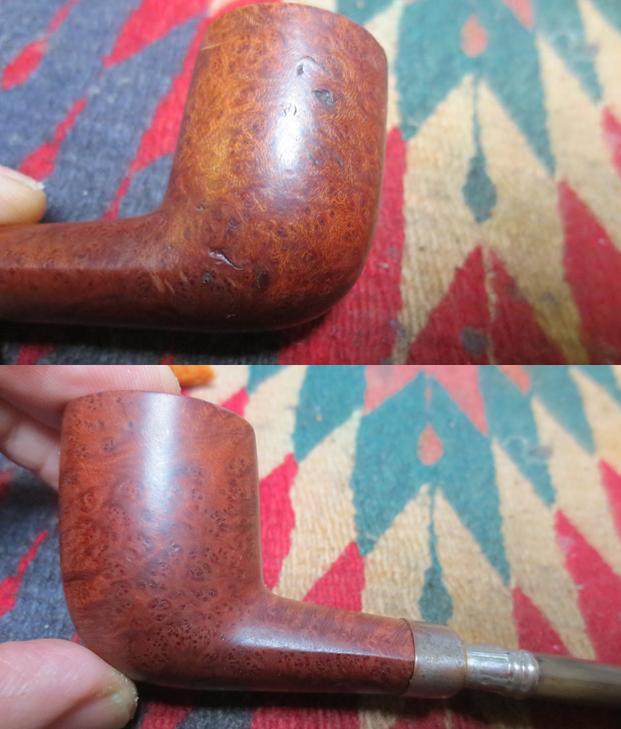
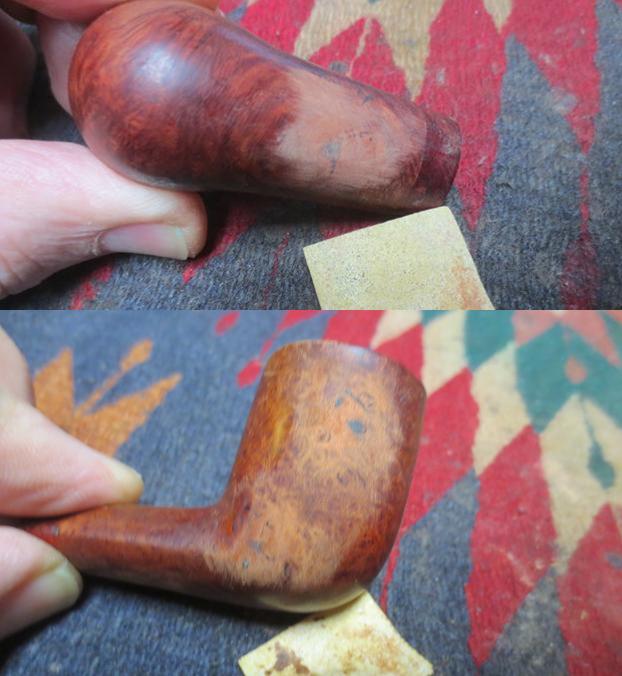
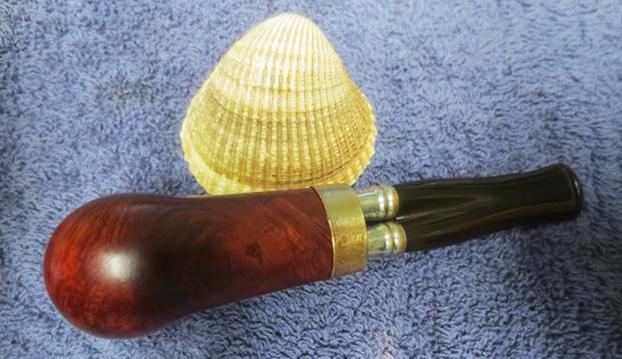
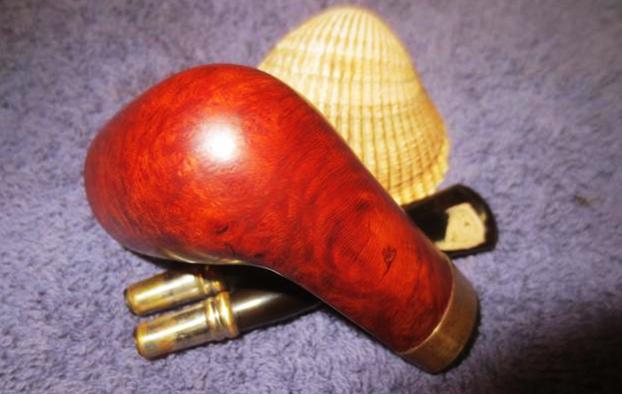
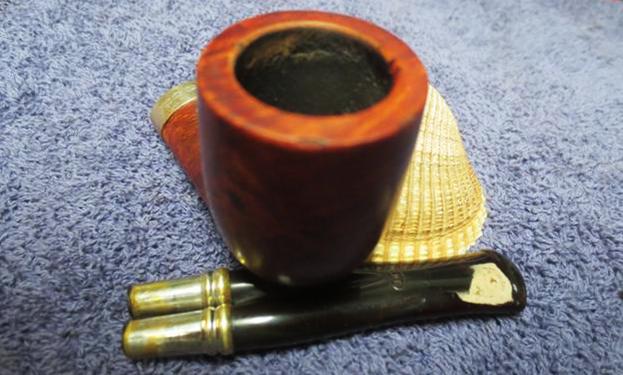
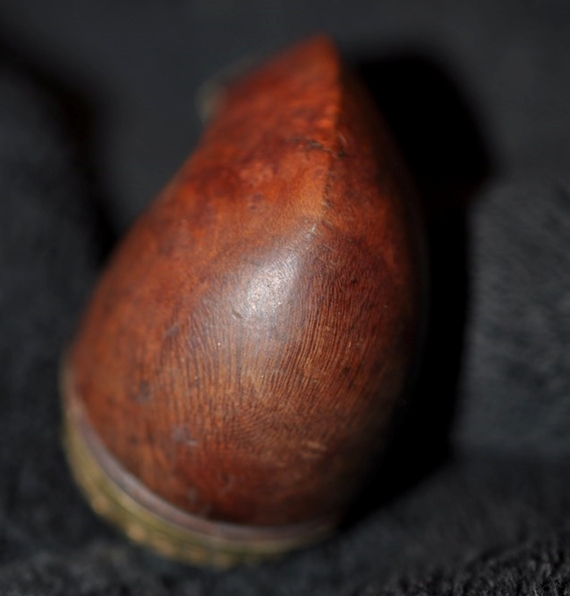
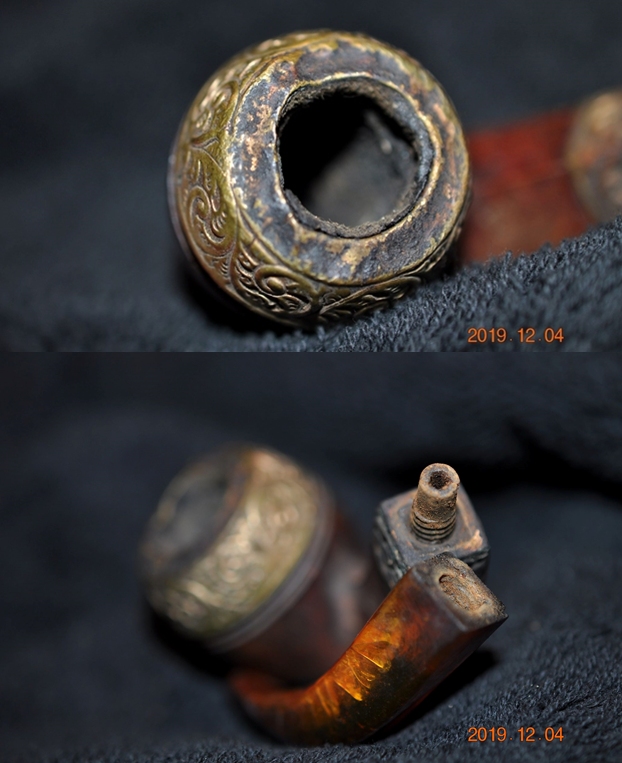 He took some photos of the sides and heel of the bowl to shows the scratches and nicks in the finish and gives a good picture of what will need to be done to bring the finish back to life.
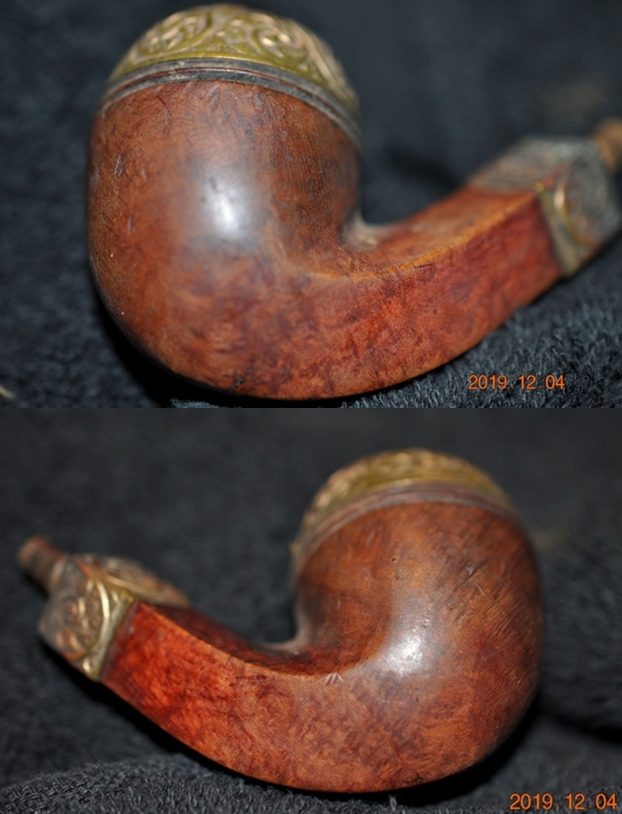
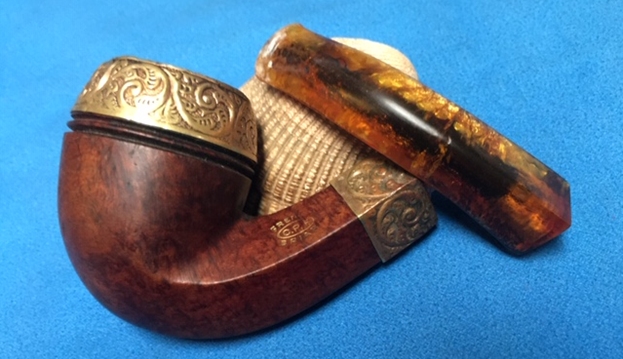
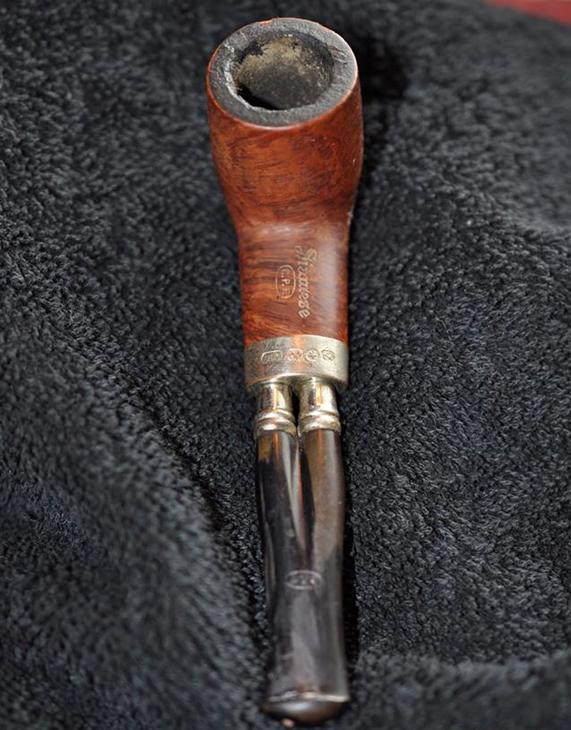
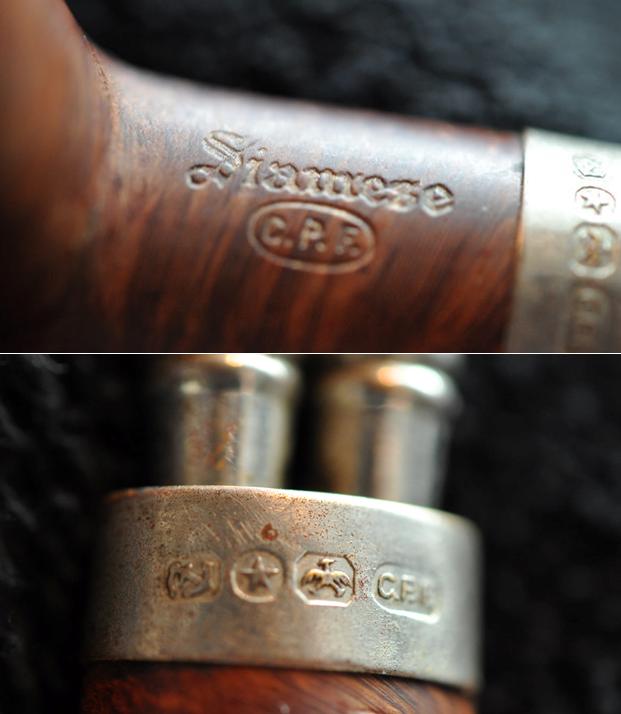
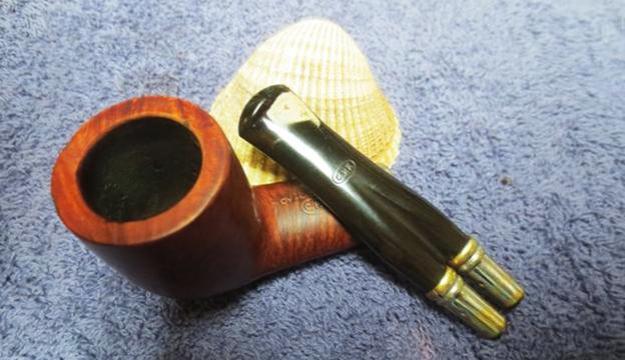
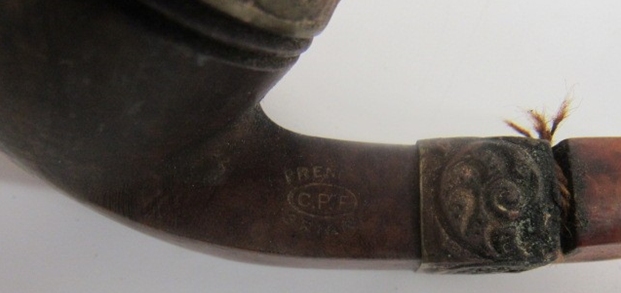
 Jeff took photos of the shank cap to give an idea of the condition of the oxidation and the darkening on the surface of the carvings in the brass. It was still solid even with the debris and oxidation.
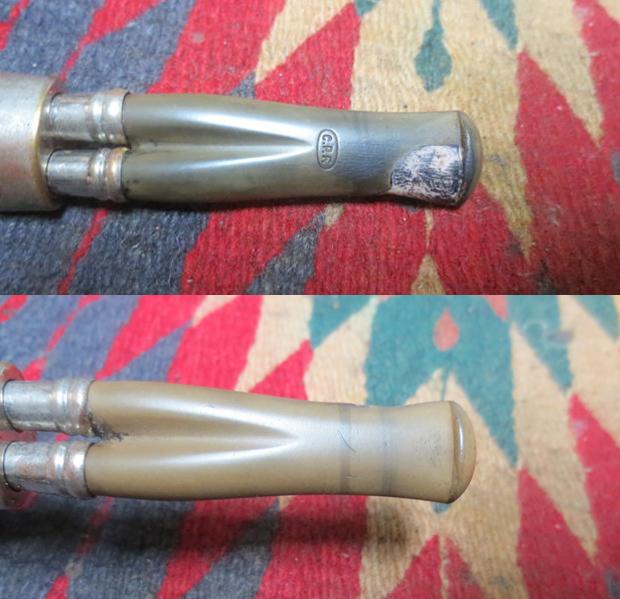
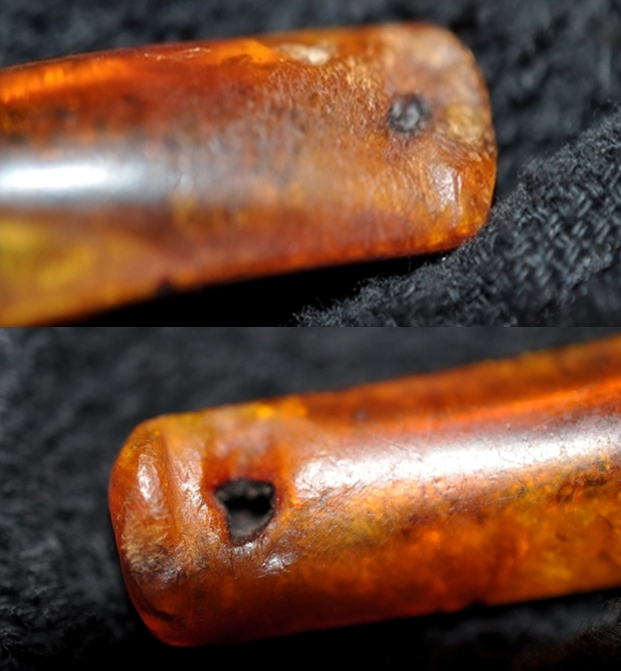
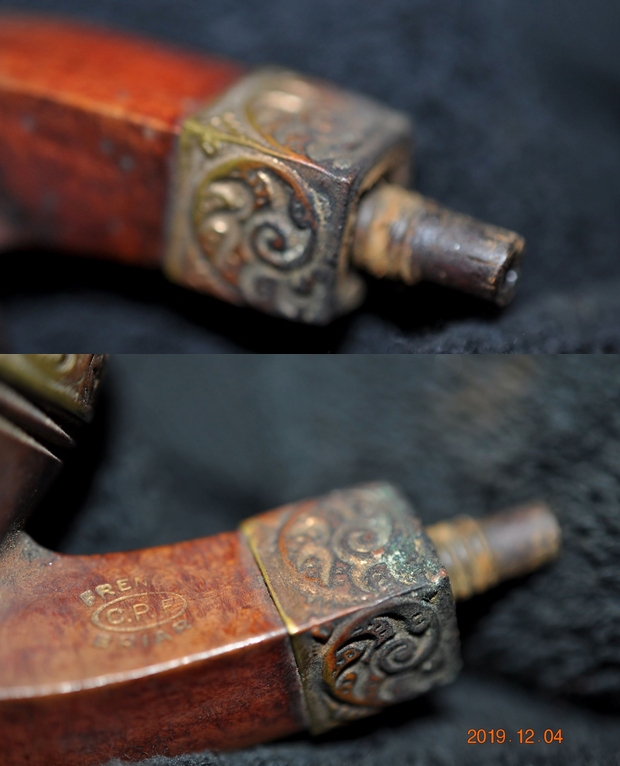 He took a series of photos of the stem to show the crystallization and cracks in the surface as well as the bite through areas and damage to the airway. The stem almost looked to be a lost cause but I had a few ideas and nothing to lose.
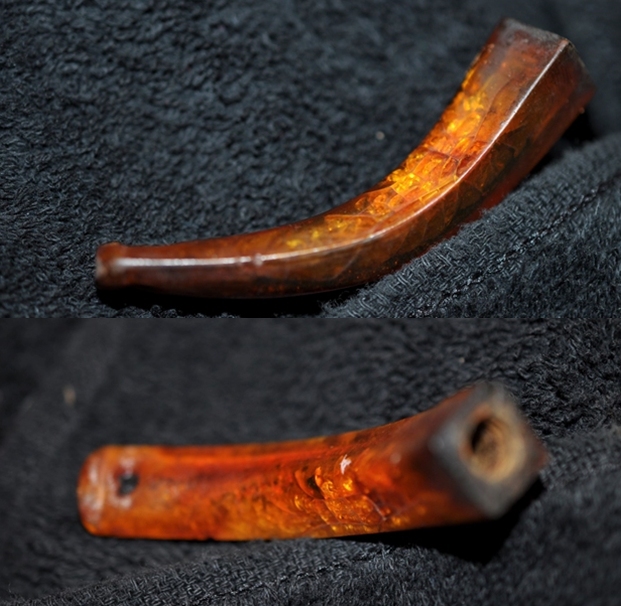
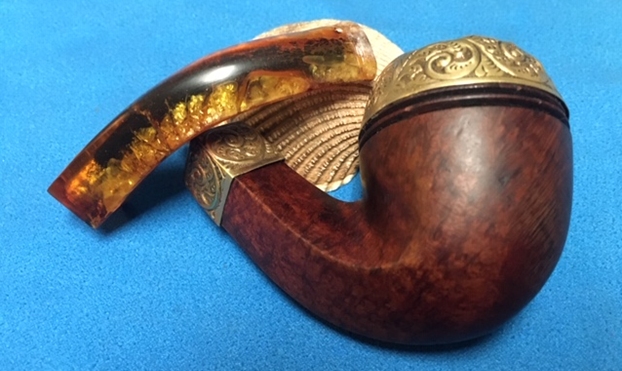
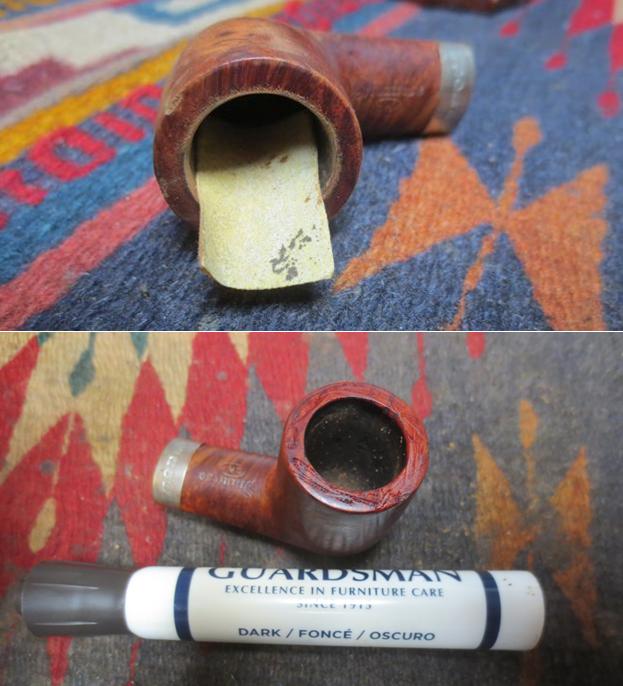
 I am getting more and more used to Jeff cleaning up the pipes before I work on them. So much so that when I have to clean them it is a real chore! The above photos told the story of the condition of the pipe when Jeff received it so I did not know what to expect when I unwrapped it from his box. II was pretty amazed at what I saw. Yes it had a lot of issues but it was CLEAN! He removed the bowl cap and reamed the bowl with a PipNet pipe reamer and cleaned up the reaming with a Savinelli Fitsall Pipe Knife. He scrubbed out the internals with alcohol, pipe cleaners and cotton swabs until the pipe was clean. He scrubbed the exterior of the bowl with Murphy’s Oil Soap and a tooth brush to remove the grime and grit on the briar and the lava on the rim brass rim cap and shank cap. The finish looked surprisingly good once it was clean. The brass rim cap showed its damage clearly and I was not sure how much of that I could remove but I would give it a try. He cleaned the stem internals and scrubbed the exterior and the result looked very good. The airway and bite through holes were clean but the crystallization was very evident. I have to say that when the pipe arrived here in Vancouver for the second stop of its restoration tour it was impressive. I took photos before I started my part of the work.
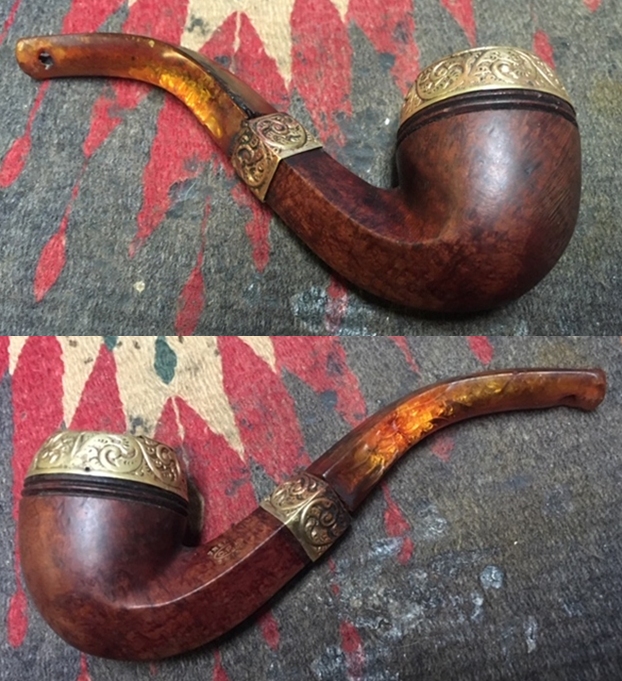
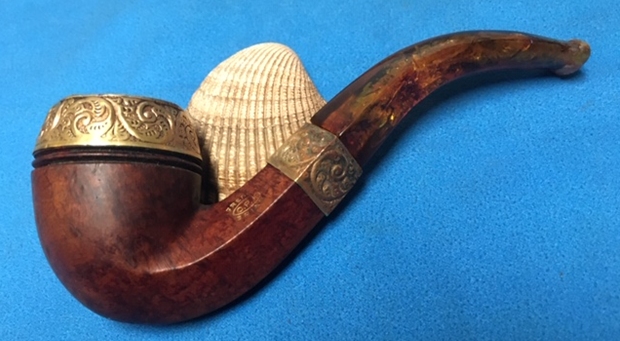
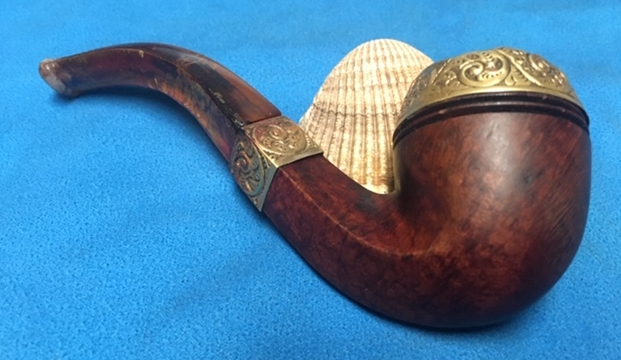
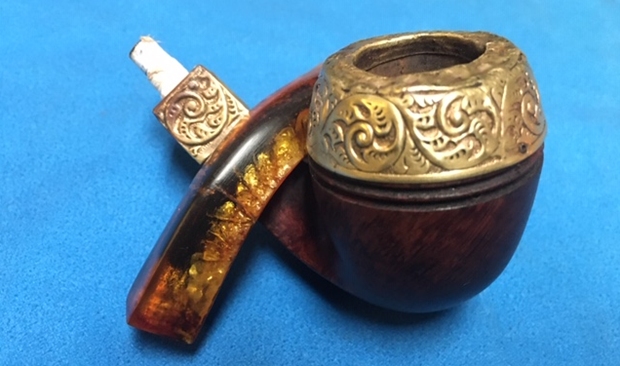
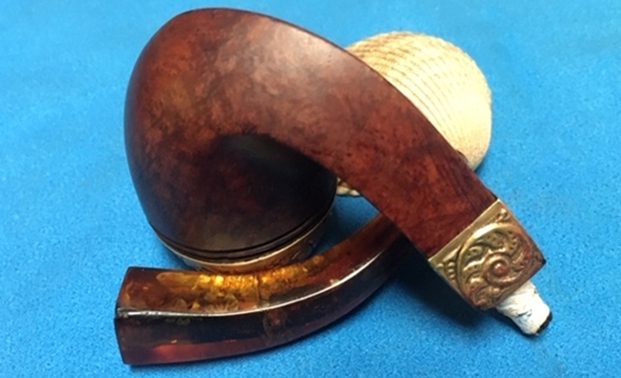
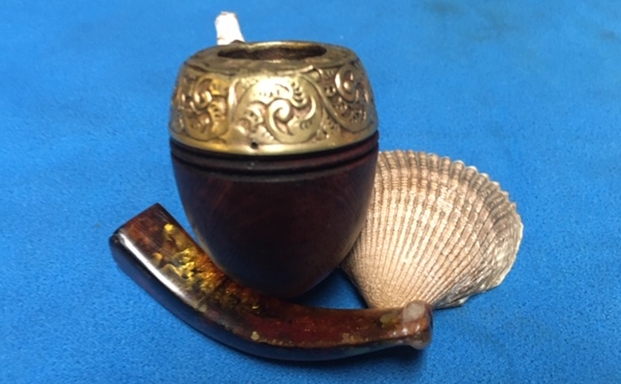
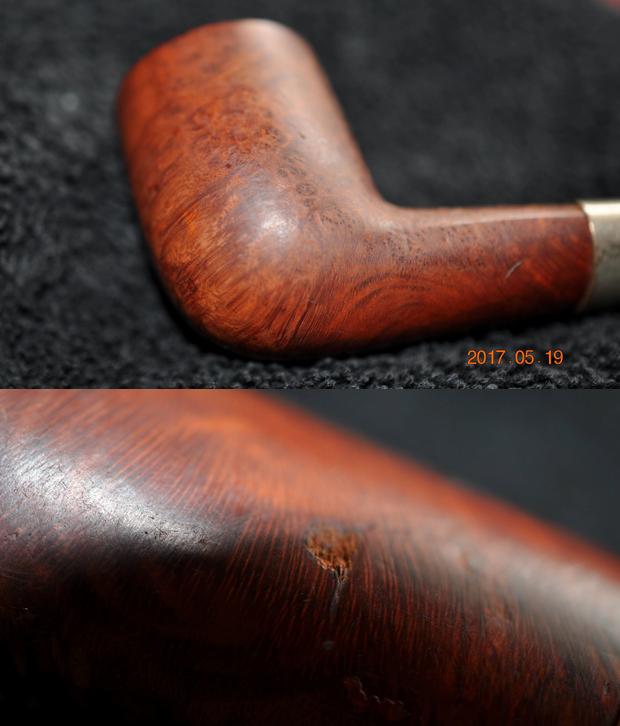
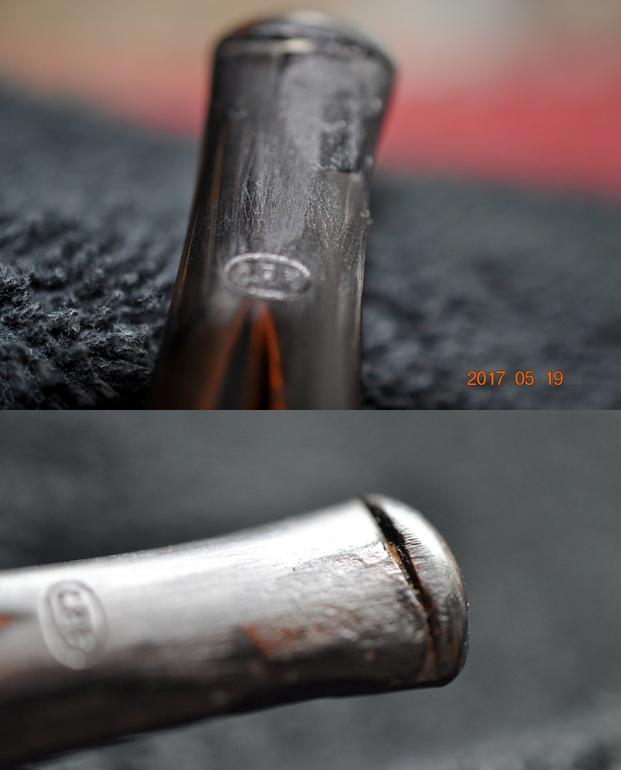
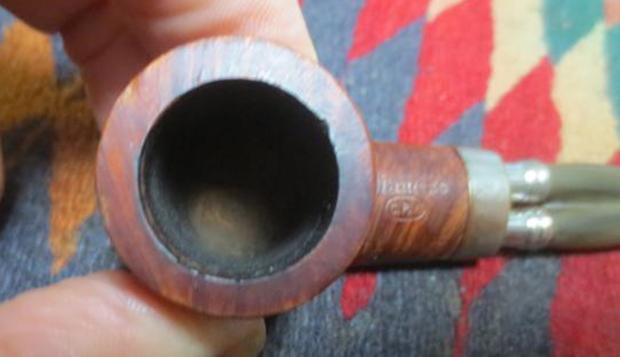
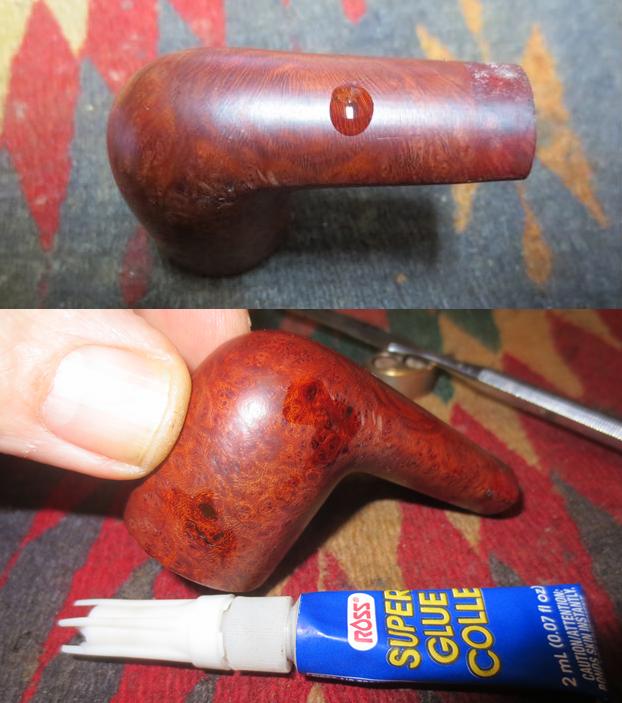
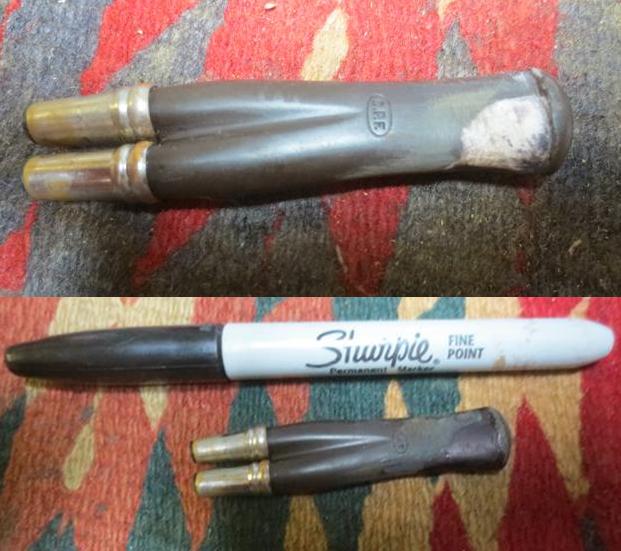
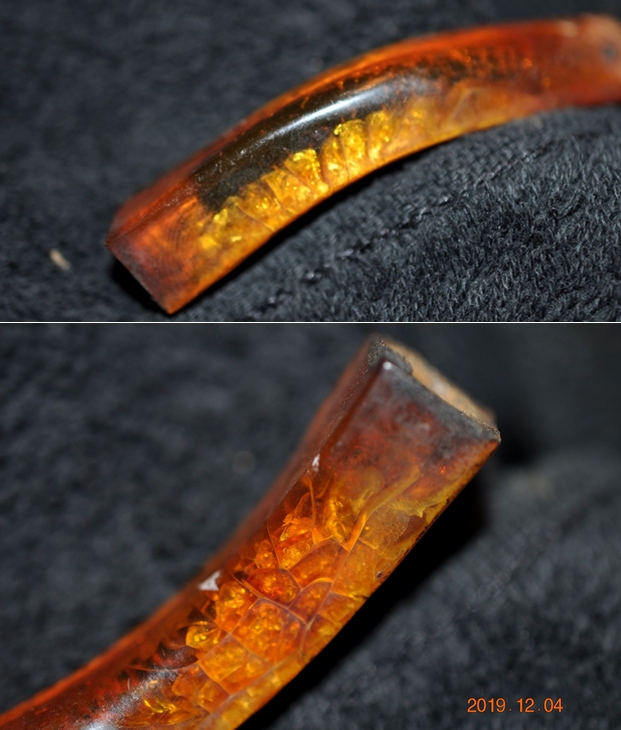
 I took some close up photos of the rim cap and shank cap. I wanted to show what an amazing job Jeff did in the cleanup of the caps. Even though they were damaged there were quite nice. The briar also cleaned up very nicely and you could see the grain! I also took close up photos of the stem to show condition it was in. It would not take a lot of work – stabilizing the crazing or crystallizing of the amber and also repairing the bite throughs.
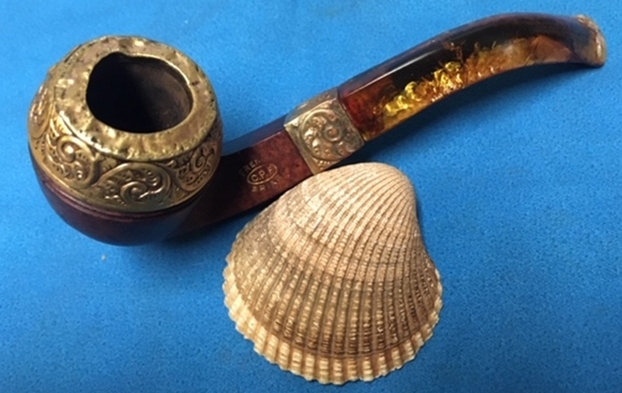
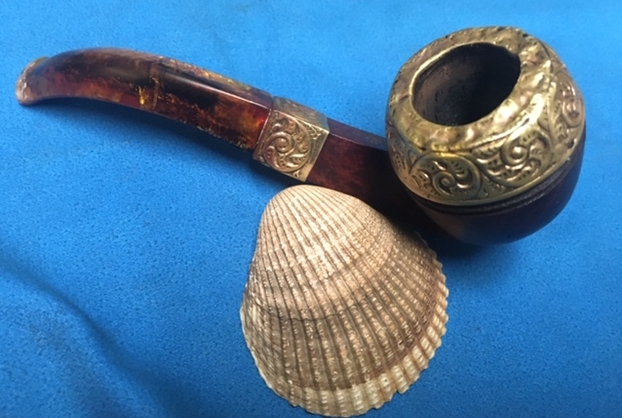
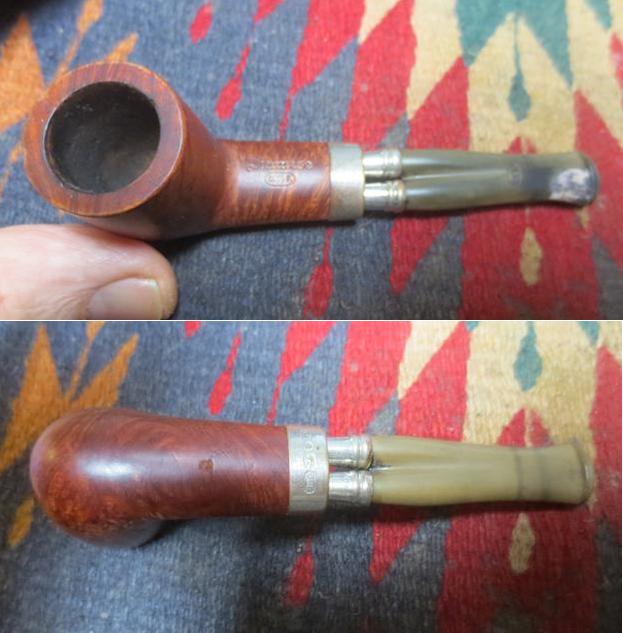
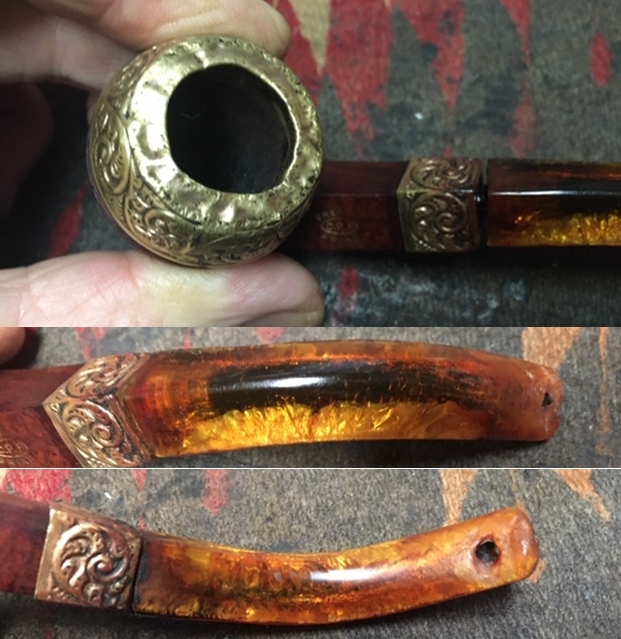 I took the pipe apart so I could work on the various components. You can see the bowl, the rim and shank cap and the stem in the photos. Each piece needed special attention.
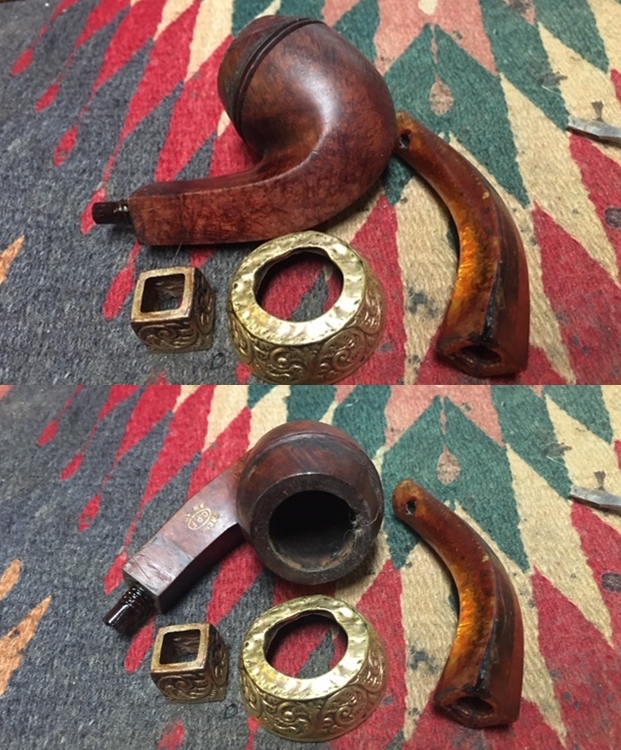 I used a small ball-peen hammer and a screwdriver and a Robertson head to tap out as many of the dents as I could.
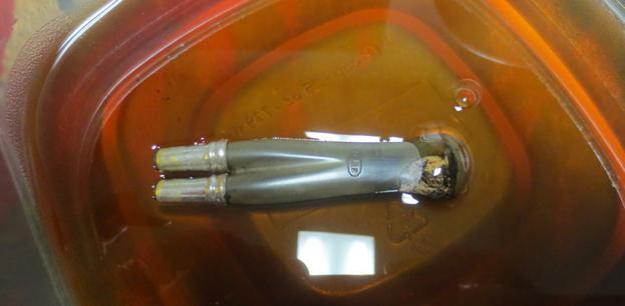
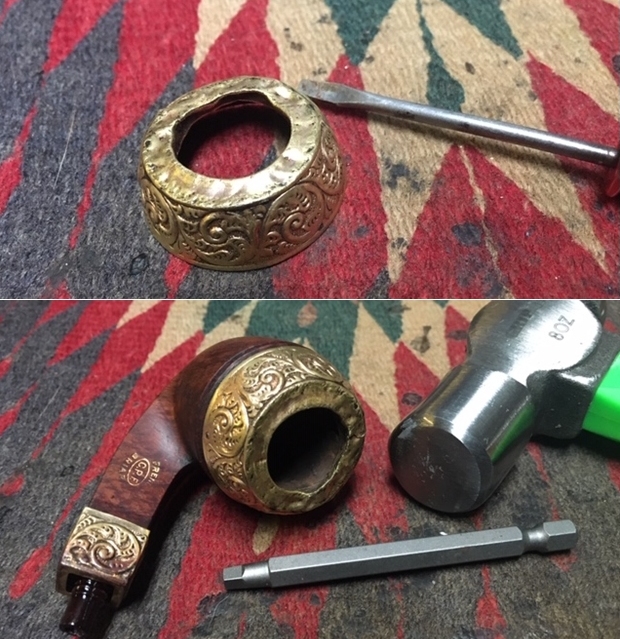 I used a brass bristle wire brush to polish the shank and rim cape and then glued them both in place on the shank and rim top respectively. I tapped the top of the rim cap with the hammer and was able to flatten it slightly. I knew that I would never get the bone tenon out of the shank and that the interior of the stem was far too big to receive the tenon. I wrapped the end of the tenon with Teflon tape to get a good fit on the stem.
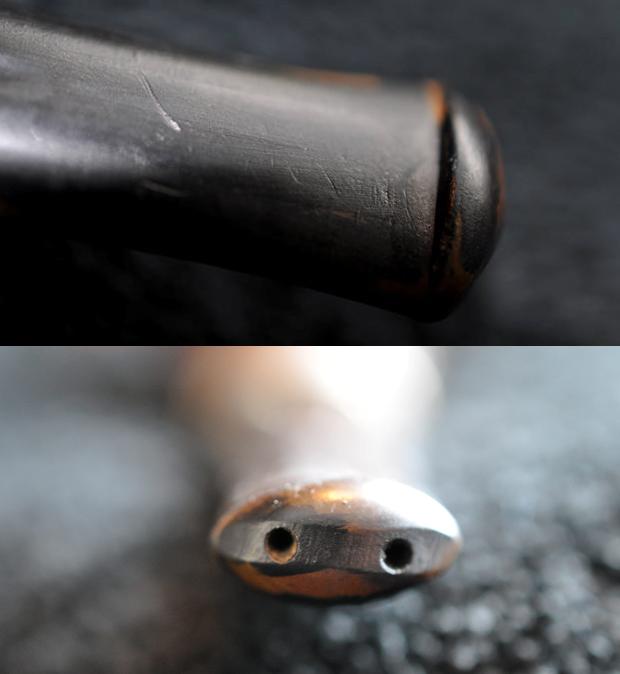
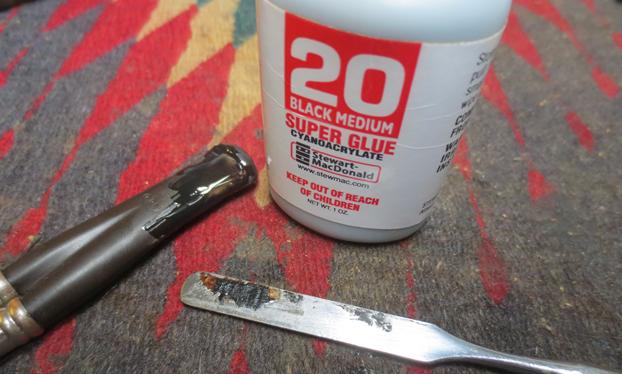
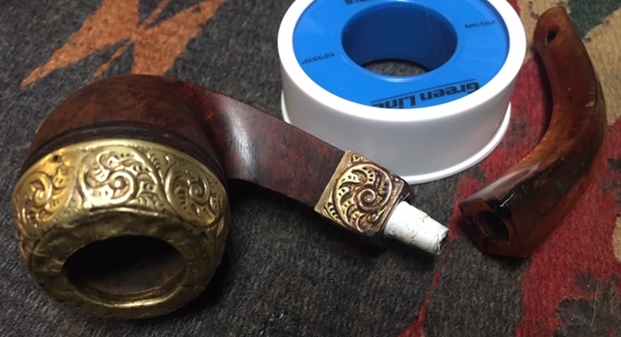 I coated the exterior of the stem with clear Krazy Glue to stabilize the crazing of the amber. I let it dry and then the stem was ready to sand. I tried to repair the bite through marks on both side of stem with the normal procedure of a greased pipe cleaner in the airway and building the hole up with the glue. It did not work this time at all.
 I used my Dremel and sanding drum to take off the damaged button. I was able to remove the majority of the bite through on the top side. Having that completed, I then was able to repair the one on the underside. I put the greased pipe cleaner in the stem and filled in the hole on the underside. This time it held. I also was able to build up the area just ahead of where the button had been on the topside. It truly looks ugly at this point in the process but would look better when I was finished.
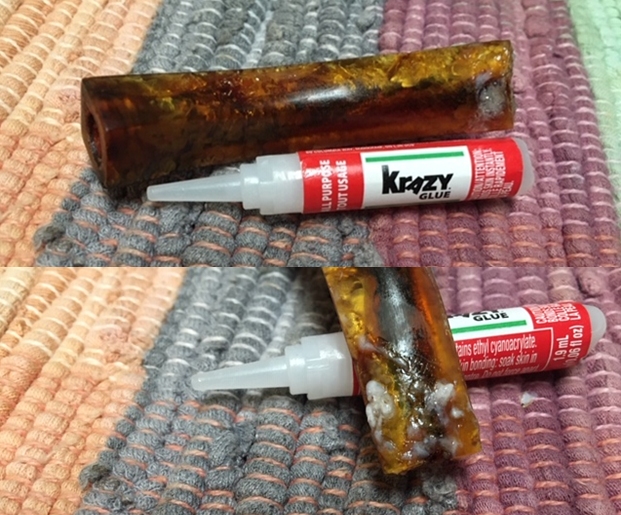 I sanded the surface on both sides of the stem with a folded piece of 220 grit sandpaper and then filled in some of the pits in the repair with more Krazy Glue.
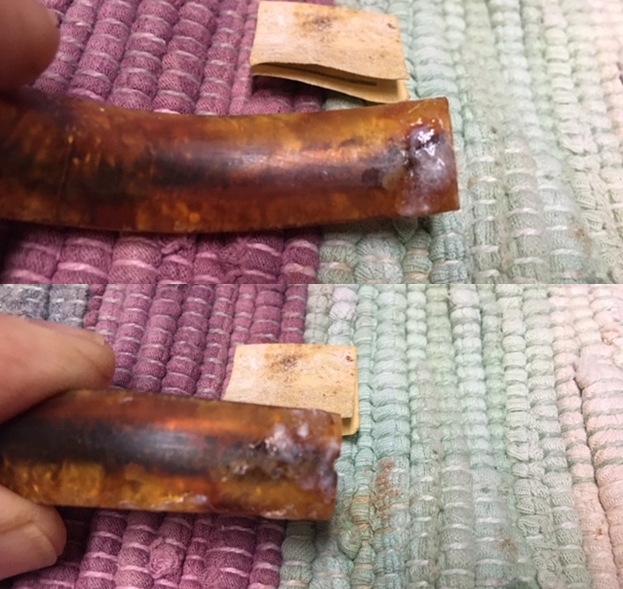 With that repair done I started to build up the glue around the stem end to make a new button. I layered on the glue and sprayed it with an accelerator and re-layered and resprayed until the button edge was present. I used a needle file to cut a sharp edge on the new button. Once it was clearly defined I sanded the button and stem surface with 220 and 400 grit wet dry sandpaper to smooth out the surface and blend it into the stem.
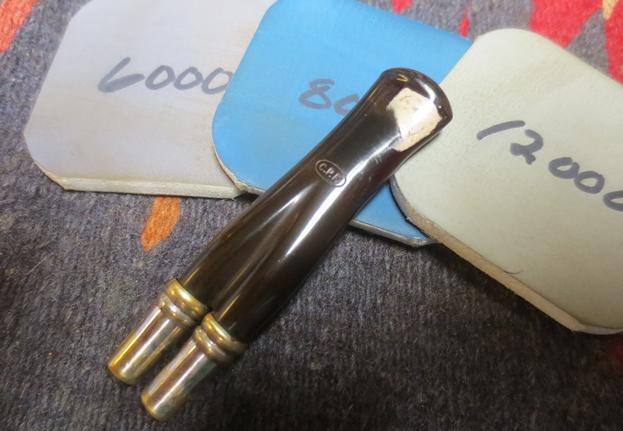
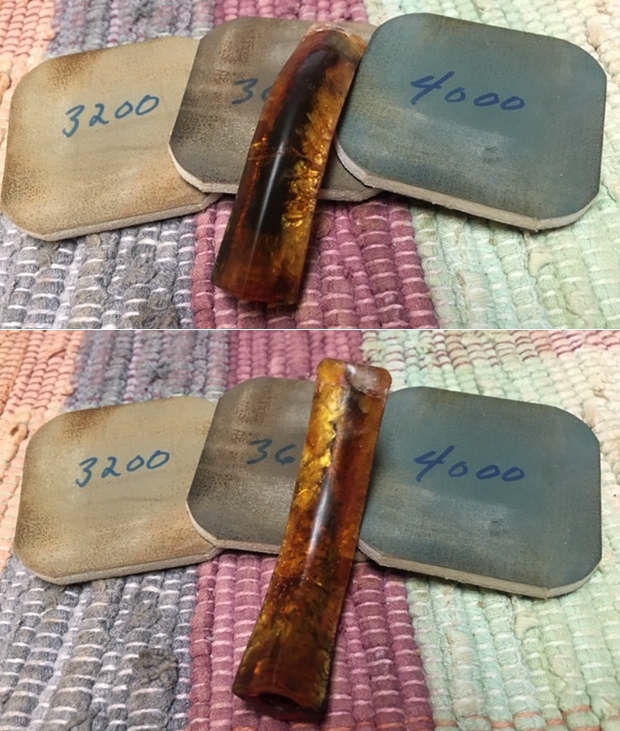
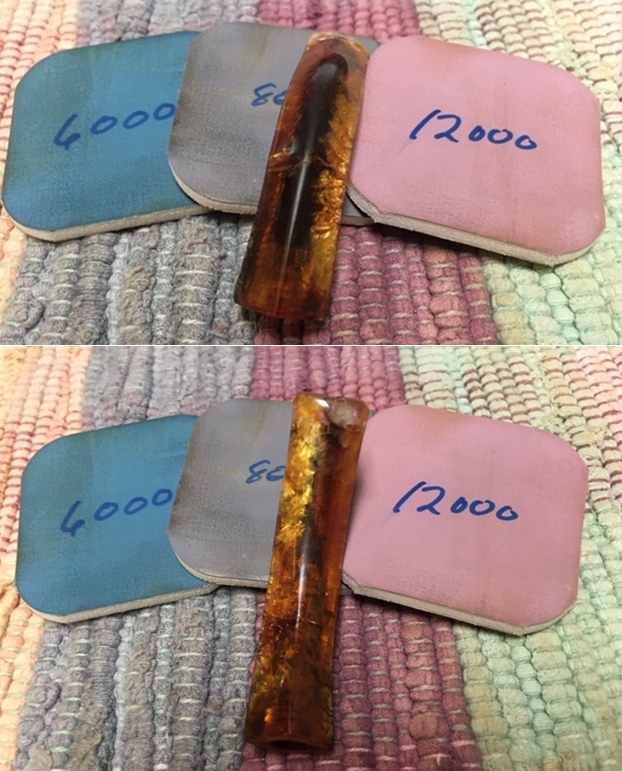
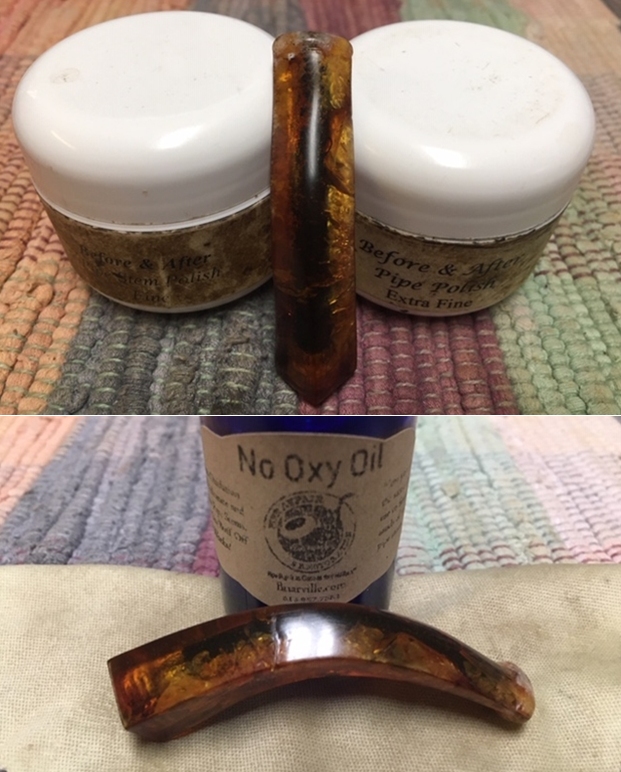
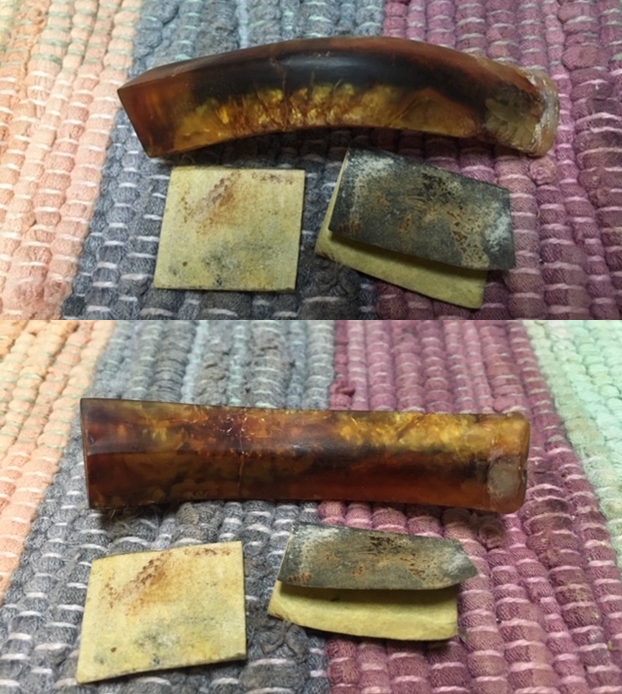 I polished the stem with micromesh sanding pads – wet sanding it with 1500-12000 grit pads. I wiped it down with a damp cloth after each pad to remove the sanding debris. I polished it further with Before & After Pipe Stem Polish – both fine and extra fine. I hand buffed it with a cloth. I wiped it down with Briarville’s No Oxy Oil to protect and preserve the stem. The progress on both sides of the stem is clear in the next series of photos.
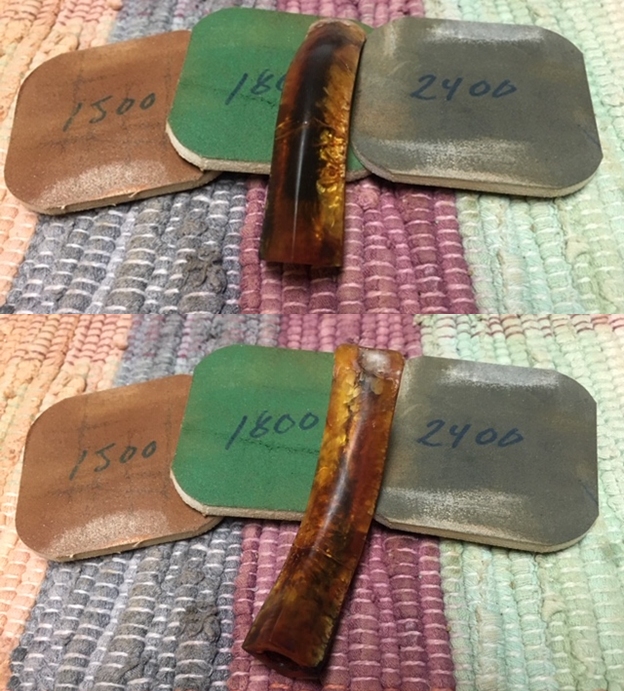
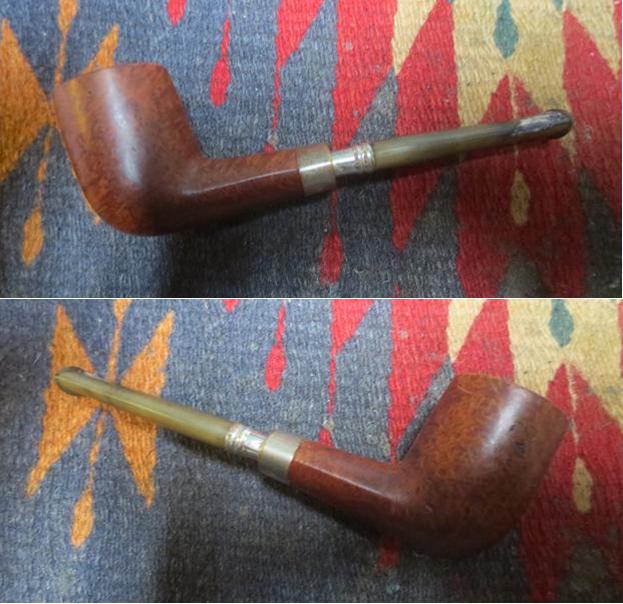
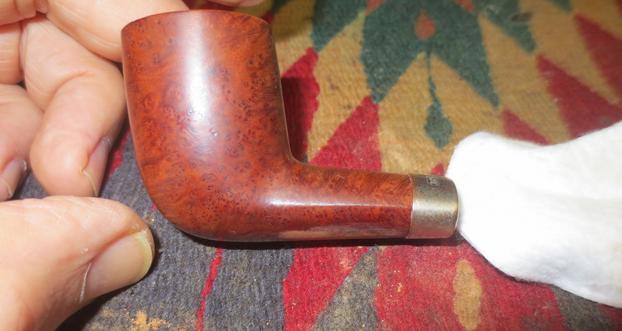
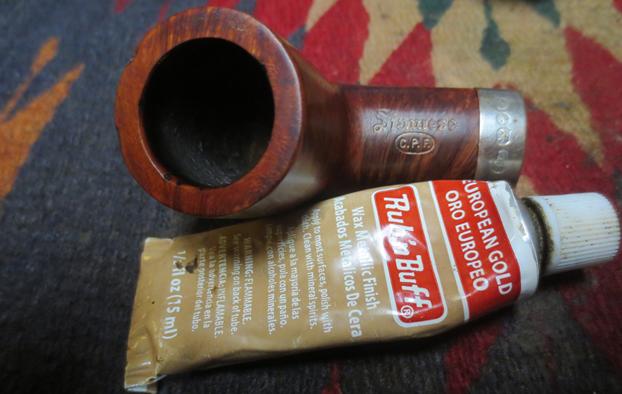
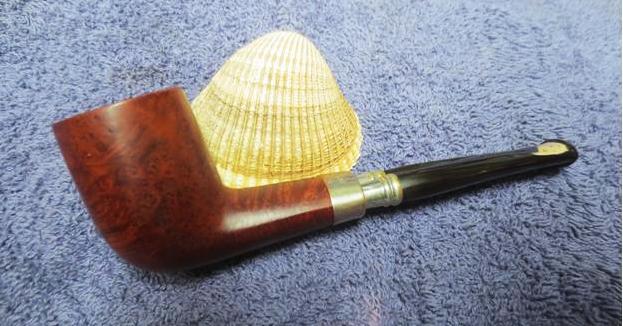
 Curtis was correct in telling me that this would be a challenging pipe to work on. Jeff had done the heavy work in cleaning it so that was a major boost for me. Once I was finished I put the repaired amber stem back on the bowl and polished it by hand with a microfiber cloth. I gave the bowl and stem multiple coats of Conservator’s Wax and buffed the pipe with a shoe brush to raise the shine. I hand buffed it again with a microfiber cloth to deepen the shine. The pipe has come a long way from where it was when Jeff received it. Thank you Curtis, for believing that I could do something with this one. That kept me moving forward during some rough moments with the restoration. The pipe polished up really well. The polished amber stem seemed to truly come back to life with the buffing. This little pipe feels great in my hand and I am sure that it will feel even better radiating the heat of a good smoke. It must have been a fine smoking pipe judging from the condition it was when we received it. Have a look at it with the photos below. The dimensions are Length: 5 inches, Height: 2 inches, Outside diameter of the bowl: 1 ¼ inches, Chamber diameter: ¾ of an inch. This is interesting piece of late 1890s early 1900s history and even with the warts and wrinkles has beauty that is eye catching. I will be putting it in my C.P.F. Collection. Thanks to each of you who are reading this blog. Remember we are not pipe owners; we are pipemen and women who hold our pipes in trust until they pass on into the trust of the next pipeman or woman. This is the push behind the work I do.