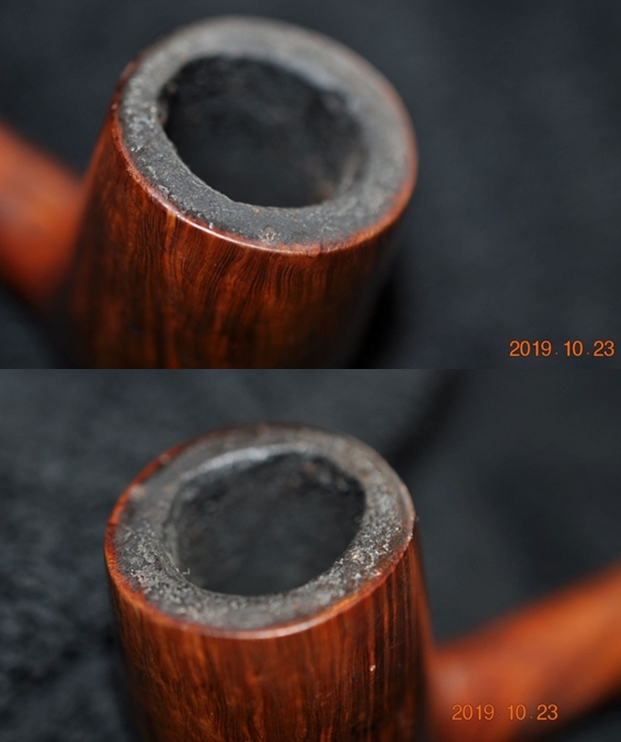
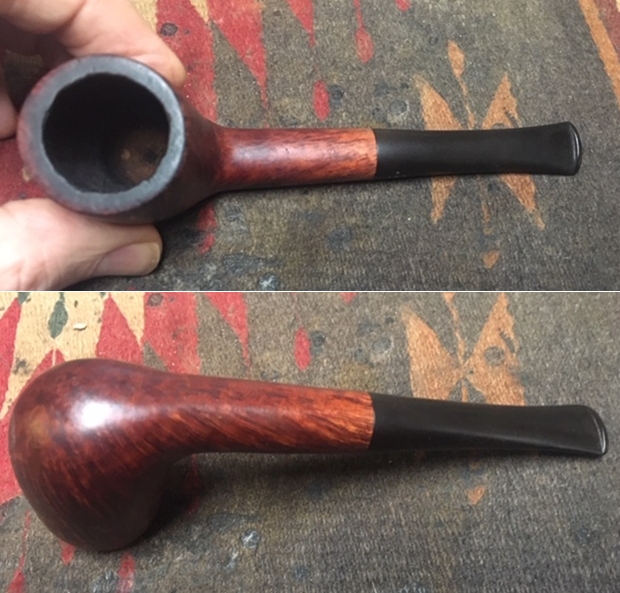
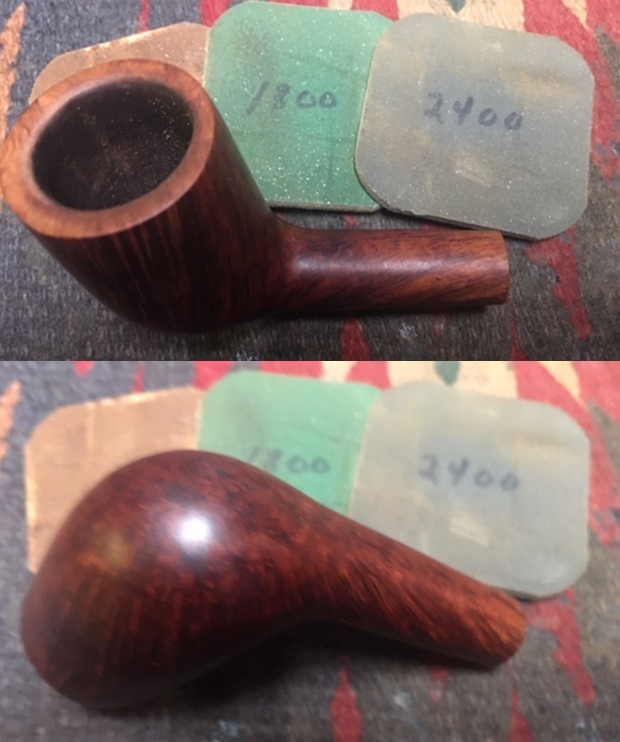
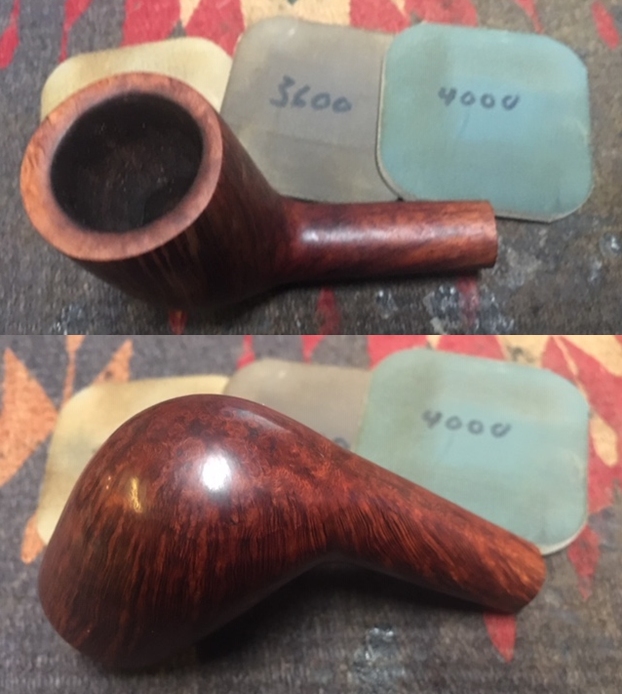
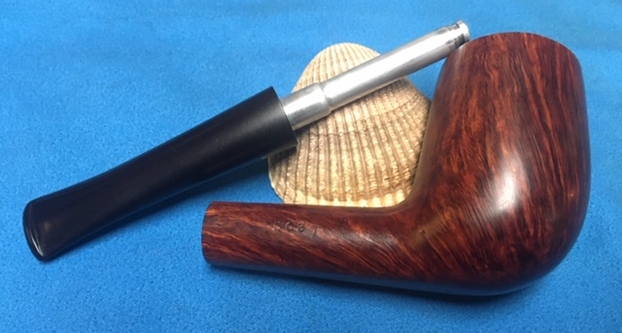
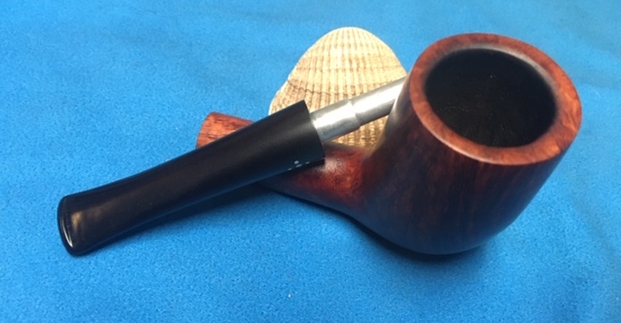
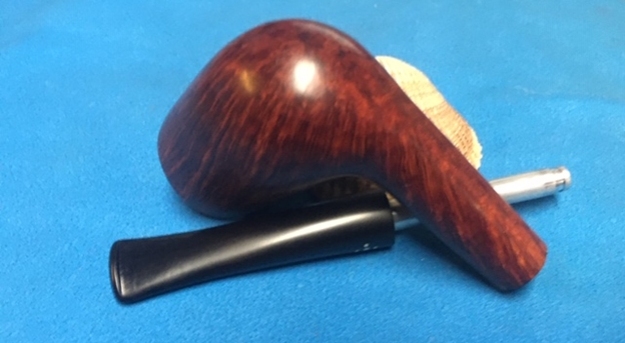
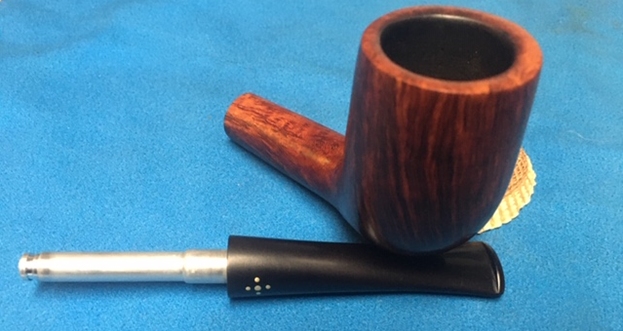
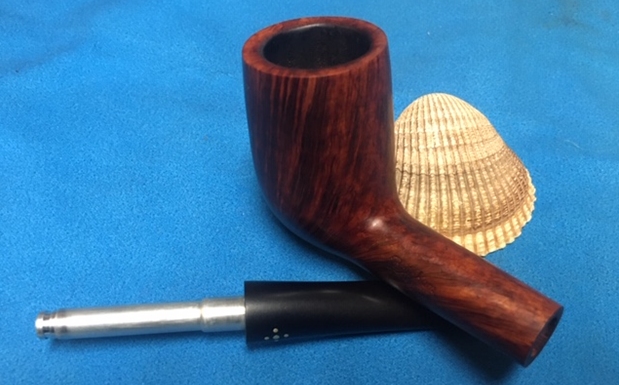
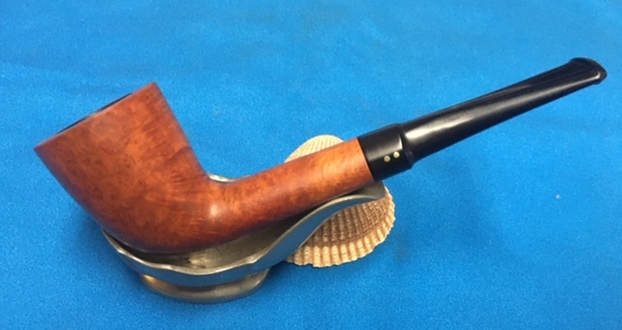
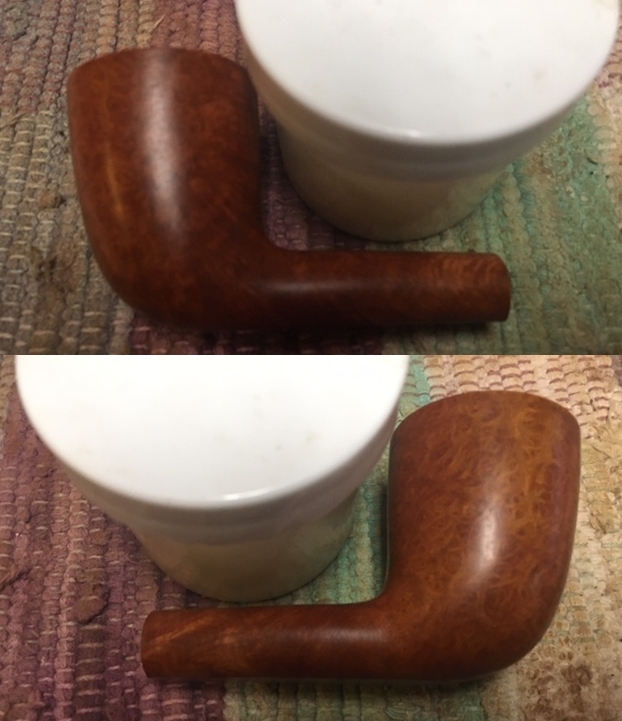
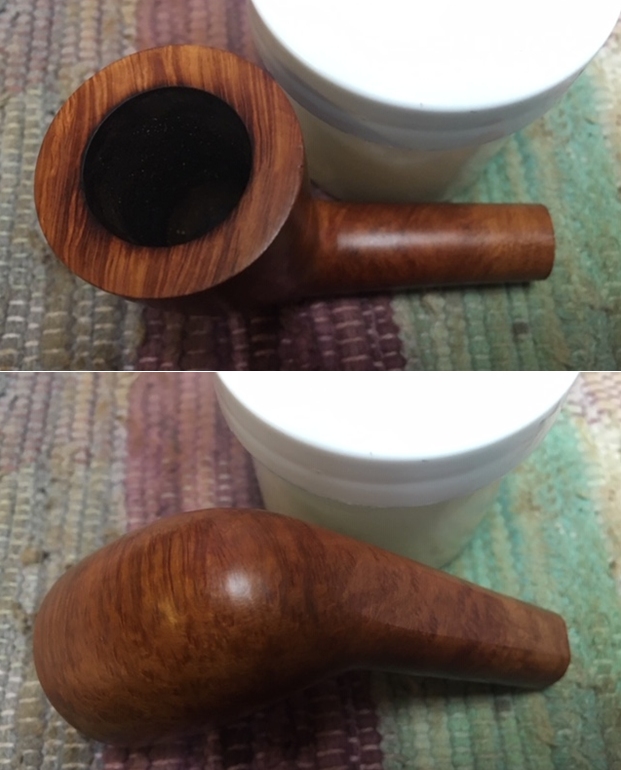
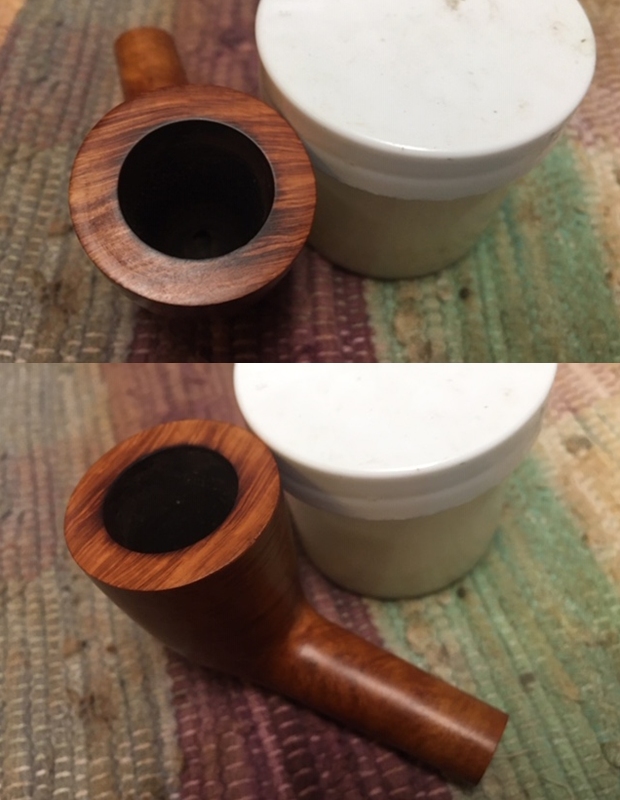
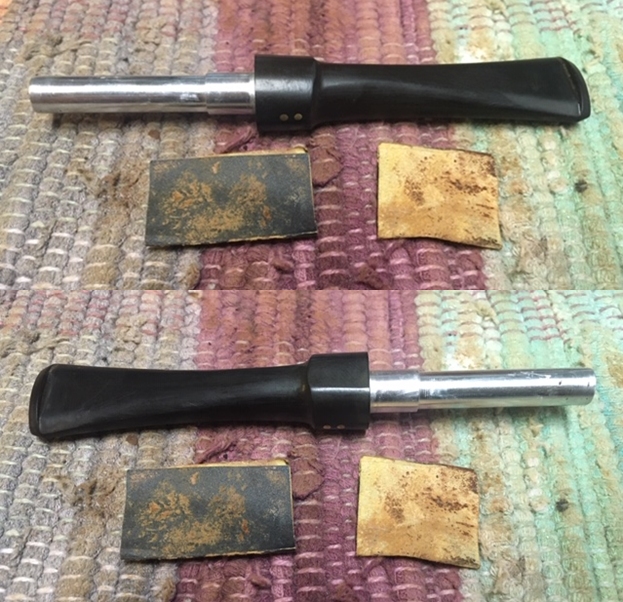
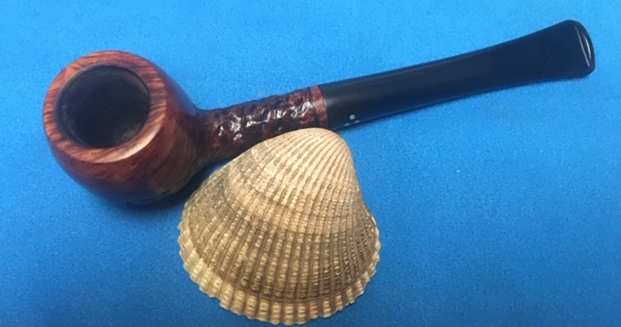
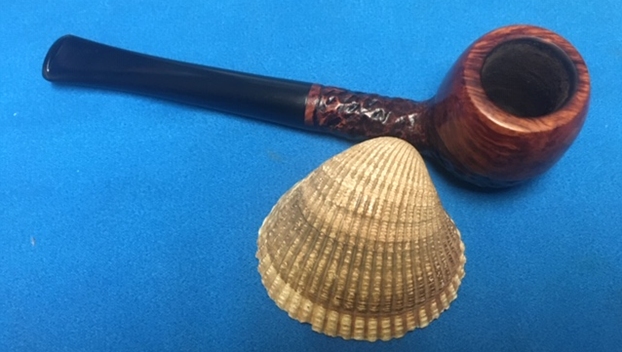
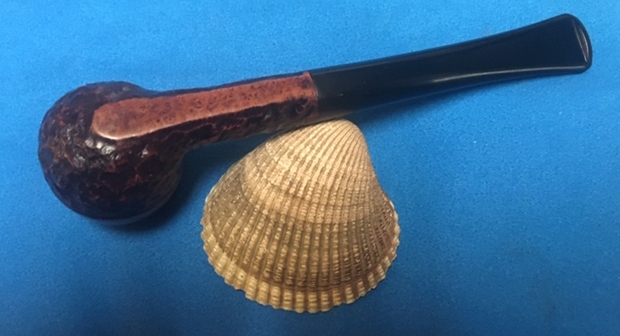
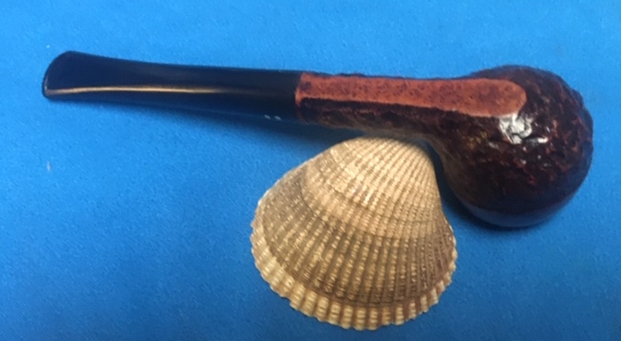
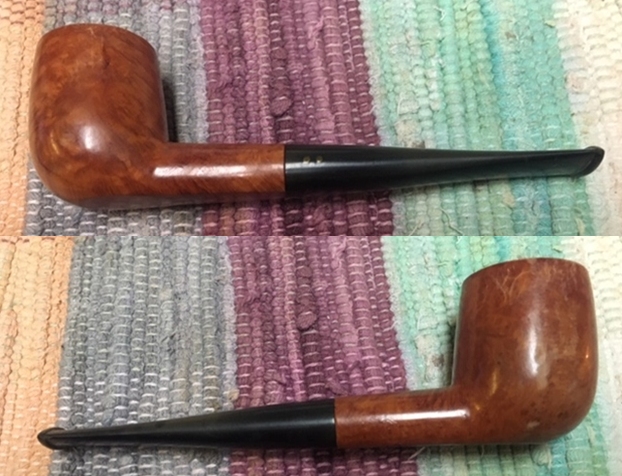
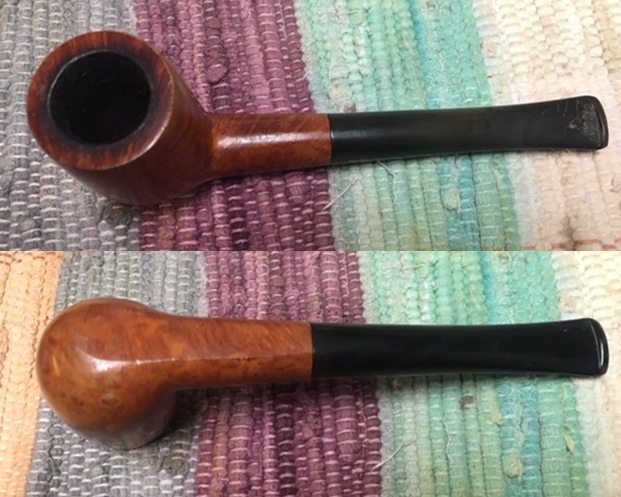
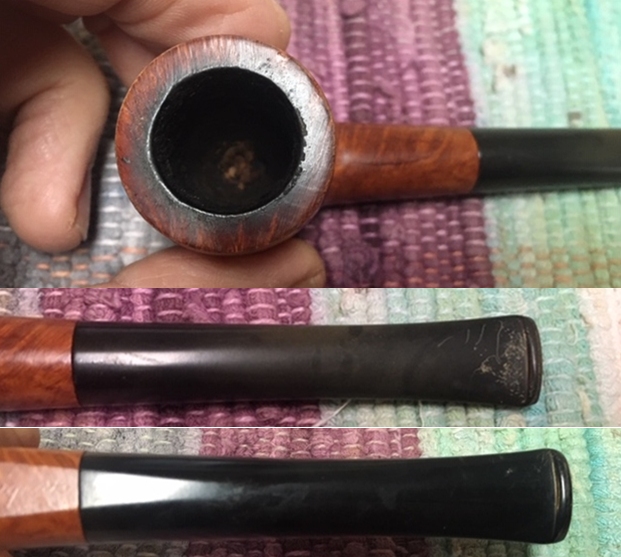
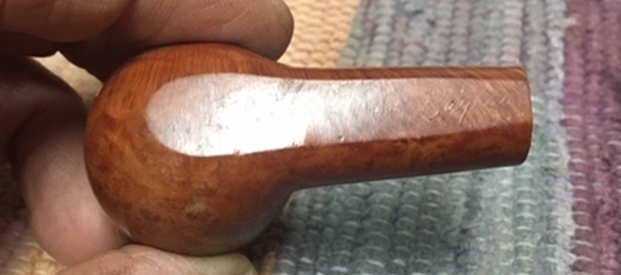
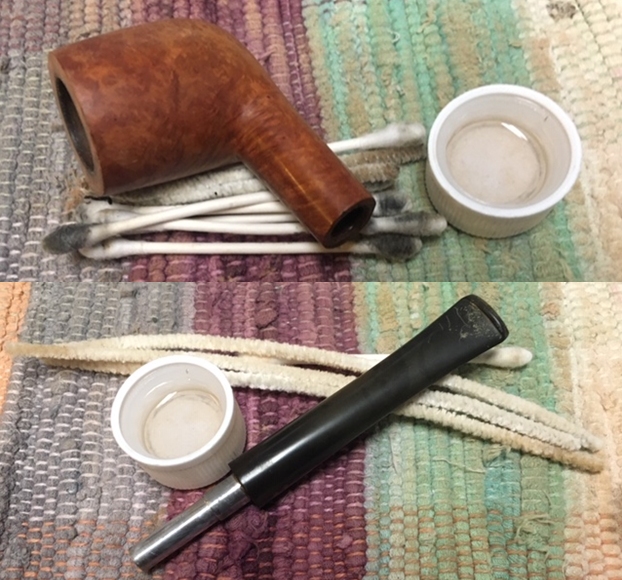
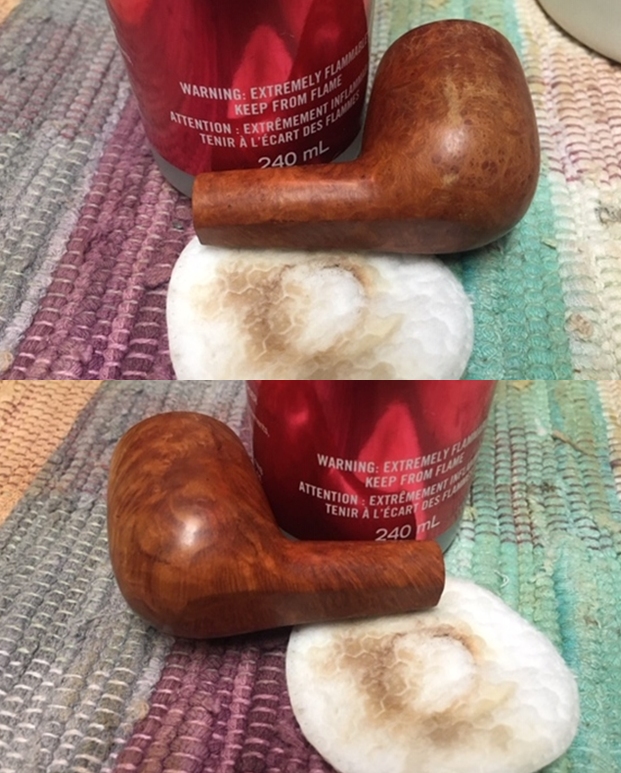
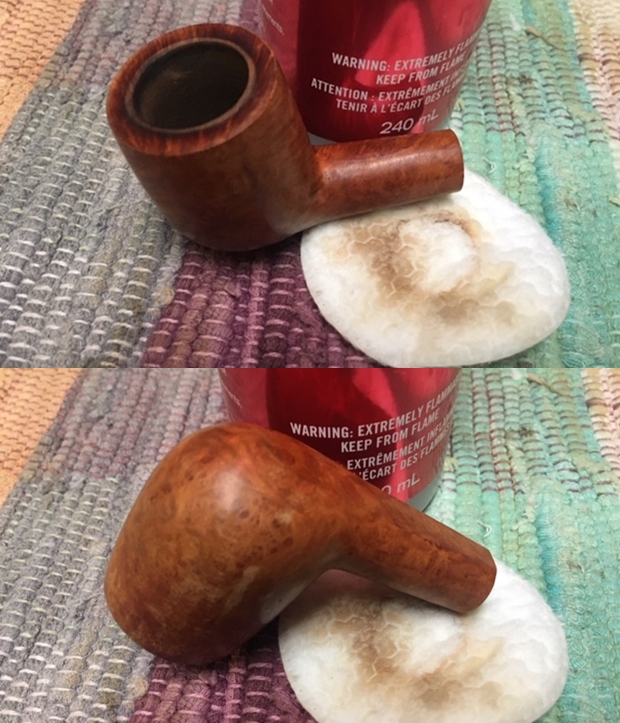
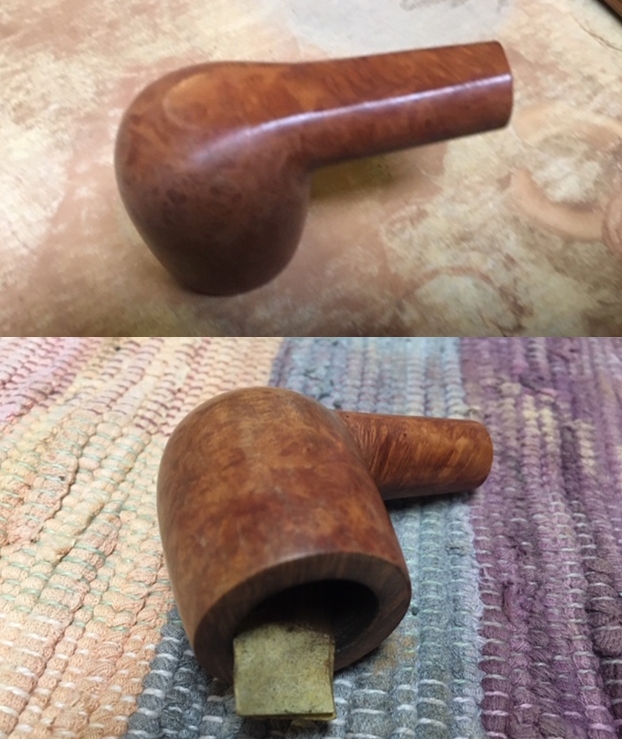
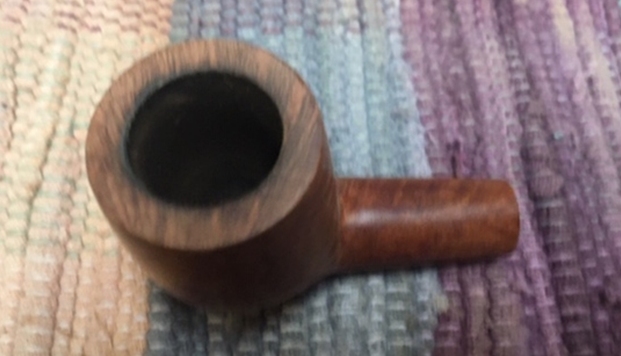
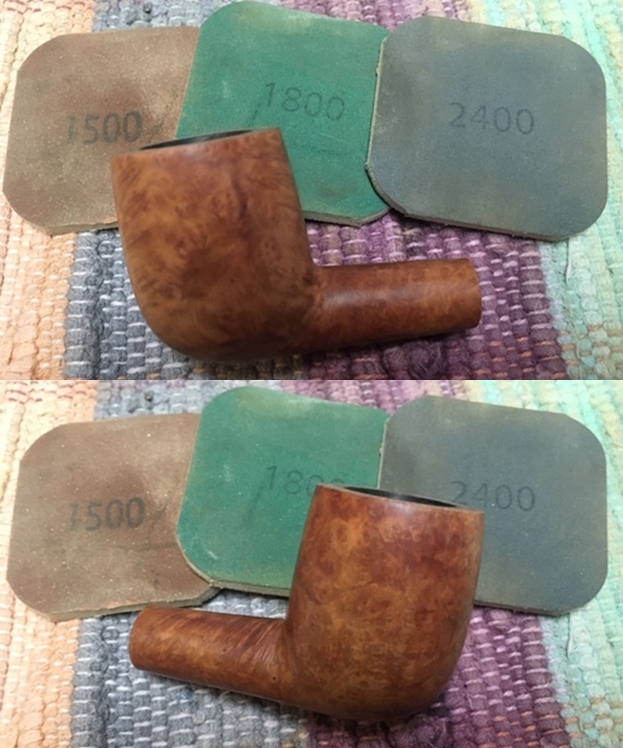
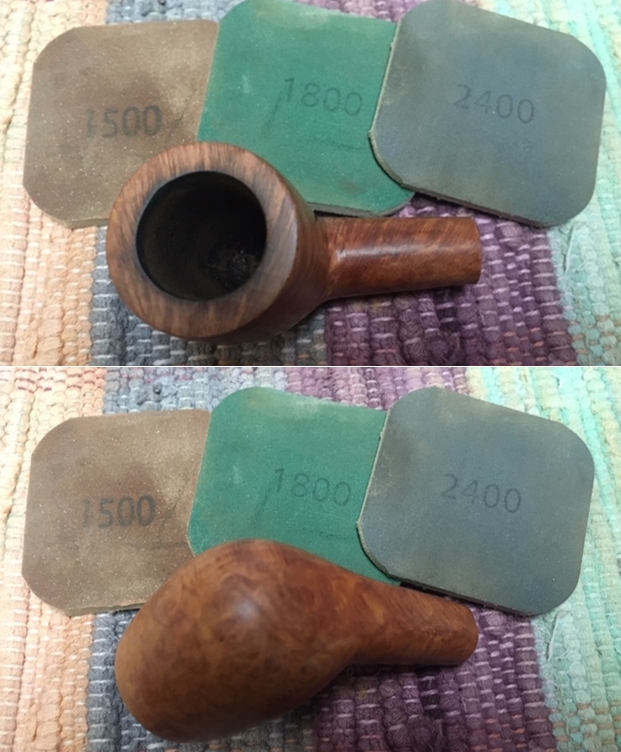
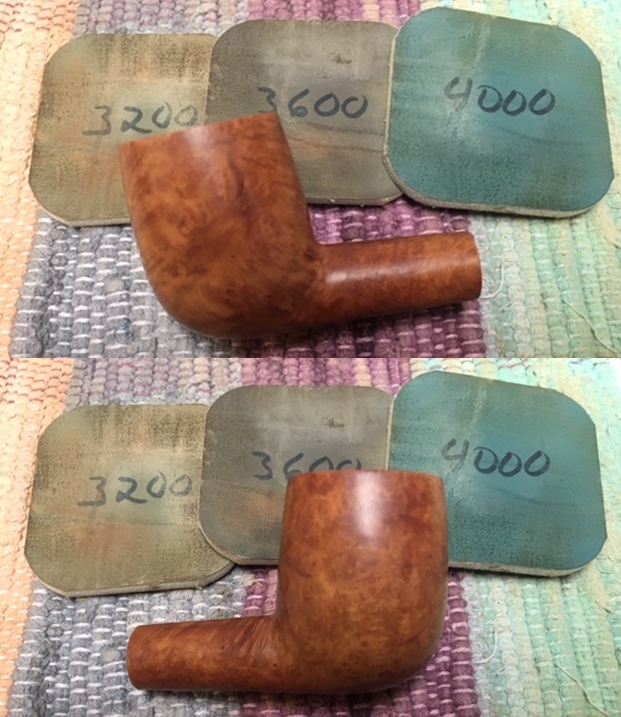
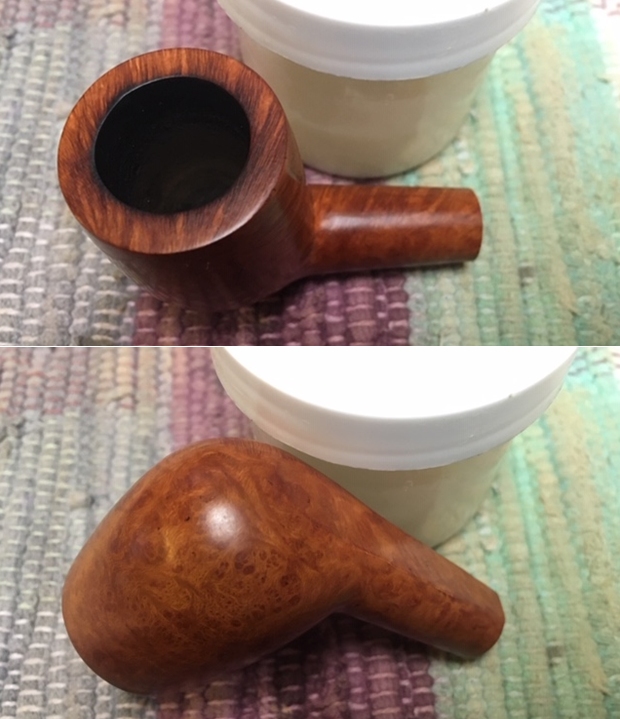
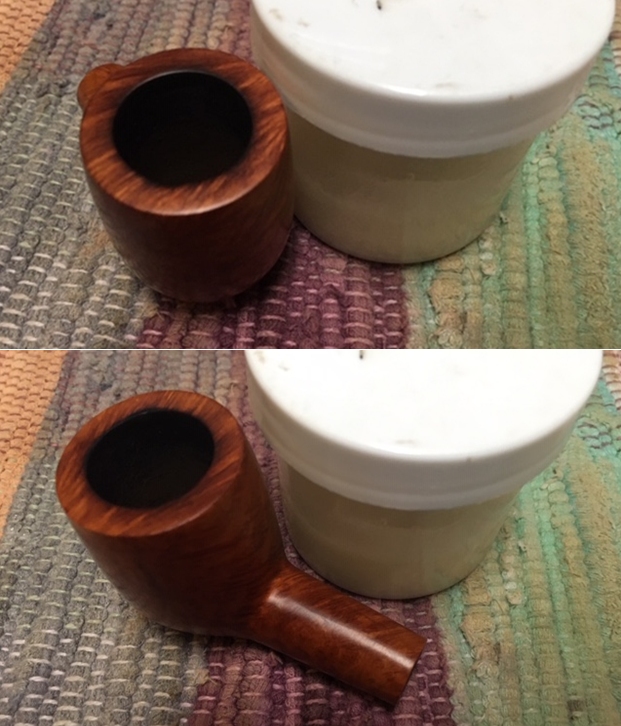
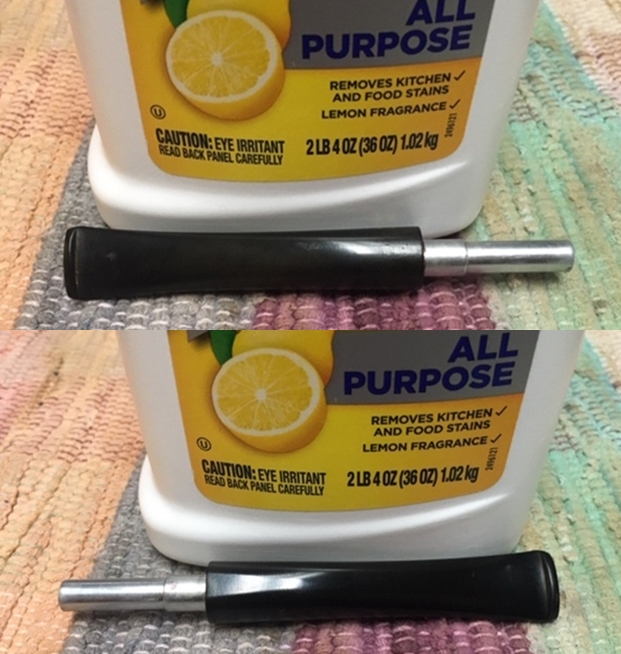
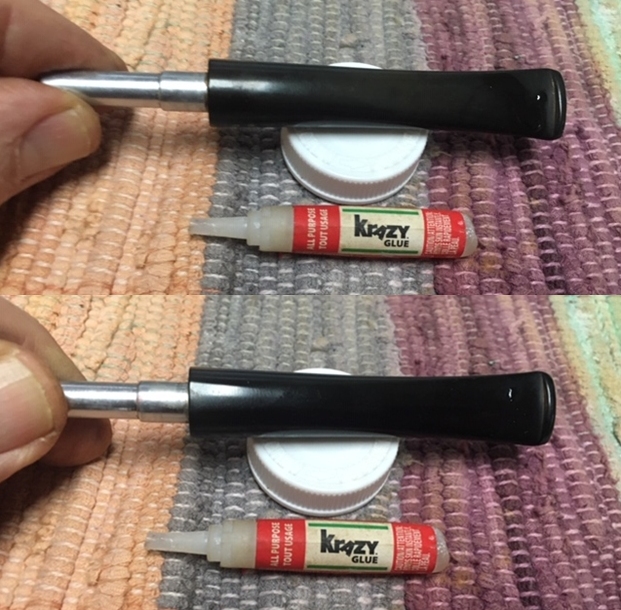
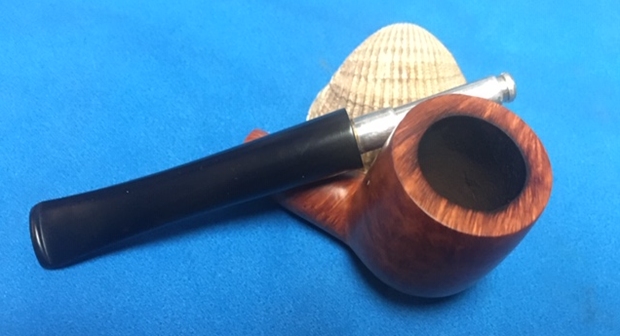
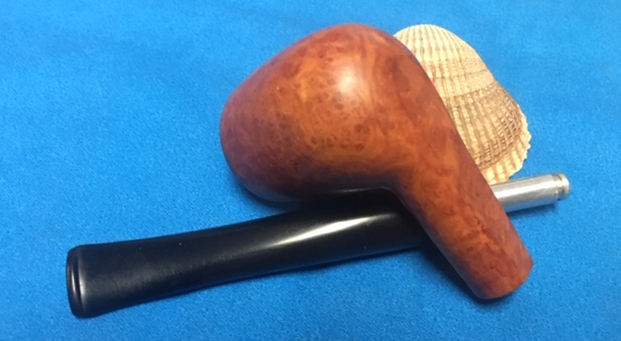
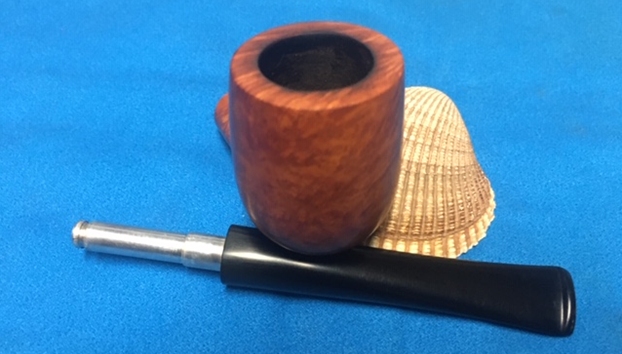
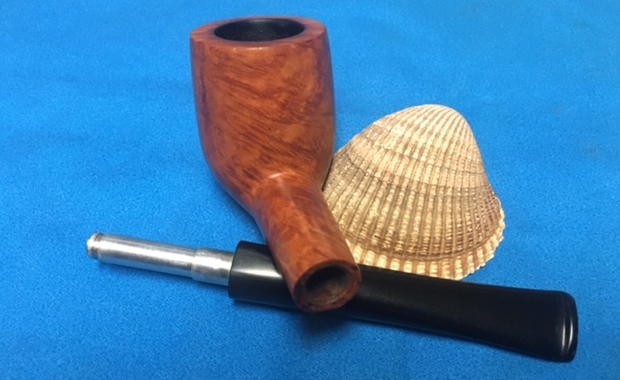
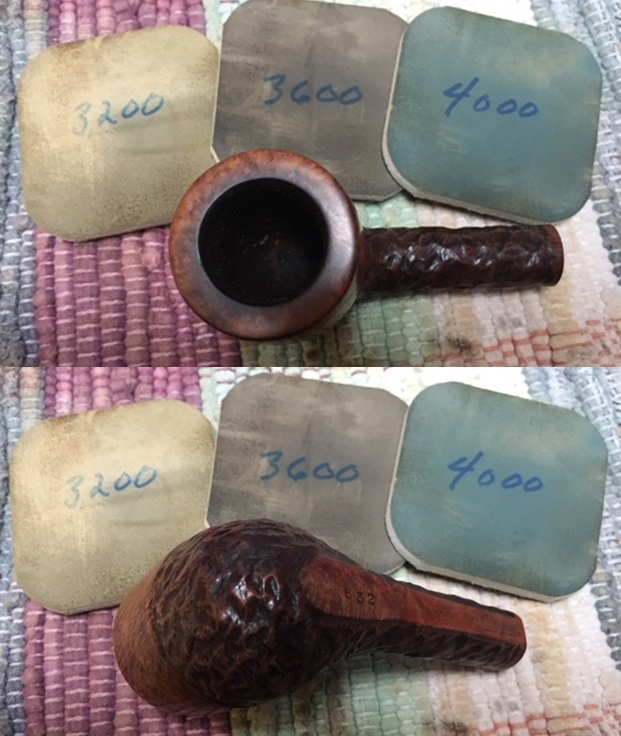
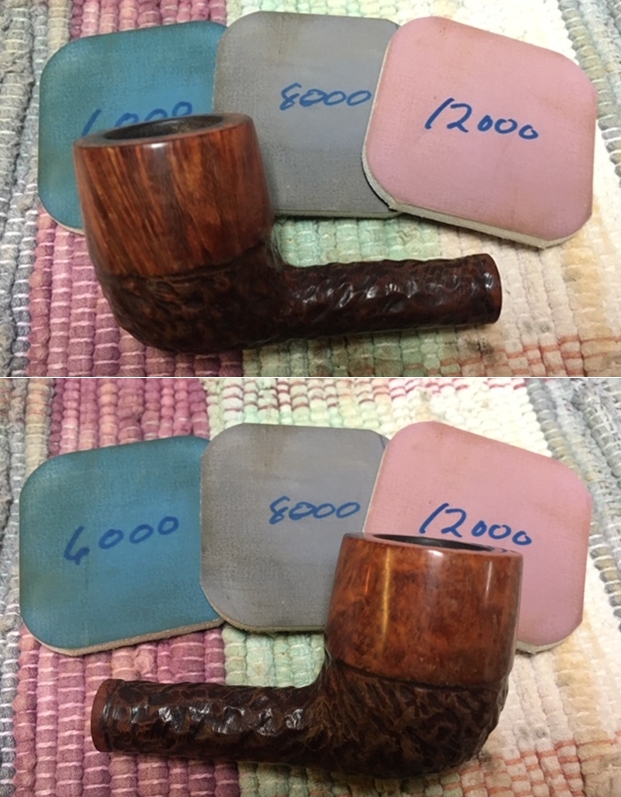
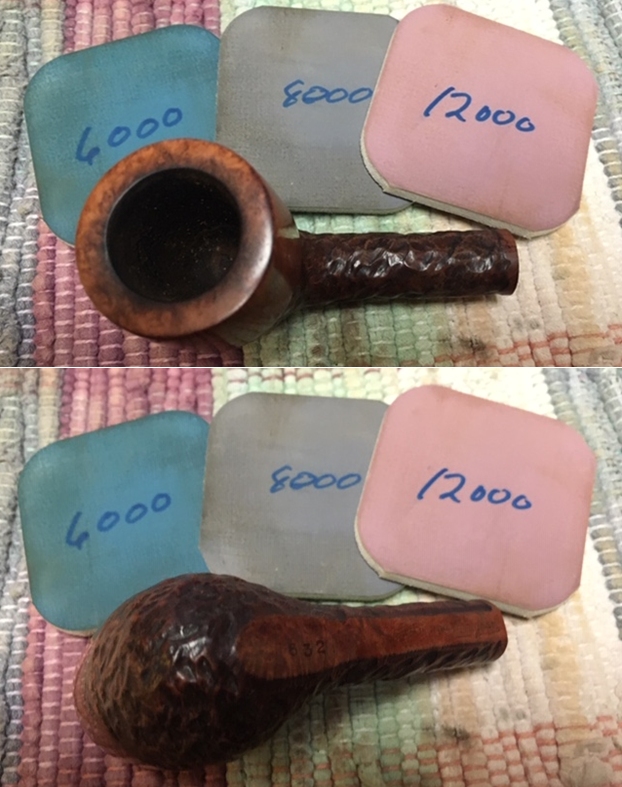
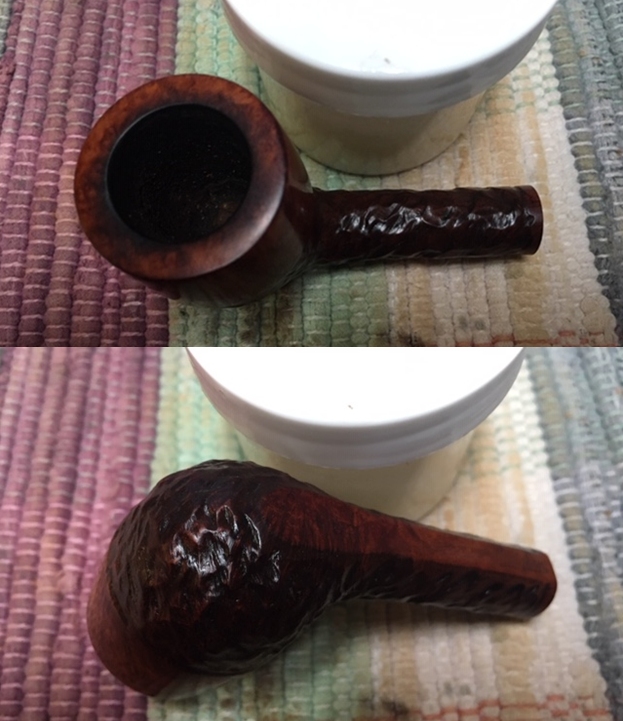
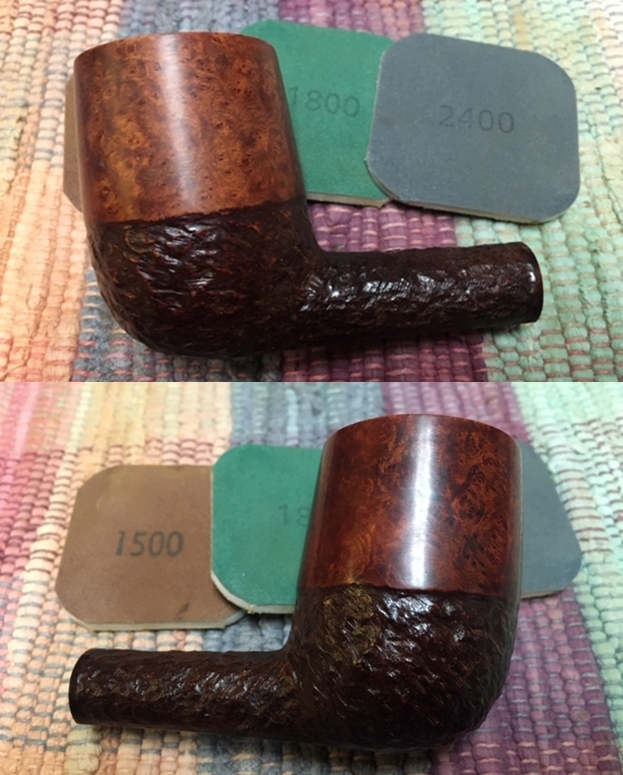
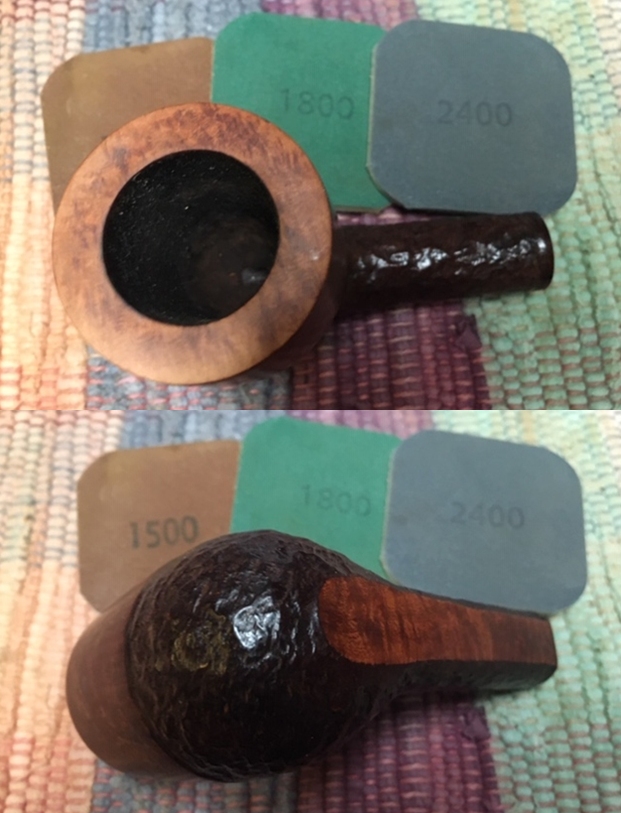
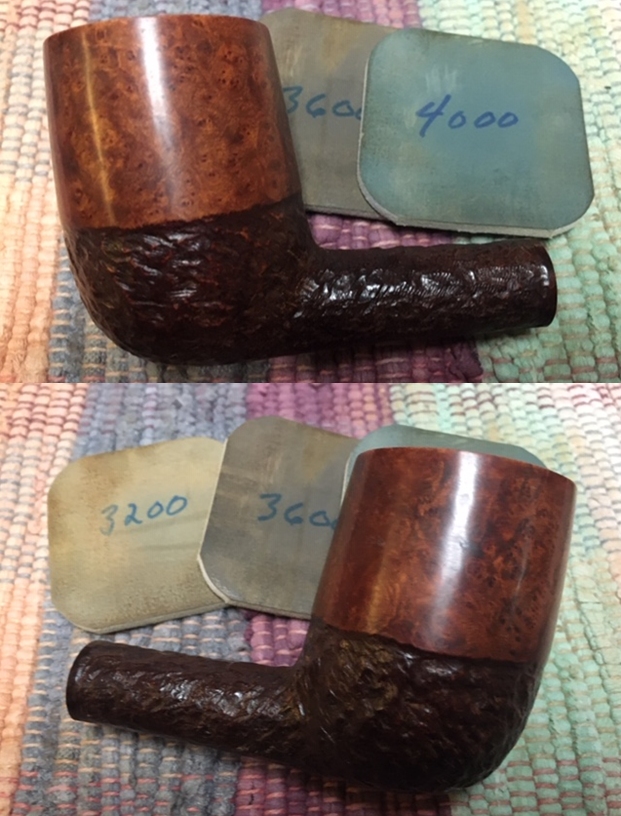
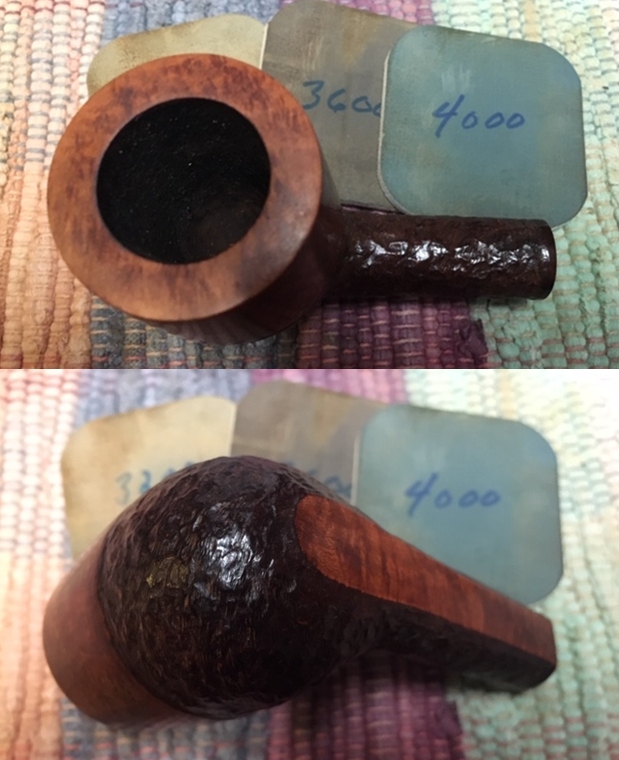
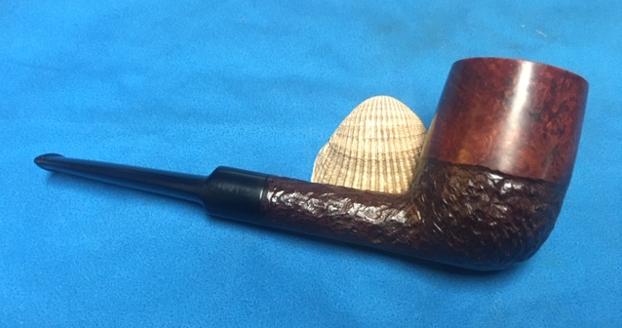
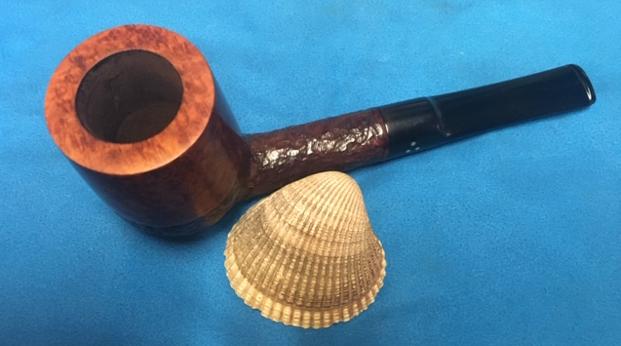
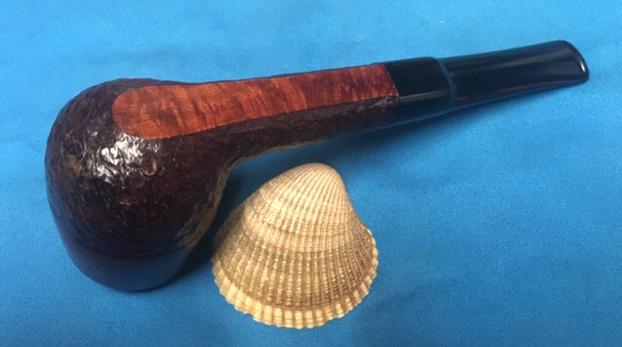
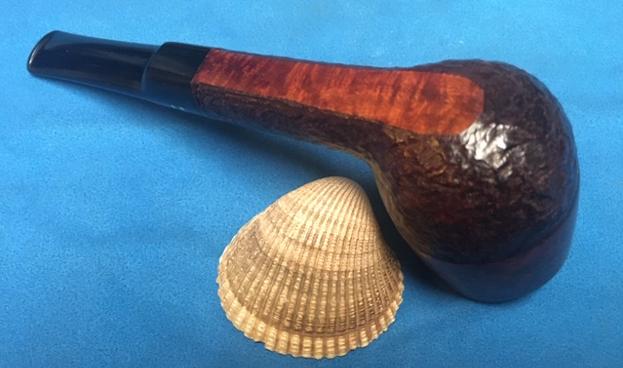
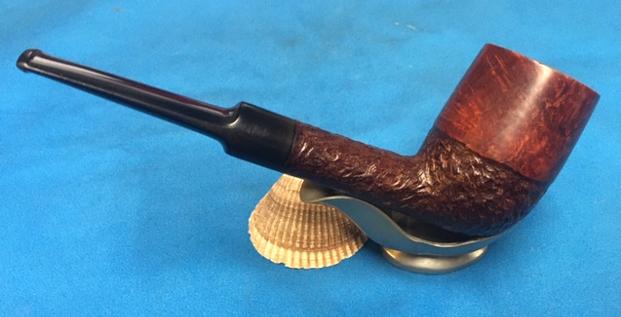
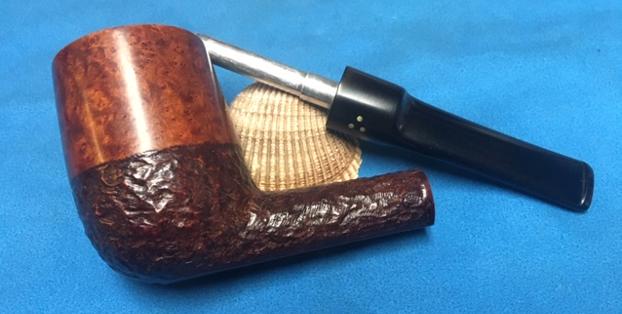
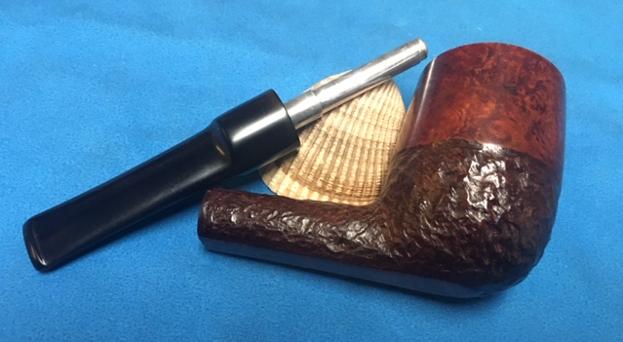
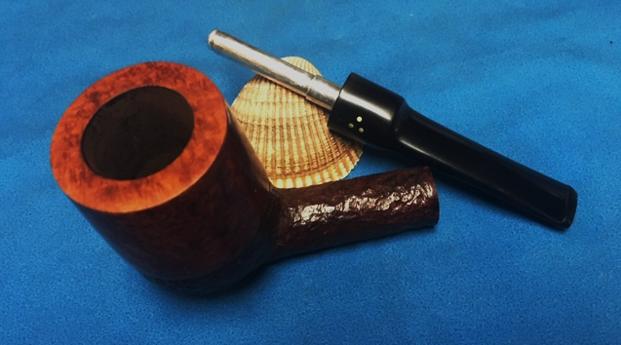
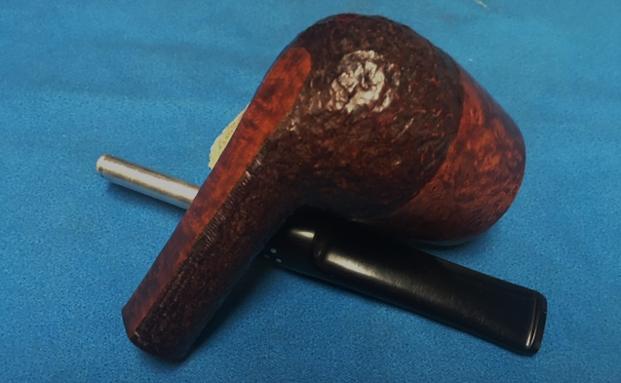
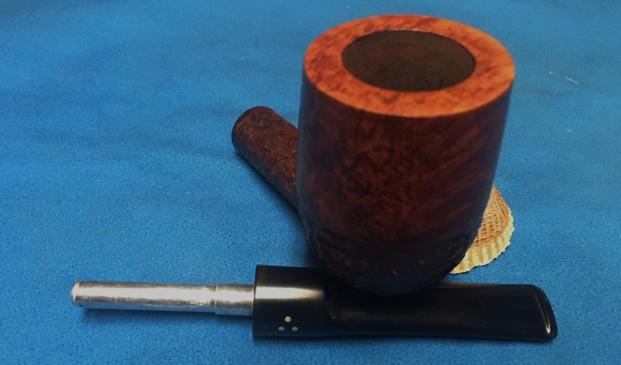
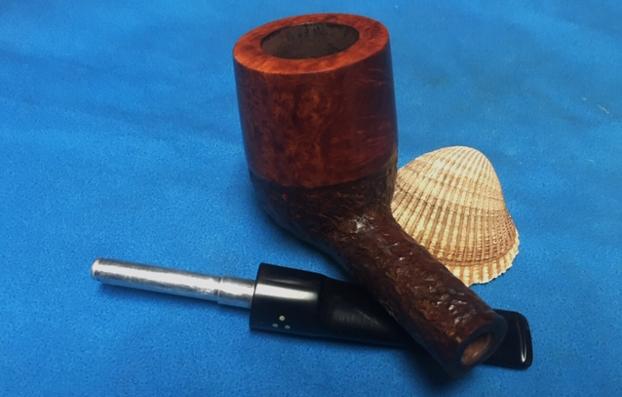
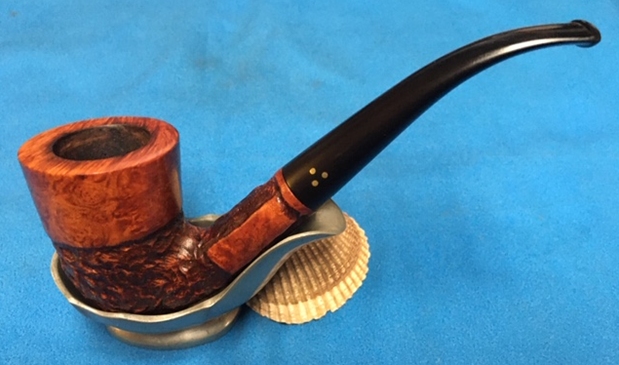
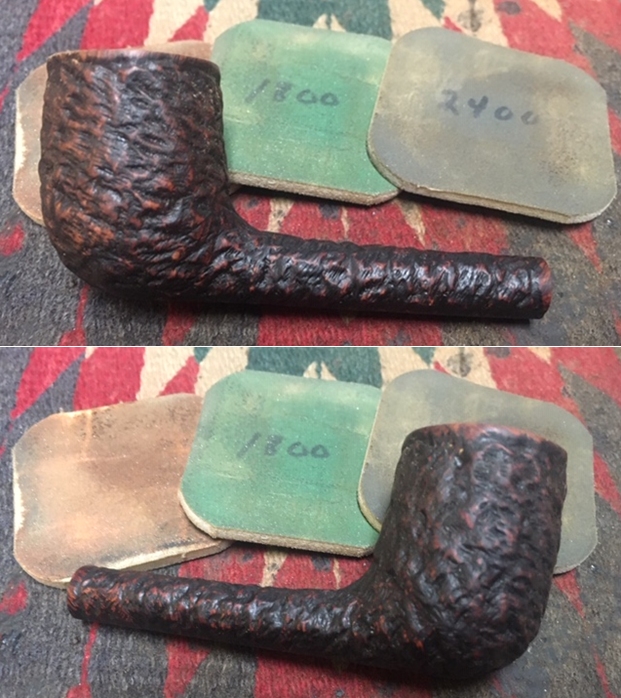
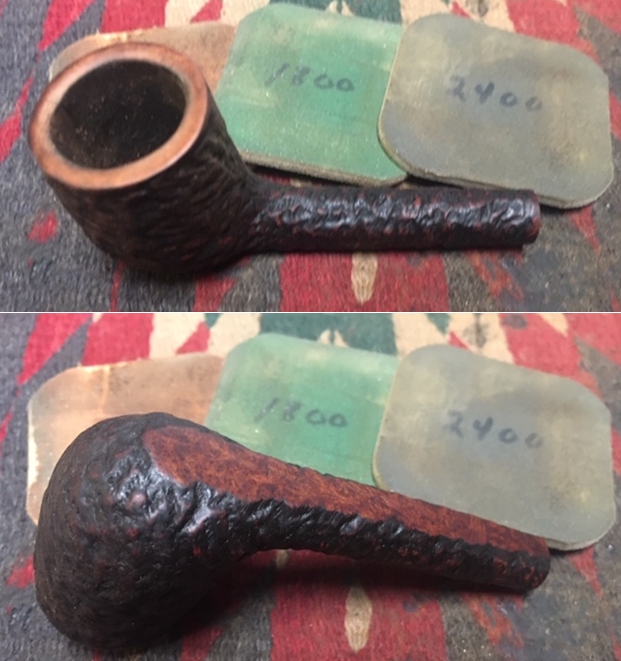
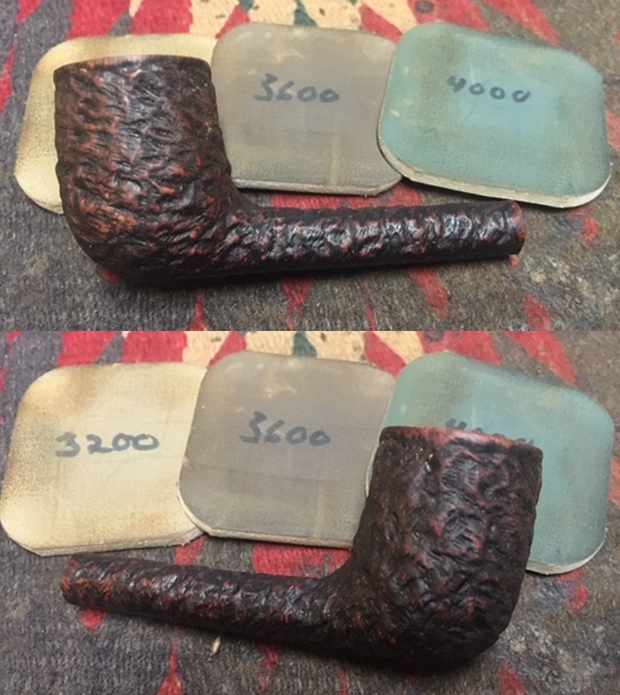
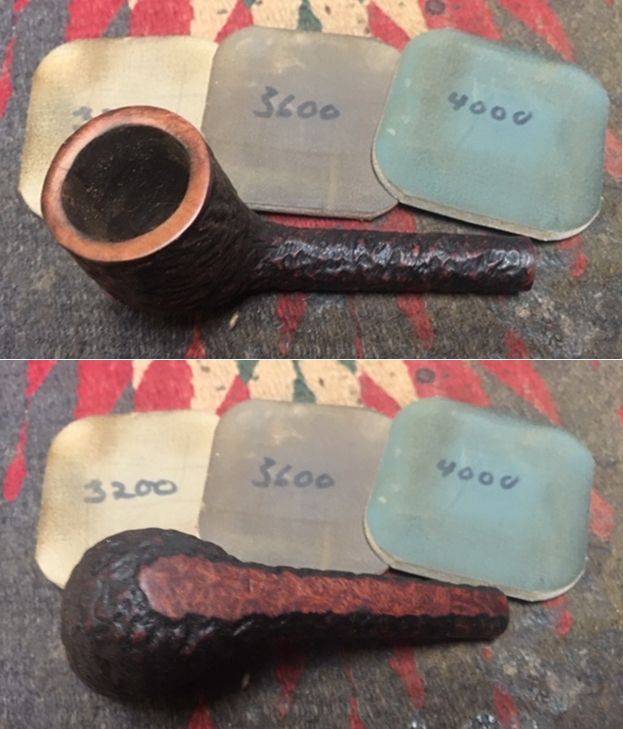
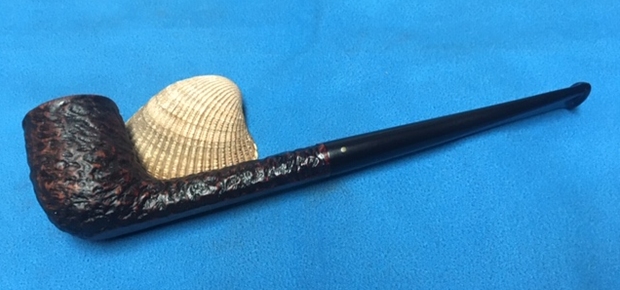
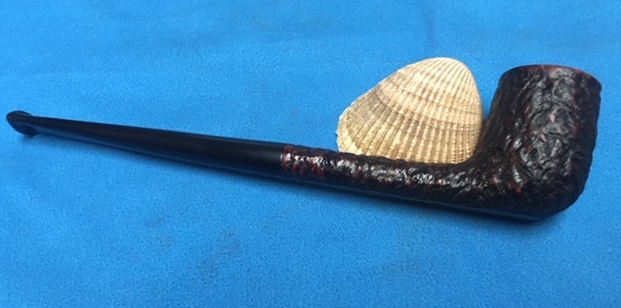
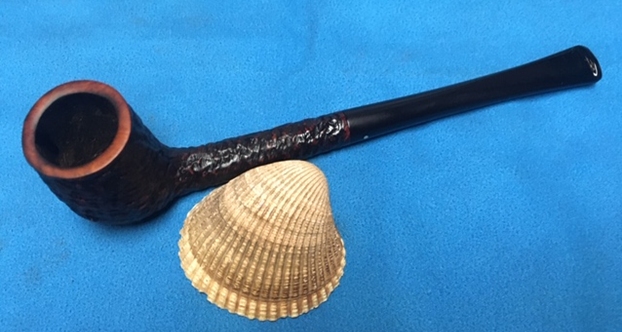
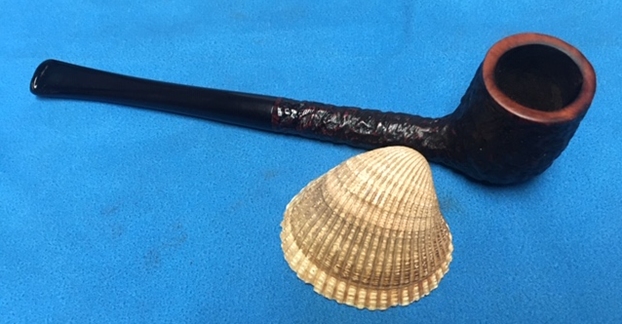
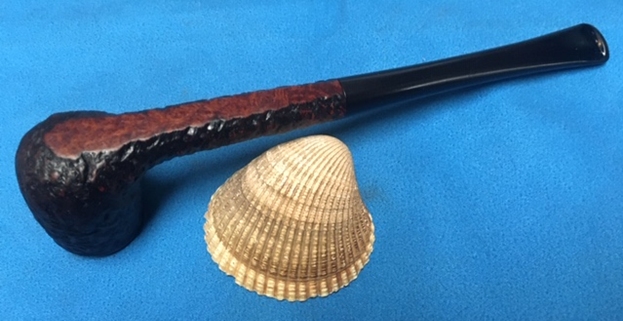
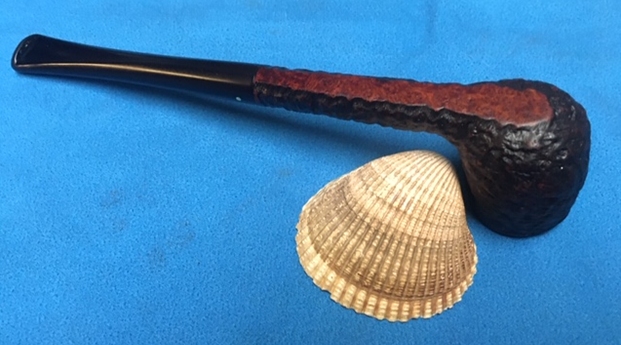
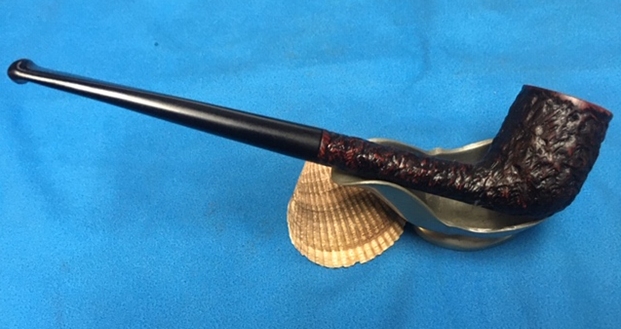
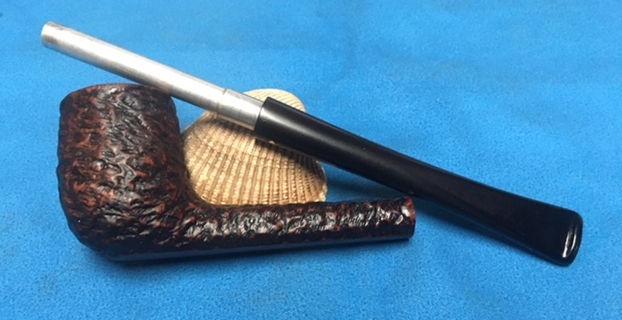
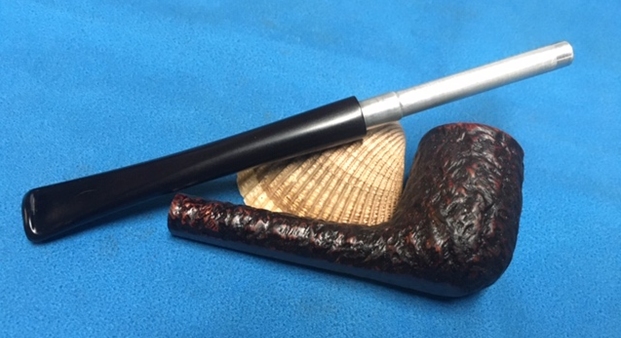
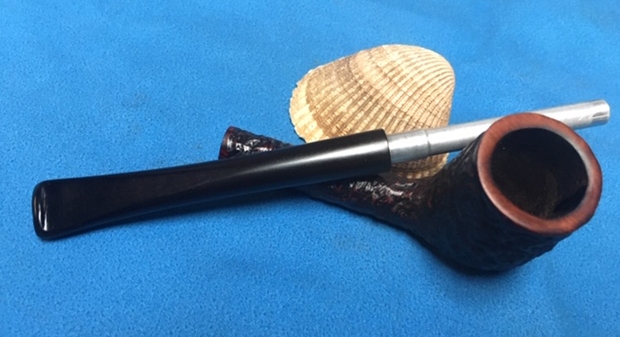
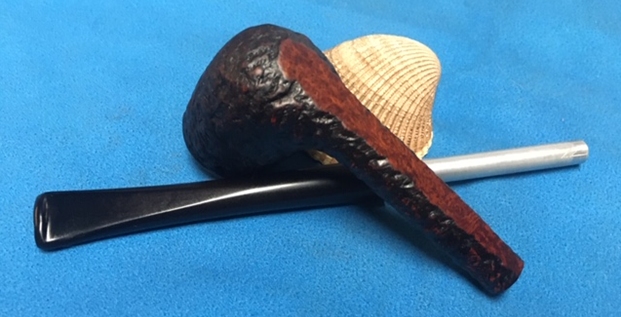
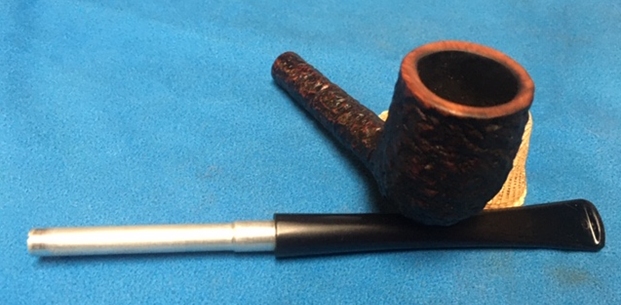
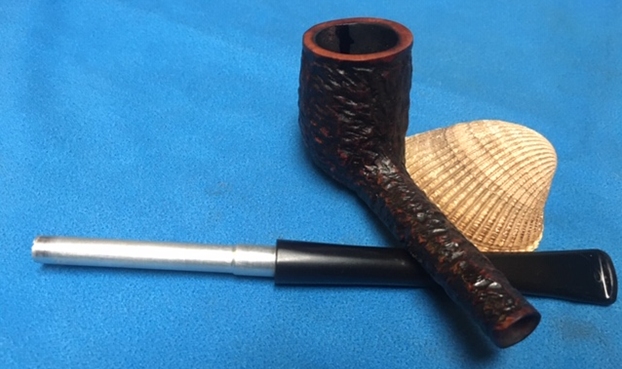
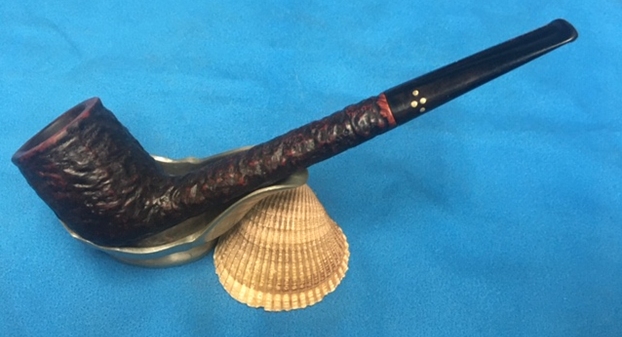
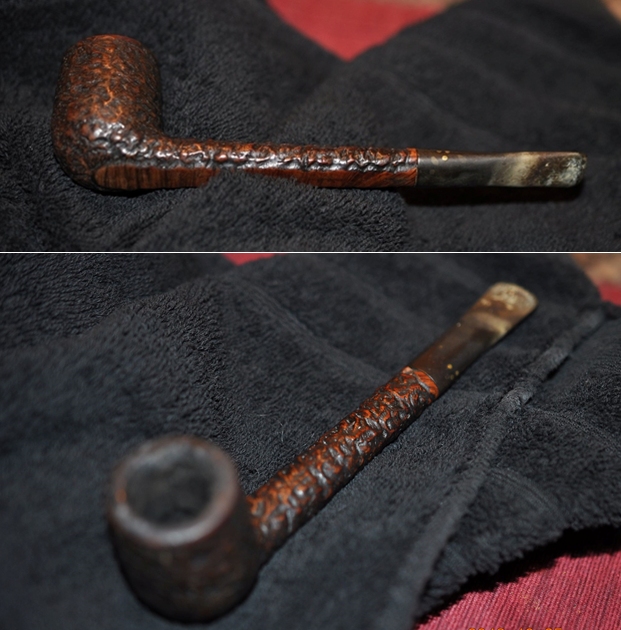
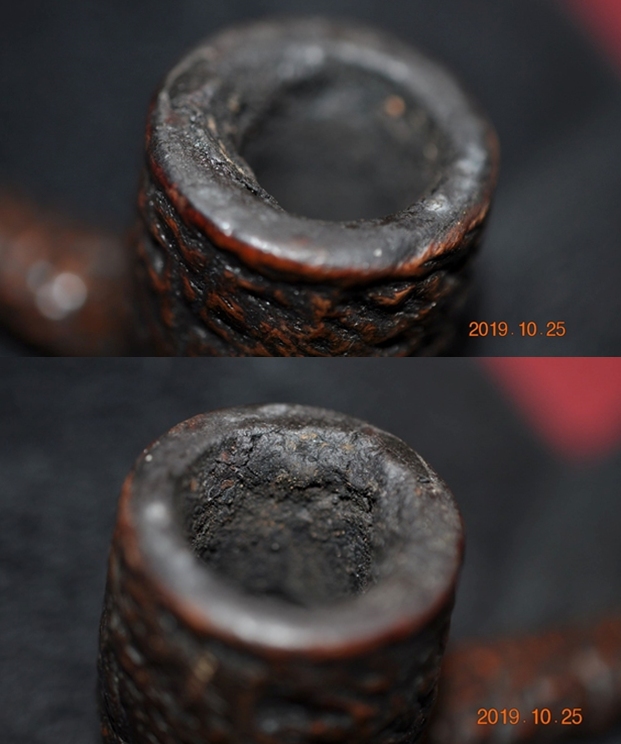
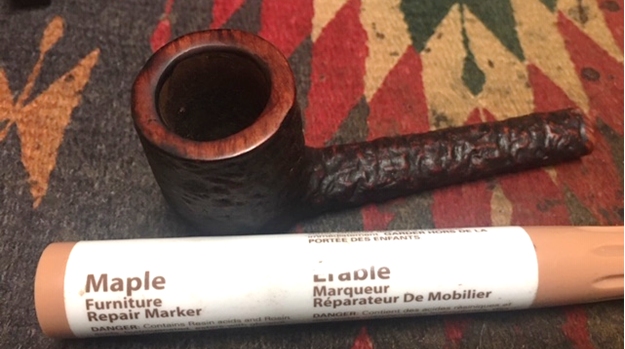
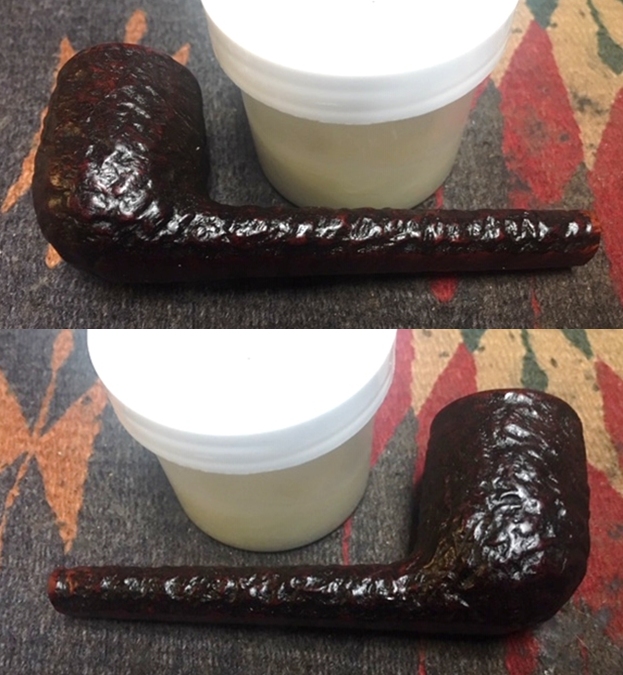
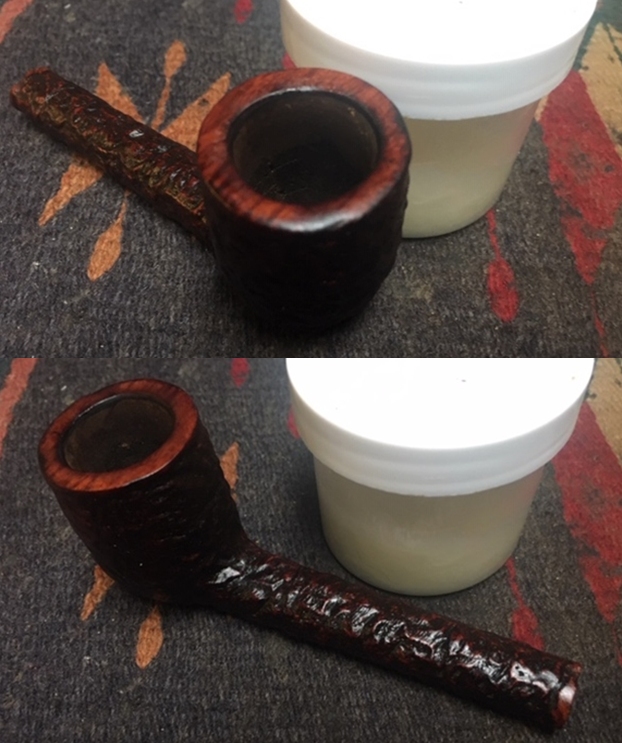
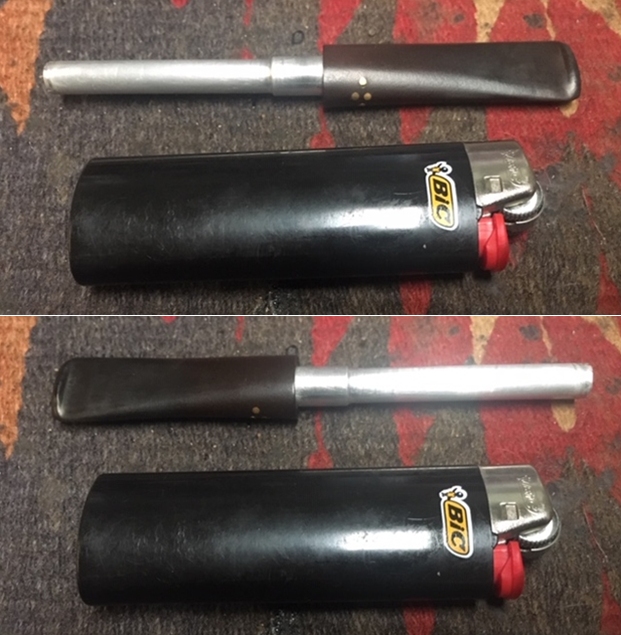
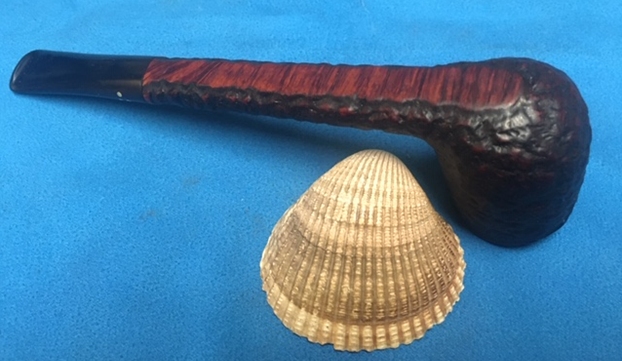
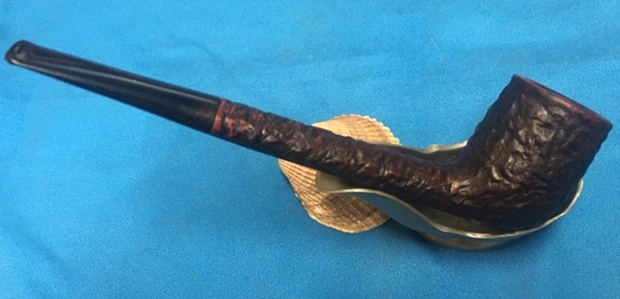
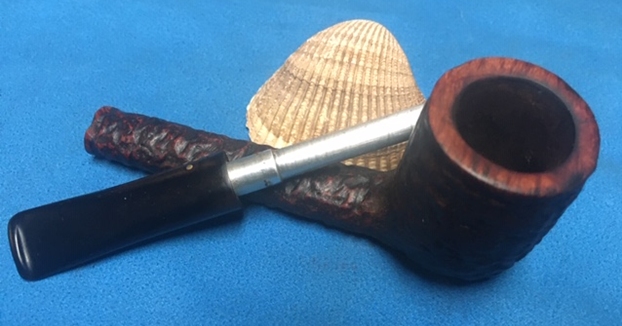
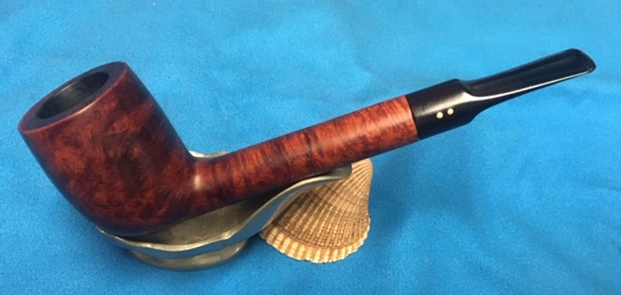
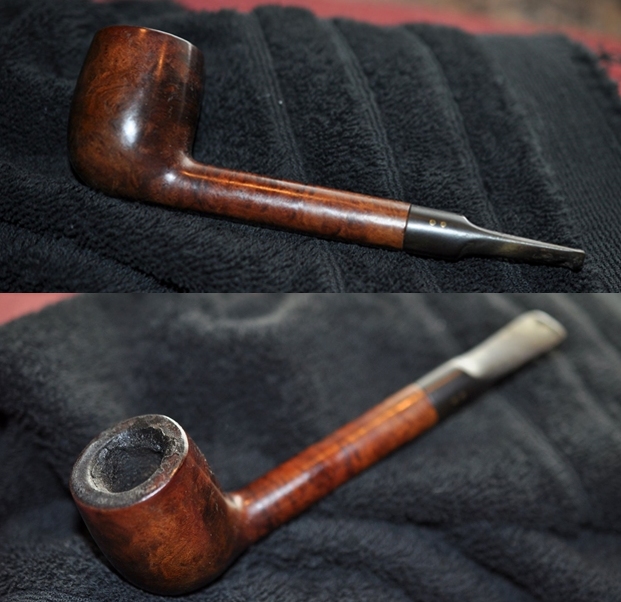
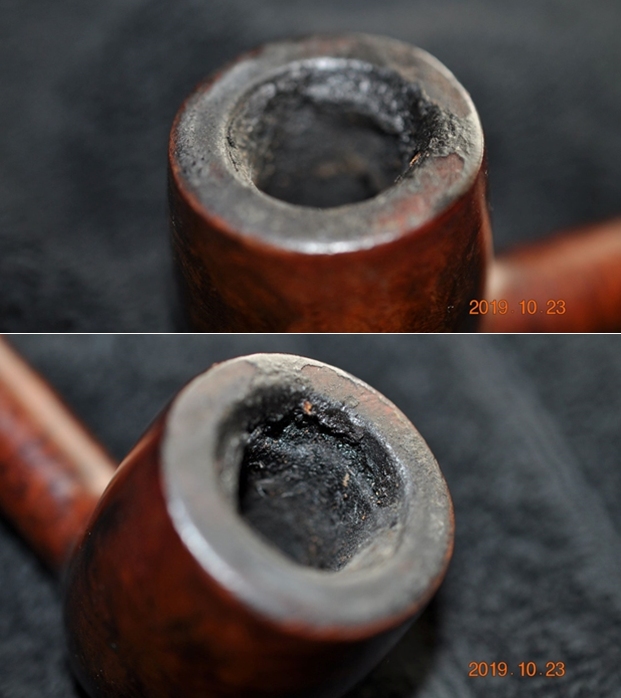
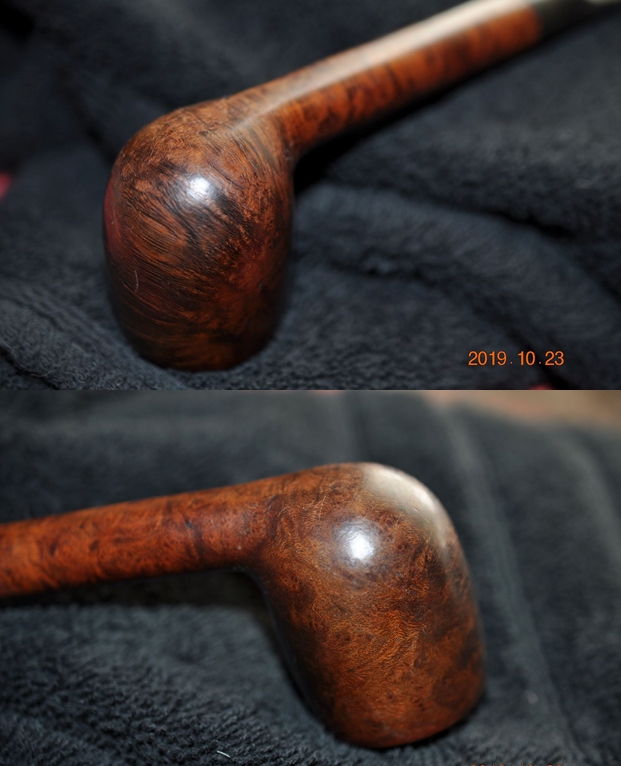
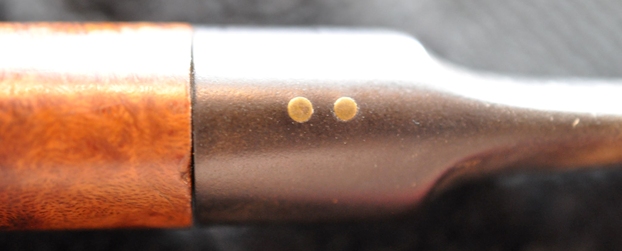
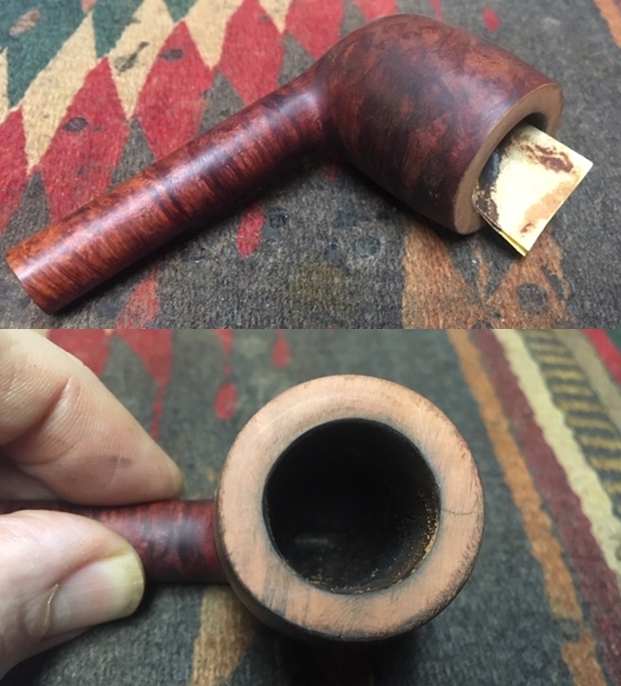
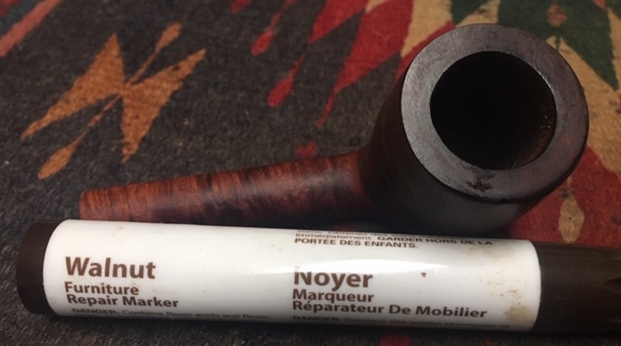
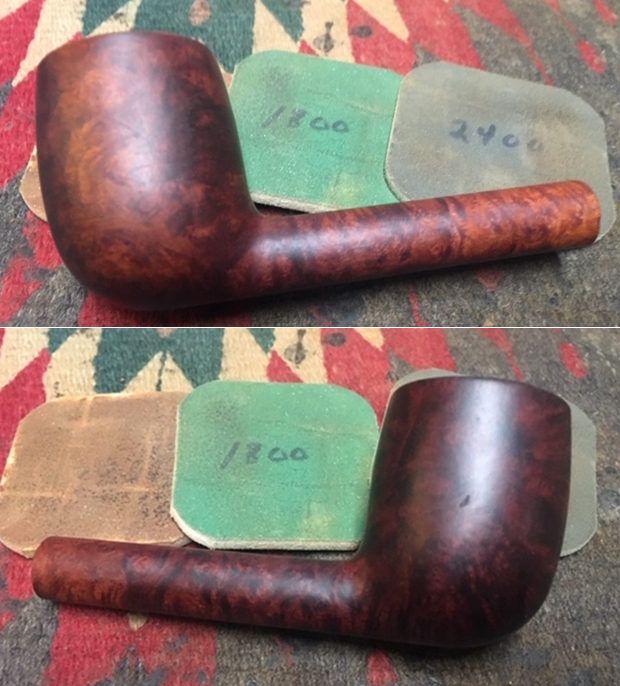
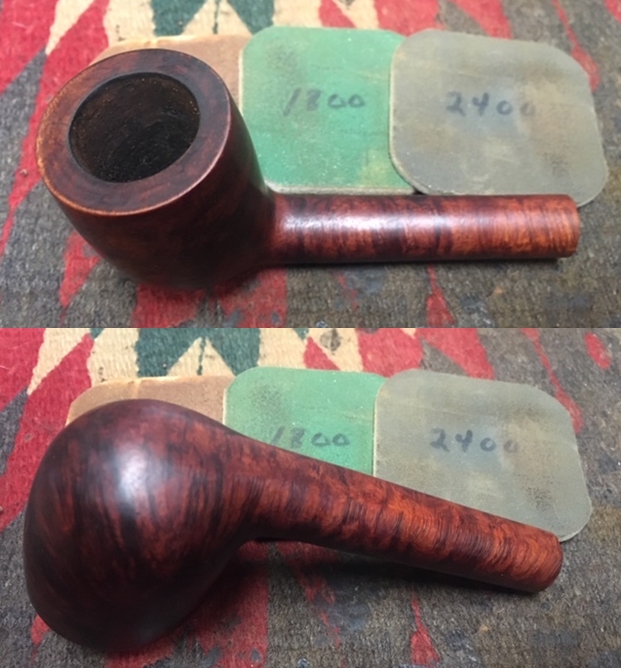
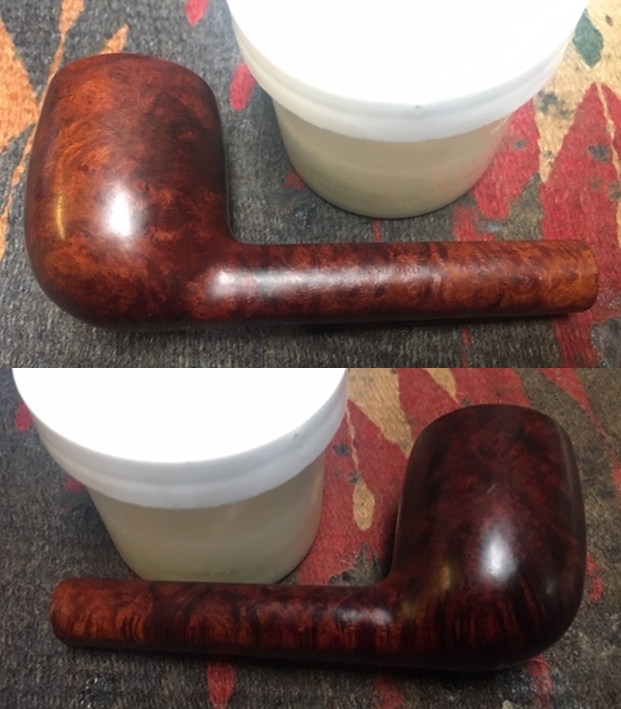
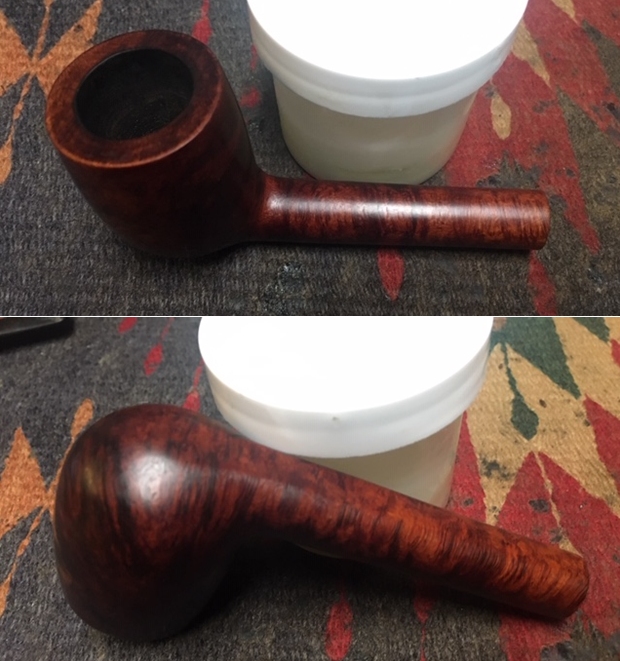
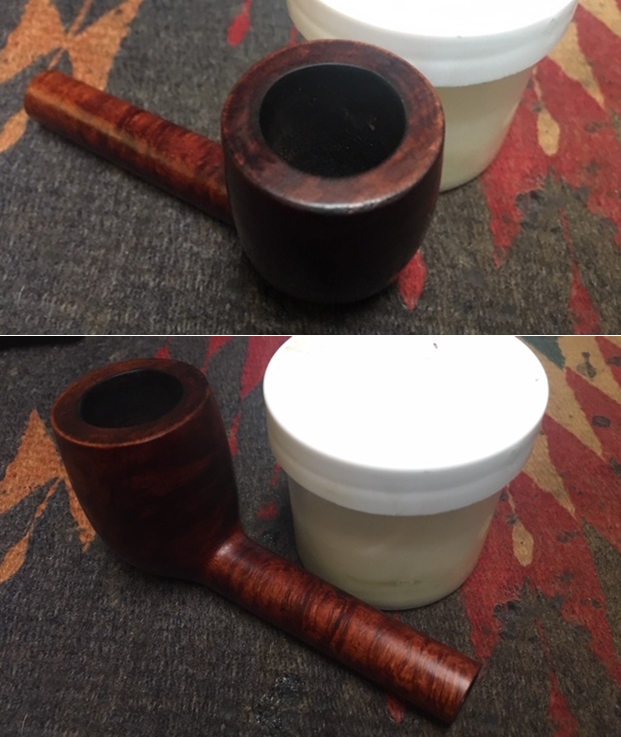
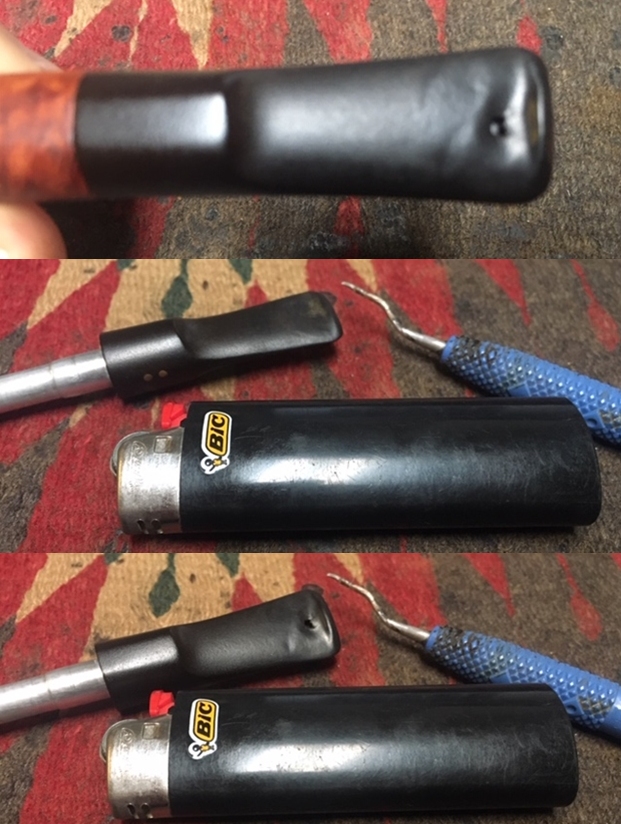
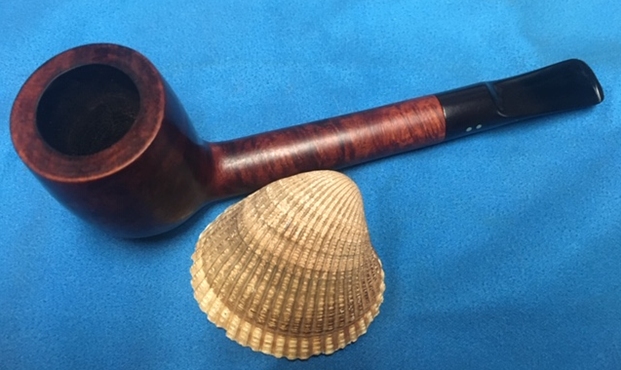
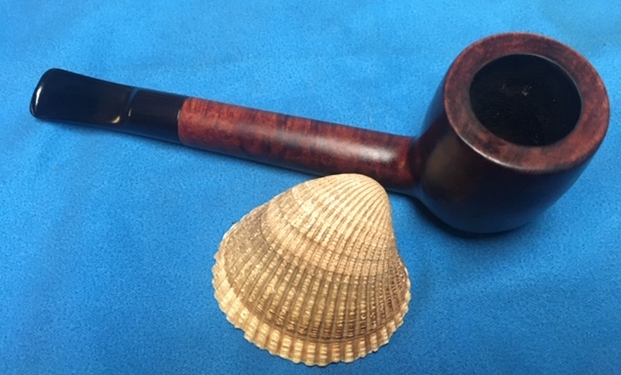
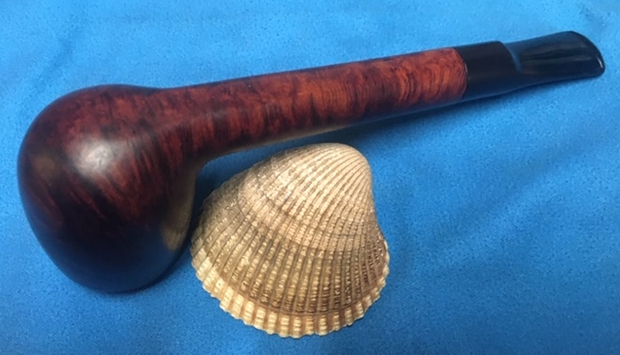
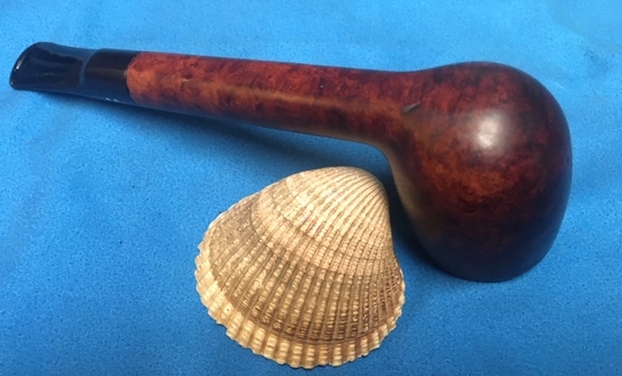
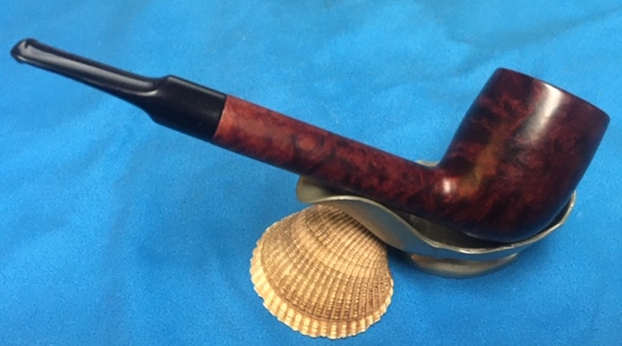
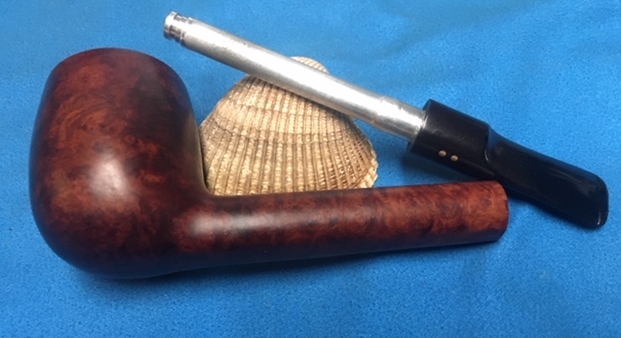
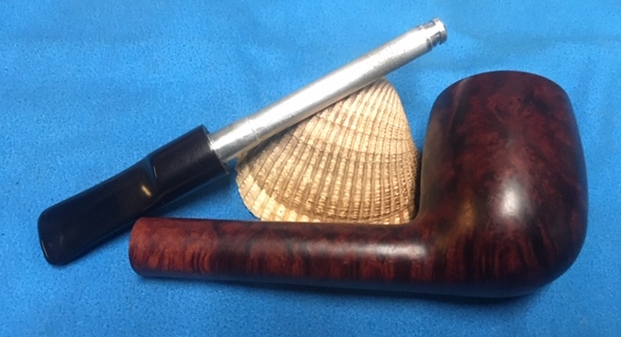
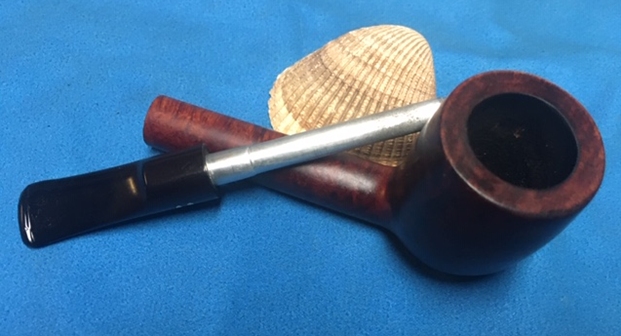
Tag Archives: Brigham Pipes

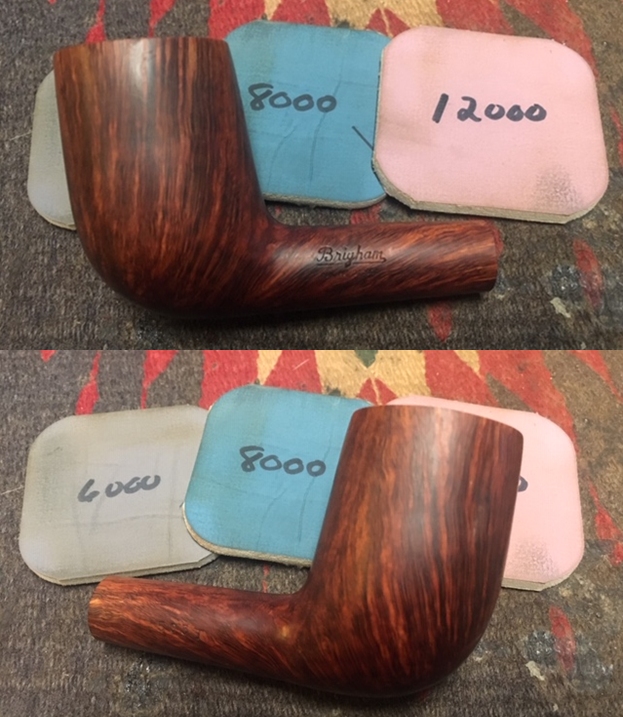
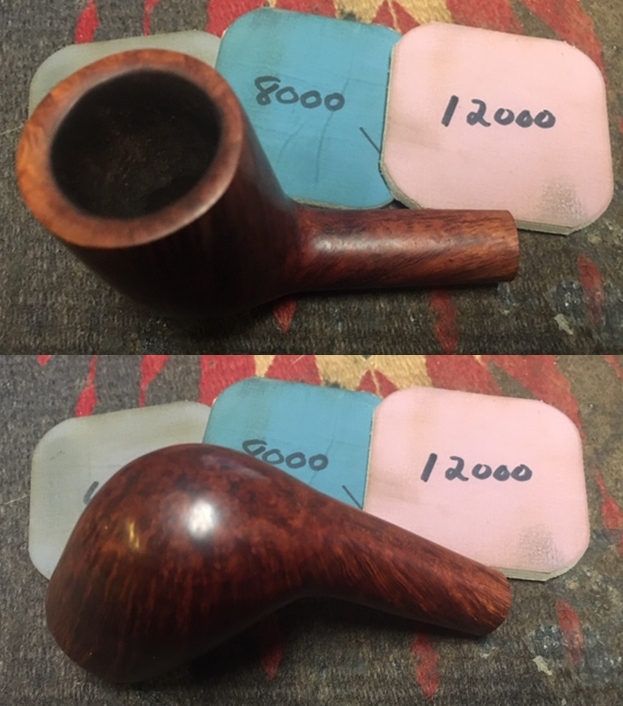
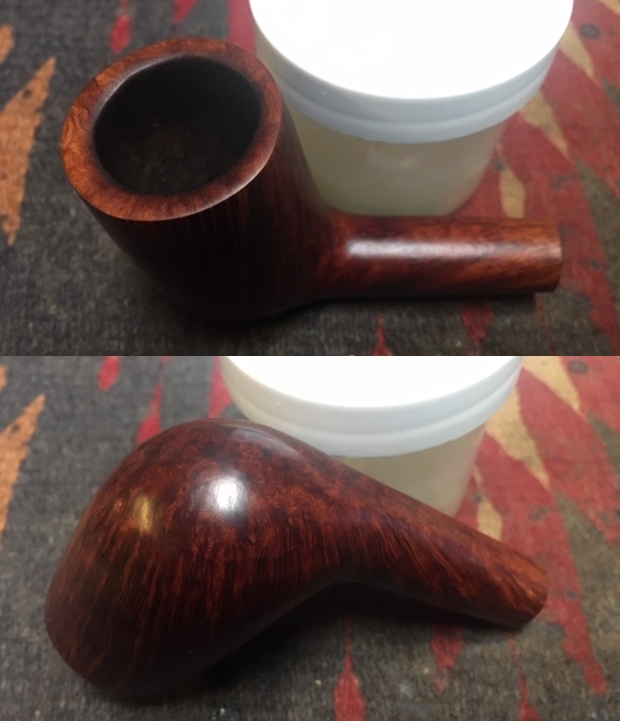
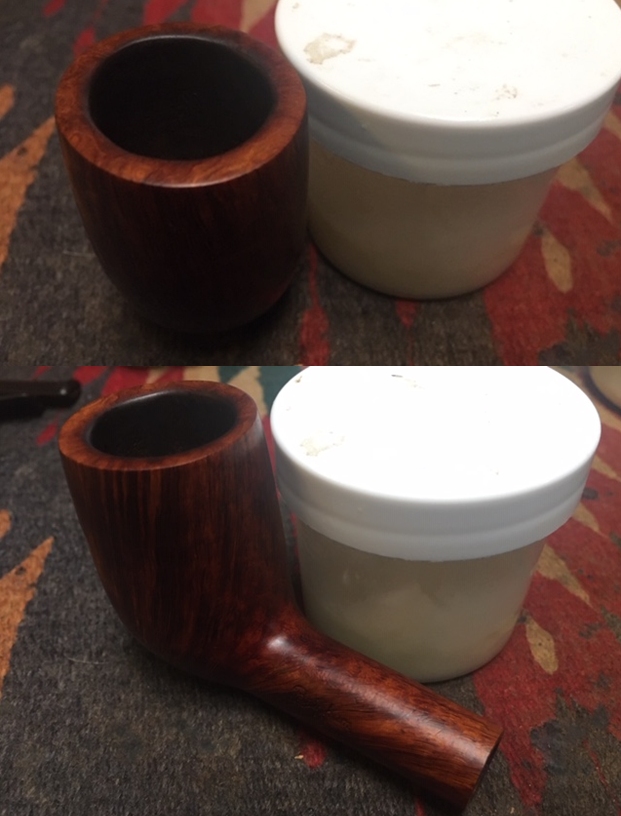
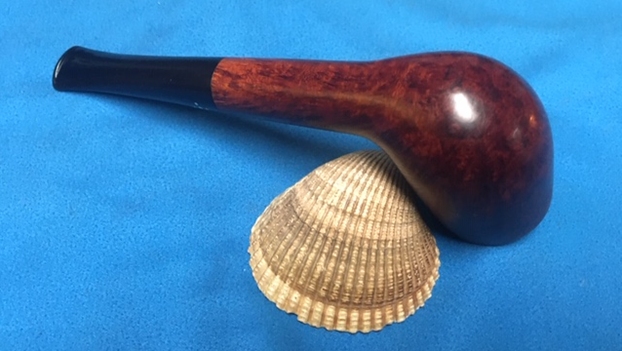
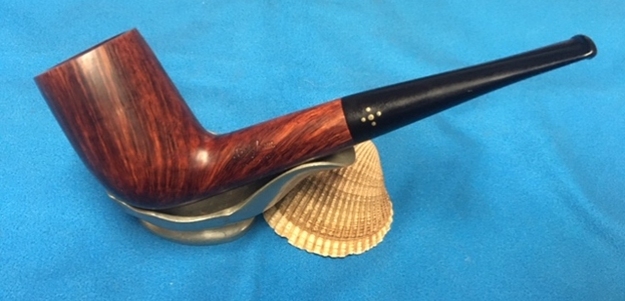
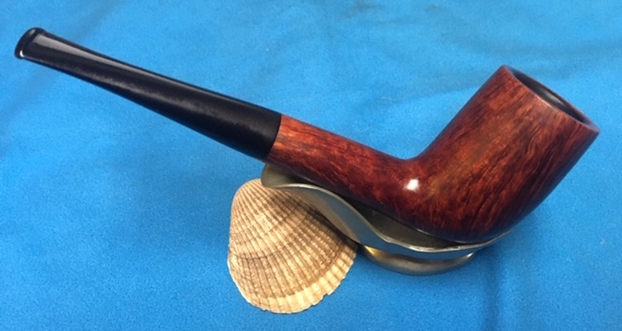
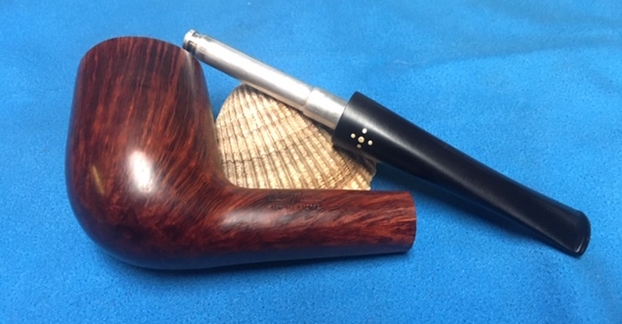
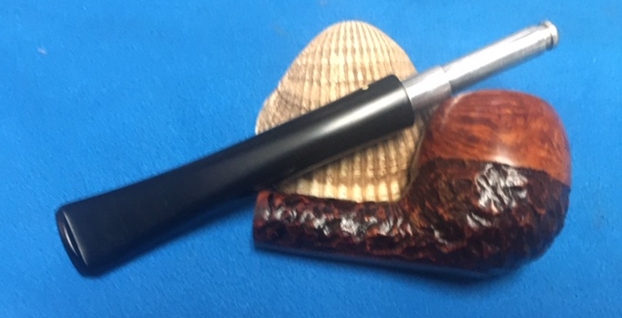
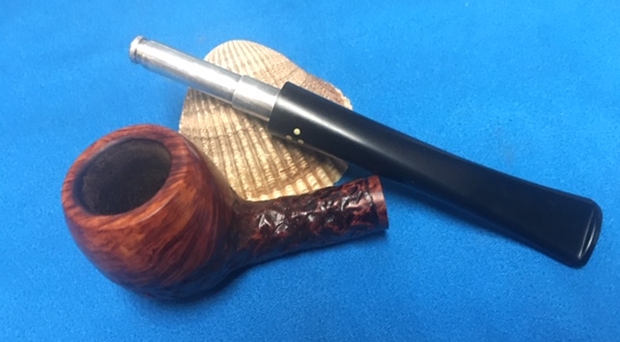
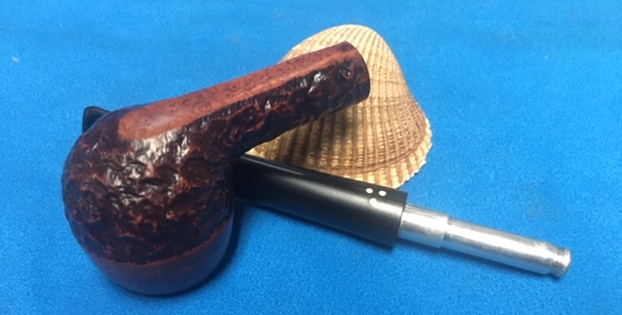
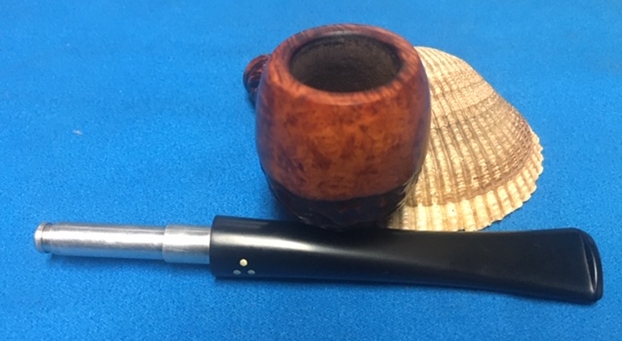
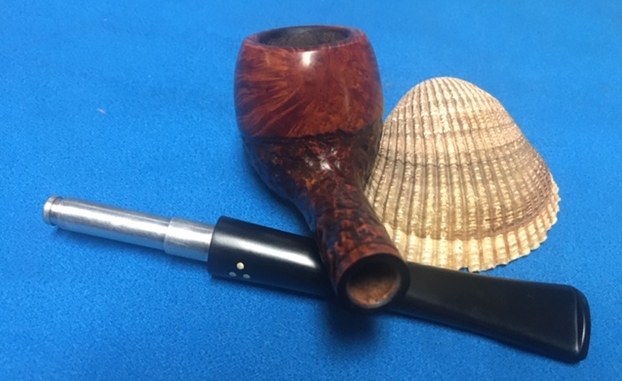
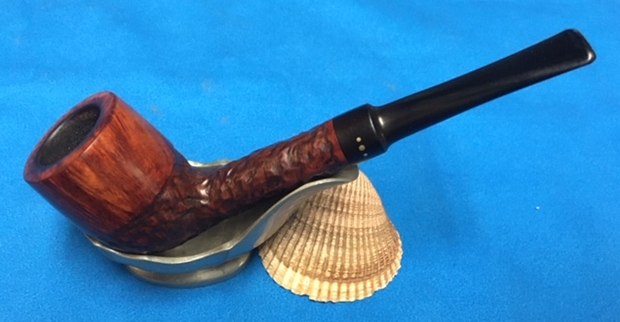
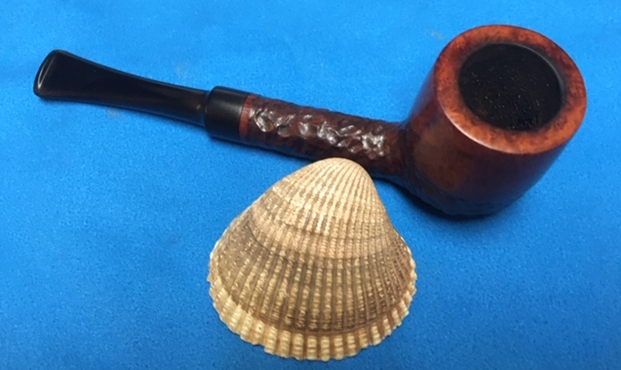
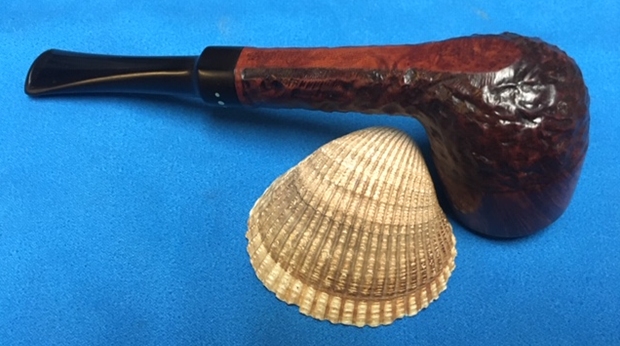
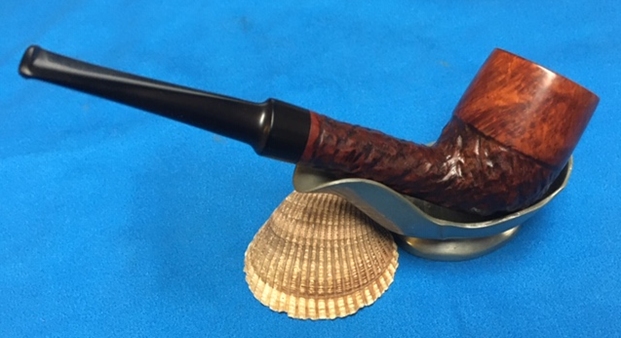
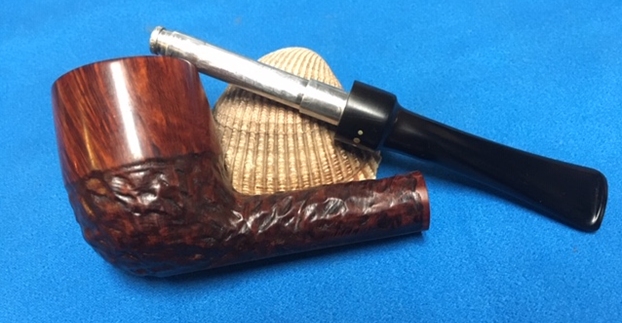
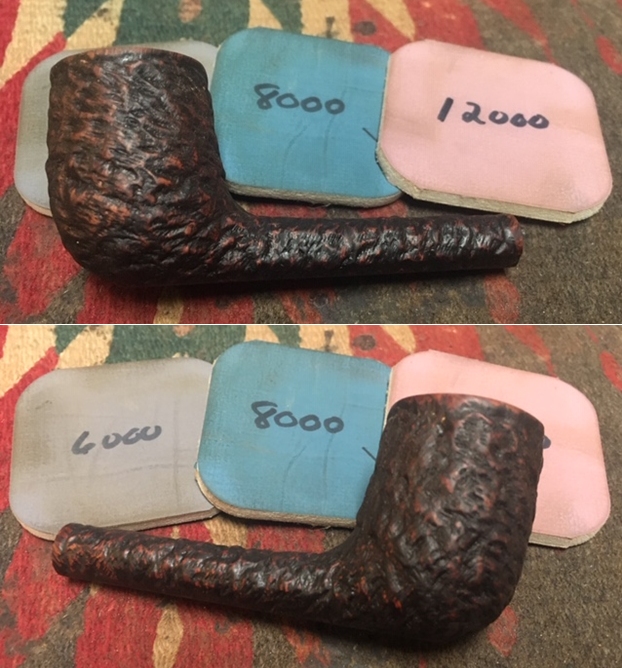
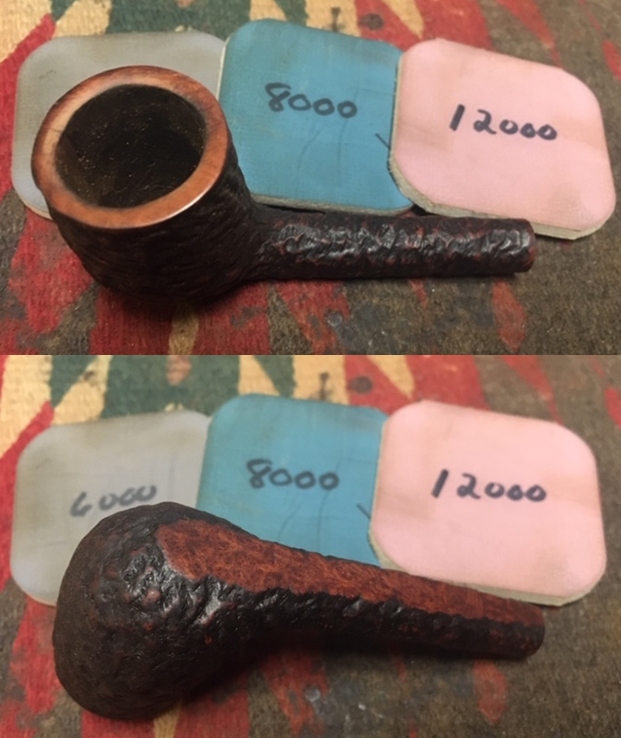
Breathing Life into a Petite Patent Era Brigham Exclusive 308 Apple


Blog by Steve Laug

Not too long ago I received an email from a fellow in Kitchener, Ontario regarding some pipes he needed cleaned up. He had been referred to me by my local pipe and cigar shop. While I am not currently adding more pipes to my queue of repairs I have made a commitment to the shop to work on pipes for their customers. Generally they have one or two pipes that need a bit of work. This fellow sent me the following email:

I just came across my smoking pipes that I’ve had in storage for about 40 years. I’m wondering what you’d charge to have them refurbished. There are 17 in total (11 are Brighams and 6 are various).

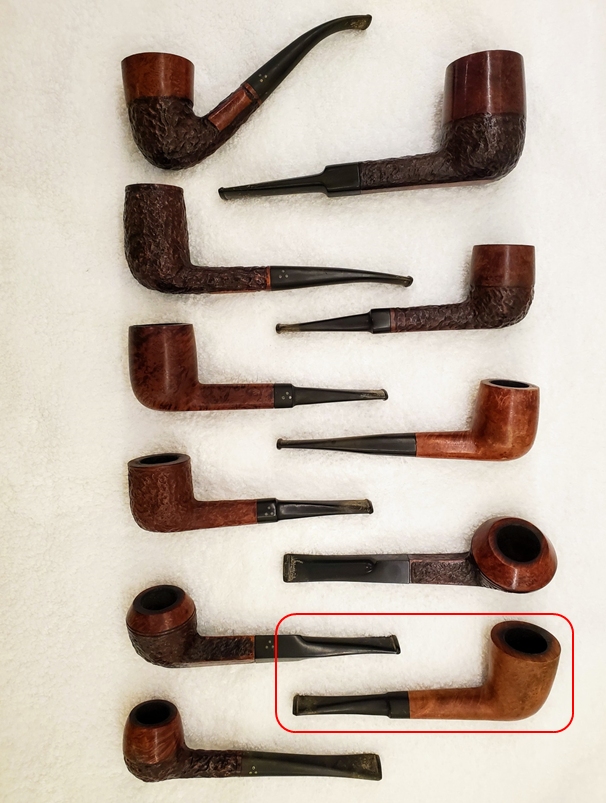
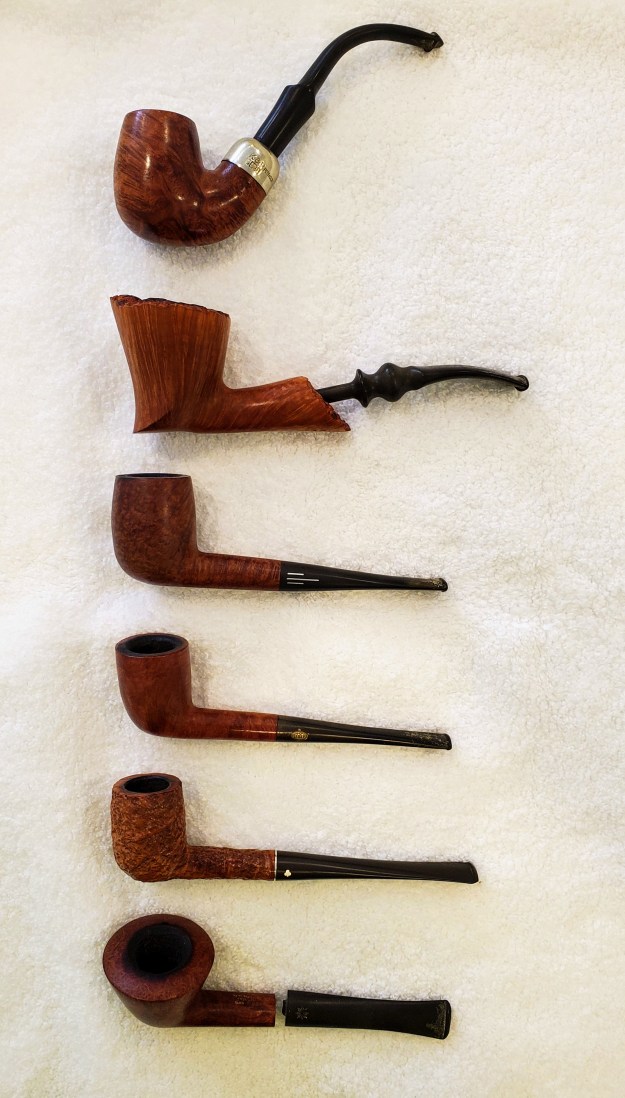
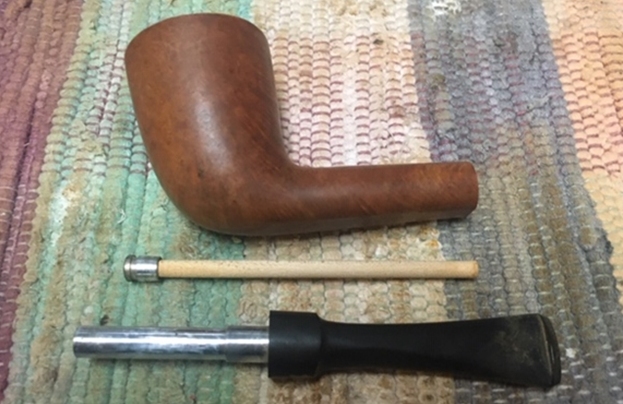
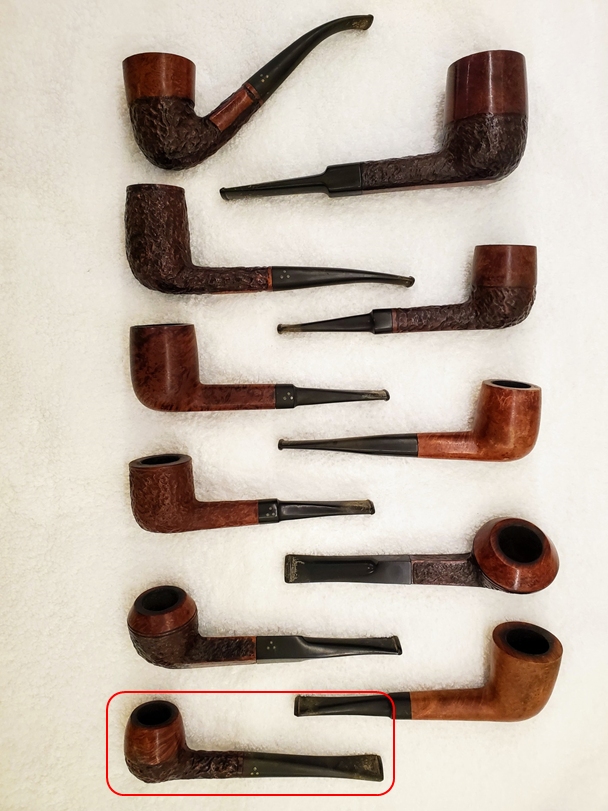
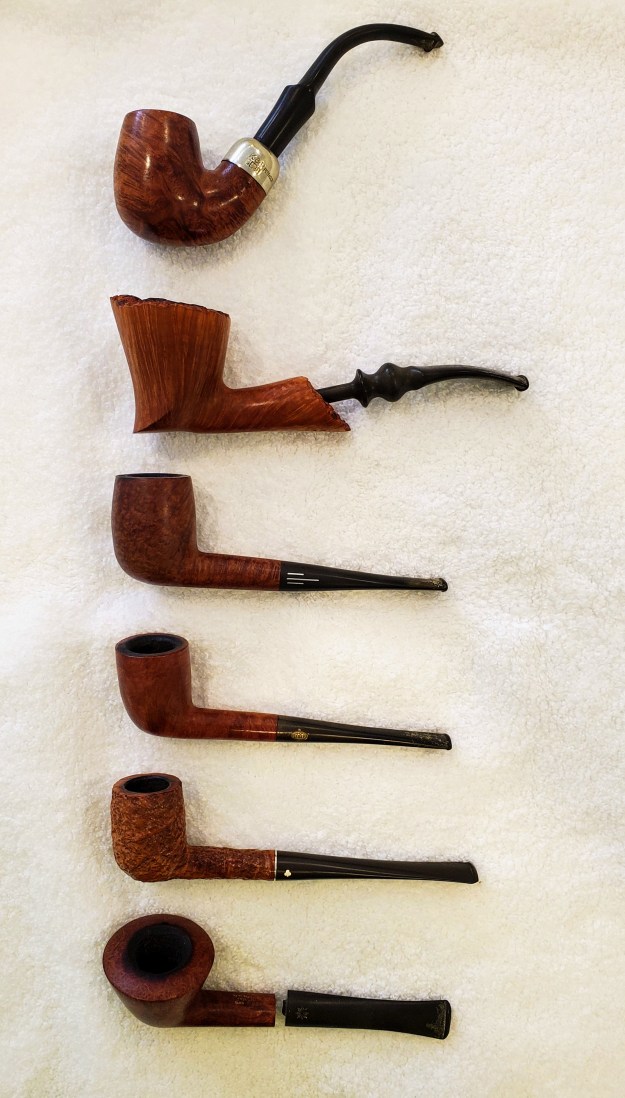
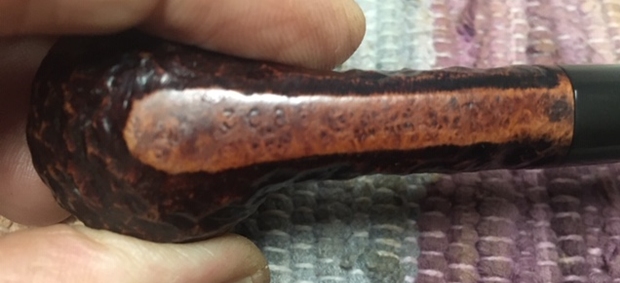
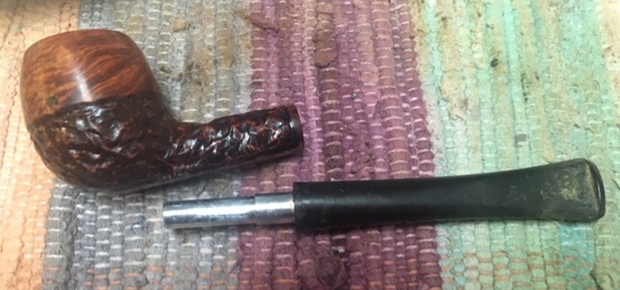
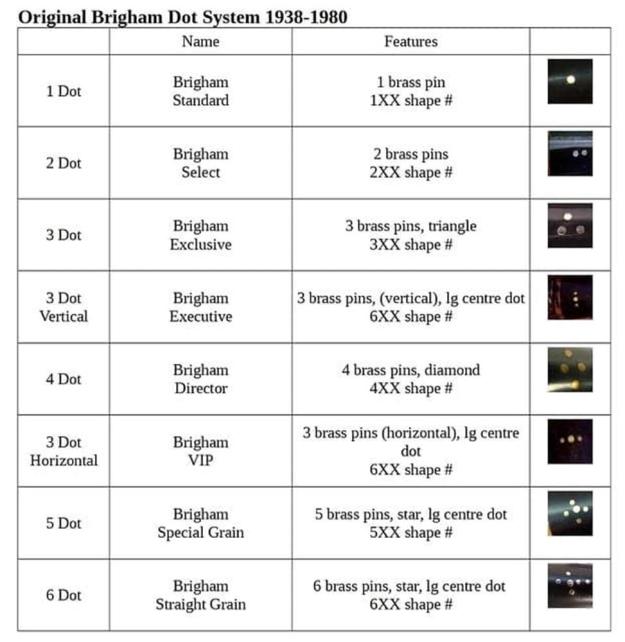
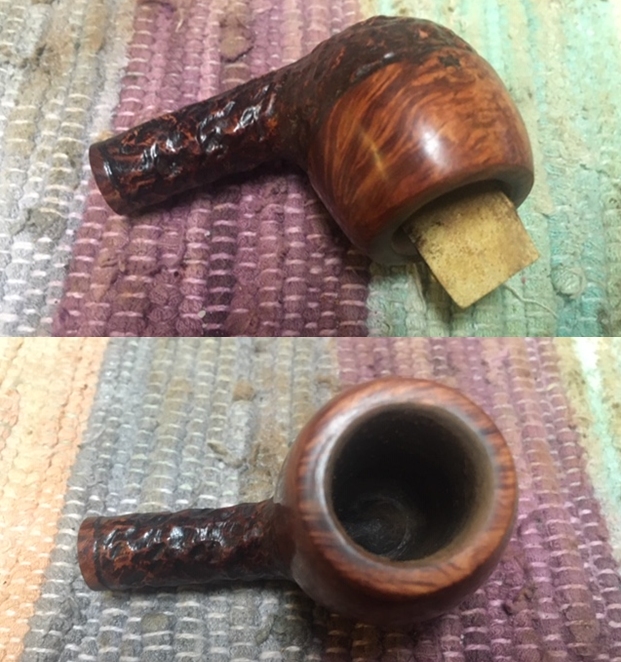
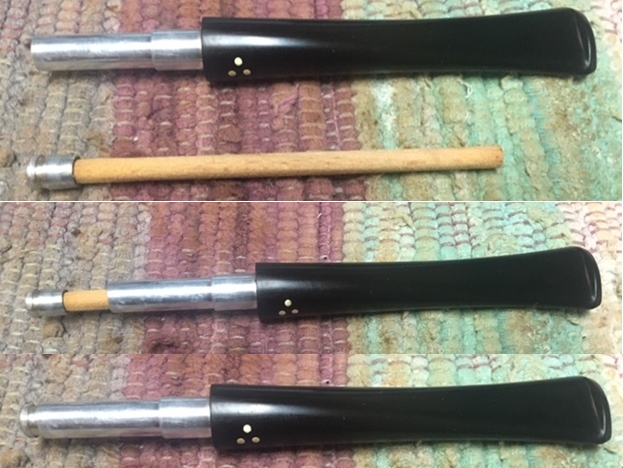
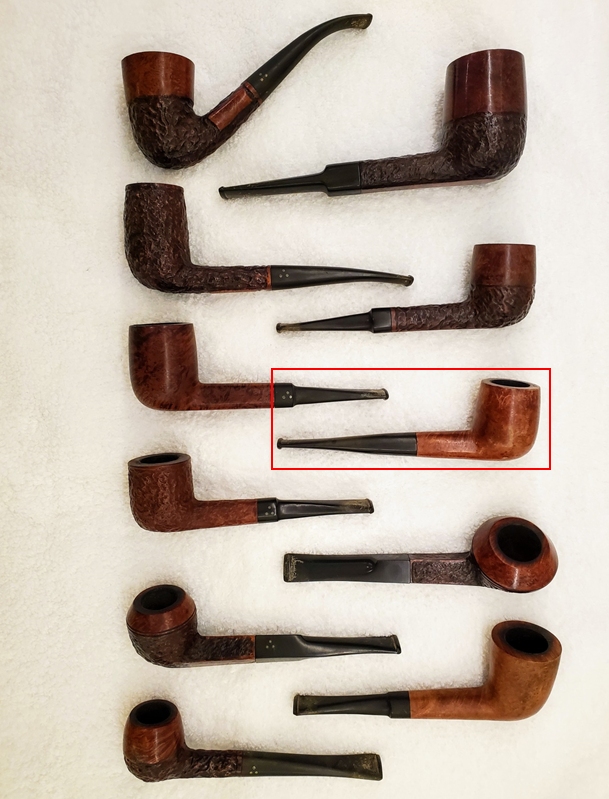
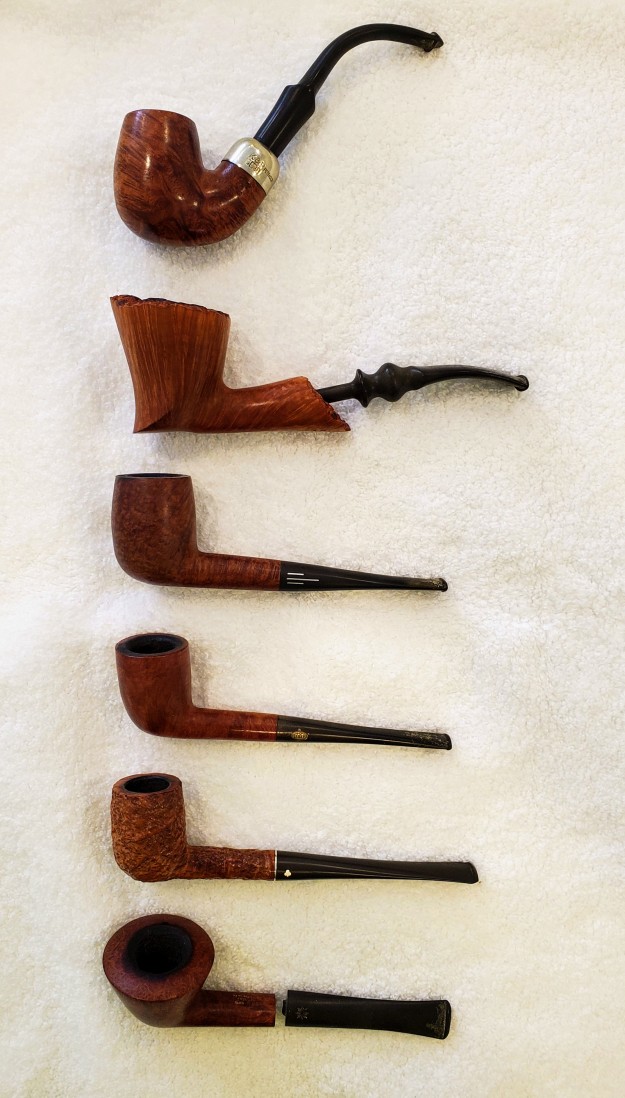
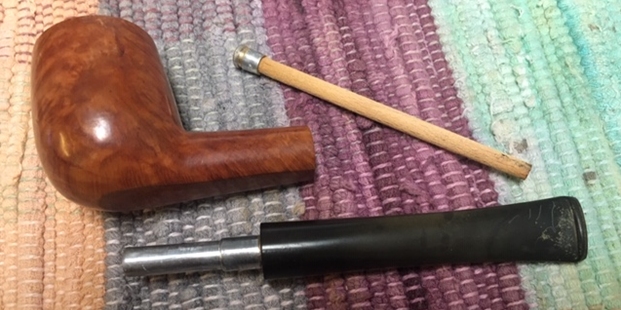
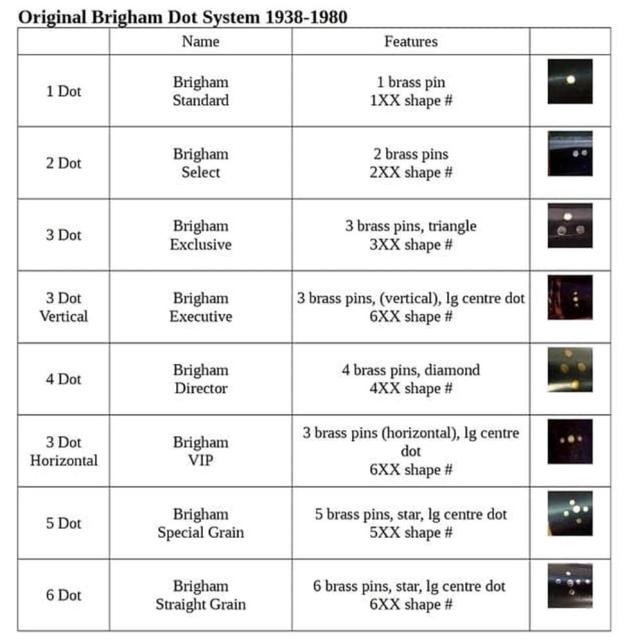
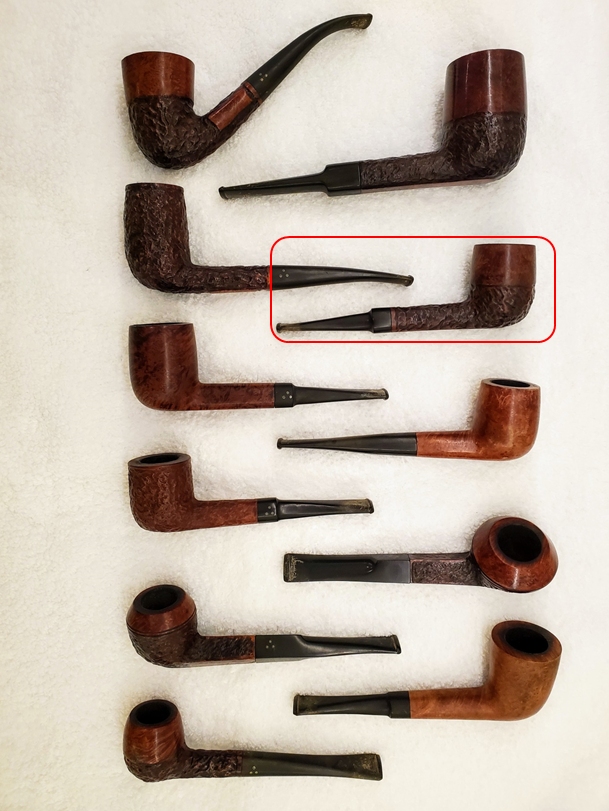
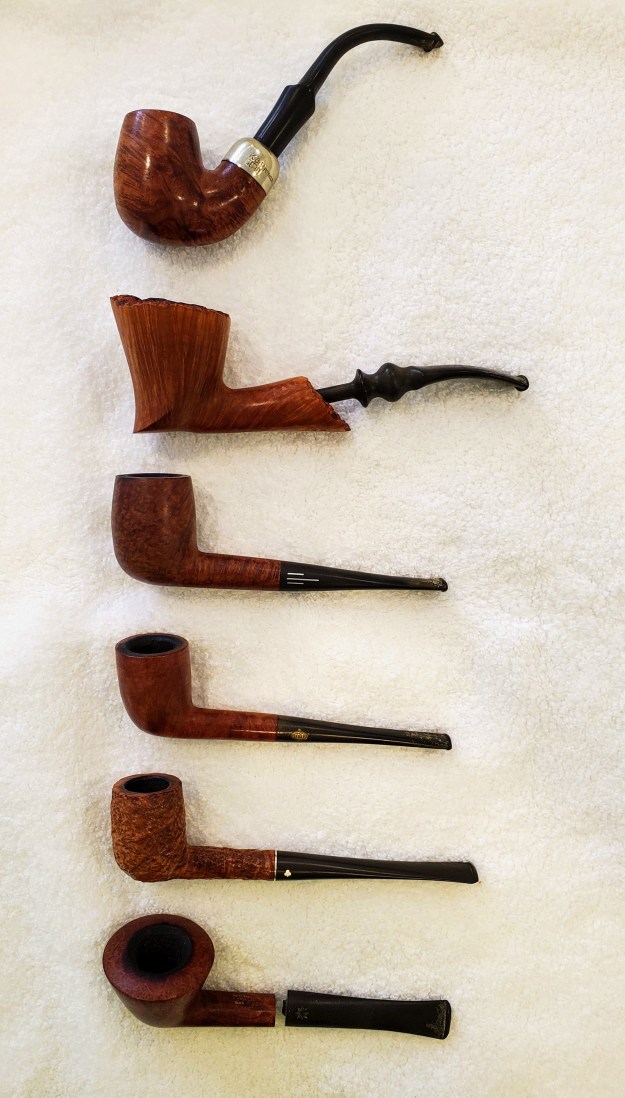
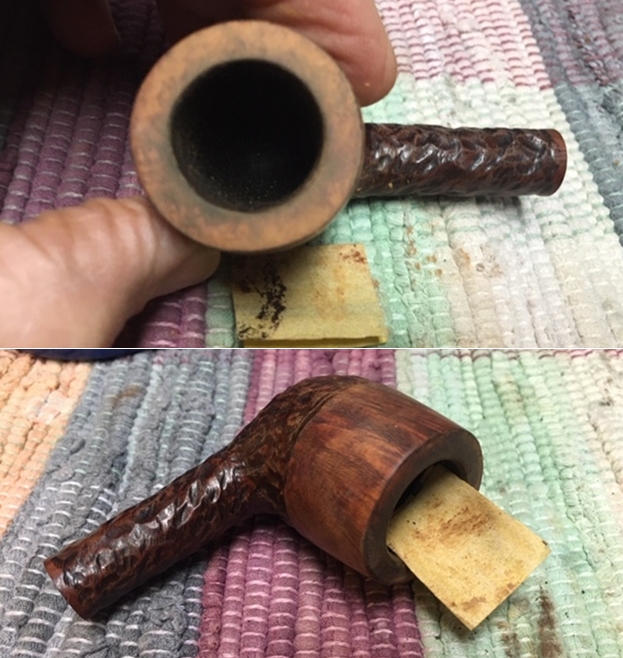
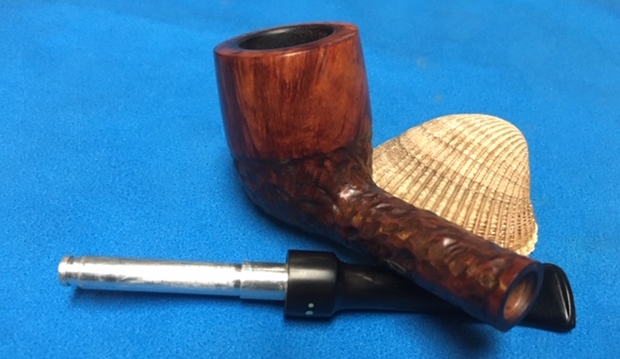
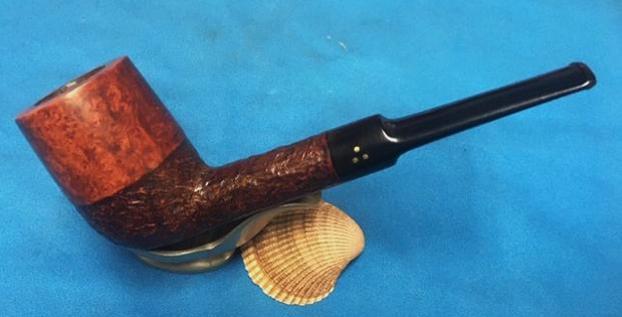
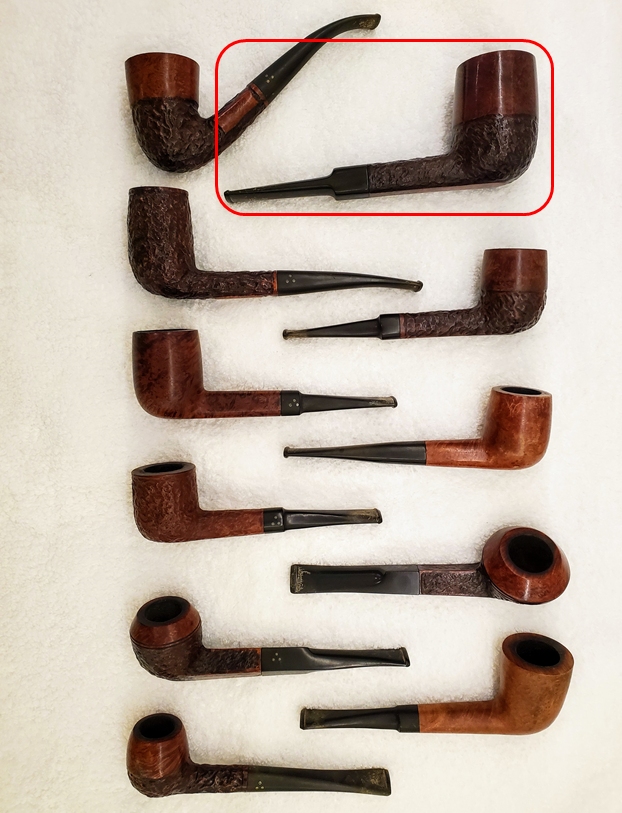
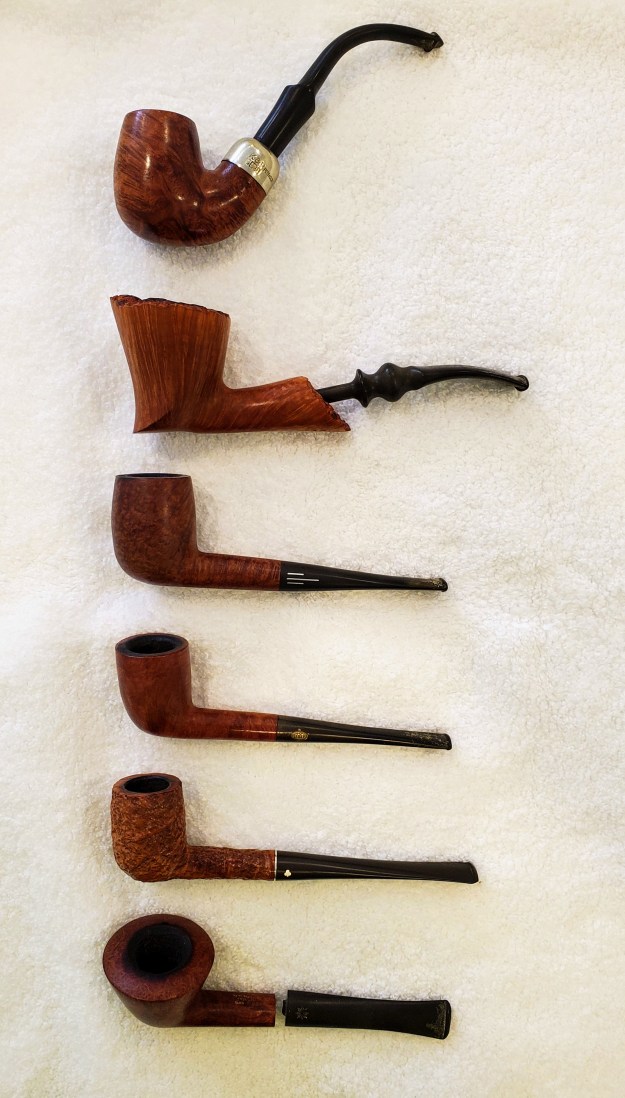
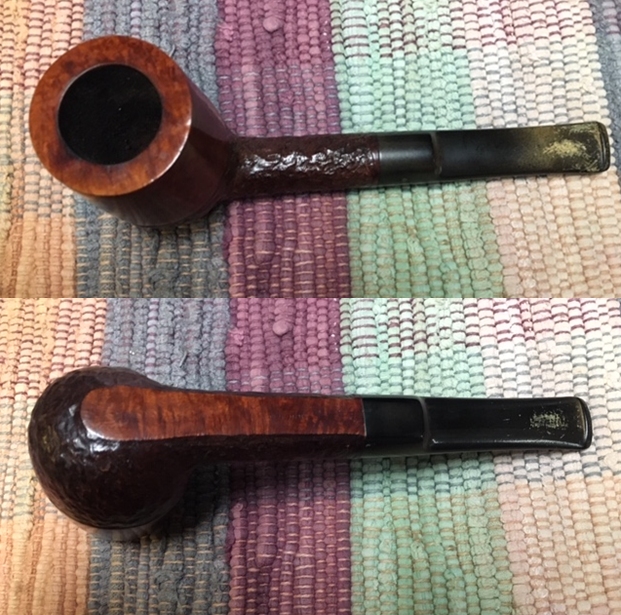
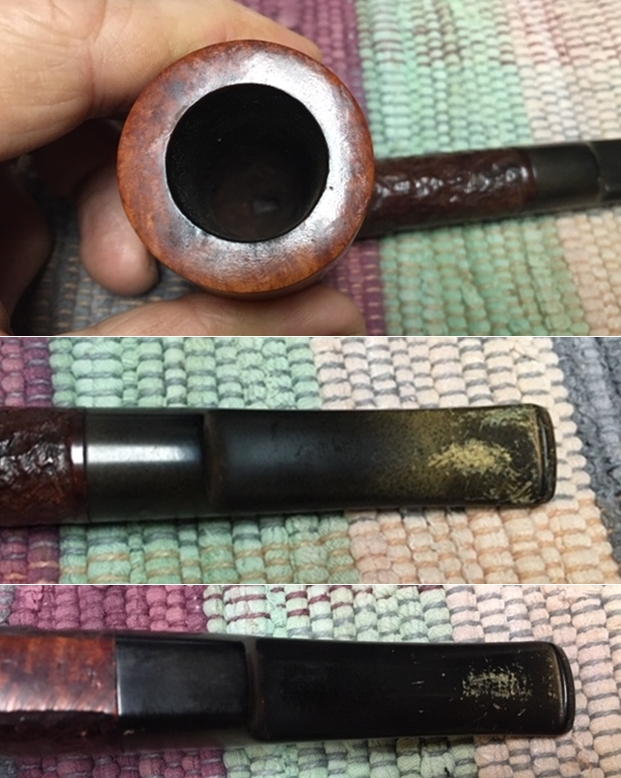
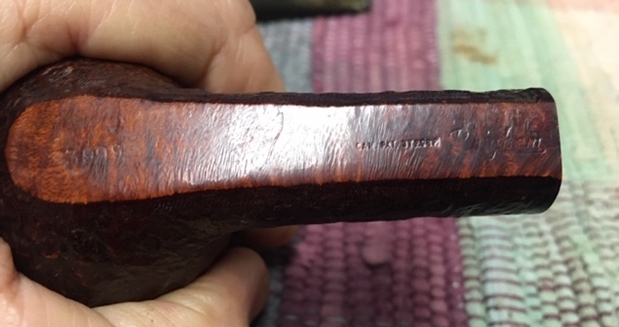
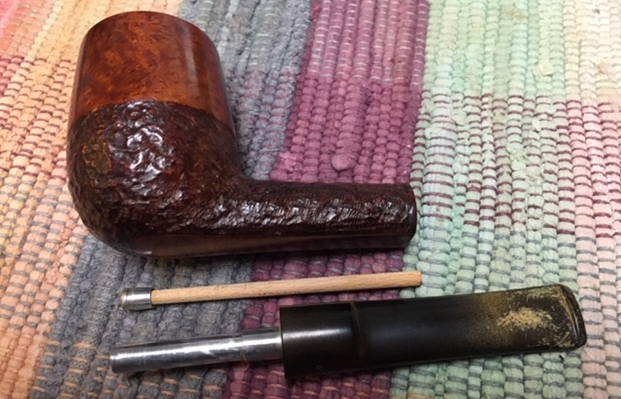
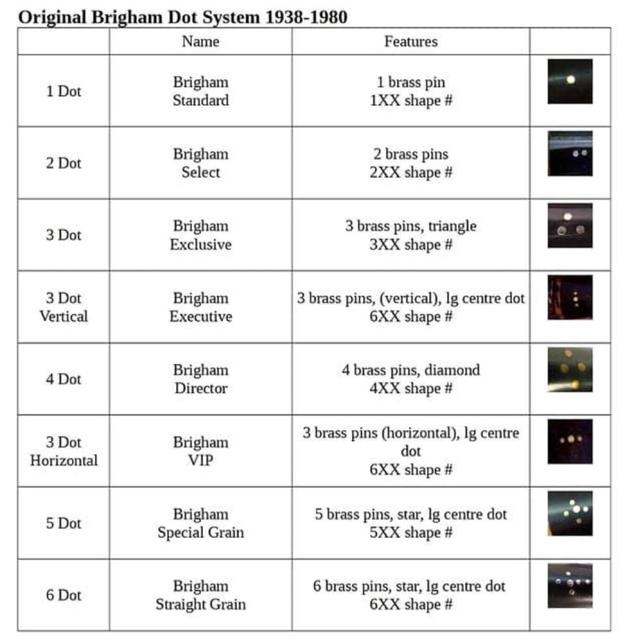
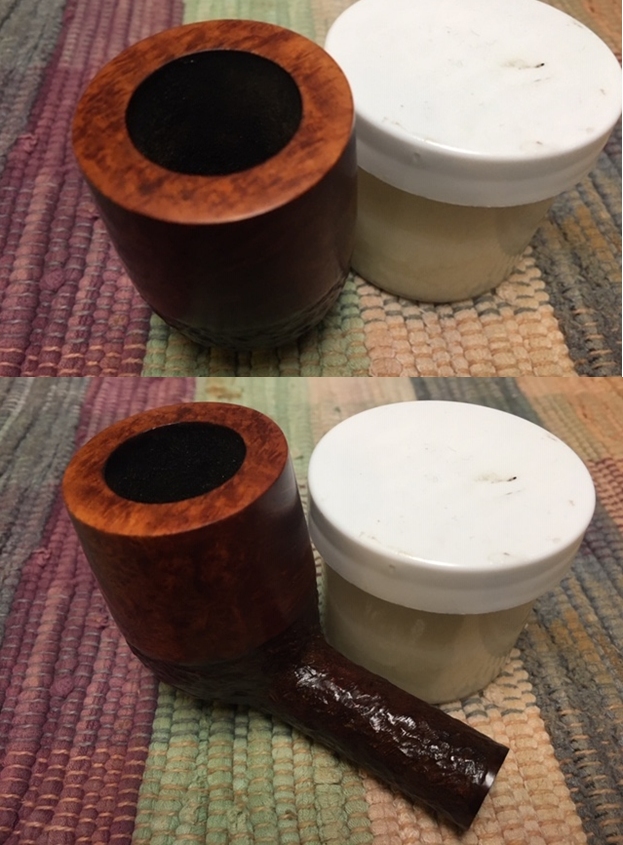
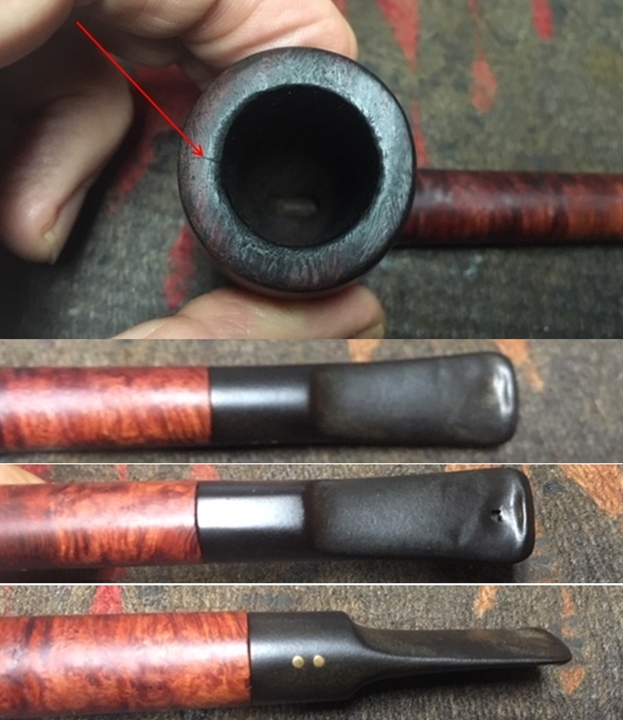
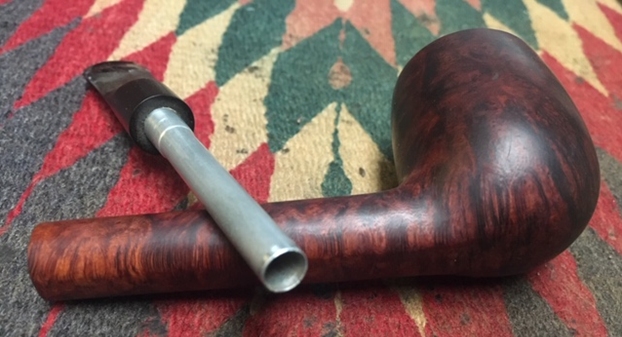
It turns out he said he had 17 pipes. That was certainly more than I expected but I communicated that there was a large queue ahead of him and I would have to fit them in as I could. He was fine with whatever time it took. He sent me the following photos of his collection that he wanted restored. The first photo shows his eleven Brigham pipes – all very interesting shapes. The second photo shows the six various pipes in the collection – A Republic Era Peterson’s System 1312 (Canadian Import), A Bjarne Hand Carved Freehand, a Comoy’s Everyman London smooth billiard, a GBD Popular Dublin 12, an English made Kaywoodie Rustica 72B, a Kriswill Bernadotte 60 with a broken tenon. When the box arrived there were two additional pipes included for a total of 19 – a Ropp 803 Deluxe Cherrywood Poker and a Comoy’s Sandblast Everyman Canadian 296. It was a lot of pipes! I have been randomly choosing the next pipe to work on and chose the Brigham that I have drawn a red box around in the first photo below. When I unwrapped it the pipe it was a Petite Brigham Apple. It was stamped on the flat shank/heel 306 which is the shape number. That is followed by Can Pat. 372982 then Brigham in a script. It had a rusticated lower half of the bowl and shank with a smooth top half. The rim top had a lava overflow from the thick cake in the bowl and some darkening around the top and edges of the bowl. The inner edge of the bowl was out of round. It was a dirty pipe but appeared to be in okay condition under the grime. The 3 Dot tapered stem was oxidized and had tooth marks and chatter near the button on both sides. There was also some calcification for about an inch up the stem. I took close up photos of the bowl and rim top to show the condition of the bowl and rim as well as the cake and lava overflowing onto the rim top. I also took close up photos of the stem to show its condition as mentioned above.    I took a photo of the stamping on the underside of the shank to show what I was speaking about above. It is very clear and readable. It reads 308 followed by Can. Pat. stamp  372982 then Brigham in script.I removed the stem from the shank to reveal the aluminum tube/tenon that held the Rock Maple Distillator. The distillator was was missing in this pipe so I would need to replace it with a new one once I had cleaned it.Before starting my clean up work on the pipe I turned to a chart that Charles Lemon of Dad’s Pipes sent to me on the patent era Brighams. There were made from 1938-1980. As the pipe I am working on is a Patent pipes, it’s more accurate to refer to its grade by name (the post 1980 grading scheme refers to Dots). Here is the  chart that Charles sent me. The pipe I am working on is thus a Brigham Exclusive with the 3 brass pins arranged in a triangle. The pipe I am working on has a 3XX shape number.It is helpful having this chart and getting a quick picture of where the pipe fits in the Brigham line. Now it was time to work on the pipe.

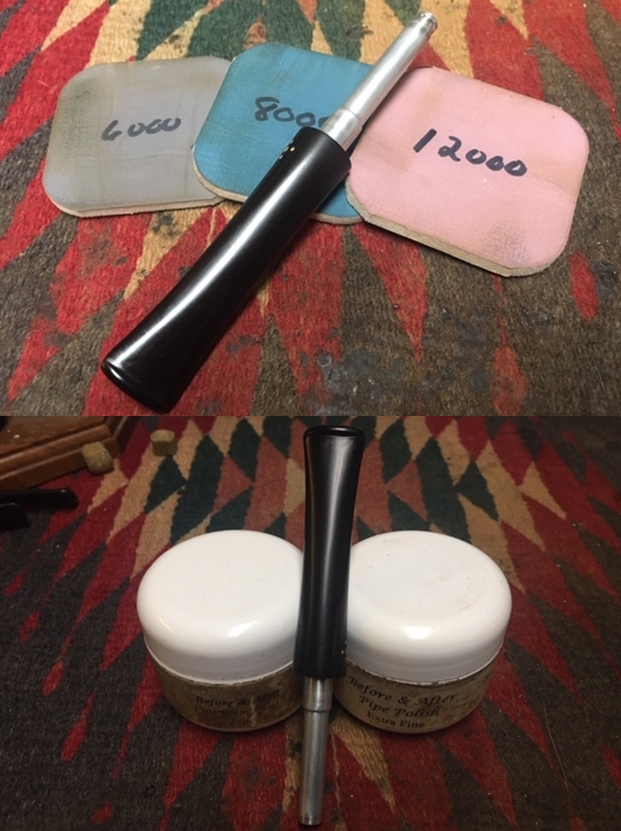
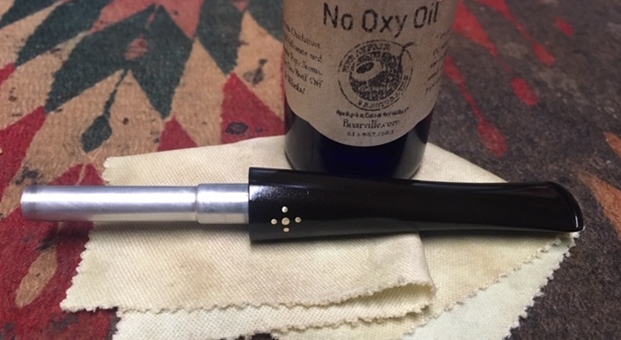
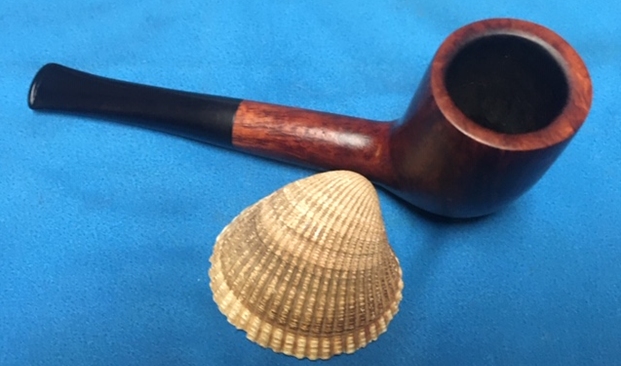
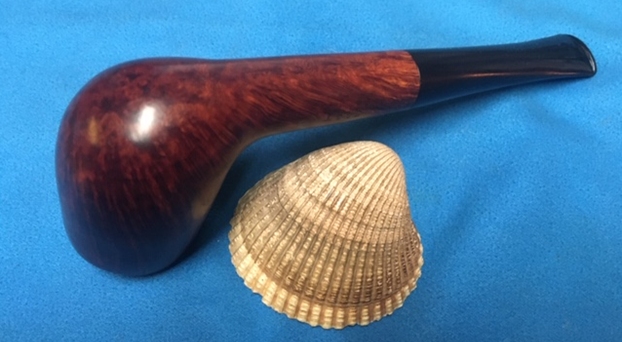
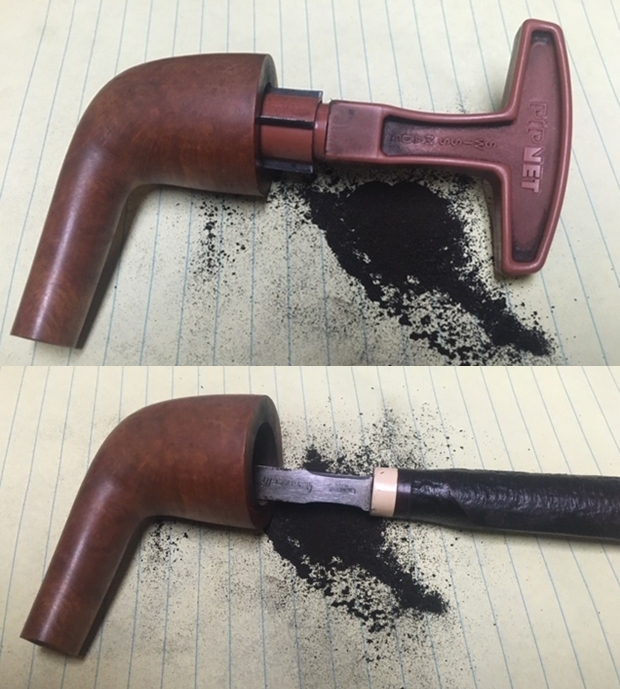
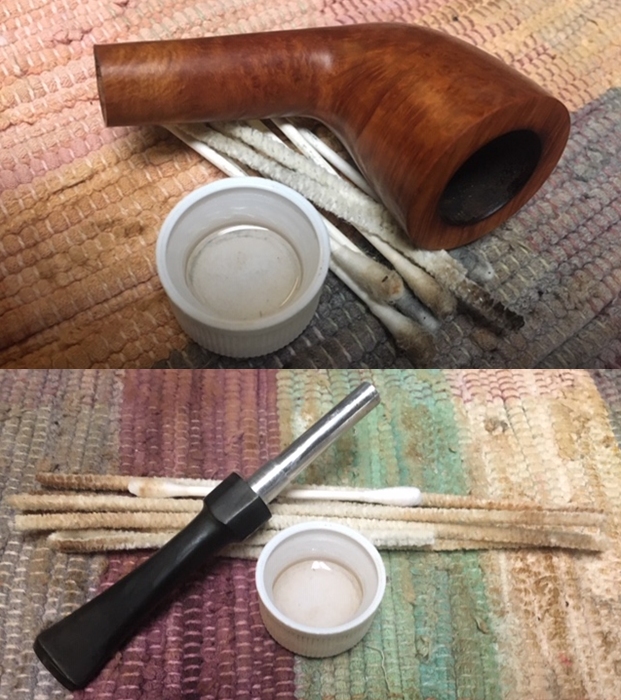
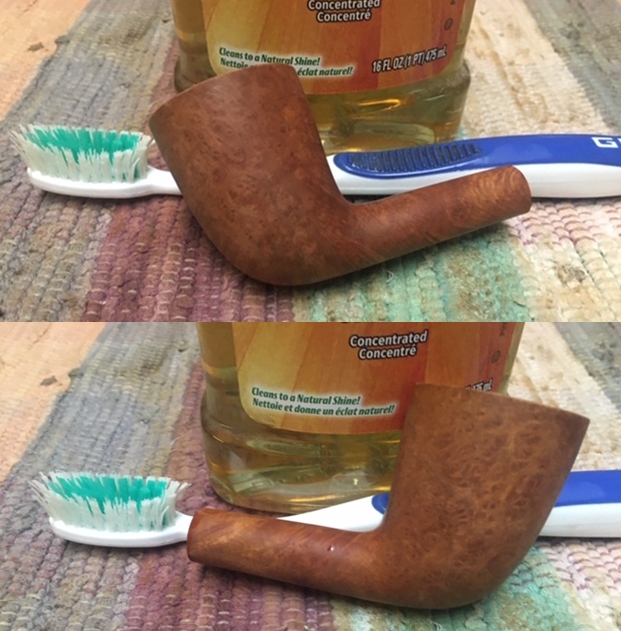
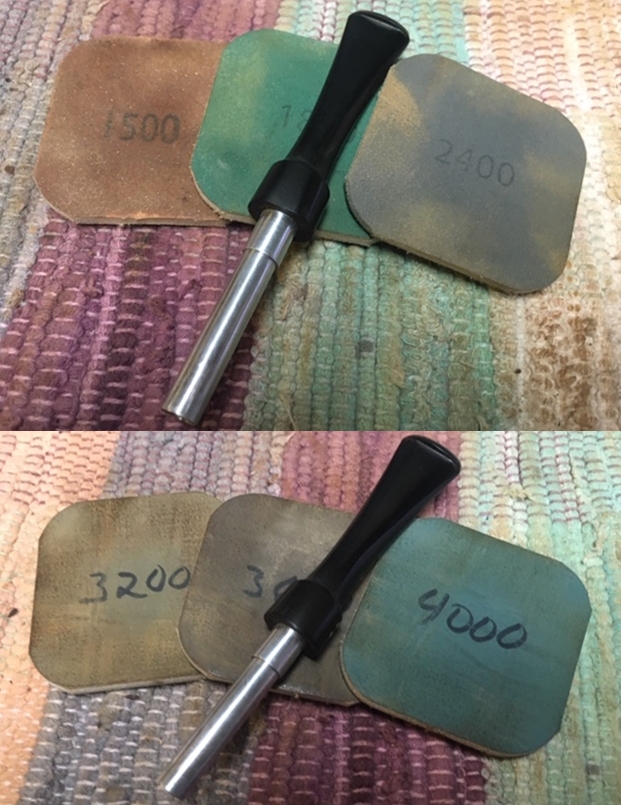
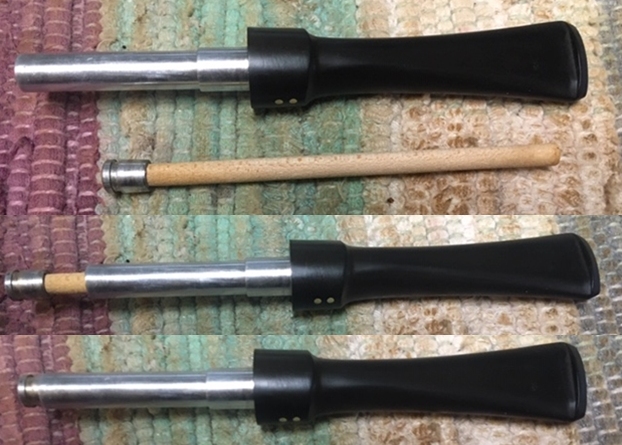
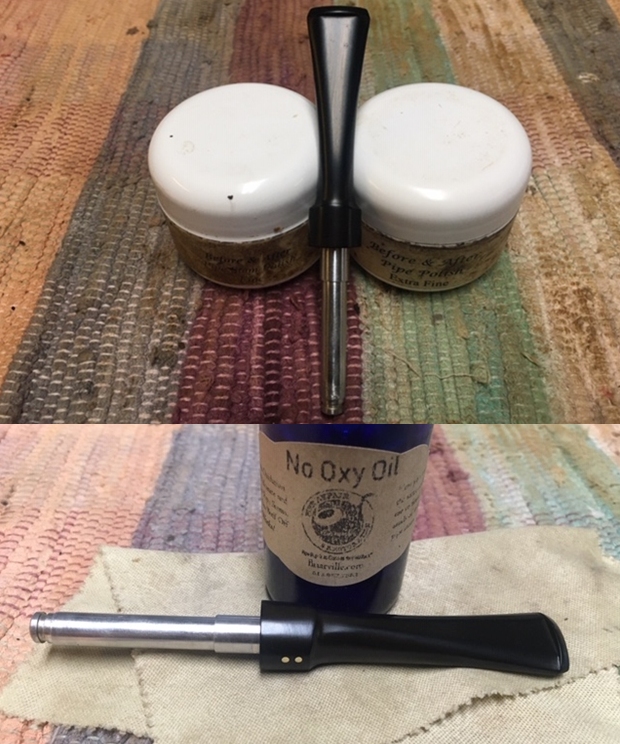
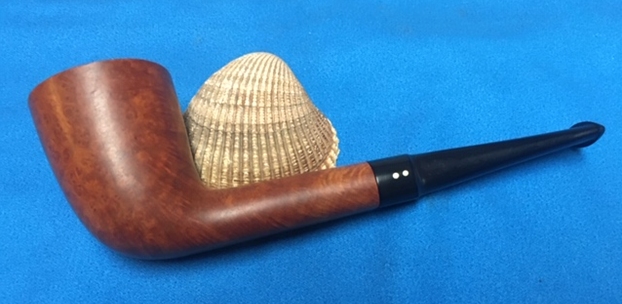
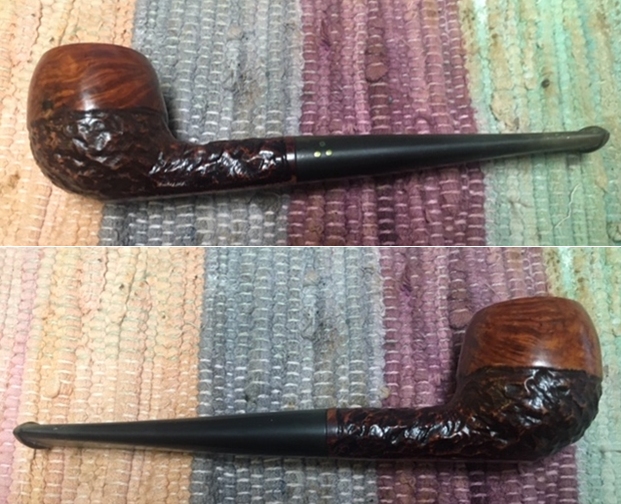
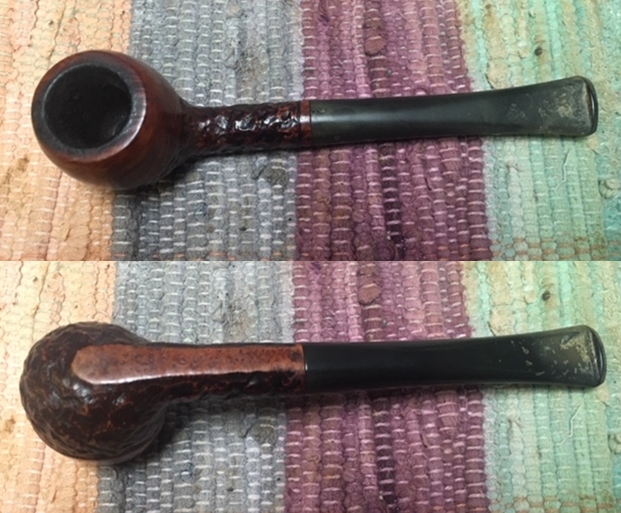
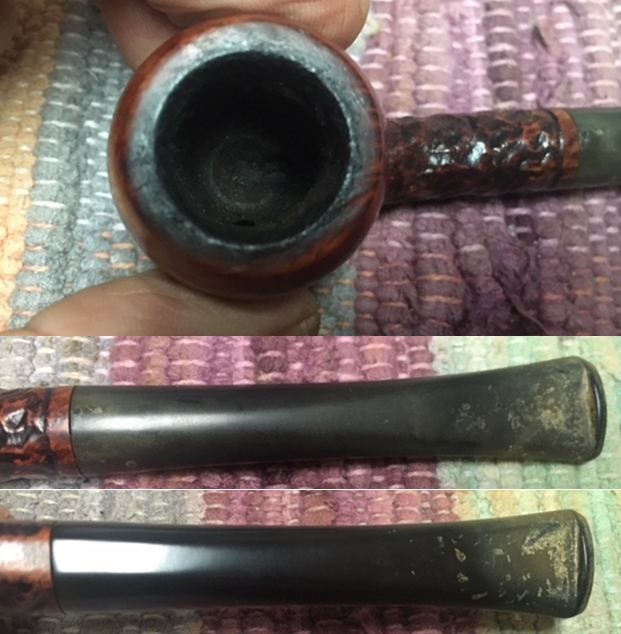
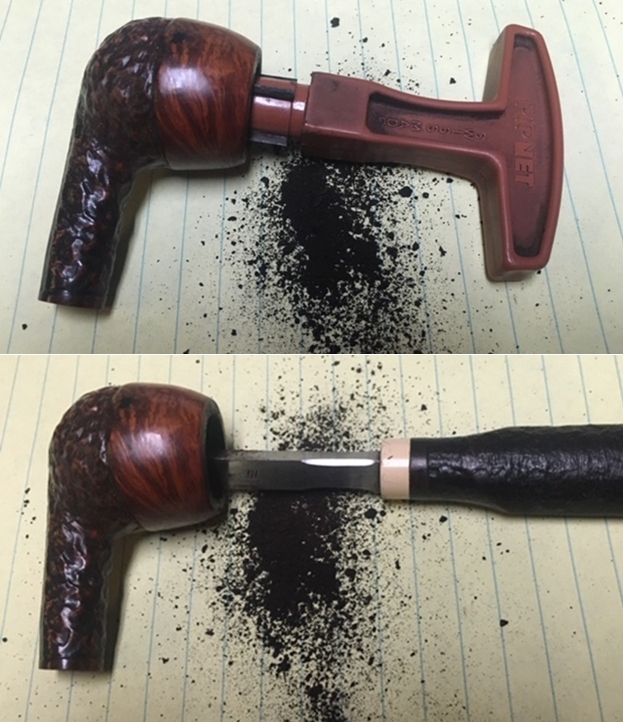
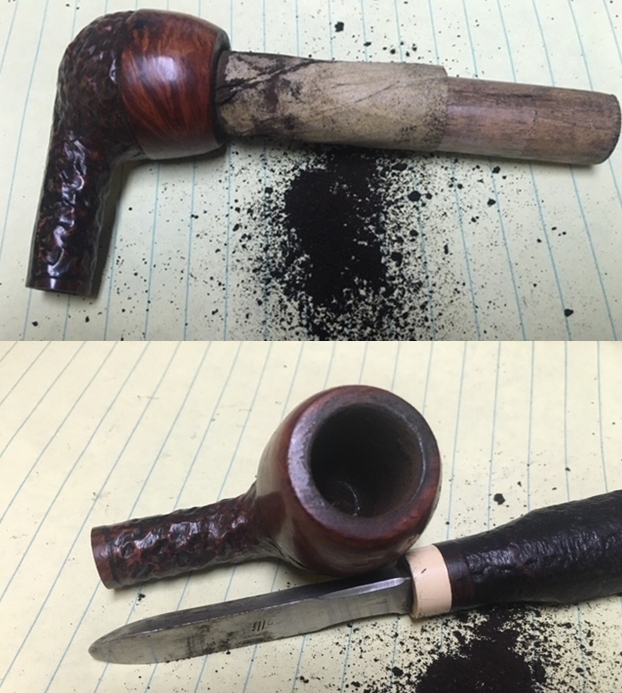
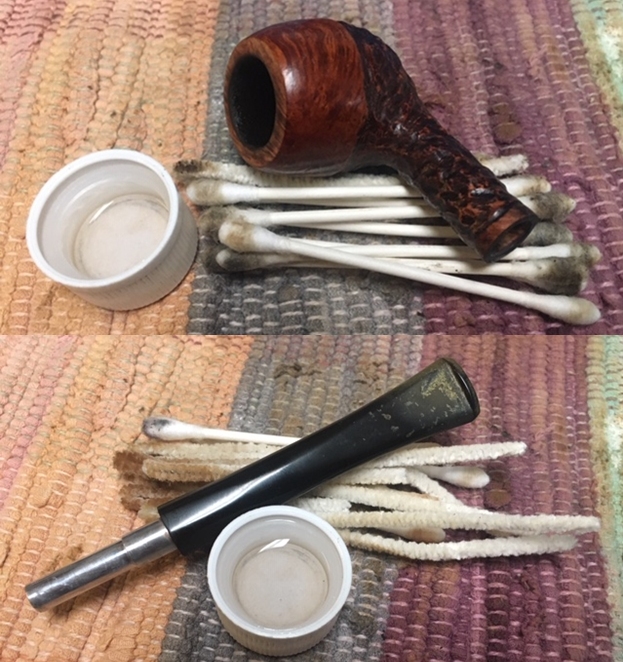
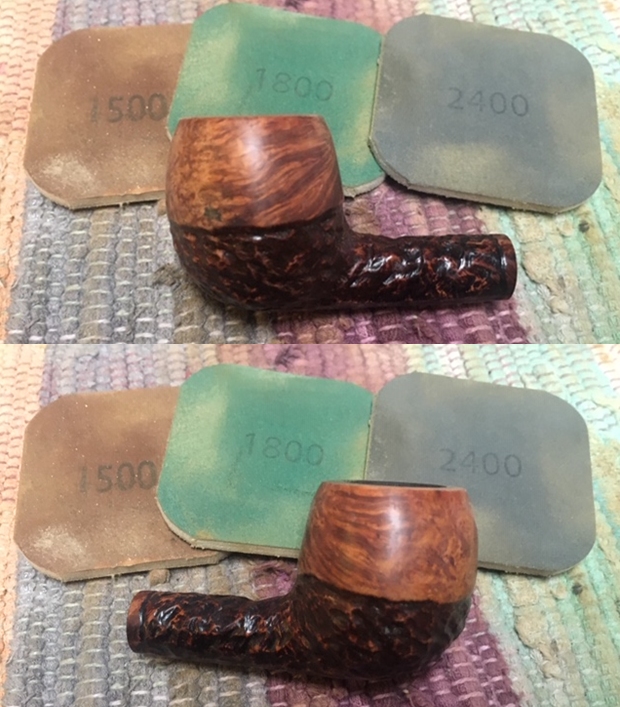
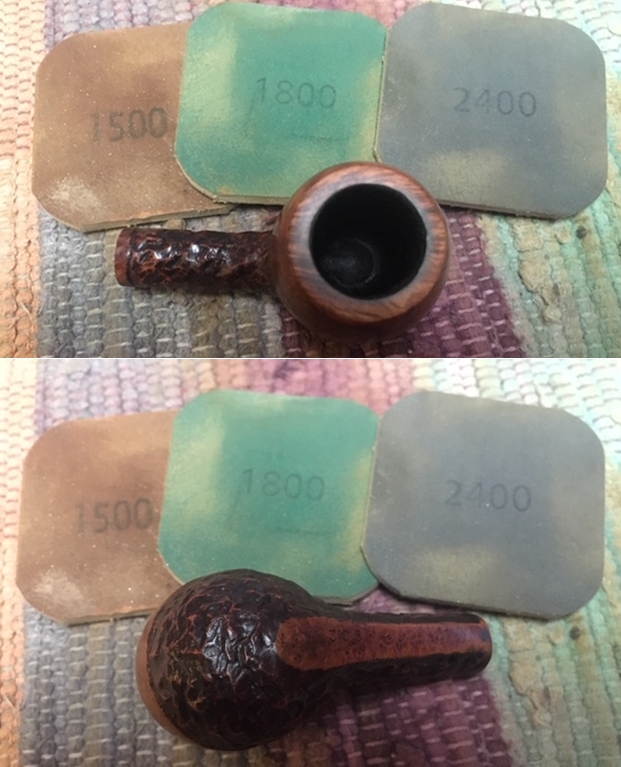
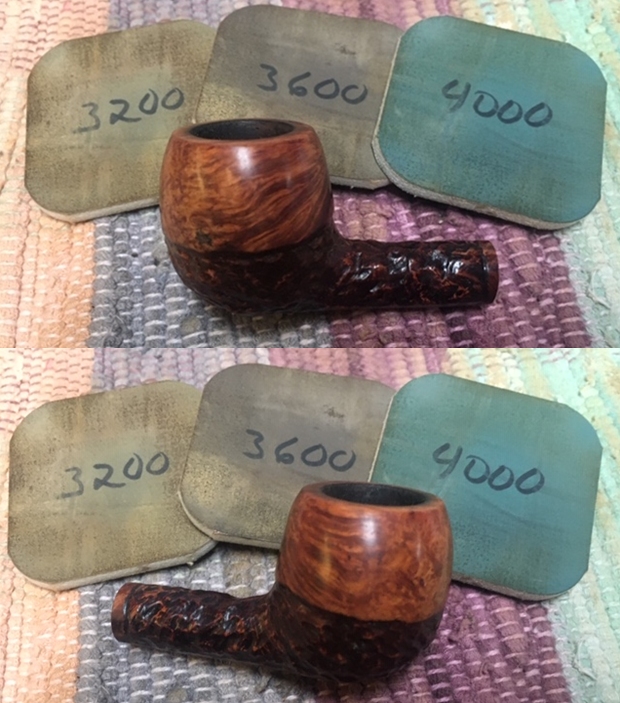
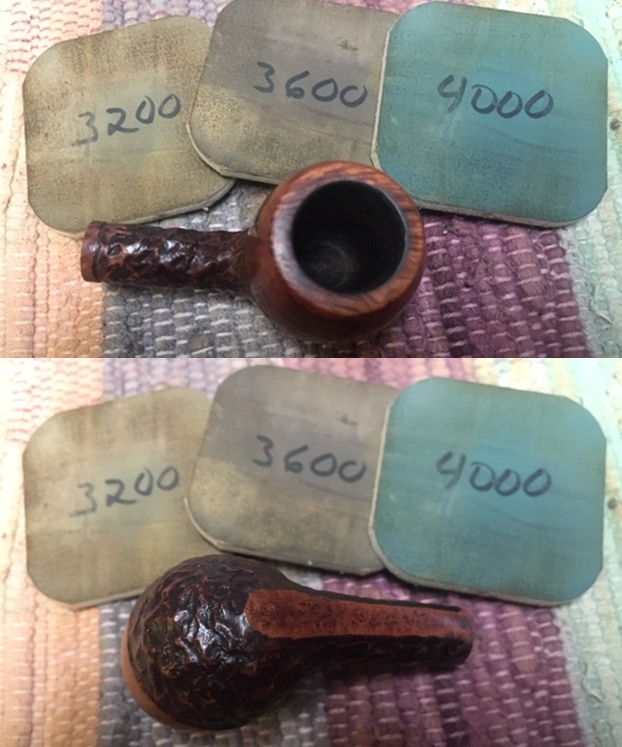
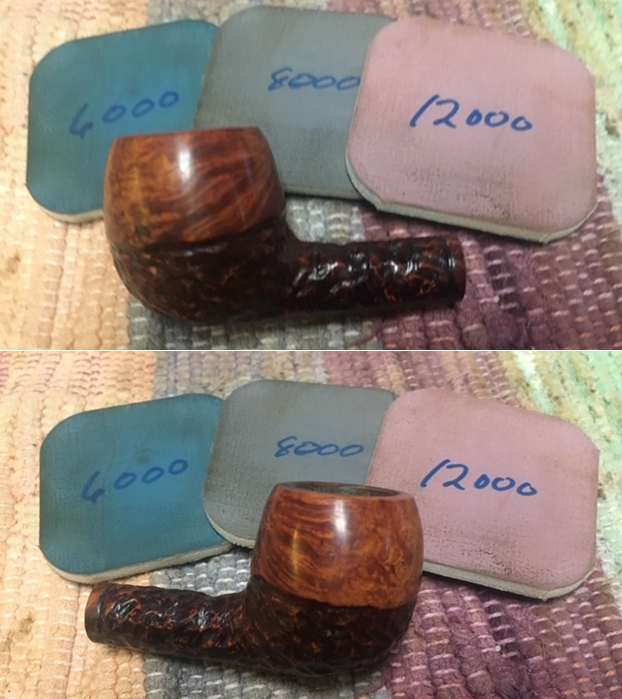
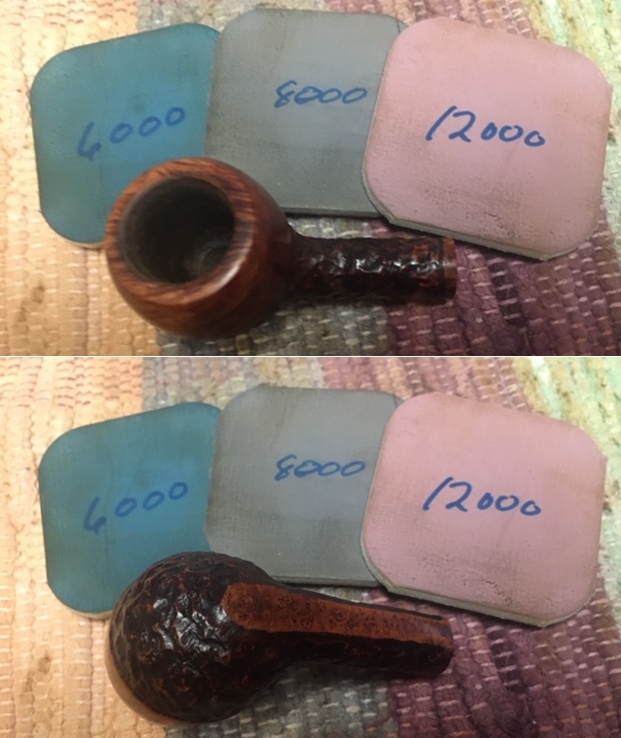
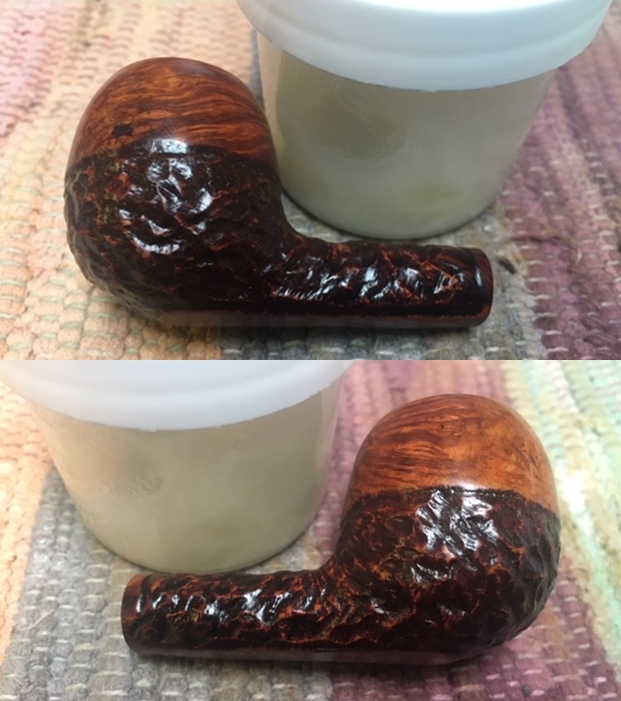
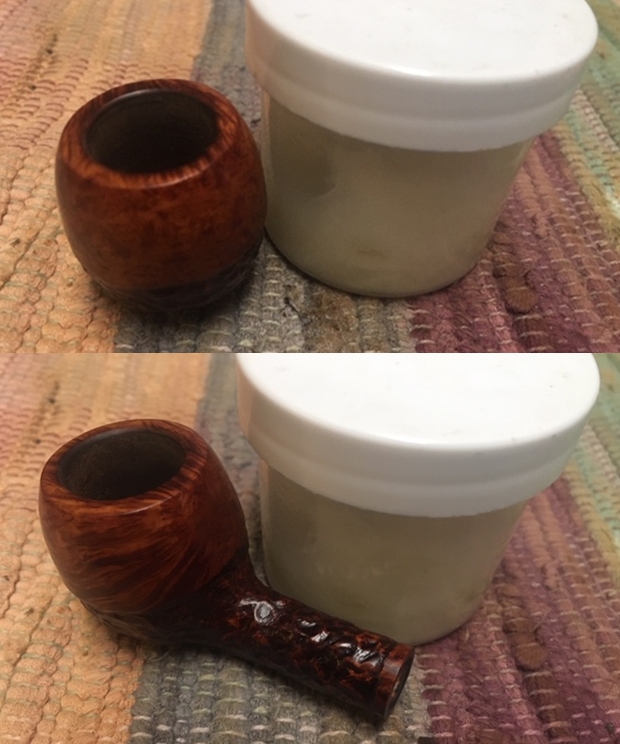
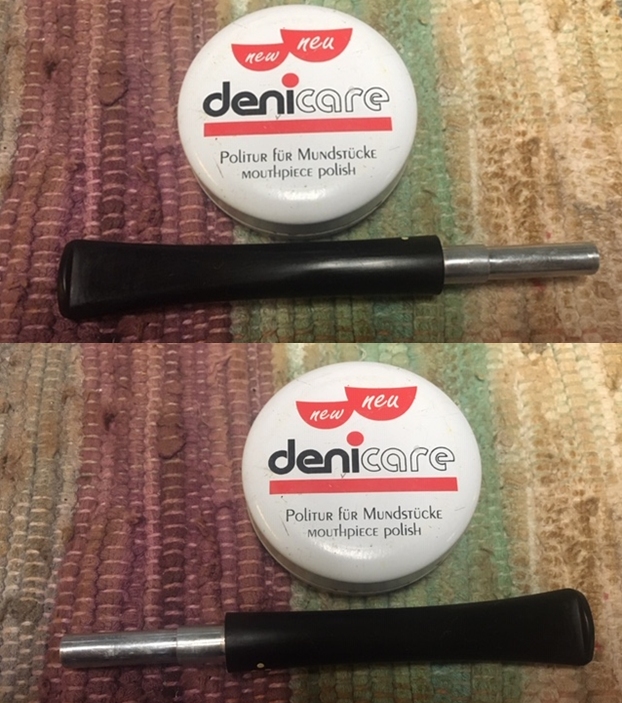
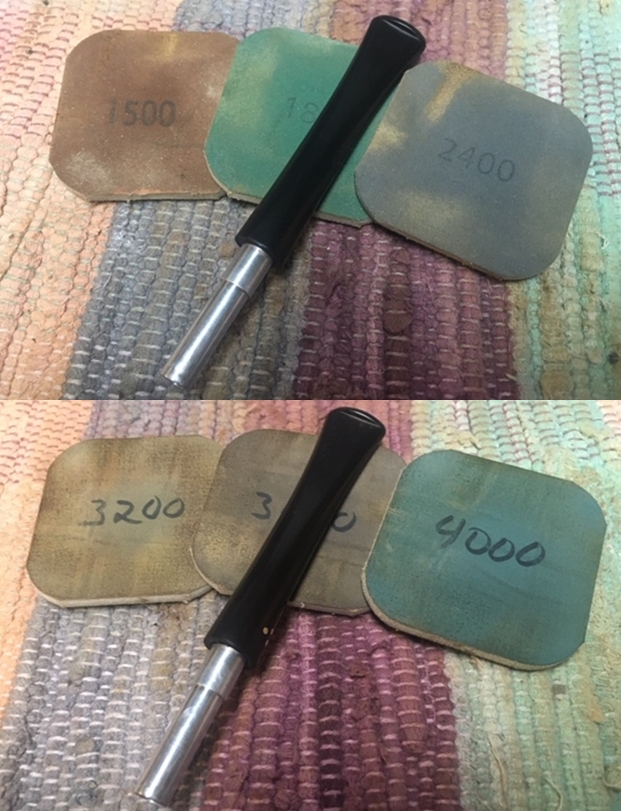
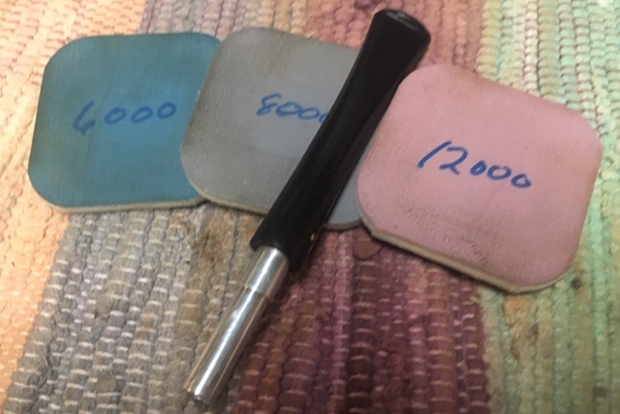
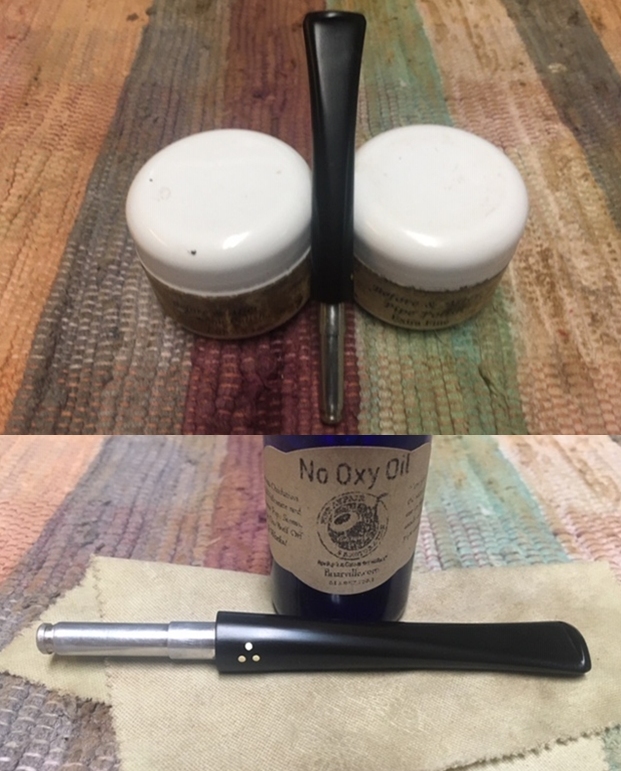
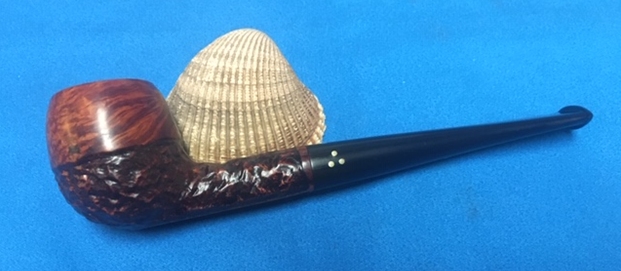
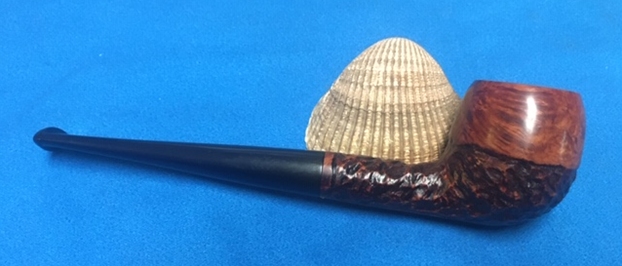
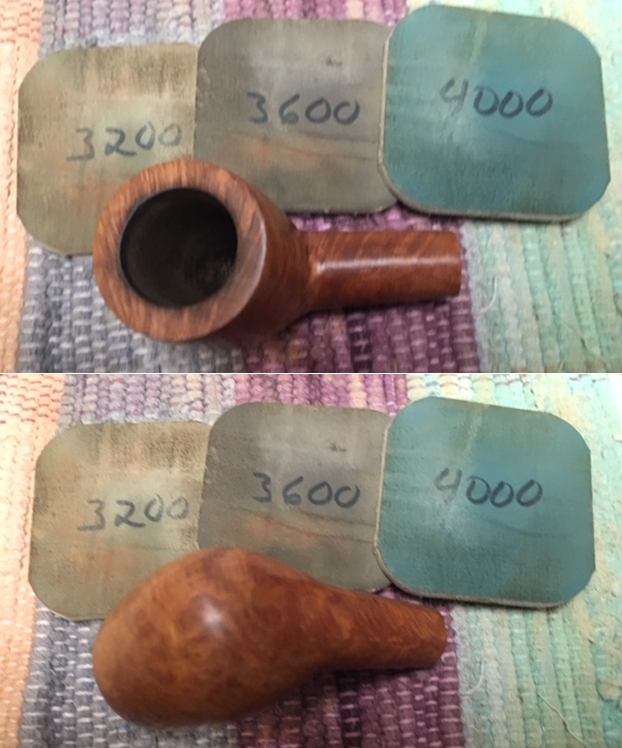
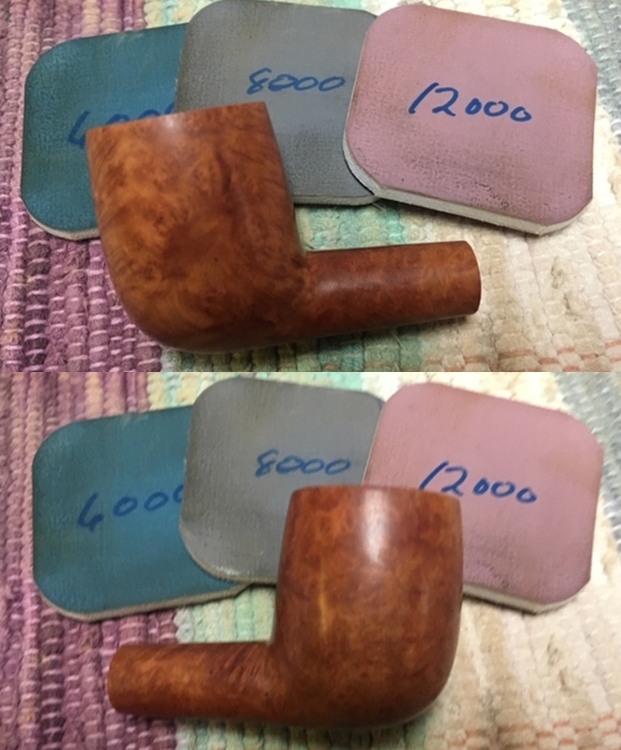
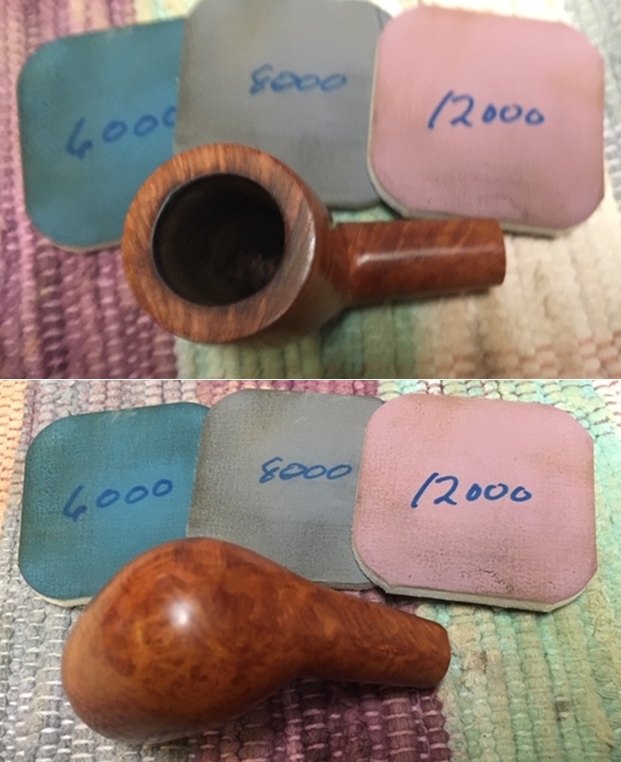
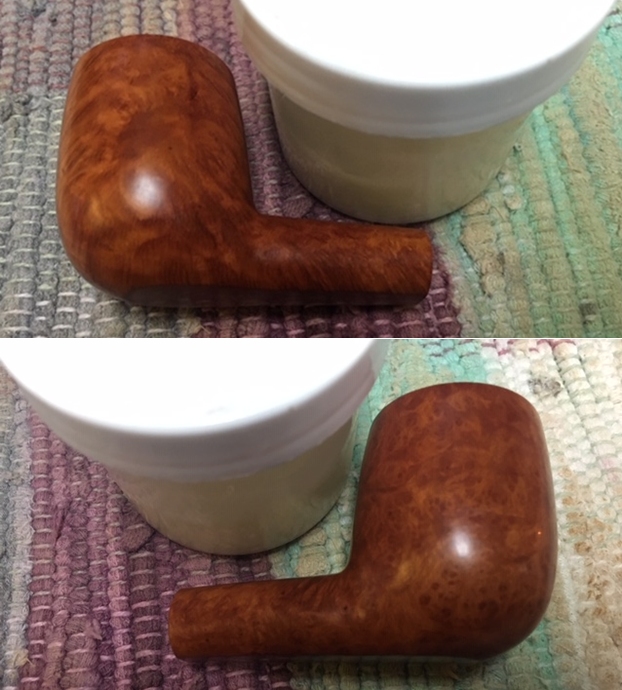
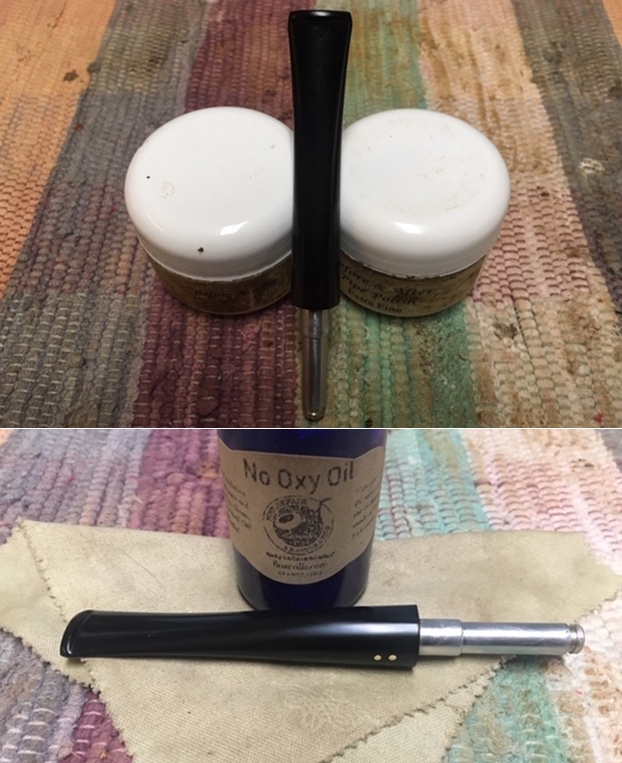
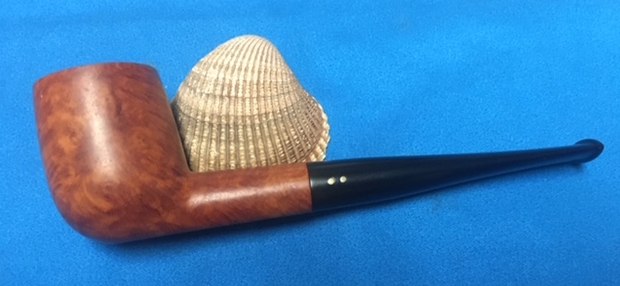
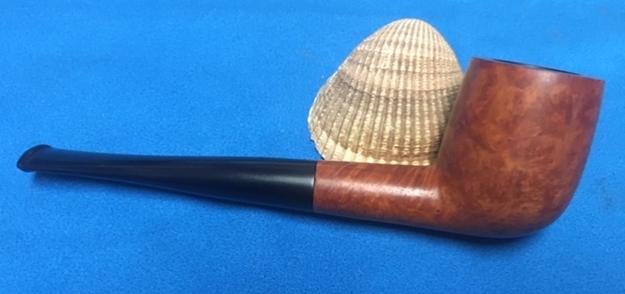
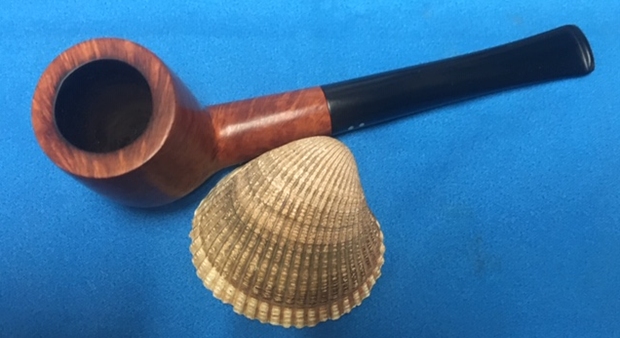
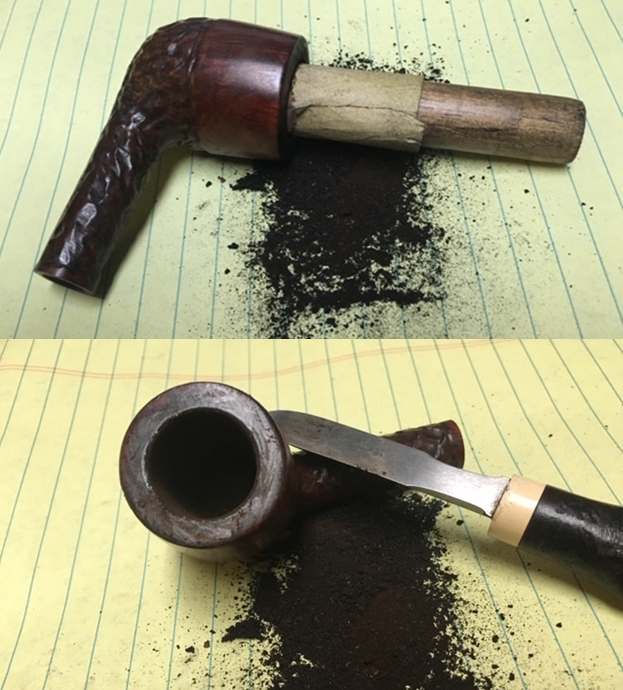
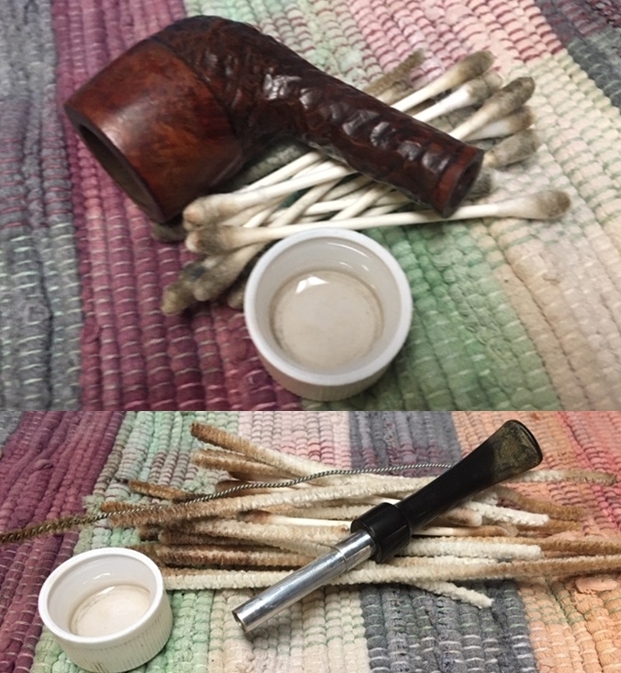
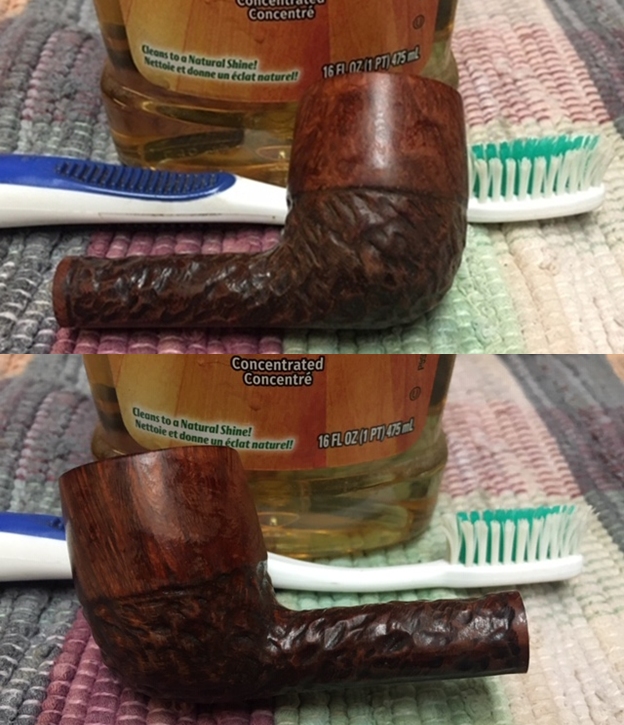
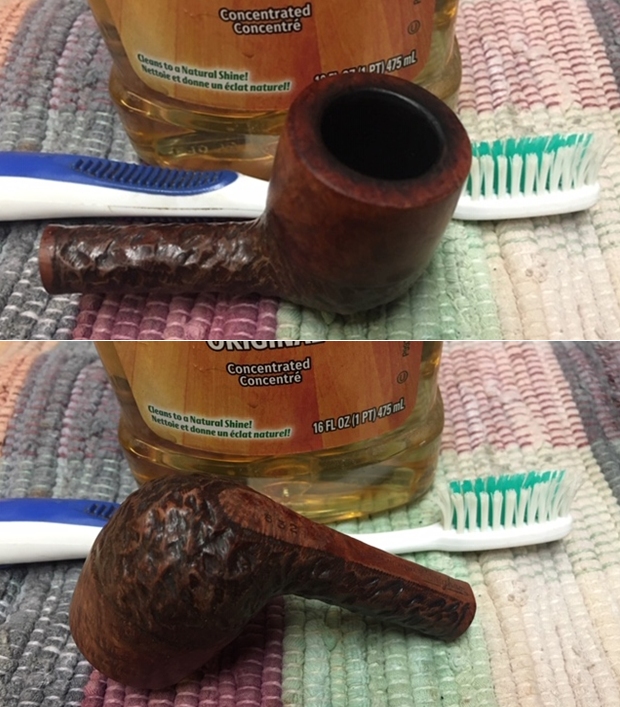
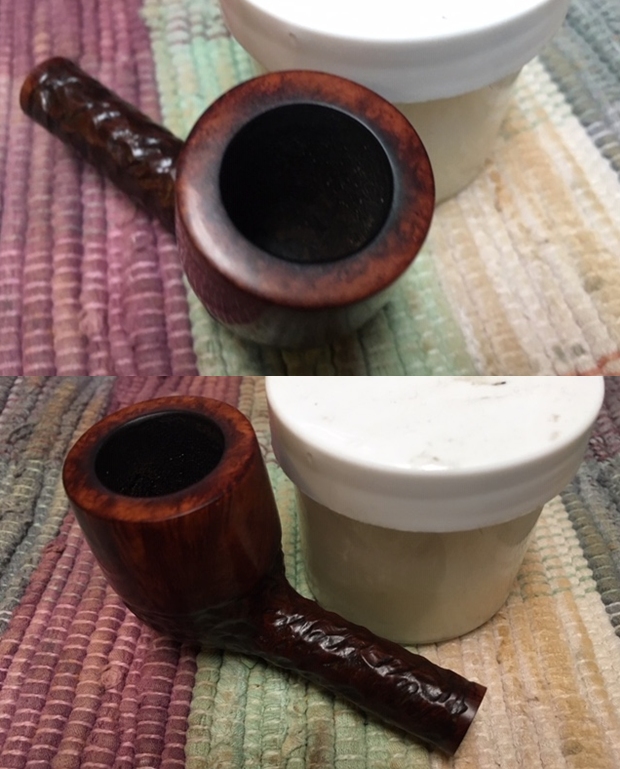
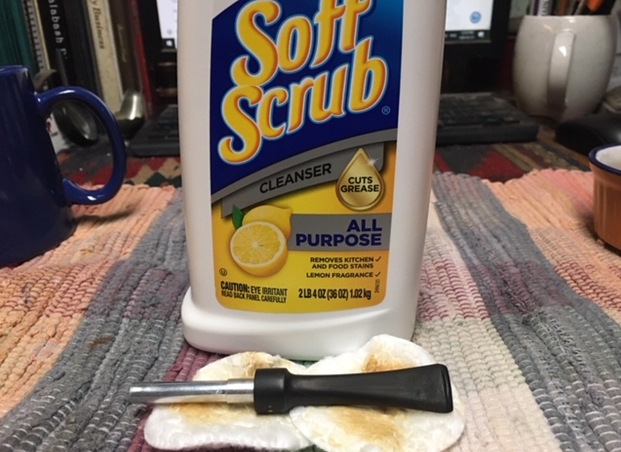
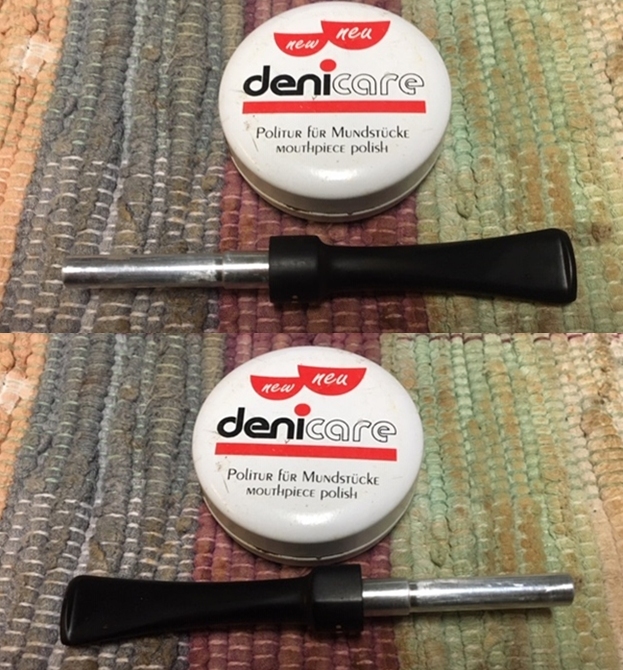
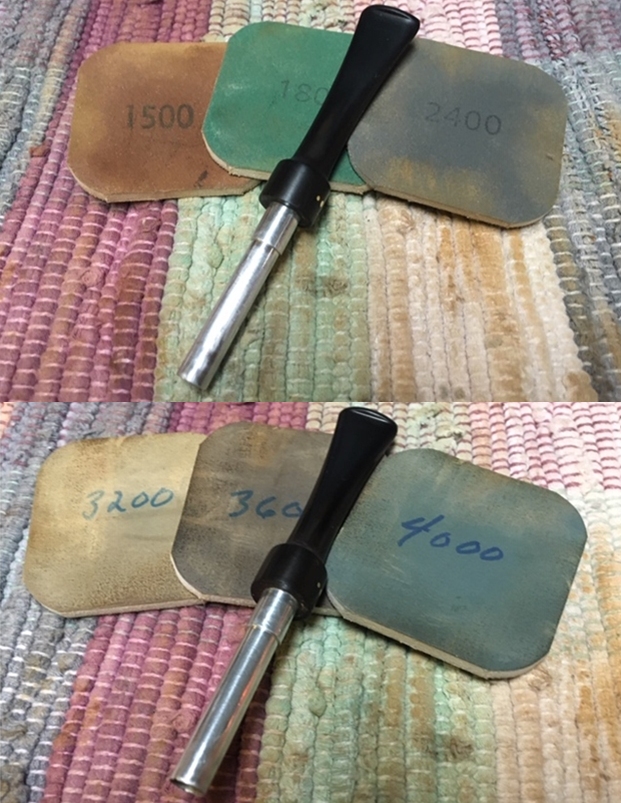
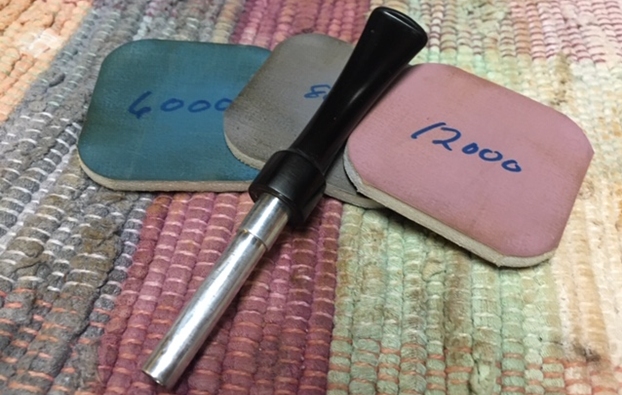
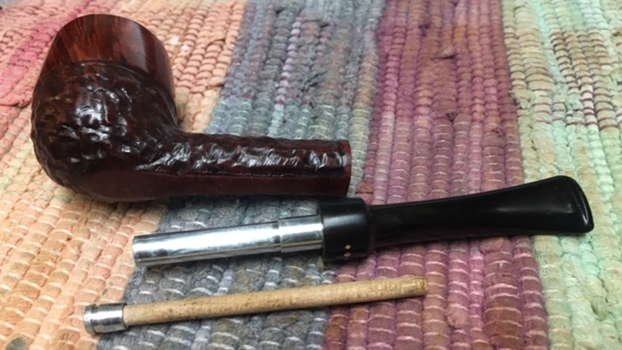
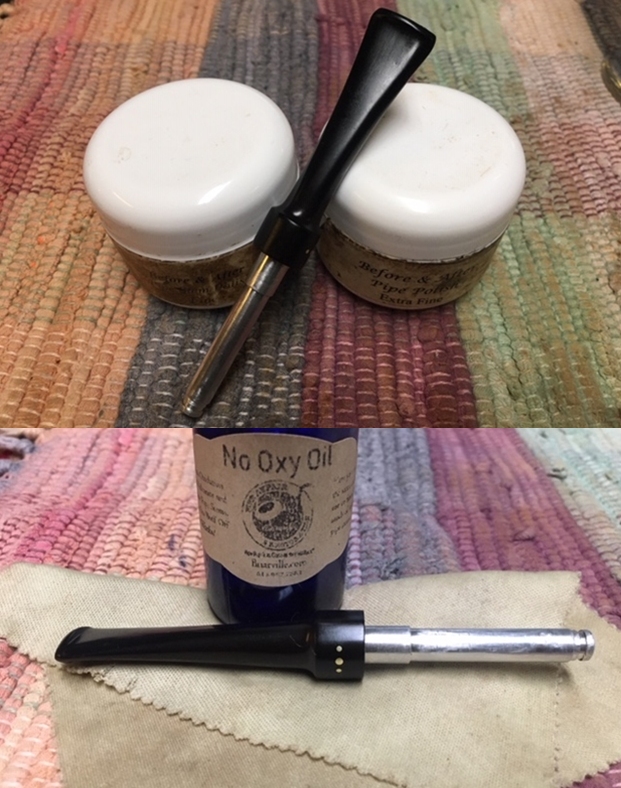
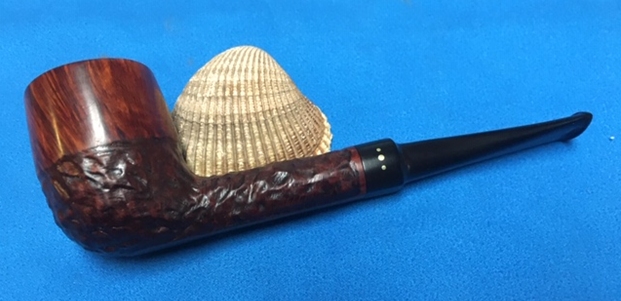
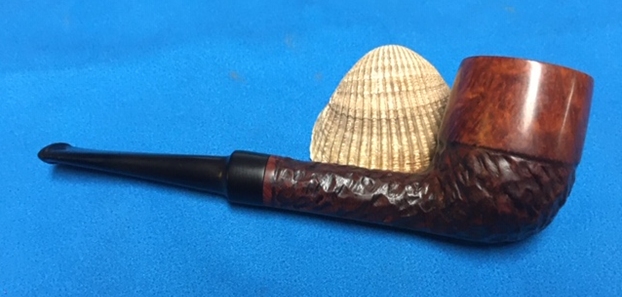
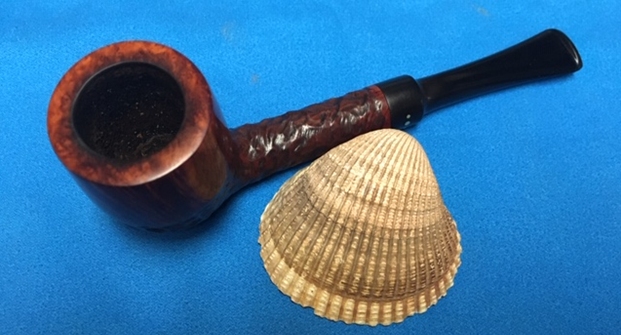
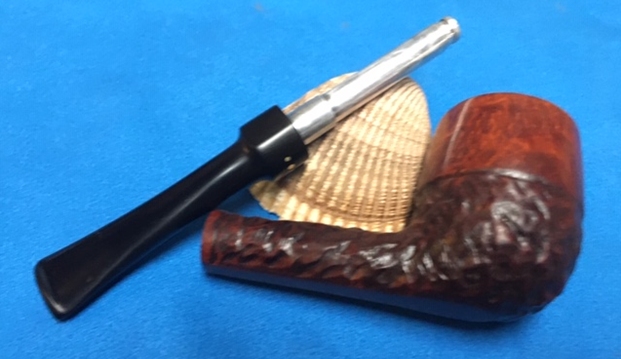
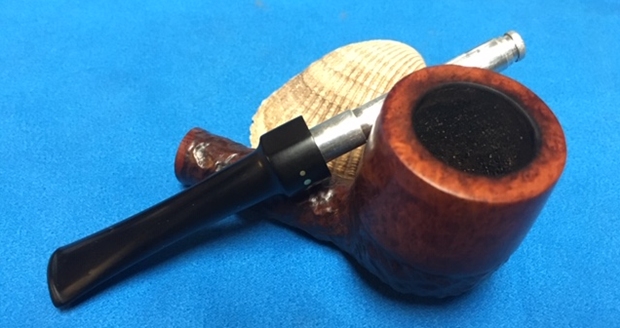
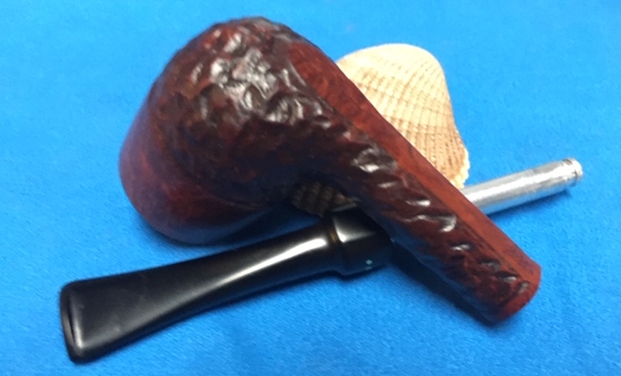
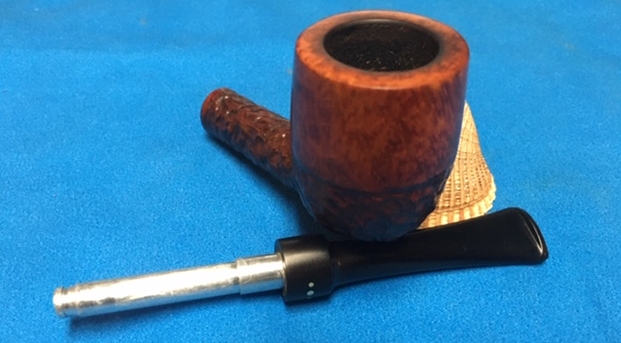
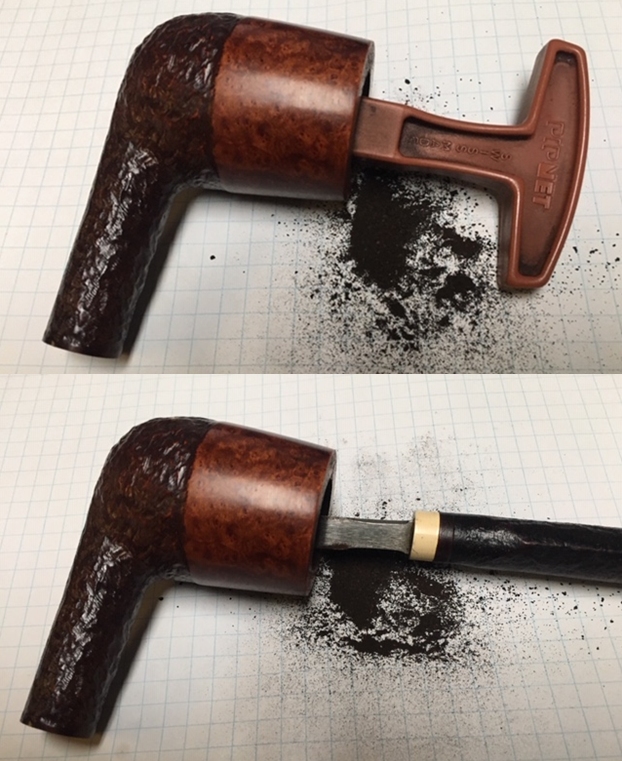
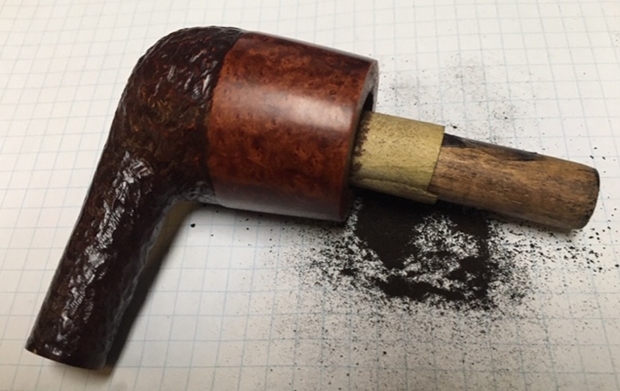
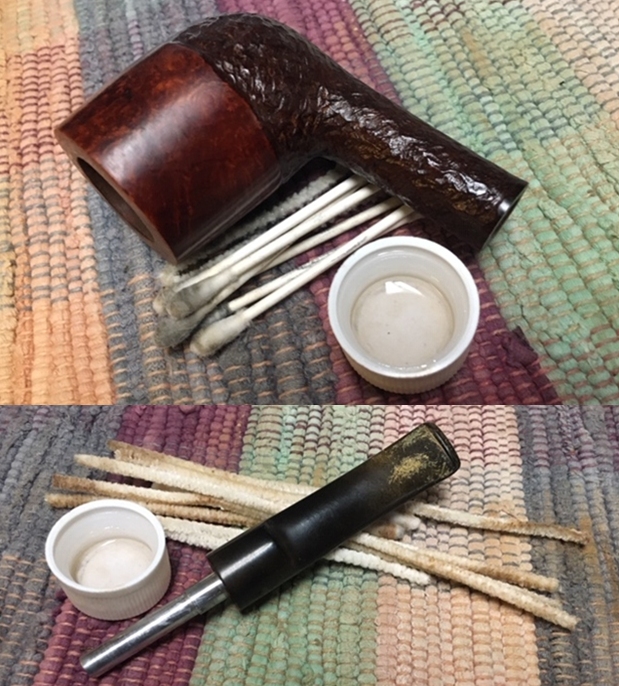
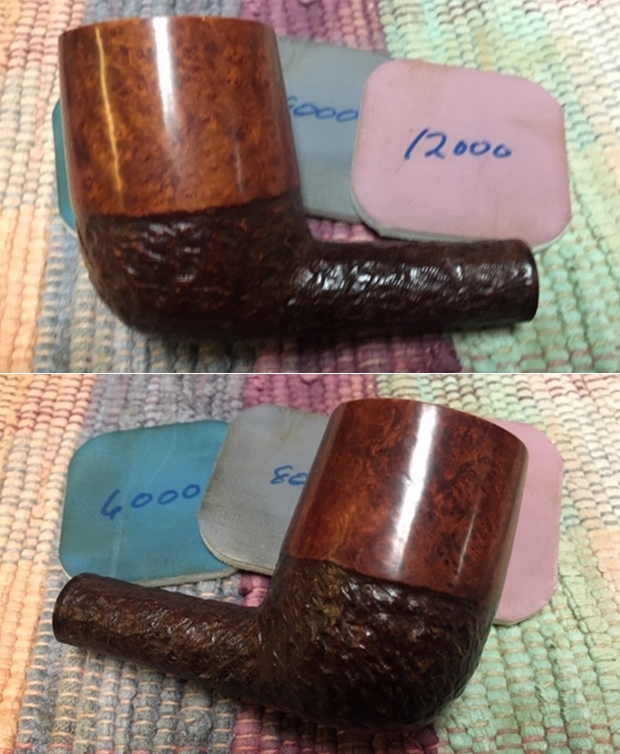
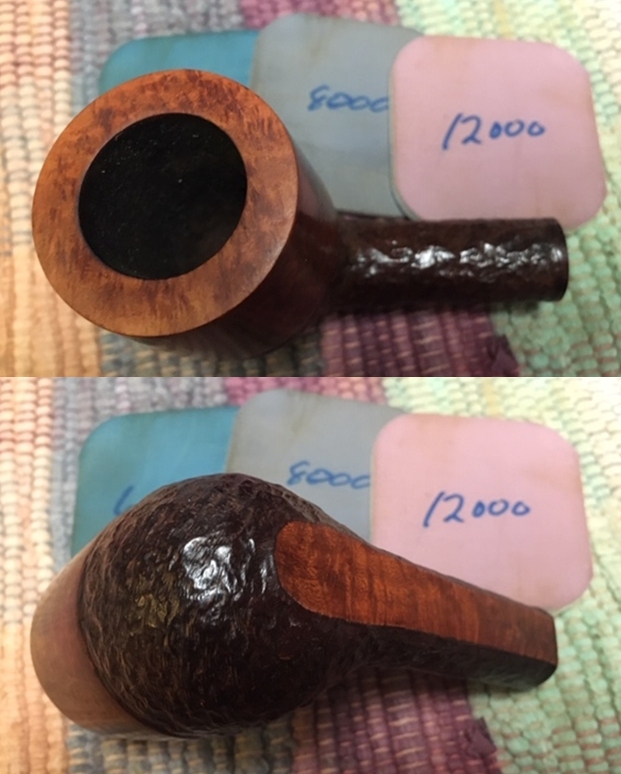
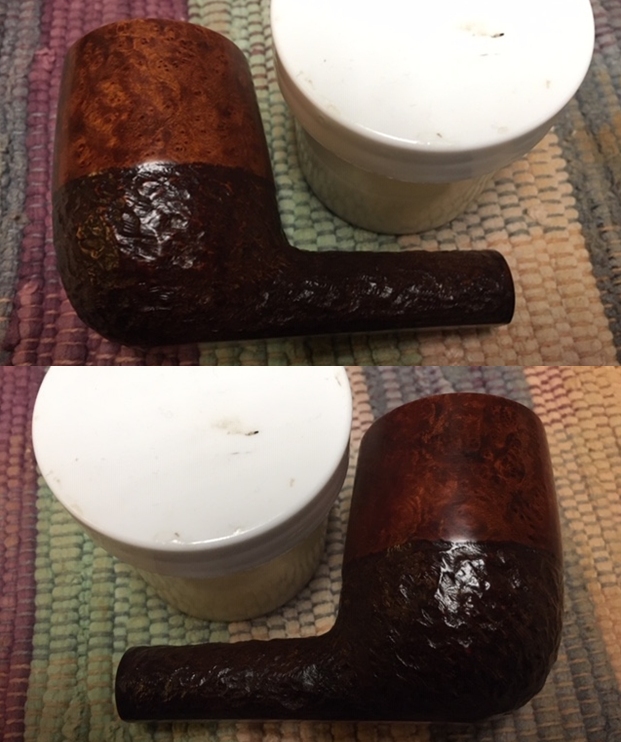
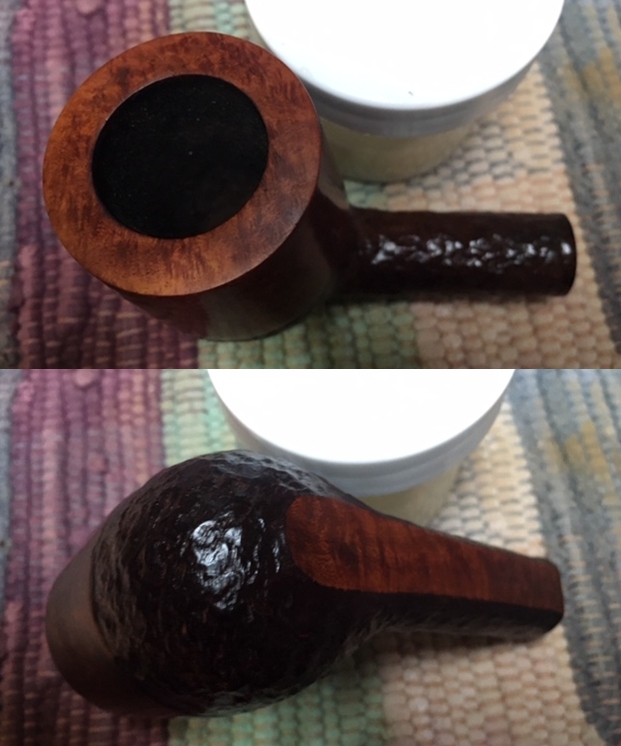
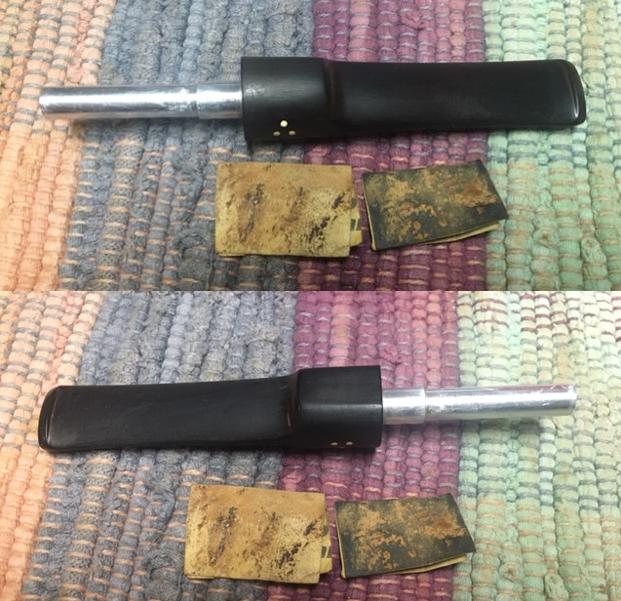
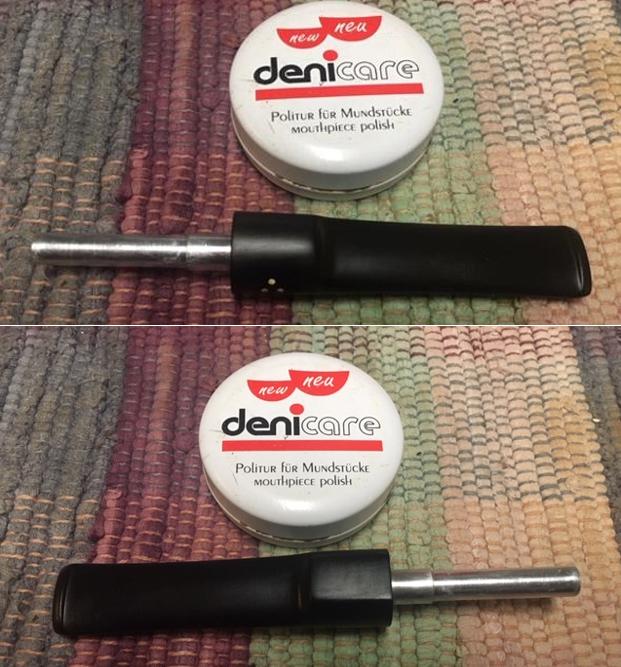
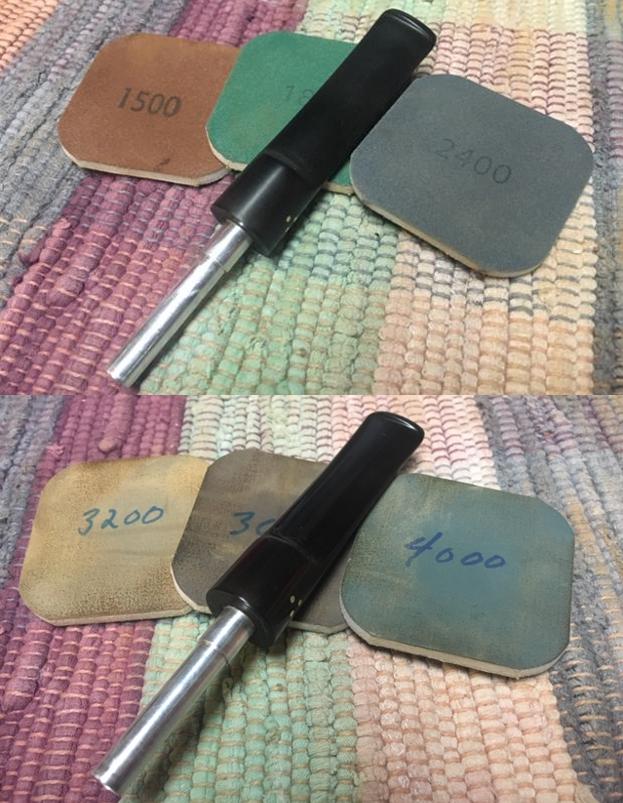
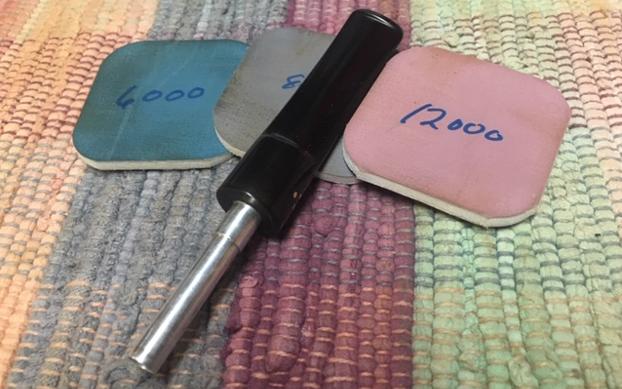
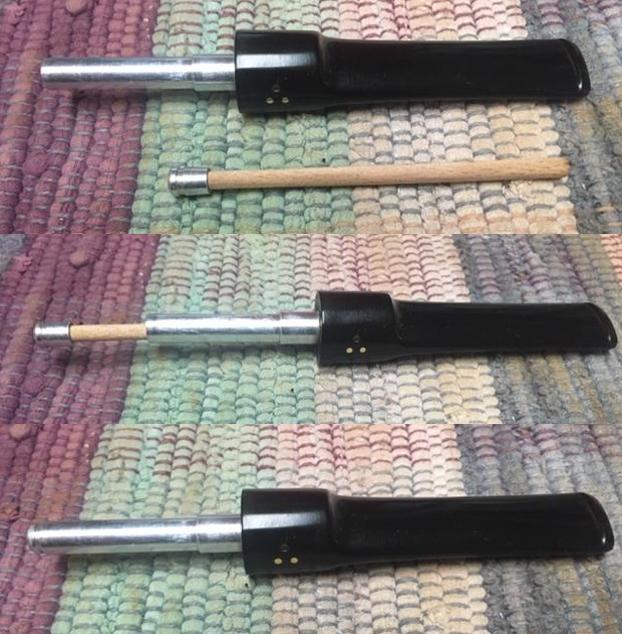
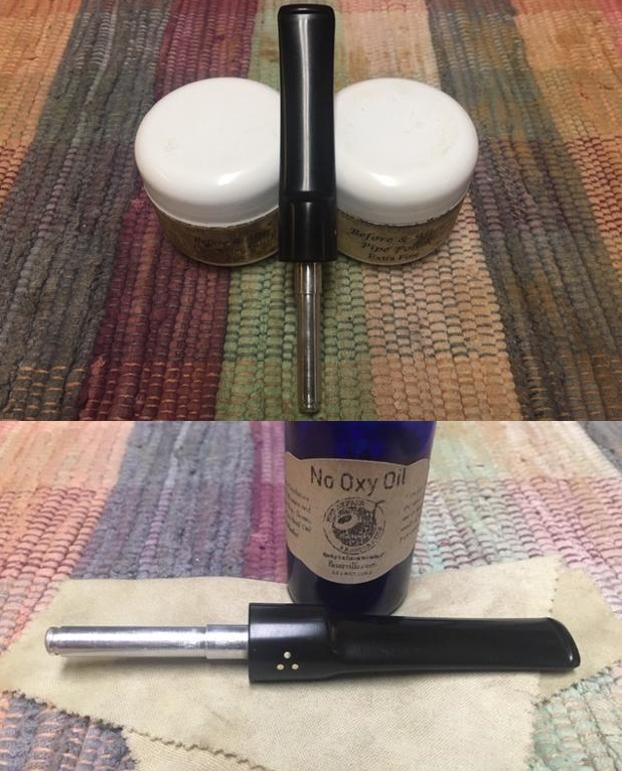
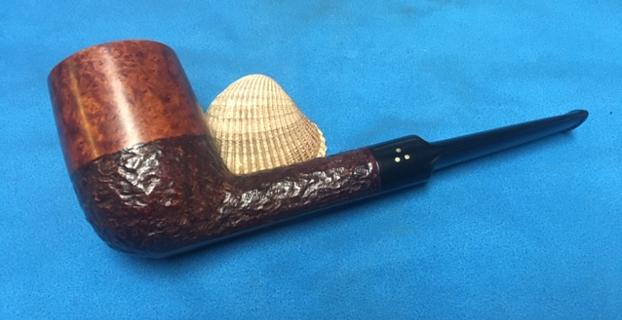
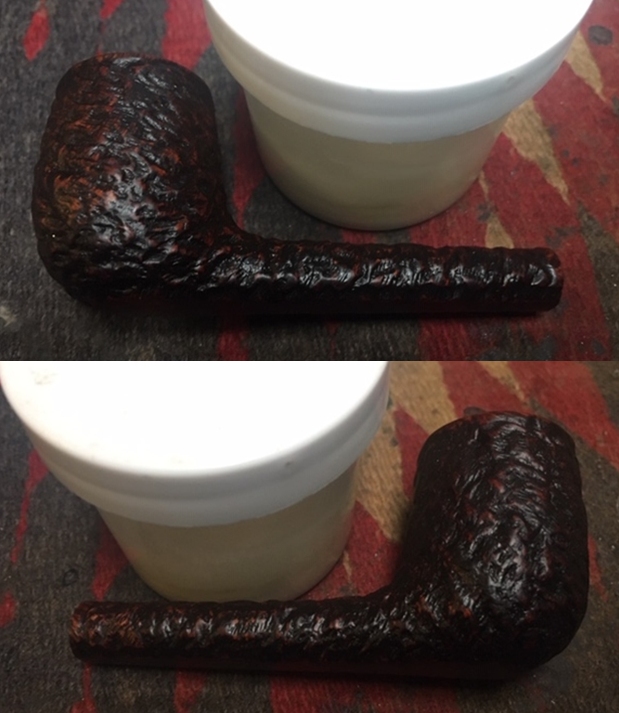
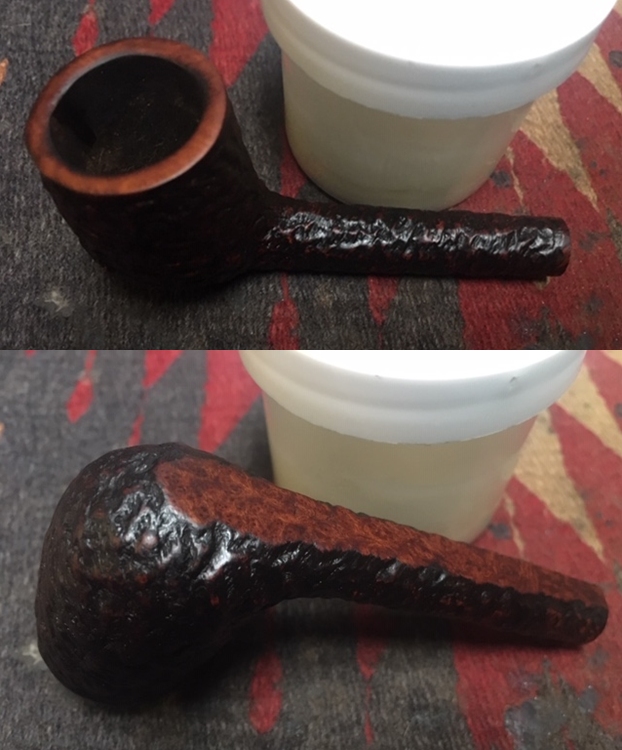
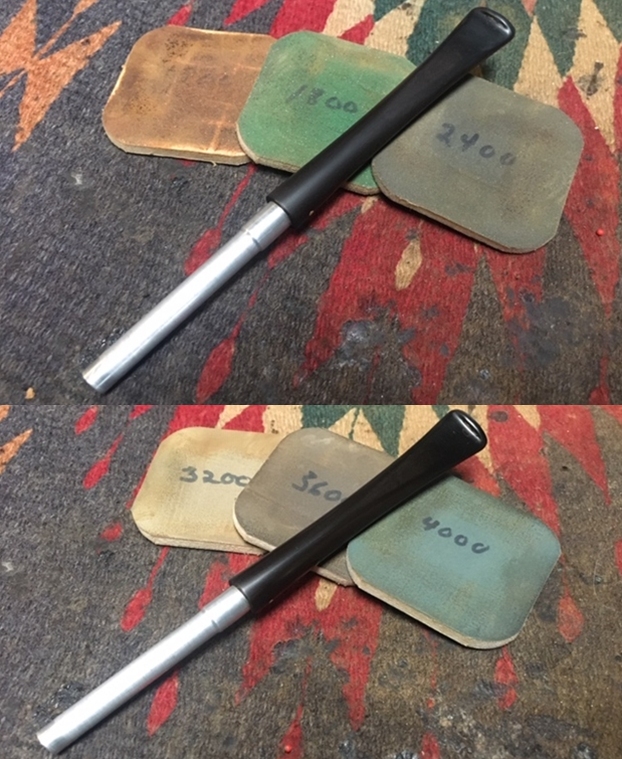
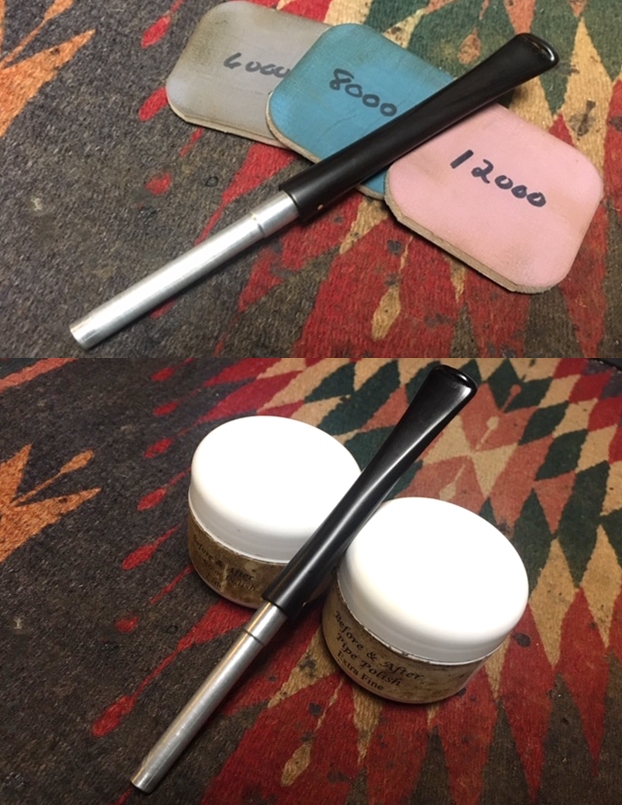
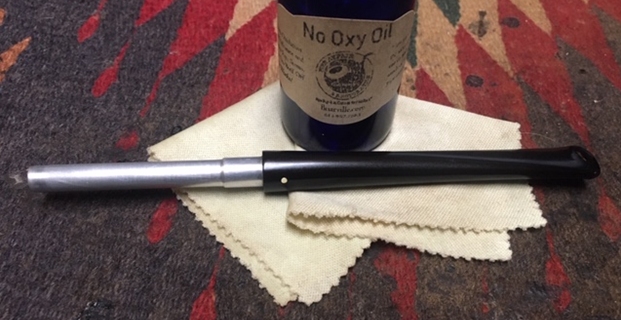
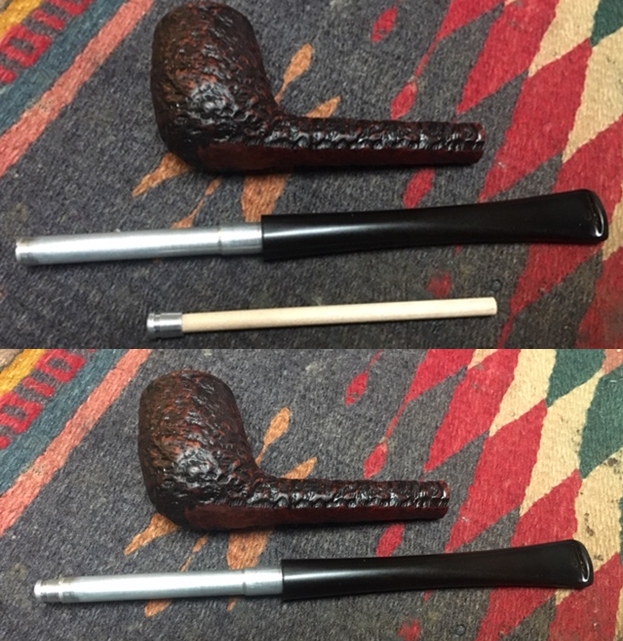
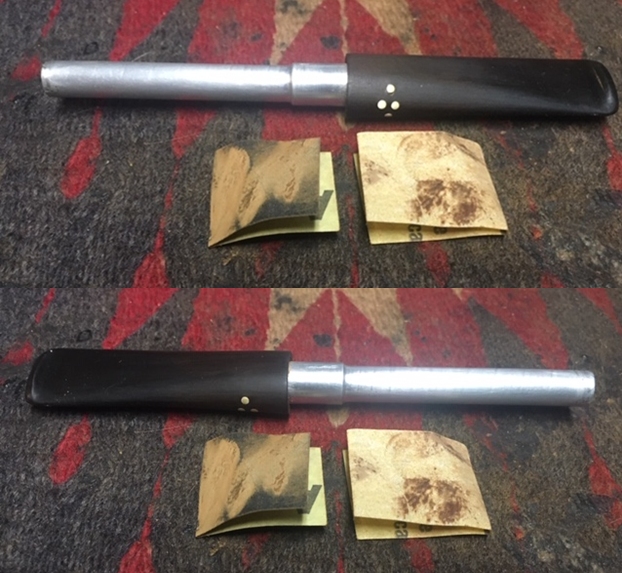
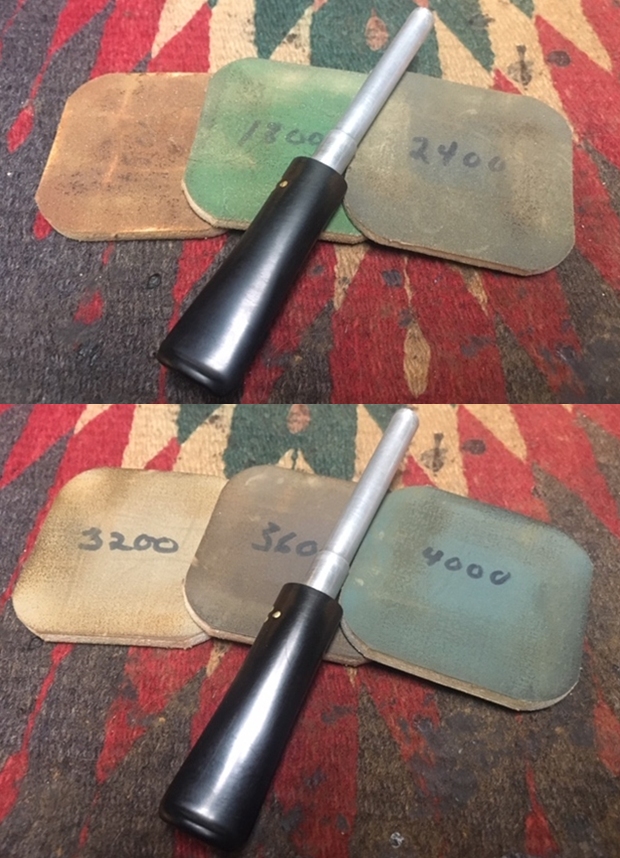
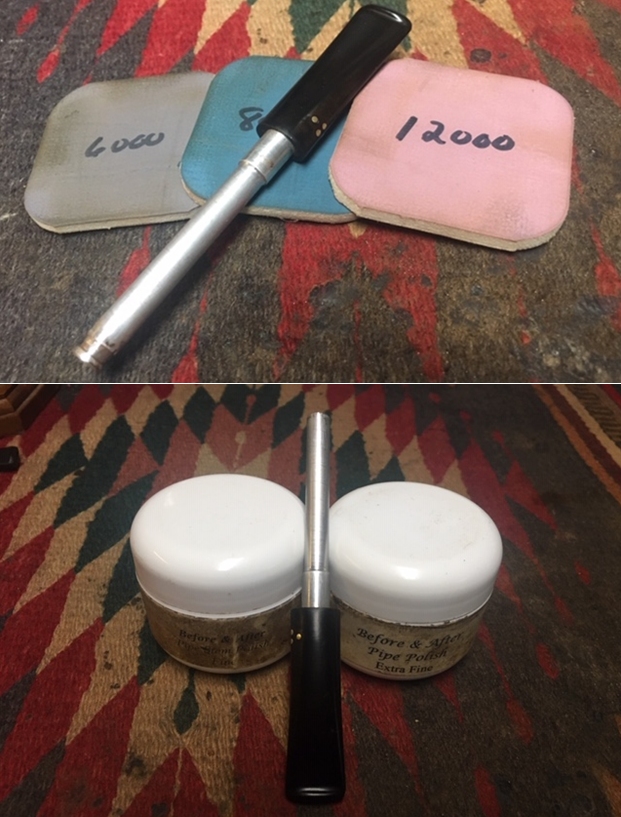
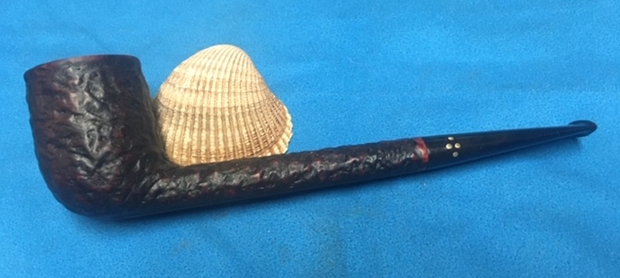
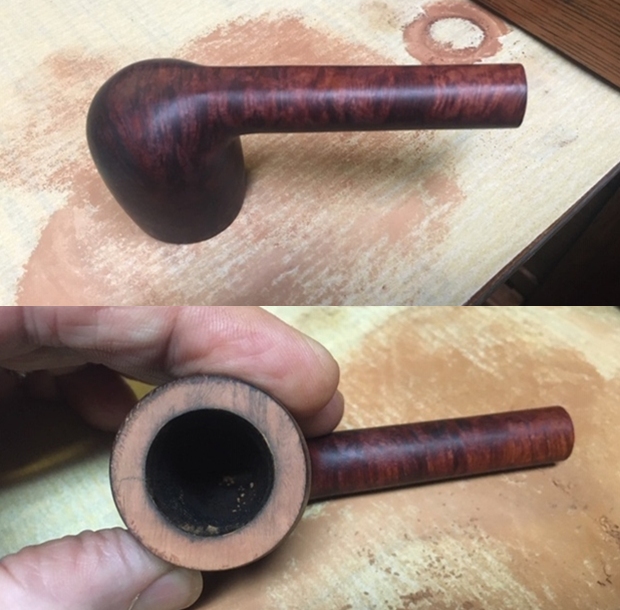
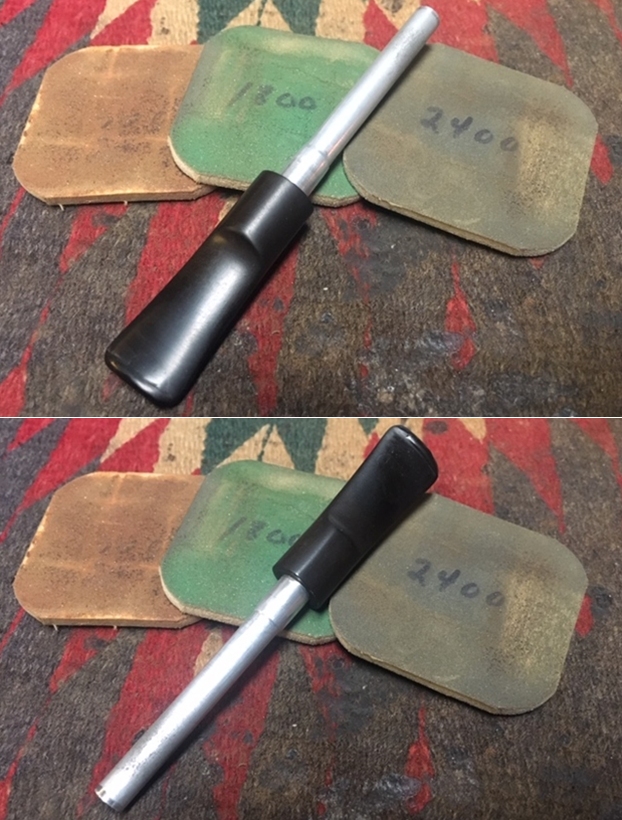
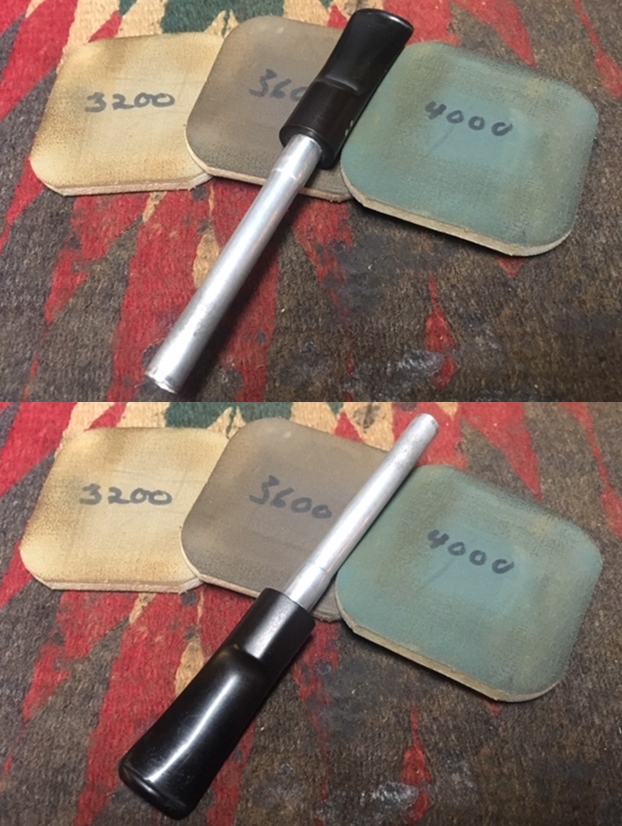
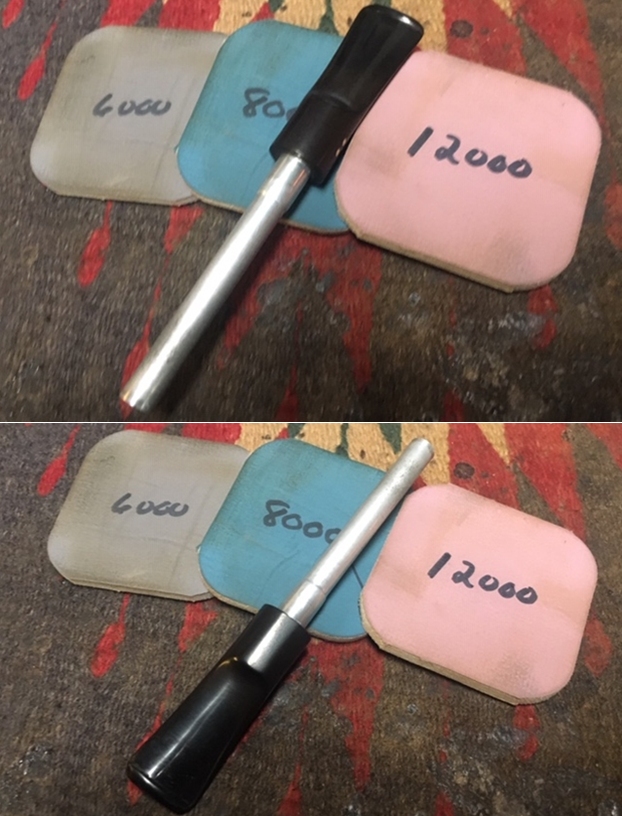
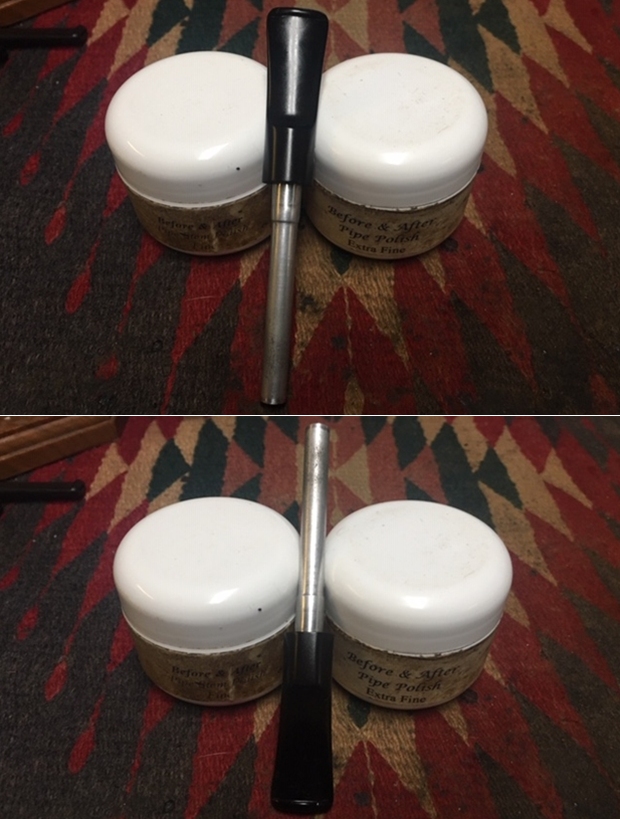
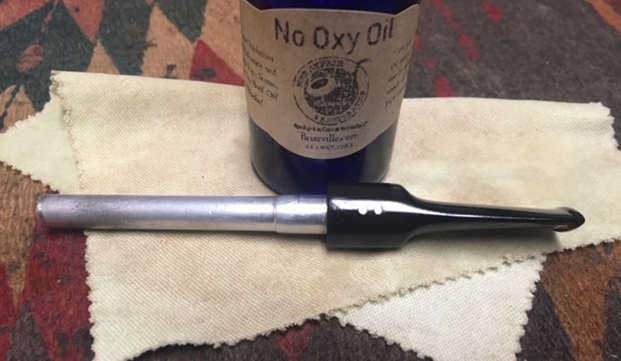
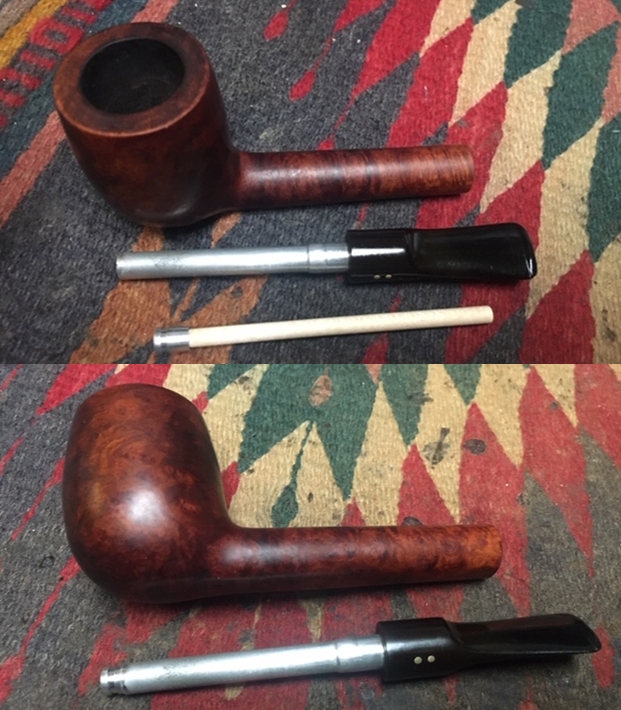
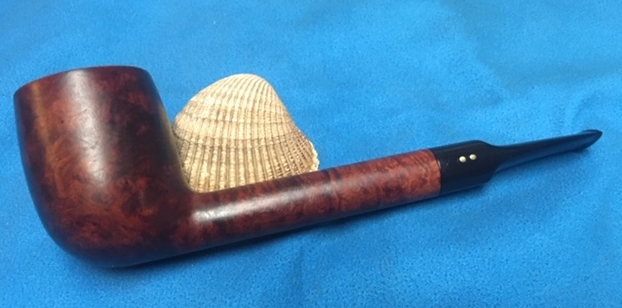
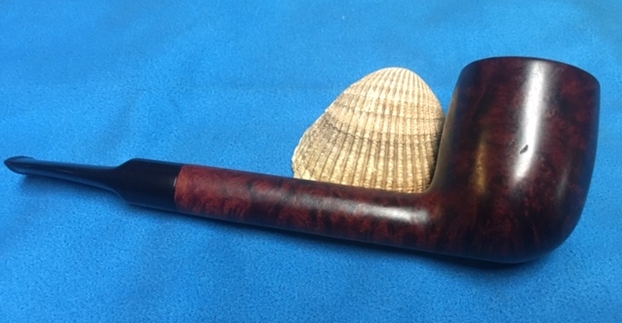
I reamed the bowl with a PipNet pipe reamer using the second and third cutting head to take the cake back to bare briar so I could inspect the walls. I cleaned up the remnants with a Savinelli Fitsall Pipe Knife. I sanded the bowl walls with 220 grit sandpaper on a piece of dowel to smooth them out and further examine them. I was happy that the walls looked very good.  I used the Savinelli Fitsall knife to scrape off the lava coat on the rim top. I cleaned out the mortise area and airway to the bowl and the interior of the metal tube and airway in the stem with pipe cleaners, cotton swabs and alcohol. The aluminum tube was really dirty since it had been smoked frequently without the distillator in place. It took a lot of work to clean out all of the grit and tars.     I scrubbed the surface of the bowl with undiluted Murphy’s Oil Soap and a tooth brush to remove the grime and grit as well as the remnants of the shiny finish on the smooth portions of the bowl. I worked on the darkening on the rim top and the rough inner edge of the bowl with a folded piece of 220 grit sandpaper to remove the darkening and smooth out the inner edge of the bowl.  I wet sanded the rim top and the smooth portions on the bowl sides with micromesh sanding pads – 1500-12000 grit sanding pads. I wiped the bowl surface down with a damp cloth after each sanding pad to remove the sanding dust. Once I finished the bowl looked good.     I rubbed the bowl and shank down with Before & After Restoration Balm. I worked it into the surface of the briar with my fingertips and a horsehair shoe brush to clean, enliven and protect it. I let the balm sit for a little while and then buffed with a cotton cloth to raise the shine. Mark Hoover’s Balm is a product that I have come to appreciate and one I use on every pipe I have been working on. It really makes the grain stand out on this pipe.   I set the bowl aside and turned my attention to the stem. I rubbed the stem down with Soft Scrub on with a cotton pad and it removed the oxidation and the calcification build up. It looked a lot better.    I sanded out the tooth chatter and the remaining oxidation with 220 grit sandpaper and started the polishing with 400 grit wet dry sandpaper.    I rubbed down the stem with Denicare Mouthpiece Polish and a cotton pad to remove the remnants of oxidation and to blend in the sanding. The polish is a red gritty paste that works wonders on removing stubborn remnants of oxidation in the crease. The stem is starting to show promise at this point in the process.   I polished the stem with micromesh sanding pads – wet sanding it with 1500-12000 grit pads. I wiped the stem down after each sanding pad with a cotton pad to remove the sanding debris. Before I finished the last polishing touches on the stem I decided to fit it with a new Rock Maple Distillator.  I finished polishing the stem with Before & After Pipe Stem Polish – both fine and extra fine. I finished by wiping it down with Briarville’s No Oxy Oil and buffing it to a shine.  I always look forward to this part of the restoration when all the pieces are put back together. I put the pipe back together and buffed it with Blue Diamond on the buffing wheel. I gave the bowl and the stem multiple coats of carnauba wax. I hand buffed the pipe with a clean buffing pad to raise the shine. It is fun to see what the polished bowl looks like with the smooth portion and the rusticated portion contrasting well and added to that the polished black vulcanite stem with the shining brass pins. This Brigham Exclusive 308 Apple is nice looking and feels great in my hand. The pipe is one that is light enough that it could be clenched and smoked while doing other things as it is very light weight and well balanced. Have a look at it with the photos below. The dimensions are Length: 5 ½ inches, Height: 1 ½ inches, Outside diameter of the bowl: 1 1/8 inches, Chamber diameter: ¾ of an inch. This is the seventh of the pipes sent to me from Eastern Canada for restoration. Once again I am looking forward to what the pipeman who sent it thinks of this restoration. Lots more to do in this lot! Thanks to each of you who are reading this blog. Remember we are not pipe owners; we are pipemen and women who hold our pipes in trust until they pass on into the trust of the next pipeman or woman.

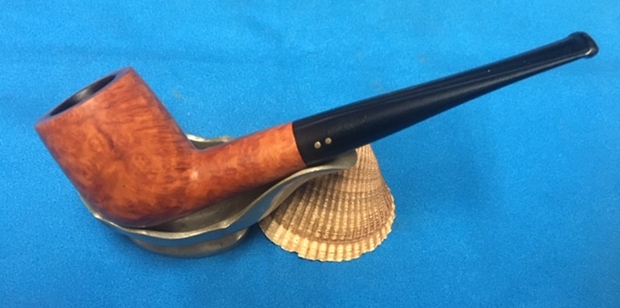
New Life for a Patent Era Brigham Select Billiard Sitter


Blog by Steve Laug

Not too long ago I received an email from a fellow in Kitchener, Ontario regarding some pipes he needed cleaned up. He had been referred to me by my local pipe and cigar shop. While I am not currently adding more pipes to my queue of repairs I have made a commitment to the shop to work on pipes for their customers. Generally they have one or two pipes that need a bit of work. This fellow sent me the following email:

I just came across my smoking pipes that I’ve had in storage for about 40 years. I’m wondering what you’d charge to have them refurbished. There are 17 in total (11 are Brighams and 6 are various).

It turns out he said he had 17 pipes. That was certainly more than I expected but I communicated that there was a large queue ahead of him and I would have to fit them in as I could. He was fine with whatever time it took. He sent me the following photos of his collection that he wanted restored. The first photo shows his eleven Brigham pipes – all very interesting shapes. The second photo shows the six various pipes in the collection – A Republic Era Peterson’s System 1312 (Canadian Import), A Bjarne Hand Carved Freehand, a Comoy’s Everyman London smooth billiard, a GBD Popular Dublin 12, an English made Kaywoodie Rustica 72B, a Kriswill Bernadotte 60 with a broken tenon. When the box arrived there were two additional pipes included for a total of 19 – a Ropp 803 Deluxe Cherrywood Poker and a Comoy’s Sandblast Everyman Canadian 296. It was a lot of pipes! I have been randomly choosing the next pipe to work on and chose the Brigham that I have drawn a red box around in the first photo below. When I unwrapped the next pipe it was a flat bottomed Brigham Billiard sitter without clear number stamp. The smooth finish looked like it had a varnish coat and that was spotty around the sides of the bowl. There is a faint Made in Canada with Brigham in a script on the flat bottom of the shank. It looked like it could also have had the Can. Pat. stamp but I could not read it for sure. The rim top has some darkening, nicks and the inner edge is out of round. There is a light cake in the bowl. The 2 Dot tapered stem is oxidized and has tooth marks and chatter near the button and some calcification. I took close up photos of the bowl and rim top to show the condition of the bowl and rim. I also took close up photos of the stem to show its condition as mentioned above.   I took a photo of the stamping on the underside of the shank to try and capture what I was speaking about above.I removed the stem from the shank to reveal the aluminum tube/tenon that held the Rock Maple Distillator. The distillator was was missing in this pipe so I would need to replace it with a new one once I had cleaned it. Before starting my clean up work on the pipe I turned to a chart that Charles Lemon of Dad’s Pipes sent to me on the patent era Brighams. There were made from 1938-1980. As the pipe I am working on is a Patent pipe, it’s more accurate to refer to its grade by name (the post 1980 grading scheme refers to Dots). Here is the  chart that Charles sent me. The pipe I am working on is thus a Brigham Select with two brass pins.It is helpful having this chart and getting a quick picture of where the pipe fits in the Brigham line. Now it was time to work on the pipe.

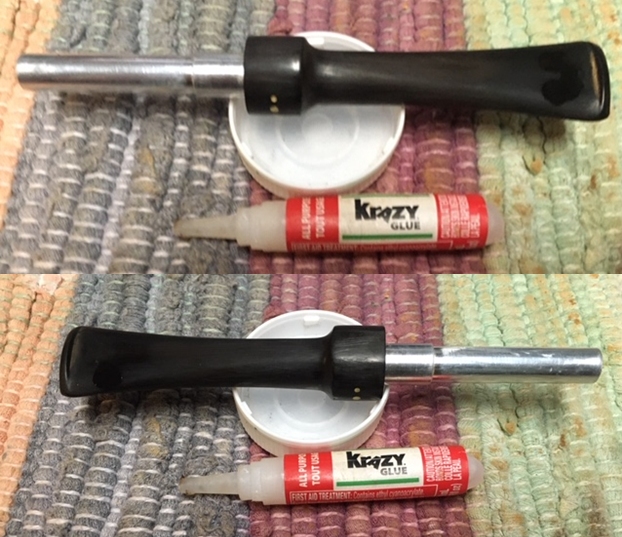
I reamed the bowl with a PipNet pipe reamer using the first and second cutting head to take the cake back to bare briar so I could inspect the walls. I cleaned up the remnants with a Savinelli Fitsall Pipe Knife. I sanded the bowl walls with 220 grit sandpaper on a piece of dowel to smooth them out and further examine them. I was happy that the walls looked very good. I cleaned out the mortise area and airway to the bowl and the interior of the metal tube and airway in the stem with pipe cleaners, cotton swabs and alcohol. I scrubbed the surface of the bowl with acetone to remove the varnish coat from the bowl. When I had finished it looked far better.   I worked on the darkening on the rim top and the rough inner edge of the bowl by first lightly topping the bowl with 220 grit sandpaper. I used a folded piece of 220 grit sandpaper to remove the darkening and smooth out the inner edge of the bowl. I wet sanded the rim top and the smooth portions on the bowl sides with micromesh sanding pads – 1500-12000 grit sanding pads. I wiped the bowl surface down with a damp cloth after each sanding pad to remove the sanding dust. Once I finished the bowl looked good. I rubbed the bowl and shank down with Before & After Restoration Balm. I worked it into the surface of the briar with my fingertips and a horsehair shoe brush to clean, enliven and protect it. I let the balm sit for a little while and then buffed with a cotton cloth to raise the shine. Mark Hoover’s Balm is a product that I have come to appreciate and one I use on every pipe I have been working on. It really makes the grain stand out on this pipe. I set the bowl aside and turned my attention to the stem. When I was in the US visiting Jeff and his wife I picked up some Soft Scrub. Jeff swears by this stuff as the first tool to use to remove a lot of the oxidation on the stem. I rubbed it on with a cotton pad and sure enough it removed the oxidation and the calcification build up. It looked a lot better.    I cleaned out the marks with alcohol and a cotton swab. I filled them in with clear super glue and set the stem aside to cure.    I smoothed out the repairs and sanded out the remaining oxidation with 220 grit sandpaper and started the polishing with 400 grit wet dry sandpaper. I polished the stem with micromesh sanding pads – wet sanding it with 1500-12000 grit pads. I wiped the stem down after each sanding pad with a cotton pad to remove the sanding debris.   Before I finished the last polishing touches on the stem I decided to fit it with a new Rock Maple Distillator.  I finished polishing the stem with Before & After Pipe Stem Polish – both fine and extra fine. I finished by wiping it down with Briarville’s No Oxy Oil and buffing it to a shine.  I always look forward to this part of the restoration when all the pieces are put back together. I put the pipe back together and buffed it with Blue Diamond on the buffing wheel. I gave the bowl and the stem multiple coats of carnauba wax. I hand buffed the pipe with a clean buffing pad to raise the shine. It is fun to see what the polished bowl looks like with the polished black vulcanite stem and the shining brass pins. This Brigham Select Billiard sitter is nice looking and feels great in my hand. The pipe is one that is light enough that it could be clenched and smoked while doing other things as it is very light weight and well balanced. Have a look at it with the photos below. The dimensions are Length: 5 ½ inches, Height: 1 5/8 inches, Outside diameter of the bowl: 1 ¼ inches, Chamber diameter: ¾ of an inch. This is the sixth of the pipes sent to me from Eastern Canada for restoration. Once again I am looking forward to what the pipeman who sent it thinks of this restoration. Lots more to do in this lot! Thanks to each of you who are reading this blog. Remember we are not pipe owners; we are pipemen and women who hold our pipes in trust until they pass on into the trust of the next pipeman or woman.

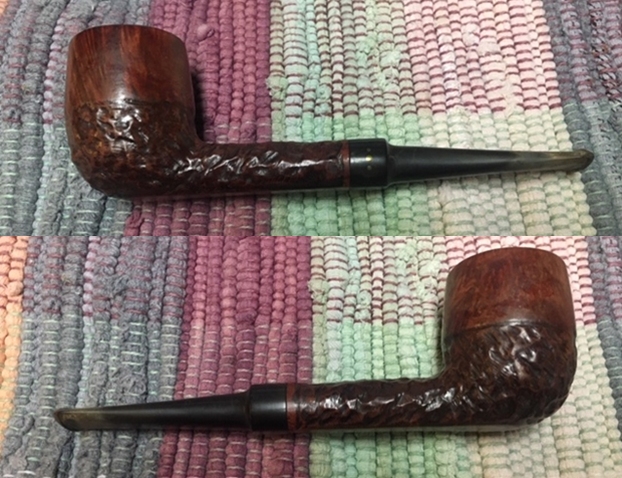
Breathing Life into a Patent Era Brigham Executive 632 Billiard


Blog by Steve Laug

Not too long ago I received an email from a fellow in Kitchener, Ontario regarding some pipes he needed cleaned up. He had been referred to me by my local pipe and cigar shop. While I am not currently adding more pipes to my queue of repairs I have made a commitment to the shop to work on pipes for their customers. Generally they have one or two pipes that need a bit of work. This fellow sent me the following email:

I just came across my smoking pipes that I’ve had in storage for about 40 years. I’m wondering what you’d charge to have them refurbished. There are 17 in total (11 are Brighams and 6 are various).

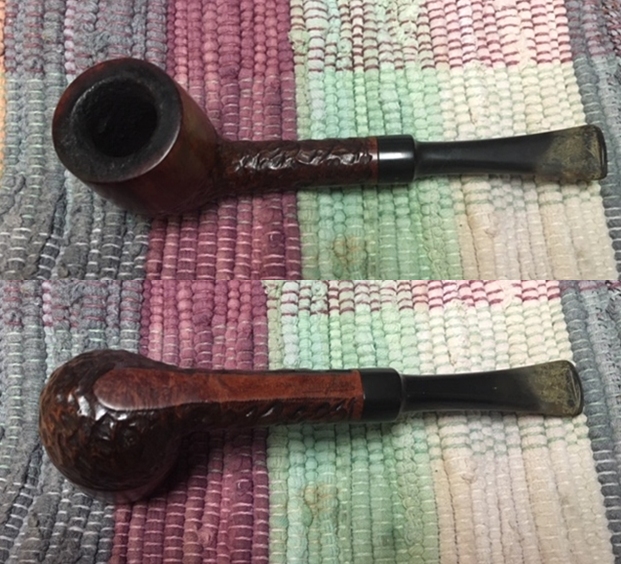
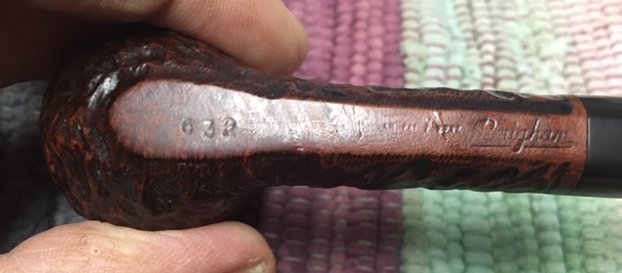
It turns out he said he had 17 pipes. That was certainly more than I expected but I communicated that there was a large queue ahead of him and I would have to fit them in as I could. He was fine with whatever time it took. He sent me the following photos of his collection that he wanted restored. The first photo shows his eleven Brigham pipes – all very interesting shapes. The second photo shows the six various pipes in the collection – A Republic Era Peterson’s System 1312 (Canadian Import), A Bjarne Hand Carved Freehand, a Comoy’s Everyman London smooth billiard, a GBD Popular Dublin 12, an English made Kaywoodie Rustica 72B, a Kriswill Bernadotte 60 with a broken tenon. When the box arrived there were two additional pipes included for a total of 19 – a Ropp 803 Deluxe Cherrywood Poker and a Comoy’s Sandblast Everyman Canadian 296. It was a lot of pipes! I have been randomly choosing the next pipe to work on and chose the Brigham that I have drawn a red box around in the first photo below. When I unwrapped it the pipe it was a Brigham Billiard. It was stamped on the heel 632 which is the shape number. That is followed by Can Pat. 372982 then Brigham in a script. It had a rusticated lower half of the bowl and shank with a smooth top half. The rim top had a lava overflow from the thick cake in the bowl and some darkening around the top and edges of the bowl. The inner edge of the bowl was out of round. It was a dirty pipe but appeared to be in okay condition under the grime. There was a shiny finish that was spotty around the smooth portions of the bowl. The 3 Vertical Dot saddle stem was oxidized and had tooth marks and chatter near the button on both sides. There was also some calcification for about an inch up the stem. I took close up photos of the bowl and rim top to show the condition of the bowl and rim as well as the thick cake and lava overflowing onto the rim top. I also took close up photos of the stem to show its condition as mentioned above.    I took a photo of the stamping on the underside of the shank to show what I was speaking about above. It is very clear and readable. It reads 632 followed by Can. Pat. stamp  372982 then Brigham in script.I removed the stem from the shank to reveal the aluminum tube/tenon that held the Rock Maple Distillator. The distillator was was missing in this pipe so I would need to replace it with a new one once I had cleaned it.

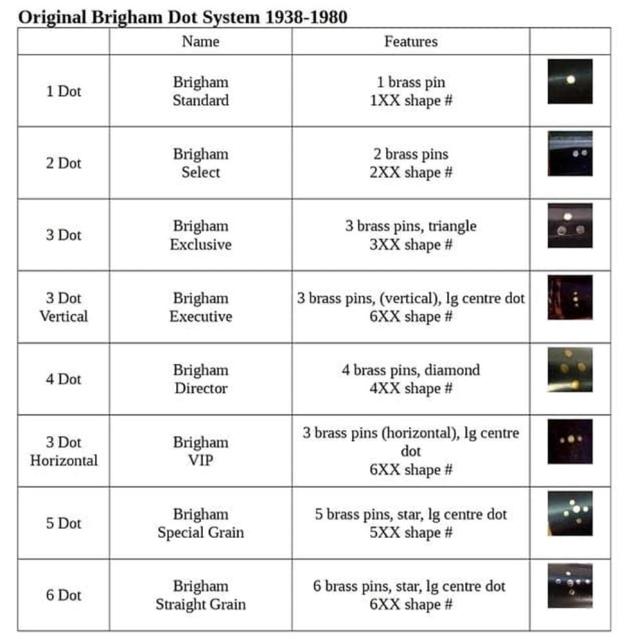
Before starting my clean up work on the pipe I turned to a chart that Charles Lemon of Dad’s Pipes sent to me on the patent era Brighams. There were made from 1938-1980. As the pipe I am working on is a Patent pipes, it’s more accurate to refer to its grade by name (the post 1980 grading scheme refers to Dots). Here is the  chart that Charles sent me. The pipe I am working on is thus a Brigham Executive with the brass pins arranged vertically. The pipe I have in hand has three brass pins with a larger center pin. It has a 6XX shape number.It is helpful having this chart and getting a quick picture of where the pipe fits in the Brigham line. Now it was time to work on the pipe.

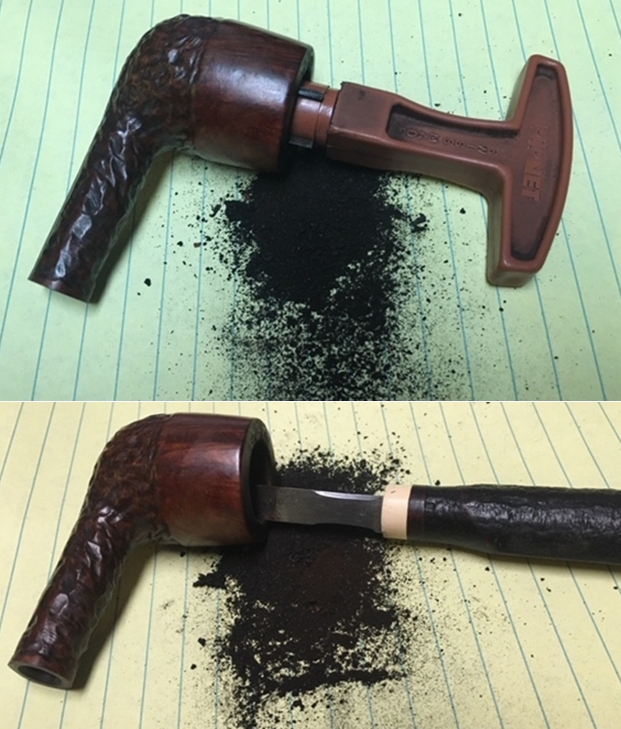
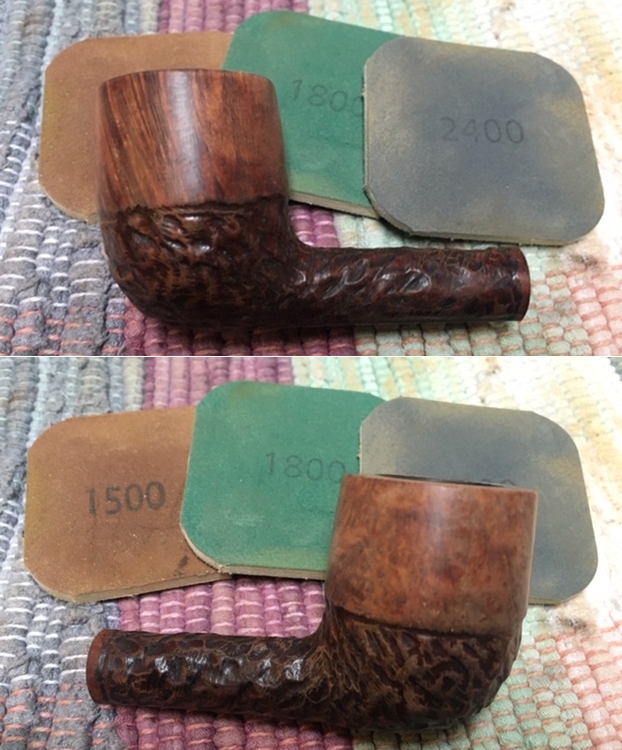
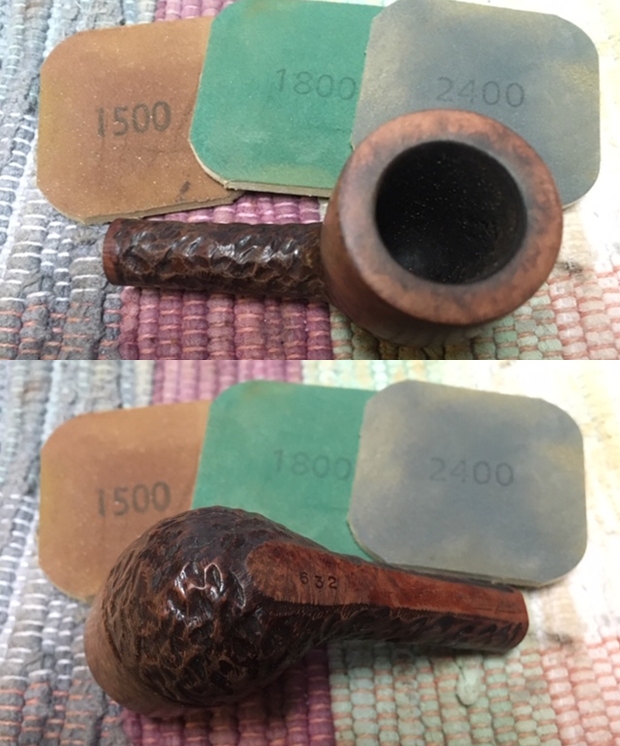
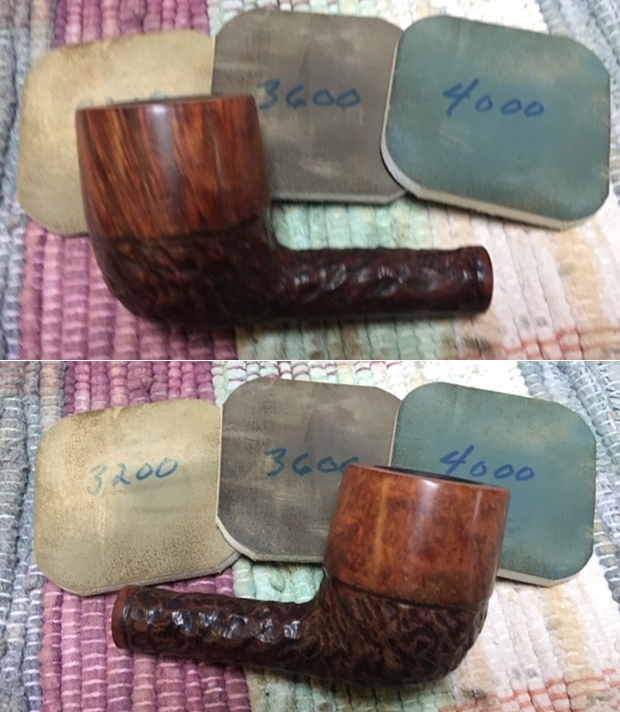
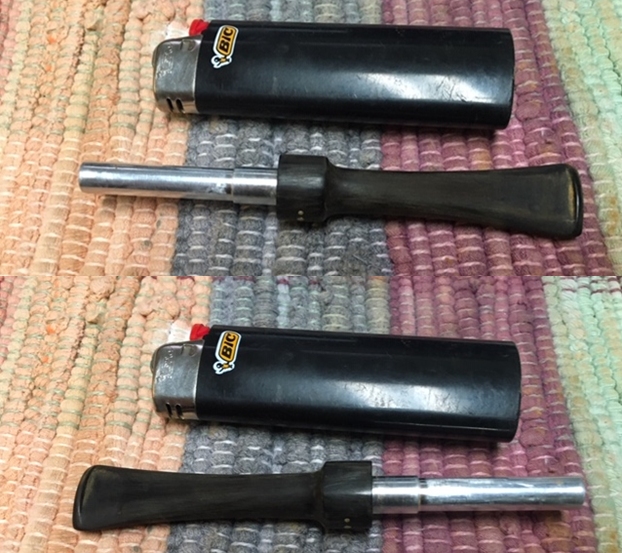
I reamed the bowl with a PipNet pipe reamer using the second and third cutting head to take the cake back to bare briar so I could inspect the walls. I cleaned up the remnants with a Savinelli Fitsall Pipe Knife. I sanded the bowl walls with 220 grit sandpaper on a piece of dowel to smooth them out and further examine them. I was happy that the walls looked very good.  I used the Savinelli Fitsall knife to scrape off the heavy lava coat on the rim top. I cleaned out the mortise area and airway to the bowl and the interior of the metal tube and airway in the stem with pipe cleaners, cotton swabs and alcohol. The aluminum tube was really dirty since it had been smoked frequently without the distillator in place. It took a lot of work to clean out all of the grit and tars. I scrubbed the surface of the bowl with undiluted Murphy’s Oil Soap and a tooth brush to remove the grime and grit as well as the remnants of the shiny finish on the smooth portions of the bowl. I worked on the darkening on the rim top and the rough inner edge of the bowl with a folded piece of 220 grit sandpaper to remove the darkening and smooth out the inner edge of the bowl.I wet sanded the rim top and the smooth portions on the bowl sides with micromesh sanding pads – 1500-12000 grit sanding pads. I wiped the bowl surface down with a damp cloth after each sanding pad to remove the sanding dust. Once I finished the bowl looked good.    I rubbed the bowl and shank down with Before & After Restoration Balm. I worked it into the surface of the briar with my fingertips and a horsehair shoe brush to clean, enliven and protect it. I let the balm sit for a little while and then buffed with a cotton cloth to raise the shine. Mark Hoover’s Balm is a product that I have come to appreciate and one I use on every pipe I have been working on. It really makes the grain stand out on this pipe. I set the bowl aside and turned my attention to the stem. When I was in the US visiting Jeff and his wife I picked up some Soft Scrub. Jeff swears by this stuff as the first tool to use to remove a lot of the oxidation on the stem. I rubbed it on with a cotton pad and sure enough it removed the oxidation and the calcification build up. It looked a lot better.I painted the tooth marks on the stem with the flame of a Bic lighter to lift them as much as possible. It removed several on each side. There were three left on the top side and one on the underside that did not lift much.  I cleaned out the marks with alcohol and a cotton swab. I filled them in with clear super glue and set the stem aside to cure.    I smoothed out the repairs and sanded out the remaining oxidation with 220 grit sandpaper and started the polishing with 400 grit wet dry sandpaper.   I rubbed down the stem with Denicare Mouthpiece Polish and a cotton pad to remove the remnants of oxidation and to blend in the sanding. The stem is starting to show promise at this point in the process.   I polished the stem with micromesh sanding pads – wet sanding it with 1500-12000 grit pads. I wiped the stem down after each sanding pad with a cotton pad to remove the sanding debris.   Before I finished the last polishing touches on the stem I decided to fit it with a new Rock Maple Distillator.  I finished polishing the stem with Before & After Pipe Stem Polish – both fine and extra fine. I finished by wiping it down with Briarville’s No Oxy Oil and buffing it to a shine.  I always look forward to this part of the restoration when all the pieces are put back together. I put the pipe back together and buffed it with Blue Diamond on the buffing wheel. I gave the bowl and the stem multiple coats of carnauba wax. I hand buffed the pipe with a clean buffing pad to raise the shine. It is fun to see what the polished bowl looks like with the smooth portion and the rusticated portion contrasting well and added to that the polished black vulcanite stem with the shining brass pins. This Brigham Executive 632 Billiard is nice looking and feels great in my hand. The pipe is one that is light enough that it could be clenched and smoked while doing other things as it is very light weight and well balanced. Have a look at it with the photos below. The dimensions are Length: 5 ¼ inches, Height: 1 ¾ inches, Outside diameter of the bowl: 1 ½ inches, Chamber diameter: ¾ of an inch. This is the fourth of the pipes sent to me from Eastern Canada for restoration. Once again I am looking forward to what the pipeman who sent it thinks of this restoration. Lots more to do in this lot! Thanks to each of you who are reading this blog. Remember we are not pipe owners; we are pipemen and women who hold our pipes in trust until they pass on into the trust of the next pipeman or woman.

Breathing Life into a Brigham Exclusive Large Lovat Sitter 3999


Blog by Steve Laug

Not too long ago I received an email from a fellow in Kitchener, Ontario regarding some pipes he needed cleaned up. He had been referred to me by my local pipe and cigar shop. While I am not currently adding more pipes to my queue of repairs I have made a commitment to the shop to work on pipes for their customers. Generally they have one or two pipes that need a bit of work. This fellow sent me the following email:

I just came across my smoking pipes that I’ve had in storage for about 40 years. I’m wondering what you’d charge to have them refurbished. There are 17 in total (11 are Brighams and 6 are various).

It turns out he said he had 17 pipes. That was certainly more than I expected but I communicated that there was a large queue ahead of him and I would have to fit them in as I could. He was fine with whatever time it took. He sent me the following photos of his collection that he wanted restored. The first photo shows his eleven Brigham pipes – all very interesting shapes. The second photo shows the six various pipes in the collection – A Republic Era Peterson’s System 1312 (Canadian Import), A Bjarne Hand Carved Freehand, a Comoy’s Everyman London smooth billiard, a GBD Popular Dublin 12, an English made Kaywoodie Rustica 72B, a Kriswill Bernadotte 60 with a broken tenon. When the box arrived there were two additional pipes included for a total of 19 – a Ropp 803 Deluxe Cherrywood Poker and a Comoy’s Sandblast Everyman Canadian 296. It was a lot of pipes! I have been randomly choosing the next pipe to work on and this time chose the Brigham that I have drawn a red box around in the first photo below. When I unwrapped it the pipe it was a Brigham Exclusive Large Lovat Sitter (at least that is what Brigham calls it even though it looks like a large billiard to me) with a shape number 3999. It was stamped on the underside on a smooth panel; it read the shape number 3999 on the heel, then Can. Pat. 372982 followed by Brigham in a script. It had a rusticated lower half of the bowl and shank with a smooth top half. The rim top had some darkening and nicks and there was a light cake in the bowl. It was dirty but overall in better condition than the last one. The finish appeared to be very good under the grime. I would see when I cleaned it. The 3 Dot saddle stem is oxidized, tooth marks and chatter on both sides near the button, some calcification. I took close up photos of the bowl and rim top to show the condition of the bowl and rim as well as the thick cake and lava overflowing onto the rim top. I also took close up photos of the stem to show its condition as mentioned above.    I took a photo of the stamping on the underside of the shank to show what I was speaking about above. It is very clear and readable. It reads 3999 followed by Can. Pat. stamp  372982 then Brigham in script.I removed the stem from the shank to reveal the aluminum tube/tenon that held the Rock Maple Distillator. The distillator was stuck in the tube so I had to carefully twist it free with a pair of pliers. Once it was free you could see the grime and grit on the metal cap. I turned to a chart that Charles Lemon of Dad’s Pipes sent to me on the patent era Brighams. There were made from 1938-1980. As the pipe I am working on is a Patent pipes, it’s more accurate to refer to its grade by name (the post 1980 grading scheme refers to Dots). Here is the  chart that Charles sent me. The pipe I am working on is thus a Brigham Exclusive with the brass pins arranged in a triangle. The pipe I have in hand has a 4 digit shape number.It is helpful having this chart and getting a quick picture of where the pipe fits in the Brigham line. Now it was time to work on the pipe.

I reamed the bowl with a PipNet pipe reamer using the second and third cutting head to take the cake back to bare briar so I could inspect the walls. I cleaned up the remnants with a Savinelli Fitsall Pipe Knife. I sanded the bowl walls with 220 grit sandpaper on a piece of dowel to smooth them out and further examine them. I was happy that the walls looked very good.   I cleaned out the mortise area and airway to the bowl and the interior of the metal tube and airway in the stem with pipe cleaners, cotton swabs and alcohol.   I wet sanded the rim top and the smooth portions on the bowl sides with micromesh sanding pads – 1500-12000 grit sanding pads. I wiped the bowl surface down with a damp cloth after each sanding pad to remove the sanding dust. Once I finished the bowl looked good.   I rubbed the bowl and shank down with Before & After Restoration Balm. I worked it into the surface of the gourd with my fingertips and a horsehair shoe brush to clean, enliven and protect it. I let the balm sit for a little while and then buffed with a cotton cloth to raise the shine. Mark Hoover’s Balm is a product that I have come to appreciate and one I use on every pipe I have been working on. It really makes the grain stand out on this pipe. I set the bowl aside and turned my attention to the stem. I sanded out the tooth chatter, marks and oxidation with 220 grit sandpaper and started the polishing with 400 grit wet dry sandpaper. I rubbed down the stem with Denicare Mouthpiece Polish and a cotton pad to remove the remnants of oxidation and to blend in the sanding. The stem is starting to show promise at this point in the process. I polished the stem with micromesh sanding pads – wet sanding it with 1500-12000 grit pads. I wiped the stem down after each sanding pad with a cotton pad to remove the sanding debris. Before I finished the last polishing touches on the stem I decided to fit it with a new Rock Maple Distillator.  I finished polishing the stem with Before & After Pipe Stem Polish – both fine and extra fine. I finished by wiping it down with Briarville’s No Oxy Oil and buffing it to a shine.  I always look forward to this part of the restoration when all the pieces are put back together. I put the pipe back together and buffed it with Blue Diamond on the buffing wheel. I gave the bowl and the stem multiple coats of carnauba wax. I hand buffed the pipe with a clean buffing pad to raise the shine. It is fun to see what the polished bowl looks like with the smooth portion and the rusticated portion contrasting well and added to that the polished black vulcanite stem with the shining brass pins. This Brigham Exclusive Large Lovat (Billiard?) is nice looking and feels great in my hand. For a pipe this large it still light enough that it is one that could be clenched and smoked while doing other things as it is very light weight and well balanced. Have a look at it with the photos below. The dimensions are Length: 6 ½ inches, Height: 2 ½ inches, Outside diameter of the bowl: 1 5/8 inches, Chamber diameter: 7/8 of an inch. This is the third of the pipes sent to me from Eastern Canada for restoration. Once again I am looking forward to what the pipeman who sent it thinks of this restoration. Lots more to do in this lot! Thanks to each of you who are reading this blog. Remember we are not pipe owners; we are pipemen and women who hold our pipes in trust until they pass on into the trust of the next pipeman or woman.

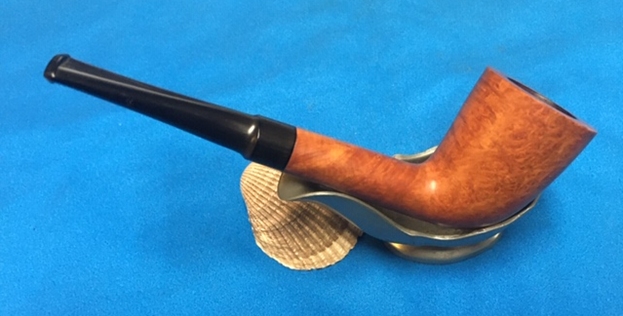
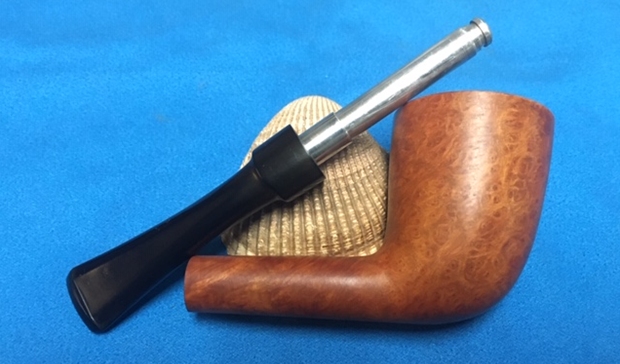
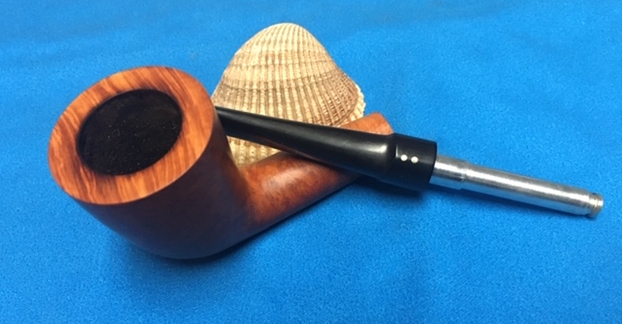
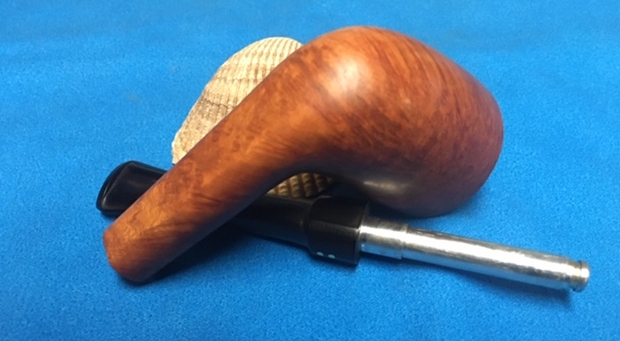
Breathing Life into a Brigham Exclusive Bent Dublin


Blog by Steve Laug

Not too long ago I received an email from a fellow in Kitchener, Ontario regarding some pipes he needed cleaned up. He had been referred to me by my local pipe and cigar shop. While I am not currently adding more pipes to my queue of repairs I have made a commitment to the shop to work on pipes for their customers. Generally they have one or two pipes that need a bit of work. This fellow sent me the following email:

I just came across my smoking pipes that I’ve had in storage for about 40 years. I’m wondering what you’d charge to have them refurbished. There are 17 in total (11 are Brighams and 6 are various).

It turns out he said he had 17 pipes. That was certainly more than I expected but I communicated that there was a large queue ahead of him and I would have to fit them in as I could. He was fine with whatever time it took. He sent me the following photos of his collection that he wanted restored. The first photo shows his eleven Brigham pipes – all very interesting shapes. The second photo shows the six various pipes in the collection – A Republic Era Peterson’s System 1312 (Canadian Import), A Bjarne Hand Carved Freehand, a Comoy’s Everyman London smooth billiard, a GBD Popular Dublin 12, an English made Kaywoodie Rustica 72B, a Kriswill Bernadotte 60 with a broken tenon. When the box arrived there were two additional pipes included for a total of 19 – a Ropp 803 Deluxe Cherrywood Poker and a Comoy’s Sandblast Everyman Canadian 296. It was a lot of pipes! I have been randomly choosing the next pipe to work on and chose the Brigham that have drawn a red box around in the first photo below. When I unwrapped it the pipe it was a Brigham Exclusive Bent Dublin and was stamped on the left side in a smooth panel, it read Brigham in script over Can. Pat. 372982. It had a rusticated lower half of the bowl and shank with a smooth top half. The rim top had some darkening and lava, out of round and a thick cake in the bowl. It was very dirty. The finish appeared to be very good under the grime. Perhaps the lava on the rim top had protected that as well. I would see when I cleaned it. The 3 Dot tapered stem is oxidized, tooth marks and chatter near the button, some calcification. It was oxidized and had tooth chatter and marks on both sides just ahead of the button. I took close up photos of the bowl and rim top to show the condition of the bowl and rim as well as the thick cake and lava overflowing onto the rim top. I also took close up photos of the stem to show its condition as mentioned above. I took a photo of the stamping on the left side of the shank to show what I was speaking about above. It is very clear and readable. The second photo shows the Can. Pat. stamp 372982. I removed the stem from the shank to reveal the aluminum tube/tenon that held the Rock Maple Distillator. The Distillator was stuck in the tube so I had to carefully twist it free with a pair of pliers. Once it was free you could see the grime and grit on the metal cap. I turned to a chart that Charles Lemon of Dad’s Pipes sent to me on the patent era Brighams. There were made from 1938-1980. As the pipe I am working on is a Patent pipes, it’s more accurate to refer to its grade by name (the post 1980 grading scheme refers to Dots). Here is the  chart that Charles sent me. The pipe I am working on is thus a Brigham Exclusive with the brass pins arranged in a triangle. The pipe I have in hand does not appear to have a shape number.It is helpful having this chart and getting a quick picture of where the pipe fits in the Brigham line. Now it was time to work on the pipe.

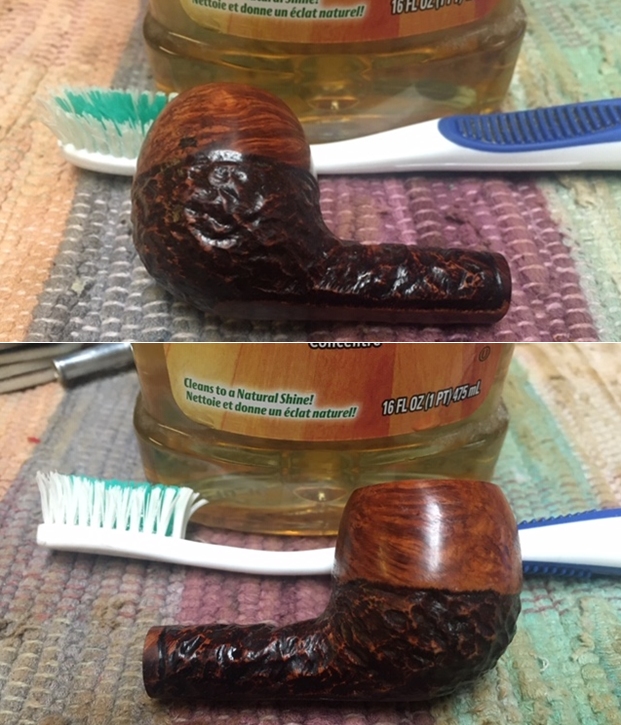
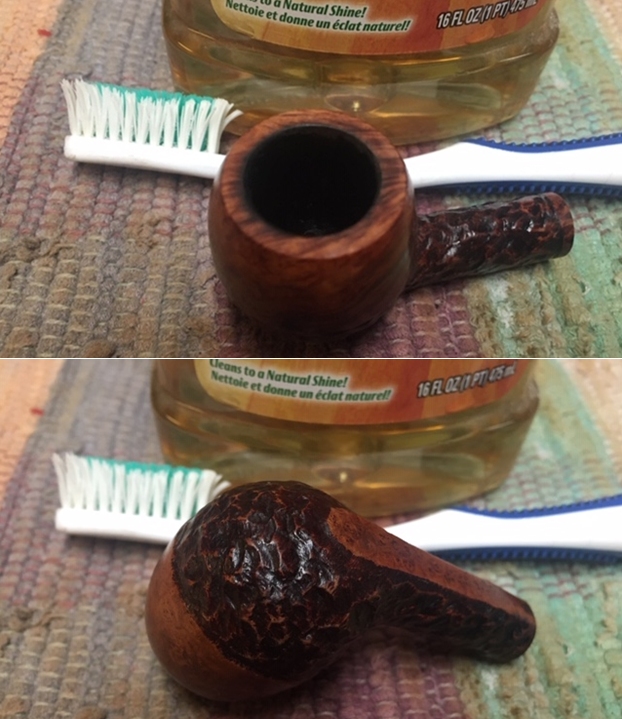
I reamed the bowl with a PipNet pipe reamer using the second and third cutting head to take the cake back to bare briar so I could inspect the walls. I cleaned up the remnants with a Savinelli Fitsall Pipe Knife. I sanded the bowl walls with 220 grit sandpaper on a piece of dowel to smooth them out and further examine them. I was happy that the walls looked very good. I cleaned up the rim edge and the rim top with a folded piece of 220 grit sandpaper. I was able to remove the damage on the edge and all of the lava from the rim top. The briar looks pretty good on the rim and edges. With the bowl reamed and the rim top cleaned off it was time to scrub the exterior of the pipe. I used a tooth brush and Murphy’s Oil Soap to scrub out the grime in the rustication and the bit that remained on the rim edges and top. I rinsed the bowl under running water and dried it off with a cotton cloth.  I cleaned out the mortise area and airway to the bowl and the interior of the metal tube and airway in the stem with pipe cleaners, cotton swabs and alcohol. I wet sanded the rim top and the smooth portions on the bowl sides with micromesh sanding pads – 1500-12000 grit sanding pads. I wiped the bowl surface down with a damp cloth after each sanding pad to remove the sanding dust. Once I finished the bowl looked good. I rubbed the bowl and shank down with Before & After Restoration Balm. I worked it into the surface of the gourd with my fingertips and a horsehair shoe brush to clean, enliven and protect it. I let the balm sit for a little while and then buffed with a cotton cloth to raise the shine. Mark Hoover’s Balm is a product that I have come to appreciate and one I use on every pipe I have been working on. I set the bowl aside and turned my attention to the stem. I sanded out the tooth chatter, marks and oxidation with 220 grit sandpaper and started the polishing with 400 grit wet dry sandpaper. I polished the stem with micromesh sanding pads – wet sanding it with 1500-12000 grit pads. I wiped the stem down after each sanding pad with a cotton pad to remove the sanding debris. Before I finished the last polishing touches on the stem I decided to fit it with a new Rock Maple Distillator. I finished polishing the stem with Before & After Pipe Stem Polish – both fine and extra fine. I finished by wiping it down with Briarville’s No Oxy Oil and buffing it to a shine.  I always look forward to this part of the restoration when all the pieces are put back together. I put the pipe back together and buffed the pipe with Blue Diamond on the buffing wheel. I gave the bowl and the stem multiple coats of carnauba wax. I hand buffed the pipe with a clean buffing pad to raise the shine. It is fun to see what the polished bowl looks like with the smooth portion and the rusticated portion contrasting well and added to that the polished black vulcanite stem with the shining brass pins. This Brigham Exclusive Bent Dublin is nice looking and feels great in my hand. It is light enough that it is one that could be clenched and smoked while doing other things as it is very light weight and well balanced. It must have been a fine smoking pipe judging from the condition it was when I received it. Have a look at it with the photos below. The dimensions are Length: 5 ½ inches, Height: 2 ¼ inches, Outside diameter of the bowl: 1 ½ inches, Chamber diameter: 7/8 of an inch. This is the second of the pipes sent to me from Eastern Canada for restoration. I am looking forward to what the pipeman who sent it thinks of this restoration. Lots more to do in this lot! Thanks to each of you who are reading this blog. Remember we are not pipe owners; we are pipemen and women who hold our pipes in trust until they pass on into the trust of the next pipeman or woman.

A Brigham Patent Era Standard 102 Rusticated Crosby from Bob Kerr’s Estate


Blog by Steve Laug

As I continue to work through the pipes in Bob Kerr’s Estate I am enjoying choosing different brands that he had to focus on for a bit. He had six different pipes from Brigham in his collection so I decided to work my way through that sub collection of the estate. Out of the 6 pipes, #5 has a ruined bowl with a crack all the way around it as well as a cut off aluminum tenon. #6 went to Paresh Deshpande in India for his collection. That left behind four pipes for me to restore – #1, #2, #3 and #4. Here is the list of what I saw when I examined the 6 pipes. I have already restored #1, #2 and #3 and included the link to the appropriate blog.

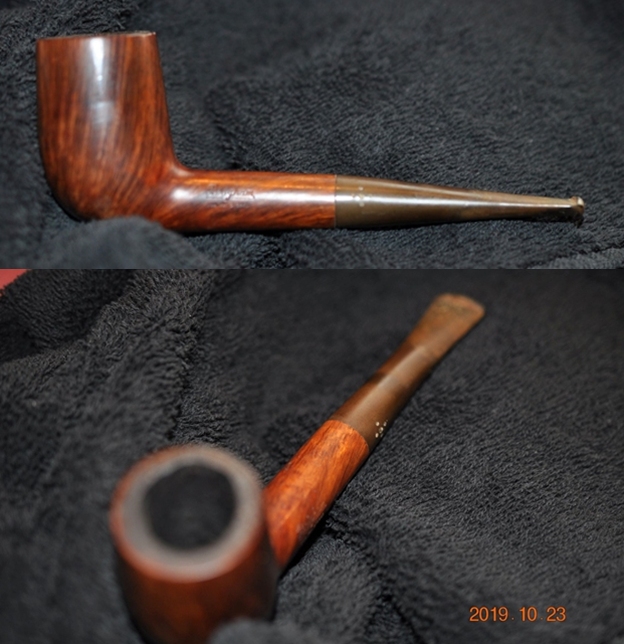
  1. Brigham 503T Can. Pat. 372982 5 Dot Stack. Stem is oxidized, tooth marks and chatter near the button, some calcification with damage to the button. Finish is dirty, thick cake and lava overflow on the rim top. Rim top has is worn and damage on the back edge. I have finished restoring this one. Here is the link: (https://rebornpipes.com/2019/12/21/a-brigham-patent-era-special-grain-stack-from-bob-kerrs-estate/).
  2. Brigham Made In Canada 490 4 Dot Canadian. Stem is oxidized, tooth marks and chatter near the button, some calcification with damage to the button. Finish is dirty, thick cake and lava overflow on the rim top. Rim top is worn and damaged. I have finished restoring this one. Here is the link: (https://rebornpipes.com/2019/12/22/a-brigham-patent-era-director-490-rusticated-canadian-from-bob-kerrs-estate/).
  3. Brigham Made In Canada 2199 2 Dot Club/Lovat. Stem is oxidized, tooth marks and chatter near the button, some calcification with damage to the button. Finish is dirty and worn. Stamping is worn. There is a thick cake and lava overflow on the rim top. Rim top is worn and damaged. I have finished restoring this one. Here is the link: (https://rebornpipes.com/2019/12/21/a-brigham-patent-era-select-601-club-lovat-from-bob-kerrs-estate/).
  4. Brigham Made In Canada 102 1 Dot Bing Crosby Style Pipe/Small Billiard. Stem is oxidized, tooth marks and chatter near the button, some calcification with damage to the button. Finish is dirty, thick cake and lava overflow on the rim top. Rim top is worn and damage on the back edge.
  5. Brigham Made In Canada 6 Dot Bent Billiard. Stem is oxidized, tooth marks and chatter near the button, some calcification with damage to the button. The aluminum tenon has been cut off. Finish is dirty and worn with paint on the bowl. There is a thick cake and lava overflow on the rim top. Rim top has a crack on the right side. CRACKED BOWL
  6. Brigham Made In Canada 4 Dot Canadian. Stem is oxidized, tooth marks and chatter near the button, some calcification with damage to the button. Finish is dirty and stamping is worn. There is a thick cake and lava overflow on the rim top. Rim top is worn and edges are damaged. SENT TO PARESH

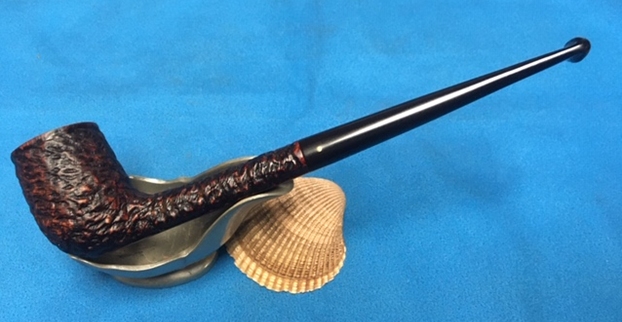
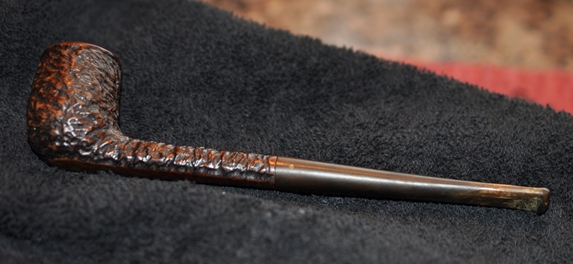
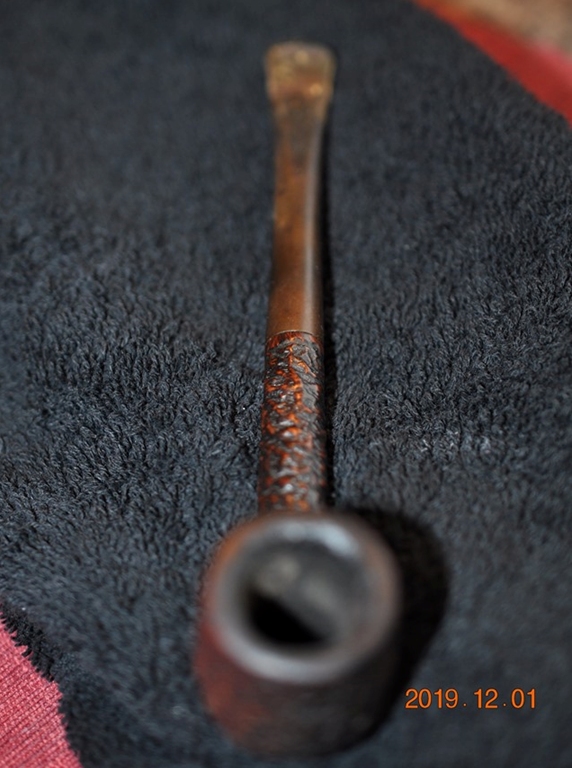
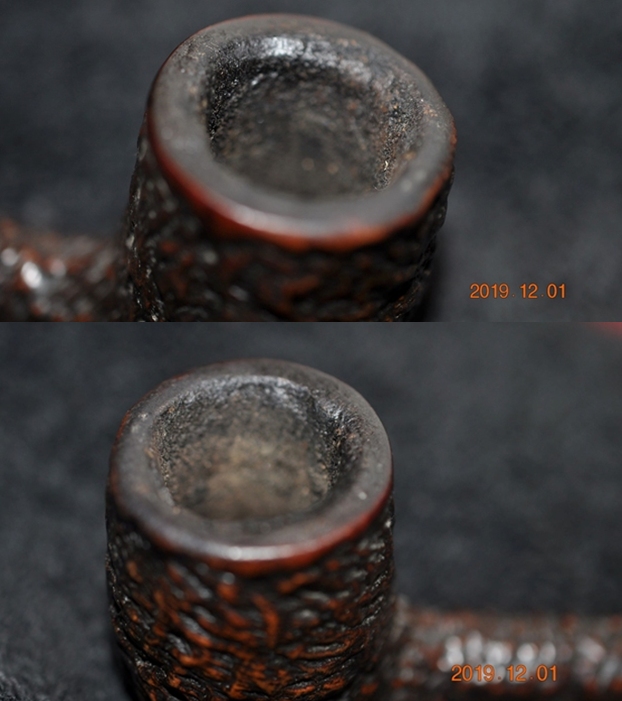
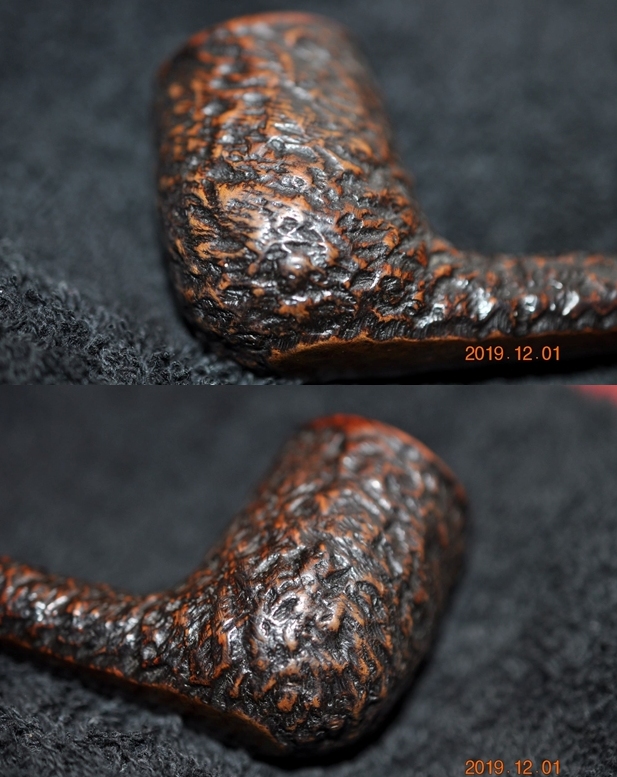
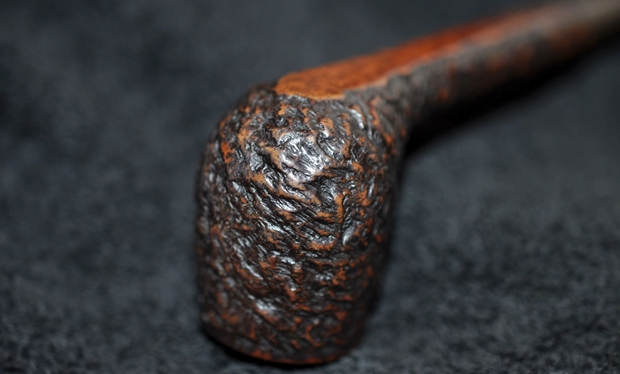
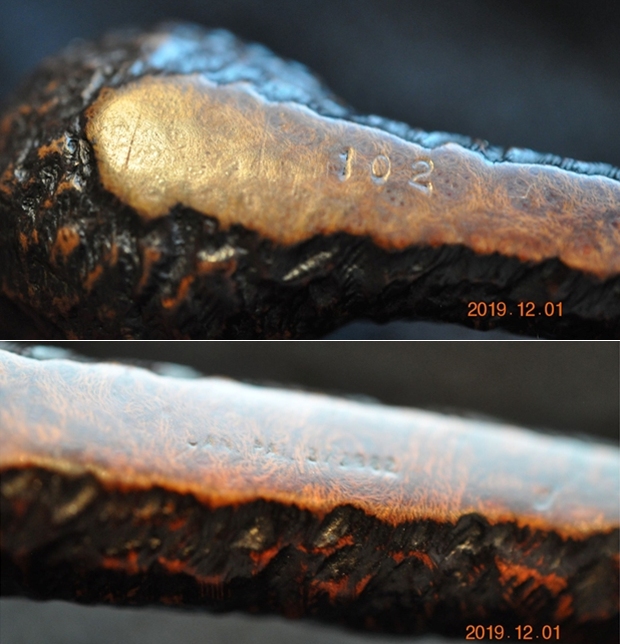
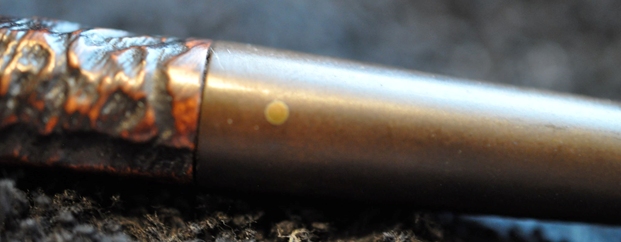
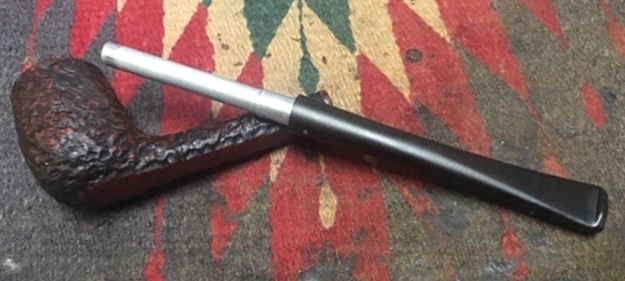
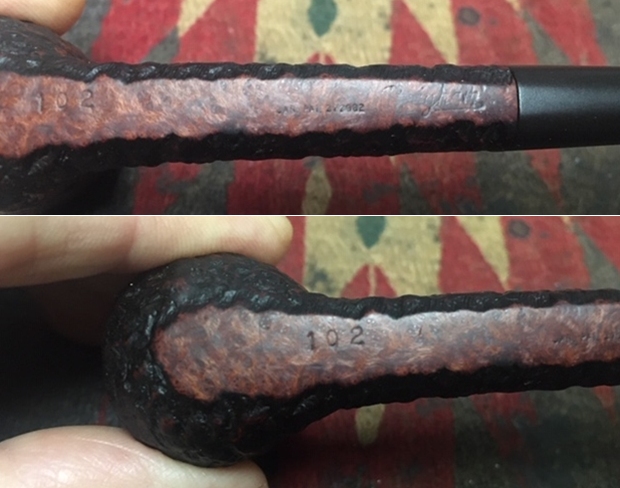
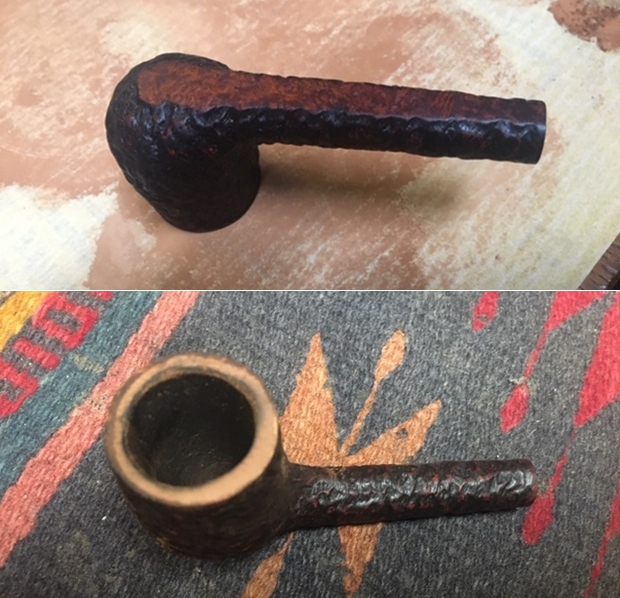
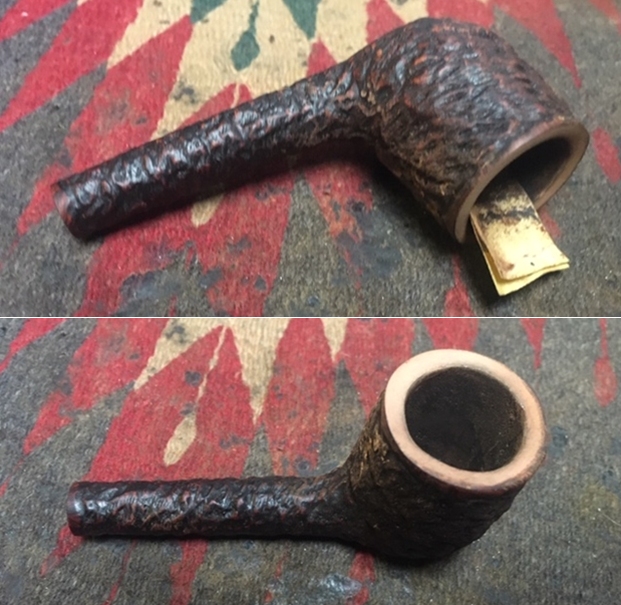
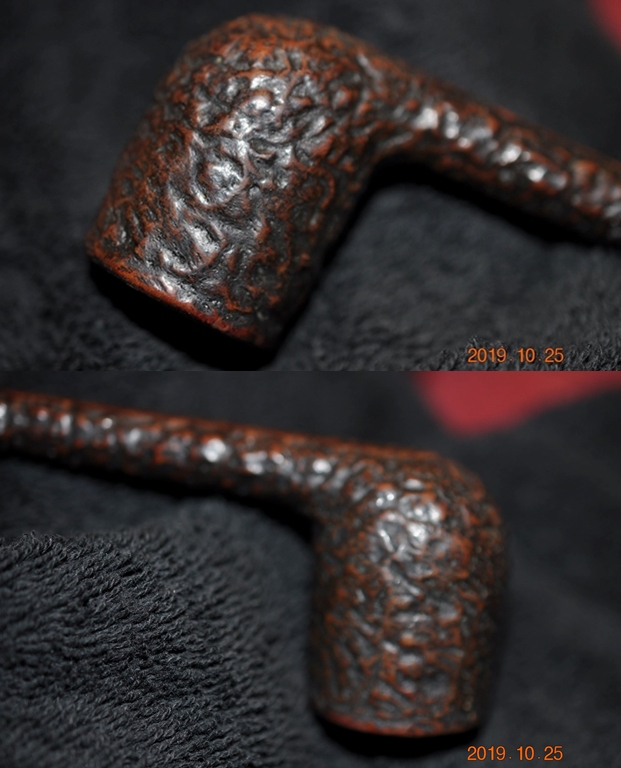
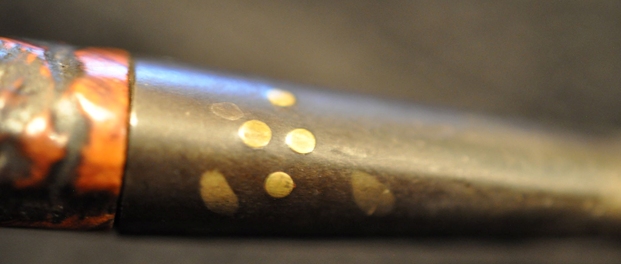
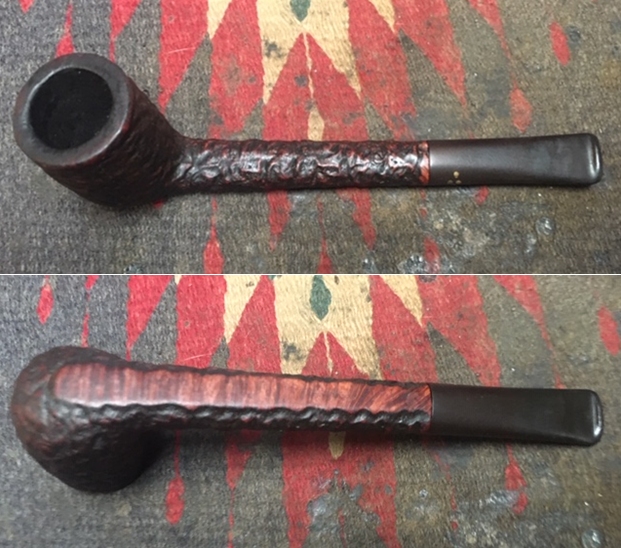
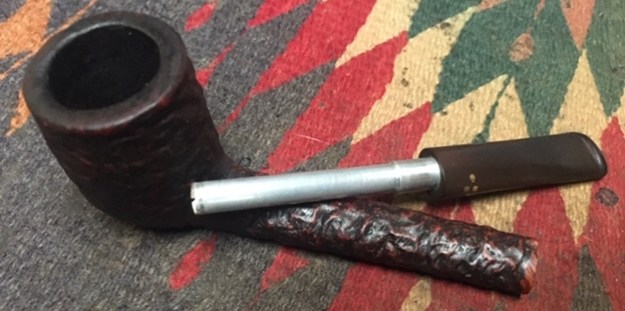
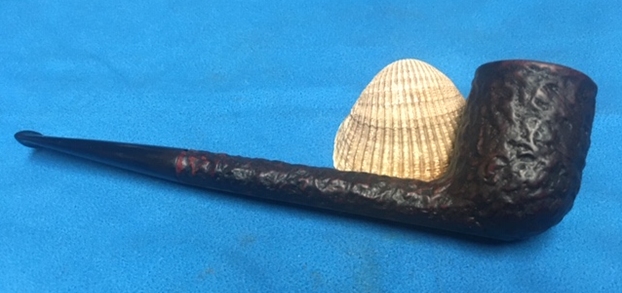
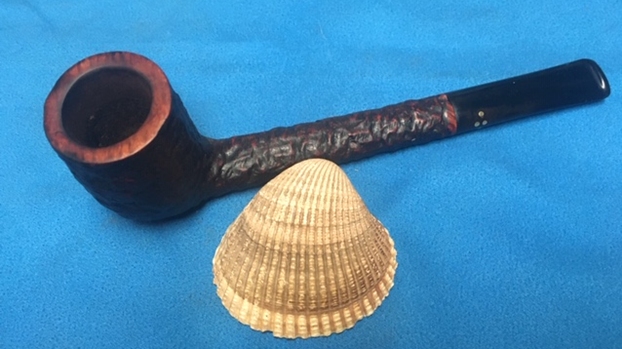
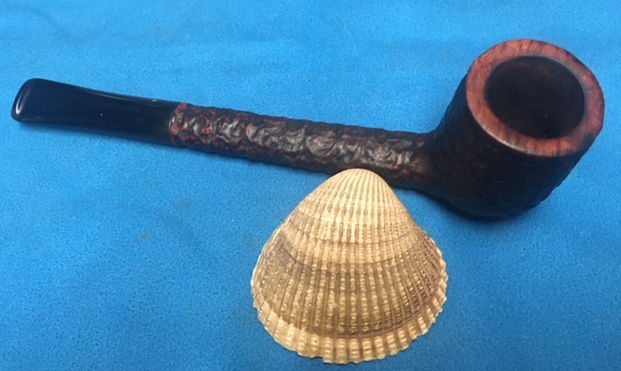
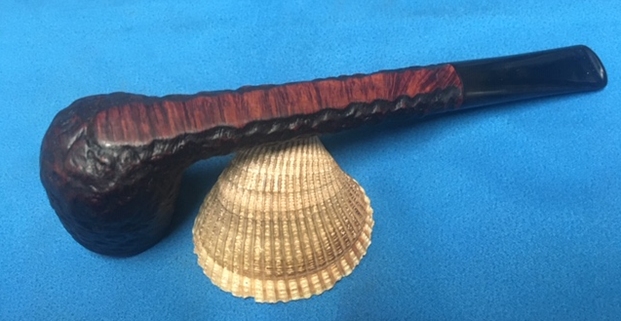
I chose to work on #4 next, the second rusticated pipe in the collection. It is a Brigham Rusticated Crosby or what Brigham calls a small billiard. To me the long stem will forever remind me of Bing Crosby and White Christmas. It was stamped on the underside of the shank with faint stamping visible with a lens under light. It reads Brigham over Can. Pat. 372982. On the heel of the bowl it was stamped with the shape number 102. There was a thick cake in the bowl with remnants of tobacco stuck on the walls. There was a lava overflow on the rim. The top and edges of the rim appear to have some damage all the way around the bowl. The rustication was the pattern I have become accustomed to on Brigham pipes. Once again, I think that there was a beautiful pipe underneath all of the buildup of years of use. The stem was oxidized and calcified toward the end with some tooth chatter. There were also some tooth marks on both sides of the stem ahead of the button. There was a pattern of four brass dots on the left side of the tapered stem. Jeff took photos of the pipe before he started his cleanup work on it. Jeff took photos of the bowl and rim top to show the thick, hard cake in the bowl with remnants of tobacco stuck on the walls of the bowl. There was a lava build up on the smooth rim top and the edges of the bowl. The rim top looked pretty good but it was hard to know for sure but it appeared that there was damage all around the inner edge. The outer edges looked good.  Jeff took a photo of the side and heel of the bowl to show the condition of the finish. You can see the beautiful rustication patterns around the side of the bowl and shank. Even under the dirt and debris of the years it looked very good.    The stamping is very faint. With a light and lens the stamping Brigham is visible. The first photo shows the shape number on the heel of the bowl. The second photo shows the Can. Pat. Number that is underneath the Brigham stamp. He included a pic of the 1 brass dot on the stem.  Jeff took photos of the top and underside of the stem showing the tooth chatter, scratching and oxidation on the stem surface and wear on the edges of the button.I am also including the information from Pipedia’s article on Brigham pipes. It is a great read in terms of the history of the brand (https://pipedia.org/wiki/Brigham_Pipes). Charles Lemon (Dadspipes) is currently working on a book on the history of the brand. Until that is complete this article is a good summary. I have included it below.
Roy Brigham, after serving an apprenticeship under an Austrian pipesmith, started his own pipe repair shop in Toronto, in 1906. By 1918 the business had grown to include five other craftsmen and had developed a reputation across Canada for the high quality of workmanship. After repairing many different brands of pipes over the years, Roy noted certain recurring complaints by pipe smokers, the most common referred to as “tongue bite”. Tongue bite is a burning sensation on the smoker’s tongue, previously thought to be due to the heat of the smoke (i.e. a “hot smoking pipe”).

He soon began manufacturing his own pipes, which were lightweight, yet featured a more rugged construction, strengthening the weak points observed in other pipes. The problem of tongue bite intrigued him, and he decided to make overcoming it a future goal.

About 1938, Roy’s son Herb joined him to assist in the business. The business barely survived the great depression because pipes were considered to be a luxury, not a necessity, and selling pipes was difficult indeed. In approximately 1937 [1], after some experimentation, Roy and Herb discovered that tongue bite was in fact a form of mild chemical burn to the tongue, caused by tars and acids in the smoke. They found that by filtering the smoke, it was possible to retain the flavour of the tobacco and yet remove these impurities and thereby stop the tongue bite.

Just as Thomas Edison had searched far and wide for the perfect material from which to make the first electric light bulb filaments, Roy & Herb began experimenting with many materials, both common and exotic, in the quest for the perfect pipe filter. Results varied wildly. Most of the materials didn’t work at all and some actually imparted their own flavour into the smoke. They eventually found just two materials that were satisfactory in pipes: bamboo and rock maple. As bamboo was obviously not as readily available, rock maple then became the logical choice.

They were able to manufacture a replaceable hollow wooden tube made from rock maple dowelling, which when inserted into a specially made pipe, caused absolutely no restriction to the draw of the pipe, yet extracted many of the impurities which had caused tongue bite. The result was indeed a truly better smoking pipe…

I wrote to Charles Lemon (Dadspipes) and asked him about the stamping on the pipe. He responded with information on all of the foursome. I am including the information on this particular pipe.

Hey Steve! Good to hear from you.

Lastly, the 102 is a Small Billiard- not the smallest Brigham (the 01 shape is an even smaller billiard) but pretty compact…As these are all Patent pipes, it’s more accurate to refer to their grade by name (the post 1980 grading scheme refers to Dots). Here is the original scheme:With the information from Charles’ message and the chart above that he included I knew what I was dealing with in terms of the stamping and the age of this pipe. I learned that this Patent Era 102 is a Brigham Standard (1-Dot) Small Billiard, though I would call the long shanked bowl a Crosby. It was made between 1938 and 1955. Most of Bob’s pipes were purchased in the 50s and 60s so my guess is that this is fits that time frame well. Now it was time to work on the pipe.

I am really happy to have Jeff’s help on cleaning up the pipes from Bob’s estate as the 125+ pipes were taking me a long time to do alone. He cleaned this filthy pipe with his usual penchant for thoroughness that I really appreciate. This one was a real mess and I did not know what to expect when I unwrapped it from his box. He reamed it with a PipNet pipe reamer and cleaned up the reaming with a Savinelli Fitsall Pipe Knife. He scrubbed out the internals with alcohol, pipe cleaners and cotton swabs until the pipe was clean. He scrubbed the exterior of the bowl with Murphy’s Oil Soap and a tooth brush to remove the grime and grit on the briar and the lava on the rim top. The finish looks very good with great looking grain around the bowl and shank. Jeff soaked the stem in Before & After Deoxidizer to remove the oxidation on the rubber. When the pipe arrived here in Vancouver for the second stop of its restoration tour I was amazed it looked so good. I took some close up photos of the rim top and also of the stem surface. I wanted to show what an amazing job Jeff did in the cleanup of the rim top. The rim top was darkened with nicks and damage to the rim top and inner edge of the bowl. The outer edge looked very good.  I also took close up photos of the stem to show the tooth marks and chatter on the stem surface.I took the stem off the shank to show the aluminum tenon/tube that was used to hold the Brigham Rock Maple Distillator. The original Distillator (filter) had been filthy so after Jeff had cleaned the pipe up he threw it away. I will replace it once I have finished with the restoration.This was a tough pipe to photograph the stamping on because it was very faint. When it starts out faint it is very easy to lose even that remnant of a stamp. But one of the things I appreciate about Jeff’s cleanup is that he works to protect and preserve the nomenclature on the shank of the pipes that he works on. I took some photos to show the stamping. In the first photo shows the shape number on the left side 102 and the Patent number mid shank followed by Brigham. The second photo gives a close-up of the shape number.   Since this is another pipe Bob’s estate I am sure that some of you have read at least some of the other restoration work that has been done on the previous pipes. You have also read what I have included about Bob Kerr, the pipeman who held these pipes in trust before I came to work on them (see photo to the left). Also, if you have followed the blog for long you will already know that I like to include background information on the pipeman whose pipes I am restoring. For me, when I am working on an estate I really like to have a sense of the person who held the pipes in trust before I worked on them. It gives me another dimension of the restoration work. Bob’s daughter wrote a short tribute to her father. I thank you Brian and tell your wife thank you as well.

I am delighted to pass on these beloved pipes of my father’s. I hope each user gets many hours of contemplative pleasure as he did. I remember the aroma of tobacco in the rec room, as he put up his feet on his lazy boy. He’d be first at the paper then, no one could touch it before him. Maybe there would be a movie on with an actor smoking a pipe. He would have very definite opinions on whether the performer was a ‘real’ smoker or not, a distinction which I could never see but it would be very clear to him. He worked by day as a sales manager of a paper products company, a job he hated. What he longed for was the life of an artist, so on the weekends and sometimes mid-week evenings he would journey to his workshop and come out with wood sculptures, all of which he declared as crap but every one of them treasured by my sister and myself. Enjoy the pipes, and maybe a little of his creative spirit will enter you!

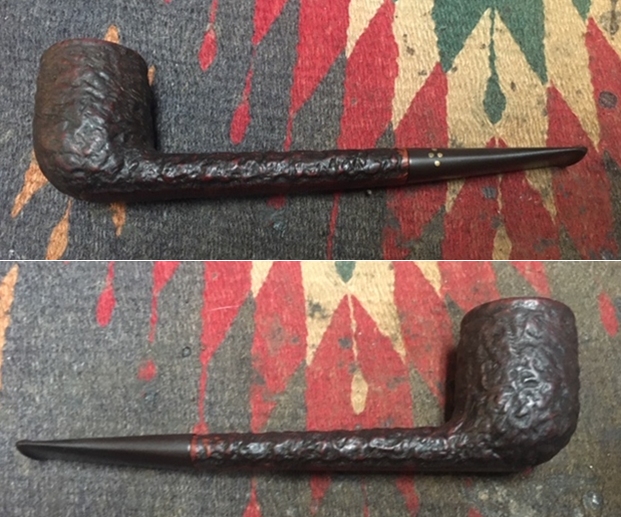
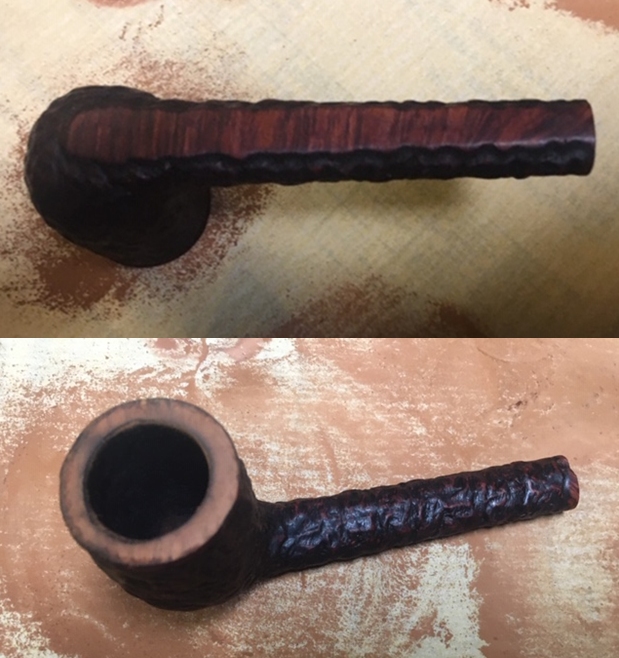
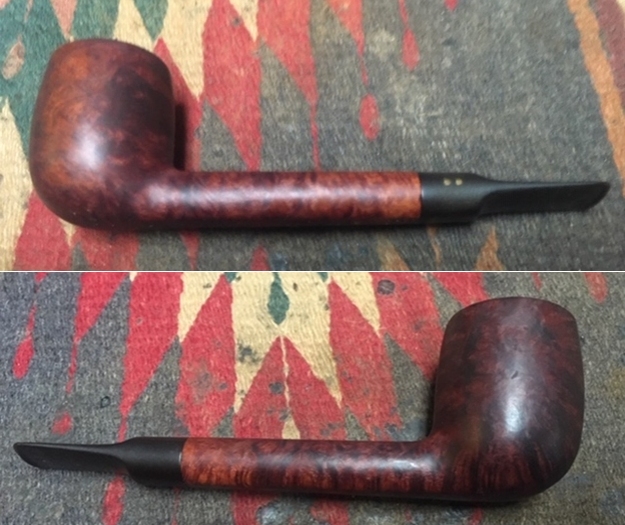
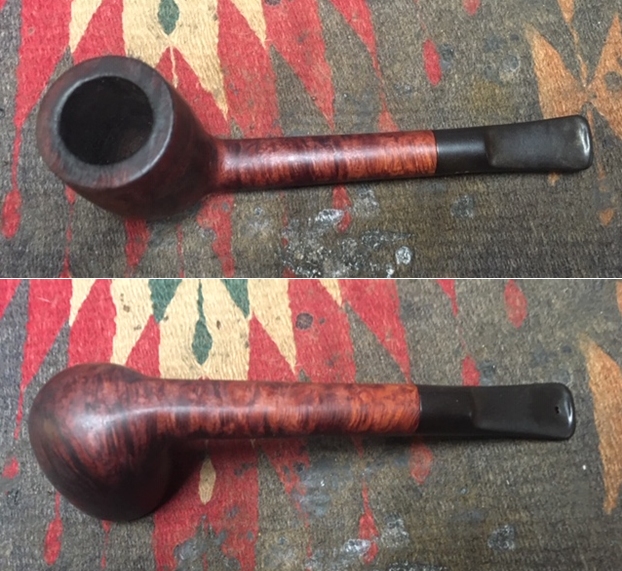
Now with all of the background on the line and the background on Bob Kerr it was time to get on with the restoration of this rusticated Brigham Standard Crosby/Small Billiard. I really appreciate the hard cleanup work that Jeff did on these pipes. They were a real mess when I sent them to Jeff and I have to tell you it was great that I did not need to clean this pipe. I decided to start the process by dealing with the damage to the rim top and edges of the bowl. I topped it on a topping board with 220 grit sandpaper. I worked on the inner edge with a folded piece of 220 grit sandpaper and gave it a very slight bevel so that it took care of the damage on the inner edge. The photos show the progress. I polished the briar on the rim top with micromesh sanding pads – wet sanding it with 1500-12000 grit pads and I wiped the bowl down after each sanding pad with a damp cloth.  The grain progressively stood out as I polished the pipe with the pads. I rubbed the bowl and rim down with Before & After Restoration Balm. I worked it into the surface of the briar with my fingertips and a horsehair shoe brush to clean, enliven and protect it. I let the balm sit for a little while and then buffed with a cotton cloth to raise the shine. I really like watching the Balm do its magic and bring the briar alive.  With the bowl done it was time to address the stem. The dents in the top and underside were the right depth for me to lift them. I “painted” the surface of the stem with the flame of a Bic lighter to raise the dents in the surface. I was able to lift them to the point that a repair would be a simple sanding job. I sanded the surface of the stem with 220 grit sandpaper to remove the remaining oxidation in the vulcanite. I polished it with 400 grit wet dry sand paper.   I rubbed the stem down with Denicare Mouthpiece Polish. I have a few tins of this laying around so I am trying to use them up. It does a pretty good job polishing the stem. I polished the stem with micromesh sanding pads – wet sanding with 1500-12000 grit sanding pads. I wiped it down after each pad with a damp cloth to remove the sanding dust. I polished it further with Before & After Pipe Polish – both Fine and Extra Fine. I finished by rubbing the stem down with some “No Oxy Oil” to protect the vulcanite. I am experimenting with the product from Briarville and tracking how it works so I can write a review of it.  With the pipe cleaned and ready to polish I put a new Brigham Distillator filter in the stem. The photos show the Distillator out of the tenon and in place in the tenon. It is a Maplewood tube that collects the moisture from the smoke and delivering a dry, cool smoke sans tongue bite.  Once again at this point in the restoration process I am excited to be on the homestretch. This is the last Brigham from the four that are in Bob’s estate so I look forward to the final look when it is put back together, polished and waxed. I put the bowl and stem back together. I polished the bowl and stem with Blue Diamond to polish out the scratches in the briar and the vulcanite. I gave the bowl and the stem multiple coats of carnauba wax. I buffed the pipe with a clean buffing pad to raise the shine. I hand buffed it with a microfiber cloth to deepen the shine. The pipe polished up pretty nicely. The rustication is worn but still stands out with the wax and polish. The black of the tapered vulcanite stem along with the four brass pins is a beautiful contrast to the browns of the rusticated bowl and shank. This is a beautiful Patent Era Standard Small Billiard/Crosby that was another fun pipe to work on thanks to Jeff’s cleanup work. The pipe is comfortable pipe to hold in the hand. The finished pipe is shown in the photos below. The dimensions of the pipe are Length: 7 inches, Height: 1 ½ inches, Outside diameter of the bowl: 1 1/8 inches, Chamber diameter: ¾ of an inch. This interesting long Crosby will be going on the rebornpipes store very soon. I have a lot more of Bob’s estate to work on of various brands. Perhaps one of those will catch your attention. Thanks for reading this blog and my reflections on the pipe while I worked on it. This is an interesting estate to bring back to life.

A Brigham Patent Era Director 490 Rusticated Canadian from Bob Kerr’s Estate


Blog by Steve Laug

As I continue to work through the pipes in Bob Kerr’s Estate I am enjoying choosing different brands that he had to focus on for a bit. He had six different pipes from Brigham in his collection so I decided to work my way through that sub collection of the estate. Out of the 6 pipes, #5 has a ruined bowl with a crack all the way around it as well as a cut off aluminum tenon. #6 went to Paresh Deshpande in India for his collection. That left behind four pipes for me to restore – #1, #2, #3 and #4. Here is the list of what I saw when I examined the 6 pipes. I have already restored #1 and #3 and included the link to the appropriate blog.

  1. Brigham 503T Can. Pat. 372982 5 Dot Stack. Stem is oxidized, tooth marks and chatter near the button, some calcification with damage to the button. Finish is dirty, thick cake and lava overflow on the rim top. Rim top has is worn and damage on the back edge. I have finished restoring this one. Here is the link: (https://rebornpipes.com/2019/12/21/a-brigham-patent-era-special-grain-stack-from-bob-kerrs-estate/).
  2. Brigham Made In Canada 490 4 Dot Canadian. Stem is oxidized, tooth marks and chatter near the button, some calcification with damage to the button. Finish is dirty, thick cake and lava overflow on the rim top. Rim top is worn and damaged.
  3. Brigham Made In Canada 2199 2 Dot Lovat. Stem is oxidized, tooth marks and chatter near the button, some calcification with damage to the button. Finish is dirty and worn. Stamping is worn. There is a thick cake and lava overflow on the rim top. Rim top is worn and damaged. I have finished restoring this one. Here is the link: (https://rebornpipes.com/2019/12/21/a-brigham-patent-era-select-601-club-lovat-from-bob-kerrs-estate/).
  4. Brigham Made In Canada 1 Dot Bing Crosby Style Pipe. Stem is oxidized, tooth marks and chatter near the button, some calcification with damage to the button. Finish is dirty, thick cake and lava overflow on the rim top. Rim top is worn and damage on the back edge.
  5. Brigham Made In Canada 6 Dot Bent Billiard. Stem is oxidized, tooth marks and chatter near the button, some calcification with damage to the button. The aluminum tenon has been cut off. Finish is dirty and worn with paint on the bowl. There is a thick cake and lava overflow on the rim top. Rim top has a crack on the right side.
  6. Brigham Made In Canada 4 Dot Canadian. Stem is oxidized, tooth marks and chatter near the button, some calcification with damage to the button. Finish is dirty and stamping is worn. There is a thick cake and lava overflow on the rim top. Rim top is worn and edges are damaged.

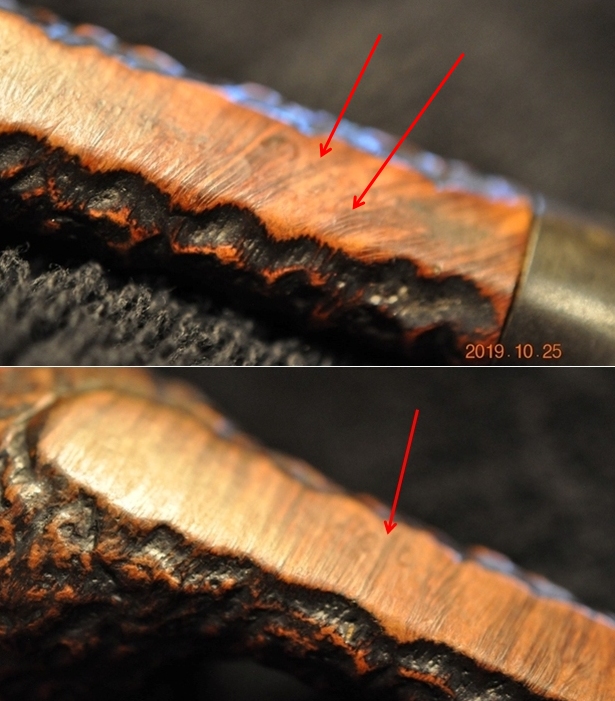
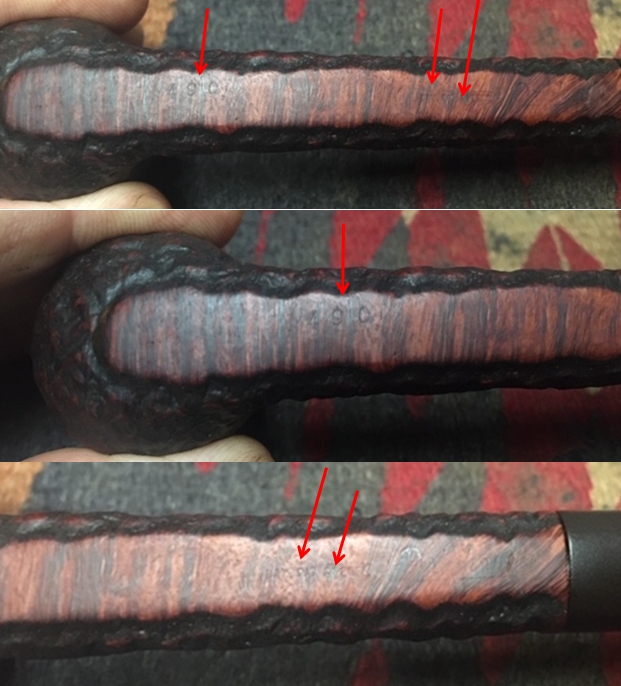
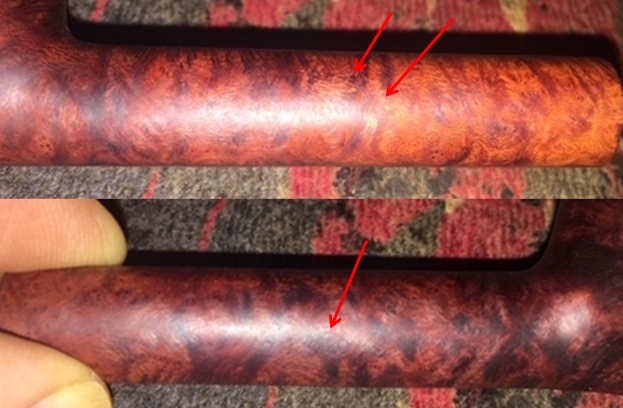
I chose to work on #2 next as it was the first rusticated pipe in the collection. It is a Brigham Rusticated Canadian. It was stamped on the underside of the shank with faint stamping visible with a lens under light. It reads Brigham over Can. Pat. 372982. On the underside of the bowl it was stamped with the shape number 490. There was a thick cake in the bowl with remnants of tobacco stuck on the walls. There was a lava overflow on the rim. The top and edges of the rim appear to have some damage all the way around the bowl. The rustication was the pattern I have become accustomed to on Brigham pipes. Once again, I think that there was a beautiful pipe underneath all of the buildup of years of use. The stem was oxidized and calcified toward the end with some tooth chatter. There were also some tooth marks on both sides of the stem ahead of the button. There was a pattern of four brass dots on the left side of the tapered stem. Jeff took photos of the pipe before he started his cleanup work on it. Jeff took photos of the bowl and rim top to show the thick, hard cake in the bowl with remnants of tobacco stuck on the walls of the bowl. There was a lava build up on the smooth rim top and the edges of the bowl. The rim top looked pretty good but it was hard to know for sure but it appeared that there was damage all around the inner edge. The outer edges looked good.  Jeff took a photo of the side and heel of the bowl to show the condition of the finish. You can see the beautiful grain around the side of the bowl and shank. Even under the dirt and debris of the years it looked very good.    The stamping is very faint. With a light and lens the stamping Brigham is visible. I have included the first red arrow on the left of the photo below to point out that stamp. The second arrow points to the Can. Pat. Number that is underneath the Brigham stamp. In the second photo I have used a red arrow to point out the shape number 490. He included a pic of the 4 brass dots on the stem. Jeff took photos of the top and underside of the stem showing the tooth chatter, scratching and oxidation on the stem surface and wear on the edges of the button. I am also including the information from Pipedia’s article on Brigham pipes. It is a great read in terms of the history of the brand (https://pipedia.org/wiki/Brigham_Pipes). Charles Lemon (Dadspipes) is currently working on a book on the history of the brand. Until that is complete this article is a good summary. I have included it below.

Roy Brigham, after serving an apprenticeship under an Austrian pipesmith, started his own pipe repair shop in Toronto, in 1906. By 1918 the business had grown to include five other craftsmen and had developed a reputation across Canada for the high quality of workmanship. After repairing many different brands of pipes over the years, Roy noted certain recurring complaints by pipe smokers, the most common referred to as “tongue bite”. Tongue bite is a burning sensation on the smoker’s tongue, previously thought to be due to the heat of the smoke (i.e. a “hot smoking pipe”).

He soon began manufacturing his own pipes, which were lightweight, yet featured a more rugged construction, strengthening the weak points observed in other pipes. The problem of tongue bite intrigued him, and he decided to make overcoming it a future goal.

About 1938, Roy’s son Herb joined him to assist in the business. The business barely survived the great depression because pipes were considered to be a luxury, not a necessity, and selling pipes was difficult indeed. In approximately 1937 [1], after some experimentation, Roy and Herb discovered that tongue bite was in fact a form of mild chemical burn to the tongue, caused by tars and acids in the smoke. They found that by filtering the smoke, it was possible to retain the flavour of the tobacco and yet remove these impurities and thereby stop the tongue bite.

Just as Thomas Edison had searched far and wide for the perfect material from which to make the first electric light bulb filaments, Roy & Herb began experimenting with many materials, both common and exotic, in the quest for the perfect pipe filter. Results varied wildly. Most of the materials didn’t work at all and some actually imparted their own flavour into the smoke. They eventually found just two materials that were satisfactory in pipes: bamboo and rock maple. As bamboo was obviously not as readily available, rock maple then became the logical choice.

They were able to manufacture a replaceable hollow wooden tube made from rock maple dowelling, which when inserted into a specially made pipe, caused absolutely no restriction to the draw of the pipe, yet extracted many of the impurities which had caused tongue bite. The result was indeed a truly better smoking pipe…

I wrote to Charles Lemon (Dadspipes) and asked him about the stamping on the pipe. He responded with information on all of the foursome. I am including the information on this particular pipe.

Hey Steve! Good to hear from you.

Shape 490 is actually called a Canadian, and in my opinion is a bit rare. Perhaps due to its prodigious length 😁!…As these are all Patent pipes, it’s more accurate to refer to their grade by name (the post 1980 grading scheme refers to Dots). Here is the original scheme:

With the information from Charles’ message and the chart above that he included I knew what I was dealing with in terms of the stamping and the age of this pipe. I learned that this Patent Era 490 is a Brigham Director (4-Dot) 90 Canadian. Charles said that the shape was pretty rare. It was made between 1938 and 1955. Most of Bob’s pipes were purchased in the 50s and 60s so my guess is that this is fits that time frame well. Now it was time to work on the pipe.

I am really happy to have Jeff’s help on cleaning up the pipes from Bob’s estate as the 125+ pipes were taking me a long time to do alone. He cleaned this filthy pipe with his usual penchant for thoroughness that I really appreciate. This one was a real mess and I did not know what to expect when I unwrapped it from his box. He reamed it with a PipNet pipe reamer and cleaned up the reaming with a Savinelli Fitsall Pipe Knife. He scrubbed out the internals with alcohol, pipe cleaners and cotton swabs until the pipe was clean. He scrubbed the exterior of the bowl with Murphy’s Oil Soap and a tooth brush to remove the grime and grit on the briar and the lava on the rim top. The finish looks very good with great looking grain around the bowl and shank. Jeff soaked the stem in Before & After Deoxidizer to remove the oxidation on the rubber. When the pipe arrived here in Vancouver for the second stop of its restoration tour I was amazed it looked so good. I took some close up photos of the rim top and also of the stem surface. I wanted to show what an amazing job Jeff did in the cleanup of the rim top. The rim top was darkened with nicks and a slight burn mark on the inner edge toward the front of the bowl. The outer edge looked very good.  I also took close up photos of the stem to show the tooth marks and chatter on the stem surface.I took the stem off the shank to show the aluminum tenon/tube that was used to hold the Brigham Rock Maple Distillator. The original Distillator (filter) had been filthy so after Jeff had cleaned the pipe up he threw it away. I will replace it once I have finished with the restoration.This was a tough pipe to photograph the stamping on because it was very faint. When it starts out faint it is very easy to lose even that remnant of a stamp. But one of the things I appreciate about Jeff’s cleanup is that he works to protect and preserve the nomenclature on the shank of the pipes that he works on. I took some photos to show the stamping. In the first photo the arrow on the left is pointed to where Brigham shape number 490 is stamped and the next arrow is pointing to Brigham number. The final arrow points to the Can. Pat. Number. In the second and third photo the arrows point at an enlargement of the same areas as the first.  Thanks Jeff for being so careful in the cleanup. Much appreciated. Since this is another pipe Bob’s estate I am sure that some of you have read at least some of the other restoration work that has been done on the previous pipes. You have also read what I have included about Bob Kerr, the pipeman who held these pipes in trust before I came to work on them (see photo to the left). Also, if you have followed the blog for long you will already know that I like to include background information on the pipeman whose pipes I am restoring. For me, when I am working on an estate I really like to have a sense of the person who held the pipes in trust before I worked on them. It gives me another dimension of the restoration work. Bob’s daughter wrote a short tribute to her father. I thank you Brian and tell your wife thank you as well.

I am delighted to pass on these beloved pipes of my father’s. I hope each user gets many hours of contemplative pleasure as he did. I remember the aroma of tobacco in the rec room, as he put up his feet on his lazy boy. He’d be first at the paper then, no one could touch it before him. Maybe there would be a movie on with an actor smoking a pipe. He would have very definite opinions on whether the performer was a ‘real’ smoker or not, a distinction which I could never see but it would be very clear to him. He worked by day as a sales manager of a paper products company, a job he hated. What he longed for was the life of an artist, so on the weekends and sometimes mid-week evenings he would journey to his workshop and come out with wood sculptures, all of which he declared as crap but every one of them treasured by my sister and myself. Enjoy the pipes, and maybe a little of his creative spirit will enter you!

Now with all of the background on the line and the background on Bob Kerr it was time to get on with the restoration of this rusticated Brigham Director Canadian. I really appreciate the hard cleanup work that Jeff did on these pipes. They were a real mess when I sent them to Jeff and I have to tell you it was great that I did not need to clean this pipe. I decided to start the process by dealing with the damage to the rim top and edges of the bowl. I topped it on a topping board with 220 grit sandpaper. I worked on the inner edge with a folded piece of 220 grit sandpaper and gave it a very slight bevel so that it took care of the damage on the inner edge. The photos show the progress. I polished the briar on the rim top with micromesh sanding pads – wet sanding it with 1500-12000 grit pads and I wiped the bowl down after each sanding pad with a damp cloth.  The grain progressively stood out as I polished the pipe with the pads.  I stained the rim top and edges with a Walnut Stain pen to blend in the colour with the rest of the bowl. It is a good match and once it is polished it will work well!I rubbed the bowl and rim down with Before & After Restoration Balm. I worked it into the surface of the briar with my fingertips and a horsehair shoe brush to clean, enliven and protect it. I let the balm sit for a little while and then buffed with a cotton cloth to raise the shine. I really like watching the Balm do its magic and bring the briar alive.  With the bowl done it was time to address the stem. The dents in the top and underside were the right depth for me to lift them. I “painted” the surface of the stem with the flame of a Bic lighter to raise the dents in the surface. I was able to lift them to the point that a repair would be a simple sanding job. I sanded the surface of the stem with 220 grit sandpaper to remove the remaining oxidation in the vulcanite. I polished it with 400 grit wet dry sand paper.   I polished the stem with micromesh sanding pads – wet sanding with 1500-12000 grit sanding pads. I wiped it down after each pad with a damp cloth to remove the sanding dust. I polished it further with Before & After Pipe Polish – both Fine and Extra Fine. I finished by rubbing the stem down with some “No Oxy Oil” to protect the vulcanite. I am experimenting with the product from Briarville and tracking how it works so I can write a review of it. With the pipe cleaned and ready to polish I put a new Brigham Distillator filter in the stem. The photos show the Distillator out of the tenon and in place in the tenon. It is a Maplewood tube that collects the moisture from the smoke and delivering a dry, cool smoke sans tongue bite.  Once again at this point in the restoration process I am excited to be on the homestretch. This is the third Brigham from the four that are in Bob’s estate so I look forward to the final look when it is put back together, polished and waxed. I put the bowl and stem back together. I polished the bowl and stem with Blue Diamond to polish out the scratches in the briar and the vulcanite. I gave the bowl and the stem multiple coats of carnauba wax. I buffed the pipe with a clean buffing pad to raise the shine. I hand buffed it with a microfiber cloth to deepen the shine. The pipe polished up pretty nicely. The rustication is worn but still stands out with the wax and polish. The black of the tapered vulcanite stem along with the four brass pins is a beautiful contrast to the browns of the rusticated bowl and shank. This is a beautiful Patent Era Director Canadian that was another fun pipe to work on thanks to Jeff’s cleanup work. The pipe is comfortable pipe to hold in the hand. The finished pipe is shown in the photos below. The dimensions of the pipe are Length: 6 ¼ inches, Height: 1 ¾ inches, Outside diameter of the bowl: 1 ¼ inches, Chamber diameter: ¾ of an inch. This interesting and rare according to Charles Lemon will be going on the rebornpipes store very soon. I have a lot more of Bob’s estate to work on of various brands. Perhaps one of those will catch your attention. Thanks for reading this blog and my reflections on the pipe while I worked on it. This is an interesting estate to bring back to life.

A Brigham Patent Era Select 2199 Club (Lovat) from Bob Kerr’s Estate


Blog by Steve Laug

As I continue to work through the pipes in Bob Kerr’s Estate I am enjoying choosing different brands that he had to focus on for a bit. He had six different pipes from Brigham in his collection so I decided to work my way through that sub collection of the estate. Out of the 6 pipes, #5 has a ruined bowl with a crack all the way around it as well as a cut off aluminum tenon. #6 went to Paresh Deshpande in India for his collection. That left behind four pipes for me to restore – #1, #2, #3 and #4. Here is the list of what I saw when I examined the 6 pipes.

  1. Brigham 503T Can. Pat. 372982 5 Dot Stack. Stem is oxidized, tooth marks and chatter near the button, some calcification with damage to the button. Finish is dirty, thick cake and lava overflow on the rim top. Rim top has is worn and damage on the back edge. I have finished restoring this one. Here is the link: (https://rebornpipes.com/2019/12/21/a-brigham-patent-era-special-grain-stack-from-bob-kerrs-estate/).
  2. Brigham Made In Canada 691 3 Dot Canadian. Stem is oxidized, tooth marks and chatter near the button, some calcification with damage to the button. Finish is dirty, thick cake and lava overflow on the rim top. Rim top is worn and damaged.
  3. Brigham Made In Canada 2199 2 Dot Lovat. Stem is oxidized, tooth marks and chatter near the button, some calcification with damage to the button. Finish is dirty and worn. Stamping is worn. There is a thick cake and lava overflow on the rim top. Rim top is worn and damaged.
  4. Brigham Made In Canada 1 Dot Bing Crosby Style Pipe. Stem is oxidized, tooth marks and chatter near the button, some calcification with damage to the button. Finish is dirty, thick cake and lava overflow on the rim top. Rim top is worn and damage on the back edge.
  5. Brigham Made In Canada 6 Dot Bent Billiard. Stem is oxidized, tooth marks and chatter near the button, some calcification with damage to the button. The aluminum tenon has been cut off. Finish is dirty and worn with paint on the bowl. There is a thick cake and lava overflow on the rim top. Rim top has a crack on the right side.
  6. Brigham Made In Canada 4 Dot Canadian. Stem is oxidized, tooth marks and chatter near the button, some calcification with damage to the button. Finish is dirty and stamping is worn. There is a thick cake and lava overflow on the rim top. Rim top is worn and edges are damaged.

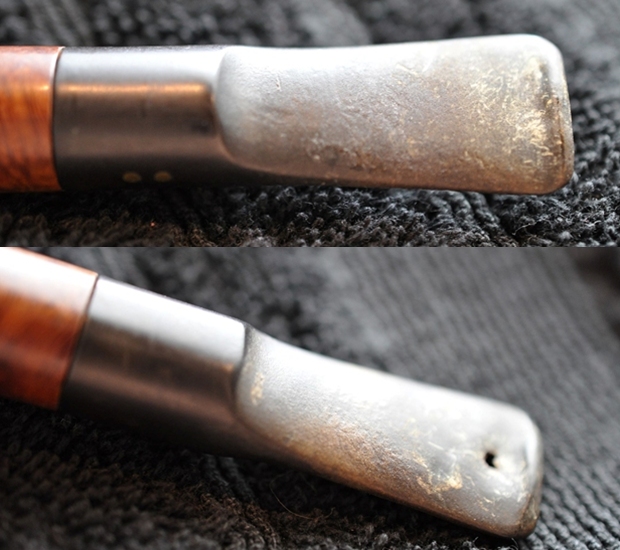
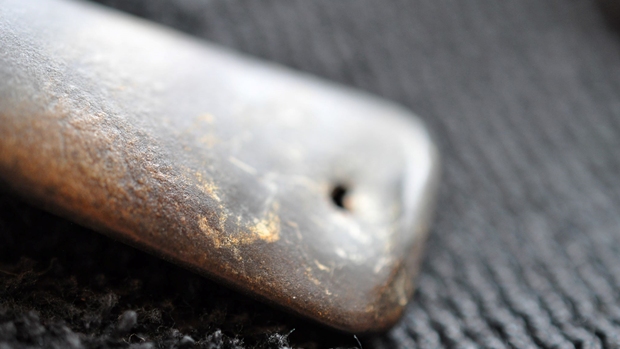
I chose to work on #3 next because of the issue with the stem. It is a Brigham Mixed Grain Lovat. It was stamped on the left side of the shank with faint stamping visible with a lens under light. It reads Brigham over Can. Pat. 372982. On the right side of the shank it was stamped with the shape number 2199. There was a thick cake in the bowl with remnants of tobacco stuck on the walls. There was a lava overflow on the rim. The top and edges of the rim appear to have some damage all the way around the bowl. The grain on the shank and bowl was a combination of grains. Once again, I think that there was a beautiful pipe underneath all of the buildup of years of use. The stem was oxidized and calcified toward the end with some tooth chatter. There were also some tooth marks on both sides of the stem ahead of the button. There was a bite through in the underside of the stem next to the button. There was a pattern of two brass dots on the left side of the saddle stem. Jeff took photos of the pipe before he started his cleanup work on it. Jeff took photos of the bowl and rim top to show the thick, hard cake in the bowl with remnants of tobacco stuck on the walls of the bowl. There was a lava build up on the top of the rim and the edges of the bowl. The rim top looked pretty good but it was hard to know for sure but it appeared that there was damage all around the inner edge. The outer edges of the rim looked to be in decent condition.  Jeff took a photo of the side and heel of the bowl to show the condition of the finish. You can see the beautiful grain around the side of the bowl and shank. Even under the dirt and debris of the years it looked very good. The stamping is very faint and cannot be captured even with a flash. He included a pic of the two brass dots on the stem and a few nicks in the shank edge.Jeff took photos of the top and underside of the stem showing the tooth chatter, scratching and oxidation on the stem surface and wear on the edges of the button. The second photo also shows the bite through on the underside near the button.  The third photo shows a close-up of the hole. I am also including the information from Pipedia’s article on Brigham pipes. It is a great read in terms of the history of the brand (https://pipedia.org/wiki/Brigham_Pipes). Charles Lemon (Dadspipes) is currently working on a book on the history of the brand. Until that is complete this article is a good summary. I have included it below.

Roy Brigham, after serving an apprenticeship under an Austrian pipesmith, started his own pipe repair shop in Toronto, in 1906. By 1918 the business had grown to include five other craftsmen and had developed a reputation across Canada for the high quality of workmanship. After repairing many different brands of pipes over the years, Roy noted certain recurring complaints by pipe smokers, the most common referred to as “tongue bite”. Tongue bite is a burning sensation on the smoker’s tongue, previously thought to be due to the heat of the smoke (i.e. a “hot smoking pipe”).

He soon began manufacturing his own pipes, which were lightweight, yet featured a more rugged construction, strengthening the weak points observed in other pipes. The problem of tongue bite intrigued him, and he decided to make overcoming it a future goal.

About 1938, Roy’s son Herb joined him to assist in the business. The business barely survived the great depression because pipes were considered to be a luxury, not a necessity, and selling pipes was difficult indeed. In approximately 1937 [1], after some experimentation, Roy and Herb discovered that tongue bite was in fact a form of mild chemical burn to the tongue, caused by tars and acids in the smoke. They found that by filtering the smoke, it was possible to retain the flavour of the tobacco and yet remove these impurities and thereby stop the tongue bite.

Just as Thomas Edison had searched far and wide for the perfect material from which to make the first electric light bulb filaments, Roy & Herb began experimenting with many materials, both common and exotic, in the quest for the perfect pipe filter. Results varied wildly. Most of the materials didn’t work at all and some actually imparted their own flavour into the smoke. They eventually found just two materials that were satisfactory in pipes: bamboo and rock maple. As bamboo was obviously not as readily available, rock maple then became the logical choice.

They were able to manufacture a replaceable hollow wooden tube made from rock maple dowelling, which when inserted into a specially made pipe, caused absolutely no restriction to the draw of the pipe, yet extracted many of the impurities which had caused tongue bite. The result was indeed a truly better smoking pipe…

I wrote to Charles Lemon (Dadspipes) and asked him about the stamping on the pipe. He responded with information on all of the foursome. I am including the information on this particular pipe.

Hey Steve! Good to hear from you.

Shape 2199 is what most would call a Lovat. Brigham called it a Club for whatever reason- just to be different, perhaps!…As these are all Patent pipes, it’s more accurate to refer to their grade by name (the post 1980 grading scheme refers to Dots). Here is the original scheme:With the information from Charles’ message and the chart above that he included I knew what I was dealing with in terms of the stamping and the age of this pipe. I learned that this Patent Era 2199 is a Brigham Select (2-Dot) 01 Lovat or what they call a Club. It was made between 1938 and 1955. Most of Bob’s pipes were purchased in the 50s and 60s so my guess is that this is fits that time frame well. Now it was time to work on the pipe.

I am really happy to have Jeff’s help on cleaning up the pipes from Bob’s estate as the 125+ pipes were taking me a long time to do alone. He cleaned this filthy pipe with his usual penchant for thoroughness that I really appreciate. This one was a real mess and I did not know what to expect when I unwrapped it from his box. He reamed it with a PipNet pipe reamer and cleaned up the reaming with a Savinelli Fitsall Pipe Knife. He scrubbed out the internals with alcohol, pipe cleaners and cotton swabs until the pipe was clean. He scrubbed the exterior of the bowl with Murphy’s Oil Soap and a tooth brush to remove the grime and grit on the briar and the lava on the rim top. The finish looks very good with great looking grain around the bowl and shank. Jeff soaked the stem in Before & After Deoxidizer to remove the oxidation on the rubber. When the pipe arrived here in Vancouver for the second stop of its restoration tour I was amazed it looked so good. I took some close up photos of the rim top and also of the stem surface. I wanted to show what an amazing job Jeff did in the cleanup of the rim top. The rim top was darkened with nicks and notches around the top and inner edge. There is a deep scratch in the rim top that looks almost like a crack. I have drawn an arrow to the spot on the rim top. The inner edge was a little rough and looked like the bowl had burned at some time in its life. I also took close up photos of the stem to show the tooth marks and chatter on the stem surface. There was a bite through on the underside of the stem near the button.  I took the stem off the shank to show the aluminum tenon/tube that was used to hold the Brigham Rock Maple Distillator. The original Distillator (filter) had been filthy so after Jeff had cleaned the pipe up he threw it away. I will replace it once I have finished with the restoration.This was a tough pipe to photograph the stamping on because it was very faint. When it starts out faint it is very easy to lose even that remnant of a stamp. But one of the things I appreciate about Jeff’s cleanup is that he works to protect and preserve the nomenclature on the shank of the pipes that he works on. I took some photos to show the stamping. In the first photo the arrow on the left is pointed to where Brigham is stamped and the arrow on the right is pointing to the Can. Pat. Number. In the second photo the arrow points at the shape number.  Thanks Jeff for being so careful in the cleanup. Much appreciated.Since this is another pipe Bob’s estate I am sure that some of you have read at least some of the other restoration work that has been done on the previous pipes. You have also read what I have included about Bob Kerr, the pipeman who held these pipes in trust before I came to work on them (see photo to the left). Also, if you have followed the blog for long you will already know that I like to include background information on the pipeman whose pipes I am restoring. For me, when I am working on an estate I really like to have a sense of the person who held the pipes in trust before I worked on them. It gives me another dimension of the restoration work. Bob’s daughter wrote a short tribute to her father. I thank you Brian and tell your wife thank you as well.

I am delighted to pass on these beloved pipes of my father’s. I hope each user gets many hours of contemplative pleasure as he did. I remember the aroma of tobacco in the rec room, as he put up his feet on his lazy boy. He’d be first at the paper then, no one could touch it before him. Maybe there would be a movie on with an actor smoking a pipe. He would have very definite opinions on whether the performer was a ‘real’ smoker or not, a distinction which I could never see but it would be very clear to him. He worked by day as a sales manager of a paper products company, a job he hated. What he longed for was the life of an artist, so on the weekends and sometimes mid-week evenings he would journey to his workshop and come out with wood sculptures, all of which he declared as crap but every one of them treasured by my sister and myself. Enjoy the pipes, and maybe a little of his creative spirit will enter you!

Now with all of the background on the line and the background on Bob Kerr it was time to get on with the restoration of this next mixed grain Brigham Select Lovat or Club as they call the shape. I am really coming to appreciate the hard cleanup work that Jeff did on these pipes. They were a real mess when I sent them to Jeff and I have to tell you it was great that I did not need to clean this pipe. I decided to start the process by dealing with the damage to the rim top and edges of the bowl. I topped it on a topping board with 220 grit sandpaper. I topped it to remove the deep scratch on the surface of the rim at the front. I was able to remove the scratch. What was left behind was a dark mark on the rim top. Once I stained the rim top that should disappear. I worked on the inner edge with a folded piece of 220 grit sandpaper and gave it a very slight bevel so that it took care of the damage on the inner edge. The photos show the progress. I stained the rim top and edges with a Walnut Stain pen to blend in the colour with the rest of the bowl. It is a good match and once it is polished it will work well!I polished the briar with micromesh sanding pads – wet sanding it with 1500-12000 grit pads and I wiped the bowl down after each sanding pad with a damp cloth.  The grain progressively stood out as I polished the pipe with the pads. I rubbed the bowl and rim down with Before & After Restoration Balm. I worked it into the surface of the briar with my fingertips to clean, enliven and protect it. I let the balm sit for a little while and then buffed with a cotton cloth to raise the shine. I really like watching the Balm do its magic and bring the briar alive.  With the bowl done it was time to address the issues with the stem. The deep dents in the top and underside with a bite through in the middle of the underside would make this a stem with multiple issues to deal with. The first photo shows the bite through. I “painted” the surface of the vulcanite to soften the rubber and then used the tip of a needle file to lift the deepest tooth marks and seek to flatten the stem surface (second and third photos). I was able to lift the tooth dents quite a bit on both sides but I would need to build up the stem surface on both sides.To prepare for the repair I wiped down the surface with alcohol on a cotton pad. I folded a pipe cleaner in half and coated it with Vaseline to make sure that the repair would not fill in the airway in the stem. I inserted it in the slot and slid it under the bit through.I mixed batch of charcoal powder and black superglue putty together on a piece of card. I learned from Dal to put a patch of tape on the card first so that the mix would not harden as quickly. It works like a charm by the way. I mixed the powder and black glue together with a dental spatula to get a thick putty/paste. I applied the putty to the top of the stem on both sides and pressed it into the bite through area. I sprayed the repaired areas on both sides of the stem with an accelerator so that the surface of the repair would be hard.  I slid the pipe cleaner out of the airway and set the stem aside to let the glue cure. When the repair had cured I used a needle file to reshape the button and smooth out the repair. More work would need to be done for it to be correct but the bite through was gone!   I sanded the repaired areas smooth with 220 grit sandpaper to blend them into the rest of the stem surface. As I sanded some small air bubbles appeared in the surface of the repair. I filled them in with clear Krazy Glue and once it had cured sanded the surface again. I started the polishing process with 400 grit wet dry sandpaper. It is starting to look pretty good!  I polished the stem with micromesh sanding pads – wet sanding with 1500-12000 grit pads. I wiped the stem down after each sanding pad with Obsidian Oil. I polished it with Before & After Pipe Stem Polish – both Fine and Extra Fine. Once I had finished the polishing I gave it a coat of a new product I am experimenting with from Briarville Pipe Repair. It is called “No Oxy Oil” and it is made to protect the stem from oxidizing. I set it aside to dry. With the pipe cleaned and ready to polish I put a new Brigham Distillator filter in the stem. The photos show the Distillator out of the tenon and in place in the tenon. It is a Maplewood tube that collects the moisture from the smoke and delivering a dry, cool smoke sans tongue bite. Once again at this point in the restoration process I am excited to be on the homestretch. This is the second Brigham from the four that are in Bob’s estate so I look forward to the final look when it is put back together, polished and waxed. I put the bowl and stem back together. I polished the bowl and stem with Blue Diamond to polish out the scratches in the briar and the vulcanite. I gave the bowl and the stem multiple coats of carnauba wax. I buffed the pipe with a clean buffing pad to raise the shine. I hand buffed it with a microfiber cloth to deepen the shine. The pipe polished up pretty nicely. The grain is quite stunning and really pops with the wax and polish. The repair to the stem surface looked really good and blended into the shiny black vulcanite stem. The black of the vulcanite stem along with the two brass pins is a beautiful contrast to the browns of the bowl and shank. This was another fun pipe to work on thanks to Jeff’s cleanup work. It really is a quite stunning piece of mixed grained briar whose shape follows the flow of the briar. The pipe is comfortable pipe to hold in the hand. The finished pipe is shown in the photos below. The dimensions of the pipe are Length: 5 ¾ inches, Height: 1 ¾ inches, Outside diameter of the bowl: 1 ¼ inches, Chamber diameter: ¾ of an inch. This beautiful pipe will be going on the rebornpipes store in the near future. I have a lot more of Bob’s estate to work on of various brands. Perhaps one of those will catch your attention. Thanks for reading this blog and my reflections on the pipe while I worked on it. This is an interesting estate to bring back to life.

A Brigham Patent Era Special Grain Stack from Bob Kerr’s Estate


Blog by Steve Laug

As I continue to work through the pipes in Bob Kerr’s Estate I am enjoying choosing different brands that he had to focus on for a bit. He had six different pipes from Brigham in his collection so I decided to work my way through that sub collection of the estate. Out of the 6 pipes, #5 has a ruined bowl with a crack all the way around it as well as a cut off aluminum tenon. #6 went to Paresh Deshpande in India for his collection. That left behind four pipes for me to restore – #1, #2, #3 and #4. Here is the list of what I saw when I examined the 6 pipes.

  1. Brigham 503T Can. Pat. 372982 5 Dot Stack. Stem is oxidized, tooth marks and chatter near the button, some calcification with damage to the button. Finish is dirty, thick cake and lava overflow on the rim top. Rim top has is worn and damage on the back edge.
  2. Brigham Made In Canada 691 3 Dot Canadian. Stem is oxidized, tooth marks and chatter near the button, some calcification with damage to the button. Finish is dirty, thick cake and lava overflow on the rim top. Rim top is worn and damaged.
  3. Brigham Made In Canada 601 2 Dot Lovat. Stem is oxidized, tooth marks and chatter near the button, some calcification with damage to the button. Finish is dirty and worn. Stamping is worn. There is a thick cake and lava overflow on the rim top. Rim top is worn and damaged.
  4. Brigham Made In Canada 1 Dot Bing Crosby Style Pipe. Stem is oxidized, tooth marks and chatter near the button, some calcification with damage to the button. Finish is dirty, thick cake and lava overflow on the rim top. Rim top is worn and damage on the back edge.
  5. Brigham Made In Canada 6 Dot Bent Billiard. Stem is oxidized, tooth marks and chatter near the button, some calcification with damage to the button. The aluminum tenon has been cut off. Finish is dirty and worn with paint on the bowl. There is a thick cake and lava overflow on the rim top. Rim top has a crack on the right side.
  6. Brigham Made In Canada 4 Dot Canadian. Stem is oxidized, tooth marks and chatter near the button, some calcification with damage to the button. Finish is dirty and stamping is worn. There is a thick cake and lava overflow on the rim top. Rim top is worn and edges are damaged.

I chose to work on these in the order above. The first pipe I tackled was #1 which was a beautifully grained Brigham 503T Stack. It was stamped on the left side of the shank with clear stamping Brigham over Can. Pat. 372982. On the right side of the shank it was stamped with the shape number 503T. There was a thick cake in the bowl with remnants of tobacco stuck on the walls. There was a lava overflow on the rim. The top and edges of the rim appear to have some damage all the way around the bowl. The grain on the shank and bowl was a combination of flame and straight grain. There was a dent mid bowl on the left side of the bowl. I think that there was a beautiful pipe underneath all of the buildup of years of use. The stem was oxidized and calcified toward the end with some tooth chatter. There were also some tooth marks on both sides of the stem ahead of the button. There was a pattern of five brass dots on the left side of the tapered stem. Jeff took photos of the pipe before he started his cleanup work on it. Jeff took photos of the bowl and rim top to show the thick, hard cake in the bowl with remnants of tobacco stuck on the walls of the bowl. There was a lava build up on the top of the rim and the edges of the bowl. The rim top looked pretty good but it was hard to know for sure but it appeared that there was damage all around the inner edge. The outer edges of the rim had some damage on the back side where it appeared to have been hit against a hard surface and left behind a rough edge.    Jeff took a photo of the side and heel of the bowl to show the condition of the finish. You can see the beautiful grain around the side of the bowl and shank. Even under the dirt and debris of the years it looked very good. Jeff took photos of the stamping on the left side of the bowl and shank. It read Brigham over Can. Pat 372982. The stamp on the right side of the shank read 503T which was the shape number.  The last photo shows the five brass dots on the left side of the tapered stem.  Jeff took photos of the top and underside of the stem showing the tooth chatter, scratching and oxidation on the stem surface and wear on the edges of the button. I am also including the information from Pipedia’s article on Brigham pipes. It is a great read in terms of the history of the brand (https://pipedia.org/wiki/Brigham_Pipes). Charles Lemon (Dadspipes) is currently working on a book on the history of the brand. Until that is complete this article is a good summary. I have included it below.
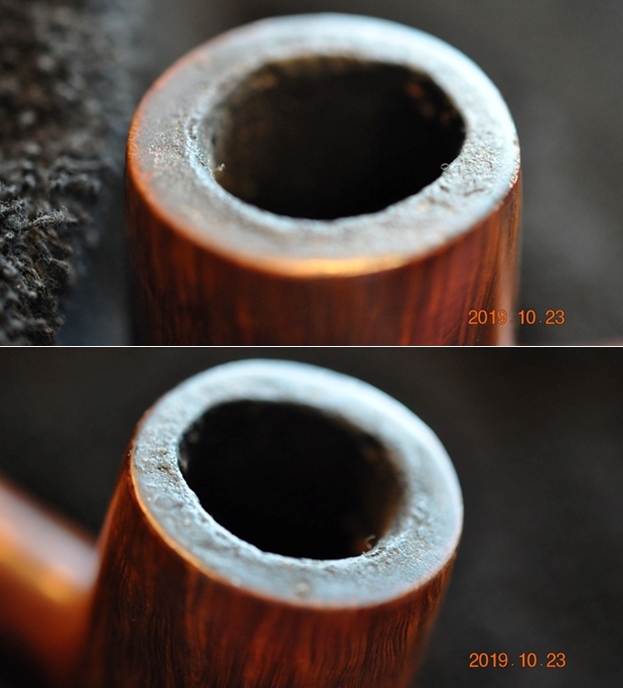
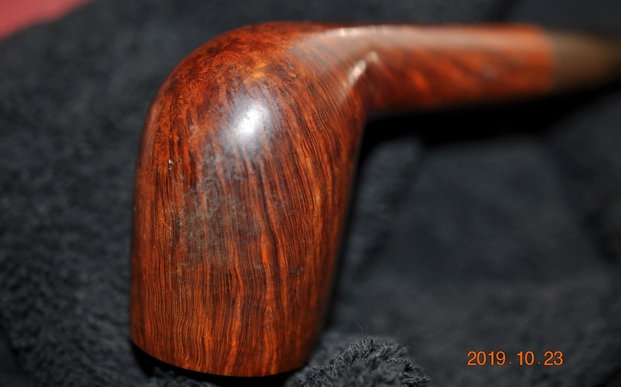
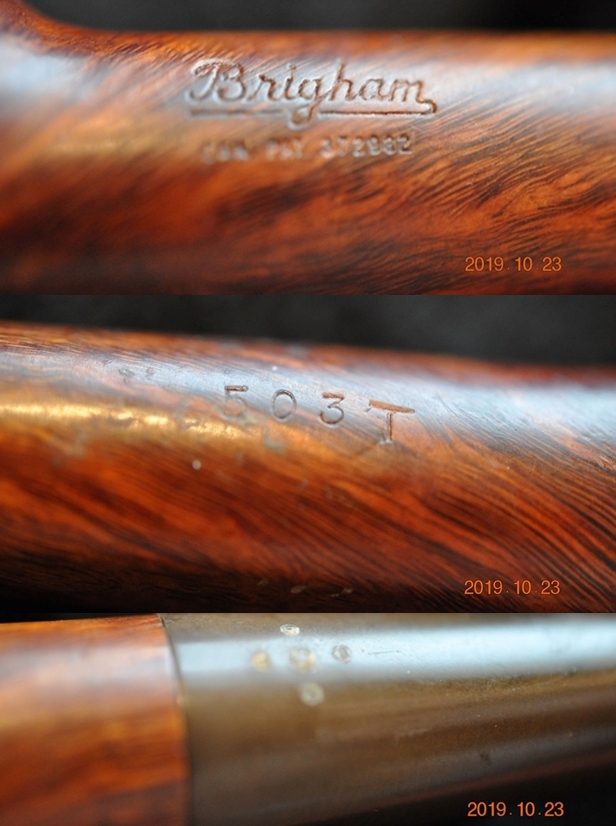
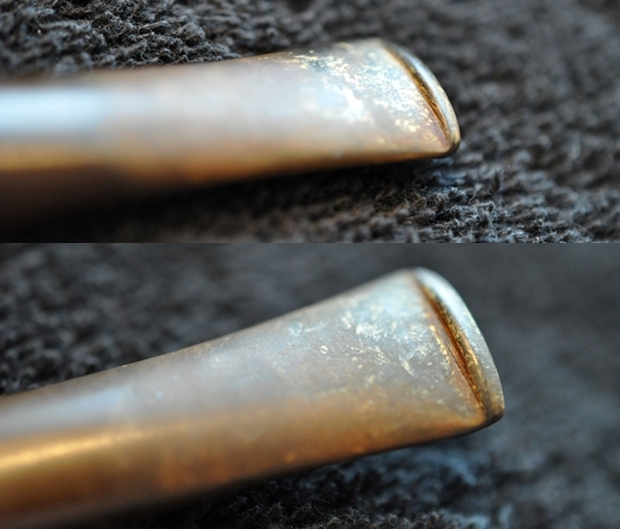
Roy Brigham, after serving an apprenticeship under an Austrian pipesmith, started his own pipe repair shop in Toronto, in 1906. By 1918 the business had grown to include five other craftsmen and had developed a reputation across Canada for the high quality of workmanship. After repairing many different brands of pipes over the years, Roy noted certain recurring complaints by pipe smokers, the most common referred to as “tongue bite”. Tongue bite is a burning sensation on the smoker’s tongue, previously thought to be due to the heat of the smoke (i.e. a “hot smoking pipe”).

He soon began manufacturing his own pipes, which were lightweight, yet featured a more rugged construction, strengthening the weak points observed in other pipes. The problem of tongue bite intrigued him, and he decided to make overcoming it a future goal.

About 1938, Roy’s son Herb joined him to assist in the business. The business barely survived the great depression because pipes were considered to be a luxury, not a necessity, and selling pipes was difficult indeed. In approximately 1937 [1], after some experimentation, Roy and Herb discovered that tongue bite was in fact a form of mild chemical burn to the tongue, caused by tars and acids in the smoke. They found that by filtering the smoke, it was possible to retain the flavour of the tobacco and yet remove these impurities and thereby stop the tongue bite.

Just as Thomas Edison had searched far and wide for the perfect material from which to make the first electric light bulb filaments, Roy & Herb began experimenting with many materials, both common and exotic, in the quest for the perfect pipe filter. Results varied wildly. Most of the materials didn’t work at all and some actually imparted their own flavour into the smoke. They eventually found just two materials that were satisfactory in pipes: bamboo and rock maple. As bamboo was obviously not as readily available, rock maple then became the logical choice.

They were able to manufacture a replaceable hollow wooden tube made from rock maple dowelling, which when inserted into a specially made pipe, caused absolutely no restriction to the draw of the pipe, yet extracted many of the impurities which had caused tongue bite. The result was indeed a truly better smoking pipe.

As a result, sales of Brigham pipes climbed briskly afterwards, and by the 1960’s there were well over 40 full time production staff. For over four decades now, the company has been the leading Canadian pipe manufacturer, producing more than three quarters of all the pipes made in Canada.

In 1978, Roy’s grandson Mike joined the firm and together with Herb (now in his 80s) they still produce pipes and wooden filters according to long established techniques, resulting in consistently high quality products. Several pipe makers who learned the craft of pipe making here at Brigham went on to make a name for themselves in Canada and internationally including Philip Trypis and Julius Vesz.

I wrote to Charles Lemon (Dadspipes) and asked him about the stamping on the pipe. He responded with information on all of the foursome. I am including the information on this particular pipe.

Hey Steve! Good to hear from you.

The ‘T’ suffix to the Brigham 3-digit shape number indicates a Tall bowl (ie taller than the standard shape). Thus your Patent Era 503T is a Brigham Special Grain Shape 03 (Medium Billiard) with a Tall bowl, made between 1938 and 1955…

…As these are all Patent pipes, it’s more accurate to refer to their grade by name (the post 1980 grading scheme refers to Dots). Here is the original scheme:With the information from Charles’ message and the chart above that he included I knew what I was dealing with in terms of the stamping and the age of this pipe. I learned that the ‘T’ suffix to the Brigham 3-digit shape number indicated a Tall bowl (i.e. taller than the standard shape). This Patent Era 503T is a Brigham Special Grain Shape 03 (Medium Billiard) with a Tall bowl, made between 1938 and 1955. Most of Bob’s pipes were purchased in the 50s and 60s so my guess is that this is fits that time frame well. Now it was time to work on the pipe.

I am really happy to have Jeff’s help on cleaning up the pipes from Bob’s estate as the 125+ pipes were taking me a long time to do alone. He cleaned this filthy pipe with his usual penchant for thoroughness that I really appreciate. This one was a real mess and I did not know what to expect when I unwrapped it from his box. He reamed it with a PipNet pipe reamer and cleaned up the reaming with a Savinelli Fitsall Pipe Knife. He scrubbed out the internals with alcohol, pipe cleaners and cotton swabs until the pipe was clean. He scrubbed the exterior of the bowl with Murphy’s Oil Soap and a tooth brush to remove the grime and grit on the briar and the lava on the rim top. The finish looks very good with great looking grain around the bowl and shank. Jeff soaked the stem in Before & After Deoxidizer to remove the oxidation on the rubber. When the pipe arrived here in Vancouver for the second stop of its restoration tour I was amazed it looked so good. I took some close up photos of the rim top and also of the stem surface. I wanted to show what an amazing job Jeff did in the cleanup of the rim top. The rim top was darkened with nicks and notches around the top and inner edge. The inner edge was very rough and looked like the bowl had been reamed with a knife at some time in its life. I also took close up photos of the stem to show the lack of tooth marks and chatter on the stem surface. It was very clean.I took the stem off the shank to show the aluminum tenon/tube that was used to hold the Brigham Rock Maple Distillator. The original Distillator (filter) had been filthy so after Jeff had cleaned the pipe up he threw it away. I will replace it once I have finished with the restoration.One of the things I appreciate about Jeff’s cleanup is that he works to protect and preserve the nomenclature on the shank of the pipes that he works on. The stamping on this one was very faint to start with so I was worried that it would disappear altogether with the cleanup. He was not only able to preserve it but it is clearer than shown in the earlier photos. I took some photos to show the clarity of the stamping. I have noticed that many restorers are not careful to protect the stamping in their cleaning process and often by the end of the restoration the nomenclature is almost destroyed. I would like to encourage all of us to be careful in our work to preserve this as it is a critical piece of pipe restoration! Since this is another pipe Bob’s estate I am sure that some of you have read at least some of the other restoration work that has been done on the previous pipes. You have also read what I have included about Bob Kerr, the pipeman who held these pipes in trust before I came to work on them (see photo to the left). Also, if you have followed the blog for long you will already know that I like to include background information on the pipeman whose pipes I am restoring. For me, when I am working on an estate I really like to have a sense of the person who held the pipes in trust before I worked on them. It gives me another dimension of the restoration work. Bob’s daughter wrote a short tribute to her father. I thank you Brian and tell your wife thank you as well.
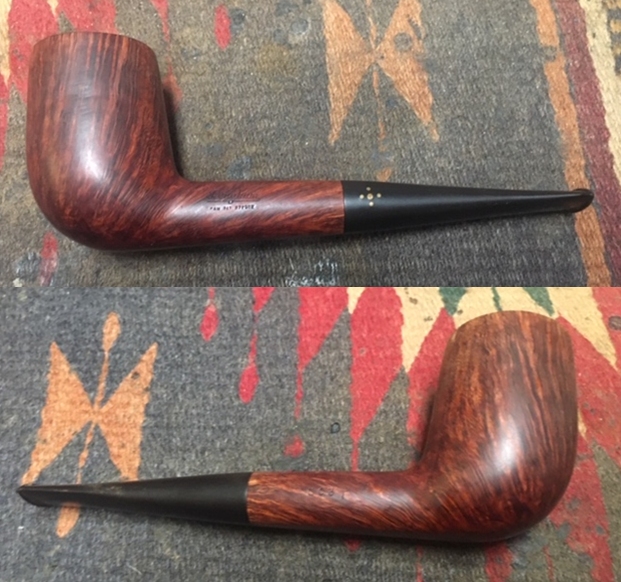
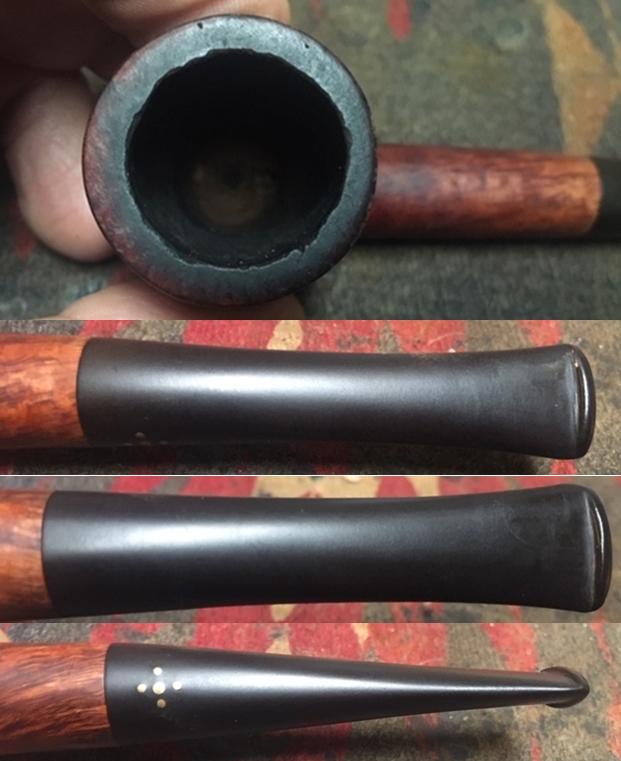
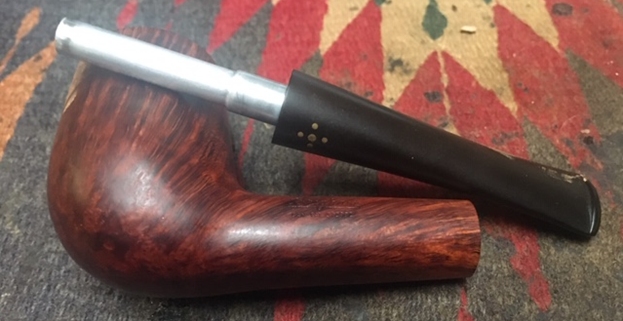
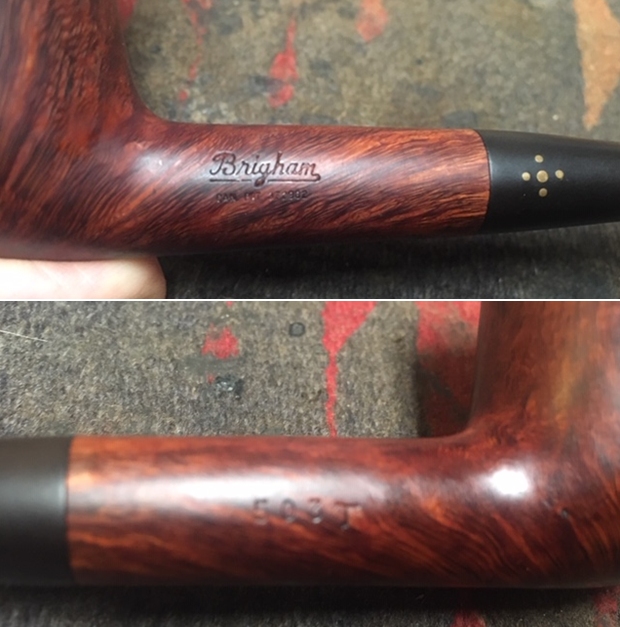
I am delighted to pass on these beloved pipes of my father’s. I hope each user gets many hours of contemplative pleasure as he did. I remember the aroma of tobacco in the rec room, as he put up his feet on his lazy boy. He’d be first at the paper then, no one could touch it before him. Maybe there would be a movie on with an actor smoking a pipe. He would have very definite opinions on whether the performer was a ‘real’ smoker or not, a distinction which I could never see but it would be very clear to him. He worked by day as a sales manager of a paper products company, a job he hated. What he longed for was the life of an artist, so on the weekends and sometimes mid-week evenings he would journey to his workshop and come out with wood sculptures, all of which he declared as crap but every one of them treasured by my sister and myself. Enjoy the pipes, and maybe a little of his creative spirit will enter you!

Now with all of the background on the line and the background on Bob Kerr it was time to get on with the restoration of this beautiful straight grained Brigham Special Grain Tall Billiard. I am really coming to appreciate the hard cleanup work that Jeff did on these pipes. They were a real mess when I sent them to Jeff and I have to tell you it was great that I did not need to clean this pipe. I decided to start the process by dealing with the damage to the rim top and edges of the bowl. I topped it on a topping board with 220 grit sandpaper. I worked on the inner edge with a folded piece of 220 grit sandpaper and gave it a very slight bevel so that it took care of the damage on the inner edge. The photos show the progress. I polished the briar with micromesh sanding pads – wet sanding it with 1500-2400 grit pads and I wiped the bowl down after each sanding pad with a damp cloth. There were some scratches in the bowl on both sides and there appeared to be a dent in the left side mid-bowl.  I interrupted the polishing of the briar to deal with the dent in the bowl side. I heated a knife and used it and a wet cloth to steam the dent out of the surface of the briar. The first photo shows the process while the second shows the bowl after the steaming. The dent is gone.   With the dent removed I went back to polishing the briar with the remaining micromesh sanding pads – wet sanding it with 3200-12000 grit pads and I wiped the bowl down after each sanding pad with a damp cloth.  I rubbed the bowl and rim down with Before & After Restoration Balm. I worked it into the surface of the briar with my fingertips to clean, enliven and protect it. I let the balm sit for a little while and then buffed with a cotton cloth to raise the shine. I really like watching the Balm do its magic and bring the briar alive. The stem was in great condition so I did not need to sand out tooth marks or chatter. I polished the stem with micromesh sanding pads – wet sanding with 1500-12000 grit pads. I wiped the stem down after each sanding pad with Obsidian Oil. I polished it with Before & After Pipe Stem Polish – both Fine and Extra Fine. Once I had finished the polishing I gave it a coat of a new product I am experimenting with from Briarville Pipe Repair. It is called “No Oxy Oil” and it is made to protect the stem from oxidizing. I set it aside to dry.   With the pipe cleaned and ready to polish I put a new Brigham Distillator filter in the stem. The photos show the Distillator out of the tenon and in place in the tenon. It is a Maplewood tube that collects the moisture from the smoke and delivering a dry, cool smoke sans tongue bite. Once again at this point in the restoration process I am excited to be on the homestretch. This is the first Brigham from the four that are in Bob’s estate so I look forward to the final look when it is put back together, polished and waxed. I put the bowl and stem back together. I polished the bowl and stem with Blue Diamond to polish out the scratches in the briar and the vulcanite. I gave the bowl and the stem multiple coats of carnauba wax. I buffed the pipe with a clean buffing pad to raise the shine. I hand buffed it with a microfiber cloth to deepen the shine. The pipe polished up pretty nicely. The grain is quite stunning and really pops with the wax and polish. The shiny black vulcanite stem with the five brass pins is a beautiful contrast to the browns of the bowl and shank. This was another fun pipe to work on thanks to Jeff’s cleanup work. It really is a quite stunning piece of straight and flame grained briar whose shape follows the flow of the briar. The Brigham 503T Patent Era Special Grain Stack is a comfortable pipe to hold in the hand. The finished pipe is shown in the photos below. The dimensions of the pipe are Length: 5 ¾ inches, Height: 2 inches, Outside diameter of the bowl: 1 ¼ inches, Chamber diameter: ¾ of an inch. I am a bit undecided on this pipe. I am thinking of holding onto it for a while but I am still not sure. If I decide to let it go this beautiful pipe will be going on the rebornpipes store. I have a lot more of Bob’s estate to work on of various brands. Perhaps one of those will catch your attention. Thanks for reading this blog and my reflections on the pipe while I worked on it. This is an interesting estate to bring back to life.
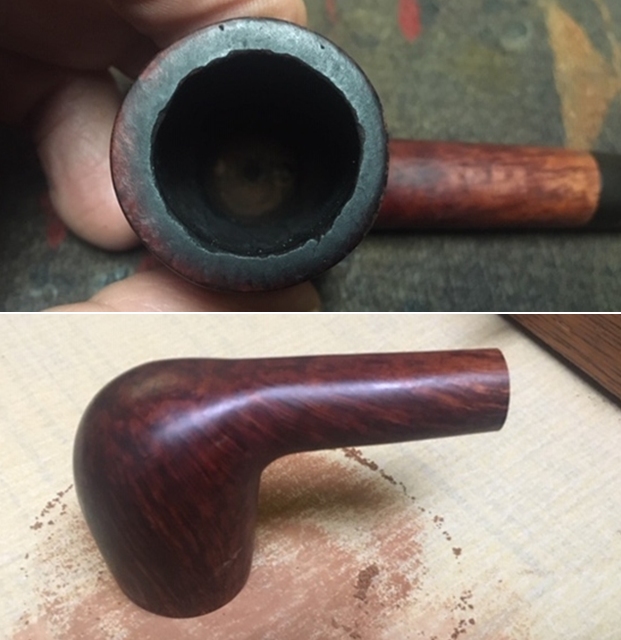
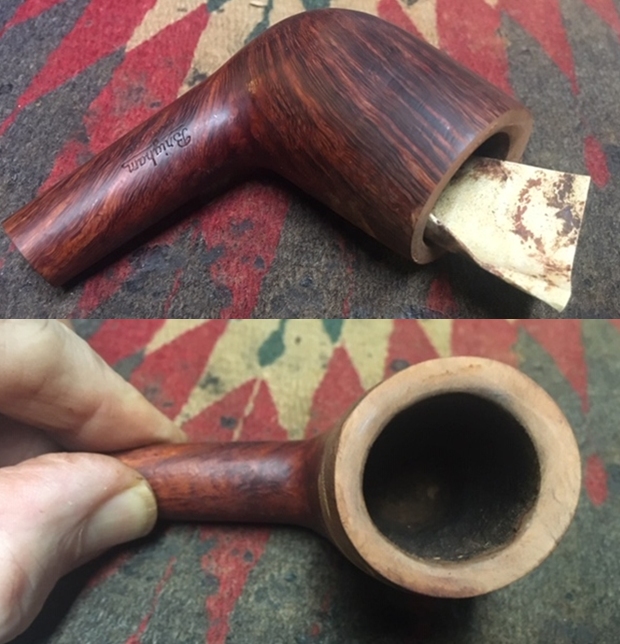
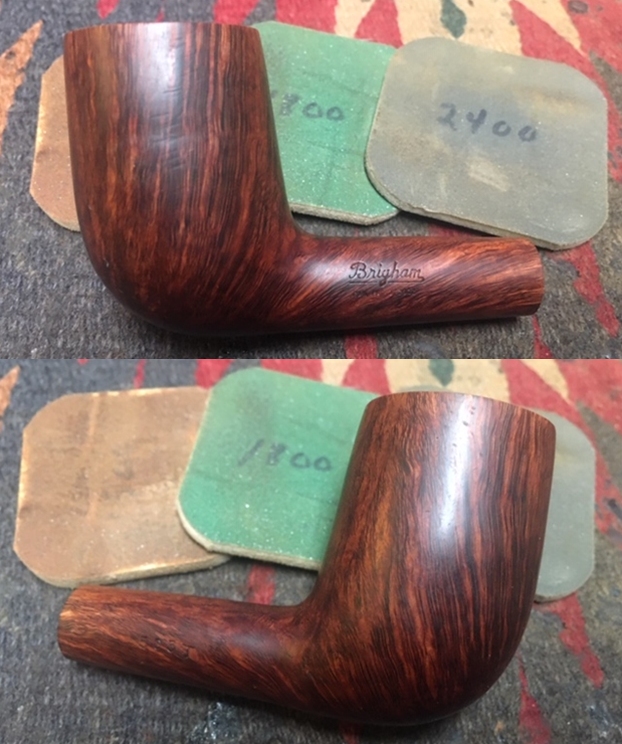
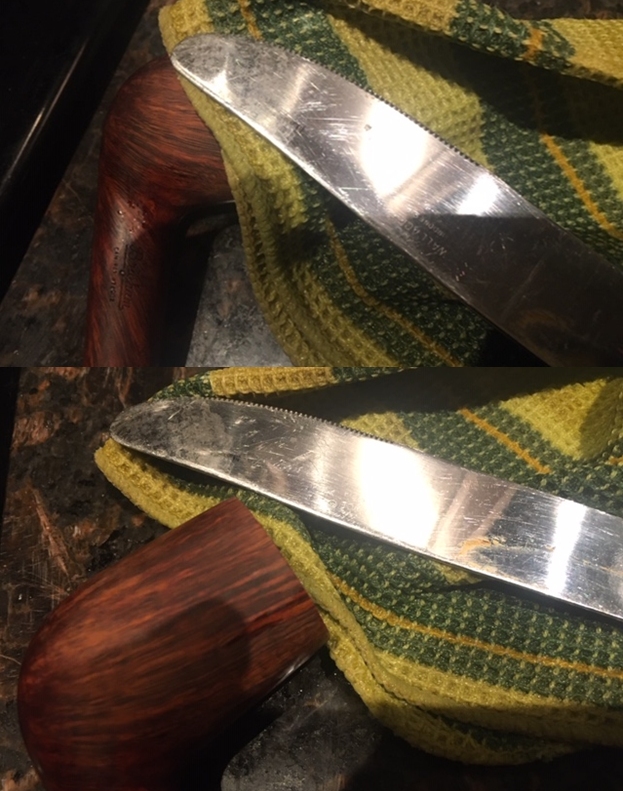
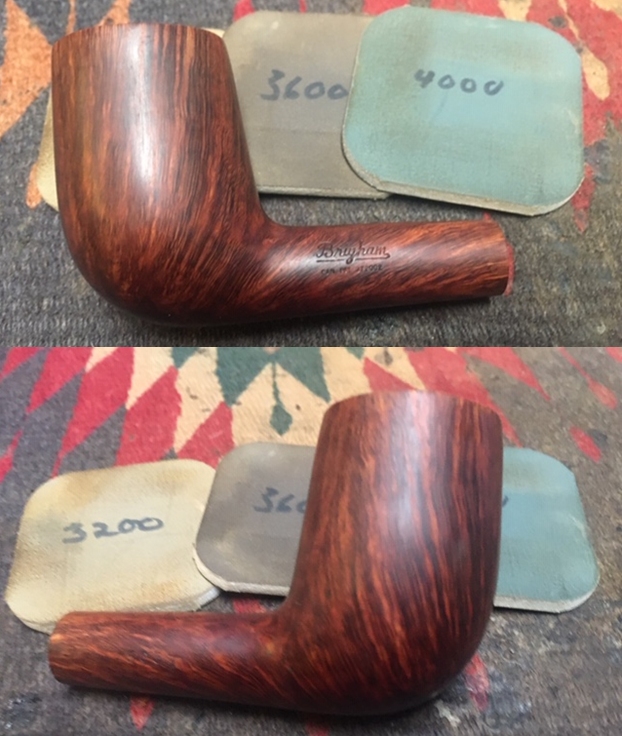
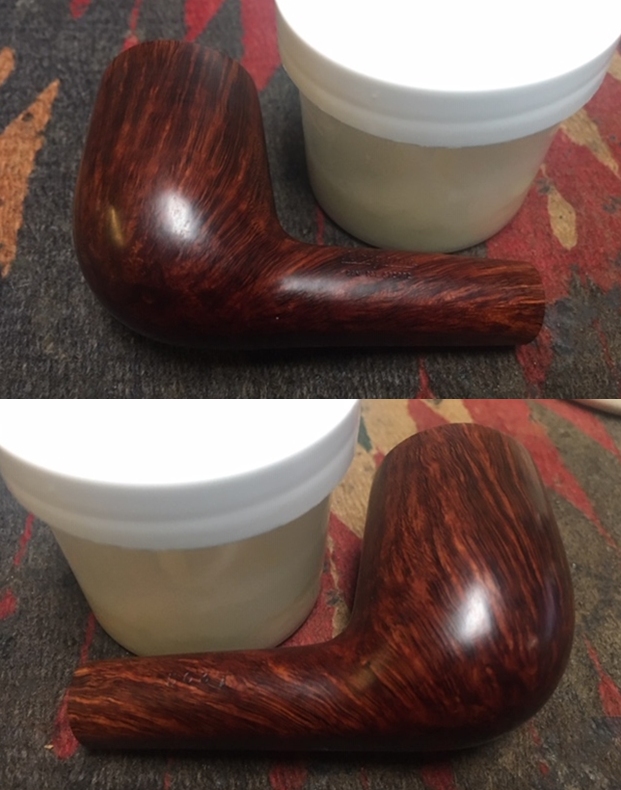
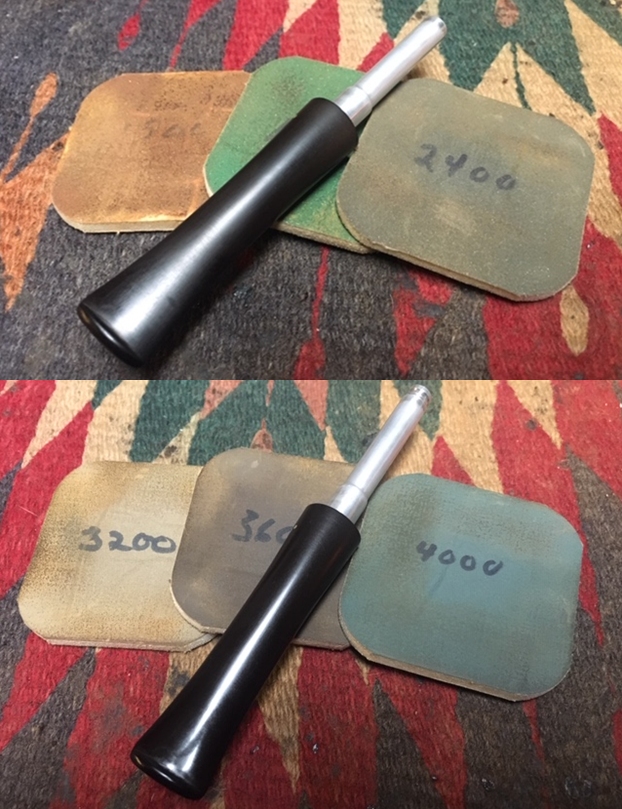
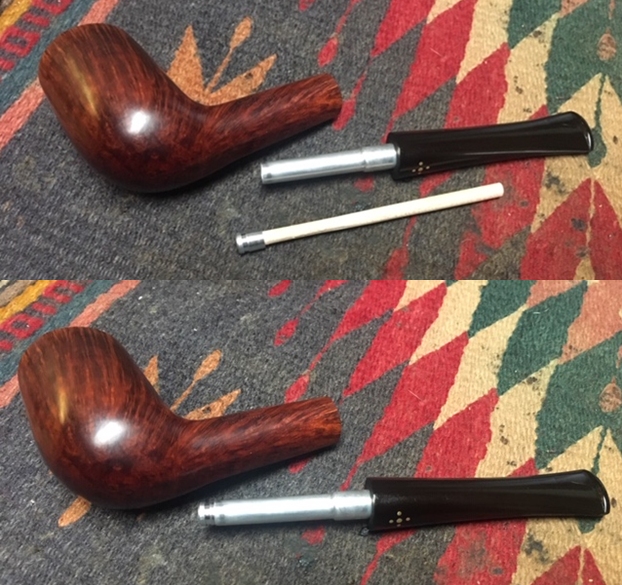
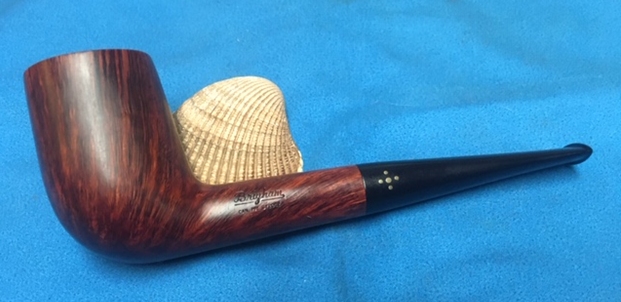
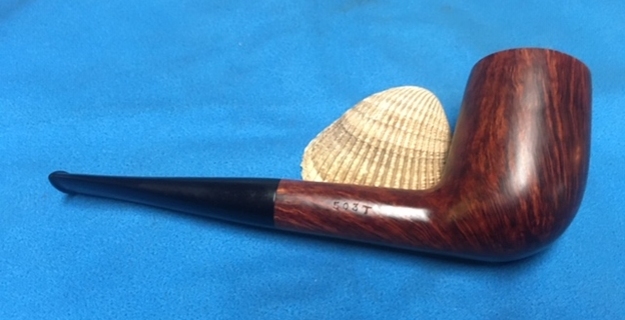
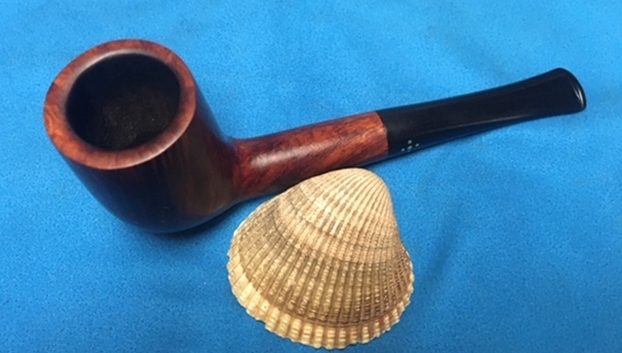
Restoring a Patent Era Brigham 1 Dot Dublin Ken Bennett’s Estate


Blog by Steve Laug

Early in August I received an email from an interesting woman on Vancouver Island regarding some pipes that she had for sale. She was looking to sell the pipes from her late husband Ken and one from her Great Grandfather. Here is her email:

I have 5 John Calich pipes that date from 1979 to 1981. One is graded 11 and the other four are graded 12. I had bought them as Christmas and birthday gifts for my late husband. He was a very light smoker for a 3 year period.

I am a wood sculptor and always admired the grain and shapes of John’s best pipes. John was a friend as well. We exhibited at many exhibitions together for over 25 years.

I am wondering if you can provide any information on how I might be able to sell them.

Thanks you for any help you might be able to provide

I wrote her back and told I was very interested in the pipes that she had for sale and asked her to send me some photos of the lot. She quickly did just that and we struck a deal. I paid her through an e-transfer and the pipes were on their way to me. They arrived quite quickly and when they did I opened the box and found she had added three more pipes – a Brigham, a Dr. Plumb and a WDC Milano.

I finished the restoration of all the pipes in the box of Calich pipes and the BBB Calabash that Pat had sent. She had included a Brigham as noted above. This Brigham Dublin one dot pipe was a classic Brigham shape and rusticated finish. The rim top was dirty and pretty beat up. There were nicks out of the outer edge of the rim around the bowl. The front outer edge was rough from knocking the pipe out again hard surfaces. The rusticated finish was in decent condition. The bowl had a cake in it and there was a lava overflow onto the rim top and darkening the finish. The inner edge of the bowl looked to be in excellent condition under the lava. The stamping on the underside of the shank was very clear and read Shape 107 on the heel of the bowl followed by Can. Pat. 372982 on the smooth panel on the shank. That was followed by Brigham. There is a long tail coming from the “m” curving under the Brigham stamp. The stem was lightly oxidized as was the single metal dot on the side of the taper. There was oxidation and light tooth chatter on both sides of the stem on both sides near the button. The shank and stem were dirty inside. The tenon was the Brigham metal system that held the hard rock maple filter. It did not look like it had ever been changed. I took a photo of the bowl and rim top to show the damage on the front left outer edge of the bowl, the cake in the bowl and the lava build up on the rim top and inner edge of the rim top. It is quite thick and darkens the natural finish of the rim top. The cake was thick and hard but hopefully it had protected the rim and edges from damage. Otherwise it looks pretty good. I also took photos of the stem to show the oxidation on both sides, damage to the button and the light tooth chatter on both sides near the button. I took a photo of the underside of the shank to show the condition of the stamping. You can see the clear stamping reading as noted above.I wrote to Pat and asked her if she would be willing to write short remembrance of her late husband and her Great Grandfather. She wrote that she would be happy to write about them both. Here are Pat’s words:

I’d like you know that Ken was an incredibly talented and creative man with a smile and blue eyes that could light up a room. His laugh was pure magic. He could think outside the box and come up with an elegant solution to any problem…

Pat sent me this reflection on her husband Ken’s life. Thanks Pat for taking time to do this. I find that it gives another dimension to the pipes that I restore to know a bit about the previous pipeman. Pat and Ken were artists (Pat still is a Sculptural Weaver) and it was this that connected them to each other and to John Calich. Here are Pat’s words.
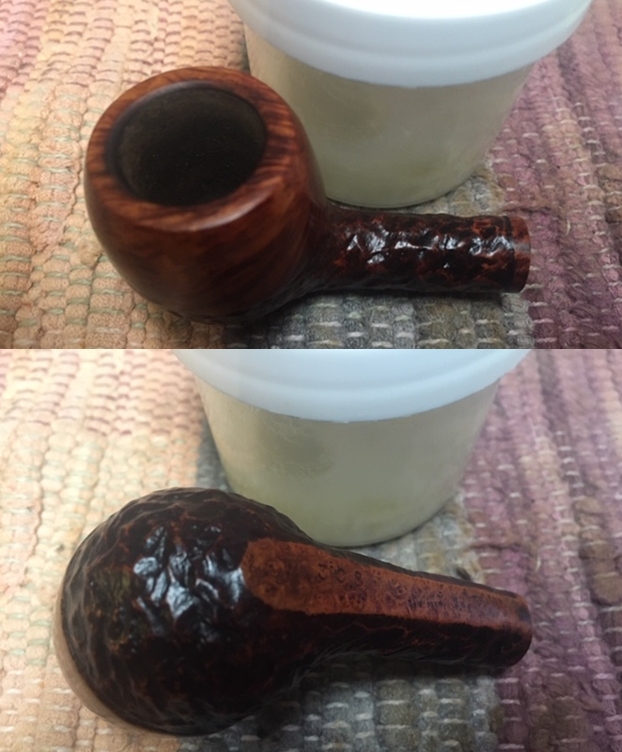
Here is the write up for Ken. We meet in University and it was love at first sight. I consider myself blessed to have shared a life together for 37 years.
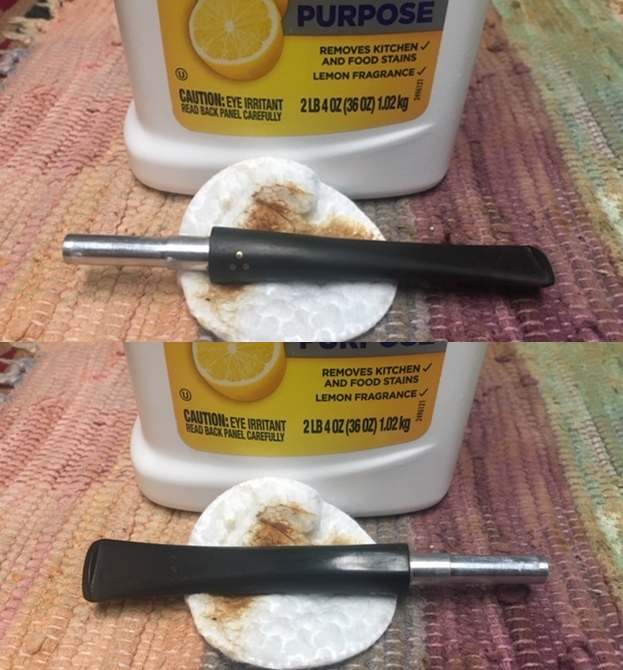
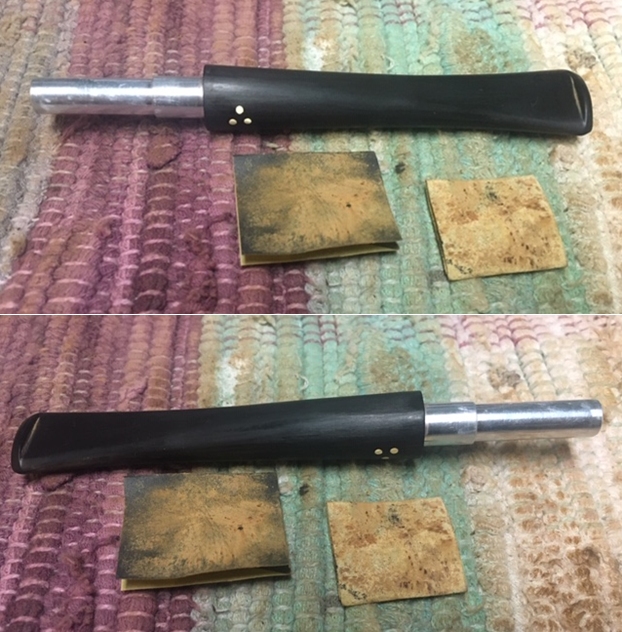
Ken graduated from Ryerson University with Bachelor of Applied Arts in Design in 1975.

Ken lived his life with joy.  Each day was a leap of faith in the creative process. His smile would light up the room and the hearts of the people he loved.

He combined the skilled hands of a master craftsman, with the problem solving mind of an engineer, and the heart and soul of an artist. He used his talents to create unique and innovative wood sculptures. Using precious hardwoods, he incorporated the techniques of multiple lamination and three dimensional contouring to create sculptural pieces that captivate the eye and entice the hand to explore.

His career was highlighted by numerous corporate commissions, awards and public recognition in Canada and abroad.

A quote from Frank Lloyd Wright sums up Ken’s approach to design.  “Form follows function – that has been misunderstood. Form and function should be joined as one in a spiritual union.” 
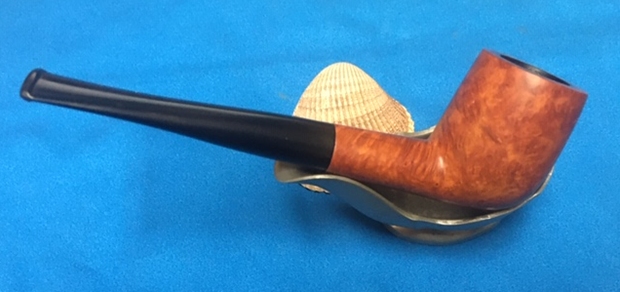
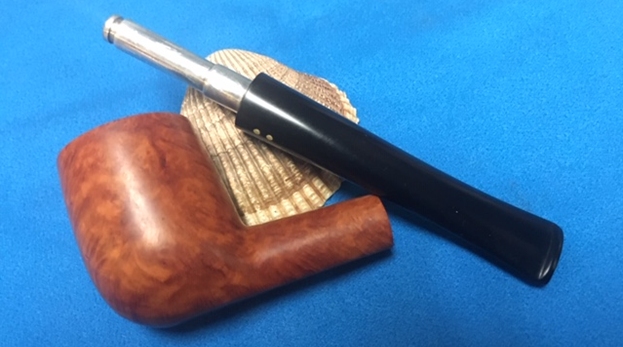
A friendship with John Calich developed over years of exhibiting their work at exhibitions. How could a wood sculptor resist some of John’s finest creations…

I wrote Charles Lemon to get some background information on the pipe. Charles knows Brigham pipes like no one else I know besides he is a great guy. Here is his response

Nice find! The stamps are really nice & clear on that one.

Date-wise, this pipe was made between 1938 and 1955 while the patent for the Brigham System was in force, thus the CAN PAT #. The underlined script logo is another indication of age – that logo was phased out sometime in the early 60s.

Shapes 05, 06 & 07 are classic Straight Dublin shapes from the earliest Brigham lineup, with Shape 05 being the smallest and 07 the largest. There are also Bent Dublin shapes but they are much higher shape numbers and presumably were added to the lineup perhaps decades later.

Hope that helps! Ironically, I was looking at the shape chart just today with an eye to doing an update, so most of this was top of mind! — Charles

I summarize the dating information from Charles now: The pipe is an older one with a Canadian Patent Number. That and the underlined script logo date it between 1938 and 1955. The shape 107 refers to the largest of the classic Straight Dublin pipes in the Brigham line up.

Armed with Pat’s stories of John and her husband Ken and the information from Charles on the background of the pipe it was time to work on the pipe. I reamed the bowl with a PipNet Pipe reamer using the third cutting head. I took the cake back to bare briar so that I could check out the inside walls. I used a Savinelli Fitsall Pipe Knife to scrape back the remaining cake. I finished my cleanup of the walls by sanding it with 220 grit sandpaper wrapped around a piece of dowel.       I scraped the rim top lava with the edge of the Savinelli Fitsall Pipe Knife. I was able to remove much of the lava. It also helped me to see the damage to the front edge better. It really was a mess.I scrubbed the briar with Before & After Briar Cleaner and rinsed it off with warm running water. I scrubbed the rim top with a tooth brush and warm running water at the same time. I dried the bowl off with a soft microfiber cloth and gave it a light buffing. The photos show the cleaned briar and the damaged areas are very clear.   Once the rim top was clean I could see the extent of the damage to the surface of the rim. The damage was quite extensive and gave the rim the appearance of being out of round. There was also a downward slant to the front edge of the bowl. I topped it on a topping board with 220 grit sandpaper. I worked to flatten out the profile of the rim. I polished the rim surface with 1500-2400 grit micromesh sanding pads. I wiped the top down with alcohol on a cotton pad. I restained it to match the rest of the bowl with three different stain pens – Walnut, Maple and Mahogany. I polished the rim top with micromesh sanding pads – wet sanding with 1500-12000 grit sanding pads. I wiped it down with a damp cloth after each pad. I rubbed the bowl and rim top down with Before & After Restoration Balm. I worked it into the surface of the briar with my fingertips and a horsehair shoe brush to clean, enliven and protect it. I let the balm sit for a little while and then buffed with a cotton cloth to raise the shine. Mark Hoover’s Balm is a product that I have come to appreciate and one I use on every pipe I have been working on.     I rubbed the bowl and rim down with Conservator’s Wax and buffed the bowl with a shoe brush. I worked on the internals. I scraped the inside of the mortise with a dental spatula to remove the hardened tars and oils that lined the walls of the metal shank. Once I had that done I cleaned out the airway to the bowl, the mortise and the airway in the stem with pipe cleaners, cotton swabs and alcohol. When I finished the pipe smelled very clean.Before I cleaned the shank I removed the hard rock maple filter. I took a new filter out of the box and set it aside for use once I finished the clean up.I wiped down the surface of the vulcanite stem with alcohol. I filled in the deep tooth marks with clear super glue.Once the repairs had cured I used a needle file to reshape and recut the edge of the button and flatten the repaired area.   I sanded the stem with 220 grit sandpaper to break up the oxidation. I started the polishing with 400 grit wet dry sandpaper to remove the scratching. It is starting to look good.I have one more tin of Denicare Mouthpiece Polish left from a few that I have picked up over the years. It is a coarse red pasted that serves to help remove oxidation. I polished the stem with that to further smooth out the surface of the vulcanite (and to be honest – to use it up).  I polished the stem with micromesh sanding pads – wet sanding with 1500-12000 grit pads. I wiped the stem down after each sanding pad with Obsidian Oil. I polished it with Before & After Pipe Stem Polish – both Fine and Extra Fine. Once I had finished the polishing I gave it final coat of oil and set it aside to dry.     This is the sixth and final pipe that I am restoring from Ken’s Estate. It is another a classic Brigham Patent era Large Dublin shaped 107. With the completion of this Brigham I am on the homestretch with Ken’s estate. This is the part I look forward to when each pipe comes back together, polished and waxed. I put the bowl and stem back together. I polished the bowl and stem with Blue Diamond to polish out the scratches in the briar and the vulcanite. I gave the bowl and the stem multiple coats of carnauba wax. I buffed the pipe with a clean buffing pad to raise the shine. I hand buffed it with a microfiber cloth to deepen the shine. The pipe polished up pretty nicely. The classic Brigham rustication and smooth rim top is very nice. The smooth, refinished the rim top, polished and waxed rustication on the bowl look really good with the black vulcanite. This Brigham Patent Era Dublin was a fun and challenging pipe to bring back to life because of the damaged rim top. It is another comfortable pipe to hold in the hand. The finished pipe is shown in the photos below. The dimensions of the pipe are Length: 6 inches, Height: 1 ¾ inches, Outside diameter of the bowl: 1 3/8 inch, Chamber diameter: ¾ of an inch. Thanks for reading this blog and my reflections on the pipe while I worked on it. This entire estate was interesting to bring back to life.