Blog by Paresh Deshpande
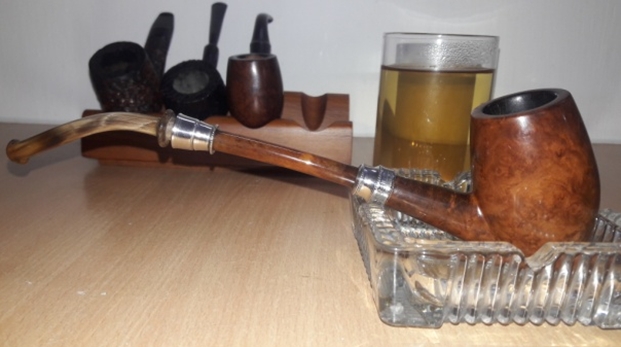
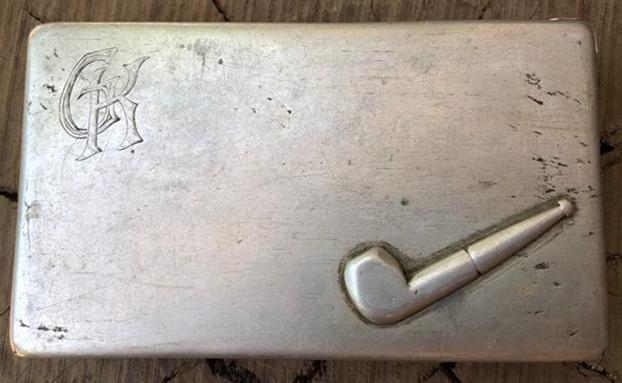
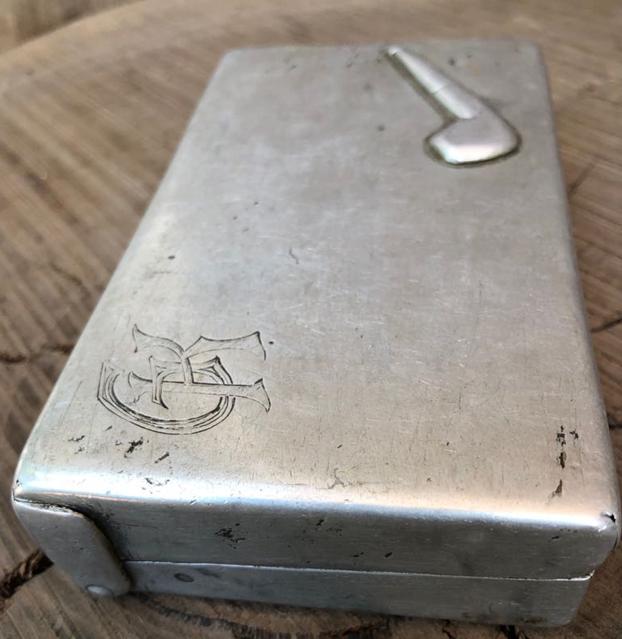
I had been on a short leave to my home town last month and that is where this happened!!!!! Even though there are still a number of pipes from the two of the three inherited boxes of pipes waiting their turn for restoration, curiosity got the better of me and I could not resist the temptations of opening the third box. What happened thereafter is that I had to unpack all the pipes earmarked to accompany me to my work place for restoration in my free time which in turn invited the wrath of my wife who had helped in packing in the first place, and repack the newly selected pipes from the third box!!!!!! In addition to the regular collection of Barling’s, Charatan’s, Comoy’s and other assorted collection, I came across two pipes which caught my fancy!!!!! The pipe on the left bears a football stamp that reads “CHOQUIN” over “A METZ” and the one on the right side simply reads “GBD” (there are other stampings on the silver ferrule, details of which will be highlighted when it comes up for restoration). Both these pipes looked vintage and unique enough that I immediately Facetimed with Mr. Steve of rebornpipes. His admission that he is willing for a trade with me for these two pipes was an indication enough for me to know and understand their uniqueness!!! Thus these two pipes moved to the top of my unorganized and chaotic list of restoration.
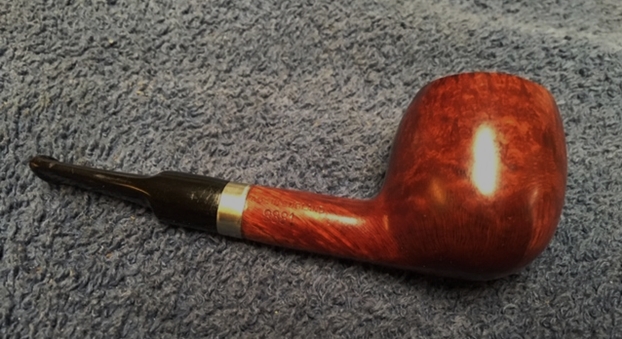
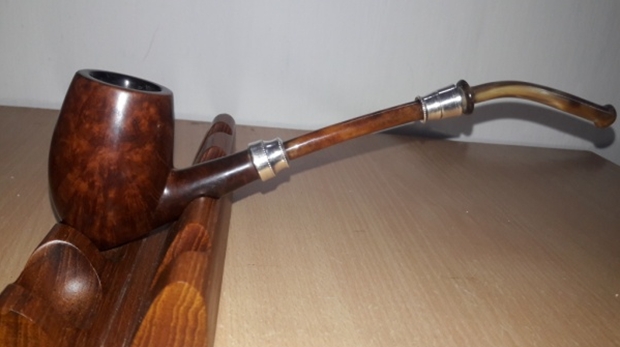
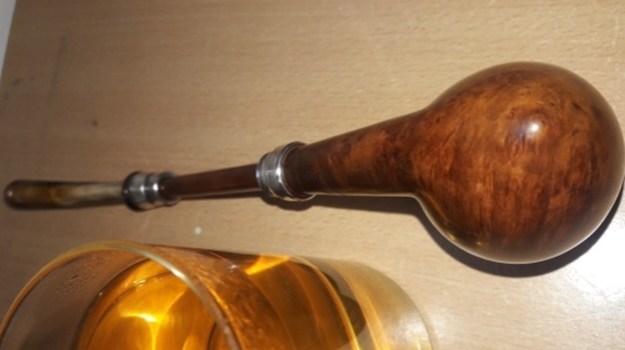
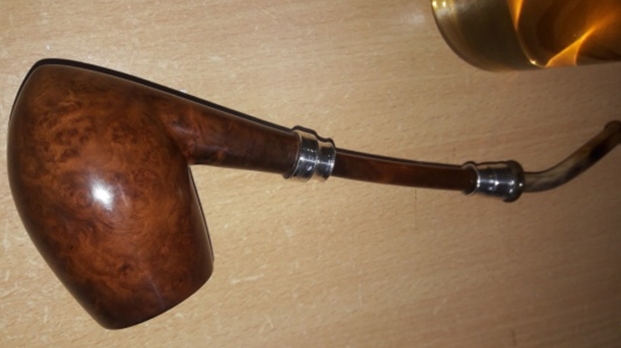
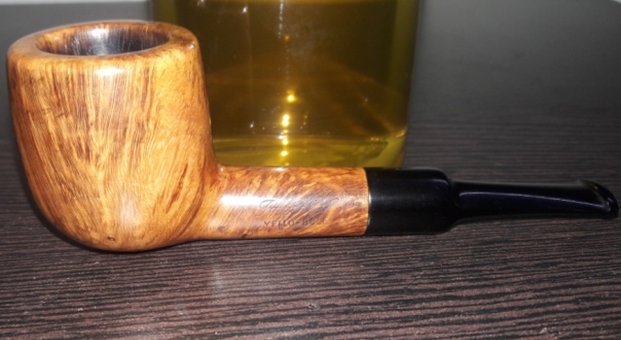
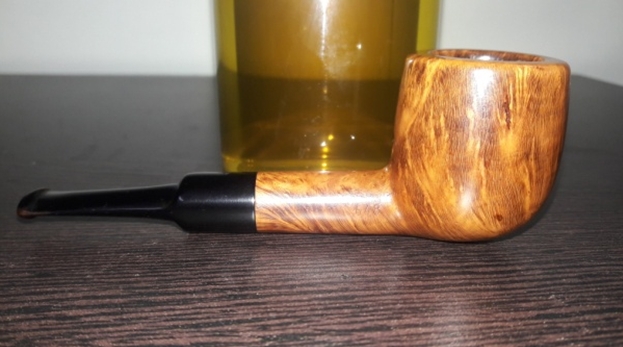
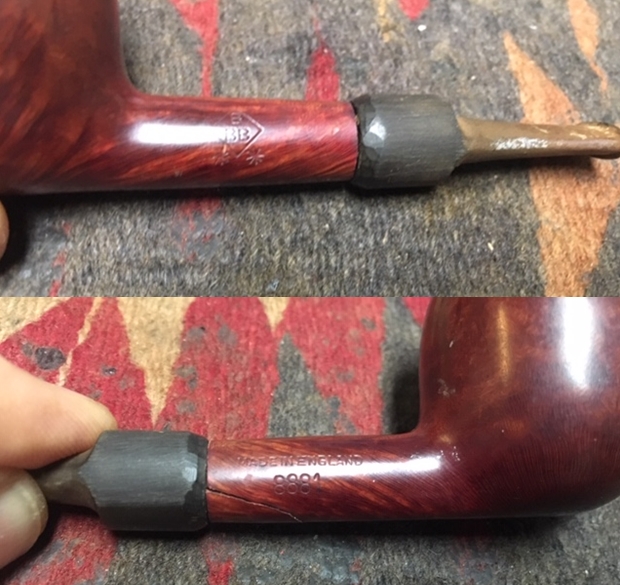
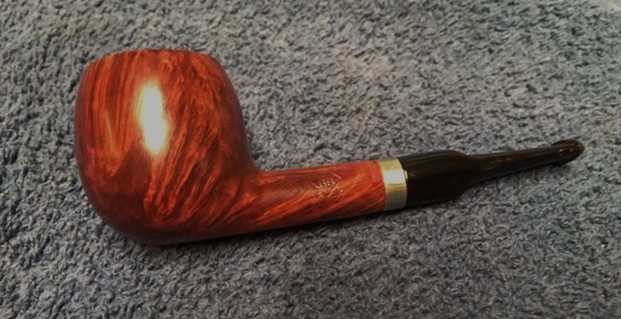
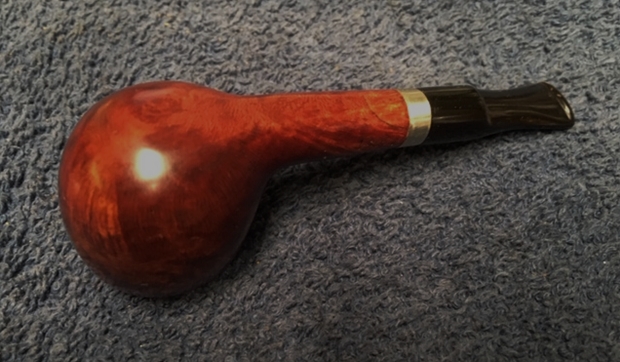
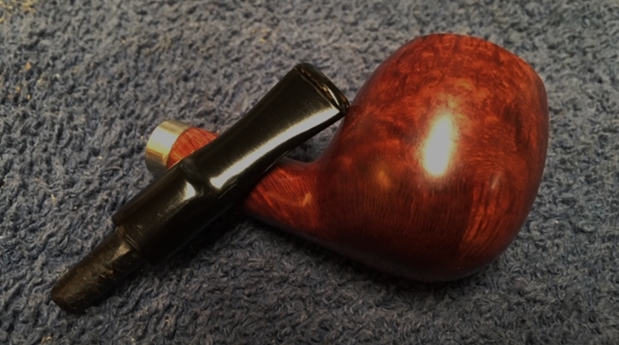
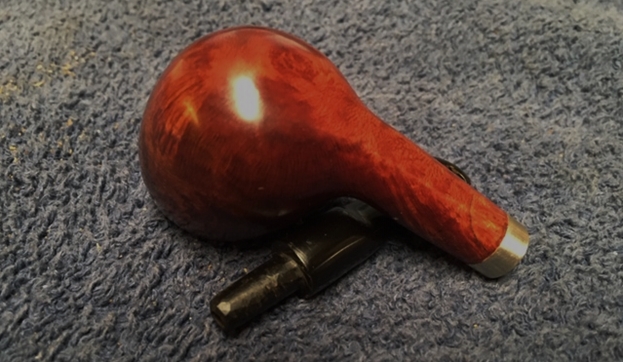
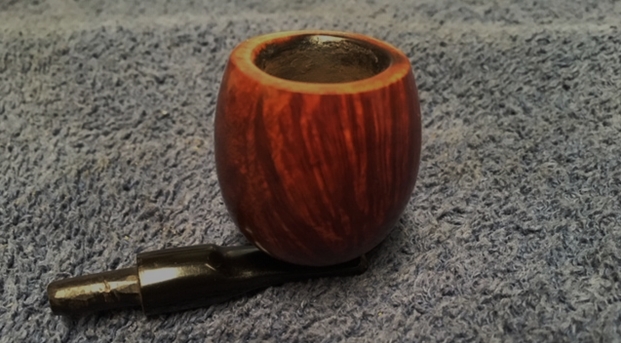
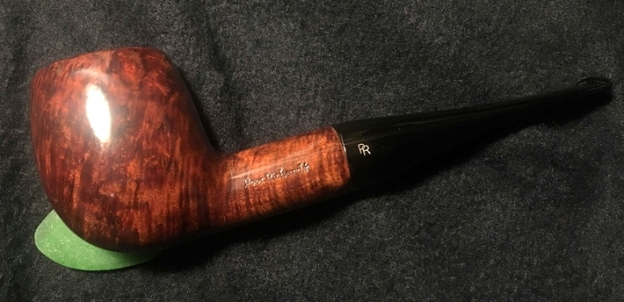
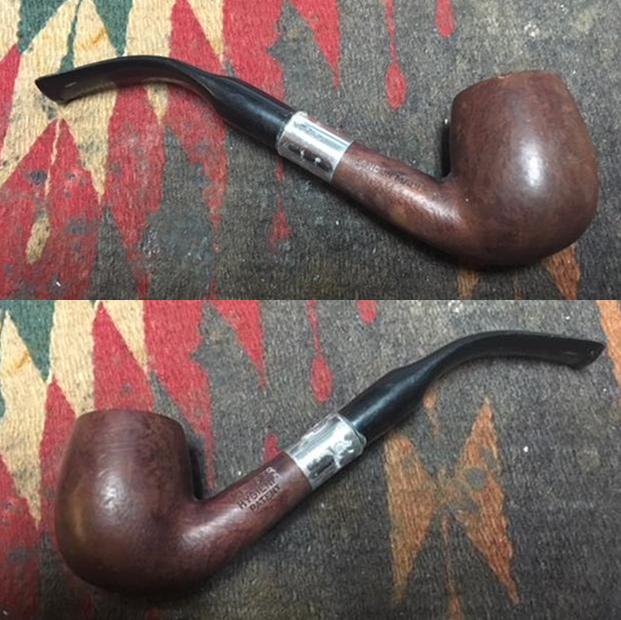
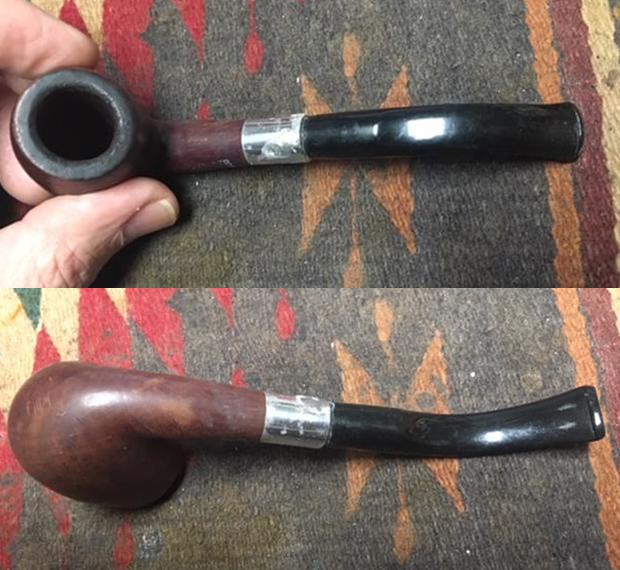
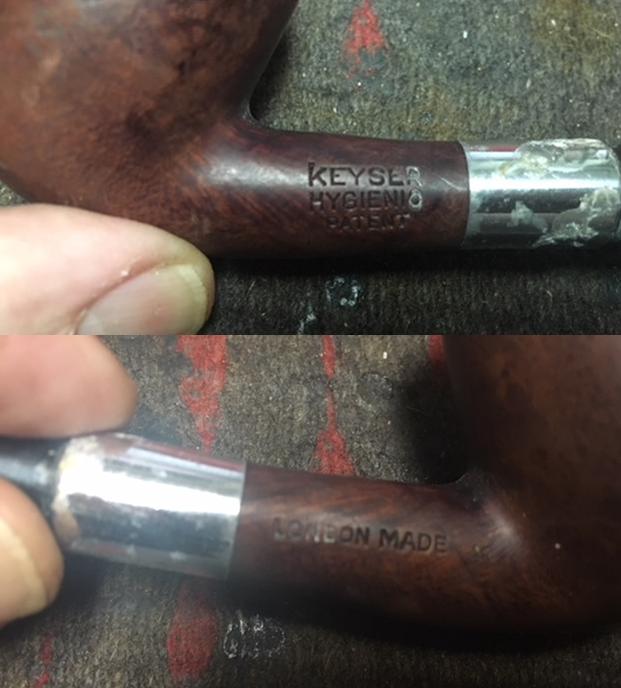
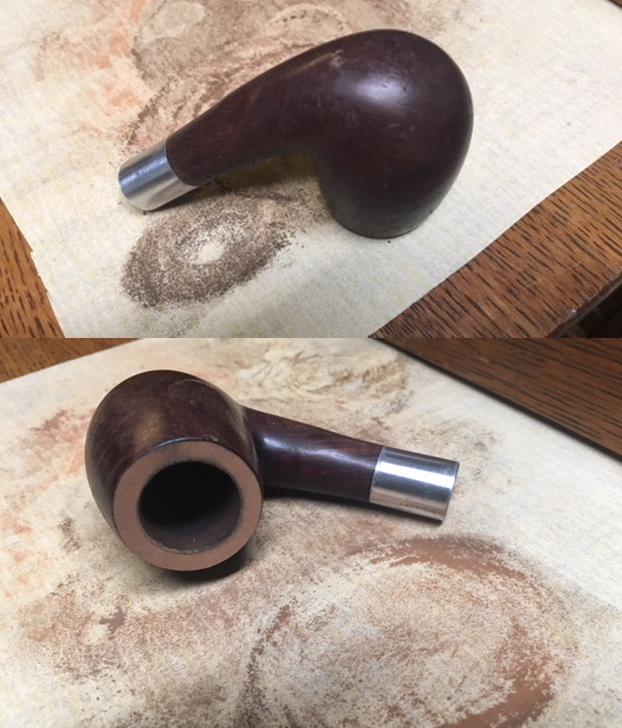
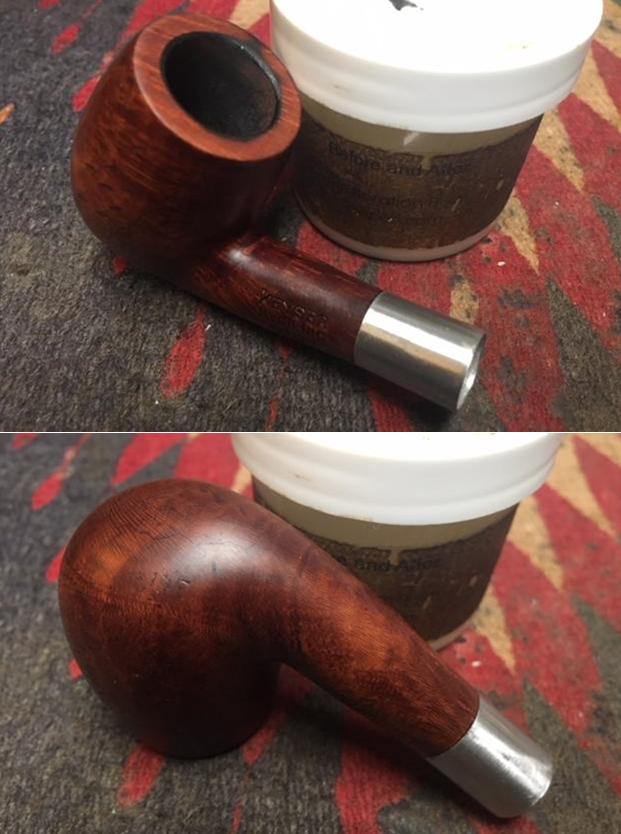
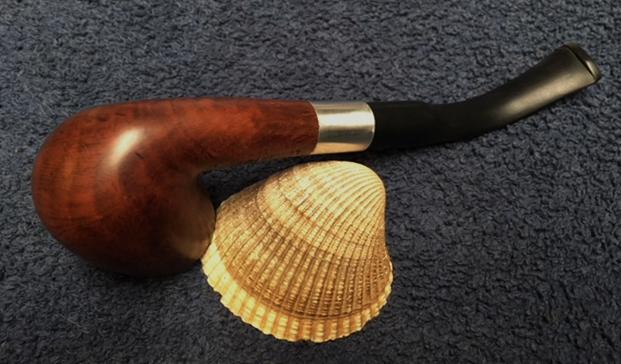
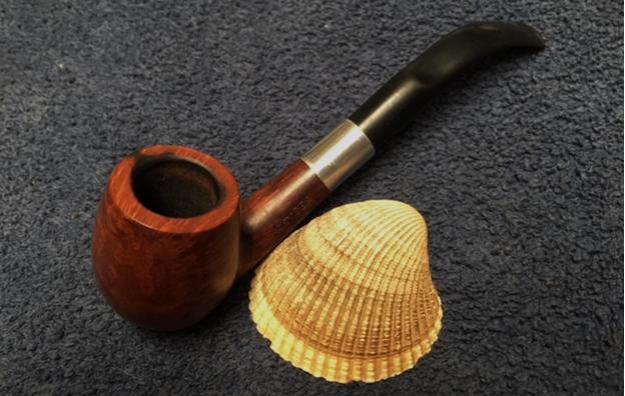
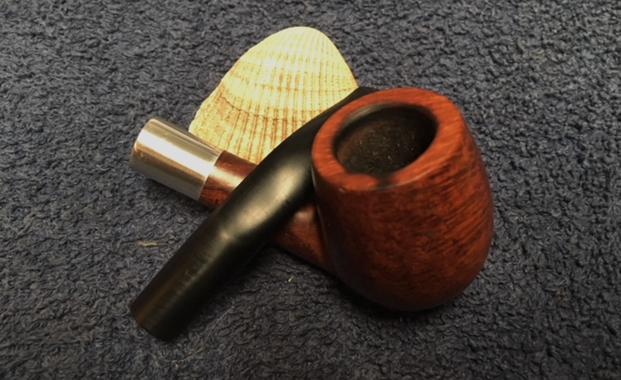
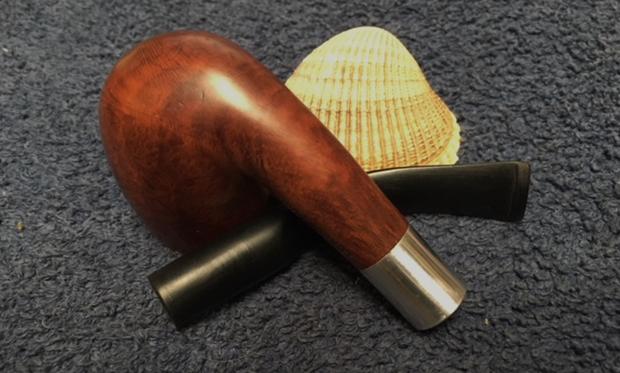
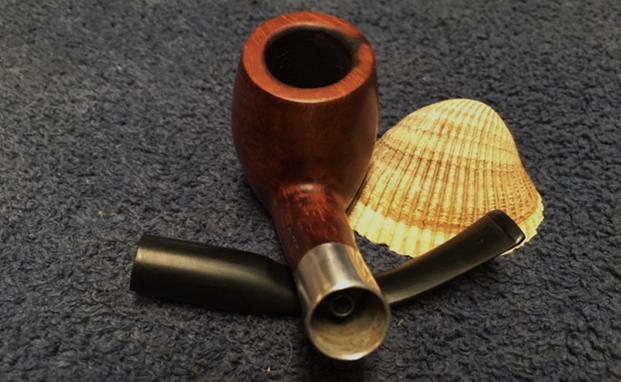
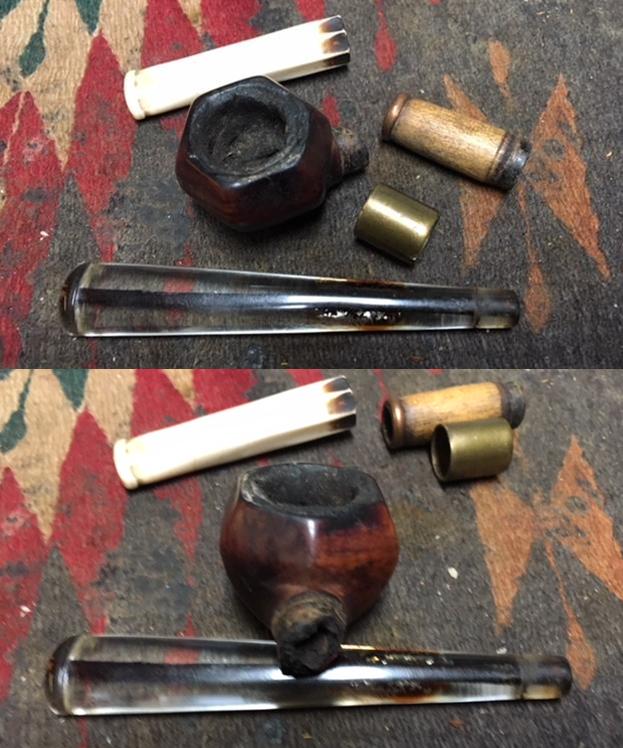
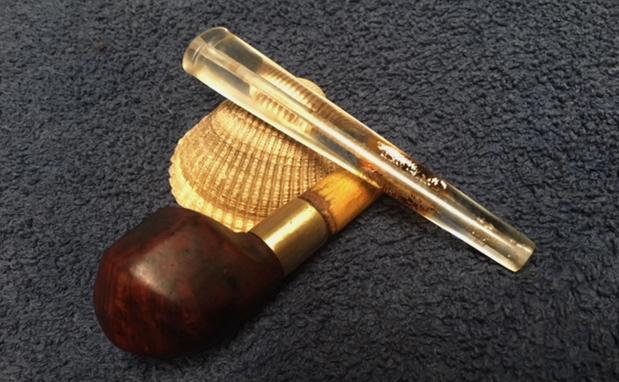
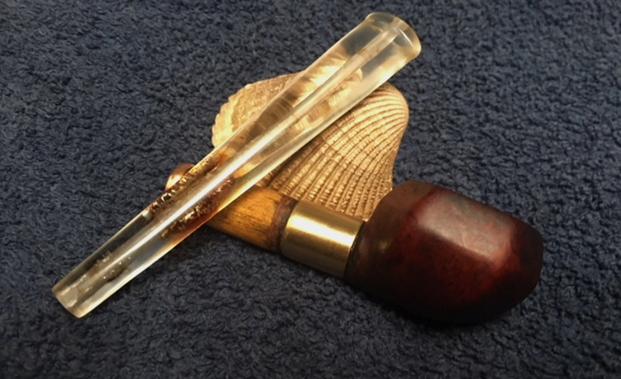
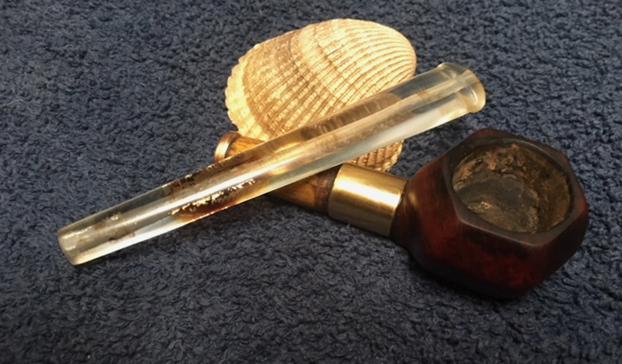
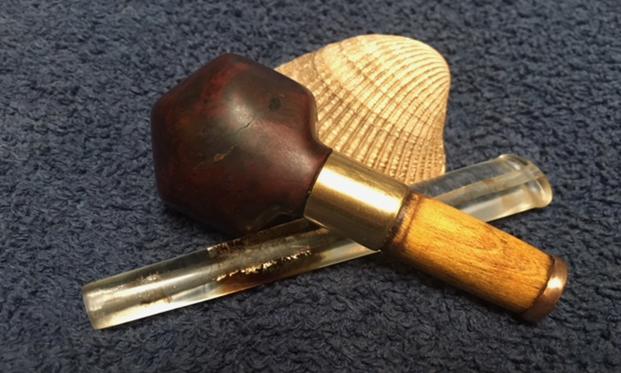
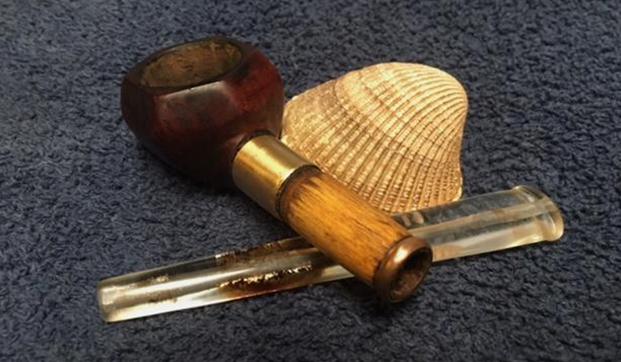
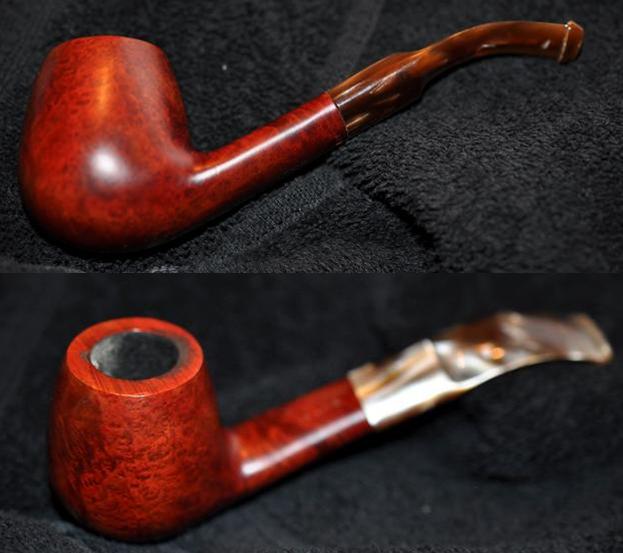
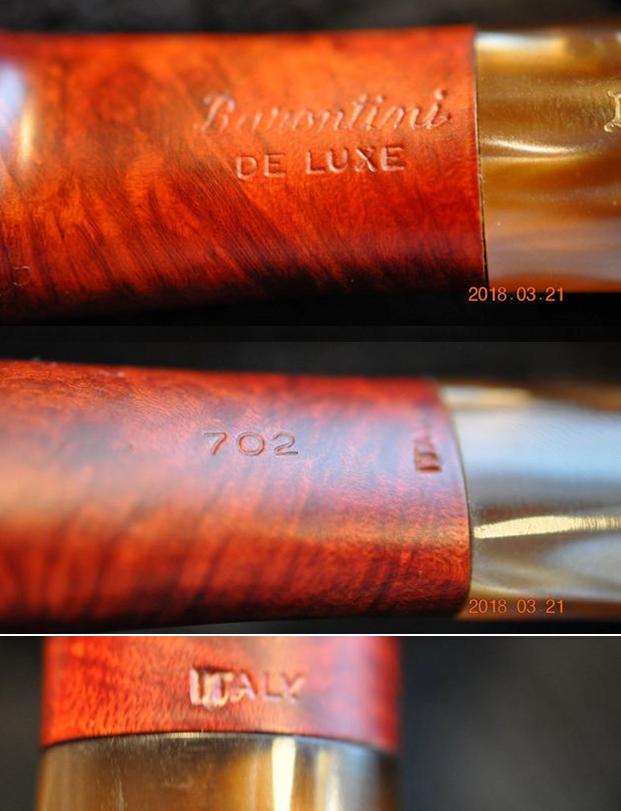
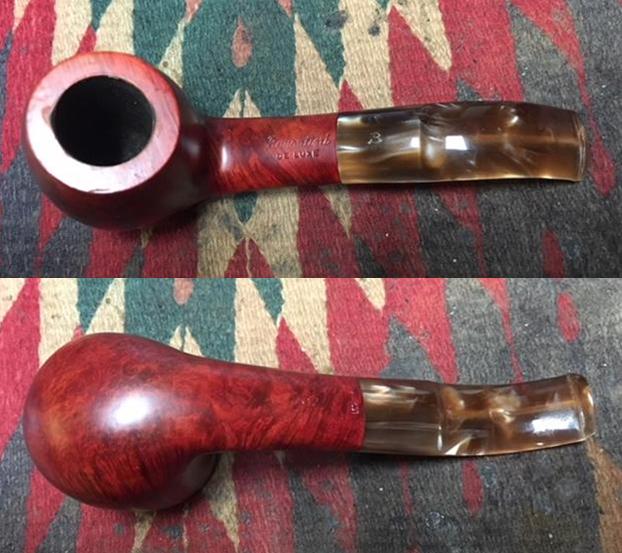
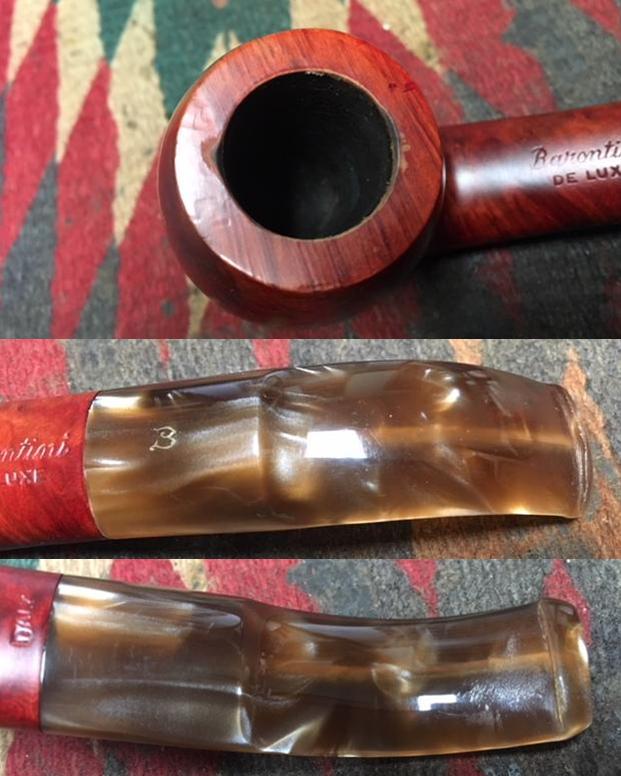
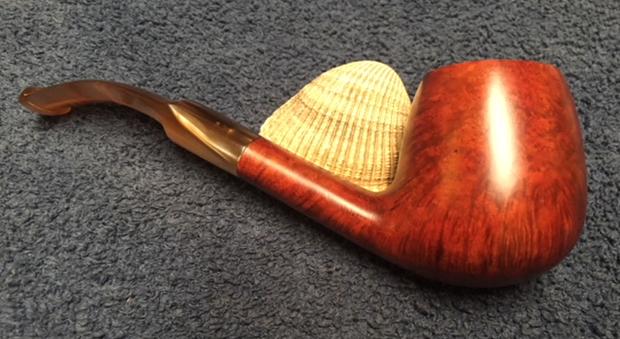
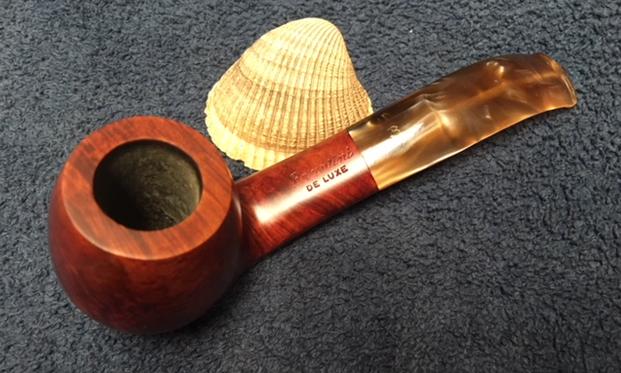
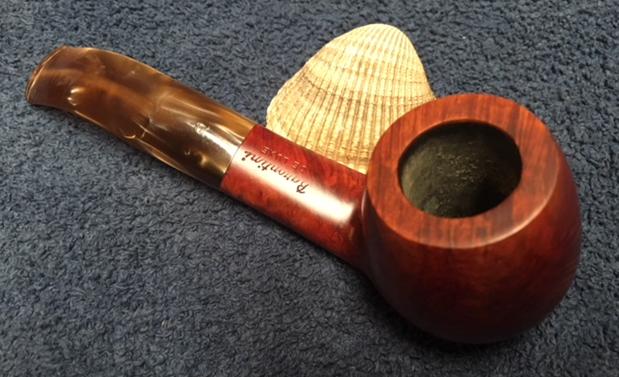
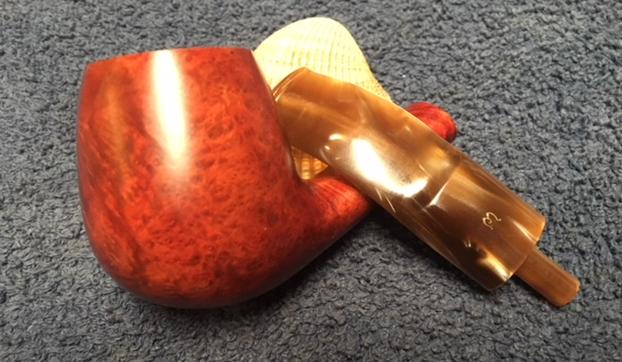
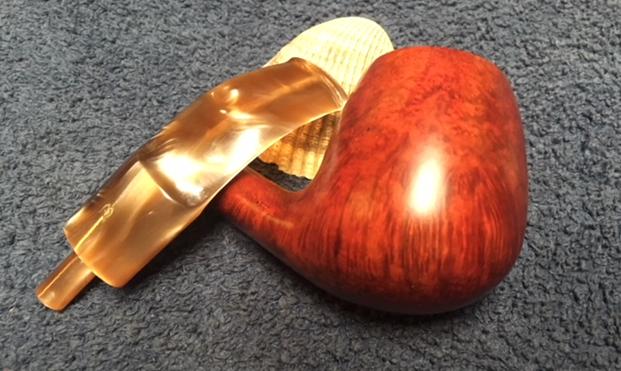
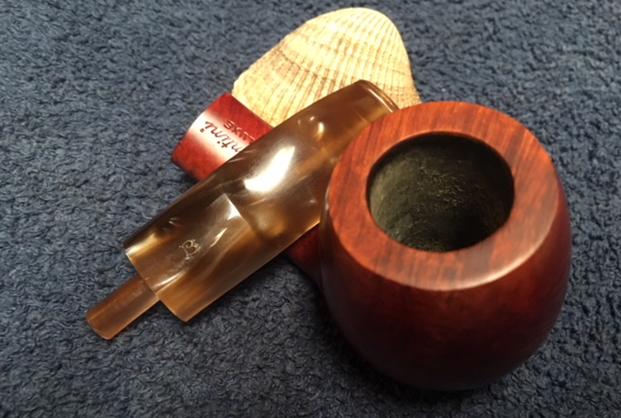
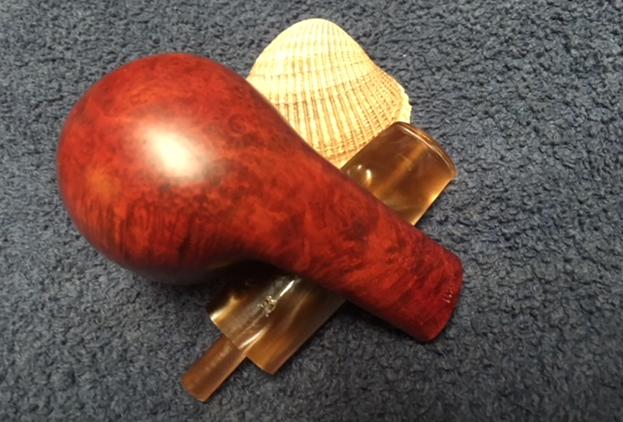
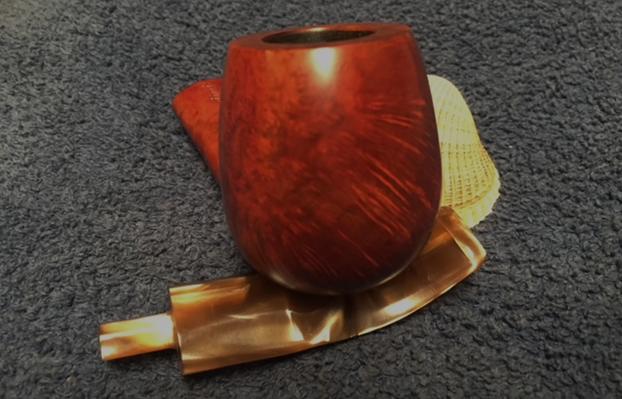
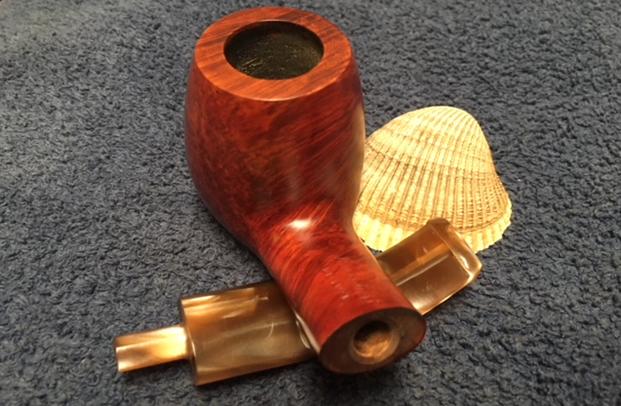
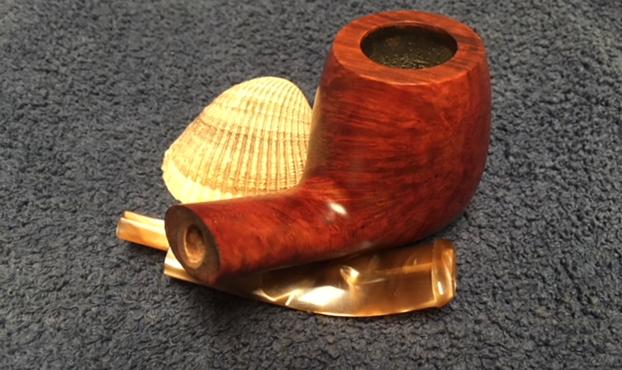
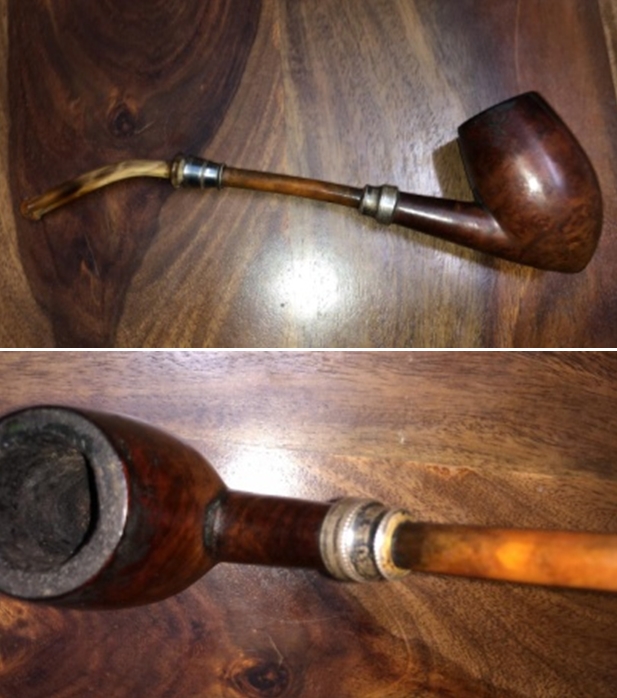
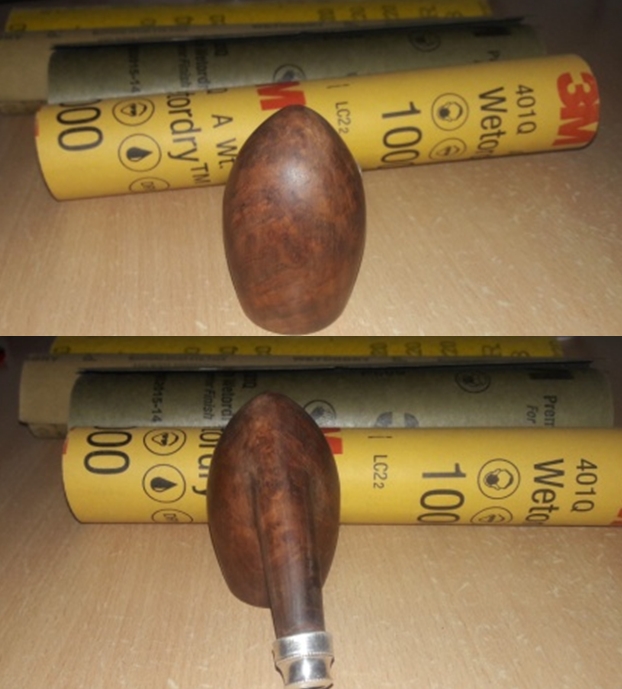
The pipe first on my work table is the CHOQUIN. It is a huge pipe with a humongous acorn shaped smooth briar bowl with a steeply raking shank, the end of which is adorned by a fixed sterling silver ornamented ferrule. This similarly designed sterling silver also masks the tenon of the horn stem. The shank and the horn stem are connected by a push-fit type bone extension. The huge acorn bowl shows beautiful, large and loosely packed birdseye grain on the right side while mixed grain adorns the left side. The stummel on the front, back and the shank displays densely packed straight grains. The only stamping that is seen on this pipe is the football stamp on the left side of the shank and reads “CHOQUIN” over “A METZ”. For its age, the stamping is crisp and clear.
 This time around, before commencing the restoration process, I posted the pictures of this pipe on the Tobacco Pipe Restorers group on Facebook as my next project. In addition to input from my mentor, Mr. Steve, I collected a lot of valuable information from all the knowledgeable stalwarts. From all the input that I have gathered, the flat bottom bowl, the stamping, the sterling silver adornments, the bone shank extension and horn stem, I can safely place this piece as being one of the first A Metz pipes from the 1858 era!!!!!
INITIAL VISUAL INSPECTION
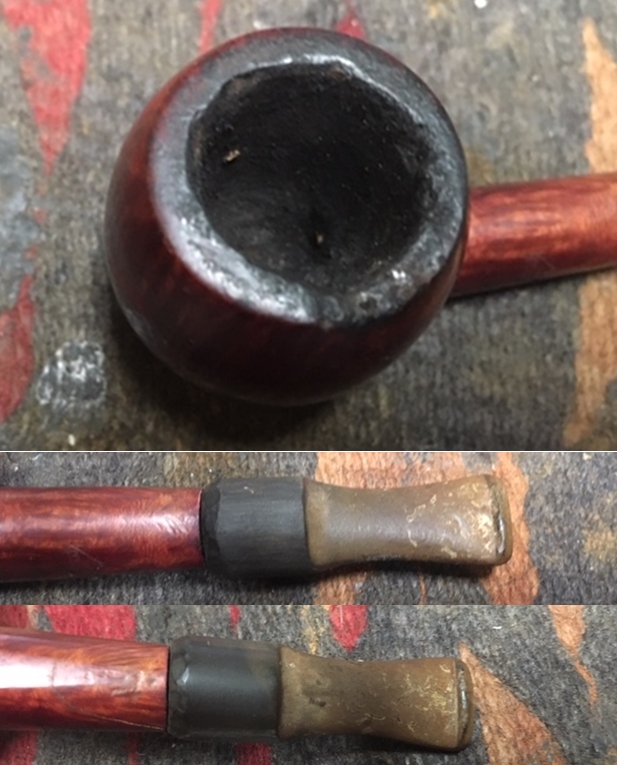
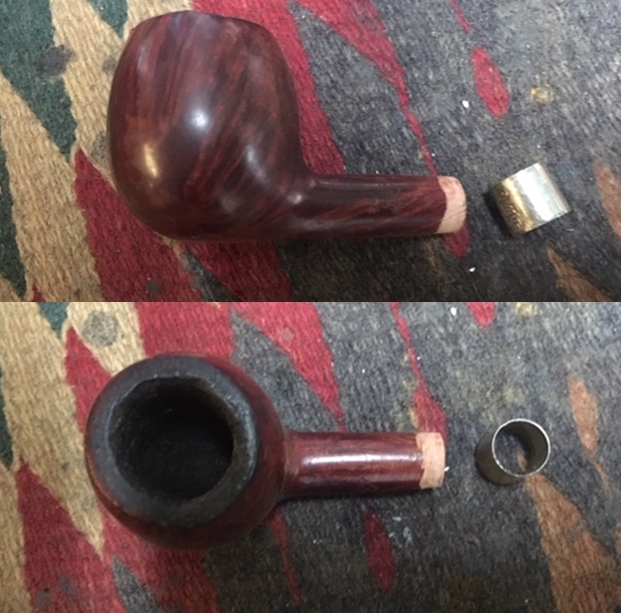
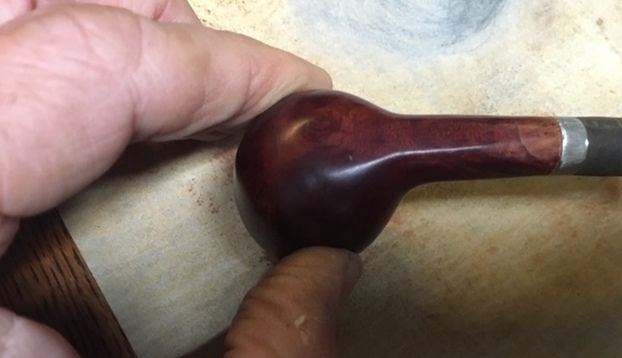
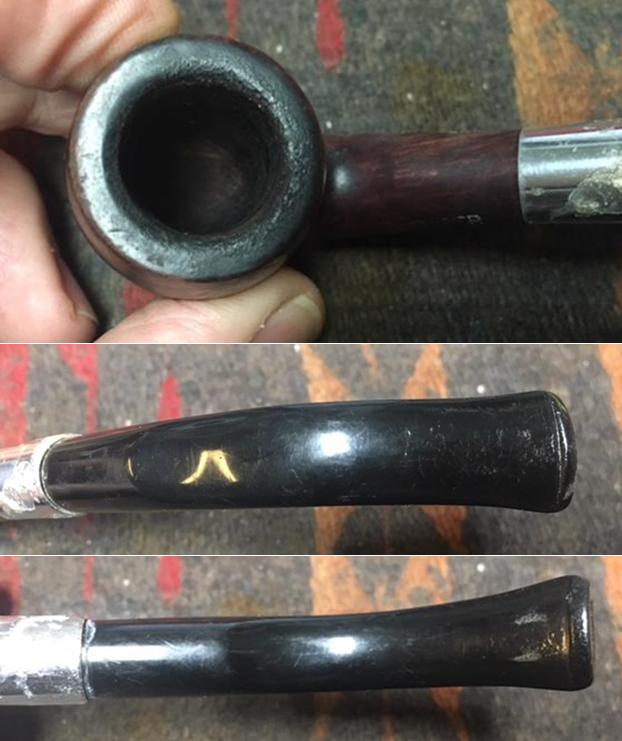
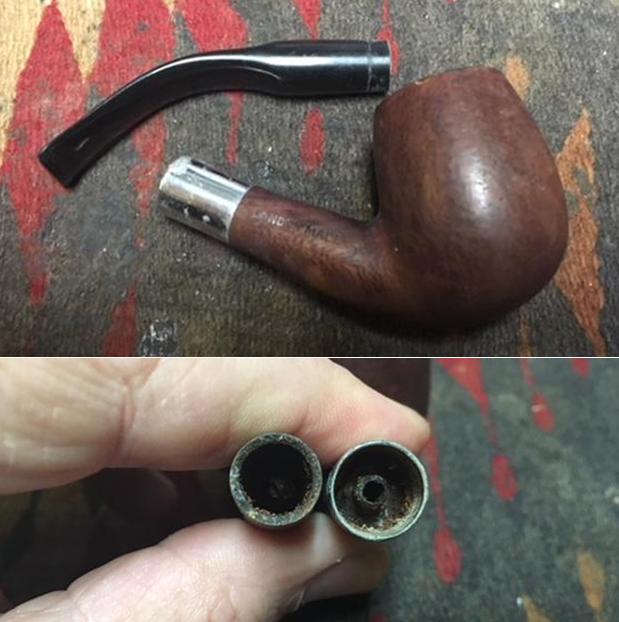
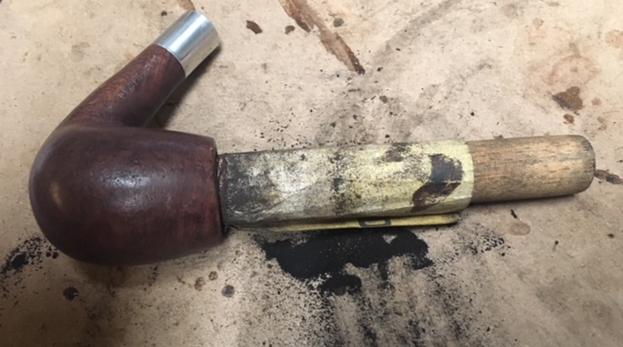
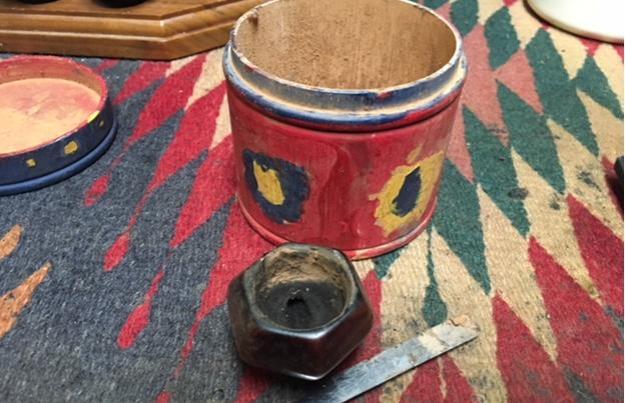
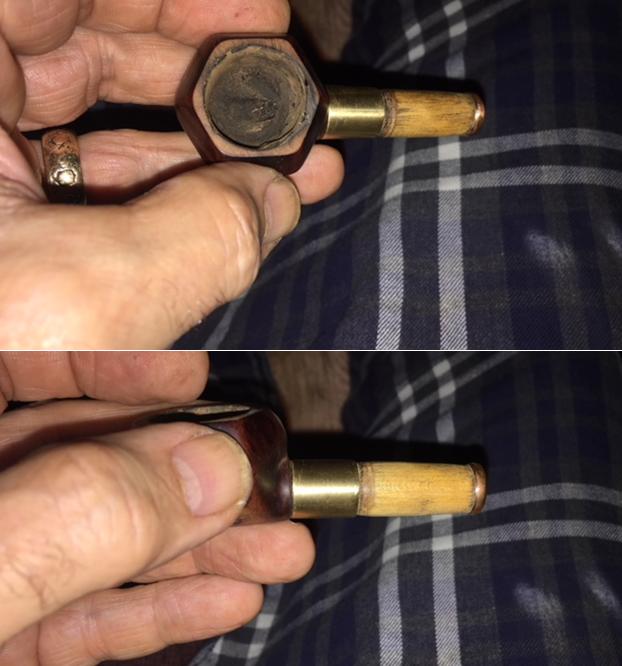
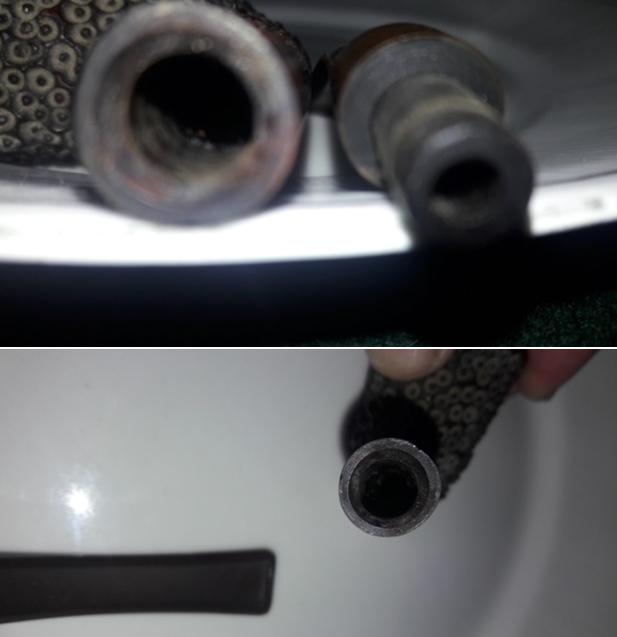
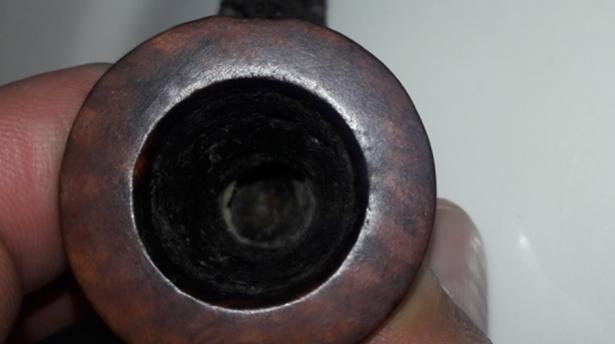
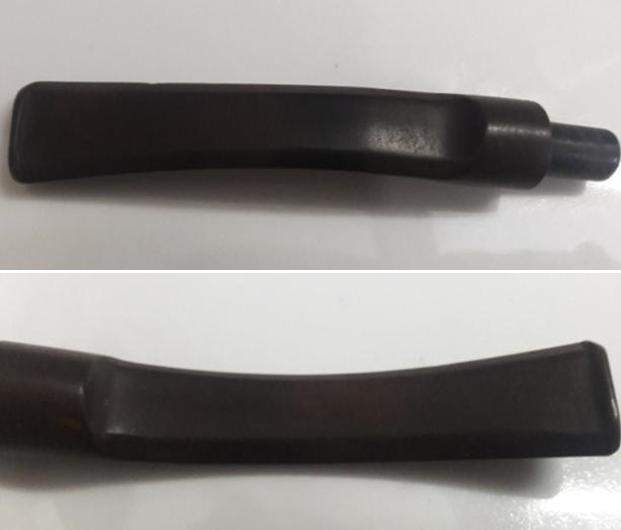
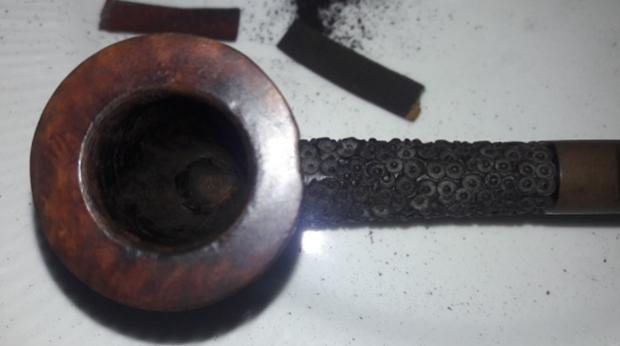
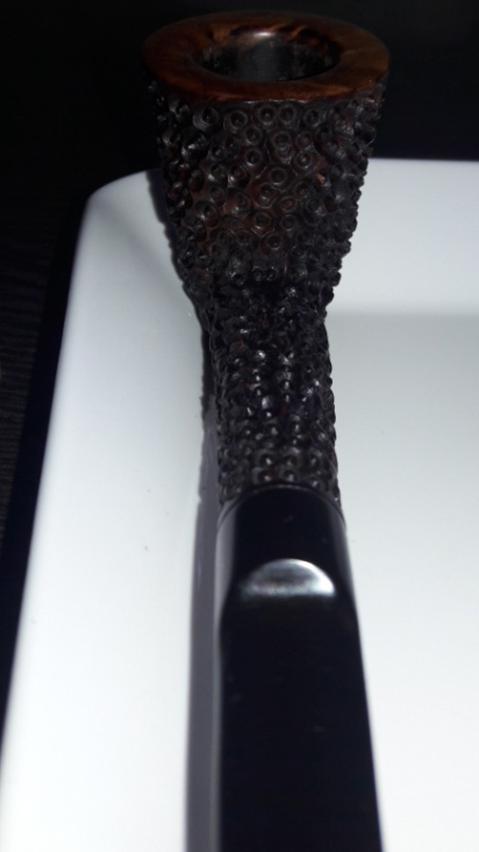
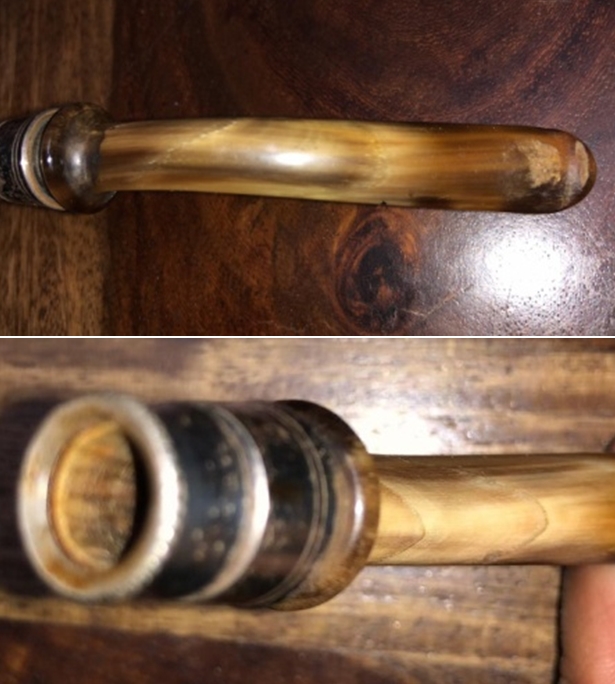
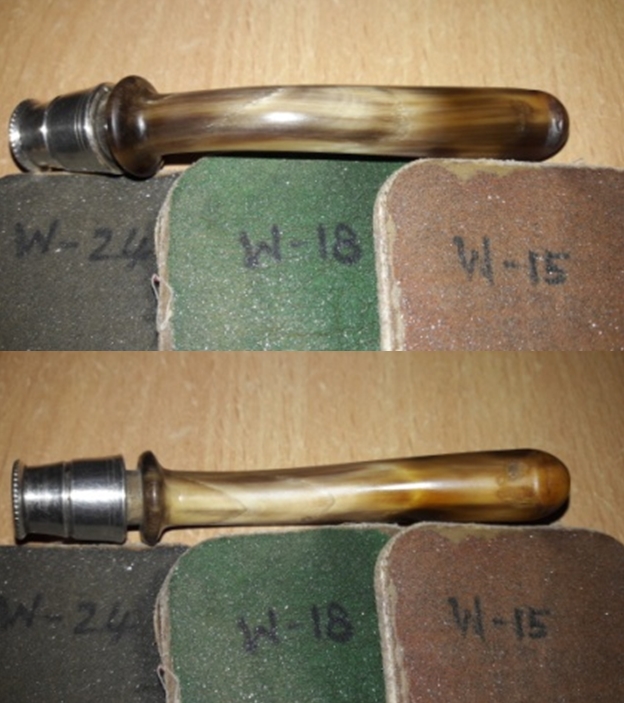
Well, even before I could start my initial visual inspection, I faced the first of the many numerous hurdles that I had to overcome during the restoration of this pipe. The shank extension and the stem would not budge even a millimeter to separate from the shank and the bone extension respectively. I remembered Mr. Steve referring to the technique of freezing the stuck parts in the freezer for a couple of hours for easy separation. I followed his advice and had to put the complete pipe in the freezer for a couple of hours as it could not be dismantled. True enough, the horn stem separated from the shank extension with the application of a little force, but the extension would not budge from the shank!!!! So I went back to Mr. Steve to tap in to his wealth of knowledge and experience. He suggested that I should apply the method of “Hot and Cold” shock treatment in which you gently and carefully heat the stuck part using a heat gun and then get it back in to the freezer. This process may need to be repeated a number of times before the parts separate. Well, I did exactly that, albeit heating with a hair dryer as I did not have a heat gun, and after 3/4 attempts, the extension finally separated from the shank!!!! The first thing that I noticed was that the shank extension and the mortise were completely filled with oils, tars and grime. The shank extension was filled to an extent that a pipe cleaner would not pass through!!!! How very much typical of my Old Man!!!!!!! Through all this muck, just a swipe of the bone extension with a cotton swab dipped in isopropyl alcohol revealed no apparent damage to the shank extension. Cleaning this would need to be a very careful, meticulous, time consuming and a tedious process given the delicate structure of such a vintage bone. Likewise, the tenon also was filled with oils and grime. Air flow through the stem was laborious to say the least!!! Both the upper and lower surface of the horn stem shows significant damage. The lower surface is peppered with 3-4 worm holes with one significantly larger than the other. Thankfully, it had not migrated through the upper surface!!!! The tenon is completely and permanently encased in the sterling silver ornament.
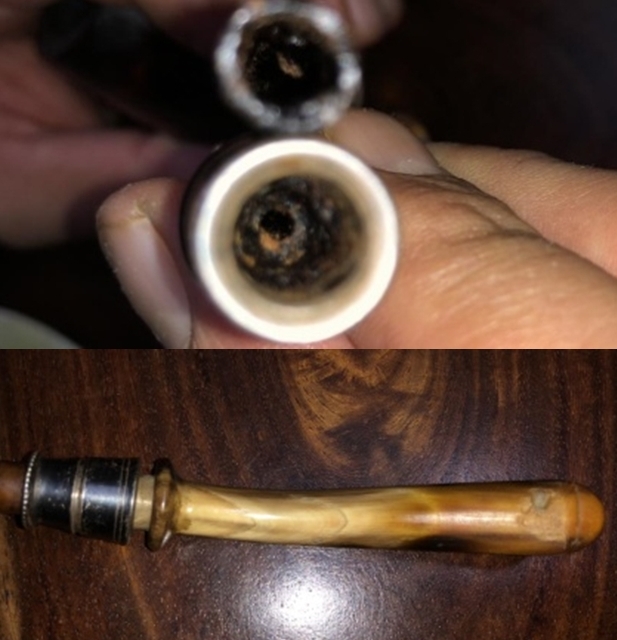
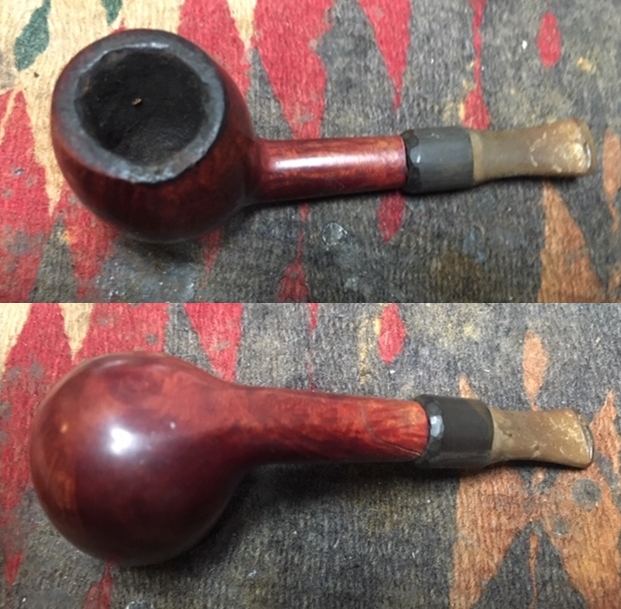
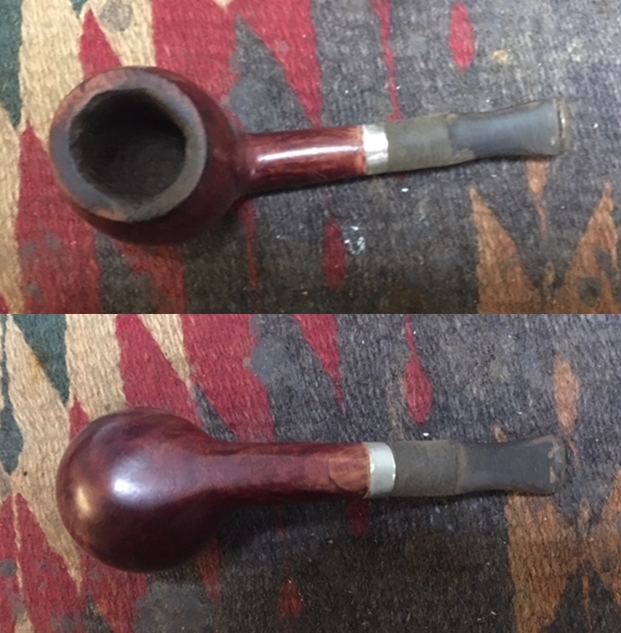
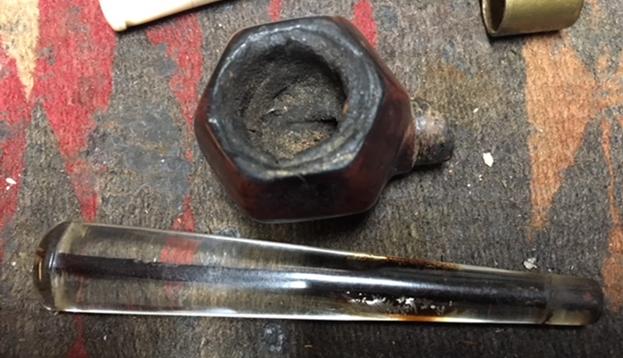
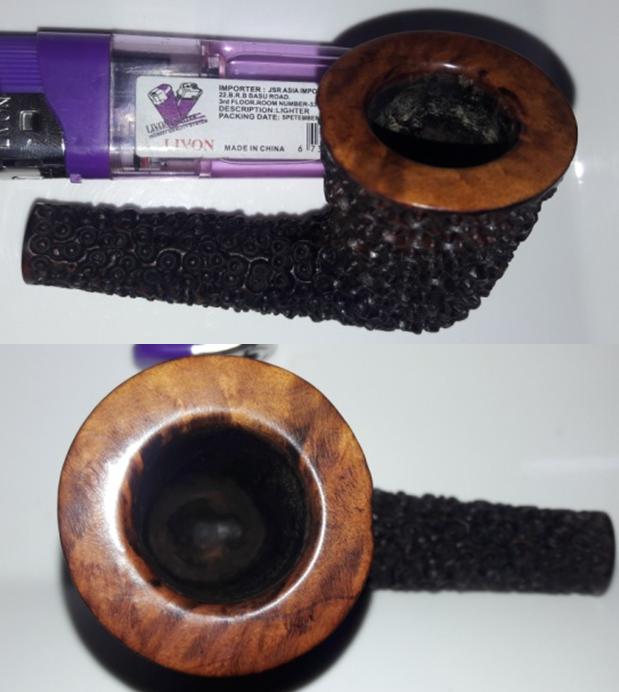
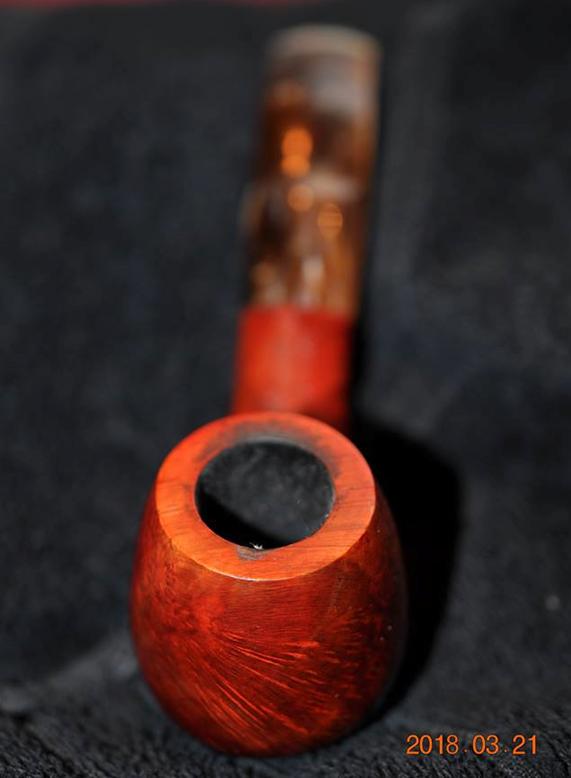
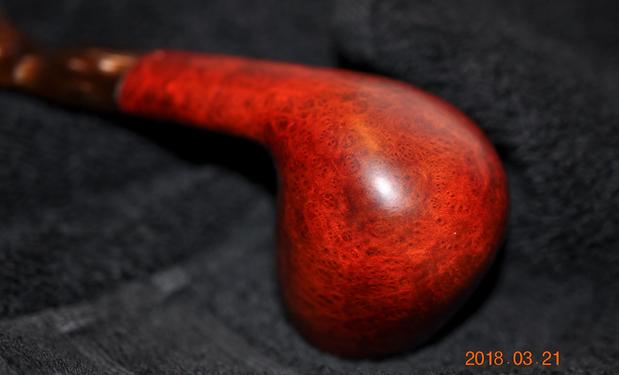
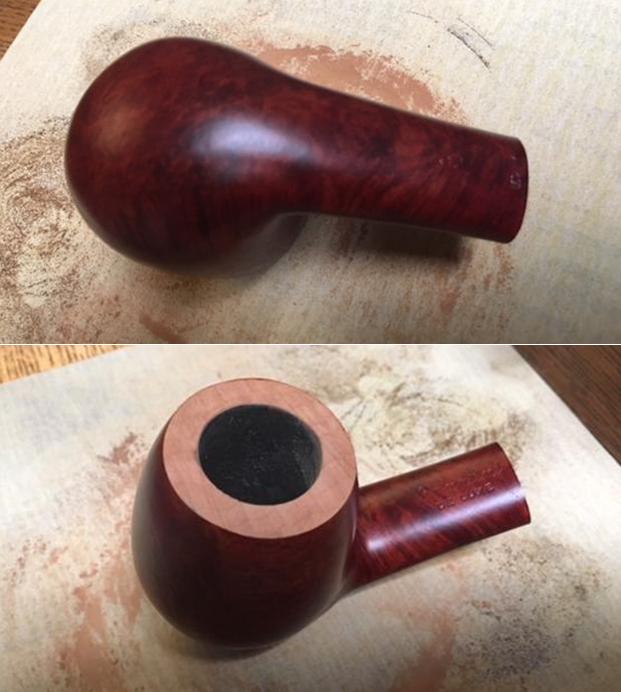
 The condition of the stummel was an equally horrendous story. Firstly, the rim top is heavily covered in overflowing lava. The overflow is so heavy that it has accumulated over the rim surface in blobs of dried tar and tobacco oil which can be seen in the subsequent pictures. This overflow had not restricted itself to accumulation on the rim top, but has spilled on to the stummel surface covering the stummel in sticky grime which has attracted more dirt and dust giving the stummel a dull and lackluster appearance. The overflowing lava has even accumulated in the junction where the shank and bowl are joined. Some dents and dings are seen on the surface through the overflow and I do not envisage any major issue like the ones I faced while working on an Imperial Yello-Bole Carburetor that I had I restored. However through all this dirt, tar, oil, grime and damage, lovely grains can be seen on the sides and the shank. It will be a challenge to address these issues and make the grains to reveal themselves in all glory.

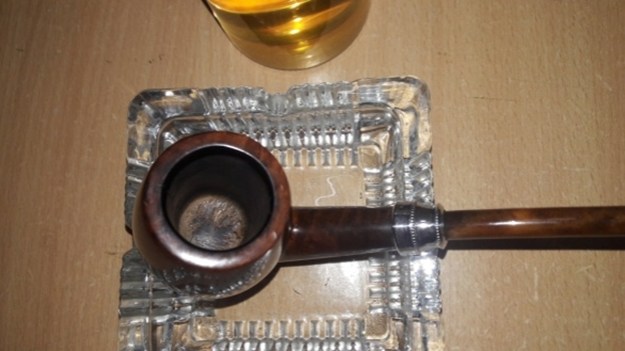
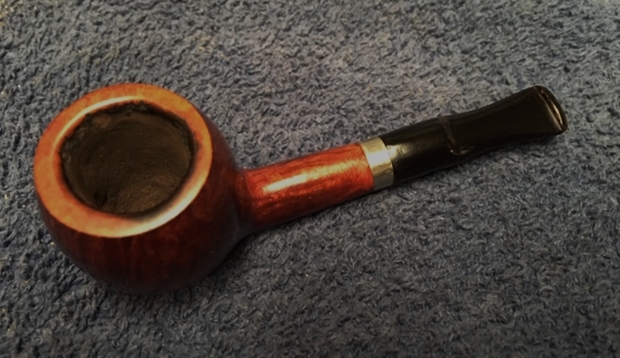
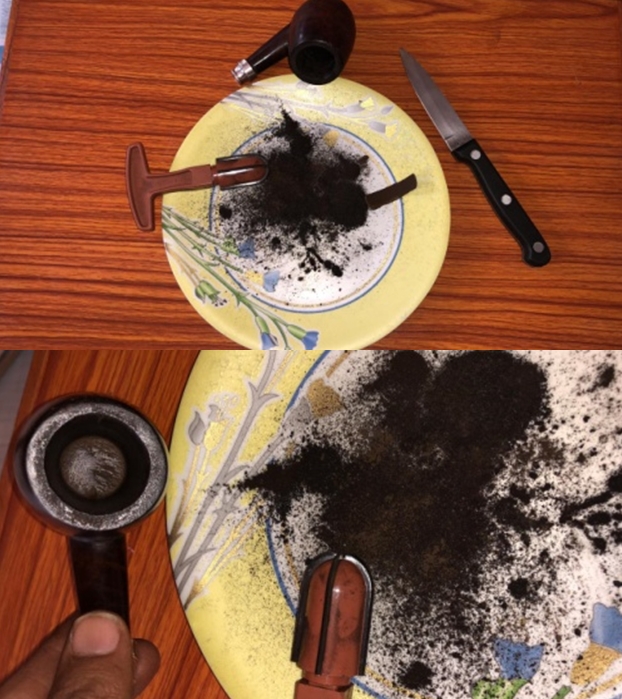
 The chamber is no different story!!! There is a thick build up of cake in the chamber. The inner edge of the rim is covered under the thick cake and as such, its condition can be commented upon only after the cake has been scrapped. The outer edge of the rim, however, shows significant damage in the form of dents, dings and deep scratches to the front in 12 o’clock direction. The cause for this damage is….. Oh, forget it, let’s not even go there!!!! The condition of the inner walls of the chamber can be ascertained only after the chamber has been completely reamed devoid of any cake, but I do not foresee any major damages here as the stummel feels solid to the touch and this huge solid piece of briar can sustain some serious damage. You have to feel the stummel in your hand to understand what I am trying to write. It is one heavy and handful of a pipe!!!!
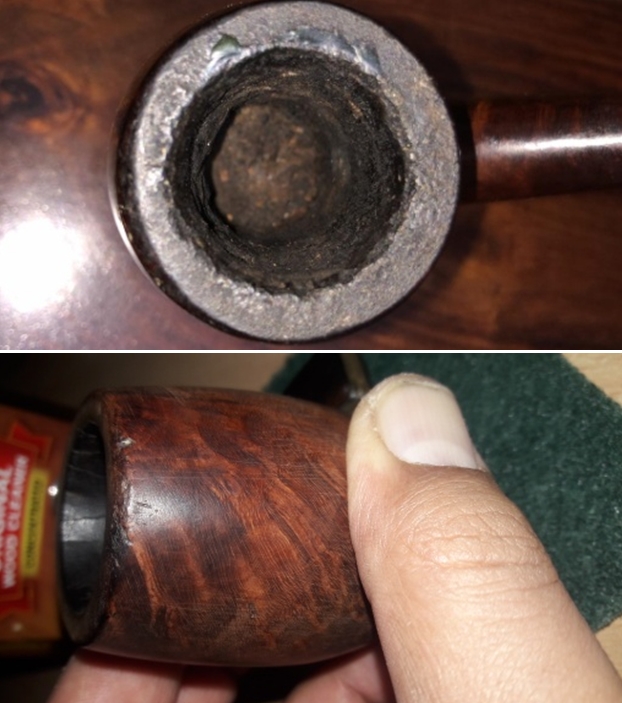 The sterling silver ferrule and tenon ornament was black as is typically seen in heavily oxidized silver. However through all this discoloration, delicate, intricate decorative design can be appreciated. This is another pointer towards the vintage of this pipe.
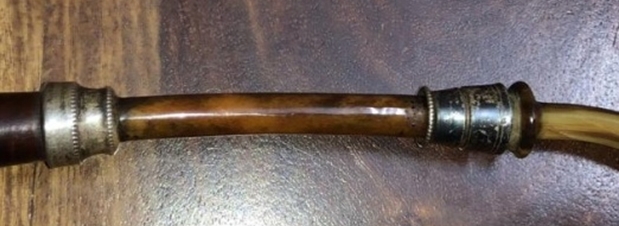 THE PROCESS
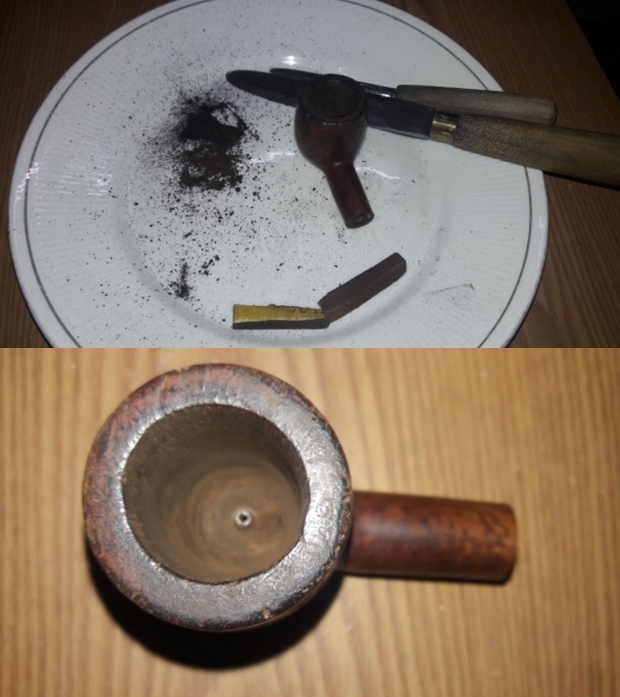
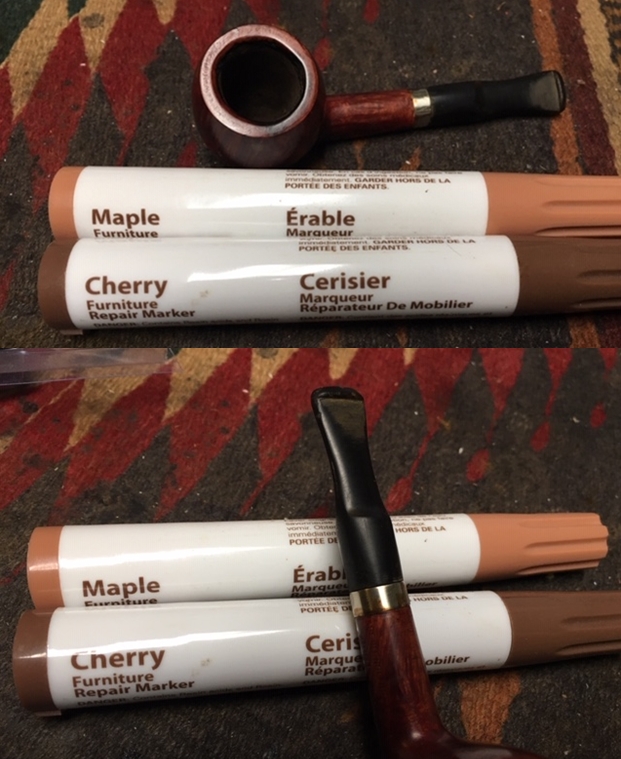
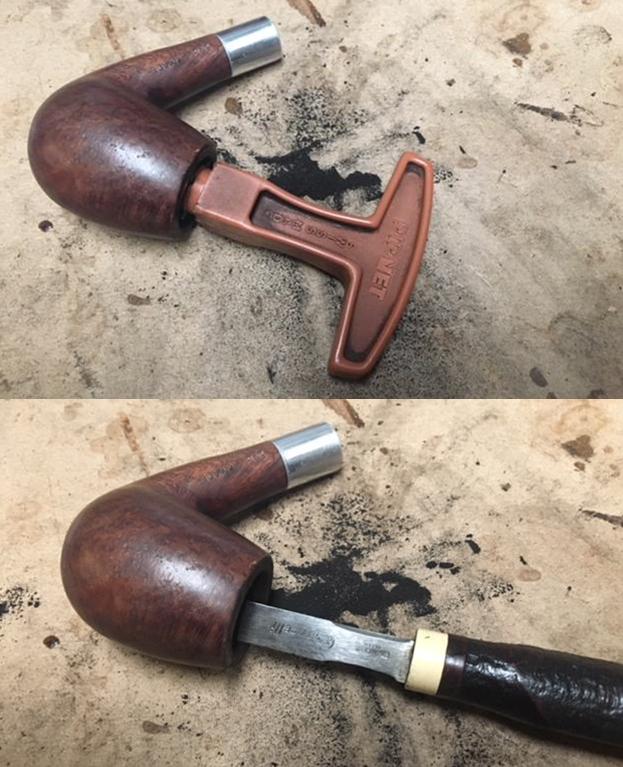
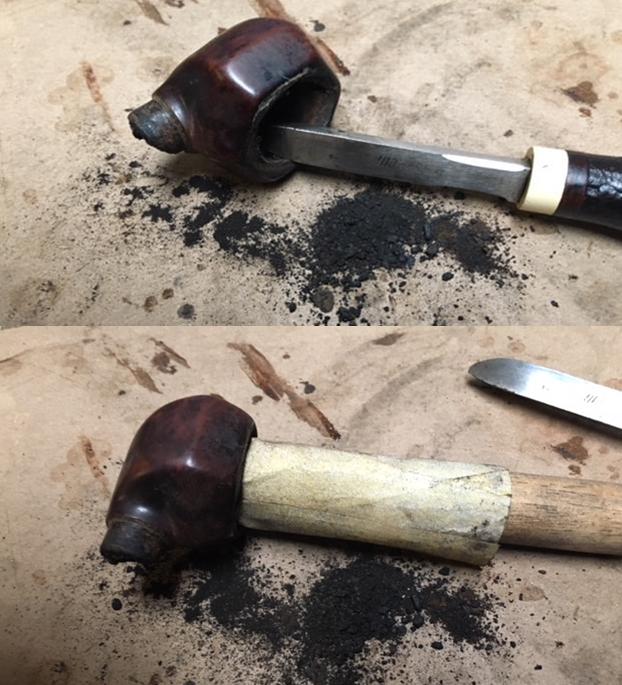
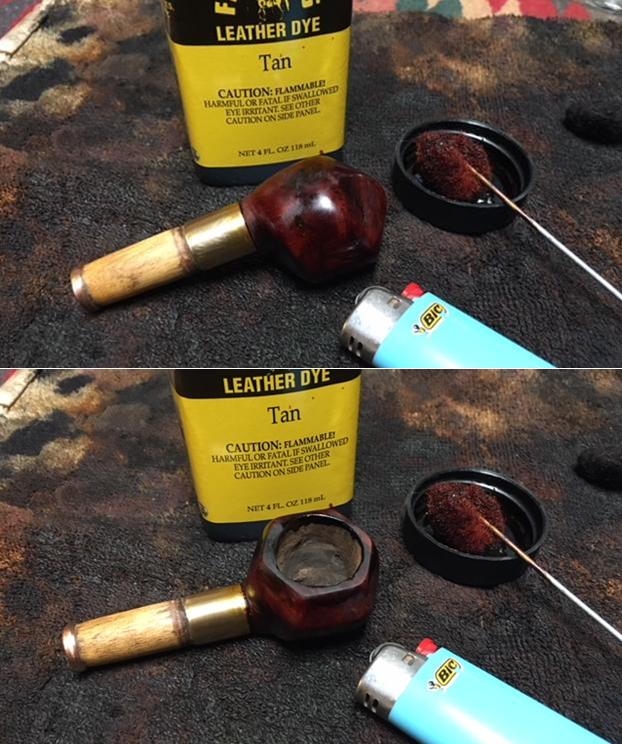
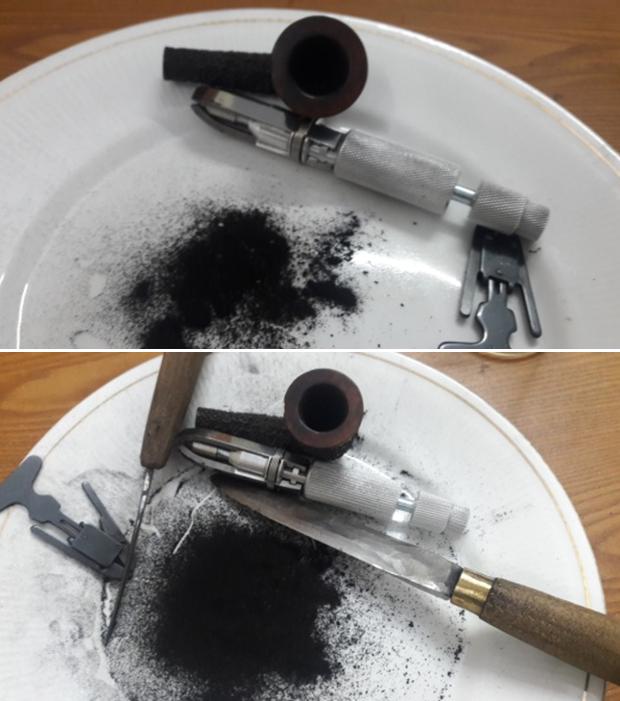
I started the process of restoration by polishing the sterling silver ornaments at the shank end and tenon with pipe ash as suggested by Mr. Steve. This was followed by reaming the chamber with size two of the PipNet reamer head and progressing through to size four. Yes Sirs, there is no typo error!!! It is indeed PipNet and not a Kleen Reem reamer as you have gotten used to reading in my write ups !!!!!! Mr. Steve has sent me a set along with some beautiful pipes that I had got from him. I followed up the reaming with scrapping the remnants of the cake from the walls, flat bottom of the chamber and the rim top surface with my fabricated knife (Oh, how I long for a Sav Fitsall reaming knife!!! Hope you are reading this Steve Sir). The cake was so hard, that I invariably ended up scratching the flat bottom surface while scraping.
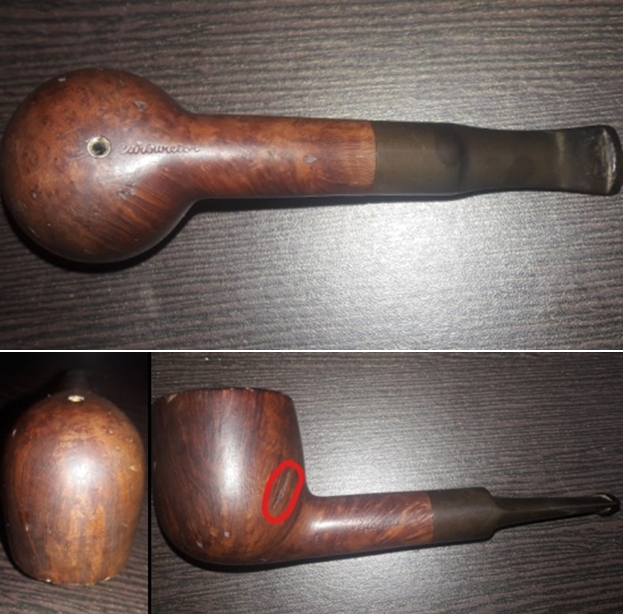
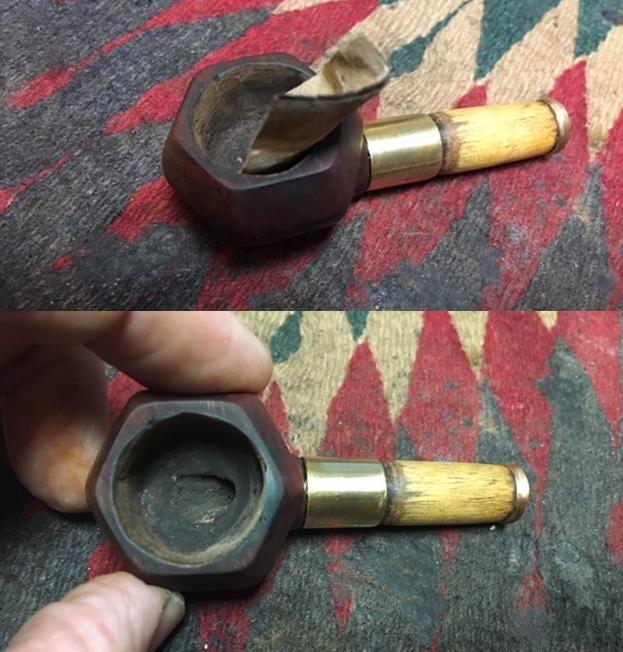
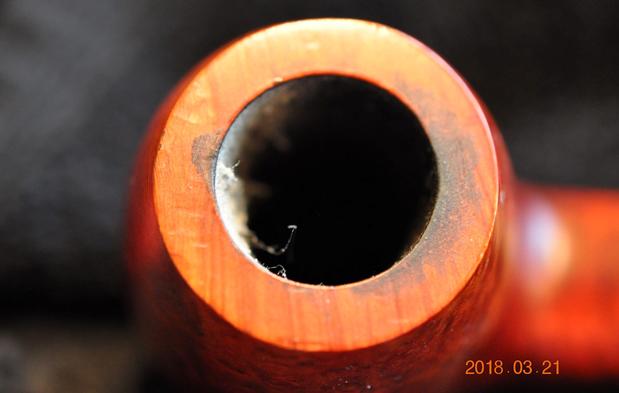
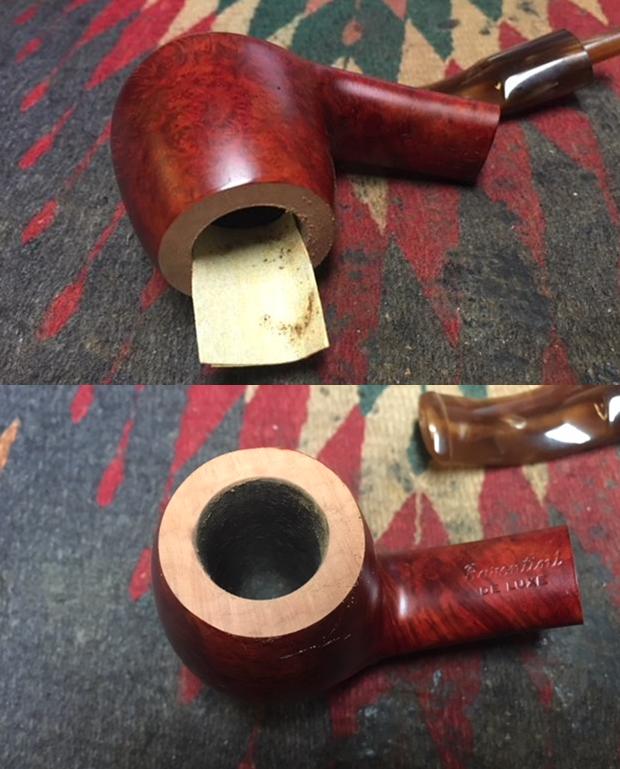
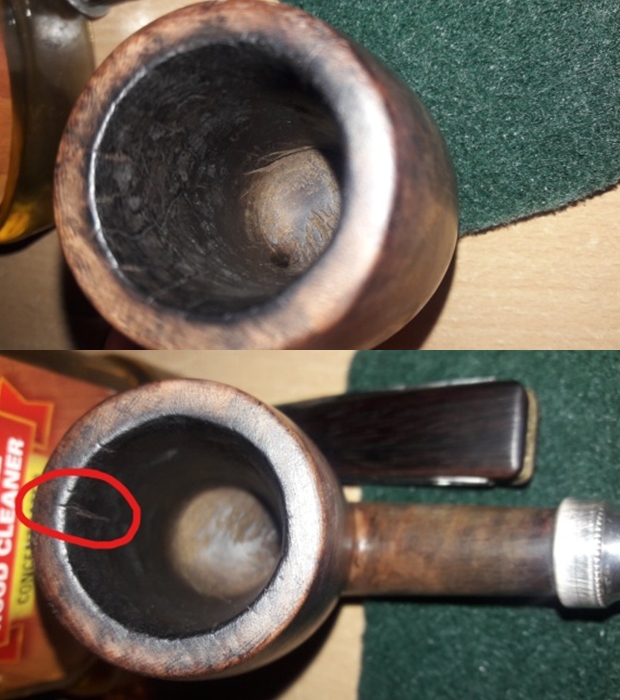
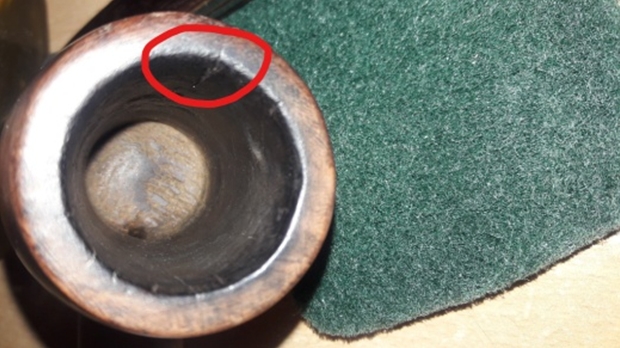
 Once the cake was reamed back to the bare briar, I used a 150 grit sand paper followed by 220 grit sand paper to remove all the traces of remaining cake and also to smooth the inner walls of the chamber surface. Finally, to remove the carbon dust, I wipe the chamber with a cotton pad wetted with isopropyl 99%. I gently scrapped the rim top surface with a sharp knife. Removing all the cake from the chamber and rim top revealed that firstly, the rim was out of round and secondly was a web of fissures along the internal walls. There was one crack, which showed prominently after a cleanup with Murphy’s oil soap, bothered me and can be seen in the pictures below which has been highlighted by a red circle. I shared these images with Mr. Steve and Mr. Dal Stanton for their opinion as to the extent of damage and further repairs. They too expressed fears that the crack may have migrated through the stummel. Mr. Steve suggested picking the crack on the top of the rim using a toothpick and filling it with CA superglue. I decided that I would address this issue later after further investigations.
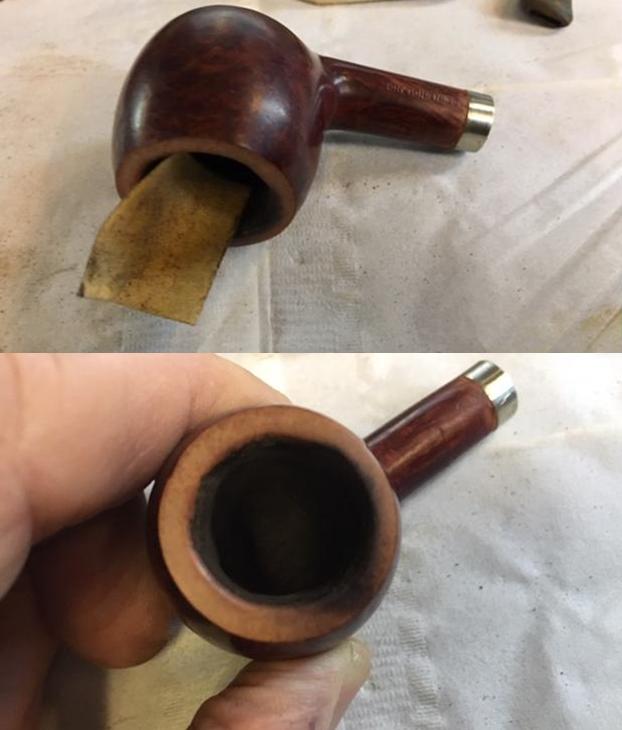
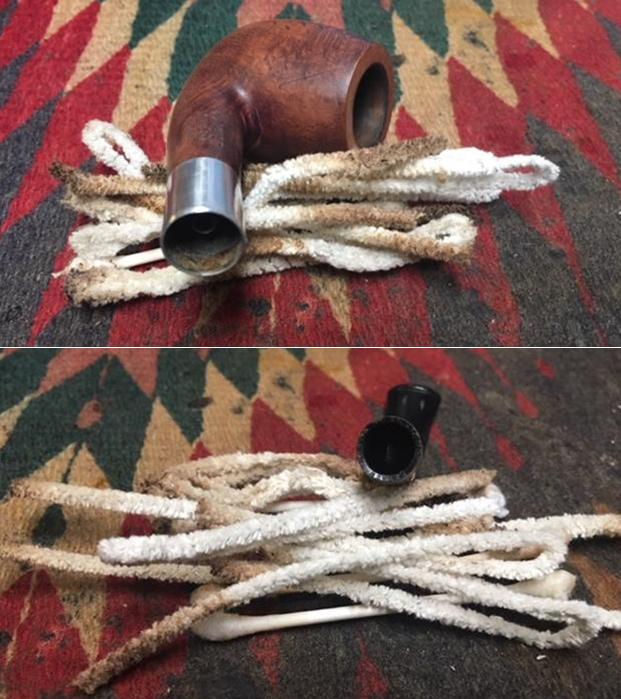
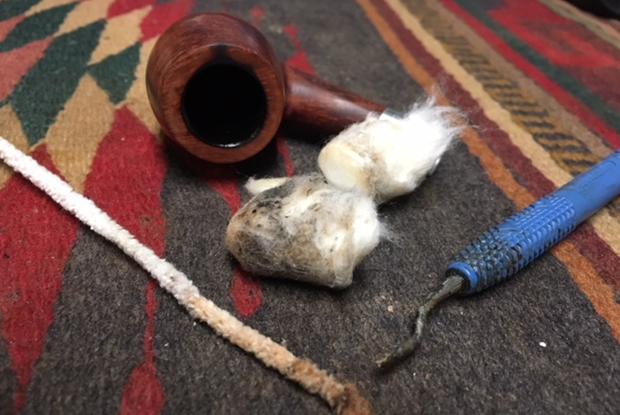
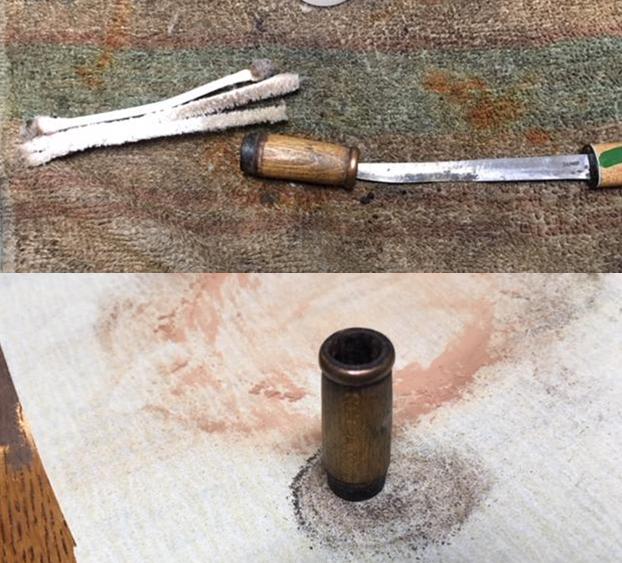
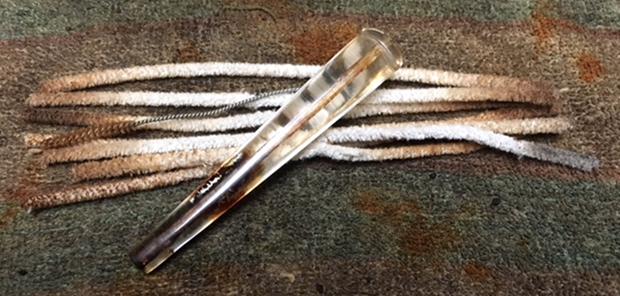
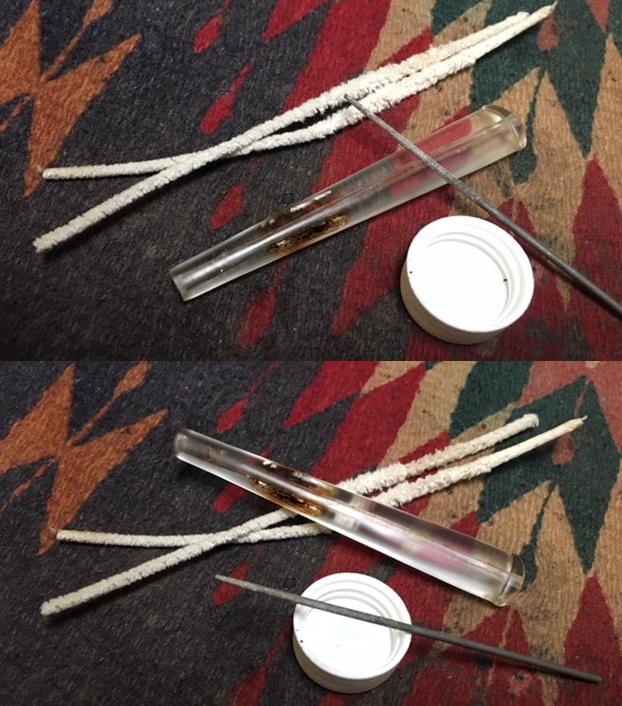
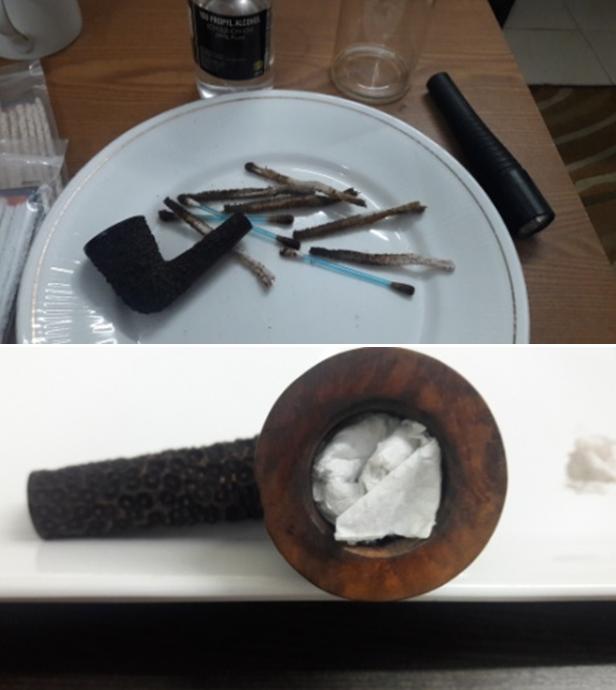
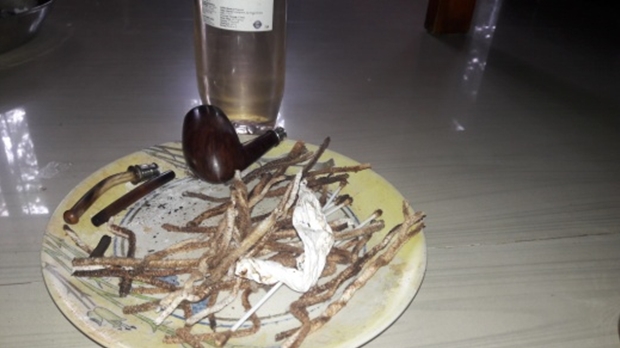
 I cleaned the internals of the shank, shank extension and the stem using hard bristled and regular pipe cleaners, q-tips, shank brushes, all generously dipped in isopropyl alcohol. I had never used such drastic measures like initially cleaning the bone shank extension by carefully inserting a round needle file for creating an opening through which pipe cleaners could pass through for subsequent cleaning. The heap of pipe cleaners and q-tips that are seen in these pictures are just the proverbial tip of the iceberg. I must have gone through an entire packet of 50 of both types of pipe cleaners, in addition to the q-tips and brush cleaning!!!!!
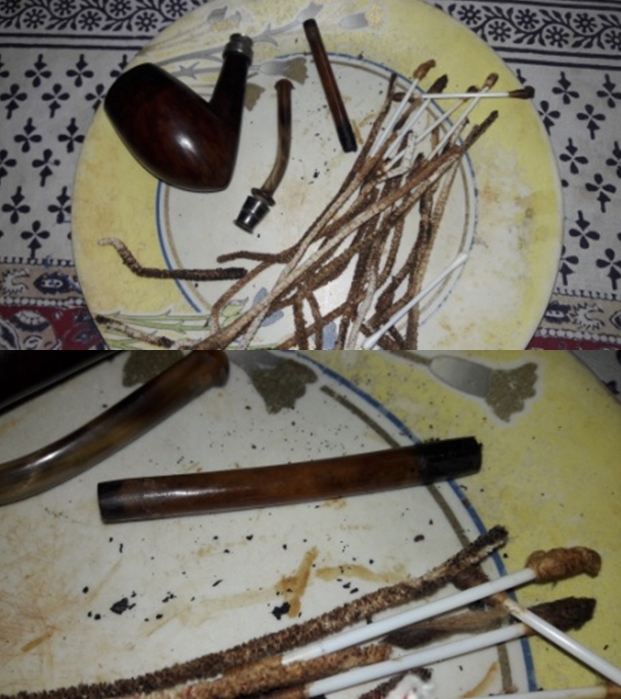
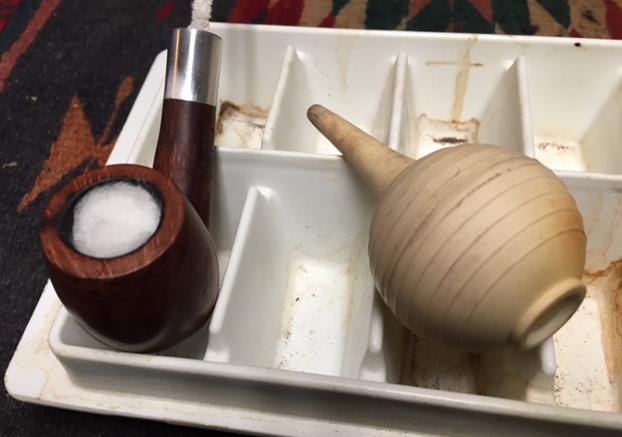
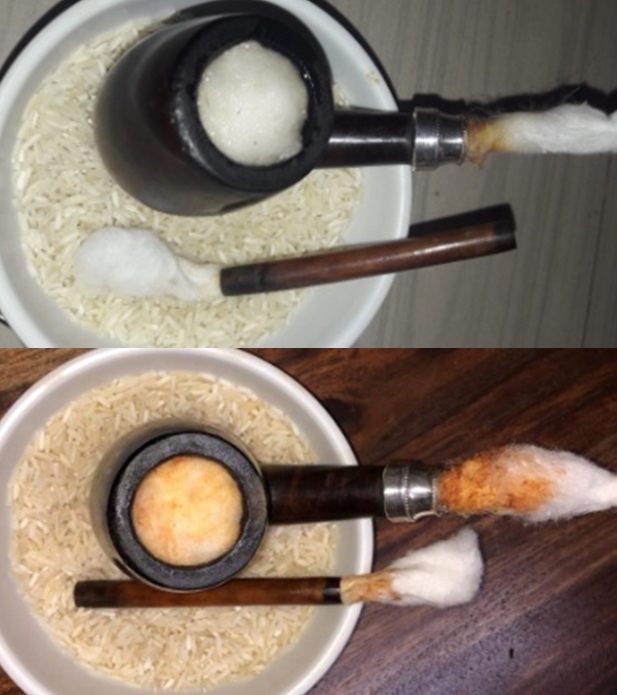
 To further deep clean and refresh the internals, I used cotton and alcohol soaks. Using a cotton ball to create a wick, I inserted it through the mortise and into the airway. I then stuffed the bowl with tightly packed cotton balls and placed it in bowl filled with rice grains to provide stability. Similarly I made a tight cotton wick and inserted it through the bone shank extension to further remove all the oils, tars and smells. With a large eye dropper, I then filled the bowl and the bone shank extension with isopropyl 99% until it surfaced over the cotton. I refilled the alcohol in a few minutes after it was absorbed into the cotton balls. I put the stummel and the bone shank extension aside for several hours to soak. After some time, the cotton and the wick were soiled. I discarded the expended cotton and wiped the bowl and the bone shank extension with paper towel. To make sure all was clean, I used a cotton bud and pipe cleaner dipped in isopropyl 99% and they came out clean.
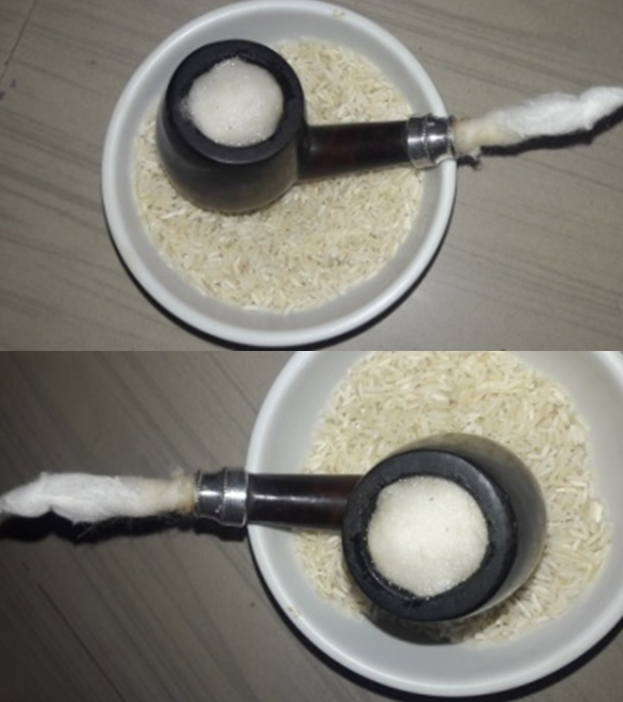
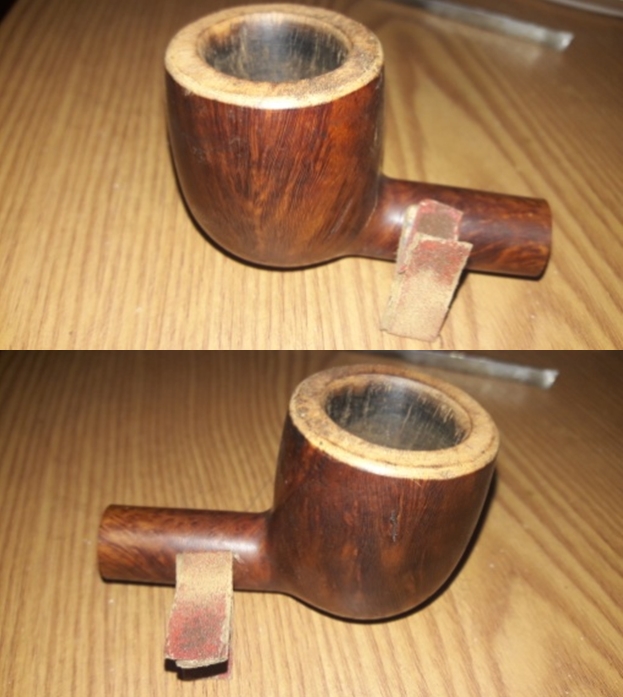
 I cleaned the stummel with undiluted Murphy’s oil soap and Scotch- Brite pad and rinsed the stummel under running tap water. This cleaning helps in bringing to the fore any other damage which could be hidden under all the dirt and grime. Fortunately, there were no major dents, dings or gouges to the stummel. There were a few minor ones which I think would be addressed when I would sand the stummel surface and subsequent micromesh polish. I dried the bowl with a paper towel and soft cotton cloth.


 Initially I had decided that I would not be topping the rim top and maintain its original profile. However, in order to ascertain if the crack had migrated through the stummel, I decided to top the rim surface. This would also help to address the numerous dents, dings and scratches on the rim’s top surface and also to remove traces of lava overflow. I topped the rim surface on a 220 grit sand paper. Though it is recommended to have a wooden board with the 220 grit sand paper firmly fixed over it, I just keep the sand paper on a flat table top, holding it firmly with my left hand and rotating the stummel rim top over it with my right hand. I have come to realize that this set up gives me lot more freedom of movement, better control and convenience of storage. Fortunately, it was revealed that the supposed crack was superficial and had not migrated through.
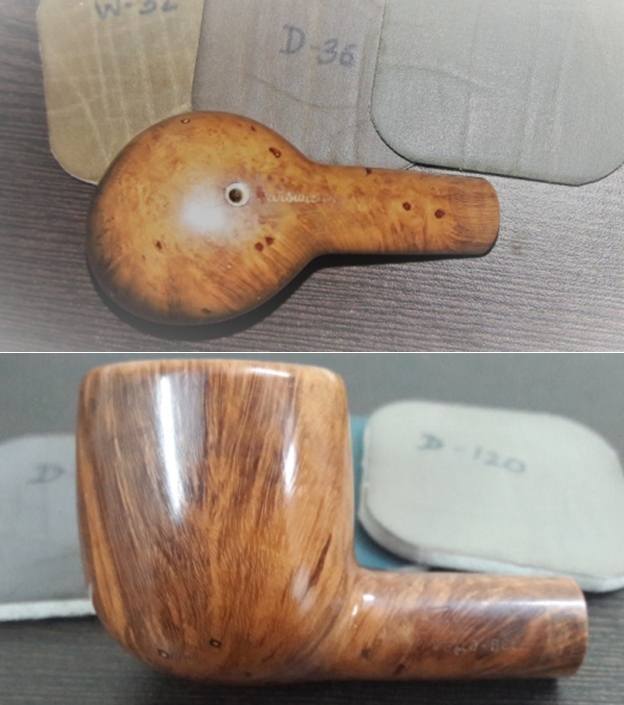
 Staying with the rim, the next issue that I addressed was the inner rim edge. With a folded piece of 180 grit sand paper pinched between my thumb and fore finger, I created a light bevel on the inner edge. This addressed the issue of uneven and out of round inner edge. The damage to the outer edge was addressed to a great extent when I had topped the rim top surface. Whatever little dents and nicks that remained on the outer edge were very minor, though visible, and I decided to let them be.
 I sand the stummel surface with a 220, 320, 600 and 1000 grit sand paper, in that order, to remove the minor scratches and marks on the rim and stummel surface. I frequently wiped the sanded surface with a moist cloth to remove the briar dust and also to check the progress of my work.
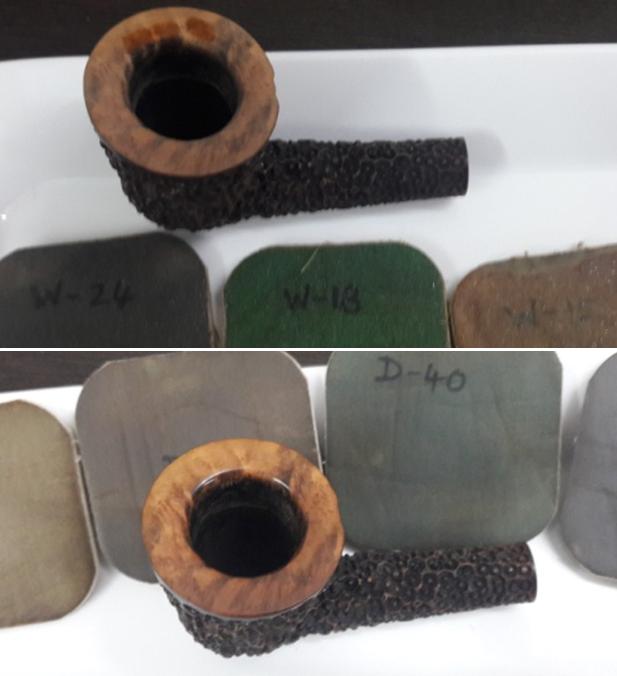
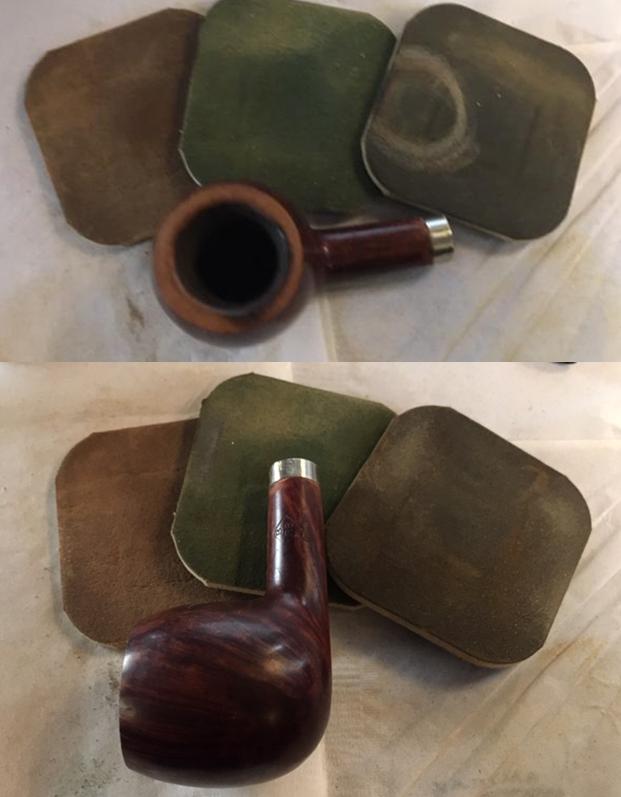
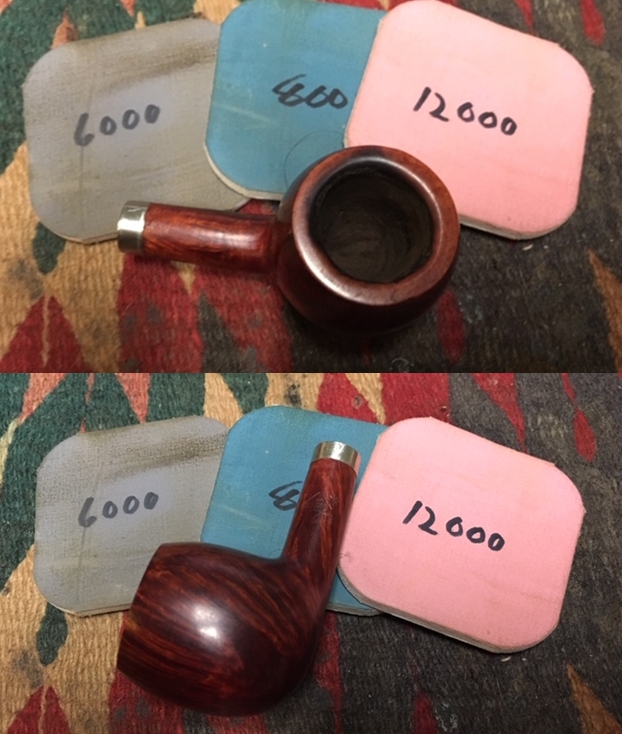
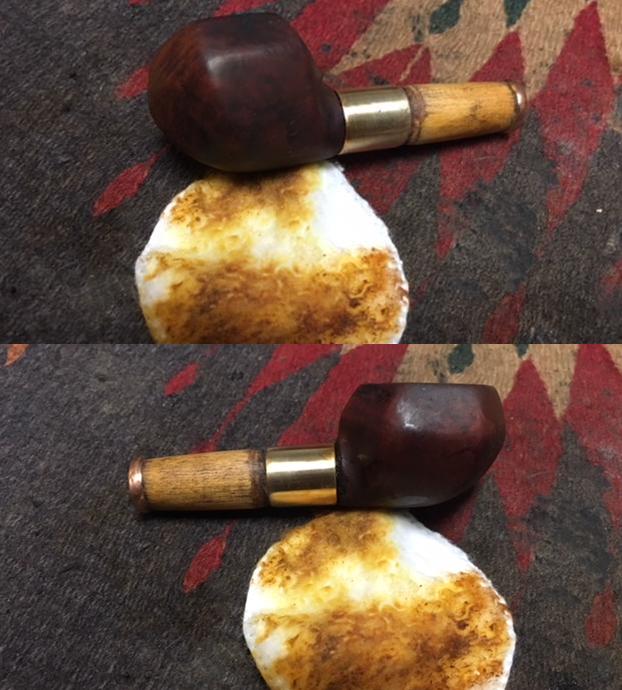
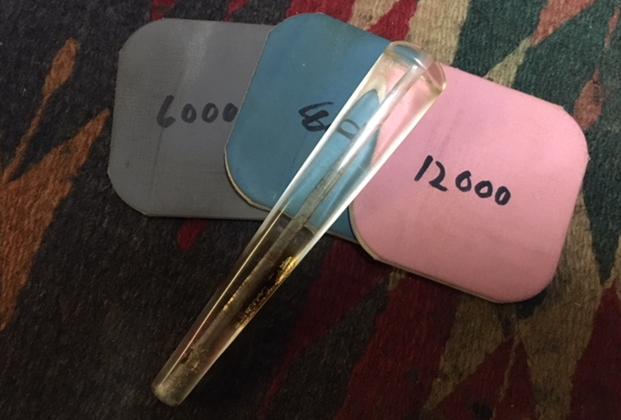
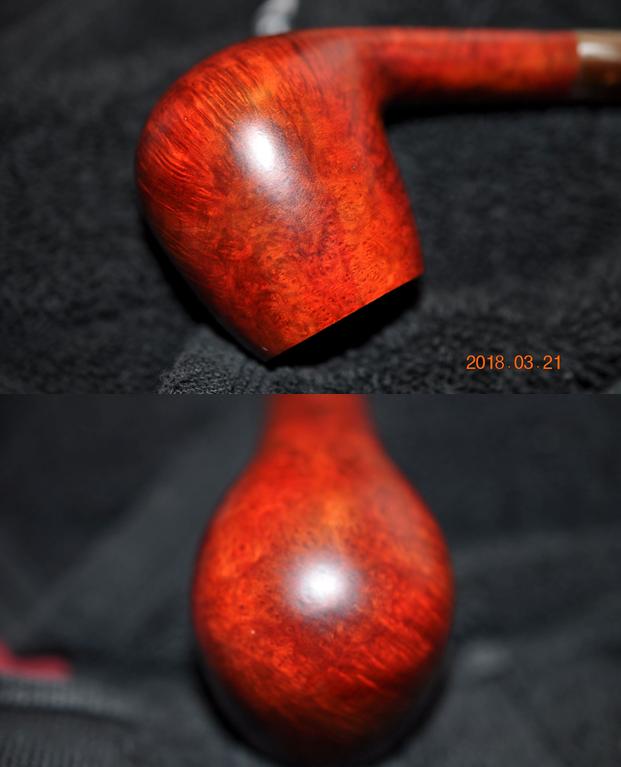
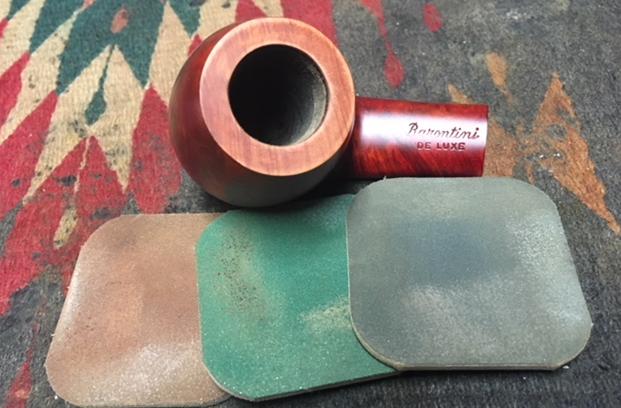
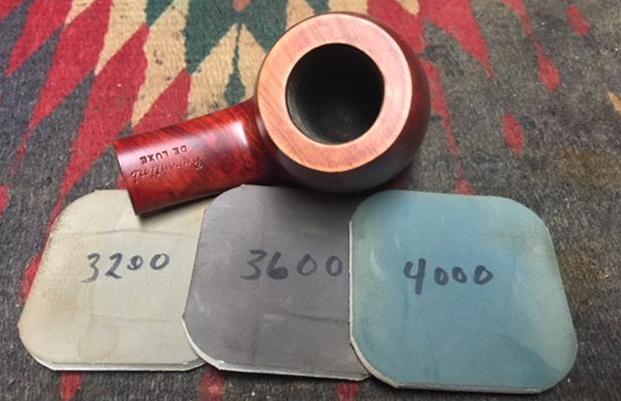
 Once I was satisfied with the match, I followed it up by micromesh polishing pads, wet sanding with 1500 to 2400 grit pads. Again, I wiped the bowl with a moist cotton cloth after each pad. I used the 3200 to 12000 grit pads to dry sand the stummel to a nice shine. I was disappointed when after all my efforts up to this stage; there were some very minute chips that were visible in pictures. But overall, at this stage of restoration, the entire bowl, rim top surface and shank is looking fresh and clean. Even though some of the dents and chips could not be completely addressed and are visible only on very close visual scrutiny, in my view, they lend this pipe a battle scarred warrior like a character.
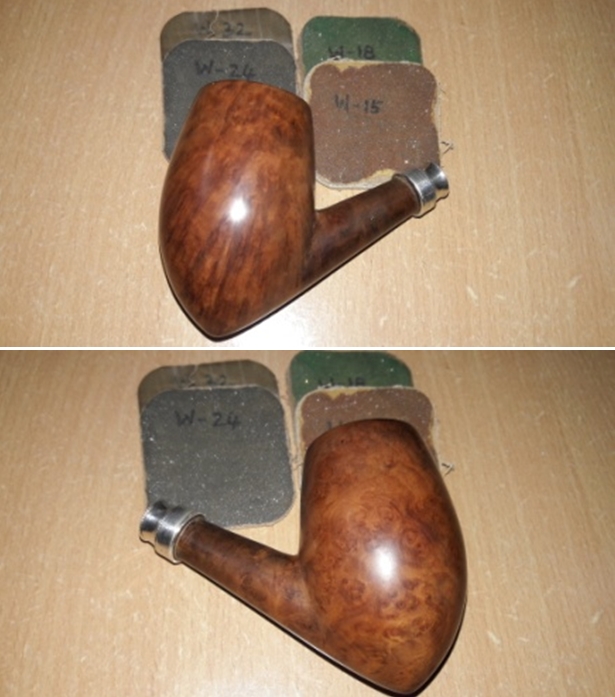


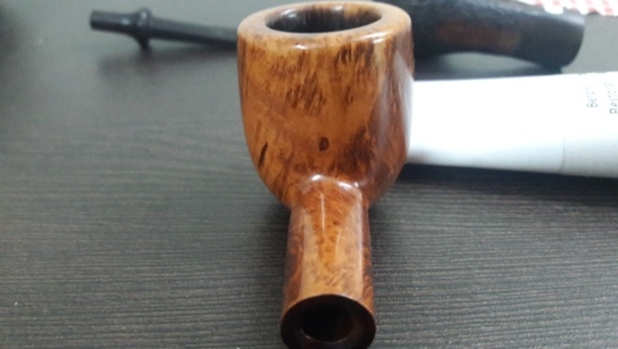
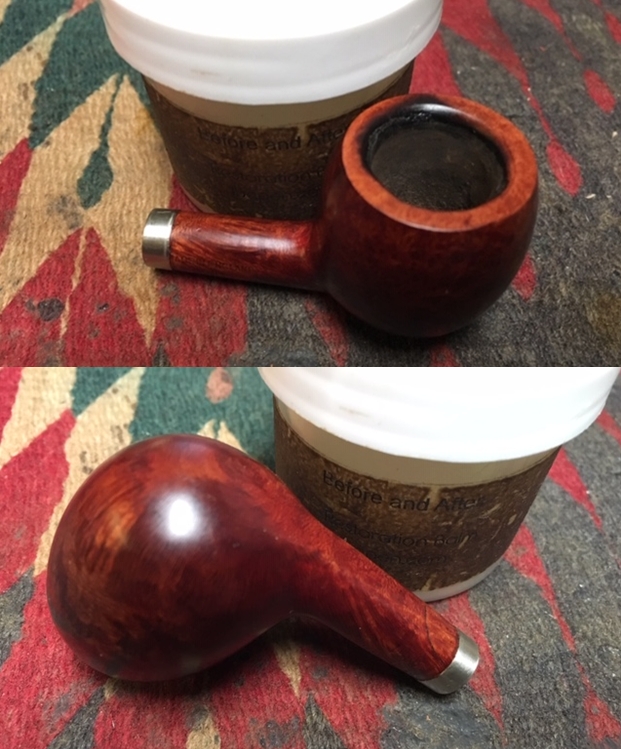
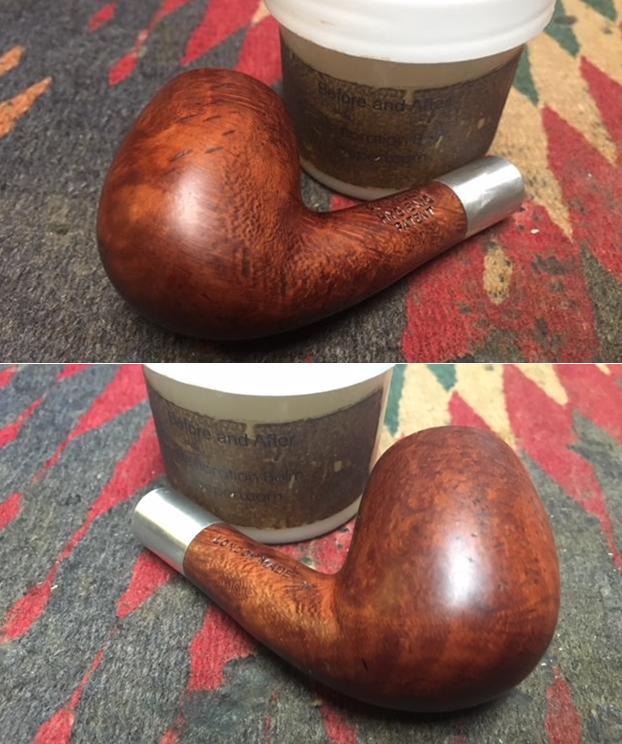
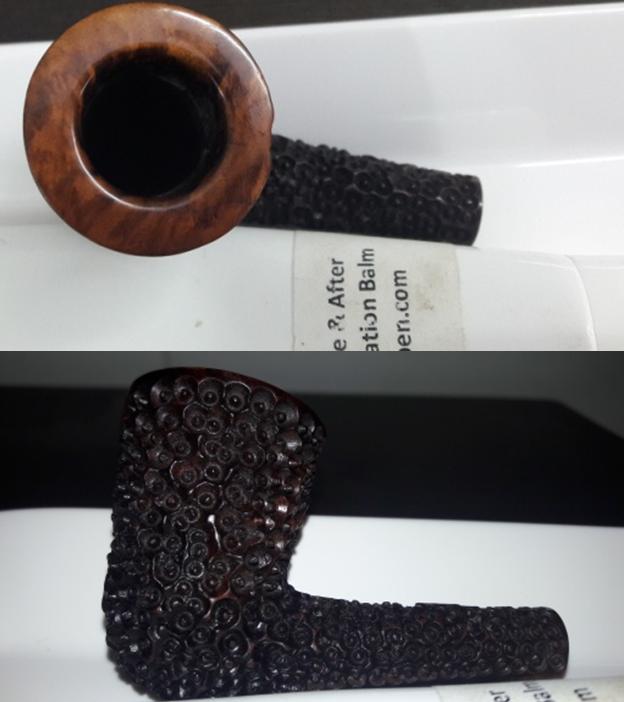
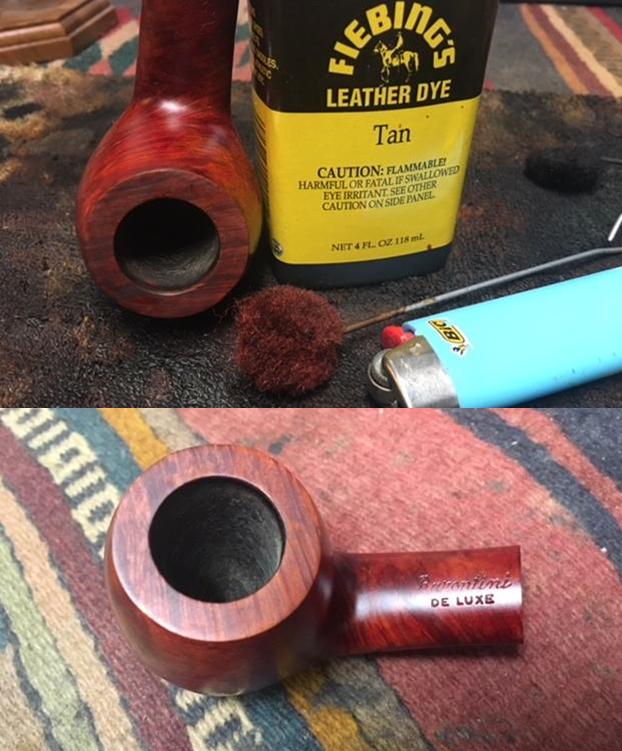
 I rubbed a small quantity of “Before and After Restoration Balm” with my fingers deep in to the stummel surface. What this balm does is it revitalizes the briar wood and breathes a new life in to the briar. It’s amazing to see the transformation as the balm works its magic on the briar wood. I further buff it with a horse hair shoe brush.
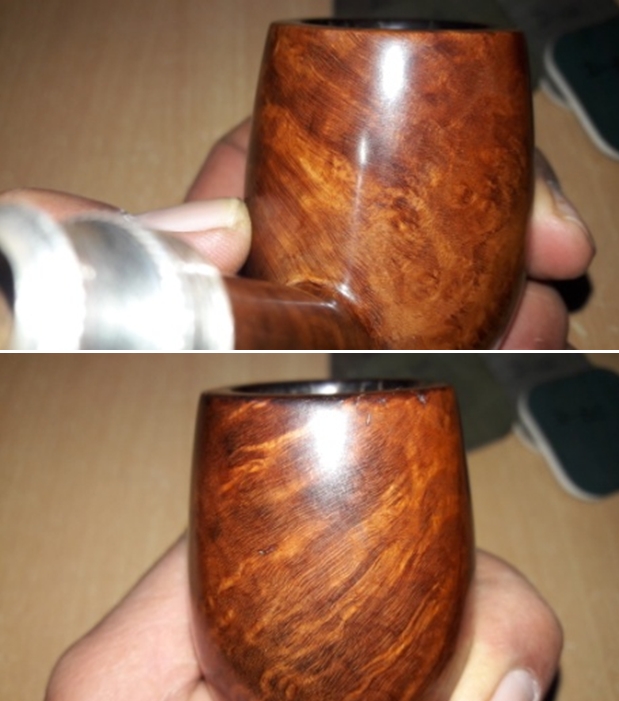


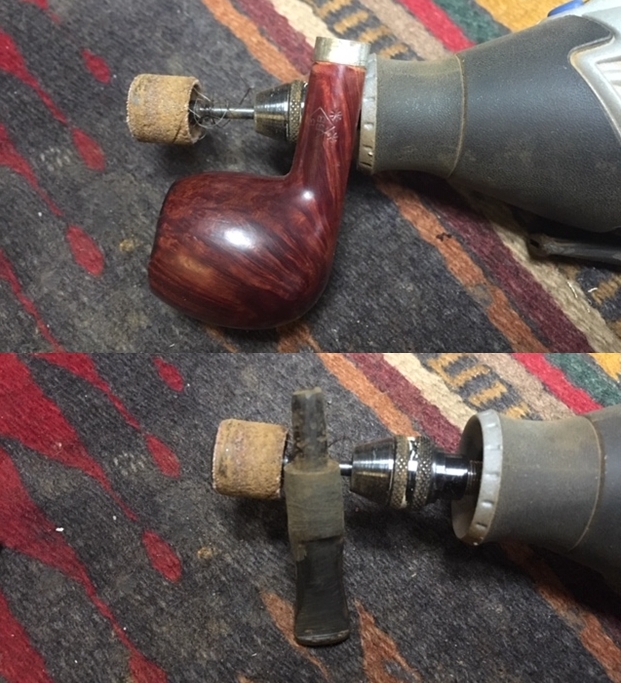
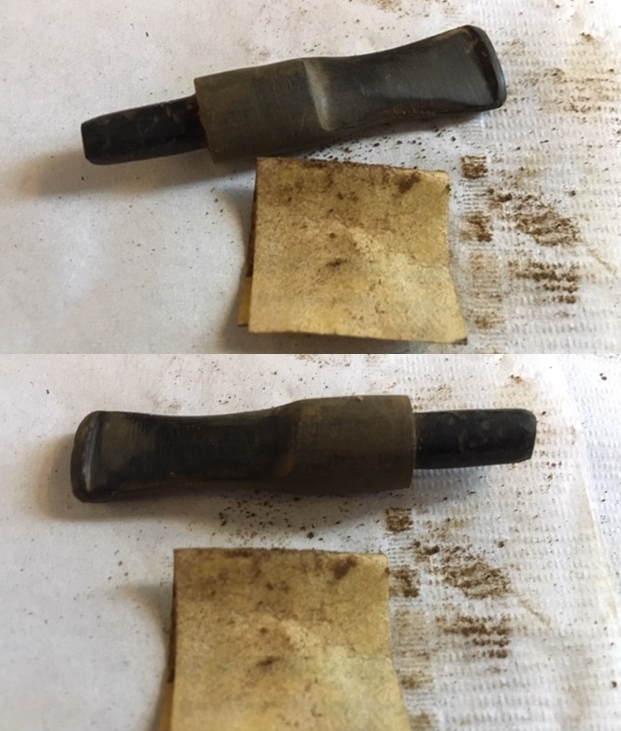
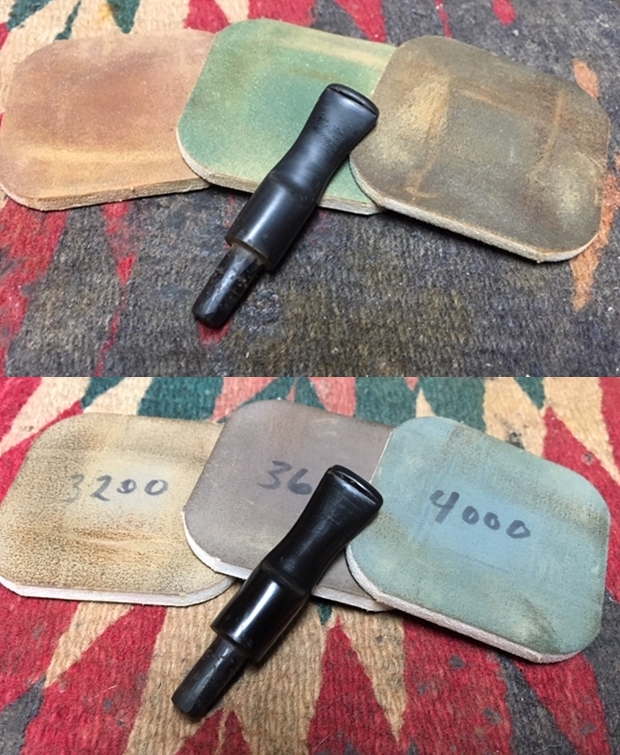
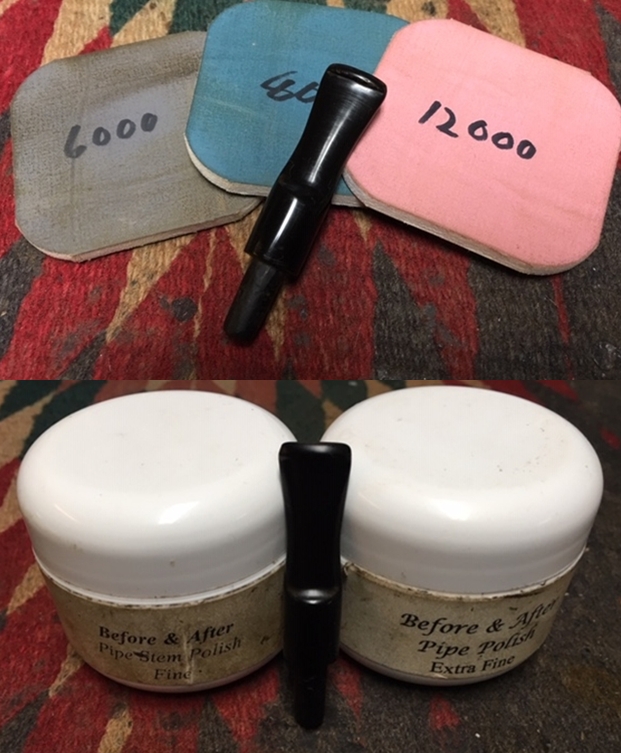
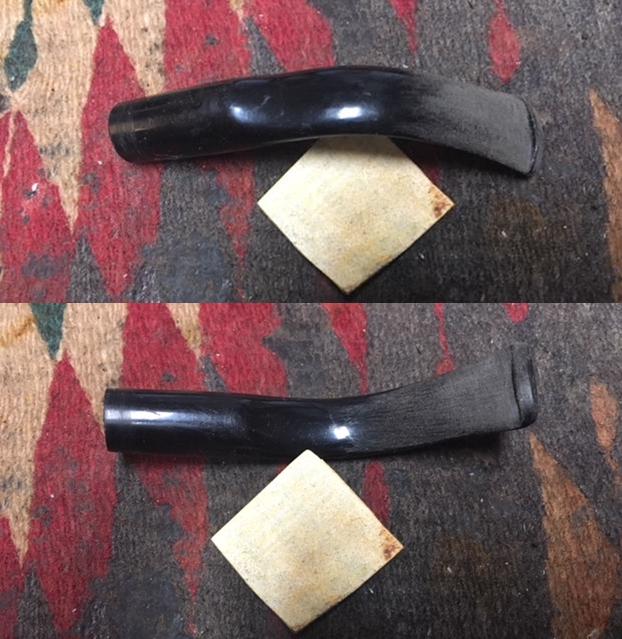
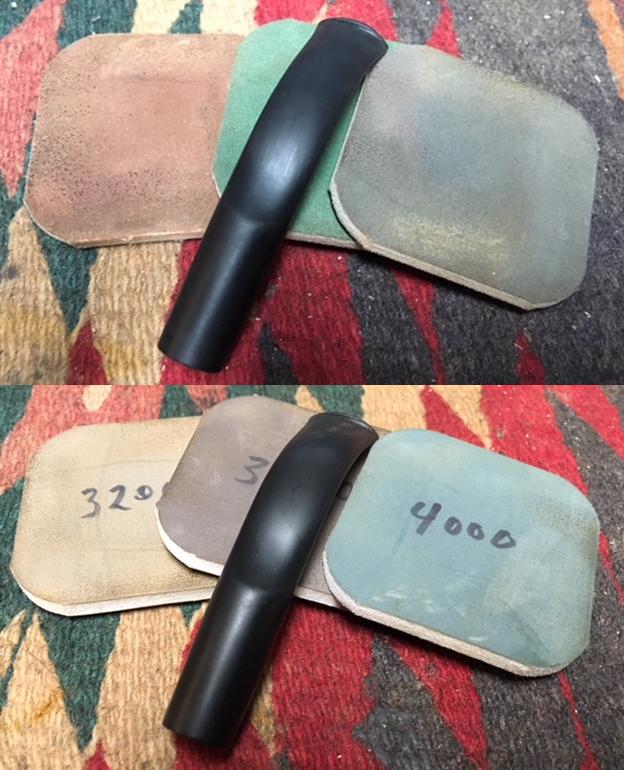
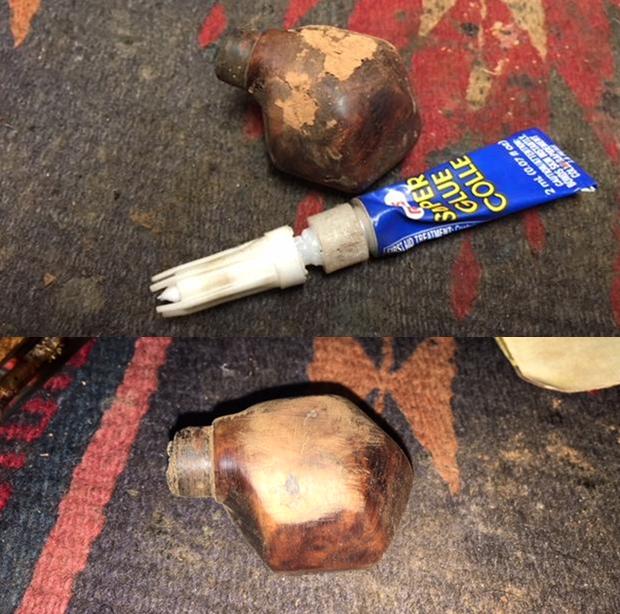
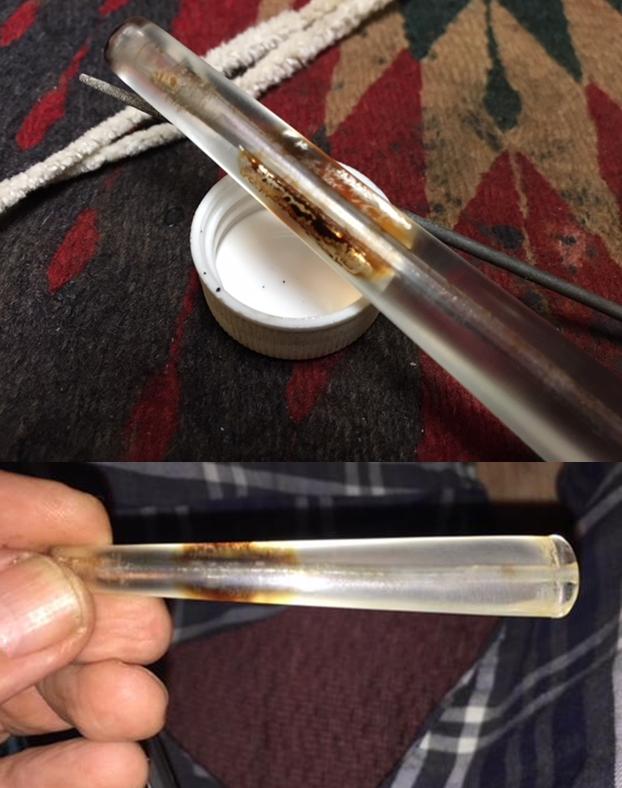
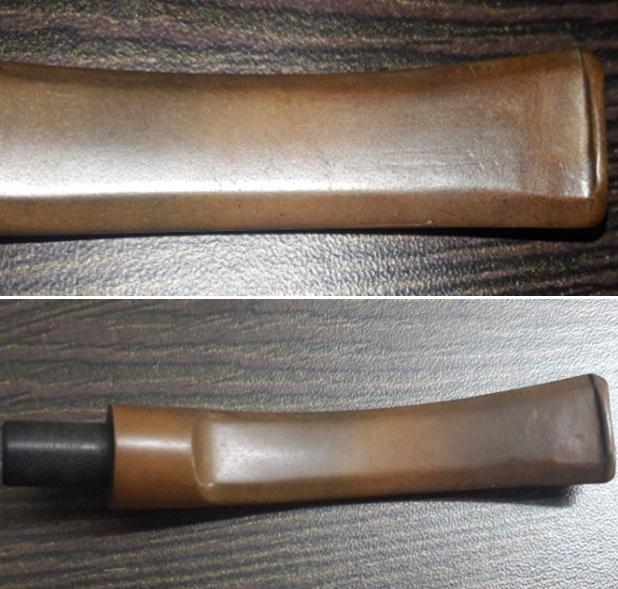
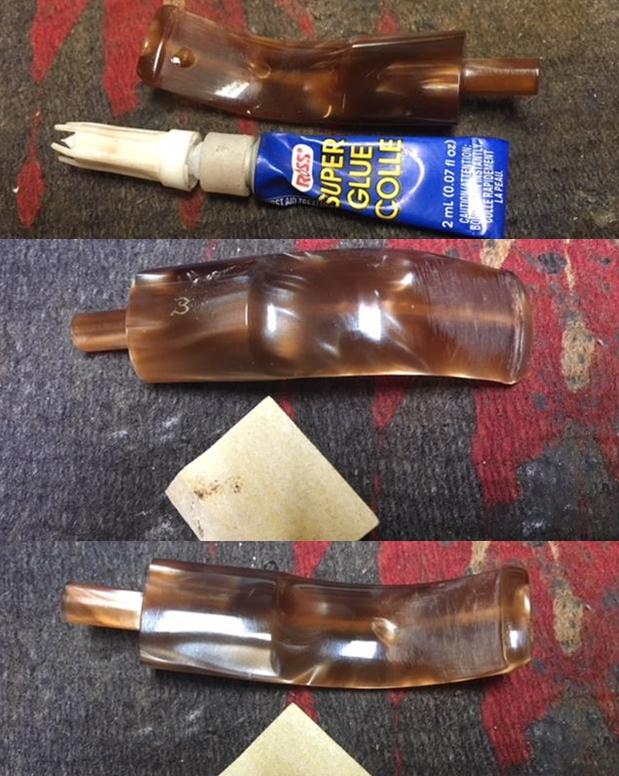
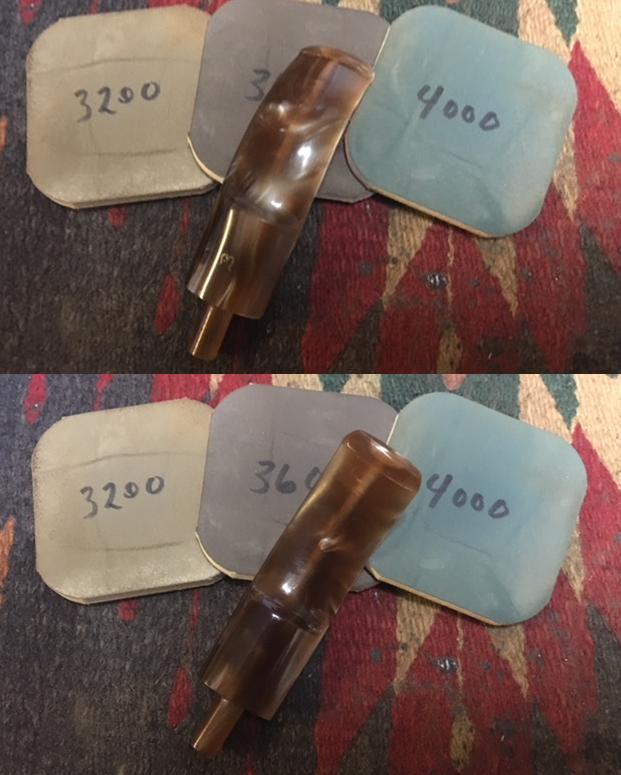
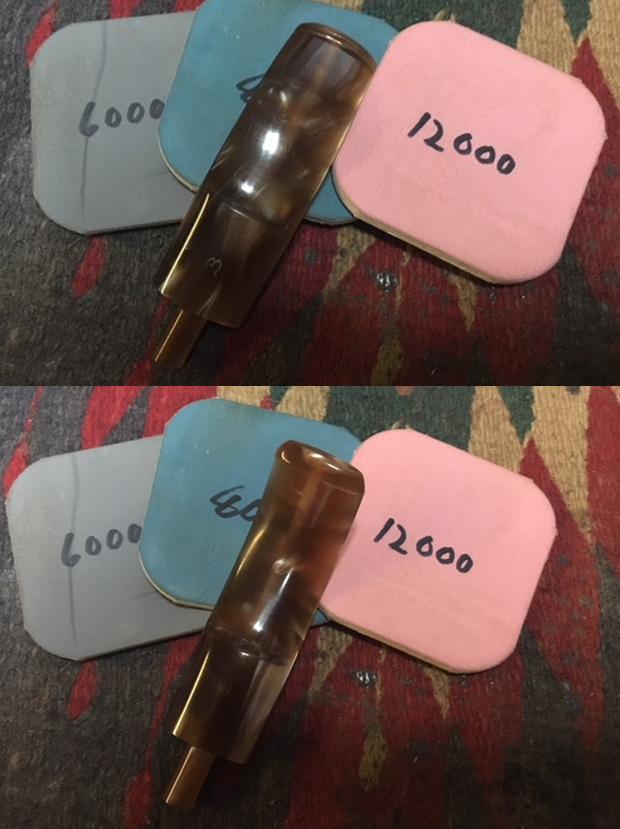
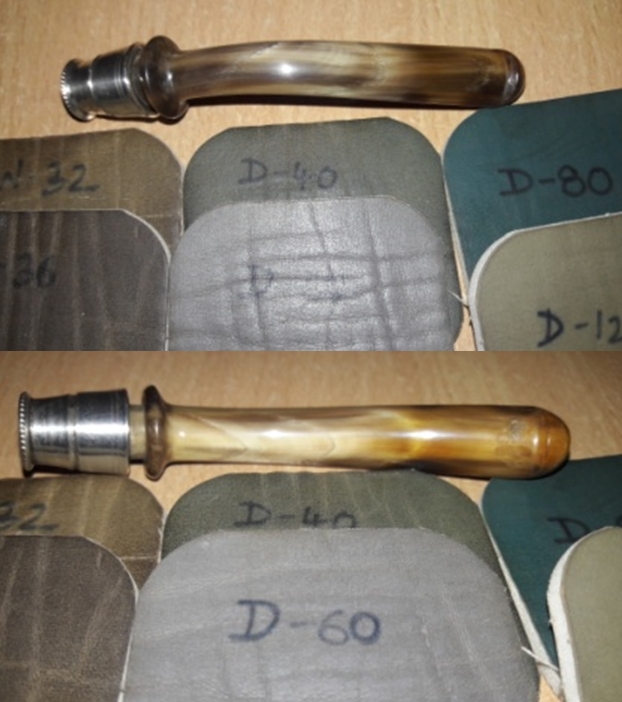
 Turning my attention to the horn stem, I cleaned the stem surface, including the worm holes, with q-tips dipped in isopropyl alcohol to remove all the dirt and dust before the fill. I filled the worm hole on the bottom and top surface with clear CA superglue and set it aside to cure. Once the superglue had cured, I sanded the fills with a flat head needle file. To further match the fills with the surface of the stem, I sanded it with 220, 320, 600 and 1000 grit sand paper. I wiped the stem with cotton pad dipped in alcohol to remove the resultant dust. I rubbed some extra virgin olive oil in to the stem and set it aside to be absorbed in to stem. A few minutes later, I polished the stem and also the bone shank extension with micromesh pads, wet sanding with 1500 to 2400 grit pads and dry sanding with 3200 to 12000. I rubbed a little extra virgin olive oil in to both after every three pads. The stem is now nice, smooth and shiny while the extension though smooth and shiny, still had the golden brownish hues of the tobacco oils and tars. I was wondering as to next course of action, Mr. David Goostree, an experienced member from The Tobacco Pipe Restorer group on FB, provided valuable information that the bone is similar to a Meer and absorbs oils from the tobacco and colours just like a meerschaum. Another issue taken care of!!!


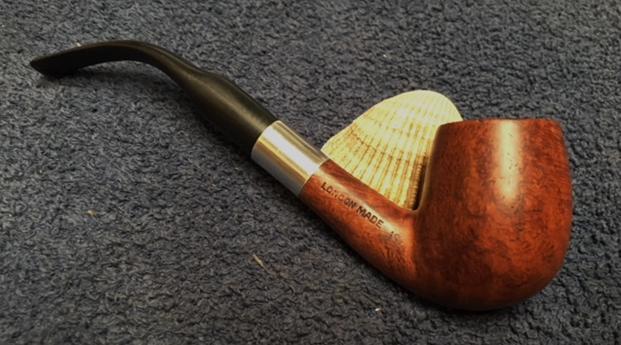
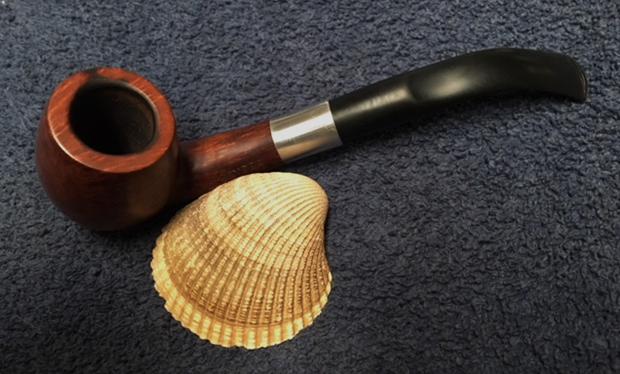
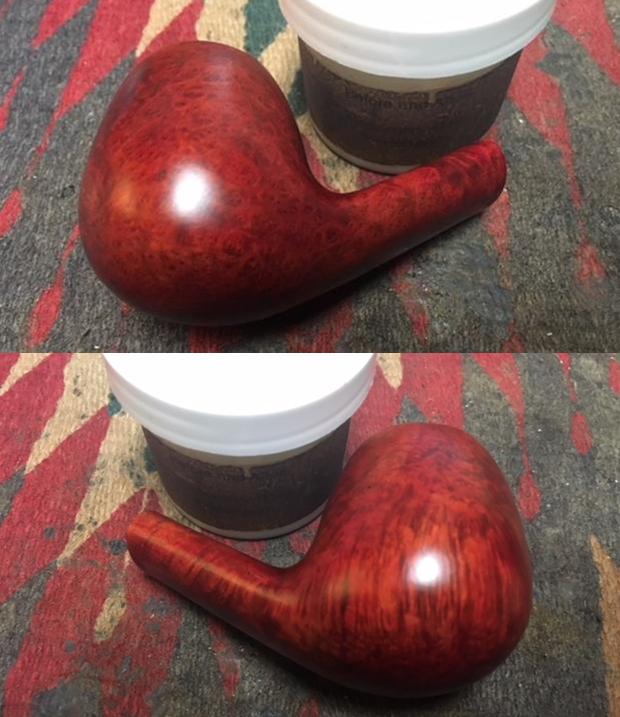
 To finish the restoration, I mounted a cotton cloth buffing wheel to the Dremel (actually it is not the brand machine, but a local machine which is similar). I set the speed at about 40% full power and applied White Diamond compound to the entire pipe. Afterwards, I wiped/ buffed the pipe with a soft cotton cloth to clear it of any leftover compound dust. I then mounted another cotton cloth wheel to the polishing machine, maintaining 40% speed and applied several coats of carnauba wax. I finished the restoration by giving the entire pipe a rigorous hand buffing using a microfiber cloth to raise the shine further. In my excitement mixed with apprehension in using the polishing and waxes for the first time, I completely missed out on taking any pictures. The completed pipe looks lovely, fresh and vibrant. Thank you for having the patience to reach this far while reading the write up. Your comments are of utmost importance to me for improving my skills in restoration process as well as writing about it. Cheers!!!!!
PS: – During this journey of restoring this beauty, I had, on occasions felt low and demoralized as issues kept cropping up like the supposed crack to the stummel, the shank extension not supposedly cleaning up as I had incorrectly anticipated and the 2/3 occasions when the my polishing machine slipped on the surface and caused very minor scratches on the stummel. However, my Guru and mentor, Mr. Steve was always around with his words of wisdom and encouragement to egg me on towards completing this project. Thank you once again, Mr. Steve. I would like to thank all the esteemed members of “The Tobacco Pipe Restorer” group on FB for their interest and valuable inputs, which made this project interesting.