
By Steve Laug
 Not long ago I worked a trade with a fellow for these five pipes in exchange for one that I had here. He sent me photos of the pipes and the deal was struck. The pipes he sent are as follows from bottom to top. There is a W.O. Larsen sandblast oval shank Brandy with a hairline crack in the shank and with tooth marks on the button on both sides, a Bertram Cutty that I had traded with him earlier, a Kriswill sandblast Canadian with a cracked shank, a Viby pencil shank Billiard and a Stanwell Royal Briar wide oval shank Dublinesque Canadian with burn damage on the rim edges and top around the bowl and deep tooth marks on the stem.
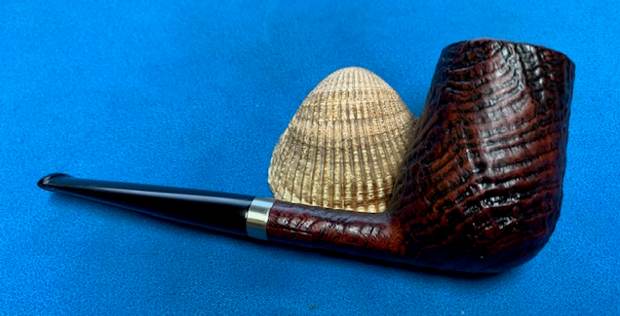
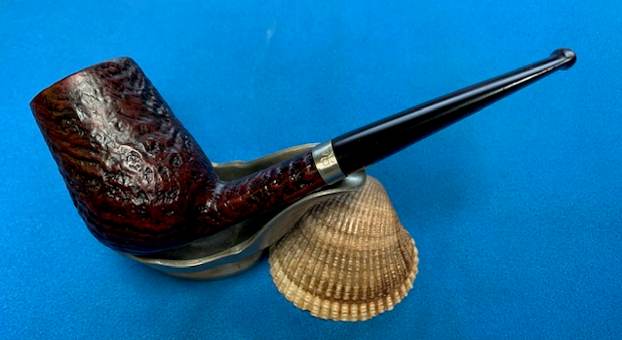
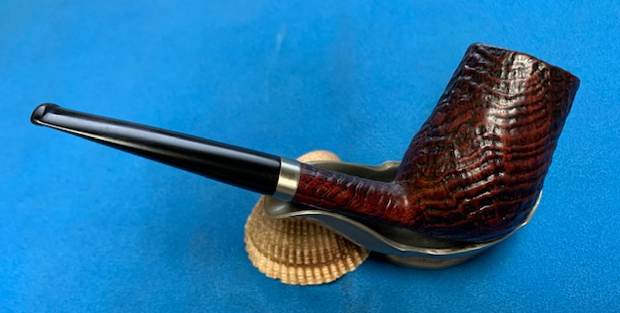
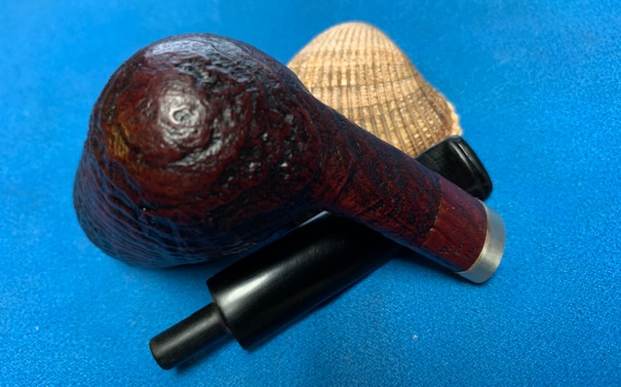
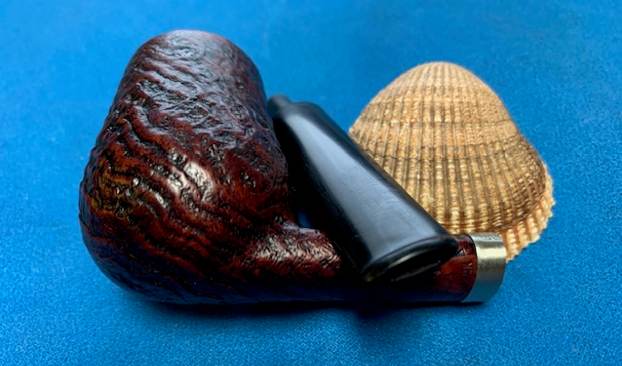
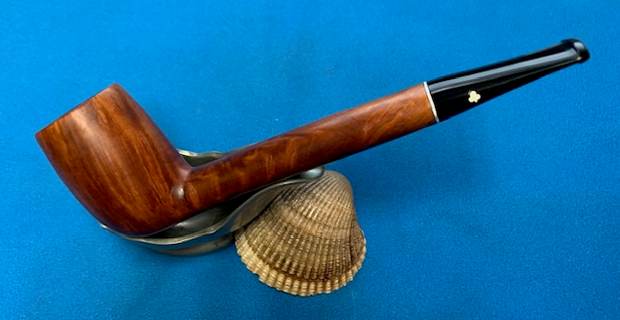
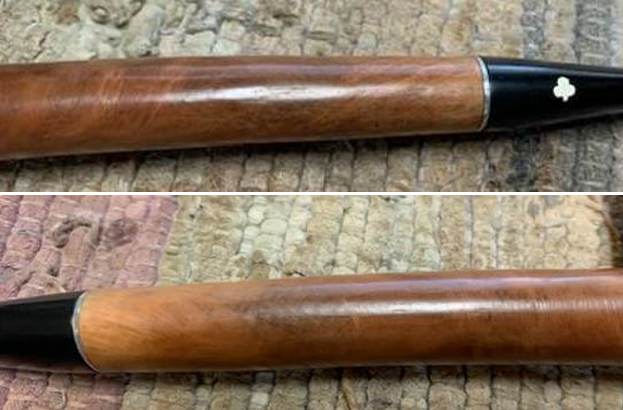
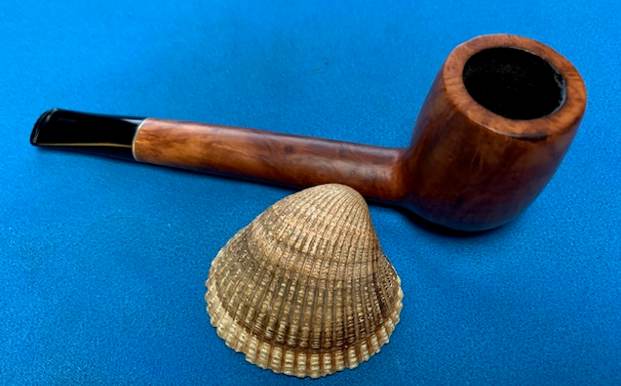
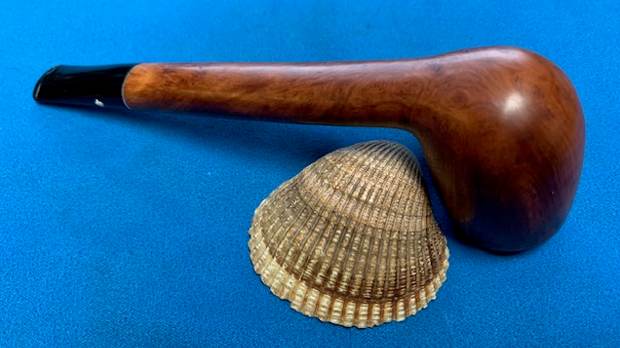
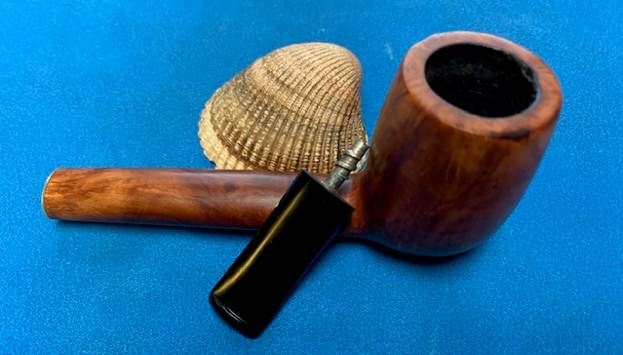
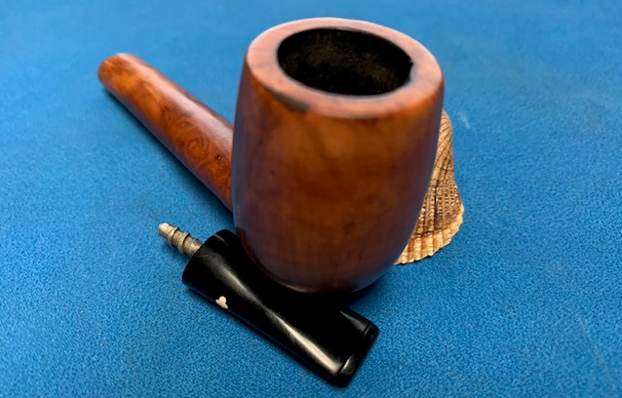
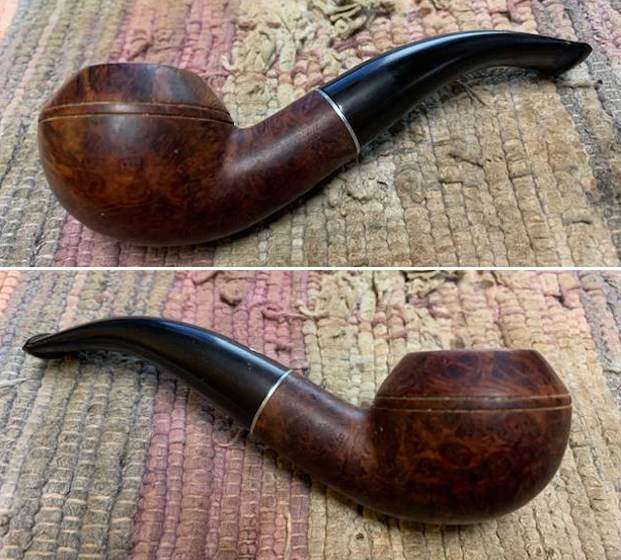
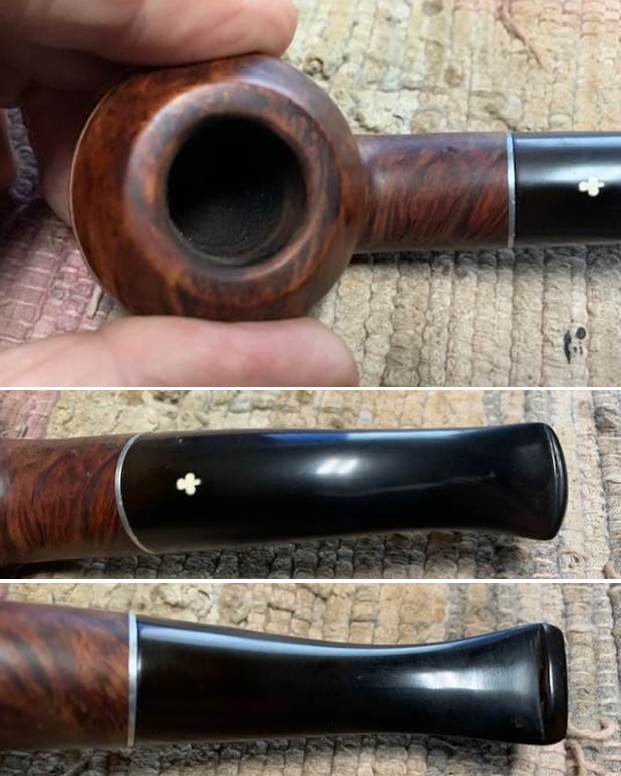
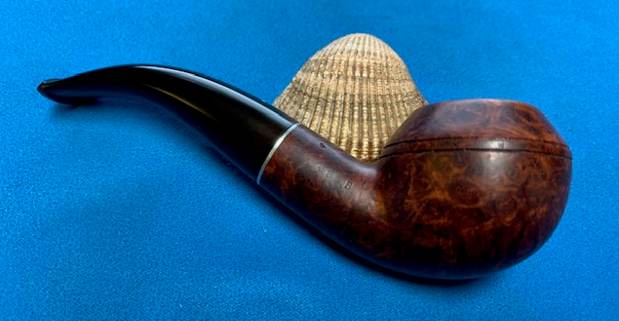
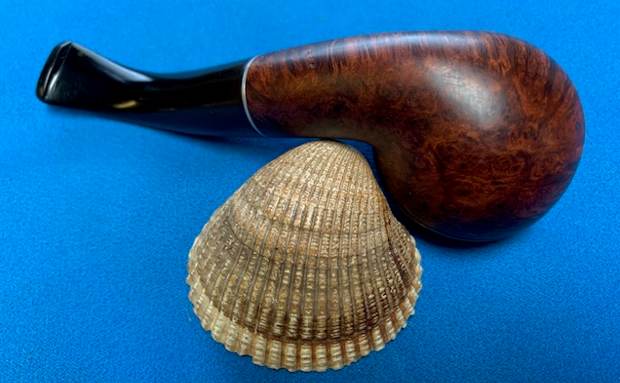
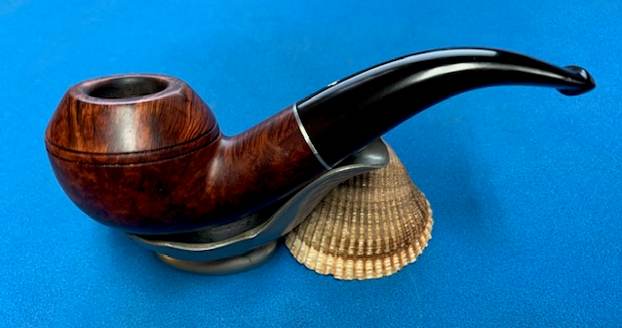
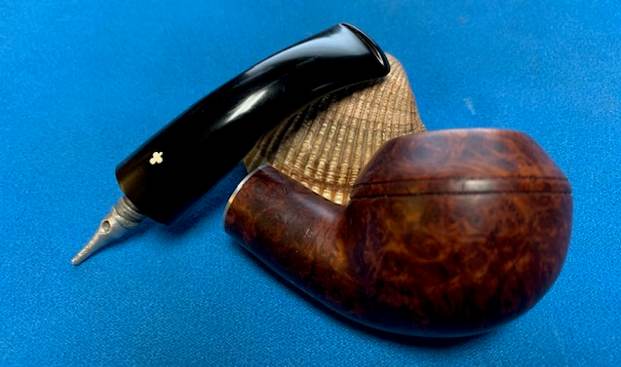
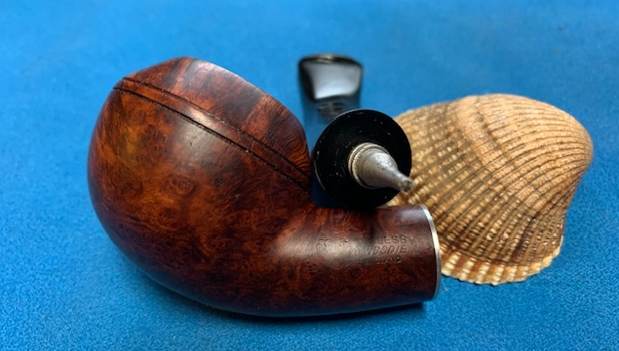
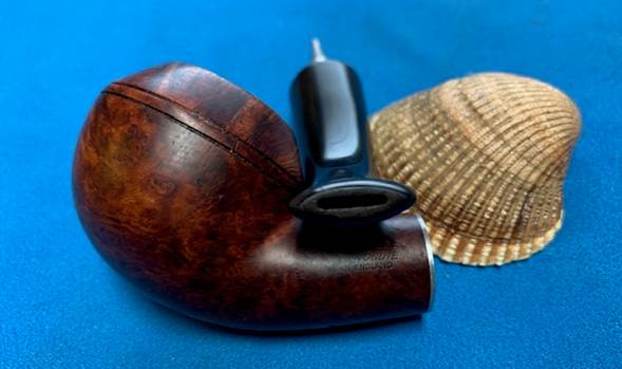
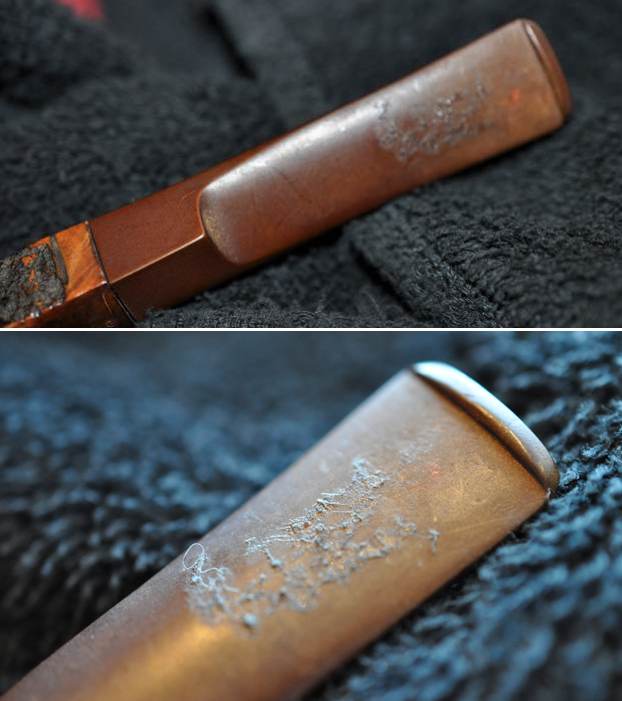
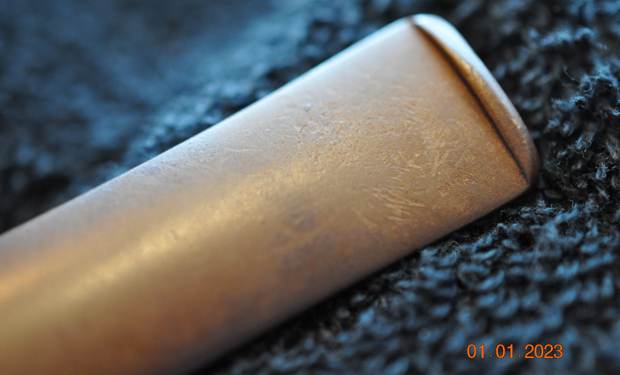
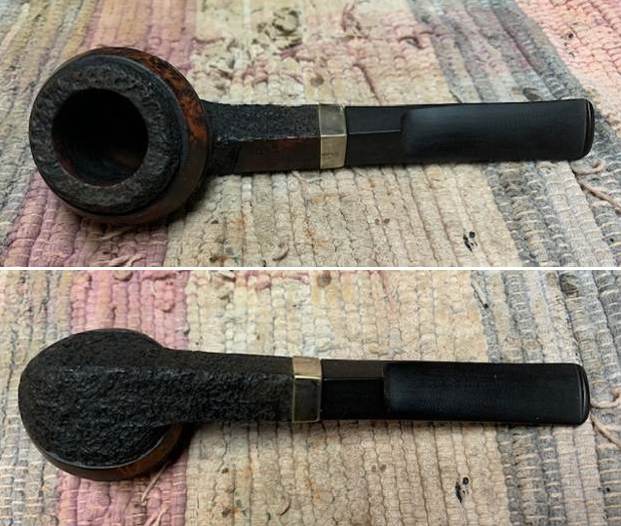
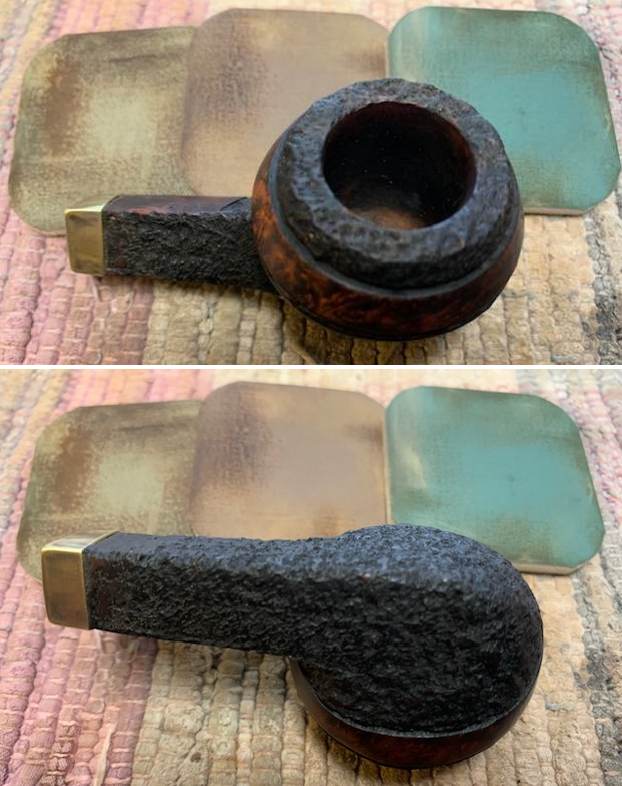
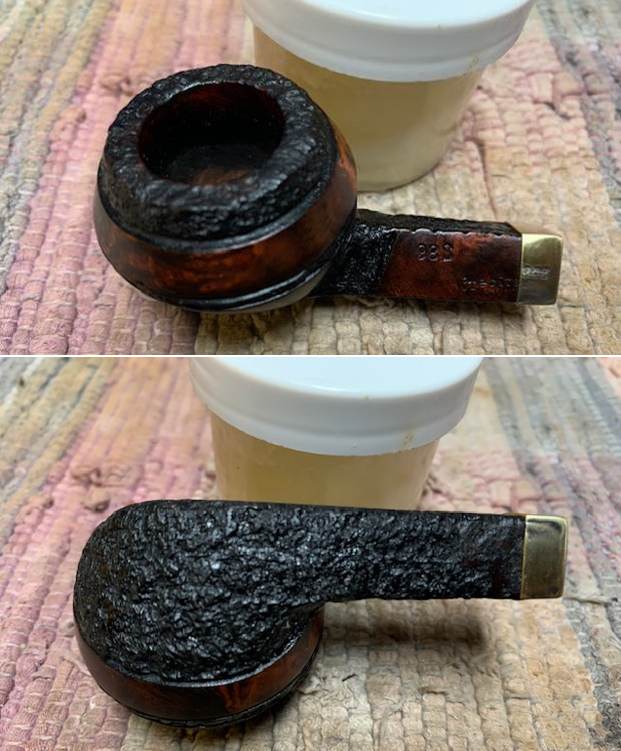
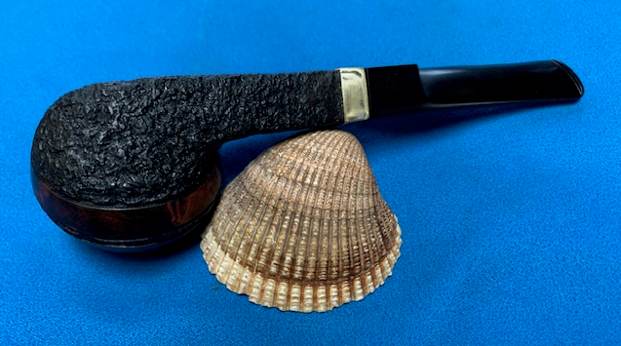
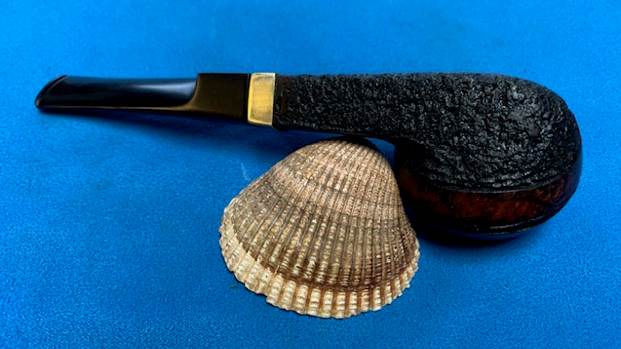
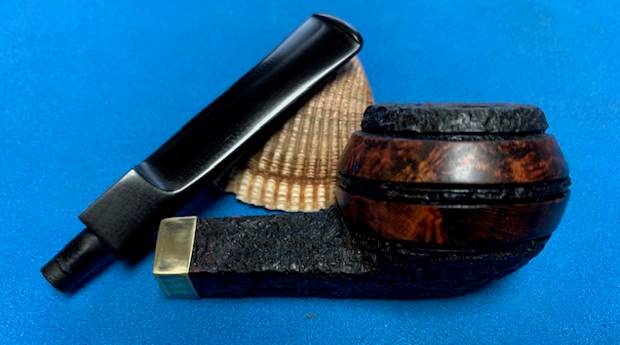
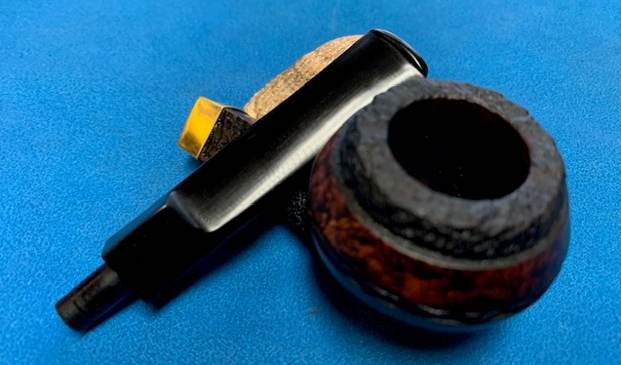
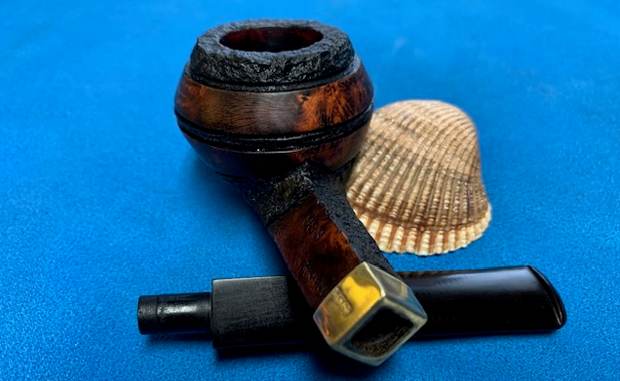
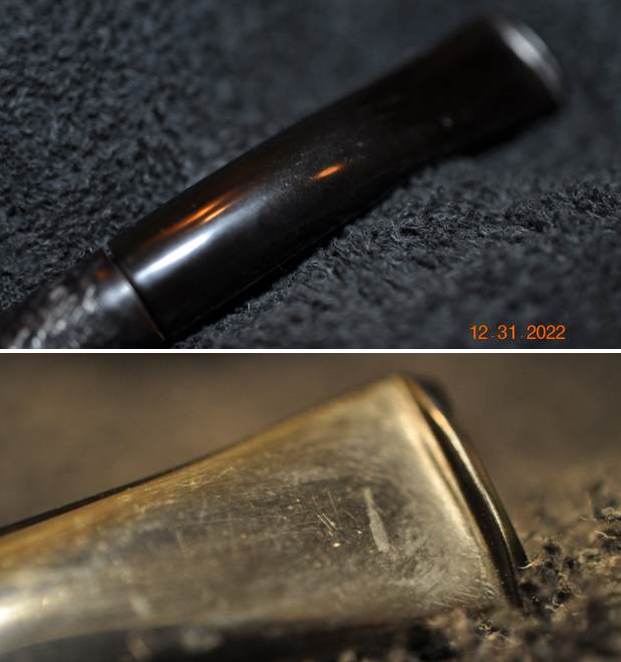
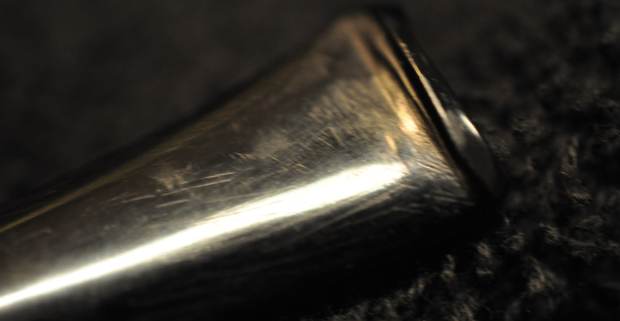
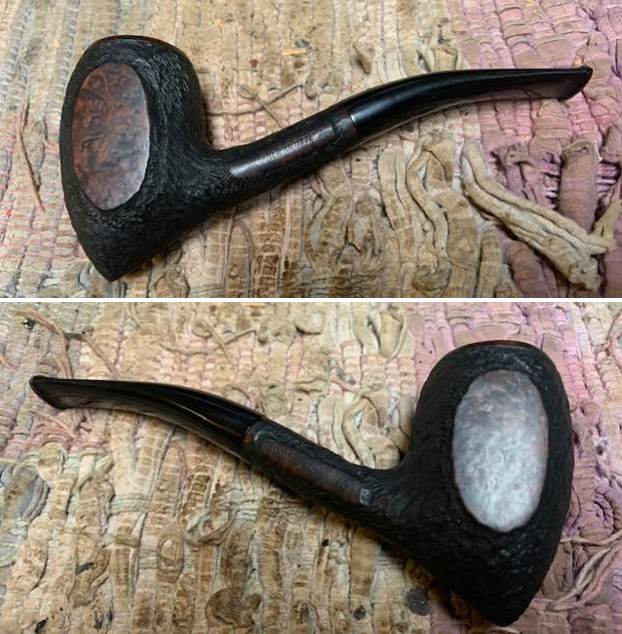
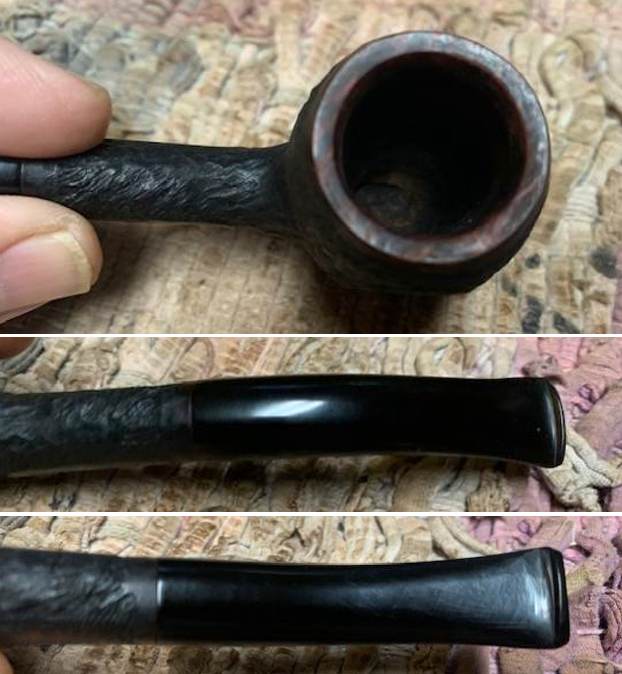
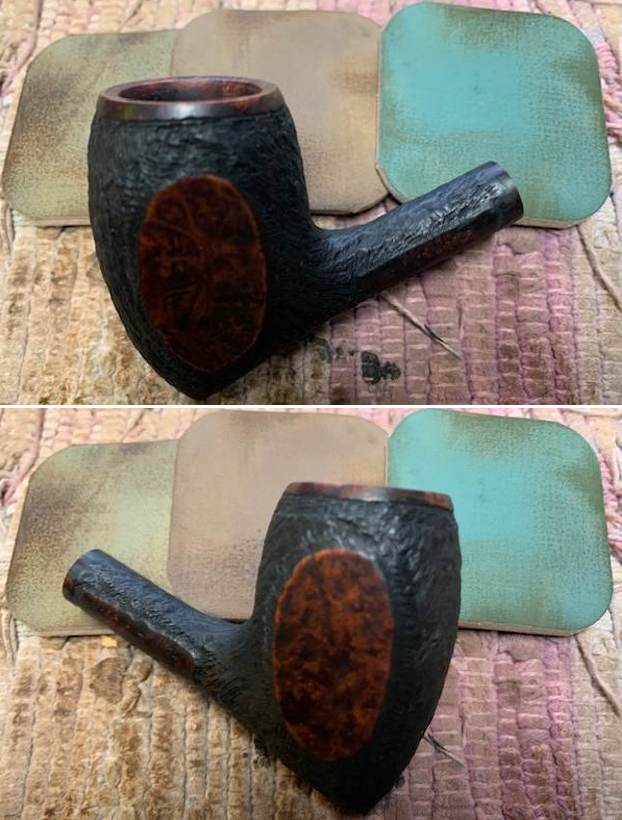
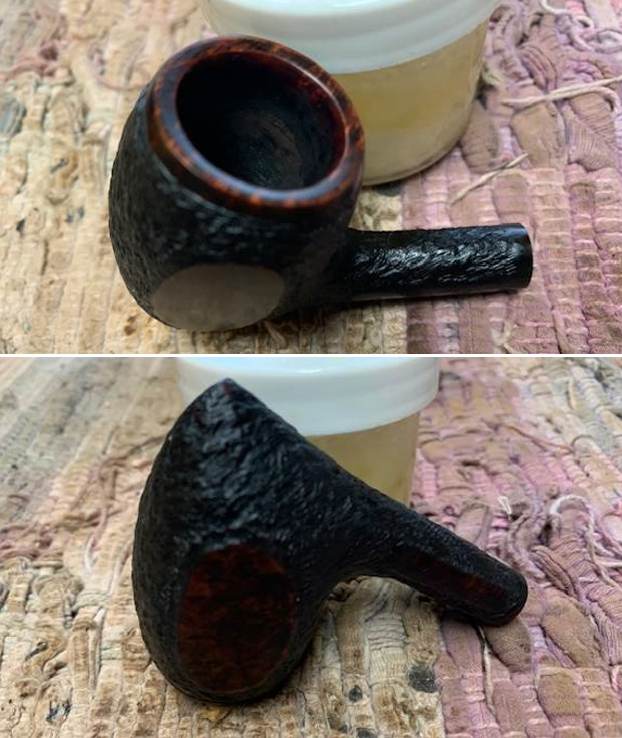
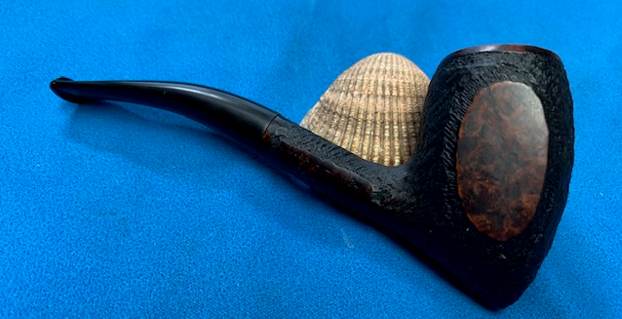
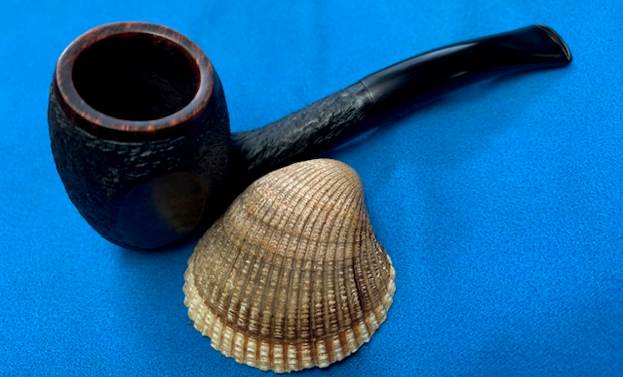
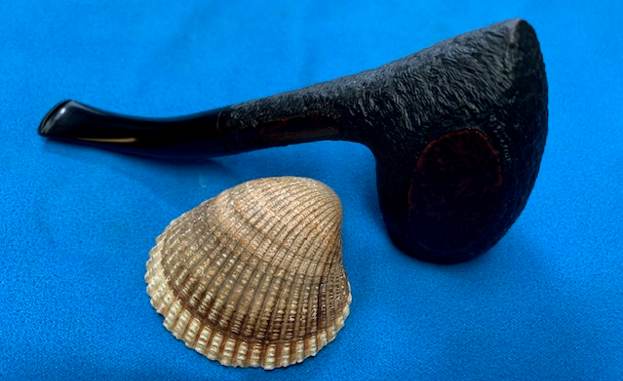
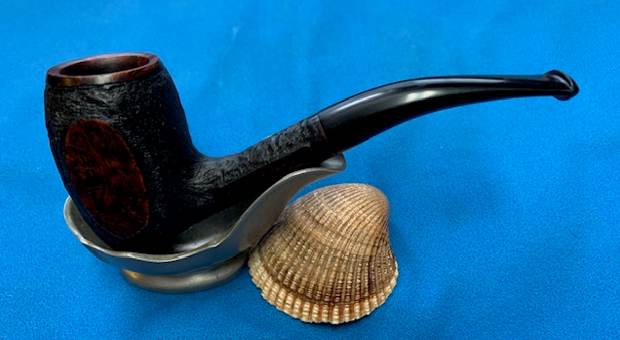
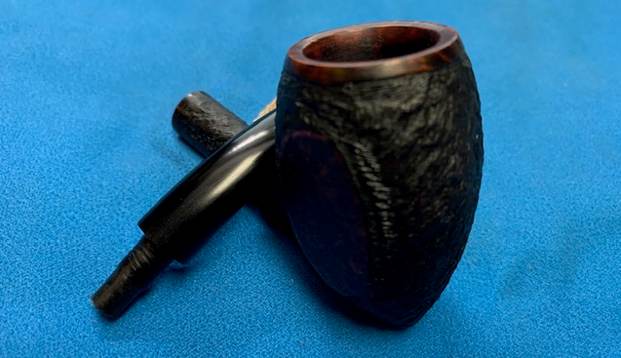
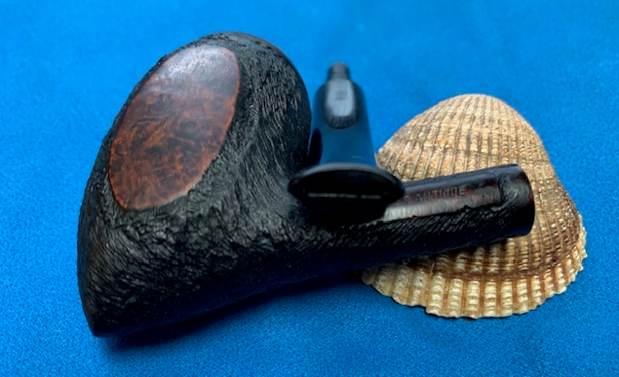
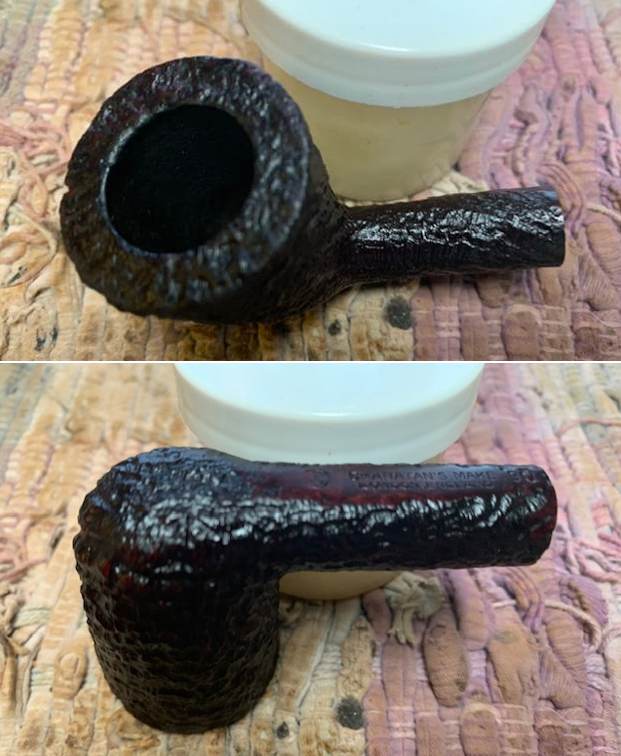
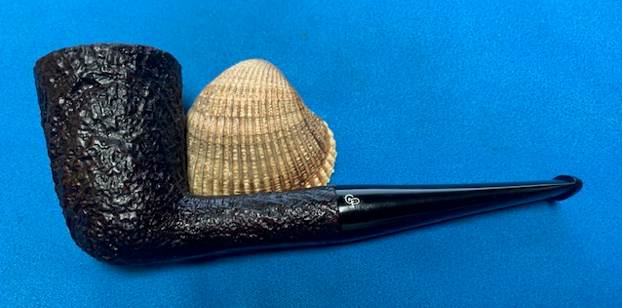
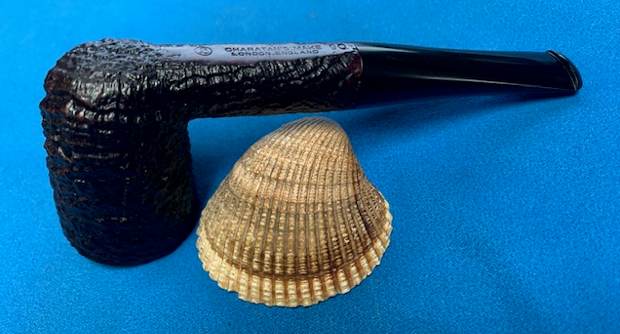
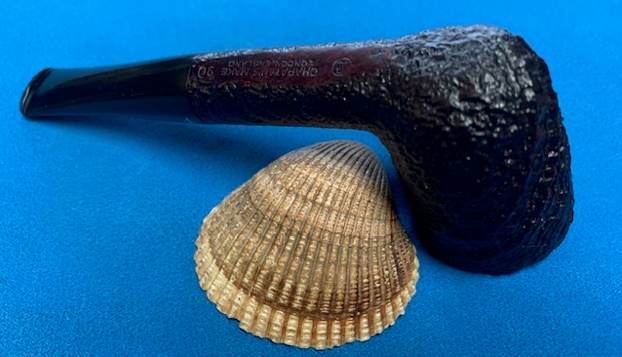
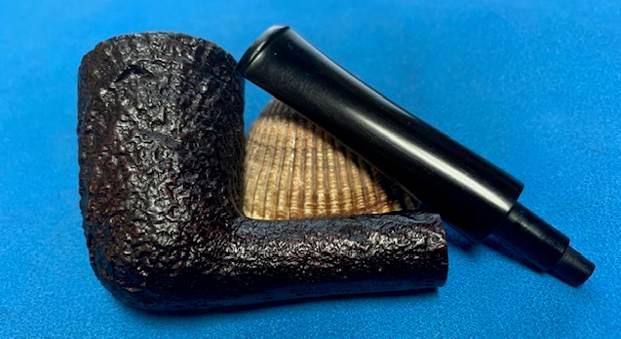
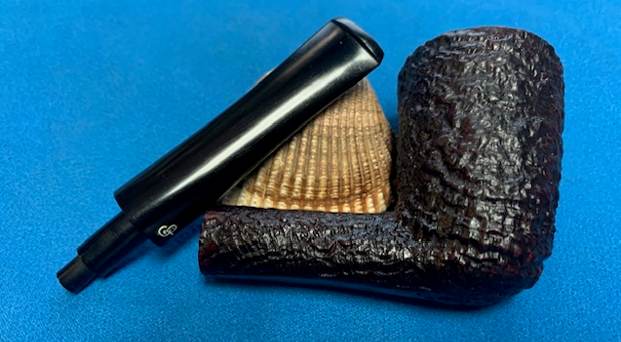
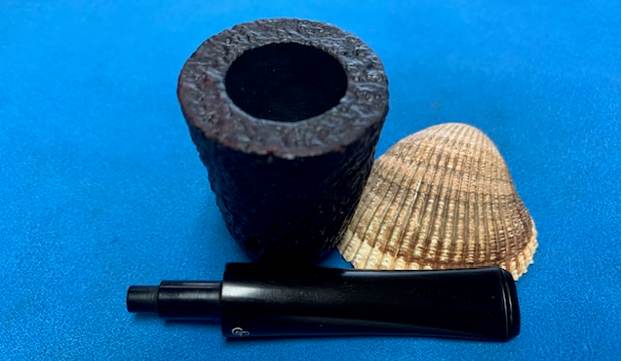
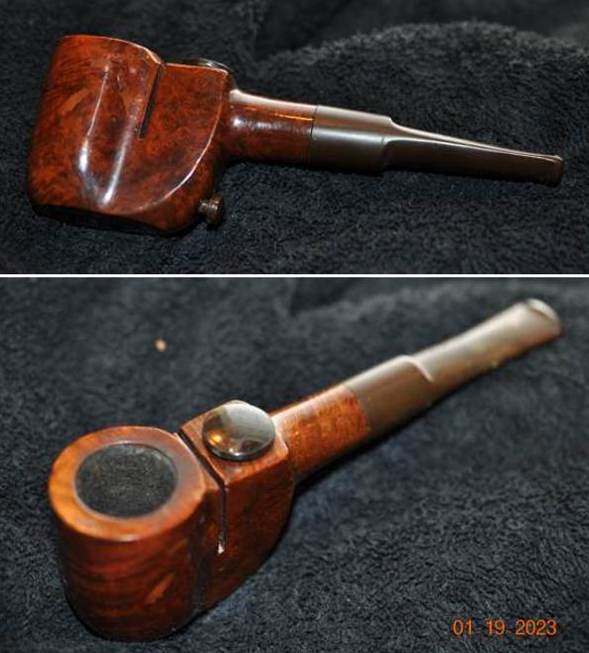
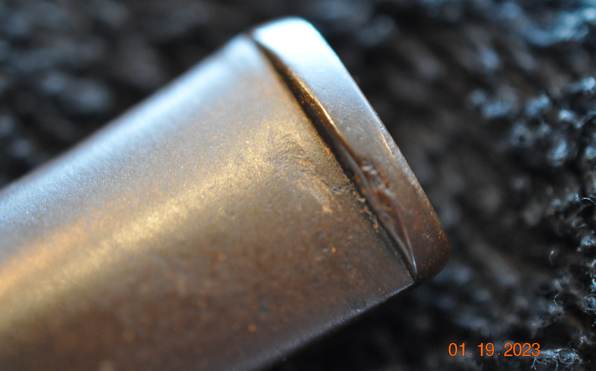
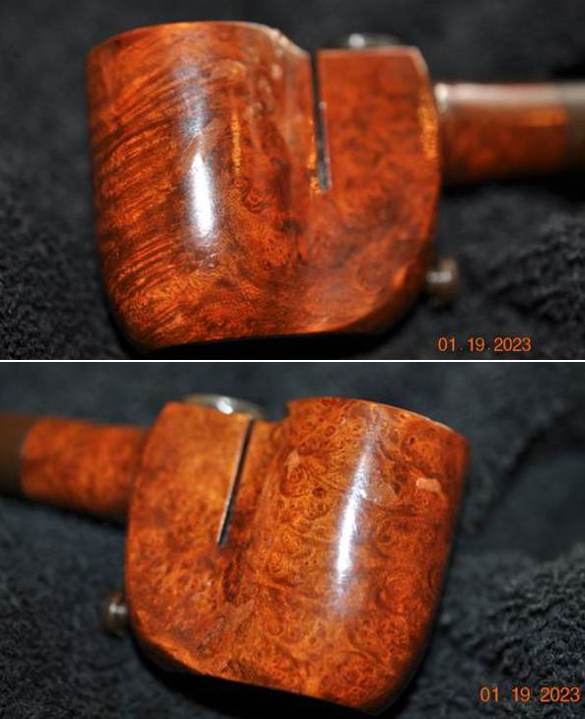
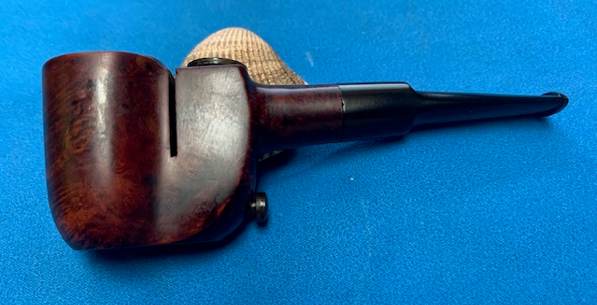
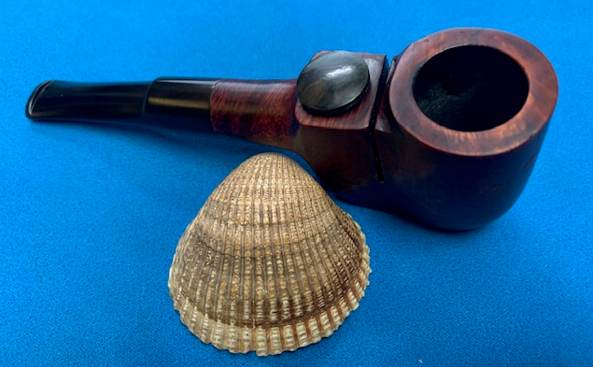
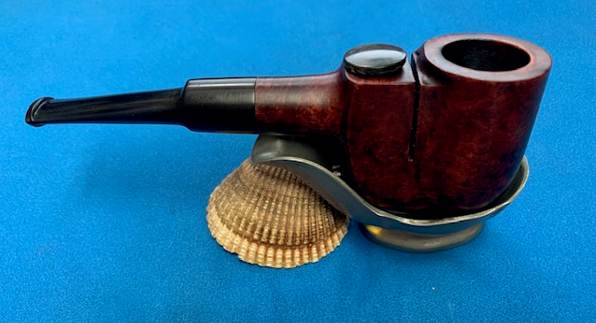
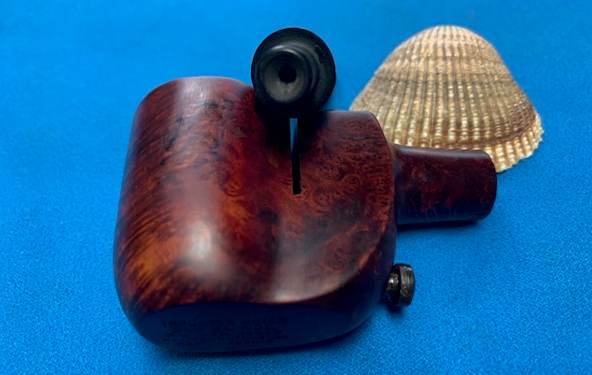
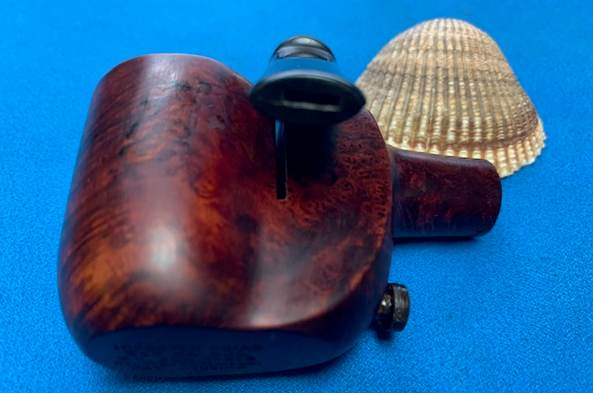
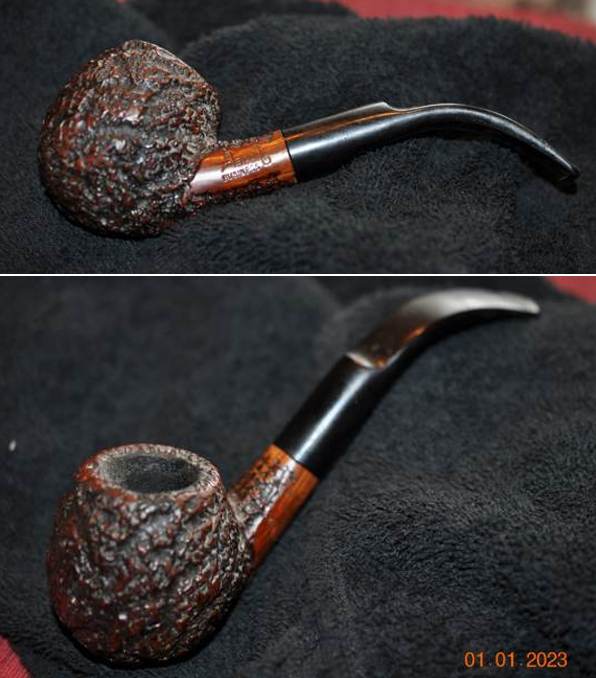
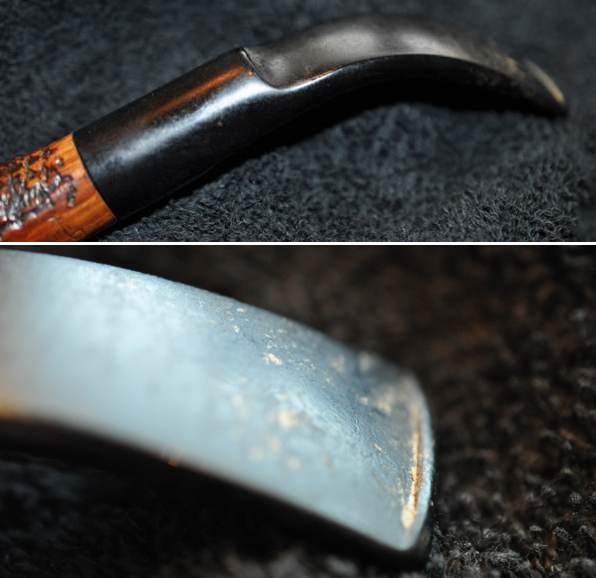
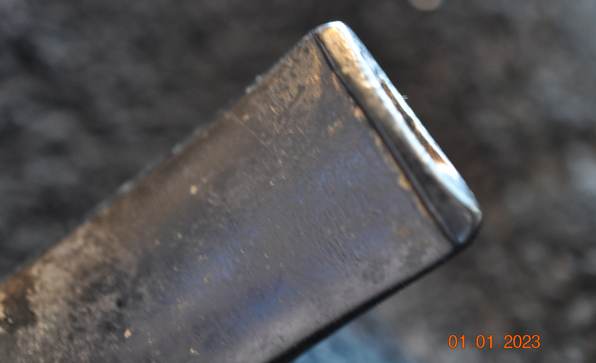
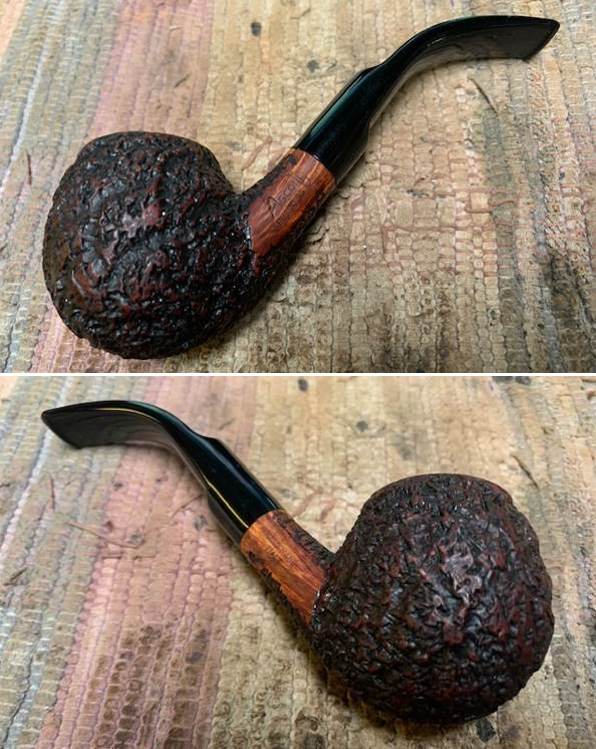
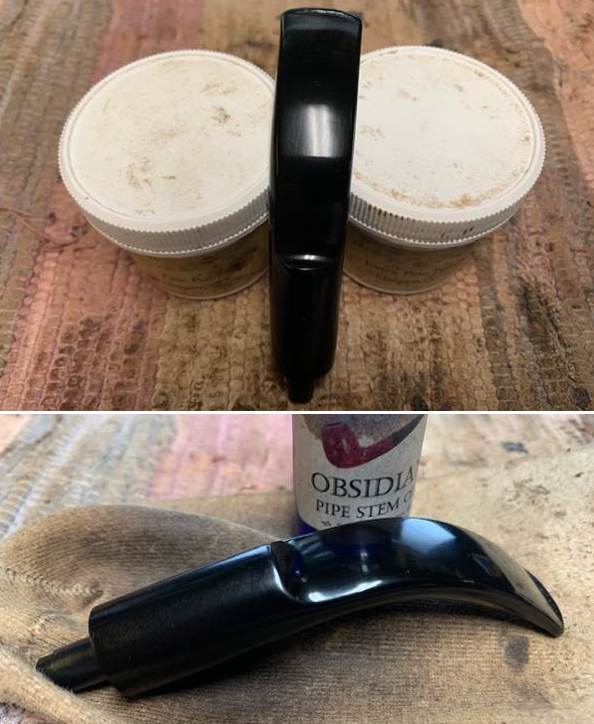
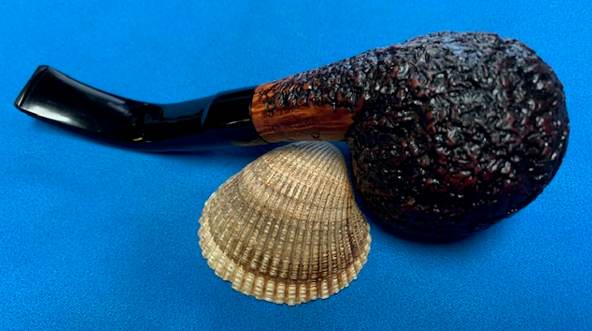
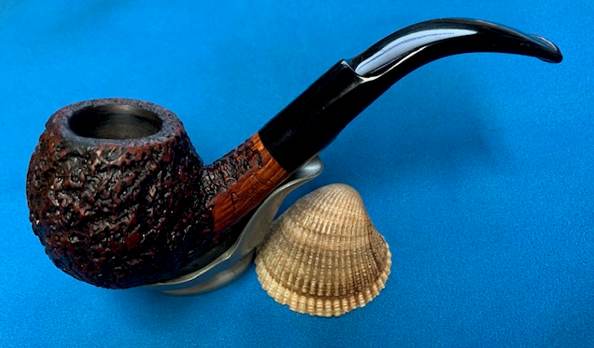
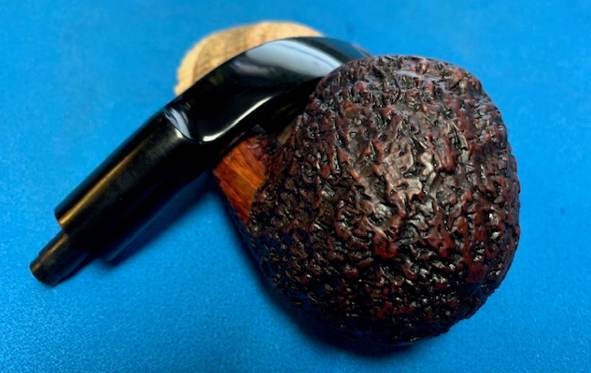
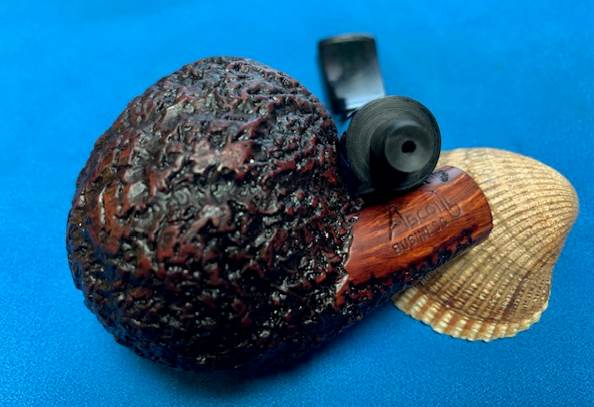
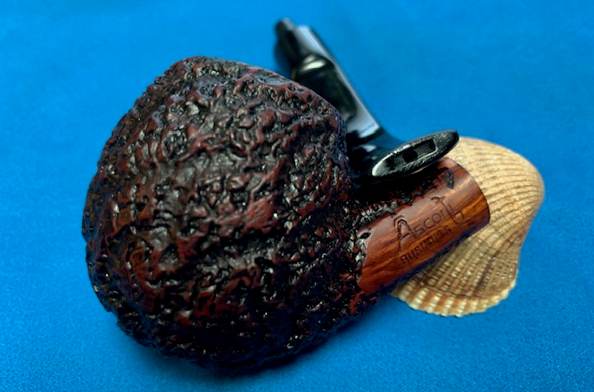
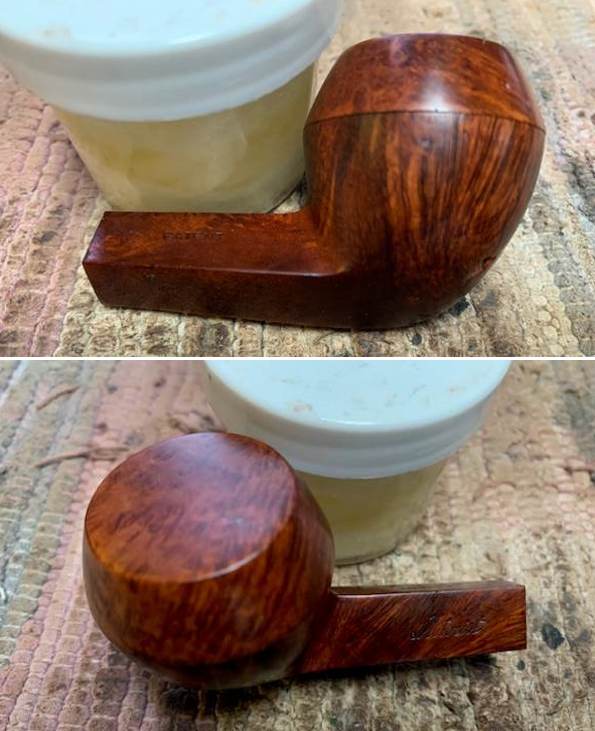
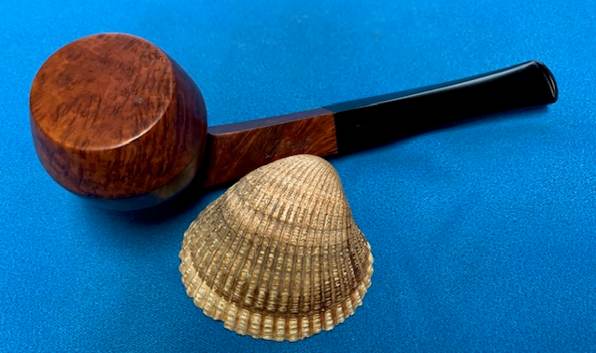
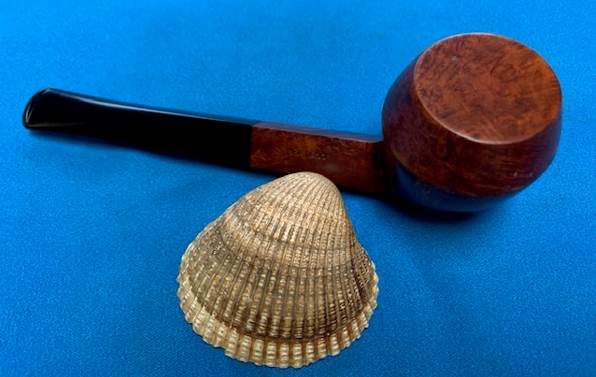
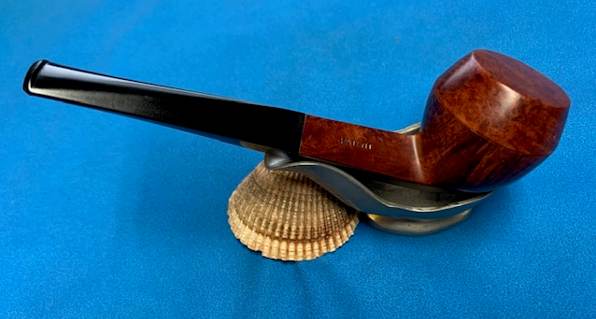
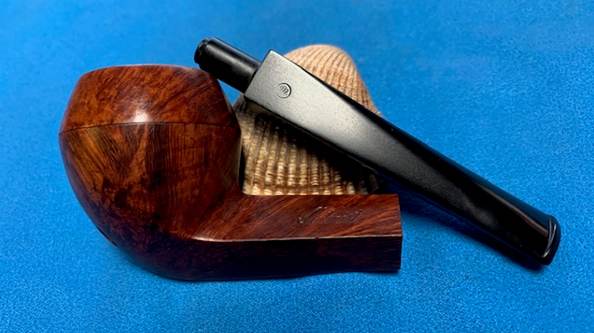
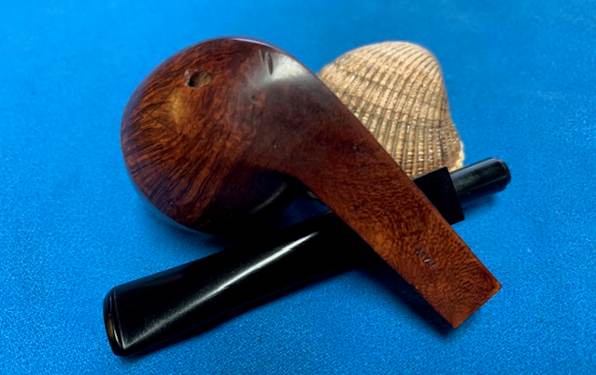
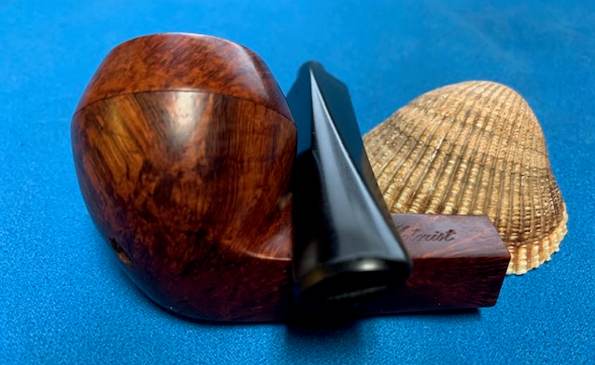
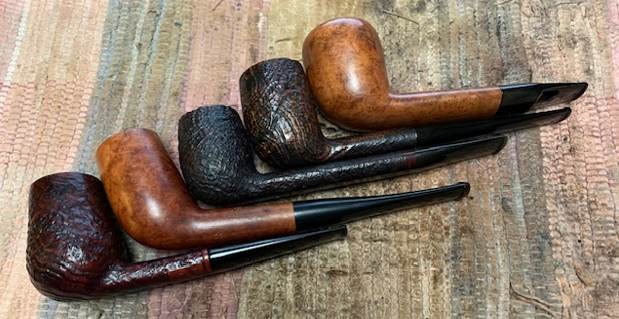 The first of these I chose to work on today is the Hand Made W.O. Larsen Sandblast Brandy at the bottom of the photo above. It is a classic Larsen Brandy shape with a beautiful, deep and tactile sandblast around the bowl and the shank. The rim top were in good condition and the blast had some darkening but no lava in the blast. The bowl has a light cake in the bowl and smells of good Virginia tobacco. The inner edge of the rim is in good condition. The blast is quite clean with no grime and little dust ground into the surface of the finish. The stamping on the underside of the shank reads W.O. Larsen [over] Handmade [over] Made in Denmark. The stain is a mix of dark and medium browns and goes well with the oval vulcanite stem. Once it is cleaned up and polished the blast will highlight the grain around the bowl and shank. The stem is in good condition with some tooth marks on it. The button area and the surface just ahead is damaged. There are bite marks on the button surface on both sides. The button edge has been flattened and worn with tooth marks on the underside. I am including two of the photos that were sent to me for viewing. The first shows the right side of pipe and the second shows the marks on the stem surface that I spoke of above.
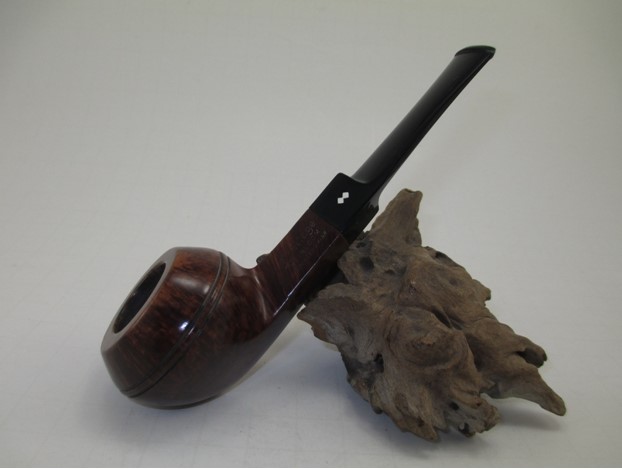
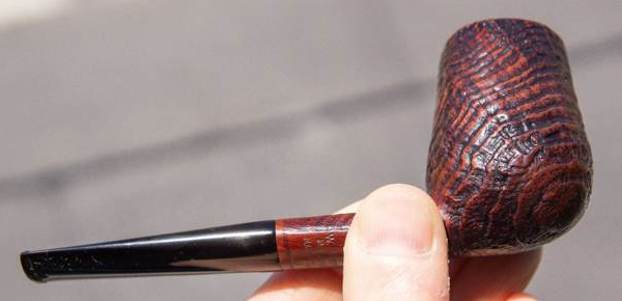
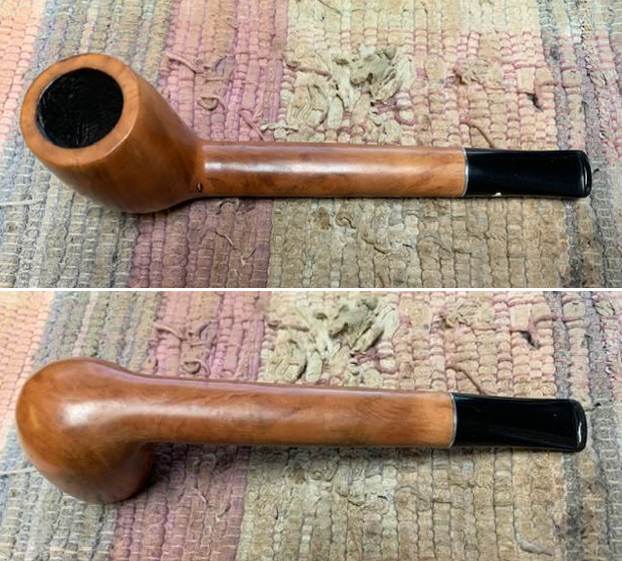
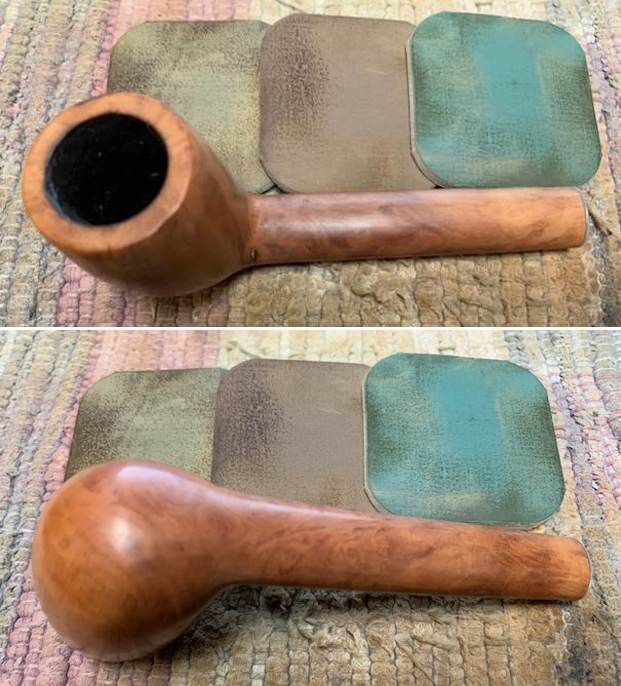
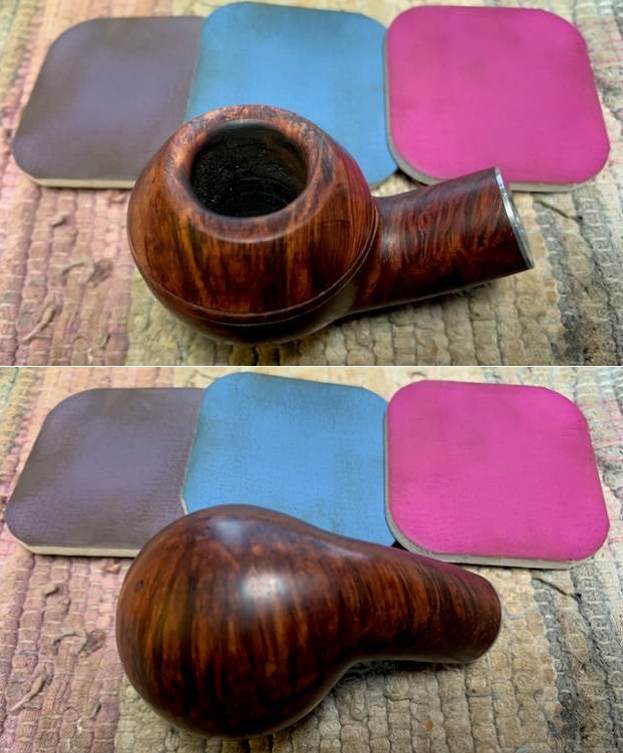
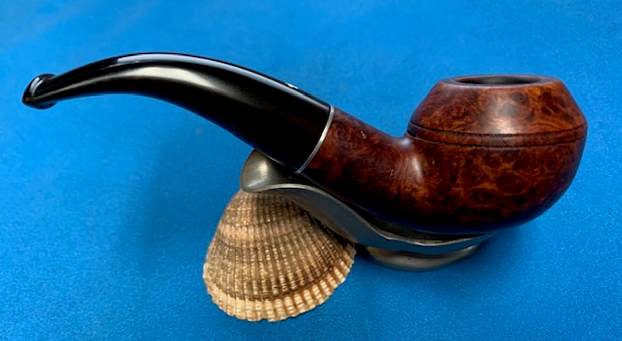
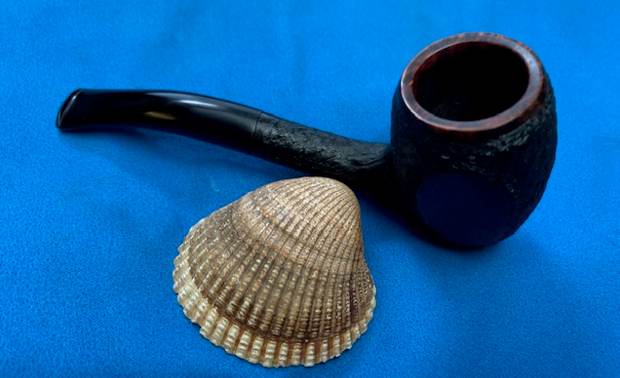
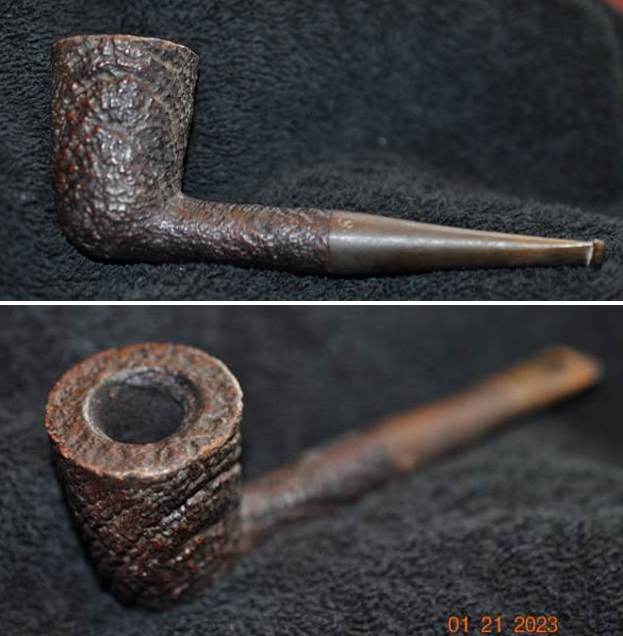
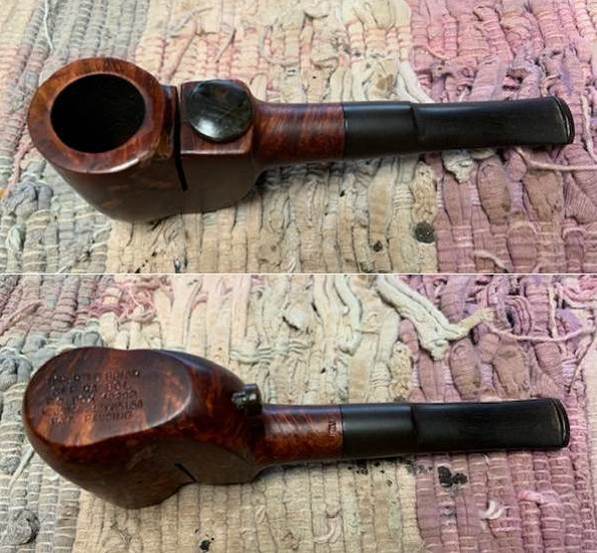
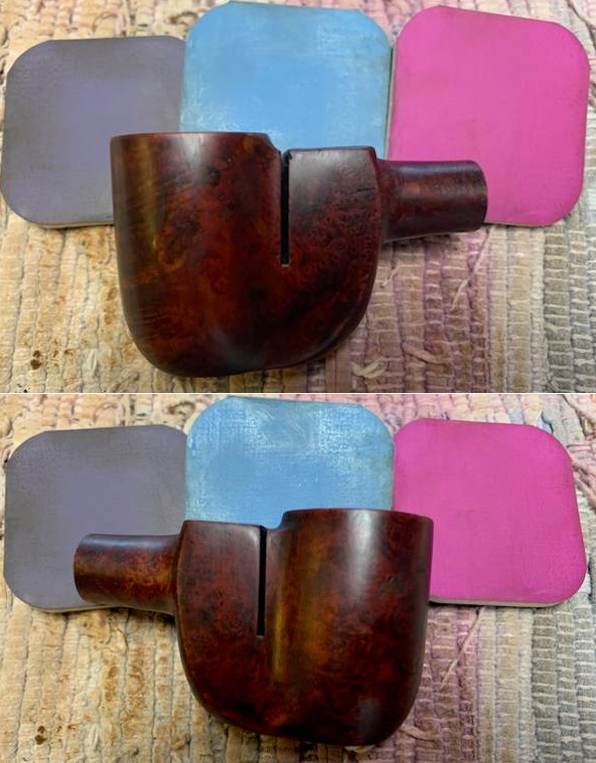
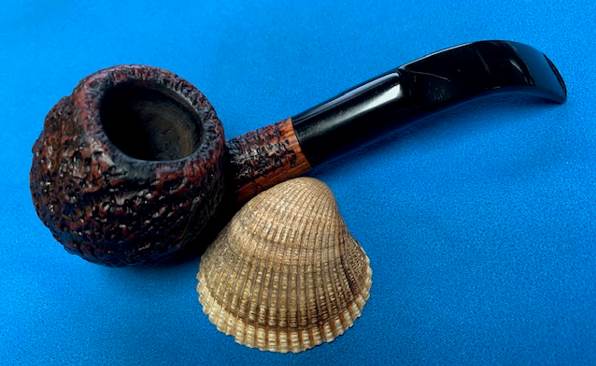
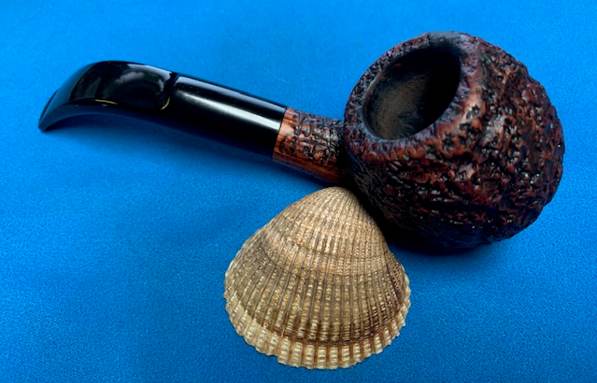
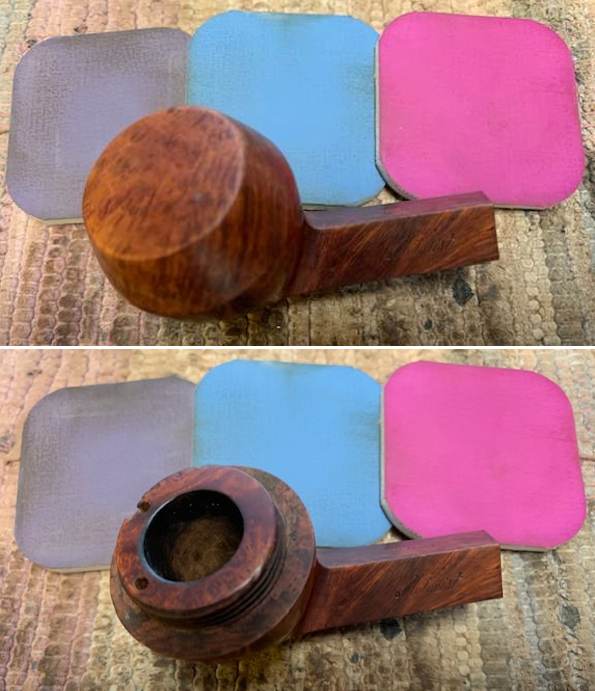
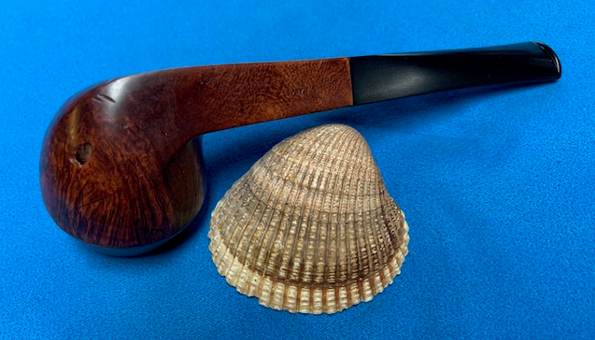
 I took photos of the pipe before I did my clean up work on it to show its condition. The photos confirm what I noted above regarding the condition of the bowl and the stem. It a nice looking pipe that will look better with a bit of work on the stem, the cracked shank and bowl.
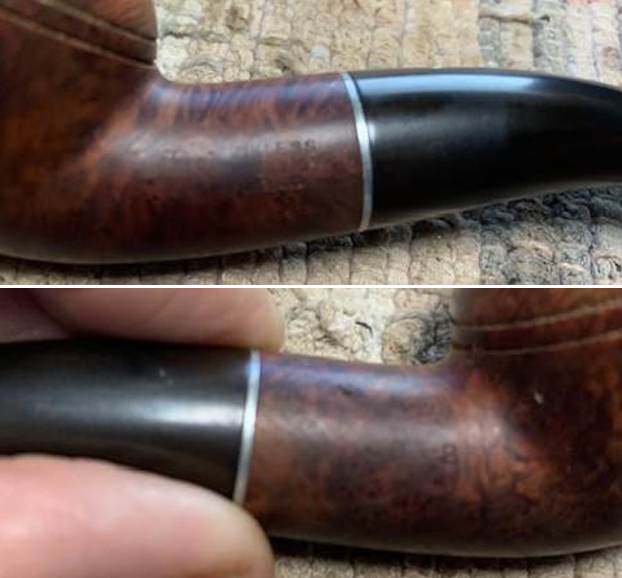
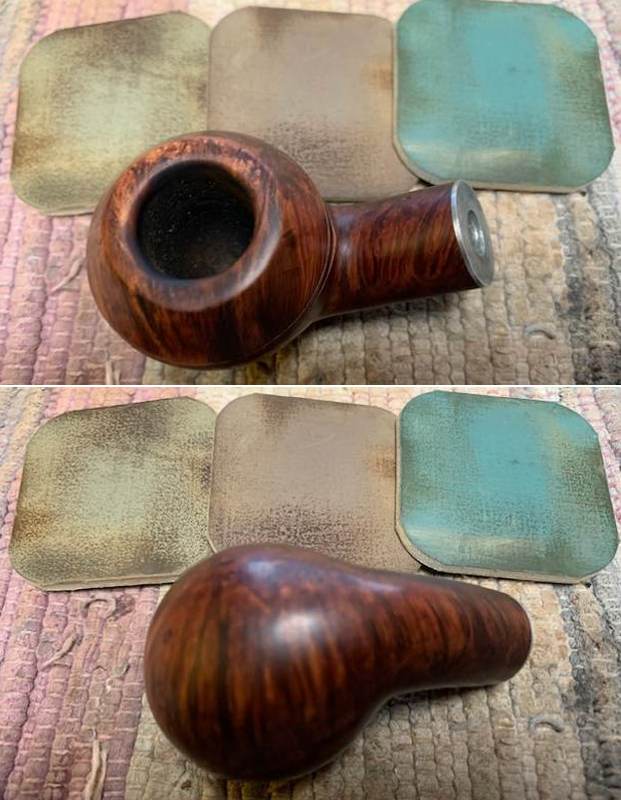
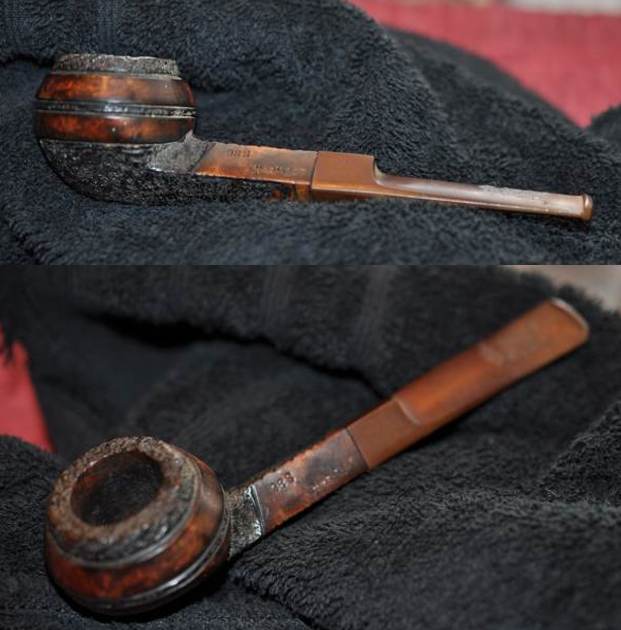
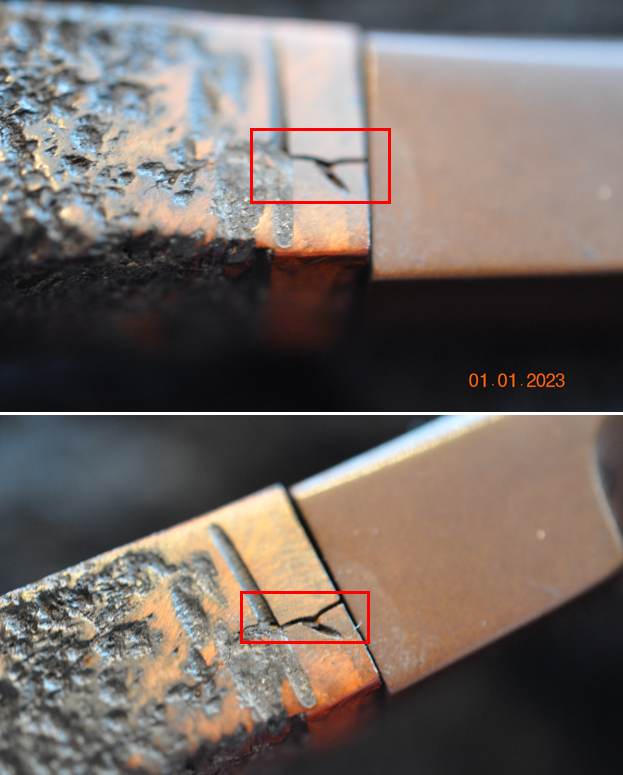
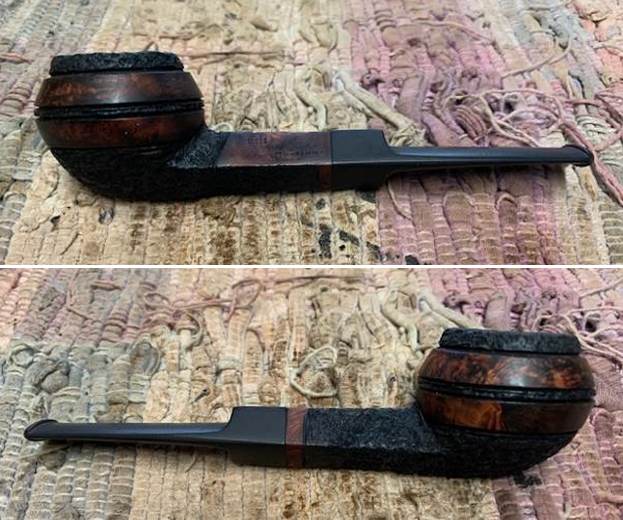
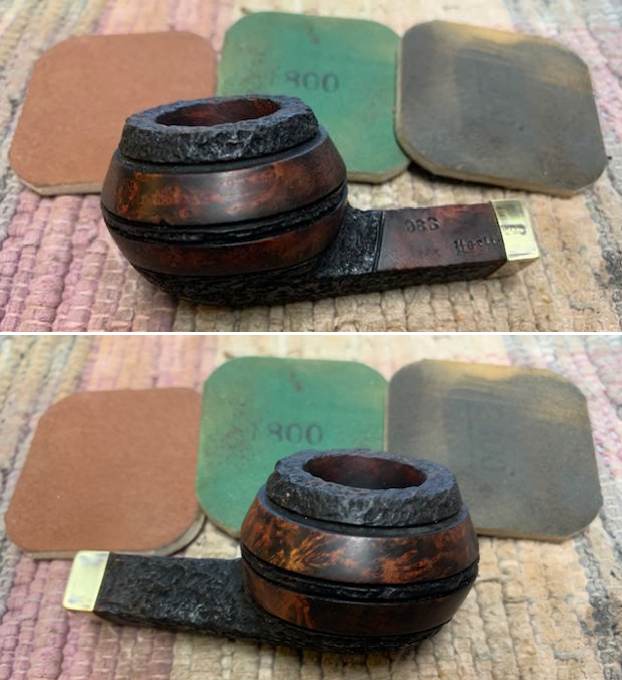
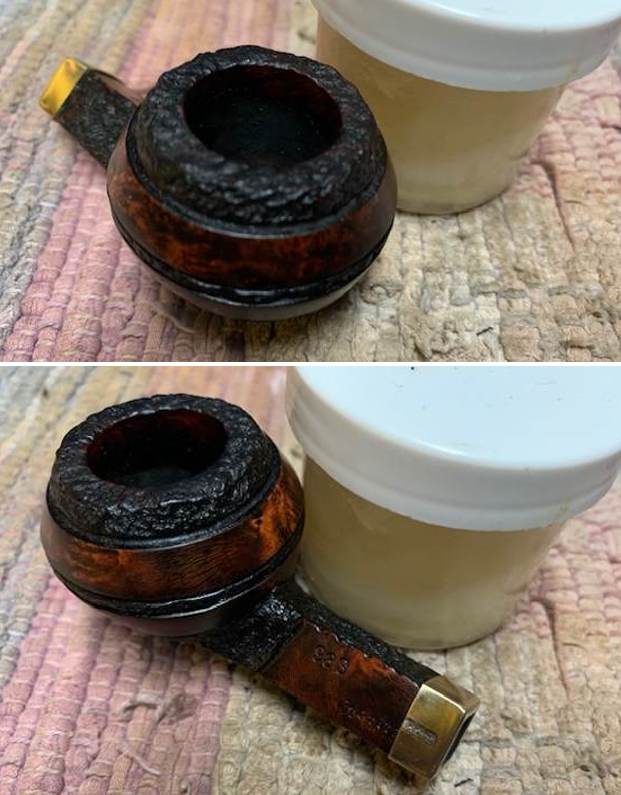
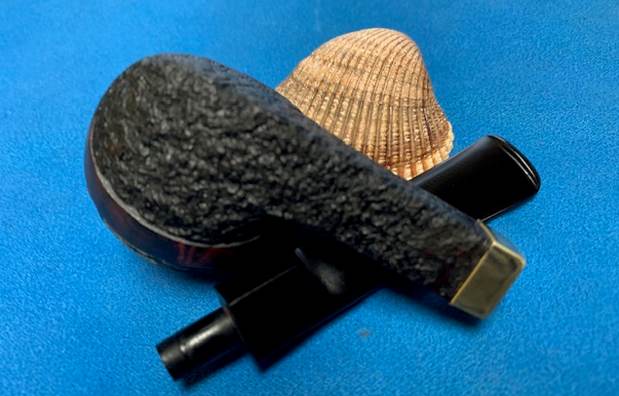
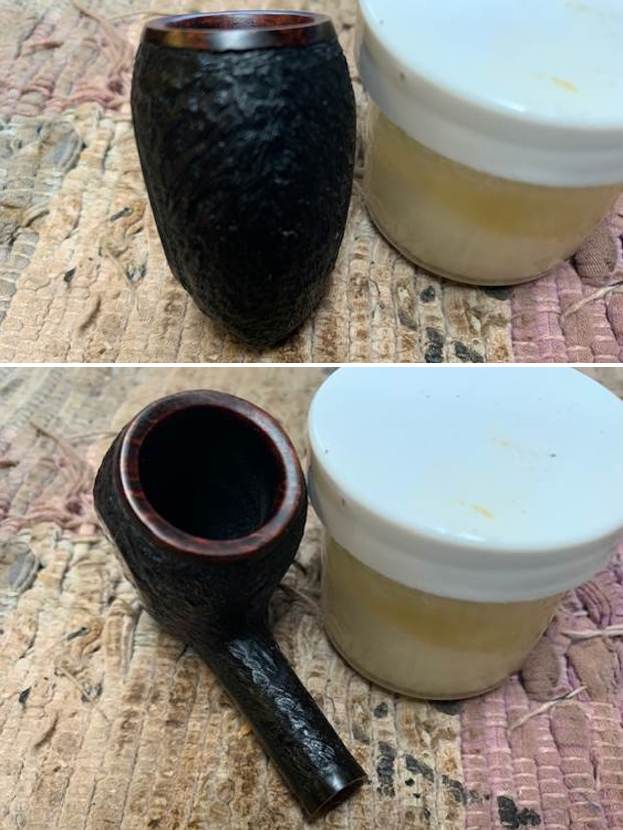
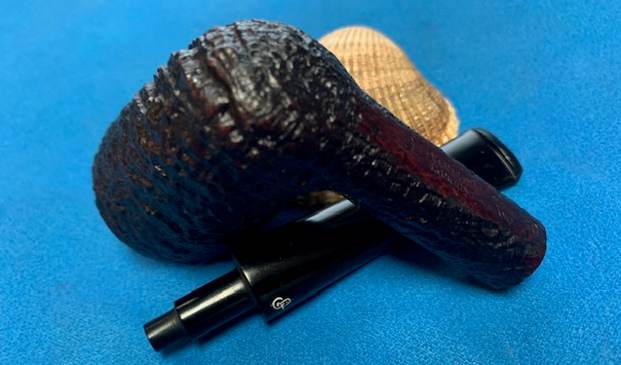
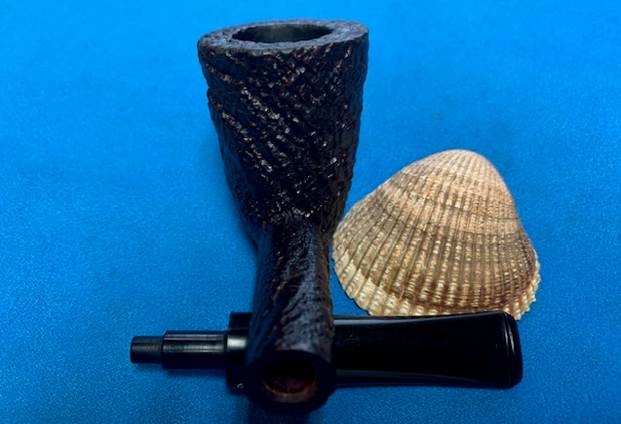
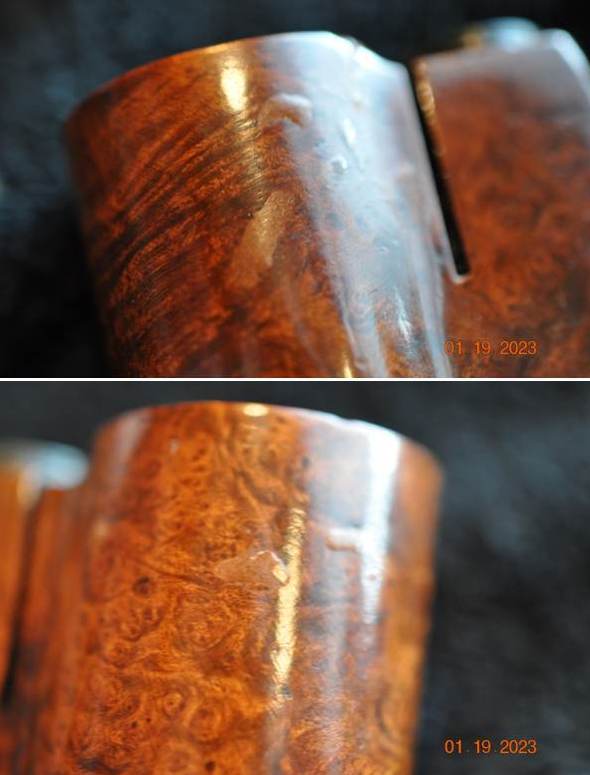
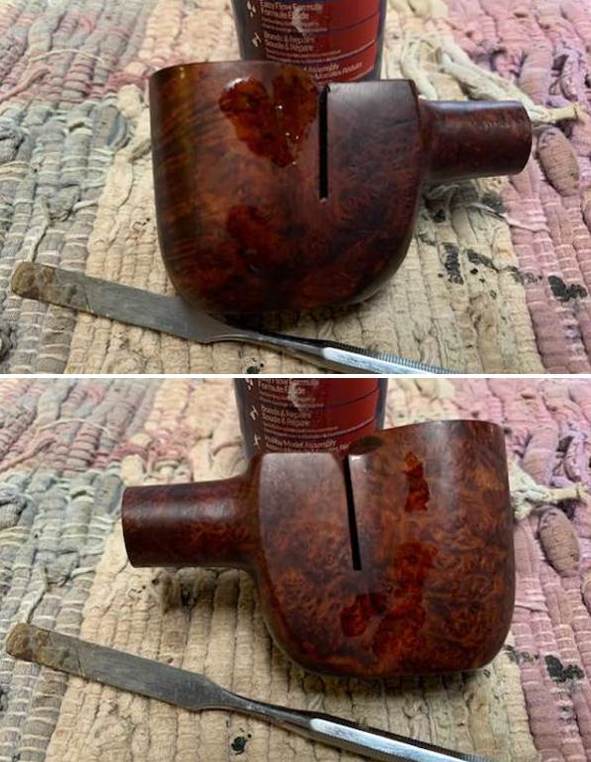
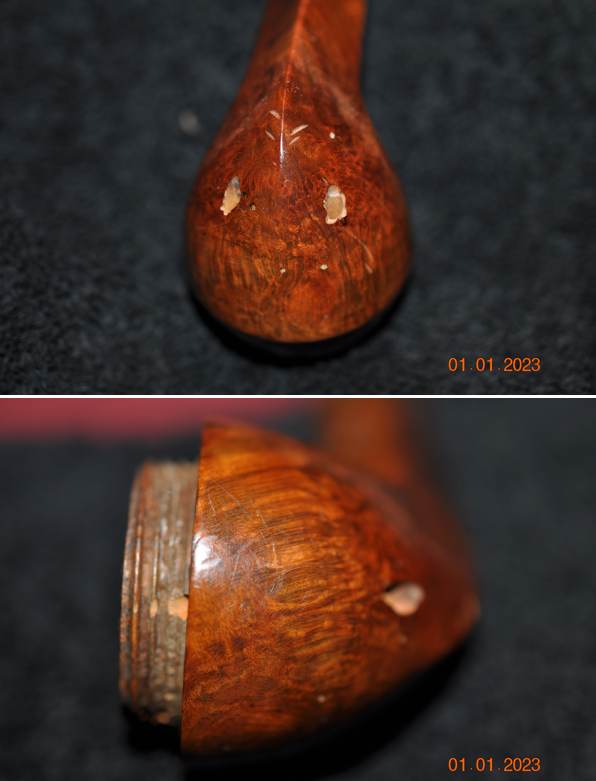
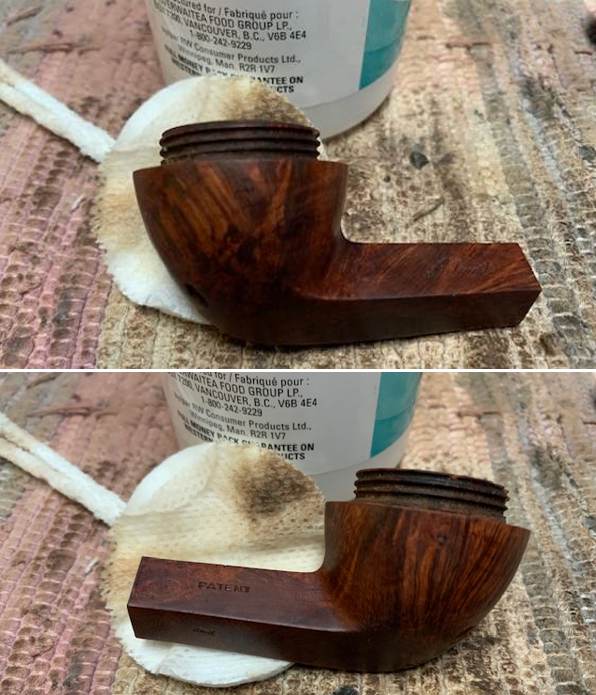
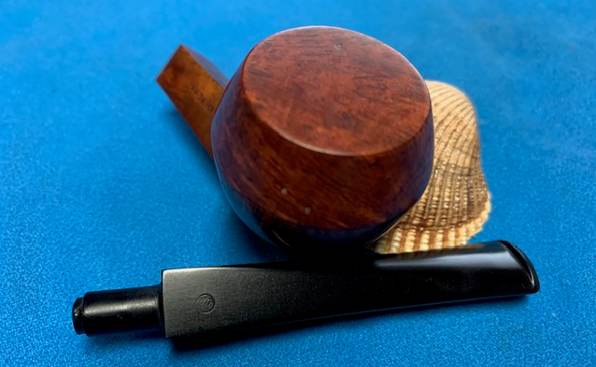
 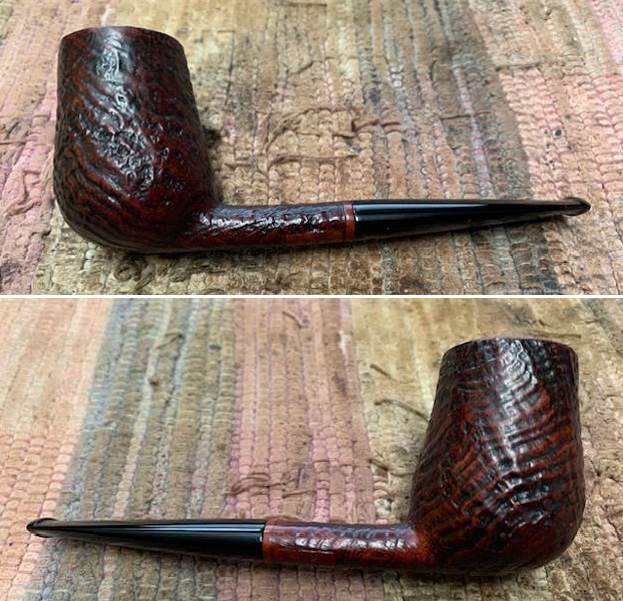 I have circled a short crack in the top of the shank with red in the top photo below. It is hairline and fine but it is very present.
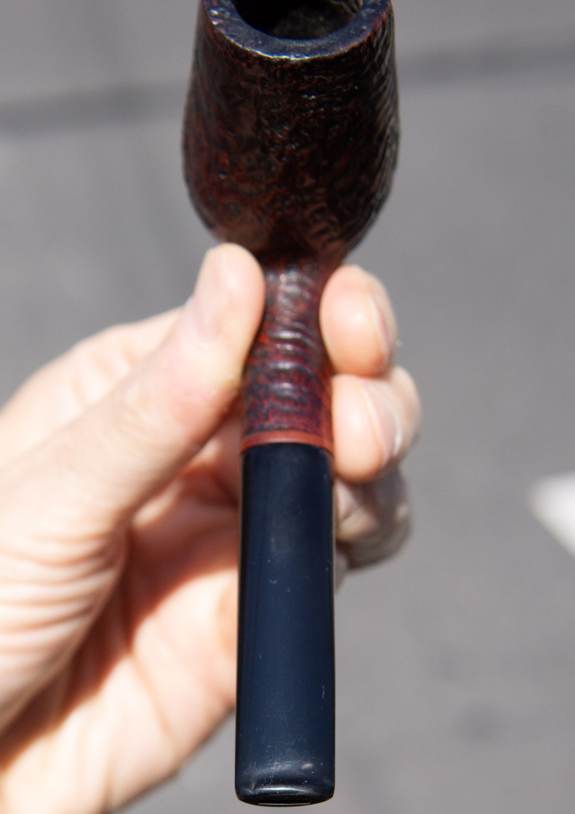
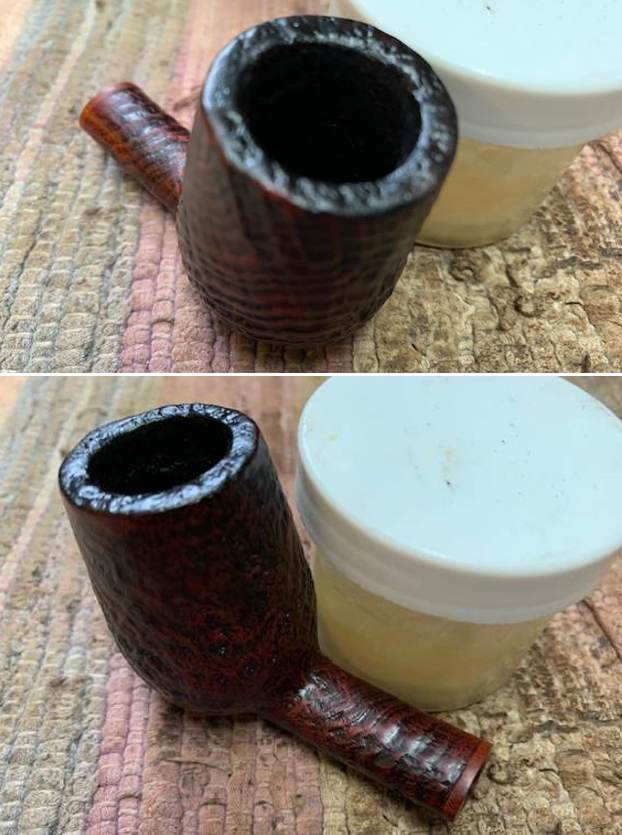
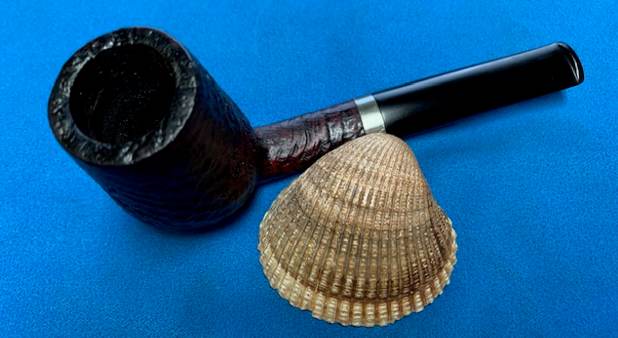
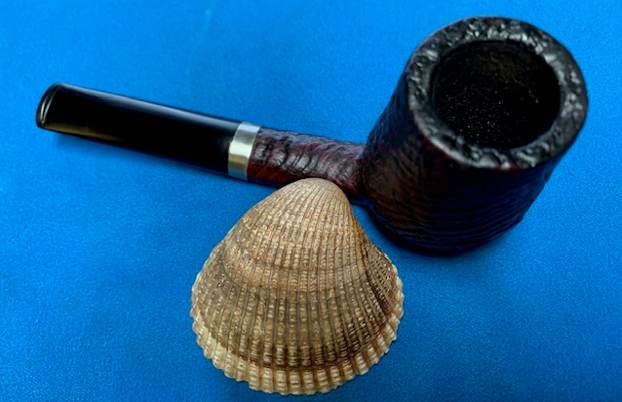
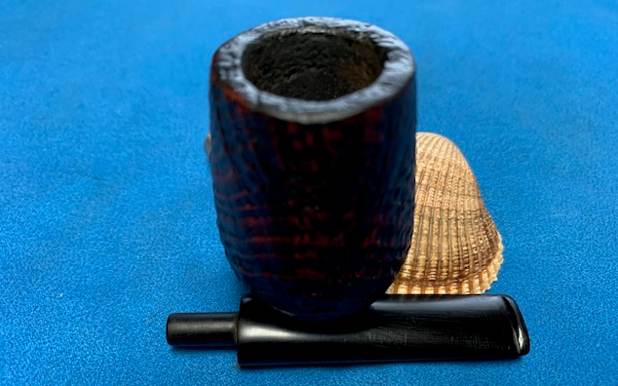
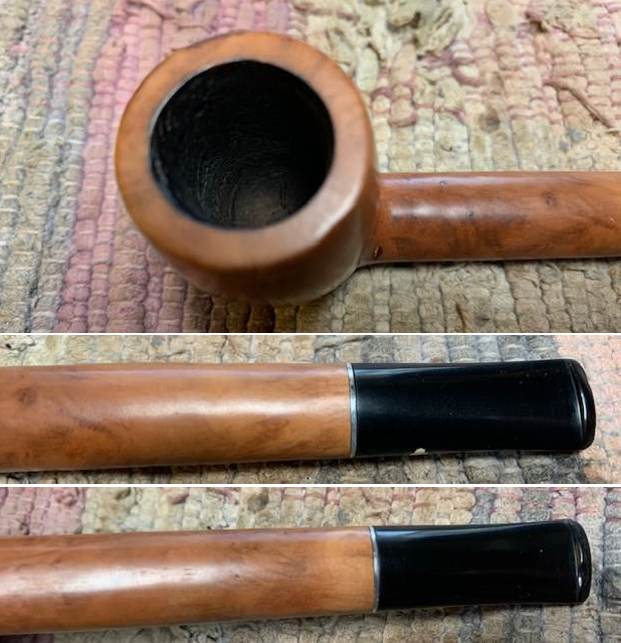
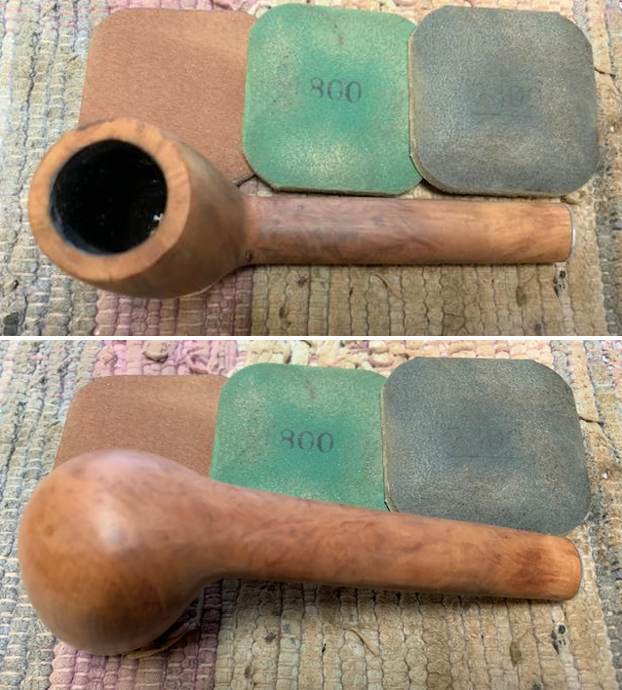
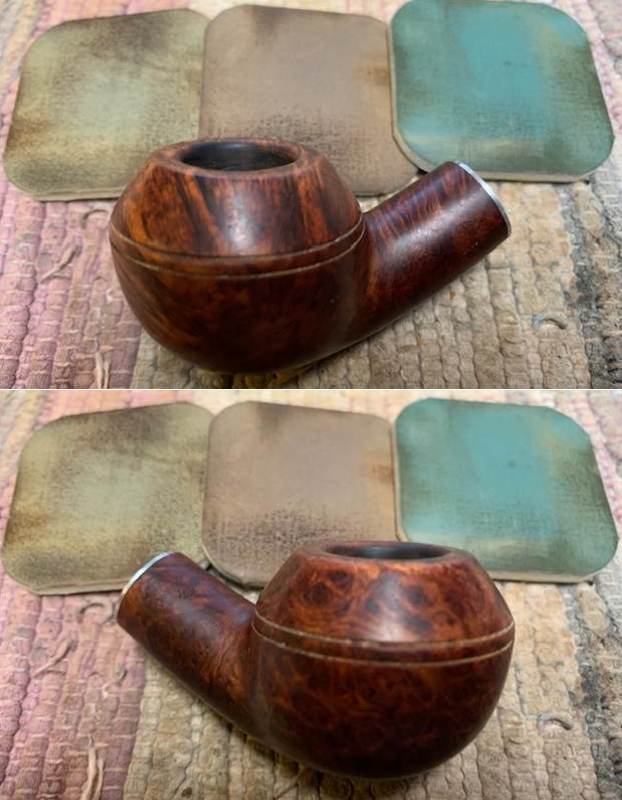
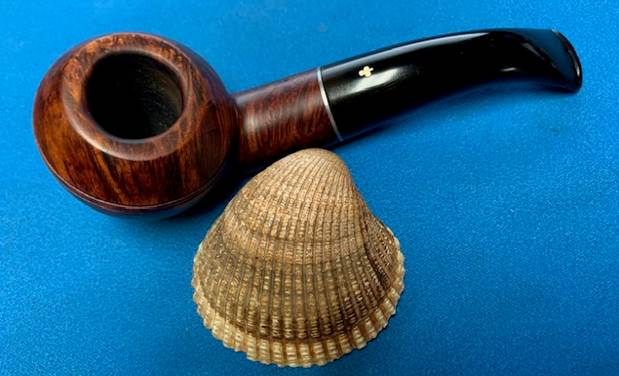
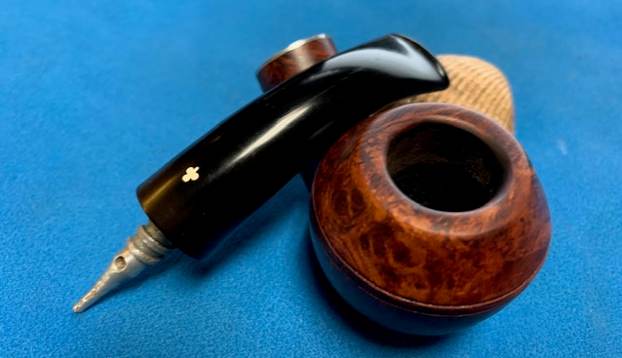
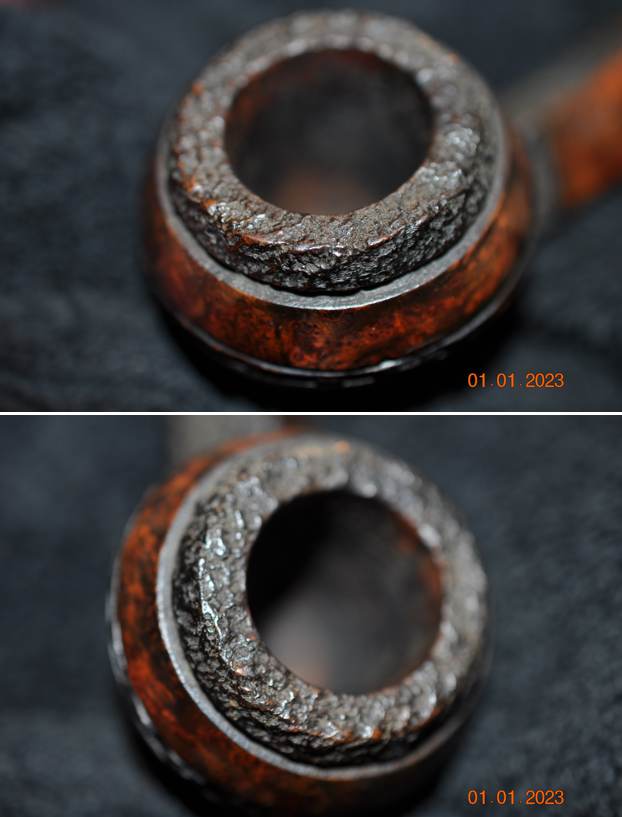
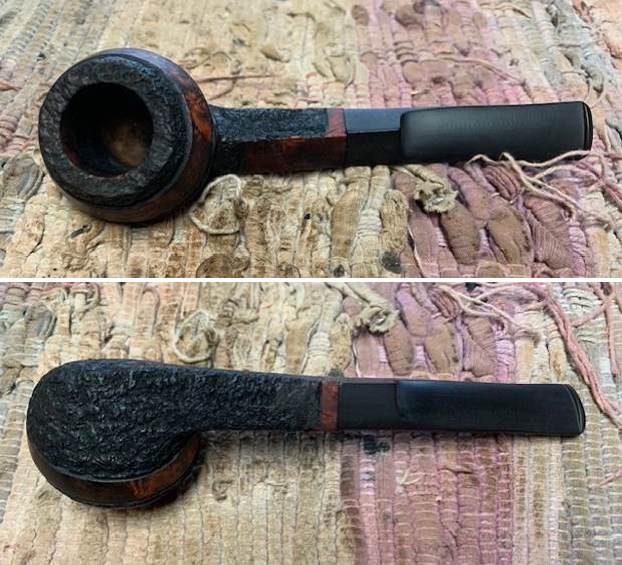
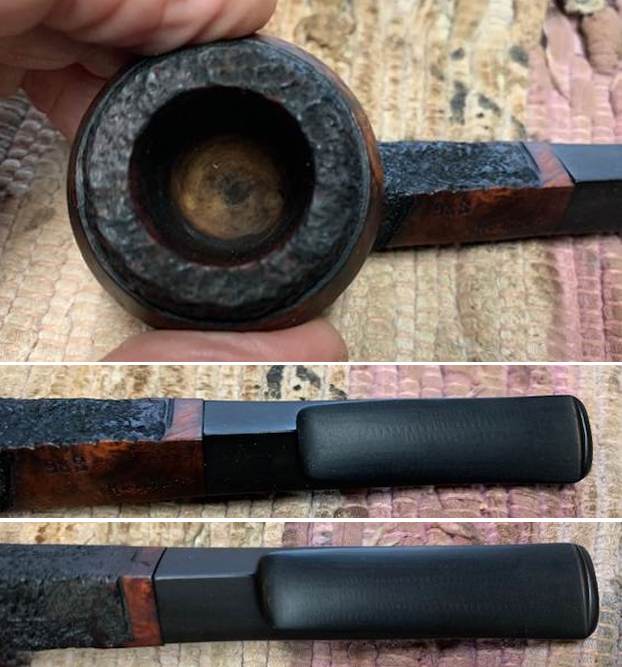
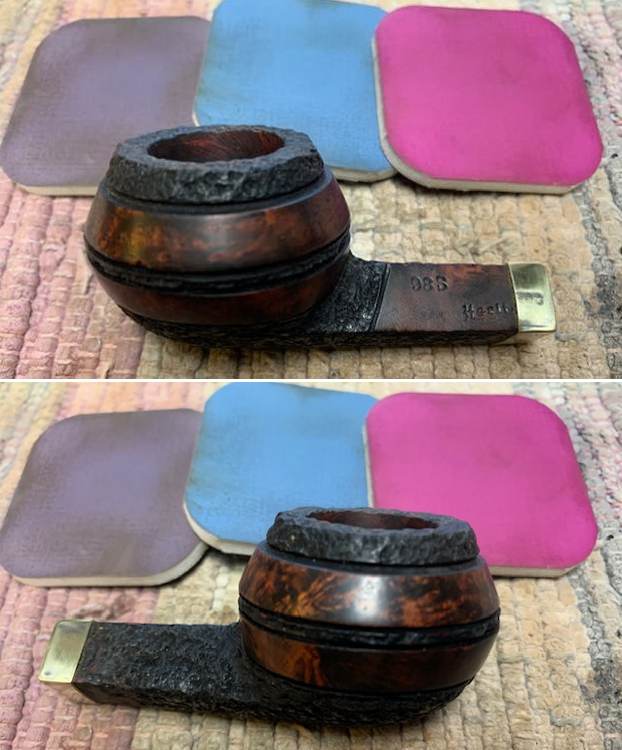
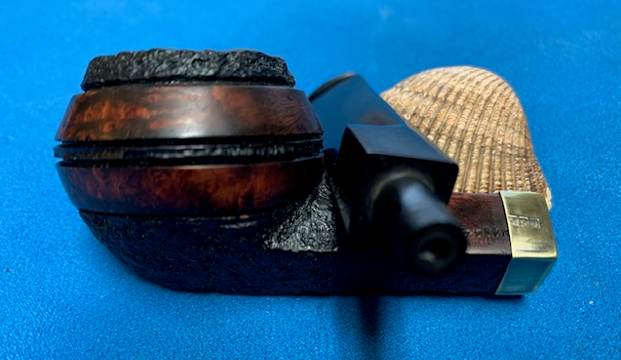
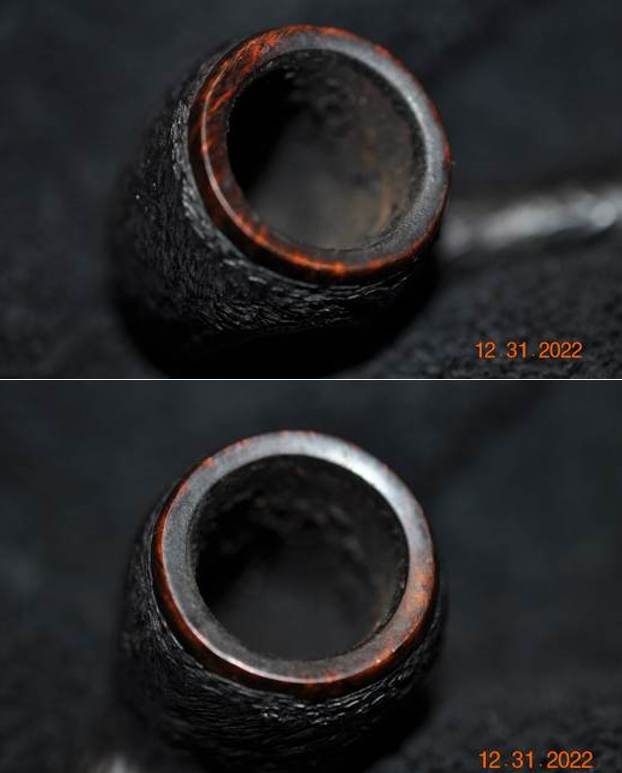
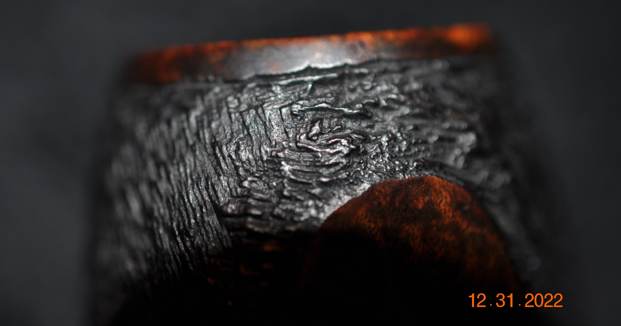
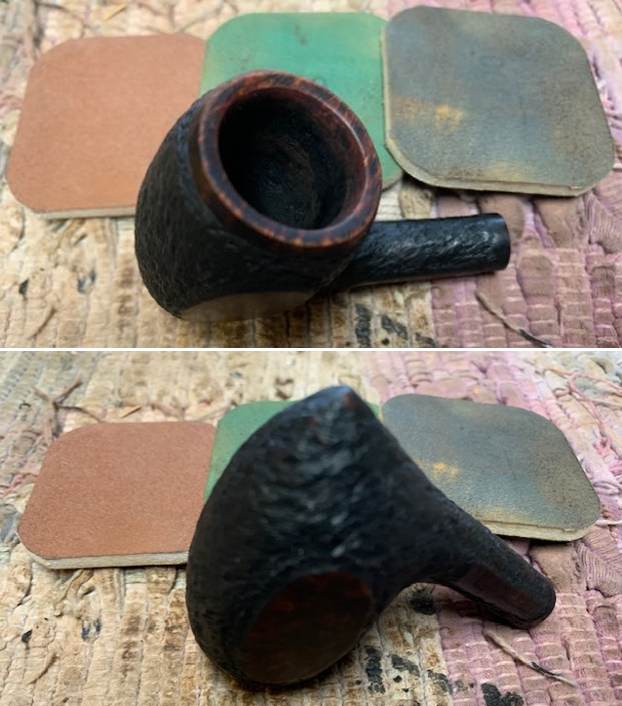
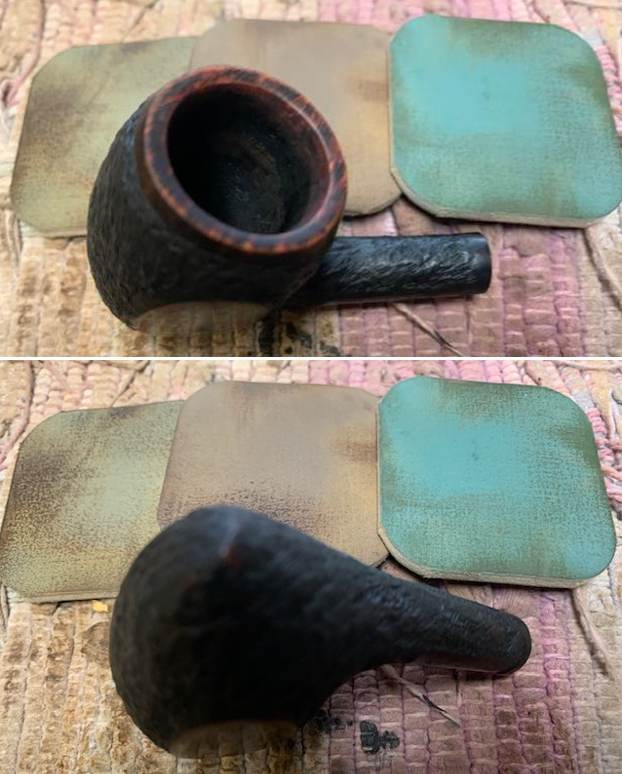
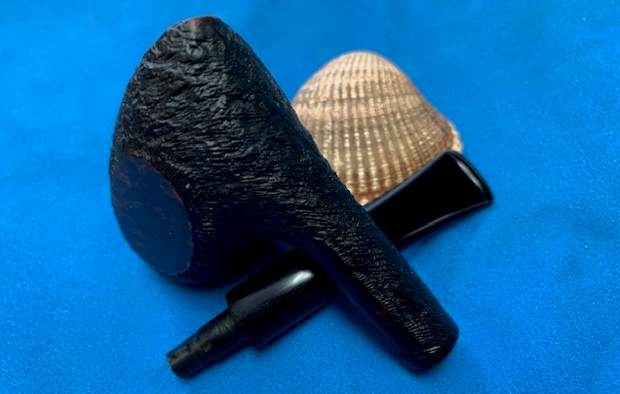
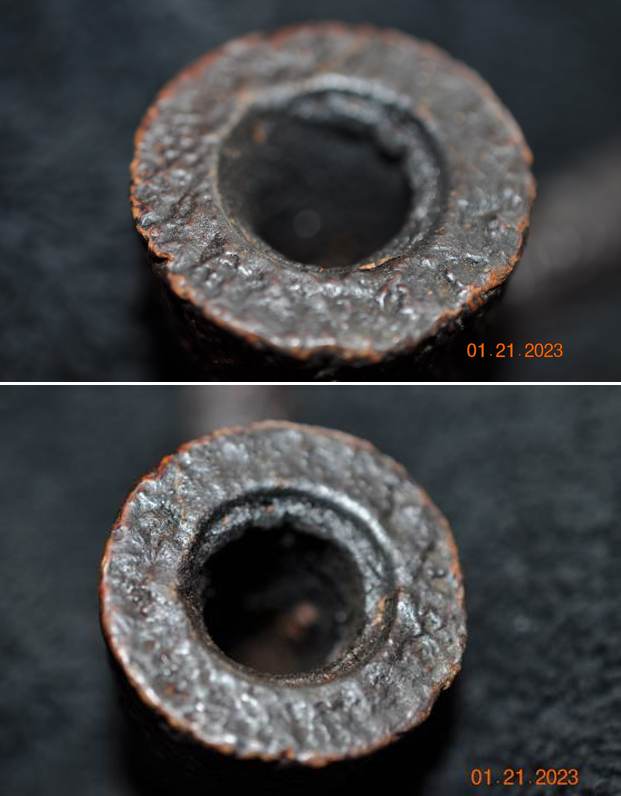
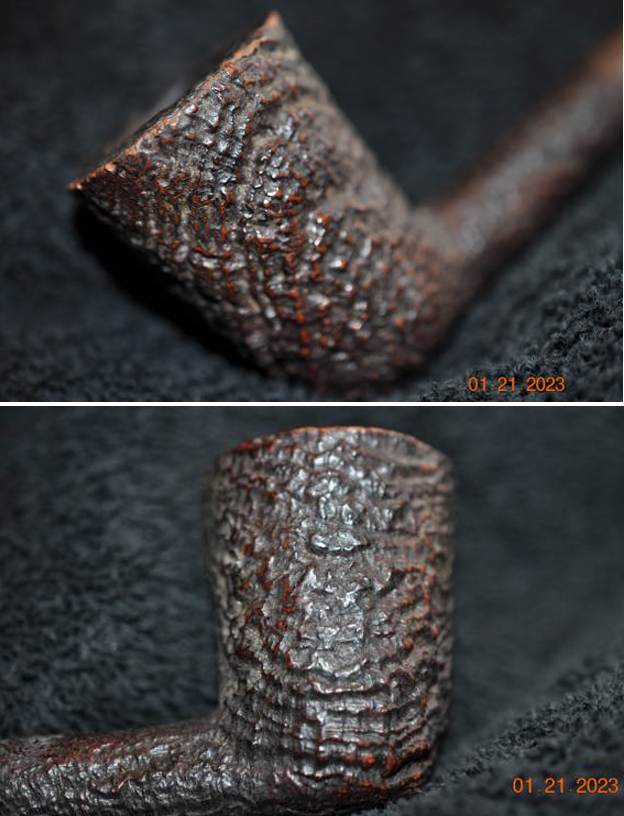
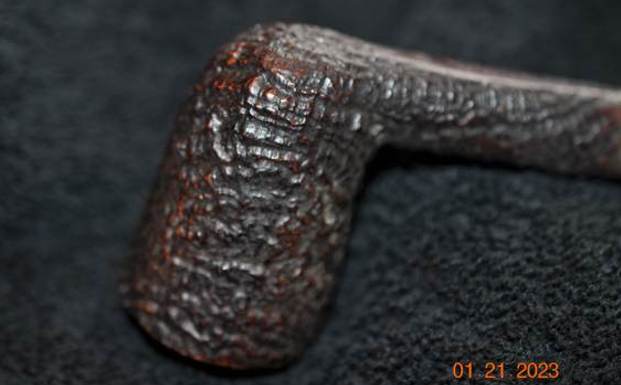
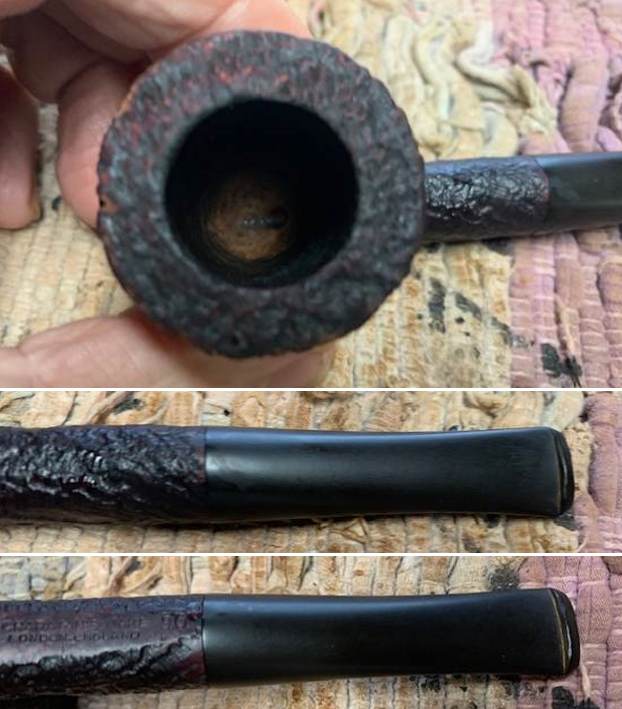
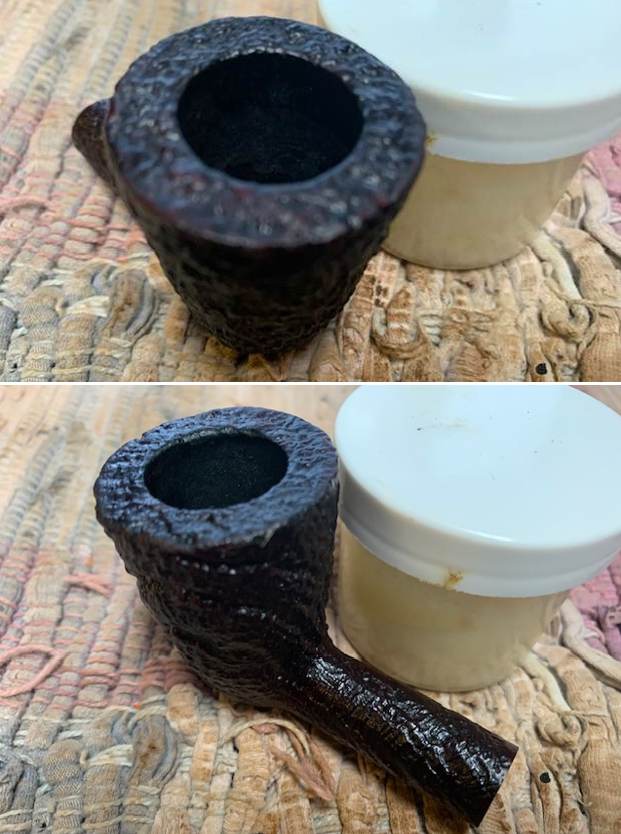
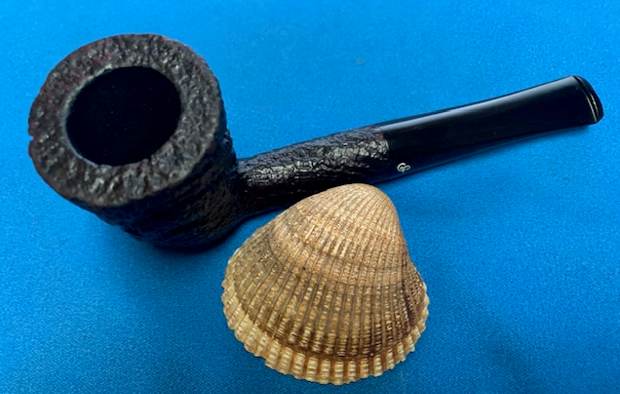
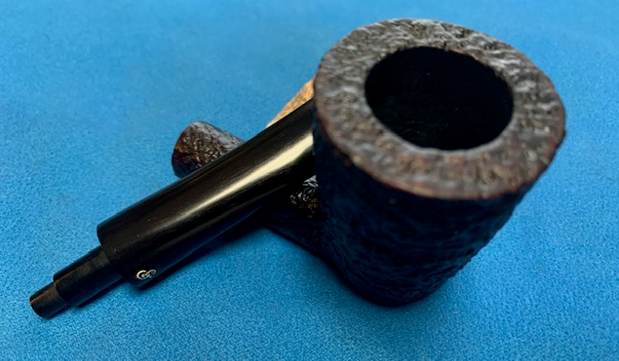
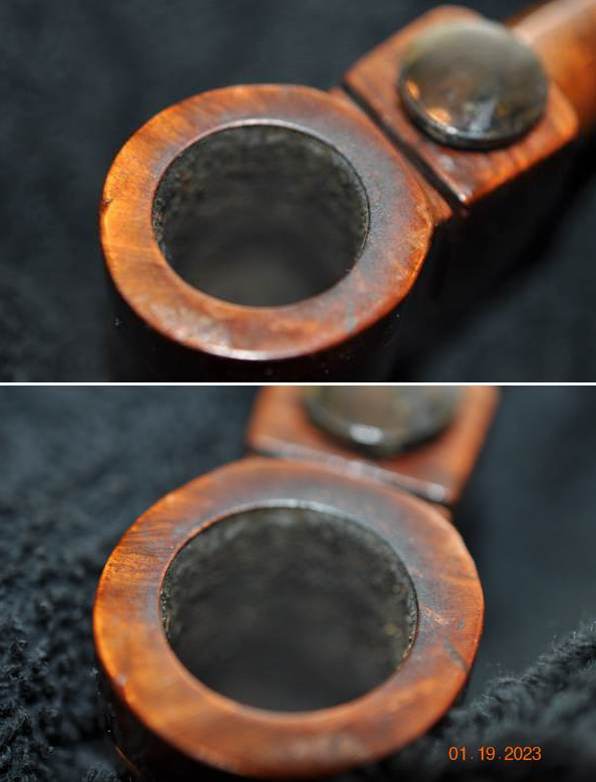
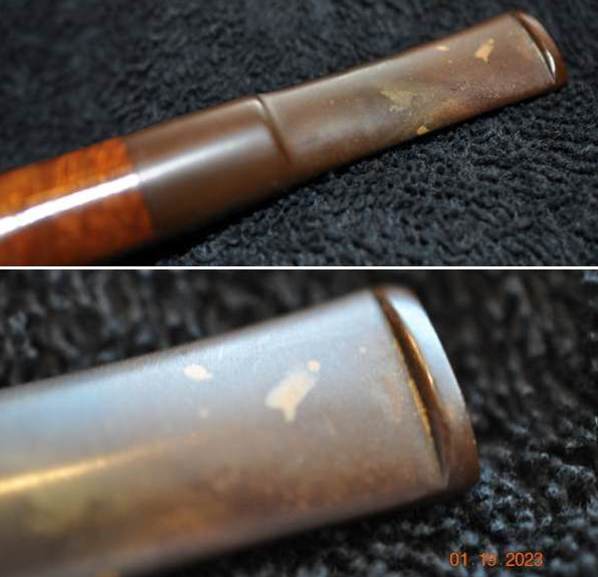
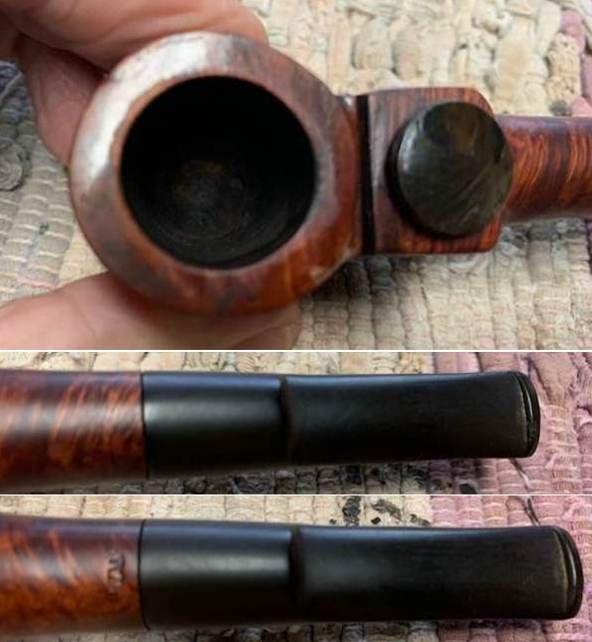
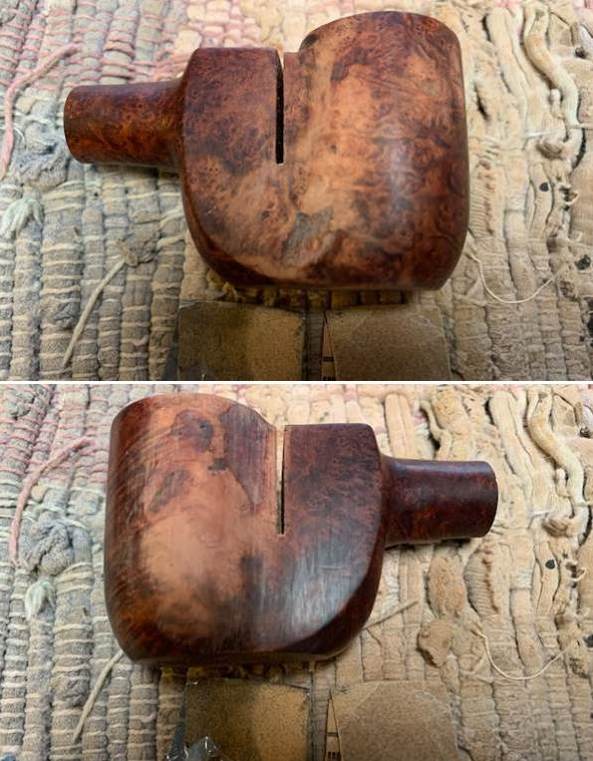
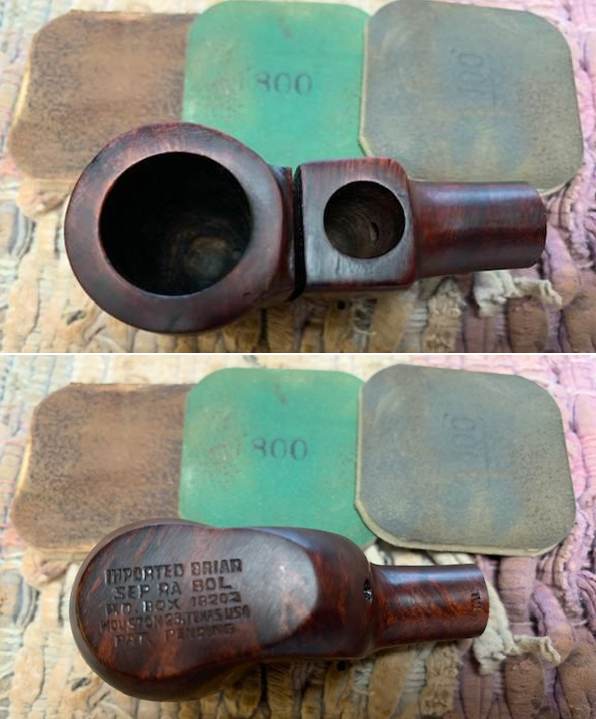
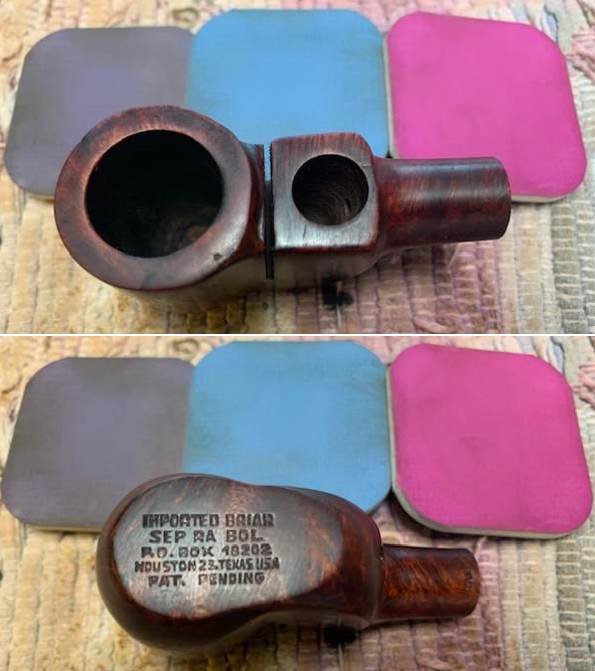
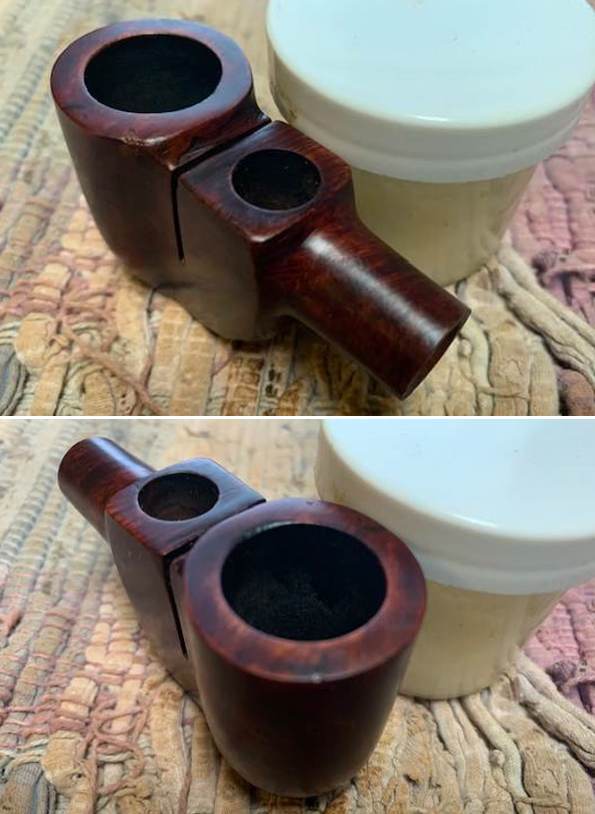
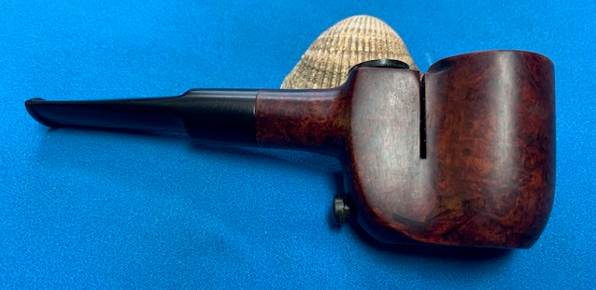
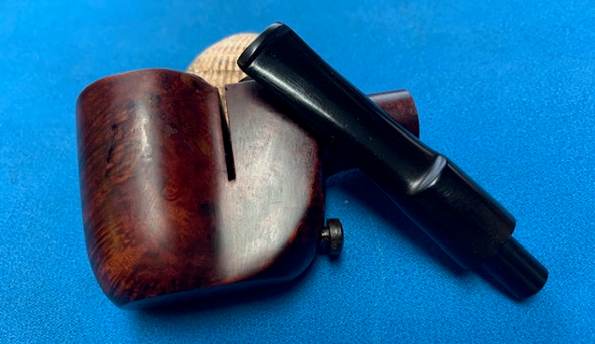
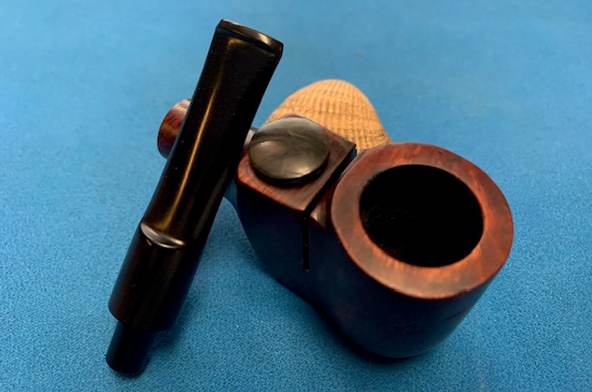
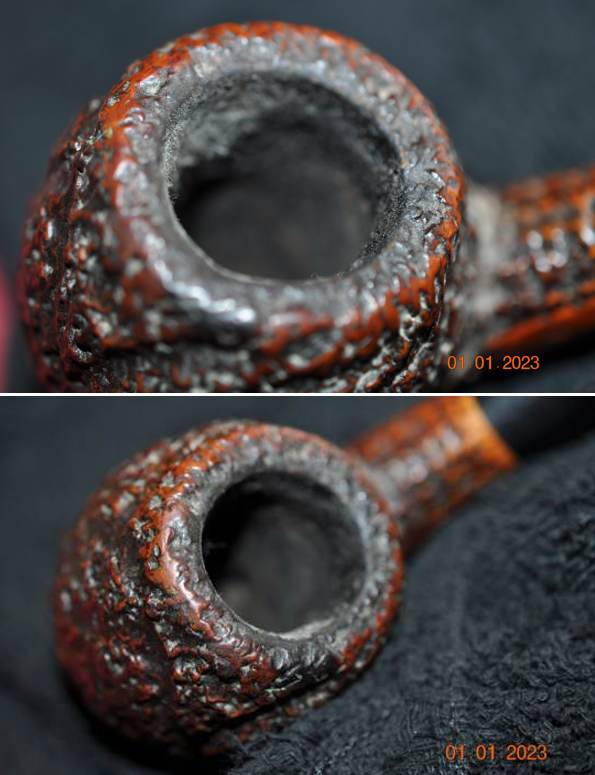
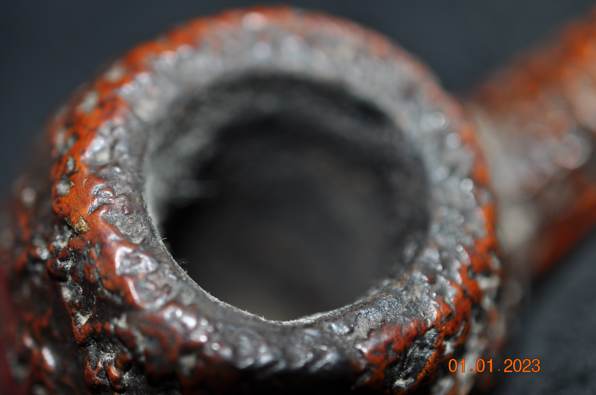
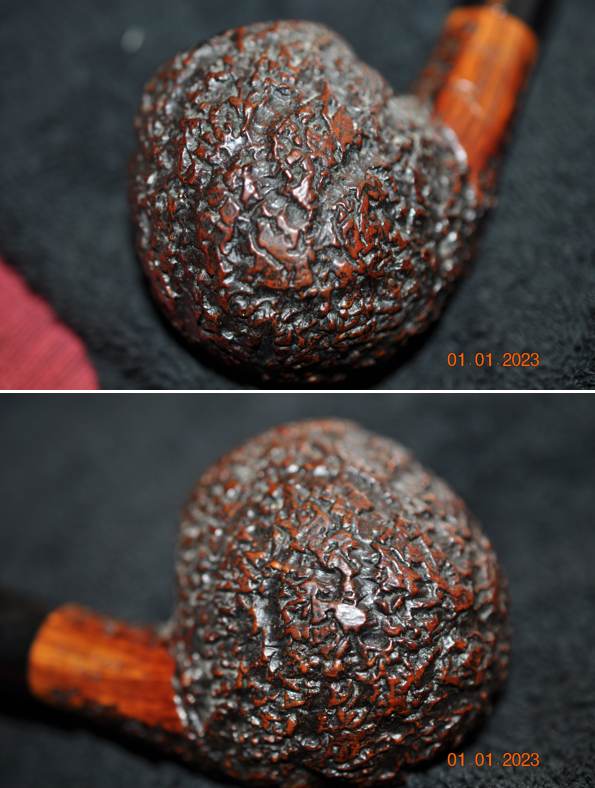
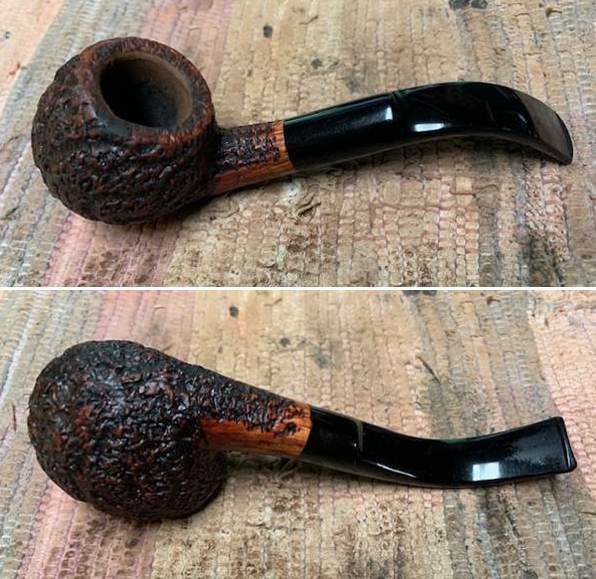
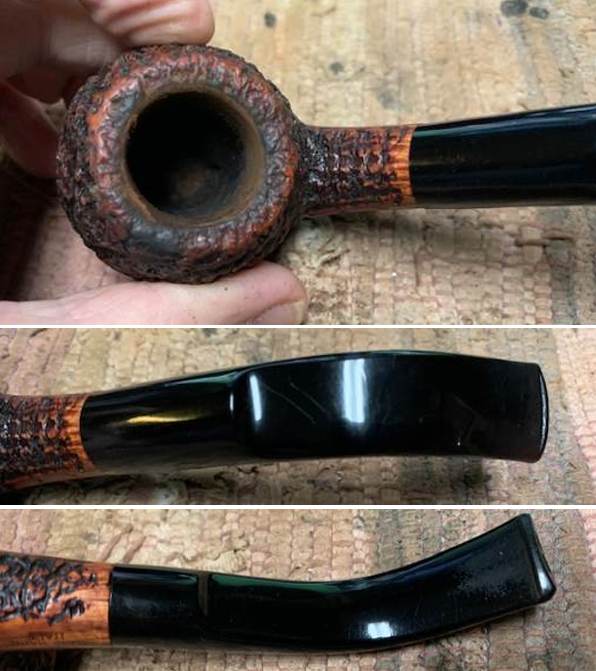
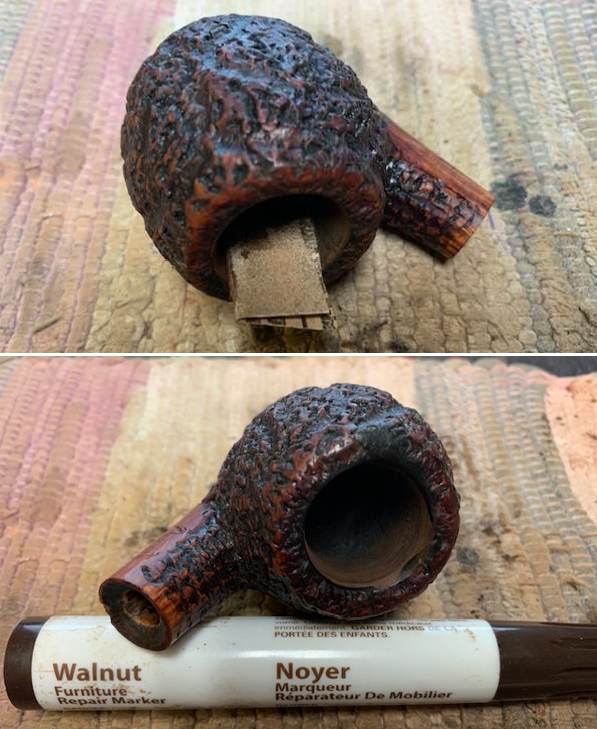
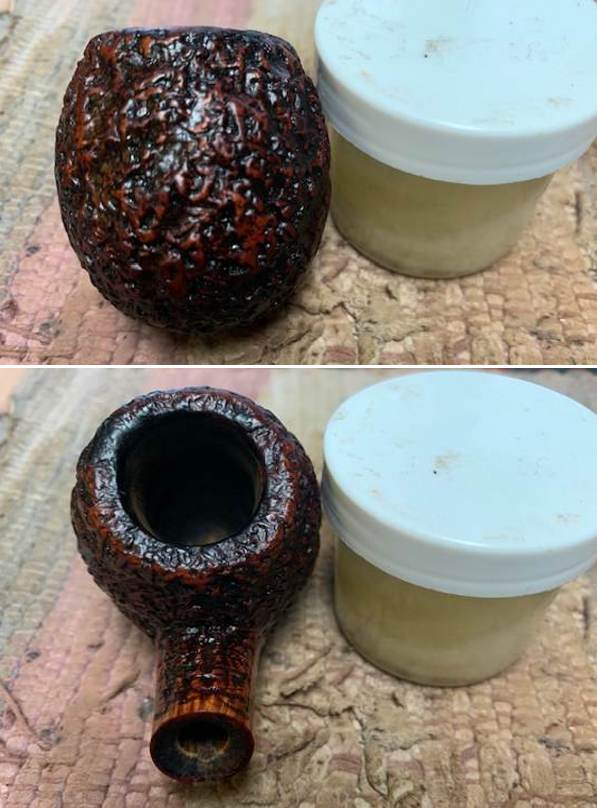
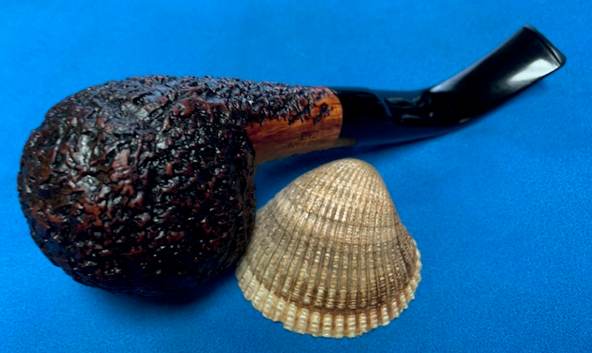
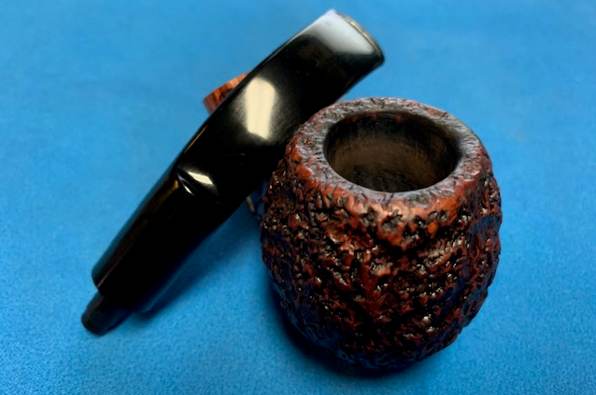
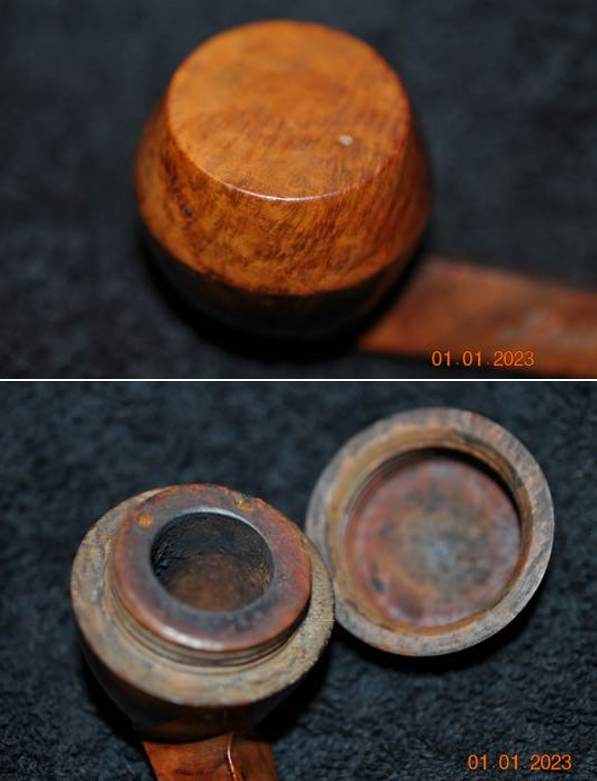
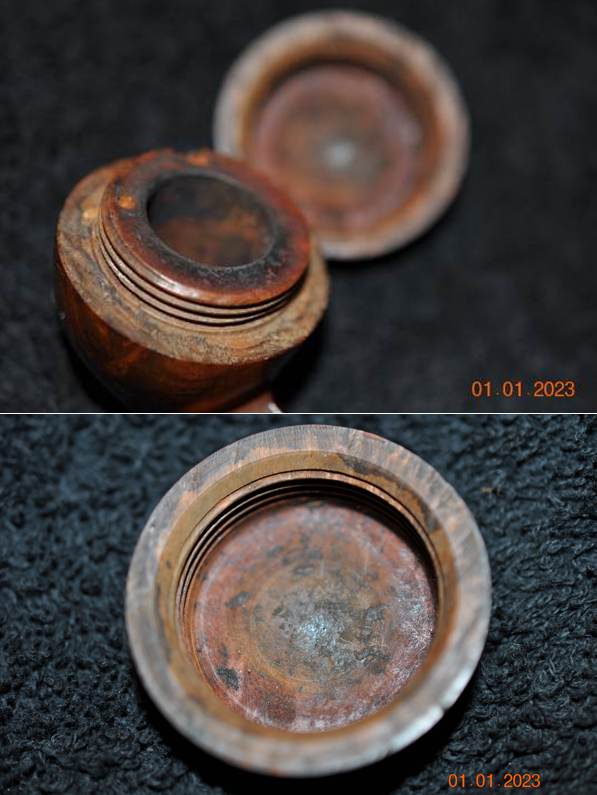
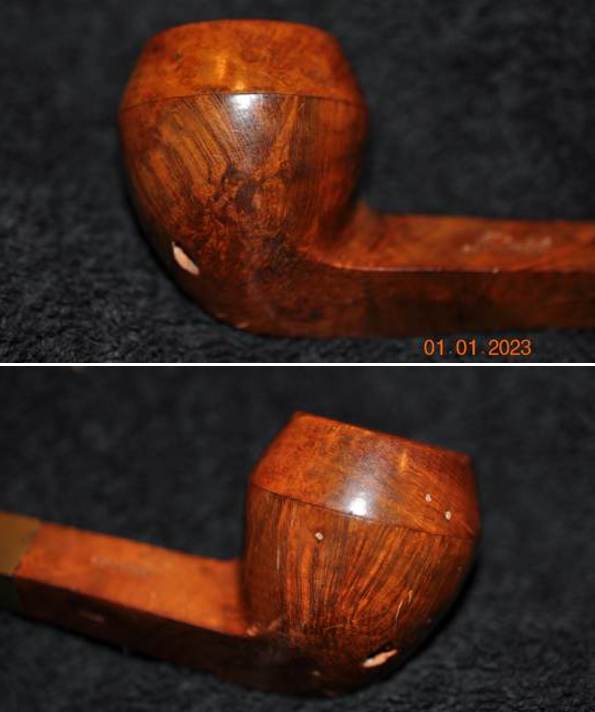
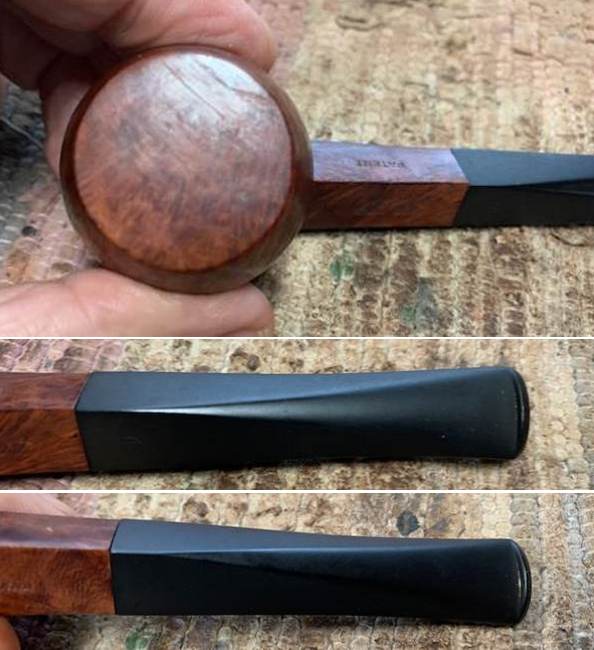
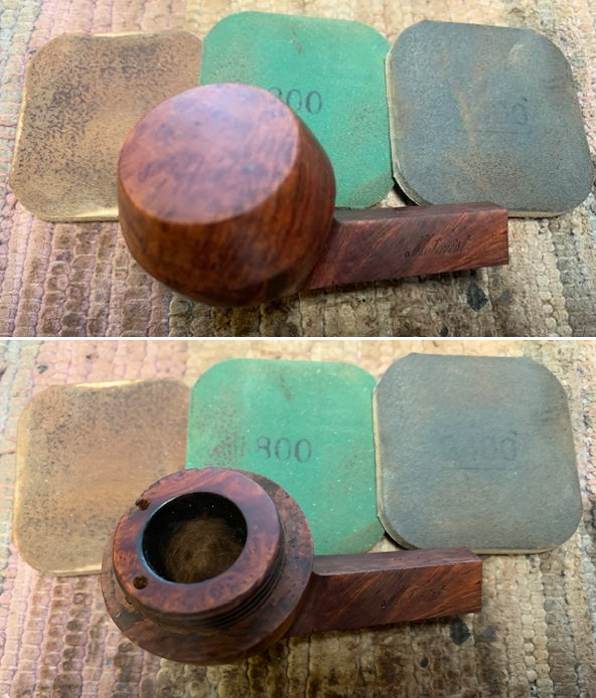
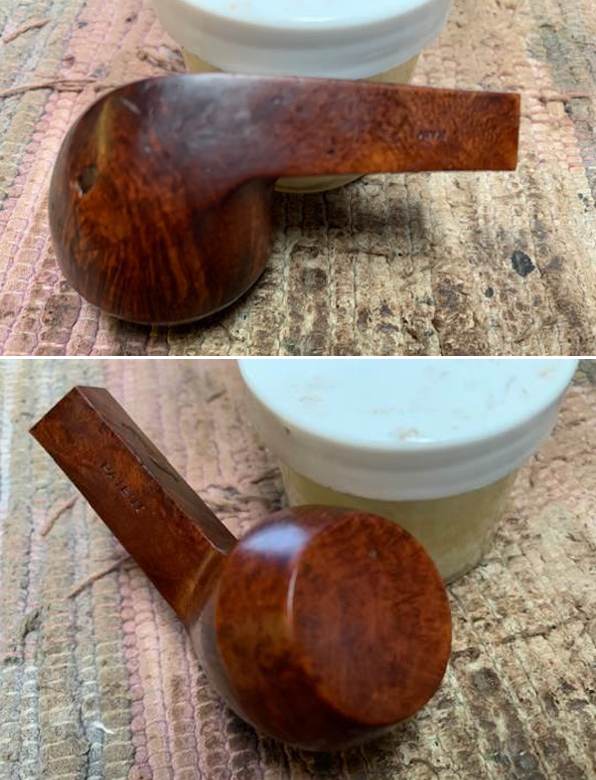
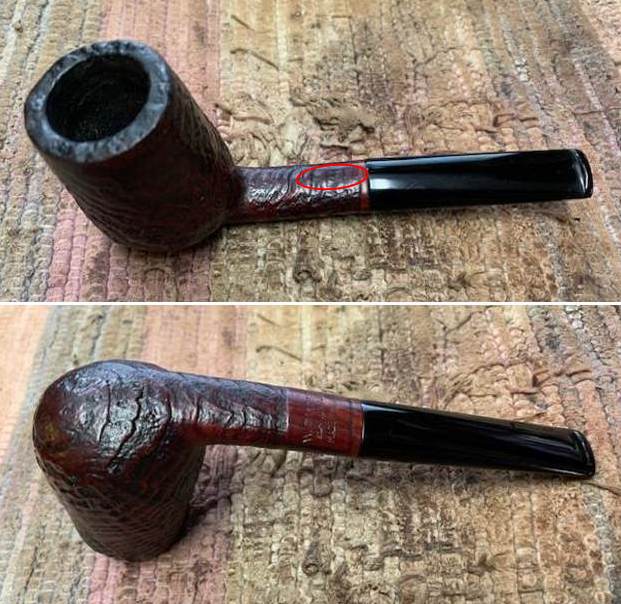 I took close up photos so that I could have a clearer picture of the condition of the bowl, rim edges and top. The rim top photos confirm my assessment above and show that while there is some darkening. However, I missed the tars and lava build up on the sandblast rim top. The cake in the bowl is quite moderate and was very smooth. You can also see the condition of the outer and the inner edge. They appear to be in great condition. This is what I look for when assessing a pipe. There is no visible burn damage at this point. The bowl is still round and other than being in a used condition it is in great shape. The small crack in the shank is circled in red below. The issues with the stem are visible in the photos on both sides ahead of the button and on the button itself.
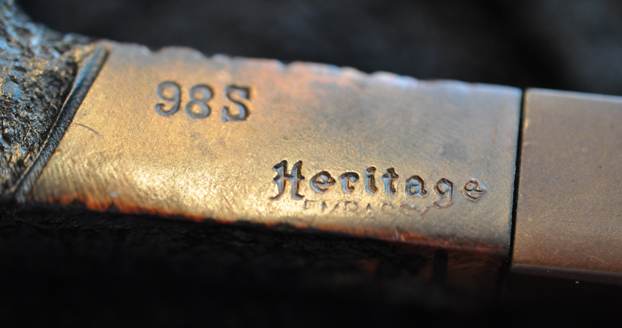
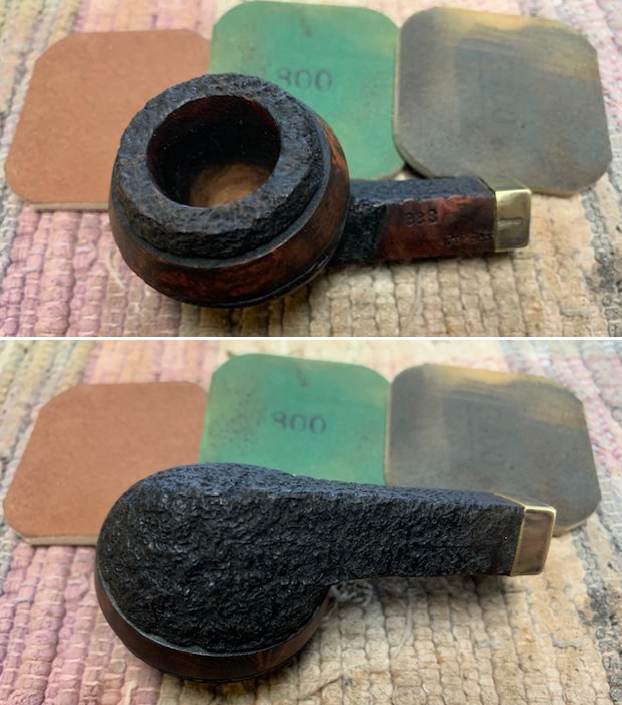
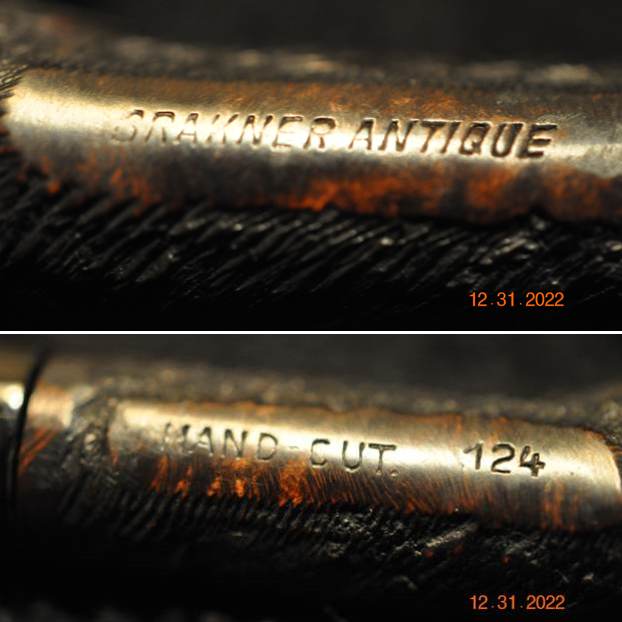
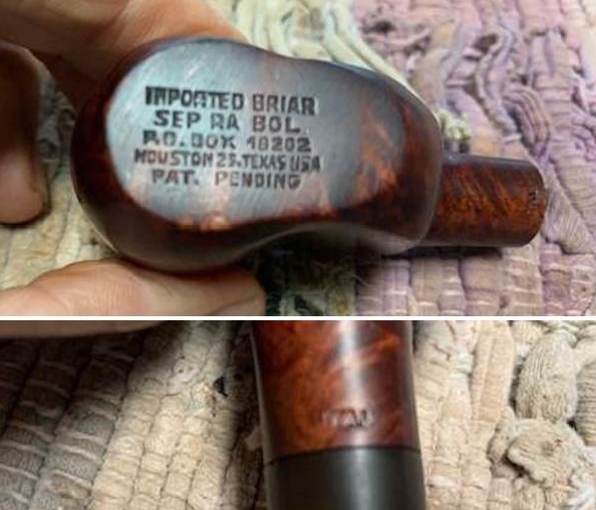
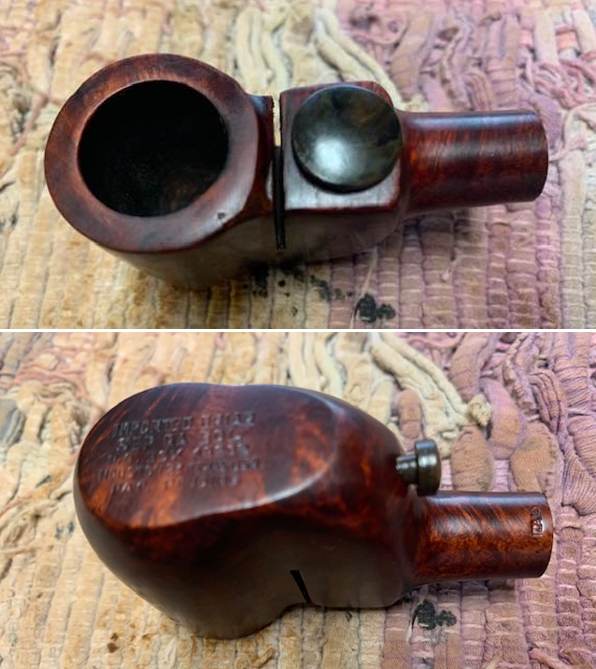
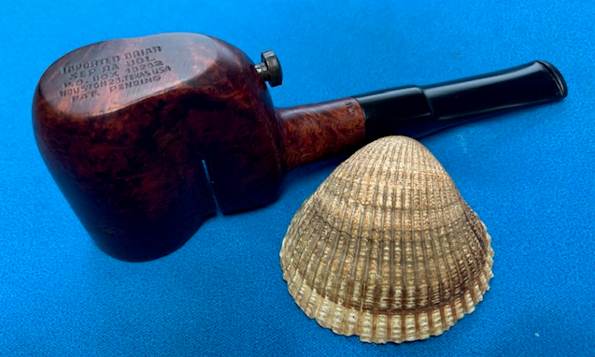
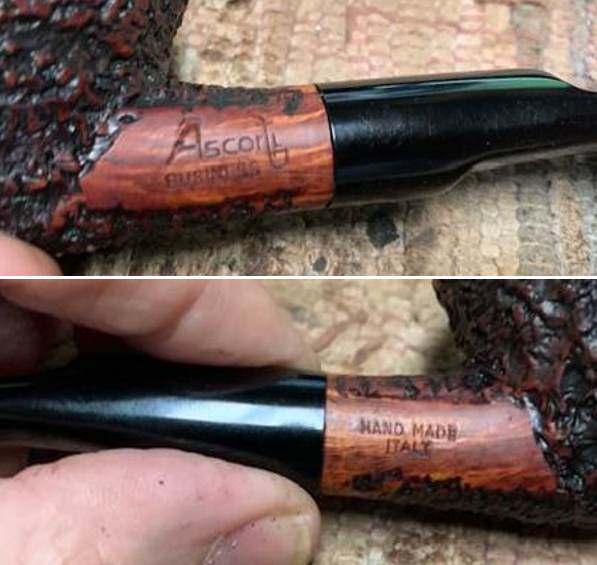
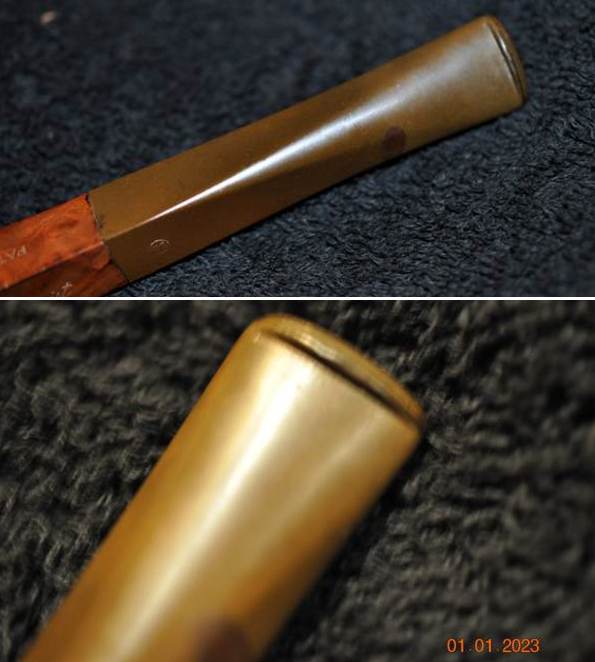
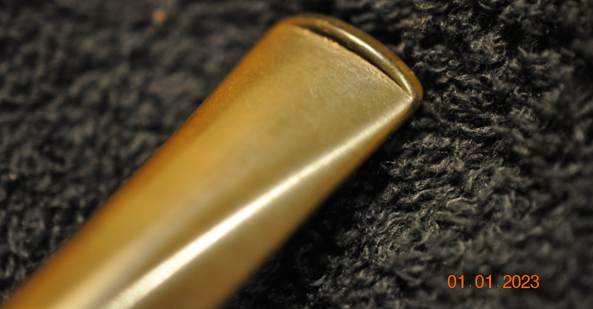
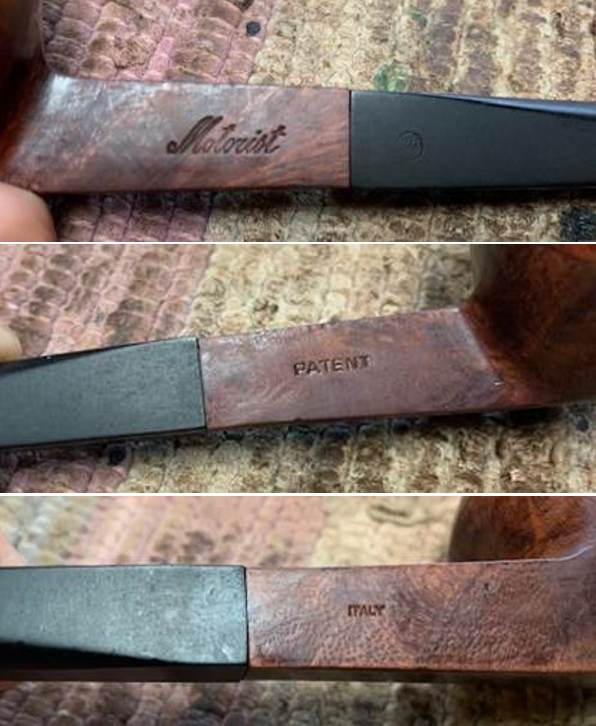
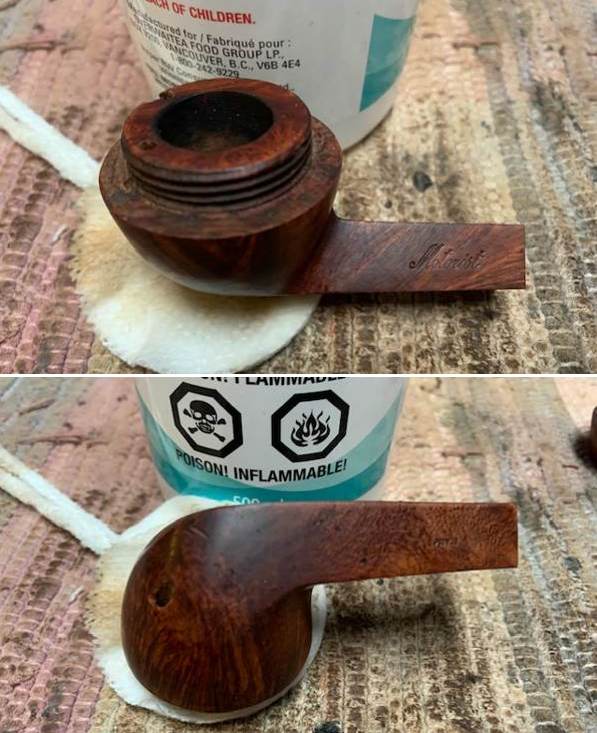
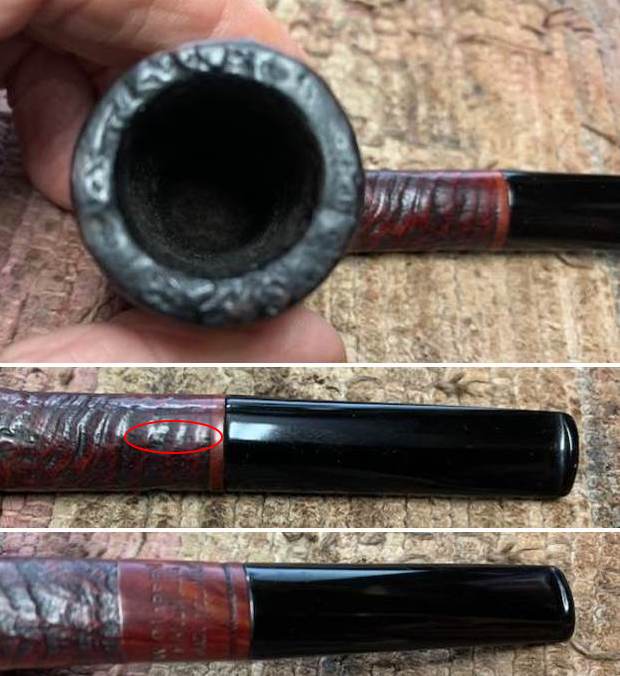 I took a photo of the stamping on the underside of the shank. It is clear and readable as noted above.
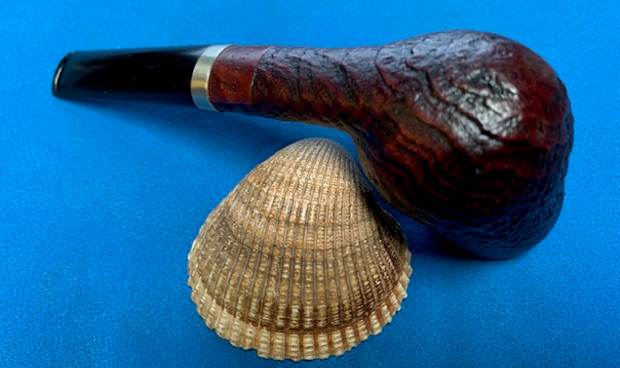
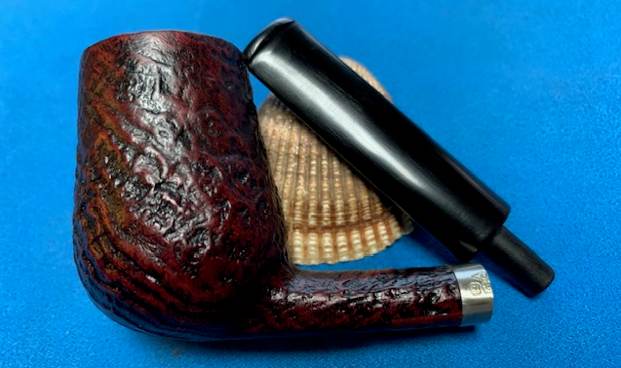
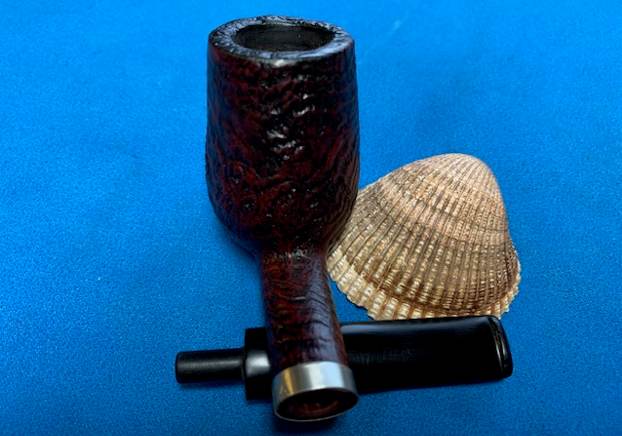
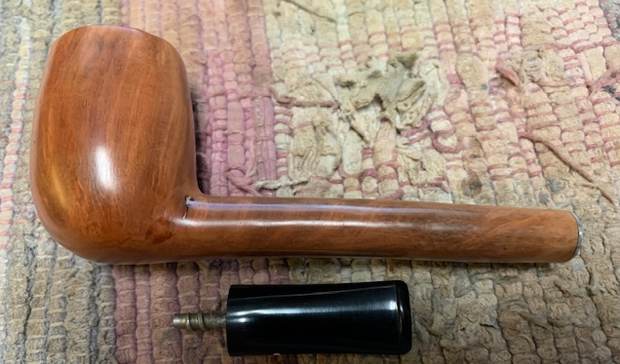
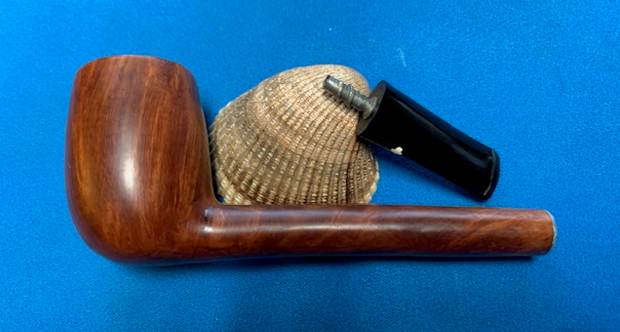
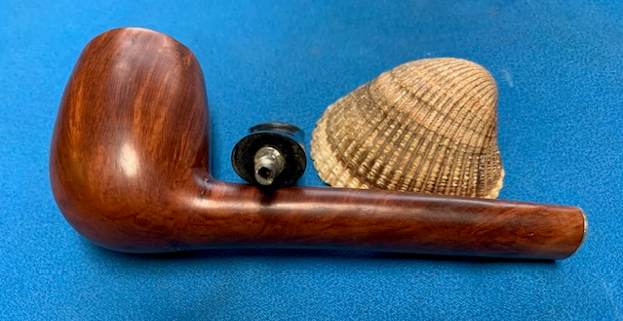
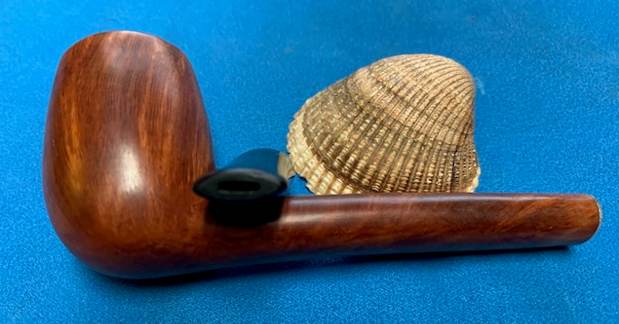
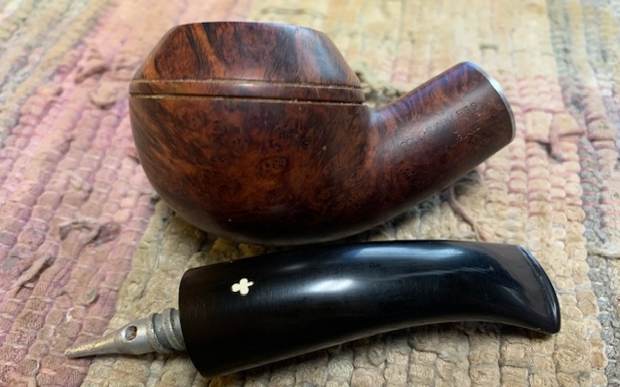
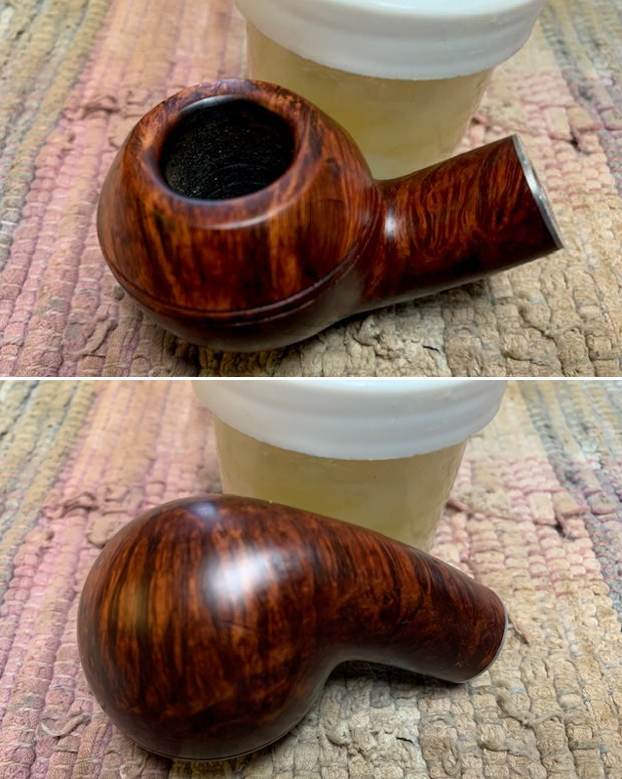
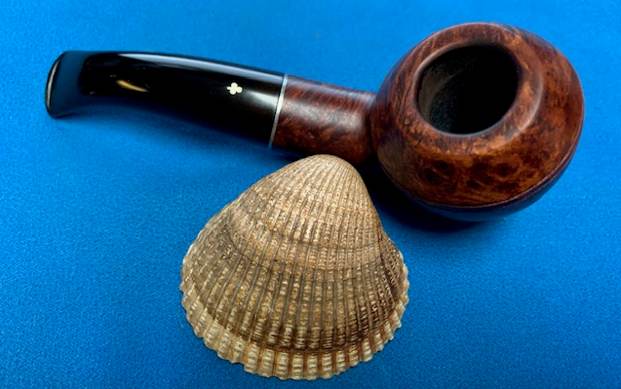
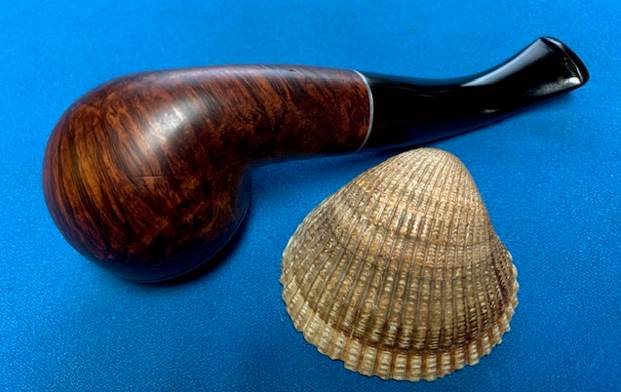
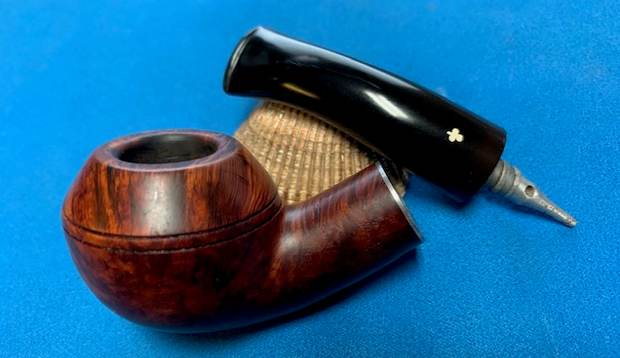
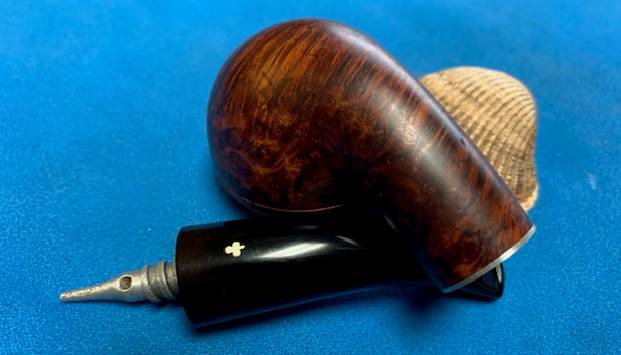
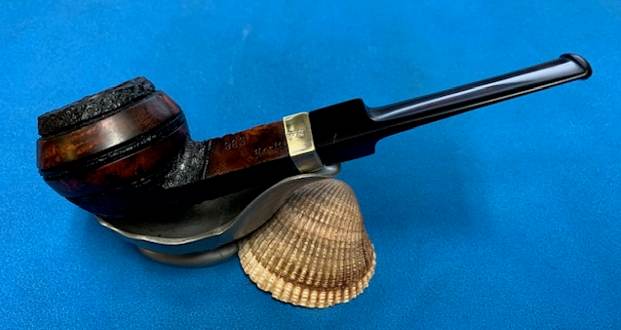
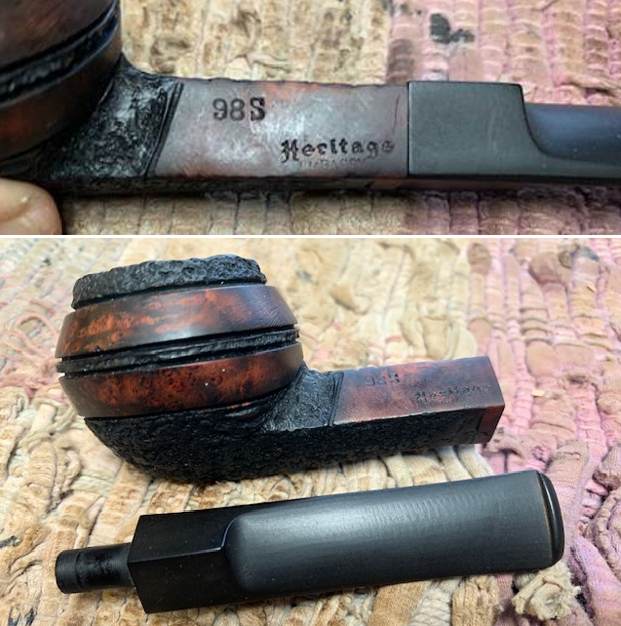
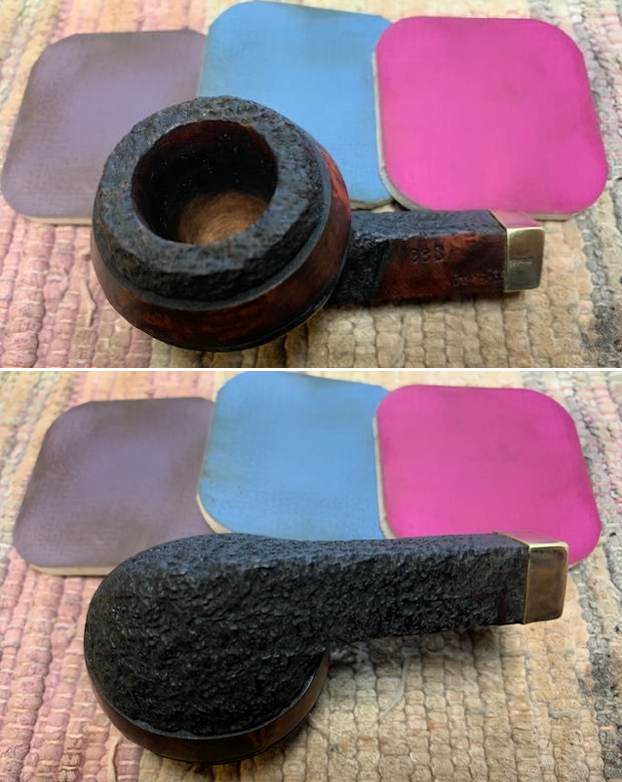
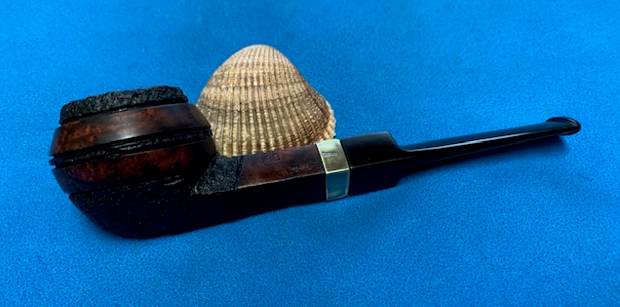
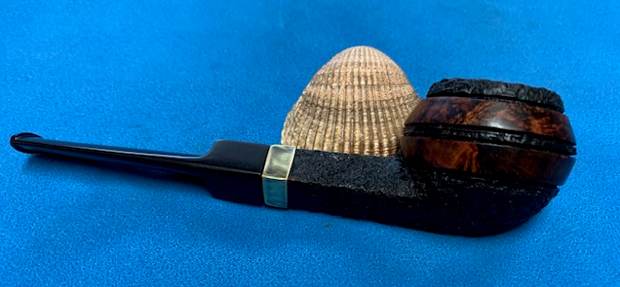
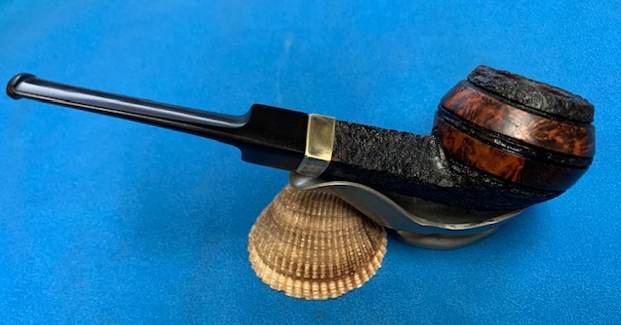
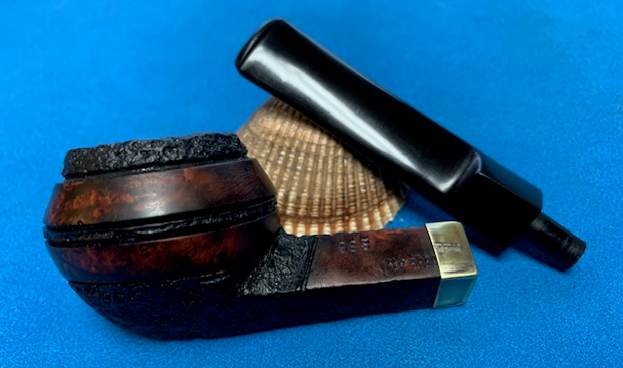
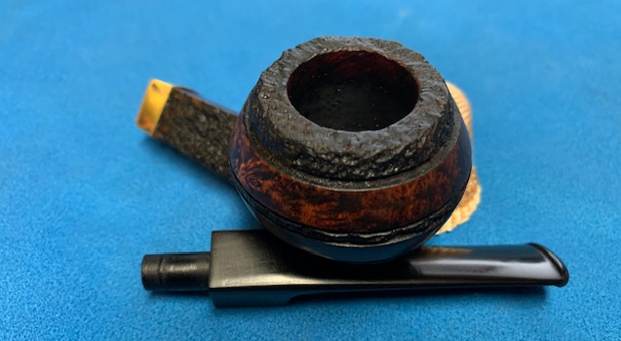
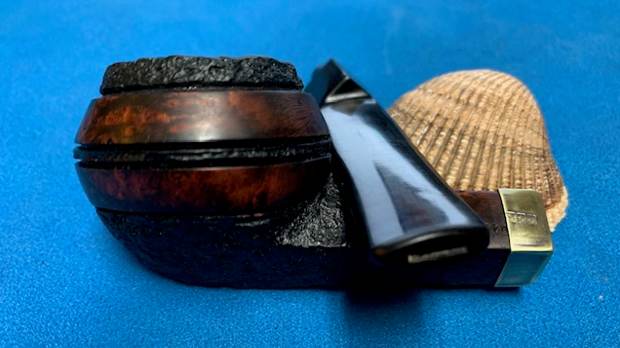
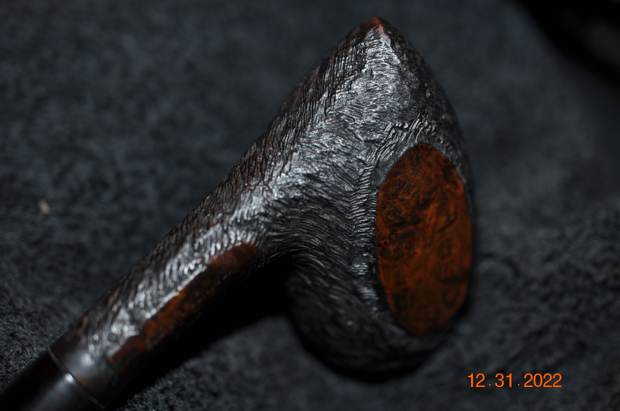
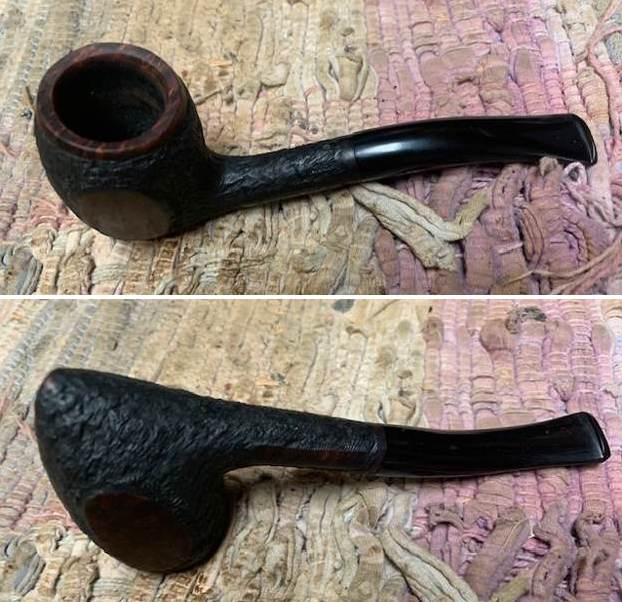
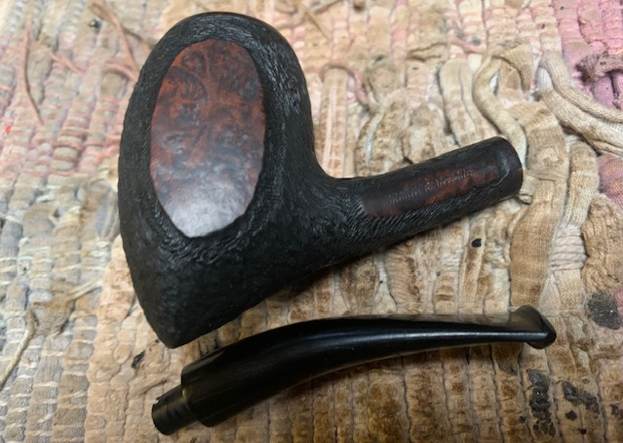
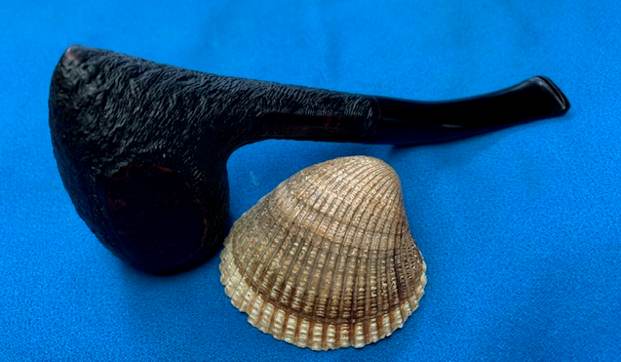
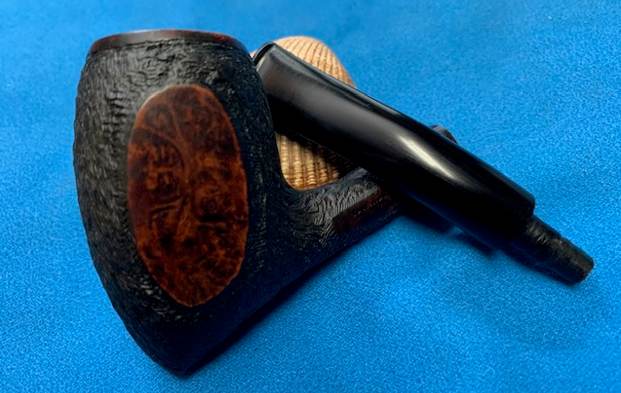
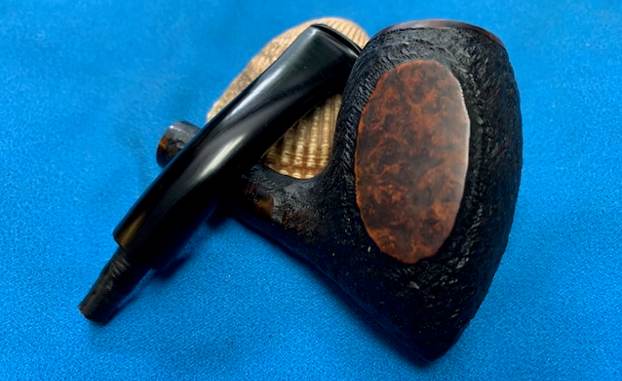
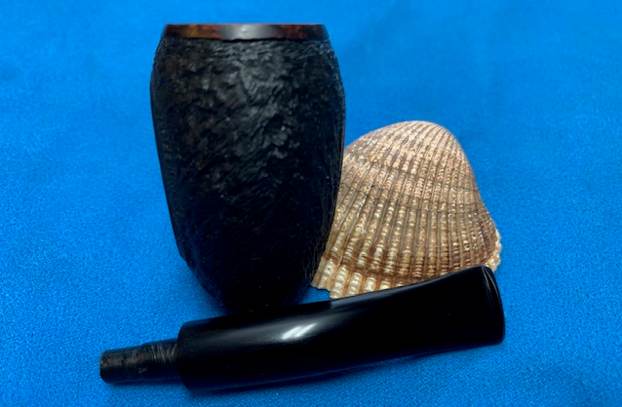
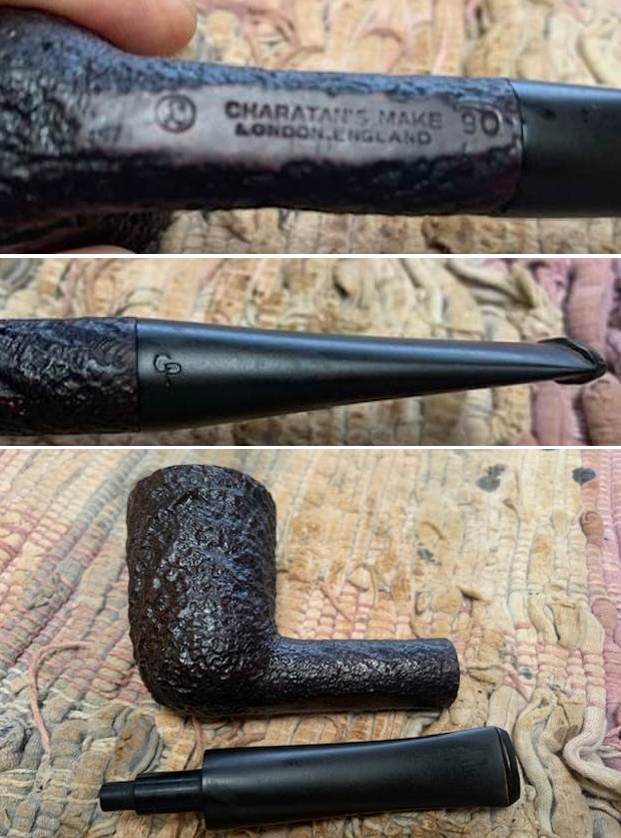
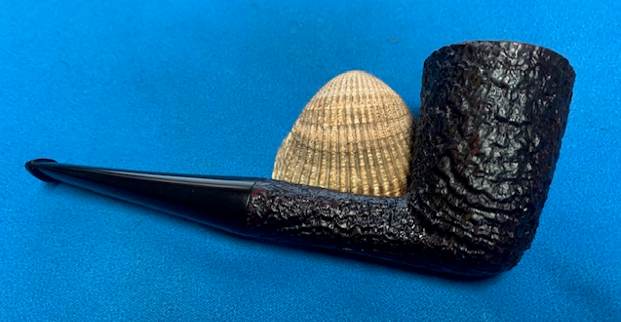
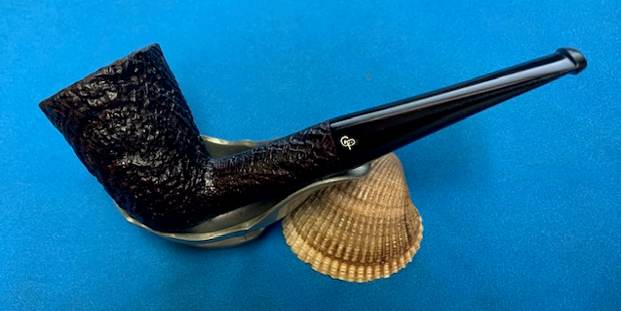
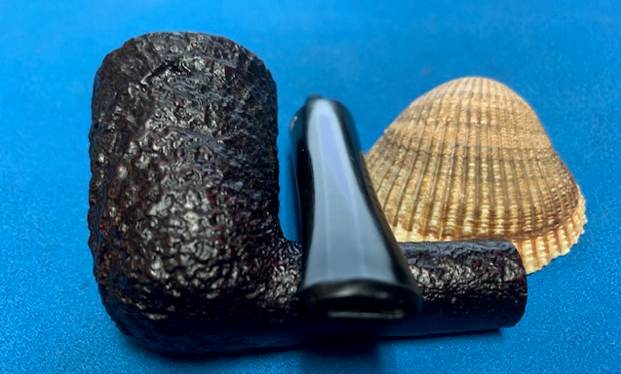
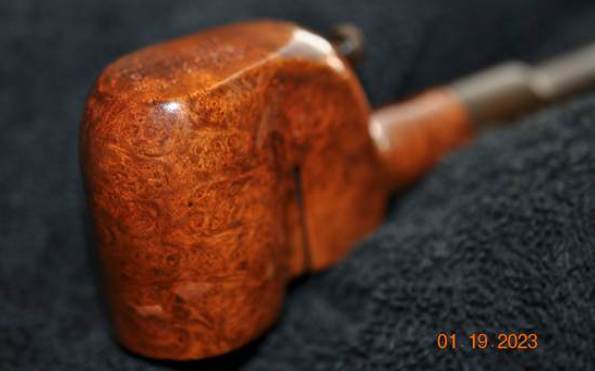
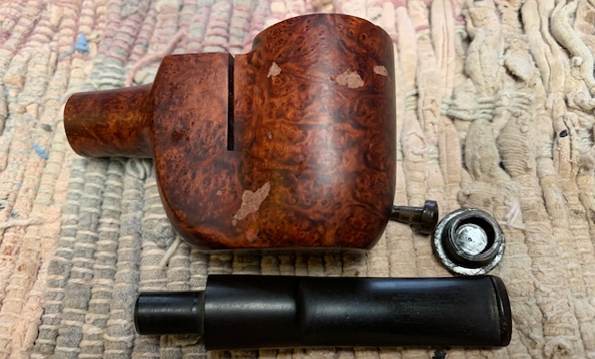
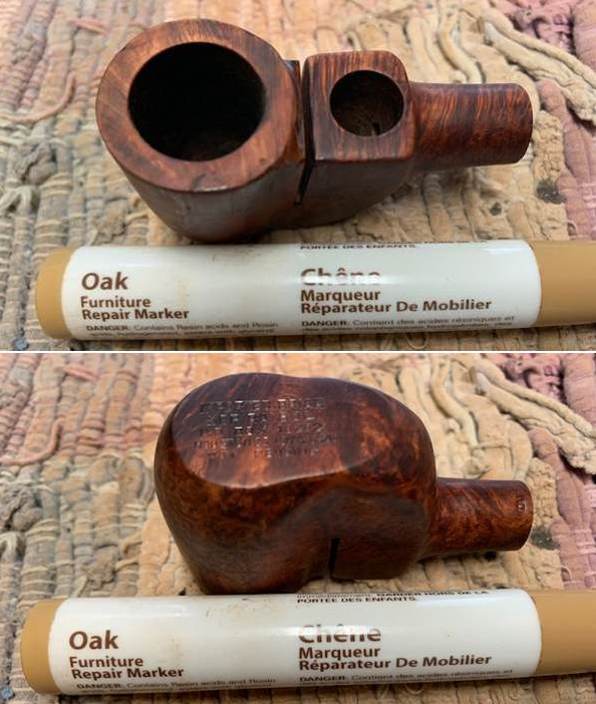
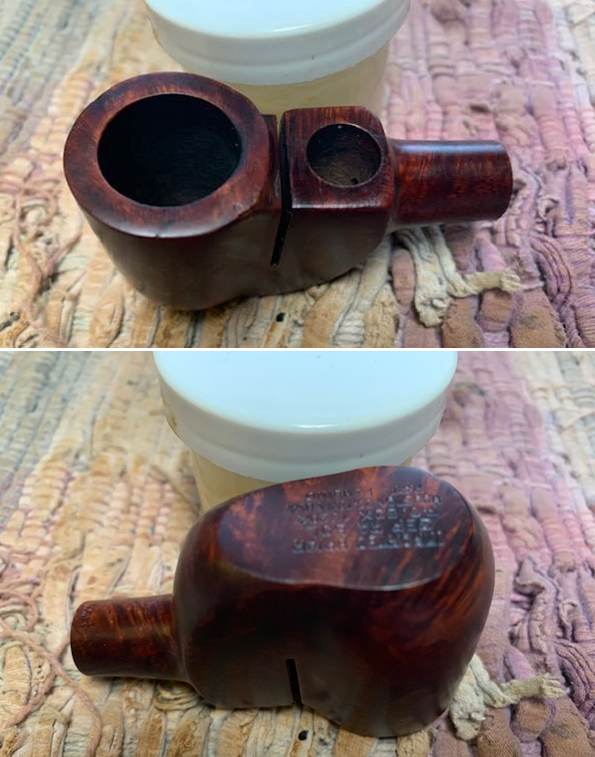
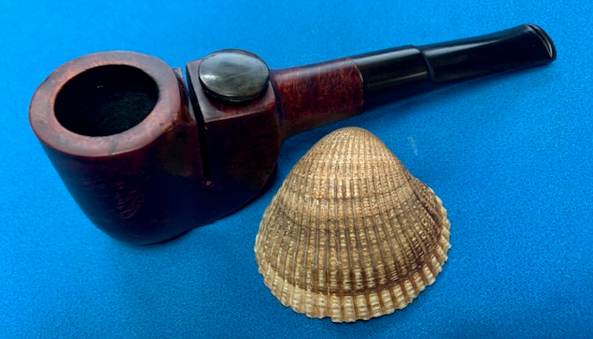
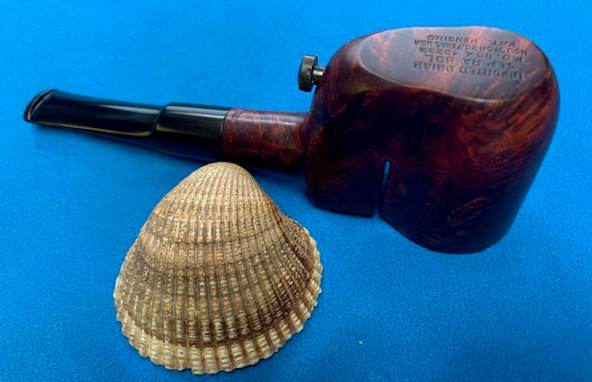
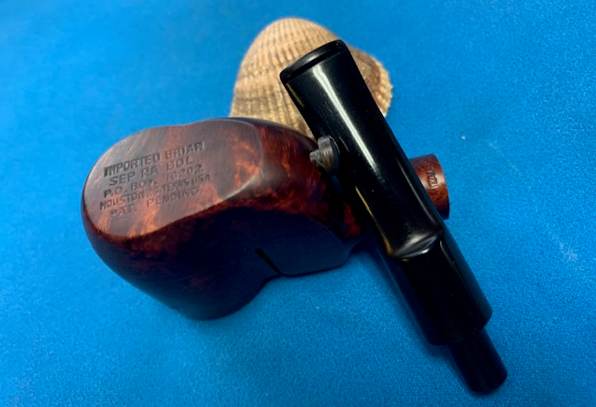
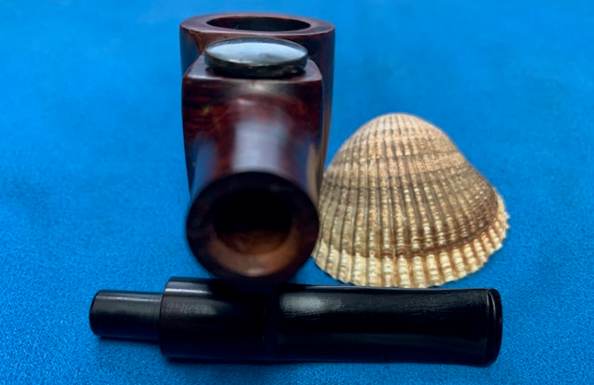
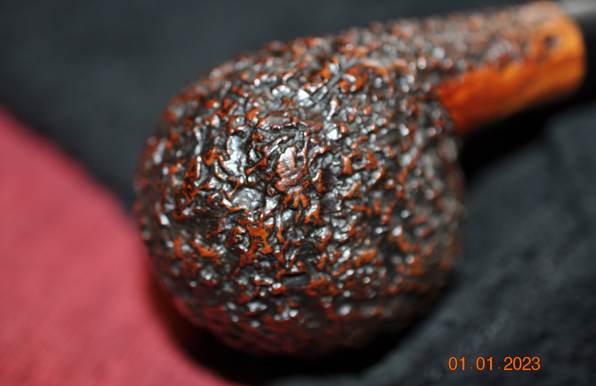
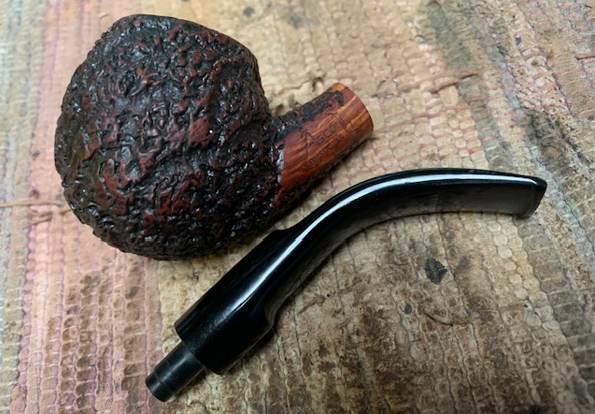
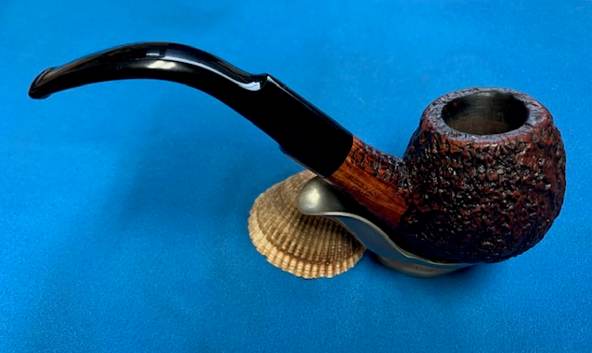
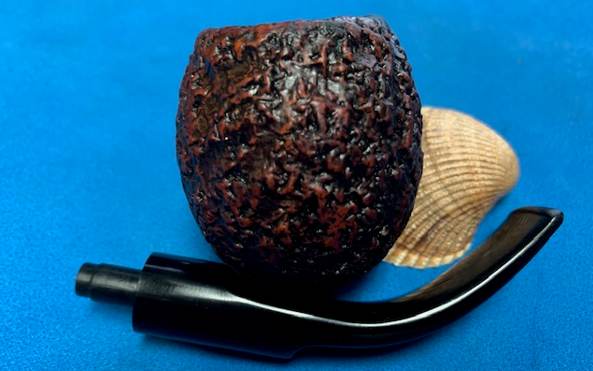
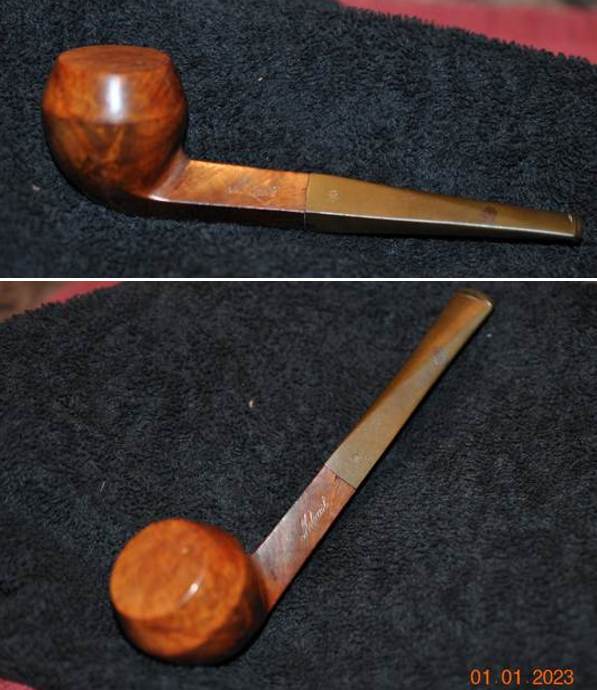
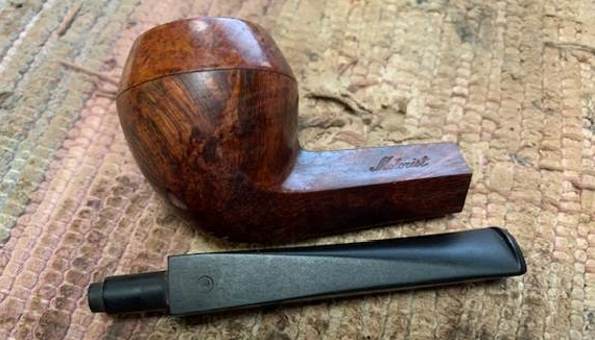
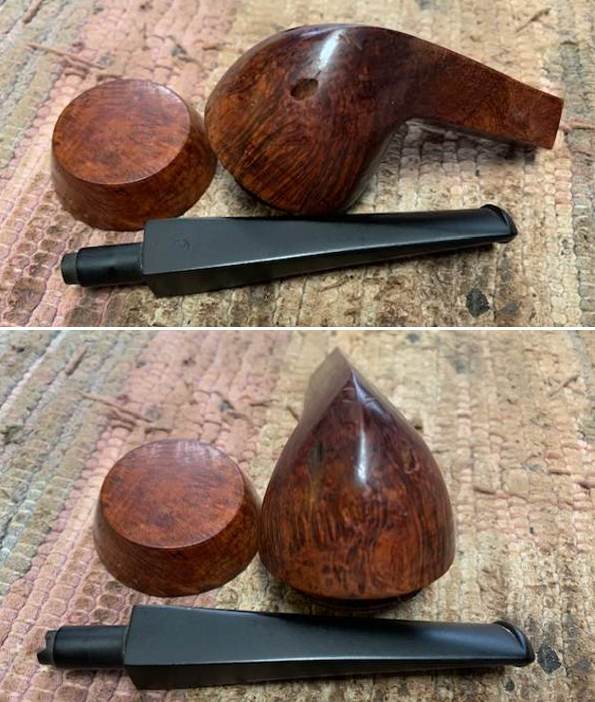
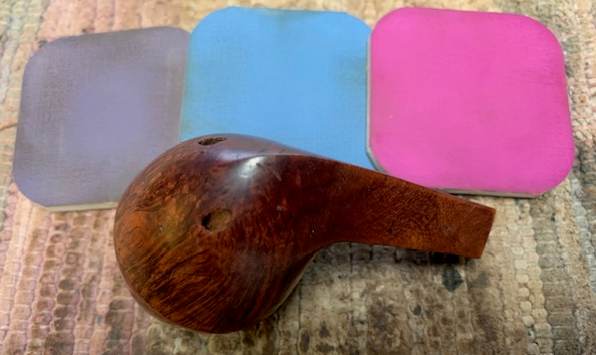
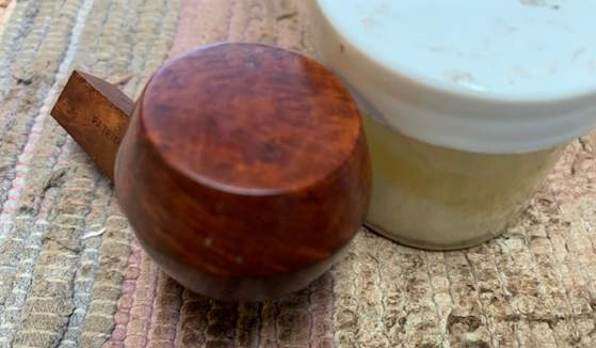
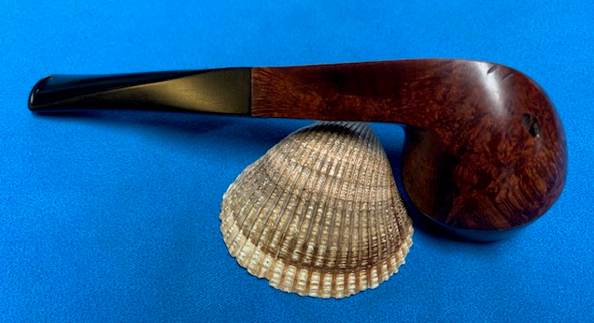
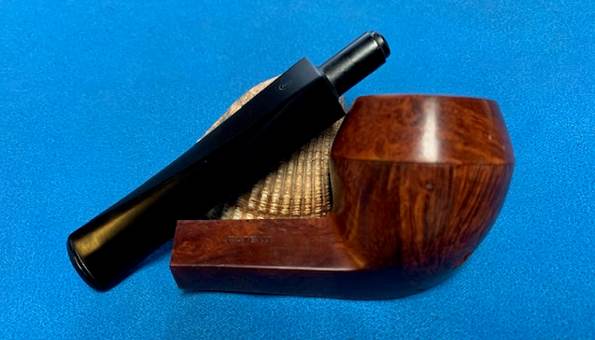
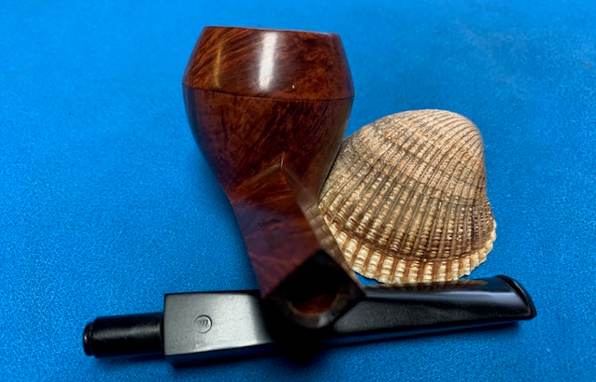
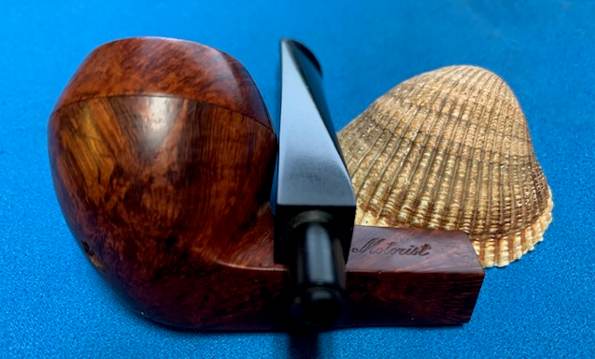
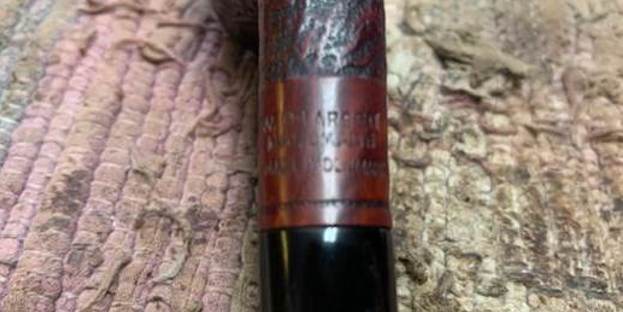 I took the stem off the bowl and took a photo of the pipe to give a sense of proportion of the pipe. You can also see shape of the pipe and some interesting grain in the blast on the briar.
 I have worked on quite a few W.O. Larsen pipes that are well made Danish takes on classic shapes. Several of them have been Brandy shaped pipes. This sandblast Canadian has a bowl that is almost a Brandy shape. Here is a link to the blog describing the background and history of the brand (https://rebornpipes.com/2021/10/25/restoring-a-sandblast-canadian-hand-made-designed-by-w-o-larsen-super-tan-65/). I quote from that blog in information that follows.
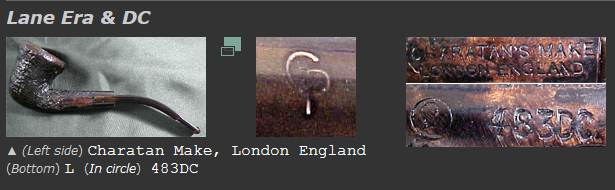
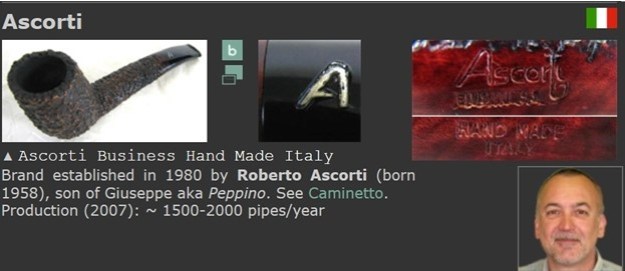
I turned to Pipephil (http://www.pipephil.eu/logos/en/logo-l2.html) to get a quick view of the brand once again. I did a screen capture of the site’s information and have included that below. The pipe I am working on is a W.O. Larsen as it is stamped similarly to the ones in the photos.  I quote from the sidebar below:
In the 1960s Ole Larsen, owner of the Copenhagen tobacco store, retails pipes carved by Sixten Ivarsson, Poul Rasmussen, Sven Knudsen or Peter Brakner. Faced with the success and urged by Sven Bang (store manager), Sven Knudsen and Former (Hans Nielsen) are successively hired to carve pipes in the basement of the shop at the beginning and in the old Larsen cigar factory afterwards. Carver like Teddy Knudsen, Tonni Nielsen, Jess Chonowitch, Peter Hedegaard work a while in this context. When Nils, son of Ole Larsen, succeeds his father he acquires the Georg Jensen pipe factory to focus on less expensive pipes. This turns out to be an error ending with the sale of W.O. Larsen trademark to Stanwell. The famous tobacco shop at Strøget, Amagertorv 9 closed down for good on Dec 31, 2004. Do not confuse W.O. Larsen with: Jorgen Larsen
I turned to Pipedia (https://pipedia.org/wiki/W.%C3%98._Larsen) for a quick read. The site is worth reading the history of the shop and the brand and its influence on Danish pipe carving. I quote a portion of the article below:
The workshop of W.Ø.Larsen
W.Ø.Larsen is Denmark’s oldest and probably most famous pipes and tobacco store, placed in the center of Copenhagen on the main pedestrian street, Stroget. If you visit Copenhagen and do a “pipe crawl” this store is a must. In the beginning of the 1960’s the store began to sell Danish hand-made pipes, especially those of Poul Rasmussen. This went very well and Poul Rasmussen could not keep up with the demand. W.Ø.Larsen, with their dynamic business manager Svend Bang (who later started his own pipe business), decided to establish their own workshop in rooms next to the store.
The first manager of the pipe workshop was Sven Knudsen, but he soon left to make pipes under his own name. The next manager was Hans Nielsen, also known as “Former” (named after the late British actor George Formby, whom he was said to resemble. Coincidentally, in Danish, “Former” means “shapes”). Under the management of Former the workshop grew and W.Ø.Larsen pipes became a prominent name abroad. Among the prominent pipemakers educated here were Else Larsen (Denmark’s first female pipemaker),Poul Ilsted, Ph. Vigen, Teddy Knudsen, Tonni Nielsen, and Peter Hedegaard.
Typical for the W.Ø.Larsen School were semi-classic shapes, meaning classic shapes, but with slight differences, often bring a little more full or round. The pipes often had lower center of gravity. A typical billard would have a bowl shaped more like a pear and the connection between the bowl and the shank would be clearly distinguished. Yellow and orange were colors more widely used for the finishes.
What I learned from the research is that the pipe is a W.O. Larsen pipe made by one of the famous carvers who worked in the shop. It is a beautiful pipe in both shape and finish.
Now it was time to work on the pipe itself. I started my work on this one by reaming the bowl with a Savinelli Fitsall Pipe Knife. I followed that up by sanding the bowl walls with 220 grit sandpaper wrapped around a piece of dowel.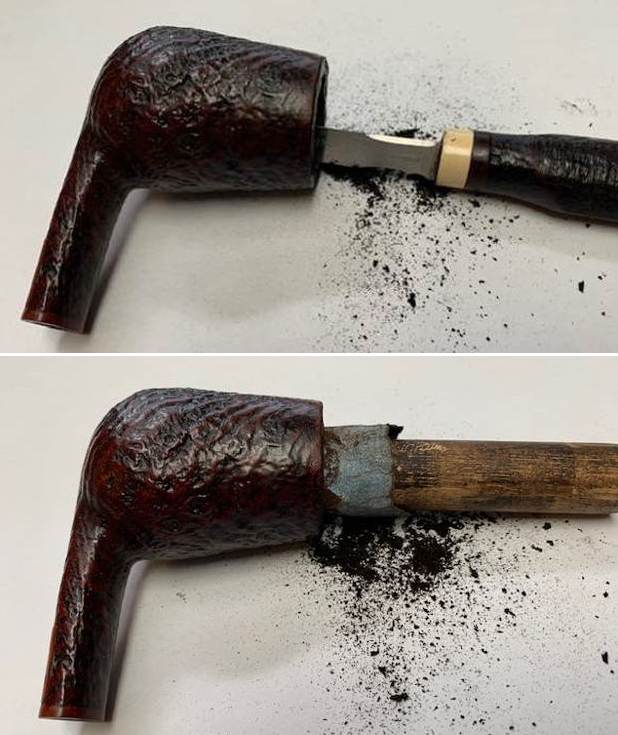 I scrubbed the rim top with a brass bristle wire brush to knock of the lava and tars in the blast on the rim top. Once it was scoured with the brass it looked significantly better.
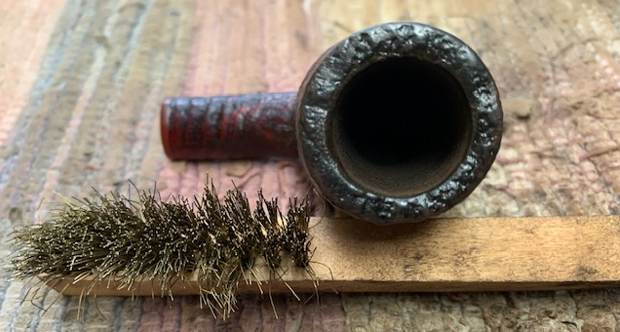 I cleaned the internals of the shank and the stem with 99% isopropyl alcohol, cotton swabs and pipe cleaners. I scrubbed it until the shank was clean and the smell was much cleaner smelling.
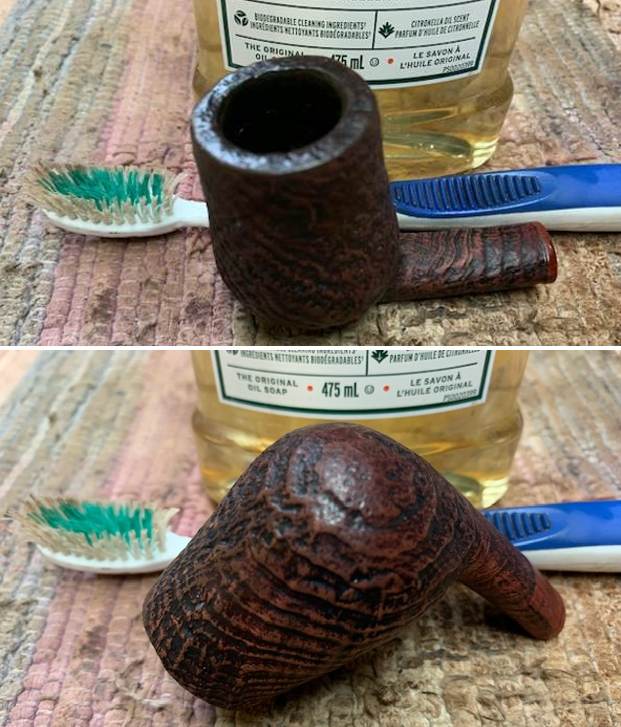
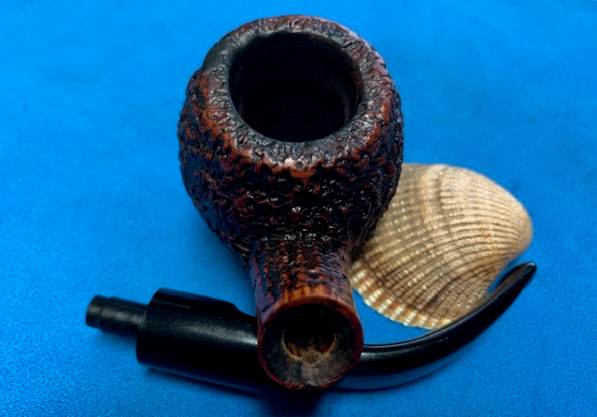
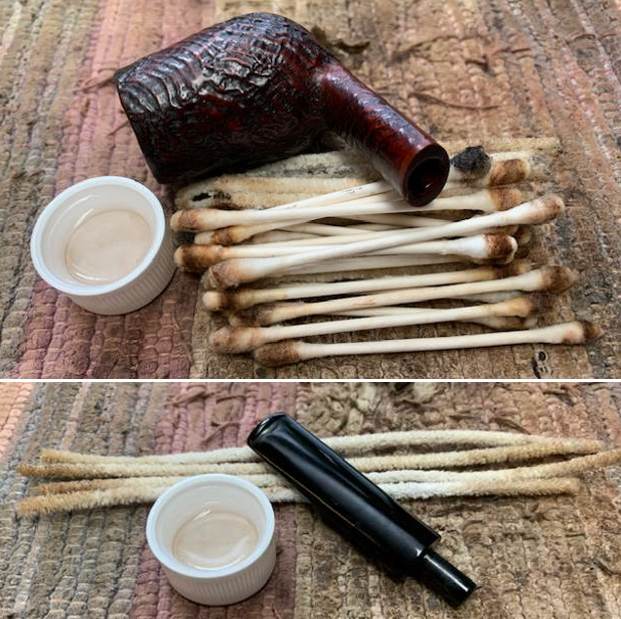 I scrubbed the external surface of the sandblast briar with a tooth brush and undiluted Murphy’s Oil Soap. I scrubbed it until the finish was clean and then rinsed it off with warm running water to rinse off the soap and the grime from the finish. I dried it off with a soft cloth and took photos of the pipe.
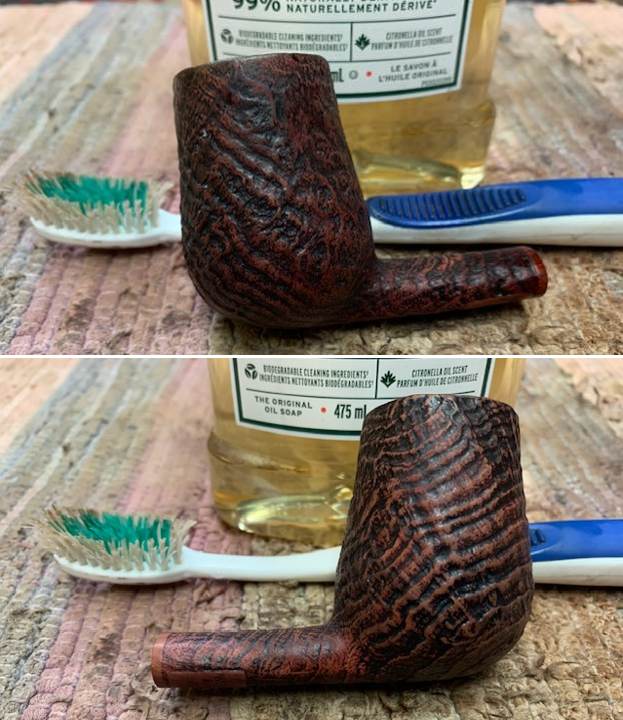
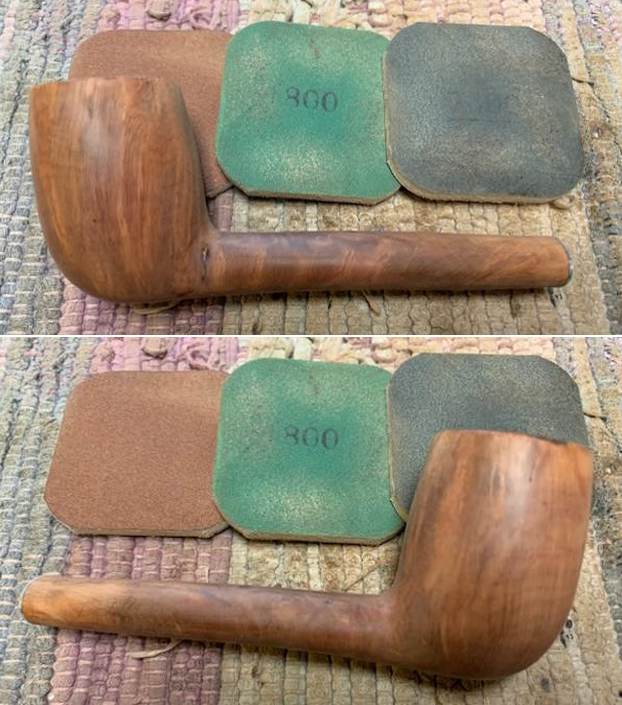
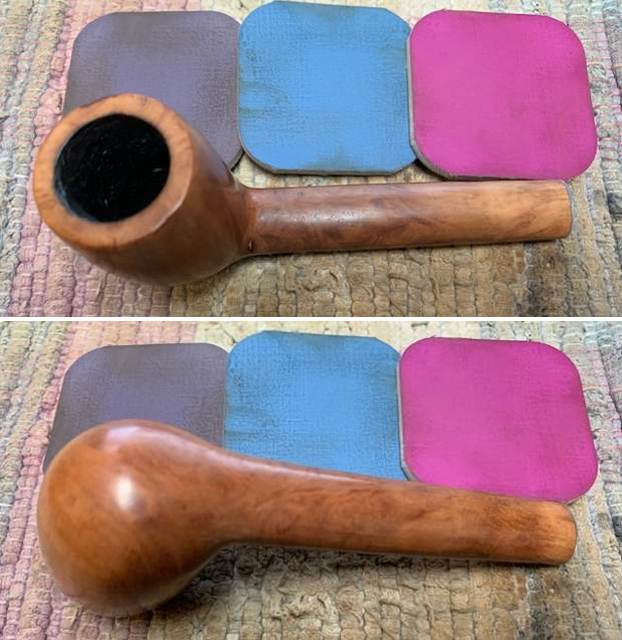
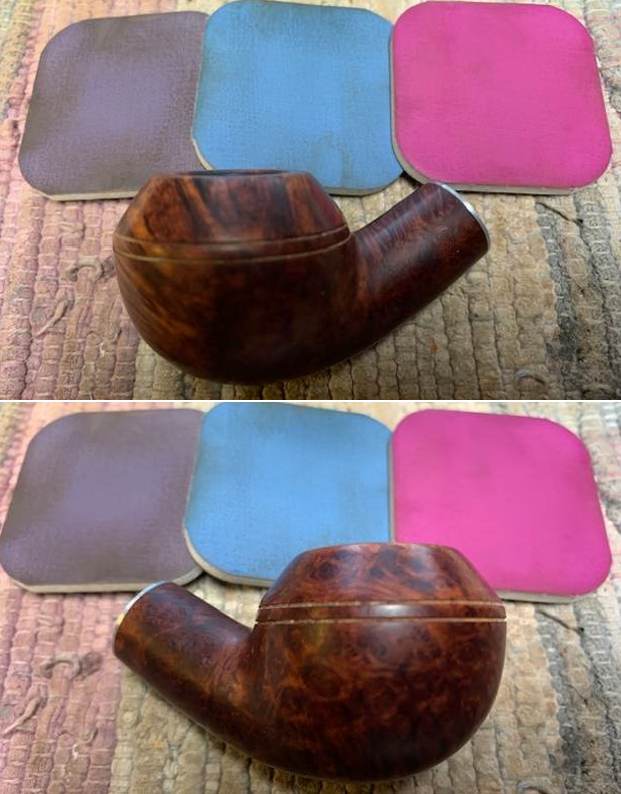
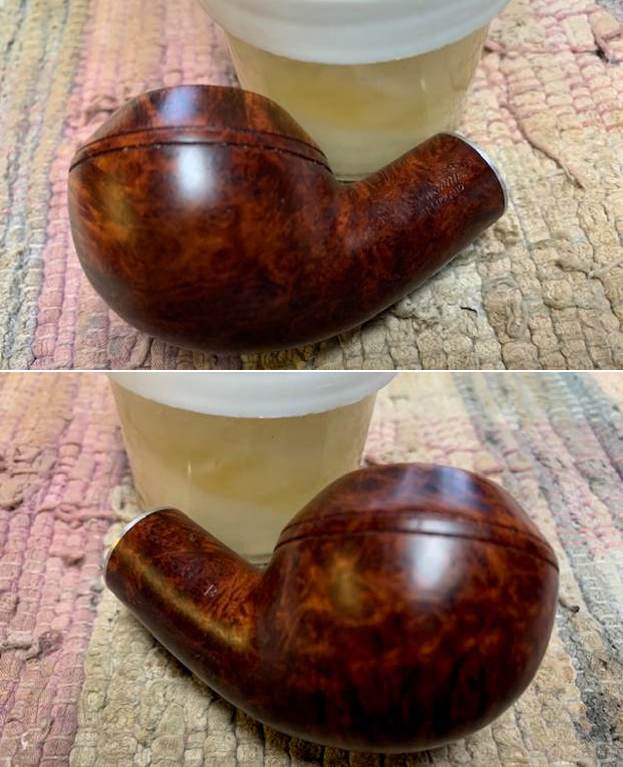
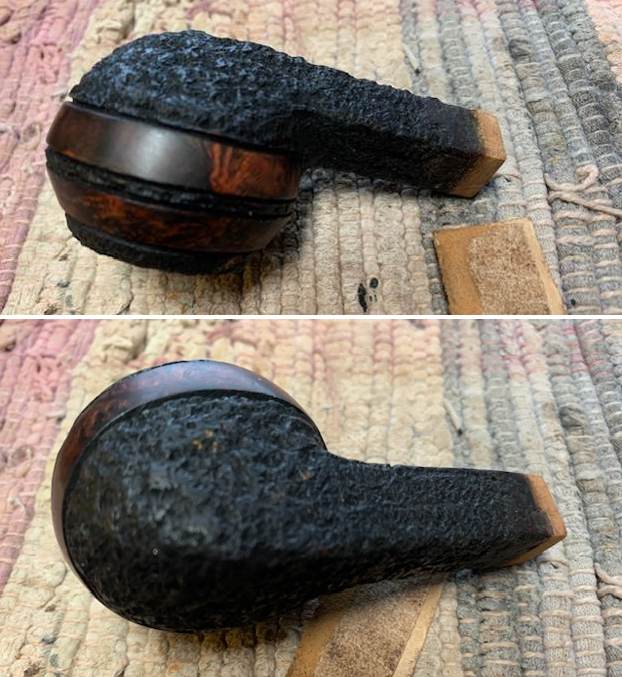
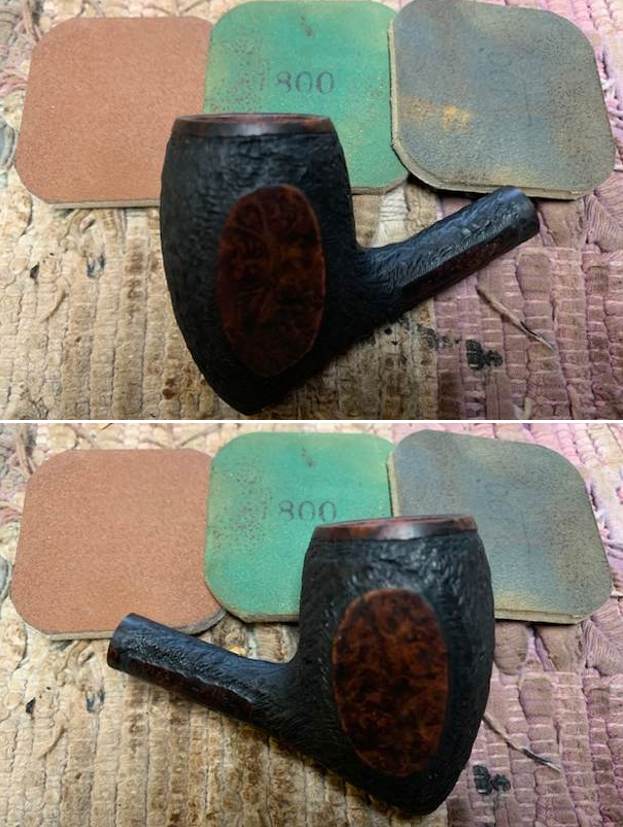
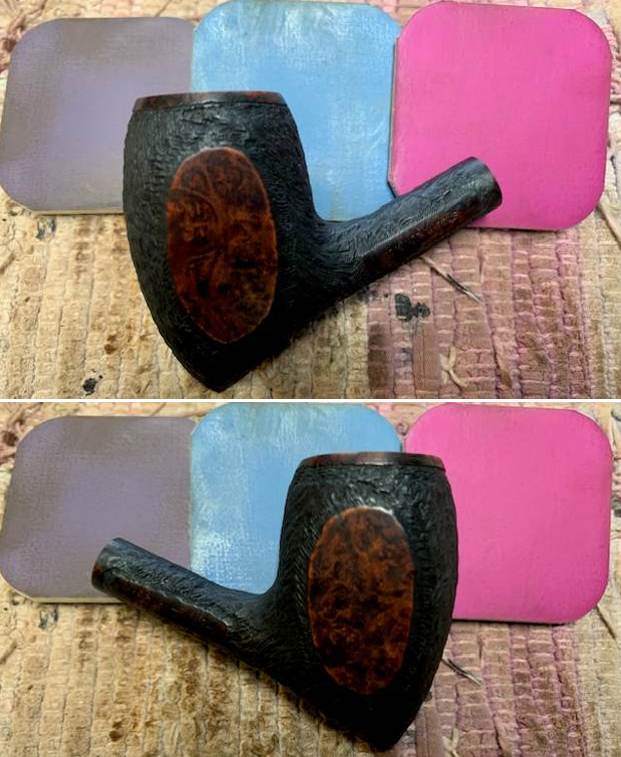
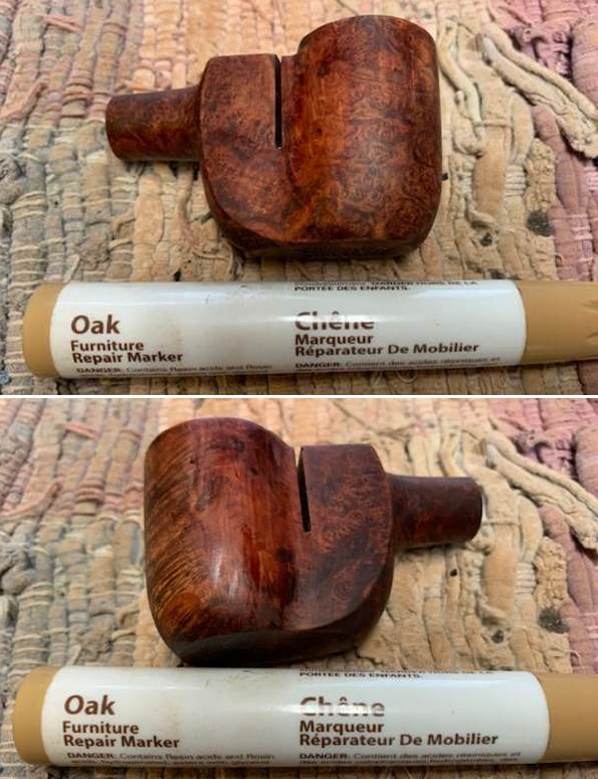
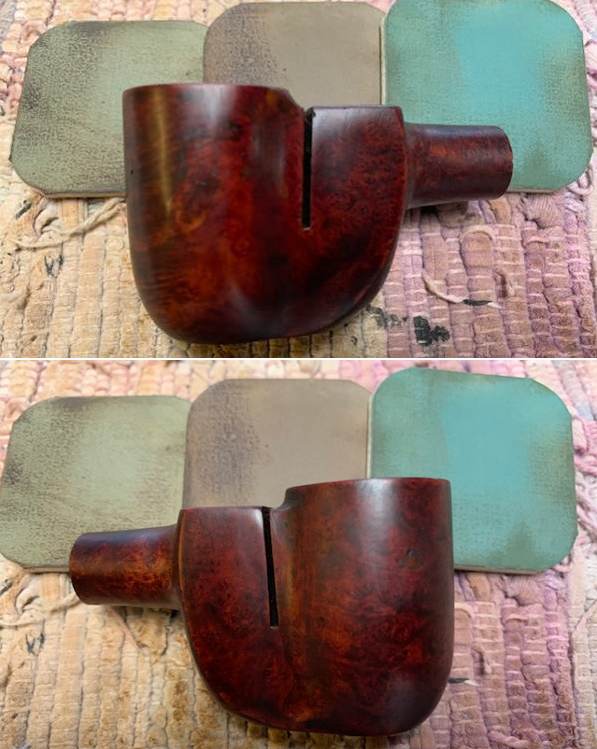
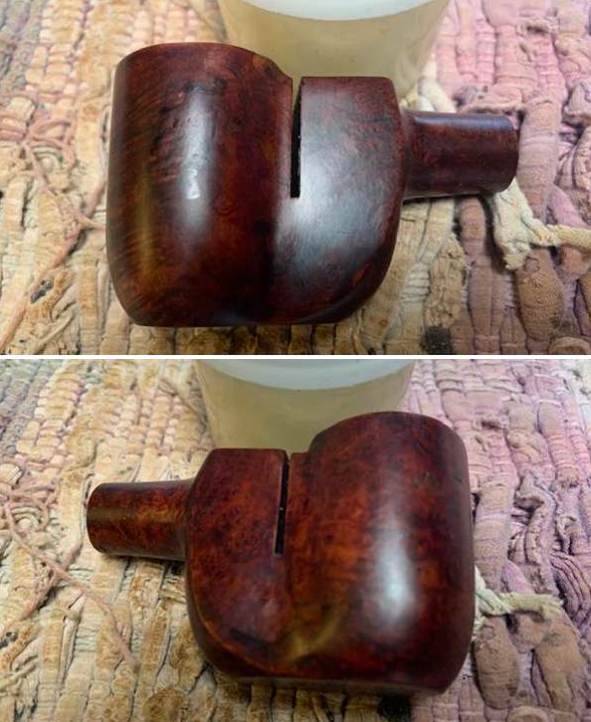
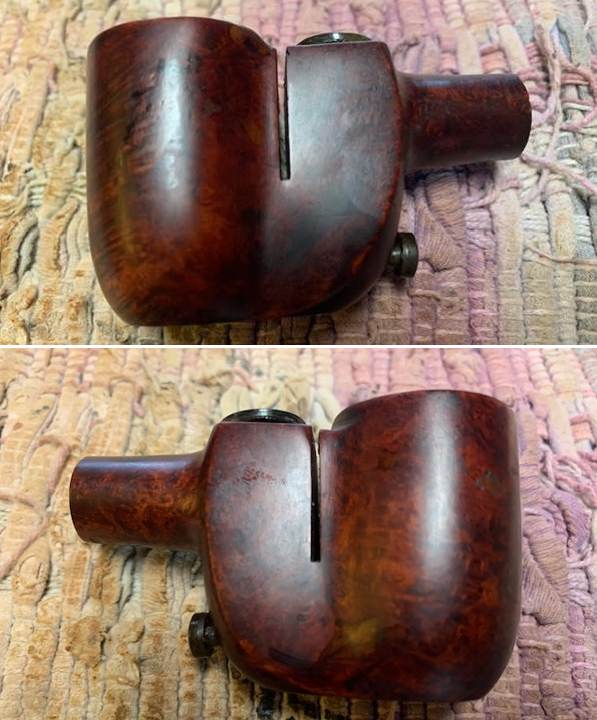
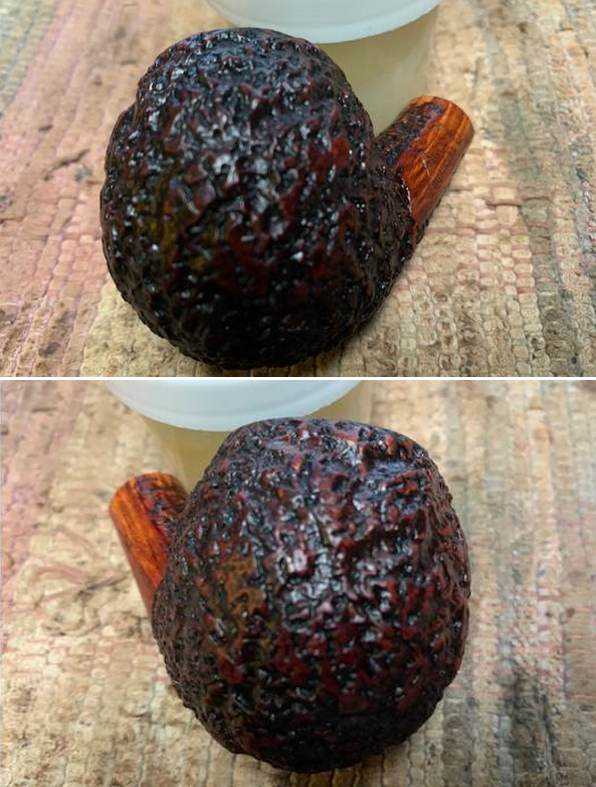
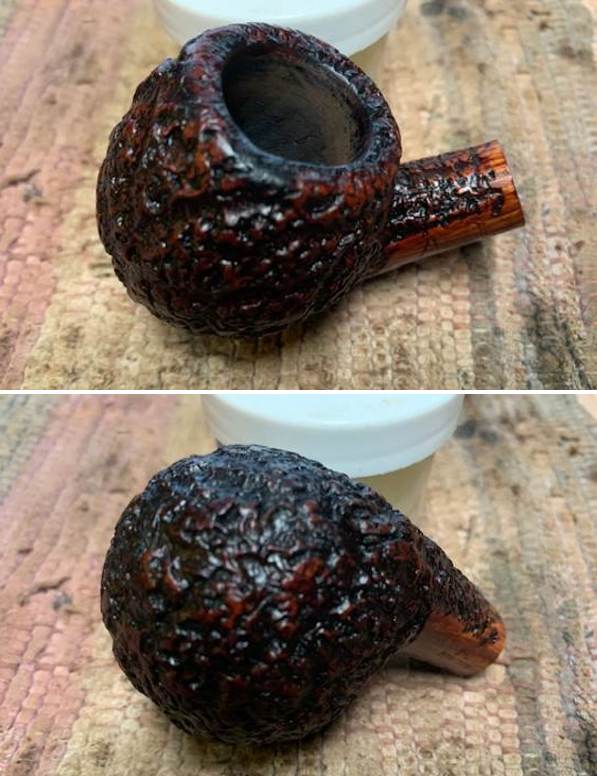
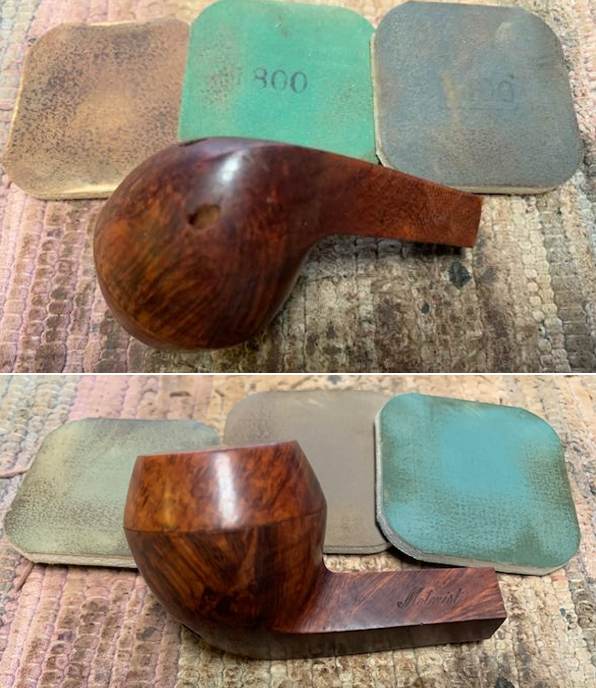
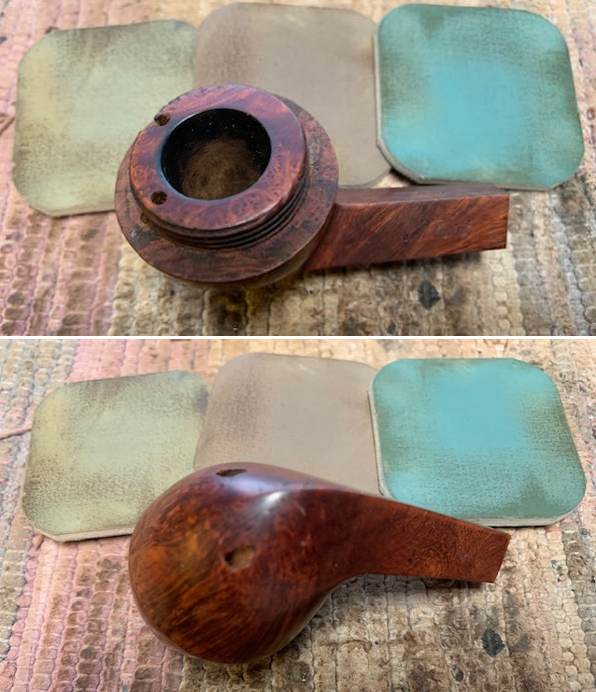
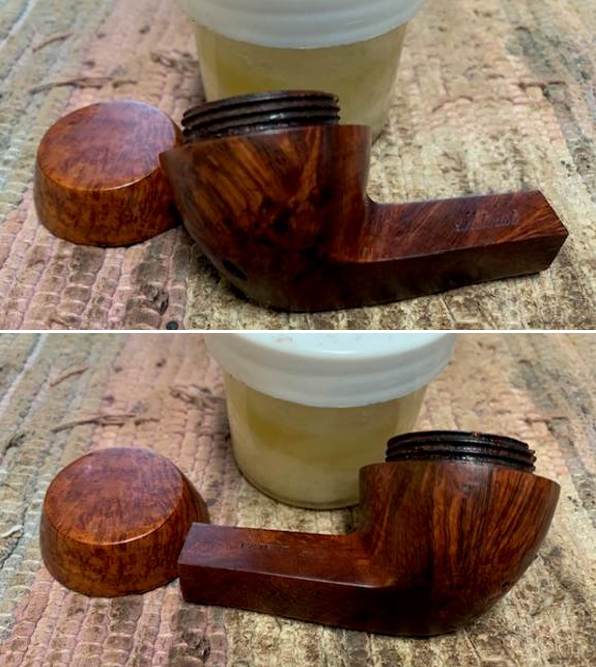
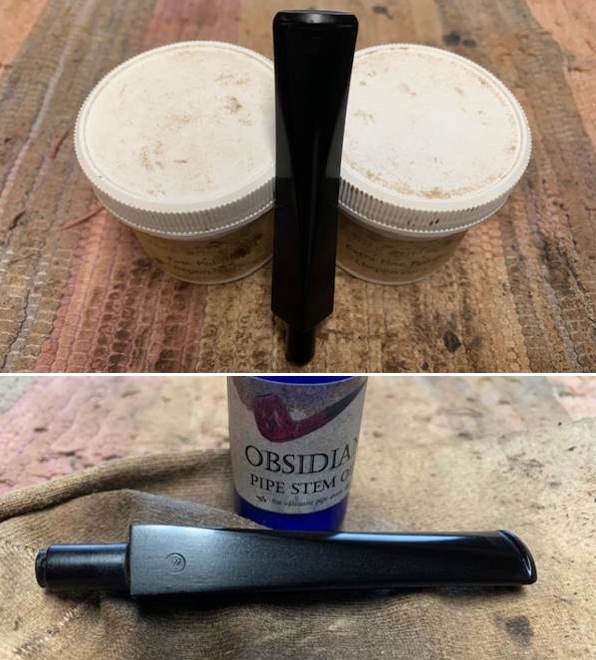
 I applied some Before & After Restoration Balm to the briar. It is a paste/balm that is rubbed into the surface of the briar – both smooth and rusticated finishes. The product works to deep clean the nooks and crannies of finish, enliven and protect the briar. I worked it into the briar with my finger tips and a horse hair shoe brush. I let it sit for 10 minutes to do its work. I wiped it off with a soft cloth then buffed it with a cotton cloth. The briar really began to have a deep shine in the briar and the grain shone through. The photos I took of the bowl at this point mark the progress in the restoration. It is a gorgeous pipe.
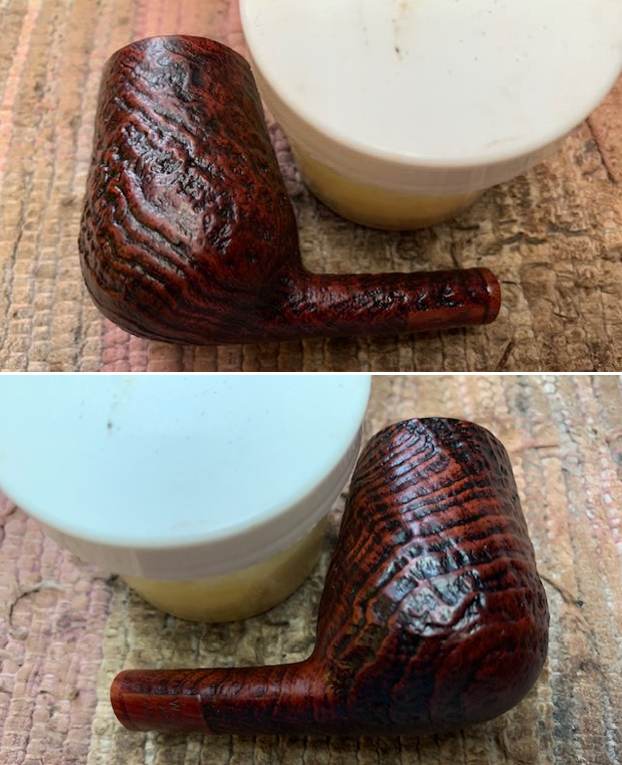

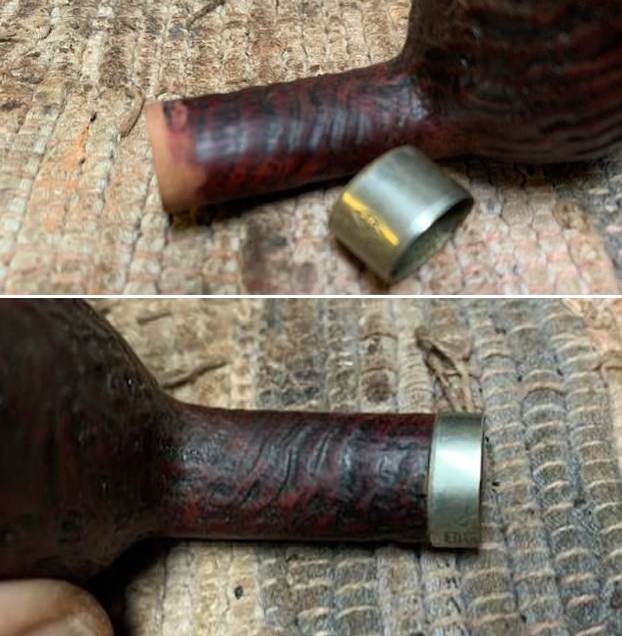
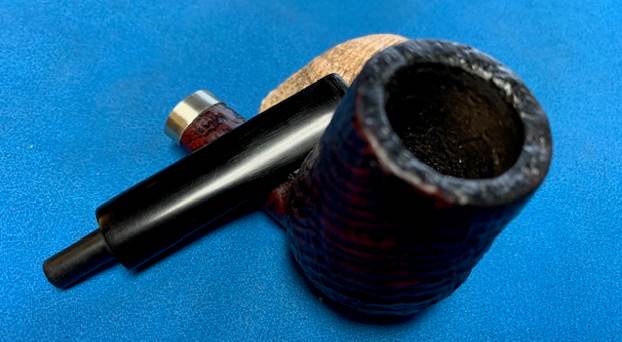
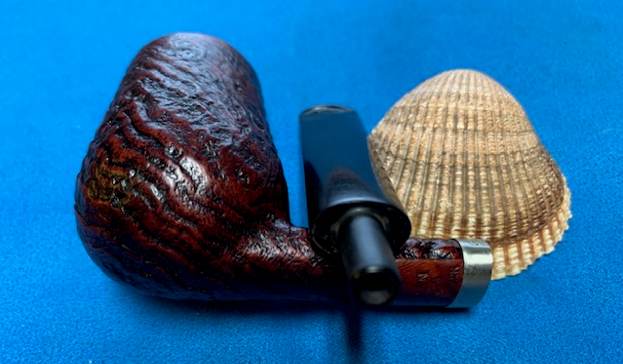
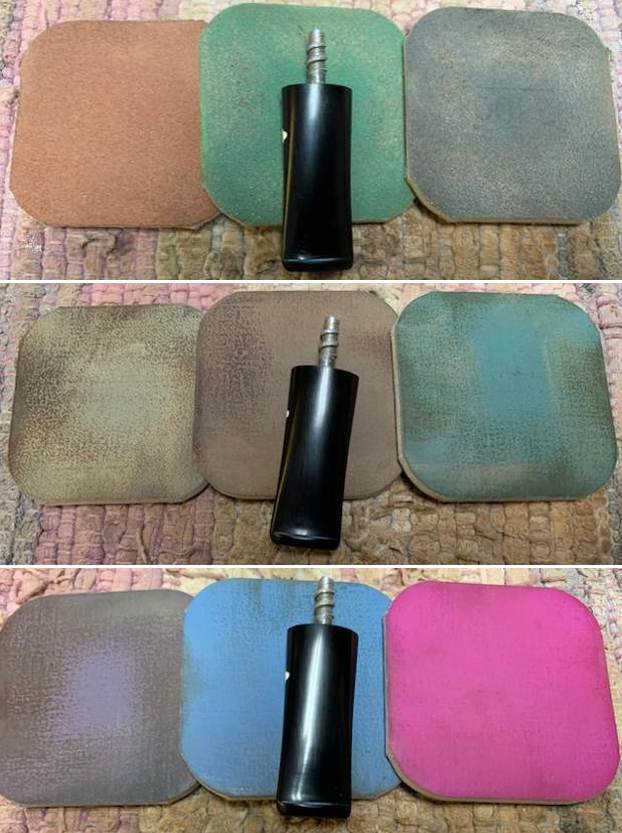
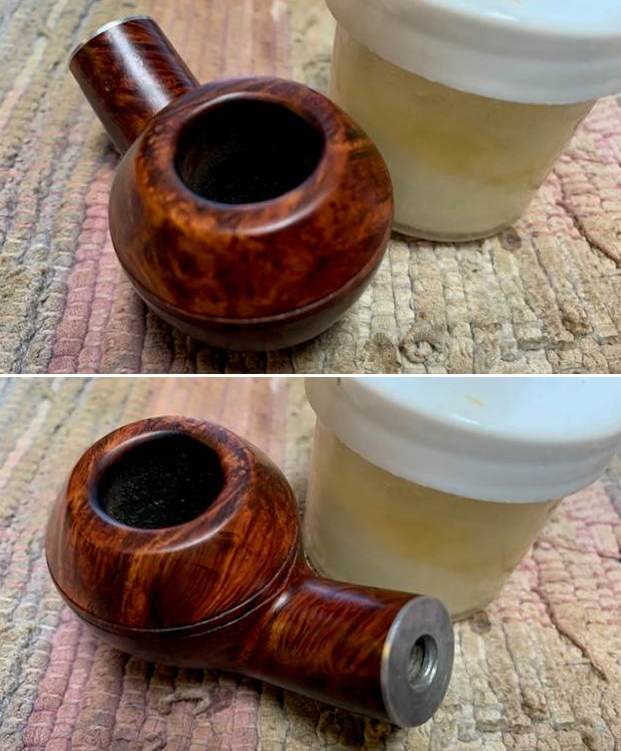
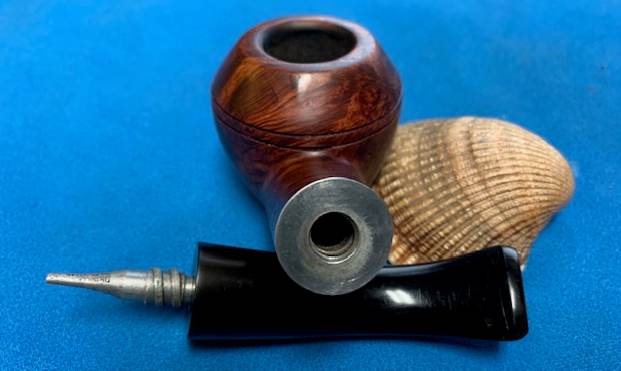
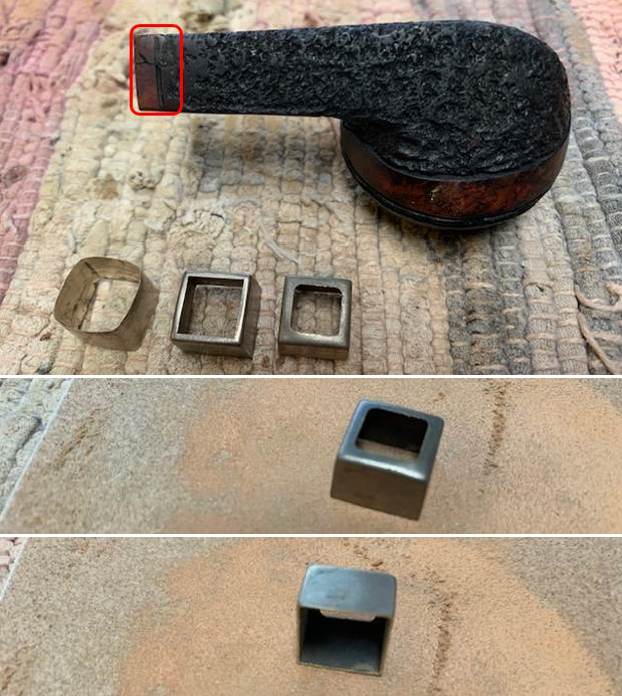
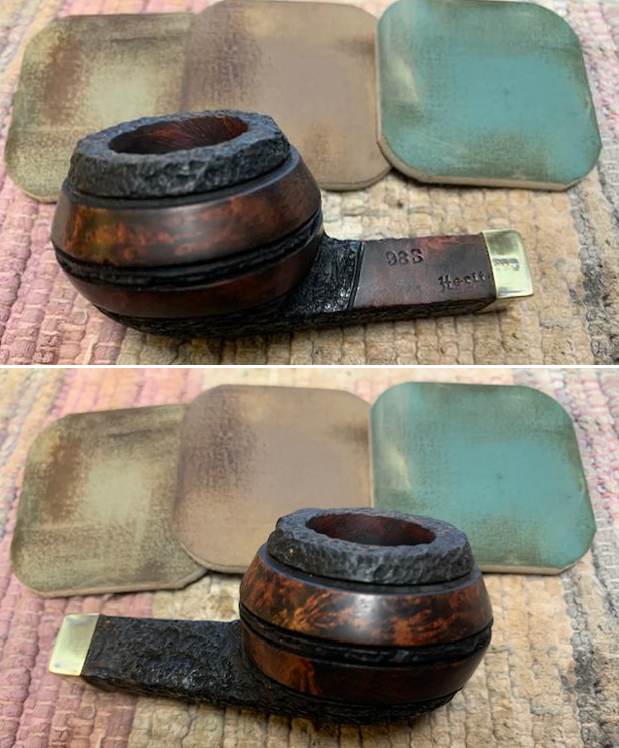
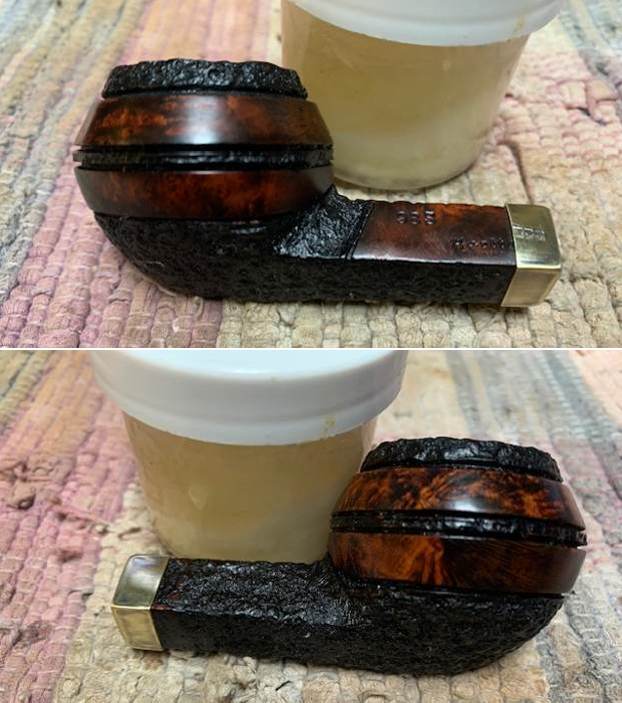
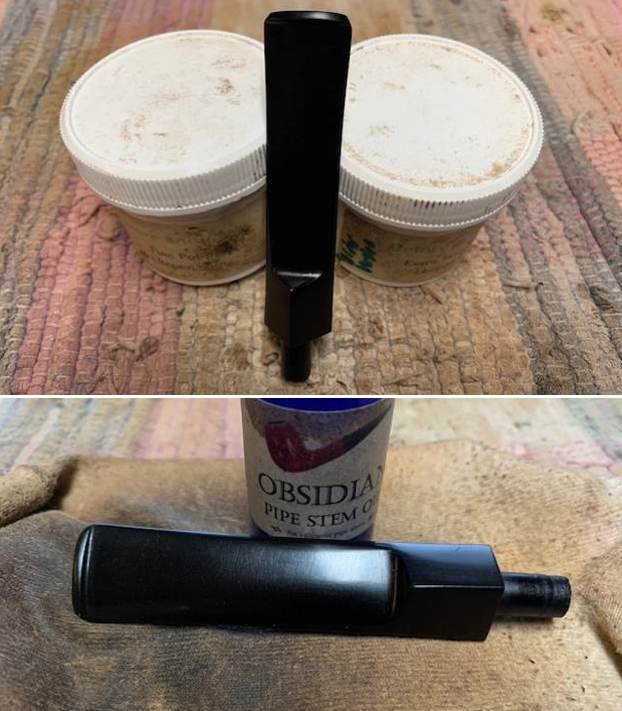
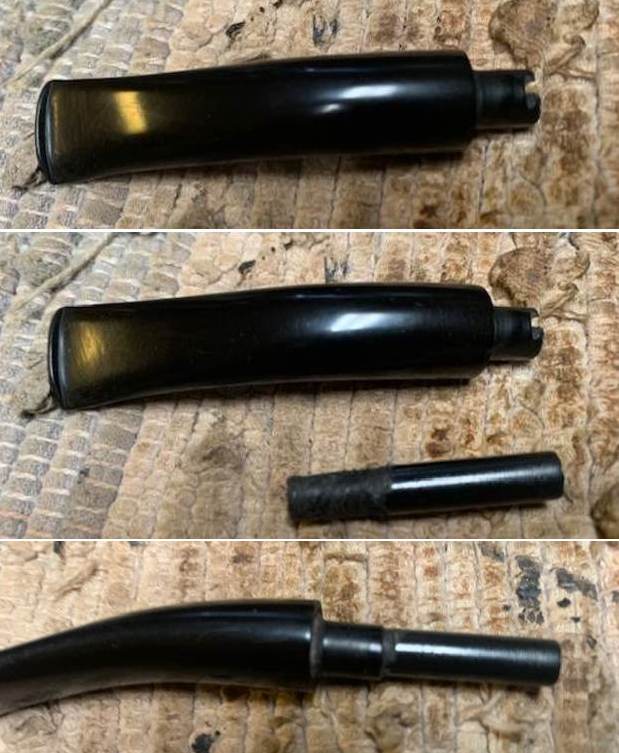
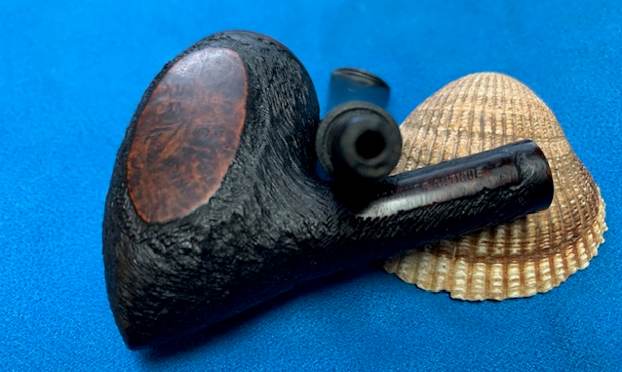
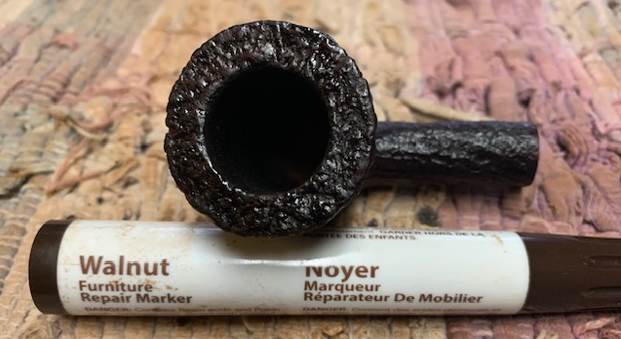
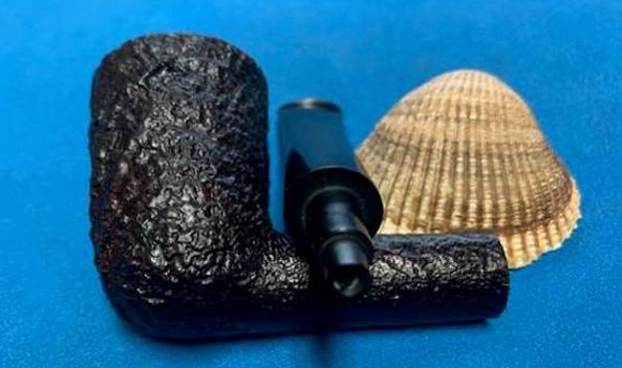
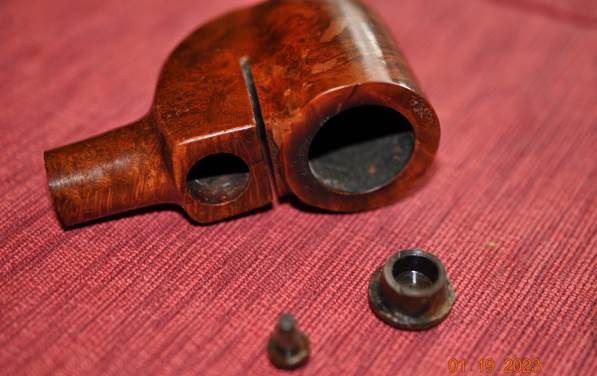
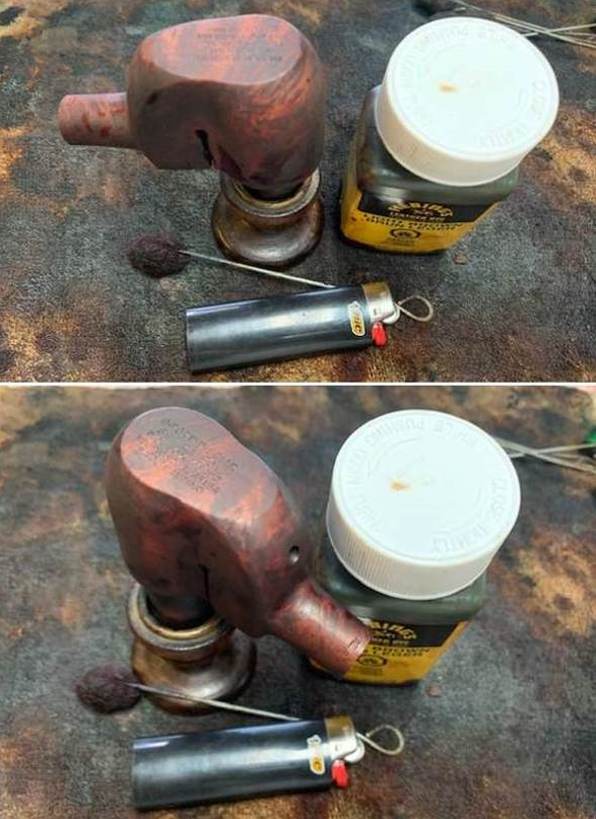
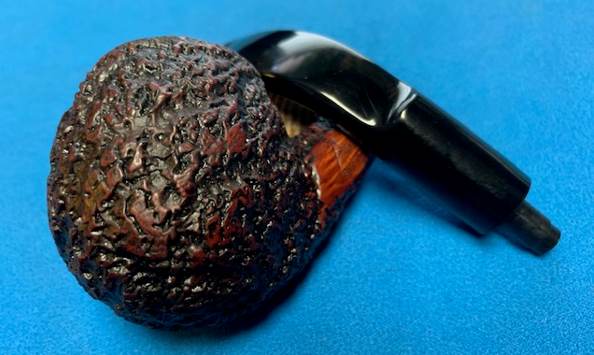
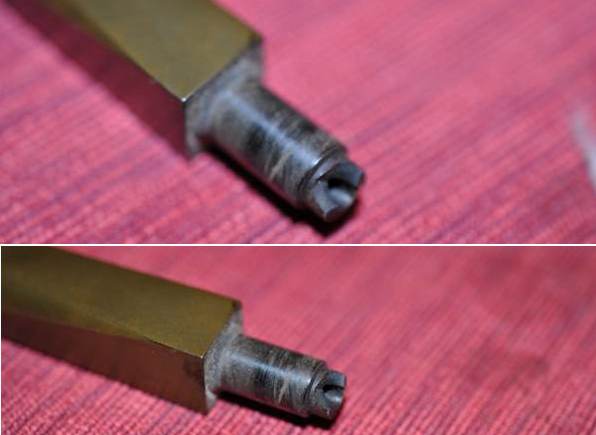
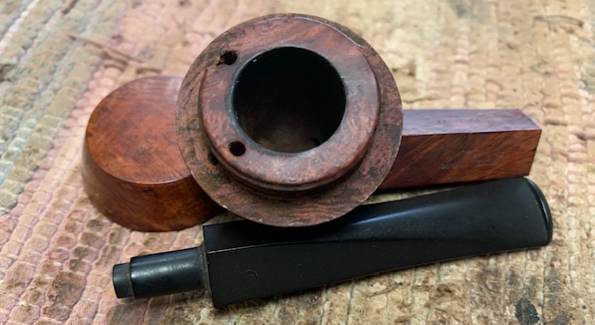
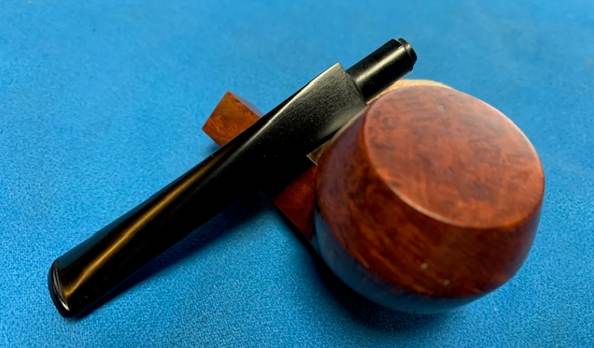
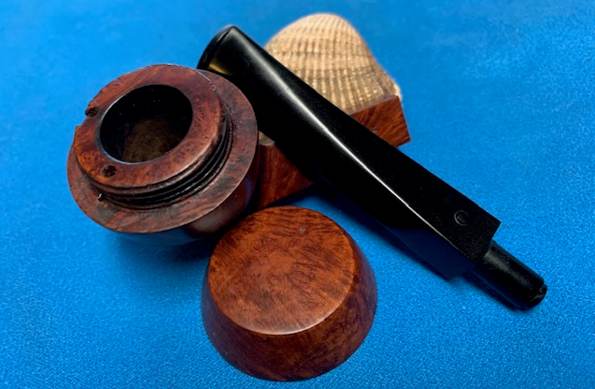
 I decided to repair the cracked shank next. The first photo shows the crack. I inserted the tenon partially in the shank to make the crack visible and took a photo. I have circled it in red so that it is clear. I cleaned up the crack and pushed a pinhole with an awl into the end of the crack to stop it. I pressed some CA glue into the crack held it together until the glue cured. I reduced the diameter of the shank end with a folded piece of 220 grit sandpaper. I found a nickel band and used a Dremel and sanding drum to remove the excess nickel on the band until the end was flush against the shank end. I cleaned up the sharp edge with a folded piece of 220 grit sandpaper. I heated it with a lighter and pressed it in place against a hard wood surface. I took photos of the band before I fit it and after it was on the shank end. It looks very good at this point.
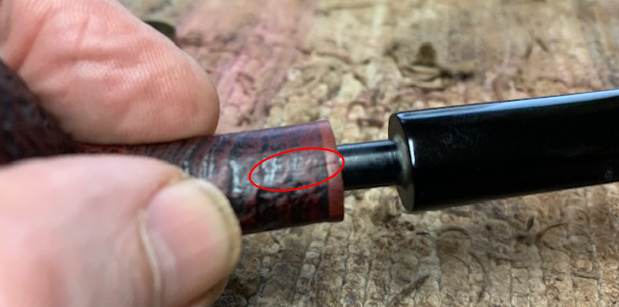
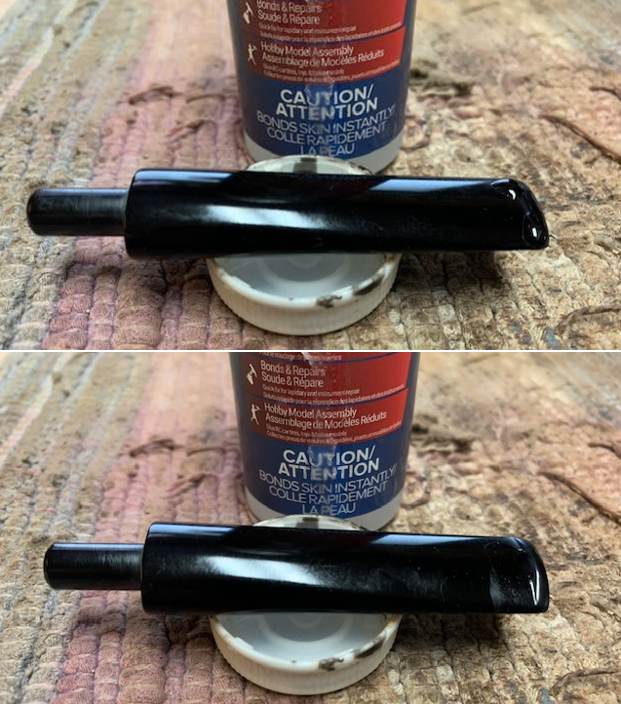
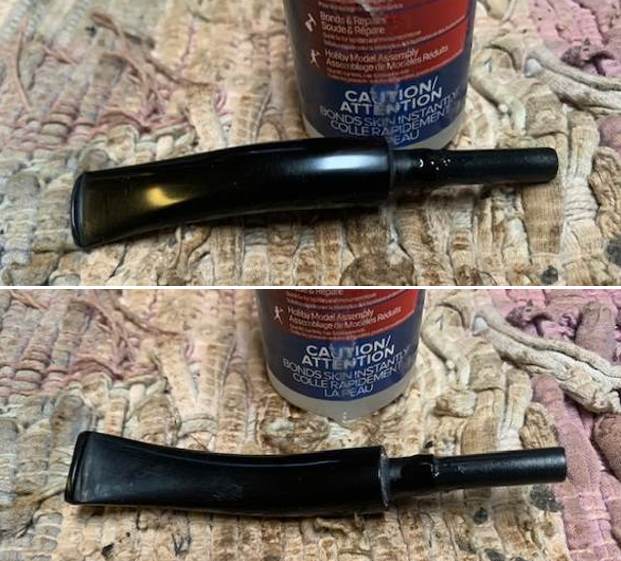
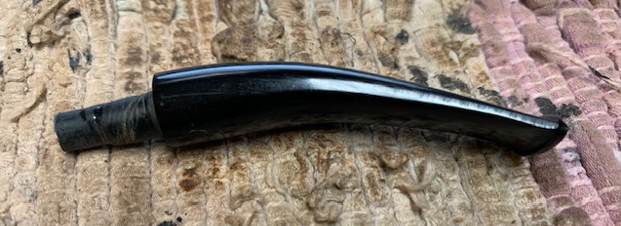
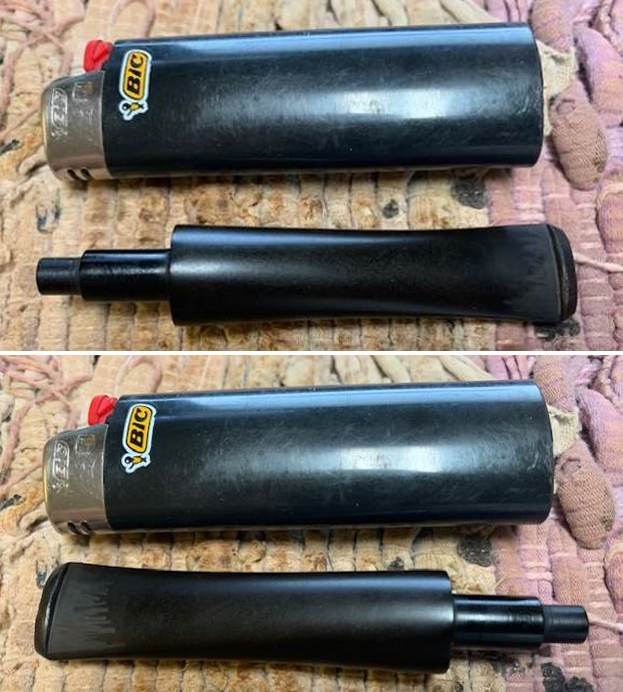
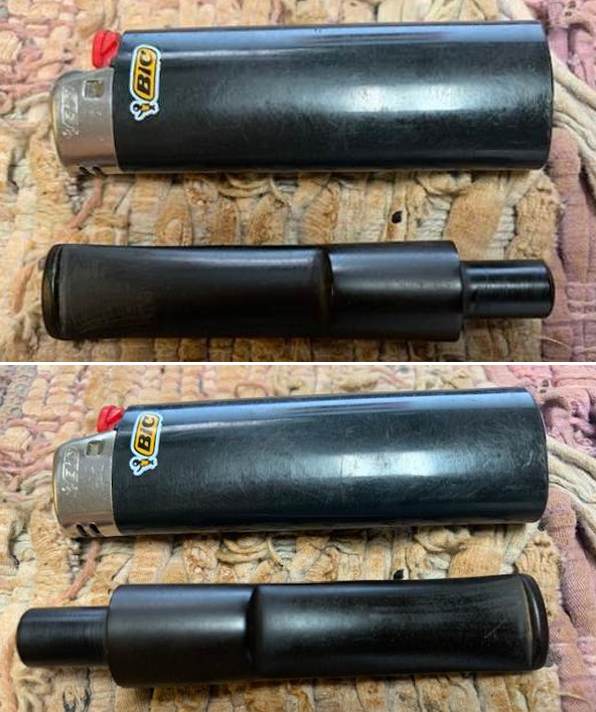
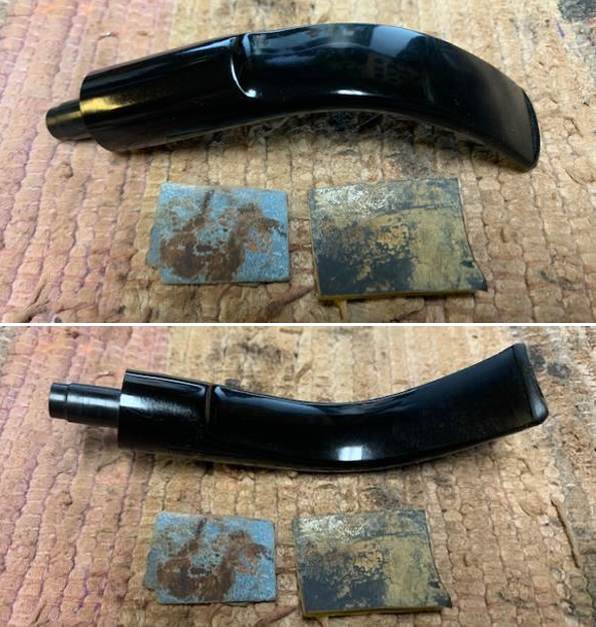
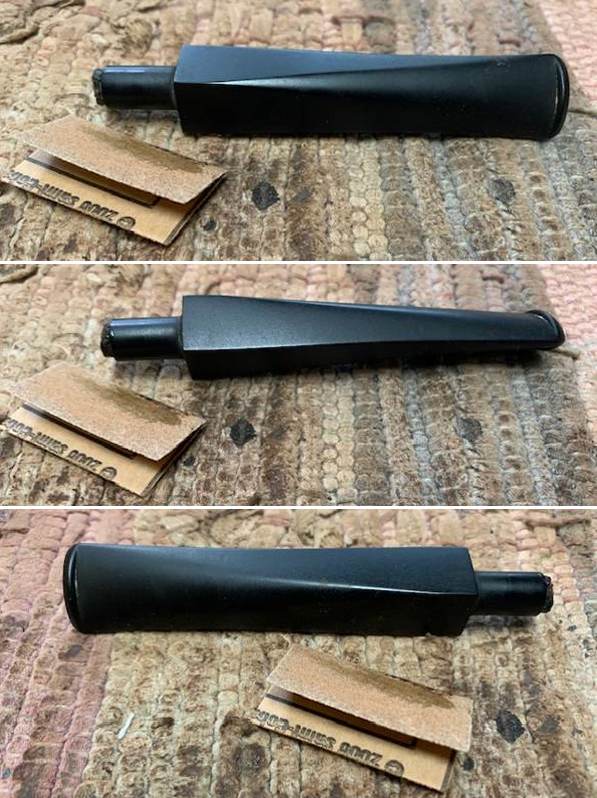
 I set the bowl aside and turned my attention to the issues with the vulcanite stem. I “painted” the surface of the stem with the flame of a Bic Lighter to lift the tooth marks in the stem surface on both sides as well as the button edges where the marks were deepest. I was able to lift the marks significantly and filled in the remaining marks with clear CA glue. I set the stem aside to allow the repairs to cure.
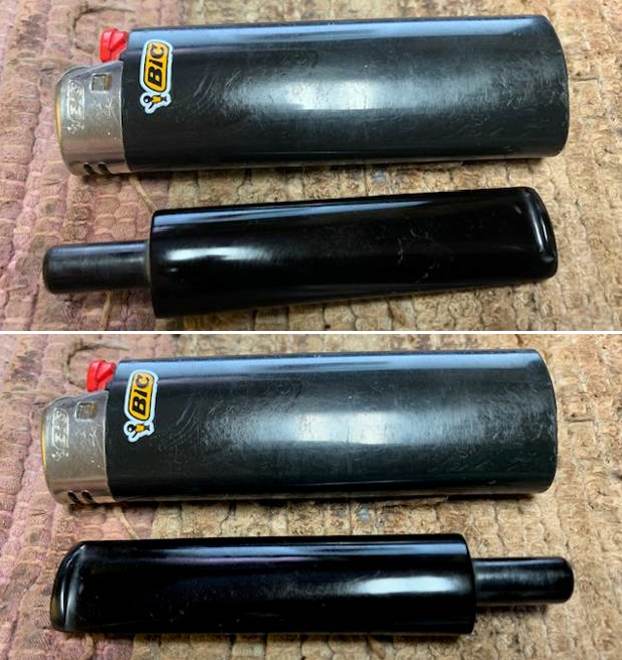
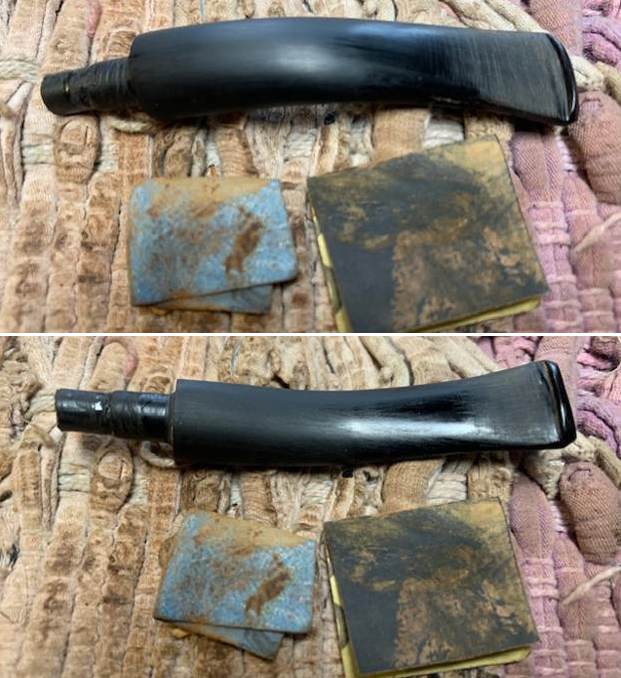
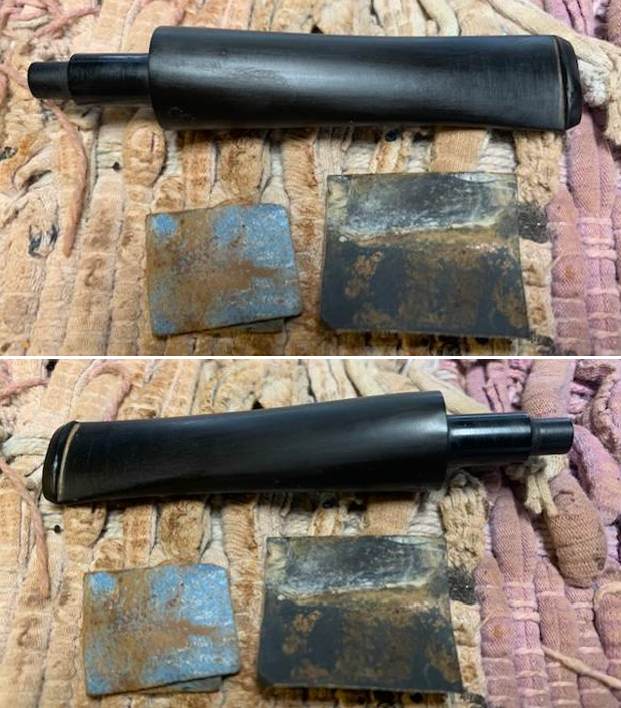
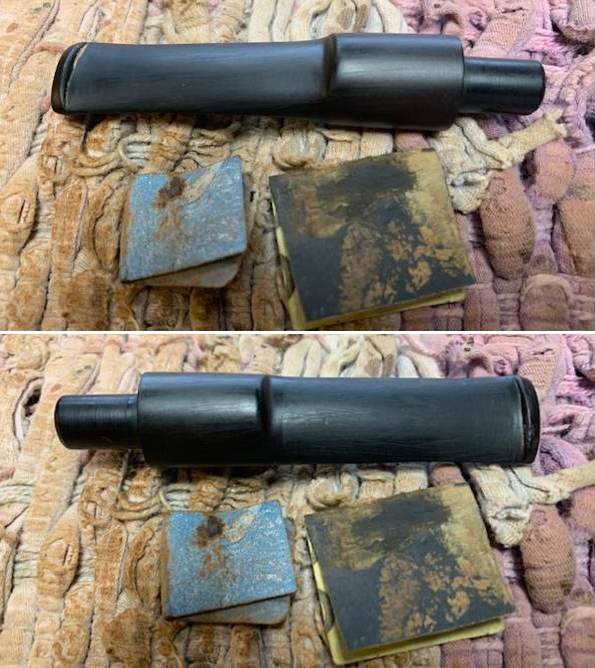
 Once the repairs cured, I used a small file to reshape the button edge and flatten them. I sanded them smooth with 220 grit sandpaper and started the polishing with 600 grit wet dry sandpaper. The stem surface and button looked much better.
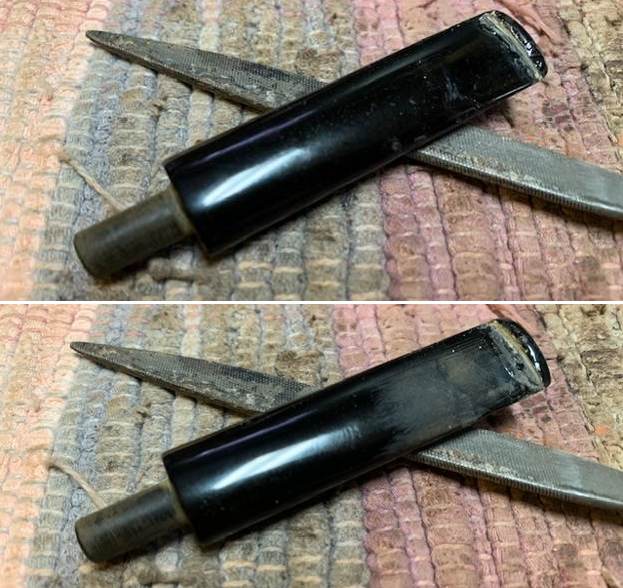
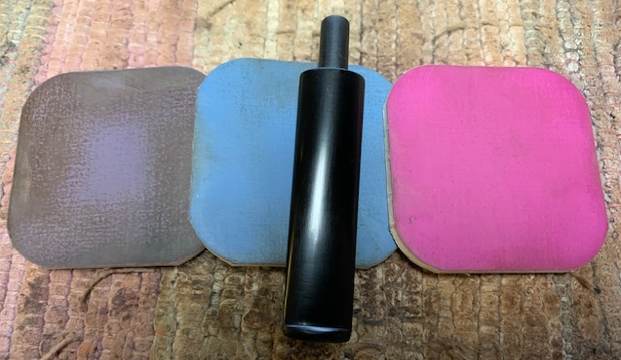
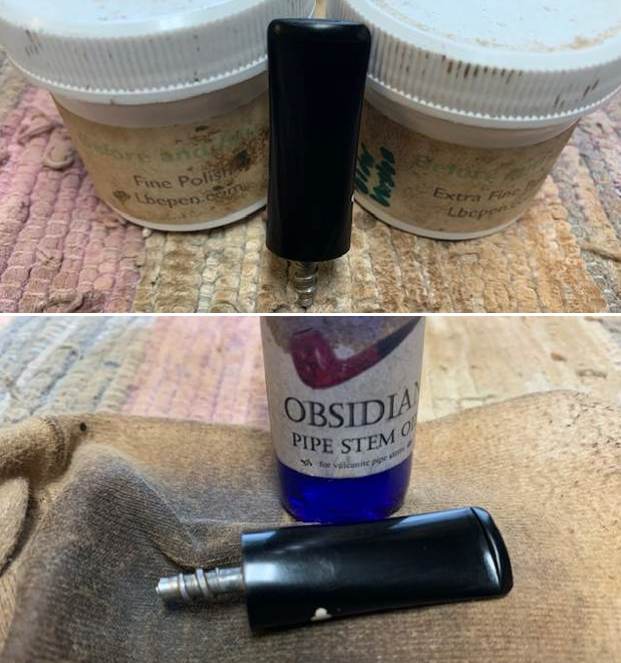
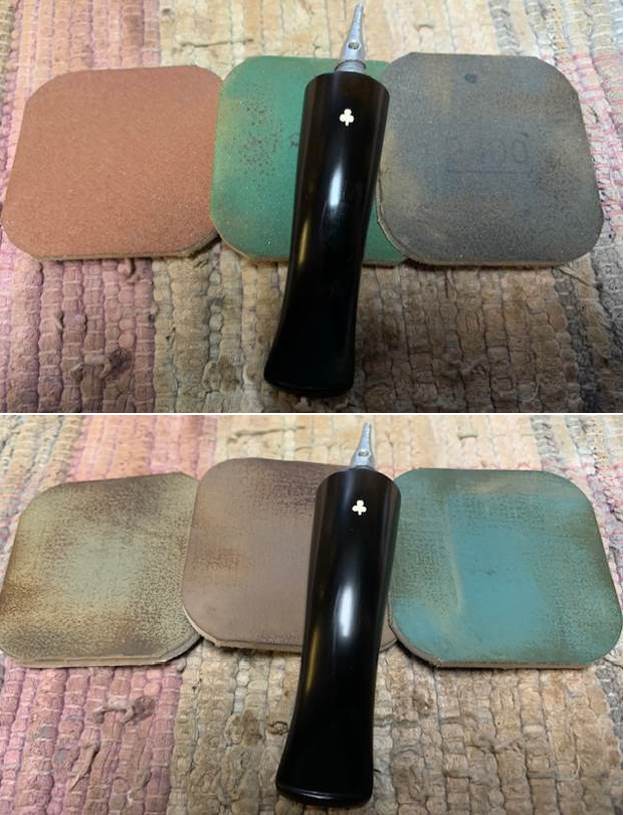
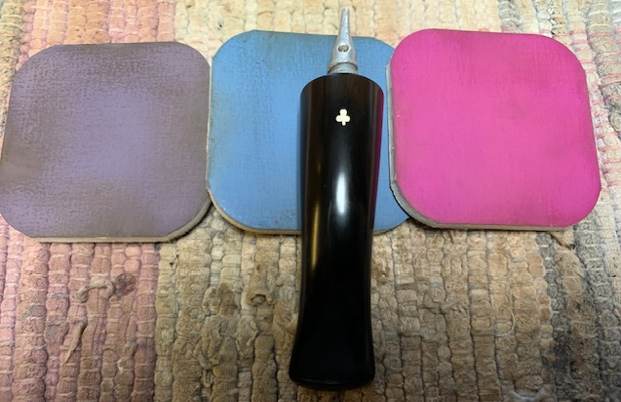
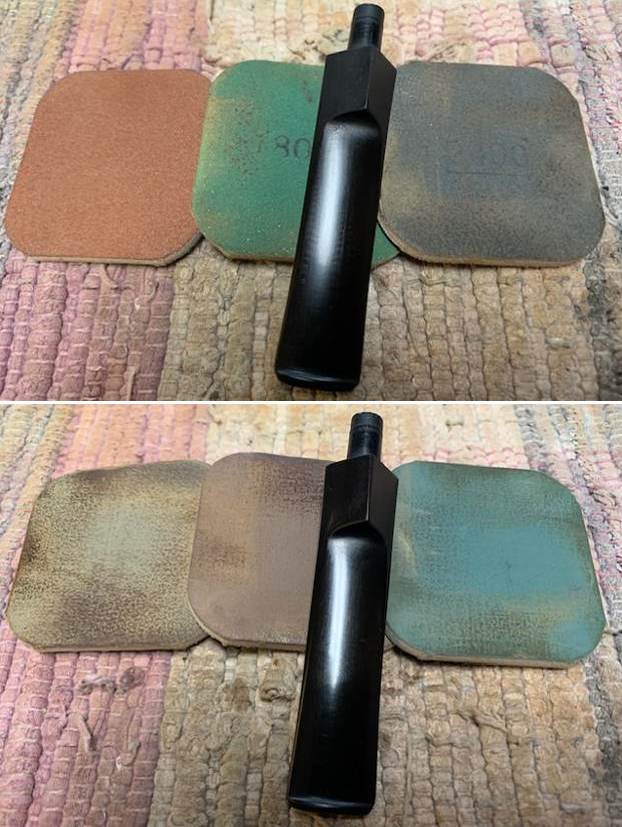
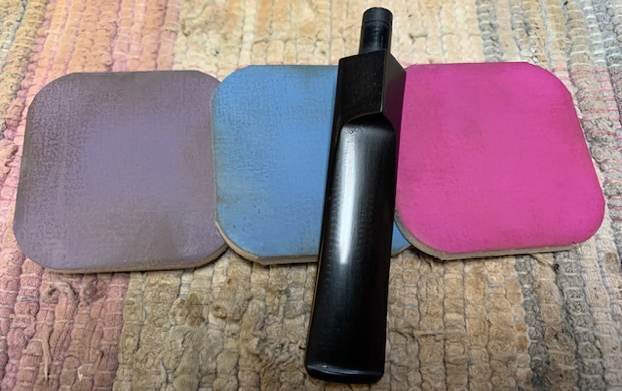
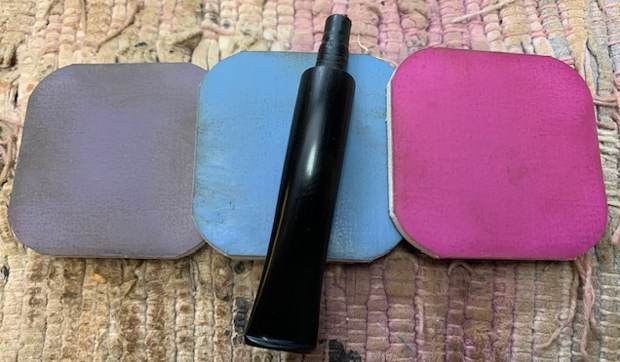
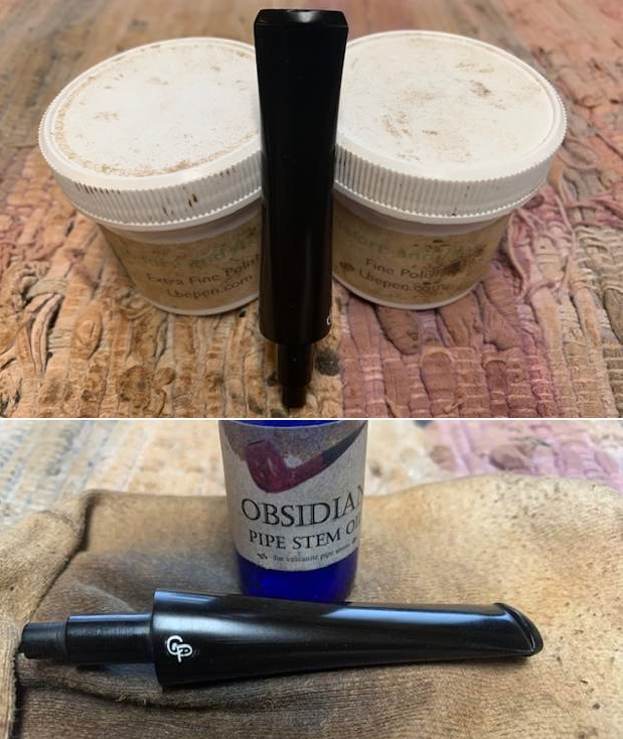
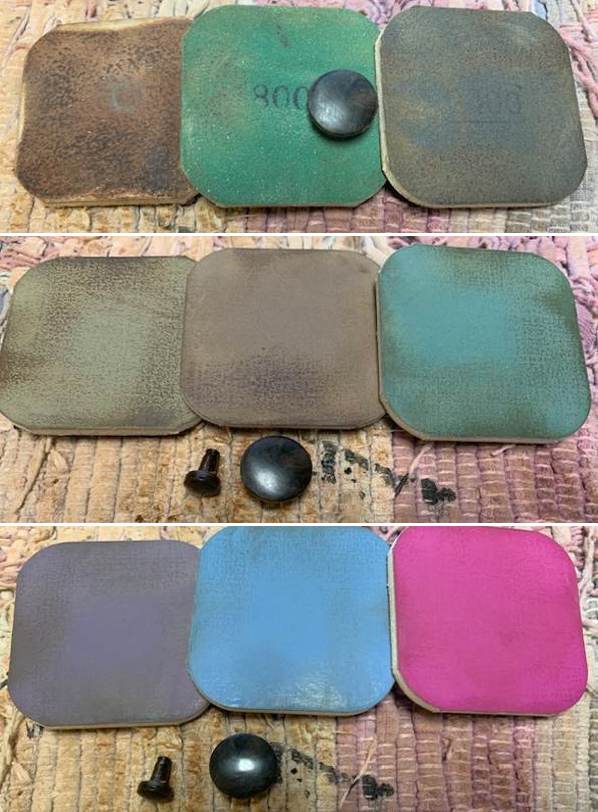
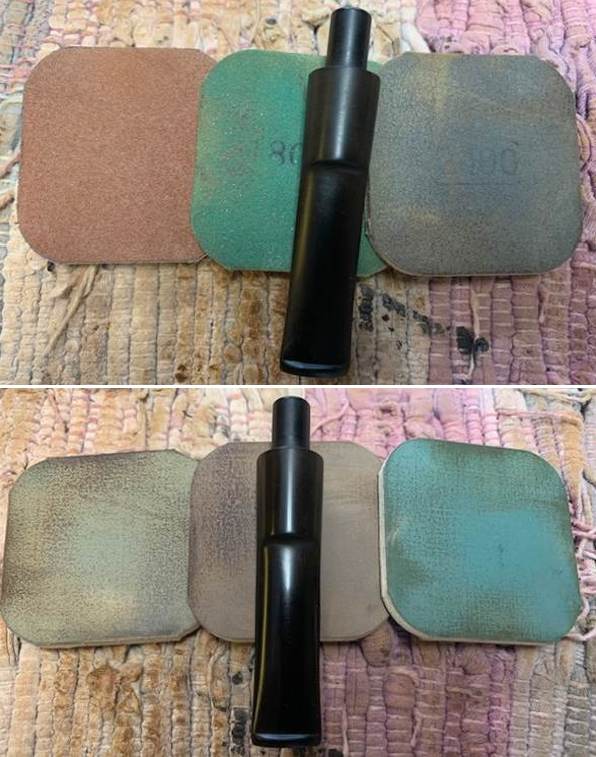
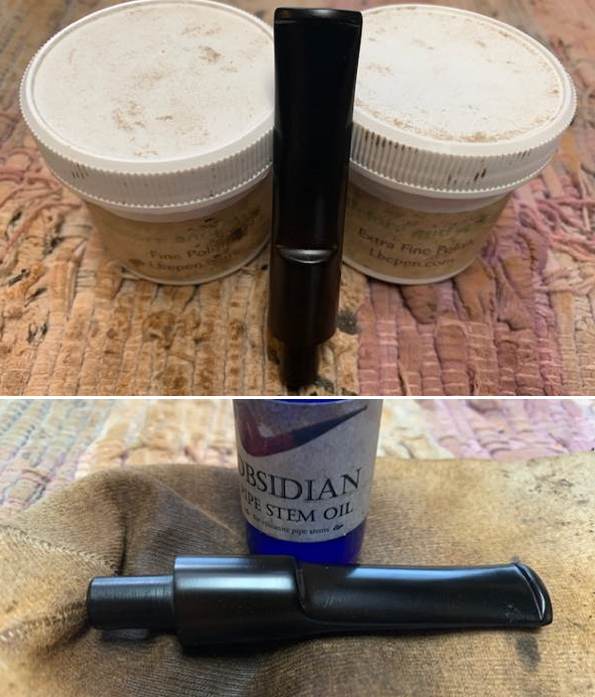
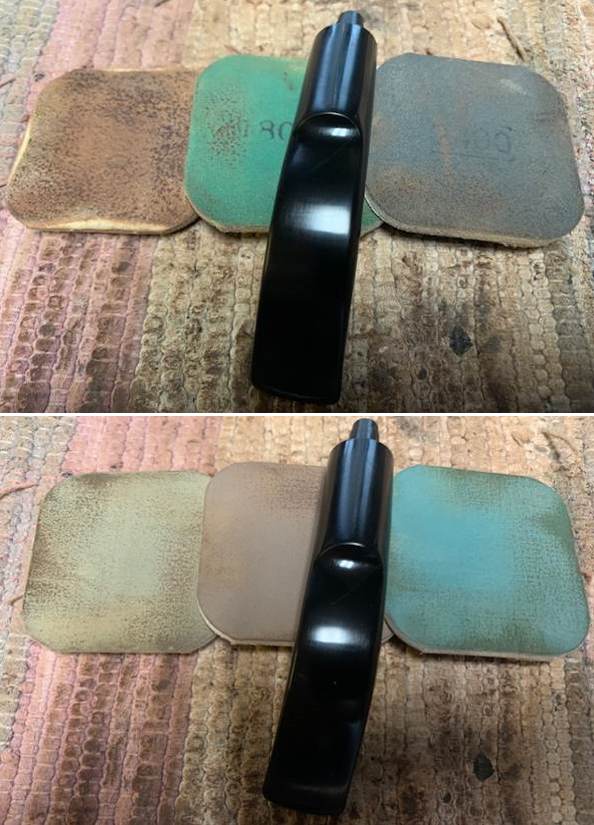
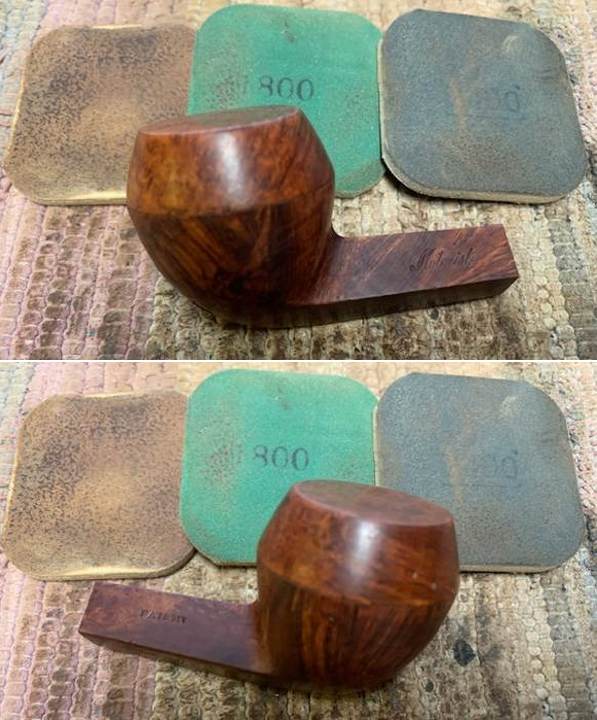
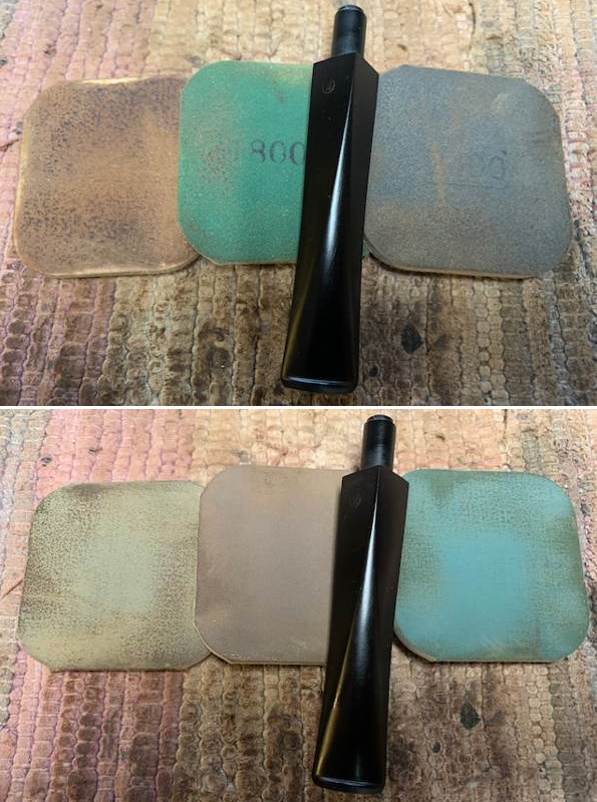
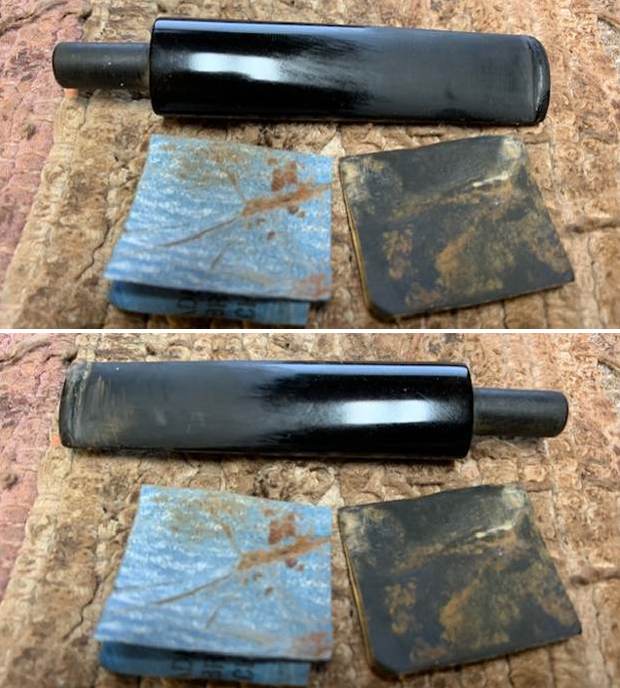 I continued polishing the stem with micromesh sanding pads – 1500-12000 grit sanding pads and water to wet sand the stem. I wiped it down after each sanding pad with Obsidian Oil on a cotton rag after each sanding pads. But I find it does two things – first it gives some protection to the stem from oxidation and second it give the sanding pads bite in the polishing process.
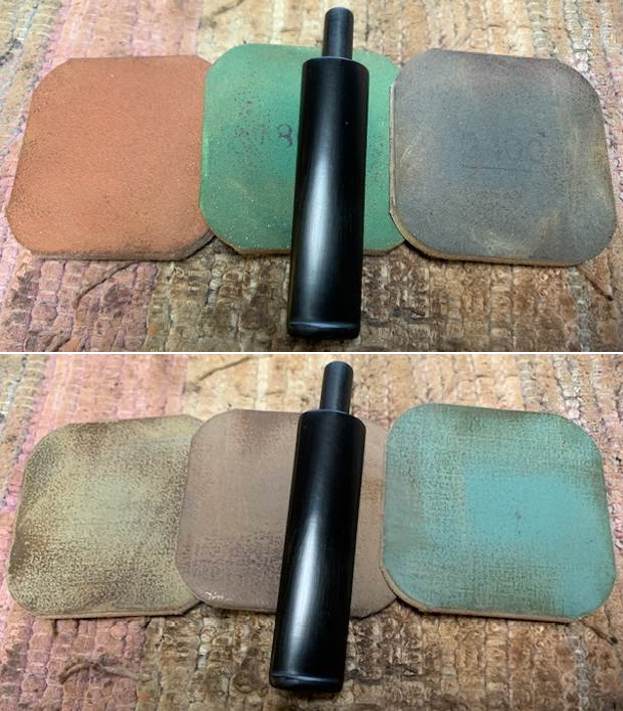
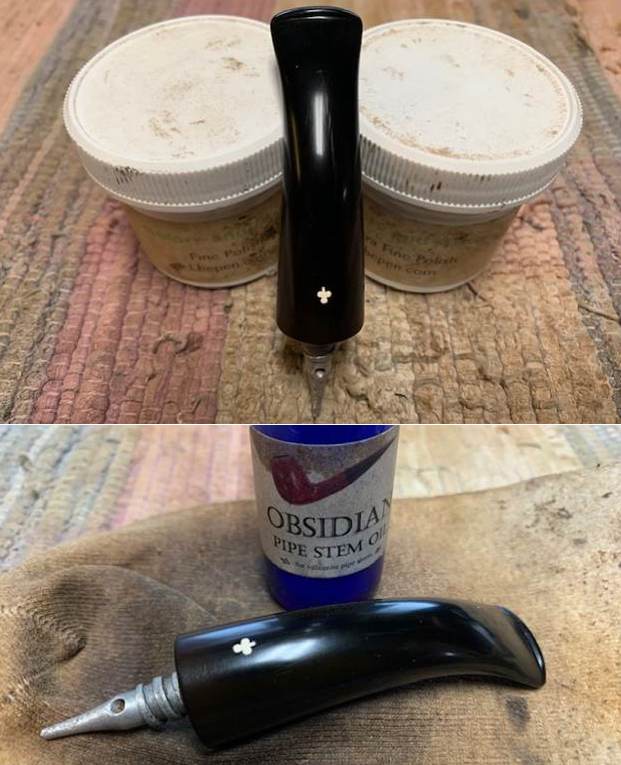
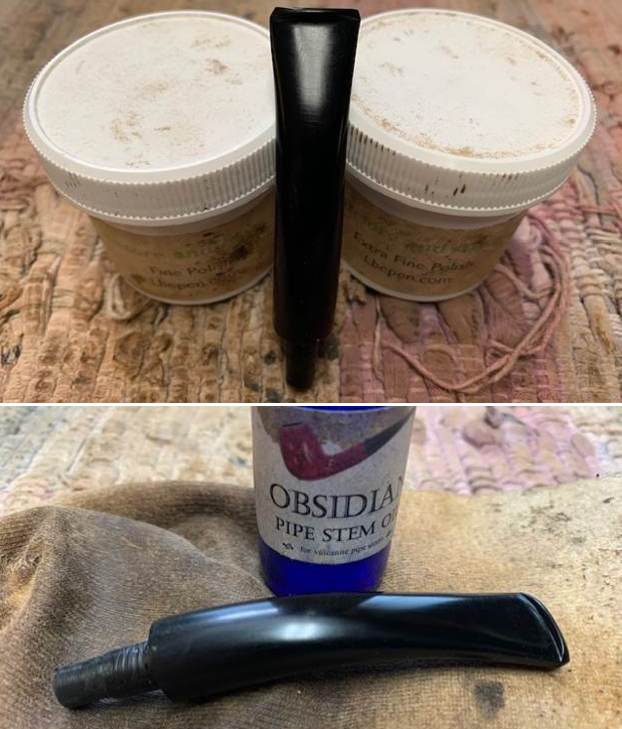
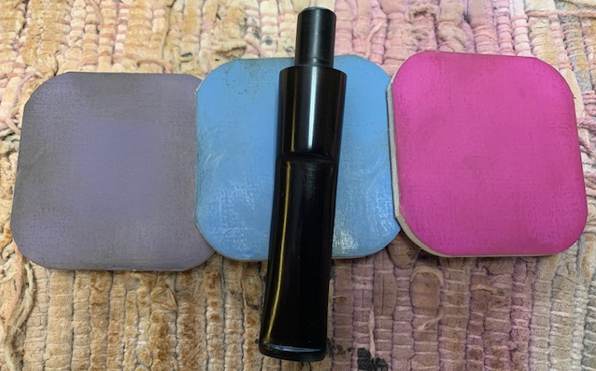
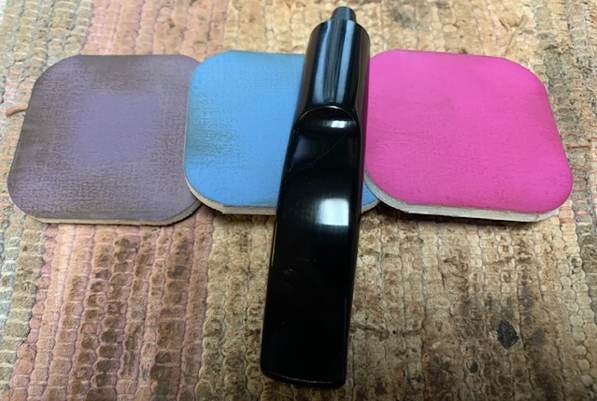
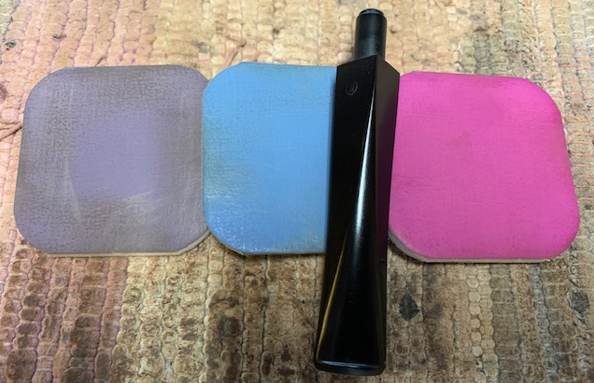
 After finishing with the micromesh pads I rub the stem down with Before & After Fine and Extra Fine stem polish as it seems to really remove the fine scratches in the vulcanite. I rub the Fine Polish on the stem and wipe it off with a paper towel and then repeat the process with the Extra Fine polish. I finish the polishing of the stem down with a final coat of Obsidian Oil and set the stem aside to let the oil absorb. This process gives the stem a shine and also a bit of protection.
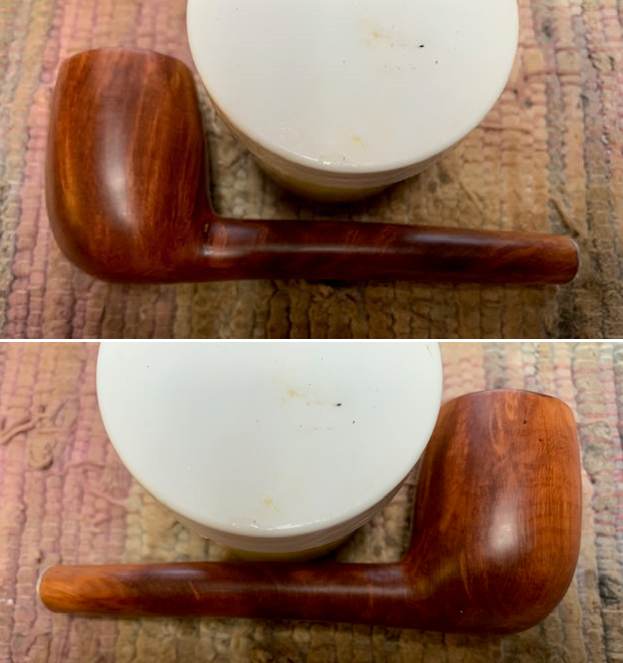
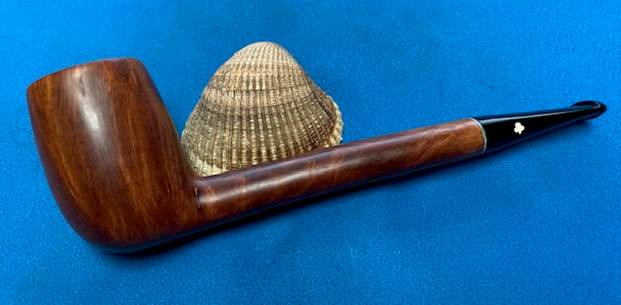
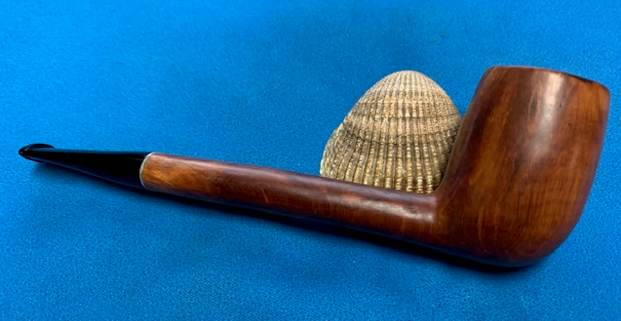
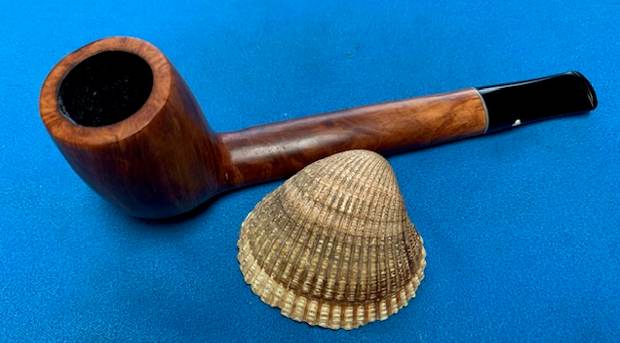
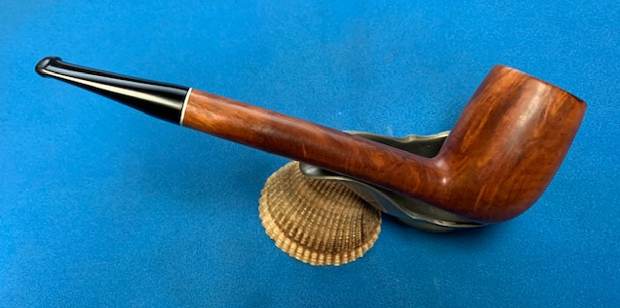
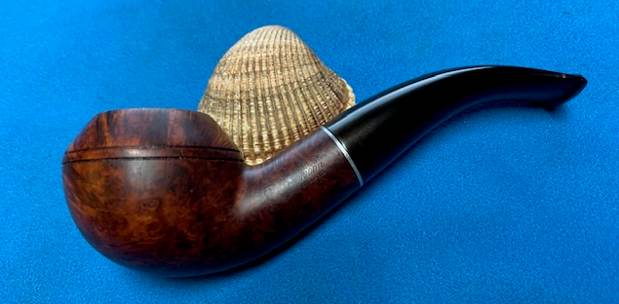
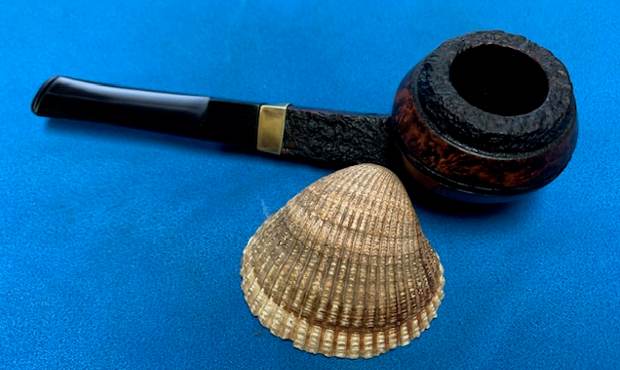
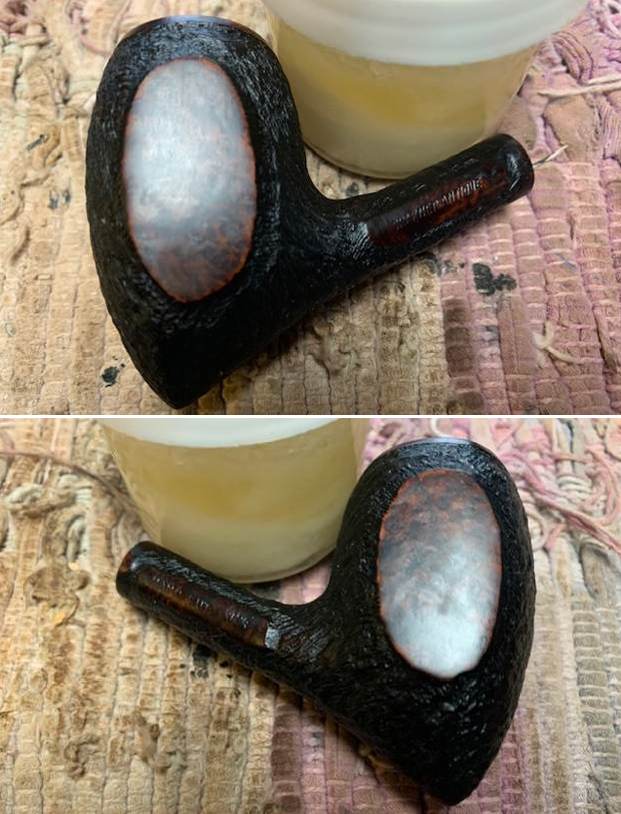
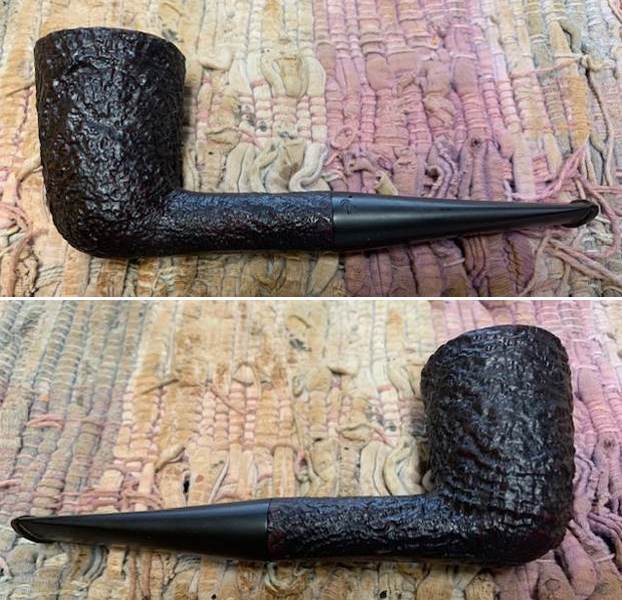
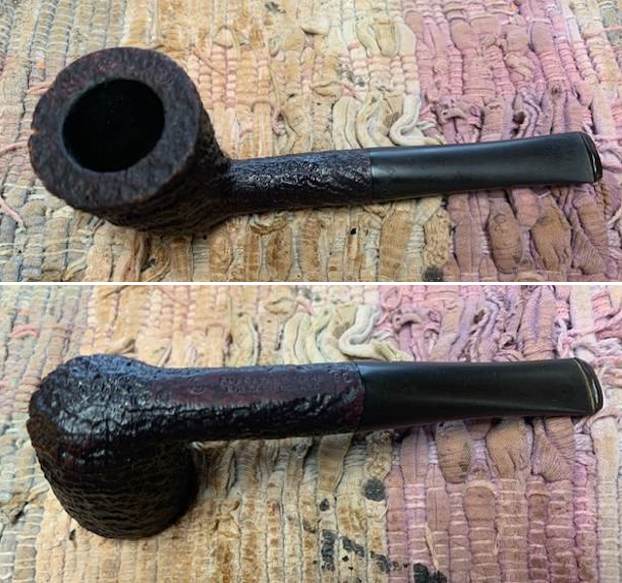
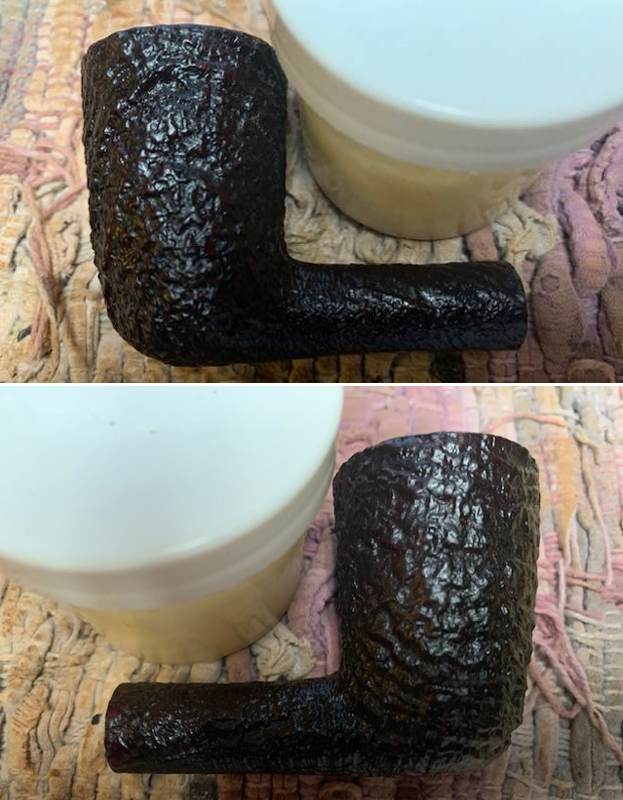
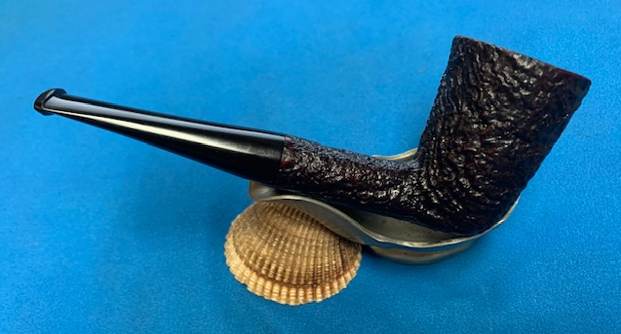
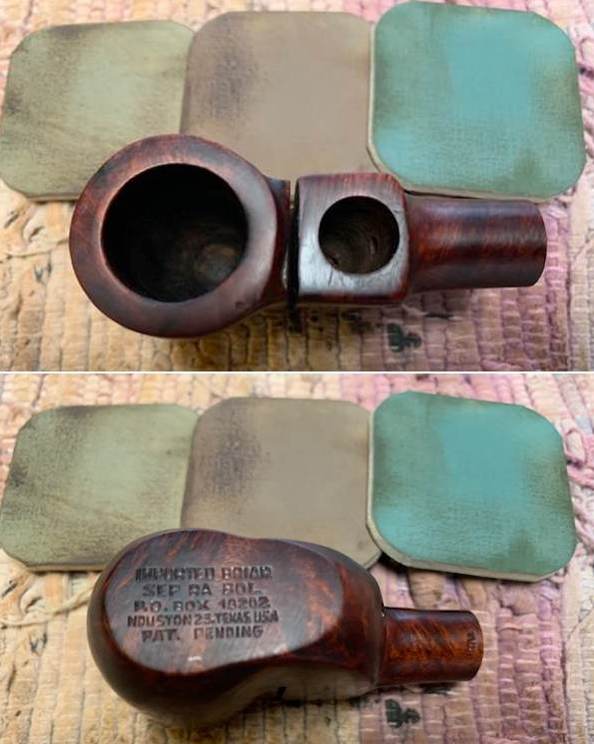
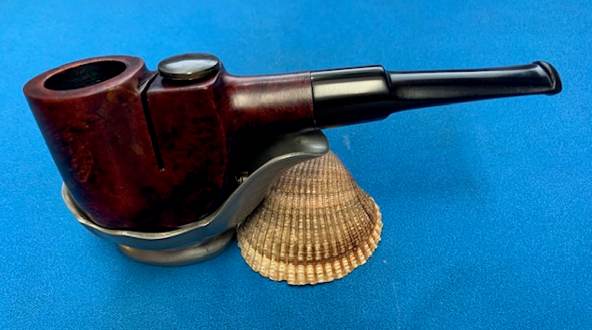
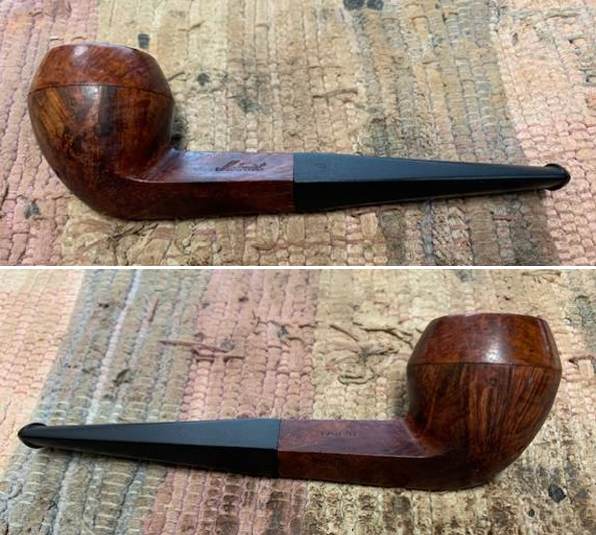
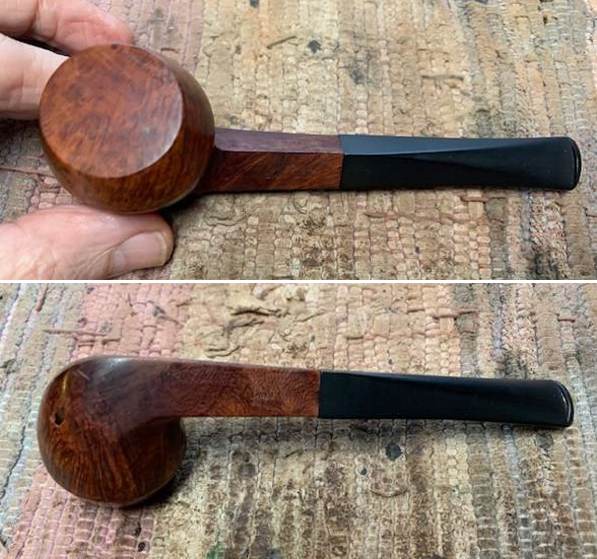
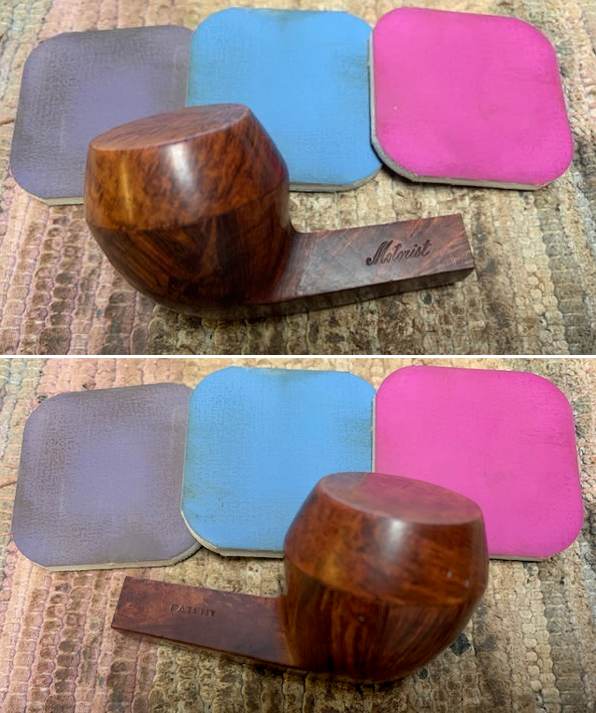
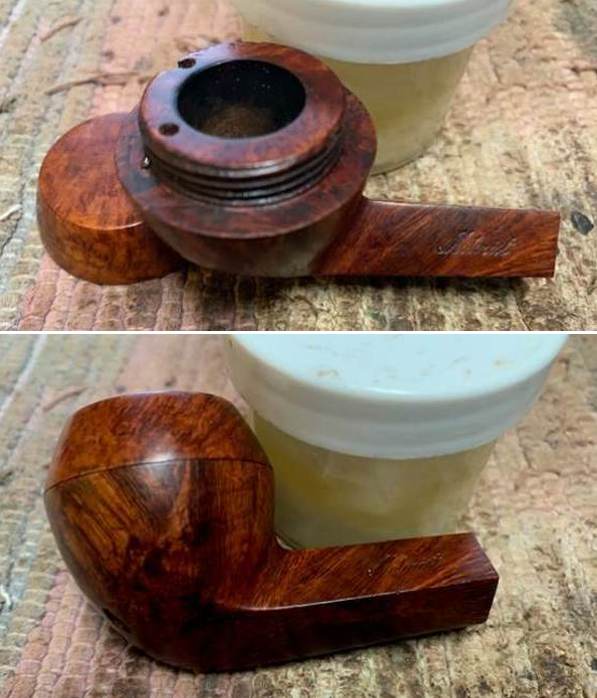
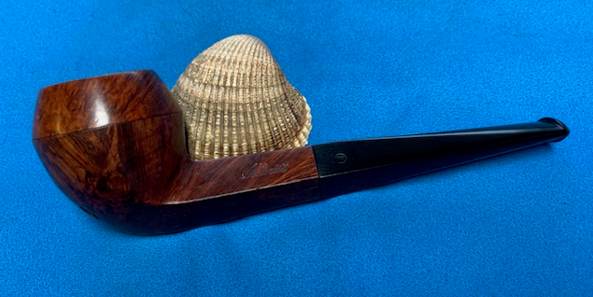
 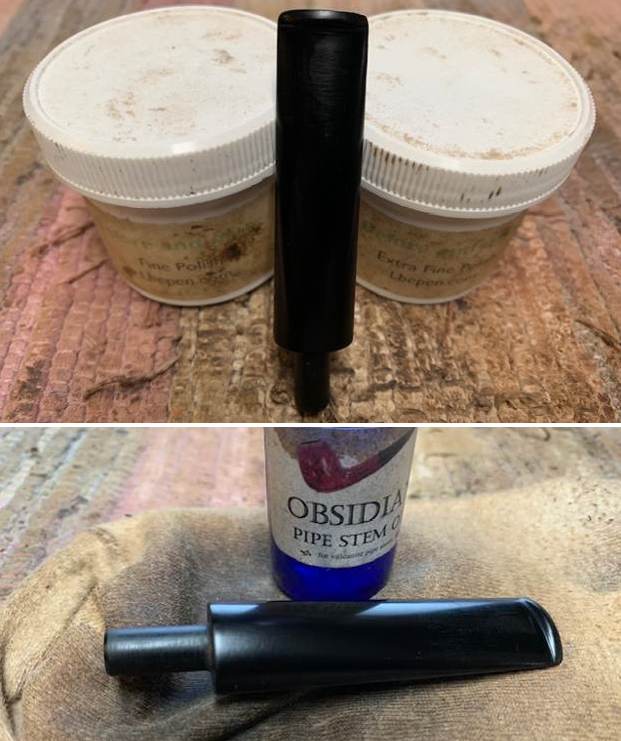 The final steps in my process involve using the buffer. I put the W.O. Larsen Handmade Brandy back together and lightly buffed the bowl and stem with Blue Diamond to polish the blast without filling in the grooves in the finish. I polished the vulcanite stem at the same time to polish out the scratches. I gave the bowl multiple coats of Conservator’s Wax and the stem multiple coats of carnauba wax. I have found that I can get a deeper shine if I follow up the wax buff with a buff with a clean buffing pad. It works to raise the shine and then I hand buff with a microfiber cloth to deepen the shine. It is always fun for me to see what the polished bowl looks like with the polished stem. It really is a nice pipe. The finish around the bowl sides and shank looks great with the rich combination of brown stains. The W.O. Larsen Sandblast Brandy feels great in my hand. It is a well balanced pipe. Have a look at it with the photos below. The dimensions are Length: 5 ½ inches, Height: 2 inches, Outside diameter of the bowl: 1 ¼ inch, Chamber diameter: ¾ of an inch. The weight of the pipe is 1.41 ounces/40 grams. It is a beautiful pipe that functions as a sitter due to the wide heel on the bowl. I will soon be adding to the rebornpipes store in the Danish Pipemakers section. If you would like to add it to your collection let me know. It should be a great smoking pipe. As always I encourage your questions and comments as you read the blog. Thanks to each of you who are reading this blog. Remember we are not pipe owners; we are pipe men and women who hold our pipes in trust until they pass on into the trust of those who follow us.
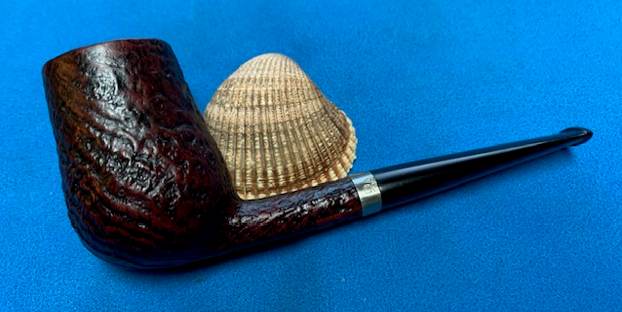


