Tag Archives: bite marks

Replacing a Tenon and Doing a Restoration on a Sorrentino Manager 0704


Blog by Steve Laug

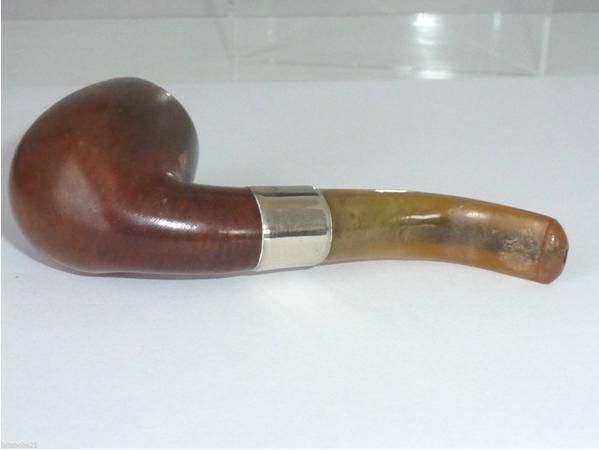
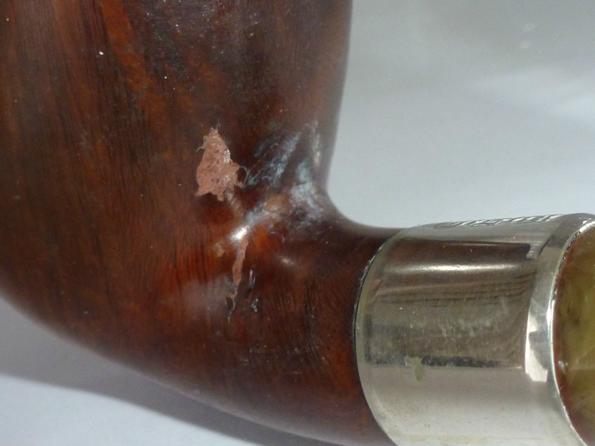
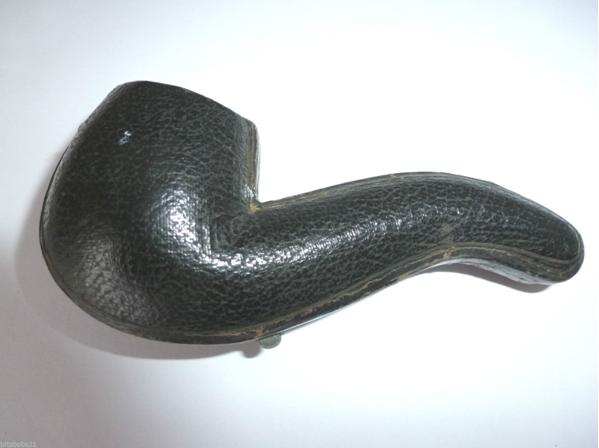
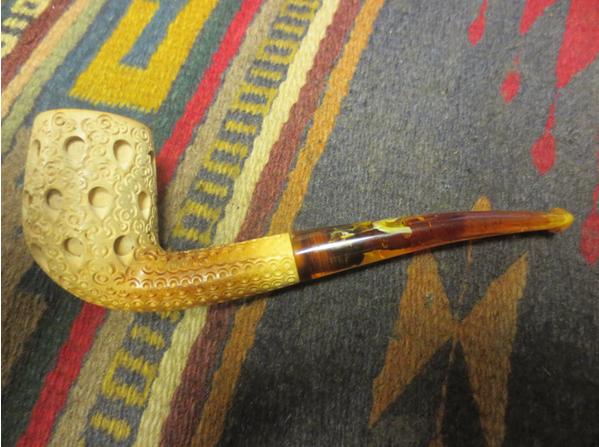
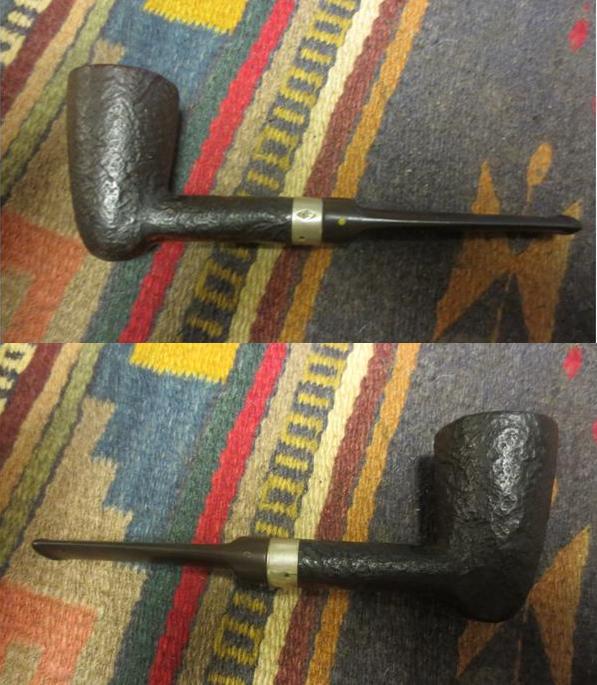
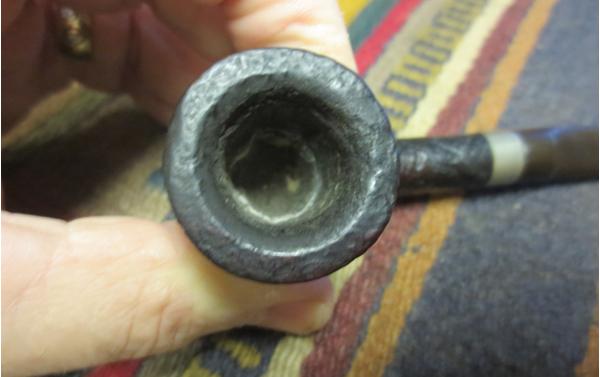
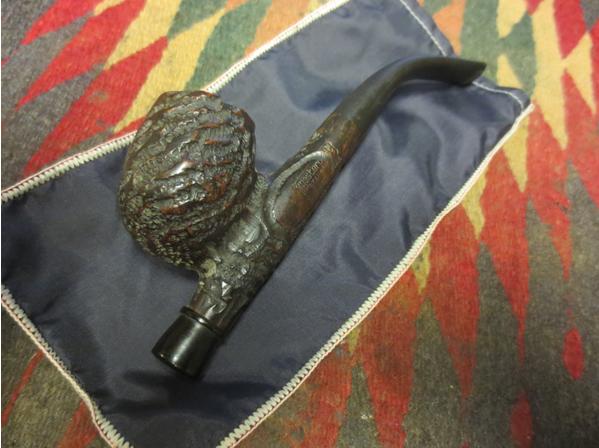
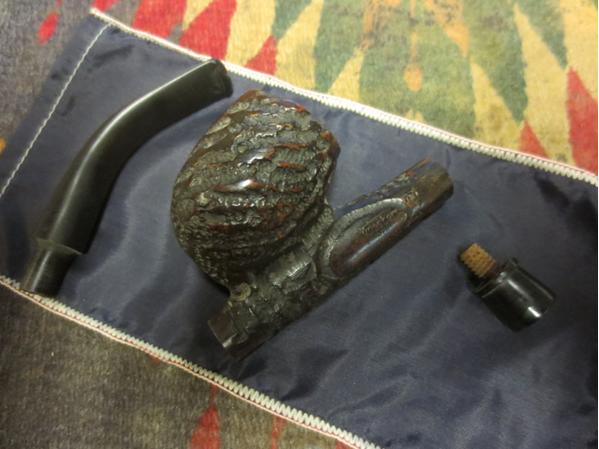
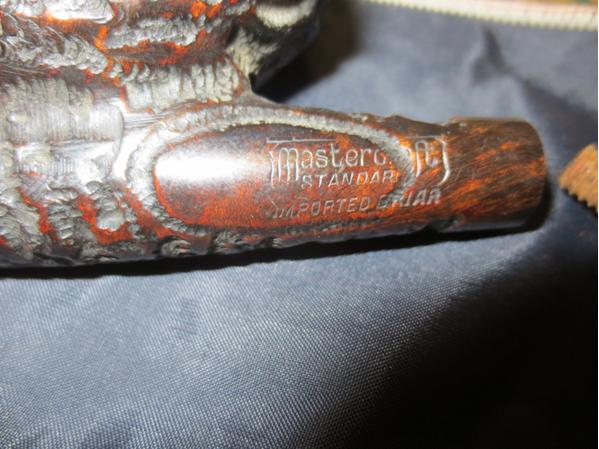
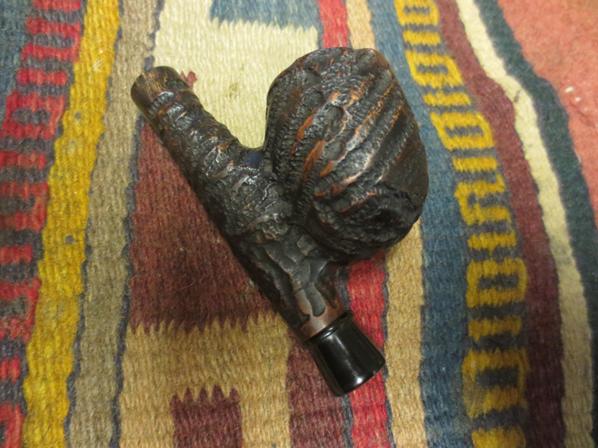
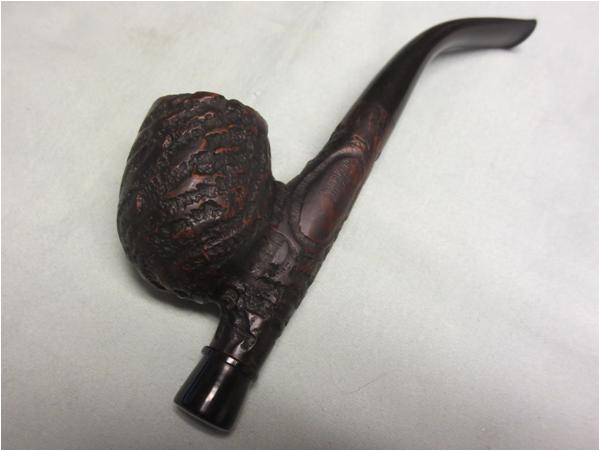
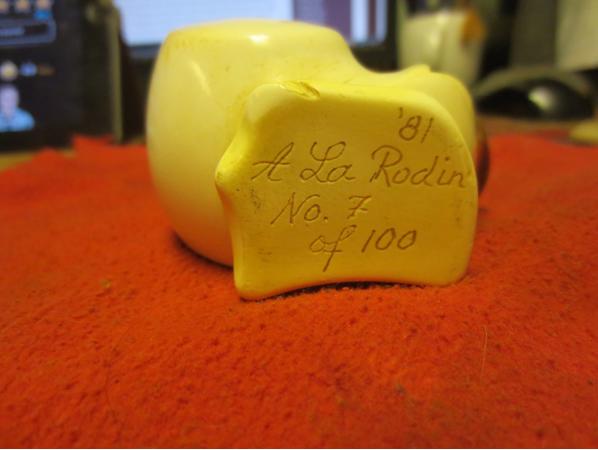
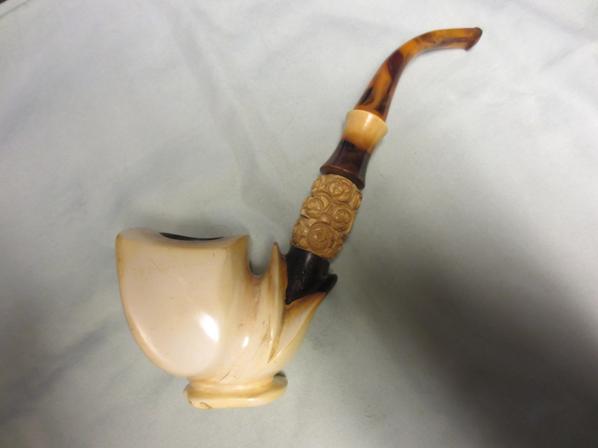
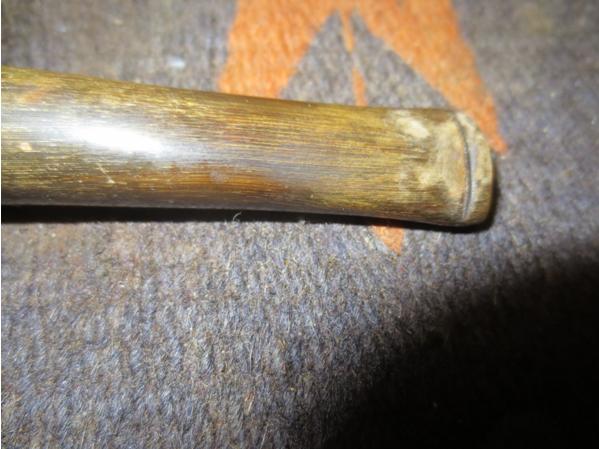
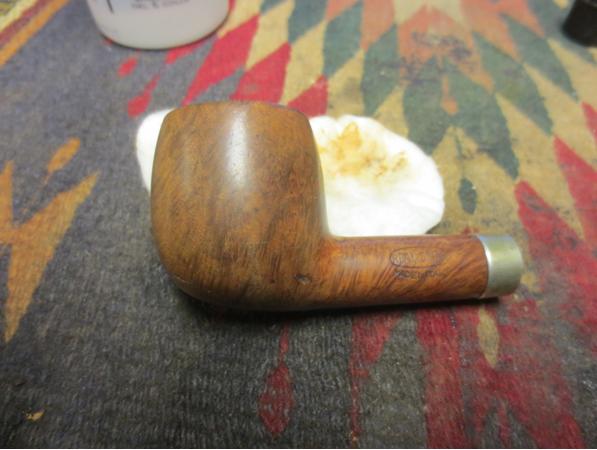
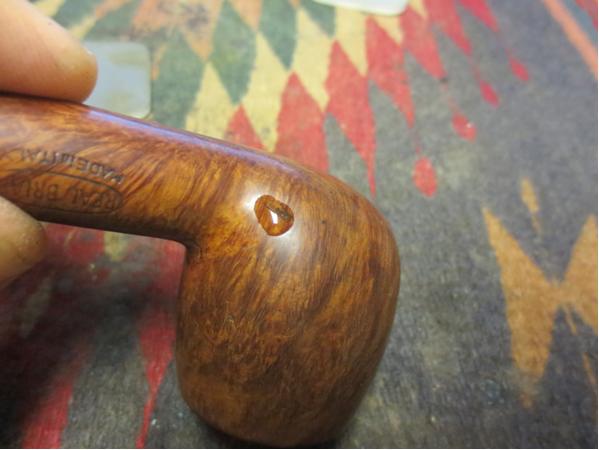
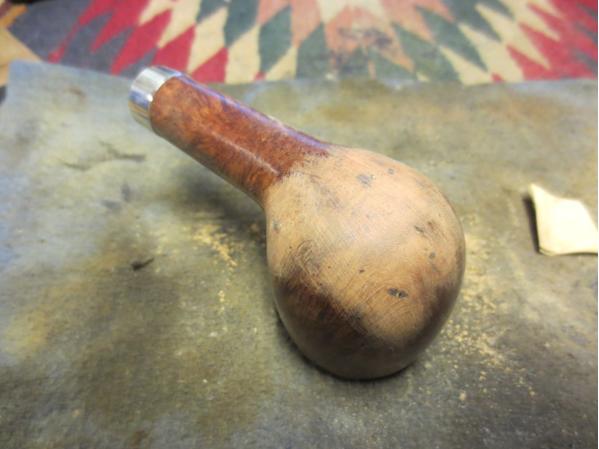
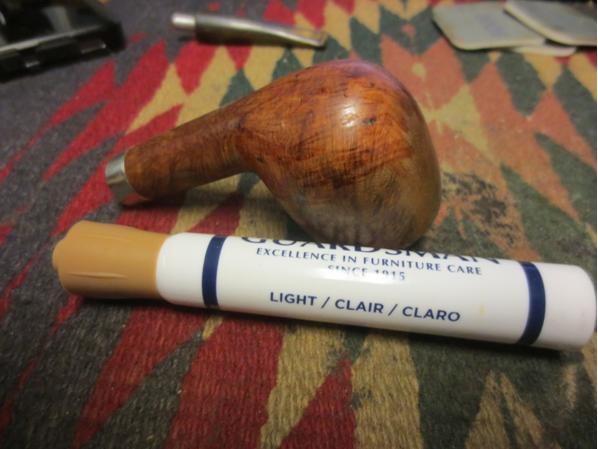
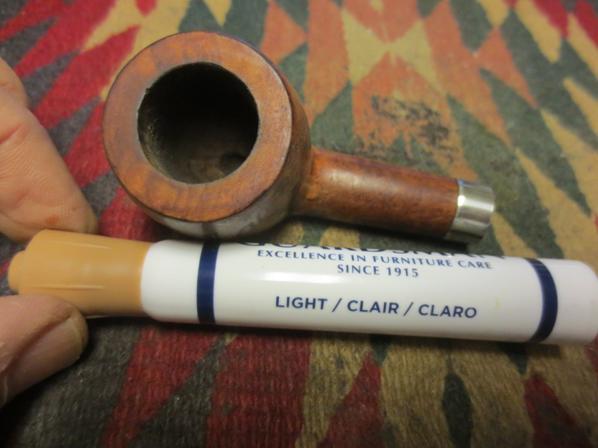
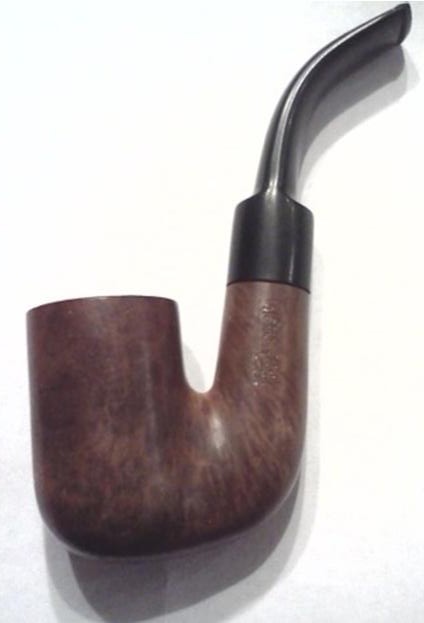
I received this one from a fellow who wanted the tenon replaced but being the way I am I could not just replace the tenon and leave the pipe looking tired and worn so I wrote and offered to clean it up for him. It took more work than I had originally thought it would but the added effort made for a beautiful looking pipe. It is stamped on the left side of the shank MANAGER over SORRENTINO. On the right side it says 0704 which is the shape number and Italy. The briar was really in need of some work. The left side was stained with a dark patch that ran from the top to the bottom of the bowl. The finish was also rough to the touch over that section. On the bottom, front and right side of the bowl there was a lot of dents and dings like the pipe had been dropped. The rim had a coat of lava and the bowl had a very uneven cake with more on the left side of the bowl than the right. The finish was basically shot. The stem came with lots of tooth chatter and a broken tenon. The tenon snapped right at the shank and was stuck in the shank. The brass band on the shank was loose. The pipe was tired and needed some TLC. Here is what it looked like when I started.Briar1 Briar2 Briar3
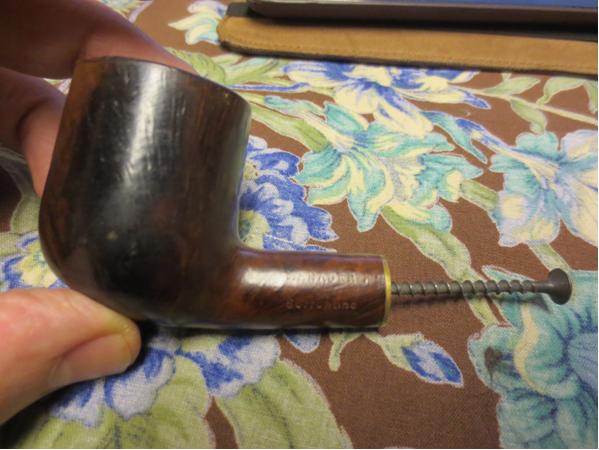
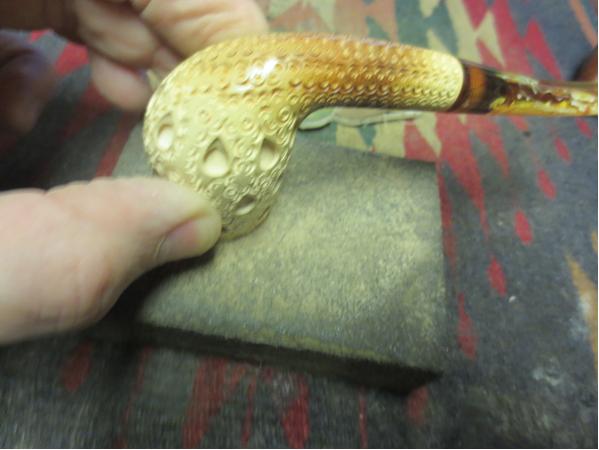
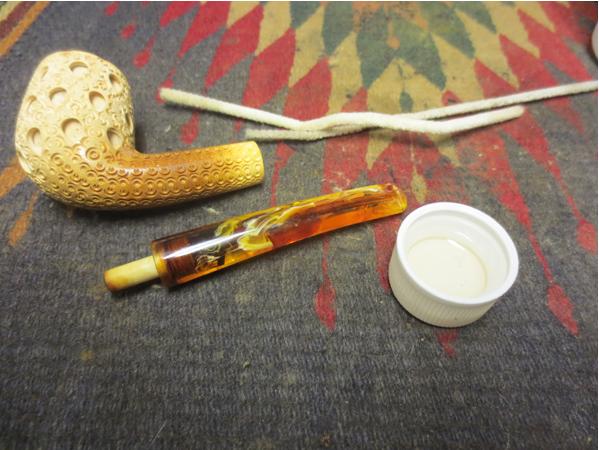
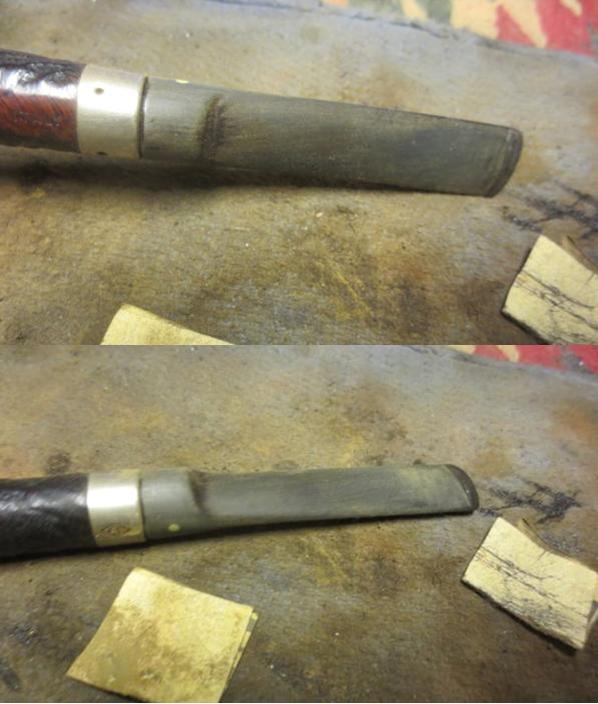
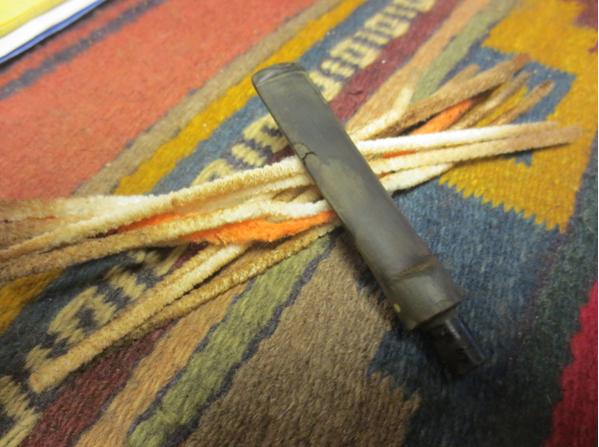
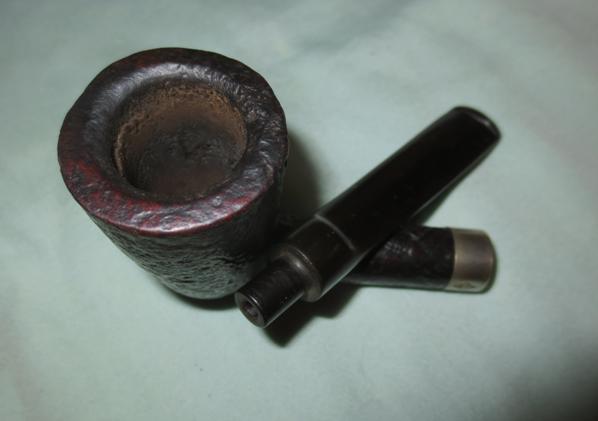
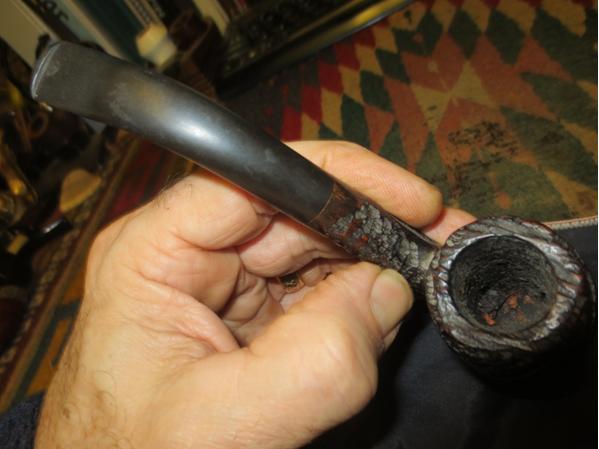
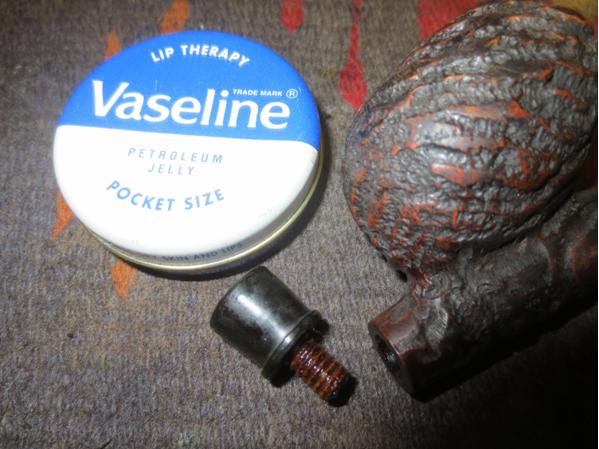
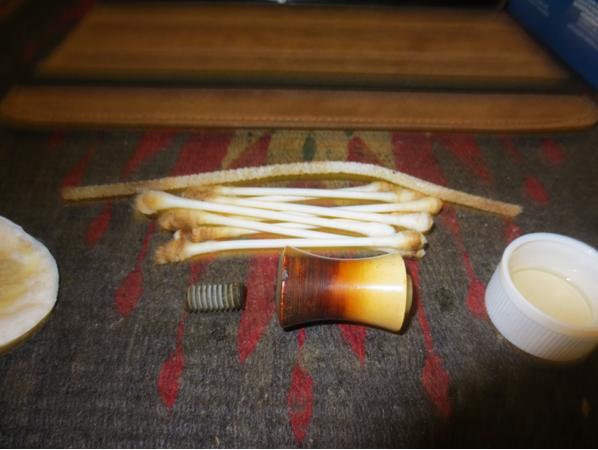
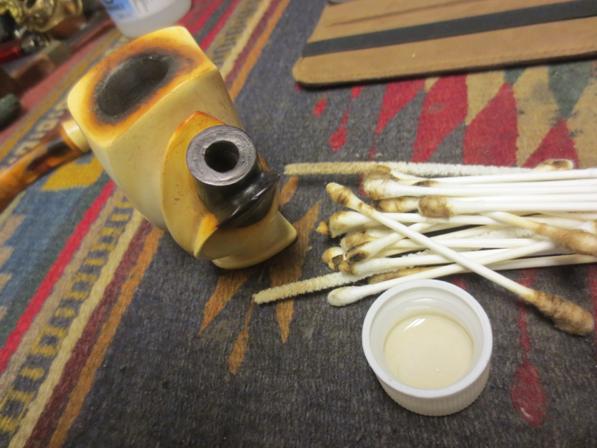
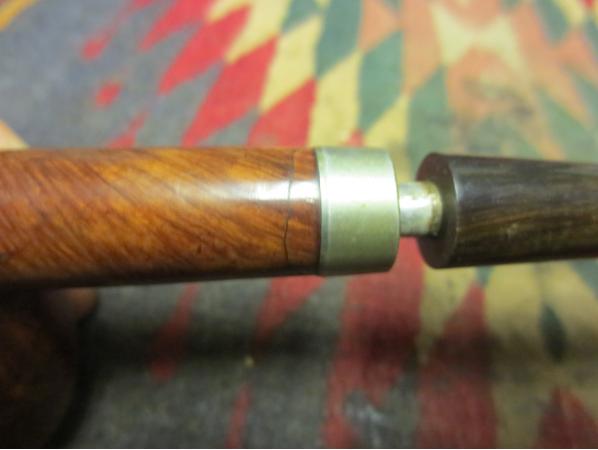
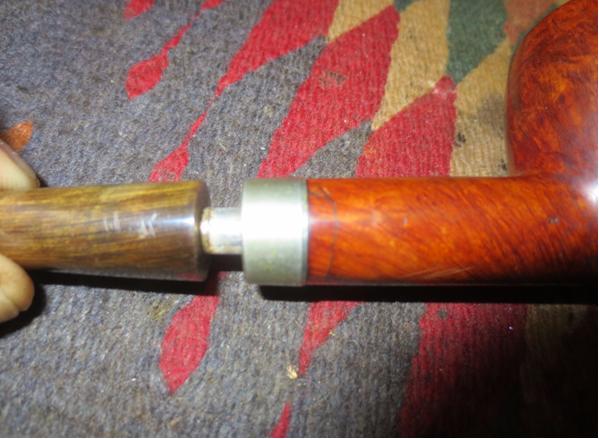
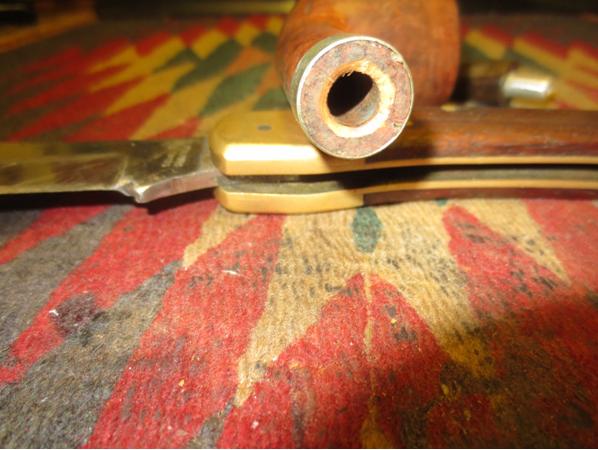
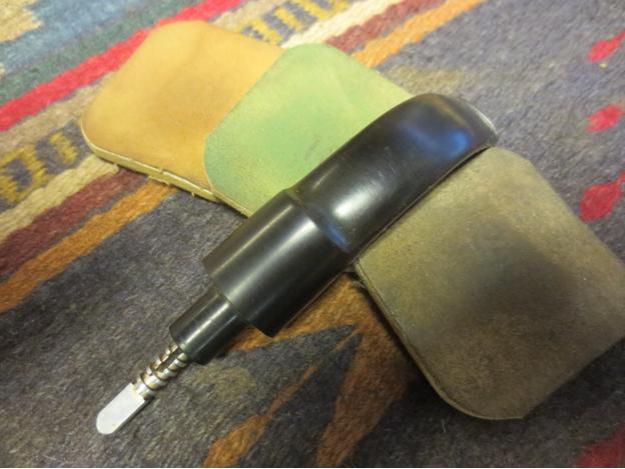
In the photos above I had already turned the wood screw into the broken tenon. I use that to pull a broken tenon and it never disappoints in effectiveness. Note the state of the bowl in the photos.Briar4
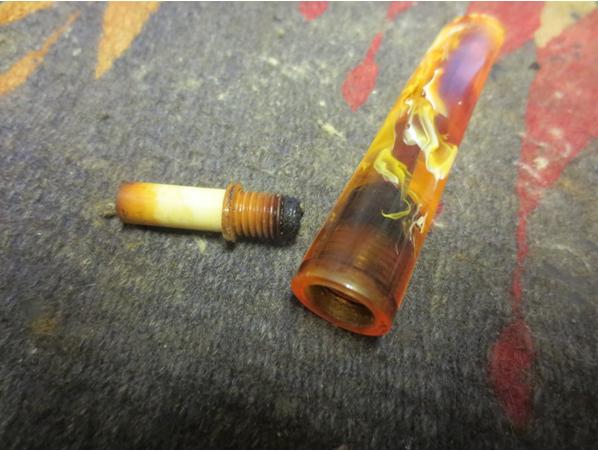
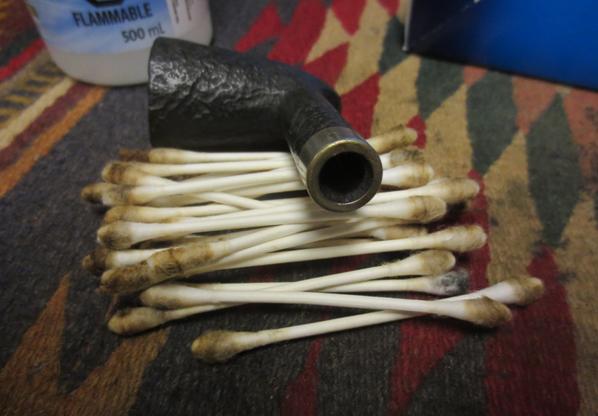
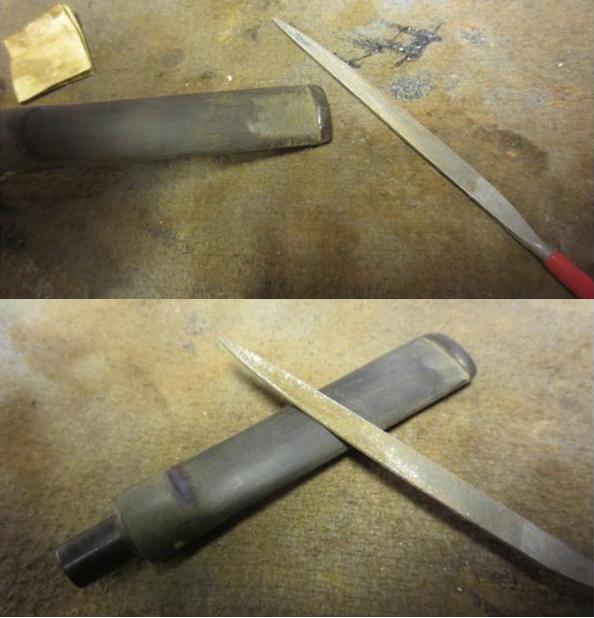
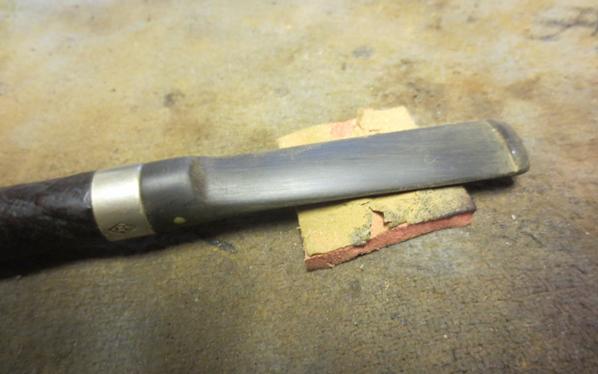
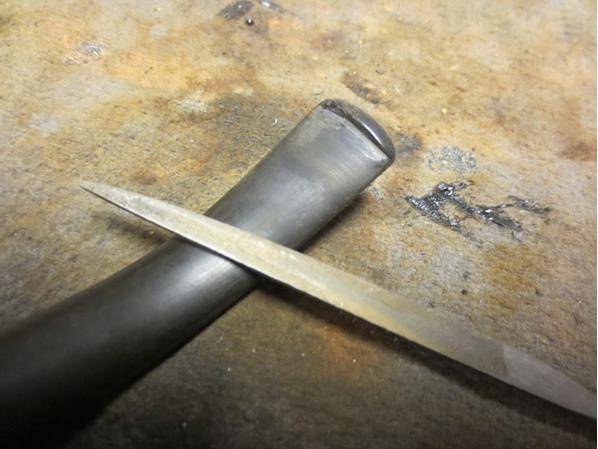
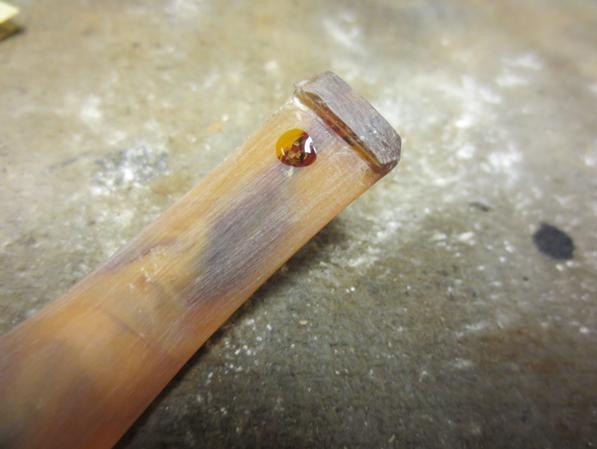
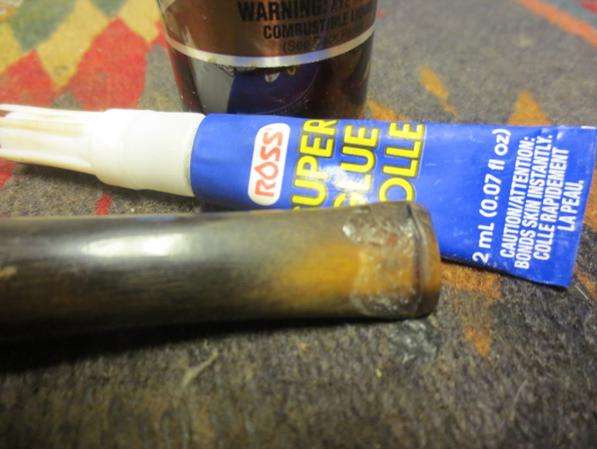
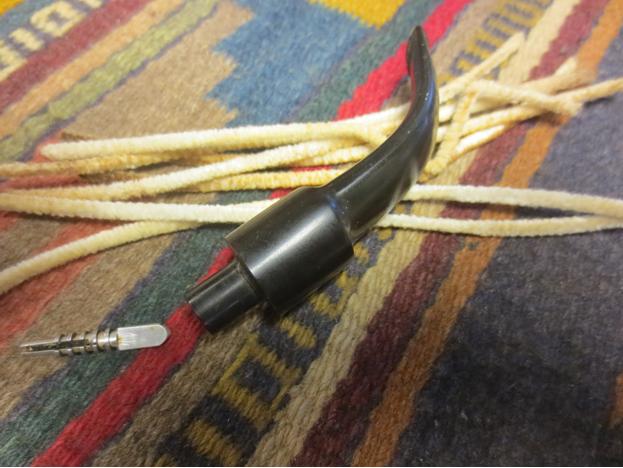
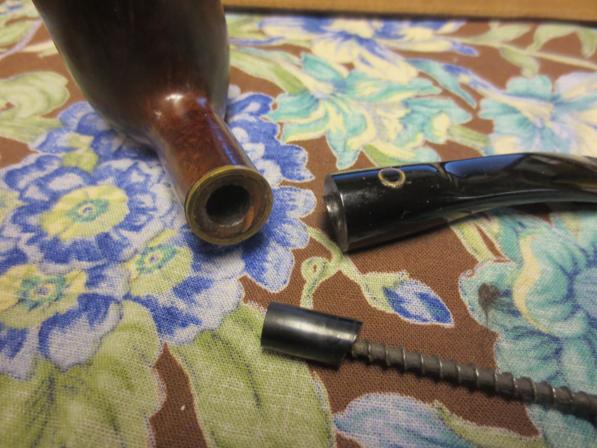
I used a Dremel and sanding drum to flatten out the remnant of the broken tenon on the stem. Once it was flat it was time to drill the stem to take the new tenon. I started with a bit slightly larger than the airway to center the drilling and turned the stem onto the bit by hand. I find that though it is harder to do it by hand, turning it by hand and not drilling it gives me more control of the stem. I worked my way up to a ¼ inch bit and then cleaned it out with a needle file. I had a Delrin tenon I purchased from Tim at JH Lowe and I roughed up the surface of the portion that would go into the stem and gave it a coat of two part slow drying epoxy to hold it in place.Briar5 Briar6 Briar7
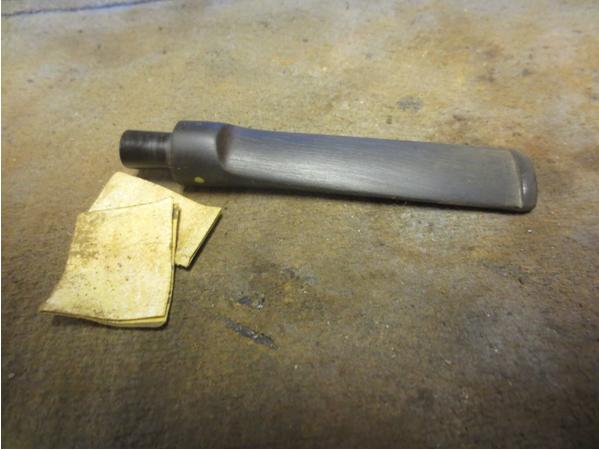
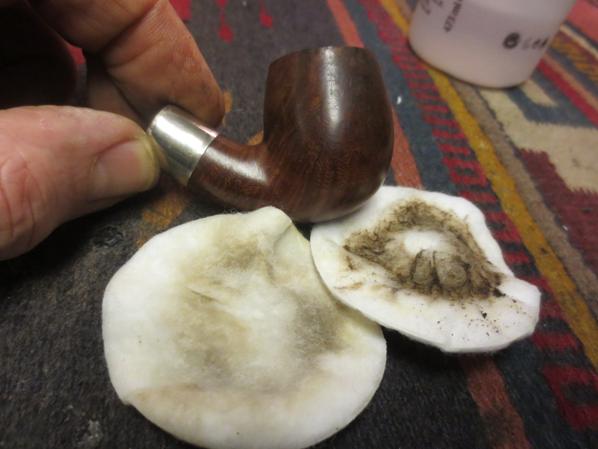
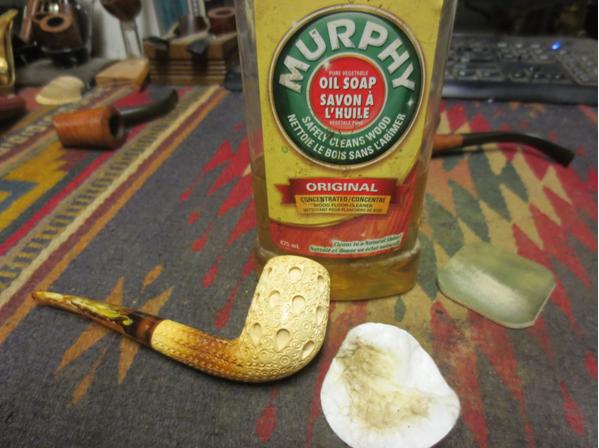
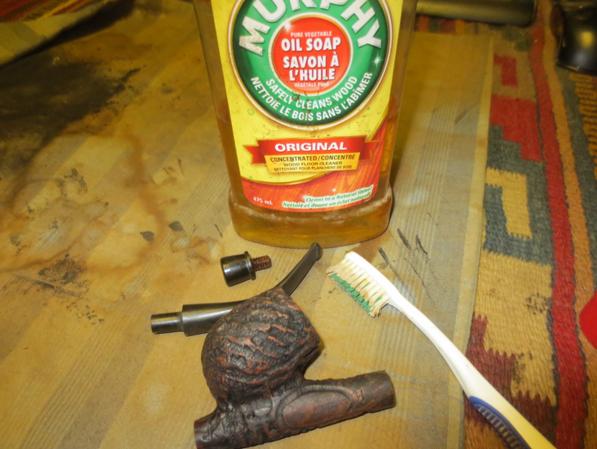
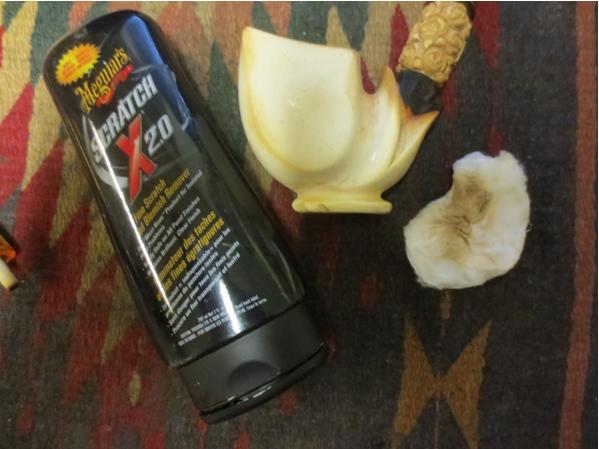
I lined up the stem in the shank and then set it aside to let the epoxy cure over night. While it dried I worked on the bowl. I stripped off the remaining finish with acetone and cotton pads. I sanded the dark stain mark on the left side of the bowl with 220 grit sandpaper to remove the damaged briar and smooth things out. I scrubbed that side with acetone to finish.Briar8 Briar9
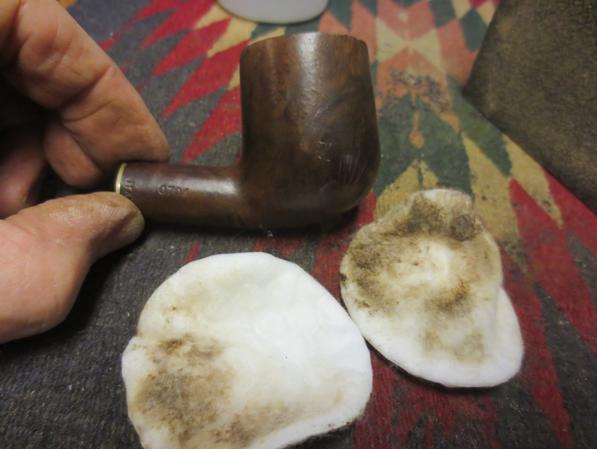
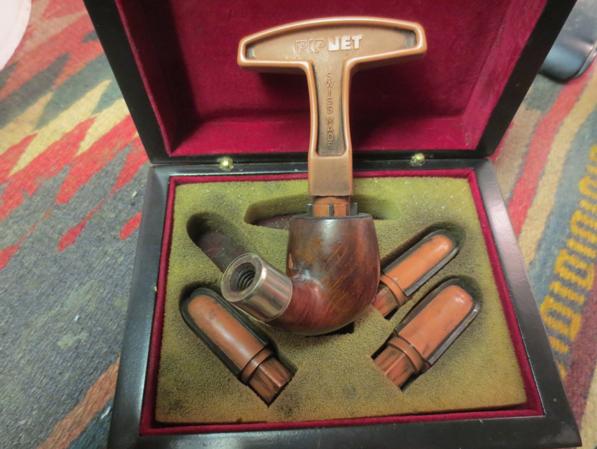
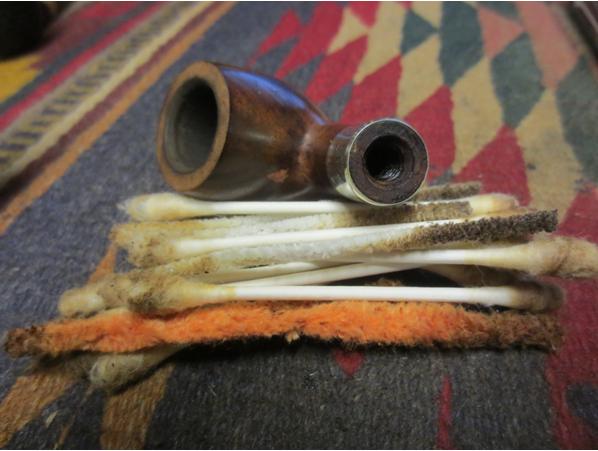
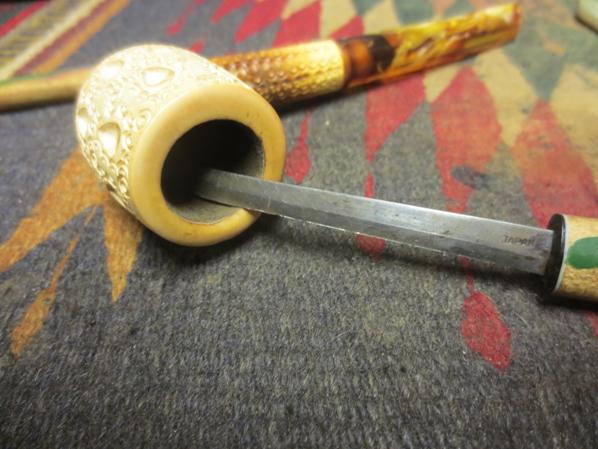
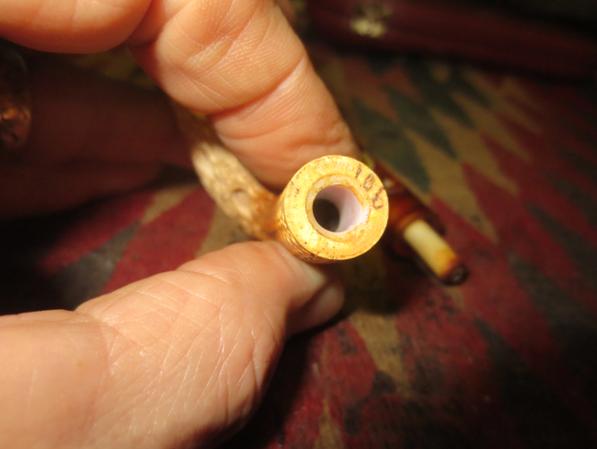
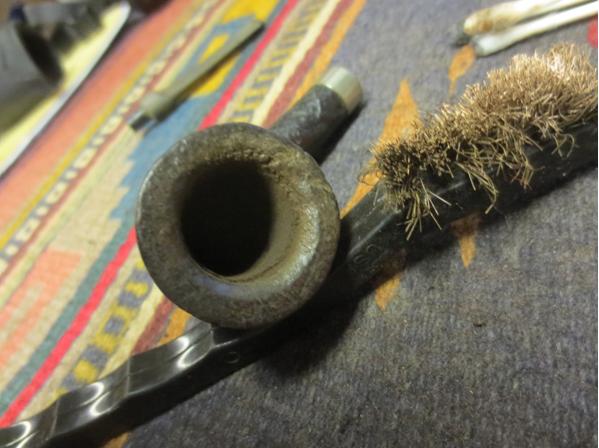
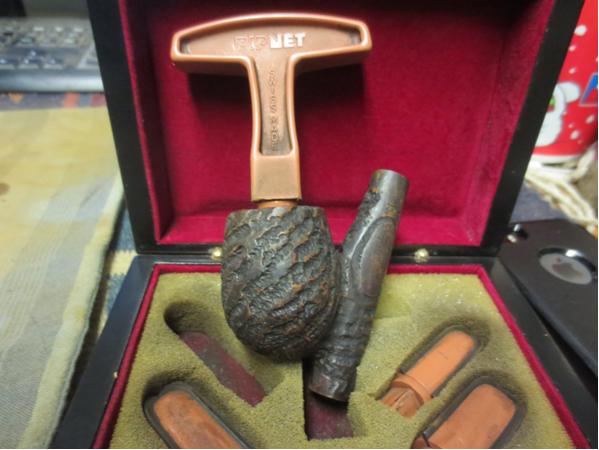
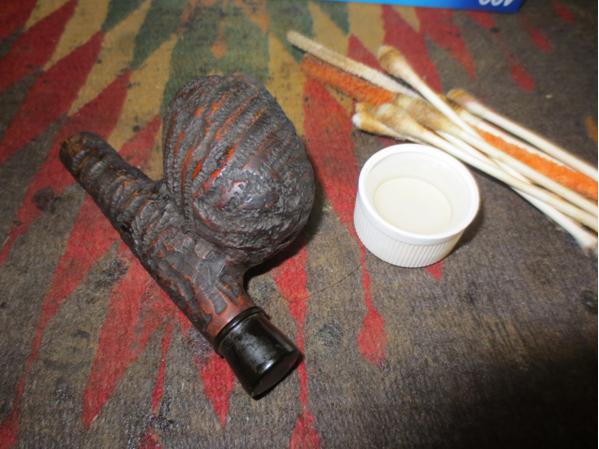
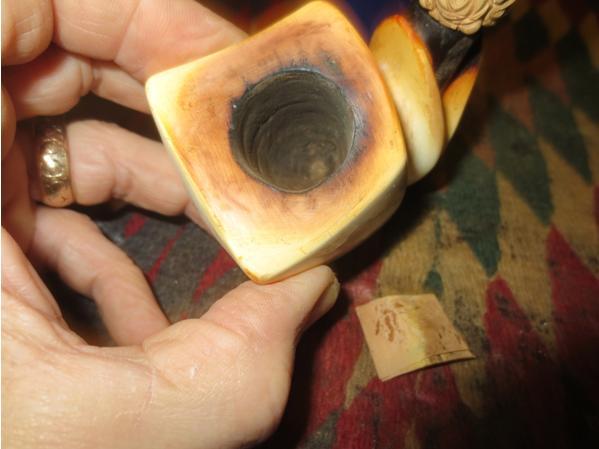
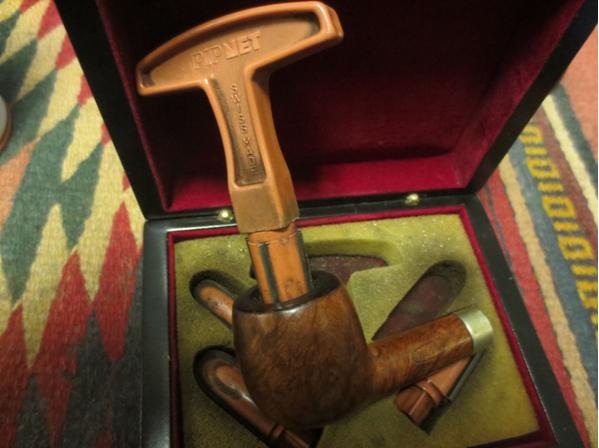
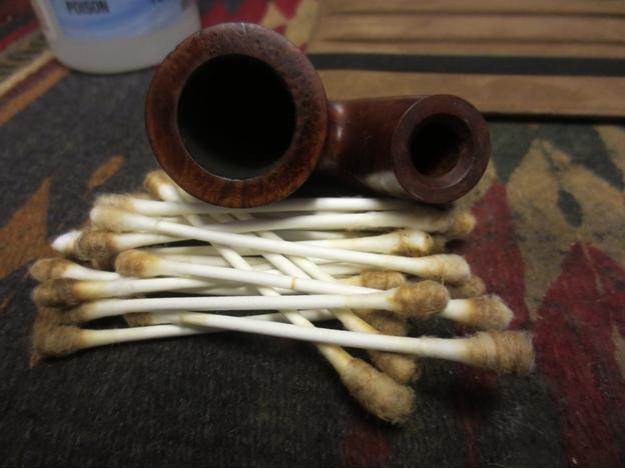
I reamed the bowl with a PipNet reamer to even out the cake that had been there. I decided to strip it back to bare wood. I wanted to check out the inside of the bowl walls. The interior was sound and there was no damage on the bowl walls. Briar10 Briar11
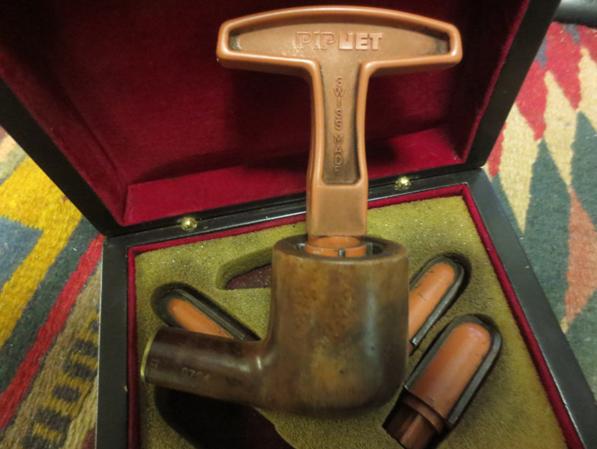
I sanded the bowl with 1500-2400 grit micromesh sanding pads to clean up the scratches left behind on the briar by the sand paper and by the wear and tear of age. The stripped and sanded bowl was looking pretty good.Briar12 Briar13 Briar14
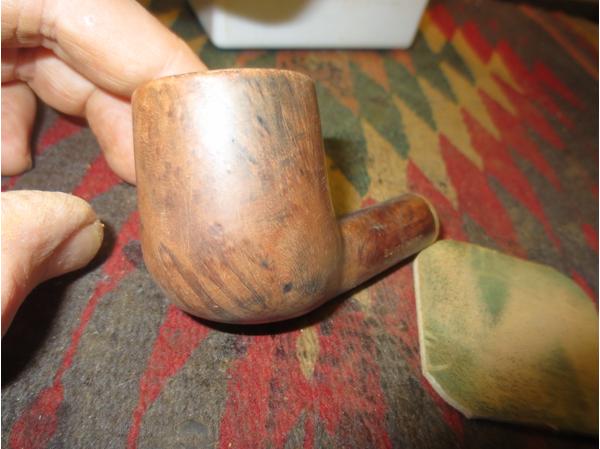
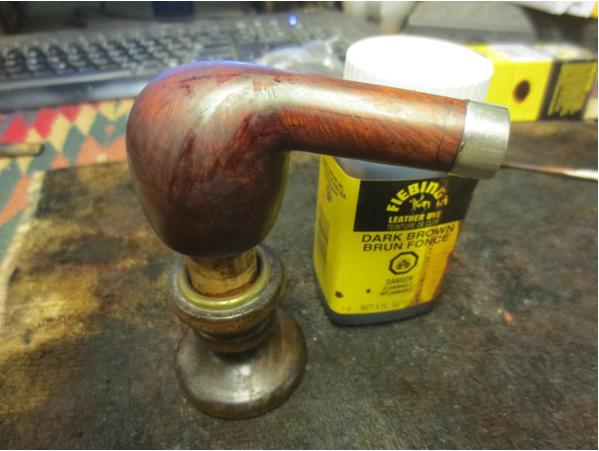
I sanded the inner bevel of the rim to clean it up and prepare the bowl for staining. I wiped it down a final time with isopropyl alcohol. I stained the bowl with a dark brown aniline stain. I flamed it and restained it with a second coat of the stain. I flamed it again.Briar15 Briar16
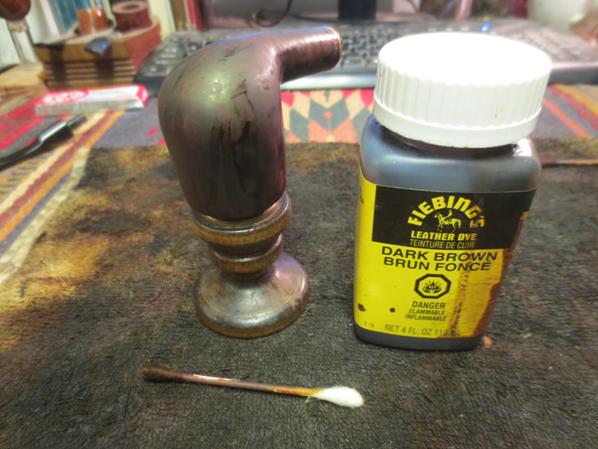
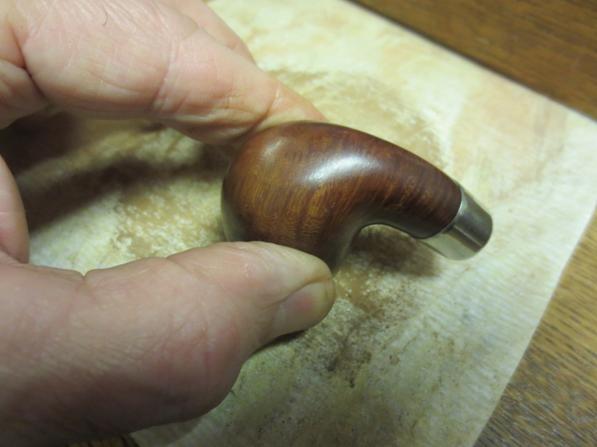
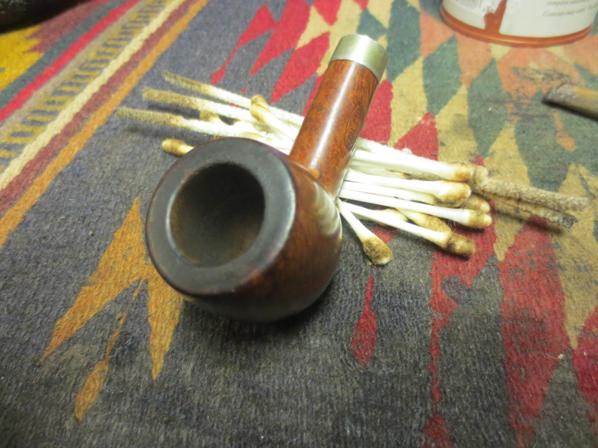
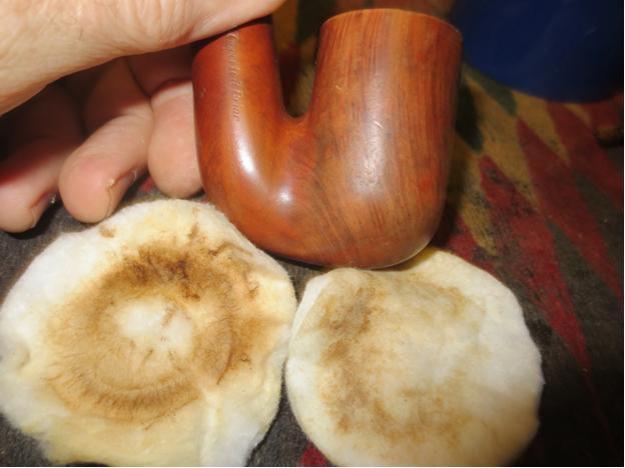
Before setting the bowl aside to dry I wiped it down with alcohol on a cotton pad to smooth out the stain and lighten it slightly. I wanted the grain to show through.Briar17
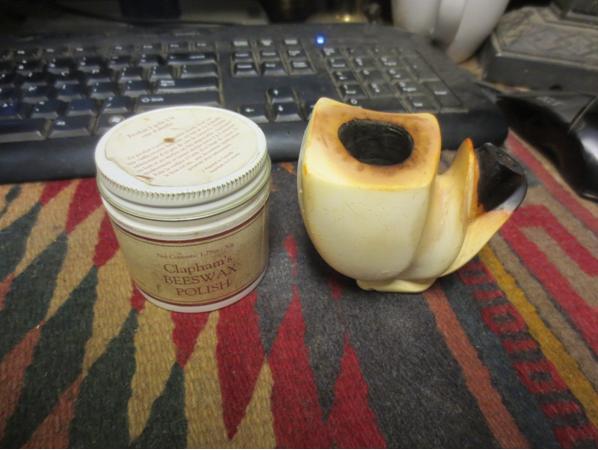
I buffed the bowl with Blue Diamond on the buffing wheel and gave it several coats of carnauba wax to seal and preserve the finish. I buffed it with a clean buffing pad to raise the shine. (Forgive the poor focus on the first photo below. It is blurry but still gives you an idea of how the dark area had been reduced.)Briar18 Briar19 Briar20 Briar21
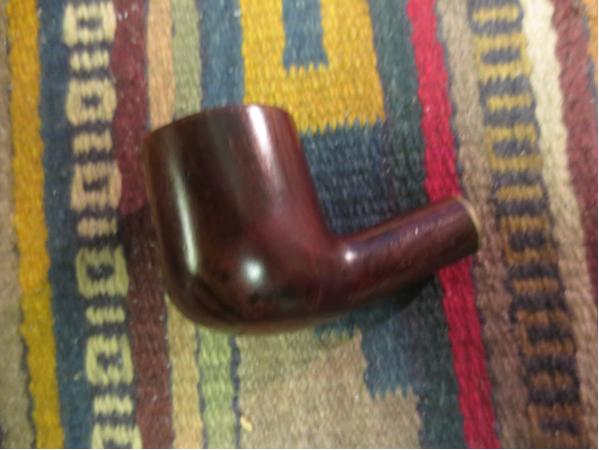
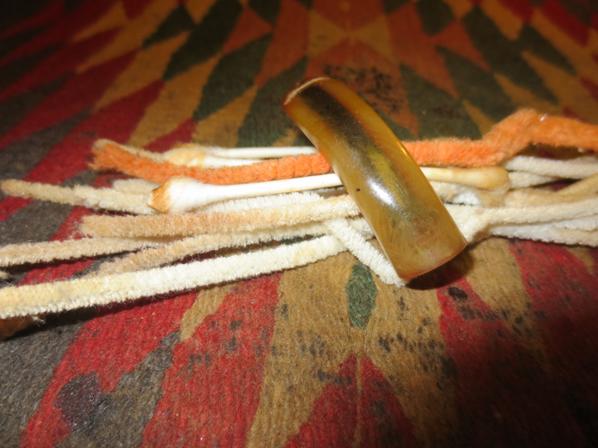
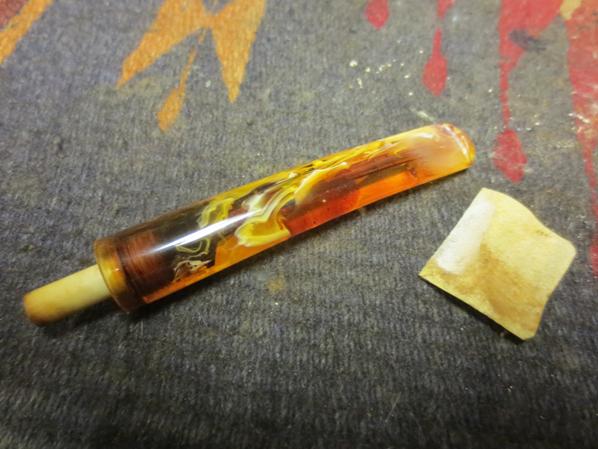
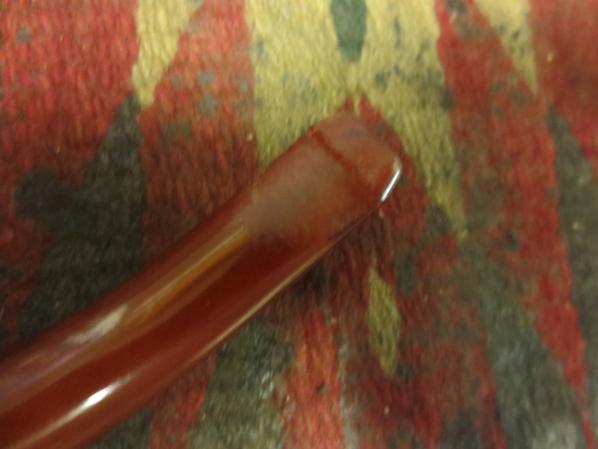
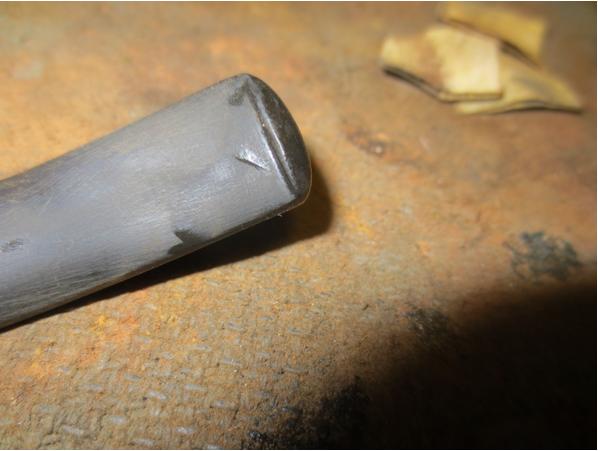
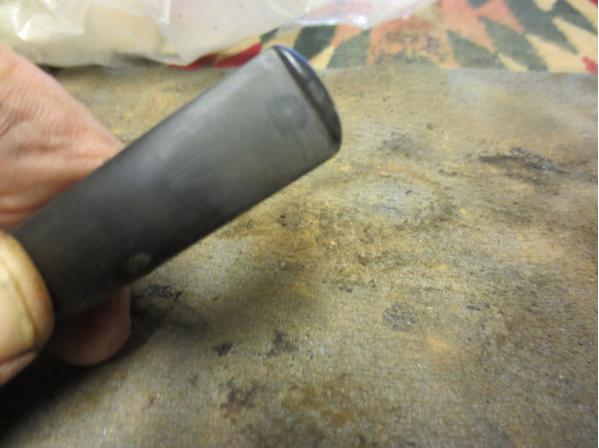
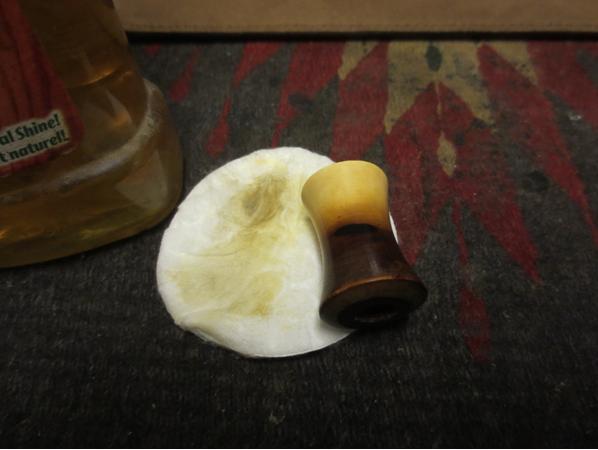
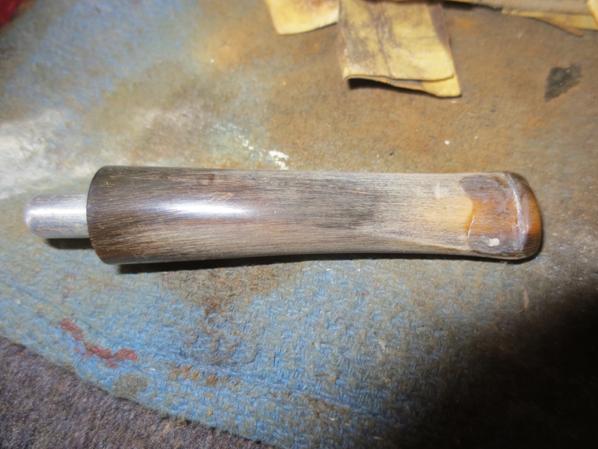
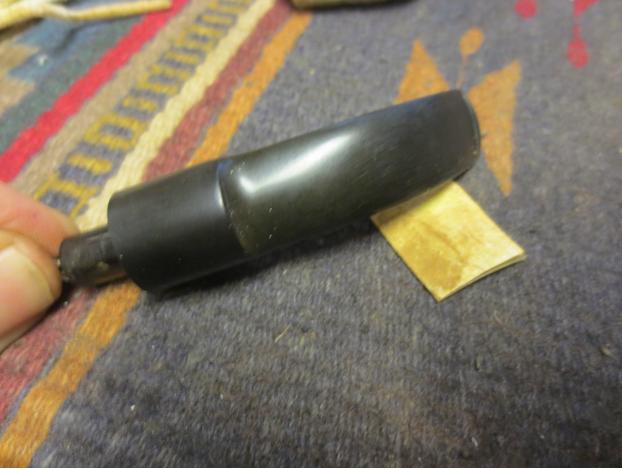
With the bowl finished I set it aside and worked on the stem. I sanded the tooth marks and chatter on the stem with 220 grit sandpaper until they were smoothed out. I was able to easily remove most of the tooth damage to the stem. There was one small tooth dent on the top of the stem that I left as it is minimal and I did not want to thin the stem.Briar22 Briar23
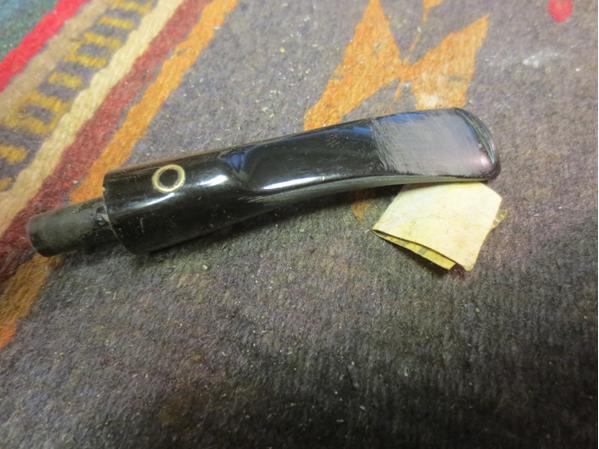
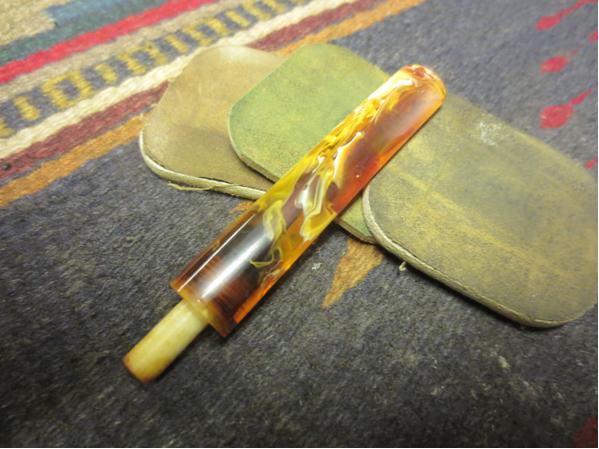
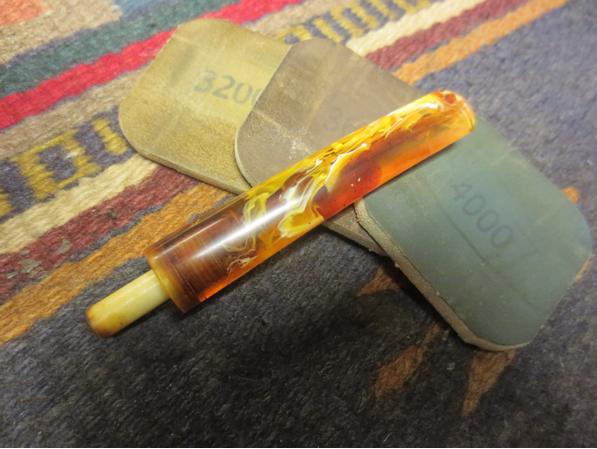
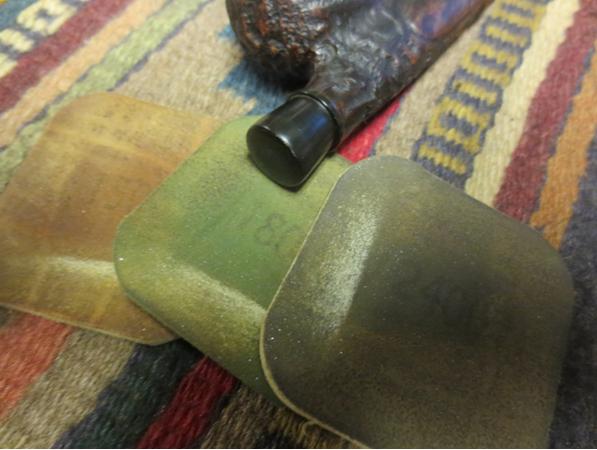
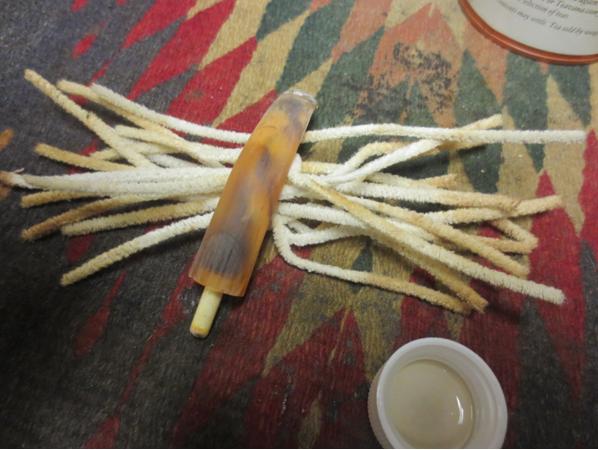
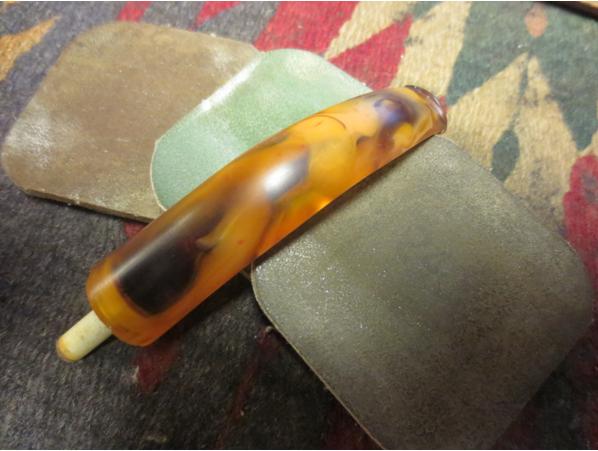
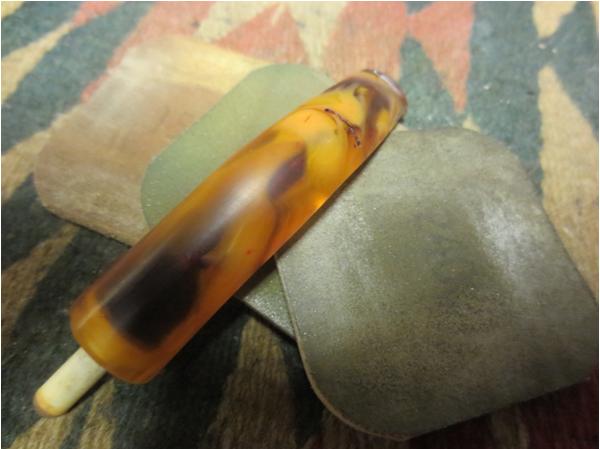
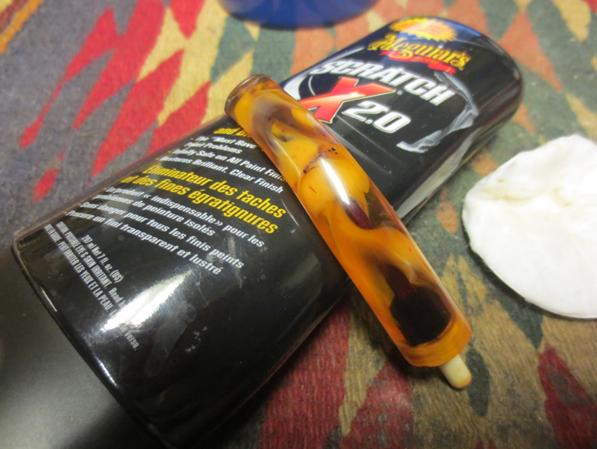
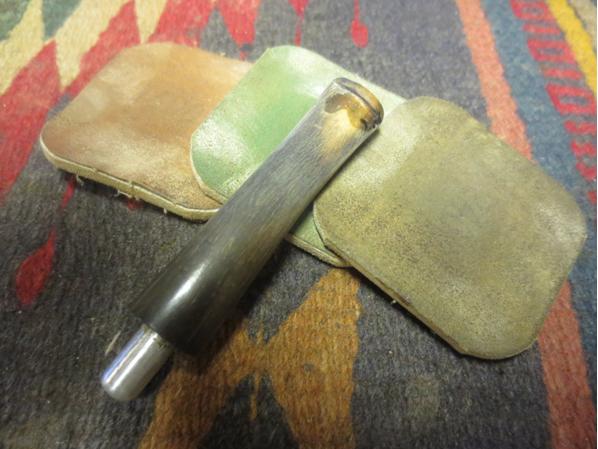
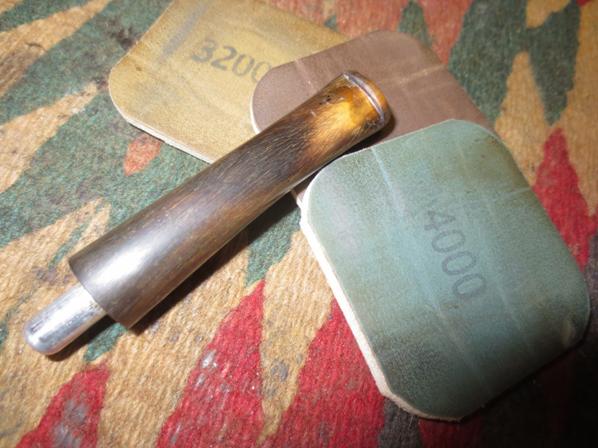
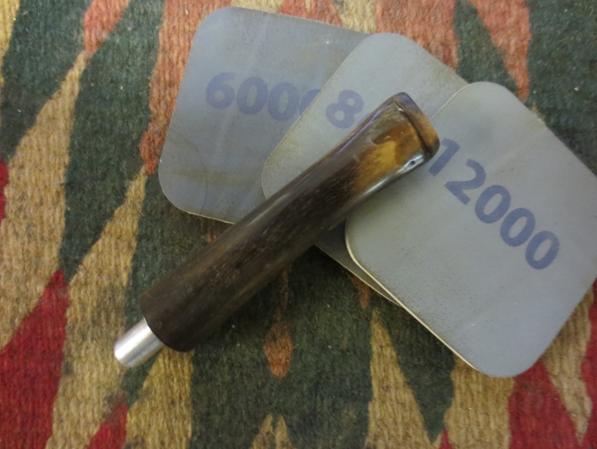
I wet sanded the stem with 1500-2400 grit micromesh sanding pads. I dry sanded it with 3200-4000 grit pads. I finished with 6000-12000 grit pads. I buffed the stem with Blue Diamond on the wheel.Briar24 Briar25 Briar26 Briar27
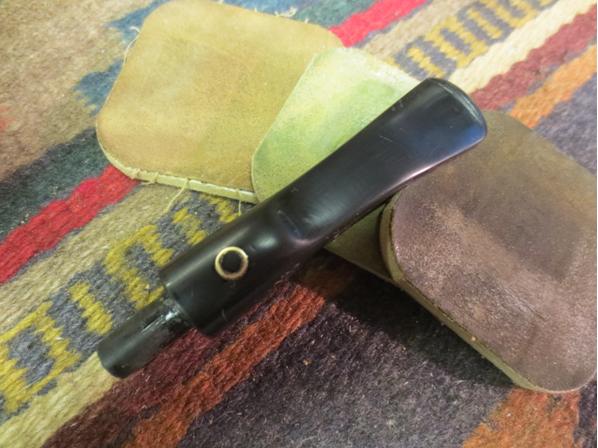
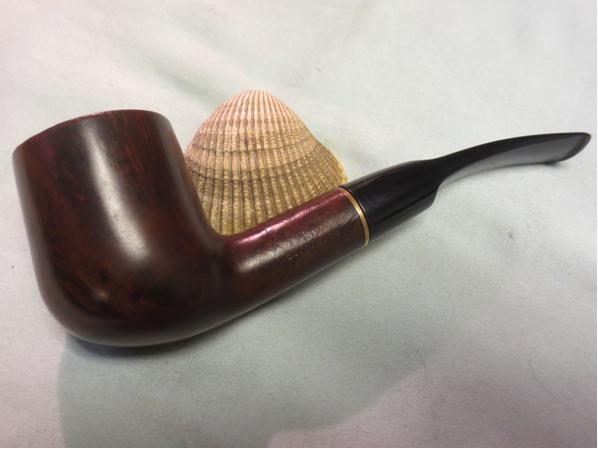
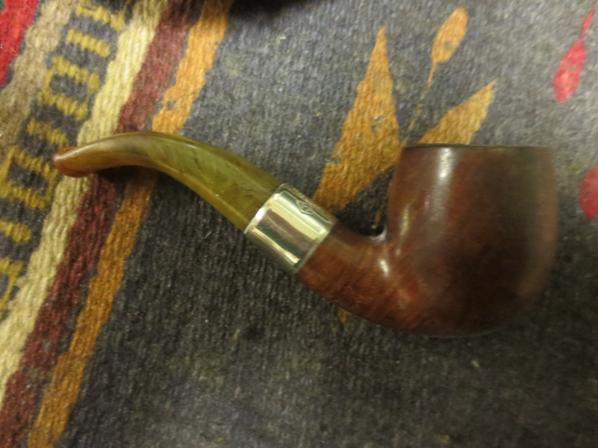
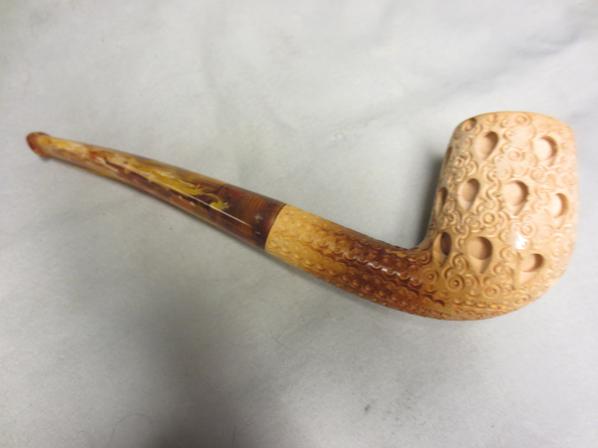
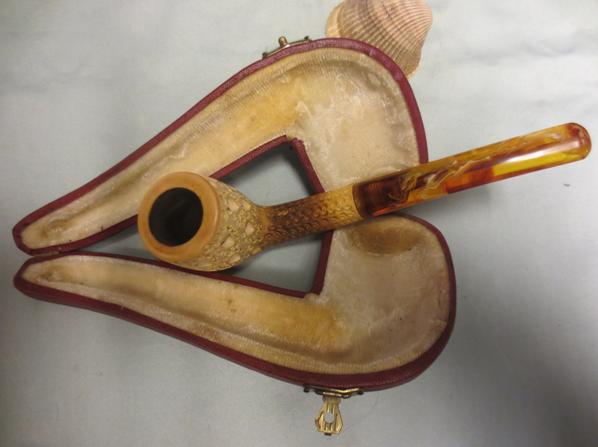
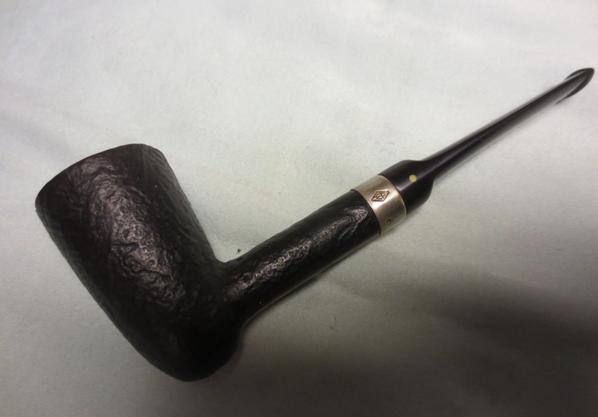
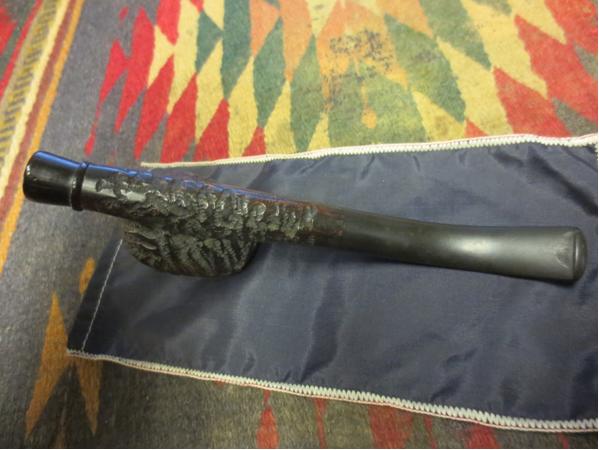
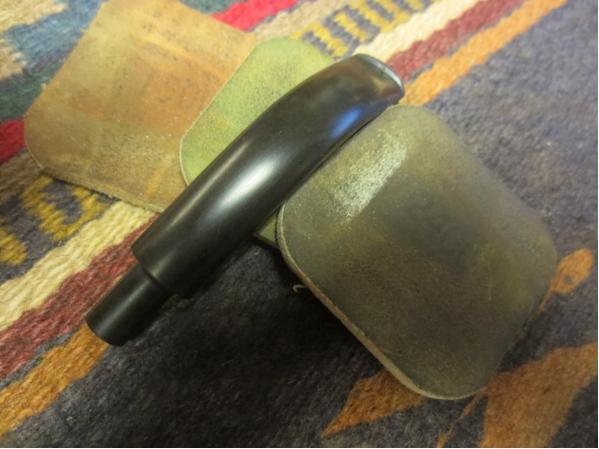
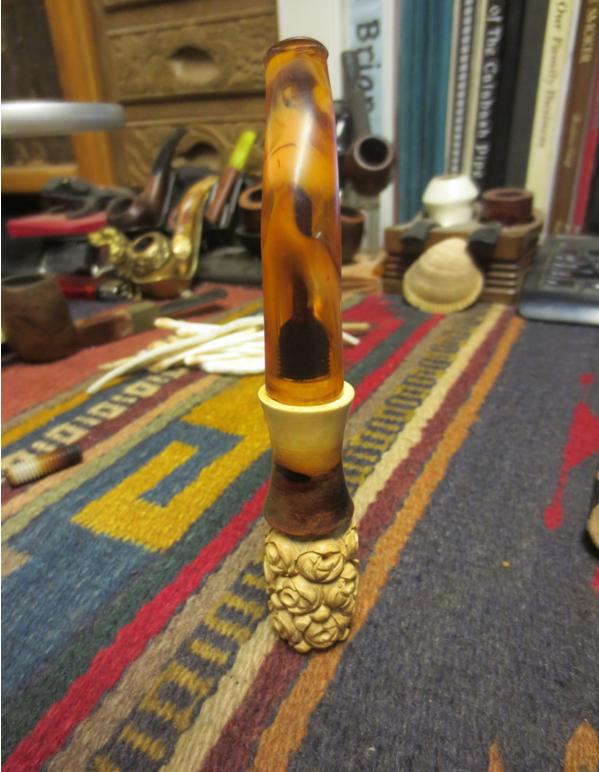
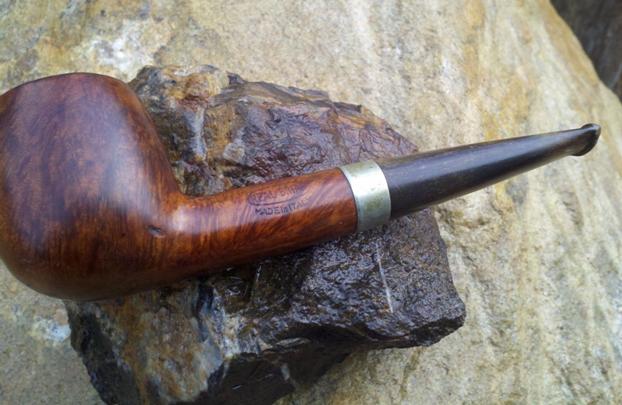
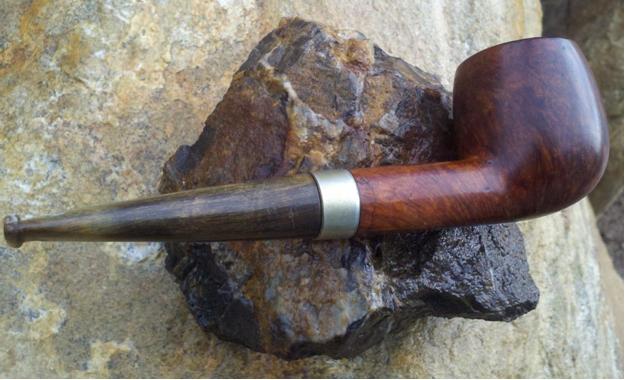
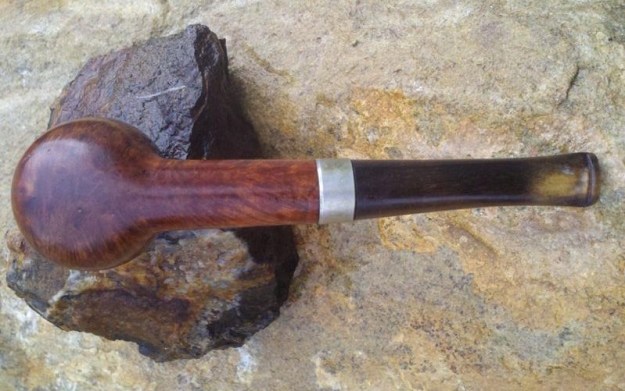
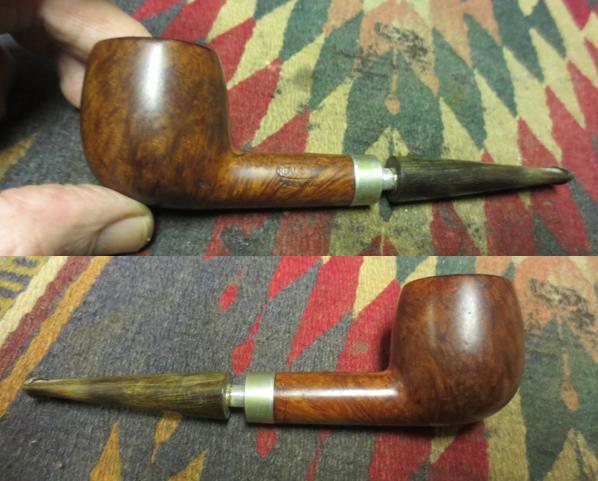
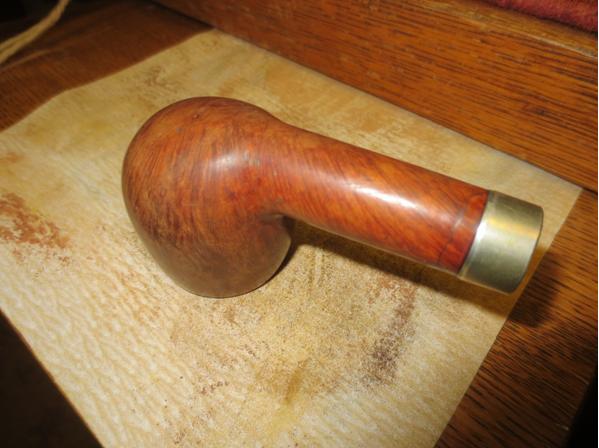
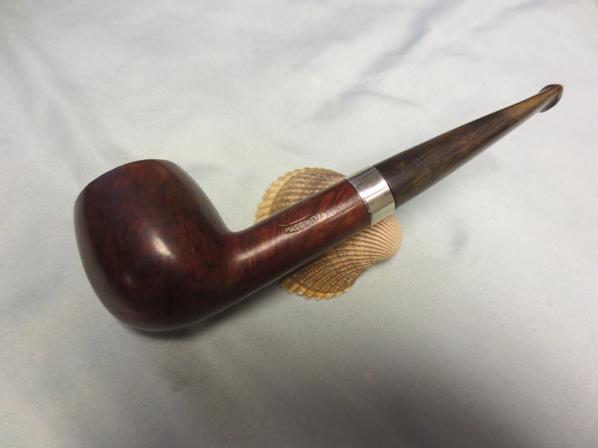
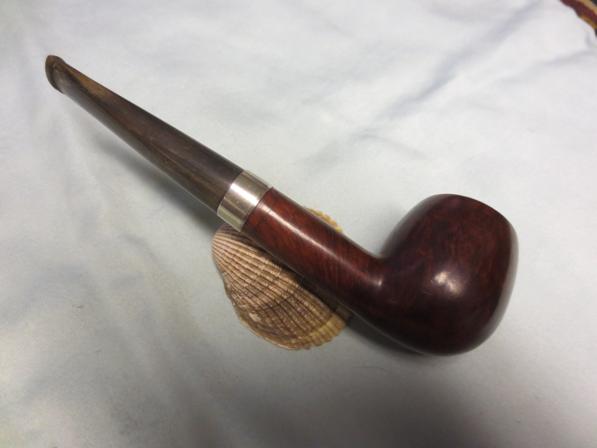
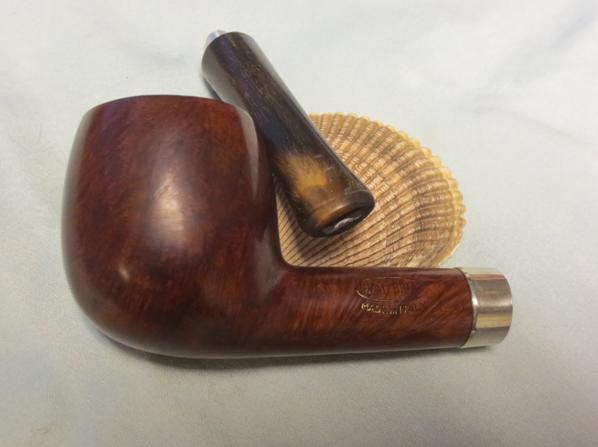
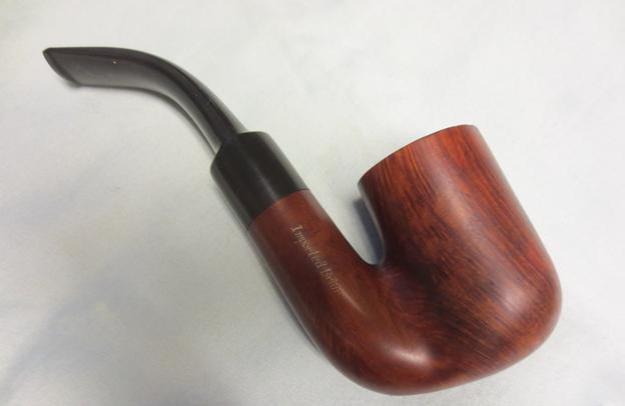
I put the pipe together and lightly buffed it with some more carnauba wax to finish it. I hand buffed it with a microfibre cloth for the final buffing. The photos below show the finished pipe. Hopefully when it is returned to the pipeman who owns it he will be pleased with the finished pipe. Thanks for looking.Briar28 Briar29 Briar30 Briar31 Briar32 Briar33 Briar34

An LHS Purex Patented Lovat that showed promise


Blog by Steve Laug

My brother showed me a link on eBay that showed this older LHS Lovat. It was stamped LHS in a diamond. Next to that was stamped PUREX over the patent number, PAT.No1587048. Under that was stamped REAL BRIAR. The shape number 12 was stamped on the underside of the shank. LHs2The pipe looked decent. There was some damage to the rim but the bowl was nice other than the usual dirtiness and dents. The shank also looked good. There did not appear to be any fills in the bowl or shank. There was very little cake in the bowl and it appeared that it had been recently reamed. The finish was in okay shape though there were paint flecks on the sides of the bowl near the rim. lhs3 LHS4 LHS5The seller included a close up photo of the rim to show the extent of damage. It looked to me that the outer rim was the roughest. It was rounded and the defined sharp edge was gone. The front edge had more damage than the back. The inner edge showed damage and would take some work to round it out. The top of the rim was pretty beat up from what I could see in the photos.LHS6The stem was in rough shape with lots of tooth chatter and wear. It was oxidized and also had a thick coat of some substance that appeared to be flaking or peeling. The dots on the stem were probably white and red though the photos showed the white dot as almost yellow. I was pretty sure that the coat on the coat on the stem accounted for that.LHS7 LHS8I weighed the work it would take to bring it back to life and we put in the only bid on the pipe. It did not take too long for the seller to send it to my brother and for him to send it to me. Even with the double postage it is cheaper to send it to him in the US and then to me in Canada than to ship it directly to Canada. When the pipe arrived in Canada I was able to see that the seller’s photos had shown the condition of the pipe very well. The only thing not shown was that the stem was quite plugged from the slot to the metal threaded tenon. I was not able to push a pipe cleaner through it. The other thing was that the patented stinger apparatus was missing. I have included a picture of the missing apparatus from the patent information.LHS1I went through my collection of tenons and I did not have one like the one shown in the drawing above. I took the next photos to show the state of the pipe from my perspective before I started on the refurb.LHS9 LHS10 LHS11 LHS12I found that the stem was slightly underclocked and needed to be rotated. The first photo below shows the turn of the tenon when it arrived. I heated the tenon with a Bic lighter to soften the glue in the stem. Once it was softened I was able to turn the stem straight. The second photo shows the corrected stem.LHS13 LHS14I took a close up photo of the rim and the bowl interior. There was still some cake in the bowl that needed to be scraped off.LHS15I reamed the bowl with the PipNet reamer and took out the remaining cake.LHS16 LHS17I cleaned out the shank with pipe cleaners, cotton swabs and alcohol. This was one dirty shank and mortise. I would need to use the retort to clean it out. I cleaned out the airway in the stem. It was clogged so I used a dental pick to open the slot area and then I was able to push a thin pipe cleaner through the airway. It took quite a few pipe cleaners to open the airway. I scrubbed the metal tenon with a brass bristle brush and then with alcohol and cotton pads. It was stained but all of the debris was cleaned.LHS18 LHS19I set up my retort, filling the test tube with isopropyl alcohol and then putting the stopper in place in the tube. I put a cotton ball in the bowl and the slid the rubber end of the retort over the stem. I lit a candle and heated the alcohol to boil through the bowl and shank. I boiled two test tubes of alcohol through the airway in the stem and shank before the alcohol came out clean. Once it was finished I ran pipe cleaners and cotton swabs through the mortise and airway to clean out the remaining alcohol and debris. Once I was finished the pipe smelled clean.LHS20 LHS21It was time to address the rim top. I topped it on the topping board using 220 grit sandpaper to remove the damage to the surface and sharpen the inner and outer edges of the rim. Fortunately I did not need to remove much of the surface to clean up the rim surface and edges.LHS22 LHS23I scrubbed the finish with acetone on cotton pads to remove the sticky surface of the finish and the dirt and grime of the years.LHS24 LHS25I sanded the stem with 220 grit sandpaper. I removed the “varnish” coat or whatever the substance was as well as the oxidation and tooth marks.LHS26 LHS27Once I had the surface clean of oxidation and tooth marks I wet sanded it with 1500-2400 grit micromesh sanding pads. I gave the stem a rub down of Obsidian Oil. I dry sanded it with 3200-4000 grit pads and gave it another coat of oil. I finished by sanding it with 6000-12000 grit pads and then gave it a final coat of oil.LHS28 LHS29 LHS30I sanded the rim with 1500-3200 grit micromesh sanding pads to smooth out the scratches left behind when I topped the bowl. I used a light brown stain pen to match the rim to the rest of the finish. I gave the pipe a light wipe down with olive oil and then buffed it with Blue Diamond plastic polish on the wheel. I gave it multiple coats of carnauba wax and buffed it with a clean buffing pad. I took it back to the table and gave it a final hand buff with a microfiber cloth. The finished pipe is shown in the photos below. I have no idea how old the pipe is but the patent number at least gives me a post 1926 date as a starting point. I don’t know how long LH Stern included the Pat.No. stamping on the shank but my thinking is that the pipe is from the mid to late 30s. Thanks or looking.LHS31 LHS32 LHS33 LHS34 LHS35 LHS36 LHS37 LHS38 LHS39

A Restoration Project – A Small Bent Billiard from a Past Era


Blog by Steve Laug

When I saw this pipe on Ebay I decided I wanted to have it in the collection. The seller said the stem was amber and it may be though I am thinking it is more of an Amberoid. The bowl had a fill on the back left side at the shank bowl junction. The band on the shank was rotated to the right and a little loose. The finish was worn and dirty. The rim was covered in tars and lava and the bowl was caked and half filled with the last unfinished bowl of tobacco. There was no information from the seller as to stampings or markings on the bowl or shank. It appeared to be a no name pipe. The seller thought the stem was horn or amber but it did not look like that to me. The stem looked to be in decent shape though it had tooth marks on the top and the underside near the button. The stem was very dull in appearance and the airway was black. The case was in decent shape with a lot of ash and detritus from the years. All in all the pipe was tired but it looked to be easily restorable. The photos below came from the seller.amber1 amber2 amberr3The next two photos show the stem damage. It does not appear to be extensive more chatter than any deep bite marks. The way the marks look on the stem it looks to me that the stem is amberoid or Bakelite not amber or horn.amber4 amber5The pipe is diminutive – a small one all the way around. It is well proportioned but is 4 inches long with a bowl height of 1 ½ inches. The inside diameter of the bowl is 5/8 inches.amber6The seller also included several close up photos – one of a large fill on the back left side of the bowl. It appeared to be tight and smooth but I would know more once I cleaned up the bowl. The other photo was of the metal band. It was stamped with faux hallmarks and an EP in a diamond that signified that the band was electroplated.amber7 amber8The case was in decent shape for a pipe this age.amber9When the pipe arrived I unpacked it and took it out of the case and took a few photos of my own to confirm my assessment from the seller’s photos. The pipe was solid and clean. The finish was worn and tired – dirty but would clean up nicely. The lava on the rim and the damage to the rim edges would need some work. The stem was not amber or horn but amberoid or Bakelite. It had some interesting swirls and would clean up nicely. The material on the inside of the case had a lot of ash and was dirty but intact.amber10 amber11 amber12 amber13 amber14I removed the stem from the shank and was surprised that I was able to unscrew the bone tenon from the stem. It was a little sticky but with a bit of wiggling it came free.amber15With the stem out I worked on the inside of the stem. The airway was almost black with tars and oils. I wanted to clean out the stem as much as possible and bring it back to a clean airway that blended with the stem material. I used alcohol, pipe cleaners and cotton swabs. The photo below shows the first stage of the cleaning. Following the scrubbing I also used Barkeepers Companion with pipe cleaners dipped in it and using that to scrub out the airways. I was able to clean out the majority of the stains.amber16 amber17I reamed the bowl with a PipNet reamer and took the cake back to bare briar. amber18 amber19To clean up the rim I topped it with 220 grit sandpaper. I was able to take off all of the lava and cleaned up the edges of the rim. I sanded the inside edge of the rim with a folded piece of sandpaper. I cleaned up the rough edges and the inside of the bowl.amber20 amber21 amber22I scrubbed the exterior of the bowl with acetone on cotton pads. It removed the finish and the grime from the bowl.amber23 amber24 amber25I removed the loose band and cleaned the outside of the shank. I reglued the band with Wellbond white all purpose glue.amber26I cleaned out the inside of the mortise and airway with cotton swabs, pipe cleaners and alcohol.amber27I used a black Sharpie to hide the fill on the back of the bowl and then stained the pipe with Dark Brown aniline stain. I flamed it and restained and reflamed it.amber28 amber29 amber30 amber31I sanded the tooth chatter with 220 grit sandpaper to remove it. I wet sanded the stem with 1500-2400 grit micromesh sanding pads to begin the process of polishing the stem. I rubbed it down with Obsidian Oil and then dry sanded it with 3200-4000 grit pads. I gave it another coat of oil and then sanded it with 6000-12000 grit pads. I gave it a final coat of oil and let it dry.amber32 amber33 amber34I lightly buffed the stem and bowl with Blue Diamond and then gave the pipe several coats of carnauba wax. I buffed it with a clean flannel buffing pad and then with a microfibre cloth. I brushed out the inside of the case with the shoe brush to remove the dust and ash. The finished pipe is shown in the photos below.amber35 amber36 amber37 amber38 amber39 amber40 amber41 amber42 amber43This is a great old pipe and one that will hold a spot in my collection. I will keep it in trust, using it and caring for it until I pass it into the hands of the next pipe man. Thanks for looking.

This is one Beautiful Meerschaum – a Lattice Billiard with a 1/8 bent stem


Blog Steve Laug

I have no idea who carved this Meerschaum Billiard but the tear drop cuts in the outer finish of the bowl and the swirls and circles that work around the tear drops and up the shank give the pipe a look of grandeur. The rim is smooth underneath all of the tar and oil build up and the bowl is already colouring. The shank has picked up some darker amber hues and the underside of the bowl also has colour. The stem has a push tenon and the amber swirl acrylic of the stem works well with the bowl as it is colouring. The stem has some whites, creams and varieties of amber colouring that are really beautiful. The bowl had a slight cake build up and the shank was dirty with oils. The push tenon was discoloured and the threads into the stem were also black and dirty. The stem had some tooth chatter on the top and bottom sides near the button. The pipe came in a red artificial leather case lined with a plush cream coloured fabric that the bowl sat against. The case was in good shape externally and the inside had flecks of dirt and tobacco ash on the surface.Amber1 Amber2I took a close-up photo of the bowl and rim to show the cake and the build up on the rim top. The inner and outer edges of the rim were in great shape. There was a slight crown to the rim curving from the inner edge to the outer edge giving it a rounded look. Amber3I took some photos of the pipe out of the case to give a clear picture of the condition of the pipe. The stem is quite beautiful and will clean up nicely.Amber4 Amber5 Amber6 Amber7I decided to gently top the bowl – not removing any meerschaum but removing the hard tar build up on the rim face. I used a medium and a fine grit topping sponge to break through the tars. It did not take long before I had the surface back to its original smooth and clean state.Amber8 Amber9I carefully reamed the bowl with a pen knife. I scraped the cake back to the smooth meerschaum surface.Amber10I scrubbed the bowl with Murphy’s Oil Soap and cotton pads to remove the dirty spots on the bowl. I wanted to remove these soiled areas and leave the patina intact so the Murphy’s Soap works well for that. I scrubbed the bowl with undiluted soap and then rinsed it with a wet cotton pad to remove the soap left behind.Amber11I cleaned out the shank and the inside of the stem with alcohol, pipe cleaners and cotton swabs and was surprised at how clean it was. It did not take much to clean up the airways.Amber12I sanded the tooth marks next to the button on both top and bottom of the stem with 220 grit sandpaper and removed all sign of the marks. Fortunately they were not deep marks.Amber13I wet sanded the stem with 1500-2400 grit micromesh sanding pads. Amber14While I was sanding the stem I tried to unscrew the push tenon and to my surprise it came out easily. This allowed me to clean out the end of the stem with alcohol, pipe cleaners and cotton swabs to remove the black tars that had built up behind the threads in the end of the stem. I scrubbed the threads on the tenon with a brass bristle brush and wiped them down with alcohol.Amber15 Amber16I lightly sanded the darkened areas on the push tenon with the micromesh sanding pads to remove any build up that was present. I dry sanded the stem with 3200-4000 grit micromesh sanding pads and wiped the stem down with the Obsidian Oil to give me some bite with the final micromesh pads. I completed the sanding with 6000-12000 grit pads.Amber17 Amber18Before put the stem back in place in the shank I took a closer look at the end of the tenon. There was some writing on the meerschaum on the top right side. It appears to be the numbers 106 but I am not sure. Anyone have any ideas what that might signify??Amber19I put the stem in place and wiped the bowl and stem down with a soft microfibre cloth to give it a little shine. The finished pipe is shown in the photos below. The colouring on the shank of the meerschaum matches nicely with the colouring of the swirled acrylic stem. The rest of the meerschaum looks clean with a slight darkening that gives it a cream colour.AMber20 Amber21 Amber22 Amber23 Amber24 Amber25I cleaned the inside of the case with a brush to remove the lint and the tobacco bits that were on the material. It came out quite well. The pipe is cleaned and ready for an inaugural smoke. Thanks for looking.Amber26

Restoring a Genuine Sandblast Silverknight Dublin


Blog by Steve Laug

Going through the box of pipes to refurbish I came across this interestingly shaped pipe. I would describe it as a Dublin but the rounded bottom extending below the bottom of the shank gives it a very unique look. It is a tall pipe with a sandblast finish. The sandblast is not deep and craggy but it is shallow and lot of swirls. The finish was dirty and lots of dust was in the grooves of the finish. The rim was dirty with a build up on the inner bevel of the rim. The outer edge was in pretty good shape with a light rustication. The bowl was lightly caked and there was some dried white wax in the bowl from whoever had given the pipe a buff before selling it on Ebay. There was a silver band on the shank for decorative purposes. It is stamped with an EP in a diamond. The EP stands for Electro Plated. On the underside of the shank there is a smooth un-sandblasted portion that is stamped GENUINE SANDBLASTED over SILVERKNIGHT. At the end of the shank it is stamped Italy. The brand is not one that I have seen before and I could not find it in any of my usual sources. The stem was oxidized and had some tooth marks and chatter on the top and bottom sides. The button was worn on both the top and the bottom. It had an interesting dot on the stem that looked like a white spot. The closer I looked I could see that it was a pale yellow spot.Blast1 Blast2I took some close-up photos of the rim and the bowl to show the interior of the bowl and the rim condition. There was some tar and oil build up on the top of the rim.Blast3The next two photos show the tooth marks on the stem.Blast4I reamed the bowl with a PipNet reamer to take the cake back to bare briar. I wanted to remove the white material in the bowl. Once I had it on the reamer it was clear that it was wax.Blast5 Blast6I used a brass tire brush to scrub the top of the rim and the inner bevel. The brass bristles do not scratch the finish but they loosen the tars and oils on the rim.Blast7I scrubbed out the interior of the mortise and airway into the shank with pipe cleaners, cotton swabs and alcohol to remove the tars and oils. I scrubbed until the cleaners came out white.Blast8I worked on the stem. I sanded it with 220 grit sandpaper to remove the tooth marks and tooth chatter. I sanded the whole stem to remove the oxidation on the surface of the stem.Blast9I cleaned out the airway on the stem with pipe cleaners – both regular and bristle ones – and alcohol. Once they came out clean the stem interior was finished.Blast10I redefined the button on the top and bottom sides of the stem with a needle files to give it a sharper more distinct edge.Blast11I sanded the file marks with 220 grit sandpaper to remove the file marks.Blast12I sanded the stem with a medium and a fine grit sanding sponge to minimize the scratches.Blast13I wetsanded the stem with 1500-2400 grit micromesh sanding disks to begin the process of polishing it. I rubbed it down with Obsidian Oil and then dry sanded it with 3200-4000 grit pads. I gave it another coat of oil and then finished sanding it with 6000-12000 grit pads. I gave it a final coat of the oil and let it dry.Blast14 Blast15 Blast16I buffed the pipe and stem with Blue Diamond on the wheel. I lightly buffed the bowl and gave the stem a bit more pressure. I gave the stem several coats of carnauba wax and buffed the bowl and the stem with a clean buff. I brought it back to the work table and gave the bowl a light coat of Conservator’s Wax and buffed it with a shoe brush. The finished pipe is shown in the photos below. It is cleaned and ready to smoke.

Do any of you have any idea who may have made this pipe? It is light weight and well made. The draught on it is perfect and the conical bowl is in really good shape. Thanks for looking.Blast17 Blast18 Blast19 Blast20 Blast21 Blast23Blast22

My Brother Says this Carved Meerschaum Bowl Reminds Him of Me…


Blog by Steve Laug

Meer1My brother Jeff sent me these photos of an old carved meerschaum that he picked up. He said he had to have it as it was the perfect likeness of his brother. I don’t know if that is a compliment of not but this is certainly an amazing carving. There is no sign of who carved it. The bowl is in really good shape in terms of not having any really bad scrapes or scars in it. There are no chips on the edges of the hood and cowl or on the beard of the old fellow. From the photos it is really hard to tell what size the pipe was but I was intrigued. It looked like it would be fun to work on and with a carved head like that and the supposed likeness to yours truly it was even more of a challenge. I could not wait for it to arrive so that I could begin to work on it.

Looking at the photos while I awaited its arrival from Idaho I was curious about the size. I wondered if the pipe might not be a cheroot pipe rather than a full-sized pipe. When I asked my brother about that he assured me that it was too big for that. I forgot to get the measurements on the pipe before he shipped it out to me so that would need to wait until I saw it. The as I looked at the photos I wondered if the bowl in the top of the head was not a colouring bowl. Maybe it was not an integral part of the pipe but an addition that was used to facilitate the colouration of the bowl. I would not know that until I had it in hand. These and other questions ran through my head each time I looked at the photos and really none of them could be answered until I held the pipe in hand. The photos below were included by the original seller. The first gives a front view. The second and third photos show the side views of the pipe.Meer2

Meer3

Meer4 The case was in two parts in the photos. It appeared to be in decent shape otherwise. When the pipe arrived I was blown away be the size of it. It was a full-sized pipe. In the photo below you can see it next to a regular tooth brush. Later there will be photos of it in my hand it is a big pipe. It appeared that the bowl in the top of the pipe was part of the pipe. It was the most worn part of the pipe. It had tars built up on the top of the rim. There were some small nicks in the surface of the outer edge. The underside of the bowl was dirty and worn and it appeared that the finish was gone. The bowl itself had surprisingly few scratches in the surface. There was darkening and wear where it had been held but it was not bad. The grooves of the cowl and hood as well as those in the beard had a lot of dust and debris in them. The mouth piece was Bakelite and had a slot in the end of the button. There were some tooth marks on the underside. The stem was also slightly overturned. The metal tenon was anchored in the shank of the meer and the stem screwed onto the tenon. It appeared to me that the threads in the stem were worn and that accounted for the overturn.

I scrubbed the surface of the meer with a tooth brush and Murphy’s Oil Soap. I wanted to clean the meerschaum and the grooves but not harm the patina of the pipe. I scrubbed to make sure that all the grime and dust was gone. I worked on the rim to soften the tars and oils there. I scrubbed the underside of the beard and the rest of the pipe. Once it was clean I rinsed the pipe under warm running water to remove the soap and grime. I dried it off with a soft cotton towel.Meer5 The photos below show the scrubbed and dried pipe. You can also get an idea of the size of the bowl in comparison to my hand in several of the photos. I love the expression on the face of the character. The carver masterfully captured the charm and character of the old man.Meer6

Meer10

Meer9

Meer8

Meer7 The next photo, though it cuts off a part of the hood still gives a clear picture of the charm of the old fellow. You can see the amusement in his face and the squint of his eyes. The face makes me wonder what he was thinking about. There is some good colouration on his face, beard and hood.Meer11 I sanded the top of the bowl with a medium grit sanding block to remove the tars and oils and bring it back to the original meerschaum surface. The buildup came off with very little work and the rounded rim of the bowl shone with the colour of a well smoked bowl. I scraped the bowl with a pen knife to clean out the thin cake that was forming on the inside.Meer12

Meer13 The stem was clogged and no air could be blown through it. I used a dental pick to clean out the slot and then tried to push a pipe cleaner through it. The pipe cleaner bent and the clog would not budge. I tried it from both ends of the stem with no luck. I used a straightened pipe cleaner and curved it to the bend of the stem and was able to push it through the clog and poke the debris free of the stem. I ran both bristle and regular pipe cleaners through the airway until they came out clean and the airway was unobstructed.Meer14

Meer15 I sanded the tooth marks near the button on the top and underside of the stem with 220 grit sandpaper until they were smooth.Meer16

Meer17 I wet sanded the stem with 1500-2400 grit micromesh pads. I rubbed the stem down with Obsidian Oil. I dry sanded with 3200-4000 grit pads and gave it a second coat of oil. I finished with 6000-12000 grit pads and then buffed the stem with Blue Diamond on the wheel. I gave it multiple coats of carnauba wax and buffed it with a clean buffing pad.Meer18

Meer19

Meer20 The rich butterscotch colour of the stem contrasts beautifully with the cleaned and aging meerschaum. The old man seems to give a quirky smile saying that his life is good now. He is cleaned and ready to use. The bowl on the top has been cleaned and the airway in the shank to that bowl is also cleaned and blown out with air to remove the debris that may have collected I the bottom of the under bowl. I will have to get some white beeswax and give it a new coat of wax and then buff it to a shine. In the mean time I buffed it with a shoe brush and raised a shine in the meerschaum. The finished pipe is shown in the photos below. I am glad my brother sent it my way.Meer21

Meer22

Meer23

Meer24

Meer25

Meer26 I am not sure what my brother is talking about seeing a resemblance the pipe and me. Do you see any resemblance in the pictures of the two old men? Hmmm makes me wonder what he sees when he looks at me. Now even my kids are calling in my mini-me. Ah well things could be worse.

Thanks for looking.Meer27

Breathing New Life into an old Mastercraft Standard Cavalier


Blog by Steve Laug

I have always wondered what it would be like to work on a Cavalier shaped pipe. There was something intriguing about working on a long shank with an end cap and a bowl carved coming out of the side of the shank. The look of the pipe and the dapper appearance may well have contributed to the name of the shape. It is made to hang from the mouth of the pipe smoker and be clenched as he is doing other things. This one is another of the pipes that came to me from my brother Jeff.Cavalier1

Cavalier2 It is a great example of the shape. It is a rusticated Cavalier that has brown and dark contrasting colours over a worm trail like rustication. The end cap is a hard rubber and has a bone tenon connecting it to internal threads in the bottom of the shank. The stem is also a good quality rubber as it is not even oxidized. There are tooth marks on the bottom and the top of the stem near the button left behind by the clencher that smoked it. Cavalier3 The rim of this one is in great shape no damage. The amazing thing was that there was unsmoked tobacco in the bottom of the bowl. There was also a thick cake on the walls of the bowl. It did not extend to the bottom of the bowl but ended shortly above the entrance of the airway at the bottom of the bowl.Cavalier4

Cavalier5 The pipe came in its own satin bag which is why the pipe was in such good shape. The finish was dirty and dusty in the grooves but that was the extent of the issues with it. This would be an easy clean up. I took it apart and took the photo below of the parts of the pipe.Cavalier6 It is stamped on the left side of the shank with the words Mastercraft over Standard over Imported Briar. All words are in upper case on the shank. It appears that the stamping was to be done in a smooth oval on the shank but it missed the oval by about a ¼ inch and sits over the rustication on the shank.Cavalier7 I scrubbed the bowl and the threads on the end cap with Murphy’s Oil Soap and a tooth brush. I rinsed off the pipe with running water and dried it off. The cleaned finish looked very good. I would not need to do much with the finish on this pipe.Cavalier8 I removed the tobacco remnants from the bowl and then reamed the bowl with a PipNet reamer. I took the cake back to bare briar.Cavalier9

Cavalier10 I cleaned off the threads on the end cap – it was a bone tenon – with a brass bristle wire brush. One it was clean I put a coat of Vaseline on the tenons and screwed it back in place.Cavalier11 Before I put the end cap in place I cleaned out the inside of the shank from end to end with pipe cleaners, cotton swabs and alcohol. Once it was clean I put the end cap in place. I also cleaned out the airway in the stem at the same time.Cavalier12

Cavalier13 The deep gouges in the top and bottom sides of the stem needed to be cleaned up. There was a lot of tooth chatter around the deep gouges so I sanded out the tooth chatter with 220 grit sandpaper. The sanding work left two gouges on the underside and one on the top side of the stem that would need some work.Cavalier14

Cavalier15 I cleaned out the divots with alcohol and dried it off. I filled them in with black super glue until there was bubble over the surface. I let the glue cure.Cavalier16

Cavalier17 While the stem patch cured I worked on the end cap. I wet sanded it with 1500-2400 grit micromesh sanding pads and rubbed it down with Obsidian Oil. I dry sanded it with 3200-4000 grit pads and gave it another coat of oil. I finished sanding it with 6000-12000 grit pads and gave it a final rub down of the oil. I let it dry.Cavalier18

Cavalier19

Cavalier20 When the end cap was dry I rubbed down the bowl with a light coat of olive oil to bring some life back to the dry briar. At this point the pipe is beginning to look really good. The contrast stain of the black and the dark brown gives depth to the rusticated finish of the bowl.Cavalier21

Cavalier22

Cavalier23

Cavalier24 Once the glue dried on the stem I used a needle file to sharpen the edge of the button and clean it up. I flattened the repair on the blade of the stem as well.Cavalier25 I sanded the repaired areas on the stem and the newly made file marks with 220 grit sandpaper. I worked until the repair was blended into the surface of the blade. The repair on the top stood out more at this point in the process. That would change as I worked on it longer.Cavalier26

Cavalier27 I sanded the stem with micromesh sanding pads – wet sanding with 1500-2400 grit pads and rubbed the stem down with Obsidian Oil. I dry sanded it with 3200-4000 grit pads and gave it another coat of oil. I finished with 6000-12000 grit pads and gave it a final coat of oil. I let the oil dry before taking the pipe to the buffer.Cavalier28

Cavalier29

Cavalier30 I buffed the stem with Blue Diamond and lightly buffed the bowl. Care had to be exercised to not get build-up in the rustication. It takes a very light touch to keep that from happening. I gave the stem several coats of carnauba wax. I used Conservator’s Wax on the bowl and hand buffed the bowl with a shoe brush. I hand buffed the pipe with a microfibre cloth to add some depth to the shine. The finished pipe is shown in the photos below. It is a beautiful pipe and I love the feel of it in my hand. It was an enjoyable restoration. Thanks for looking.Cavalier31

Cavalier32

Cavalier33

Cavalier34

Cavalier35

Cavalier36

Cavalier37

This one was a challenge for me – a 1981 CAO Bekler A La Rodin No. 7 of 100


Blog by Steve Laug

A fellow Canadian contacted me about working on a Bekler that he had picked up. He said it was pretty rough. He sent me these photos for a quick look. I loved the look of this pipe. It is stamped CAO Bekler on the darkened shank. On the foot it is stamped ’81 over A La Rodin no. 7 of 100. Above the darkened shank is an insert of carved roses. Above that is a bi-colour spool. The stem was pushed into the spool. There are threaded connectors between each piece of the shank. Bekler1 Bekler2When the pipe arrived it was in worse shape than I had expected. Joe had said that the stem needed work but I did not expect the mess that came. Someone had hacked the stem with files and left behind an uneven surface with many deep file marks and scratches. Some of the flaws were raised and some were indents. It looked as if they had tried to thin the mouthpiece down and narrow the width of the stem. The button was intact but had file marks. The file marks went every direction across the stem. The slot in the end of the stem was off centre with the drilling in the slot slightly to the left. The stem itself was twisted to the left as well. The inside of the stem had a dark sludge in it that pretty well hid the tortoise shell look of the Lucite. The bowl and shank were badly scratched and the rim was a mess. The bowl was out of round and the same person had used the file on the rim leaving behind deep gouges in the top of the rim. On top of the scratches there was a thick coat of lava that covered the top from the inner edge out to about the middle of the top. The foot had some nicks out of it. This would take some tedious work to clean up.

I took some photos after I initially sanded the stem. I wanted to document the condition of the pipe.Bekler3 Bekler4 Bekler5 Bekler6 Bekler7 I sanded the stem with 220 grit sandpaper to smooth out all of the cuts and file marks. It took a lot of sanding and shaping to smooth out the stem surface. I found that under the file marks there were some tooth marks in the underside of the stem. I sanded that surface smooth and wiped it clean. I used a clear super glue to fill in the divots.Bekler8 Once the glue dried I sanded the entire stem once again and blended the patch into the surface of the Lucite. I reshaped the button and the edge with the sandpaper and cleaned up the slot with needle files.Bekler9

Bekler10 Once the surface was smooth I cleaned out the inside of the stem with pipe cleaners and alcohol. I scrubbed the interior with both smooth and bristled pipe cleaners. I was able to clear out the darkening and tar in the airway.Bekler11 With the stem cleaned up and the surface smooth I took a picture of all of the parts on this pipe. The connectors look rough but upon examination I found that they were solid and needed to be cleaned up. You can also see the file marks on the top of the rim and the tars and lava that filled them.Bekler12

Bekler13 I scrubbed the spool insert with Murphy’s Oil Soap and then rinsed it off with water.Bekler14 I cleaned out the inside of the spool and the threaded connector with alcohol, cotton swabs and pipe cleaners. I used a topping board to clean up the ends of the connector as it was poorly done. It looked like someone had shortened it with a pair of cutters and left the residual chips and flakes on the connector. The tars had caught on them giving the end a rough look. The threads were also caked with tars and oils.Bekler15 I scrubbed the next shank insert, the carved rose piece with the Oil Soap and a tooth brush and rinsed it with water. I cleaned out the interior with pipe cleaners, cotton swabs and alcohol. I also cleaned the longer connector inside and out. I used a dental pick to clean out the threads. I also used the topping board to smooth out the ends.Bekler16

Bekler17 The next photo shows the two shank inserts joined together with the smaller of the two connectors. I gave them a light coat of Conservator’s Wax and buffed them with a shoe brush to raise a shine.Bekler18 I decided to work on the stem with the micromesh pads to see what the surface looked like with some shine. I find that the first three grits of micromesh pads – 1500-2400 – tell a lot. I could see the spots that I needed to still work on but I could also see the lovely tortoise shell Lucite beginning to show its colours.Bekler19 I put the stem on the two inserts to get a feel for the look of this part of the pipe. I took the next two photos to show the progress. The stem was getting there. I still needed to heat it and straighten out the twist in the bend and bend it slightly more as it did not fit snugly in the case. Before I heated the stem I examined it carefully. There was a small flaw in the swirls of the material on the top surface of the stem at the bend so I would need to be careful in the heating and bending. Fortunately the flaw did not go too deeply into the stem material but sat on the surface. I heated the tip of the stem and straightened out the twist in it as I bent it slightly to match the case. I repaired the flaw with super glue and sanded it with 20 grit sandpaper to smooth out the repair.Bekler20

Bekler21 I cleaned the interior of the bowl and shank with pipe cleaners, cotton swabs and alcohol.Bekler22 I set the bowl aside to dry out and I sanded the stem with micromesh sanding pads. I wet sanded with 1500-2400 grit pads and rubbed the stem down with Obsidian Oil. I dry sanded it with 3200-4000 grit pads and gave it another coat of oil. I finished with dry sanding it with 600-12000 grit pads and gave it one last coat of oil.Bekler23

Bekler24

Bekler25 I polished the stem with Meguiars Scratch X2.0 and then gave it several coats of wax.Bekler26 I scrubbed the surface of the bowl with the Scratch X2.0 and hand buffed it with a cloth.Bekler27 I sanded the file marks on the rim to bring it back to smooth. The deep gouges were blackened and took quite a bit of sanding to remove them. I started sanding with 220 grit sandpaper and worked on the surface of the rim. I was careful to not change the profile of the bowl or the angles of the rim.Bekler28 I sanded the rim with micromesh pads from 1500-12000 grit to smooth out the surface and give it a shine. I gave the bowl several coats of Clapham’s Beeswax Polish and buffed it by hand with a cloth.Bekler29

Bekler30

Bekler31

Bekler32 With the buffing the bowl began to shine. The carving on the foot of the bowl stood out clearly. The rim surface looked far better than when I began.Bekler33

Bekler34 I lightly buffed the bowl with Blue Diamond on the wheel being careful around the blackened shank. The shine rose in the meerschaum and the pipe looked good. Though there were still nicks and scratches they now looked like marks of honour and age rather than abuse. To me it is always a fine balance between restoring a pipe and reworking a pipe. On a beautiful pipe like this one I opted to work on the big issues and leave some of the war wounds on the sides of the bowl. To me the pipe has been around long enough to earn those marks. I want a pipe that is finished to look better than when I started but I am not aiming at making a 35+ year old pipe look new. I want it to look cared for and well smoked. The finished pipe is shown in the photos below.Bekler35

Bekler36

Bekler37

Bekler38

Bekler39

Bekler40

Bekler41

Bekler42

Bekler43

Bekler44

Bekler45

Bekler46

Bekler47

More Work than I thought – A Real Briar Billiard with a horn stem


Blog by Steve Laug

When I saw this pipe on eBay when my brother and I were searching for pipes in the estate pipe area I thought it would be a simple restoration. The briar appeared to be in decent shape and the finish looked very good. The rim was dirty but looked undamaged under the grime and tars. The horn stem did not look too damaged and should also be an easy repair. When the pipe arrived at my brother’s home he took the following photos and sent them to me to have a look at the pipe. It still looked pretty straight forward to me.RB1

RB2

RB3

RB4

RB5 When the pipe arrived here in Canada I was in for a surprise. It definitely looked good but the more I dug deeper the more issues that I found. The rim was tarred and covered with lava and underneath the outer edges were rounded over. The bowl had a light cake at the top and half way down and a deep groove had been cut in the bottom of the bowl by aggressive insertion of the pipe cleaner. The groove or pit was below the airhole entry to the bowl. The shank had been repaired and the crack that I noted in the pictures had been well repaired and the band put in place to strengthen the shank. It would not take much to clean it up. The finish which at first glance looked good had deep gouges in the bottom of the bowl and on the left side of the bowl near the shank union. These were sharp cuts and could not be steamed out. There was a large fill on top of the shank where it met the bowl. It appeared to be pink putty but it was solid and tight. The stem was also nicked quite a bit on the top mid stem and on the left side near the band. The top and bottom sides had some deep tooth marks on them that I could not see from the photos. The stem was very tight in the shank and took some persuasion to remove.RB6

RB7 The next two photos show the repair work on the underside of the shank. It was very well done and would not need to be further dealt with. The third photo shows the rim with the rounded outer edge.RB8

RB9

RB10 I removed the stem from the shank with a bit of pulling and found that the metal tenon was covered with tar and had been stuck in the shank by the tars.RB11 I reamed the bowl back to bare wood to bring the rest of the bowl in line with the bottom half. I used a PipNet reamer with the second cutting head. In the second photo you can see the deep pit in the bottom of the bowl.RB12

RB13 I cleaned out the stem and the tenon with alcohol, cotton swabs and pipe cleaners.RB14 The next two photos show the tooth marks on both sides of the stem. They are quite deep and they will need to be repaired.RB15

RB16 I wiped down the stem with a cotton pad and alcohol and then put drops of super glue in the tooth marks. I sprayed them with accelerator.RB17

RB18 I scrubbed out the mortise, shank and bowl with alcohol, pipe cleaners and cotton swabs. I scrubbed until the pipe cleaners and cotton swabs came out clean.RB19 I topped the bowl to remove the damage to the bowl top and to clean up the round outer edge of the rim. Once again, note the deep pit in the bottom of the bowl that is visible in the second photo.RB20

RB21 I scrubbed the exterior of the bowl with cotton pads and acetone to remove the finish and the grime that was ground into the briar. I was going to need to do some work on the gouges on the bowl sides and bottom so I wanted it clean.RB22

RB23 The stem never sat completely tight against the shank so I beveled the inner edge of the mortise to accommodate the tenon/stem junction.RB24 With the externals cleaned I decided to do the repairs on the gouges on the bowl side and bottom. I put a drop of clear super glue in the divot and then pressed briar dust into the hole with a dental spatula. I pressed the dust deep into the glue to get a good fill. The second photo below shows the bowl side and bottom with what looks like a pox. The briar dust and glue fills are dry at this point and ready to sand. I sanded them with 220 grit sandpaper and then with 1500-2400 grit micromesh sanding pads.RB25

RB26

RB27

RB28 I used a light brown stain pen to give the fresh sanded briar on the bowl bottom and the rim an initial coat. I then stained the entire bowl with a dark brown aniline stain, flamed it and repeated the process. I set it aside to dry for about 30 minutes before buffing with Blue Diamond on the wheel.RB29

RB30

RB31

RB32 I mixed a batch of pipe mud (cigar ash and water) to fill the pit in the bottom of the bowl. I put a pipe cleaner in the airway with just the tip extending into the bowl. I used the spatula to put the mud in the bottom of the bowl and pressed it into the pit with the hand of the spatula. I added the pipe mud until the bowl bottom was level.RB33 I set the bowl aside to so that the pipe mud would cure and worked on the stem. I sanded the stem with 220 grit sandpaper to smooth out all of the nicks and scratches as well as blend in the super glue fills. It took a lot of sanding to smooth out the stem surface and remove as many of the scratches and dents as I could and still keep the profile. The super glue dried hard and the clear glue looks shiny and raises colour in the horn so it is very visible at this point.RB34

RB35 When I had smoothed out the surface of as many flaws as possible I worked on it with micromesh sanding pads. I wet sanded it with 1500-2400 grit pads. The repairs are starting to blend in. They will never be invisible but they are smooth. I rubbed the stem down with Obsidian Oil before continuing.RB36

RB37 I wet sanded the stem with 3200-4000 grit micromesh and then dry sanded with the same grit pads. I gave it another coat of the oil.RB38

RB39 I finished by dry sanding the stem with 6000-12000 grit micromesh sanding pads and then buffing the stem with Blue Diamond on the wheel. I gave it a final coat of Obsidian Oil and set it aside to dry.RB40

RB41 I polished the silver band with silver polish and brought the parts together. I gave the pipe a final buff on the wheel and gave it multiple coats of carnauba wax. I buffed it with a clean buff and the with a microfibre cloth to raise the final shine. The finished pipe is shown in the photos below. While the patches in the stem still show they are shiny and smooth to the touch and will give protection to the stem. The repairs to the cuts and gouges in the bowl look really good and virtually disappear under the stain and the polish. The pipe should live through at least another life time before it needs this kind of attention again.RB42

RB43

RB44

RB45

RB46

RB47

RB48

RB49

RB50

If it’s good enough for Bing then it’s good enough for me – Mastercraft Standard Oom Paul


Blog by Steve Laug

MCOver the years I have cleaned up quite a few Mastercraft pipes. My brother picked one up on Ebay for me recently. It looked like a good one when he sent me the photos of the pipe. I could not wait for it to arrive and I could begin to work on it. In one of my earlier blogs I wrote a bit about the history of the brand (https://rebornpipes.com/2014/06/22/learned-a-bit-of-american-pipe-history-mastercraft-executive-choice-pot-restored/). In that article I made the connection of the brand to Bing Crosby. I posted this old advertisement for the pipes with the old crooner himself.

The connection between the pipe in this advert and the Oom Paul I received from my brother. They both bear the same stamping. The both had the shield on the left side of the shank and then bore the same stamping. The Oom Paul was stamped Mastercraft over Standard in the shield. On the right side of the shank it was stamped I continued through the Google list for Mastercraft and one of the next listing was in Pipedia. http://pipedia.org/wiki/Mastercraft

It doesn’t appear that Mastercraft was ever a manufacturer and bought pipes from multiple factories — mostly French and English. It survived briefly the post war recovery and then was acquired by Grabow. As an importer of finished pipes M/C worked with many of the world’s foremost pipe makers and had in inventory finished product from the likes of… England: Hardcastle and Orlik. France: Ropp, Jeantet, Jean LaCroix. Italy: Lorenzo, Gasparini, Federico Rovera, Emilio Rovera, GIGI Pipe, Brebbia, Santambrogio, Fratelli Rossi. Israel: Shalom and Alpha. Plus all the tools, pouches and lighters from Hong Kong and Japan. The list of suppliers is enormous.

I had also found some older RTDA Almanac pages on Chris’ Pipe Pages site. http://pipepages.com/index.html. The first one of these shows the Mastercraft Standard. It sold for $3.50 and was a midrange pipe value as shown on the list below.The first of these shows the address of the Mastercraft Pipe Company in New York which was where they were prior to moving to North Carolina. I clipped this image from the 1949 RTDA Almanac. It is an early catalogue listing, since the brand was created in 1941.MCa My guess, judging from the previous advertisement and the 1949 RTDA Almanac clipping above, is that the pipe I have is from the period between the beginning of the company and the publication of this catalogue (1941-1949). After that period in the 50’s and 60’s the names of the pipes changed and I was not able to find the Mastercraft Standard in later catalogues.

MC1The photo to the left and the next two photos that follow are the ones my brother sent to me before I received the pipe. They give a good idea of the condition of the pipe when I received it. The pipe had a natural finish, no stain on the briar. Over the years the briar takes on a richer colour. This one had taken on a reddish tint. The stamping on the left side still showed the gold stamping in some of the grooves. There were specks of white paint on the bowl, shank and stem. There was also some darkening on the sides at the shank junction with the bowl from oils and soiling from the previous pipe man’s hands. The rim was thickly tarred with lava overflow. The bowl had a thin cake on the top 2/3 and the bottom 1/3 was still fresh briar showing raw briar. The pipe obviously had not been smoked to the heel. The stem was quality rubber and did not show signs of metal fragments in the mix that seem to appear in many of the war year pipes. There was little oxidation but there were tooth marks on the top and underside of the stem near the button. There was tooth chatter on both sides. The stem did not fit tight against the end of the shank.MC2

MC3 When the pipe arrived I put it in my refurbishing box and would eventually get to it. Today I took it out of the box to work on it. I removed the stem and was a bit surprised to see the interesting and unusual stinger apparatus in the end of the tenon. It had a flat blade that ended in a point. It was almost a spear point. It sat down in the sump of the shank. It ended at a spiral cylindrical piece with a slot in the last half of the cylinder. It fit into tenon by pressure and was easily twisted free.MC4

MC5 I scrubbed the bowl with acetone on cotton pads to remove the grime and soil in the briar and the white flecks of paint on the bowl and shank. I scrubbed the rim with the acetone as well to try to remove the lava overflow that was present. I used a pen knife and scraped at the lava between wipes of acetone and was able to remove the buildup without damaging the finish on the rim. I did not need to top the bowl!MC6

MC7 The acetone removed the grime from the briar and all of previous coats of wax that had given it a dull finish.MC8

MC9

MC10 Once I had cleaned the finish of the bowl and shank with the acetone I washed it down with alcohol and dried it off. I used some antique gold Rub ‘n Buff to restore the stamping to its previous look.MC11

MC12 I hand buffed the bowl with a shoe brush and a little Conservator’s Wax to protect it during the rest of the clean up. Though I probably should have done the next step before the work on the stamping I did not do so. But such is the way things go. I reamed the bowl with a PipNet reamer using the third cutting head to take back the cake to bare briar. Since the bottom 1/3 of the bowl was uncaked I wanted the transition between the sides of the bowl from top to bottom to be smooth.MC13

MC14 I scrubbed the stinger with alcohol and cotton swabs to remove the grime. I also scrubbed it with a brass tire brush.MC15 I cleaned out the airway in the stem with pipe cleaner, cotton swabs and alcohol to remove the tars and oils. I was surprised to find that the tenon was lined with an aluminum tube. The stinger pressed against the sides of the tube when it was inserted. I think it was also an attempt to strengthen the tenon.MC16 I scrubbed out the mortise, sump and airway on the bowl with cotton swabs, pipe cleaners and alcohol until they came out clean.MC17 I sanded the tooth chatter and tooth marks on the top and bottom of the stem with 220 grit sandpaper to remove them as they were not too deep.MC18

Mc19 I wet sanded the stem with 1500-2400 grit micromesh sanding pads and rubbed the stem down with Obsidian Oil. I dry sanded it with 3200-4000 grit pads and gave it another coat of oil. I finished sanding it with 6000-12000 grit pads and gave it a final coat of oil, then left it to dry.MC20

MC21

MC22 I rubbed down the bowl with a light coat of olive oil and then buffed it with Blue Diamond. I gave the bowl and stem multiple coats of carnauba wax and then buffed it with a clean buffing pad. I gave it a final buff with a microfiber cloth to raise the shine. The finished pipe is shown in the photos below. It should provide many years of service to the next pipe man whose rack it graces. It will likely outlive both that pipe man and me and be passed on it trust to the next person who will enjoy it companionship for the years that they have it in trust. These old pipes always outlive the pipe man who keeps them company if they are well cared for (and even sometimes when they are not!).MC23

Mc24

MC25

MC26

MC27

MC28

MC29