Blog by Steve Laug
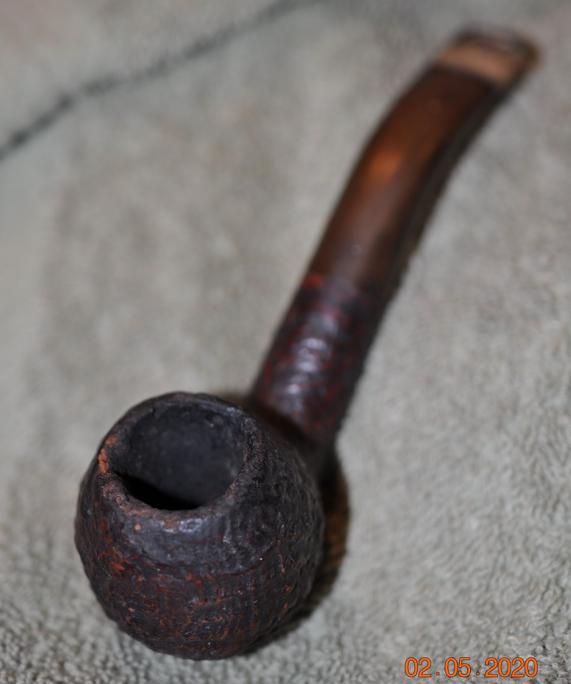
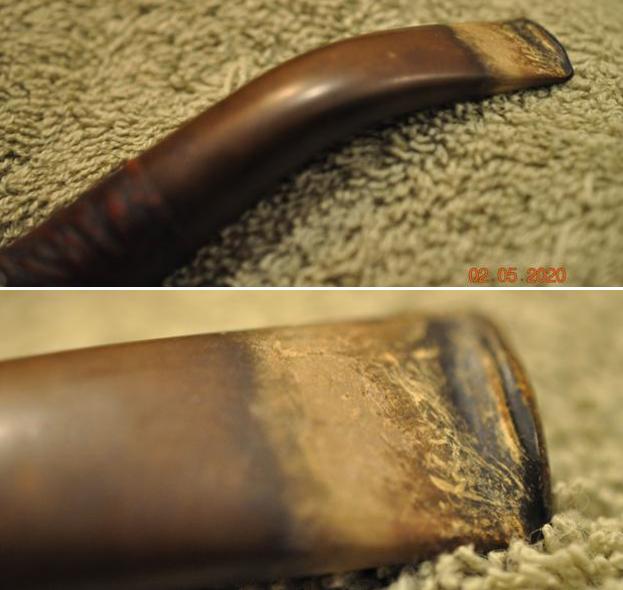
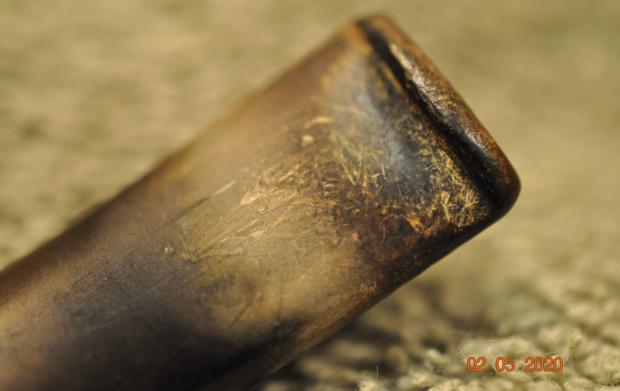
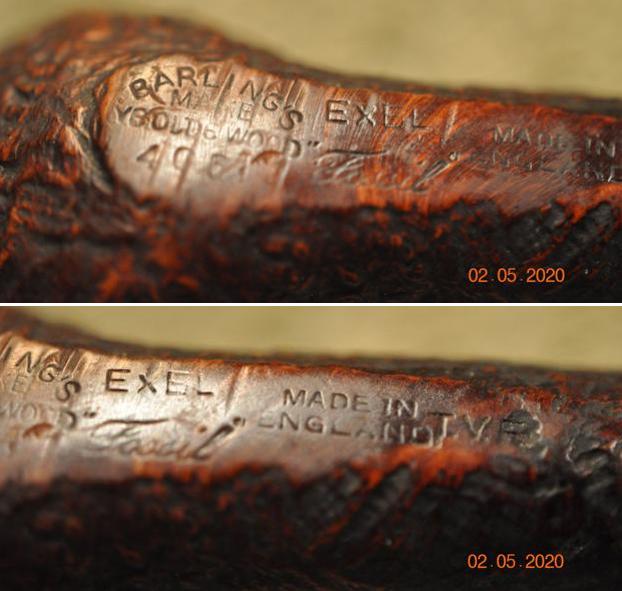
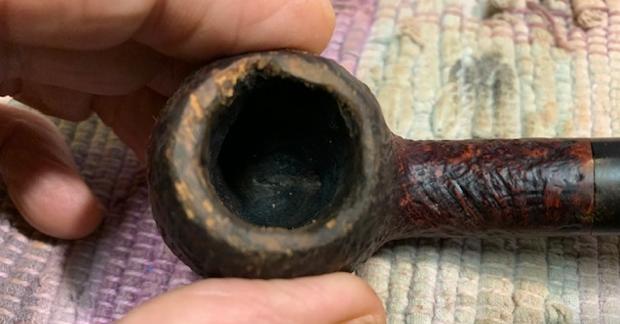
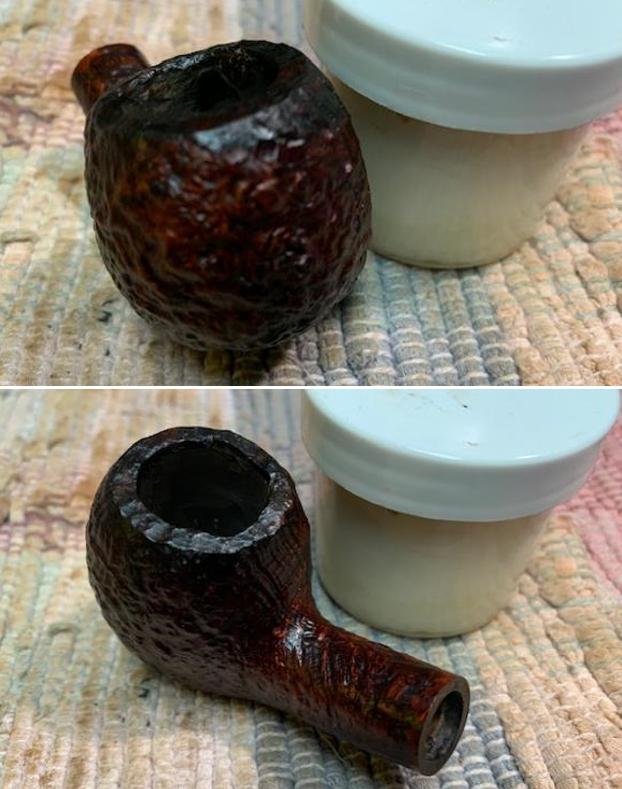
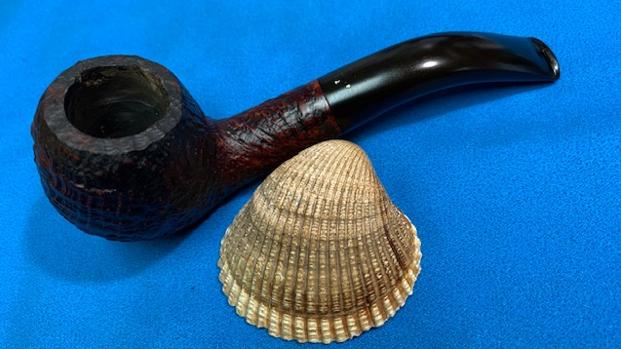
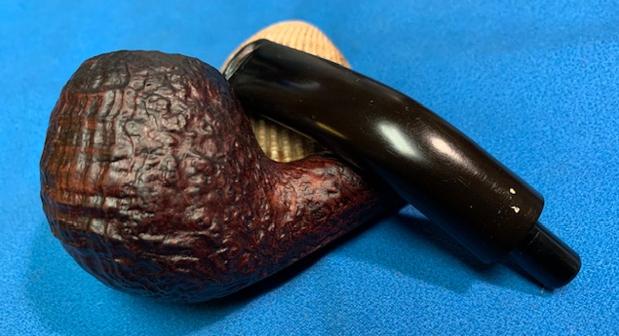
The next pipe is one that I have avoided working on for over a year. Not because it was particularly hard to work on but because of the fact that it is a Barling with a thin Dunhill Stem. The stem needed to be replaced and I was hoping I could replace it with a Barling stem that would match. I looked through all the stems that I have here and also have looked other places but no luck on the stem. So, I decided to shape a replacement stem for the pipe and finish the cleanup work on the bowl. It has only been sitting here for a year and a half. We purchased the Barling 04/09/2022 from an estate in Cleveland, Ohio, USA. It is stamped on the heel of the bowl and shank and reads Barling’s[arched over] Make [over] Ye Olde Wood [over] 1533. That is followed by Made in [over] England followed by Fossil in script. The letters TVF are at the end of the shank near the shank stem junction. Jeff took photos of the pipe before he did his cleanup work on the pipe. Jeff took a closeup photo of the bowl and rim to capture the condition of the pipe before he started his cleanup work. The rim top had a thick lava overflow and darkening on the back of the bowl. There was some burn and reaming damage on the inside edge of the bowl at the front of the bowl. The Dunhill stem is oxidized and dirty and there are light tooth marks and chatter on the surfaces ahead of the button.
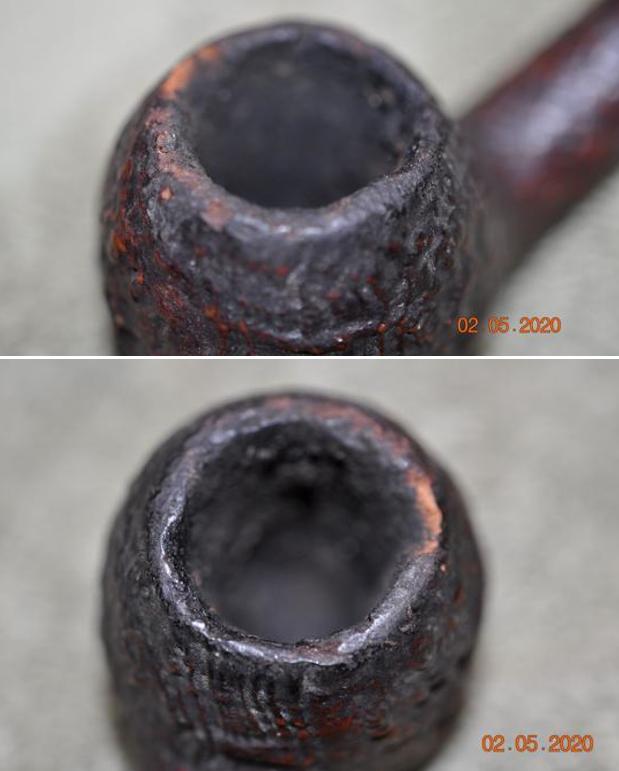
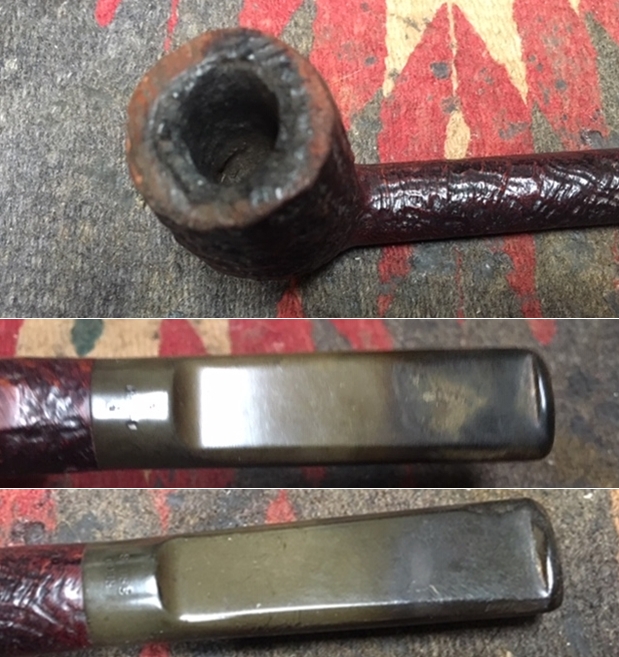

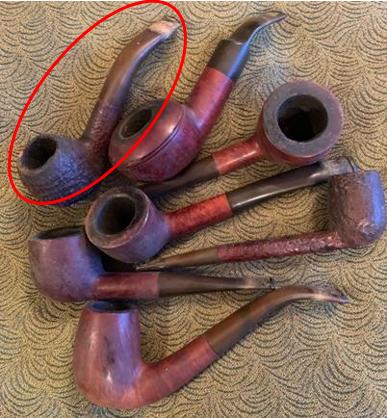
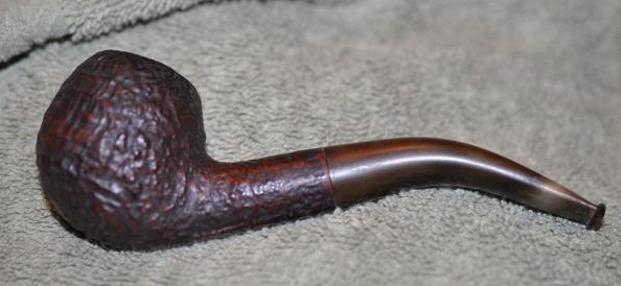
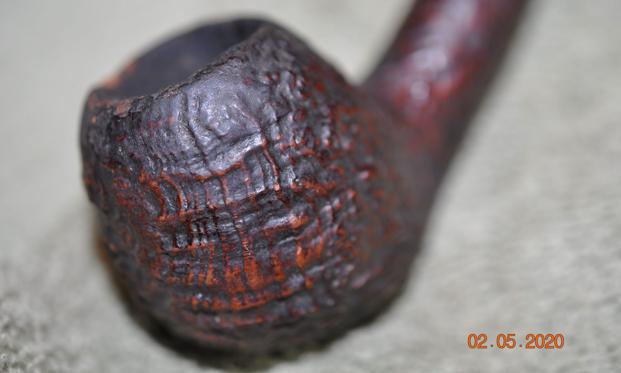
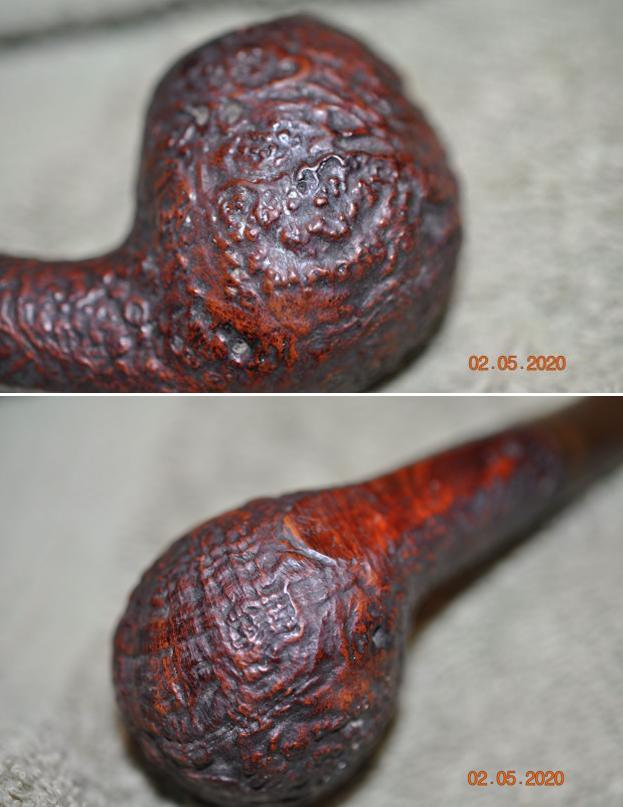
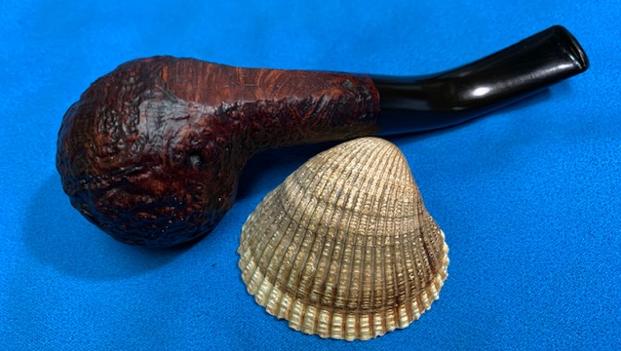
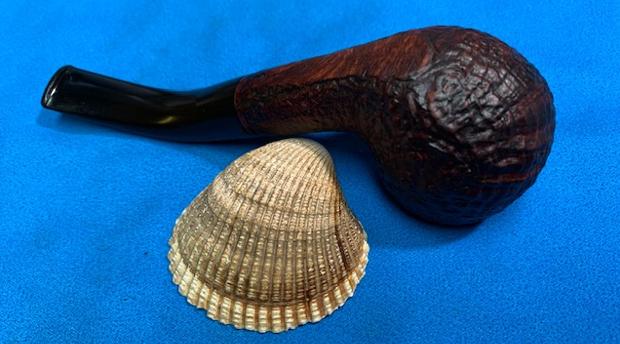
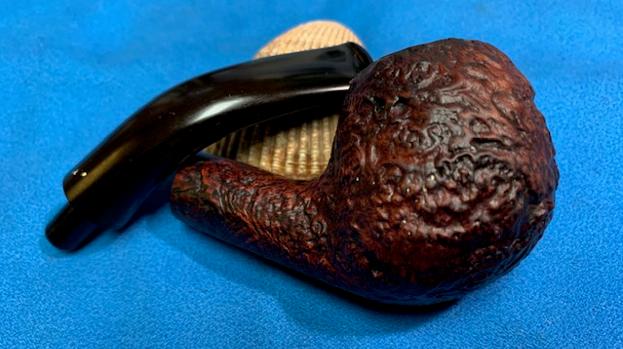
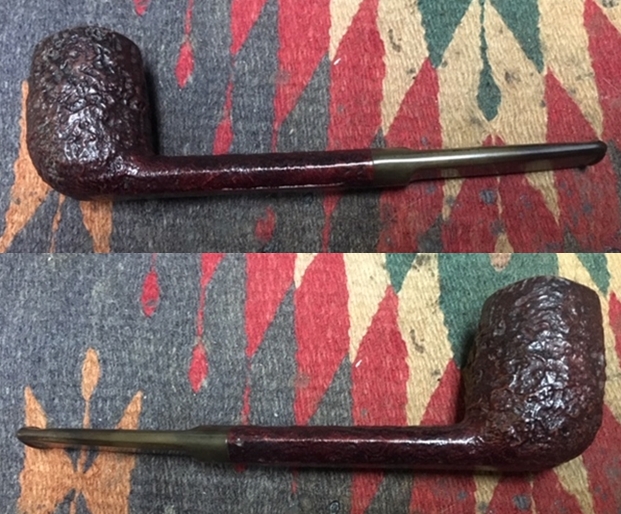
 He also took photos of the sides and bottom of the bowl and shank to show the beautiful grain in the sandblast around the bowl. The photos show the general condition of the bowl and wear on the finish. It is very dirty but this is another beautiful pipe.
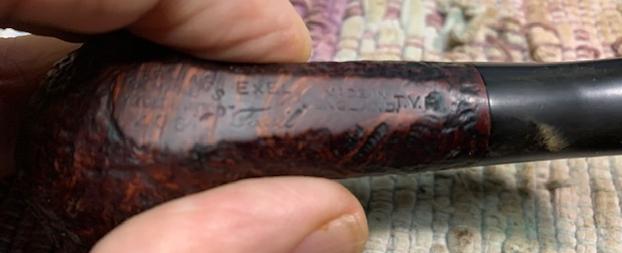
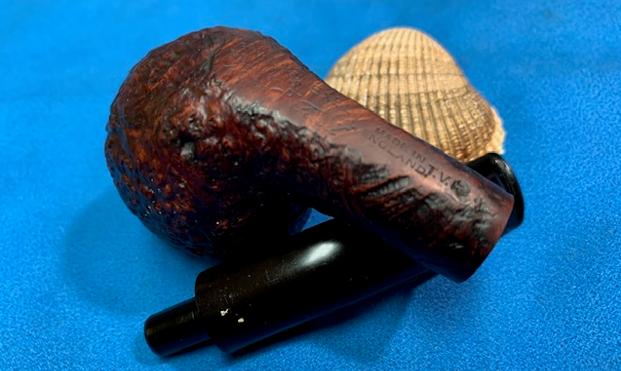
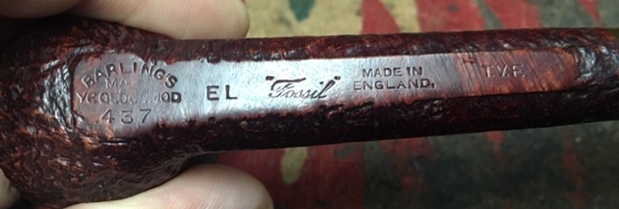
 Jeff took a photo to capture the stamping on the shank. The photos show the stamping is clear and readable as noted above.
 I turned to Pipedia to refresh the details for a Family Era Pipe made between 1812-and late 1962 (https://pipedia.org/wiki/Barling). I am including portions of the article that are pertinent to this pipe. I have highlighted them in bold.
Family Era – 1812 – late 1962 Details
The Barling family-controlled production up till this point. Quality was excellent, however some sources indicate a marked inconsistency in quality starting as early as 1954. As stated earlier, Jonathan Guss suggests that the Algerian War for Independence played a role in the change in quality due to the lack of Algerian briar, which the company supplemented with briar sourced from other countries. (Guss)
Prior to 1954 Barling pipes were made from old growth “extra extra” grade Algerian briar, of a quality no longer available. Barling conducted their own harvesting operations, looking for roots that ranged from 80 – 150 years of age. Jonathan Guss indicates that Barling had a commercial investment in Algeria as far back as 1928, though the nature and extent of this investment is not currently known.
We do know that Barling conducted its own harvesting operations, as well as cutting and seasoning of their selected briar. These images from the 1920’s brochure, Romance Of The Barling Pipe, shows images of their Algerian ventures. Also, the copy states that Barling looked for briarroot that was about 50 years old.
While many find the grain to be beautiful, this was not the aim of the Barling Company, and many of their pipes have rather unremarkable grain. The Barling Company’s intent was simple, to create the finest smoking instruments in the history of the world. Many connoisseurs believe that they achieved that goal admirably.
In addition to the smoking qualities of their air-cured wood, the Barling Company outfitted their bowls with hand made stems that many consider to be the most comfortable ever created. Their engineering is beyond reproach. Their silver work remains unsurpassed.
As an interesting side note, the soft Algerian Briar was not initially prized, as it was prone to burnout. But Barlng took the time to properly age and season this carefully selected wood for between 3 and 5 years, before finishing. They also made pipes with thicker walls, which helped defend against burnout. The porous mature of this briar resulted in excellent heat dispersion and provided a cool smoke.
Family Era Nomenclature:
Before discussing the nomenclature of the Family Era pipes it is important to note that there are no absolutes. Barling pipes from this period show a remarkable degree of variation when it comes to nomenclature. The following information can be applied in a general fashion.
According to Tad Gage, Pre-1946 stampings are minimal. Pre WW2 pipes rarely have size, shape or grading. But pipes have surfaced, hallmarked as early as 1925 with size marks, and as early as 1926 with model numbers. There may be earlier examples, and when we see them we will revise the dates.
Examples with silver hallmarks illustrate that a distinct change in nomenclature occurred around 1938-40, although clearly the war and London bombings impacted production of silver-mounted and of all English pipes. A George Yale Pipes & Tobacco catalog from 1941 features the familiar stampings such as “YE OLDE WOOD”, “TVF”, and style names like “Fossil”, and these were not generally found on pre-1940 pipes, although “YE OLDE WOOD” did inconsistently appear on some earlier examples. (Gage)
Sandblasts:
Until recently it was believed that Barling didn’t produce sandblasts until the late 1930’s and didn’t list them formally as part of the product line prior to 1943. It’s possible that Barling may have been producing sandblasts much earlier, possibly as early as 1917, the same year Dunhill is credited with inventing the sandblast. More on that possibility in a moment.
Logo Nomenclature:
…Barling also provided sterling work for BBB until BBB established their own silver working capabilities in Birmingham England, and started crafting its own silver fitments circa 1910. (Gage) By the time that Barling was making sterling fitments for BBB the Barling makers’ mark had been changed to “EB” over “WB” for Edward and William Barling. Many Barling briar pipes made prior to 1906 lack any company markings except for the name of the shop that sold them. As was common practice at the time, the majority of bowls Barling used prior to 1906 were imported from Saint-Claude or Jura to be finished in the Barling factories. If there was anything to identify Barling as the maker it was their maker’s mark, EB over WB, stamped into a sterling fitment. During the late 1800’s the BARLING’S MAKE stamp appears on some pipes, evidence that Barling was manufacturing some of their product completely in-house. The “BARLING’S MAKE” has the word “BARLING’S” arched over the word “MAKE” in capital block letters. Barling used this block letter logo until late 1962.
In addition to the block letter logo, Barling used a script logo for special pipes as well as for advertising, and packaging art…
…During the 1930’s and early 1940’s the BARLING’S MAKE logo appeared in a small version with a simpler letter style. Following the War, the small “BARLING’S MAKE” logo was discontinued and a larger logo was used. The larger logo would continue to be in use until 1962, when the 1930’s style logo was reintroduced along with the new numbering system.
Over the years there were a number of changes and adjustments to the nomenclature, though the company logo stamps remained a constant….
Ye Olde Wood Stamp:
Sometime around 1913, the “Ye Olde Wood” stamp made its appearance on selected pipes. An example exists stamped on a 1913 date hallmarked pipe.
This logo will continue to be used in the decades to come. Initially it was used to designate a higher grade than the average, much as the “Special” grade would after the Second World War. Price lists show the “Ye Olde Wood” pipes as a separate grade from the basic BARLING’S MAKE pipe. Eventually, “Ye Olde Wood” came to represent the company to the world. The use of “YE OLD WOOD” as a stamp prior to 1940 was haphazard, at best, although the company used the slogan in advertising materials from the early teens onward. (Gage)…
Model Numbers:
Also according to Tad Gage, the only four-digit number that denotes a Pre-Transition piece begins with “1,” which was used for pipes sold in England. Any other four-digit Barling pipe is a Transitional piece– (Tad Gage in P & T magazine)…
Now I knew I was dealing with a Pre-Transition, Family Era pipe bowl as shown by the stamping and the four digit shape number. I also knew from the 1 preceding 553 shape designates that it was made for pipes sold in England. As best as I can tell it was made in the 1940s and no later than 1962.
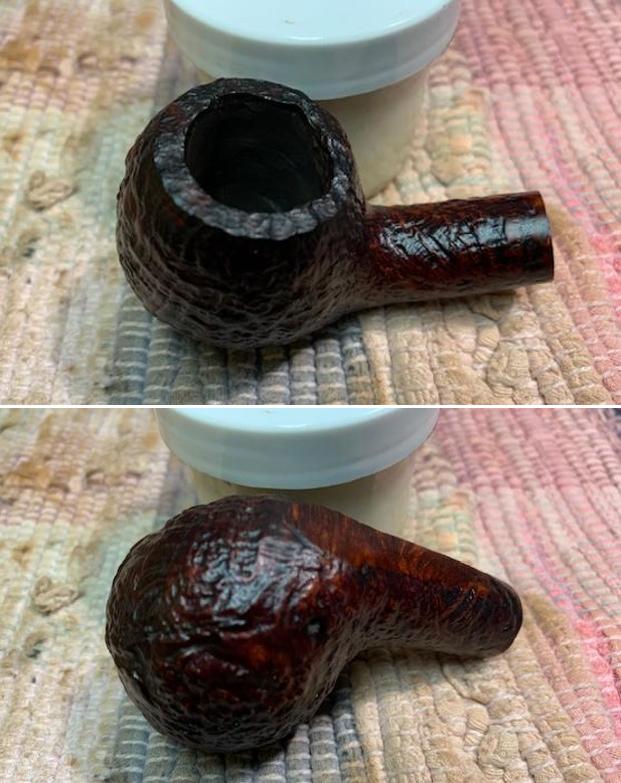
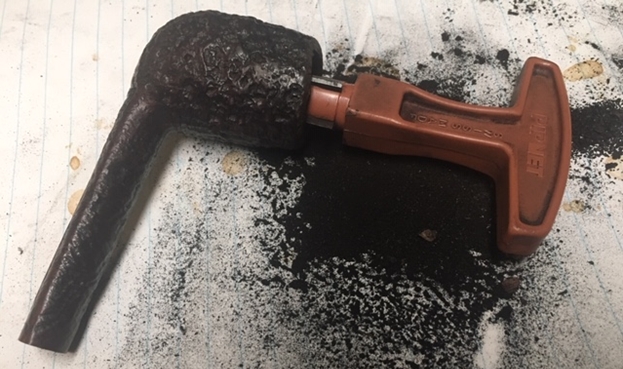
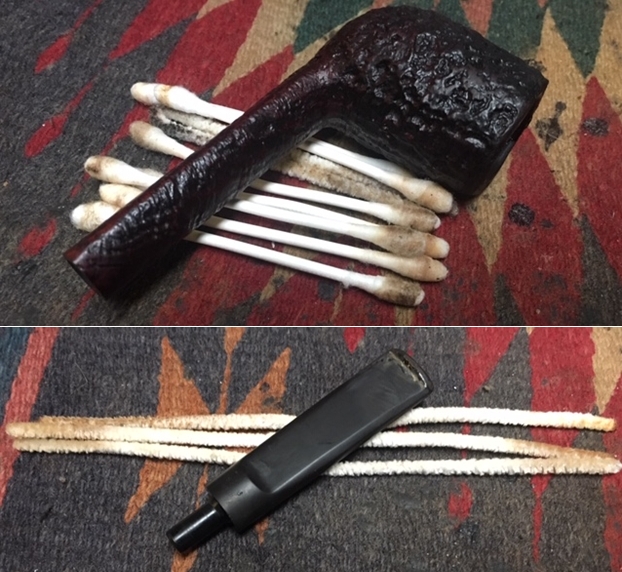
When the pipe arrived in Vancouver it was very clean. The briar and stem were spotless. The long Dunhill stem fit well to the shank. It appears that when it was fitted the shank was sanded slightly and smoothed out some of the sandblast but as I work on it I will know with more certainty. The shank end had been tapered to the stem. Jeff had reamed the bowl with a Pipenet Pipe Reamer and cleaned up the bowl walls with a Savinelli Fitsall Pipe Knife. He scrubbed the airway in the stem and shank with pipe cleaners, cotton swabs and alcohol. He scrubbed the exterior of the bowl and shank with Murphy’s Oil Soap (undiluted) and a tooth brush. He rinsed the exterior with warm running water and dried. He polished the briar and stem with a small drop of olive oil. The pipe really looked very good. It was going to be a fun one to work on for my part. I took photos of the pipe when I brought it to the table for my work. This is what I saw.
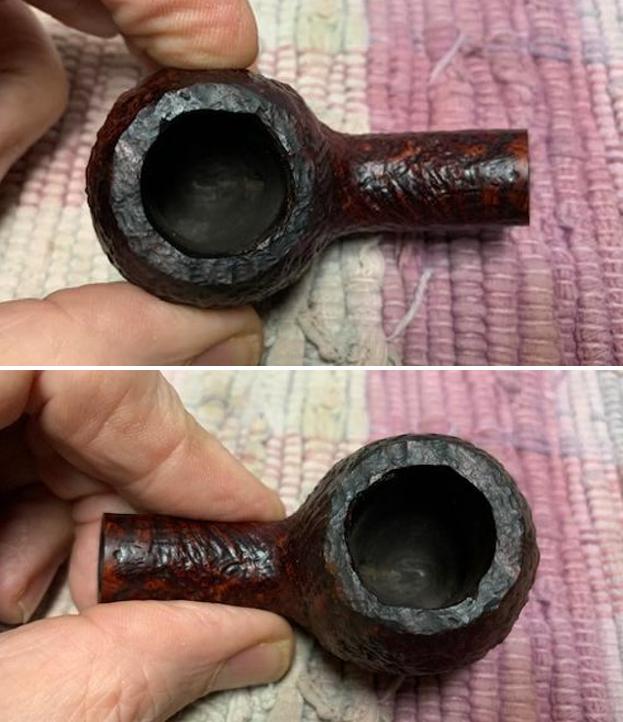
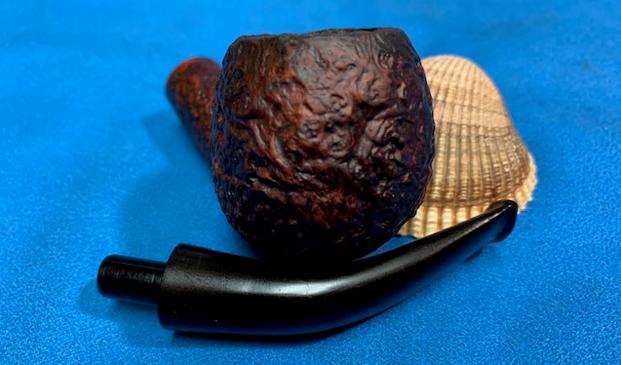
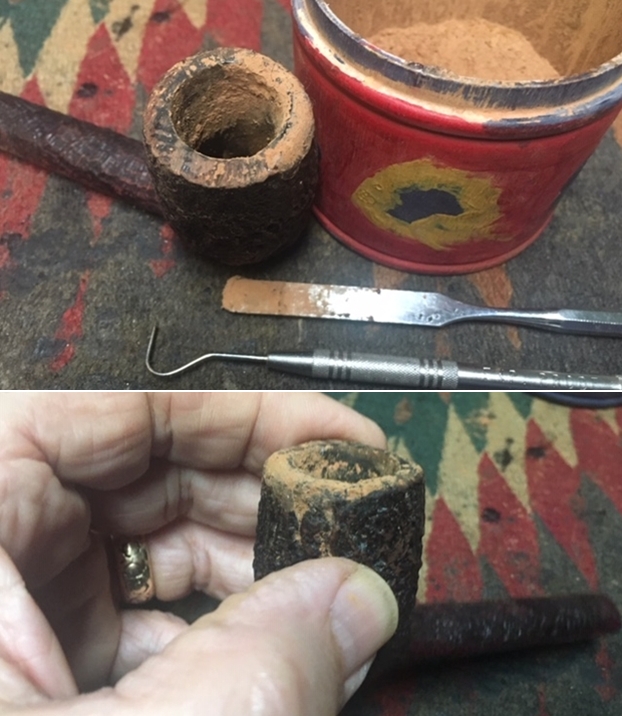
 I took a photo of the rim and bowl to show the condition of the cleaned pipe. You can see the darkening and the damage on the front inner edge and the left side inner edge. The Dunhill stem is quite clean and I will be putting it in my can of stems for use on a Dunhill pipe in the future.
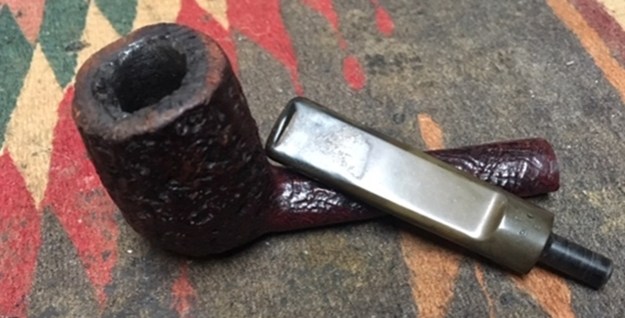
 I took a photo of the stamping on the heel of the bowl and the underside of the shank. It is clear and readable as noted above. I removed the stem from the shank and took a photo of the look of the bowl with the Dunhill stem. It looked interesting but was significantly longer than necessary.
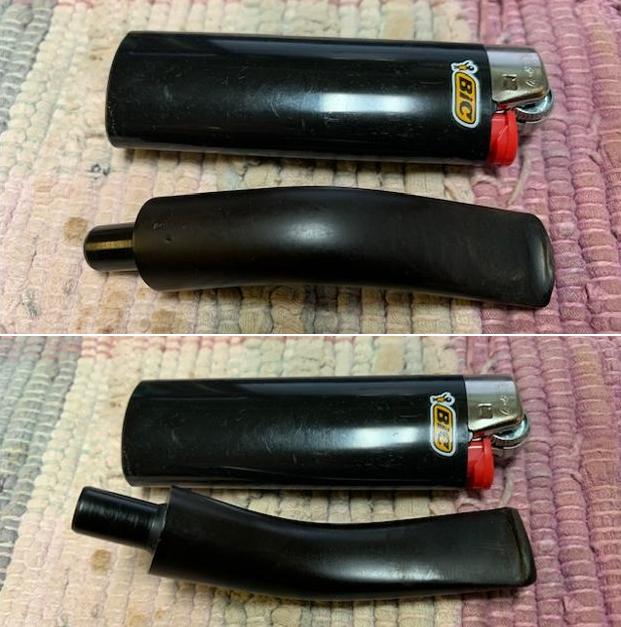
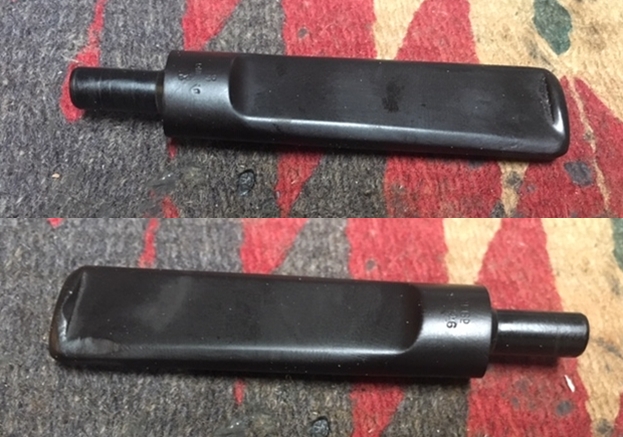
 I went through my stems and found a nice saddle stem that was the right length in my mind and with some work would look great with the pipe.
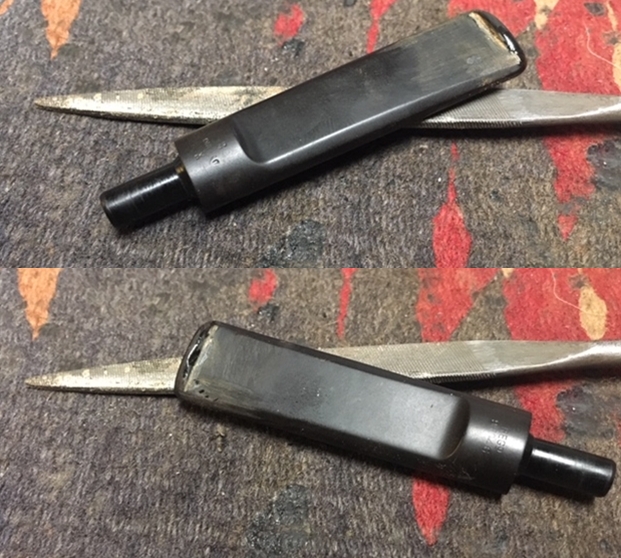
 I set the Dunhill stem aside and turned my attention to the new stem. The tenon fit the shank perfectly so nothing needed to be done with that. The diameter of the saddle stem was larger than that of the modified shank. I used a file and 180 grit sandpaper to shape the stem. I put a plastic spacer between the shank and the stem so I could proceed without further damage to the shank. It worked well to shape the diameter of the stem to match the shank. I tried to match the diameter to the undamaged part of the shank.


 With the stem fit close I moved on to clean up the rim top and edge of the bowl to bring it back into round. I gave the rim a slight bevel to reduce the damage on the front inner edge of the bowl.
 I put the stem on the shank and took a photo to have a look at the sanded portion of the shank. It went from the end inward about ½ inches. The sandblast had been smoothed out to the point that it was virtually gone on the end. It is slightly tapered rather than the straight angle that should have been there along the top of the shank. I thought it might be worth put a small band on it to cover the damaged area and provide a straight angle. It would be cosmetic as there were no cracks to the shank end. I found a nice decorative band in my collection of bands that had some beading along the shank end. I took a photo of the band alongside the bowl to show what it looked like.
 I pressed the band on to the shank end and took photos of how it looked. It covered the damaged area well and took care of the tapered end of the shank. I like the way it looked.
 I took a photo of the pipe without the band and with the band in place. To me the band really helped with the tapered shank end. It gave a touch of bling to the pipe and cleaned up the flow from the bowl to the end of the stem. I like how it looked.
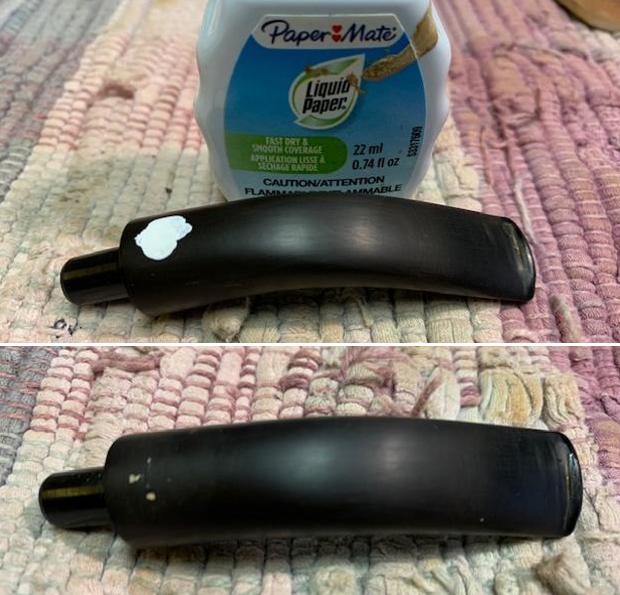
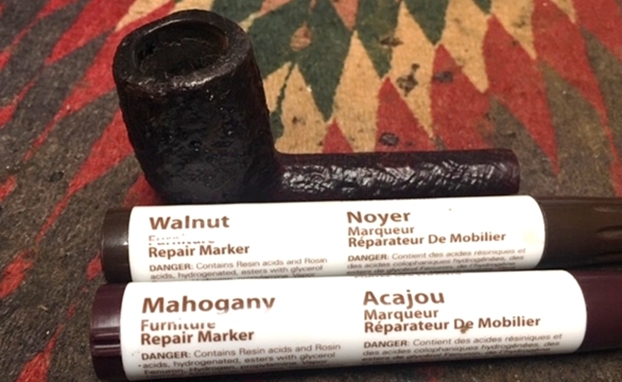
 I touched up the inner edge of the bowl with a Maple stain pen to blend the rim edges and top into the stain on the rest of the bowl. It really helped with blending the bevelled edge and giving the bowl a better sense of round.
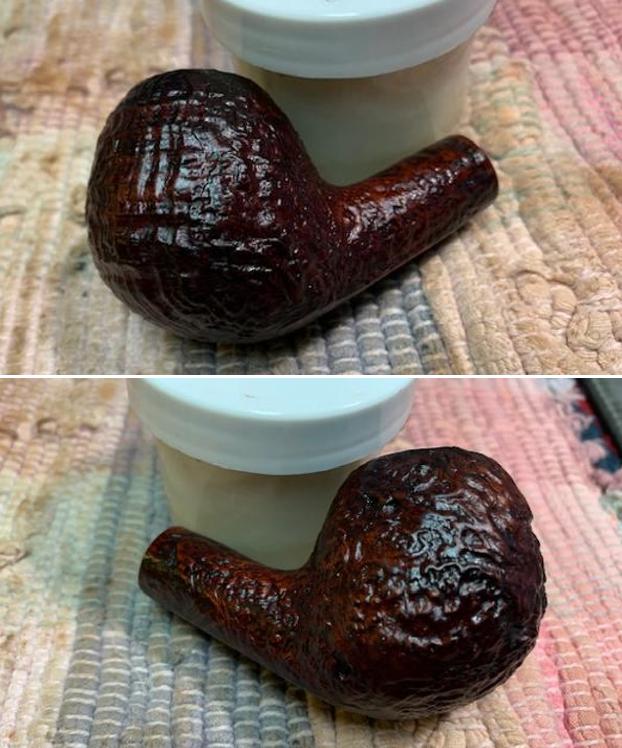
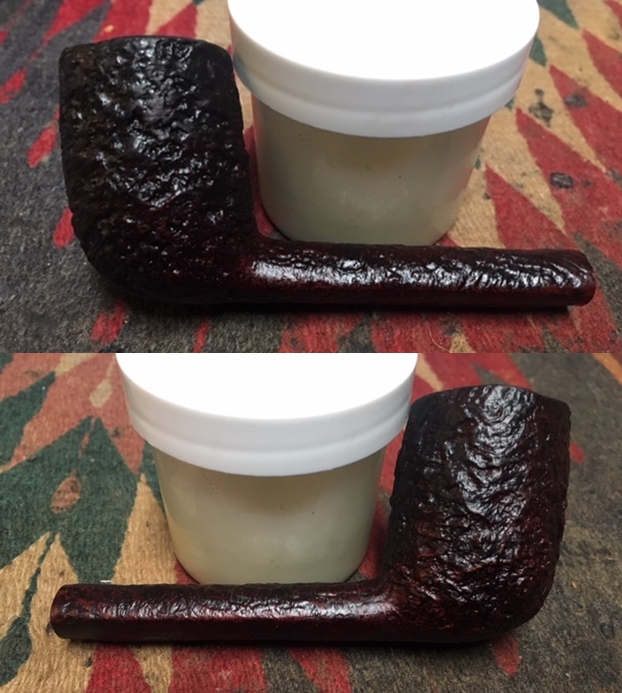
 I worked some Before & After Restoration Balm into finish of the briar with my fingertips to clean, enliven and protect it. I let the balm sit for a little while and then buffed with a cotton cloth to raise the shine. The Restoration Balm really makes the sandblast grain stand out beautifully.

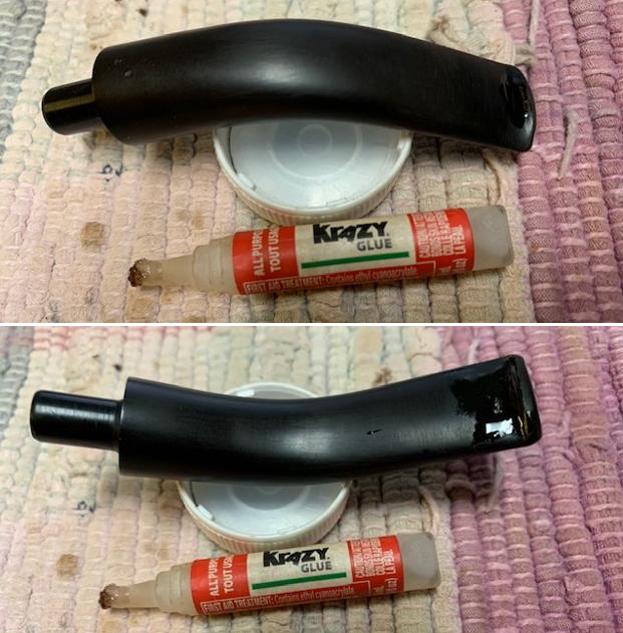
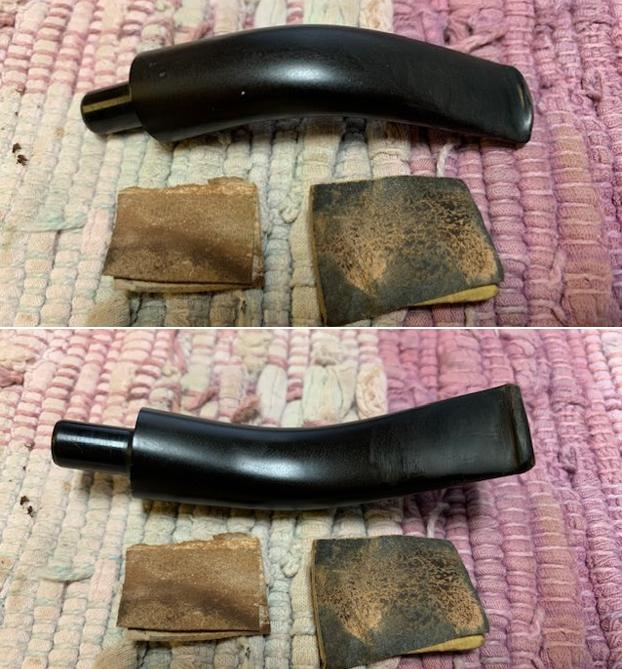
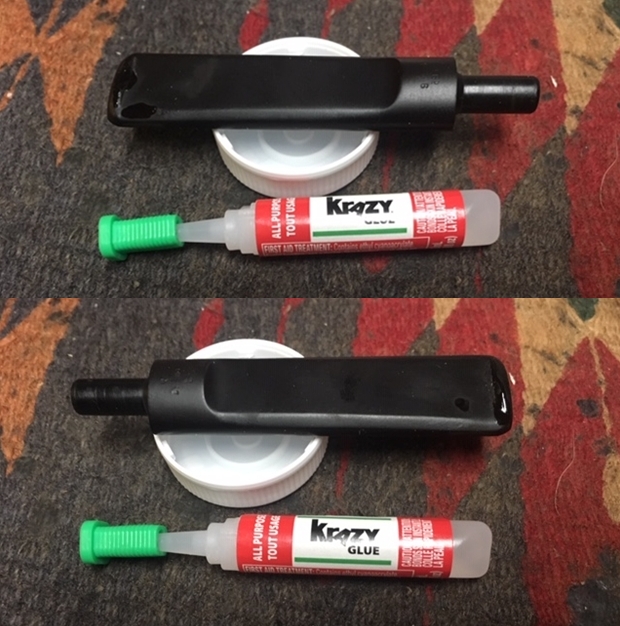
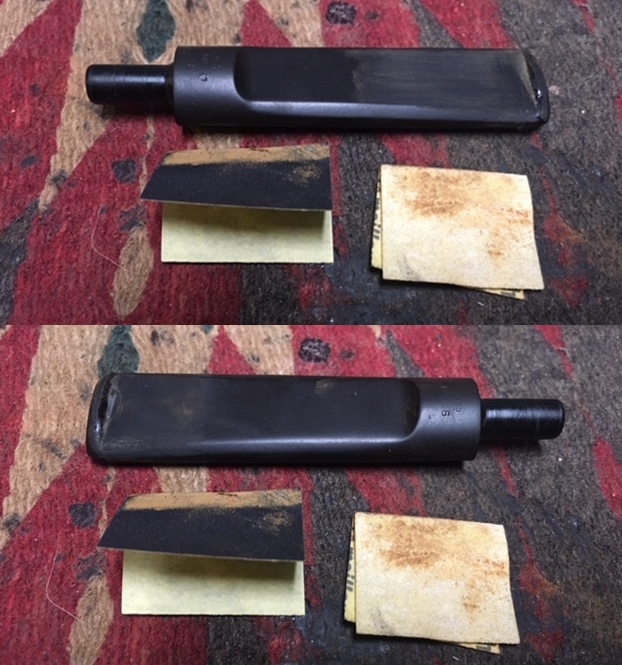
 I sanded out the file and 180 sanding marks on the stem surface and saddle portion with 220 grit sandpaper. I started polishing the stem with 600 grit wet dry sandpaper. It was starting to look much better.
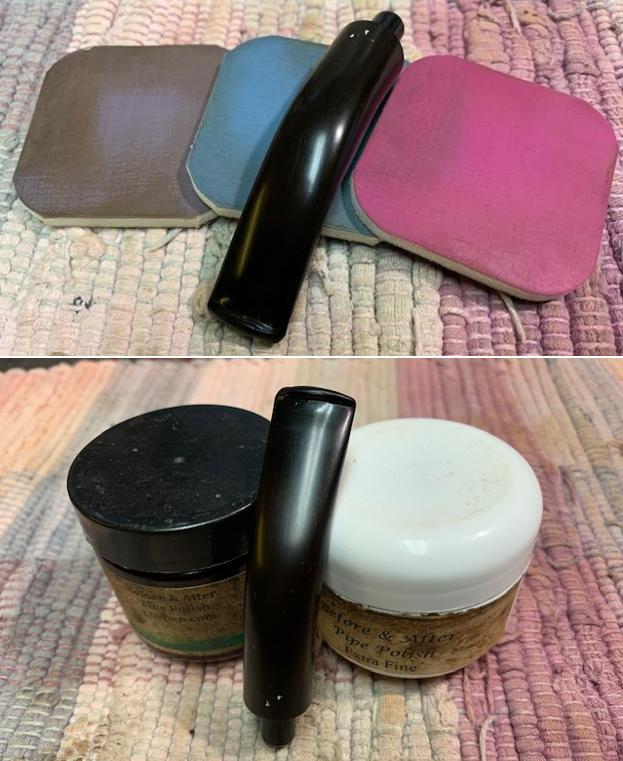
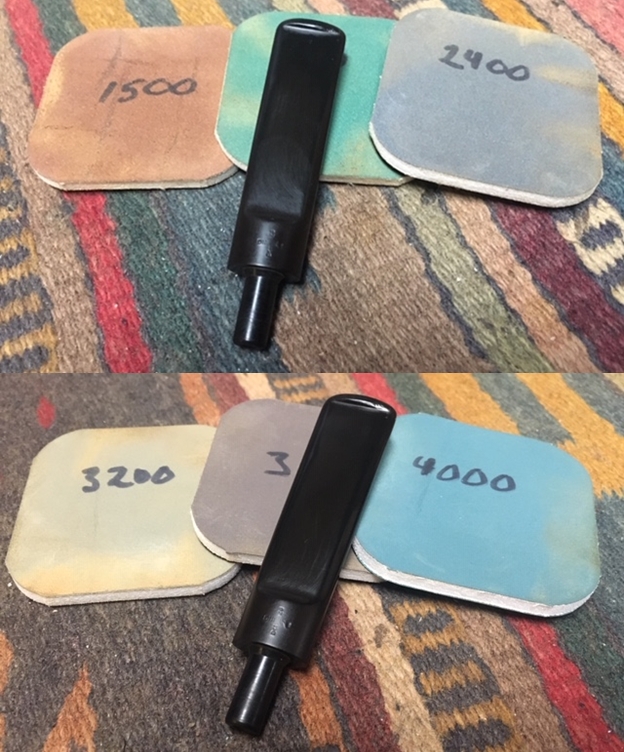
  I polished the stem with micromesh sanding pads – wet sanding with 1500-2400 grit pads and dry sanding with 3200-12000 grit pads. I wiped the stem down after each pad with Obsidian Oil.
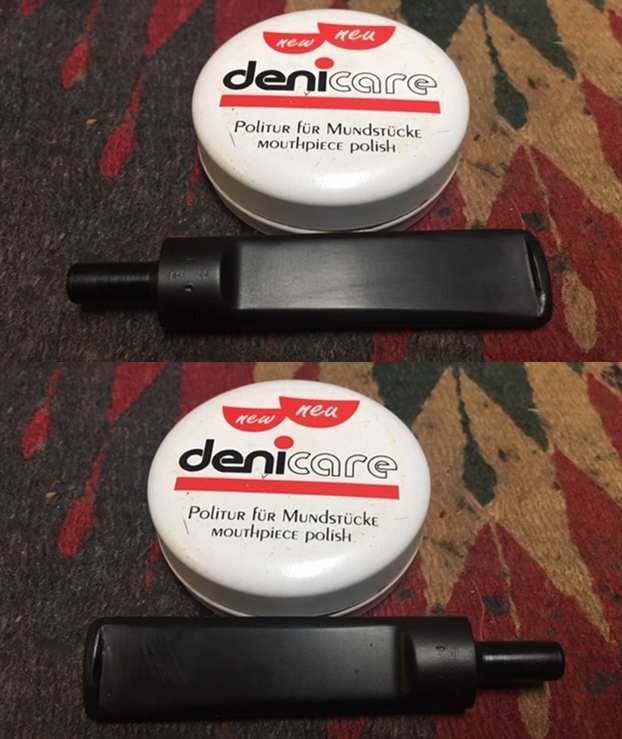
 I finished the hand polishing of the stem with Before & After Pipe Polish – both the Fine and Extra Fine polishes. I gave it a final coat of Obsidian oil and set it aside to dry.
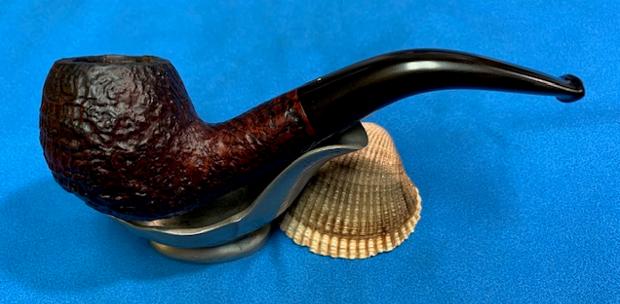
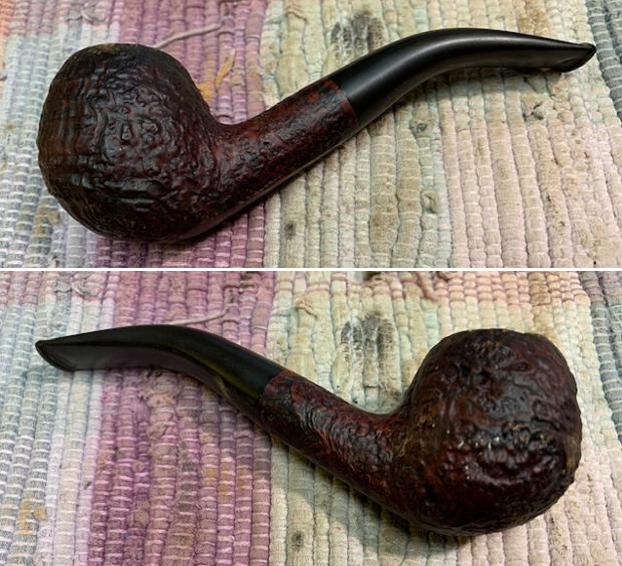
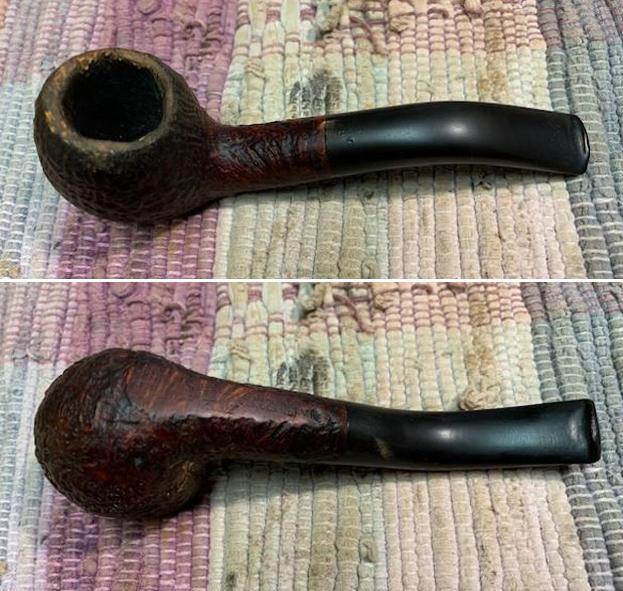
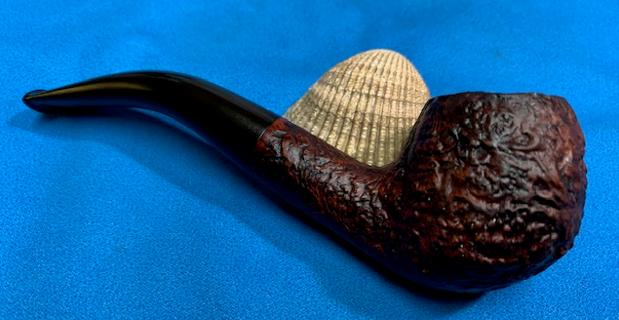
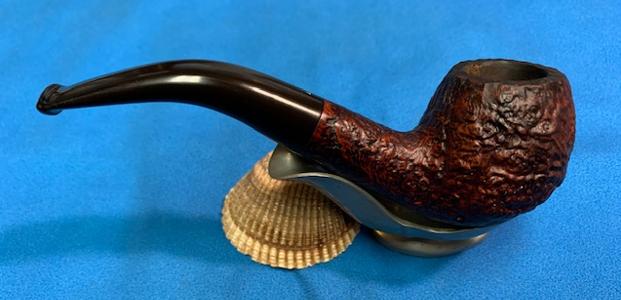
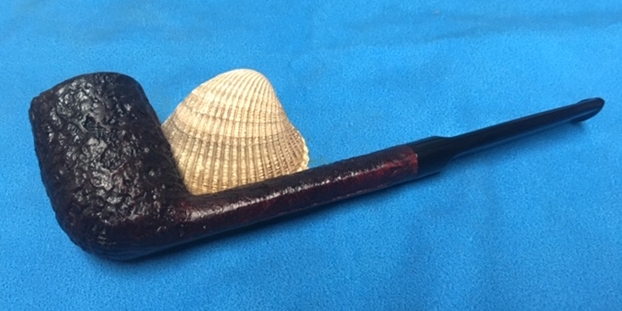
 The Barling’s Make Ye Olde Wood 1553 Fossil Pot restemming and restoration was finished. I polished the bowl and stem with Blue Diamond to polish out the remaining small scratches. I used a very light touch so as not to damage the stamping on the shank. I gave the bowl multiple coats of Conservator’s Wax and the stem multiple coats of carnauba wax. I buffed the pipe with a clean buffing pad to raise the shine. I hand buffed it with a microfiber cloth to deepen the shine. The pipe polished up pretty nicely. The depths of the sandblast came alive with the buffing and works well with the decorative brass band and the polished black vulcanite saddle stem. Altogether this Barling’s Make Ye Olde Wood Fossil Pot has a rich look. The finished pipe is shown in the photos below. The shape, finish and flow of the pipe and new stem work very well. The dimensions are Length: 5 inches, Height: 1 ½ inches, Outside diameter of the bowl: 1 ¼ inches, Chamber diameter: 7/8 of an inch. The weight of the pipe is .99 ounces/28 grams. I will be putting it on the rebornpipes store in the British Pipemakers Section soon. If you are interested in adding it to your collection let me. I have one of these and they are a cool dry smoke. Thanks for walking through the restoration of this fine old Barling’s Make pipe. It was a pleasure to work on.
As always, I encourage your questions and comments as you read the blog. Thanks to each of you who are reading this blog. Remember we are not pipe owners; we are pipe men and women who hold our pipes in trust until they pass on into the trust of those who follow us.