Blog by Paresh Deshpande
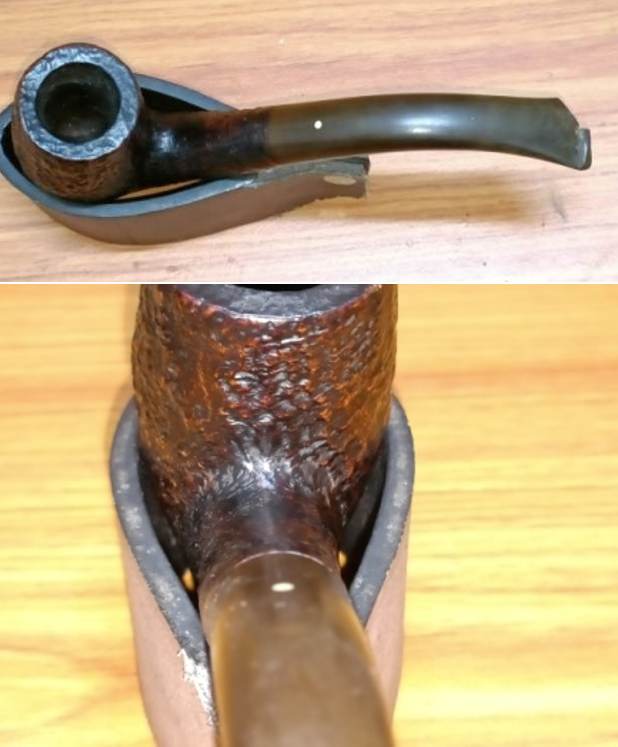
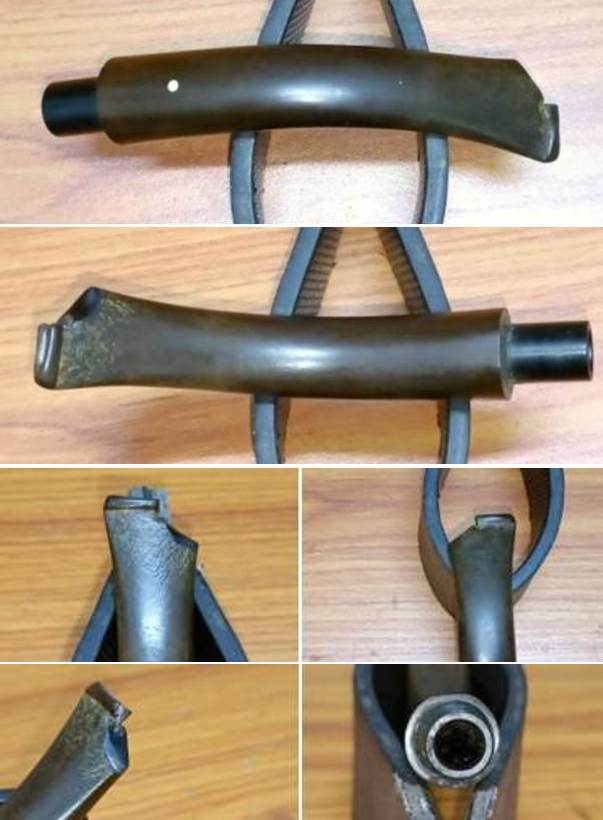
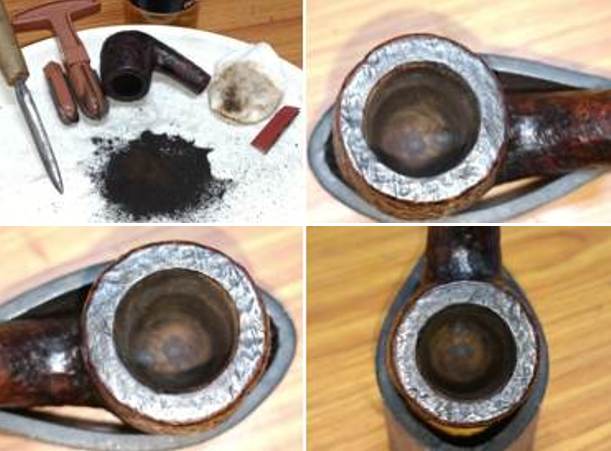
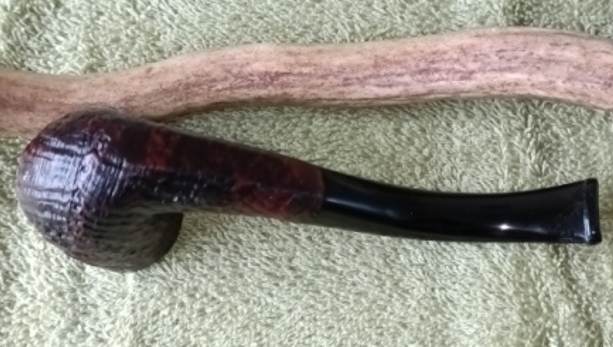
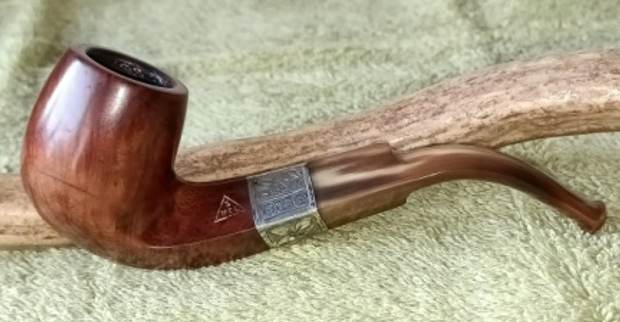
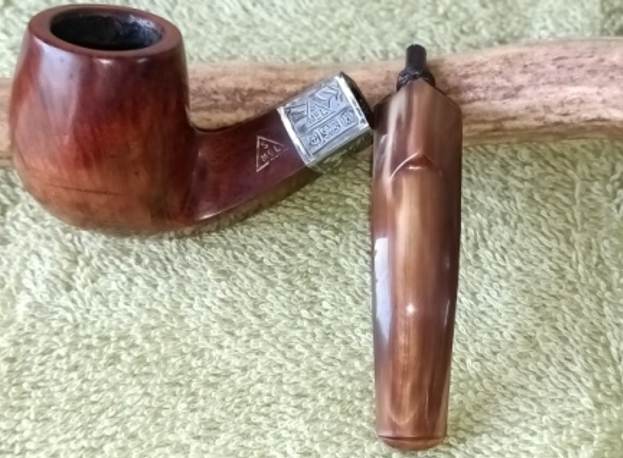
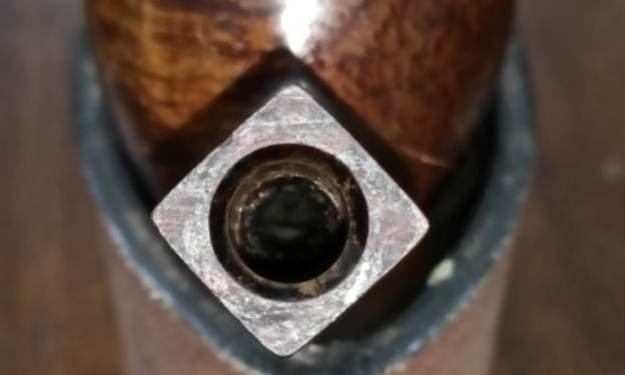
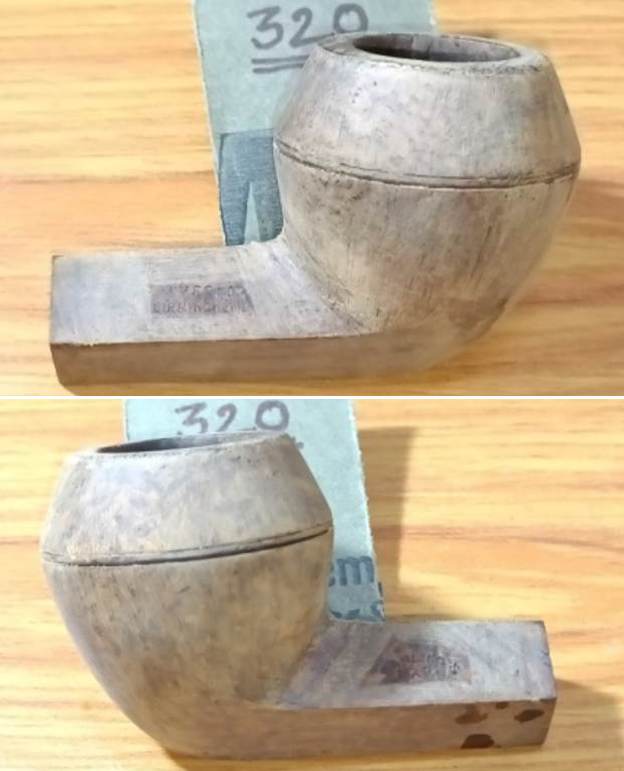
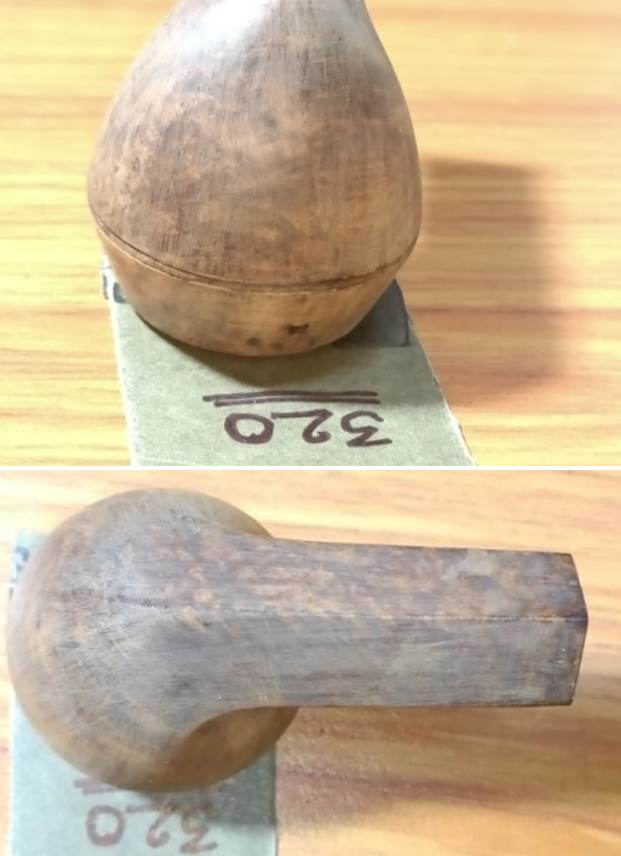
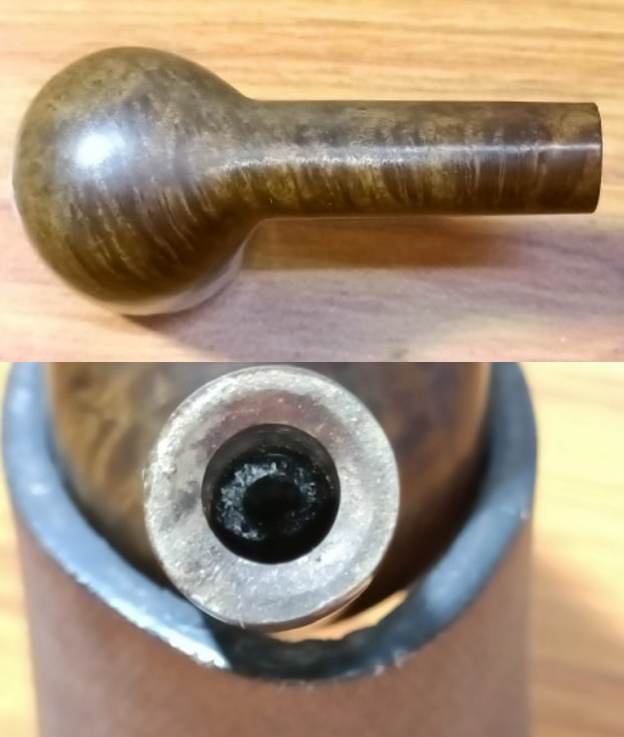
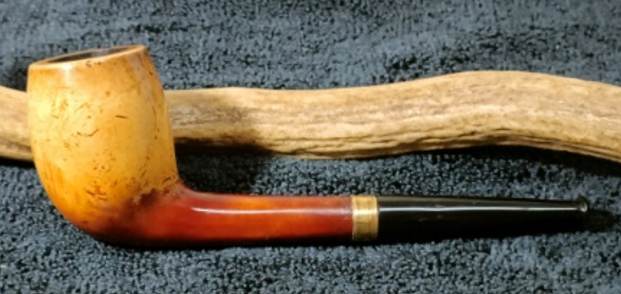
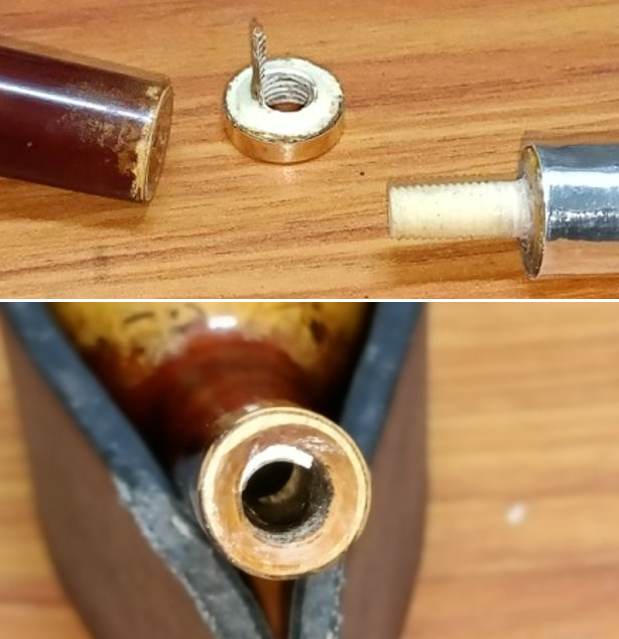
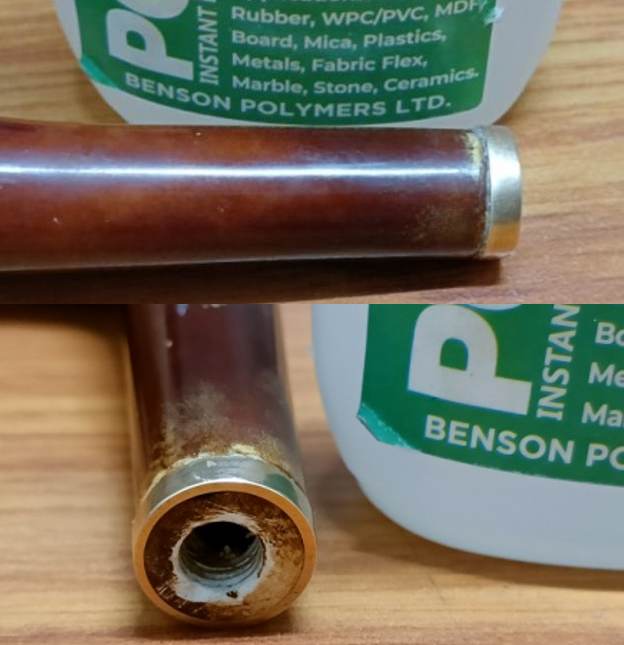
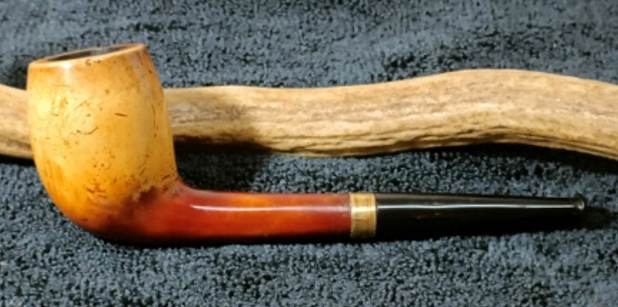
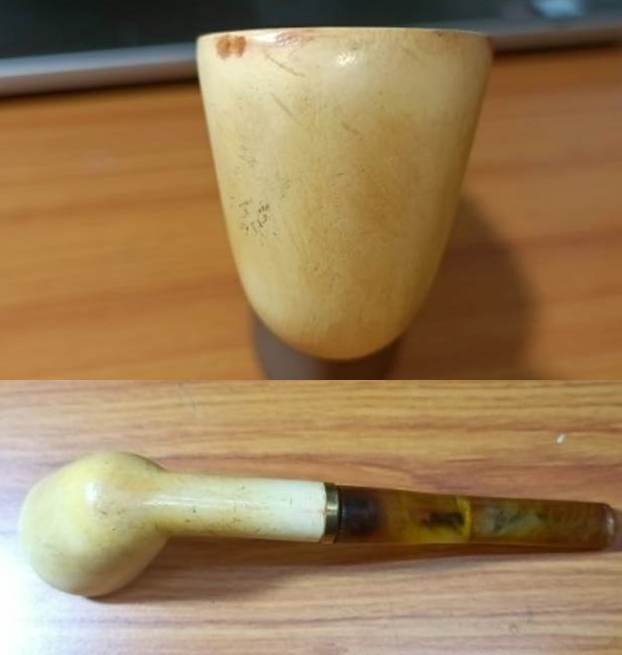
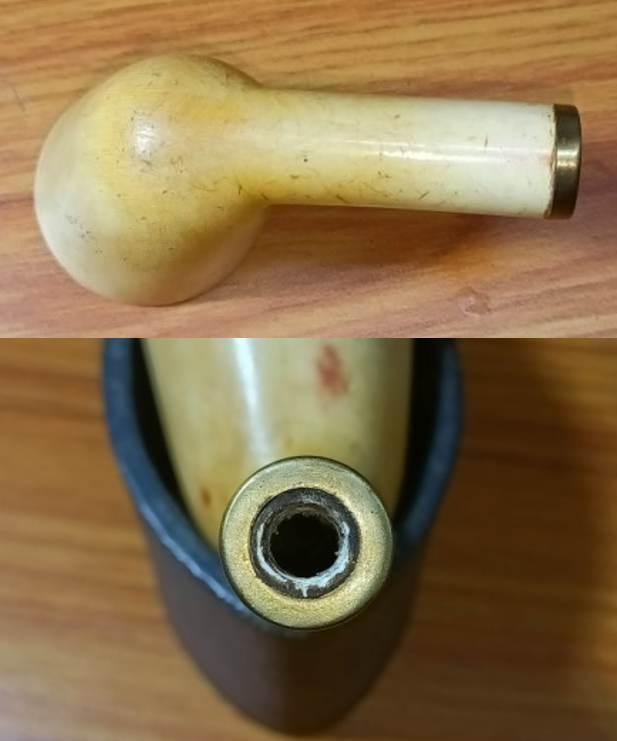
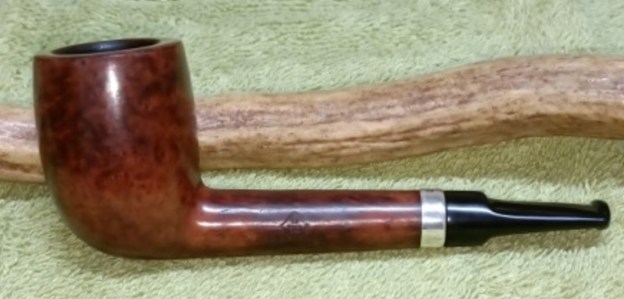
I absolutely love my classic BBB pipes that I have inherited and one such pipe is now on my worktable. This classic Lovat has some beautiful cross grains on the front, back and shank surface with beautiful bird’s eye grains on the sides that can be made out under the grime and dust covering the stummel surface. It is stamped on the left side of the shank as “BBB” in a rhombus with “OWN” and “MAKE” on either side of the rhombus. The Sterling silver ferrule at the shank end is stamped as “AF & Co.” in a rectangle followed by three cartouche bearing hallmarks. Starting from the left, the first cartouche bears the stamp of an “Anchor” for the Birmingham Assay Office followed by the “Lion Passant” certifying the silver quality and the last cartouche bears the Date letter “i” which is quite worn out and the outline of the letter can be made out only under close scrutiny under a magnifying glass. The vulcanite saddle stem is devoid of any stem logo. The stampings are clear and easily discernible except the date code letter.
 BBB – Pipedia has detailed information on the origins of the brand, it’s transition to the Cadogan group making this article a good read for those interested. I would like to highlight that, quote “At the beginning, BBB produces two qualities. One, BBB Own Make, became finally BBB Best Make, other pipes being simply estampillées BBB. There are reasons to believe that Own Make in fact were produced in London (Reject pipes cuts year R stamped one them.), whereas the simple BBB were imported, and this, to the paddle of the 20th century. However, if all that is not very clear, it is probable that the lines low-of-range were an import of Saint-Claude” un-quote.
Now coming on to the most interesting and satisfying part of the research on this piece of briar and that is establishing the probable date of manufacture of this pipe. I prefer to follow English silver marks: the guide to hallmarks of London sterling silver (silvercollection.it) while establishing the dates on the basis of the date letter in the hallmarks. The Anchor points to the Birmingham Assaying Office. Thereafter, I followed the link to the dating guide of the Birmingham Assay Office to date this pipe. I have included a hallmark chart for dating the pipe and have put a red mark around the letter for 1908. It is the same style of “i” and the cartouche that holds the letter stamp. Thus it is with certainty I say that this BBB was made in 1908, give or take a year as the ferrules were assayed in bulk and used as required. The stamp of Own Make designates this as the finest quality pipe that was made in London for the local market in limited quantities.
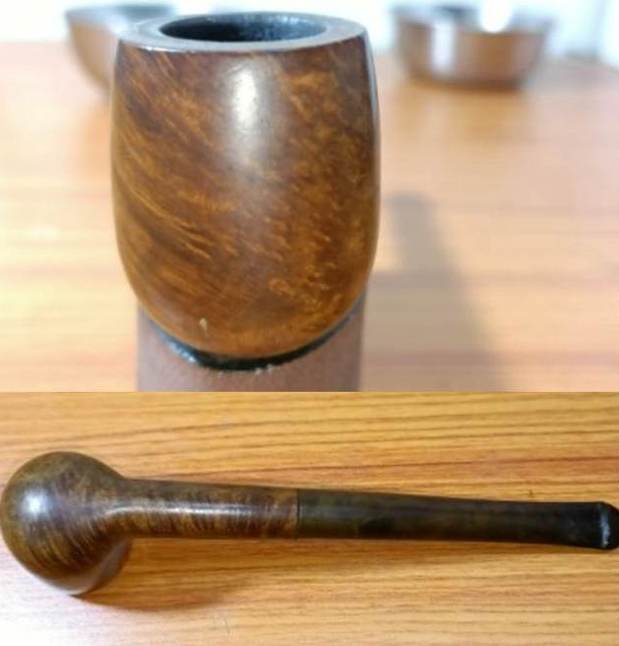
Initial Visual Inspection
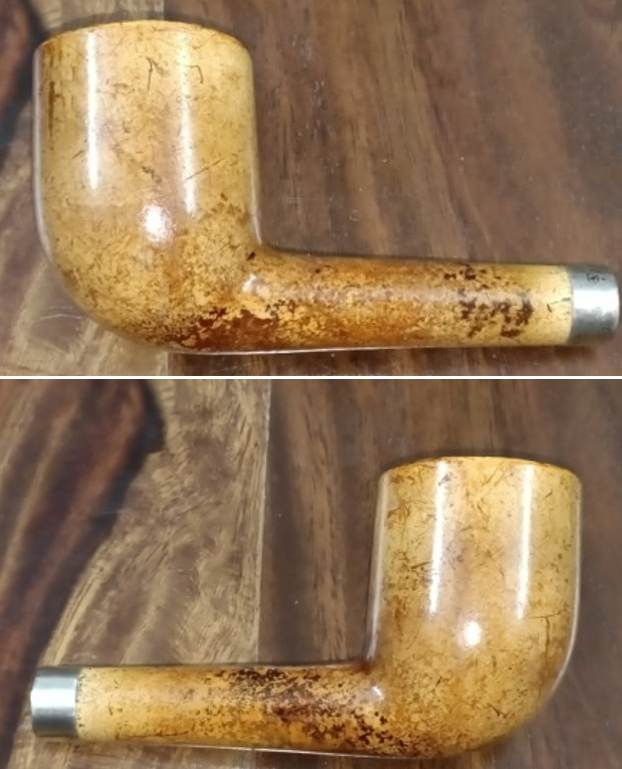
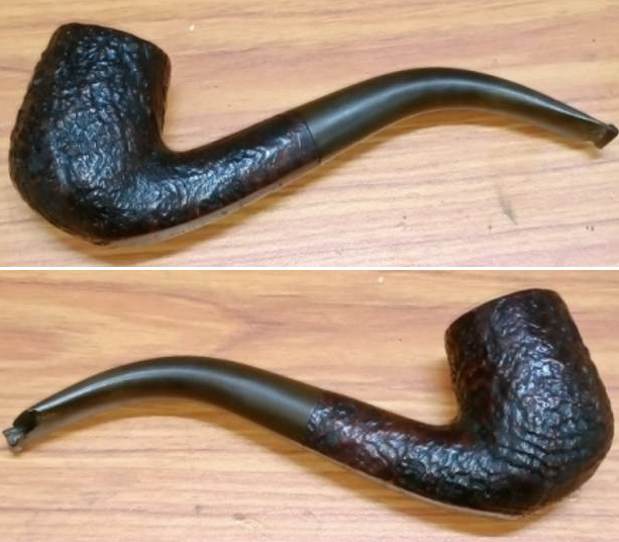
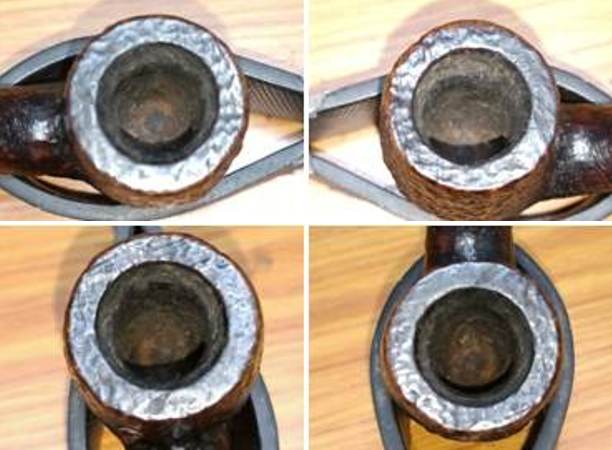
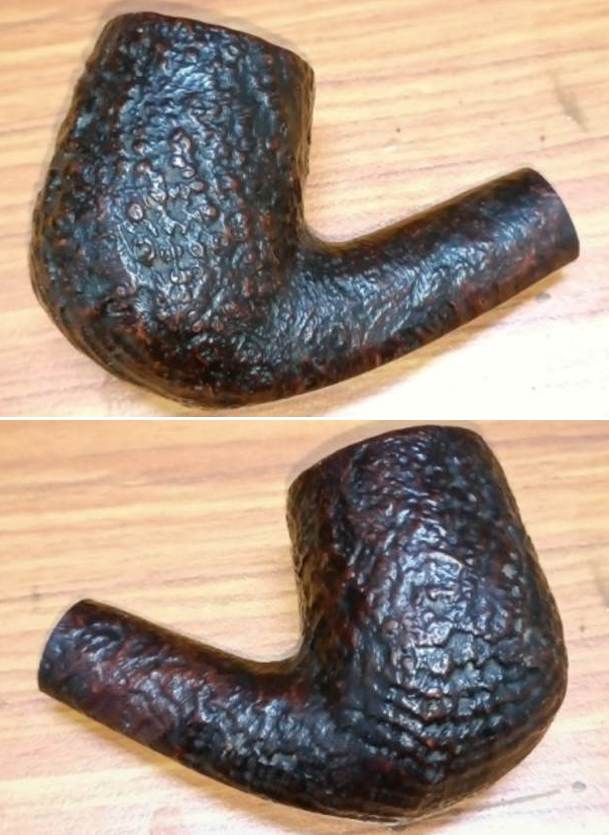
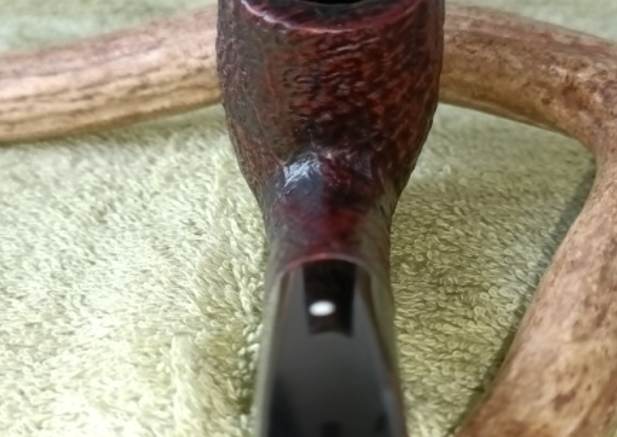
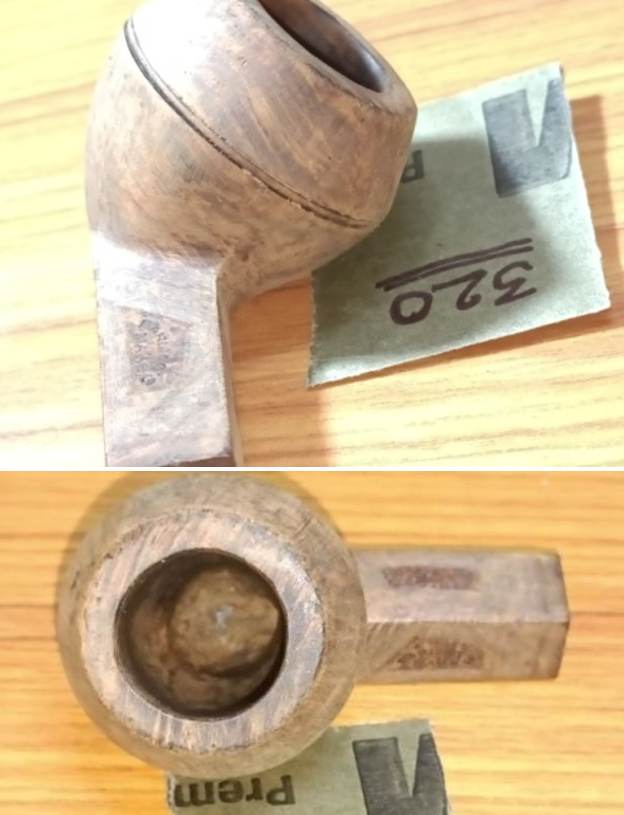
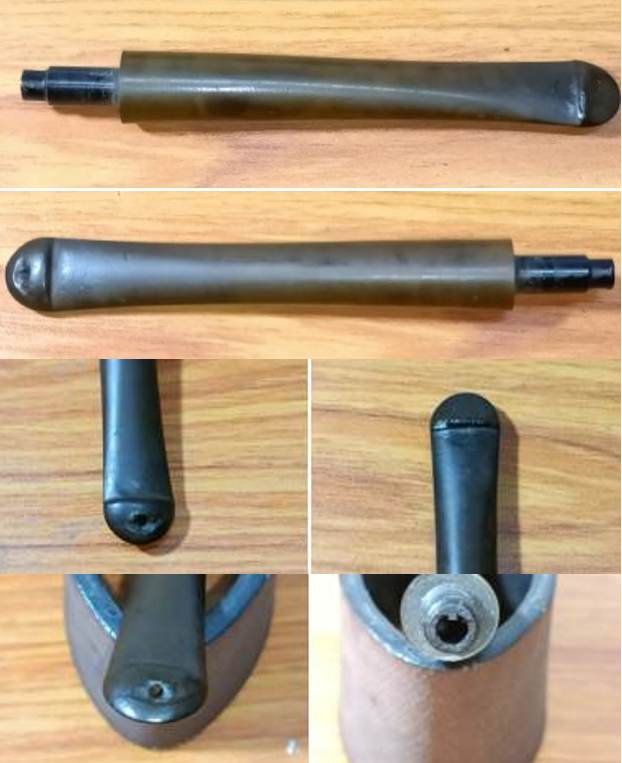
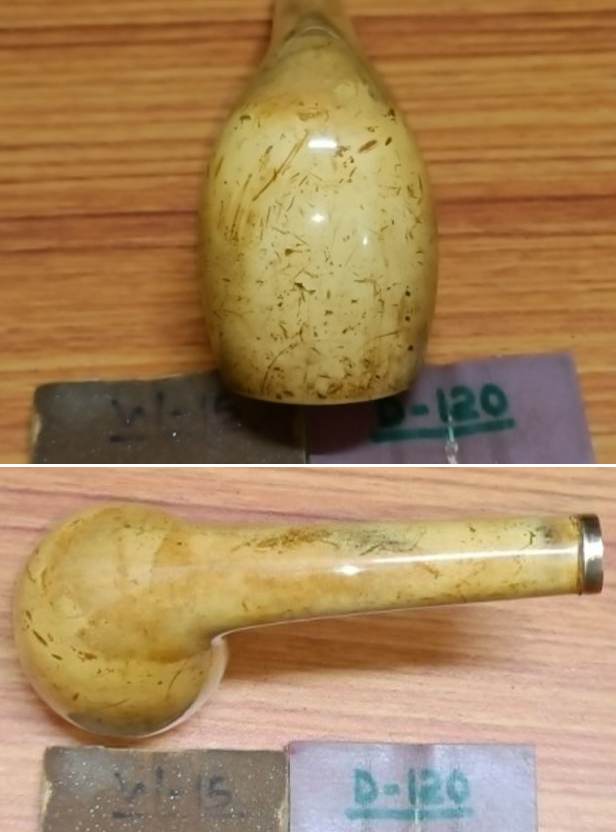
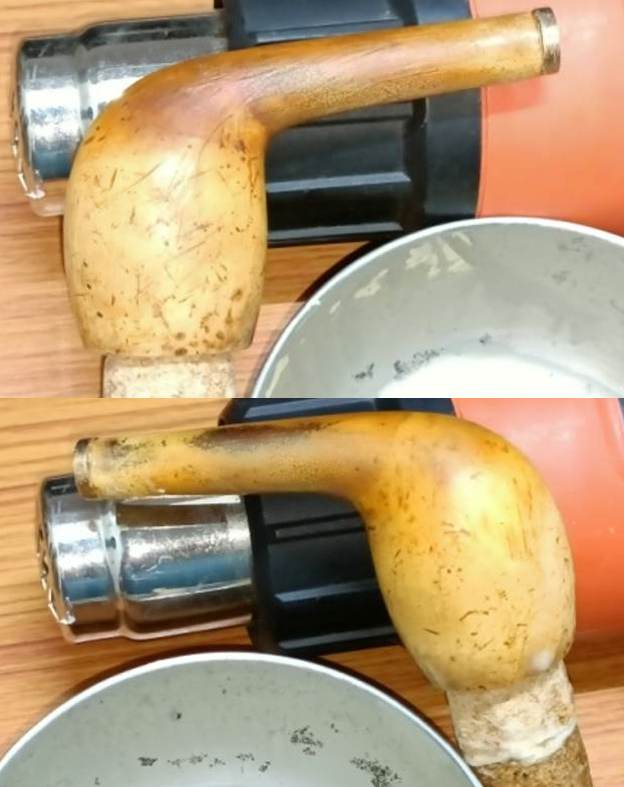
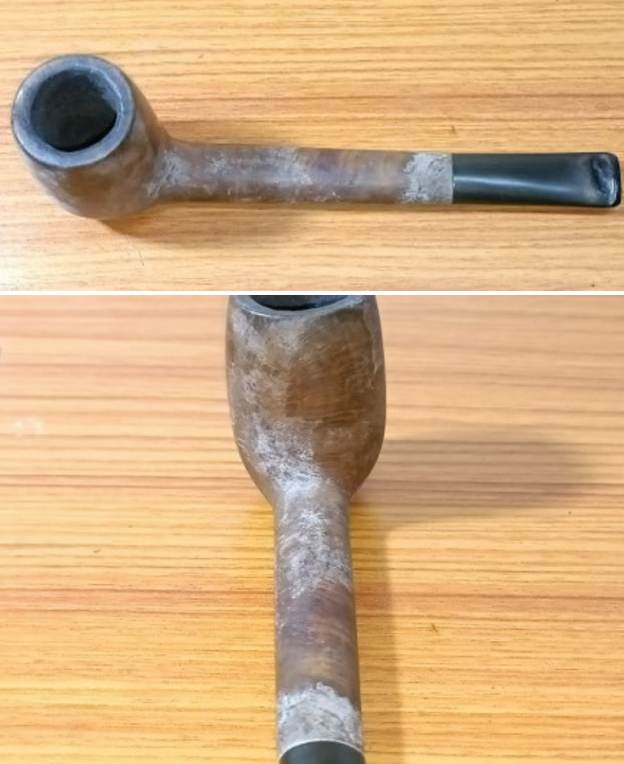
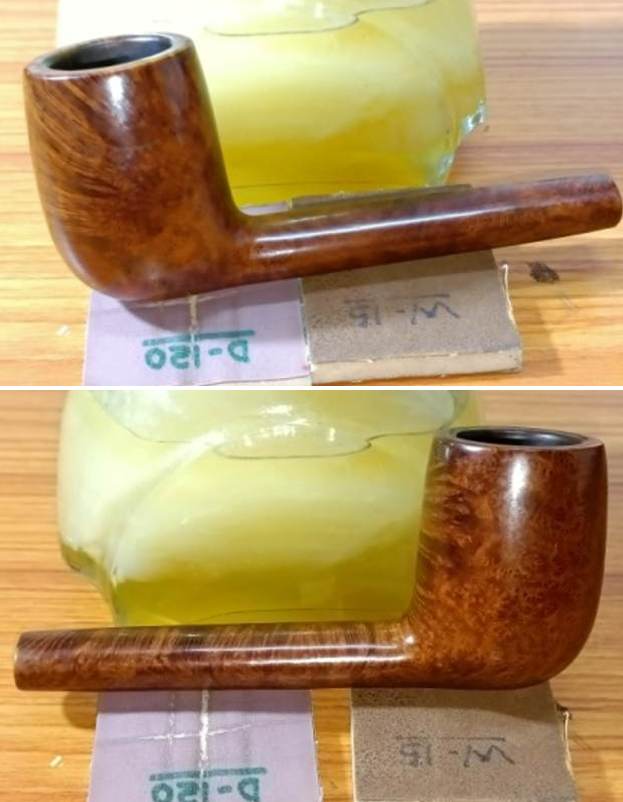
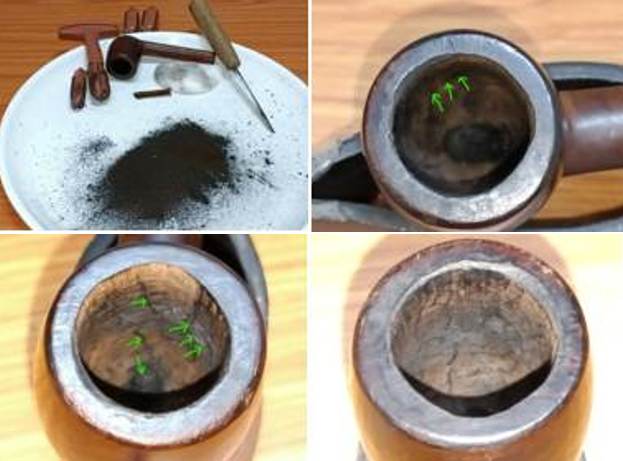
This 115 year old pipe flaunts it’s age with great dignity and élan. There is a decent layer of cake in the chamber that is even throughout. The rim top surface is covered in a layer of lava overflow. Underneath this crud and grime, the inner rim edge damage is apparent. The outer rim edge has a number of dents and dings. The stummel surface, though covered in dirt, dust and grime, has developed a nice patina. The stem has a chunk of vulcanite missing from the button and rounded orifice. The following pictures will give the readers a general idea as to the condition of the pipe as it sits on my worktable.
 Detailed Visual Inspection
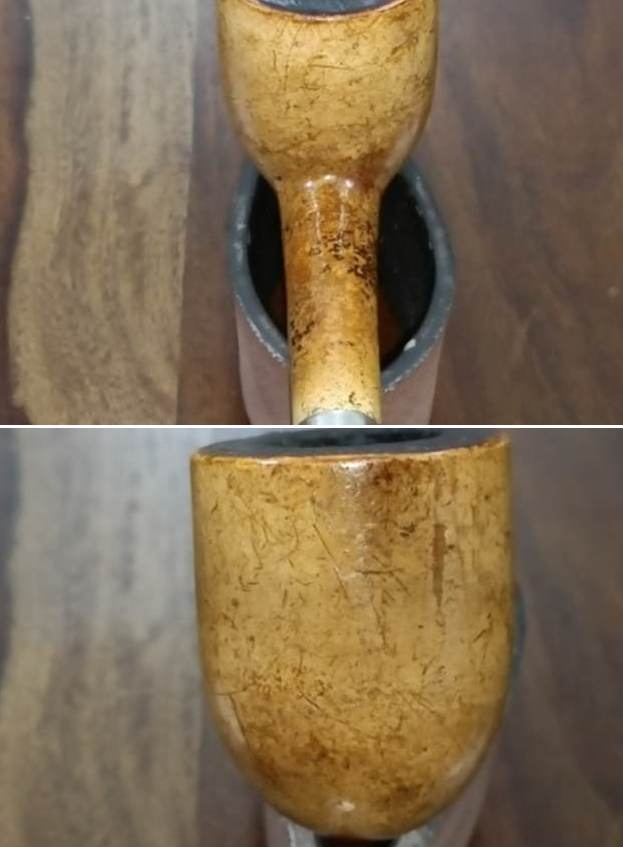
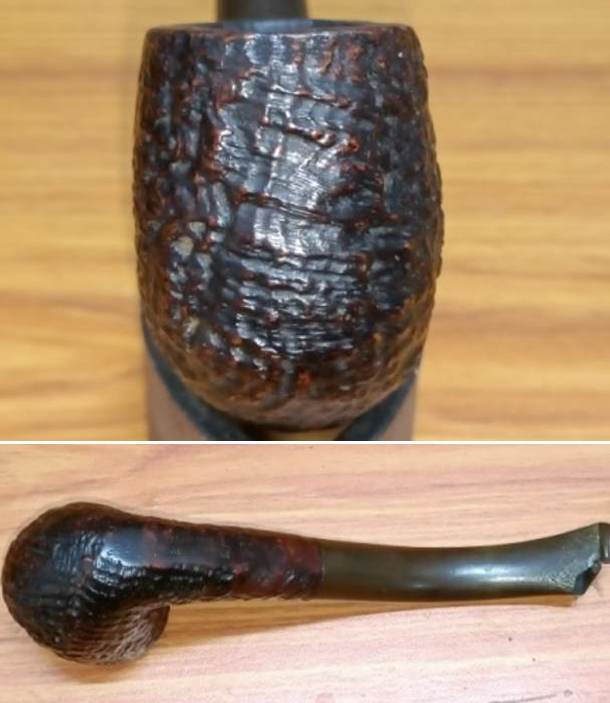
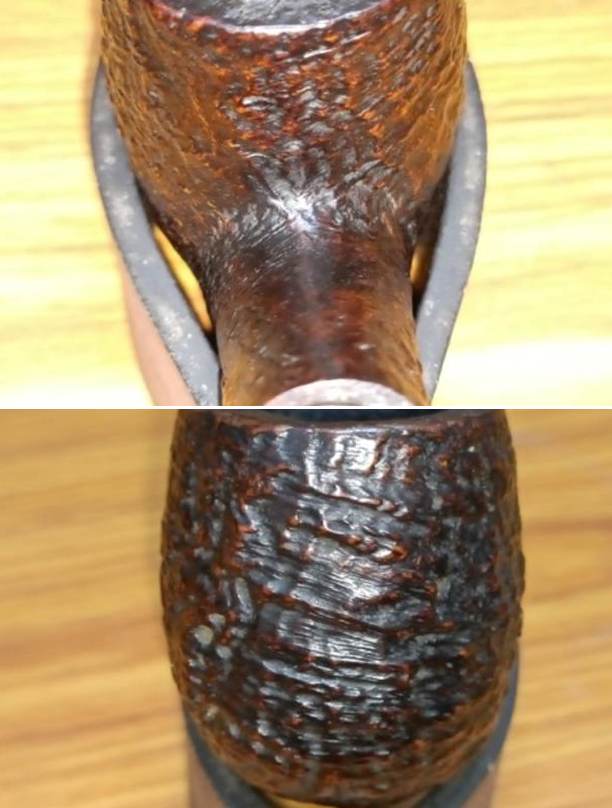
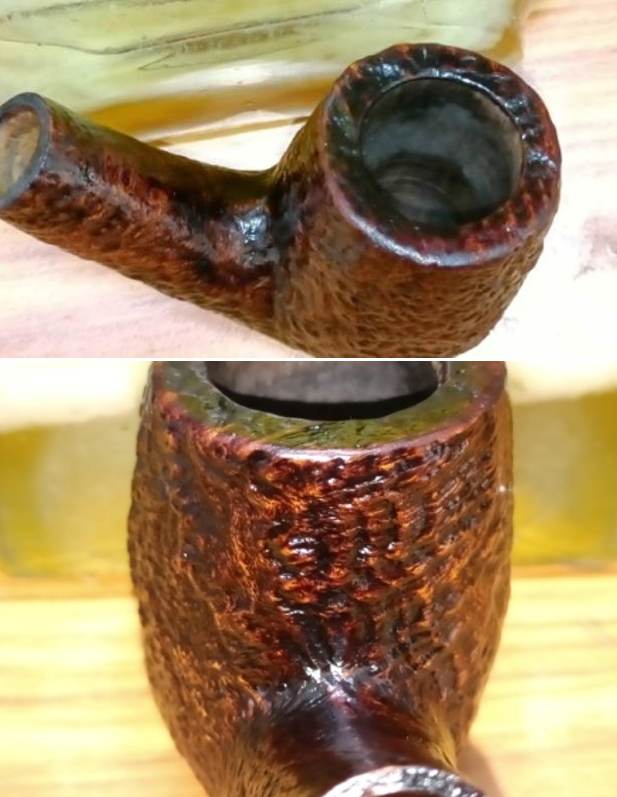
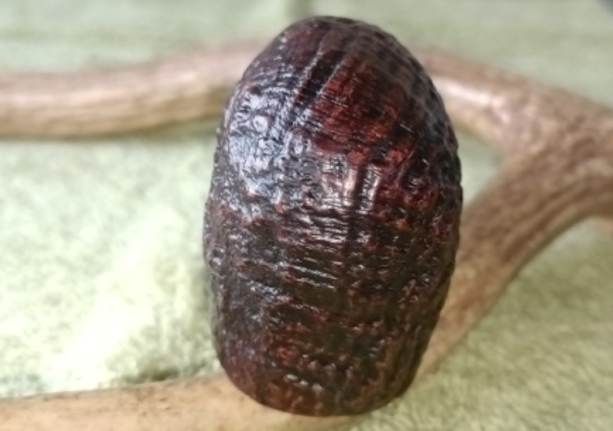
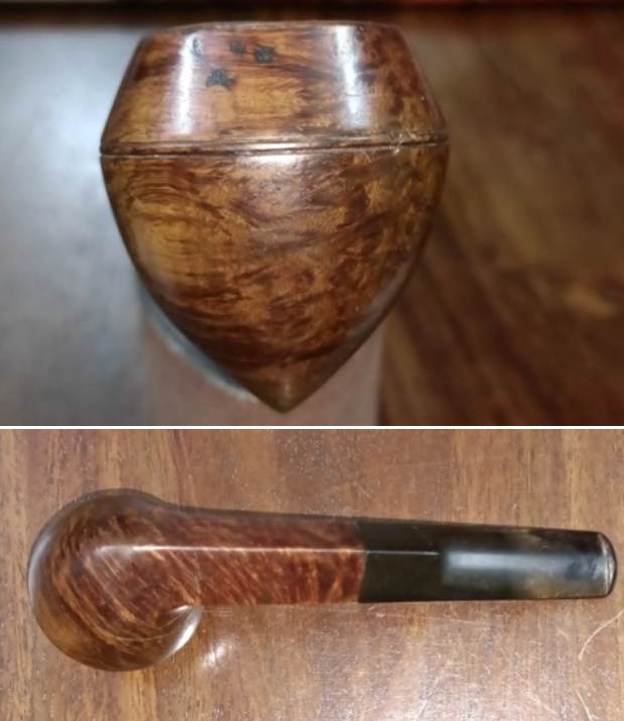
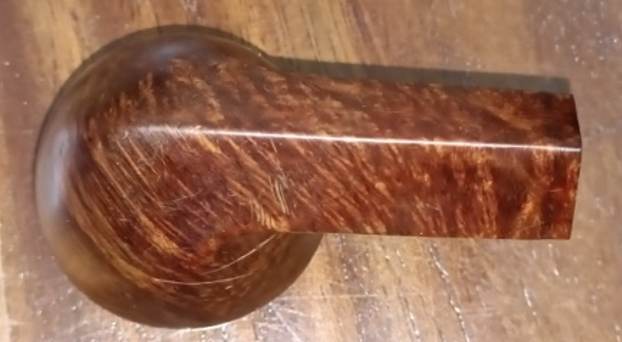
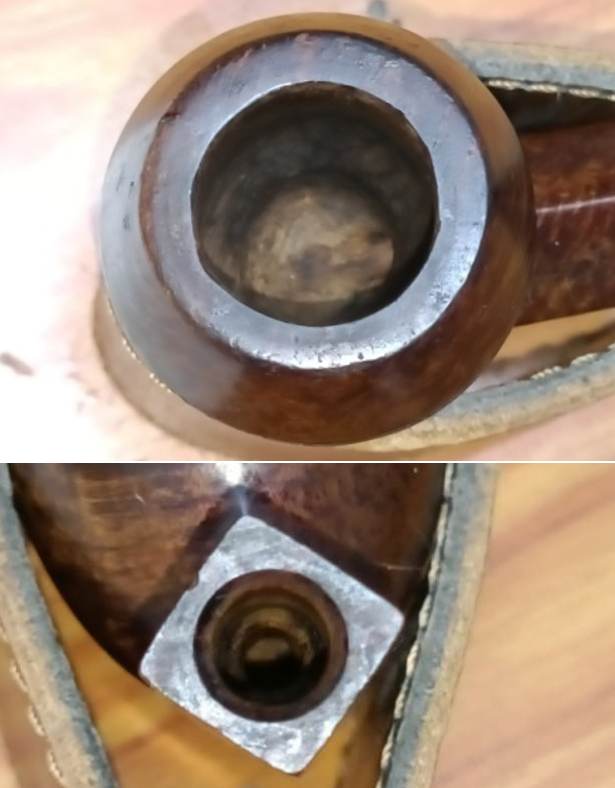
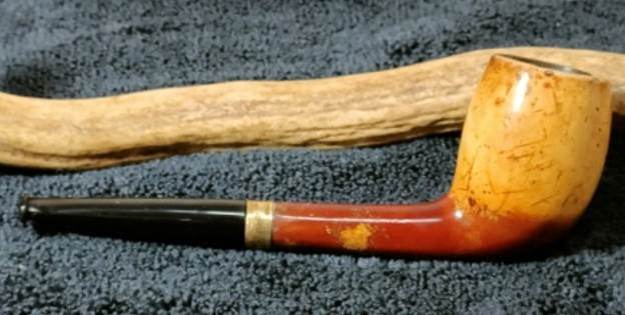
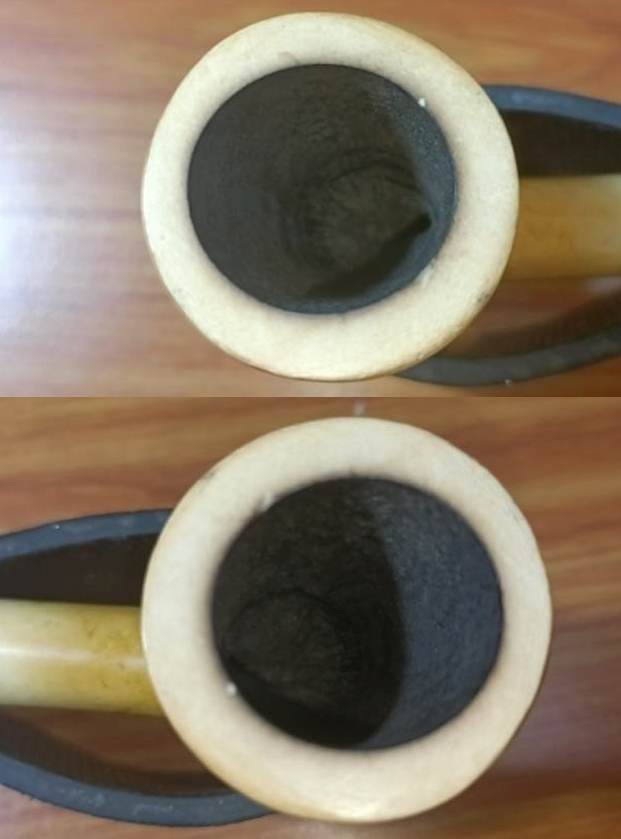
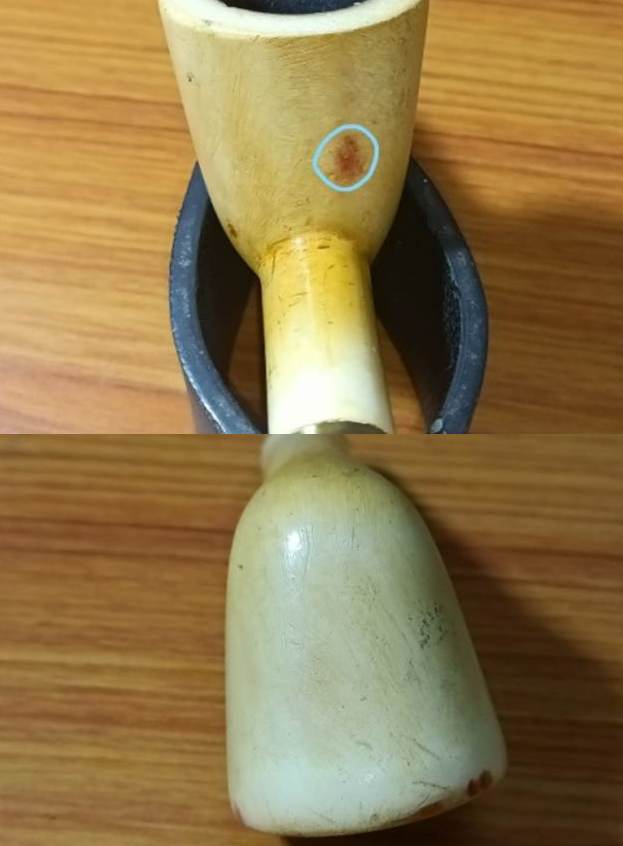
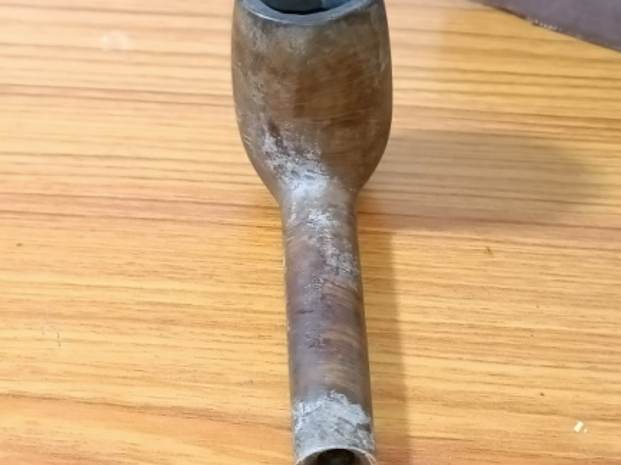
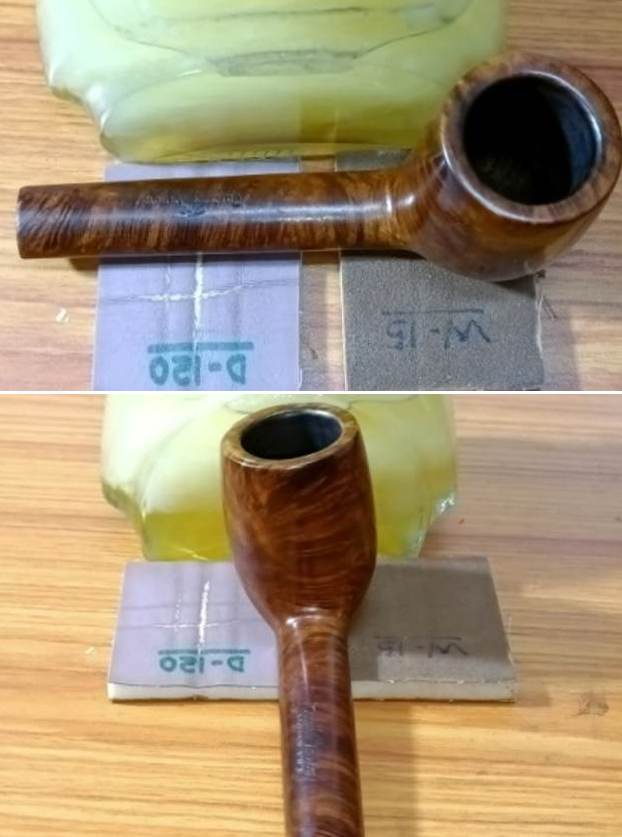
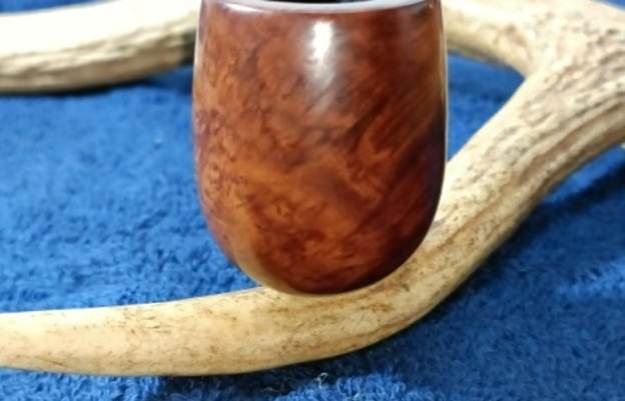
As brought out earlier, the chamber has an even layer of hard and brittle cake. It appears that the cake was being regularly reamed to maintain the correct bare minimum thickness. The condition of the chamber walls will be ascertained after the cake has been taken down to bare briar. The rim top surface is uneven and covered in a layer of overflowing oils and tars. Also the condition of the rim inner edge is indicative of it being subjected to an amateurish use of a sharp knife to remove charred surface from the edge. The end result is an uneven and an out of round chamber. The outer rim edge too has a number of dents and dings, most likely caused due to striking against a hard surface to remove the dottle. I intend to address the issue of uneven rim top surface by topping the rim surface. It will also help to address the damage to the inner and outer rim edges to an extent and what damage remains; will be masked by creating a bevel. The stummel is covered in a layer of dirt and grime from years of uncared for storage. The sides and front of the bowl appears considerably darker due to accumulation of grime over the hand oils from over a period of 115 years. However, beautiful cross grains on the front, back and shank surface with beautiful bird’s eye grains on the sides can be made out under the grime and dust covering the stummel surface. There are no scratches/dings or dents over the stummel surface. The briar has developed a beautiful dark patina over the years and it will be my endeavor to maintain it through the restoration process. The mortise is clogged with old oils, tars and ash; however, the shank face is sans any crack or deformation. This also confirms that the band is not a repair band but is original to the pipe. There is no reason to sand the stummel surface to address any dents / dings as there are none. I shall dry sand the bowl with micromesh pads to bring out the grains and impart a shine to the surface while preserving the patina.

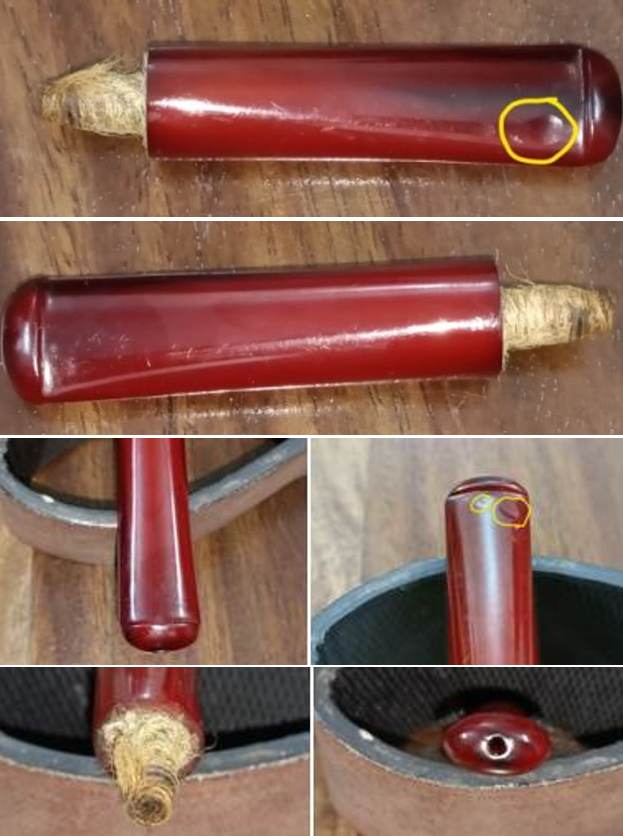
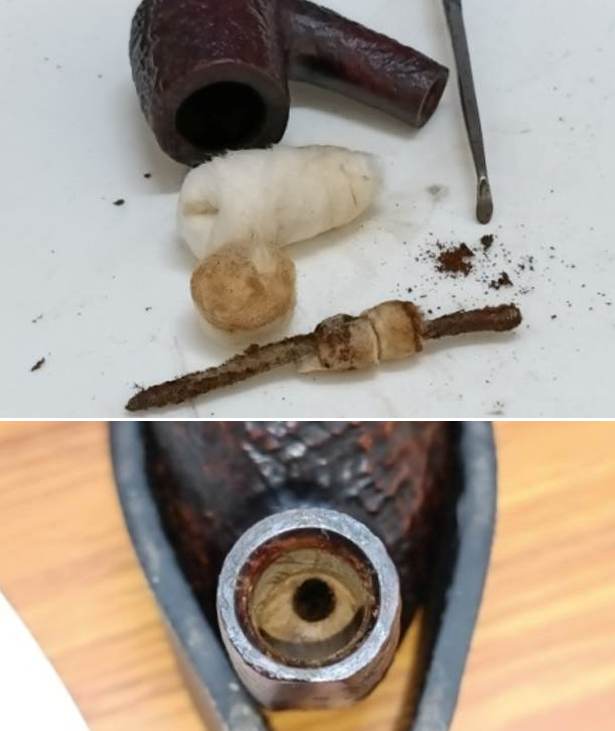
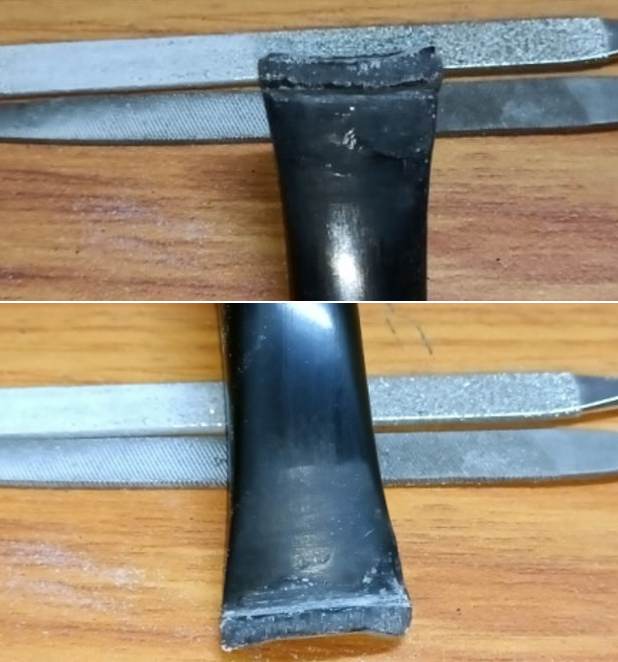
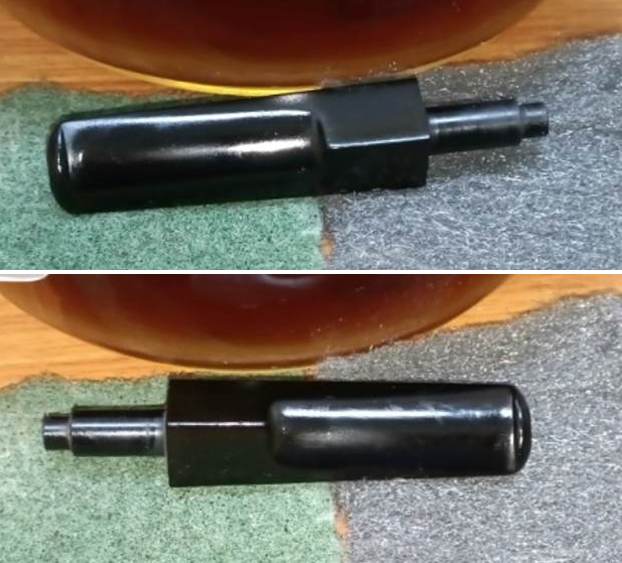
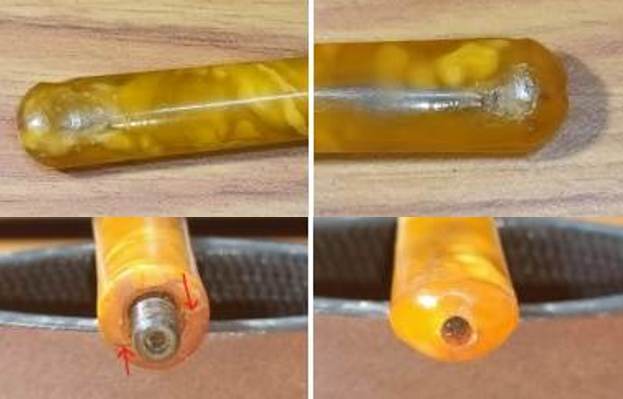
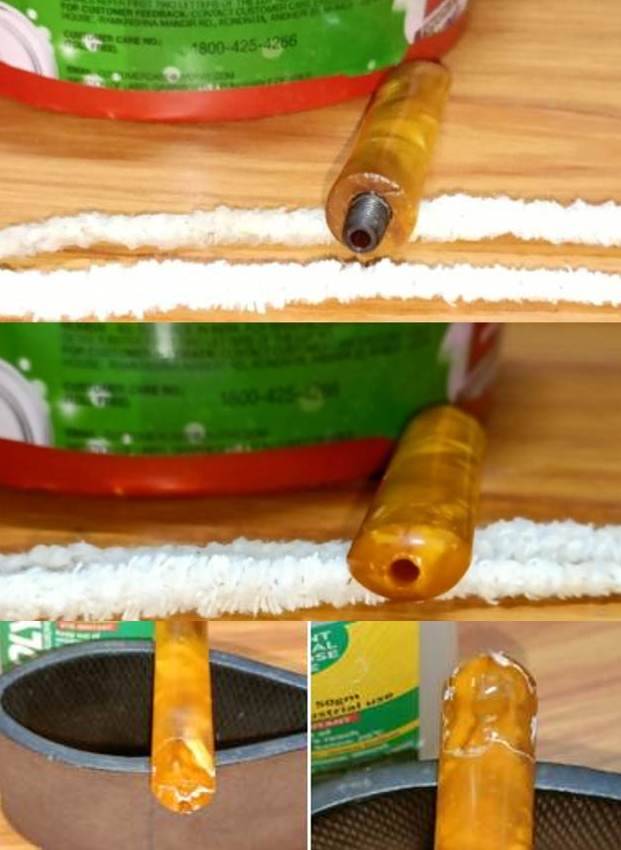
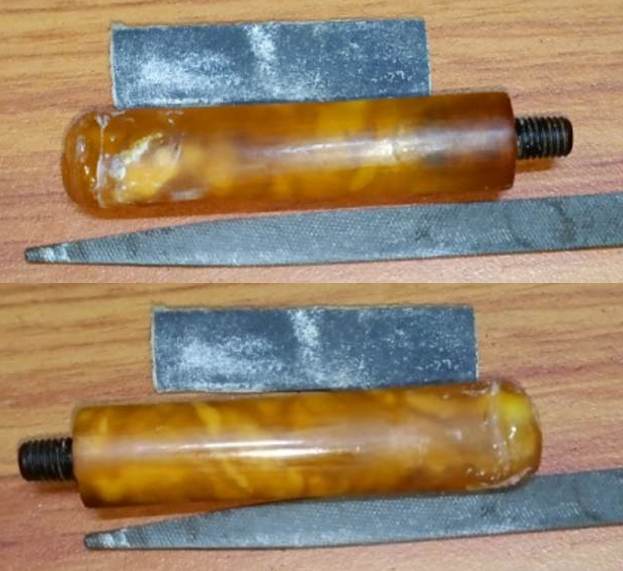
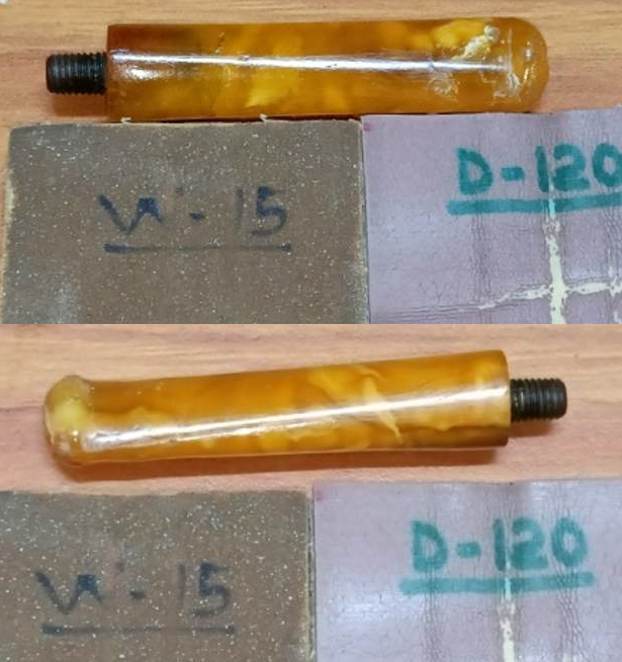
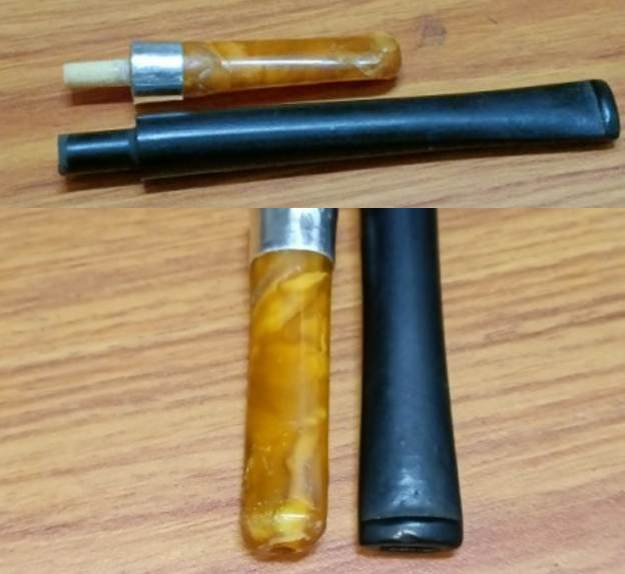
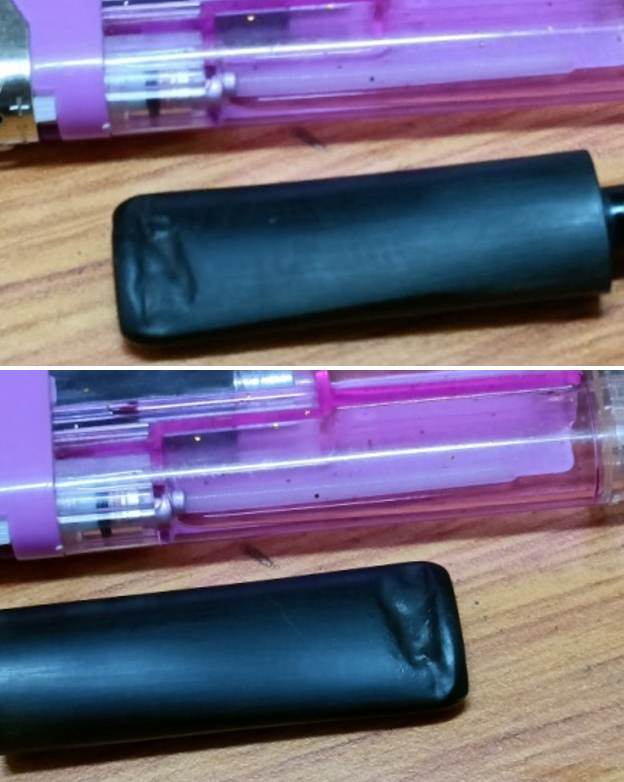
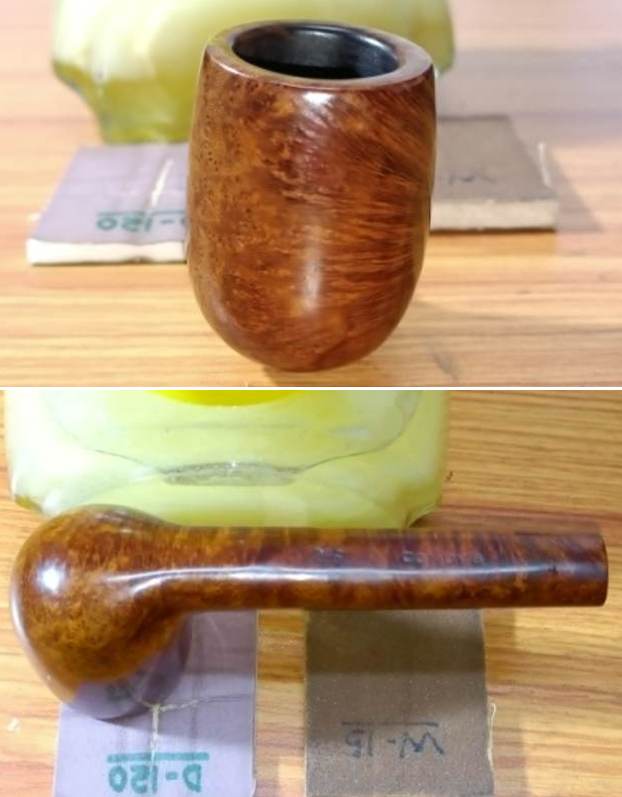
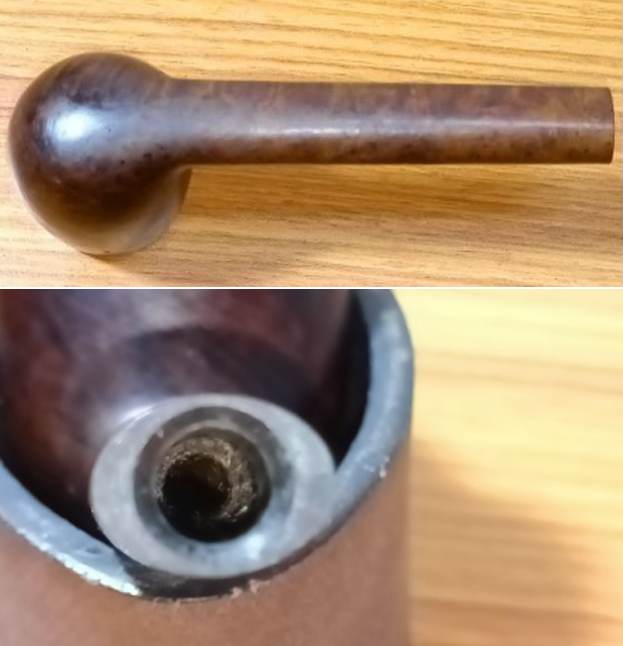
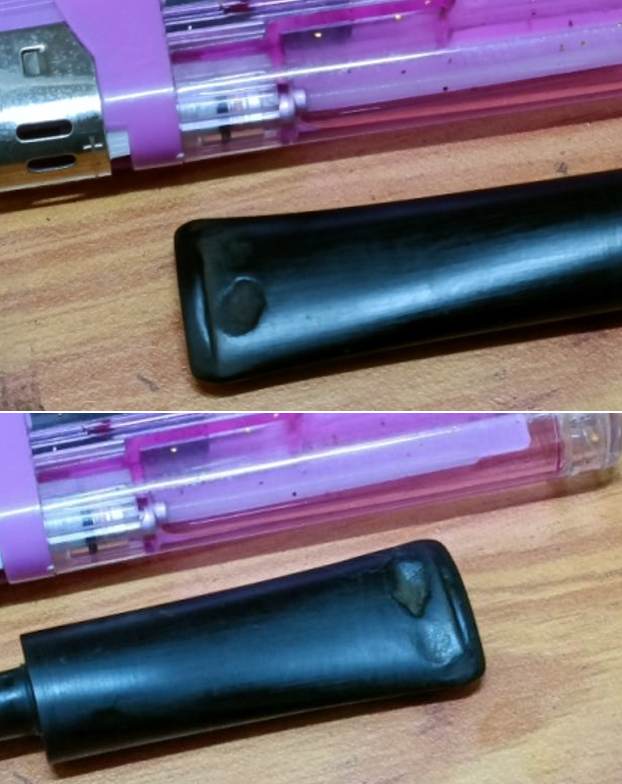
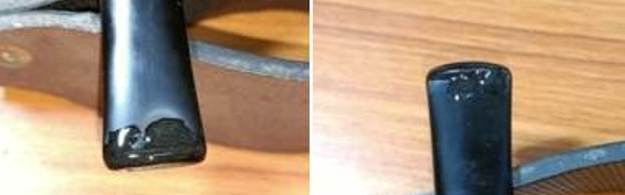
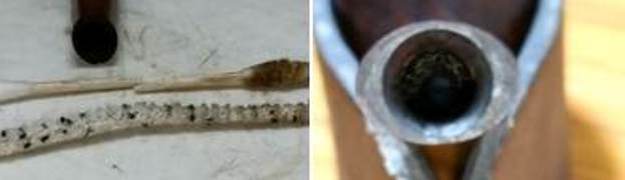
 The period correct vulcanite saddle stem with a round orifice has a quality feel to it. It is oxidized and is missing a chunk of vulcanite from the bite zone including the button and the round slot. The area around the damaged portion has deep tooth indentations. The step tenon is covered in accumulation of old oils, tars and grime. I will rebuild the damaged portion of the stem using activated charcoal and CA superglue and thereafter match the repaired portion with the stem profile and the rest of the stem surface. After the cleaning and polishing regimen, the repairs should blend in well with the stem surface.
 The Process
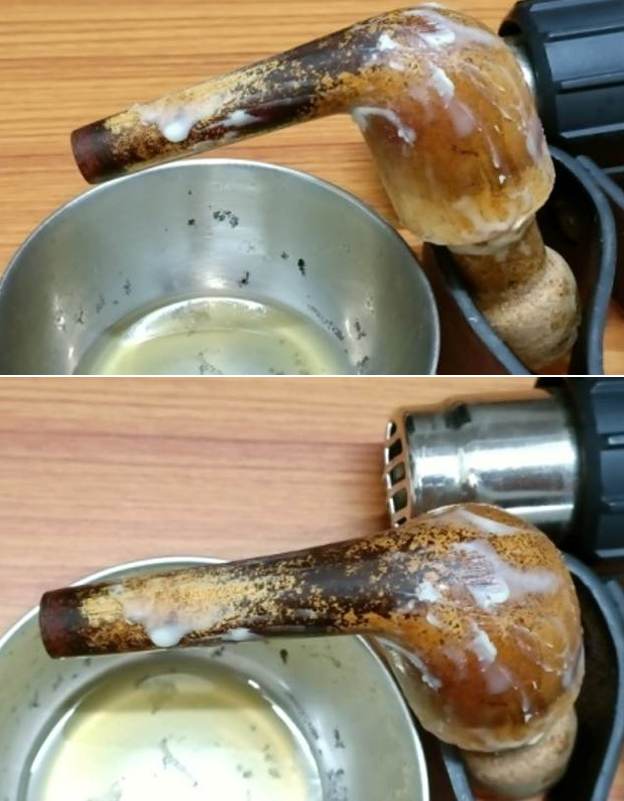
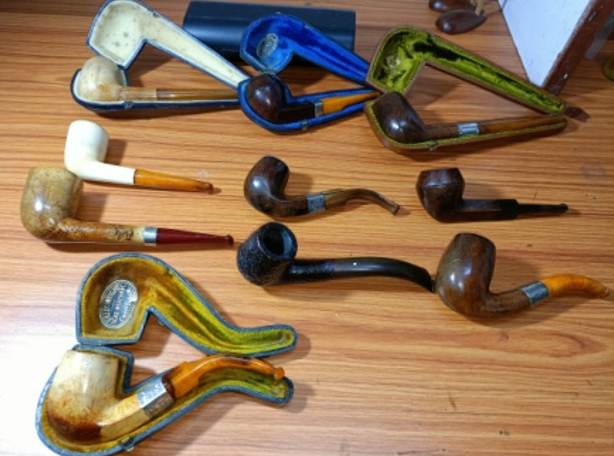
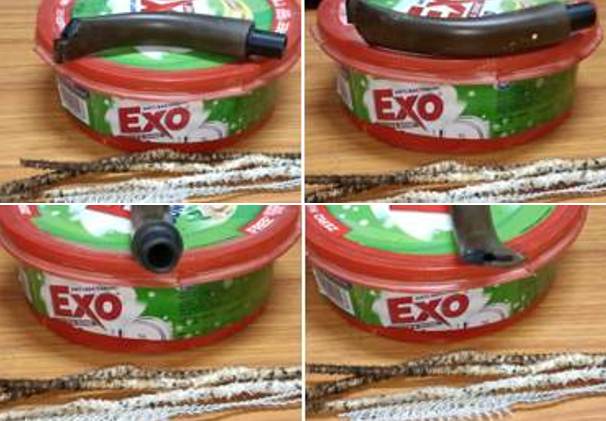
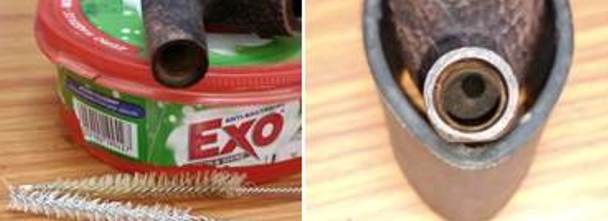
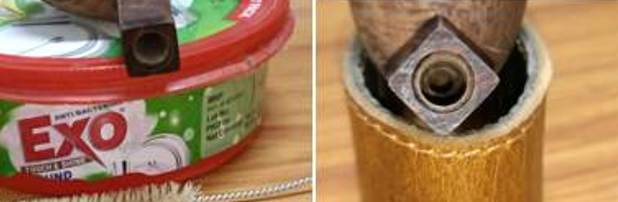
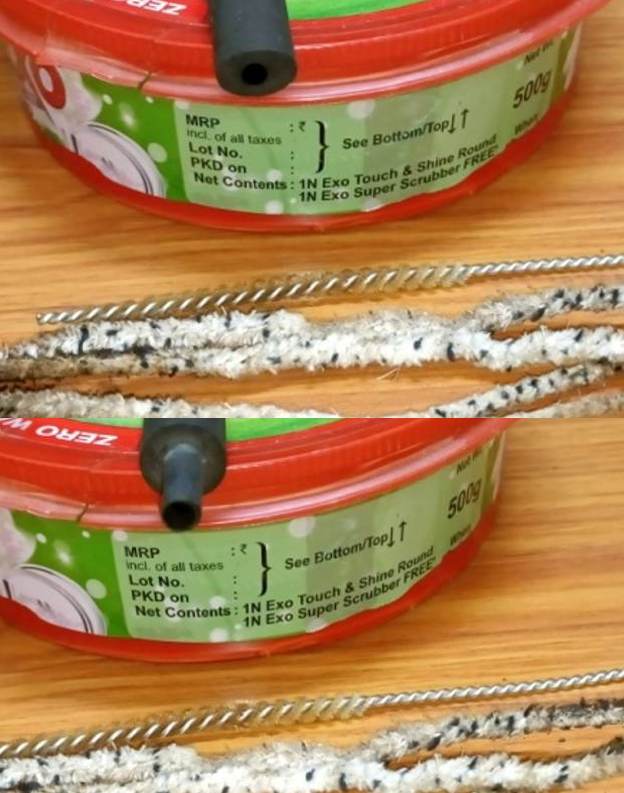
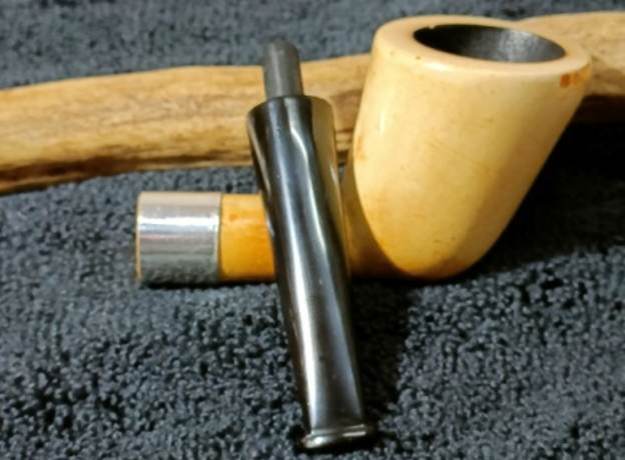
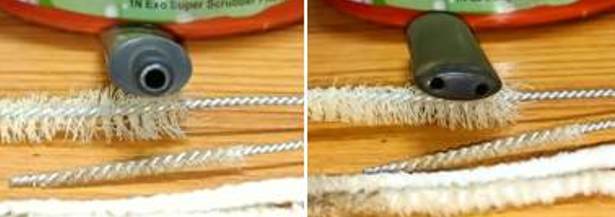
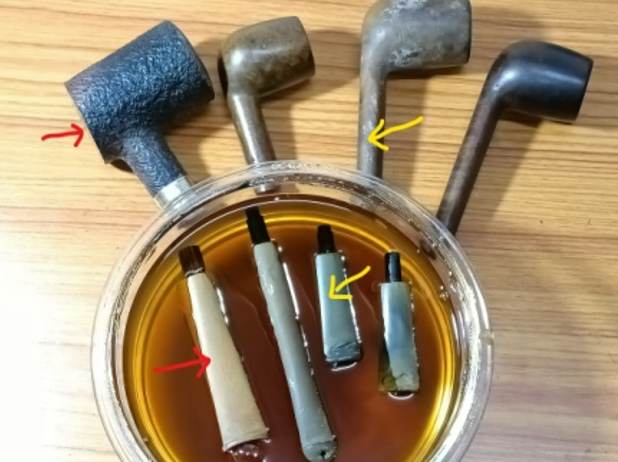
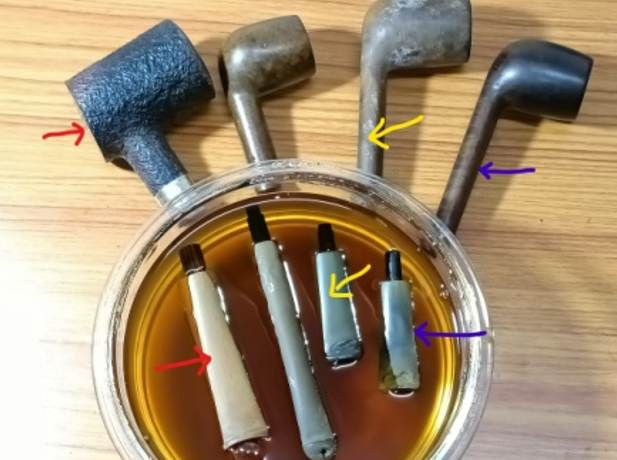
I began the repair and refurbishing process with cleaning of the stem internals. Using thin shank brushes and anti-oil dish washing soap, I cleaned the stem airway. I have modified this process of cleaning the stem airway by doing away with pipe cleaners and alcohol as it saves me a ton of pipe cleaners, which is a precious commodity for me here in India. I continued this cleaning till only white clean foam came out of the stem airway, indicating that the airway was nice and clean. I ran a couple of pipe cleaners dipped in alcohol through the airway to dry it out and make sure that there are no traces of soap and gunk hidden in the airway. With the stem internals now clean, I moved to external cleaning of the stem surface by dunking the stem into “Before and After Deoxidizer” solution developed by Mark Hoover. The solution helps to draw out heavy oxidation to the surface making it’s further removal a breeze, while the minor oxidation is eliminated to a very great extent. I usually dunk stems of few pipes that are in-line for restoration and this BARLING’S MAKE is marked in yellow arrow. I generally allow the stems to soak in this solution overnight for the solution to do its work.
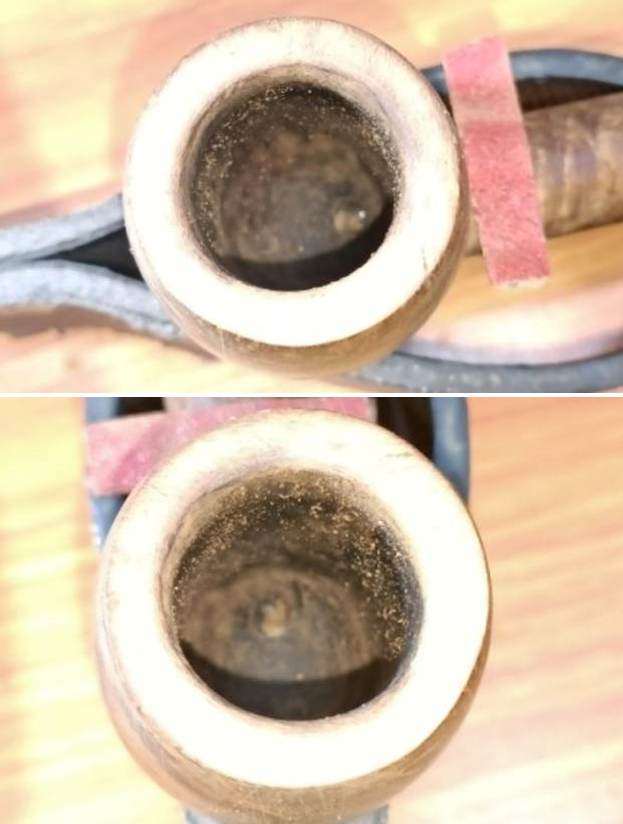
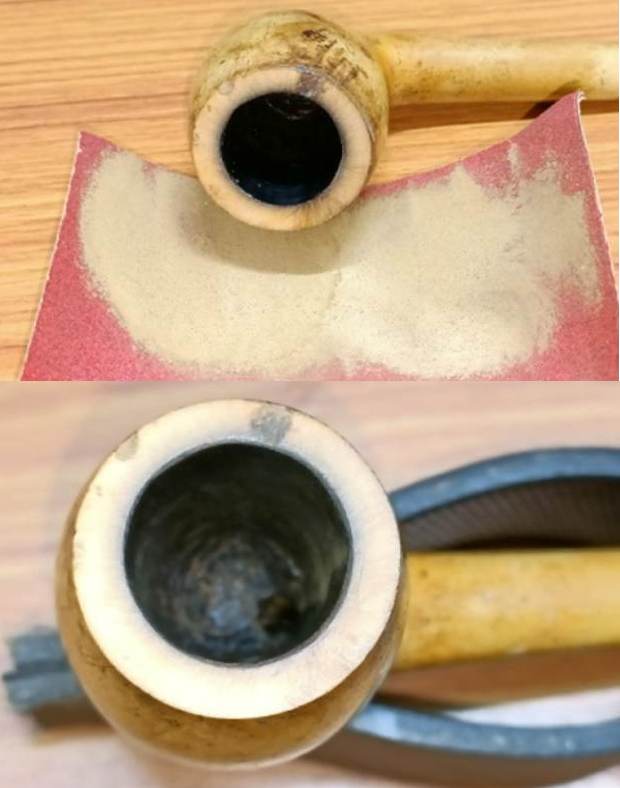
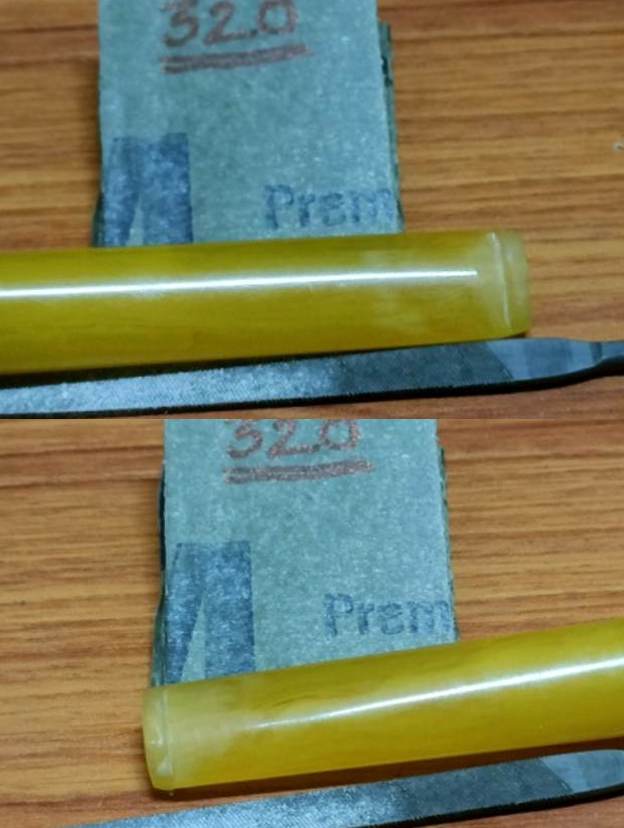
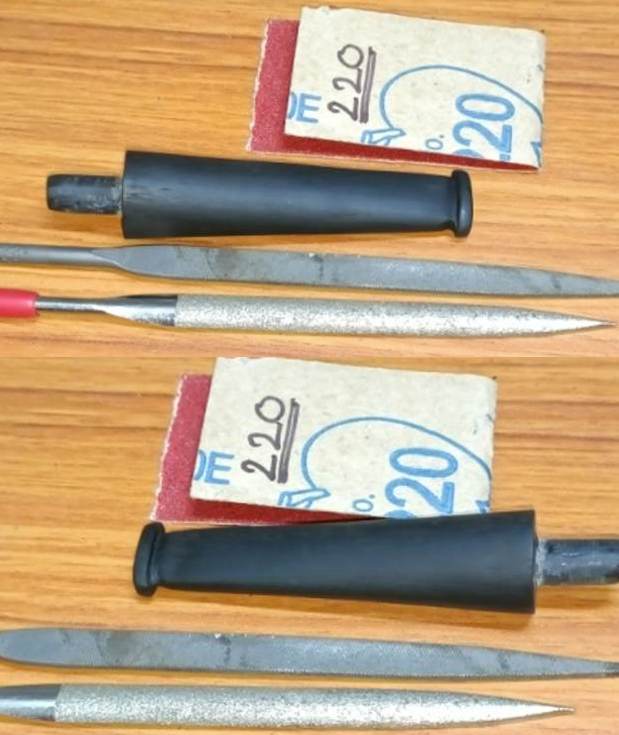
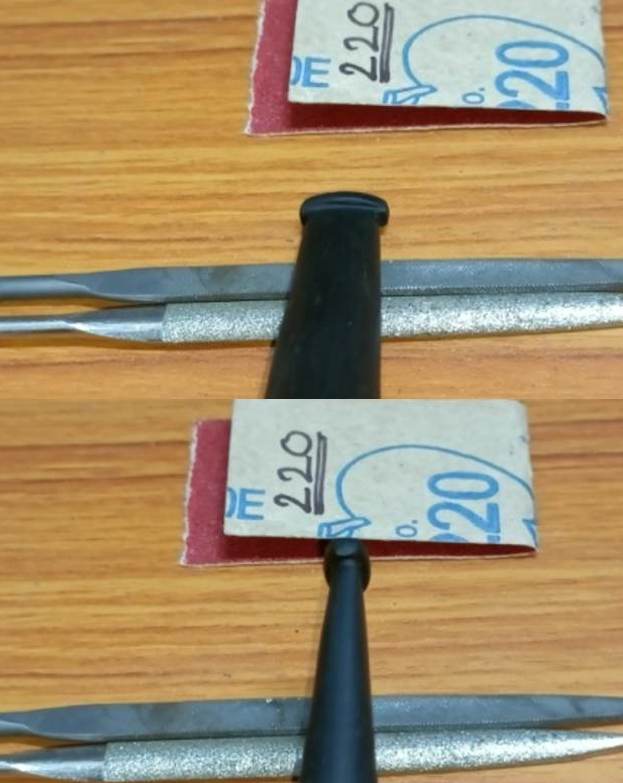
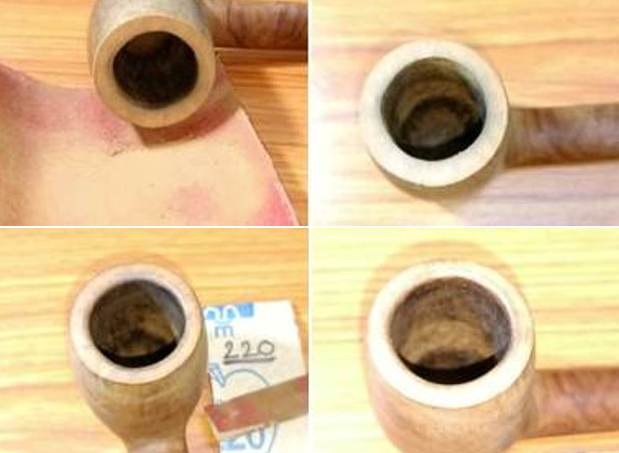
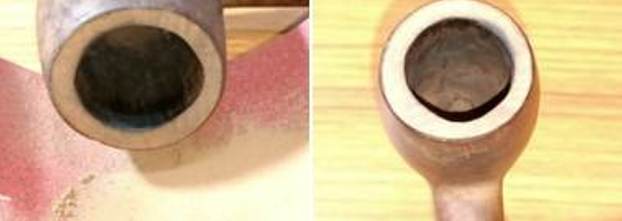
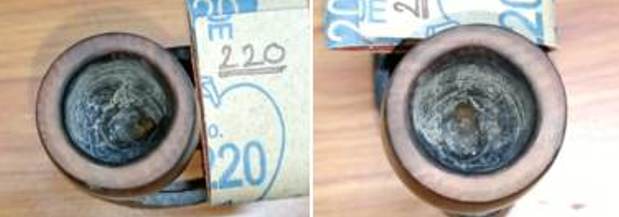
 While the stem was soaking in the De-oxidizer solution, I reamed the chamber with size 2 head of the PipNet pipe reamer. I removed the carbon from the areas where the reamer head could not reach with my fabricated knife. To completely remove the residual carbon from the walls of the chamber and smooth out the walls, I sanded the chamber walls with a folded piece of 220 grit sandpaper followed by cleaning the chamber with a cotton swab wetted with isopropyl alcohol. The chamber walls are in pristine condition. I gently scrapped off the lava build up over the rim top using a sharp knife to avoid damage to the surface.
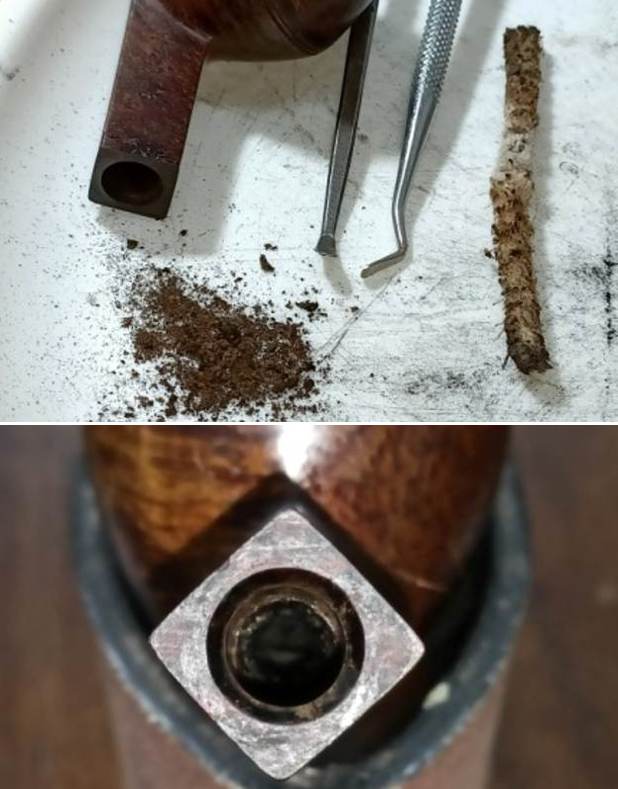
 I cleaned the mortise and shank airway using a dental pick and hard / soft bristled pipe cleaners dipped in isopropyl alcohol. I shall continue with further cleaning of the shank internals once I clean the external stummel surface.
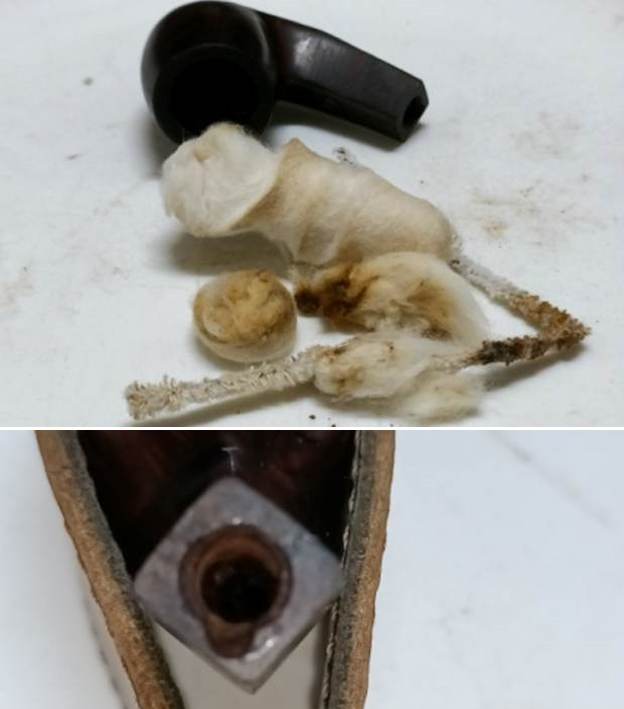
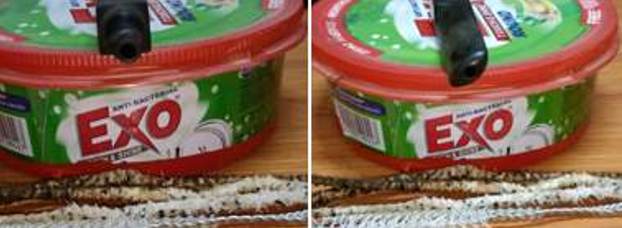
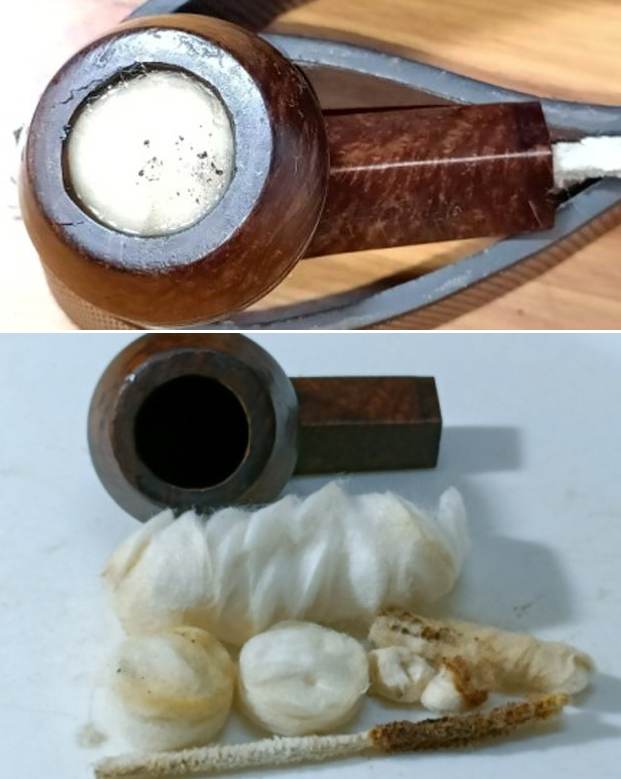
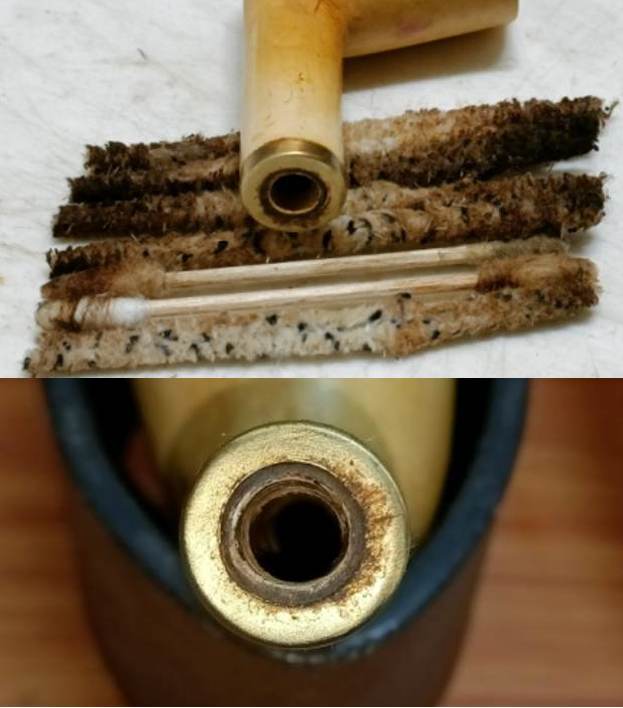
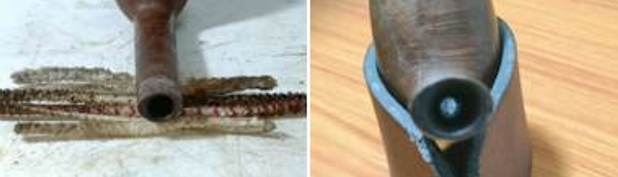
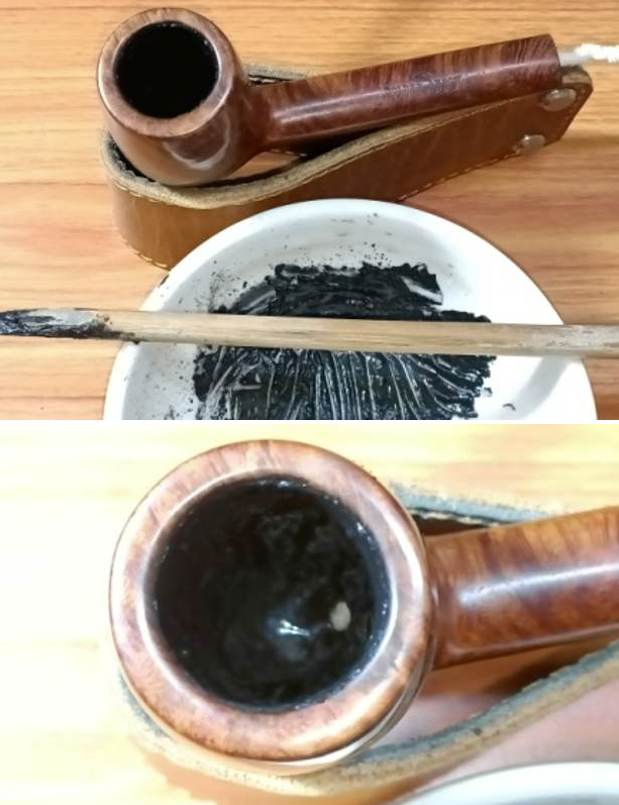
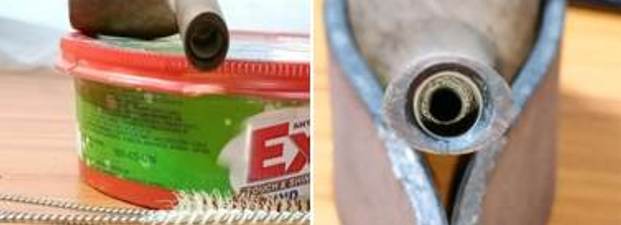
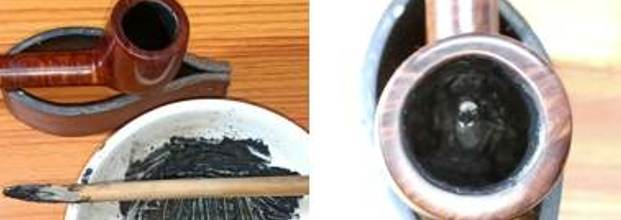
 Next, I decided to subject the chamber and mortise to cotton and alcohol bath. I packed the chamber with cotton and drew out a wick from the cotton and along with a folded regular pipe cleaner, inserted it into the mortise and through the draught hole into the chamber. I tightly packed cotton balls into the remaining portion of the mortise. Thereafter, I soaked the cotton balls with isopropyl alcohol up to the brim. About half an hour later, the level of alcohol had gone down, having being absorbed by the cotton. I topped it up once again and set it aside overnight. By next afternoon, the cotton and alcohol had drawn out all the remaining oils and tars from the chamber and mortise. I removed the cotton balls and the dirt can be gauged by the appearance and coloration of the cotton balls and the pipe cleaner. With my fabricated knife and dental tools, I spent the next hour scrapping out the entire loosened gunk from the mortise. I ran pipe cleaners through the mortise and draught hole to clean out all the loosened tars and gunk that was lodged in the draught hole and mortise. The chamber and mortise now smelled clean, fresh and looked it too. I set the stummel to dry out naturally.
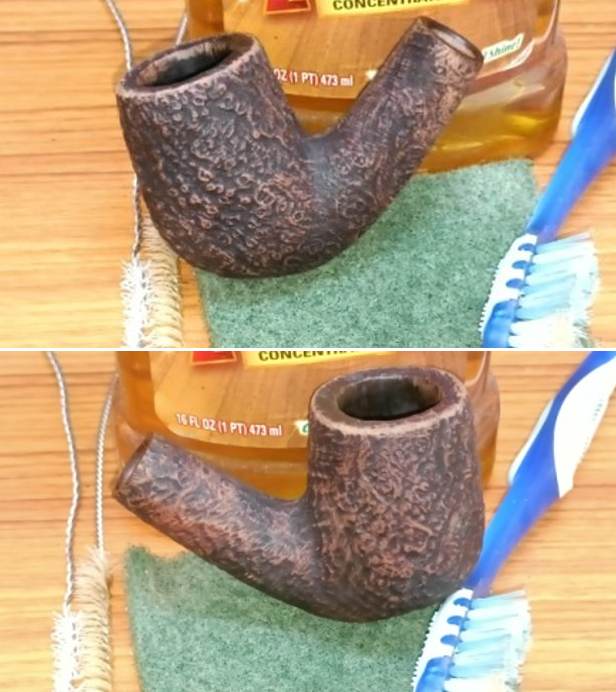
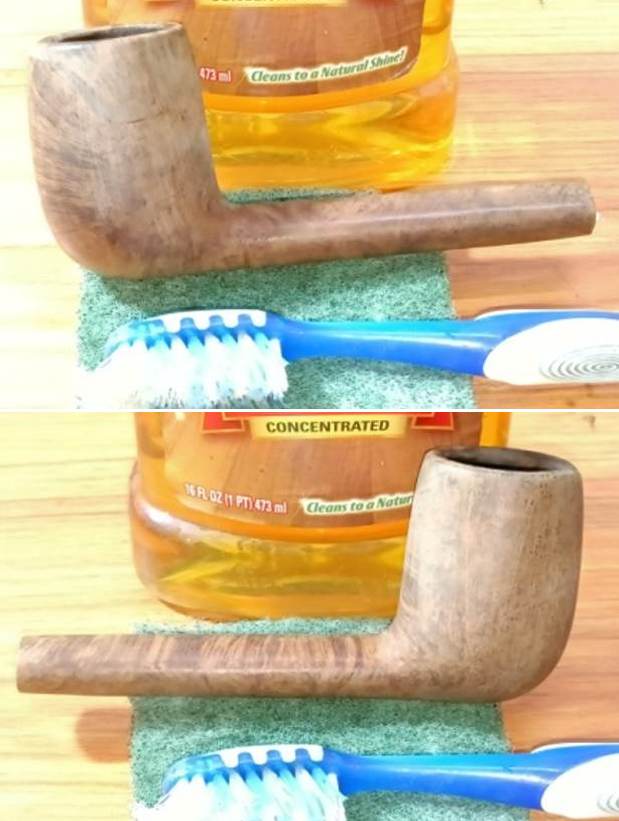
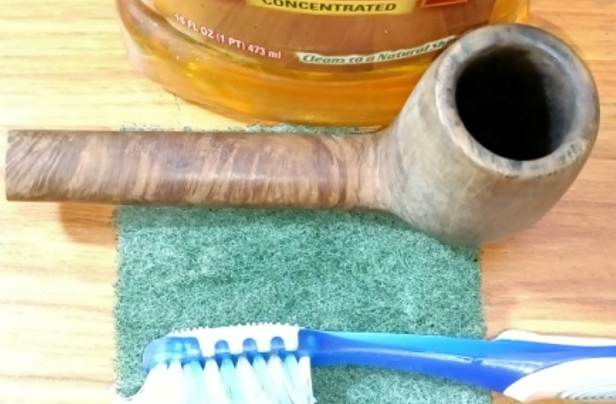
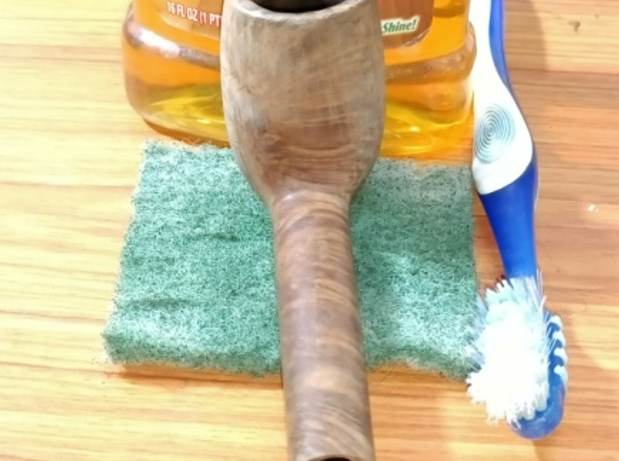
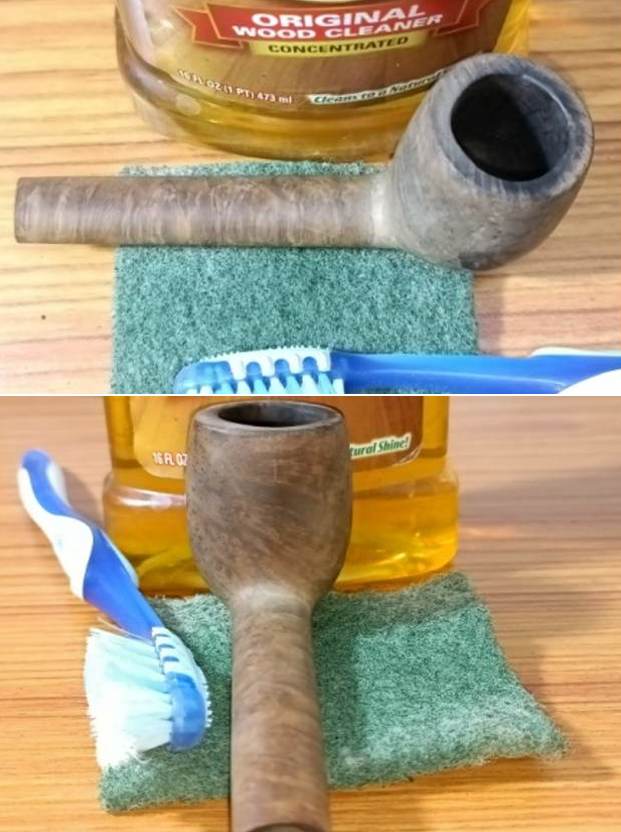
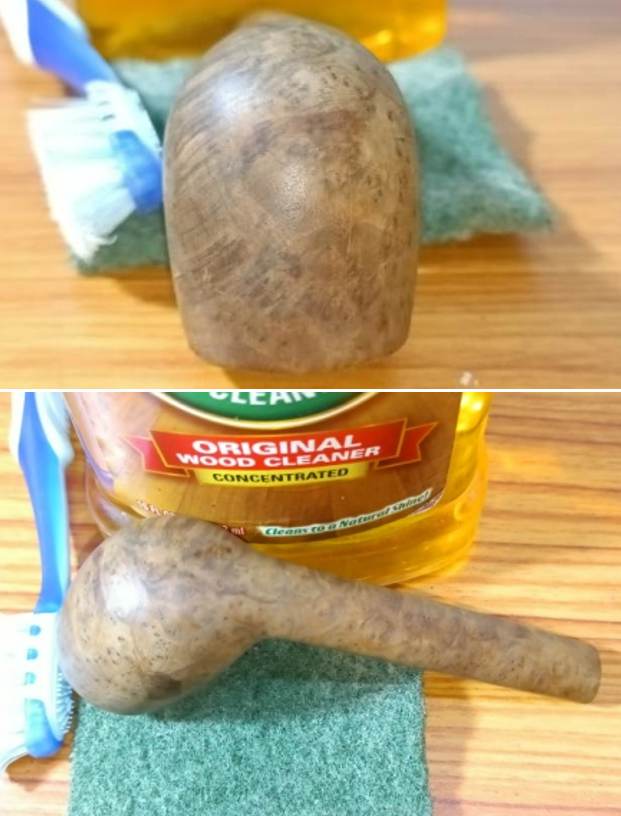
 Once the internals of the chamber and shank were cleaned, I cleaned the external surface of the stummel with Murphy’s Oil soap and cotton swabs followed by scrubbing the surface with a toothbrush and dish washing soap. This rid the stummel surface of all the accumulated dust, dirt and grime. Using a piece of Scotch Brite scrub, I deliberately cleaned the rim top and removed the crud from the surface. The damage to the rim edges is, thankfully, not as severe as I had anticipated.

 I also cleaned the shank internals with dish washing soap and a shank brush. I set the stummel aside to dry out naturally while I worked the stem.
 By the time I was done with internal and external cleaning of the stummel, the stem had been in the deoxidizer solution for nearly 24 hours. I cleaned the stem and the stem airway under running warm water and scrubbed the raised oxidation from the surface using a Scotch Brite pad and the airway with a thin shank brush. I further removed the oxidation by scrubbing the stem with 0000 grade steel wool. Once the stem was dried with paper towels, I applied a little olive oil to rehydrate the stem.
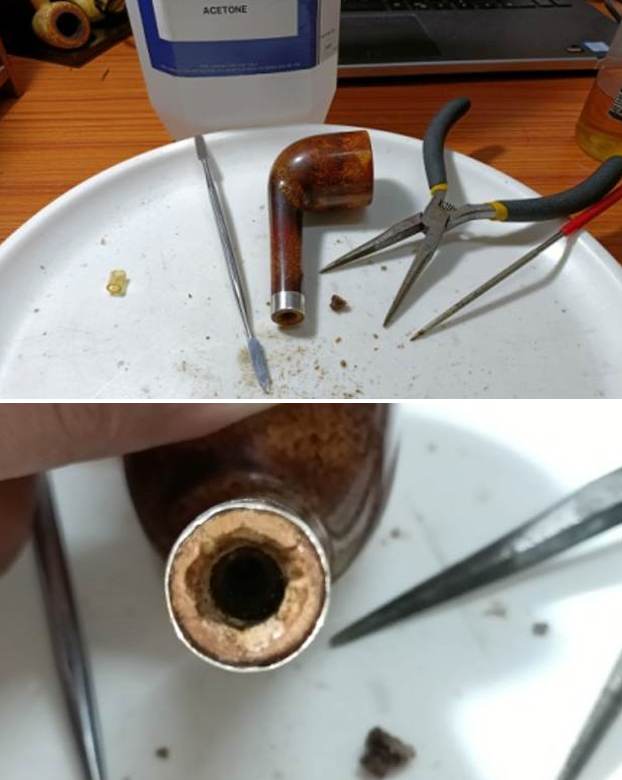
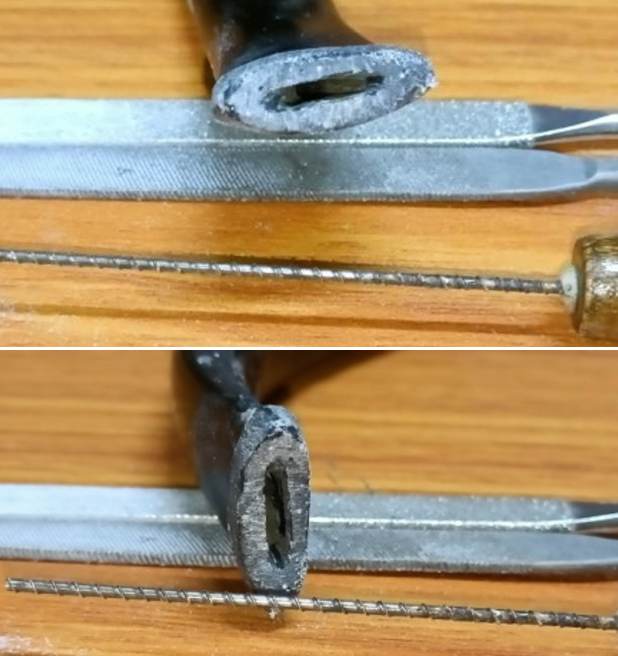
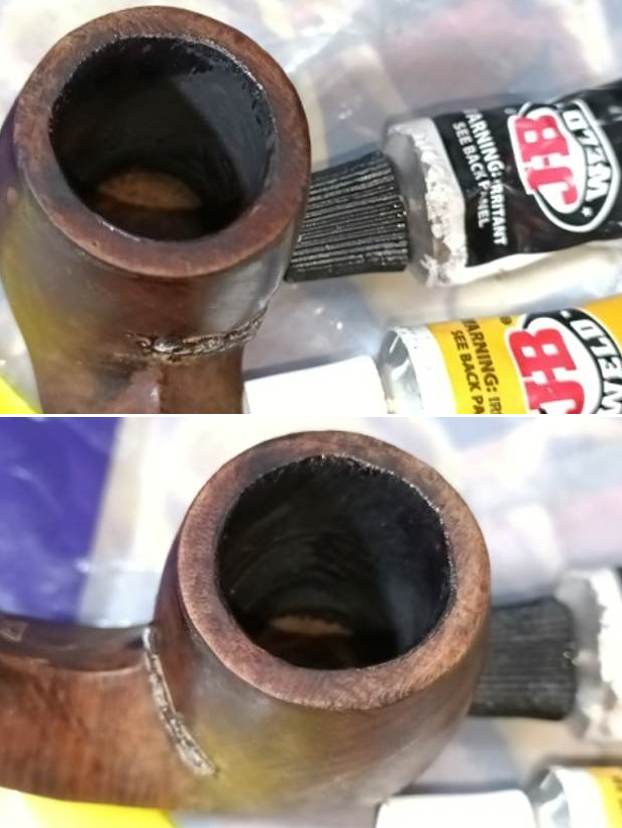
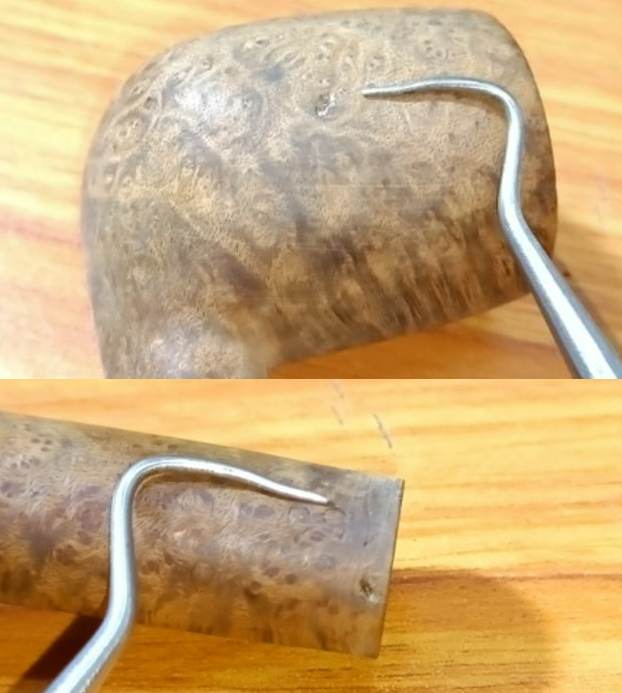
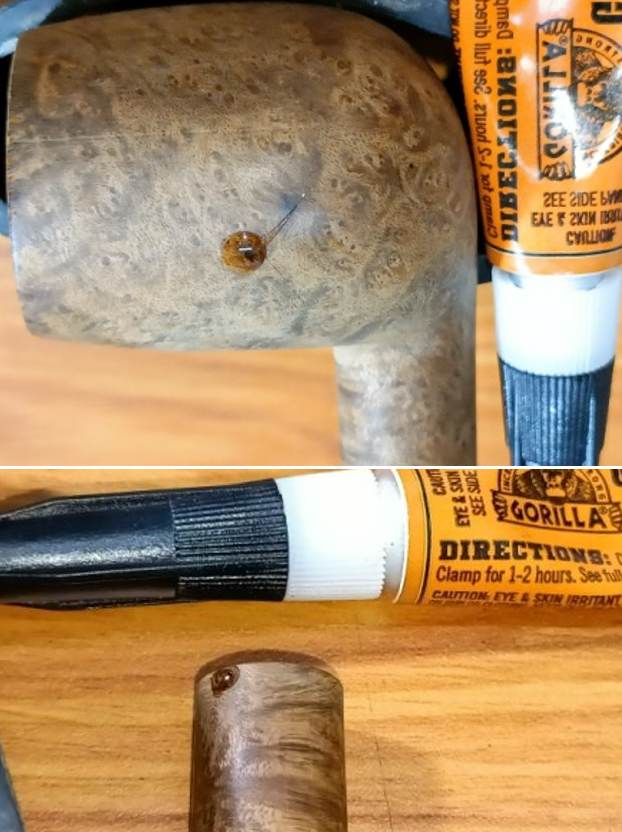
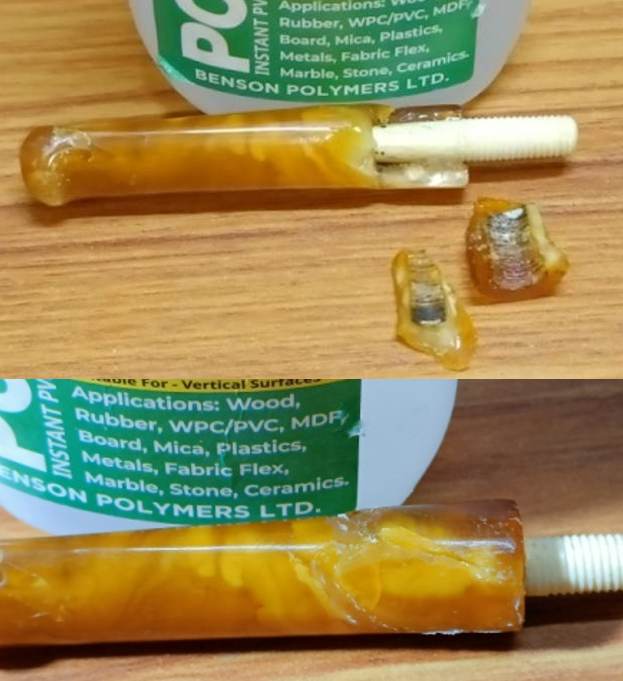
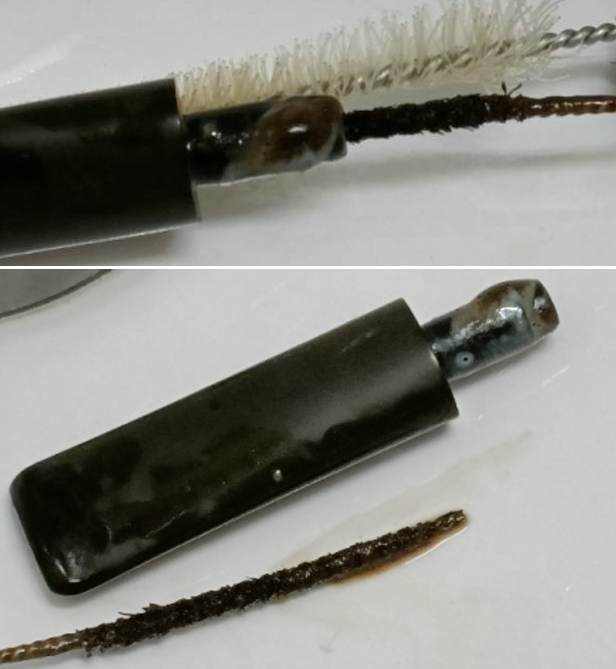
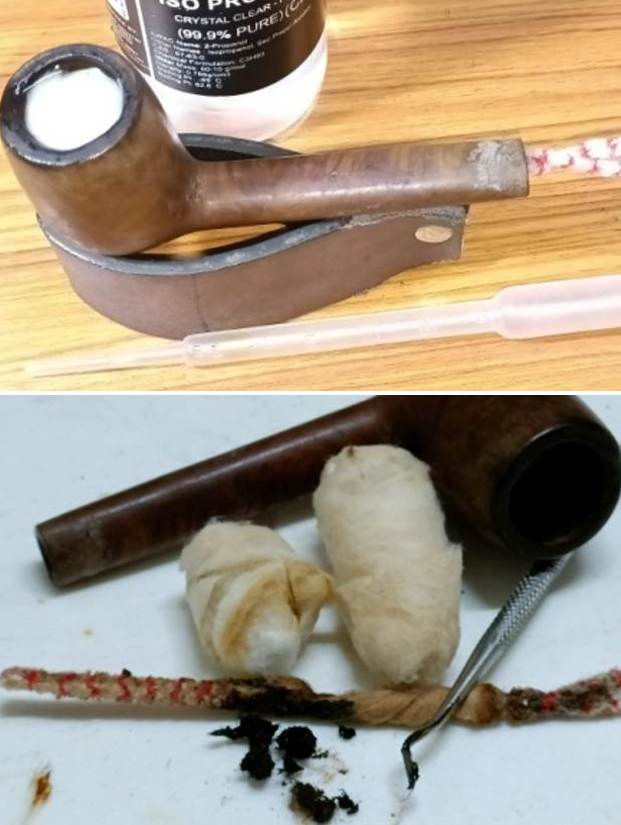
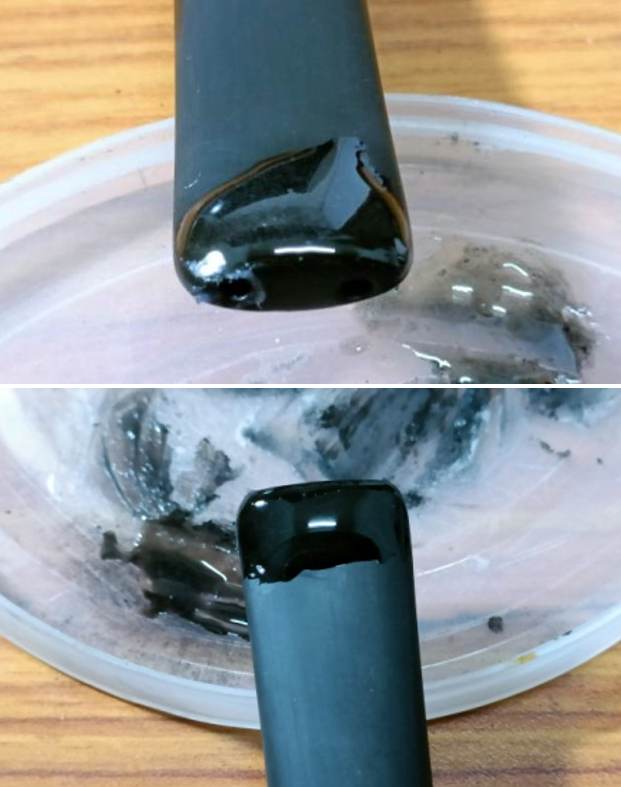
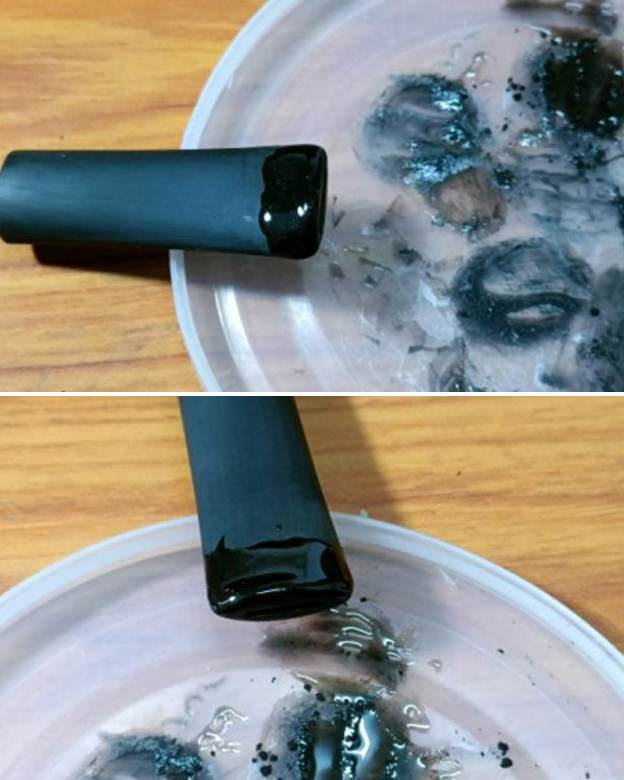
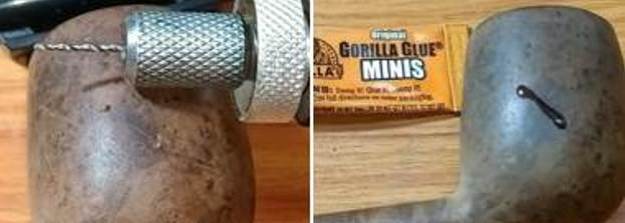
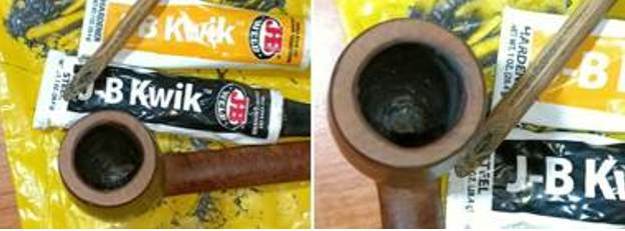
 I wiped the stem surface, particularly the damaged button end, with a cotton pad and alcohol to remove any traces of dirt and grime. To begin the stem repairs, I first wound a scotch tape around the tapered portion of a pipe cleaner and inserted it into the stem airway. I prepared a mix of CA superglue and activated charcoal and generously applied it over and extending beyond the broken surface and set it aside for curing over night. The tape will help prevent the mix from clogging the stem airway.
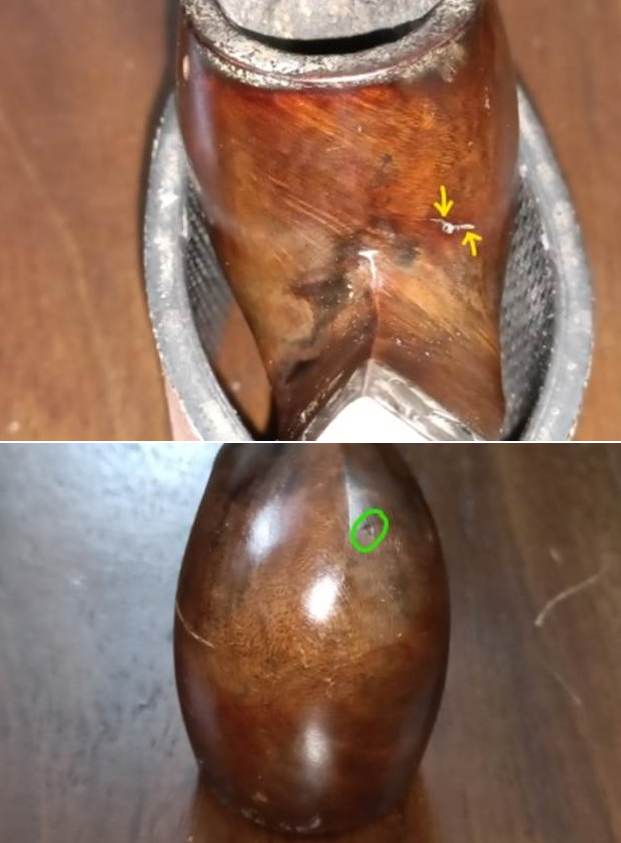
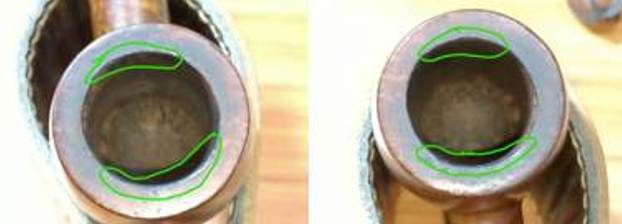
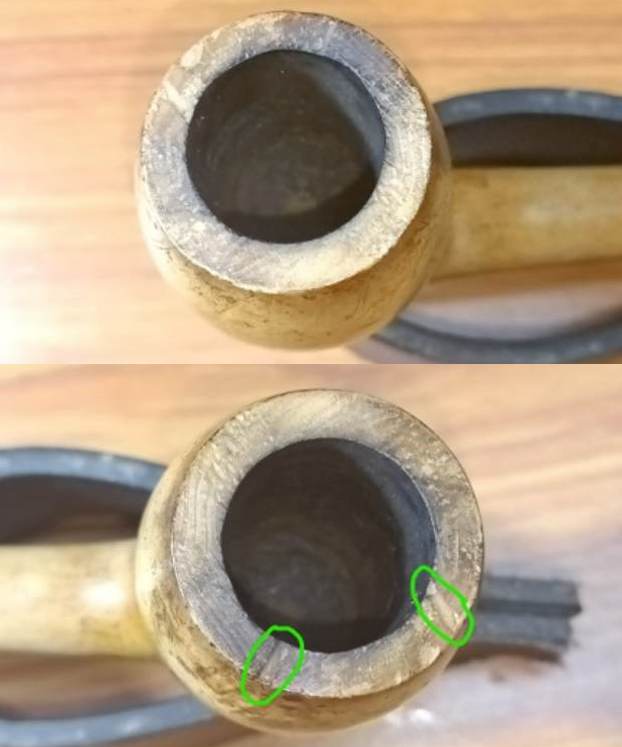
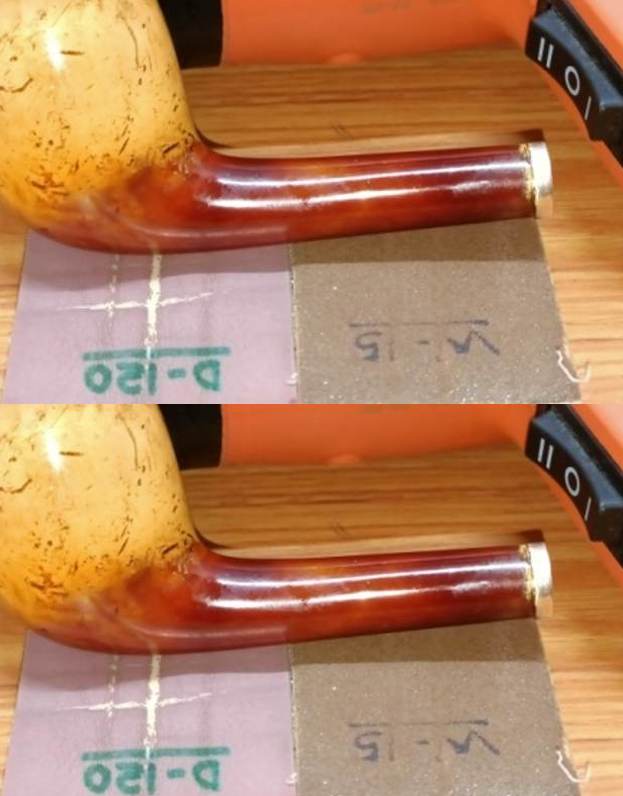
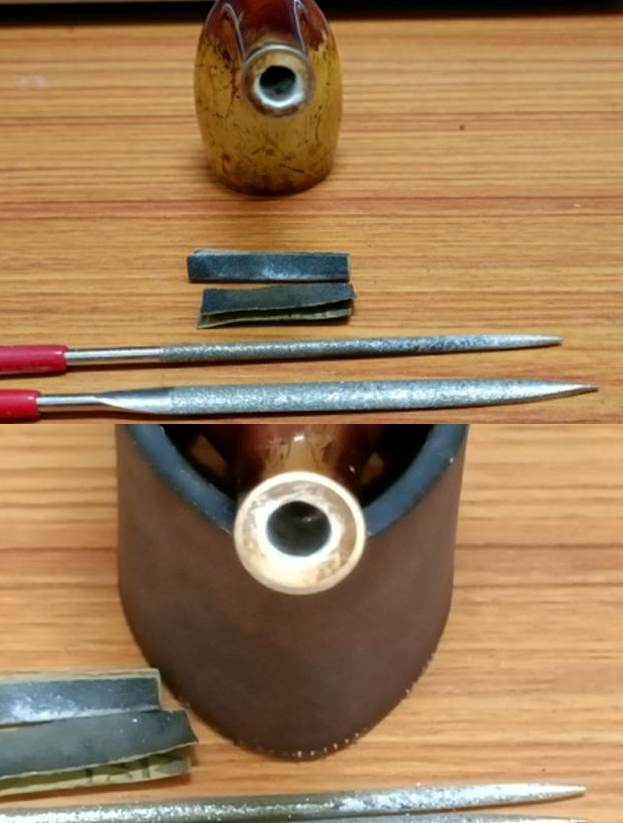
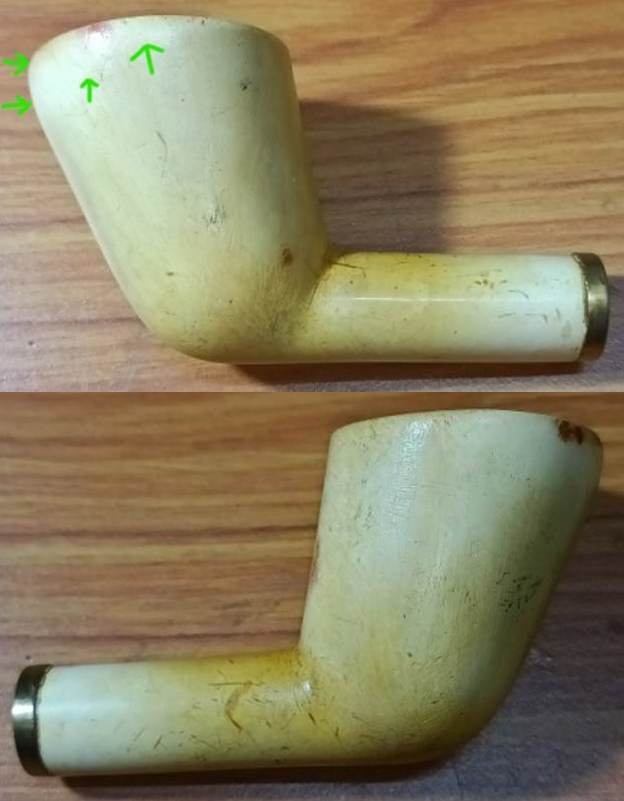
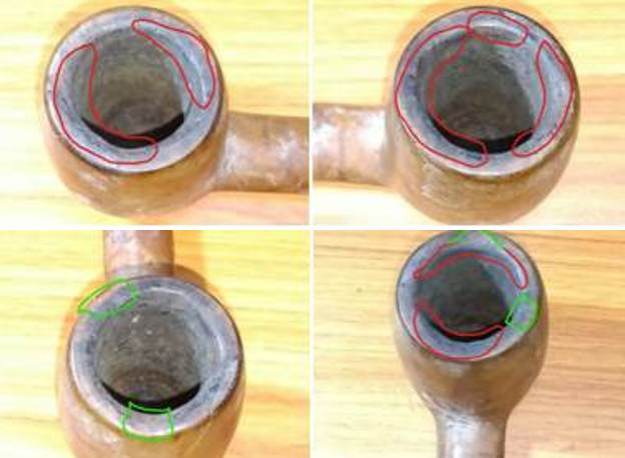
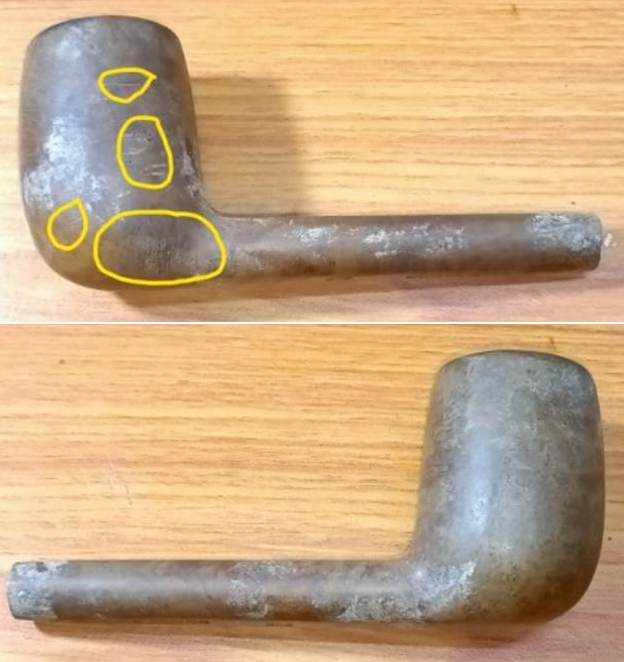
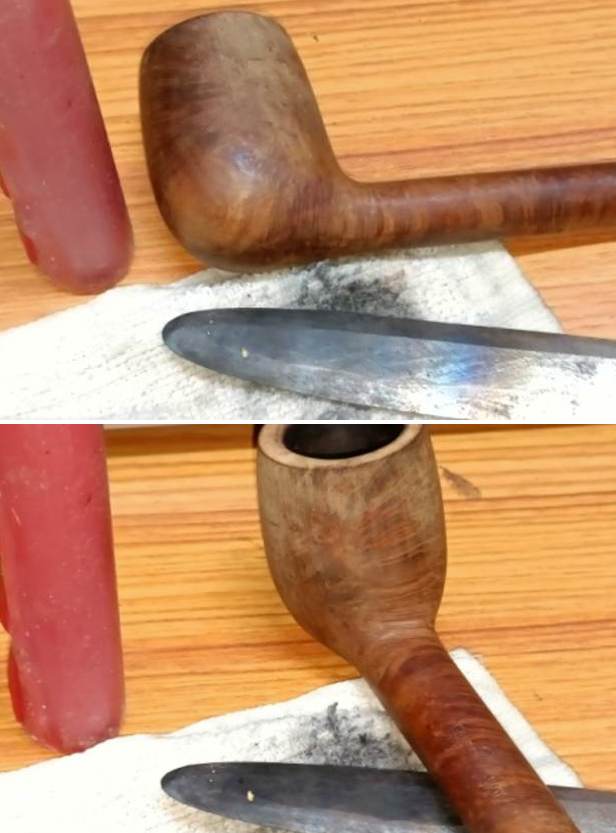
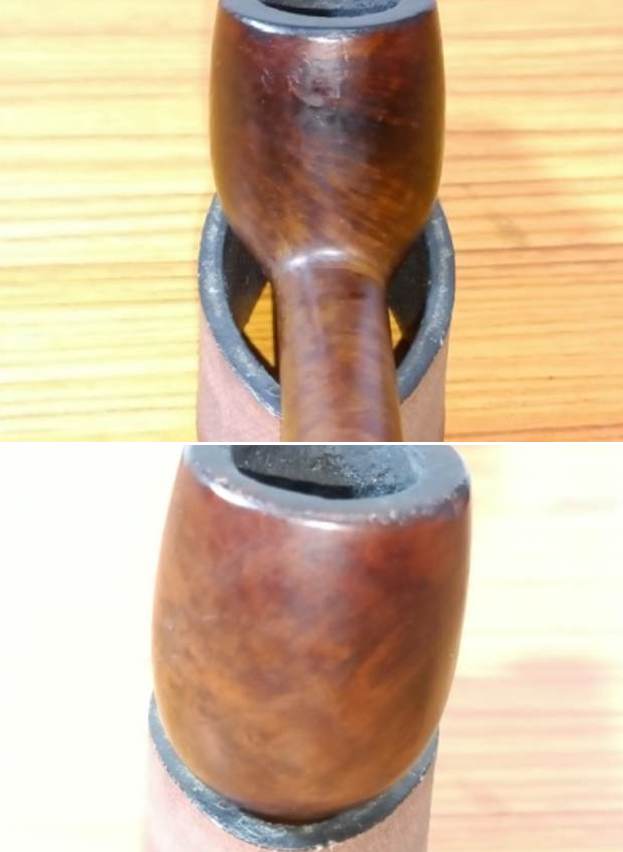
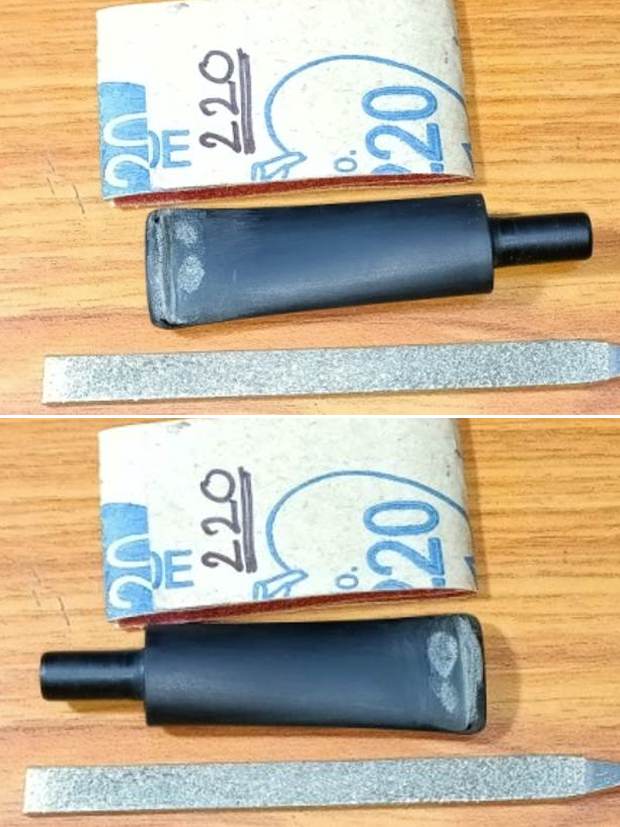
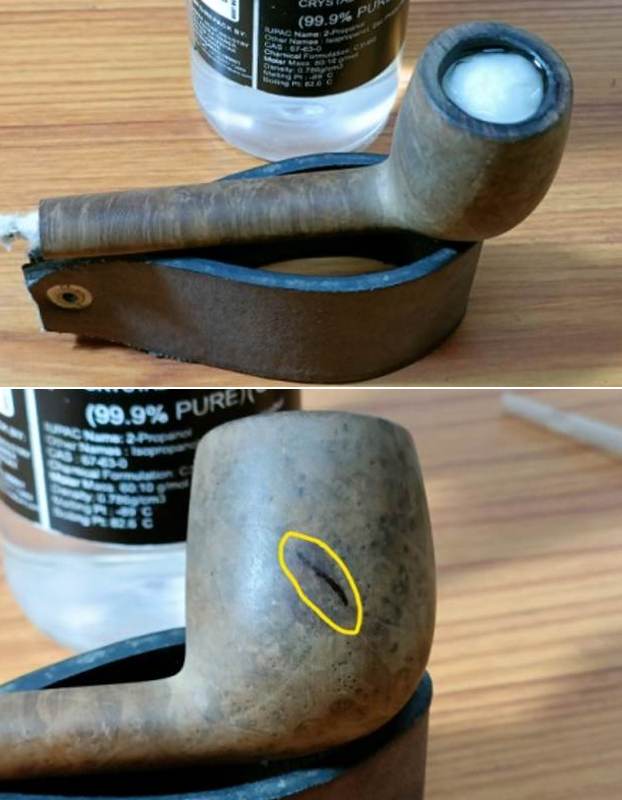
 While the stem fills were curing, I addressed the damage to the rim top surface by topping the rim to reduce the charred surface and bringing the bowl back to round. I always use a square piece of 220 grit sand paper and firmly hold it with my hand on my work table. I work the rim top on the sand paper in circular motion, frequently checking the progress as I want to keep the briar loss to a bare minimum necessary. The inner rim edge damage has not been addressed entirely with a few dings and uneven surface visible on the sides (encircled in red) and charred surface to the front of the bowl (encircled in green). Also a few minor dents and chipped surfaces are visible along the outer rim edge. These issues were addressed next.
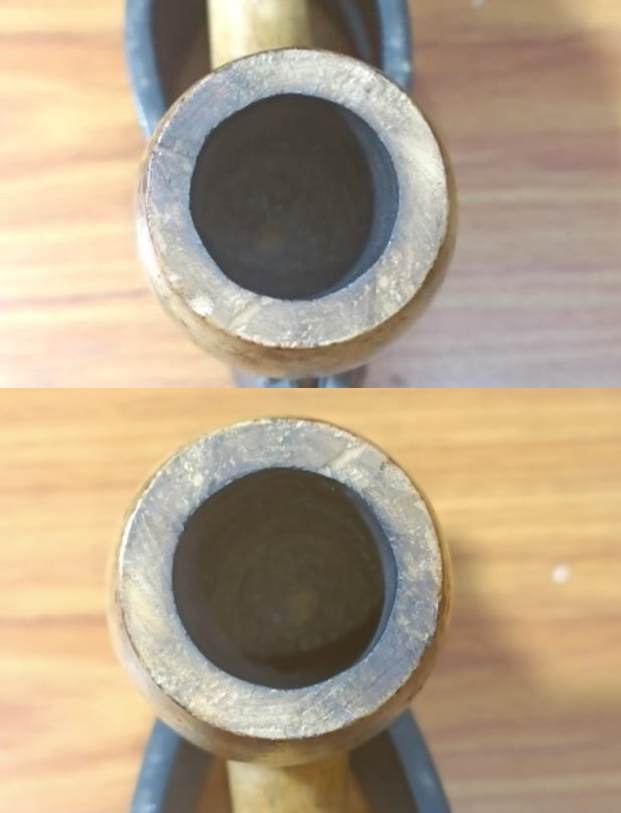
 In order to mask the still visible damage to the inner rim edge, I created an inner edge bevel by pinching a folded piece of 180 grit sand paper between my thumb and forefinger and moving along the inner edge with a constant pressure, to minimize the charring on the inner edge of the rim. Similarly, I created a slight bevel on the outer edge of the rim to address the minor dents and chipped areas.
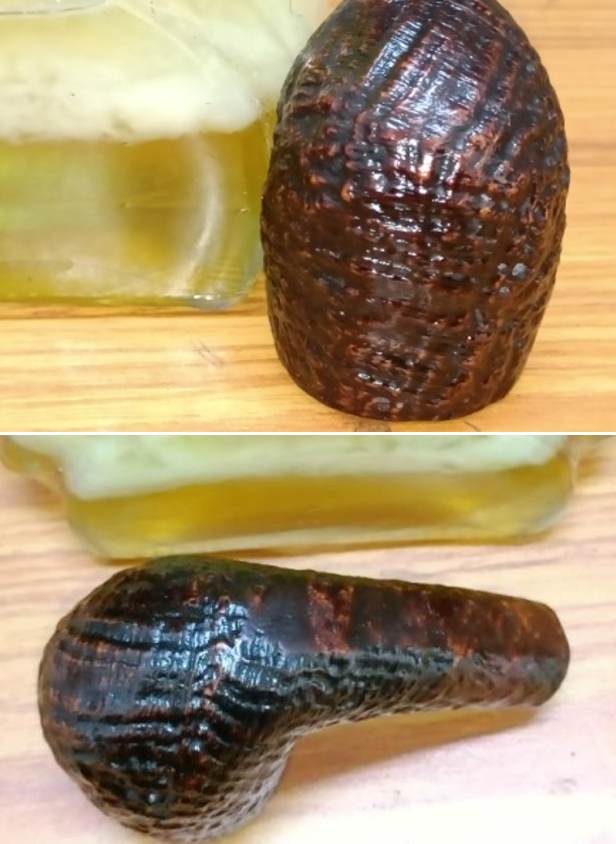
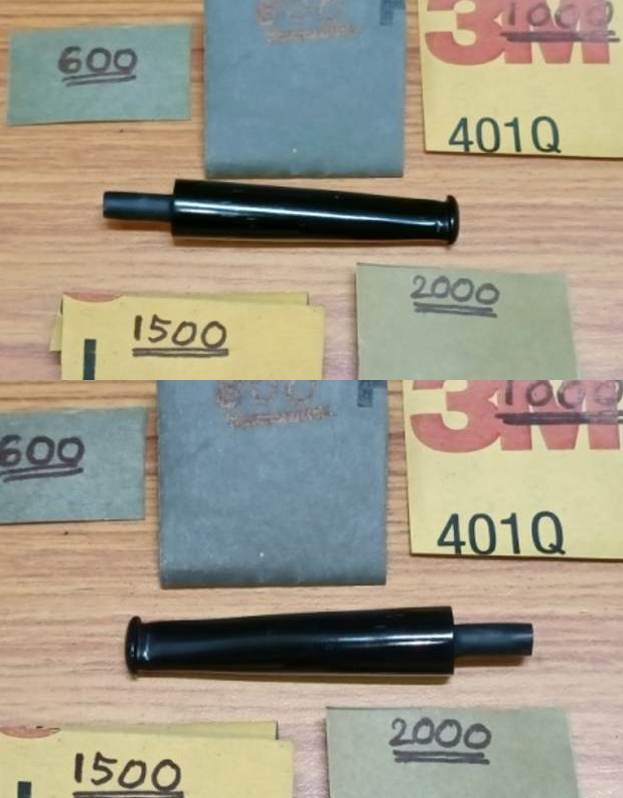
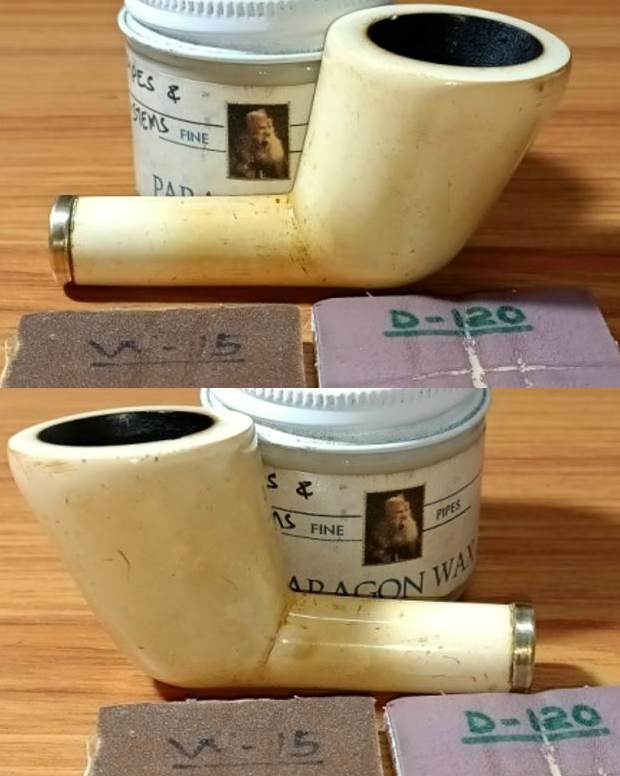
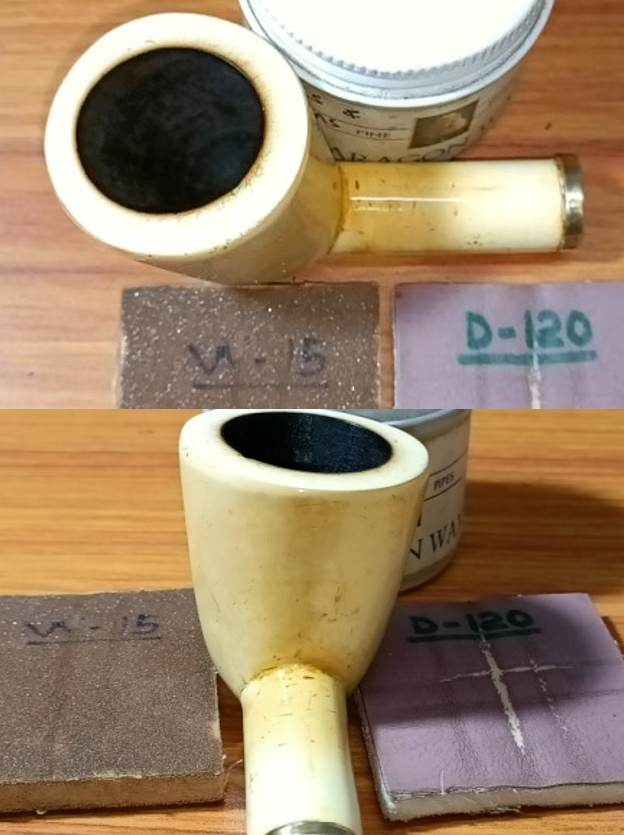
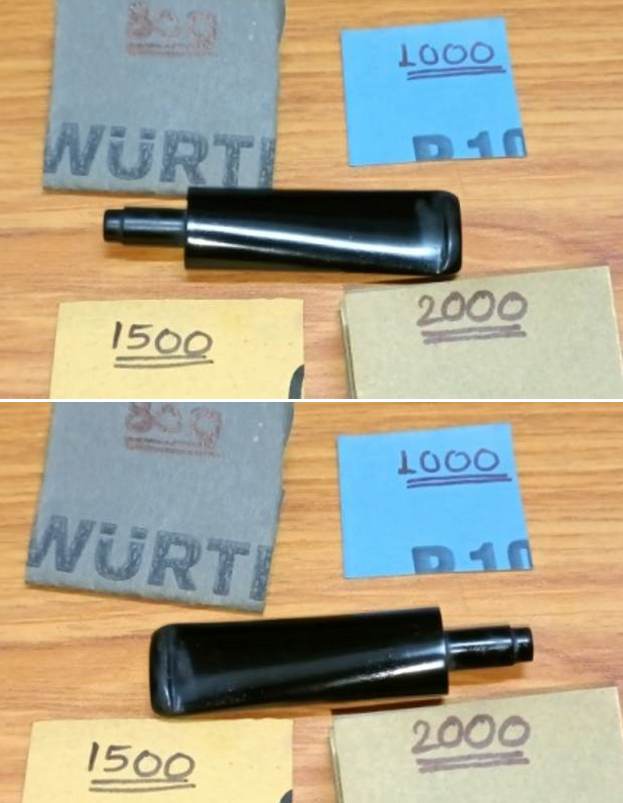
 Next, I subjected the stummel to a complete cycle of micromesh polish, wet sanding with 1500 to 12000 grit pads. I wiped the stummel with a moist cloth after every grit pad to remove the sanding dust left behind by the pads. This also helps in monitoring the progress being made and ensures early corrective action. I am happy with the progress being made until now. I massaged a small quantity of “Before and After Restoration Balm” into the briar surface with my finger tips and worked it deep into the surface and let it rest for a few minutes. The balm almost immediately works it’s magic and the briar now has a nice vibrant appearance with the beautiful bird’s eyes and cross grain patterns on full display. It was at this stage that I polished the sterling silver with a jeweller’s cloth to a nice shine.

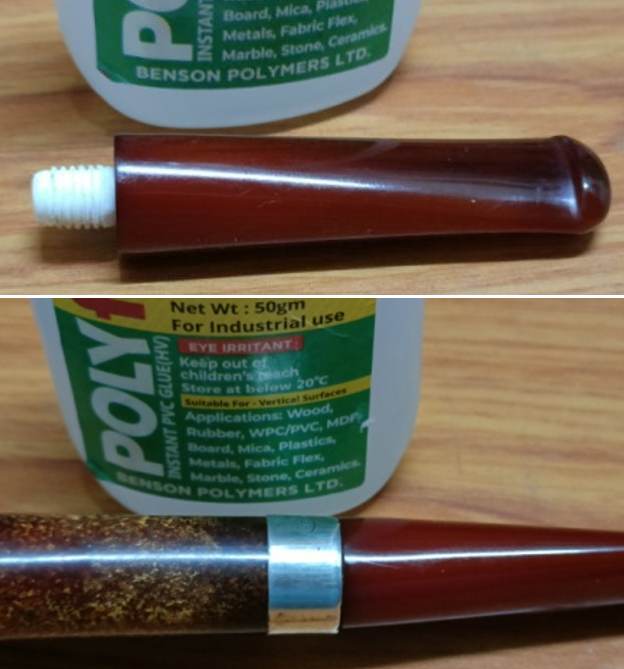
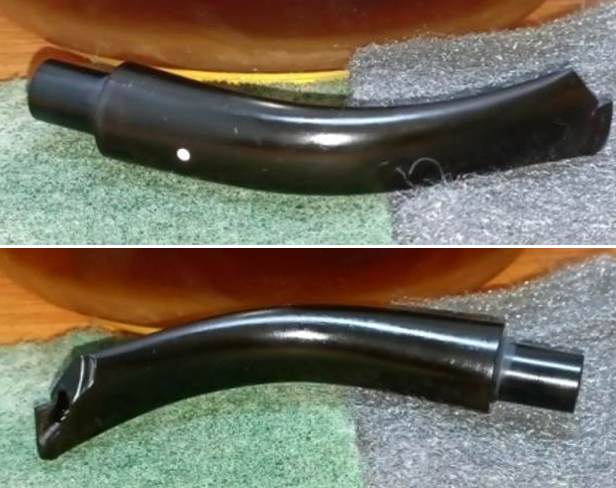
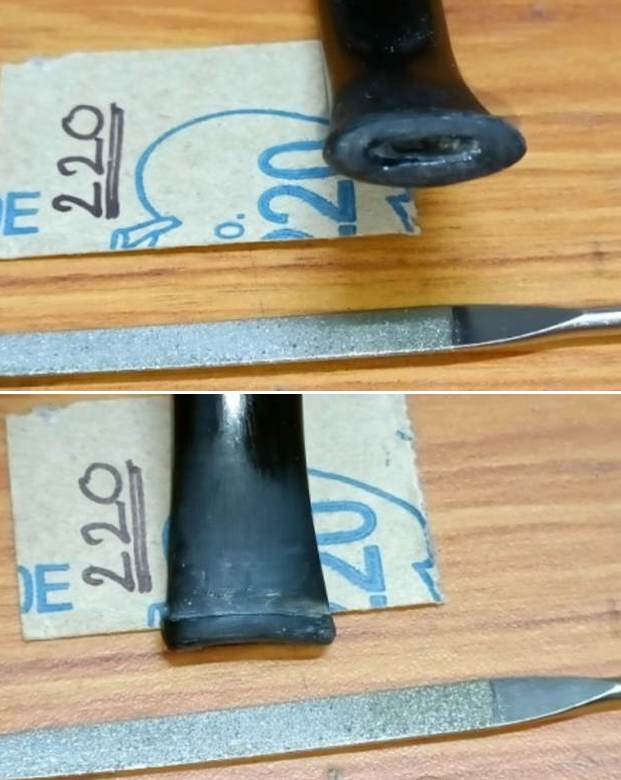
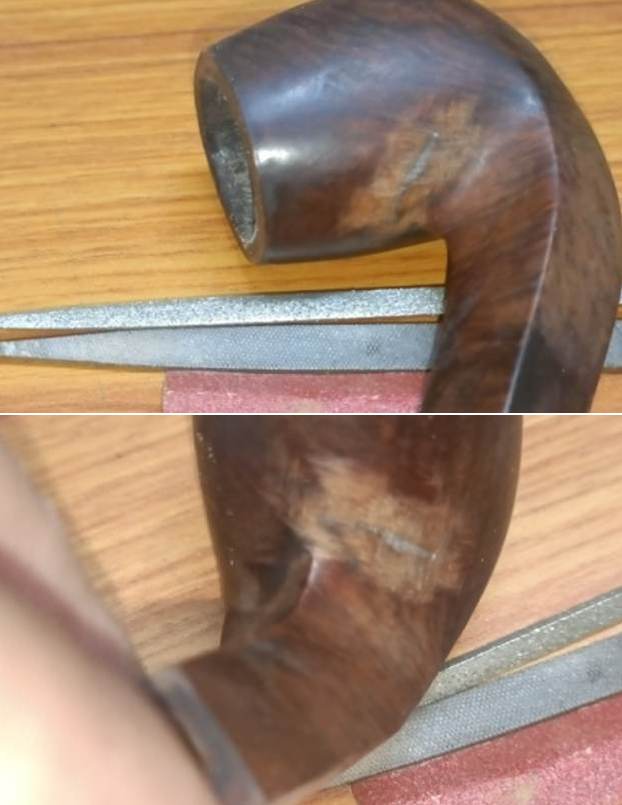
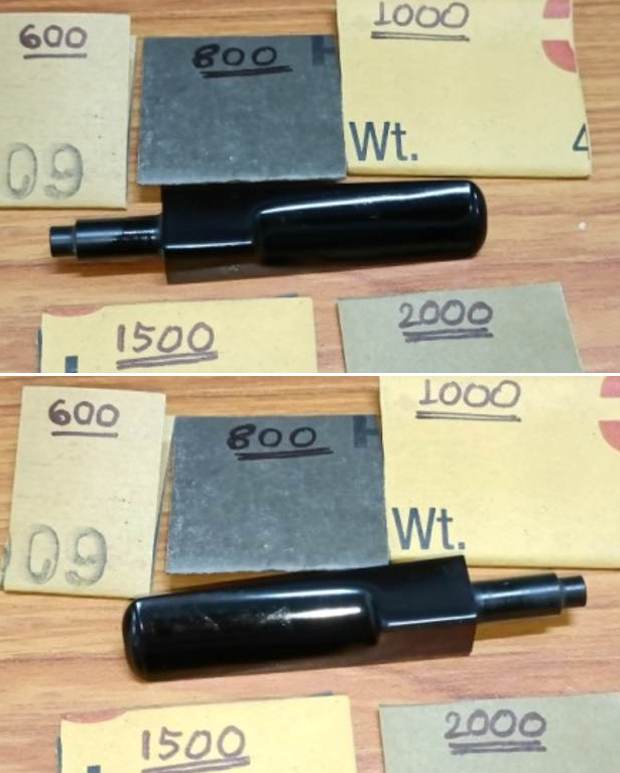
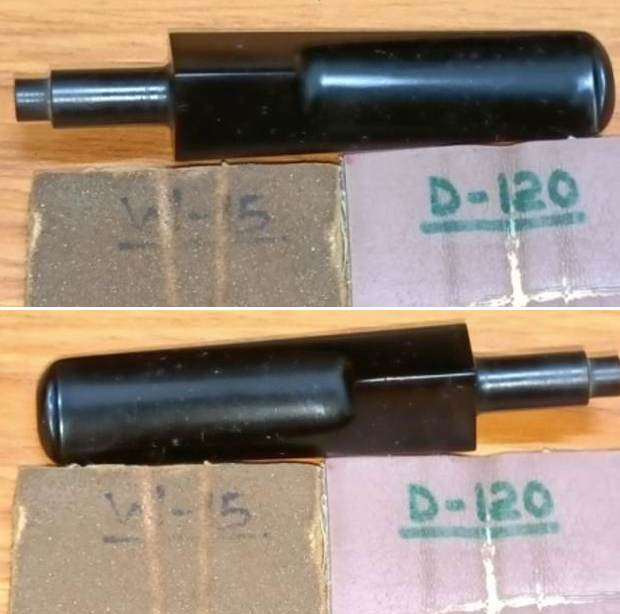
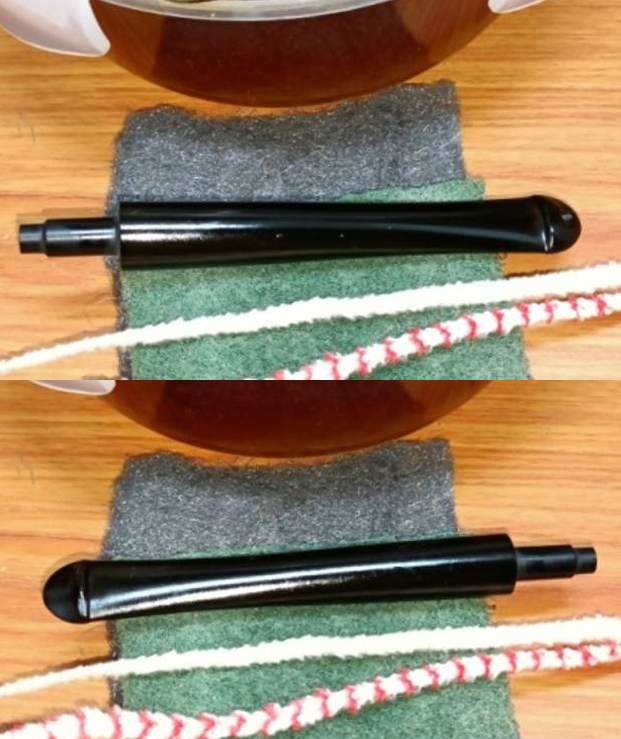
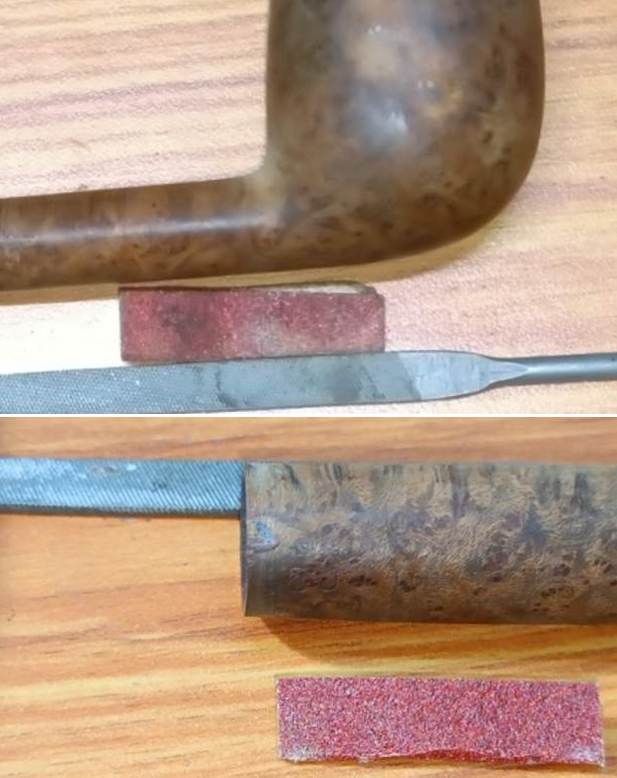
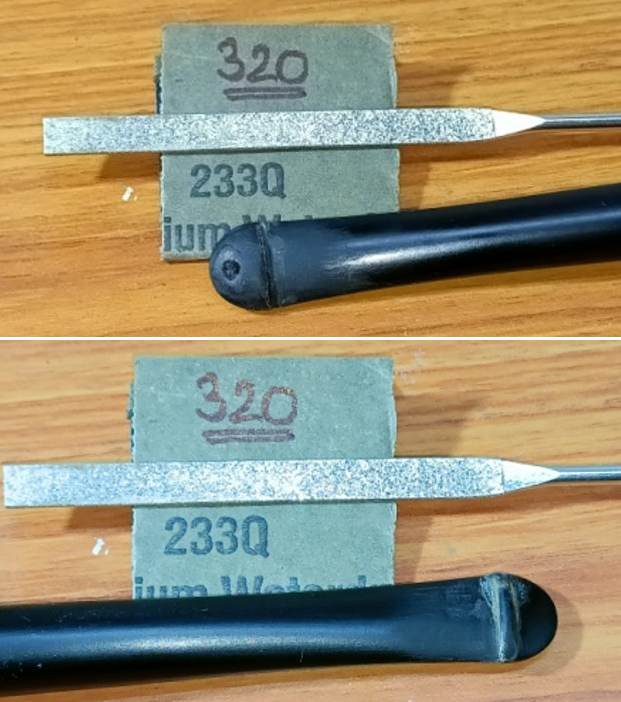
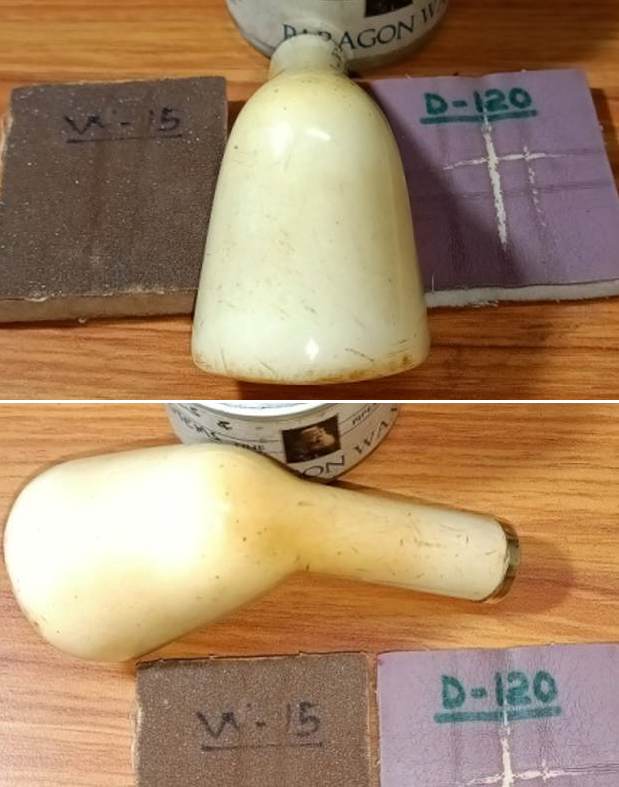
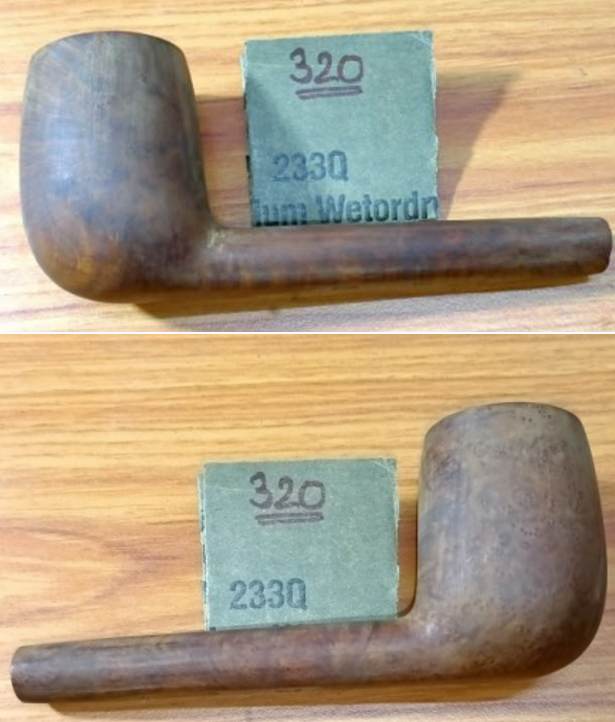
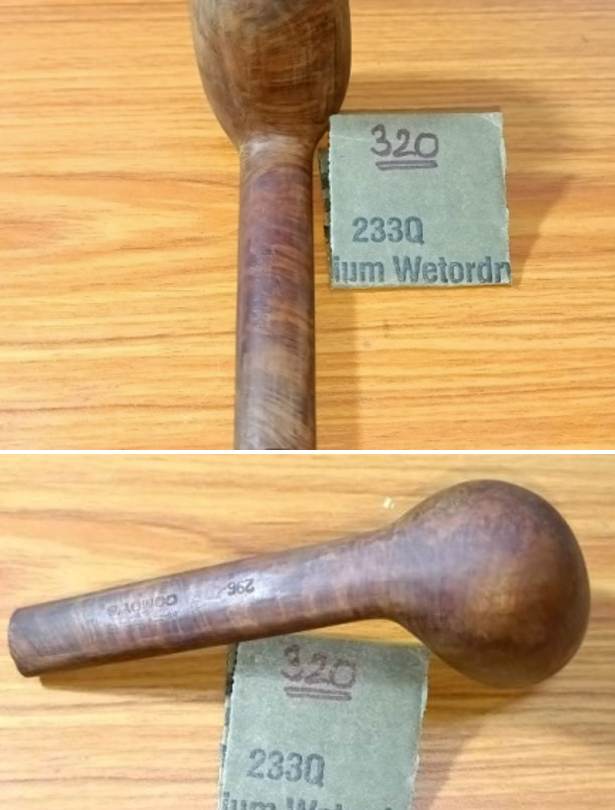
 By the time I was through with the stummel polishing, the stem fills had completely cured. I moved ahead with the process of filing and shaping the button end with a flat head needle file. With a round needle file, I reshaped the round orifice at the slot end. For a better blending, I further sanded the entire stem with a folded piece of 320 grit sandpaper.
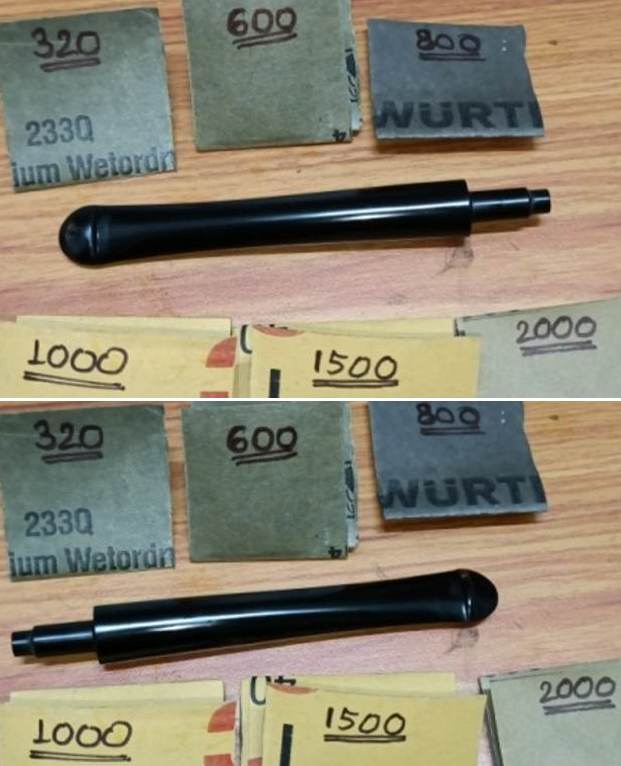
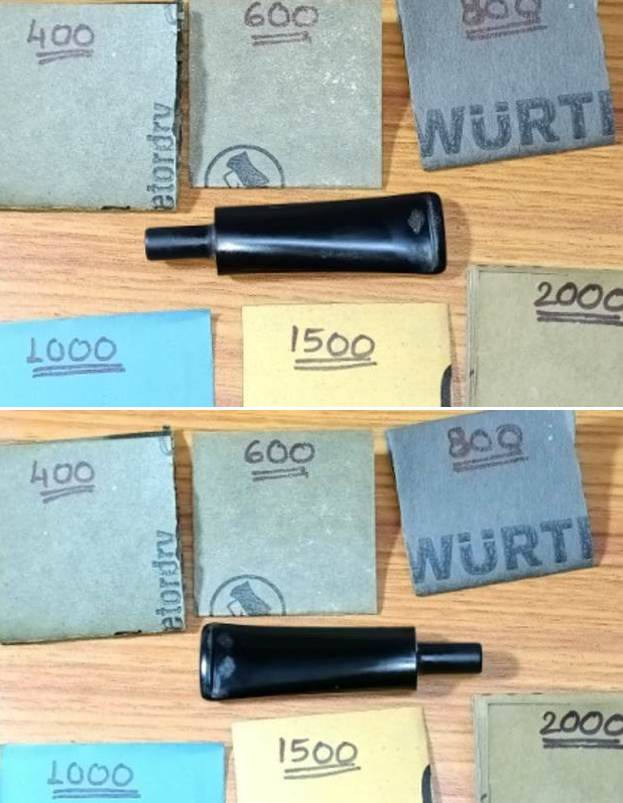
  I continued to dry sand the entire stem with a folded piece of 400 followed by 600 and 800 grit sandpaper and further progressed to wet sanding with 1000, 1500 and 2000 grit sand papers. I rubbed a small quantity of EVO into the stem surface and set it aside for the vulcanite to absorb and hydrate.
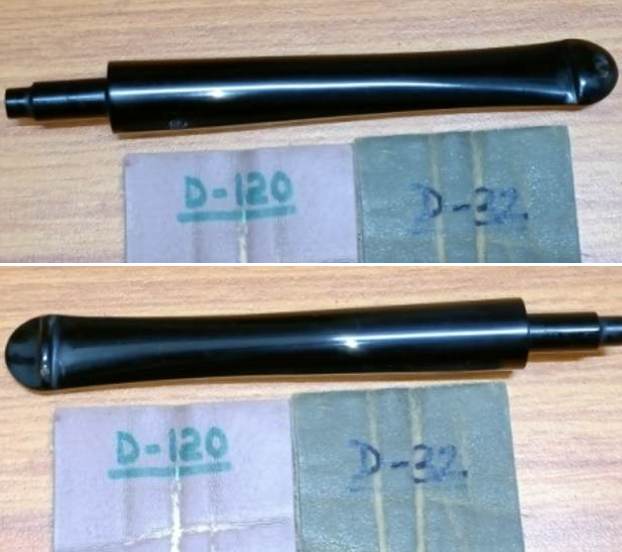
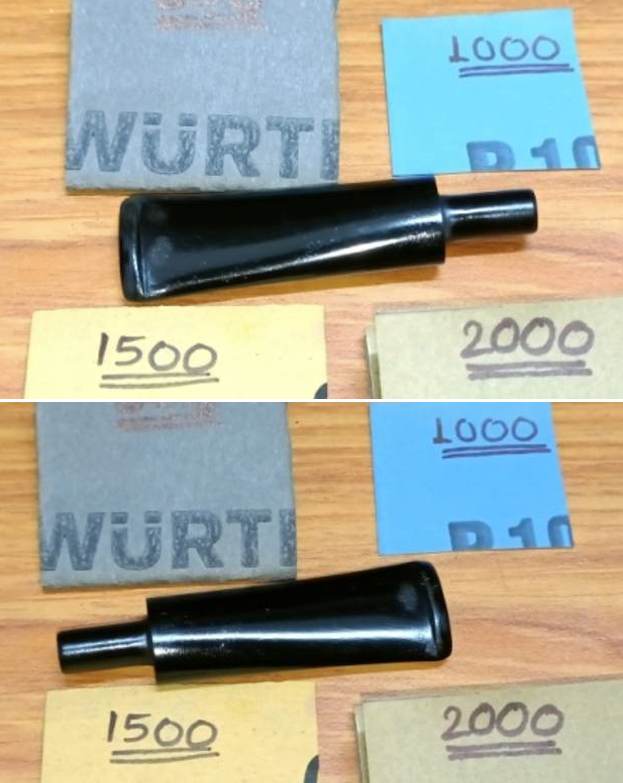
 To bring a deep shine to the vulcanite stem, I went through the complete set of micromesh pads, wet sanding with 1500 to 12000 grit pads. I wiped the stem with moist cloth after working each pad and rubbed it down with Extra Virgin Olive oil to rejuvenate the vulcanite.
 To complete the restoration, I mounted a cotton cloth buffing wheel on to my hand held rotary tool and polished the stummel and stem with Blue Diamond compound. This compound helps to remove the minor scratch marks that remain from the sanding.
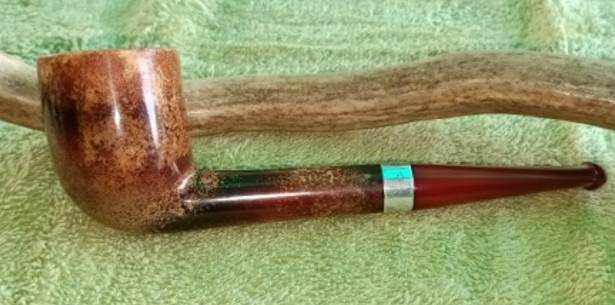
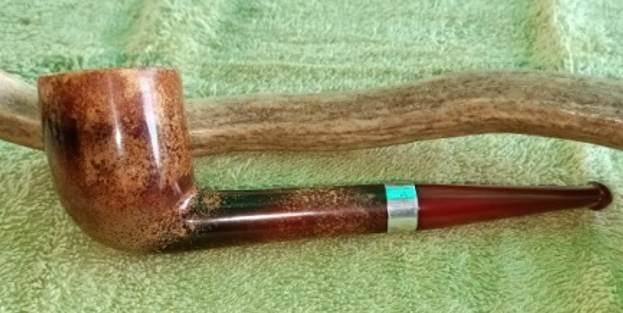
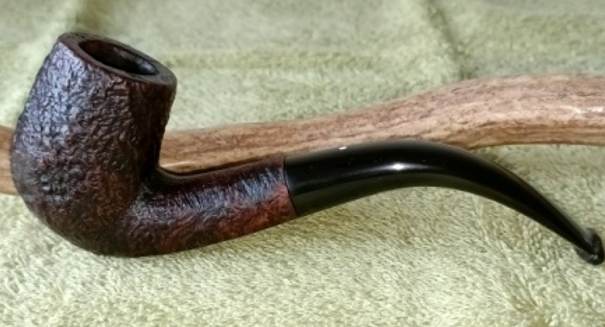
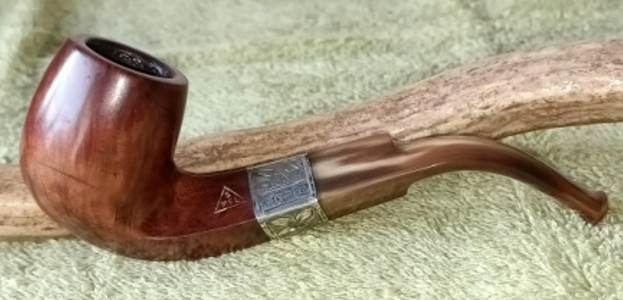
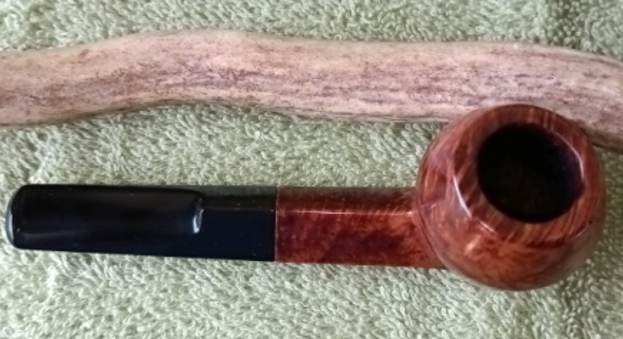
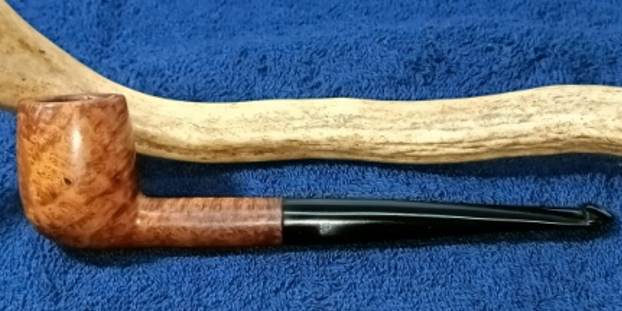
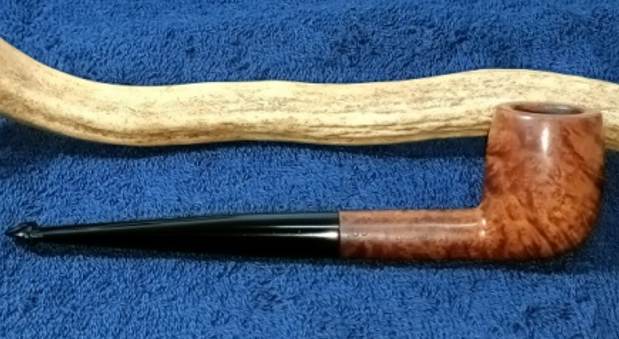
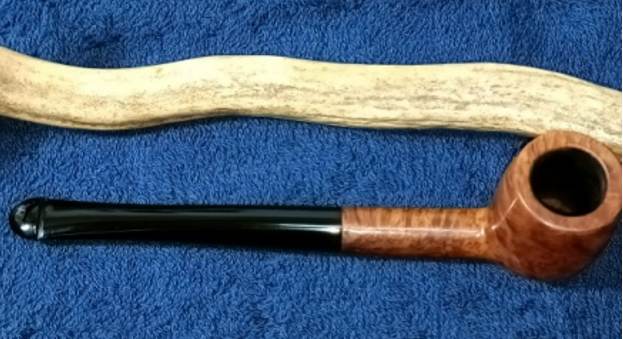
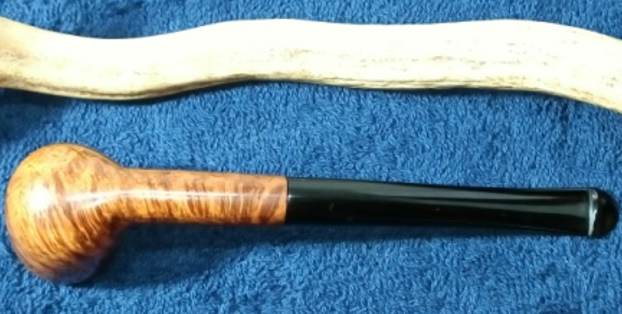
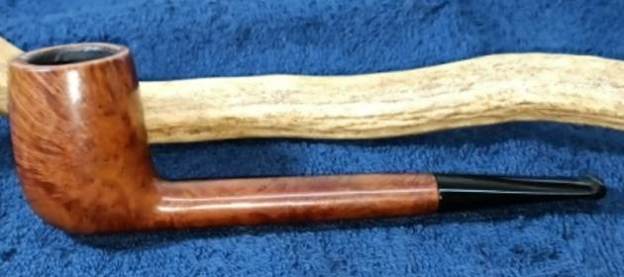
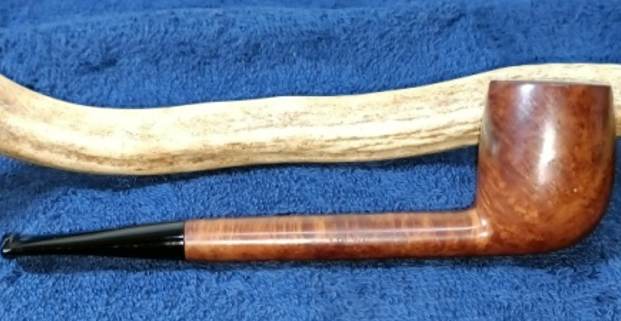
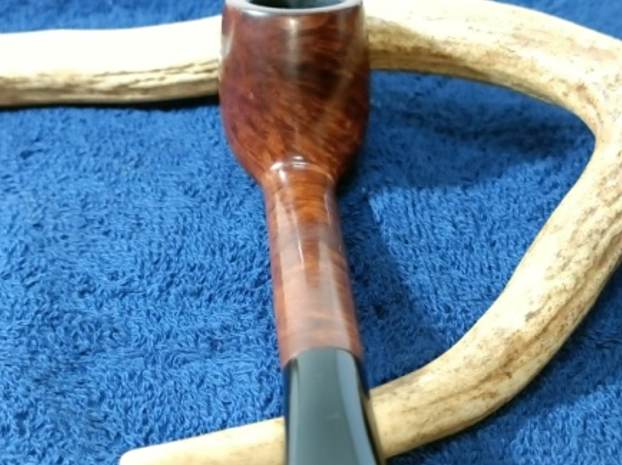
 Next, I mounted another cotton buffing wheel that I have earmarked for carnauba wax and applied several coats of the wax. I finished the restoration by giving the entire pipe a rigorous hand buffing using a microfiber cloth to raise the shine further. The finished pipe looks amazingly beautiful and is ready to join my collection. I only wish it could share with me it’s story of the past years while I enjoy smoking my favorite Virginia blend in it or maybe an English blend or maybe just keep admiring it!! The finished pipe is as shown below:-


 A note of thanks to all the readers who have joined me in this journey that has been such a pleasure! You and your loved ones are always in our prayers…