Blog by Paresh Deshpande
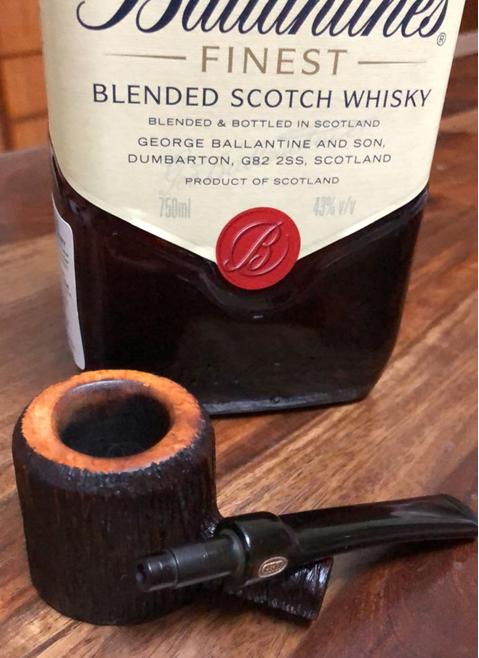
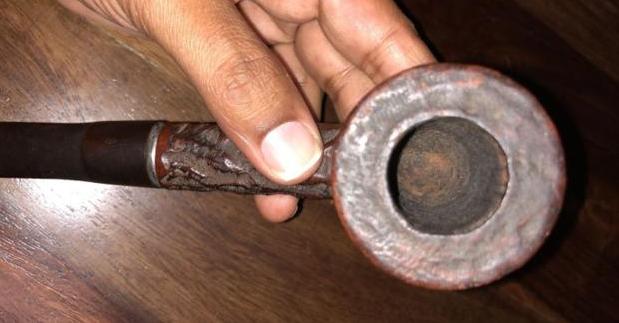
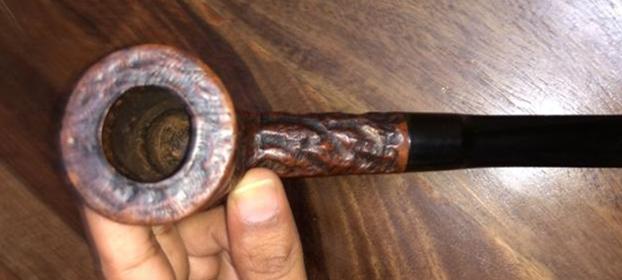
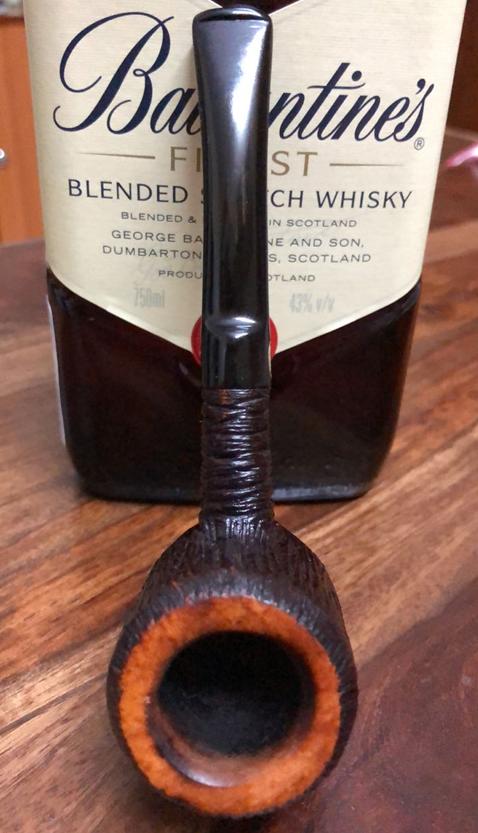
The next pipe that caught my fancy for restoration was a GBD ROCKROOT # 1345. This pipe has beaten Kriswill “Chief” # 20 and Kriswill “ Golden Clipper” to the finish line, though not decisively since I do not have stain pens and I had to leave the rim top duly sanded to remove all the oils and tars and burn marks. Personally though, I rather liked the look of the contrast the rim provided to the dark coloured pipe bowl, shank and stem. But I have seen other similar GBDs and they all had the nice bowl coloured rim top which also looked beautiful!!!! Hence, my attempt at darkening the rim top. 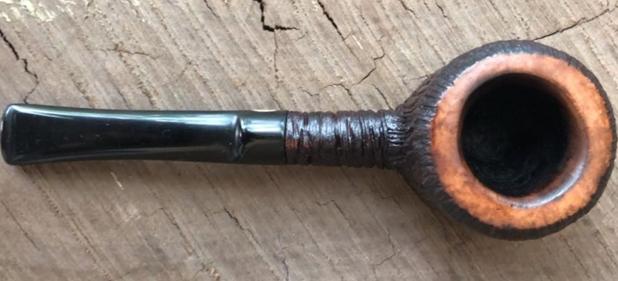 Without darkened rim top!! You decide and suggest please!!!
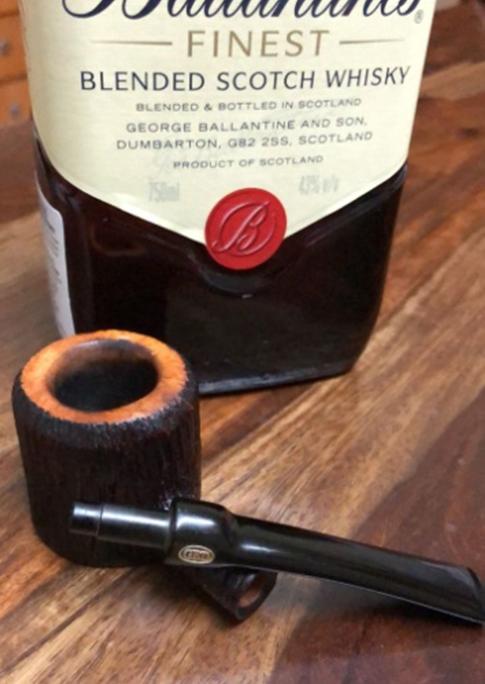
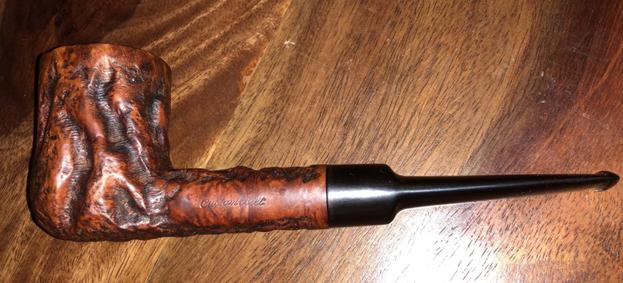
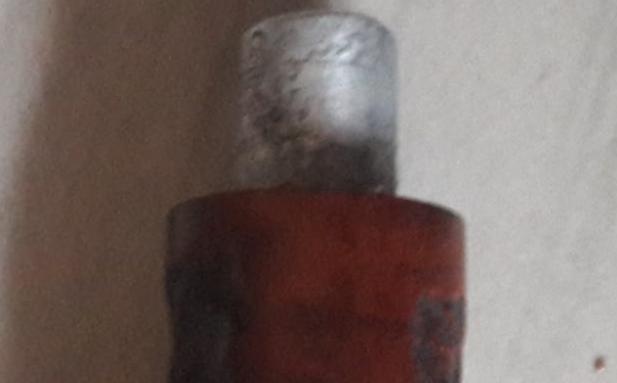
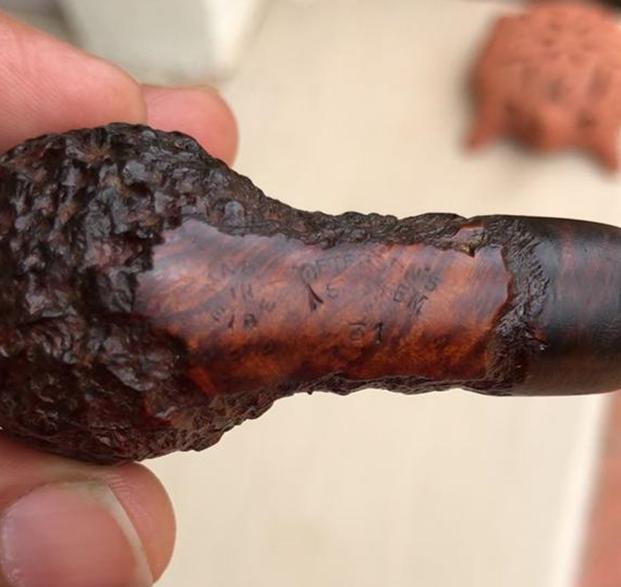
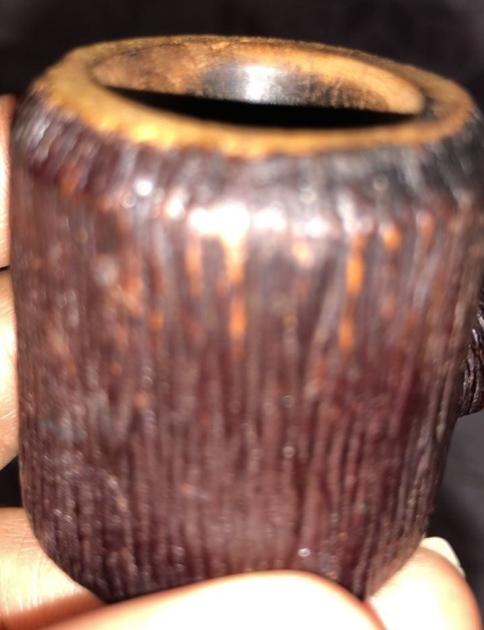
This pipe has a relatively smaller sized bowl with wire rustications running vertically along the bowl with circular wire rustications run around the shank. This wire rustication runs along the entire rim top. 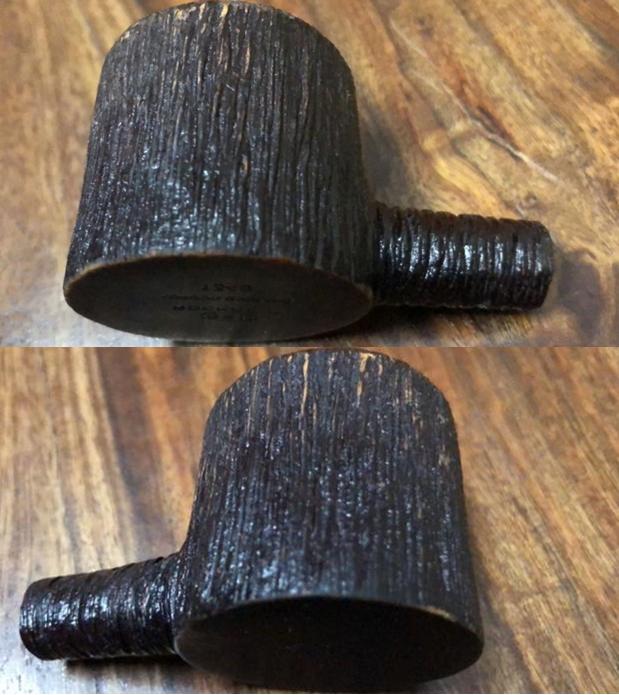 The bottom of the bowl is flat, smooth and bears crisp stampings with ‘GBD’ in oval over ‘ROCKROOT’ over ‘LONDON ENGLAND’ in a straight line over # ‘1345’. The saddle stem has a very subtle and delicate bend with just the lip touching the table top which coupled with the flat bottom of the bowl, makes it a perfectly balanced sitter. A brass oval roundel rim with embossed GBD is embedded in the saddle. This should polish up very nicely.
 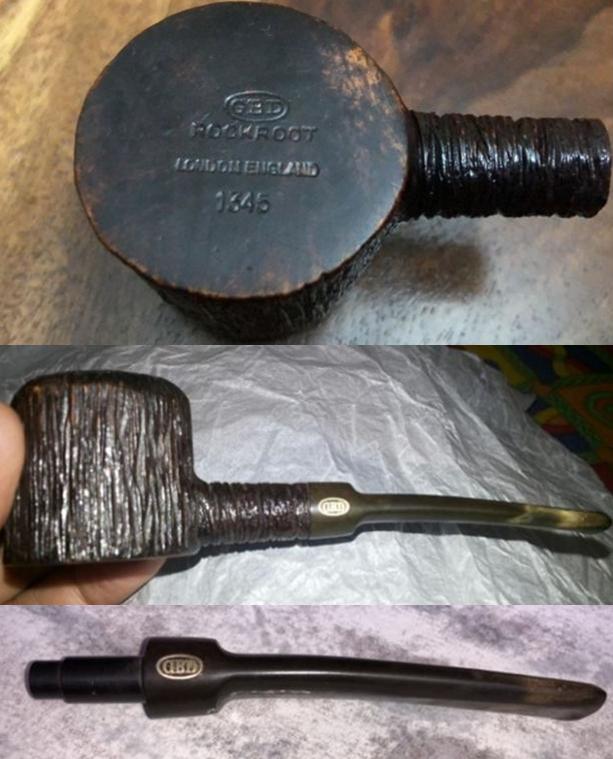 INITIAL INSPECTION
The initial visual inspection of the pipe revealed the following:
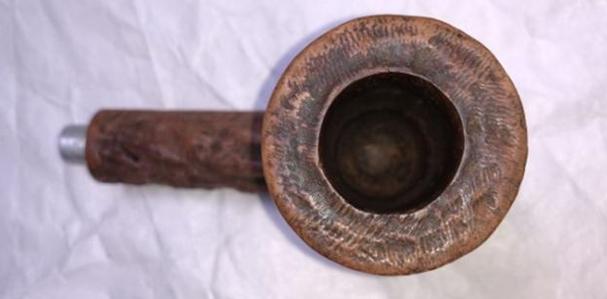
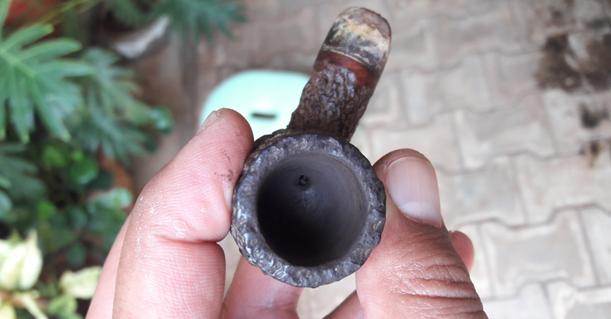
The bowl was heavily caked with oils, tars and grime overflowing onto the rim top and down the bowl along the vertical wire rustications. There appears to be some deep charring along the inner edge of the rim on the right hand side in 1’o’clock direction and on the left side in 7’o’clock direction. The extent of the damage to the rim can only be determined after reaming the bowl.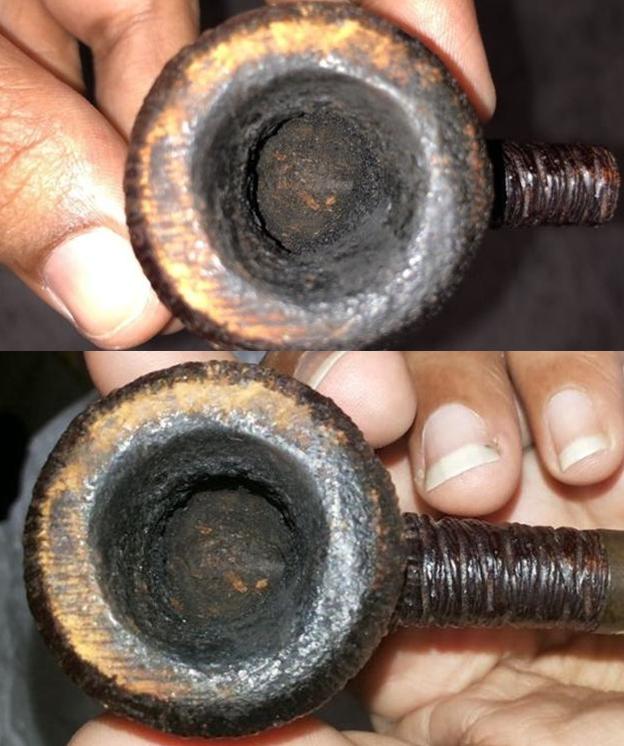 The thin wire rustication on the rim top is worn out at certain places. The rest of the rustications along the bowl and shank is filled with dust, oils, gunk and dirt which has been accumulating over the years.
  Air did not pass through the stem. When the stem was removed from the shank, visual inspection revealed a completely blocked mortise and airway. The stem, too, was slightly blocked.
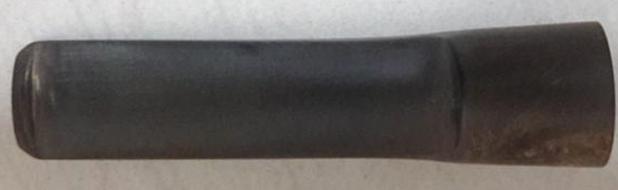
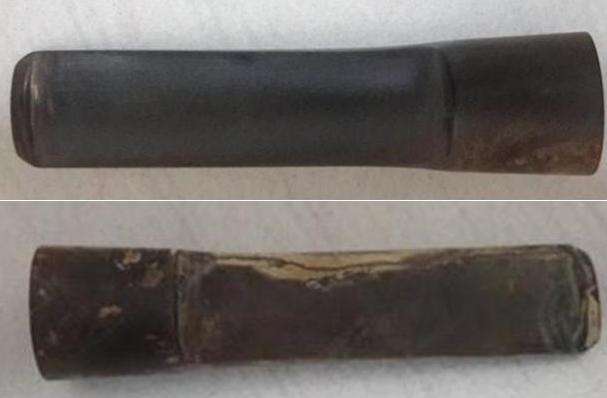
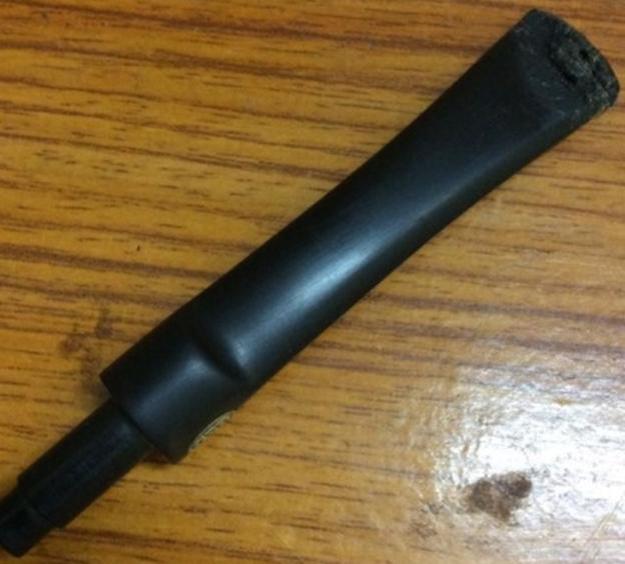
 The stem was heavily oxidized with heavy calcification near the lip. There was heavy tooth chatter extending up to an inch from the lip towards the saddle on both sides of the pipe. But thankfully there were no deep bite marks or holes. The lip on both sides has also been chewed out of shape.
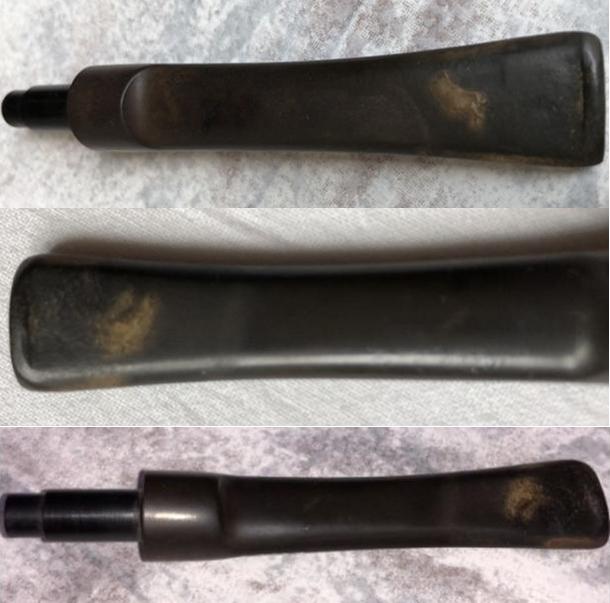 Dimensions:
Length – 5 inches
Bowl height – 1.5 inches
Bowl depth – 1 1/8th inches
Bowl inner diameter – 7/8 inch
Bowl outer diameter – 1.5 inches
THE PROCESS
As usual Abha, my wife, started work on the bowl while I addressed the stem. Using a Kleen Reem reamer and British Buttner pipe reaming tool, Abha removed most of the thick cake in no time. The reason being a 1 inch deep bowl!!! She had been very careful in avoiding the edges which had the charred marks.
 While Abha was working her magic on the bowl, I painted the stem with the flame of a Bic lighter to try to lift the light tooth chatter. The lightest of the tooth chatter evened out and the remaining ones were lifted to the surface. I had to sand out the stem to smooth out the tooth chatter. At this point, using a 220 grit paper, I sanded down the stem till the surface felt even and smooth to the touch. I tightly folded a piece of the grit paper and using its edge tried to shape the edges of the lip. Then I applied Extra virgin olive oil to the stem and kept it aside to be absorbed by the stem. And as usual, I just forgot to take pictures of the stem at this stage!!!
Thereafter, I turned my attention to the bowl with hesitation. This was so because the reaming had revealed that the issue of charring was something I had not handled before. I immediately Facetimed Mr. Steve and sought his advice. It was decided that a smooth surfaced rim, akin to the smooth bottom of the bowl, will add an interesting character to the pipe and will also take care of the charred inner edge of the bowl.
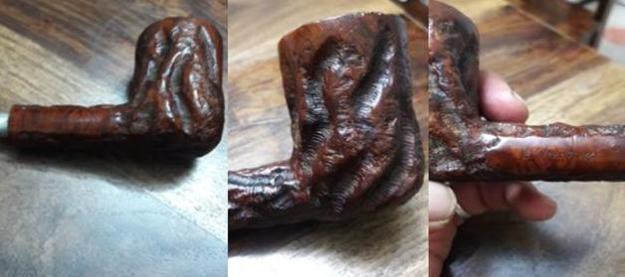
I began with cautiously sanding the inner edges of the bowl to remove as much of the charring as possible. Using Murphy’s oil soap and a hard bristled toothbrush I removed as much of the accumulated tars and lava from the rim top as I could. I lightly topped the bowl on a 220 grit sand paper. The charred portion of the briar came apart in chunks during the topping process. Thereafter, I tried to round off the inner edges of the bowl as much as I possibly could, by creating an inner bevel to cover up and address the charred portion. However, the bowl still remains out of shape. As can be seen, the bowl edge in the 1 o’clock (front right) and 7 o’clock (rear left) directions has moved out too far. I was not too inclined to sand down the other edges to merge with the moved out edges for fear of losing too much briar and further thinning the rim top. Any suggestions whether I should go all out with the inner edge to completely round it or leave it as is are welcome.
 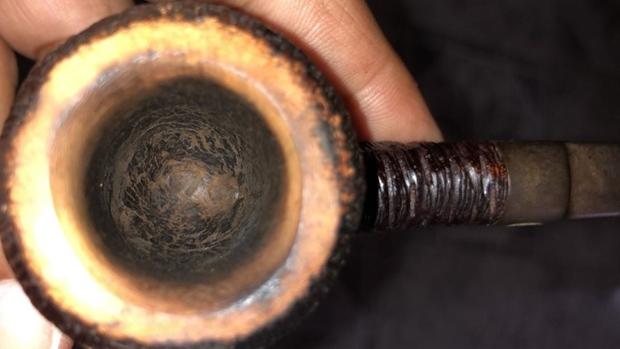 Once the bevel was made and I had sanded out as much of the charring as I was comfortable with, I sanded down the rim with micromesh pads, wet sanding with 1500 – 2400 grit and dry sanding with 3200 – 12000 grit. Using a brush and Murphy’s Oil soap, I cleaned the exteriors of the bowl, rim top and shank and rinsed it under running water. The bowl was wiped dry using a cotton cloth and left to dry out overnight.
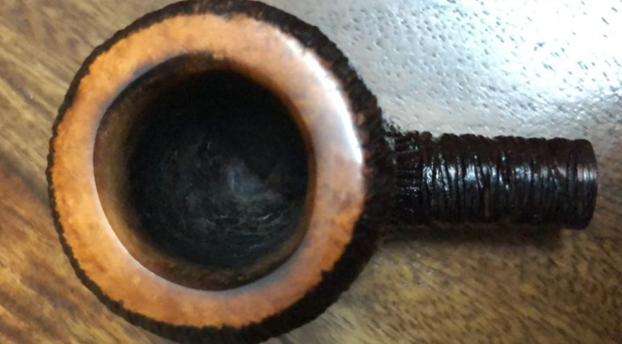

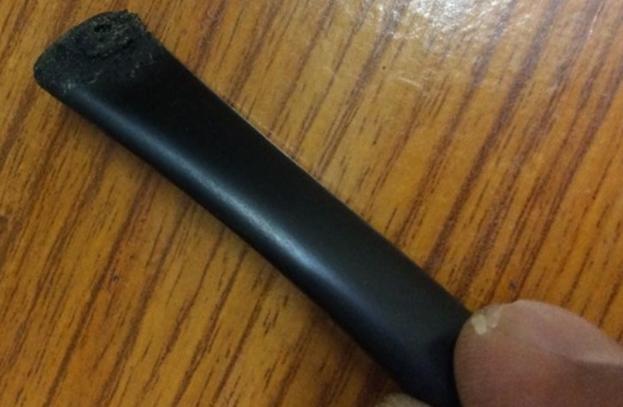
 Turning my attention back to the stem, I wiped it down with a soft cotton cloth. On close inspection, I realized that there was one bite mark on both sides which was not raised and also that the lip edge was not defined/sharp. I mixed up activated charcoal powder with clear CA glue (the glue that was available to me here, has a tendency to come off in lumps. Hence I was skeptical about its function in this process) and applied it on both sides of the stem to fill in the bite mark as well as on the tip edge to define it further and set it aside to cure overnight.
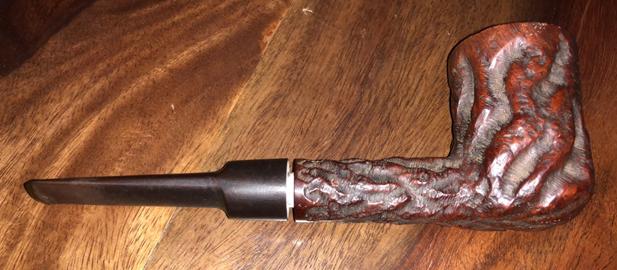
 Next morning, I rubbed some “Before and After Restoration Balm” into the thin wire rustications of the dried out bowl. Every time I use this balm, I cannot help but appreciate how effectively it works to enliven and refresh an old briar bowl. I rubbed a small quantity of balm with my fingers into the thin wire rustications on the bowl and shank and kept it aside for a few seconds. Using a horse hair brush, I buffed the bowl and shank and worked the balm deeper into the closely packed rustication. I rubbed it down with a soft cloth to a bright shine. I had to use a lot of muscle power and time to get the desired shine since I do not have a wheel. I was satisfied with the way the bowl had turned out up to this point in the restoration.
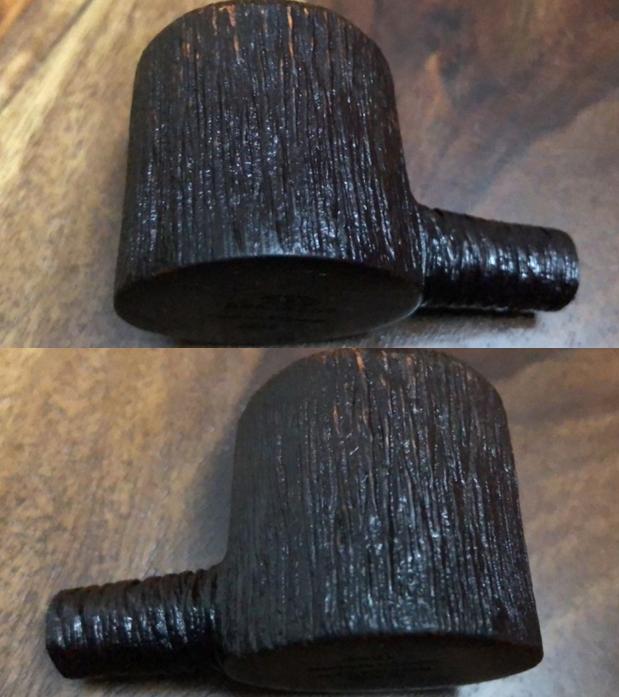 Thereafter I turned my attention to the stem. The fill of CA super glue and charcoal powder had cured sufficiently. Using needle files, I started filling away carefully and cautiously restricting the filing only to the filled areas. Using a flat head needle file, I filed away the excess filling and was satisfied with the end result. I used a 220 grit sand paper to further blend in the fill. I further polished the stem using micromesh sanding pads. Wet sanding with 1500 – 2400 grit pads helped reduce the sanding marks left behind by 220 grit papers to a great extent. I wiped it clean and coated the stem with extra virgin olive oil and let it rest for some time. This allows the vulcanite to absorb the oil. Thereafter I dry sanded the stem with 3200 – 12000 grit micromesh pads and applying olive oil after every third pad. The stem is now nice, smooth and shiny. I shared the pictures of the bowl and stem with Mr. Steve for his opinion and advice for further improvement.
 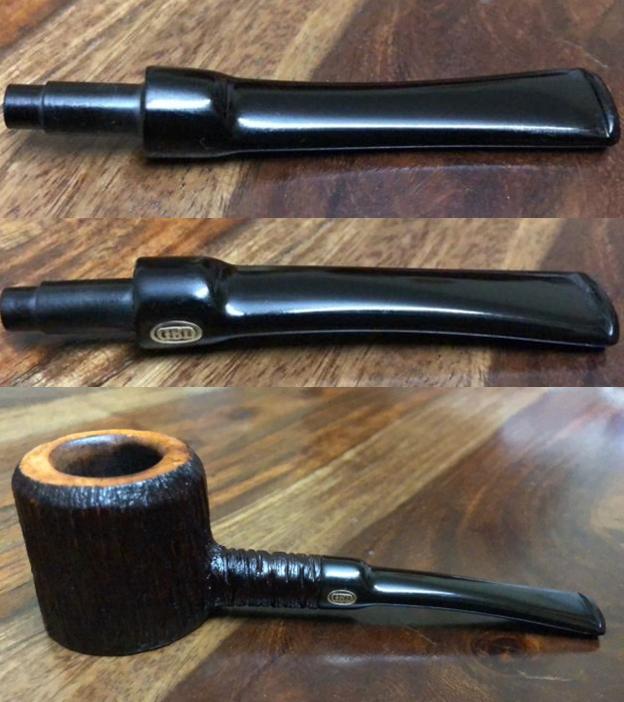 As is his style, Mr. Steve first appreciated the effort and suggested that a darker stain would look good. Since he was well aware that the stain pens I had ordered did not reach me, he suggested an ingenious and practical way of staining using local and readily available material. He suggested boiling black tea leaves in a little water and making a very strong and thick brew, letting it sit overnight. Using cotton swab/cue tip dipped in this brew, gently apply onto the area that is to be stained.
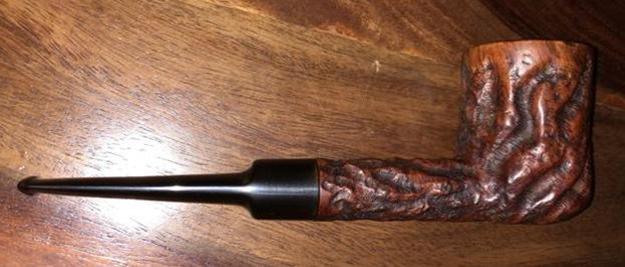
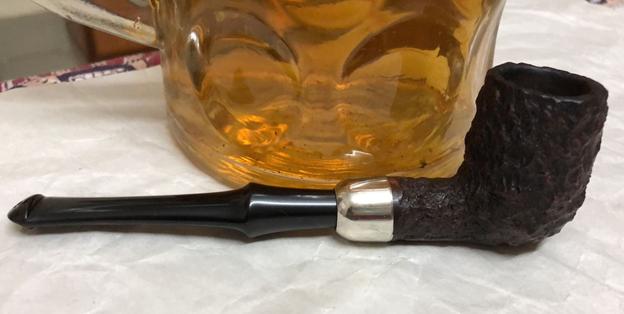
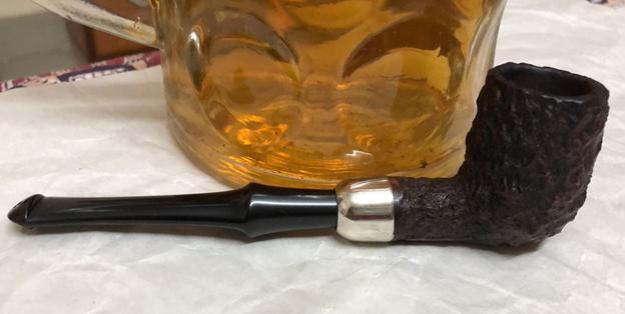
I followed his advice and applied it to the rim top of the Rockroot. After allowing it to rest for a few minutes, I gently wiped it off with a soft cotton cloth. The results are truly amazing. Mr. Steve further advised me to use regular black boot polish to further stain and bring back the shine to the rim top. The results of this can be seen in the following pictures of the finished pipe.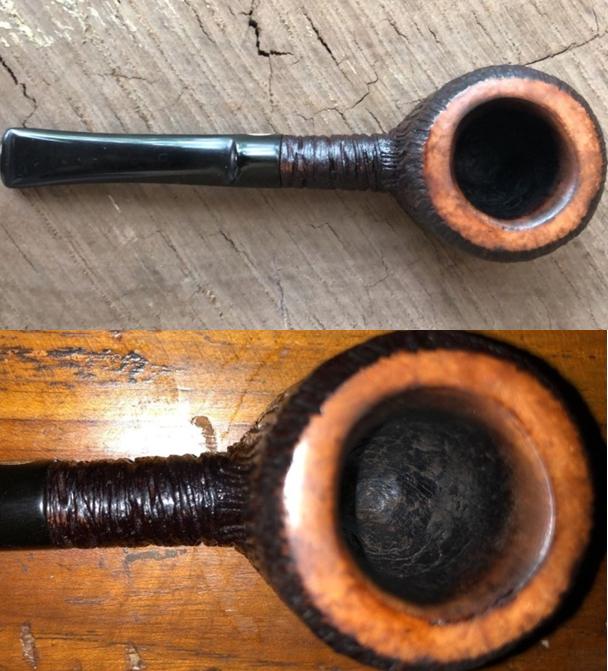 This restoration has been a fantastic journey of learning, trials and frustrations which I enjoyed to the fullest. I cannot thank Mr. Steve enough for his wise, practical and timely advice and sharing his immense wealth of experience so readily with a novice like me. Thanks Steve!!!