Restoring a Piece of History – A Mastercraft Mark II Zeppelin


Blog by Mike Zarczynski

I first read about Mike’s restoration of this Zeppelin on Facebook in one of the pipe smoking groups. Because I was so impressed with what he had done with the pipe and because I have been looking for one to restore, I wrote him a message and asked if he would be willing to do a write up for rebornpipes. It is a privilege to have him post his first blog here and show us some of his work. I think you will enjoy the work he has done on this unique piece of pipe history. He has written a brief introduction to himself so rather than repeat it I will let him tell you in his own words. “I’ve been restoring pipes for about a year now, I started when I first became inspired by Steve’s blog rebornpipes (it is an incredible honor to have been requested to write an article for the blog). At first it was a way to avoid paying list price for big brands, but now it’s a full blown addiction. I’ve restored fishing gear most of my life and once I started smoking I realized pipes were an obvious choice to fill the need of fixing things.”

The pipe itself:
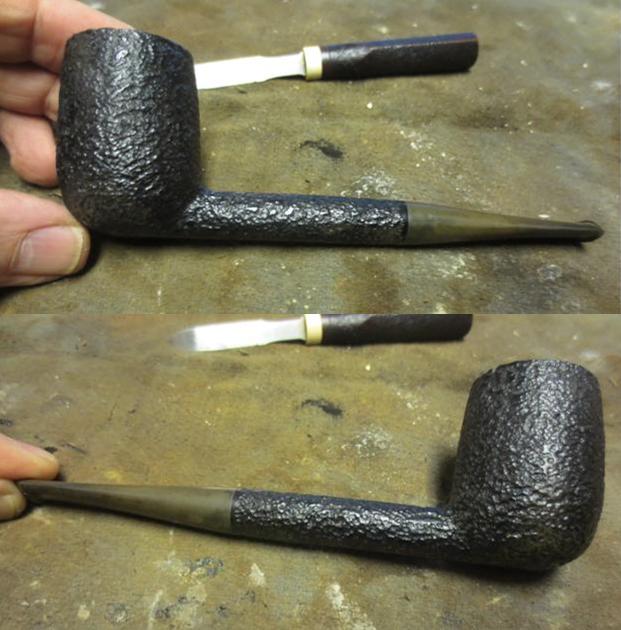
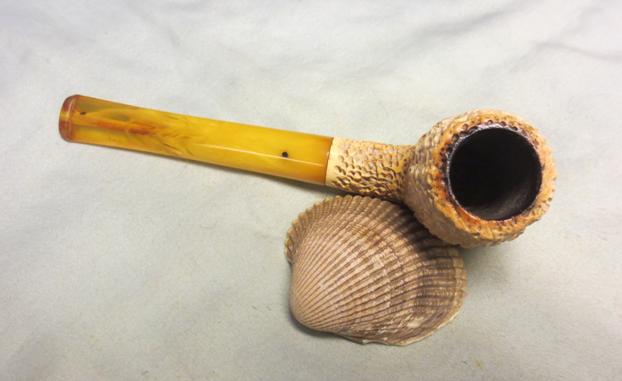
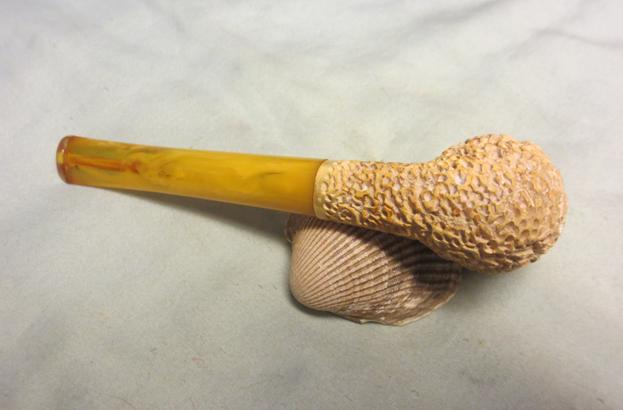
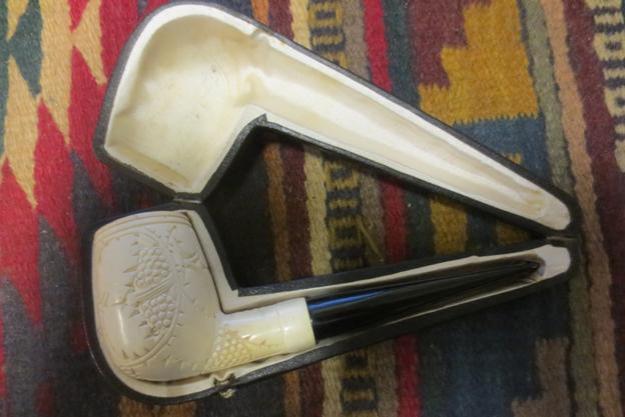
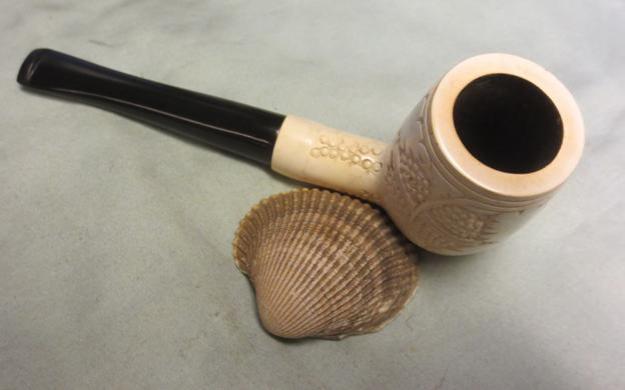
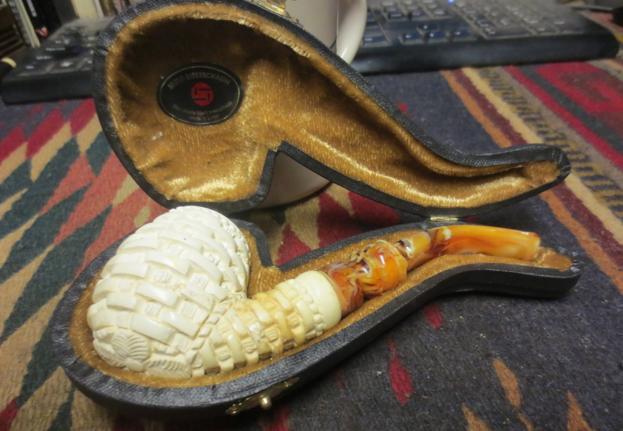
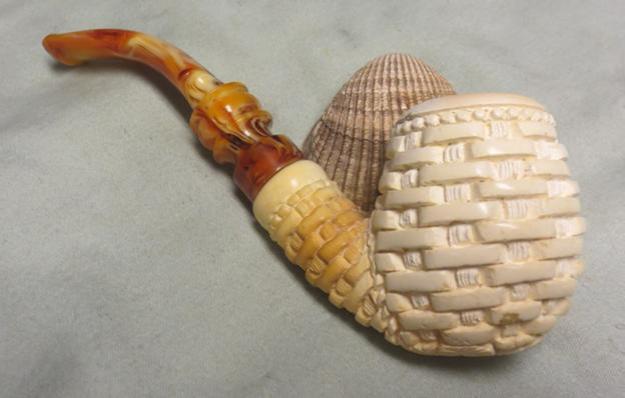
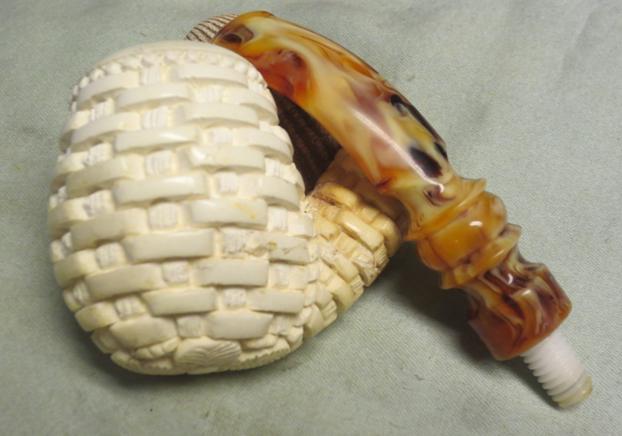
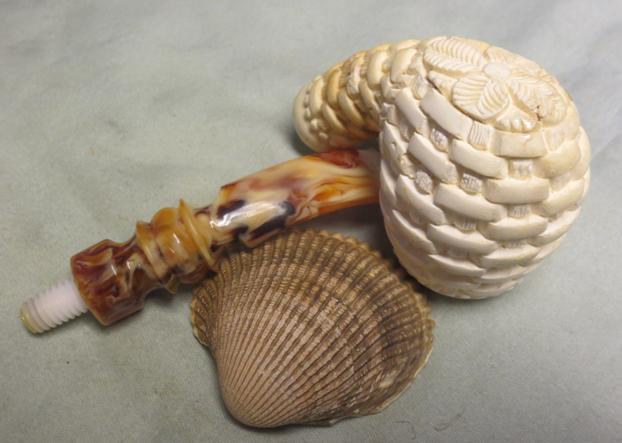
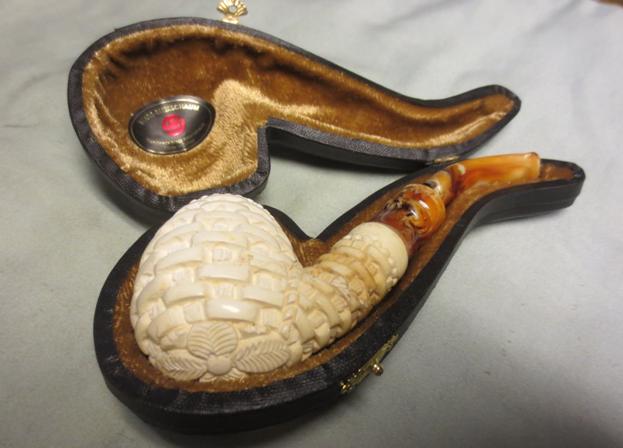
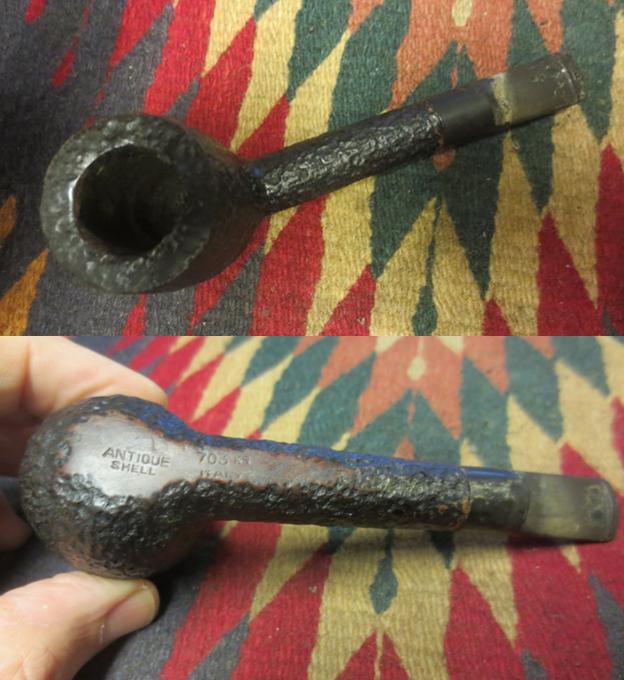
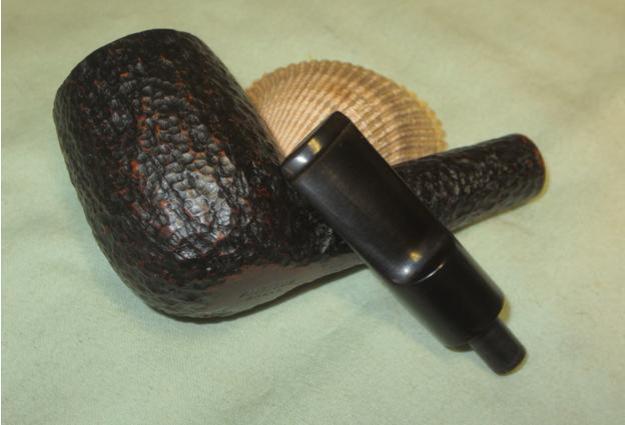
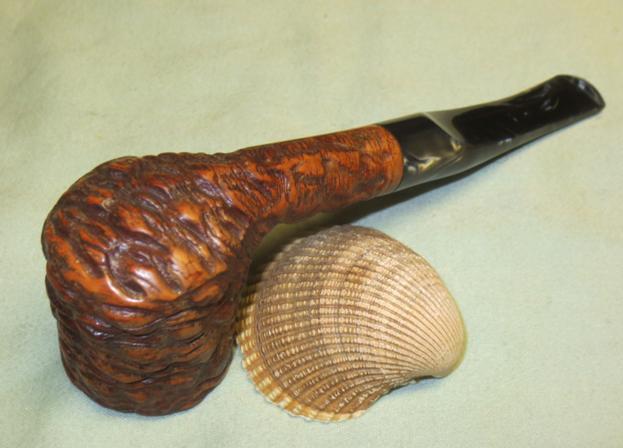
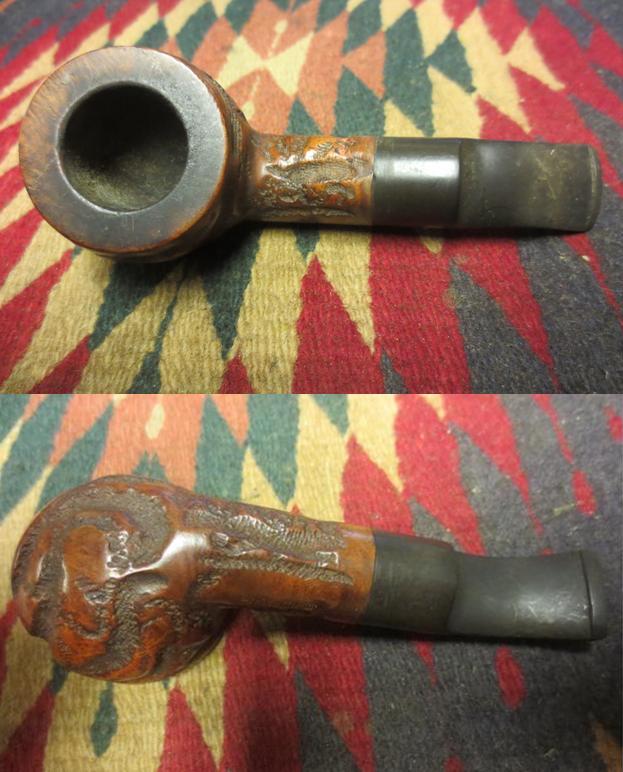
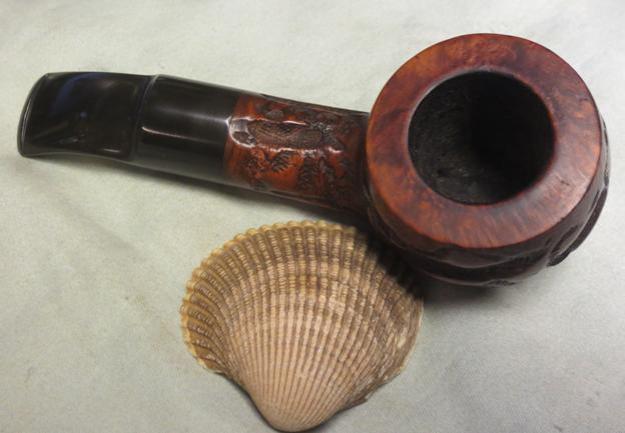
Being an avid reader of both Charles’ and Steve’s Blogs, I read an article on an odd pipe. Charles had restored a Master-craft Zeppelin pipe for a family member, but one thing crossed my mind, how did it smoke? Months passed by of watching the type and shape, and almost winning a few auctions had me wondering, just how rare is this pipe? I read on pipephil that there were two main versions, Mark I, a smooth pipe, and Mark II, a rusticated pipe. Being a fan of rusticated pipes, I started searching for the second variety. (The idea of rustication is to give as much surface area as possible to dissipate heat.) I finally won an auction and the pipe was received on a Saturday following the transaction.

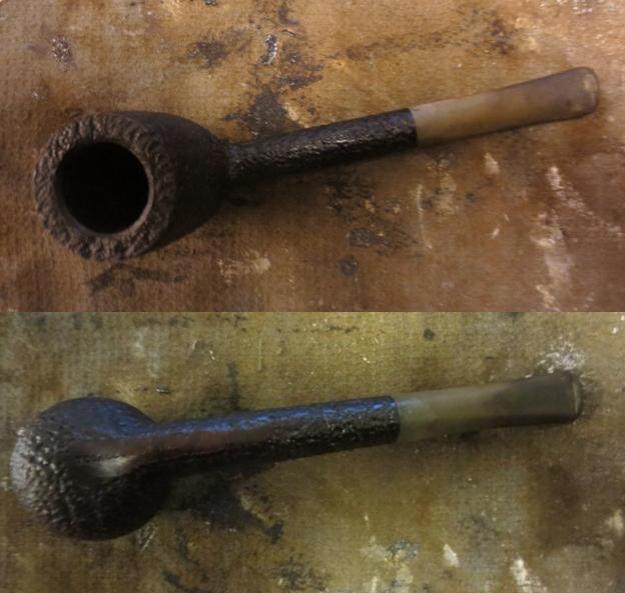
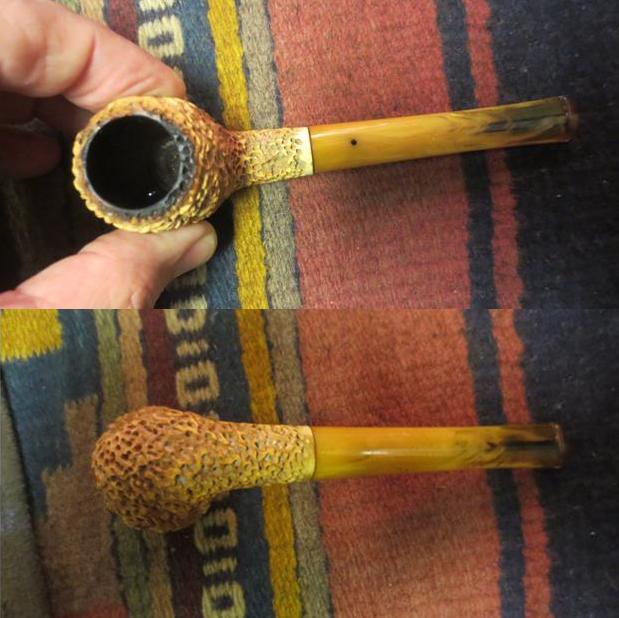
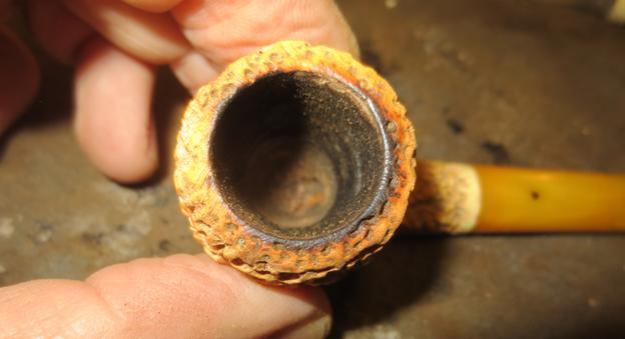
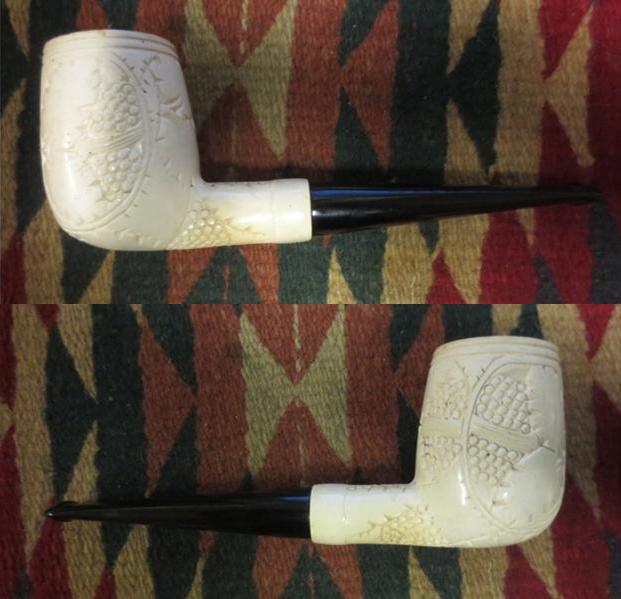
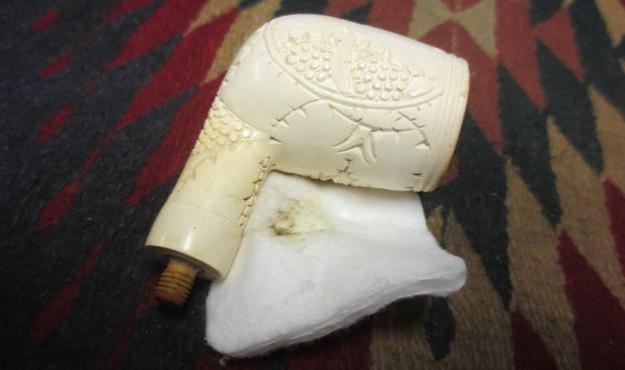
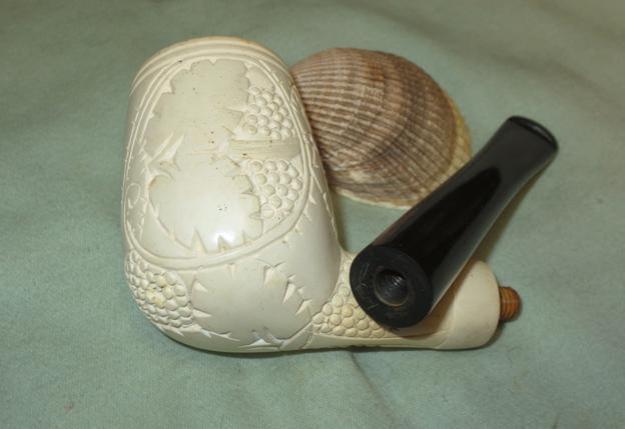
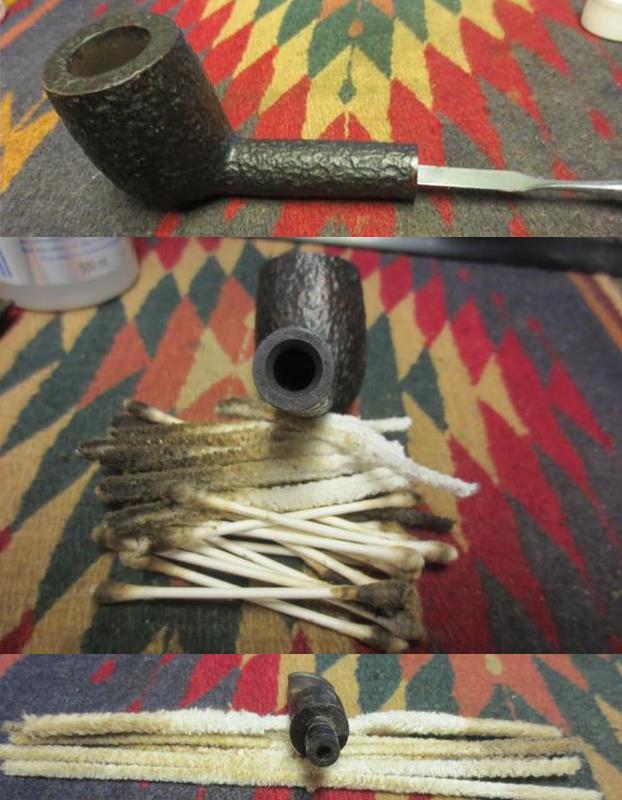
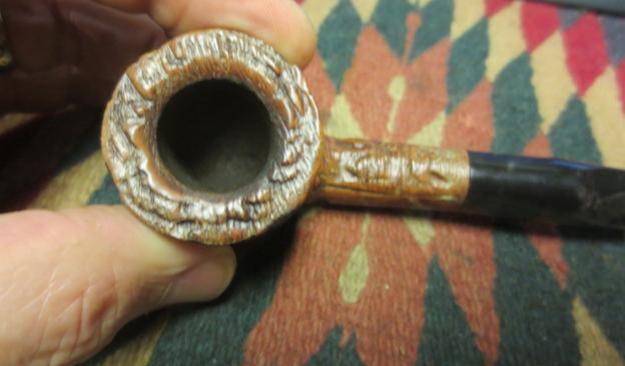
The pipe was in great shape, no corrosion on the aluminum, a bit of oxidation on the stem, and two fills on the briar. One of the fills had shrunk to the point it needed replacing, but the other could stay.Marx1 Marx2 Marx3
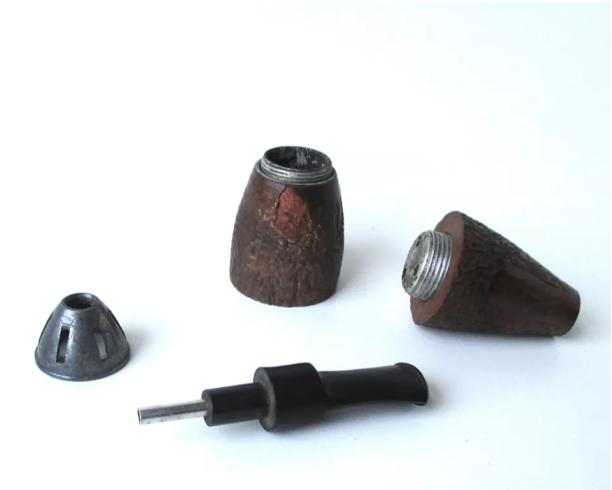
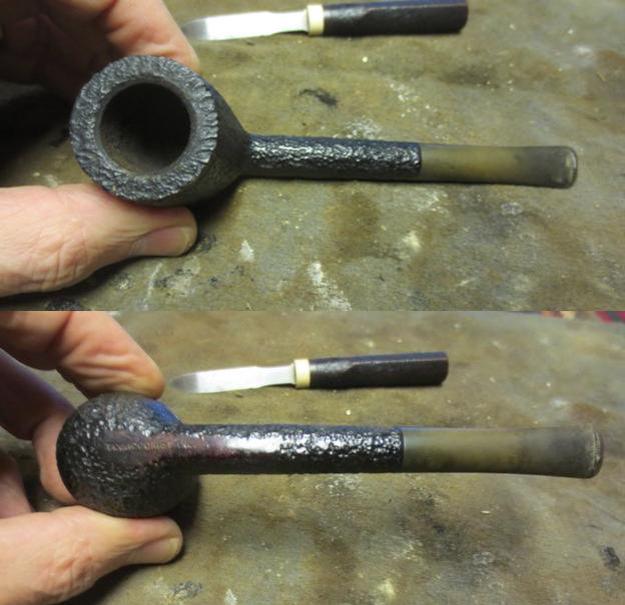
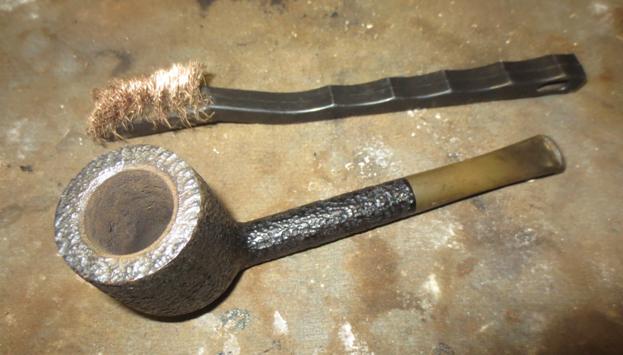
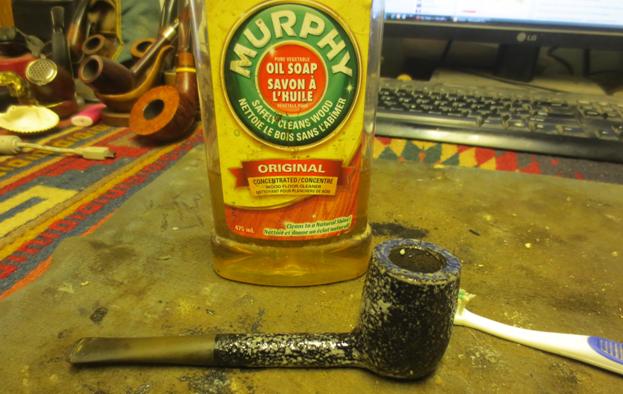
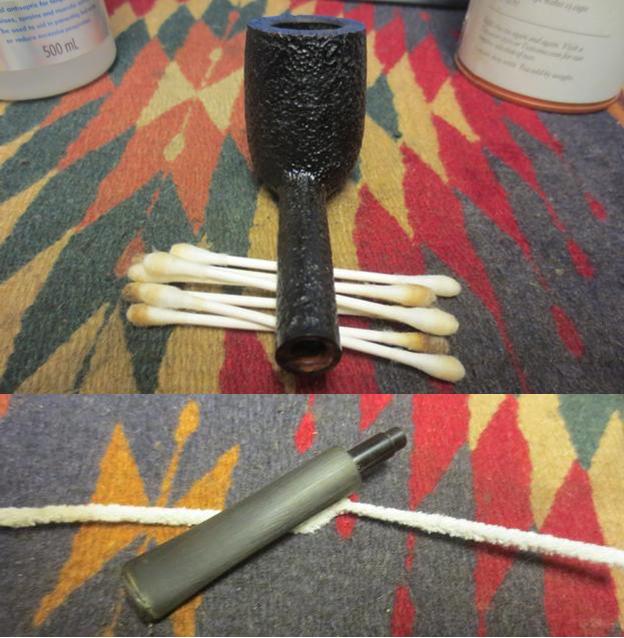
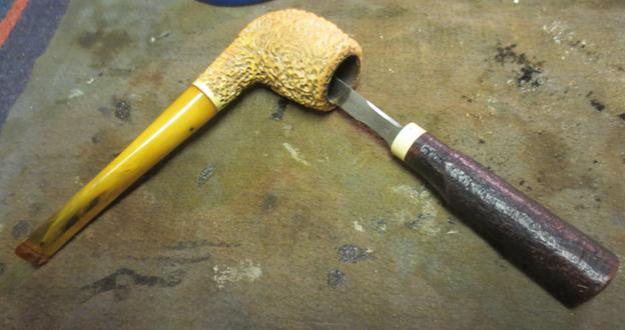
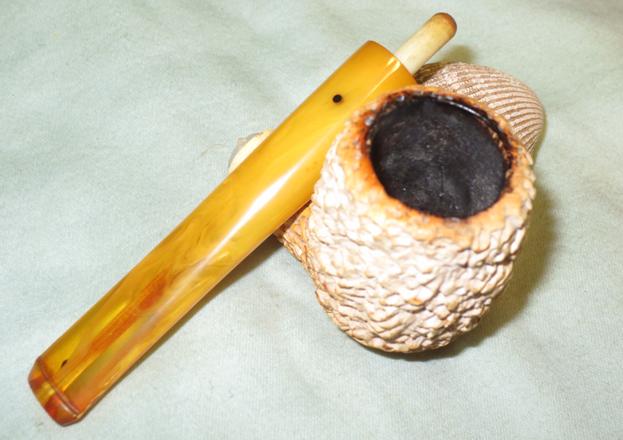
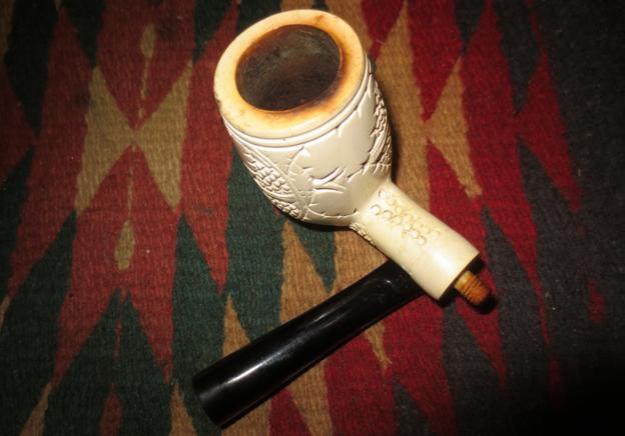
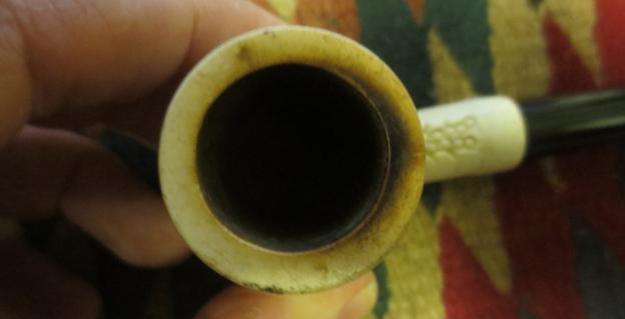
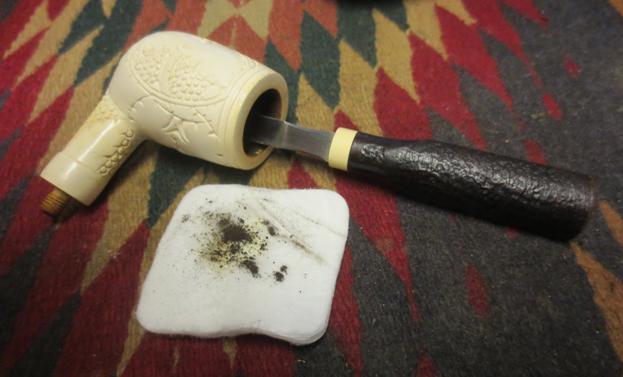
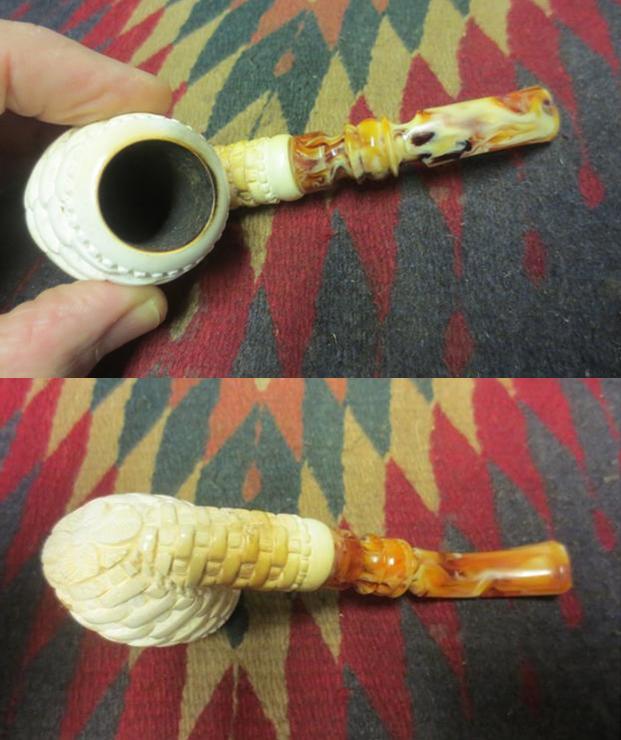
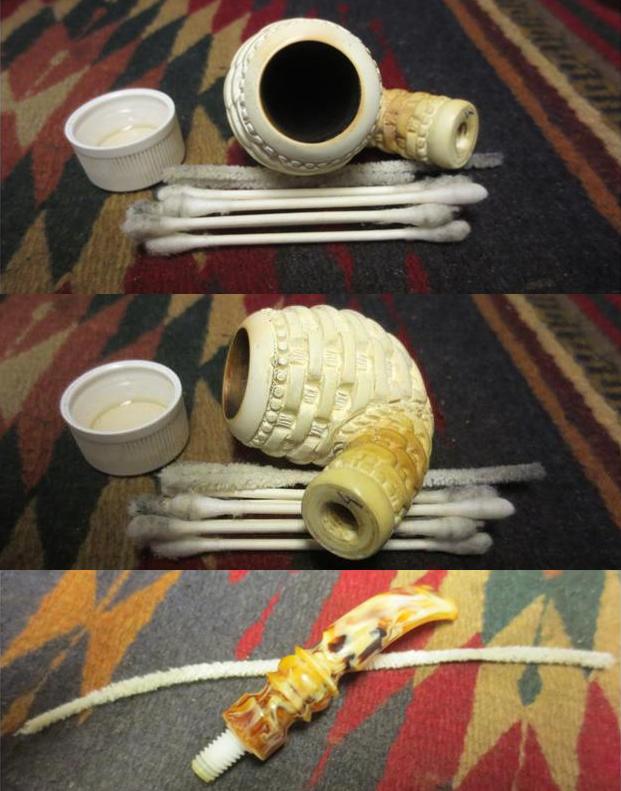
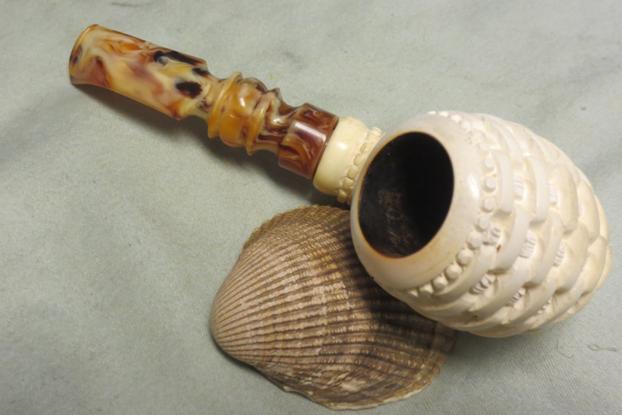
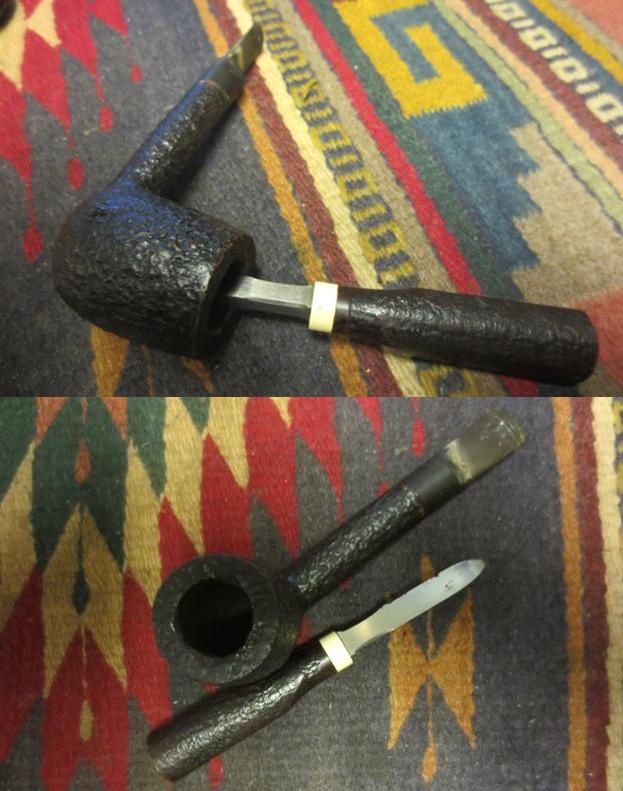
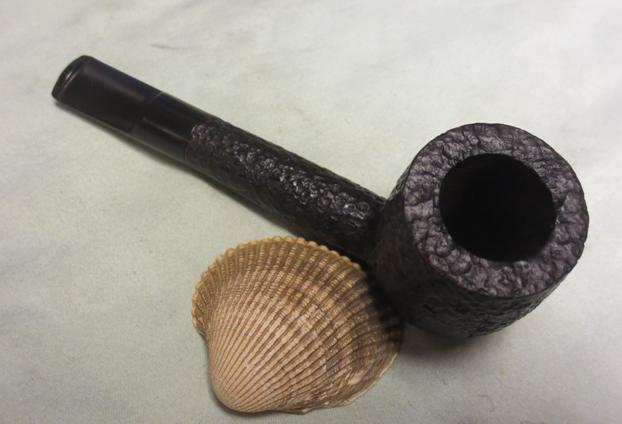
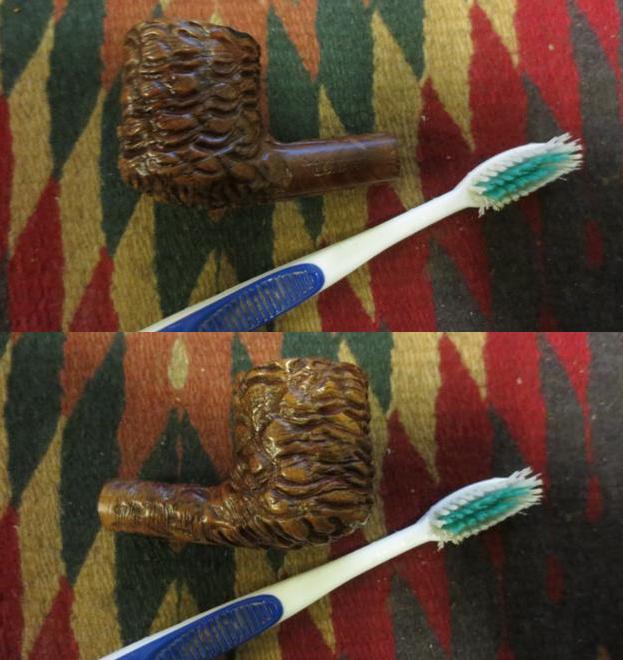
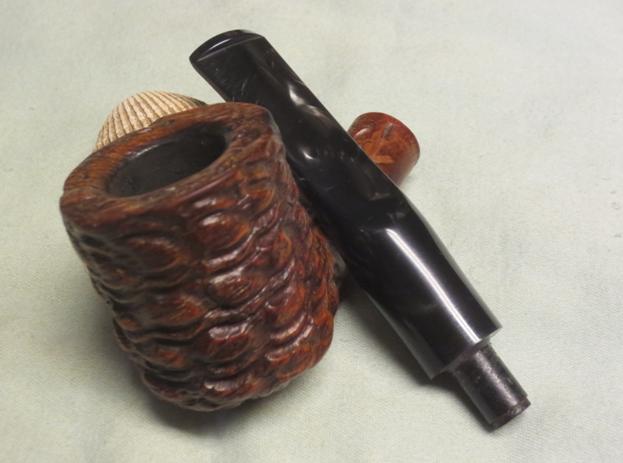
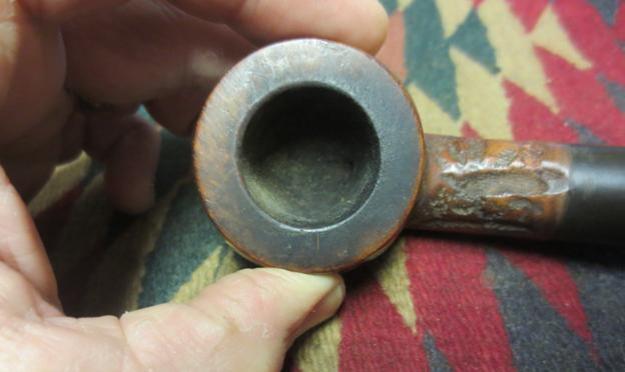
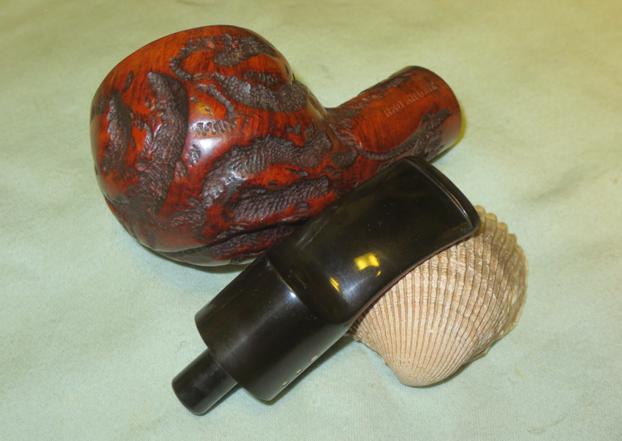
First off is to ream the bowl, and scrub the outside (I prefer to work on a clean pipe.) The interior of the pipe was in decent shape with no major burn outs or char. I popped the large fill out and started filling it with layers of CA superglue mixed with briar dust. The result worked nicely and was re-rusticated with a Dremel.

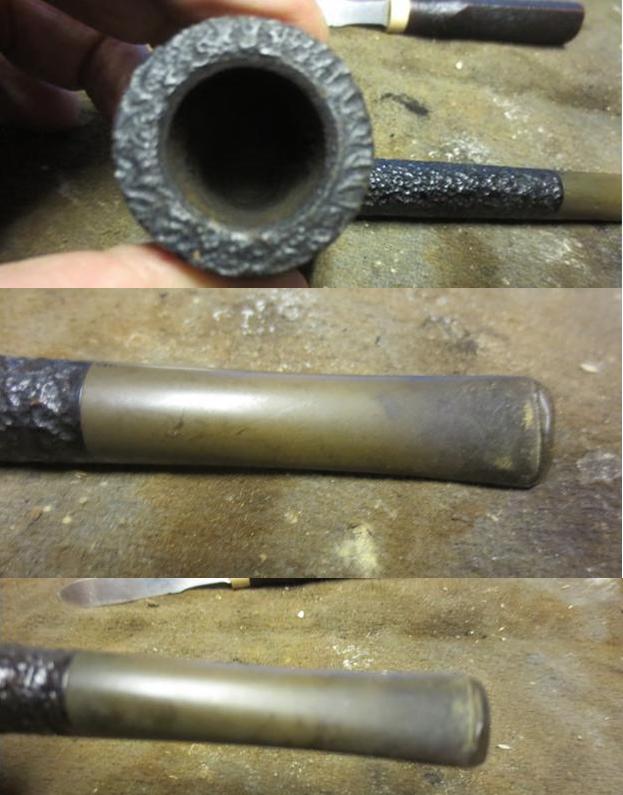
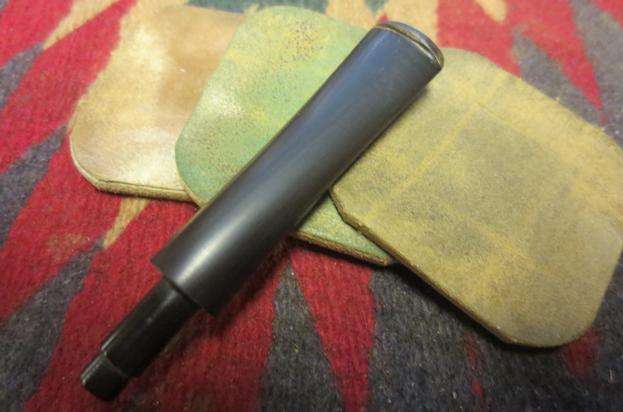
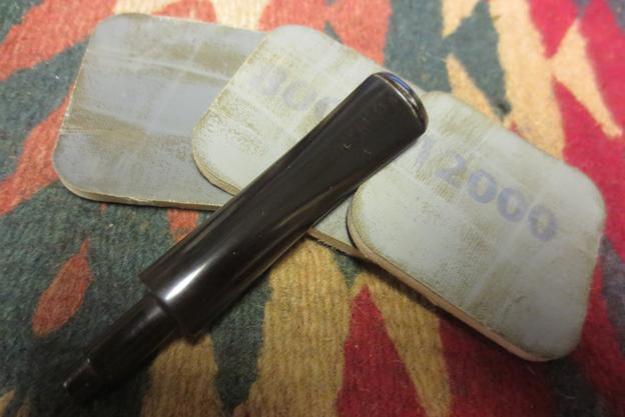
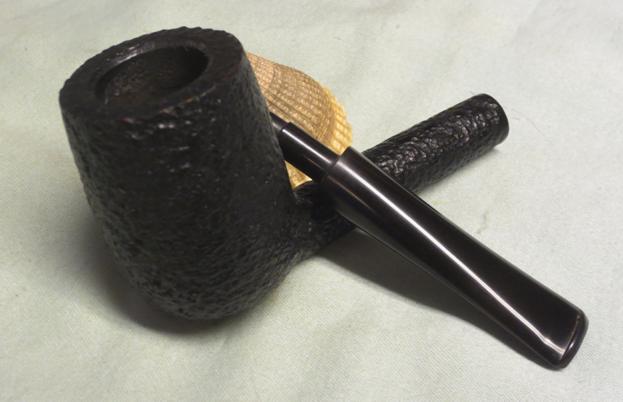
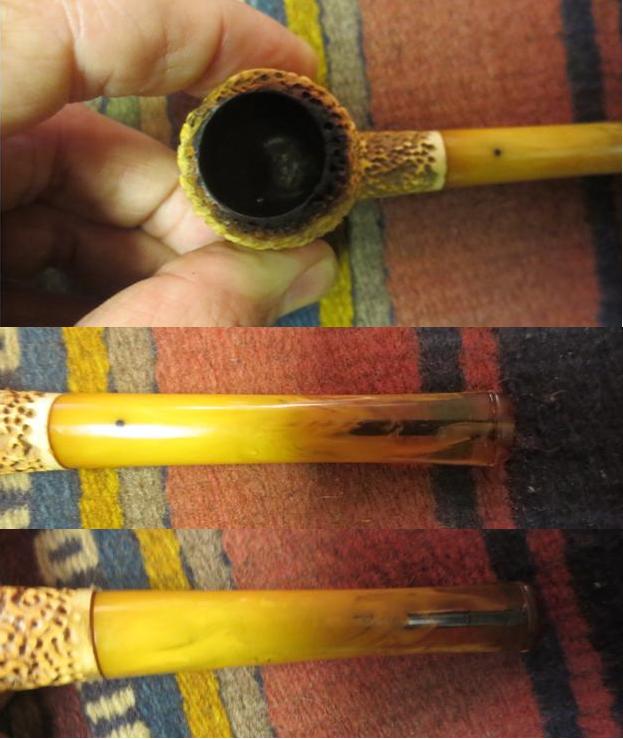
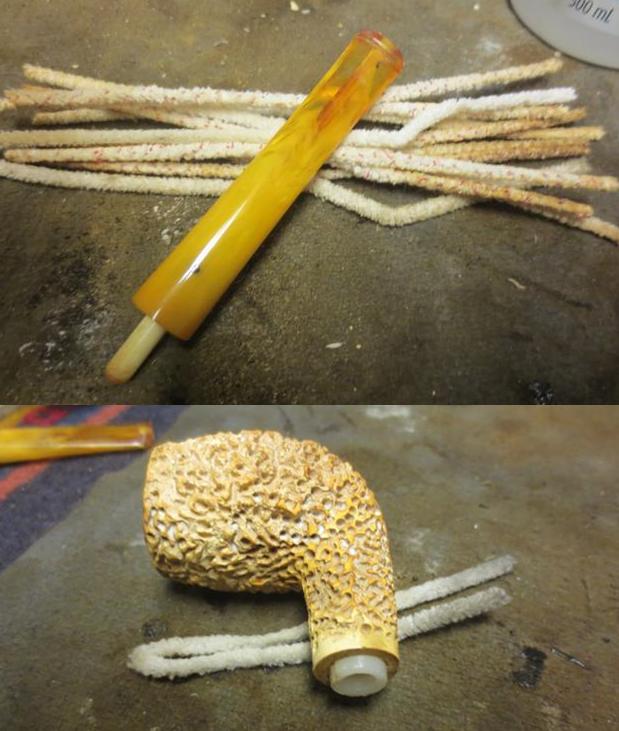
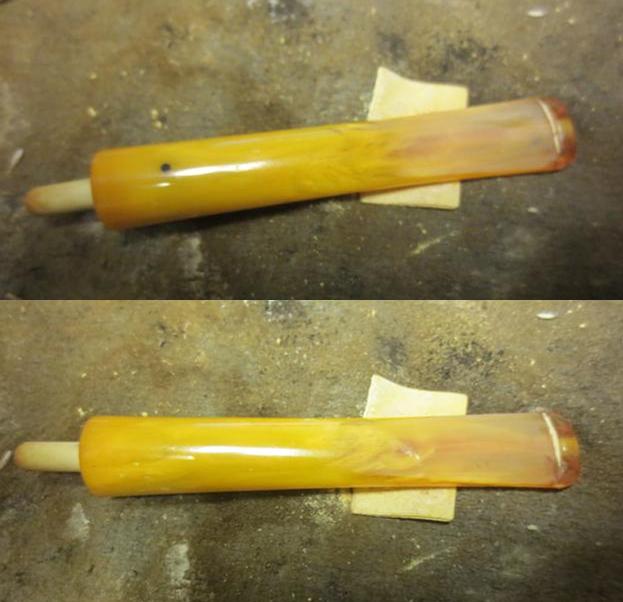
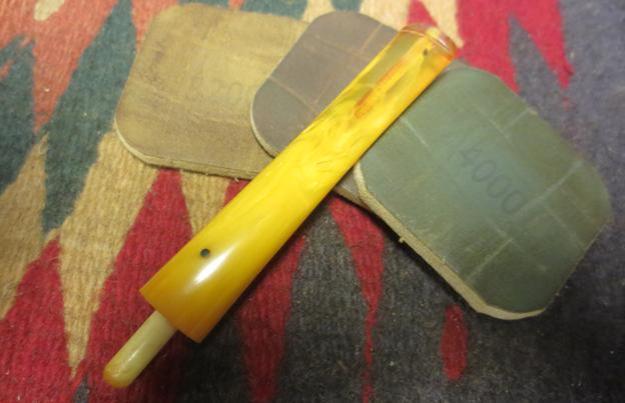
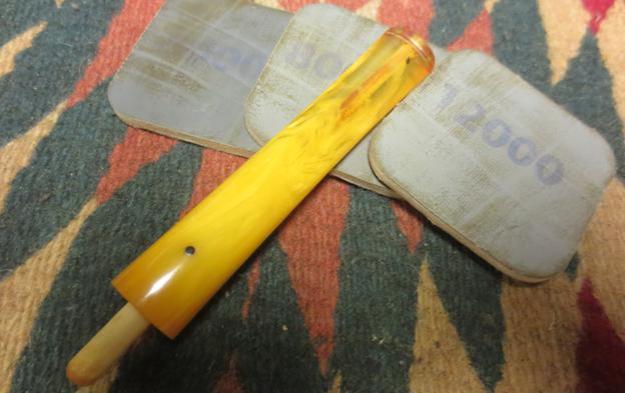
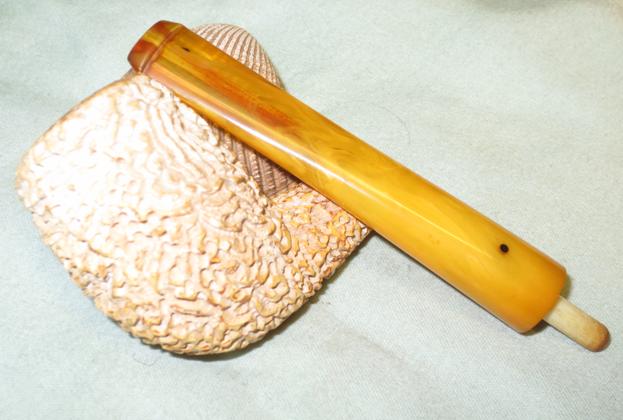
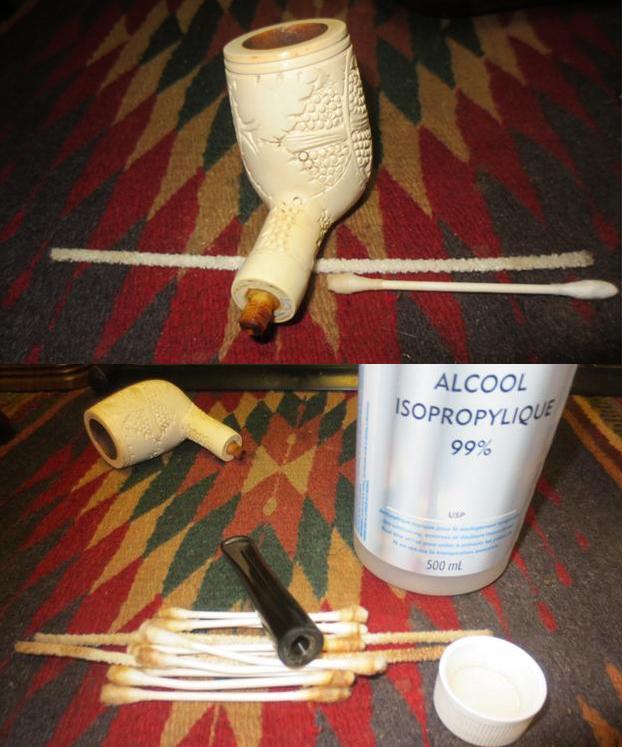
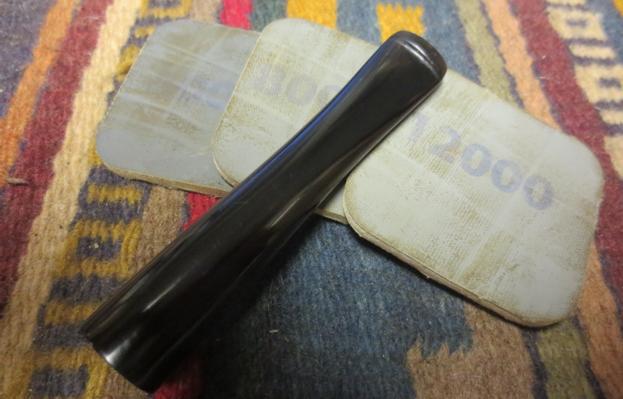
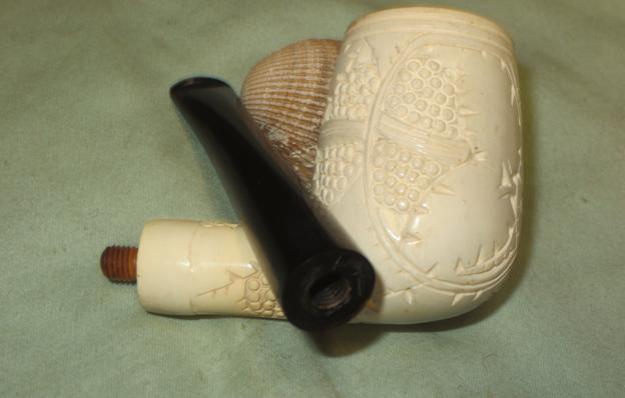
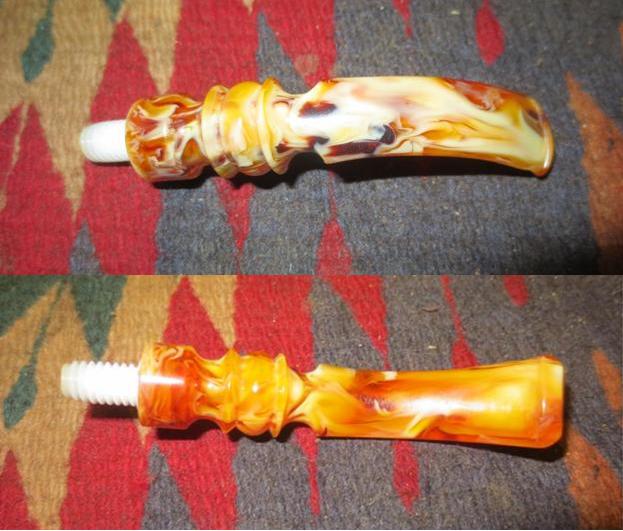
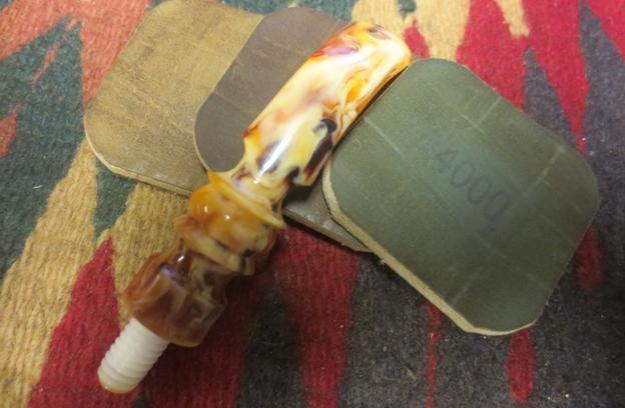
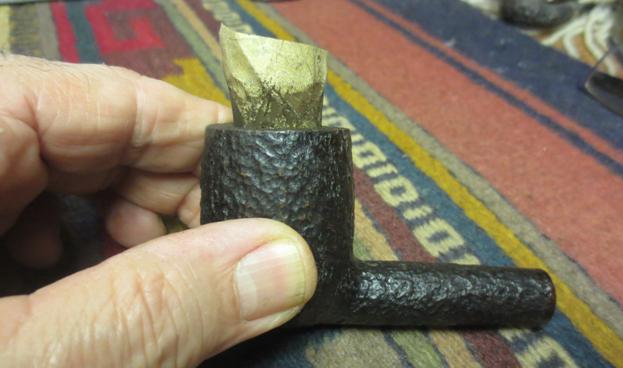
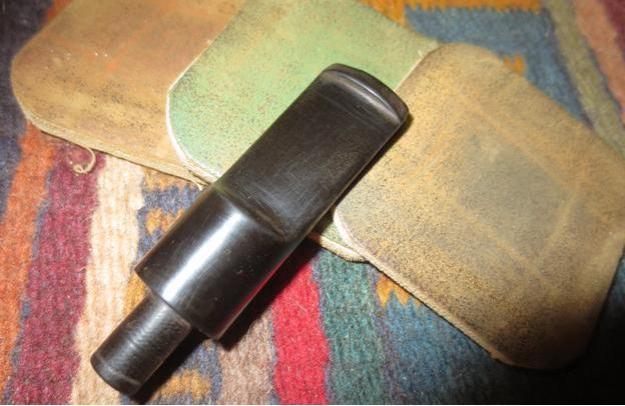
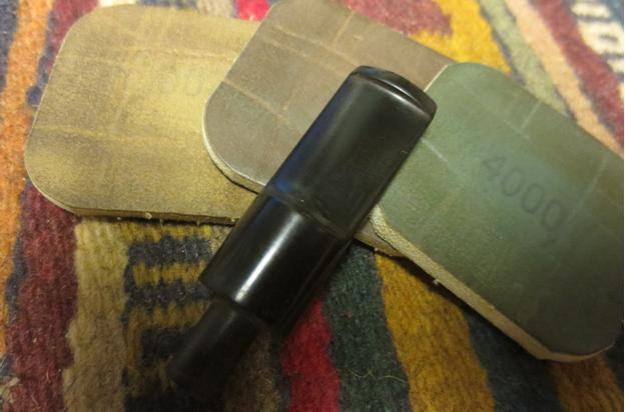
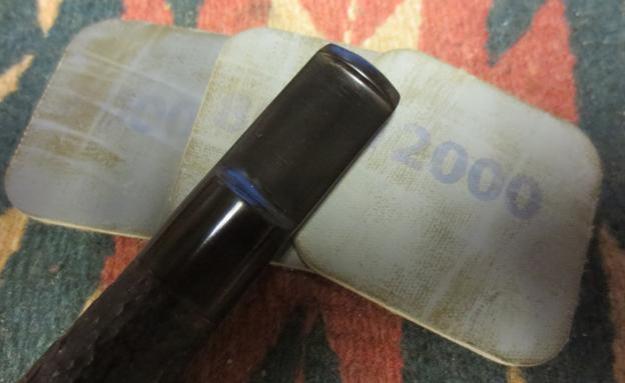
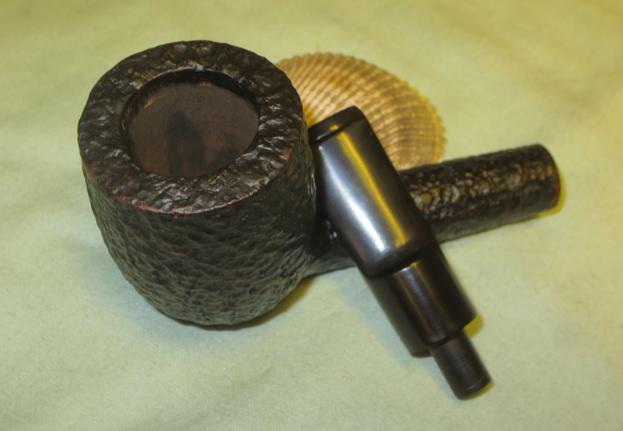
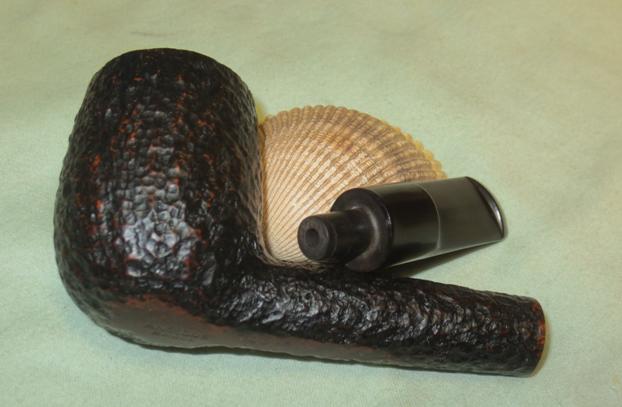
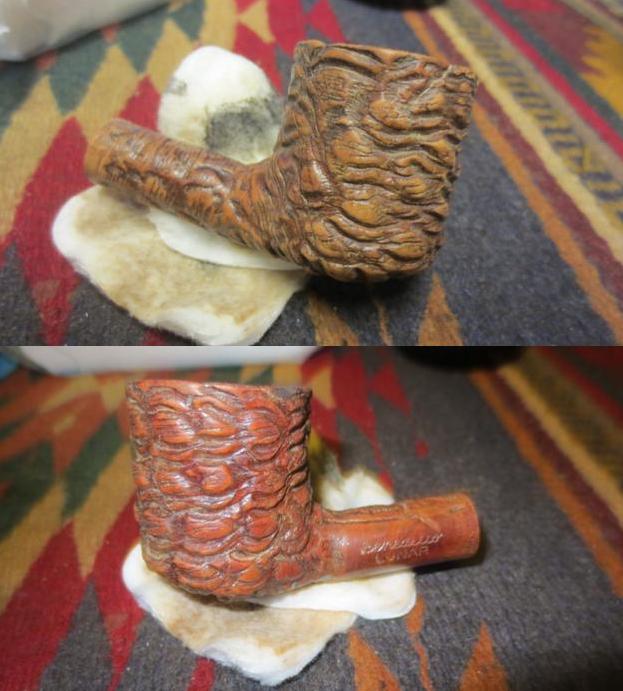
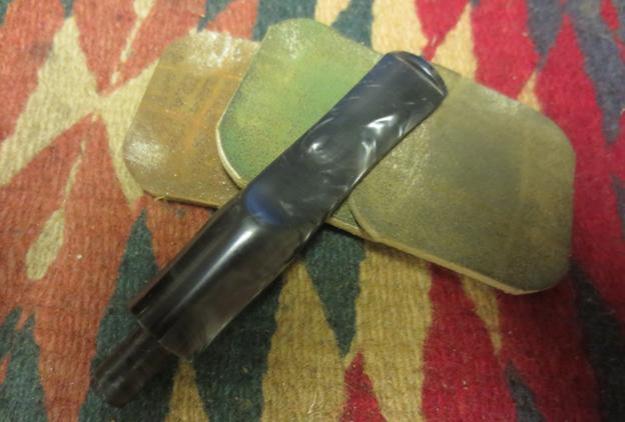
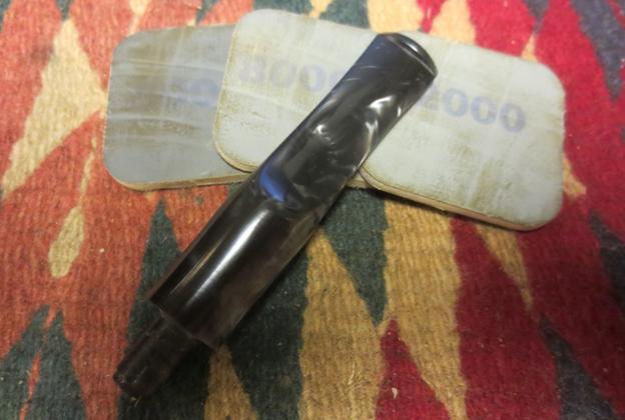
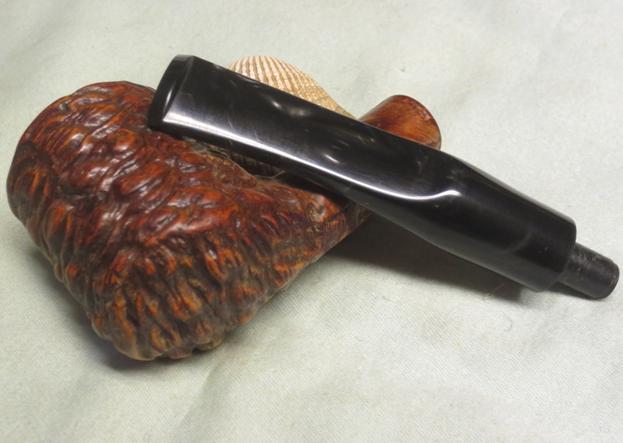
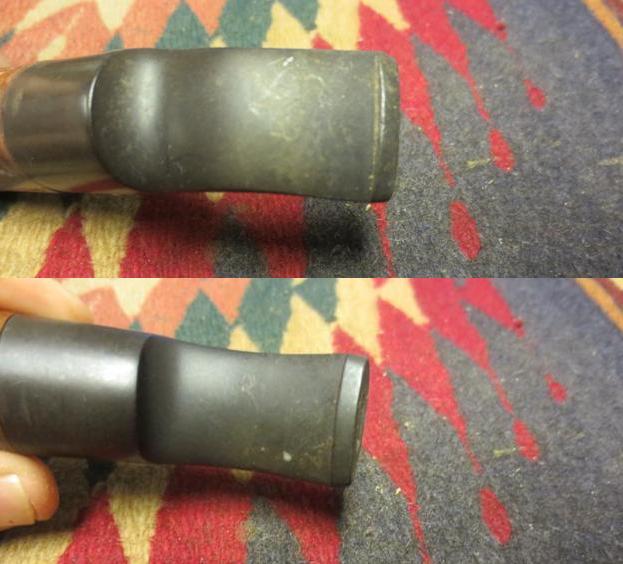
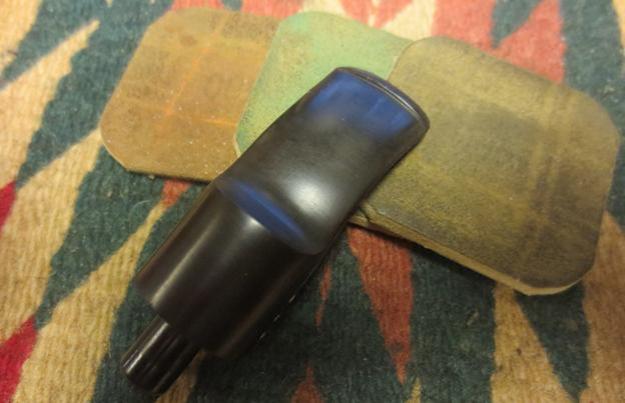
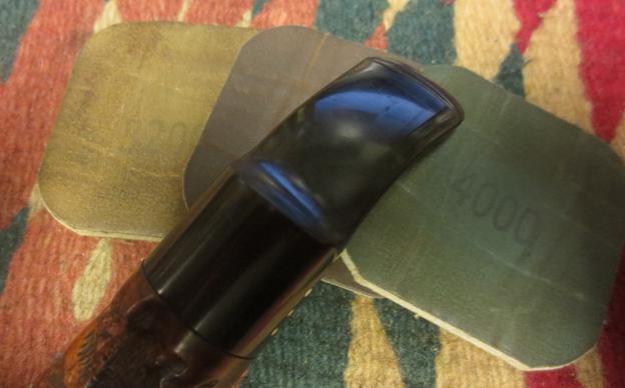
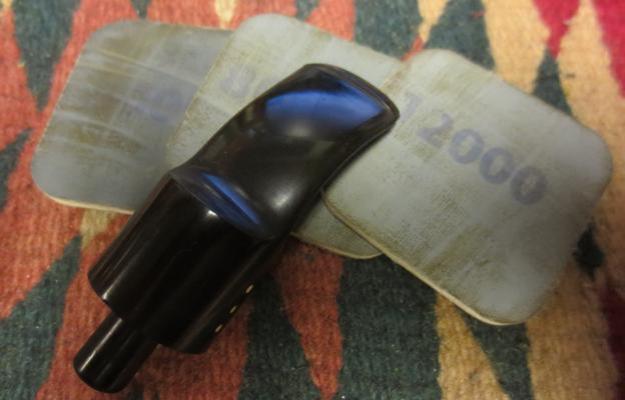
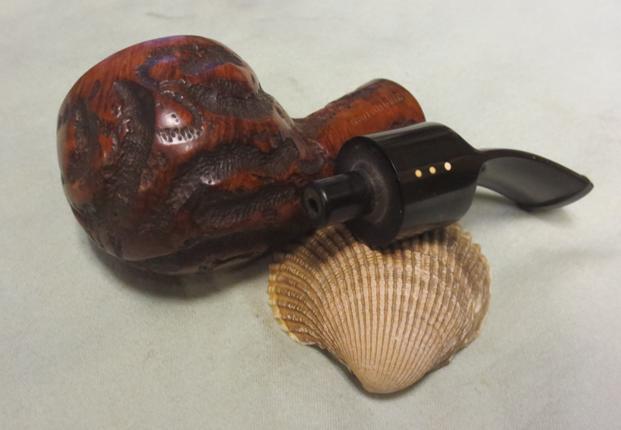
After a good retort and scrub of the “smoke chamber”, I could shine the aluminum in the interior. I shined the nosecone of the zeppelin with 6000 grit sandpaper to give it a shine, but leave the oxidation to give it an antique look. I sanded the stem with 600-6000 grit sandpipers to remove any oxidation and to give it a shine. The stem was also cleaned with 70% isopropyl alcohol and pipe cleaners.

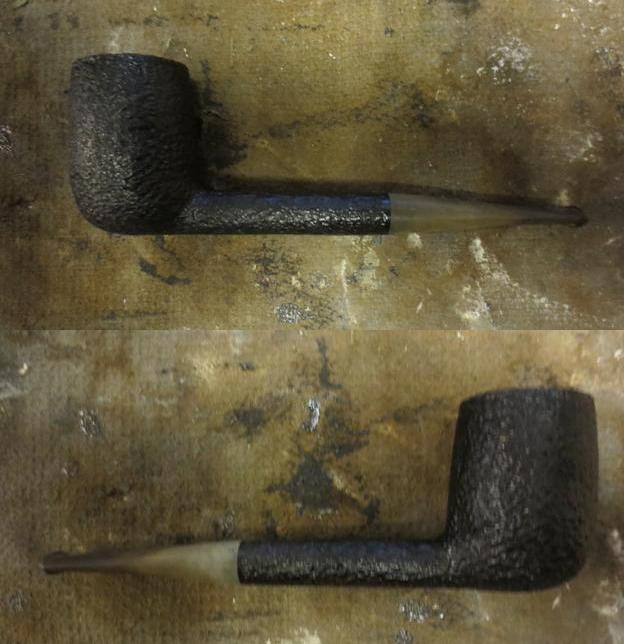
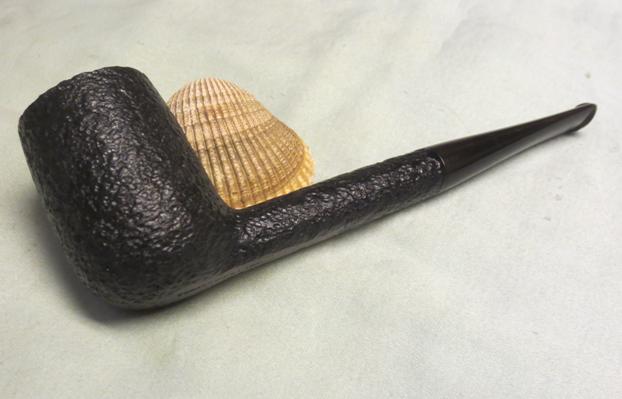
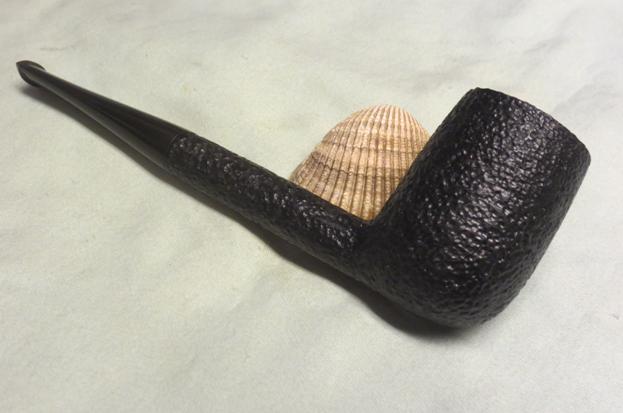
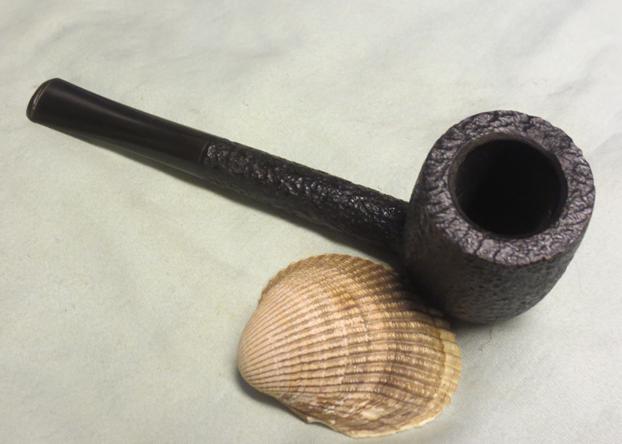
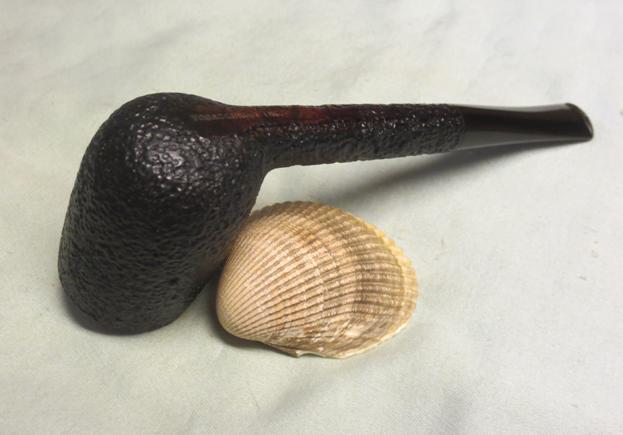
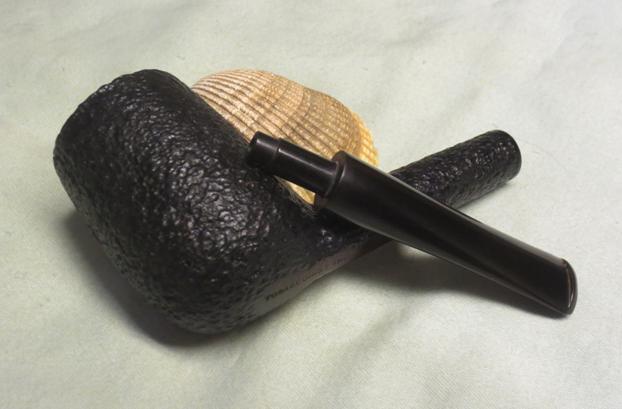
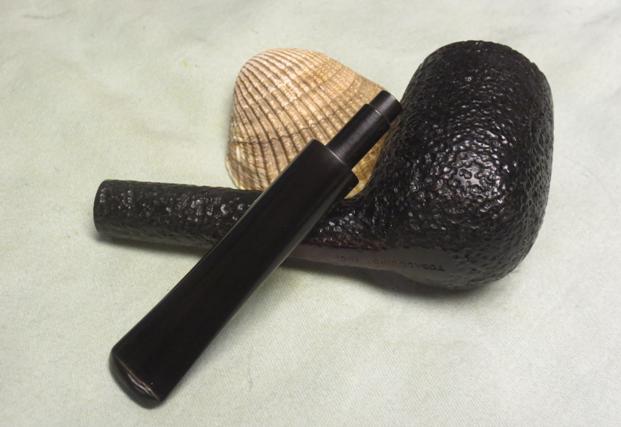
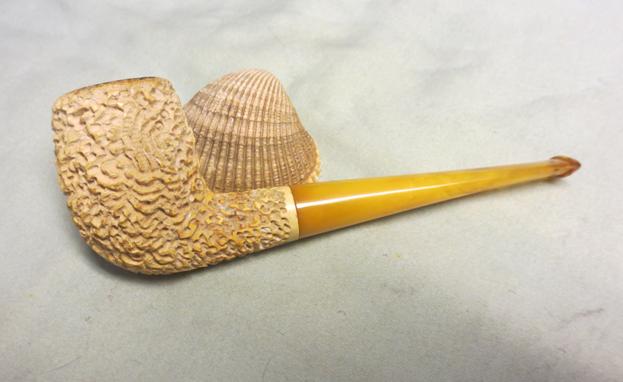
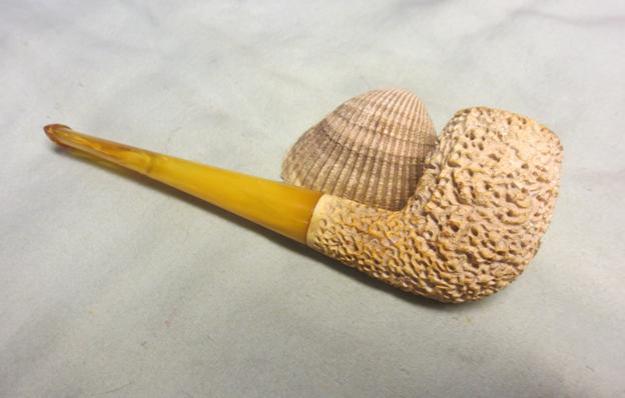
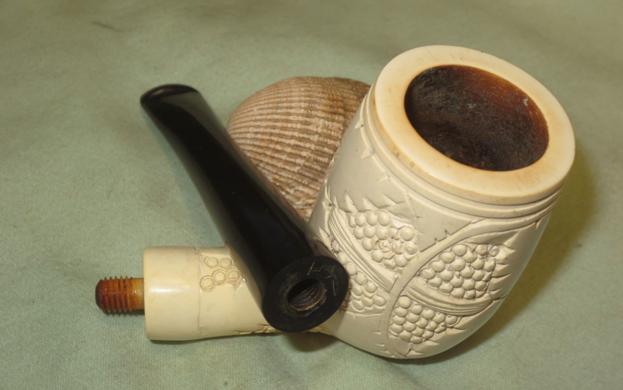
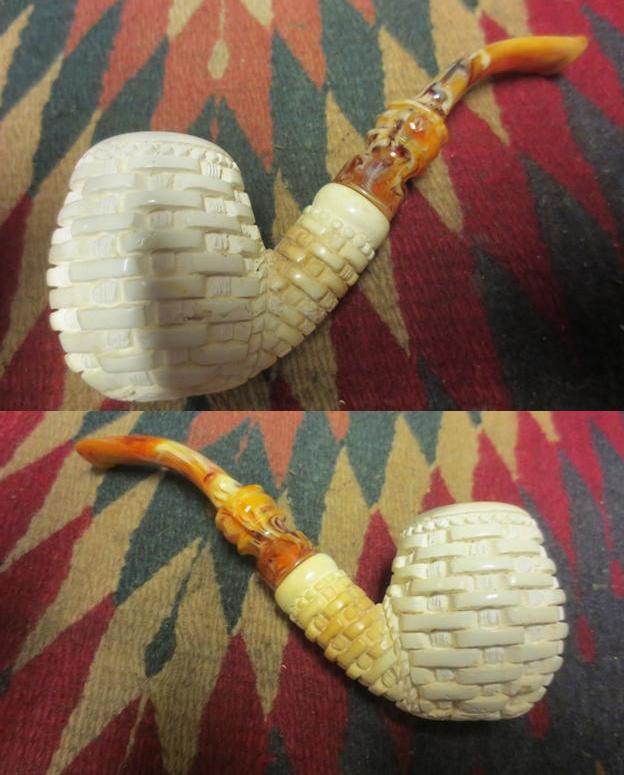
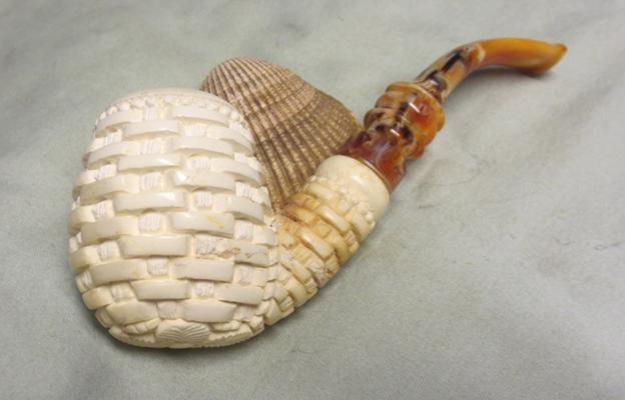
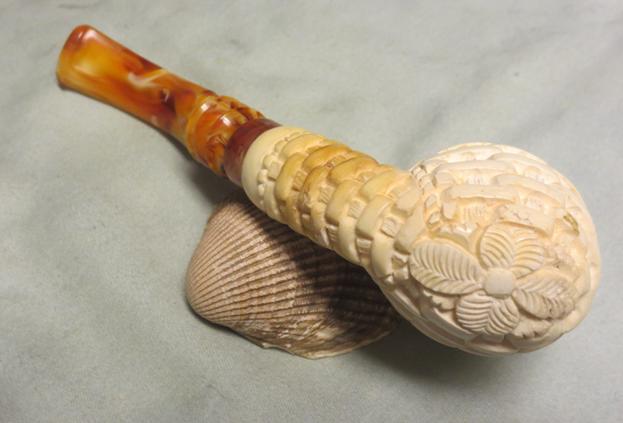
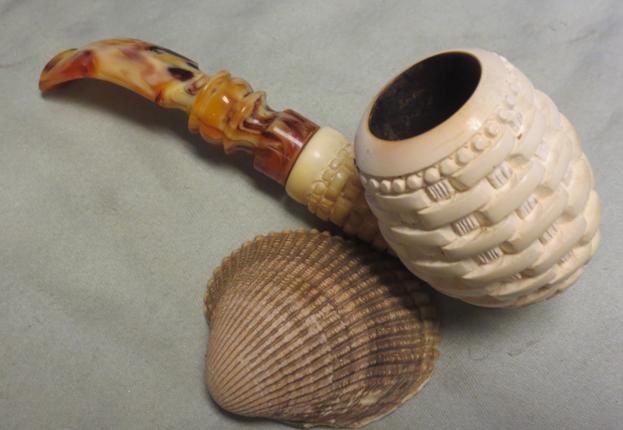
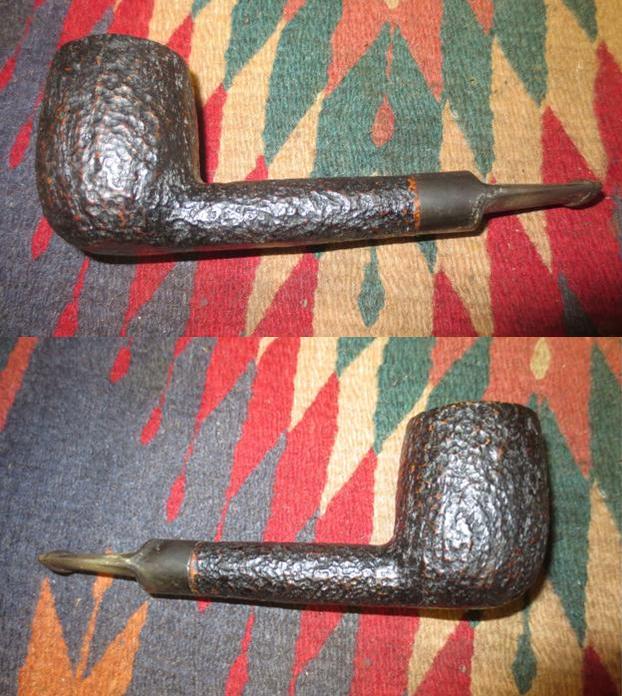
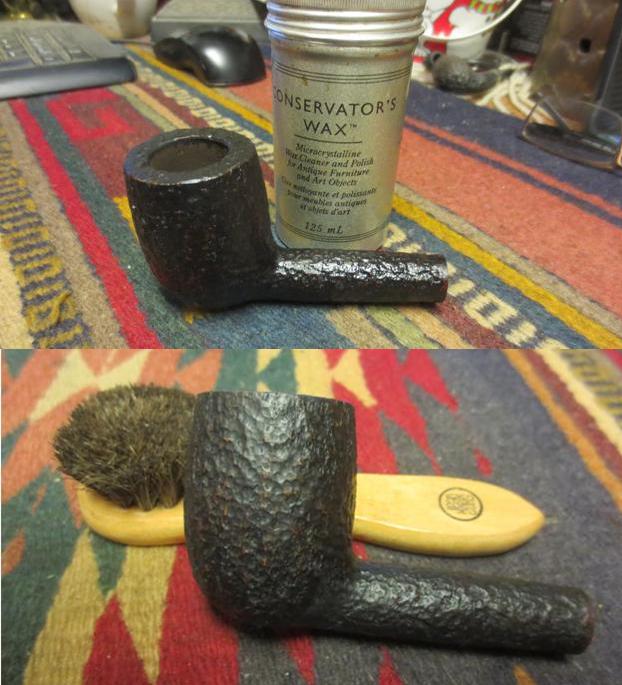
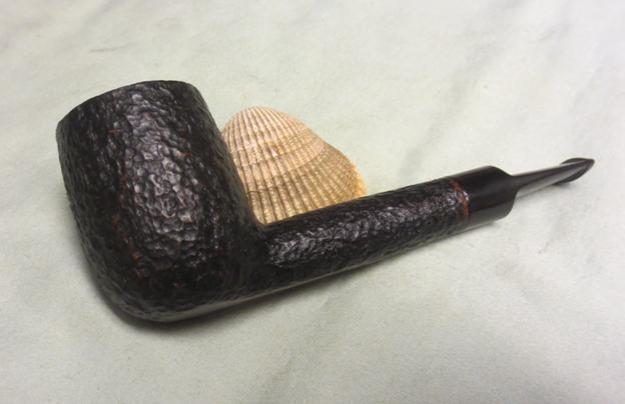
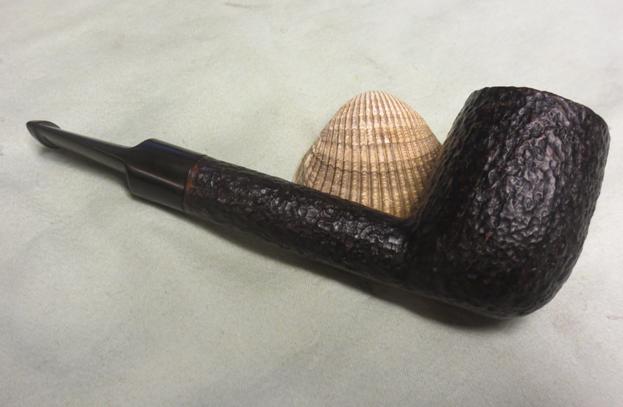
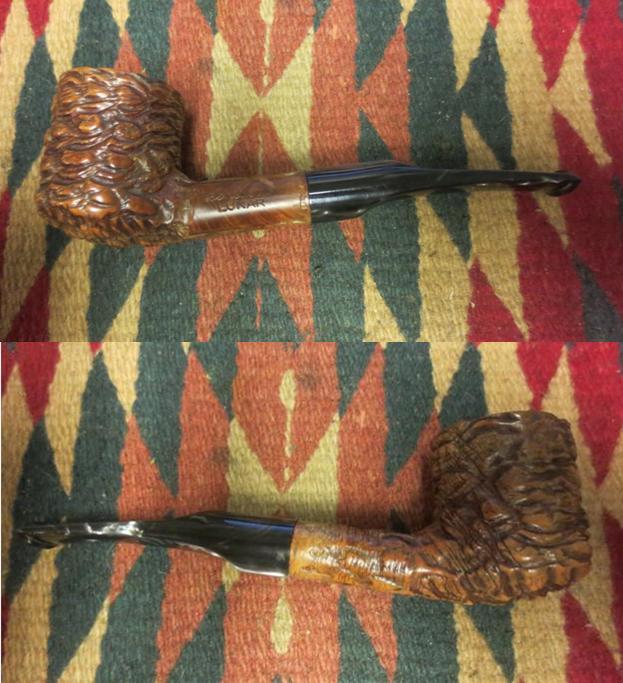
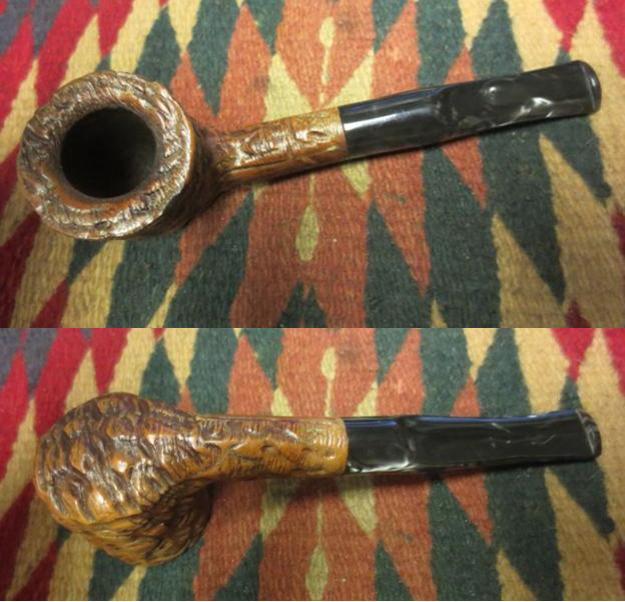
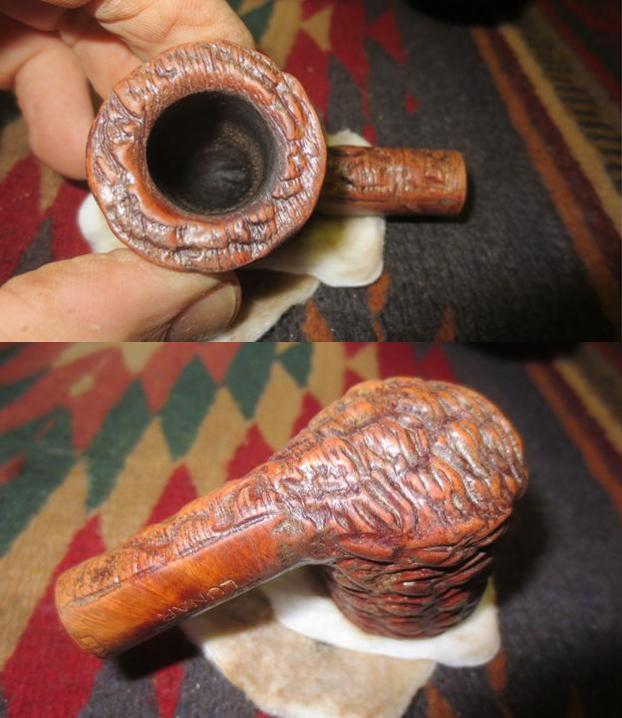
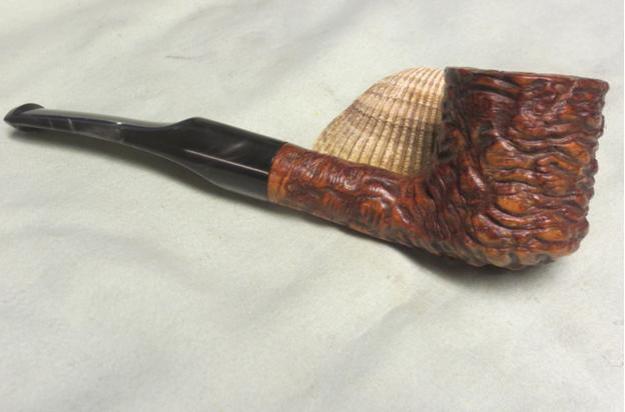
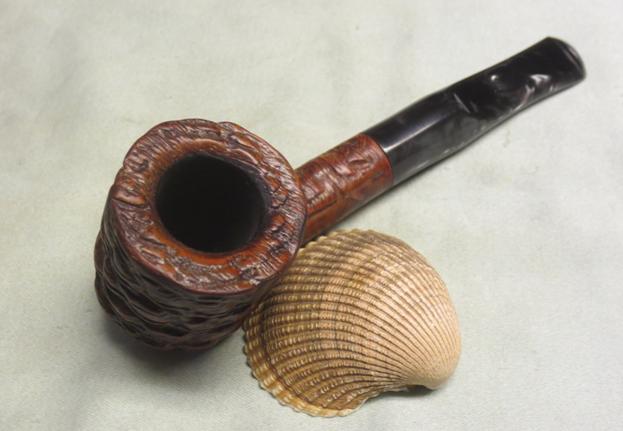
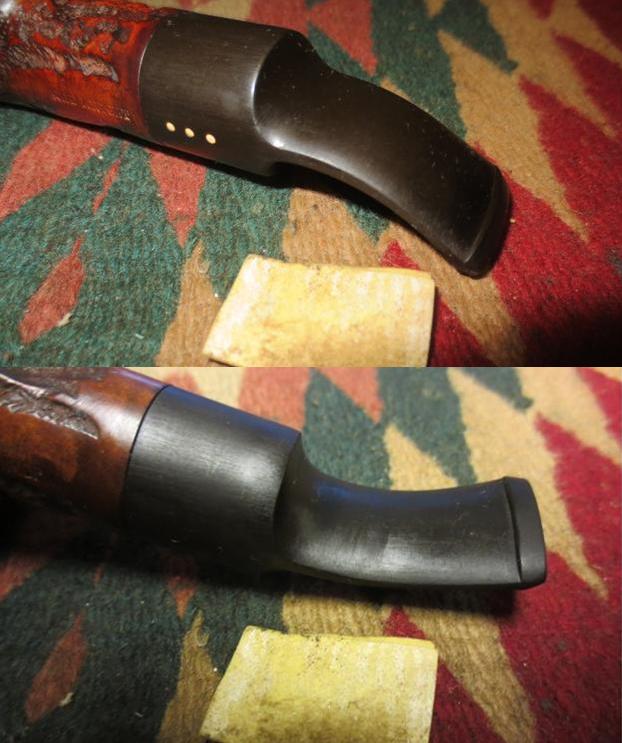
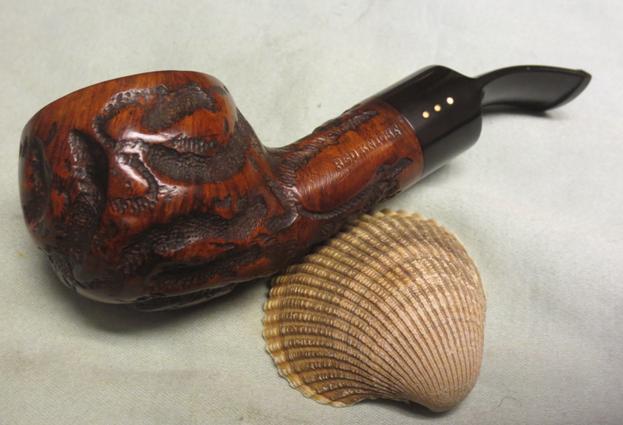
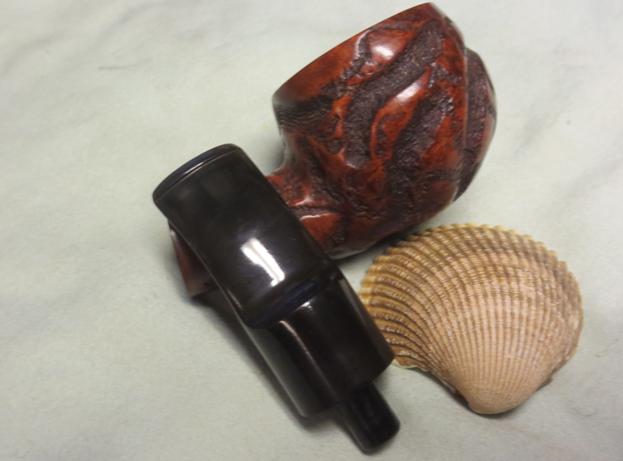
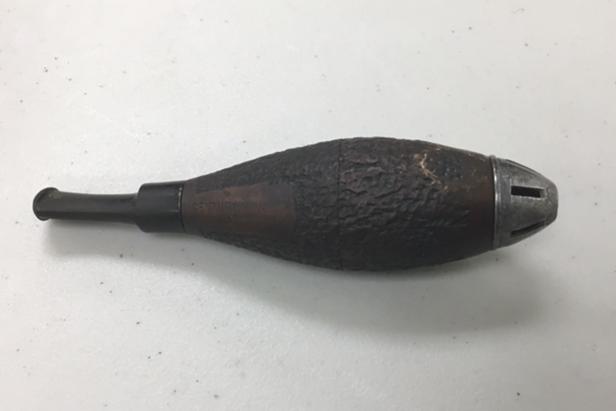
I chose to re-stain the pipe to give it a more contrasted dark-light look with the rustication. I set the dye with the flame of a lighter (gotta love the blue flame of this step) and set it to finish drying. After a quick wipe down and hand buff with conservative wax, the pipe was pieced back together and a “bowl” of Prince Albert Burley was packed to try to give it a start of a cake once again. Here are the results of this restoration:Marx4 Marx5 Marx6 Marx7 Marx8
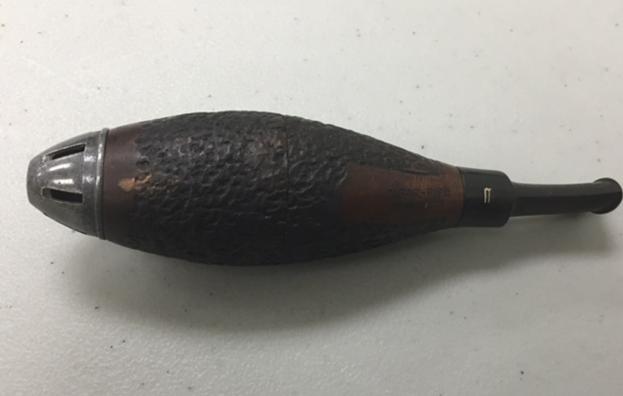
Thank you to Steve Laug and friends for not only letting me write an article on my restoration, but for serving as inspiration and entertainment for this past year, and for the many years to come.

Day Trips and Memories


Family day trips were always popular in our family. Many is the time I remember going for day-long rides with my Papaw in his pick-up truck – Granny was usually at work since they worked opposite shifts – out country roads many of which don’t exist today. We would stop at mom & pop stores and get our lunch. Papaw would tell the old man behind the counter he wanted whatever lunch meat he was in the mood for that day, cut about half an inch thick, on bread (white bread was a given) with mayonnaise and then asked what I wanted; I always wanted the same thing he’d ordered – even when I had no idea what the lunch meant I was getting was. The old man would get the items from the deli case and start making our sandwiches while we picked out a pop, soda for you northerners, which was usually a Hire’s Rootbeer. Papaw would toss a bag of chips on the counter and we’d set our rootbeers up there, too. He’s then dig out his billfold, as he always called his wallet, and tell the man, “Put it all in a poke for us, please.” (That’s a paper bag, again for you younger and/or norther folks.)

We’d load into the truck, always a Chevy or GMC and usually orange or red in color, and drive down the road a few miles until we found just the right spot, where we’d pull off the side of the road in the shade and park. The tailgate served as both our picnic table and benches. Occasionally Papaw would light up his pipe; he only had one that I know of. More often he would get a jaw-full of Redman or Levi Garrett afree we ate and we would talk – for hours some days. I honestly can’t remember most of the conversations we had on those drives. But the memories I do have are vivid and very dear to me.

Now I am the “Papaw” and we still carry on this tradition, granted, in a slightly modified version; we usually pack a lunch (there aren’t many mom & pop shops that fix you a sandwich anymore) or hit a restaurant. And there’s always at least three of us: Papaw, Granny, and grandson. Occasionally our son goes along too, if he’s not working.

A week or so ago we had one of these all too rare times when the four of us took a spontaneous road trip to Carter Caves State Park in KY. The drive isn’t too far and, while not as popular a destination as it once was, it’s a beautiful place to visit with a lot of activities if you plan for them.

We arrived around 1:00 pm I think and drove a little loop through the main part of the park to 1) get the lay of the land and 2) give Granny and the grandson a bathroom break. Once the “necessaries” were out of the way, we drove back down to the entrance of the park no began our look for the spot. My son and wife both had input on where it should be; neither agreed, to no big surprise LOL. But none of them were right in my mind. I suddenly stopped the truck, scanned the area and decided this was it! To some protest, I pulled off the road onto a parking shoulder and parked my Silverado. While the other two questioned my judgement, I asked my grandson what he thought about the spot. “If you like it it’s perfect, Papaw.” Issue settled.

We unpacked what little we had taken and set up next to a real picnic table with real benches and the dispute quickly dissipated: it was shady, comfortable, had a great view and was close to but a safe distance from he creek, perfect to hear the water gently flowing by.

My son and grandson geared up for their hiking adventure, my wife settled into a comfortable spot at the picnic table, and I got set up in my bag chair. The young ‘uns headed off on their adventure and I broke out my pipe. I loaded it up with a favorite blend; it took fire nicely, enhancing my anticipation of a nice, relaxing afternoon. As I sat there, bluish smoke gently swirling around me, listening to the gentle babbling of the creek, I was transported back in time it seemed. My wife was walking along the creek’s edge picking up interesting rocks for my grandson and me (we have 3-5 stones from everyplace we visit, another hobby/collection we share) and she seemed 20 years younger – as did I! It was a most perfect, peaceful, and serene few of hours spent just enjoying each other’s company and God’s wondrous creation.image

All too soon the sun had moved as the hours ticked by and devoured our cool shade. It was well timed though as about the same time the boys were winding up – or winding down from – their adventure. My grandson had packed back 5 stones, the same number I had collected with my wife’s help. We settled on 6 or 7 to bring home and packed them and everything else up in the bed of the truck. It had been a splendid day indeed!

The drive home was a much quieter one than the trip there; everyone had worn themselves pretty much out. As I drove with the radio softy playing, I couldn’t help but reflect on those trips with my Papaw. And wonder how much he must have enjoyed them; I often wish he was still around to talk about those and many other things. But the main thought on my mind during that drive home and in the days since was quite simply this: it’s really good to be the Papaw.

A Liverpool stamped Tobacconist Inc.


Blog by Steve Laug

I was looking through the box of pipes that I have to refurbish to see what struck my fancy this time around. It may sound like an easy process but my brother has been filling the box faster than I can clear it out… no complaint there however as he has great tasted in pipes and he has found some amazing pipes. The one that stood out to me this time was a Liverpool that has a rustication that was so tight that it looked like a sandblast. On closer inspection it was clear that it was a rusticated pipe. The bowl and long shank were at dark brown with a flat smooth strip on the bottom of the shank and the bowl where it was stamped Tobacconist Inc. That was a brand I had not heard of but I figured that it must have been a shop pipe for a tobacco shop somewhere. The bowl had a light cake and the beveled inner edge of the rim was flawless. The rim was pretty clean with just a little buildup in the rustication. The stem was oxidized but there were no bite marks or tooth chatter.Tob3 Tob4I took a close-up photo of the rim and bowl to show the cake and the condition of the rim surface. It was a pretty clean old pipe. I also took some photos of the stem top and bottom to show the oxidation and lack of damage. I was fortunate with that.Tob5I googled the Tobacconist Inc. stamp to see if I could find any information on the brand. There was no information in Who Made that Pipe and I could find nothing on Pipedia. The name Tobacconist Inc. came up shop a tobacco shop in Chicago. It is called Tobacconist Inc. and is located at 3524 W. Irving Park Rd. Chicago, Illinois. The phone number is 773-463-8468. I have included two photos of the sign and the shop. The sign says the shop has “Everything for the Smoker” and has been in existence since 1946. Sounds like a place I need to visit one day. I may have to call them and see if they have any information about the pipe.Tob2Tob1I started working on the pipe by reaming the bowl with the Savinelli Pipe Knife. I took the cake back to bare briar.Tob6I used a brass bristle brush to clean up the rustication on the top of the rim. It did not take too much work to clean off the tars and dirt.Tob7I scrubbed the bowl with Murphy’s Oil Soap and a soft bristle tooth brush to remove all of the dust and debris from the rustication.Tob8I rinsed the bowl off with running water and dried it off with a soft towel. The clean pipe is shown in the photos below.Tob9 Tob10I sanded the stem with 220 grit sandpaper to remove the oxidation on the surface. In the cleanup I found a small tooth mark on the top left side of the stem. I was able to remove the tooth mark with sanding.Tob11I cleaned the mortise and airway in the shank and stem with pipe cleaners, cotton swabs and alcohol. I was surprised on how clean the pipe was. It did not take too much to clean out the airways.Tob12I wet sanded the stem with 1500-2400 grit micromesh sanding pads and followed my usual routine. You can probably recite it by now if you have been a long time reader of the blog. Sand and Obsidian Oil repeated until finished. I dry sanded with 3200-4000 grit pads, gave it another coat of oil and sanded it with 6000-12000 grit pads. I gave it a final coat of Obsidian Oil and set the stem aside to dry.Tob13 Tob14 Tob15I buffed the pipe with Blue Diamond on the wheel and then gave it multiple coats of carnauba wax. I used a light touch on the bowl so as not to get waxy buildup in the rustication. I buffed it with a clean buffing pad to raise the shine. The final touch I use is a microfibre cloth and a rubdown on the entire pipe to deepen the shine. The finished pipe is shown in the photos below. Thanks for looking.Tob16 Tob17 Tob18 Tob19 Tob20 Tob21 Tob22


Beautiful High Grade B Bjarne Nielsen Handmade Freehand


Blog by Steve Laug

I picked this pipe up from Pocatello, Idaho when my brother and I visited an older pipeman there who was selling some of his collection. It was a beautiful freehand pipe cut to maximize the amazing grain. The flame grain flows up the sides of the bowl and shank with great birdseye on the top and the bottom of the bowl and shank. It has a Cumberland stem with a briar insert centered in the saddle portion of the stem. There is also what appears to be an ivory or faux ivory ring that is integrated at the end of the saddle that sits against the shank when the pipe is inserted. The Cumberland tenon is part of the pipe and is funneled to direct the airflow from the shank to the stem.

The pipe is stamB1ped on the underside of the shank Bjarne Nielsen over Handmade over In Denmark. There is a grade stamp B under the other stamping. The bowl was in very good shape though there was dust and grime over the surface of the bowl that was mixed in with the wax and gave the bowl a waxy almost sticky feel in the hand. The birdseye on the rim was hidden in the grime. There was a light cake in the bowl that I reamed out when I was visiting my brother so when I started working on it today there was nothing in the bowl. The stem was oxidized and also covered with the same waxy stickiness as the bowl. The briar insert was faded and light under the grime. The stem was obviously handmade and very well cut with a thin button. The pipe is amazingly light weight for a pipe this size. B2 B3I have had many Bjarne pipes cross my work table over the years but all had been stamped only Bjarne or Bjarne Handmade. None of them had his full name stamped on it and none had a letter stamp which I assumed indicated the grade of the pipe. I did some research on Pipedia.com and found some helpful information on both the stamping of my pipe and the history of Bjarne Nielsen himself. I am including the link to the full article on Pipedia and also some pertinent sections of the article that I have edited for quick reference. https://pipedia.org/wiki/Bjarne

From the early 1990s Bjarne had seven pipemakers employed and the pipes were sold in no fewer than 32 countries. For more than six months each year, Bjarne traveled around the world to promote his pipes by meeting with dealers and customers. But sadly, it all ended in February 2008 when Bjarne, then 66 years old suffered a fatal heart attack. An unexpected blow fist of all to his family, but also to the pipemakers who had been working for him, and to all lovers of his pipes from around the world. And as no one was willing to take over, the Bjarne pipe died together with its creator.
Among the pipemakers that worked for Bjarne were Johs (for the lower priced high volume pieces), and makers like Ph. Vigen, Ole Bandholm and Tonni Nielsen for high grade pieces. The cheaper line was stamped “Bjarne” while the highest grades were stamped “Bjarne Nielsen” (never with the pipemakers’ name) and graded, from highest to lowest, by the letters: AX, A, B, C, D, E, F, G, H, I, and J.
Now I knew that the pipe I had was made before 2008 and could well have been made by Tonni Nielsen. The B stamping told me it was a fairly high grade pipe – third grade from the top AX grade. That makes sense when I look at the grain and also the way the pipe maker cut the pipe to maximize the lay of the grain on the bowl. I took a few photos of the pipe taken apart to show how the stem was made and to give a good look at the Cumberland under the oxidation. There were no tooth marks or chatter on the stem top or bottom.B4I scrubbed the sticky wax and grime off the bowl surface with Murphy’s Oil Soap on a cotton pad. I was surprised how much grit and grime came off the bowl. Some of what appeared to be nicks or scratches were in the thick wax coat on the bowl and once it was removed so were the marks in the surface. The grain really showed clearly once I rinsed off the soap on the bowl.B5 B6 B7 I cleaned out the mortise and the airway in the shank and the stem with cotton swabs, pipe cleaners and alcohol.B8 The stem was in such good shape under the wax, grime and oxidation that I wiped it down lightly with alcohol on a cotton pad and then went directly to the micromesh sanding pads. I wet sanded the stem with 1500-2400 grit pads and gave the stem a coat of Obsidian Oil. I dry sanded it with 3200-4000 grit pads and gave it another coat of oil. I finished by sanding it with 6000-12000 grit pads and gave it a final coat of Obsidian Oil. I set the stem aside to dry.B9B10B11 I buffed the pipe and stem with Blue Diamond on the buffing wheel being careful to not buff the stamping on the underside of the shank. I gave the bowl and stem several coats of carnauba wax and buffed the pipe with a clean buffing pad. I hand buffed it with a microfibre cloth to deepen the shine. The finished pipe is shown in the photos below. It too will be available soon on the rebornpipes store. Send me a message or a response if you are interested. Thanks for looking.B12B13B14B15B16B17B18B19

Refreshing a Coral Finish Meerschaum Billiard


Blog by Steve Laug

I am on a meerschaum refurbishing binge. I have a few in my box of pipe to be refurbished. This one is a bit unique to me. I have had rusticated meerschaum pipe from Manx Pipes and Nording but I have never had one with what to me looks like this one. I have labeled it a coral finish because it not only looks like it with the carved grooves and pits in the finish but tactilely it also feels like a piece of worn coral. The bowl finish was dirty – more dirty than coloured. The photos below actually make it appear a bit darker than it was when I started. The grooves and pits were lined with dust and debris. The rim had a tarry buildup that was hard and black. The bowl had a light cake forming on the inner walls. The stem is probably made of acrylic or if earlier Bakelite. It has a swirled amber appearance becoming clear in the last third of the stem to the button. There is a single black dot on the top of the stem. The stem has a push tenon and the shank an insert for the tenon. These are either nylon or Delrin. They lead me to believe that the pipe is a bit newer. It does not look like a replacement tenon. The airway in the stem was darkened with tobacco stain. This would give me a chance to use my newly worked out method of cleaning clear stems.c1 C2I took a close-up photo of the rim to show the build up on the back of the top along with darkening to a lesser degree all the way around the top of the bowl. I also took a photo of the top and bottom of the stem. Though they are clear enough they do not show the rippling and tooth marks in the surface. It looked to me like someone had tried to buff out the tooth marks and ended up with a wavy surface on the stem. You can also see the staining of the airway in the clearer portion of the stem.C3I decided to use a gentle soft scrub product to clean the exterior of the meerschaum and the tarry buildup on the rim. I scrubbed it with a tooth brush and rinsed it under running water. I dried it off with a towel. I used a brass bristle brush to work on the rim top. I was able to remove much of the tarry buildup on the rim and rinsed it once again with running water.C4 C5I reamed out the light cake with a Savinelli Pipe Knife and took the cake completely out of the bowl.C6I worked on the inside of the airway with mini-needle files to smooth out the drilling and the slot. It took three different needle files to remove much of the roughness – a round, an oval and a flat oval file.C7I scrubbed the inside of the stem with bristle pipe cleaners and soft scrub cleanser. With repeated scrubbing alternating with the needle files I was able to remove the majority of the staining in the airway. I scrubbed the airway and mortise in the bowl with alcohol and pipe cleaners.C8To remove the waviness of the stem and the tooth marks I sanded it with 220 grit sandpaper and a medium grit block. I was able to remove the wavy lines and the tooth marks and restore the taper of the stem.C9I wet sanded the stem with 1500-2400 micromesh sanding pads and wiped the stem down with a damp cotton pad. I dry sanded it with 3200-4000 grit pads and wiped it down again. I finished sanding it with 6000-12000 grit pads and wiped it down a final time to remove the sanding dust.C10 C11 C12I buffed the bowl and stem lightly with Blue Diamond on the wheel. I gave the stem multiple coats of carnauba wax and buffed the pipe with a clean buffing pad. I hand buffed the stem and bowl with a microfibre cloth. The finished pipe is shown in the photos below. If you are interested in adding this pipe to your collection send me a message on Facebook or respond in the space below the blog. Thanks for looking.C13 C14 C15 C16 C17 C18 C19

Cleaning up a no name Vineyard Meerschaum Billiard


Blog by Steve Laug

I received a second meerschaum pipe in a leatherette or vinyl covered case. This one was a straight billiard. The bowl was lightly carved with grape vines and clusters of grapes all around the bowl. There were two rings carved around the top of the bowl to set off the vines and grapes. The bowl has begun to colour – especially around the shank and on the lower portion of the bowl. The rim had some dark marks and a coat tar that was stuck on the top. The stem is made of a dark acrylic and has some tooth marks and chatter on the top and the bottom sides near the button. The nylon/Delrin threaded tenon has some darkening but is in excellent condition. The stem sits perfectly on the shank. The case is lined with white satin like material.G1 G2 G3 G4I took a close-up photo of the rim top to show the damage. There was darkening and tar but there were also some nicks in the surface that had retained the oil. I also took some photos of the top and bottom side of the stem to show the tooth chatter and tooth marks.G5 G6I wiped down the surface of the meerschaum with soft scrub to remove some of the marks and oils from handling that were on the bowl sides, front and back.G7I scrubbed the bowl top with the soft scrub and wet sanded the rim top with 1500-2400 grit micromesh sanding pads. I followed that up with 3200-4000 grit sanding pads. I wiped the top of the bowl down with the cotton pad. I was able to remove all of the damage and all of the buildup.G8I scraped out the light cake with the Savinelli Pipe Knife. I did not want any cake build up in the bowl. I wiped the bowl down on the inside with a damp cotton pad.G9I scrubbed out the shank and the airway in the tenon and the shank with pipe cleaners and cotton swabs and light alcohol. I was surprised that the internals were not too dirty. I scrubbed out airway in the stem with alcohol, cotton swabs and pipe clean cleaners. I worked on the area that the tenon screwed into in the stem.G10I sanded the tooth marks and tooth chatter with 220 grit sandpaper until they were no longer visible. I wet sanded it with 1500-2400 grit micromesh sanding pads and rubbed it down with Obsidian Oil. I dry sanded it with 3200-4000 grit sanding pads and gave it another coat of oil. I finished sanding it with 6000-12000 grit pads. I gave it a final coat of Obsidian Oil and set it aside to dry.G11 G12 G13I buffed the stem with Blue Diamond and hand buffed bowl. I gave the stem several coats of carnauba wax and buffed it with a clean buffing pad. I hand buffed the entire pipe with a microfibre cloth. The finished pipe is shown in the photos below. This one is also available for anyone who is interested in adding it to their rack. Just send me a message on Facebook or leave a message in the response box below the blog. Thanks for looking.G14 G15 G16 G17 G18 G19 G20 G21

Refreshing a Servi Bent Basket Weave Meerschaum


Blog by Steve Laug

When I got this pipe from my brother, Jeff it was in a case and I did not take time to look at it. Last evening, I was on FaceTime with my brother and he said to have a look at it. So I went to the box, took it out and opened the case. What was inside was a well-cared for basket weave meerschaum with a mixed amber coloured Lucite stem. The tenon was a nylon/Delrin tenon connecting the stem to the shank. The stem was very clean with no tooth chatter or marks. It was dull but would not take much to polish. The connector was also very clean. The exterior of the bowl was beginning to colour but most of the colour was on the shank. The rim had some tar on the topside of the rim at the back. The inner and outer edge of the bowl was in great shape. There was a light cake in the bowl that would need to be removed. The case was in excellent shape. The covering on the outside was a black leatherette with gold hinges and clasp. The lining was gold faux fur with a Servi Block Meerschaum sticker inside the top of the case.Servi1 Servi2I took some photos of the pipe when I took it out of the case to show what I was going to work on in terms of refreshing the pipe.Servi3 Servi4 Servi5I took a close-up photo of the rim and the bowl. You can see the slight buildup of tars on the top back side of the rim and the light cake in the bowl.Servi6The stem was in great shape so I took some photos of it. It is a rare thing these days to find any stems without tooth marks of chatter of some kind. This one had no marks.Servi7I used a 2400 grit micromesh sanding pad to work over the tars on the top of the rim. It did not take too much effort to remove the dark spot and bring the bowl back to fresh look. I used the Savinelli Pipe Knife to scrape out the thin cake in the bowl until it was no longer an issue. I scrubbed out the mortise and the airway in the shank and the stem with pipe cleaners, cotton swabs and alcohol.Servi8I wet sanded the stem with 1500-2400 grit micromesh pads and wiped it down with a damp cotton pad. I dry sanded it with 3200-12000 grit pads and wiped it down between each grit of micromesh and again when I was finished.Servi9 Servi10 Servi11I hand buffed the bowl with a shoe brush and gave the stem a buff with Blue Diamond. I gave the stem several coats of carnauba wax and buffed it with a clean buffing pad. I buffed the bowl with a clean buff as well. The finished pipe is shown in the photos below. It is a beautiful example of a well carved meerschaum and it is in excellent shape. The colouration of the bowl has begun and the shank is showing a rich golden colour. It is ready for the next pipeman to carry on the process of smoking this beauty to enrich the colour on the bowl and shank. If you are interested in adding this one to your rack let me know. It is available.Servi12 Servi13 Servi14 Servi15 Servi16 Servi17 Servi18 Servi19 Servi20 Servi21

Just finished cleaning up a Savinelli Antique Shell Lovat


Blog by Steve Laug

Throughout the past 15 years or more I have cleaned up a lot of Savinelli pipes. I have cleaned a large variety of shapes and sizes but I have never seen one that is a Lovat shape, the 703 KS. I have worked on quite a few of the Antique Shells in the past but still not one of these. I have restemmed and restored any number of fascinating Shells but never a Lovat. This little pipe grabbed my attention when I opened my box of pipes to be refurbished. It is one that my brother picked up either on eBay or in an antique shop somewhere on his journeys. When I started working on this one it was in decent shape. The bowl had a light cake. The rim was really dirty with an overflow of tars and oils. The finish was dirty but there was no damage to the exterior of the pipe. The dark brown and medium brown contrasting stains looked like they would clean up really well. The stem was oxidized and had what looked like the debris left behind when a pipe has been smoked with a rubber softee bit.Shell1 Shell2I took a close up photo of the rim top to show the buildup of tars and oils. They were thick on the rim filling in all of the crevices and grooves in the finish. It was raised and thickened along the back inner edge of the bowl. I also tried to get a couple of photos of the condition of the stem to show the oxidation and the white calcification line where the softee bit must have been. There were not any tooth marks or chatter on either side of the stem.Shell3 Shell4I reamed the bowl with the Savinelli Pipe Knife and took the thin cake back to the walls.Shell5The rim was a mess so I used a brass bristle wire brush and a dental pick to clean up the rim top. It took some work to get all of it off the rim. The picture below shows the process about half finished. I used the dental pick out the debris from the top. I then wire brushed it some more and between the two was able to remove all of the grime.Shell6I scraped the bowl edge one more time with the pipe knife and then used a rolled piece of sandpaper to sand out the inside of the bowl.Shell7I gave the bowl several coats of Conservator’s Wax and hand buffed it with a shoe brush.Shell8I used the dental spatula to clean out the inside of the shank and followed it up with pipe cleaners, cotton swabs and alcohol. I also cleaned out the airway in the stem with pipe cleaners and alcohol.Shell9I sanded the stem with 220 grit sandpaper to remove the oxidation and the calcification on the stem. I wet sanded with 1500-2400 grit micromesh sanding pads and rubbed it down with Obsidian Oil. I dry sanded it with 3200-4000 grit pads and gave it another coat of oil. I finished sanding with 6000-12000 grit pads, gave it a final coat of Obsidian Oil and set it aside to dry.Shell10 Shell11 Shell12I buffed the bowl and stem with Blue Diamond polish on the wheel and then gave the stem several coats of carnauba wax. I gave the bowl several more coats of Conservator’s Wax and buffed the bowl and stem with a clean buffing pad. I hand buffed the pipe with a microfibre cloth to give it a deeper shine. The finished pipe is shown in the photos below. This one will soon be for sale in the store. If you are interested contact me, and this could be yours. Thanks for looking.Shell13 Shell14 Shell15 Shell16 Shell17 Shell18 Shell19 Shell20

Have you ever heard of a Benedetto Luna Billiard?


Blog by Steve Laug

The next pipe on my work table is a rusticated billiard with a fascinating rustication. The pipe is stamped on the left side of the shank, Benedetto Luna from Italy. It has a gnarly rustication and a marbled silver and black Lucite stem.Ben1The bowl seemed to have a coat of urethane that was wearing away. The rim had some darkening and the crevices were dirty. The bowl had a light cake. The stem was in great shape other than being dirty and having minimal tooth chatter. I figured it would be a relatively easy clean up.Ben2 Ben3I took a close-up photo of the rim to show its condition. You can see the light cake in the bowl and the dust in the crevices of the rustication on the rim. The inner and out edges are undamaged and still round. The stem photos show the condition of the top and underside – light chatter but otherwise excellent condition.Ben4 Ben5I scrubbed the bowl with a tooth brush and Murphy’s Oil Soap to remove the dust and grime from the rustication. I scrubbed and rinsed the bowl under running water. I dried it off and took a series of photos to show the clean bowl.Ben6 Ben7 Ben8I decided to try to remove the urethane finish with acetone. It was an exercise in futility but I thought I would try.Ben9I sanded the high spots on the bowl and shank with a medium and fine grit sanding block to break up the urethane on those spots. It worked significantly better than using the acetone by itself. I washed down the bowl with acetone once I finished sanding.Ben10 Ben11I cleaned the mortise and airway in the bowl and the stem with alcohol, cotton swabs and alcohol. It was not particularly dirty in comparison to many of the pipe I have cleaned up.Ben12I sanded the tooth chatter with 220 grit sandpaper to remove it from the top and bottom sides of the stem. I wet sanded with 1500-2400 grit micromesh pads and dry sanded with 3200-12000 grit pads. I wiped the stem down with a damp cotton pad between grits to keep the stem clean of dust.Ben13 Ben14 Ben15I gave the bowl several coats of Conservator’s Wax and hand buffed it with a shoe brush. I gave the stem several coats of carnauba and then buffed the entire pipe with a clean buffing pad. I hand buffed it with a microfibre cloth to deepen the shine. The finished pipe is shown in the photos below. If any of you would like to add this one to your rack let me know. It will be an inexpensive addition to you collection and should smoke extremely well. Just send me an email or a message on Facebook. Thanks for looking.Ben16 Ben17 Ben18 Ben19 Ben20 Ben21 Ben22

Breathing New Life into a John Surrey Ltd. Red Knight


Blog by Steve Laug

It seems like I am currently on a bit of a roll with the rusticated Tracy Mincer like pipes that I have been working on. This one came to me in my brother’s box and it is stamped Red Knight on the left side of the shank and John Surrey Ltd. over Imported Briar on the right side of the shank. red1The straight line of three dots on the left side of the saddle is also characteristic of John Surrey Ltd. pipes. I did some digging on the Pipephil Logos site http://www.pipephil.eu/logos/en/logo-j3.html and read that John Surrey, Ltd., was located at 509 Fifth Avenue New York NYC, NY and made pipes in the late 40s and early 50s. I also looked on Chris’ Pipe Pages and found a catalogue of their line. Here is the link: http://pipepages.com/jsurpage.htm jsur16red2When the pipe arrived it was in decent shape. The rusticated grooves were dirty with grime and dust but there was some nice grain on the smooth portions of the bowl. The rim was very dirty and thick with tars and oils. The inner edge and the outer edge were very clean. The inside of the bowl had a thin cake and the airway and mortise were very dirty. The stem was in good shape with not tooth marks but some chatter on the top and the bottom sides. It was oxidized. The dots on the side of the stem are a light yellow in colour. red3I took a close up photo of the rim top so that I would have a record of what it looked like when I received it. The thin cake on the bowl walls would be easy to clean off. I also took some close up photos of the condition of the stem top and bottom.red4 red5I began the clean up by cleaning the rim top. I scrubbed the rim with saliva on cotton pads to remove the buildup. I also used a 1500 grit micromesh sanding pad to remove what was left behind by the scrubbing and then repeated the scrubbing. It did not take too long to remove the grime on the rim.red6I scrubbed the exterior of the bowl with alcohol and cotton pads to remove the grime in the grooves.red7I scrubbed out the mortise and airway in the bowl and the stem with alcohol, cotton swabs and pipe cleaners.red8I sanded the surface of the stem with 220 grit sandpaper to remove the oxidation and the tooth chatter.red9I wet sanded the stem with 1500-2400 grit micromesh sanding pads and rubbed the stem down with Obsidian Oil. I dry sanded it with 3200-4000 grit pads and gave it another coat of oil. I finished by sanding it with 6000-12000 grit pads and gave it a final coat of Obsidian Oil and set the stem aside to dry.red10 red11 red12I buffed the bowl lightly with Blue Diamond polish on the wheel and buffed the stem normally at the same time. I gave the bowl several coats of Conservator’s Wax and the stem several coats of carnauba wax. I hand buffed the bowl with a shoe brush and then buffed the stem and bowl lightly with a clean buffing pad. I hand buffed it with a microfibre cloth to give it deeper shine. The finished pipe is shown in the photos below. The look and shape of the pipe are quite attractive and the feel of the pipe in the hand and the mouth is excellent. Thanks for looking.red13 red14 red15 red16 red17 red18 red19 red20