It captured my attention: a beautiful Rinaldo Titania Lithos YY Author


Blog by Steve Laug

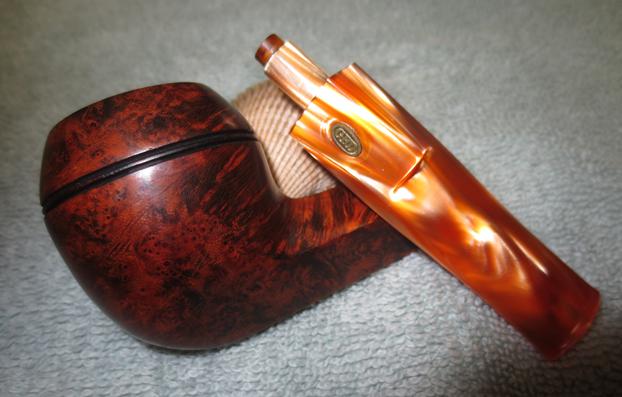
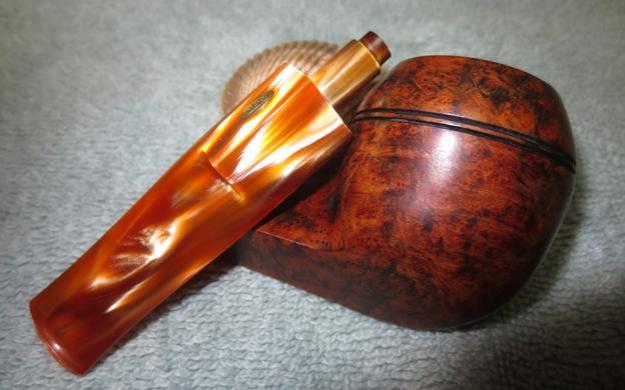
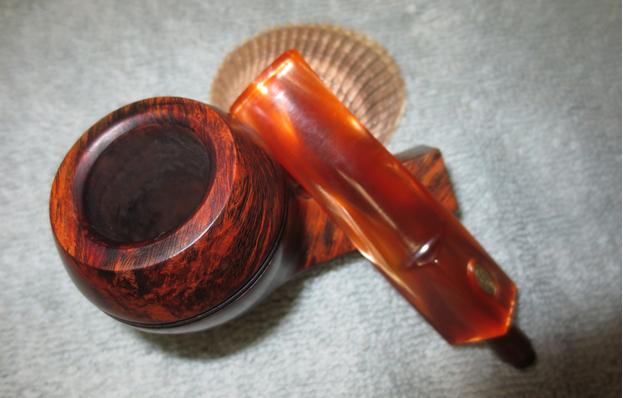
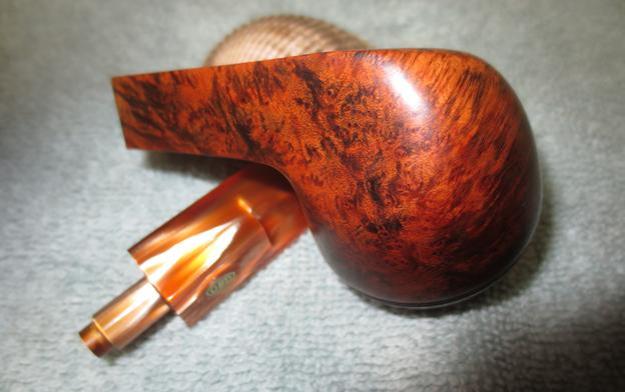
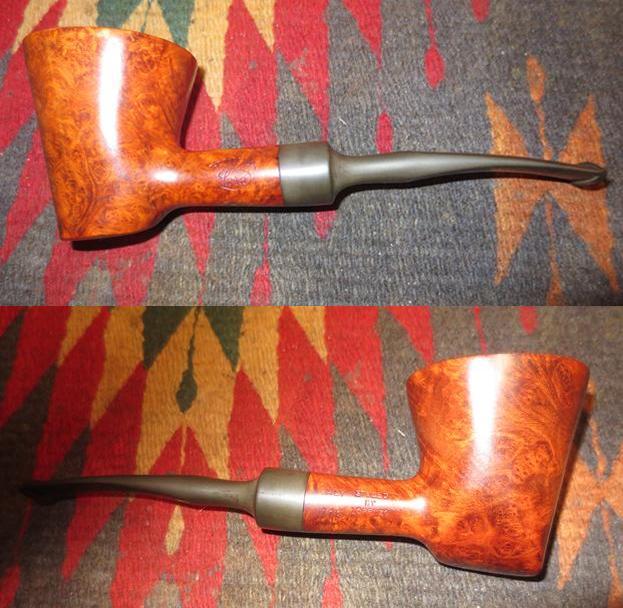
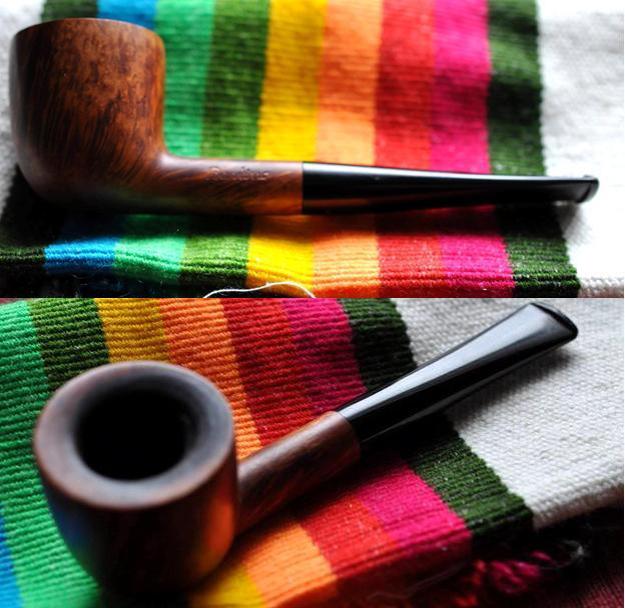
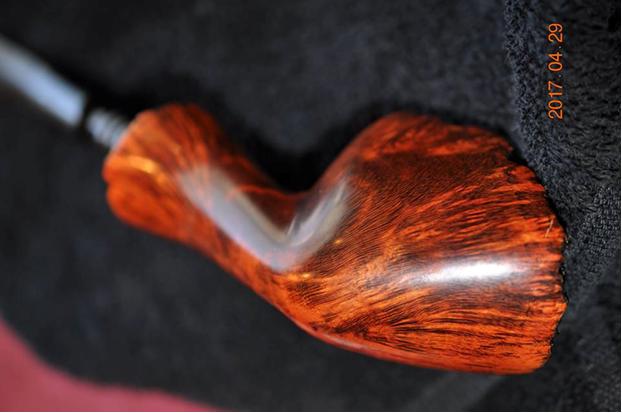
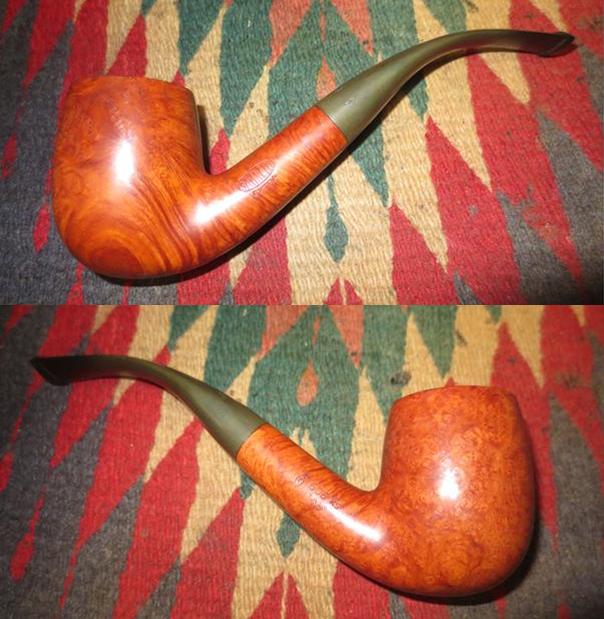
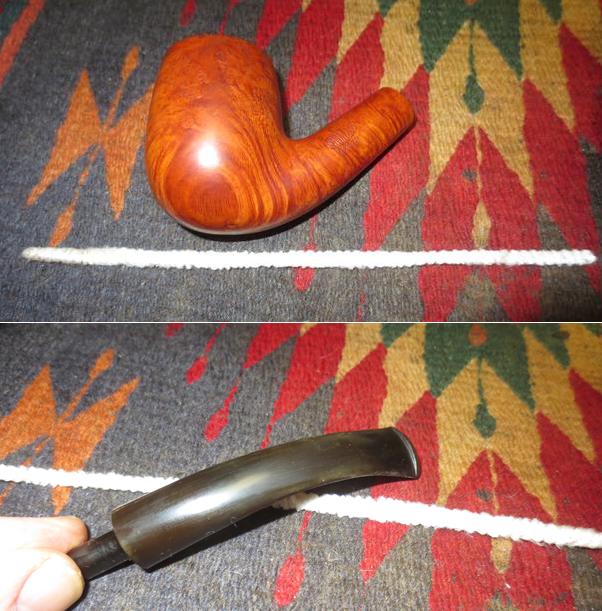
I don’t know if you have had this happen to you. But you probably have if you have been a pipe man for long. Today on my lunch hour I was browsing the Gentlemen’s Pipe Smoking Society (GPSS) on Facebook. I was honestly just taking a break from a morning of phone calls and meetings. I just wanted to have a quiet time. I shut the door of my office and quietly ate lunch and browsed through the feeds on GPSS. Then it happened. I saw a pipe that Neal Yarm was selling. Now Neal is selling a bunch of unsmoked pipes – Castellos, Ardors, Rinaldos and others. But this one – a Rinaldo Tatiana Lithos YY Author grabbed my attention. I have never had a Rinaldo on my work table or in my collection. But I liked the way this one looked. I clicked on the photos and enlarged them so I could look the pipe over. I went through every photo he included – they weren’t enough for me, I wanted more. But ultimately I had to admit no amount of photos would change the reality. I wanted this pipe; it ticked off all the boxes for me. It was unsmoked and came with the original pipe sock and box. What more could I ask for. I sent Neal a private message, he sent me the invoice, I paid the bill and the deal was done. Now I await it arrival.I know next to nothing about Rinaldo Pipes so I took some time to remedy that during the rest of my lunch hour. I googled the brand to see what I could find. The first thing I read was a quote from one of my favourite author’s on pipes and pipe brands – José Manuel Lopes. In his book, Pipes, Artisans and Trademarks, he writes that Rinaldo is the Italian brand of the Sicillian artisan brothers Elio & Guido Rinaldo, who left for the continent at an early age and settled in Pesaro. At 15, Elio started working for Mastro de Paja, with Guido joining him shortly after, in 1974. Now I had some basic information. It was Italian (which I already knew) and it was made by two brothers in Pesaro.

I continued through the google listings and found a link to Smokingpipes.com. They sell new Rinaldo pipes and often in their introductory remarks to a pipe or a brand there is a lot of helpful information. In this case there is some repetition to the information from Lopes but also some expansion. I quote their entry from their online store in full.

Rinaldo pipes are made by two brothers, Elio and Guido Rinaldo in Pesaro, Italy. Elio began making pipes when he was only fifteen, and his younger brother, who worked with precious metals for jewelry, began making pipes when he was sixteen. There are few families of pipes being made these days, and these two gentlemen work in perfect harmony in their shop. They initially worked for a large pipemaking company, but branched off to work for themselves in 1987 when they started Rinaldo pipes. Because of his jewelry background, Guido is responsible for making all of their silver bands and accents on-site. They use acrylic stems and finish their pipes either smooth, sandblasted, or rusticated. Working together, the brothers produce around 1,500 pipes annually. https://www.smokingpipes.com/pipes/new/rinaldo/I read the next google entry which was Pipedia https://pipedia.org/wiki/Rinaldo. I read briefly there and saw that it cited Steve Monjure’s website – Monjure International. I followed the link to that site and read further http://www.monjureinternational.com/rinphist.htm. I looked through his interesting information on the Rinaldo brand and its history. He gave more detailed information on the brand that added to my knowledge base. I quote his introductory comments first and then the section on history.

The Rinaldo brand began in 1987. It produces 1500 pipes a year — mainly classic shapes, but with a more rustic design than the majority of similar Italian brands — and has its main markets in Italy, Germany, and the US. It uses briar from Liguria, and Lucite stems. The pipes are stamped: RINALDO. Grading: from one to four Y and Fiammata. Symbol: stylized Greek letters ρ and ι

From the history of the brand section I quote: http://www.monjureinternational.com/rinaldo.

Elio and Guido Rinaldo began their work with briar in 1974 at the very young ages of 16 and 14 respectively. At this time they were employed by a well known pipe factory. In the beginning they were involved with the design, modeling and finishing. After years of study, hard work, and hands on experience, Elio and Guido mastered their art. This knowledge combined with their sensitivity allowed them to answer the burning desire they had to express themselves in their own way. Their dream to create a pipe with their own mark became a reality.

In 1987, the two brothers founded “Rinaldo Pipes” with the intention of creating fine handmade (fatta a mano) pipes with highly personalized lines fitted with silver and gold treatments that distinguish their exquisite pipes from the vast panorama of pipes. Their production is very limited since Elio and Guido are the sole ones to make the Rinaldo pipe. This has been their wish from the very first day the factory was started. Because of this loyalty to solely crafting their pipes, the smoker is guaranteed that each phase of the work is being maintained by skilled and expert hands. Each Rinaldo pipe is made from the very best Mediterranean briar and Elio and Guido select each briar block for its compact texture and regular veining. The acrylic mouthpieces are perfectly balanced and studied for optimal dental grip. This attention to detail results in a mouthpiece that has a pleasant and “easy hold” and is truly a “work of art”.

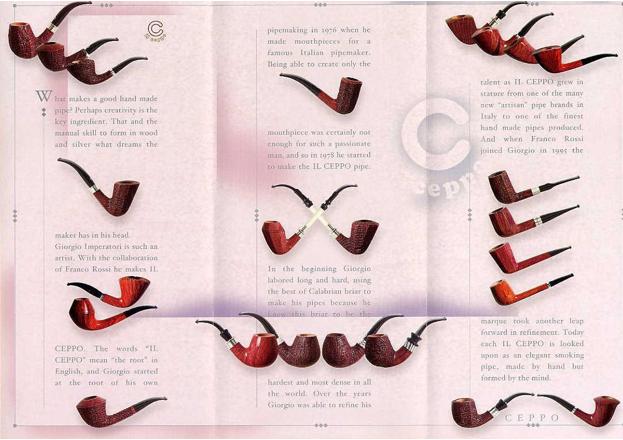
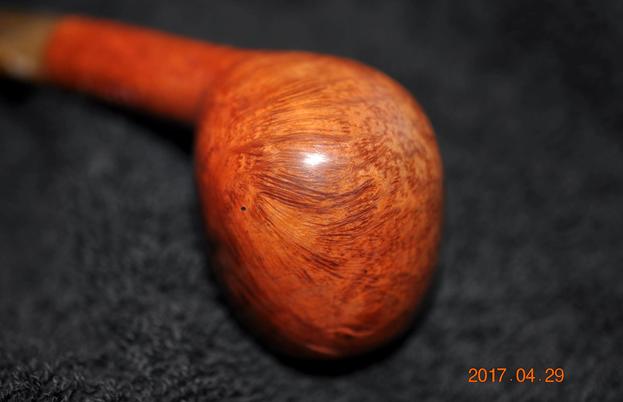
The Rinaldo pipe is currently offered in the following finishes: Lithos(Rustic) – Sahara(Sandblast) – Triade(Smooth). The Rinaldo pipes are divided into three lines: Briar Line(All Briar) – Silver Line(Silver Ornaments) – Gold Line(Gold Ornaments). There are five grade levels: Y, YY, YYY, YYYY, and Fiammata(Straight Grain). All Shapes are available in the regular size bowl and the “Titania” which is a bowl of greater dimensions.

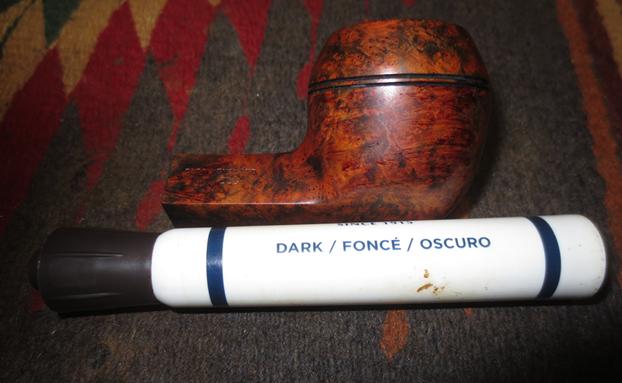
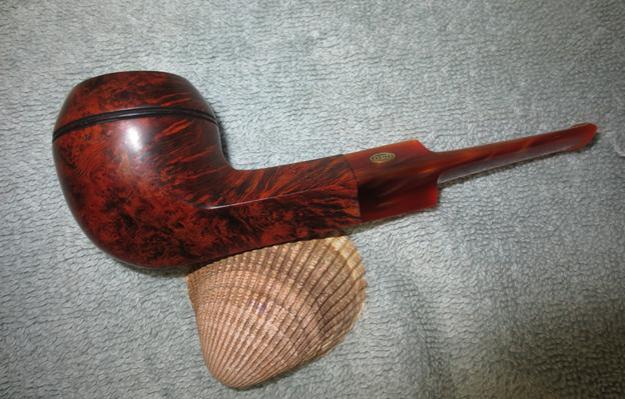
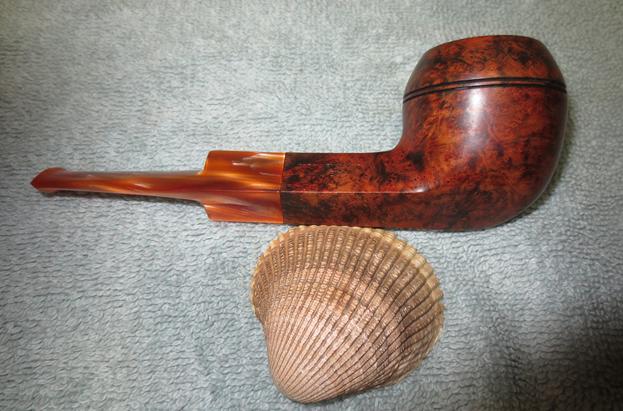
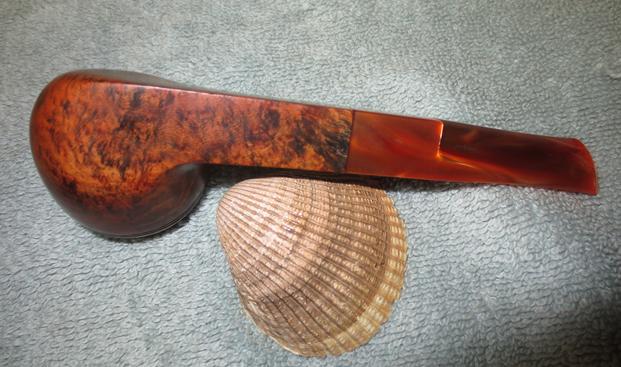
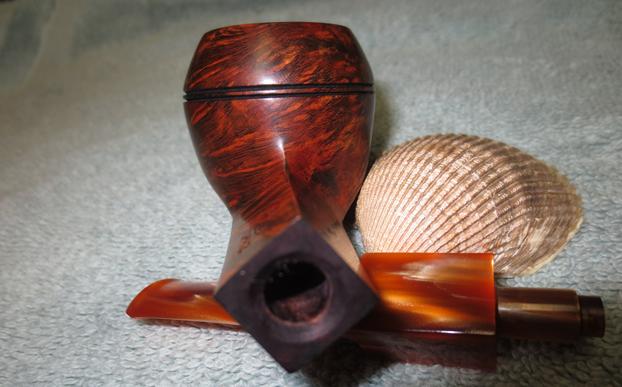
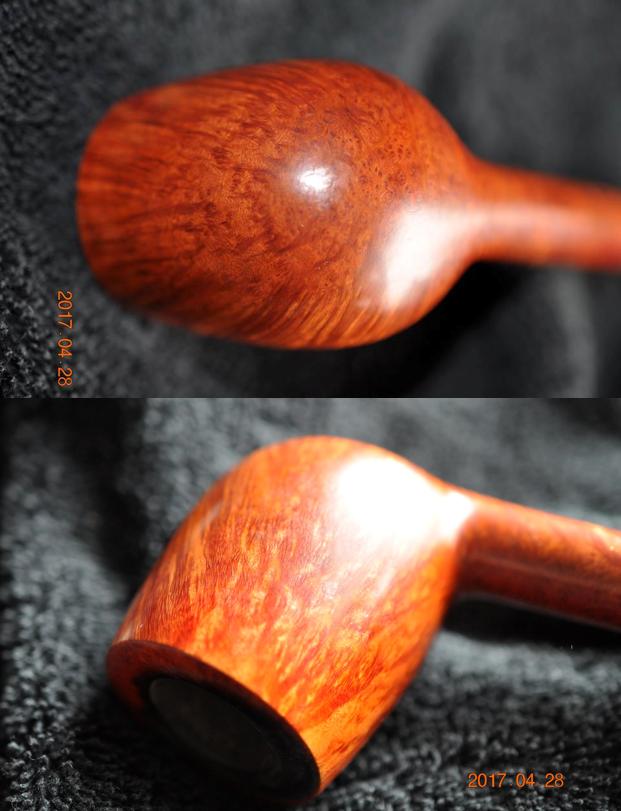
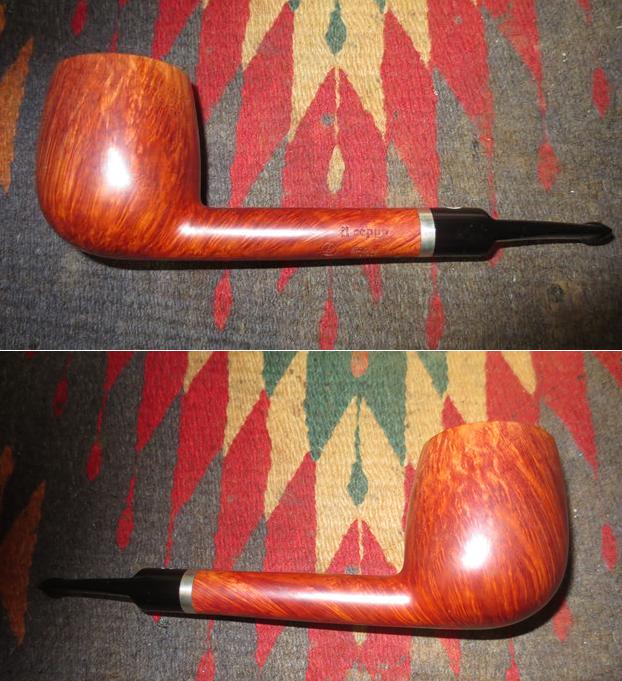
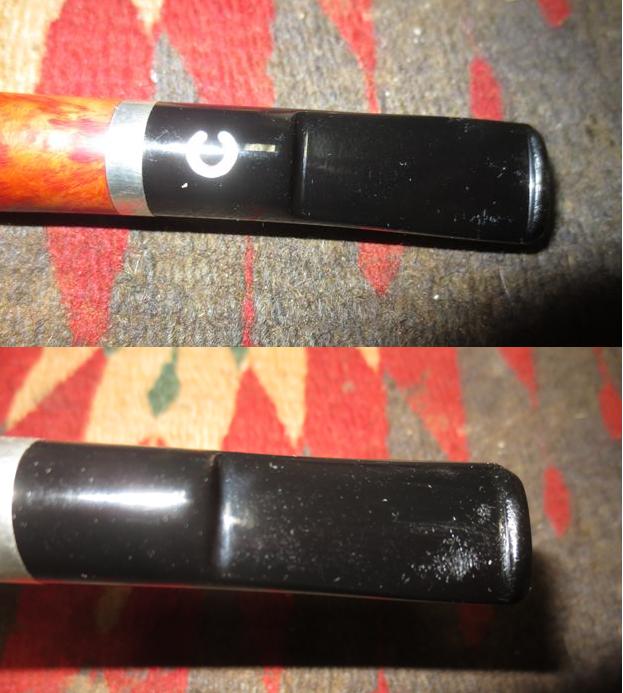
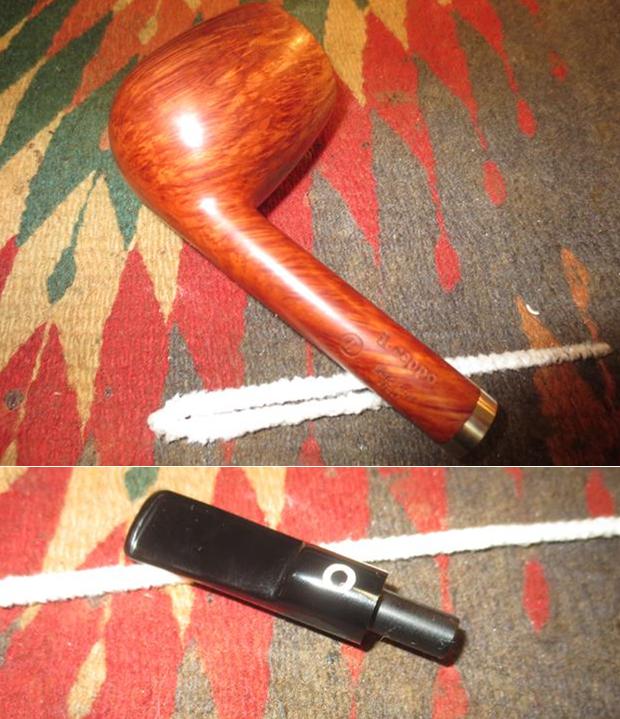
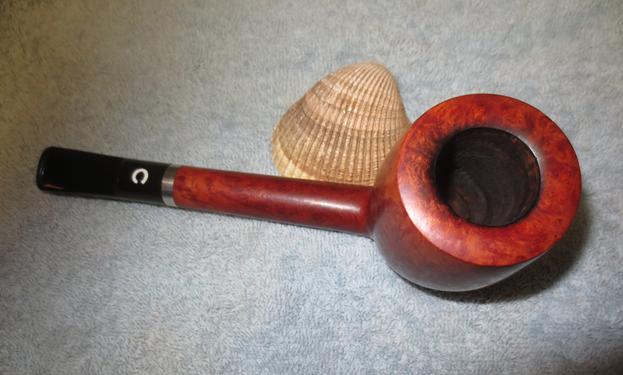
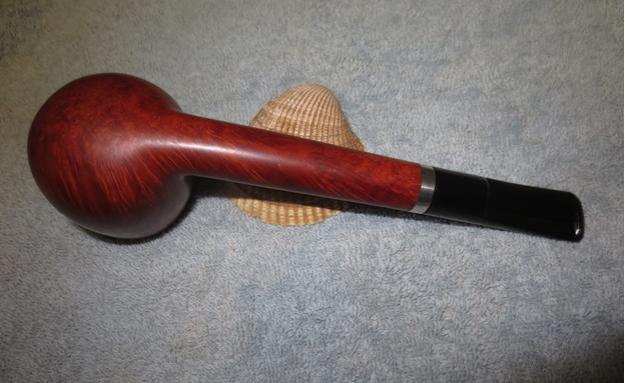
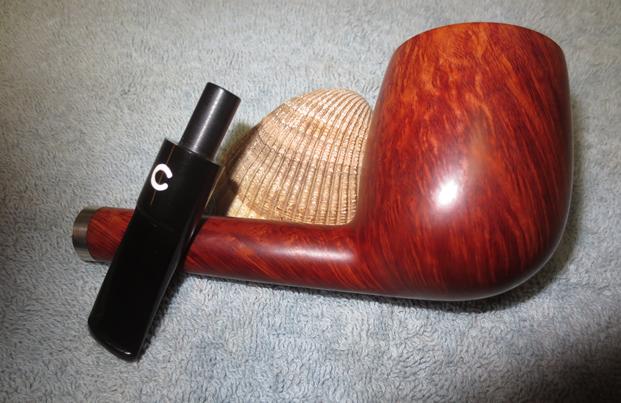
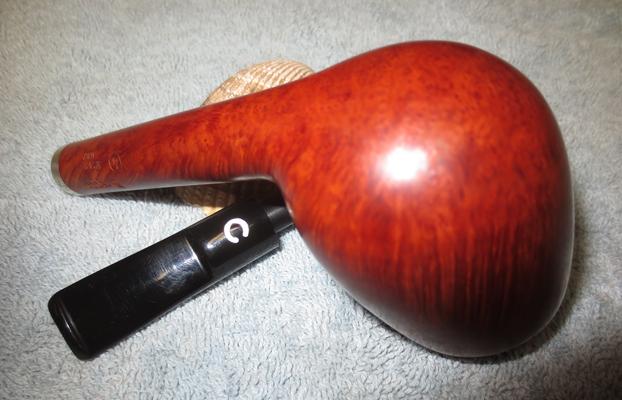
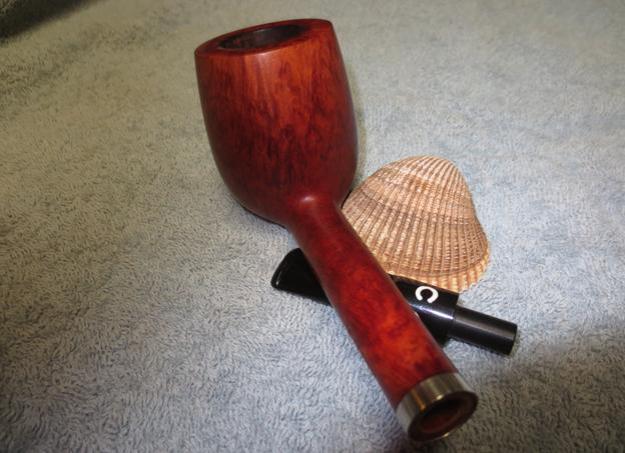
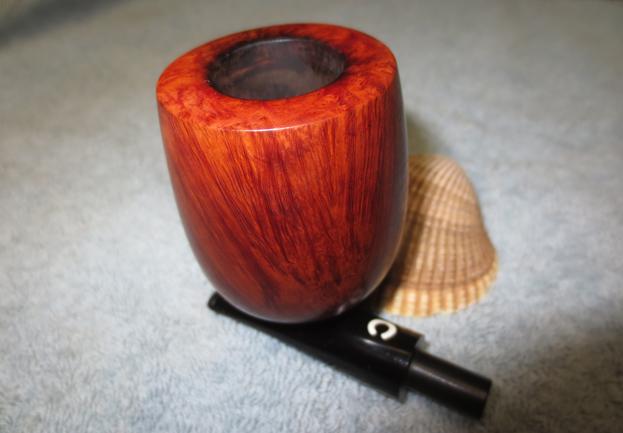
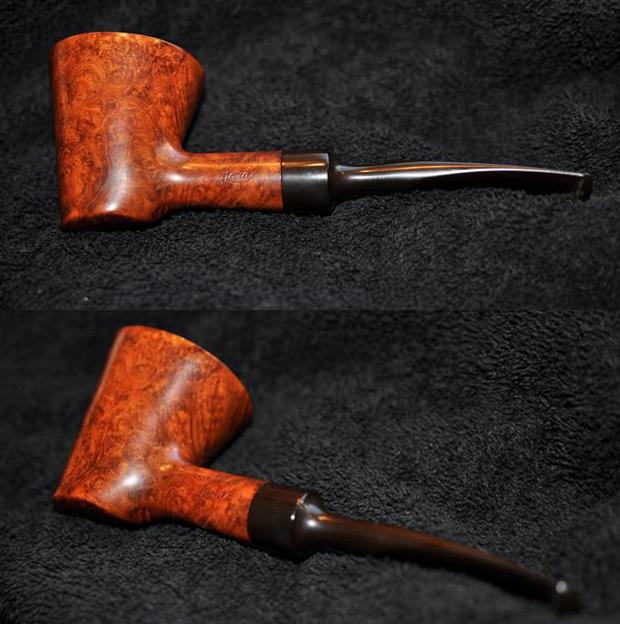
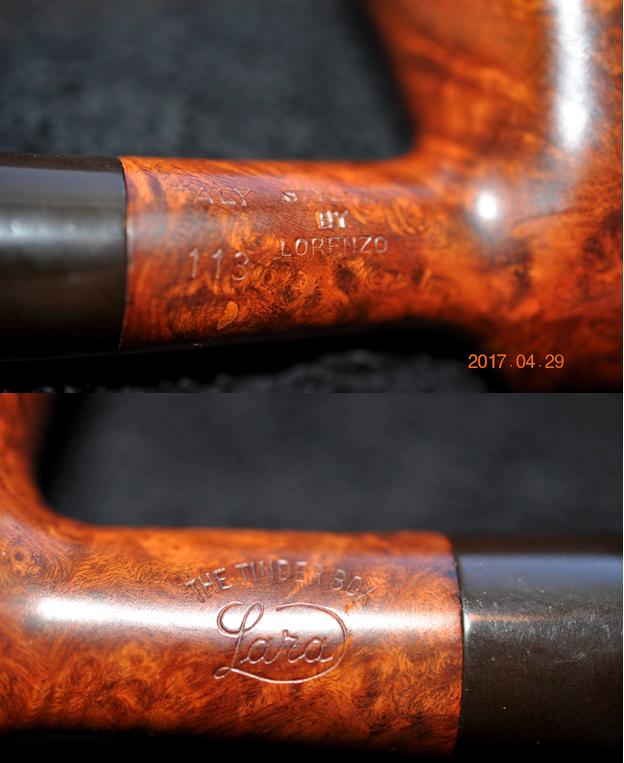
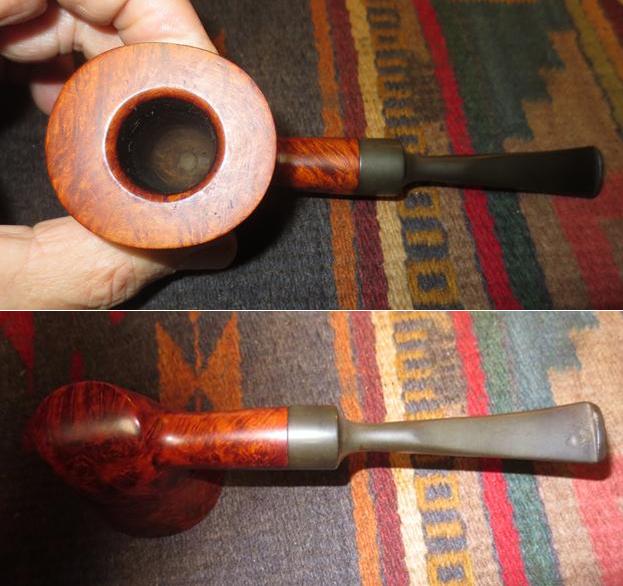
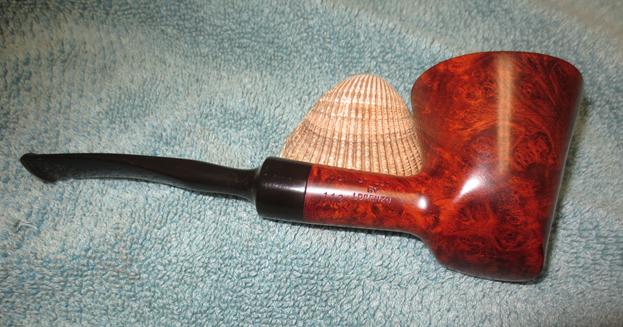
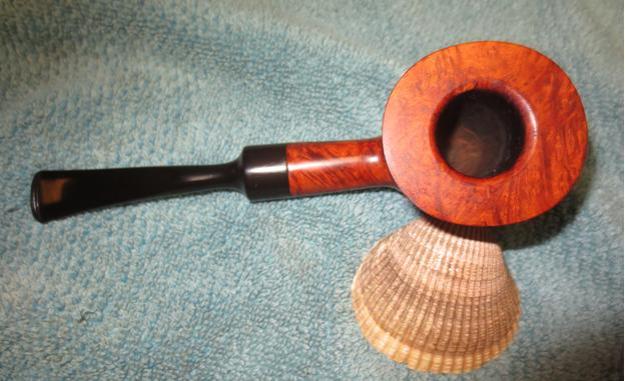
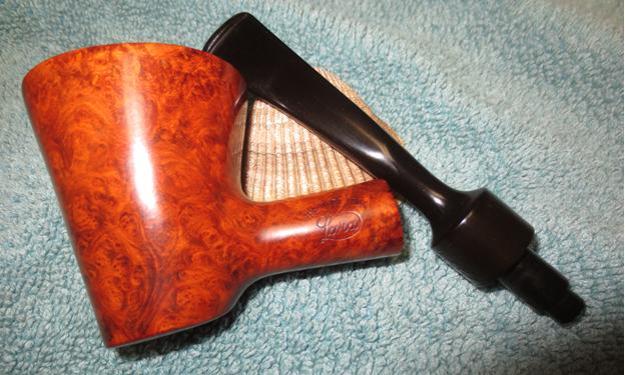
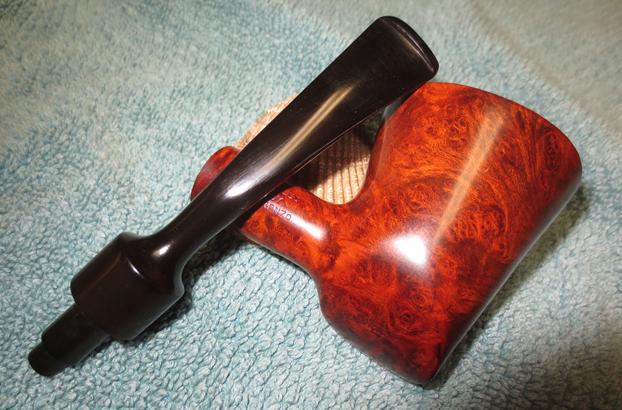
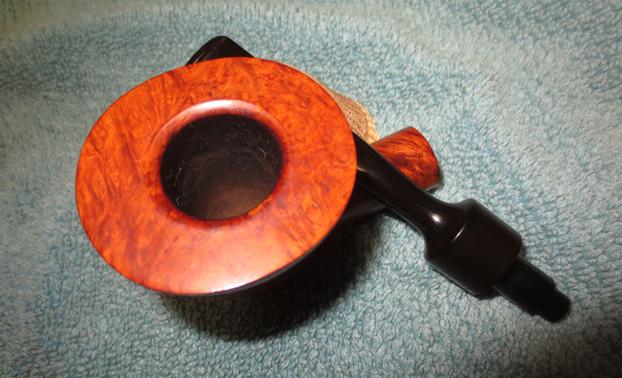
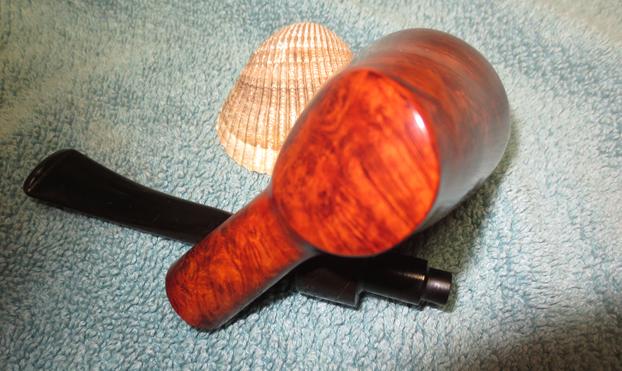
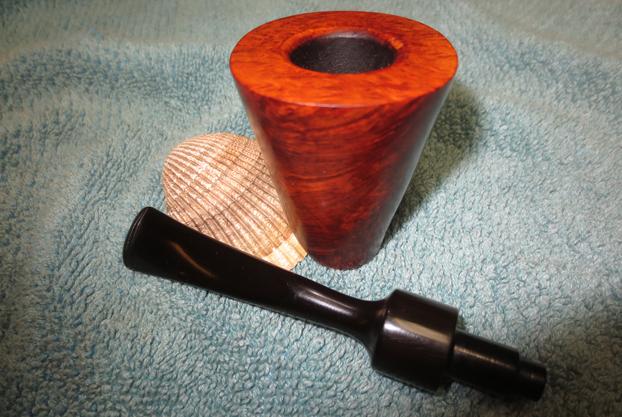
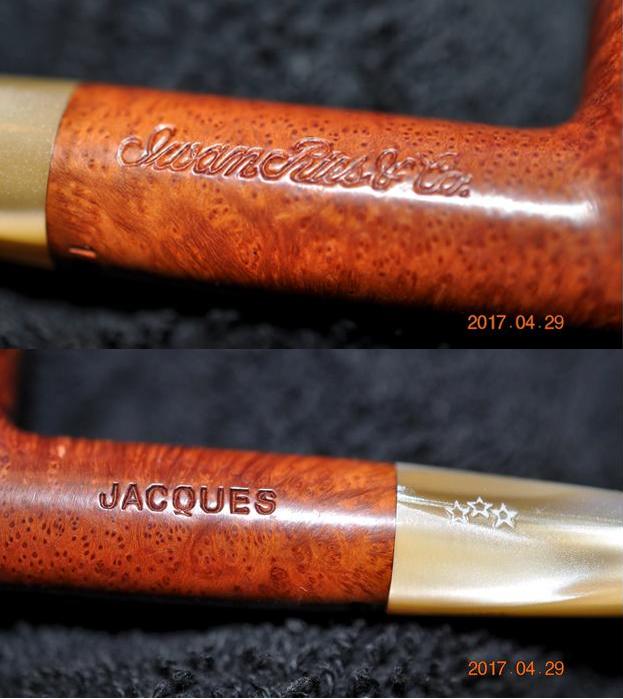
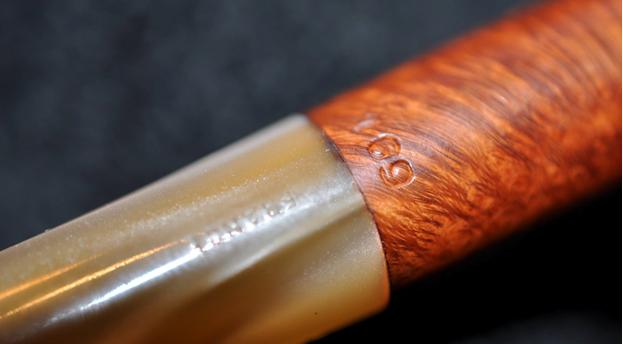
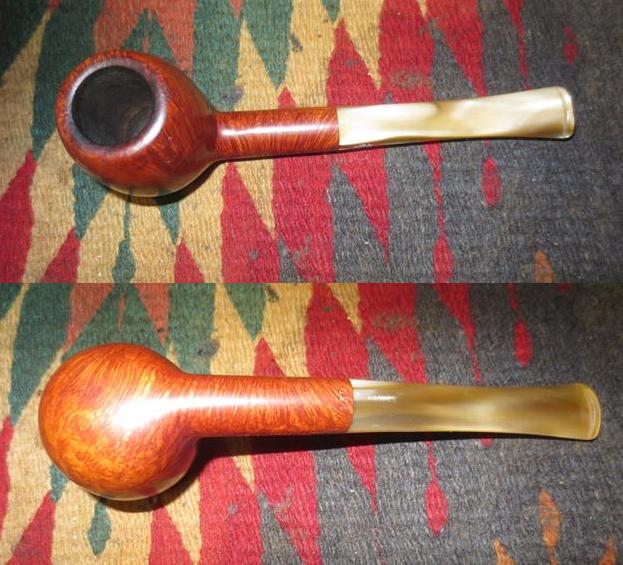
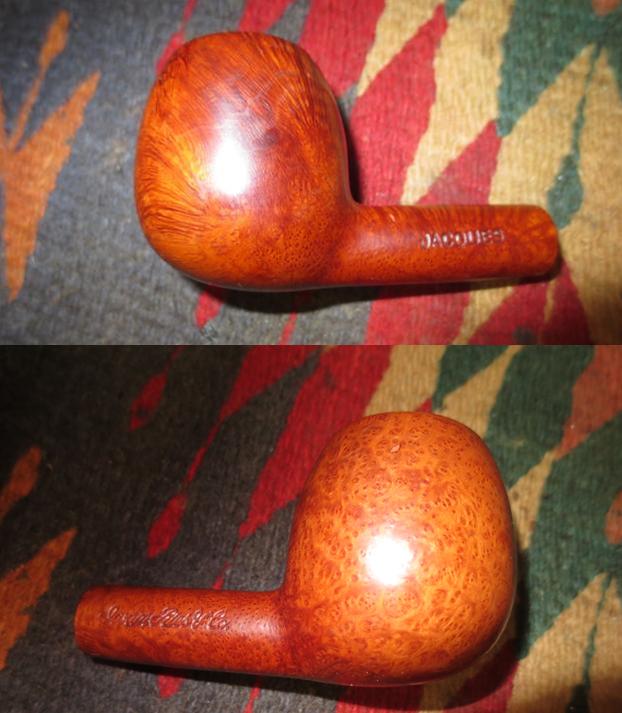
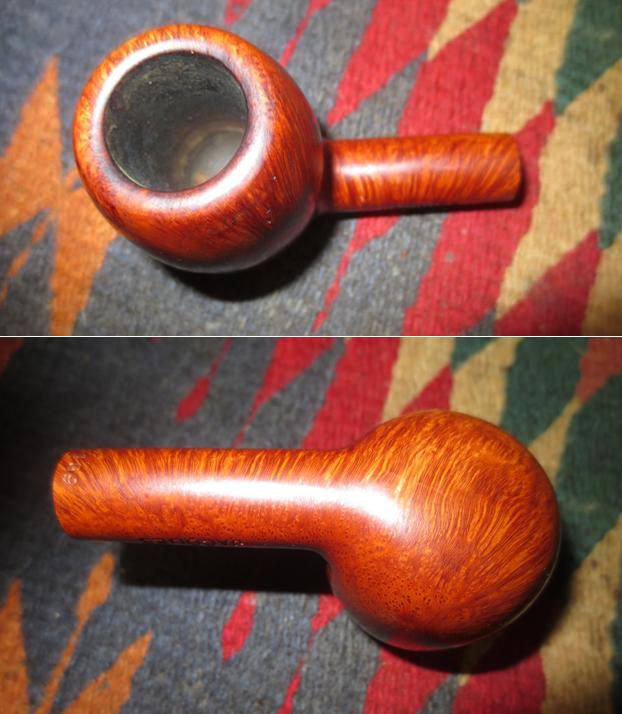
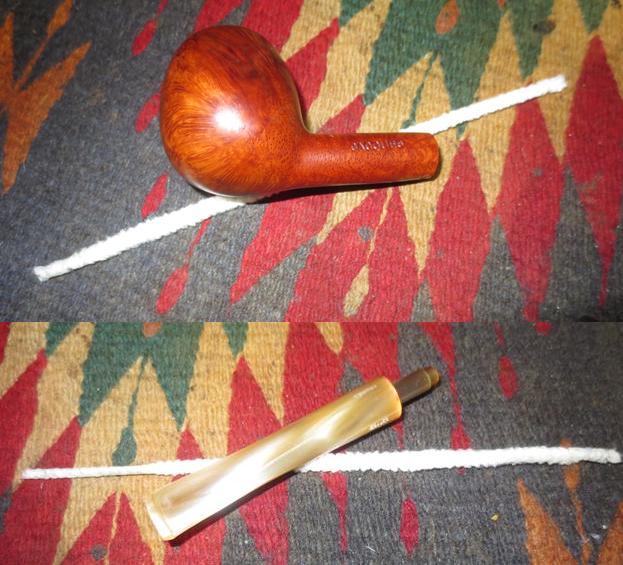
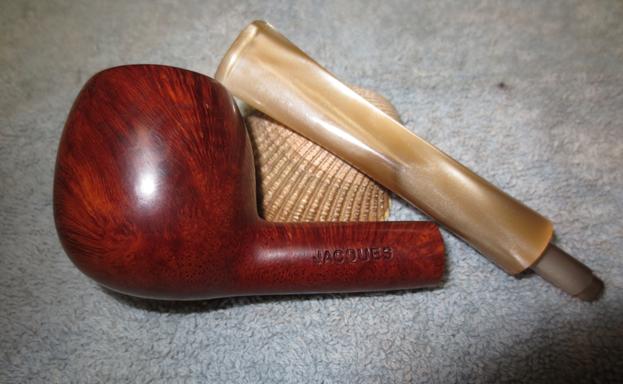
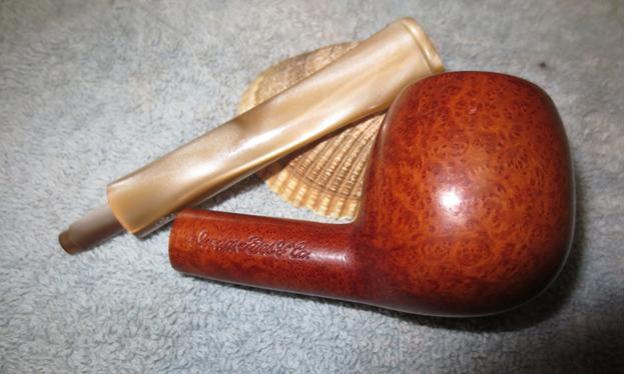
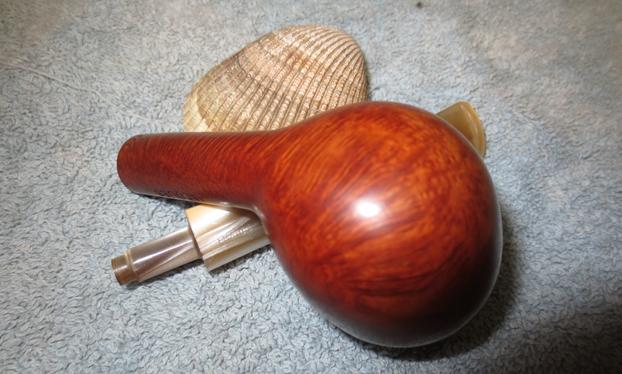
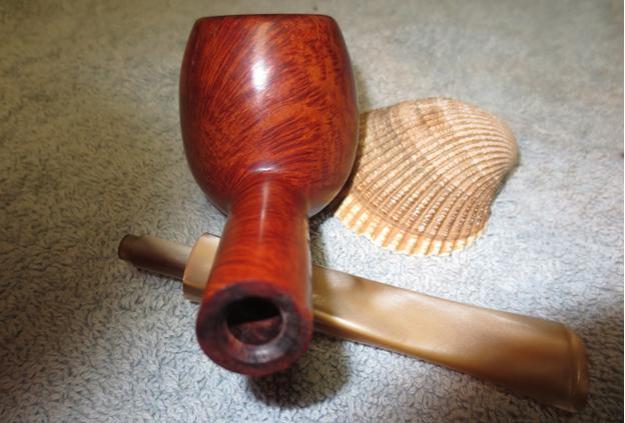
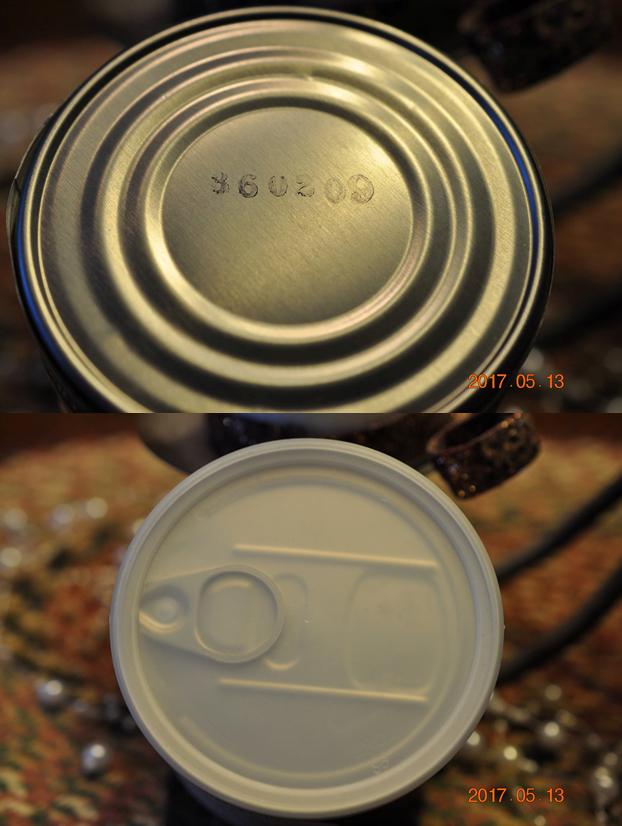
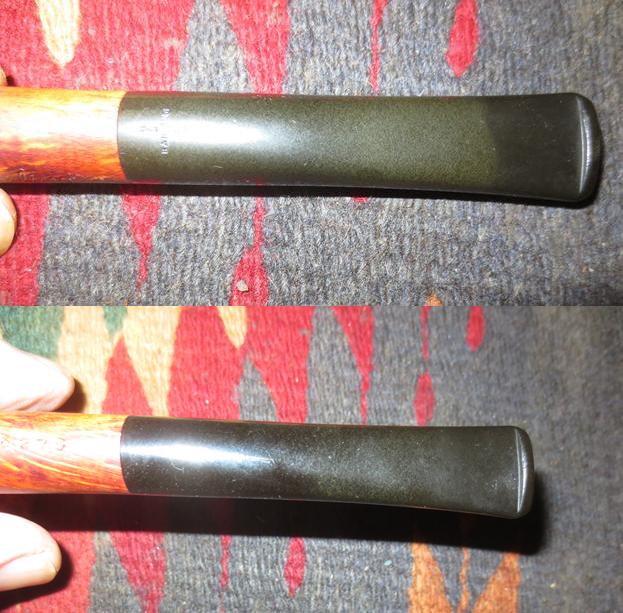
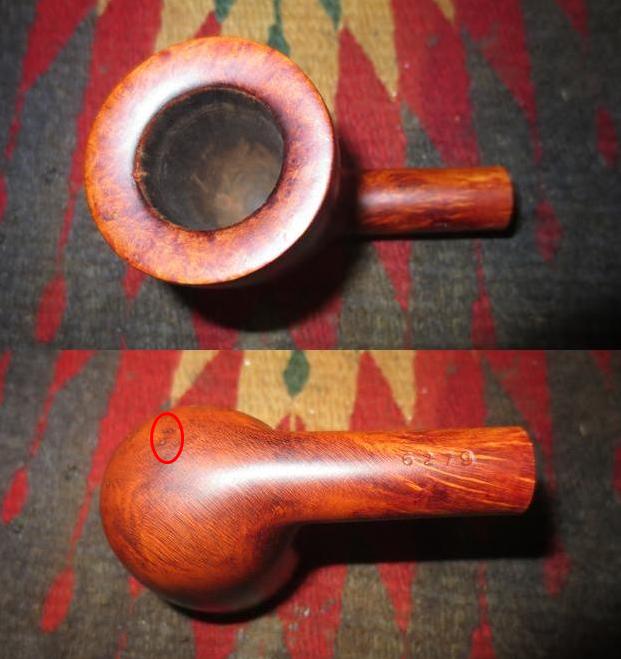
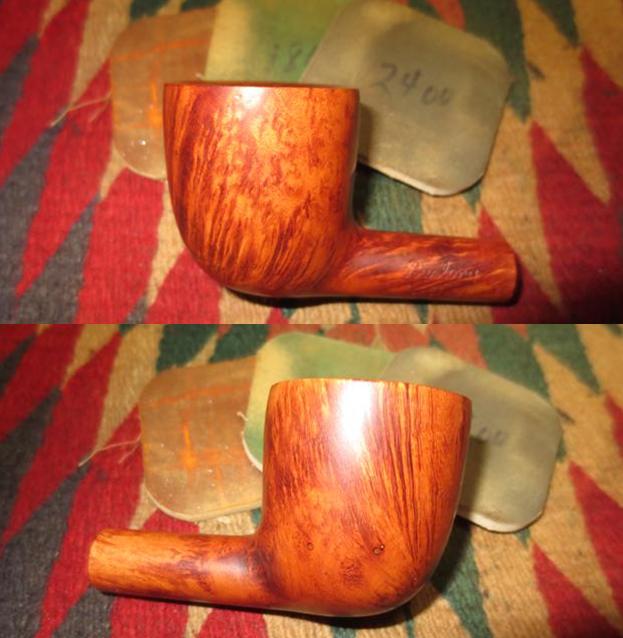
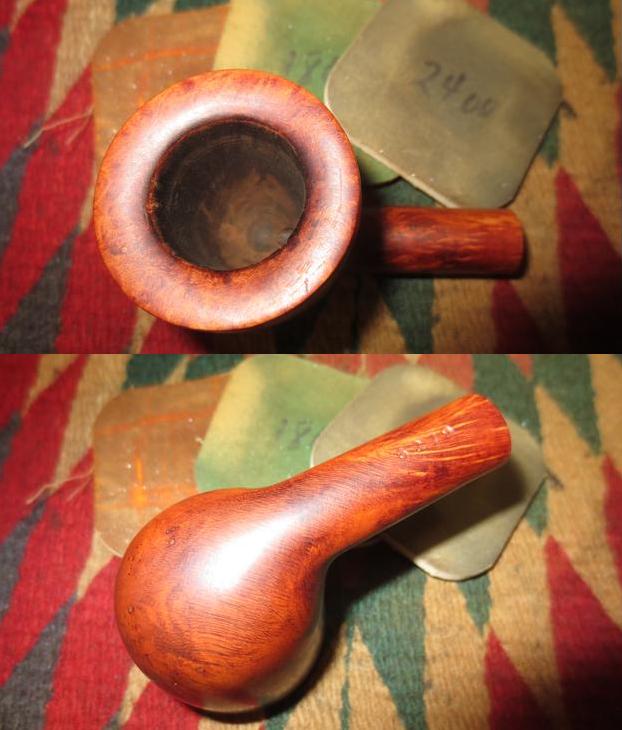
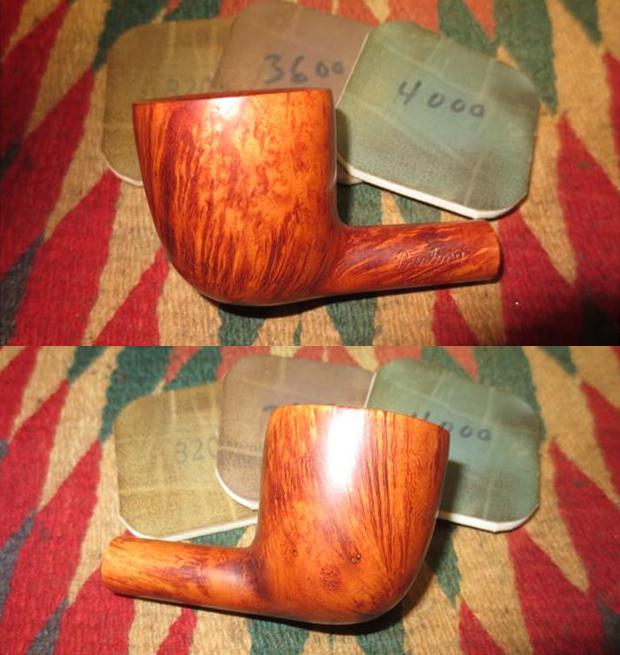
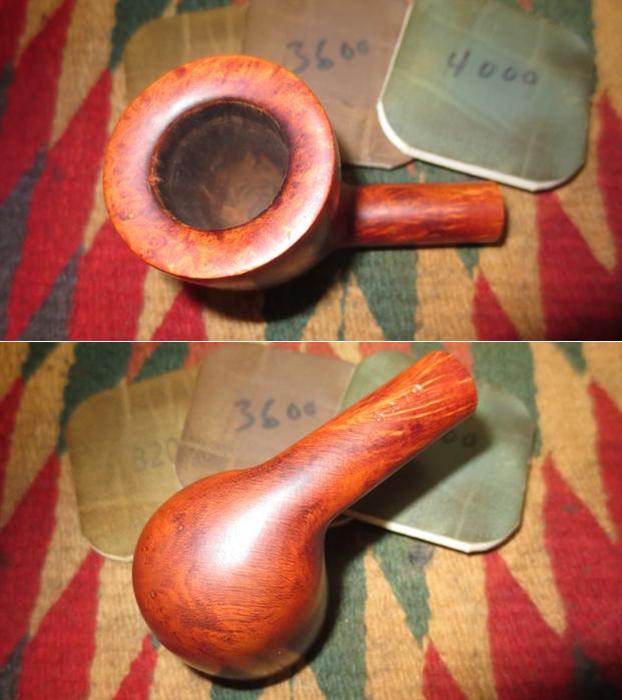
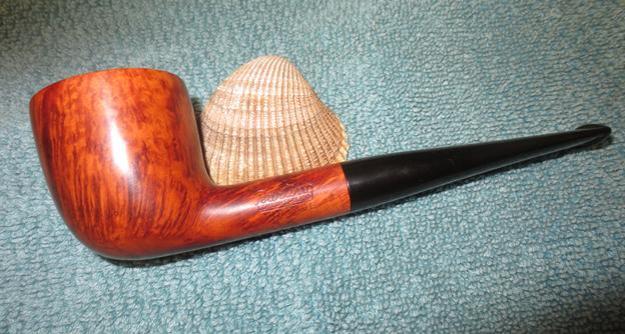
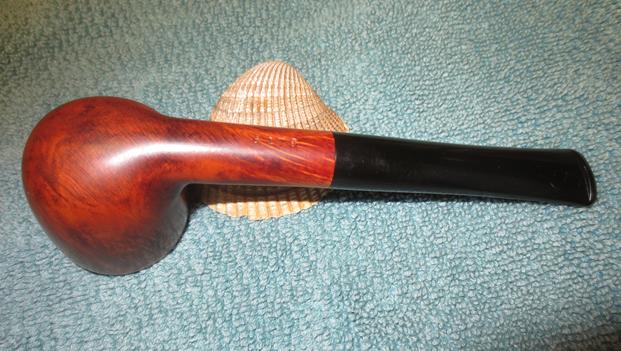
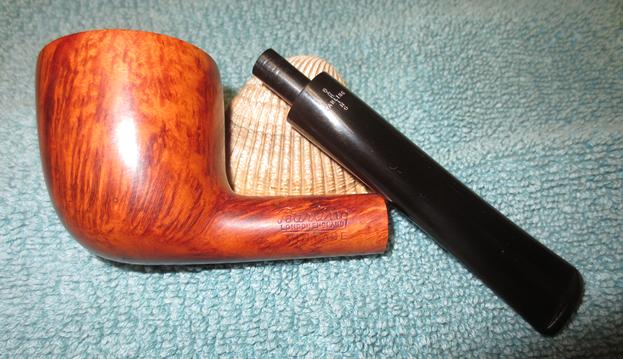
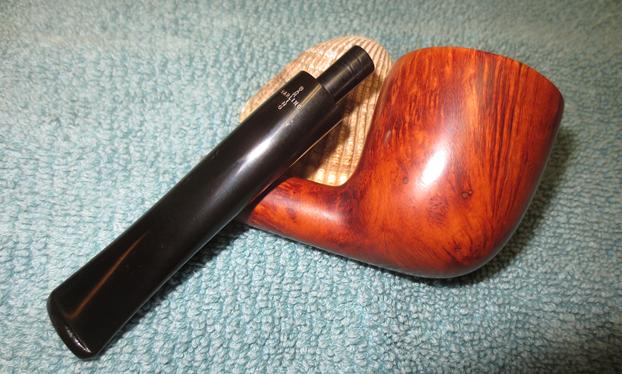
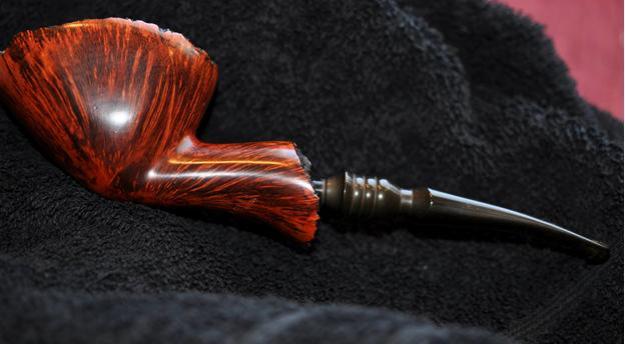
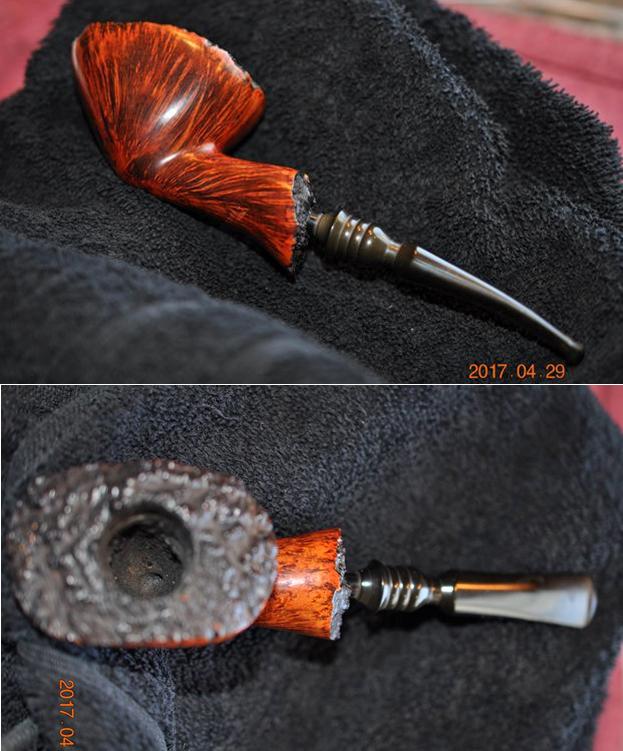
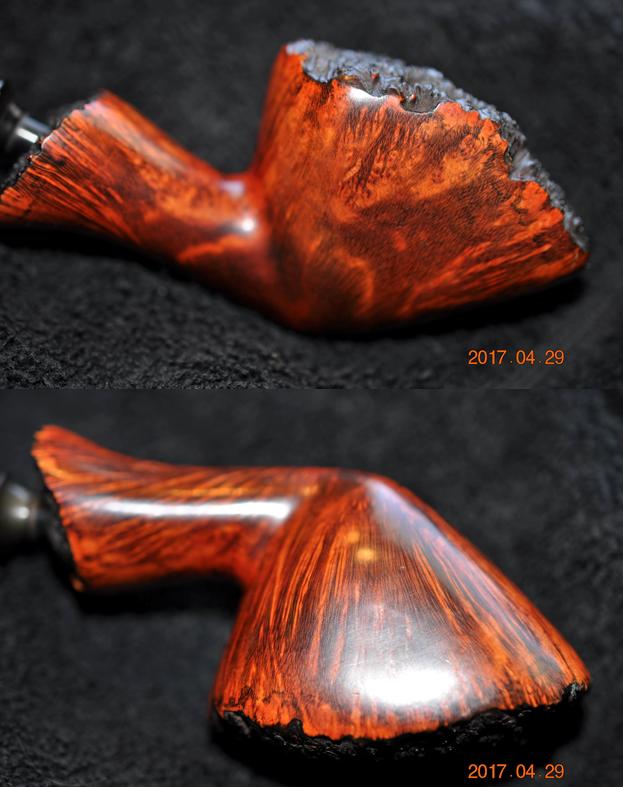
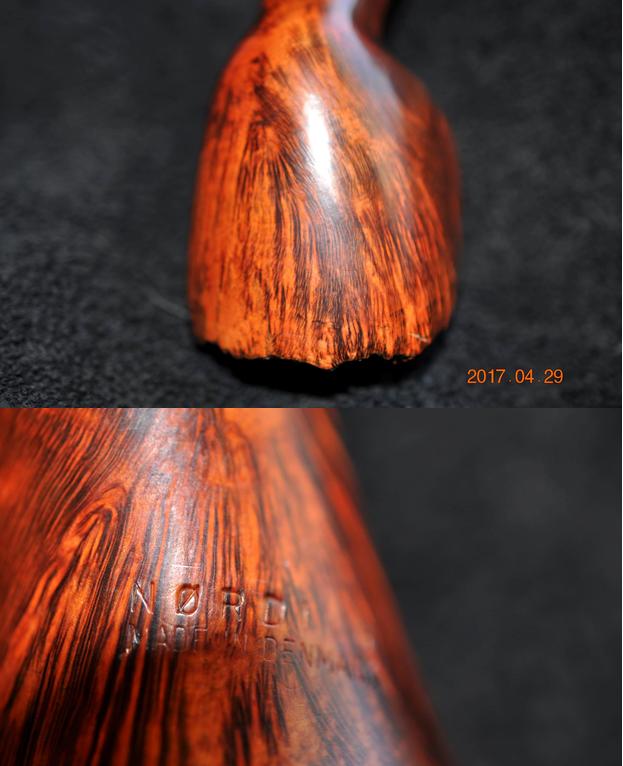
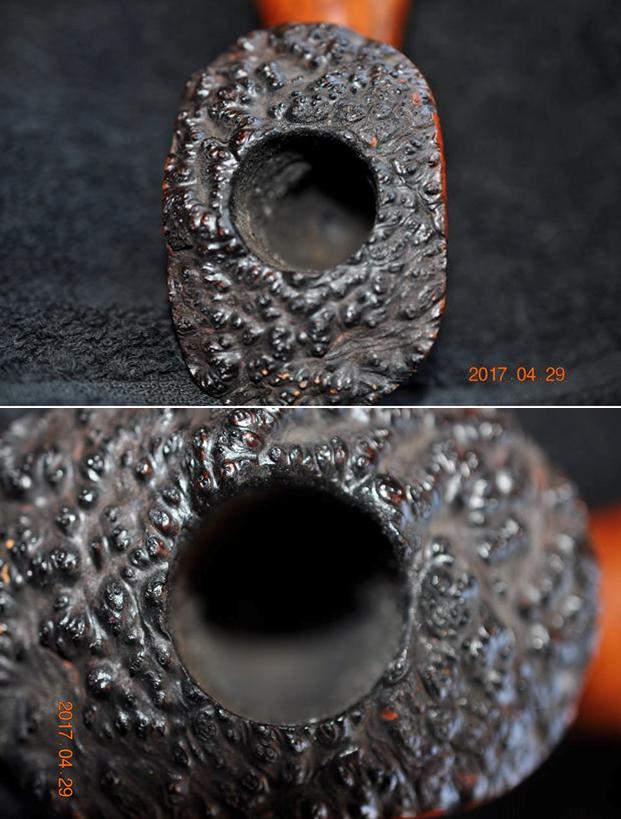
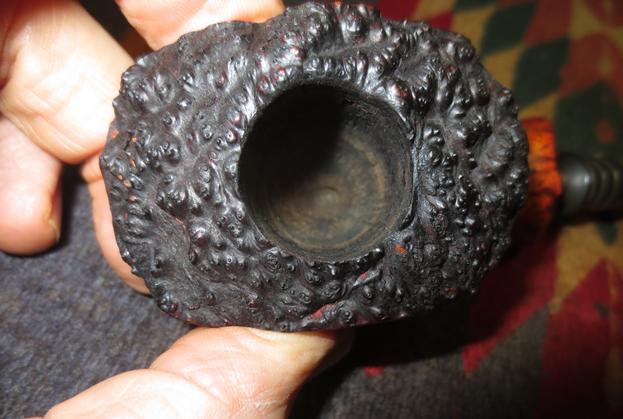
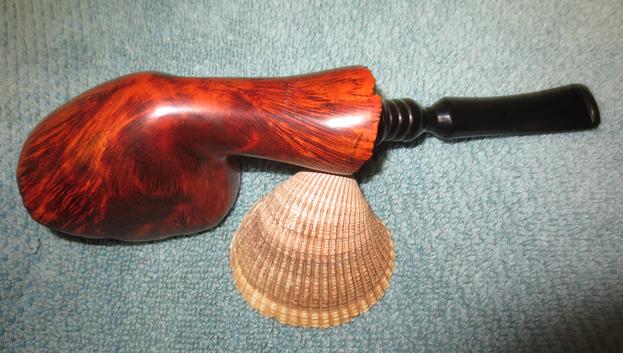
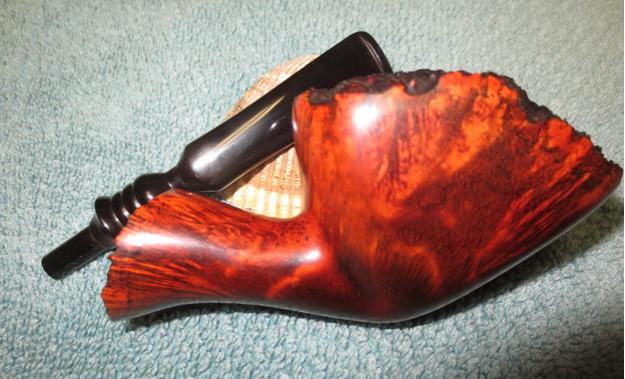
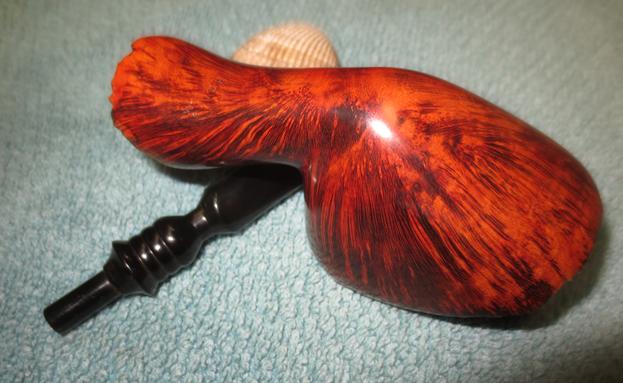
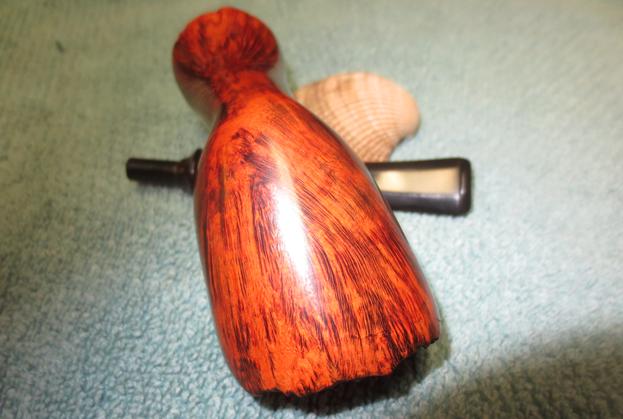
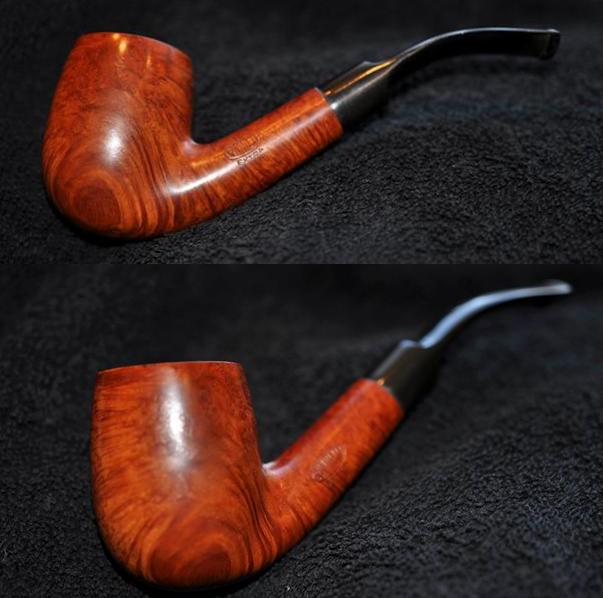
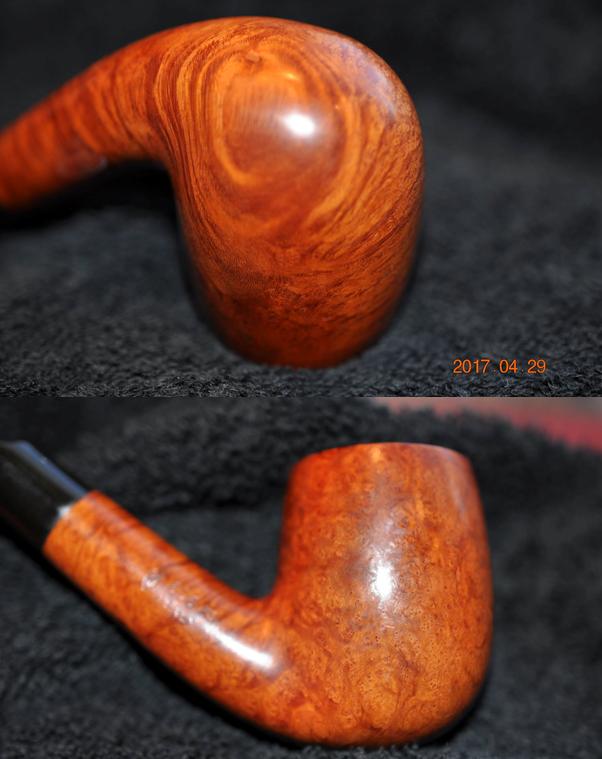
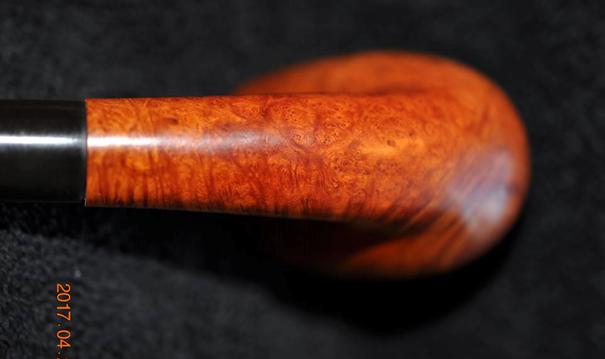
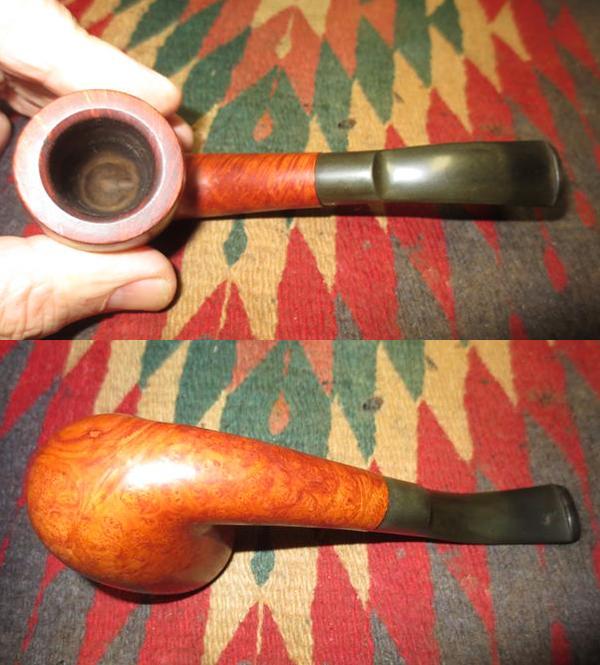
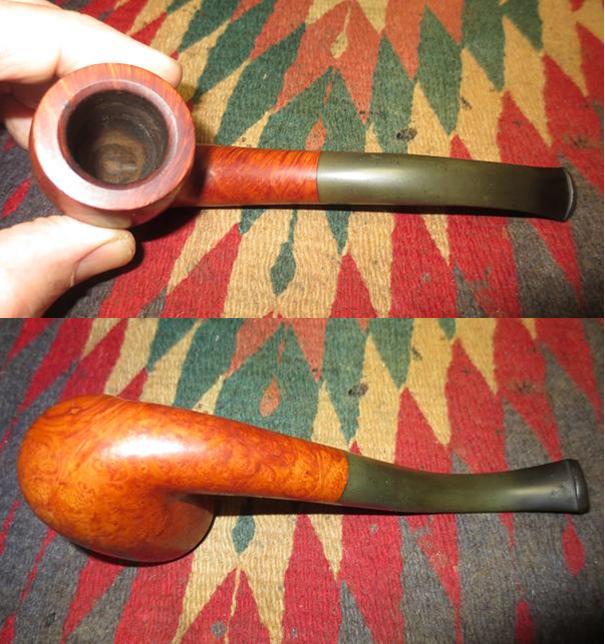
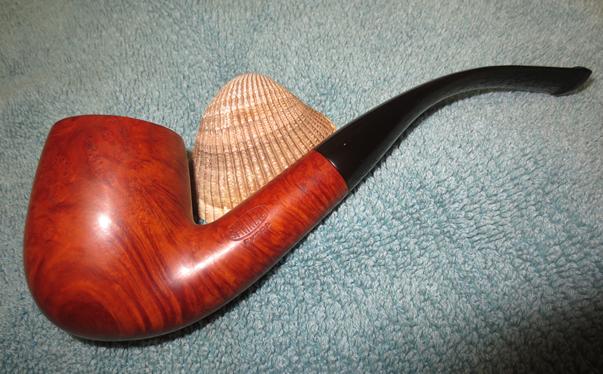
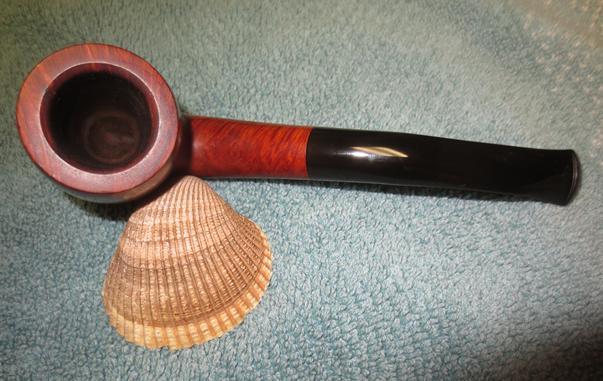
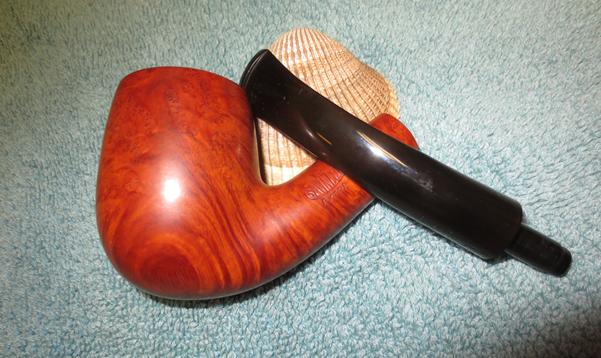
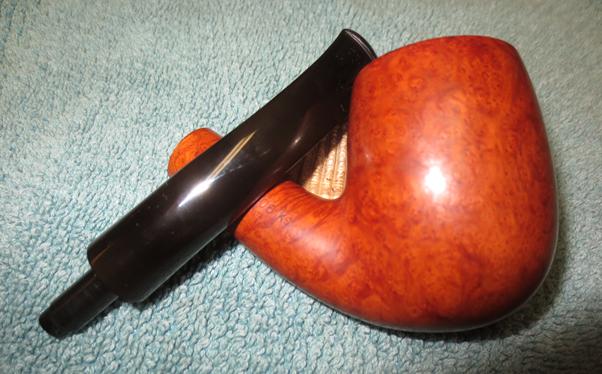
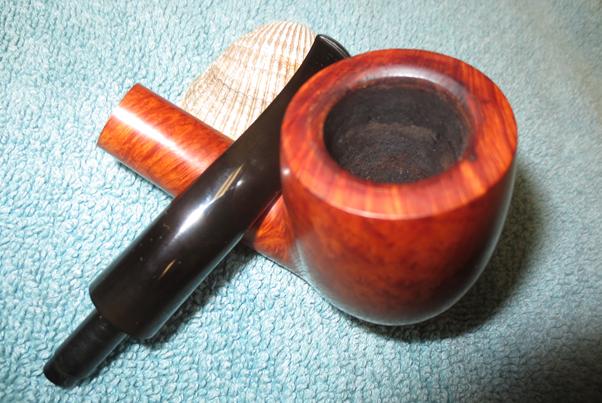
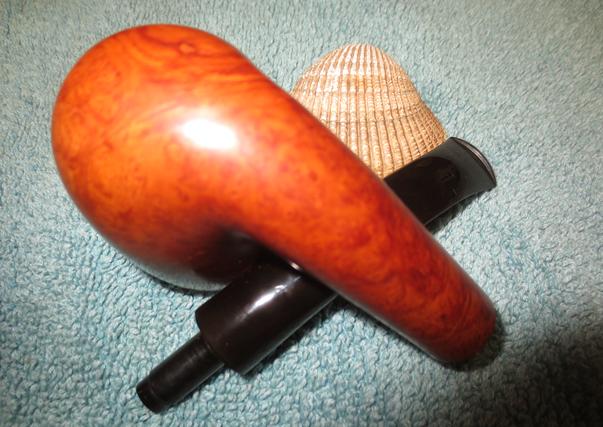
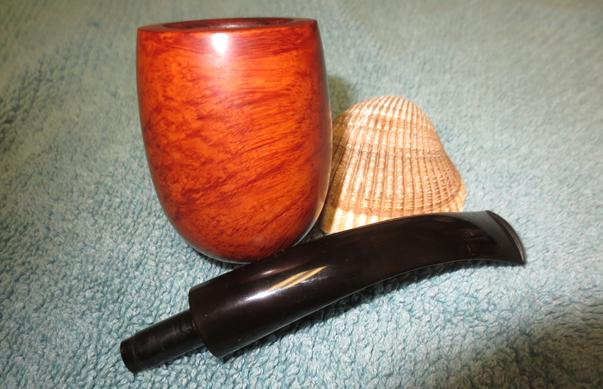
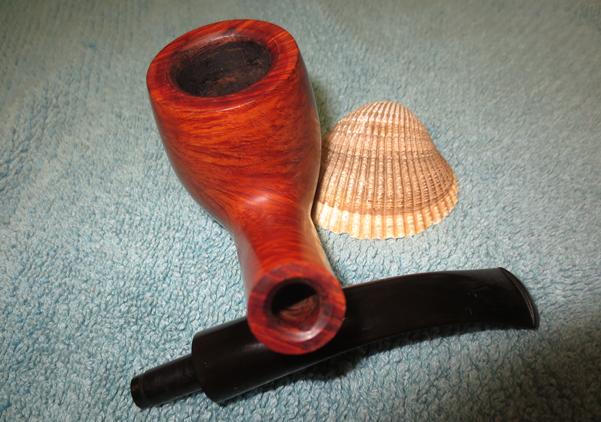
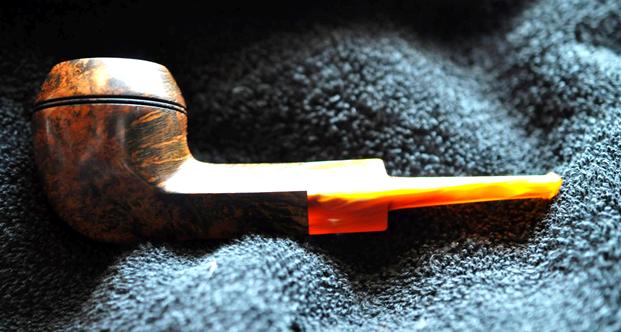
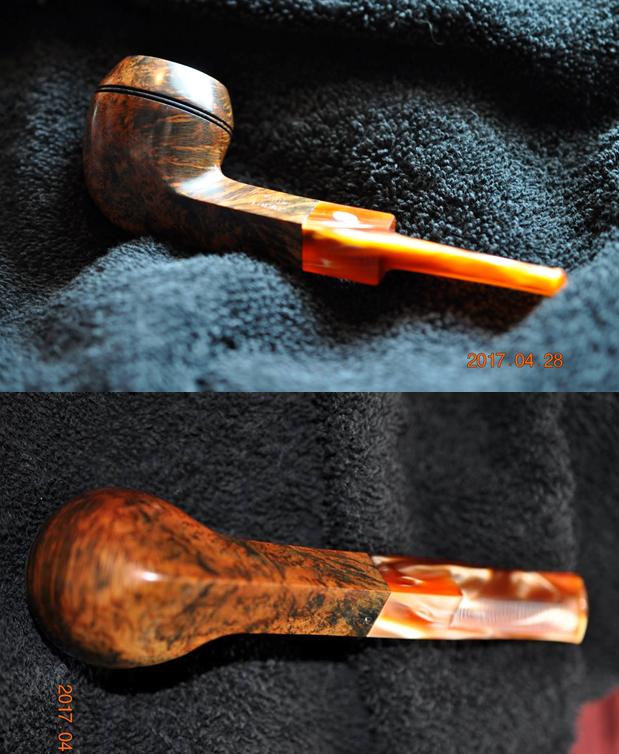
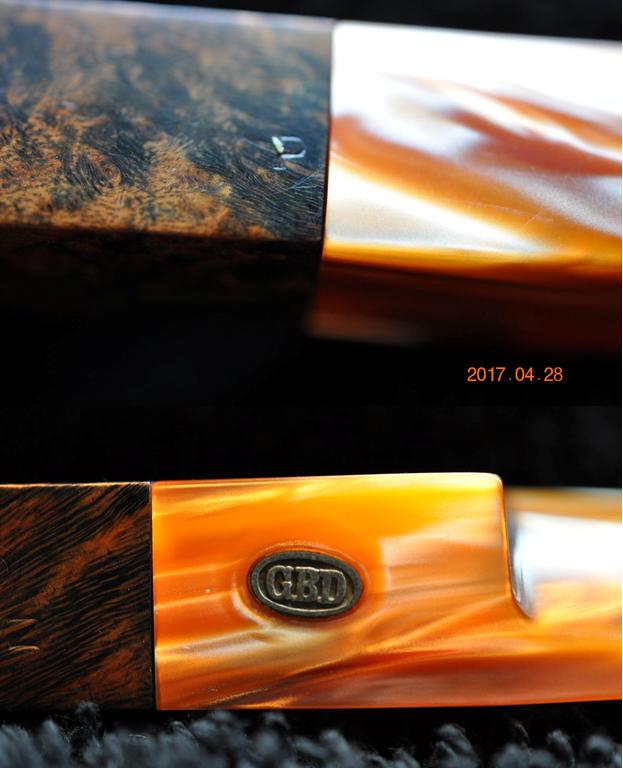
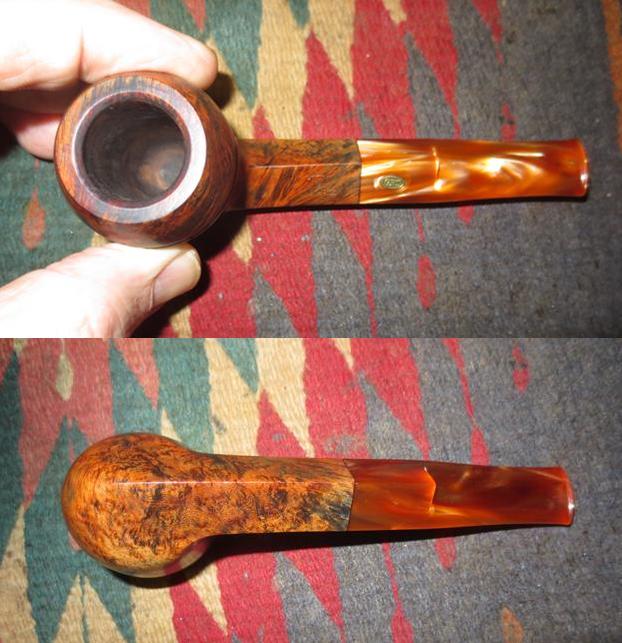
The pipe I had purchased is stamped on the underside of the shank Titania over Lithos YY, Hand Made in Italy, Rinaldo. From the above information I learned that the pipe was Rusticated (which I could see from the photos), it was graded YY (which is the second grade), and it was a Titania (which is a larger bowl). I also learned that the LITHOS hand made pipes came in three inishes – Rustic Tan, Brown or Black.The article went on to describe the detail and care that goes into each pipe that the brothers craft. Here is how the website describes it:

Each Rinaldo pipe is offered for the pleasure of beholding its classical and liberal forms. Elio and Guido Rinaldo’s passion for crafting the finest pipes available is evident in each piece. Elio and Guido Rinaldo are currently producing approximately 1,500 pipes per year. When it comes to hand-made (fatta a mano) Italian pipes, two brothers in Italy, Elio and Guido Rinaldo are raising eyebrows around the world and are proving that high quality doesn’t always come at a high cost. In 1987 they started the business that bears their name although they actually started making pipes back in 1974 when they were only in their teens. They use the finest Mediterranean briar and their pieces not only are expertly designed and easy to hold, but they use fine balanced acrylic mouthpieces to insure a pleasant grip and ease on the teeth. Although some pipe manufacturers employ a body of carvers to create their designs, the two Rinaldo brothers are the sole carvers of their company. They create pipes in three different finishes (smooth, sandblast, and rusticated), several different sizes, and line their pipes with briar, silver, and gold ornaments.

The Monjure International Website includes an article on Rinaldo pipes in Pipes & Tobacco Magazine. Here is a link to that article; it is well worth a read if you are interested in reading about the brothers and their pipes. http://www.monjureinternational.com/rinaldo_articleP1.htm

Now that I had educated myself regarding the brand I was even more excited for the arrival of my new pipe. I could not wait to have it in hand and examine it up close. I wanted to look over all the hand made details and care that had gone into its design. I don’t often buy a new pipe; my tendency is to buy estates (as those of you who read rebornpipes have already figured out). They are already broken in and after a bit of cleaning can pick up where the last pipe man laid them down. But in this case I have to tell you, I am looking forward to giving this one a go and breaking it in myself. Once more thanks for sharing my excitement on this one. It is good to know that others are inflicted with the same “disease” and enjoy pipes along with me… I know that my wife and daughters only word for this is, “Another pipe? Do you really need that?” And to those comments I nod a yes, make no excuses and share my excitement with each of you. Cheers!


New Life for a Lorenzo Lara Smooth (For Tinderbox) Unique 113


Blog by Steve Laug

As I looked through the box of pipes that my brother had picked up from the estate sale he went to recently I was looking for the next pipe to bring to my work table. I picked through a variety of apple shapes, bent billiards, Lovats and authors but none of them grabbed my attention. I wanted to work on something a little different. I picked up this interesting take on a poker – with a little bit of a Dublin look to it. I wrote my brother a message and asked about the before pictures. He sent them and wrote back that this pipe his favourite from the lot. The pipe is stamped on the left side of the shank The Tinder Box in an arc over a script text Lara with the curl of the L underlining the entire word and swirling up along the letter a. The right side of the stem is stamped Italy over 113 (shape number) and next to that it reads Styled By Lorenzo. My brother took the following photos to show the condition of the pipe when he brought it home from the estate sale. I have worked on a lot of Lorenzo pipes over the years and have always found them to be large and bulky. None of them did anything for me so I generally passed them on as either gifts or sold them on the store. This one however looked different from the others I have seen. Tinder Box seems to have ordered a line of pipes from Lorenzo to bear their store stamp. As I looked through photos on the web I found that the Lorenzo Lara pipes made for Tinder Box all had the same unique stem shape. I saved some of the photos below to show the variety of shapes that bear this unique stem shape. Jeff also took some close up photos to show the condition of the bowl and the rim top before he cleaned them up. There was a thick cake in the bowl that had overflowed on to the top of the rim and around the beveled inner edge of the bowl.The grain on the bowl sides was beautiful – a combination of swirls and birdseye that was captivating to look at. The finish was very clean on the rest of the bowl in comparison to the rim top.The stamping on the shank side was very readable and sharp on the left side and less so on the right. The next two photos show the stamping.The stem was in decent shape but had the by now familiar tooth chatter and marks on both sides near the button and on the button edge itself. They were a little deeper on the underside than the top but still very repairable. There was also some light oxidation on the vulcanite.My brother did a thorough cleaning of the pipe inside and out. He reamed the bowl and scrubbed out the mortise and airway in the shank and the stem with alcohol, cotton swabs and pipe cleaners. He scrubbed the rim top with Murphy’s Oil Soap and rinsed it with water. The finish really was in great shape and the soap took the rim build up off and left the pipe remarkably clean. When I received it and brought it to the worktable I took the next four photos to show what it looked like after cleaning. I took a close up photo of the rim top to show the amazing job that Jeff did in cleaning off the lava. The rim looked pristine and the inner edge bevel of the bowl was flawless. The rim top was beautiful and it had the same glossy look as the rest of the bowl.I took some photos of the stem to show the tooth marks. They came out more clearly after cleaning. The oxidation came to the surface and the tooth marks on the top and underside near the button are very visible in the photos.I sanded the stem with 220 grit sandpaper to remove the tooth marks and chatter and also to break up the oxidation on the stem surface.I sanded the stem with 320 grit sandpaper to minimize the scratches left behind by the 220 grit sandpaper. I polished the stem with micromesh sanding pads – wet sanding with 1500-2400 grit sanding pads and rubbing it down with Obsidian Oil. I dry sanded the stem with 3200-12000 grit sanding pads and giving a coat of Obsidian Oil between each pad. I gave it a final coat of oil after the 12000 grit pad. The following photos tell the story. The bowl was in such great shape that I only needed to polish it and wax it. I put the stem back in place on the pipe and buffed it with Blue Diamond on the buffing wheel. I find that Blue Diamond does a great job in polishing out the minute scratches in vulcanite and briar. I gave the pipe multiple coats of carnauba wax to protect it and buffed it with a clean buffing pad to raise the shine. A lot of people leave out this buff. To me it is critical to get a good shine on the pipe to use a clean pad. I hand buffed it with a microfibre cloth to deepen the shine. The finished pipe is shown in the photos that follow. The shape and the grain on the bowl make it a unique and attractive pipe. The dimensions of the pipe are Length: 6 inches, Height: 2 inches, Outer bowl diameter: 1 ¾ inches, Chamber diameter: ¾ inches. This pipe is available if you hear it calling your name. I will be posting it on the rebornpipes store shortly. You can email me at slaug@uniserve.com or send me a private message on Facebook if you want to add it to your rack. Thanks for looking.

Breathing New Life into an Iwan Ries Jacques 169 Apple


Blog by Steve Laug

The next pipe on the table from the estate sale to be refurbished is a small apple that is stamped JACQUES on the left side of the shank and Iwan Ries & Co on the right side. It is also stamped 169 (Shape Number) on the underside of the shank at the stem/shank junction. The piece of briar is really a beauty with a mix of grains. The right side of the bowl has some beautiful birdseye grain that just pops. The combination of the yellow, cream coloured Lucite stem with the medium brown stain on the bowl works well and brings out the reds in the briar. Jeff took some photos of the pipe when he brought it home and before he worked his magic cleaning it up. He took some photos of the pipe to show the condition. The first of these shows the cake in the bowl and the lava overflow on the rim top. The rounded rim top looked like it was also darkened but I would know for sure once he had cleaned the top of the bowl.The next three photos show the stamping on the bowl. It is sharp and readable. There are also three stars on the left side of the taper stem as well. On the underside of the stem it is also stamped France. I am not sure if that is in reference to the entire pipe or just the stem being made in France. The next series of close up photos of the bowl show the overall condition of the pipe. The first photo shows the damaged fills on the left front of the bowl. These will need to be picked out and repaired to take care of the crumbling putty. The following photos show the now familiar tooth marks on the top and underside of the stem near the button. Unfortunately they are a bit hard to see as the colour of the Lucite obscures them. The top has tooth chatter and the underside has both chatter and a few deeper tooth marks.My brother worked his cleanup magic on the pipe and when it came to me the bowl had been reamed and cleaned. The airway in the shank and stem had been scrubbed with alcohol and pipe cleaners and the mortise cleaned with cotton swabs and alcohol. The pipe was in pristine condition internally. All I had to do was rework the fills and sand out the tooth marks on the stem. The next four photos show the pipe upon arrival in Vancouver. Jeff had been able to remove the cake in the bowl and all of the lava from the rim top. There was indeed some rim darkening that would need to be taken care of but it was very clean.  The second photo shows the ugly, damaged fills on the left front of the bowl.The stem looked really good and the tooth marks and chatter are even harder to see than in the previous photos but they are there.I picked out the damaged putty fills with a dental pick until they were clean. I wiped down the area with an alcohol dampened cloth to remove any remaining debris. I filled the areas with briar dust and clear super glue. It dries dark but that will work in these fills that follow the grain pattern of the bowl.Once the patch had dried I sanded it with 220 grit sandpaper to remove the excess fill and then with 320 sandpaper to smooth that out a bit. I polished the repair with micromesh sanding pads – 1500-12000 grit sanding pads to smooth out all the scratches. I touched up the repaired area with a dark brown stain pen. The colour of the stain matched the bowl perfectly and the fills blended in better than they were before.I hand buffed the bowl with a microfibre cloth to have a look at the rest of it and get a feel for the finished look. I ran a pipe cleaner through the mortise and the airway in the shank and the stem to check for any debris that might have collected from my sanding. They were still very clean.Now it was time to take care of the tooth marks on the stem. I sanded them out with 220 grit sandpaper and smooth that out with 320 grit paper. I polished the stem with micromesh sanding pads – wet sanding with 1500-2400 grit pads and dry sanding with 3200-12000 grit pads. I wiped the stem down between each pad with a water dampened cotton pad to remove the sanding debris. I put the stem back on the pipe and buffed it with Blue Diamond on the buffing wheel. I am skittish about buffing Lucite as it can heat up quickly and then make a mess of the work that has been done. I used a gentle touch to buff the stem and powered through buffing the bowl and shank. I took care not to damage the stamping on the shank. I gave the bowl and stem multiple coats of carnauba wax and buffed it with a clean buffing pad to raise a shine. I hand buffed it with a microfibre cloth to deepen the shine. The dimensions are Length: 5 ¾ inches, Height: 1 5/8 inches, Outer diameter of the bowl: 1 ¼ inches, Chamber diameter: ¾ inches. The finished pipe is shown in the photos below. It turned out to be a beautiful pipe and the repaired fills look better than when it left the factory. This one is available if you want to add it to your rack. Email me at slaug@uniserve.com or send a private message via Facebook if you are interested. Thanks for looking.

Seven “Collectible Tobacco Tins” from the Recent Estate Sale


Blog by Steve Laug

At the recent estate sale that my brother visited, along with the batch of pipes that he purchased he also picked up 7 unopened 100 gram tins of tobacco with some age on them. They are all English/Oriental blends. Six of them are McClellands Tobacco Company blends that I have found are always better with a bit of age on them. On eBay and other venues these unopened tins are marked as collectible tins. The age on these tins lend them to being quite “collectible” to any pipeman.

My brother and I are willing to sell one or all of them to anyone who resides in the US. I apologize that they are not available outside of the US at this point. My brother has them and lives in the US so he will mail them.

The first of these is a 100 gram unopened tin of Frog Morton on the Town, blended by McClellands Tobacco Co. It is marketed as an elegant Oriental blend, fragrant with Basma and smooth and rich with Latakia. The stamping on the bottom of the tin dates to 2008. I am asking $20 for this tin. The second unopened tin is from Iwan Ries. It is their 140th Anniversary Gourmet English Blend. I am not sure who tinned it. This blend commemorates the anniversary of the Iwan Ries Tobaaconist shop in Chicago. The shop opened in 1857 and 140 years later would have been 1997. This is a well-balanced blend of naturally aromatic Turkish tobaccos, smoked Latakia and mellow aged Virginia rich in flavor, rich and cool-burning. The date stamp on the tin appears to be from 2000. I am asking $20 for this tin. The third unopened tin is McClelland’s Personal Reserve Blend, British Woods. It is billed as a Medium-Full Mixture. It is a distinguished Oriental mixture, slow burning and cool smoking. Heavy with fragrant Latakia, spiced with Macedonian leaf, lightly softened with Matured Virginia. The stamping on the bottom of the tin dates it to 2014. I am asking $20 for this tin. The fourth unopened tin is another McClelland’s Personal Reserve Blend, British Woods. It is billed as a Medium-Full Mixture. It is a distinguished Oriental mixture, slow burning and cool smoking. Heavy with fragrant Latakia, spiced with Macedonian leaf, lightly softened with Matured Virginia. The stamping on the bottom of the tin dates it to 2014. I am asking $20 for this tin. The fifth is another unopened tin of McClelland’s Personal Reserve Blend, British Woods. It is billed as a Medium-Full Mixture. It is a distinguished Oriental mixture, slow burning and cool smoking. Heavy with fragrant Latakia, spiced with Macedonian leaf, lightly softened with Matured Virginia. The stamping on the bottom of the tin dates it to 2014. I am asking $20 for this tin. The sixth unopened tin is a fourth tin of McClelland’s Personal Reserve Blend, British Woods. It is billed as a Medium-Full Mixture. It is a distinguished Oriental mixture, slow burning and cool smoking. Heavy with fragrant Latakia, spiced with Macedonian leaf, lightly softened with Matured Virginia. The stamping on the bottom of the tin dates it to 2011. I am asking $20 for this tin. The seventh unopened tin is McClelland’s Personal Reserve Blend, Bombay Extra. It is a full mixture – a rich, full Oriental Mixture, perfect after dinner. We begin with Bombay Court and enrich it with mellow, Red Virginias, a touch of Perique and Latakia. A satisfying, naturally fragrant evening smoke. The stamping on the bottom of the tin dates it from 2009. I am asking $20 for this tin.

Contact me through my email slaug@uniserve.com or through a private message on Facebook. Thanks for looking.


Restoring a beautiful Barling Vintage 6279 Pot


Blog by Steve Laug

The next pipe from the estate lot my brother found and sent to me was a Barling Pot. It is stamped on the left side of the shank Barling over London England there is a thin line and under that it reads Vintage. On the underside of the shank it is stamped 6279 which is the shape number. My brother took the following photos of the pipe when he got home from the estate sale. These document the state of the pipe before he started his cleanup.Jeff took some photos of the rim top and the condition of the bowl. The bowl had a thick cake in it and it had overflowed onto the beveled rim top with a thick coat of lava.The next two photos show the grain on the pipe. There was one small sandpit on the bottom front of the bowl and another on the right side of the bowl. Both have been filled with tan putty that blends in really well with the stain on the briar.The next two photos show the stamping on the pipe. The first shows the left side and the second shows the underside of the shank. My brother had also turned the stem over to show the Barling cross on the stem. It had faded and the white paint that is usually in it was gone.The last two photos showed the now familiar tooth chatter and marks on the top and underside of the stem next to the button. Fortunately these were not too deep in the vulcanite either and should be able to be cleaned up quite easily.Dating Barling pipes always proves interesting to me. I get all of the eras confused and find that pinning down some dates is difficult if not nigh on impossible (at least for me). The four digit shape number was the first thing I checked out. I found a catalogue page from a 1962 Barling Catalogue on Pipedia’s post on Barling Pipes that gave me a listing of shape numbers. The 6279 shape is a Pot Bevel with a flat stem according to the chart. The pipe I have indeed a Pot shape with a beveled rim top. However, it did not have a flat stem. It had a taper stem. That was the first anomaly I found regarding this pipe. I like the taper stem on this one. It works well with the shape. (I have outlined the shape of this pipe with a blue box in the photo below.)I did some more work on the internet to try to figure out when the Vintage finish pipes were made and sold. I read several articles but found nothing specific until I found another article on Pipedia under the following heading. I quote that section of the article in full.

Lines and Nomenclature (https://pipedia.org/index.php?title=Barling)

During the late 1970’s additional lines of pipes were introduced and the Company was restyled as Barling of England. In the late 1970’s production of Barling pipes was shifted to Denmark where Eric Nording manufactured Barling pipes for Imperial. There may have been other factories, but as of this writing, none has been identified. Nording stated that he made approximately 100.000 pipes for Imperial.

It was at this point that Ronald Harden, general manager of Barling, stepped in to attempt to save the brand from extinction. Through the efforts of Mr. Harden, Bucktrout and Company bought the rights to the Barling name and at this point operations were moved to the Isle of Man with Mr. Harden as chairman. The company was renamed Barling Pipes Ltd. From that point on, the goal was to restore the old tradition of pipemaking from the family era. New equipment was installed and pipes were made following the Pre-Transition patterns. In 1980, rather than becoming a footnote in pipemaking history, the new line of Barling pipes was introduced.

Some of the Pre-Transition nomenclature was restored, such as the old SS thru EXEXEL size system even though the pipes continued to be stamped with a 4-digit number that also included a size designation. The use of a “Barling’s Make” block letter logo was reintroduced on the 1978 series of pipes, though the logo is on one line with no arched lettering. And both the “Ye Olde Wood” and “TVF” stamping was brought back.

Barling was established as a mid market level pipe and remained such through a portion of the 1990’s. Most recently inexpensive pipes bearing the Barling name, but made by Peterson have been available for sale in the US.

The first highlighted box above gives the information on the Vintage finish Barling in the part of the quoted article that notes the four ranges. The one I had was found in Number 2 above. The information included there gave me a starting date of the late 1970’s for the manufacture of the Barling that I was working on. In the second highlighted box I found a date of 1980 when Imperial closed down Barling operations entirely. This gives a 5-7 year window when the pipe could have been made. So I am working on either a 40-42 year old pipe or a 30-32 year old pipe. I was actually successful in finding the information on the little Barling Vintage Pot that was on my work table. Better informed than when I began, I could turn my attention to working on the pipe itself.

I took the next four photos of the pipe when it arrived in Vancouver. My brother had done an exceptional job cleaning it up. The pipe looked really good. The finish was clean and the rim was spotless. I took a close up photo of the rim to show the condition it was in when it came. Jeff had reamed it really well and had cleaned off all of the lava on the rim. Somehow the lava had protected the beveled rim from damage or burn marks. It was in excellent shape.The stem showed oxidation as well as tooth chatter and marks on the top and underside near the button. The Barling cross on the stem was faded but it was well stamped and could be repainted.I ran a pipe cleaner and alcohol through the airway in the stem and the shank and cleaned out the mortise with a cotton swab and alcohol to remove any remaining tars or oils in those areas. The pipe was really clean as I expected.I buffed the stem with red Tripoli and wiped it down with a damp cotton pad to remove the dust and grit that remained in the Barling Cross. I painted that area on the stem with white acrylic paint to fill in the vertical and horizontal Barling name that was crossed on the top side of the stem near the tenon end. I pushed the paint into the letters and wiped off the excess with a soft, dry cotton pad.I buffed the bowl with Blue Diamond on the buffing wheel to polish the briar. You can see the three small filled sandpits in the first photo and the one toward the bottom of the bowl in the second photo. The fourth photo shows three small fills on the bottom of the bowl. I circled the fills in red in the photos. These fills showed me what I was expecting in a pipe from this era. In the second highlighted portion of the Pipedia article that spoke of closing the pipe, it noted that:“Despite these attempts to diversify the line, Barling lost its market. These pipes just weren’t equivalent to the family era pipes.” I set the bowl aside and turned my attention to working on the stem. I polished the stem with micromesh sanding pads. I wet sanded it with 1500-2400 grit pads and rubbed it down with Obsidian Oil. I buffed the stem with red Tripoli to further remove the oxidation on the stem. I dry sanded it with 3200-12000 grit pads to polish it further. I rubbed it down with Obsidian Oil after each sanding pad to enliven the vulcanite. I gave it a final coat after the 12000 grit pad and set it aside to dry. I polished the briar with micromesh sanding pads as well. I wet sanded it with 1500-2400 grit sanding pads and wiped it down with a damp cotton pad. I dry sanded it with 3200-12000 grit pads and wiped it down after each set of three sanding pads. The more I polished the briar the more the fills on the right side and the front began to blend into the briar. Notice how they are disappearing in the following photos. After polishing with the final three pads (6000-12000 grit) the briar really shined and the fills though still present did not stick out so much. I put the stem back on the bowl and buffed the pipe with Blue Diamond on the buffing wheel. I gave both multiple coats of carnauba wax and buffed it with a clean buffing pad to raise a shine. I hand buffed it with a microfibre cloth to deepen the shine. The finished pipe is shown in the photos below. It is a beautiful pipe. Even the small fills that are around the sides and bottom of the bowl do not detract from the great shape and look of the pipe. This Barling Vintage pipe will soon be on sale on the rebornpipes store. It will make a great addition to someone’s rack and should be a good smoker as the mechanics are really well done. The dimensions are Length: 5 ¾ inches, Height: 1 ¾ inches, Outside bowl diameter: 1 ½ inches, Chamber diameter: 7/8 inches. Check it out there and if you are interested email me at slaug@uniserve.com or send me a message on Facebook and the pipe can be yours. Thanks for looking.

Refreshing a Nording Hand Made Freehand Pipe


Blog by Steve Laug

One of the most unusual pipes in the estate pipes that my brother Jeff purchased and sent to me recently was a freehand that is stamped on the underside of the shank with the words NORDING over MADE IN DENMARK. The plateau on the top of the bowl and the end of the shank is black in colour and is rough to the touch. It is a nice contrast to the cherry and brown stain of the rest of the bowl and shank. The smooth portions are stained with a contrast of a dark stain and a red cherry stain. The contrast is very beautiful and makes the grain pop. The stem is a nicely turned freehand style stem. There is a barrel at the end of the tenon that has several turns that make it look barrel like. There is then a pinched area above the barrel and then a tapered stem.The plateau on the rim and the shank end were dirty with dust and grime. The smooth portion of the bowl and shank was grimy but undamaged. There was also no damage to the plateau portions of the bowl. There was a light cake in the bowl. My brother took the photo above and the rest of the photos that follow to show the condition of the pipe when he brought it home.He took some photos from a variety of angles around the bowl to show the grain that covered the bowl sides, bottom and the shank sides, top and bottom. The last photo shows the Nording over Made in Denmark stamping on the underside of the shank. He took some close up photos of the rim top to show the condition of the plateau. It was undamaged but dirty. You can see the condition of the cake in the bowl in these photos.The stem was oxidized and had the now familiar tooth chatter and tooth marks in the vulcanite on both sides near the button. They were also on the top and bottom sides of the button.My brother did his usual good job cleaning the inside and the outside of the pipe. He reamed it with a PipNet reamer and cleaned out the mortise and the airway in the shank and the stem. He scrubbed the finish with Murphy’s Oil Soap and a tooth brush to clean out the dust from the plateau on the rim and the shank end. He scrubbed the stem as well. The pipe was impeccably clean when it arrived in Vancouver. I took the following four photos to show the condition before I finished the restoration. I took a close up photo of the rim top. There were some spots on the rim that needed to be touched up with black stain. The bowl was very clean.The next two photos show the stem on both sides. The oxidation is more evident on the top than the bottom. The tooth chatter and tooth marks are on both the top and the bottom of the stem near the button.I touched up the spots on the rim top with a black Sharpie pen and then waxed the plateau on the rim and the shank end with Conservator’s Wax and buffed it with a shoe brush to raise the shine.I lightly buffed the bowl with Blue Diamond on the buffing wheel and hand polished it. I took photos of what the bowl looked like at this point in the process. I laid the bowl aside and worked on the stem. I sanded the stem with 320 grit sandpaper to break up the oxidation on the surface. I worked the sandpaper into the grooves in the tenon end of the stem. The oxidation still remained but it was much softer and closer to the surface.I wiped the stem down with some Obsidian Oil and then cleaned out the airway in the stem and cleaned the airway in the shank and the mortise at the same time. The interior was very clean so it took no effort to clean it out.I polished the stem with micromesh sanding pads – wet sanding with 1500-2400 grit pads and starting the process of polishing it. I rubbed it down with Obsidian Oil and then took it to the buffer and buffed it with red Tripoli. I worked on all the rings and surfaces of the stem with the Tripoli and the wheel to remove more of the oxidation. I polished it more by dry sanding it with 3200-1200 grit pads to further remove the oxidation and bring the shine to the surface. I gave it several more coats of Obsidian Oil and set it aside to let the oil be absorbed in to the vulcanite. I buffed the finished pipe with Blue Diamond polish on the wheel carefully avoiding the plateau areas. I polished the minute scratches out of the sides of the bowl and from the surface of the stem. I gave the smooth portions of the bowl and shank and the stem multiple coats of carnauba wax and buffed it with a clean buffing pad to raise the shine. I hand buffed the entire pipe with a soft microfibre cloth to deepen the shine. The finished pipe is shown in the photos that follow. It is a beautiful piece of briar and the stains on the plateau portions and the smooth provide a good contrast. The plateau portions and the black of the vulcanite stem highlight the dark striations of the grain on the bowl sides. The dimensions of the pipe are Length: 7 inches, Height: 2 inches, Diameter of the outer bowl: 1 ¾ inches, Chamber diameter: 7/8 inches. This pipe is available to any of you who want to add it to their collection. It is just a bit large for my liking or I would keep it myself. I will post it on the rebornpipes store shortly. Send me an email to slaug@uniserve.com or a private message on Facebook. Thanks for looking.

Finally: Comoy’s Old Bruyere 256 Restoration


By Al Jones

If you follow my contributions to this blog, you’ve heard me mention my “Holy Grail” list. I started this list six years ago and it was made up of specific brand shapes. Most were Rhodesians, Authors or Bulldogs. The list grew to fifteen pipes, with all British marquees, save for two Castellos. I’ves slowly but surely been able to find all but one piece. A few years ago, it appeared that securing a Comoy’s shape 256, the Author; was going to be challenging. Several shape 256 Comoy’s seconds were sold last year, but I was holding out for a Comoy’s with the beautiful 3-piece drilled “C” stem logo. The last Comoys 256 I can find on Ebay appears to have been sold in 2013.

The Comoy’s logo and the country of manufacture mark indicate that the pipe was made between the early 1920’s and the 1930’s. Pipepedia describes the football (rugby) shaped COM as:

Made in England

This is stamped in a circle with “MADE” at the top, “IN” in the middle, and “ENGLAND” forming the bottom of the circle. This can be seen on a Cecil as early as 1910 and on an Old Bruyere of 1921 and more frequent from the 1930s. It can also appear as “MADE” arched, “IN” below, and “ENGLAND” arched the other way. These stamps are in an oval rugby-ball shape rather than a circle round shape.

In the Pipedia article on Comoy’s, the Old Bruyere finish is described as:

Old Bruyere. I have two Old Bruyeres dated 1921 and a 1931 sales leaflet that states, “Out of every gross of Bruyere pipe bowls made, only 4 are good enough to be called Comoy’s Old Bruyere.” At this time, therefore, it was definitely a high grade.

The pipe was heavy oxidized, but the stem looked to be in pretty decent shape. There was some build-up on the rim and a mild cake build-up. The briar was covered in grime but the nomenclature was legible. The pipe appeared to have been left in direct sunlight, as portions of the stain were faded.

Using my Pipenet reamer, I carefully removed the cake. To finish, I wrapped a piece of 320 grit paper around a suitable bit, which is my preferred method of finishing a bowl. The bowl was in excellent shape, with no damage. I used a cloth with warm, mildy soapy water to remove the grime from the exterior of the briar. 6000 grade micromesh was used to remove the build-up on the bowl top. The bowl was filled with sea salt and alcohol, and left to soak for several hours.

While the bowl was soaking, I put a dab of grease on the “C” stem logo and soaked it in a mild Oxy-Clean solution.

Following the soaks, I used a bristle brush to clean the shank and then mounted the stem to begin to use oxidation. I used a plastic colllar to get close to the stem edge and also to keep too much water from leaking over to the briar, which could further lighten the stain. There were a few teeth indentions and nearly all responded to heat from a lighter to raise them. I then used 400 grade wet paper to remove the heavy oxidation, then 800 grade, followed by 1500 and 2000 grade paper. 8,000 and 12,000 micromesh was then used as a final prep. The stem was then buffed with White Diamond and Meguiars Plastic polish. The briar was buffed with White Diamond, being careful to stay away from the nomenclature. This was followed by several coats of Carnuba wax.

Below is the finished pipe, which will see regular use on my watch.

Restoring a Savinelli Extra 606KS with an Accidental Stem


Blog by Steve Laug

The next pipe from the estate lot that I brought to my work table was a Savinelli Extra Bent Billiard. It is stamped Savinelli in an oval over Extra on the left side of the shank and on the right side was the Savinelli shield with an S inside and to the left of that was the shape number 606KS over Italy. It was a great looking piece of briar with swirled grain on the left side of the bowl and birdseye on the right side and cross grain and mixed grain around the shank and the front and back of the bowl. Even the rim has some nice grain.

The odd thing was that the stem that was on the pipe was obviously not the right one. The diameter of the shank and the stem did not match. It was a saddle stem and was a little shorter than the original one. It was obvious that the estate owner had put the stem in place on the shank and used it on this pipe because it had the same tooth chatter and marks as the rest of the lot.

My brother took photos of the pipe before he cleaned it up. I have included those here. There was a cake in the bowl and the lava had overflowed onto the rim top. The lava was heavier on the back side of the rim top. The inner bevel and the outer edge of the bowl were protected and they looked to be in good shape under the grime.He took some close up photos of the bowl sides and bottom of the bowl to show the grain and the condition of the pipe. The next photos show the tooth chatter and tooth marks on both sides of the stem near the button. Even though it was the incorrect stem it was definitely the one that had been used by the owner of the rest of the pipes.My brother did a thorough cleaning of the pipe – the bowl had been reamed and the finish scrubbed with Murphy’s Oil Soap to remove the grime and the tarry build up on the rim top and beveled inner edge. The inside had been scrubbed clean as well. When the pipe arrived in Vancouver it was very clean. I took the next four photos to show the condition of the pipe when it arrived here. I took a close up photo of the rim and the inside of the bowl to show how clean both were. He had really done a great job on the bowl and rim.The next two photos show the condition of the stem but what you should notice is how the diameter of the shank and the stem do not match. The stem is slightly smaller in diameter than the shank. The joint is circled in red in both photos below. Look at the difference in the shank and the stem diameter inside the red circle.My brother has picked up my habit of picking up loose stems along with pipes and he saw a stem sitting at the sale. It was priced high so he left it and went back the next day to pick it up half price. He bought it, cleaned it and put it in the box of cleaned pipes that he sent to Vancouver. When I unpacked the box I put the stem on the top of my work table. When I was working on this pipe I happened to glance at the stem on the table. It looked like it was the correct diameter stem for the Savinelli. There was a faint Savinelli Crown stamp on the left side of the stem. I was pretty sure that this was the right stem for the pipe. I removed the incorrect stem from the shank and put the new stem in place there. The fit was perfect and it looked really good. The new stem also had the characteristic tooth chatter and marks as all of the other stems. They are on both sides of the stem near the button. The stem was also lightly oxidized.I sanded the tooth marks and chatter with 320 grit sandpaper to remove them from the surface of the vulcanite. Fortunately like the other stems the tooth marks and chatter were not too deep in the stem surface.I ran a pipe cleaner and alcohol through the airway in the shank and stem and folded it and wiped the inside of the mortise clean. The pipe was spotless on the inside.I cleaned up the remnants of cake in the bowl with a Savinelli Fitsall Pipe Knife. I scraped the cake back to bare briar and smoothed out the bowl walls.I polished the stem with micromesh sanding pads – wet sanding with 1500-2400 grit pads. I rubbed the stem down with Obsidian Oil. At this point the light of the flash revealed more oxidation on the stem.I put the stem in the shank and buffed the pipe with red Tripoli to remove more of the oxidation from the stem surface. I polished it again with 3200-4000 grit micromesh pads and rubbed it down with another coat of Obsidian Oil. It is definitely improving but there is still oxidation that is showing through in the flash.I buffed it hard with Blue Diamond with the stem in the shank and was able to remove the remaining oxidation. I polished it with 6000-12000 grit pads and gave it another coat of Obsidian Oil.I buffed the bowl and stem with Blue Diamond a final time to polish it and remove the small minute scratches. I gave the bowl and stem multiple coats of carnauba wax and buffed it with a clean buffing pad to raise the shine. I hand buffed it with a microfibre cloth to deepen the shine in the stem and briar. The finished pipe is shown in the photos below. It is a beautiful grained piece of briar and with the correct stem it looks much like it must have looked the day it left the factory. The dimensions of the pipe are Length: 6 inches, Height: 2 inches, Outer bowl diameter: 1 ¼ inches, Chamber diameter: ¾ inches. This beauty will also be going on the rebornpipes store and can be added to your collection. If it interests you contact me by email at slaug@uniserve.com or by private message on Facebook.

Freshening up a GBD Topaz 559 Bulldog


Blog by Steve Laug

This is another of the pipes that came from that estate sale that my brother picked up recently. It is a classic GBD shape. It is stamped GBD in an oval over TOPAZ on the left side of the shank and London, England over 559 on the right side of the shank. On the left underside of the shank next to the stem/shank junction it is stamped with a P. The Topaz line was introduced in about 1980. From a Pipedia link with a list of GBD lines I quote: “Probably the most perfect harmony of combining the soft beige tones of the Hand Cut Acrylic mouthpiece with complimentary shades of brown in the Briar.” This GBD is probably made after the merger by Cadogan, who also makes Comoys, Dr. Plumb’s Perfect Pipes, BBB, and Orlik Pipes. Since the merger in 1981 GBD pipes are not considered to be of the same quality that they were originally. Though the brass rondels were discontinued after the merger they once again reappeared on new production GBD’s. (https://pipedia.org/wiki/GBD_Model_Information, https://pipedia.org/wiki/GBD_Model_Information#List_of_GBD_Models.)

My brother sent me the following photos of the pipe before he cleaned it up to send to me. (I have to say by the way that I really like working on clean pipes. It makes the job so much easier for me. Thanks Jeff.) He took some close up photos of the sides of the bowl and the rim to give an idea of the condition when he brought it back from the estate sale. The bowl had a thick cake that had overflowed onto the beveled rim and top leaving a nice coat of lava. I was hoping that once he removed it that we would find that the lava protected the bowl rim from damage. He took some photos of the stamping that I noted above. The stamping was sharp and readable. The P stamp on the underside of the stem on the left was readable as well. I am not clear what the stamp means however. Do any of you know what the meaning of it is? The brass roundel is not worn and is very clean. It is a little hard to see from the photos of the stem shown below but this pipe had the same kind of tooth chatter and marks that the rest of the pipes in this estate had. They were worse on the underside of the stem but they were present on the top as well.My brother did a very thorough job reaming and cleaning this pipe. The internals and externals were very clean. The bowl looked well reamed and showed that the pipe had never been smoked to the bottom of the bowl – there was still fresh briar at the bottom ¼ of the bowl. The next four photos show what the pipe looked like when it arrived in Vancouver and I brought it to the work table. I took a close up photo of the rim to show the change from the caked and dirty pipe that Jeff started with. It is amazing how well the lava protected the bevel and the rim top.
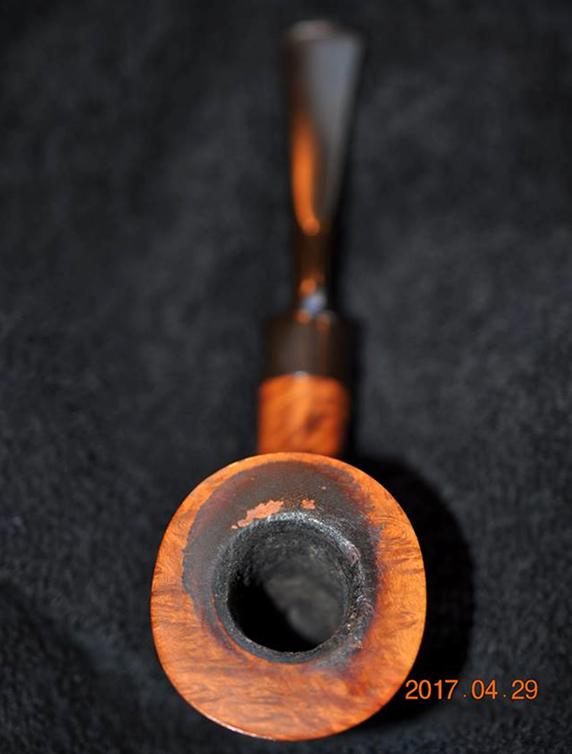
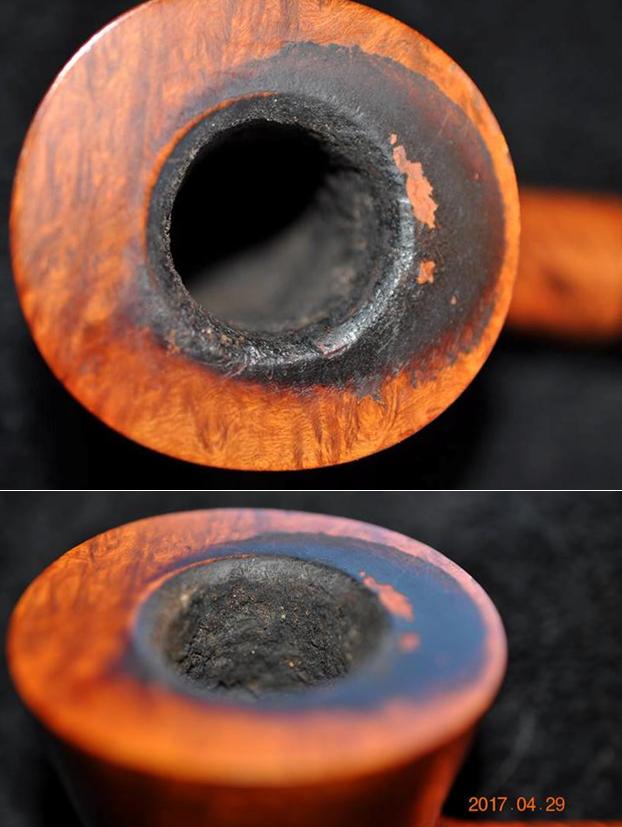
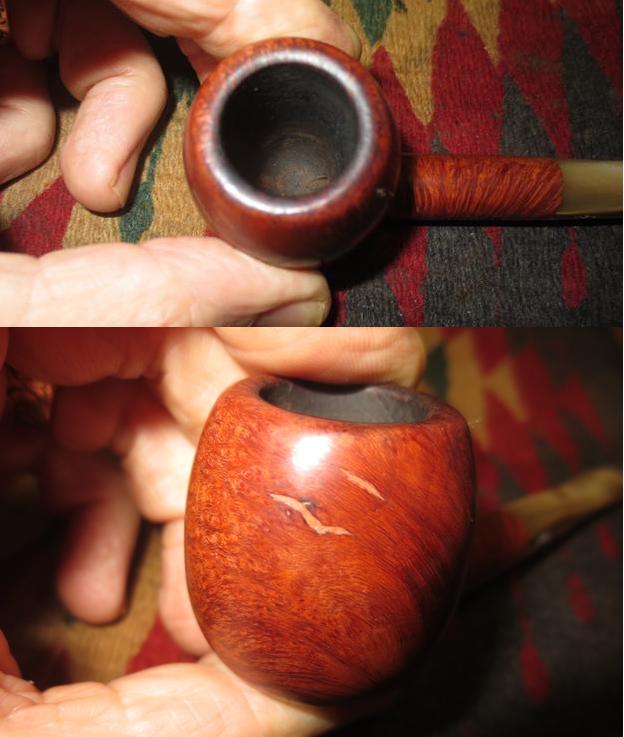
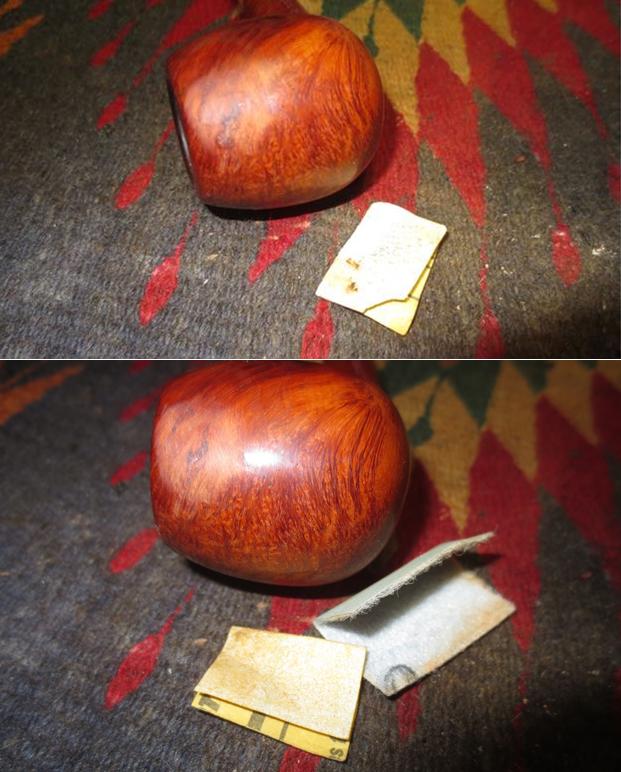
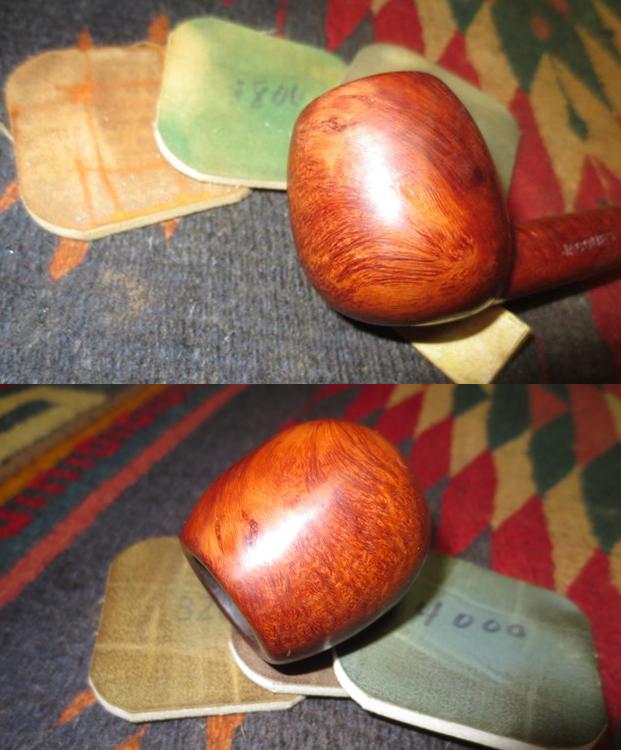
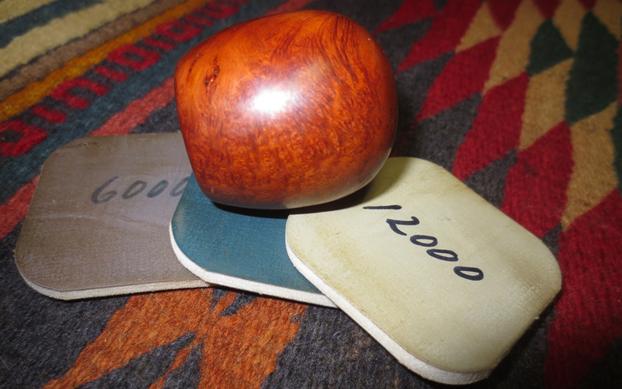
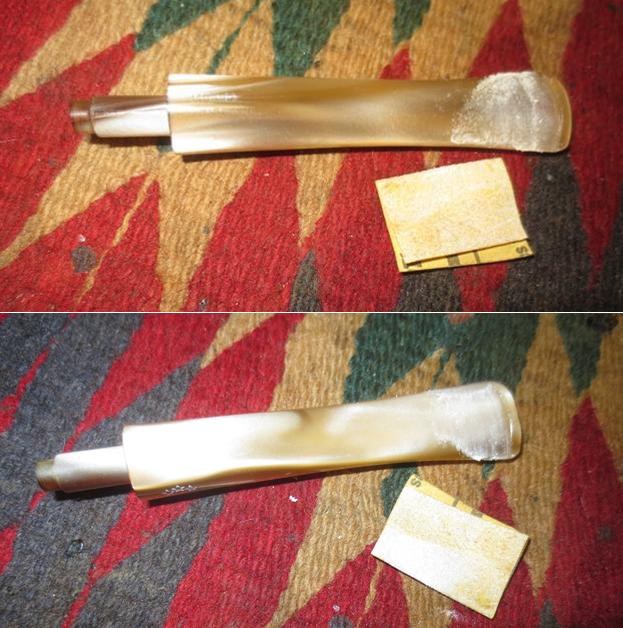
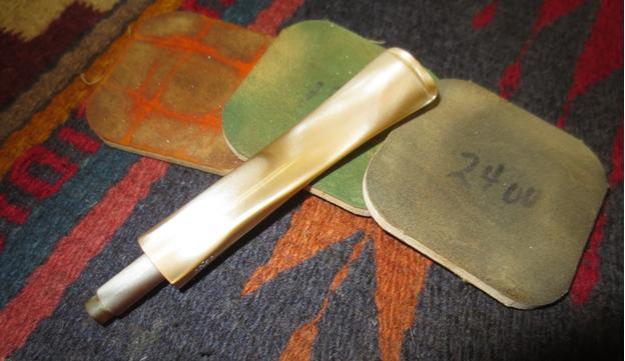
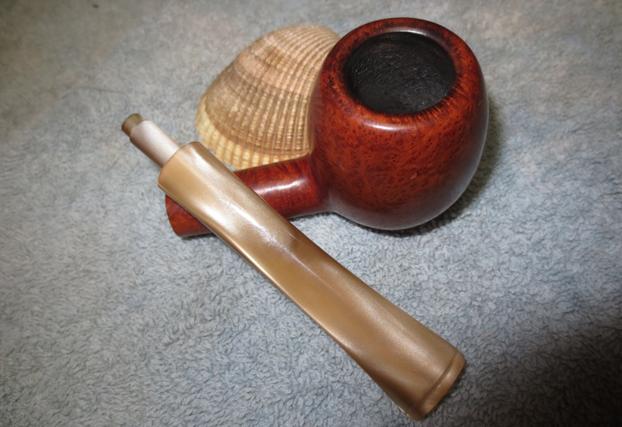
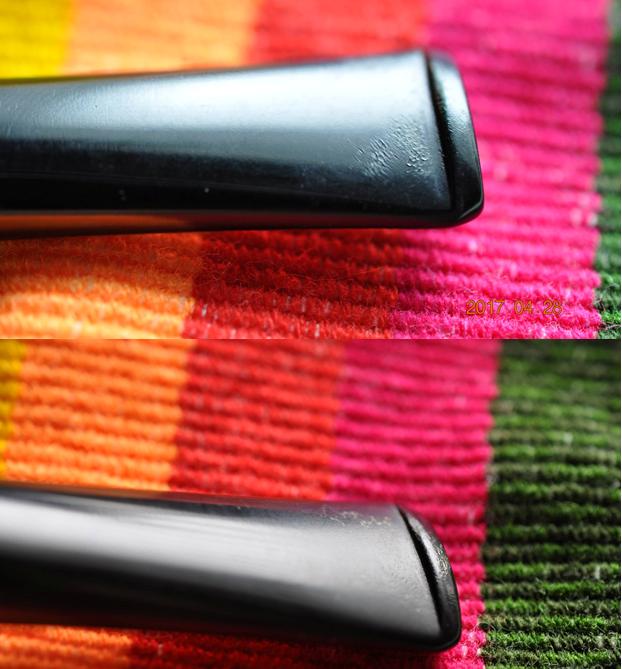
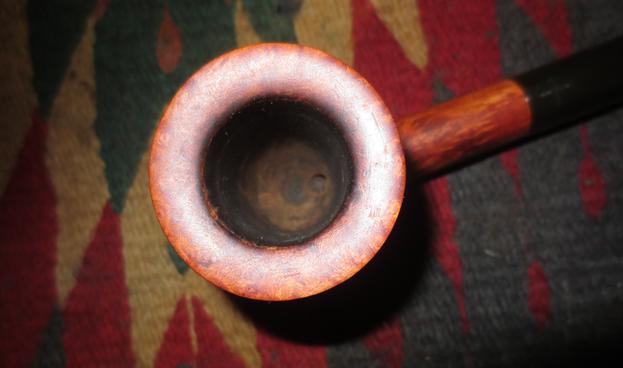
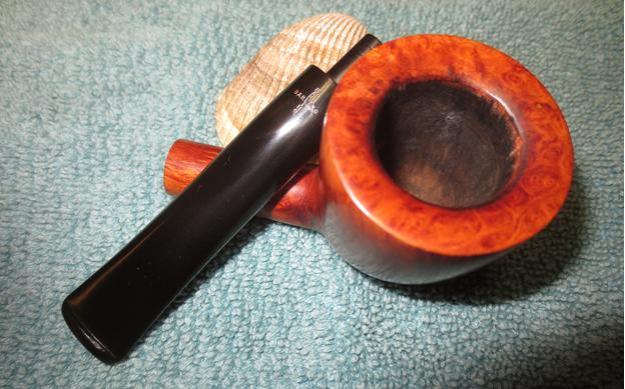
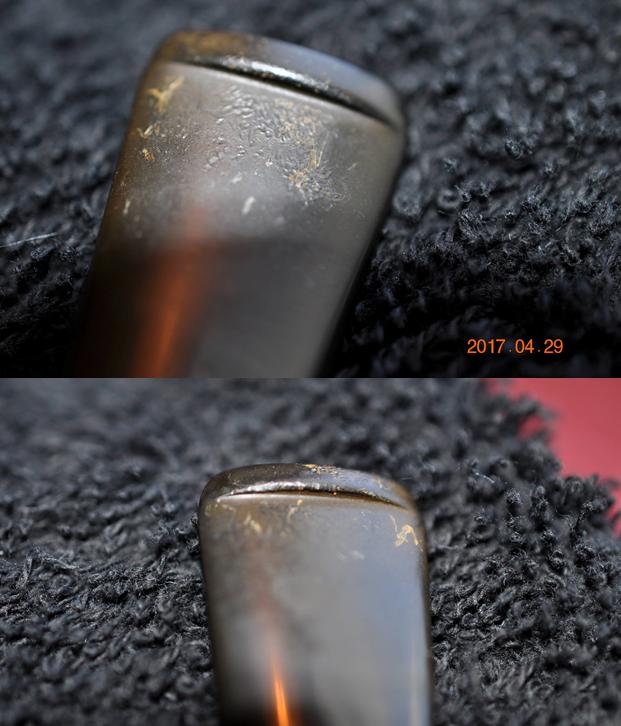
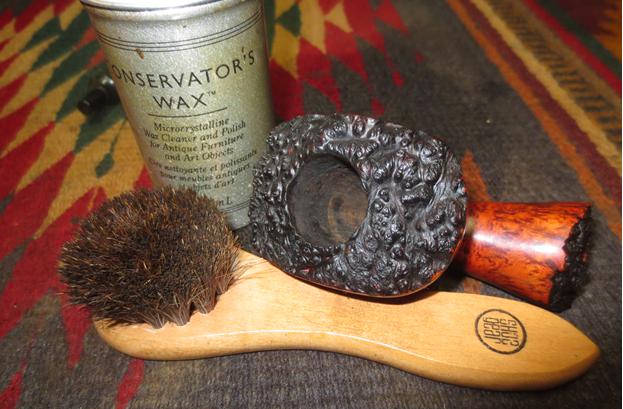
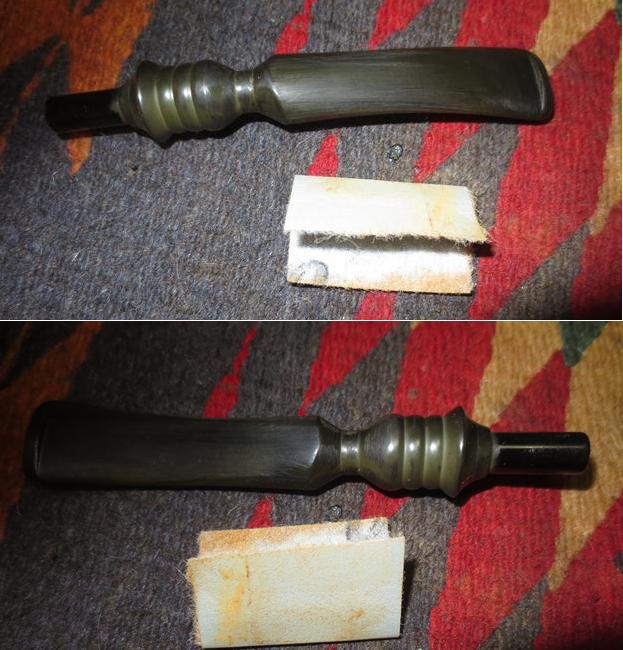
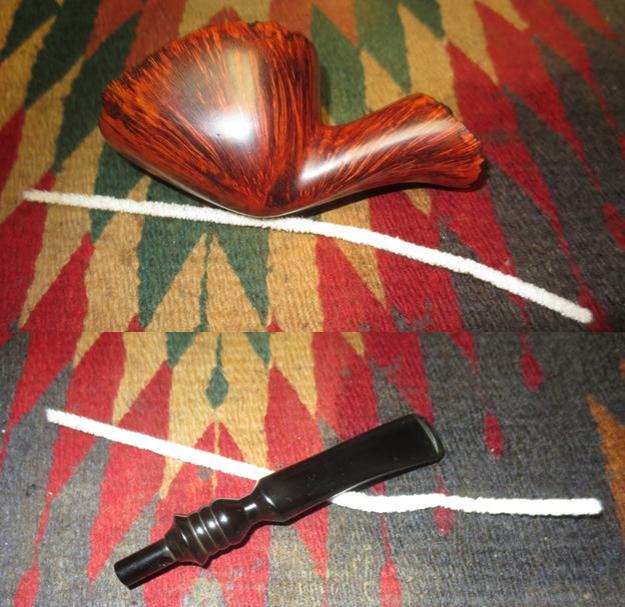
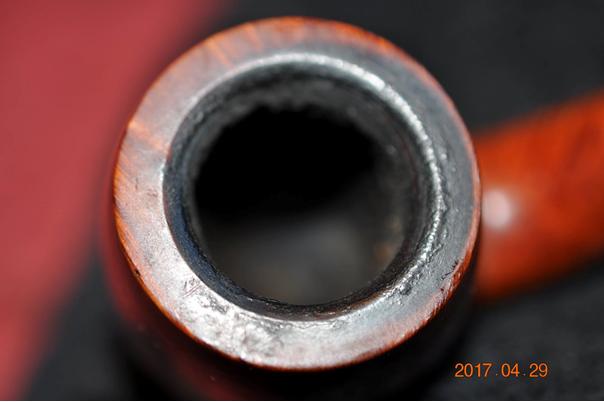
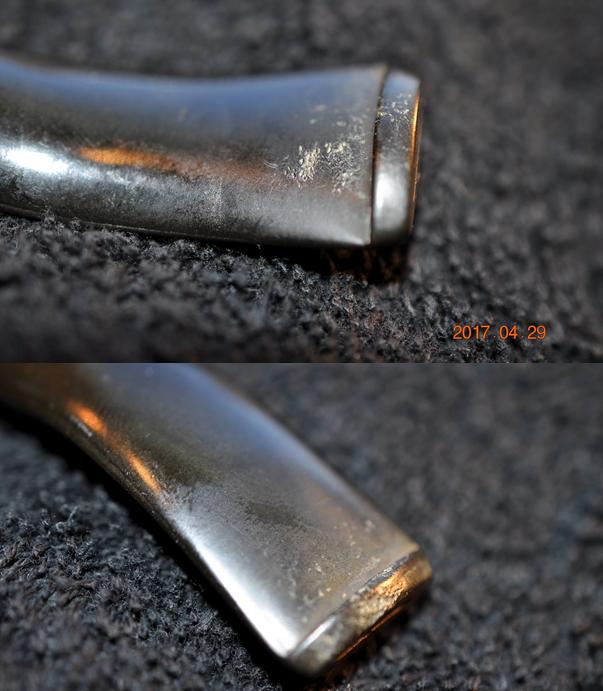
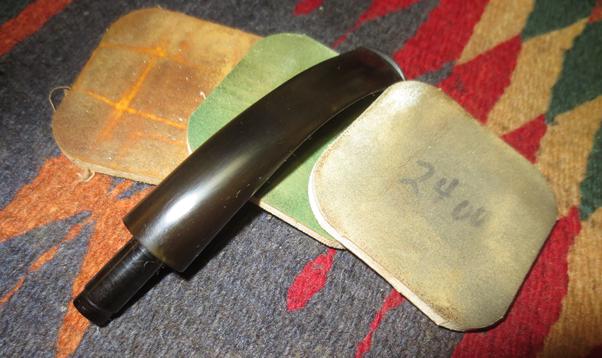
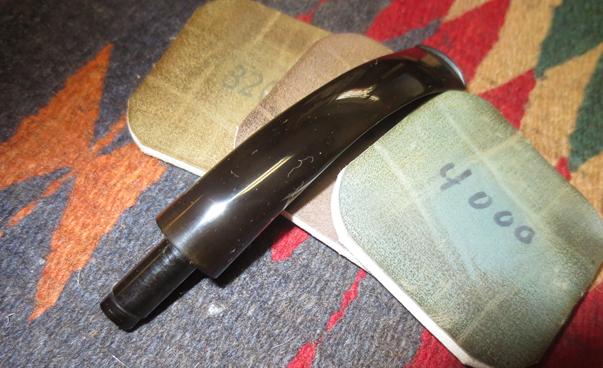
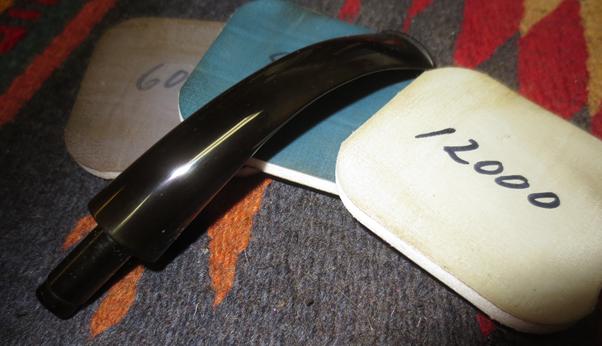
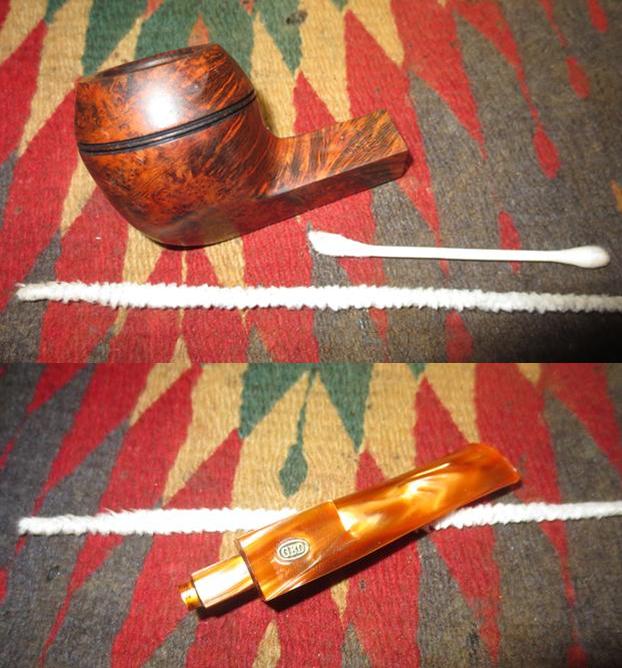
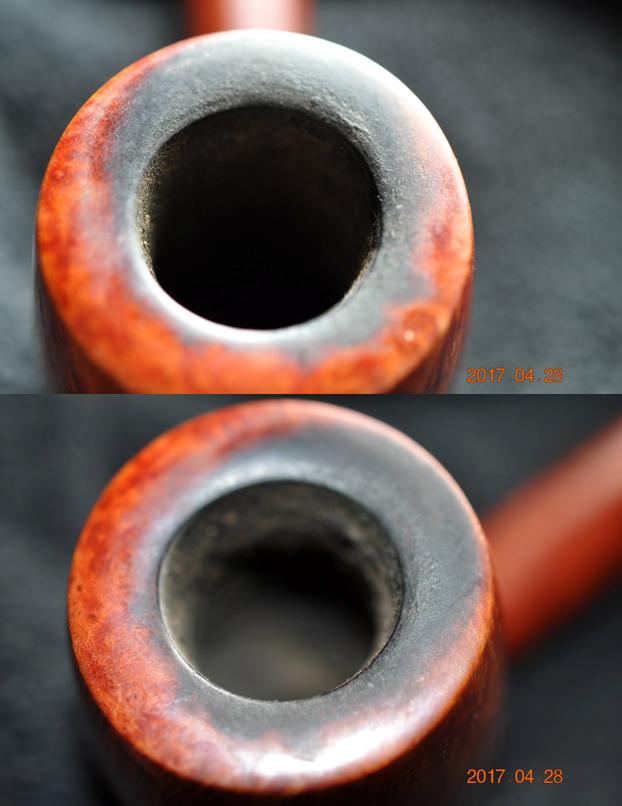
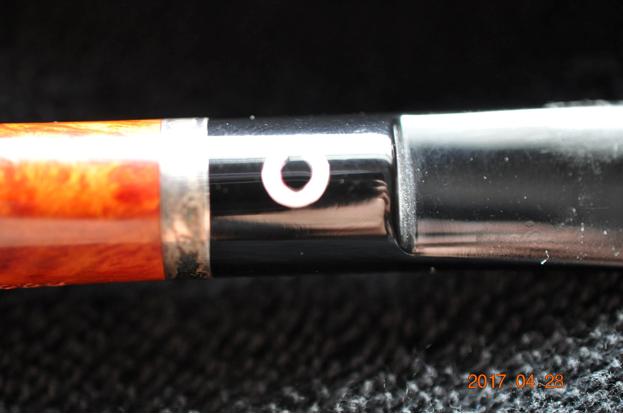
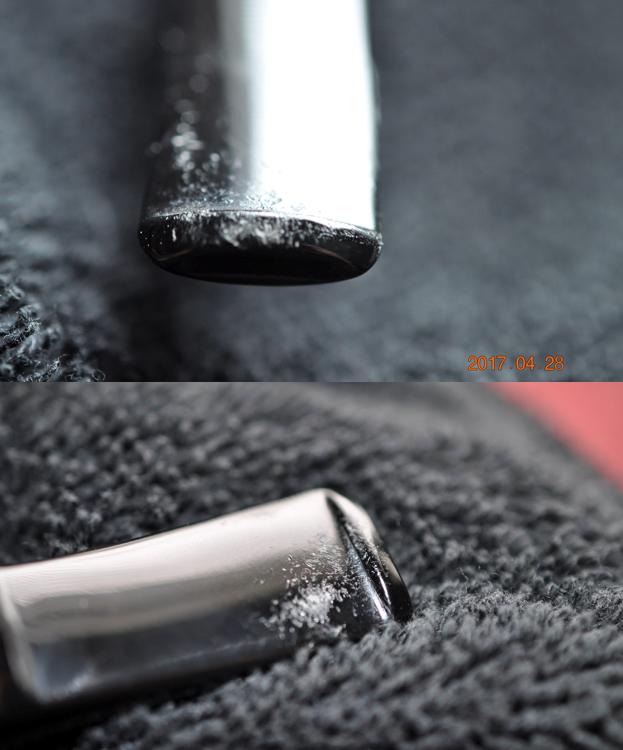
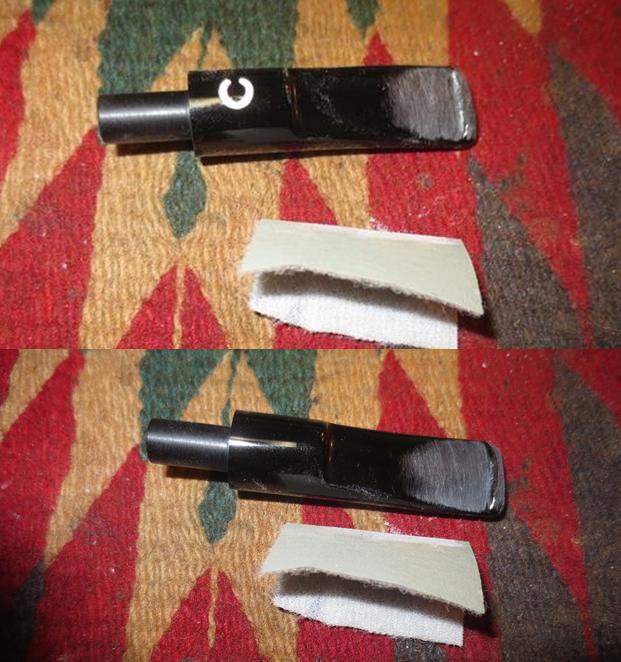
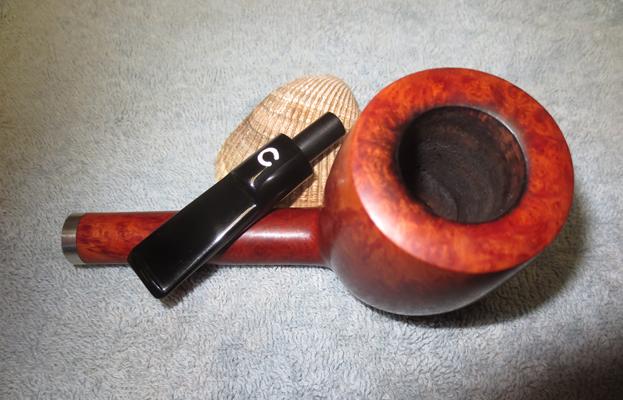
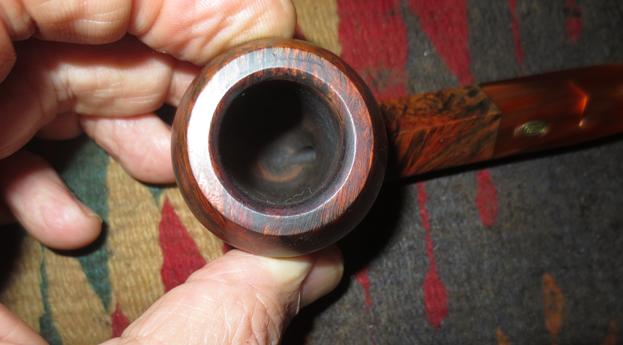
I ran a pipe cleaner through the airway in the stem and the shank and they were very clean. I used a cotton swab to clean around the step down on the tenon and in the mortise. These too were clean.The right side of the bowl had a lightened area where the stain had worn away from the original owner’s hand. I touched it up with a dark brown stain pen. It blended very well. When it dried I hand buffed it and gave the bowl a coat of Conservator’s Wax to protect it.I took some photos of the stem to try to capture the tooth damage and chatter on both sides. It is hard to see with the copper Lucite but it is very present. You can see a bit of it showing up toward the bottom of the second photo.I sanded out the tooth marks and chatter with 320 grit sandpaper. It did not take much sanding to remove all of the marks and chatter as they were not too deep in the acrylic. I polished the acrylic with micromesh sanding pads – wet sanding with 1500-2400 grit pads and dry sanding with 3200-12000 grit pads. I wiped the stem down with a damp cotton pad between each sanding pad to remove the dust and check the progress. The photos below tell the story. I put the stem back in place on the bowl and buffed the pipe with Blue Diamond on the buffing wheel. I polished out the minute scratches in the briar and Lucite with that buffing. I gave the pipe and stem multiple coats of carnauba wax and buffed it with a clean buffing pad to raise the shine. I hand buffed it with a microfibre cloth to deepen the shine. The finished pipe is shown in the photos that follow. It is a beautiful pipe with a lot of character. The dark stain and the copper coloured variegated Lucite stem work really well together. The contrast is really stunning. The dimensions are Length: 5 ½ inches, Height: 1 ¾ inches, Outer diameter of the bowl: 1 ¼ inches, Chamber diameter: ¾ inches. The pipe is ready to pass on to its next pipe man. It should serve the next owner for a long time. If you are interested in adding it to your rack email me at slaug@uniserve.com or send me a private message on FaceBook. I will be putting this one on the rebornpipes store shortly. Thanks for looking.

Cleaning up a Beautiful Il Ceppo Lumberman


Blog by Steve Laug

The next pipe on the worktable from the lot that my brother picked up at an estate sale recently is a beautifully grained Il Ceppo Lumberman. It is a large pipe, which is well laid out with the grain of the briar. The look of the briar and the stem contrast beautifully and accent the beauty of the pipe. The shape is part of the Canadian shape family. It is similar to the smaller Lovat (saddle stem) and Liverpool (taper stem) in that it has a round shank unlike the oval shank of a Canadian.I am pretty much a novice when it comes to the world of mid to high end Italian pipes. I have a few a couple of nice Castellos and a Le Nuvole but other than that, I know next to nothing about Italian pipes. It is fascinating that in this batch of estates most of them are Italian made and toward the mid to high end range. Over the past years of pipe repair and restoration I have read of the Il Ceppo brand but this is the first one that I have seen up close. I did some research on the brand on the internet so that I could learn a bit of the history and possibly identify the maker of this particular pipe. I found quite a bit of information. I have digested it below for quick reference.

I found that RD Field give a great summary of the history of the brand. You can read it at the following link: http://www.rdfield.com/Il%20Ceppo/il_ceppo.htm or you can read the part that I have included here. The IL CEPPO brand has been in production since the late 1970’s but, in spite of its overall good value, is not well known in all parts of the United States. Partly this is because of a limited supply of pipes and partly because the brand has not been put in front of the pipe smoking public through a national venue.

The Il Ceppo brand is made in Pesaro, Italy and is part of the famous Pesaro school of design that has also produced Mastro de Paja and Ser Jacopo. That all three brands have similar characteristics can be seen at a glance, but they all have significant differences as well.

Giorgio Imperatori, an architect, had a passion for pipes and in 1978 begun to design and make IL CEPPO. Always considered a good value and very good for smoking the brand did not make folks stop and take notice until 1995 when Franco Rossi joined the firm. He brought with him a true elegance of design and a unique flair that now helps IL CEPPO stand apart. Giorgio has retired to his farmhouse and the pipes are now all made by Franco and his sister Nadia.

I found this Il Ceppo Leaflet online as well and have included it here for reference. Be sure to click on it and read it. There is some great information included.I looked on Marty Pulvers site http://sherlocks-haven.com/italian.html and found some more brief and interesting information. I quote here: They consistently have some of the finest grained sandblasts in the field. They use top notch, well aged briar and are made and overseen by just one artisan, Franco Rossi. The problem? Possibly the name, which may suggest “cheap” to some (it simply refers to the briar burl from which pipes are made) or the unfortunately large, and to some reversed “C” logo on the stem. (Marty has a sandblast pipe on his site for sale for $275.)

I read in Jose Manuel Lopes, “Pipes, Artisans and Trademarks” brief article on the brand that Mario Lubinski formed the company in 1978. Franco Rossi arrived in 1995 and the name was changed to Il Ceppo (the root). Grading: “9” (rustic), “1” (sandblast), “2” (semi rustic) “3” (semi sandblast) “4” to “7” (smooth), with Fiammata being the top of the range. There I learned a couple of interesting facts that help me place this pipe. It came after the name change in 1995 and that the pipe was made by Franco Rossi. I also learned a bit about the grading system of the pipes.

Further searching found a great digest of the Grading System. I found it on the PipePhil website: http://www.pipephil.eu/logos/en/logo-i.html. I have included the summary of the grading of the pipes during the two periods of Il Ceppo pipe history. I also found a retail price list from March 2008 that I have included to give an idea of the range of prices for the various grades of pipes in the Il Ceppo line.

The pipe is excellent condition with a very well done finish on the bowl. The Lucite stem has a lot of tooth chatter and tooth marks on both sides of the stem near the button. The stamping on the left side of the shank reads Il Ceppo with the number 4 in a circle. Next to that, it reads Hand Made over Italy.

From the first chart to the left, I could determine both the period and the Grade of the pipe I had. It was from the second period (1995-Present) and it was a Grade 4 smooth. From the second chart I had a pretty good idea that the pipe sold for $430 US in 2008.

My brother took the first photo above and the following photos to show the condition of the pipe before he cleaned it up to send to me. It really is a beautiful pipe underneath the grime and dirt. The next two photos show the rim top and the cake in the bowl from two different angles. There was a fairly thick cake in the bowl and the lava flowed over the rim top. It was thicker toward the back of the bowl but did go all the way around the bowl. It would need to be cleaned up before I would know if there was any damage to the inner edge of the rim.The next two photos show the grain on the bowl sides and bottom. It is a very pretty piece of briar and the pipe is laid out to maximize the grain.The shank is stamped on the left side with il ceppo and underneath that it read Hand Made over Italy. There was a stylized 4 in a circle to the left of the stamping. The thin silver band is oxidized.The saddle portion of the Lucite stem had a large white C on the top side. It was in really good shape and showed no wear or tear.The next two photos show the tooth marks and chatter on the topside and underside of the stem. The first photo shows the top. Notice the chatter on the top of the button as well as the stem just in front of the button. The second photo shows the underside and the chatter and tooth marks at that point.I took the next four photos of the pipe when I brought it to my worktable. My brother had done a great job reaming and cleaning the interior and the exterior of the pipe. It was pretty spotless by the time I worked on it. The photo below of the rim top shows the cleaned top with a bit of darkening toward the back of the bowl.My brother’s cleaning job highlighted the tooth chatter and marks on both sides of the stem.I sanded out the tooth chatter and marks with 320 grit sandpaper to remove all of the marks. It did not take too much to remove the marks because they were not very deep in the surface of the Lucite.I polished the stem with micromesh sanding pads – wet sanding with 1500-2400 grit pads and dry sanding with 3200-12000 grit pads. I wiped down the stem with a damp cotton pad after sanding with each grit of micromesh. The process is shown in the photos below. I gently cleaned up the remaining cake in the bowl with a Savinelli Fitsall Pipe Knife. I wanted to clean up the little bits of remaining cake on the bowl walls.I polished the silver band with a jeweler’s cloth to polish off the tarnish.I ran a pipe cleaner through the mortise in the bowl and the airway in both the stem and shank. It was very clean so it did not take too much.I buffed the stem and bowl with Blue Diamond on the buffing wheel to remove the last of the light scratches that were still in the briar and the Lucite. I gave them both several coats of carnauba wax and buffed it with a clean buffing pad to raise a shine. I hand buffed it with a microfiber cloth to deepen the shine. The finished pipe is shown in the photos below. It is a beautiful piece of briar with a bowl that flows with the grain. The dimensions of the pipe are Length: 6 inches, Height: 2 inches, Outer diameter of the bowl: 1 ½ inches, Inner chamber diameter: ¾ inches. This pipe will make a great addition to someone’s pipe rack. It is available on the rebornpipes store. Email me at slaug@uniserve.com or send me a private message on FaceBook. Thanks for looking.