An Exceptional Bjarne Hand Made Freehand


Blog by Robert M. Boughton

Copyright © Reborn Pipes and the Author except as cited

He could have been an ambassador for his country, but instead he became an ambassador for Danish pipes.

— Jan Anderson, author of Scandinavian Pipemakers (2012)

INTRODUCTION

Jan Anderson was speaking of Bjarne Nielsen, the great Danish pipe maker, who finished his studies at the University of Copenhagen with an MBA in the early 1960s and went to work for the Ministry of Foreign Affairs, in the export division.  Nielsen made his first pipes when he was 16 and gave them to friends then and later at the university, and of course he continued making pipes as a hobby.  Whether he knew it or not, he was bitten by the bug.  Call it Pipe Makers Disorder (PMD), if you like.  Bjarne was considered a likely candidate for appointment as ambassador to a foreign country, but he gave it all up to pursue his real ambition, which will come as no surprise to anyone with creative leanings was to form his own business.

Bjarne may never even have imagined turning his pastime into a career, but fate, if there is such a thing, is powerful.  The freehand pipe movement was first building speed when Bjarne was at the Ministry, and he was often asked to help find foreign buyers for the style of pipe that was more popular abroad than in Denmark, where it started.  Many older smokers, deeply rooted in the English tradition of the classic Dunhill style, considered the new direction outlandish, crazy and worst of all, ugly.  And every source Bjarne knew had orders for such pipes up the wazoo.  I’m sure he used more diplomatic words.

Then, out of the blue, again if there is such a phenomenon, Bjarne had the idea to send photos of some of his pipes to a few of those same foreign distributors.  I’m sure he put it out of his mind and wasn’t watching the pot until it started to boil over with so many positive responses he had to decide whether to stay with the Ministry or pursue his innate talent.  Not being the average man, fearful of taking such a huge risk – or, rather, being the typical young man he was, still full of dreams – Bjarne embarked on the journey that would make him a legend, meaning most of the world has never heard of him.

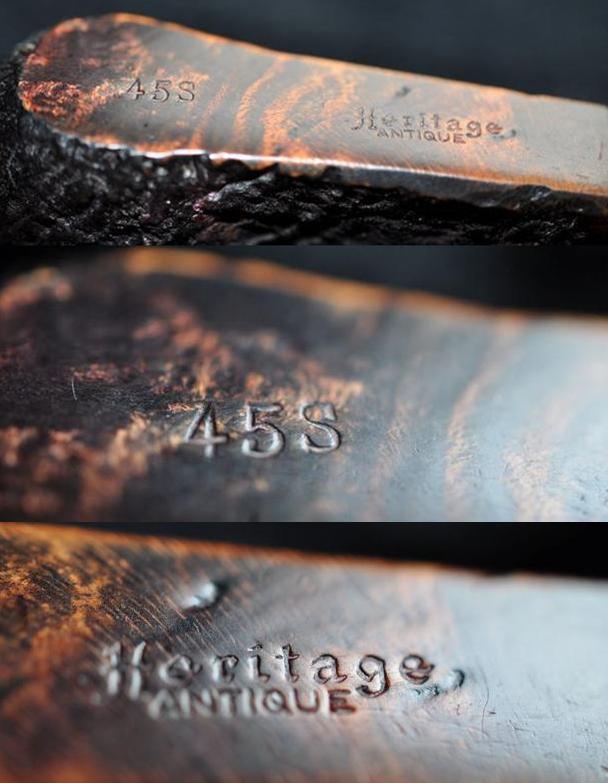
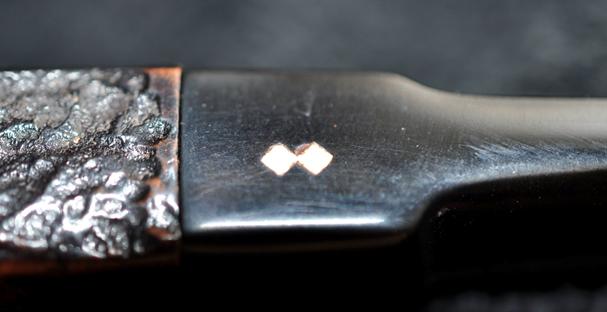
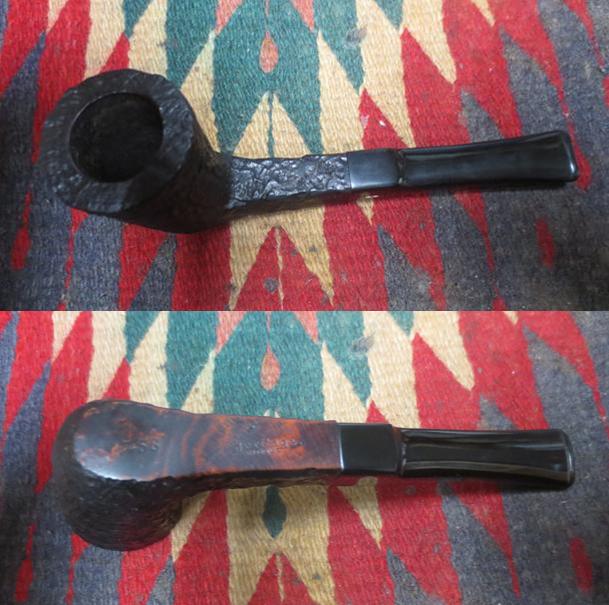
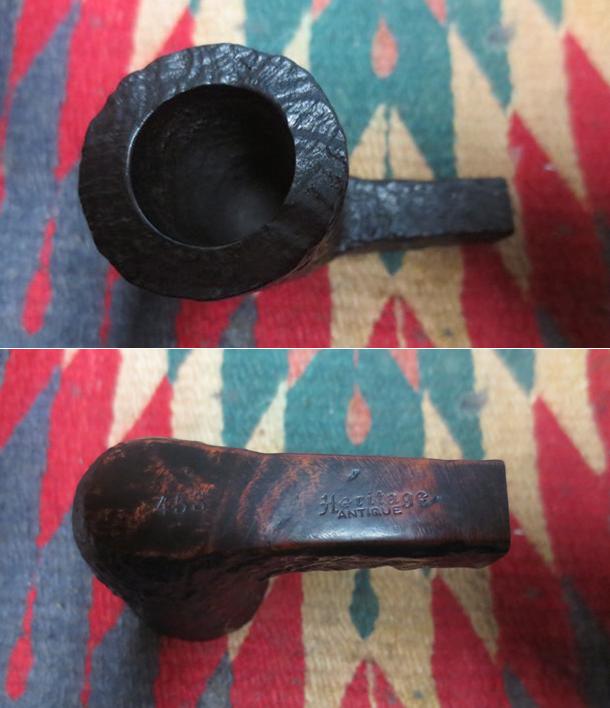
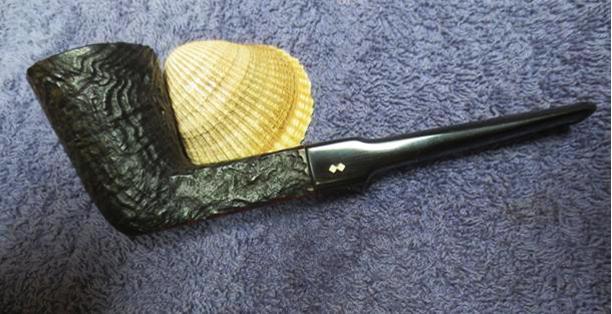
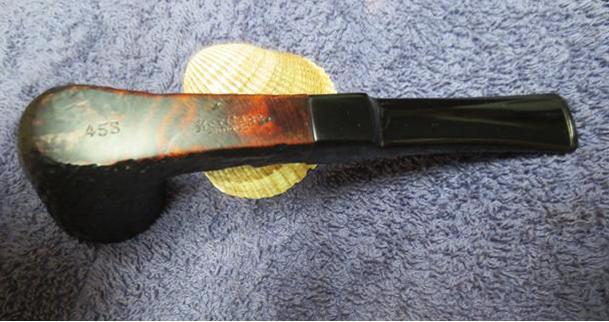
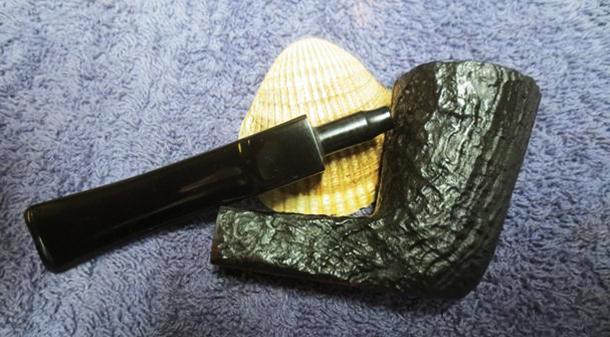
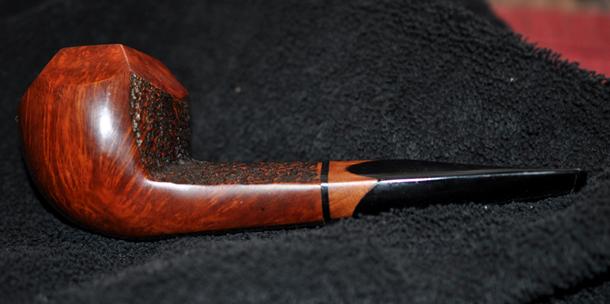
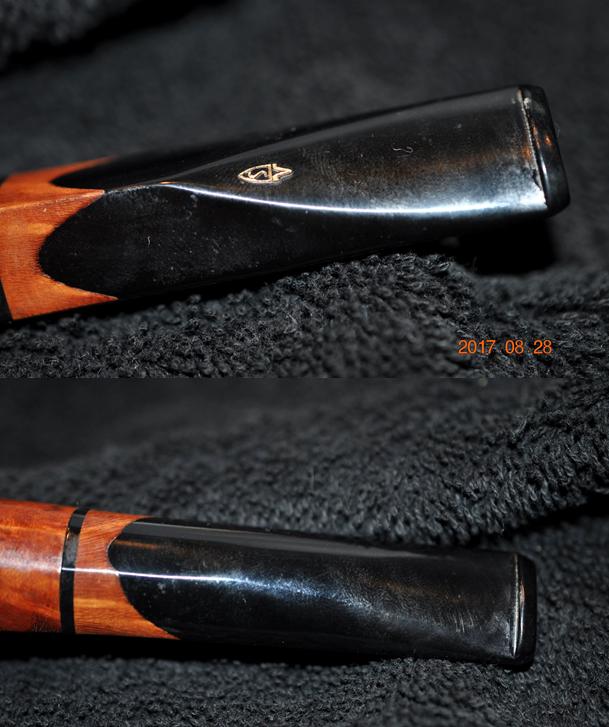
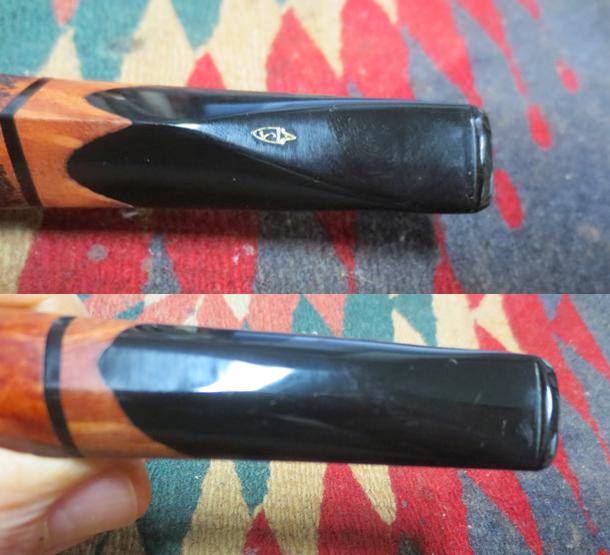
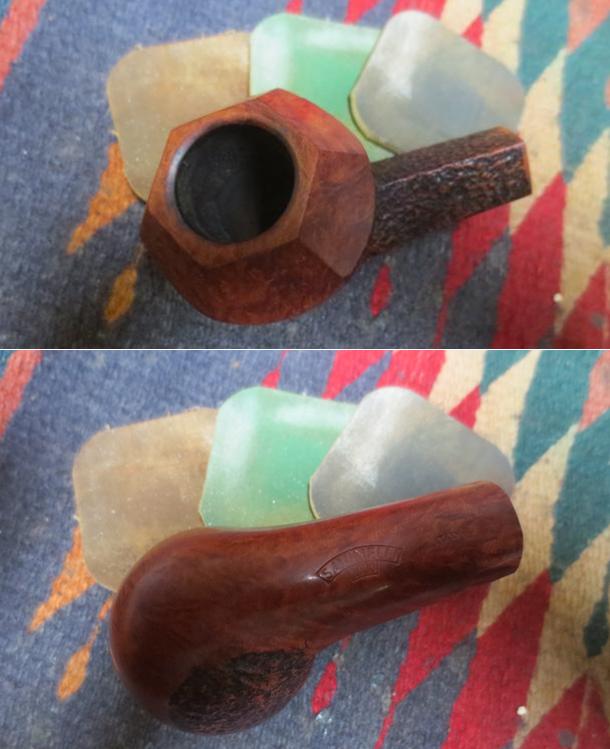
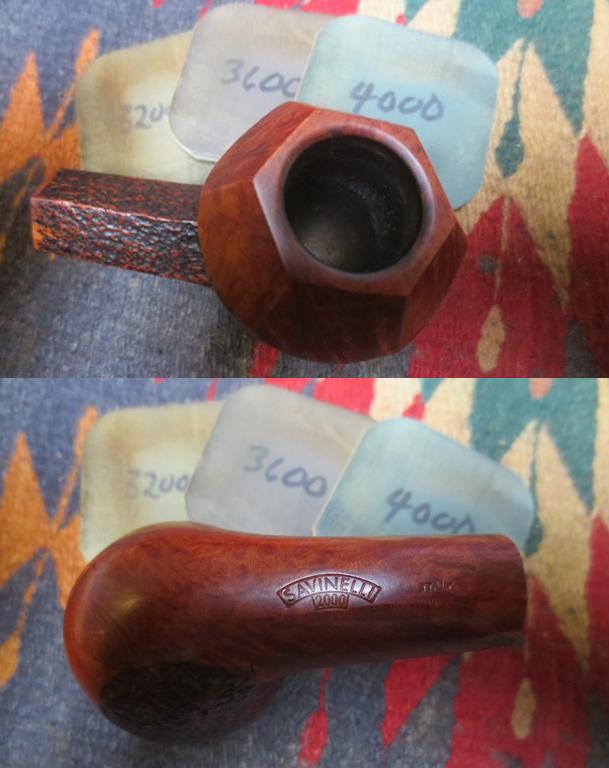
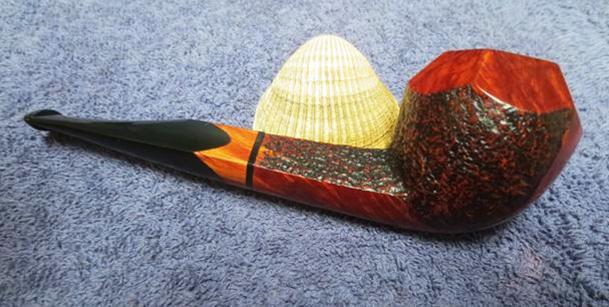
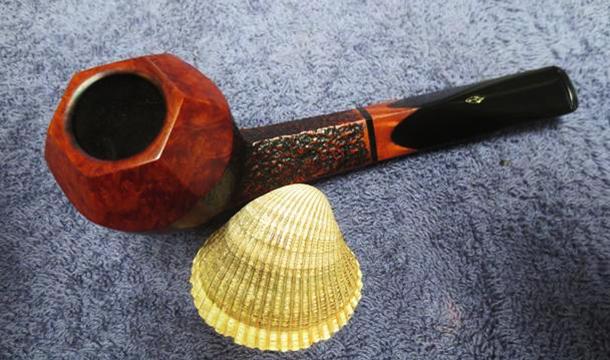
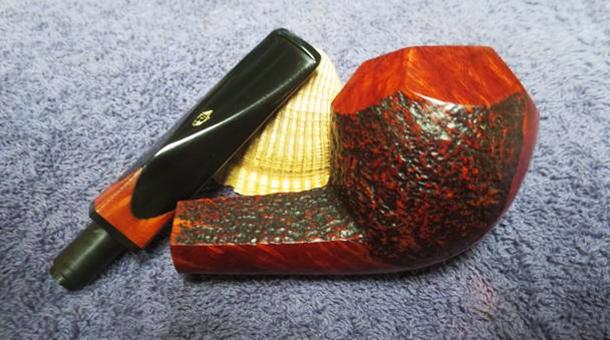
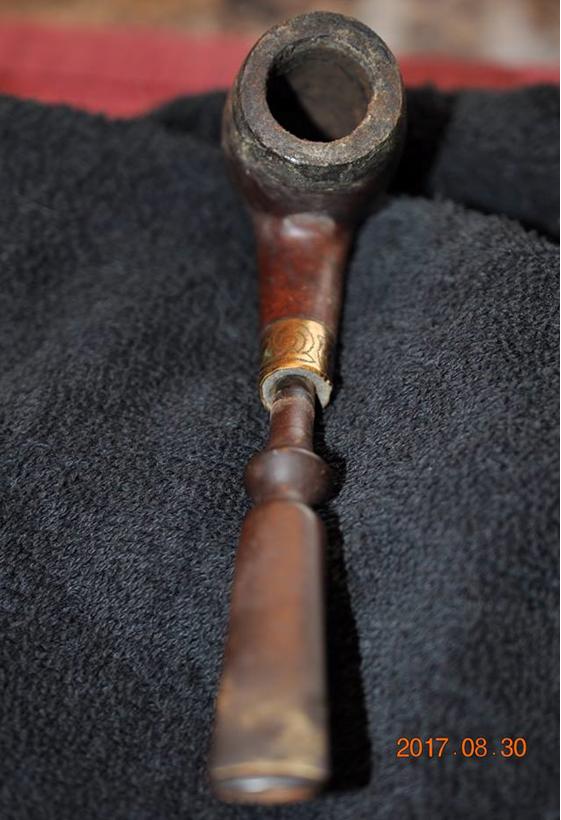
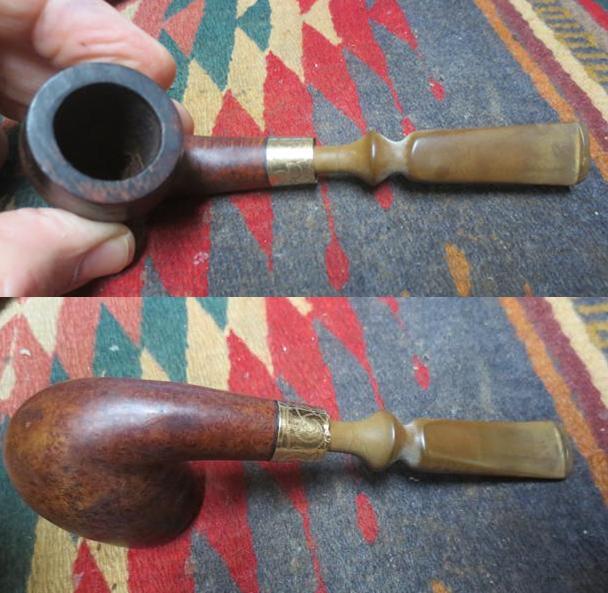
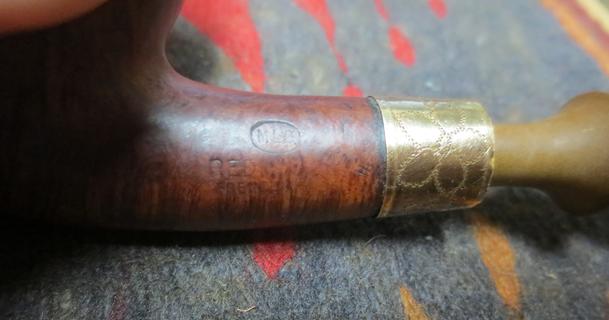
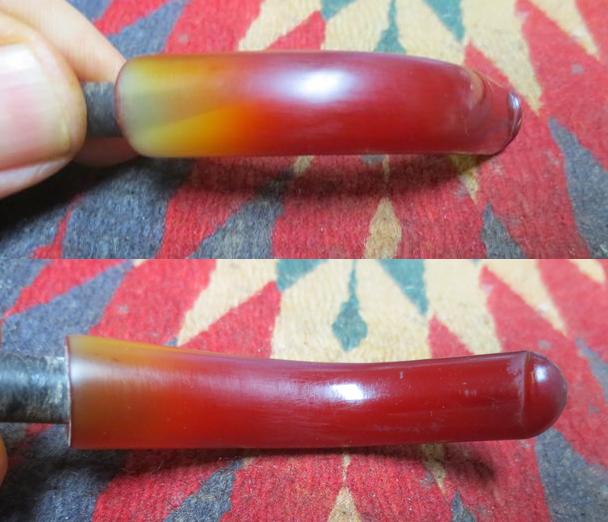
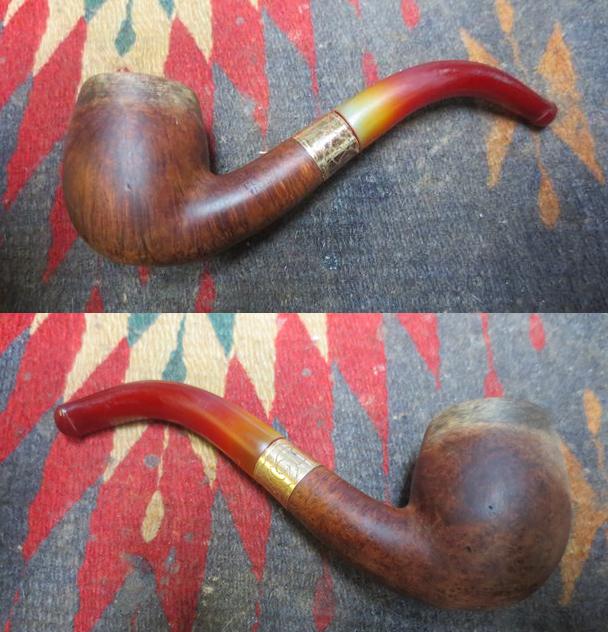
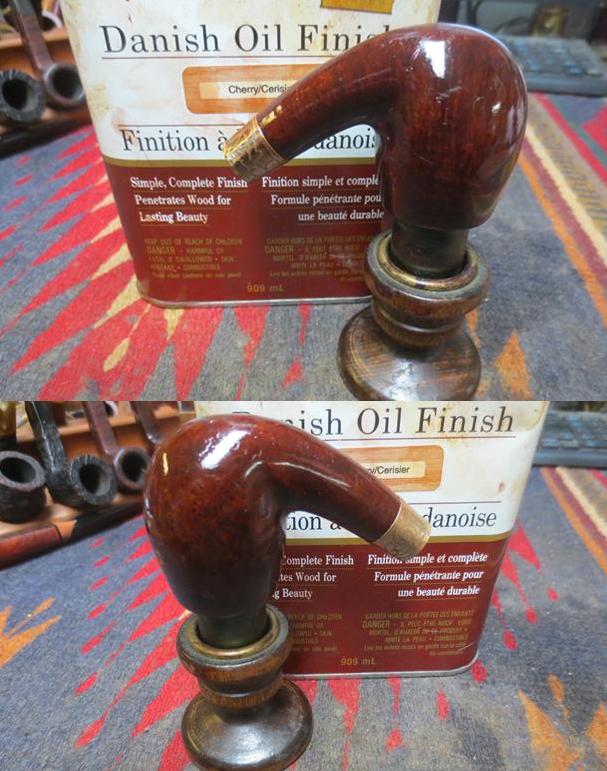
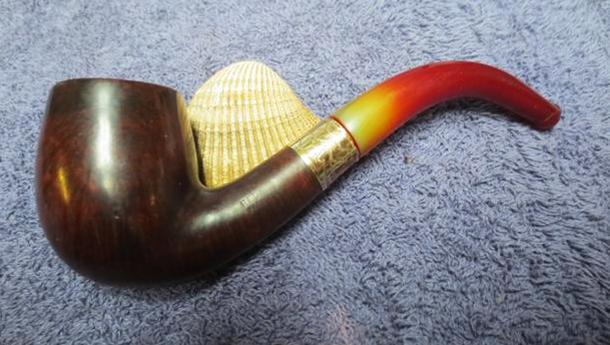
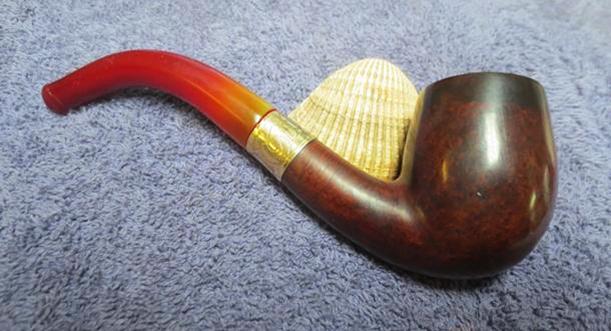
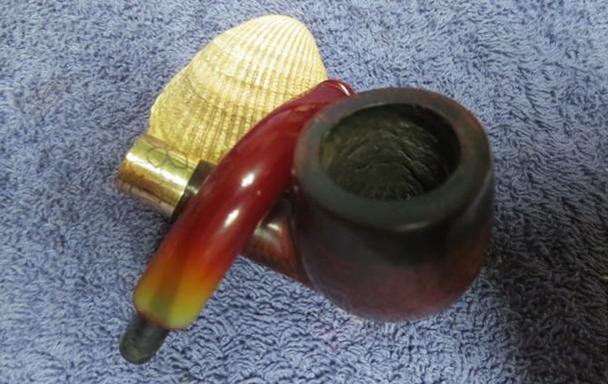
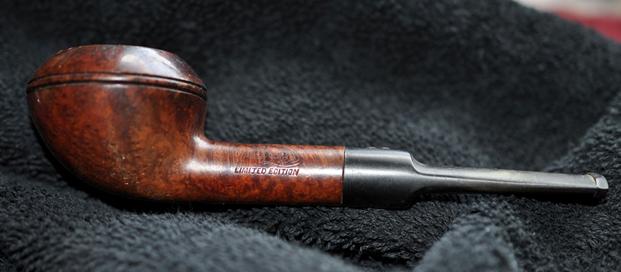
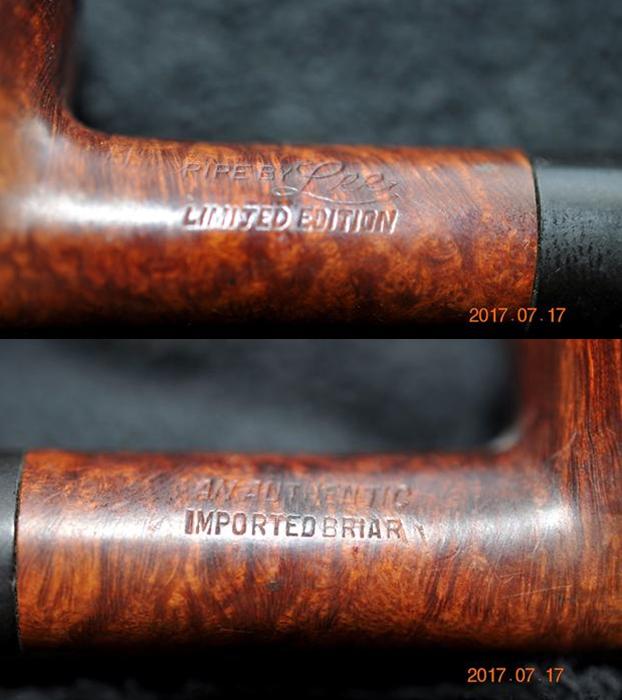
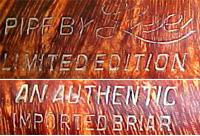
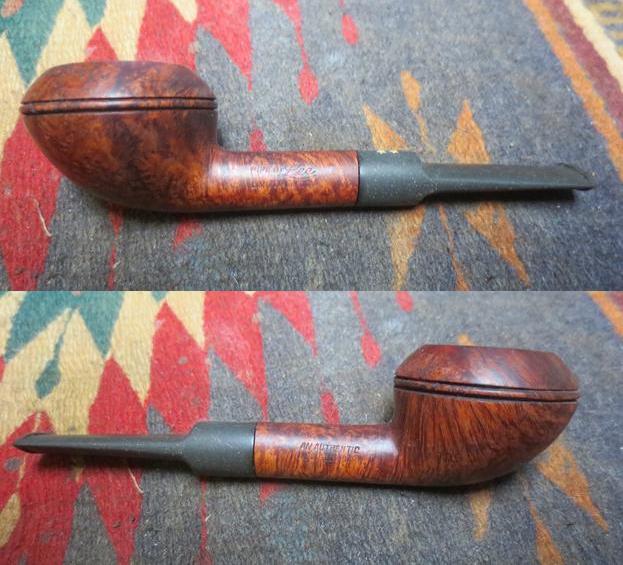
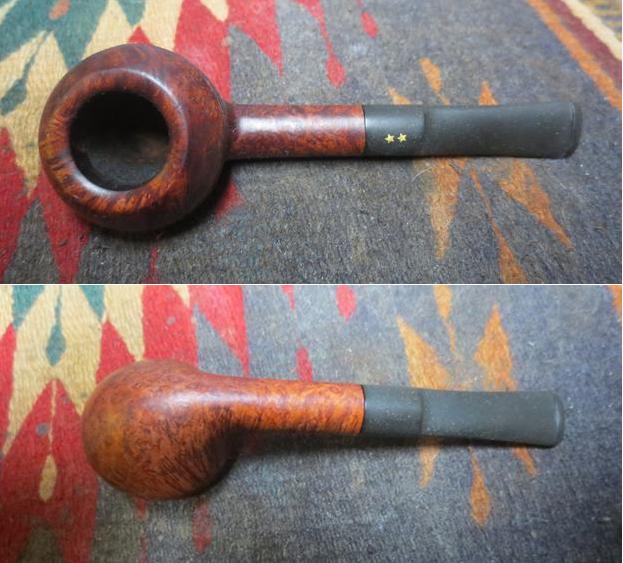
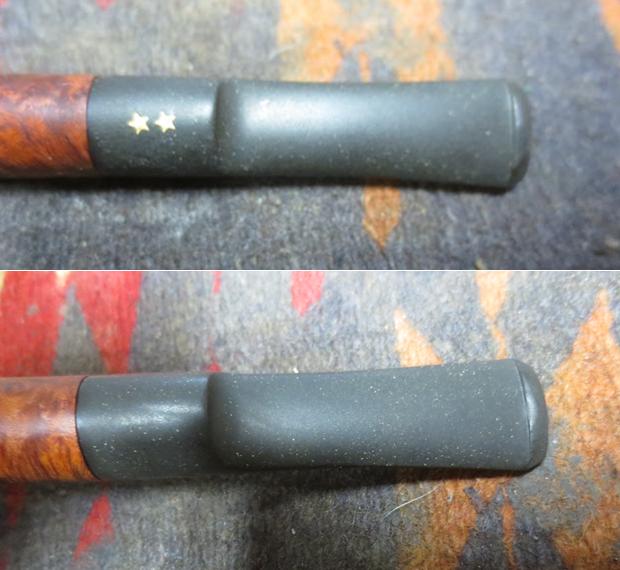
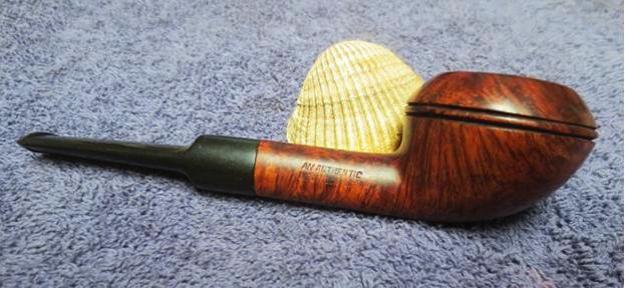
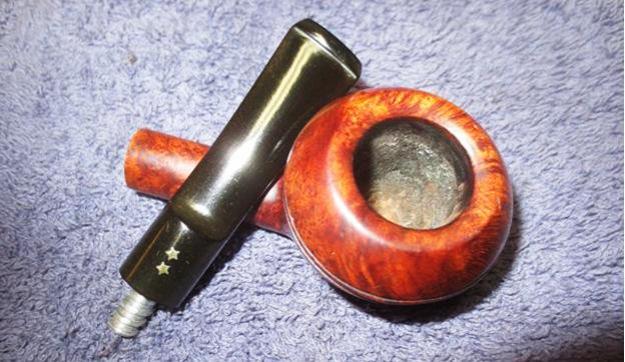
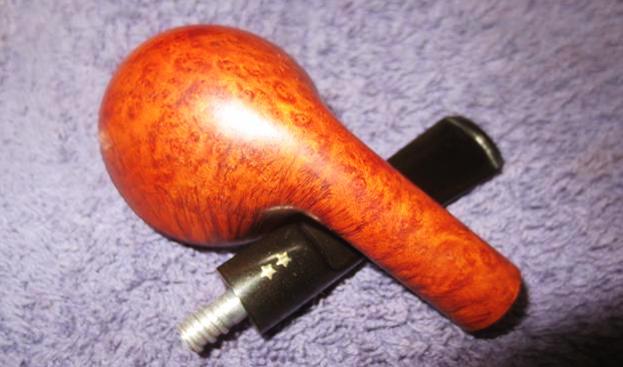
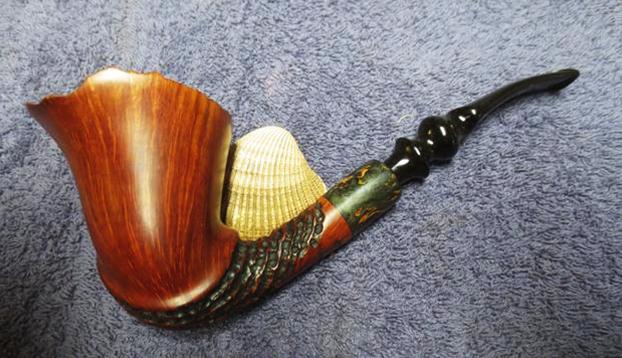
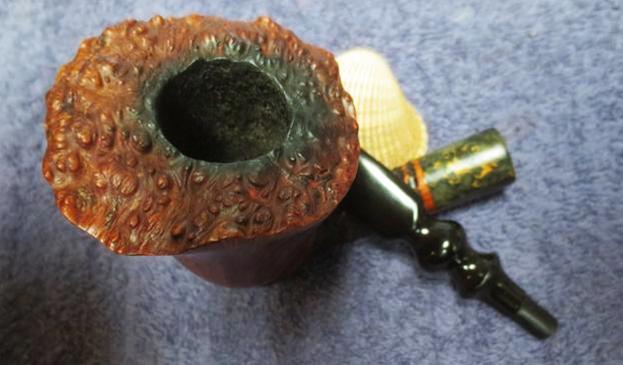
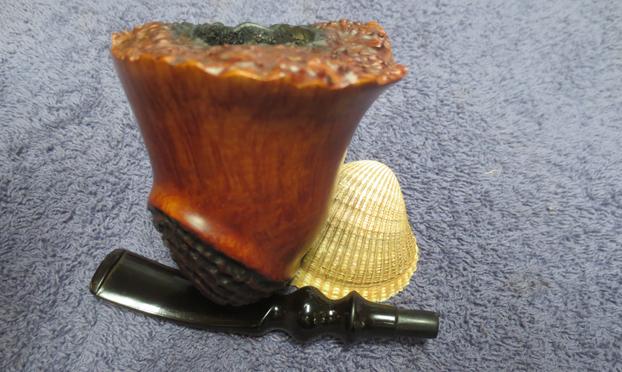
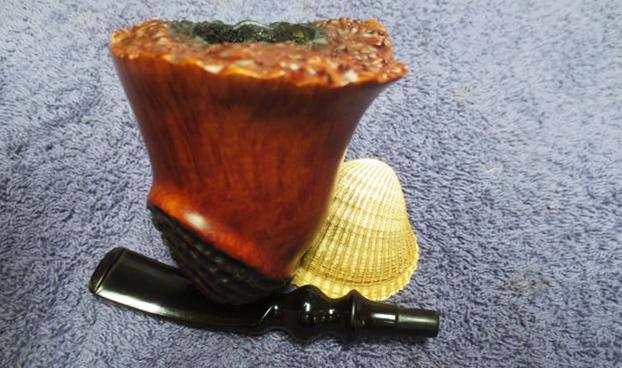
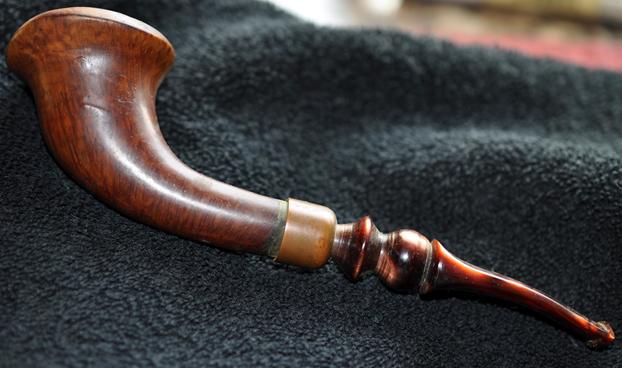
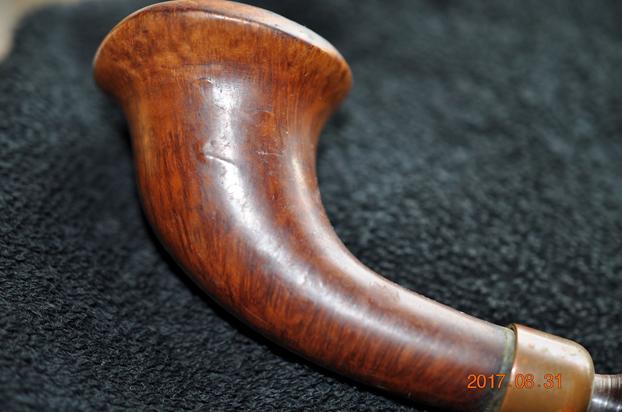
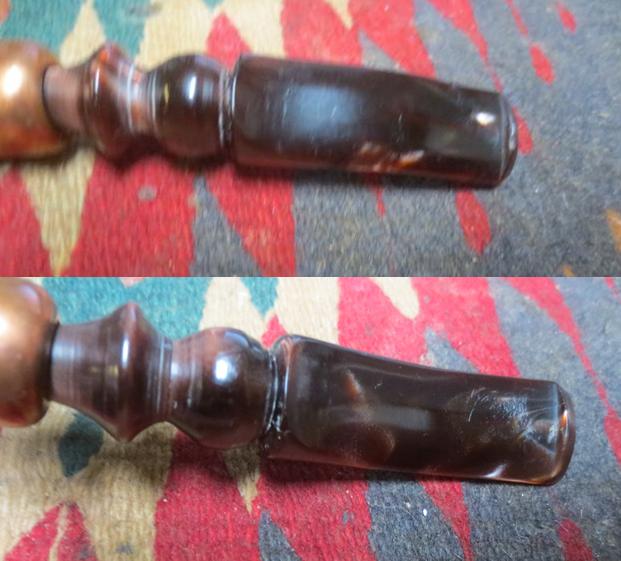
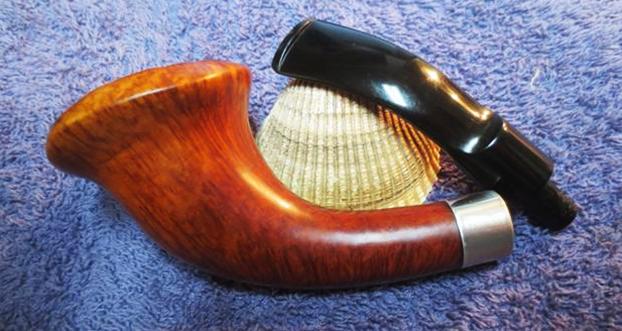
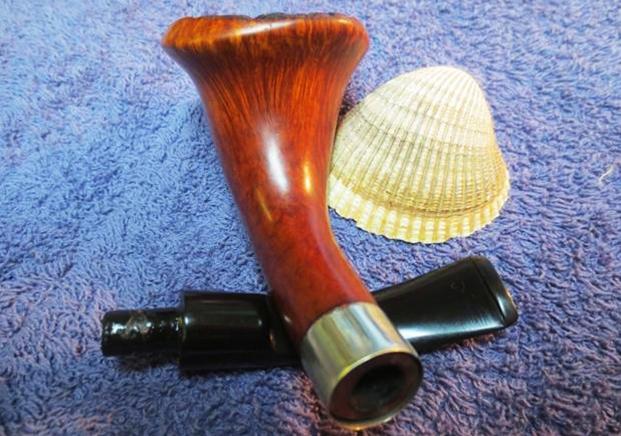
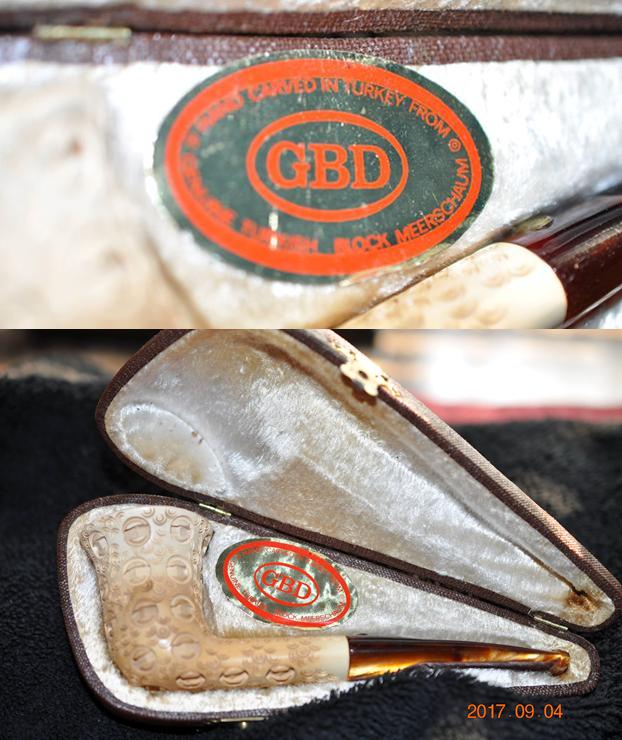
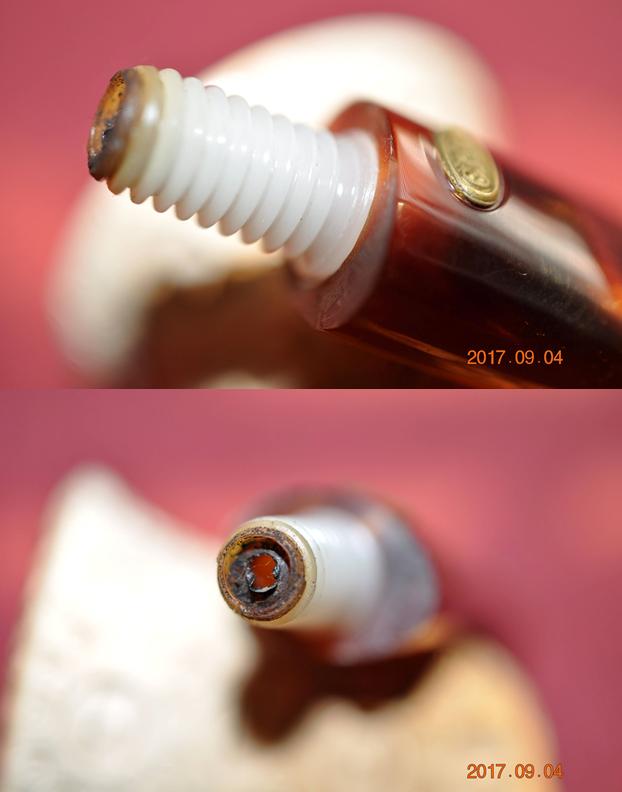
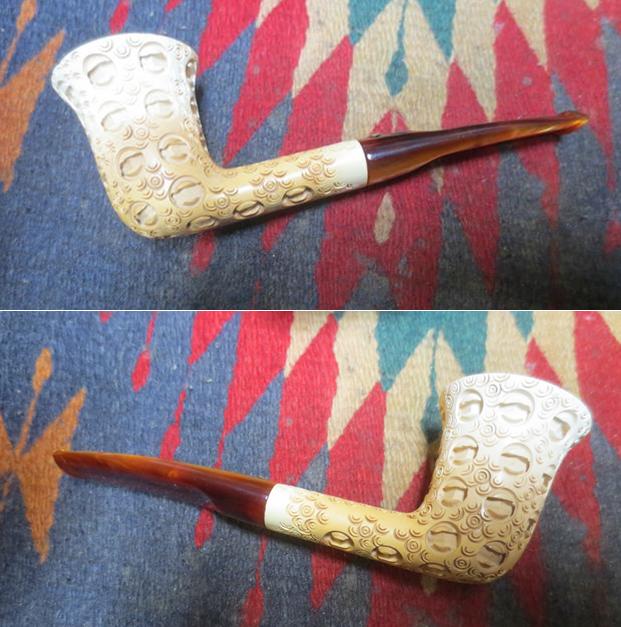
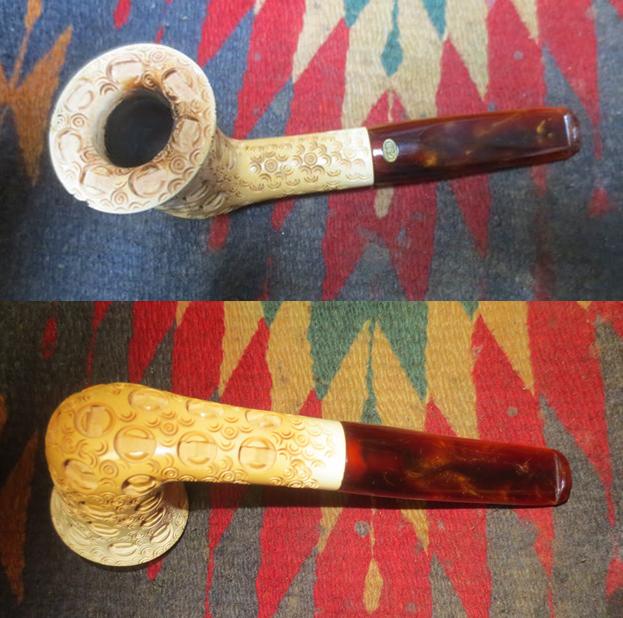
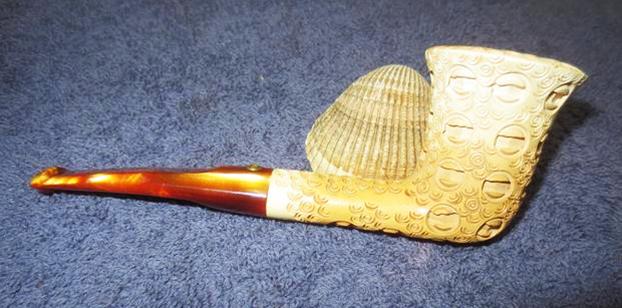
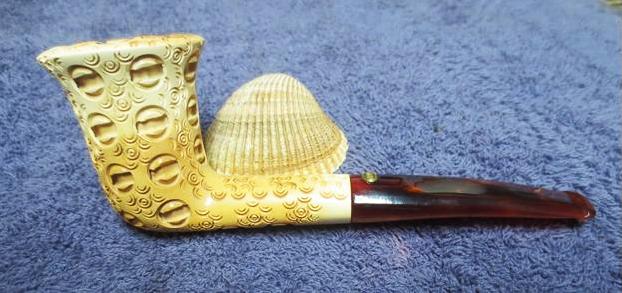
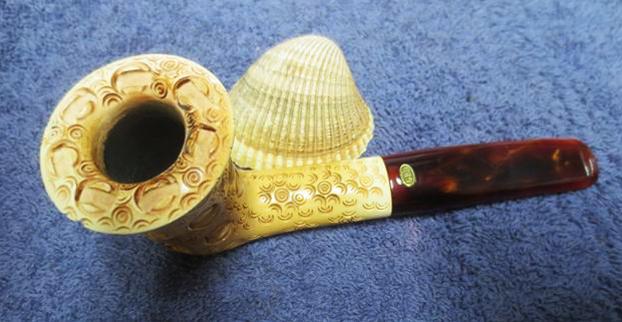
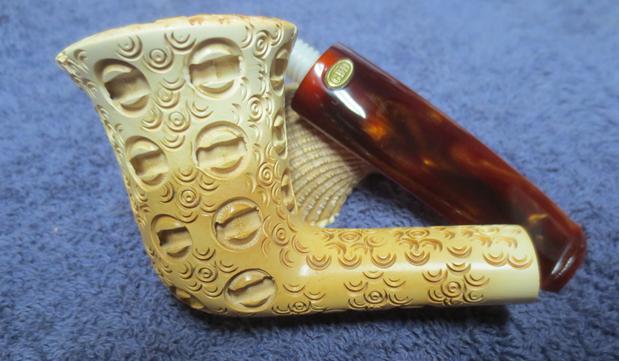
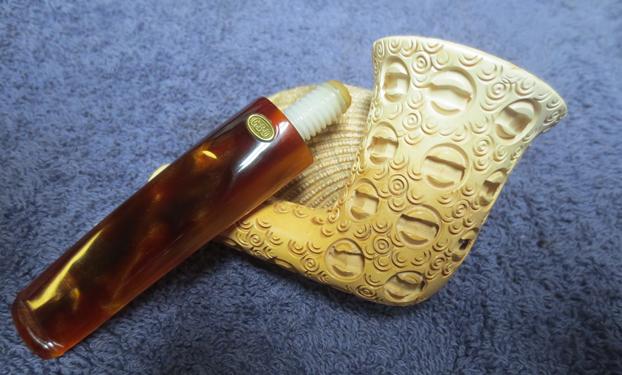
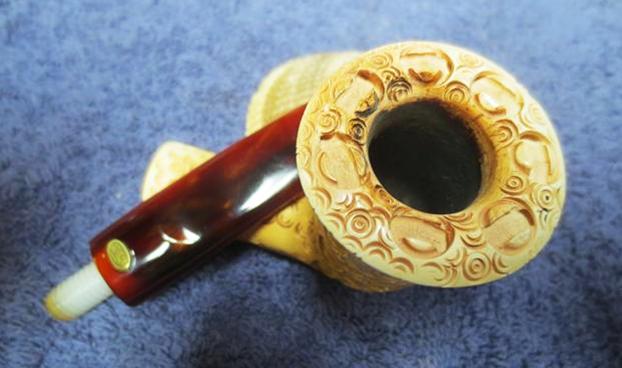
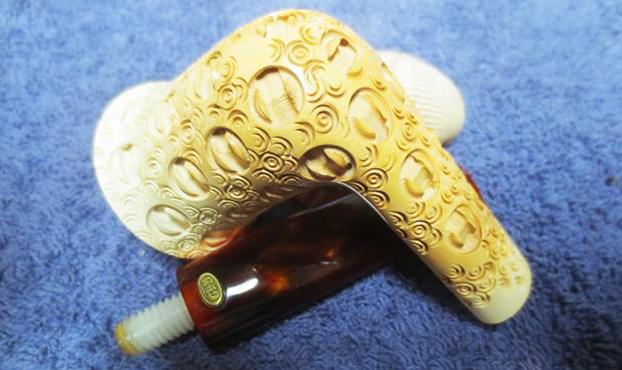
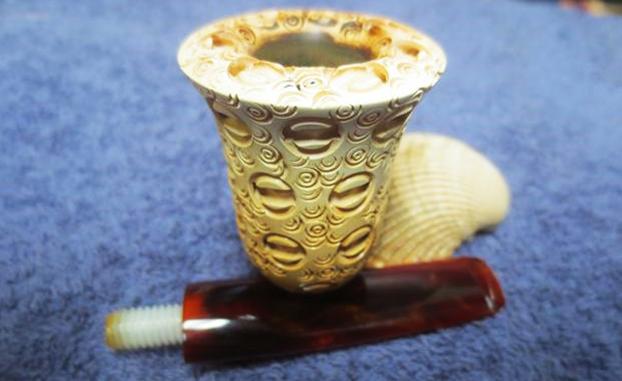
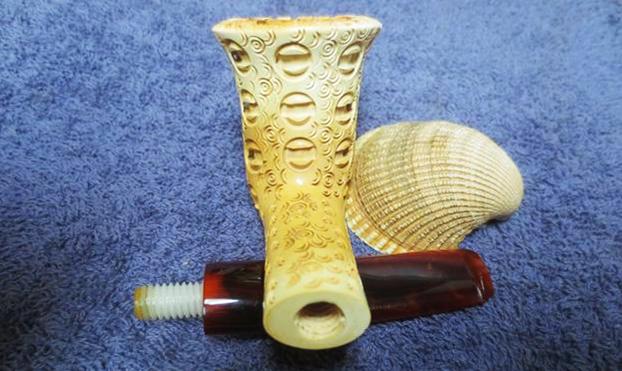
The hand-made Danish freehand in this blog has three lines of clear block nomenclature on the bottom of the shank, below the stem: BJARNE/HANDMADE/ IN DENMARK.  The stem also bears a mark – a lower-case b sitting in the curl of a lower-case j.

Courtesy Pipephil

This means Bjarne did not make the pipe himself, but instead delegated the job to one of three master carvers who were and are in business for themselves and did special work for him.  They are Mogens “Johs” Johansen, Jes Phillip Vigen Jertsen (Ph. Vigen) and Tonni Nielsen.  These pipes were sold by Bjarne as lower-grade pieces than those he carved and on which he ascribed his full name, in cursive script, above HANDMADE/IN DENMARK.  The pipes Bjarne carved himself also bore a grade of AX or A-J.  The man’s self-appraising standards were refined to the extreme.  They bear no mark on the stems.

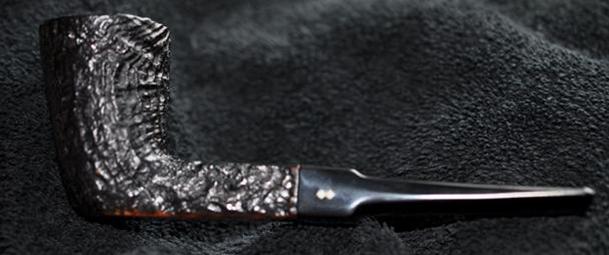
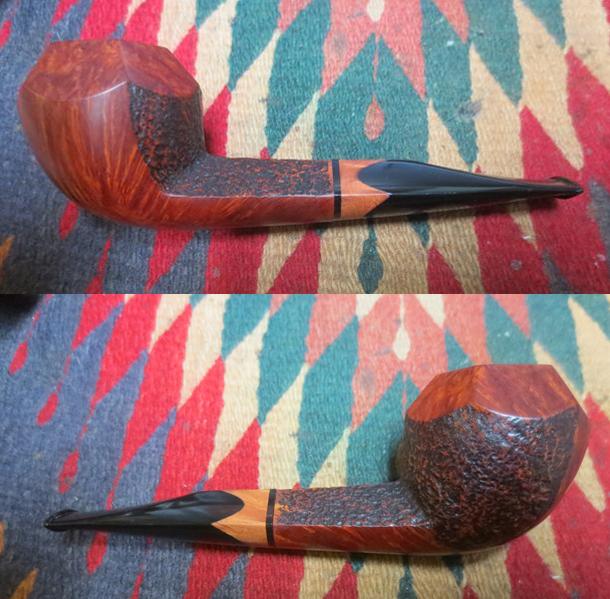
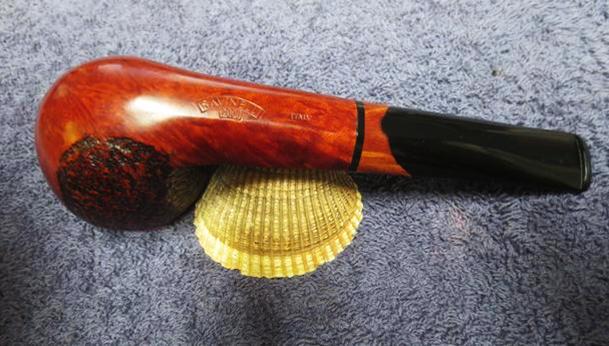
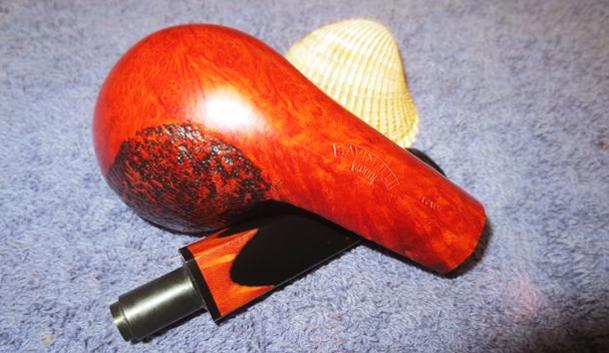
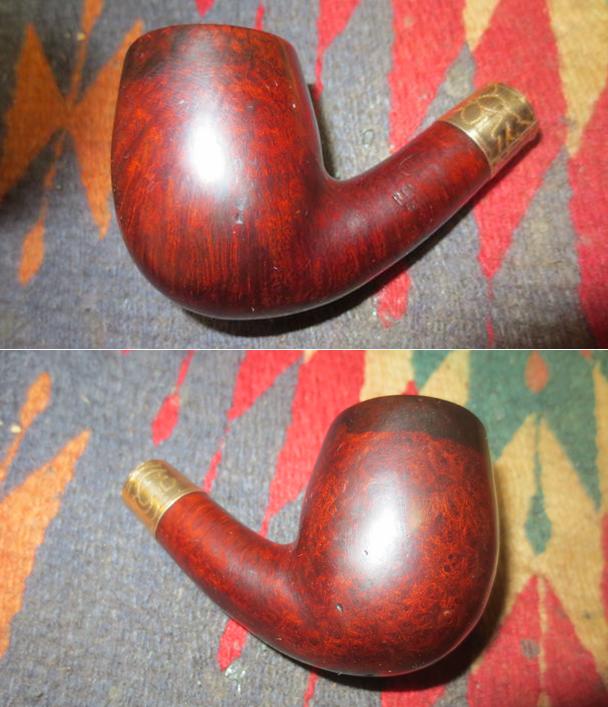
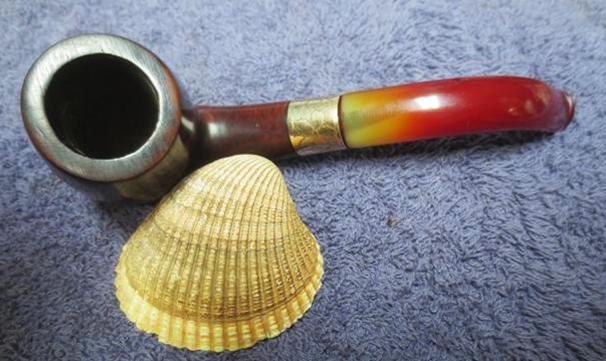
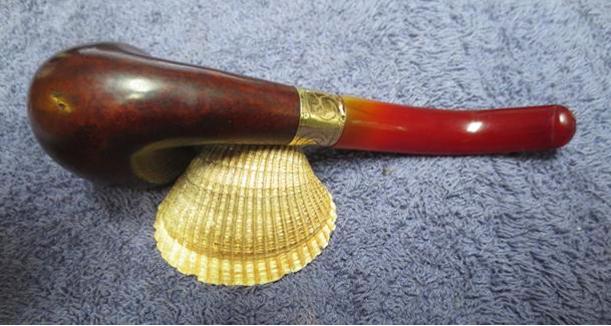
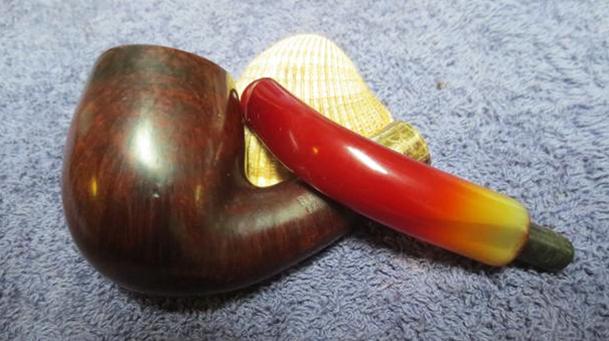
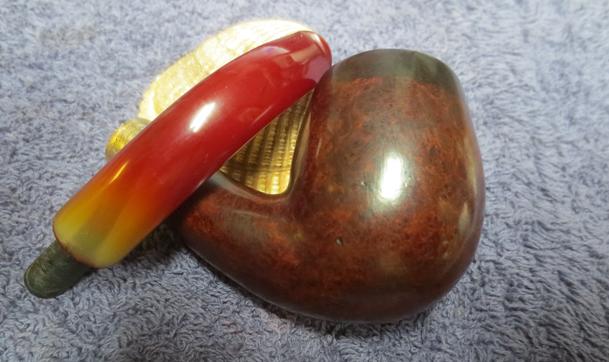
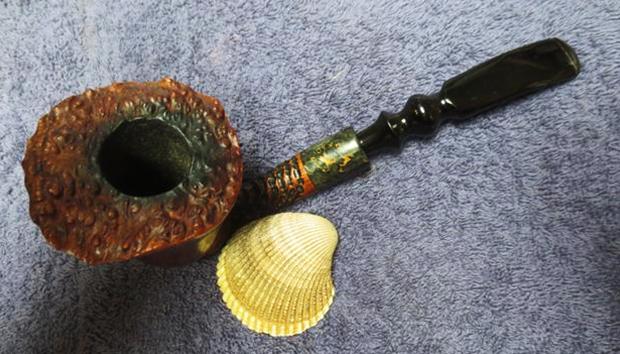
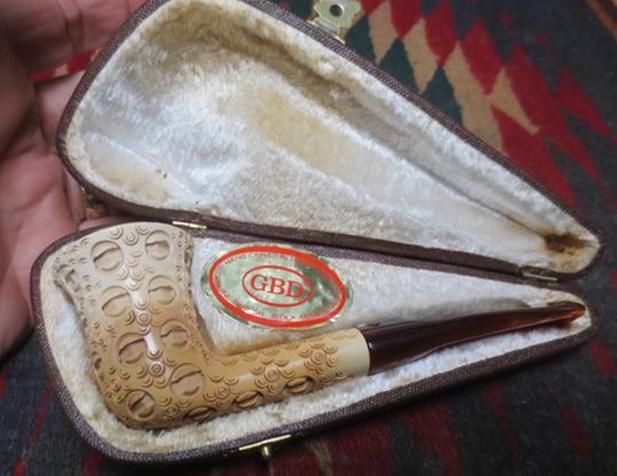
Bjarne Nielsen Bulldog Grade O, photos, courtesy abel2antique on eBay

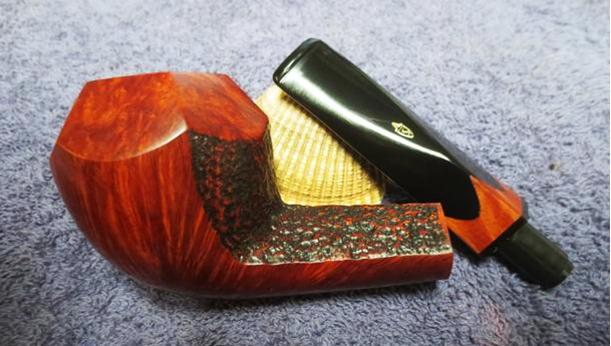
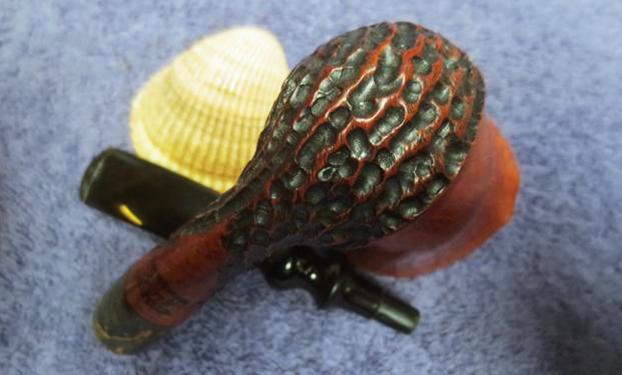
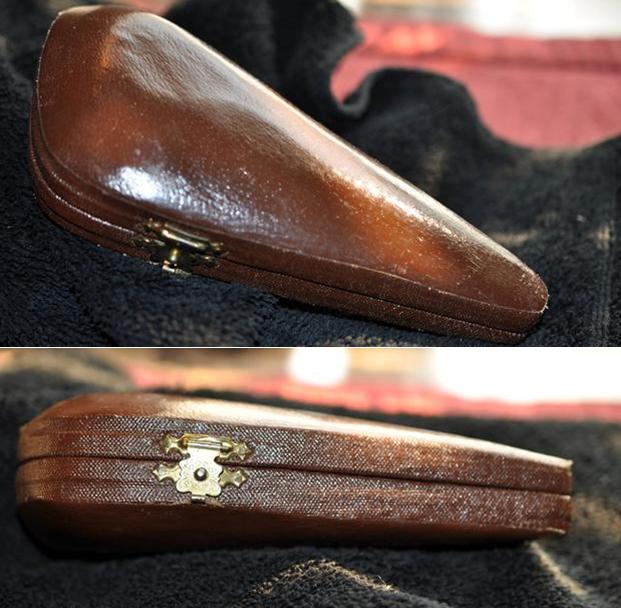
I didn’t mind that my new Bjarne, whichever of the fine craftsmen above made it, came with a box and sock as well.

RESTORATION Three long years ago, before I learned lessons beyond count and, more than anything else, that the process never ends, I wrote a blog here called “Ben Wade and the Chamber of Horrors,” in which I recounted the restoration of a huge BW poker with cake so gnarly it took me hours to repair.  As I can think of no better words to describe the terrors of uncovering layer after layer of hardened old carbon, only to reach a patch of almost perfect smoothness and then reaching spiraling new veins and lumps, I’ll give a brief quote from the BW blog.

“The ongoing task of removing all of the cake, every time I thought I achieved smoothness all around, only uncovered still more hidden holes, like microcosmic pits and craters on the moon, only black…the evil chamber walls in spots felt like the bowels of a volcano.”

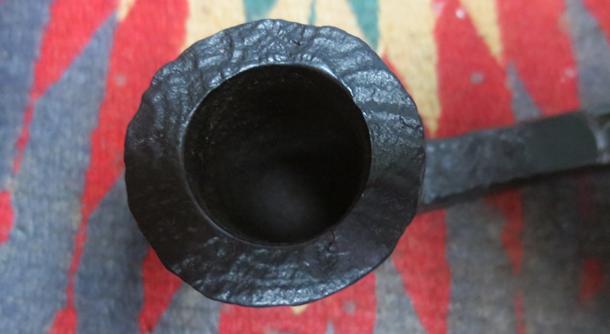
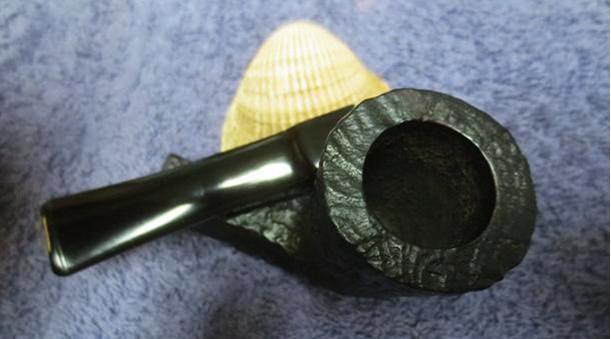
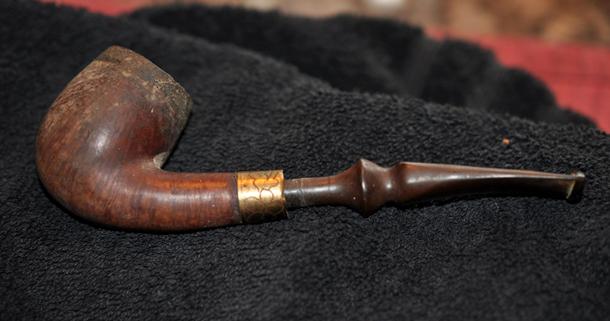
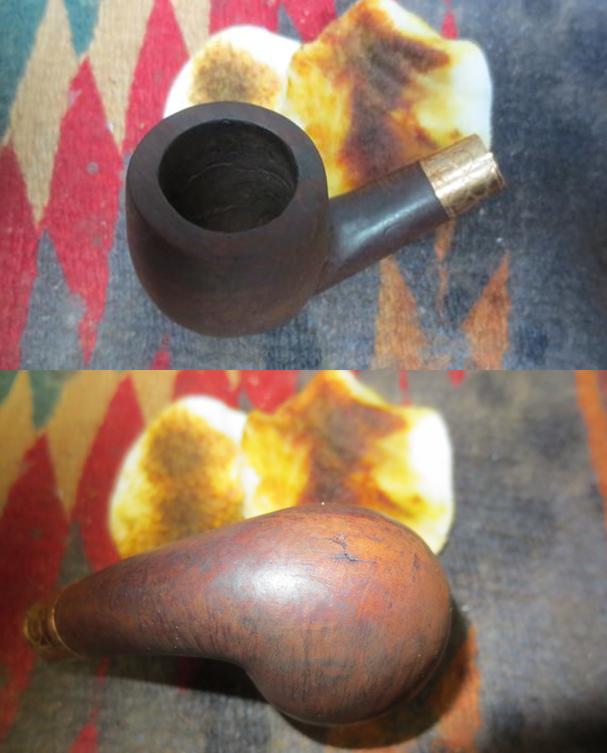
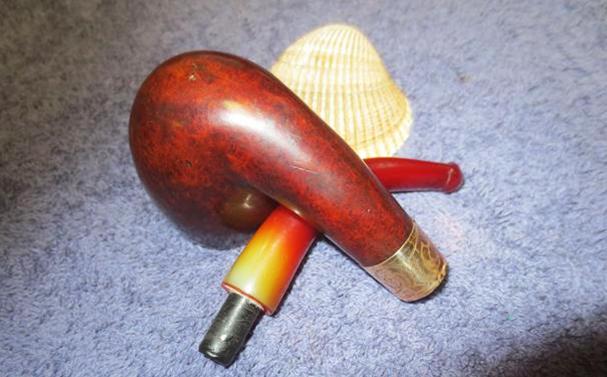
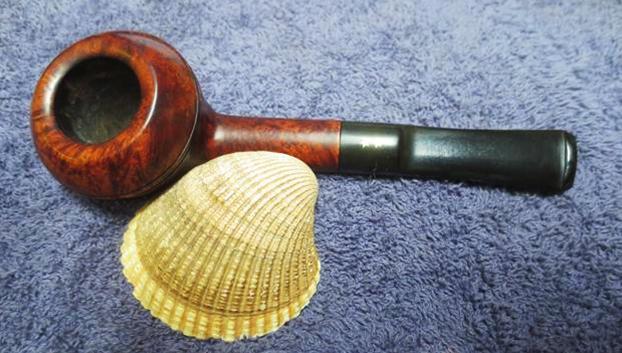
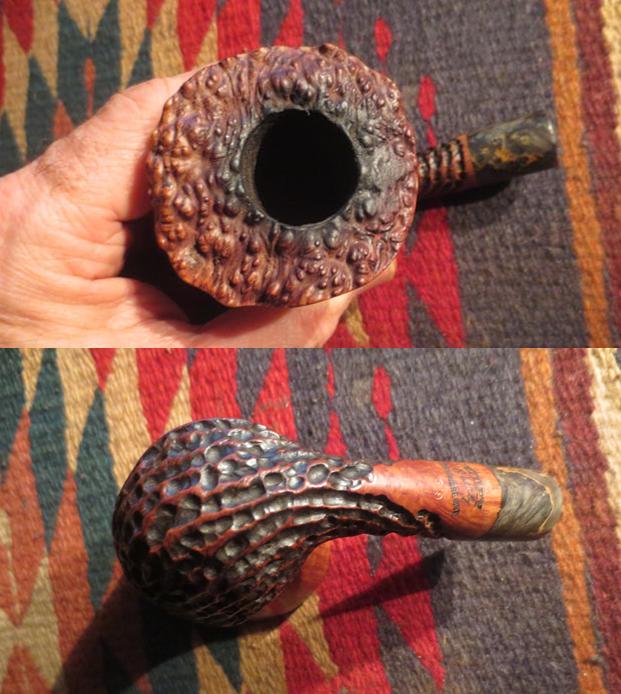
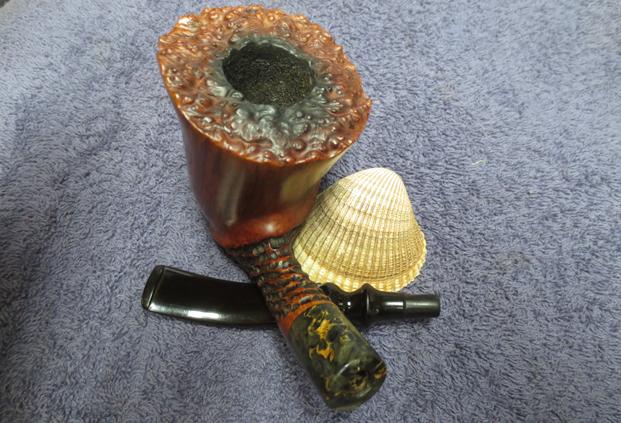
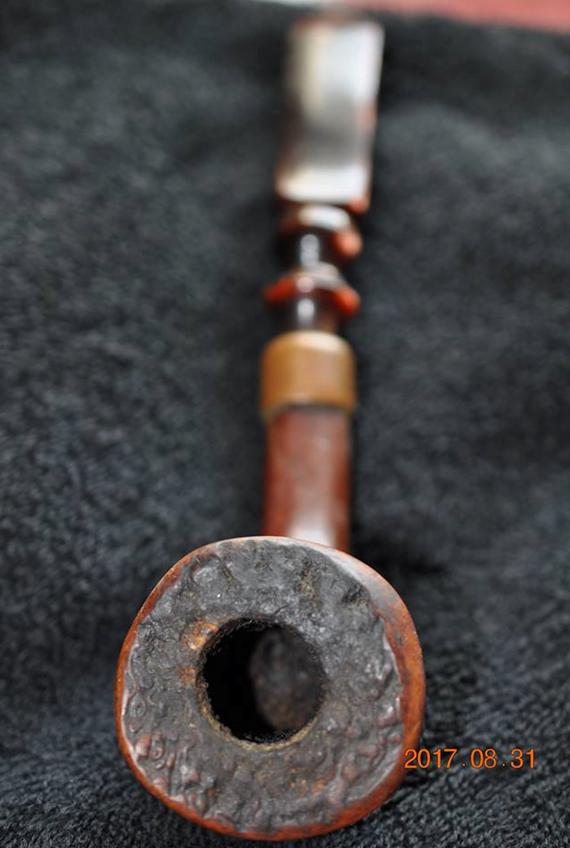
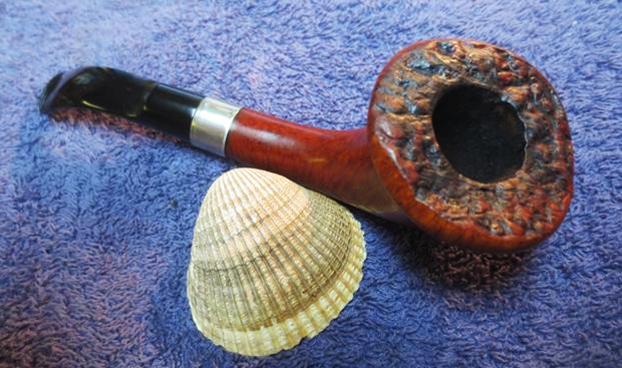
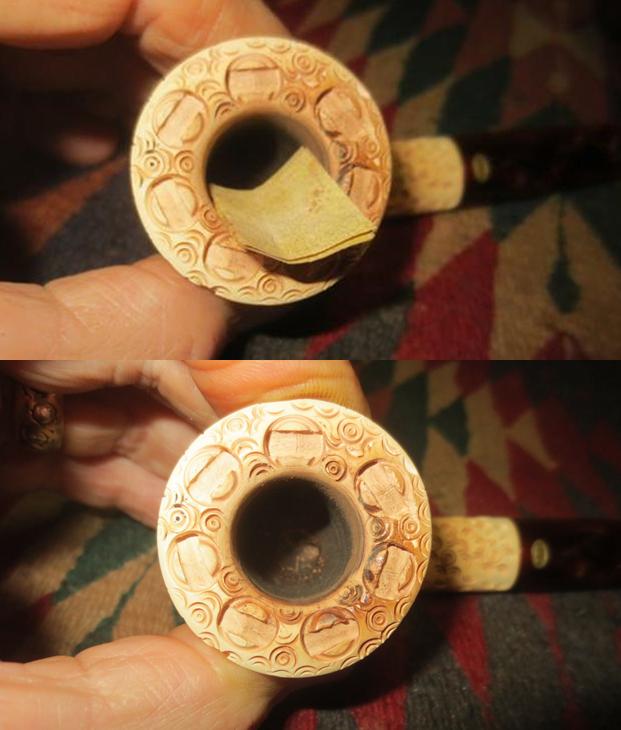
But this pipe was so much worse, it took me days of concerted effort to get to the bottom of the years of iron-like cake.  I am certain that had this pipe come my way three years ago, I would have been forced to set it aside in the to-do pile.

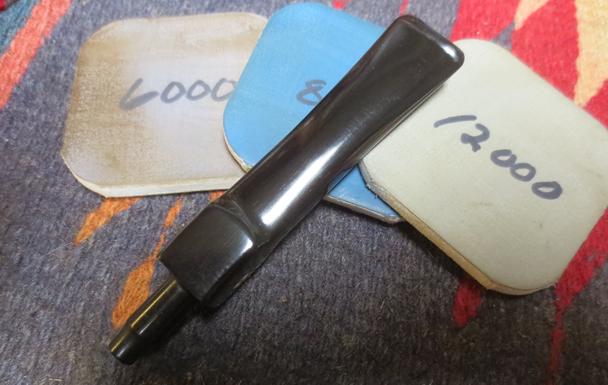
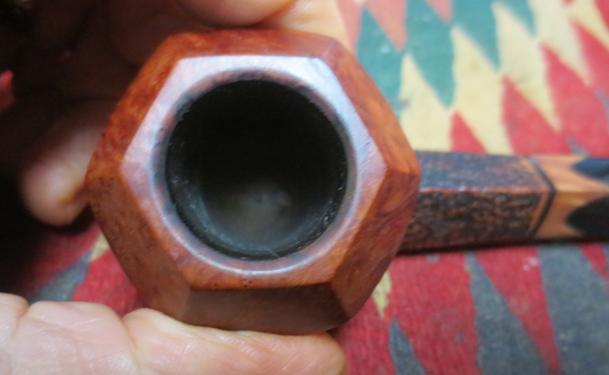
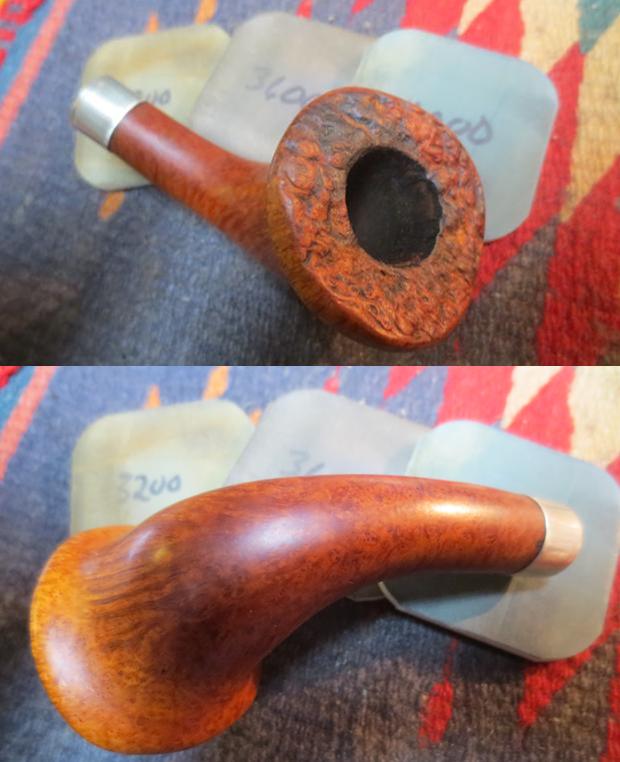
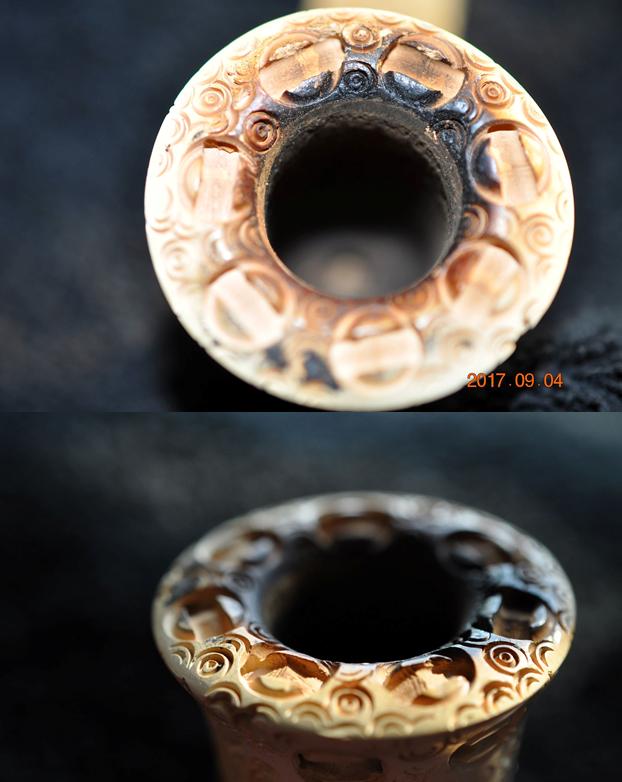
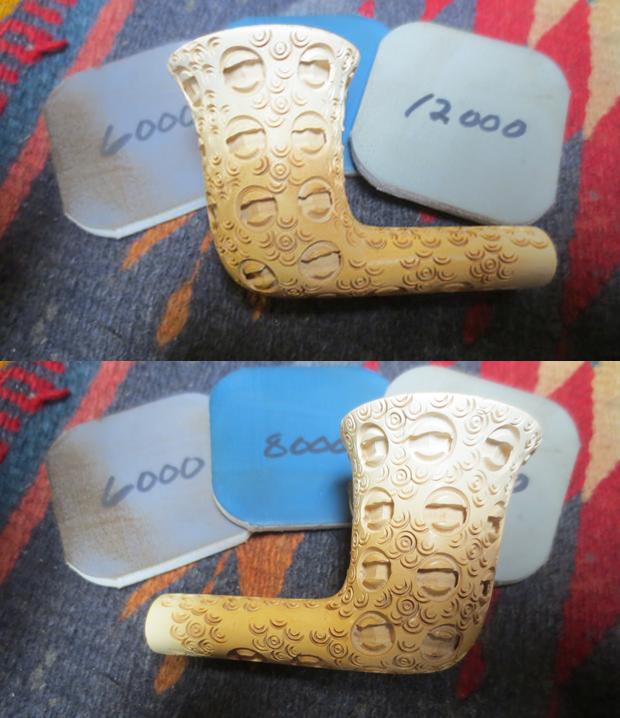
I started with my Junior Reamer, which, due perhaps to the curve of the freehand chamber, made almost not even a dent. 
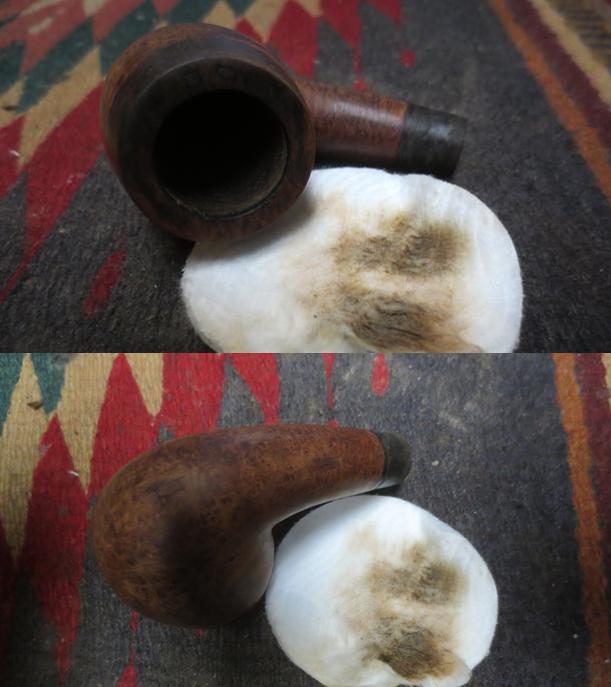
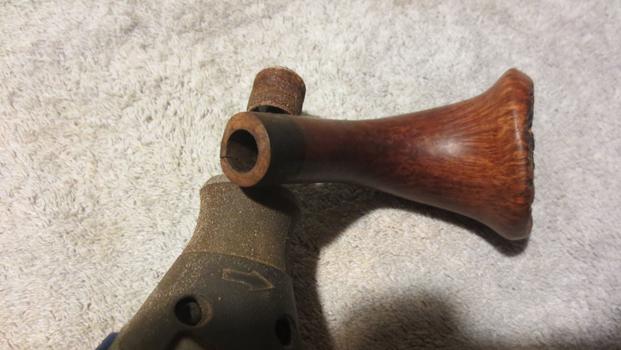
The coarsest sandpaper I had was a small old finger-length strip of 180-grit that has stood by me for years and is most often the roughest I need to get with a chamber’s walls.  A half-hour or so of that left my hand aching, my fingers burning and one of them torn open, as was the case to a much more serious degree with the BW chamber of horrors.  I put the chamber ordeal on pause and decided to see how awful the shank’s airway might be.  I admit my attitude sucked by then, but also that I was pleased with the relative ease of clearing the shank of grime with alcohol-dipped regular pipe cleaners.  The first one took some finagling to break on through to the other side, but only four cleaners were needed for the preliminary cleaning. 
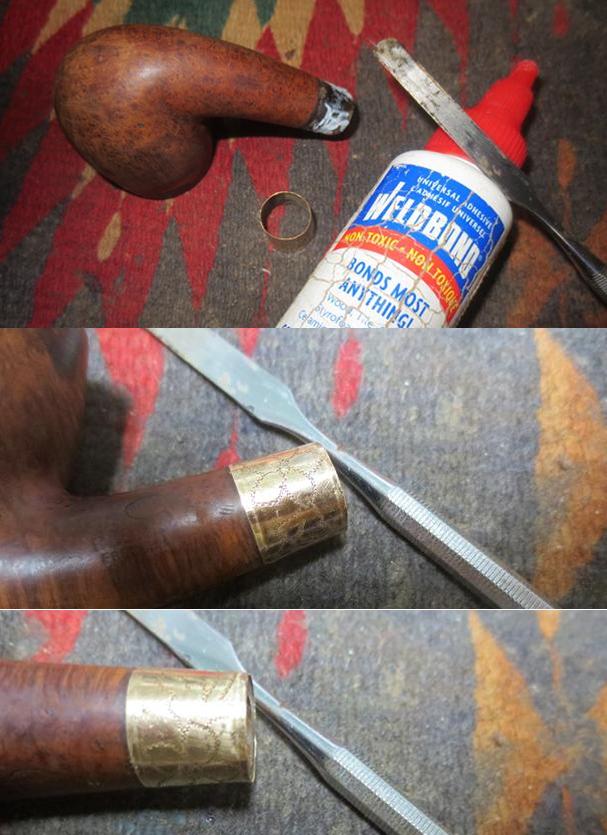
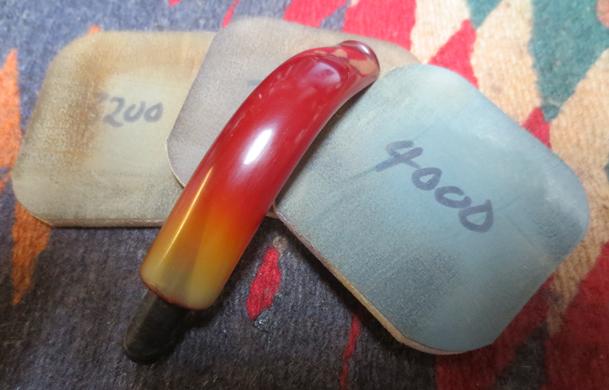
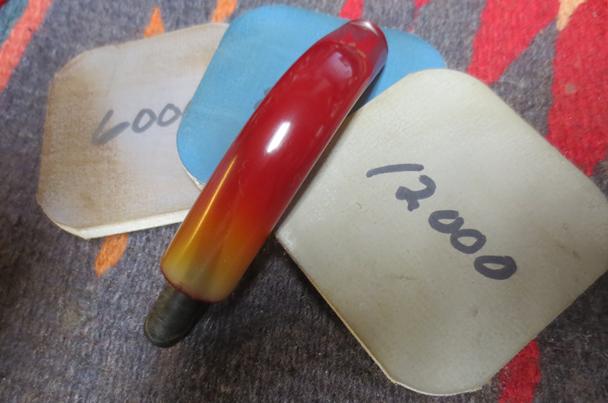
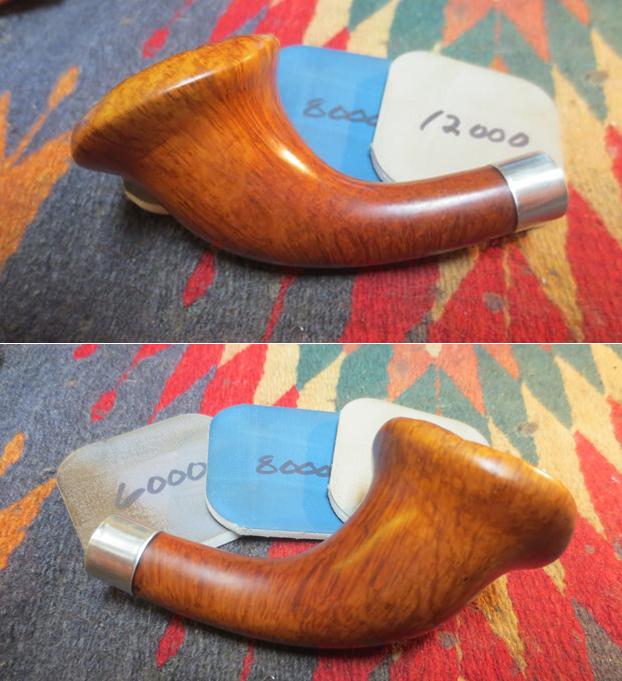
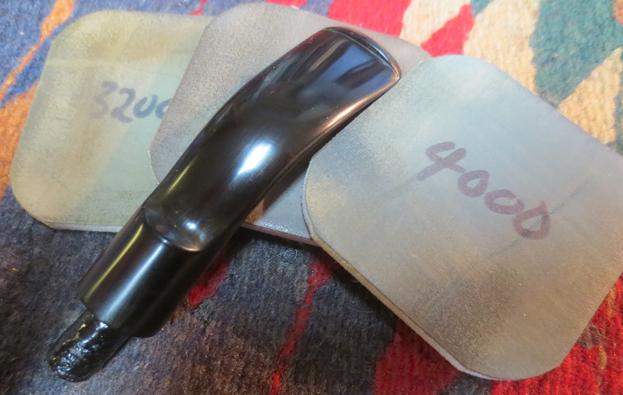
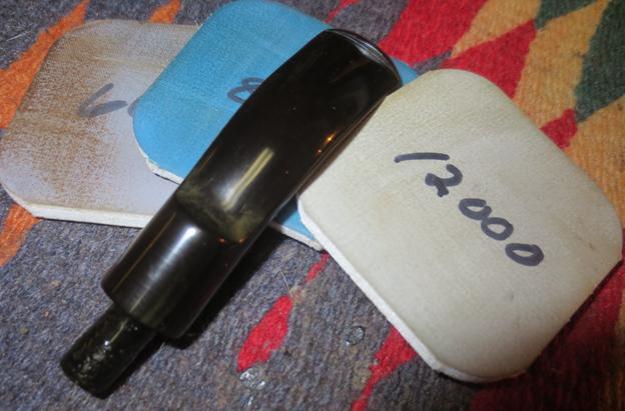
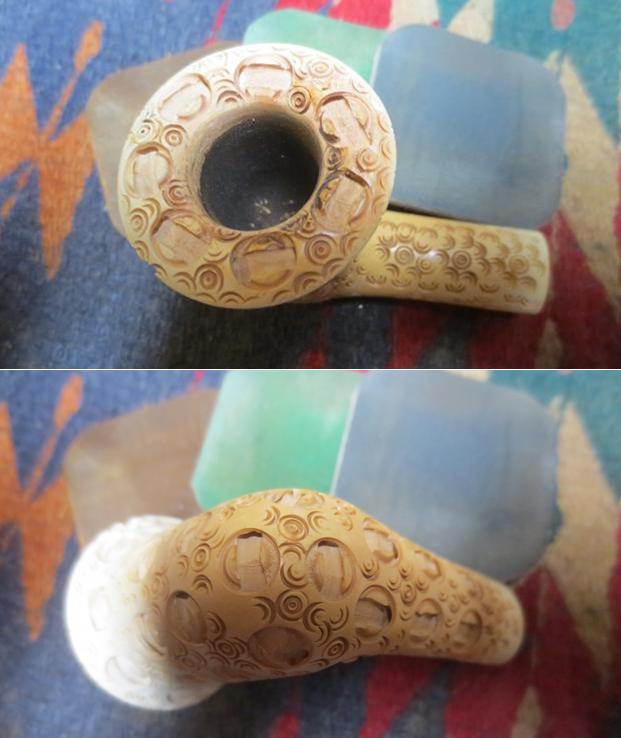
I girded for another go at the chamber with the following armaments.
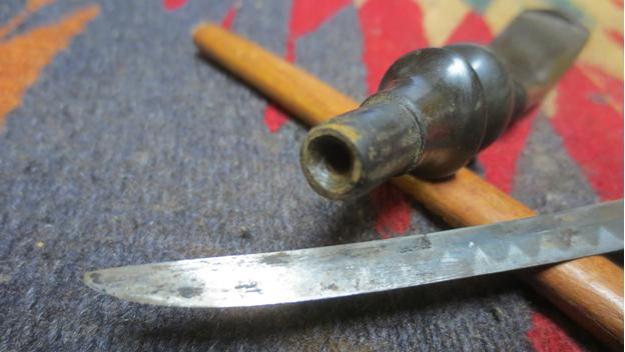
I hoped I would not have to resort to either (and certainly not both) blades, but I was going to be prepared for anything.  As it turned out, the Dremel I used in the BW chamber of horrors case would have come in handy, but I had to borrow it and didn’t want to take the time.  The task was longer and more arduous than I can detail in photos, but here are some time lapses – during the first day.  I hope they show the bulges and veins that appeared hither and thither with each new attack.  Indeed, both the pen and utility knives were needed throughout the three-day process of perfecting the chamber. 
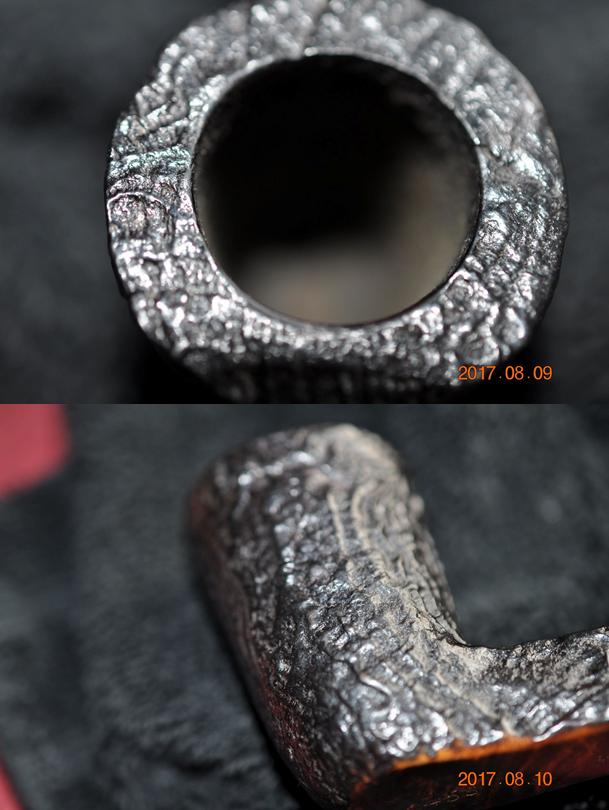
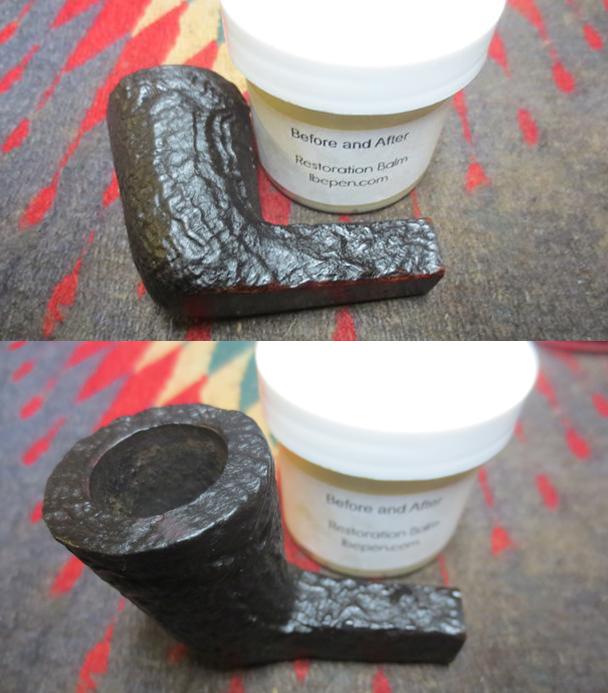
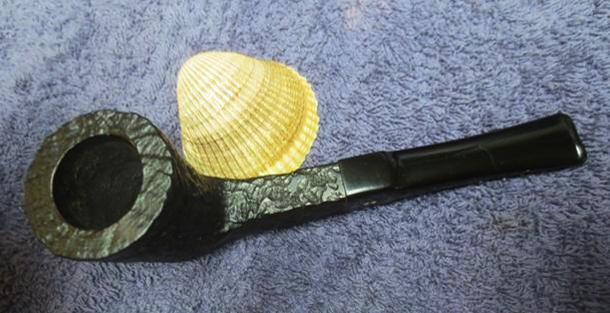
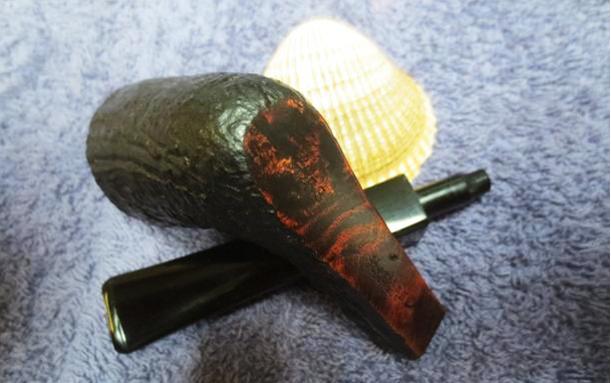
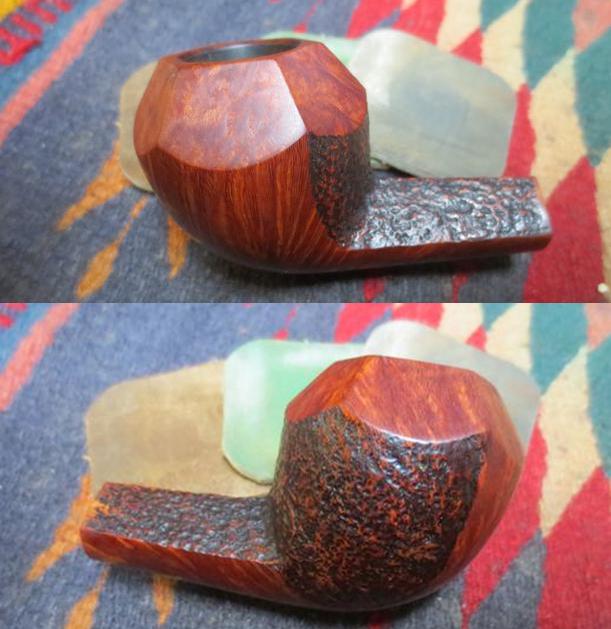
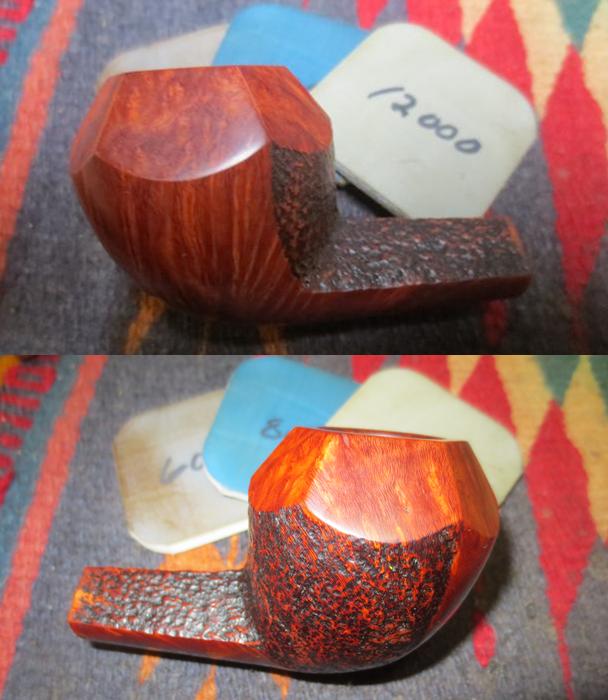
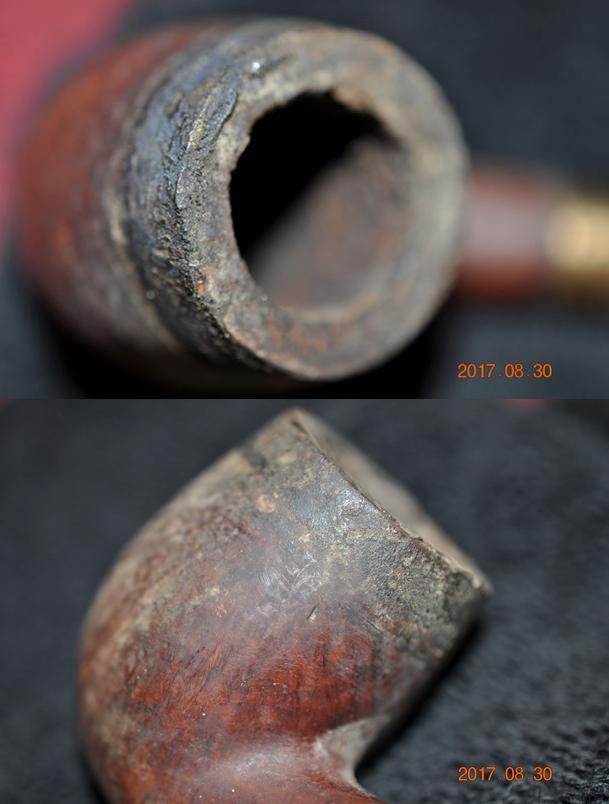
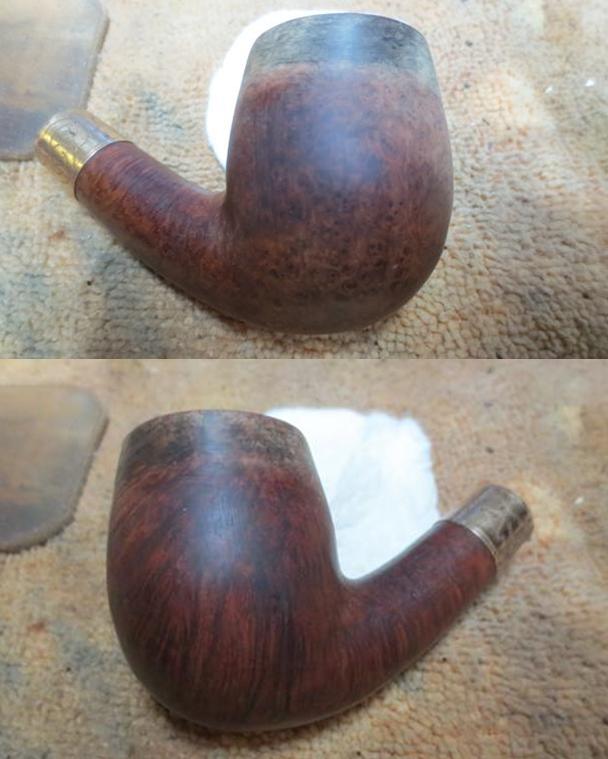
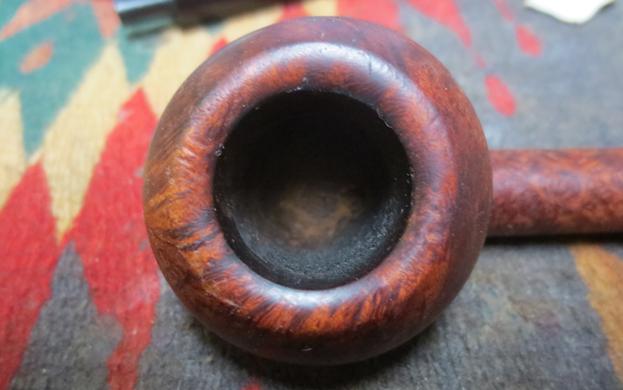
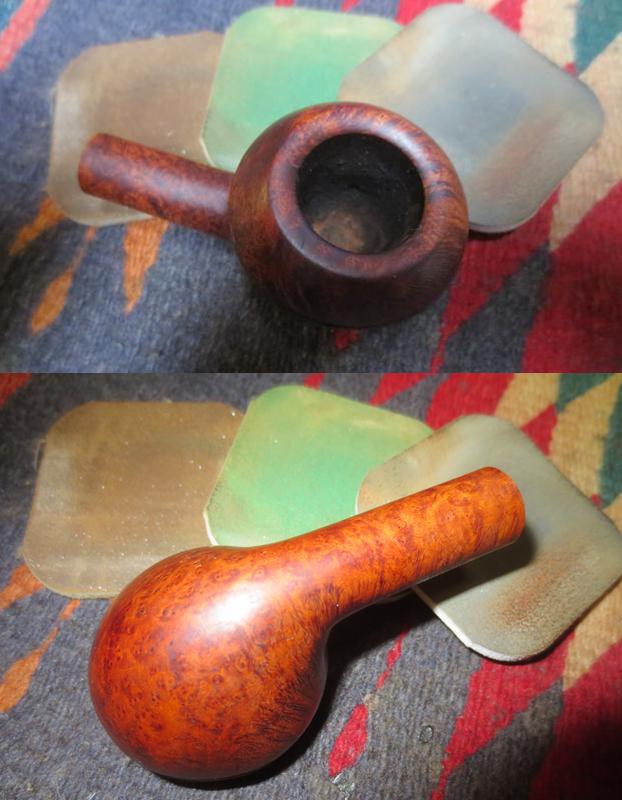
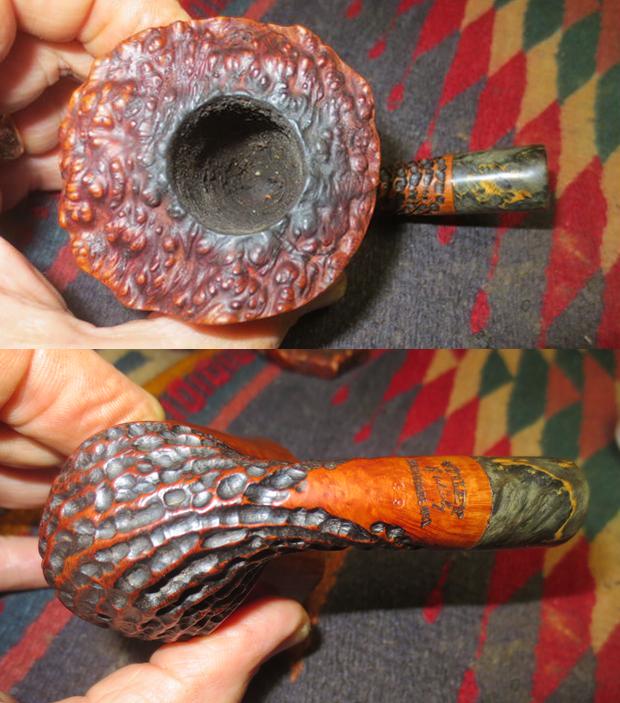
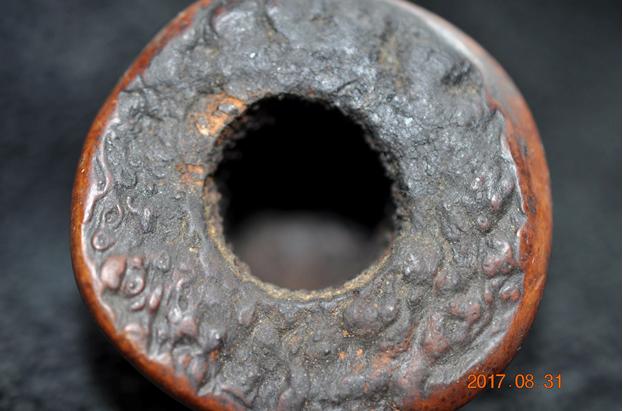
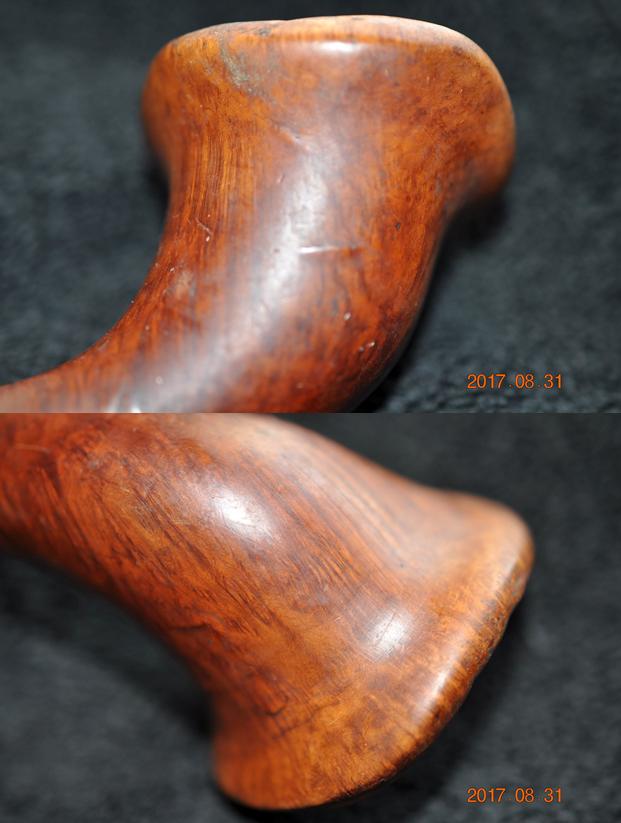
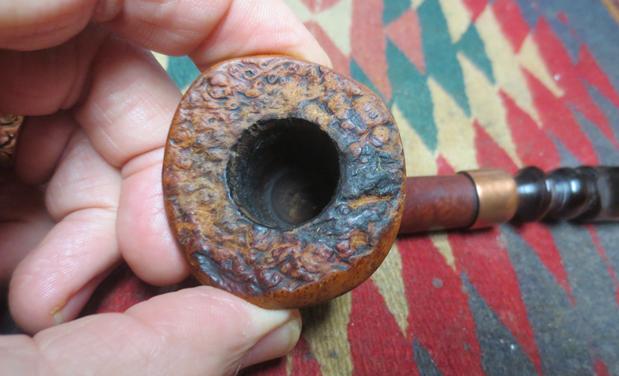
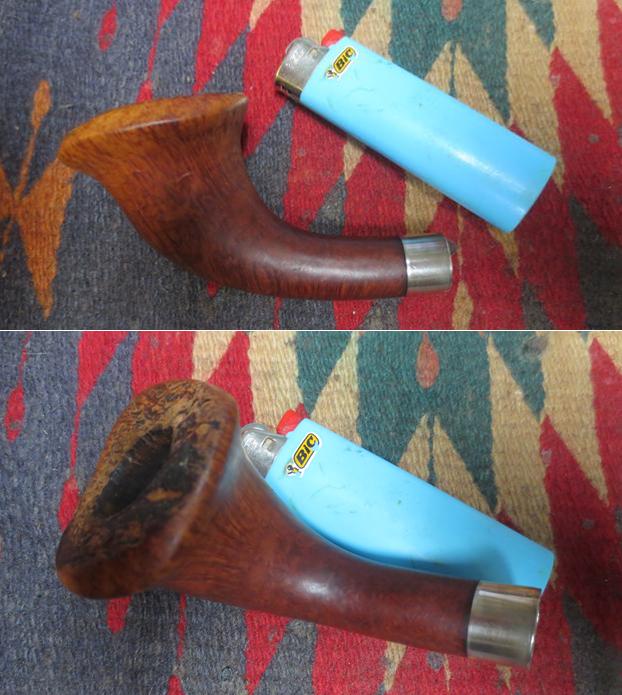
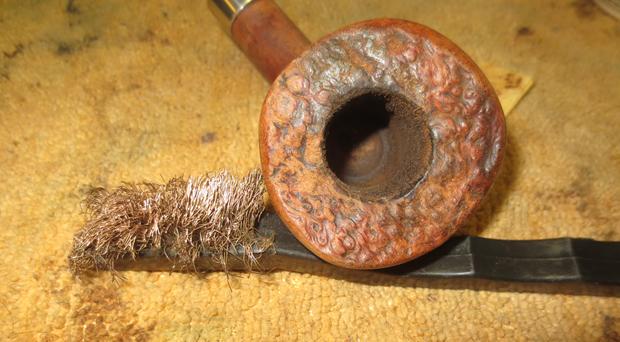
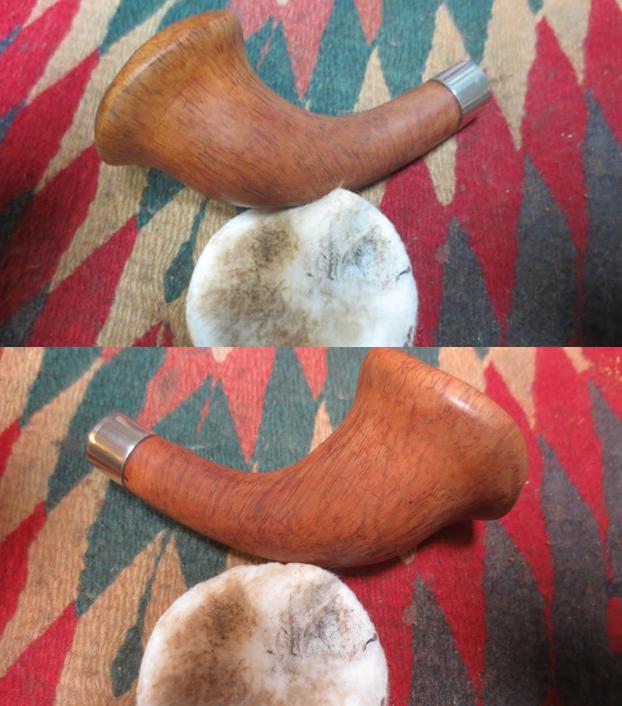
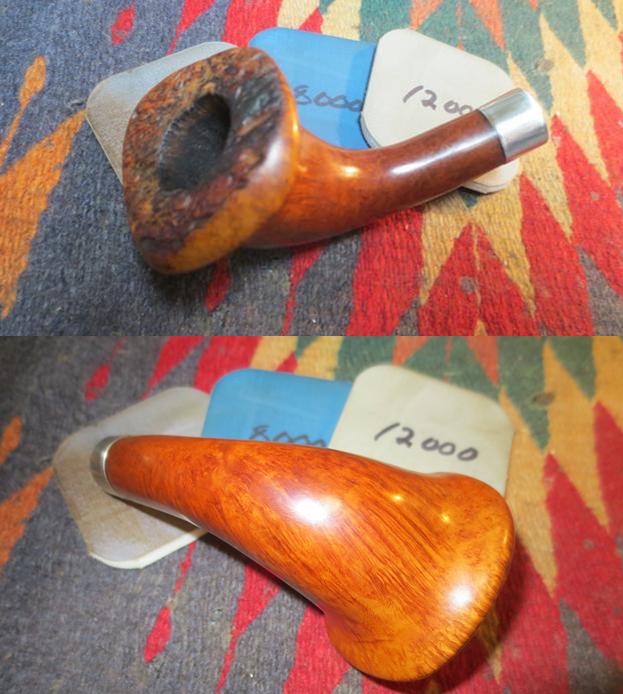
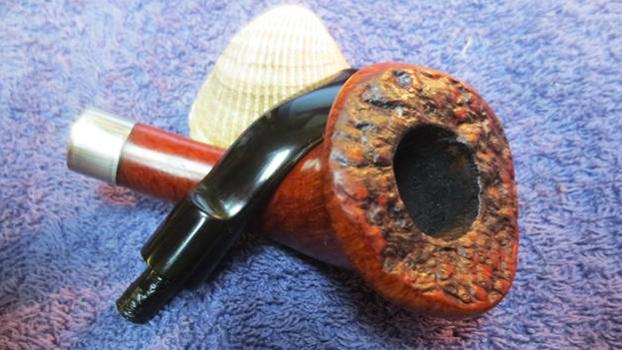
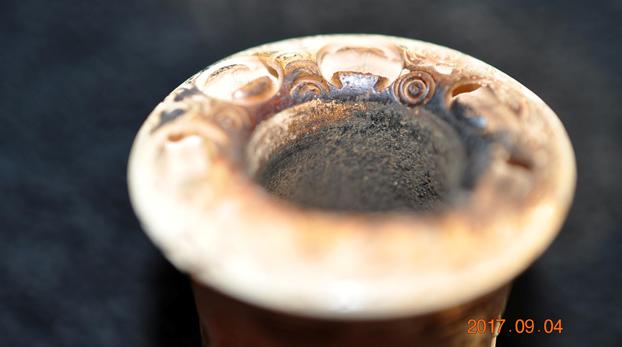
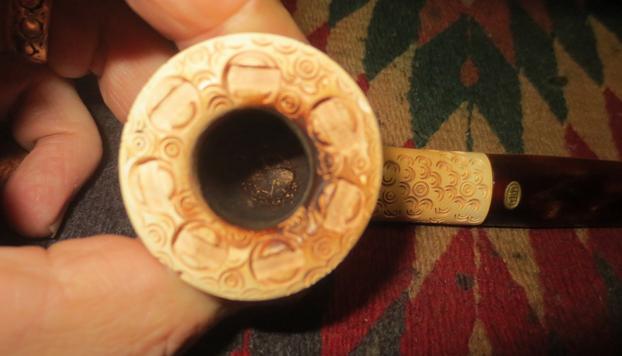
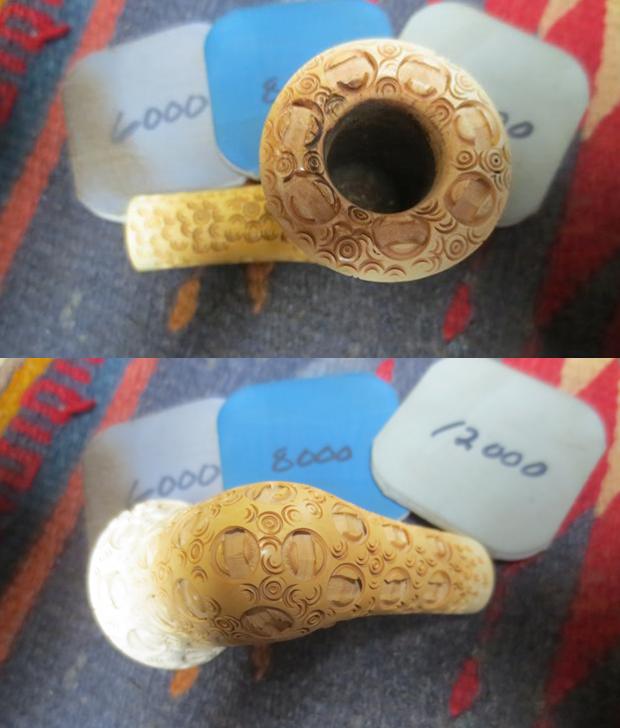
Another problem I’m sure has not gone unnoticed was the rim burn that was fairly bad, but on the plateau area of a freehand presented greater than average problems.  I did not want to use sand paper or even spot-soak the rim in alcohol, if black stain was under the char.  After debating the options available to me with my resources at hand, I opted for an approach that may seem unusual but I knew from experience would leave any black paint intact.  I submerged the entire stummel in alcohol for several minutes at most, and when I removed it I thought I had the desired result of eliminating the old stain and excess char. 
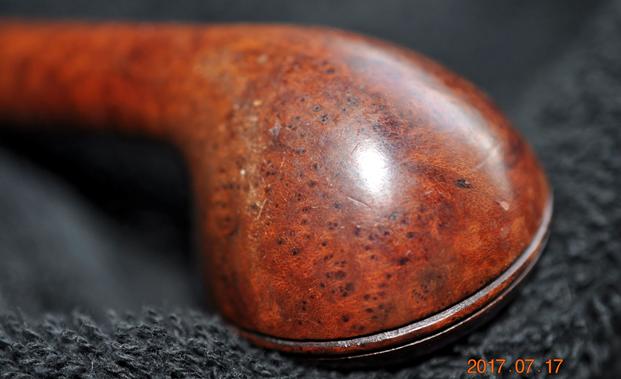
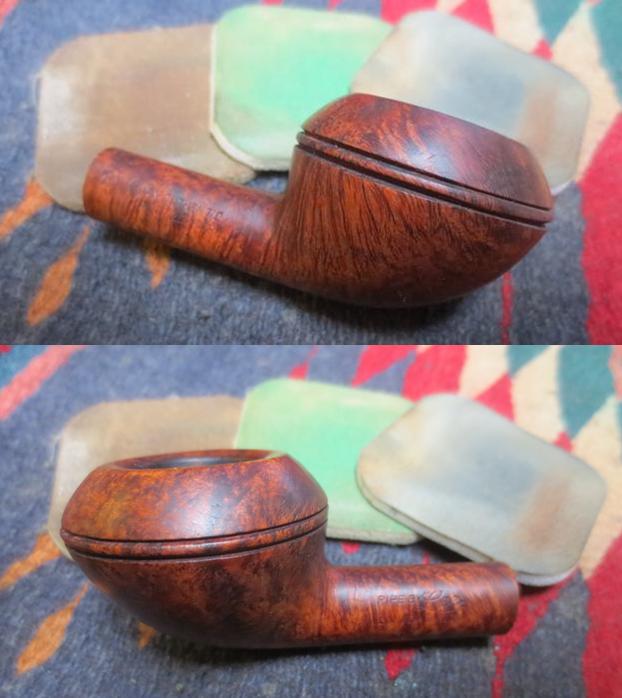
Scrutiny of the outer wood showed a perfect piece of briar, free of any blemishes or even a single scratch.  The only other such experience I recall after alcohol-stripping a stummel was with my previous blog about a Capitello Jonico Dublin.  I tried to tell myself the remaining blackness on the rim was natural or maybe left-over stain.

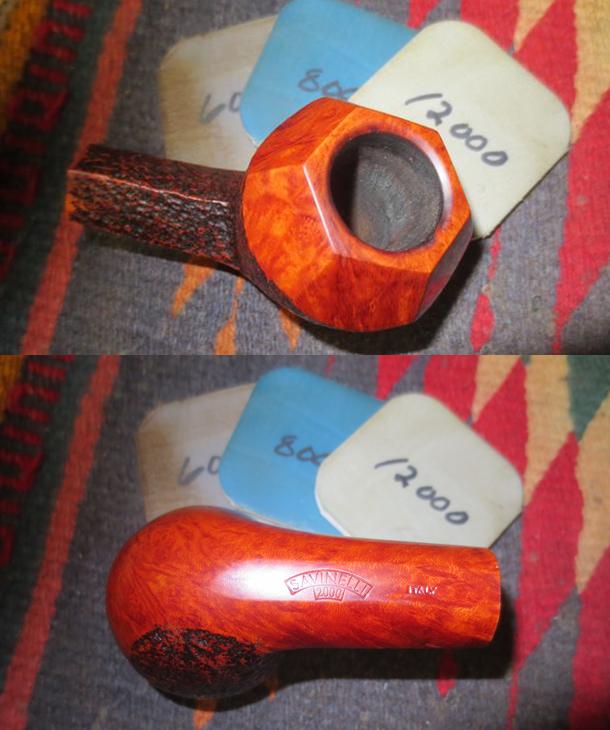
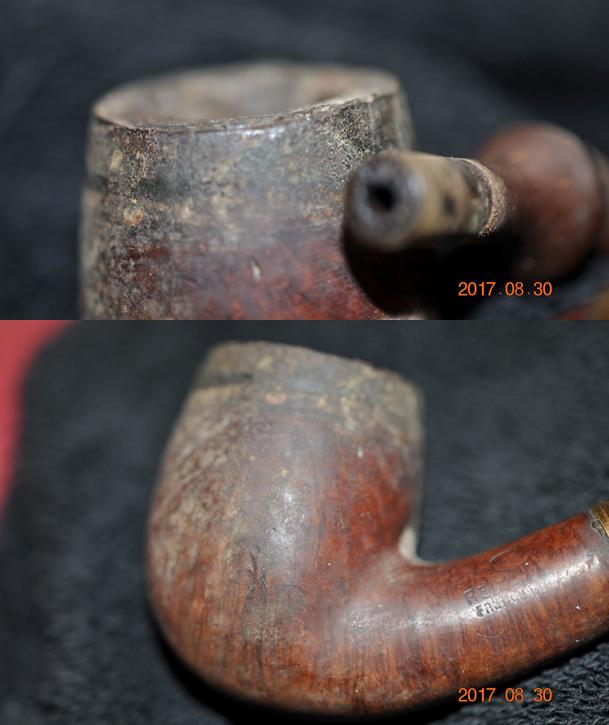
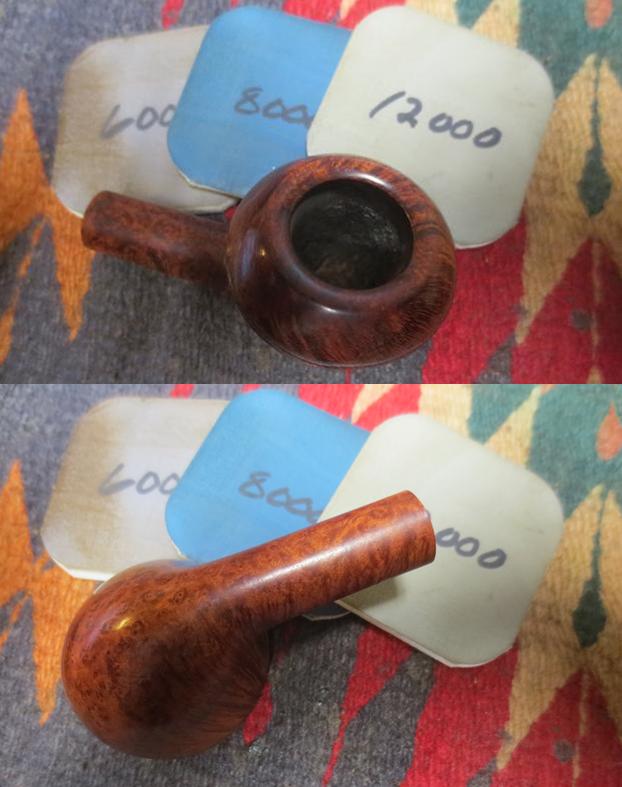
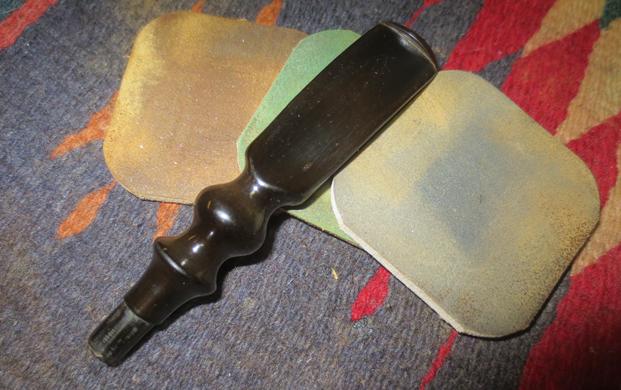
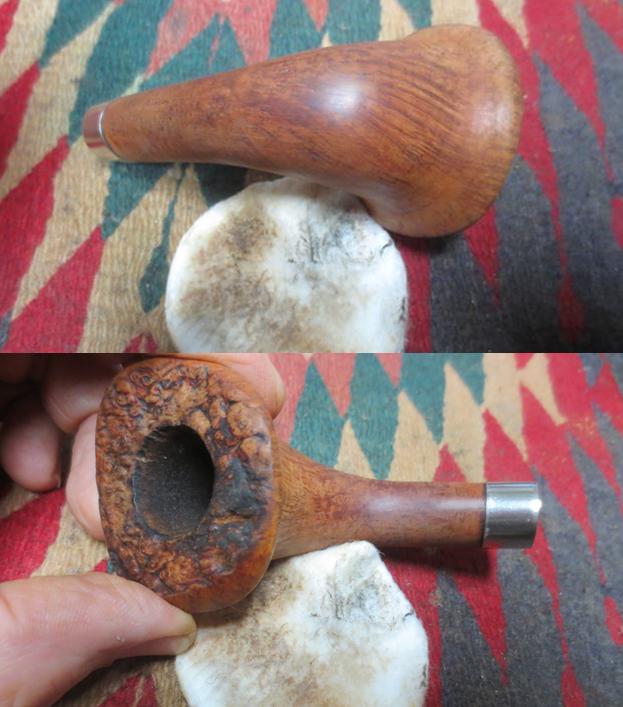
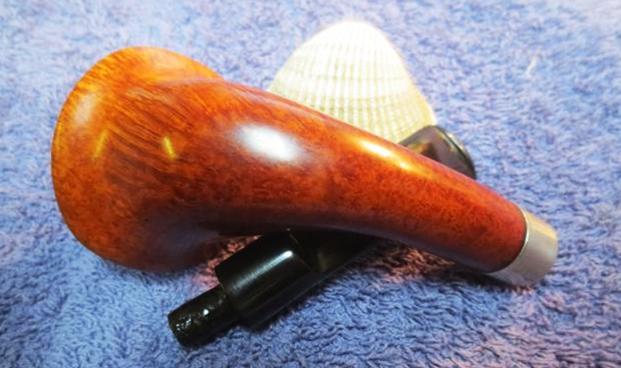
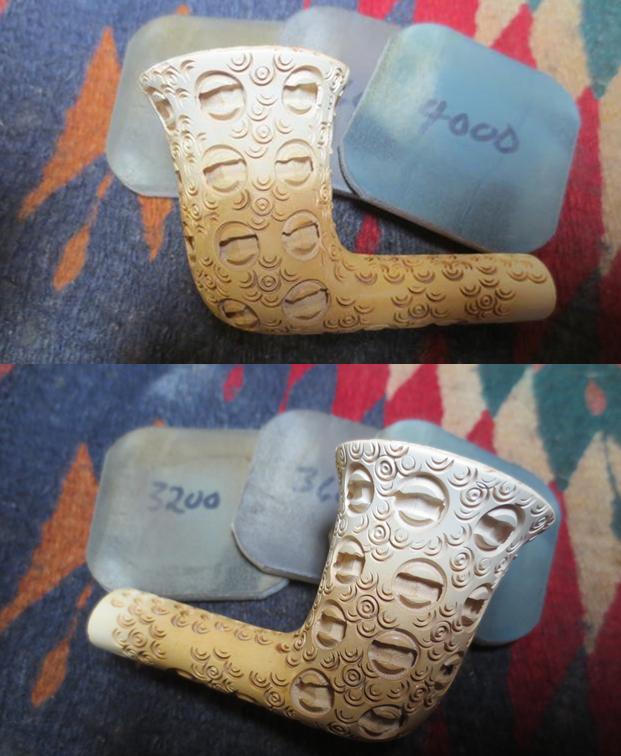
Other than the final sanding, which tore through the final layer of uneven cake, the time for micro-meshing had arrived.  Giving the stummel a final inspection, I overrode my misgivings about the dull murkiness that pervaded most of the rim, with random rays of nice red wood making it through the gloom. I remembered a Ben Wade by Preben Holm I restored and had to re-stain the rim black, and I’ve never quite been happy with it.  The whole approach to this project was to restore the freehand to a better look than it may ever have had, if I may be excused the apparent impertinence.  Still, I proceeded with the micro-mesh, which only confirmed my gut instinct. 
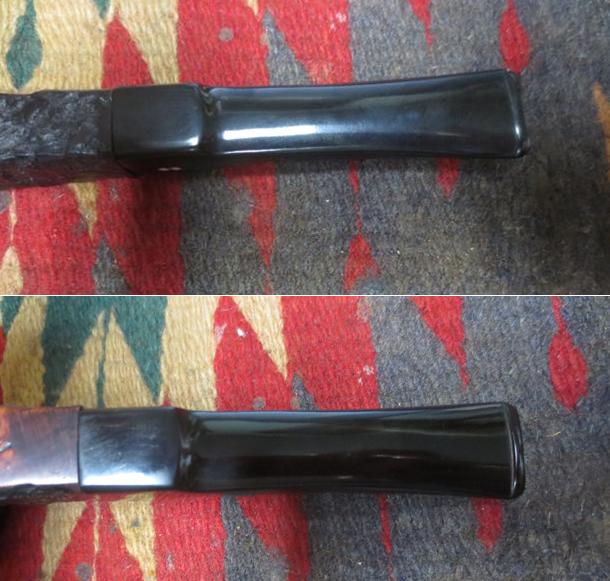
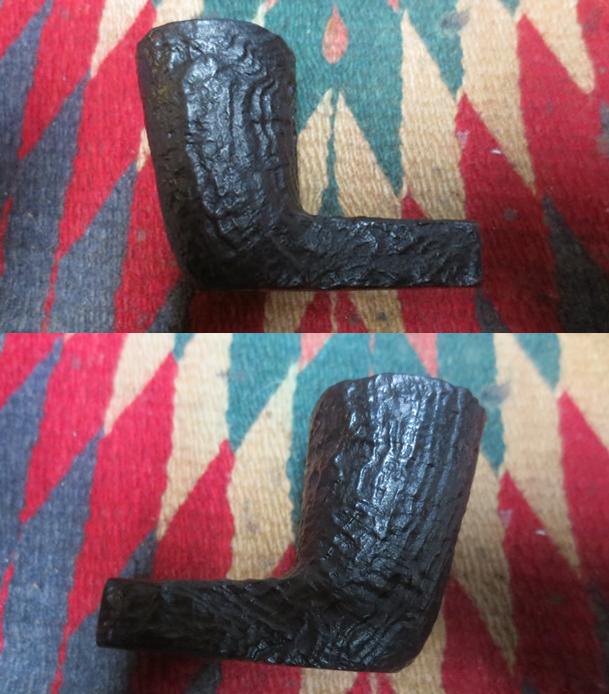
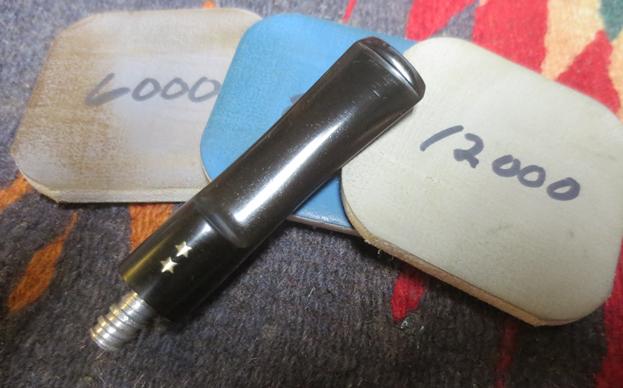
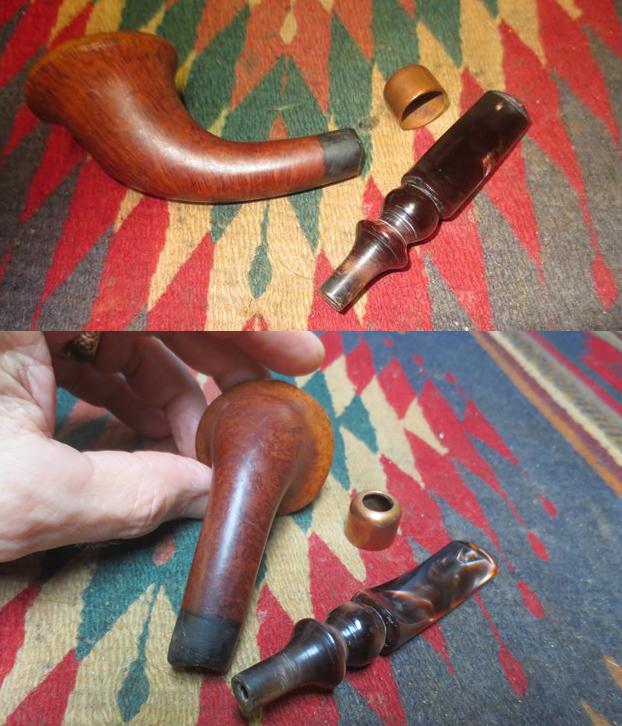
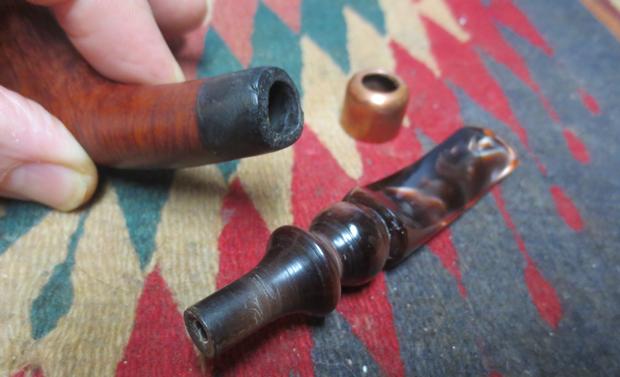
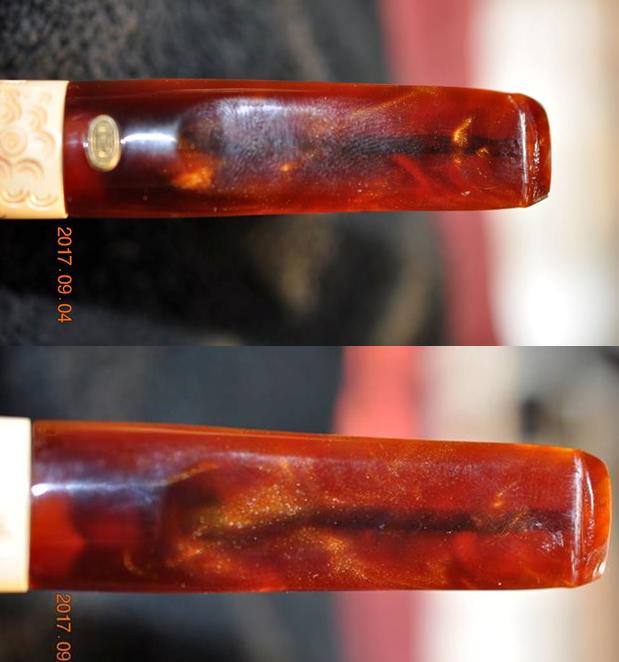
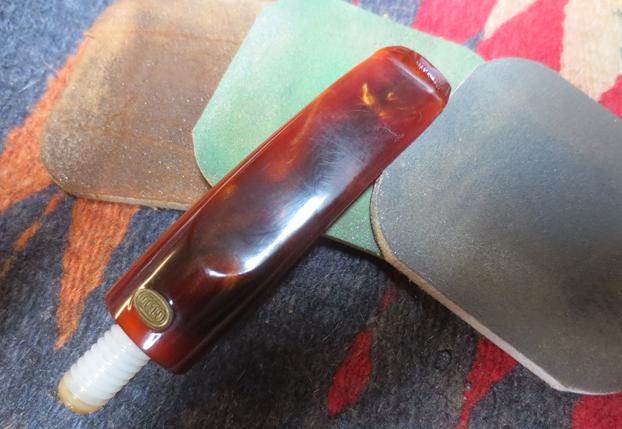
Before I return to the rim, there are a few minor wrap-ups to make.  First, look at the discoloration of the wood at the top of the front view above.  I figured Super Fine 0000 steel wool should do the trick, and it did.
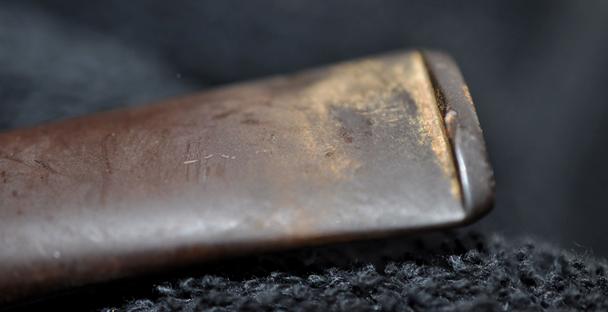
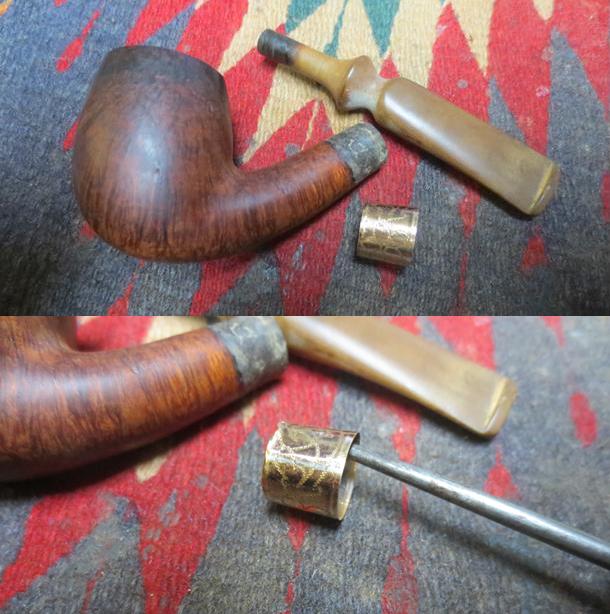
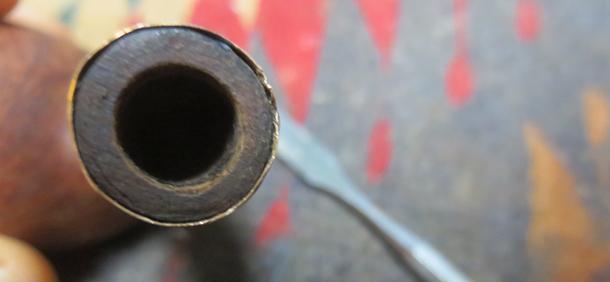
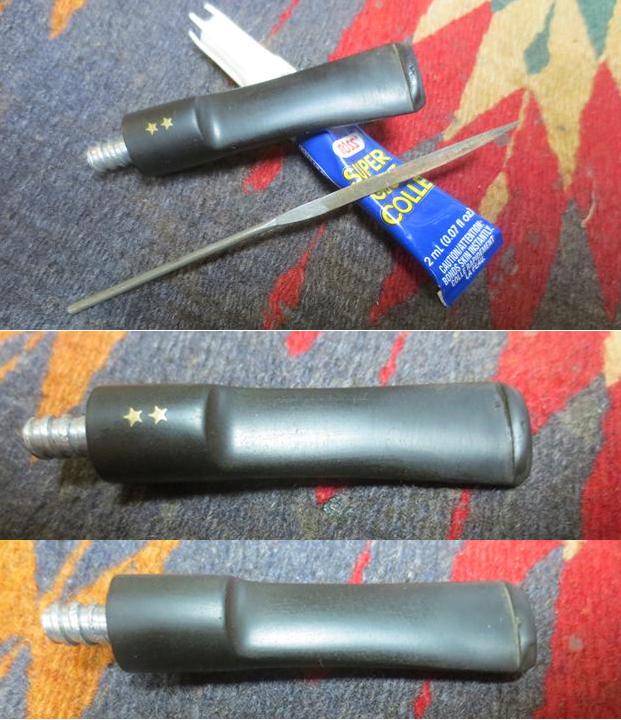
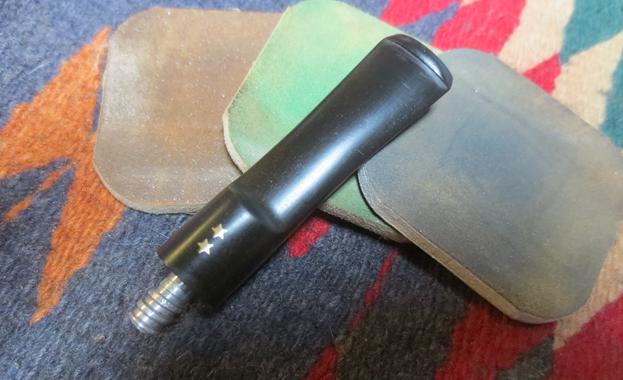
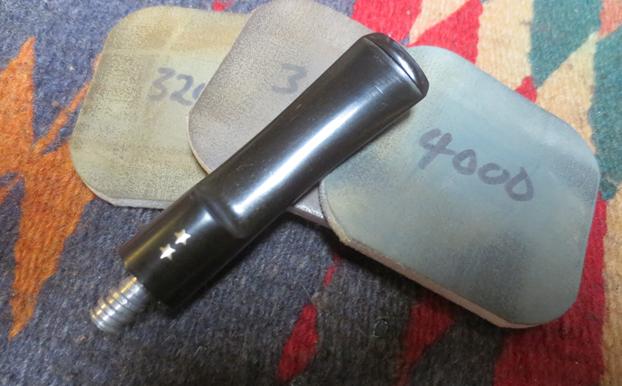
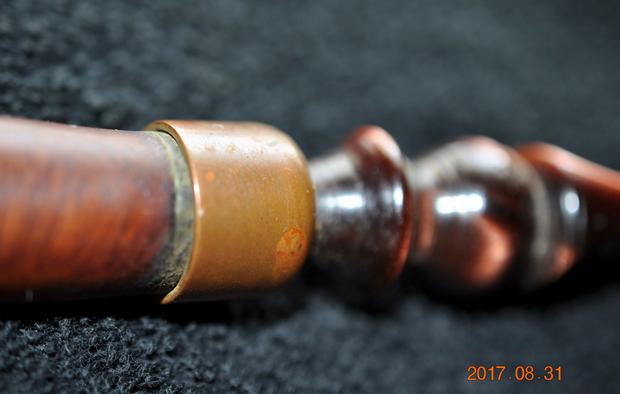
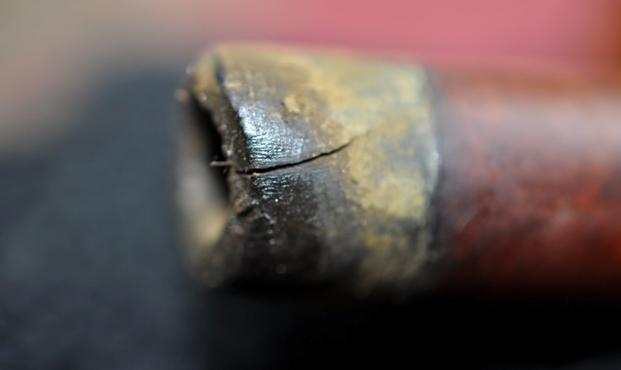
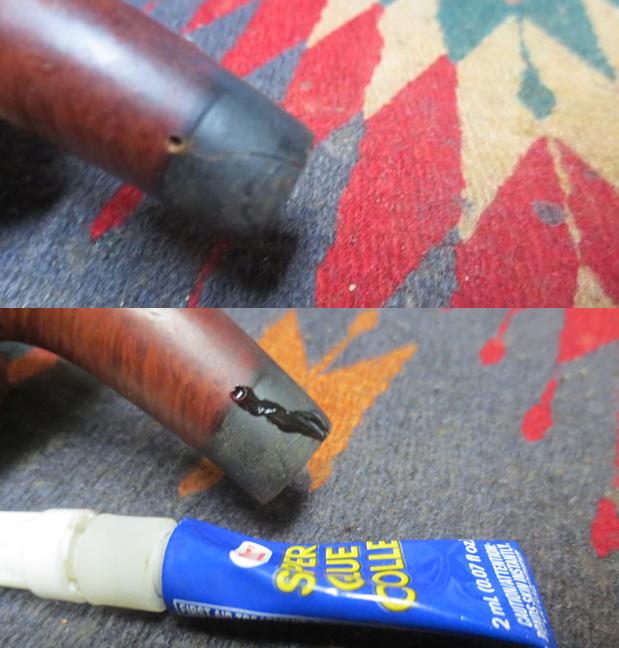
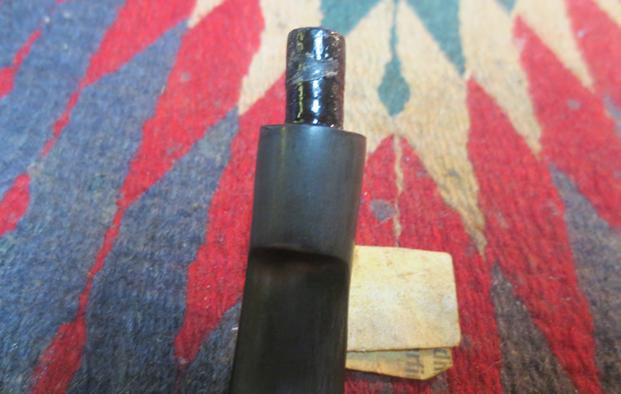
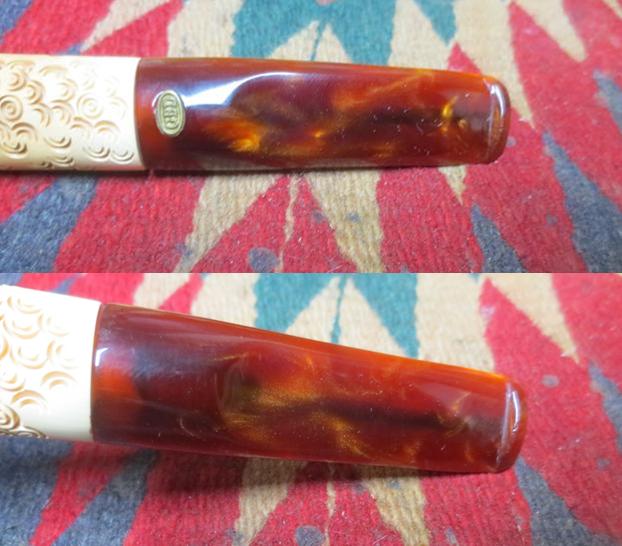
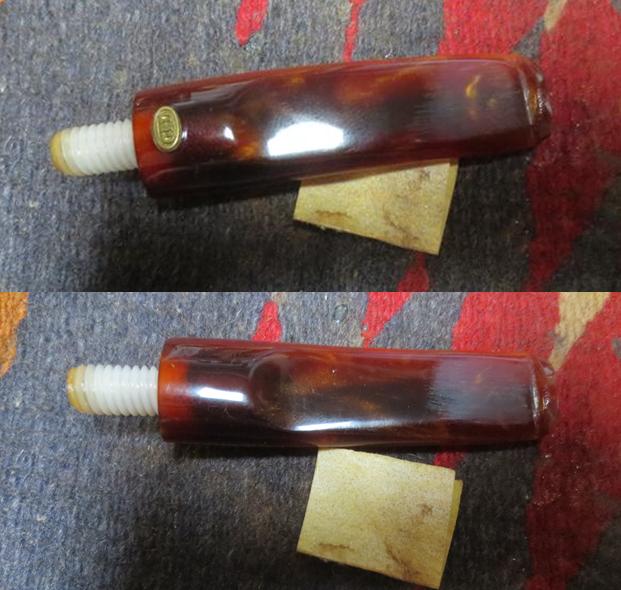
Then there were the stains on the tip of the Lucite tenon and inside the button of the stem.  I scraped out the difficult to reach crud from the button with a mashed end of a pipe cleaner dipped in alcohol and sanded clean the open end of the tenon with my trusty 180-grit fragment of paper.The retort went well, requiring only three Pyrex test tubes of alcohol – the first that was sucked up into the cotton stuffed in the chamber, the second coming out moderately dirty, and the third, after boiling through the pipe four times, was clear.
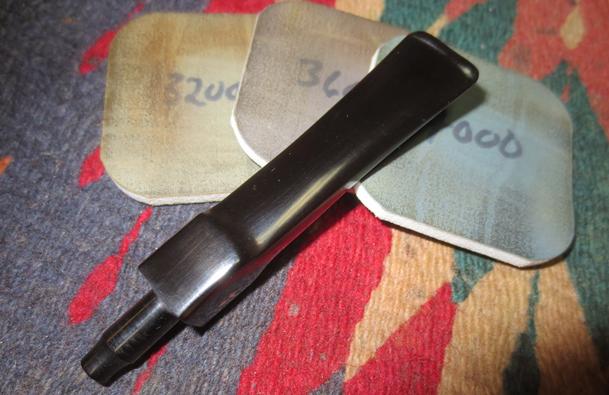
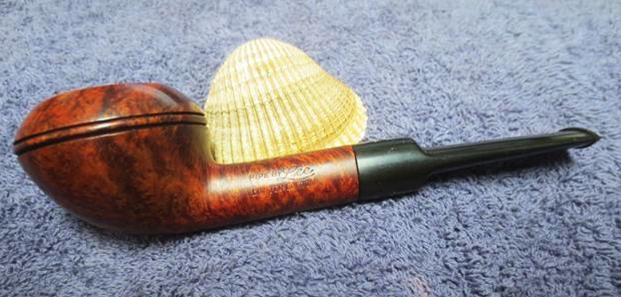
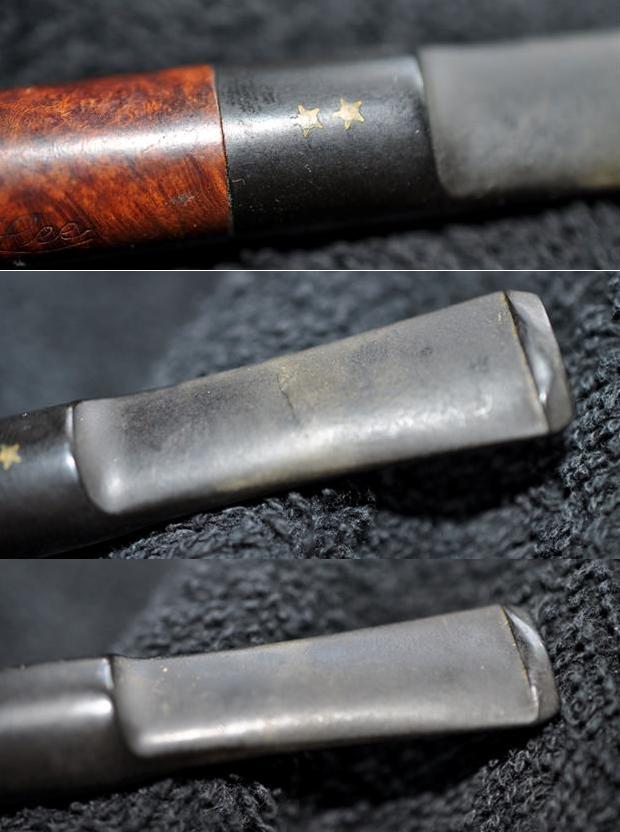
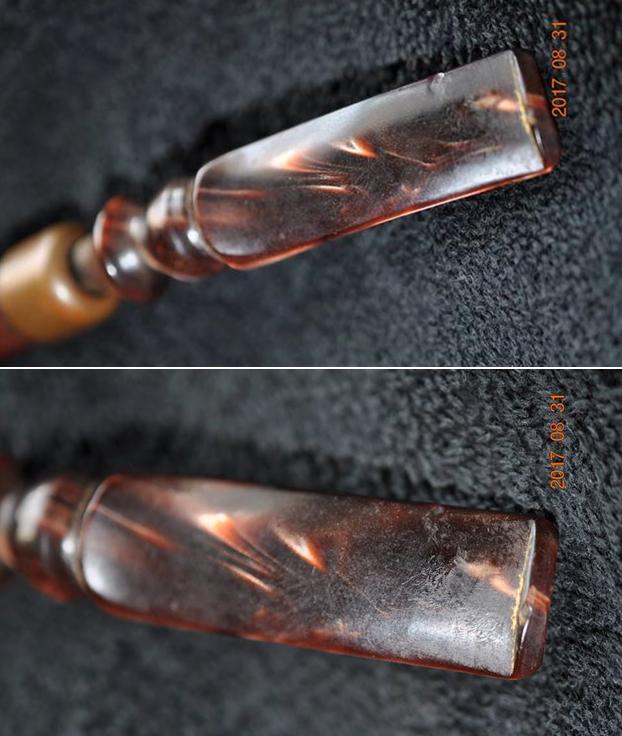
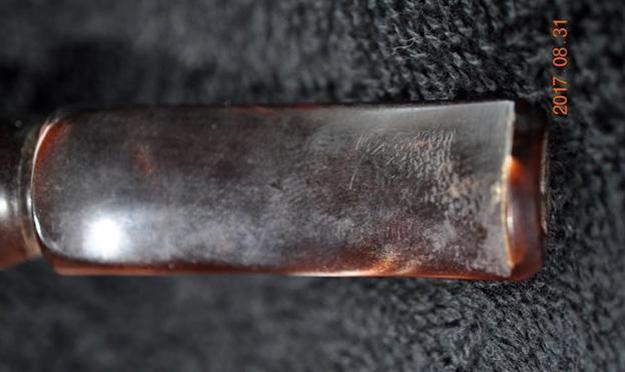
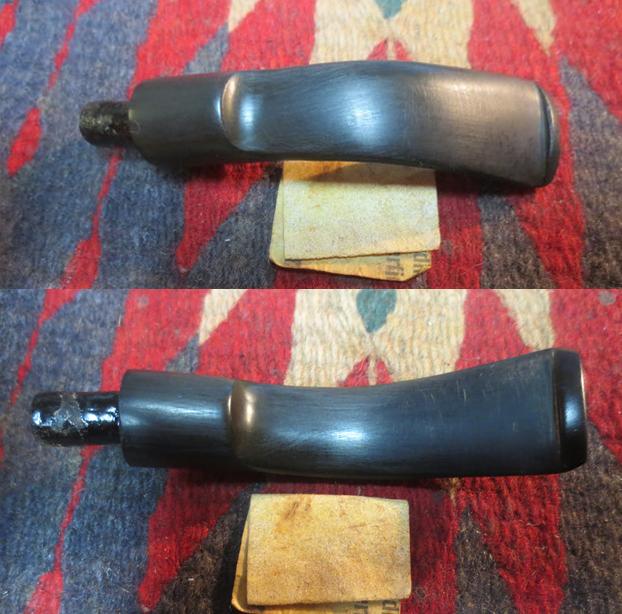
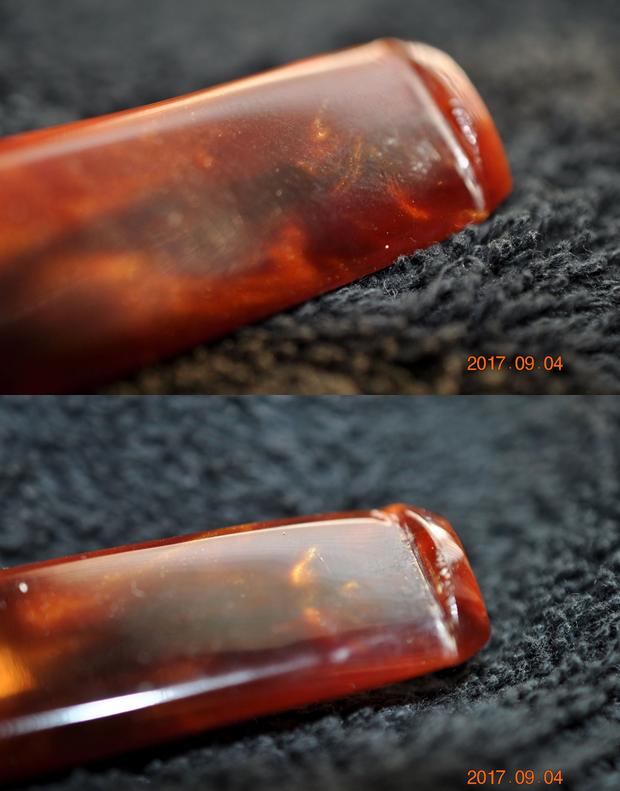
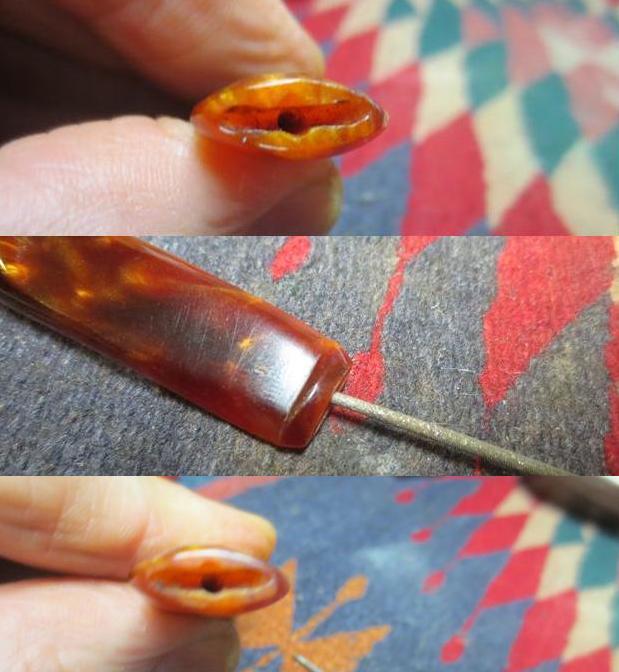
The last step I imagined before the final wheel buffing – there would be no stain – was to fill in the congruent bj etching on the stem that had not been worn away.
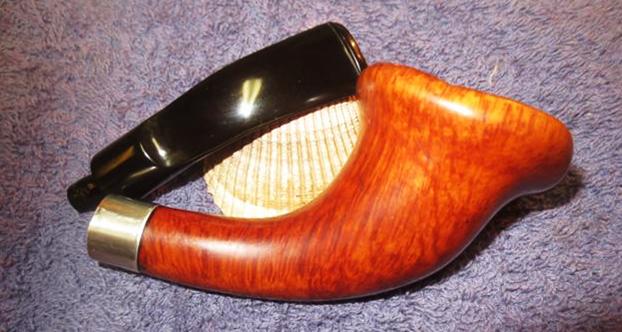
Unfortunately, the curl of the b is completely faded away.

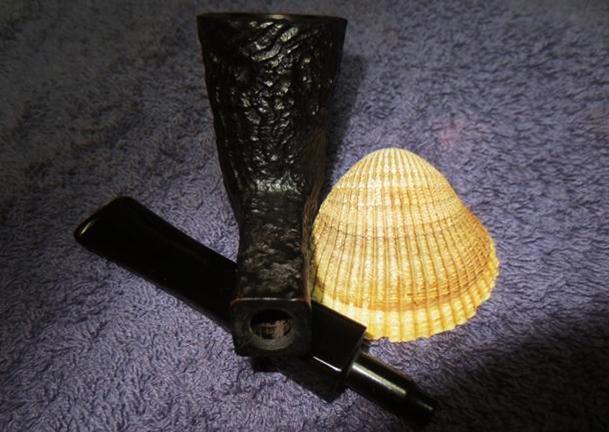
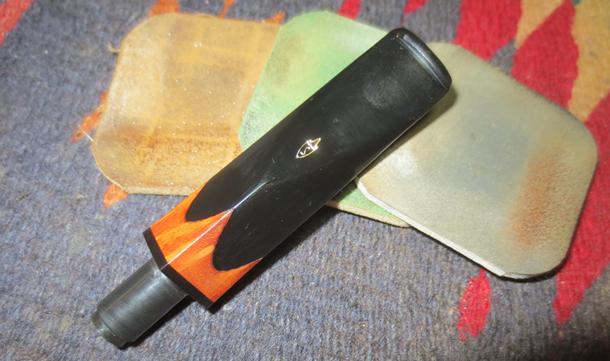
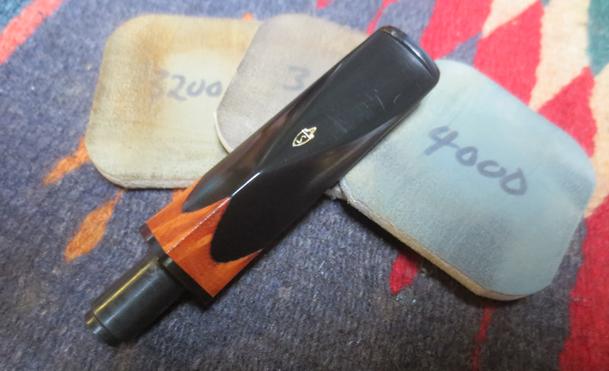
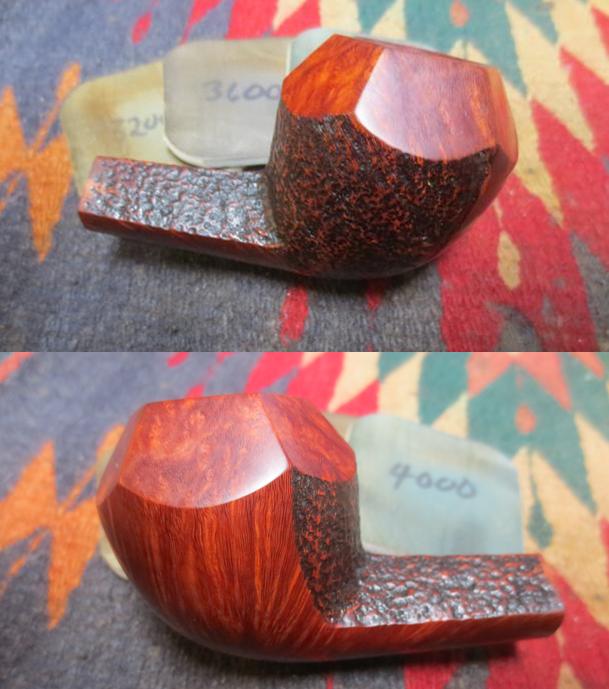
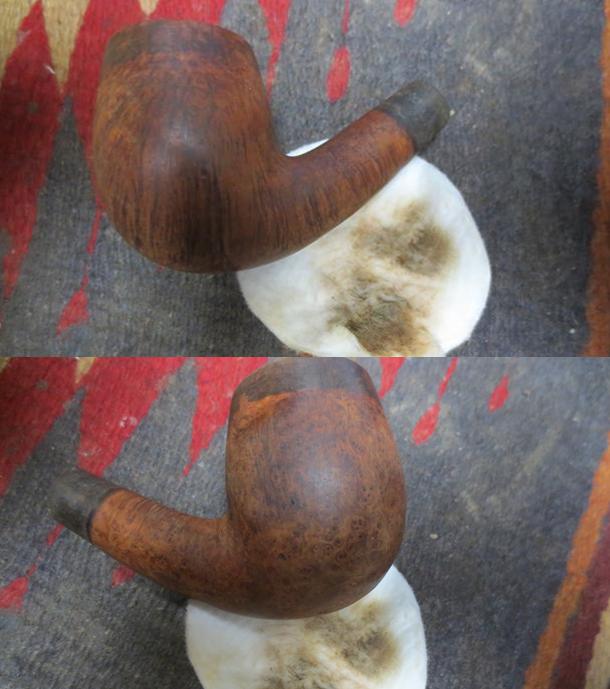
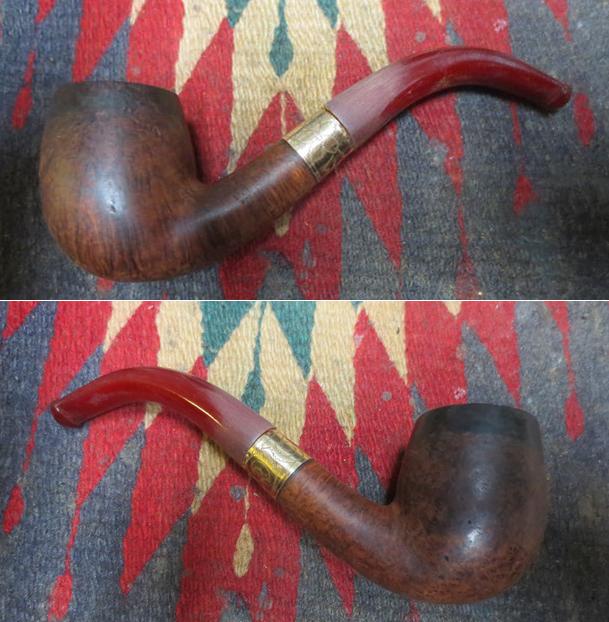
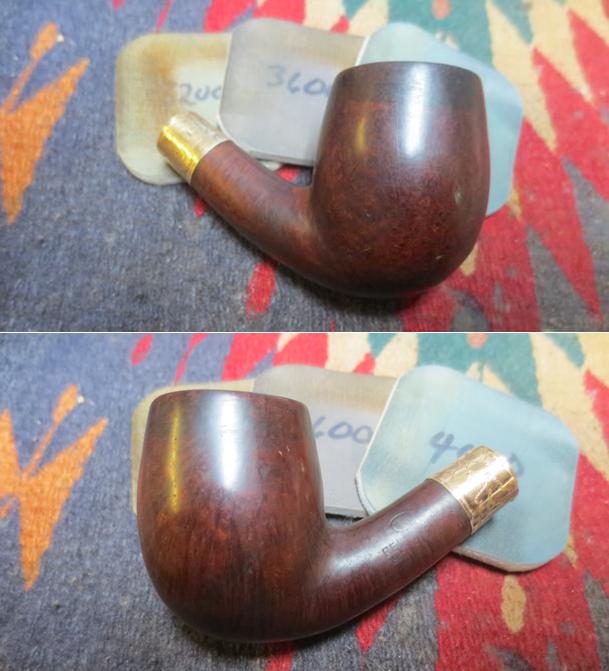
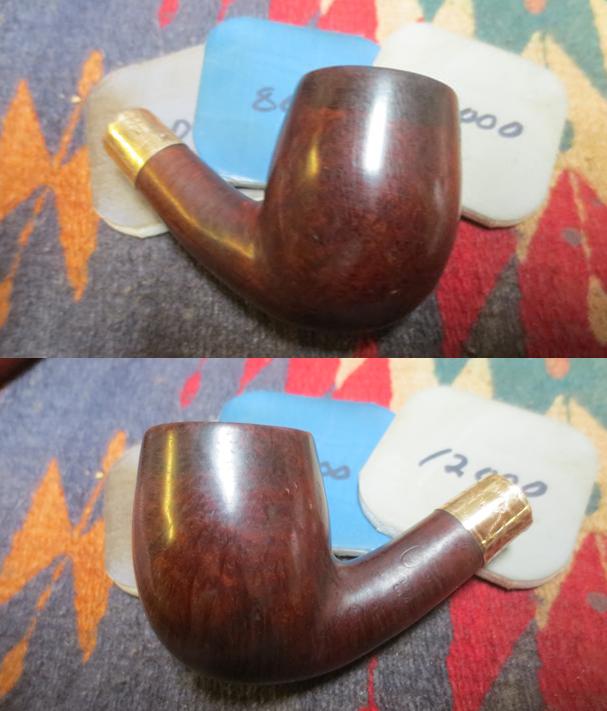
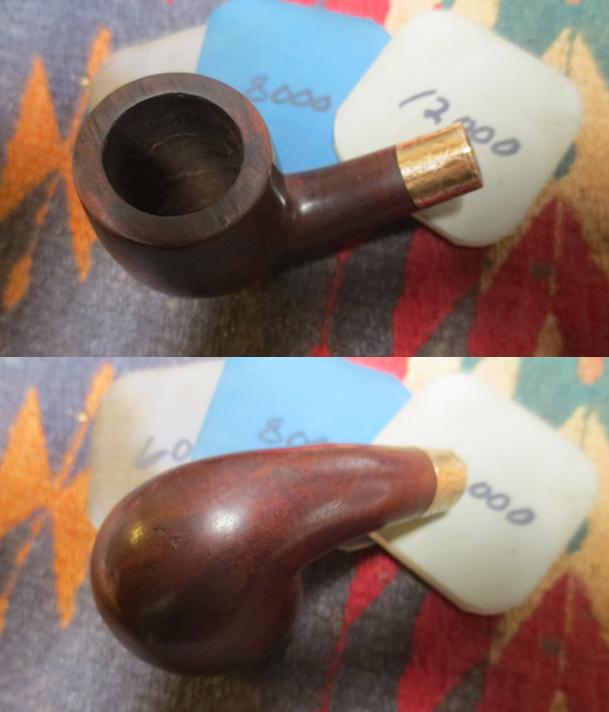
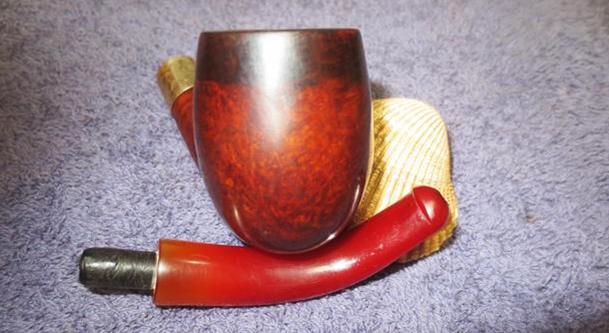
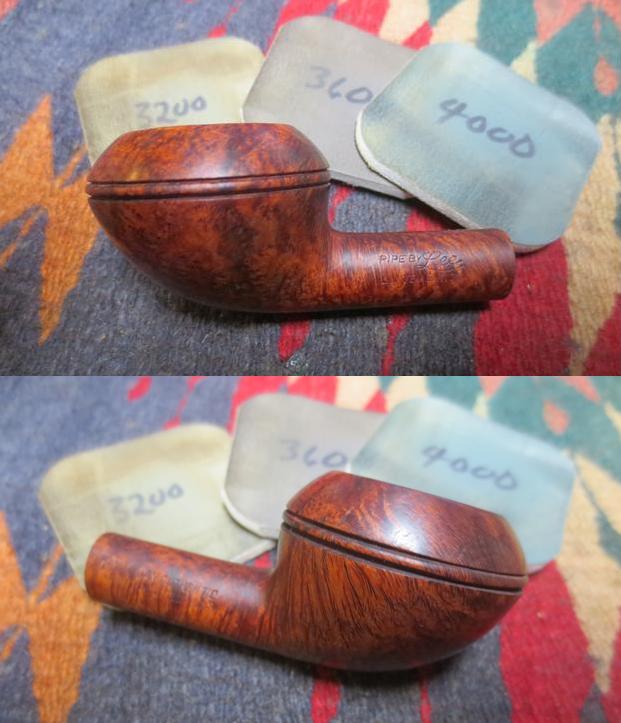
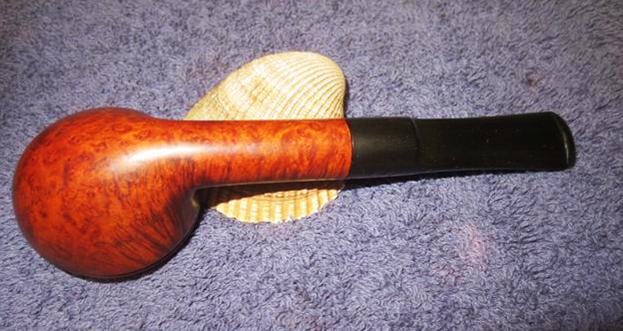
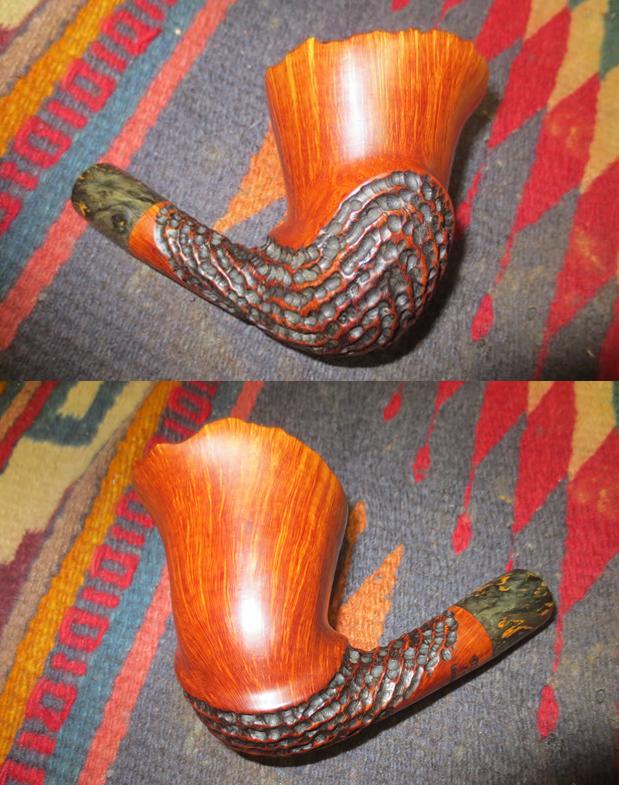
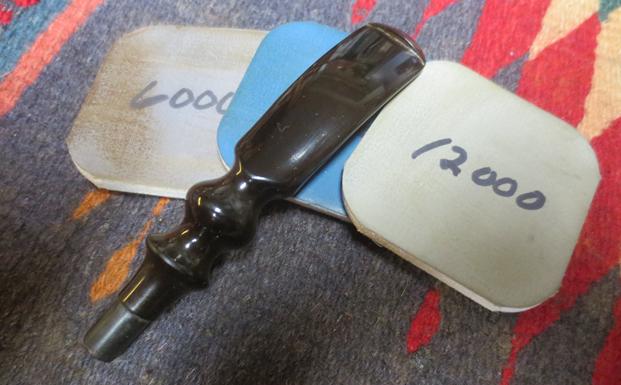
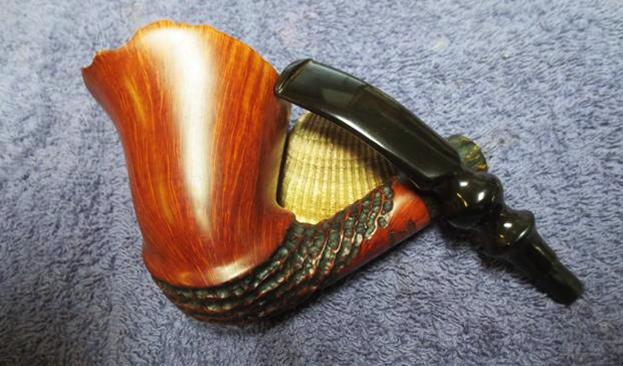
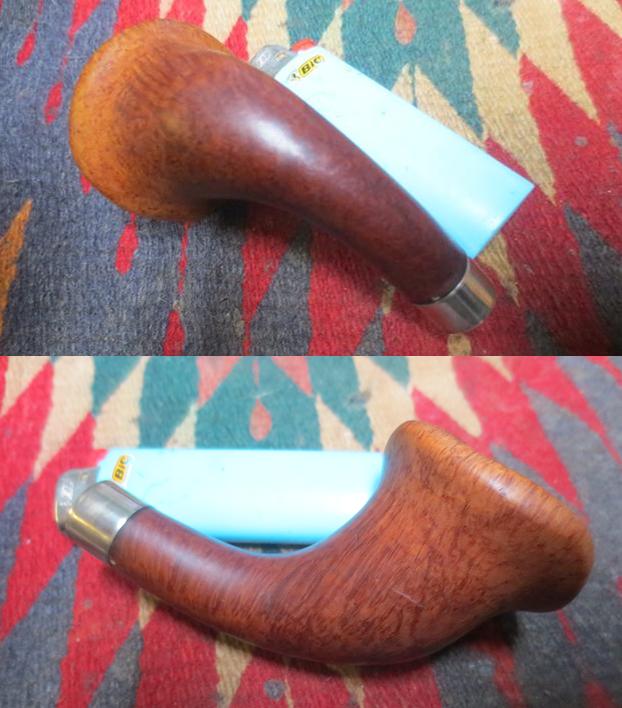
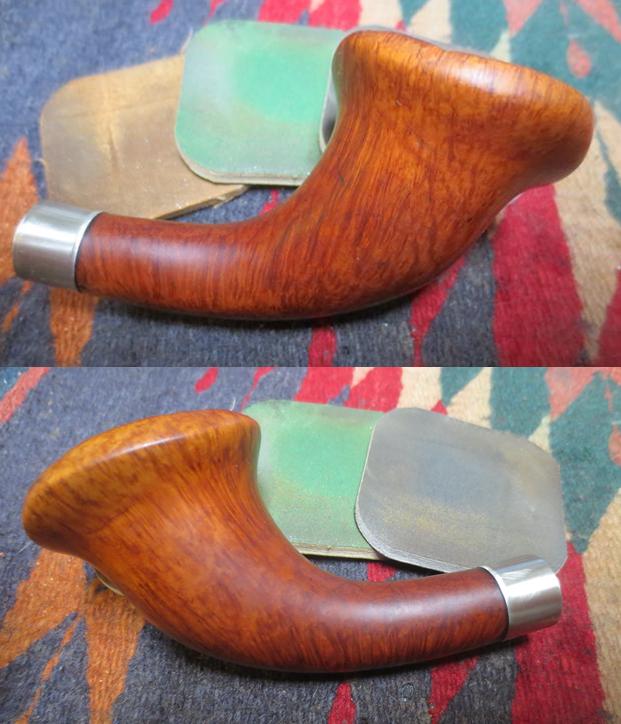
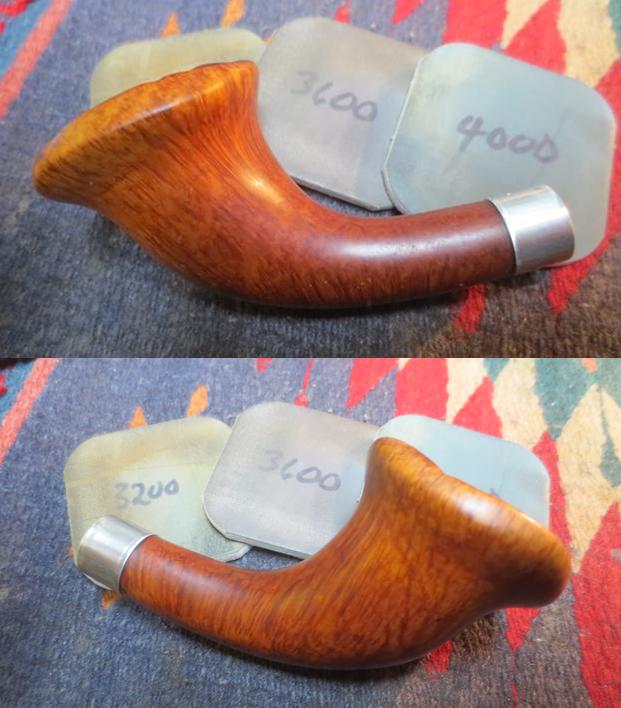
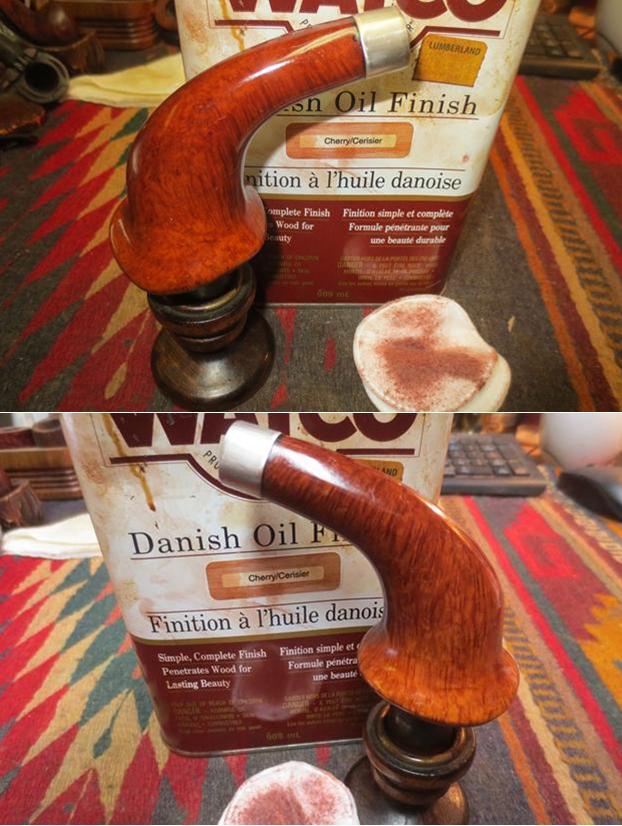
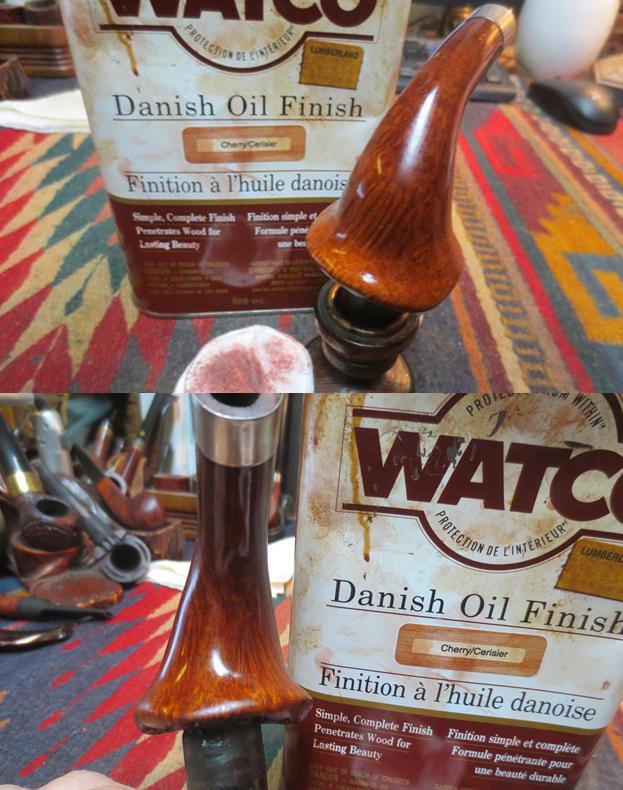
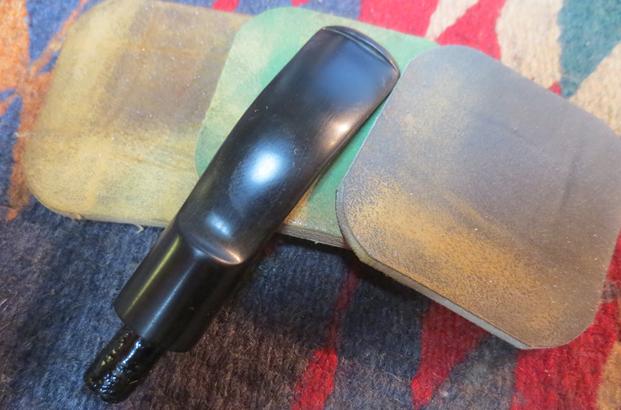
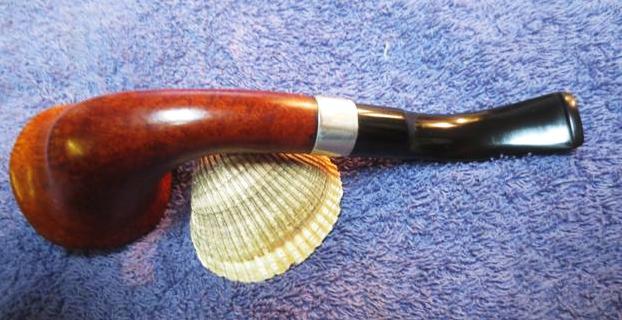
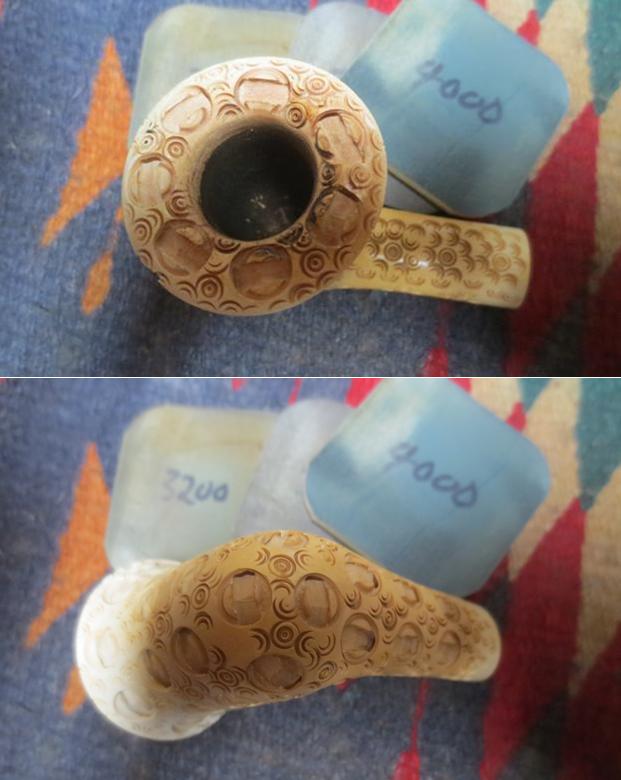
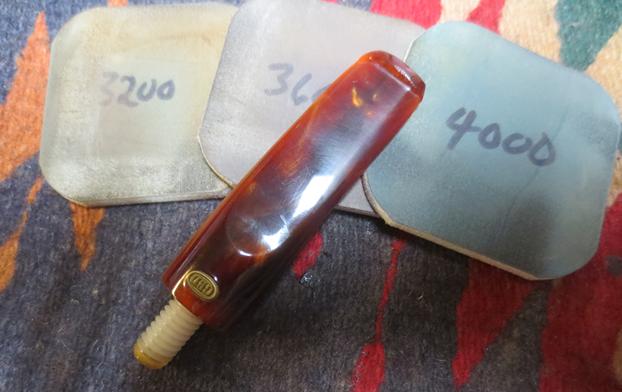
I just could not see proceeding with either of the courses that presented themselves, leaving the dull, scorched earth look of the rim as it was and trying to make it shine or buying more black stain and hiding the beautiful wood I was sure was hidden.  And so, I gave the rim a spot-soak in alcohol to see what lay beneath.The result was a very pale rim, but I knew that would change with another, focused full course of the micro-mesh pads.  The semi-final result as I headed for the buffers was just what I wanted.  I buffed the stummel with brown Tripoli and a heavy coat of Carnauba, and the stem with Carnauba.

CONCLUSION

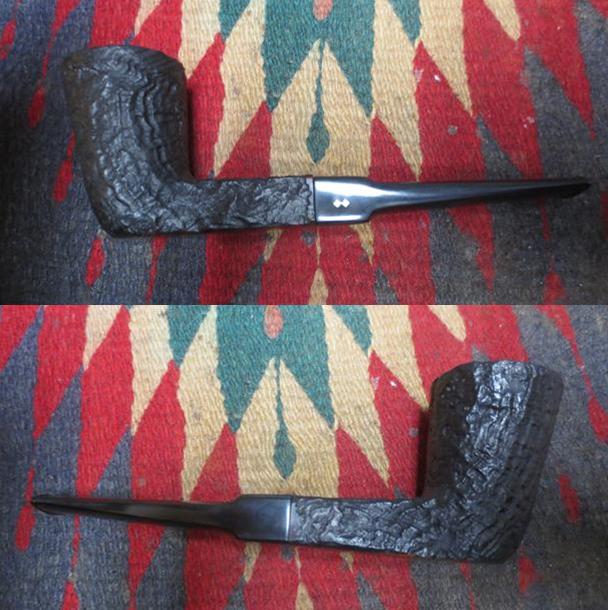
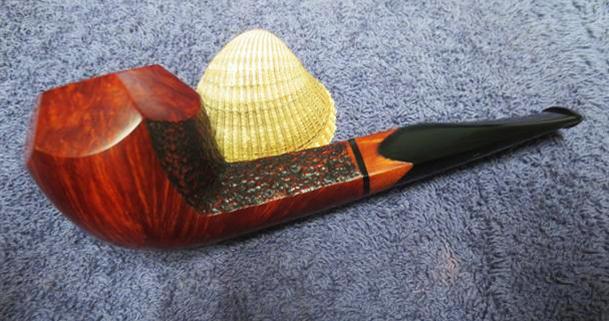
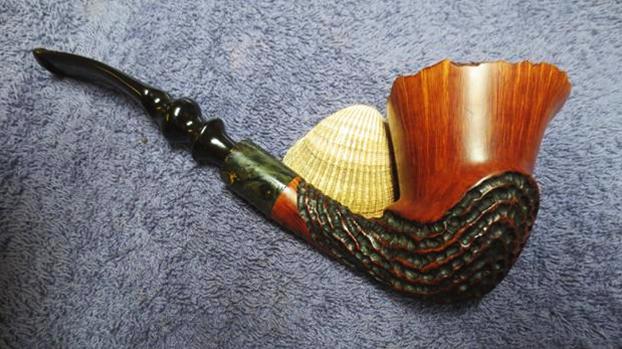
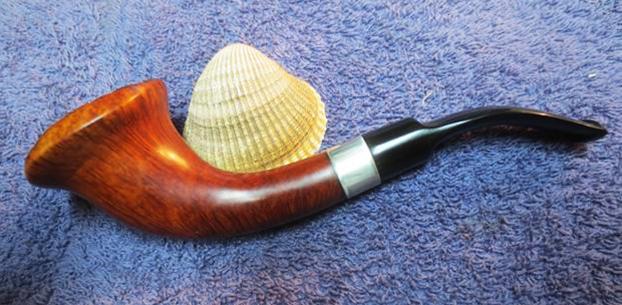
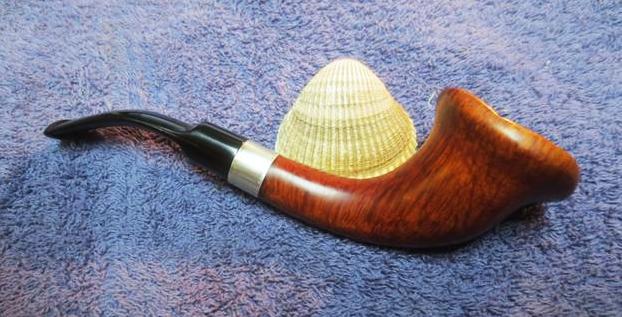
This restore was one of the biggest surprises I’ve had in the few years I’ve been learning a few of the myriad techniques and resources available.  Thinking at first it would be done overnight, three days later I knew never to underestimate the opponent each new pipe presents as.  I struggled with the question of to sell or not to sell, and gave in to my P.A.D.  All I have to say is, I’m glad I did, because, as the title says, this is one extraordinary freehand.

SOURCES

https://pipedia.org/wiki/Bjarne
http://www.pipephil.eu/logos/en/logo-b5.html

Cleaning up the first of three Heritage Pipes 45S Dublin


Blog by Steve Laug

Earlier this summer I was relaxing and surfing EBay on my iPad and I came across three listings for Heritage Pipes. All were square shank pipes and all were in decent condition. Two of them had original stems while the third had a well done replacement stem. Since I had found out about the brand through Andrew Selking who writes for rebornpipes I have kept an eye out for them. There do not seem to be too many showing up on EBay but every so often there is one. This time there were three. I contacted my brother with the links and he bid and won the threesome. Andrew wrote up a blog giving background, history, line information and a classic brochure from the company.  The information is helpful and it is worth a read if the brand intrigues you at all. Here is the link: https://rebornpipes.com/2014/12/23/refurbishing-a-heritage-heirloom/. I am including a brief summary of what he found in the next two short paragraphs to set the stage for the pipe on my work table.

Heritage pipes were Kaywoodie’s answer to Dunhill. According to one of their brochures, Heritage pipes were made from “briar burls seasoned and cured for up to 8 months,” with only “one briar bowl in over 300 selected to bear the Heritage name.” “Heritage stems are custom fitted with the finest hand finished Para Rubber stems. Mouthpieces are wafer thin and concave.”

The Heritage line began in the early 1960’s, with the trademark issued in 1964. The line was started at the request of Stephen Ogdon, (who worked for Kaywoodie in 1962). Mr. Ogdon had previous experience working for Dunhill, either running the New York store or working for Dunhill North America. Mr. Ogden was made President of Heritage Pipes, Inc., Kaywoodie Tobacco Co.,Inc. and Kaywoodie Products Inc. as well as a Vice President of S.M. Frank & Co. Heritage Pipes were produced from 1964 until 1970 (Source Kaywoodie.myfreeforum.org).

The pipe I chose to work on first from the threesome I had on the table was the number 45S Large Dublin, Square Shank, Saddle Bit. I have circled it in the page below. Interestingly, the one thing the Heritage line shared with Kaywoodie was the size and shape numbers. Unlike Kaywoodies, the Heritage pipes are normal push tenons.I am also including another page from Andrew’s blog post that highlights the line of Heritage pipes that the 45S Large Dublin comes from. It is a Heritage Antique which is described in the page below. Its “Rustic grain stands out in rugged relief”.  The brochure goes on to describe it in these terms, “…A special sandblasting process exposes a greater surface area on the bowl, giving a cooler, more satisfying smoke. Centuries-old Heritage Antique is strikingly masculine in appearance.”When the pipes arrived in Idaho, Jeff took photos of them before he did his cleanup work. The 45S Large Dublin was in good condition. There was a light cake in the bowl and no lava on the rim. The rugged sandblast finish was in excellent condition with only the dust of the years in the grooves. The underside of the square shank and bottom of the bowl were smooth. It was stamped 45S on the bottom of the bowl followed by Heritage over Antique mid shank. The stem was flawless other than a lack of lustre. The quality vulcanite had held up well through the years. The rim top was very clean and there was a thin cake in the bowl. The next two photos show the condition of the finish with photos of the rim and left side of the bowl.Jeff took a series of three photos of the stamping showing the entirety and each of the individual stampings.The left side of the saddle stem bore the twin diamonds that are the Heritage Pipe logo. You can see some scratches and scuffs in the hard rubber but there is no oxidation. The photos of the top and underside of the stem in front of the button are in excellent condition and show no tooth chatter or marks. Jeff worked his usual magic in cleaning up the light issues on this pipe. He reamed it with a PipNet reamer and cleaned up the remnants with a Savinelli Fitsall pipe knife. He scrubbed out the mortise and the airway in the shank and the stem with alcohol, cotton swabs and pipe cleaners. He scrubbed the exterior of the bowl, rim and shank with a tooth brush and Murphy’s Oil Soap to remove the dust of the years. He rinsed it under running water. He dried it off with a soft cloth. Once the dust was removed it was clear that the finish underneath was in stellar condition. The sandblast on the briar was a mix of grain shown in the grooves and crevices of the blast around the bowl and shank. I took photos of the pipe to show its condition before I started my work on it. The rim and bowl look really good. They are both very clean. I will need to rejuvenated the briar but little else regarding the finish.The stem looked really good. I only needed to polish it with micromesh sanding pads and give it a buff and it would be perfect. I polished the stem with micromesh sanding pads to remove the scratches and raise a shine. I wet sanded with 1500-2400 grit pads and wiped the stem down with Obsidian Oil after each pad. I dry sanded it with 3200-12000 grit pads and wiped it down after each pad with oil. When I finished with the 12000 grit pad I gave it a final coat of oil and set it aside to dry. Once it dried and I had finished with the bowl I would buff it with Blue Diamond on the buffing wheel and give it several coats of wax. I am continuing to experiment with a new product from Mark Hoover – the creator of the Before & After Pipe Stem Deoxidizer and Polishes. He calls it Before & After Restoration Balm and it can be used on briar or stems – whether vulcanite, acrylic or horn. He said it was designed to pull the dirt off of the briar as well as polish it. He added some anti-oxidants to keep the briar from getting damaged from both UV rays and water. This is the second pipe I have used it on that has a sandblast finish on the briar. I will continue using it for a while and see how it works in a variety of settings before I give an opinion of the product.I scrubbed the surface with the product and a soft cotton pad to rub it into the nooks and crannies of the finish. I buffed it with a shoe brush to further spread the balm over the surface of the bowl. I hand buffed it with a microfiber cloth and took the following photos of the bowl at this point. The finish is looking good. I put the stem back on the bowl and buffed it with Blue Diamond on the buffing wheel to polish the briar. I used a soft touch on the sandblasted areas as I did not want to flatten them or fill in the grooves with polishing compound. I gave the stem multiple coats of carnauba wax and I gave the sandblasted areas several coats of Conservator’s Wax. I buffed it with a clean buffing pad to raise a shine. I hand buffed it with a microfiber cloth to deepen the shine. The rough sandblast finish with its black and dark brown contrast stain and the square shank work well with the square saddle stem to present a beautiful pipe. The pipe looks fresh and new. The dimensions of this pipe are Length: 5 1/2 inches, Height: 2 inches, Bowl diameter 1 1/2 inches, Chamber diameter: ¾ inches. The finished pipe is shown in the photos below. It is a pipe that I really want to hang on to but I cannot have them all. It will soon be added it to the rebornpipes store if you are interested in adding to your collection. It is a beauty and will serve someone very well. Email me at slaug@uniserve.com or send me a message on Facebook. Thanks for looking.

I needed an easy clean up and this Savinelli Y2K Bulldog was just the ticket


Blog by Steve Laug

After finishing up the little MLC Redmanol French Briar bent billiard and dealing with many issues in the restoration I needed something different and something a bit less labour intensive. My brother had included a beautiful Savninelli straight Bulldog in the box he just sent me. It was a 6mm filter pipe made especially for the Savinelli triangular shaped balsa filter. It has a mix of finishes on the bowl and shank. It is predominantly smooth with a section that is sandblasted on the back part of the bowl wrapping part way around the right side and on the top side of the shank. The blast is nicely done and is rich looking. The grain on the rest of the bowl and shank is mixed straight, flame and birdseye. The stem has a thin band of acrylic between an insert of briar and the acrylic stem. The stem and shank are diamond shaped on the top and round on the underside. The stem provides a striking contrast with the rest of the pipe and matches the dark stain in the sandblast portion of the bowl. My brother took the following photos of the pipe before he started cleaning it.The pipe was in pretty good shape when it arrived at my brother’s place in Idaho. It had been smoked and had a thin cake in the bowl and some light lava on the inner edge of the bowl and the rim top. There were some light scratches in the briar but the finish was quite clean. The stem was in good shape though there was some light tooth chatter on both sides of the stem near the button.I wanted to know more about this particular line of Savinelli pipes so I did a quick search and found the following link that had a great deal of information on it that I found helpful. The linkis: http://www.smokeshopmag.com/0600/pipe.htm. I quote in full from the site because I could not have summarized the information any better. The pipe is one of the Y2K Limited Edition Pipes from Savinelli.

Each year, Italian pipe manufacturer Savinelli produces a limited production Collection Pipe – its so-called “pipe of the year.” Only 500 units are manufactured.

The 2000 Collection Pipe, the 16th in the series which extends back to 1985, has a flat bottom allowing the pipe to sit upright, referred to as a ‘sitter.’ Each comes with a pack of balsa inserts, an informational leaflet, and a presentation package. Suggested retail is $220.

This year, Savinelli is also offering a special limited edition Millennium Series, known as the Year 2000 Pipe. “We have developed a product possessing charismatic lines and an alluring design not previously seen in a pipe,” the company says of the unique six-sided, faceted bowl.

The pipe is available in five finishes.

All smooth, light natural finish.

All smooth, two-tone finish.

All smooth, deep walnut finish.

Part smooth, part sandblast.

All hand carved bowl and shank with a smooth top.

Like all Savinelli pipes, materials are selected from top quality plateaux briar and seasoned naturally for many years. Only ecological finishes and waxes are used, allowing the pipe surfaces to breathe.

Each of the five Year 2000 pipes is available together in the Year 2000 VIP Set, which also includes an additional Smooth Red finish R version with a Savinelli VIP Case.

They were available through Savinelli Pipes, Inc., PO Box 526, Morrisville, NC 27560, Tel.: (919) 481-05111, Fax: (919) 481-1948.

I really liked the look of the pipe. The fact that it was one of 500 pipes made that year made it interesting. It was not numbered so there was no way of knowing what number of the 500 this pipe was but that was ok. The finish on it is quite stunning and Jeff included some photos of the pipe from various angles. The last photo in the next set of four shows the stamping on the underside of the shank. It reads Savinelli in its classic banner over 2000 with Italy stamp to the right of it. The stem shows the combination of acrylic and briar that was done before the stem was cut and shaped. It is kind of an arched cut away stem – diamond shaped tapering back to the button on the top and rounded on the underside. There is some light tooth chatter as noted above on both sides of the stem at the button. The gold Savinelli crest is stamped in the top of the stem as it tapers back to the button. The crest is in excellent condition.This one was also a bit easier for Jeff in terms of the cleanup. He was no less thorough, nor did he very his process. He reamed the cake back to the walls of the bowl with a Pipnet reamer and cleaned it up with a Savinelli Fitsall pipe knife (somehow fitting on this pipe). He scrubbed the exterior carefully with Murphy’s Oil Soap and rinsed it off. He cleaned the exterior of the stem the same way and rinsed it. He cleaned out the internals with alcohol, pipe cleaners and cotton swabs until they were spotless. The pipe was really clean and would take polishing but little else to bring it back to top form. I took some photos of the pipe when I got it to record what it looked like before I did my refurbishing work. The top is very clean, though there is some darkening on the inner beveled edge of the rim that would need to be removed.The stem looked very good. He seemed to have been able to remove the tooth chatter on both sides. It would only need to be polished with micromesh and buffed to bring back the deep acrylic shine.I polished the stem with micromesh sanding pads – wet sanding it with 1500-2400 grit pads and dry sanding it with 3200-12000 grit pads. I rubbed the stem down with Obsidian Oil after each pad to give traction to the next pad and help me polish it. After the final pad I wiped it down with a damp cloth. The next series of photos show the development of the shine on the rubber stem. I lightly buffed the bowl with Blue Diamond to polish it a bit and see where I needed to do some work before the final buff. I hand polished the briar with micromesh sanding pads – wet sanding with 1500-2400 grit pads and dry sanding with 3200-12000 grit pads. I worked on the beveled inner edge of the bowl to clean it up some more. I wiped the bowl down with a damp cloth after each pad. I hand buffed it with a microfibre cloth after the 12000 grit pad. The pictures below show the progress of the polishing on the briar. I am experimenting with a new product from Mark Hoover – the creator of the Before & After Pipe Stem Deoxider and polishes. It is a Restoration Balm that can be used on briar or stems – whether vulcanite, acrylic or horn. He said it was made to pull the dirt off of the briar as well as polish it. He added some anti-oxidants to keep the briar from getting damaged from both UV rays and water. This is the first pipe I have used it on the briar. Earlier I used it on a horn stem and was really impressed by the life it gave back to the horn. I will keep using it for a while and see how it works in a variety of settings. I put the stem back on the bowl and buffed it with Blue Diamond on the buffing wheel to polish the briar. I used a soft touch on the sandblasted areas as I did not want to flatten them or fill in the grooves with polishing compound. I gave the stem and the smooth portions of the bowl multiple coats of carnauba wax and I gave the sandblasted areas several coats of Conservator’s Wax. I buffed it with a clean buffing pad to raise a shine. I hand buffed it with a microfiber cloth to deepen the shine. The handmade briar and acrylic stem and the combination of the dark stain in the sand blast and medium brown stain on the smooth portions of the bowl work well together to present a beautiful pipe. The pipe looks fresh and new. The dimensions of this pipe are Length: 6 inches, Height: 2 inches, Bowl diameter: 1 ¾ inches, Chamber diameter: ¾ inches. The finished pipe is shown in the photos below. I will soon be adding it to the rebornpipes store if you are interested in adding to your collection. It is a beauty and will serve someone very well. Email me at slaug@uniserve.com or send me a message on Facebook.Thanks for looking.

Rode Hard & Put Away Wet – MLC Redmanol French Briar Bent Billiard


Blog by Steve Laug

This older MLC bent billiard is a turn of the 20th century pipe. According to Pipedia, (https://pipedia.org/wiki/M._Linkman_%26_Co) the initials stand for M. Linkman Company which was thought to mean Mary Linkman Company. They were a Chicago based company that produced both briars and meerschaums. The company was named for the mother of the same Linkman who branded pipes under that same name and then eventually became the Dr. Grabow pipe manufacturer with which we are familiar. Pipephil’s site gave a little more information at this link (http://www.pipephil.eu/logos/en/logo-l4.html). M. Linkman and Co. was established by Louis B. Linkman and August Fisher in 1898. The company closed down in the 1950s and the Dr Grabow branch was sold to Henry Leonard and Thomas Inc. There was also a note that early Linkman’s pipes were stamped MLC in an oval.

If you have followed this blog for a while you have come to know that I love really old pipes and this one fits into that category of pipes. It is stamped MLC in an oval over Redmanol over French Briar on the left side of the shank. There are no other stampings on the pipe. The band is brass and is etched with a pattern of vines and flower around the entire band. The band was a mess on the shank end. It was bent and dented and no longer round. It was loose on the shank and would need to be straightened out before it was reglued. It is a small bent billiard and definitely sporting the wrong stem. It should have had a Redmanol stem to go with the stamping on the shank of the bowl.

I have written a bit more about the MLC brand on several early blogs (https://rebornpipes.com/2016/11/12/an-interesting-the-nuvo-mlc-italian-briar-hidden-in-a-wdc-case/ https://rebornpipes.com/2017/08/17/restoring-a-sad-old-mlc-bent-billiard/).

Jeff took the photos that follow before started the cleanup. You can see from the photos the condition of the pipe. The bowl exterior was absolutely filthy. It is the first time I have seen the lava that usually is on the rim flow over the top and down the sides of the bowl. The lava on the outside edge of the bowl and the thick cake in the bowl made it hard to know what the condition of the rim edges. The incorrect stem and the condition of the pipe told me that it was someone’s favourite smoker and when the old stem broke or wore out a convenient replacement was stuck in the shank and it continued to be smoked. The next photos of the bowl, rim and the flow of lava down the outside of the bowl shows how filthy this pipe was before Jeff started his clean up. The bowl is scratched and nicked but even that damage is hard to assess given the condition of the pipe. If you look closely you can see the MLC oval on the next photo of the shank. Below that it reads Redmanol over  French Briar. You can see the tars that have built up on the shank and pushed the band toward the end of the shank. It really was a dirty pipe. The photo of the bottom of the bowl and shank show more of the worn condition of the briar.The next three photos show the condition of the end of the band. It was in rough shape. As the band was pushed off the shank end because of the tars the end that extended beyond the briar of the shank was bent and damaged.The last photo Jeff took showed the condition of the stem. I was not particularly concerned with the stem as I was planning on replacing it with a fitted stem. If I used it in the future I would clean it up.I reread the blogs on the MLC pipes that I had restored previously to refresh the information. Now I was ready to see what I could do with this old pipe. It is really nice working on clean pipes. I have done enough repairs recently that have required me to ream and clean them that I have a greater appreciation for how nice it is to have this done for me. Thanks Jeff for your work and the way it makes my part a bit easier. He worked his usual magic in cleaning up this messy pipe. I really wondered what would lie beneath all of the grime and tars. Jeff reamed it with a PipNet reamer and cleaned up the remnants with a Savinelli Fitsall pipe knife. He scrubbed out the mortise and the airway in the shank and the stem with alcohol, cotton swabs and pipe cleaners. He spent quite a bit of time scrubbing the exterior of the bowl, rim cap and shank with a tooth brush and Murphy’s Oil Soap to remove the build up. He rinsed it under running water. It took a lot of scrubbing to get it free of the tars but it worked well. He dried it off with a soft cloth. Once the grime was removed it was clear that the finish underneath was in rough shape. The briar was quite nice with a mix of straight and birdseye grain around the bowl and shank. I took photos of the pipe to show its condition before I started my work on it. Jeff had done a miracle in removing the thick cake, cleaning the lava on the rim and sides of the bowl. The inner edge was in pretty  decent shape as was the outer one. I was happy to see the condition. There was however a darkening on the rim top and all around the bowl coming down the sides about ¼ inch. At first I thought that it might have been left behind by a rim cap of some sort but there were no small nail holes in the briar on the sides of the bowl. I think that actually it is what is left behind by the greasy hands of the pipe man and the lava that had flowed down the bowl sides.He was also able to remove much of the grime around the band on the shank and leave the stamping undamaged.I removed the stem and carefully slid the band off the shank. I wanted to clean up the end of the shank with alcohol and sandpaper. I also want to smooth out the back edges of the band and see if I could make it smooth and useable once again. I heated the end of an awl/ice pick and pressed it against the damaged areas of the band. The brass was quite thin so it was really quite workable. I was able to remove all of the damaged areas but one that was a compressed area on the bottom side. It would be hidden on the underside of the shank once it was glued back in place.I scrubbed the shank end and the dark area with acetone to remove more of the grime that was on the surface of the briar. I was able to reduce quite a bit of the buildup around the top of the bowl and the rim top with this method. I sanded the end of the shank to smooth it out. I used a dental spatula to spread the all-purpose glue around the shank. I pressed the band back on the shank with the small damaged spot on the underside.I took a photo of the end of the shank to show that the band fit tight on the shank and was even with the shank end. You can see the damaged area on the underside of the shank on the right side of the photo.I looked through my can of stems because I remembered having a bent Redmanol stem that I had picked up somewhere along the way. Sure enough it was there. It was slightly larger in diameter than the shank of the pipe so it would need to be sanded to fit nicely on the shank. It also had a push stem on it that would need to be removed and replaced with a normal tenon. Both of those were relatively easy jobs. I was anxious to get moving on the stem so of course I forgot to take photos of the stem with the meerschaum push tenon. It was loose so I unscrewed it from the stem. I had a small threaded Delrin tenon with the threads that were close to the same and threaded it into the airway on the stem. It worked well so I unscrewed it and glued it in place in the stem. The photos below show the new tenon on the stem.The tenon fit well in the mortise. The fit against end of the shank was nice. I sanded it to remove the excess material and reduce the diameter of the stem to match the shank using 220 grit sandpaper. In the photos below it is getting close to a nice fit. What you can’t see in the photos is that the nice, rich, red colour of the Redmanol lightened with sanding to shades of blood orange. I could not start over so I decided to keep sanding until the fit was correct. At first I did not like the effect on the Redmanol and I was disappointed by the colour shift. Looking at the stem from the drilled airway before I put the tenon in place and the flat end of the stem it appeared that the red was solid all the way through the material so when the oranges and yellows started to show up I was a bit frustrated. Now as I look at it I have to say it is growing on me. It reminds of the Popsicles that we used to by when I was a kid. I stopped sanding the bowl and put the stem on the shank to get a couple of photos so I could look at it on the screen and get the effect. It is almost like flame… kind of a nice variation. It is interesting to see the fine red line between the band and the stem – the flat end still is an even red. I don’t quite understand it but I am resolved to live with it. I am going to stain the bowl so that should also add to the variations of colour on this old pipe.I decided to try to bleach out the darkening on the rim top and first ¼ inch of the bowl all the way around. I wiped it down with bleach on a cotton pad and left it on the dark area to do its work. It worked better on the left side than the right.I stained the bowl with a dark brown aniline stain to try to blend in the dark rim stains. I applied the stain, flamed it and repeated the process. Once it dried I wiped the bowl down with alcohol on cotton pads to make it more transparent and let the grain shine through.  In the process some of the nicks in the briar showed up more clearly. I decided not to fill them in but to leave them as war wounds on this old timer. They tell a story that I wish the pipe could tell us. I polished the briar with micromesh sanding pads. I started polishing with 3200-4000 grit pads and wiped the bowl down after each pad with a damp cloth. I continued to polish with 6000-12000 grit pads and wiped it down after each pad. I hand buffed it with a soft cloth. The dark ring around the top of the bowl is still visible but less than before. The rim looks good. To further blend the darkened top portion of the bowl with the rest of the pipe I gave the bowl a contrast coat of Danish Oil Cherry Stain. I applied it by hand and rubbed it off and repeated the process to get a good smooth coat.I wiped the stain coat off and hand buffed the pipe lightly. The photos below show what the pipe is looking like at this point in the process. The right side still shows darker than the left at top edge of the bowl. I polished the stem with micromesh sanding pads – wet sanding it with 1500-2400 grit pads and dry sanding with 3200-12000 grit pads. I wiped the stem down with Obsidian Oil after each pad. After the final 12000 grit pad I gave it a final coat of oil and set it aside to dry. I put the stem back on the bowl and buffed it with Blue Diamond on the buffing wheel to polish the briar. I gave the pipe multiple coats of carnauba wax and buffed it with a clean buffing pad to raise a shine. I hand buffed it with a microfiber cloth to deepen the shine. The newly variegated Redmanol stem did not too bad with the old pipe. It shines like polished horn and the flow of the colours worked with the colours on the bowl. The way the colours shifted on the parts worked well together to present a beautiful pipe. The dark rim edge almost looks like the way meerschaum pipes were flumed with a dark edge. The pipe looks fresh and new. Later I will need to give it a bowl coating to protect the bowl inside as there are spidering cracks all around the briar. The finished pipe is shown in the photos below. Thanks for looking.


A Pipe by Lee Limited Edition 2 Star Rhodesian worth restoring


Blog by Steve Laug

Over the years I have gained a soft spot for Pipe by Lee pipes. I have found them in antique and junk shops around Canada and the US. They seemed to have had quite a following. Most of the pipes I have found have been 2 or 3 star pipes – designated by the number of gold stars on the stem. I have had a variety of shapes from Billiards, Bulldogs, Bull Moose, and Rhodesians. All have been well cut shapes and fairly decent pieces of briar. Some of the 2 star pipes have had small fills but generally they are well blended into the rest of the briar with the stain. Many have obviously been favourite pipes judging by the thick cake in the bowl and the wear and tear on the stems. They are workhorses and when cleaned up there is always a lot of life left in the pipe.

My brother Jeff picked up a Pipe by Lee Rhodesian that is on the delicate side – far different from the chunky ones that I have cleaned and restored. This one is a low profile Rhodesian with a round shank and a saddle stem. It has a dark stain on the briar, which is also different from other Lee pipes I have worked on. Jeff took some photos of the pipe before he started to work on it.The next two photos show the condition of the bowl. You can see from the photos that the bowl is thickly caked and there is a heavy lava overflow on the rim top and the inner edge of the bowl. It covers the beveled rim top to where it almost looks flat. There appears to be some nicks and damage on the front outer edge of the bowl but I won’t know until it has been reamed and cleaned. The finish on the bowl was dirty and had a lot of nicks and scratches in the surface of the briar. The double rings around the rim cap are in excellent condition with no damaged areas.Jeff took some photos of the shank sides to show the stamping on the pipe. It is stamped Pipe by Lee on the left side of shank over Limited Edition. On the right side it is stamped An Authentic over Imported Briar. The saddle stem had two gold stars inset in the top portion of the saddle equidistant from the front and back of the saddle. The stem was dirty, sticky and lightly oxidized. There were light tooth marks on the top and underside at the button and on the sharp edge of the button.

I decided to refresh my memory regarding the Pipe by Lee brand. I checked on my usual sites to learn what I could. I went to Pipedia and looked up the brand. Here is the link https://pipedia.org/wiki/Lee

I quote the entirety of the listing as it is brief and pointed regarding the history of the brand.

This brand was distributed by Stewart-Allen Co. Inc., NY. The Grading (ascending): 1 to 5 stars. Early pipes have seven pointed stars, middle run have five points and later pipes are stamped with coloured gold stars.

The site also quoted a section from the pipephil website regarding the brand. Lee seconds: Briar Lee, Gold Coast (preceding content from  “Pipes: Logos & Markings” website http://www.pipephil.eu/logos/en/logo-l3.html#lee)

I quote the next section of the article because it pertains to the pipe I am working on.

I have seen one pipe. “Pipe By Lee” stamped on left side of shank over “LIMITED EDITION”. Right side of shank stamped “AN AUTHENTIC” over “IMPORTED BRIAR”. Logo on top of the stem is three gold seven pointed stars in a row. Additional information on time frame of operation or quality of the pipes would be helpful. — Dgillmor 21:51, 10 May 2012 (CDT)

I went directly to the pipephil site to look at the stamping and logo markings that are included there. There was a photo of a similar pipe though it had a tapered stem rather than the saddle stem on the one that I am working on. The shape is a Rhodesian as well. Below that there was a photo of the stamping on that pipe that matches the stamping that is on the pipe have. http://www.pipephil.eu/logos/en/logo-l3.html#lee

I decided to do some more searching and look for sites other than Pipedia or Pipephil. I wanted to find a good summary of the history of the brand from someone who collects the pipe. I found a great link to a conversation on the Shotgun World BBS. The link is as follows http://www.shotgunworld.com/bbs/viewtopic.php?f=75&t=269843 I am including portions of that conversation from a member there, going by the screen name SuperXOne. He obviously collects pipes from Pipe by Lee. If you are interested in reading the entire interchange you can go to the site. For my purposes I only wanted the one side.

For any of you pipe smokers, I want to share something I’ve discovered about “estate” pipes. You may come on a pipe at a garage sale, flea market, or eBay that is marked “Pipes by Lee”. This pipe will be, if not completely abused beyond salvation…a goodun!!!

Evidently, there was somebody named Lee who made pipes in New York City from just after WW2 on up until sometime in the 1970’s. Lee’s pipes were not ever cheapies. He sold them mail order and wholesale, and Lee met Kaywoodie grade for grade back when Kaywoodie was winding down from making their best pipes into a slow, declining mediocrity.

Lee Pipes came marked with stars to determine quality. As of 1950, a one star pipe was $3.50, Two stars were $5, and Three stars were $10. Four star pipes were $15 and Five star pipes were $25. $3.50, $5, and $10 were the exact prices in the first three grades of Kaywoodies, the Drinkless, Super Grain, and Flame Grain. Later prices went up gradually for both brands, but somewhere along the line Lee lost the race and yet you can still buy a brand new pipe that says Kaywoodie Flame Grain in 2011…but it’s only a decent, basic pipe that wouldn’t have even made the lowest cut for a $3.50 Drinkless or One Star in 1950.

The overwhelming majority of Lee Pipes that I own and I’ve seen were three stars. There are two periods of quality, and no Lee Pipe is ever junk. The earlier, better Lee Pipes had actual gold inlaid stars into the rubber stem. The later, still good but not as nicely polished Lee pipes, had the stars cast into the stem but have no gold inlaid in the stars. Every so often, I’ll see a two star Lee and it will always have nice grain, but a few “fills” here and there. A three star Lee will have no noticeable “fills” and will always have excellent grain structure, but not quite on a level with a Pre War Kaywoodie Super Grain or Flame Grain. Evidently, Lee saved his best wood for his four star and five star pipes…but I’ve never seen one and never seen one advertised for sale. Likewise, for some odd reason, I’ve never seen a “one star” Lee pipe. Perhaps because the one stars all got used up and smoked out and thrown away within a few years of purchase.

What you’ll likely find is a “Three Star” Lee in a conventional shape such as an Author, Billiard, Apple, or Bulldog. They pretty well matched Kaywoodie in their shapes offered. Do not pretend that a Lee Pipe is the equal of a Pre War Kaywoodie “four hole” Super Grain or Flame Grain. But they are probably better than the Pre War “four hole” Kaywoodie Drinkless…at least the three star Lees are…and a Pre War “four hole” Kaywoodie Drinkless is a truly fine pipe. I’ve found the Lees to be better quality than the later “three hole” Kaywoodies, as well…even the higher grades of Kaywoodie. I’ve never seen a trace of varnish on a Lee pipe of any grade, and the workmanship is wonderful. Remember too that all that incredibly fine briar that Kaywoodie used before the war to make all those wonderful “four hole” Kaywoodies was already more or less gone by the time that Lee starts making his pipes after the war. Lee pipes more than hold their own against Kaywoodies of the same year of manufacture.

Prices on Lee pipes are cheap. A brand new one in the box is often less than fifty bucks. Well-used ones are giveaway cheap at flea markets and yard sales. A fair price for a good condition, lightly smoked three star Lee is probably twenty five dollars. For that you’ll get a pipe that you’d have to pay several hundred for if it was made brand new today…if you could even find one as good.;)

Here’s a web page that shows the Lee 1950 dealer’s catalog. Drool away!: http://pipepages.com/pblpage

But while Lee might have equaled Kaywoodie pipes, Kaywoodie had Lee beat hands down in catalogs. If you smoke a pipe you just have to see this 1947 Kaywoodie catalog: http://pipepages.com/47kaycat2.htm

All links are to Pipe Pages. A fine place to while away the time looking at old pipes.;)

And here’s a link to the existing Kaywoodie Company. Sad to compare them with the 1947 Kaywoodie, but at least they are still kicking and still in the USA: http://www.smfrankcoinc.com/

Too further illustrate just how high quality the Lees and the Kaywoodies were in the 1940’s, here is the 1949 price list of Alfred Dunhill. You could get your choice of Dunhill pipe in the USA in 1949 for $15 retail. In those days that would have included tariffs, and of course transportation to the USA from England. Dunhills are, of course, still being made to the exact same standards as they were in the late 1940’s. Today any Dunhill is over five hundred dollars…at the very least,,,,even the sandblasted ones. Back in the 40’s Lee and Kaywoodie hardly sold any sandblasted pipes at all, because their customers demanded for ten dollars a completely perfect, flame grained, smoothly polished, outrageously high quality pipe, and they would have only sand blasted a pipe that somehow didn’t make the grade. For fifteen dollars an American expected a Lee or Kaywoodie to be out of this world wonderful, and I can’t even imagine those $25 grade Kaywoodies and Lees…but we know that some were made. We Americans don’t think about us making the finest of anything, but we did back in the 1940’s when it came to making smoking pipes. Our pipes were the absolute best in the world, using the very best briar. http://pipepages.com/49rtda13.htm

Armed with the renewed information it was time to work on the pipe. Jeff did his usual thorough clean-up work. He reamed it with a PipNet reamer and cleaned up the remnants with a Savinelli Fitsall pipe knife. He scrubbed out the mortise and the airway in the shank and the stem with alcohol, cotton swabs and pipe cleaners. He scrubbed the exterior of the bowl, rim cap and shank with a tooth brush and Murphy’s Oil Soap and rinsed it under running water. It took a lot of scrubbing to get it free of the tars. He dried it off with a soft cloth. Once the grime was removed the finish was in excellent condition with a mix of straight and birdseye grain around the bowl and shank. He cleaned up the vulcanite stem and metal threaded tenon with the oil soap as well and was able to remove much of the debris. There were some light tooth marks on both sides of the stem.I took photos of the pipe to show its condition before I started my work on it. Jeff did an excellent job removing the cake from the bowl and scrubbing the rim cap. The bevel came out absolutely clean and looked great. The rounded outer edge of bowl looked good as well. There were a few light scratches that could be lifted from the right front of the rim top.The stem looked very clean. The vulcanite was pitted but did not show much oxidation on the surface. The wear on the sharp edge of the button on both sides was clear. The tooth mark on the top of the stem near the button was deeper than the chatter on the underside.I repaired the worn sharp edge on the top and underside of the button with clear super glue and used a needle file to clean up the edges. I sanded the tooth mark out with a folded piece of 220 grit sandpaper.I sanded the stem surfaces with 220 grit sandpaper to remove the light oxidation and the button. I polished the stem with micromesh sanding pads – wet sanding it with 1500-2400 grit pads and buffed it with red Tripoli to remove the oxidation that showed up in the first photo below. I dry sanded it with 3200-12000 grit pads. I rubbed the stem down with Obsidian Oil after each pad to give traction to the next pad and also bring a little life to the vulcanite stem. After the final pad I gave it a last coat of the oil and set it aside to dry. The next series of photos show the development of the shine on the rubber stem. I buffed the bowl with Blue Diamond to polish it a bit and see where I needed to do some work before the final buff. I hand polished the briar with micromesh sanding pads – wet sanding with 1500-2400 grit pads and dry sanding with 3200-12000 grit pads. I wiped the bowl down with a damp cloth after each buffing pad. I hand buffed it with a microfibre cloth after the 12000 grit pad. The pictures below show the progress of the polishing on the briar. I put the stem back on the bowl and buffed it with Blue Diamond on the buffing wheel to polish the briar. I gave the pipe multiple coats of carnauba wax and buffed it with a clean buffing pad to raise a shine. I hand buffed it with a microfiber cloth to deepen the shine. The black stem of polished vulcanite and the polished dark stained briar work well together to present a beautiful pipe. The pipe looks fresh and new. The finished pipe is shown in the photos below. Thanks for looking.


Restemming a A Unique Randy Wiley Freehand 99


Blog by Steve Laug

Earlier this week I received a call from a fellow who had been referred to me by a local pipe and cigar shop. He had a pipe that he had broken the stem on and wanted to know if I would replace the stem for him. He was visiting Vancouver and thought he could get a stem while he was here. I told him to drop it by my office and I would have a look and see what I could do with it. I was not clear at this point if the stem had broken at the tenon or somewhere else. I also wondered if the tenon was still in the shank. I wanted to see for myself before I committed to repairing it. He brought it by the office and he showed it to me and I was hooked. It was a beautiful Randy Wiley Pipe stamped Wiley over an R. Wiley signature. Under that it was stamped Handmade USA over 99. Andy C. posted a comment below that the number 99 is a grade number and that this is one of Randy’s higher grade pipes. Thanks Andy for the information. He told me that pipe was a gift from a partner and he really wanted it repaired. The briar was beautiful grained on the smooth part and faded into a swirled and dotted rustication pattern. The rim top was plateau briar and had been left natural. There was a shank extension that was marbled green, golds, yellows and blacks and really worked well with the patterns on the briar. I looked down the shank of the pipe and could see a lot of debris that was built up in the mortise and airway. It appeared to be tars and pieces of debris from the broken stem. The bowl still had some remnants of tobacco inside. It had a rich tobacco smell that was intriguing. I asked him what tobacco he smoked and he said that he primarily smoked a dark natural tobacco from the Amazon called Mapacho.

I knew nothing of Mapacho so I looked it up on the internet. I found that Mapacho was Nicotiana rustica and is a rainforest plant in the Solanaceae family. It is a very potent variety of tobacco. It contains up to nine times more nicotine than common species of Nicotiana such as Nicotiana tabacum (common tobacco). I have included a picture because it is an intriguing looking tobacco.I asked him if he wanted me to clean up the bowl, ream and polish the pipe while I made a stem. He did not think it was necessary as it did not have a thick cake and he had taken good care of it. So I brought it home to fit a new stem. I checked out the inside of the mortise and shank with pipe cleaners, cotton swabs and alcohol to make sure that I could get a snug fit with the new stem. I pushed a pipe cleaner through the airway and cleaned out the debris. I waxed the bowl with Conservator’s Wax and buffed it with a clean buffing pad to raise the shine. I took pictures of the polished pipe.  It really is a beauty and the contrast of finishes with the marbled shank extension of the really work well together. The next photo shows the stamping on the underside of the shank. The stamping is very clear and readable.With the bowl finished I used a preformed stem that I had in my stem can that I thought would work well with the style of this pipe. It was in excellent condition – unused and undamaged. It had slight oxidation that would be quite easy to deal with on the buffer. I turned the stem end on my PIMO tenon turning tool to reduce the end to fit in the shank. I cut it back to slightly larger than I needed and then sanded and filed it by hand until it fit in the mortise.I funneled the end of the tenon to facilitate the flow of air from the bowl to the end of the button. I used a sharp pen knife to shape the funnel and sanded the inside to remove all sharp edges.I sanded the stem surfaces with 220 grit sandpaper to remove the light oxidation and scratches on both sides of the stem. I sanded the end of the button and the sides of the stem to remove the casting marks on the stem. I worked on it until it was black and there was no remnant of oxidation or the casting marks left on it. I polished the stem with micromesh sanding pads – wet sanding it with 1500-2400 grit pads and buffed it with red Tripoli to remove the oxidation that showed up in the first photo below. I dry sanded it with 3200-12000 grit pads. I rubbed the stem down with Obsidian Oil after each pad to give traction to the next pad and also bring a little life to the vulcanite stem. After the final pad I gave it a last coat of the oil and set it aside to dry. I buffed the stem with Blue Diamond and gave it multiple coats of carnauba wax. I buffed it with a clean buffing pad to raise the shine. The next series of photos show the development of the shine on the rubber stem. I gave the pipe multiple coats of carnauba wax and buffed it with a clean buffing pad to raise a shine. I hand buffed it with a microfiber cloth to deepen the shine. The new black stem of polished vulcanite and the polished briar work well together to present a beautiful pipe. The pipe looks fresh and new. Tomorrow it will go out in the afternoon post to its original owner. I think he will enjoy the look and feel of his new stem. The finished pipe is shown in the photos below. Thanks for walking with me through this restemming job and through a bit of education for me on Mapacho tobacco. Thanks for looking.

The Rebirth of an Unmarked Horn


Blog by Steve Laug

When my brother sent me photos of this particular pipe I could not see what he saw in it. It was just ugly in my opinion. The shank was crooked, the plateau crown had been sanded slightly, the shank was cracked and missing a chunk of briar, the copper ferrule looked like it fit better under a sink than on the shank and the finish had warts in it all around the bowl. To top it off the stem was clunky, thick Lucite and had lots of divots and tooth marks. It did not look like it belonged at all. The entire pipe looked like a failed shop project to me – one that took its own direction as it was being made. He purchased it and took photos of it before he cleaned it up thinking I might be charmed by it as he was.The next photo from the top shows the bow in the shank. I figured that the drilling would be way off once I got it and took it apart. I was pretty certain this one was going to interesting to work on to see if I could get anything resembling a nice looking pipe out of the concoction that it was in the photos. Note also the thick cake in the bowl and the overflow of lava on the rim filling in the smoothed out plateau. It was hard to know at this point if there was damage to the inner edge of the rim because of the thick cake and lava. Only a thorough clean up would reveal the condition. The next three photos show the warts on the sides of the bowl. The finish was rough. It was hard to tell if these were fills or if the pipe had not been sanded smooth when it was originally finished. In the photos, they look like scratches but they are actually standing above the finish on the briar. Some of them have scratches around the edges on the surface of the bowl. As I looked at the horn, I had to admit there was something strangely alluring to the shape and it was growing on me. The copper fitting is not snug on the shank it rattles around and is only held in place by the stem. You can see the gap between the cap and the shank. The shank under the band is coated with grime and there is a dark oxidized buildup.When the stem is removed the cap falls off and reveals the damaged shank. You can see the crack in the shank end and up the side on the right side of the photo below. The tars and oils that have built up on the end of the shank and in the mortise are quite thick. In the second photo below you can see the missing piece of briar. The third photo is a close up of the shank end. It shows the damage clearly as well as thick tars on the shank  under the cap. The stem is Lucite and in rough condition. It is the thick kind of stem that came out when Lucite first came on the market. It thick and poorly shaped. There are major dents in the surface and many tooth marks and chatter on both sides of the stem at the button. I do not intend to reuse the stem as it is not my kind of stem. I will replace it with a vulcanite stem and fit it to the shank. Jeff did his usual thorough clean up even on this ugly, old pipe. He reamed it with a PipNet reamer and cleaned up the remnants with a Savinelli Fitsall pipe knife. He scrubbed out the mortise and the airway in the shank and the stem with alcohol, cotton swabs and pipe cleaners. He scrubbed the exterior of the bowl and shank with a tooth brush and Murphy’s Oil Soap and rinsed it under running water. He scrubbed the rim on the bowl to clean out the lava on the plateau. It took much scrubbing to get it free of the tars. He dried it off with a soft cloth. The bowl itself was very light weight. It is a good looking piece of briar and has flame grain all around the bowl and shank with some birdseye on the shank top and bottom. He cleaned up the Lucite stem with the oil soap as well and was able to remove much of the debris. There were tooth marks and tooth chatter on both sides of the stem. The freehand style stem had a tapered tenon that sat tightly in the copper end cap. The copper cap was loose and fell off when the stem was removed from the pipe. I spent time turning the pipe over to see if I could find any identifying stamping that would help me know who made it and when it was made. There was nothing there. It was an unstamped pipe by an unknown maker at an unspecified point in time. I took photos of the pipe to show its condition before I started my work on it. Jeff did a great job on the rim top and the bowl. The inner edge of the rim was in good condition with little damage. There was still a little lava on the back side of the rim top that would need to be taken care of.The Lucite stem was clean but looking at it close up I knew that I did not want to keep the stem. I would need to go through my can of stems to find one that would work on this pipe.I removed the stem and the end cap and looked closely at the damage to the end of the shank. Once Jeff had cleaned it up the damage was really clear. The end of the shank had deteriorated and chunks of briar were missing. The surface of the shank end was rough and damaged. There was a large crack on the right side near the underside going from the shank end up the shank for ½ inch. I used a Dremel and sanding drum to remove the damaged shank end. I evened up the end of the shank and took off all of the compromised briar. I cleaned up the end so that a regular stem would work with it. I smoothed out the inside of the mortise. During this cleanup is when I discovered that the mortise and the airway in the shank were drilled at an angle. The airway was high in the end of the mortise and came out at the bottom of the bowl. The mortise itself curved and was poorly drilled in the shank. I cleaned up the briar that had been under the copper band. The briar was black with the colour going deep in the briar. I sanded it smooth and used a microdrill bit to drill a pin hole at the end of the crack to stop it from spreading further. I filled in the hole and the crack with clear super glue and let it cure.When the glue repair had dried, I sanded it smooth and pressure fit a nickel band over the end of the shank. I heated the band with a lighter to expand it and pressed the shank end and band so that the band went up the shank to cover the crack and the repair. I think that the band was a far better look for the pipe than the copper shank cap had been. I scrubbed the plateau top with a brass bristle tire brush to remove the remaining lava in the crevices of the surface. I worked on it until the rim top was clean.I sanded the bowl with 220 grit sandpaper to remove the warts from the surface and smooth out the scratches and dents. I wanted the surface to be smooth the way it should have been when the pipe was made. I worked on it until it was smooth to the touch. When I finished I washed the surface of the bowl and shank with acetone on a cotton pad to remove the last of the dust and the remaining finish from the briar. I buffed the bowl with Blue Diamond to polish it a bit and see where I needed to do some work before the final buff. I hand polished the briar with micromesh sanding pads – wet sanding with 1500-2400 grit pads and dry sanding with 3200-12000 grit pads. I wiped the bowl down with a damp cloth after each buffing pad. I hand buffed it with a microfibre cloth after the 12000 grit pad. The pictures below show the progress of the polishing on the briar. I used a black Sharpie Pen to colour in the crevices on the plateau top. I wanted the smooth high spots to shine through the deep black in the grooves. The contrast would look really good once the pipe was given a finish coat of stain and was buffed and waxed.I stained the briar with a Danish Oil Cherry stain to highlight the red colours in the briar and bring about a contrast with straight grain. I stained the plateau as well to give red hues to the high spots and contrast with the black of the crevices on the top. I hand buffed the bowl with a soft cotton cloth and then with a microfiber cloth to raise the shine. The bowl looks really good and the grain stands out. The straight grain all around the bowl sides looks really good. I chose a vulcanite saddle stem for the replacement for the Lucite stem. I knew it would be a bit of work to get things lined up because of the drilling in the shank. I measured the angles in the shank and figured I would need to bend the tenon at the angle shown in the photo. I heated the tenon and put it in the shank while it was still pliable and set the angle to match the angle of the mortise. The photo below shows the angle on the tenon. Bent at that angle the stem sits tight against the mortise. It gives you a good idea of the how poorly drilled the pipe was and what measures I had to take to line things up. I gave the tenon a coat of clear fingernail polish to make it fit snug in the mortise and let it dry. I roughened it up with the edge of a needle file to give it a bite in the shank. I tried the fit and all was well.I sanded the stem surfaces with 220 grit sandpaper to remove the light oxidation and the tooth marks and chatter on both sides of the stem. I worked on it until it was black and there was no remnant of oxidation or tooth marks.I polished the stem with micromesh sanding pads – wet sanding it with 1500-2400 grit pads and dry sanding it with 3200-12000 grit pads. I rubbed the stem down with Obsidian Oil after each pad to give traction to the next pad and also bring a little life to the vulcanite stem. After the final pad I gave it a last coat of the oil and set it aside to dry. I left the tenon with a few ridges to add bite to the inside of the mortise and hold it firmly in place. Some oxidation showed up on the top side of the stem near the saddle in the photos above so I worked it over in that area once again. When I finished I buffed the pipe on the wheel using Blue Diamond Polish and worked over the stem and bowl to remove any remaining scratches. I buffed the nickel band to give it a shine. I gave the pipe multiple coats of carnauba wax and buffed it with a clean buffing pad to raise a shine. I hand buffed it with a microfiber cloth to deepen the shine. The warts and nicks that I had sanded out were gone and the grain just popped on this old pipe. The new stem, with the angled tenon brought things into line and to me the pipe looked much better. The black of the polished vulcanite and the polished briar work well together to present a beautiful pipe. The finished pipe is shown in the photos below. It really is a beauty. Thanks for looking.

1933 Parker Super Bruyere Lovat


By Al Jones

This beautiful little lovat was a gift from my friend, Dave Jacobson which he found at the recent Kansas City Pipe show. I’ve restored a few Parkers over the years, but I wasn’t immediately familiar with the nomenclature and dating process. This one has a Patent number, which I knew could be used to date the pipe and that it was most likely pretty old. Reviewing the Pipedia article on the brand, I determined that because of the “10” near COM stamp that the pipe was made in 1933. The pipe was in such solid shape on all accounts, I still have a hard time believing it is 84 years old! A member of the PipesMagazine forum and frequent contributor to the British Pipes section there confirmed the date.

Below is the pipe as I received it from Dave. It had some plier type marks on the stem, some small teeth indentions under the button and a heavy cake buildup. The shank was completely blocked, requiring the drill piece from a Senor reamer to clear the draft passage. But it certainly looked to be a simple restoration.

I used my Pipenet reamer to remove the thick layer of cake, finishing with a piece of 320 grade paper wrapped around a smaller sized bit. The bowl is in fantastic condition and despite the pipes diminutive size, it had very thick walls. I soaked the bowl with sea salt and alchol.

Following the soak, the stem was mounted. I was able to remove most of the tool-type marks with some 800 grit wet paper, without altering the profile of the stem. The tooth indentions lifted slightly, but they were so shallow, I left well enough alone. Oxidation was removed with 800, 1,500 and 2,000 grit wet paper, followed by 8,000 and 12,000 micromesh sheets. A worn piece of 2,000 grit wet paper removed most of the rim top darkening without breaking the stain. The stem was then buffed with White Diamond and Meguiars Plastic Polish.

This is the first Lovat shape in my collection. I’ve worked on a number of British lovats over the past few years, but to this point, all of them have been too large for my tastes, so they were resold or traded. This little gem is only 21 grams, so it is a keeper. Thanks for thinking of me Dave Jacobson!

A Trio of Blue Ribands


By Al Jones

Any collector and enthusiast of Comoy’s pipes knows that that the Blue Riband grade is one of the finest made by that storied maker. I own a number of Comoy’s pipes and have restored several dozen in the past few years. But to this point, I’d only seen the fabled Blue Riband on internet forums and never held one for myself. The trio here belong to my friend Dave Jacobson and were found at the recent Kansas City pipe show. I was thrilled for the opportunity to restore them. “Restore” might be a bit strong as all three were in very good condition. The seller (or someone else) had cleaned them and polished the stems but there was some rim build-up on one pipe and all three had a stubborn layer of oxidation on the stem. The trio included a Shape 252, a “Medium Pot”; Shape 66, a “Large Liverpool”; and the Shape 483, “Large Apple”. All three bear the same, round “Made in London, England” stamp used from the late 1940’s to the merger in 1981.

Shape 252

Shape 483

Shape 66

I polished all three stems starting with 800 grit wet paper, followed by 1,500 and 2,000 grades. 8,000 and 12,000 micromesh sheets were used next, followed by a machine polish using White Diamond and Meguiars Plastic Polish.

The briar was polished with White Diamond and several coats of Carnuba wax, while being careful to stay away from the very good nomenclature.

The Shape 66 had an odd stem logo and I determined that the stem was a replacement. The “C” was stamped and not of the drilled, 3 piece logo found on the other two. The tenon was also slightly different and it did not include the stainless tenon insert. Fortunately, the replacement stem is of a very high quality. This pipe was the most worn of the trio. Assuming they belonged to the same pipeman, this one might have been his favorite. He chose well on the repairman for the the replacement stem and it should be equally as comfortable as the stems on the other two. This one has a bit of bowl-top build-up which I removed with a worn piece of scotch brite and 2,000 grade wet paper.

Here is the metal supported tenon found on the other pipes.

I used some white acrylic paint to brighten the stamped “C” logo. The stamp was a bit shallow, but it did improve the appearance. That finished pipe is below

Here is the finished Shape 252.

And finally, the Shape 483.

Renewing an old GBD Lattice Work Meerschaum Calabash


Blog by Steve Laug

When Jeff messaged me that he had picked up a GBD lattice meerschaum pipe, I was a bit surprised. I had read the there were GBD meets out there but I had never seen one let alone worked on one. I was excited to see what he had found. He sent photos of the pipe and case before he cleaned it up. The case was covered in brown canvas that had been waterproofed. It was in excellent condition and showed little wear or tear. The brass hardware looked new.When he opened the case, it was lined with a taupe plush fabric. The GBD logo was inside the base just above the inset for the pipe. It read, “Hand carved in Turkey from Genuine Turkish Block Meerschaum” in a circle around the GBD oval logo. The inside of the case was in excellent condition. Sitting in the form fitted case was a lattice meer. It looked to be in good condition and was already picking up a patina on the shank and lower half of the bowl.  The rim top was also lattice work and it had a bit of lava in the crevices and grooves of the lattice. There was a thick cake in the bowl that overflowed on the back inner edge of the bowl. The next four photos give various views of the rim top so that you can appreciate the work that needed to be down on the rim top of the pipe. Jeff took a photo of the side of the bowl and the underside of the bowl and shank to show the colouration – the patina that was already beginning to develop on the pipe. The trick would be to clean up the dirt and grime without damaging the patina.The stem had the GBD rondel in the top of the saddle portion and it was in great condition. There were tooth marks and chatter on both the top and underside of the stem and wear on the button surface. The slot in the button was also very tight and it was almost impossible to pass a pipe clean through the airway without a lot of effort. The nylon tenon was in excellent condition and screwed directly into threads in the mortise of the meerschaum. There was no shank line or receptacle end to receive the tenon. The airway in the tenon was clogged with bits of tobacco and tars so even going through the tenon end was difficult to do with a pipe cleaner. Jeff had to use a paper clip to open the airway in the stem before he could get a cleaner through from tenon to slot.Jeff did his usual thorough clean up on this meerschaum. He carefully reamed it with a PipNet reamer and cleaned up the remnants with a Savinelli Fitsall pipe knife. He scrubbed out the airway in the shank and the stem with alcohol, cotton swabs and pipe cleaners. He had to open the airway in the stem with a paper clip before he could get pipe cleaners through. He scrubbed the rim top with a tooth brush and Murphy’s Oil Soap and carefully rinsed it under running water. He dried it off with a soft cloth. The meerschaum in this pipe was very light weight. The swirls and lattice work are quite unique. I have not seen that kind of carving in the past. There were tooth marks and tooth chatter on both sides of the stem. The threaded tenon was in great condition as were the threads in the mortise. The stem was Lucite and was a combination of swirled reds/browns and tans. Whoever carved this in Turkey for GBD did a great job in making a beautiful pipe. I took photos of the pipe when I brought it to my worktable. I like to have a record of what the pipe looked like before I started for comparison once I have finished working on it. I took a photo of the rim top to show what it looked like after Jeff had scrubbed it. The lava on the front right of the rim was gone. The back side lava was gone and what was left was some darkening along the inner bevel of the rim and in the edges of the swirls in the lattice work. He did a great job on it.The stem damage is more obvious after he had cleaned it up. None of the tooth chatter or marks were too deep so they would be fairly straightforward to sand out.To vary my work pattern I decided to start on the bowl on this pipe. I picked at the remaining debris in the swirls of the lattice with a dental pick and was able to remove more of the debris. I used a folded piece of 220 grit sandpaper to work on the darkening around the beveled inner edge of the rim. I was able to remove almost all of it without changing the shape of the bowl or rim top.I spot cleaned the rim with a damp cotton pad to remove the debris that my work had left behind. With the rim top cleaned up it was time to polish the meerschaum bowl. I started polishing with 1500-2400 grit micromesh sanding pads. After each pad I wiped the bowl down with a damp cotton pad. I continued polishing using 3200-12000 grit pads and wiping it down after each sanding pad. I took photos of the bowl after each set of three pads to show the progress of the shine. I set the bowl aside and turned my attention to the stem. I sanded the tooth chatter and marks out of the Lucite with 220 grit sandpaper. It did not take too much sanding to remove the damage to the stem surface and the surface of the button on both sides.I reworked the button and slot using needle files to open up the airway enough to be able to easily push a pipe cleaner through the airway.I polished the stem with micromesh sanding pads – wet sanding with 1500-2400 grit pads and dry sanding with 3200-12000 grit pads. I wiped the stem down with a wet cotton pad after sanding with each pad. I buffed the stem with Blue Diamond on the buffing wheel and carefully buffed the bowl at the same time. I used a light touch on the bowl and a heavier touch on the stem. I avoided the GBD rondel so as not to damage it. The pipe feels great in the hand. The carving is very well done and the pipe is exceptionally pointing to a quality block or meerschaum. The developing patina is a bonus for whoever adds this one to their collection. The dimensions are Length: 5 ½ inches, Height: 2 inches, Bowl diameter: 1 ½ inches, Chamber diameter: ¾ inches. I will be adding it to the rebornpipes store shortly. If you want to add it to your collection email me at slaug@uniserve.com or send me a message on Facebook. Thanks for looking.