Category Archives: Pipe Refurbishing Essays

Essays and pictorial essays on the art of refurbishing

Restoring A Medico Double-Dri Bakelite Pipe


Blog by Steve Laug

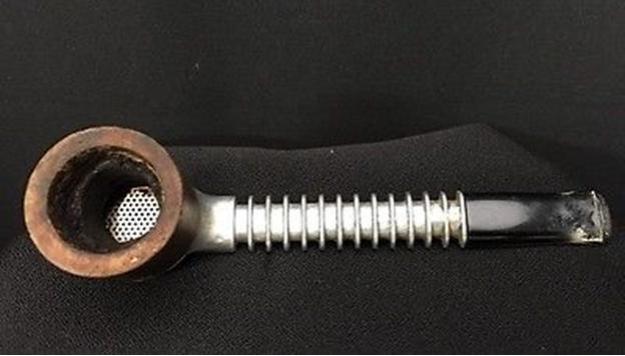
In the ongoing adventure of discovery of the quest for the drier smoking pipe I keep finding new ones that intrigue me. This latest addition that my brother Jeff picked up is unique even if it was not part of that adventure of discovery. It is stamped Medico over Double-Dri and it is unusual to say the least. The base of the pipe I believe is made of Bakelite. The bowl is painted briar or at least looks to be. The bowl is friction fit into the base and is held in place by a cork or composition ring around the edges of the base. The bottom of the bowl is a hard clay or ceramic material. The bowl is U shaped and has three holes in the bottom of the bowl that angle outward toward the edge of the external bottom of the bowl that fits in the base. The bottom of the base has a raise metal pillar that sits in an indentation on the bottom of the bowl once it is in place. Double-dri3

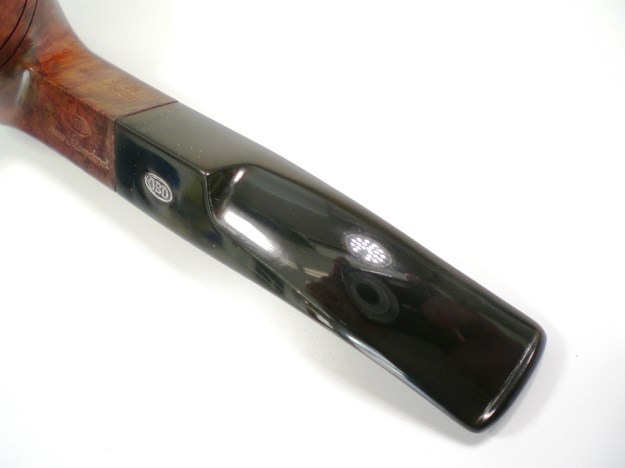
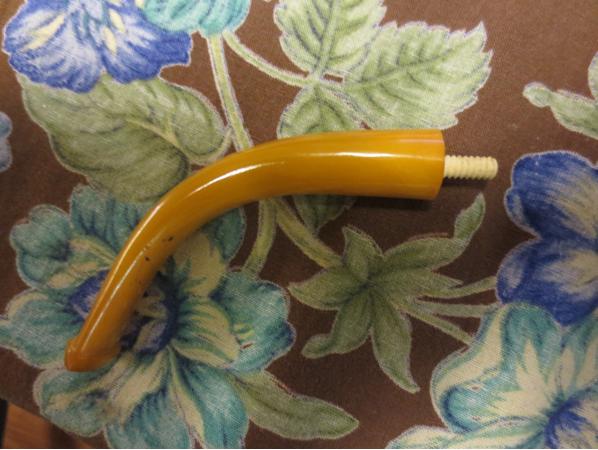
This directs the airflow into the rounded bottom of the base and the airway on the back of the pipe. There is a Medico paper filter that sits in the shank of the pipe and the tenon of the stem to further dry out the smoke. Thus there are two traps for moisture so that the smoke that is drawn into the mouth of the smoker is Double Dry. The stem on the one I have is made of a multi-coloured white/grey and has a raised interlocking DD logo. The white/grey nylon looks quite nice with the dark of the base and the white of the bowl.

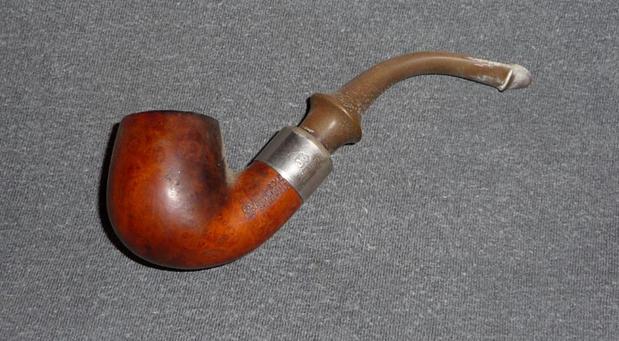
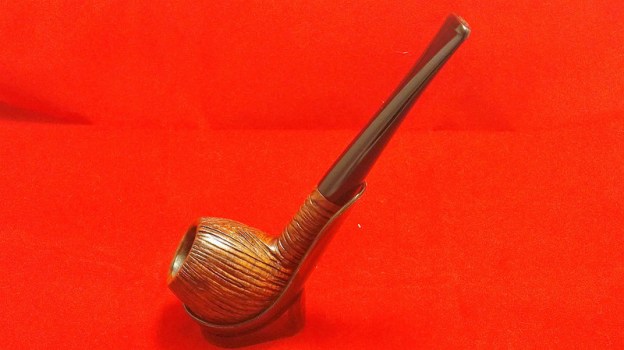
The pipes seemed to come in a variety of colours and bowl configurations and materials from meerschaum to briar and painted briar. The bases also came in a variety of colours as did the stems. I found the next photo on the web that gives some idea of the wide variety of choices in this 50’s era pipe. Double-Dri1Charles Lemon at Dadspipes wrote about one he did a refurb on and it got my attention so I have had an eye out for one. Here is his write up http://dadspipes.com/2015/10/30/1041/ He wrote that the “Double-Dri was Medico’s foray into the field of removable and interchangeable bowls, though where the Falcon pipe used aluminum for its shank, the Double-Dri used another 1950’s Space Age material, Nylon, for both shank and stem. Press-fit bowls were available in briar or the more expensive meerschaum.”Double-dri2

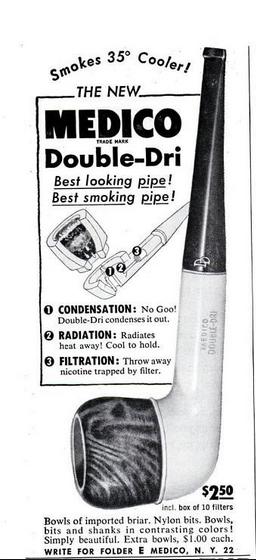
There was not much information on the brand. The PipePhil site just had the brand and a few photos of two different pipe configurations. The Smoking Metal site gave the name and a picture of the pipe put together and taken apart. There was nothing that I could find that spelled out what Charles spoke of in terms of the base and stem being nylon. It appeared to me that he was right about the stem on the one I had. It was nylon. The base however was exactly like earlier Bakelite pipes that I have in my collection. I know there is a way to check that but the look and feel certainly makes me think I am right in that assessment.

Like Charles I also found a few advertisements in 1950s era magazines that sold the pipe. I could not resist using the one to the left.It is a Medico advertisement in the March 1955 edition of Popular Mechanics magazine. The language of the advert makes for great reading. It says that it is the Best Looking Pipe and the Best Smoking Pipe. It smokes 35 degrees cooler. The Double-Dry system is shown in the line drawing as made up of three parts – Condensation, Radiation and Filtration. If you buy the press on this pipe you will wonder why it is not still being sold 60+ years later. (I would love to get a hold of a copy of the folder that is mentioned at the bottom of the advertisement if any of you have one around.)

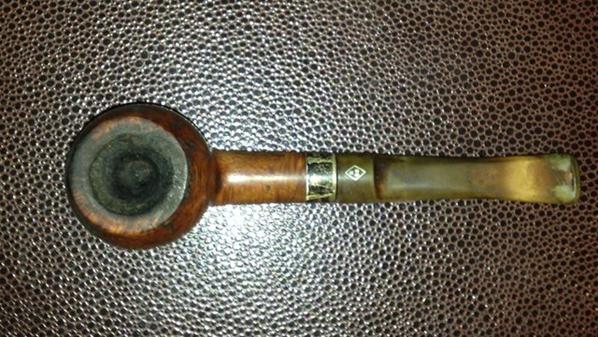
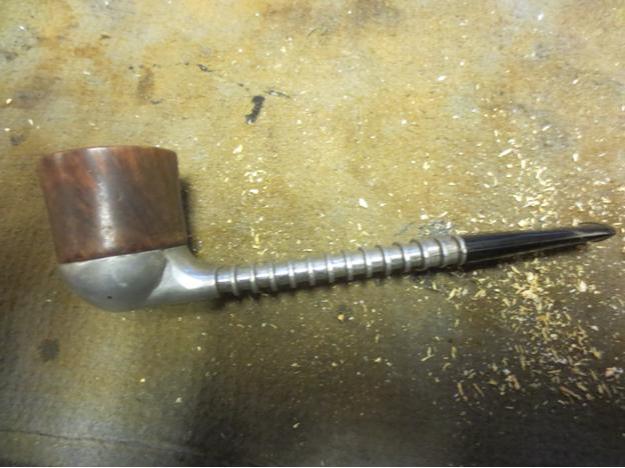
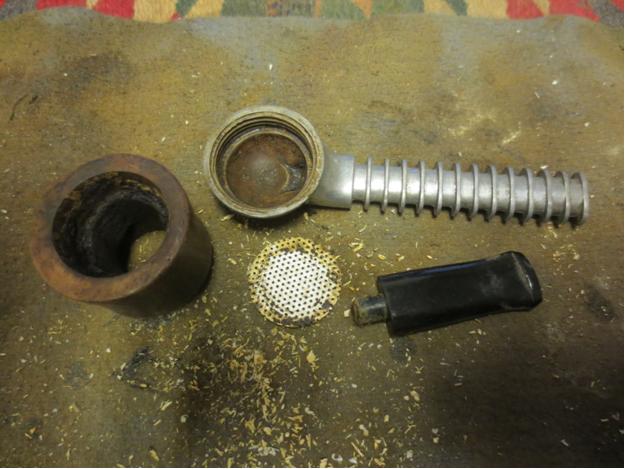
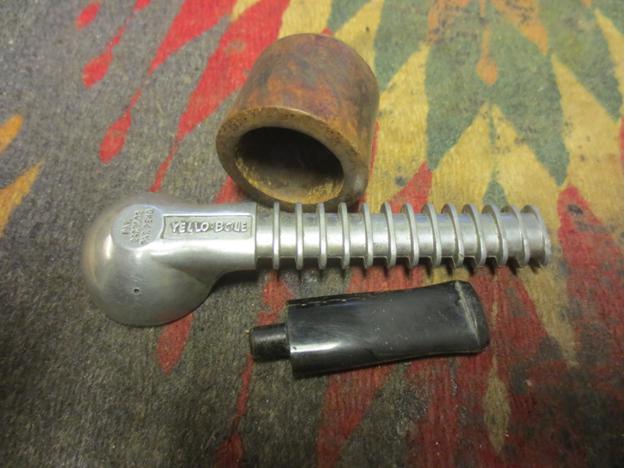
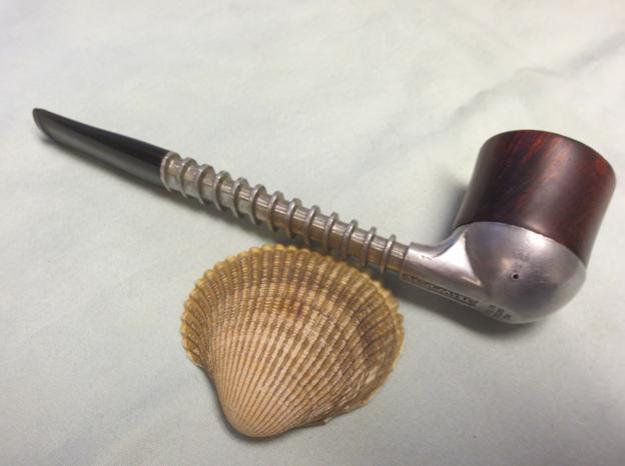
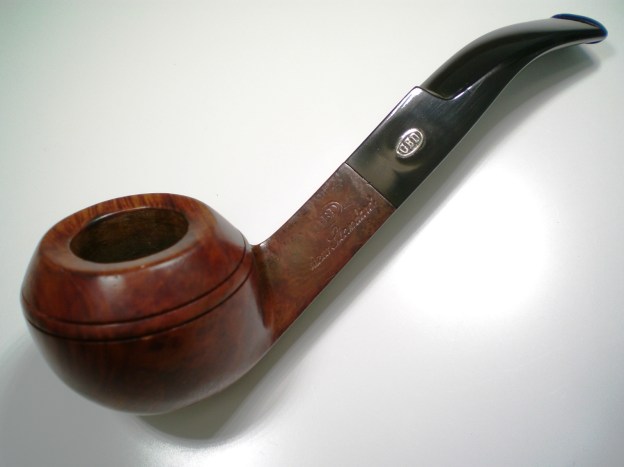
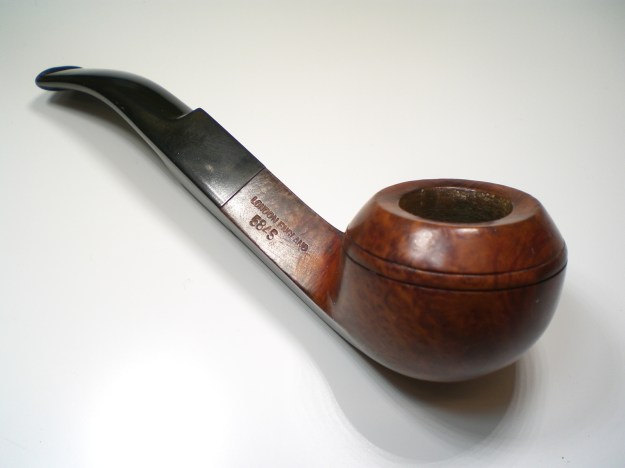
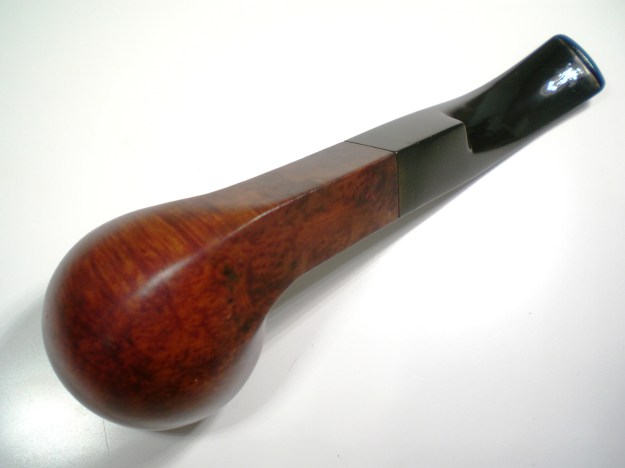
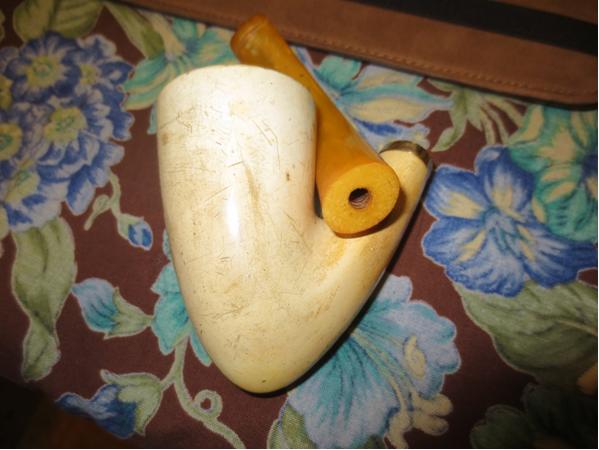
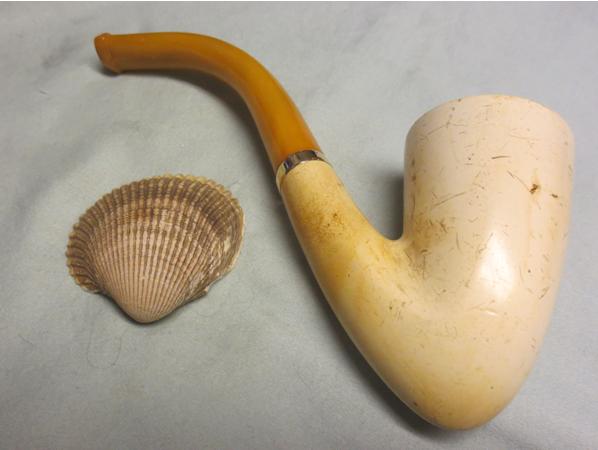
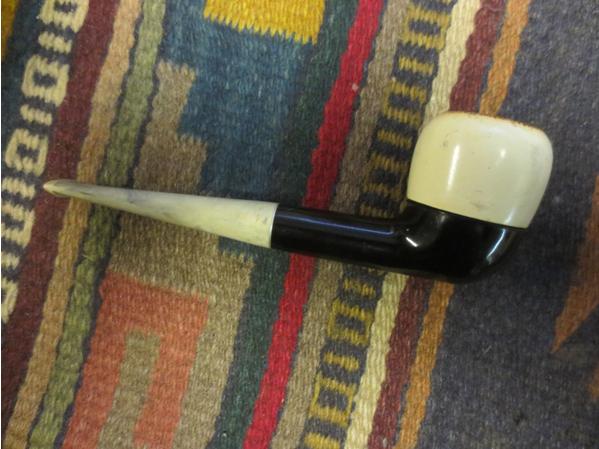
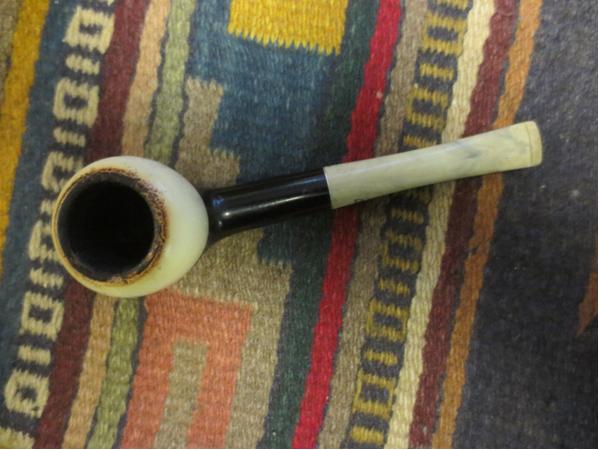
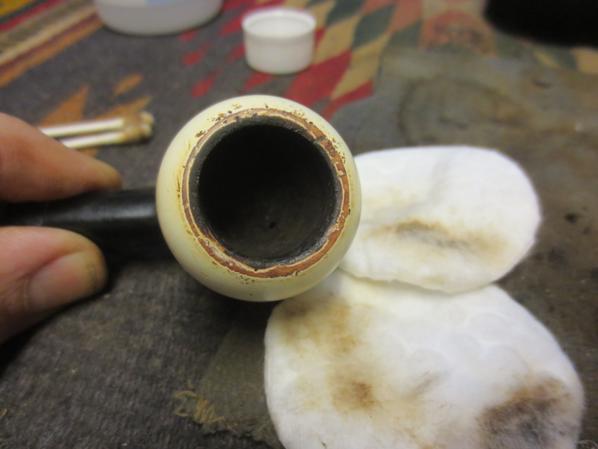
When the pipe arrived I brought it to the worktable I took a few photos to show what the condition was when I started the clean up. It was in decent shape. The bowl was caked and the holes in the bottom of the bowl were clogged. I could not see how the airflow worked with the bowl and base from looking inside the bowl. The bowl had some nicks and damage on the top edge and had a thick coating of tars. The bowl exterior was also dirty and there were some black marks on the sides of the bowl. The base was dirty and caked with hardened tars and oils. The inside of the shank and airway were black and the airway into the base was reduced in size. The stem had a lot of tooth chatter on the top and the bottom sides near the button and the contrasting grey and white of the stem material were dull. The double DD on the stem looked to be in excellent shape.Double-dri4 Double-dri5 Double-dri6 Double-dri7
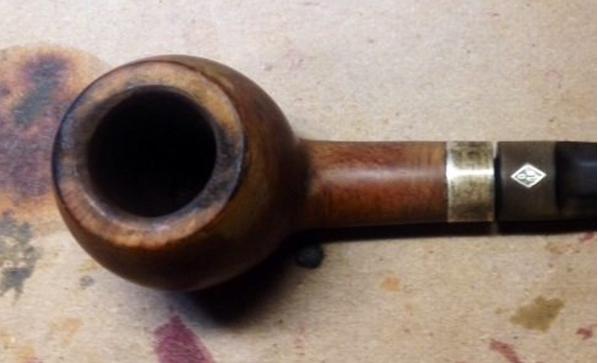
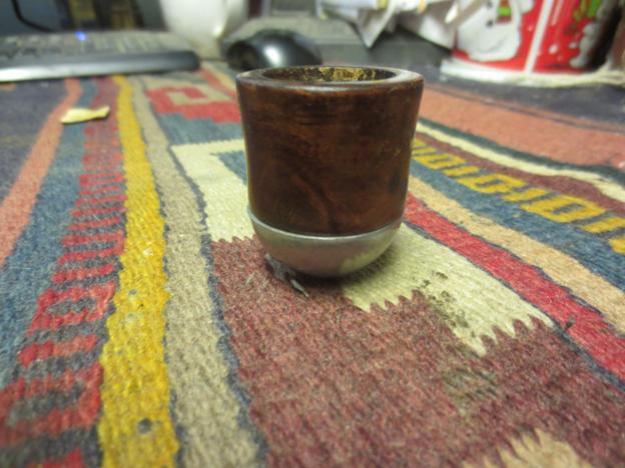
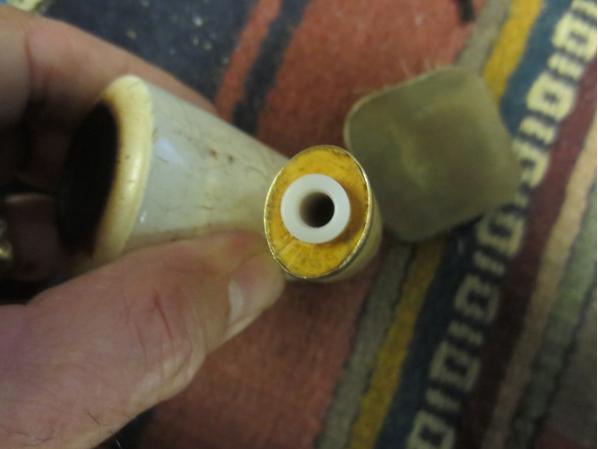
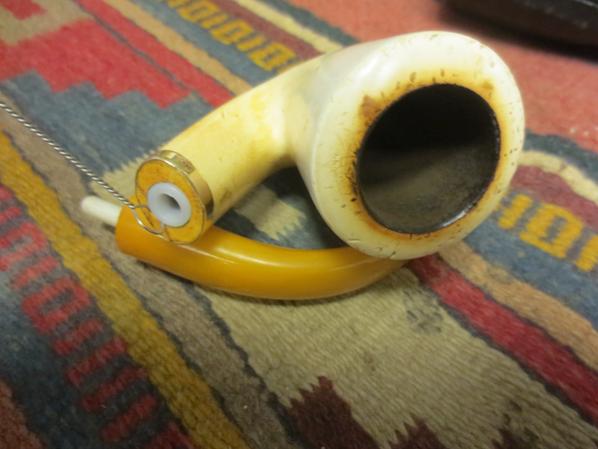
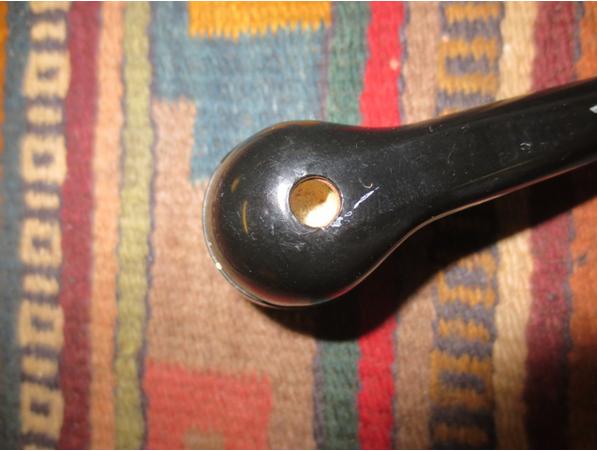
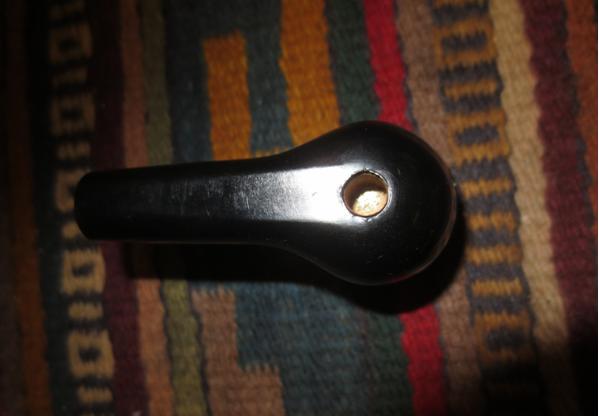
I took a close up photo of the rim to show the damage that would need to be dealt with. I also did a close up photo of the bottom of the base to show the inset up into the bowl base.Double-dri8 Double-dri9

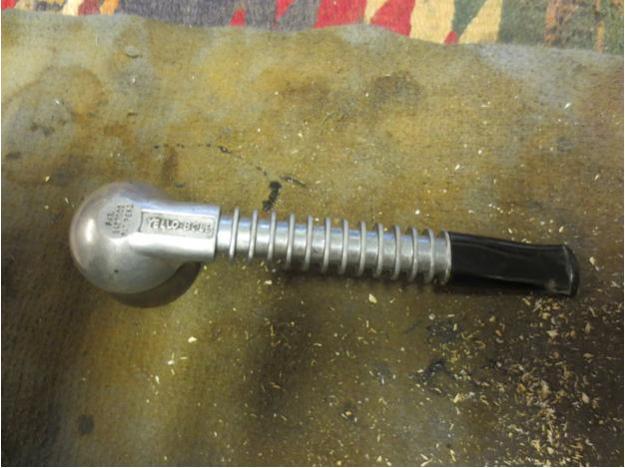
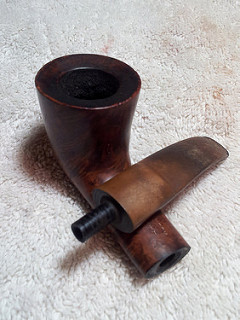
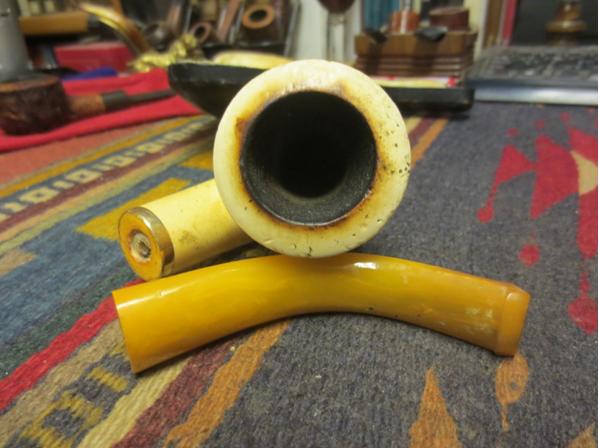
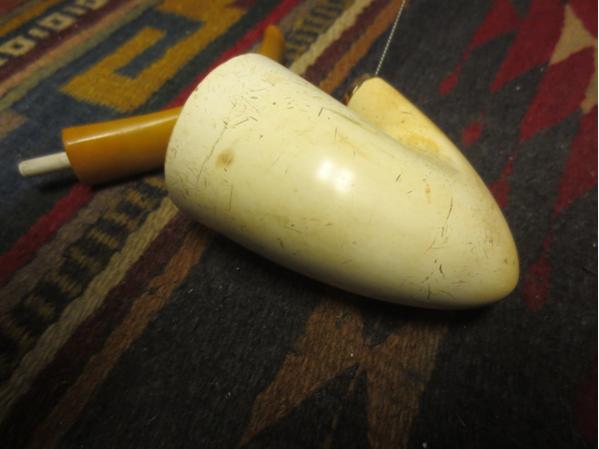
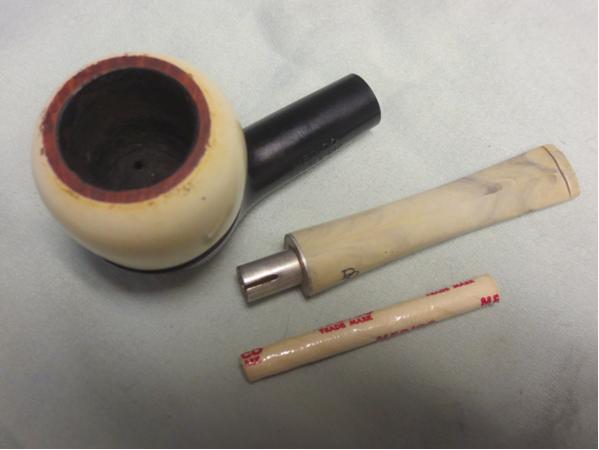
I took two photos of the base and the bowl – one looking at it from the top down and the other with the bottom side of the bowl showing.Double-dri10 Double-dri11

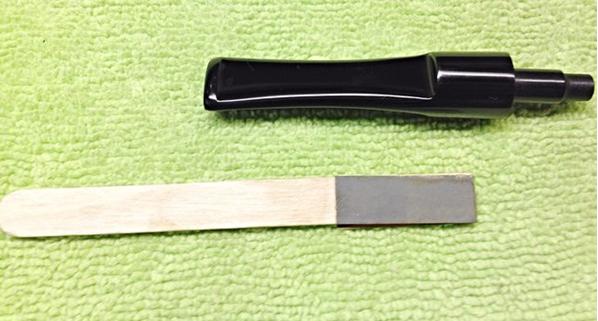
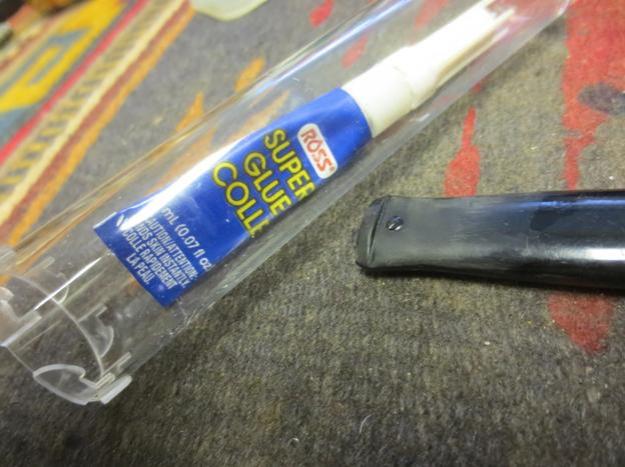
I removed the stem from the pipe and the old paper Medico Filter was present.Double-dri12

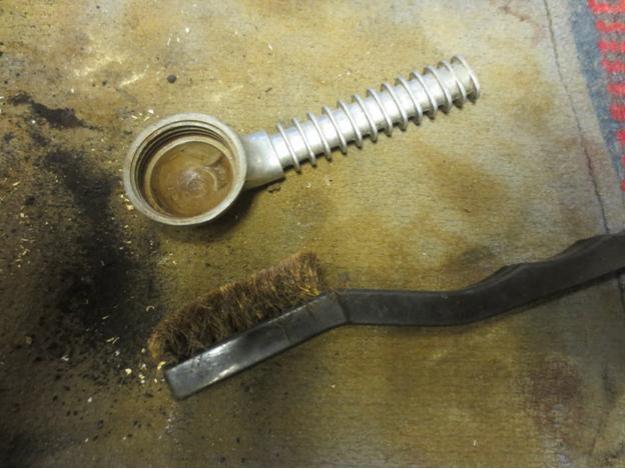
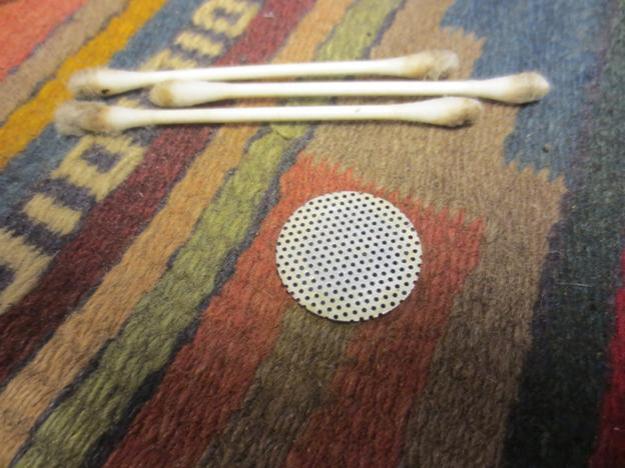
I cleaned out the inside of the base with cotton swabs and alcohol and cleaned out the airways in the shank and stem with pipe cleaners, cotton swabs and alcohol.Double-dri13 Double-dri14

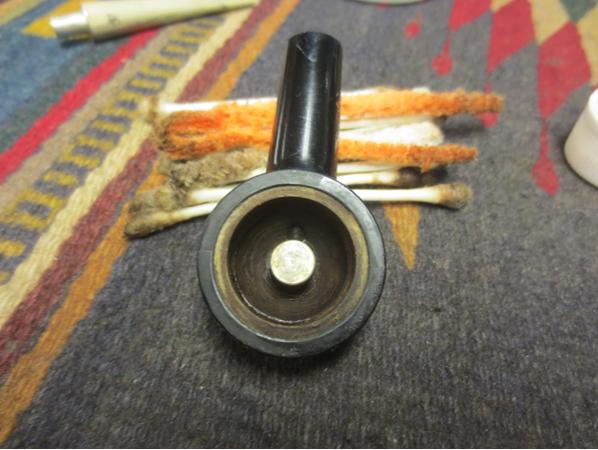
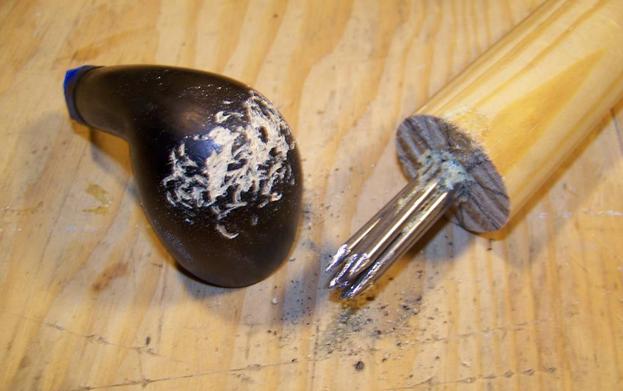
The bowl had a rounded bottom so I used a PipNet reamer and reamed the bowl to remove the cake and enable me to see the airways in the bottom of the bowl.Double-dri15 Double-dri16

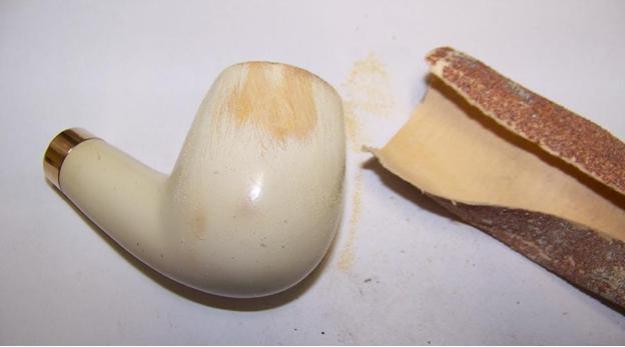
I used a paper clip to break through the airways from the underside of the bowl.Double-dri17I scrubbed the bowl exterior and rim with cotton pads and alcohol. I was able to remove most of the grime from the bowl and a fair bit of the lava from the rim. I could see that the rim was actually unpainted briar.Double-dri18 Double-dri19 Double-dri20 Double-dri21
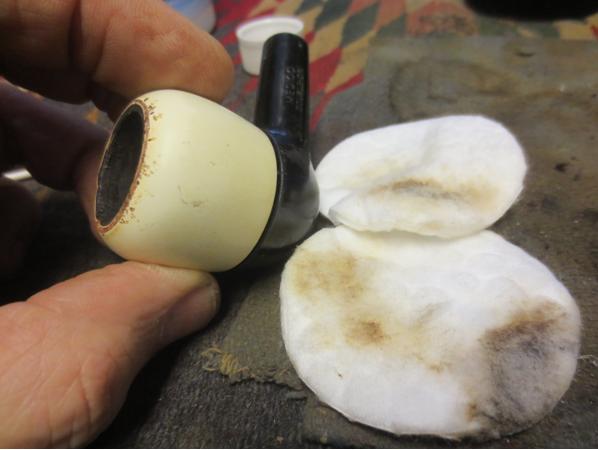
I sanded the bowl with 1500-2400 grit micromesh pads to remove some of the pieces of tar and oil that were stuck to the surface of the bowl. I also sanded the base with the micromesh to give it a shine.Double-dri22 Double-dri23
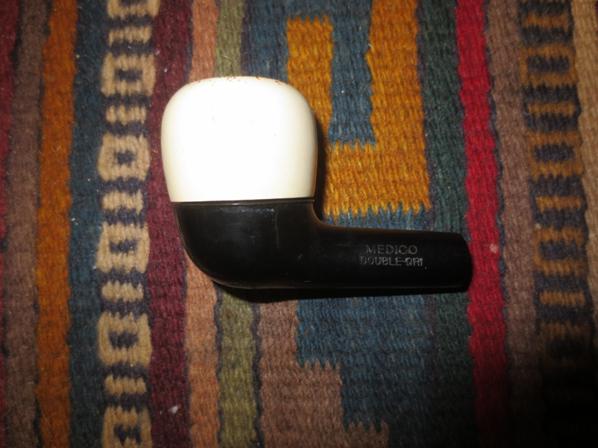
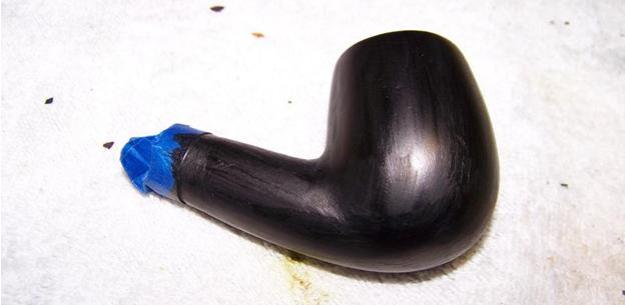
I lightly topped the bowl to clean up the outer edge of and the top of the rim. I sanded the inner edge of the rim to smooth that out as well. I followed up on it by sanding it with 1500-2400 grit micromesh pads.Double-dri24
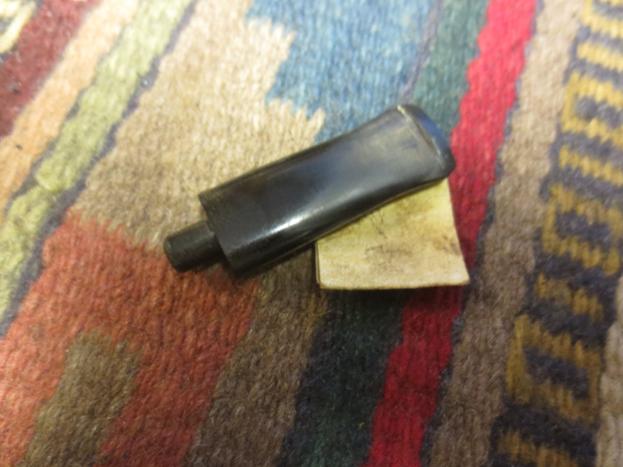
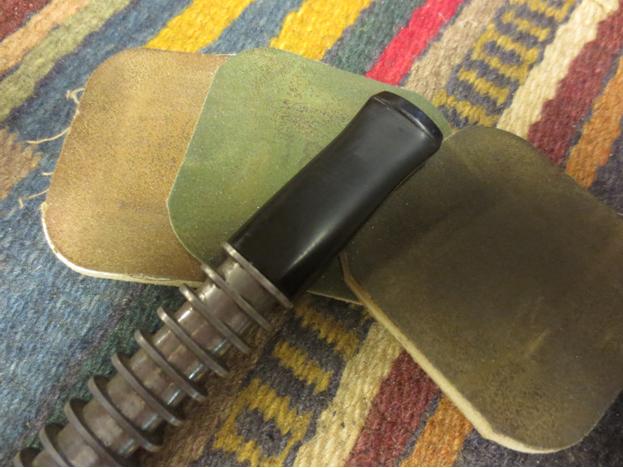
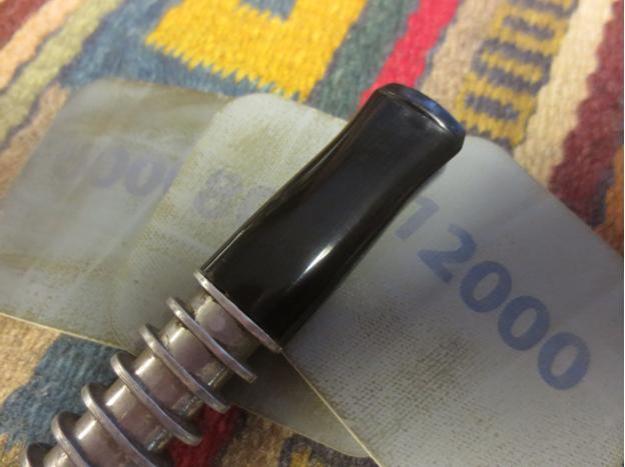
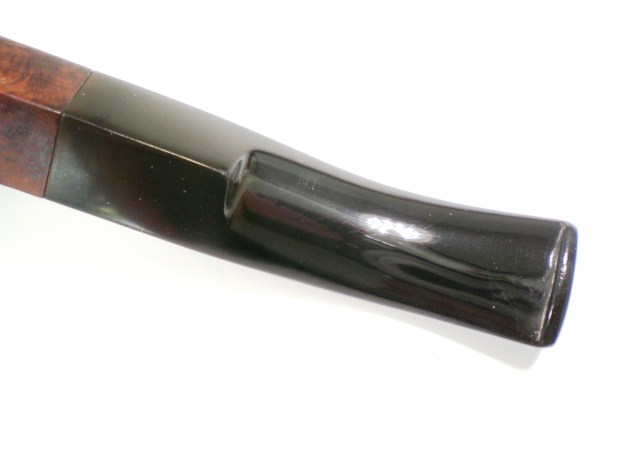
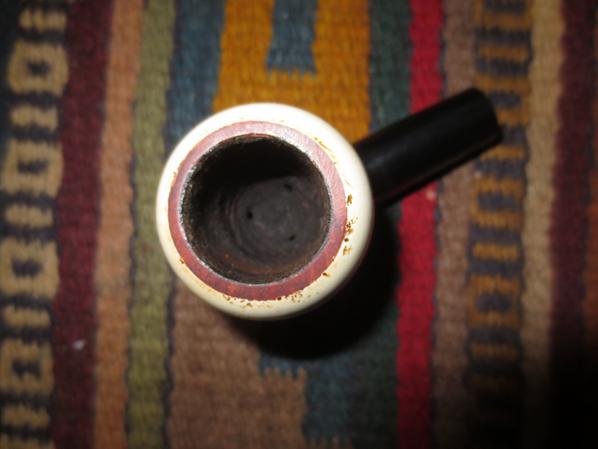
I sanded the tooth chatter and marks out of the stem with 220 grit sandpaper and then wet sanded it with 1500-2400 grit micromesh sanding pads. I dry sanded it with 3200-12000 grit pads and the shine came back to the stem. The contrast of grey and white really began to stand out.Double-dri25 Double-dri26 Double-dri27
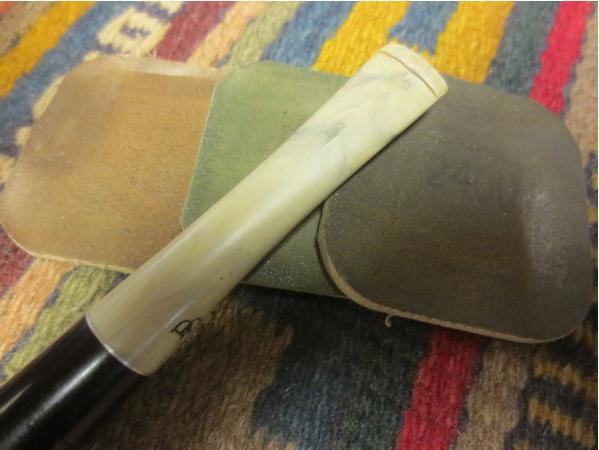
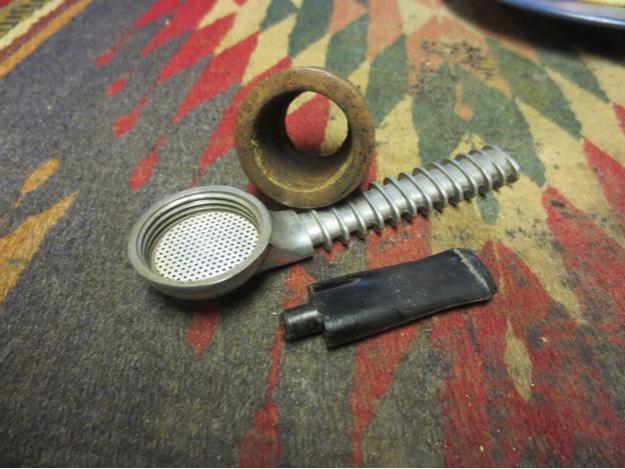
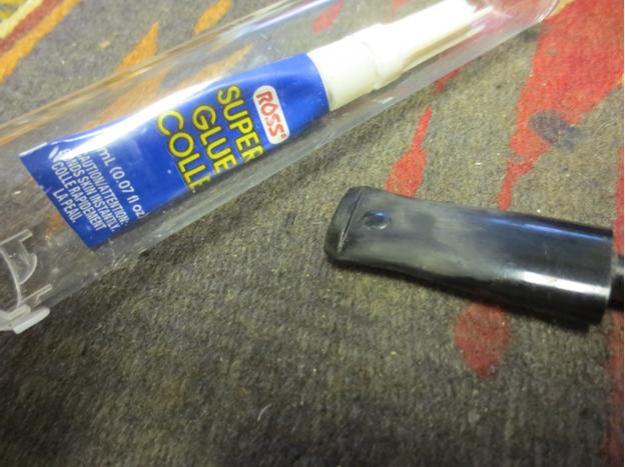
I gave the nylon stem several coats of Conservator’s Wax and hand buffed the stem with a microfibre cloth. I put the pipe back together piece by piece including a new Medico paper filter in the stem.Double-dri28 Double-dri29 Double-dri30
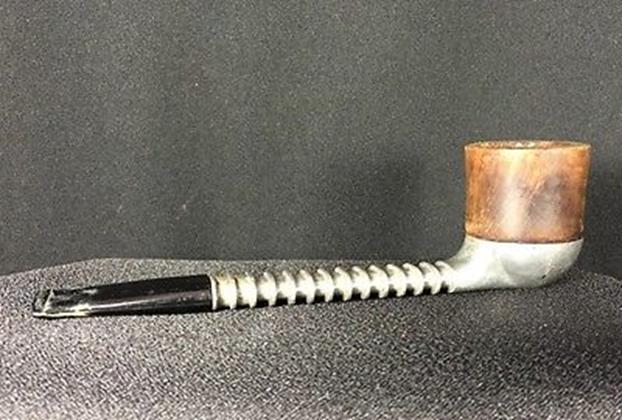
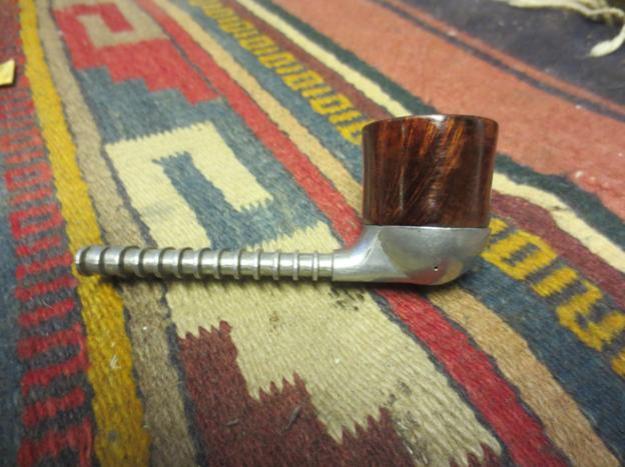
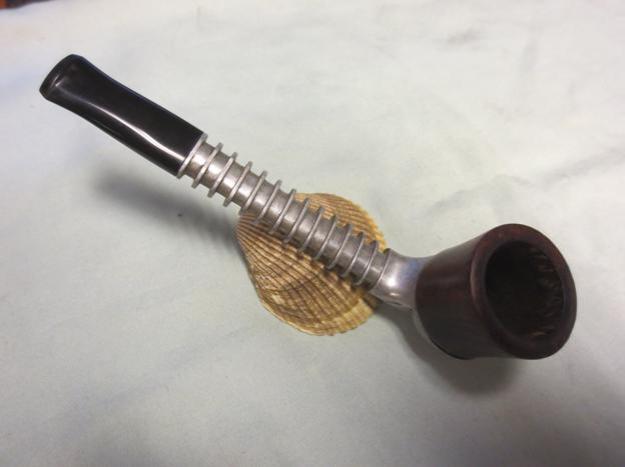
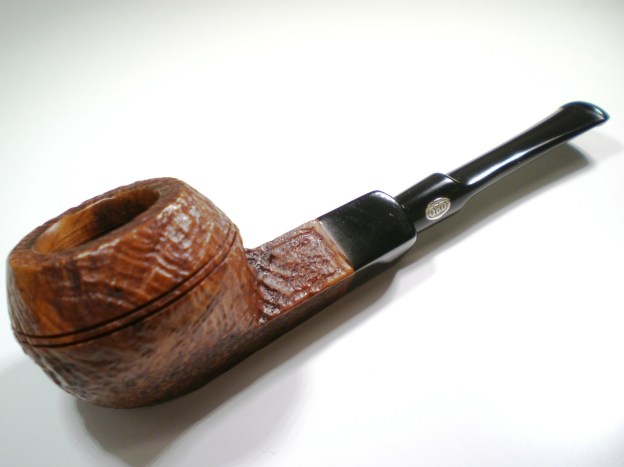
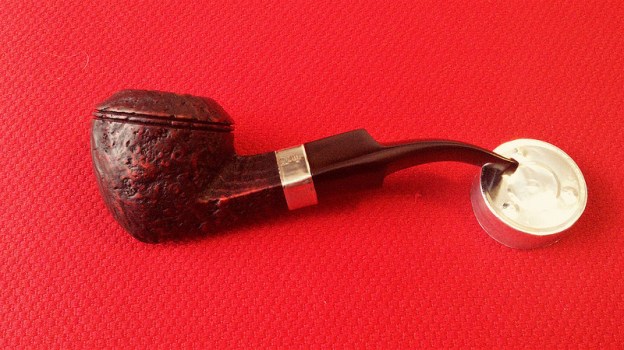
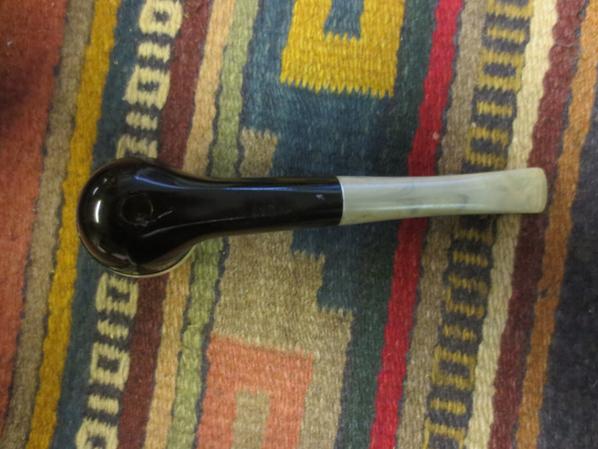
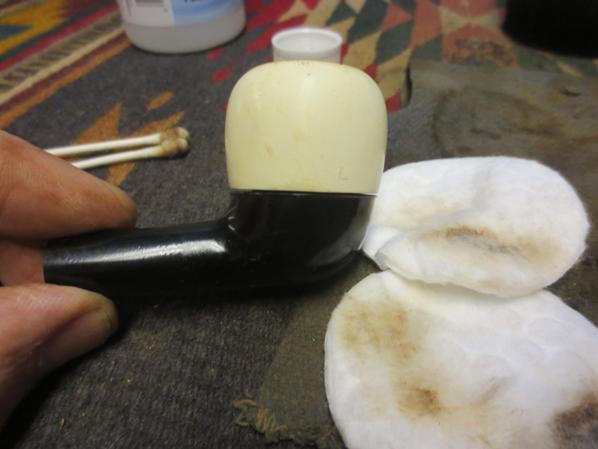
I gave the entire pipe another coat of Conservator’s Wax and hand buffed the pipe to a shine. The finished pipe is shown in the photos below. Other than the damage on the curve of the bowl the pipe looks very good. Thanks for looking.Double-dri31 Double-dri32 Double-dri33 Double-dri34 Double-dri35

BBB Own Make #166 Reconditioning


Blog by Dave Gossett

I’ve owned a few BBB’s for years but lately I’ve taken a real liking to the Own Make. I picked this up from eBay on the cheap. Even with the blurry pictures it looked rough, but it was even worse upon arrival.

The one time this pipe was actually reamed, I think it was with a knife. The inner rim was hacked up and the top was charred. Dave1 Dave2 Dave3 Dave4 Dave5I like a challenge so I got to work. I used a Dremel drill with a barrel sander to make way for a reamer.

Here is it after the initial cleaning. Lots of rim char and missing briar. Dave6I started with a slight topping to give it a crisp symmetrical outer rim ring and then beveled the inner rim to smooth out the damage. Next I sanded the outside of the bowl to remove the scratches. Once the rim and stummel repairs were finished, I sanded the bowl chamber smooth and added a fresh carbon coating.

Next up: the stem. Once the stem was cleaned and sanitized I removed the tooth chatter with needle files and began wet sanding. I use craft sticks and glue various grits of sand paper to them for wet sanding the sharp edges and angles. Wet sanding the entire stem by hand can soften the crisp edges of the original design. Using these small sticks, can remove all the oxidation without compromising the original shape.

Here is an example from another project pipe. The stem in this picture also has a button patch repair. Dave7To finish up, I gave it few coats of carnauba wax and polished the silver band. Dave8 Dave9 Dave10 Dave11

A Facelift for Colored Billiard


Blog by Aaron Henson

Last fall I went to a flea market at our fair grounds and found a pipe that I could not leave without. It is was a Yello-Bole, Chesterfield, bent billiard with P-lip stem and nickel-plated shank band. It had been well used but was in good shape. When I got into restoring it I found that it had two significant issues, one of which was a deep burn on the outside of the rim. After a consultation email with Steve, I decided to build up the outside of the bowl and then rusticate the bowl to hide the repair. Since I had not rusticated a bowl before I thought I should try my hand on another pipe first. This is the story of my first pipe rustication. I’ll do a write up on the Chesterfield when I get it done.Aaron1Incidentally, I also picked up a white bent billiard at the same flea market. Truth be told (and revealing my inexperience), I thought I was buying a smooth meerschaum. It had a nice smooth bowl, with a gold shank band and a yellow acrylic stem. The stem attached to the bowl with a tenon that threaded into an insert in the shank. The rim was dark and heavy with tar. It wasn’t until I cleaned off the rim that I noticed the chipped paint and the wood underneath and realized my error.Aaron2 Aaron3After deciding to rusticate the Chesterfield, I thought that this pipe would be a perfect candidate on which to practice. I began by reaming the bowl and cleaning the shank. The tar was very thick and hard even the stem was plugged about halfway. Once the internal of the stummel were cleaned I started removing the white paint. Not a necessary step but I wanted to see just what kind of wood lay underneath the white coat of paint. To my surprise it wasn’t briar at all. I’m still not certain what it is; very little grain, very light in color and quite soft compared to briar. My guess is pear wood but it could be any of a variety of alternate woods.Aaron4 Aaron5I used 60-grit sand paper to remove the paint which left a rough surface. I didn’t bother to smooth in any further but rather applied a heavy coat of black aniline dye. The dye was sacrificial and would help me see the extent and depth of the rusticating.Aaron6I made my rustication tool using ten 10d nails set with Gorilla Glue into the hollowed out end of a large dowel. Before gluing the nails, I cut off the heads and sharpened the points. Taping them all together so the points were even I set them in the dowel and waited for glue to set. The nails extended a little more than 2 inches from the dowel and I later found that this was too far. Using the push and twist method the nails would flex and separate while twisting the tool. Placing a hose clamp around the nails about half an inch from the end kept the nails together and the tool worked much better. Aaron7 Aaron8At this point the bowl had a very sharp and coarse texture so I knocked it down with a wire brush and then switched to a light sanding with 60-grit sandpaper. With the texturing done, I applied another two coats of black Feibing’s dye and flamed them to set the color.Aaron9I wanted to try a contrasting stain, so I took some 400 grit paper and worked the stain off high points. By the time I got done and wiped the stummel down with alcohol, I had a slightly rusticated pipe with white high points and blue (faded black) low points. I was not very happy with the results so I set it aside to dwell on it for a while.Aaron10Reflecting on the pipe I realized that the wood was not very interesting and did not seem to absorb stain well; I can see why it was painted in the beginning. I also reminded myself not to get ‘attached’ to this pipe. It was for practice after all; experiment and learn.

The texture that I got with my rustication tool was not what I wanted for the Chesterfield. So I took the white and blue stummel back to the workbench again and this time used a small carving bit on my Dremel. I went over the low spots and making them more defined and just randomly played with the tool. In the end I had something I kind of liked, and more importantly, something that I felt I could use on the Chesterfield.

To finish the stummel I decided to go simple and leave it all black. I gave it two coats of black dye and set it aside to dry. Because the wood didn’t seem to hold the stain well I was concerned about buffing the finish. Instead I finished the stummel with two coats of clear shellac.

Then, I turned my attention to the stem. I had decided early on that the yellow acrylic stem would not work with the new look so I would need to fashion a new one. I liked the idea of an acrylic stem but after looking at stems online I could not find just what I wanted. So I ordered two different round tapered vulcanite stems from Vermont Freehand.Aaron11Having only worked with vulcanite stems with integral tenons I was on the low end of the learning curve for this type of tenon. In the shank, there is a threaded (female) insert. The tenon itself (the other part) is double ended (male-male) – one threaded and other end smooth. The threaded end is simple enough to understand and the smooth part fit into the end of the stem.Aaron12When I received the stems I selected the one I thought would look best and took it to the work bench. First I cut off the formed tenon, then using progressively larger drill bits, enlarged the air hole. I made the mortise for the smooth end of the plastic tenon. I have a detachable chuck for my hand drill and I used it to hold the bit while I turned the stem by hand. Aaron13I then had to counter sink the mortise to seat the tenon ring. Aaron14After the tenon was fit to the shank and the stem was rotated correctly, I marked the top of the stem and taped off the band to protect it. Using a flat micro file I shaved off stem material until it closely match the shank diameter. I finished the shaping with 240-grit wet/dry sand paper taking care not to round the shoulder of the stem.Aaron15Once the stem was fully fitted and shaped to the stem I used a heat gun to soften the vulcanite and bend it to match the shape of the original stem. I set the shape by dipping the stem in cool water. This is where I ran into my next challenge. The heat from bending the stem also expanded the mortise and now the tenon was too loose. My solution was to coat the inside of the mortise with a thin layer of super glue. I am not sure how this will hold up long term but it works well for now.

Lastly I polished the stem with micro mesh pads (1500–12,000) using a little mineral oil between each set of three. I finished the stem with white diamond on the buffing wheel then three coats of carnauba wax.Aaron16 Aaron17 Aaron18 Aaron19 Aaron20All things considered, I am happy with the results. I am under no illusions, this pipe is no master piece, but I did learn a few things and that was what I was after. Hopefully this will help someone else too. Your feedback is very welcomed. Thank you for taking the time to read this.

Bringing New Life to a Yello-Bole Metal


Blog by Steve Laug

My brother found this older Yello-Bole metal pipe. It is a lot like the older Grabow Vikings but the bottom of the bowl is different from the Grabow. Between the bowl and the metal base there is a flat perforated screen or disk that the tobacco sits on. It acts as the bottom of the bowl. The wooden bowl itself is a threaded tube that screws into the base. There are two pin holes on the sides of the base (one on each side about mid base below the bowl). These serve as openings to draw air into the bowl. This one was in decent shape and would take a little work to clean up. The photos below were provided by the eBay seller and show the state of the pipe. From the first two photos below you can see the wear on the stem and the white calcification that generally builds up under a rubber softee bit. The finish on the bowl is shot. There is nothing but bare briar showing. The outer edge of the rim looks good. YB1 YB2The next two photos give a top and underside view of the pipe. You can see the ring of cake in the bowl around the middle and lighter on the top and bottom edges. You can see the metal disk in the bottom of the bowl. I have purchased a few of these over the years and almost all of them were missing the metal disk that sat in the base between the bowl and base. The stem shows some tooth marks on the top and underside.YB3 YB4The final photo included by the seller showed the stamping on the underside of the base. It read Yello-Bole horizontally along the bottom of the shank. It also gave the patent number on the bottom of the base. It read PAT. over 2467002 over PAT. PEND. That was enough data to do a patent search on the US Patent Information site. http://www.uspto.gov/patents-application-process/search-patents. From there I copied the patent drawing and included it below.YB5The diagram and the accompanying documents show the conceptual and descriptive narrative of what the pipe was about and what its maker hoped to achieve with his design. The inventor was a Samuel Laurence Atkins of New York. He filed his patent application on July 14, 1945. The patent was granted April 12, 1949. The pipe that I have is stamped Patent Pending thus it is easy to extrapolate that it was made between the dates July 14, 1945 and April 11, 1949 which are the dates before the patent was granted. That makes this pipe between 67-71 years old. It is in pretty decent shape for a pipe of that age.YB6 YB7I took the following photos when the pipe arrived. The seller’s photos were pretty good at showing the issues with the pipe. All the things noted above were correct.YB8 YB9 YB10 YB11The pipe was quite easy to take apart. I unscrewed the bowl and tapped out the disk in the base. The stem came out of the shank with little effort. I took the photo below to show the parts. The second photo shows the cake in the bowl.YB12 YB13I started the clean up with reaming the bowl. I used the PipNet reamer and the largest cutting head to ream from the top of the bowl. I used the second head to ream the bowl from the bottom. I reamed it back to bare briar. There was still some of the signature Yello-Bole bowl coating showing near the top just below the rim.YB14 YB15I scrubbed the bowl base with a brass bristle brush to loosen up the dried tars and oils in the base. I used a dental pick to clean out the threads. I also scrubbed the disk with the brush. YB16 YB17I used pipe cleaners, cotton swabs and alcohol to clean the surface of the disk and the inside of the base and airway.YB18 YB19

I scrubbed the interior and exterior of the stem with alcohol and pipe cleaners to remove the build up on the outside and the oils on the inside.YB20With the cleanup finished I set the parts on the table and took a few photos of the cleaned up pipe. Now it was time to restore it.YB21 YB22I wiped down the bowl with cotton pads and acetone to remove the grime and the remaining finish on the bowl.YB23

I stained the bowl with a dark brown stain pen.YB24 YB25I buffed the bowl with red Tripoli to spread and polish the stain. I buffed it with Blue Diamond and rubbed the bowl down with a light coat of olive oil. At this point in the process the bowl and the metal base was complete. I took the following photos to show the state of the progress thus far.YB26 YB27 YB28 YB29 YB30I cleaned the stem and used a clear super glue to repair the deep tooth marks in the top and underside of the stem near the button.YB31 YB32I sanded the repairs with 220 grit sandpaper to blend it into the surface of the stem. YB33 YB34I worked on the stem with micromesh sanding pads. I wet sanded with 1500-2400 grit sanding pads and then rubbed the stem down with Obsidian Oil. I wet sanded with 3200-4000 grit pads and gave it another coat of oil. I finished by dry sanding with 6000-12000 grit pads. I gave it a final coat of oil and let it dry.YB35 YB36 YB37I buffed the bowl and stem with Blue Diamond on the wheel and then gave both multiple coats of carnauba wax. I buffed it with a clean buffing pad and then by hand with a microfiber cloth. The finished pipe is shown in the photos below. Thanks for looking.YB38 YB39 YB40 YB41 YB42 YB43

Refreshing a Comoy’s King’s Ransom Bent Dublin


Beautifully done clean up on the Comoys Dublin

Charles Lemon's avatar

This King’s Ransom pipe is another from my recent haul of estate pipes at a local antique market. It is stamped “King’s Ransom” over “London Made” on the top of the shank, and “604” on the bottom. Unfamiliar with this marque, and finding nothing online, I emailed Steve Laug of RebornPipes, who linked me to the Comoy’s of London pipe shape chart at Pipedia.org. According to the information there, 604 is a Comoy’s shape number for a 1/4 Bent Dublin pipe – timely information that quickly elevated this King’s Ransom from basket pipe to sub-brand of one of the UK’s best known pipe producers. This is the sort of discovery that makes estate pipe hunting so much fun!

I received the pipe in fairly good estate condition. The stummel was peppered with small “handling marks” – little dents and dings accumulated through use and storage in pockets, drawers and glove boxes…

View original post 736 more words

Re-Stemming Grandpa’s Sabra Israel Apple


This pipe is a Sabra brand from Israel. It is a brand I have worked on before but like Charles could I could find no information on. Charles did a great job on this one. It looks really good. The new stem is a great fit. Well done.

Charles Lemon's avatar

This pipe was sent to me by a fellow member of the Canadian Cigar Forum. It had been his grandfather’s, and the owner wanted to be able to use it. The problem, I was told, was that the tenon had been broken at some point in the past. The remaining stem had been cut down to create a new tenon, but the resulting new stem face was narrower than the shank and did not fit flush. I offered to see if I had a stem that would suit, and before to long the pipe arrived in the mail.

At first glance, the pipe was in decent shape. Though the stem was ill-fitting, it was clean and free from oxidation. The stummel was a rather shiny red colour, which I initially put down to a factory shellac finish. The bowl showed recent signs of light use, with just a small bit…

View original post 1,062 more words

GBD 584S New Standard Restoration


By Al Jones

This GBD 548S New Standard came to me thru Ebay and seemed to be in good condition. The thick, striated layer of oxidation appeared to be the only challenge. The 584 shape is intriguing in that I don’t recall seeing it previously. Google yielded only one ebay ad from 2008,sold by Coopersark (a pair of 584, tapered stem pipes) It is similar in shape to the more common 549 Bulldog GBD shape. Below is the pipe as received.

GBD_584S_Before (1)

GBD_584S_Before (2)

GBD_584S_Before (3)

GBD_584S_Before (4)

GBD_584S_Before (5)

I reamed the slight cake from the bowl and soaked it with alcohol and sea salt. The stem was soaked in a mild Oxy-Clean solution to loosen the oxidation.

I used 800 grit to remove the top layer of oxidation on the stem. I wrap the paper around a popsicle stick to keep the diamond stem angles from rounding. Removing oxidation is always a compromise, as stem material is also removed. I then moved to 1500 and 2000 grade wet papers. Then 8000 and 12000 micromesh. The stem was mounted on the bowl and buffed with White Diamond and then Meguiars Plastic Polish.

The bowl top had some darkening, which I removed carefully with 2000 grade paper. I did a “stain wash” on the bowl and bowl top with a paper towel dipped in Medium Brown stain. There were some faded areas of the stain and the wash helps blend in those areas for a more consistent color finish. The bowl was then buffed with White Diamond and several coats of Carnuba Wax.

Below is the finished pipe.

GBD_584S_Finish (1)

GBD_584S_Finish (2)

GBD_584S_Finish (3)

GBD_584S_Finish (4)

GBD_584S_Finish (5)

GBD_584S_Finish (6)

GBD_584S_Finish (7)

?

?

?

?

GBD_584S_Finish (1)

GBD Militaire Bulldog


By Al Jones

This unqiue GBD was posted unrestored,last year on the “GBD Collectors Thread on PipesMagazine and caught my attention. I was recently delighted to find it for sale on Ebay and fully restored. I won the auction and after receiving it, I realized that I knew little about the Militaire finish. This pipe is sandblasted and in the 9240 Squat Straight Bulldog shape.

GBD Collectors Thread – PipesMagazine.com

Google didn’t yield any additional information on the Militaire finish but the few pipes I discovered were all sandblasted (typically “Prehistoric” grades). By GBD standards, the blast is very good.

The seller (303_pipe_restoration) did a great job on the pipe and it came ready to smoke. I’m typically not happy with most stem restoration work, but this one was excellent. I used some high grade micromesh on the stem and then polished it with Meguiars Plastic Polish as I feel it helps retard oxidation. The bowl was very clean and there was no ghosting.

The pipe is stamped “London, England” and has the brass stem rondell, which indicates it was made prior to 1981. The pipe weighs an amazing 30 grams and is easily the lightest of any GBD in my collection.

GBD_9240_Militaire_Gallery

GBD_9240_Militaire (5)

GBD_9240_Militaire (3)

GBD_9240_Militaire (4)

GBD_9240_Militaire (6)

GBD_9240_Militaire (2)

?

?

GBD_9240_Militaire_Gallery

Replacing a Threaded Mortise/Tenon system with a Push Mortise/Tenon System in a Meerschaum Pipe


Blog by Steve Laug

When I received this meerschaum pipe the sender said that it needed to have the tenon replaced. It looked like it would be a simple repair so I left it until last. I restemmed the other little meerschaum that I posted earlier and put a new tenon on an Italian pipe for him and figured that this would be an easy fix. I unscrewed the stem from the broken tenon – it was split and half of it was missing. The stem came off with no problem. I had a perfect replacement tenon available to me so I screwed it into the stem and then looked at the broken tenon in the shank. Still the problem seemed quite simple. I used my wood screw and threaded it into the airway and tried to pull the tenon – either unscrewing it or at least wiggling it free. It did not move at all. I looked at it with a lens and saw that there were remnants of epoxy around the portion of the tenon that showed. Now I was in trouble. What had originally been an easy fix now was complicated.Meer1Meer2Meer3 Meer4Before I drilled out the tenon I took a few photos of the bowl to show the condition of the meer. It was worn and scratched but had some beauty that shown through the grime and the scratches. The rim was dirty and pitted but the edges were sharp. The bowl interior was lightly caked and the pipe smelled of strong aromatics.Meer5 Meer6 Meer7 Meer8I drilled out the tenon in the shank of the pipe starting with a bit slightly larger than the airway. No problem with that first step. I increased the size of the bit and drilled it again. It was my hope to have the glued tenon break free with the drilling. I increased the size of the bit yet again, this time to almost the same size as the threaded tenon. No luck. The tenon was absolutely stuck to the insert in the shank. I increased the bit size once more and this time the tenon broke. I tried to pick out the remaining pieces but they were solidly glued in place. I looked at the insert with a lens and could see that the glue and tenon had damaged the internal threads on the insert. This was turning into a real pain. I would have to drill out the entire insert and replace it. Once I had the tenon free I figured this would be easy as well. Again I was wrong. The insert was also glued in place. I increased the size of the bit several times until I had removed the insert itself. This old pipe was turning into a head ache.

I finally was able to remove the insert. I examined the inside of the shank. The original drilling of this pipe was fascinating. It was obviously drilled in several stages stepping down the mortise to the airway. I wrote to the owner and asked if it would be okay to replace the threaded tenon and mortise set up with a push tenon. I figured why complicate things. He confirmed that he was okay with that replacement. I started work on the stem and shank for that set up. I drilled the airway on the stem slightly bigger to take the push tenon. I cleaned out the inside of the stem to remove the debris and the tars. I checked the fit of the tenon in the stem and it was a good fit. I would need to countersink the airway to accommodate the rim on the tenon.Meer9 Meer10 Meer11I cleaned out the shank and airway on the bowl as well. I fit the insert in the shank. The fit was good but I would also need to countersink it to make a flat surface for the stem to sit against.Meer12I used a slightly larger drill bit to create the countersink on the shank and pushed the insert in place. The fit was perfect. Due to the damage on the shank from all of the glue I would need to use glue to hold the insert in place but I wanted to clean up the fit before I set the glue in place. In the photo below the new system can be seen. The mortise insert is in place and the push tenon is on the stem.Meer13I cleaned out the shank one more time and then mixed a two part epoxy for the insert. I applied the mixture to the insert and pressed it into place. I aligned the airway and the stem so that things would be straight once it dried and set the bowl aside so the epoxy could cure.Meer14I used a drill bit to countersink the rim on the tenon into the stem. I threaded it in place to make sure the fit was correct.

I sanded the bowl with micromesh sanding pads to smooth out the roughness and bring back some of the shine of polished meer. I wet sanded it with 1500-2400 grit pads and was able to bring back a lot of the life in the meerschaum. I dry sanded with 3200-4000 grit pads to polish it further. The photos below show the pipe after I had sanded it. When I am working on an older meerschaum I do not like to remove all of nicks and scratches as they add character to an old pipe. They are like battle scars and each of them has a story to tell. I clean up the surface damage and highlight the patina but leave the pipe clean but looking its age.Meer15 Meer16 Meer17I let the epoxy set over night and then this morning pushed the stem into the new mortise. The fit was a little tight and I could see some light between the stem and the shank end. I needed to finesse the fit of the stem and shank.Meer18 Meer19 Meer20 Meer21I carefully sanded the end of the mortise with the Dremel to make sure the insert was flush against the meerschaum end of the shank. I also worked on the countersink of the tenon in the stem with a sharp knife to give it a wider and sharper bevel to accommodate the rim around the middle of the tenon. I polished the newly sanded and cut areas with micromesh sanding pads to smooth out the fresh work. I polished the stem and the bowl lightly with some soft white Beeswax and then buffed the pipe by hand with a microfibre cloth to raise the shine. The finished pipe is shown in the photos below. Soon I will pack up the threesome of pipes and send them back to the pipe man who sent them to me. They are all functional now and to me actually look and work better than they did before. Thanks for looking.Meer22 Meer23 Meer24 Meer25 Meer26 Meer27 Meer28 Meer29

Banding a Cracked Shank on a Truly Filthy Alpha Enterprise Chubby Bulldog


This is a great refurb. The process Charles used in cleaning and restoring it are great examples of how to move through a clean up.

Charles Lemon's avatar

I spotted this Alpha pipe on eBay and managed to submit the winning bid at a price reflective of the pipe’s condition. It’s always nice when that works out. I think most other bidders were put off by the euphemistically described “hairline” crack running about 3/8” up the shank from the mortise, but as I had recently stocked up on repair bands, I figured I likely had one that might get the job done.

In due time the pipe arrived and I got my first good look at it (the pics online were, typically, not the best). To say that the pipe needed a cleaning would have been a gross understatement. It was filthy, inside and out. The ridges in the sandblast finish were visibly plugged up with dirt and grime, the rim was covered in lava that dripped back down the rear of the tobacco chamber, the chamber itself…

View original post 1,174 more words