Author Archives: Greg

Unknown's avatar

About Greg

I am medically retired from my 'career', have been since 1999. For quite some time I missed my old job a lot. I enjoyed it, I was good at it and didn't have any desire to do anything else. But the Lord had other plans for me. Now He has called me to work for Him. He has graciously given me some talent to work with words. He has also seen fit to guide me with the Holy Spirit to study and comprehend His Word. Don't misunderstand; I am no scholar nor a pastor. I'm just trying to be obedient to my Lord and Savior and do what He asks me, in a way that would please and bring glory to His holy Name.

An OxyClean Experiment


Blog by Greg Wolford

Not long ago I was involved in a discussion about what I do when I start restoring an estate pipe. The subject was on removing oxidation from stems so I stated that the first thing I do is an OxyClean bath, soaking for an hour to overnight. One of the folks involved thought I meant that I put stummel and all in the soak and asked what it did to the briar. I explained that I didn’t put the stummel in, only the stem. But this got me wondering what would happen if I put the whole pipe in … this this experiment.

I picked this little pipe up in a lot and thought at first it was just a “toy” but closer inspection showed it had been used by its former owner – a lot. The cake was surprisingly thick and I figured it must have been his short smoke pipe. This unmarked little guy would be my Guinea pig.

I dropped the separate pieces into the Oxy bath and left it overnight, doing no reaming, acetone wipe, or anything else before so. It sat overnight as the OxyClean did its work.

When I returned to it the next day I retrieved the stem first and saw the soak had done its job on bringing up the oxidation. And I was a bit surprised how much oxidation there actually was. But onto more pressing issues: What did the briar look like?

So I reached in and pulled out the stummel and immediately felt the slick, almost slimy feeling that an OxyClean soak gives stems was on the briar, too. I began wiping it dry and noticed immediately that almost all the finish and a fair amount of the stain was gone. There was one patch that didn’t seem to be too effected by the soak, maybe it was not fully submersed; I don’t know.

The next thing I noticed was the cake, or lack thereof. The OxyClean bath had removed pretty much all of the buildup in the bowl and on the rim, which wasn’t to bad to start with. It would most likely not need any reaming after it was dry from looking at it.

So, what do I think about soaking the whole pipe in OxyClean now? I think that of removing the finish and stain are your goal and it has a fair or greater build up of cake/tars, this probably a pretty viable option. I still need to get the rest of the finish off and sand the stem and stummel; it is nowhere near finished. But I am leaning toward this experiment being called a success. Of course after the pipe has dried well and I finish the work on it I’ll have a better idea of what the pros and unknown at this time cons are so more experimentation is needed to say for sure. But at this stage I think I have new weapon to use (really an old one in a new way) for certain situations. Time will surely tell.

20130418-103448.jpg

20130418-103457.jpg

Irwin’s (GBD Second) 9448 Refurbished


Blog by Greg Wolford

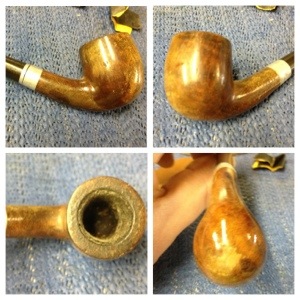
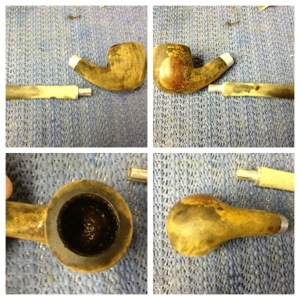
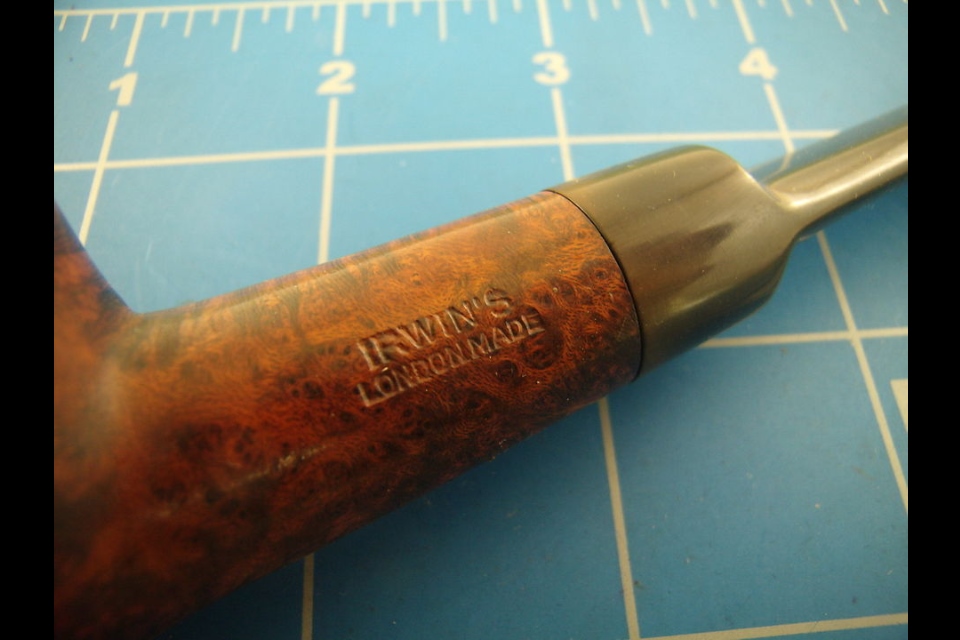
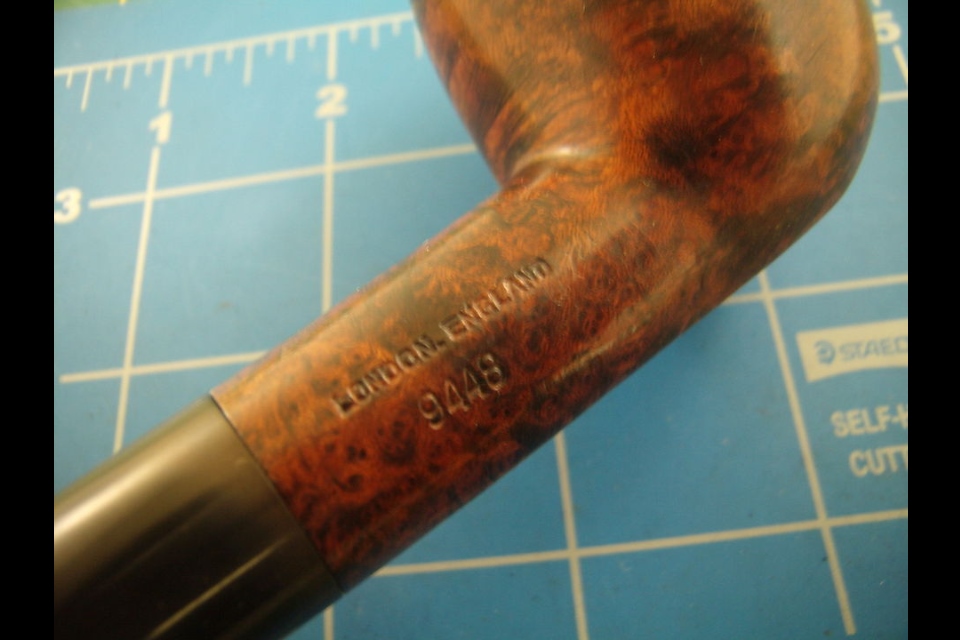
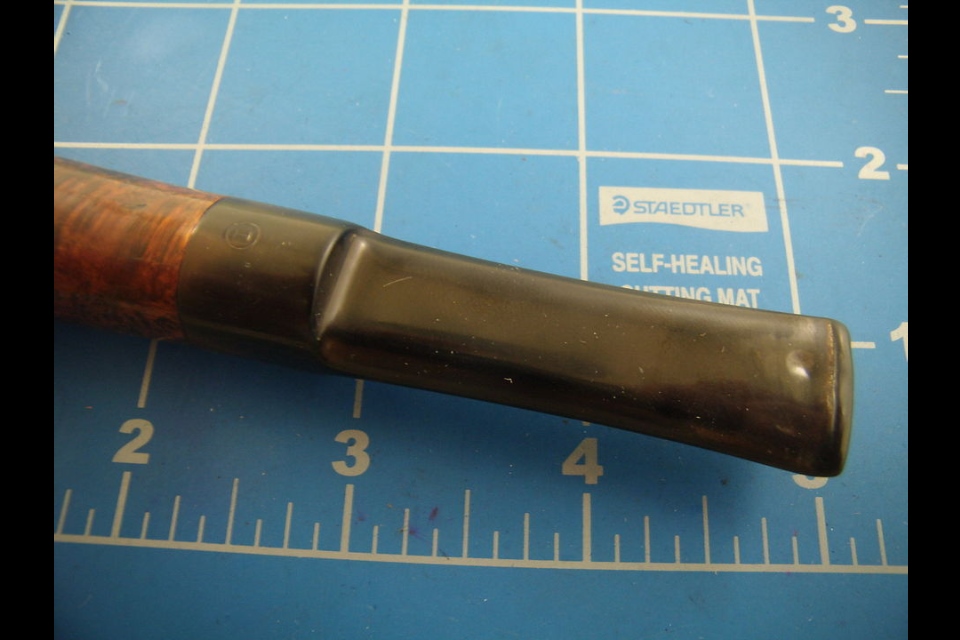
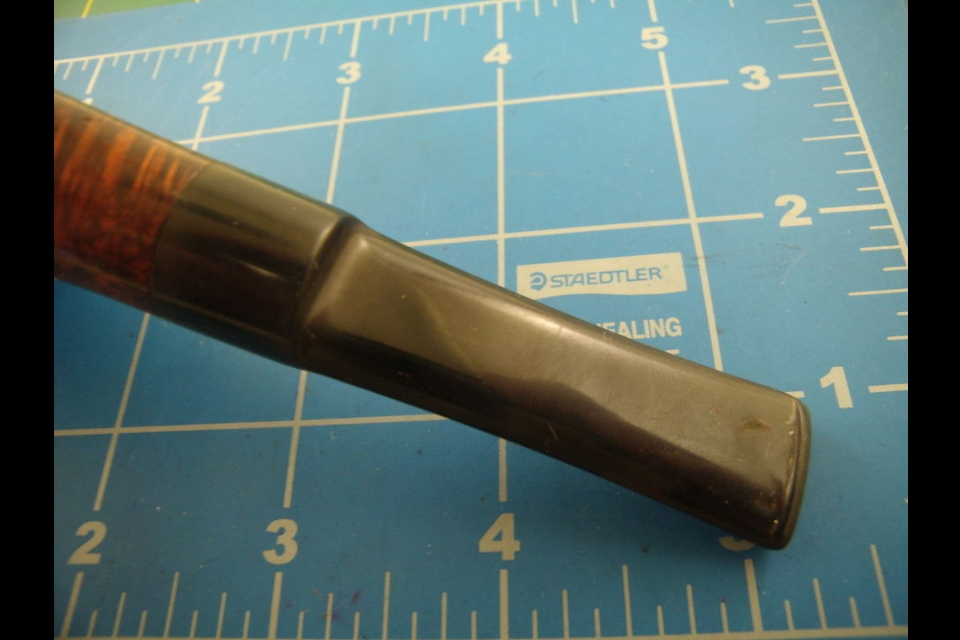
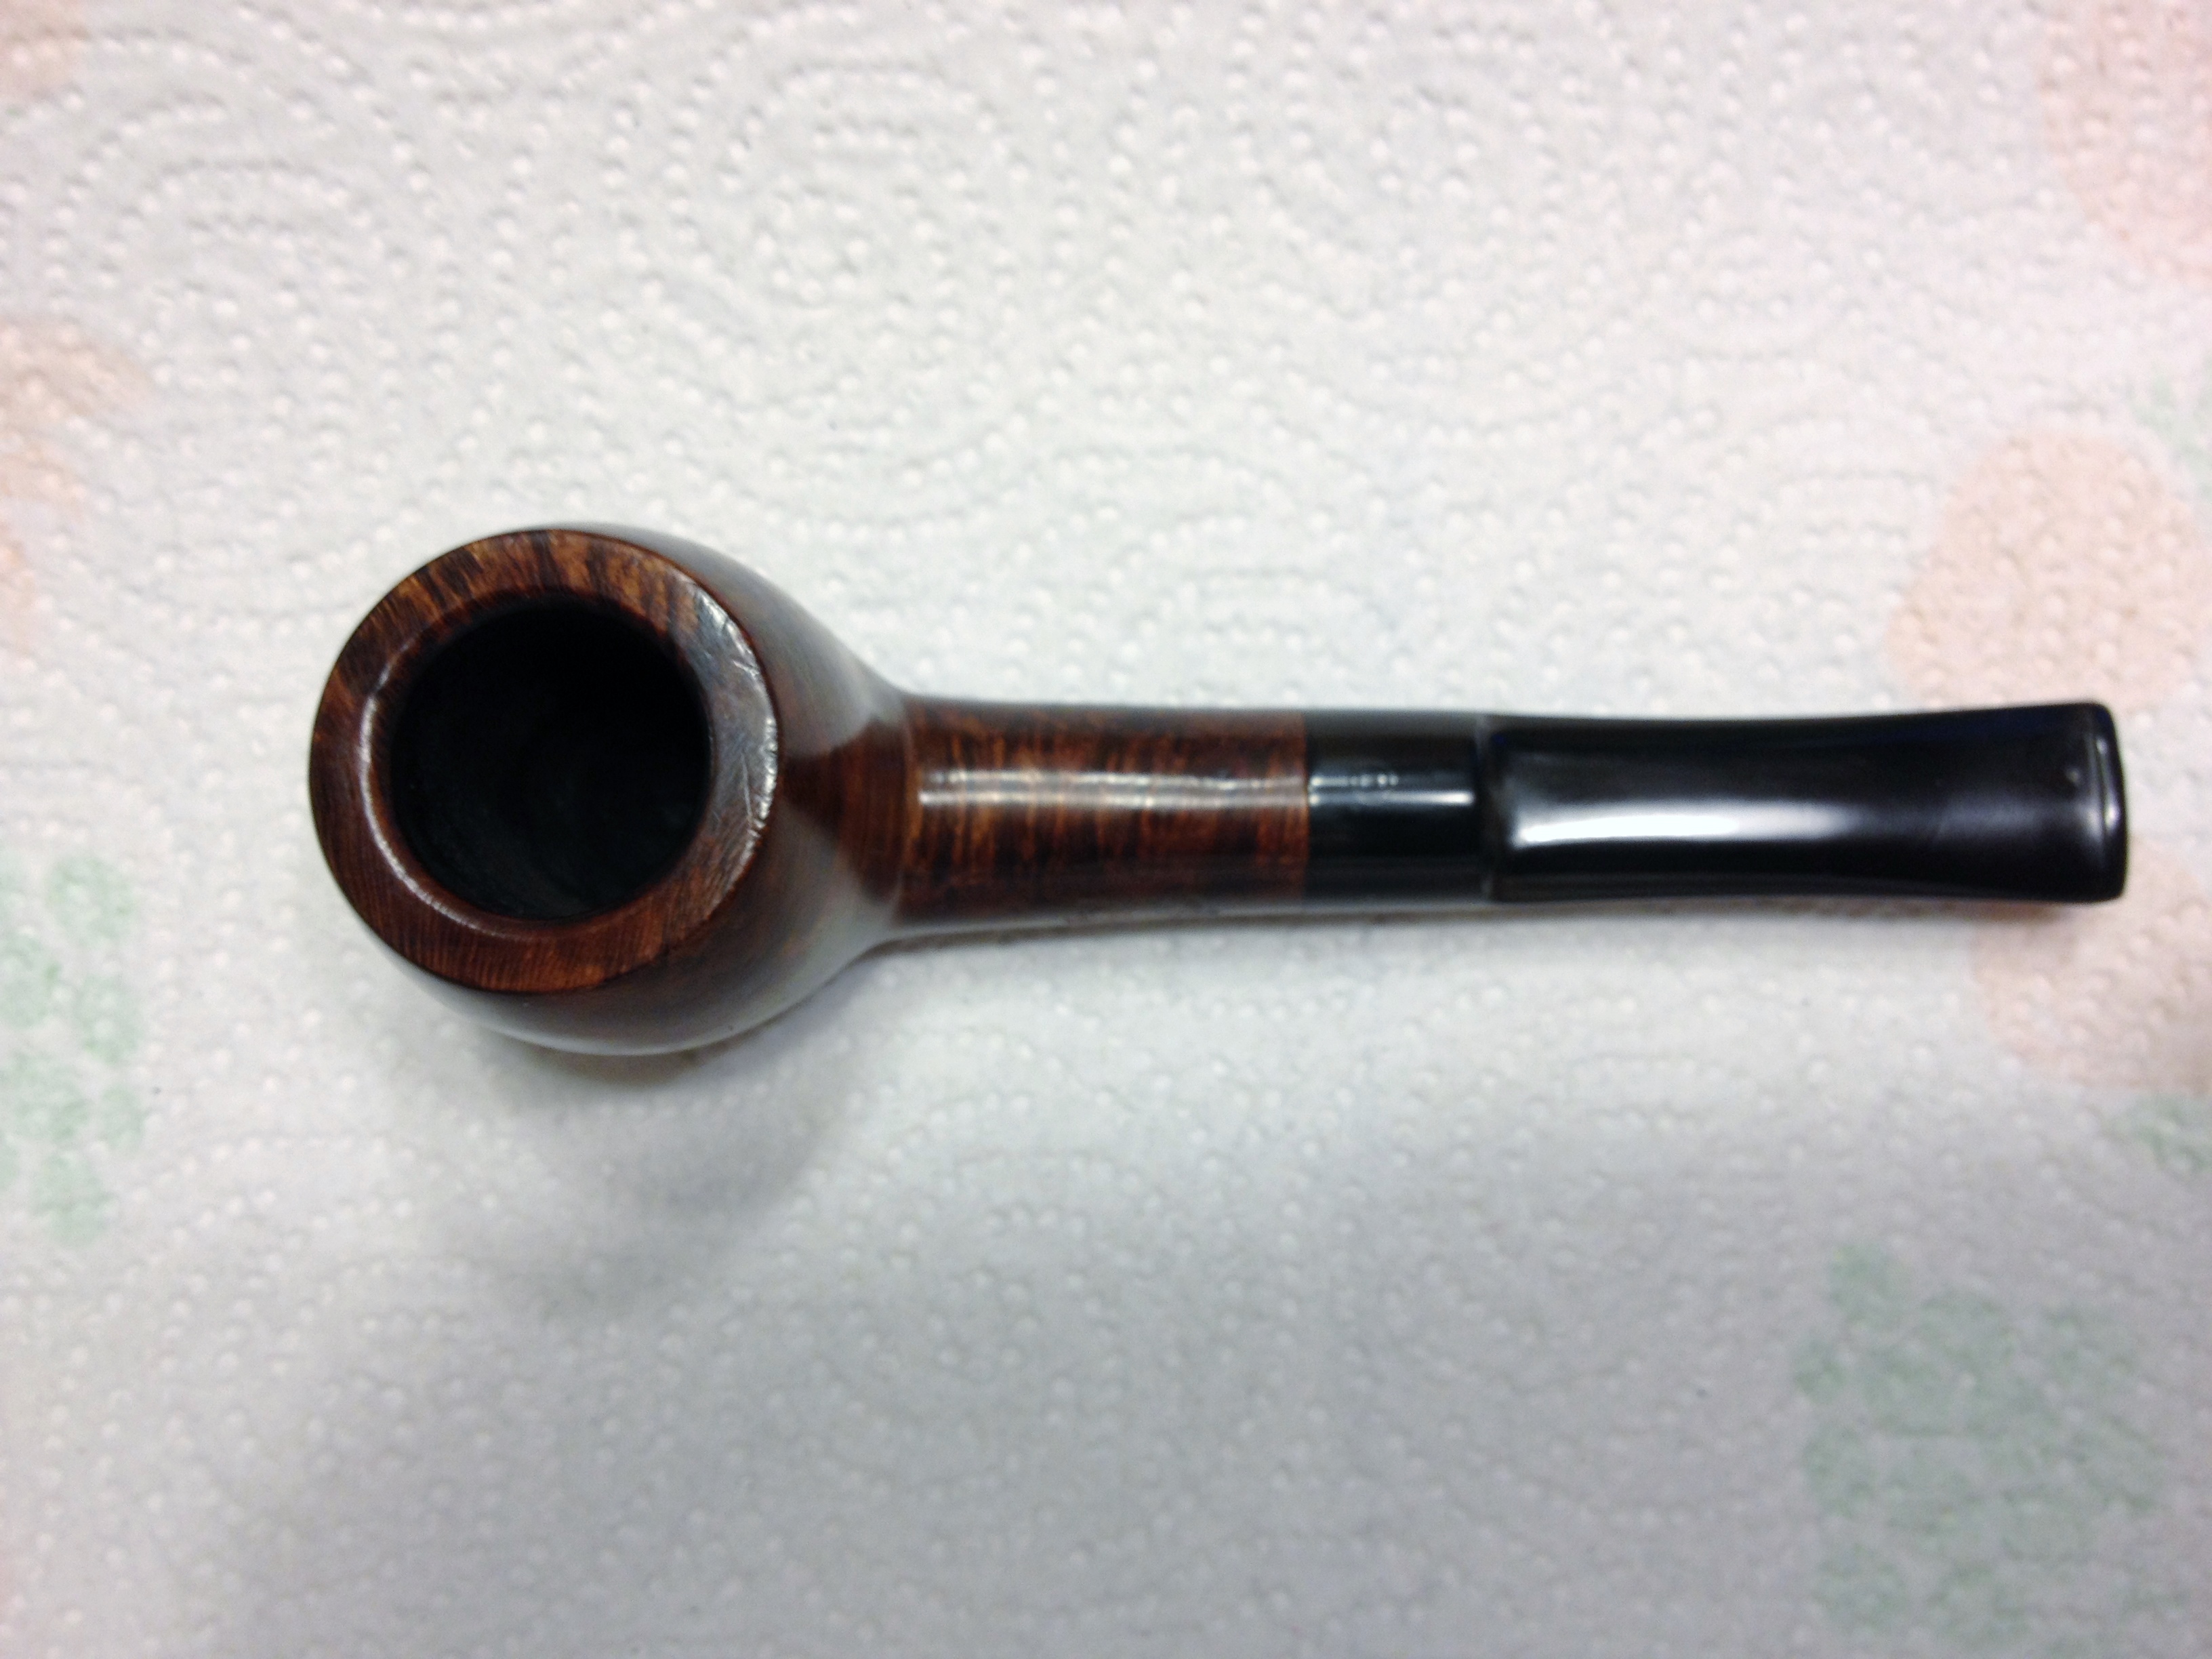
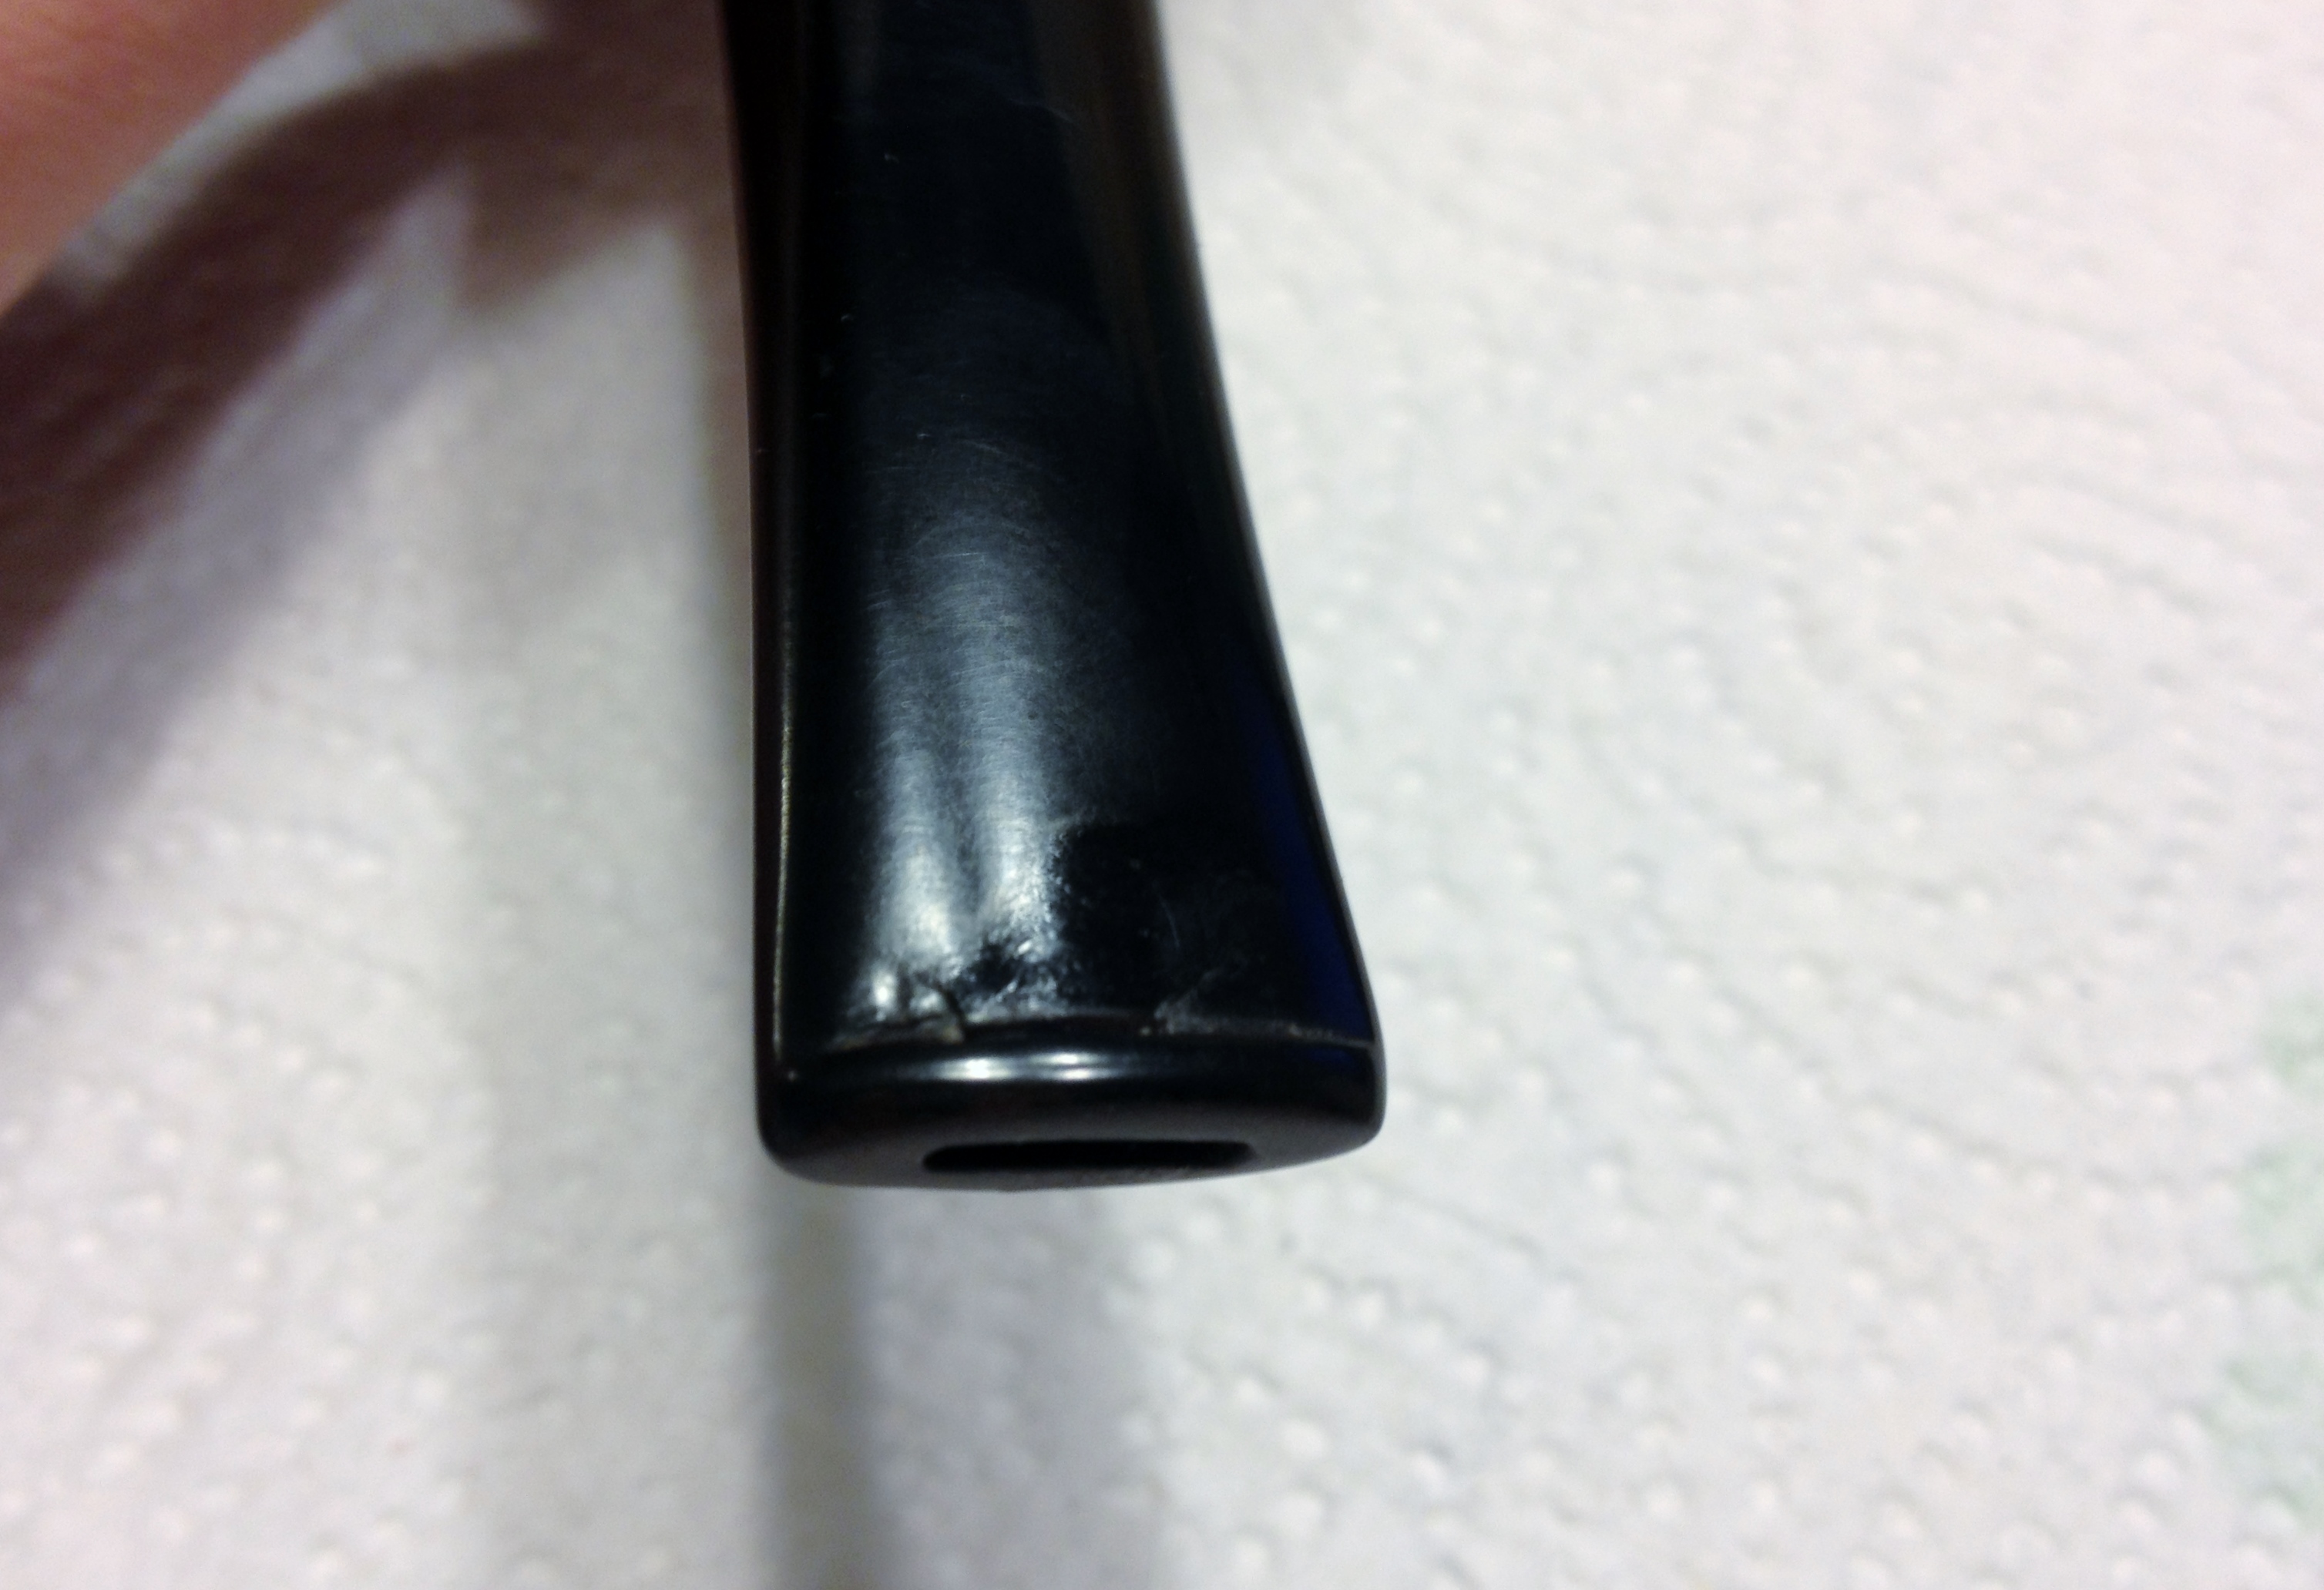
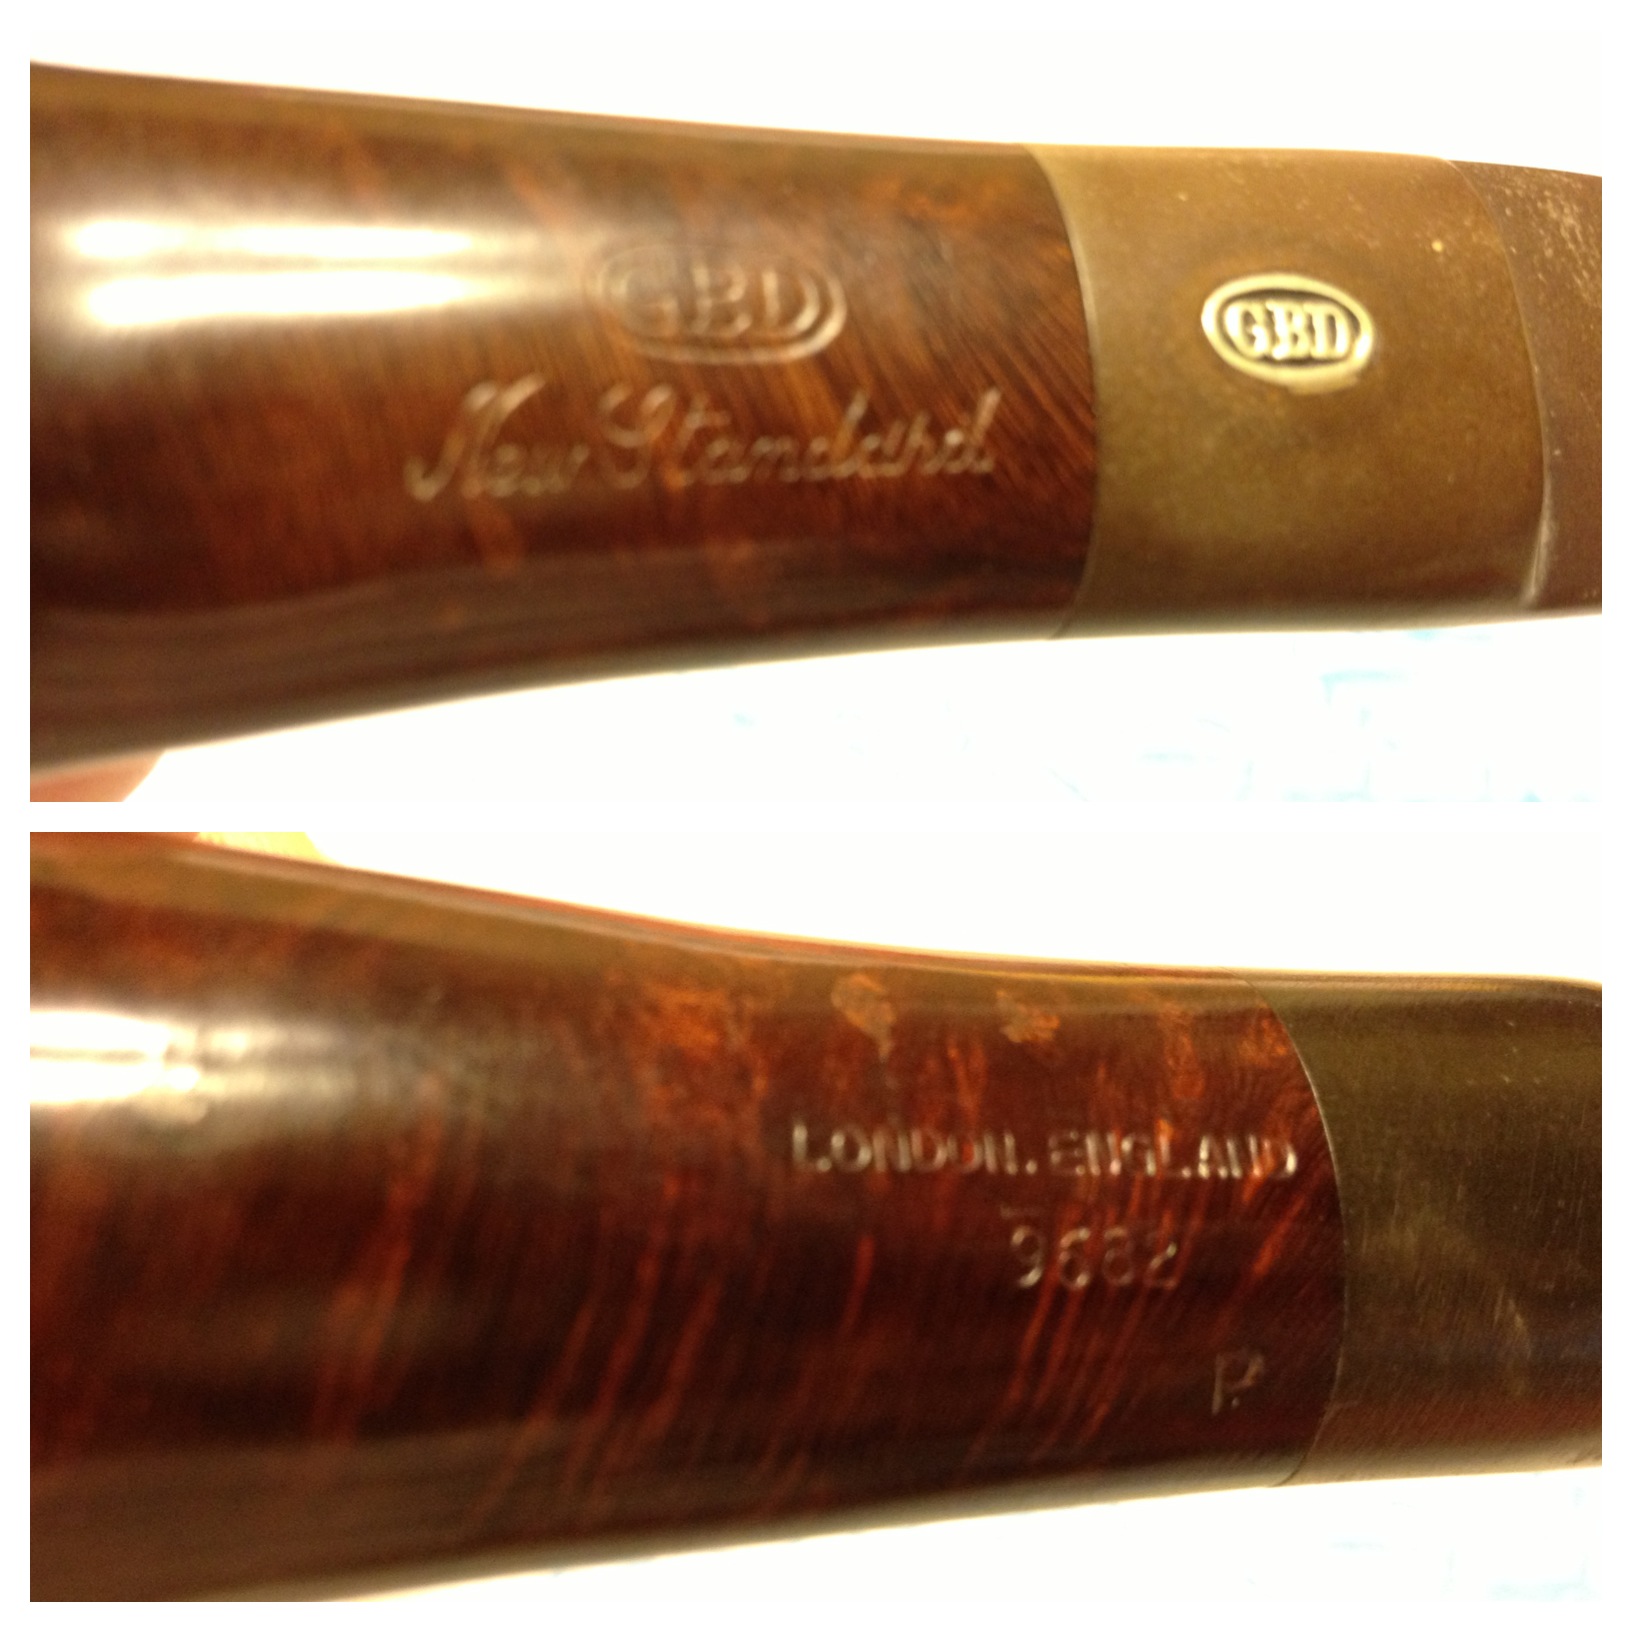
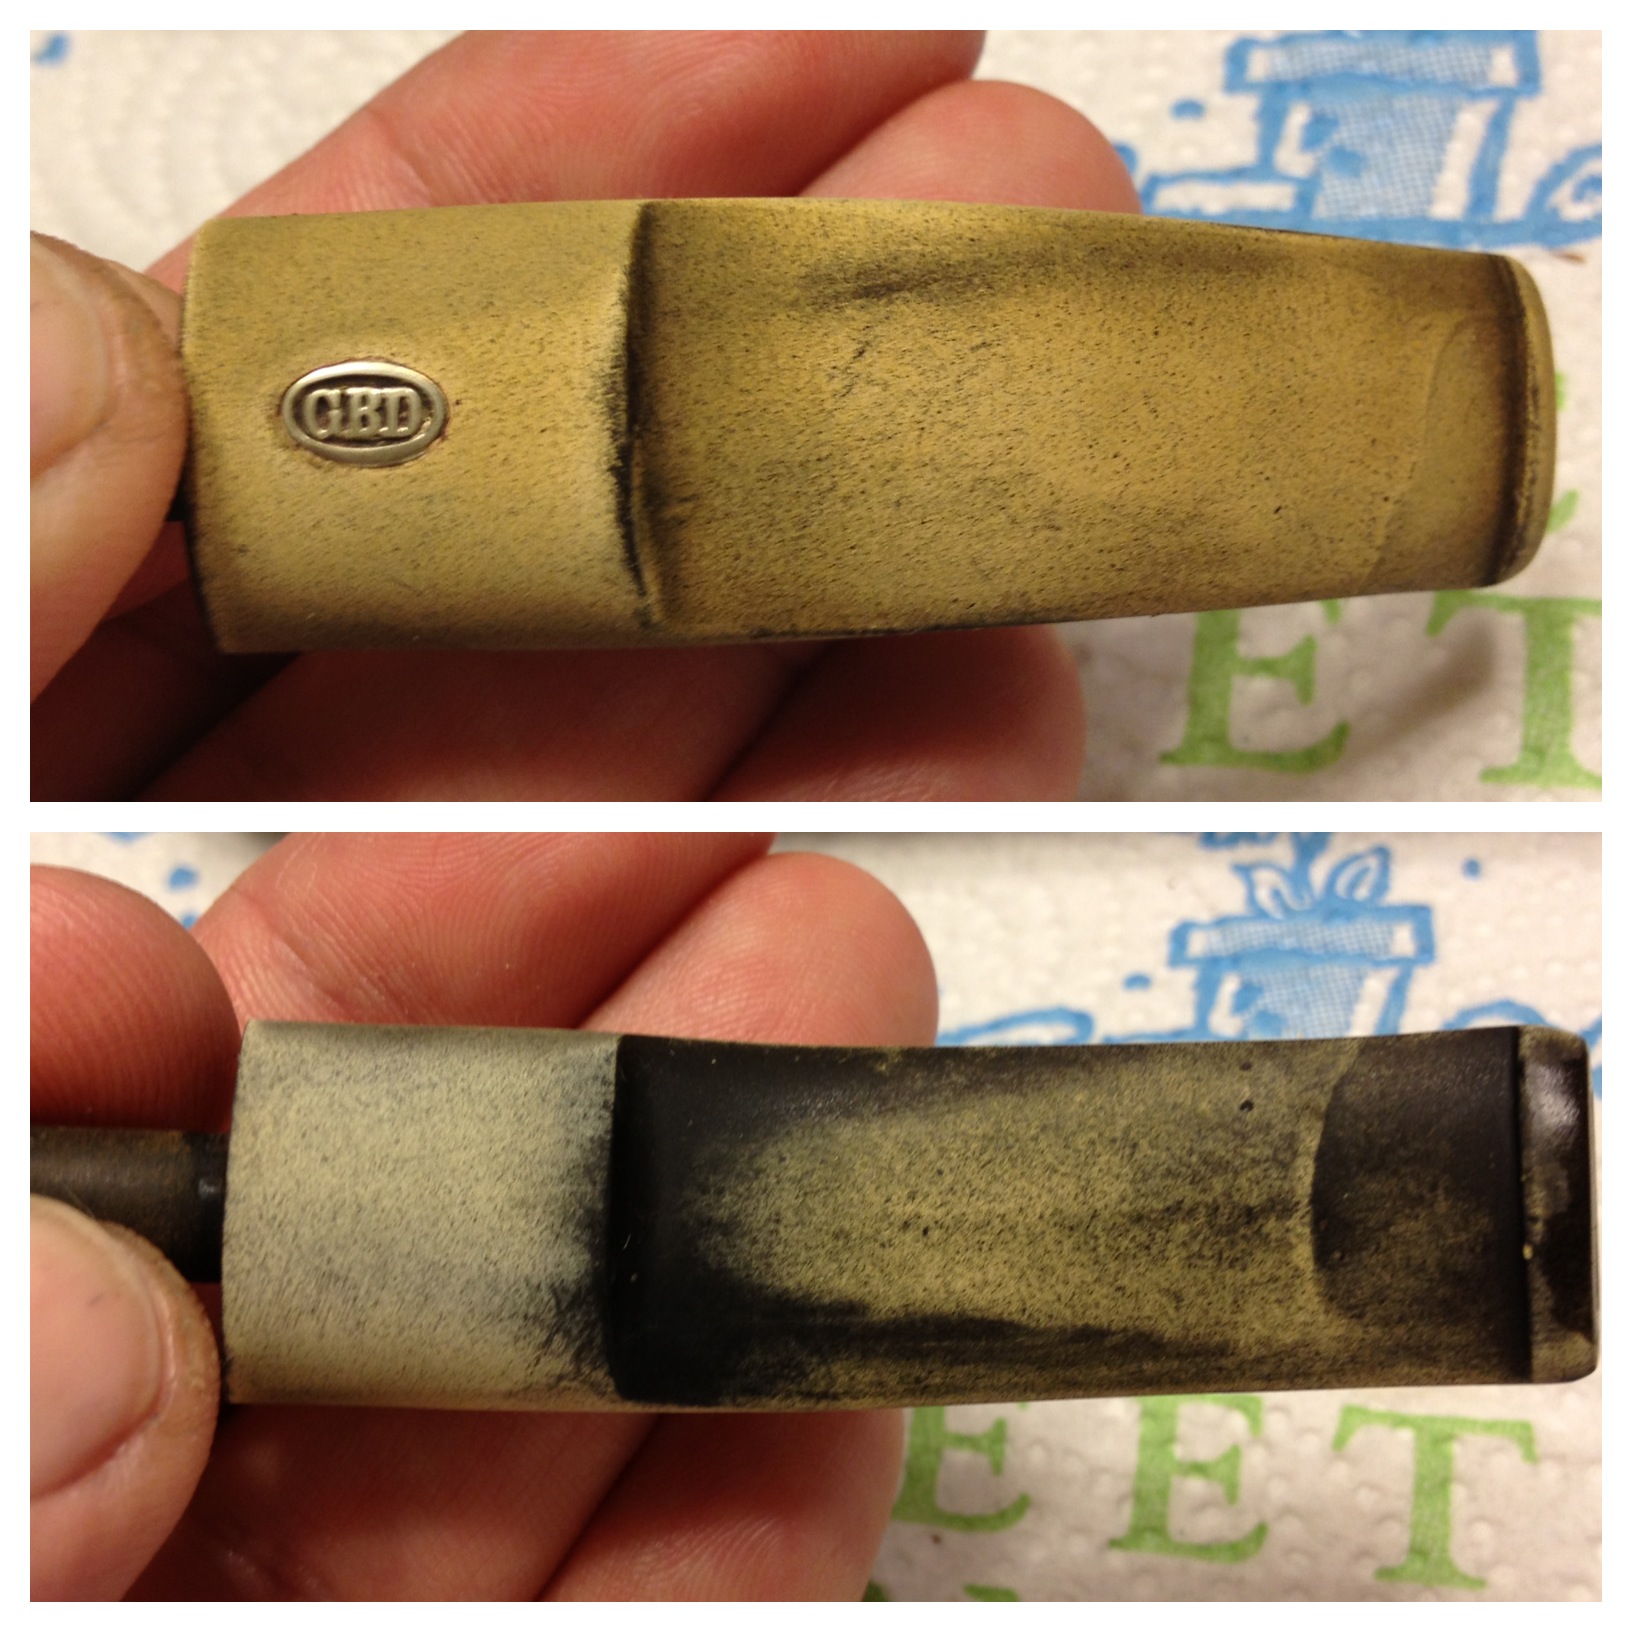
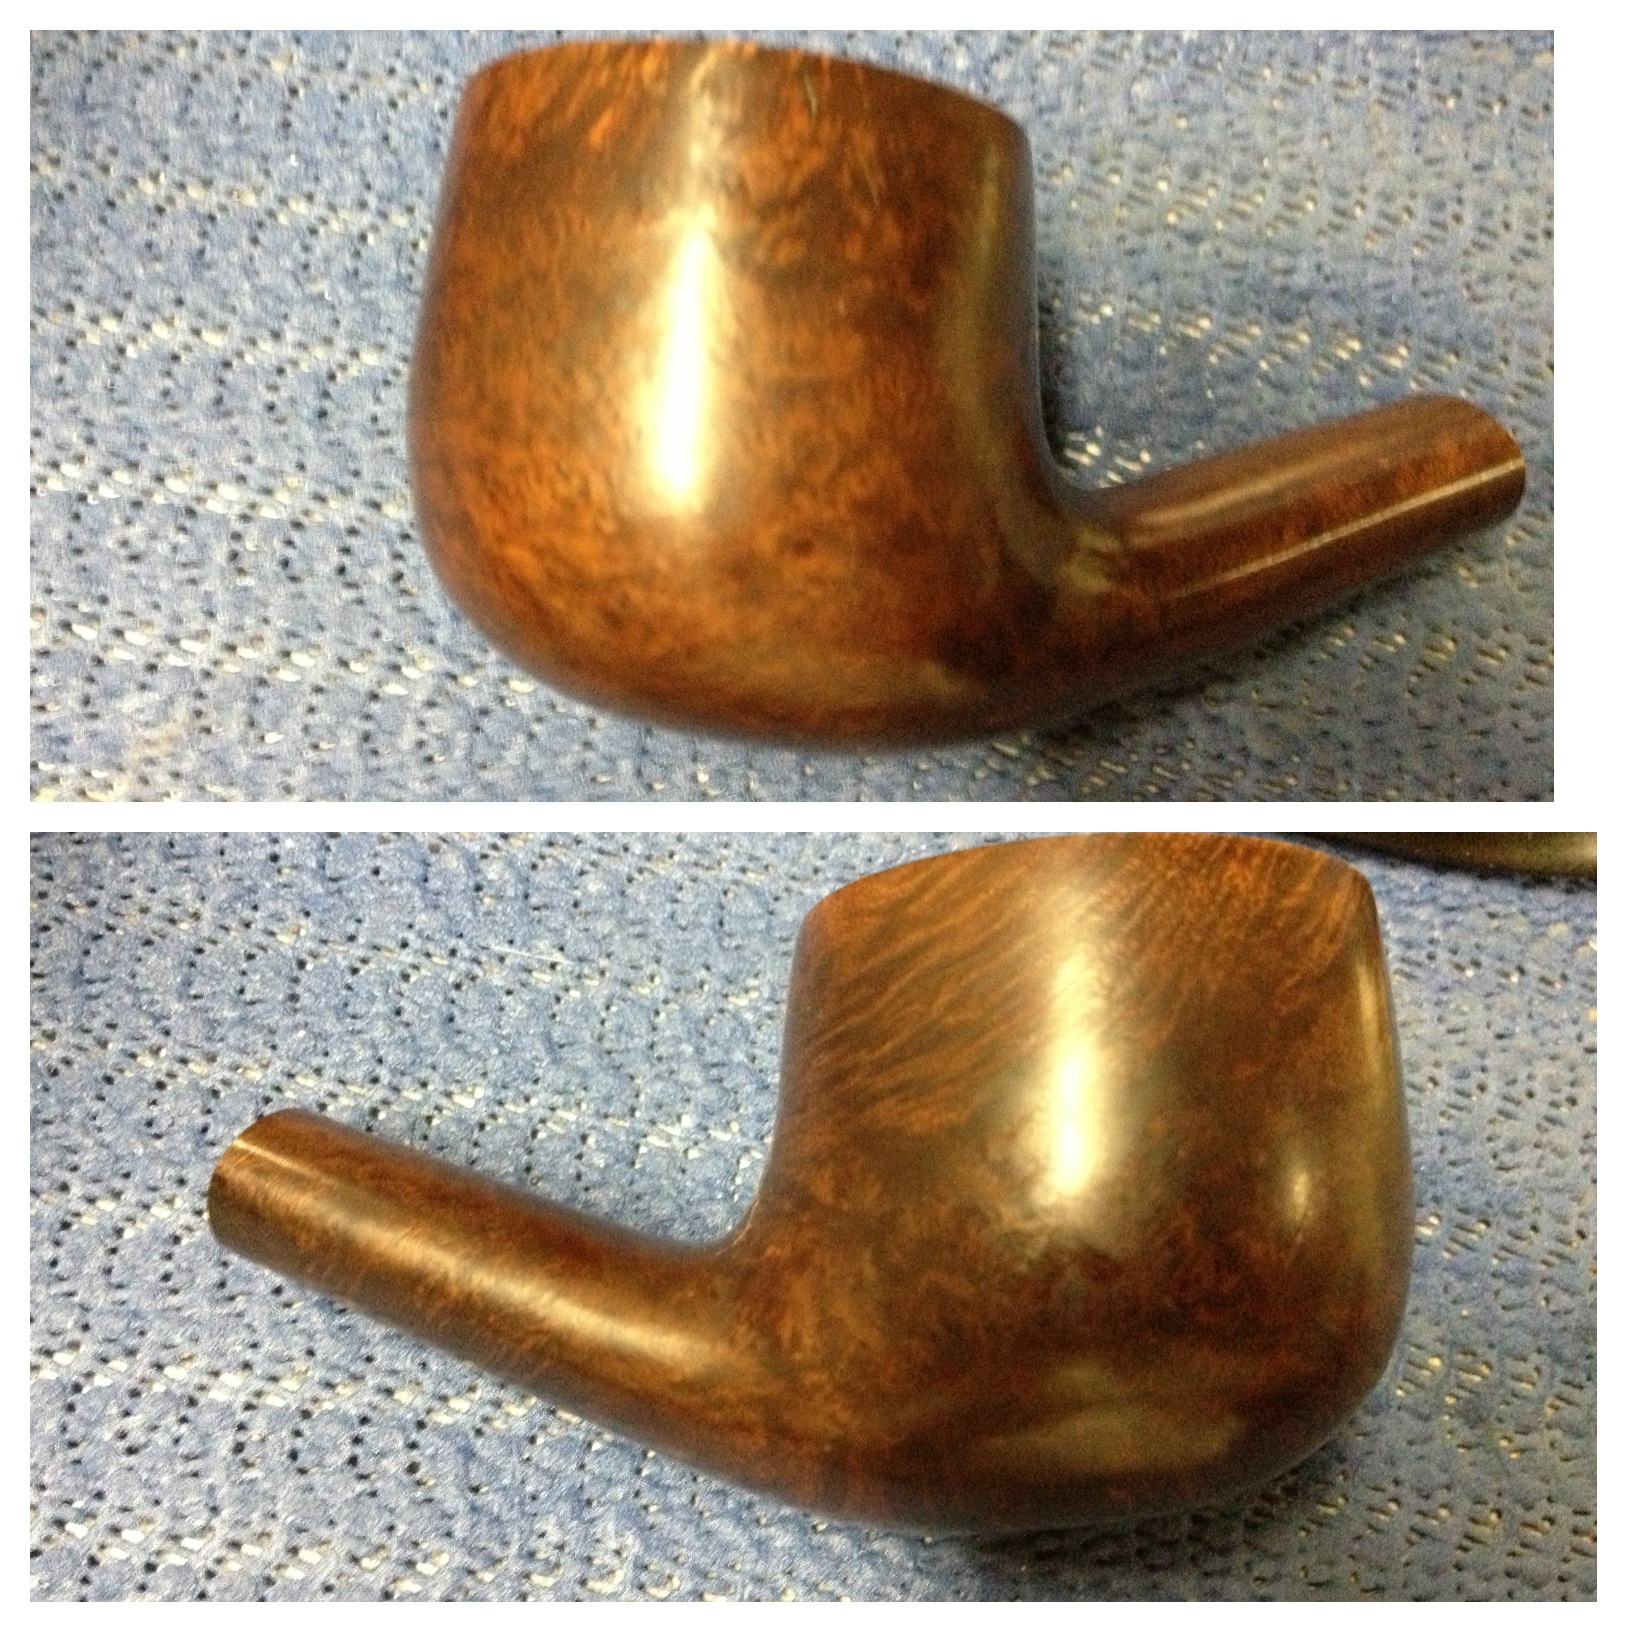
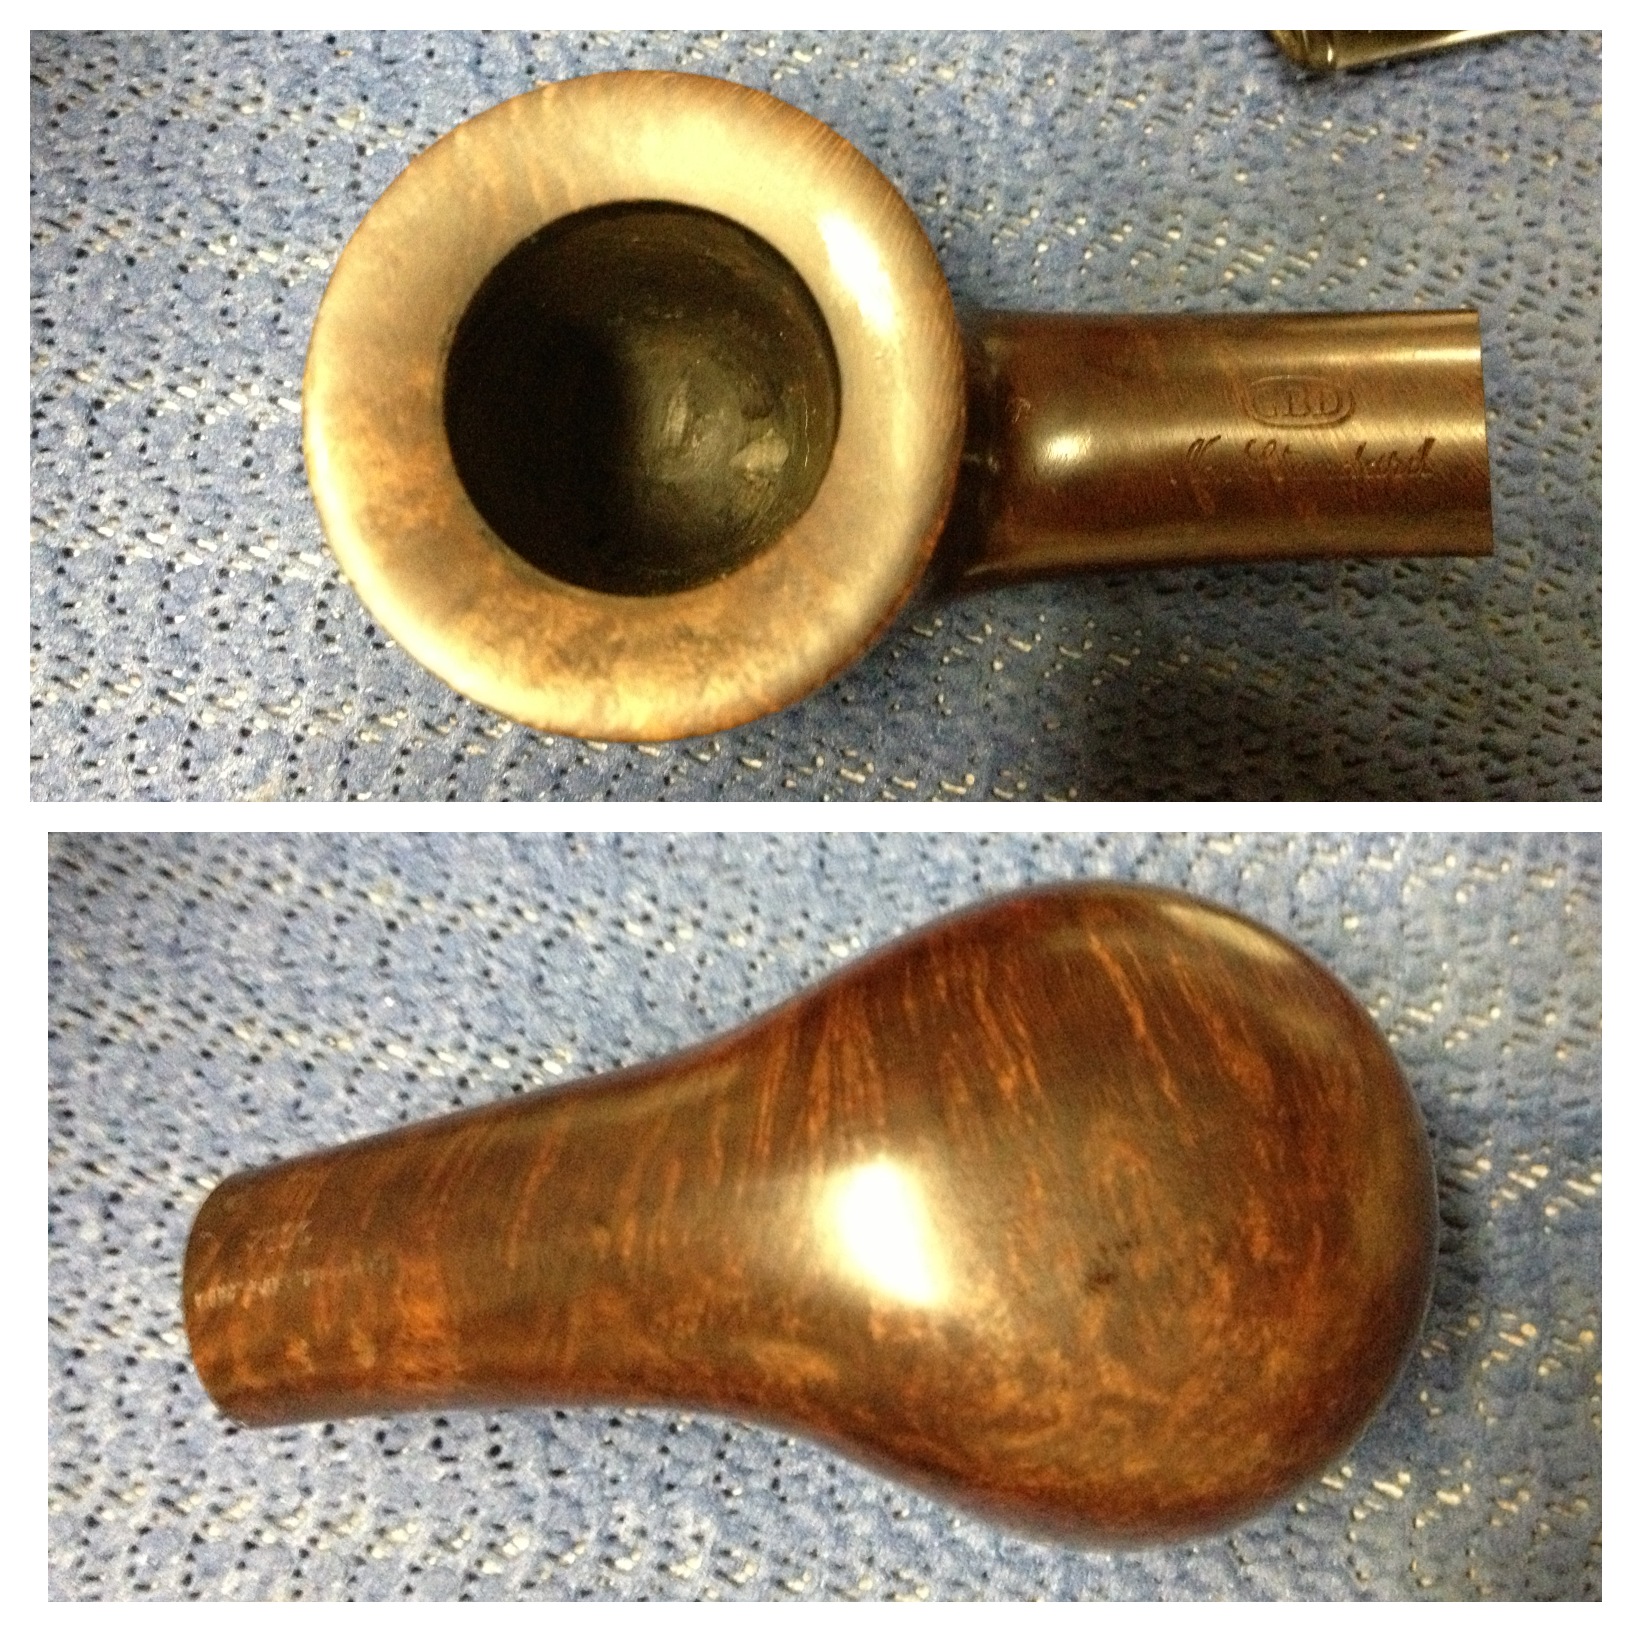
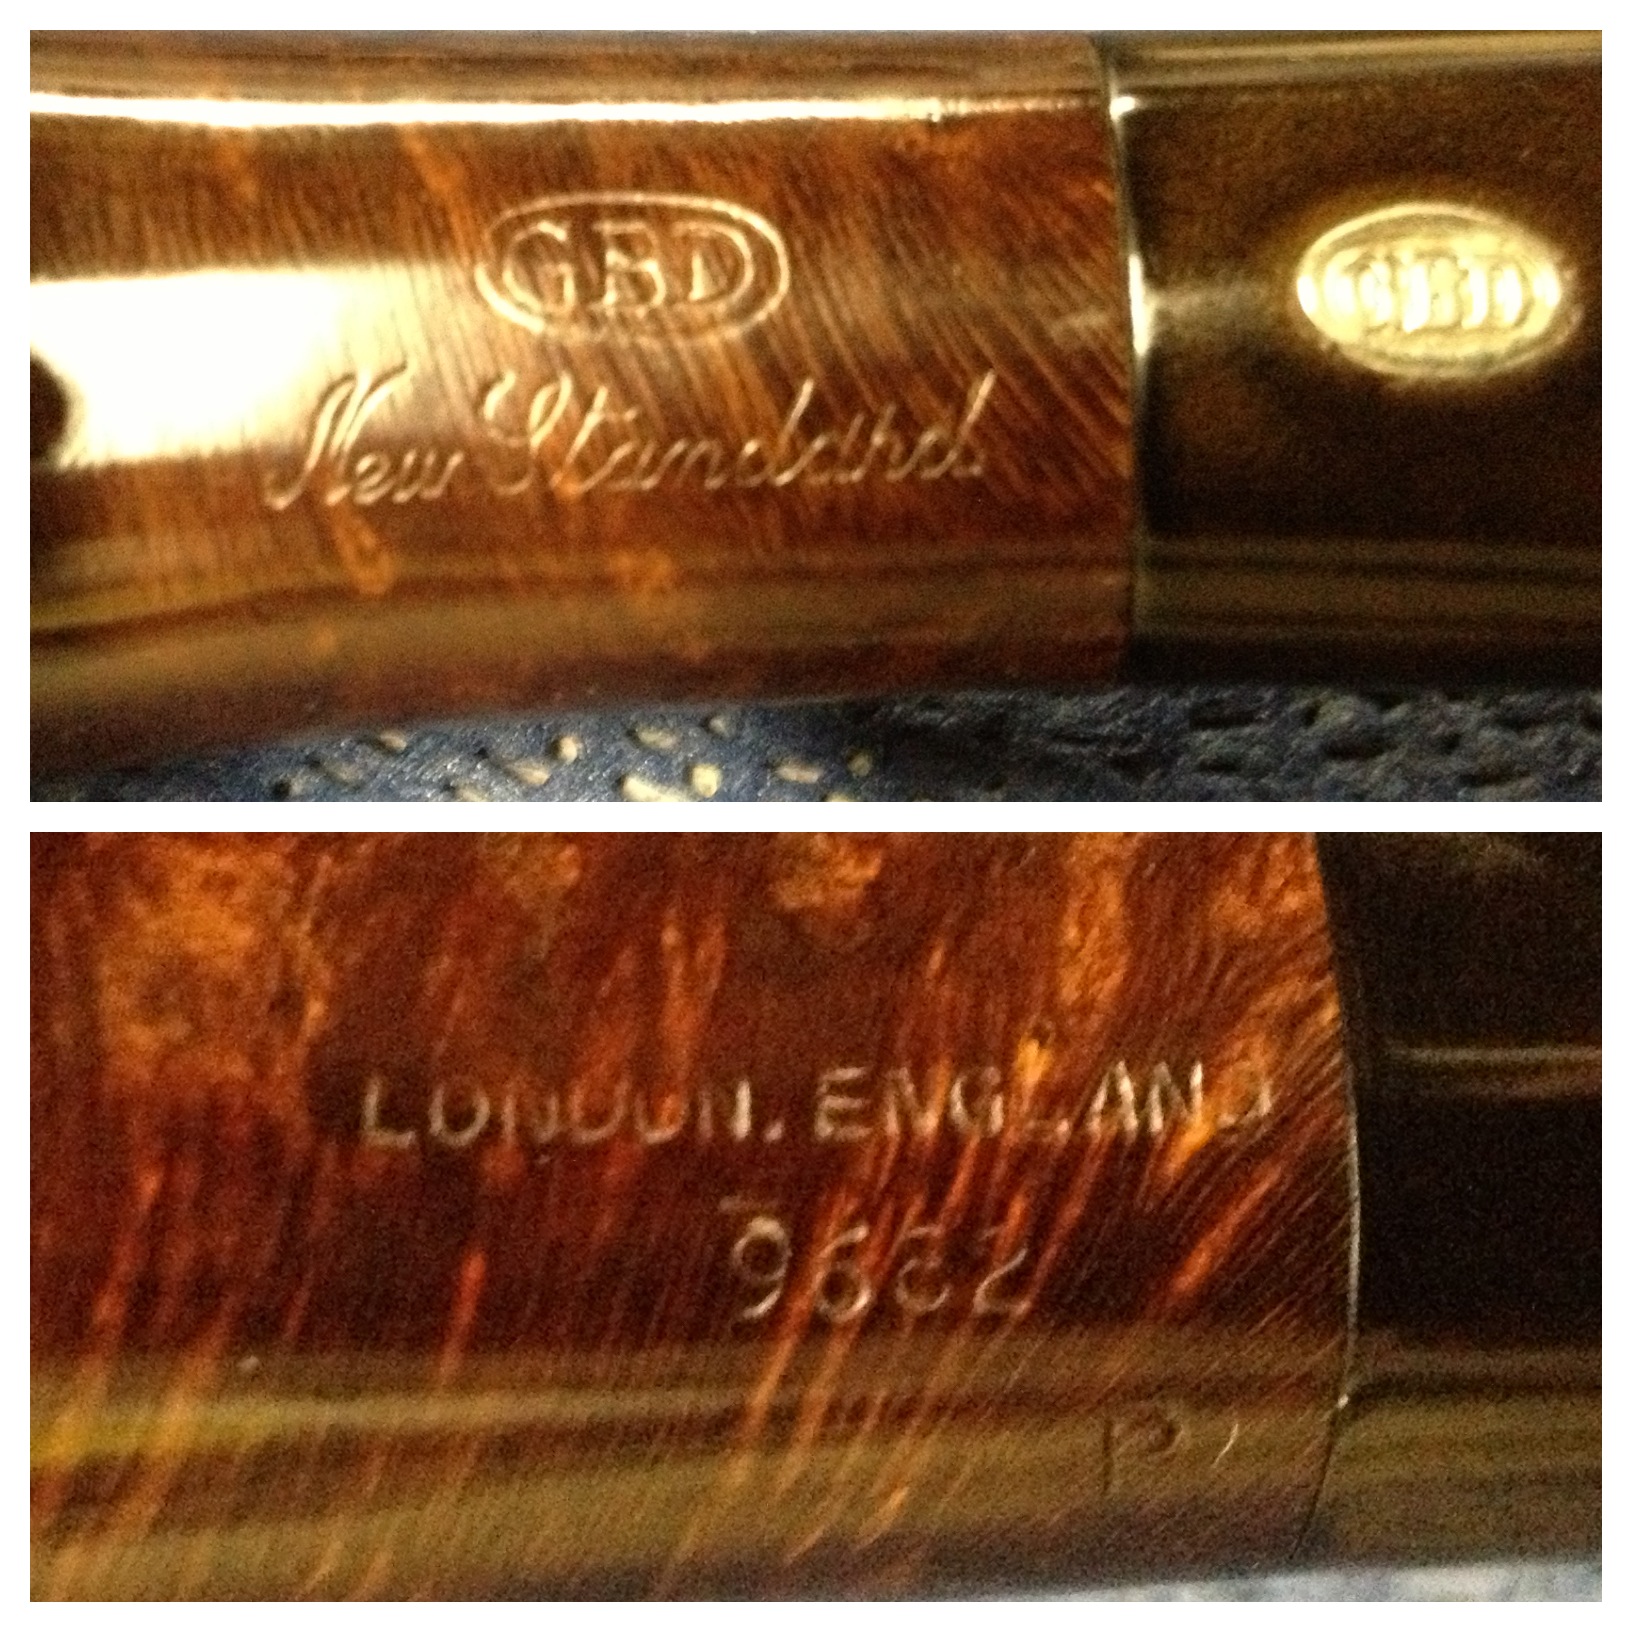
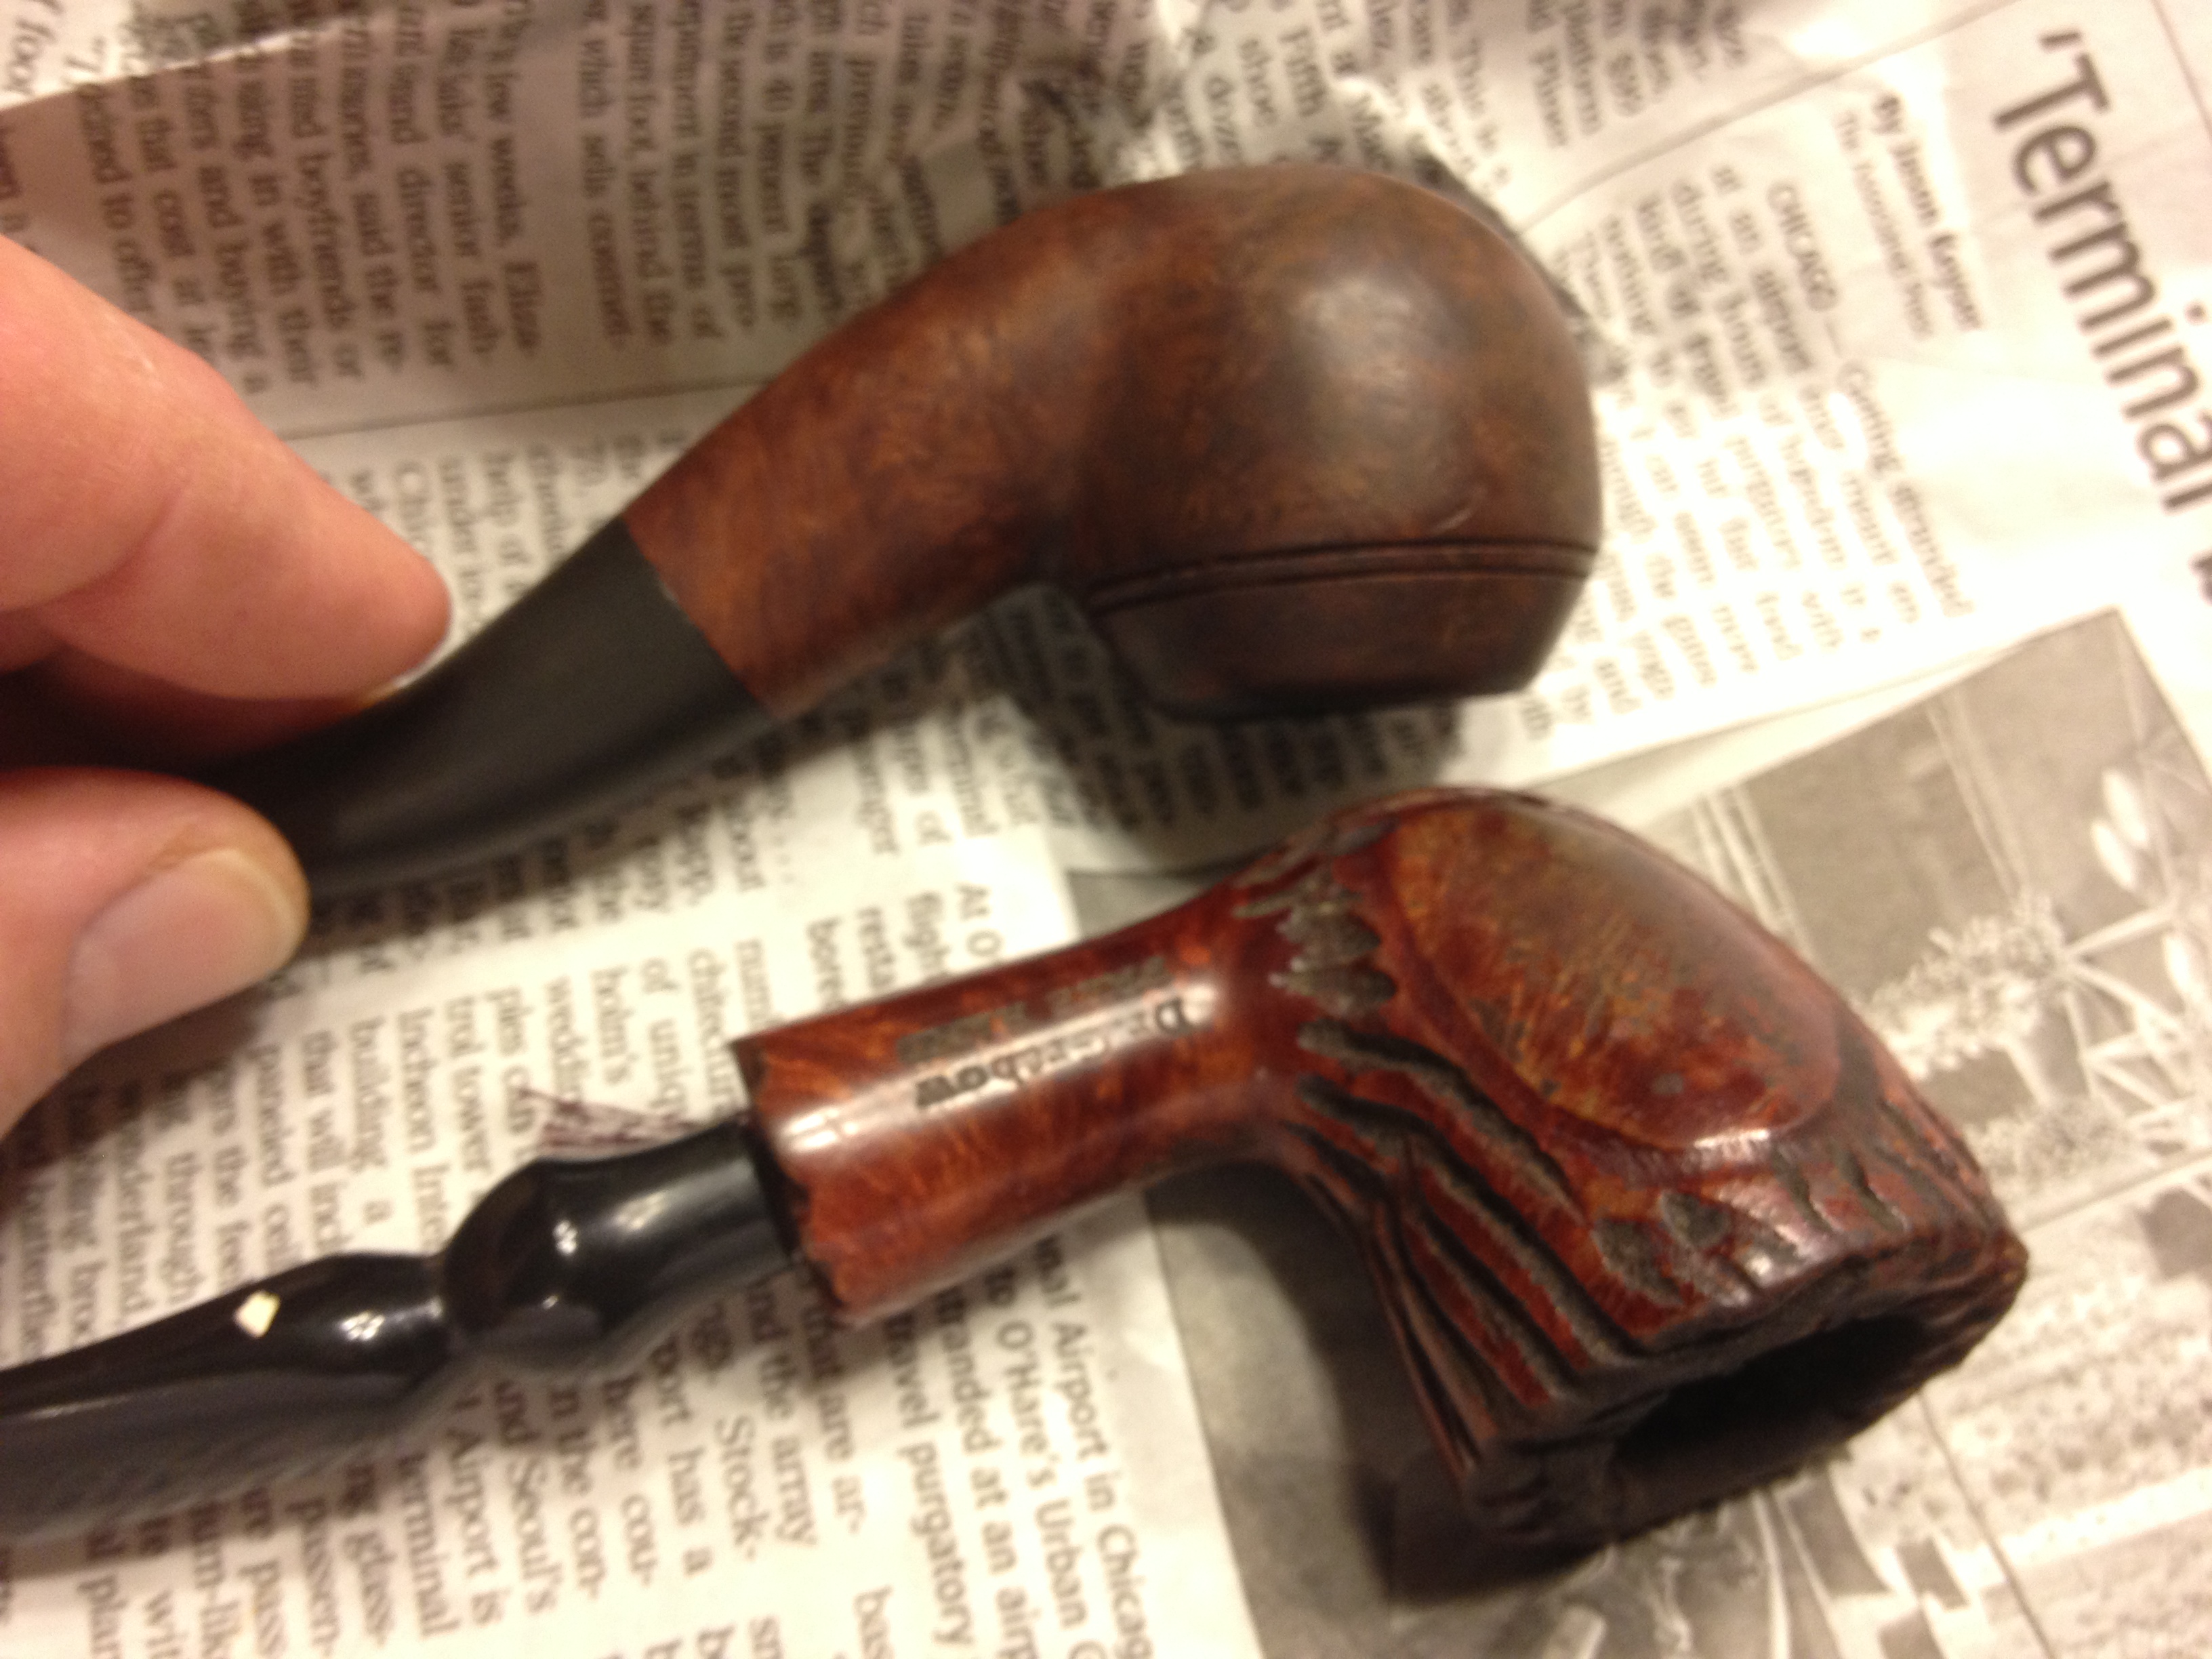
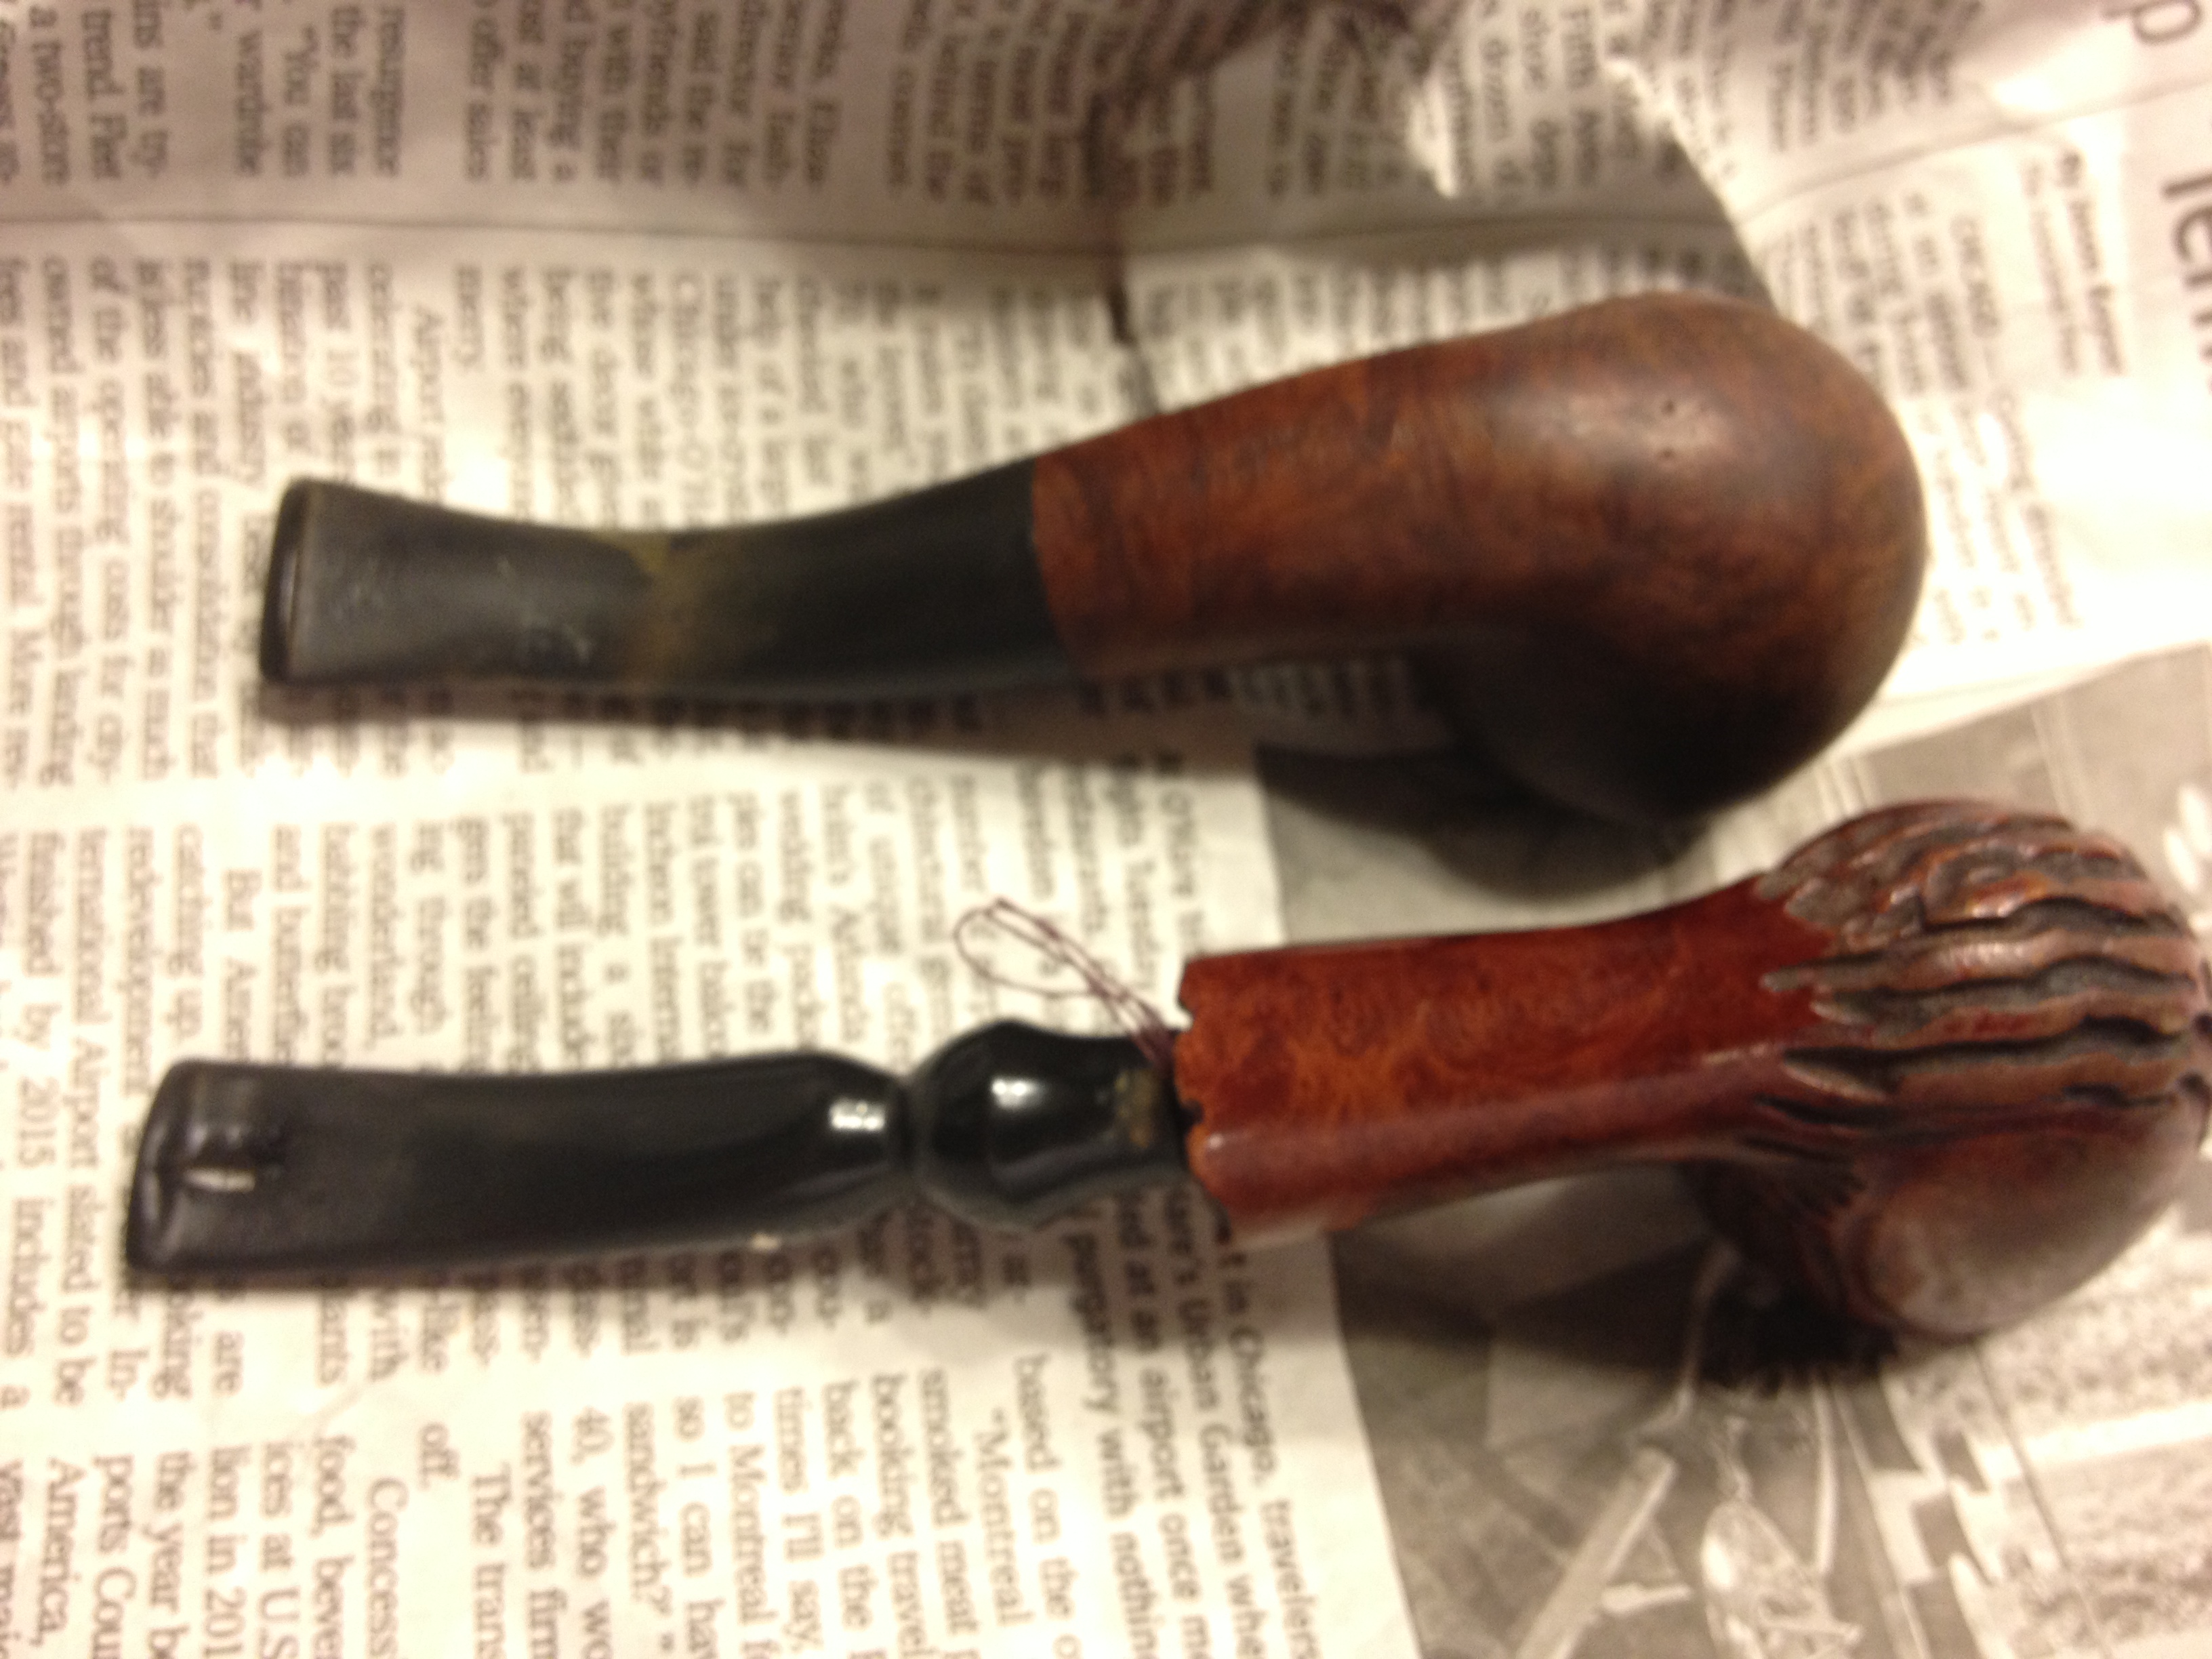
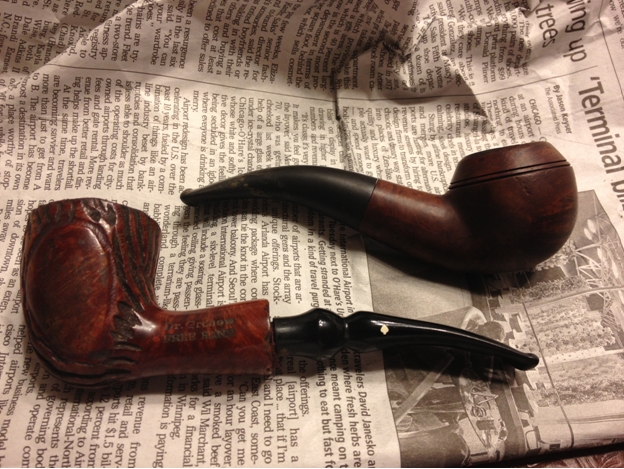
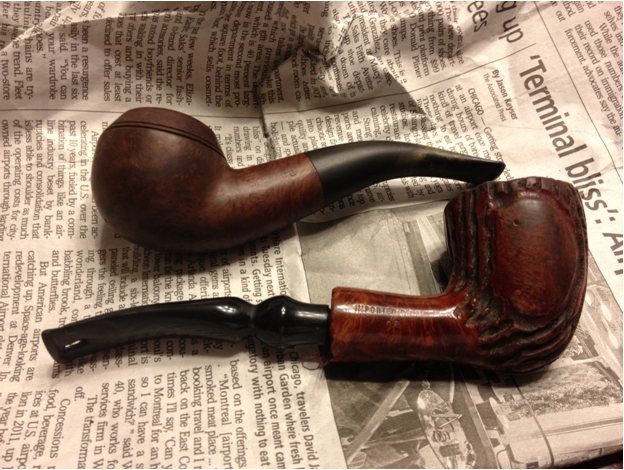
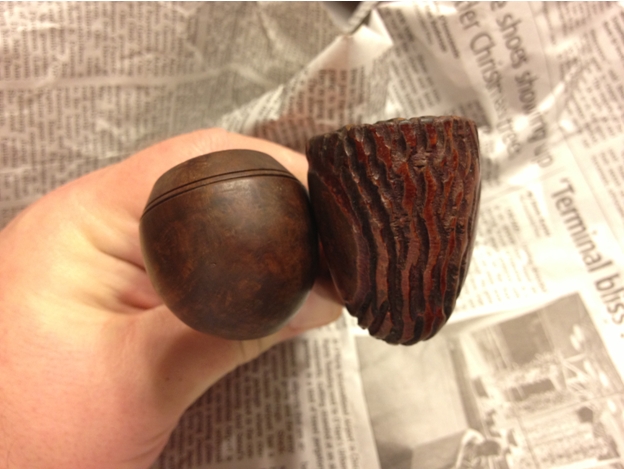
I picked this Irwin’s 9448 up not too long ago expecting it to be an easy clean up, which was partly right and partly wrong, and knowing it was a GBD second it should be a great pipe for the money. From the seller’s photos I figured a little heat to lift the tooth dents, some light sanding and then micro meshing and the stem would be good to go. The stummel I figured would need to be cleaned, soaked in an alcohol bath and retained. Here are the photos from the seller:

Seller's Photo

Seller’s Photo

IMG_5457 (2) IMG_5458 (2) IMG_5459 (2) IMG_5460 (2) IMG_5461 (2) IMG_5462 (2)

I forgot to take my own photos when the pipe arrived and during the process so only the seller’s before and my after photos will be shown. The process went as follows though:

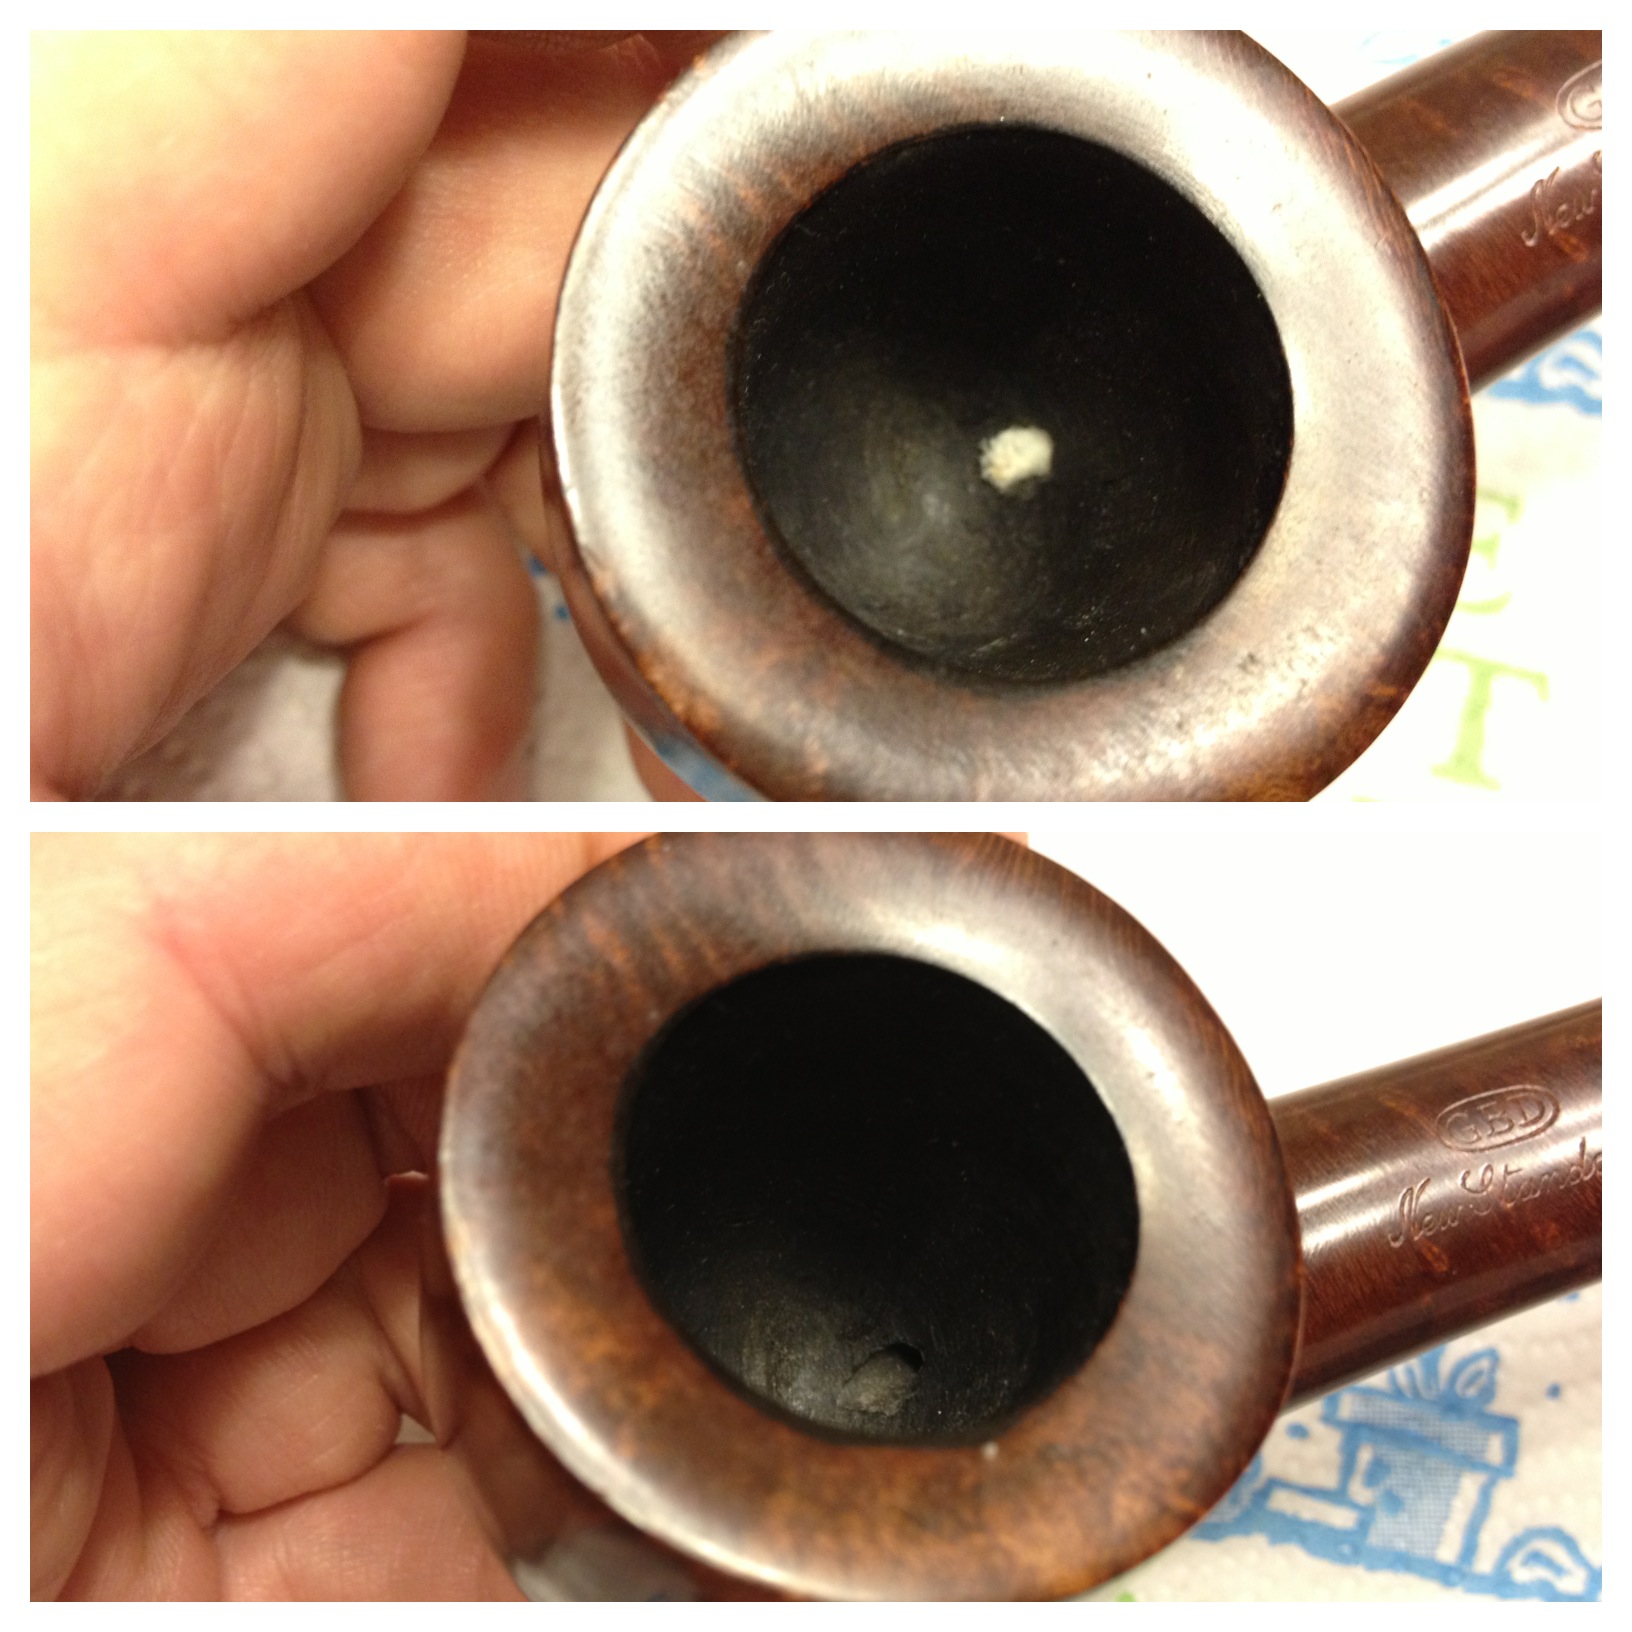
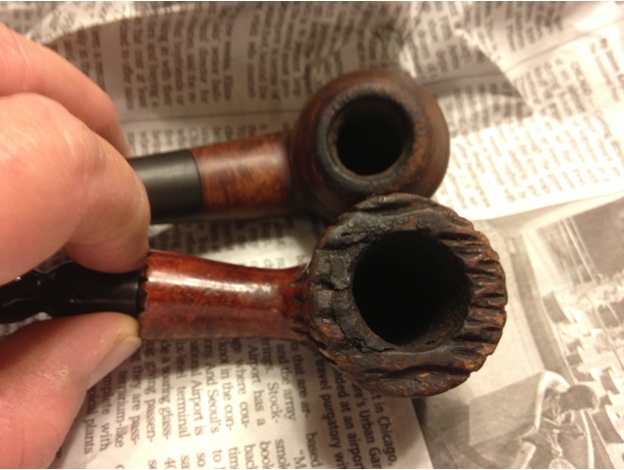
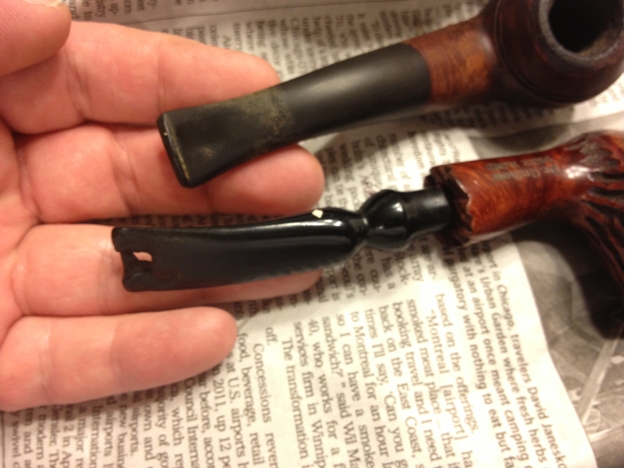
The stummel was in better shape than I anticipated: it was dirty and did have a few dents to raise but was in really good condition overall. The stem was another story: the tooth dents were much deeper than the photos showed or than I had expected. I knew that this stem was going to require filling the dents and thought over a few options, which I have more to say on later here. So, I decided to start with the stummel.

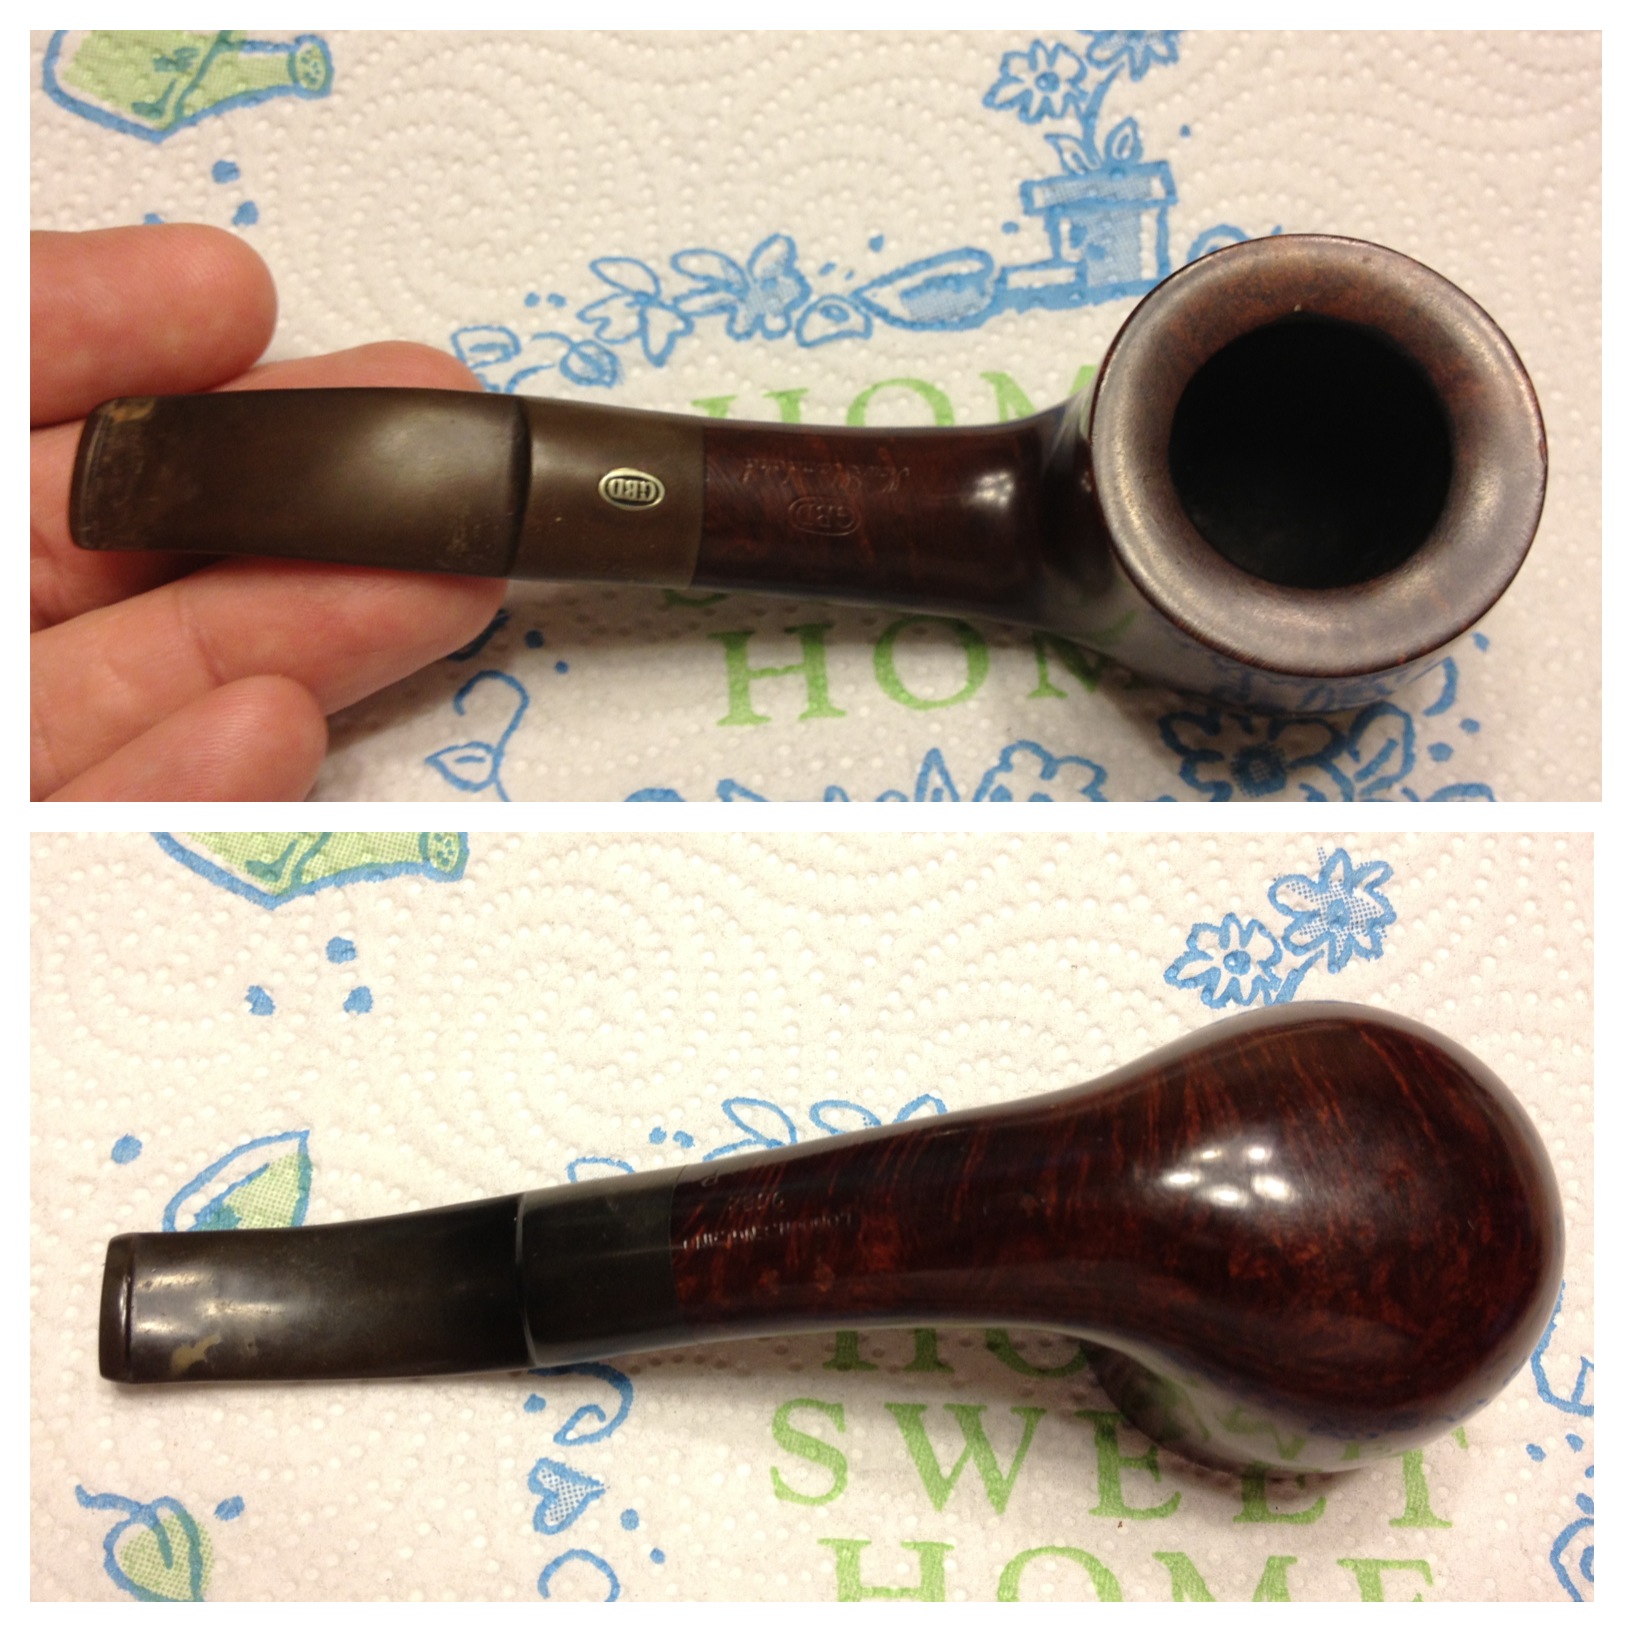
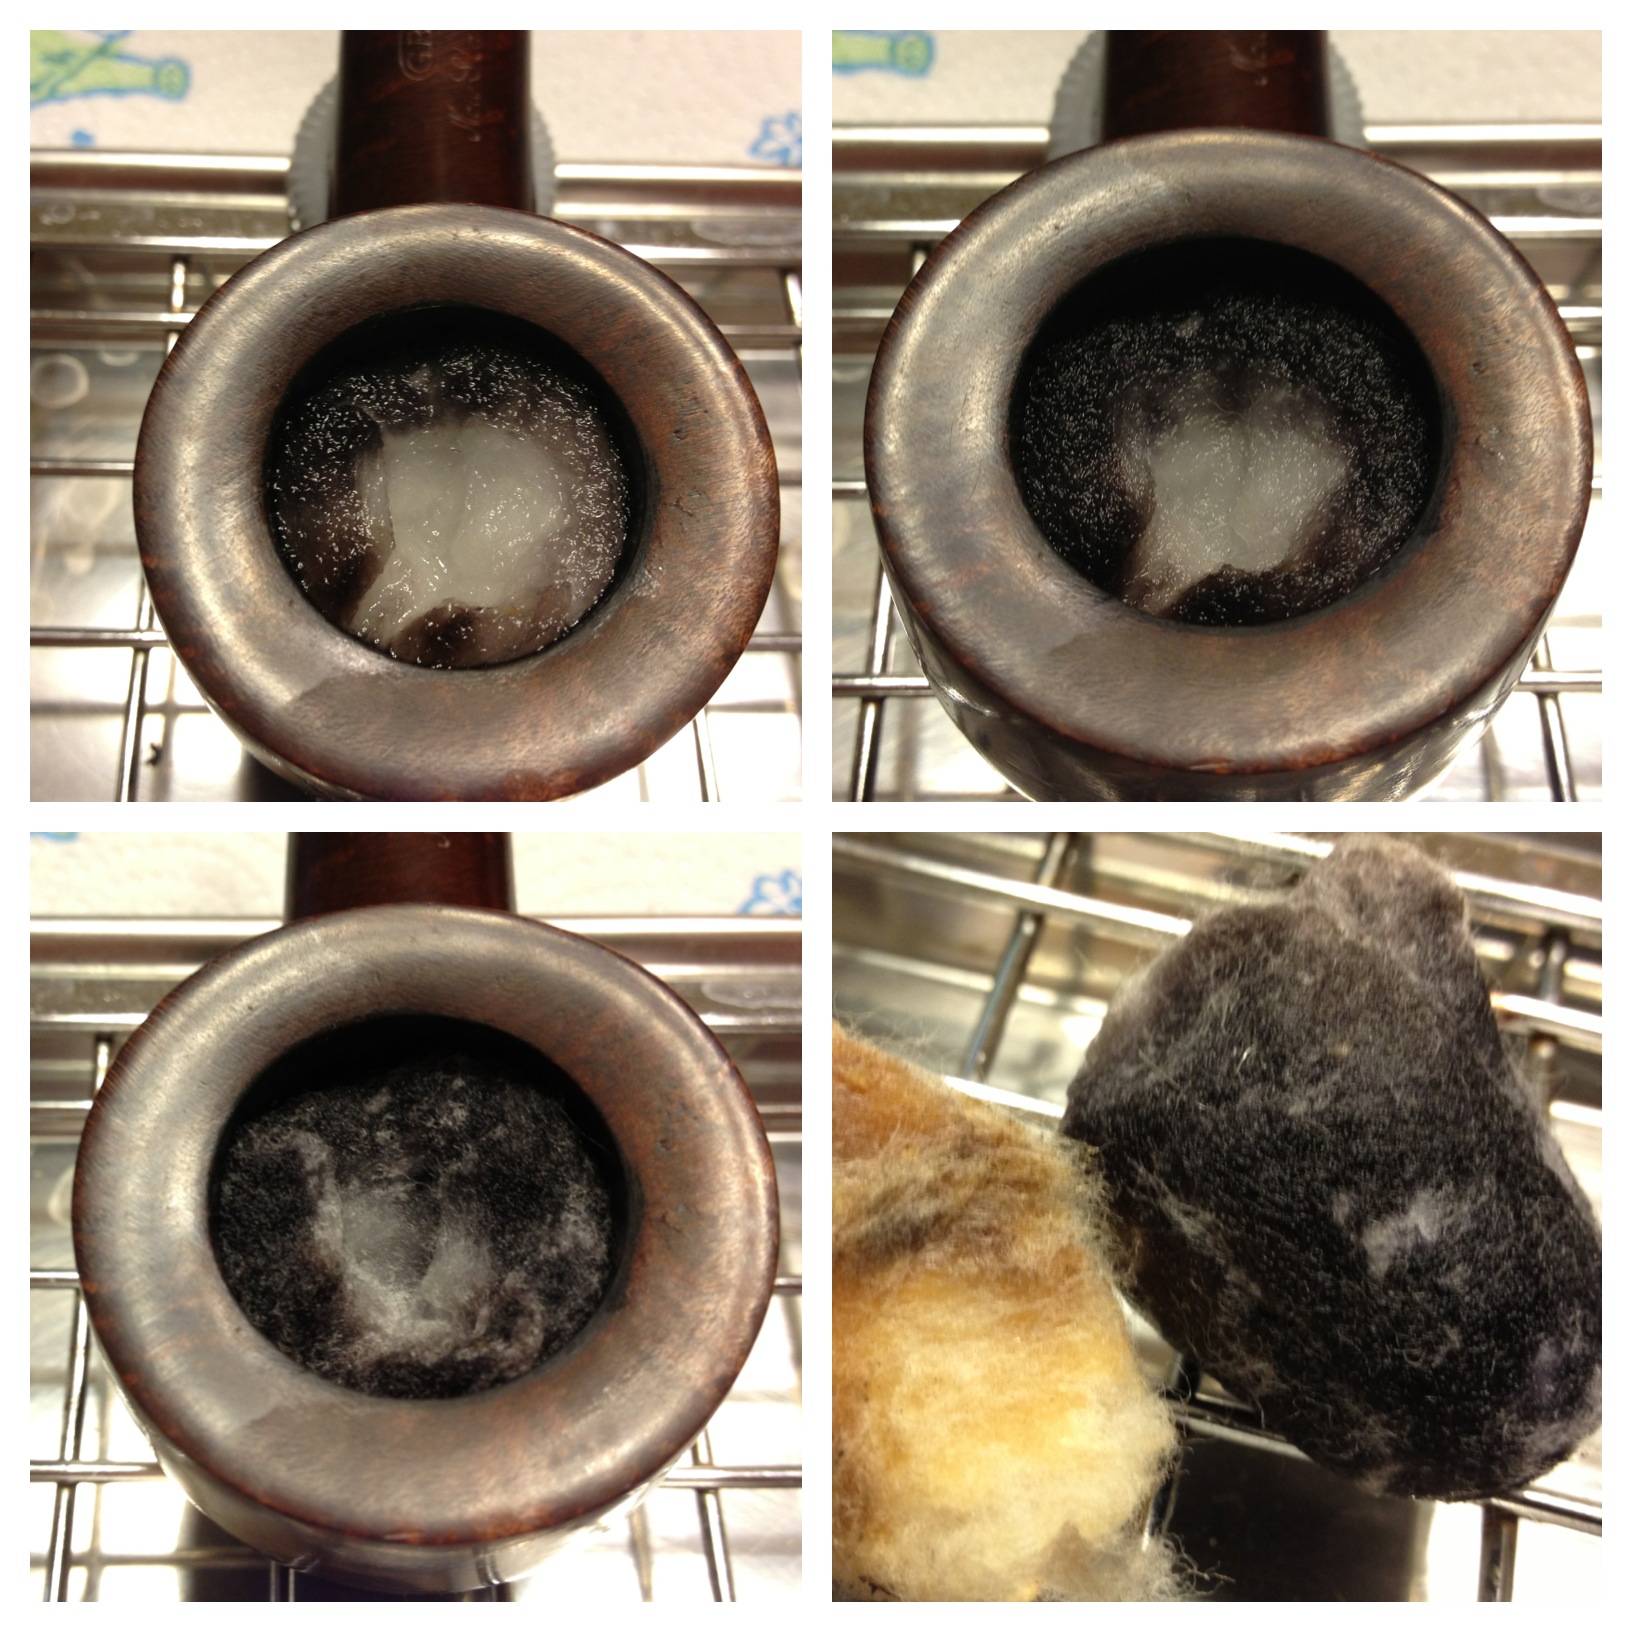
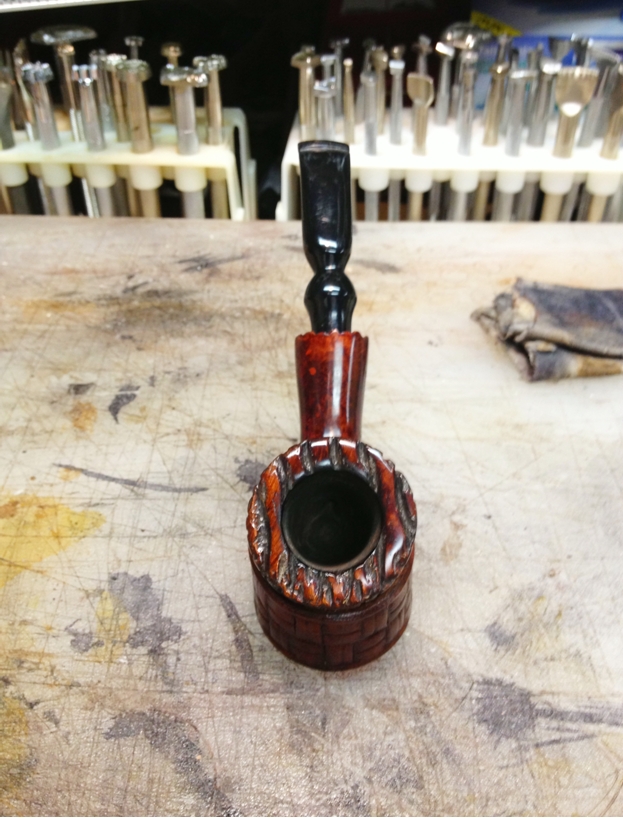
After reaming the bowl and cleaning the shank, I began by wiping the pipe down with acetone on disposable cotton pads, and went through many of them. After get most of the dirt and wax off, I took some cotton swabs dipped in 91% isopropyl alcohol and began to work off the heavy build up on the rim. It was a slow process but as the layers came off I could see the rim was in very nice shape and didn’t need topped. Once all the gunk was off, I took a few more passes over the entire stummel with a couple more cotton pads wet with alcohol to make sure all the finish and dirt was removed. I then turned my attention to the dents: one on the front of the bowl, two on the bottom near where the curve of the bowl met the flat “sitter” area, and a couple on the rim.

I used my heat gun to heat up the end of an old kitchen “butter knife” and a wet scrap rag to produce the steam to raise the dents. All of them came out fairly easily except for one on the “sitter” portion and it took several applications of steam to get it out. But it did finally raise.

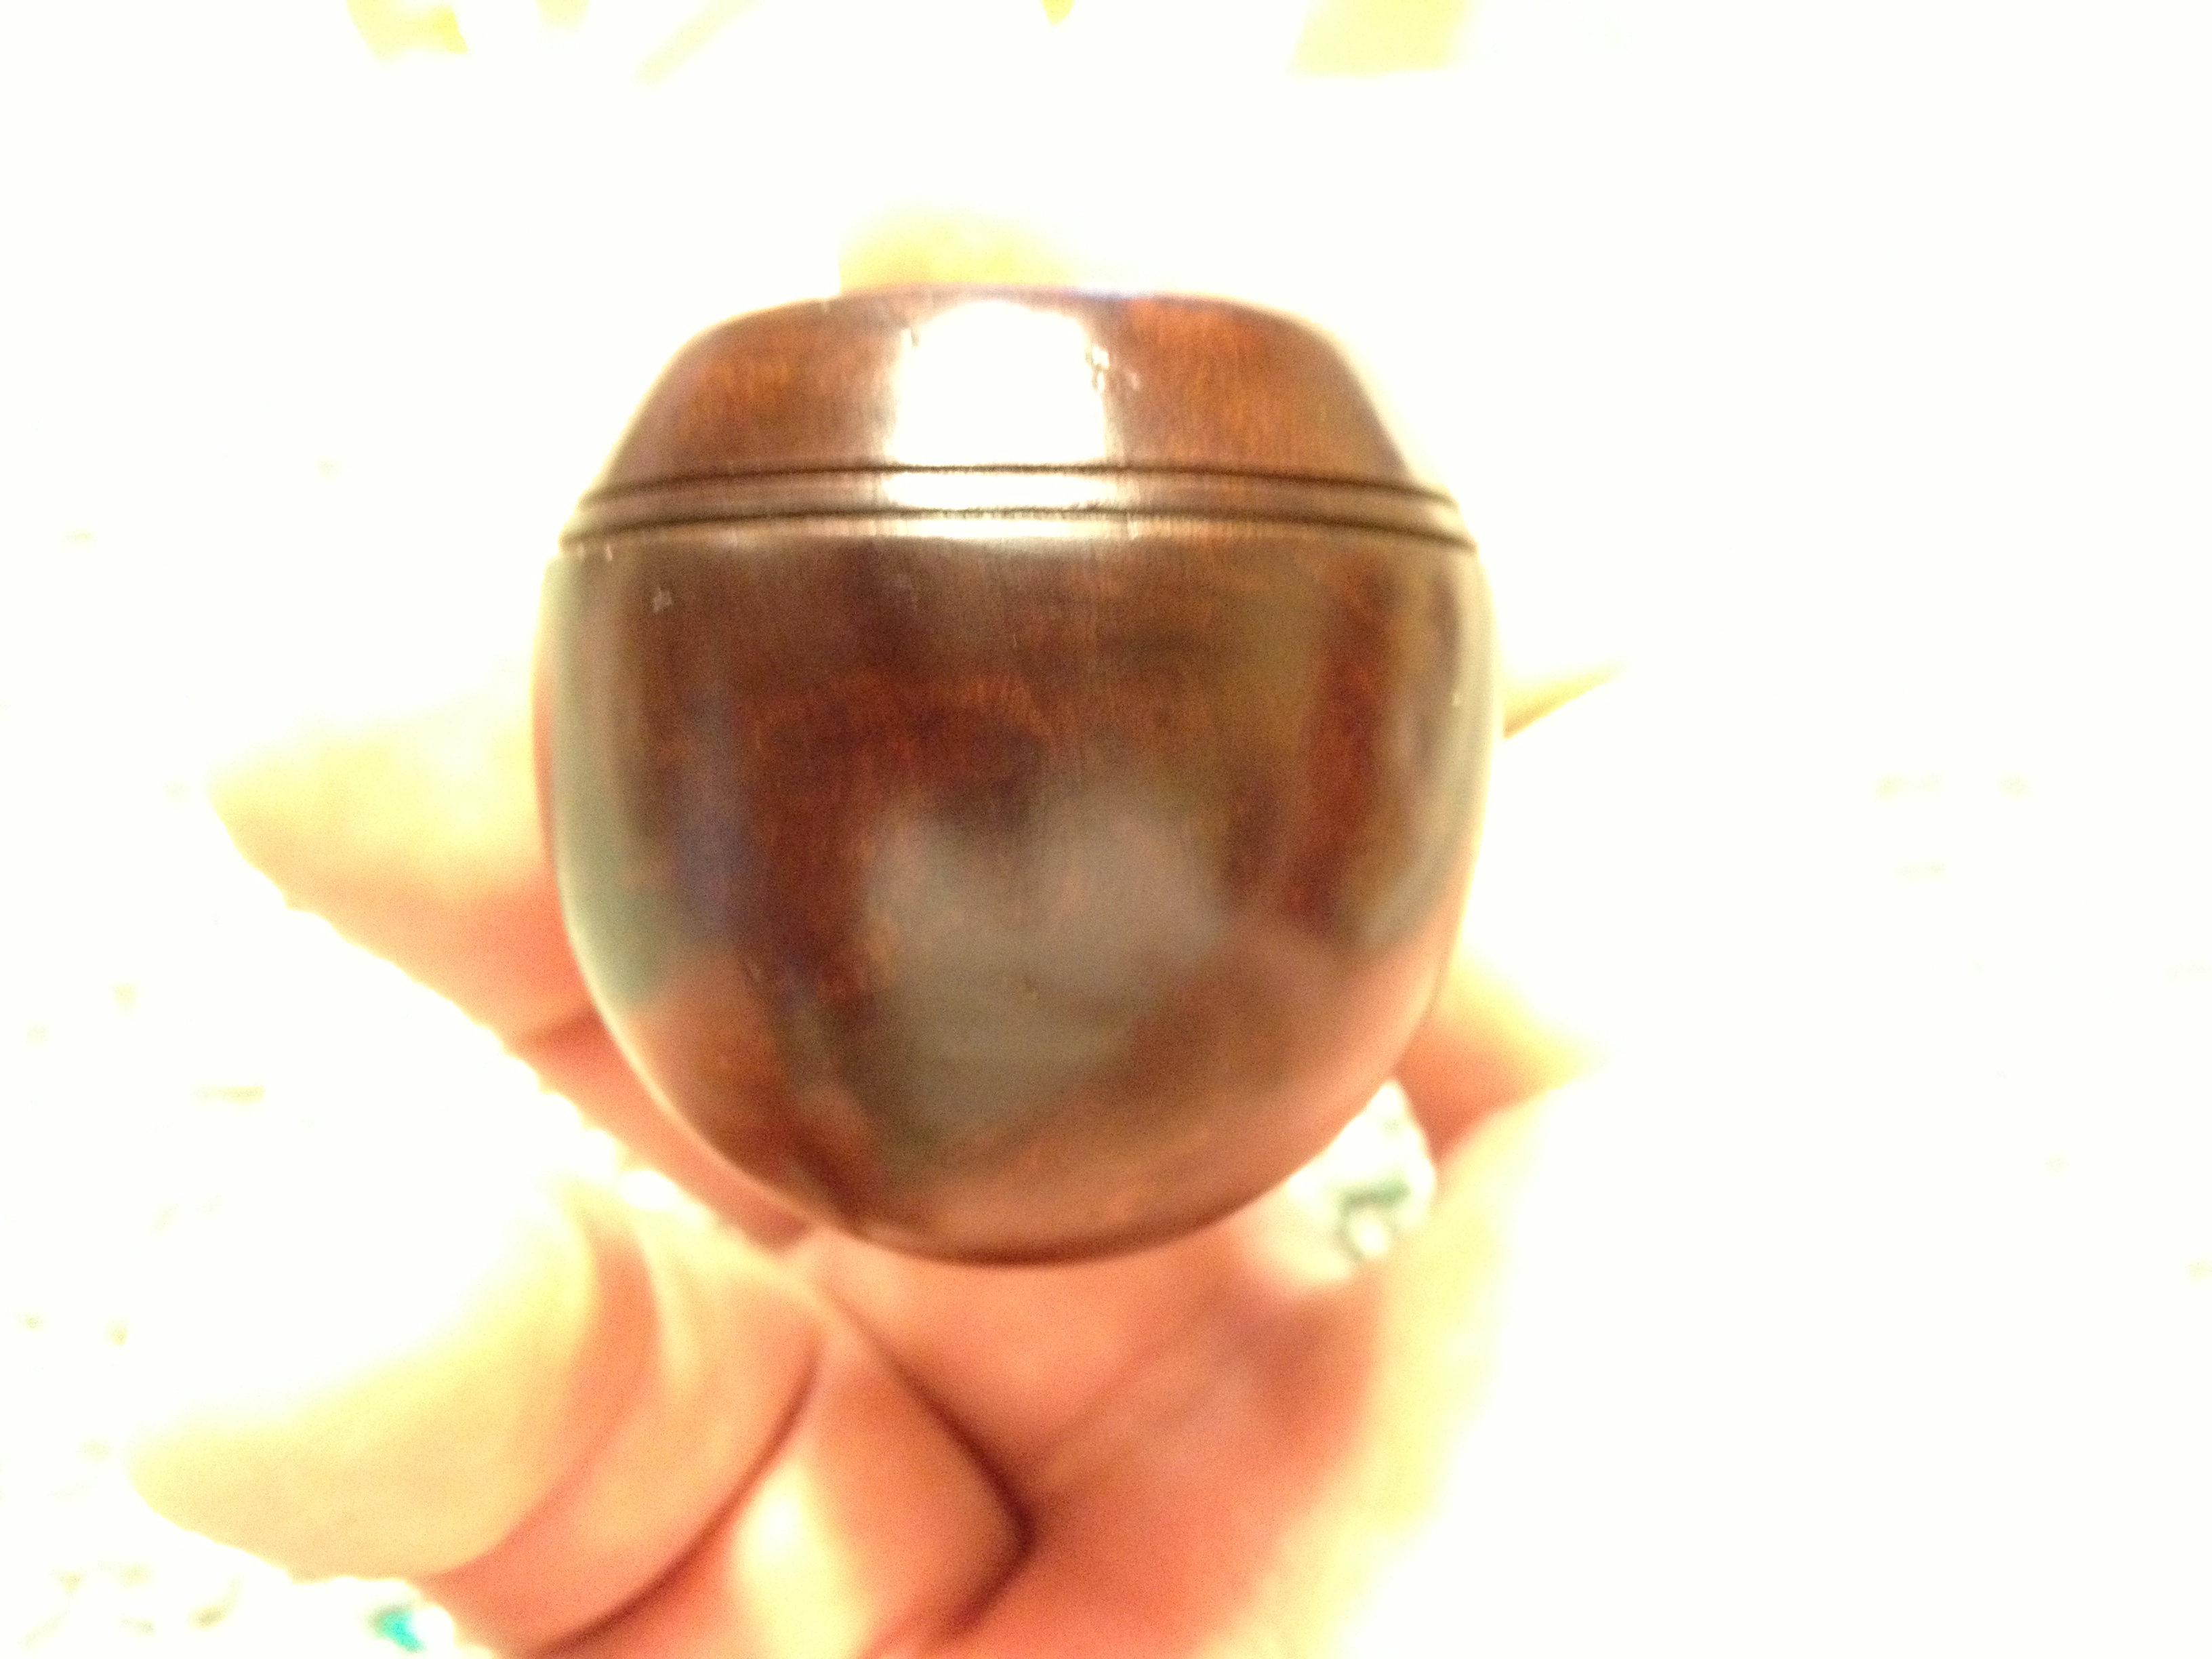
At this point I went to the buffer to see what the stummel looked like. I buffed it with some Tripoli and then again my hand with an old t-shirt. I saw then that the pipe had good color under all the dirt, it had just been hidden. And the steam had done its job very nicely, too, giving me a pretty well smoothed out stummel. There was one fill on the left side of the bowl but not a large one and it didn’t really stand out to my eye so I decided to leave it alone. I wiped it down with one more alcohol pad to remove any trace left from the Tripoli and then decided to not sand or re-stain it; the color was really nice and the grain showed in a nice contrast. So I set the stummel aside to work on the stem.

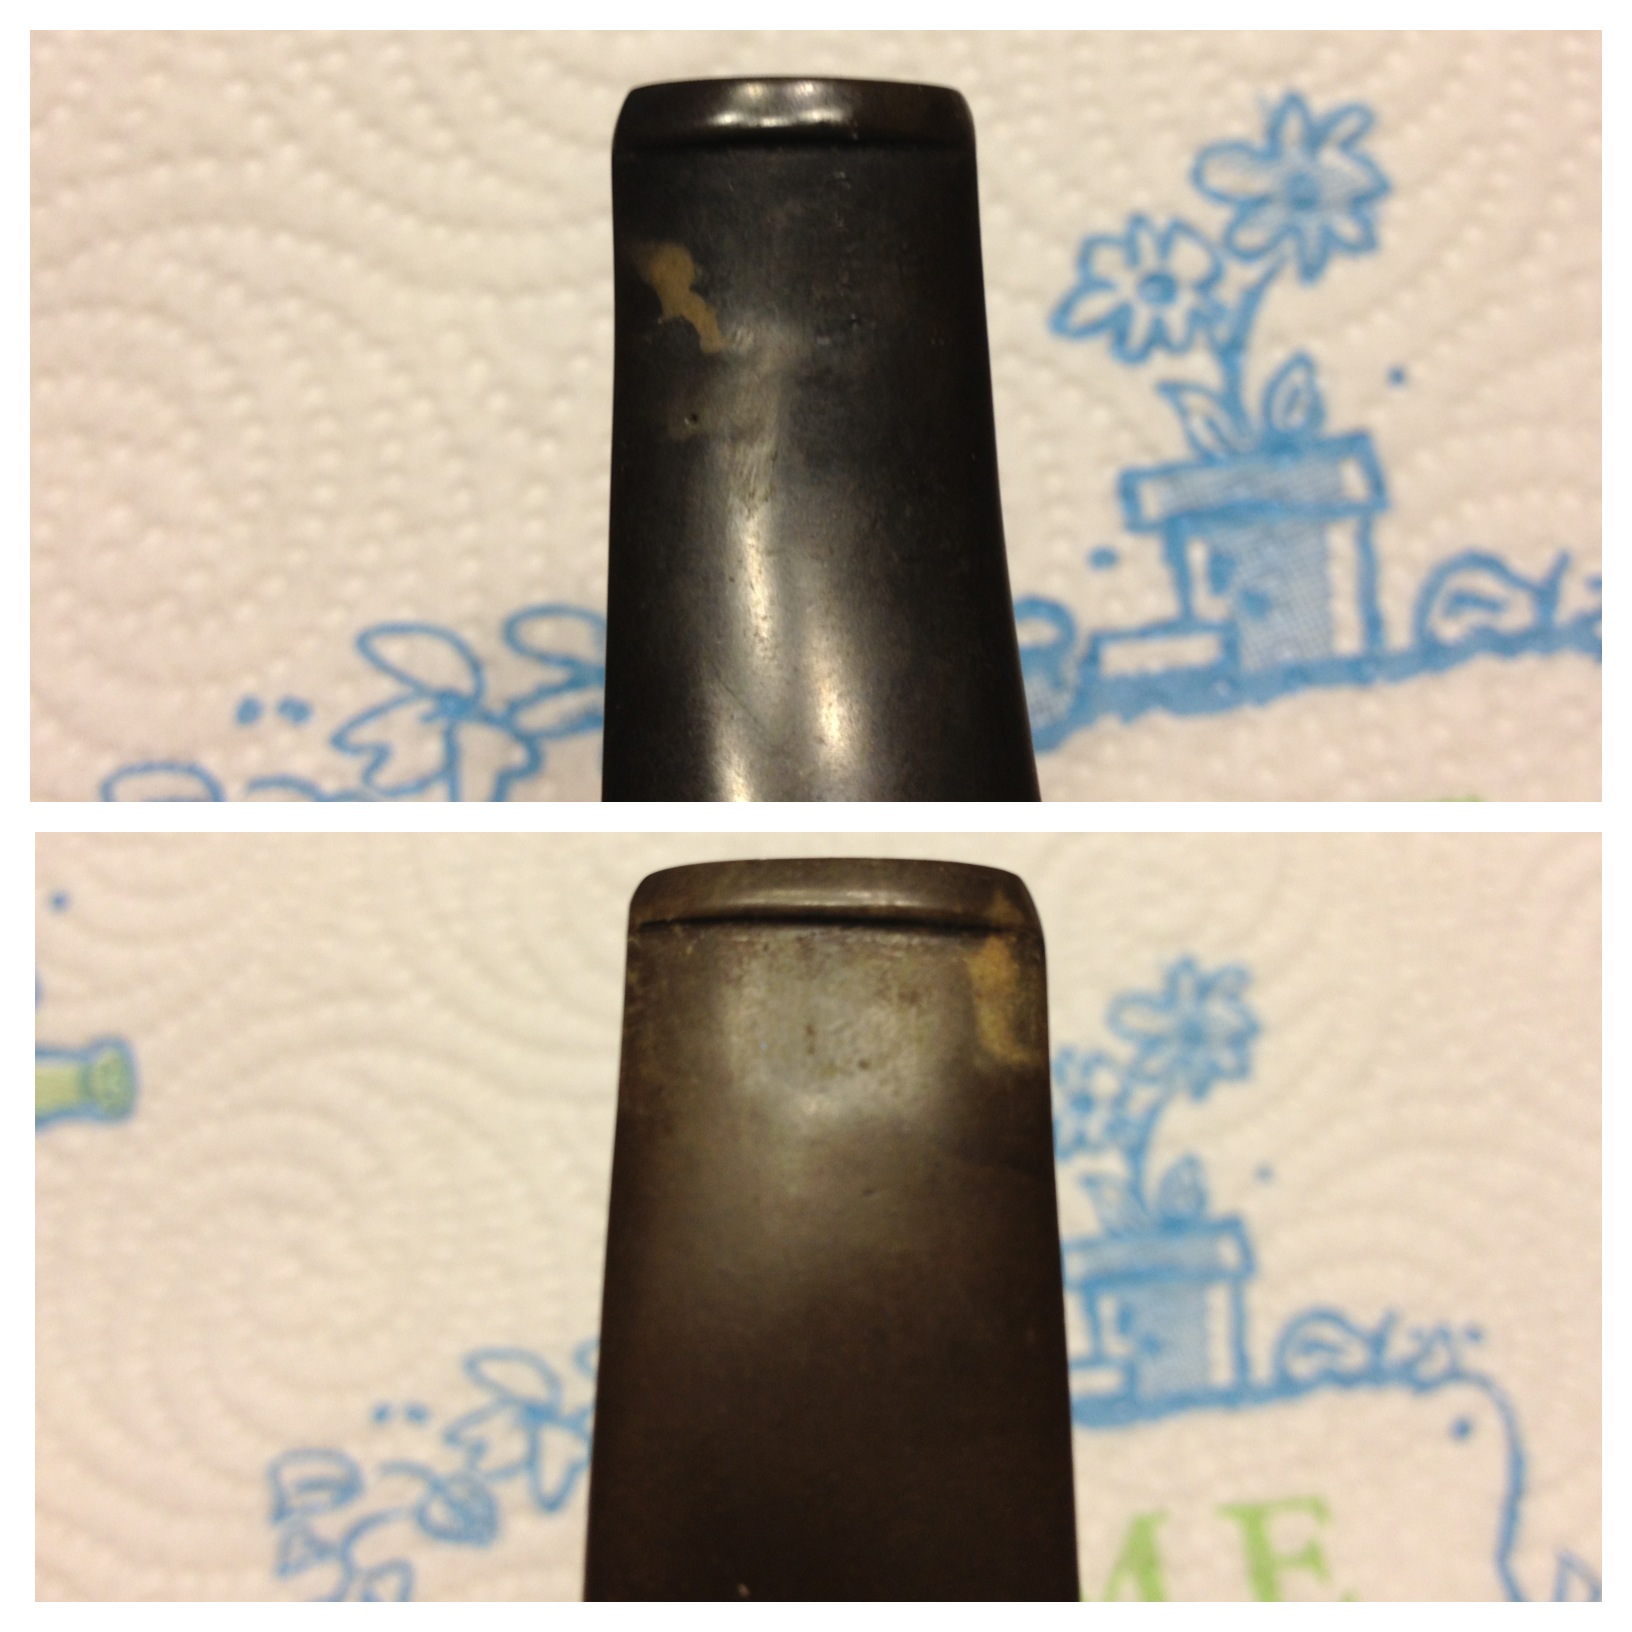
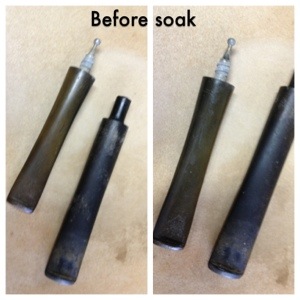
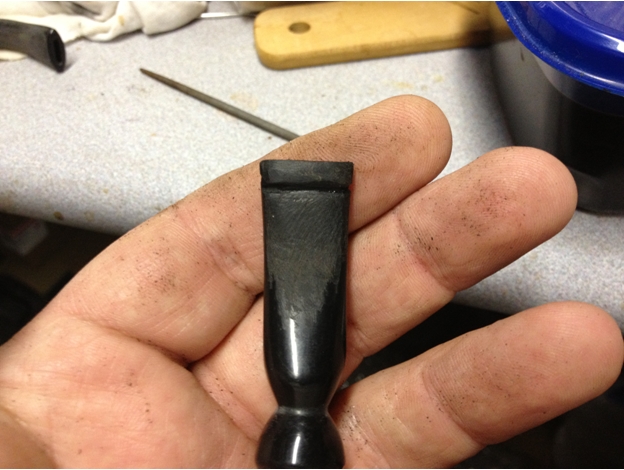
I began by heating the stem, with a pipe cleaner inserted to make holding, moving and not damaging the airway easier. The dents lifted some but, as I expected, were too deep to come anywhere near level. So now it was time to try some patching or filling of the dents.

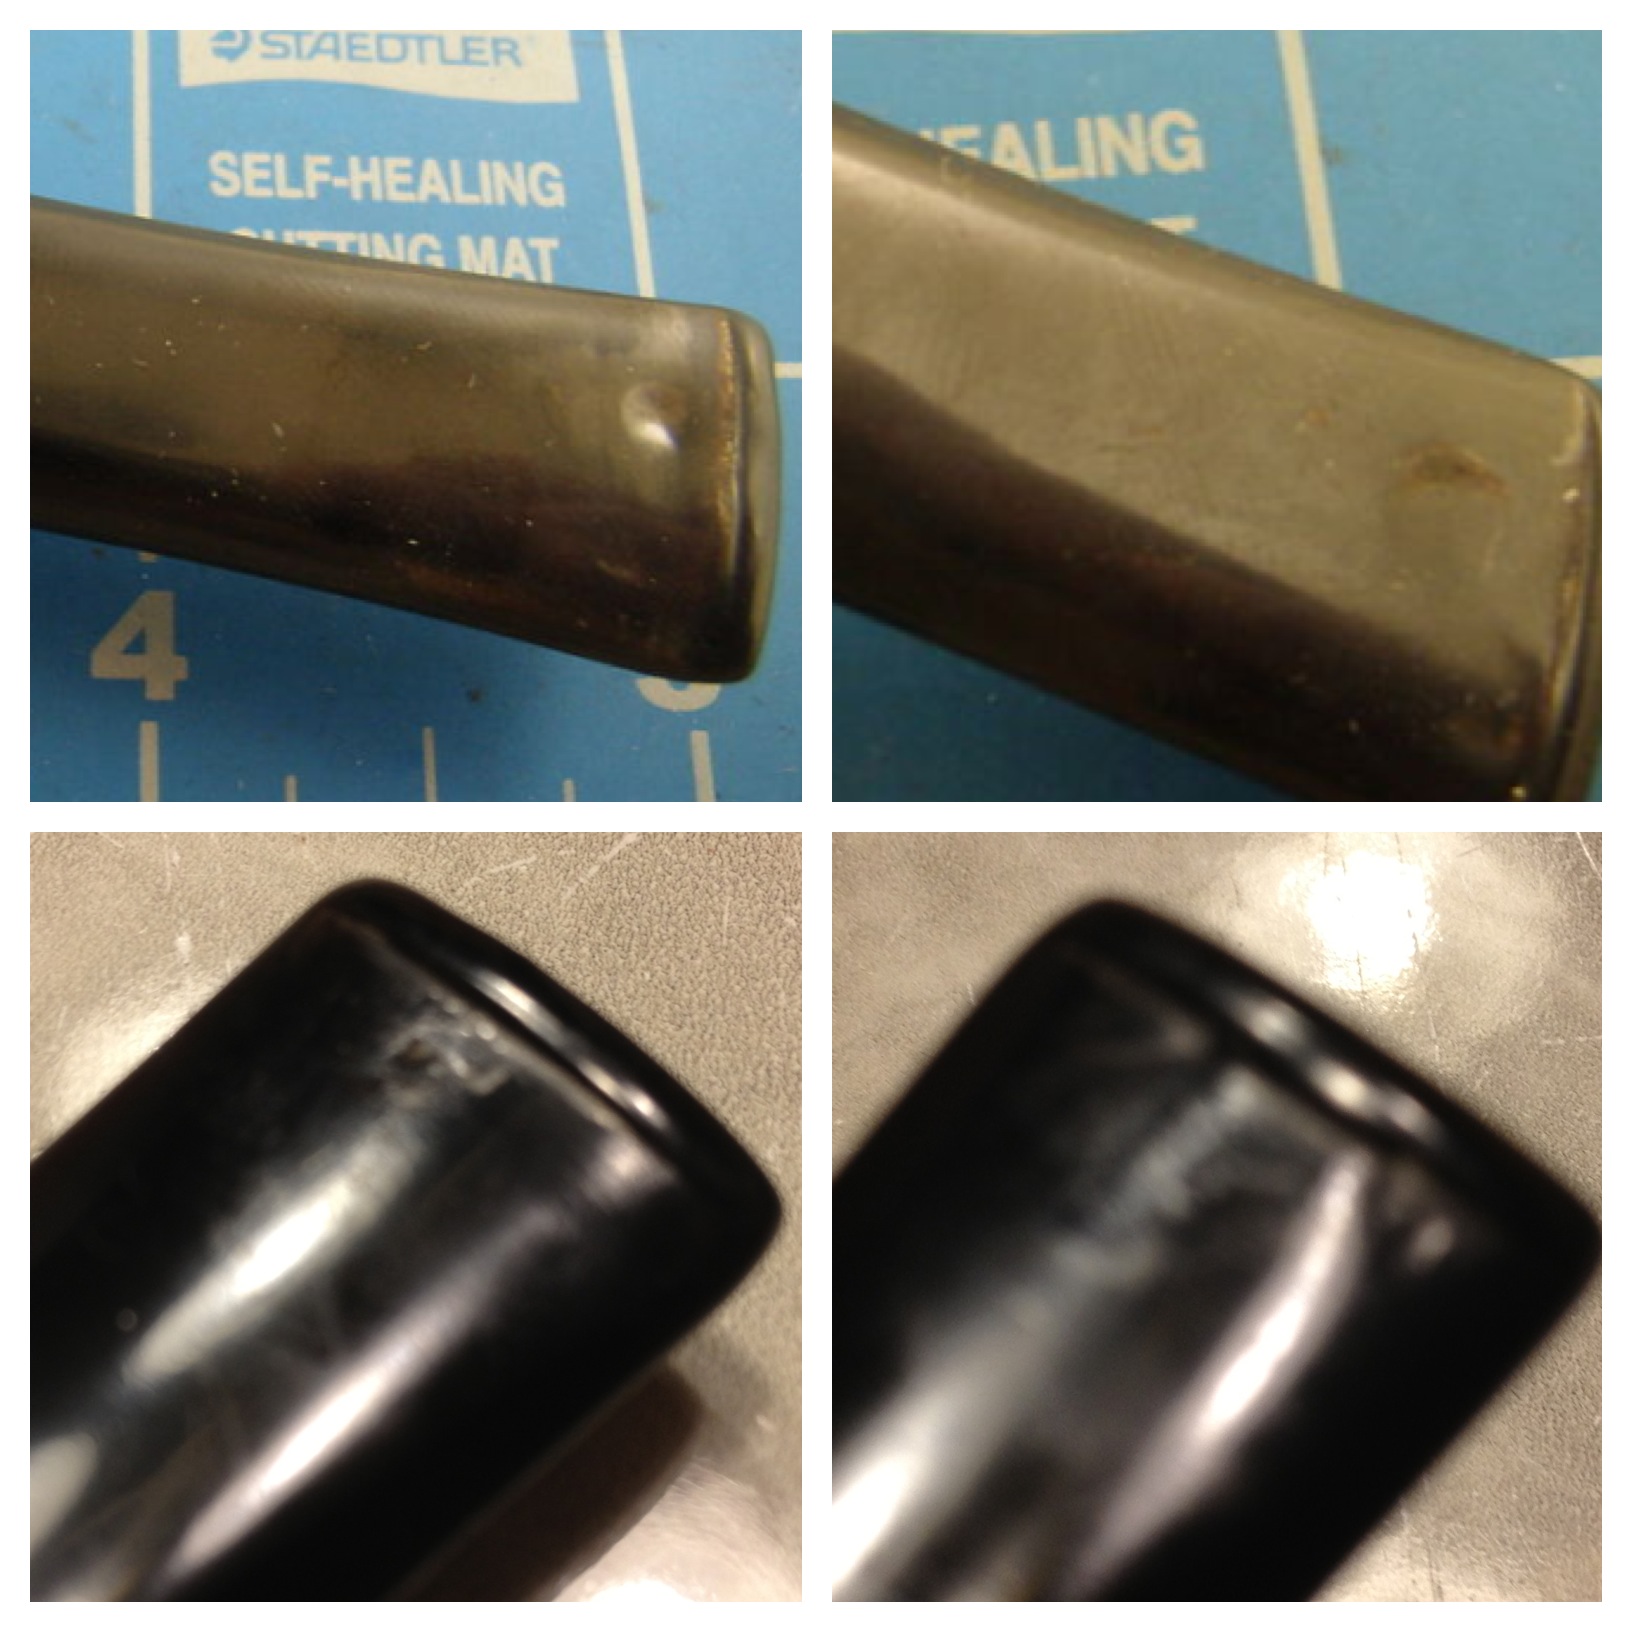
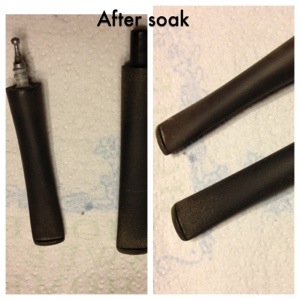
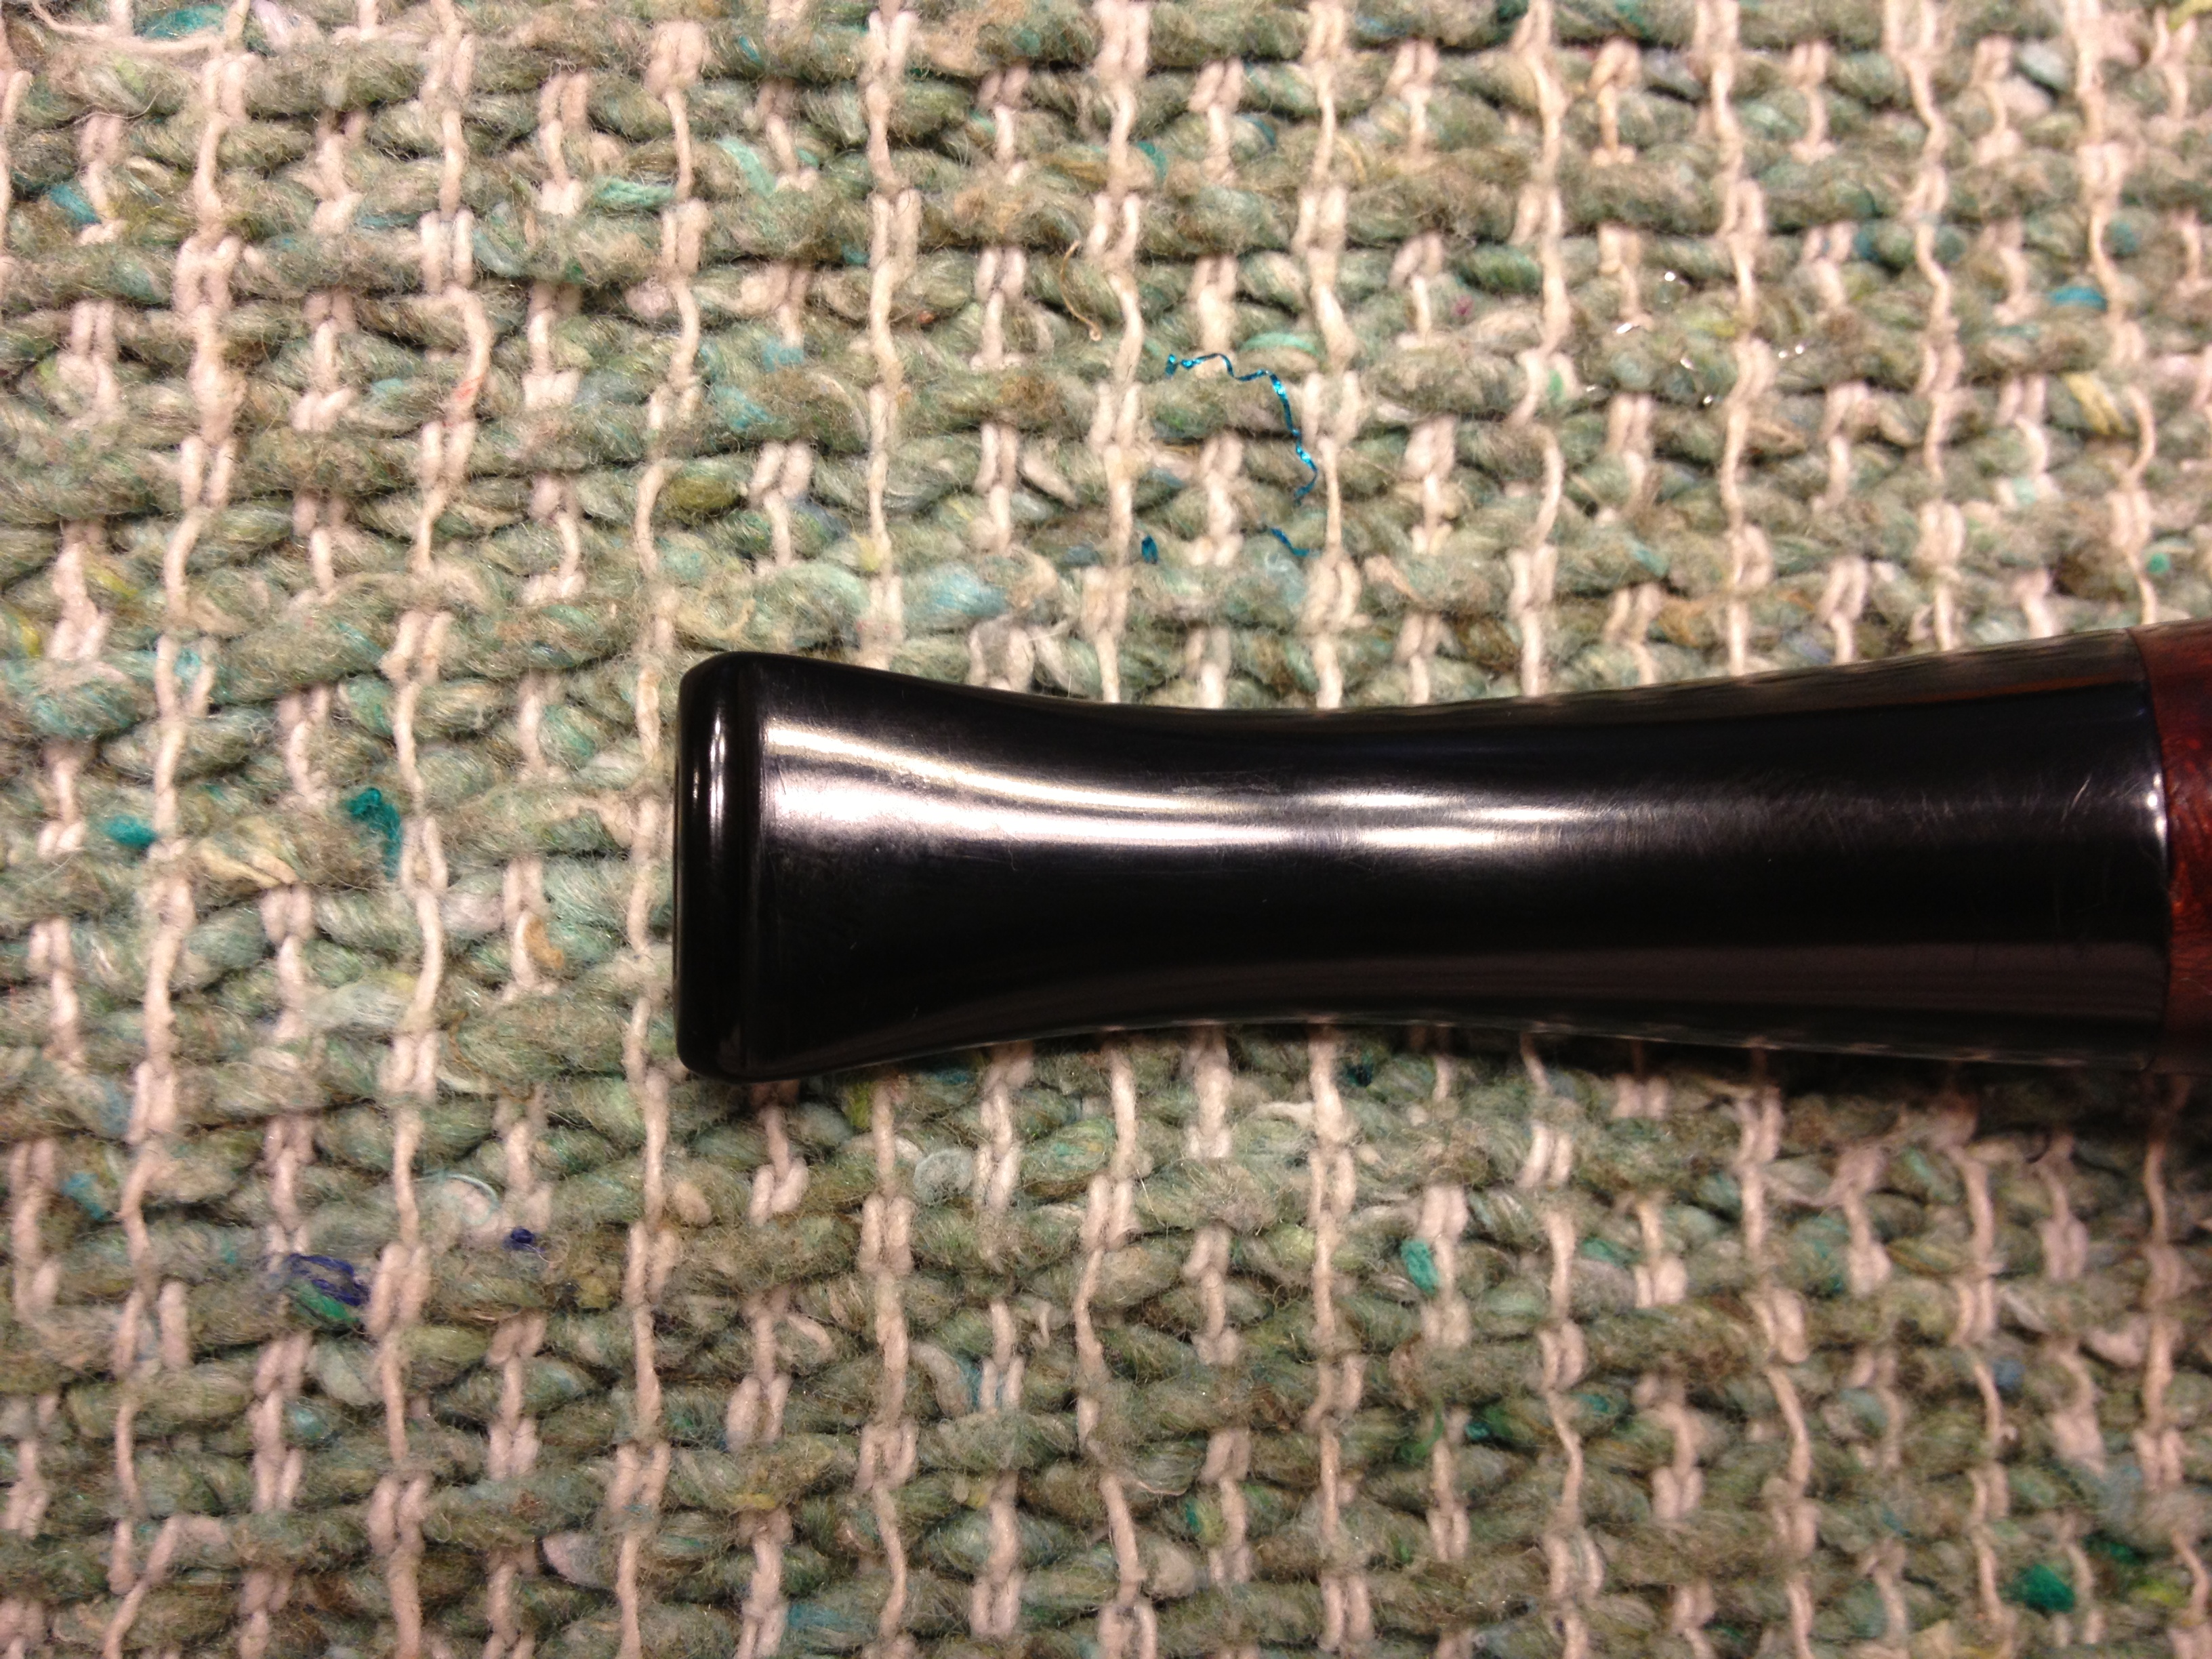
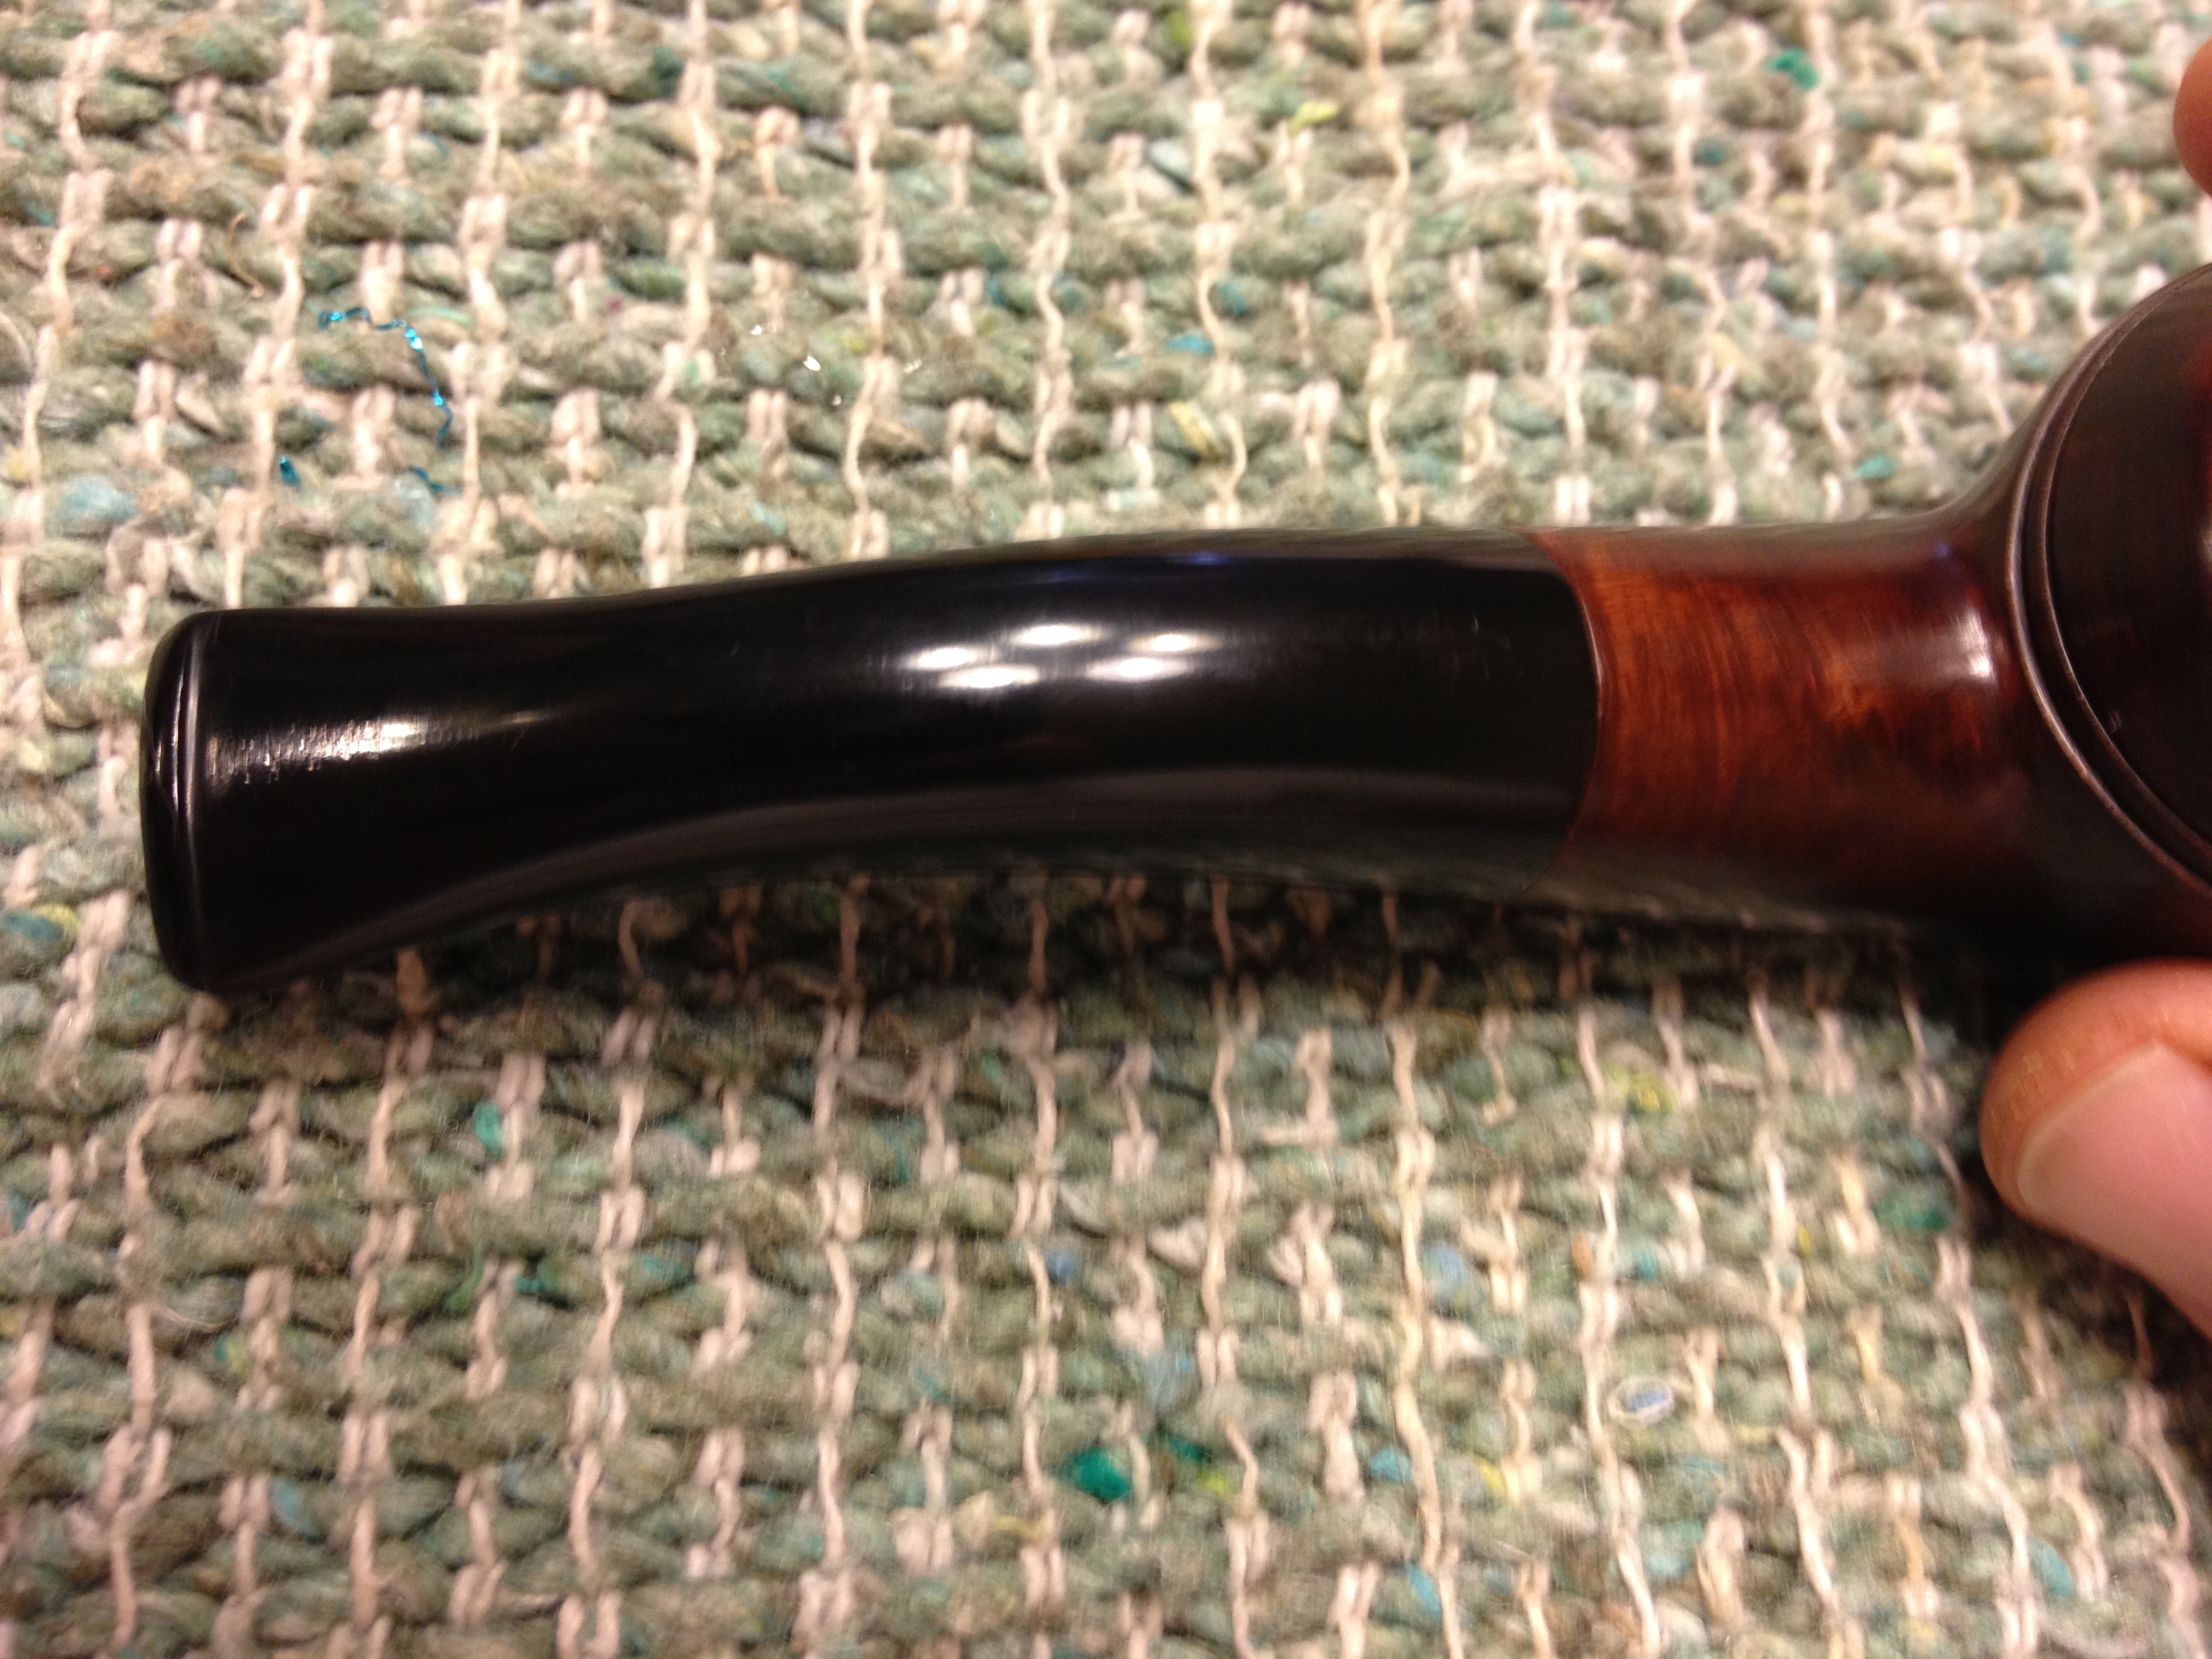
A while back Al, another contributor here on the blog, had mentioned he had used cigar ash to fill in a few dents but that they were still visible repairs. I have been experimenting with a couple of ideas that so far have not made any great improvements over just using super glue alone. I thought that on this one I would try to make a patch with carbon reamed from the pipe. The carbon is much darker, a real black, than ash so I thought this might make a better repair. I worked in layers, packing in the carbon, applying a drip of super glue, allowing it to dry, sanding it back down with an emery board and repeating; I think I did three rounds on each side of the stem, trying raise the dents slowly and make them stronger in the long run. After the last application on the underside, I began to work with my needle files, then emery boards, 320 grit wet sand and finally onto micro mesh, wet sanding 1500-2400. I then applied the Novus 2 plastic polish, rubbing it on and off with cotton pads. The remaining grits of micro mesh I used dry through 12,000. Finally I used the Novus 2 again, applied the Mother’s Back to Black with my fingers and let it dry before buffing it off with another cotton pad. The final step was to polish it with the Novus 1 plastic polish. Now it was time to reassemble the pipe and take it back to the buffer. At this point I knew the patch wasn’t as good as I’d hoped it would be: it was better, I think, but it was also still noticeable.

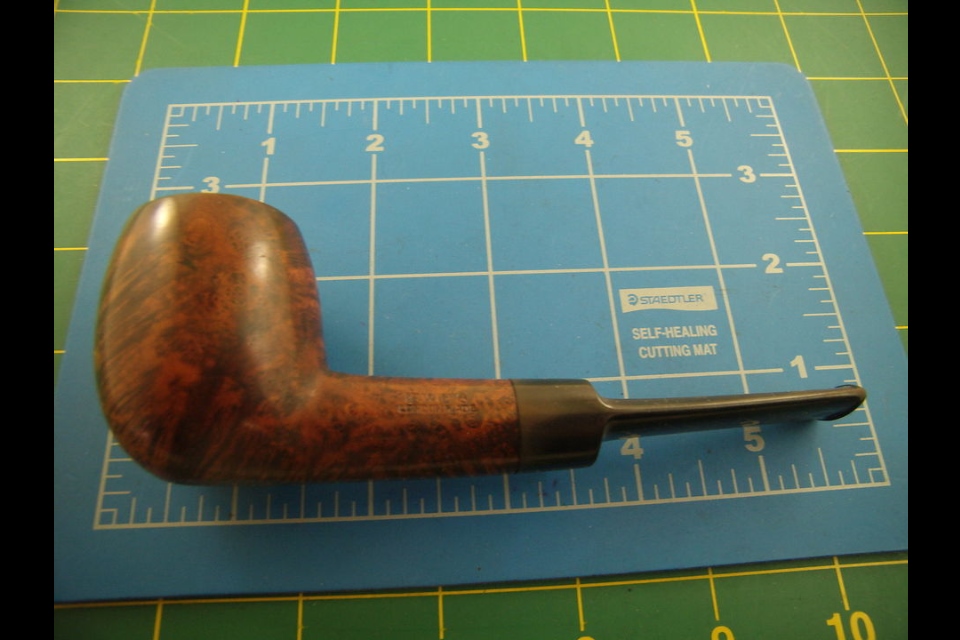
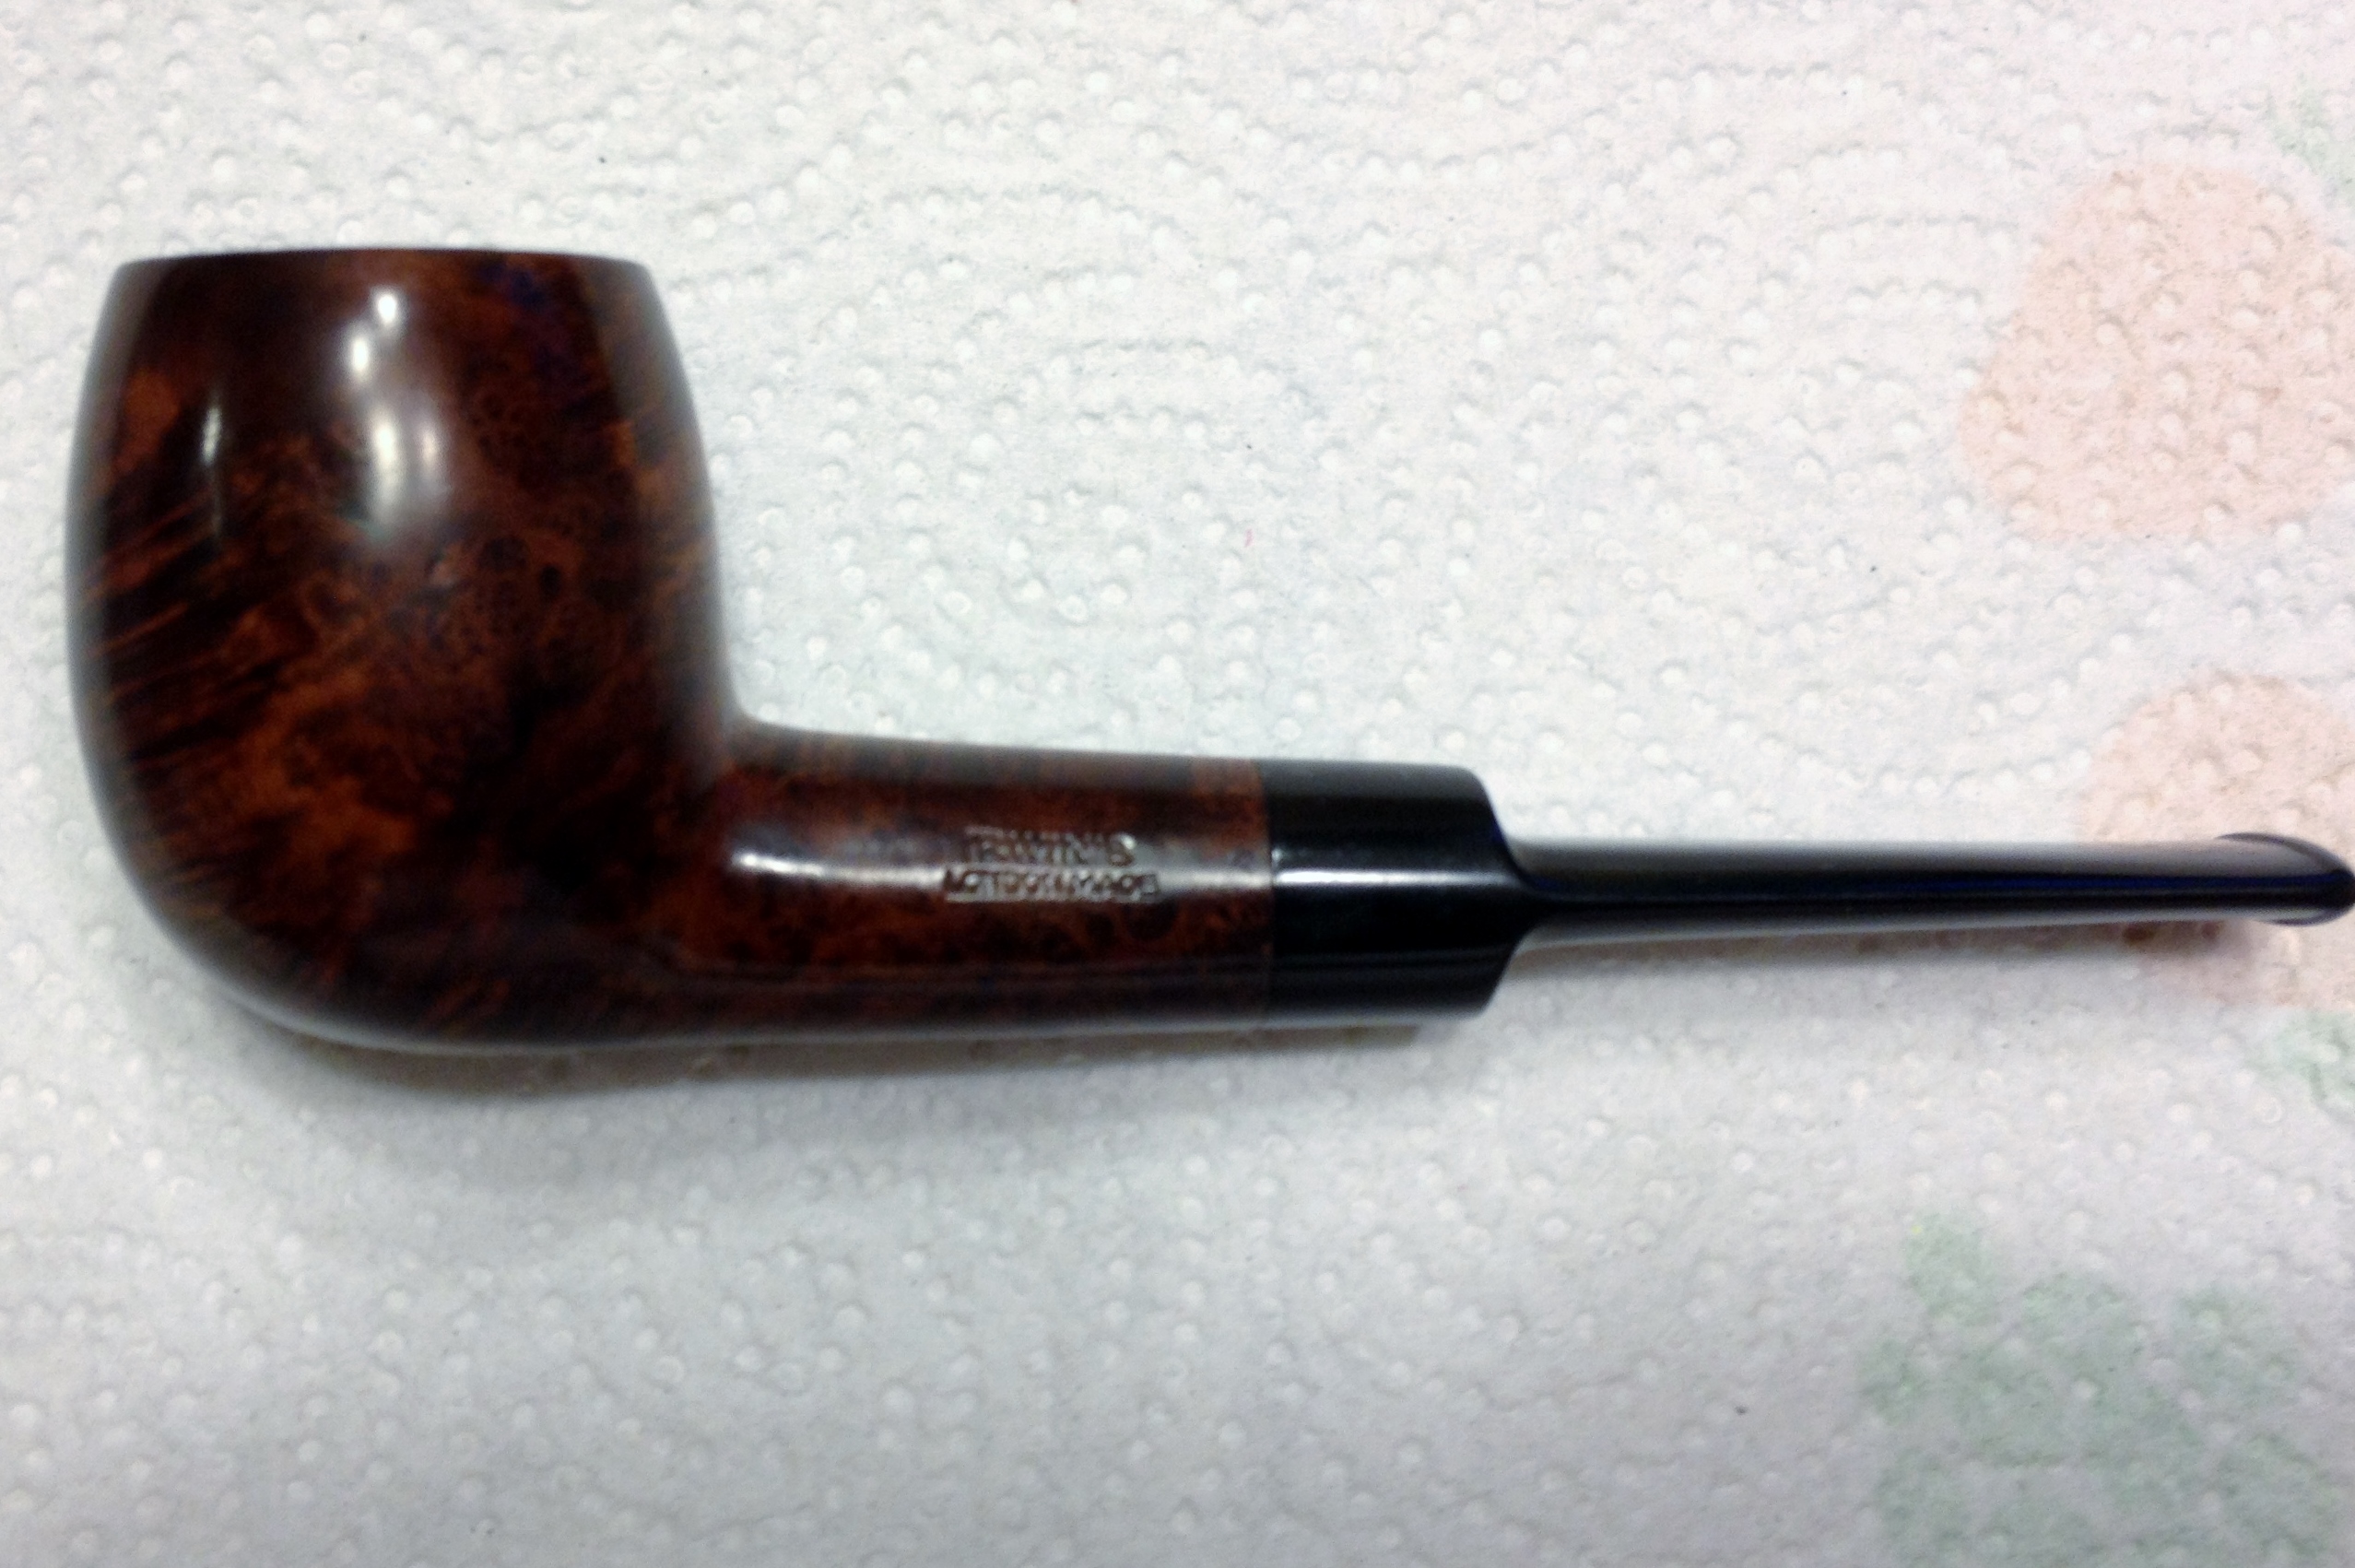
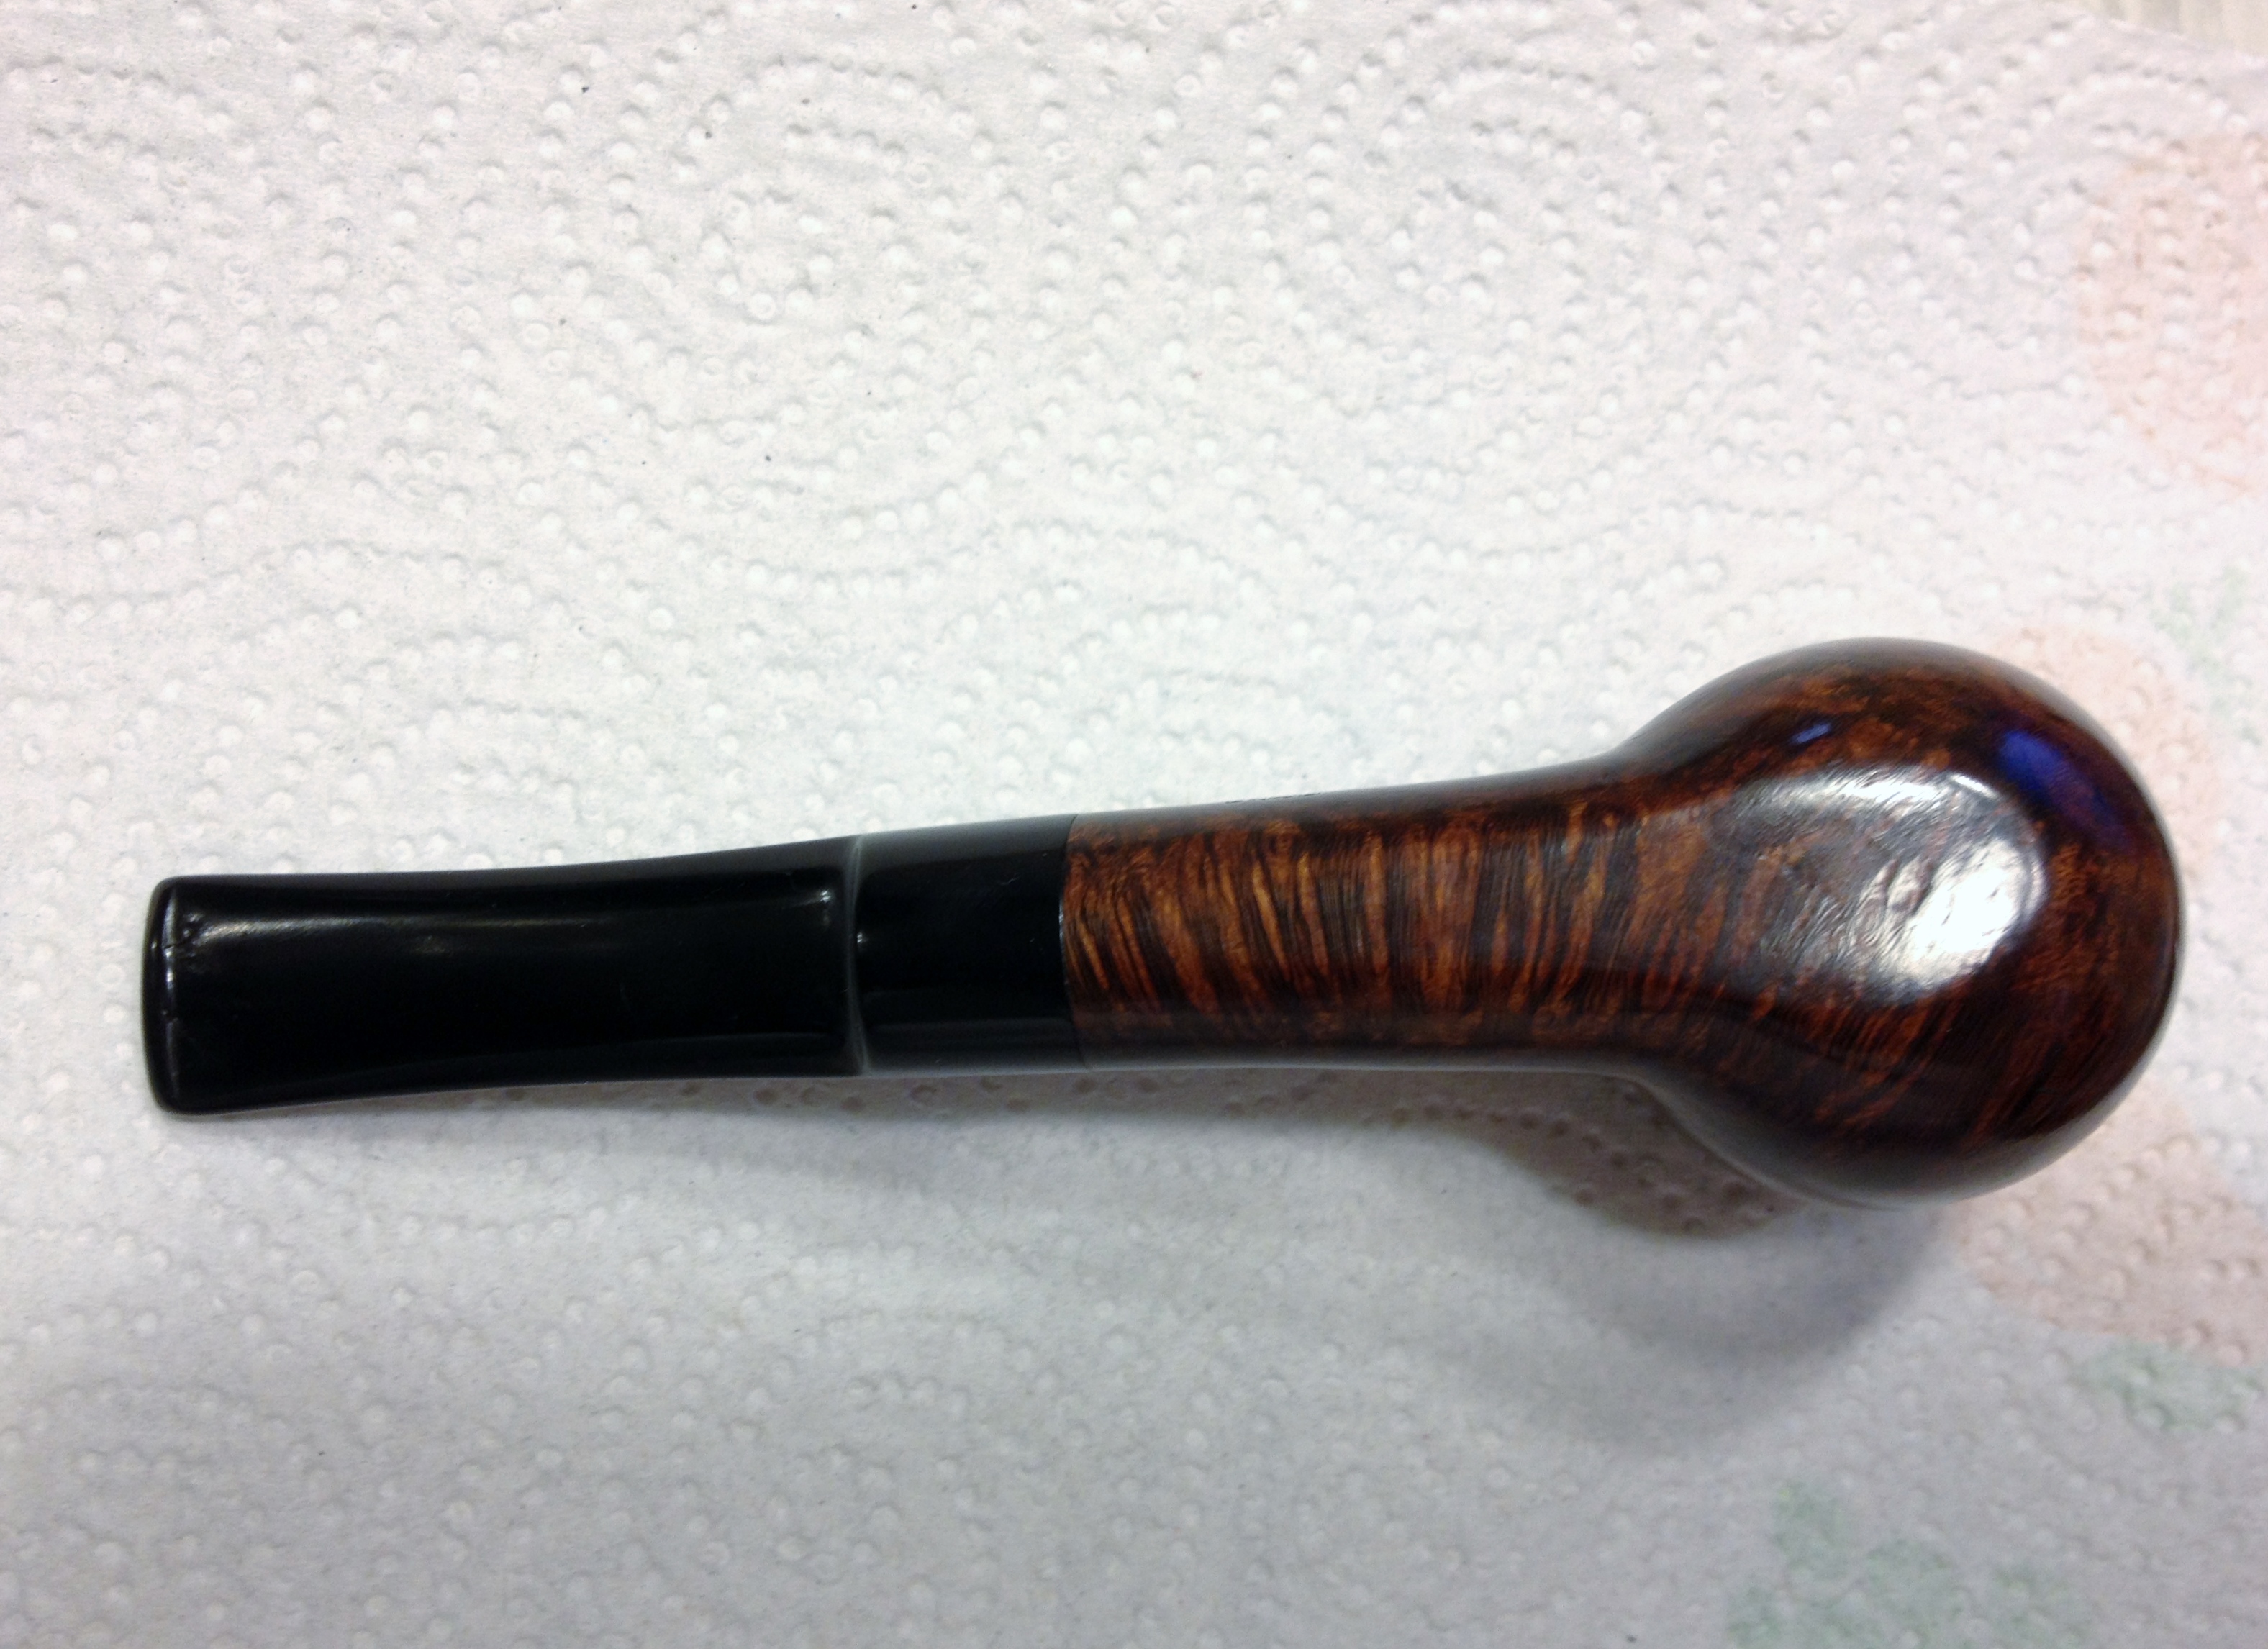
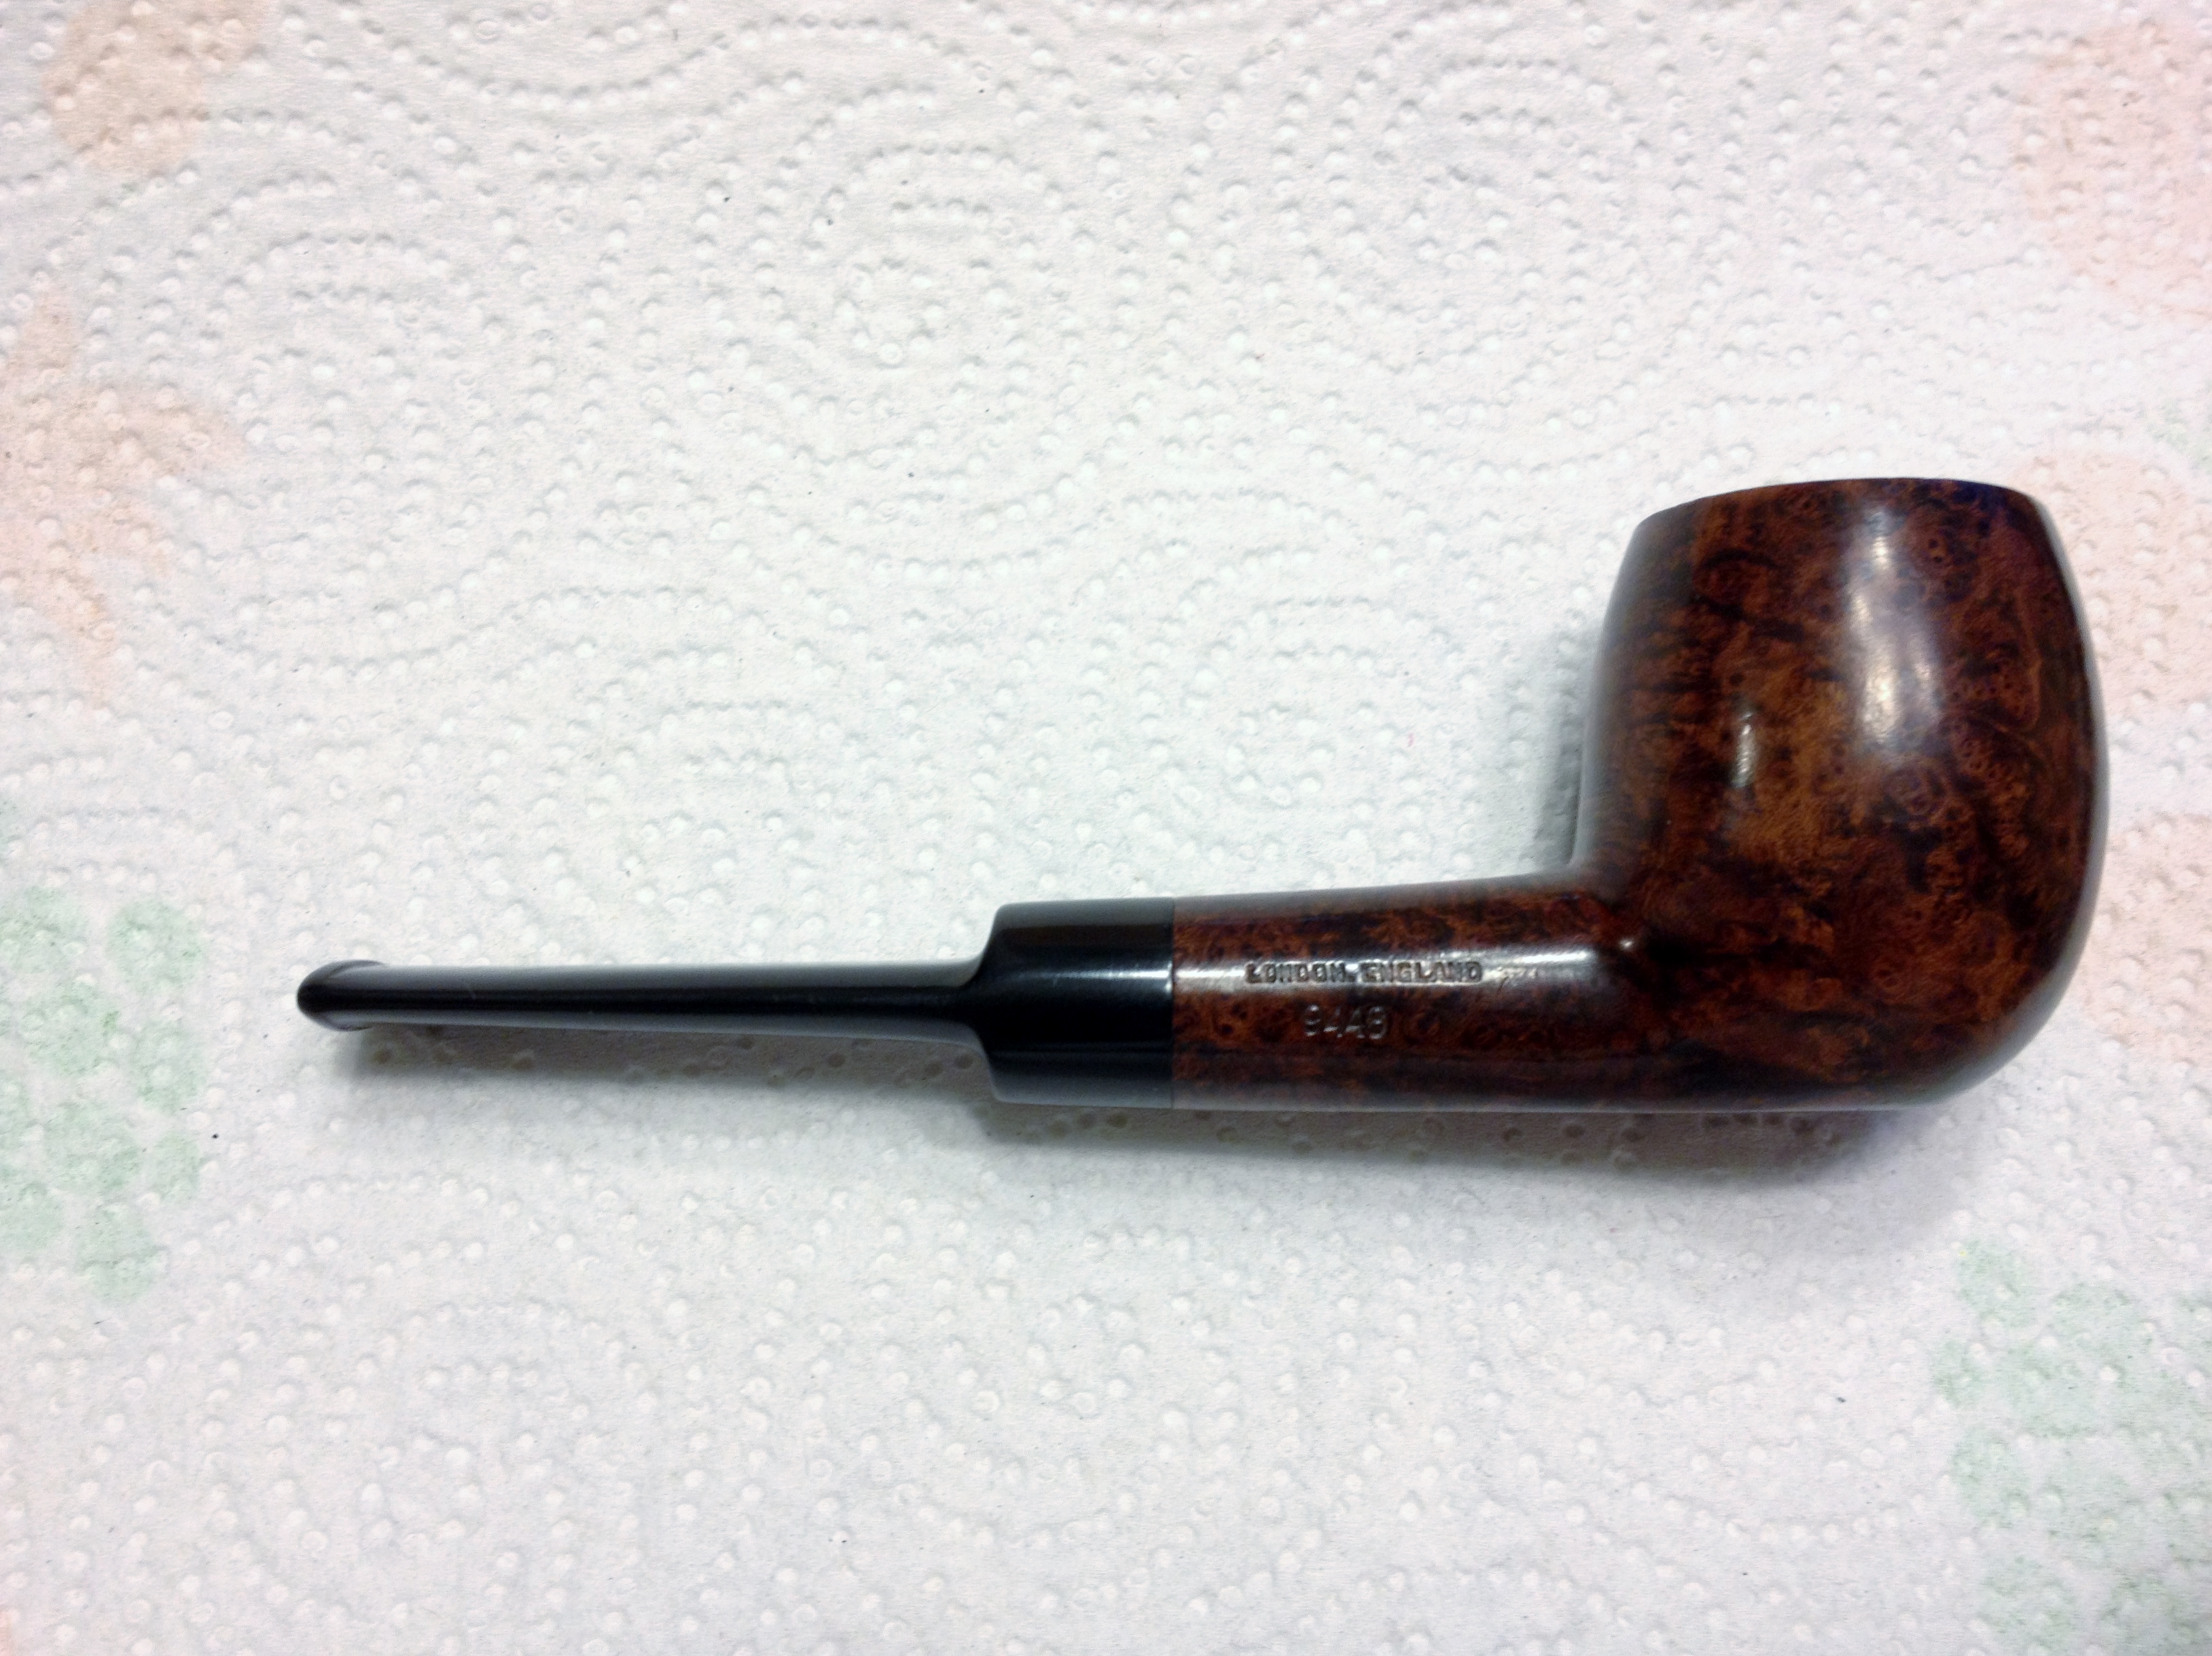
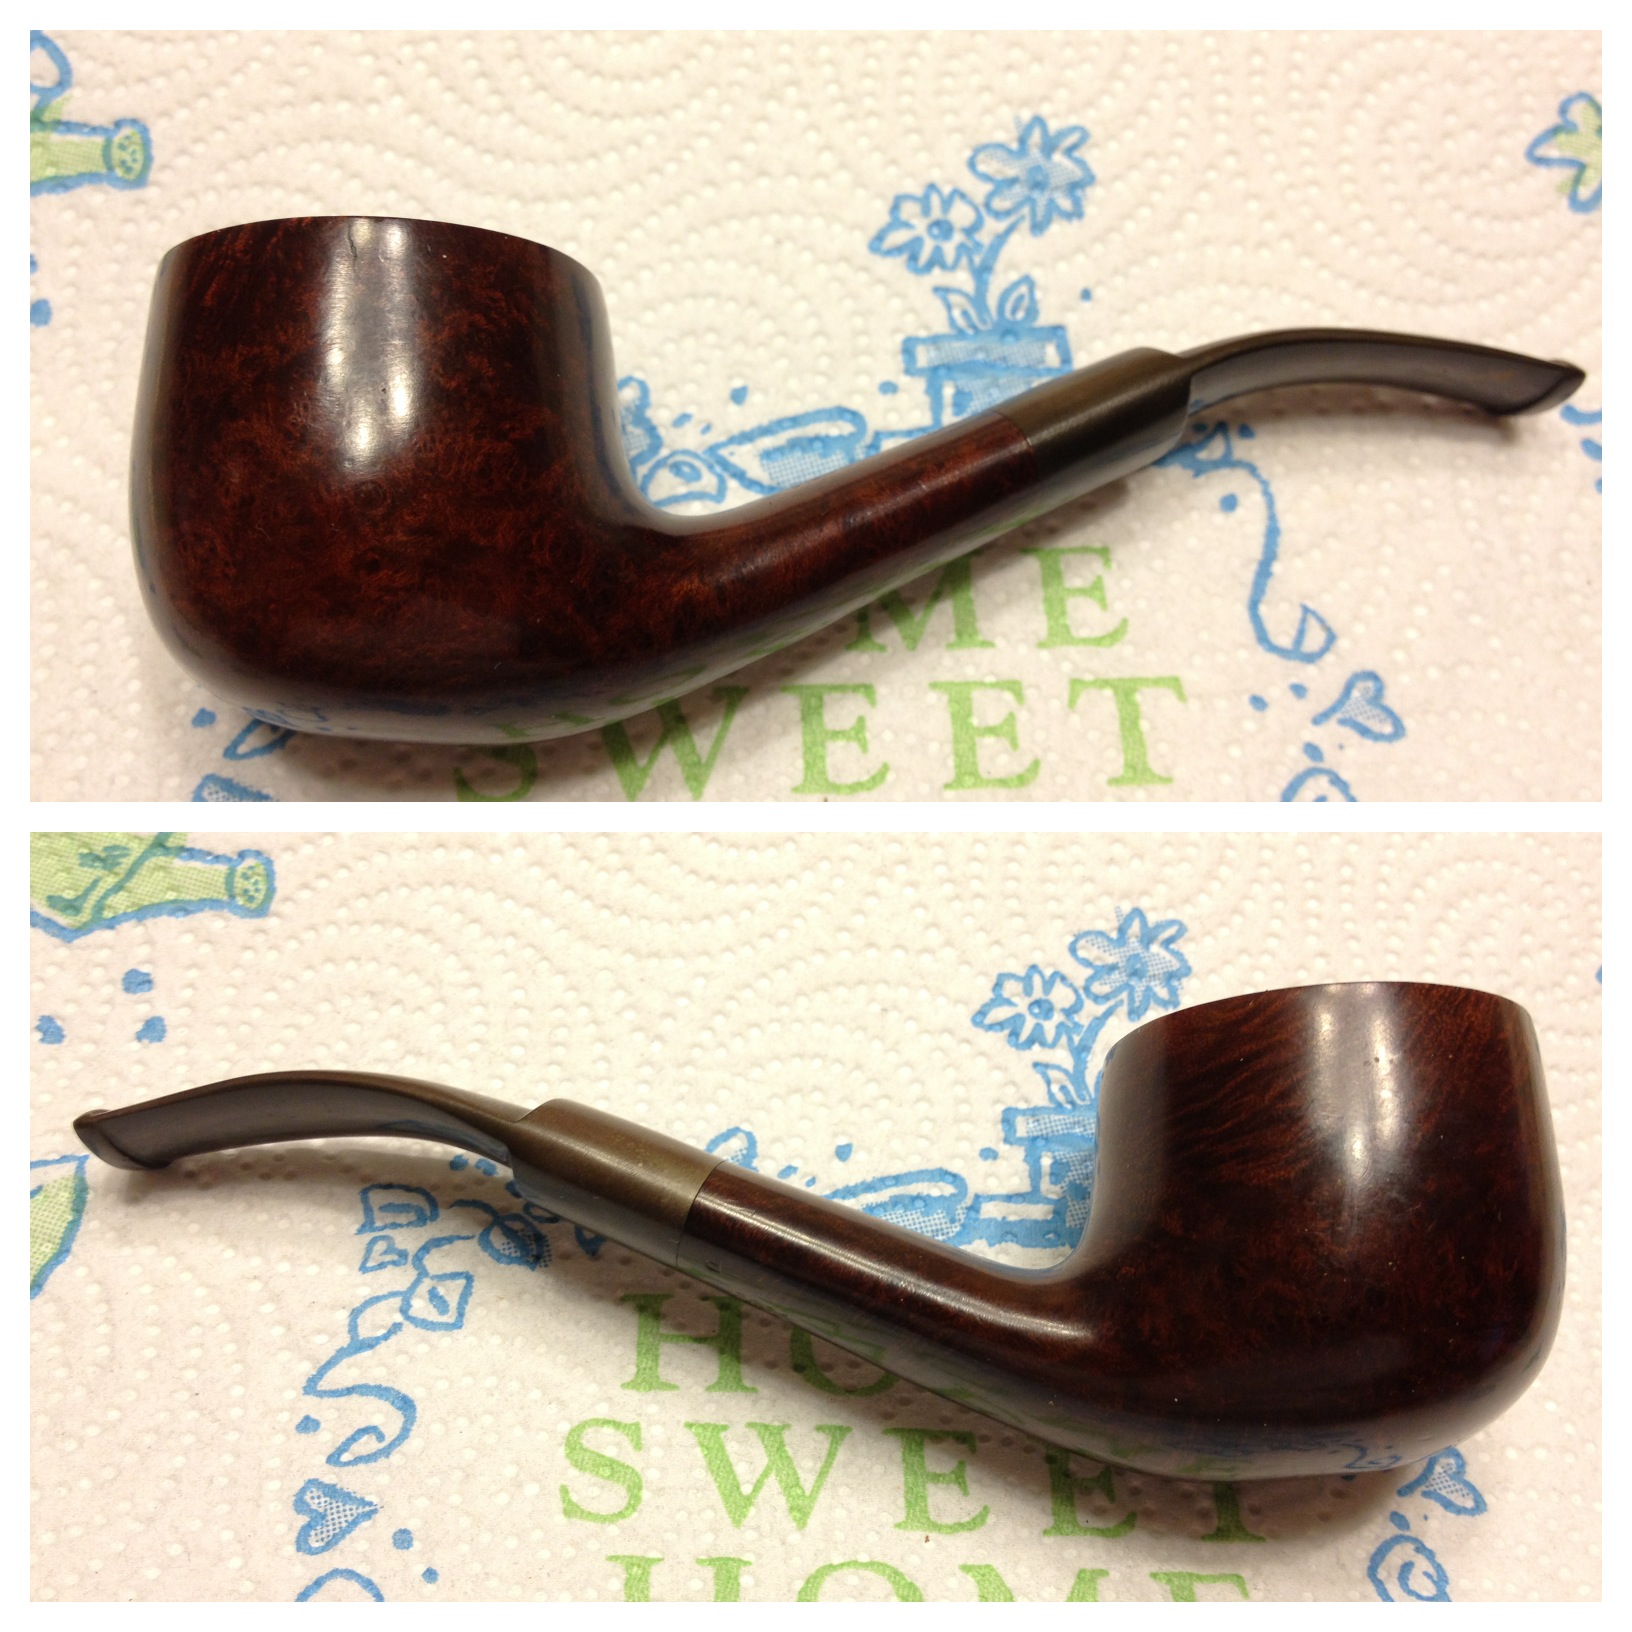
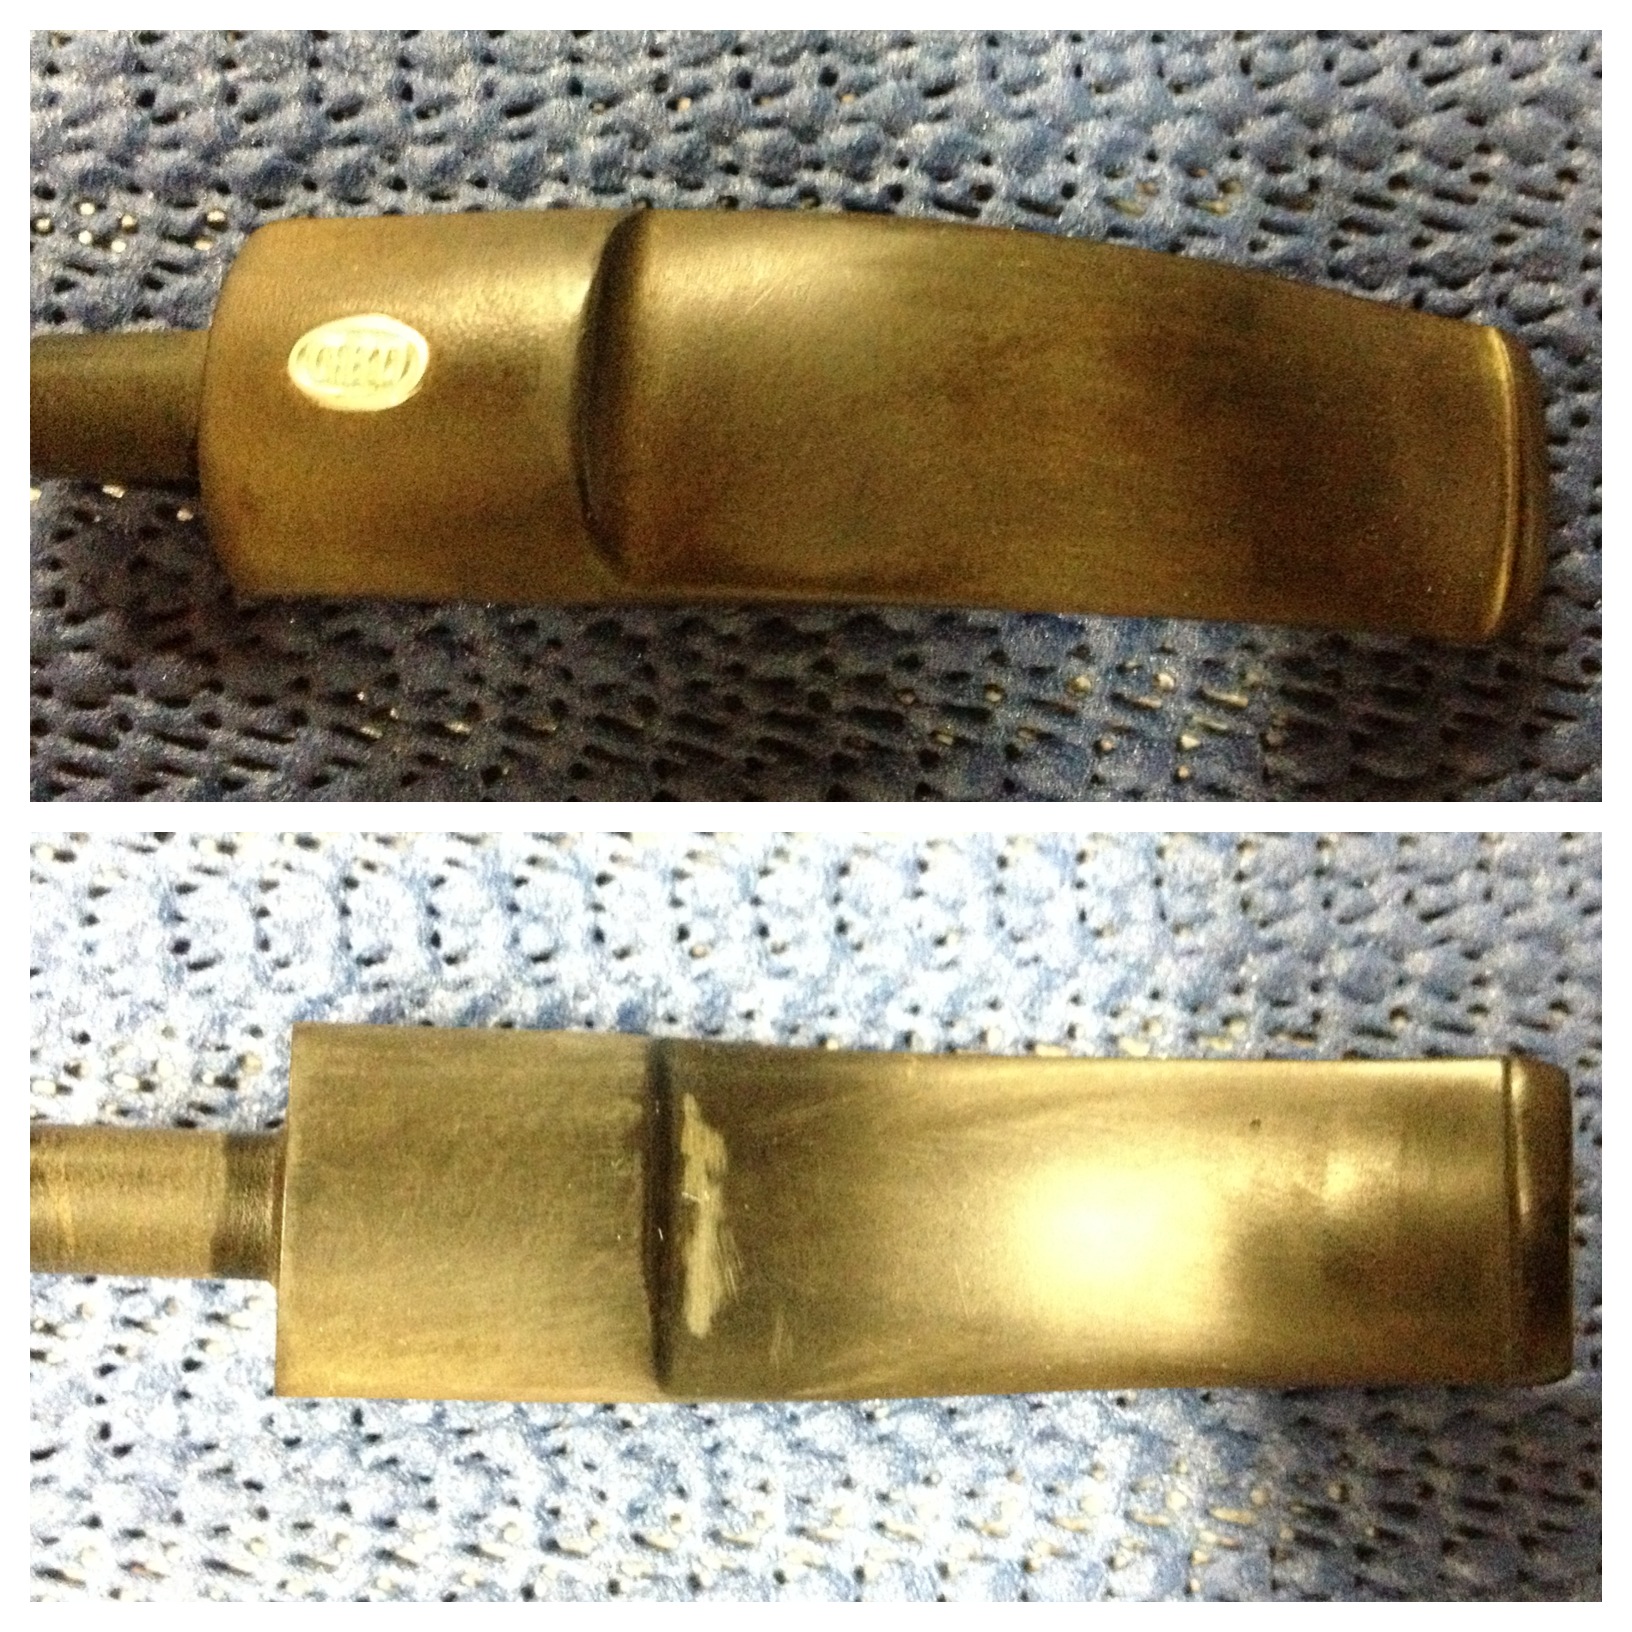
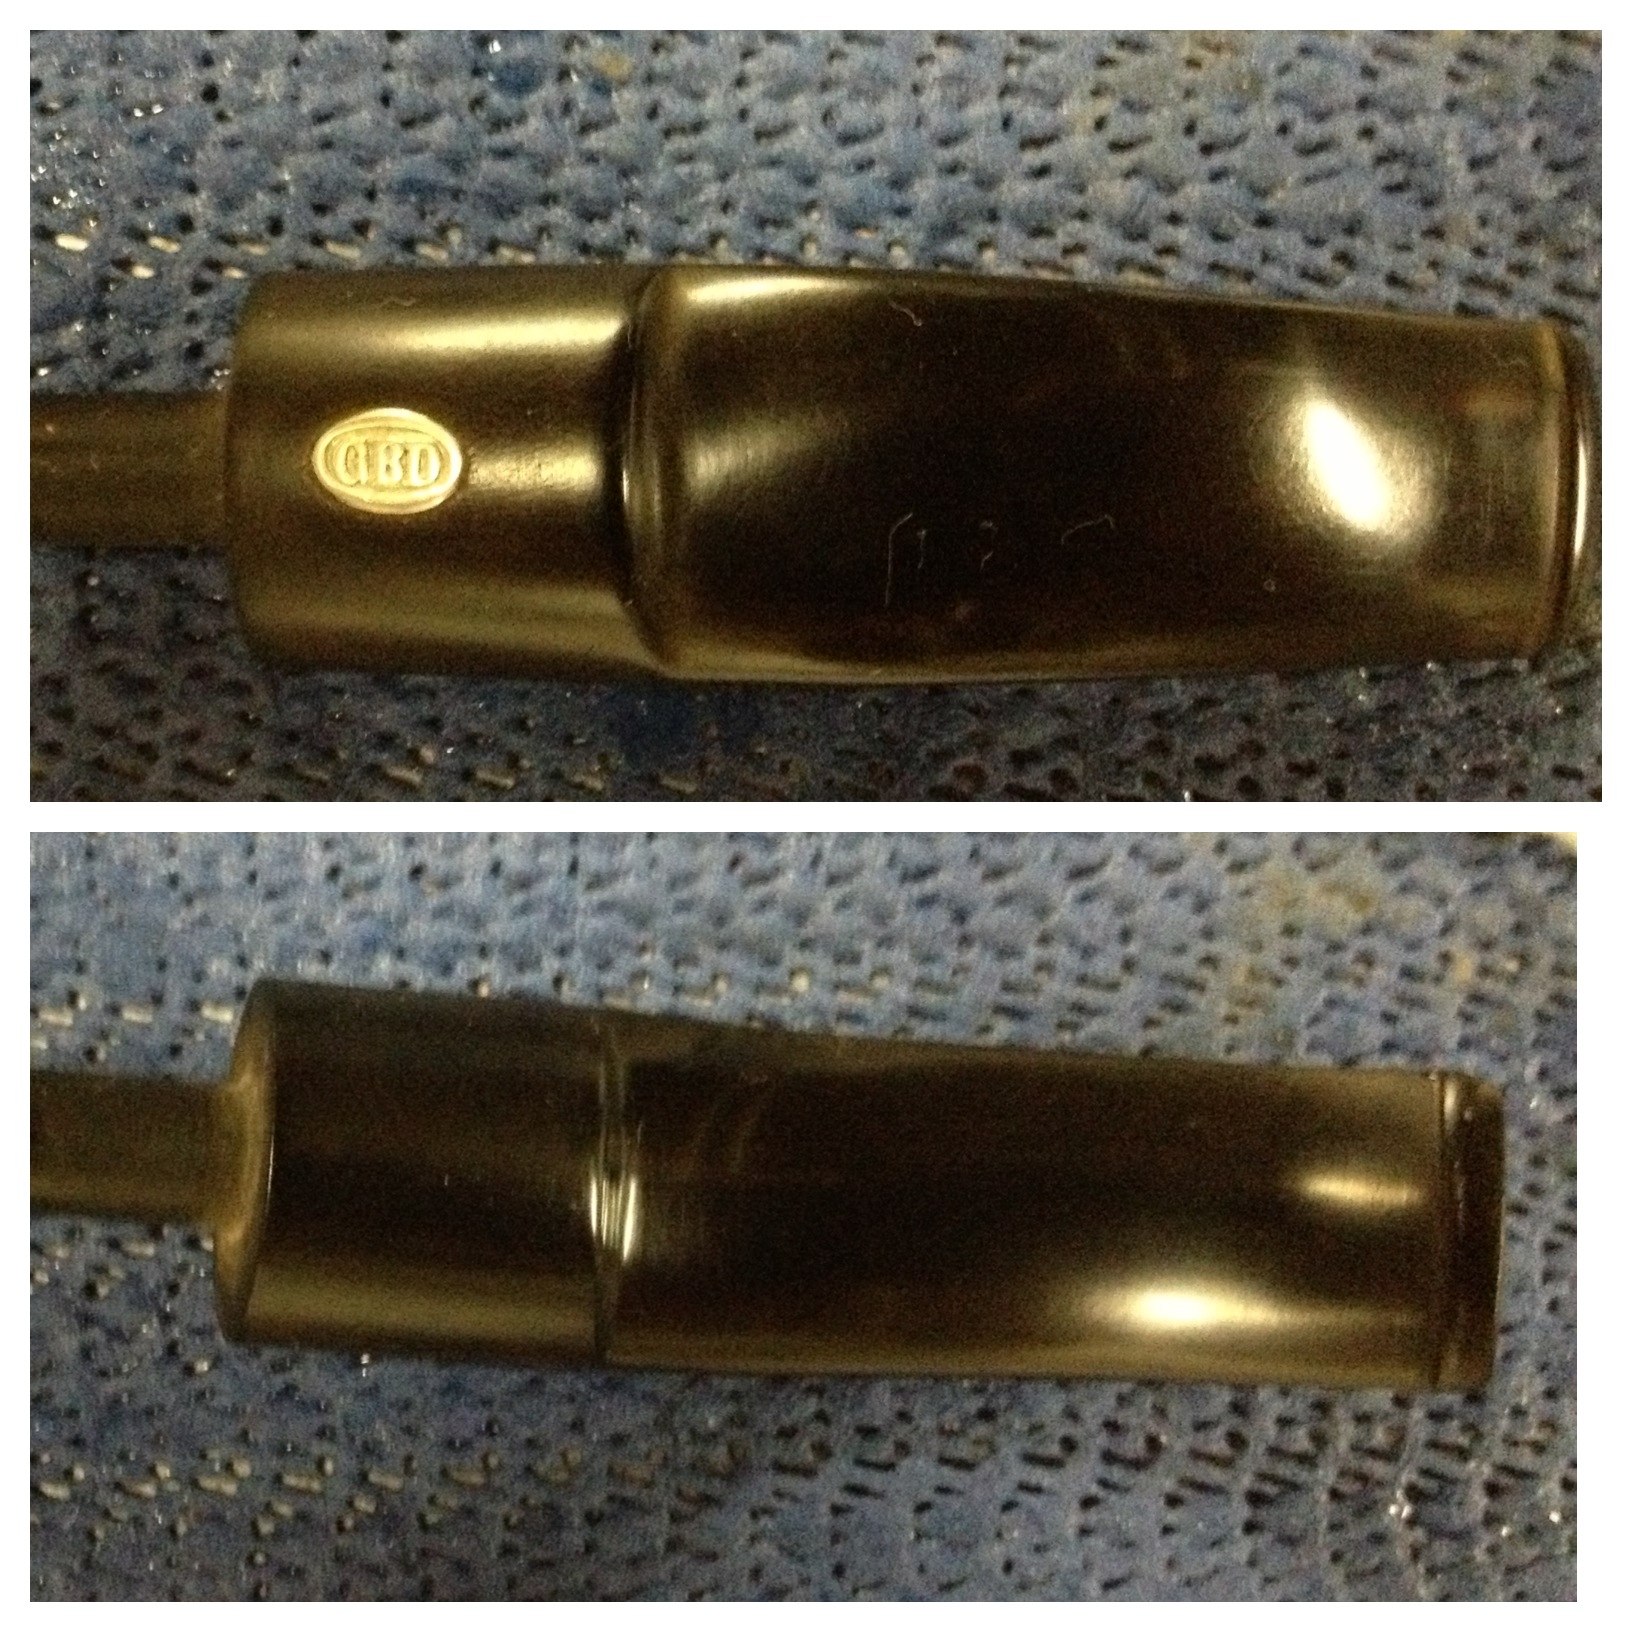
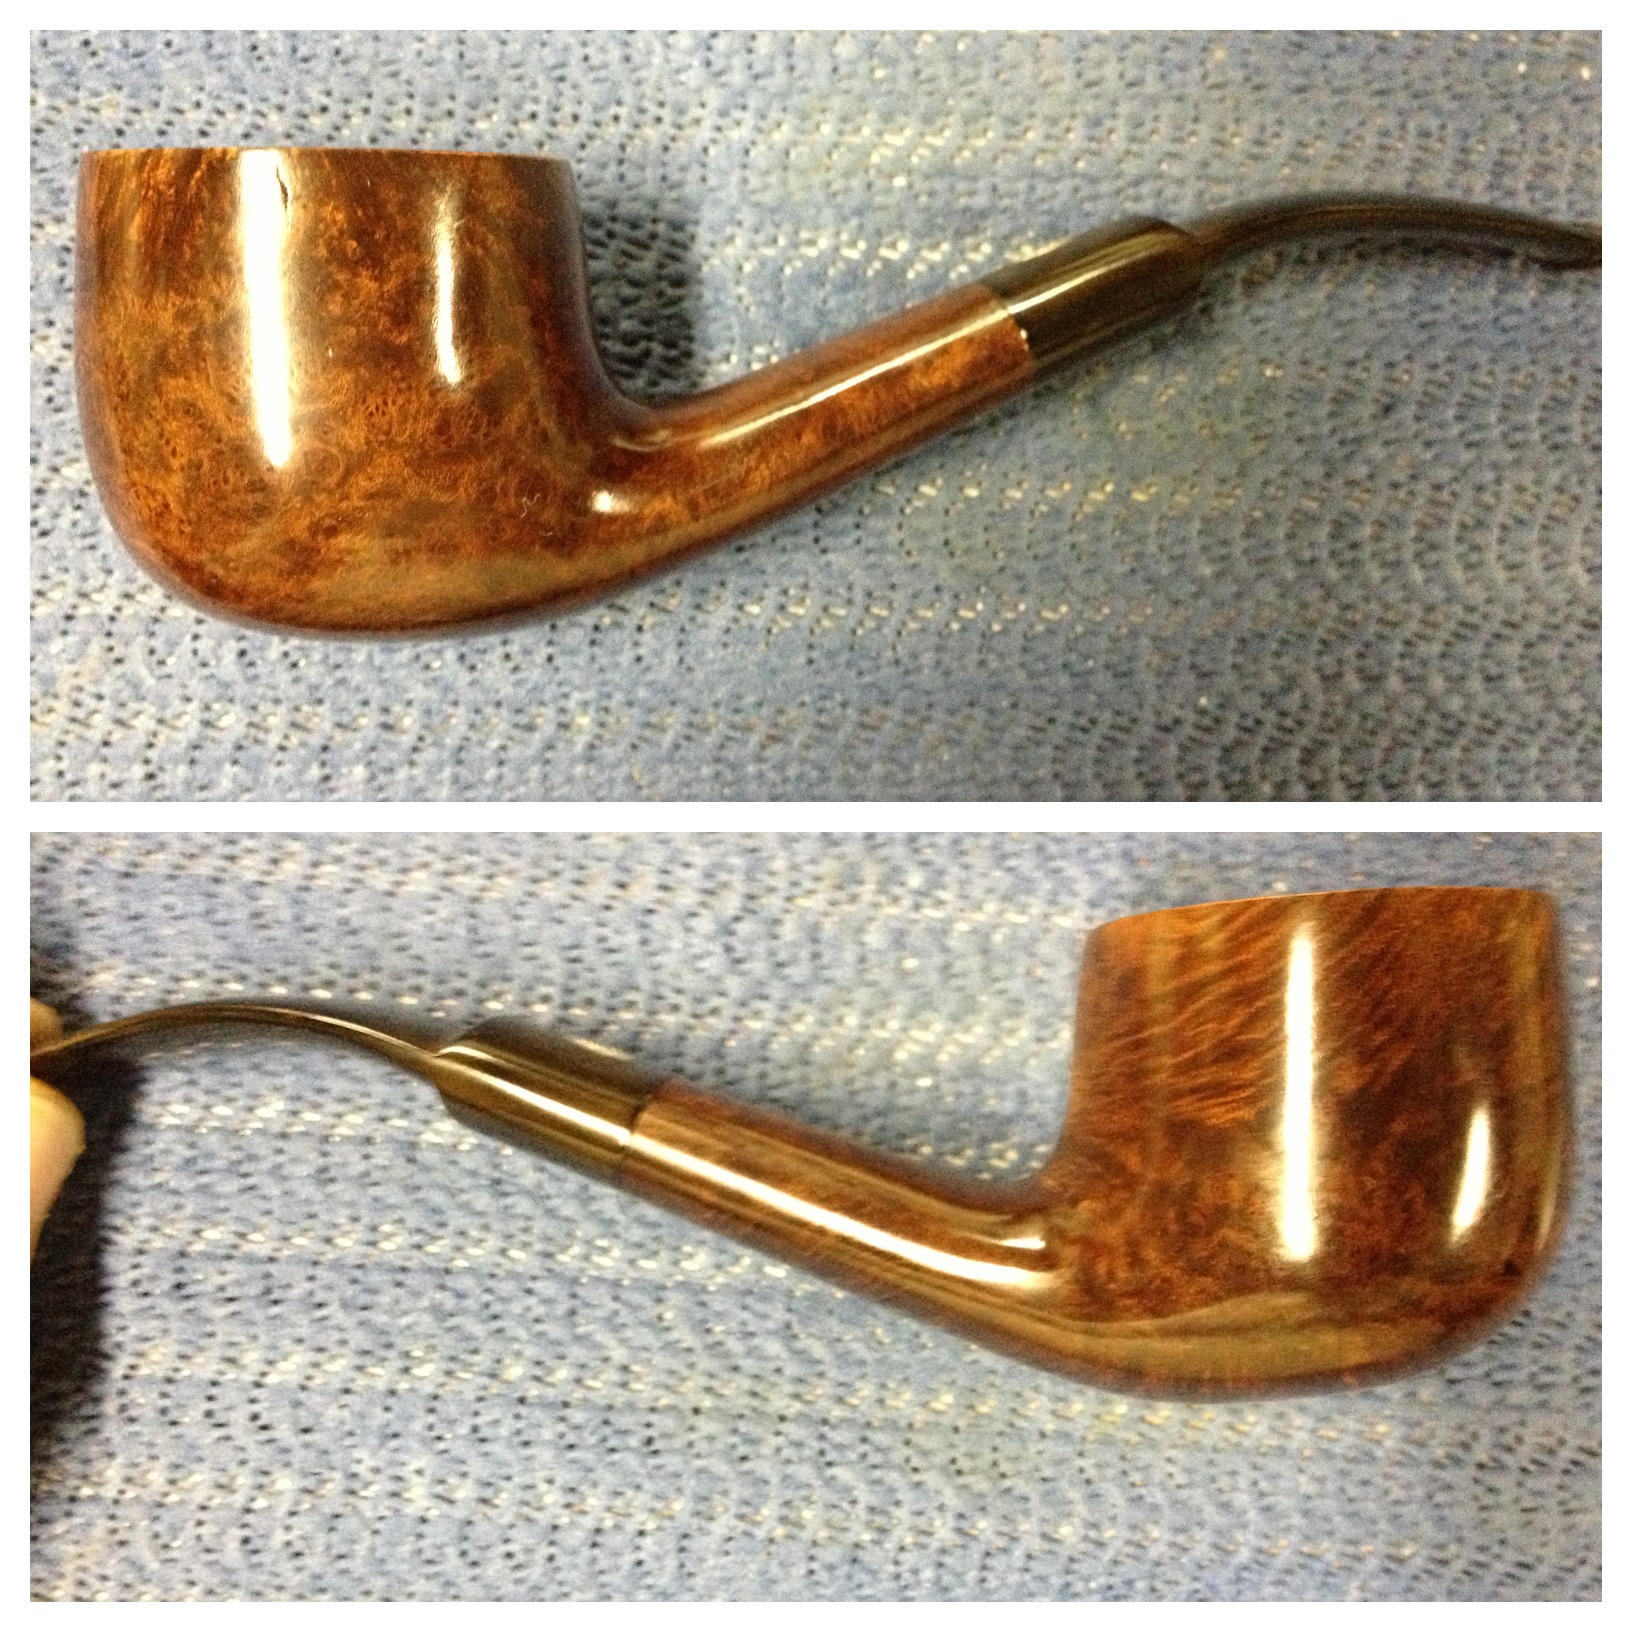
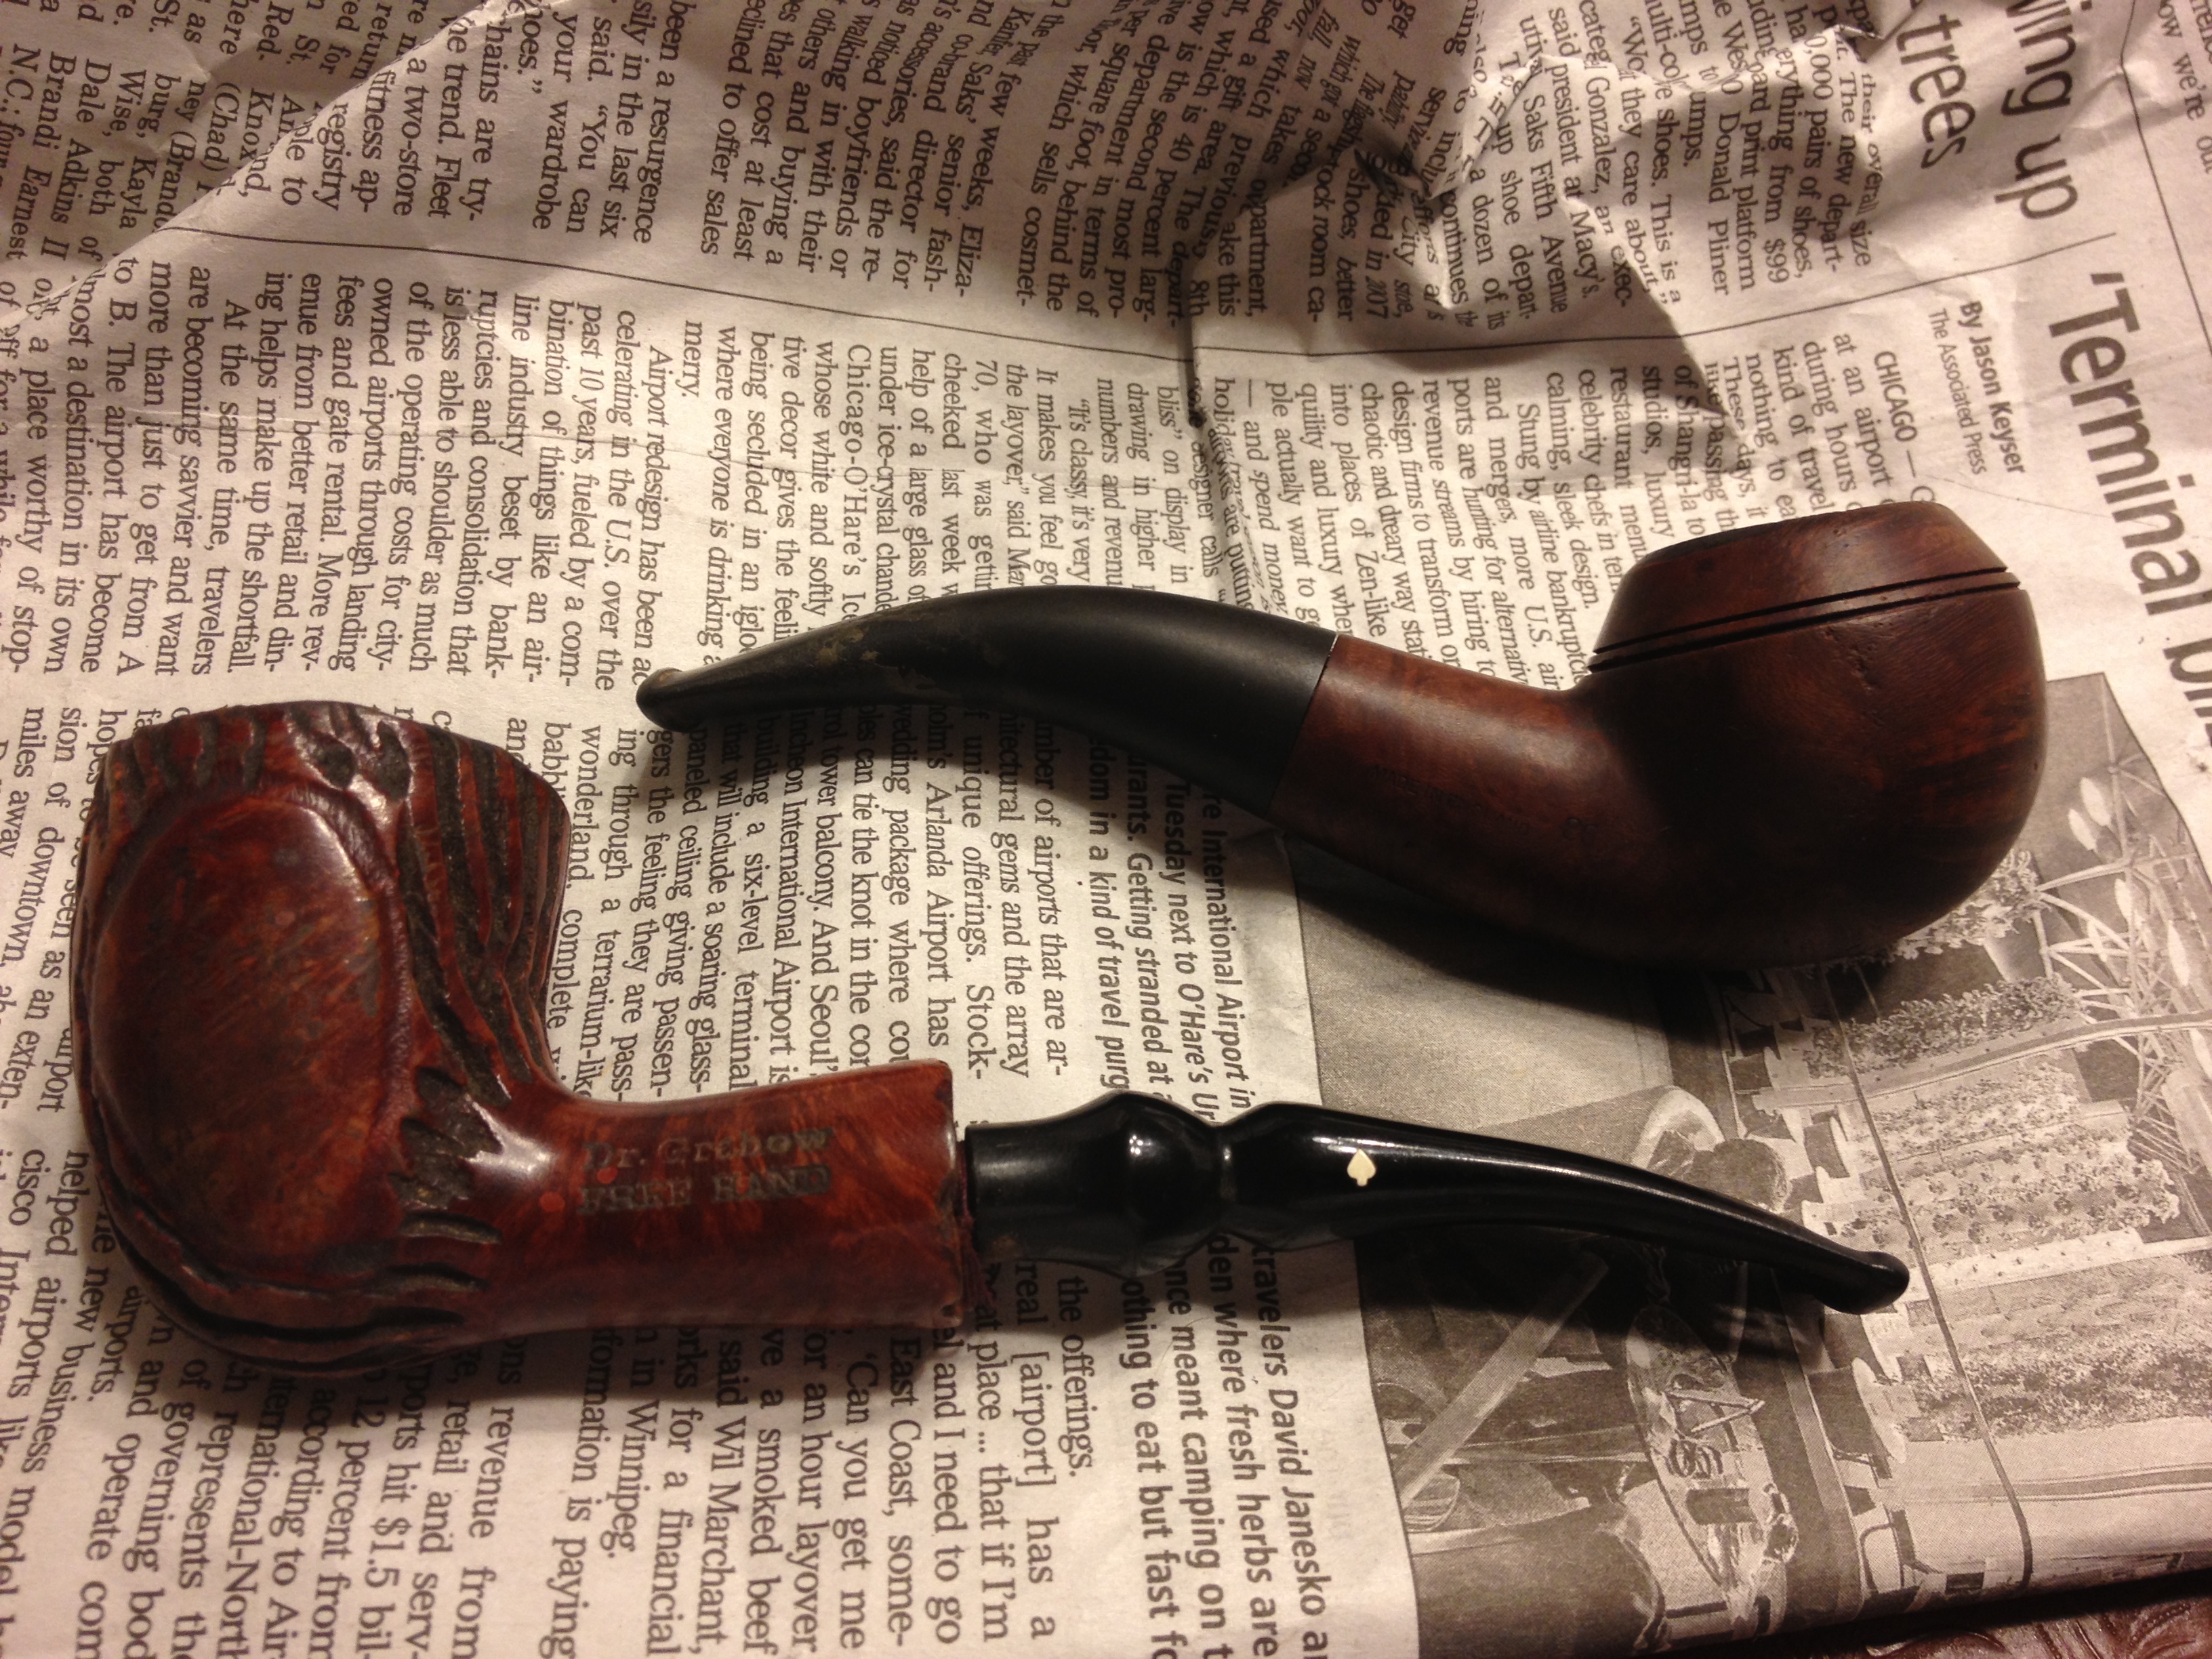
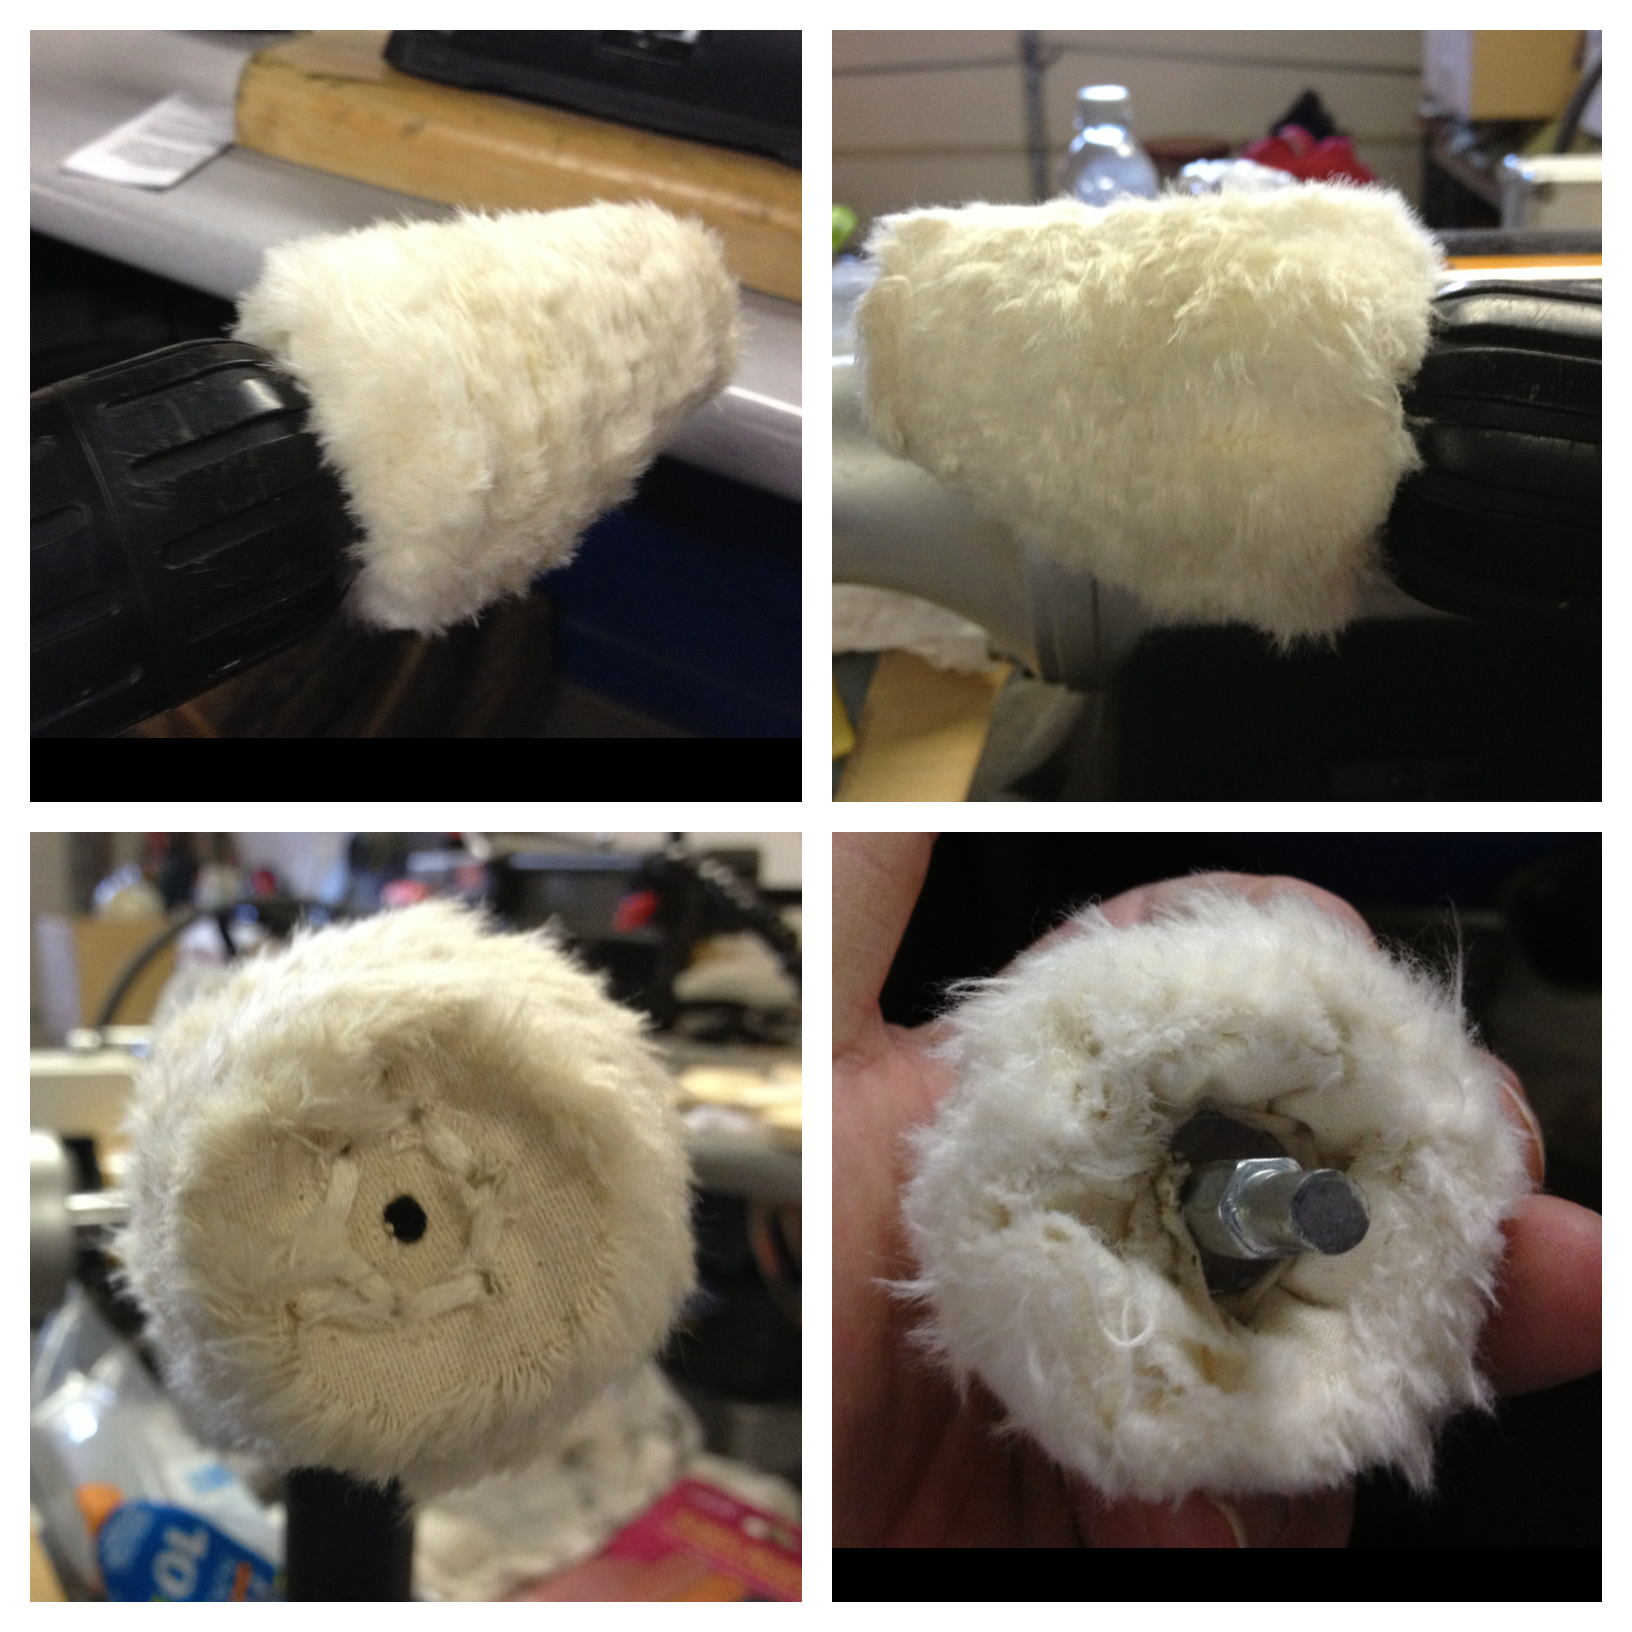
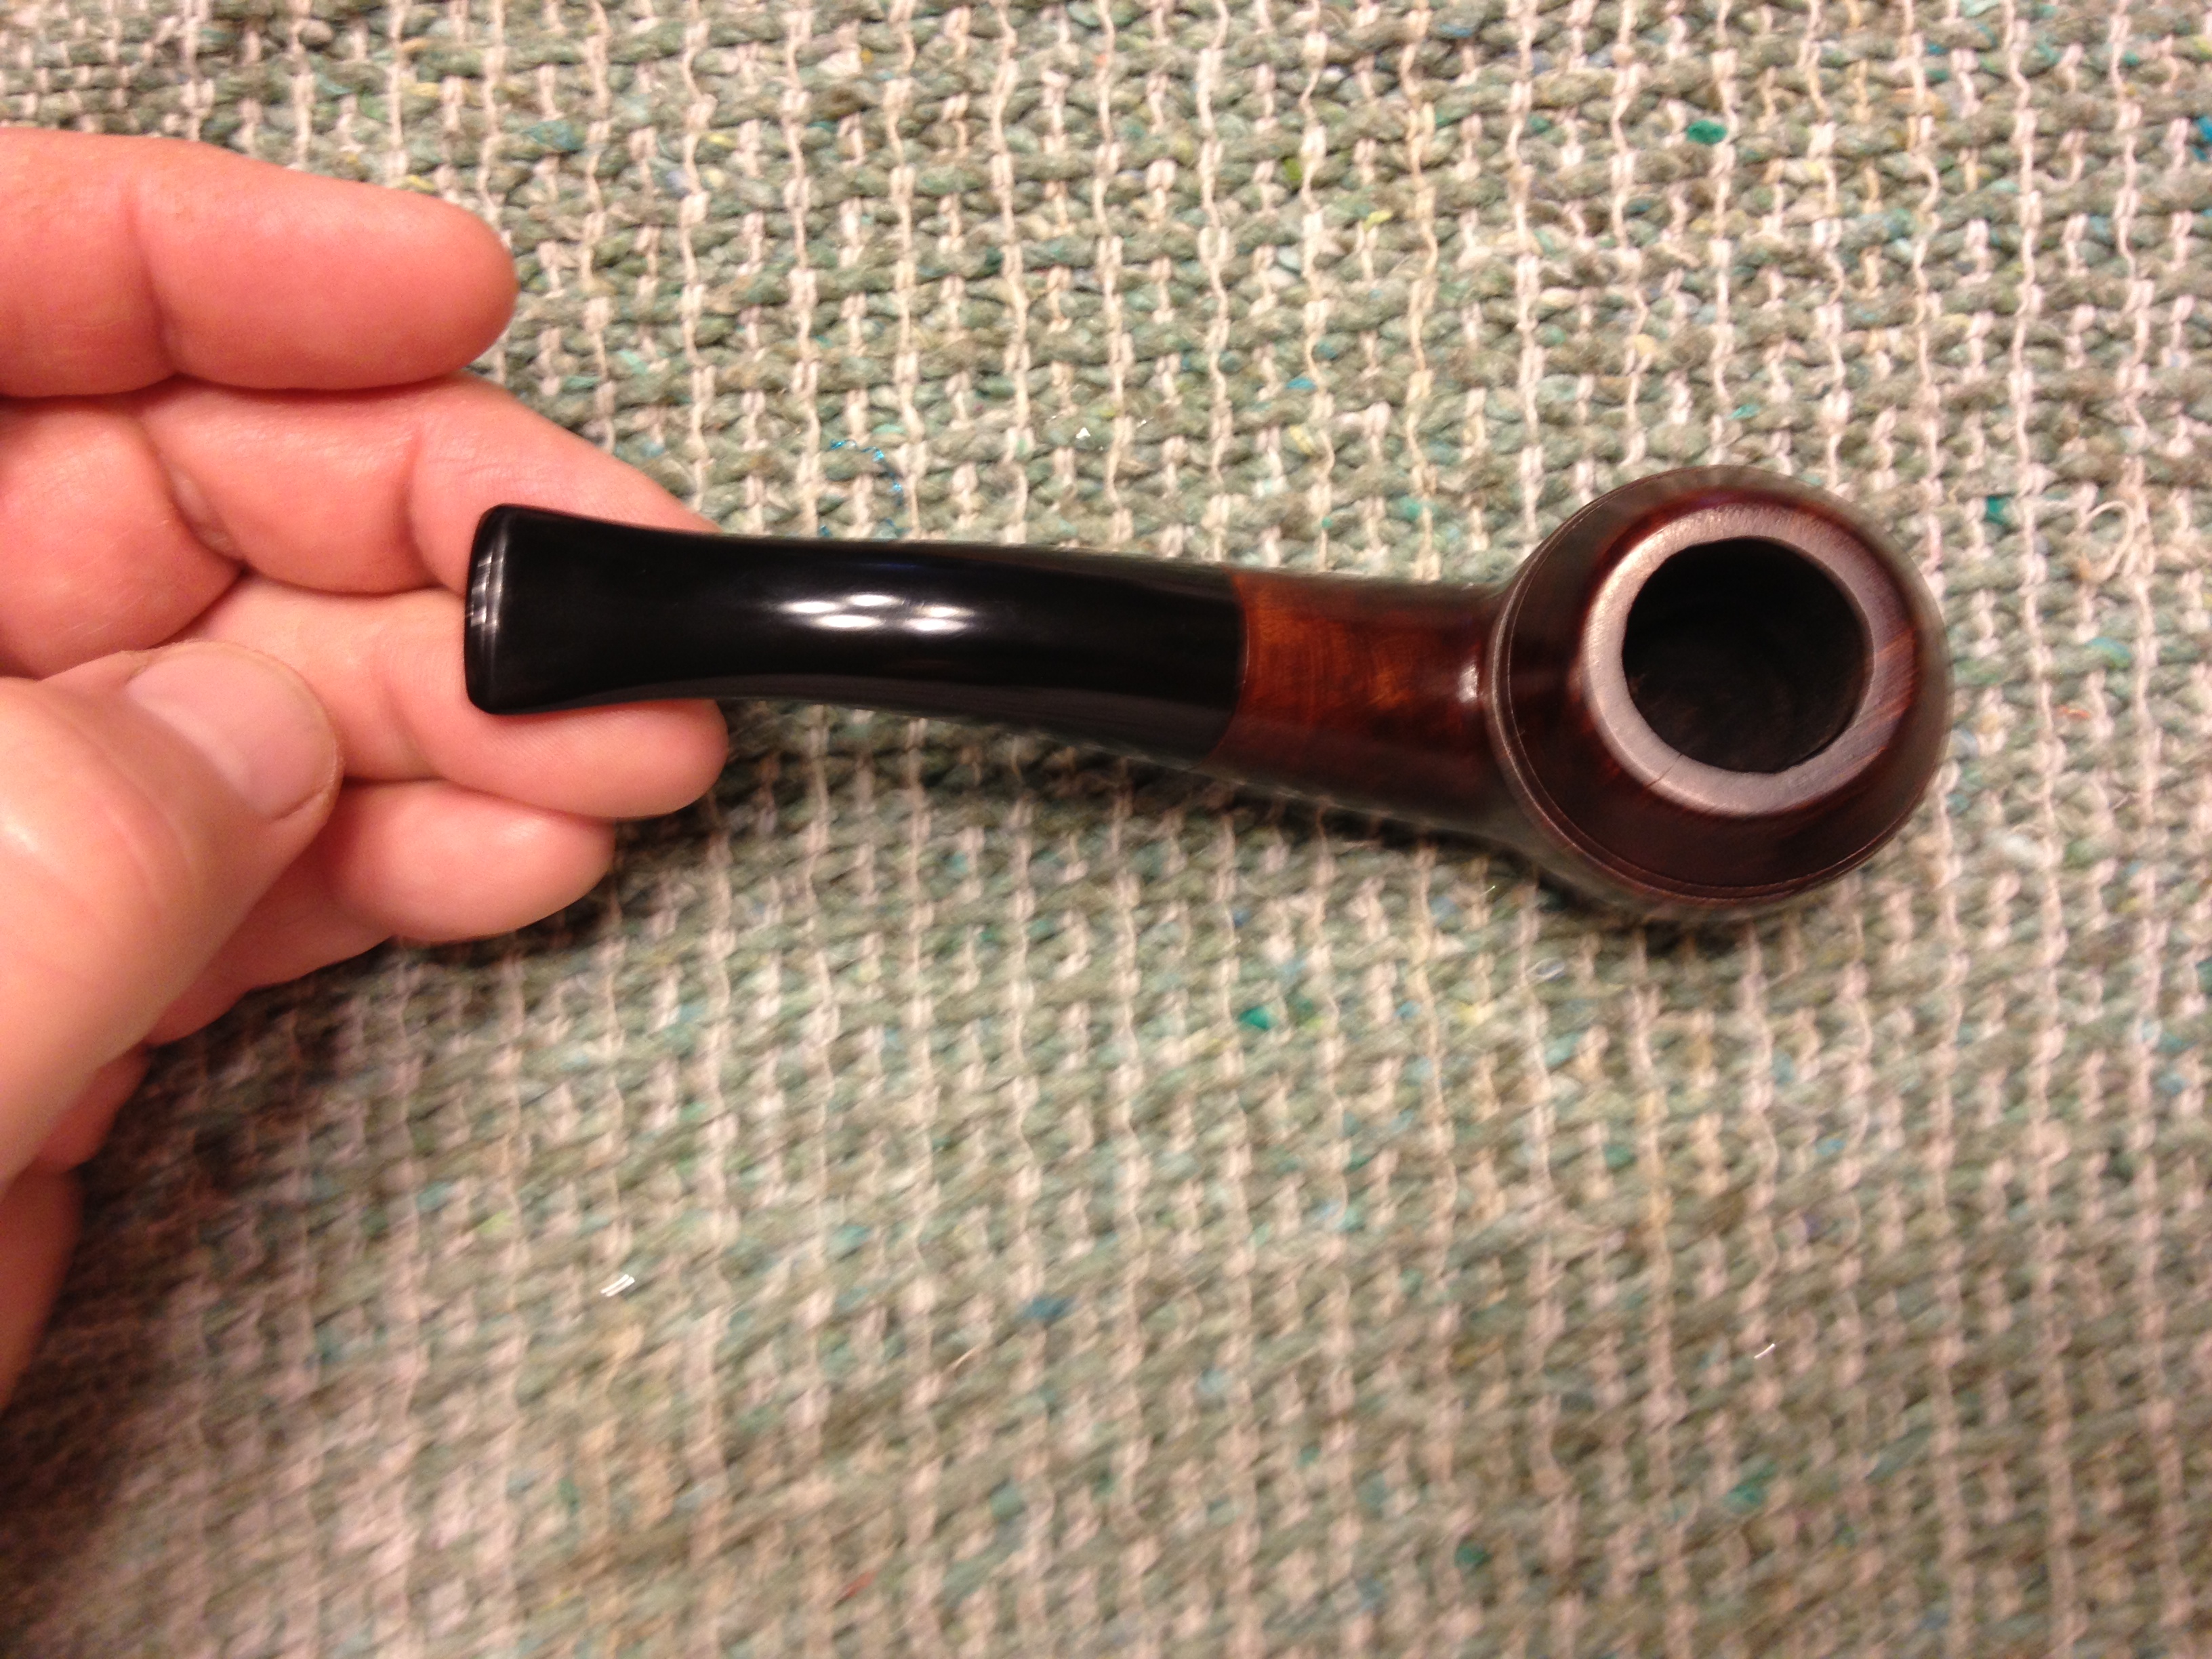
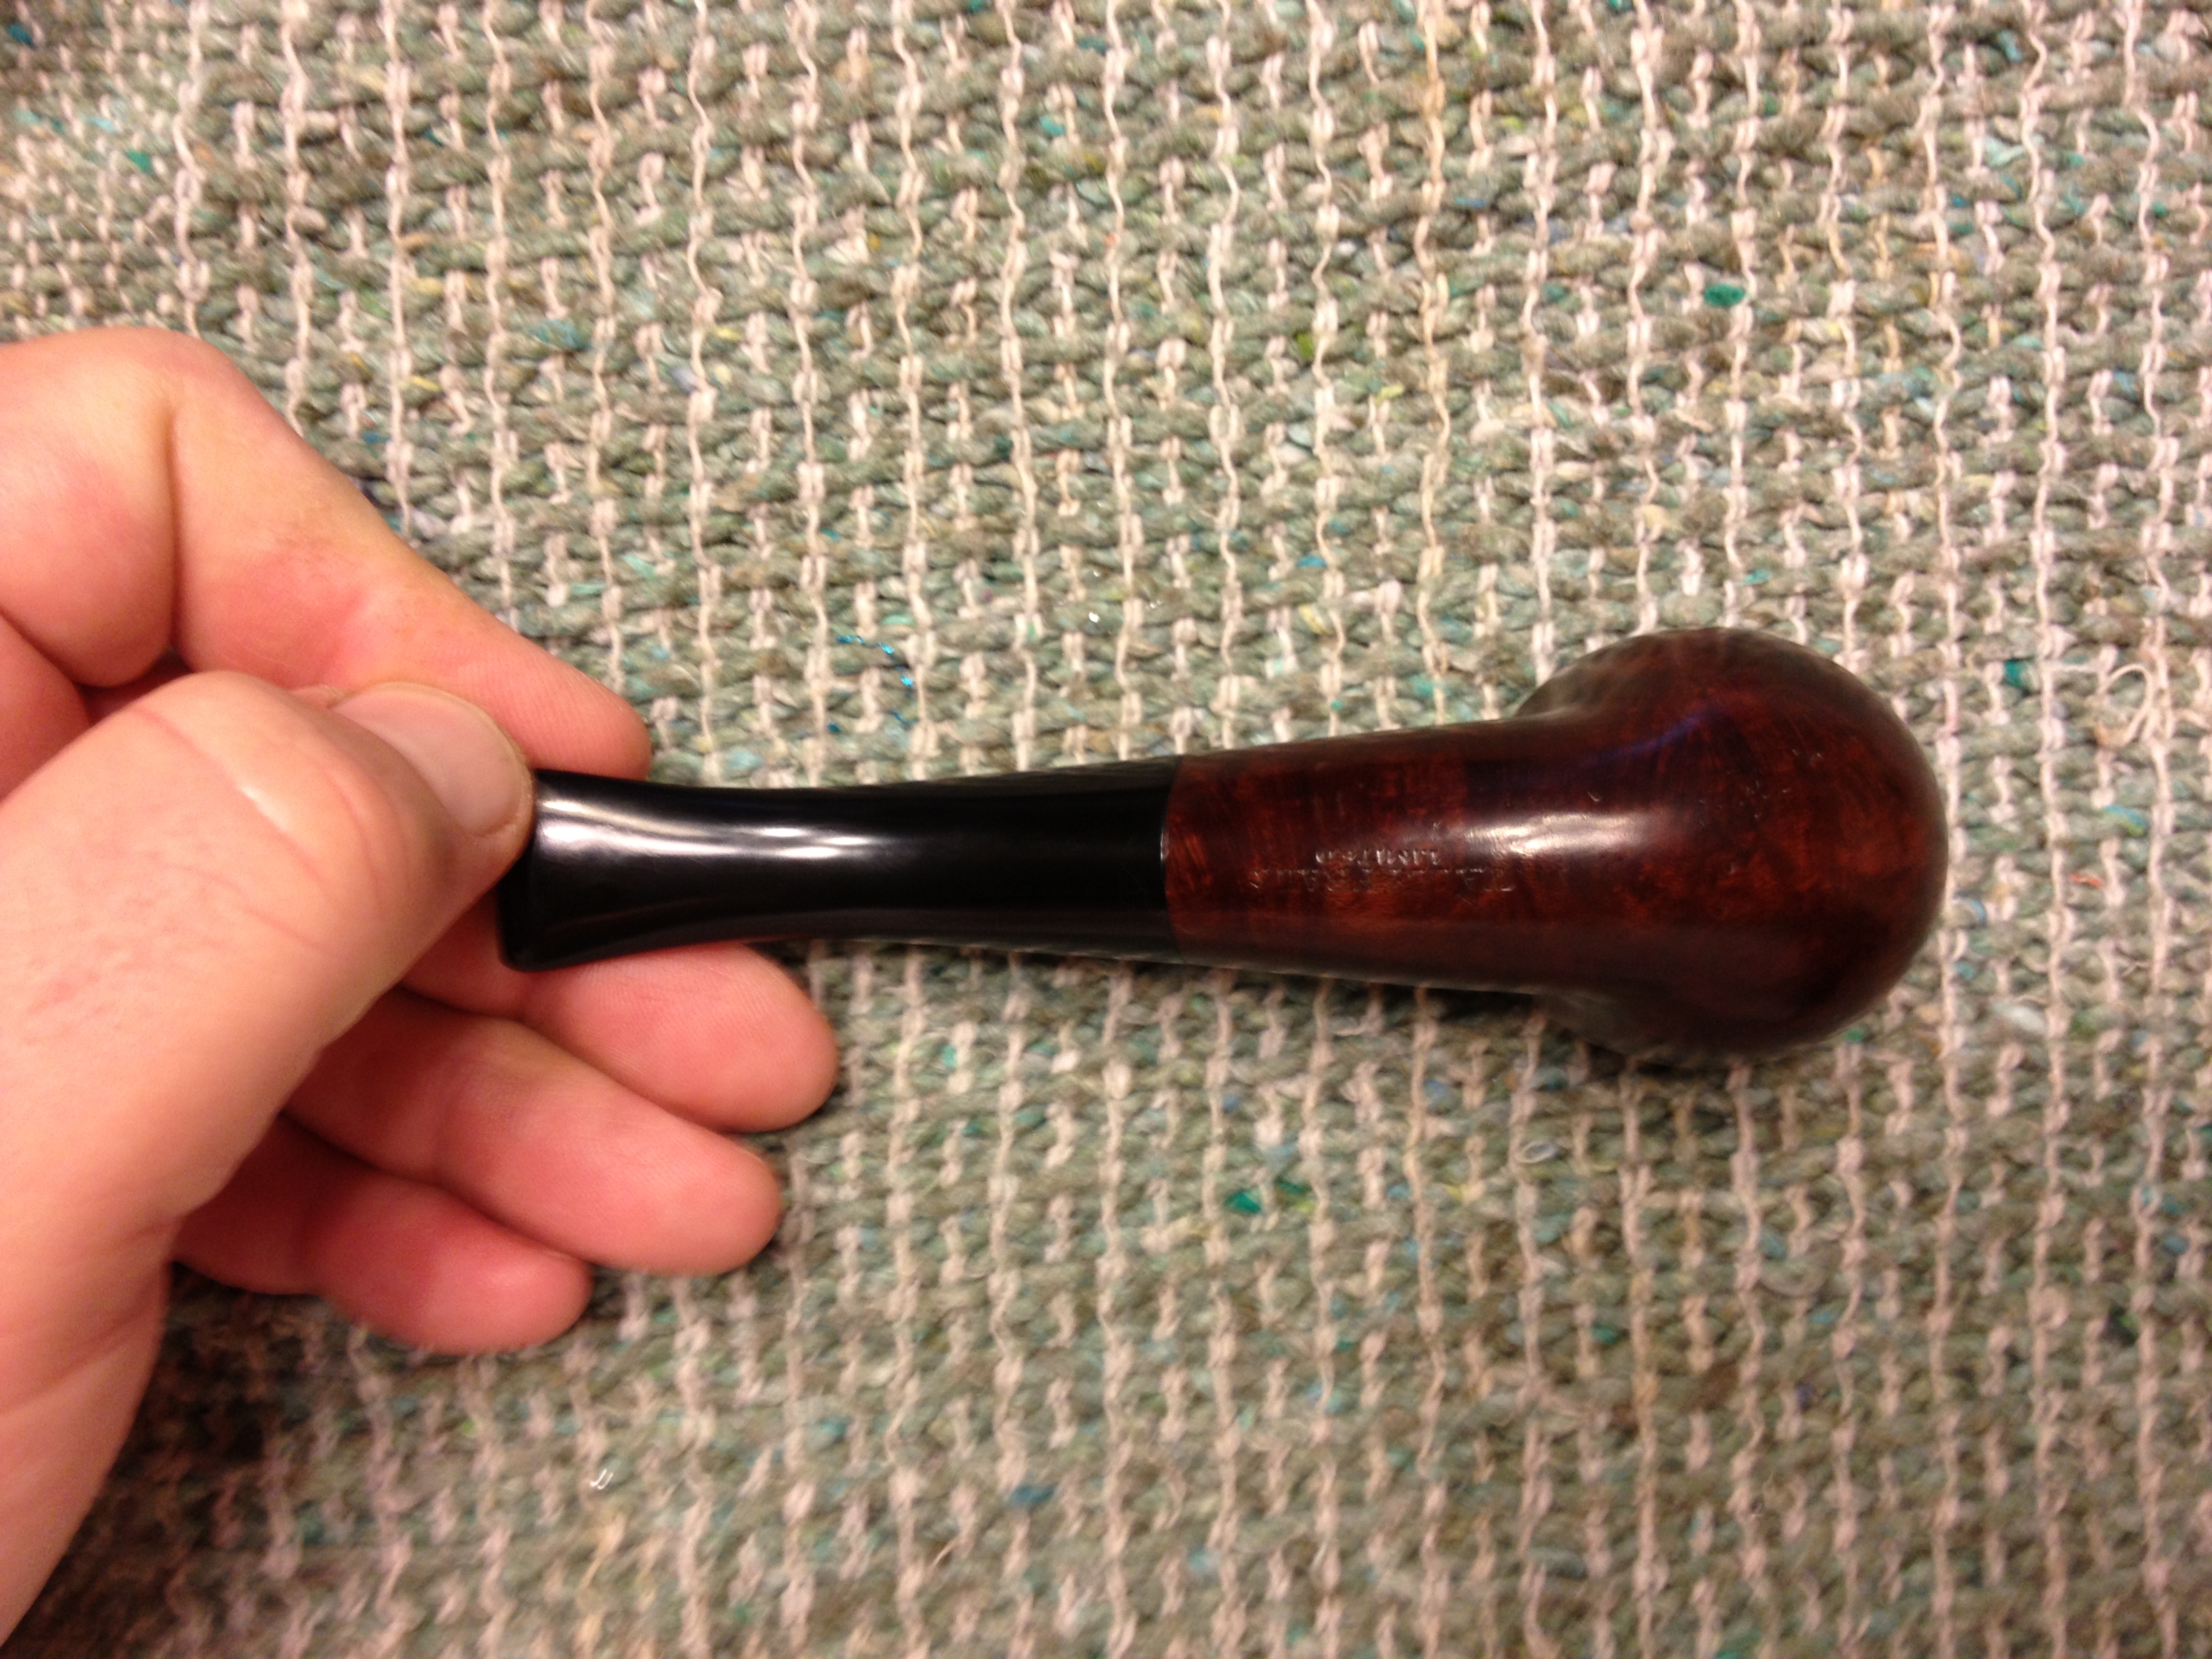
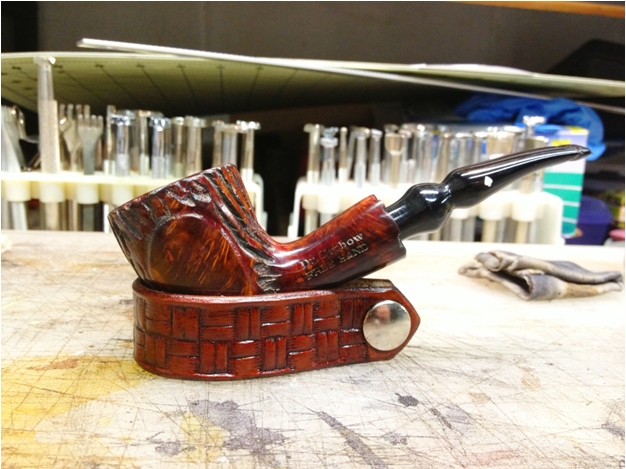
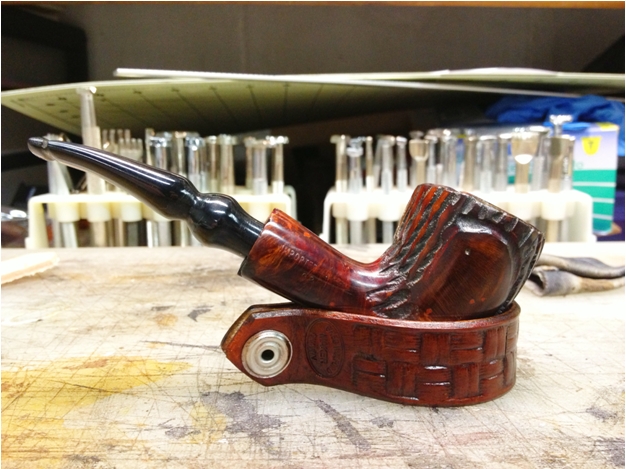
I buffed the stummel with Tripoli again before I reassembled the pipe and buffed the entire pipe with white diamond. I then applied several coats of carnauba wax to the pipe and buffed it out with a new soft cloth wheel. This is what the pipe looks like now, cleaned up (except for the fact I smoked it before I took the photos) but without any new staining done to it.

After

After

IMG_5493 IMG_5492 IMG_5491

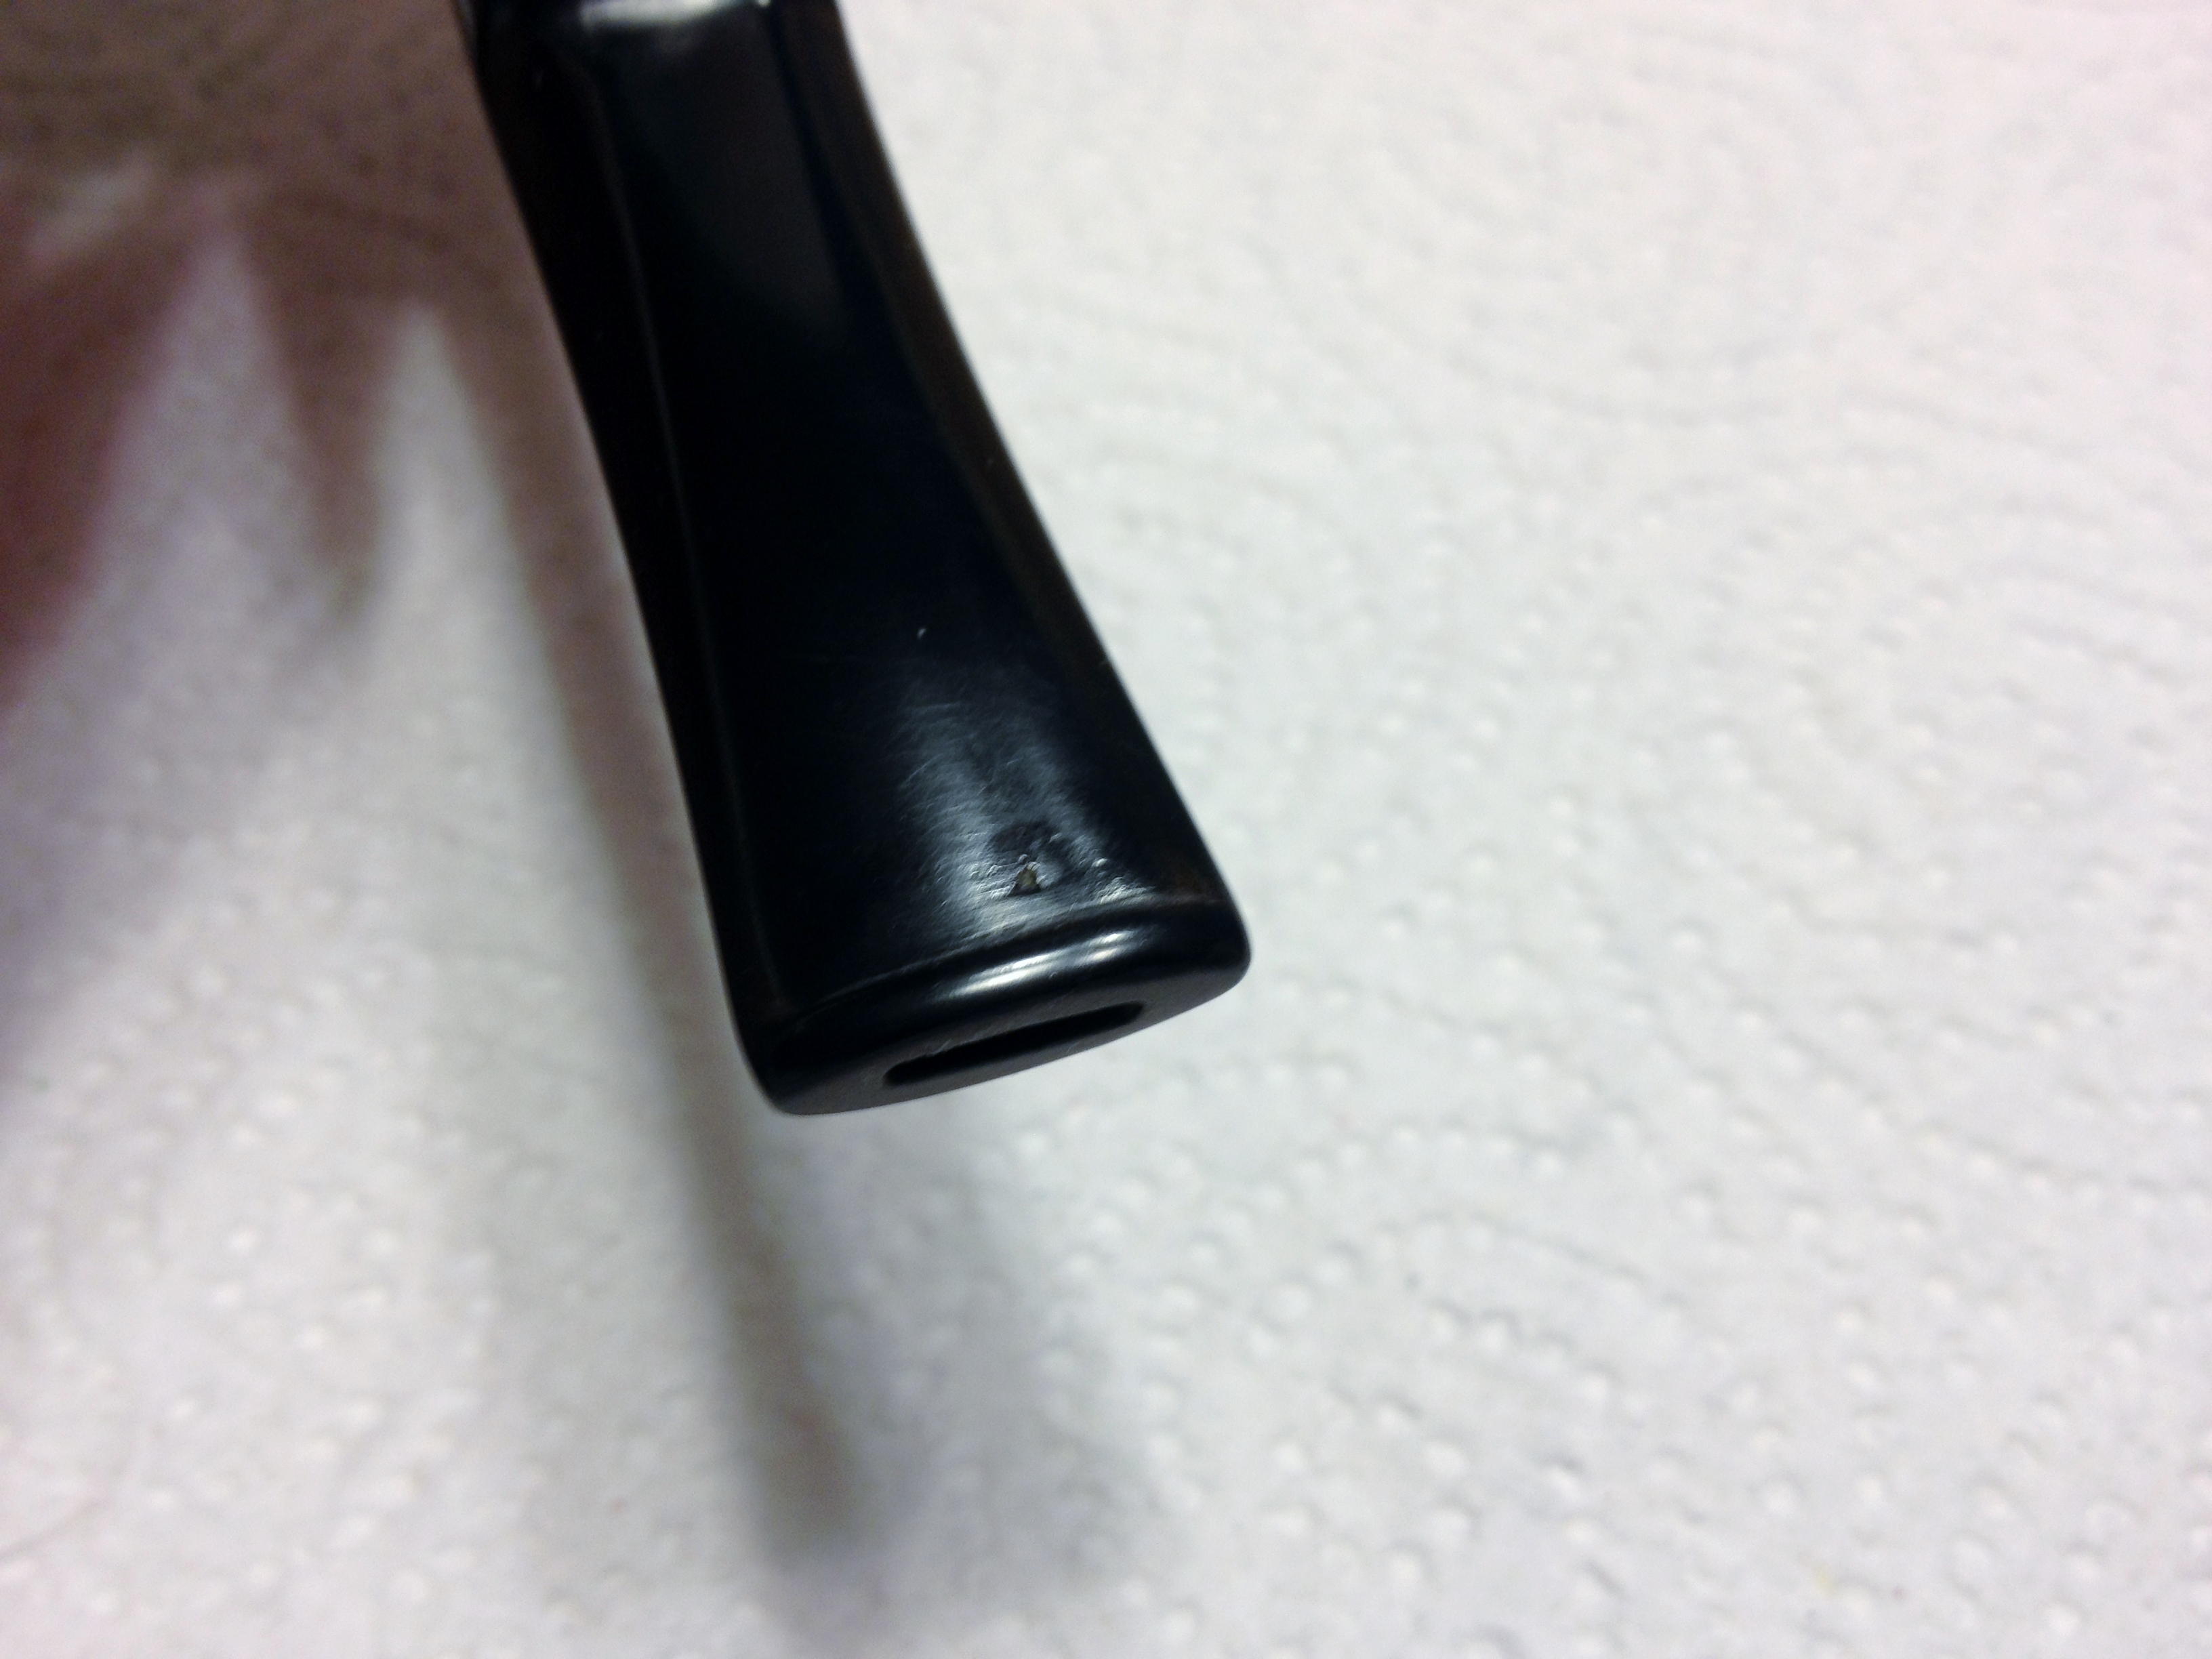
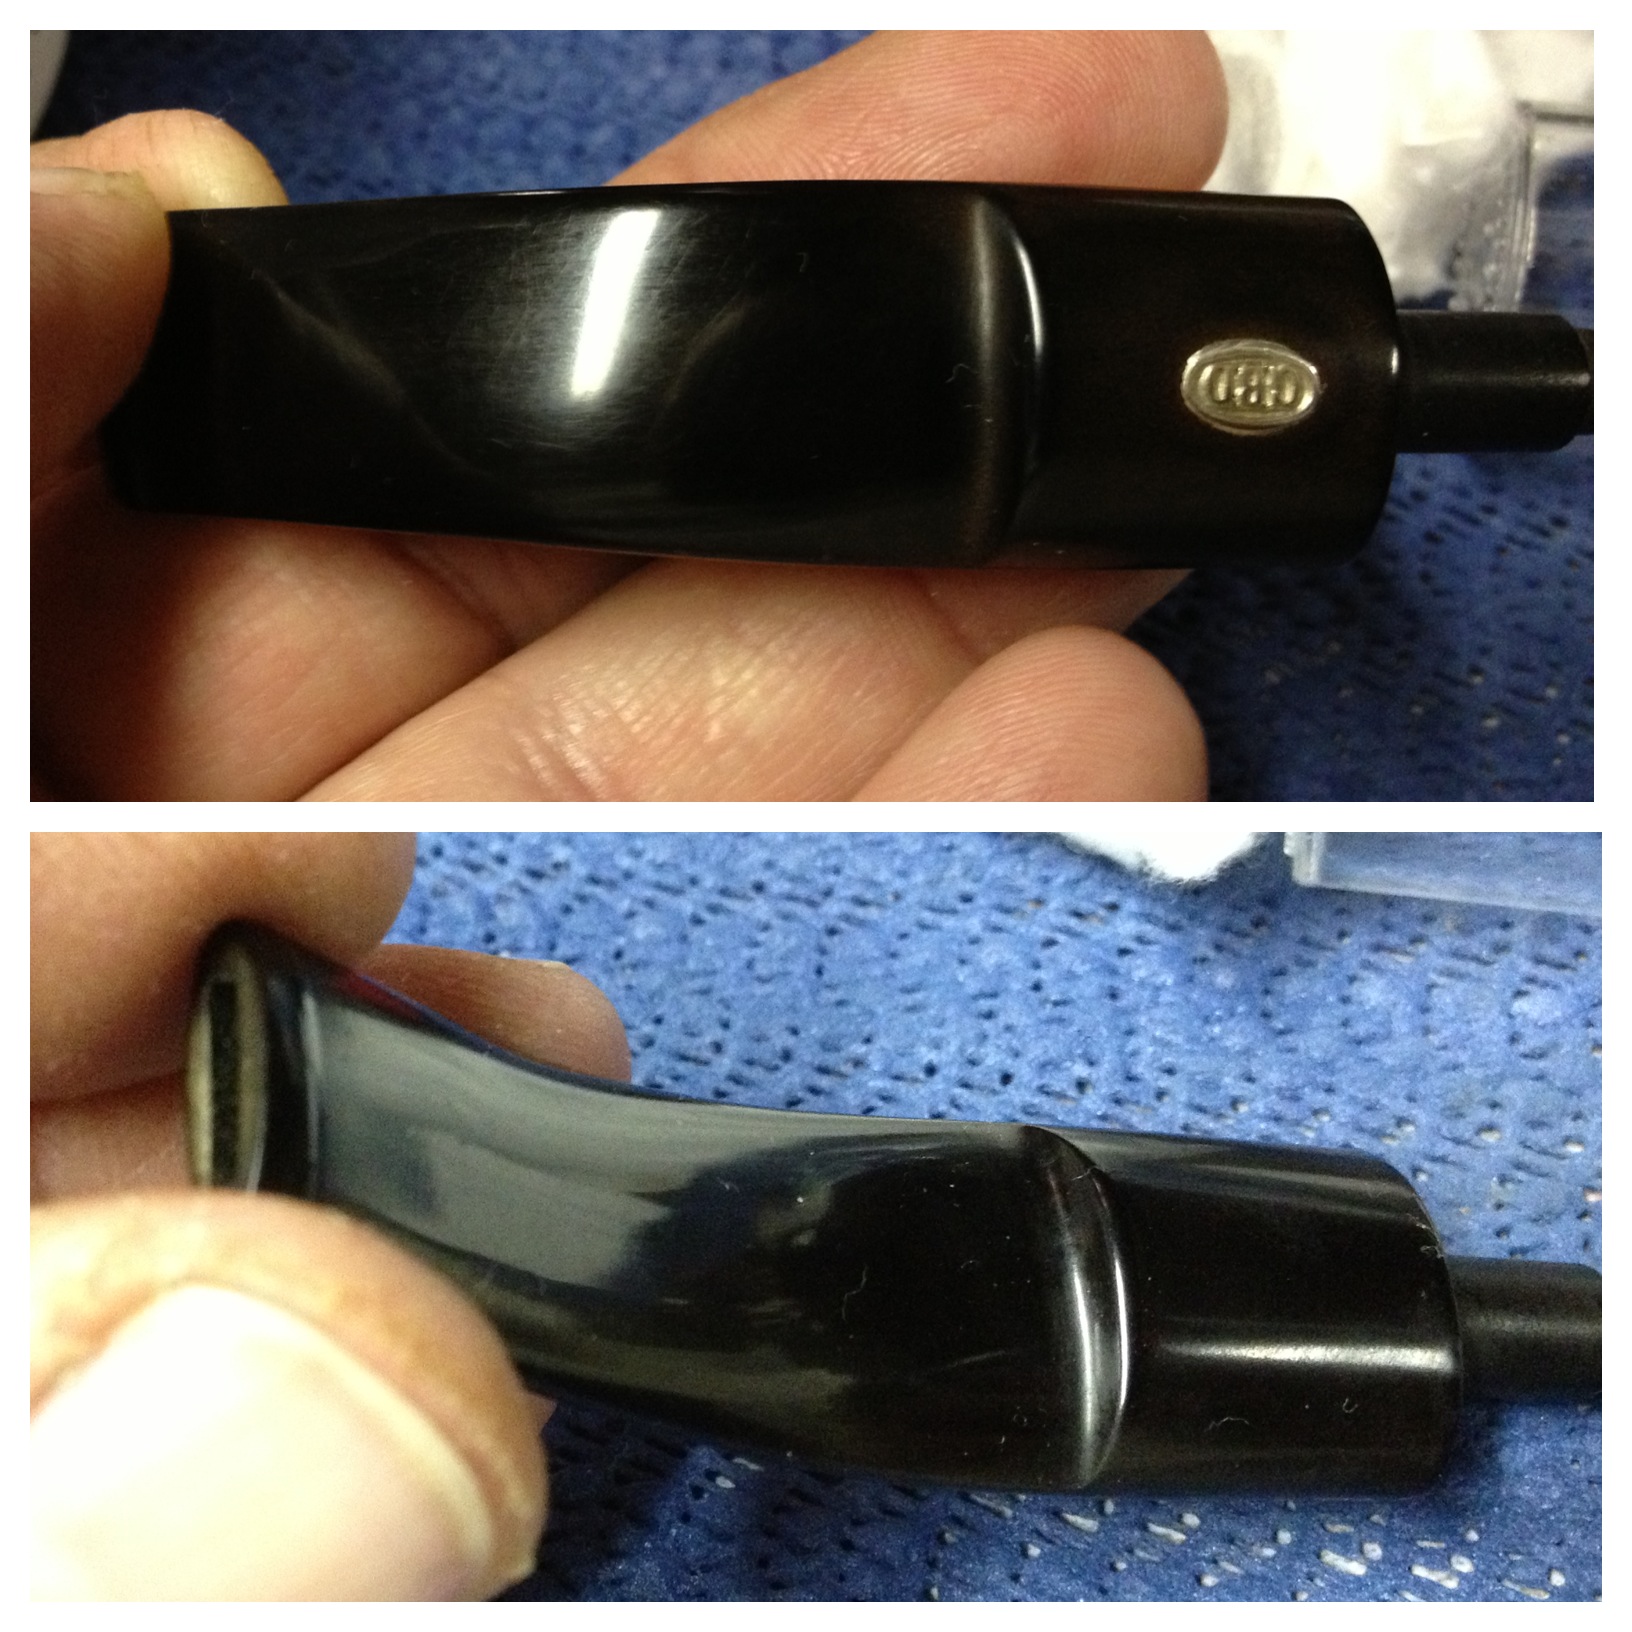
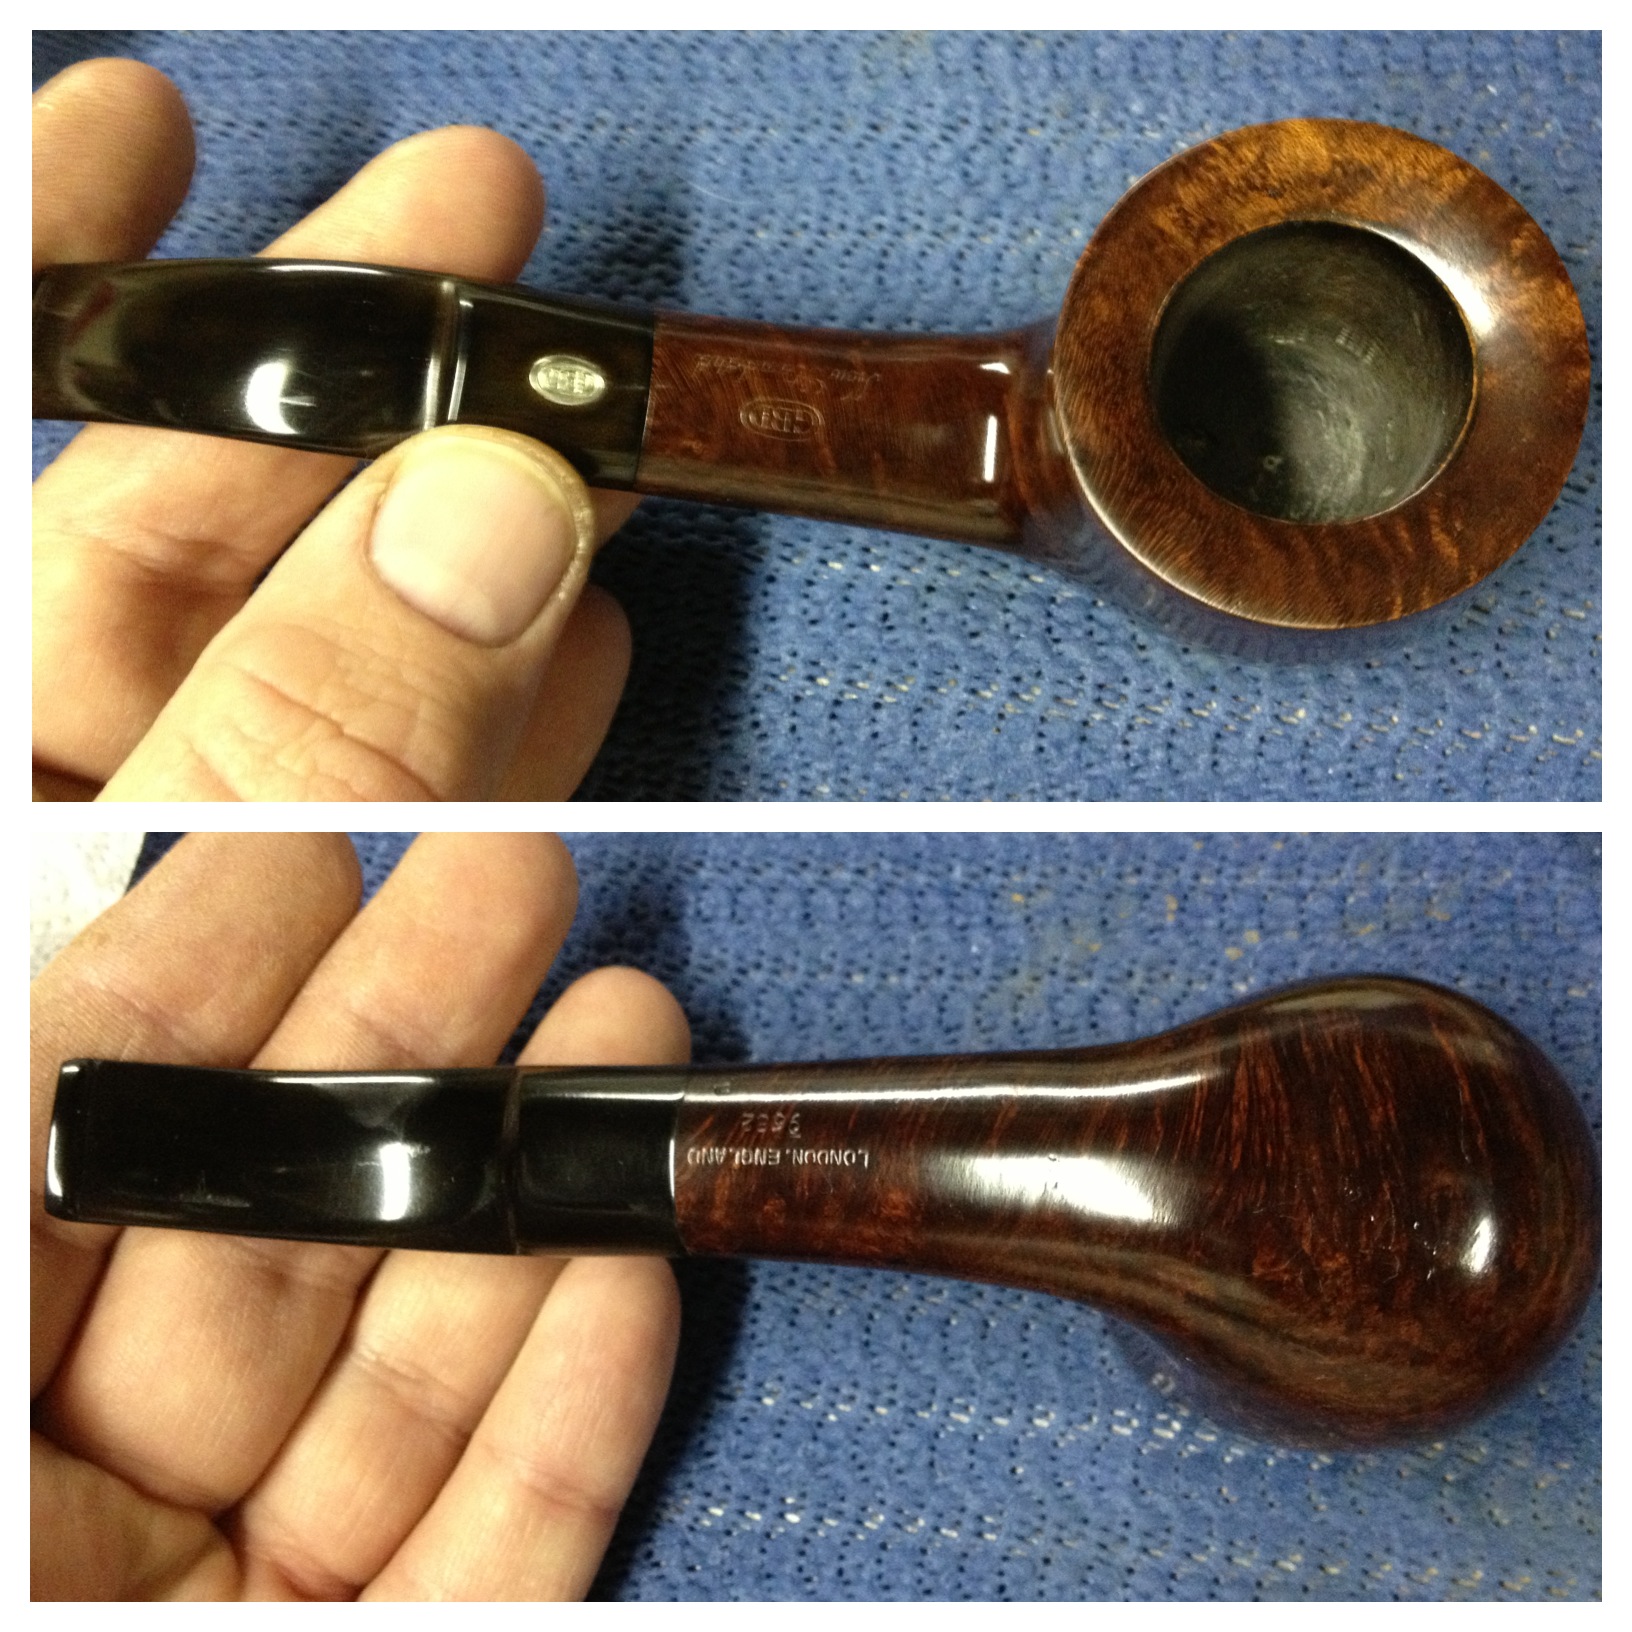
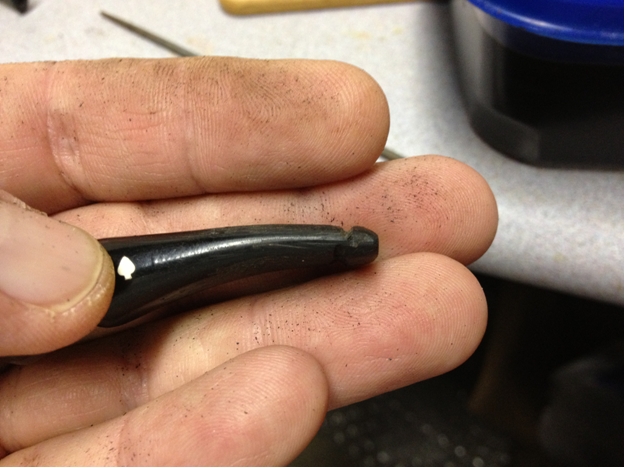
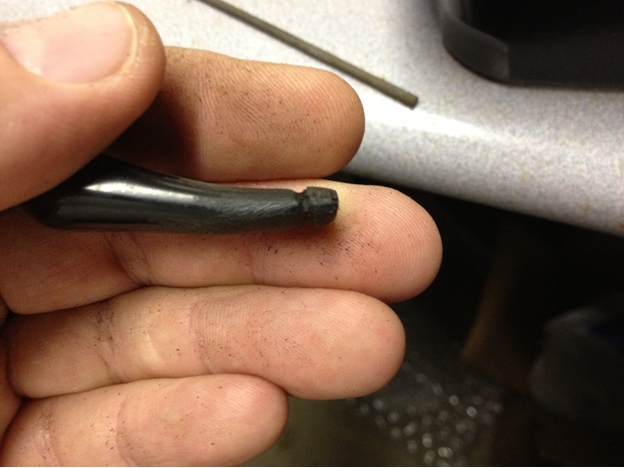
The bit area does look a lot better and it is smooth, almost; apparently the layering technique wasn’t my best idea as a small piece of the top patch came off at some point, probably on the buffer. Next time I will not work in layers but more like a briar-dust fill and do it all at once, which be faster, too. I do wish it were less noticeable on the whole,though.

IMG_5494 IMG_5495

Before and After

Before and After

I have a few other ideas about trying to get a less visible patch that I may pursue. However, now that I know I can get black super glue, already made, that may be my future course. But the “can I do it myself ” part of me wants to keep experimenting so we shall see. If any of you readers have any ideas on making these repairs less visible I’d be most appreciative if you would share them in the comments section.

GBD New Standard Reborn


Blog by Greg Wolford

I picked up the GBD New Standard recently because of its shape mostly: a thick-walled pot. It is stamped GBD in the oval over New Standard on the top of the shank. The bottom of the shank is stamped London England over 9682 with a “P” below and to the right of that.

When I got the pipe it was in pretty good shape: dirty, oxidized, the normal stuff. But it seemed lightly smoked with no cake and no real issues and only light chatter. IMG_5241IMG_5242IMG_5243Nomenclature

You can see in the top a pipe cleaner sticking through the drought hole, showing a well drilled pipe.

You can see in the top a pipe cleaner sticking through the drought hole, showing a well-drilled pipe.

The pipe has a few fills but the are mainly on the bottom – out of sight, out of mind – and I wanted to keep this pipe as original as I could so I didn’t bother with them.

I started with putting the stem into a OxiClean bath; I let it soak for about 45 minutes I believe. While the stems (I actually was doing two pipes at a time, as I often do) soak I did a cotton ball and alcohol treatment on the two bowls. Usually I use coarse salt, not cotton balls, for this but since this bowl appeared to be so lightly used and the second bowl was fairly gunky I thought this would be a good time to experiment with the new-to-me cotton ball treatment. I put one large cotton ball into each bowl, plugged the shanks with cotton swabs and set them up on a steel drainer I have in my kitchen. I then filled the bowls with 91% isopropyl alcohol, slowly, with an eye dropper.

The photos below show the progression of black “stuff” drawn out of the GBD bowl; you may also see some of the tars (brownish-yellow stuff) in the cotton ball from the other pipe. This process started within a minute, the first photo, and then each picture after is after about 15 minutes, with the final result at about one hour.

IMG_5246

I don’t know what the black “stuff” was but it sure removed a lot of it in the treatment! As a side note, I found the cotton balls easier to deal with than the salt and it seems to have done as good a job, too. I will probably continue to us this method in the future.

The stems had been soaking for about an hour, maybe 45 minutes, at this time and were ready to come out of their bath. As you can see, quite a lot of oxidation was raised and loosened by this soak.

IMG_5247

I then washed the stems in dish liquid and scrubbed them with Bar Keepers Friend and an old toothbrush; this took about an hour, making a paste of the powder and scrubbing, rinsing and wiping, then repeating. The results from that looked like this:

IMG_5248

Still a lot of oxidation and work left to go. Next came sanding and polishing with wet/dry paper and micro mesh. I used 320 & 400 wet/dry paper before moving on to the micro mesh. Before the mesh, though, I used the Novus 2 plastic polish on the stem to take off some of the scratches and a little more left over oxidation. I wet sanded with micro mesh 1500-4000 and then polished with the Novus 2 again. I now dry sanded/polished with the remaining grits of 6000-12000, then polished with Novus 1 plastic polish to get to this look

IMG_5249

Now I applied my “secret substance” before setting the stem aside to work on the bowl. This is how the stem looks at this point:

IMG_5250

What, you may ask, is my “secret substance”? Obsidian oil maybe? No. It is Mothers Back-to-Black automotive polish.

The bowl was really very easy since I didn’t plan on totally refinishing it. I wiped it down several times with acetone to take off the old finish and get the grime off of it. I then wiped it down a few times with cotton pads dampened with alcohol. I lifted a small amount of stain in the process but not enough to really change the color of the pipe, only enough to let the grain pop a bit more. The most time-consuming part here was rubbing, with alcohol then saliva on cotton swabs, to clean the rim. There were a couple of small dents I lifted with steam ( I heat an old “butter” knife with a heat gun and apply it to a dampened cotton towel that is laying over the dent) but can’t actually recall how many or where they were they were so incidental. The next photos show the stummel before taking it to the buffer:

IMG_5252IMG_5251

I then buffed the stummel with Tripoli before reassembling the pipe and buffing the whole thing with white diamond and then carnauba wax. Here is the finished pipe:

IMG_5253

This photo is slightly over exposed

IMG_5254IMG_5255

Experimenting with Alternative Oxidation Removal Techniques


Blog by Greg Wolford

I’ve recently been involved in a conversation about removing oxidation on stems with steel wool. I have to be honest, at the first mention of steel wool being used on a stem made my jaw drop (literally, almost dropped my pipe). But these guys are long time pipe smokers and restorers so I didn’t just brush off the information.

They said that using 0000 steel wool, dampened with water, removes oxidation much more efficiently than miracle erasers, Bar Keepers Friend or any micro mesh/sandpaper treatments. The increased efficiency also reduces the time invested I am told, which makes sense and is appealing.

So I decided to try an experiment on two old stems. These stems weren’t in terrible condition but had some oxidation to them and they were nothing too valuable if I made a real mess of them: they are expendable so they became my test subjects.

20130312-095418.jpg

I soaked them in a room temperature OxiClean bath for about four hours or so; I had to leave the house for a while so I made sure the water wasn’t too warm and left them to soak while I was gone. When I got home I washed them with dish detergent and a scrubby sponge until they no longer felt slick: about 2-3 minutes. They were the. Left to air dry on a drain board overnight.

20130312-095310.jpg

Yesterday morning I went out and bought some supplies: a package of 0000 steel wool and some 400 grit wet/dry sanding sticks; the sticks, or pads, remind me of short wide emery boards.

I took a piece of the steel wool and dampened it and began to rub the stems. Every few minutes I would wipe off the stem on an old towel, rinse out the wool, and go back to rubbing. It took very little time to remove the signs of oxidation and the stems were much less matte finished than they usually are after initial sanding. So I turned my attention to the stem with the stinger to work on the chatter.

I used the new 400 grit pads to wet sand on the chatter, going back and forth, wiping and rinsing as I had with the wool. These pads seem like they will be very useful in getting into that hard (for me at least) to get bit area and is why I bought them to begin with. They did, indeed, reach into that area much more easily and they took out the chatter fairly fast. That area was now more matte than the rest of them stem so I went back to the damp steel wool. In a few minutes the shine came back up even across the stem, which actually surprised me.

The whole process, not including the soak and dry time, took less than 15 minutes; I was again impressed.

20130312-095310.jpg

Will steel wool scrubs replace all the sanding and micro mesh polishing? I don’t think so. Will it reduce the amount of time and effort spend making an old stem look new again? I believe it can. I expect to explore with more stems just how effective this process can be and how much sanding and polishing can be avoided using the steel wool. One fellow said he can go straight to the buffer after the wool scrub. On some stems that may be a possibility but I think on most it won’t. Any chatter or deep marks I think are still going to require sanding. And if you have a rough stem after the oxidation is gone I think it’s still going to need sanding, too. But this is a (new to me) technique that I think needs more investigation and experimentation, one that potentially reduce the amount of time and labor spent on many stems, letting is be more productive overall.

20130312-095226.jpg

Stem after using 400 grit pad and 0000 steel wool to remove chatter and bring back up some shine.

(Photo of the stem at the point I stopped along with the 400 grit pad I used and the packaging it cam in. By the way,  my local Hobby Lobby has begun to carry a rather large line of Micro Mesh and Alpha Abrasives products. The prices are competitive and the selection good so if you have a local Hobby Lobby it would be worth your while to see if they are carrying these items in your area, too.)

New Selection of Micro Abrasives at Hobby Lobby

Wally Frank Shipmate


Blog by Greg Wolford

The same trip out that I picked up the Dr. Grabow Freehand I also picked up this Wally Frank. It was in pretty good condition, really just needing a good clean up. I’d never had a Wally Frank before, like the Freehand, so that was part of my interest. But the real interest laid in its shape: a Rhodesian.  The Bulldog and Rhodesian top my list of favorite shapes so this one had to come home with me.

The following photos show the Wally Frank and the aforementioned Dr. Grabow as they looked when I unwrapped them at home. You can see that the Frank was in much better condition than the Grabow, especially the stem!

IMG_4431 IMG_4432IMG_4433 IMG_4436 IMG_4436IMG_4434IMG_4435IMG_4436IMG_4438

There are some fills in the pipe but the only one that really bothered me was the one on the face of the bowl (last photo), though I’m not sure how well you can see it. That one irritation made me decide to refinish the pipe but to keep it as close to original as I could.

At the time I was working on this pipe I didn’t know I would be writing about the experience, so there are no in progress photos to share.

I started by dropping the stem into a OxiClean bath to loosen the gunk and oxidation. Since I didn’t want to remove all the stain I didn’t do an alcohol bath. I began by lightly reaming the bowl which was actually not bad at all; there was virgin briar still in there! After reaming, I began to clean the bowl with acetone on disposable cotton pads; I buy them in the make-up section of Wal-Mart. Once cleaned I then topped the bowl. For topping I used 320 wet/dry sandpaper laid out on my workbench which has a granite slab on it for my leather working. Once the bowl was sufficiently evened out to my satisfaction I began to work on the fill that annoyed me.

I used some 400 grit wet/dry sandpaper to touch up the area a but before I picked out the fill. I then cleaned the area with a isopropyl dampened cotton pad and then, using briar dust from the bowl topping, I packed the area with dust and dripped on some Super Glue. I let it penetrate for 30 seconds or so and then quickly wiped off the excess. The result looked nice, with little extra glue. I gave it another few minutes to set well and then moved on to sanding.

As I said, I wanted to preserve the original look as much as possible and the other smaller fills didn’t really bother me. I decided the best approach was to lightly sand the whole pipe with 400 grit wet/dry paper, avoiding the nomenclature completely. I would work over the entire bowl, wipe it with alcohol pads, evaluate, and repeat; I belive it took three passes to get it to where I liked it.

I then mixed up some Fiebing’s Medium Brown leather dye 50/50 with 91% isopropyl alcohol which I applied with a wool dauber and flamed in. I buffed it by hand to see what the color looked like, trying to blend the sanded briar with the mostly untouched stamped areas; it was a very close match but needed another application. The bowl rim needed more, too, due to the topping so I started by applying and flaming the dye to the rim only and then applying and flaming the entire bowl. Again I buffed it by hand and compared the two areas; I was happy with the results so it was time to move on to the stem.

After taking the stem out of the OxiClean bath I washed it well and scrubbed it with a Miracle Eraser, which removes a lot of the loosened oxidation. From there I began wet sanding with 320/400/800 grits; thankfully there were no holes, dents or even much chatter to work on with this stem. Next I applied the Novus 2 plastic polish. Sometimes I don’t use the plastic polish this soon but I wanted to get an idea of the shape of the stem at this point. The stem looked better than I expected so I then moved on to the micro mesh, wet sanding with 1500-4000 grits. I used another application of the Novus 2, which I work in with a cotton pad and then polish off with another clean one. I then polished with the micro mesh, dry, through 12000. At this point I switched to the Novus 1 plastic polish to bring up the shine.

I moved to the buffer and buffed the bowl with Tripoli. I then put the pipe and stem together and buffed the entire pipe with white diamond and a few coats of carnauba wax. I buffed the pipe out to the final shine with my “mushroom” on my cordless drill.Mushroom

The final result was one I am happy with. The pipe smokes much better than I’d anticipated; there is no more virgin briar in its bowl. The fit and feel of it are fantastic and now it looks more like it once did, when someone else loved it.

IMG_5186 IMG_5187 IMG_5188 IMG_5189 IMG_5190 IMG_5193

Dr Grabow Restoration and Stem Repair


Blog by Greg Wolford

I picked up this Dr Grabow Freehand at an antique mall about a month ago when I got the Wally Frank that is visible in the photos, too. It was scratched to heck on all the smooth briar and the stem was chewed completely through. But I went ahead and bought it for three reasons:

– I’ve  never had a freehand
– I have been wanting to restore a stem with a hole or, in this case, a lot of damage
– I got a pretty decent price
So, I picked it up.Greg1

Greg2

Greg3

Greg4

Greg5 I decided to deal with the bowl first, by stripping it with acetone and soaking it overnight in an alcohol bath; I also put the stem in a OxiClean soak at this time.  After removing the bowl from the alcohol bath I then used a brass bristle brush to get all the tar and gunk out of the rusticated top grooves. Then I sanded it to remove all the scratches from the smooth briar and take the old stain off the high points using 400 grit wet/dry sandpaper.Then I used some water based black leather dye on it, getting into the recesses well and wiping of the smooth portions as I went; I wanted to keep that darker contrast in the grooves. After I had it covered to my liking I dried it with the heat gun. Next I went back to 400 grit to take down the high points and smooth areas to remove the small amount of black color from the water based dye. When that looked good to my eye I polished it with 600 grit, wiped it down with 91% isopropyl alcohol on a cotton pad to remove any left over dust and dirt.  I heated it with the heat gun again to make sure the briar was good and dry. When it was nice and warm I applied Fiebing’s dark brown spirit-based leather dye, diluted 2:1 with 91% alcohol and flamed it in; I did this twice. The color was a bit too dark now so I wiped the pipe down, taking care to not soak my cotton pad too heavily or get into the recesses too much, with alcohol until it looked right to me. I then set it aside.Greg6

Greg7 When I soaked the bowl in the alcohol bath I also left the stem in a OxiClean soak overnight. I had removed and washed it well before starting on the bowl so it was ready now to work on.Greg8 I decided to shorten and reshape the stem instead of replacing it or trying to fix the gaping holes. I used a coping saw to cut off the end, saving as much of the stem as I could. The bottom hole had also cracked so it required removing quite a lot of the stem to get most of the crack out. The next step was to grease a pipe cleaner with petroleum jelly and insert it into the stem. I then dripped some Super Glue into the crack and let it set up while I worked on something else.

When I came back to it, the glue was hardened and I was ready to move on to the next step: making a new button. I began this process by scoring a line along the top and bottom of the stem where I wanted the button with a cutoff wheel on my Dremel. After I had the new button laid out, I then started to shape it with various needle files. I began shaping from the button back, forming it into shape with the rest of the stem. This took considerable time to get it even and “natural” looking. When I was satisfied I then began to shape the end of the button.Greg9

Greg10 I shaped the bit with needle files, too, again using several to get the shape right. The first step for this was getting the angle to look right on the top; this didn’t take as long as I expected. I then began to form the bottom of the bit, trying to match the shape of the top as close as I could; this took more time and effort than I’d expected.

Making a new drought hole was something new to me. And was not without its challenges either. I used my needle files, again, to start shaping the new hole, making it a bit taller as well as wider than the hole that was left in the cut off stem. I took the extra time to fan the drought hole, too, partly because I wanted to and partly to see if I could do it. This ended up being some of the most time-consuming and tedious work of the entire project: I needed to make sure I didn’t go too thin in any direction but I wanted the hole to really funnel out well. I am pleased with the results and the way it smokes and would say it was worth the extra time and effort to accomplish it.Greg11

Greg12 After all the shaping I wiped the stem well with alcohol to clean it off for a test fit – to my mouth. The test failed; the bit was too long and too steep. So back to the files I went. I filed, tested, filed, tested a few times until it felt comfortable in my mouth and looked good to me. Now time to get it shiny again.

I began with a fine/medium grit sanding sponge. It worked very well to get in and around the bit to smooth it a bit more and to take out the file marks. I then began wet sanding with grits 220/320/400. At this point I applied some Novus 2 plastic polish. The Novus line come in three grades: 3 – the most course, 2 – the second, and 1 – the final polish. I began using this product on my motorcycle windshield a few years ago and loved it. I have numbers 1 & 2 but have yet to try 3.

After using the Novus, I began with the micro mesh, wet sanding with grits 1500/1800/2400/3200/4000 (I’m not looking at the numbers but I believe that was the correct grit numbers. I applied the Novus 2 again and then polished with micro mesh 6000/8000/12000. Now it was off to the buffer with pipe and stem.

I buffed the pipe several times around with Tripoli to get the color just where I liked it. I then moved onto the white diamond for both the pipe and stem. I took a little extra time on the stem to make sure I fine tuned the button a little more, testing it every so often. After buffing the pipe and stem with white diamond I changed to a metal buffing wheel with blue rouge to polish the metal tenon on the stem; I hate a nicely polished stem that hasn’t has the metal (if there is any) not polished, too.Greg13

Greg14

Greg15 Several coats of carnauba wax was then applied to both pipe and stem. I did the final buffing with my “mushroom” on my cordless drill. I like the control I have with it and also the fact it’ll reach almost anyplace with little effort. The final touch was to polish the rustication with a soft toothbrush to make sure I didn’t have any wax residue left.Greg16 There were, and still are, some fills in the pipe but I wasn’t particularly concerned with them. Several are on the shank and it would have been “dicey” to try to fix them without ruining the nomenclature. There was one fill on the side that fell out, presumably from the softening of the putty in the alcohol bath. I missed that one until after I had already started smoking it.  If I’d seen it earlier in the process I would have fixed that one but now it’s there for the duration.Greg17 (I couldn’t get a good focused shot of the finished button.)