Blog by Steve Laug
Earlier in June I received an email regarding restoring some pipes for her husband. Here is here email.
I have one Calich and one Dunhill pipe which my husband destroyed using a torch lighter on. I am wondering if it is possible to get them restored somehow. If you want to have a look I can send pics.
I wrote and asked for photos of the pipes. She wrote that there were actually 5 pipes not two and included photos of all five. I asked her if she was wanting to sell them or just repair them. Here is her response.
No… I don’t want to sell (yet) he’s 86 and has taken up smoking his pipes again. He was using a torch lighter until I discovered and replaced with proper pipe lighters. For now, I’m wondering if it’s possible or even wise to restore them. – Kathleen.
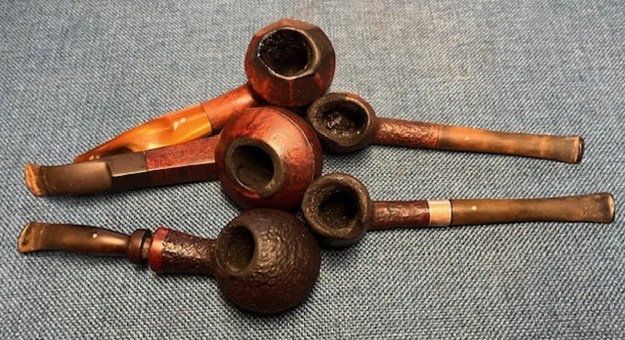
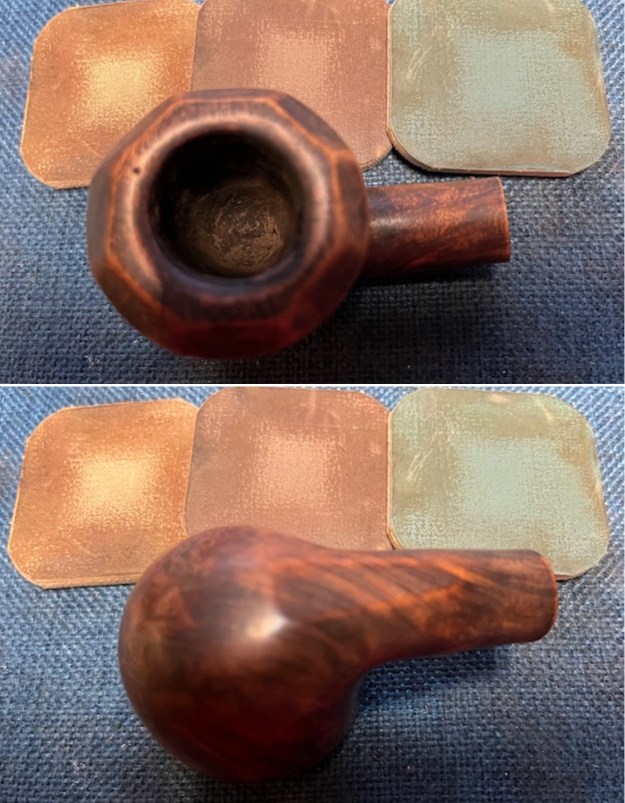
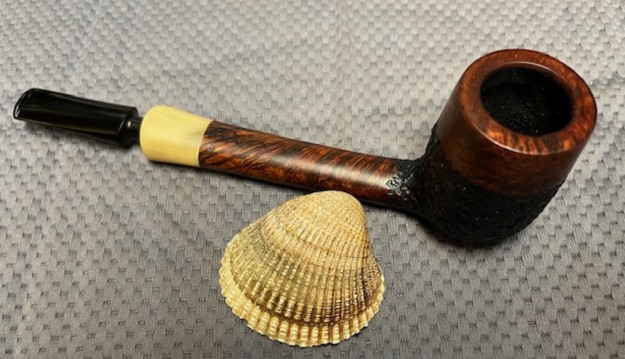
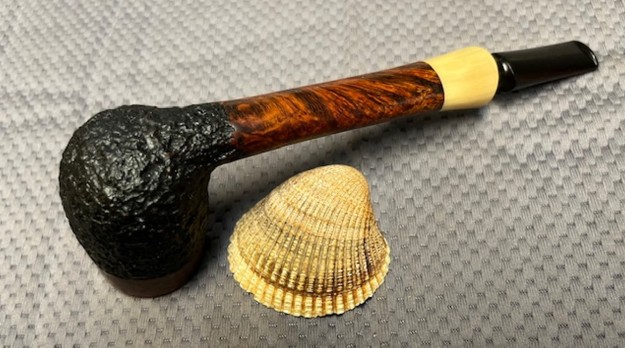
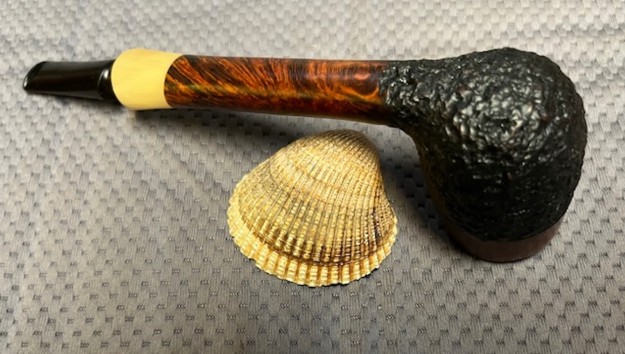
I replied to Kathleen and invited her to send the pipes to me in Vancouver. They arrived just before I left for my visit with my Dad in Idaho. Here is what I found when they arrived. There were three Caliches, a Dunhill, and an Ed Burak Connoisseur. The Calich Pipes included a rusticated straight Opera, a bent Rhodesian with an octagonal rim cap and an acrylic stem. The Dunhill was a sandblast Billiard with a repair band on the shank. The Ed Burak Connoisseur was a bent Bulldog. All had rim top damage from being lit with a torch lighter. Some were in worse condition than others. The worst were the Calich Opera and the Dunhill Billiard which had torch damage on the left side of the rim and down the bowl side. The others had varying degrees of burn damage. I set them aside until I returned home from my visit. Here are the photos that Kathleen sent me of the second Calich pipe – the Rhodesian with the octagonal rim cap.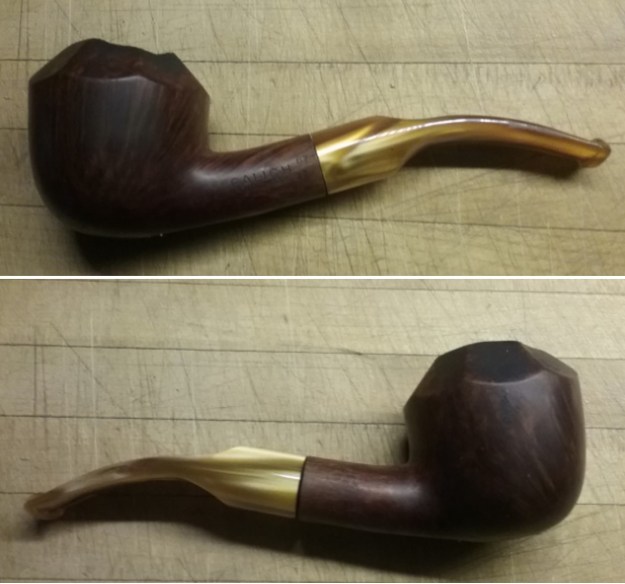
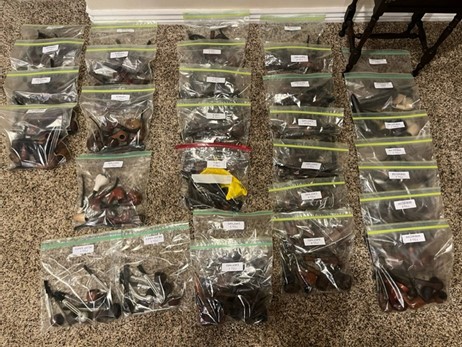
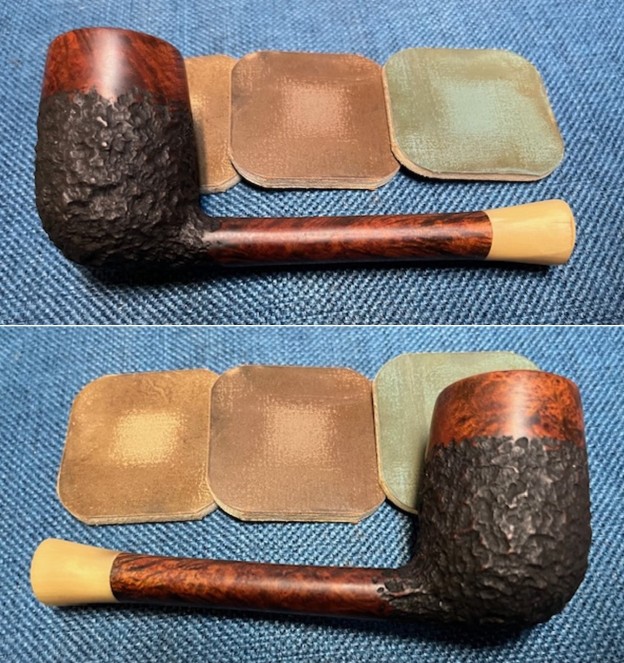
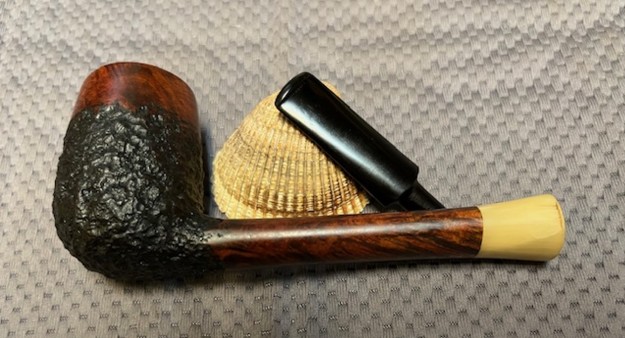
 This morning I took the pipes out of the box and laid the group out on my worktable. I took some photos of the group to show their condition. The photo of the left side of the shank shows the damage I mentioned in the earlier paragraphs. The right-side photo looks very good. The photos from the rim top show a lot of damage and the overall condition of the pipes very clear.
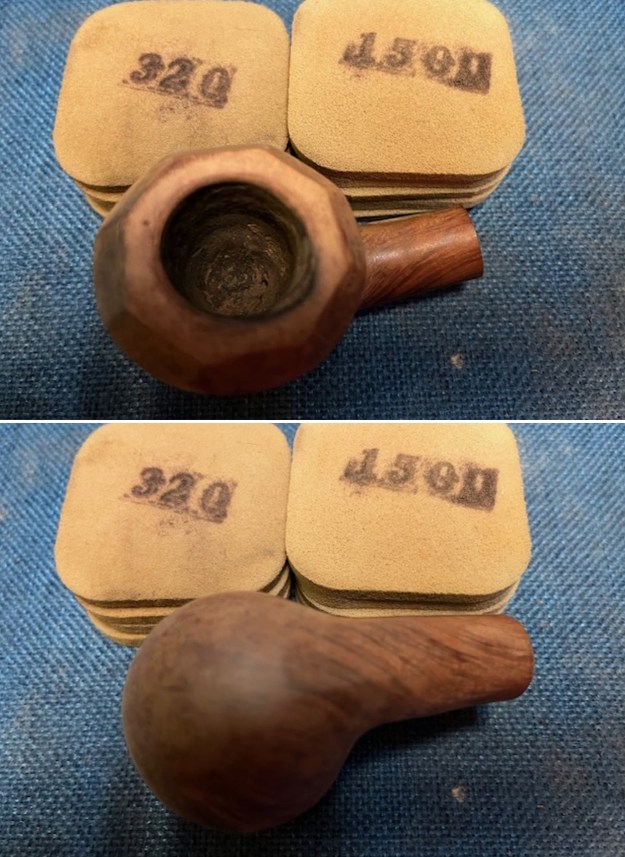
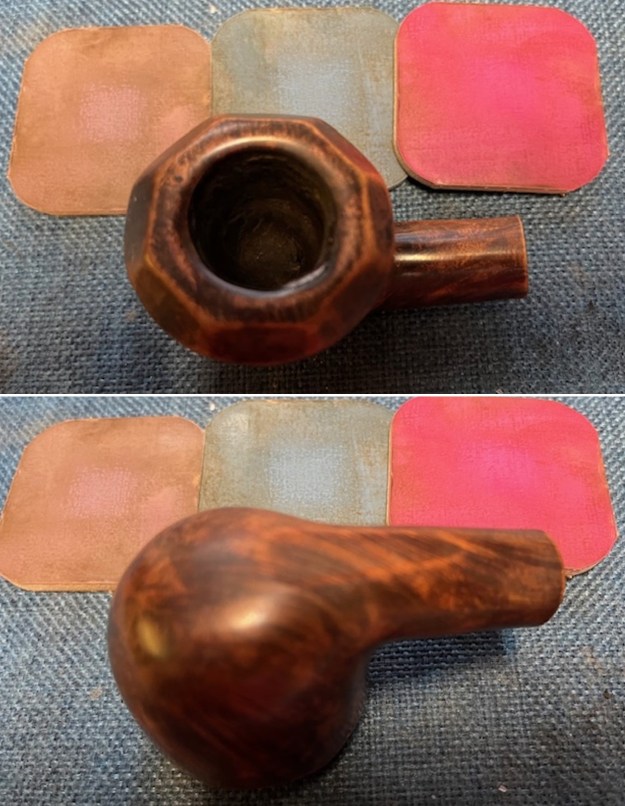
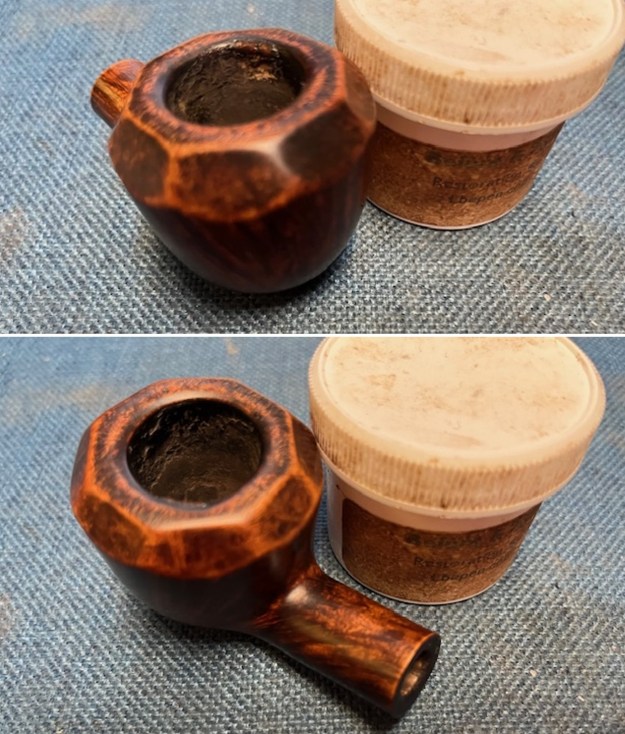
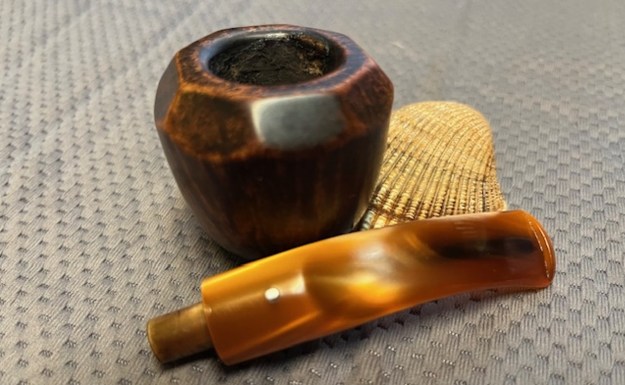
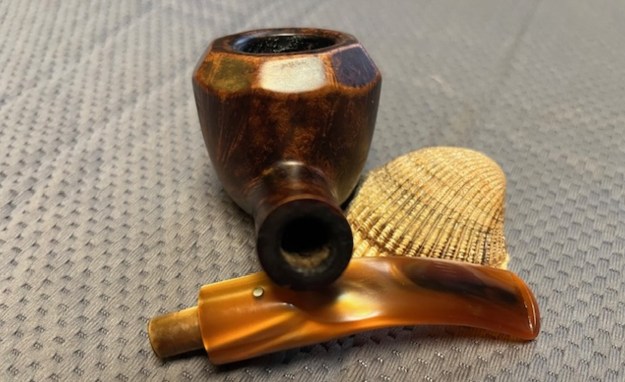
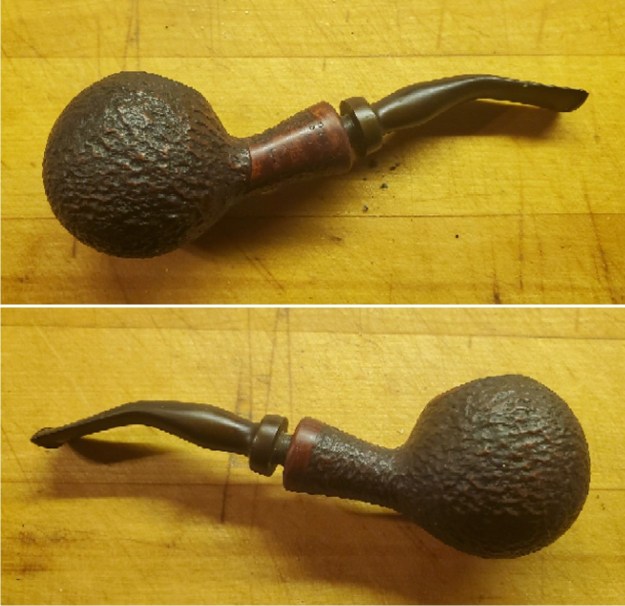
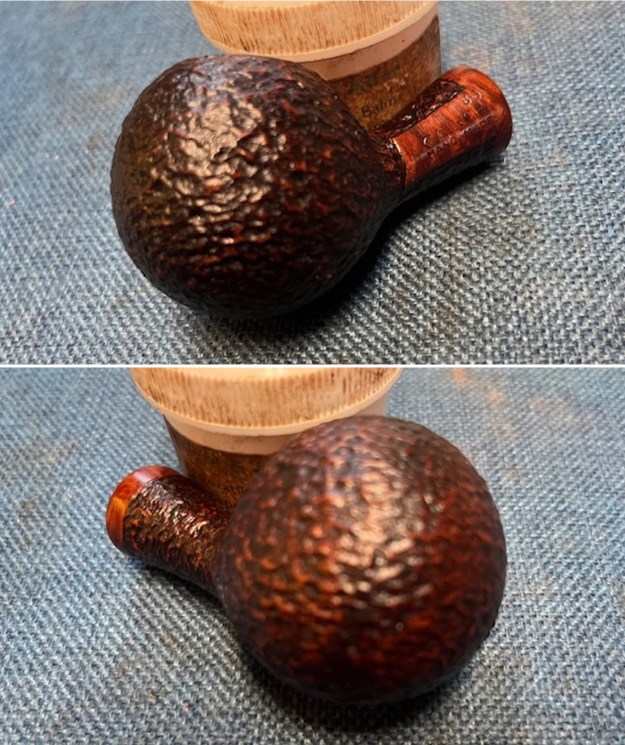
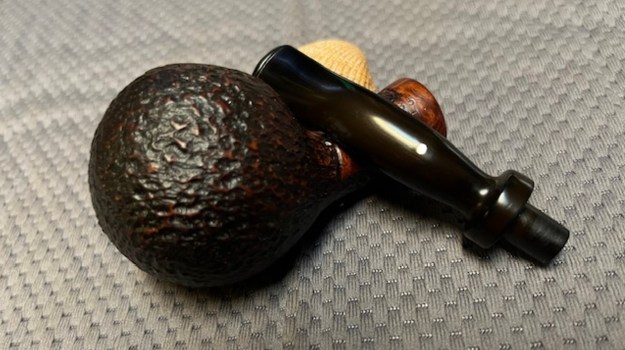
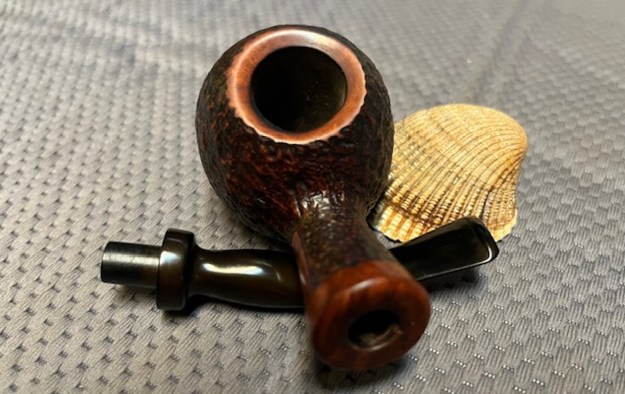
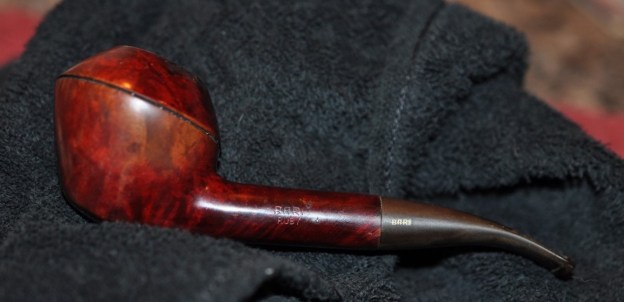
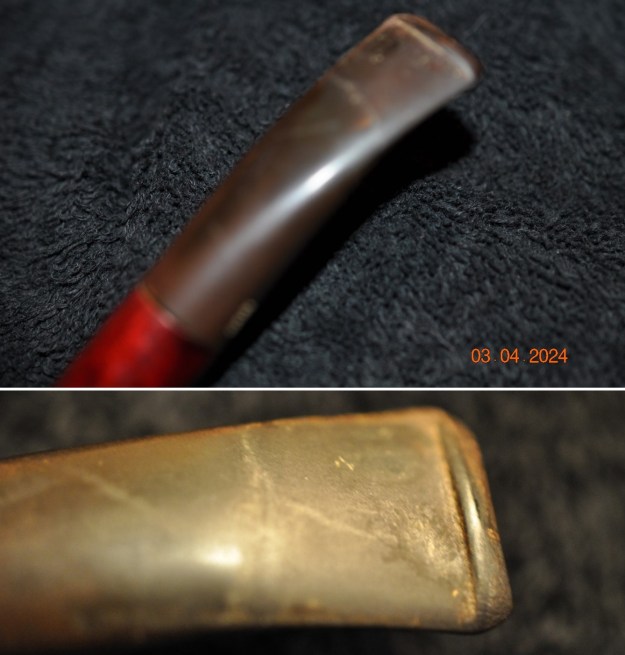
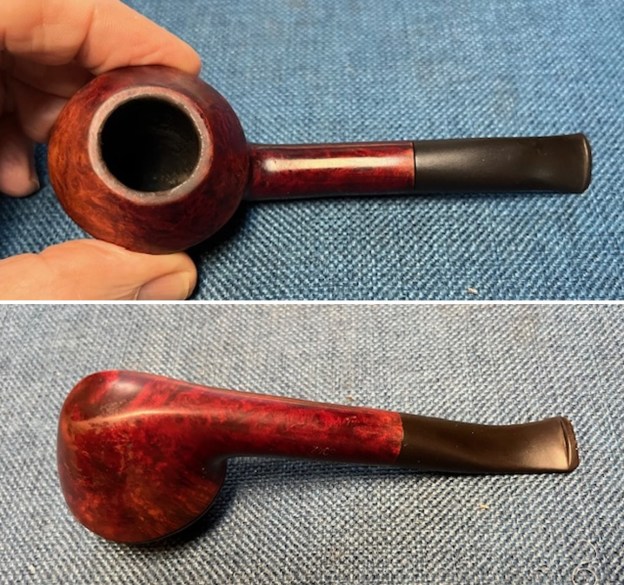
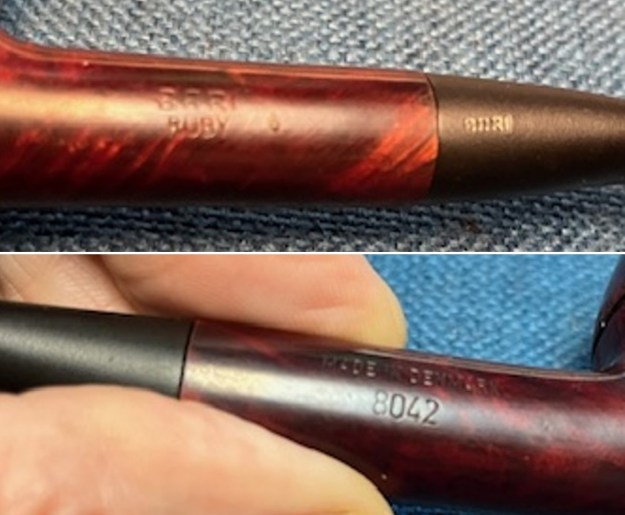
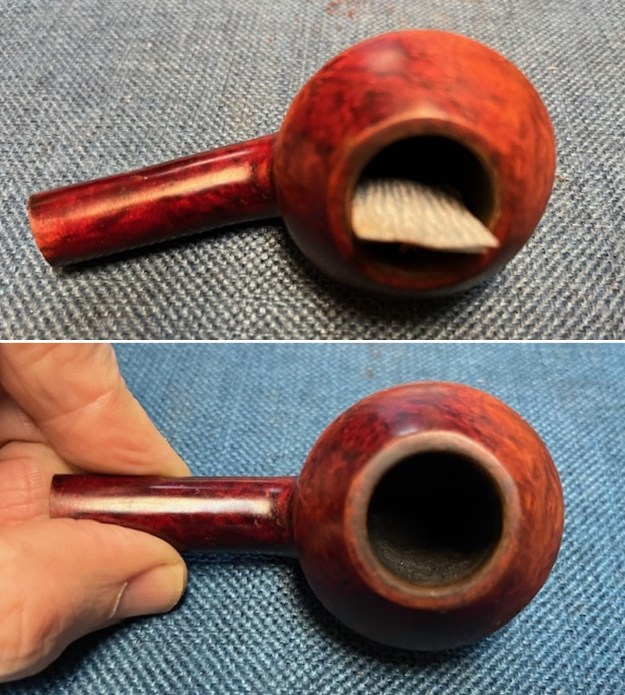
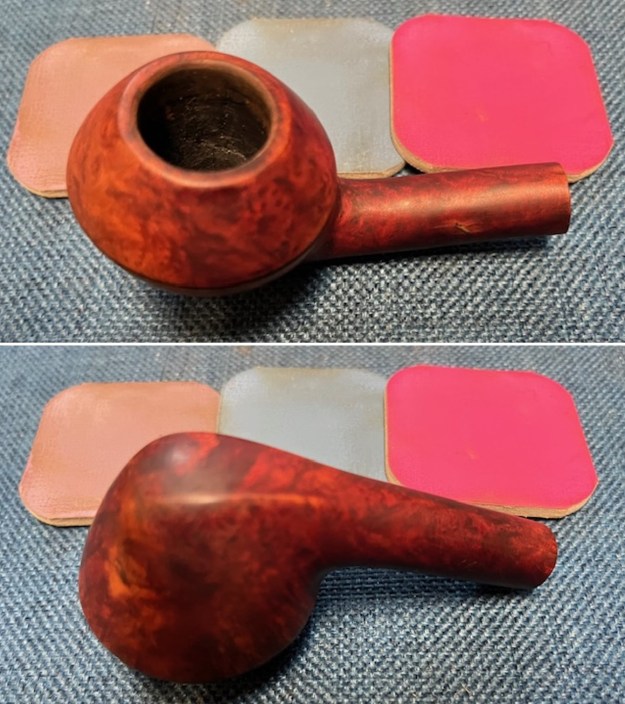
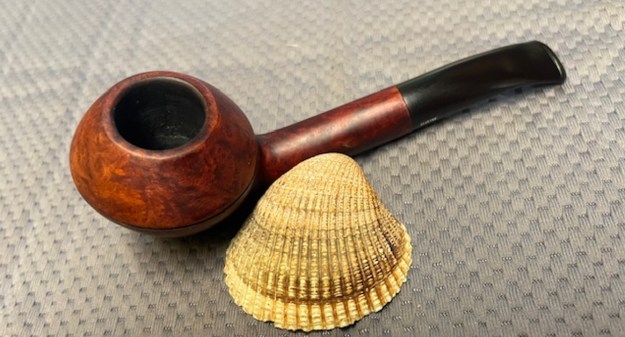
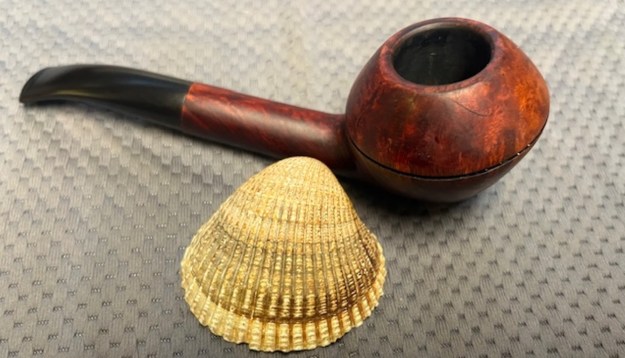
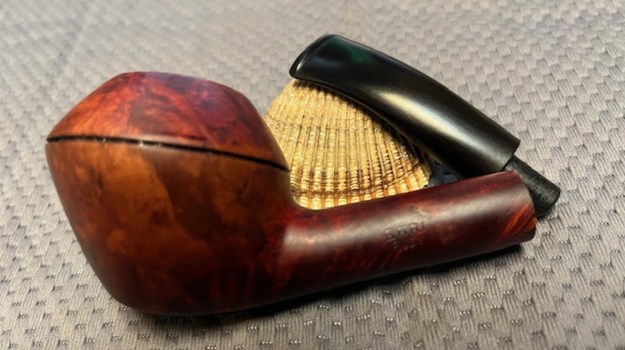
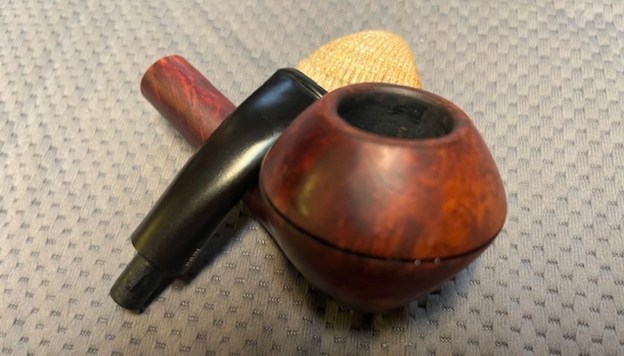
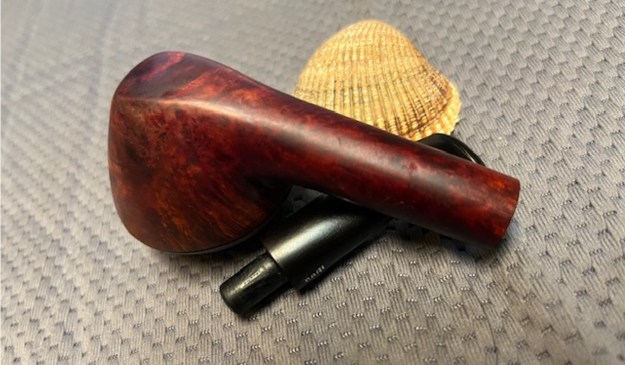
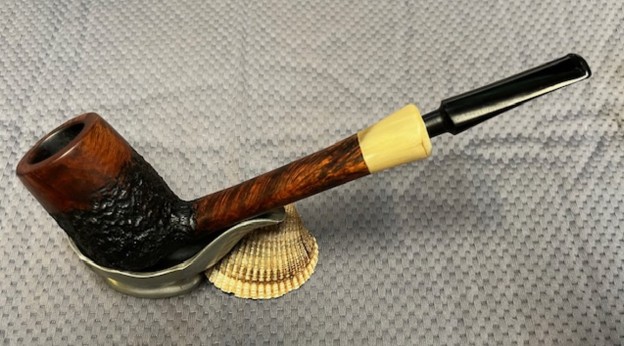
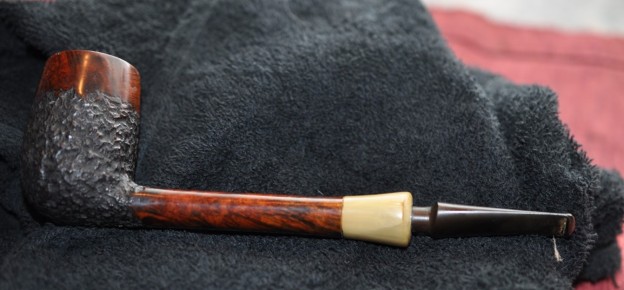
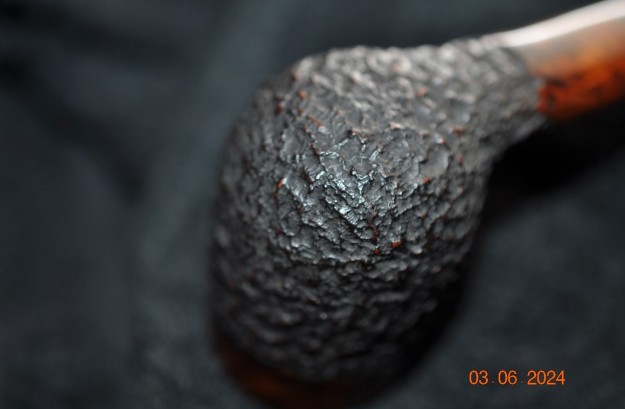
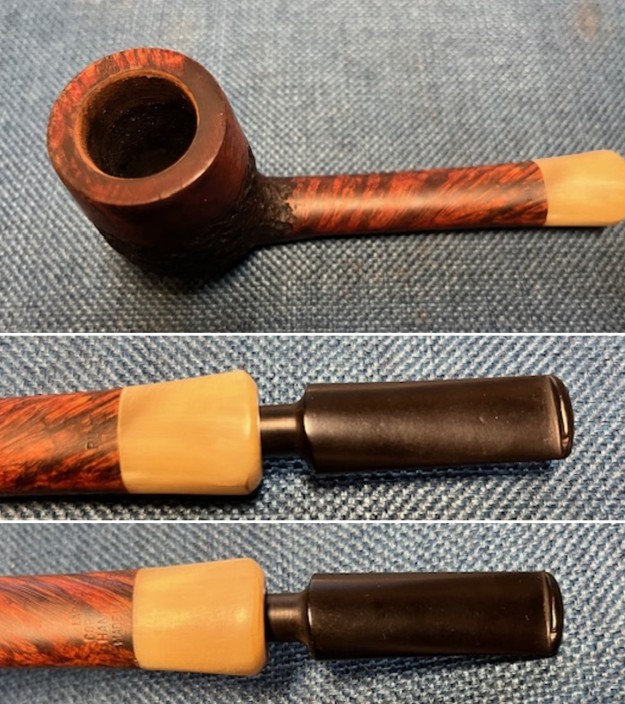
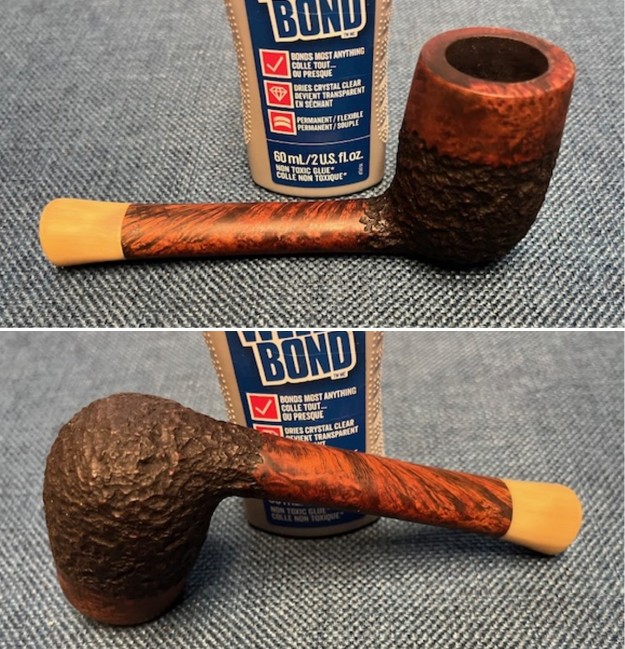
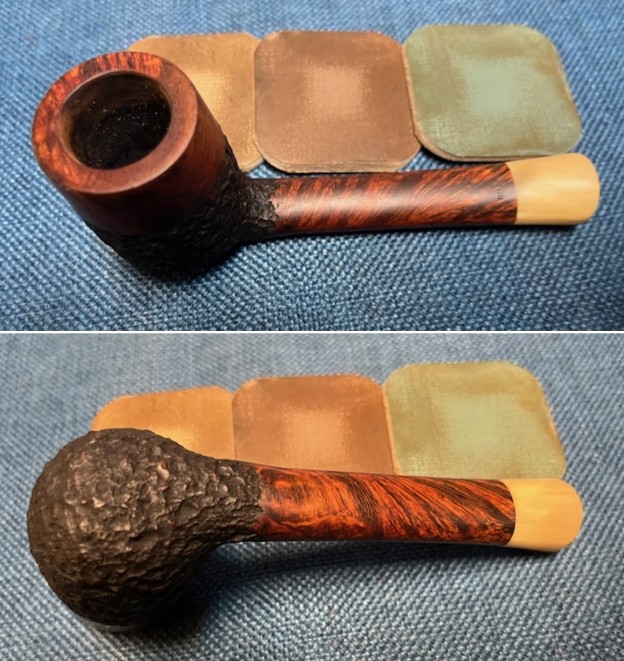
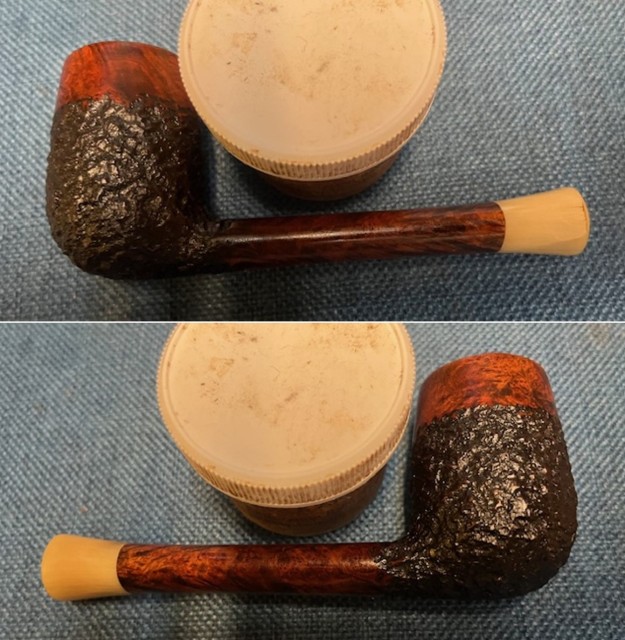
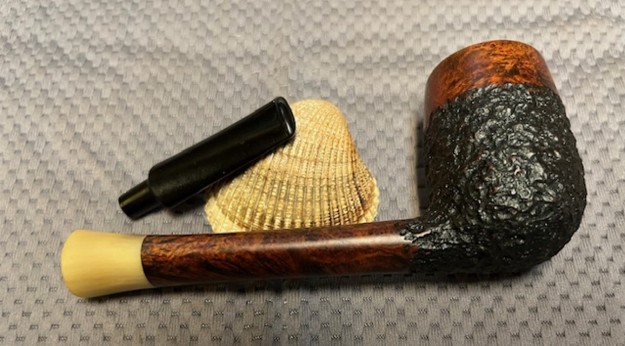
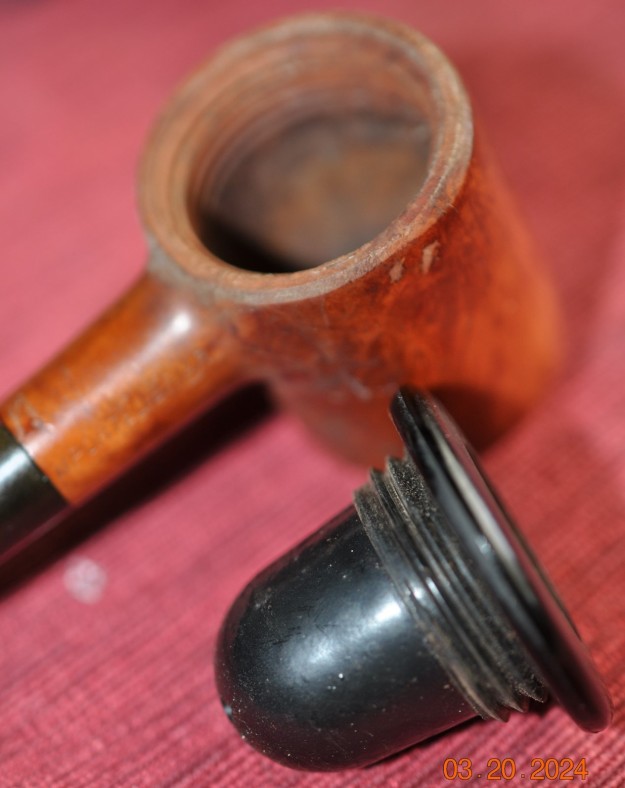
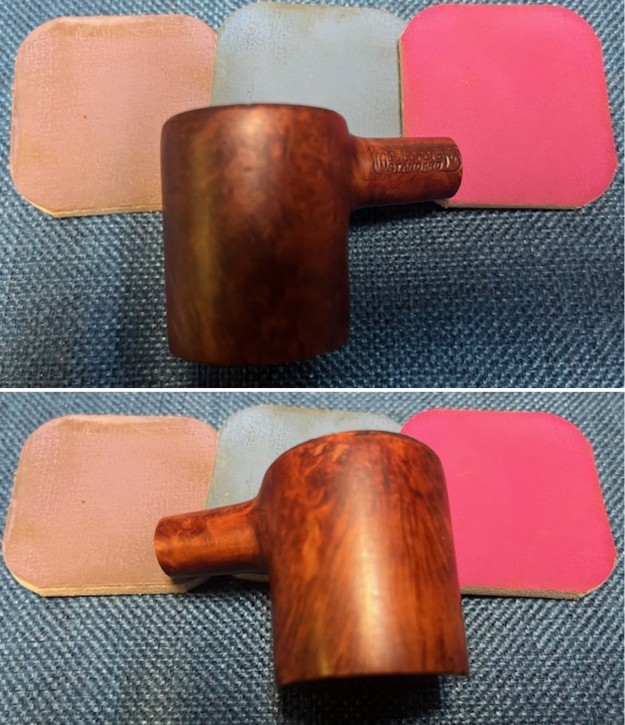
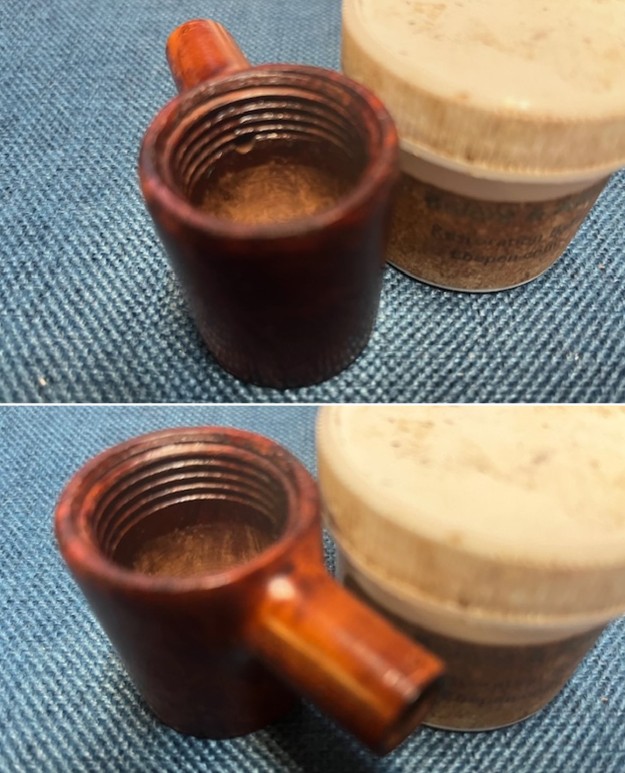
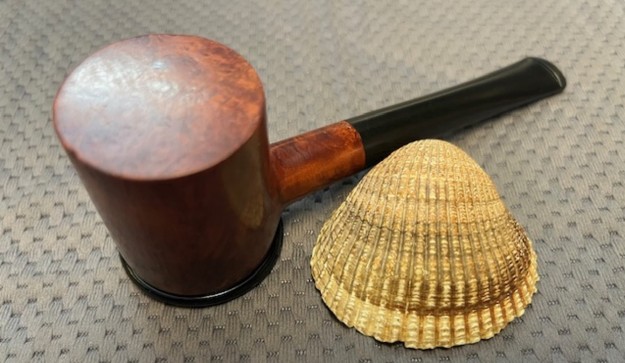
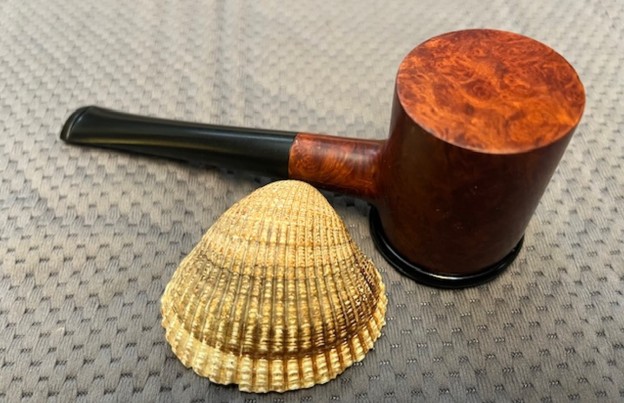
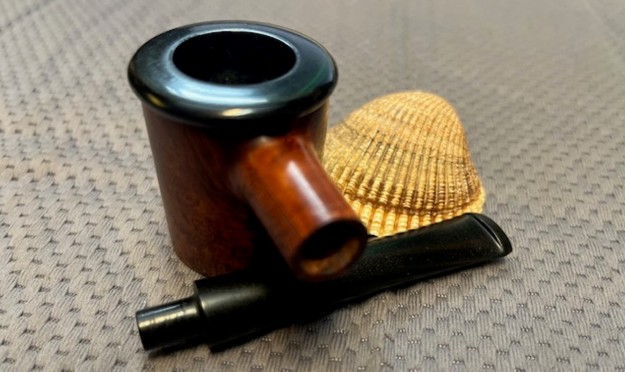
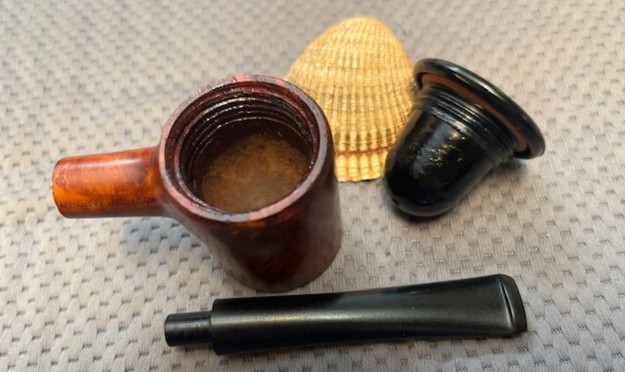
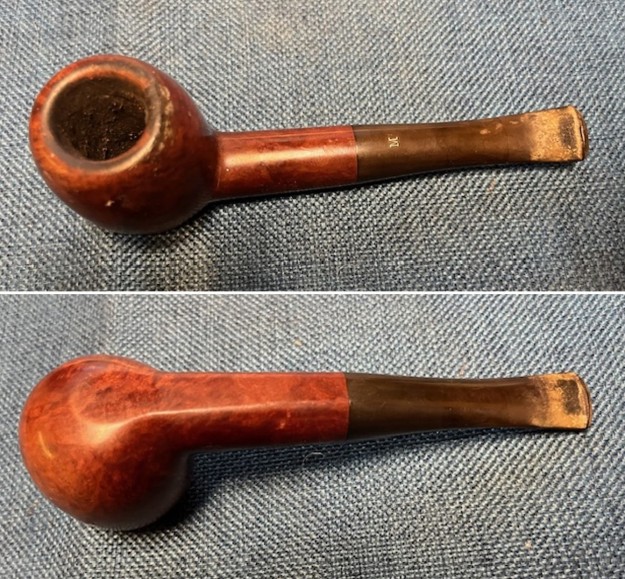
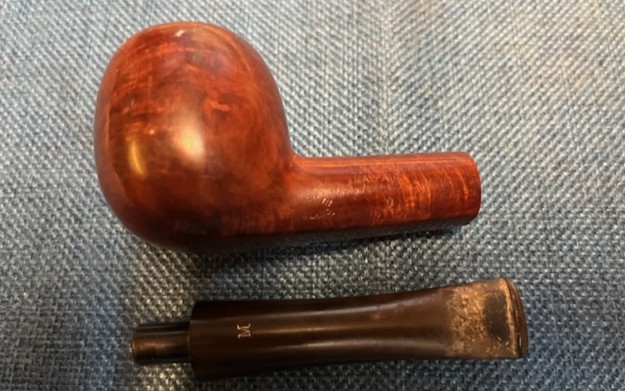
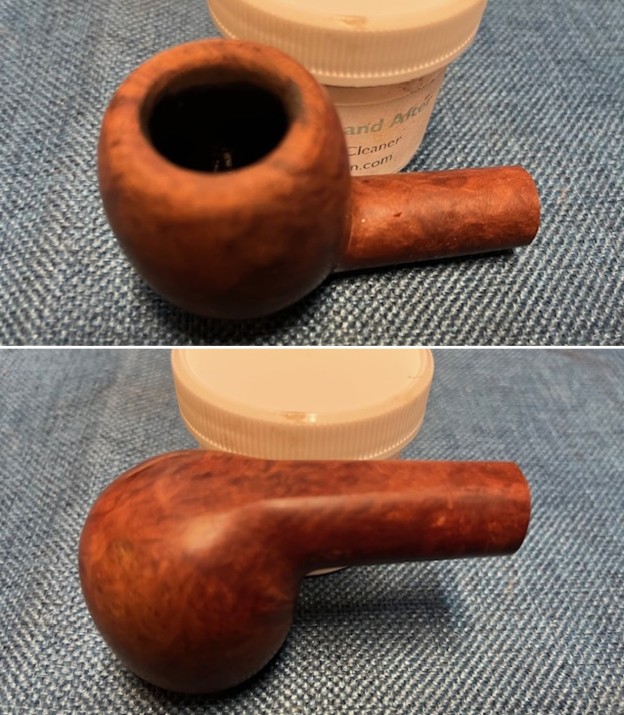
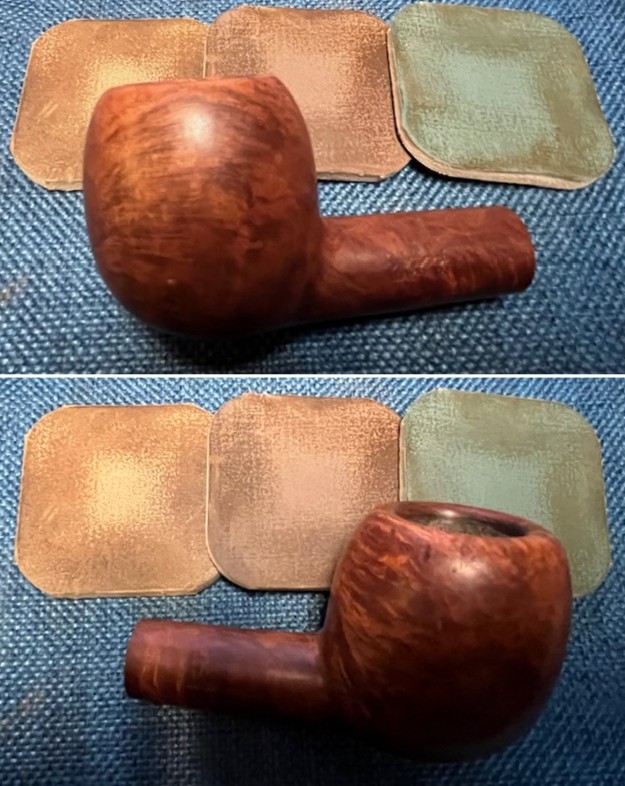
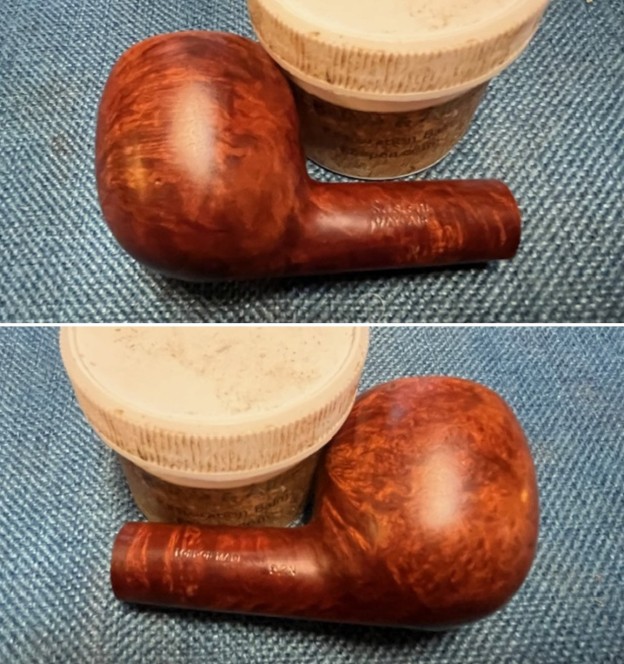
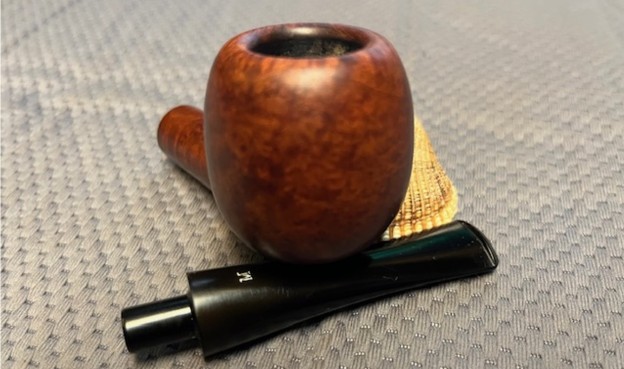
 After looking through the remaining group of four pipes I decided to work on the second of the Calich pipes. This one is a smooth Rhodesian with an octagonal rim cap. It is stamped CALICH [over] Hand Made [over] 11 and just above that is the number 87. The smooth finish Rhodesian had a very thick cake in the bowl and there was a lava overflow on the top. There was heavy burn damage under the lava on the front edge of the bowl toward the front right as well as much heavier burn damage on the left back edge. The bowl was completely out of round. The finish had a lot of oils and tars built up on the sides and the cap. It was oily and sticky to the touch while I held it. There was some burn damage on the front of the bowl on one of the octagonal panels. The shank had a thick coat of tars and oils and the stem had a thick tar build up as well so its fit in the shank was very sticky and dirty. The stem itself is variegated gold acrylic with a single silver dot on the topside of the saddle. It was dirty and had some deep gouges on the surface of the stem ahead of the button. There were overflowing tars on the smooth shank end around the fit of the tenon in the mortise. A lot would be revealed once I had cleaned it. I took photos of the pipe before I started my cleanup work.
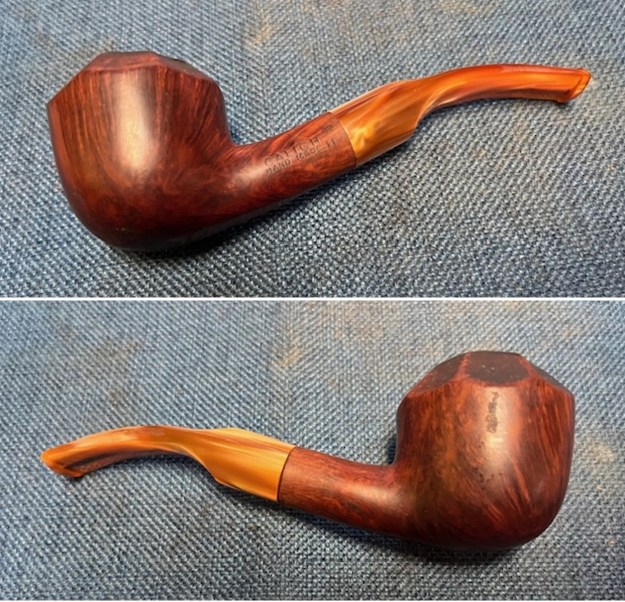
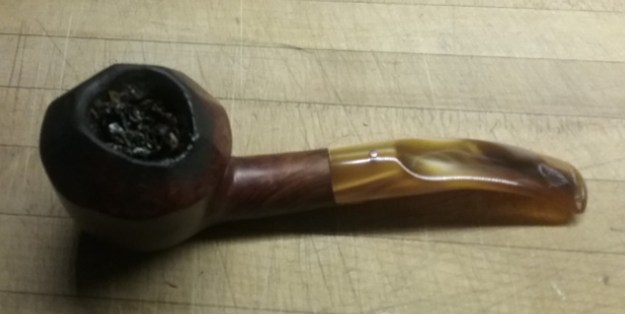
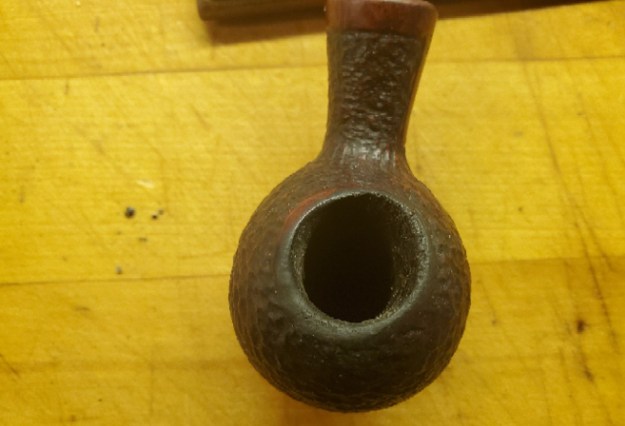
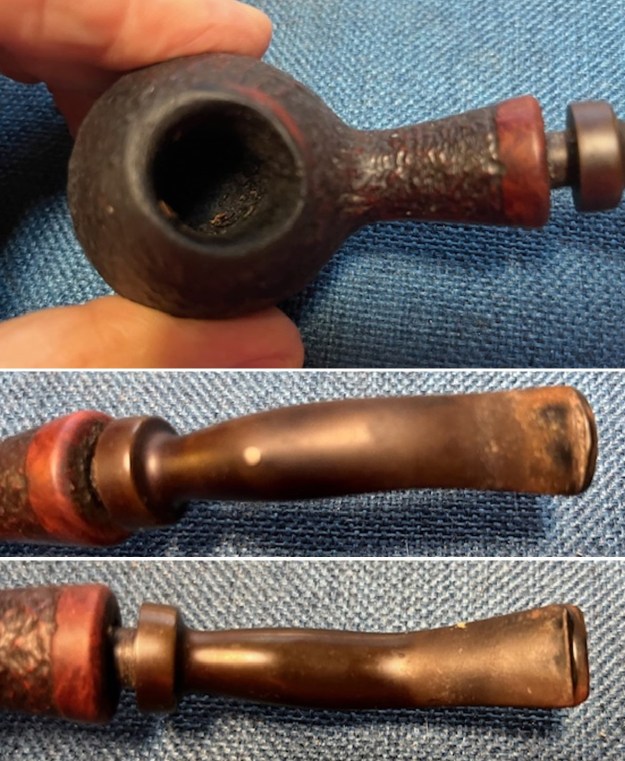
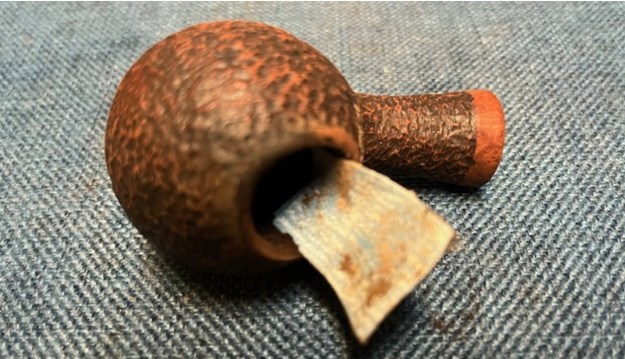
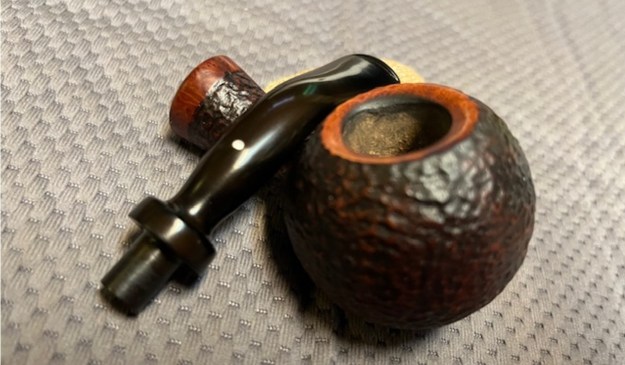
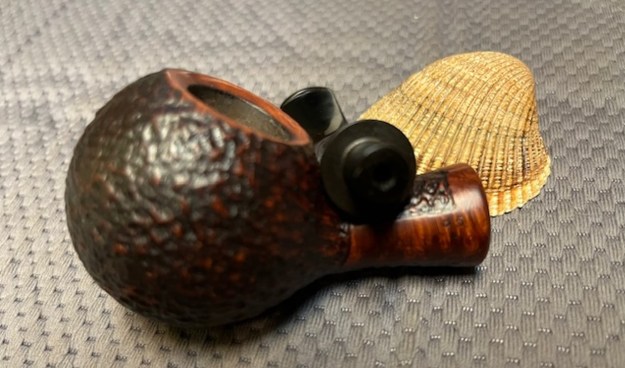
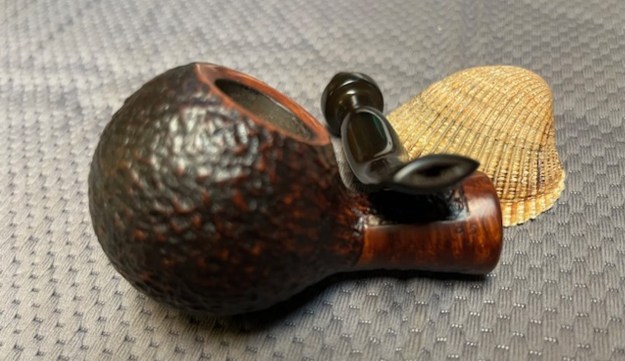
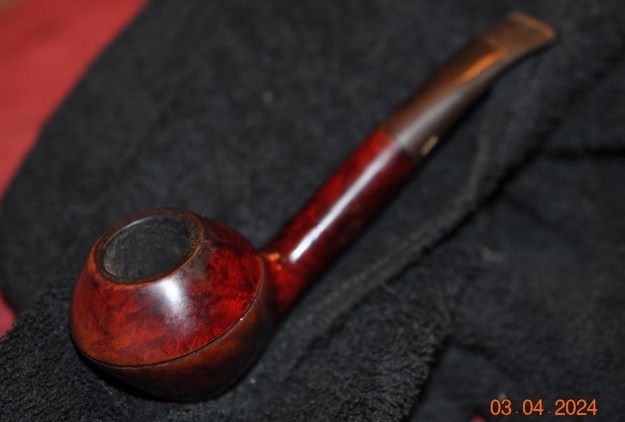
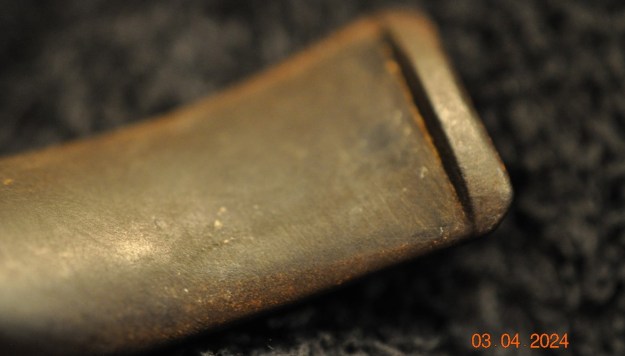
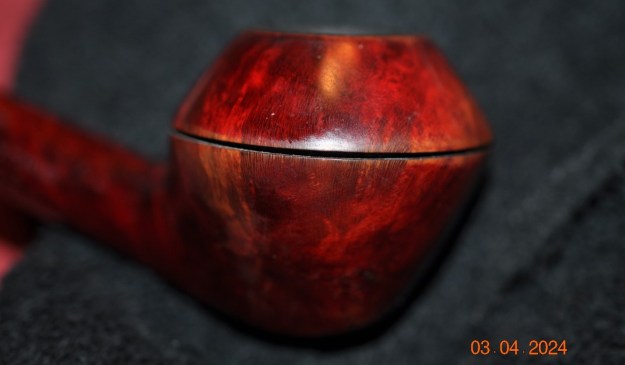
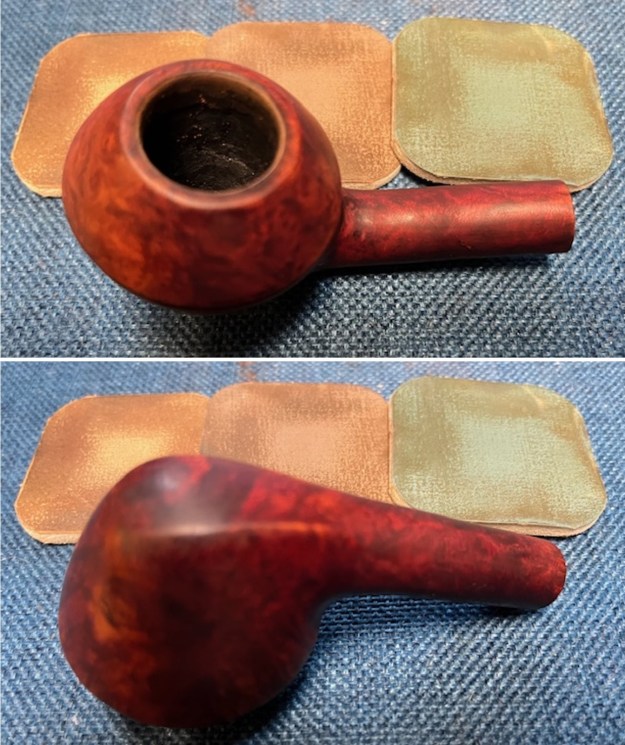
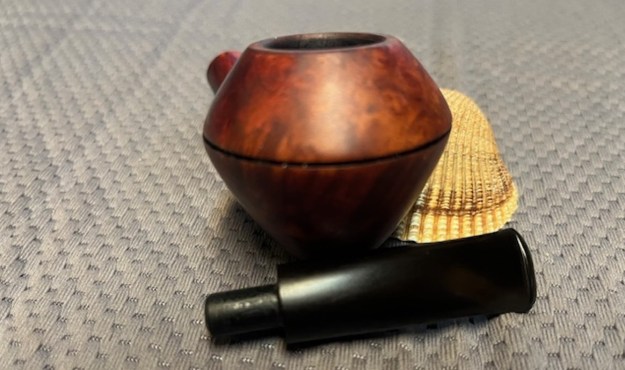
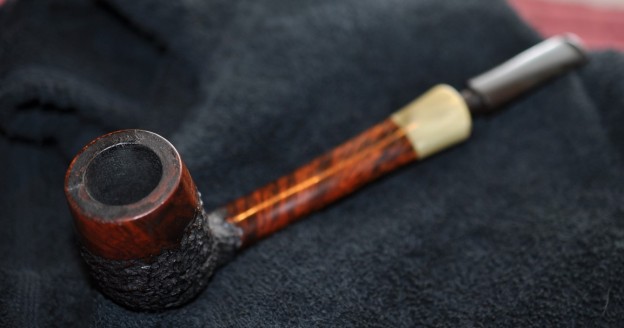
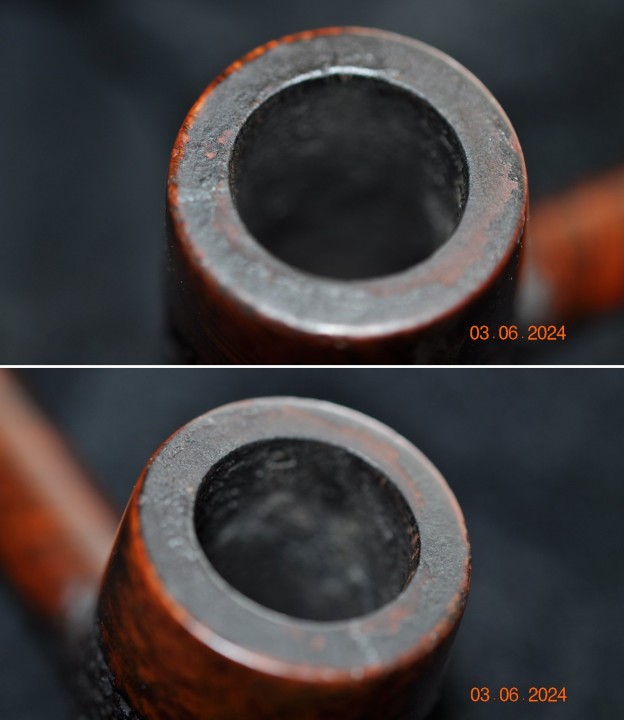
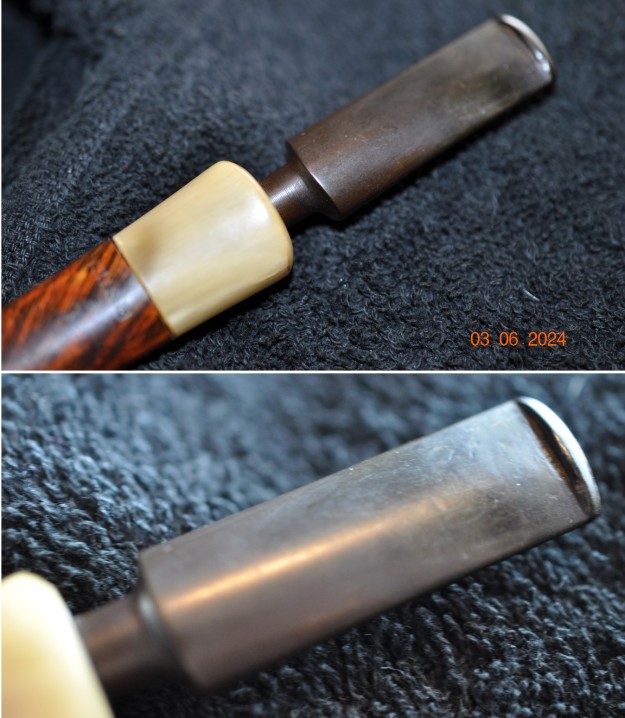
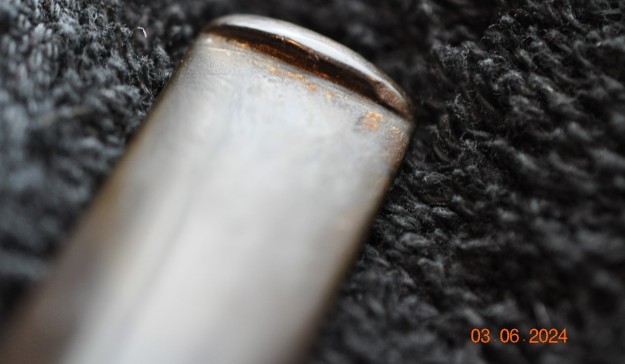
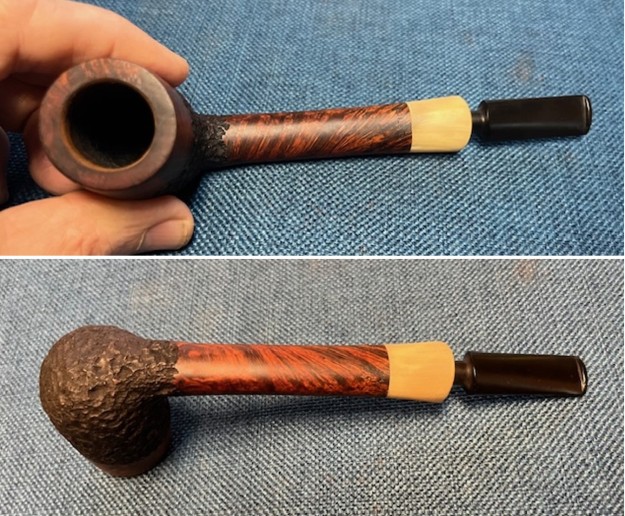
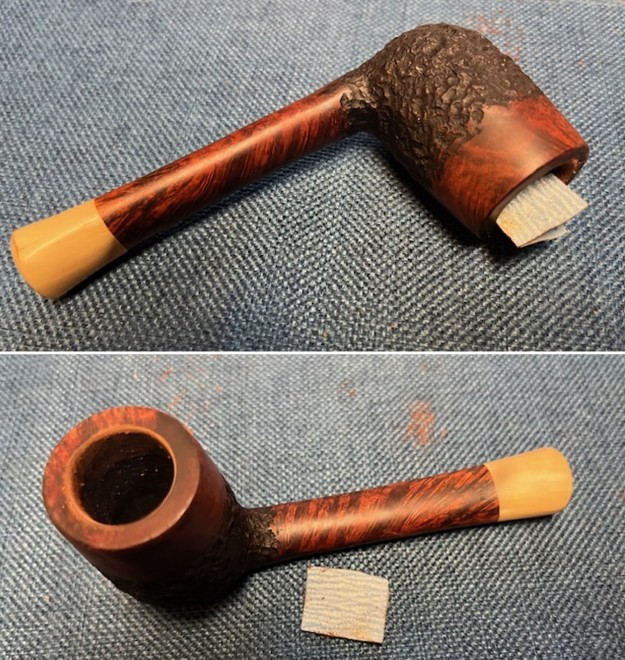
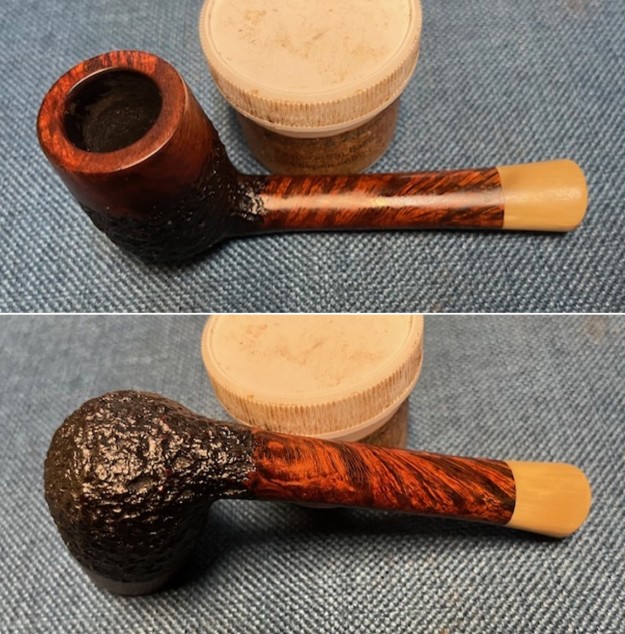
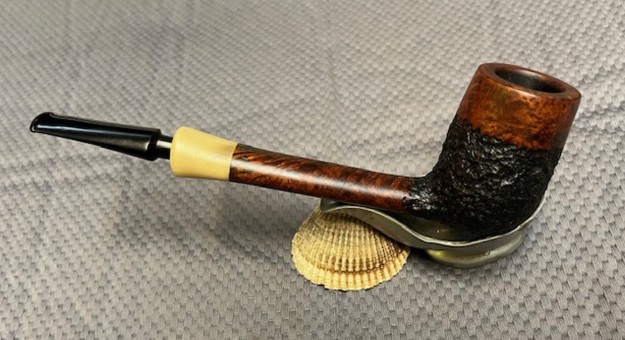
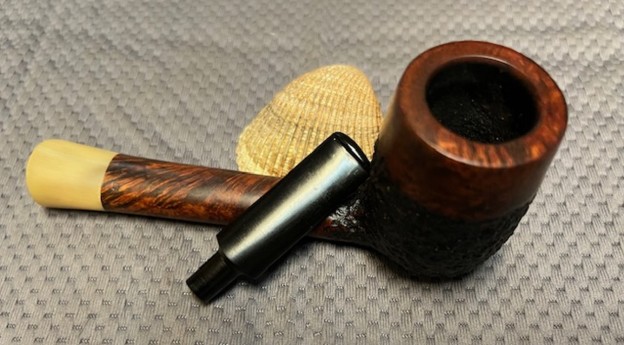
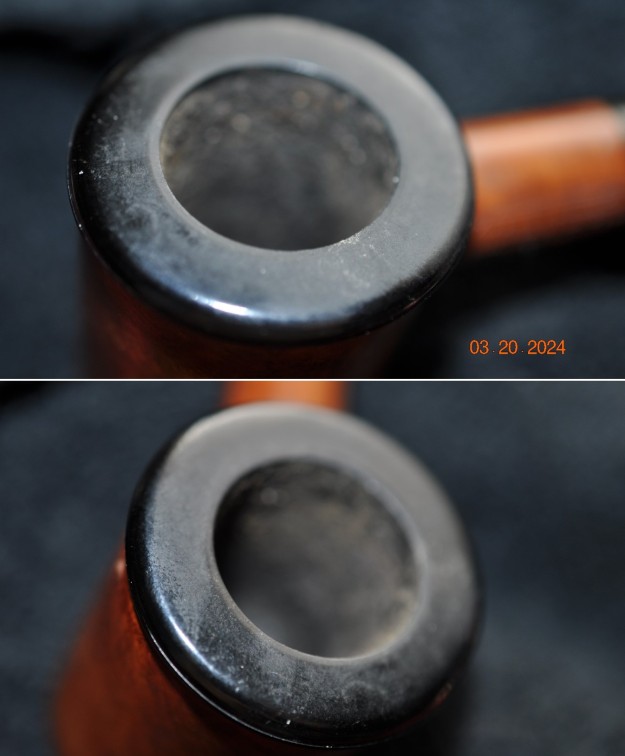
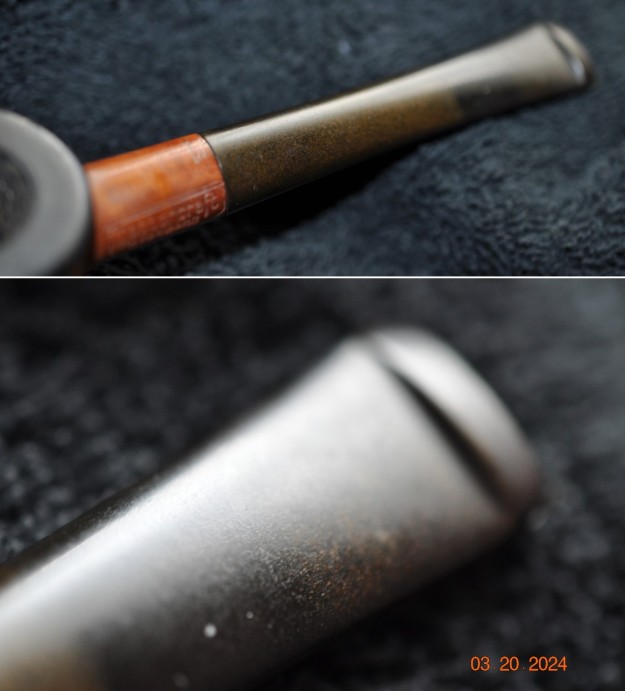
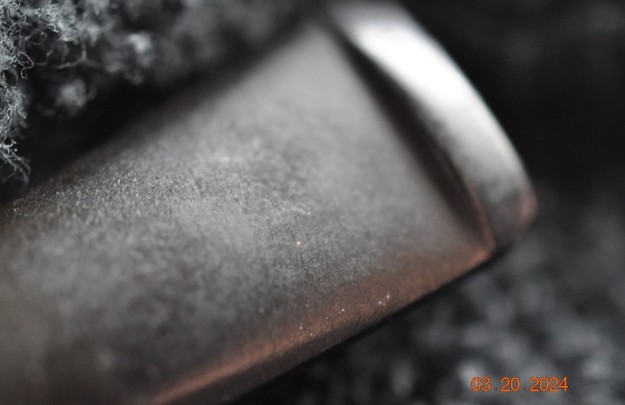
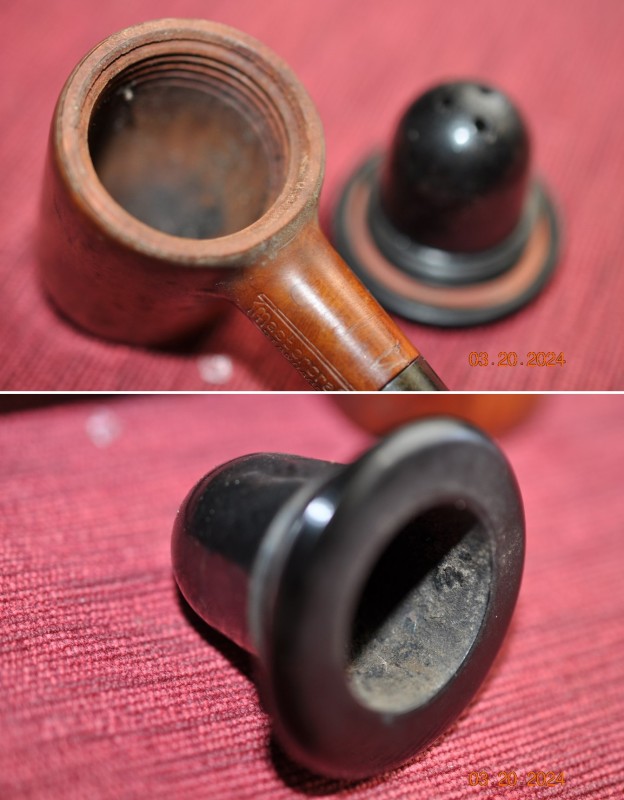
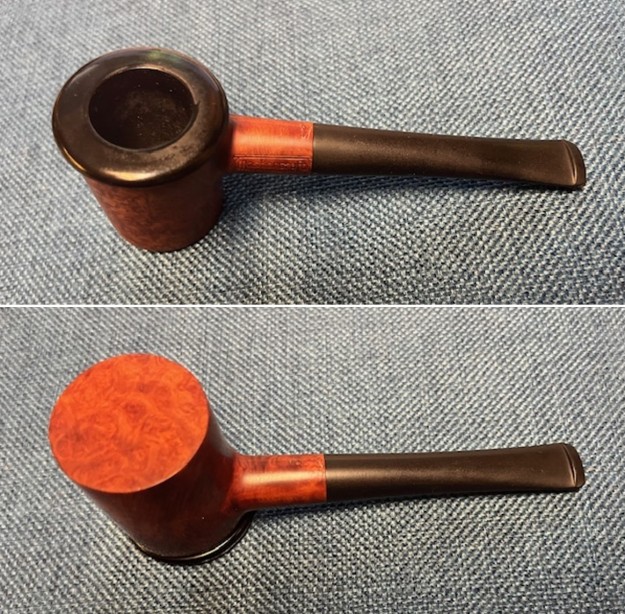
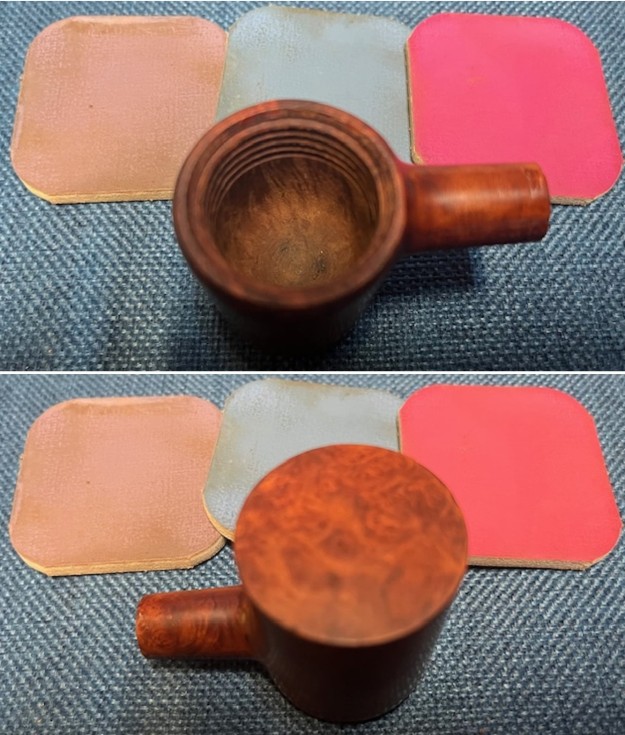
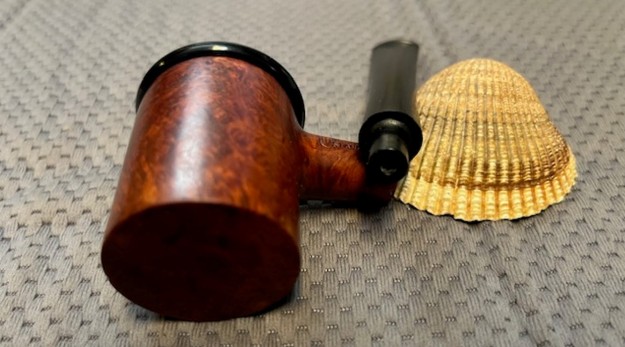
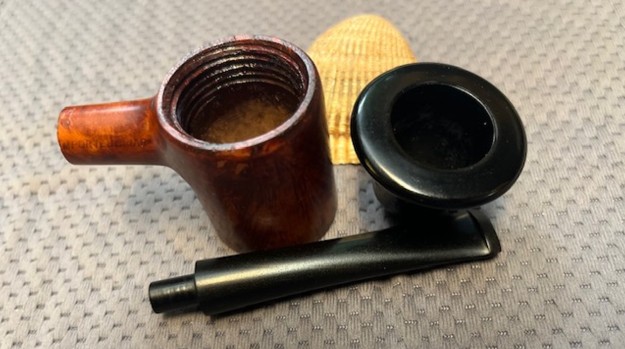
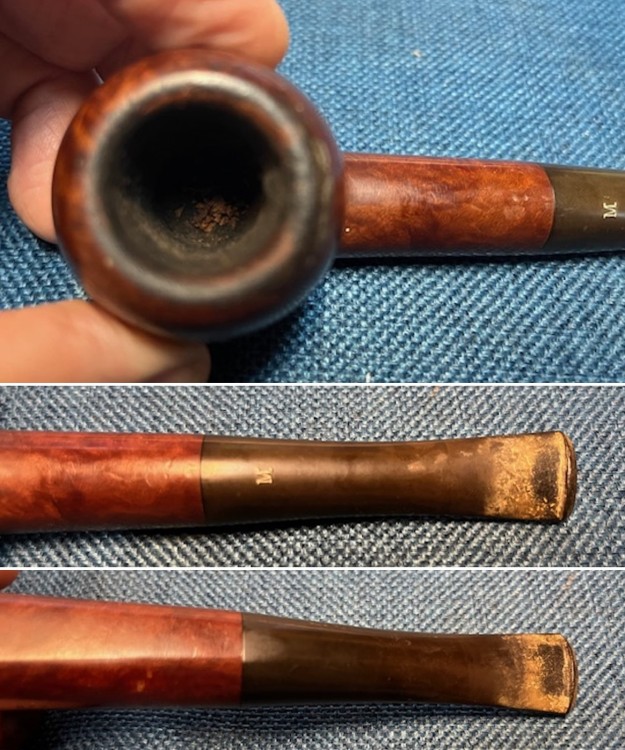
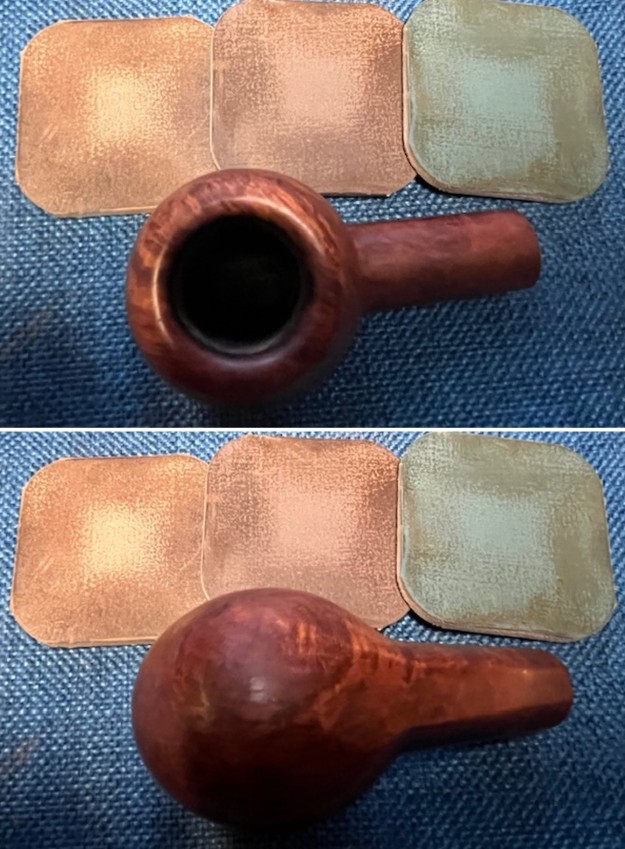
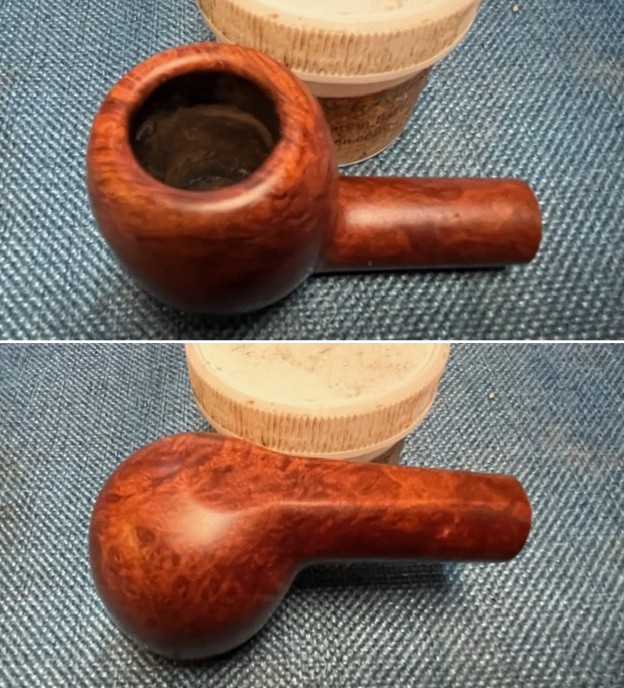
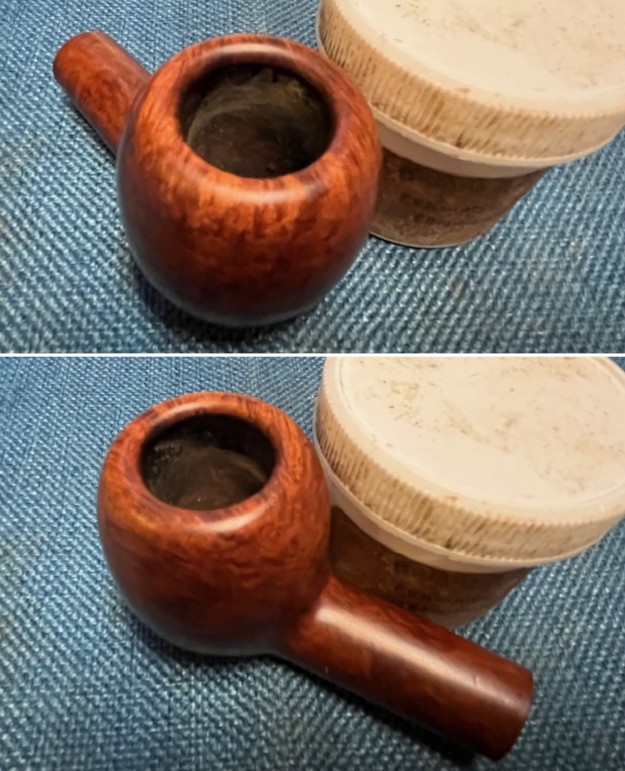
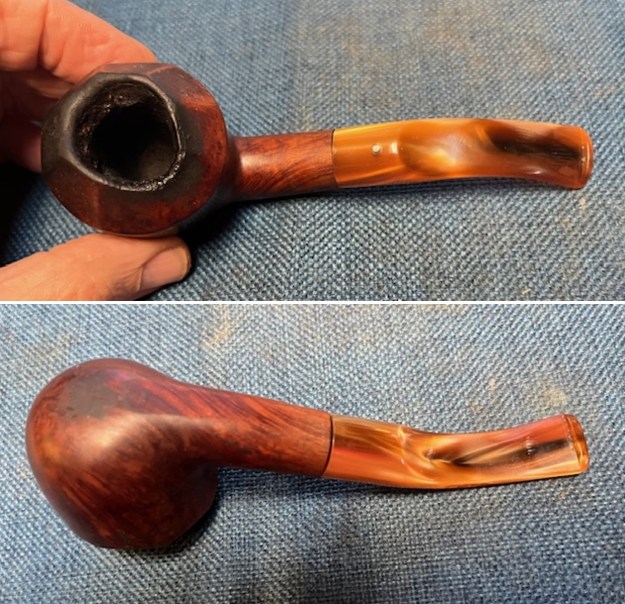 I took a close-up photo of the bowl and rim top to show its condition. The inside of the bowl was heavily caked with a wet oily tobacco. The rim top had damage on the front right in the photo below as well as on the back left. The back left side is the worst as it is quite thin and the bowl is out of round. It left a mess for me to clean up. The stem was also is a mess. There was some tooth marks and dents on the top and underside ahead of the button. There was a thick coat of calcification and oxidation on the stem. The silver dot on the stem top was tarnished but very visible.
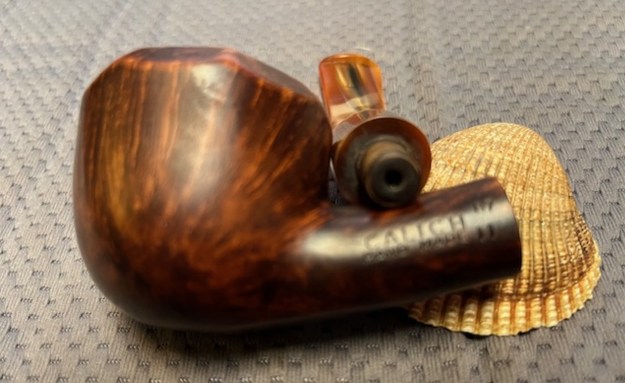
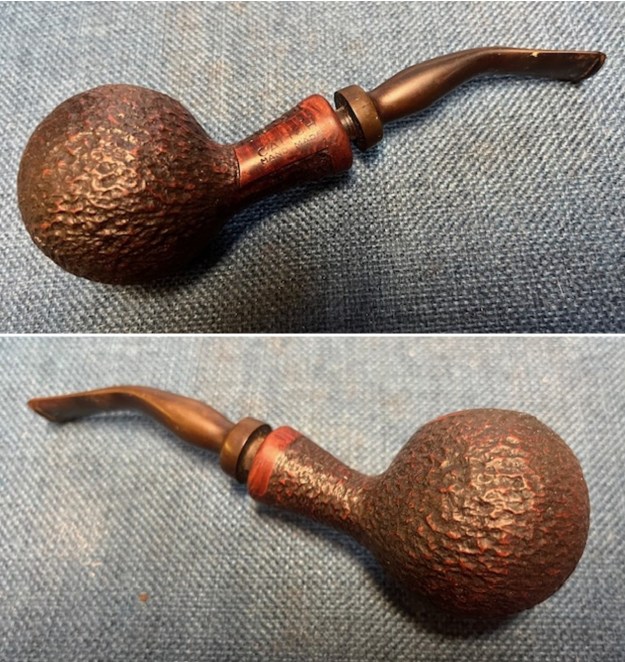
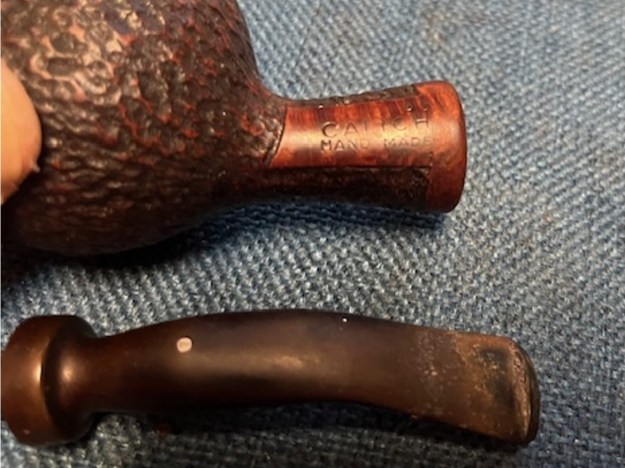
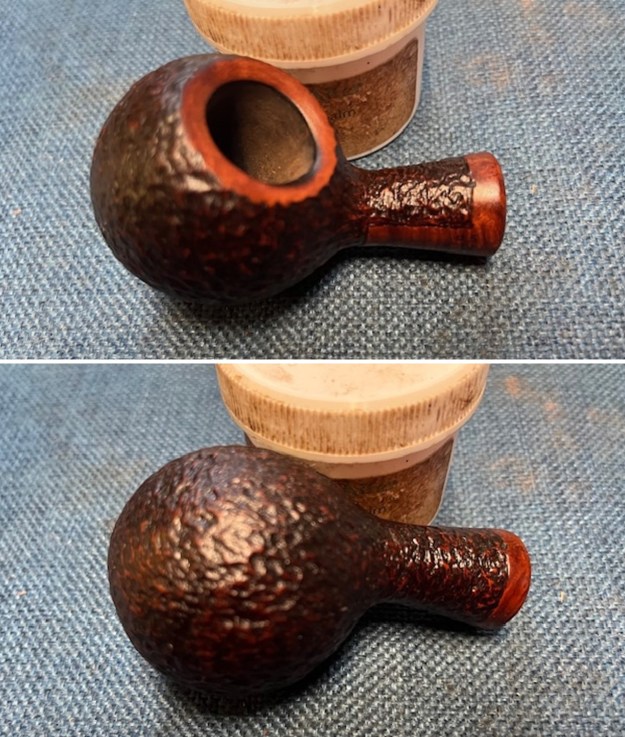
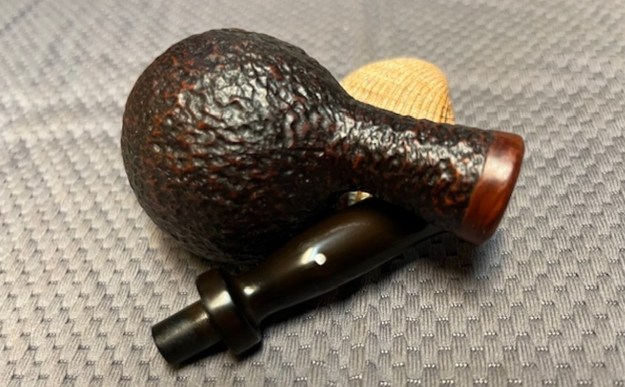
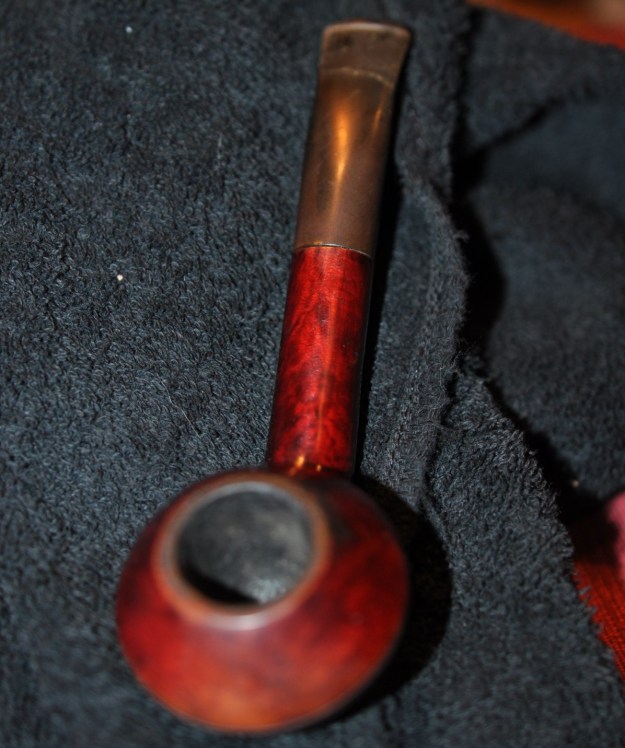
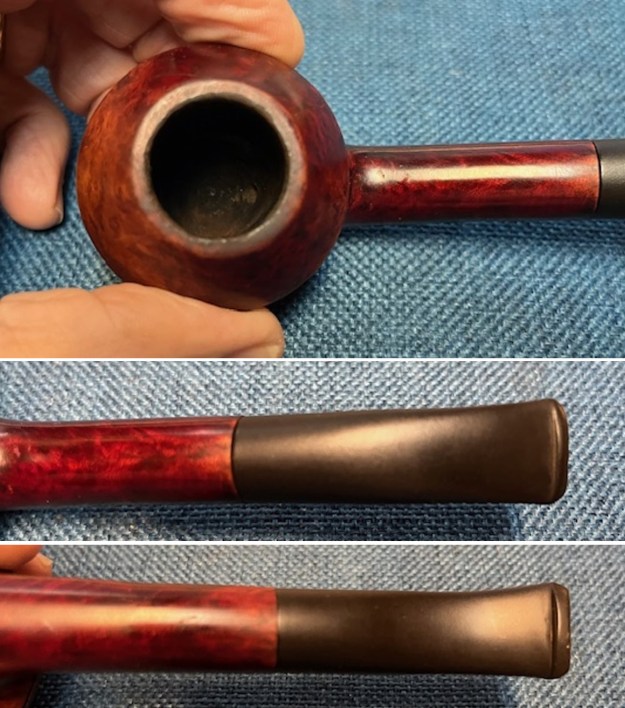
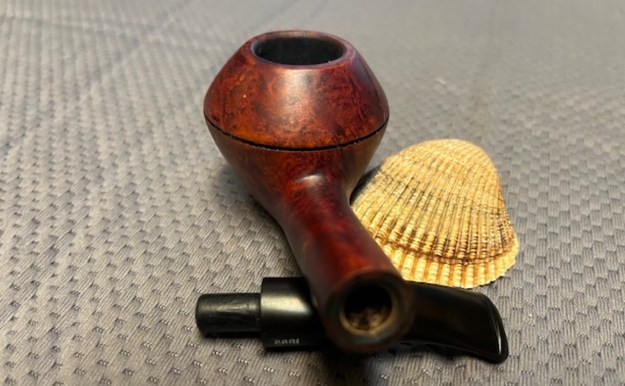
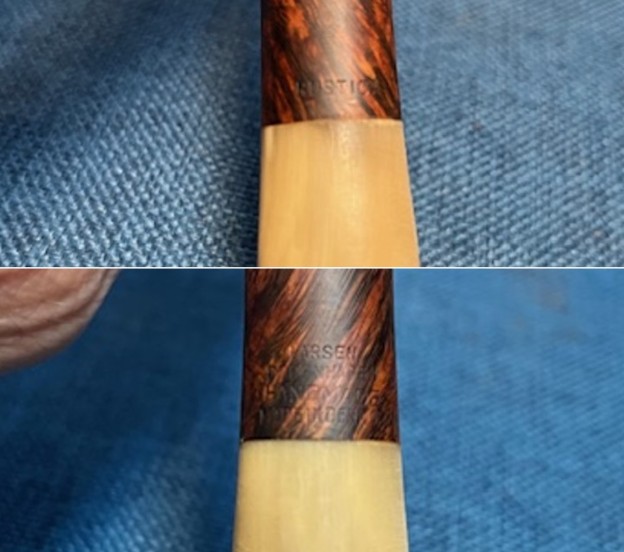
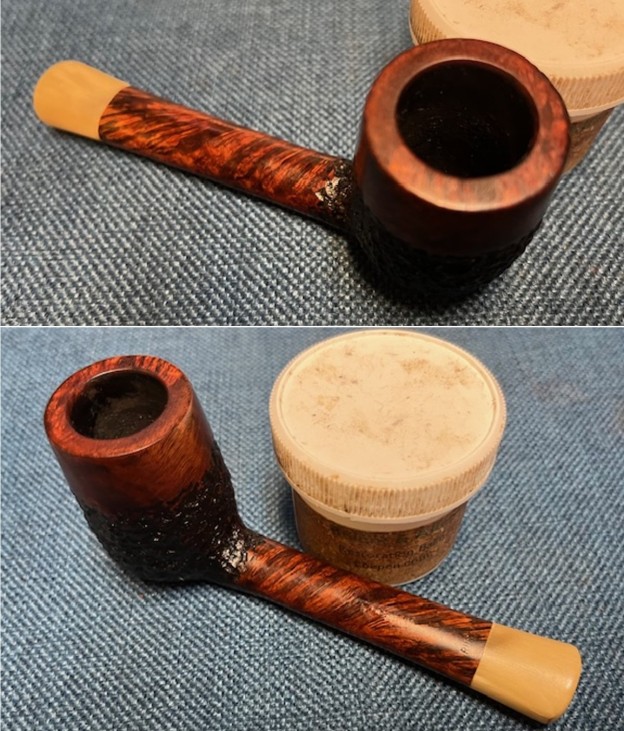
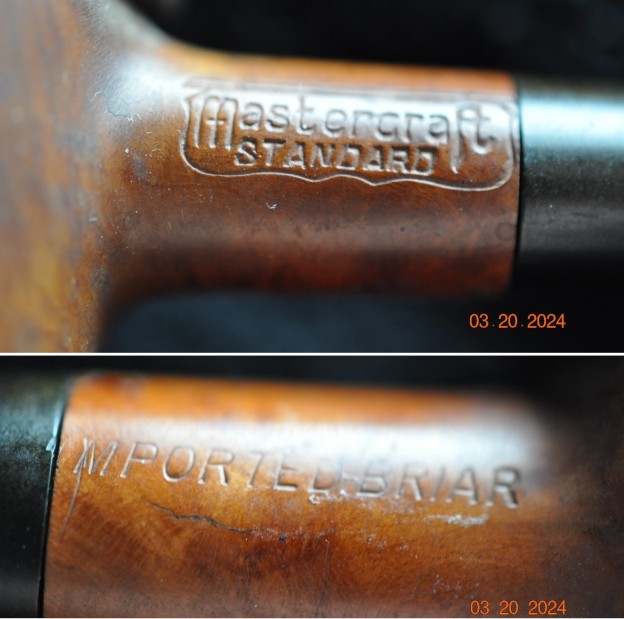
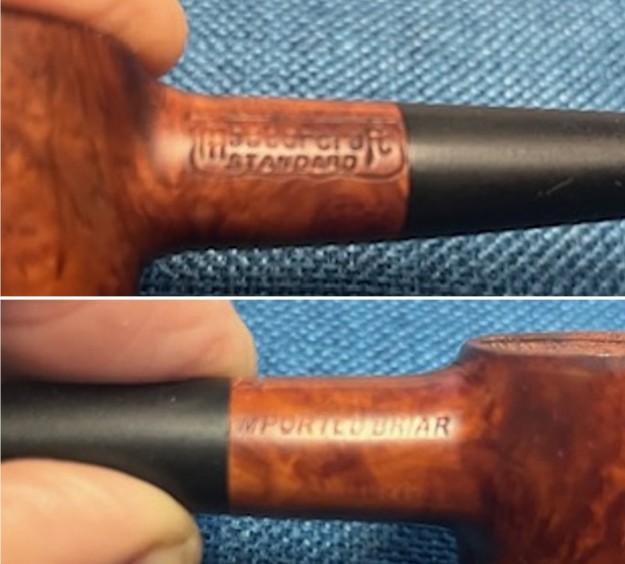
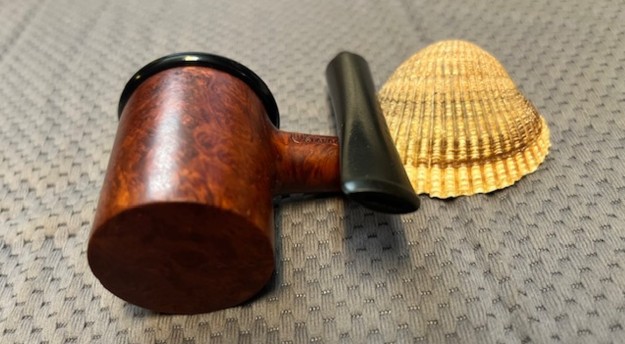
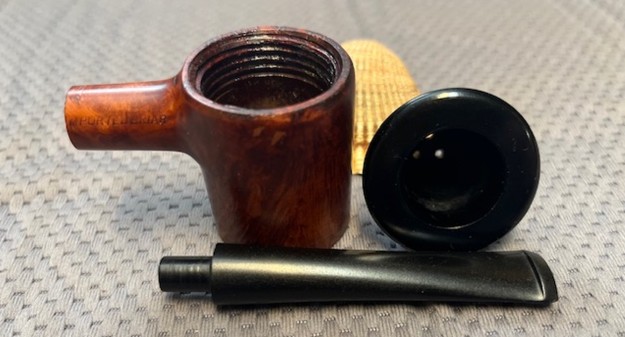
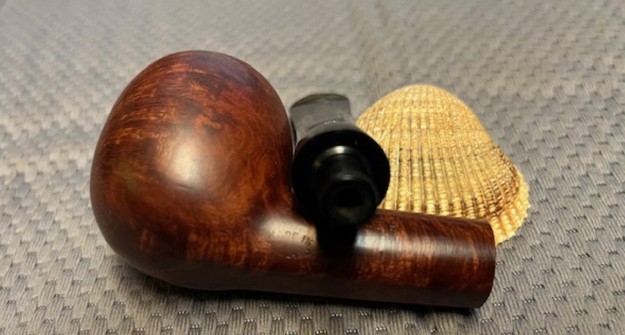
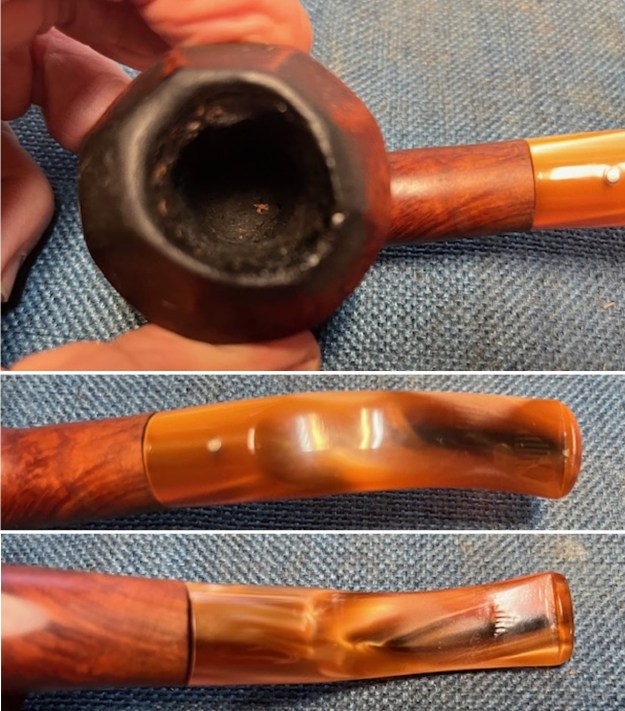 I took a photo of the stamping on the left side of the shank. It is clear and readable as noted above. I removed the stem from the shank and took a photo of the pipe showing the silver dot on the top of the saddle. It is a nice looking pipe that shows a lot of damage from burning.
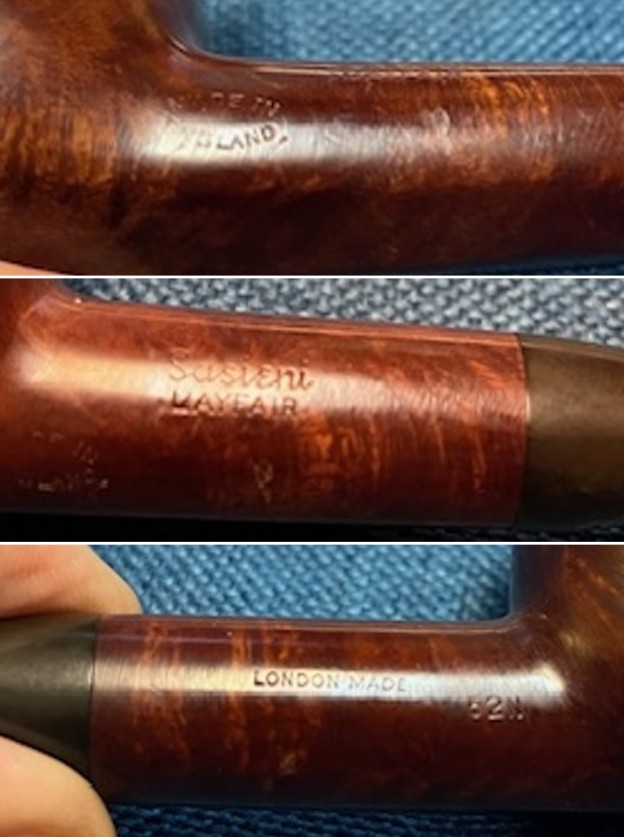
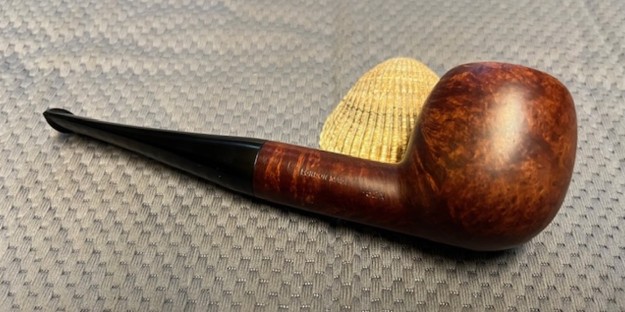
 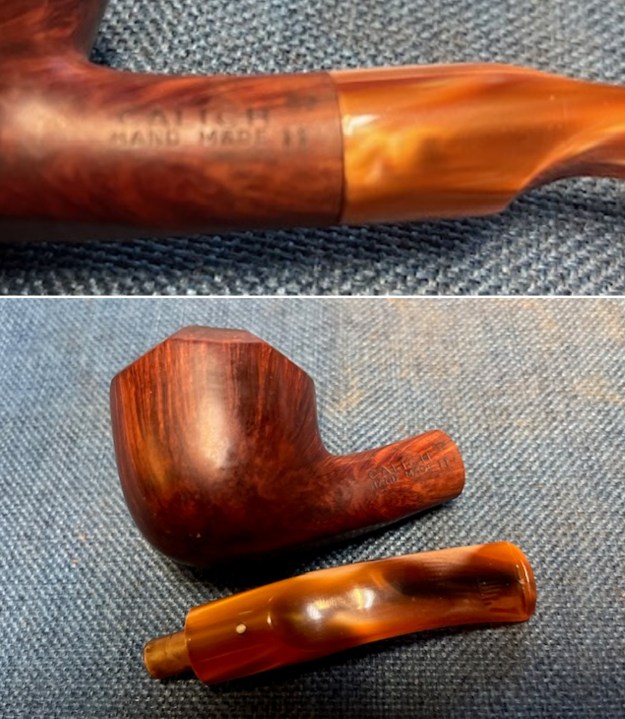 Once again I am including a bit about John Calich the pipemaker as I have loved John Calich’s pipes for over 25 years now and have collected a few of them. I have restored quite a few of them and written blogs about them that can be read if you are interested in seeing the kind of pipes that John made. They are unique and beautiful. Each of his pipes are a work of art to me. I am including the links to the previous blogs that have written about his pipes.
https://rebornpipes.com/2015/03/03/one-of-my-john-calich-pipes-a-calich-ee-billiard/
https://rebornpipes.com/2019/01/23/i-am-the-happy-owner-of-an-unsmoked-pipe-by-the-late-john-calich/
https://rebornpipes.com/2015/03/03/one-of-my-john-calich-pipes-a-calich-ee-billiard/
https://rebornpipes.com/2014/03/21/reflecting-on-my-collection-of-john-calich-pipes/
Each of the blogs reflects on John’s pipes if you want to get a feel for them take a few minutes and read them.
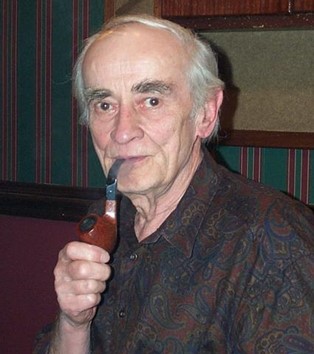
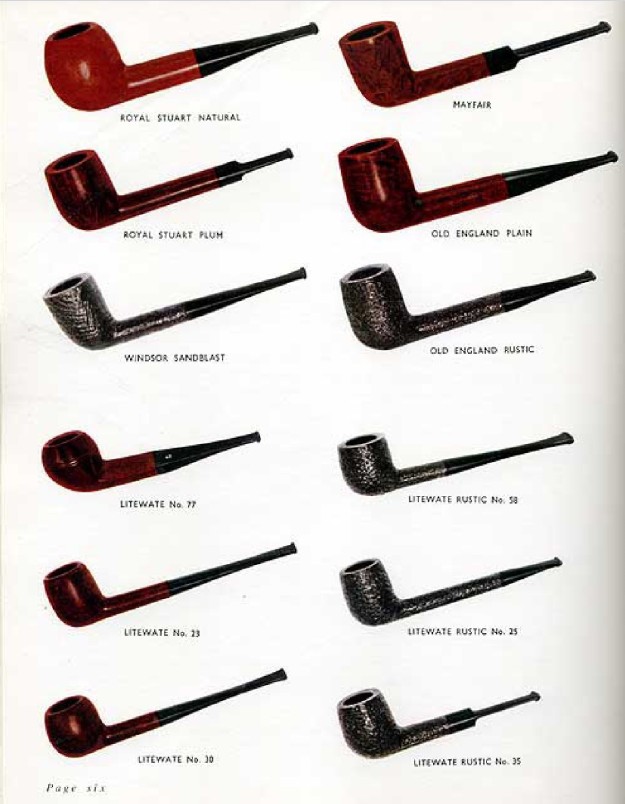
When John was living I spoke with him several times via phone and had him make some new stems for some of his pipes that I picked up off eBay. He was a very kind gentleman and was always helpful when I spoke with him. He was always ready with encouragement and when I needed to know how to do something when I was first learning to repair pipes he was willing to help. He was one of the old guard of Canadian Pipe makers. I miss him. I am including a short piece from Pipedia on John to give details on his work and the grading of his pipes. The second paragraph below is highlighted in blue as it gives some information on the Grade 12 Apple that I am working on with the single silver dot now. I am also including a photo of John Calich, courtesy Doug Valitchka
 John Calich was one of Canada’s finest carvers. He died in July 2008. John was a full-time pipe maker for the last 40 years. Calich pipes were mostly traditional shapes. His signature style is rustication and smooth on the same pipe along with his unique skill to stain a pipe in contrasting colors. He used only top-quality Grecian and Calabrian briar. The mouthpieces are hand finished Vulcanite “A”. Each pipe was entirely made by hand. John Calich was featured in the summer 2005 issue of Pipes & Tobacco.
His pipes are graded 3E – 7E. Retail prices range from$ 145.00 to $ 500.00 Each pipe is stamped “CALICH” 3-8E, his earlier pipes were graded from 3-14, and a single, tiny silver dot is applied to the top of the stem (https://pipedia.org/wiki/Calich).
I summarize the dating information from those blogs now: From my research and conversations I learned that John’s his later pipes were graded 3E – 8E. The retail prices for them ranged from $145.00 to $500.00. Each pipe was stamped “CALICH” and given an E grade. His earlier pipes were graded from 3-14 and had a single, tiny silver dot applied to the top of the stem. More information can be found at the Pipedia article above. All of this information told me as expected that the pipe I had was an earlier one.
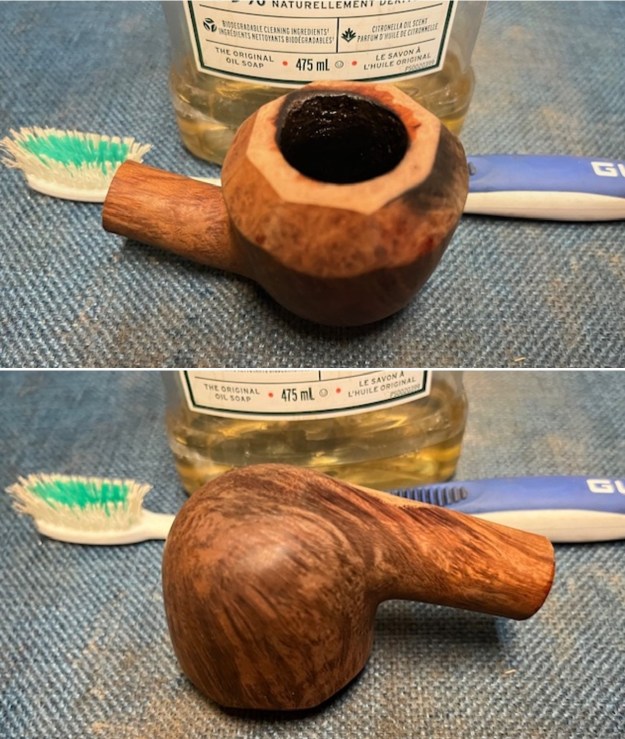
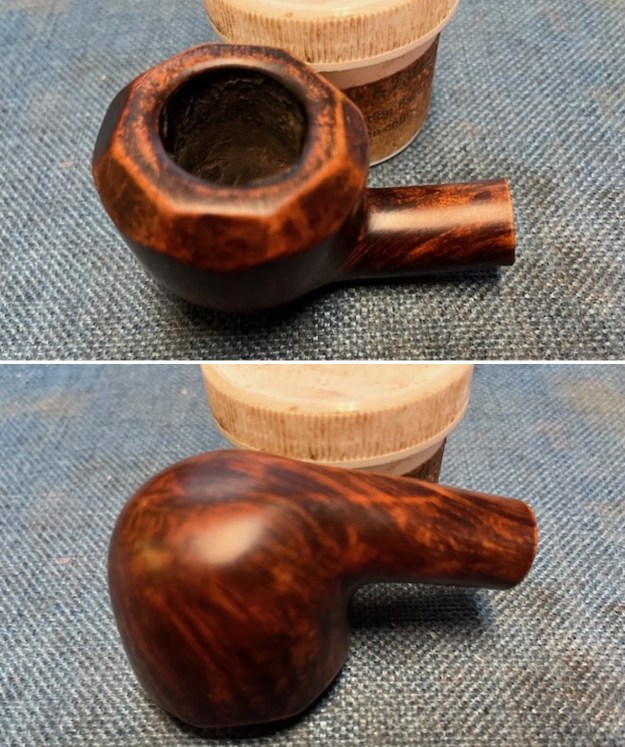
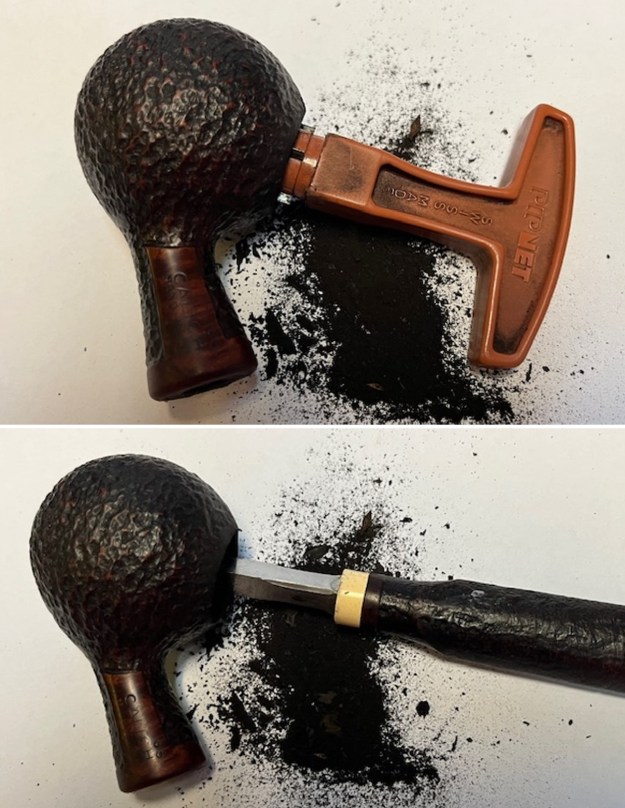
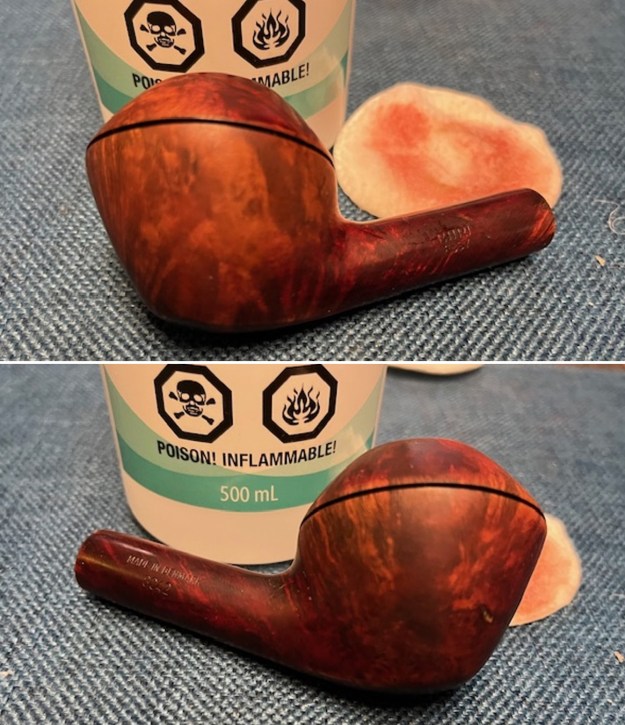
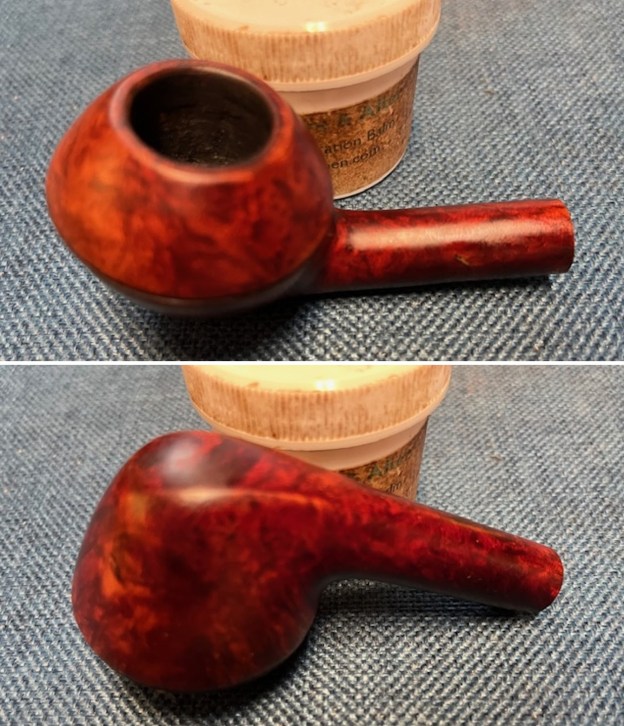
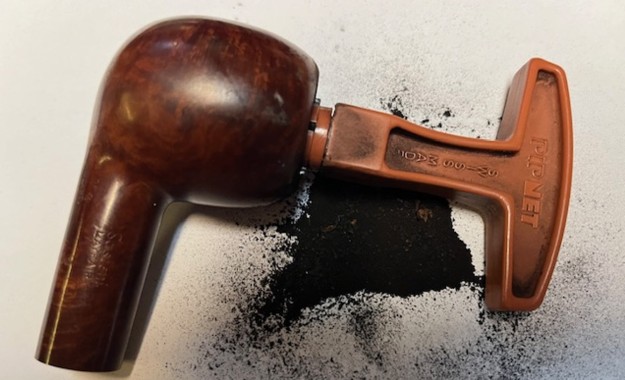
Armed with the information about John’s grading system I knew that the pipe in hand was an earlier Calich Hand Made Grade 11 made in 1987 and it was time to work on the pipe. I reamed the bowl with a PipNet Pipe reamer using the first cutting head. I took the cake back to bare briar so that I could check out the inside walls. I used a Savinelli Fitsall Pipe Knife to scrape back the remaining cake. I finished my cleanup of the walls by sanding it with 220 grit sandpaper wrapped around a piece of dowel. 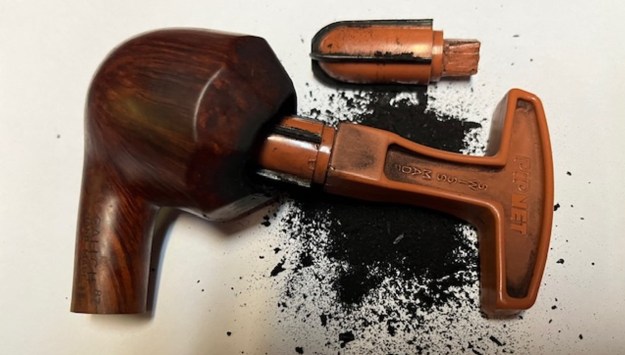
 I decided to top the burned bowl. I used a topping board to flatten the rim top and remove the damage. I would still need to work on the rim more but I wanted it flat before I did my clean up and scrubbing.
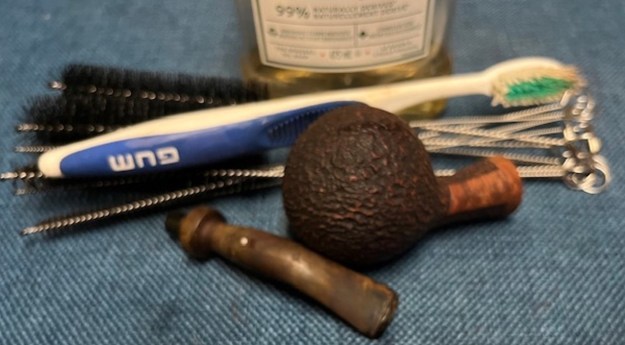
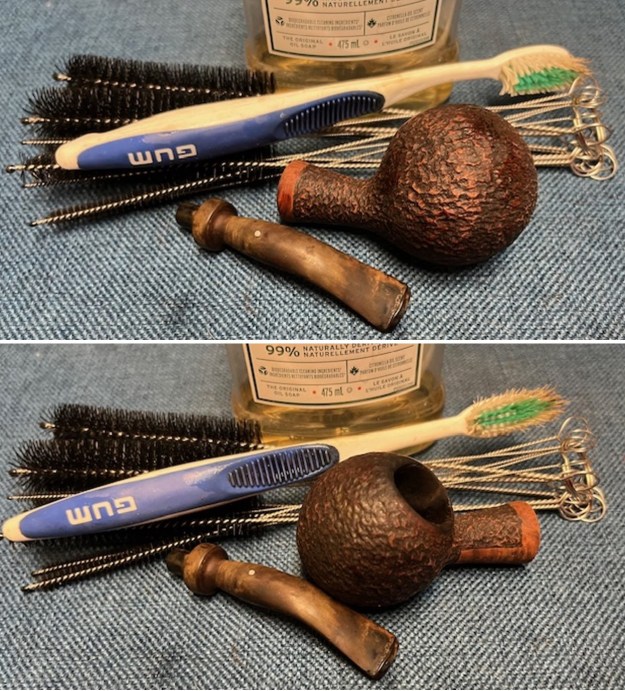
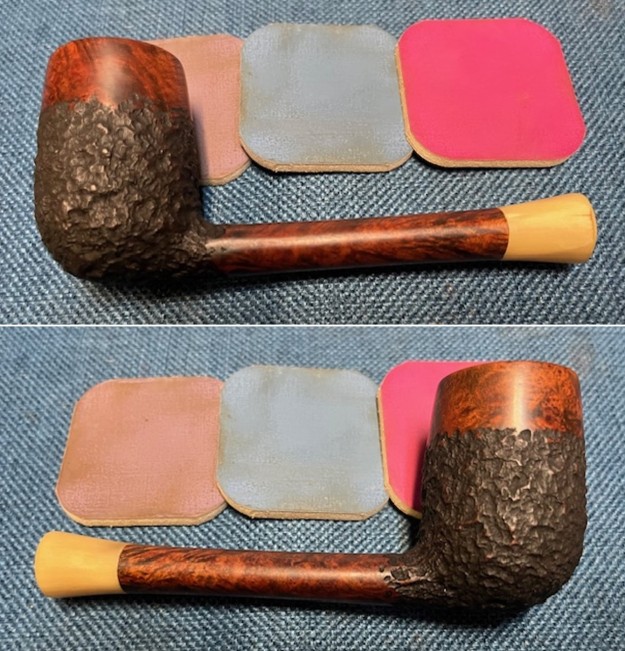
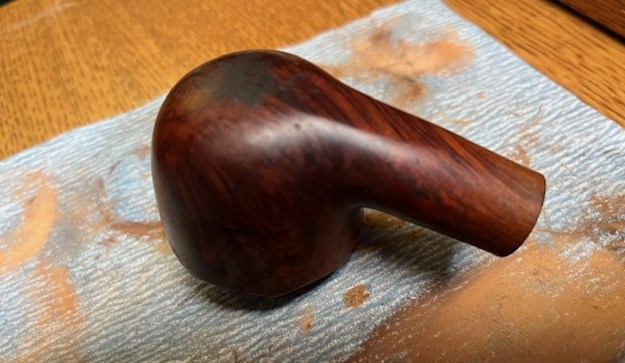 I scrubbed the briar with undiluted Murphy’s Oil Soap and a tooth brush and rinsed it off with warm running water. I scrubbed the rim top with a tooth brush and warm running water at the same time. I dried the bowl off with a soft microfiber cloth and gave it a light buffing. I also cleaned out the shank, mortise and airway in the stem and shank with Murphy’s Oil Soap and shank brushes to clean out the oils and tars on the inside. You can see the darkening or burn damage on the front panel of the rim cap in the third photo. I am hoping it is removable.
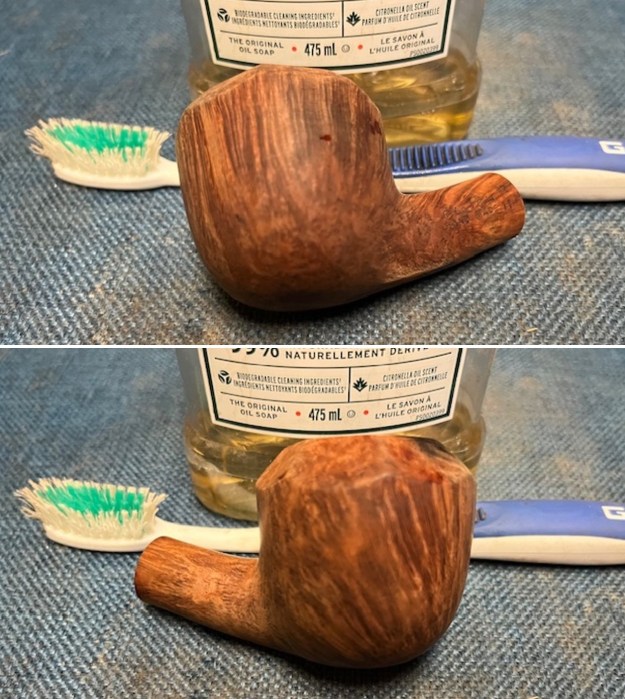
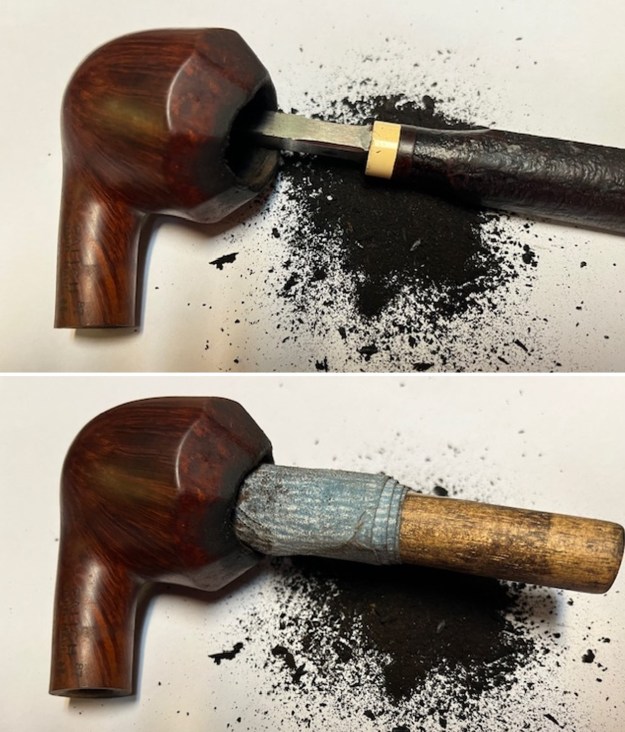
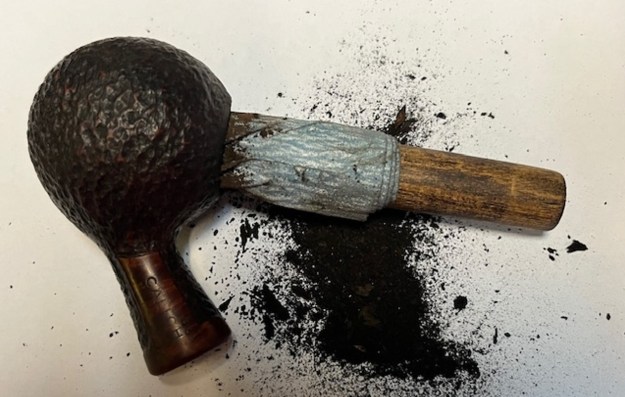
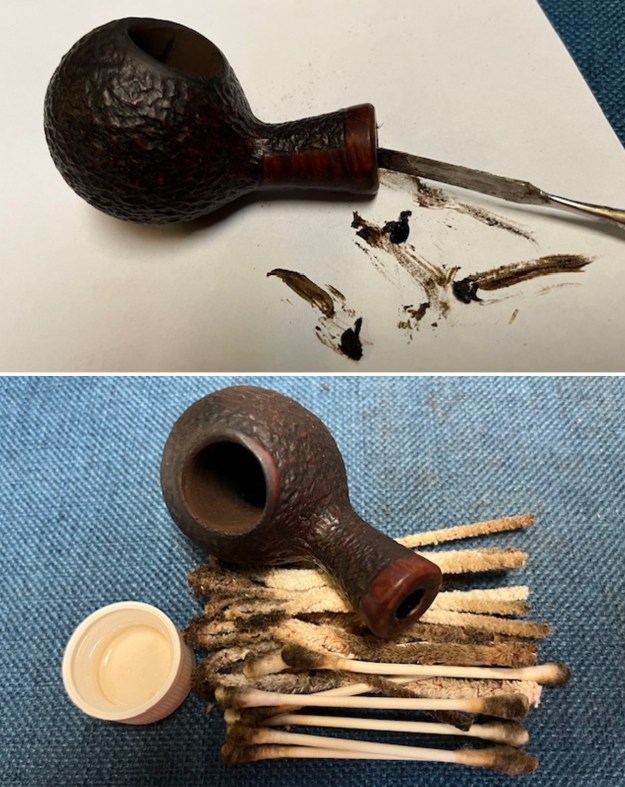
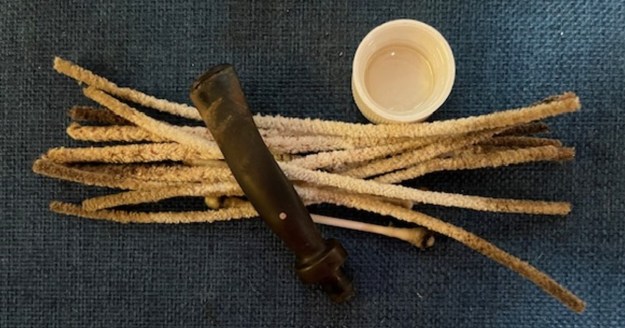
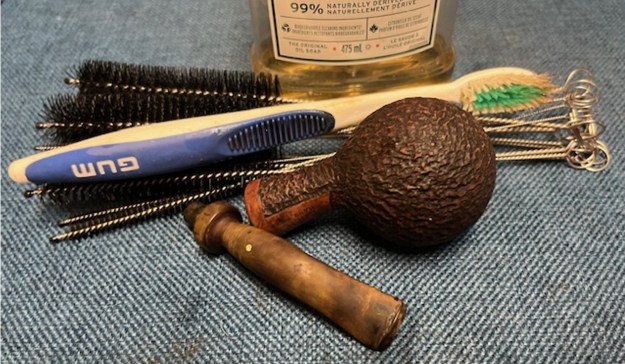
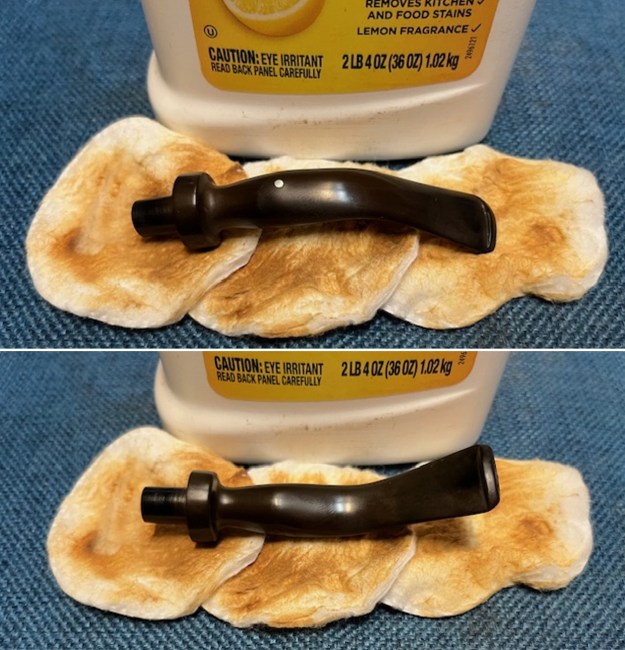
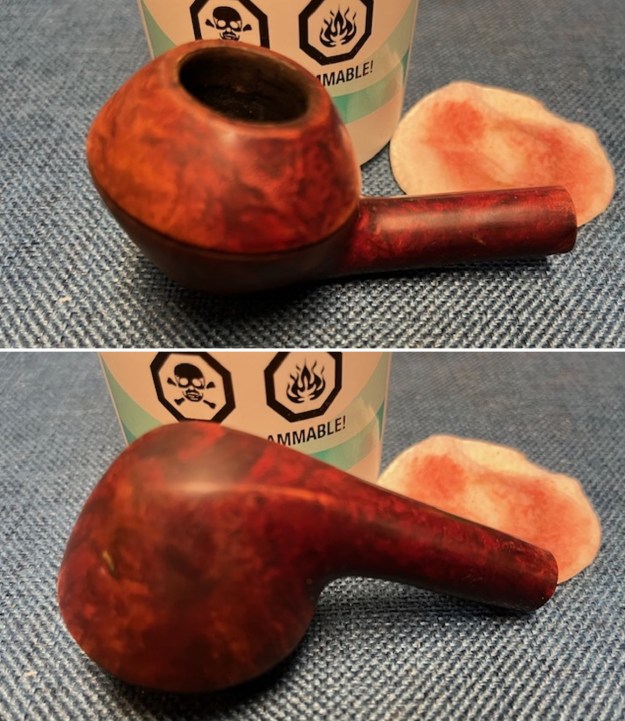
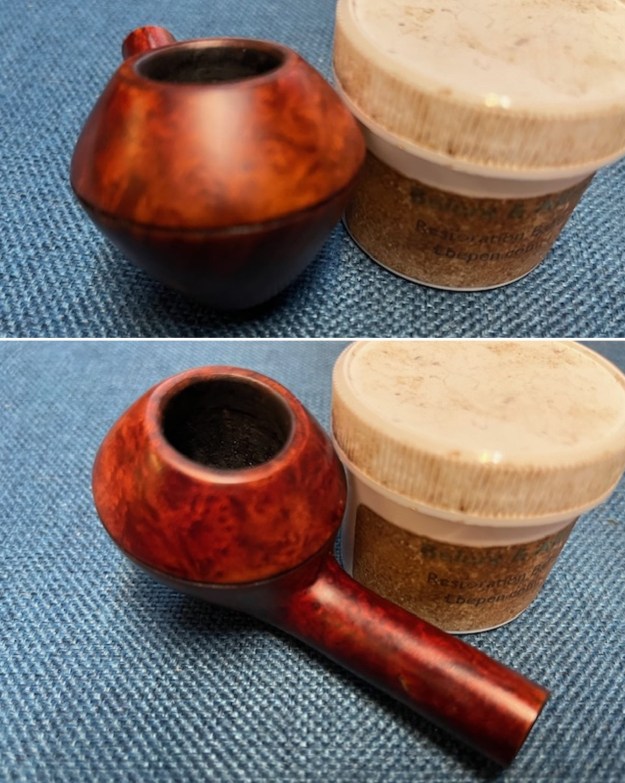
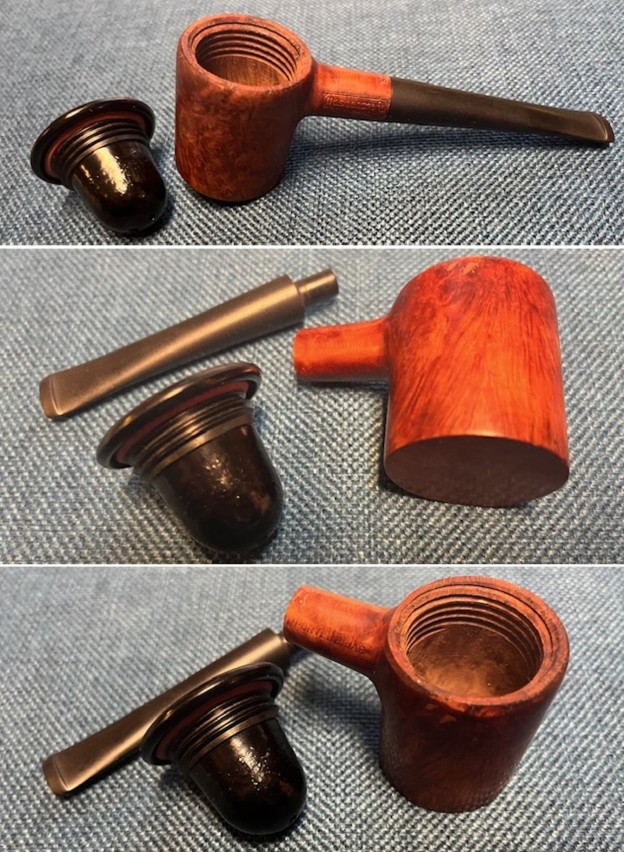
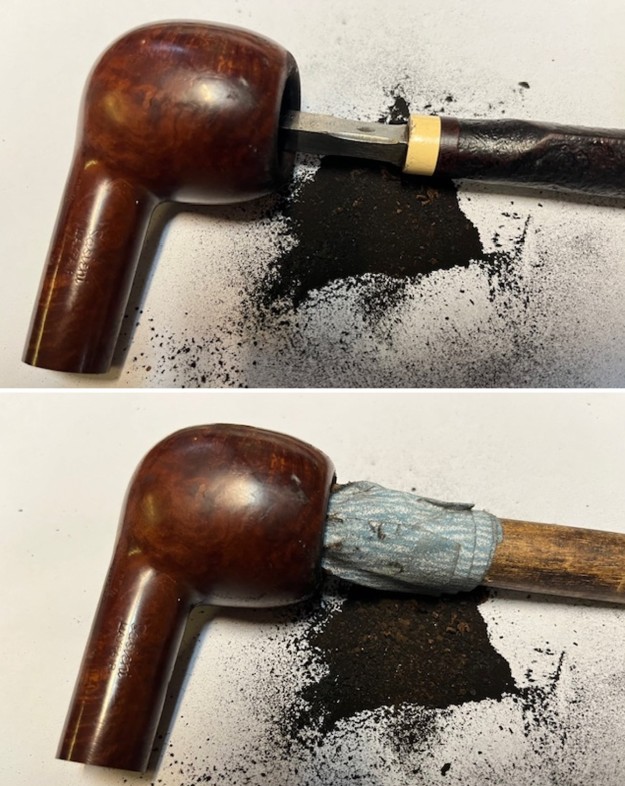
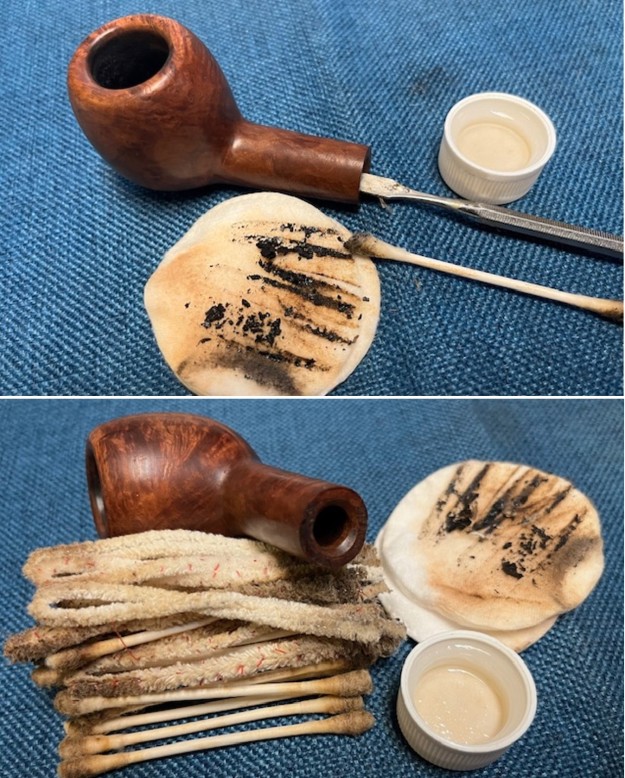
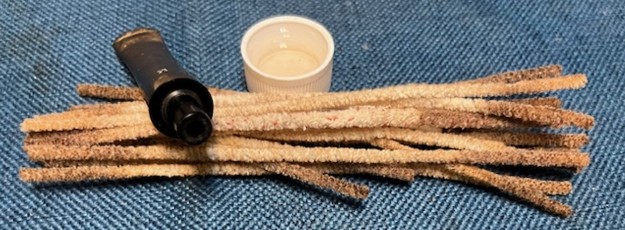
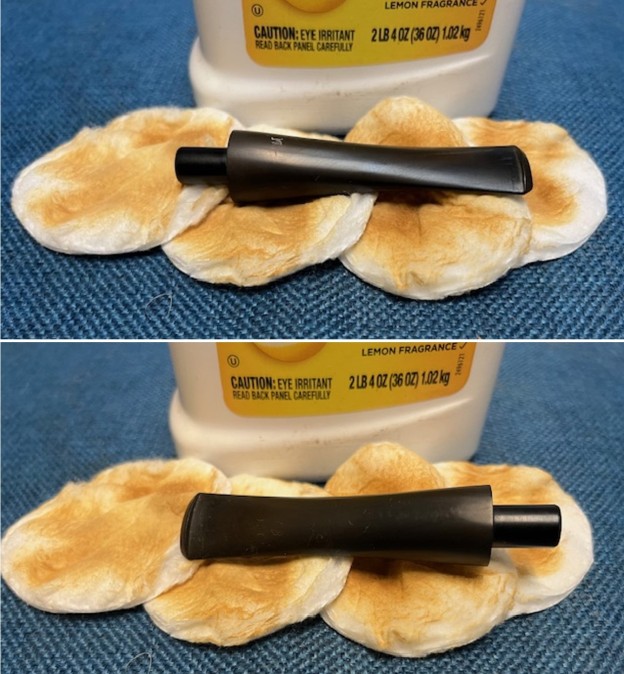
 I worked on the internals. I cleaned out the airway to the bowl, the mortise and the airway in the stem with pipe cleaners, cotton swabs and alcohol. When I finished the pipe smelled very clean.
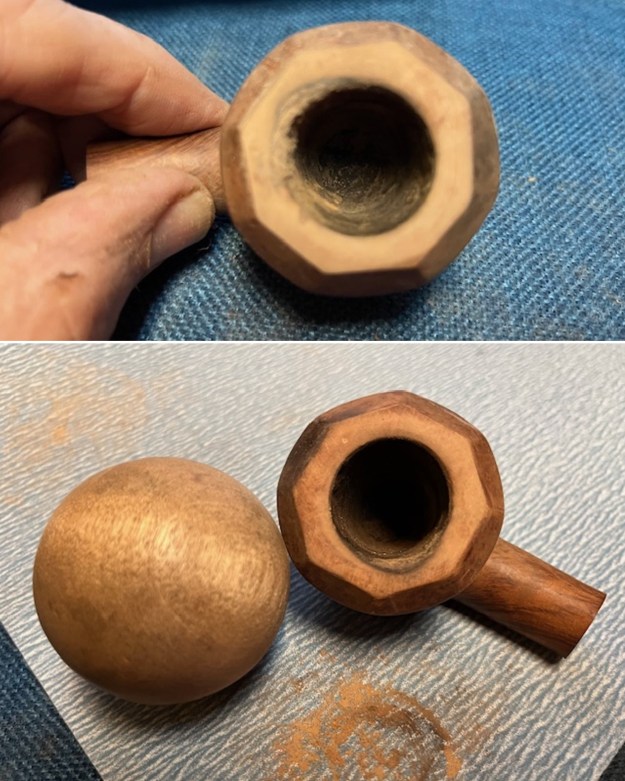
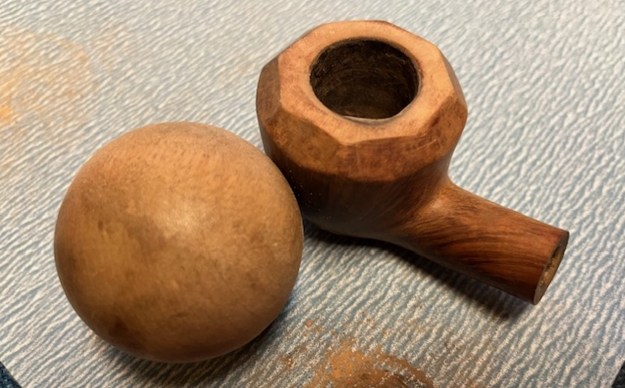
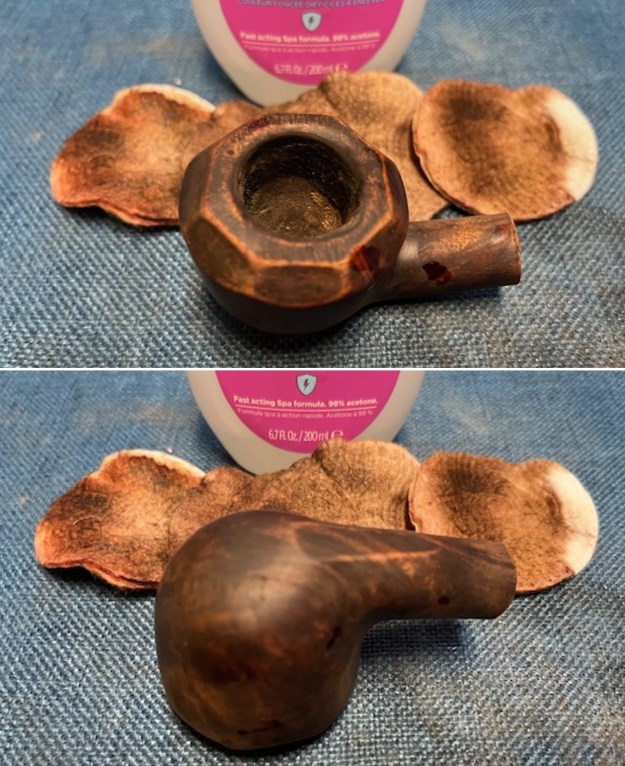
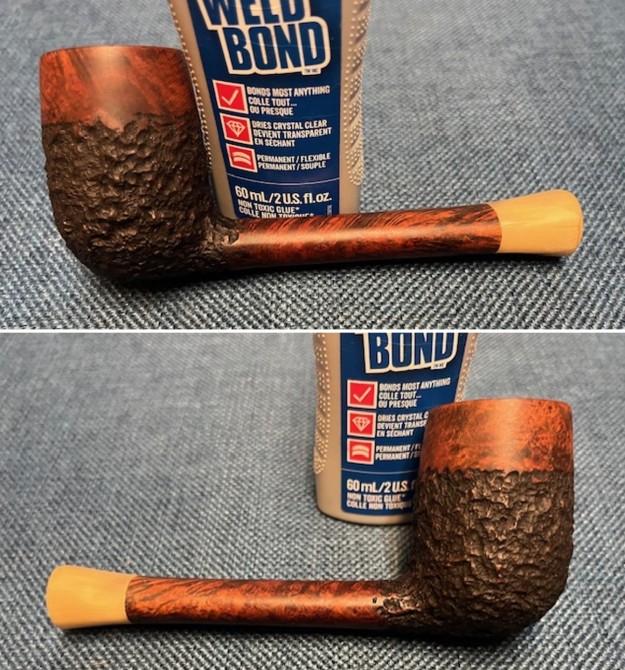
 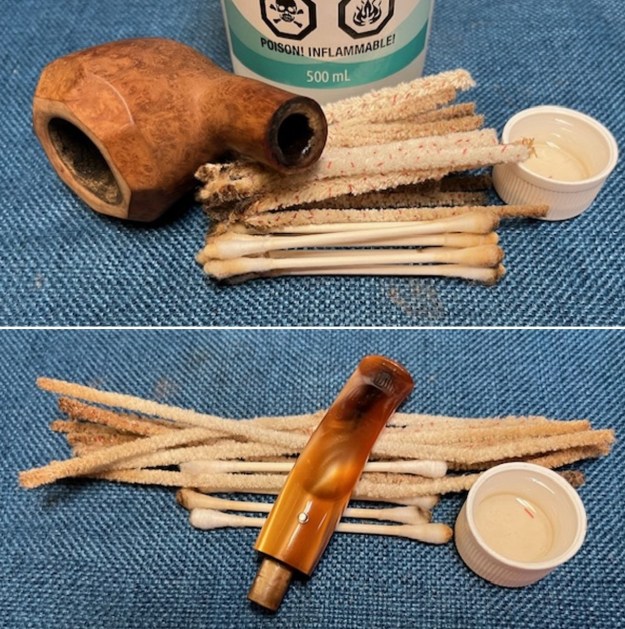 Once it was clean I turned my attention to the rim top. I cleaned up the inner edge of the bowl with a folded piece of 220 grit sandpaper. There was a damaged divot on the rear left inner edge of the bowl. I filled it in with briar dust and clear CA glue to built it up even with the rest of the edge and the rim top. I topped the bowl with 220 grit sandpaper to smooth out the top. I used a wooden ball and sanded the top edge and inner edge of the bowl with 220 grit sandpaper. I gave the top and inner edge a slight bevel.
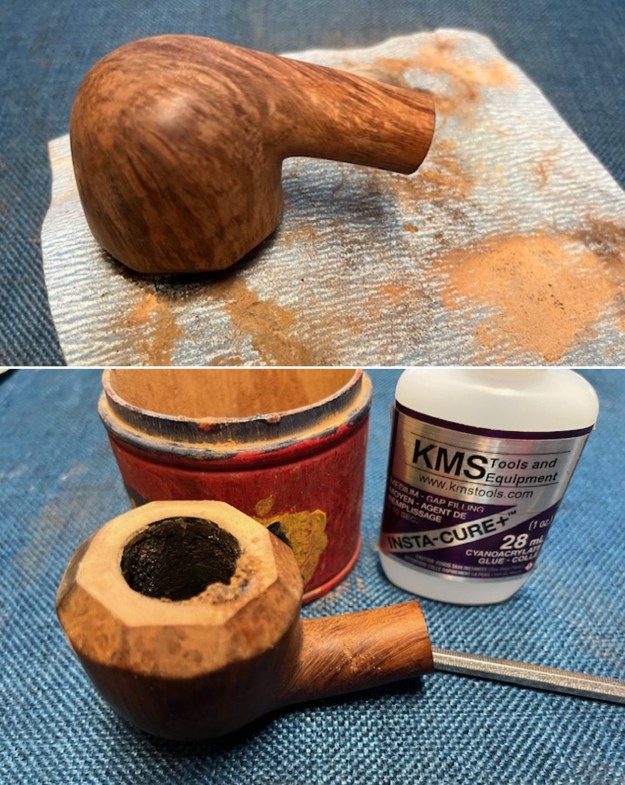
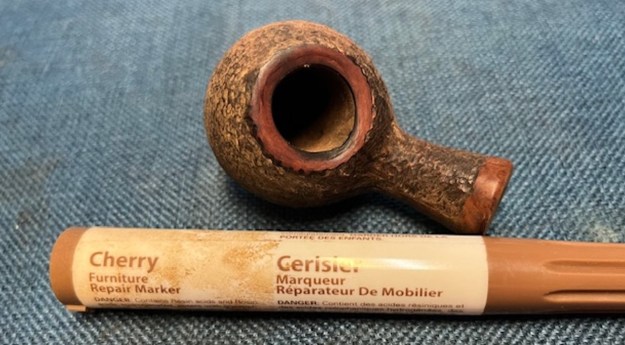
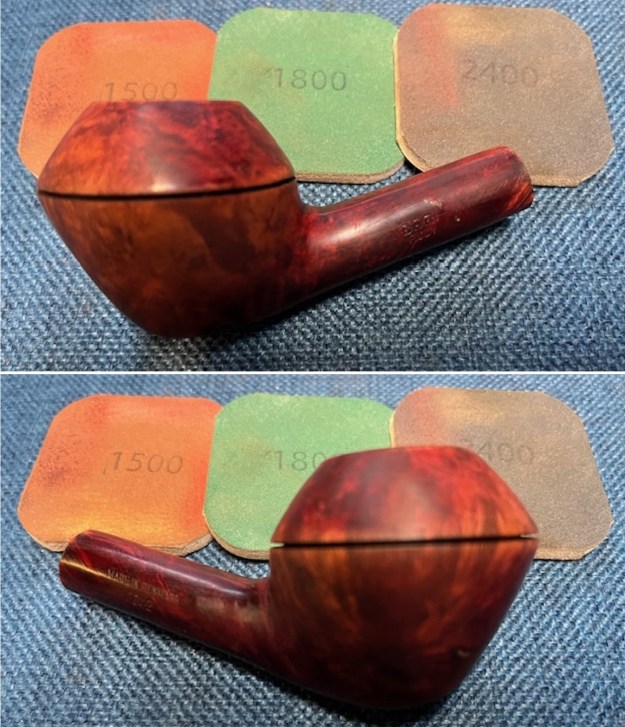
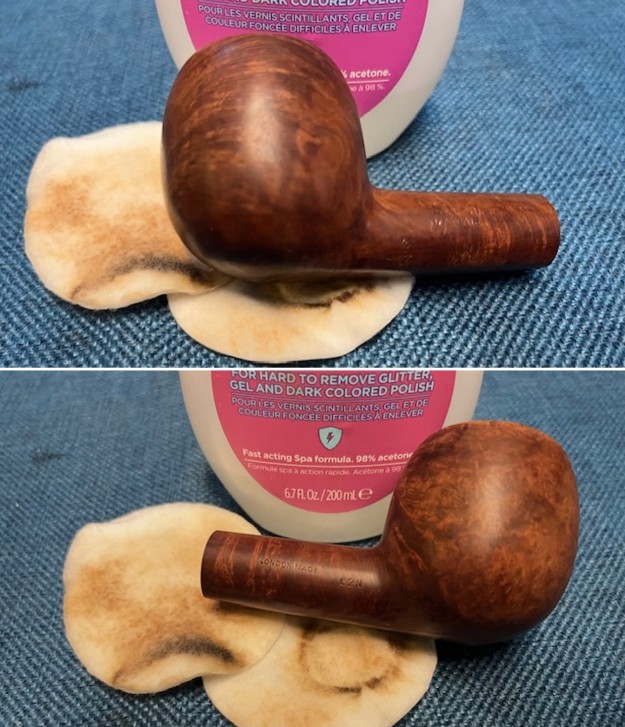
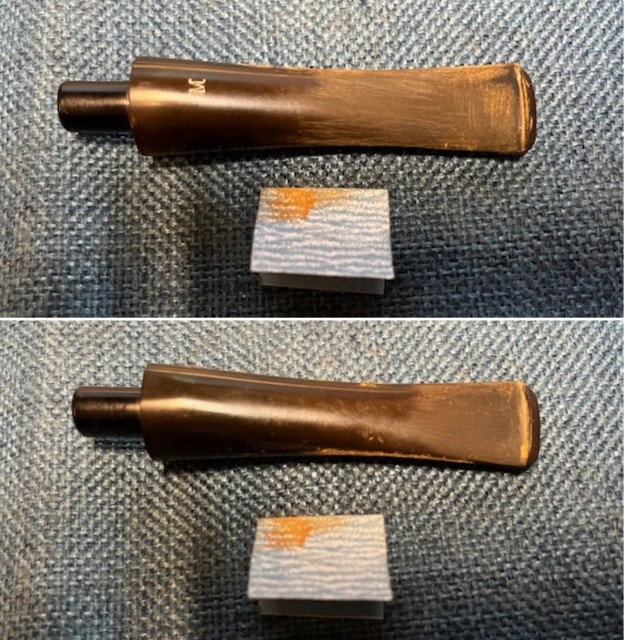
 To remove some of the dark marks – both burn and tars/oils, I wiped the front edge of the cap with a mix of Oxalic Acid and water to try to lighten the surface of the briar. While it removed some, it did not work completely.
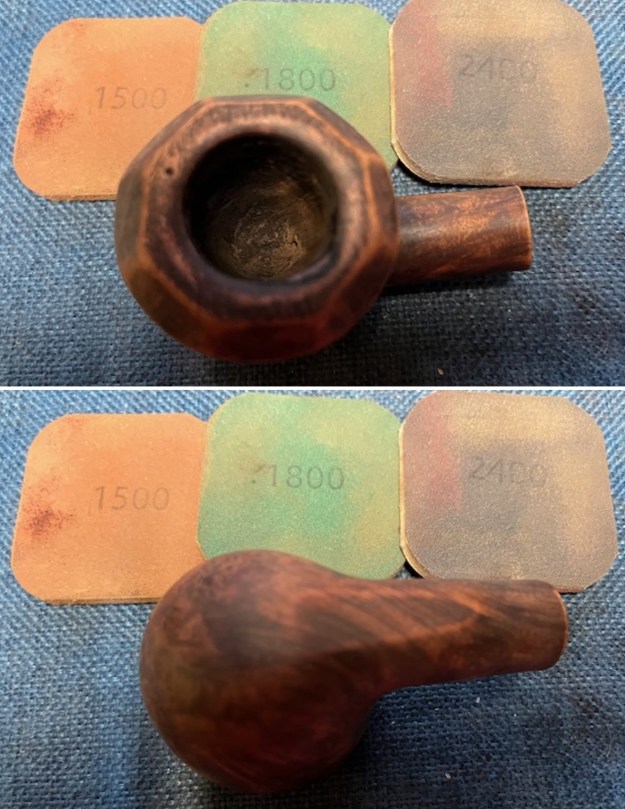
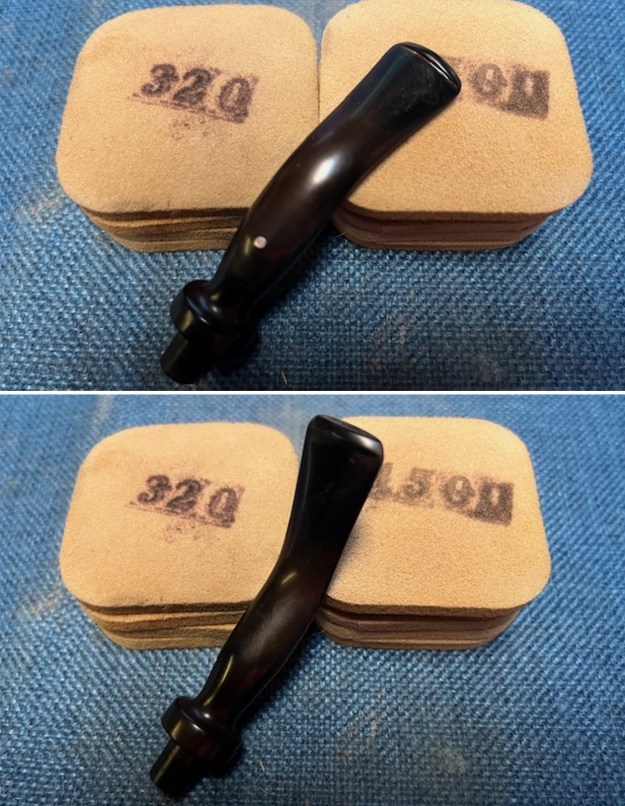
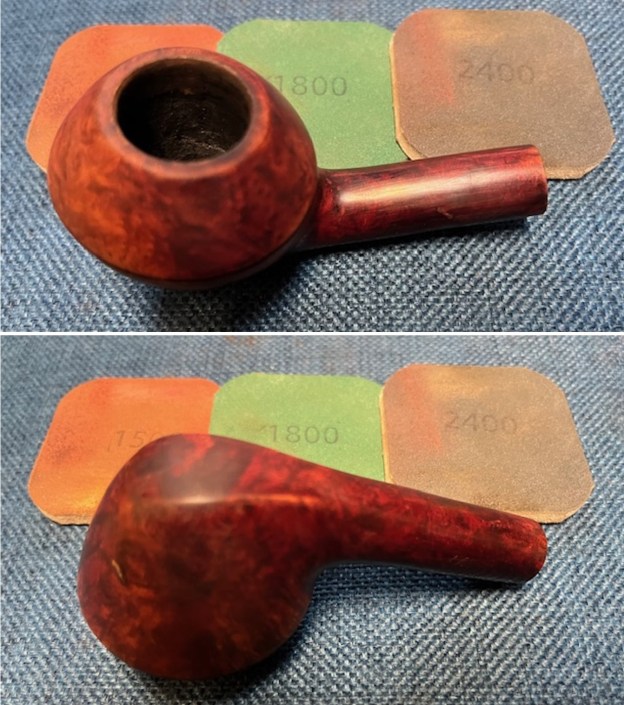
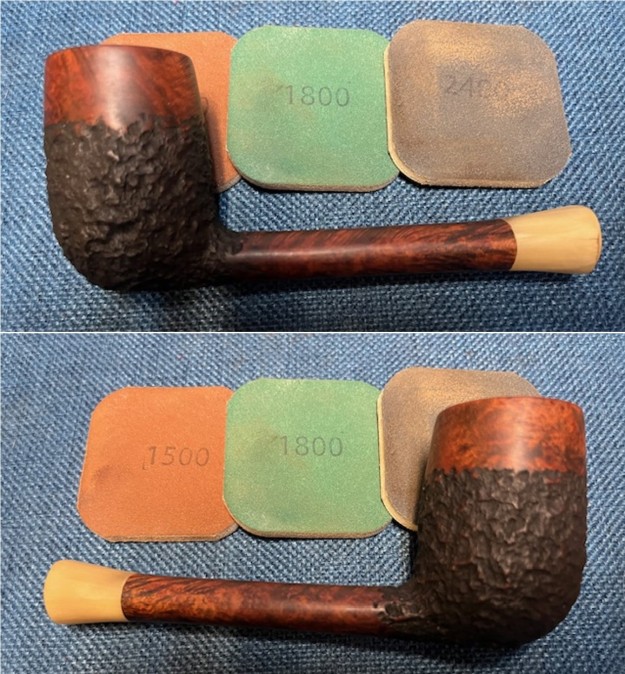
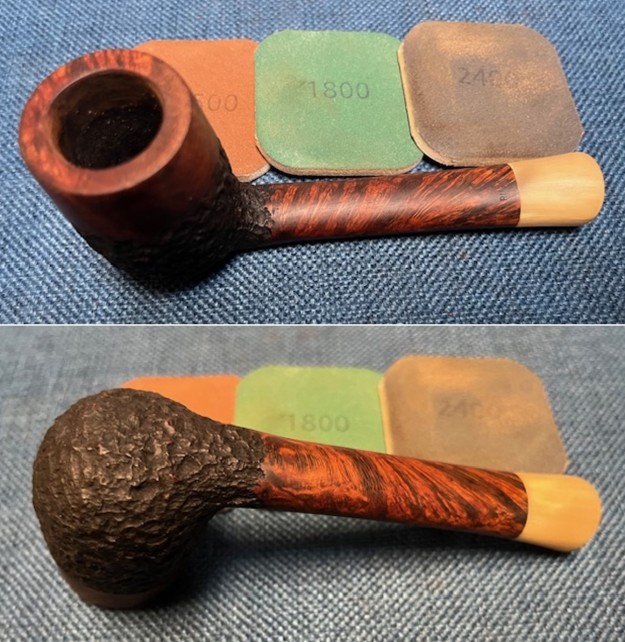
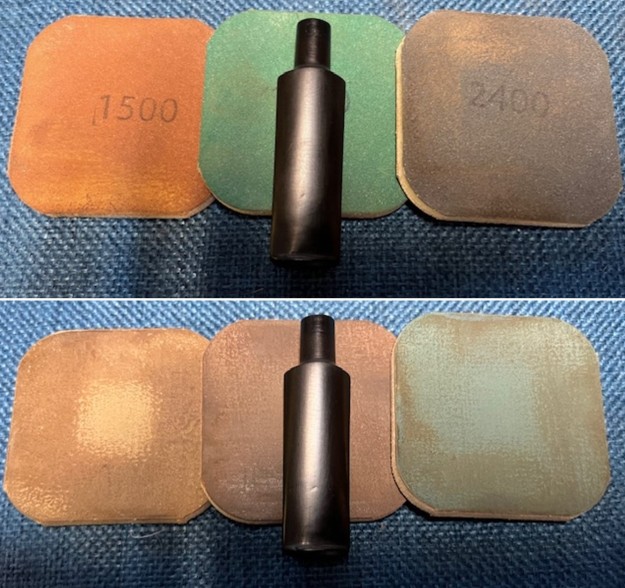
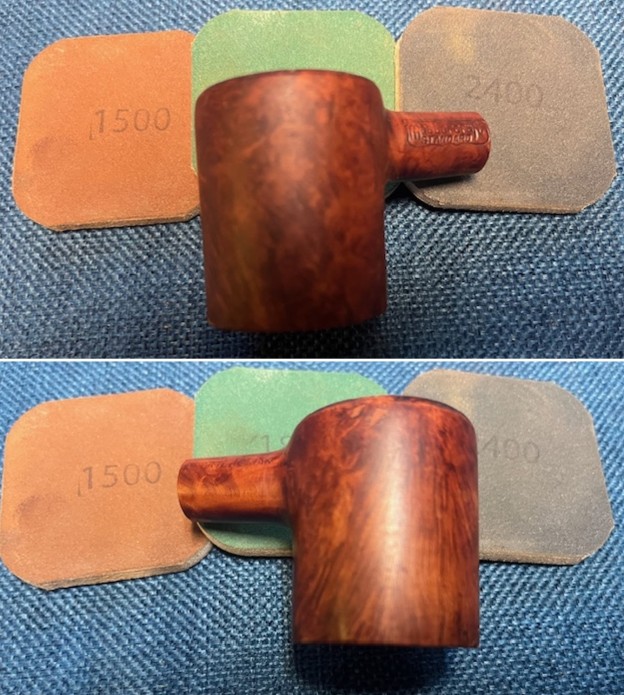
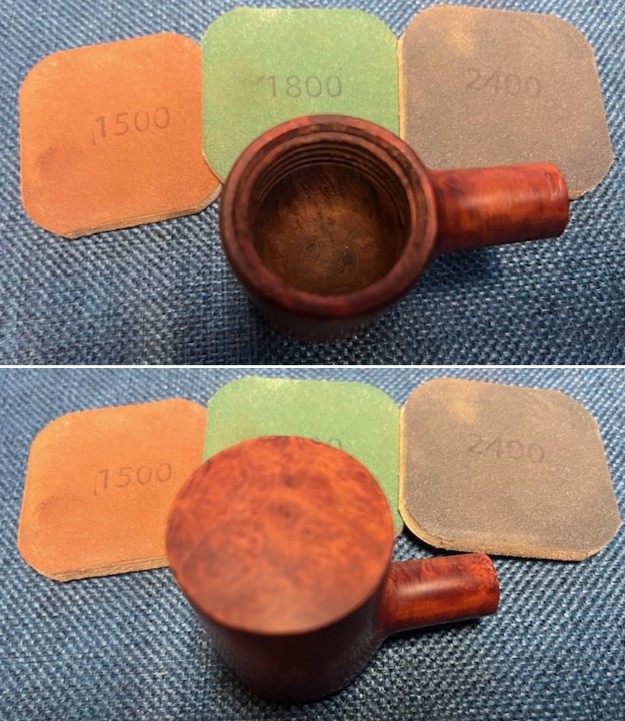
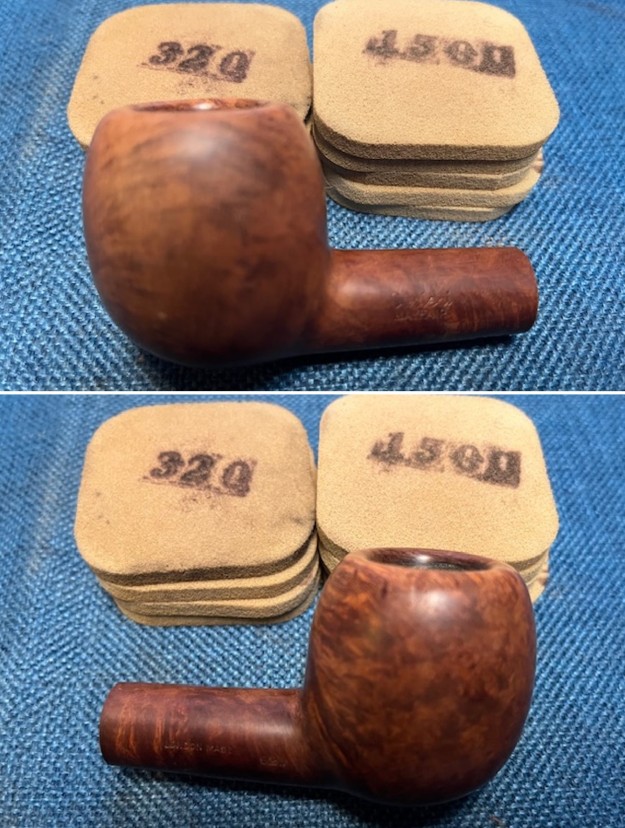
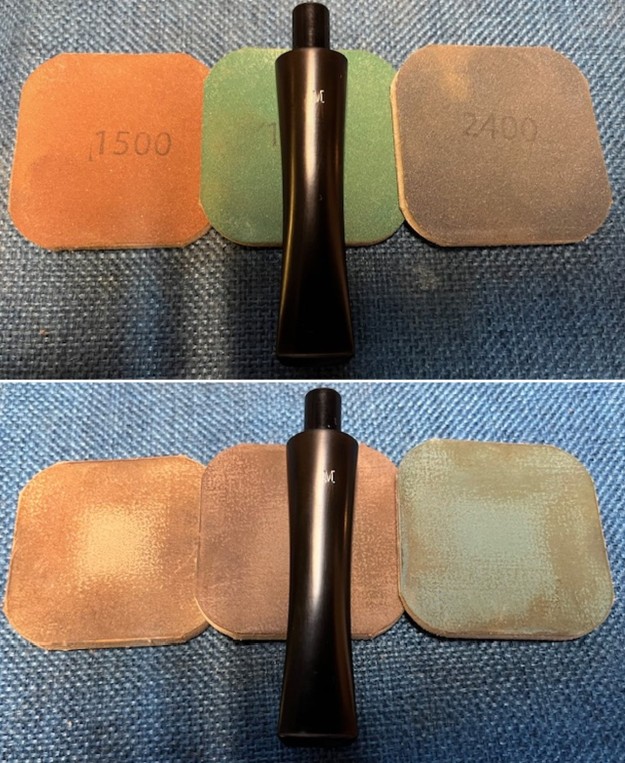
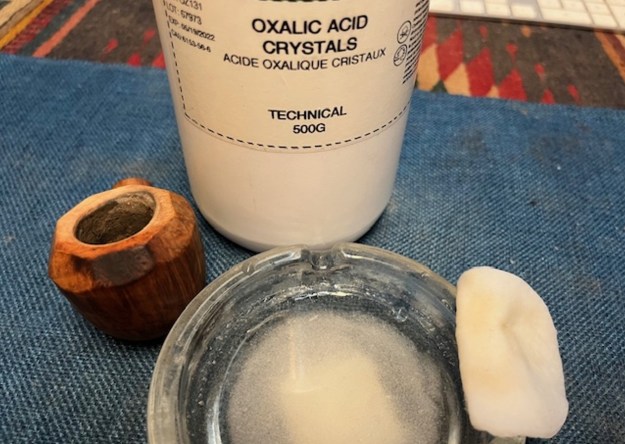 I sanded the bowl and cap with 320-3500 grit sanding pads to smooth it out before I restained the bowl. I wiped the bowl down between each pad with a damp cloth. When I finished it wiped it down with a cotton pad and alcohol.
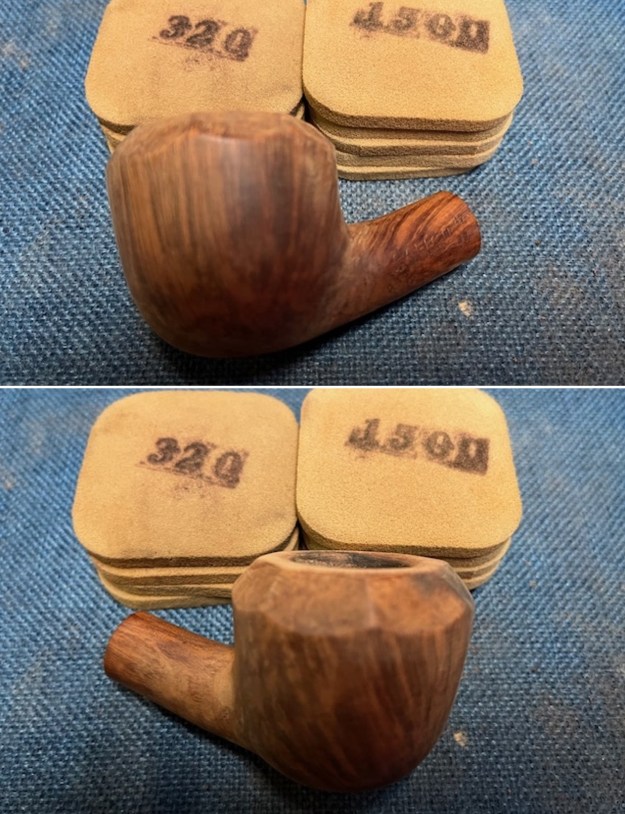
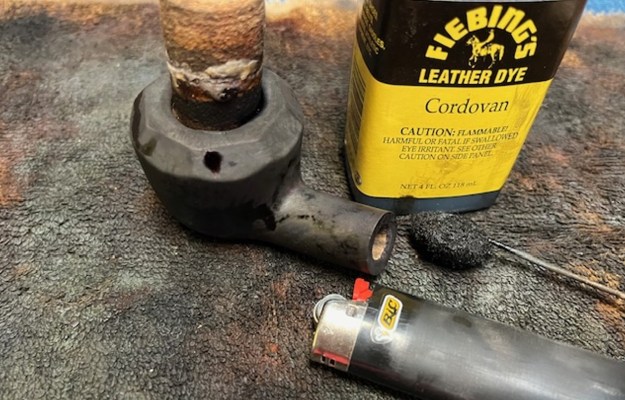
 I restained the bowl with a Cordovan Fiebing’s stain and flamed it with a lighter. I repeated the process until I was happy with the coverage on the bowl. I wanted to use a darker stain to hide the burn damage on the inner edge and top of the cap as well as those on the front of the cap. It would be darker but I thought it would work very well.
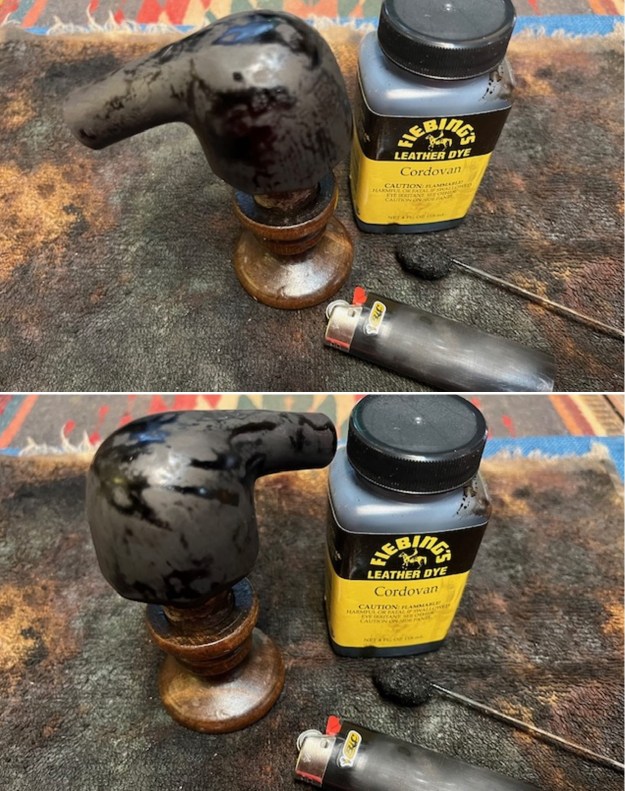
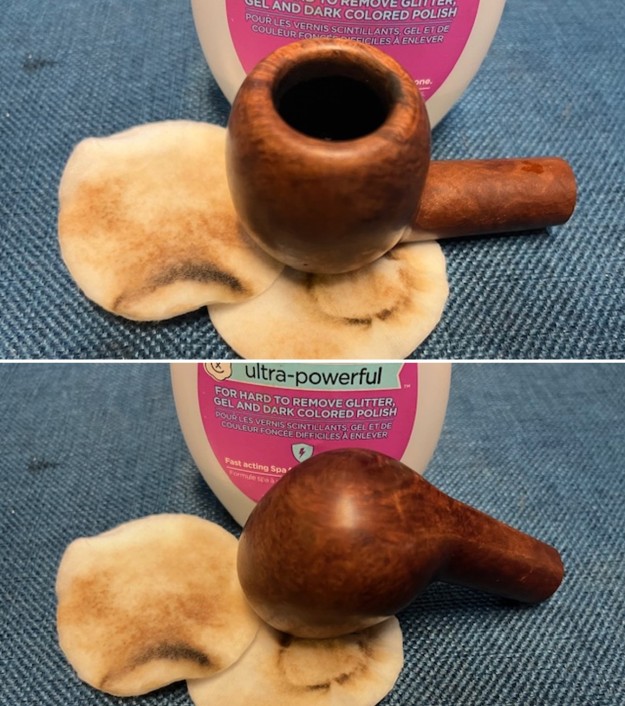
 I wiped the stain down with some acetone and cotton pads to remove the excess stain and make the grain stand out more on the surface of the briar.
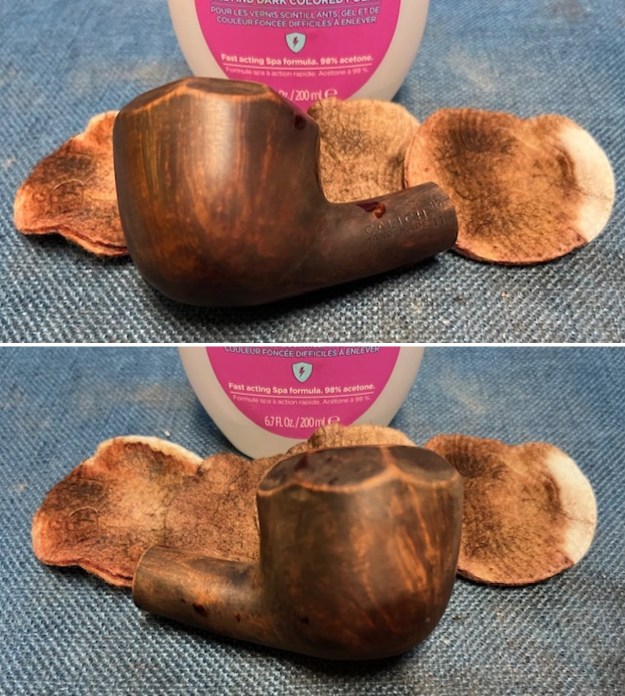
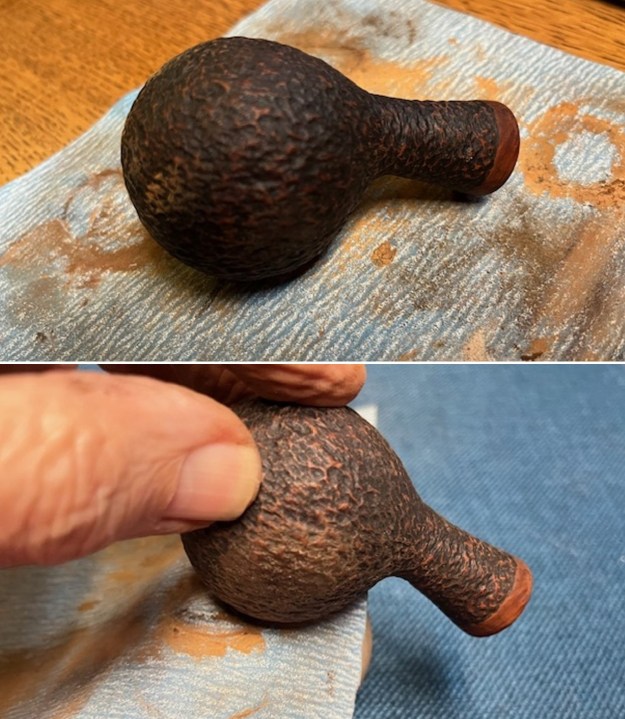
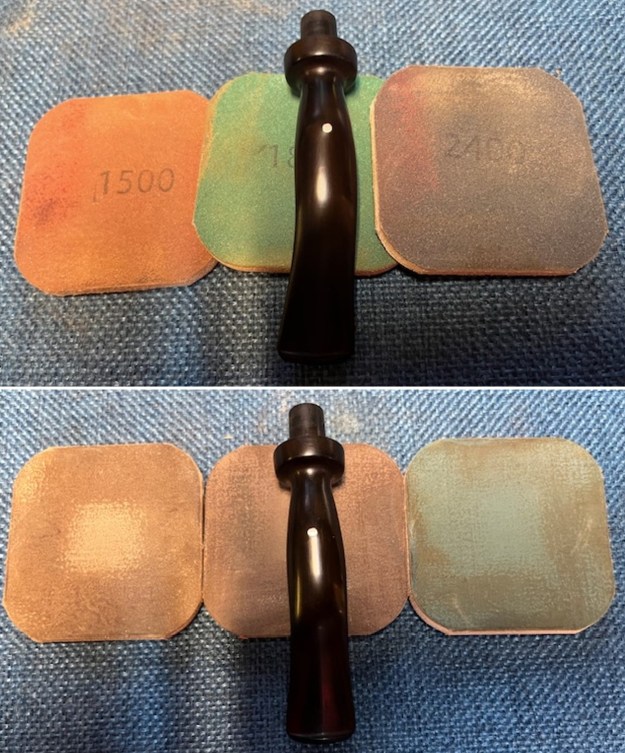
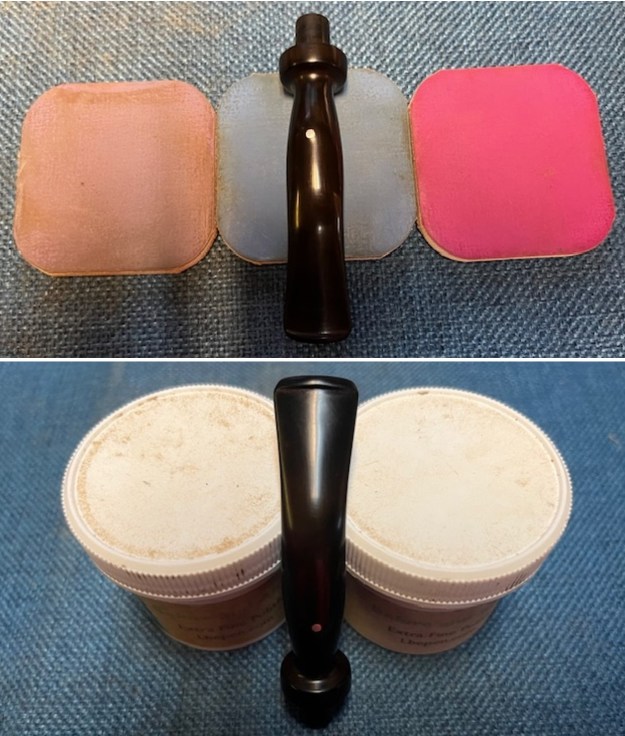
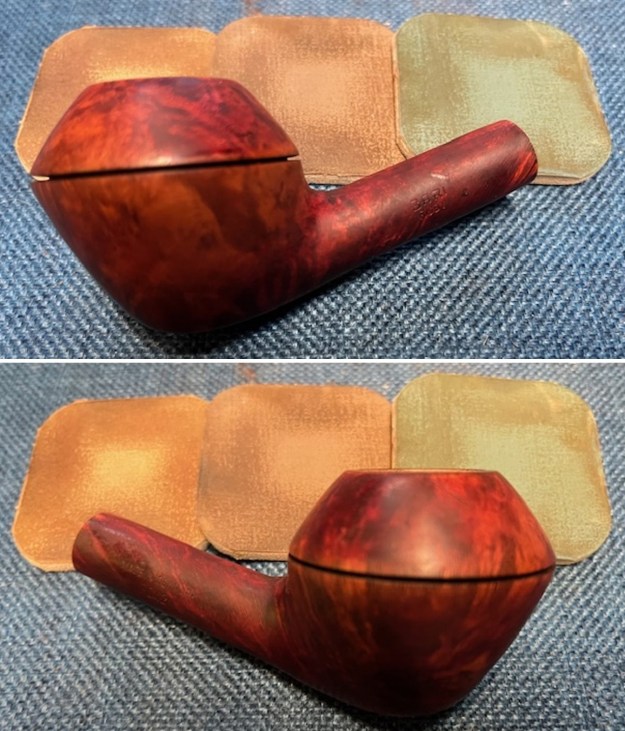
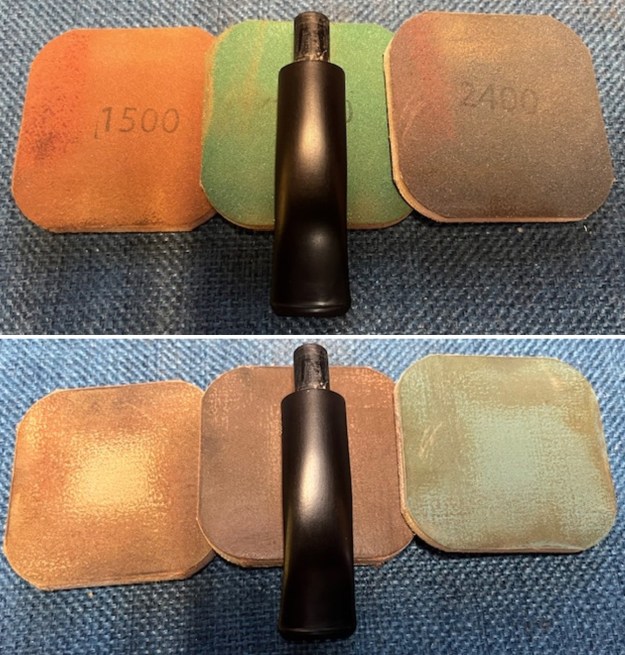
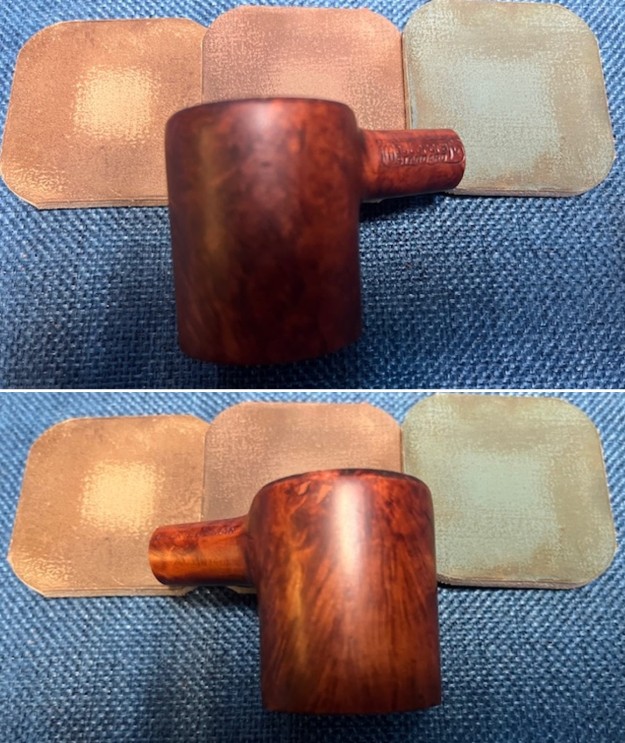
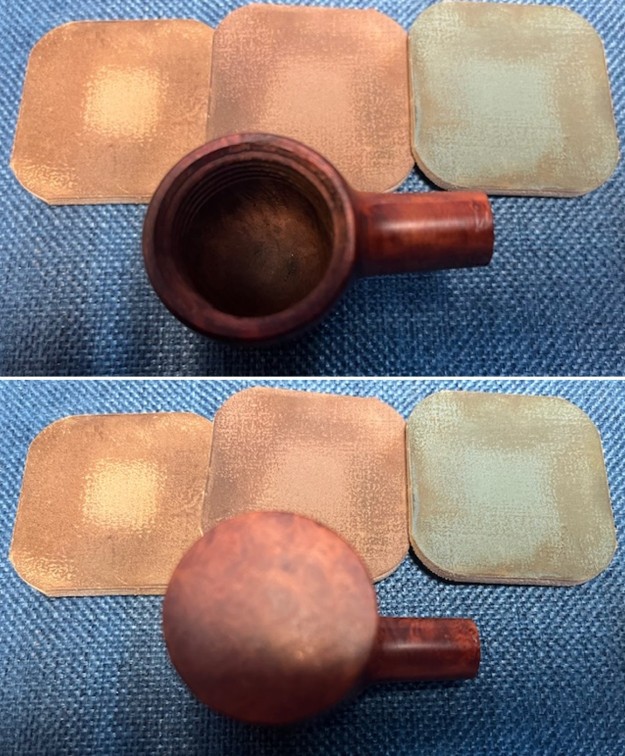
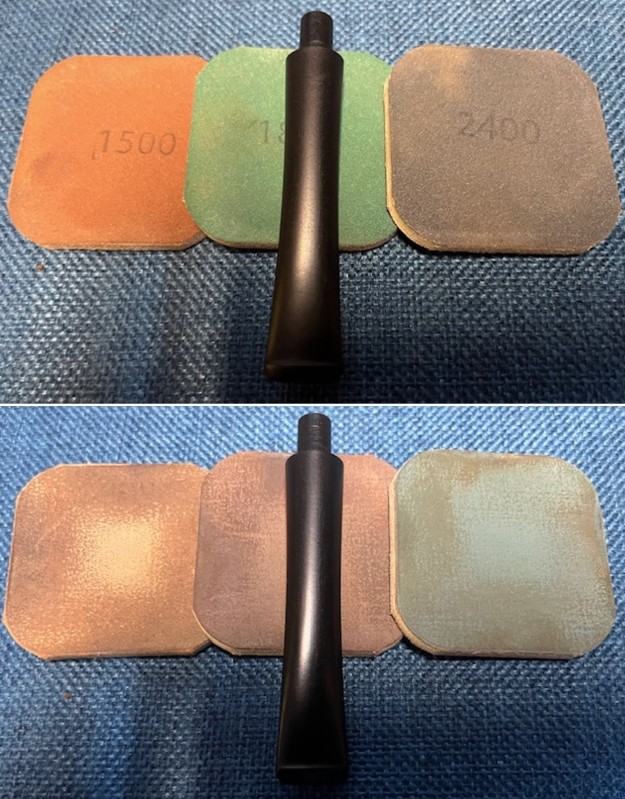
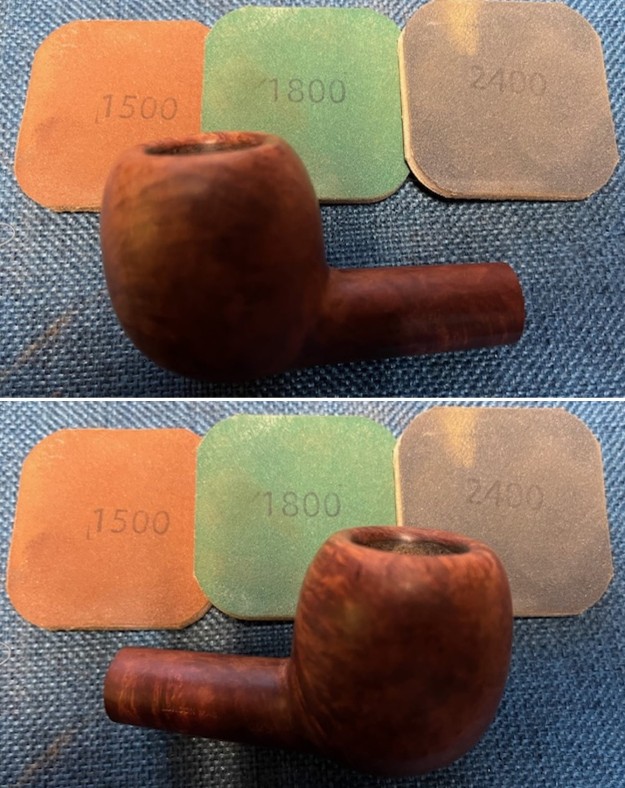
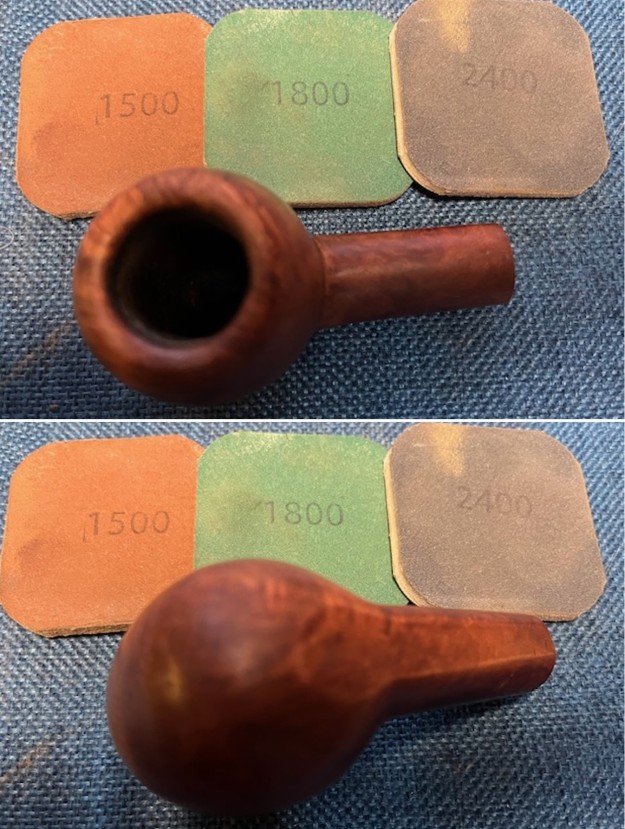
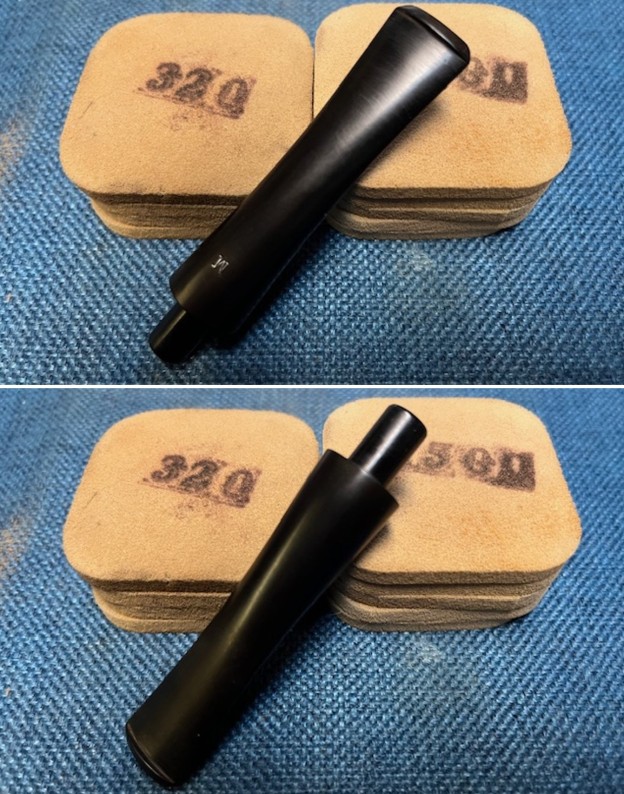
 I polished the bowl with micromesh sanding pads – wet sanding with 1500-12000 grit sanding pads. I wiped it down with a damp alcohol cotton makeup pad after each sanding pad.
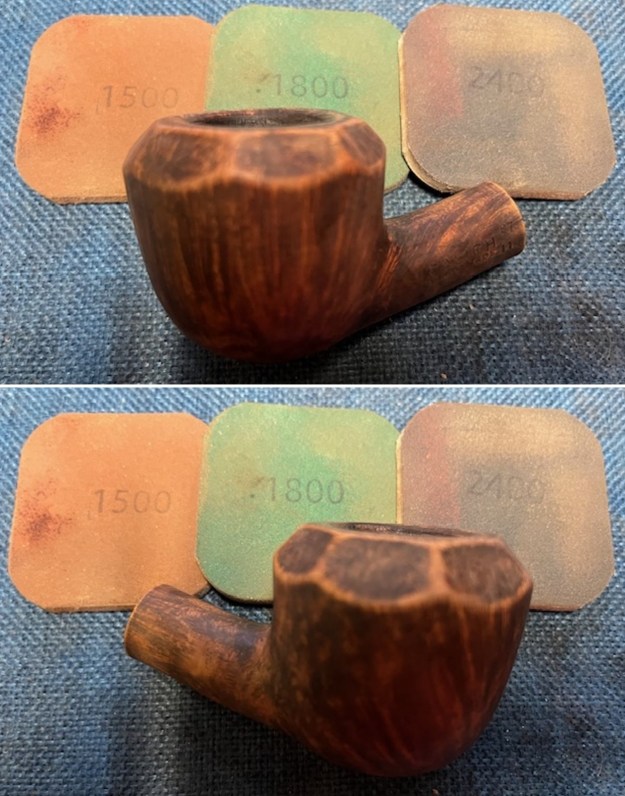


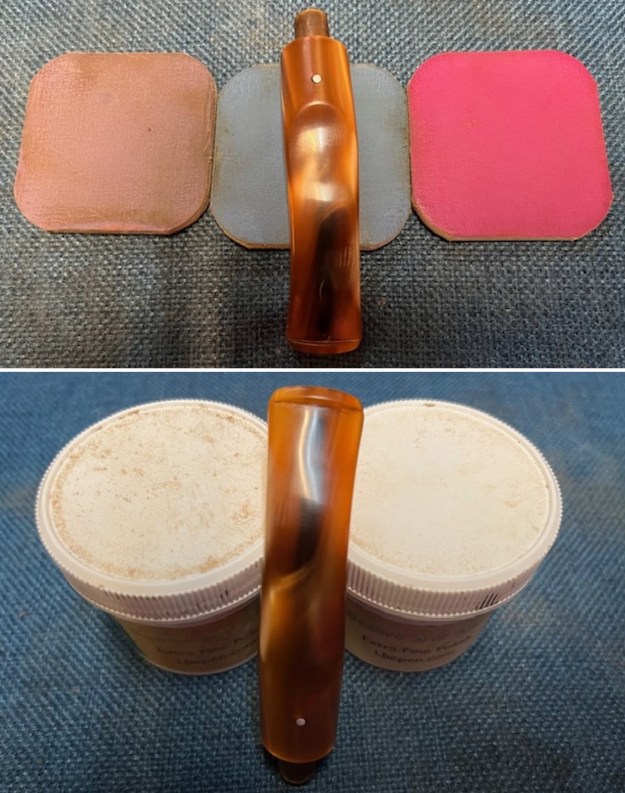
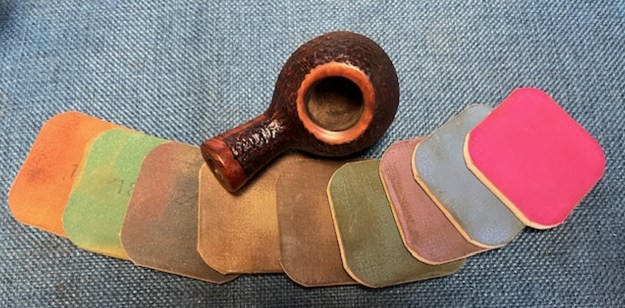
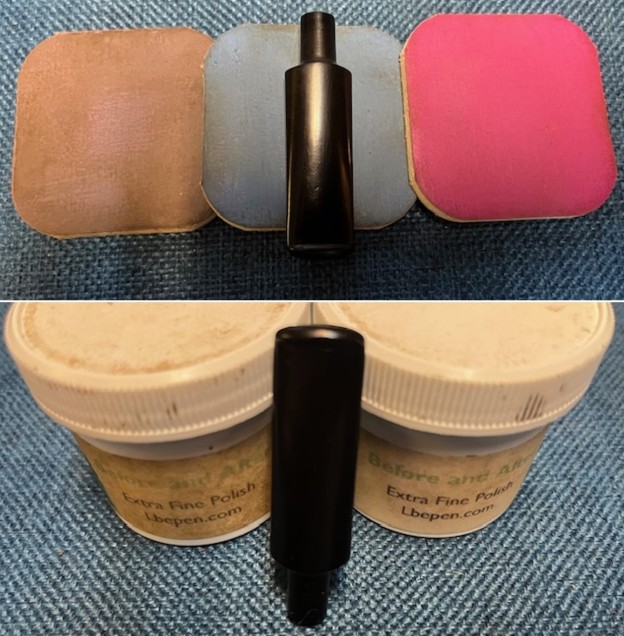
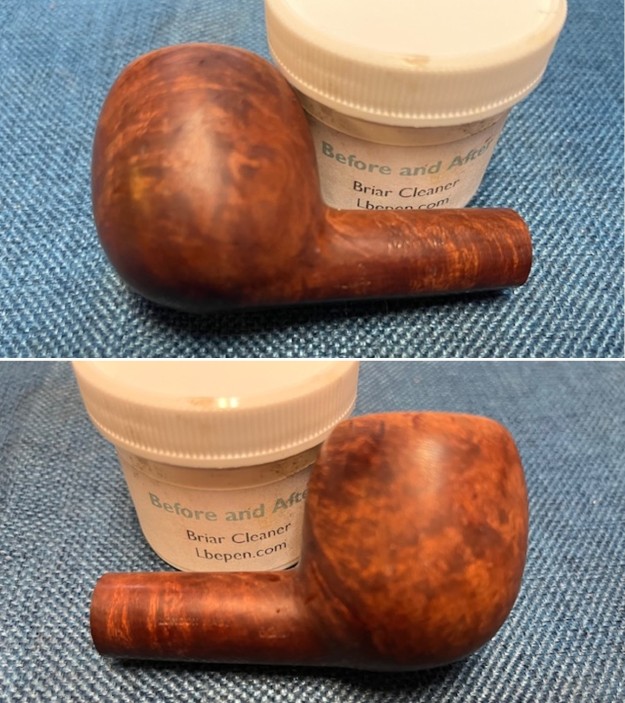
 I rubbed the bowl down with Before & After Restoration Balm. I worked it into the surface of the briar with my fingertips to clean, enliven and protect it. I let the balm sit for ten minutes then buffed with a cotton cloth to raise the shine. Mark Hoover’s Balm is a product that I have come to appreciate and one I use on every pipe I have been working on.
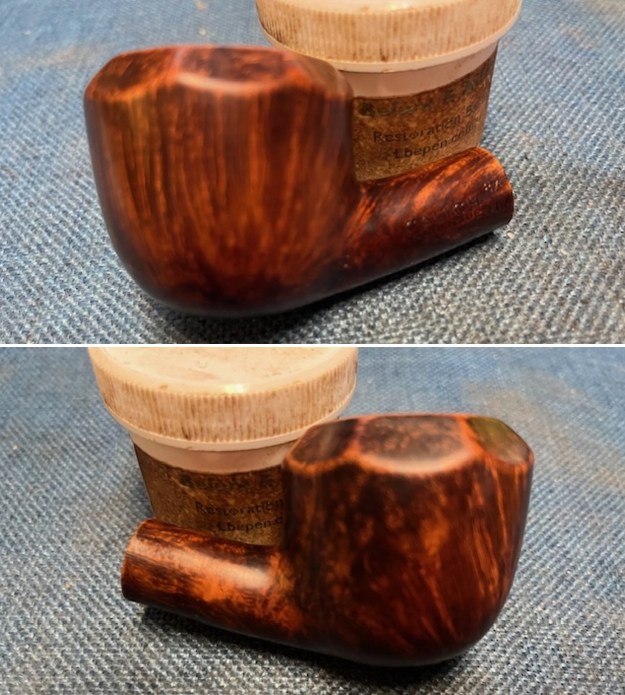
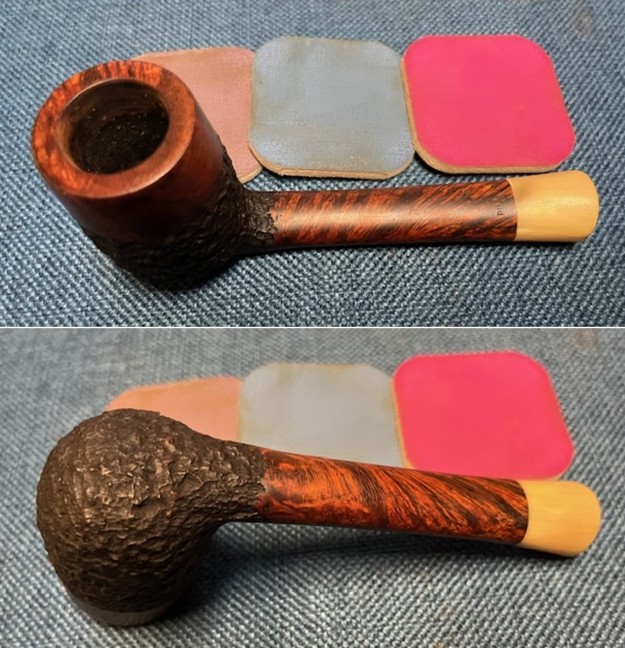
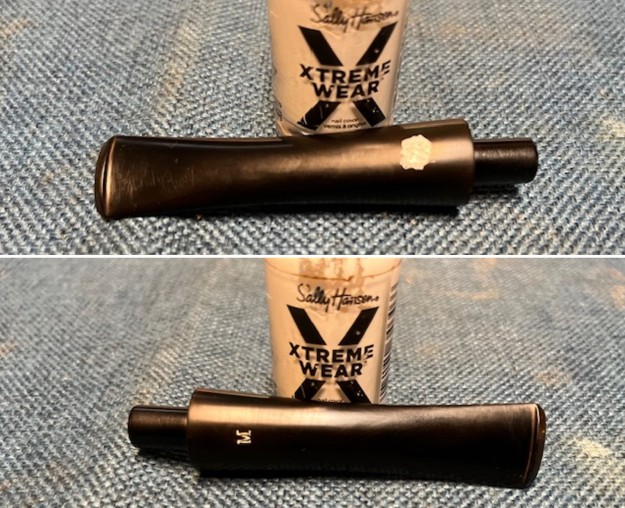
 I set the bowl aside and turned my attention to the stem. The stem had some deep marks from what looked like pliers’ marks on the top and underside just ahead of the button. These marks were rough and very visible. I painted them with the flame of a lighter to try to lift the marks then sanded them out with a folded piece of 220 grit sandpaper and they were removed. The surface was smooth.
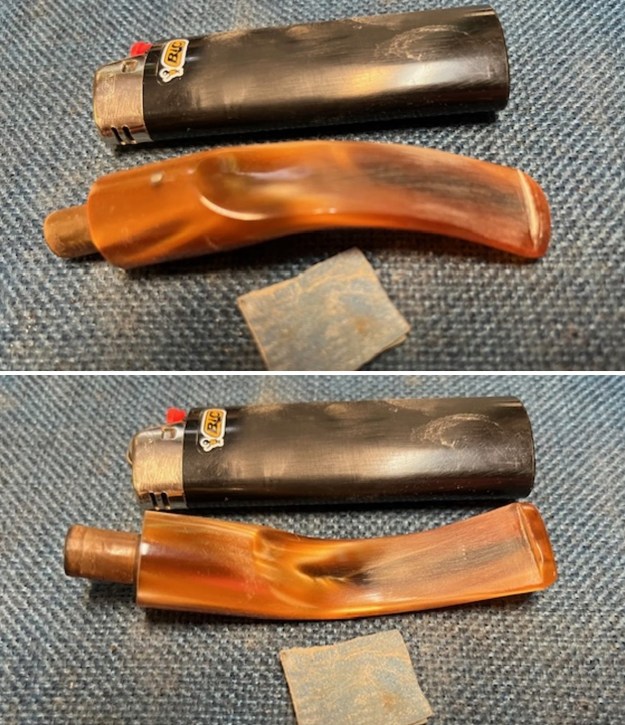 I sanded the stem with 320-3500 grit sanding pads to smooth out the remaining marks and begin polishing the stem. I wiped it down after each sanding pad with a soft cloth. It began to look good.
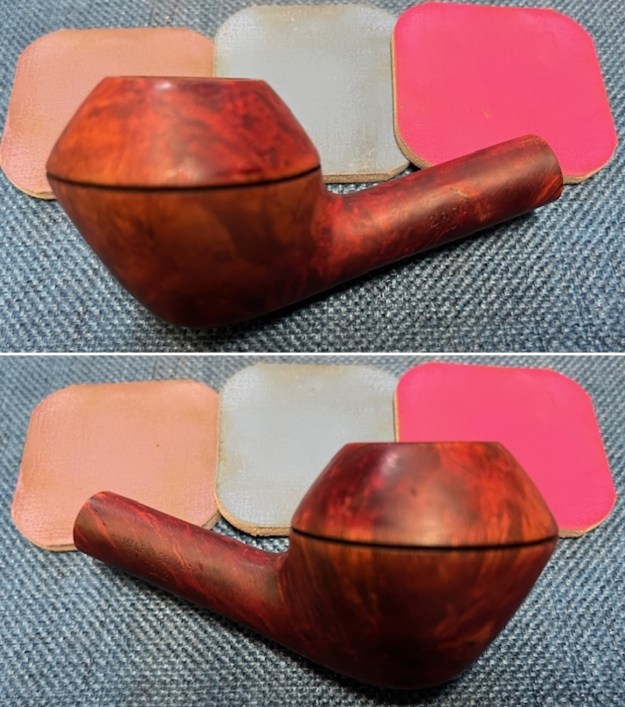
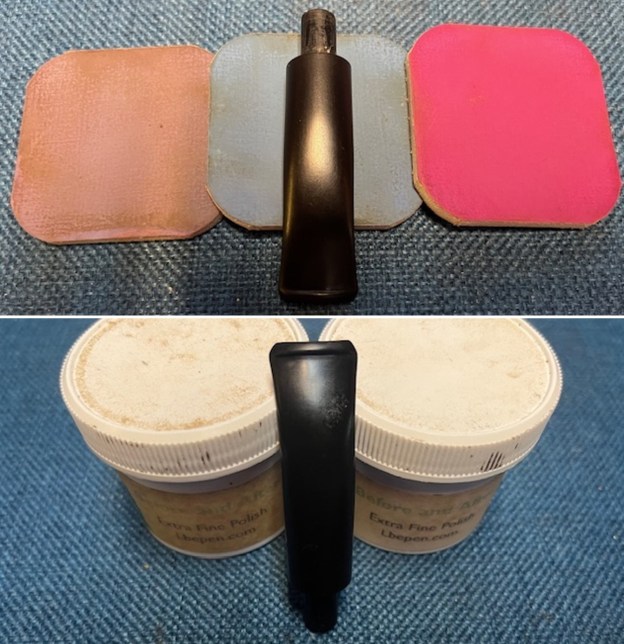
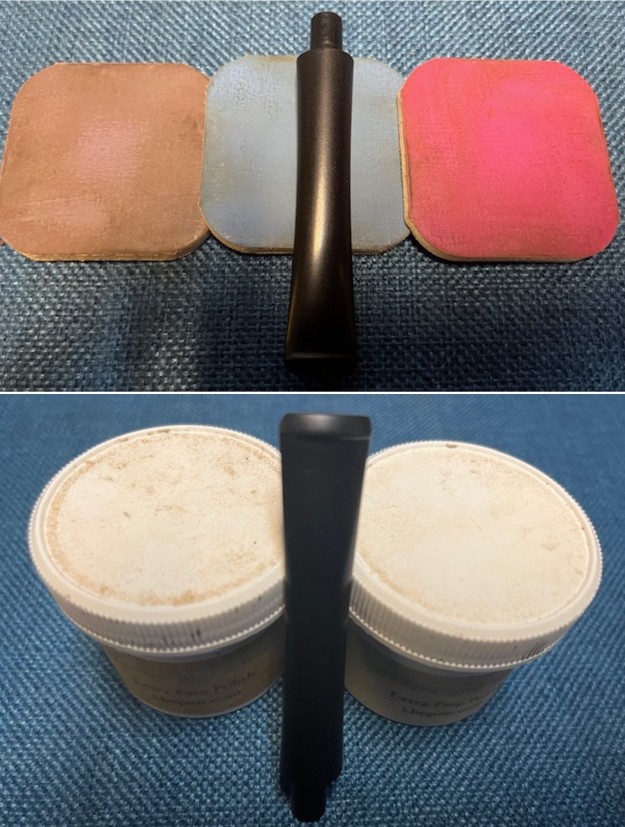
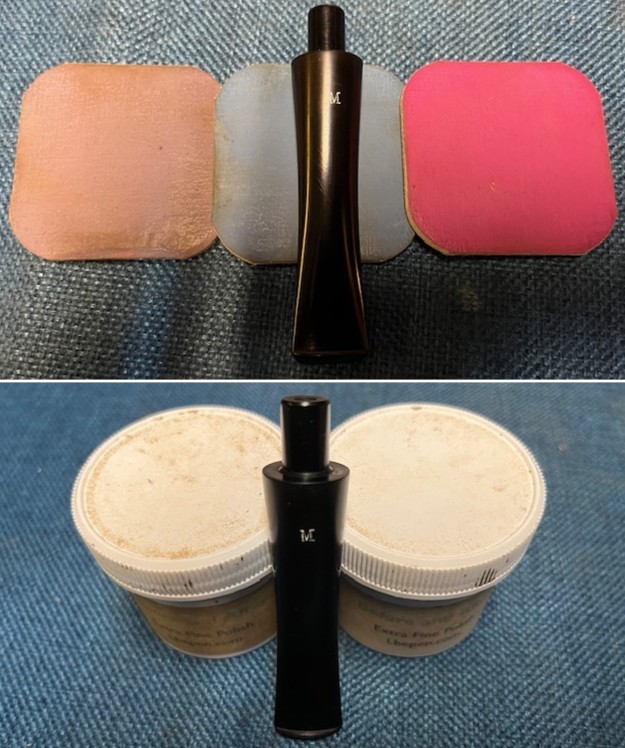
 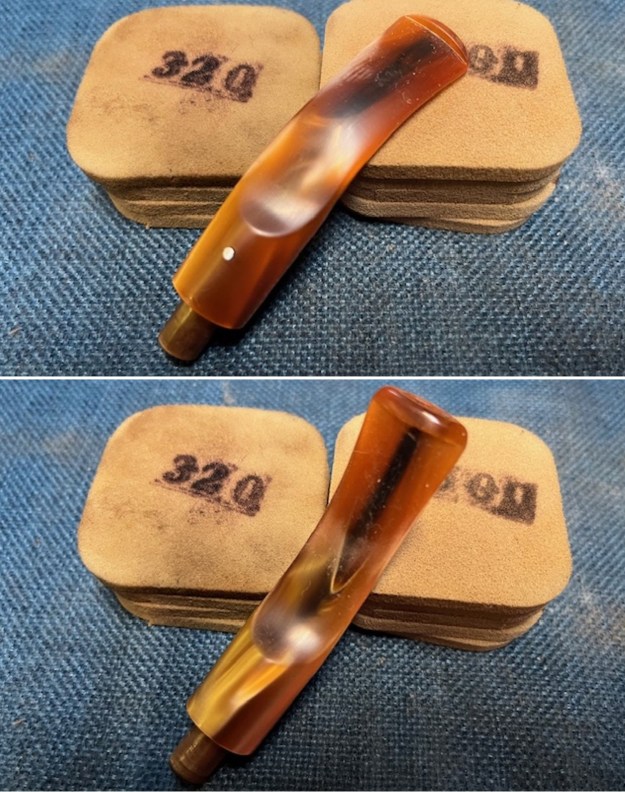 I polished the stem with micromesh sanding pads – wet sanding with 1500-12000 grit pads. I wiped the stem down after each sanding pad with Obsidian Oil. I polished it with Before & After Pipe Stem Polish – both Fine and Extra Fine. Once I had finished the polishing I gave it final coat of oil and set it aside to dry.
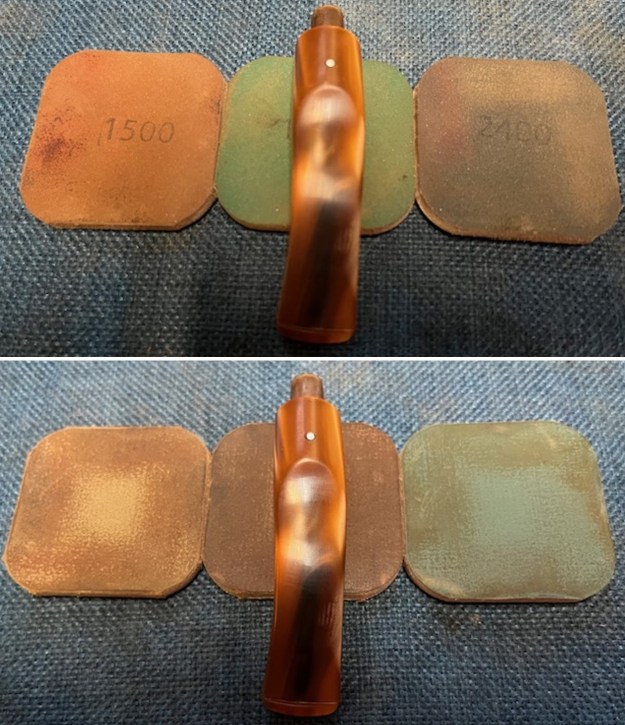
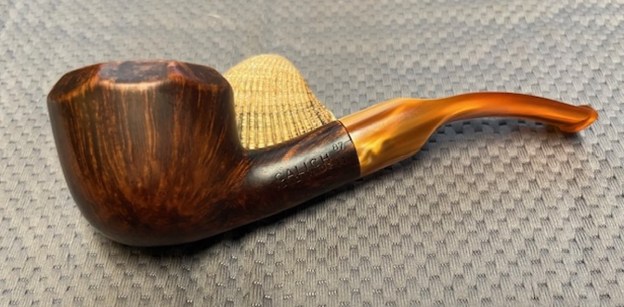
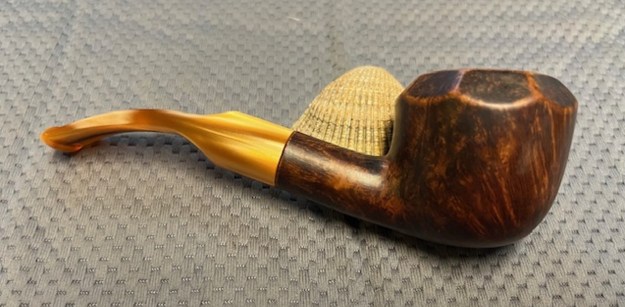
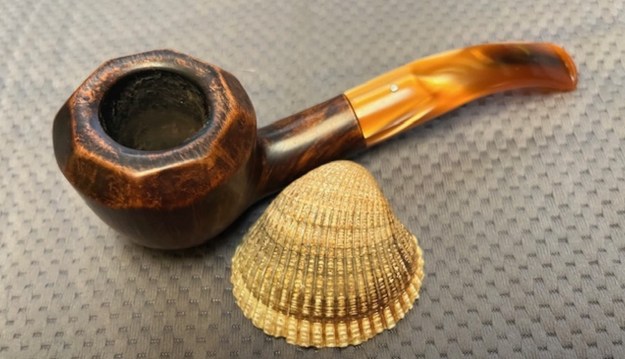
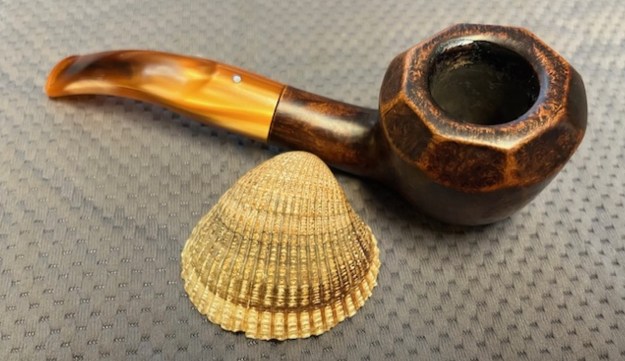
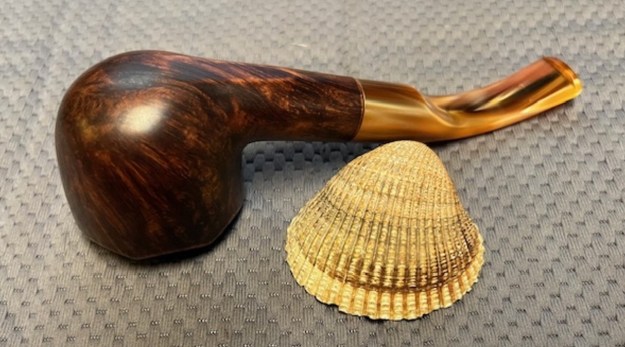
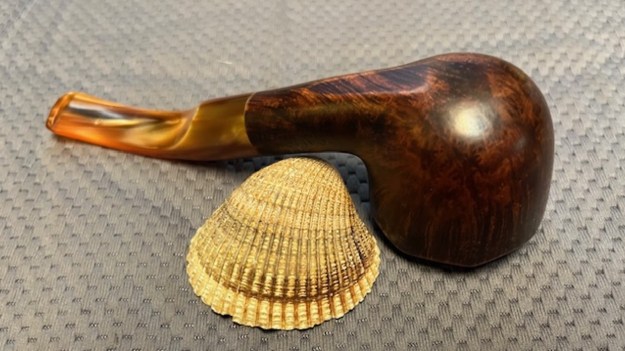
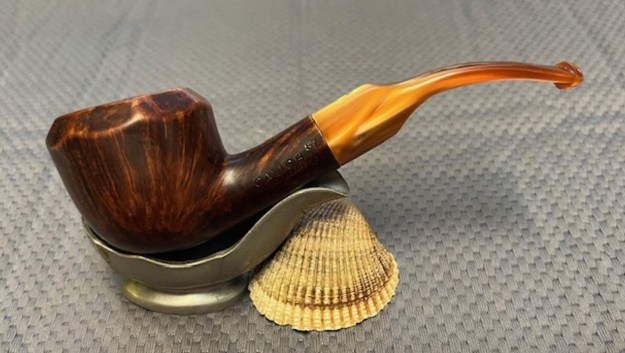
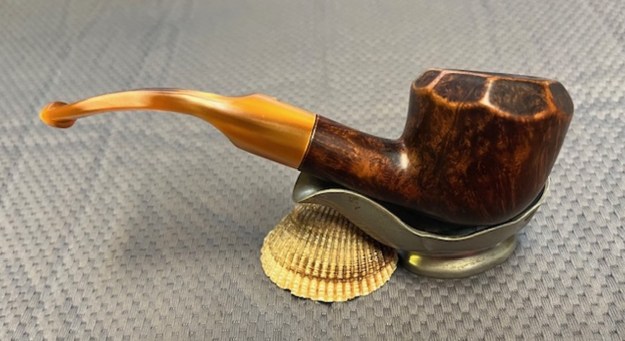
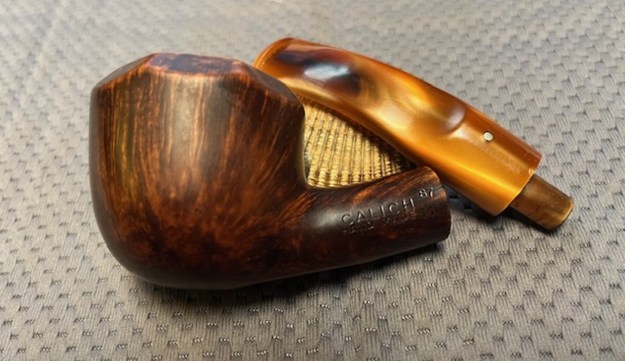
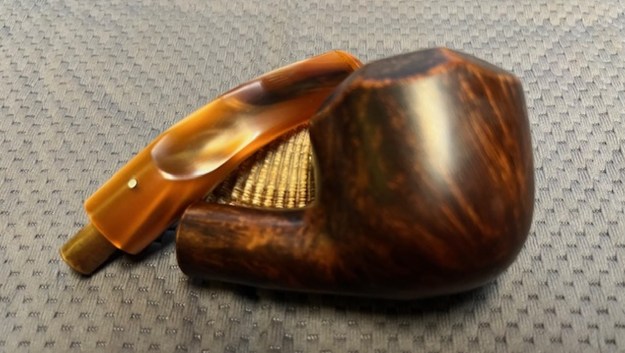
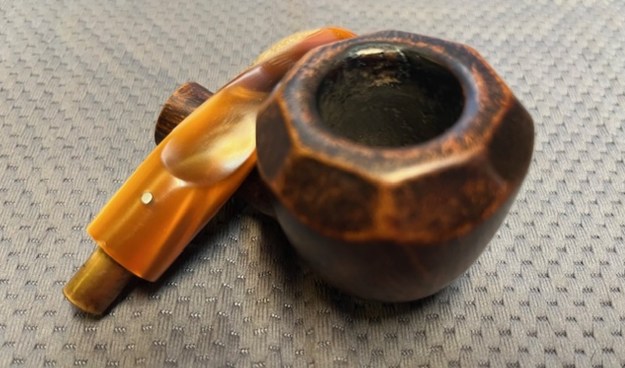
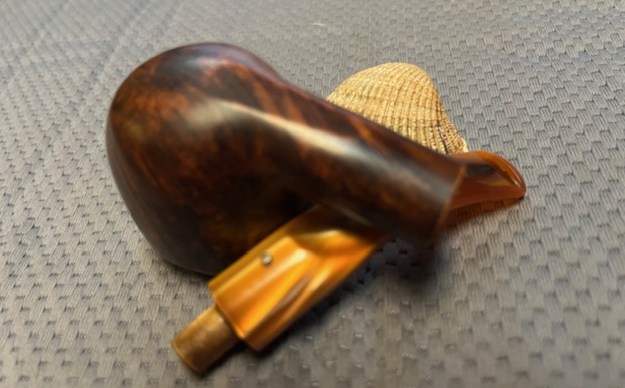
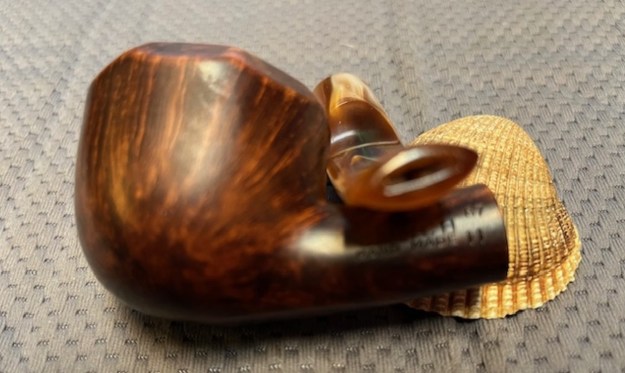
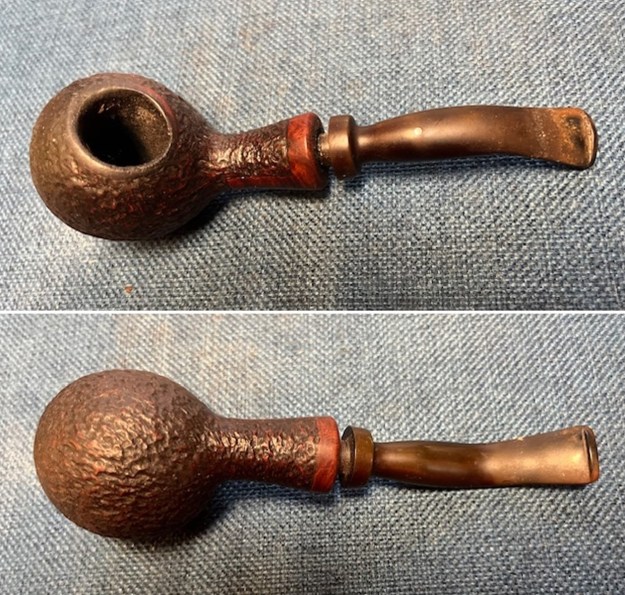
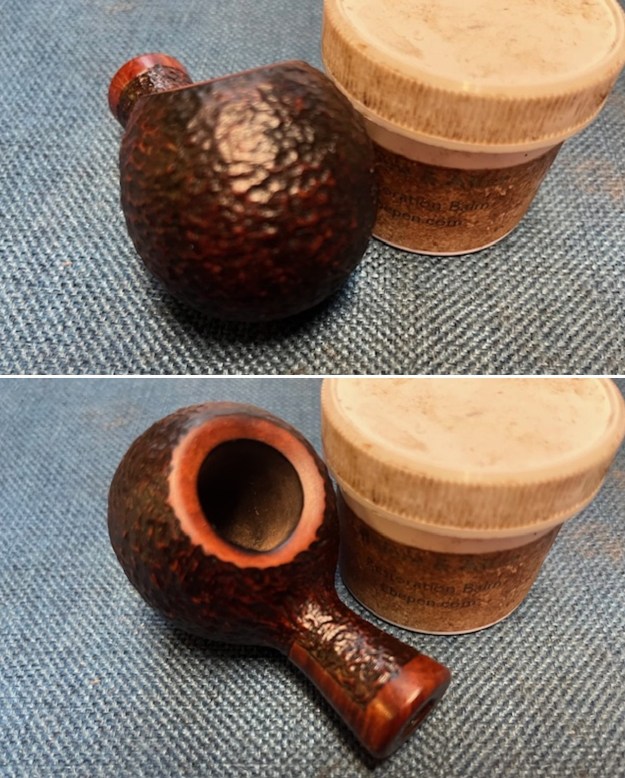
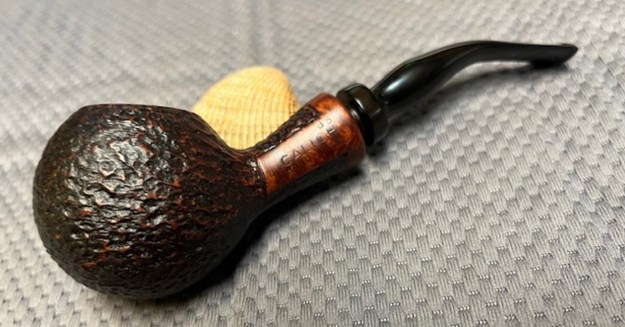
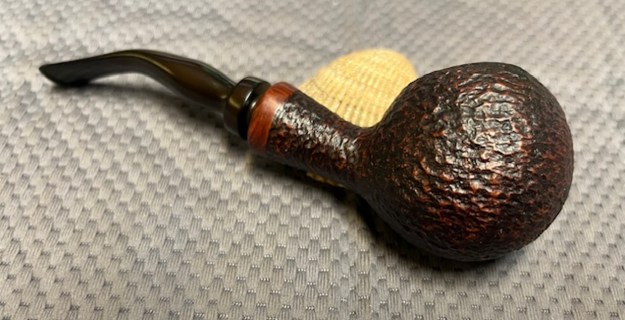
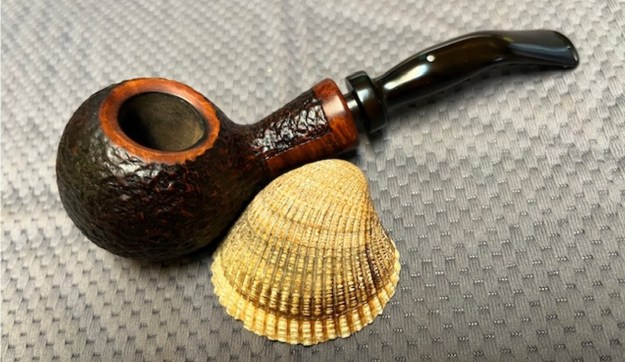
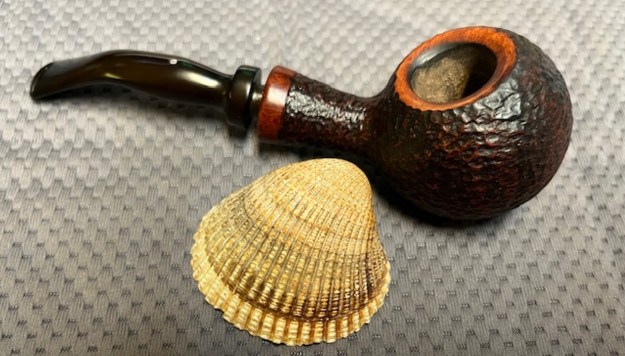
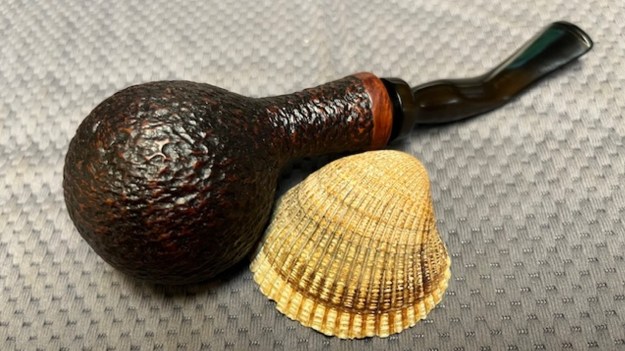
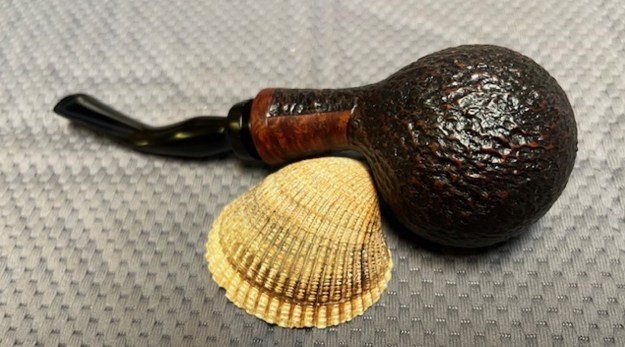
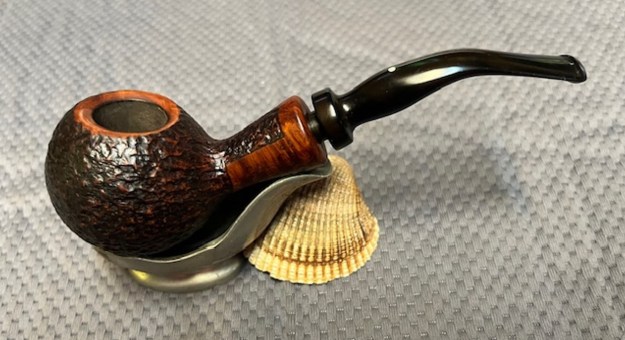
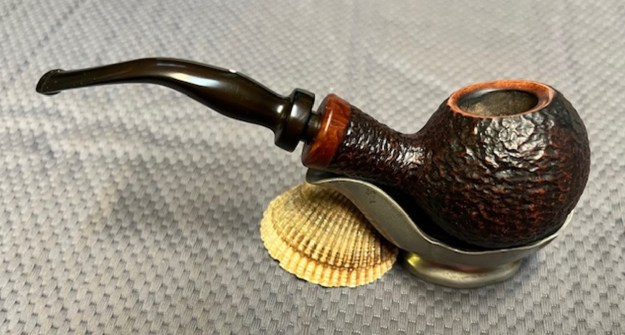
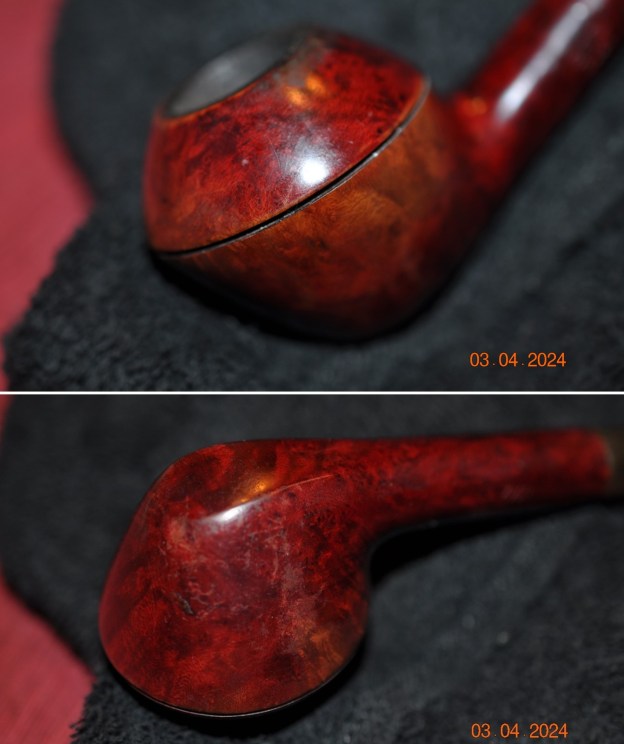
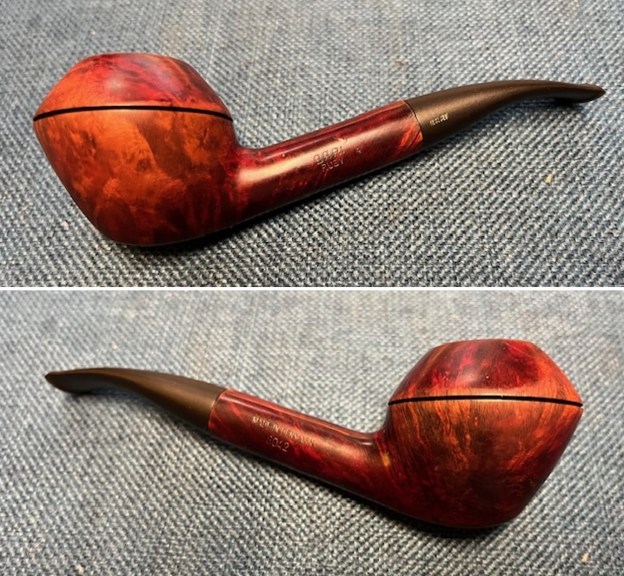
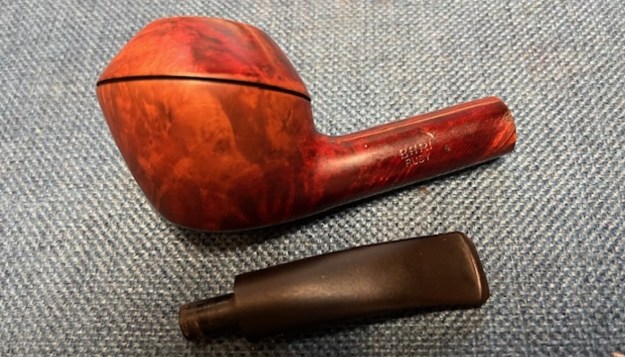
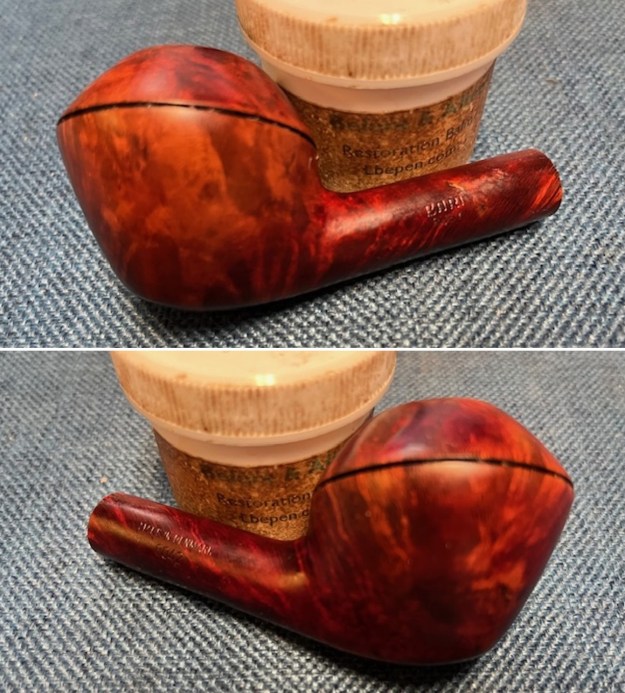
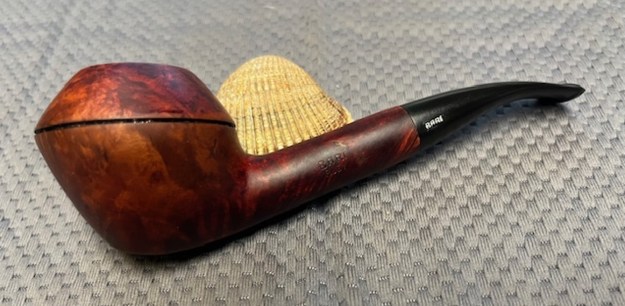
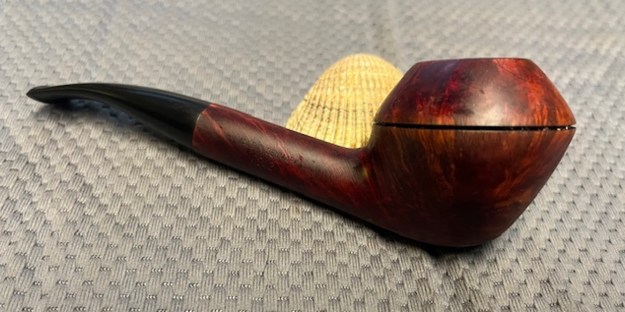
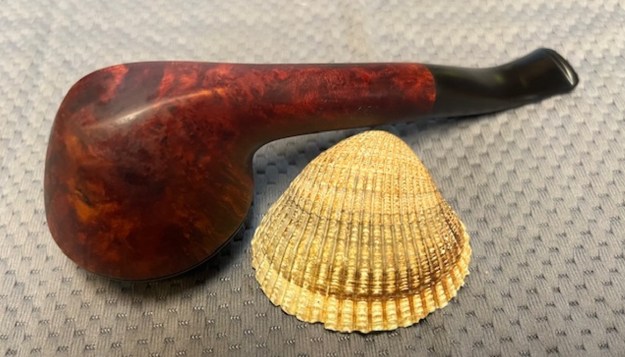
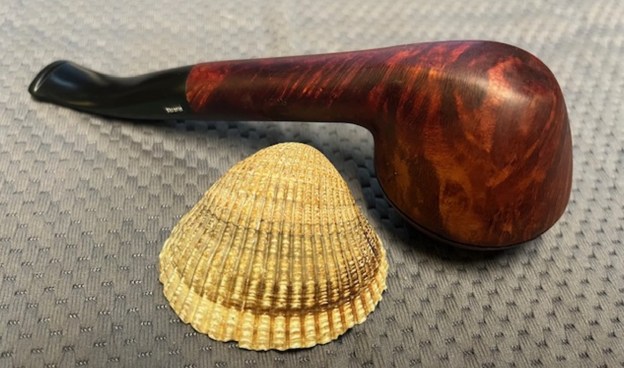
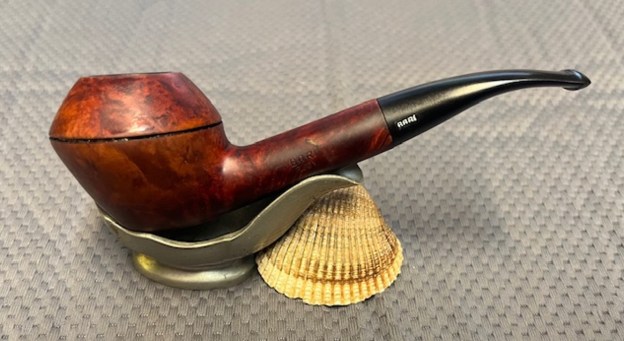
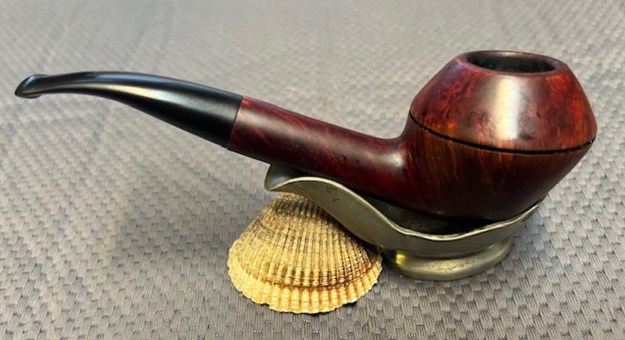
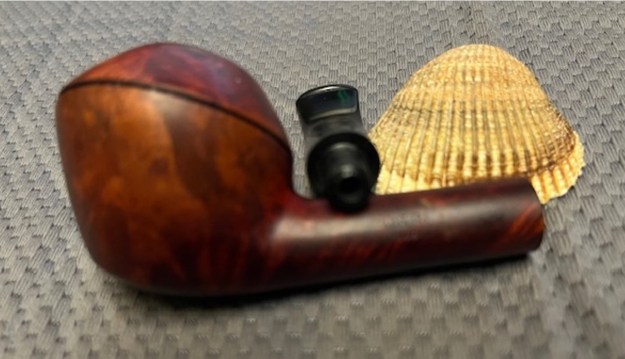
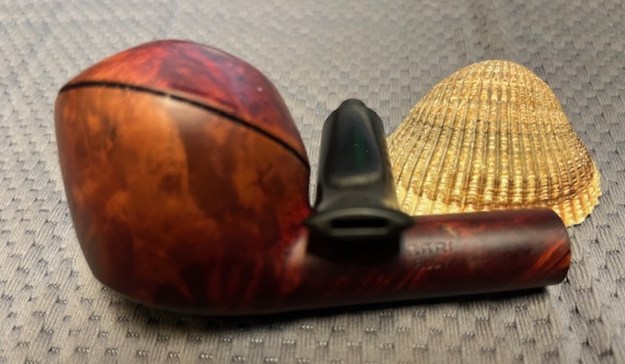
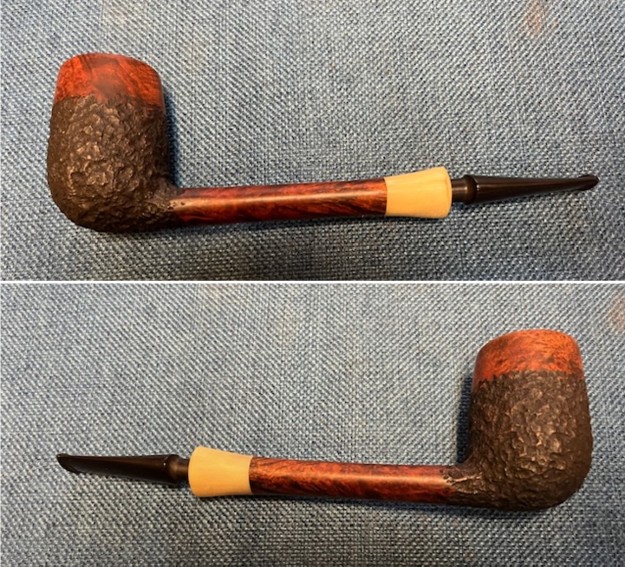
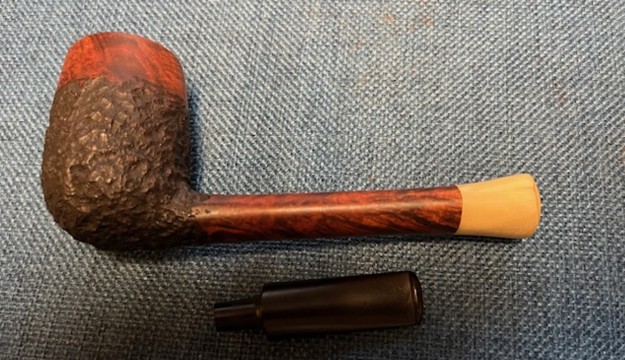
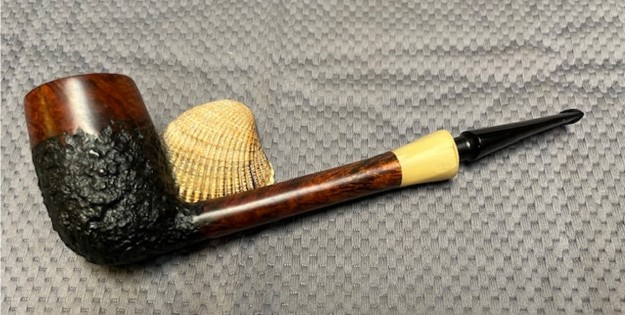
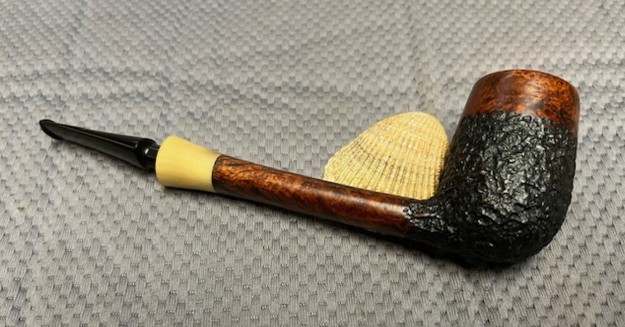
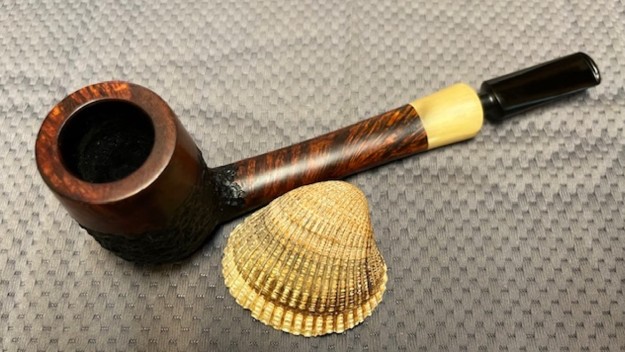
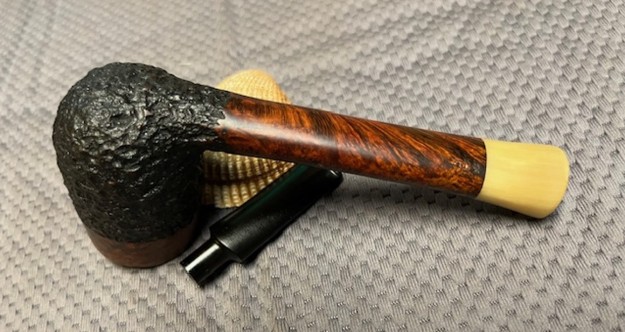
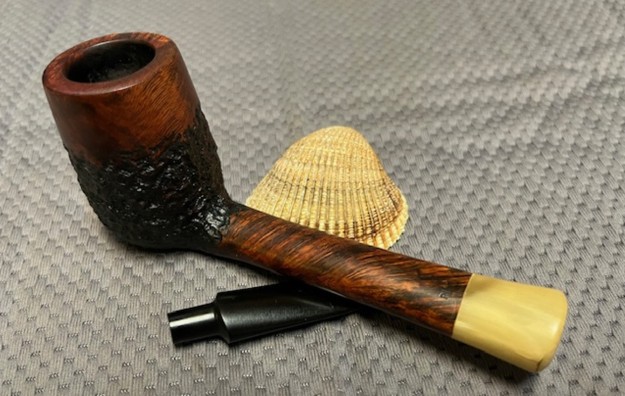
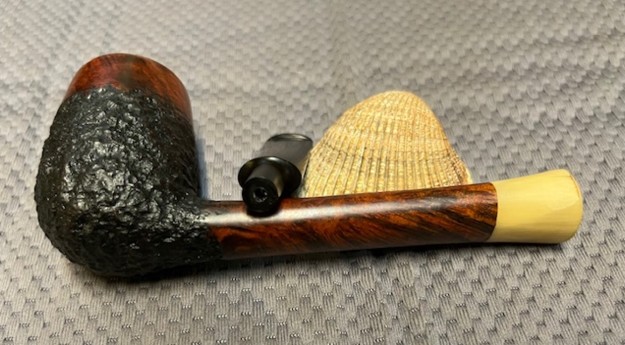
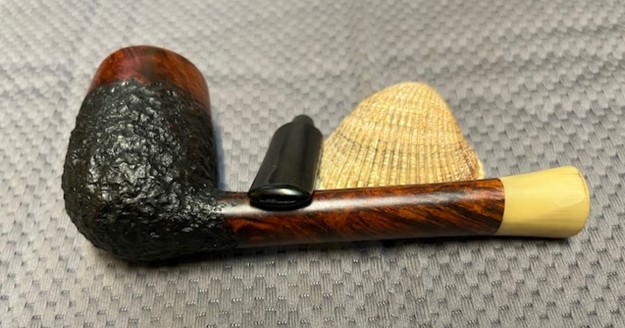
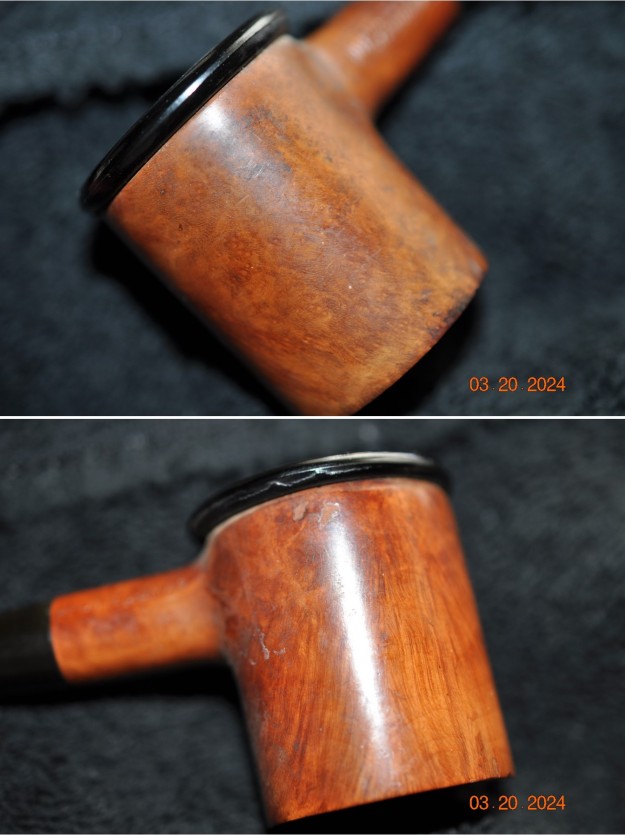
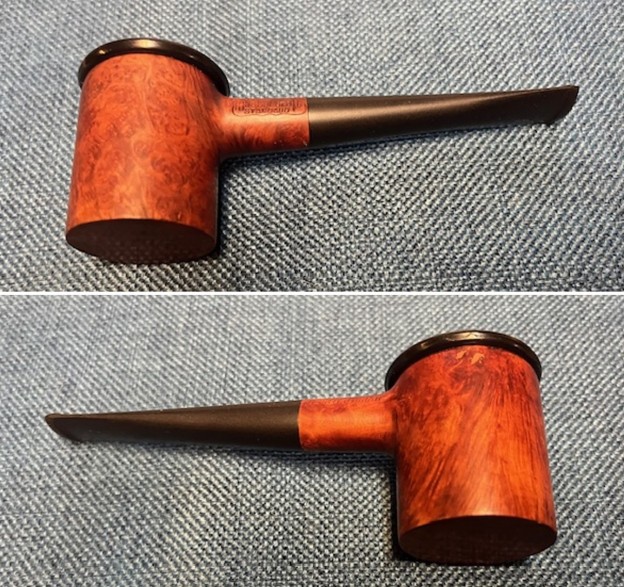
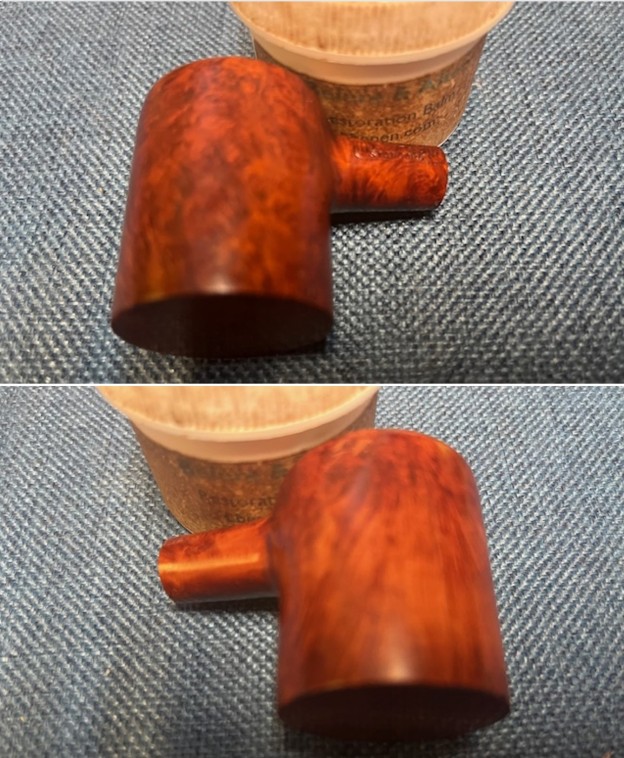
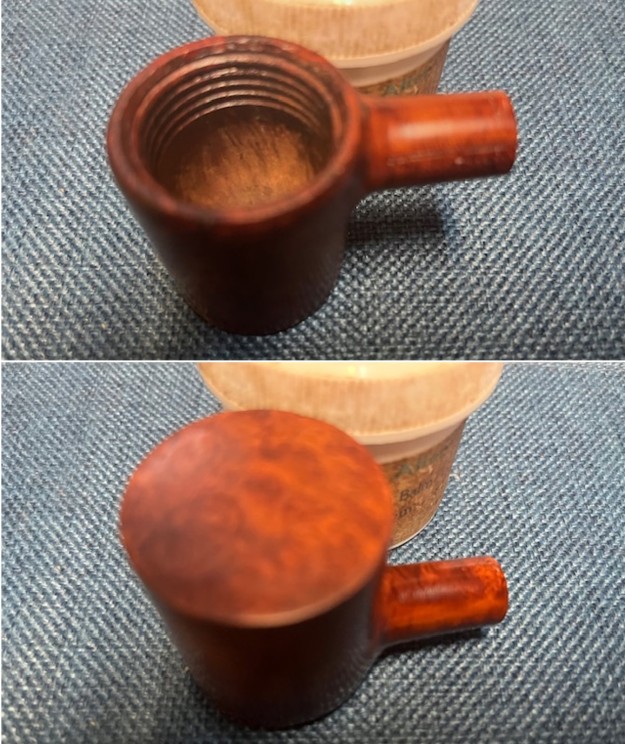
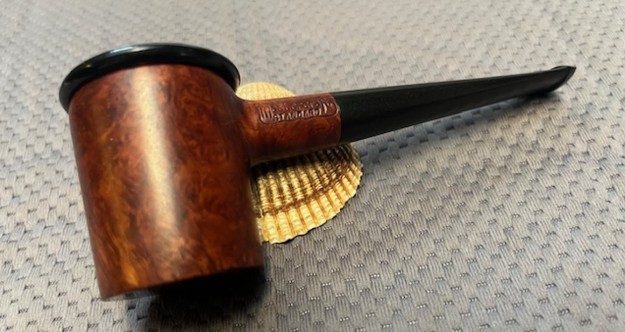
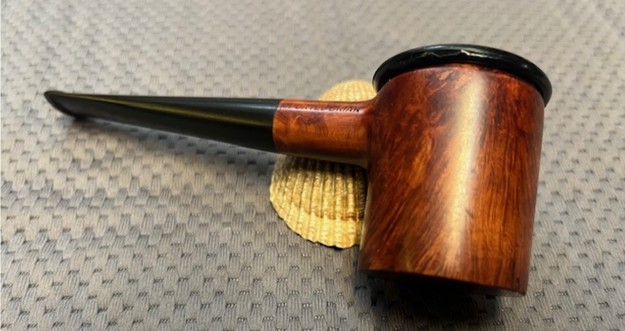
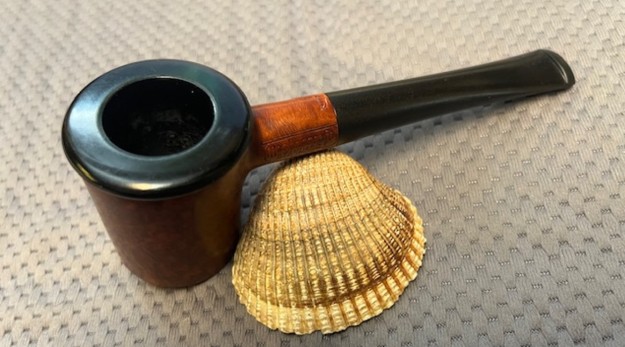
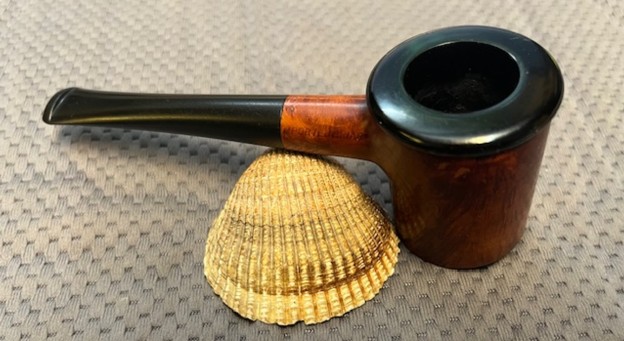
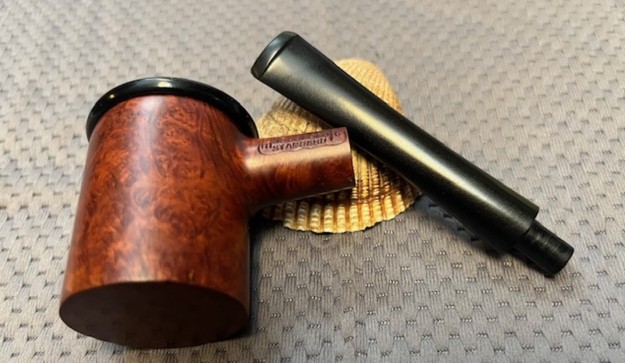
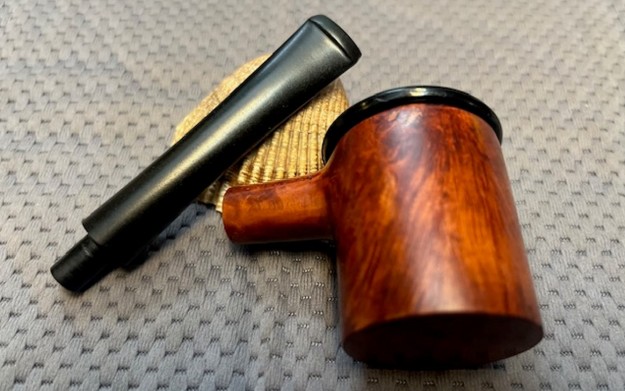
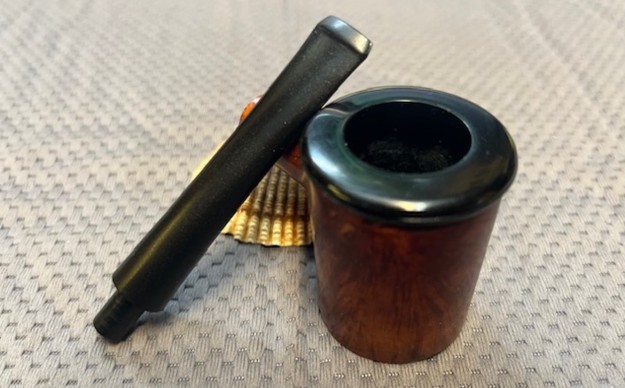
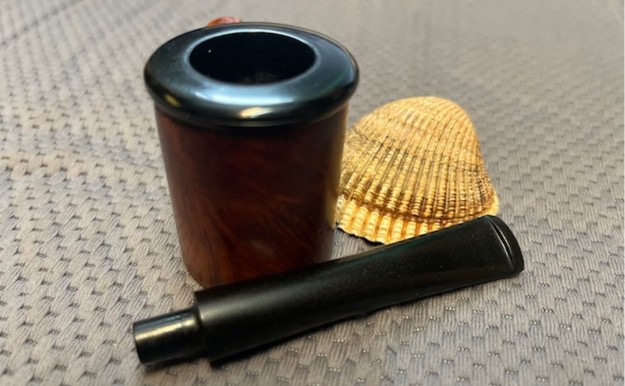
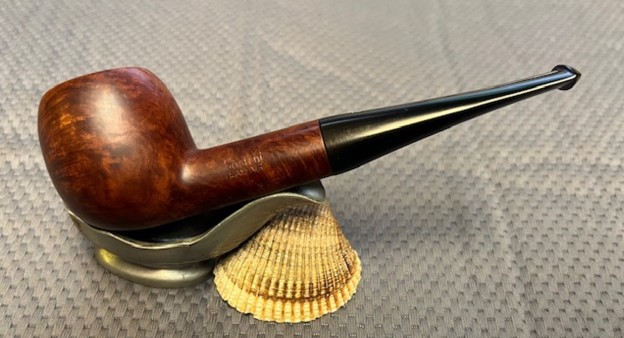
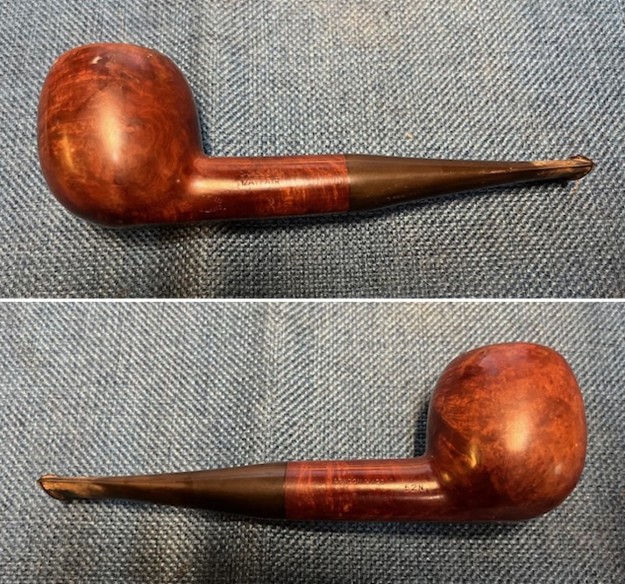
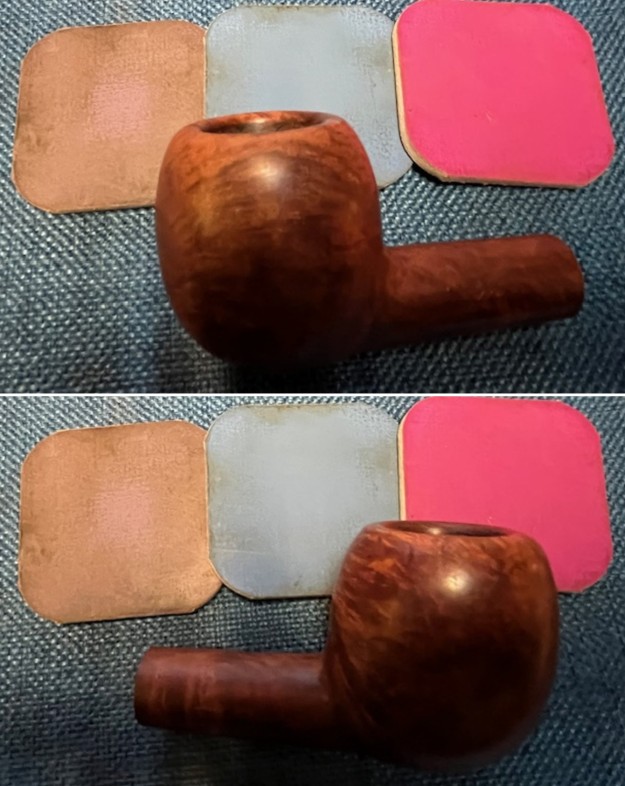
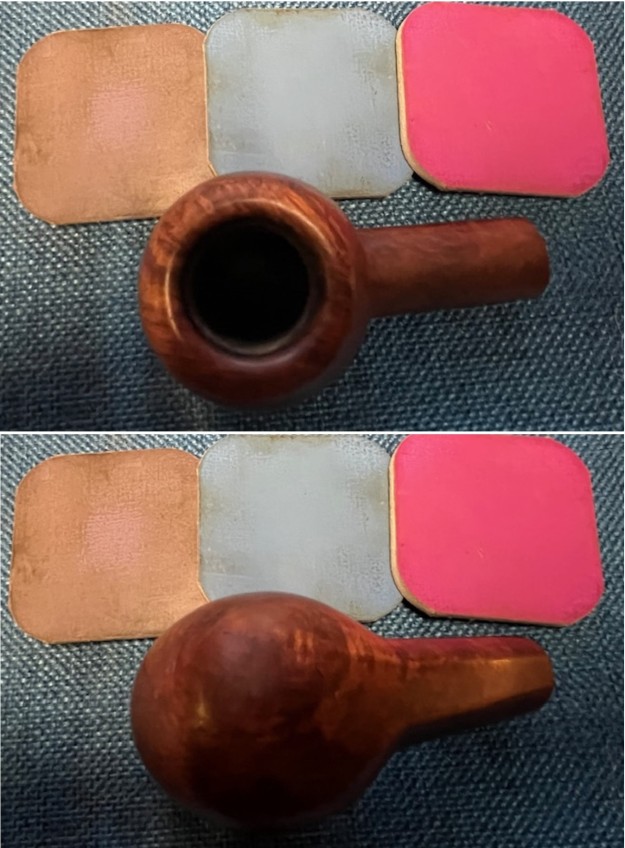
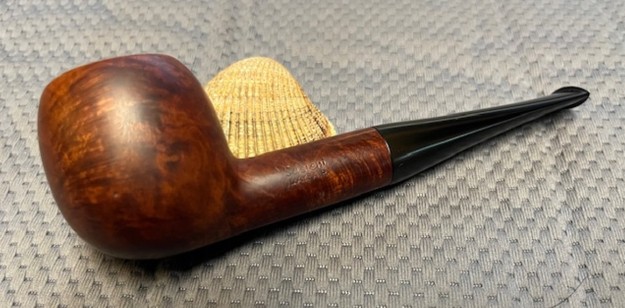
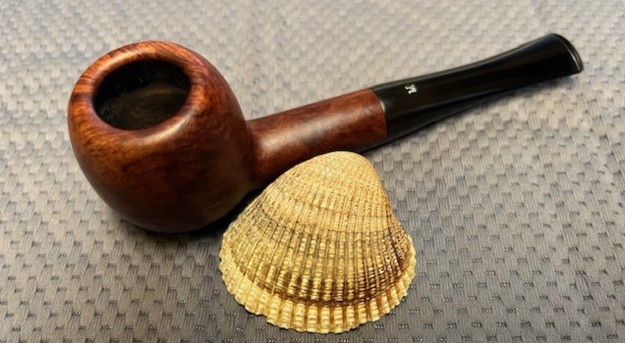
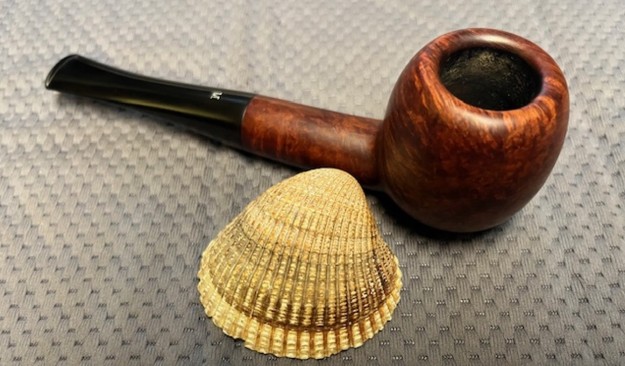
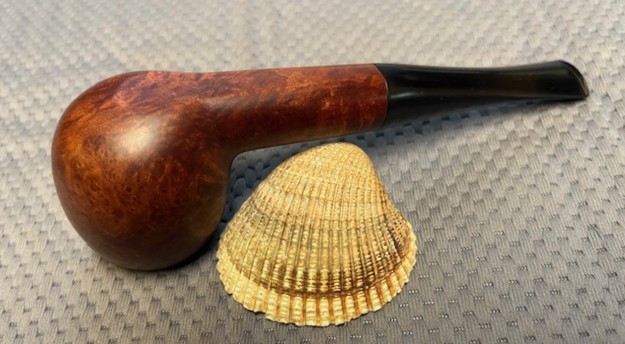
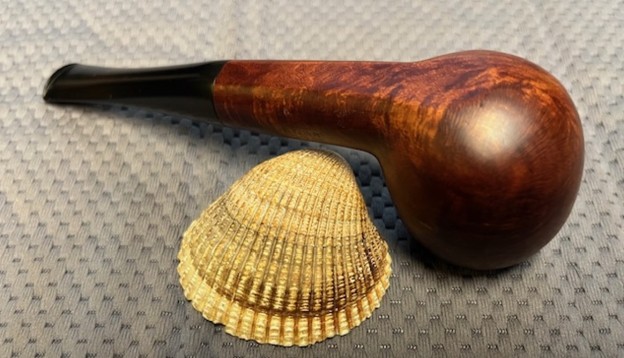
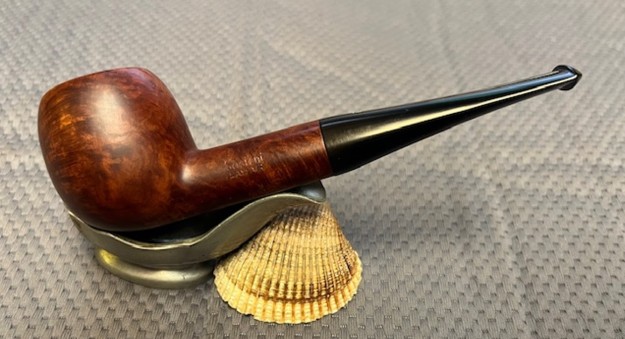
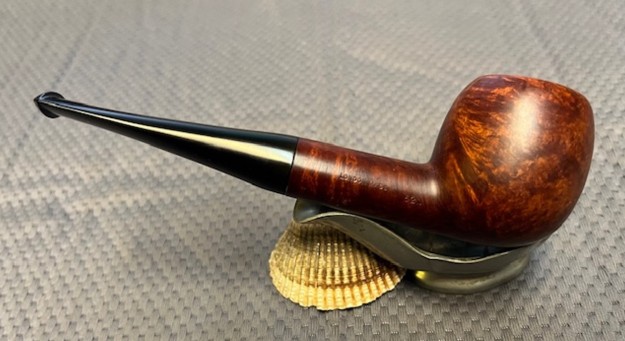
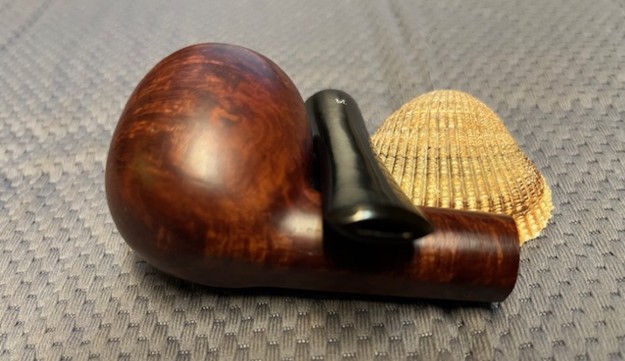
 This is the second of five pipes from Kathleen that I am working on. It is a beautifully shaped John Calich Hand Made Grade 11 Smooth Bent Rhodesian. It has the kind of beauty I have come to expect from John’s pipes. I put the bowl and stem back together. I polished the bowl and stem with Blue Diamond to polish out the scratches in the briar and the vulcanite. I gave the bowl and the stem multiple coats of carnauba wax. I buffed the pipe with a clean buffing pad to raise the shine. I hand buffed it with a microfiber cloth to deepen the shine. The pipe polished up pretty nicely. The smooth finish is well done and the reshaped rim cap look really good with the variegated acrylic stem. This Calich Hand Made Bent Rhodesian was a fun pipe to bring back to life. It is a comfortable pipe to hold in the hand. The finished pipe is shown in the photos below. The dimensions of the pipe are Length: 6 inches, Height: 2 inches, Outside diameter of the bowl: 1 ¾ inches, Chamber diameter: 7/8 of an inch. The weight of the pipe is 61 grams/2.12 ounces. Thanks for reading this blog and my reflections on the pipe while I worked on it. Once I finish the other three pipes in the lot I will be sending them back to Kathleen for her husband to enjoy once again.


