Author Archives: rebornpipes

A “King’s Imperial” Opera Pipe Reborn


Blog by Steve Laug

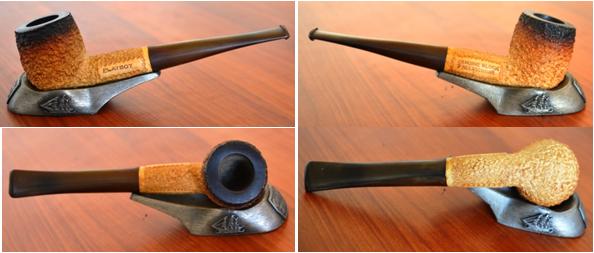
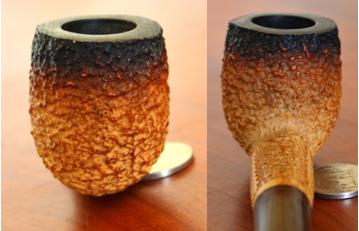
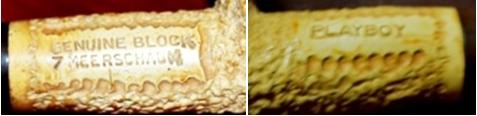
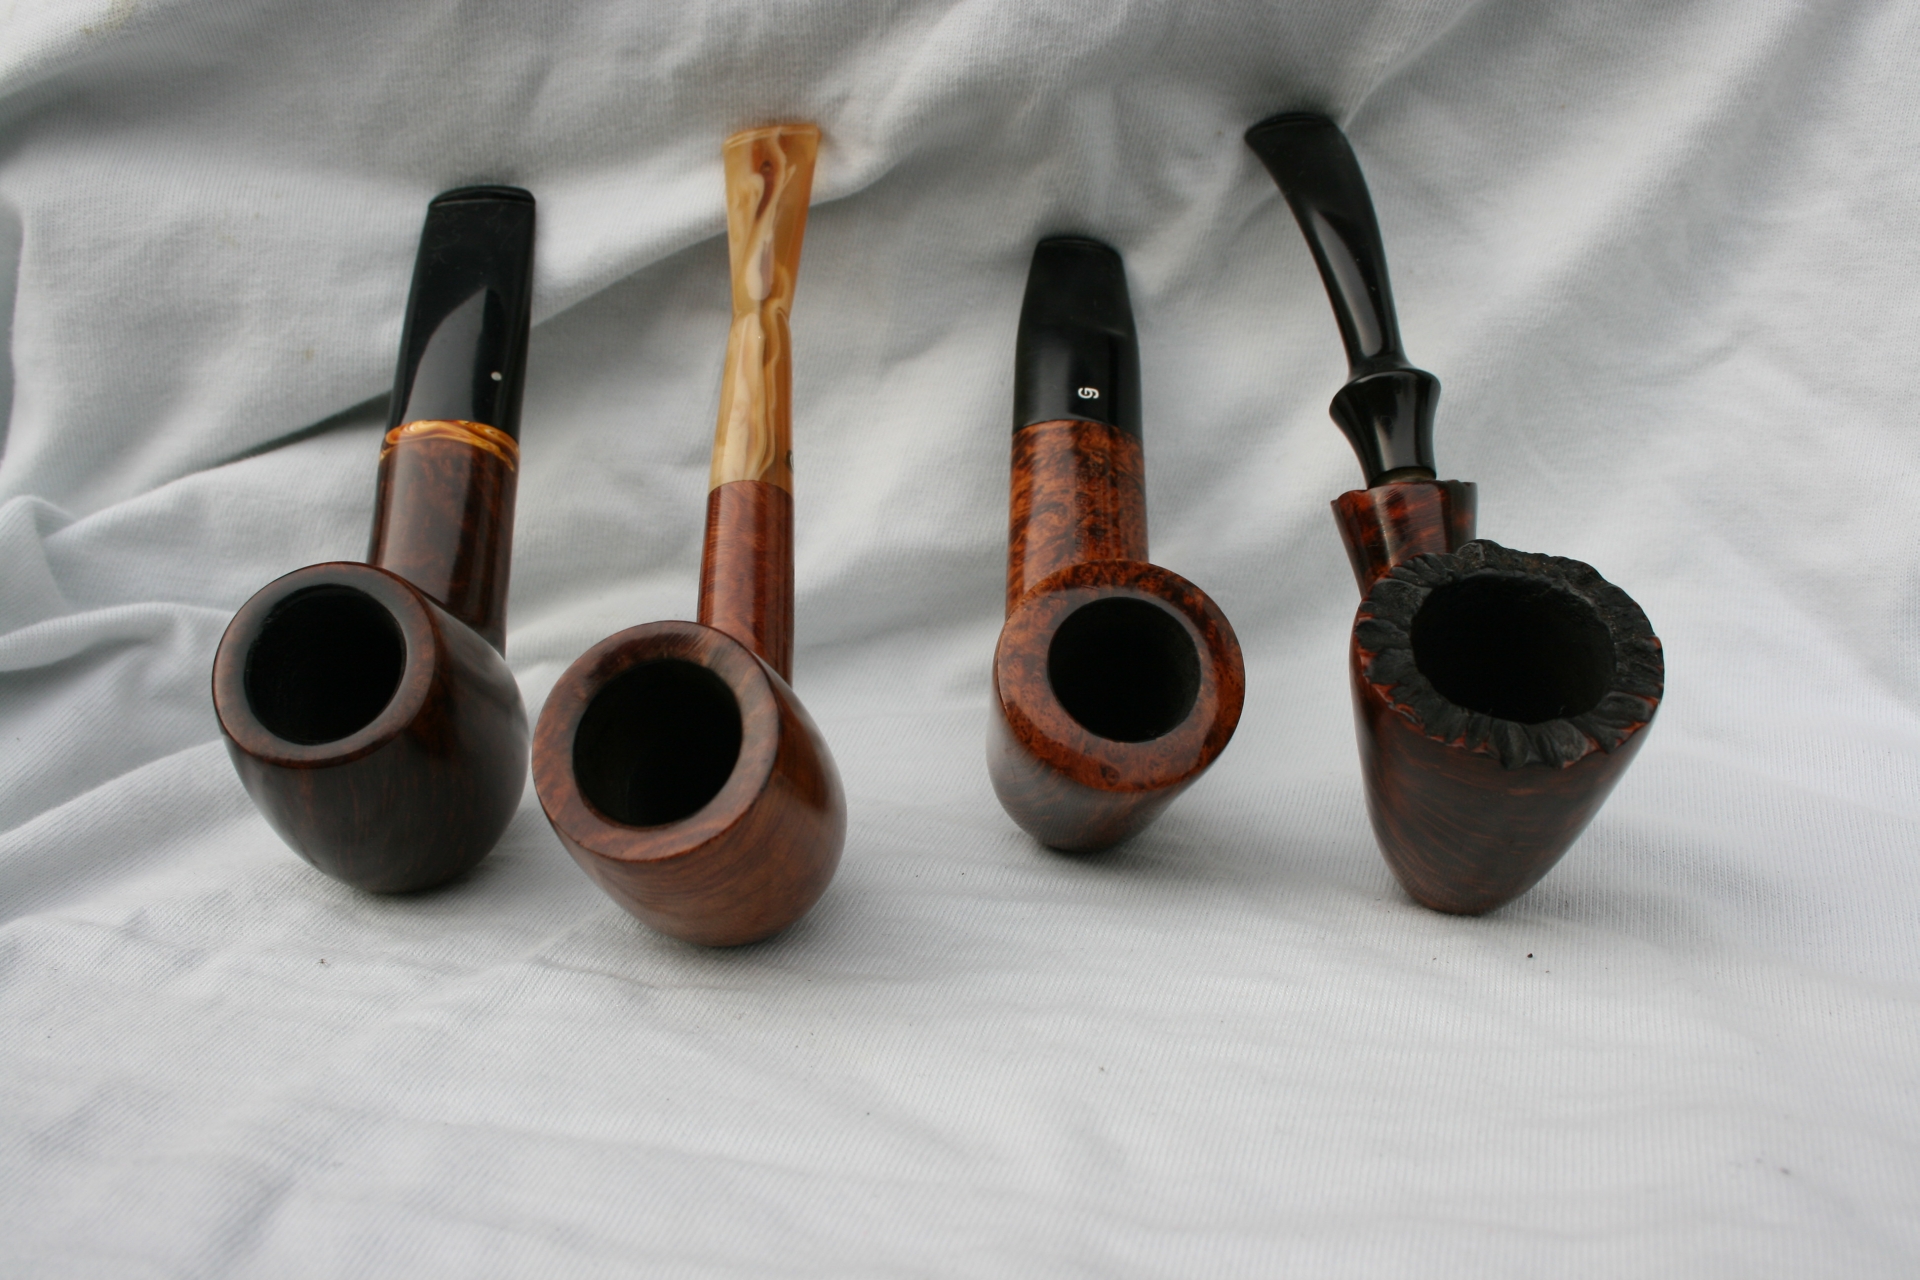
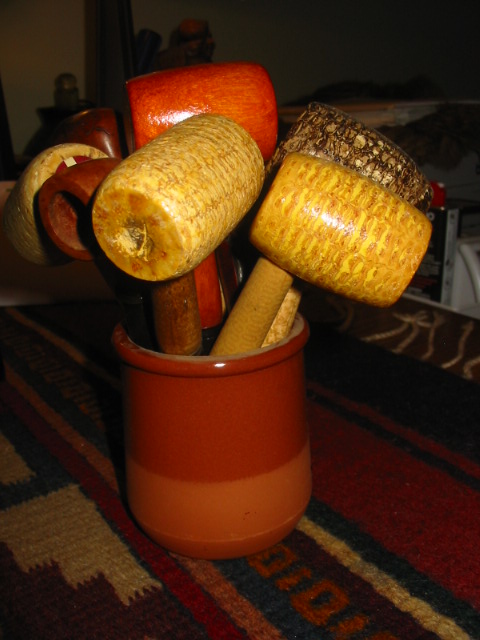
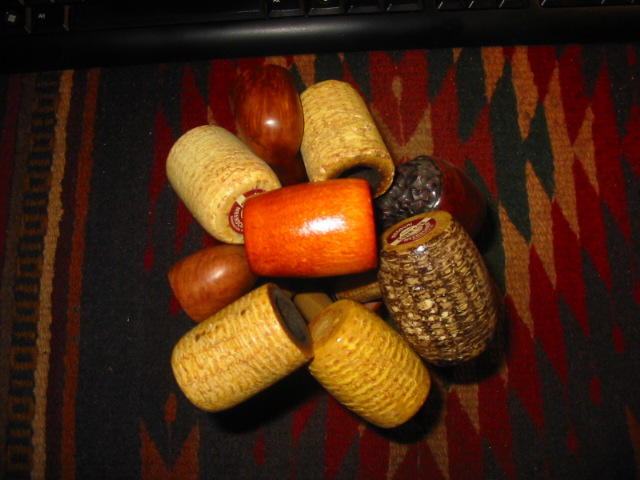
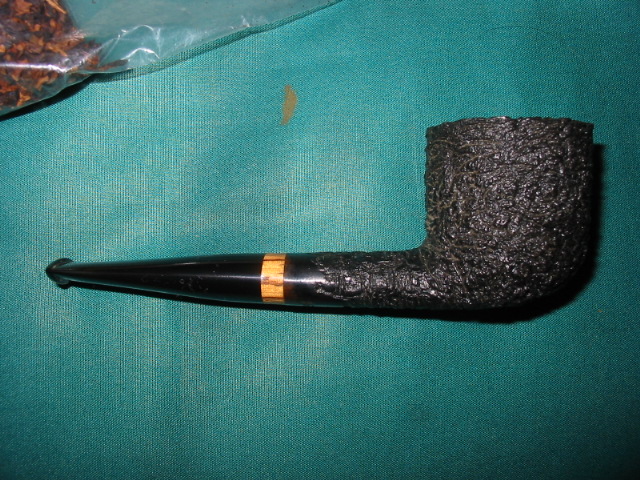
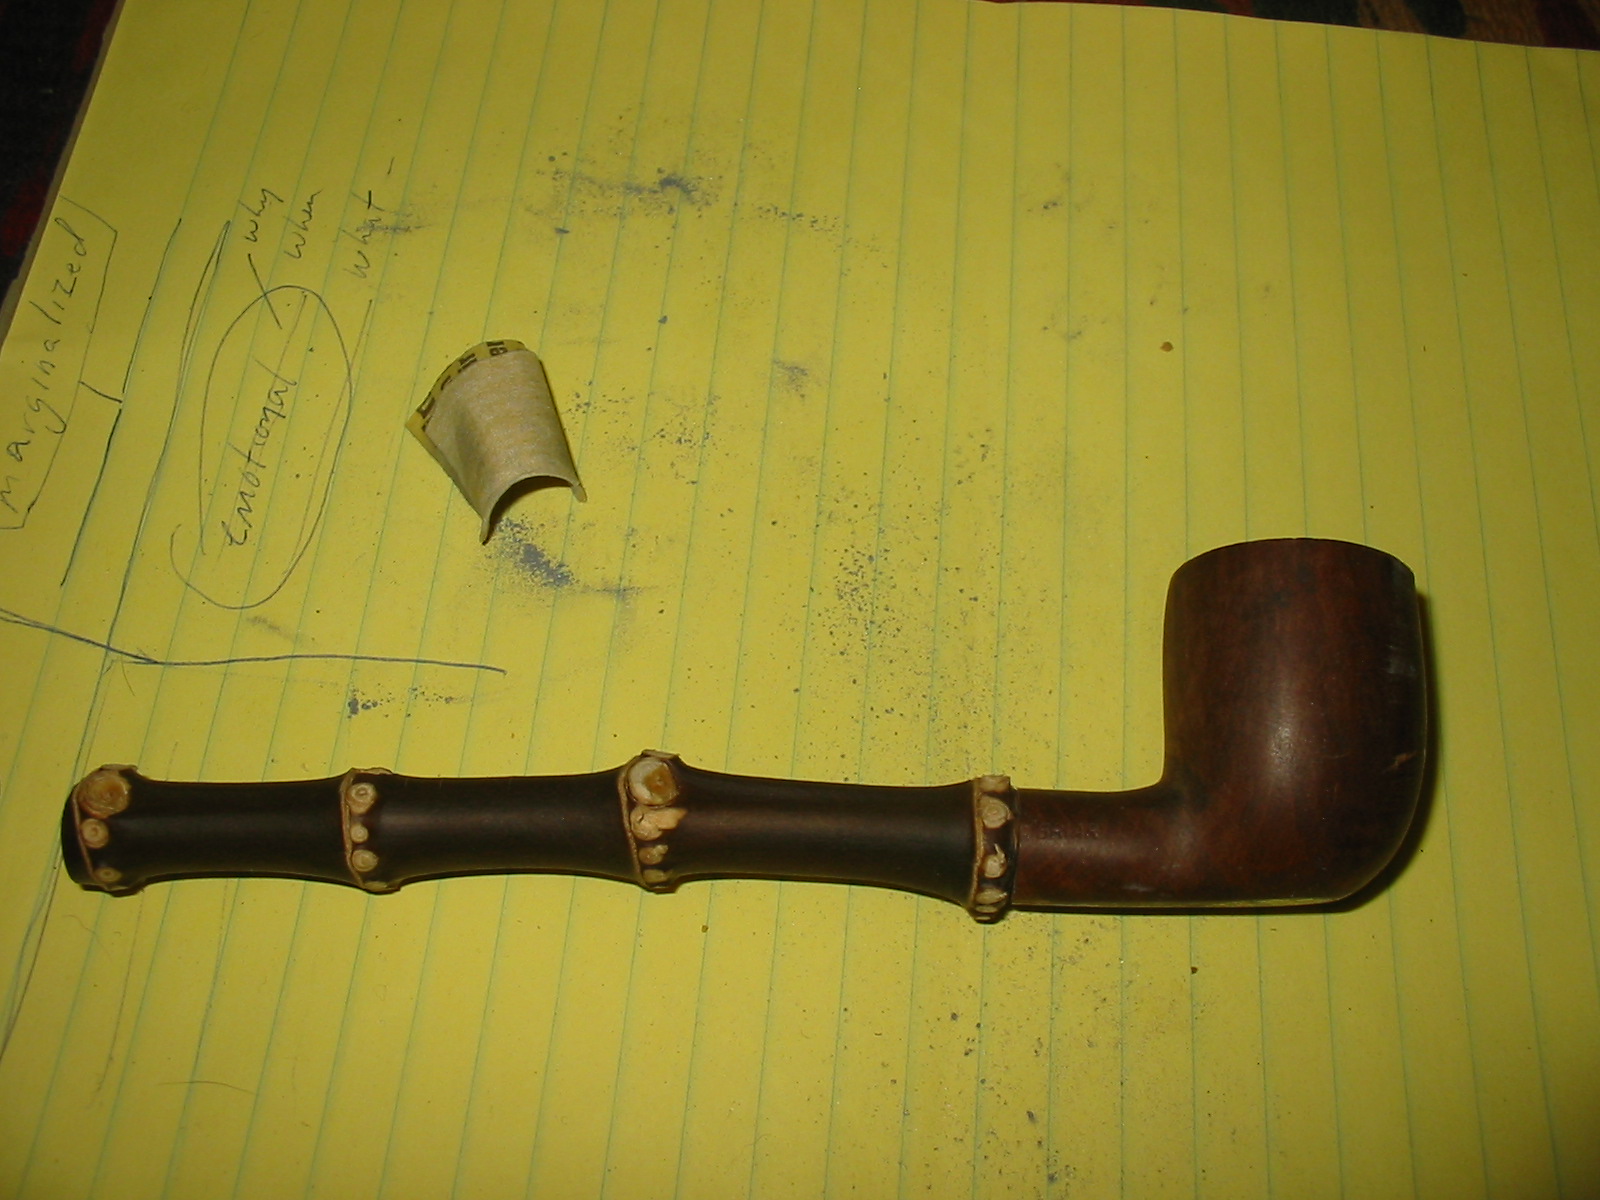
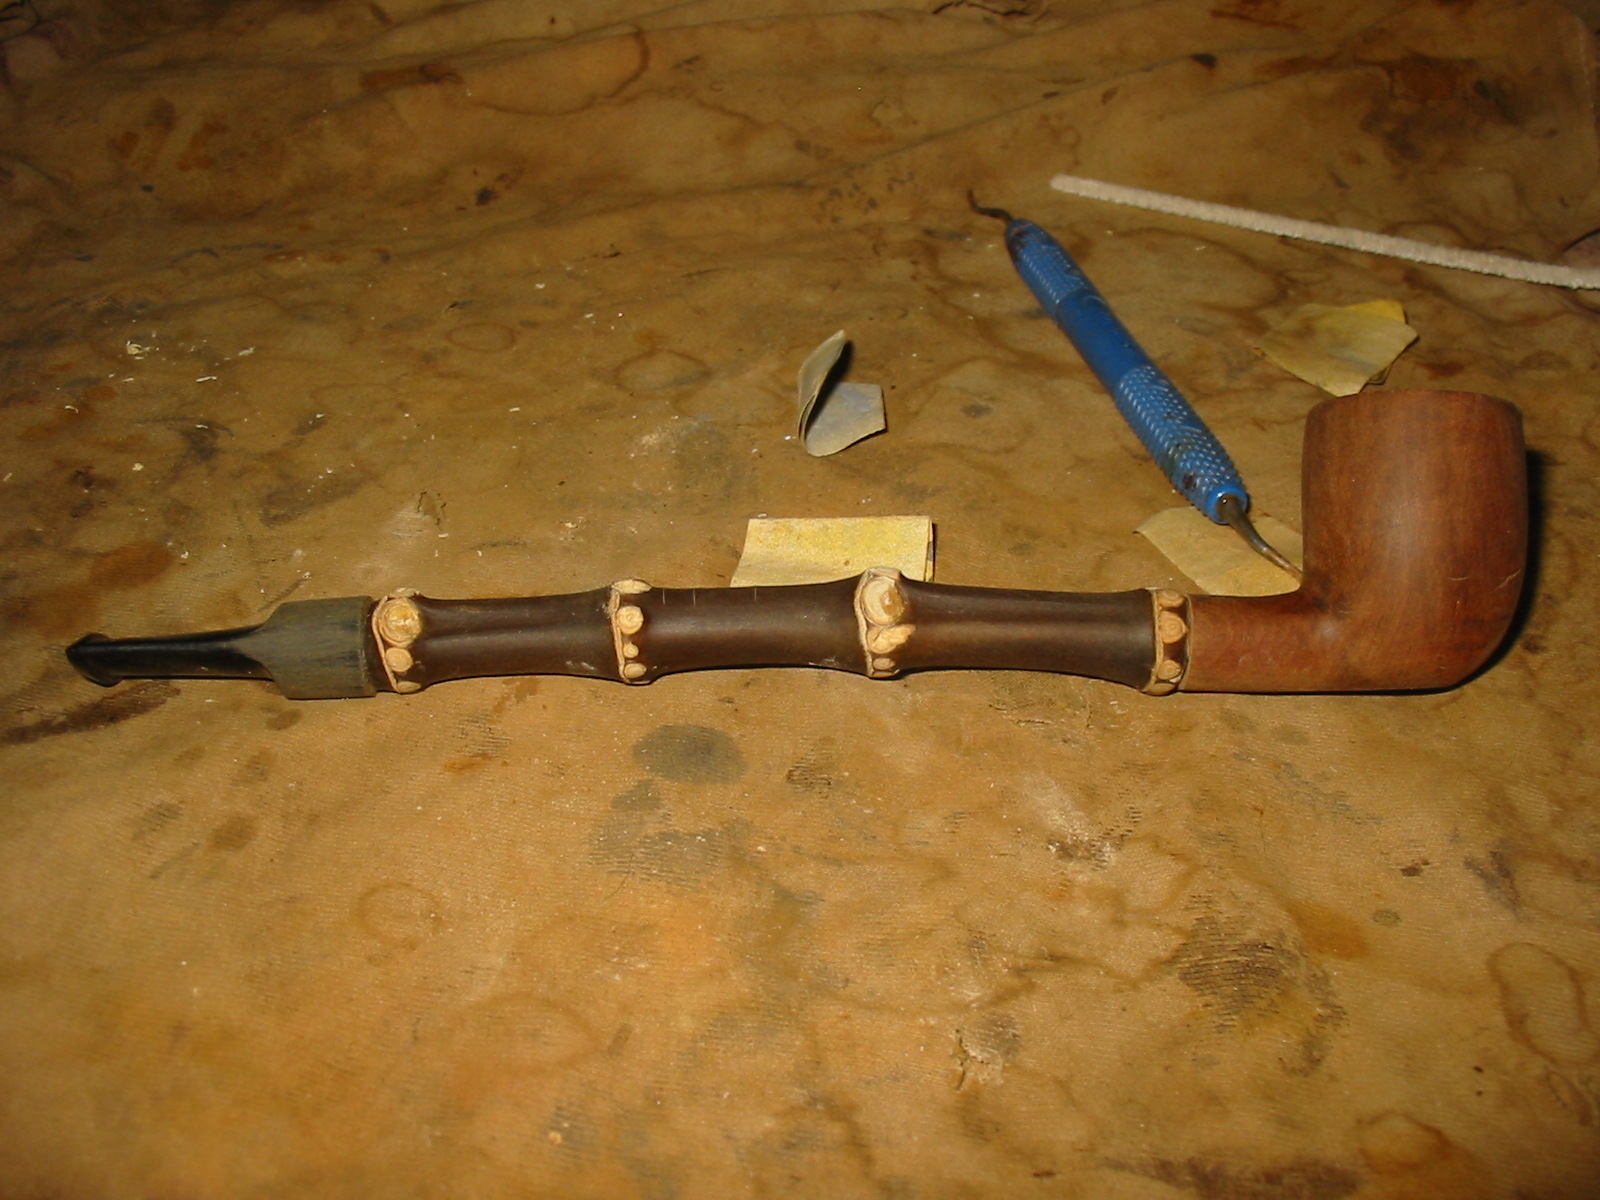
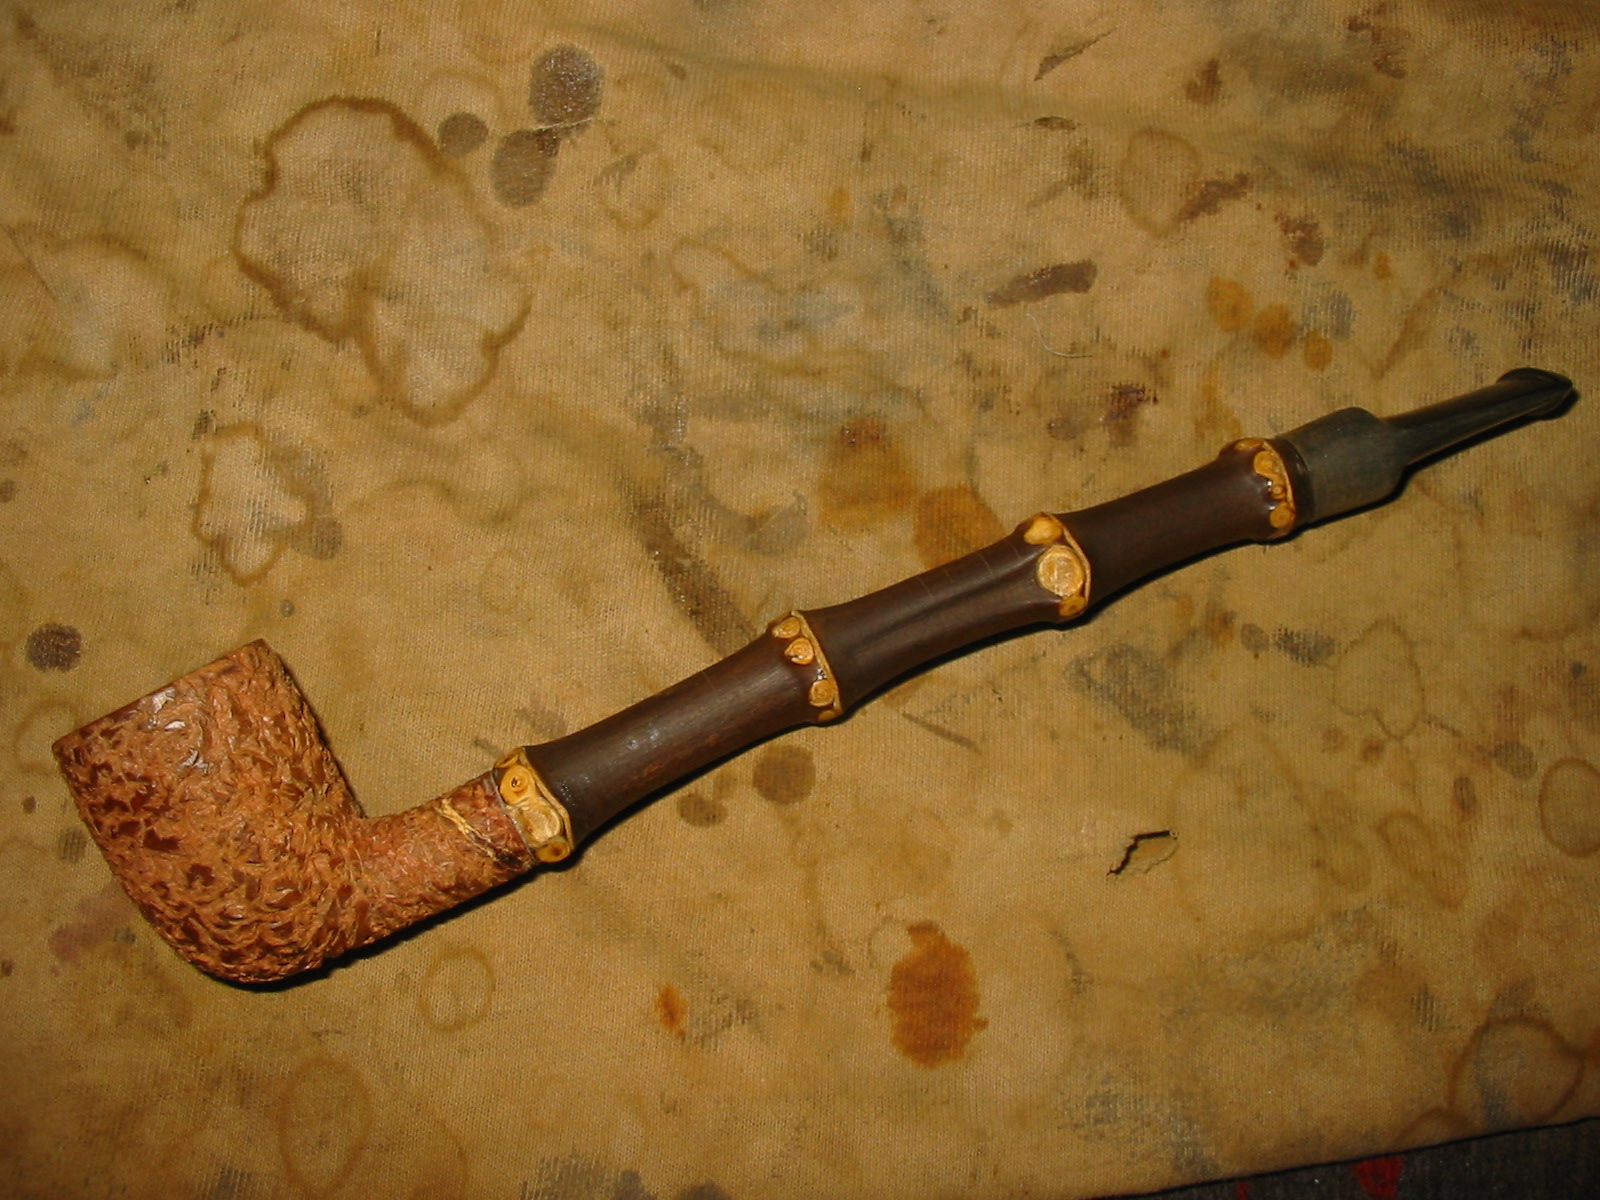
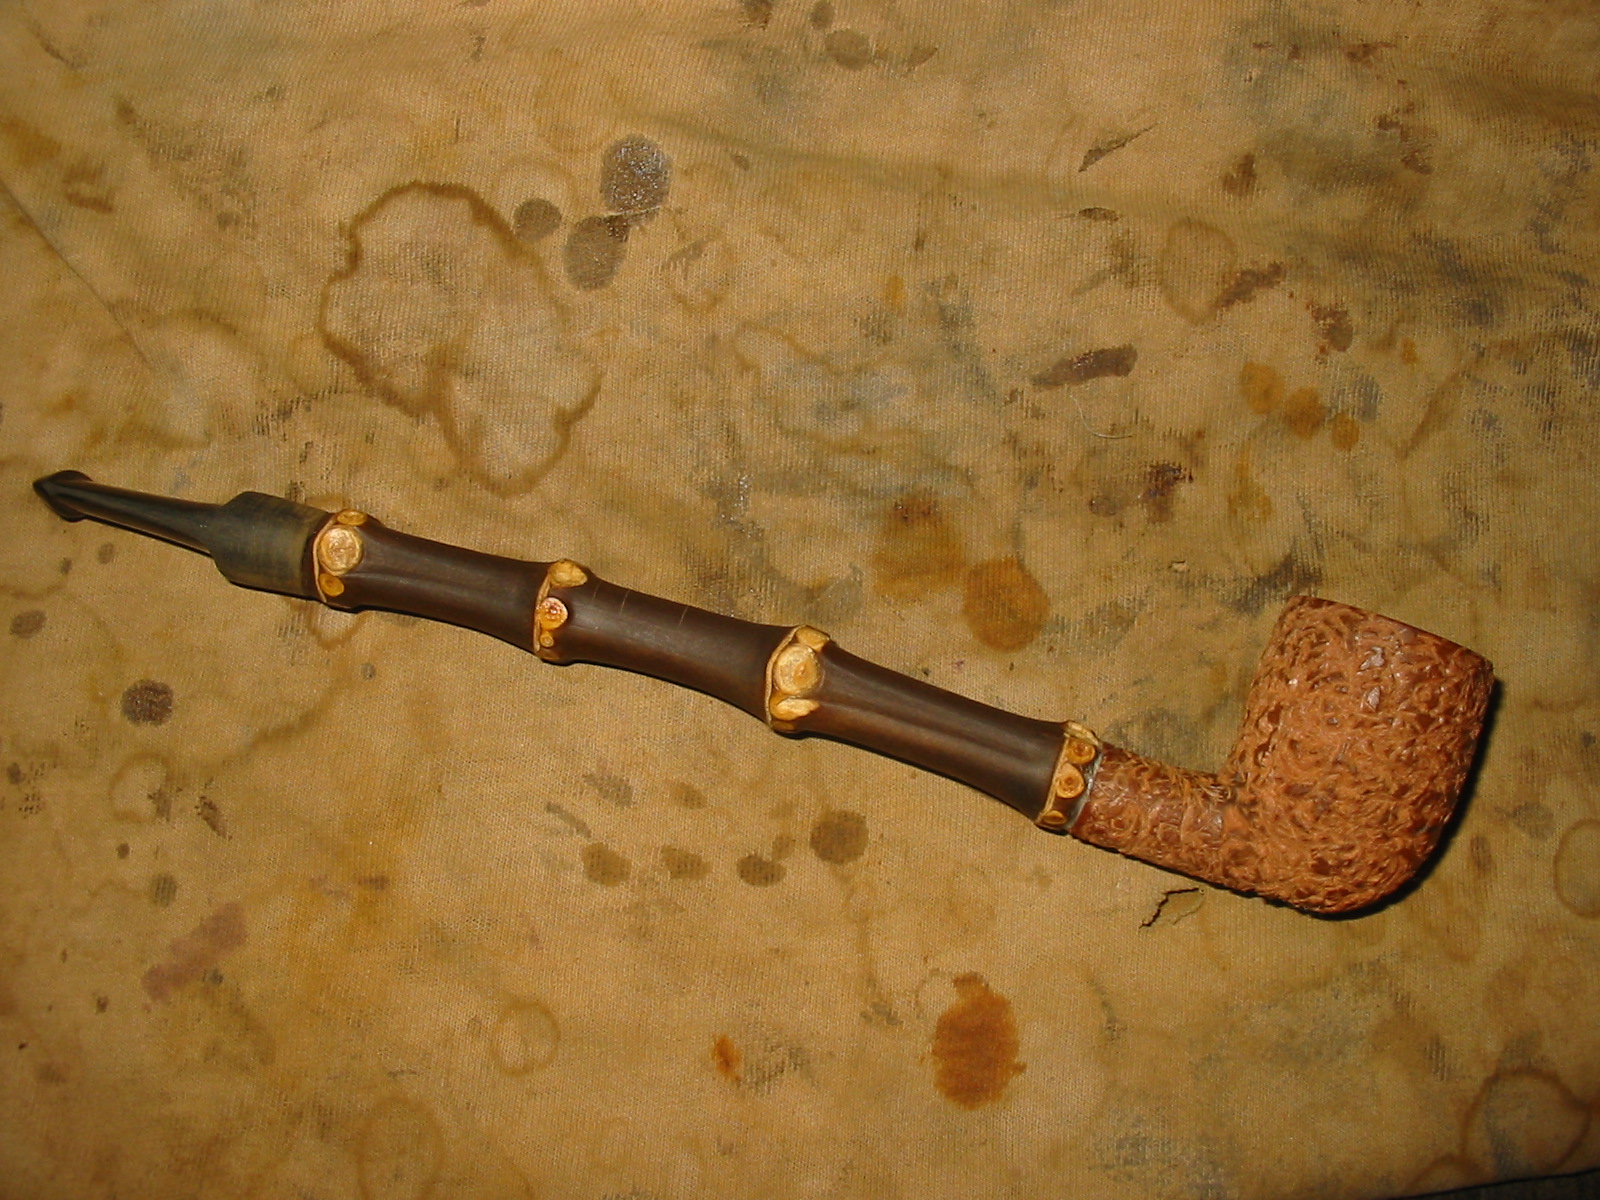
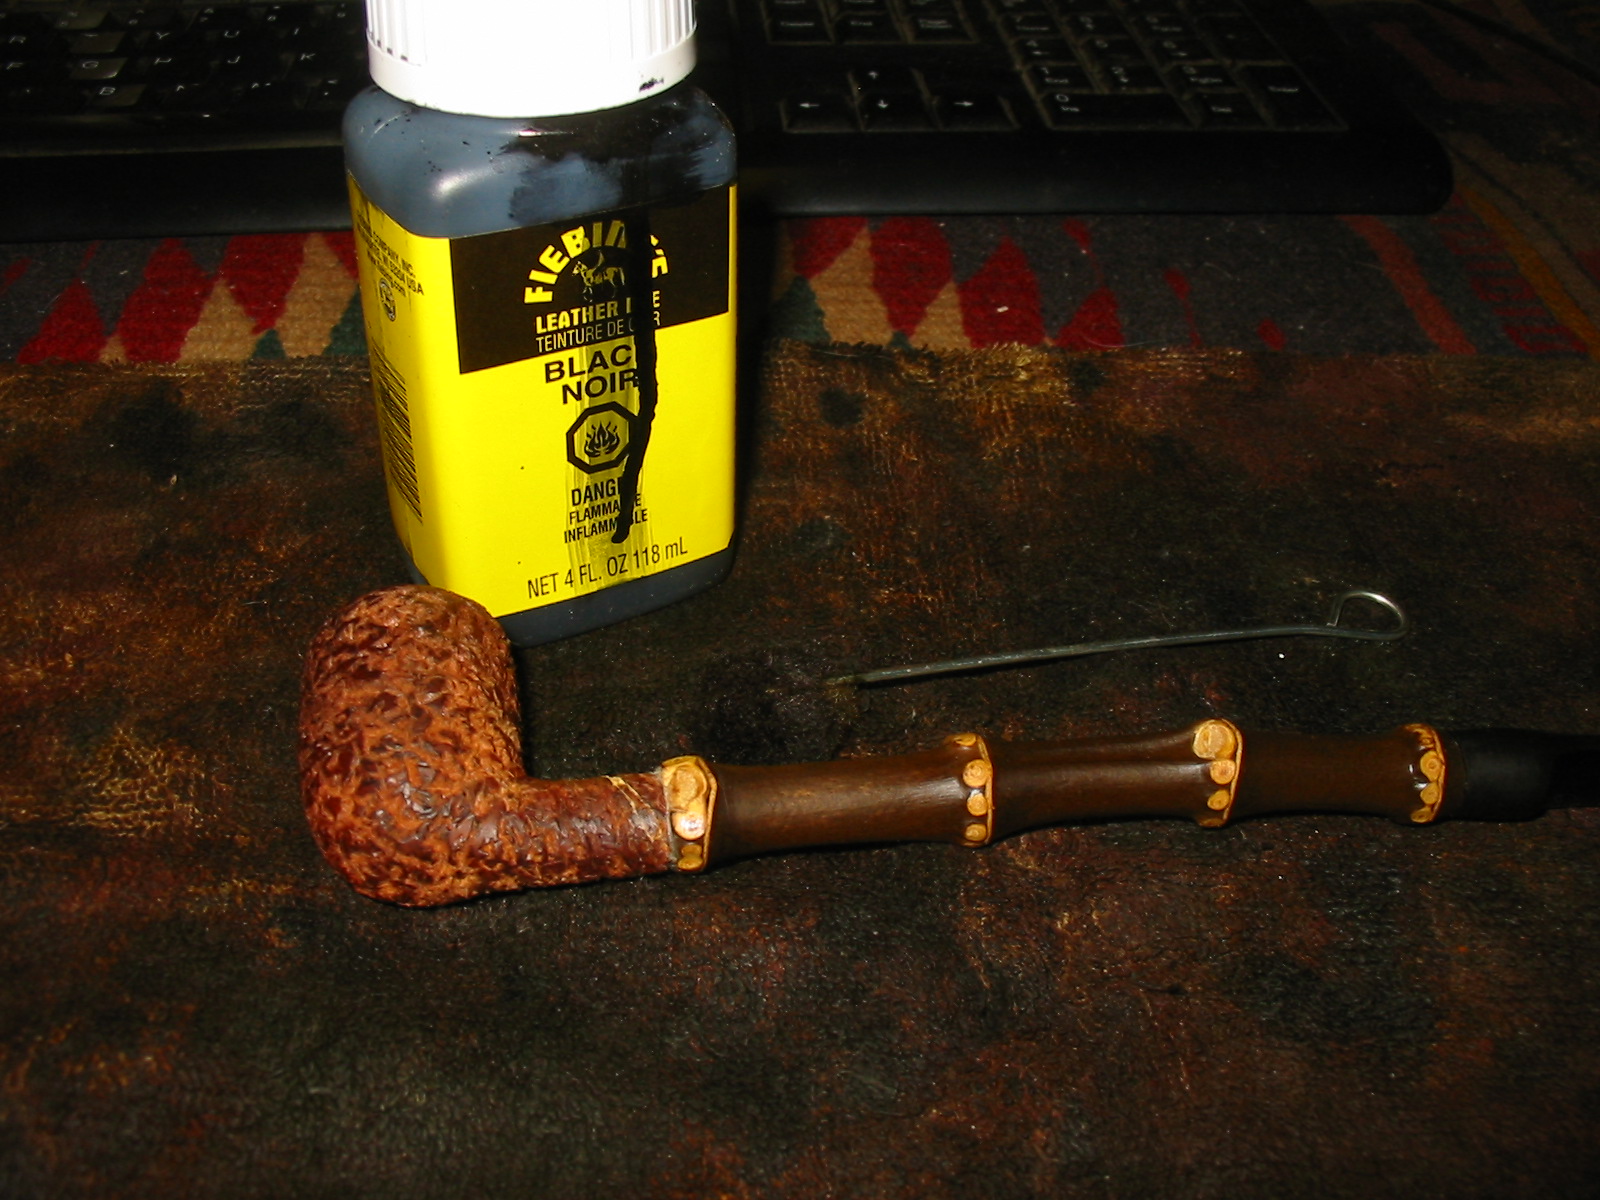
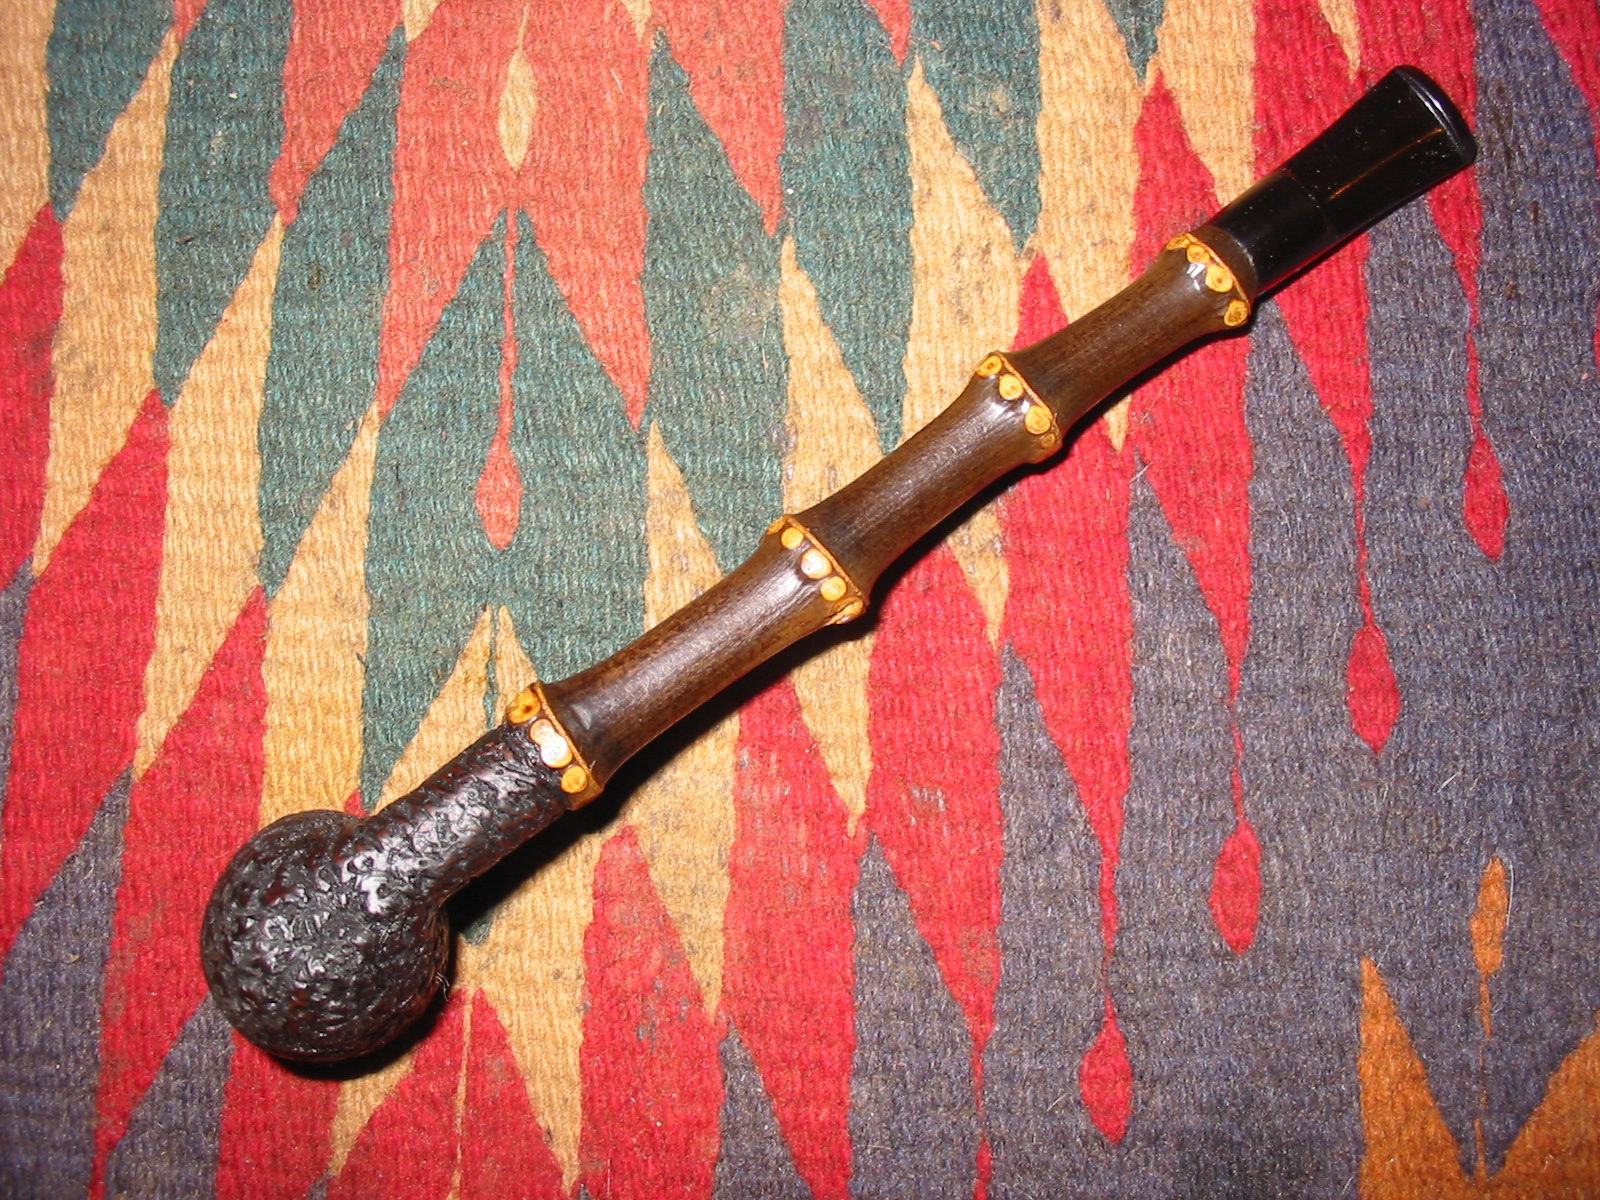
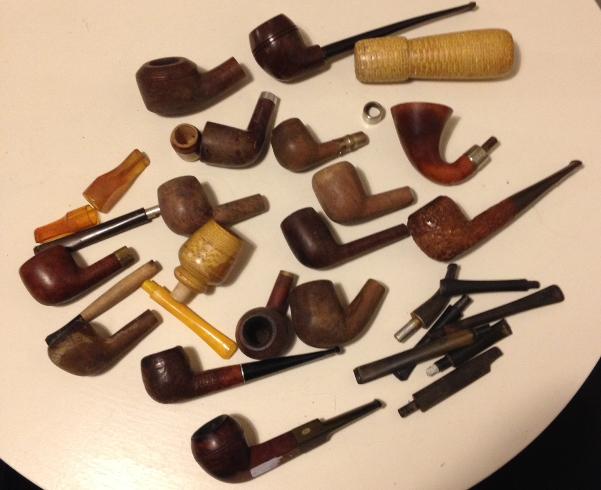
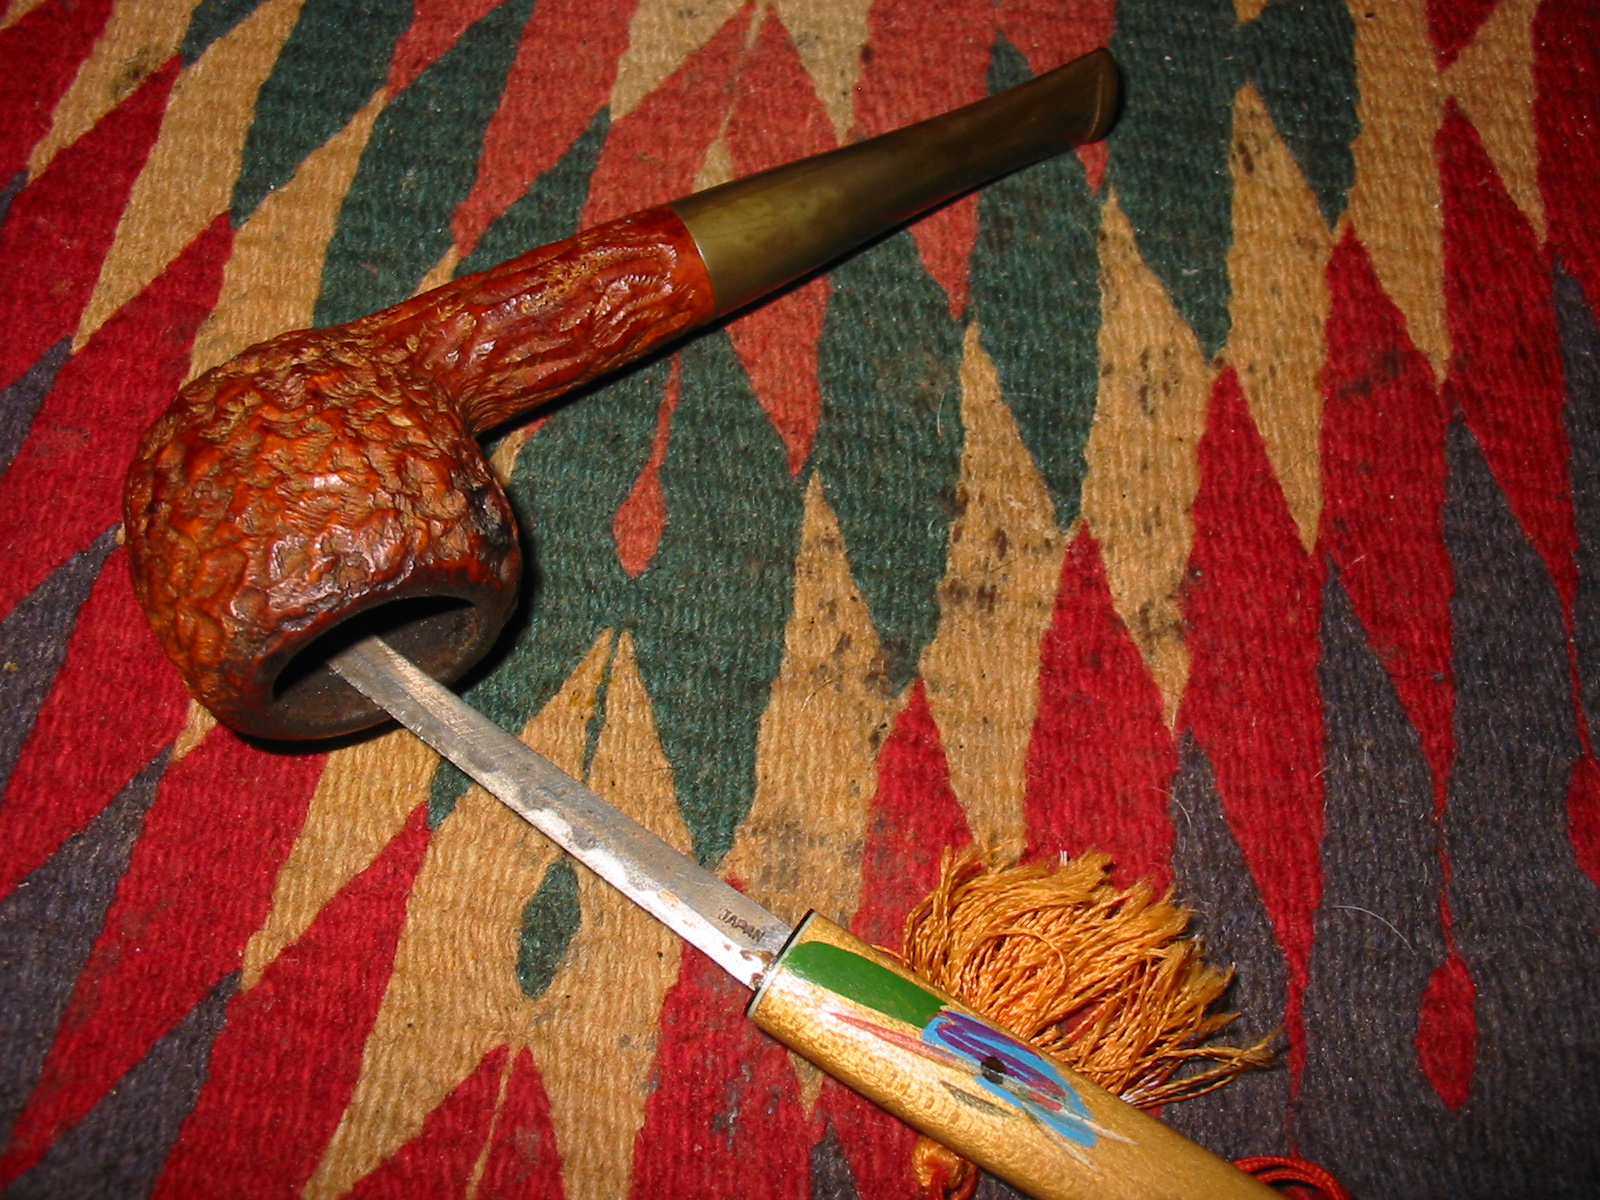
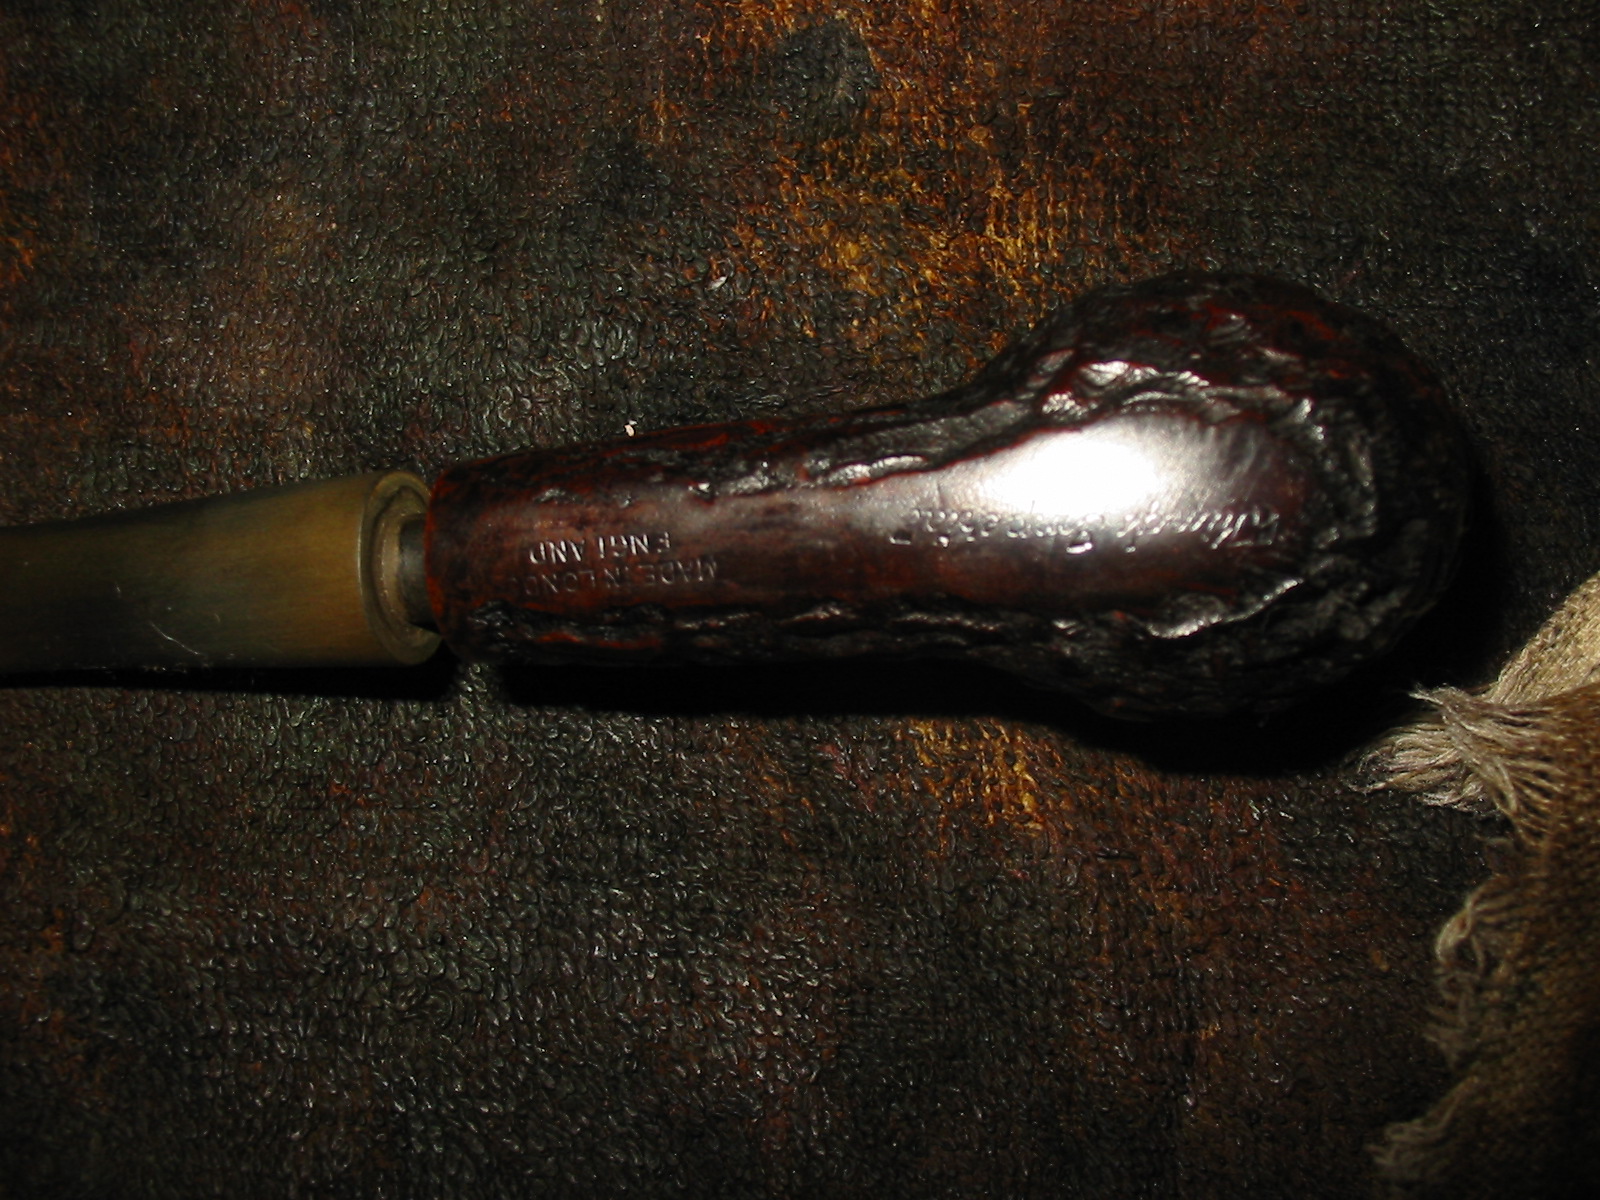
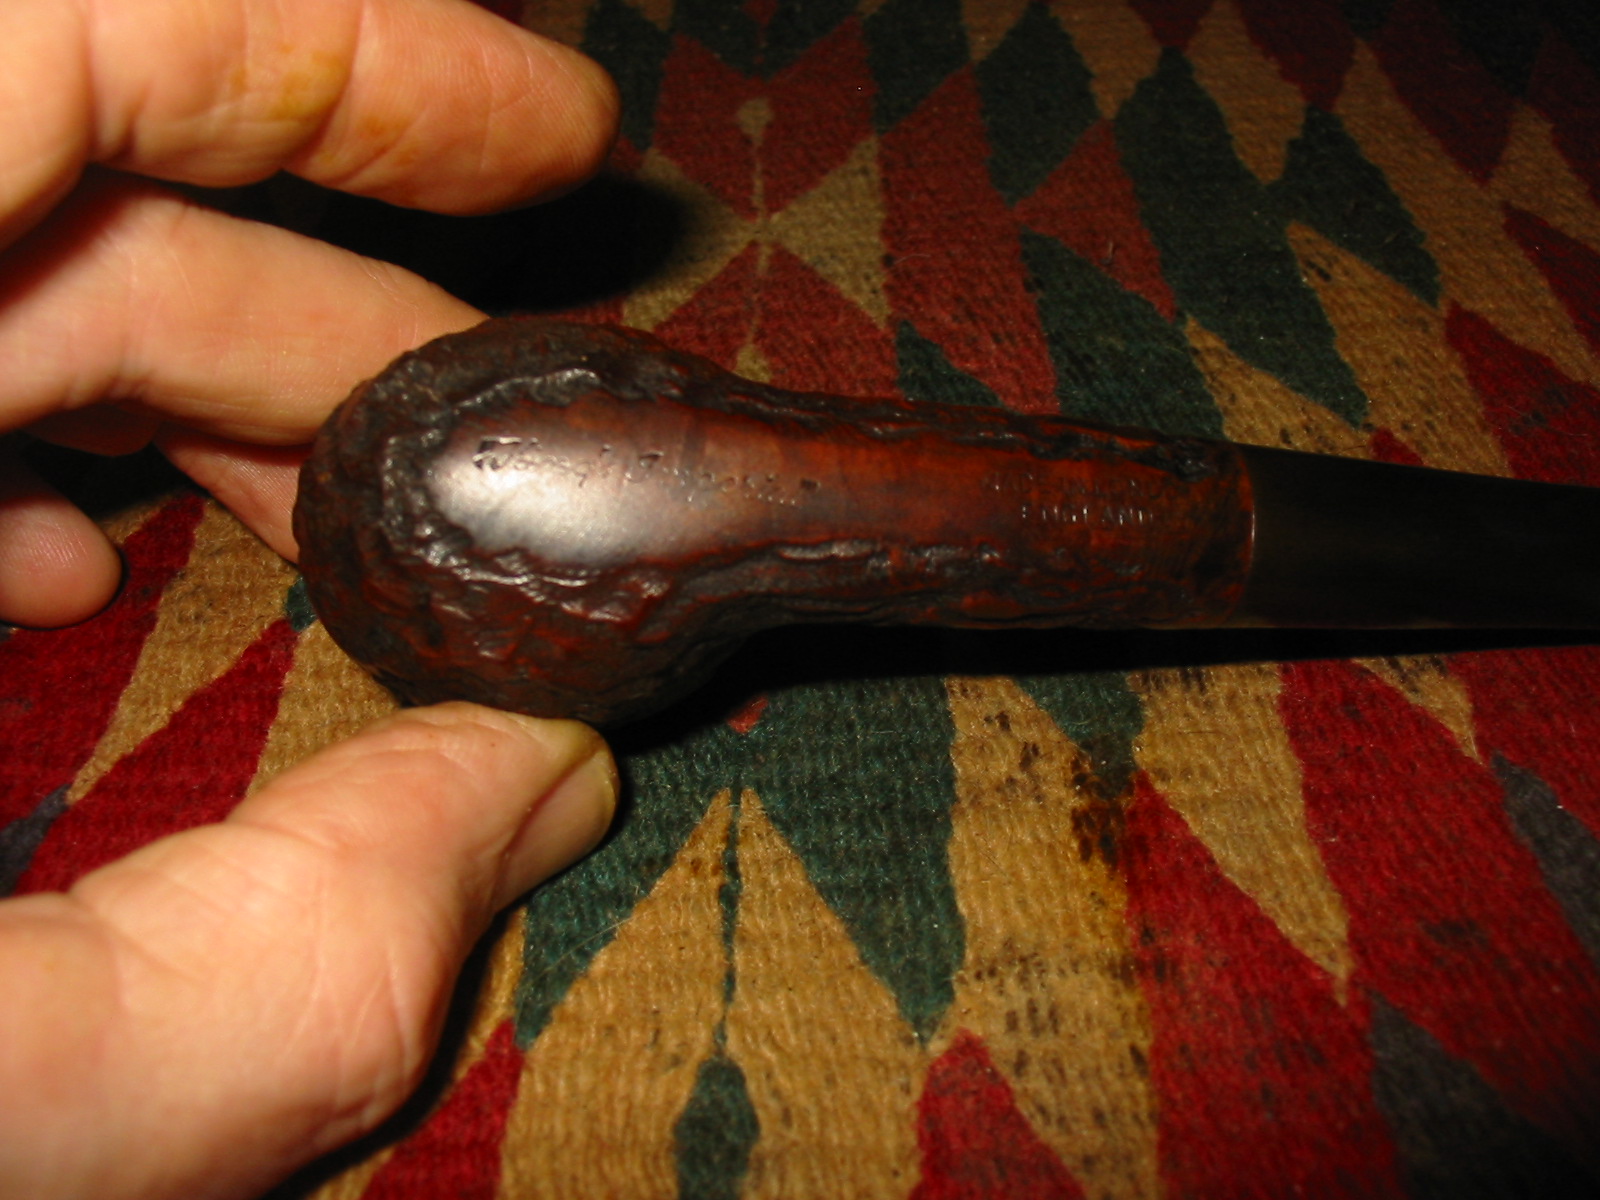
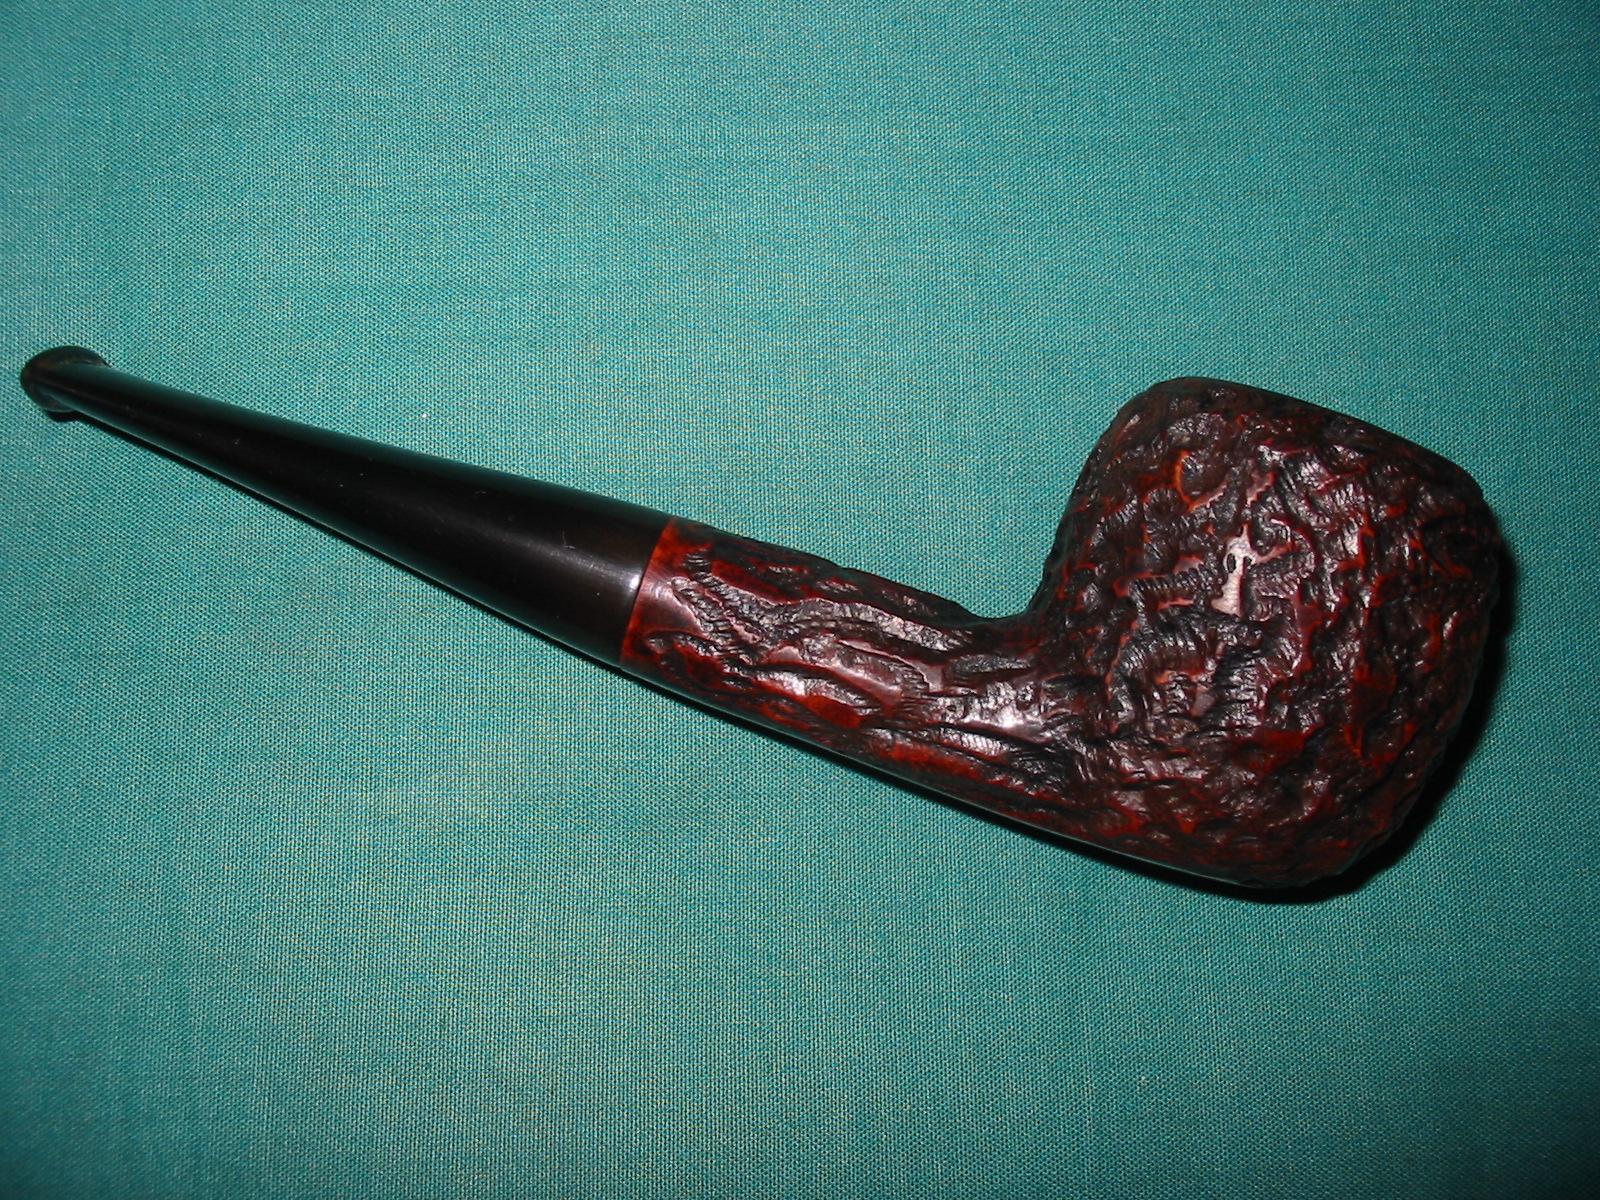
Looking over my latest box of pipes that I picked up at an antique mall in Edmonton, I chose to work on one that did not need to be restemmed and had a bit of a mystery attached to it. In the photo below it on the right side just above the batch of stems that were included in the purchase. It was hard to read the stamping while I was in the shop as I had forgotten to bring along a loop to examine it but I could read Made in London England stamped on the underside of the shank near the stem. It was priced at $20 which I figured it was worth in this condition so I added it to the lot.
Pipe finds2
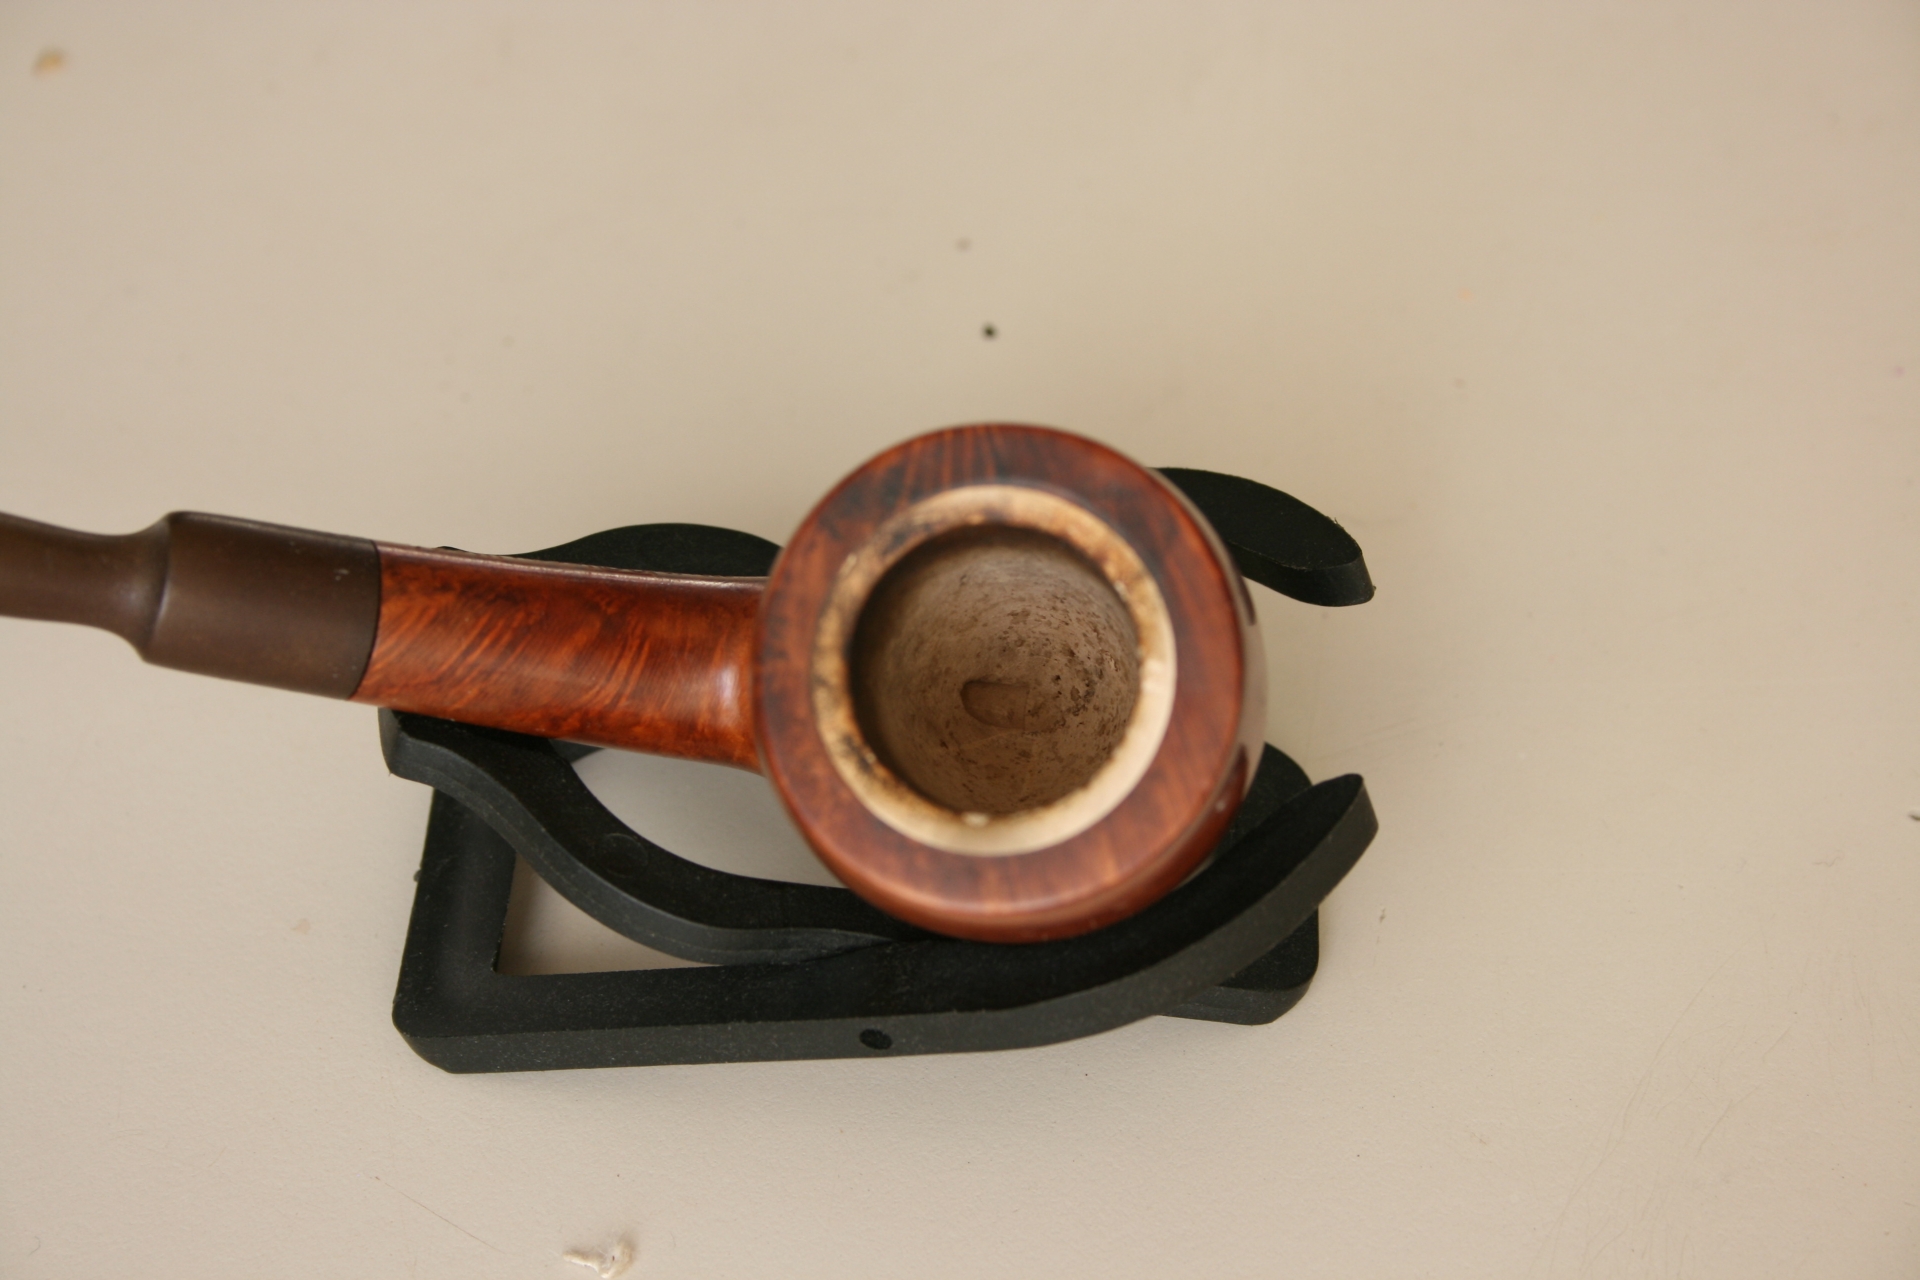
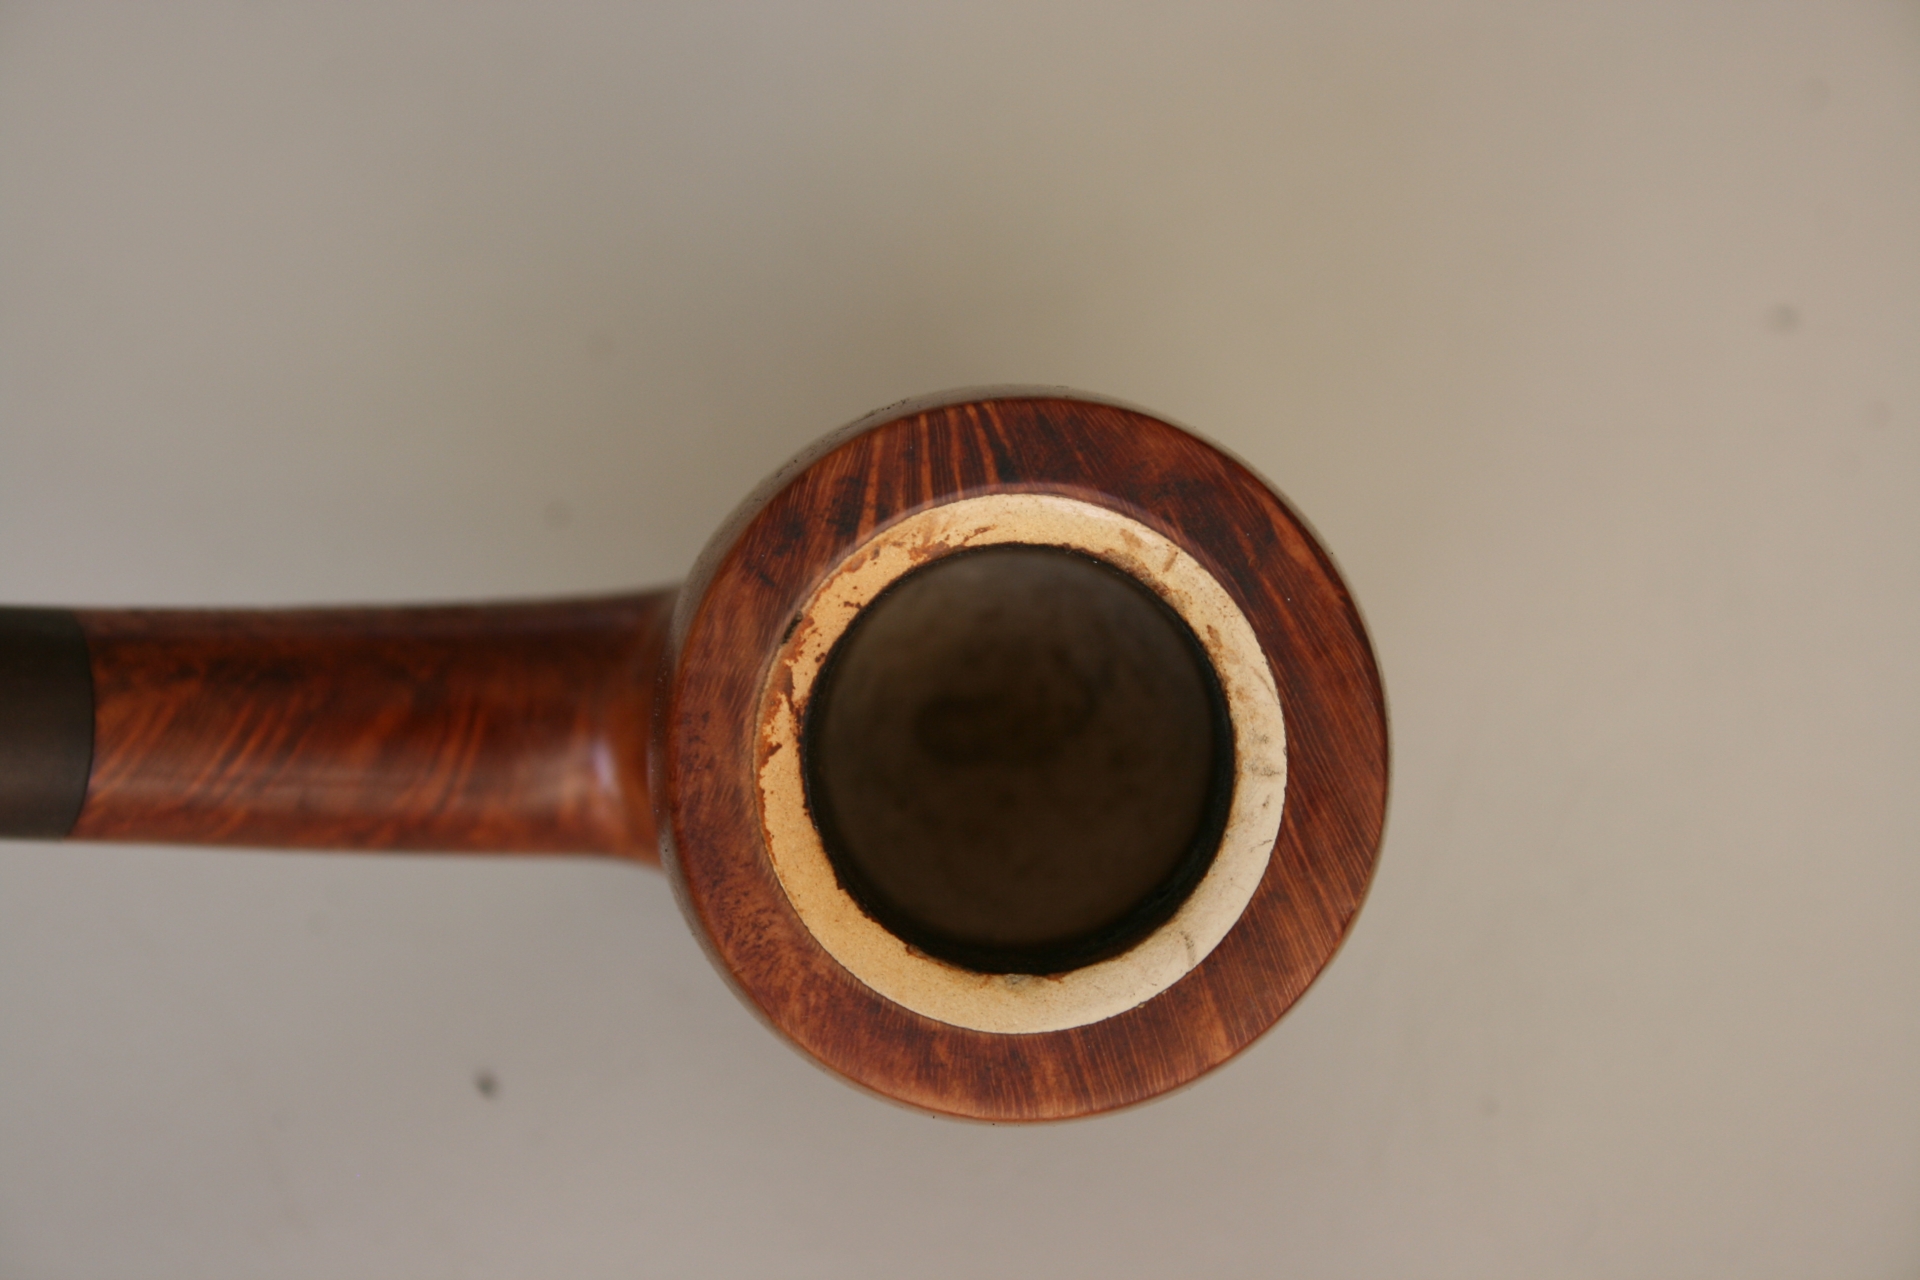
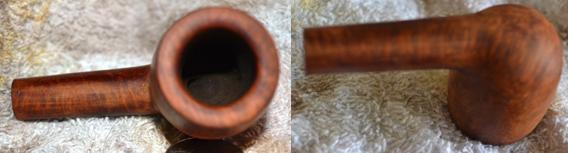
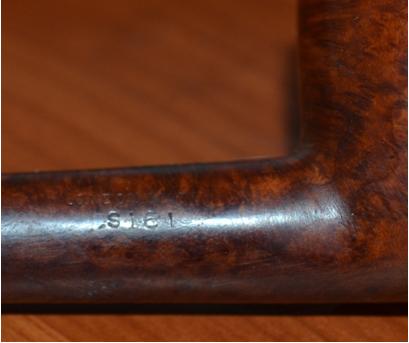
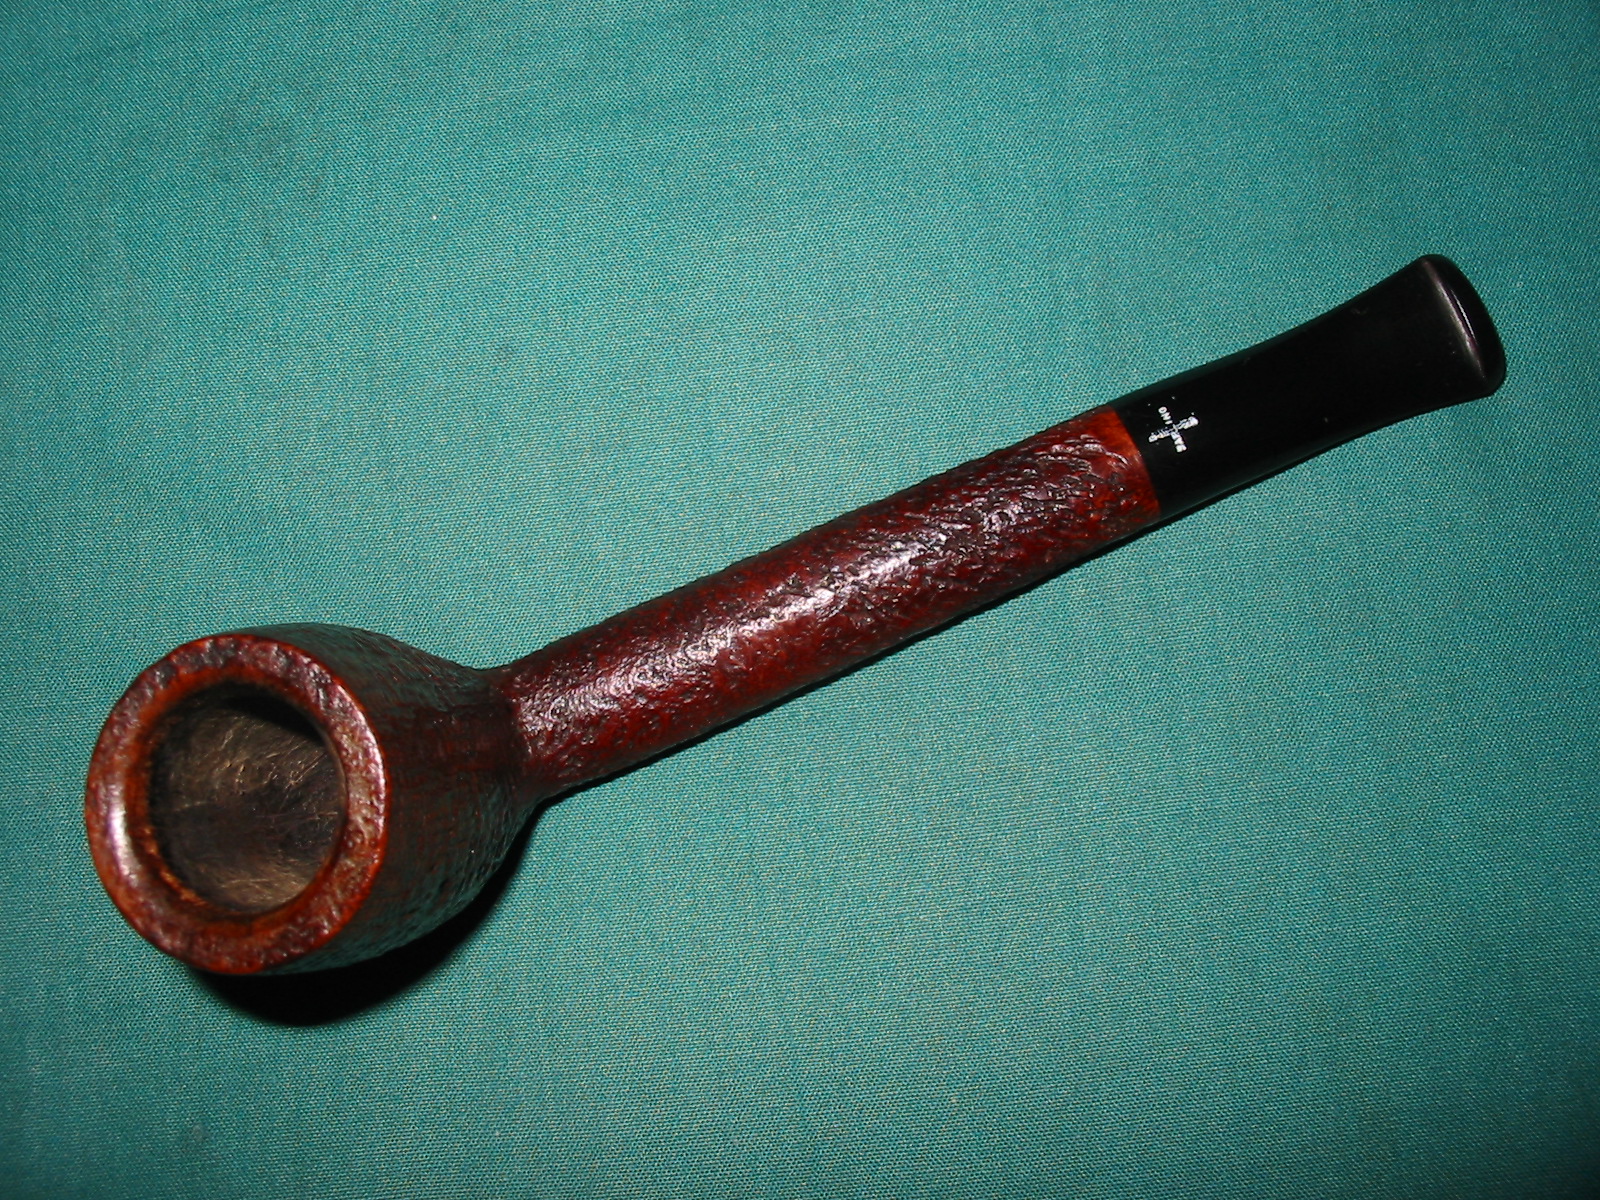
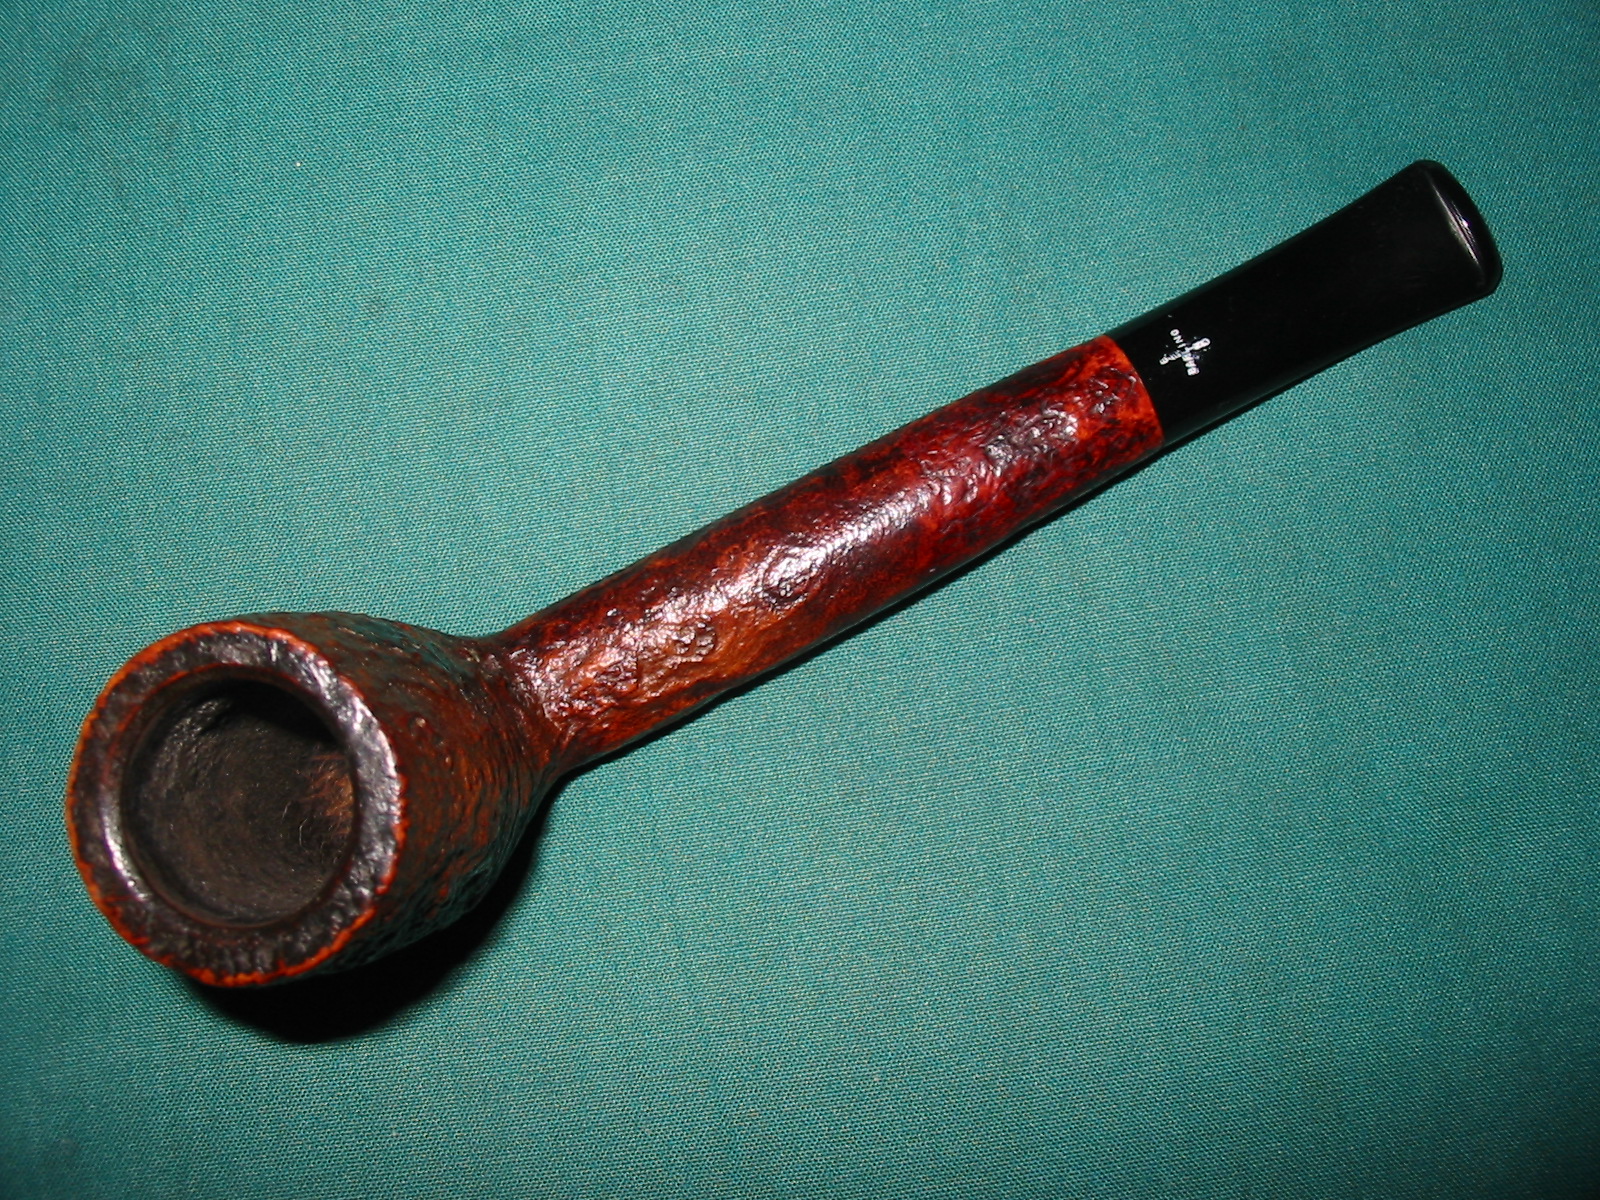
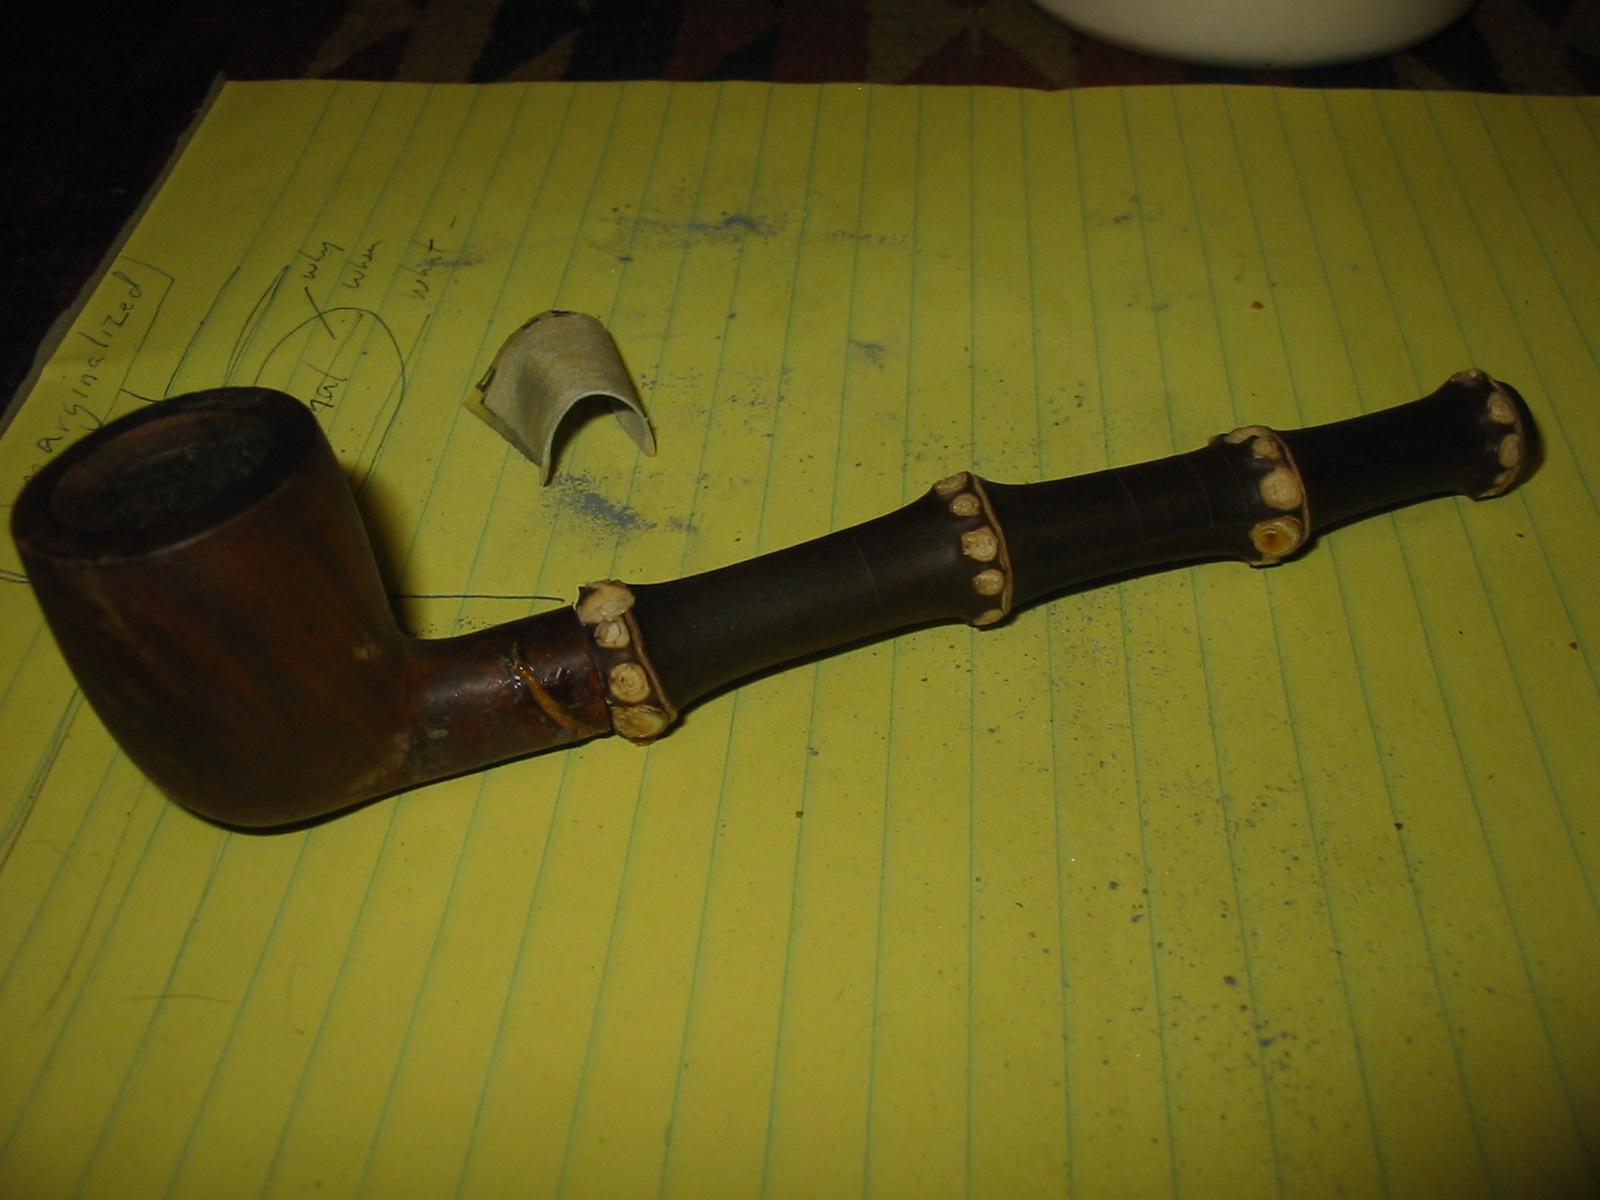
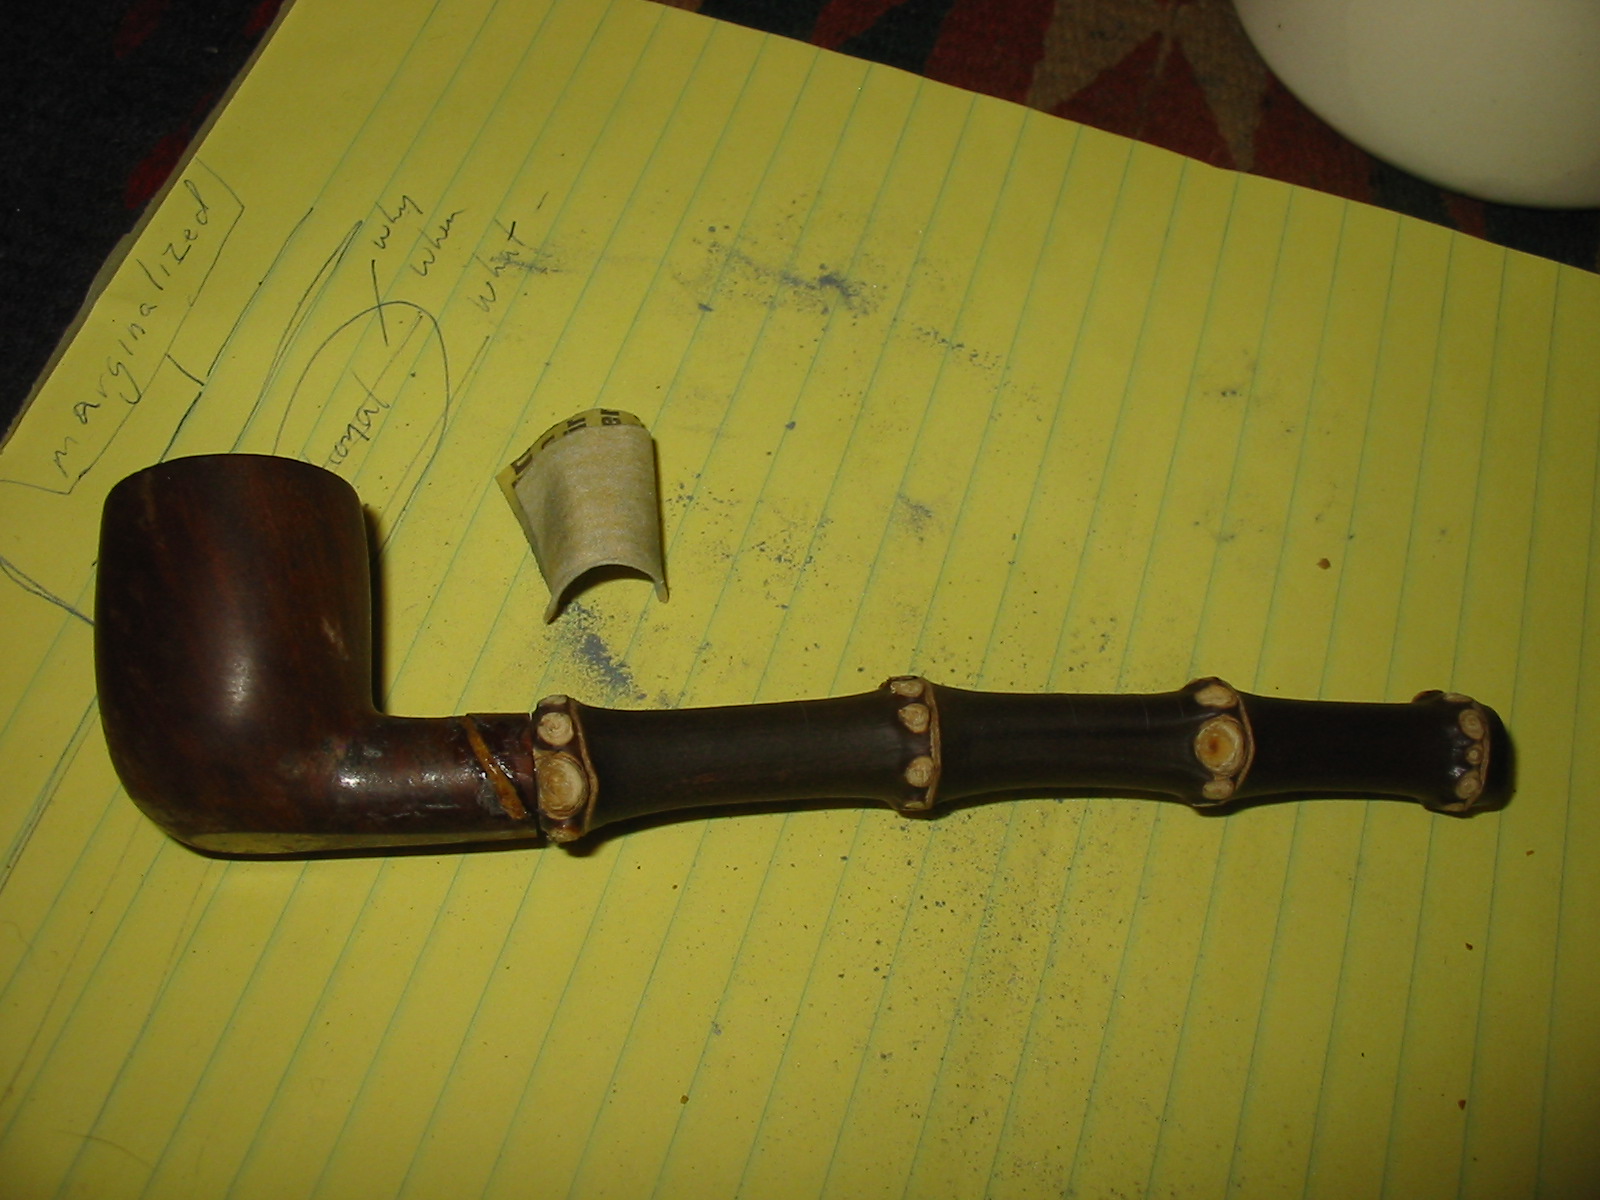
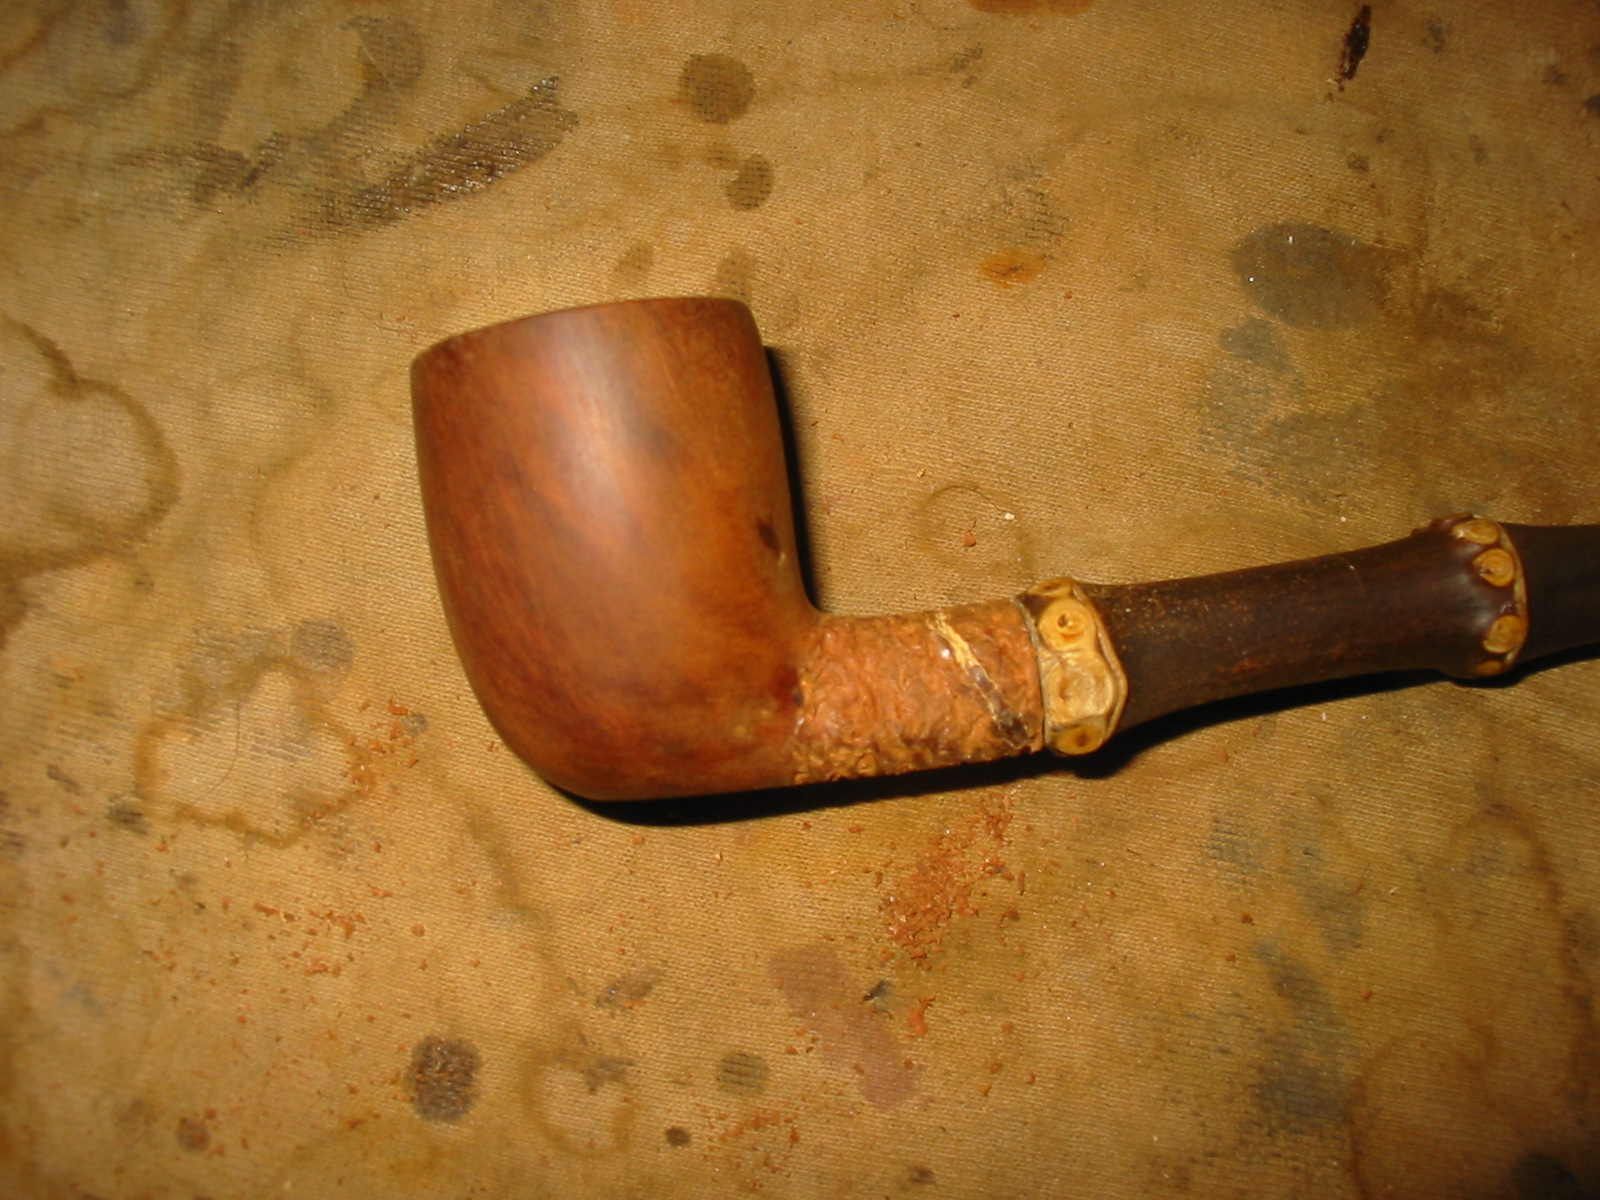
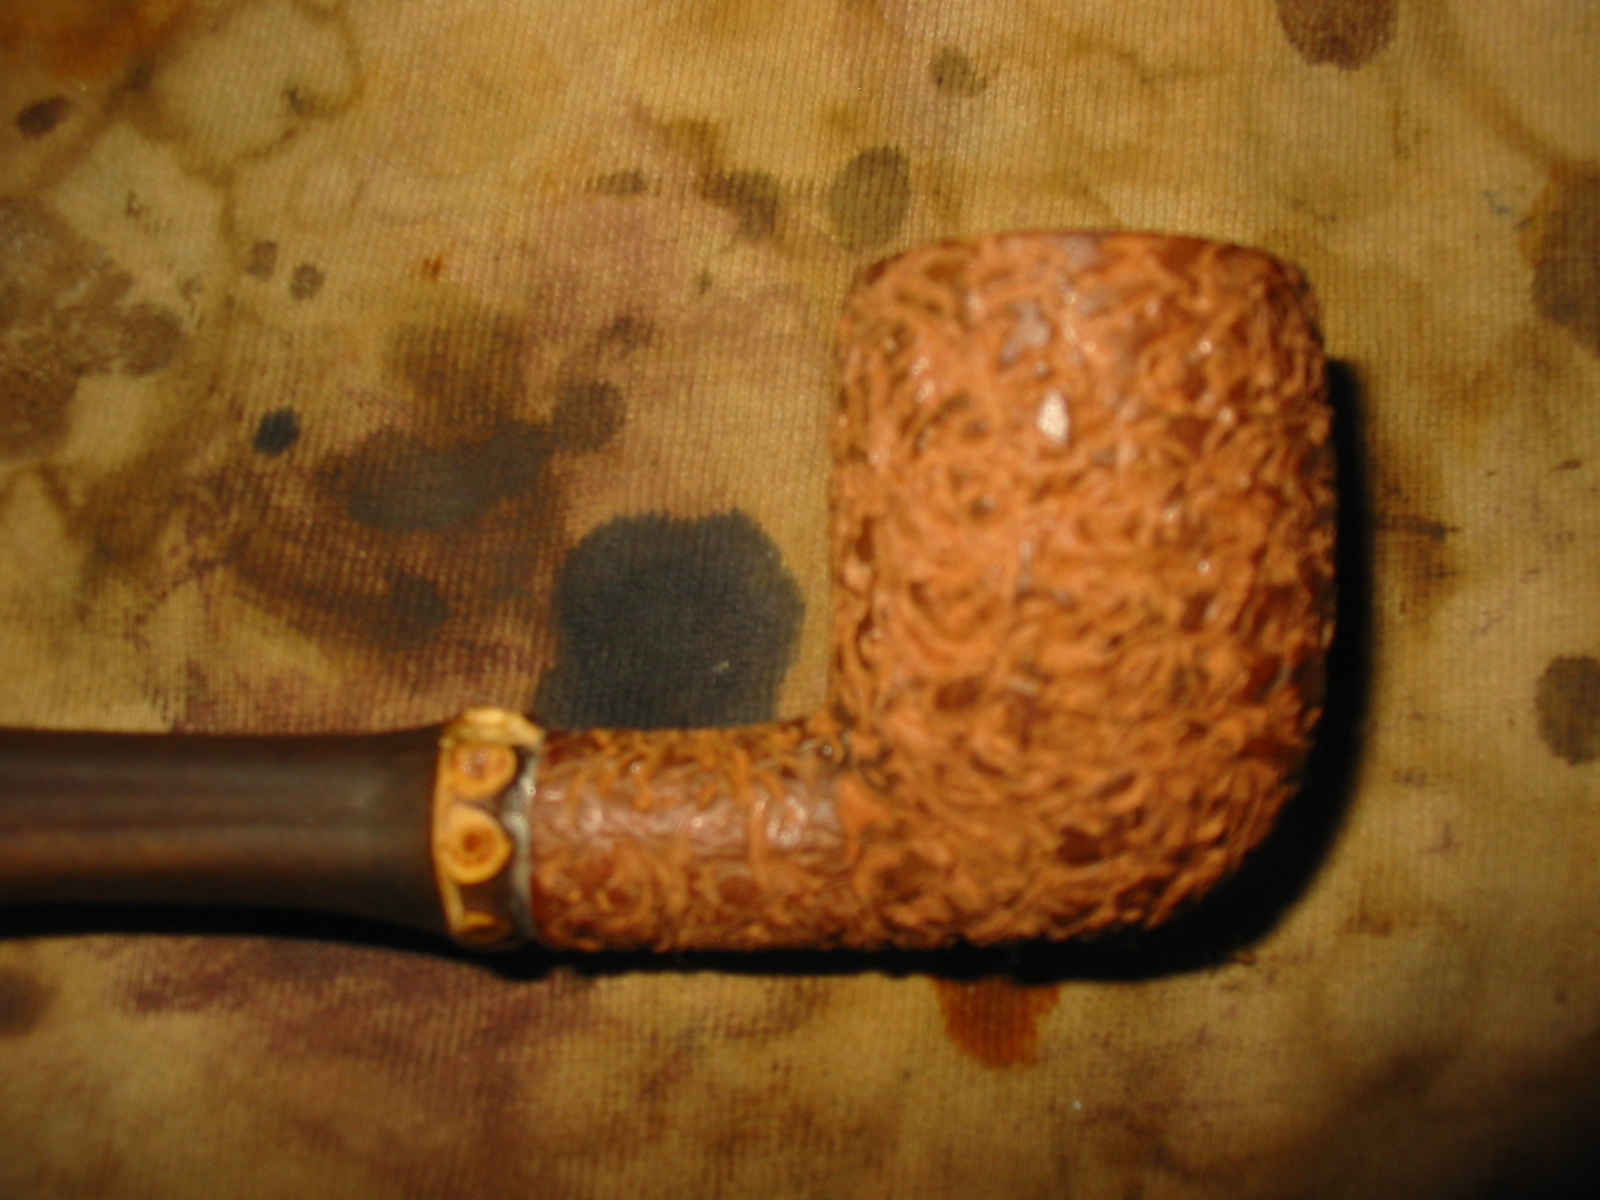
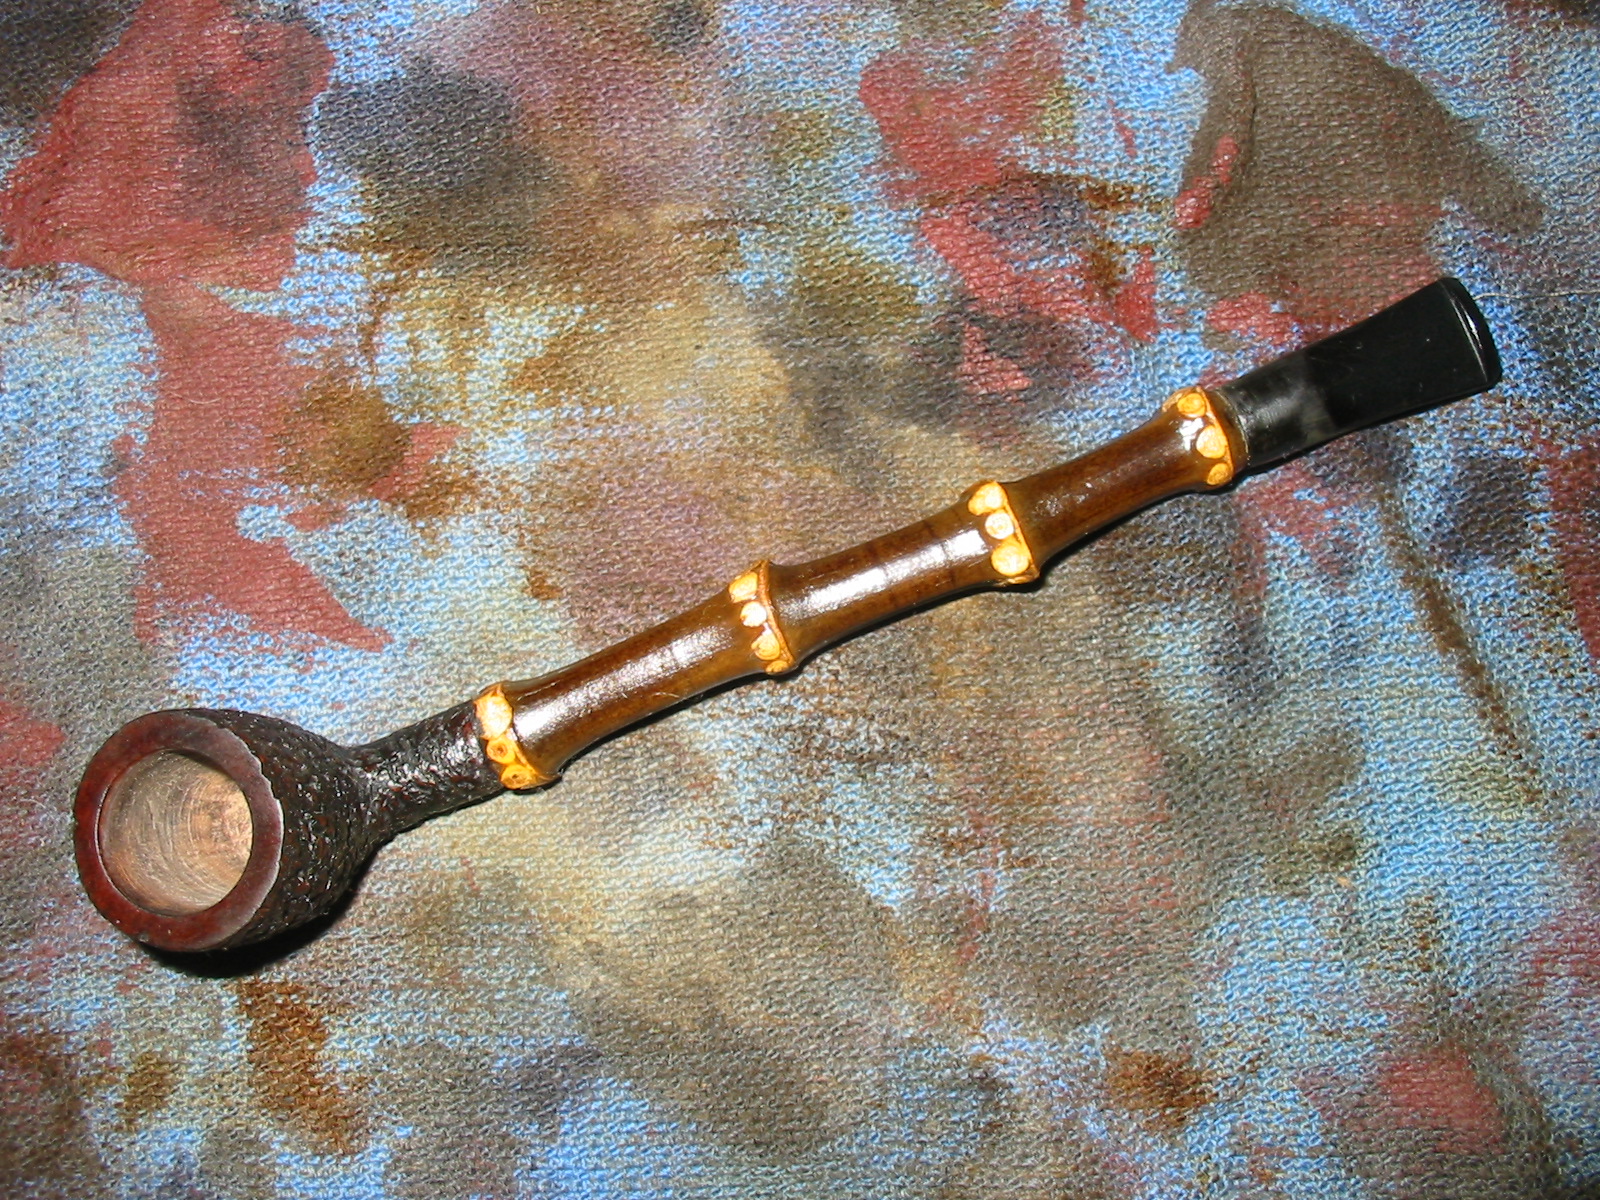
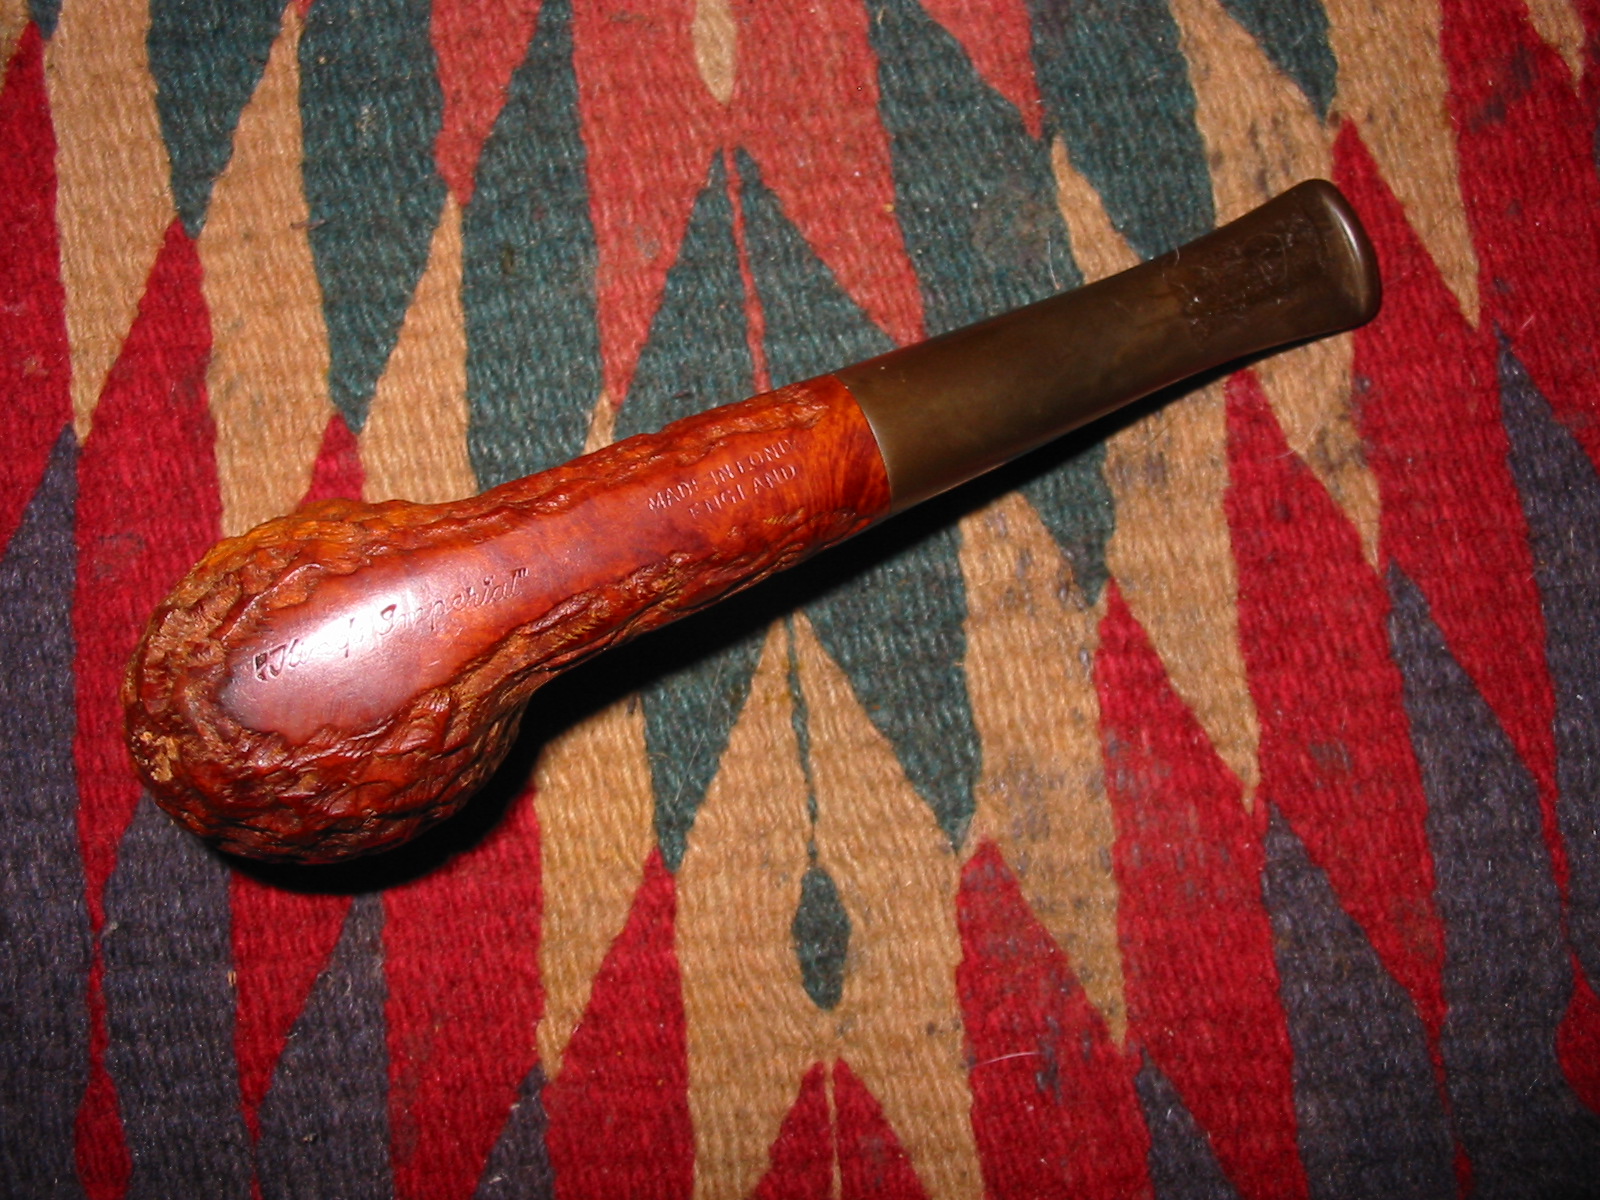
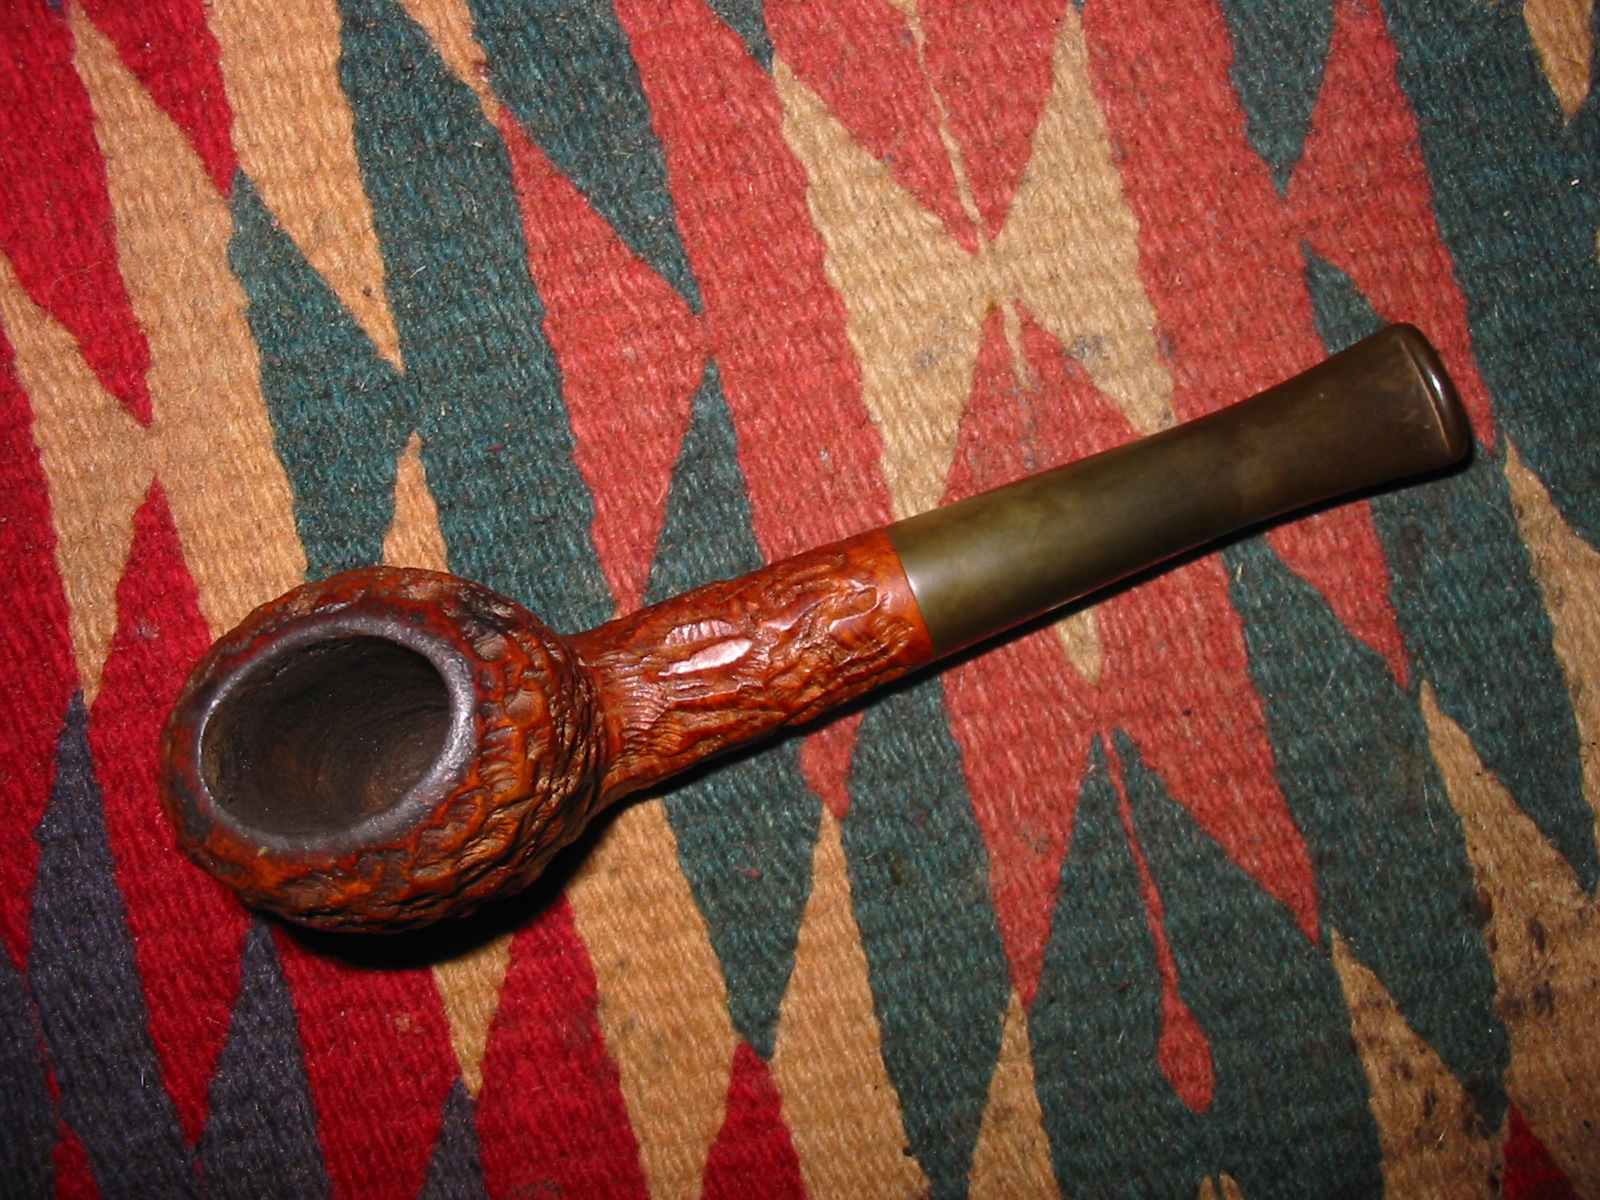
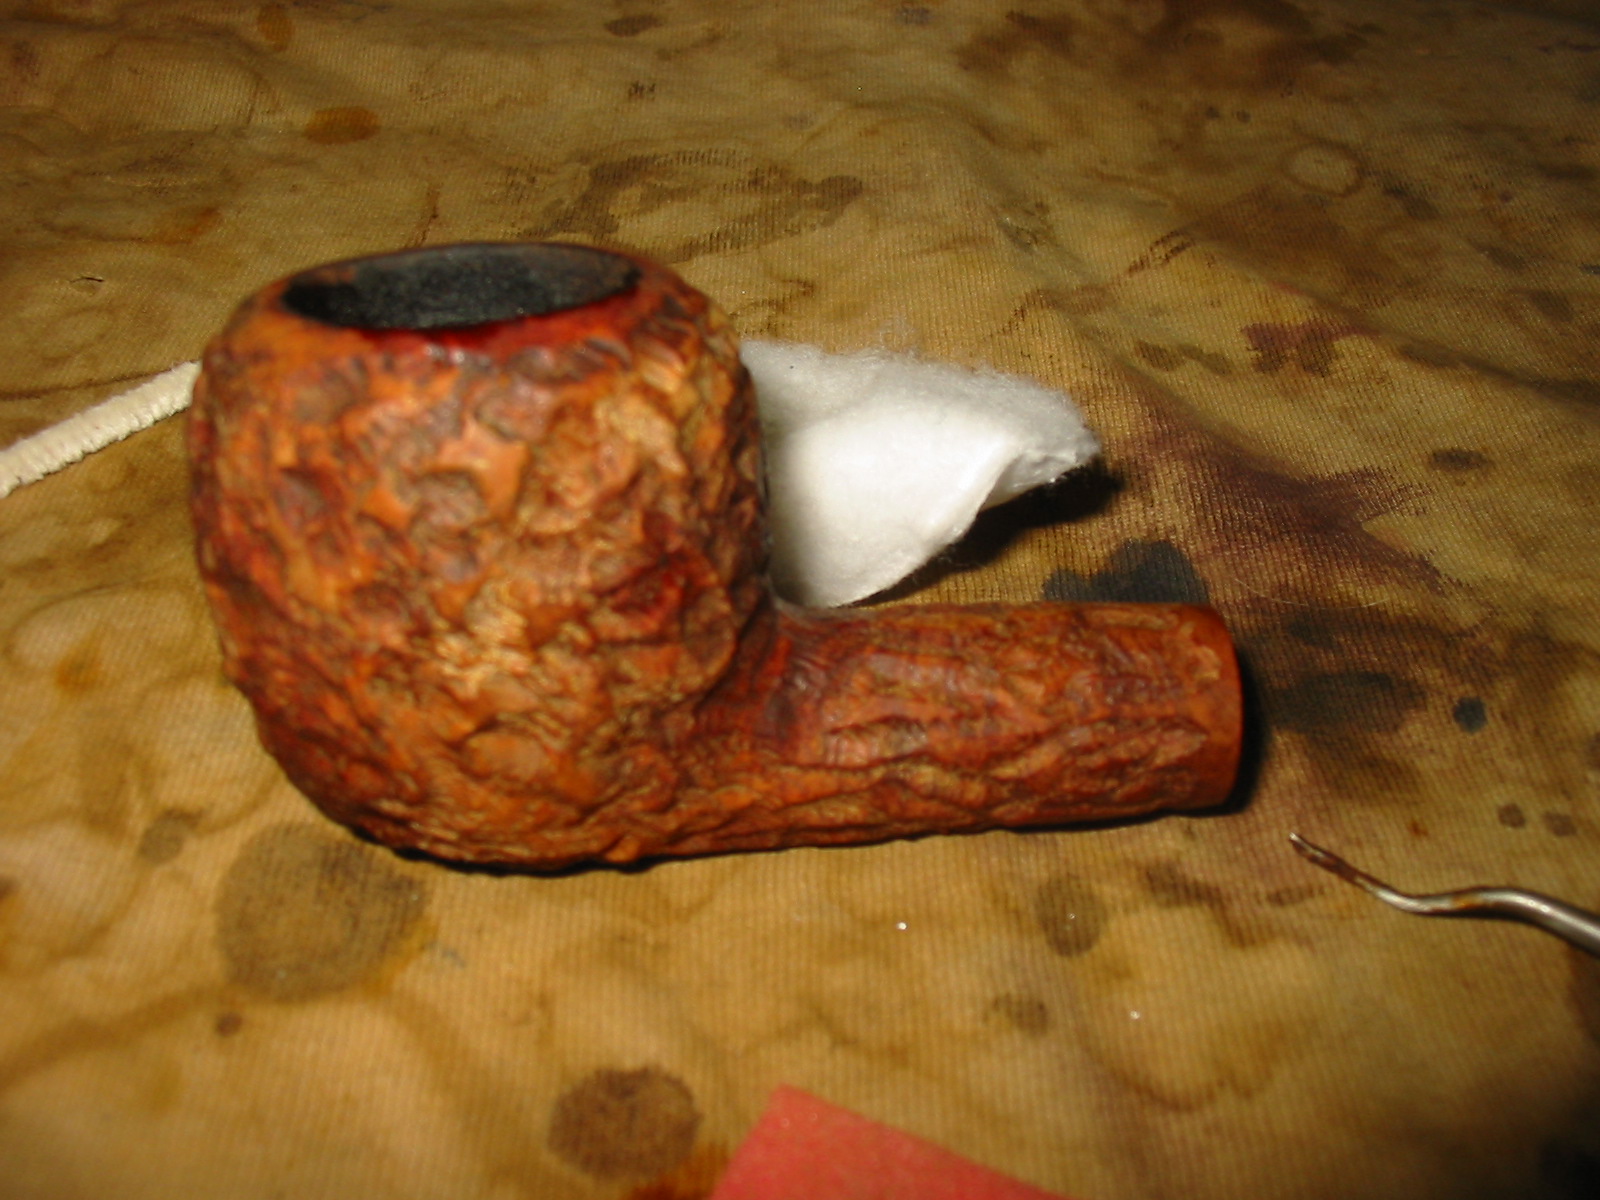
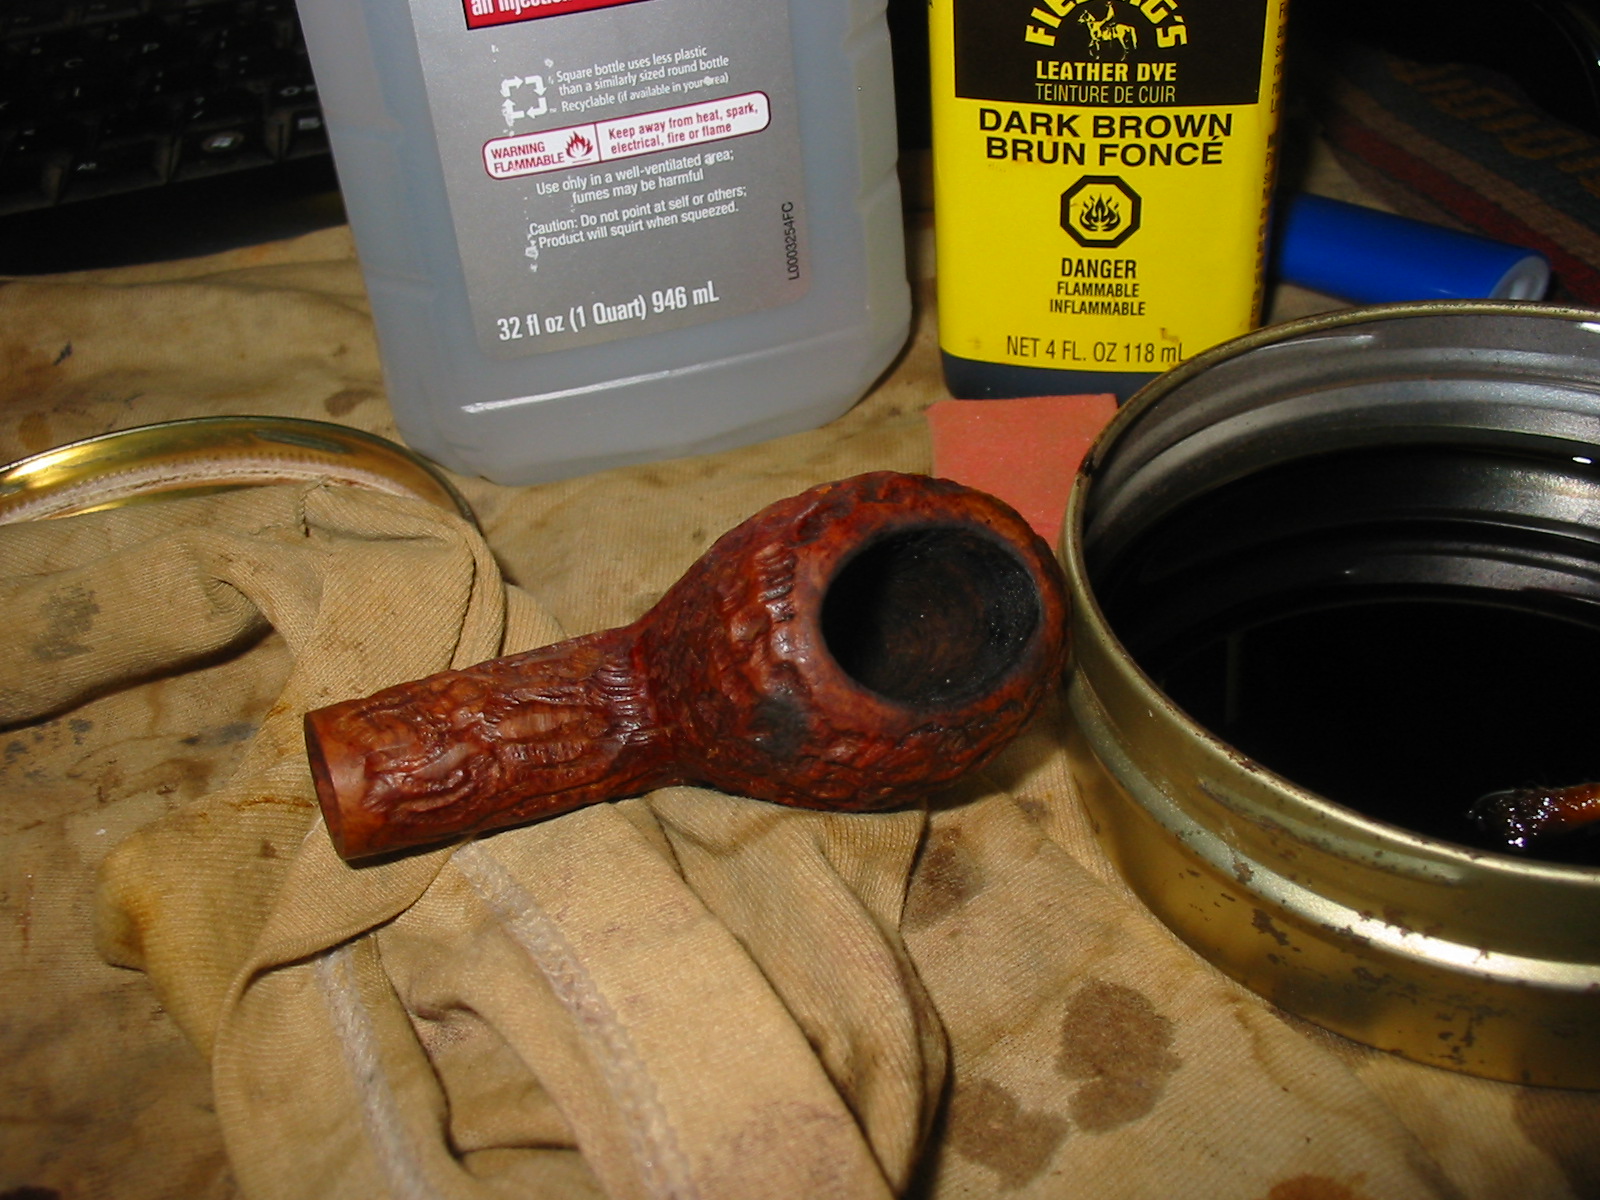
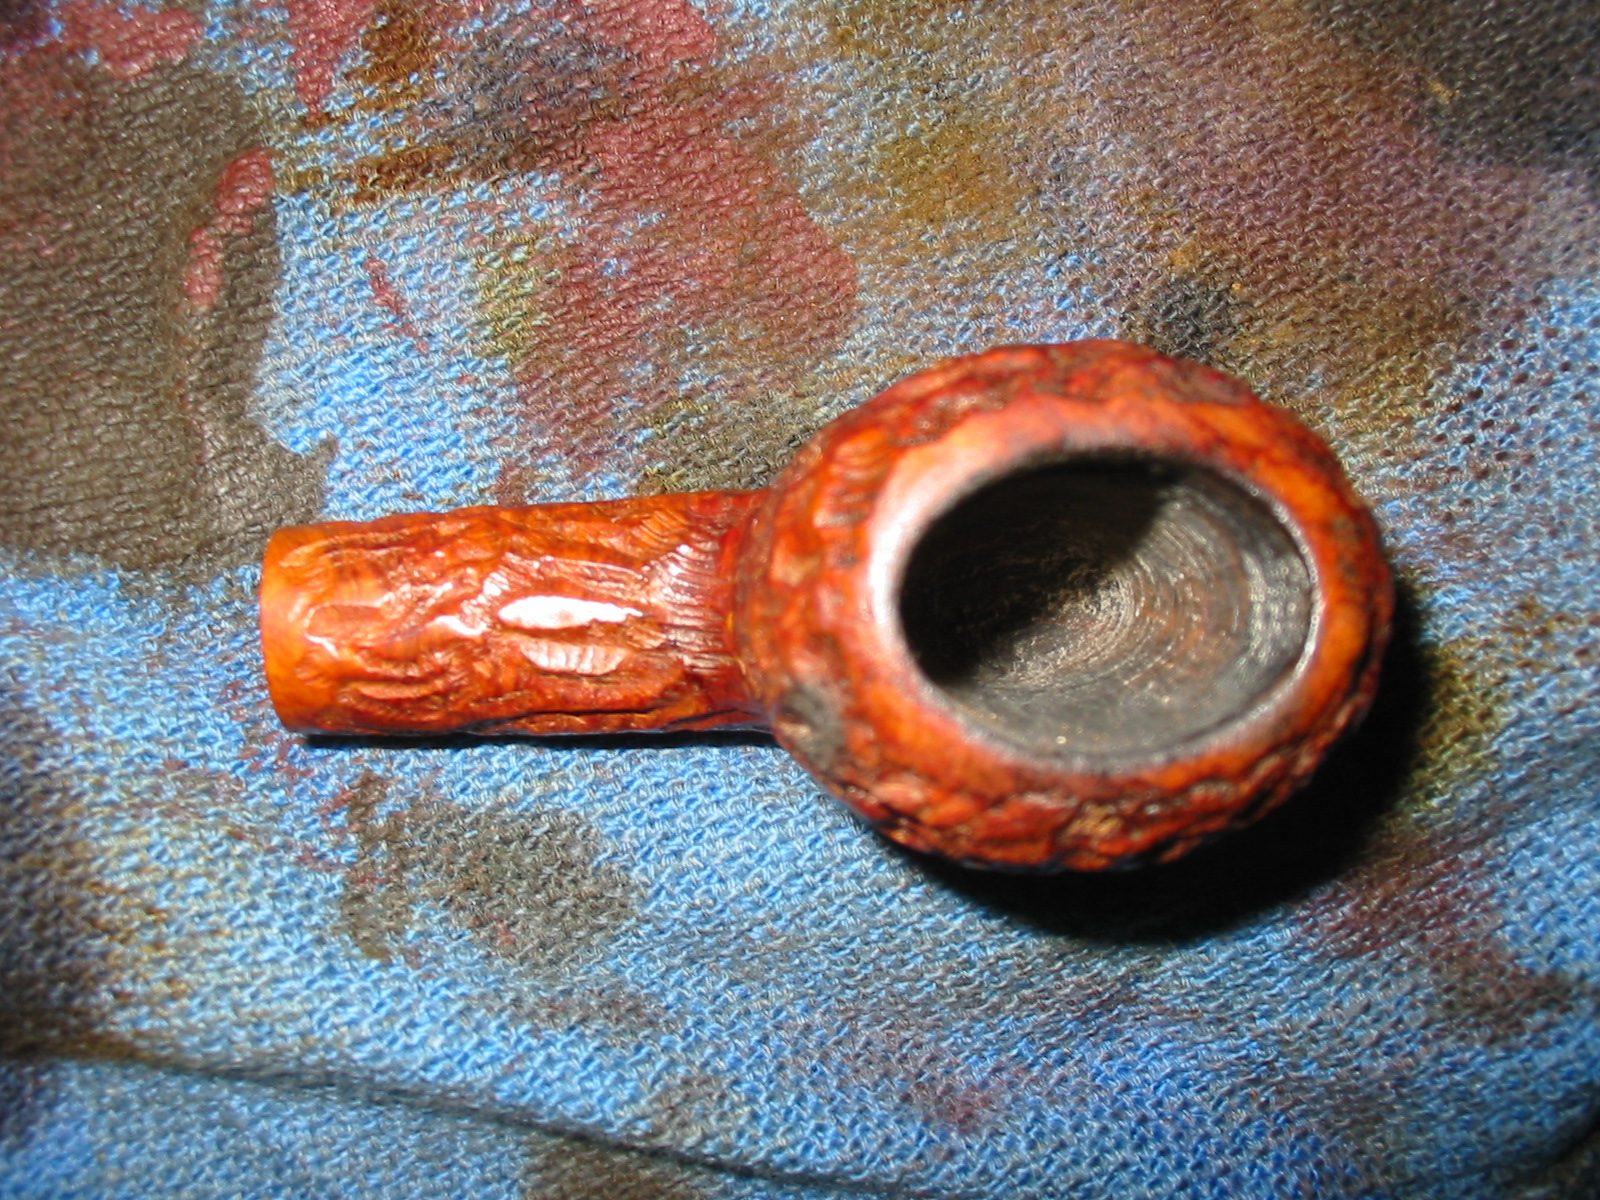
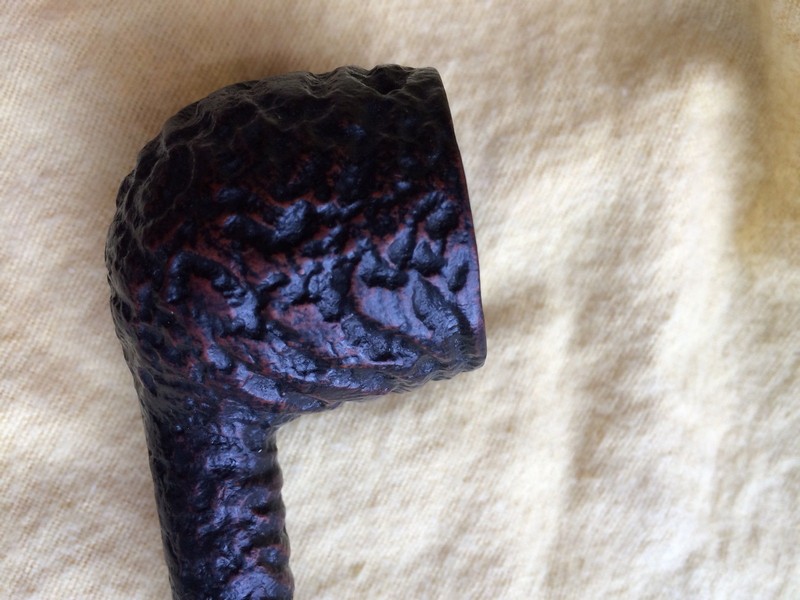
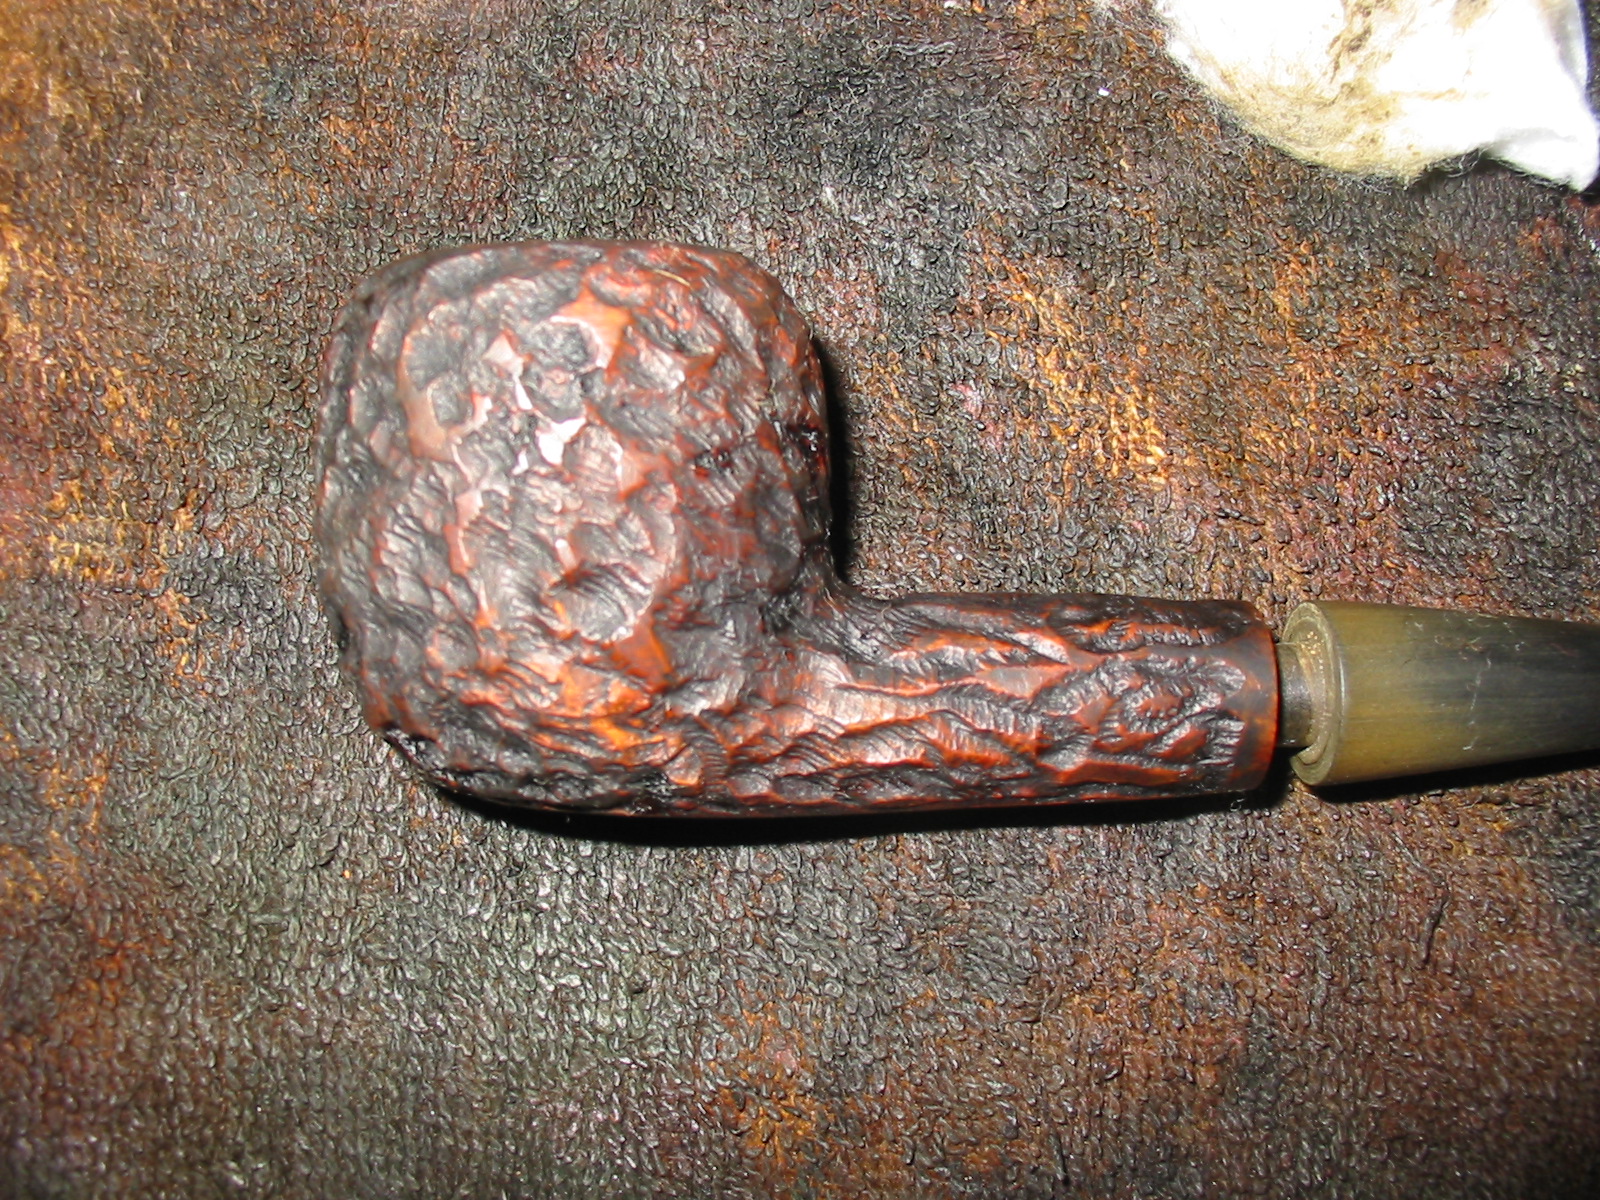
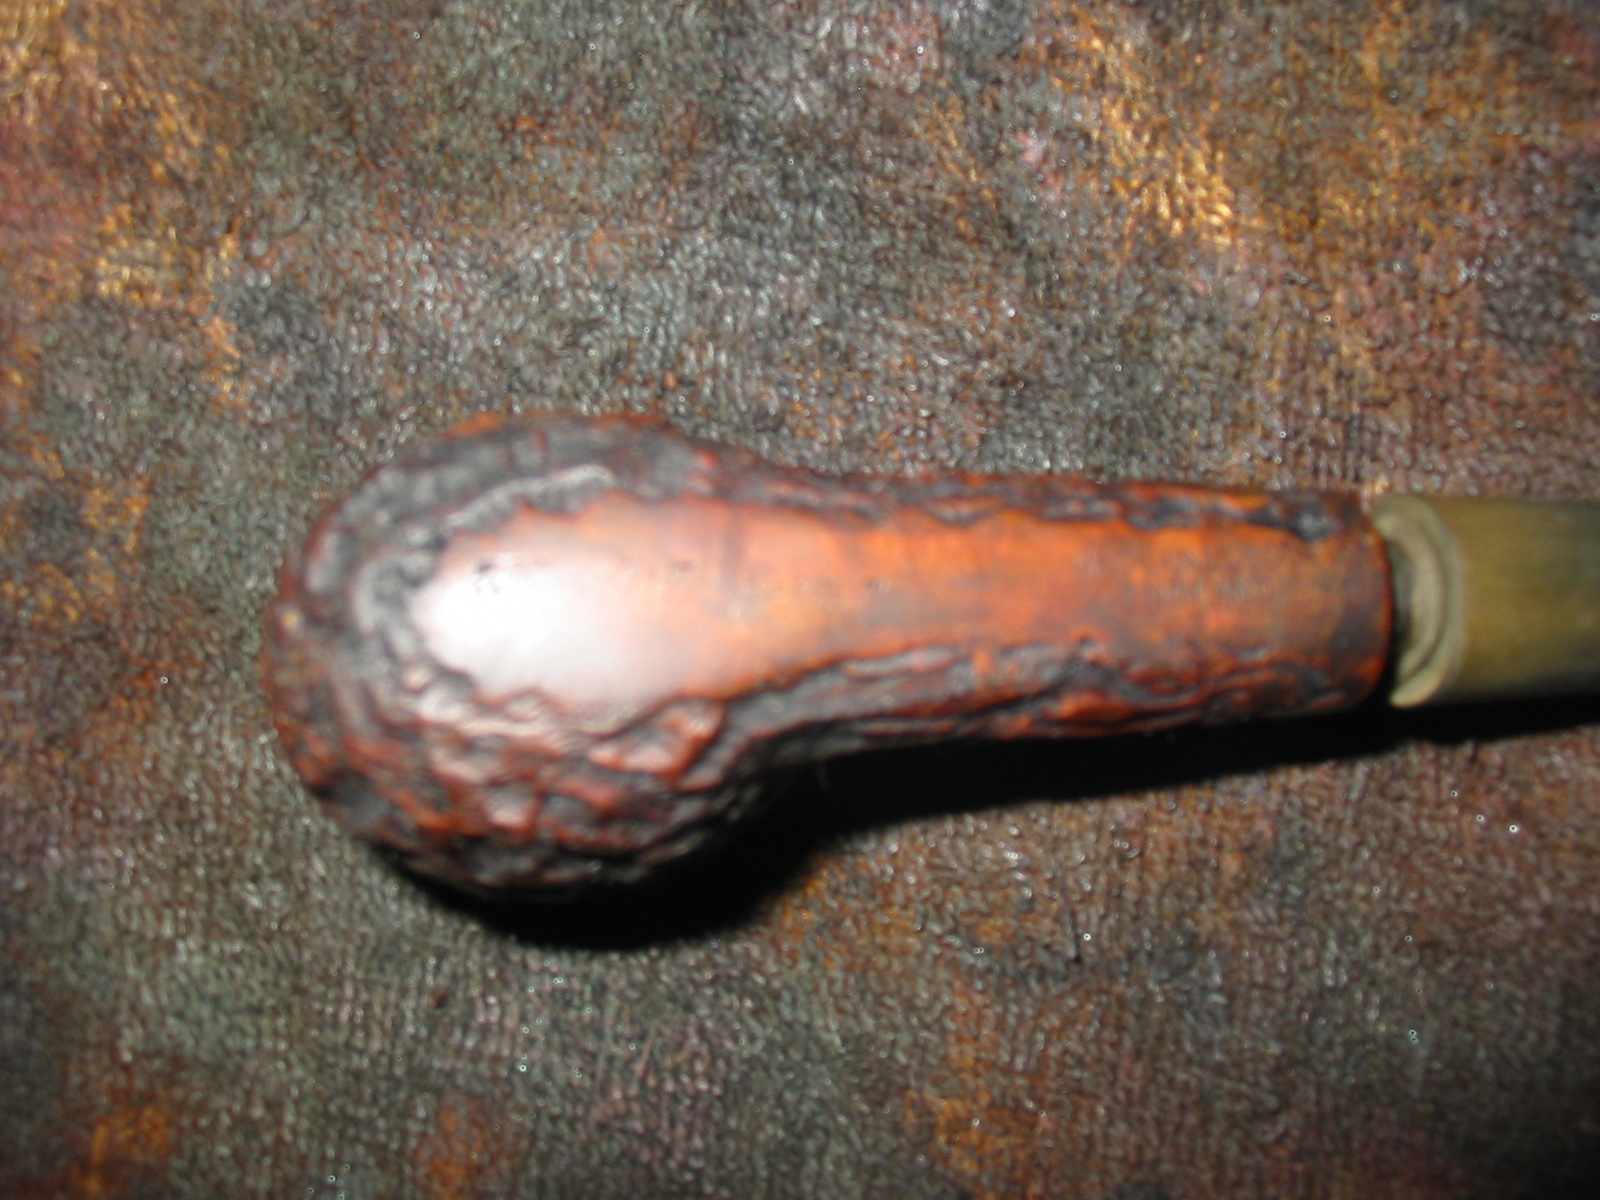
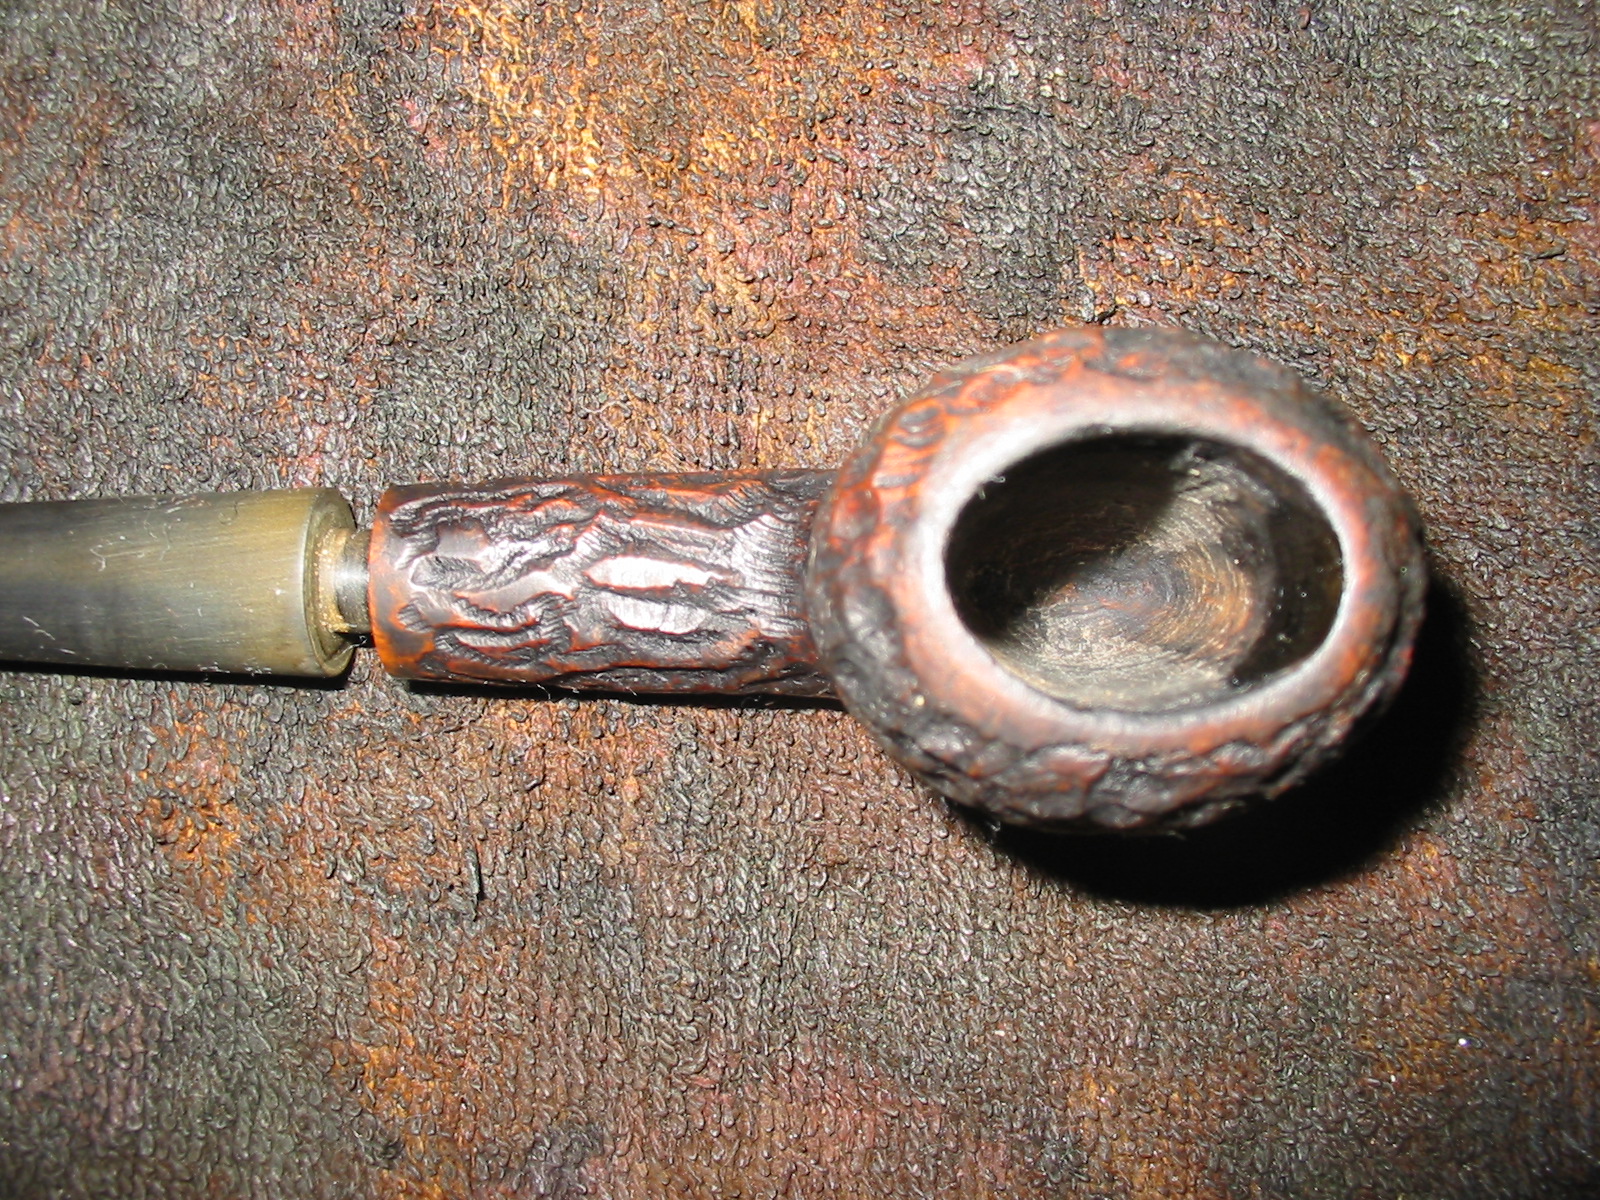
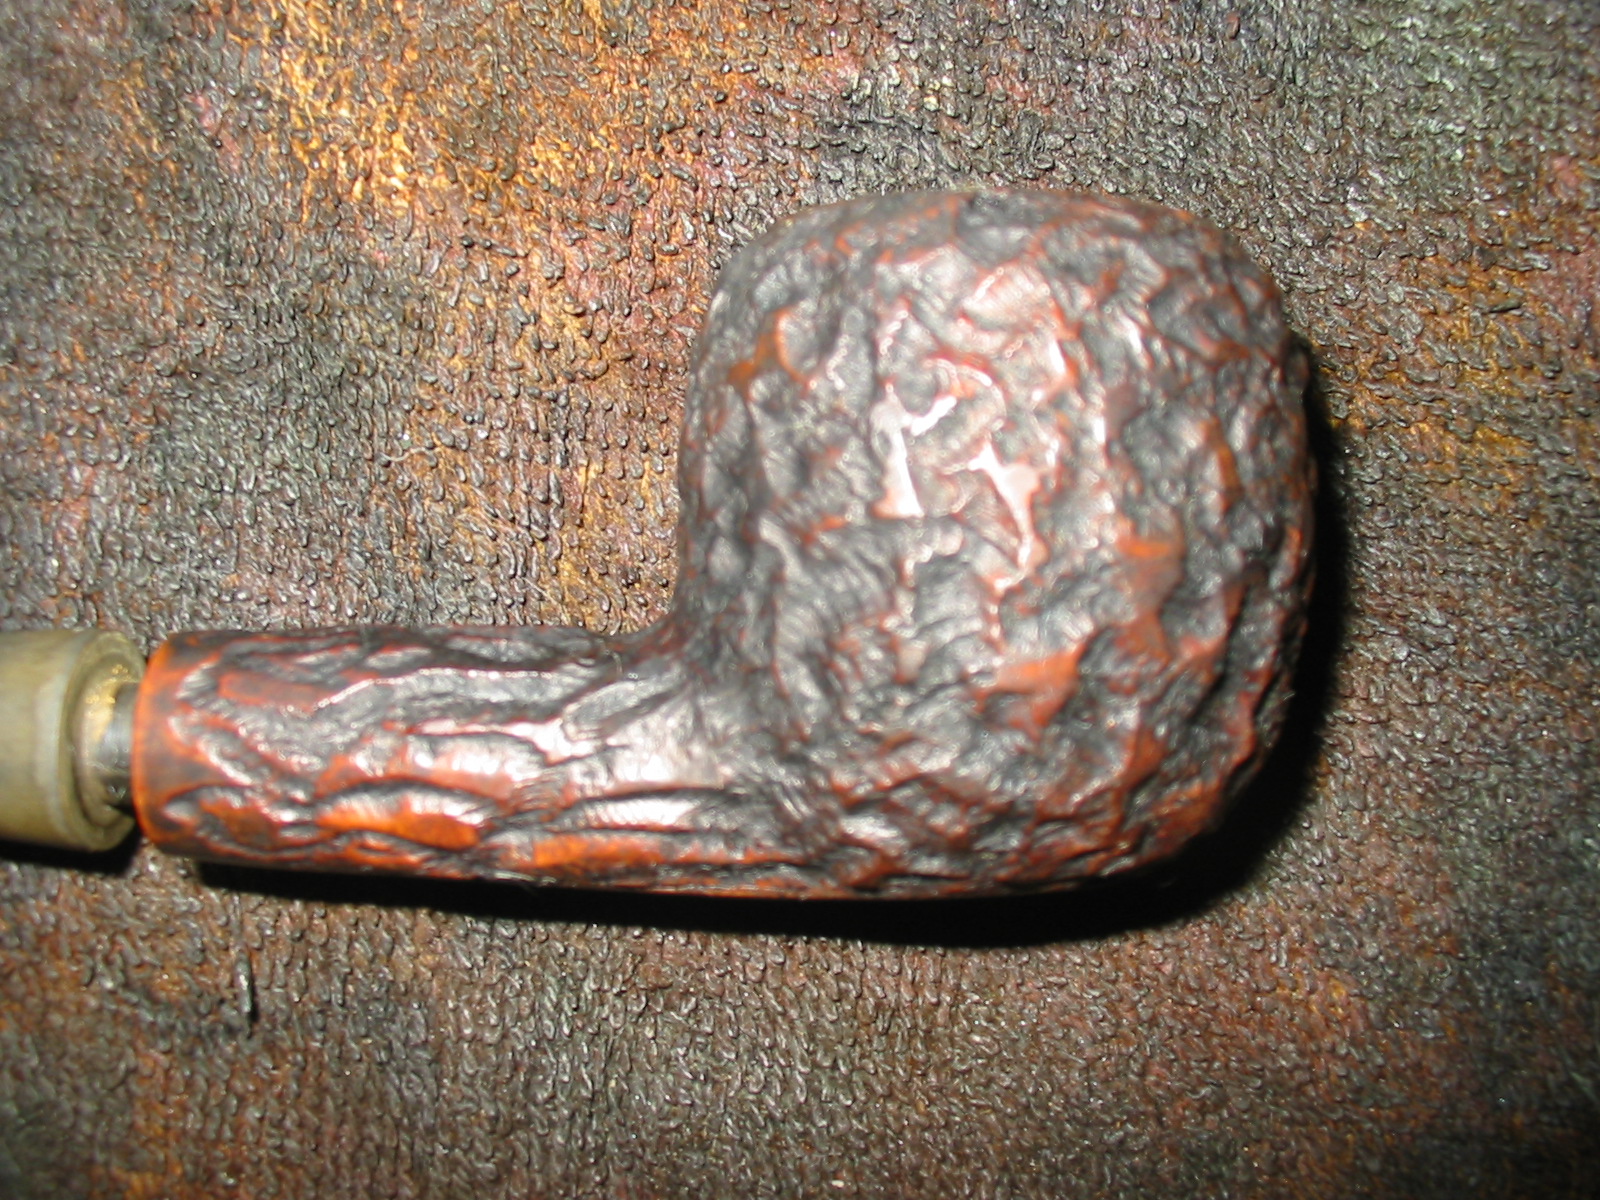
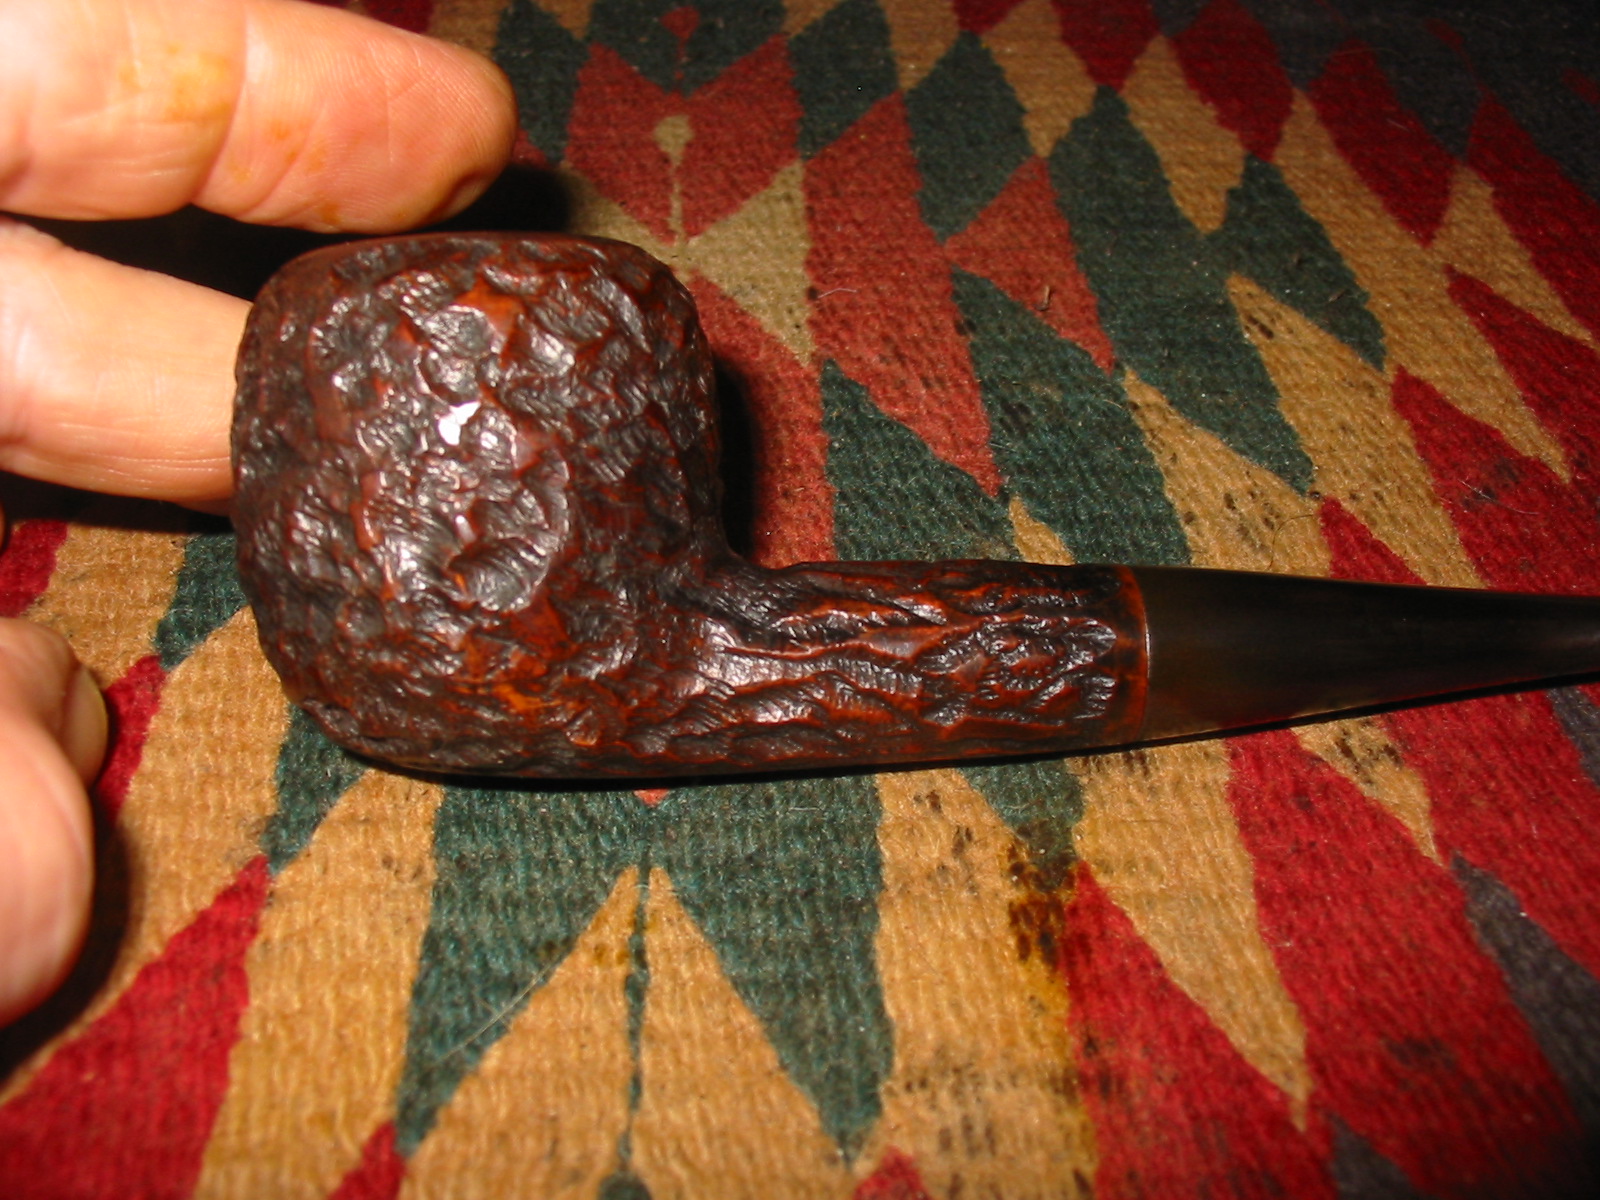
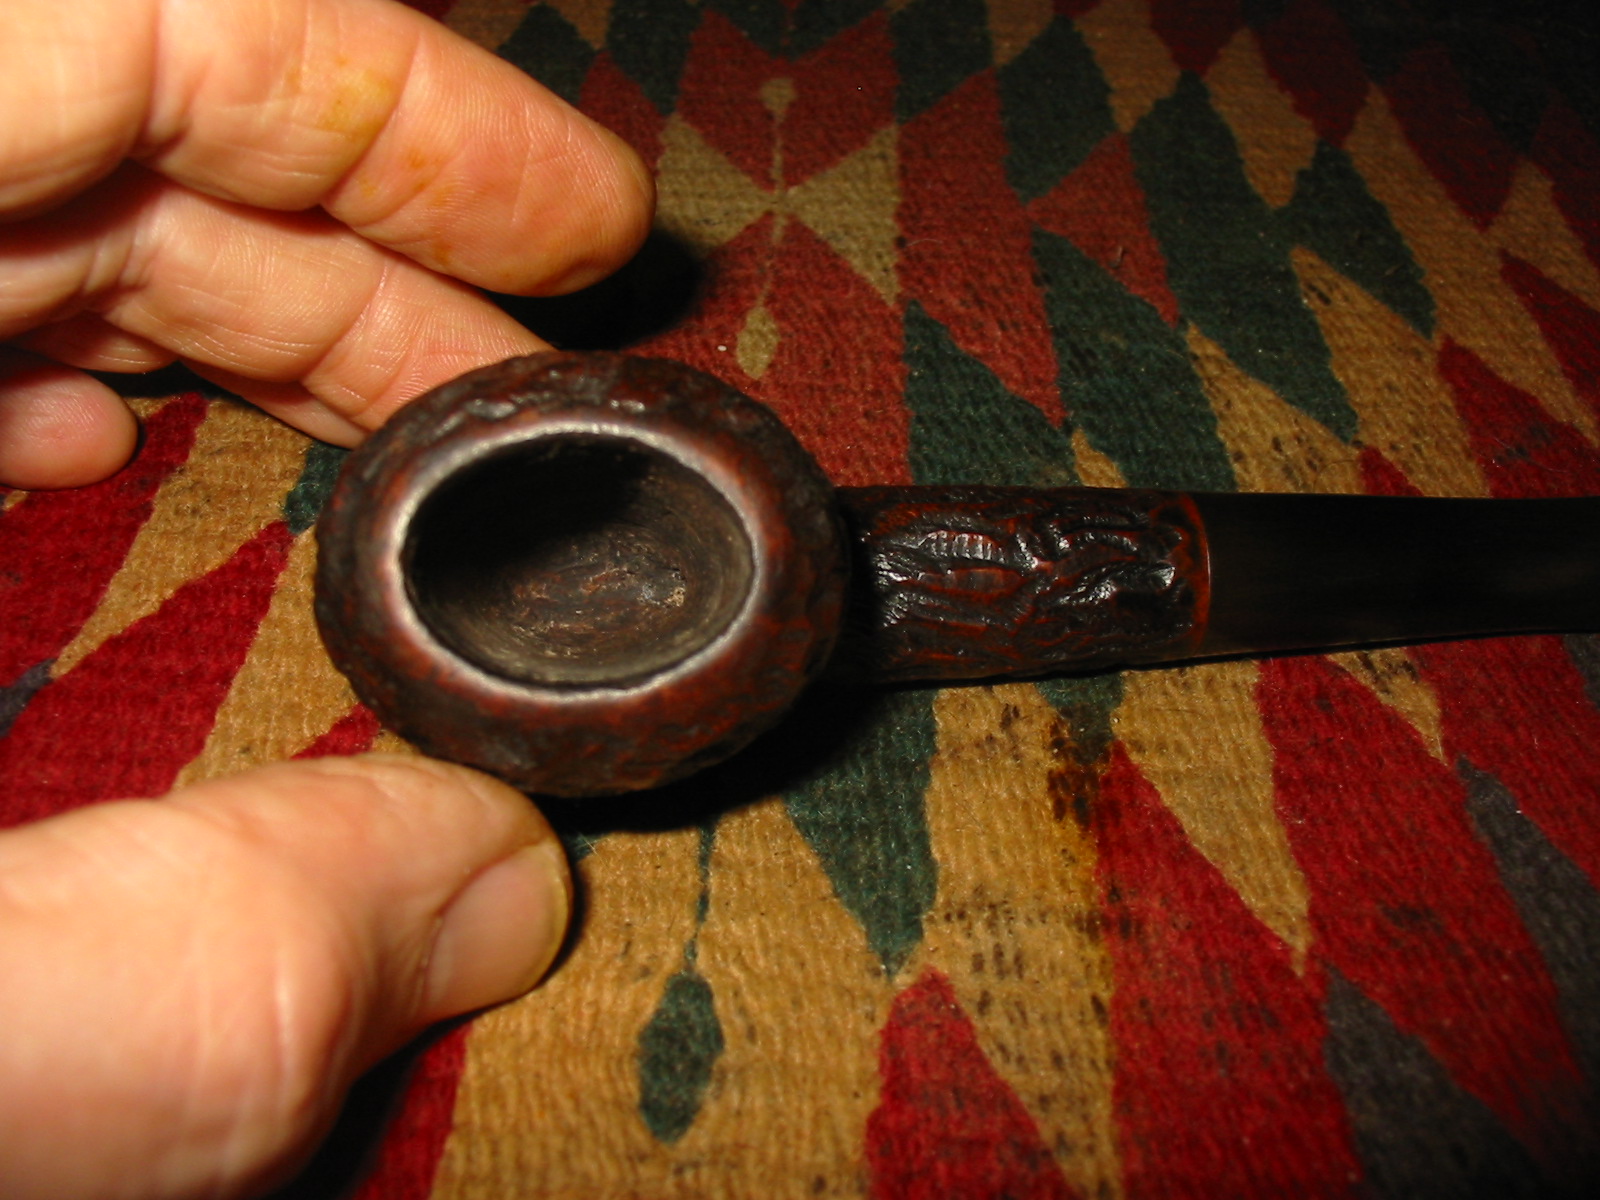
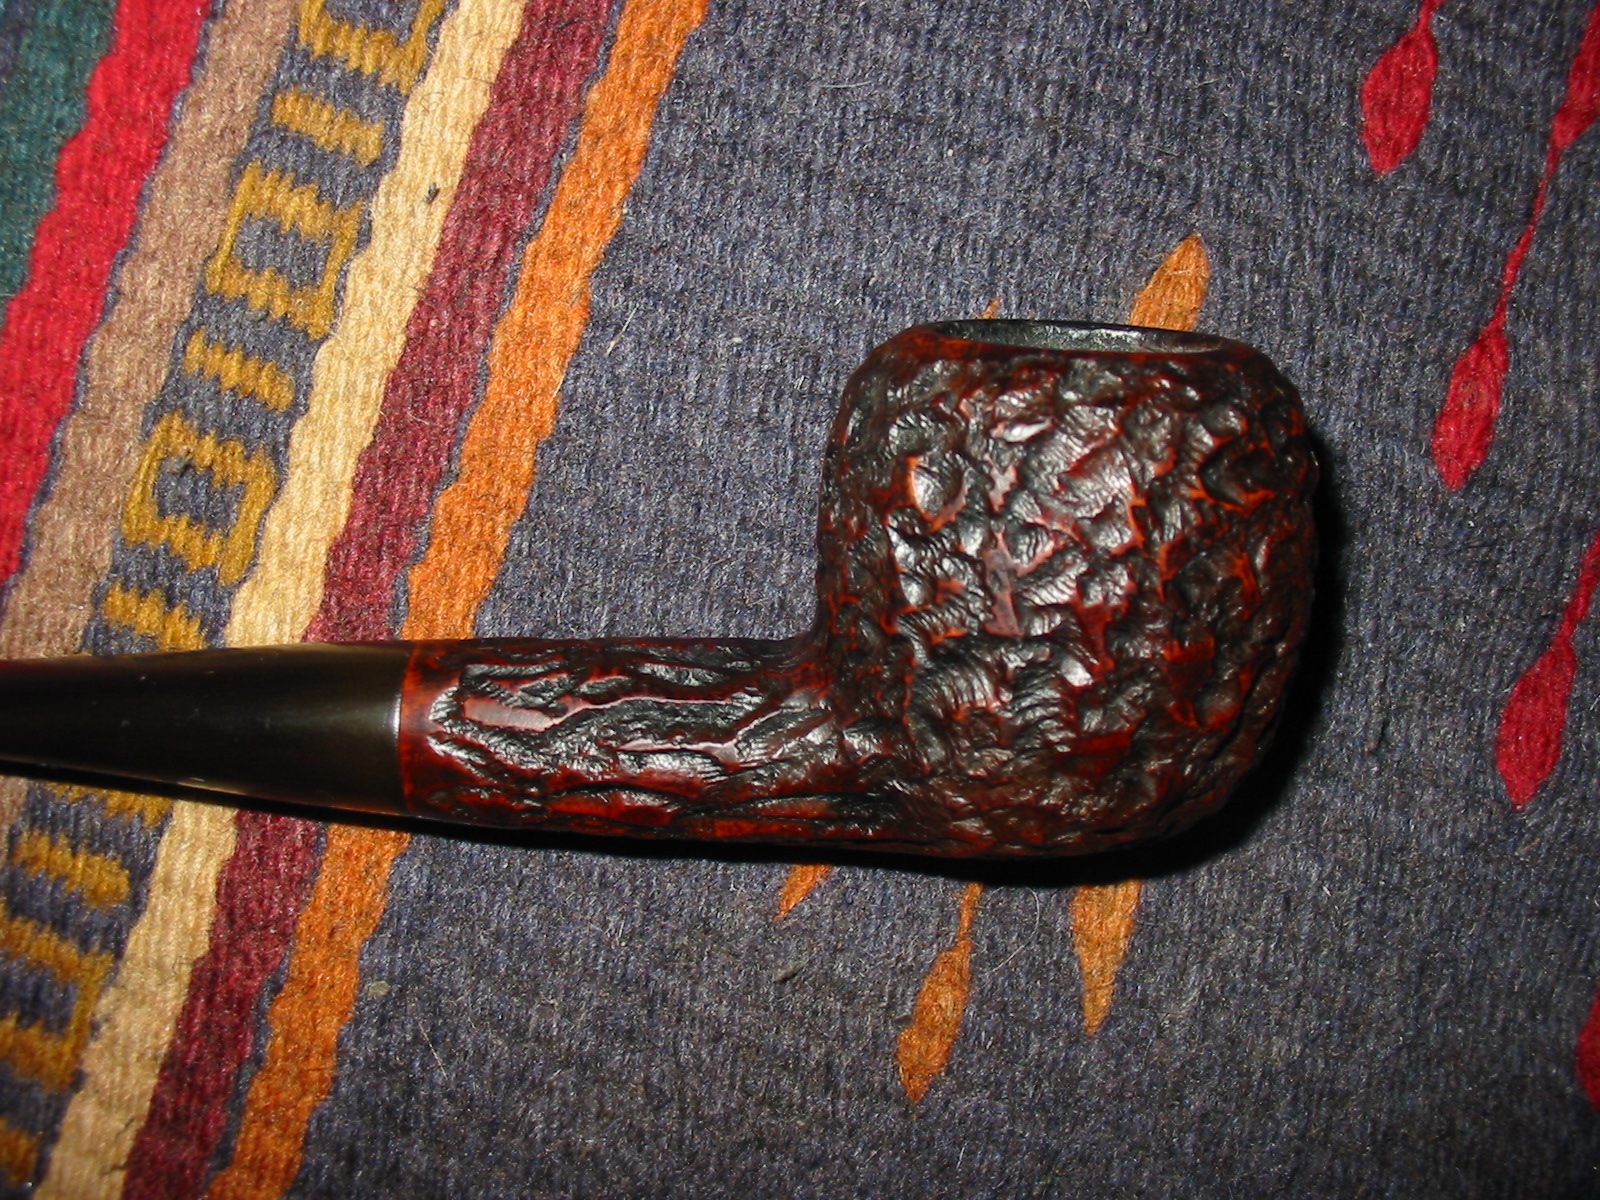
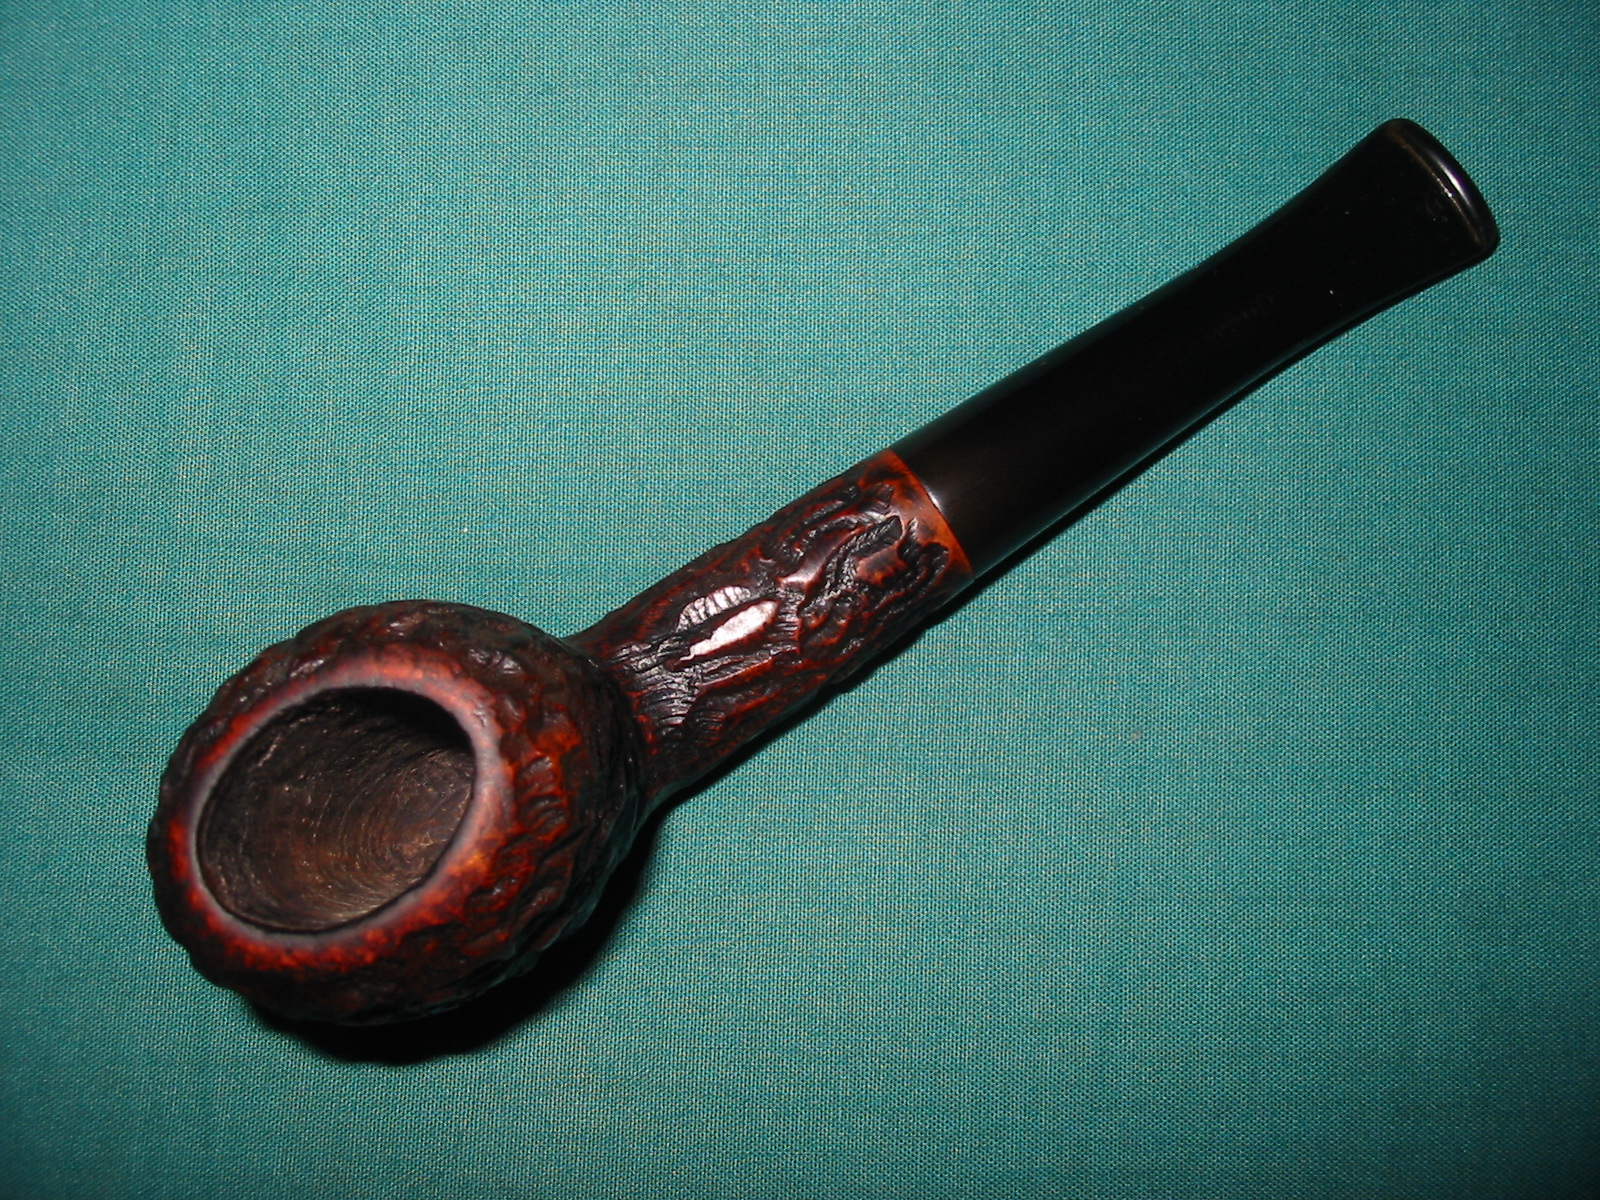
When I got home I looked at it more closely under a magnifier and saw that the stamping read “King’s Imperial” Made in London England. The pipe was rusticated in an identifiable manner that I had seen on several pipes before so it looked promising. The finish was actually far rougher than it appears in the photos below. The stain was gone in many of the high spots and the low spots in the rustication were also pretty raw briar. There were two burn marks on the top back side and front side of the bowl that had darkened, though they were not scorched and rough. There was also a rough place on the left side bottom front of the bowl where it looked as if it had been knocked about. These marks would make it unlikely that I would be able to stain the bowl a natural tan colour. The bowl was oval both inside and outside. The rim had some scorching and darkening. It had been reamed in the centre of the oval but both ends were still caked and needed to be cleaned. The stem was oxidized and had a shallow tooth mark on the topside near the button.
IMG_5992

IMG_5993

IMG_5994

IMG_5999
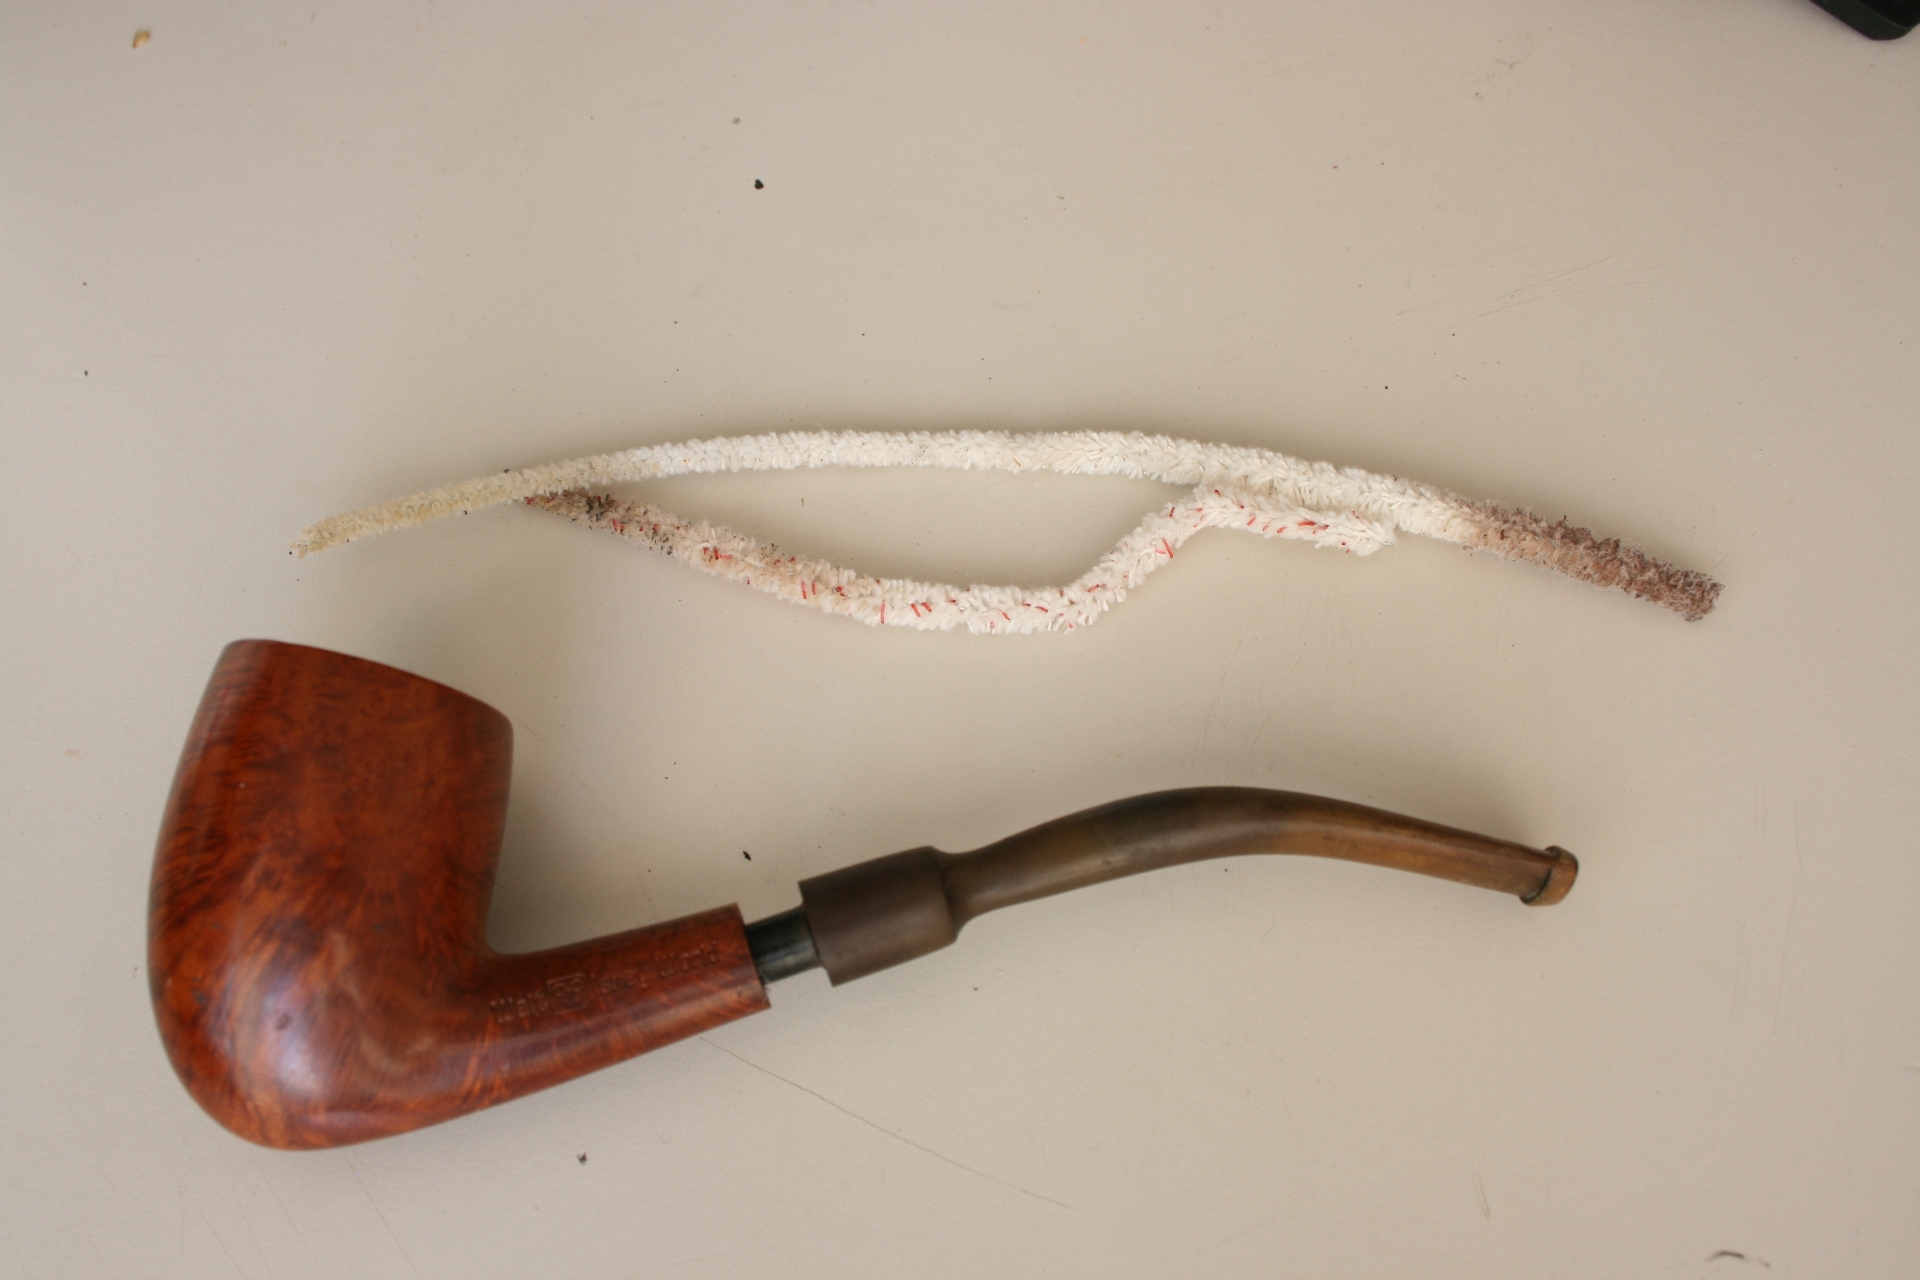
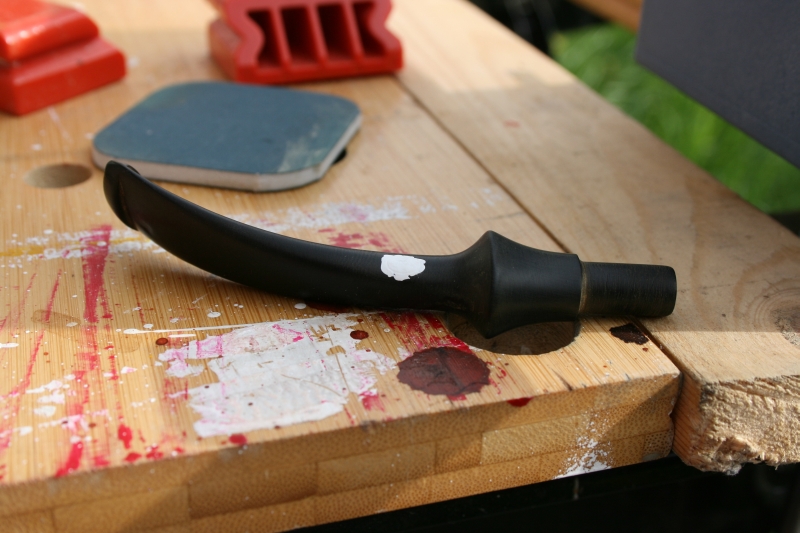
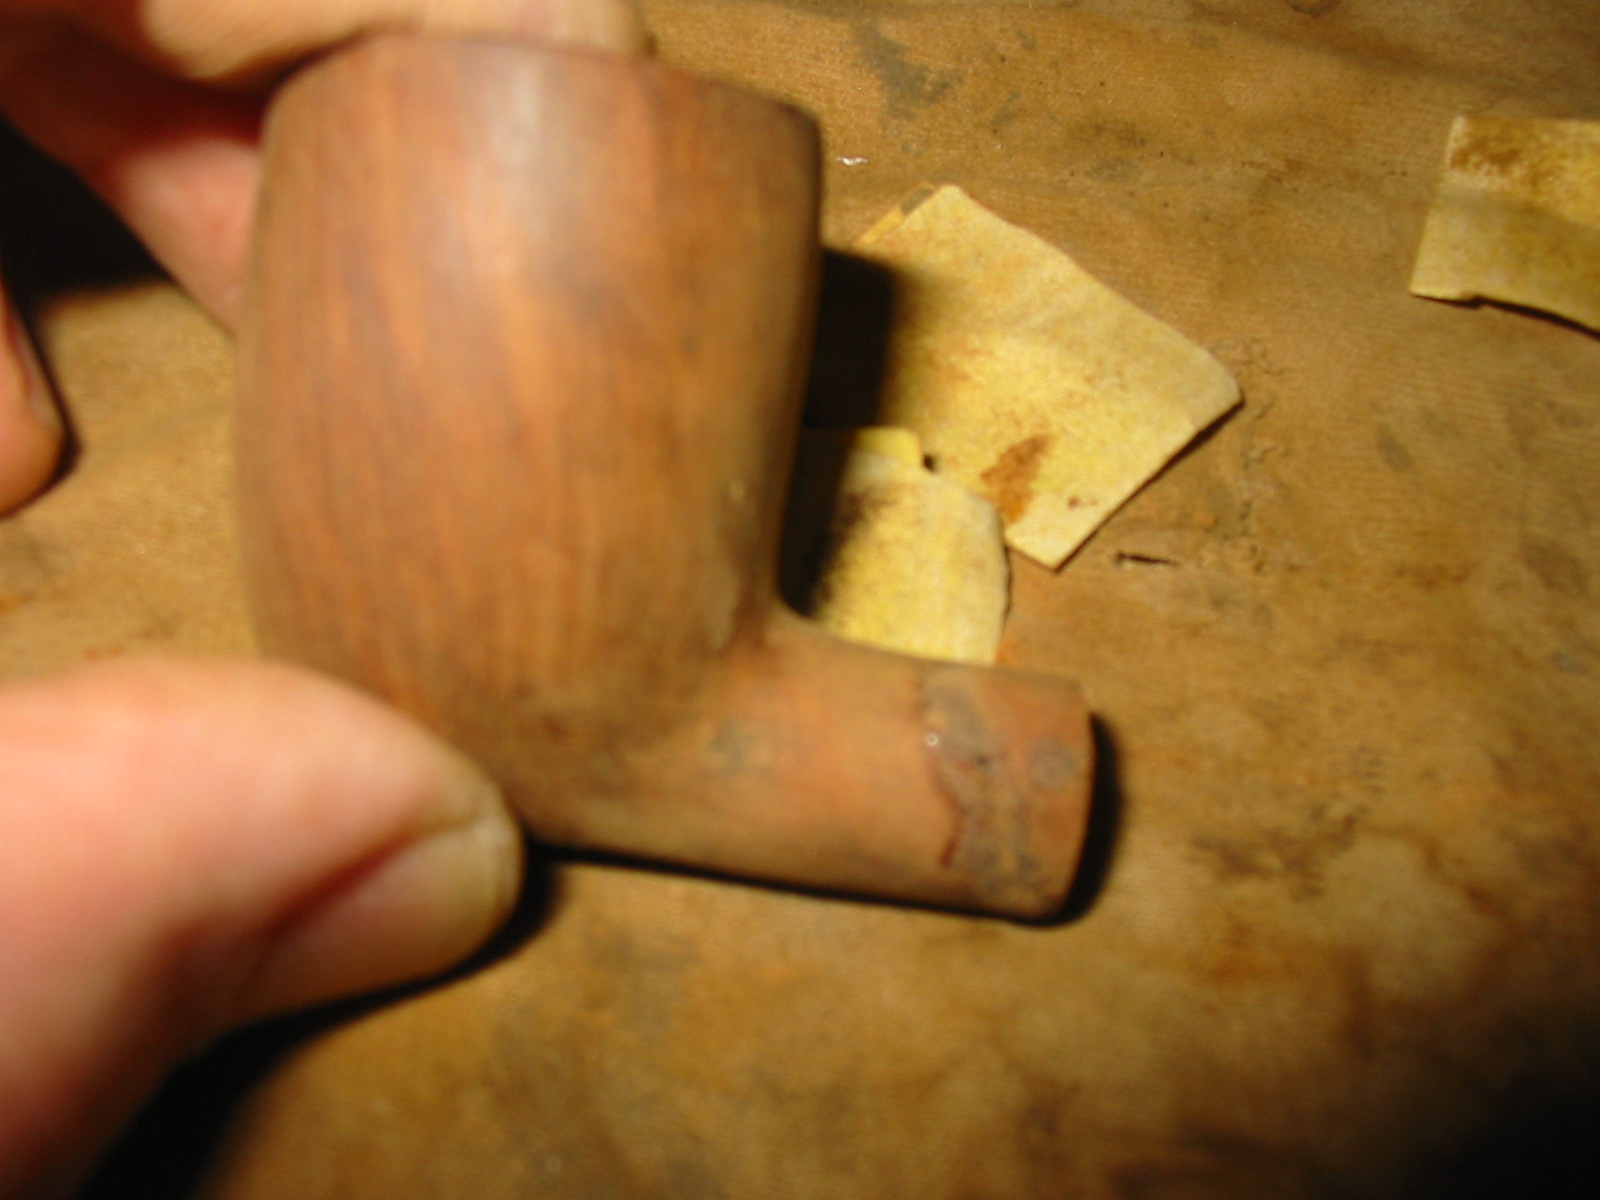
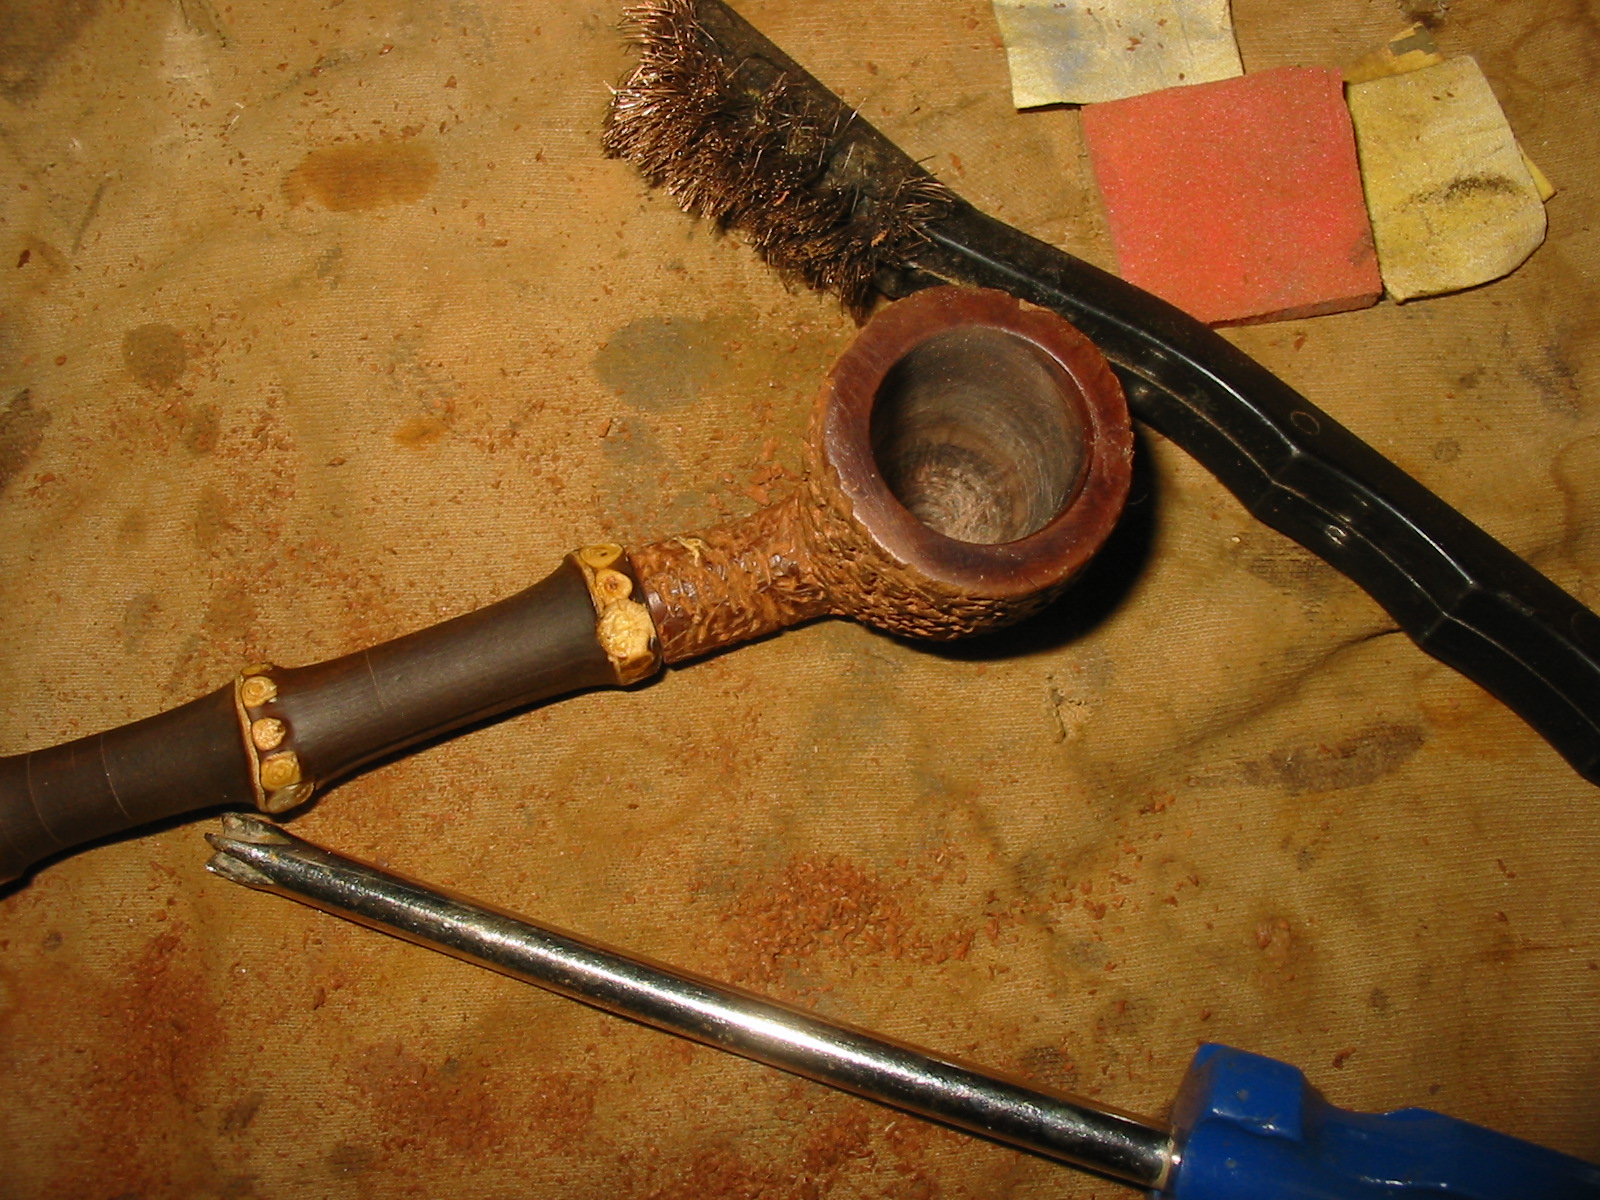
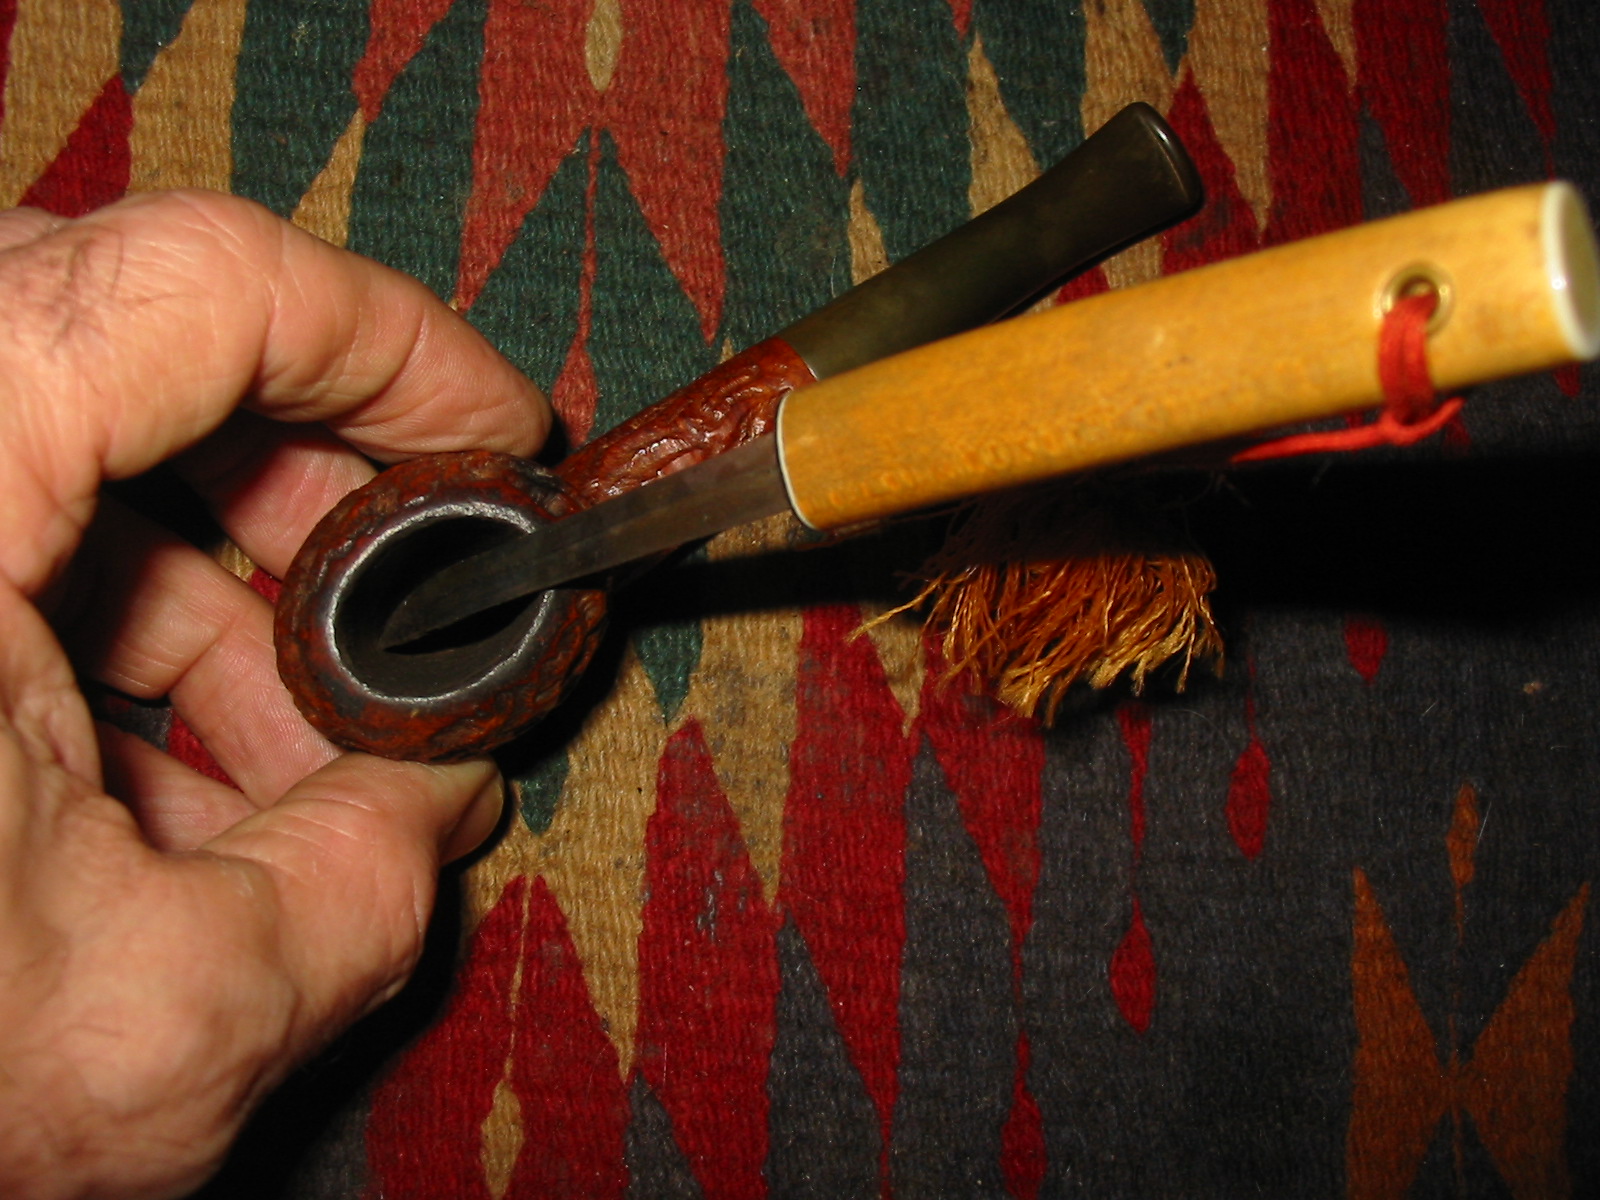
I have a sharp bladed Japanese letter opener that was a gift from my grandfather that worked very well to ream the oval ends of the bowl. I proceeded to slowly scrape away the buildup of carbon and took the cake back to the bare briar.
IMG_6000

IMG_6001
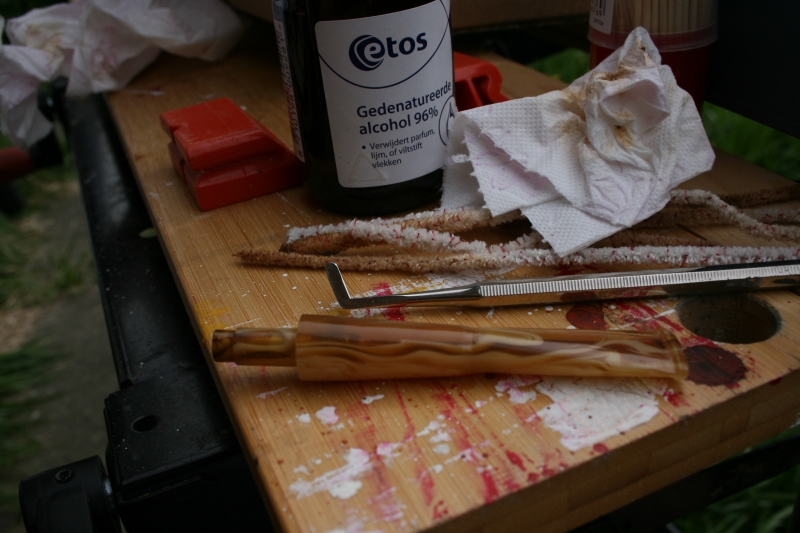
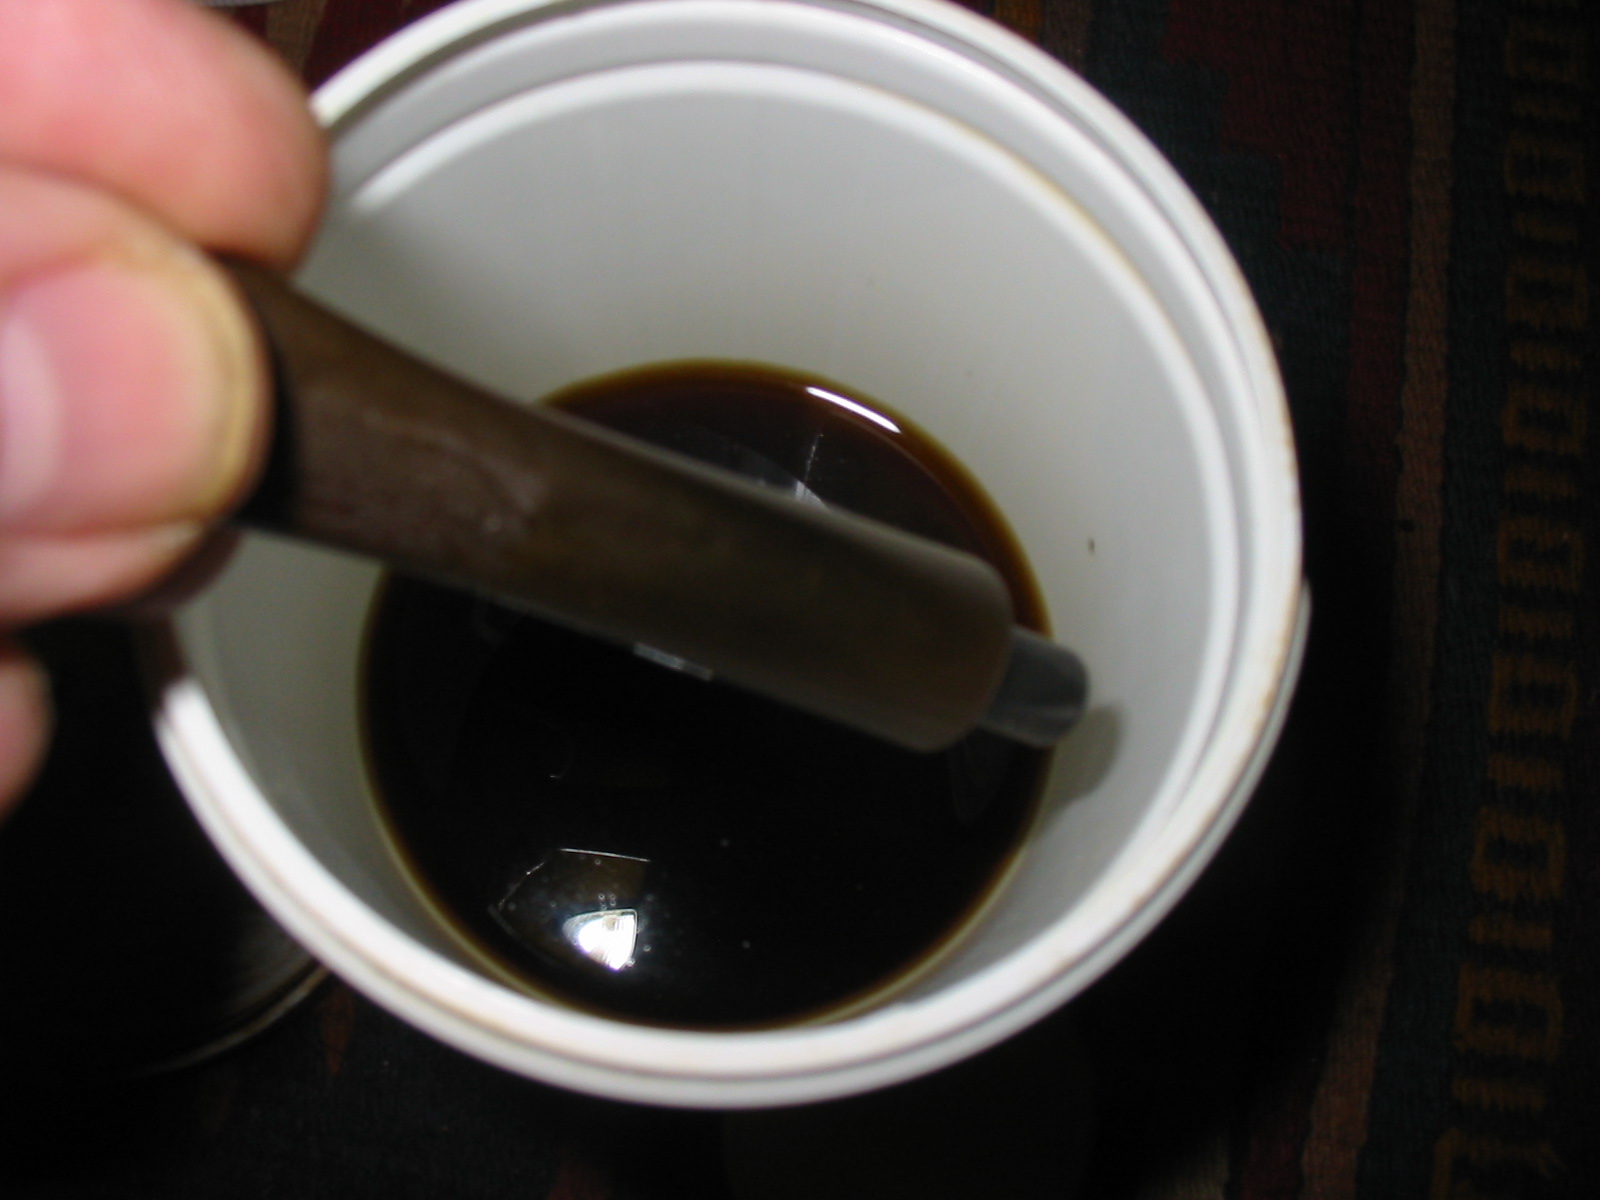
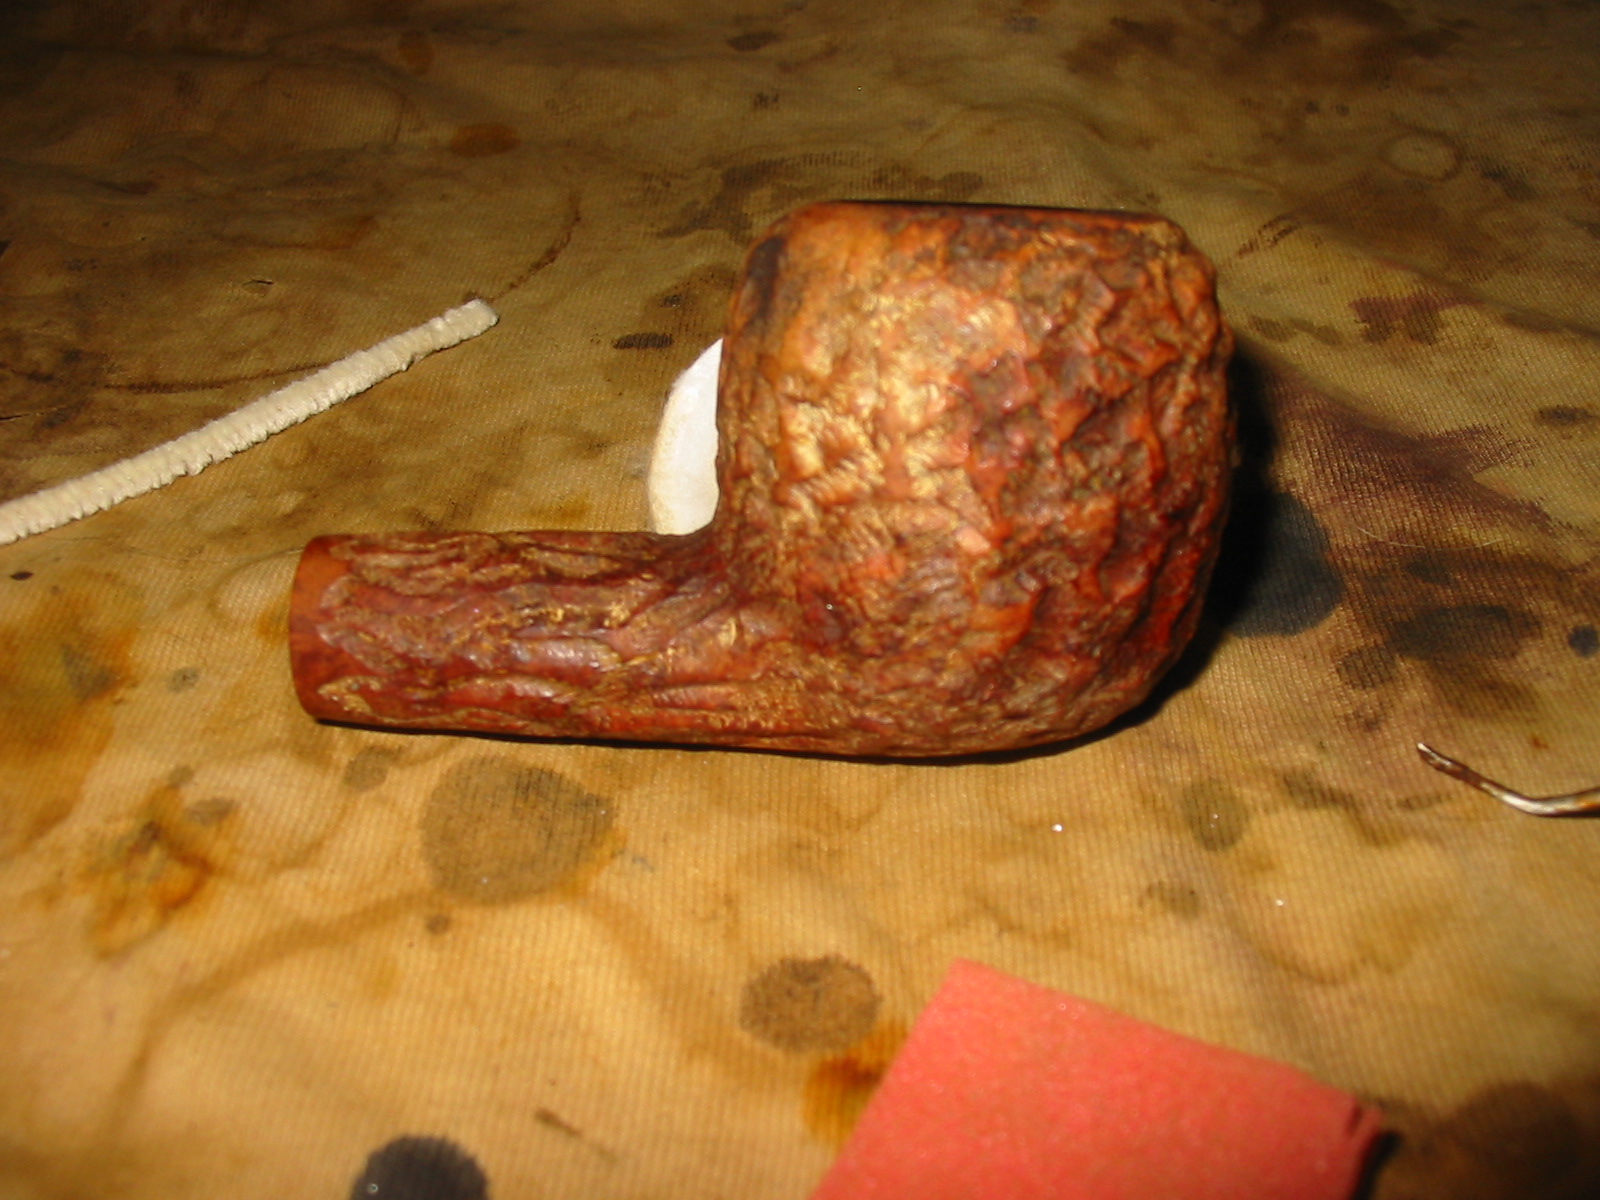
After reaming the bowl I dropped the bowl into an alcohol bath to soak for an hour and then scrubbed it with a brass bristle tire brush to clean up the surface of the bowl and to scrub the burned areas on the bowl. I also put the stem into an Oxyclean bath to soften the oxidation on the vulcanite so that it would clean up more easily when removed.
IMG_6003
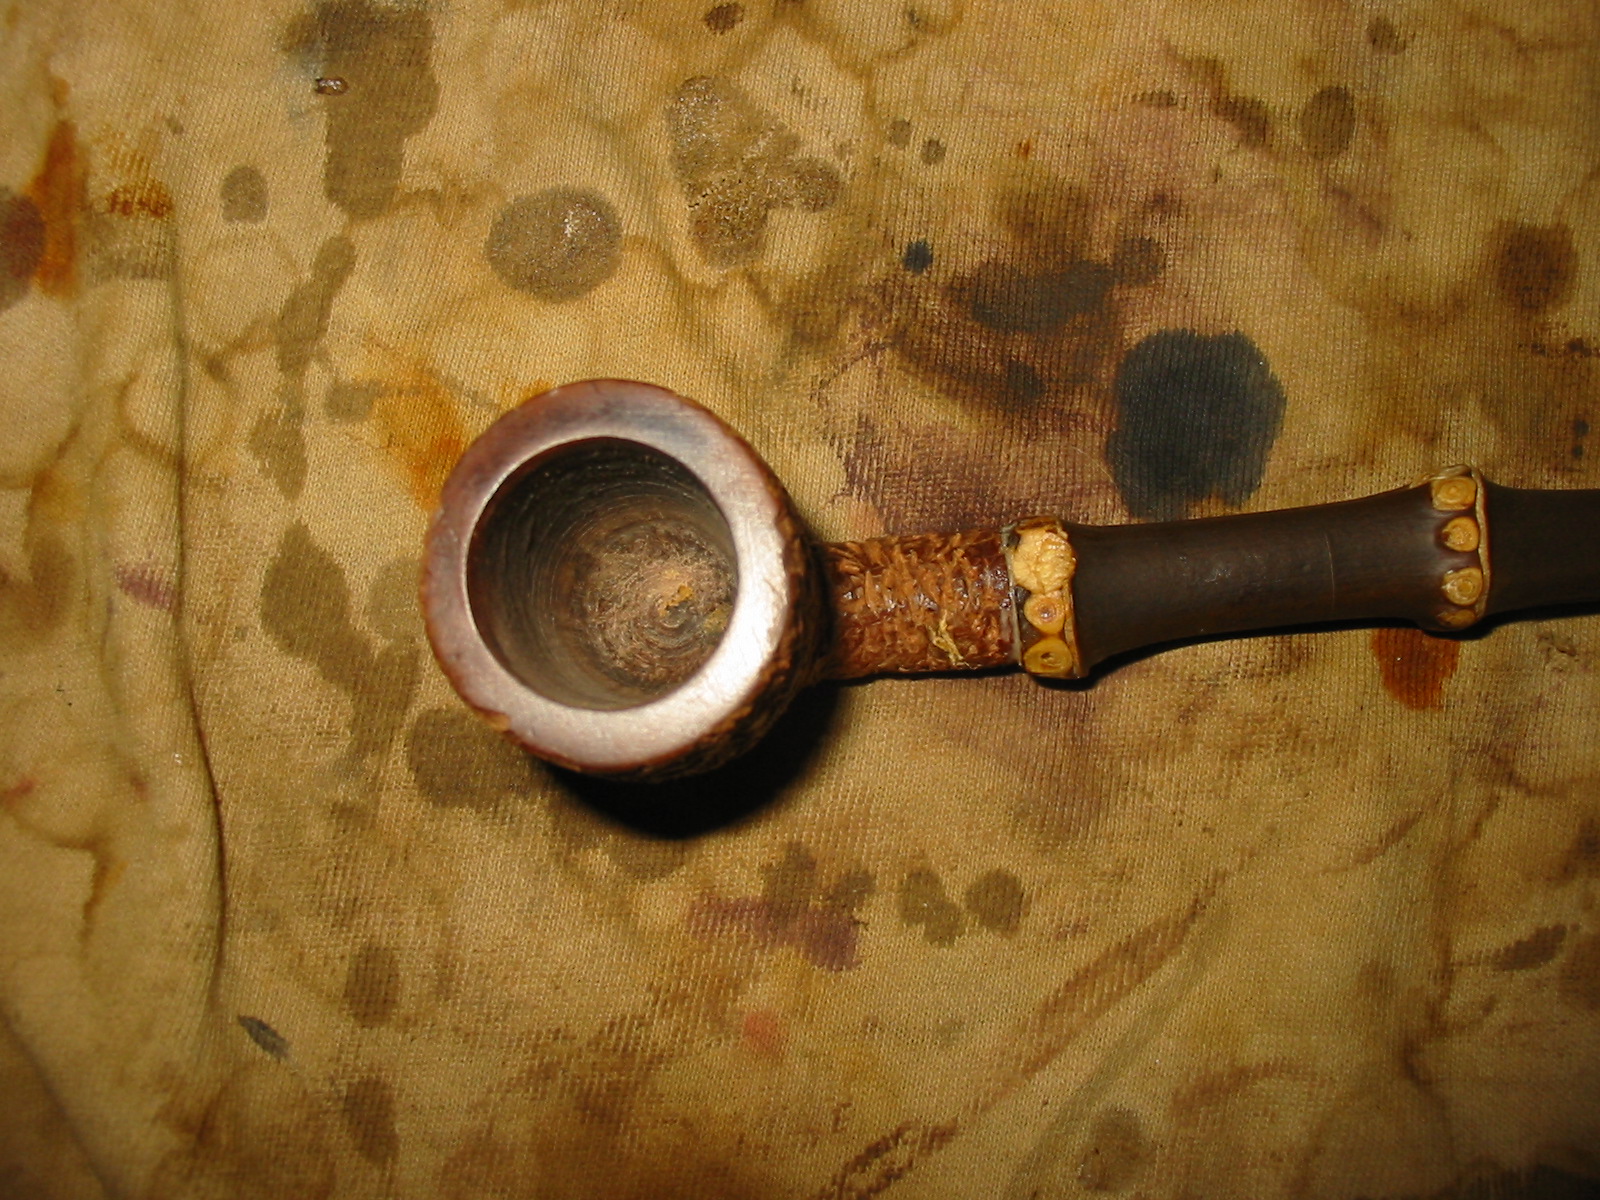
After an hour of soaking the alcohol bath I took the bowl out and dried it off with cotton cloths. I scrubbed it with a soft bristle tooth brush to remove any remaining grit in the grooves of the finish and then dried it off again. I wiped the bowl down with acetone on cotton pads to remove stubborn areas of the old finish. I wanted the bowl clean and free of any remnant of the old finish before I was ready to restain the briar. I sanded the rim with a fine grit sanding sponge to clean off the softened tar buildup and wiped it down with the acetone as well. I used a dental pick to pick out grime that was stubbornly remaining in the grooves of the rustication. I finished by cleaning out the inside of the bowl and shank with clean isopropyl alcohol and cotton swabs until they came out clean.
IMG_6004

IMG_6005

IMG_6006
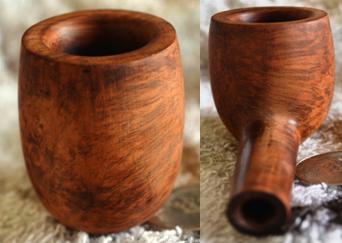
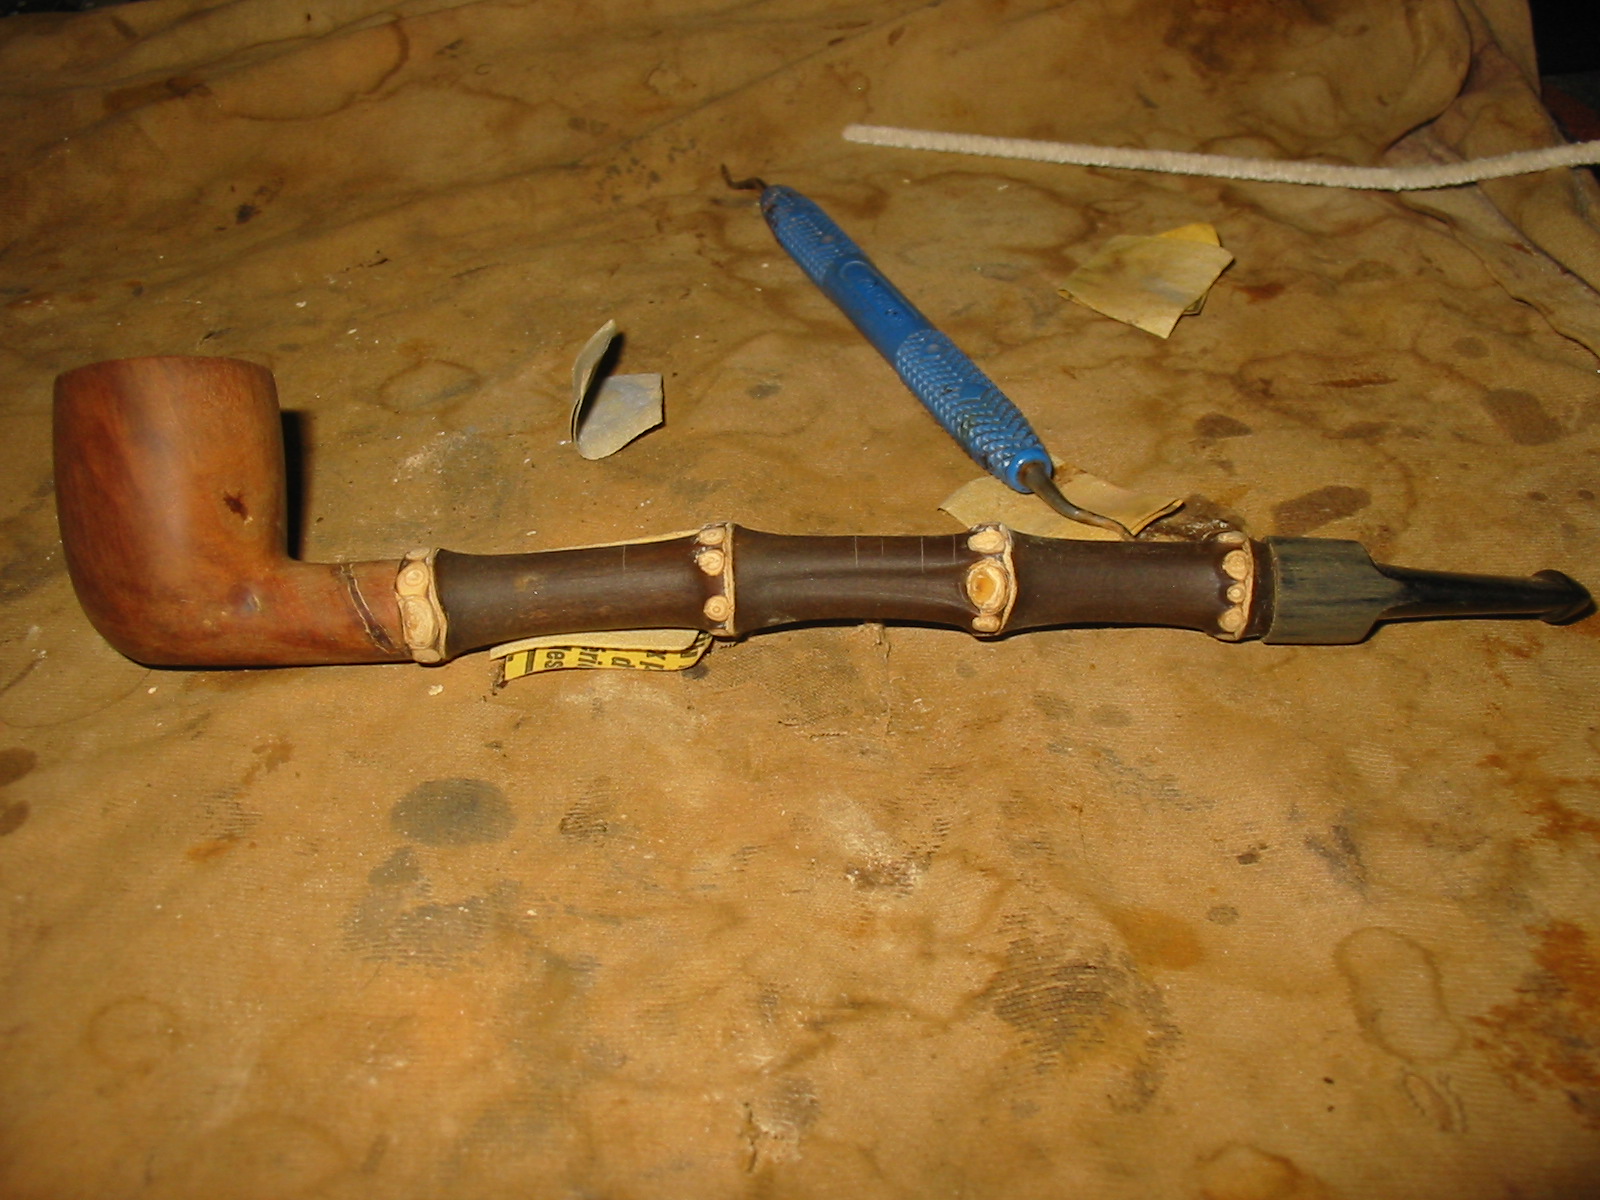
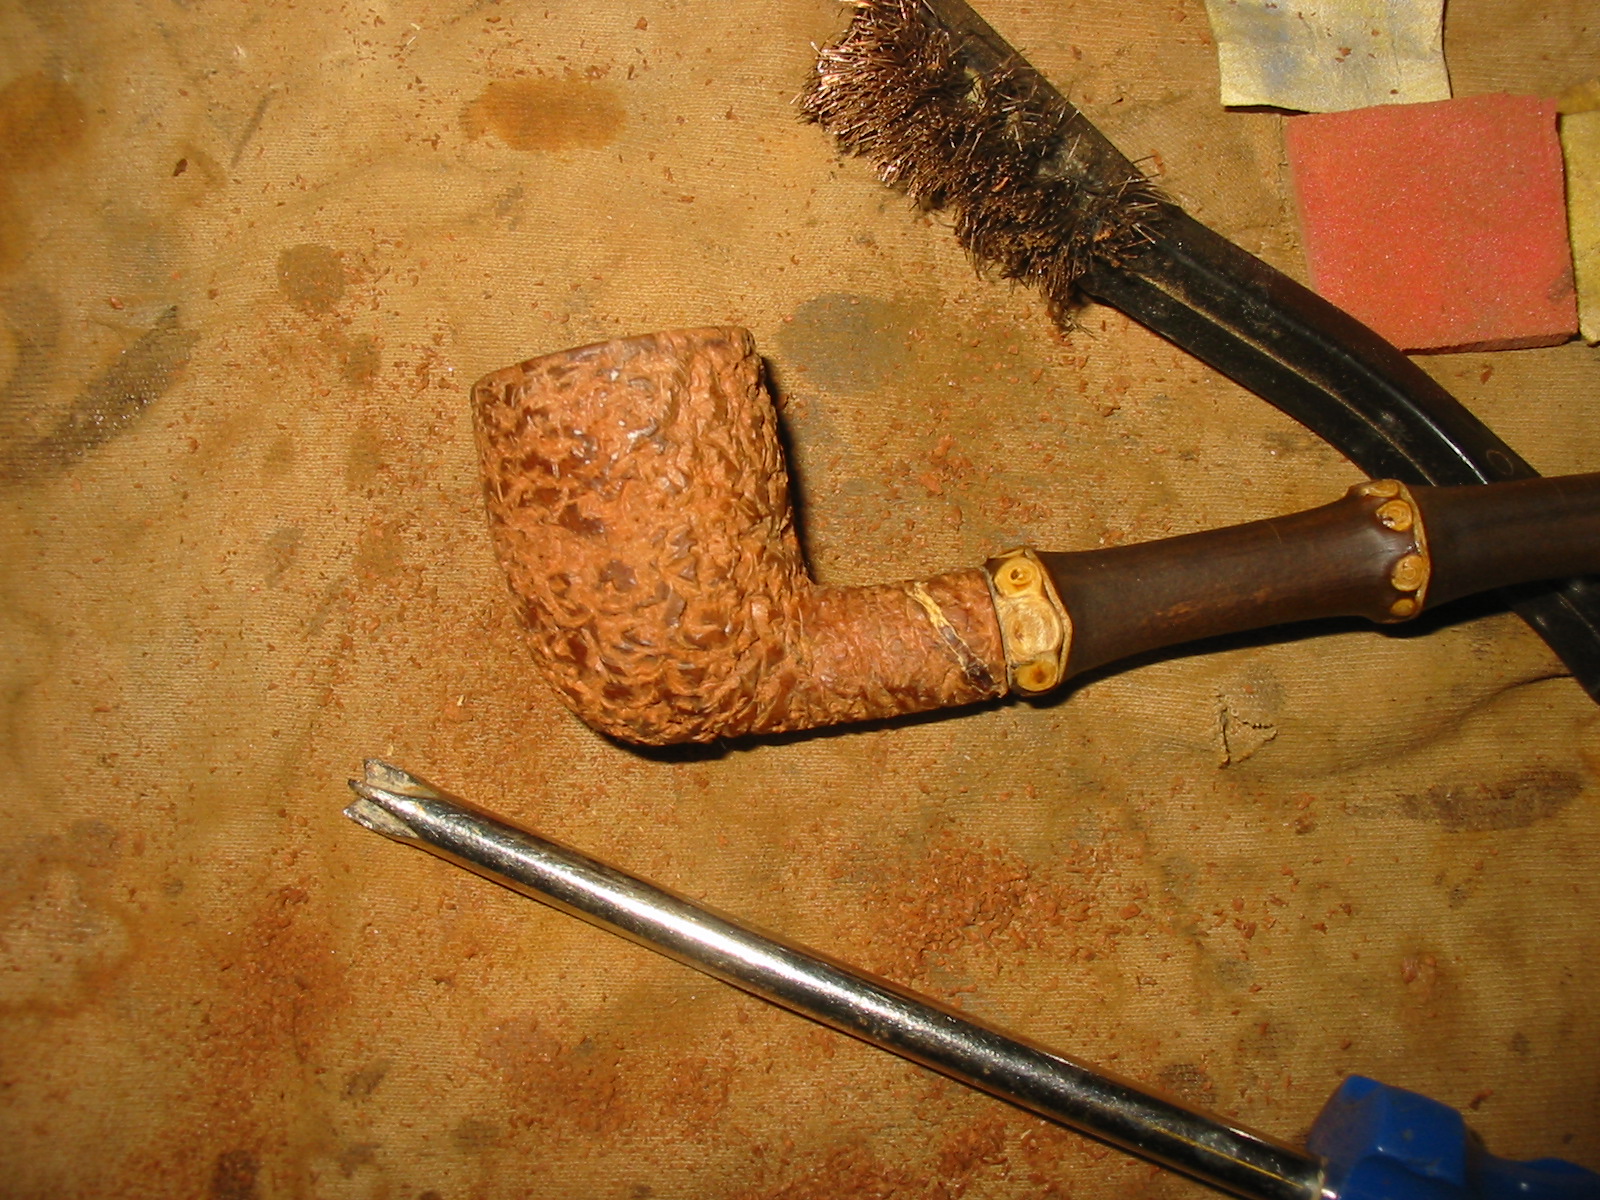
I decided to try and stain the pipe with a light brown stain – almost tan coloured to mimic the original appearance of the bowl. I mixed one part dark brown stain with 3 parts isopropyl alcohol to make a light brown wash. I applied it to the rusticated surface with cotton swabs and flamed it once it was done. I restained it and reflamed it a second and third time to give it an even coverage.
IMG_6007

IMG_6008

IMG_6009

IMG_6010
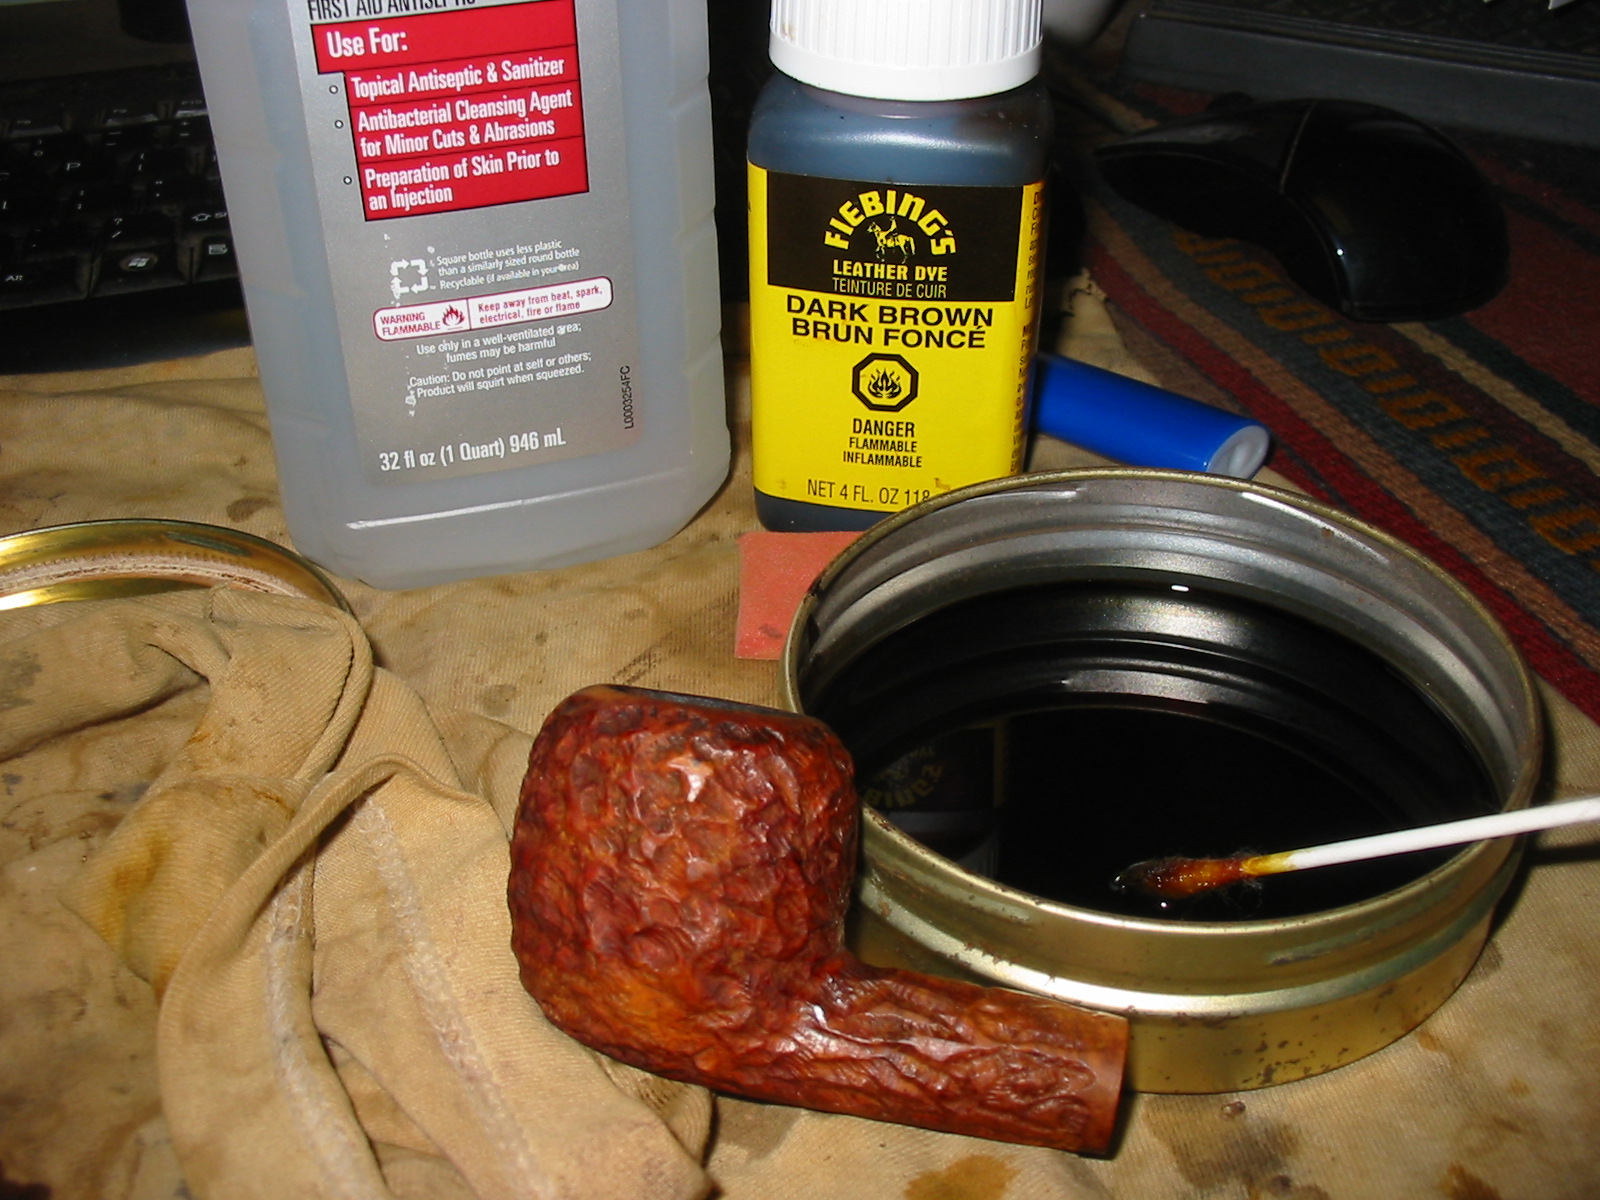
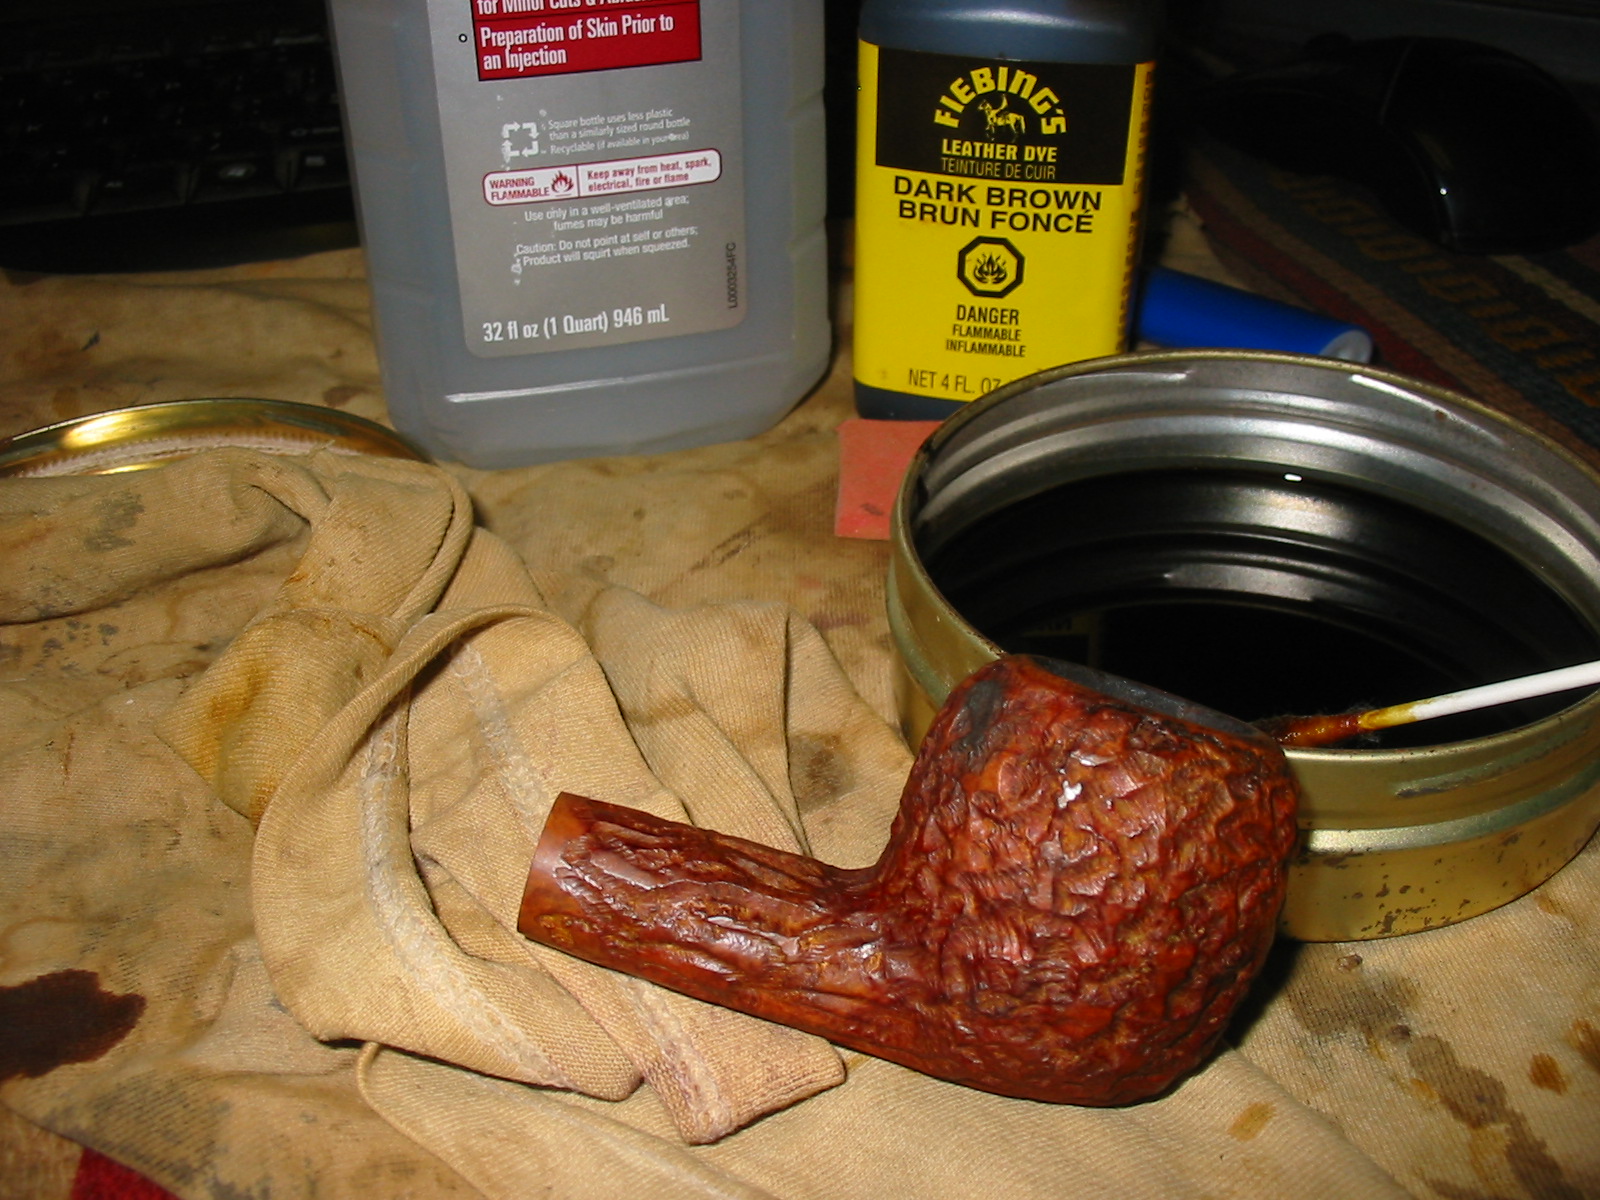
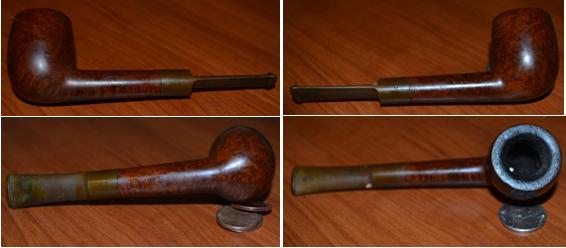
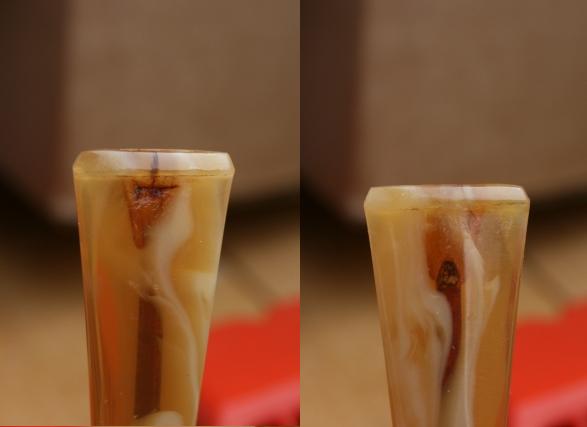
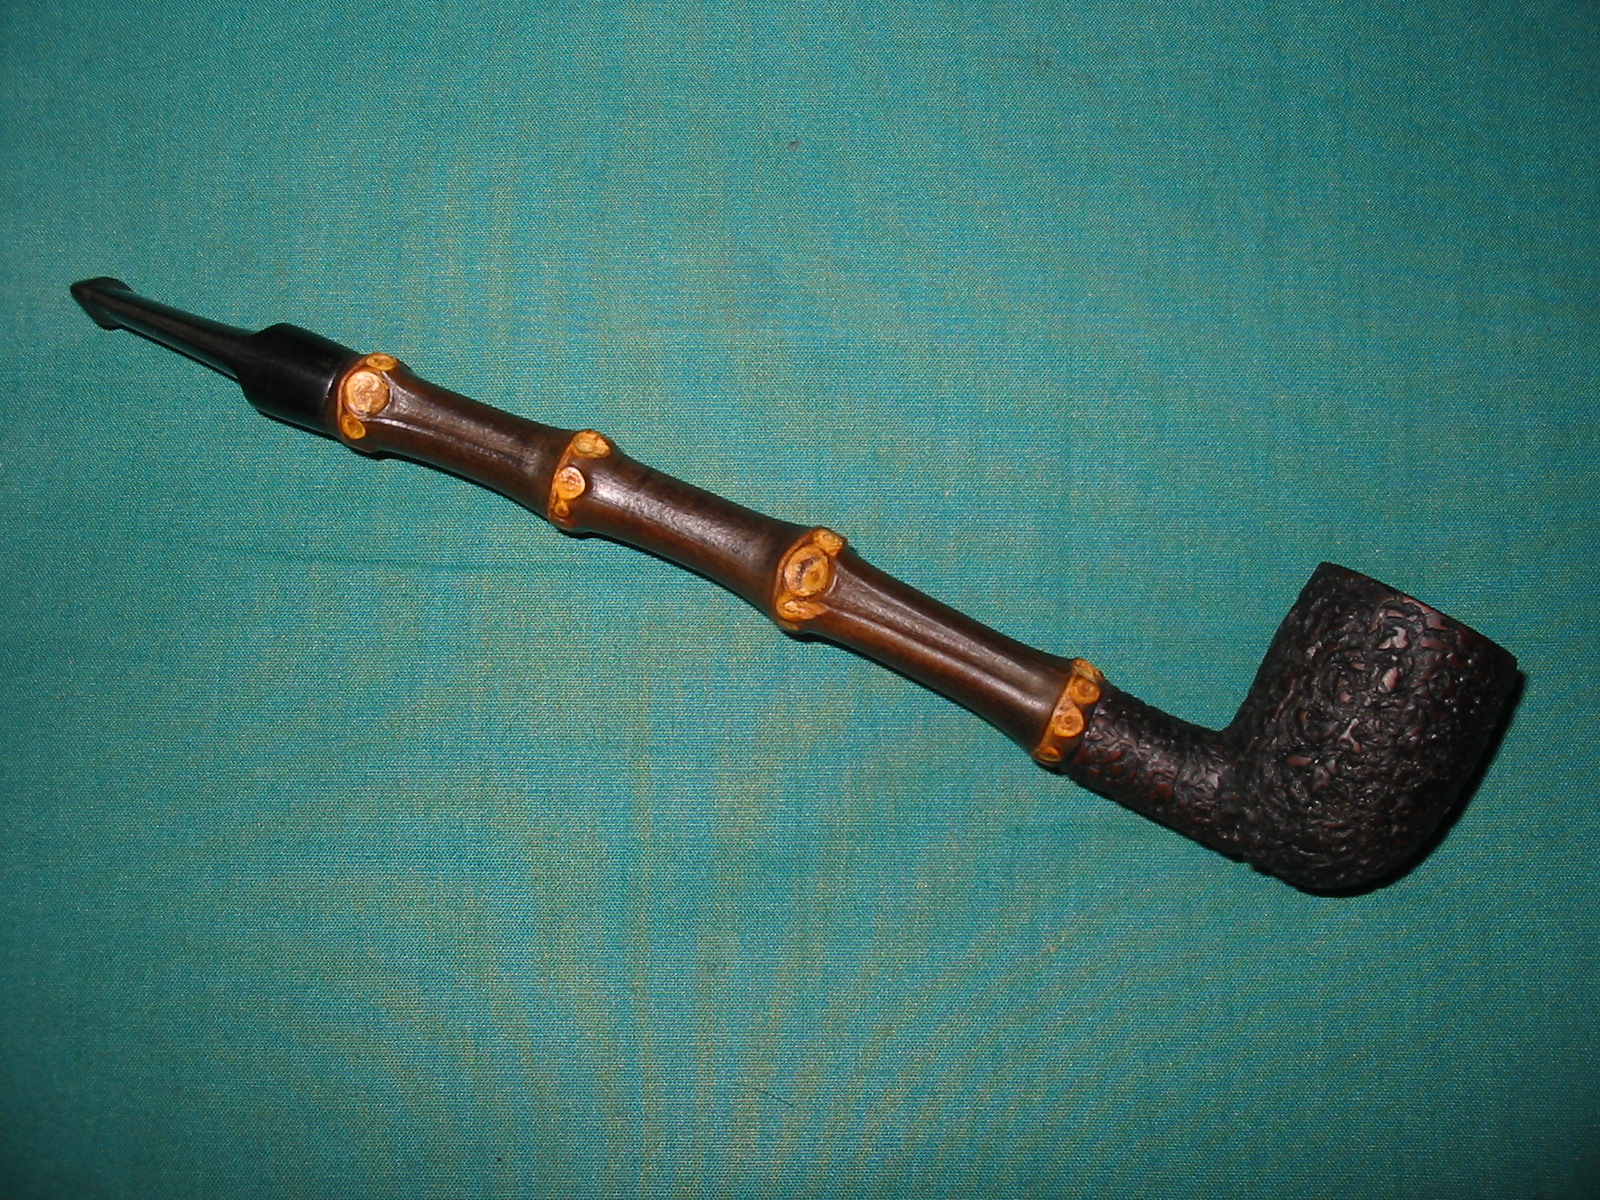
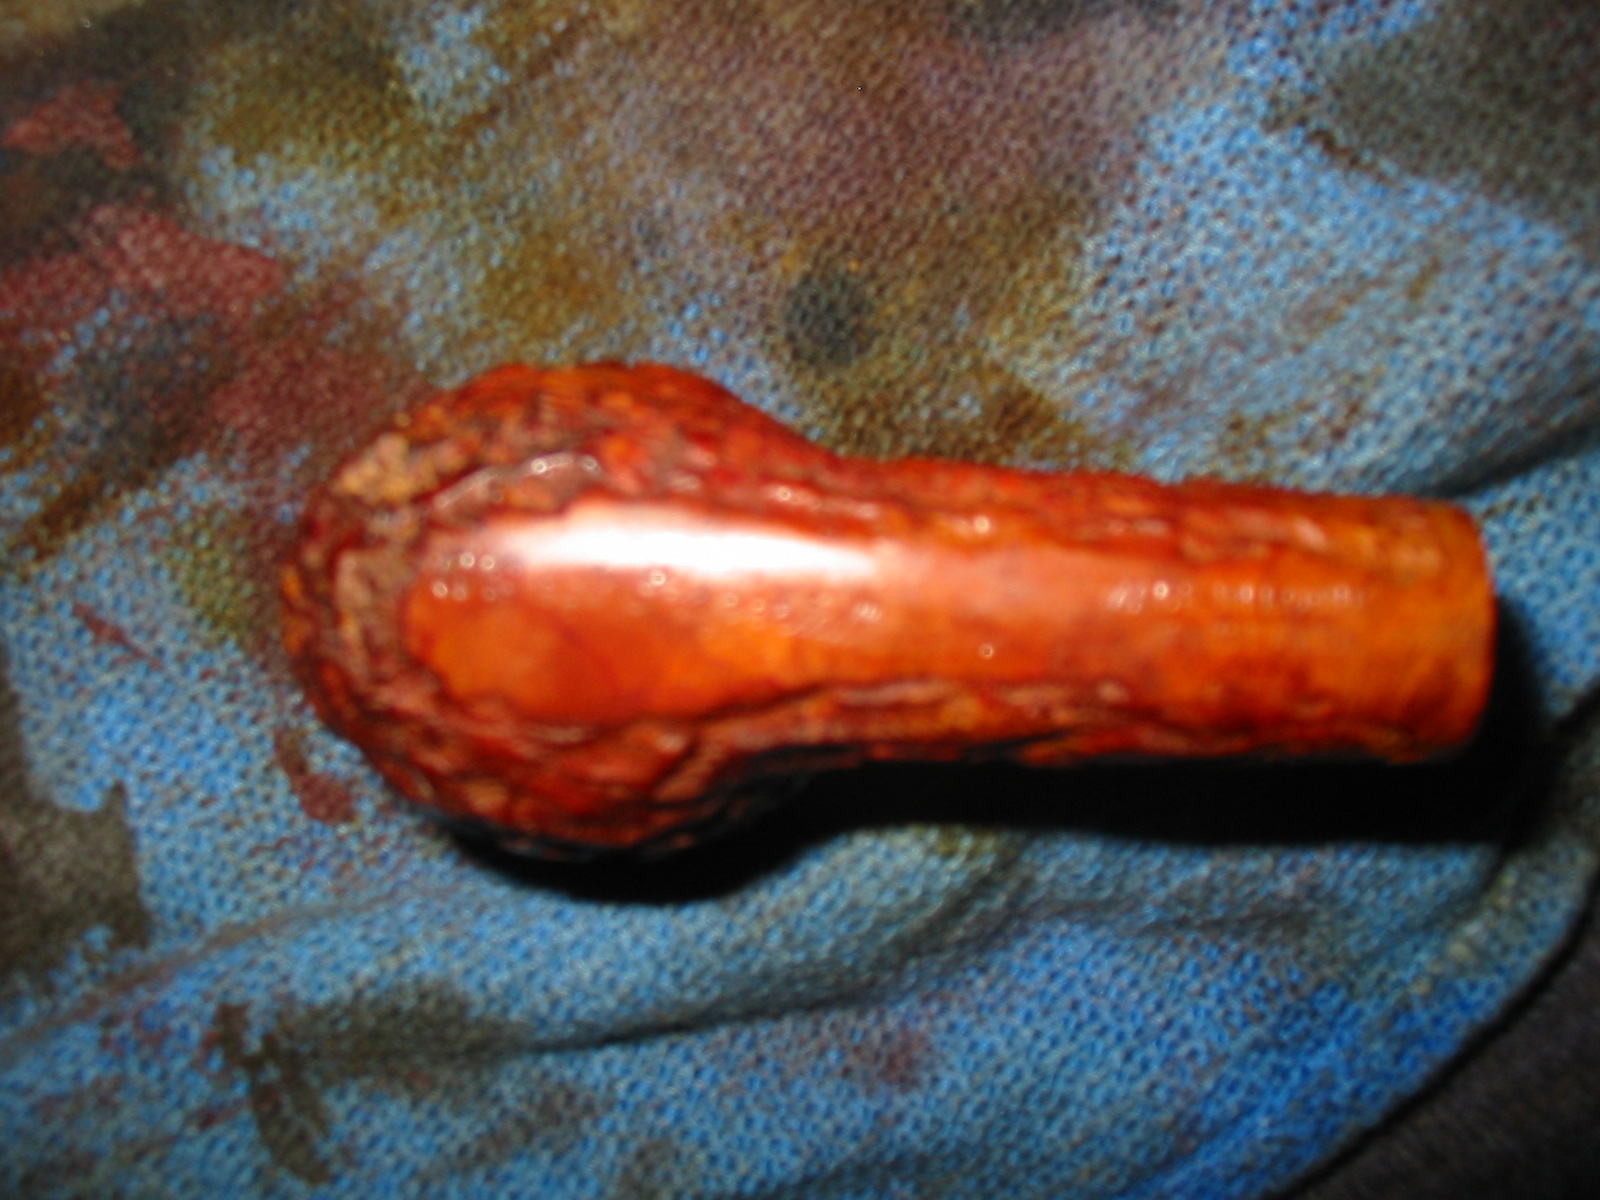
Once it was dry I buffed it lightly with White Diamond to see where things stood. When I brought it back to the work table I took the following photos to give me a clearer picture of the look of the pipe. The burn marks were not covered and in fact seem to be highlighted by the light stain. I set the bowl aside for a while to think about what I would do with it.
IMG_6012

IMG_6013

IMG_6014

IMG_6015
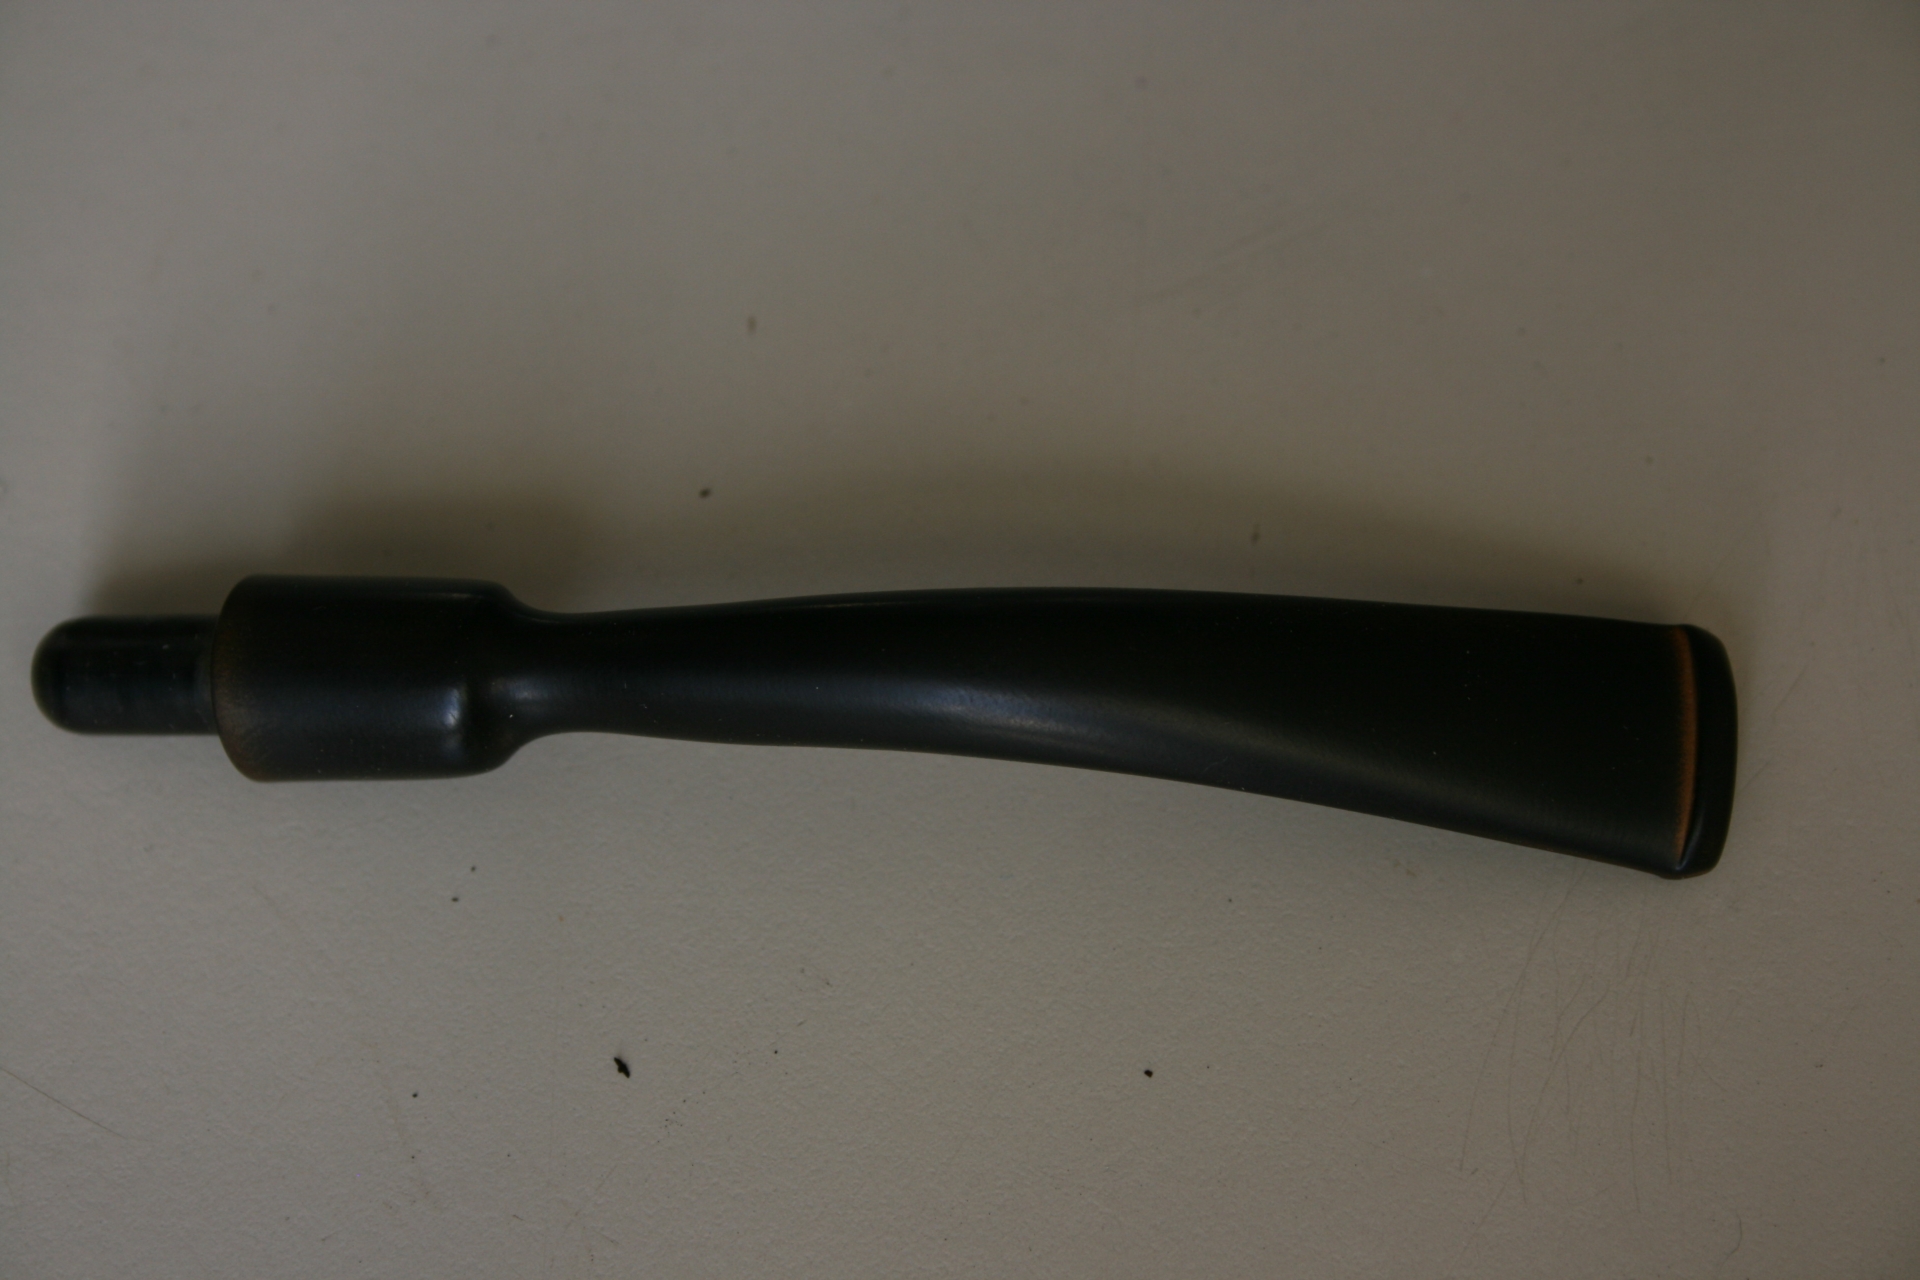
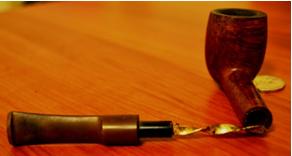
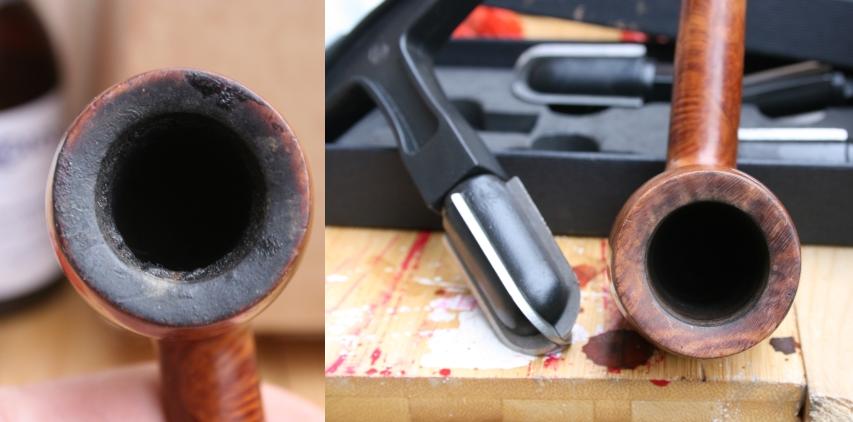
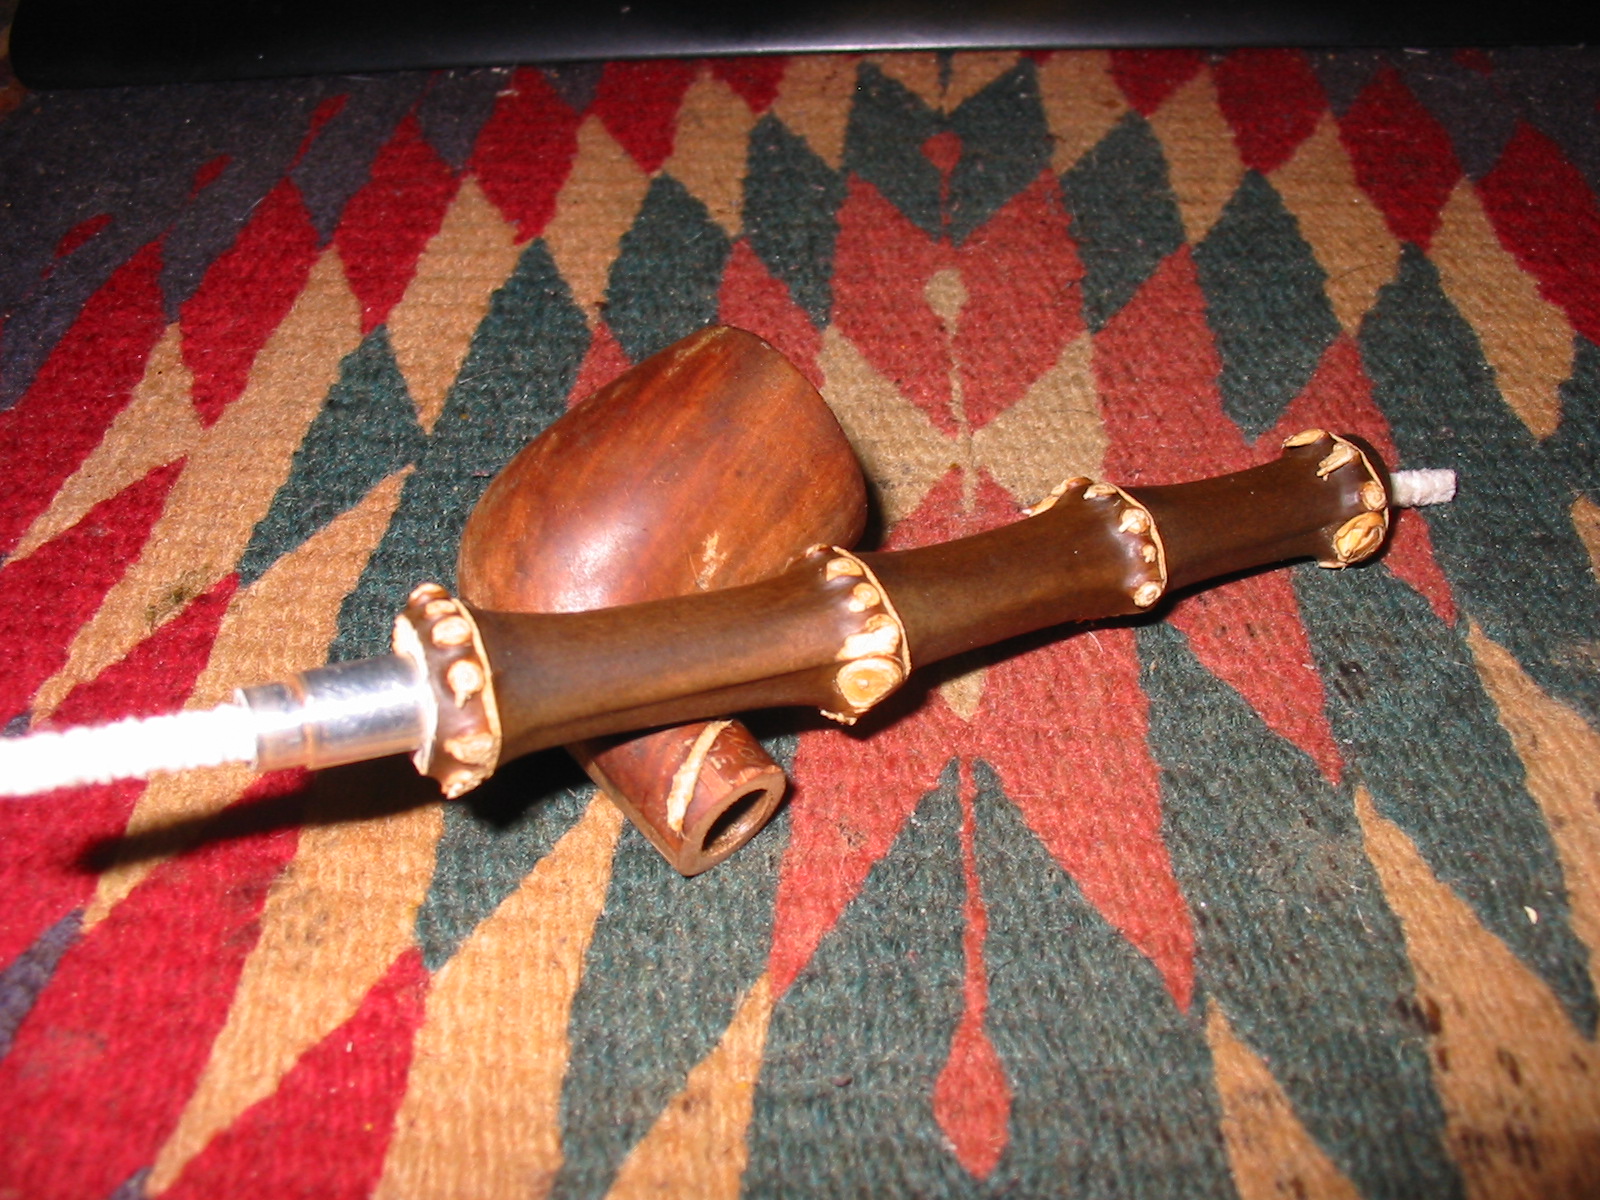
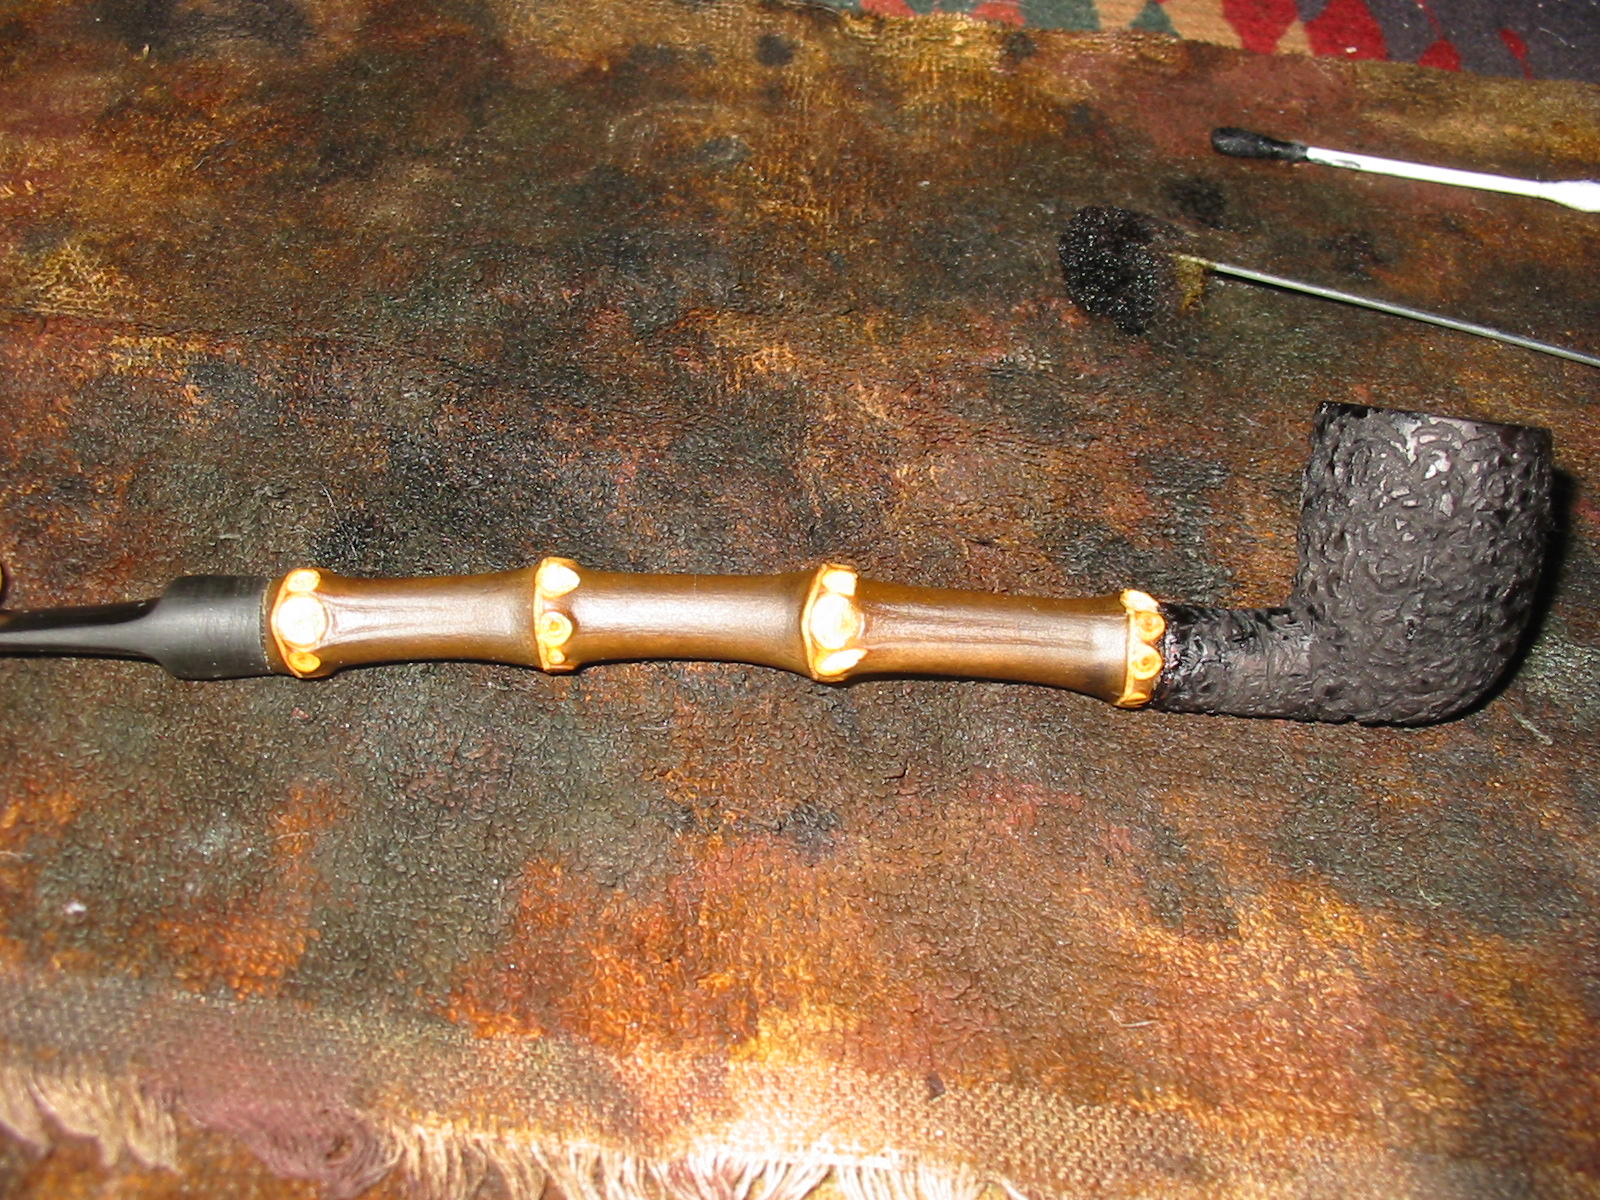
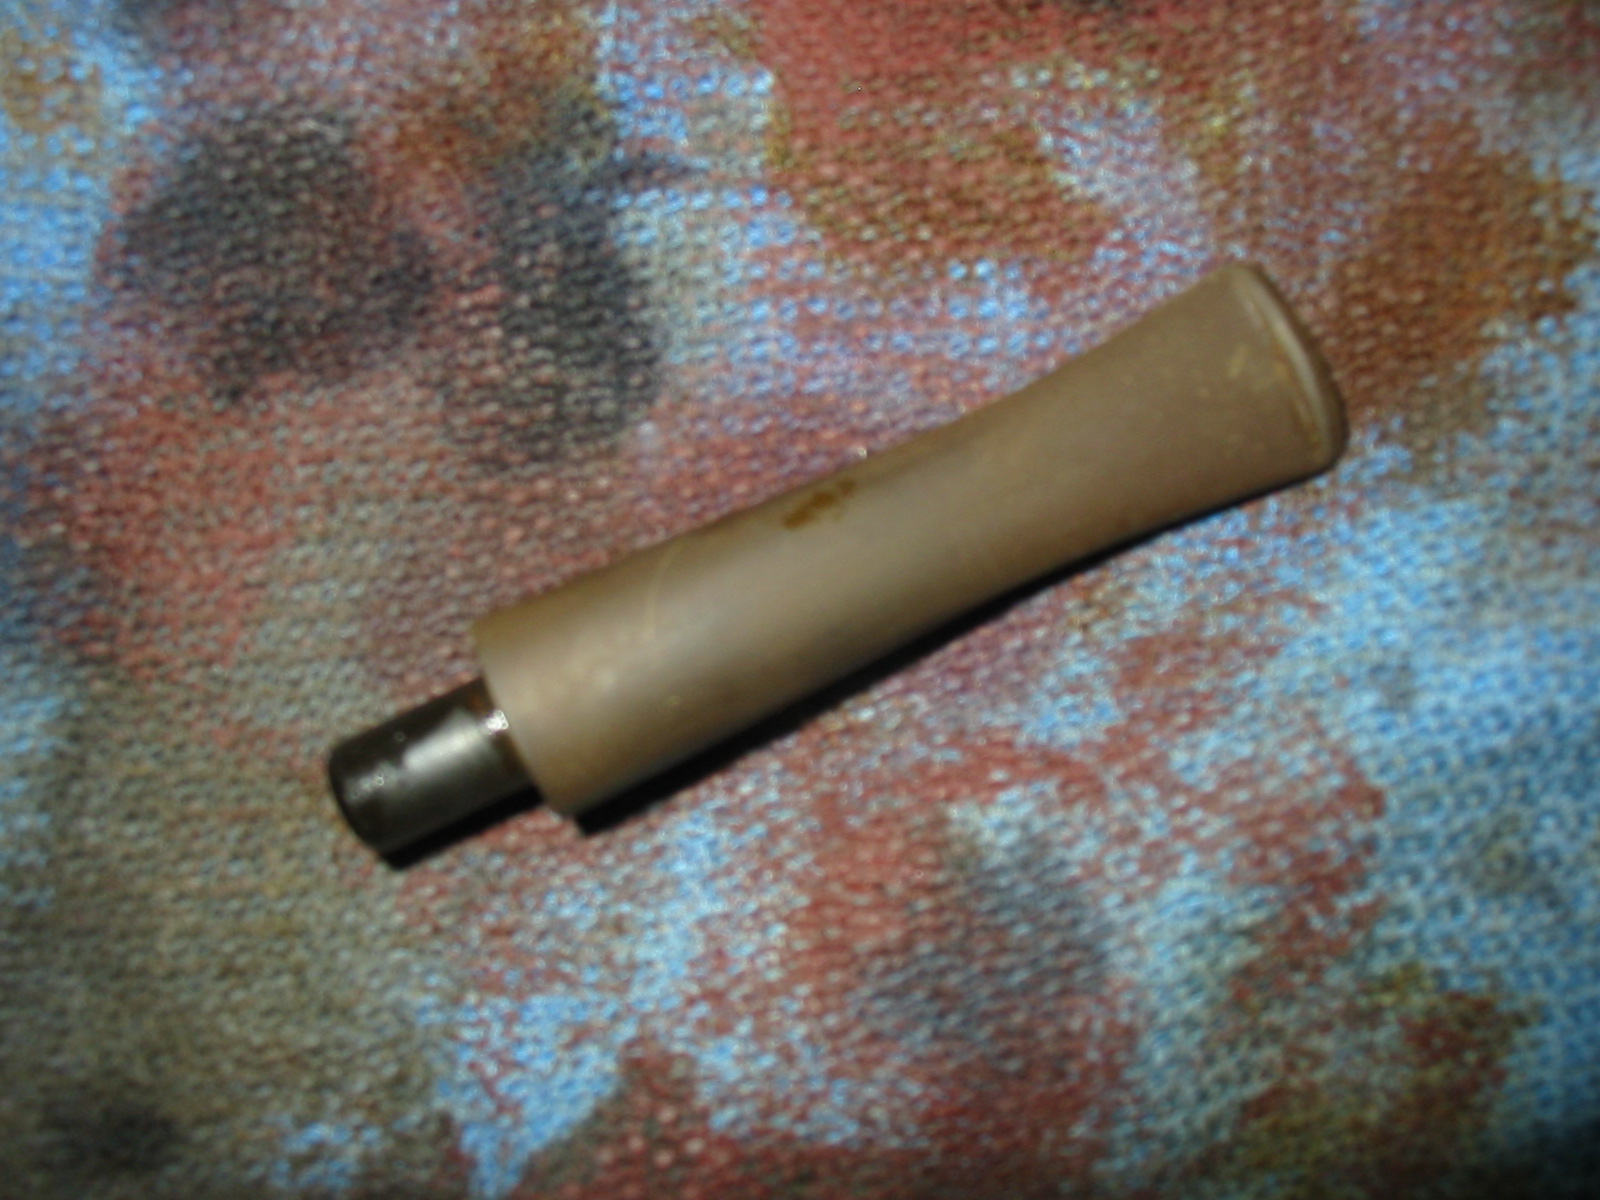
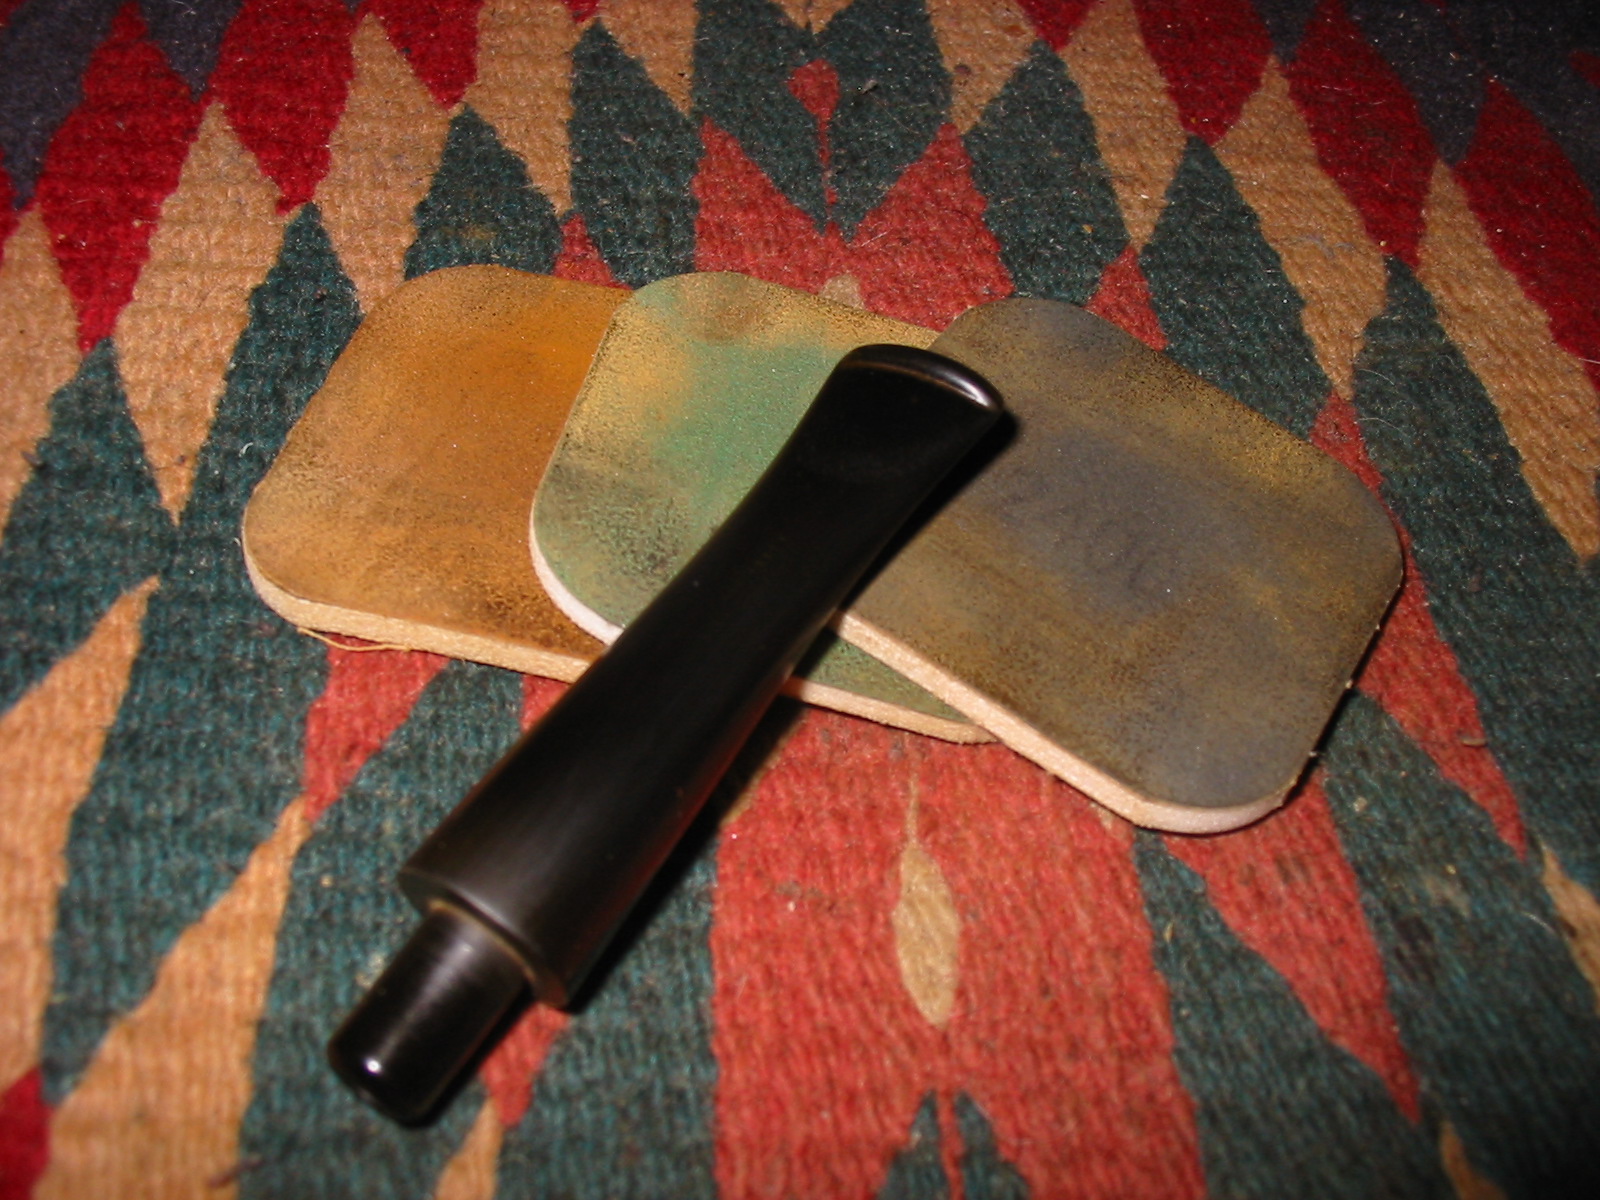
With the bowl set aside I turned my attention to the stem. I took it out of the Oxyclean bath and dried it off. The next two photos show the top and bottom of the stem. The oxidation is even and soft over the surface of the stem. The Oxy does not remove oxidation on stems but merely serves to soften it. When I dried it off with the cloth that it is pictured on it took a lot of oxidation off the surface.
IMG_6017

IMG_6018
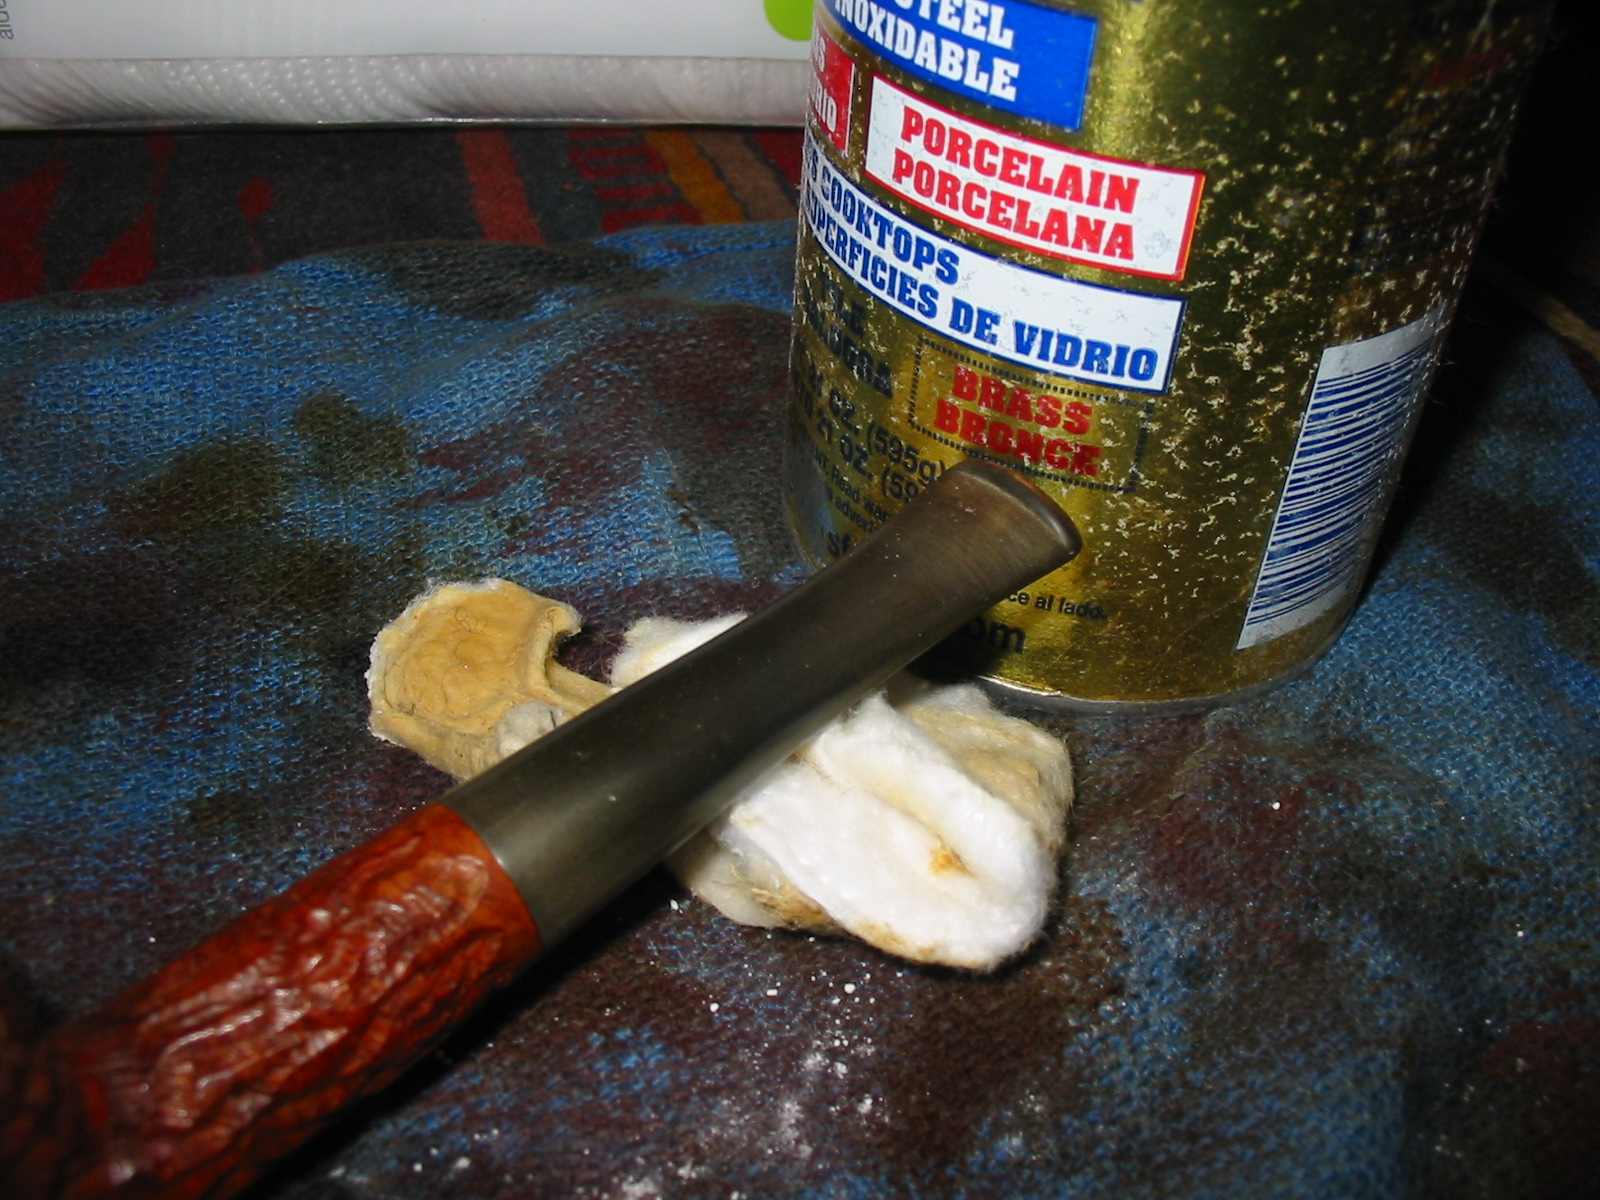
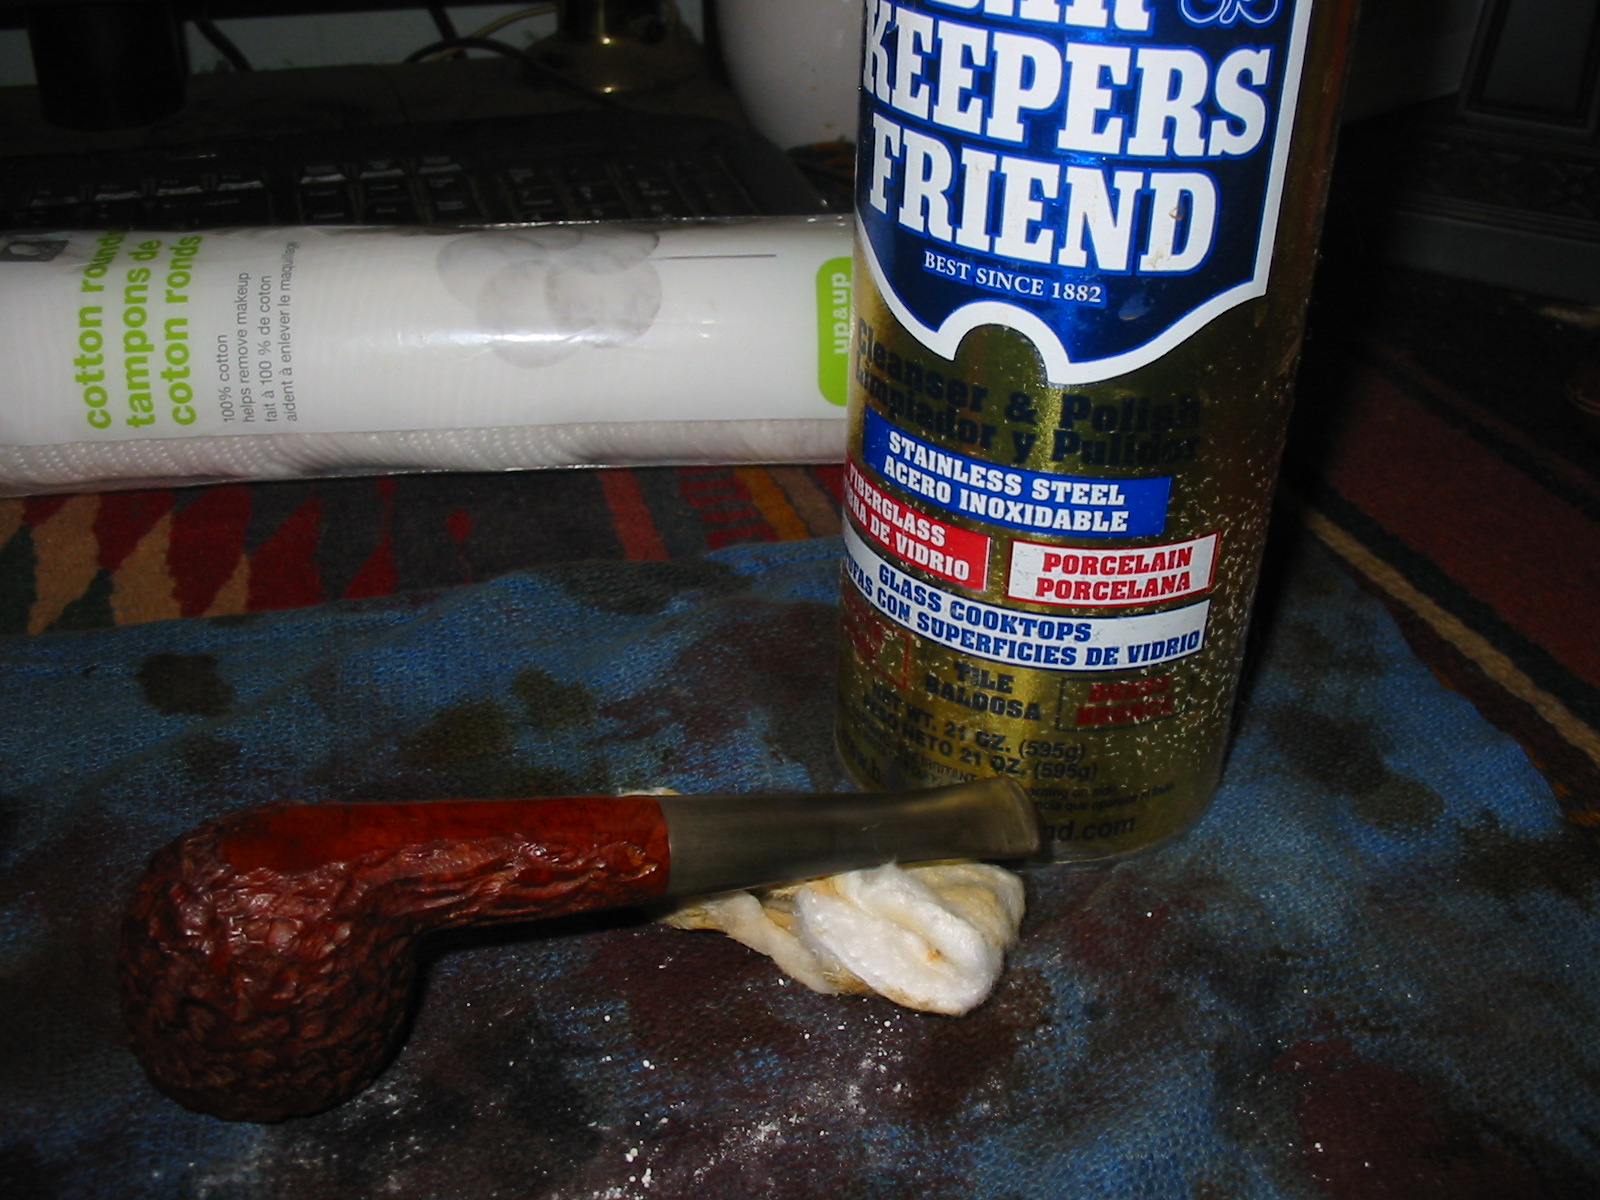
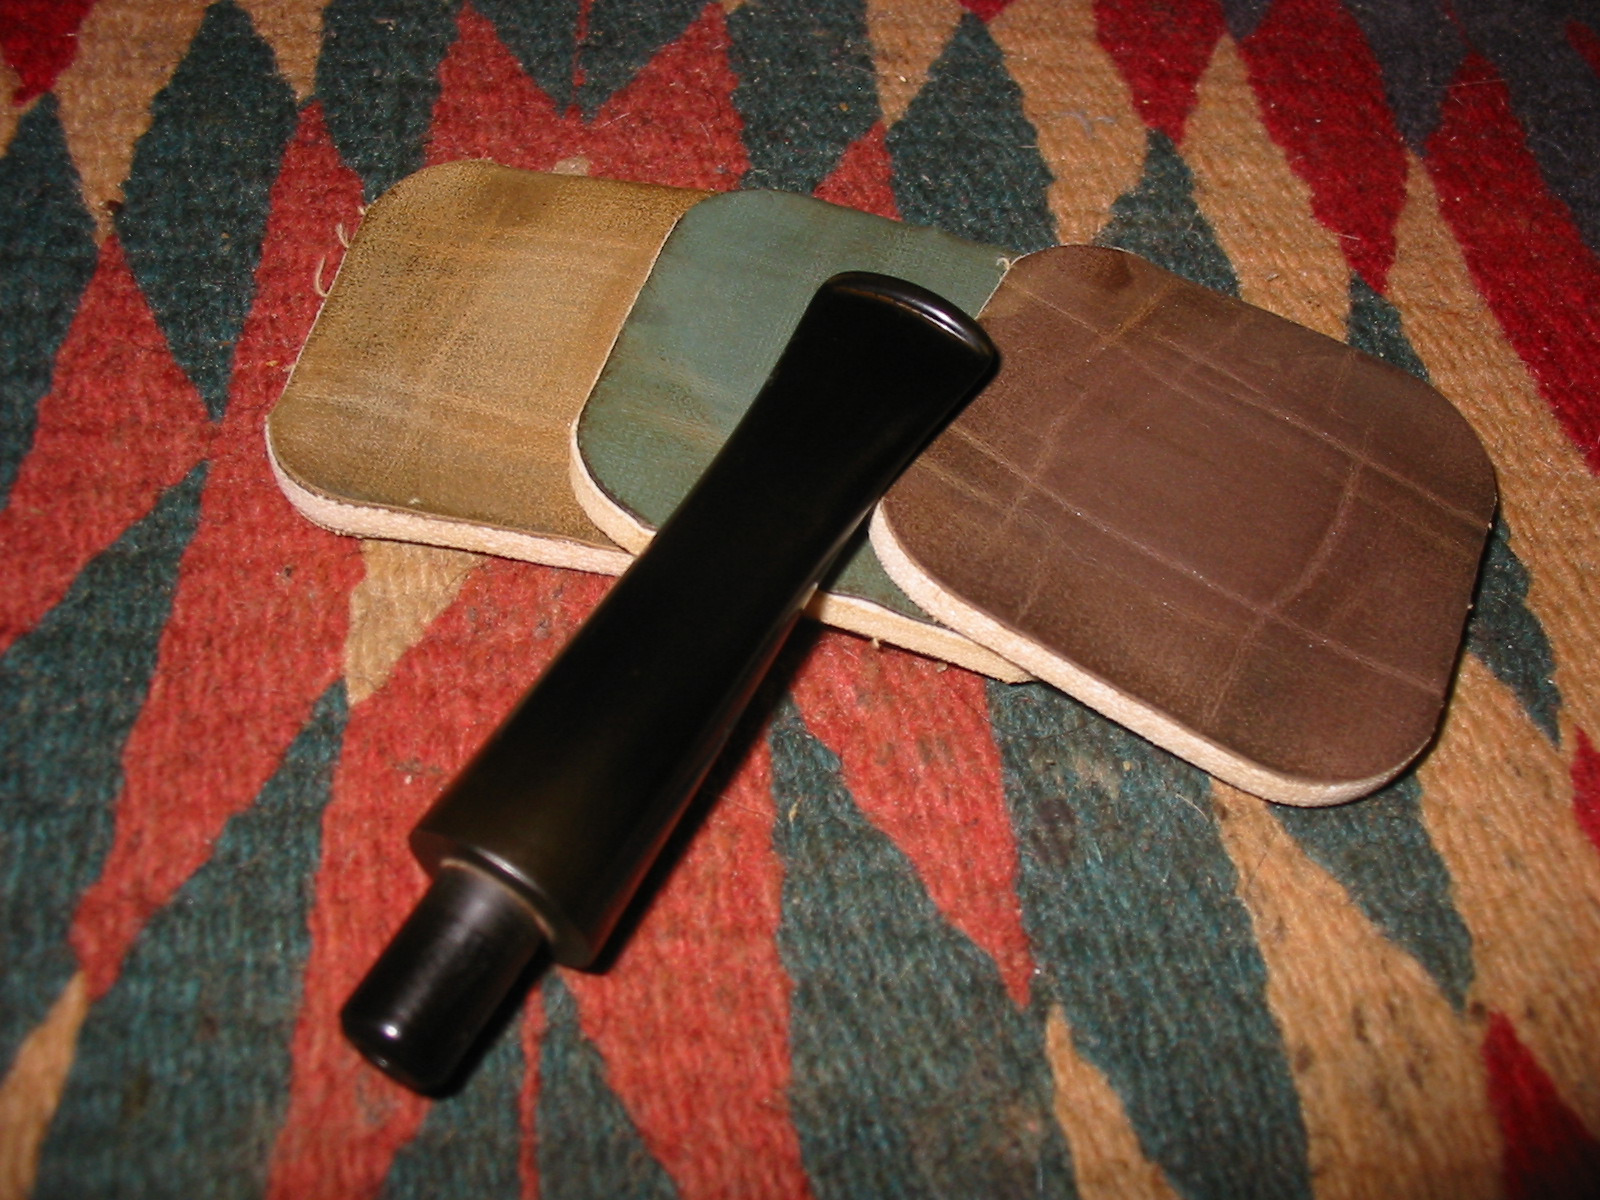
I decided to use Bar Keepers Friend on this stem. I wet the stem with a wet cotton pad and then sprinkled the surface with the powder. I scrubbed it with the wet pad and a dry pad to scour off the oxidation. The next three photos show how well the Bar Keepers Friend work to remove most of the oxidation. There were some stubborn spots around the shank and the button that would take more work, but it was definitely cleaning up well.
IMG_6019

IMG_6020

IMG_6021
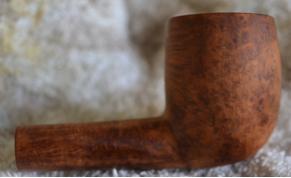
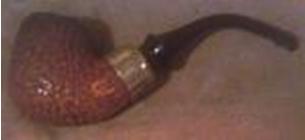
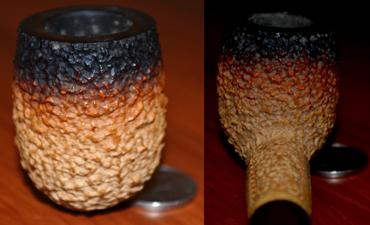
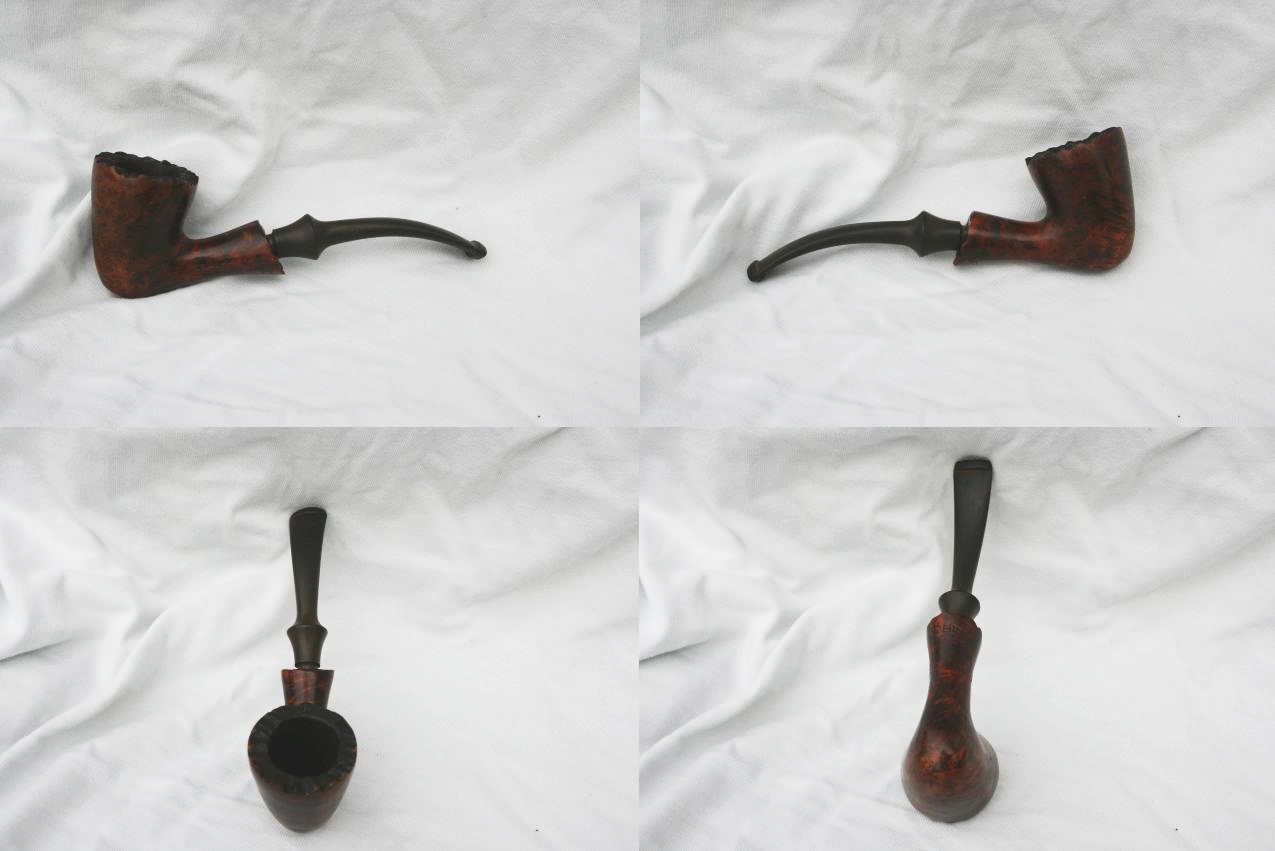
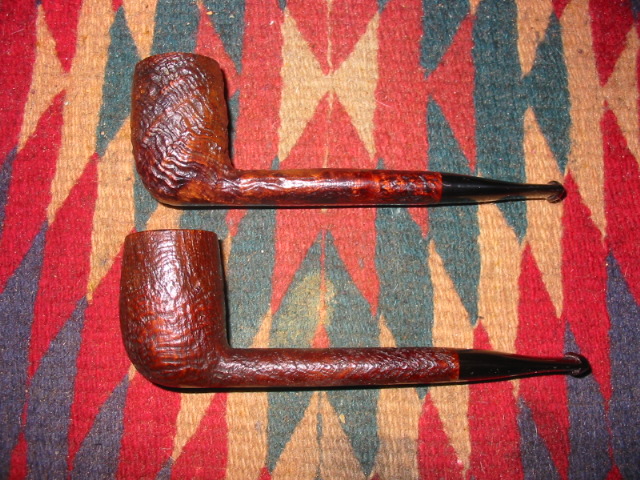
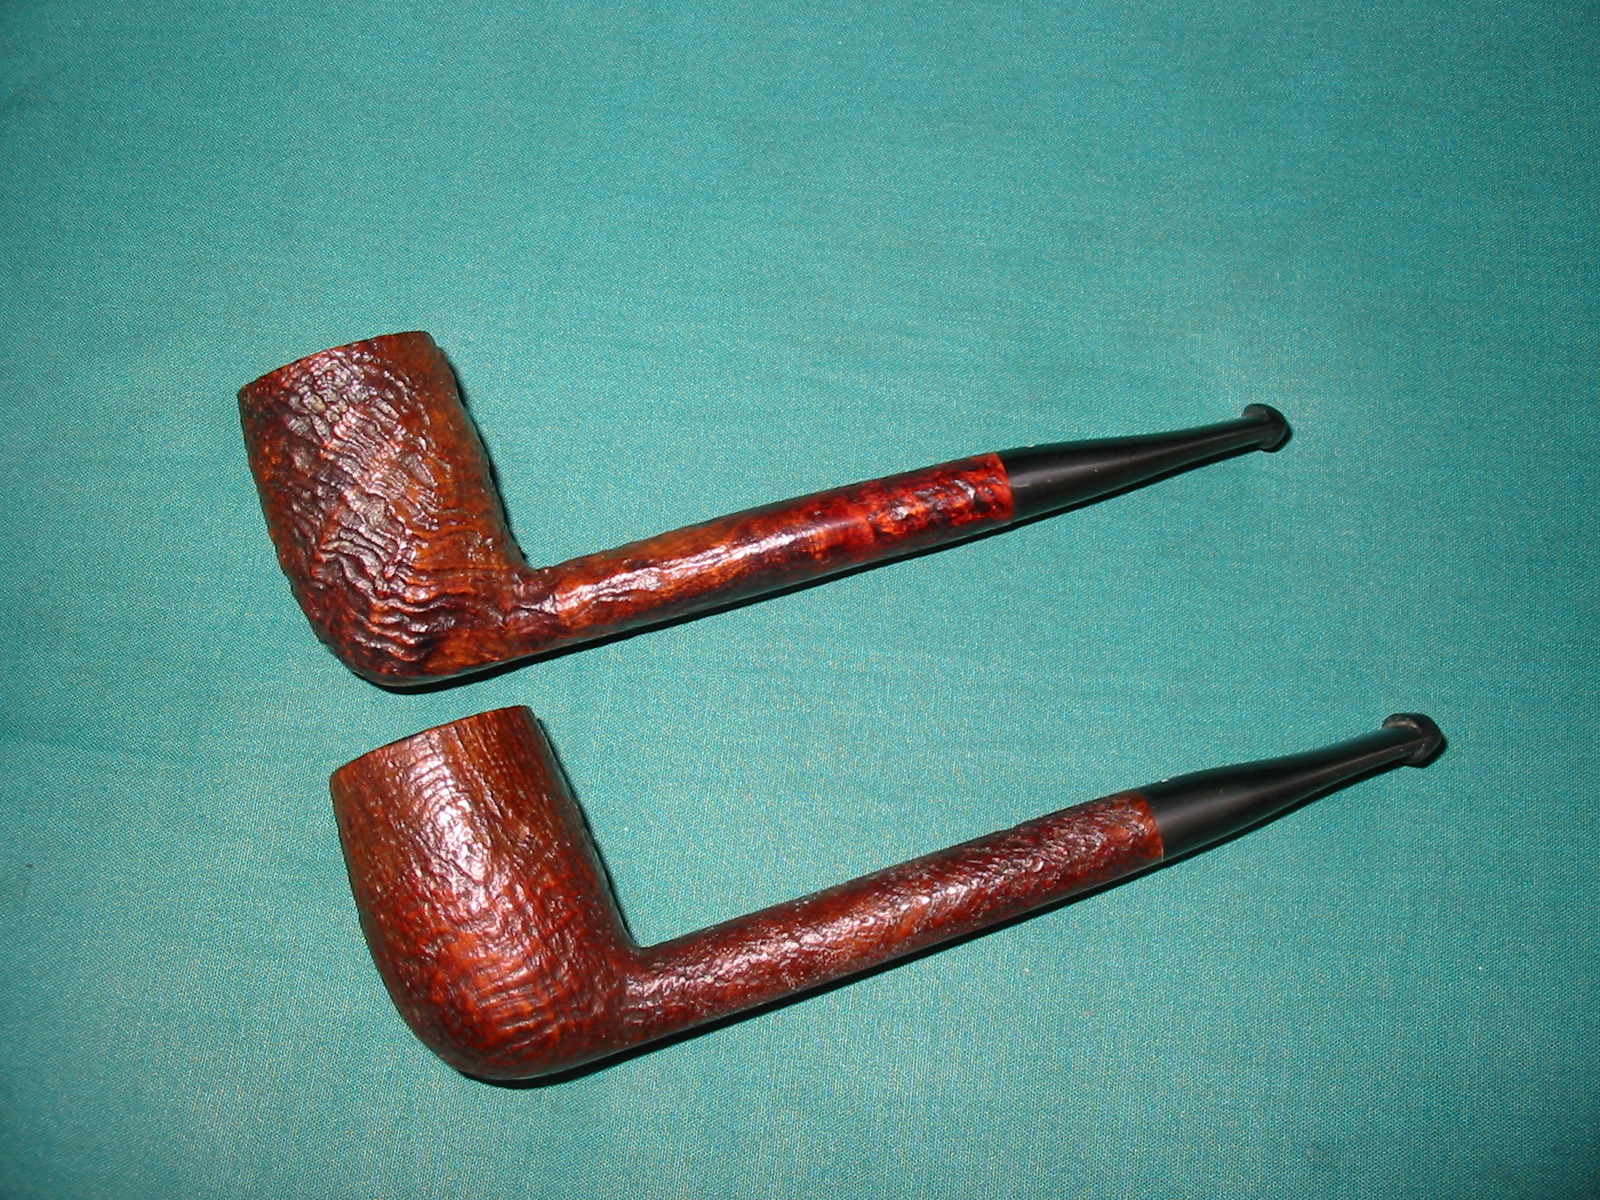
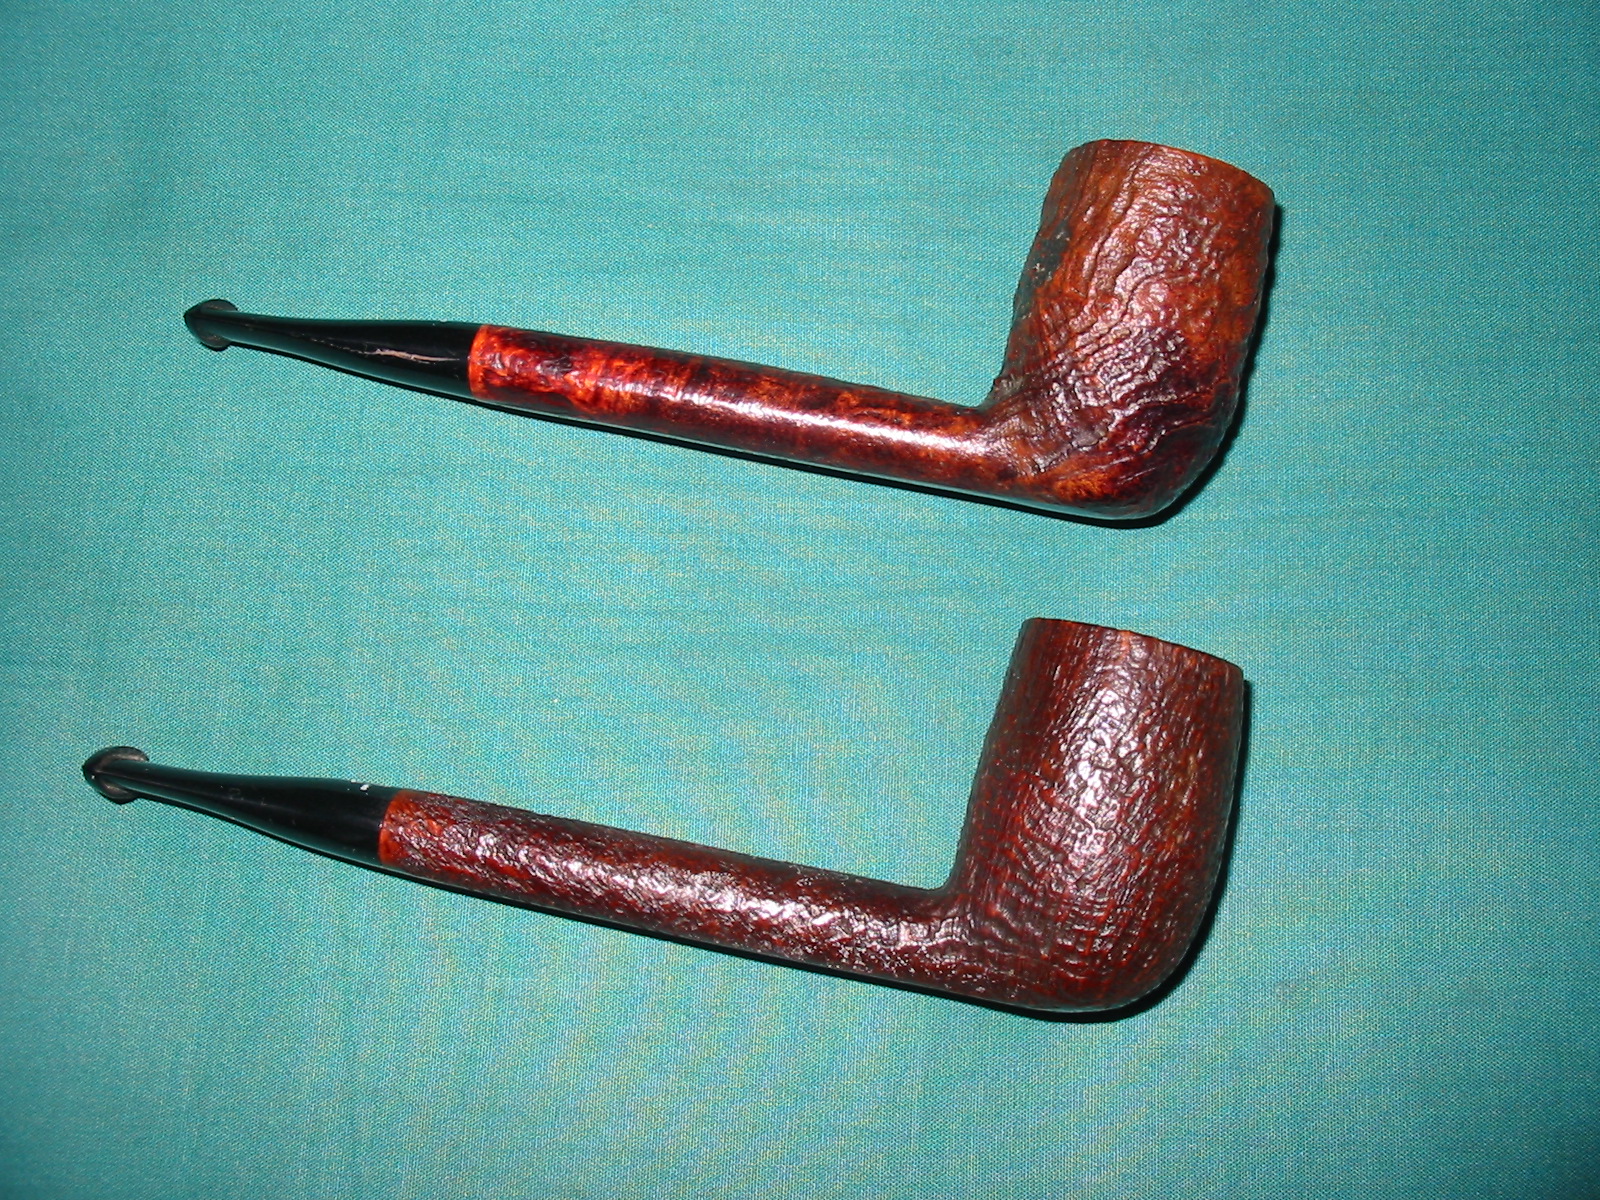
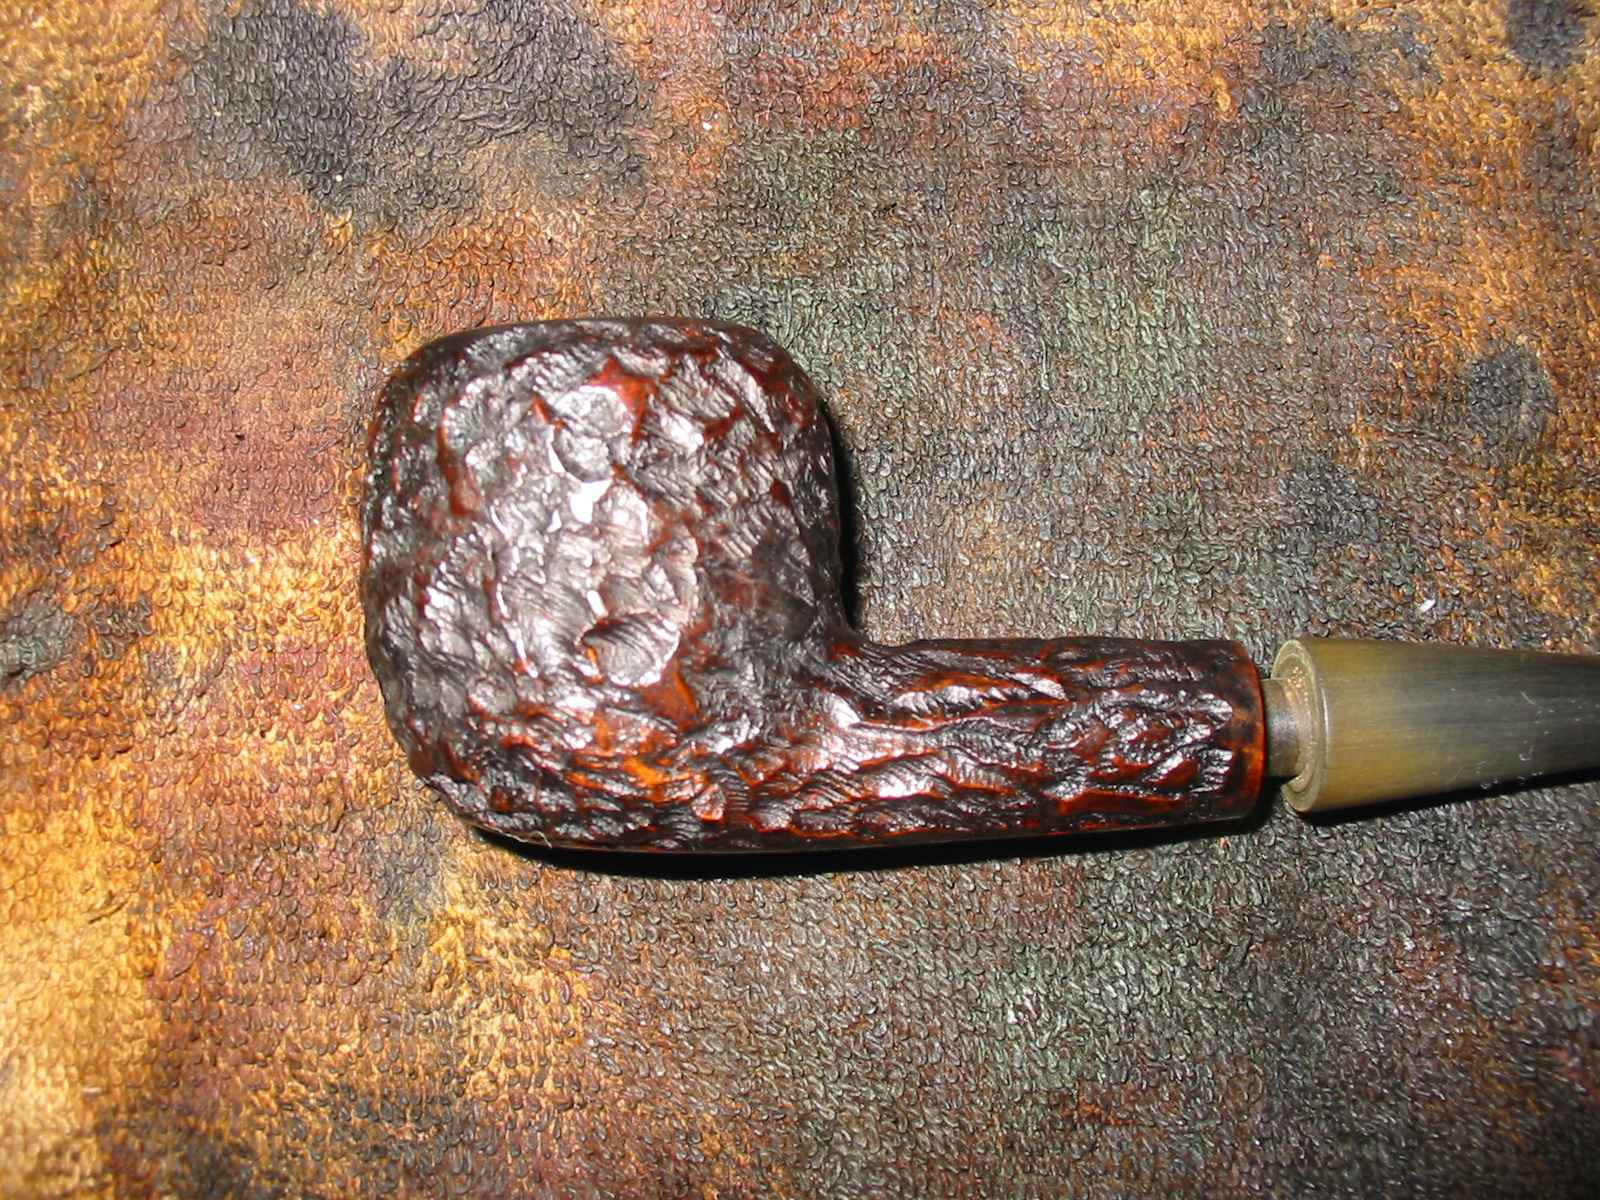
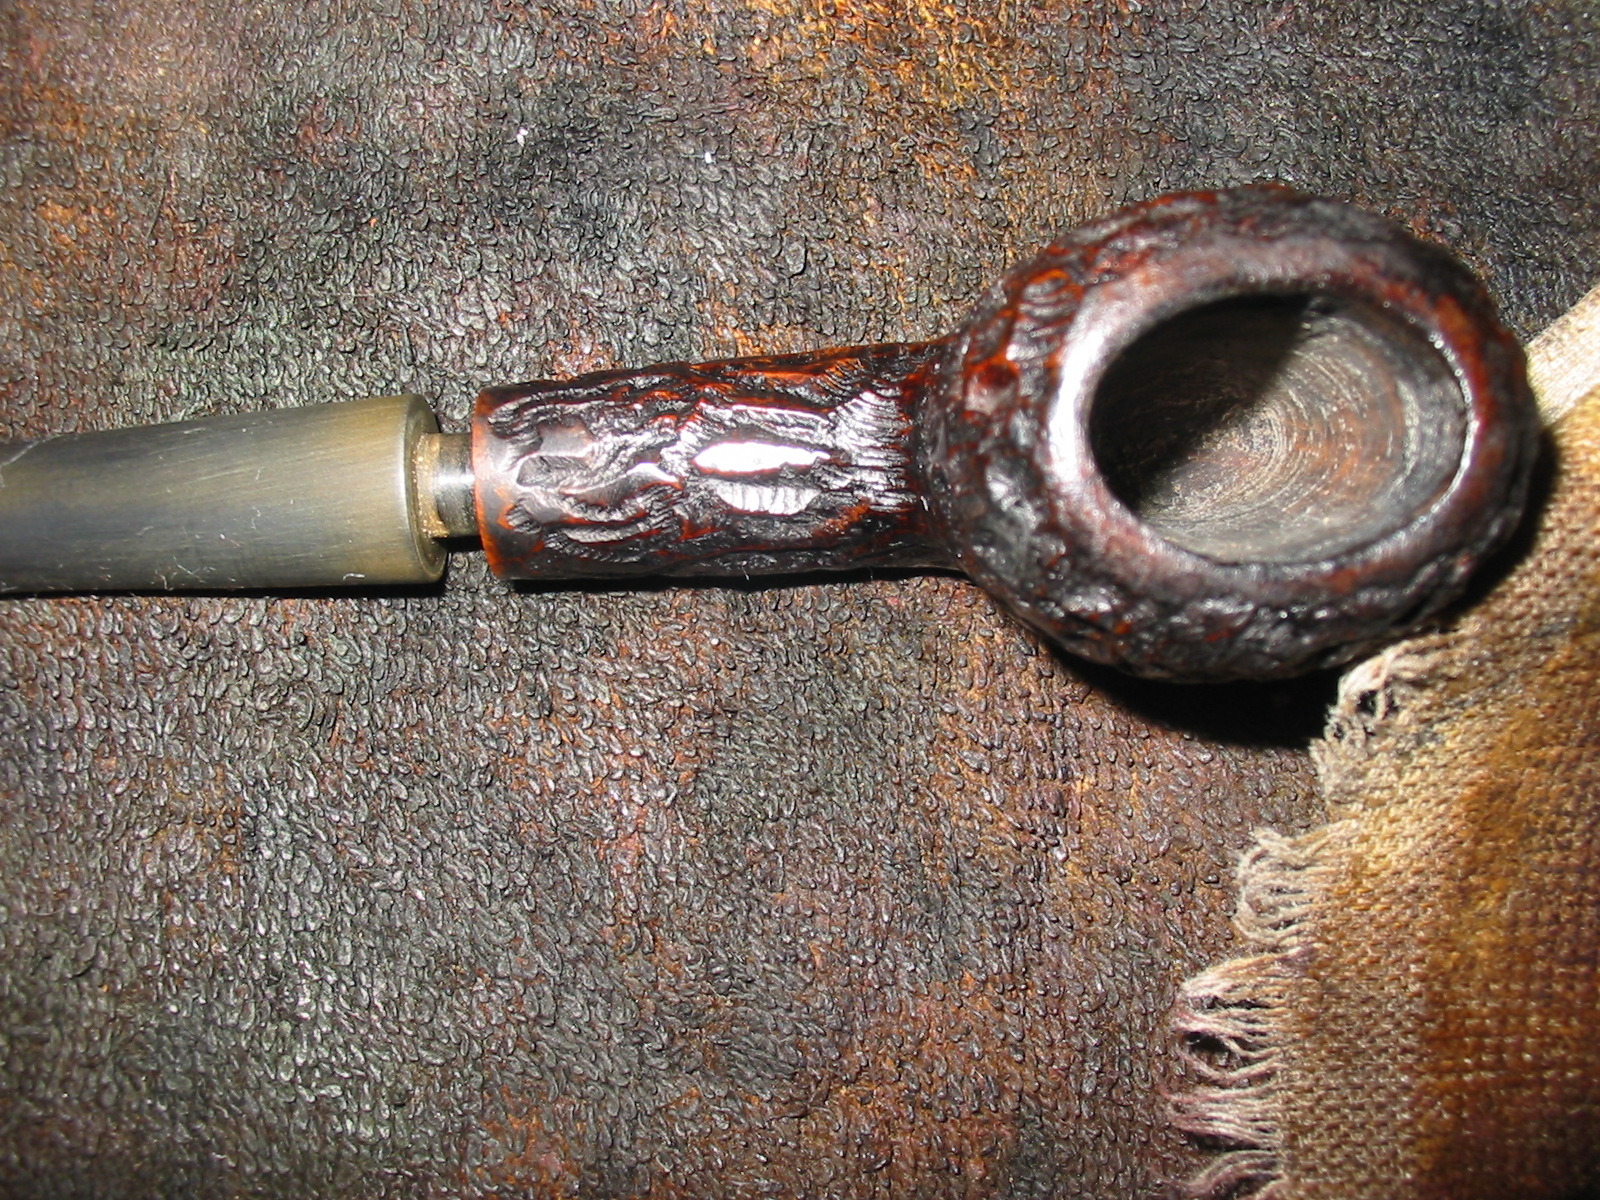
My tendency in cleaning up a pipe is to work on the bowl for a bit, set it aside and work on the stem and cogitate about what I plan to do to address issues on the bowl. In this case while I worked on the stem I was thinking about how to address the darkened marks on the bowl. The light stain was not working and a darker brown would not work either. I set aside the stem and wrote a quick post on two of the forums I am part of and asked about the brand. I had not heard of the “King’s Imperial” brand before and decided to ask about it. A friend on one of them did not have information on the brand but posted a couple of photos of a Hardcastle Sandhewn pipe that he had refurbished to show similarities in the finish of my pipe. When I looked at his pipe I saw the solution to taking care of the burn marks and darkening. Here are a couple of photos of the Sandhewn pipe.
sandhewn1

sandhewn2
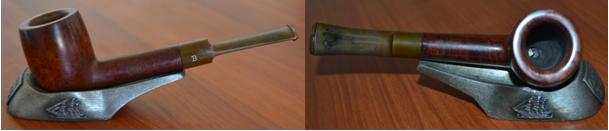
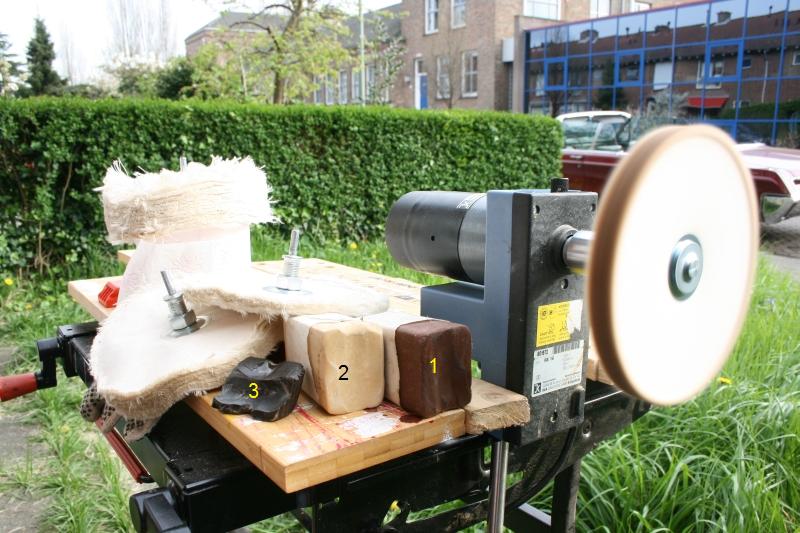
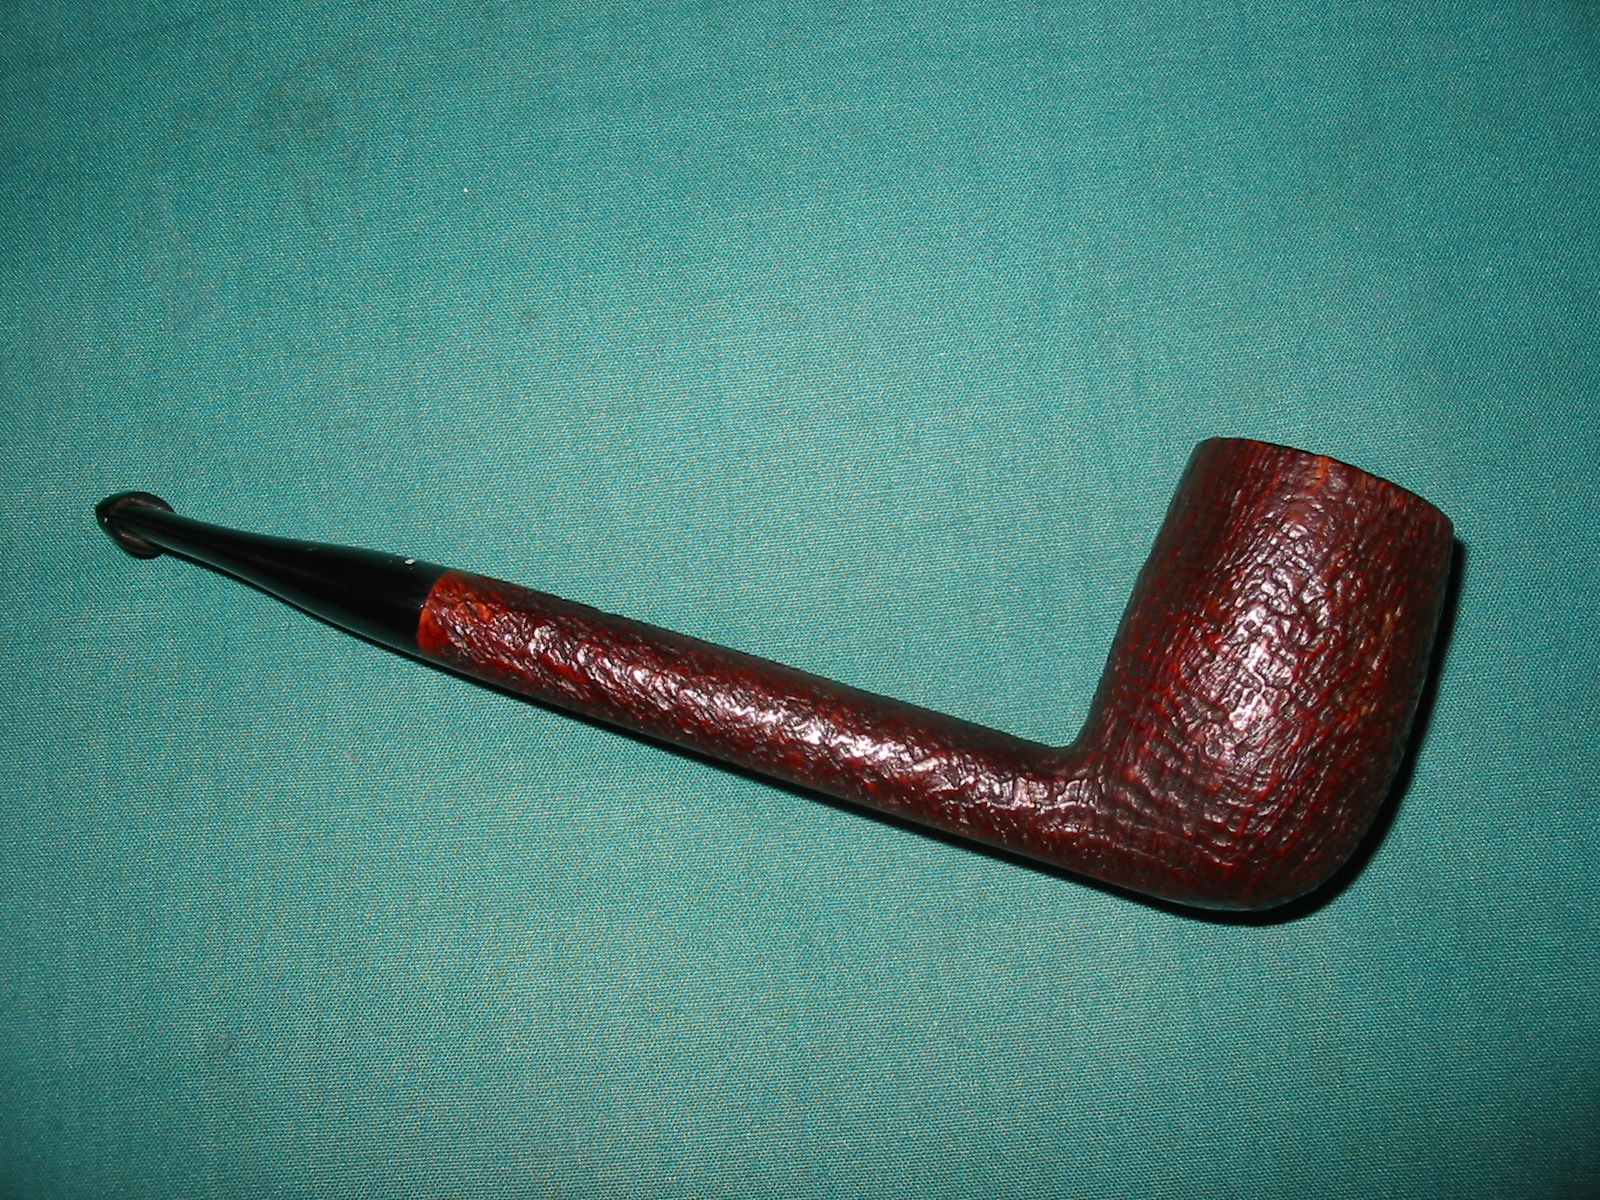
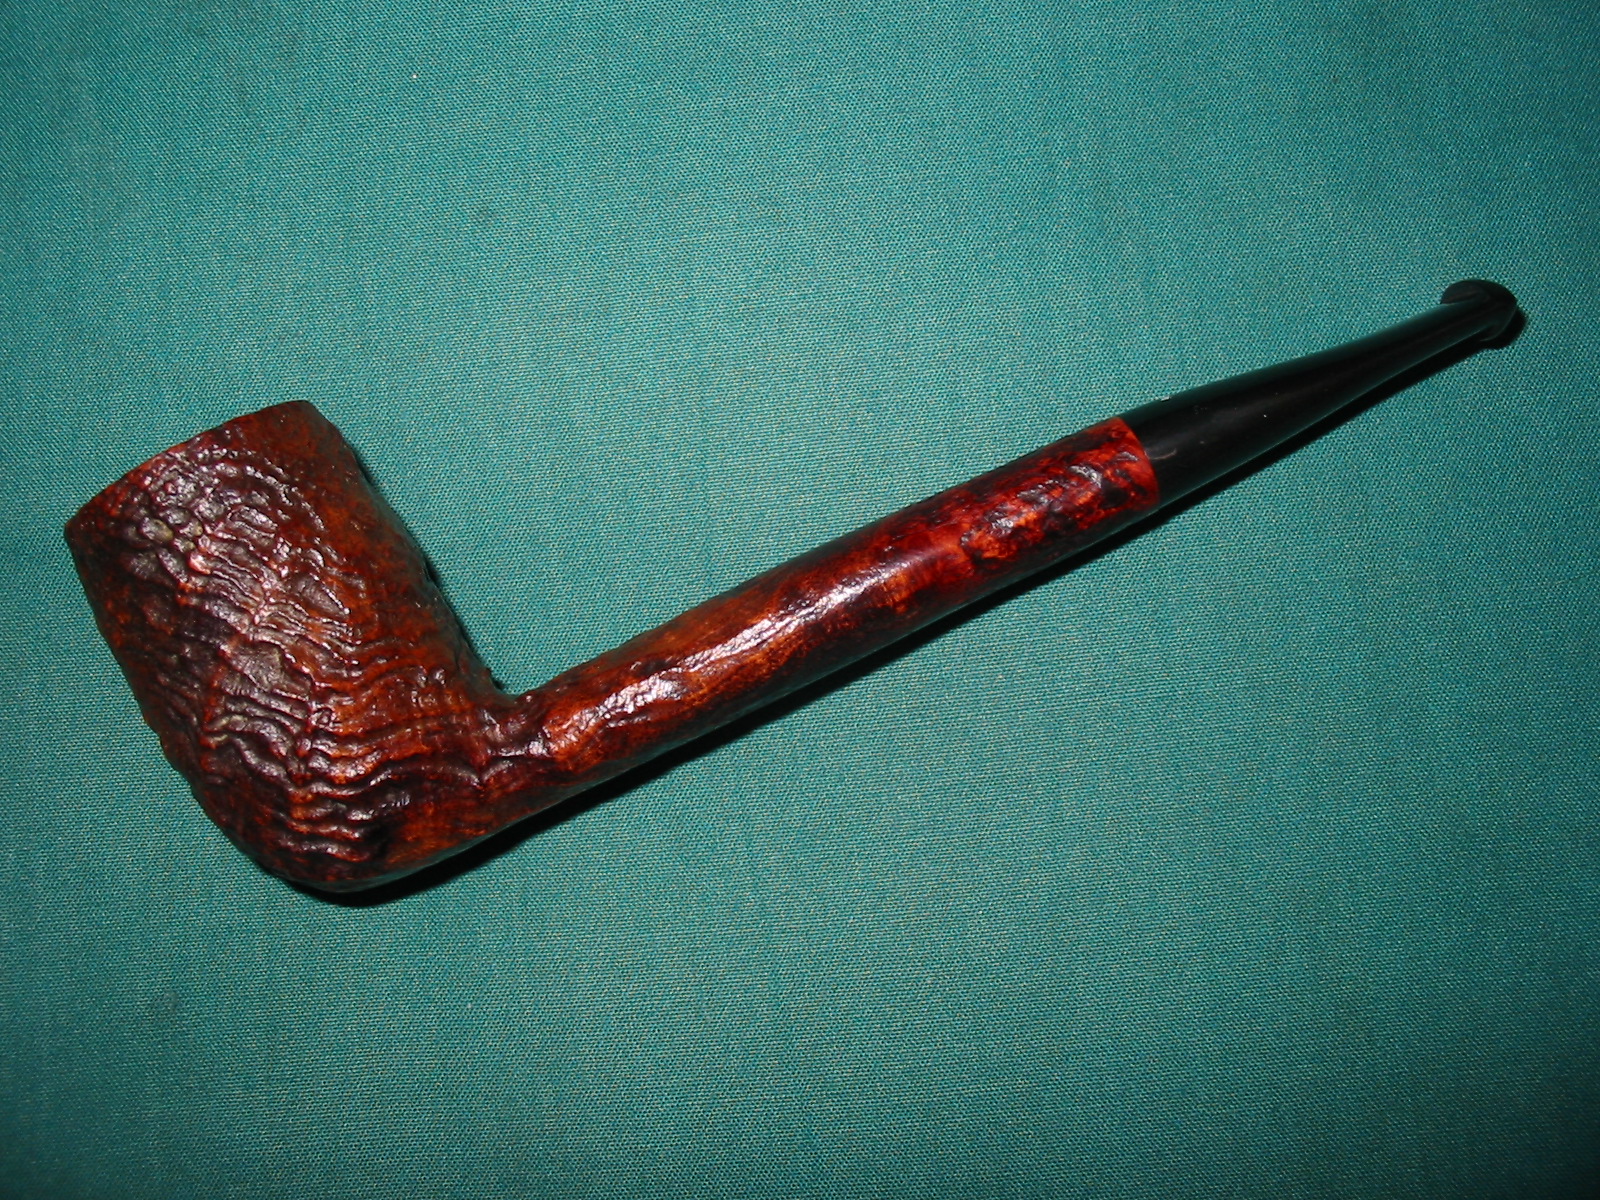
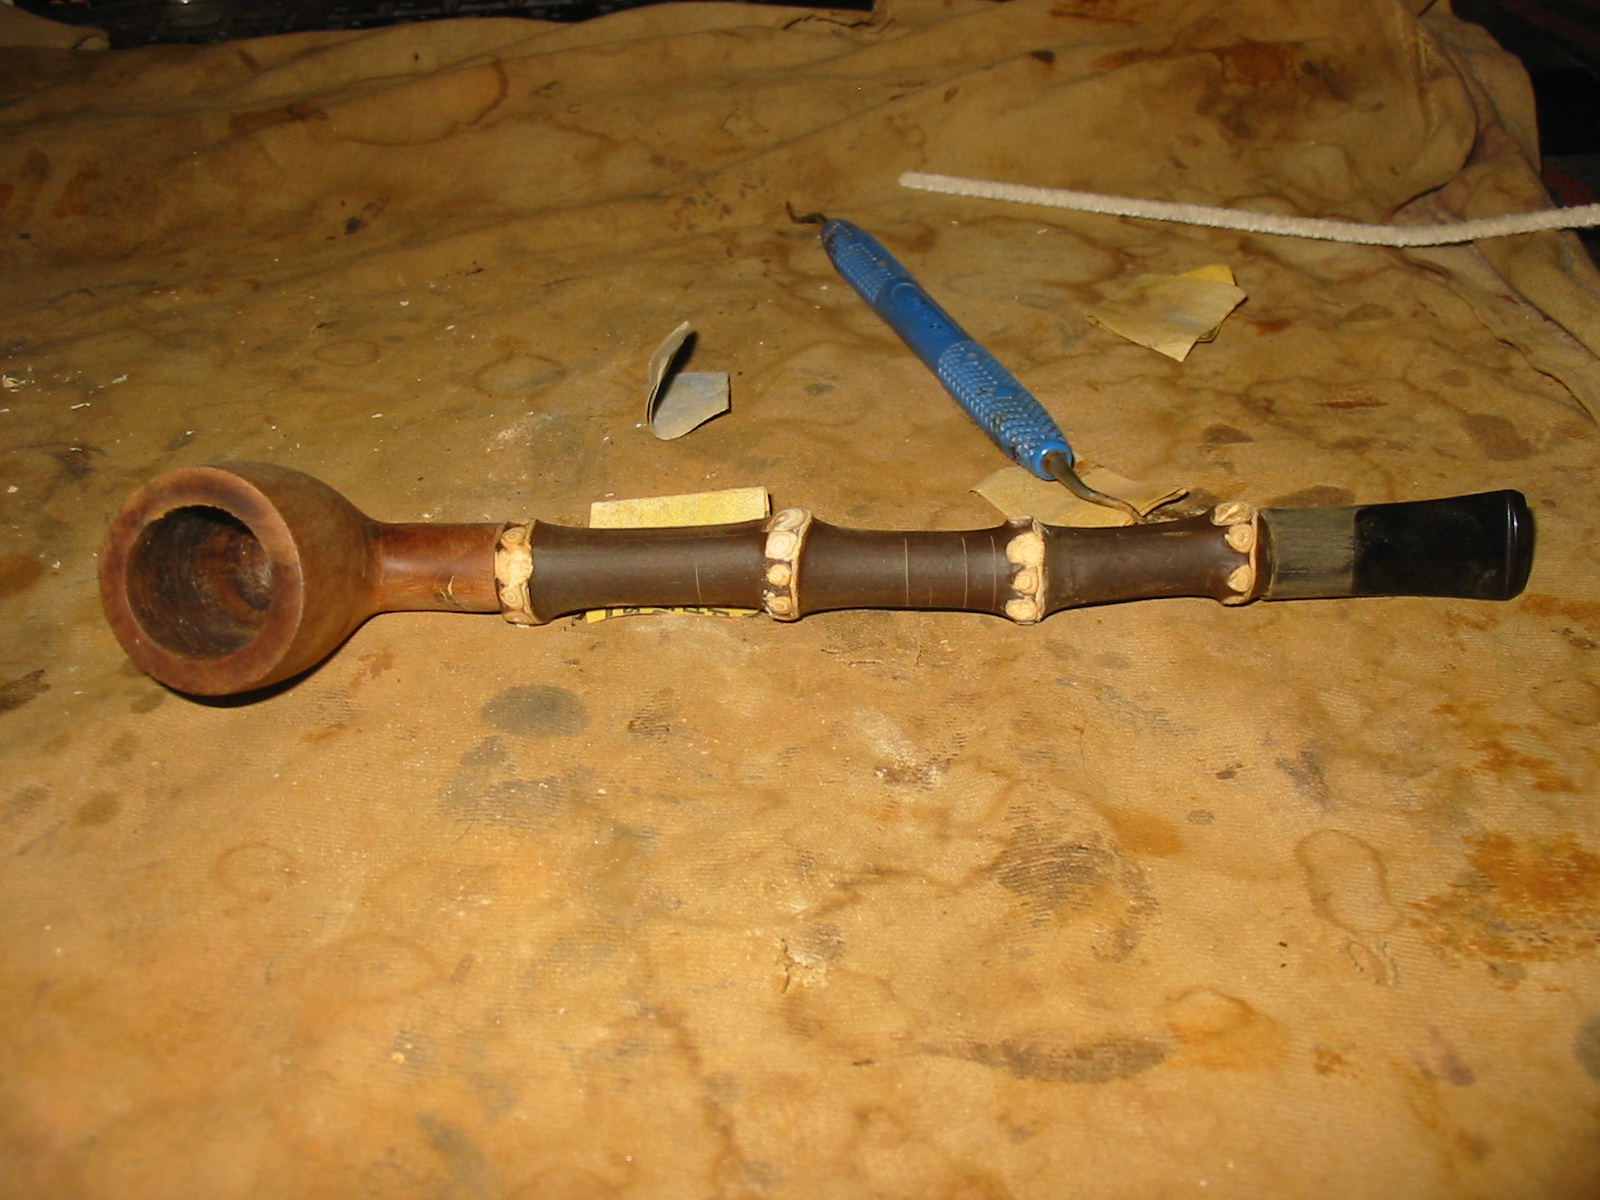
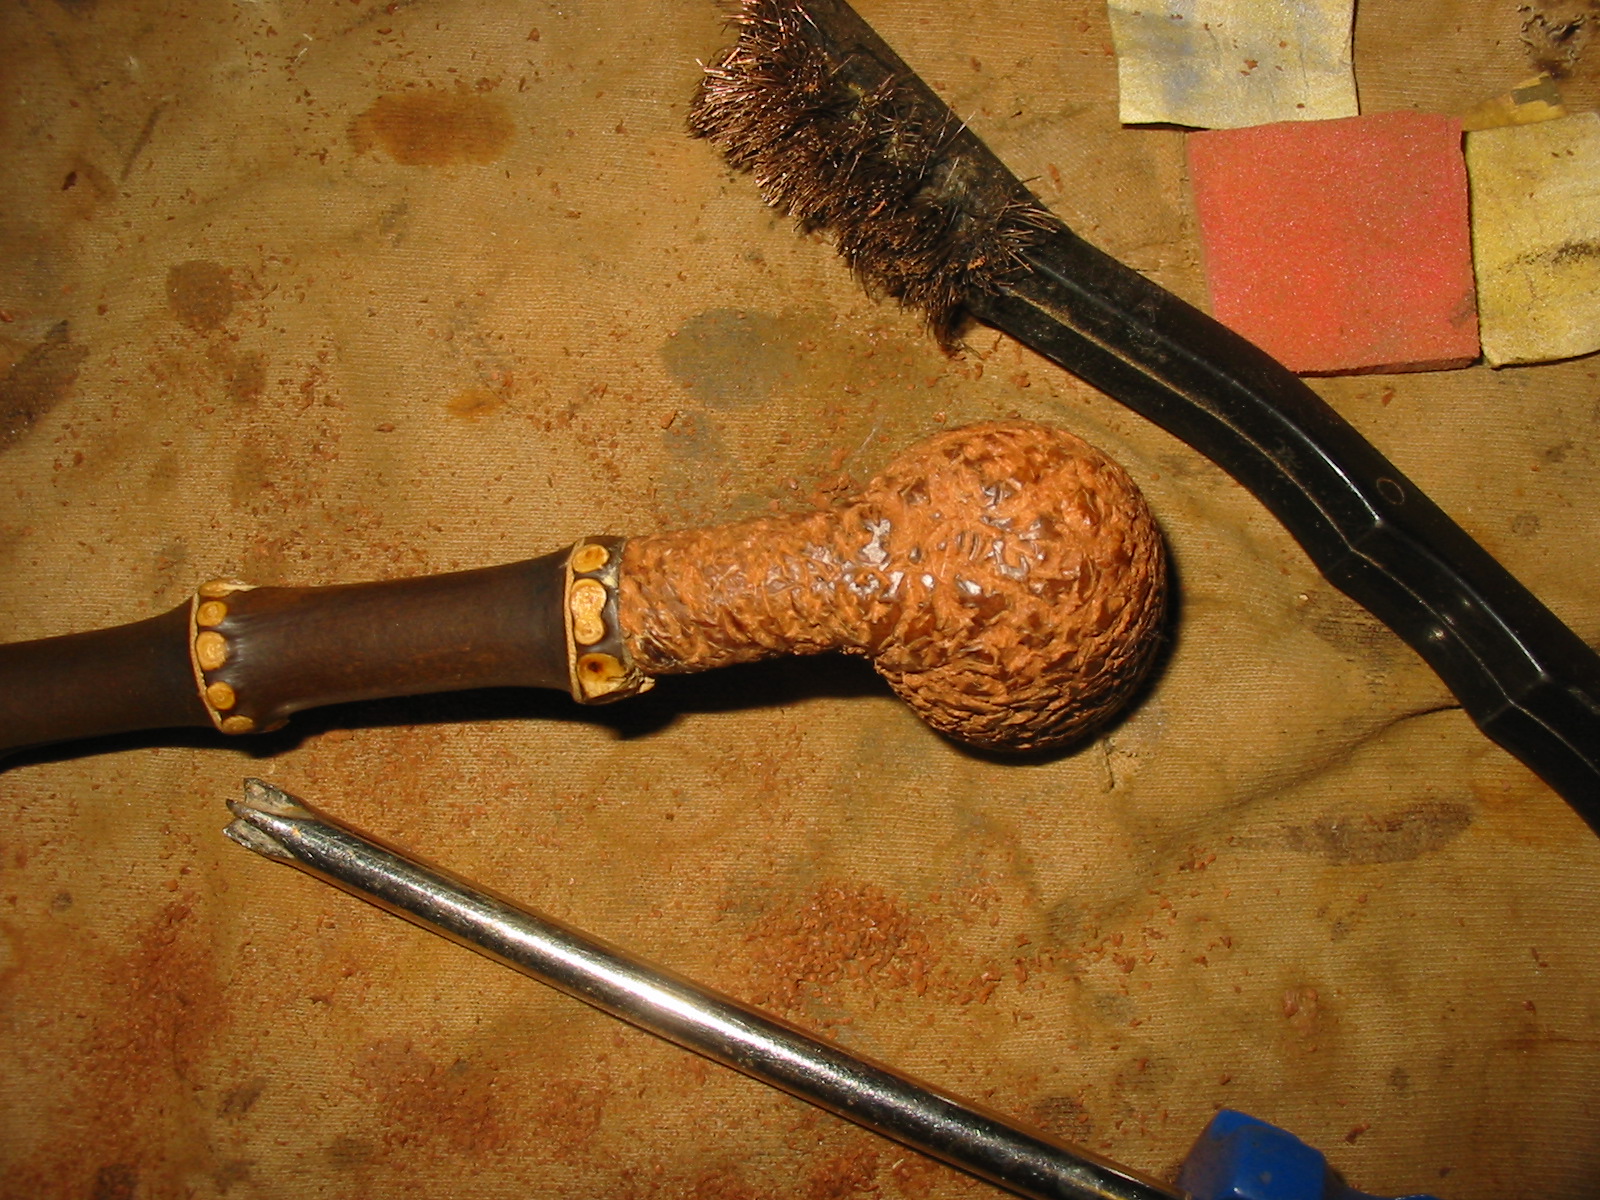
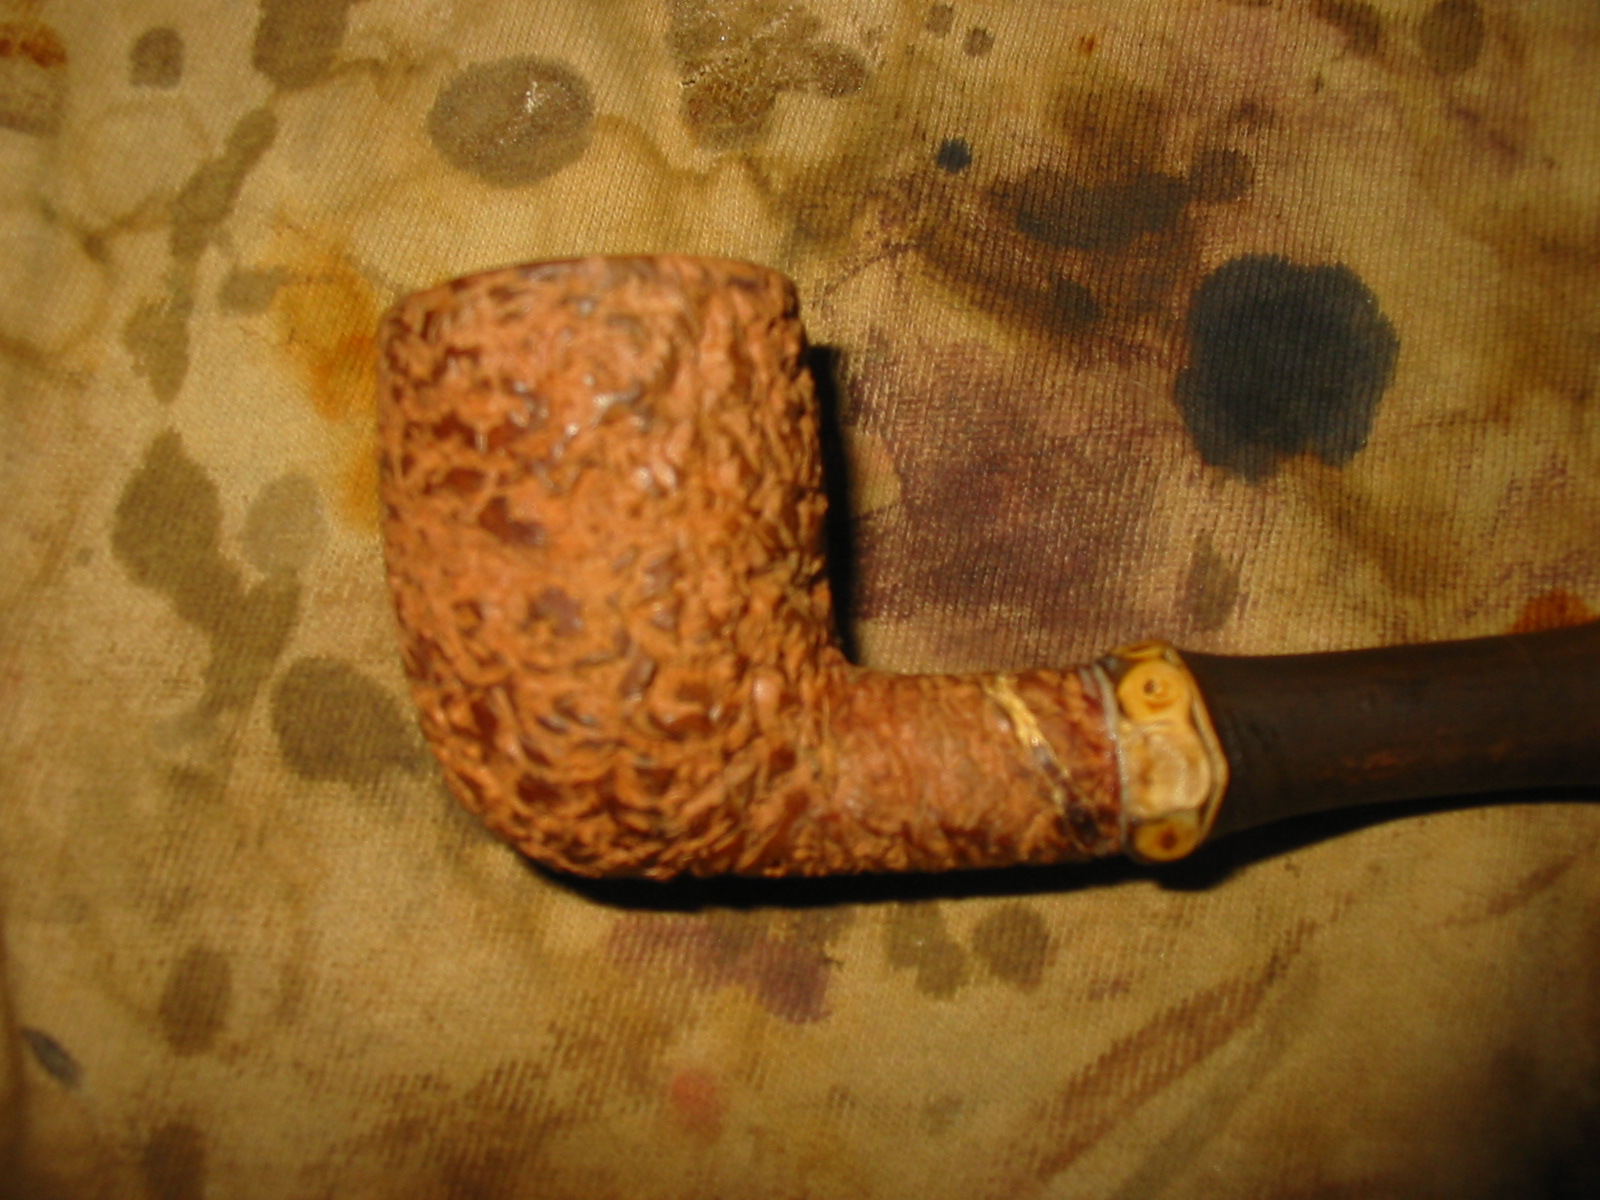
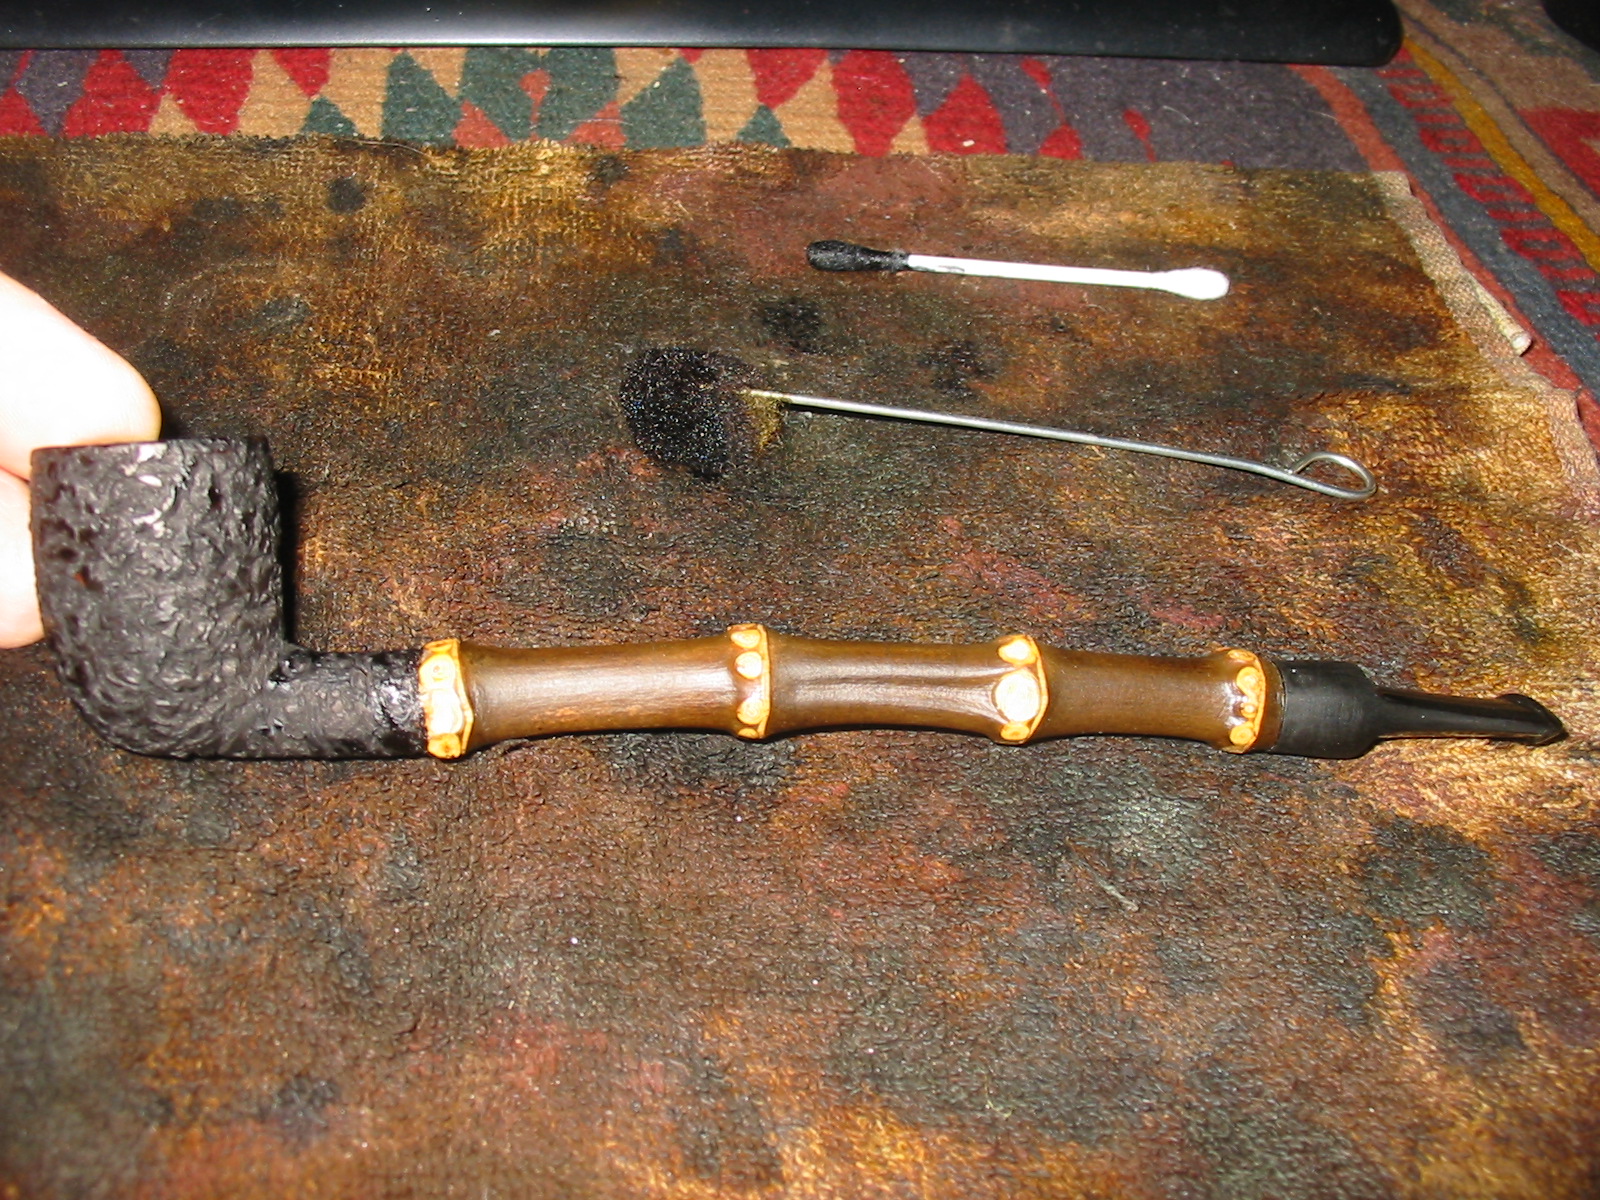
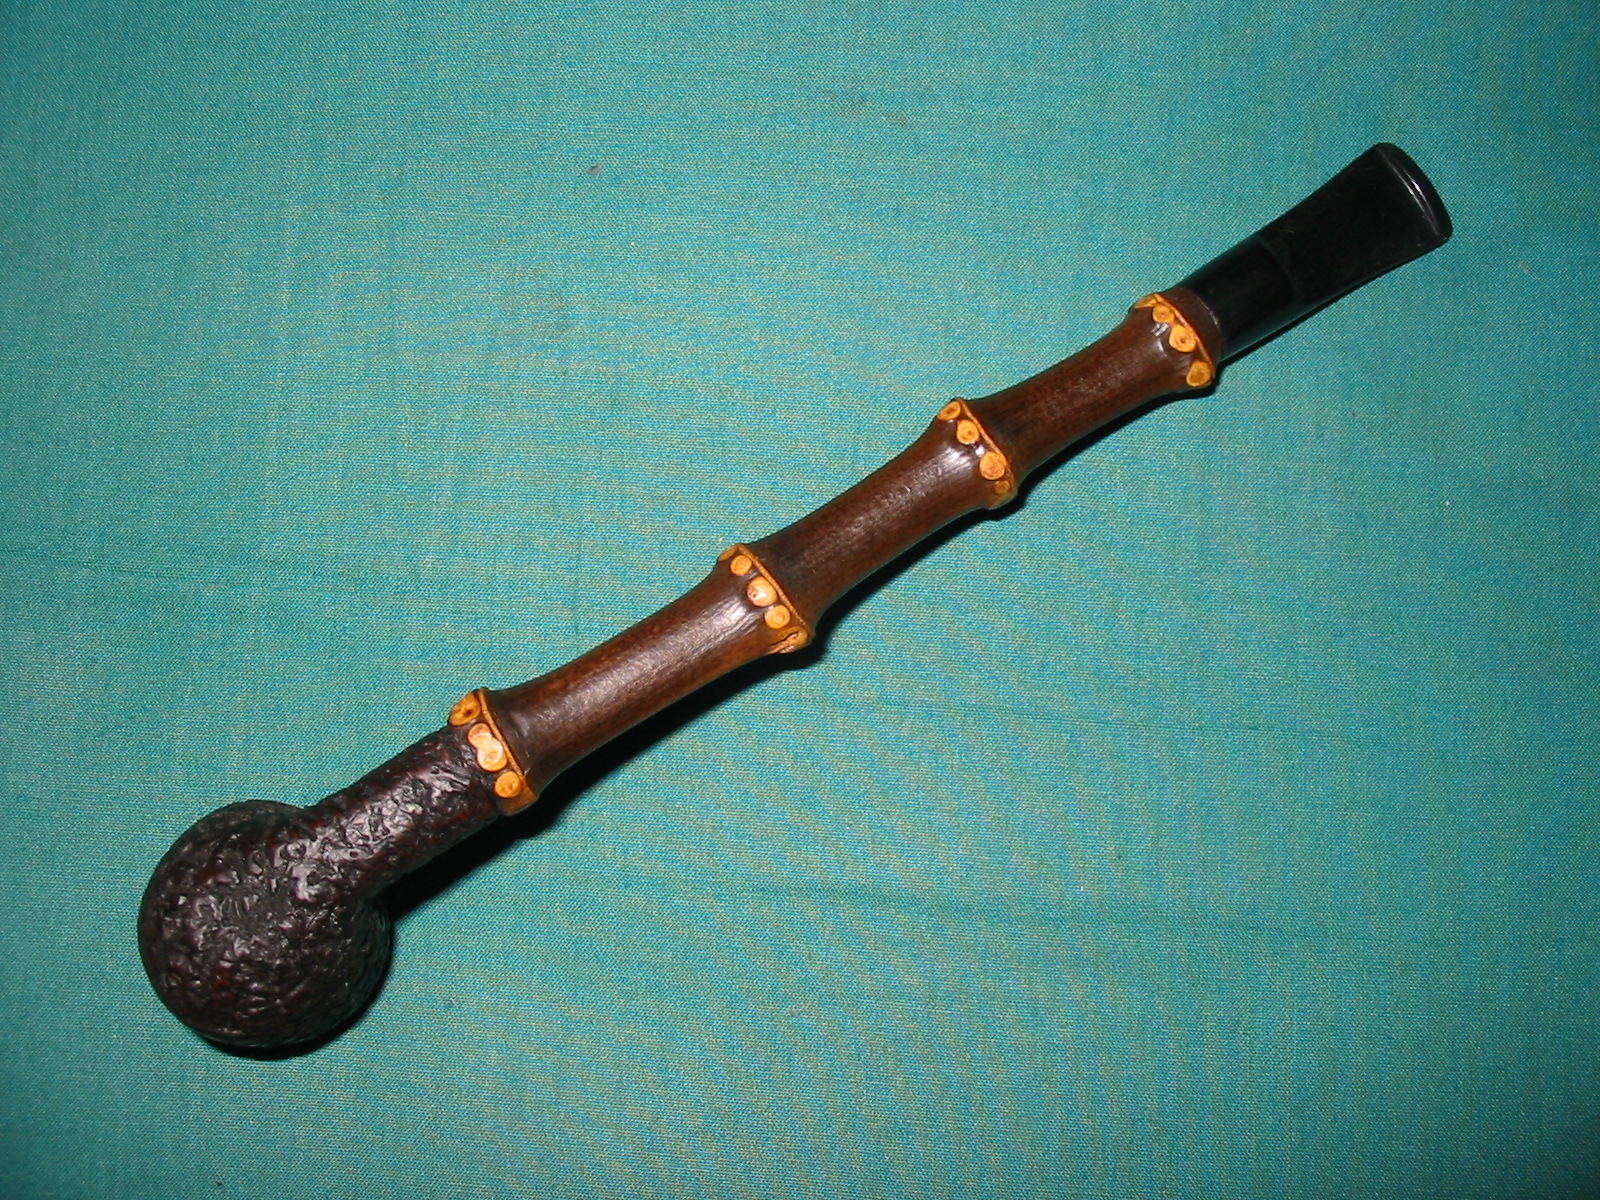
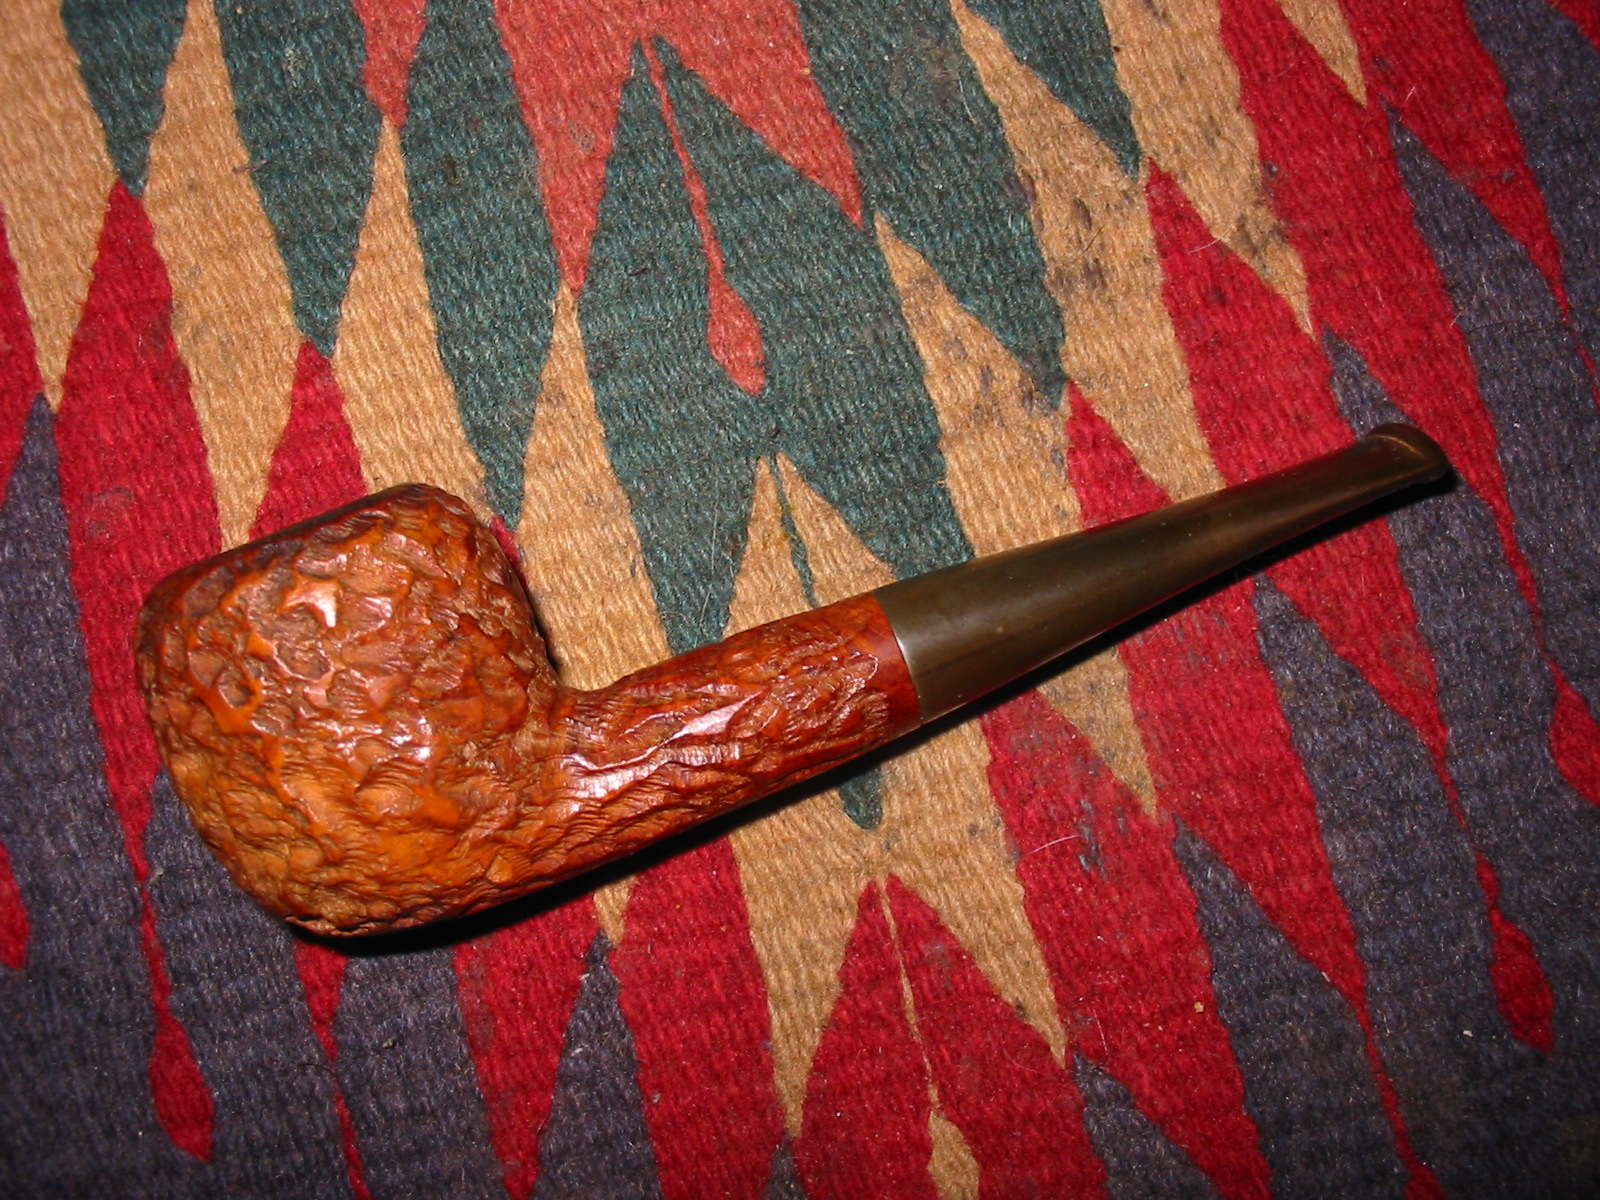
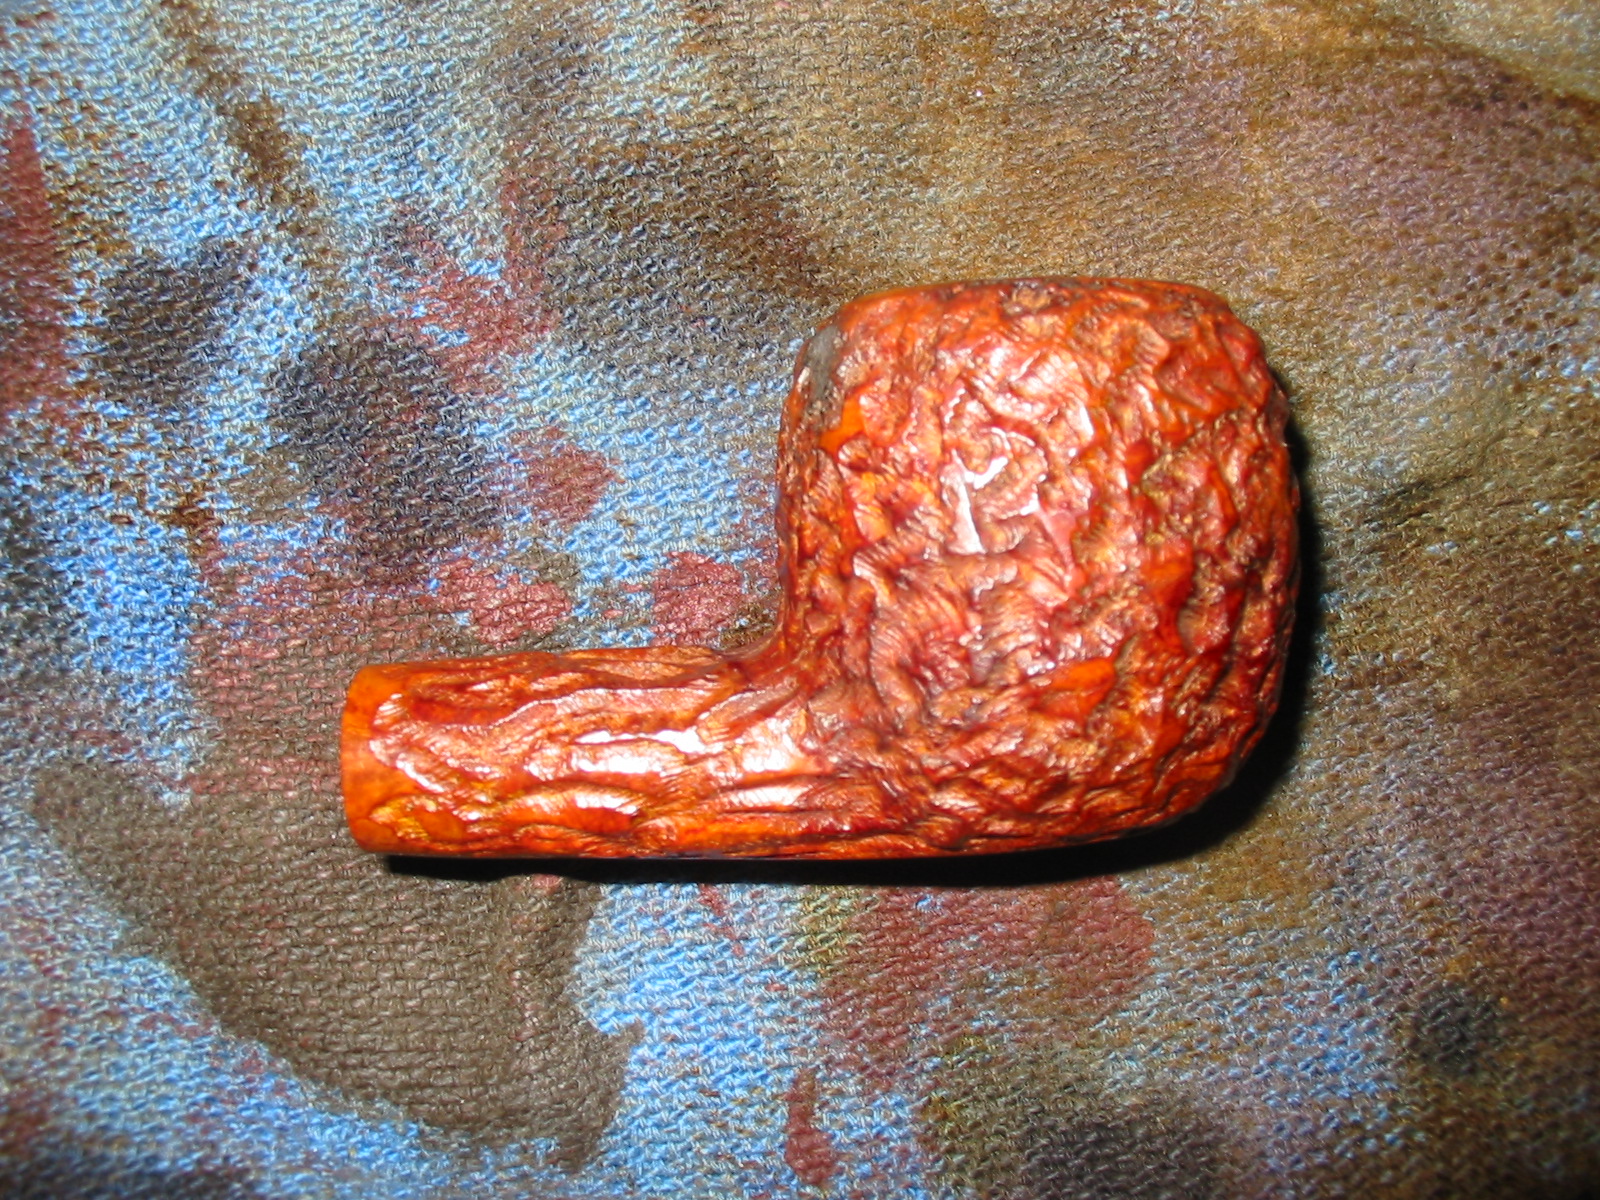
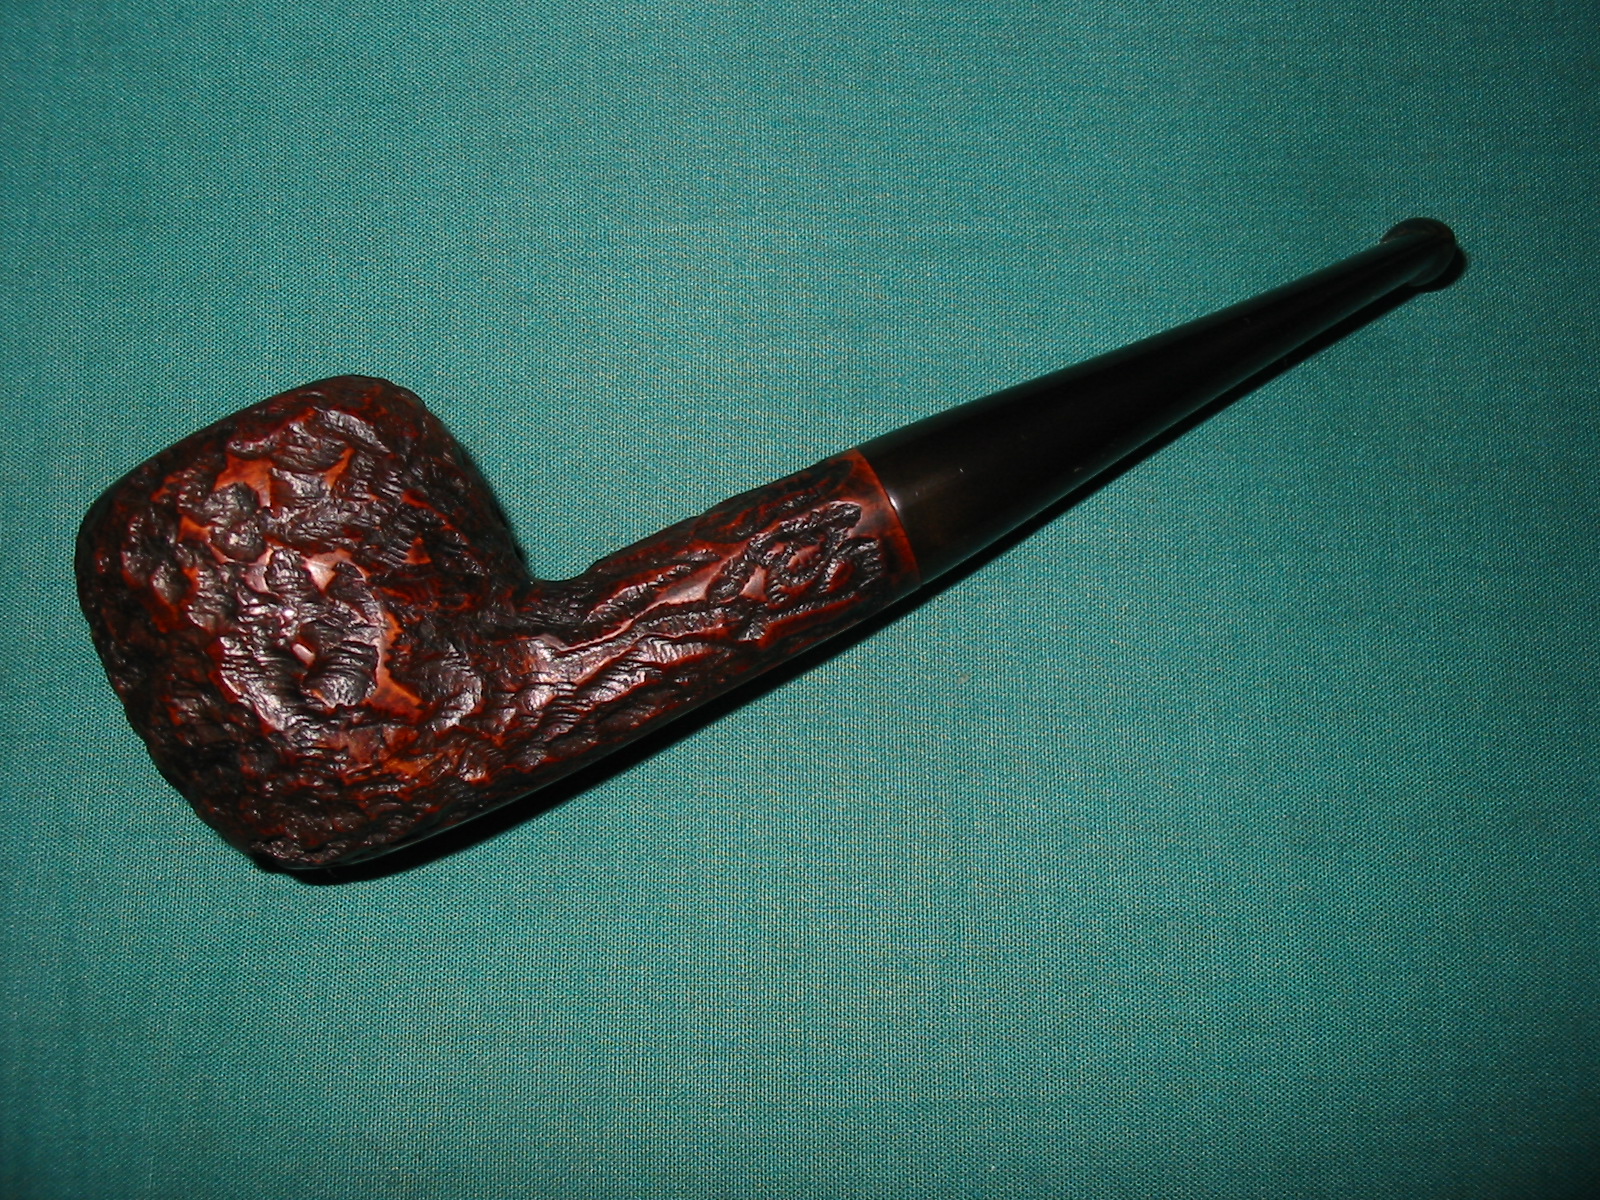
Hardcastle had used a contrast stain on this pipe that made the grooves of the rustication black and the high spots on the briar were brown. There was my solution staring me in the face. I set up my staining cloth and put the bowl on the cloth. I applied the black aniline stain and flamed it to set it in the grooves. Once it was dry I buffed it with Red Tripoli to highlight the high points on the rustication and remove the black stain from those areas. The photos below show the pipe after the staining and the buffing. The contrast stain worked well on the burned and darkened areas of the bowl.
IMG_6022

IMG_6023

IMG_6024

IMG_6025
The contrast was still not quite what I wanted as it was too dark for my liking. I wiped the bowl down with isopropyl alcohol on cotton pads to remove more of the black from the high spots on the bowl and shank. I also wiped down the smooth rim area as I wanted it to match the high spots on the bowl.
IMG_6026

IMG_6029

IMG_6030

IMG_6031
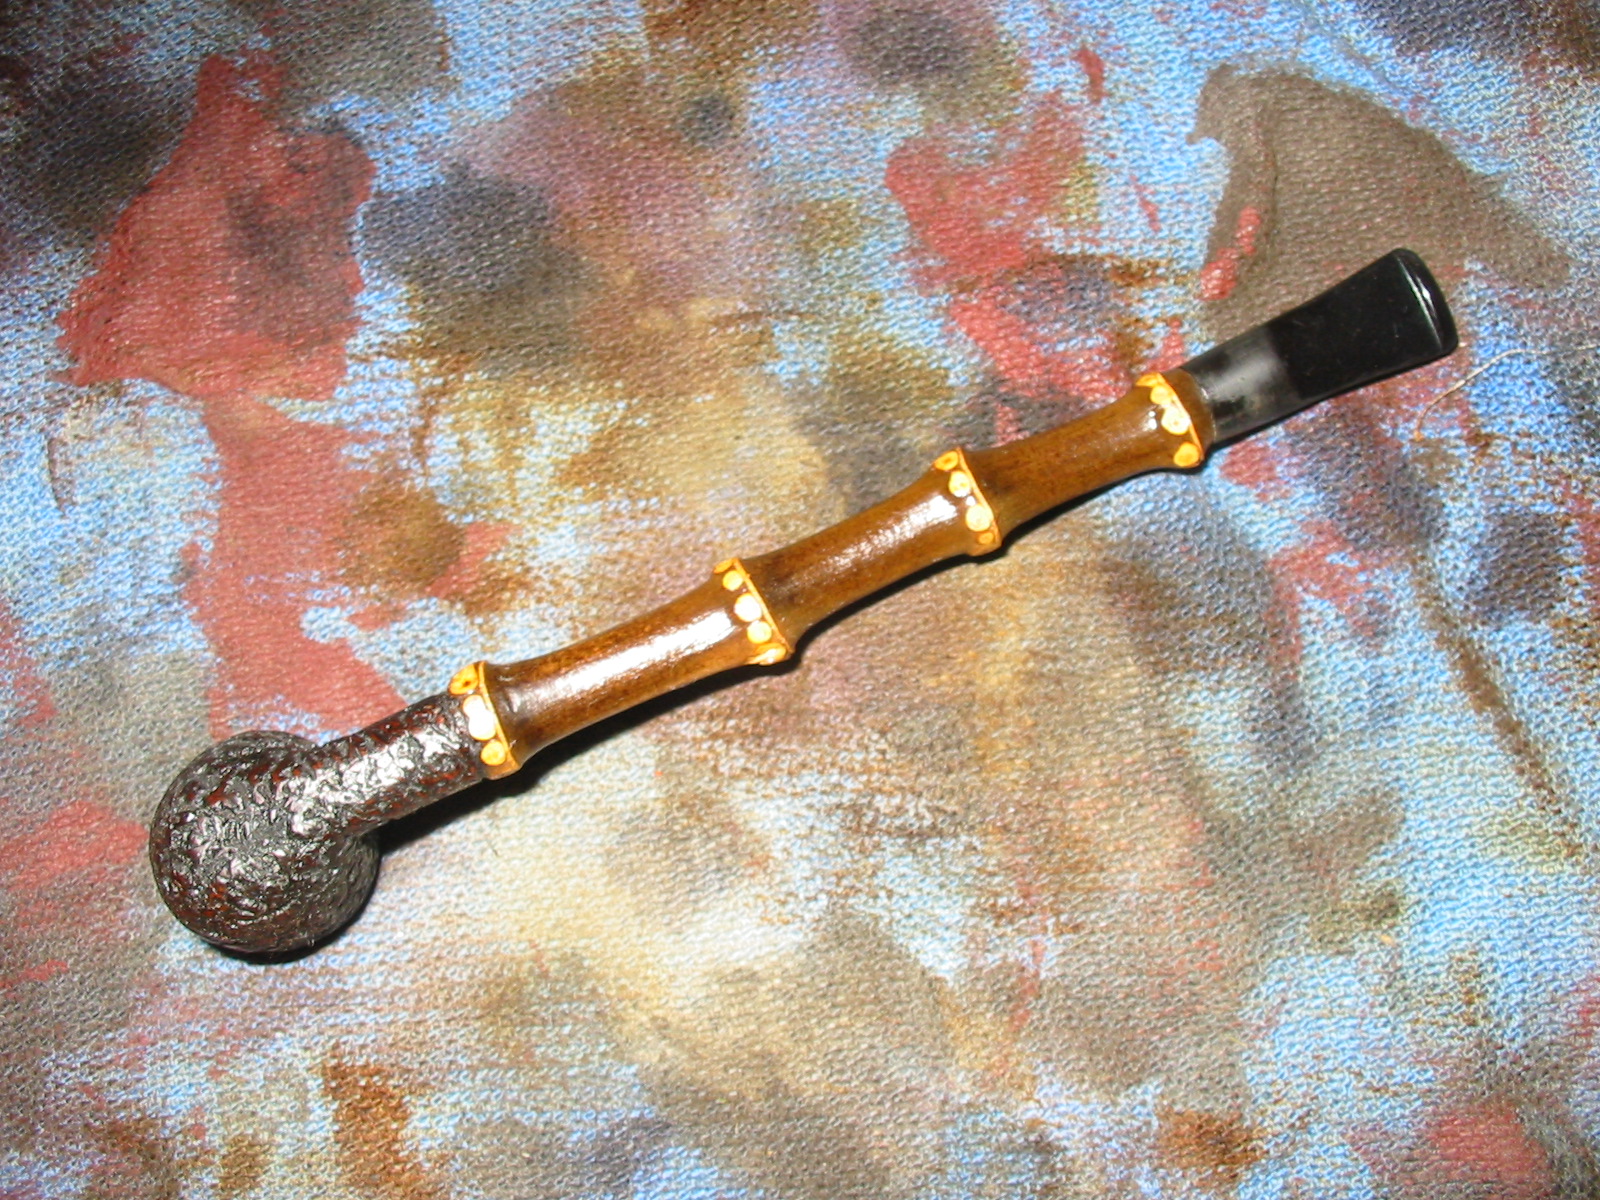
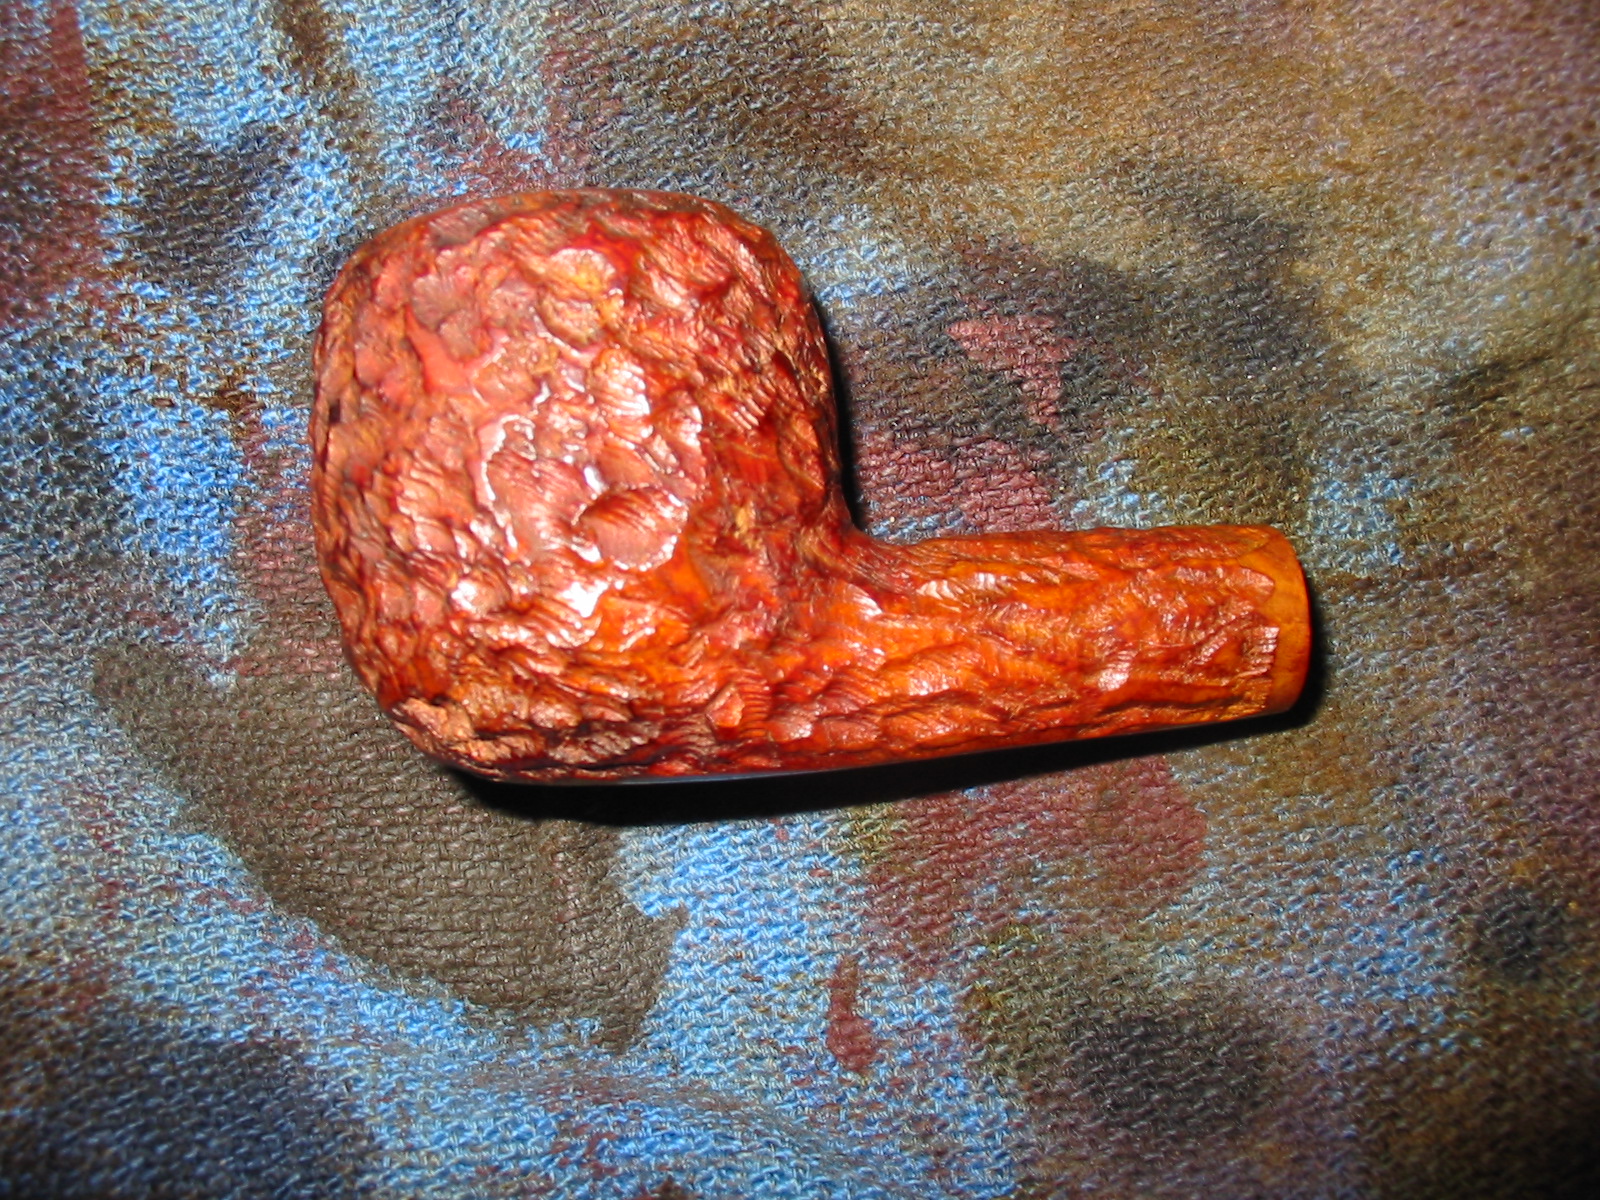
I took the pipe to the buffer again and buffed the bowl and stem with Tripoli and then with White Diamond to give it a shine. The contrast now was exactly what I was aiming for with the staining so I was pleased with the results.
IMG_6034

IMG_6035

IMG_6036

IMG_6039
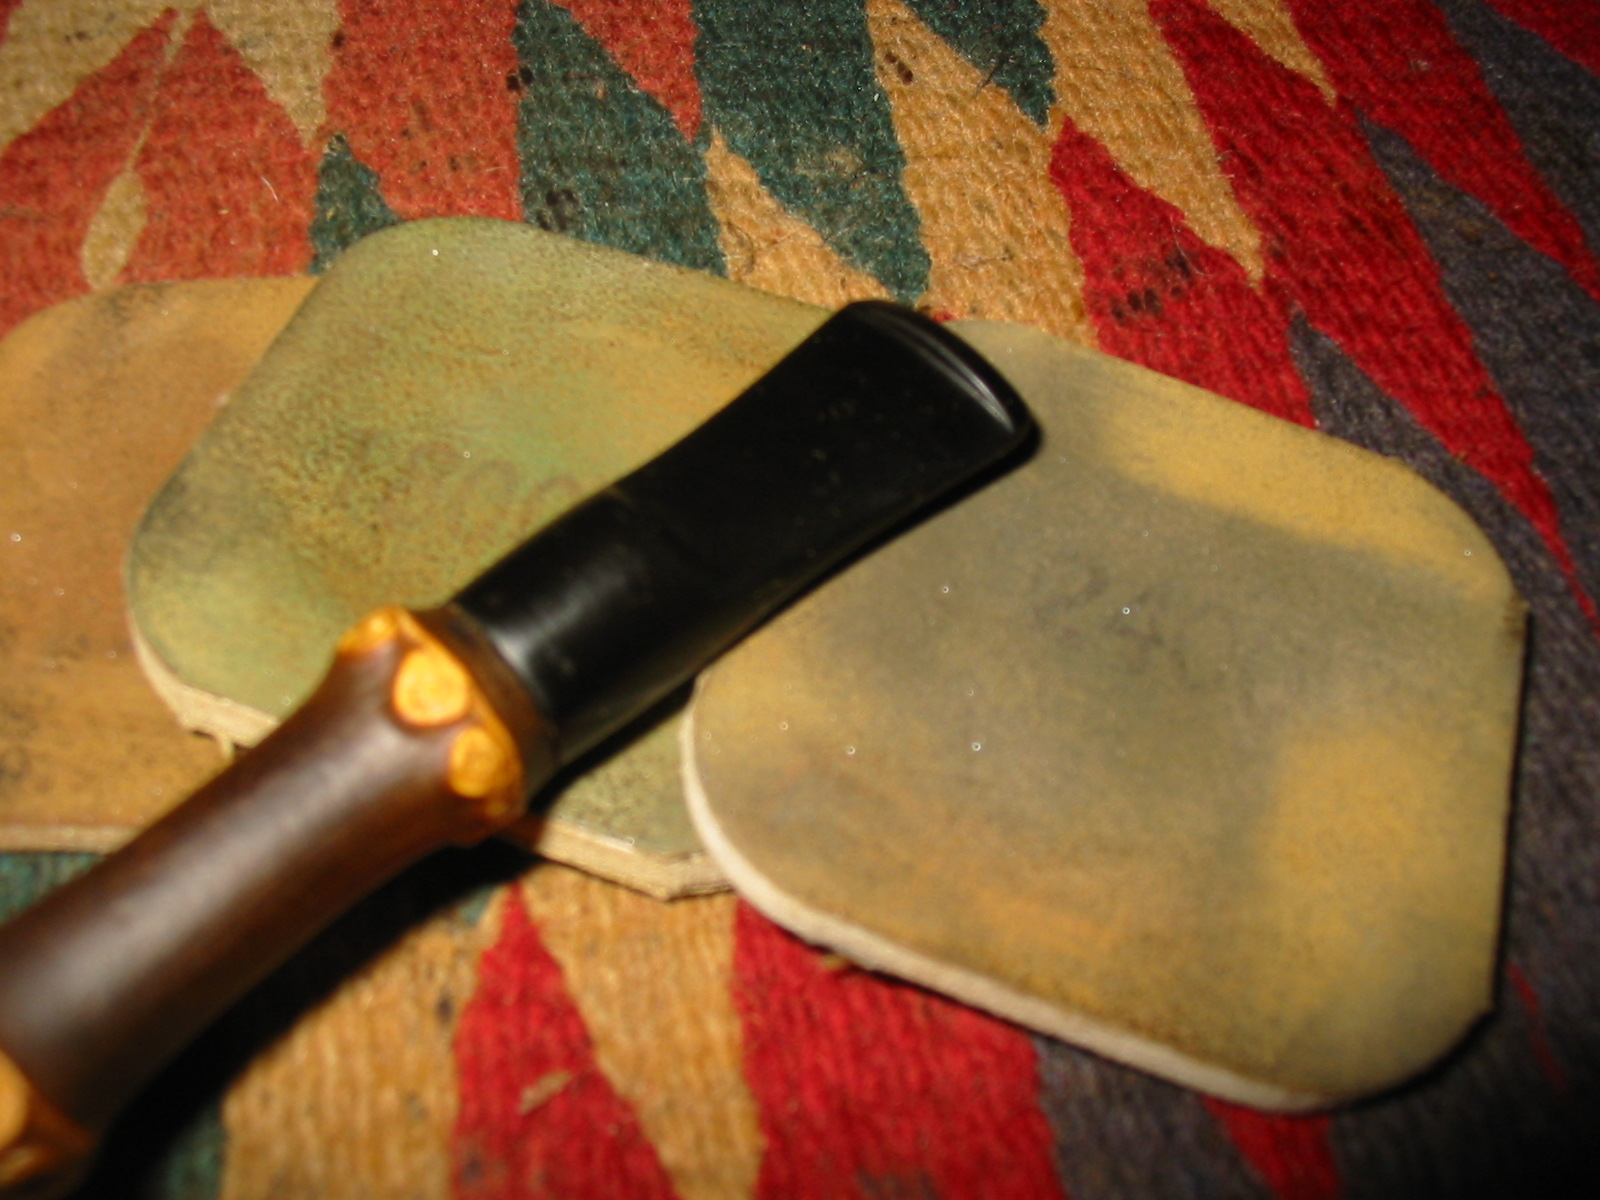
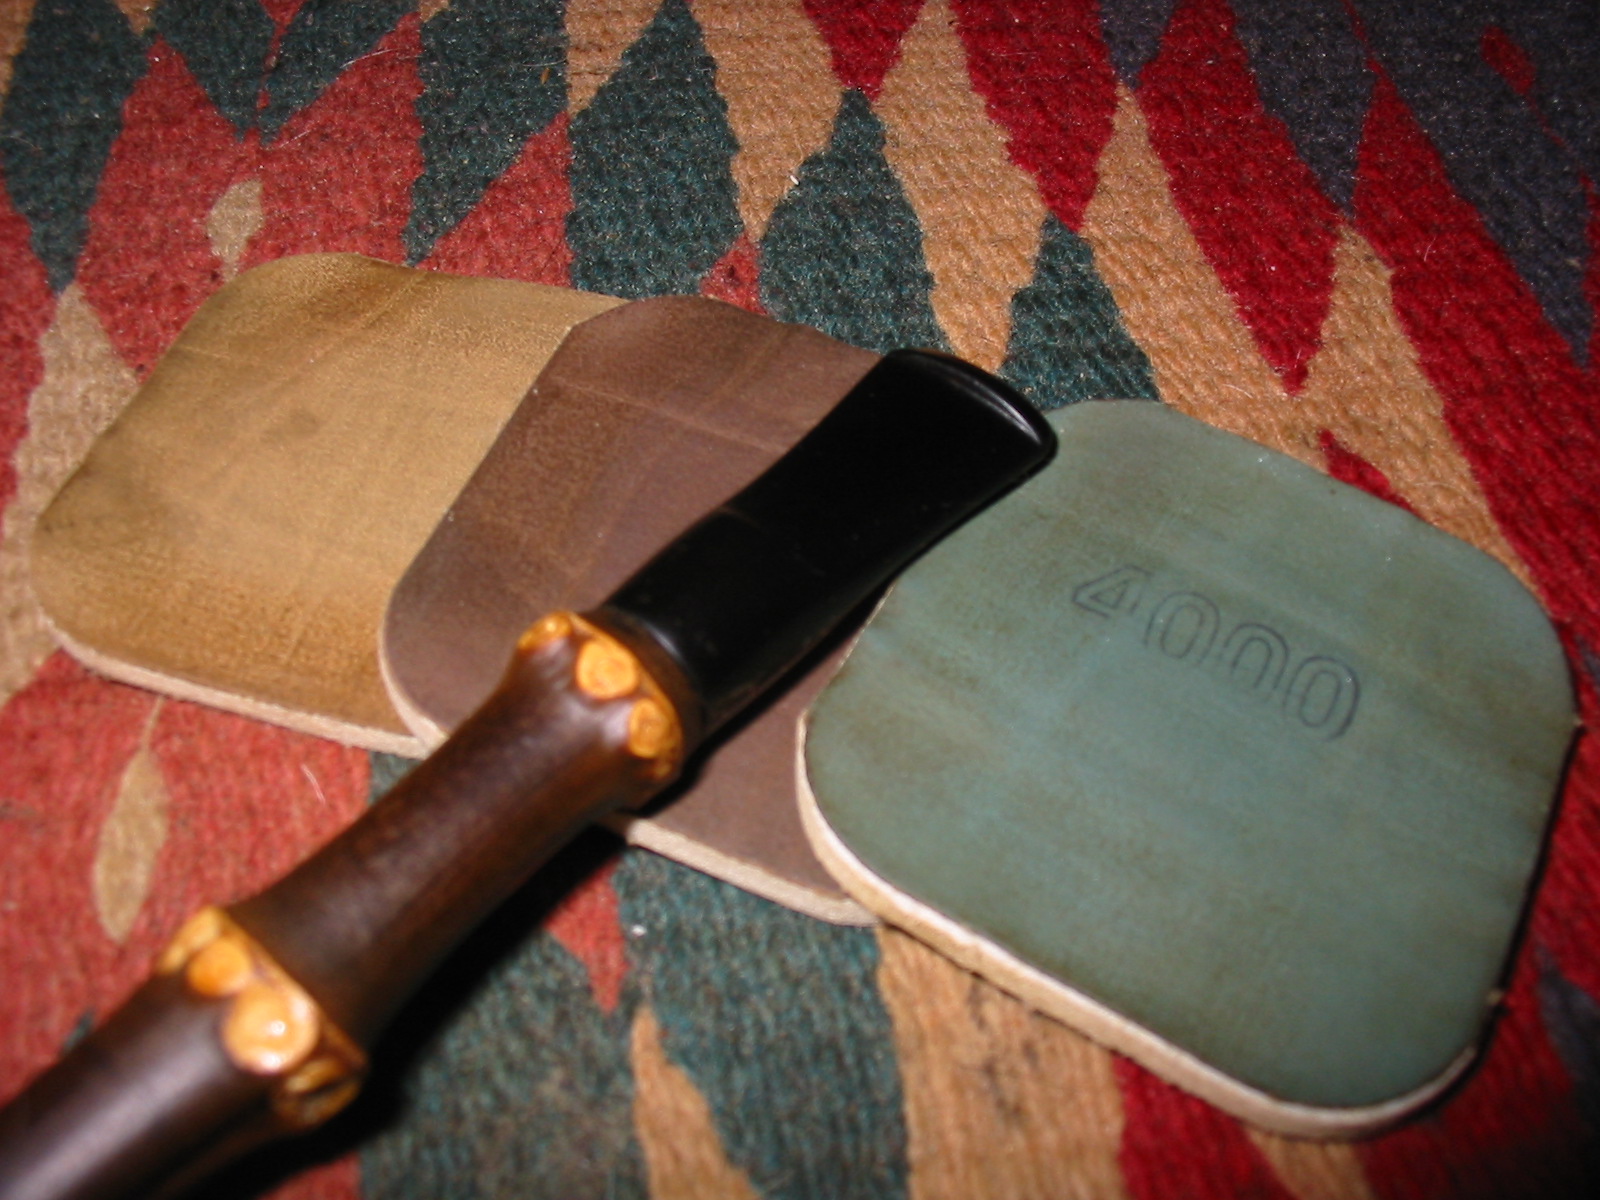
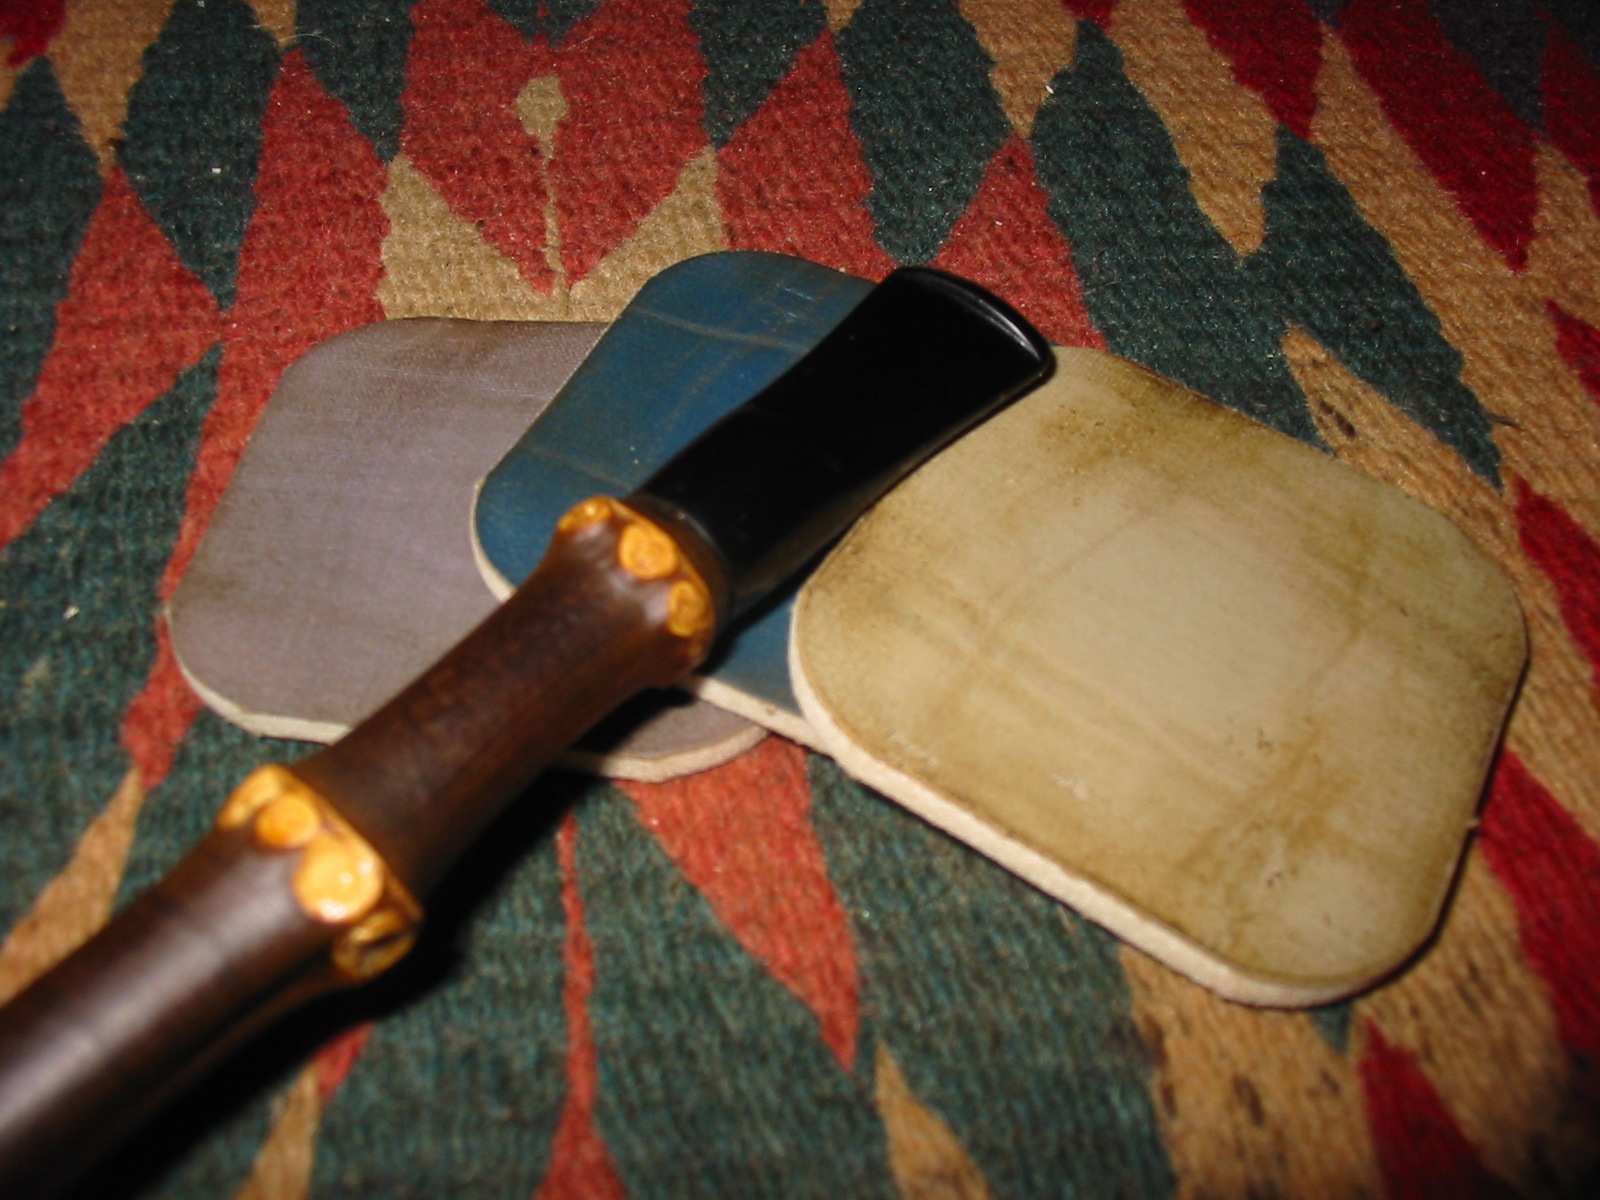
I set the bowl aside and worked some more on the stem. I sanded it with a fine grit sanding sponge to remove the stubborn spots of oxidation at the button and the shank end. I then used my usual array of micromesh sanding pads – wet sanding with 1500-2400 grit pads and dry sanding with 3200-12000 grit pads. Each photo below shows the progressive deepening of the shine and the blackness of the vulcanite.
IMG_6041

IMG_6042

IMG_6043
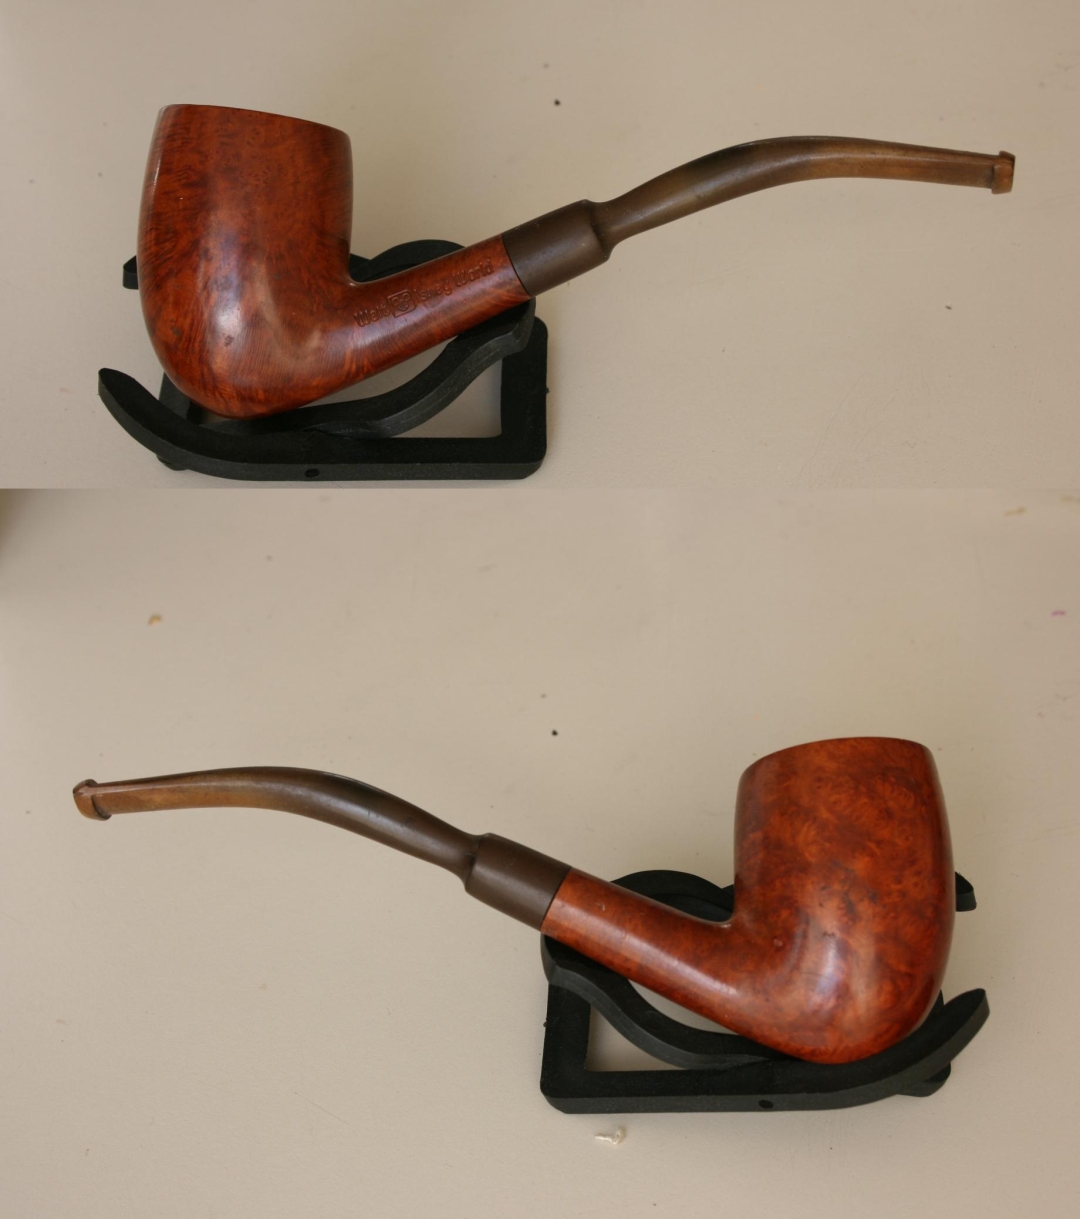
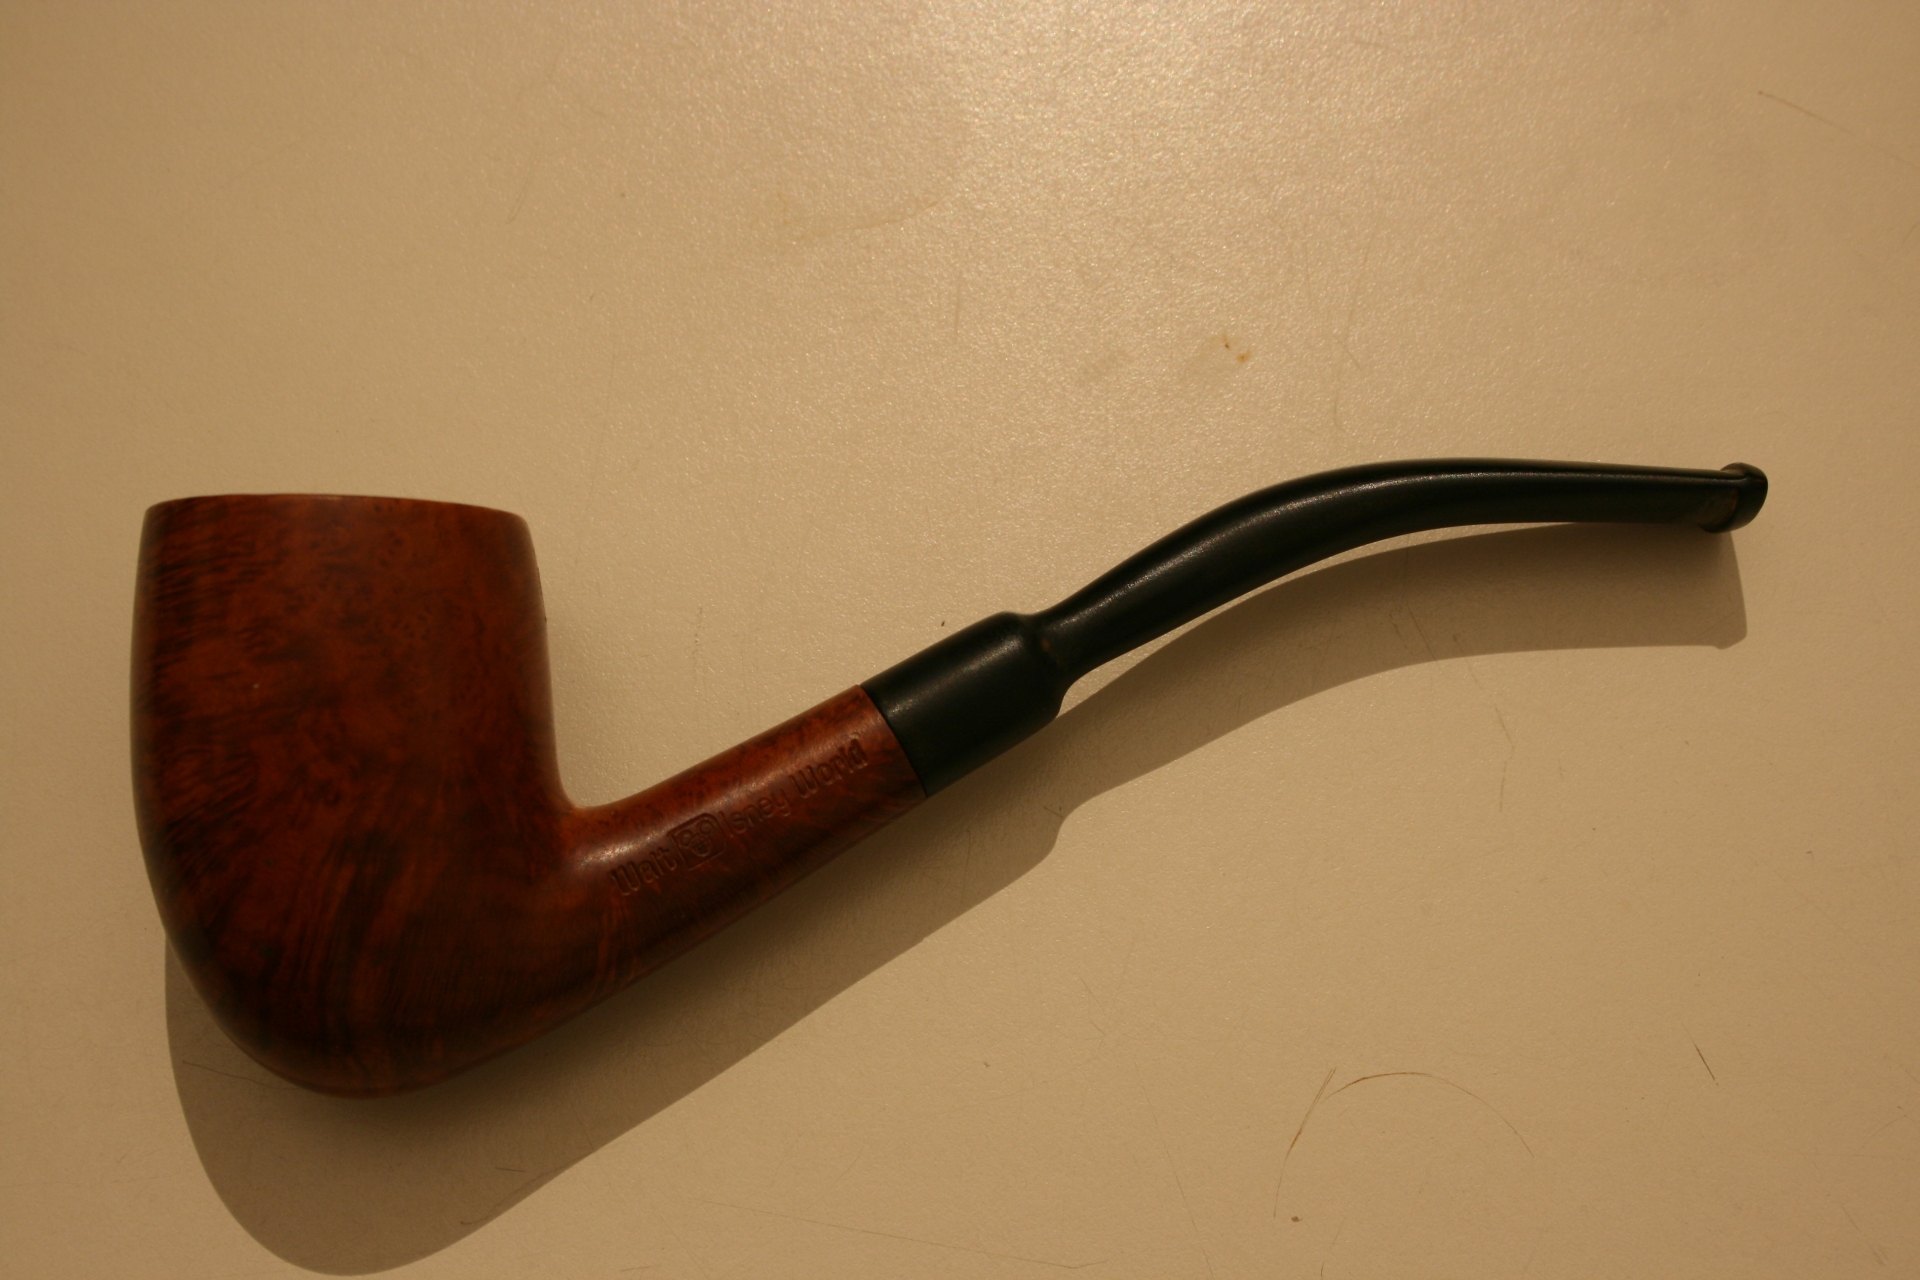
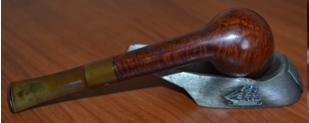
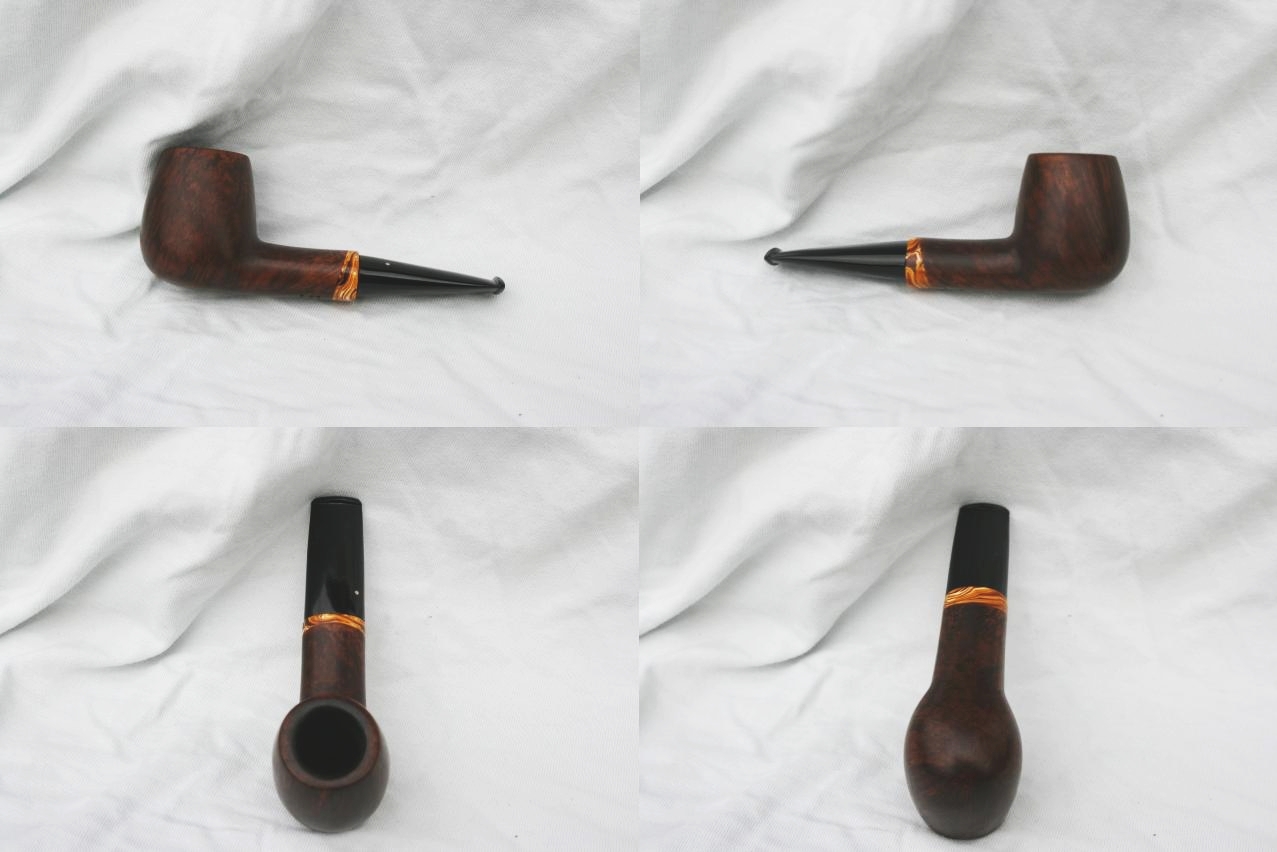
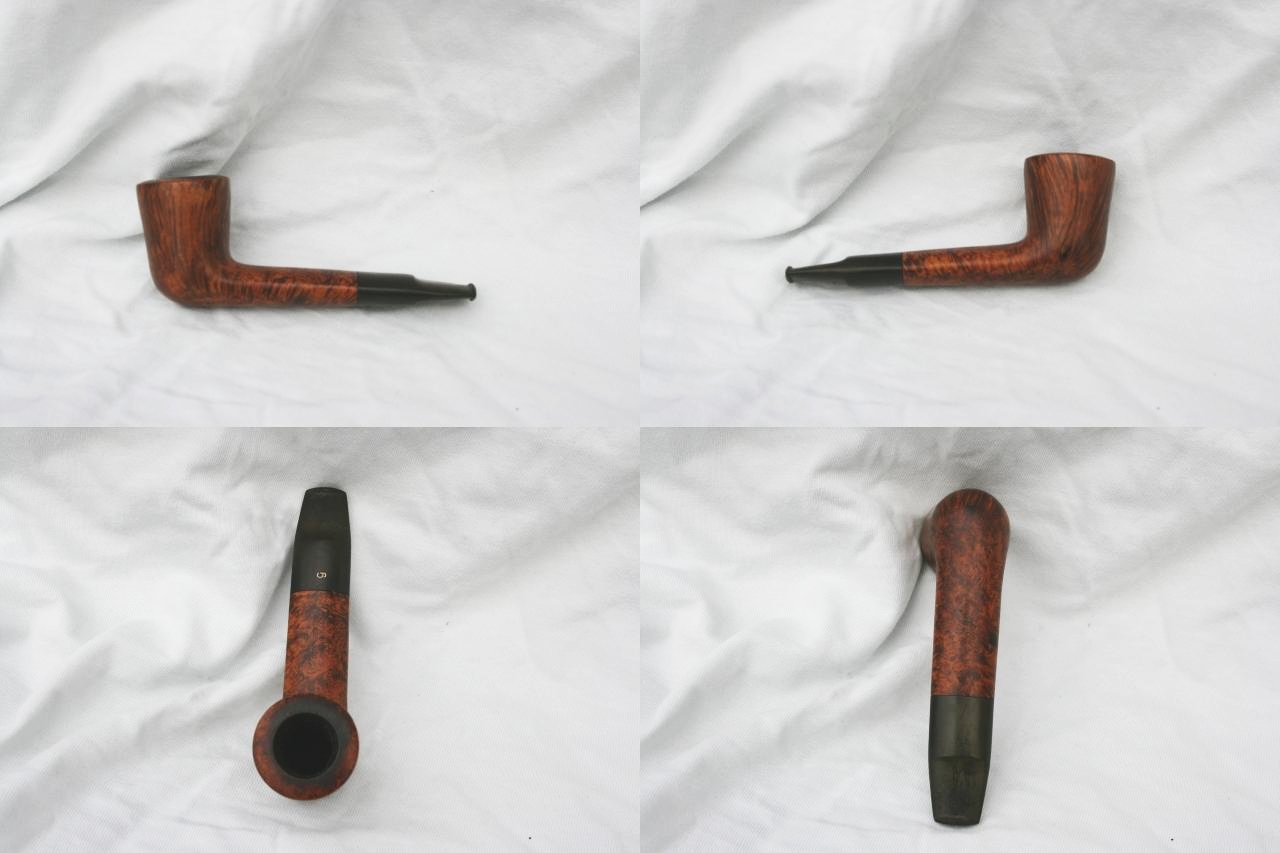
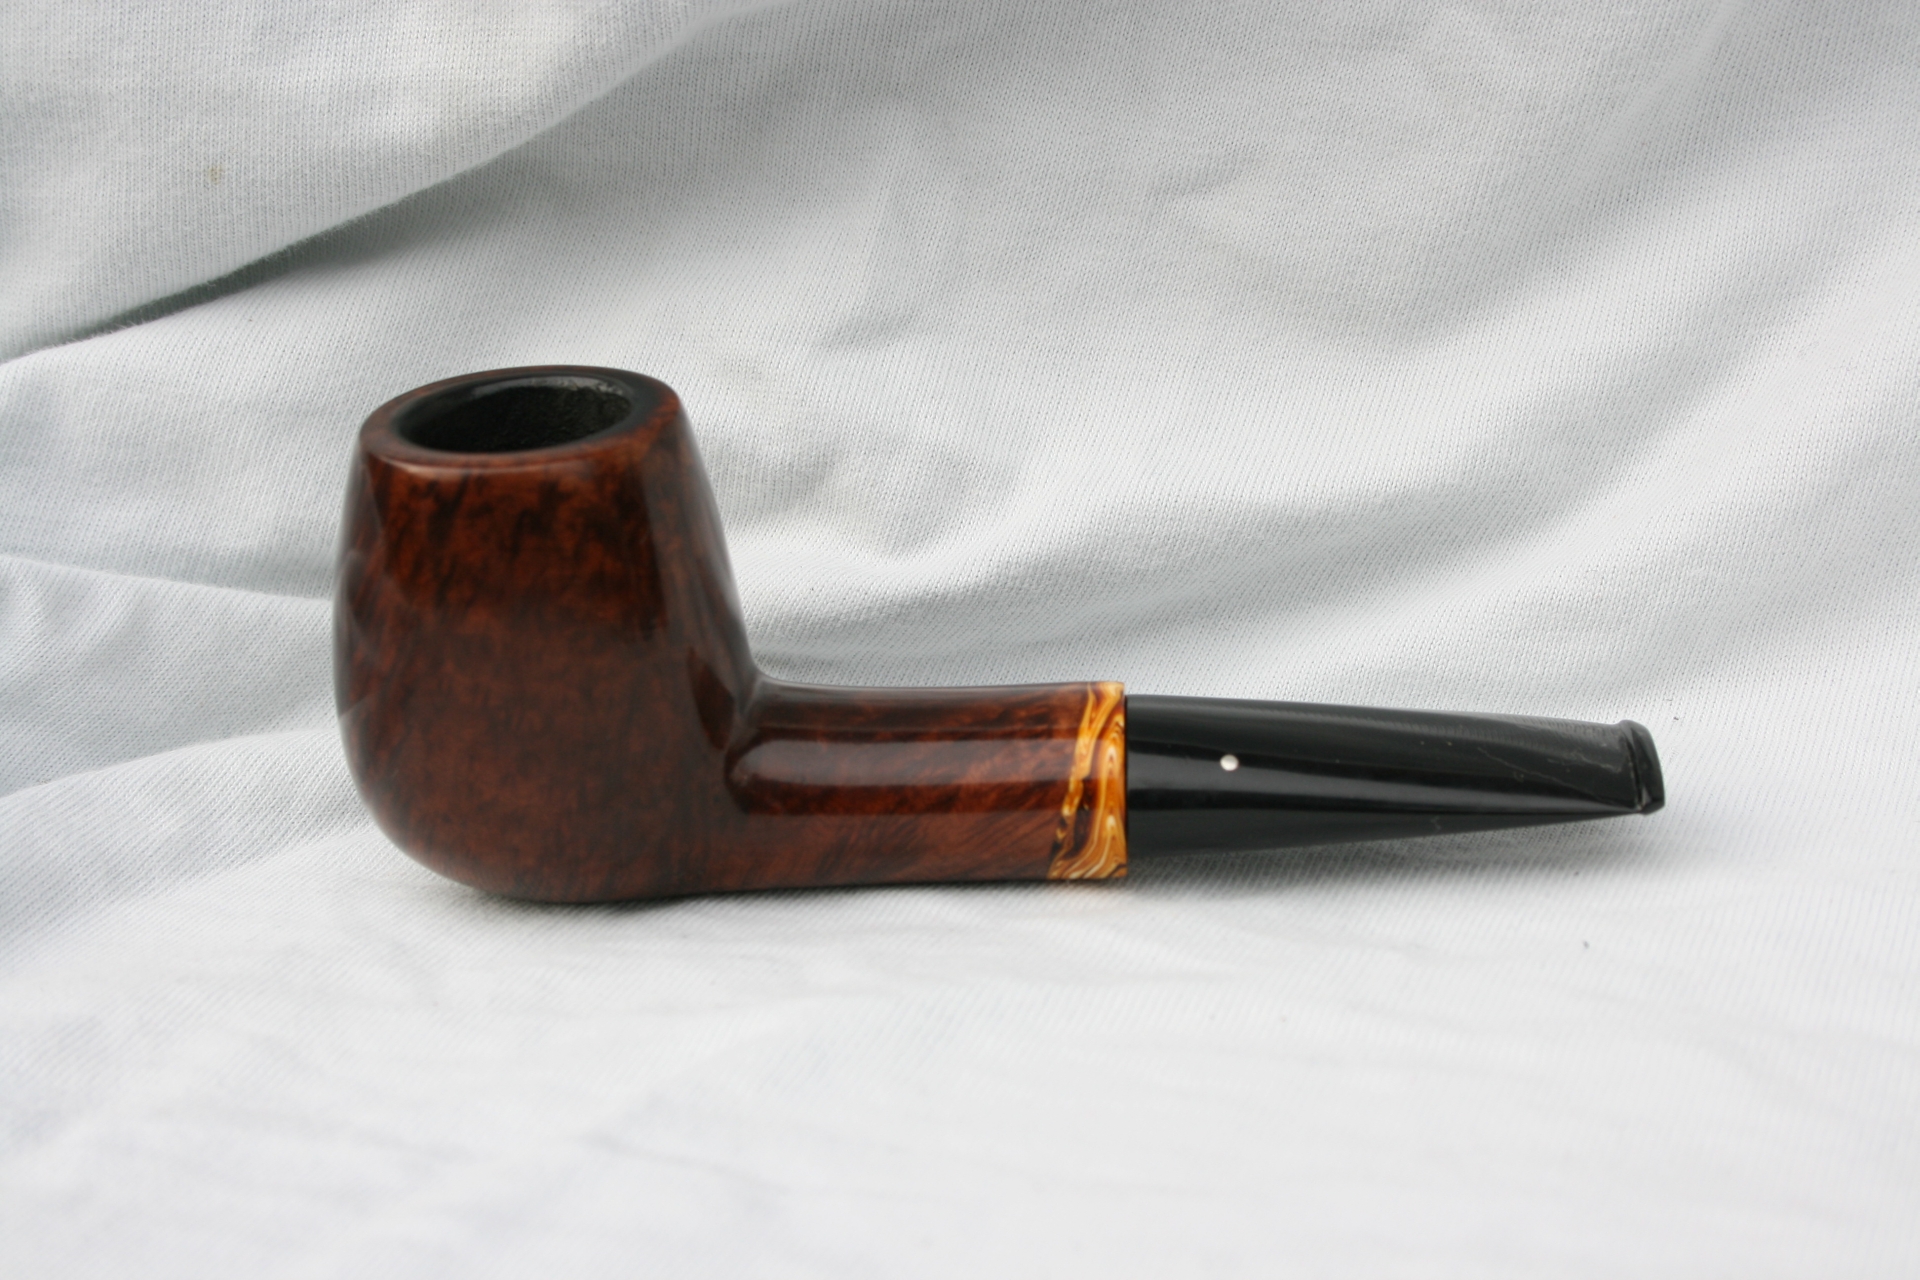
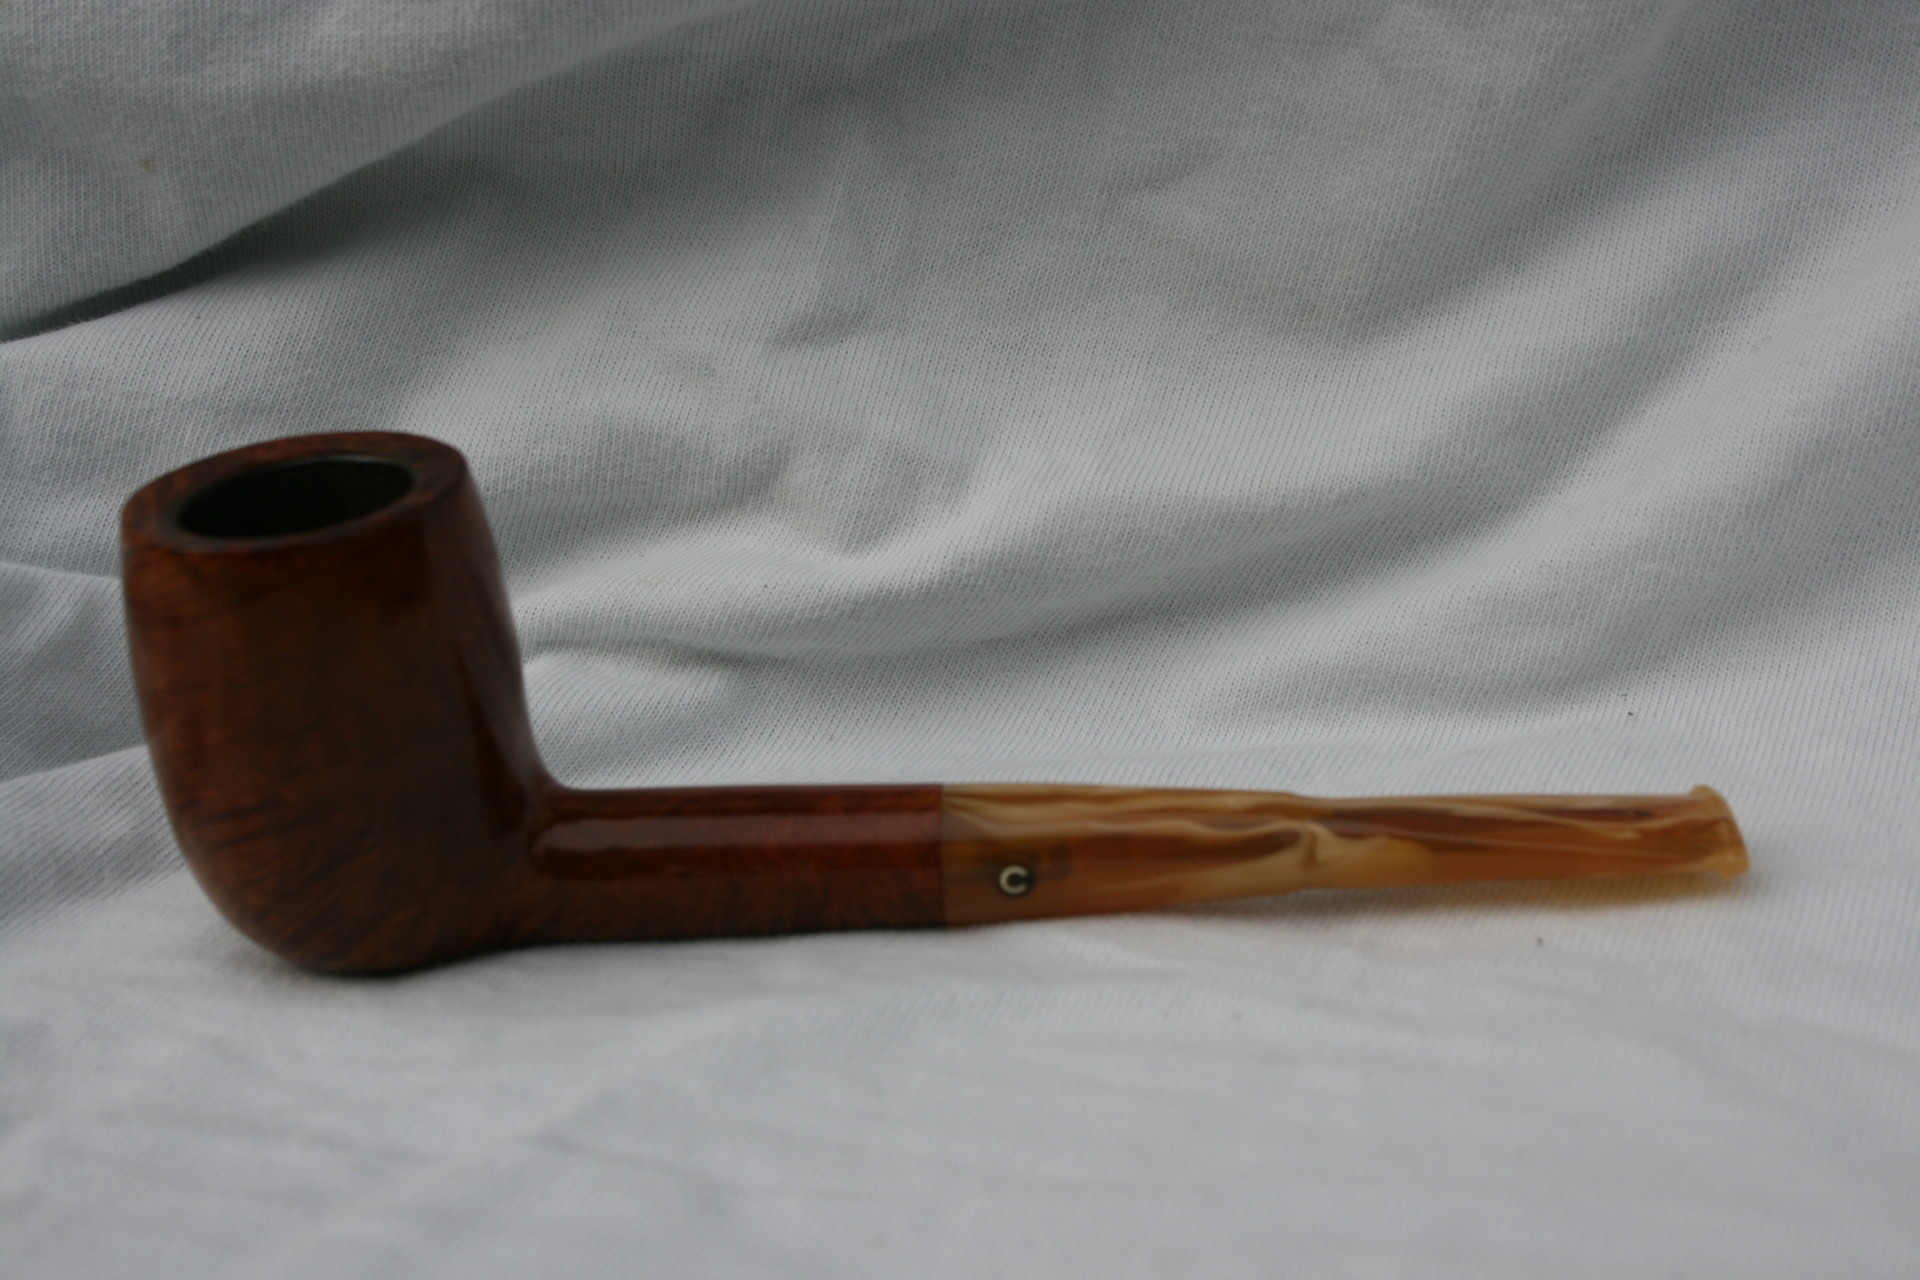
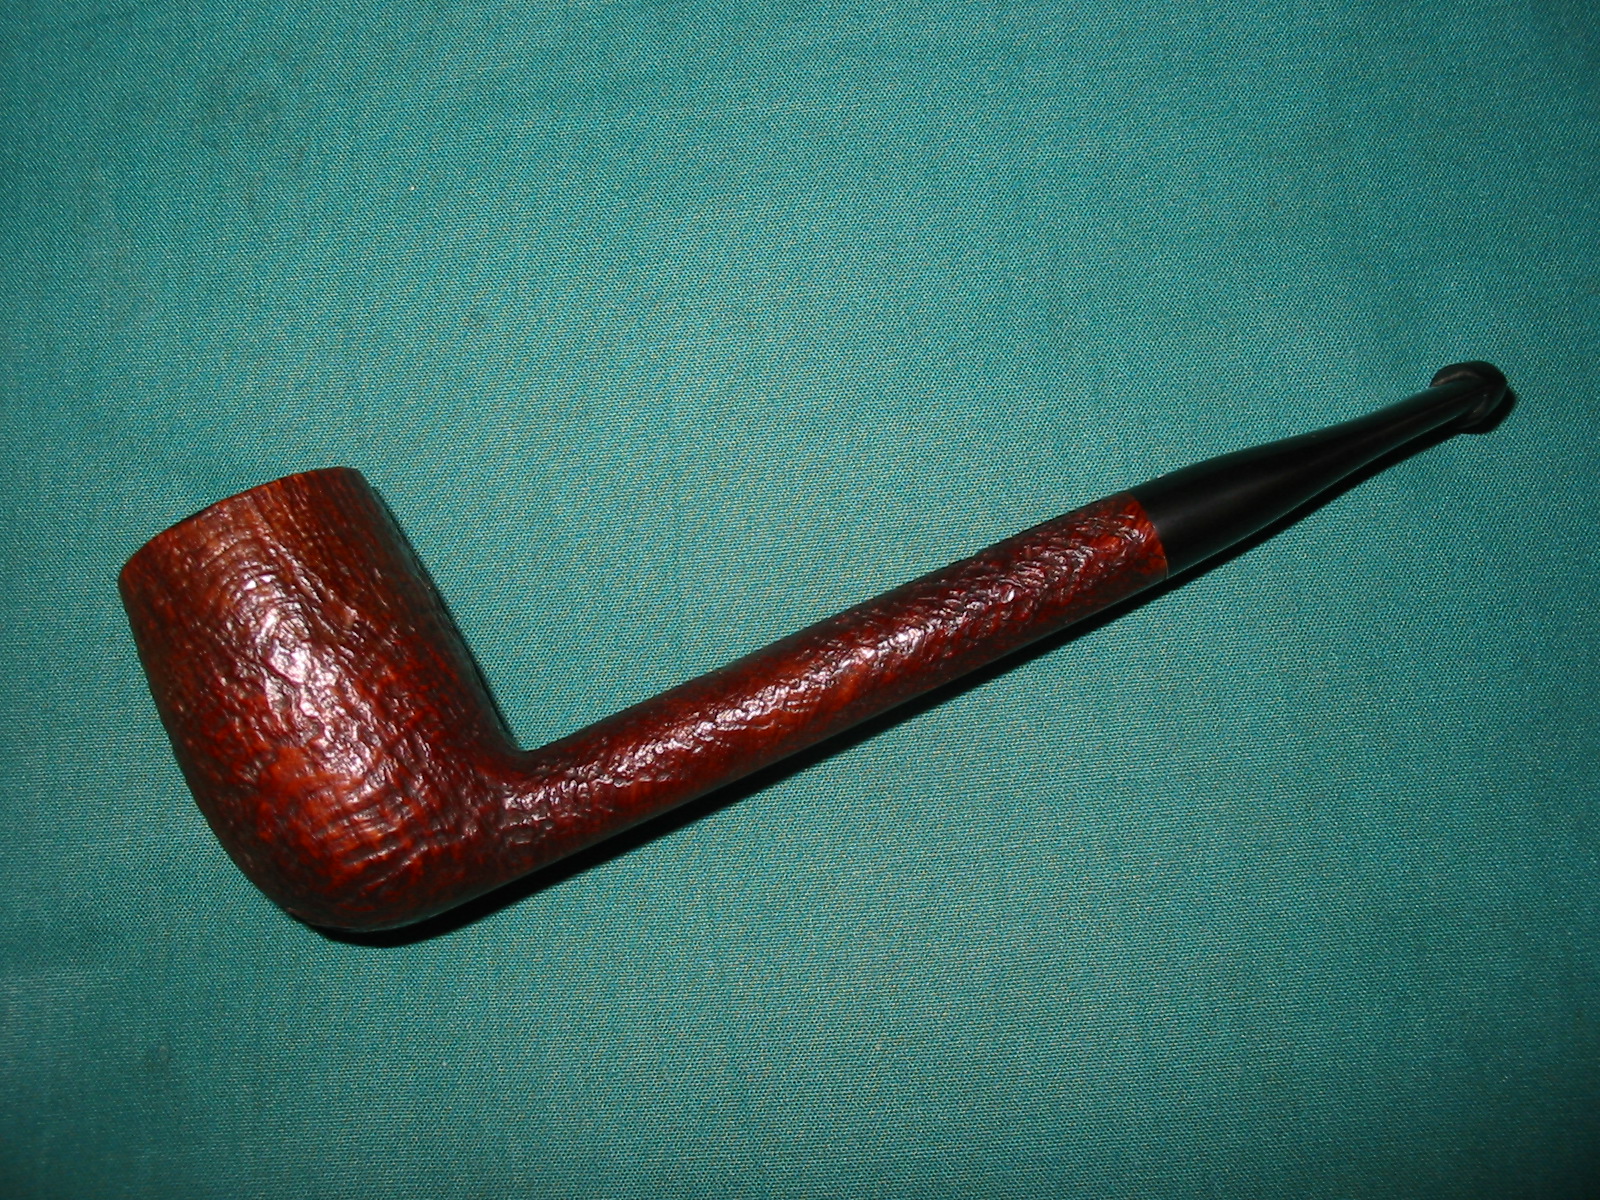
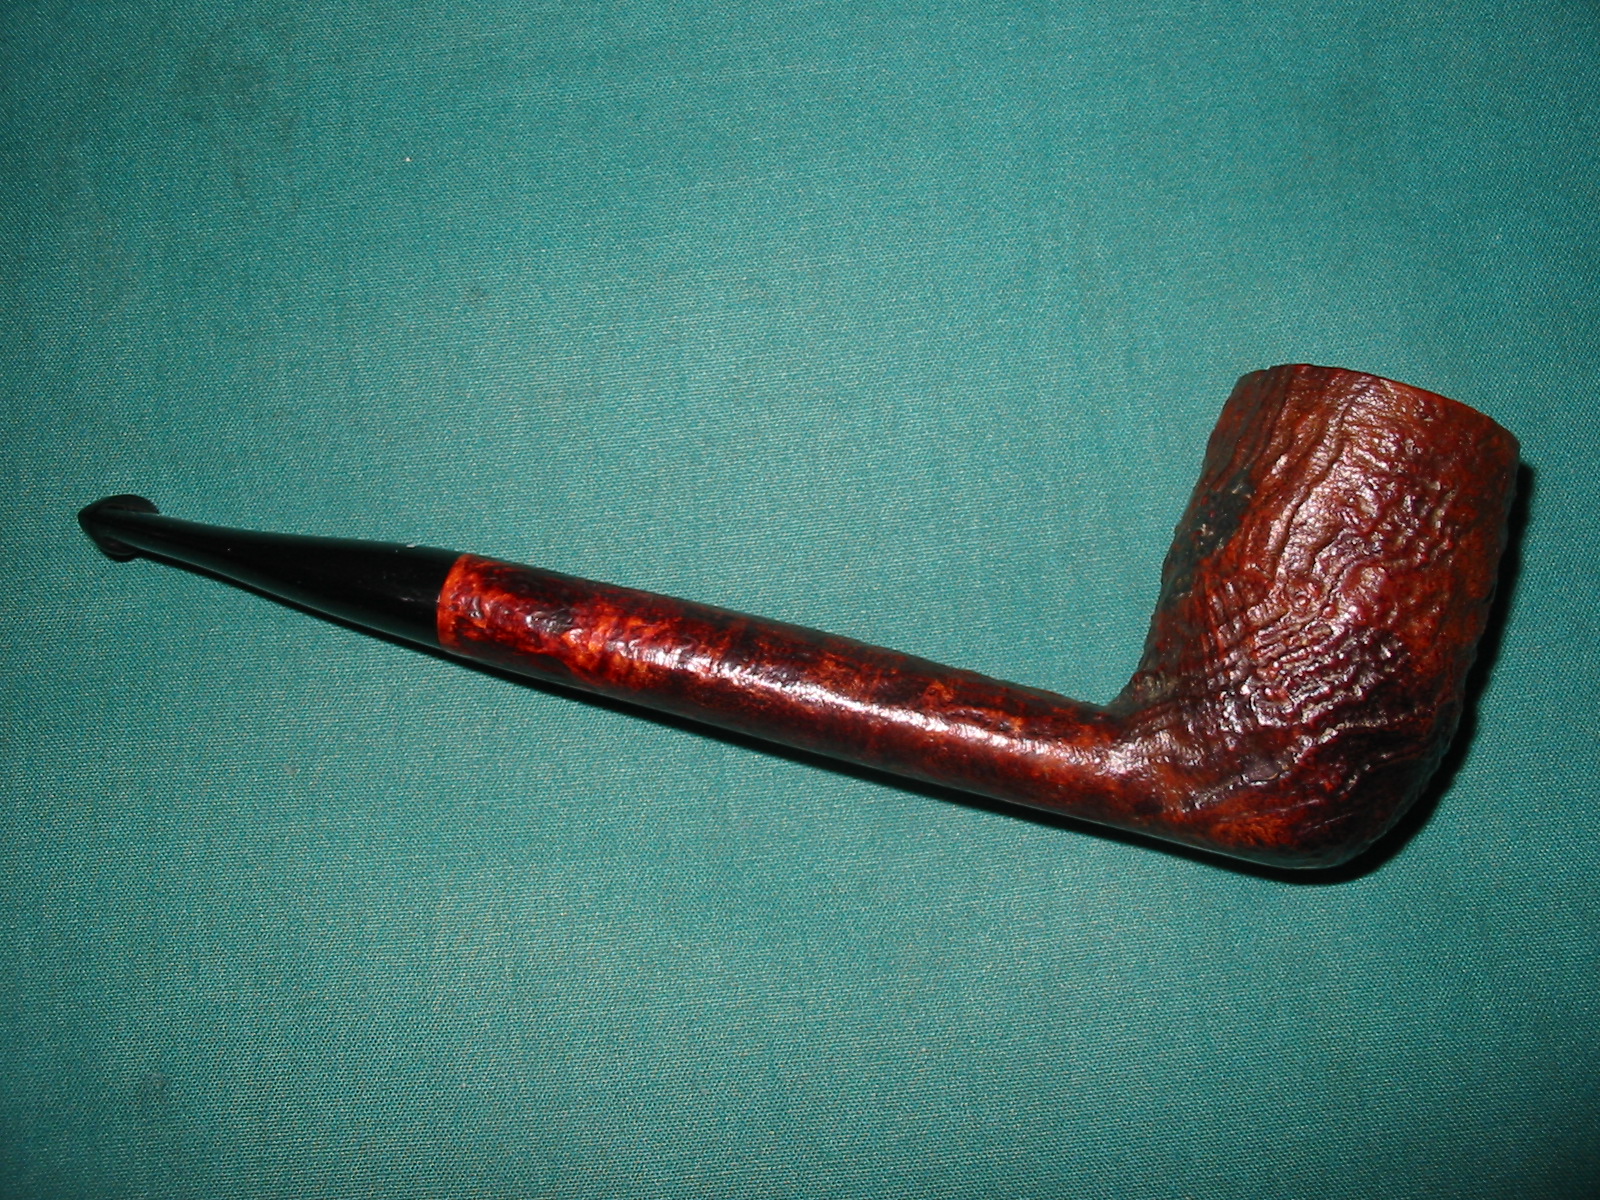
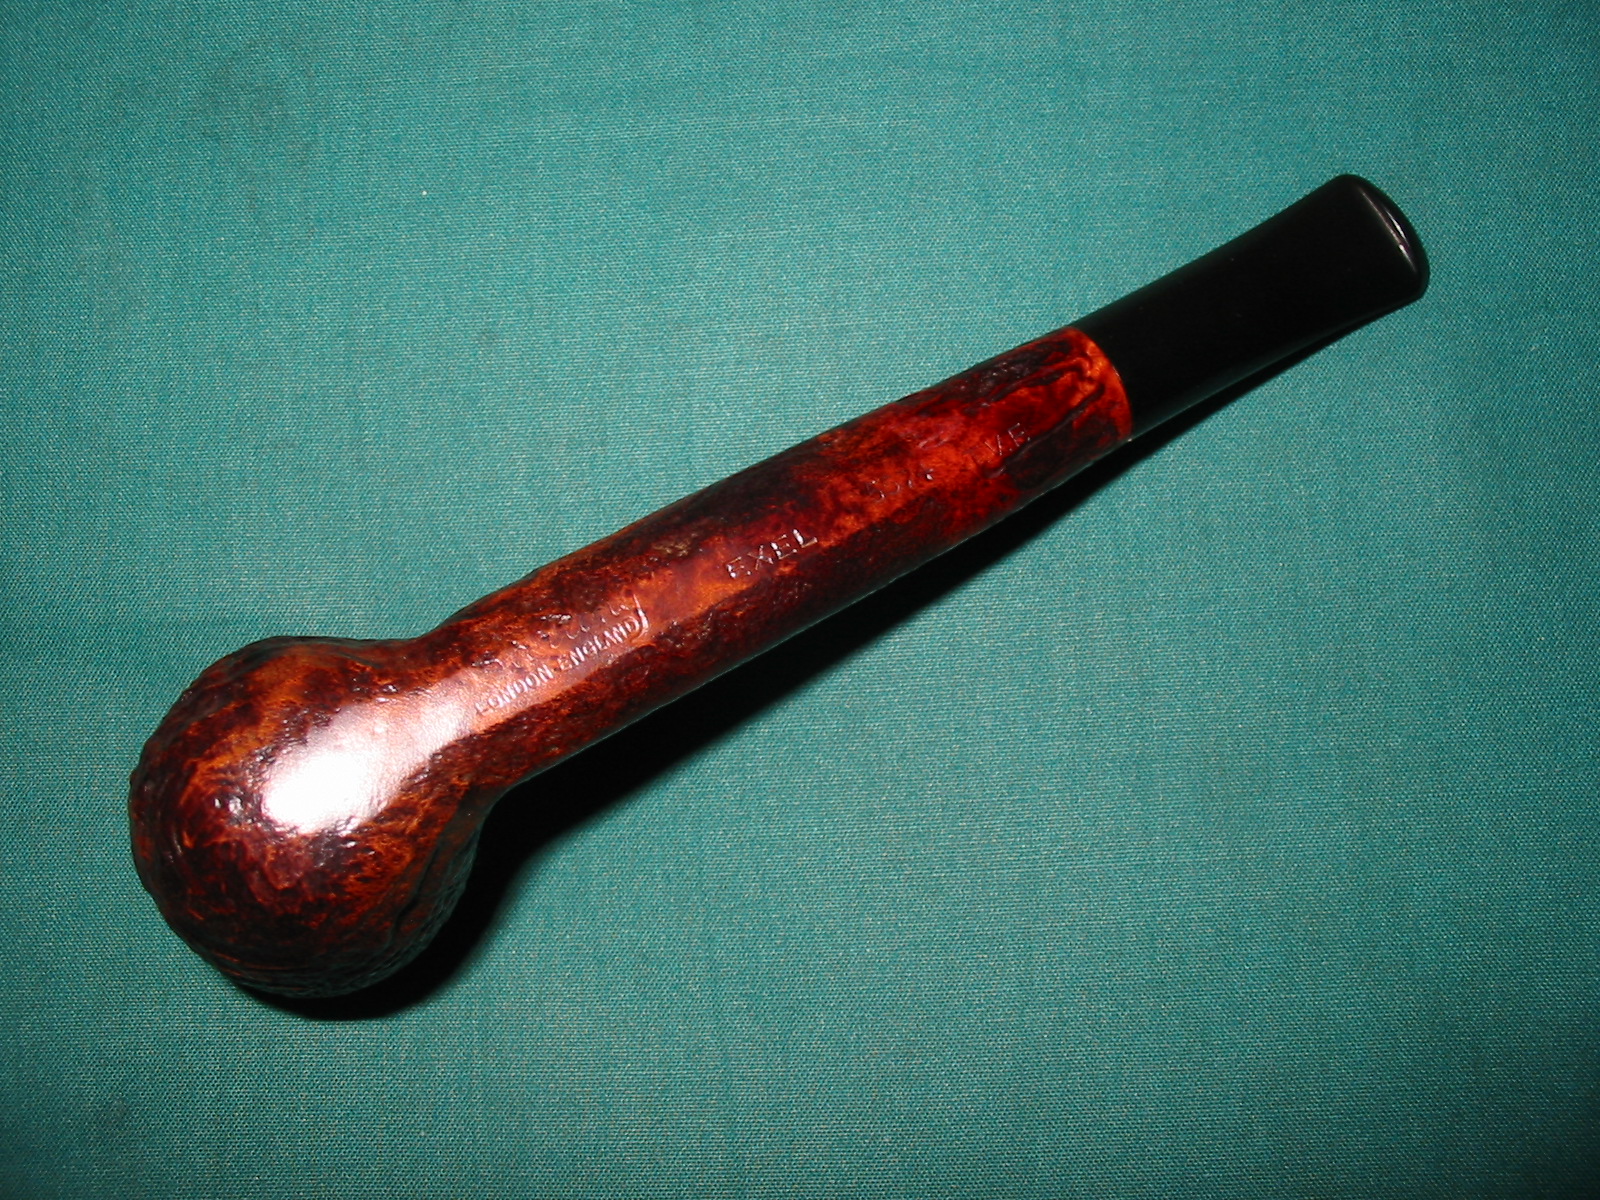
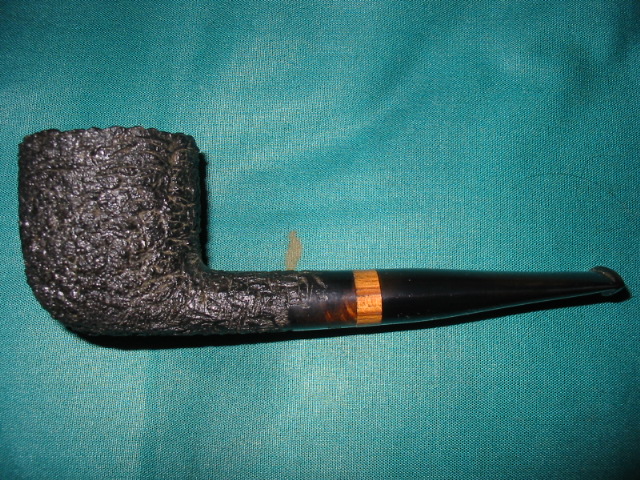
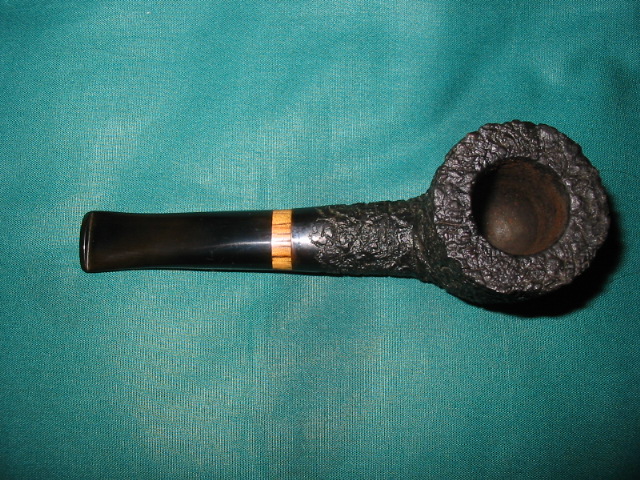
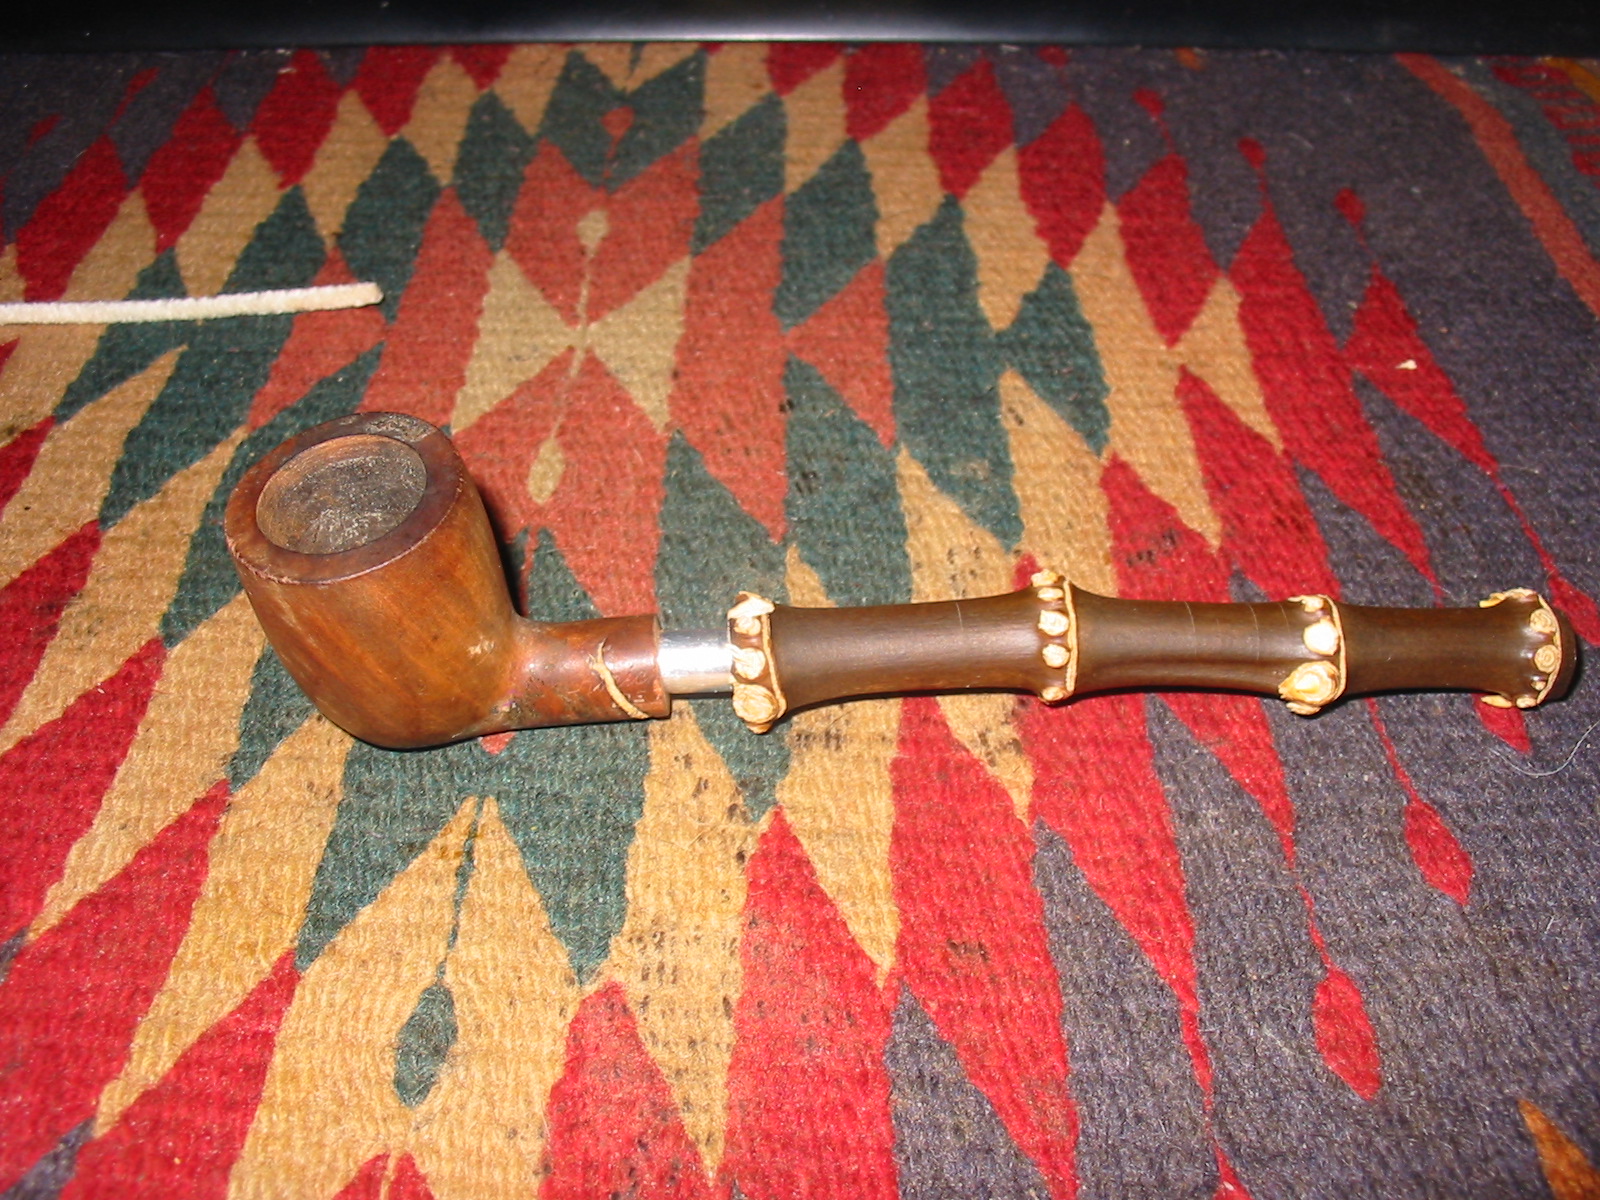
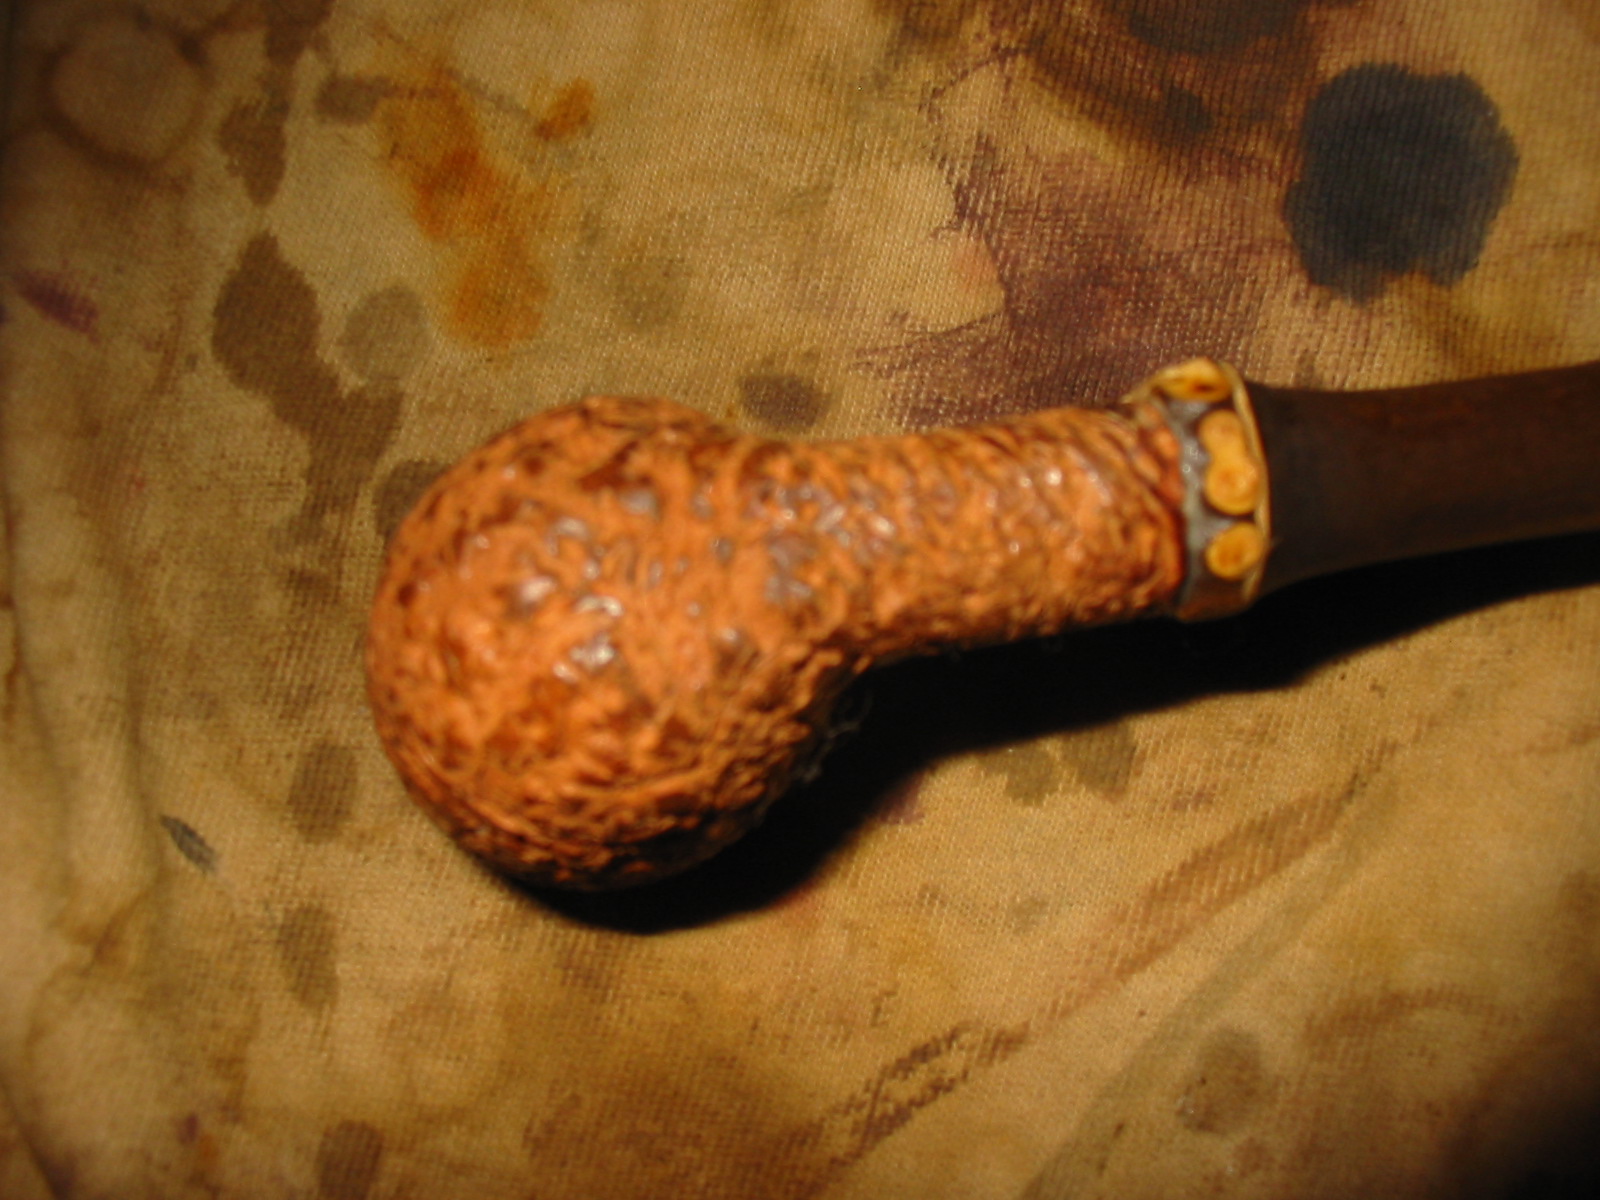
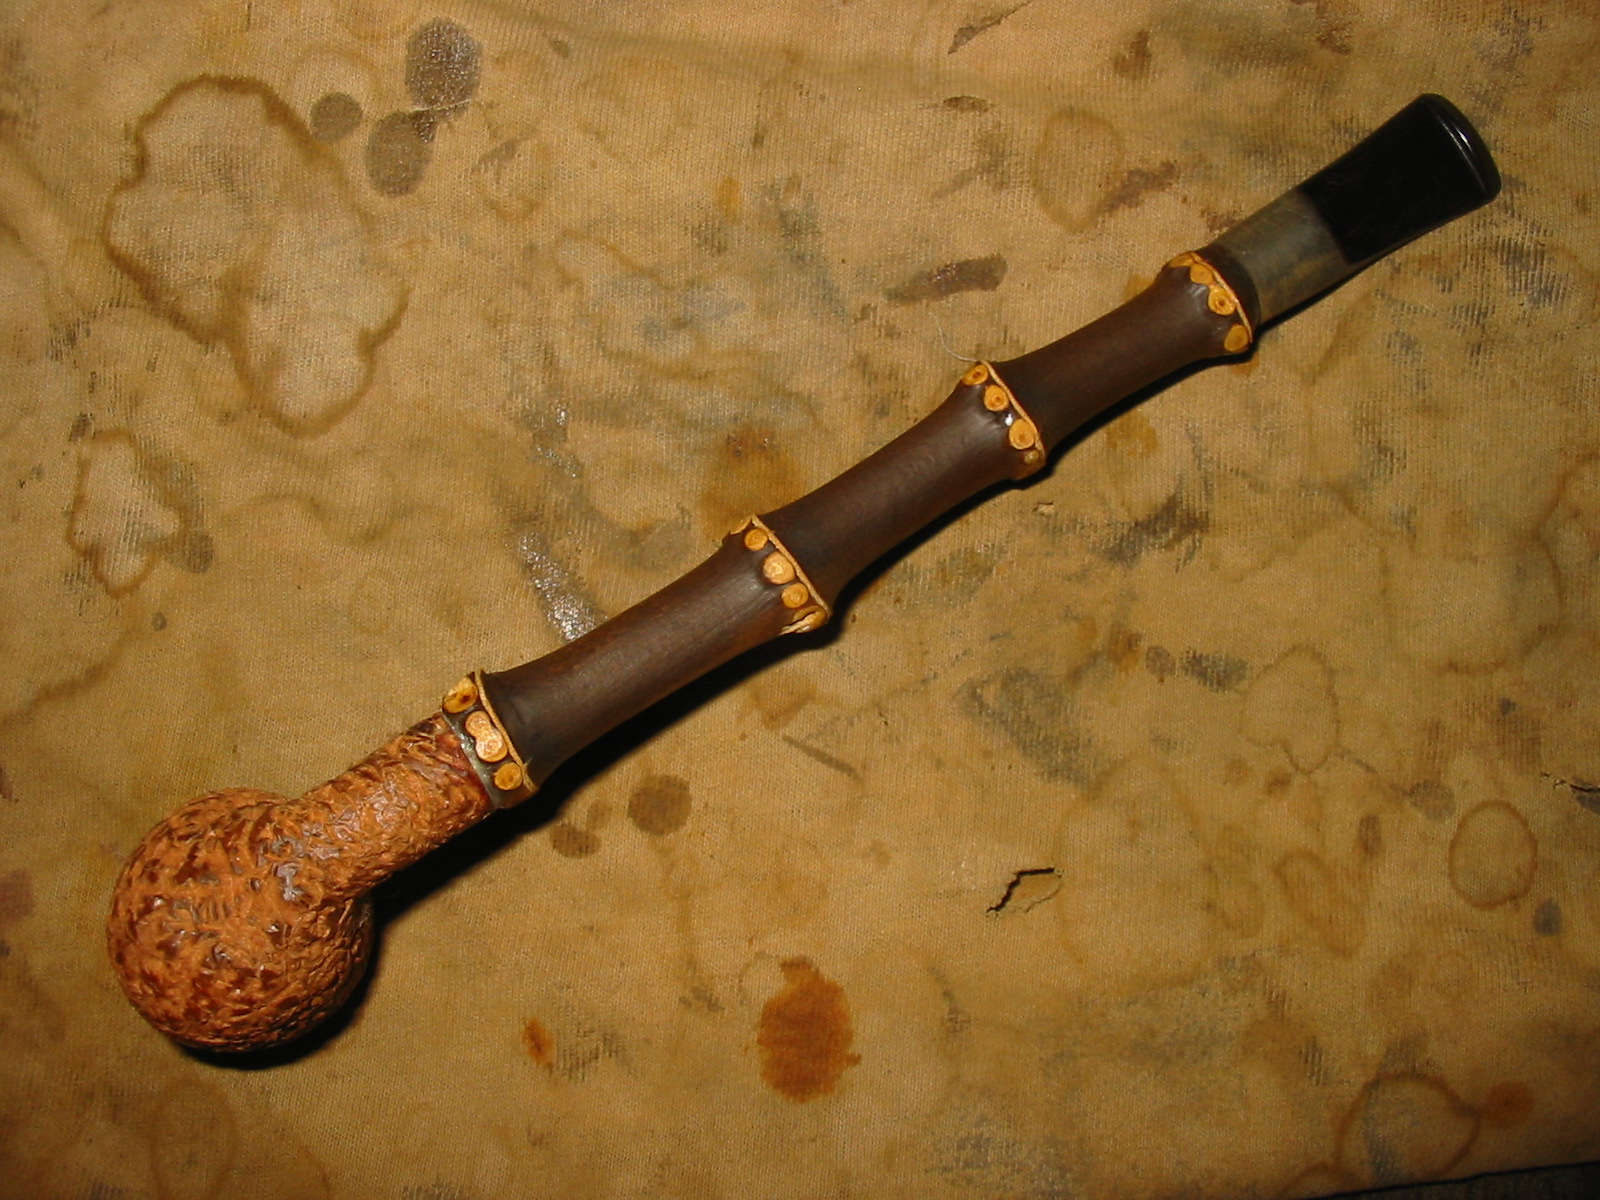
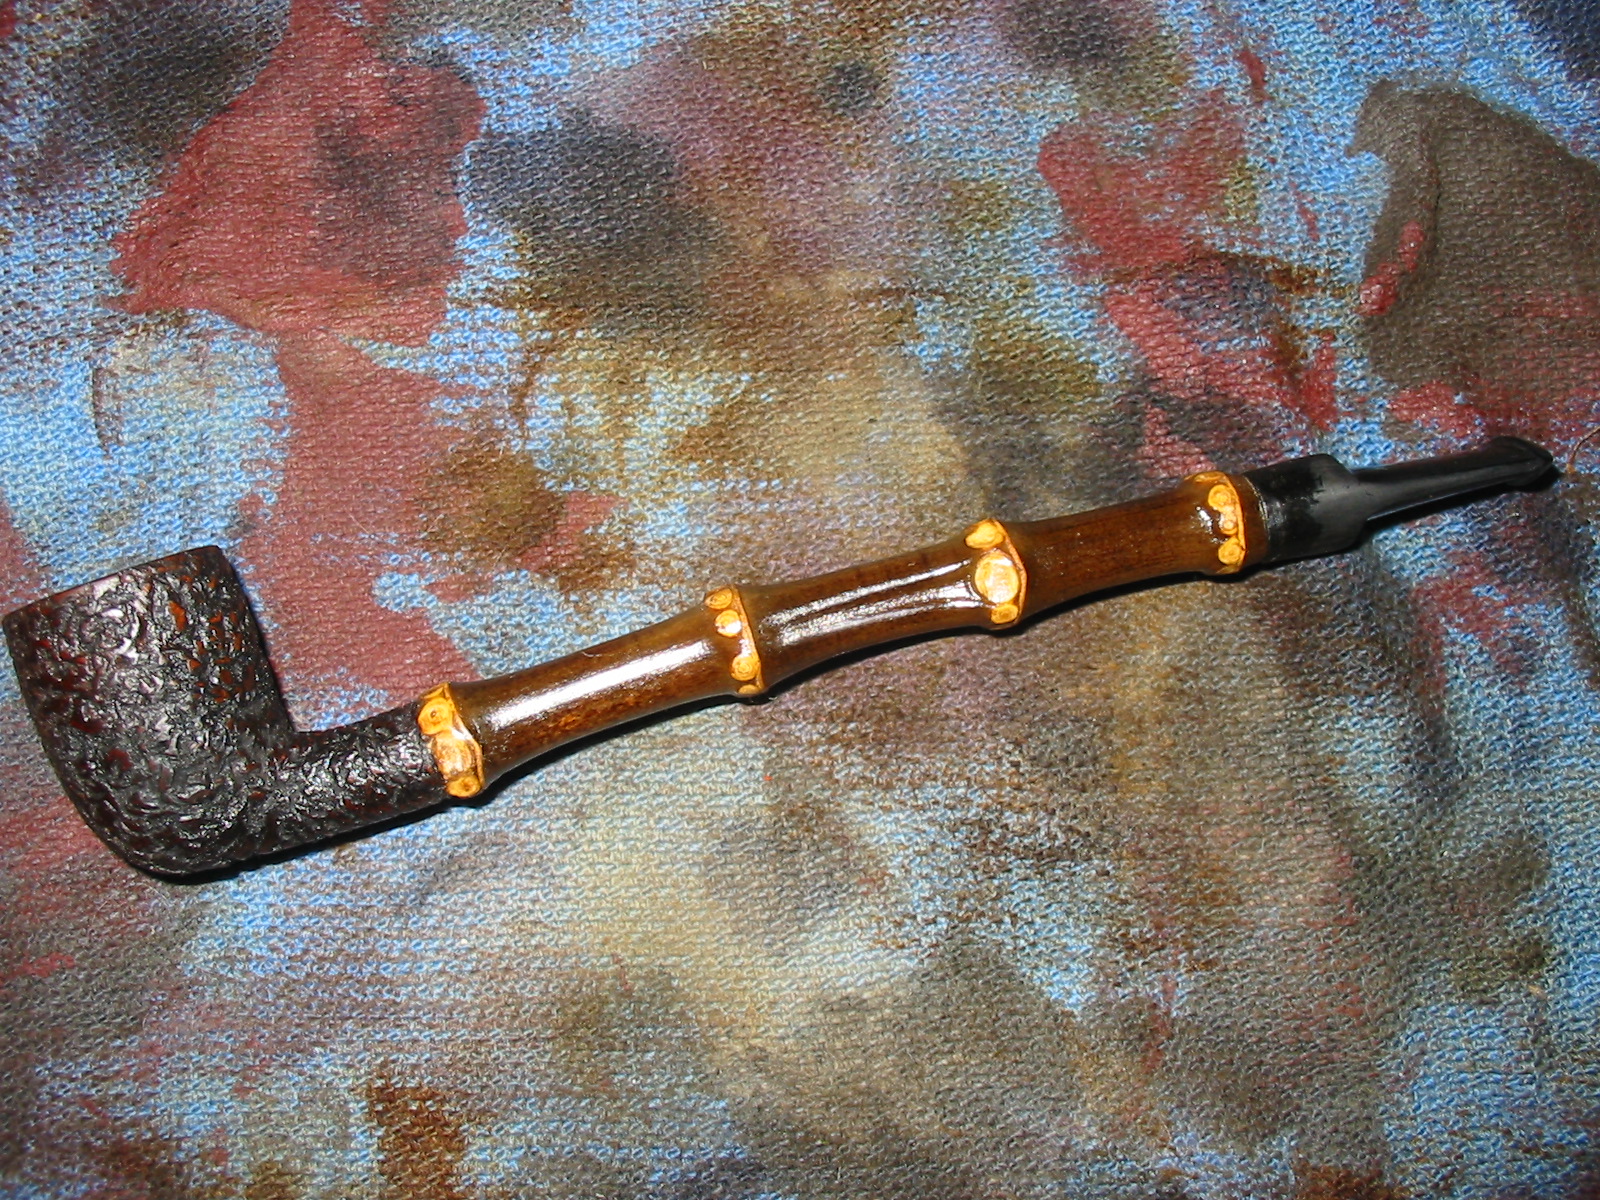
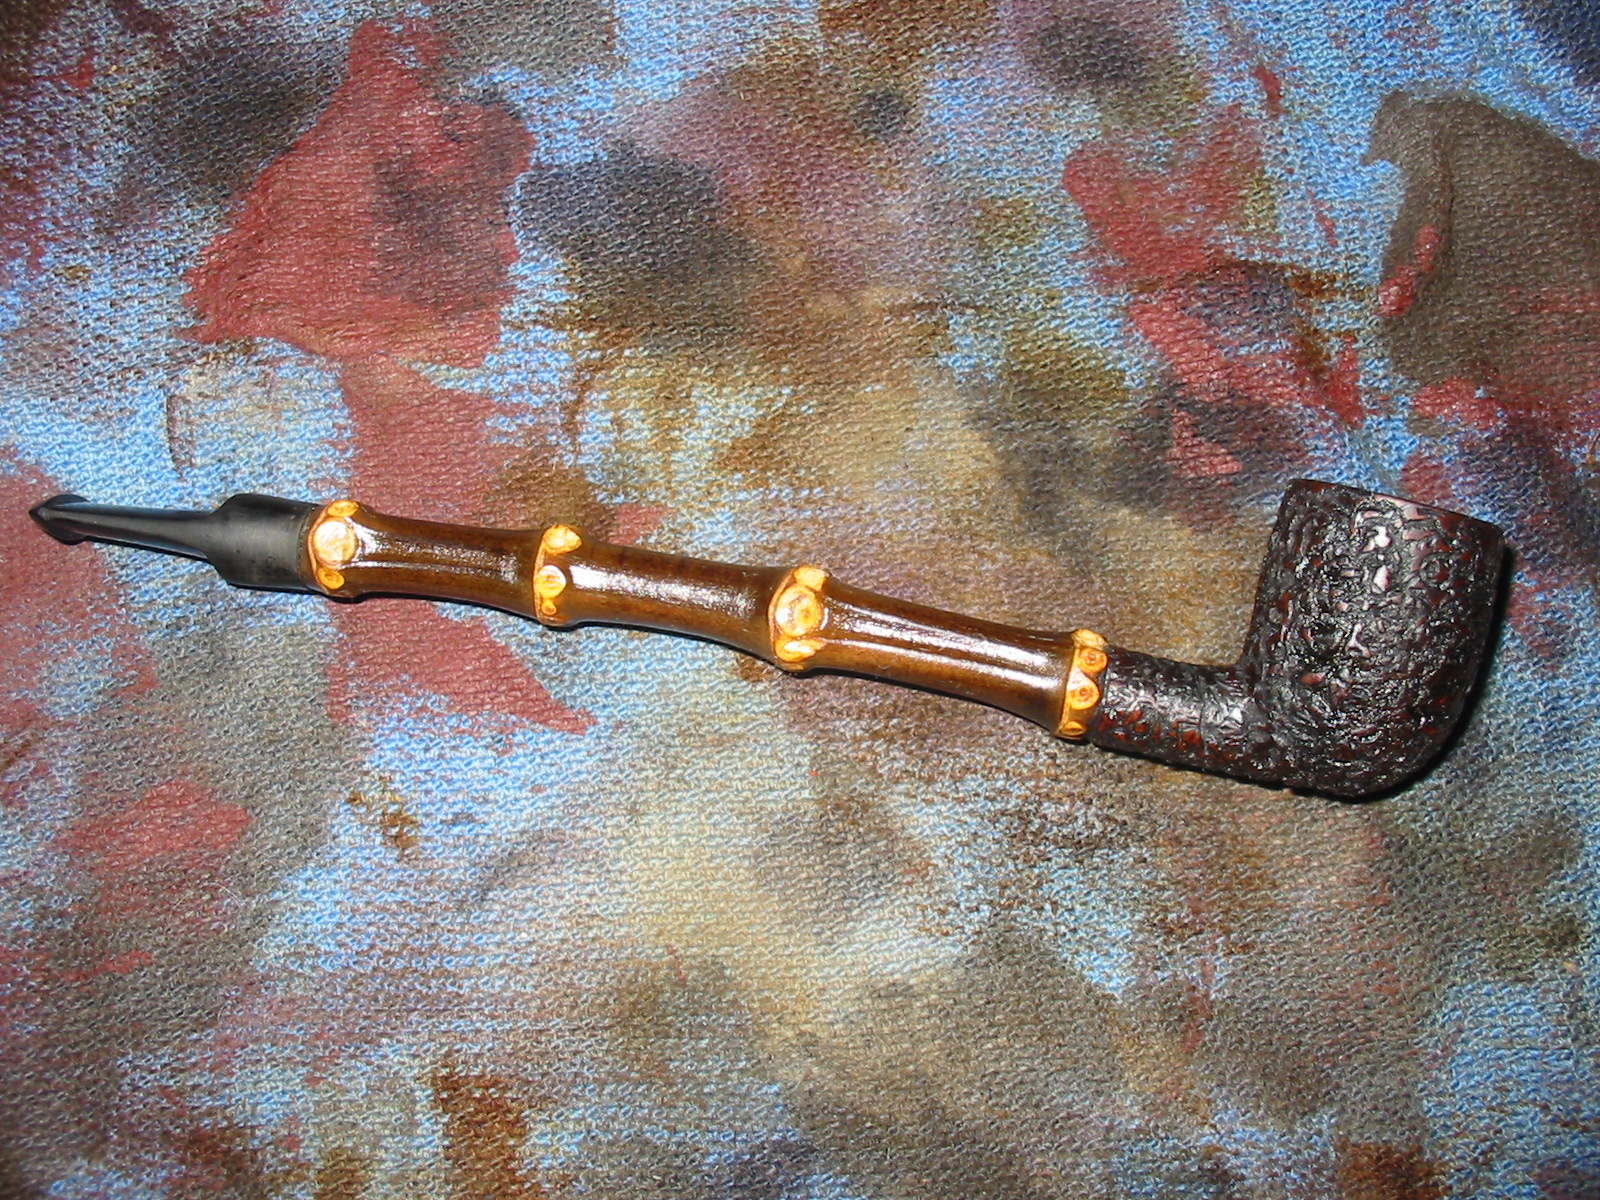
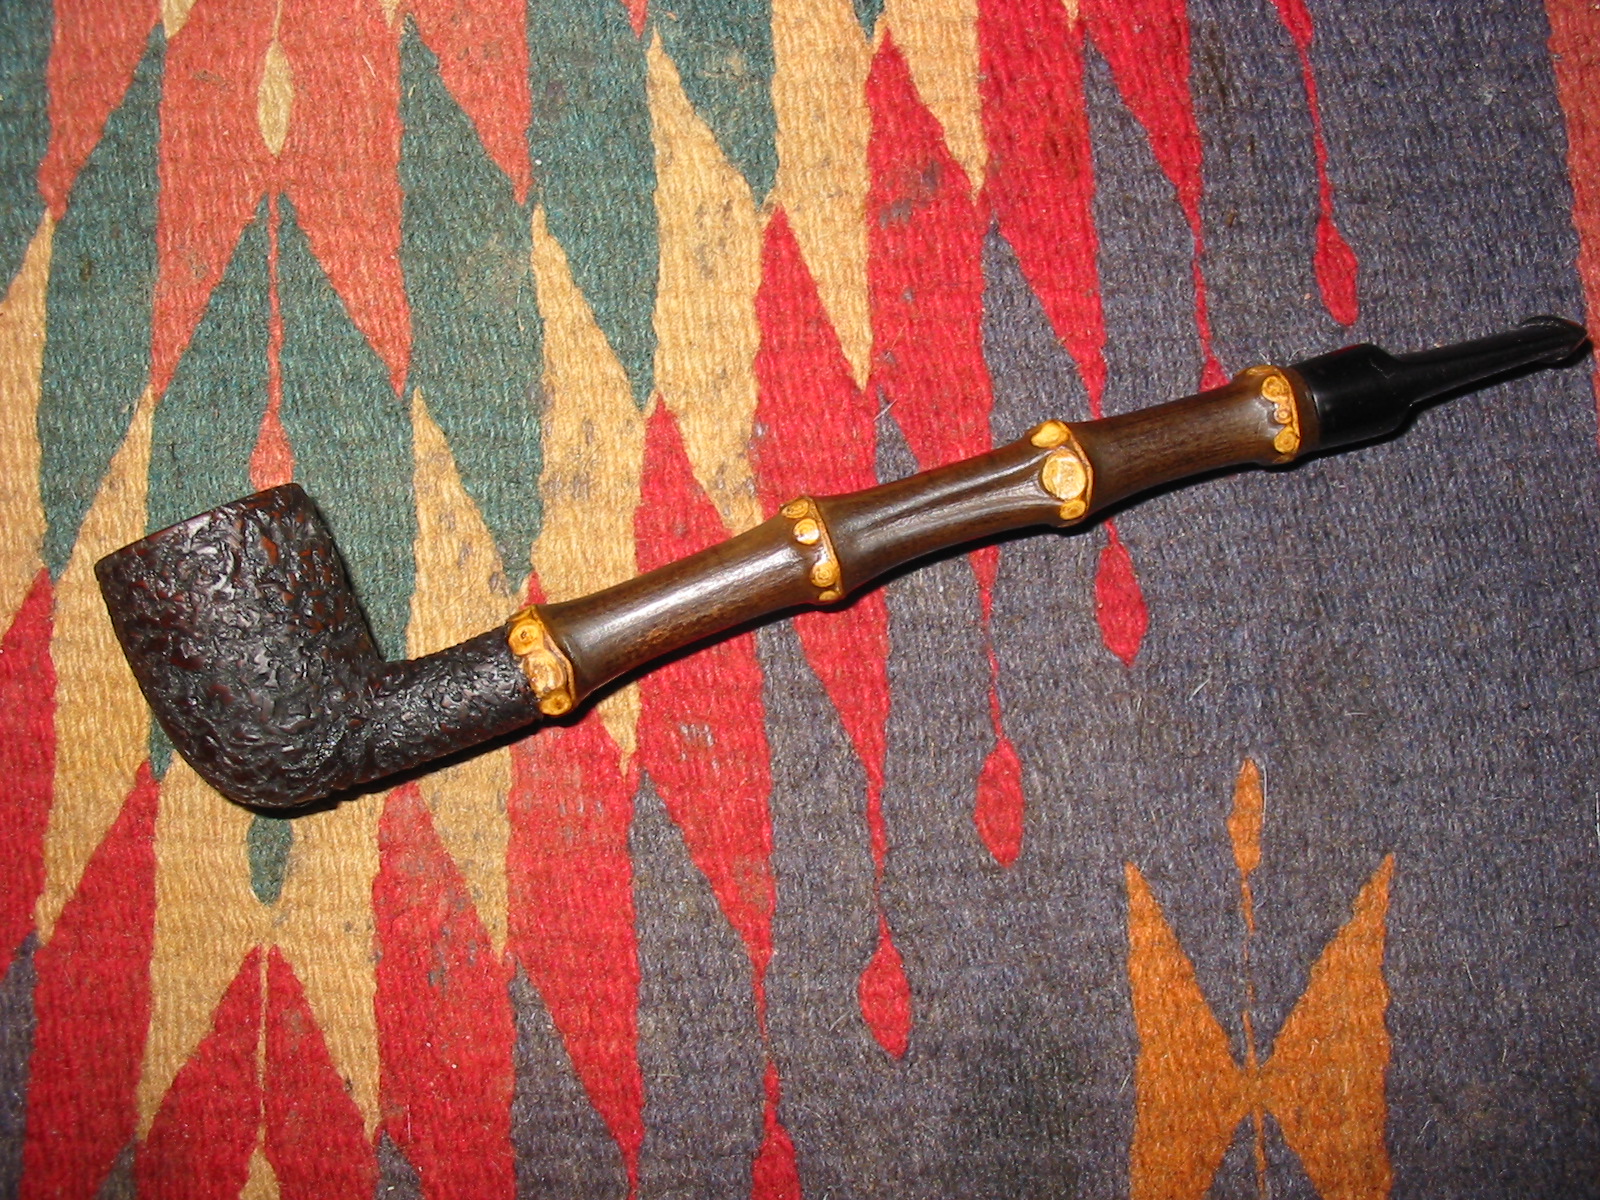
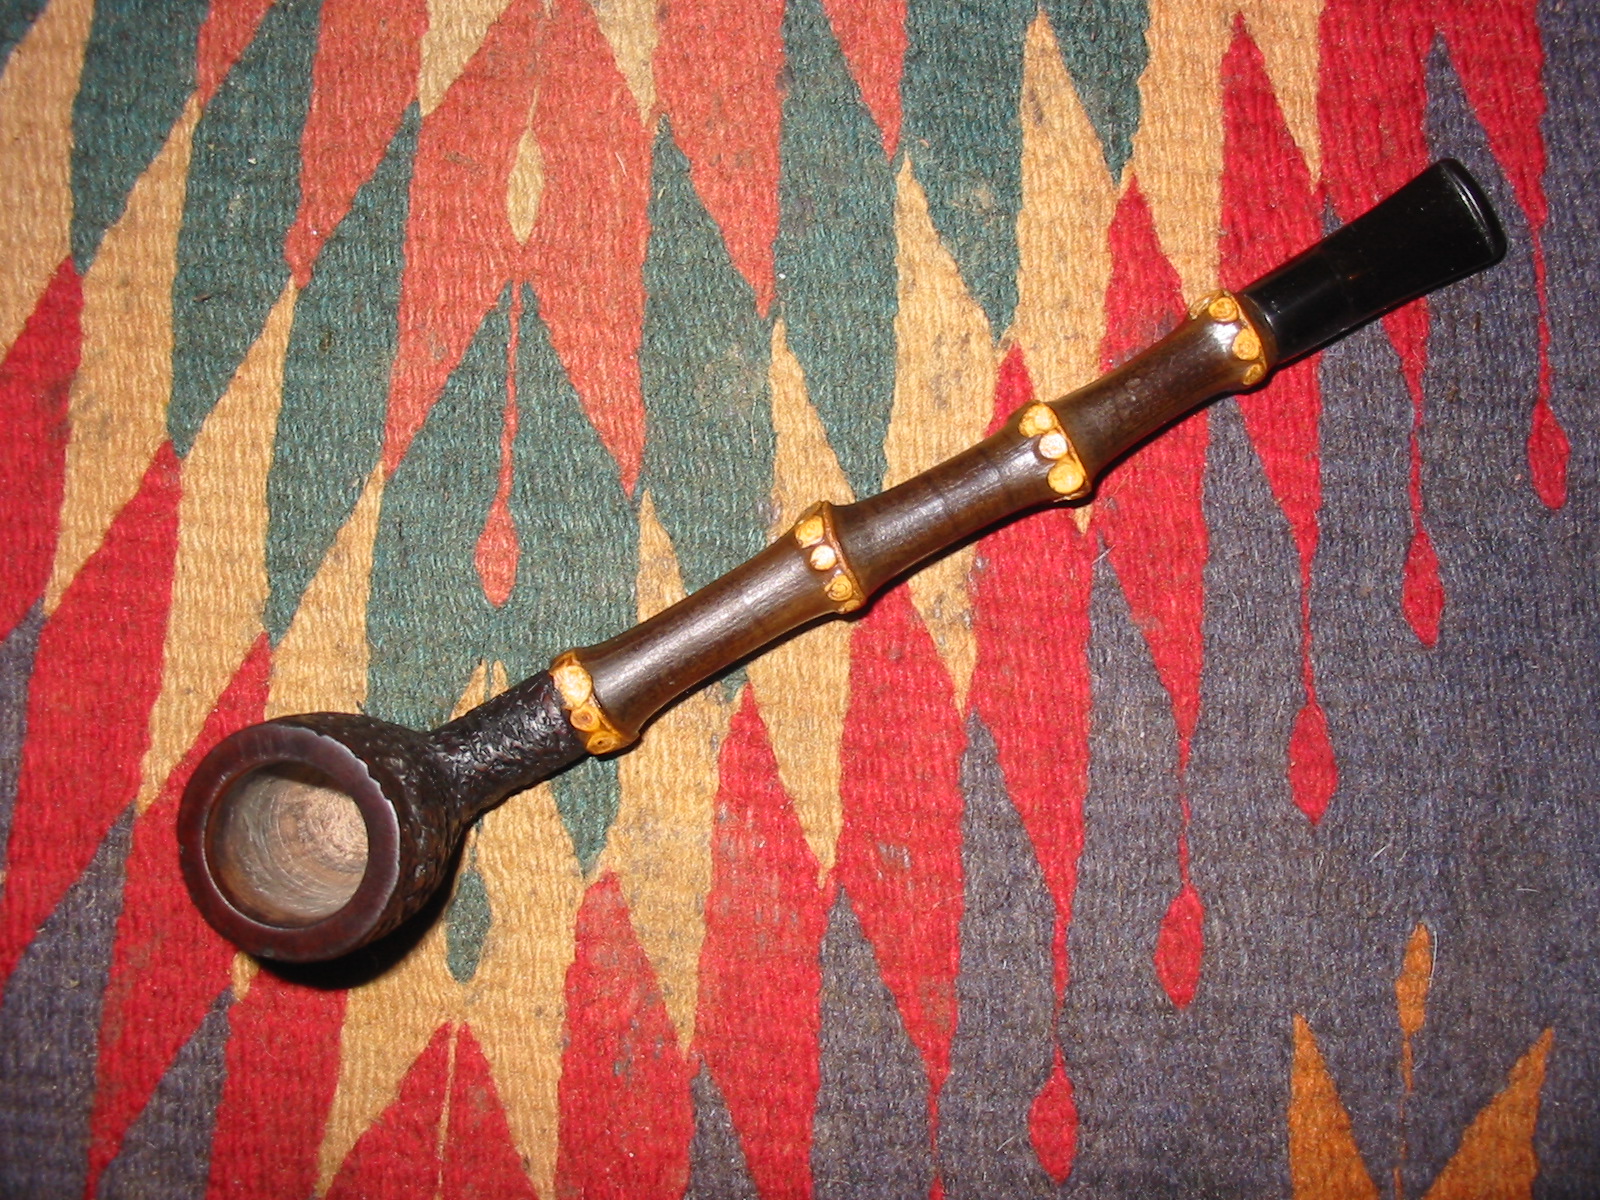
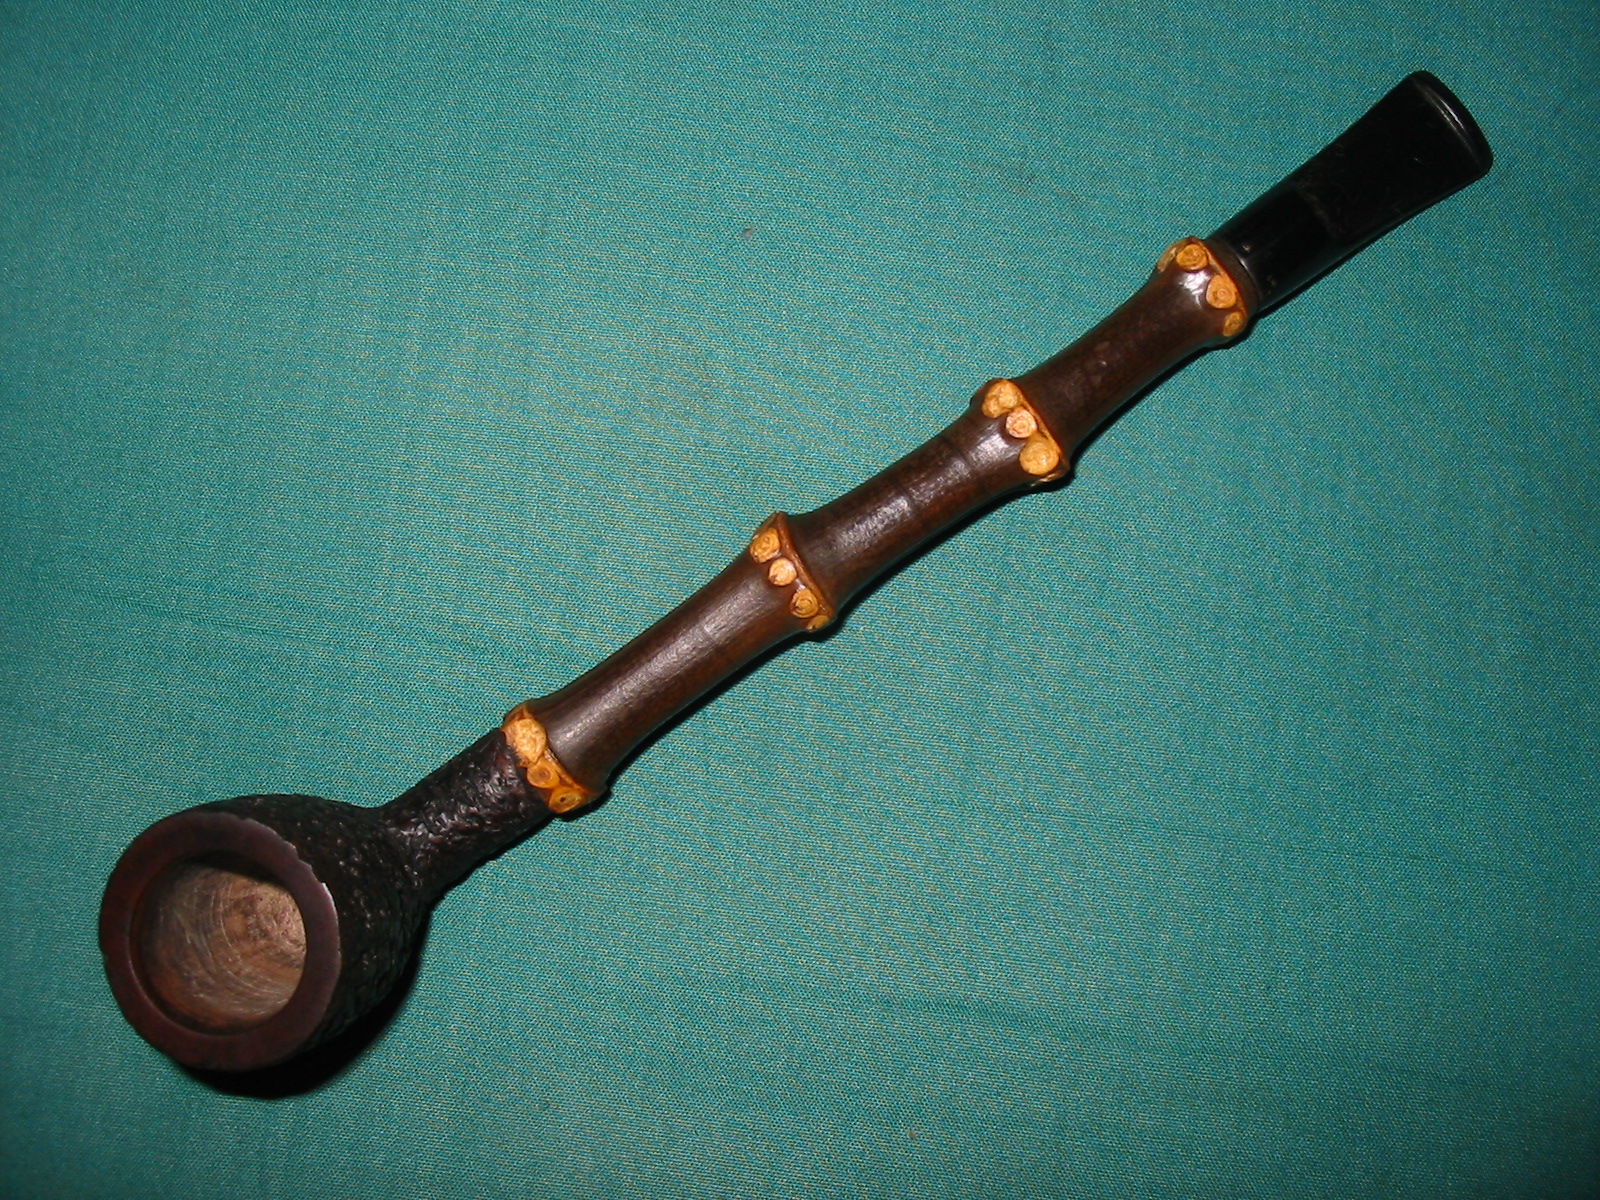
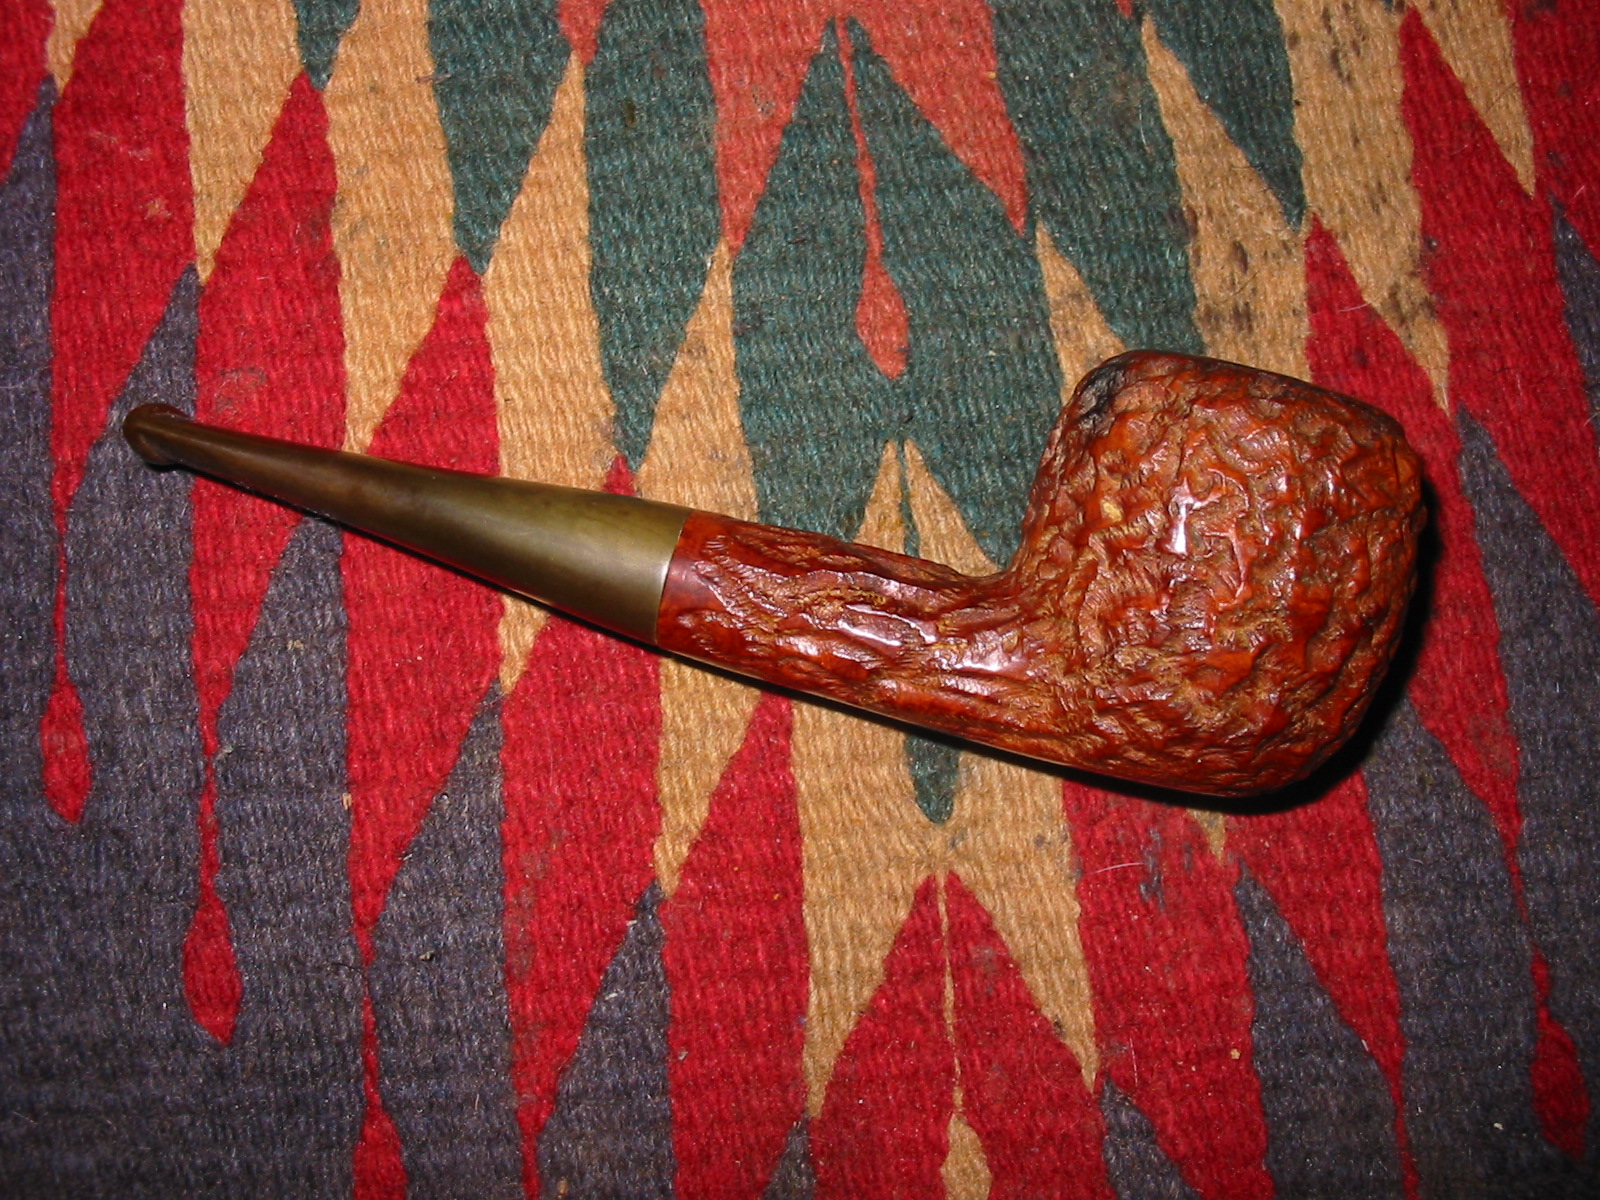
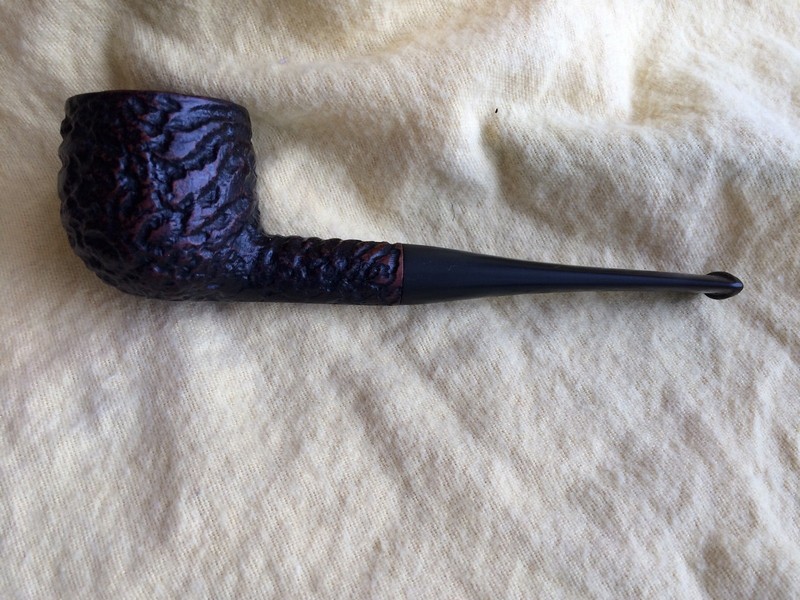
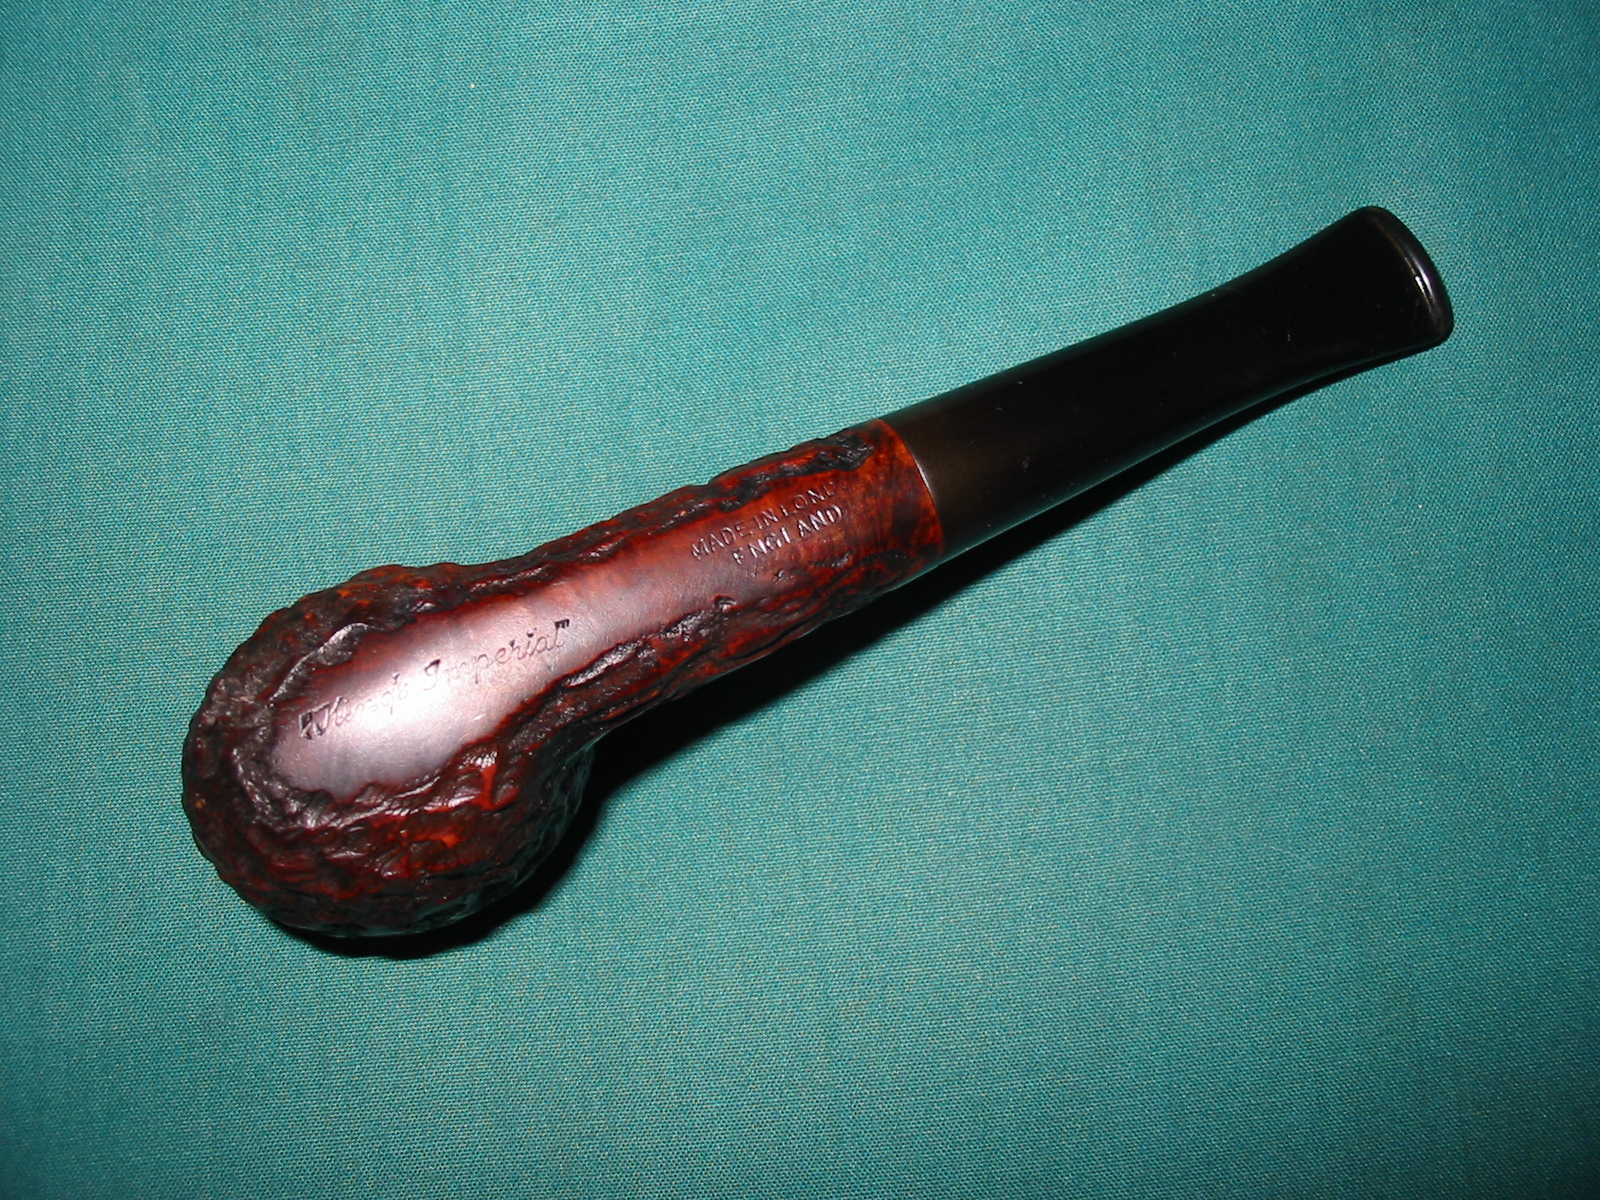
I rubbed the stem down with Obsidian Oil and when it was dry buffed the pipe and the stem with White Diamond. I was careful in my buffing around the stamping on the bottom of the shank as I did not want to further damage the stamping. I applied multiple coats of carnauba wax to the bowl (lightly touching it against the buffing pad so that it would not cake up in the rustication) and the stem. The finished pipe is pictured below.
IMG_6044

IMG_6045

IMG_6046

IMG_6047
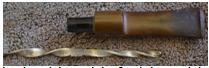
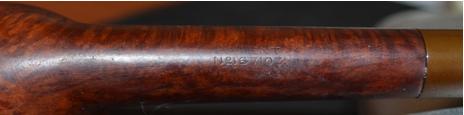
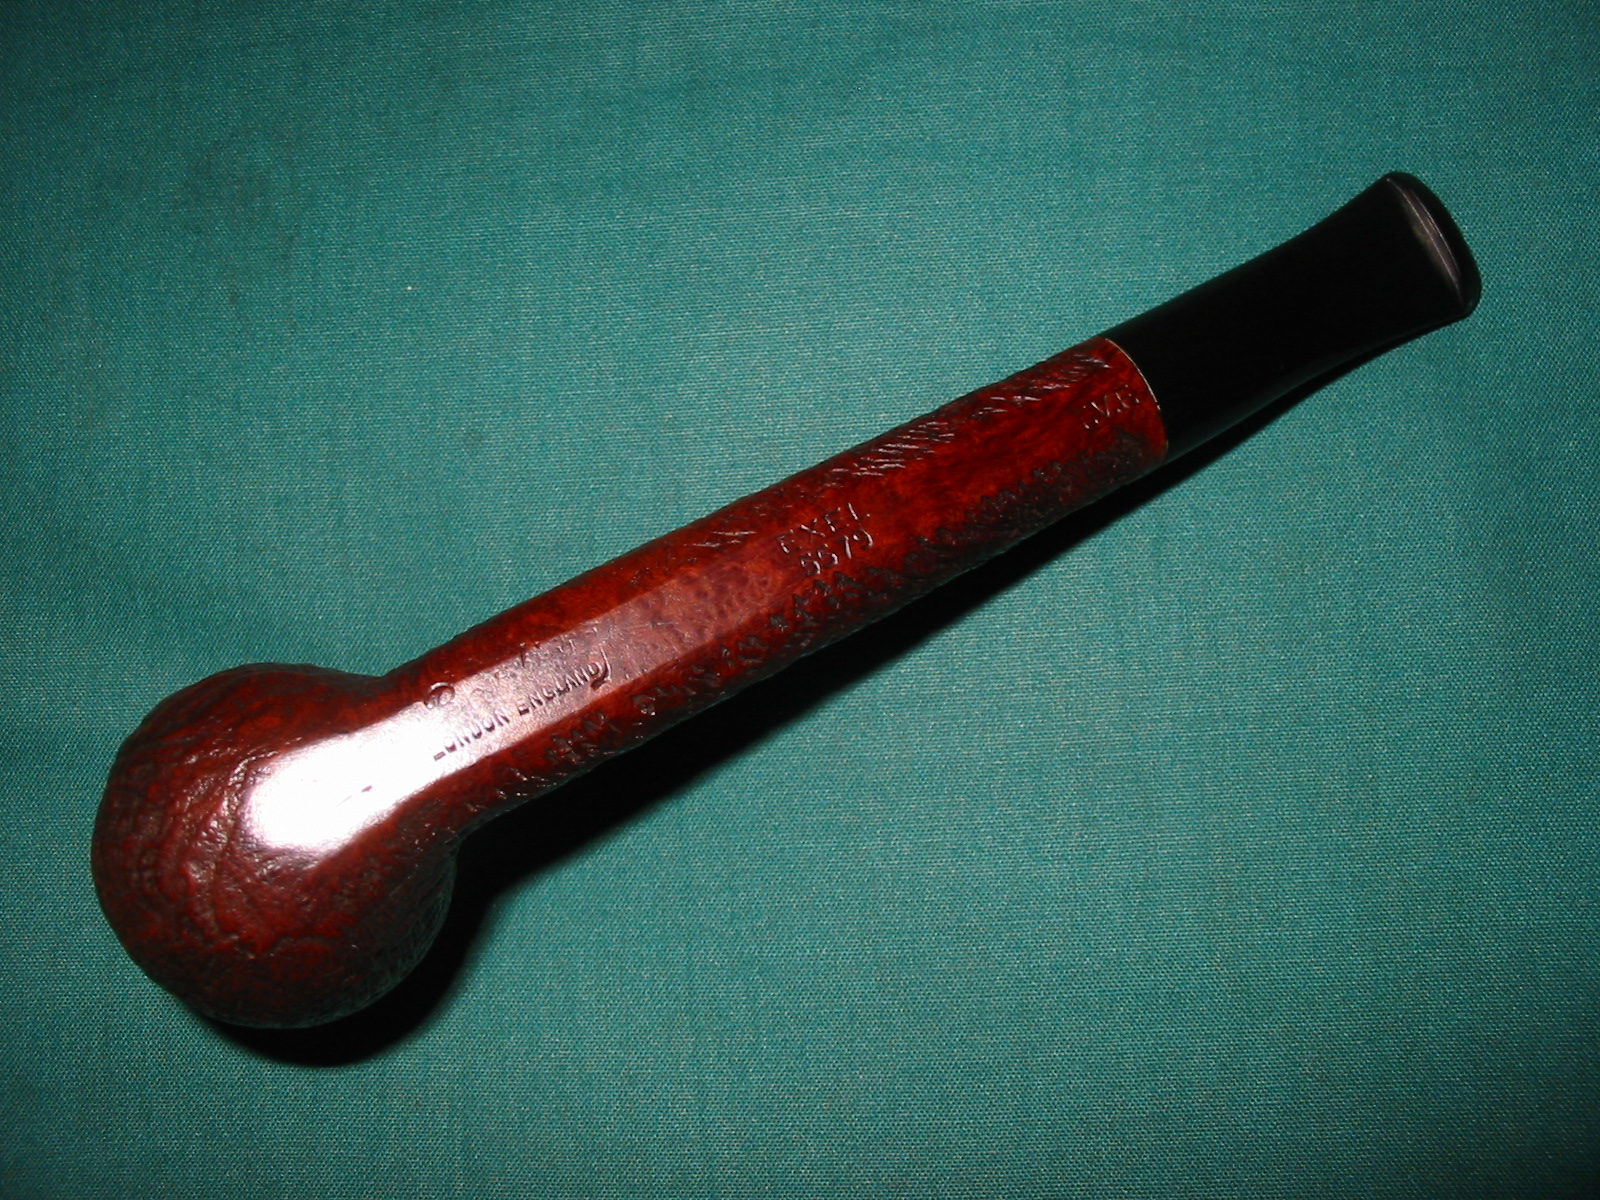
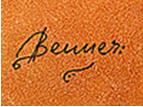
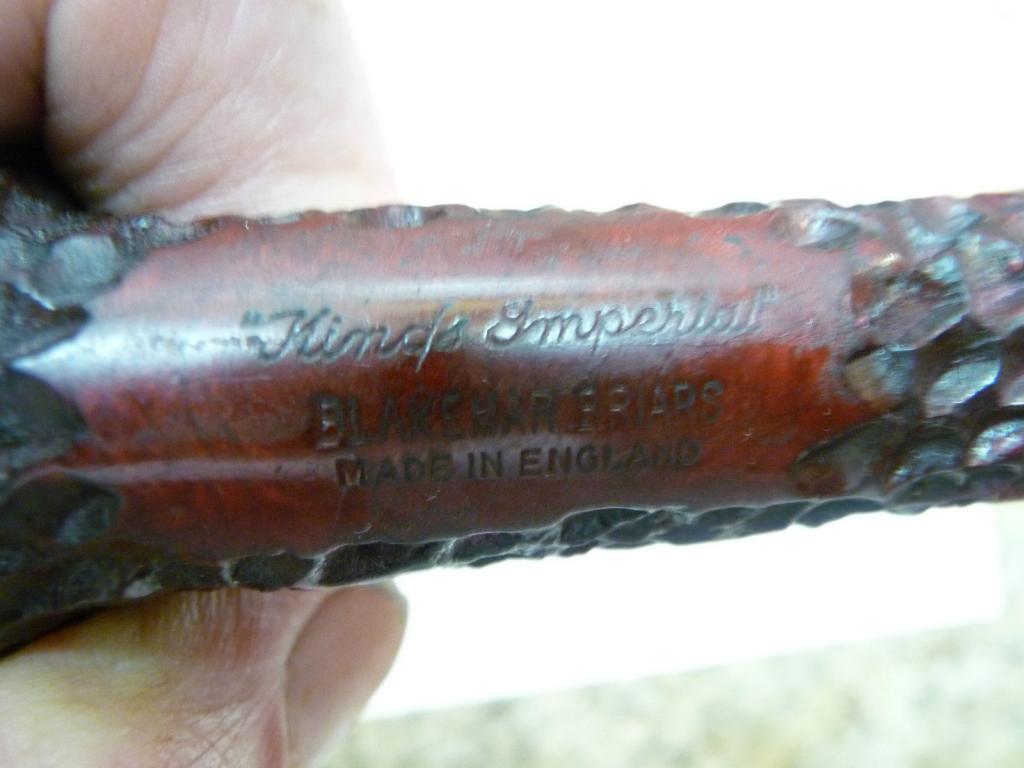
This morning while I worked on the pipe, I checked on the forums to see if there was anyone that had information on the brand. Bill, on Pipe Smokers Unleashed forum, had come across a photo online that had the same stamping but one additional line – Blakemar Briars. The stamping can be seen in the photo below. The “King’s Imperial” stamping was identical. My pipe was stamped Made in London England while this one said Made in England. The Blakemar Briars was the addition that gave the first clue.
T2eC16hy4FIZzOrmvBSc3d8PQ60_57
After reading this I sent an email to Mike Billington at Blakemar Briars to ask about the brand. He replied with the following email.

Hi Steve
It is possible that the “King’s Imperial” pipe was made here, it depends on the age to some extent. My Uncle used to make pipes for John Redman Ltd during the 60’s and 70’s and early 80’s and I continued to do so until the early nineties. The King’s Imperial range was one of John Redmans pipe ranges during that time, but Redmans also had them made by other pipe makers; they also did some pipe making “in house”- so while it is possible that the pipe was made here, it is not definite. From around 1992 until 2005 (I think), Redman’s brands were taken over by Gerald Grudgings of Loughborough in Leicestershire and during that time any Kings Imperial produced were definitely made here.

My memories only go back to the early 70’s but if you send a photo, I can tell you if it seems familiar to me

thanks
Mike

I immediately sent him photos of the pipe as it was when I found it, showing the stamping on the bowl. I am waiting to hear back from him. But I found it interesting to learn that John Redman Ltd had Blakemar Briars make pipes for them during the 60’s, 70’s and 80’s and into the early 90’s. To find out that King’s Imperial was a range of Redman pipes during that time was also invaluable. Some of the other historical notes of interest in Mike’s email were that Redman’s had others making pipes for them and that they also did pipe making in house. I am hoping that Mike can remember and give a bit of certainty to the dating on this old opera pipe. I will update this post as I gather new information.

Georg Jensen Pipe Brochure – Jacek A. Rochacki


It is great to have Jacek back and once more he provides us with great piece of tobacciana, pipe history with his scans of a Georg Jensen piece. In years past I have hunted for such information to help identify some of the Jensen pipes that I have come across. There was next to nothing available to help me in my quest. So, I for one say thank you to Jacek for providing this for us.

I did not find any booklets or pamphlets with pictures of Georg Jensen* pipes at Chris Keene’s Pipe Pages. All I found on the internet was this nice brochure from ca.1970: http://www.danishpipemakers.com/pdf/Georg-Jensen.pdf

So I thought that this modest pamphlet that I got in 1970 in Copenhagen might be useful for those of us who are interested in Georg Jensen pipes.
——
* “our” Georg Jensen – the pipe maker is not this famous Georg Jensen – Danish designer, silversmith and sculptor. More info is available here: http://thepipesmoker.wordpress.com/2011/10/15/old-george/
G Jensen pipes 1

G Jensen pipes 2

Walt Disney pipe –AJ Verstraten (aka Bananabox-Ninja)


I am happy to see AJ back at his refurbishing work and writing about what he is working on. This pipe is particularly interesting in that it is a Disney Pipe. I have not seen much about these pipes and have enjoyed AJ’s work and write up. Thanks AJ for doing this and allowing us the pleasure of seeing the Disney pipe.

Greetings. When I first joined the PRF, a little over 18 months ago, there was a subject on the forum in which members could share with the other members what they thought was their dream pipe.

I was still rather green behind the ears when it came to brands, shapes and sizes so I didn’t reply in it at first. However, after a few months I found this article on Pipesmagazine.com:
http://pipesmagazine.com/blog/pipe-smokers-of-the-past/walt-disney-american-icon-inventor-of-pop-culture-pipe-smoker/ It was an interview with Brian Levine who explained about the fact that the Walt Disney Company sold pipes and pipe tobacco in the parks up until 1991/93.
This tickled me; the fact that the ‘wholesome WD Company’ sold tobacco and especially pipes with their logo on it was too good to be true. It was then that I decided a Walt Disney pipe would be my dream pipe.

So I shared this with my fellow Dutch pipe smokers on the PRF and explained that since I live in the Netherlands it would be an interesting challenge to try to acquire on for a reasonable price.

Thus my quest started and ended a mere three weeks later when I was not out bid on this eBay lot:
000

A tobacco pot with two pipes, the one on the left being a Disney pipe. The closing bid was $19.53 for the whole lot though my mood was a bit adjusted when I found out the shipping cost would be $42,-. Still, corrected to Euros it was a nice price for something so rare for a European.

When the pipe came it was very well packed and had survived the transit wonderfully. The other pipe was a Kaywoodie which I will write about in the future.

The first thing that struck me was that the pipe seemed to be only smoked a few times. The mouthpiece was oxidized through time and air but on the whole it was in good condition.
001
The inside of the bowl was lined with meerschaum, wetting a finger with spit and pressing it against the meerschaum I concluded it to be pressed – meerschaum instead of block meerschaum.
002
A rule of thumb (no pun intended :-)) is that when your wet finger sticks to the meerschaum it has a higher absorption rate and is thus most likely to be block-meerschaum. The pipe also confirmed the story from Levine that most of these pipes were basket-pipes stamped with the WD logo, though this one was of better quality than I expected.
003
First I cleaned the inside with 96% alcohol and pipe cleaners. They came out rather clean on the first go.
004
The soot and coal on the rim were rubbed off easily with a little spit and an old sock. And with 1500 grit sandpaper I smoothed the bowl a little, I decided to leave the brown spots on the meerschaum as I didn’t want to ruin the look of the pipe should the spots run deeper than I anticipated.
005
Then using the motor and abrasive wheels I removed the oxidation on the mouthpiece.
And with a needle file the hard to get oxidation near the tip. The picture is made just after the abrasive wheels.
006

The pipe before buffing

The pipe before buffing


The buffing was done with brown paste, followed by white, carnauba wax and a buffing on the fluffy wheel.
008

Bewlay Beauty and the Playboy Meer Beast – Robert M. Boughton


It is once again my pleasure to present an article by Robert Boughton. Robert has written several pieces on his work in refurbishing pipes. He always has a great way of not only describing the process he uses in the work but also does very thorough research into the background of the pipe brands he works on. This article covers his work on two pipes that recently joined his rack – a Bewlay and Playboy meerschaum. Thank you Robert for your willingness to share your work with us.

Bewlay Beauty and the Playboy Meer Beast Guest Blog by Robert M. Boughton
http://about.me/boughtonrobert Photos © the Author
Rob1
“Destiny has two ways of crushing us – by refusing our wishes and by fulfilling them.” – Henri Frederic Amiel, Swiss philosopher, poet and critic

INTRODUCTION
As I admitted in a thread on the Smoker’s Forums, I am the first person to acknowledge that I suffer from a severe case of Pipe Acquisition Disorder (P.A.D.), and so I take both of the above admonitory notes with all due respect, even though I made up one and have no intention of troubling myself with the other. With that in mind, during the past two months my pipe acquisitions have reached epic proportions, at least for me, at 16 additions and one more (a 1980s series Peterson Mark Twain) I am committed to buy on Friday. I really have no choice about that last one, you see, as my word is as good as the metal of the band in my Peterson Gold Spigot Bent System natural grain.And to further my own defense, I should add that I received a nice tax refund and pay raise.Besides, there are far worse things on which to spend ones money, and I have no other serious vices, even having given up alcohol 26 years ago for reasons obvious to everyone who knew me back in the day. Really, when you look at the situation from all sides, it’s more of a quirk than a disorder. Right? I say the habit should be called Pipe Acquisition Quirk, or P.A.Q., to downplay the association of the condition from that of a mental disease.At any rate, that is quite enough of that.

My goal here, as I have already tried to begin making clear, is to have some fun describing the excitement of the hunt for little gems of pipes that can be found in odd locations, such as second-hand stores and antique shops, and the special thrill when it is apparent that the rewards located need some attention and care to restore them to their rightful glory. The latter aspect of the overall adventure is the best part for me, anyway. That is why I was almost disappointed to find that the Knickerbocker and Winston pipes I picked up on Tuesday are in pristine condition and have never even been smoked. If you ask me, I have to say that response to buying pipes is more twisted than being in the habit of acquiring one at every turn.

But as I already suggested, there is nothing like the clandestine hunt for the prized pipe, not online or in the regular haunts but in the wild, so to speak – lurking out there in a dark corner of the jungle where everything from the lowest to the highest example of the art of pipe craft might be found by the crafty hunter, just waiting for the right person to place in his sights and liberate the artifact from its unwitting seller for restoration and lifelong appreciation.

Such was the case this Friday past, while I was driving to my weekly pipe meeting earlier than usual and the notion hit me to veer from my regular course for a stop at an unassuming and poorly situated antique arcade on the east side of town, whence I had heard from a fellow pipe club member of incredible deals on excellent pipes. However, by the time I arrived at the scene, my friend, who seems to have a touch of the old P.A.D. himself, had pretty well cleared out the available stock and was remembered with cloying fondness by all of the vendors. Still, there were five left – the two I bought last Friday, which are the subjects of this blog, the other pair I purchased on Tuesday and one I let someone else have. Note I do not call it the one that got away because had it been a fish I caught I would have thrown it back in the water.

THE RESTORATIONS

I.The Bewlay London Made Hand Cut Spiral
Rob2 Bewlay & Co., Ltd. was an English chain of pipe shops for about the first half of the 20th century until it was sold. [See Steve’s excellent recap of everything I found in my own research and more at https://rebornpipes.wordpress.com/2014/03/07/house-of-bewlay-pipes-tobacco-leaflets/.%5D The general consensus is that Bewlay sold only Barlings, Charatans and Loewes with the Bewlay name and mark on the pipes. Another source included Orlik in the list. But regardless of the total roster of pipe crafters that supplied Bewlay, everything they offered was considered to be of high quality.

Such is the case with my little beauty of a Bewlay small billiard (1-½” x 5”). I have had a difficult time trying to match this pipe with its maker. Even after viewing many samples of all of the above pipe crafters’ works, it is with uncertainty but sufficient confidence that I attribute the pipe’s origin as Barling.rob3Most of my pipe friends to whom I have shown the Bewlay commented right away that it looks like a Barling. My only serious doubt arose from the little billiard’s bizarre, if I may be so bold as to describe it, tenon bit. Here indeed is a bit fashioned by an evil dentist tossed out of the profession and turned stem-maker. My friend and mentor, Chuck Richards, calls it a “funky screw,” but I prefer corkscrew or even drill bit. The thin half of the screwy bit, which bears the same Patent number found on the bottom of the shank – № 167103 – as shown above separate from the bit, fits snugly through a thin horizontal slot in the front of the tenon. The wider half slips into the mortise. Whatever this bit’s real name (and I would very much appreciate a message from anyone who knows the answer), it is removable for cleaning and perhaps replacement if necessary, which is not unimaginable given its frailty. To tell the truth, in fact, I bent mine with almost no force applied when I first discovered its presence and just had to probe to see what I could discover. Well, I soon found that the odd bit is at least like aluminum and can be removed intentionally or not, and bends with alarming ease, but then again bends right back just as handily.

The Bewlay/Barling Spiral billiard was in pretty good shape when I bought it, other than the scorched rim, cake build-up in the bowl, some scratches on the pipe, bite marks and discoloration of the originally brown stem and general dirtiness inside.
rob4

rob7
My first line of attack was to ream the bowl carefully, then sand it with 400-grit paper torn off into a piece that wrapped around my ring finger. Then I soaked it for some time in alcohol, removing most of the old coating which I finished off with some 1000-grit micro-mesh, careful to leave the areas around all of the nomenclature untouched.
Pleased with the results so far, I applied Lincoln light brown alcohol-based boot stain to the entire outside of the pipe bowl and shank, and flamed it all around just enough to see the whoosh of blue light as the alcohol burned off and left a light layer of black soot. The soot I easily removed with the finest micro-mesh
rob8

rob9

rob10

rob11
The only task remaining for the bowl and shank were to buff them with my cheap high-speed dual buffer: once all over with white Tripoli, then again with carnauba. At last I think I’m getting the hang of using a light touch on the single high-speed buffers so as to avoid flying objects that can break easily and to achieve the desired polished effect evenly and without streaks.

I micro-meshed the stem with #600 paper, getting rid of all the discoloration that was not inside the stem itself, and buffed it with white Tripoli. To finish it off, I used a white crayon marker to fill in the Bewlay “B.”
rob12

rob13

rob14

Bewlay Spiral

Bewlay Spiral

London Made S101

London Made S101

Patent № 167103

Patent № 167103

II. THE PLAYBOY MEERSCHAUM BEAST
I already owned one Laxley African Meer…
rob18
…and as soon as I saw the Playboy, I knew it had to be a Laxley also.
rob19

rob20

Rob21
With Chuck’s concurrence, I am satisfied it’s a Laxley Playboy club edition.
This rugged African pebbled Meer was easy to clean up and make it look almost new again, despite the heavy, crystallized burning all around the rim. I began by taking some small cotton gun cleaning cloths and applying a little purified water to each, then lightly cleaning off the outside of the bowl and shank.

I had to sand off the bright black crystallized burn around the rim with patient use of 400-grit paper until I began to see the light brown of the Meerschaum show through. Then I switched to micro-mesh and decided to go all the way past the black stain from the original. Not having any stain of that color, I bought some Lincoln for $6.95 and daubed it around the rim with care not to let it run down the top, which was fine the way it was. Next, of course, I flamed it and micro-meshed the ash away to a very smooth finish.

The screw on brown stem was a mess, so I fixed it up with micro-mesh #600 micro-mesh and buffed it evenly with white Tripoli only.
rob22

rob23

rob24
That, my friends, is how beauty met the beast. And as I intend to keep both of these for my ever growing, P.A.D.-fueled collection, I expect they shall live happily ever after.

Getting back in the saddle – AJ Verstraten


It is a pleasure to post another article by AJ Verstraten aka Bananabox-Ninja. It has been a while since he has been able to do any refurbs do to some health issues he had to deal with. It is great to know he is back and feeling much better. Glad to hear from you AJ and glad to hear you are healing. Thank you for taking the time to record your work for us to read and enjoy.

Greetings, it’s been a while since I was able to get behind my workstation and get some work done on the huge lot of pipes that are patiently waiting for a fix.
Some of you might remember my earlier piece in which I explained that I was home bound due to a motorcycle accident. Turns out I needed an operation to fix my cruciate ligament in my knee, this left me with a long recovery time but last week I was able to sit down and do four pipes that only needed some minor work to ‘flex my muscles’ so to speak.

A note about the pictures, as I did it outside in the nice spring weather there were still a lot of clouds and this makes some of the pictures quite dark.

These are the pipes I chose for cleaning:

Winsløw Grade E bought on ‘Marktplaats’ the Dutch version of Ebay
001 Winslow E group a
Chacom Silhouette a gift from a family friend who quit smoking years ago.
002 Chacom Silhouette a
Vibro Woodart acquired from a fellow forum-goer at the PRF.
003 Vibro Woodart a
Georg Jensen straight grain from the same friend as the Chacom.
004 Georg Jensen a
The procedure for all was the same.
Firstly I used hard bristled pipe cleaners dipped in 96%-proof alcohol. Afterwards the kettle would be inspected and cleared if necessary. After this I would set them aside and buff them one after the other.

The Winsløw is remarkable as it has only one dot on its mouthpiece instead of the two, I reached out to the Winsløw company about this but they didn’t reply. The pipe rather dull to clean as it was very well kept. I only cleaned the inside with the alcohol and that was it, the rest was nice and clean so I set it aside.
005 Winslow
The Chacom Silhouette was heavily used as was evident from the mouthpiece. It is made from swirling acrylic and you can see through it as they used clear acrylic in it. The black tar buildup took a lot of cleaners and the use of a new tool I acquired at a flea market.
006 Cleaning
The brown of the tar build up sits in the small cracks on the inside of the acrylic. These were formed by the precious owner who bit rather hard on his mouthpieces. I tried the ultrasonic cleaner but it wouldn’t budge. So I decided to keep it as is. (If anyone has a tip for me on that one I would be much obliged.)
007 Mouthpiece
Then it was time for the bowl, it had seen better days but there was no damage on the wood itself. So with the help of spit, a sock and the tool as shown earlier the coal layer was removed and the bowl was reamed with the reamer tool.
008 CS bowl
The Vibro Woodart pipe was the first one with an ebonite mouthpiece, so I set up the motor and abrasive wheel and let loose. It came out nice and black in the end.
009 Mouthpiece and motor
I noticed the mark in the mouthpiece was still visible so I used a correction fluid pen to fill it up and used the abrasive pads (8000 grit) to remove it gently.
010 colouring the letter
(The end result will follow)

I don’t have any pictures of the Jensen pipe as the pictures were all too dark. But I did the same as the Vibro pipe. Using the abrasive wheel and the correction fluid pen to get the logo back out again.

Then it was time for the buffing. Buffing with brown (1), white (2) and then with carnauba wax (3).
011 Buffing
Here are the final results, you can see the W on the Vibro pipe quite clearly and on the group shot the result on the Jensen.
012

013

014

015

016
In the end it was good to sit in the sun and once again get my hands into cleaning a nice pipe.
I always feel quite happy when a dull pipe with a heavily caked bowl turns into a nice shiny one that can be once again hopefully be used for many years to come.

A Pair of Barling Canadians – The Trust Continues


Quite a few years ago I received a pair of Barlings Canadian bowls from the late Mike Leverette. We had exchanged quite a few pipes and tobaccos over the years and one day I received an email from him saying that he had sent me a pair of Canadians that needed stems but were otherwise in great shape. They were clean and ready except for a lack of stems. When they arrived they were beautiful the top on had a stunning sandblast – deep and rugged. The other had a good sandblast but not nearly as rugged. The two were oval shank pipes but one was slightly smaller and shorter than the other. The stamping on them was also different. The top pipe (below) is stamped in a line across the underside of the shank, Barling in script over London England, EXEL 5574 T.V.F. The bottom pipe is stamped slightly different. It begins with Barling in script over London England. That is followed by EXEL over 5579 and then it is followed by T.V.F.

I cleaned them and gave them a polish and sent them to Dave Wolf at Walker Briar Works for restemming. I wanted replacement stems that had the Barling cross stamp on them and new that Dave had the stamps to do that. Once I sent them to him the wait was not very long and they came back polished and stemmed. The photo below shows the pipes as they looked when they arrived and I took them out of the package.
Barlings 001
I took them out of the pipe cupboard the other evening to polish them and remind myself of the story behind them. For me, part of the joy of being a pipe man is to remember/know the stories attached to my pipes. Some of them the stories begin with me as I can find no information on them. Others come to me with a long history that makes them very interesting. This pair comes with that history. Mike bought them in a lot on EBay and figured I would enjoy them. He took the time to ream and clean them before he sent them my way. My story with the pipes is at least 12 years old if not more. Add to that Mike’s history with them and I can trace their story back 15 or more years. I enjoy that kind of thing. The only thing that would make it even better is to be able to know a bit more of the back story. Ah well, as I smoke them I raise a bowl in memory of Mike. I took the next three photos this evening to show the pair as they look now. Both have a few more years and smokes on them but they remain in great shape and have many more years left in them.
IMG_5971

IMG_5972

IMG_5974
I also decided to take a few pictures of each of the pipes separately to give you a better picture of their individual characteristics. The next series of four photos show the 5579, the bottom pipe in the photos above. It has a lighter blast and the stain took to the briar in a different way than it did on the deeper blasted 5574. Interestingly it is the same colour stain on both pipes – the variation is caused by the briar.
IMG_5982
There is gracefulness to this Canadian shape. Barling makes the shape like no one else does and I think it epitomizes the English version of the shape. The blast is well done showing both the ring grain and the vertical lines on both the shank and the bowl. The taper from bowl to button on the stems is very graceful as well. Dave was able to capture the look of the original stem very well.
IMG_5983
The blast carries on to the rim as well and ends as the inner edge of the rim bevels inward toward the bowl. The bevel is smooth as is the strip on the bottom of the shank where the stamping is located. There is also a smooth band at the stem shank union.
IMG_5984
The stamping is clear but faint on the Barling portion. The T.V.F. stamp is tight against the end of the shank.
IMG_5985
The second pipe, the 5574 is a different pipe. The look of the shape is not nearly as refined as the first pipe. The craggy blast and the shape of the bowl make the look more rugged and not nearly as elegant looking. The tactile nature of the blast though is amazing as bowl heats up during a smoke. The stain is also variegated on the pipe. It gives the pipe a mottled look that is even clearer in person. I like the look of the mottled appearance as combined with the texture it makes a very interesting pipe to look at and observe while I am smoking it. There are times when I am holding this pipe that I find myself drawn to just sit and examine it, turning it from side to side to look at the texture and finish.
IMG_5986
The craggy texture of the blast is carried through on both sides of the bowl while the shank is much more reserved and smoother. I am not sure whether it came this way originally or is that way from wear. I tend to think it was originally not as blasted as the bowl as the stamping in quite sharp on the bottom of the shank. I have found that a blast does not take as well on hard portions of the briar.
IMG_5987
The blast carries through to the top of the bowl and to the inner bevel on the rim. The bevel is smooth like the previous pipe as is the bottom of the shank and a small band at the stem shank union. I find that the taper on the shank to the stem is more dramatic than the previous pipe. If the blast was not unharmed I would attribute that to the restemming. It appears to have been like this when it left the Barling factory unless somewhere in its history it was previously restemmed and then repaired to look original.
IMG_5988
The stamping on this is very sharp from mid shank back toward the stem. The Barling script and London England stamping is not as sharp, though still very readable.
IMG_5991
I am pleased to have these two old pipes in my collection. Perhaps one of you who read this article can explain the difference in the shape numbers – 5574 and 5579 as I am unable to find any information online. It would be great to add that to the story. I will maintain the trust with them until the day comes that they pass into the hands of the next pipeman. They will then pass from my companioning to another’s and my story will be added to that of Mike’s. That is the thing I love about this hobby – the adding to the story of a pipe that occurs with each successive pipeman’s receipt of the trust. Until that day I will continue to fire them up and enjoy the great smoke that they deliver.

A Bouquet of Pipes


On a trip to England for my 25th Wedding Anniversary almost 12 years ago now I picked up a snack at a local pub. It was a bread pudding in a pottery jar. I kept the jar all these years and I have used it as a vase for a bouquet of corn cobs. This bouquet is kept in my pipe cupboard most of the year but on warm Spring and Summer days I take it out to my table when I am set up on my front porch for an afternoon of pipe smoking and reading. I have learned over time that as soon as I settle into a book and a pipe company drops by and settles in with me. Typically there is not much talking beyond the initial greetings before they note the tobacco and pipes and ask if they can give a pipe a try.

This is where my bouquet comes into play. In the bunch pipes in the jar are some unsmoked and some well broken in cobs. All are cleaned and ready for smoking. All have the filters removed to make the smoking much less wet and the draught wide open. On the table next to the bouquet I keep several jars of the tobaccos that I am currently smoking. Usually these include a Virginia and an English blend. Once in a while I put out an aromatic blend. Next to the jars are a pouch or pipe cleaners, several pipe nails and a bic lighter. With little ado they load up a pipe and fire it up. Then we settle into the quiet of the moment and puff, the rhythm of the puffing provides a cadence only interrupted by the bees and butterflies flitting by or a hummingbird stopping for lunch. It is a great moment.
031
On a rare occasion one of the “flowers” go home with the pipe smoker but as often as not they want to leave them in the vase for the next time they visit the front porch. I keep them clean and ready. I also have a few MM hard maple pipes and some smaller briars in the vase as well for those who want to try those out. I have found that this keeps my own pipes out of the hands and mouths of those who want to try pipes. I know that may sound harsh but I like to keep my pipes undented by teeth and free of tooth chatter from the unwary new smoker who seems bent on chewing the stem. In fact if I notice them chewing on the stem then the pipe automatically goes home with them. The last thing I want is more pipes to refurbish. At least not cobs and inexpensive briars that I put in the vase.
030
The bouquet has served me well over the years. If you have friends and neighbours stopping by for a visit and wishing to try out a pipe the bouquet is a great way to facilitate them doing so at a low cost to you. Somehow I find that the cob delivers a great smoke for these new pipesters and at the same time provides for the seasoned pipe man who for some reason known only to them has forgotten to bring along a pipe to smoke.

Spring is in the air here in Vancouver so I cleaned up the pipes in the vase this morning. I am getting ready for some good days on the front porch once the weather warms a bit. I know that my visitors will come with the sun so I am ready for them. Here is a photo of what I look forward to. The furniture is out, the table ready and waiting for the bouquet and tobaccos to be brought out and even my dog Bailey is waiting for me. The book, the computer and a brew are ready for me when I settle down for a pipe and some reading. Why not come by for a visit.
Porch2

A Review – A Benner Rusticated Oval Shank Pot


Blog by Steve Laug

I was drawn to this little rusticated estate pot when I saw in on Keith/Exile’s estate pipe site, http://exilesplace.dk/. I had not heard of Benner before so it was not the name that drew me but rather the look of the pipe that called out to me. Keith sells Benner’s pipe new as well, but in looking at them I still wanted this one. I emailed Keith and soon the pipe was on its way to me from Denmark.
003 (2)
While I was waiting for it to arrive I did some research on who Benner was in terms of the realm of Danish pipe carvers. Keith had this information:

“His real name is Bent Nielsen but the world knows him as Benner. Benner has been making pipes for a long time. He once worked with the late and great Karl Erik Ottendahl and did some design work for Stanwell at one time. He has exported to the US, Germany and, lately, to Russia. These days Benner runs his workshop as the mood takes him and he says he is looking forward to retirement. If I know Benner, that retirement won’t be a permanent thing.”
http://thepipesmoker.wordpress.com/2011/04/10/benner/

I found this picture of Benner on the web and also found information on Pipedia http://www.pipedia.org/wiki/Benner
2978_m
“Considering his reputation among some connoisseurs Bent Nielsen, nicknamed Benner, didn’t leave too much usable traces. He is sometimes mentioned as a nephew of Viggo Nielsen, but in fact he’s no relative of Viggo’s clan.

Starting around 1970 he worked for Karl Erik some years and later for Stanwell, where he sketched a number of new models. Around the climax of enthusiasm for Danish freehands he started to release pipes under his own name. Not too many at all, which stuck more closely to classical models.
He later worked under the synonym Benner. His German distributor however advised him against using his nickname for sales in Germany, because Benner didn’t sound really Danish. Benner, as a Danish pipester recently told, “dared” to carve some more fancy styled pipes than Bent Nielsen did before and every now and then he made some pipes of olive wood, too.

Still he’s supposed to make a few pipes every once in a while selling them to a few local shops in Denmark and a limited number of enthusiasts all over the world.”

I don’t remember the exact date when I purchased my Benner pot from Keith but I have been a frequent visitor to his website and his blog for a long time now. I frequently scan through his listings to see if anything in particular catches my eye. The particular day I found the Benner listed I am not sure what captured me – the shape, the gentle taper of the sides of the oval shank, the rugged rustication, the walnut band. I am just not sure. I am typically not attracted to pot shaped pipes. I have a few in my collection but they are minimal and I am rarely drawn to them when I reach for a pipe. But I remember seeing this one and being captured by it. I left the site, went to work and later that evening I bought the pipe.

The pipe is small, almost a nosewarmer at 4 3/4 inches long and 1 ½ inches tall. The tobacco chamber is 1 1/8 inches deep and 3/4 inches in diameter. The band is smooth, naturally finished hardwood (walnut or oak?) and adds a contrast to the dark stained rustication. It is integrated into the stem. The stem is handmade from vulcanite and has a gentle taper.
BennerWhen the pipe arrived it was far more impressive than Keith’s pictures had led me to expect. The workmanship of the pipe and colour and feel of it in my hand just captured me. I remember opening the package and sliding the pipe out of the sleeve and enjoying the look and feel of this pipe. It was and is beautiful. It had the faint aromas of the Virginias that its previous owner had smoked, yet it was clean and ready for me. The rustication is tactile yet is not sharp or jarring. It is a tight pattern that almost looks like it was sandblasted after rusticating. Examining it up close it is obvious that it is not blasted but that a master-hand rusticated it very well. The bowl is rusticated up and over the rim and ends at the inner rim edge. There is a smooth band of briar at the shank end that is narrow on the top and sides of the oval shank and slightly wider on the bottom of the shank to provide a spot for the stamping. The overall flow of the bowl and shank is brilliant and the colours are beautifully matched from rim to the end of the shank with a contrast of black stain and the underlying colour of the briar. Combined with the black of the vulcanite it gives the pipe a dressy look. The natural wood band that is part of the stem that not only separates the texture of the bowl and stem but gives focal point that draws the eye to take in the taper of the stem and the texture of the bowl.
005
The inner mechanics of the pipe are perfect. The drilling is perfectly executed from the shank and into the bowl – coming out exactly centre in the bottom of the bowl. The airway from the bowl into the mortise is centred. It is smooth in its entrance to the mortise and the mortise itself is also smooth with no rough spot left by drill bit. The bowl itself is U-shaped and smooth from sides to bottom. The air way enters the bowl and is smooth and clean. As the pipe was an estate when it came to me it was impossible to tell if it originally had a bowl coating but my guess would be that it would have been smoothly sanded briar.

The stem itself is hand cut out of a vulcanite. It is well tapered with good even angles top and bottom progressing from the shank to the button. The portion of the stem that is put in the mouth is thin and comfortable. Benner did a great job shaping the stem and capturing a shape that really works with this pipe. The hardwood band is integral to the stem and is seamless in its flow with the vulcanite. The tenon is Delrin that has been inserted into the vulcanite stem for durability and ease of use. The airway is funnelled slightly for a smooth transition from the mortise when it is in place. There is a very minimal gap between the end of the tenon and the base of the mortise. The transition where the Delrin meets the vulcanite of the stem is seamless. There is no lip or rough spot at that junction. The draught is unrestricted and open from the bowl to the tip of the stem. Draught is effortless. The fit of the stem to the tenon is very well done. The button is cut to my liking with a good sharp inner edge and tapered to the tip. The slot is opened and funneled to deliver a uniform airway from bowl to button.
004
The overall construction of this pipe is very well done. It is light in the hand and in the mouth. It is well balanced and has a great tactile feel when it is cool and as it warms up during the smoking of a bowl. I have smoked the pipe since I got it and enjoyed the fact that it was previously smoked and well broken in. The shape of the bowl has kept this a good Virginia smoking pipe in my rotation. It delivered a good smoke from the first smoke and continues to do so. It draws well; the lighting has never been a problem and continues to be an effortless smoke. Thanks Keith for introducing me to this maker and to Benner for delivering a well-made pipe that remains a very good smoking pipe to this day. If you can acquire a pipe made by Benner (they are hard to come by as he makes just a few) it will not disappoint you and soon become a favourite in your rack.

A Book Review – Tobacco, Pipes and the Pleasures of Pipe Smoking


IMG_5918 This beautifully illustrated little book was produced in Canada to be given as a gift to pipe smokers by the – Turmac Tabakmaatschappij Canada Ltd. In their introductory preface they declare their intent to give it as a gift to be enjoyed as much as they enjoyed collecting all the stories and anecdotes about pipes and pipe smoking. They end their paragraph with the words; “We hope that it will add new pleasure and meaning to your pipe smoking”.

On the inside fly page there are these words: “I keep a friend in my pocket… my pipe. When I sit out on the porch at the cottage and the evening is quiet, I like to take my friend out of my pocket, tamp in bright, golden shreds of tobacco, and light up.

Then, when the bowl glows red in the dusk, when the bit tastes warm, and fragrant wisps of smoke trail in the still air, peace comes to me and my friendly pipe.”

The book is a short 35 page overview of the field of pipes, tobaccos and pipe smoking itself. It is not divided into chapters but rather into sections. Virtually every page is filled with beautiful photos, engravings and pen drawings of pipe history. A wide variety of photos of pipes grace the pages – from ancient clay to modern clay, from briar to meerschaum.

The book begins with a brief history of tobacco and the art of smoking it. It development is traced across the continents on both sides of the Atlantic, or Pacific as the case may be! There is a quick walk through Columbus and the discovery of tobacco and its use among the indigenous population of the Americas. The name tobacco comes from what these people called their smoking tubes – Tobaga. It later morphed into our now well known term tobacco. The text quickly moves to Sir Walter Raleigh’s impact on the use of tobacco in the British Isles. The entire history is brief and well written. It moves through 8 pages and covers a broad scope of history in a way that is a pleasure to read – interspersed with quotations from early journals and drawings and photos from the time periods discussed.

From there the book turns to the history of the pipe itself. In a section entitled “From Coconut to Seafoam”, the authors give a brief introduction of the materials that have been used in making pipes. The section moves through the materials in quick order in a compact and entertainingly written piece. It begins with the coconut used in Nargilehs in the orient to clay, porcelain, iron, steel, bone, stone, silver, copper and bamboo and finally to the meerschaum and then the briar. The section then develops longer treatments on each of the major materials – clay, porcelain, meerschaum and finally briar.

I found it particularly interesting to read the well written discovery of the meerschaum pipe. A Budapest Shoemaker named Carl Kovac was the first man to carve a meer pipe. This section reads like a well written short story.

There is a short section on Pipe Smoking and Fine Art in which the writers quickly summarize the presence of the pipe in fine art. Again it is not the breadth that gives the subject its interest but the choice of what to cover. In a short paragraph the Dutch masters, Rembrandt and Honore Daumier are all mentioned.

The section on the pipe ends with a description of the briar pipe and its development from burl to pipe. In a succinct section the process of pipe making is delineated with enough information to be entertaining and informative.

From the discussion of the pipe the book turns to discussing what we smoke in our pipes. IN very short and descriptive sentences tobacco growth and processing is covered with a brief glimpse of Virginia, Burley and Oriental tobaccos and how they are processed to the leaf we smoke.
The next section is pictured below and is entitled “A Guide to Tobacco Blending”. The descriptions are well written and concise. I don’t think I have ever read this kind of compact and clear writing that is also entertaining and direct.
IMG_5919
Once the details on various blends are explored the text turns to the art of choosing a tobacco. I had to laugh when I first opened the book and found the tobacco placard below inserted at this point in the story. It was almost like a bookmark and of course is one of the blends that gifter of the book manufactures.
IMG_5923
The section on choosing a pipe was fascinating reading. Again in the style of English that is clear and pointed the authors give the major things to keep in mind when choosing a pipe of a particular shape and finish. They provided the following diagram as a part of the book that is helpful.
IMG_5920
The last sections of the book can be summarized as tips for pipe smokers and includes all the information necessary to load and light a pipe as well as what is necessary to take care of it as you use it in the course of your life. There are tips on how to have and maintain a dry smoke, how to care for the cake in your pipe – proper reaming procedures etc are diagrammed to help the pipe smoker visualize how to keep their pipe functional and delivering the best possible smoke that it is able to deliver. It also includes a section on accessories that are necessary for having a great smoke. These include pipe cleaners, liquid pipe cleaner, humidors, tobacco pouches, ash trays, pipe tools, pipe racks and of course the pipe collection!

The closing paragraphs of the book bear quoting. They give both a great conclusion to the book and a clear picture of the writing style of the book. It is that which captured me the first time I read it and that which keeps me coming back. I quote:

“ A day can never be completely without brightness as long as there is a glowing pipe in hand, nor can a man be alone, for in a good pipe there is companionship, its warmth is like a glowing hearth where in there is deep understanding and peace.

You like the friendliness of a man with a pipe and what better compliment to a friendship than for a man to offer you some of his own special tobacco. Just this one simple act will tell you he is gracious, reliable, unselfish and, above all, considerate.

A good pipe and a good tobacco say good things of a man. And the good things that it does are many: it gives heart to the man at work, it accompanies his leisure hours and brightens his fireside at night.

His cares, his worries drift away in the air, weariness floats away and disappears, it brings hope for the days ahead and the contentment of well-being. It is a brightener of conversation, the maker of friendship.

In its aroma there is comradeship, and in the goodness of its taste there is unending pleasure.
Indeed a simple pleasure with deep satisfaction, and priced so that a man may enjoy the contentment of hours, if he has but two silver quarters.”

I think that well summarizes the beauty and pleasure of this small book. If you can find a copy you will not do wrong to buy it whatever the cost. It is a treat to read and has the ability to lift you from the mundane of your days. The following drawing in on the end piece of the book.
IMG_5922

Crafting a Bamboo Shank Briar Mini Churchwarden


Blog by Steve Laug

I had all the parts to do a bit of an experiment. I had a broken shank briar pipe, a long piece of black bamboo and an assortment of stems to choose from to see if I could connect all the pieces and make a workable smoking pipe. Putting together the pieces is reminds me of playing with my old Erector Set when I was a kid. The only limit to what can be put together is your imagination. The bowl came to me with two large gashes in the shank. They were both quite deep and both had been repaired by fills. There was a metal threaded mortise in the shank for a threaded tenon. While I was cleaning up the bowl the shank fell off in my hands. I put it in the cupboard as I expected I could scavenge some briar for repairing burn outs in the future. It sat there for more than a week before I began to wonder if I couldn’t do something with it. I went through my parts drawer and found the piece of black bamboo that had been sitting for quite a few years waiting for the right moment. I brought the bowl out and put the two pieces side by side and kind of liked what I saw. The end product would be a four knuckle bamboo mini Churchwarden pipe. It would be extremely lightweight and might actually end up looking quite nice. Now it was time to start working.
IMG_5869

IMG_5870

IMG_5871
I drilled out the inside of the bamboo with an 11/64 inch drill bit. I then drilled out the end that would meet the bowl with a ¼ inch and then a 3/8 inch bit so that I could use a metal tenon I had saved from a previous pipe. Once the drilling was done the tenon fit the newly drilled bamboo mortise very well. I faced the end of the broken shank so that the bamboo would fit against it smoothly.
IMG_5872

IMG_5873
The metal tenon also fit in the shank of the bowl well. The length was perfect as it fit against the airway in the end of the shank next to the bowl bottom. There was no gap between the two so the smoked would flow smoothly down the shank of the pipe. I cleaned out the bamboo airway with pipe cleaners and isopropyl alcohol and then put the pipe together and checked the draw. It was open and was an effortless draw.
IMG_5874
I repaired the fill on the side of the shank as it was not even with the surface of the shank. I used a superglue and briar dust patch on it. Some might wonder why I did not cut back the shank and eliminate the damaged area. I chose not to do that as I wanted the shank to have some length to it in contrast to the long bamboo section. I also planned on rusticating the entire bowl so the damage would be covered. The insert of the metal tenon would stabilize the area as well and the shank repair would be solid.
IMG_5875

IMG_5876

IMG_5877
I took the bamboo shank off the bowl and sanded the bowl with 220 grit sandpaper to smooth out the finish. I repaired several of the gouges on the bowl surface with superglue and briar dust. I wanted a smooth canvas to work on when I rusticated the bowl. I then sanded the bowl with a medium grit sanding sponge. The top of the bowl had a slight buildup of tars so I cleaned that with the medium and fine grit sanding sponge. I wiped down the bowl with acetone on cotton pads. I sanded the knuckles on the bamboo to remove the fibers that were still attached and to smooth out the nodules. More work would need to be done on the shank but at least at this point it would be smooth in my hand while I worked on the bowl.
IMG_5878
I set the bowl aside and went through my can of stems to find a nice saddle bit that would look good proportionally with the pipe. I drilled out the stem end of the bamboo with a ¼ inch bit to serve as a mortise for the stem. I turned the tenon on a PIMO tenon turning tool and then hand sanded it. I pushed the stem in place and starting sanding the saddle portion of the stem to get the diameter of the stem and shank to match. I mixed some two part epoxy and glued the metal tenon in place in the bamboo. When it was dry I put the pipe together. I did not epoxy the bowl to the shank at this point as I wanted to be able to remove it work on the rustication. The next three photos show the pipe with all parts in place.
IMG_5879

IMG_5880

IMG_5881
I used a Dremel with a cone shape cutting head to pre-rusticate the shank and then followed that up with the modified Philips screwdriver. I rusticated the briar shank with it attached to the bamboo so that I could rusticate it up to the joint of the two shank materials. Once I had the shank finished I removed the bowl and worked on it with the Philips screwdriver. I find it easier to manipulate the bowl when it is not attached to the shank. When the bowl was completely rusticated I used a brass bristle wire brush to knock of the rough edges and give the bowl the texture that I wanted. I left the rim smooth to contrast with the finish on the bowl.
IMG_5882

IMG_5883
I put the pipe back together to have a look at the finished rustication and the contrast with the finish on the bamboo. I liked the overall look of the pipe at this stage. I did a bit more rustication on the bowl and shank and wire brushed them until I was happy with the end result.
IMG_5884

IMG_5885

IMG_5886

IMG_5887
At this point I was ready to attach the shank to the bowl permanently. I scored the metal shank to give the surface something to bond with in the briar shank. I mixed the two part epoxy and applied it to the metal shank with a dental pick. I pressed the two parts together and used the dental pick to trim off the excess glue and wiped it down with a soft cloth. I clamped the parts together while the epoxy set.
IMG_5888

IMG_5889

IMG_5890

IMG_5891

IMG_5892
While the glue was drying I worked on the stem to taper it to fit the diameter of the bamboo shank. I sanded it with a Dremel to take off the majority of the excess vulcanite and then hand sanded it with 220 grit sandpaper. Once the epoxy had set, late last evening I inserted the stem and took the photos below.
IMG_5893

IMG_5894

IMG_5895

IMG_5896
This morning I got up early and stained the bowl with a black aniline stain. My plan is to use the black stain as an undercoat on the bowl. Once the pipe is dry I will buff it with red Tripoli to remove the black from the high spots on the rustication and then stain the bowl with a brown topcoat to give it depth and contrast.
IMG_5897

IMG_5898

IMG_5899
I buffed the bowl with the Tripoli and then used isopropyl alcohol on cotton pads to dab off the stain on the high spots. The finish is rough so to scrub it with the pads leaves behind a lot of cotton bits. I sanded the surface of the bowl with a fine grit sanding sponge to remove more of the black stain from the high spots and to soften the rustication. I stained the bowl and shank with a coat of walnut stain to give some depth and highlights to the bowl. I had asked online how to finish bamboo and received a step by step response from James of JSEC pipes. He said to stabilize the cracks in the bamboo with superglue and then to sand the bamboo with 600 grit wet dry sandpaper and follow that with 1500 grit sandpaper. I followed that process to the letter. The change in the surface of the bamboo was noticeable. It was smooth and had a developing patina on the surface. I then took the next steps in the process and rubbed the shank down with Danish Oil. James said the he generally gave multiple coats of Danish Oil over several days. The photo below was taken after the bowl had been stained with the walnut and the shank sanded as described above. It also shows the first coat of Danish Oil on the stem. After about one hour the oil had dried to a matte finish on the bamboo.
IMG_5900

IMG_5901

IMG_5902

IMG_5903
While the Danish Oil was drying on the bamboo I worked on the stem. I sanded it with 220 grit sandpaper to reduce the diameter of the saddle to match the shank diameter. I then used a medium grit sanding sponge and 600 grit sandpaper. I then sanded the stem with my usual array of micromesh sanding pads. I wet sanded with 1500-2400 grit pads and dry sanded with 3200-12,000 grit pads. I rubbed the stem down with Obsidian Oil and let it soak into the vulcanite.
IMG_5905

IMG_5906

IMG_5907
When the bamboo had dried I buffed it with White Diamond on the buffing wheel. I buffed bowl and stem as well. I took the next series of four photos before I gave the bamboo a second coat of the Danish Oil. The pipe is beginning to look finished. I like the look of the black bamboo with this treatment – there is a rich patina beginning to show up on the shank now.
IMG_5908

IMG_5909

IMG_5910

IMG_5911
I gave it a second and third coat of Danish Oil and then buffed the bamboo with White Diamond. I gave the stem and the bowl a light buff as well. The bamboo is looking really nice. I like the developing patina that is coming from the finishing. I gave the shank and stem multiple coats of carnauba wax and then buffed to a shine with a clean flannel buff. The finished pipe is picture below. This weekend I hope to take it on its inaugural smoke!
IMG_5912

IMG_5913

IMG_5915

IMG_5916