Author Archives: rebornpipes

Dressing up a Drab Imported Briar Oom Paul


Excellent step by step facelift for an Oom Paul. Well done

Charles Lemon's avatar

I thought I’d squeeze in another post before heading out for a late-summer camping trip before back-to-school activities take over.

Estate Pipe Lot

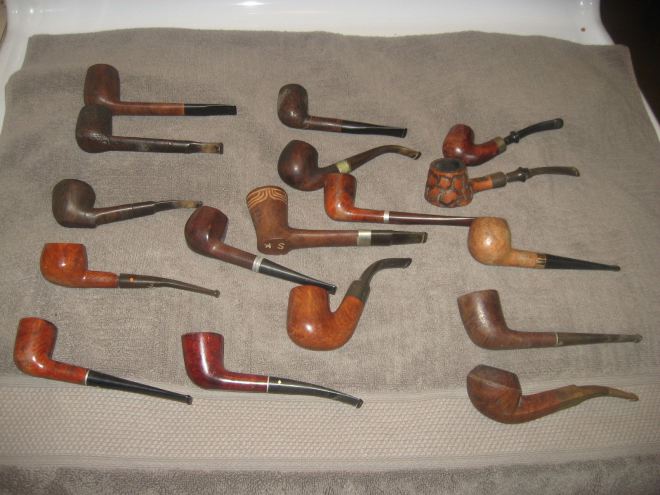
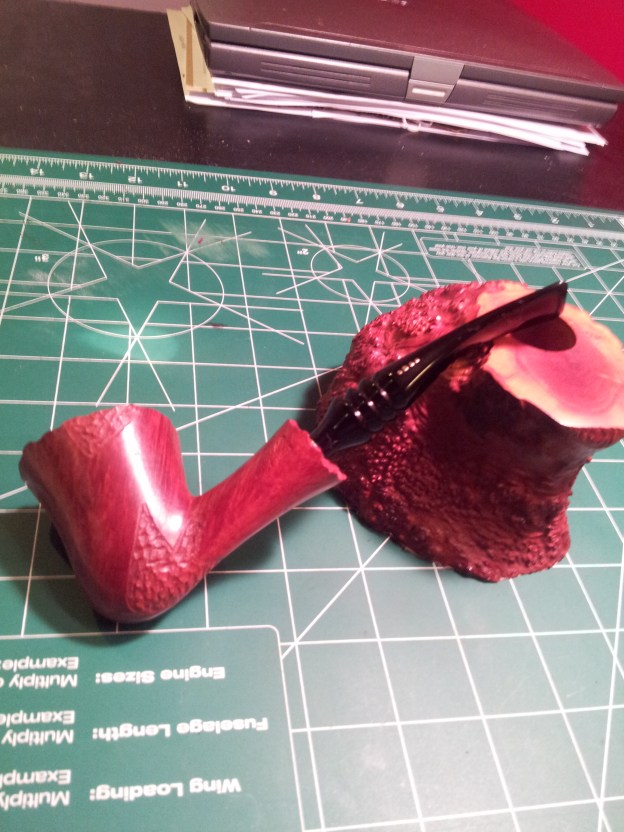
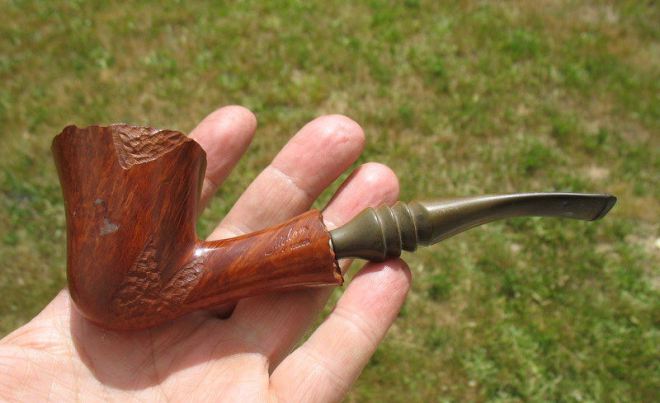
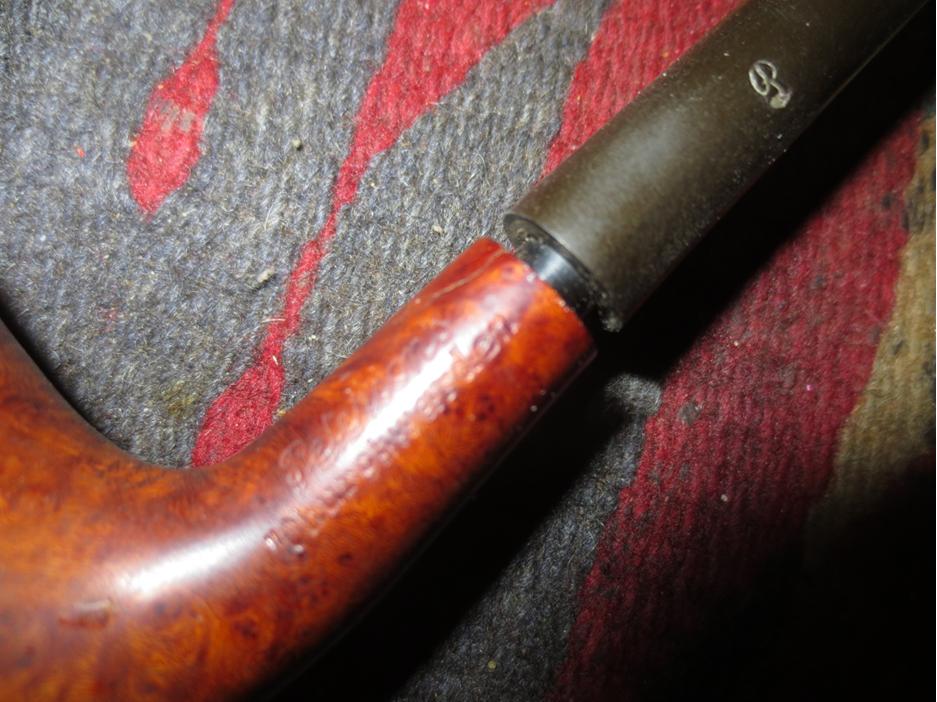
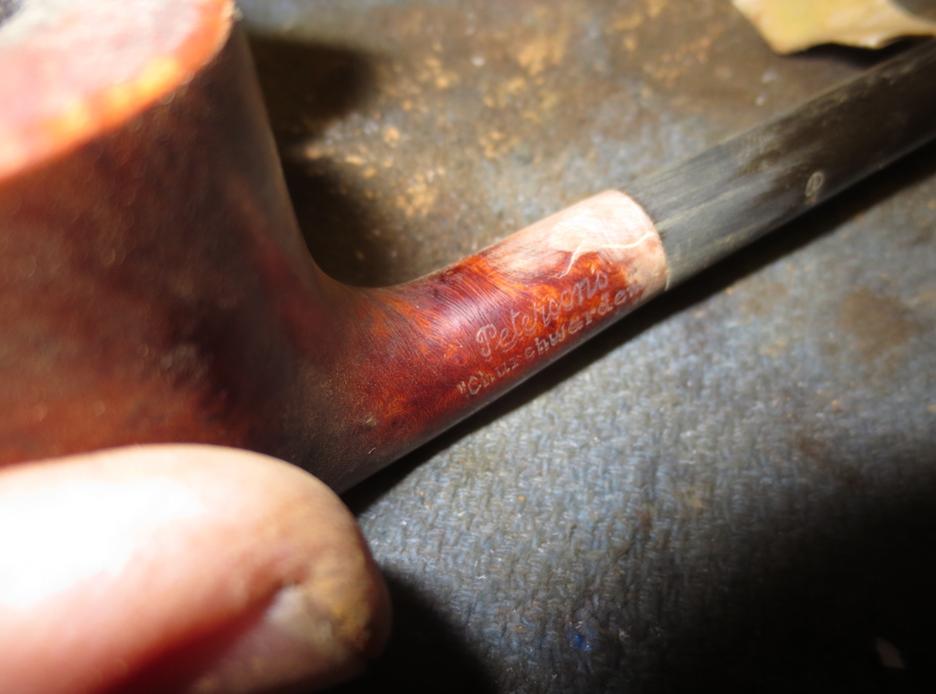
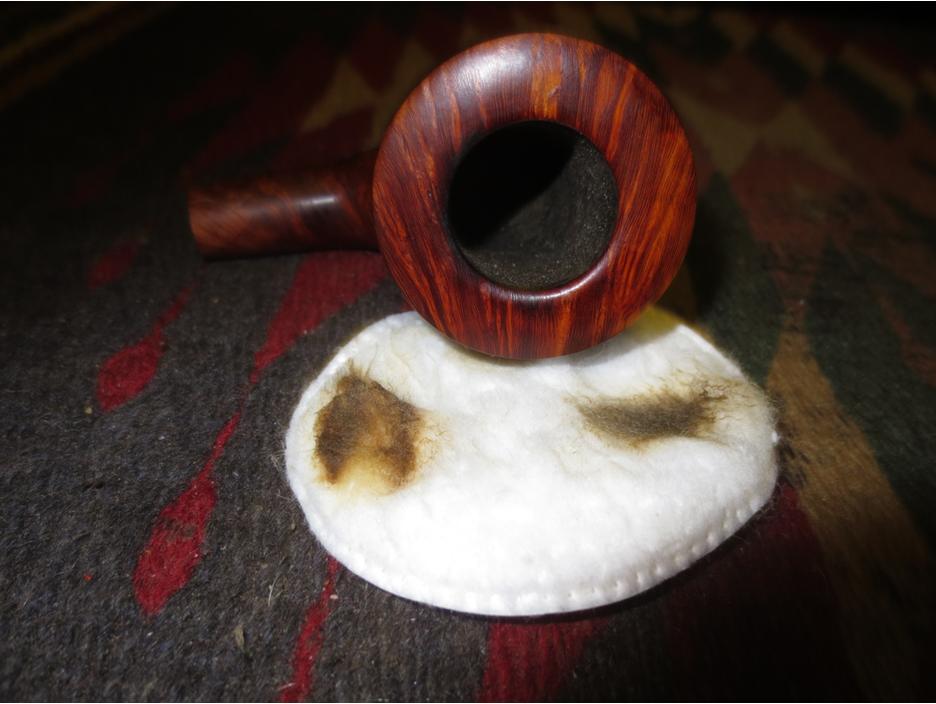
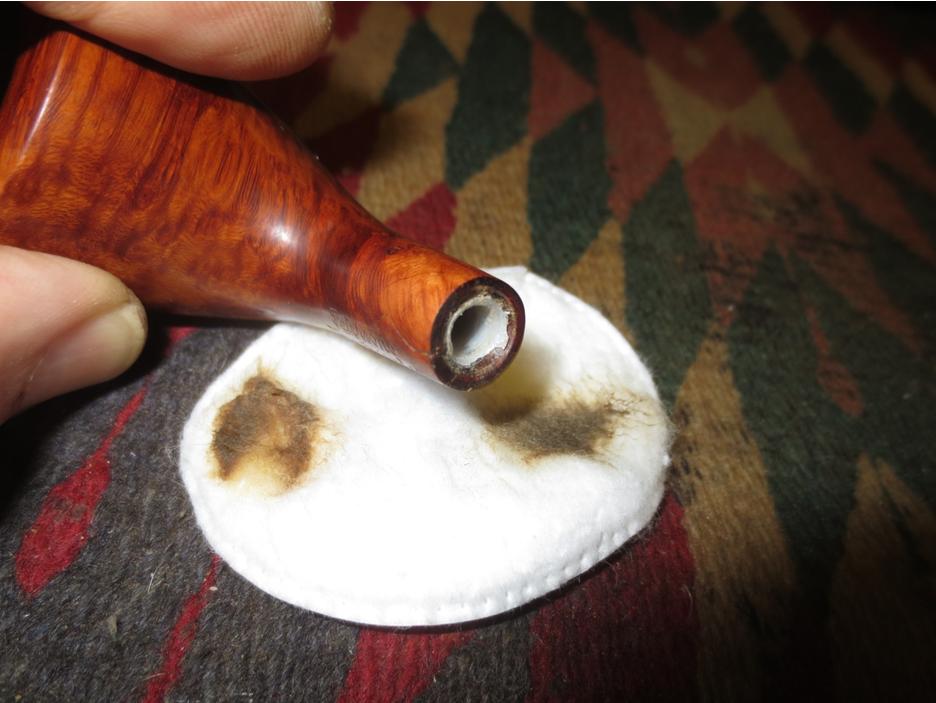
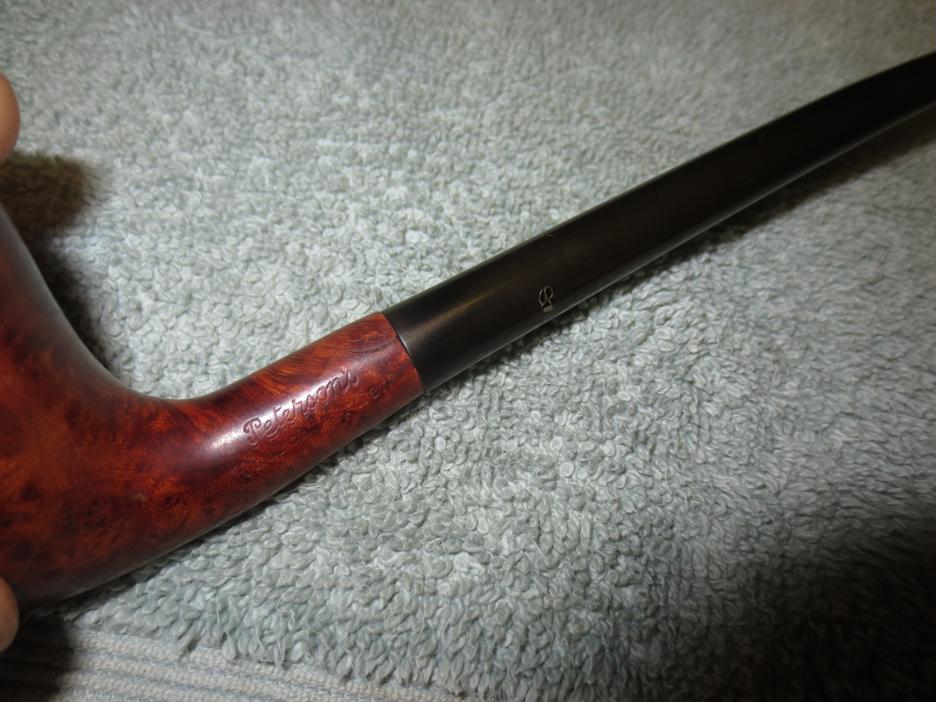
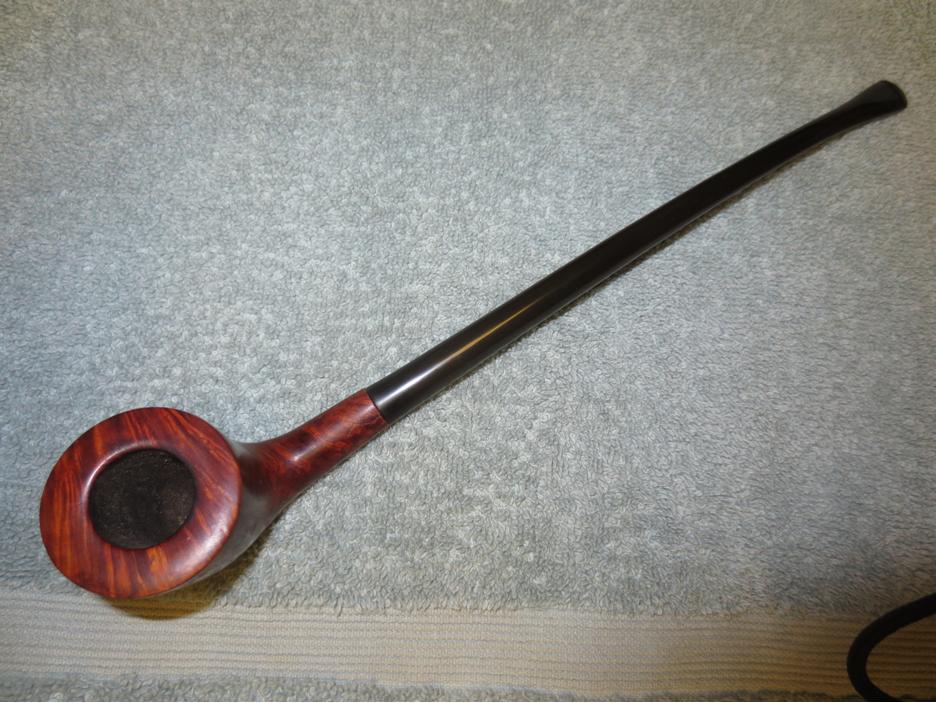
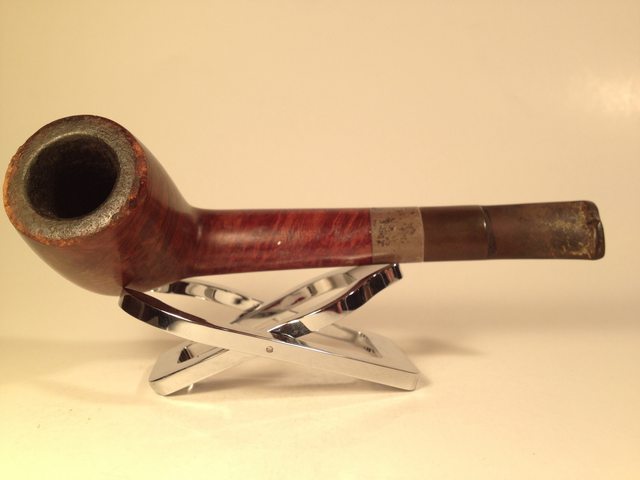
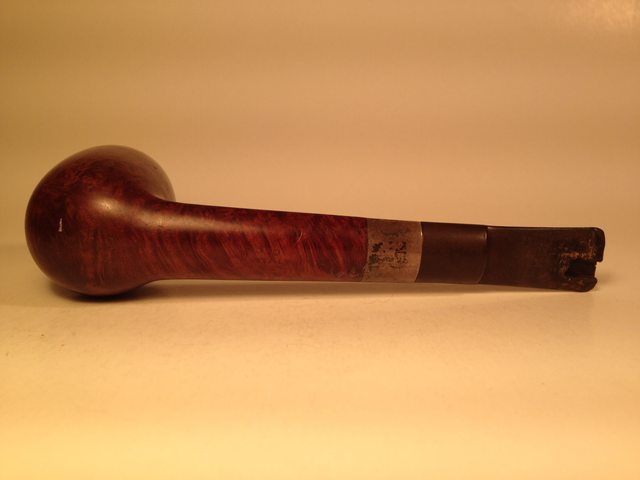
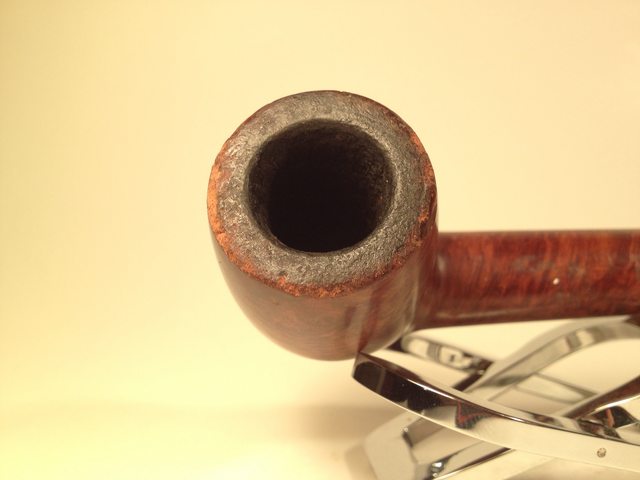
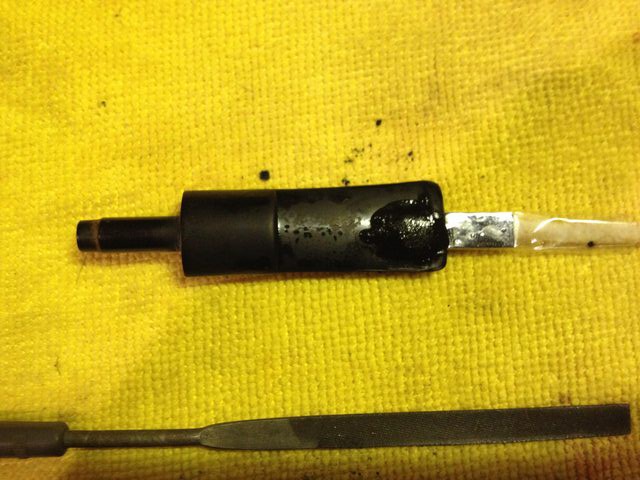
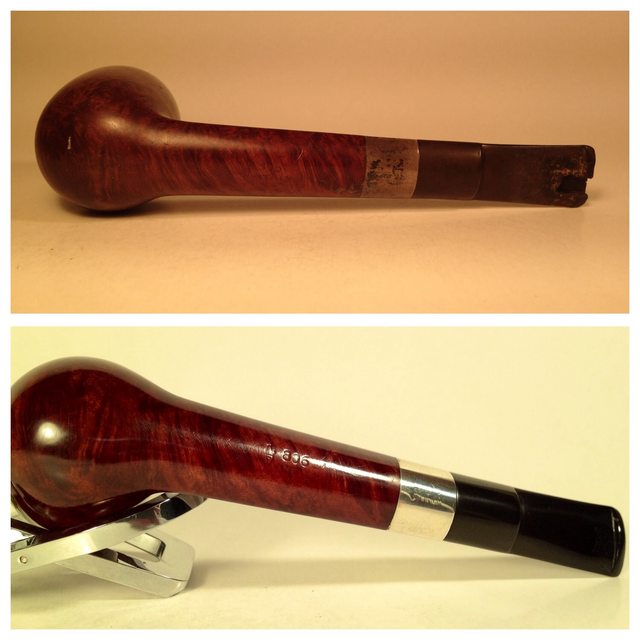
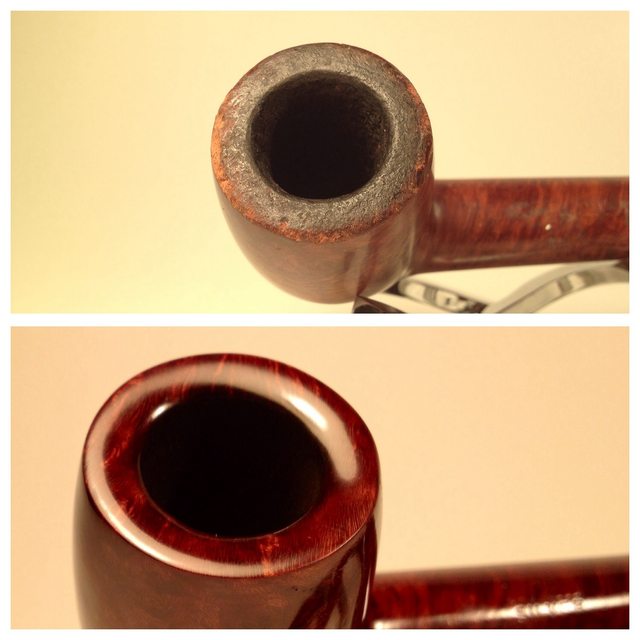
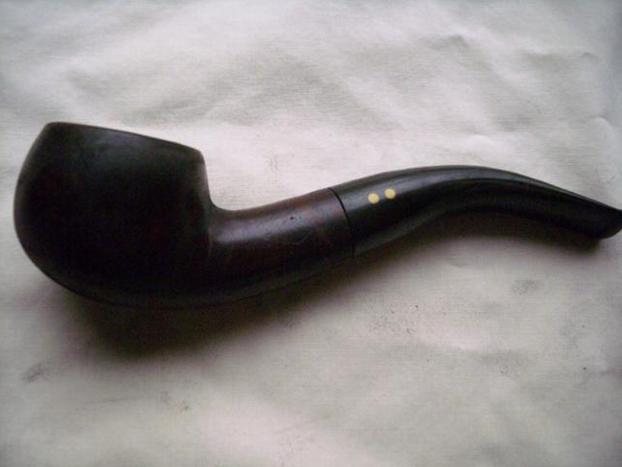
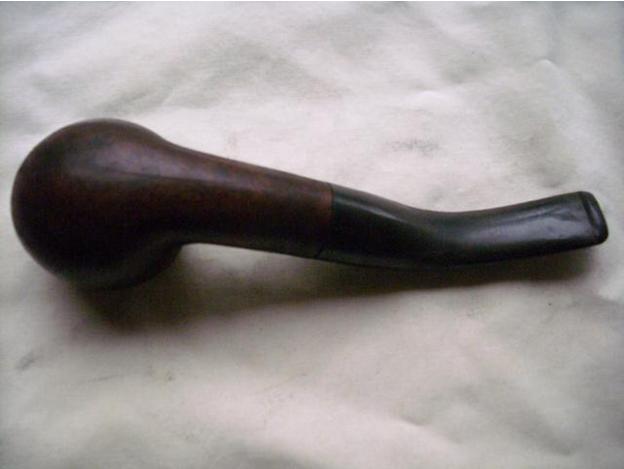
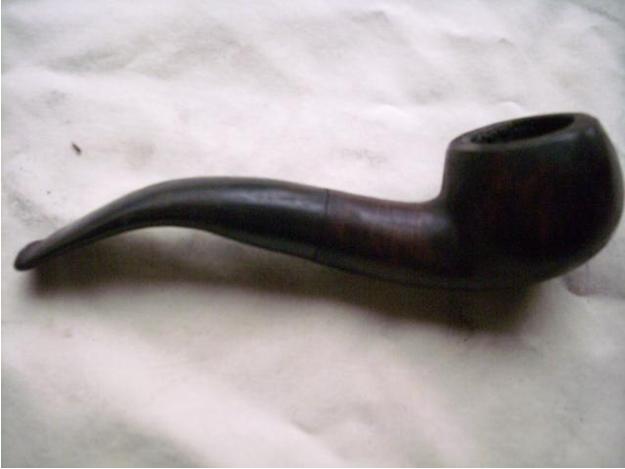
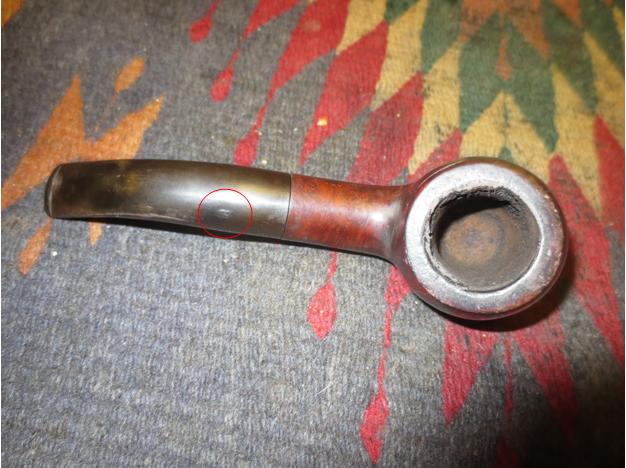
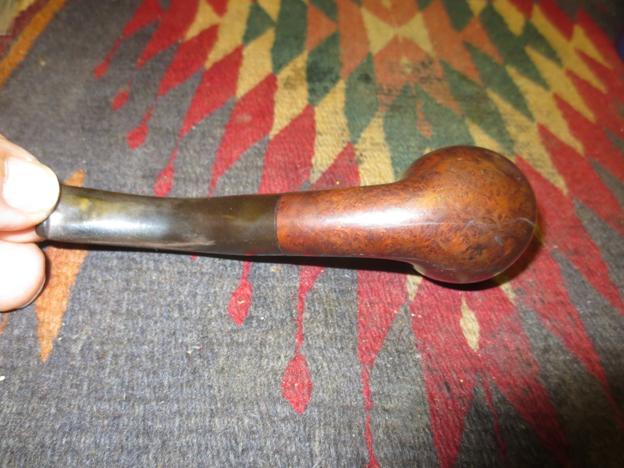
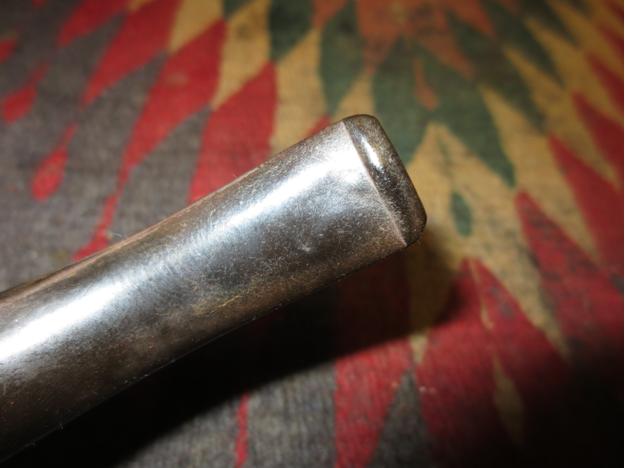
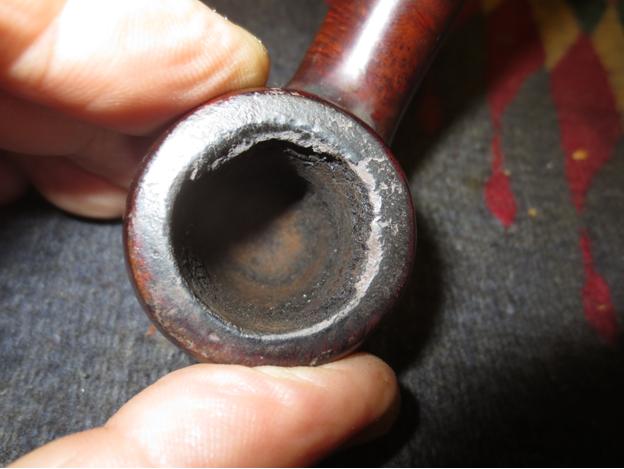
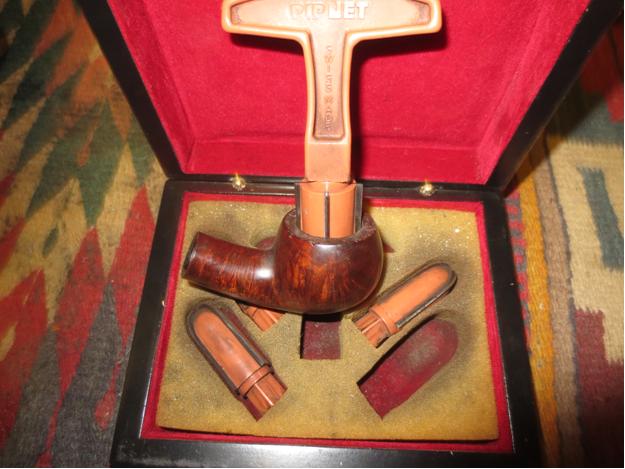
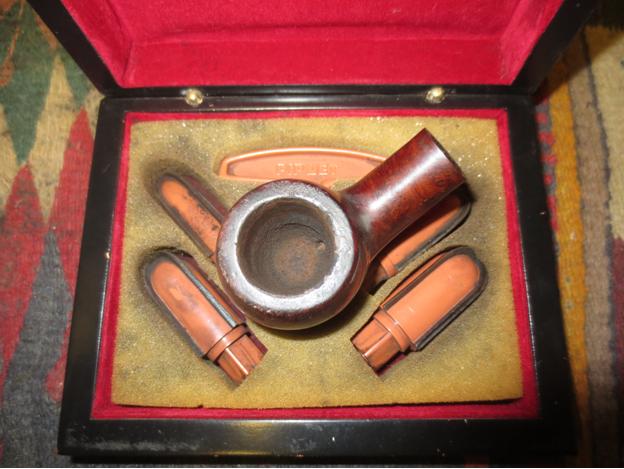
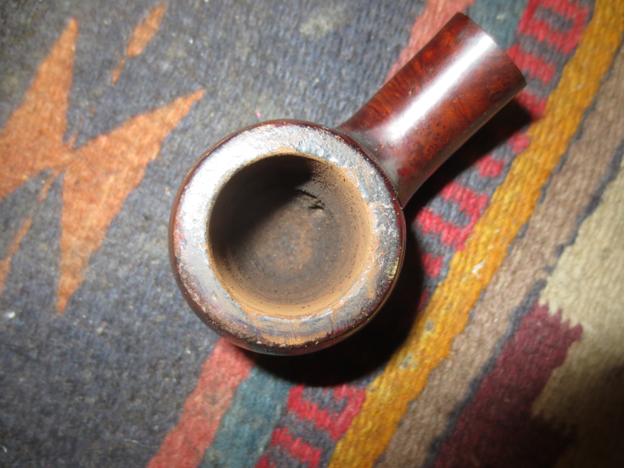
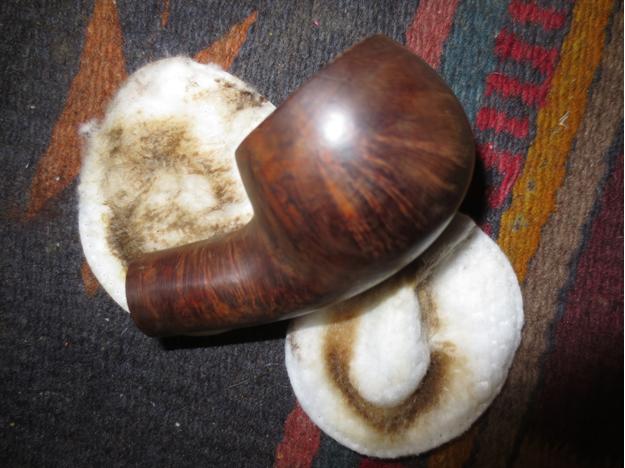
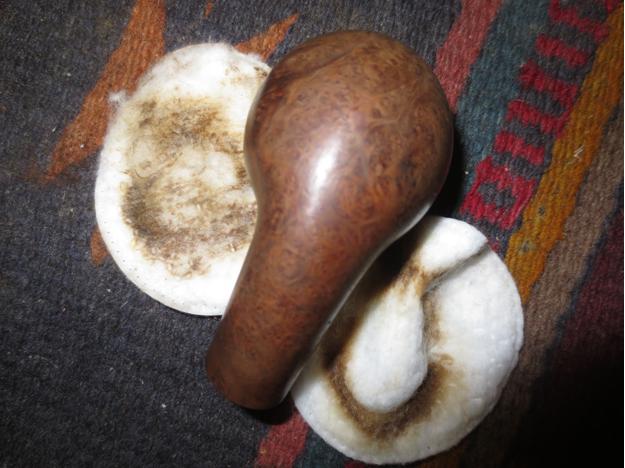
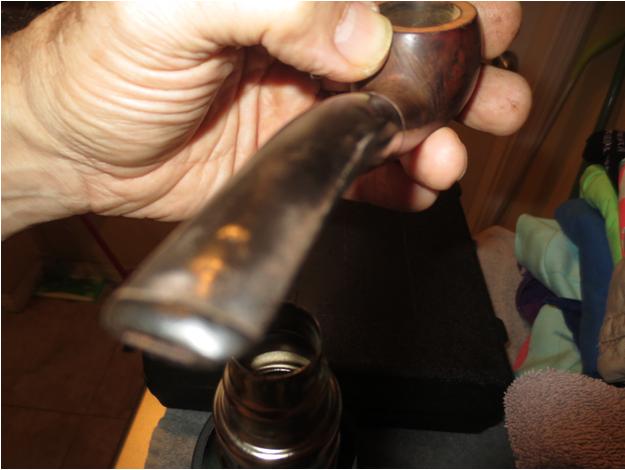
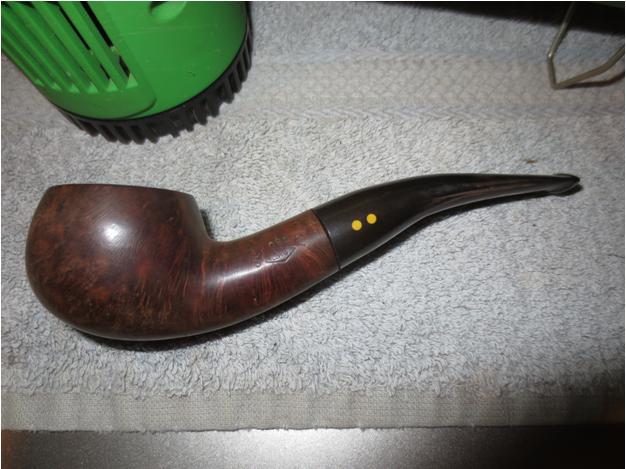
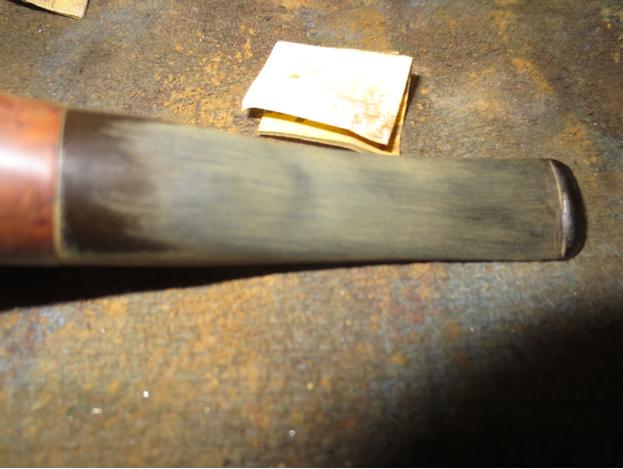
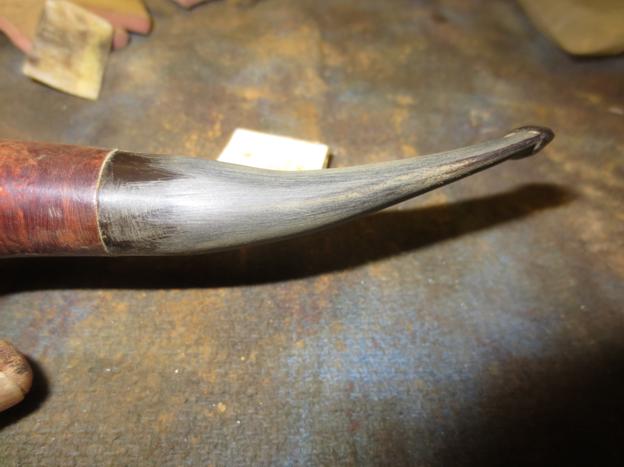
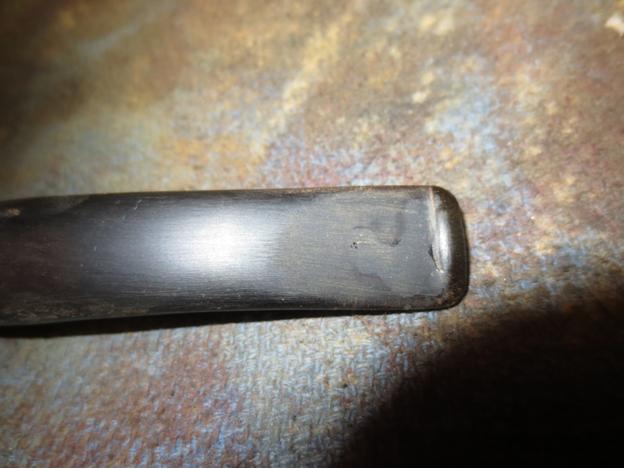
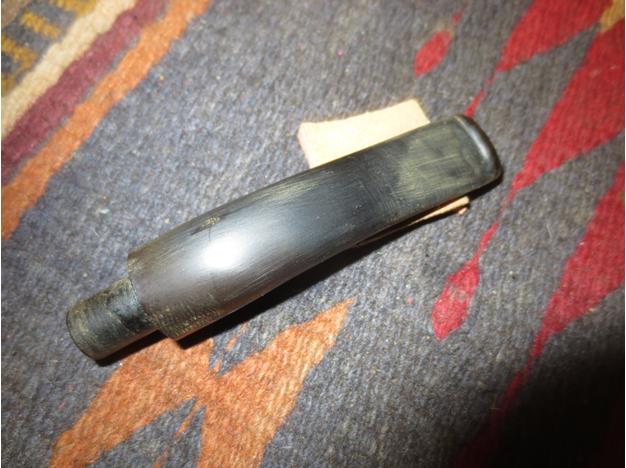
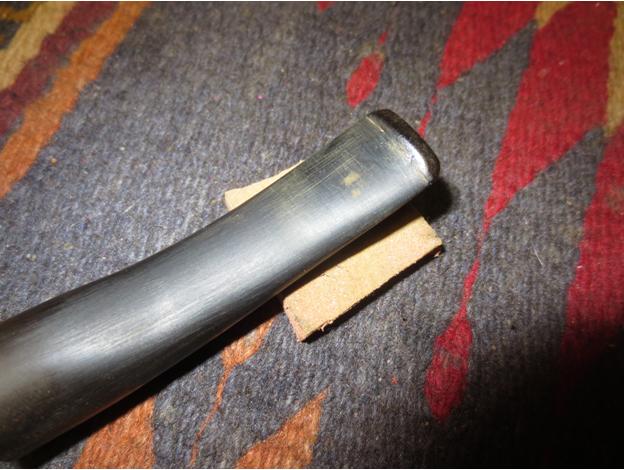
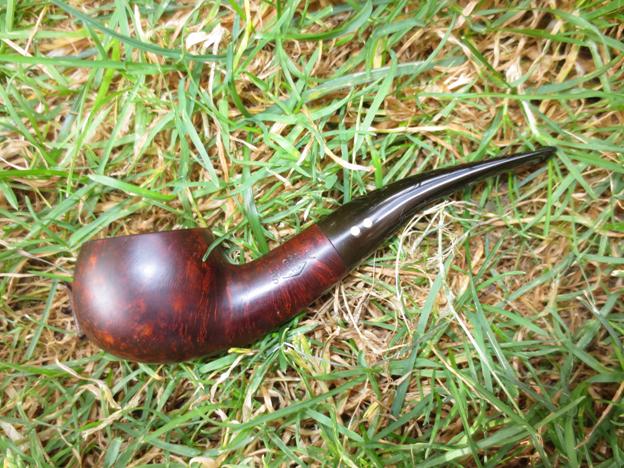
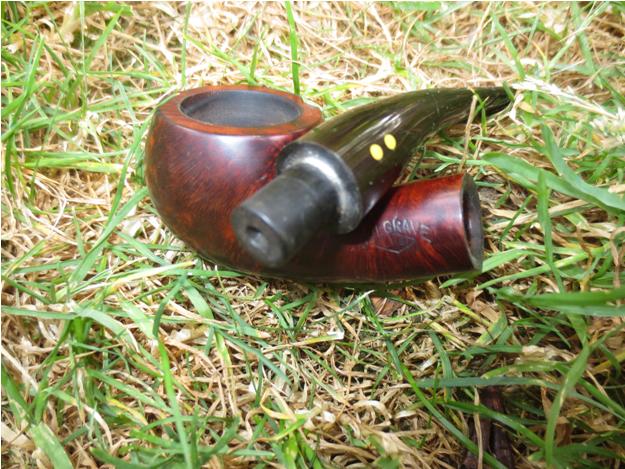
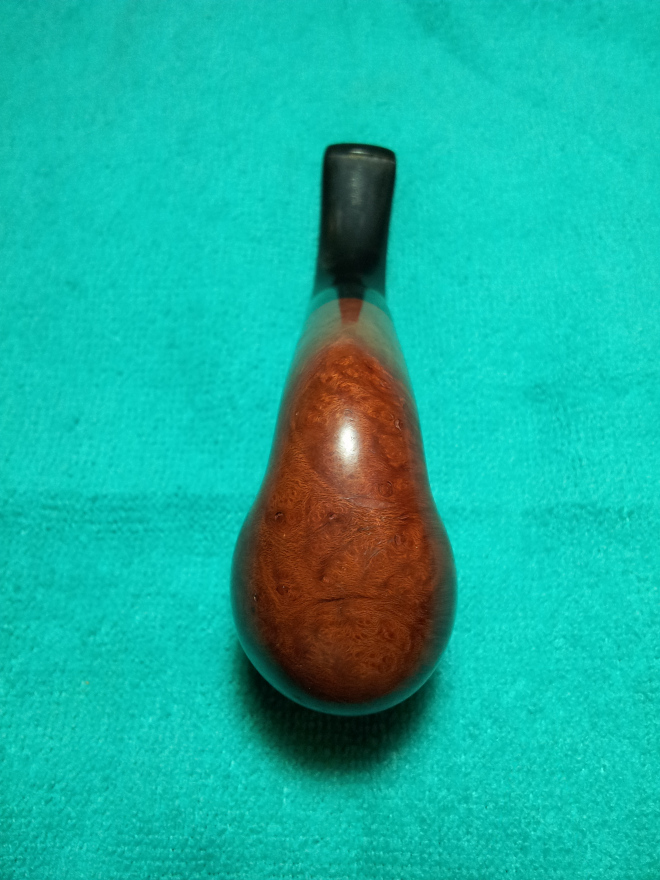
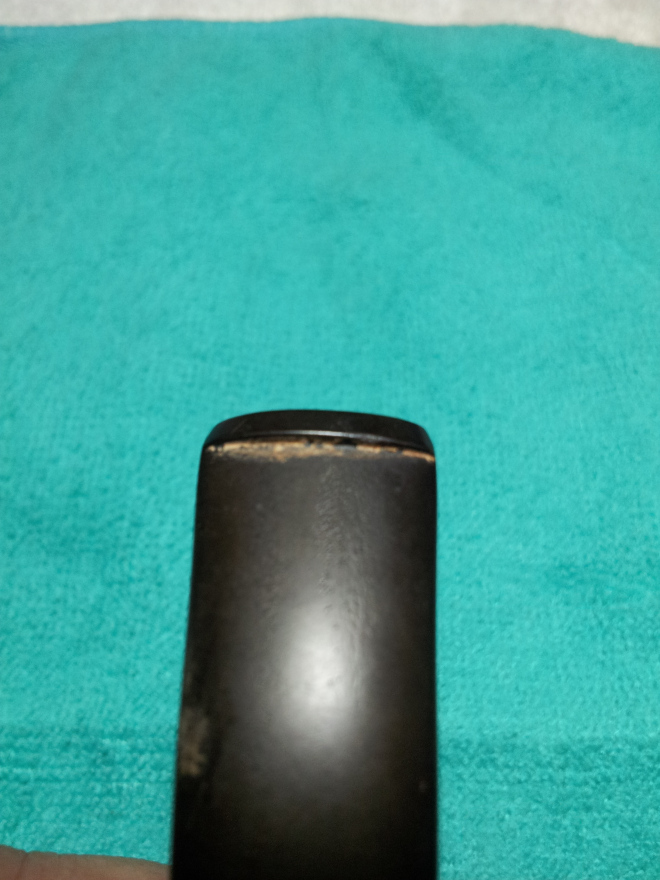
This no-name Oom Paul pipe came to me in a recent auction lot purchase (second row from the bottom, centre column in the pic). It was in pretty good shape when it arrived. Compared to many pipes in the lot, this one had not seen a great deal of use. There was a light cake in the bowl, and only a small amount of oxidation on the stem. Even the original stinger was intact. The only real issue was a scraped up rim; it looked almost as if someone had attempted to clean tars from the rim with a dull knife, and had taken off more rim than tars.

20150816_11105720150816_11110420150816_11111620150816_11112920150816_111248

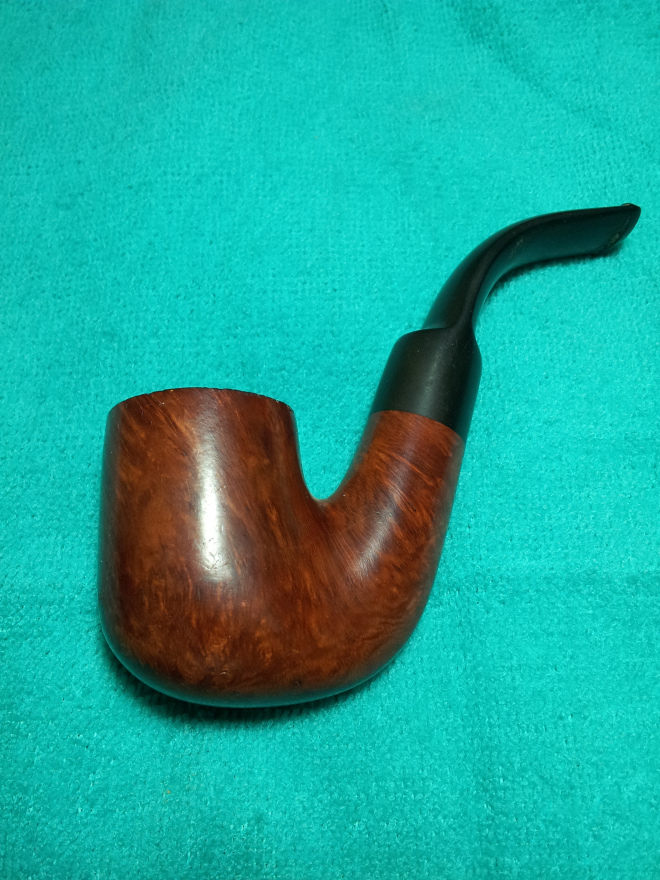
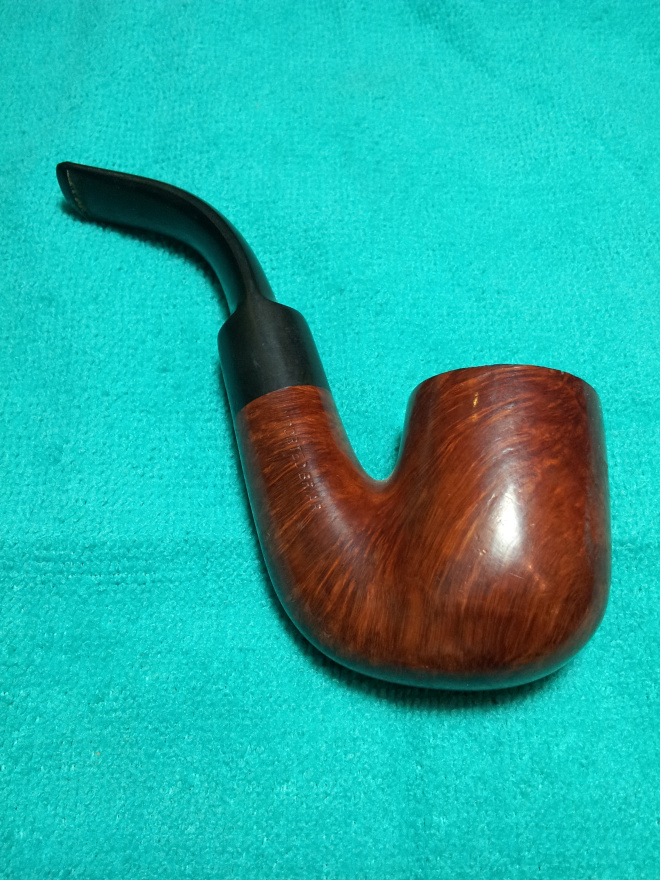
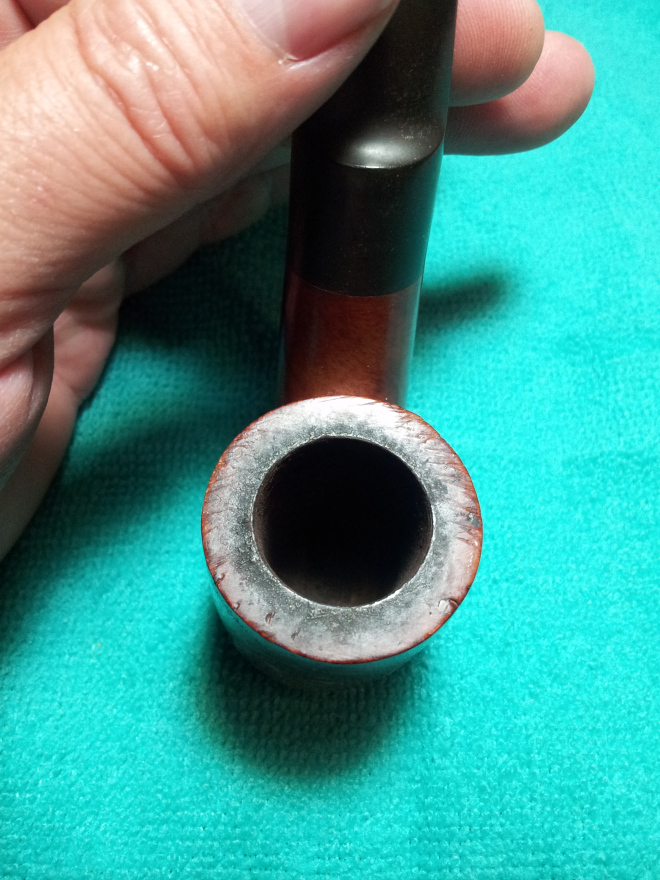
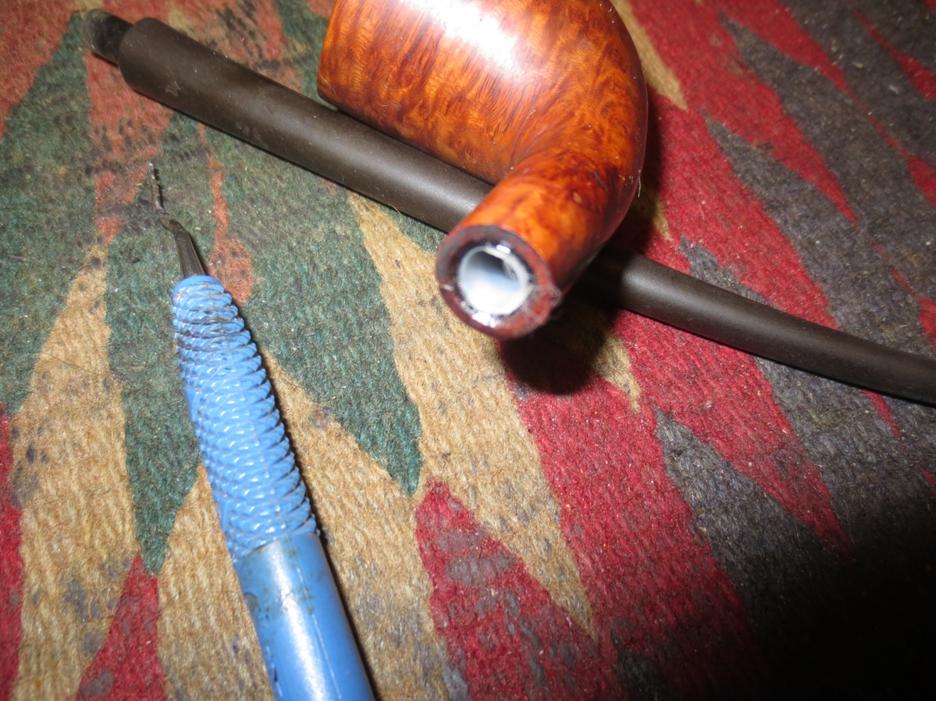
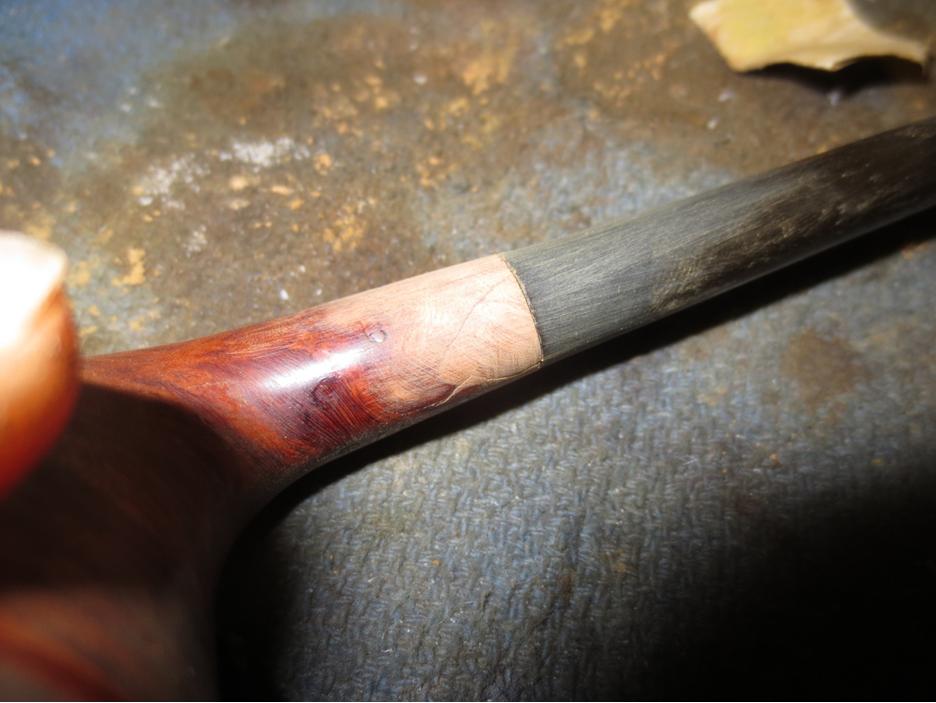
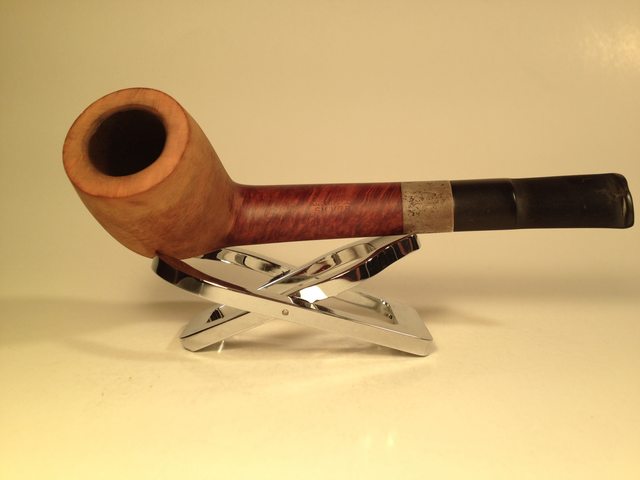
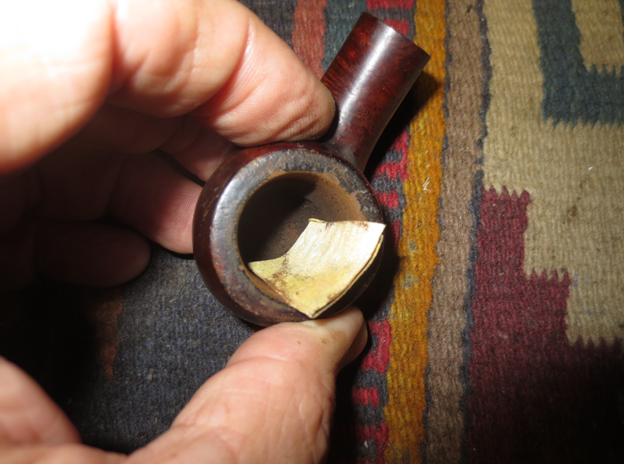
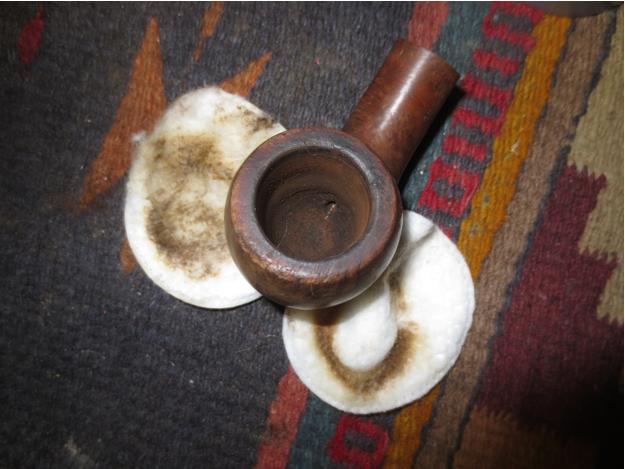
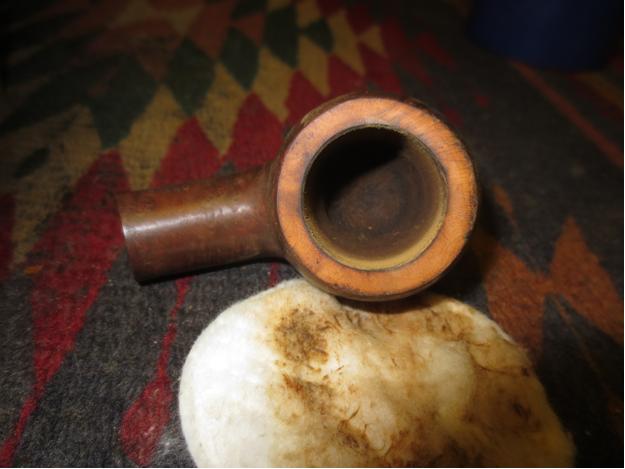
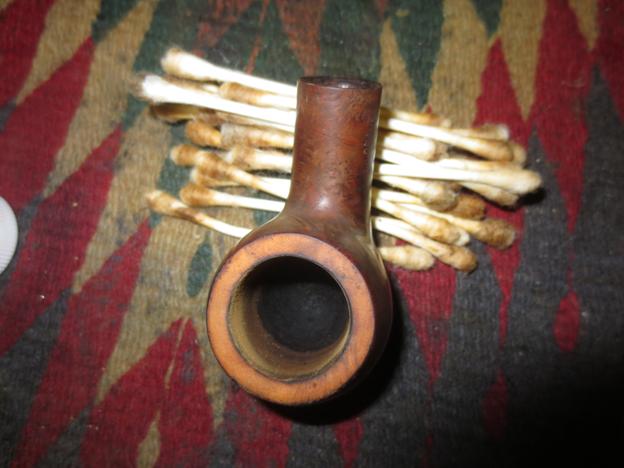
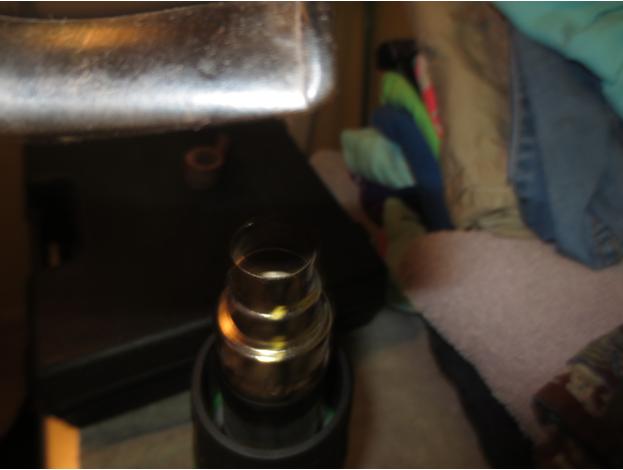
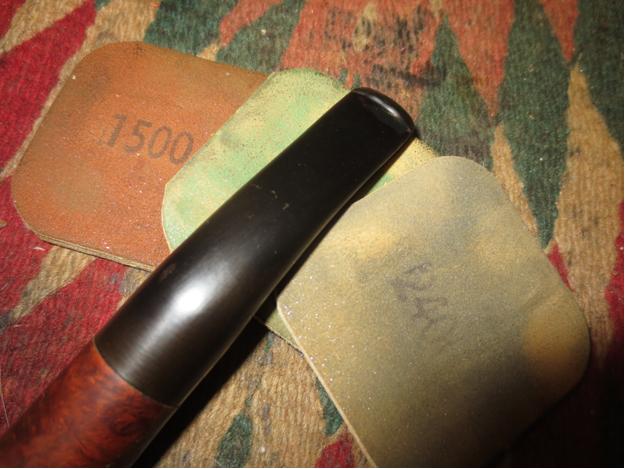
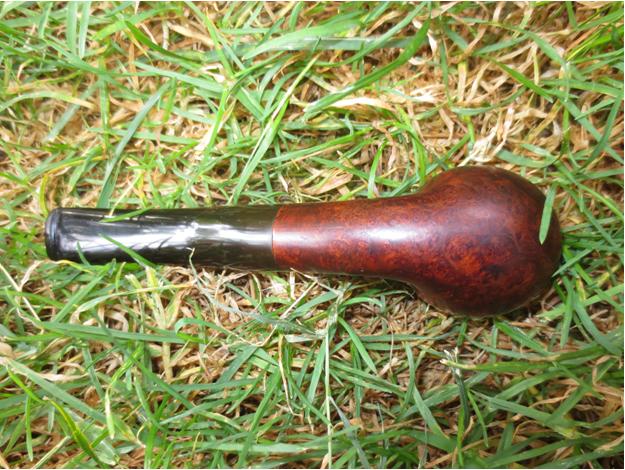
After reaming what little cake there was in the bowl and confirming that the briar was in very good shape inside…

View original post 789 more words

King of the Brighams – Identifying a Presidential Series A Grade Freehand!


Another great Brigham Restoration by Dadspipes

Charles Lemon's avatar

I’ve found most of my estate Brigham pipes on eBay so far. This one caught my eye for two reasons – it was a model/shape that I hadn’t seen before and it was a bit of a mystery! The listing pics were not of the best quality, so it was nearly impossible to make out the telltale Brigham Dots on the pipe stem. So hard in fact, that other potential buyers had asked if the stem was original to the pipe. Here’s the pic from the listing -can you spot the dots??

brigha14

This risk factor, I think, affected the bids and I came away the winner at only $40CAD. But would the gamble pay off? In due time, a pipe-shaped package arrived at my door. I eagerly opened it up and had a good look at the pipe for the first time. My eyes aren’t what they used to be…

View original post 1,053 more words

Refurbished KB&B Yello Bole Imperial Large Billiard


Yet another refurb by Troy that is stellar. If you have not visited his blog yet follow the links and have a look. He is doing a great job.

Troy W's avatarBaccy Pipes

Since my last  KB&B Yello Bole 07 Billiard ended up being a odd and unique prototype ( i know whoa is me ) i ended up looking for another for my regular smoking rotation. I really like the Kaywoodie/Yello Bole 07 shape and size of the classic billiard .Every one i own is a great smoking pipe and can be found for a song most of the time .To me its a American classic.

I was able to pick this pre 1955 Imperial 07 up. It looked like it was a good example and had very decent grain.

Other than a rim being banged up slightly and a few teeth marks on the button , it just needed a good cleaning and some elbow grease .


After a slight reaming and cleaning of the shank i put the stem in for a good soak in 91% alcohol .
I then…

View original post 272 more words

Crafting a Interior Shank Repair for a Cracked Shank Peterson Churchwarden


Blog by Steve Laug

A friend of mine stopped by with a pipe he wanted me to take a look at. It was a beautiful Peterson Churchwarden with a shapely long bent stem. The Dublin shaped bowl was perfect for this pipe. He showed me the issue – a cracked shank. Now that is typically an easy repair – just drill a pin hole at the end of the crack, glue and band the shank. But John being who he is does not like bands or bling on his pipes so he wanted me to see if I could band it from the inside! I thought it would be worth a try as I had done it before using a Delrin tube glued inside the shank to stabilize the cracks and then super glue into the cracked area and clamp until it sets. The issue with this crack was not as straight forward as the two photos below show. It was actually cracked in two places on the top of the shank – about a half-inch apart. The two cracks joined and if I had wanted to I could have removed a triangular piece of briar from the shank. The good news with this was that the joining of the two cracks had stopped the crack from going further up the shank so a repair would be straightforward.CW1

CW2 Now the challenge begins. I did not have any Delrin tenons that I could repurpose so I looked in my parts box and found the shank end of a replacement push tenon insert for meerschaum pipe repairs. Long ago I had used the stem end for something else and saved the shank insert knowing that one day I would be able to use it. Today was the day. I used my Dremel and sanding drum to sand off the edges of the thick end and to take down the threads on the insert. When I was finished sanding I had a rough surfaced tube insert that would sit in the shank of the Peterson with little effort.CW3 I opened the crack in the shank and put clear super glue into the opening. I pressed it together until it set. Then I coated the exterior of the tube with viscous super glue that was slow drying and pressed it into the shank. I set it aside to dry while I worked on the diameter of the tenon to reduce it enough to fit in the repaired shank. To me this is always the tricky part. I was sure I could take the tenon down some without weakening the strength of the tenon too much. With the size of the airway I only had one chance to get it right.CW4 When the insert was set, I used a drill bit and turned it into the shank to remove excess thickness and maximize the room for the tenon. I also used a knife to bevel the end of the tube insert and flare it to fit the bevel of the briar. I put the stem in place and the fit was good! I sanded the shank to clean up the repair glue. I sanded carefully around the nomenclature so as not to harm it but I wanted it to blend with the rest of the shank.CW5

CW6

CW7

CW8 Once I had the shank/stem fit the way I wanted it I stained it with a medium and dark stain pen to blend it in with the rest of the briar. I also scrubbed the rim with saliva and a cotton pad to remove the tars on the surface. I buffed the bowl with Blue Diamond and then gave the bowl several coats of carnauba wax.CW9

CW10 Though still visible on the exterior of the shank the crack is sealed and repaired. I worked on the stem to give it a polish. I sanded it with micromesh sanding pads – wet sanding with 1500-2400 grit pads and dry sanding with 3200-12,000 grit pads. In between each set of three pads I rubbed the stem down with Obsidian Oil. After the final sanding with the 12,000 grit pad I let the oil soak into the vulcanite before buffing the stem with Blue Diamond.CW11

CW12

CW13 I buffed the stem with Blue Diamond polish on the wheel and then gave the bowl and stem multiple coats of carnauba wax. I polished it with a clean flannel buff and then rubbed it down by hand with a microfibre cloth to give it a final shine. The finished pipe is shown below.CW14

CW15

CW16

CW17

CW18

CW19

Salvaging a Sorely Mistreated Brigham 3-Dot Acorn


I have always appreciated Brigham Pipes. I have restored a fair number of them. This one had a lot of challenges and it came out great.

Charles Lemon's avatar

Here is my latest pipe refurb project – a 1970’s vintage, Made in Canada, Brigham 3-Dot Acorn I found at a local antiques mall. I paid the princely sum of $14CAD for this poor old pipe. I have a soft spot for Brigham pipes – they were my Dad’s pipe of choice – so I hoped I could bring this one back to a useful, if not original, condition.

20150715_133533

The pipe as purchased was in a sorry state. The previous owner obviously loved the pipe – it was well used – but by the same token obviously didn’t care about preserving the pipe. It was clearly the original owner’s habit to knock the dottle out of the pipe by bashing the rim against whatever object happened to be nearby – a brick wall? Concrete curb? Steel fence? In any case, most of the front right rim was significantly worn away…

View original post 577 more words

Refreshing a Whitehall Washington Park Zulu, with a Little Help From an Erstwhile Apprentice.


Great work and even better to have help with it. I was touched by the father daughter work on this one being a dad with four daughters it is always great to have them join in the work. Well done.

Charles Lemon's avatar

This restoration is a bit special for me, not for the pipe, but rather for the refurbishing apprentice I gained on this project – my daughter. Interested to know more about a subject that obviously captures my attention, my daughter asked if she could help with a refurb. Naturally, I gave her free pick of the pipes remaining in my box.

She selected this Whitehall Washington Park Zulu. It is the pipe second from the bottom on the far right of the picture of my recent estate lot purchase.

Estate Pipe Lot

It was in fair condition when received – dirty and grimy to the touch like all the other pipes in the lot, with tars on the rim, lost fills on the bowl, and uneven ridges on the front edge where the harder grain seems to have risen, giving the front a washboard texture and appearance. The stem suffered from oxidation and…

View original post 675 more words

Reviving a Savinelli Silver 806


Blog by Dave Gossett
Dave1 My Army cousin stationed in Italy came to the states recently bearing gifts. He bought me 9 pipes at a swap meet in Vencenza – 5 Savinelli’s, 2 Brebbia’s, 1 Rossi, and 1 lesser known Italian briar. I’m a sucker for silver bands, long shanks, and Sav’s, so naturally this is the first one out of the batch I cleaned up.

This one had not been “smoked lightly” as the saying goes. The rim was beat up, the stummel had plenty of scratches, and the stem had a hefty chunk missing.Dave2

Dave3

Dave4 I started out by reaming and cleaning the airways. Then I topped the bowl and beveled it, and sanded the scratches from the exterior.Dave5 After removing the damage from the stummel, I gave it a light alcohol scrub to remove the rest of the stain.

I gave it a dark contrast stain starting with Fiebings dark brown and a hint of oxblood, then after drying for 24 hours I sanded it to lighten it up and make the grain pop. A cloth dampened with alcohol can be used around the stampings to lighten the stain a bit without compromising the nomenclature.

Next up, the stem. I removed the oxidation and scored the area around the repair site. Patched up the missing vulcanite with CA and charcoal, then filed it down and wet sanded smooth, followed by a light run on the wheel with compound.Dave6 I’ve already put a few bowls of Syrian Reserve through it since the pictures were taken. Great smoker. This one’s a keeper.Dave7

Dave8

Dave9

Dave10

Dave11

Dave12

Dave13

Breathing New Life into an LHS Sulgrave


Blog by Steve Laug

I have become a fan of older LHS pipes and restored quite a few of them lately. I am always on the lookout for different LHS lines that I have not seen. Recently I picked up this LHS Sulgrave from a fellow on the Dr. Grabow Collectors Forum for $15. It is a line that I had not heard of before. He described it as a lightly smoked briar pipe. When I saw it I wanted it as it was my kind of shape. Never sure what to call this shape – bent banker, squat apple – not sure but I like it. He gave the following description in the sale listing. The shank is stamped Purex Sulgrave arched over LHS in a Diamond on the left side. The stem has two light coloured dots on the left side. The pipe is 5 1/8 inches long from the bottom of bowl to end of bit. The bowl chamber diameter is 7/8 inch and bowl depth is 1 1/4 inch. There is light caking in bowl. There is light tooth wear on end of the stem near the button. It has normal wear and tear (dings, oxidation and scratches) for an estate pipe. Nice overall shape and condition. Here are the photos that he included when I emailed him for details.LHS1

LHS2

LHS3

LHS4 When the pipe arrived I was not disappointed. The shape was perfect. The description was accurate and the only variation that I could see was that the stamping did not include PUREX on the shank. Not a big deal in my book. The bowl was unevenly caked and appeared to have been reamed. The back side of the bowl had a thicker portion of cake that gave the inside wall on the back side an uneven and out of round look. I was pretty certain that with a good reaming and a light sanding the rim would look better. The stem was over bent and there was a slight crease on the underside of the bend. There was a coat of wax or some kind of coating on the stem and bowl. The stem was oxidized. In the first photo below you can see slight imperfection in the vulcanite stem. I have circled it to highlight it in the photo below. It is not a hole or worn spot, it is actually a thread of cord in the rubber. Its presence gives some idea of the date of manufacture as recycled rubber was used in WWII pipes.LHS5

LHS6

LHS7

LHS8 The stem also had a lot of tooth dents and chatter along both top and bottom with some very deep marks on both. I tried to capture them in the next two close-up photos but they are still not very clear. The odd thing was that the dents went up the stem over an inch. The slot in the button was not centred and appeared to have left the factory that way. The dents were deep enough that I was concerned regarding the thinness of the stem surface over the airway. The mortise and airway in the shank were dirty and the end of the mortise was chipped away. It looked as if there had originally been a stinger in the tenon but it was no longer with the pipe.LHS9

LHS10 I also have included the next close-up photo of the rim and the bowl interior to show the cake that gave the bowl an out of round appearance.LHS11 I reamed the bowl with a PipNet pipe reamer using the largest cutting head. I took the cake back to bare wood to even out the inner edge of the bowl. I wanted to get rid of the cake so that I could smooth out the edge.LHS12

LHS13 I folded a piece of 220 grit sandpaper to smooth out inner edge. It took a little effort remove the inner edge damage and clean up the roundness of the bowl.LHS14

LHS15 I wiped down the bowl with acetone on cotton pads to remove the tars and the wax coat on the briar. With them removed the outer edge of the bowl showed damage as well. The bowl had been knocked about on the front edge particularly. The grain on this pipe was lovely.LHS16

LHS17

LHS18

LHS19 To minimize the outer edge damage I topped the bowl with 220 grit sandpaper on a topping board. I sanded it to remove the damage to the top of the bowl and clean up the outer edge of the bowl.LHS20

LHS21 I cleaned out the shank and the bowl with pipe cleaners, cotton swabs and alcohol to remove the grime inside. It took quite a few of both to clean out the shank but finally they came out clean.LHS22 I heated the stem with a heat gun to try and lift some of the dents to the surface and to also take out some of the bend. I also wanted to smooth out the sharpness of the bend on the bottom side.LHS23

LHS24

LHS25 I cleaned out the airway in the stem with pipe cleaners, cotton swabs and alcohol.LHS26 The heat had raised most of the dents significantly. The ones that were left in the stem needed to be sanded out and then filled to take care of them. I used 220 grit sandpaper to smooth out the surface. I also worked on the curve on the underside of the stem to make it less sharp looking.LHS27

LHS28

LHS29

LHS30 The dents in the stem needed to be filled to bring the surface back to smooth flowing condition. I used a black super glue to fill the surface and set the stem aside to dry for several hours. Once dry, I sanded the fills with 220 grit sandpaper and then used a medium and a fine grit sanding sponge to feather them into the surface of the stem.LHS31

LHS32

LHS33

LHS34

LHS35

LHS36 I used a needle file to clean up and sharpen the edge of the button and give it more definition. I sanded the sharp edge with sandpaper and then sanded it with micromesh sanding pads. I wet sanded the stem with 1500-2400 grit micromesh pads and dry sanded with 3200-12,000 grit pads. I rubbed the stem down with Obsidian Oil between each set of three pads and then let it dry after sanding with a 12,000 grit pad.LHS37

LHS38

LHS39 I buffed the pipe with White Diamond and Blue Diamond on the buffing wheel to polish and remove the slight remnants of oxidation that had come to the surface. I gave it multiple coats of carnauba wax and buffed it with a clean flannel buffing pad. I brought it back to the table and hand buffed it with a microfibre cloth. The finished pipe is shown in the photos below.LHS40

LHS41

LHS42

LHS43

LHS44

LHS45

LHS46

Filling and Filing – An Exercise in Repairing Pits and Dents on a Treaty Bond Rhodesian


Good repair and replacement of fills. Nice work

Charles Lemon's avatar

This is another pipe from my recently auction lot purchase. The shape and size of this Rhodesian is, at least for me, very appealing, though it may be a tad heavy for those that like to clench the pipe in their teeth. It is marked “Treaty Bond” over “Made in France” on the left shank, and, faintly, “Imported Briar” over “409” on the right shank.

The pipe arrived on my work table like all the others from this lot – dirty! It had obviously been smoked a lot, as the bowl was clogged up with a heavy cake. In fact, the airway at the bottom of the bowl was completely caked over. The rim also had a layer of tars. The outside of the bowl was grimy and had two large spots where factory fills had fallen out. I also found a small crack on the bottom of the outside…

View original post 931 more words

Resurrecting a Beheaded Dunhill Shell Briar Billiard


I thought this was an interesting repair. The combination of methods used gave a good result.

Charles Lemon's avatar

This is the second pipe I’ve tackled from my recent auction lot. It is a Dunhill Shell Briar which met a horrible, Anne Boleyn-esque fate – off with its head! I’m guessing most of the auction lot came from the same estate, as no less than four of the 17 pipes had similar injuries. Was the previous owner fond of knocking the dottle out against a wall a bit too fiercely? Or perhaps these pipes were the victims of a not so subtle campaign to “encourage” someone to quit the pipe altogether? We’ll never know for sure.

What I do know it that the bowl had broken off the shank and had been poorly repaired. The glue joints were uneven, and the pieces of the stummel were out of alignment with each other, leaving the pipe misshapen and awkward looking, like a broken arm that has been incorrectly set and allowed to…

View original post 1,525 more words