by Steve Laug
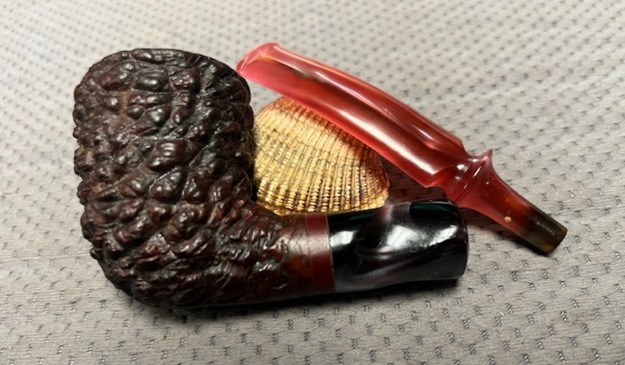
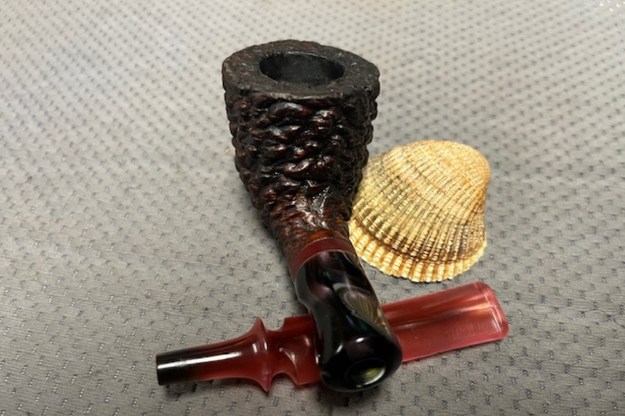
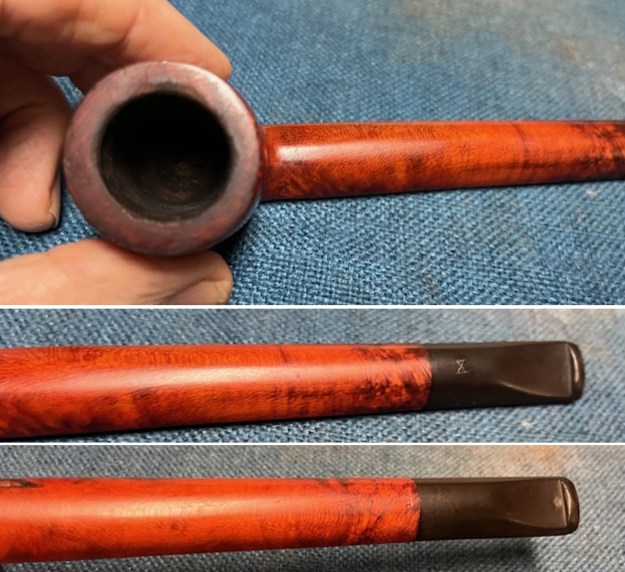
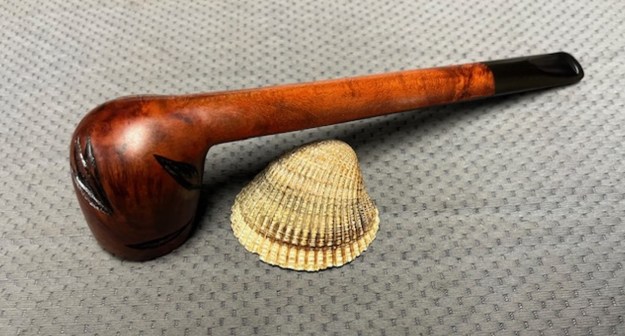
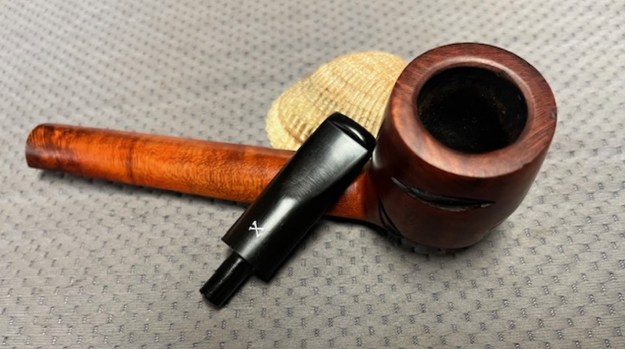
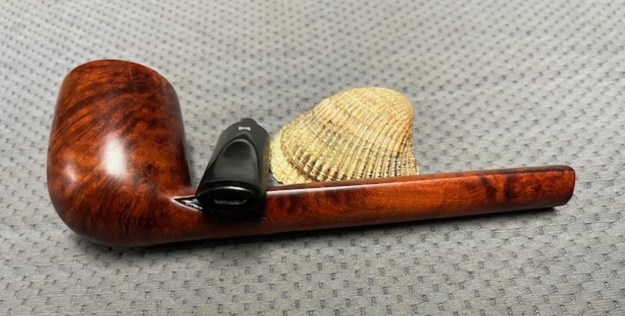
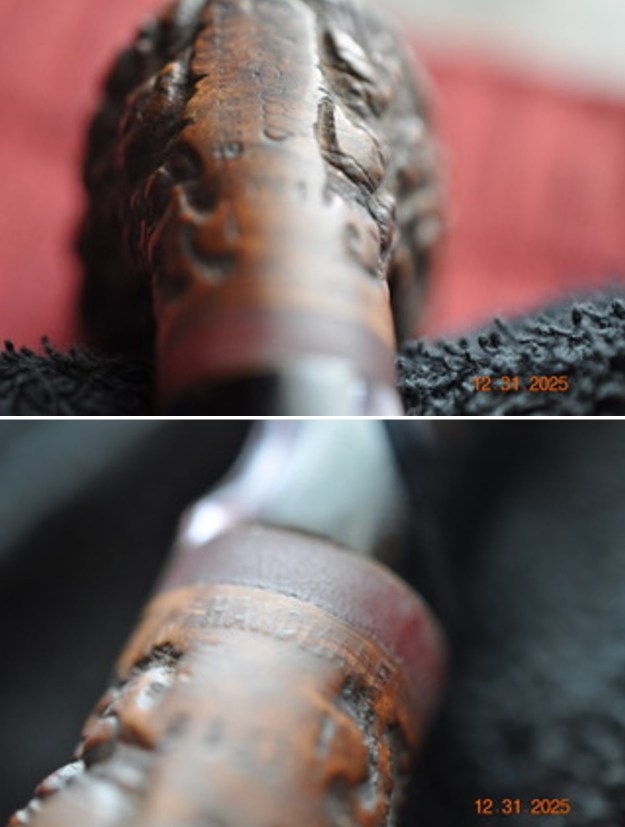
The next pipe on the table is a Pebble Rusticated Dublin that Jeff picked up on 03/08/2025 from a seller in Macon, Georgia, USA. The finish is pebble rusticated on the rim top and around the bowl and shank. There is a variegated purple twisted shank extension on the end. The bowl had rich mixed browns stain all around it. There is a smooth ring around the outer and inner edge of the rim top. It is a great looking pipe. It is stamped on the heel of the bowl and the underside of the shank and reads Edwards in script [over] Algerian Briar [followed by] CF1. It is stamped Hand Made at the shank stem junction. The finish was dirty and had a lot of grime and grit ground into the rustication around the bowl. The rim top and inner edge of the bowl is dirty with a heavy lava flow on the edge and in the rustication of the top. There is a thick cake in the bowl. The rose-coloured acrylic saddle stem is dirty and there were tooth marks and chatter on both sides ahead of the button. Jeff took photos of the pipe before he started his clean up work. It showed a lot of promise.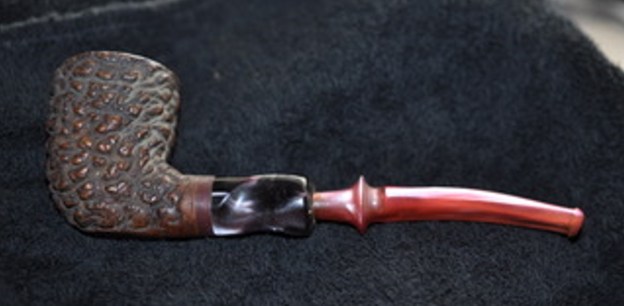
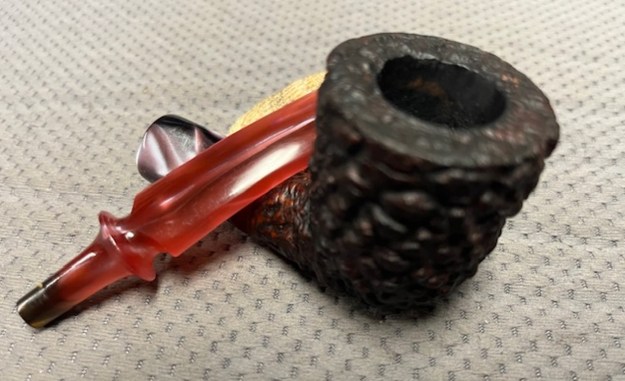
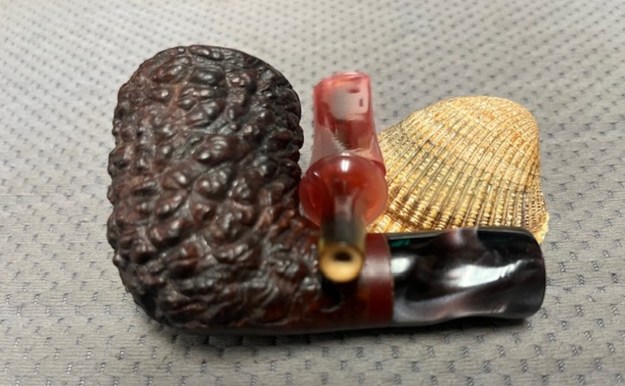
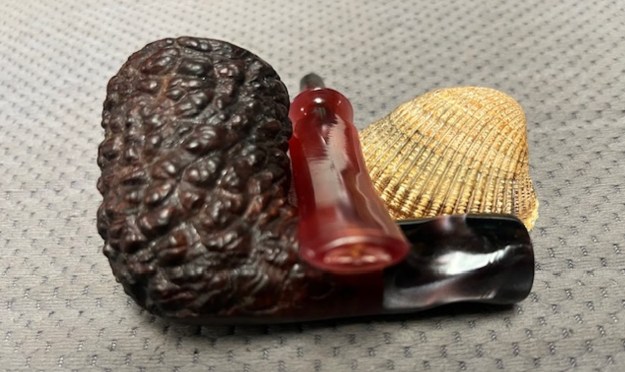
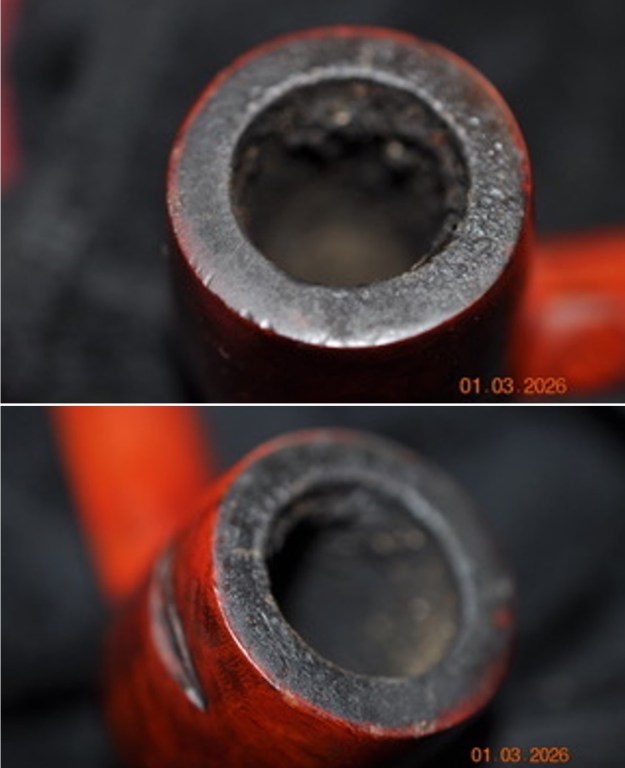
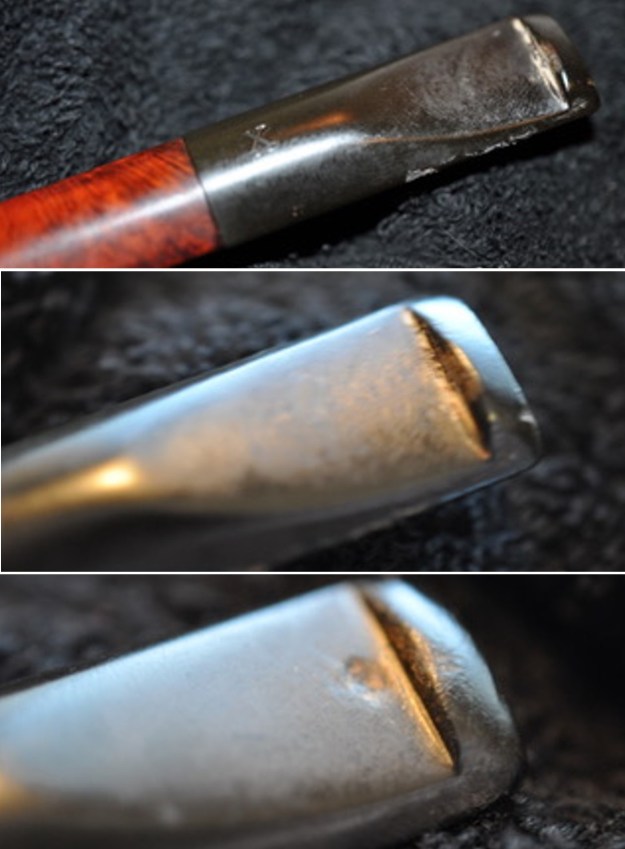
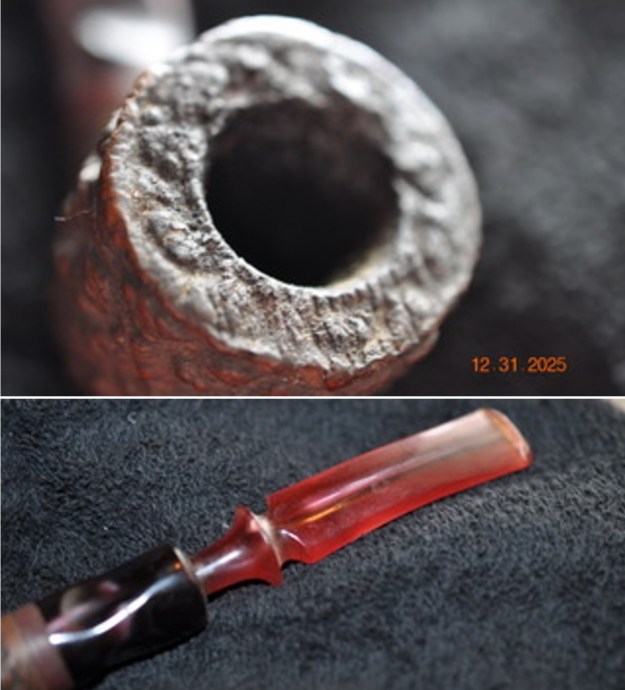
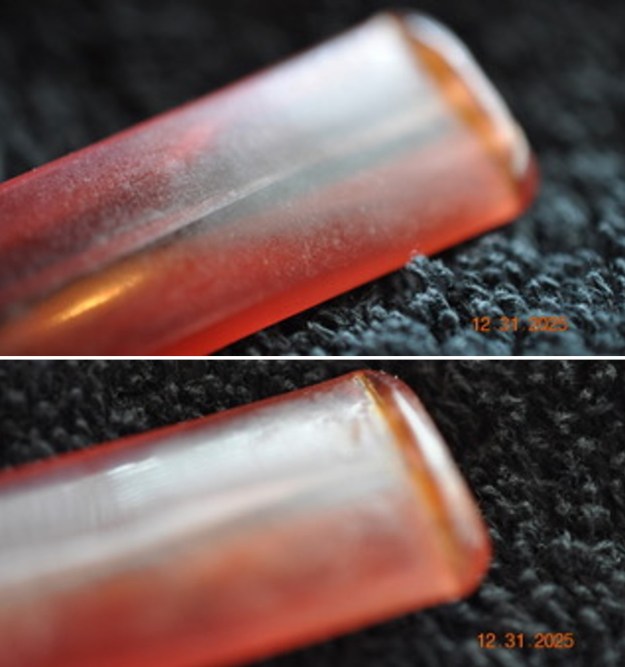
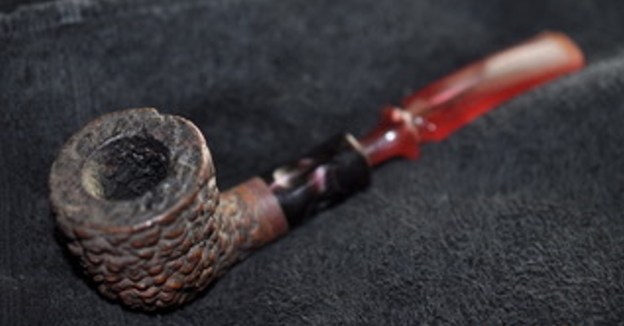 Jeff took photos of the bowl and rim top to show this thick cake in the bowl and heavy lava coat in the rustication of the rim top. Hopefully the cake and lava had protected the inner and out edge of the rim. The photos of the stem show the chatter and tooth marks on both sides.
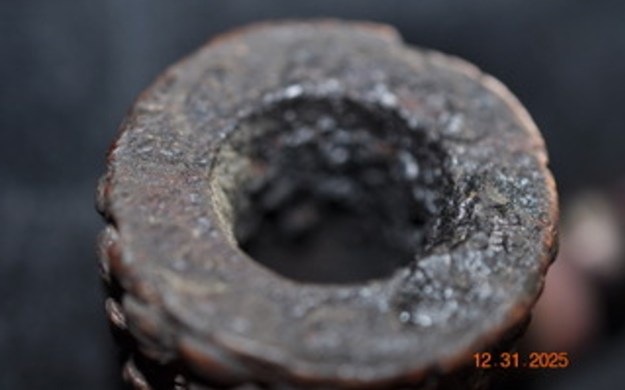
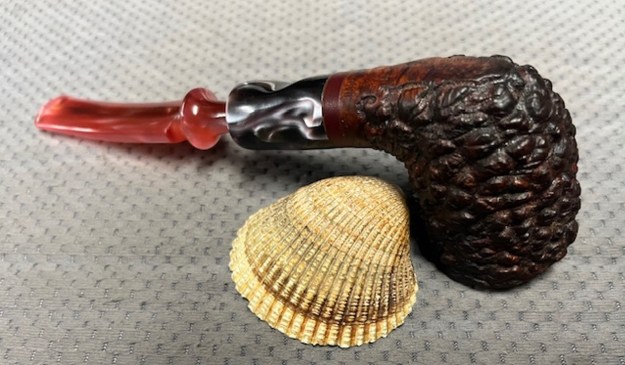
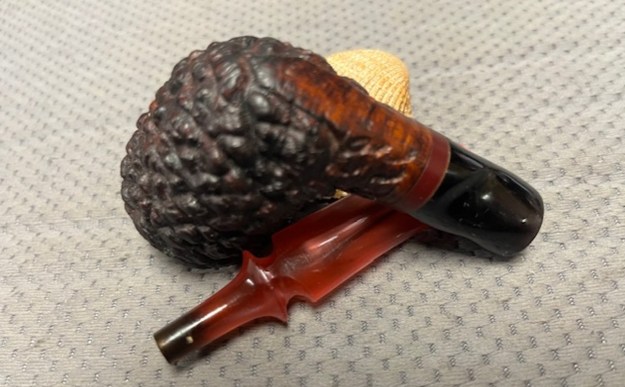
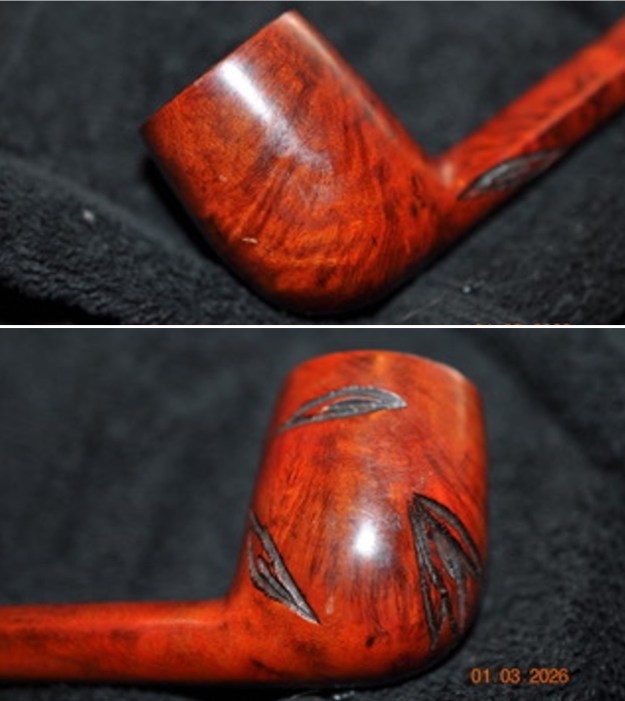
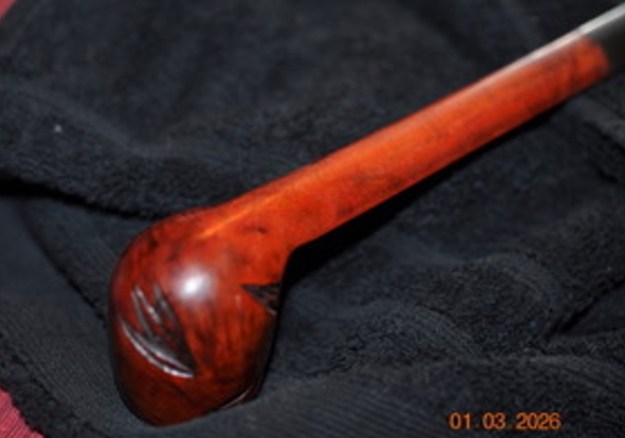
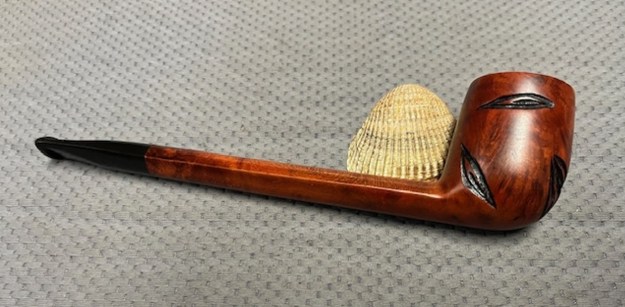
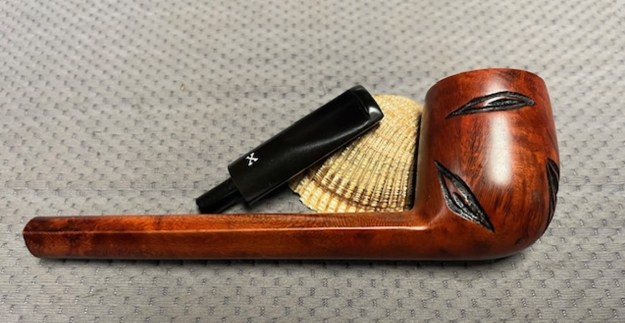
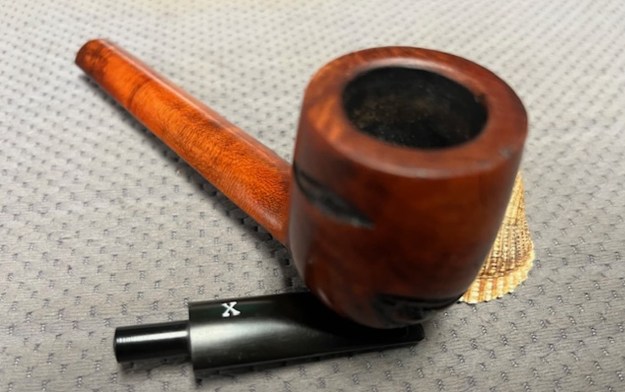
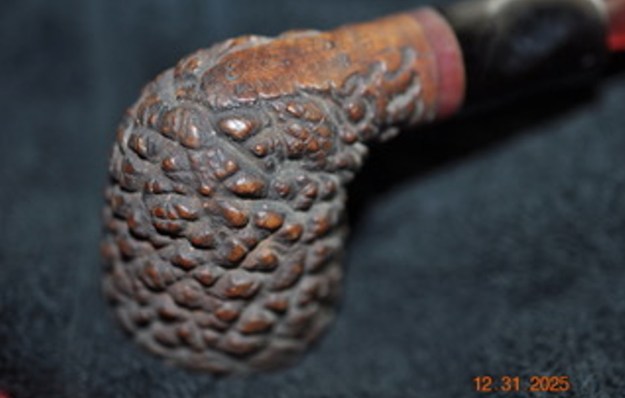
 The next series of photos show the condition of the finish on the bowl. The pebble, or coral rusticated finish that Edwards put on the pipe was worn but quite unique. The rim top showed some different style of rustication. There was a smooth ring around the shank end ahead of the acrylic shank extension.
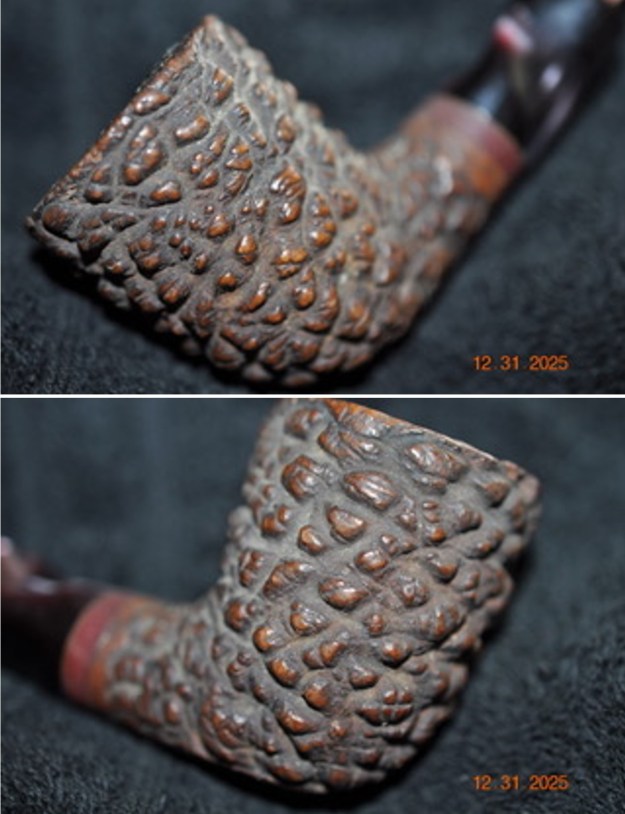
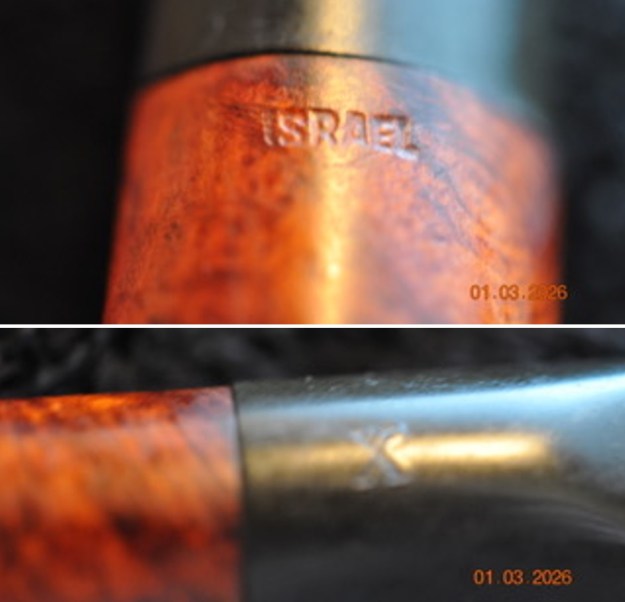
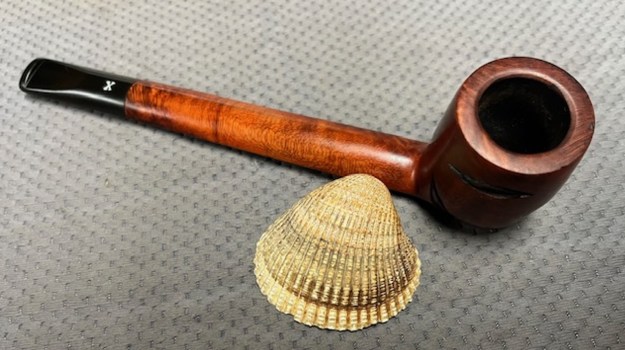
 The next photos show the stamping on the underside of the shank of the pipe. All of it is clear and readable.
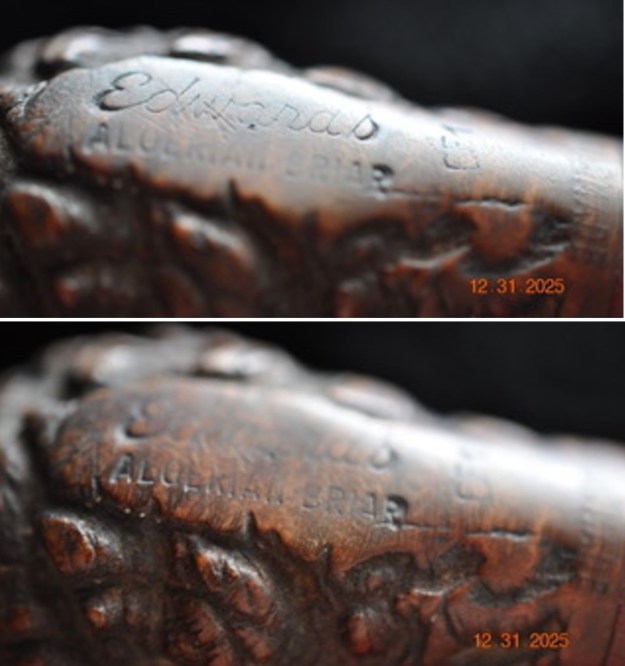
 Across the board Edwards pipes were all Algerian Briar and all were unstained waxed or oiled briar. I remember reading that actually oil curing was a feature of their pipes. I did a quick look on Pipedia (https://pipedia.org/wiki/Edward’s) and found that I was correct. I quote:
Edward’s pipes were originally produced in St. Claude France when France actually was a world-class pipe maker with longstanding business & political connections to Colonial Algeria that allowed them to obtain the finest briar.
During the tumultuous 1960’s, Edward’s created a business model to offer the finest briar available in both Classic and Freehand shapes – all at a fair price. They bought the company & equipment and cornered the market on the finest, choice Algerian Briar just before the supply vanished in political turmoil of Algeria’s independence. Edward’s packed up both machinery and briar-treasure to America, safely caching the essentials to create a new pipe-making dynasty. This was a coup, for the 70’s and 80’s were grim years for pipe smokers as quality briar all but disappeared.
All of Edward’s pipes are Algerian Briar – a fact very few pipe companies can claim, and all are oil-cured utilizing natural finishes – no strange concoctions are used to interfere in your tastebud’s dance with the briar. Algerian, Calabrian, Sardinian, Corsican – take your pick, but Algerian Briar is generally considered the finest smoking briar ever used. When combined with oil-curing, Algerian takes on a magical quality that even Alfred Dunhill recognized as far back as 1918 as the choice for both his Bruyere and Shell.
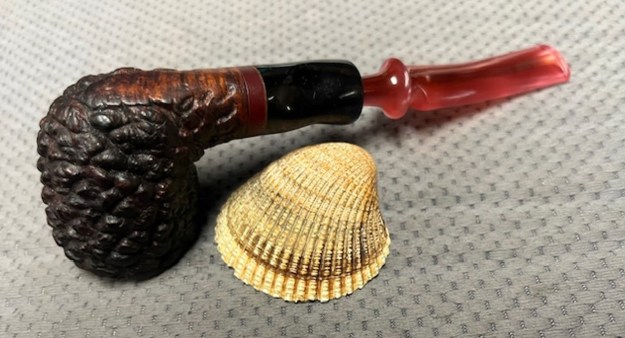
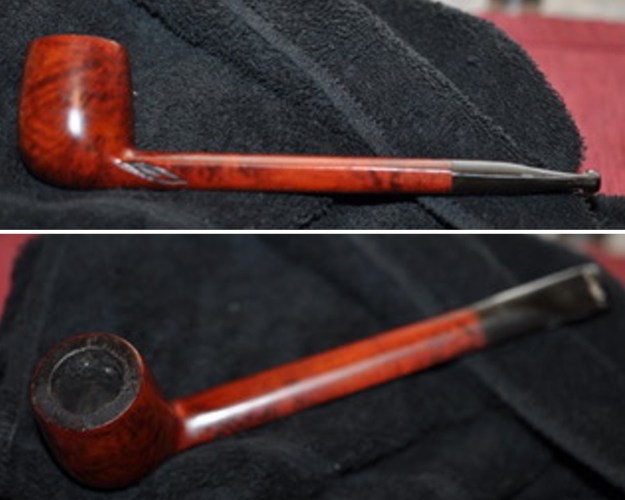
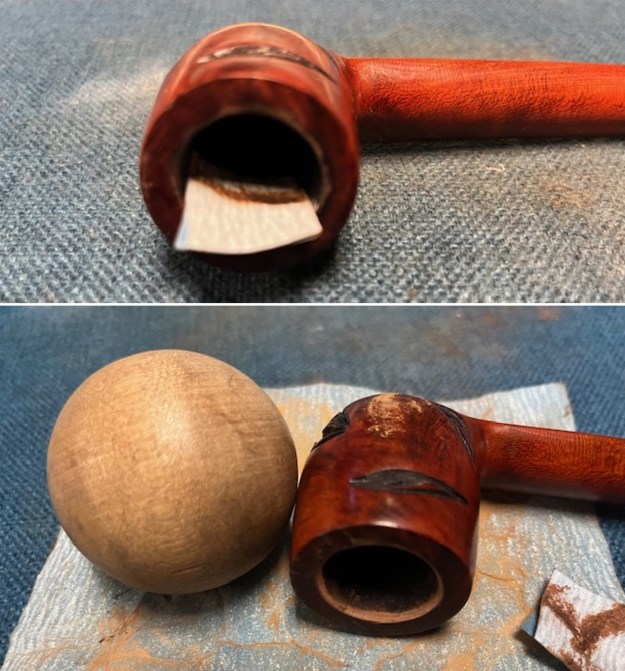
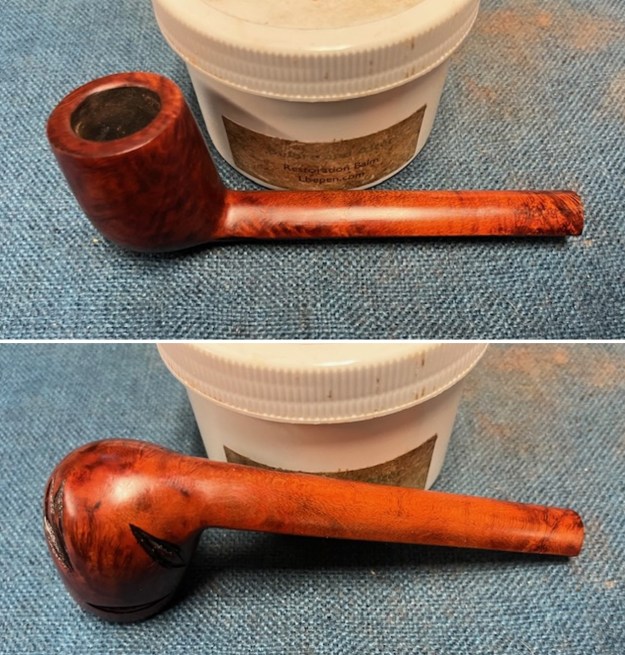
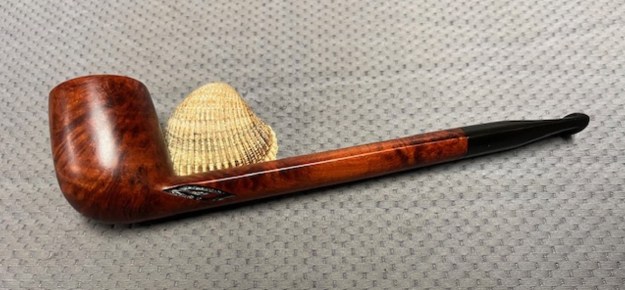
With that information on the brand in hand I turned to the pipe. Jeff had cleaned the pipe well which I really appreciate because of the freedom it gives me in dealing with pipes. He reamed it with a PipNet pipe reamer and got rid of the cake. He cleaned up the reaming with a Savinelli Fitsall Pipe Knife so that we could see the walls of the bowl and assess for damage. He cleaned the internals of the shank and stem with alcohol, pipe cleaners and alcohol. He scrubbed the exterior with undiluted Murphy’s Oil Soap and a tooth brush. He rinsed the pipe under warm water. He dried it off with a cloth and then let it air dry. The stem was scrubbed with Soft Scrub to remove the grime. Once it was rinsed off, it came out looking very good. The finish on the bowl and the rim top cleaned up nicely. I took pictures of the pipe to show how it looked when I brought it to the table.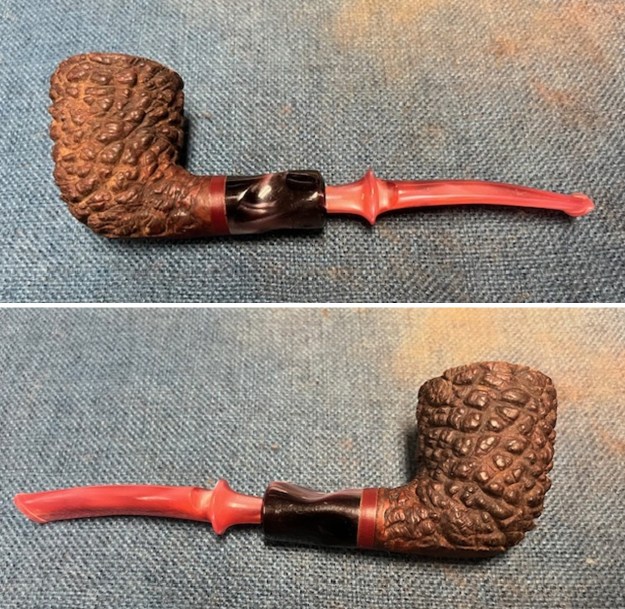
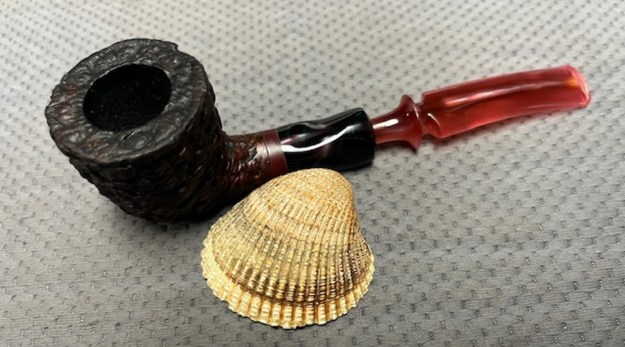
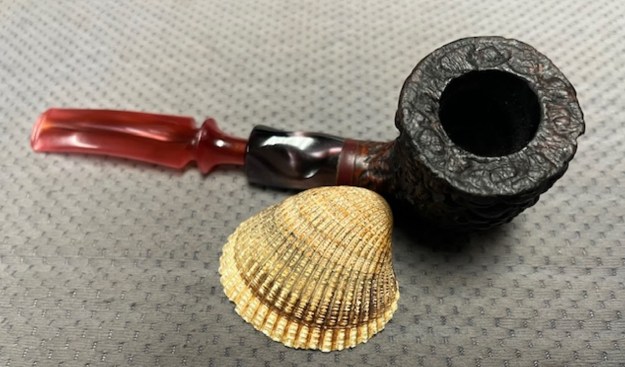
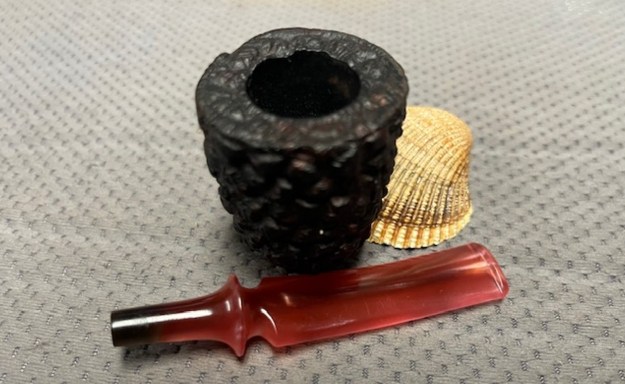
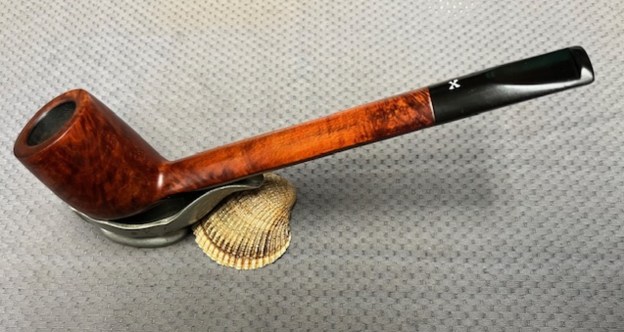
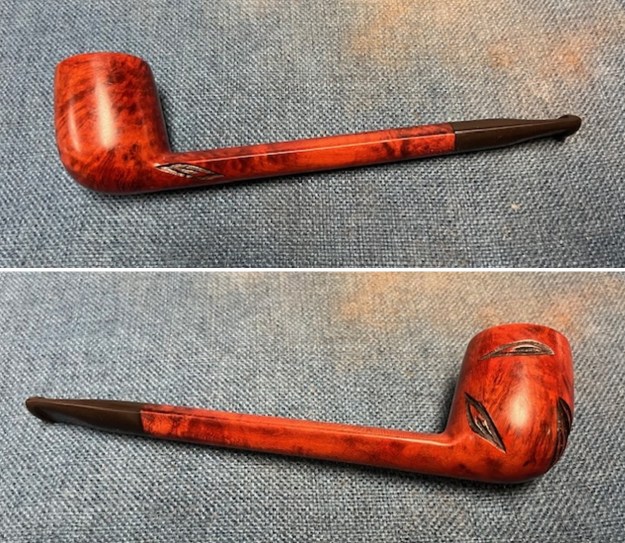
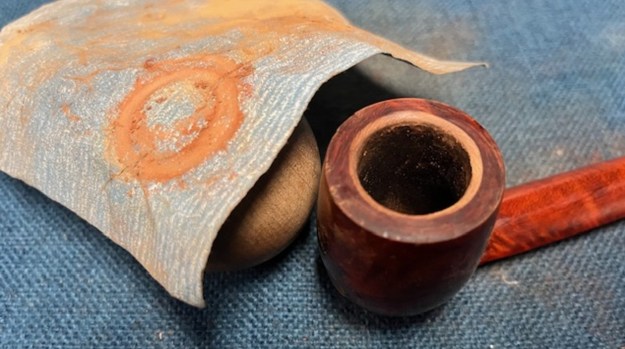
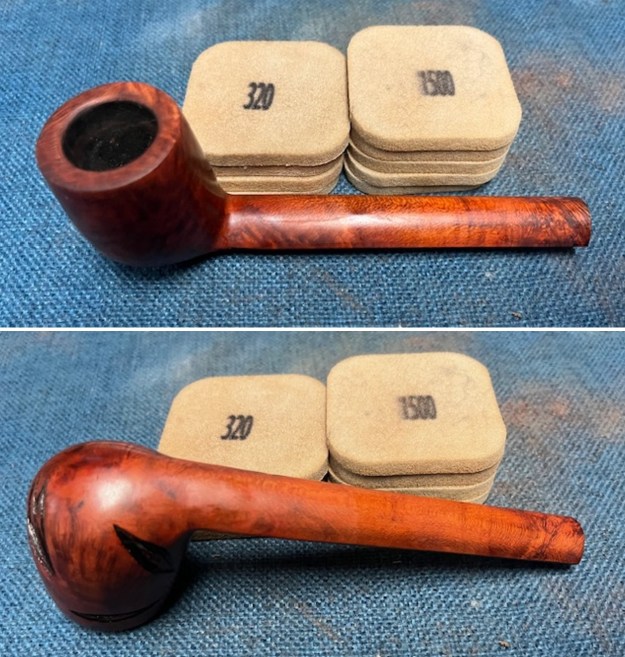
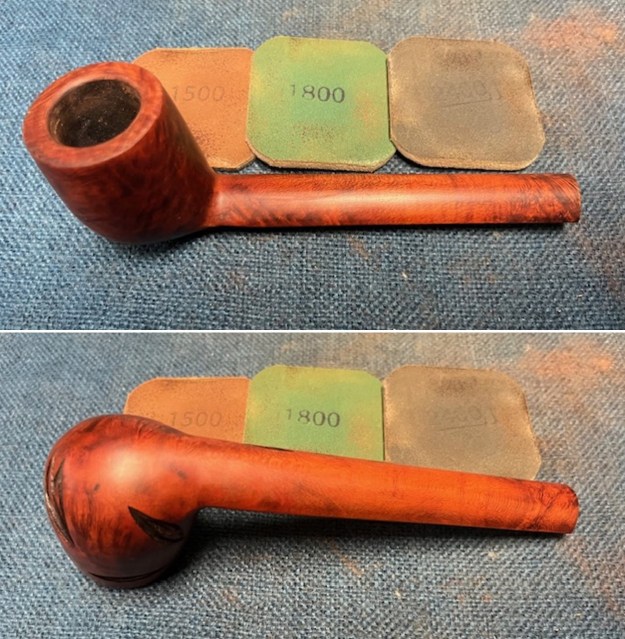
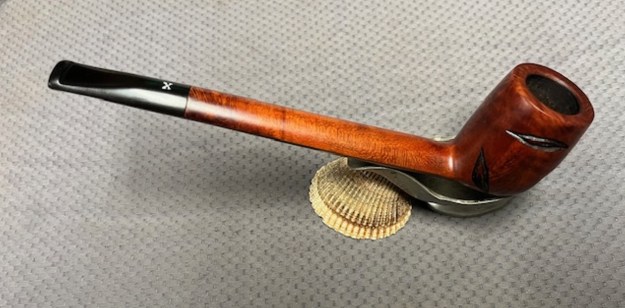
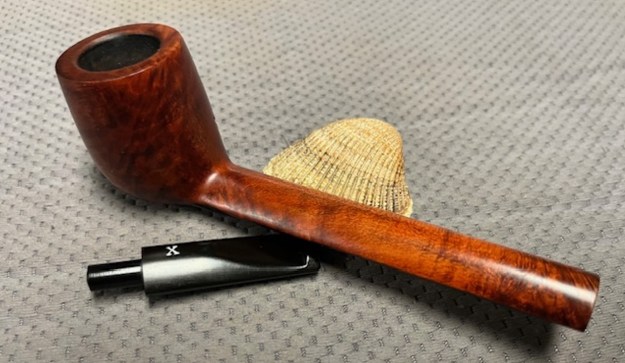
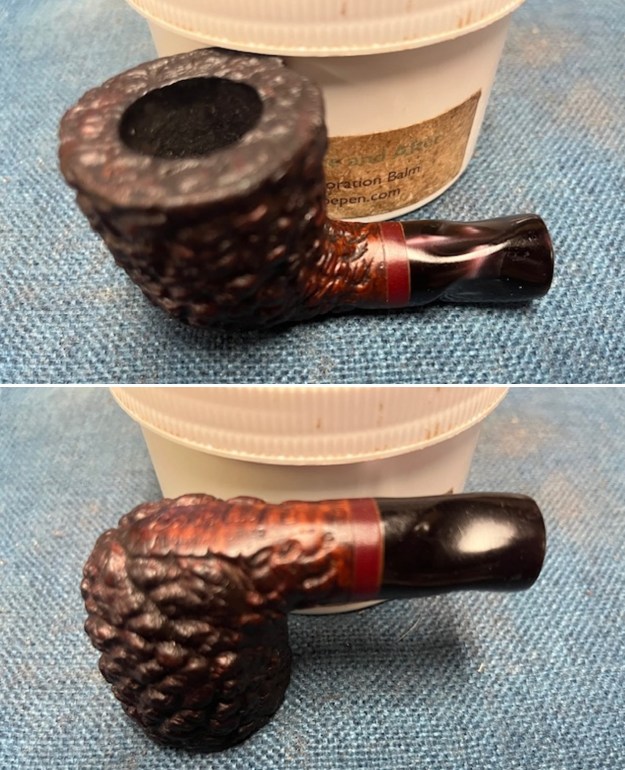
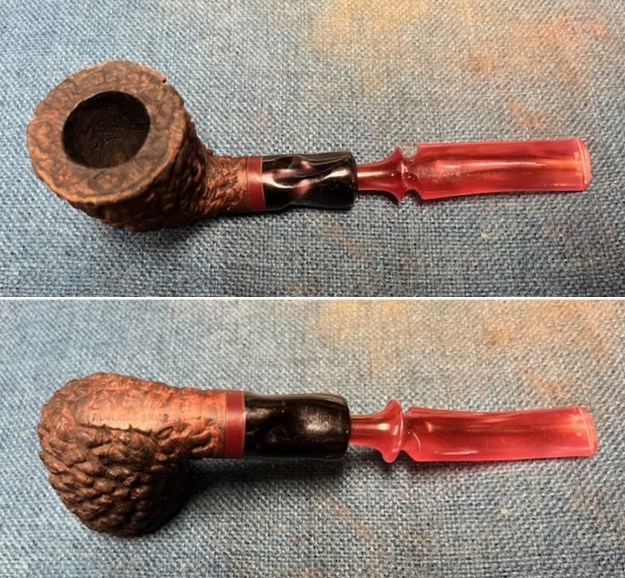 I took a close up photo of the rim top to show how clean it was. You can see the rustication on the rim top and the ring around the inner and outer edge of the rim. The rose acrylic stem looked good just some light tooth chatter and marks near the button. Overall the pipe is a beautiful looking piece.
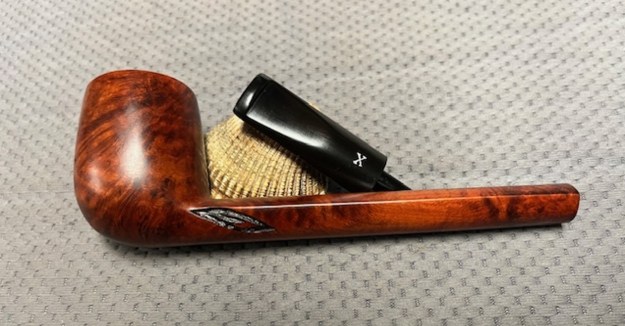
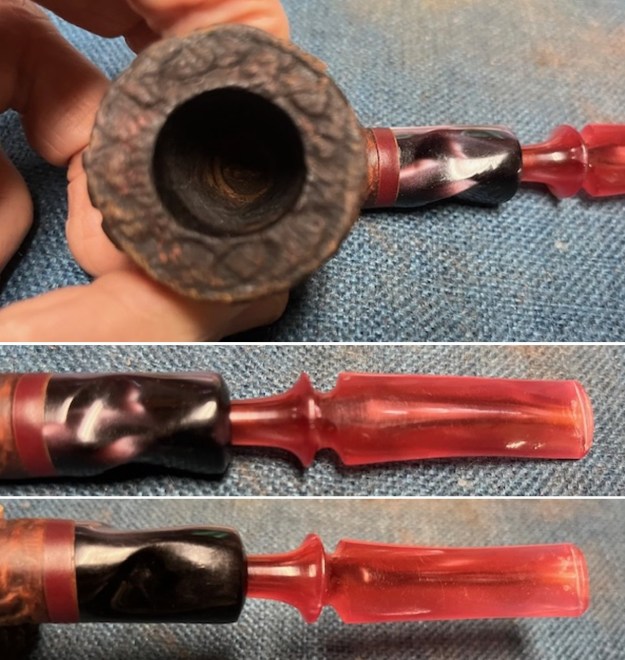 I took photos of the stamping on the sides of the shank. It read as noted above. It is clear and readable. I took a photo of the pipe with the stem removed to give a sense of the proportions of the pipe.
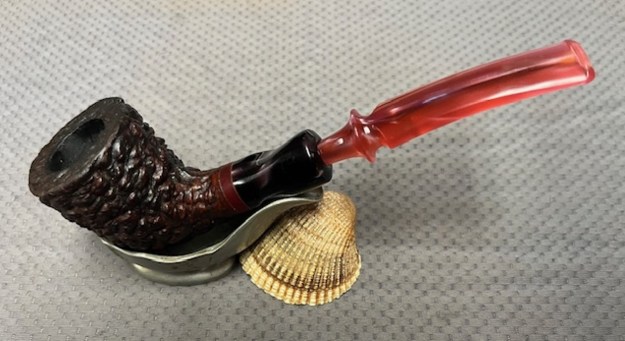
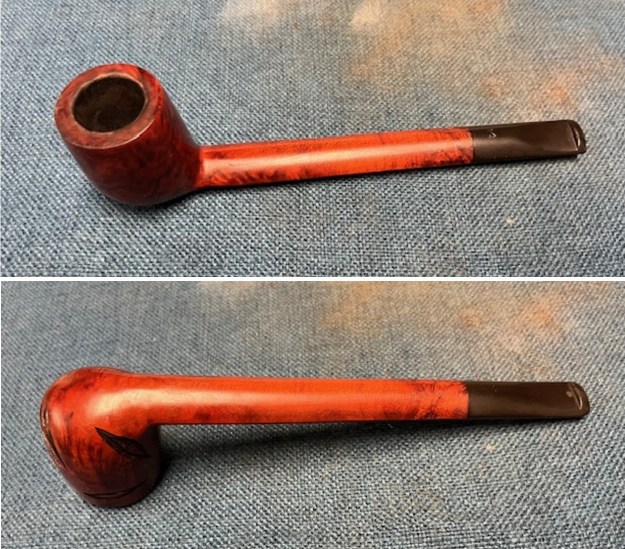
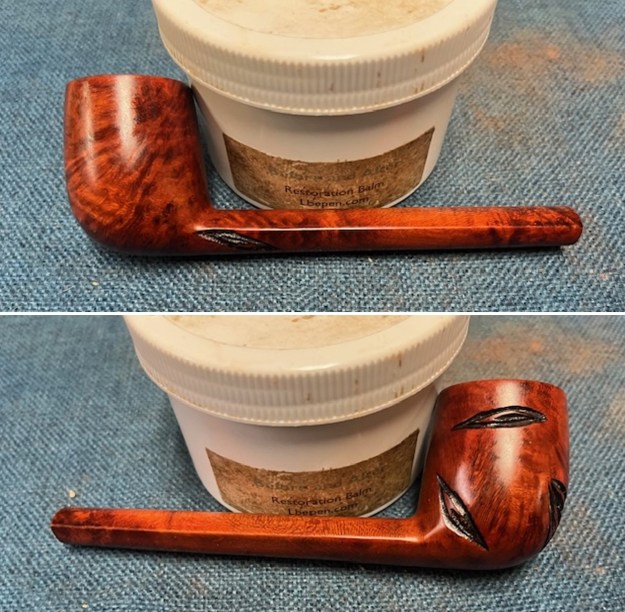
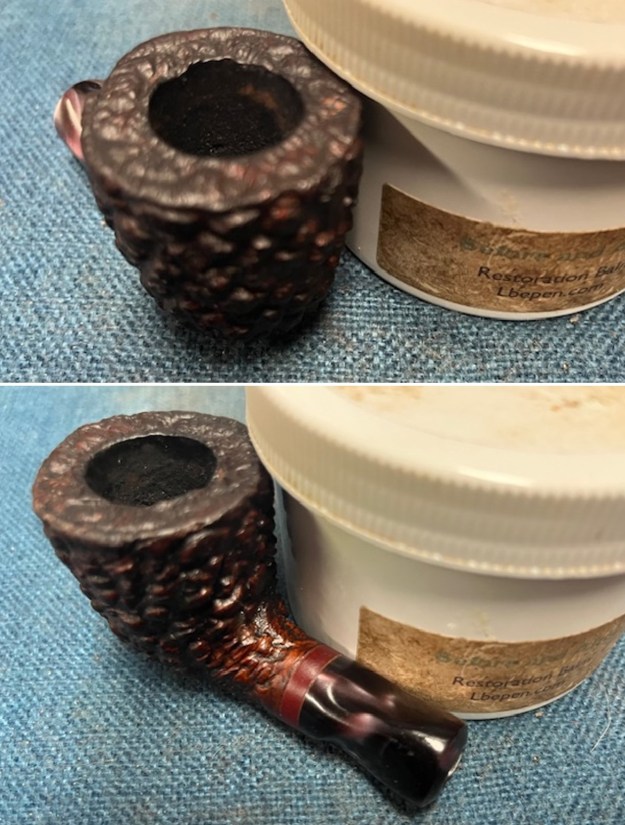
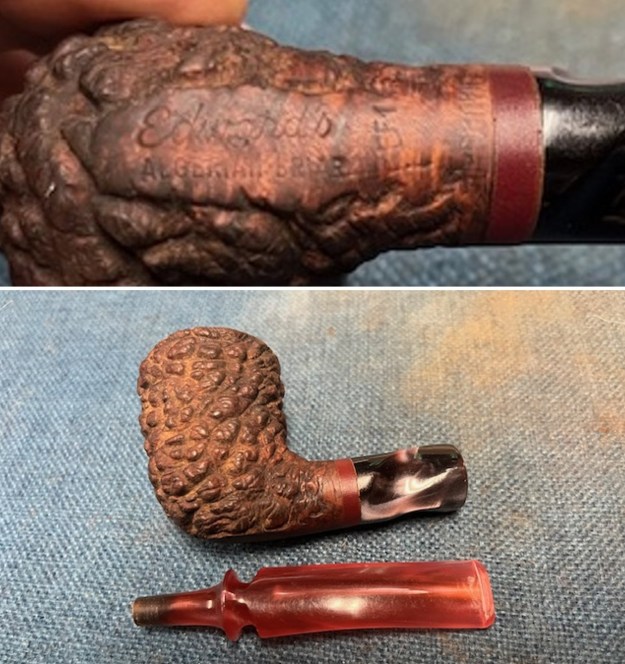 I worked some Before & After Restoration Balm into the briar with my finger tips and a horsehair shoe brush. The product is a great addition to the restoration work. It enlivens, enriches and protects the briar while giving it a deep glow. It is a product I use on every pipe I restore.
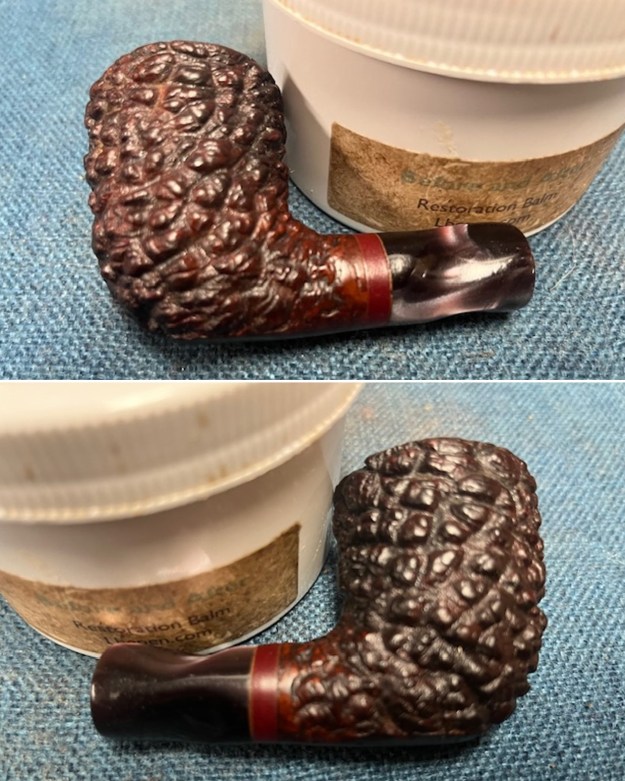
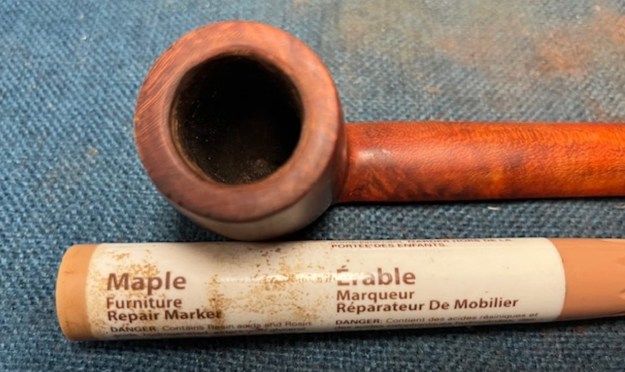
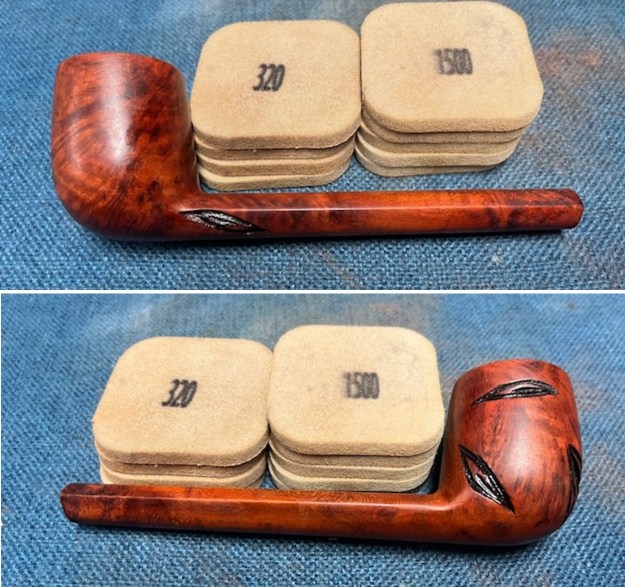
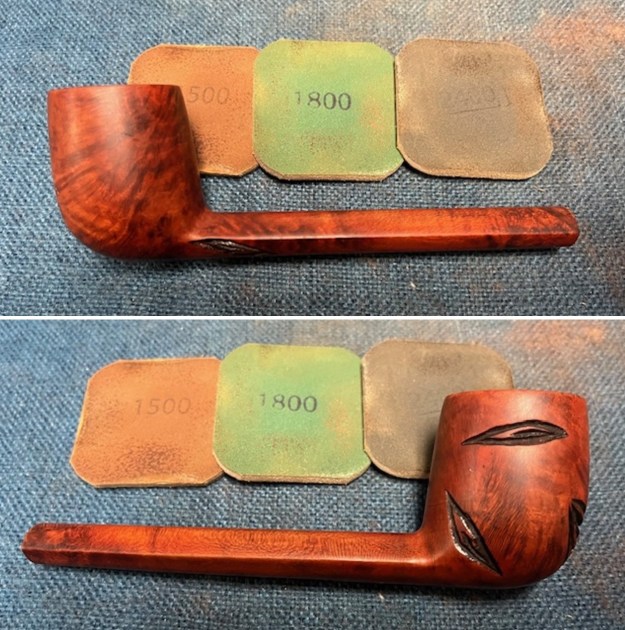
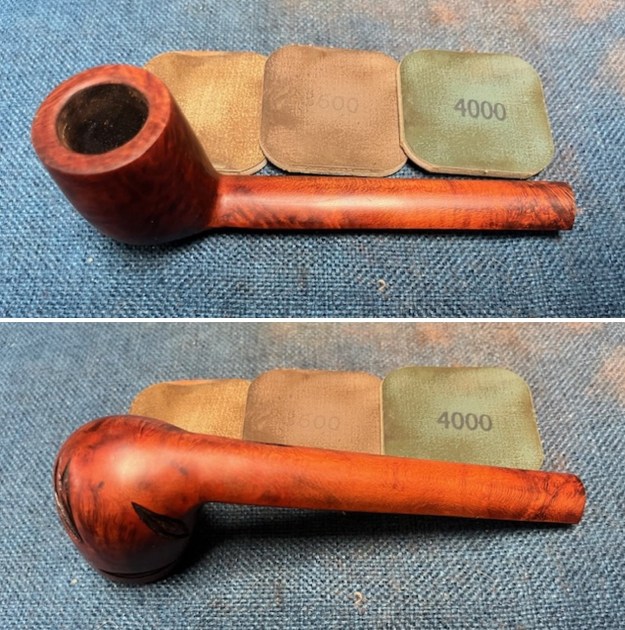
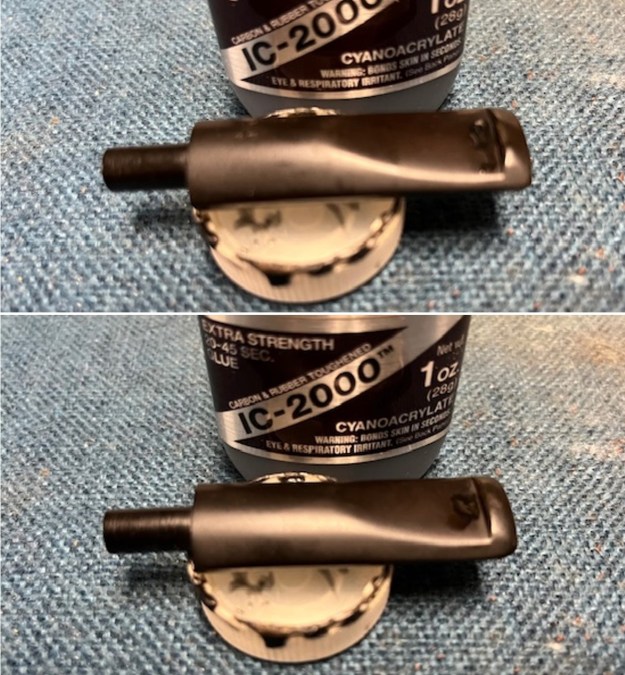
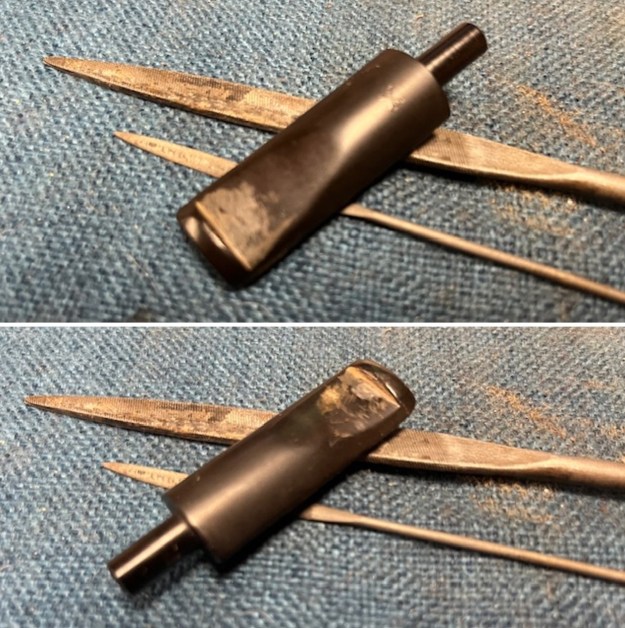
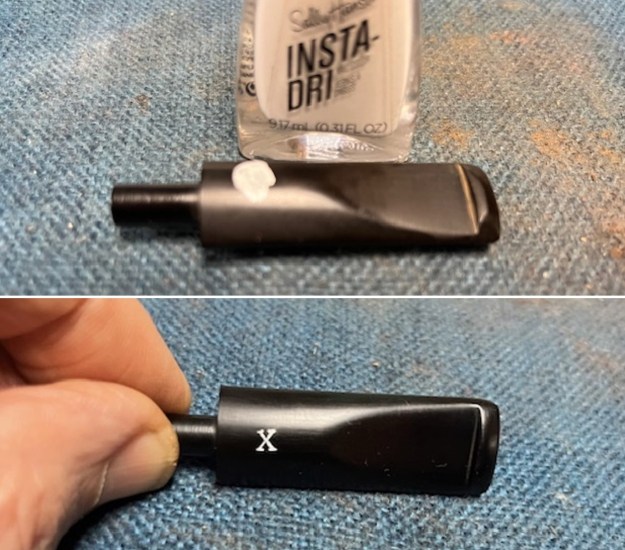
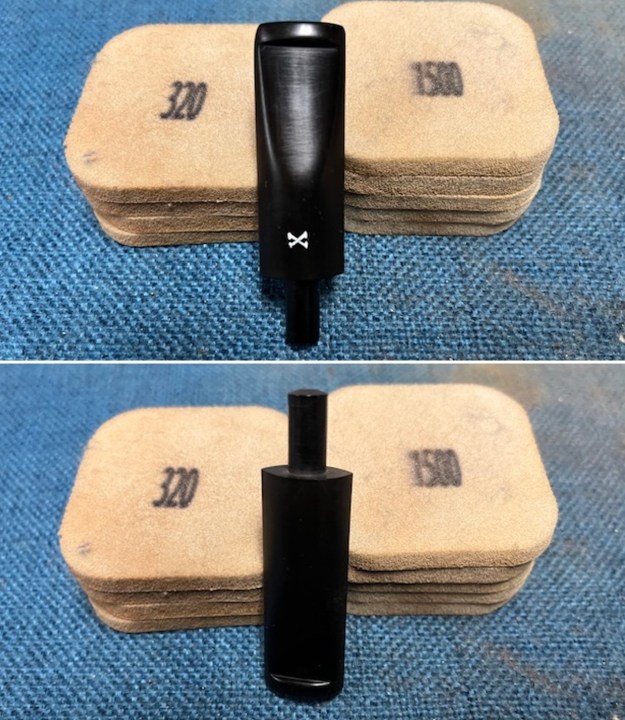
 I set the bowl aside and worked on the stem. I sanded out the light tooth marks and chatter with 220 grit sandpaper to remove them.
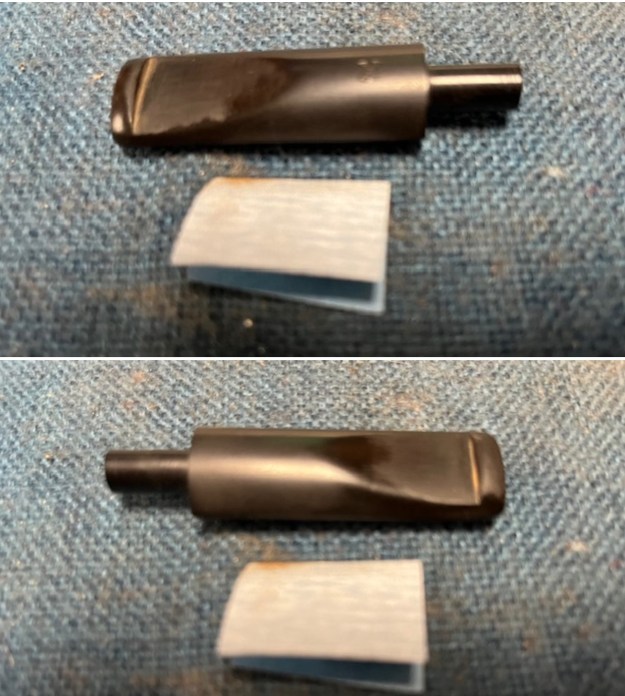
 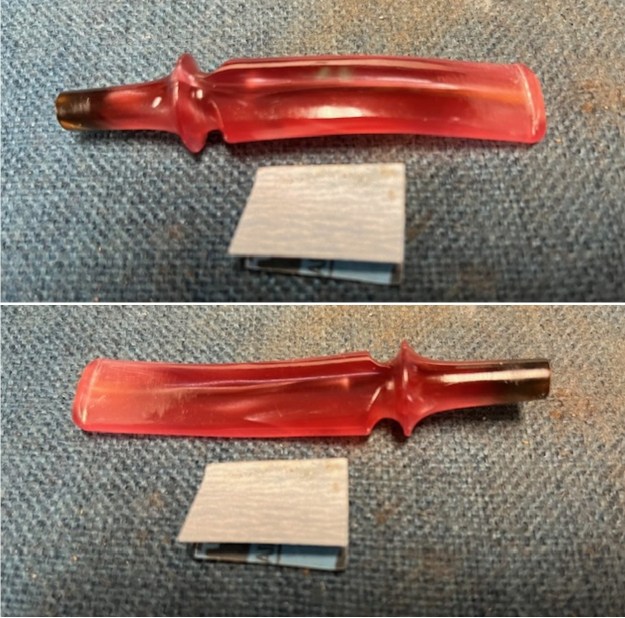 I sanded the stem with 320-3500 grit 2×2 inch sanding pads to smooth out the scratching and remaining tooth marks and chatter. I wiped it down with a damp cloth to remove the sanding debris. The stem is looking very good.
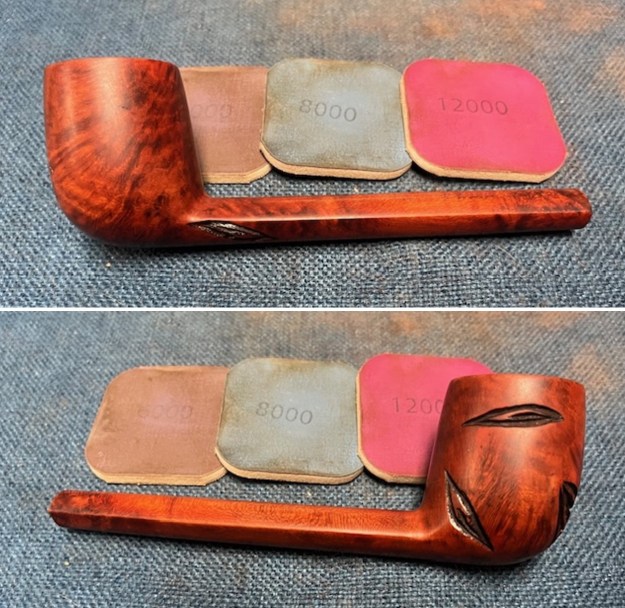
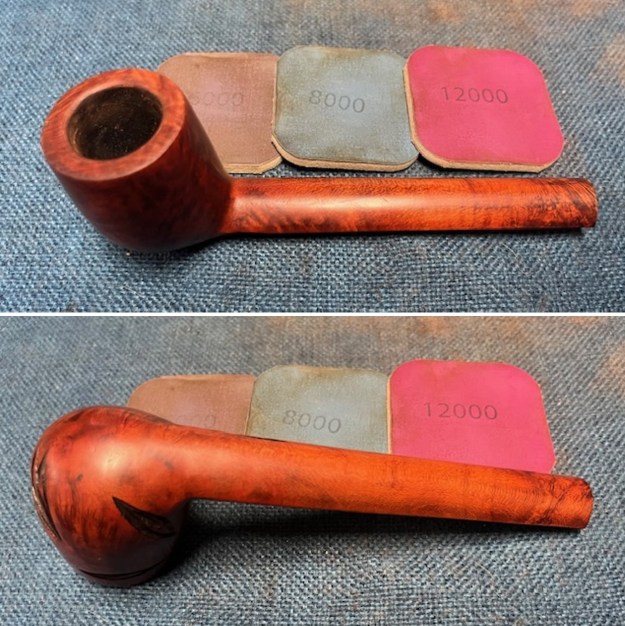
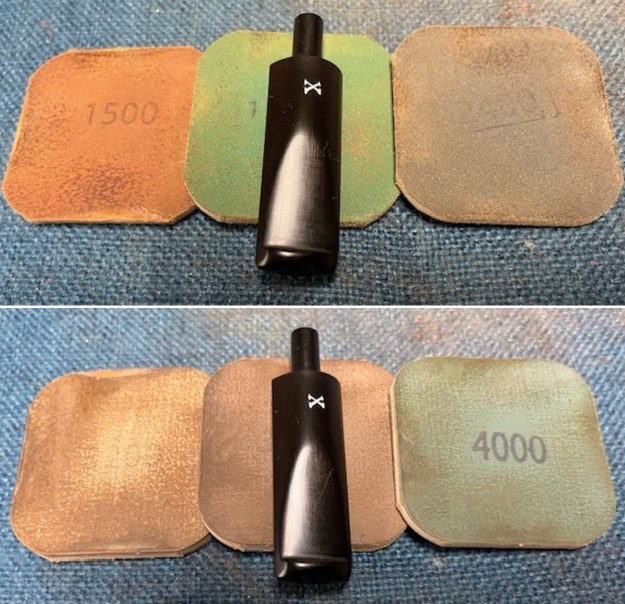
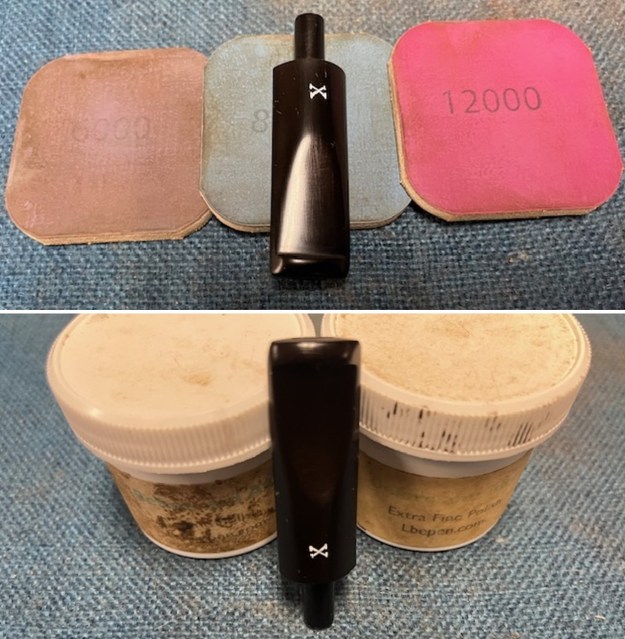
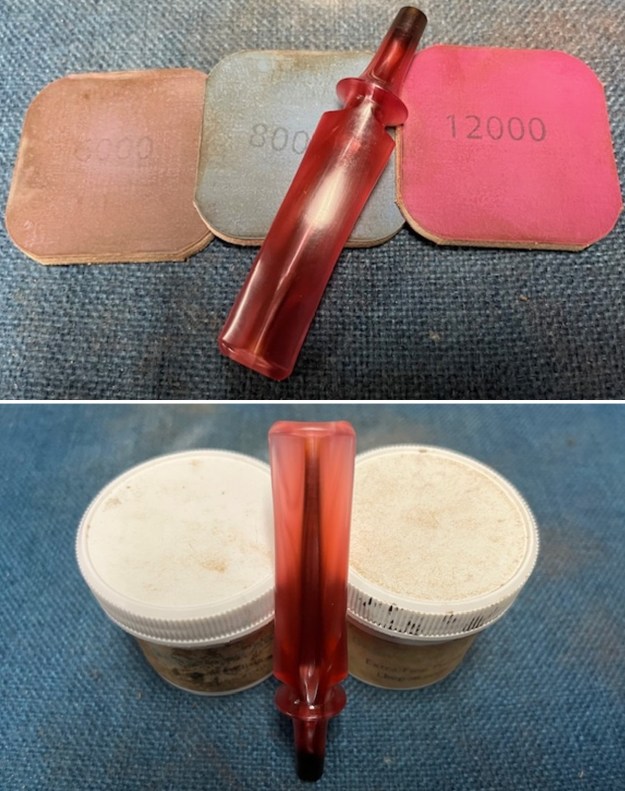
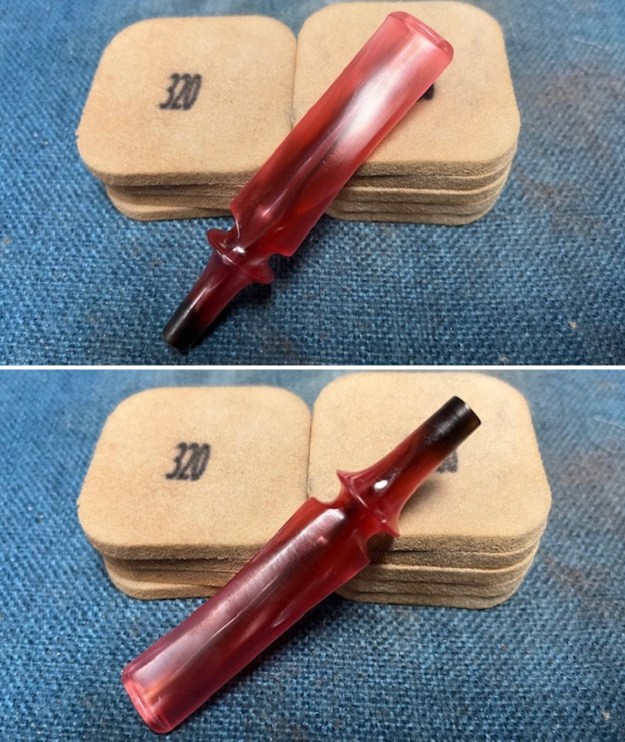 I polished the stem with micromesh sanding pads – dry sanding with 1500-12000 grit sanding pads. I wiped it down after each sanding pad with Obsidian Oil. I polished it with Before & After Pipe Stem Polish – both Fine and Extra Fine. I buffed the stem with a soft cloth to raise the shine. I gave it a final wipe down with Obsidian Oil to protect the stem from UV and slow down future oxidation.
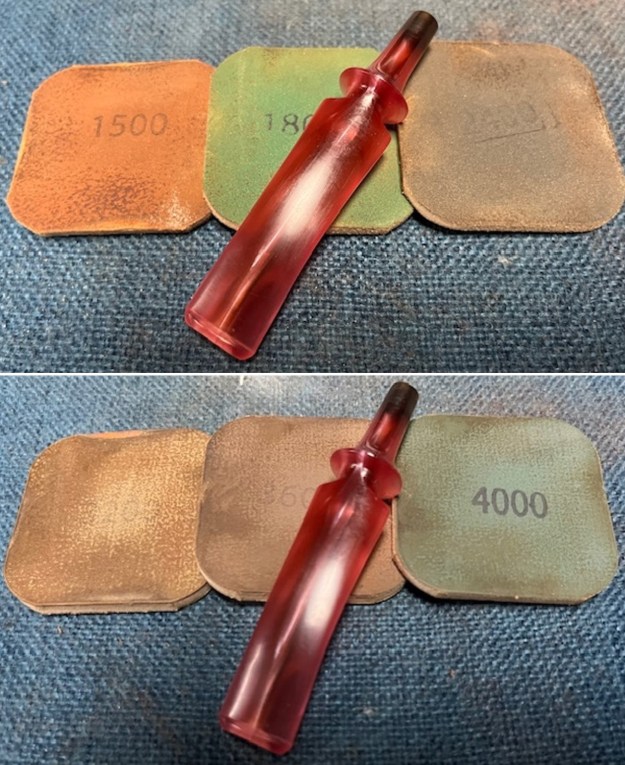
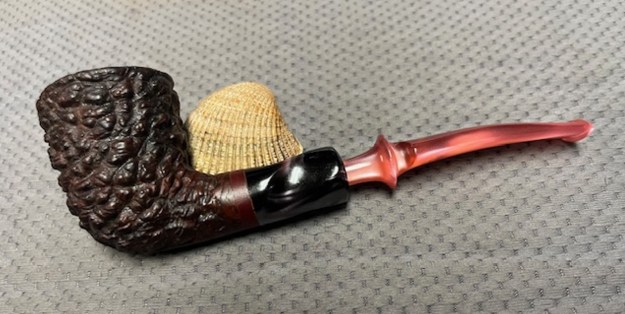
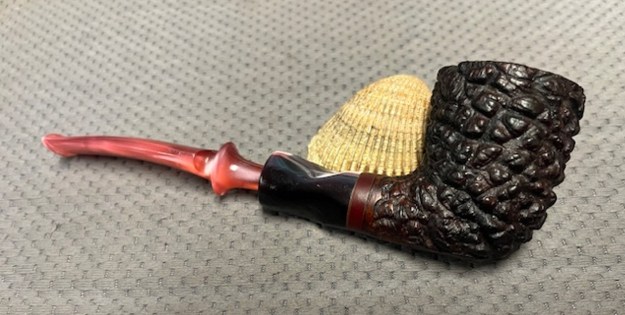
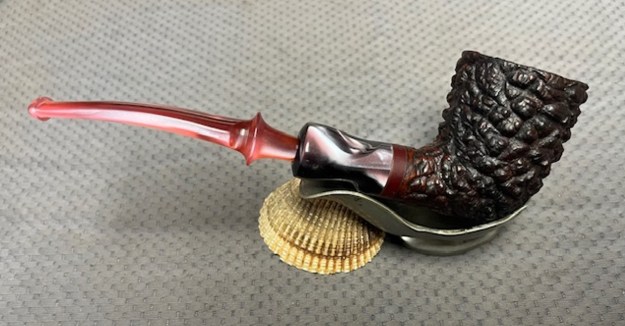
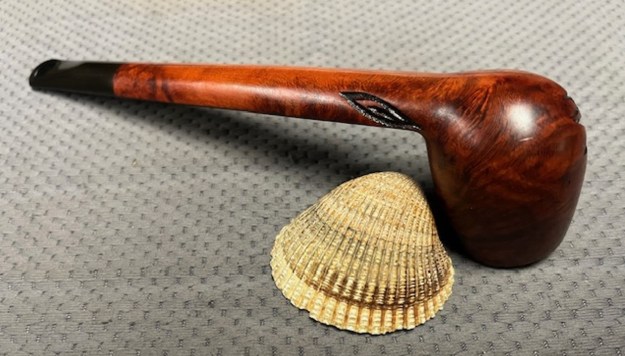
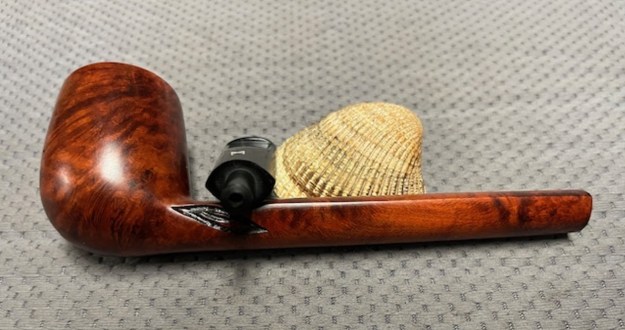
 I don’t know what it is about finishing a restoration but I have to tell you that it is my favourite part of the process. It is the moment when everything that I have been working on comes together. I can compare it to where I started and there is always the satisfaction that it does indeed look better than when Jeff and I picked it up. I put the Edwards Algerian Briar Pebble Rusticated Dublin back together and carefully buffed it with Blue Diamond on the buffing wheel. I gave the bowl multiple coats of Conservator’s Wax and the stem multiple coats of carnauba wax. I buffed the pipe with a clean buffing pad and hand buffed it to raise the shine. It is fun to see what the polished uniquely shaped Edward’s Rustication looks like along with the polished fancy rose coloured acrylic stem. This is an interesting Pebble Finish Edwards Dublin and I am sure that it will be comfortable in hand when smoking as it is light and well balanced for a pipe of this size. Have a look at it with the photos below. The dimensions are Length: 6 ½ inches, Height: 2 inches, Outside diameter of the bowl: 1 ½ inches, Chamber diameter: ¾ of an inch. The weight of the pipe is 1.87 ounces/53 grams. Thanks for walking through the restoration with me as I worked over another beautiful pipe. This one will be going on the rebornpipes store in the Pipes from American Pipe Makers Section shortly if you would like to add it to your collection. Thanks for your time.