Monthly Archives: August 2024

Reworking another newly acquired trade, a Michel Deluxe Sandblast Pot


by Steve Laug

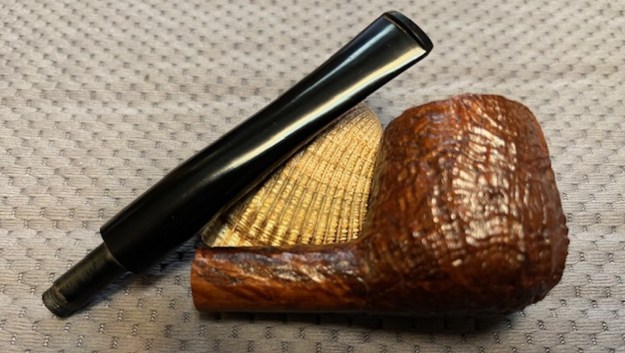
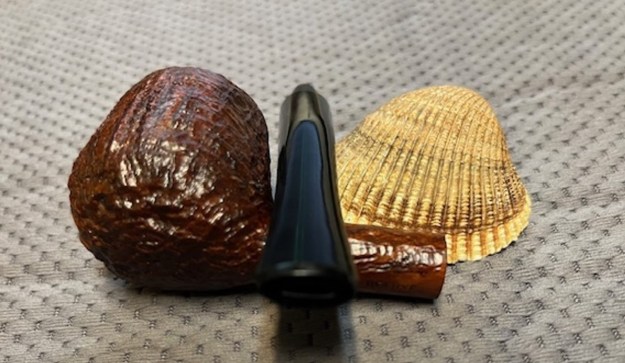
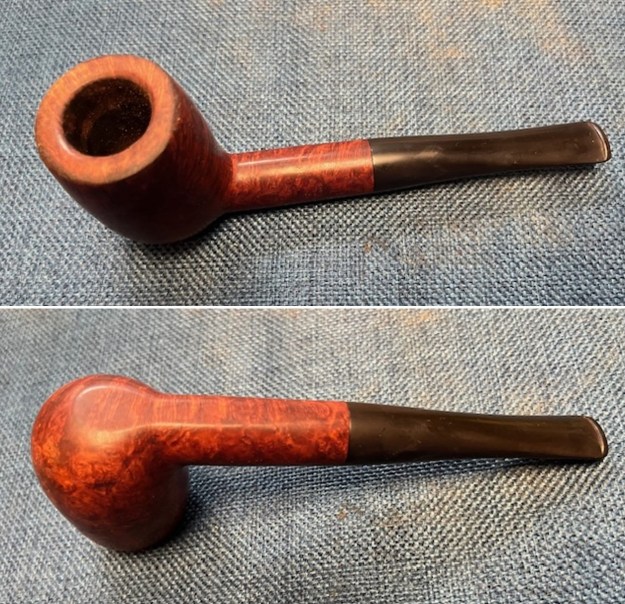
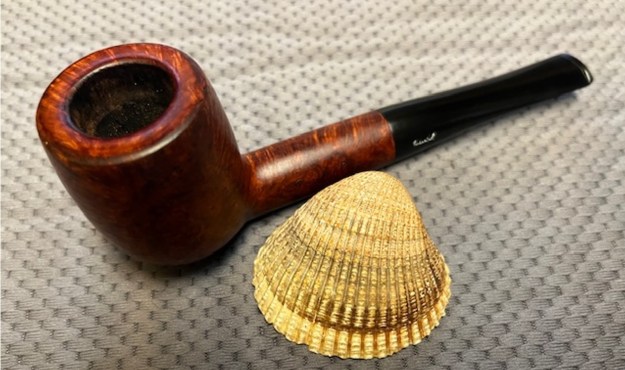
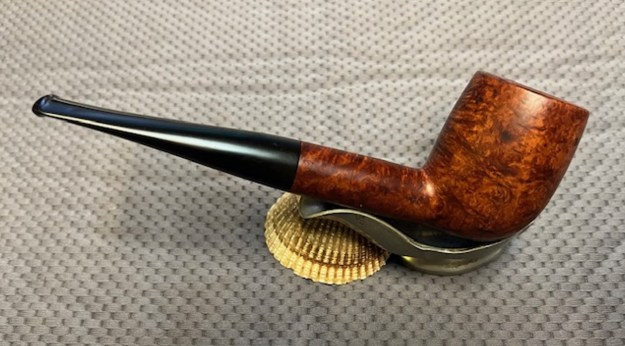
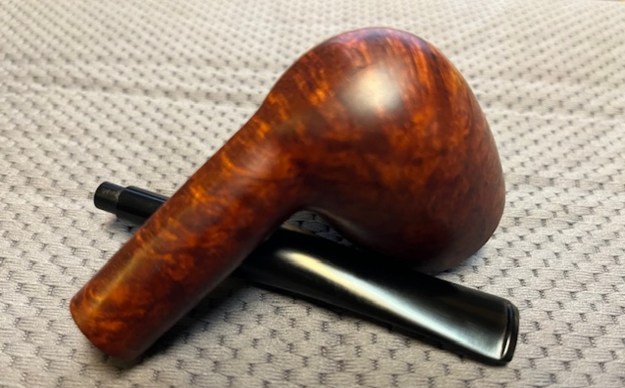
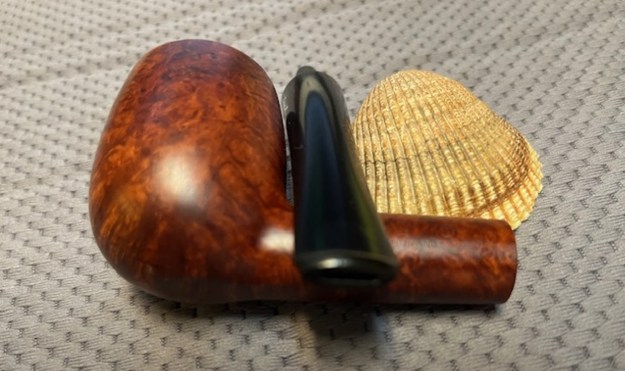
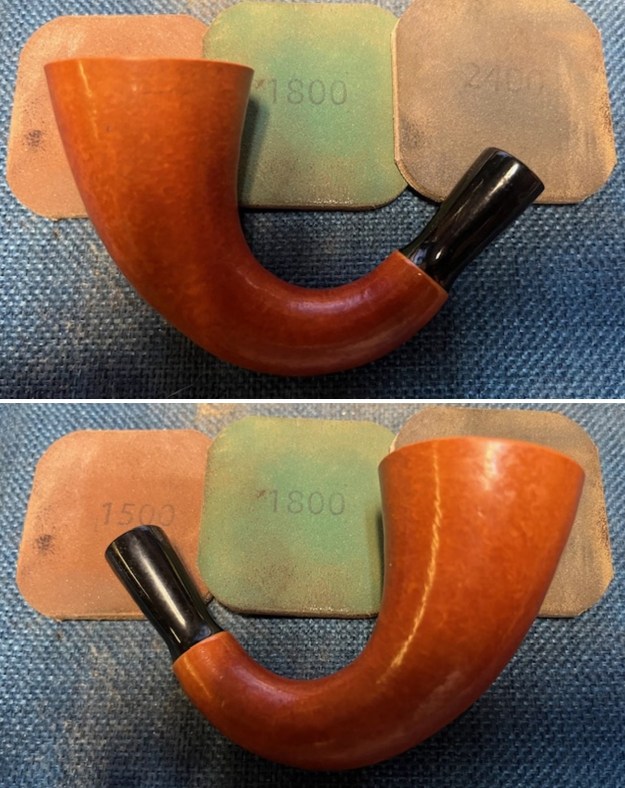
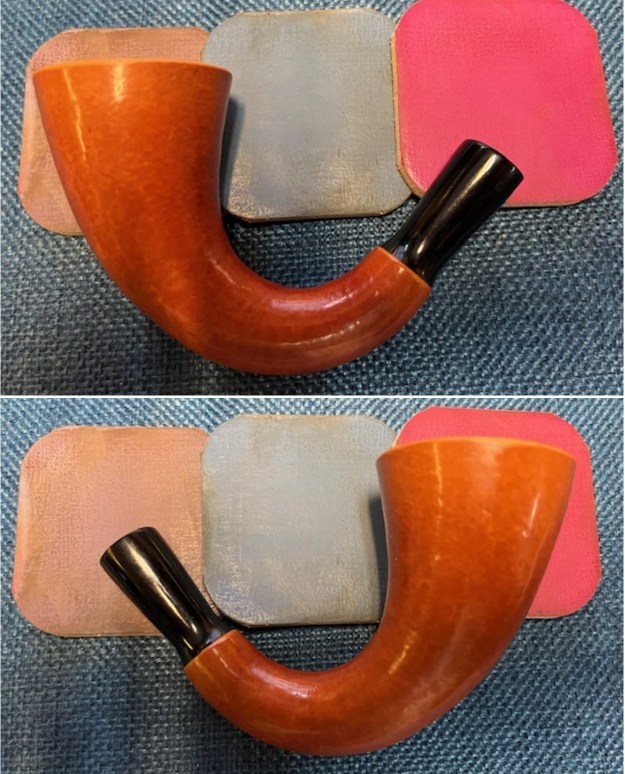
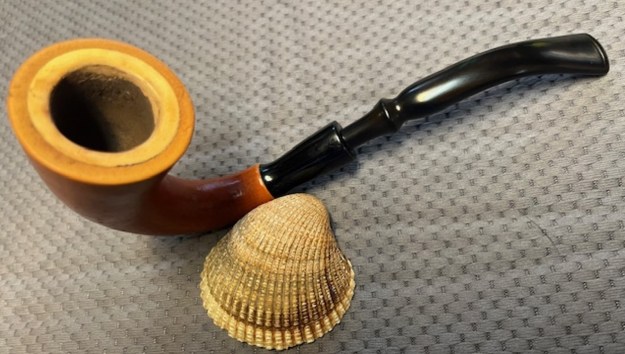
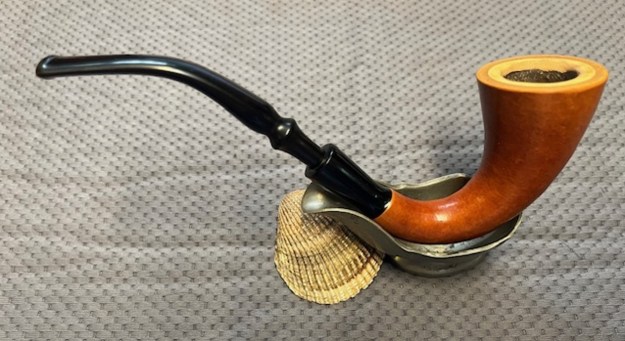
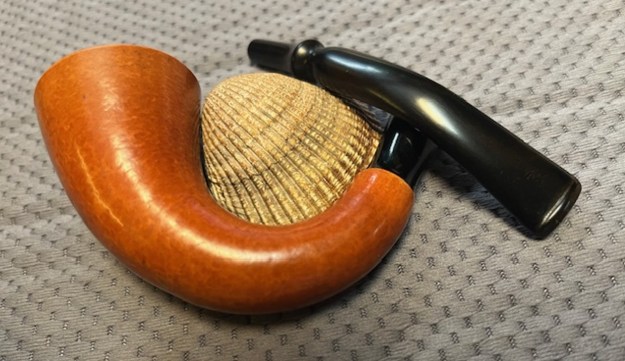
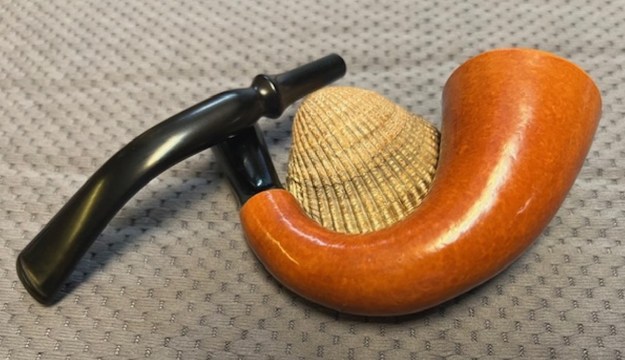
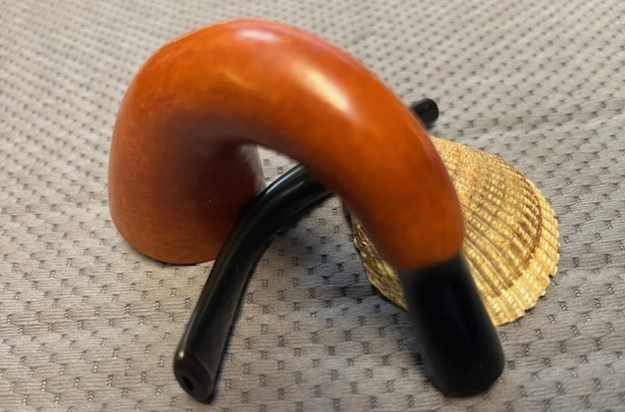
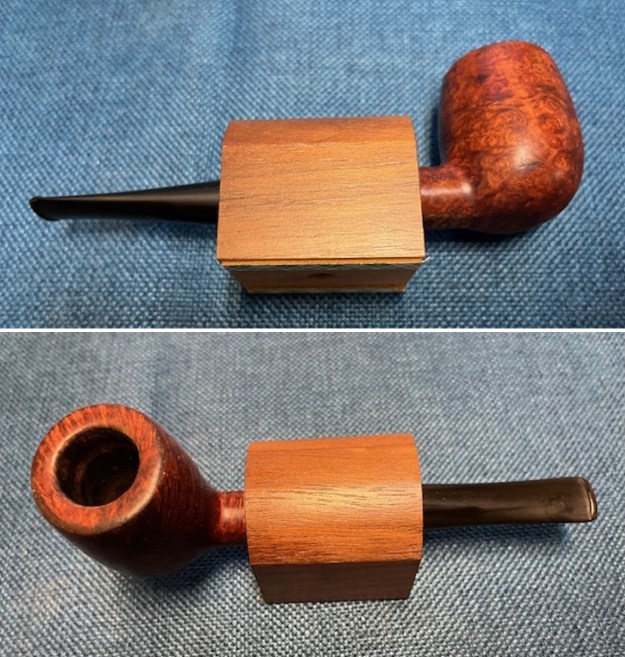
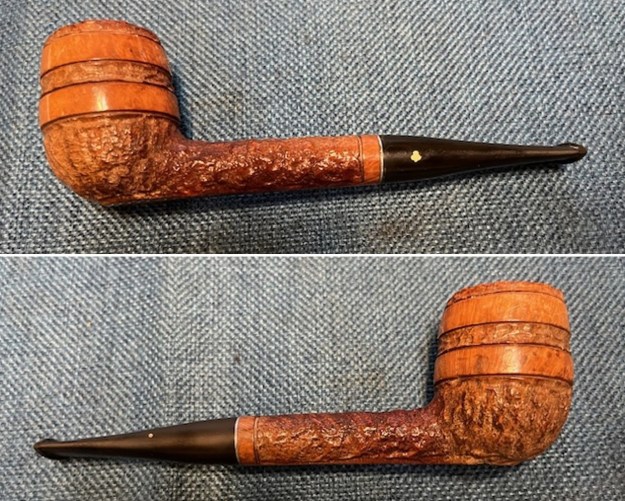
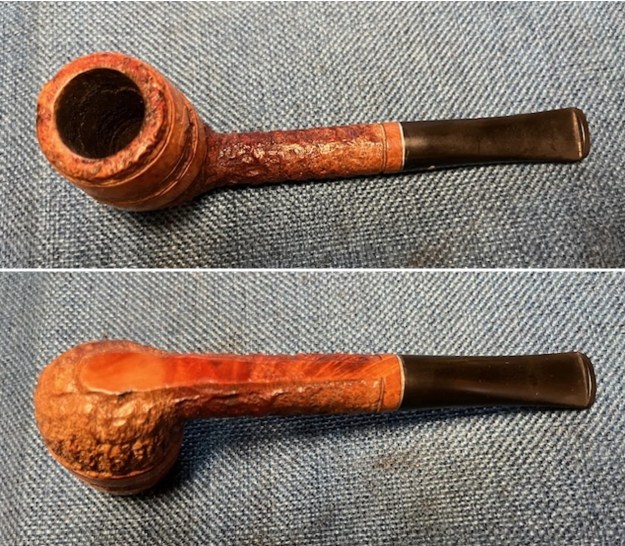
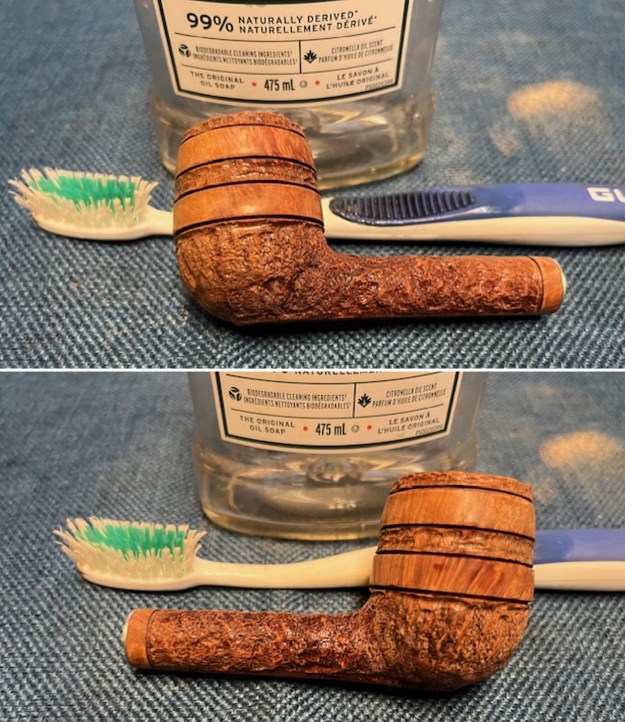
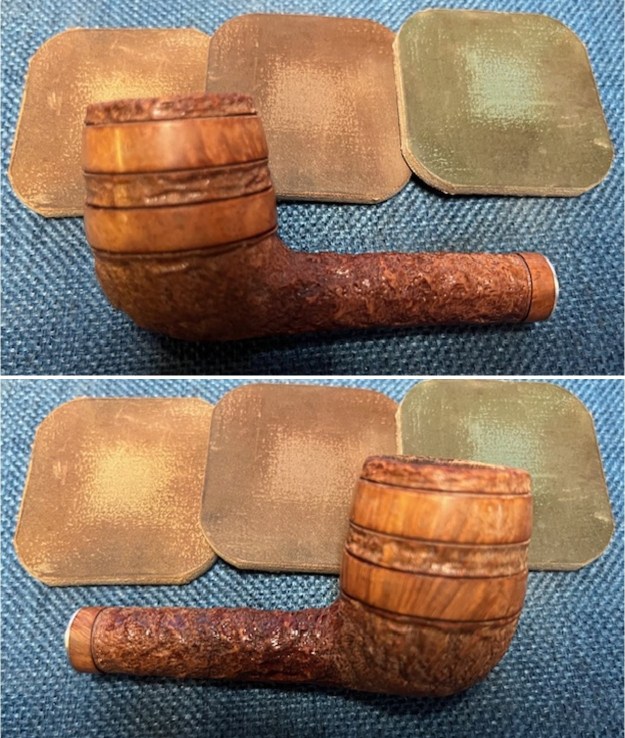
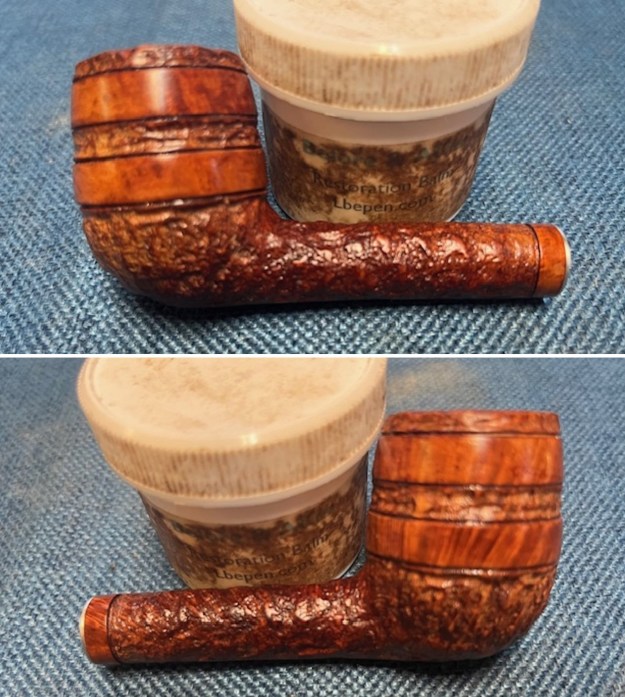
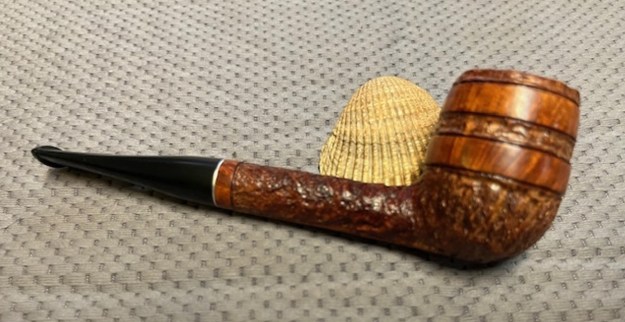
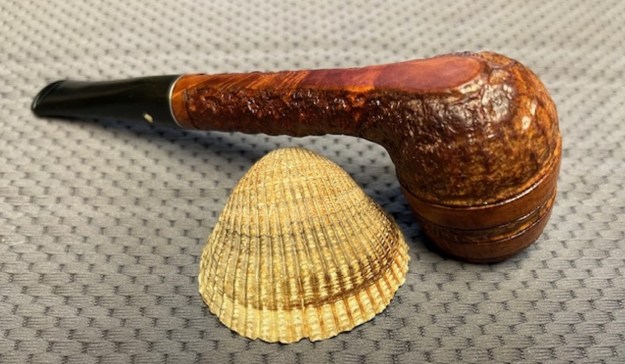
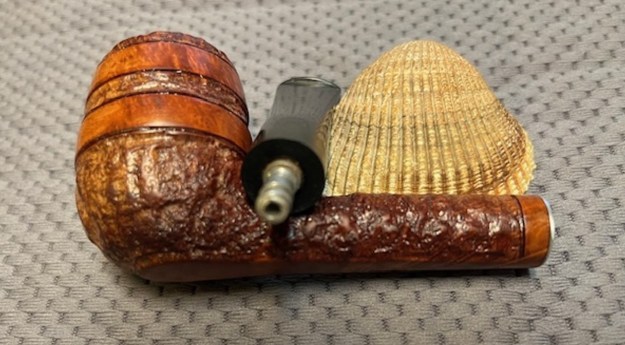
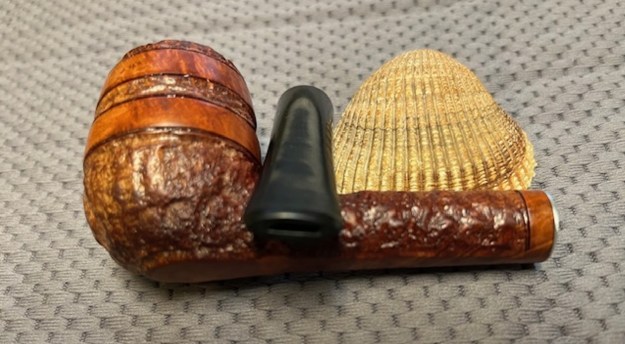
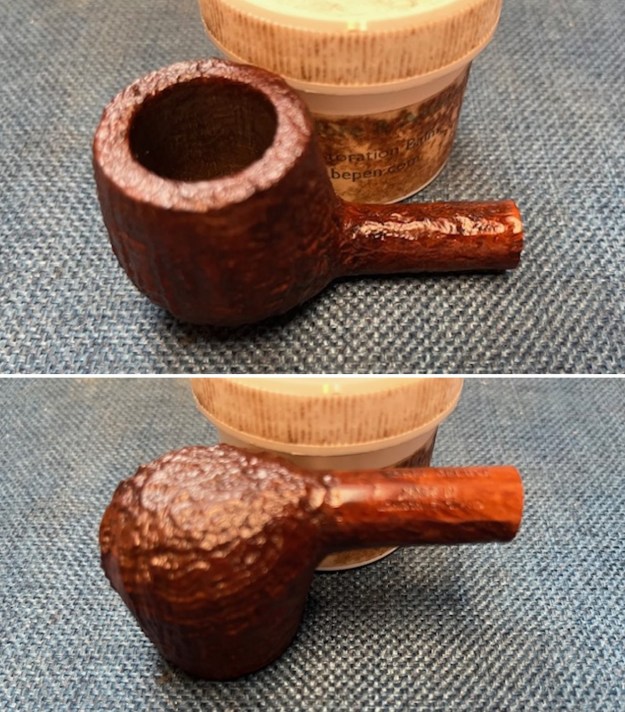
A month or so ago I received an email from a fellow in Japan who had some pipes he wanted to sell. He sent me a few and one of them was this interesting sandblast Pot. The Pipe was clearly stamped and read Michel Deluxe [over] Made in [over] London, England. The stamping was clear and readable. The bowl has been reamed and the pipe cleaned. The shank is very clean inside and the pipe smelled very clean. It was so clean that I don’t think the pipe had been smoked since the fellow in Japan picked it up. It looked to me like it had a repair on bottom front wall of the bowl. The damage was well repaired but looked like it was from overzealous cleaning with pipe cleaners. It looked like the kind of damage that is caused by the wire in a pipe cleaner. The rim top and edges looked very good. There was no damage to the inner or outer edges. The pipe had been given a varnish/shellac coat that made the blast very shiny. The stem looked very good. It was polished and there were no tooth marks or chatter on either side of the stem. Overall, I am happy with it but I will need to remove the shiny varnish coat. I took photos of the pipe before I started my work on it. 
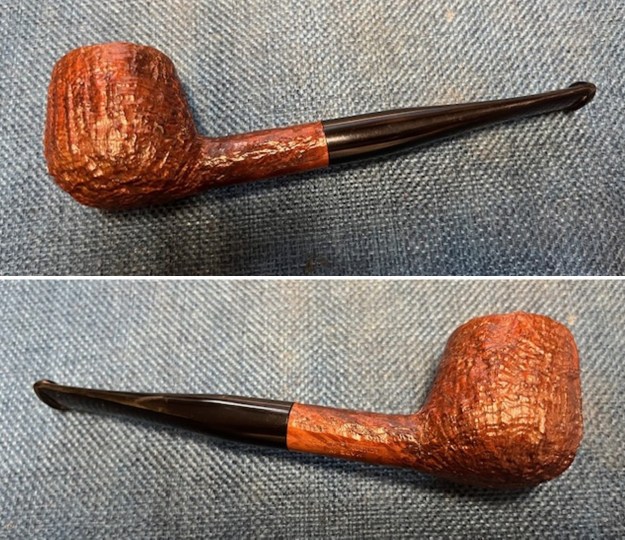
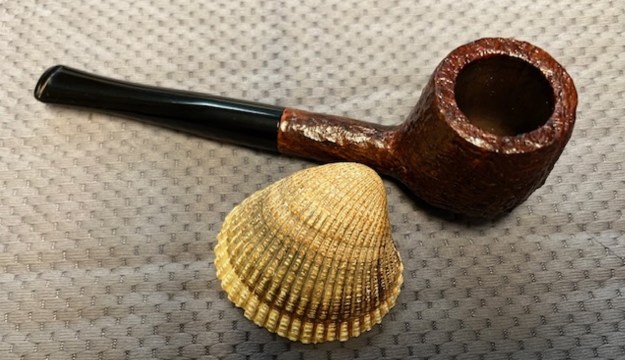
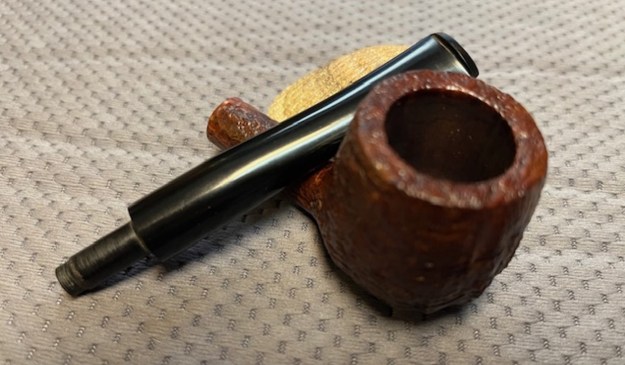
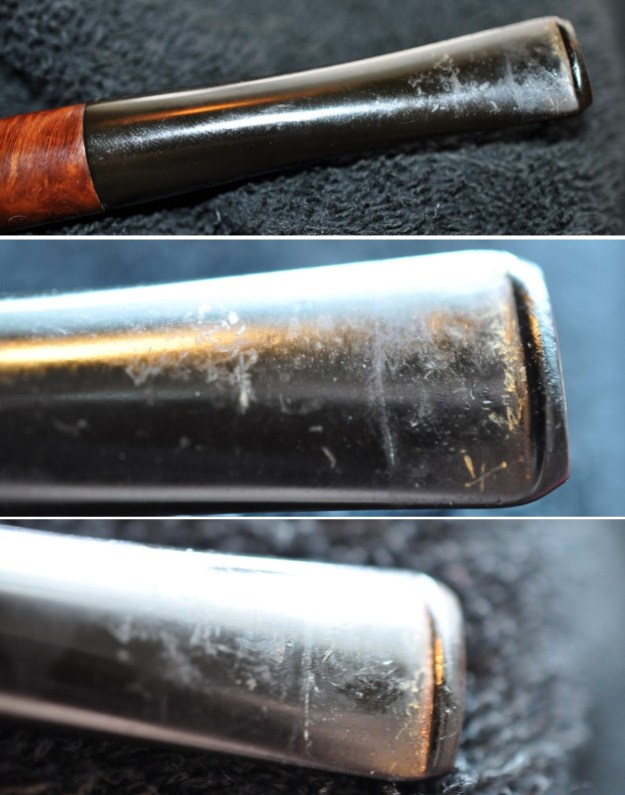
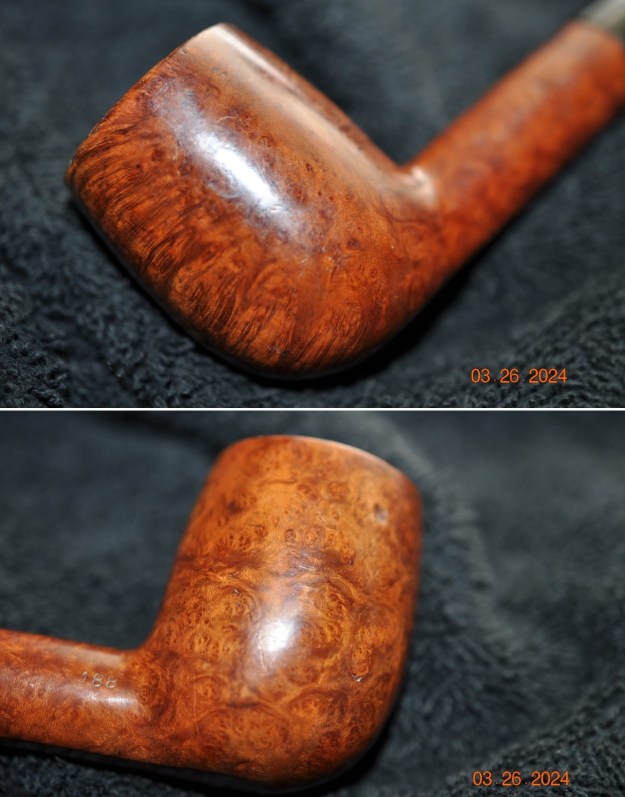
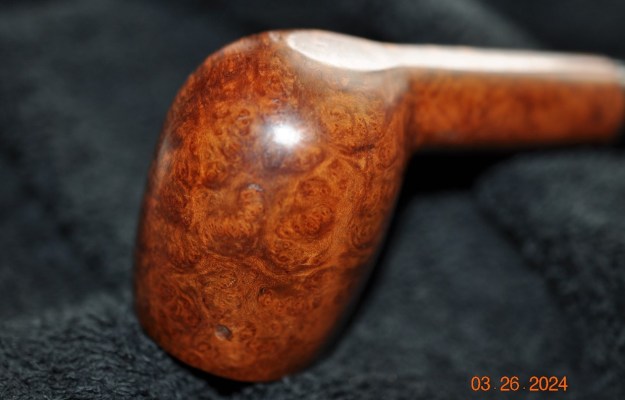
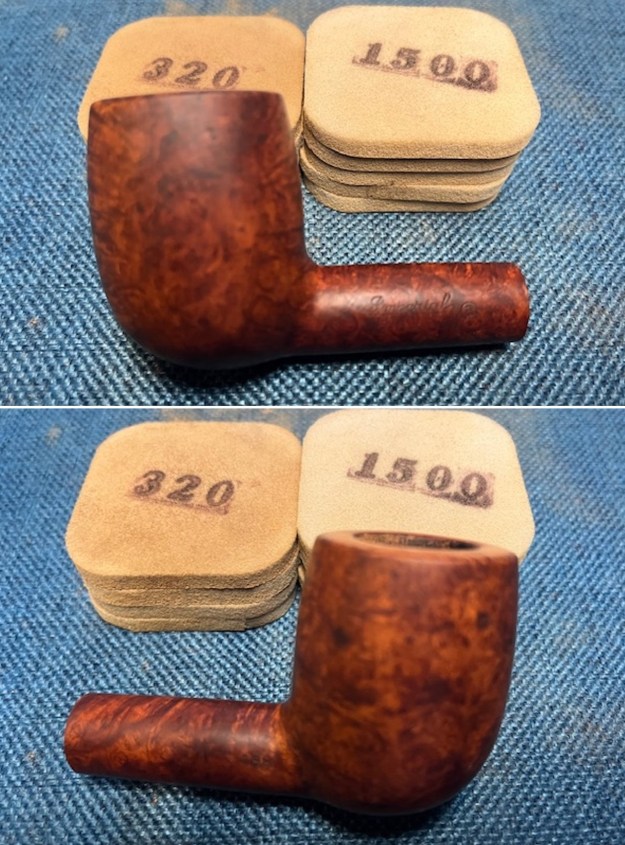
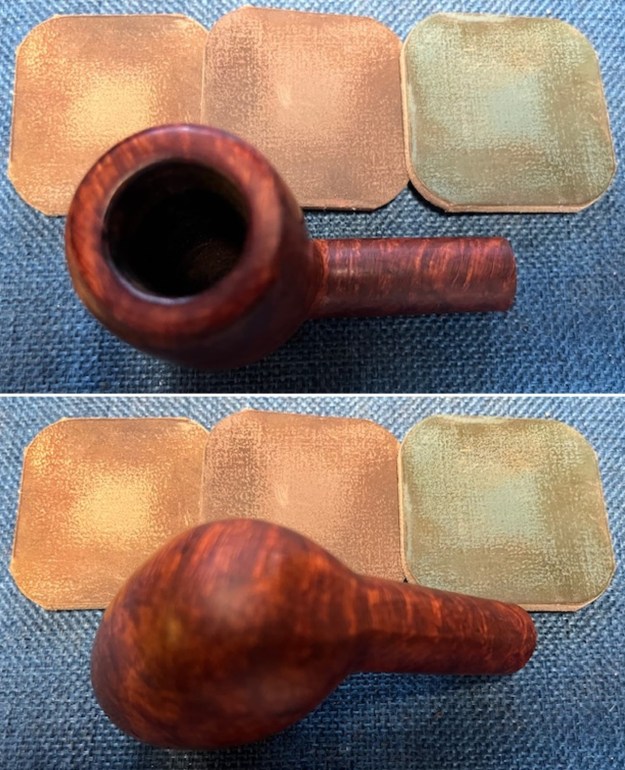
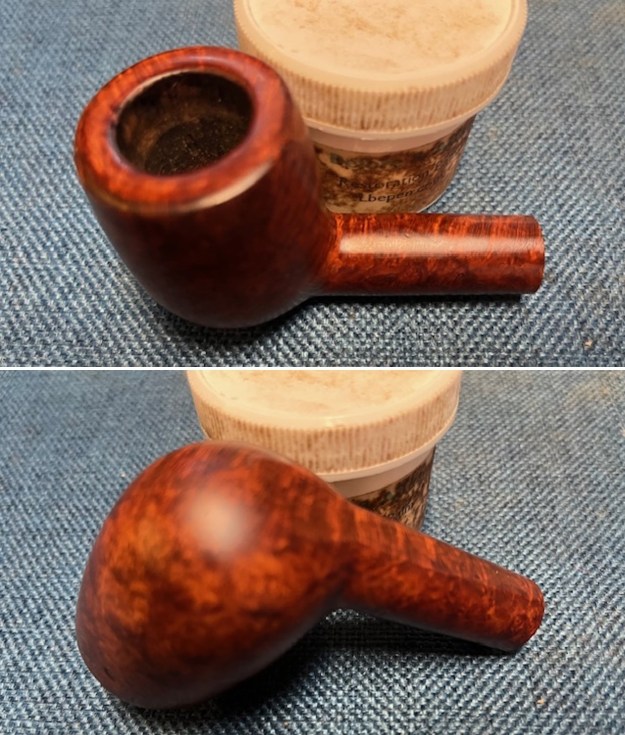
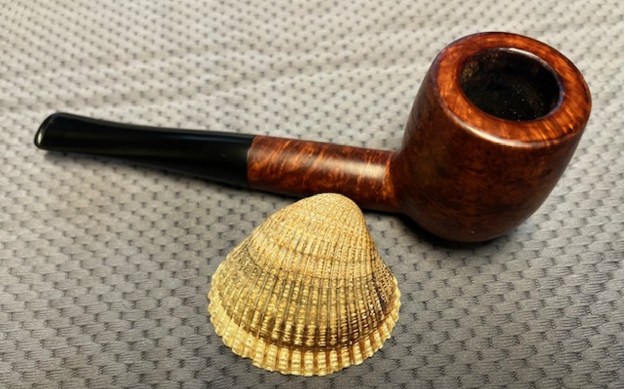
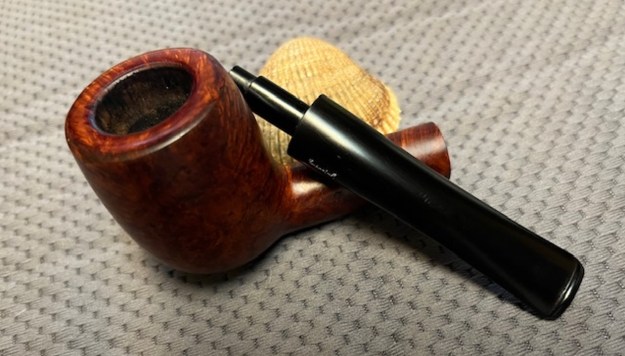
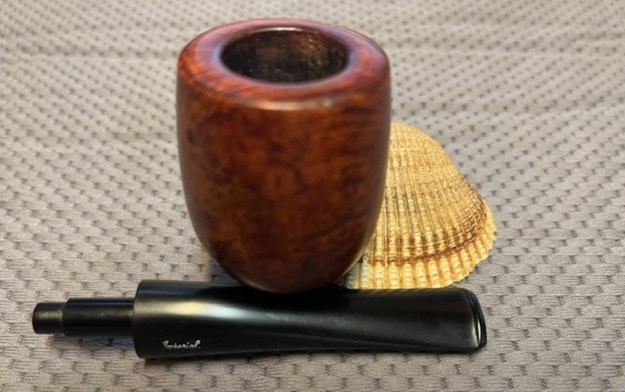
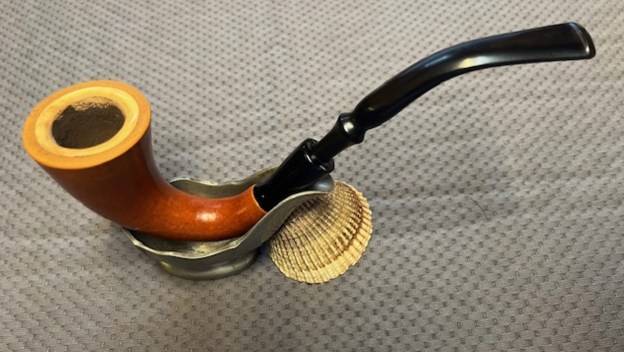
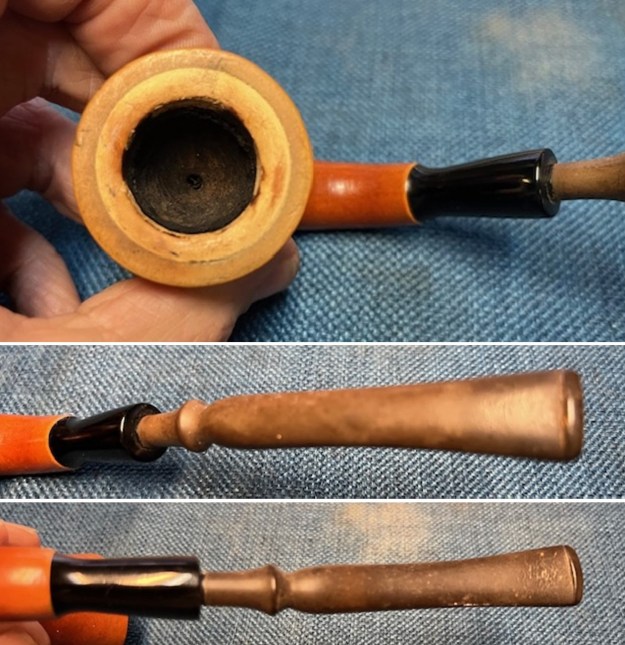
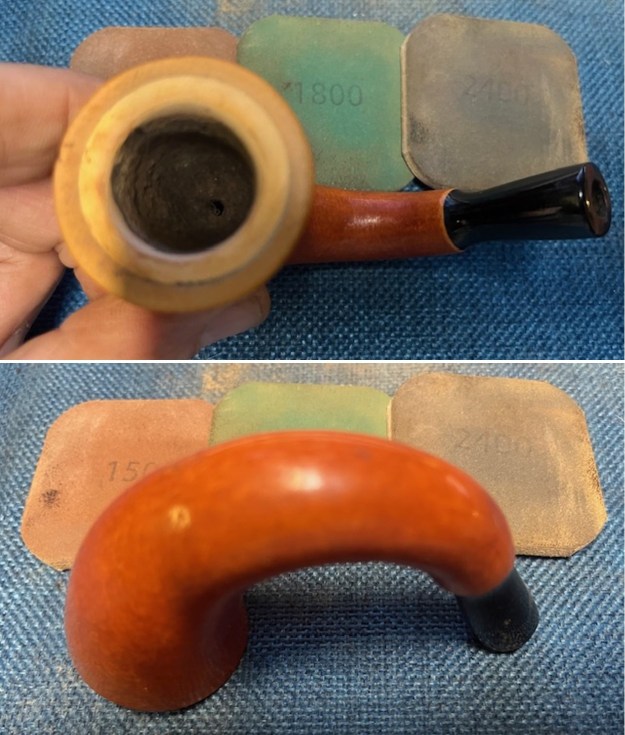
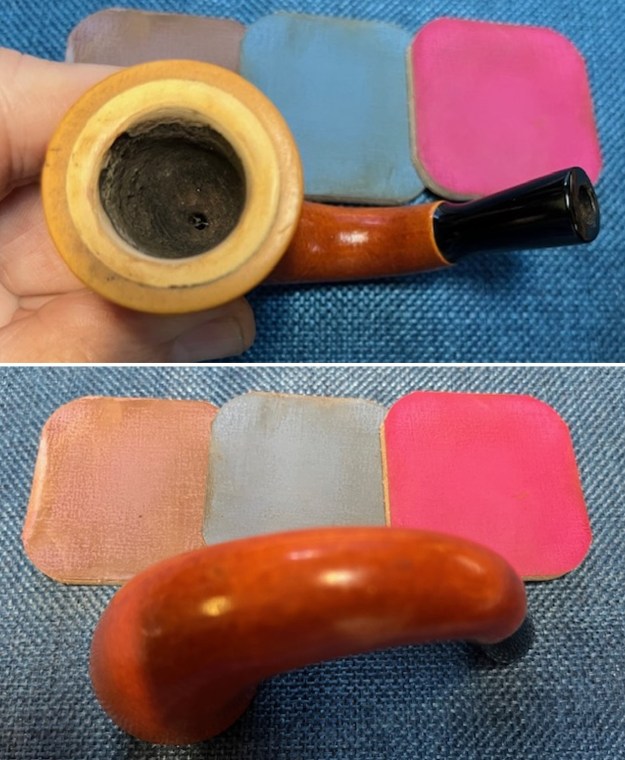
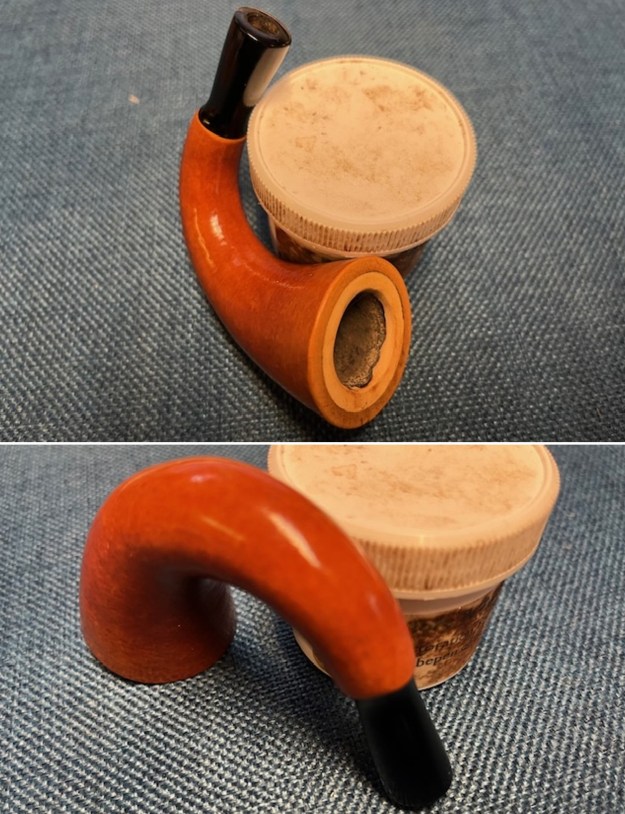
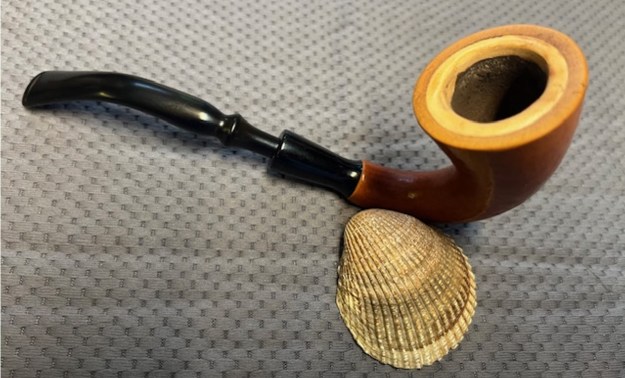
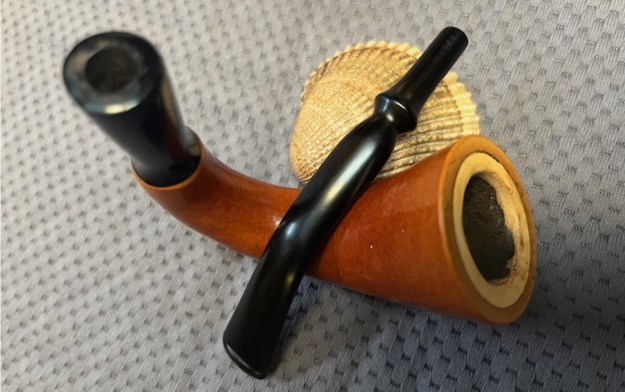
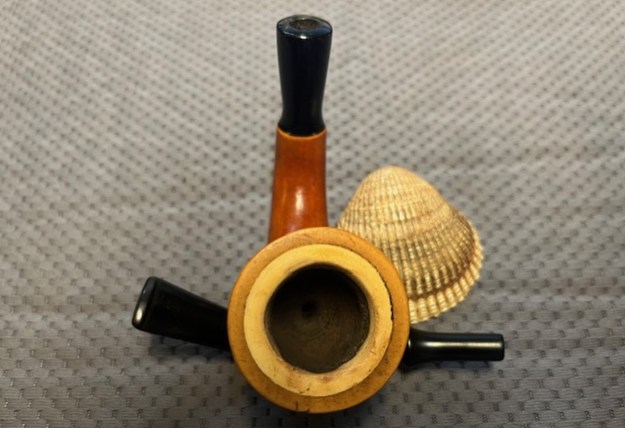
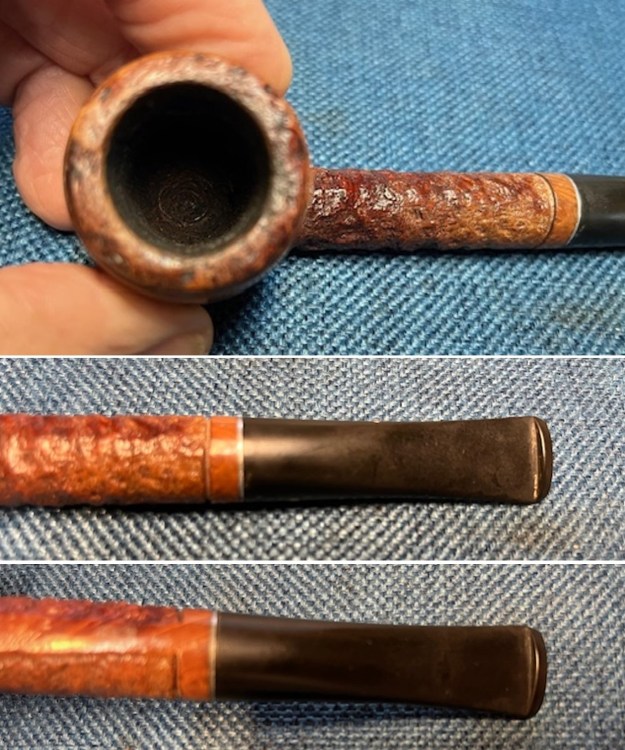
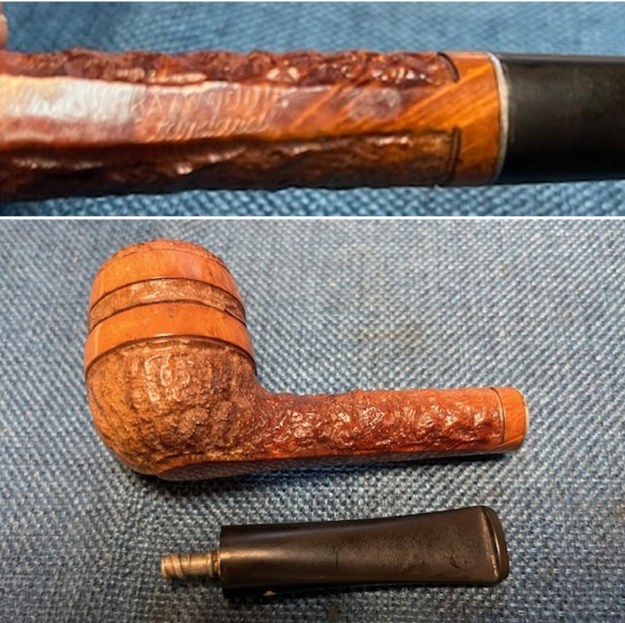
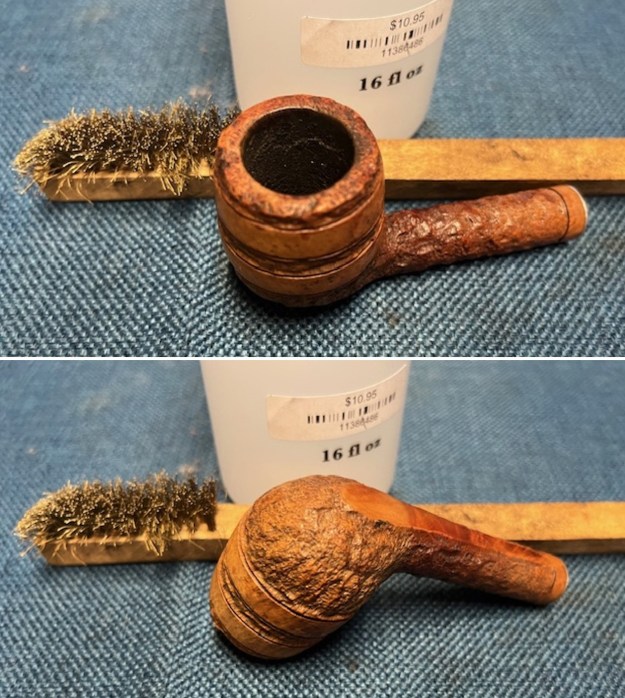
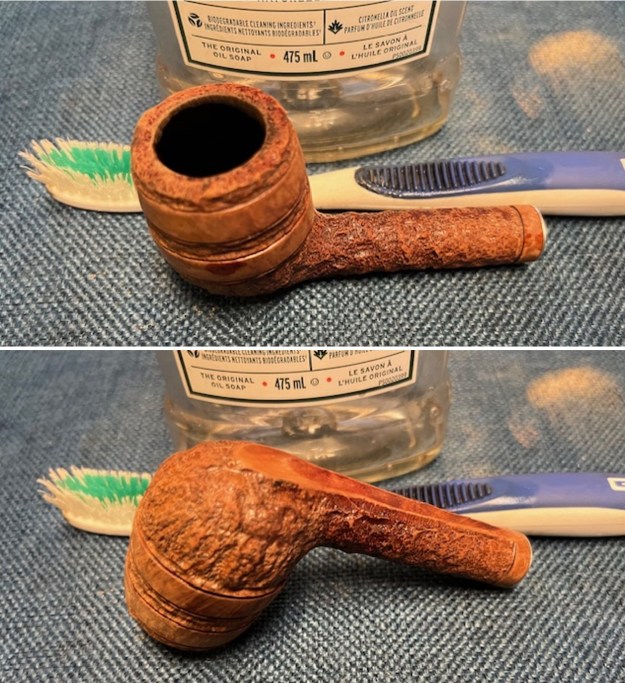
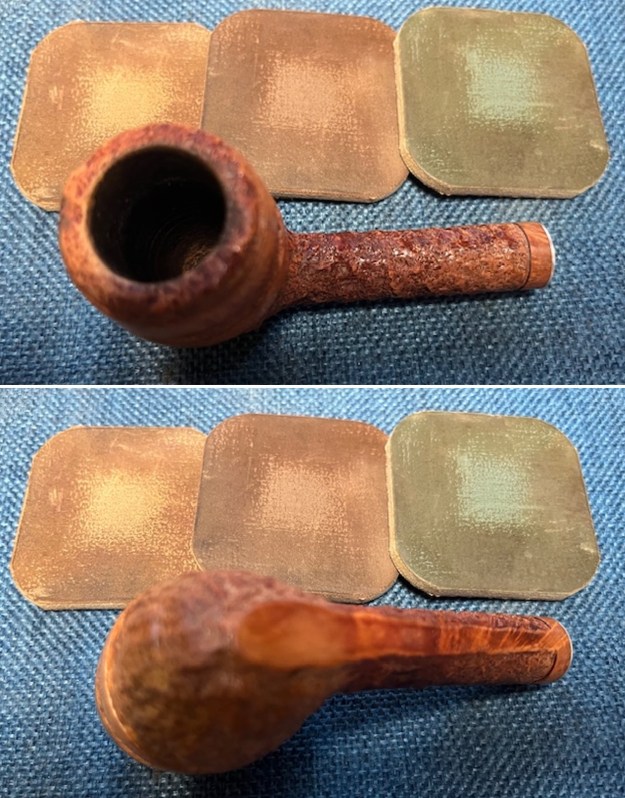
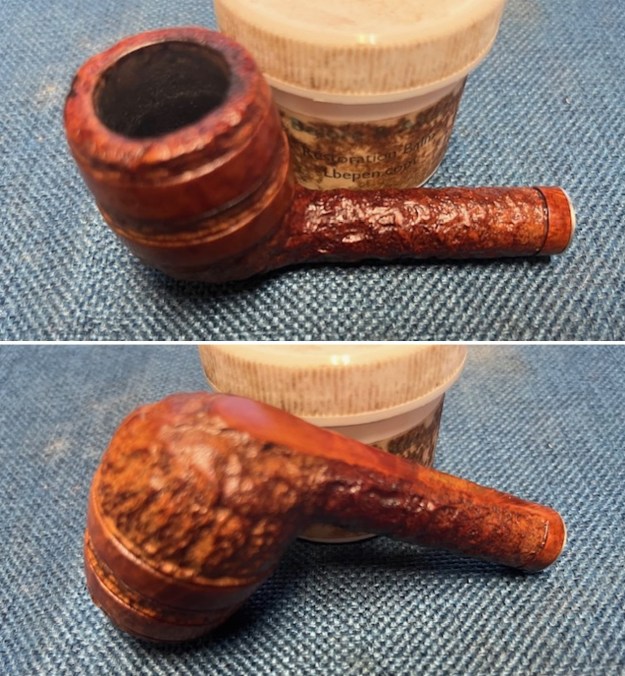
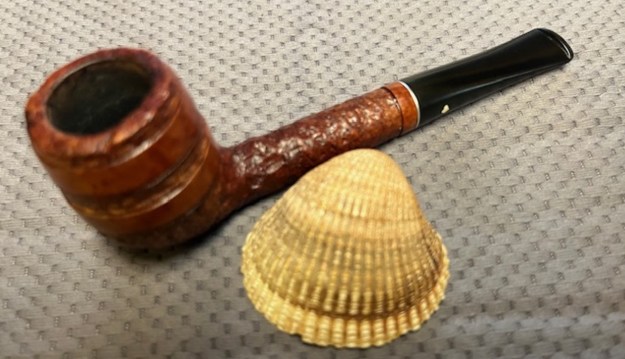
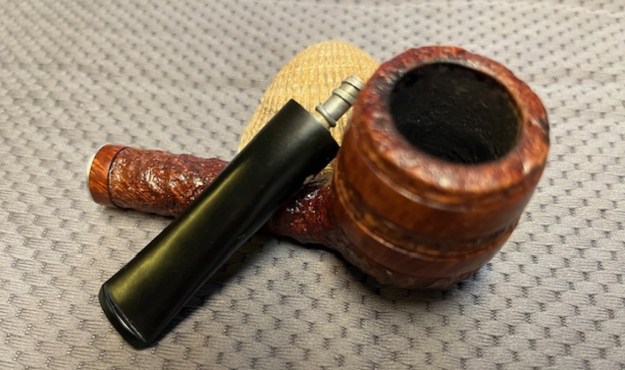
I took a photo of the rim top to show the condition of the bowl and the top. You can see clean bowl and rim top. You can also see the light repair on the bottom front of the bowl. They did a great job so it is solid. The stem looks very good with no tooth damage and no oxidation on the surface of the vulcanite.
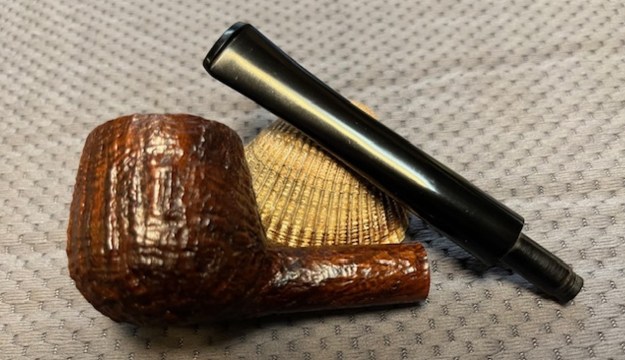
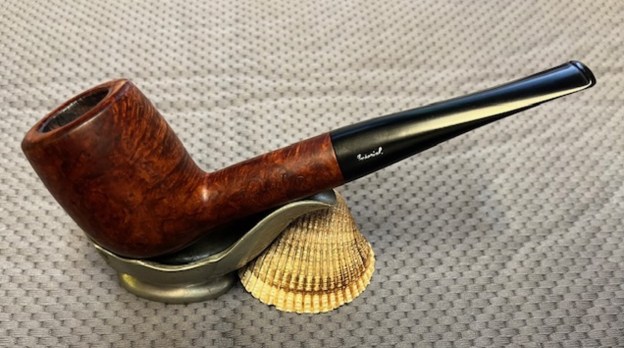
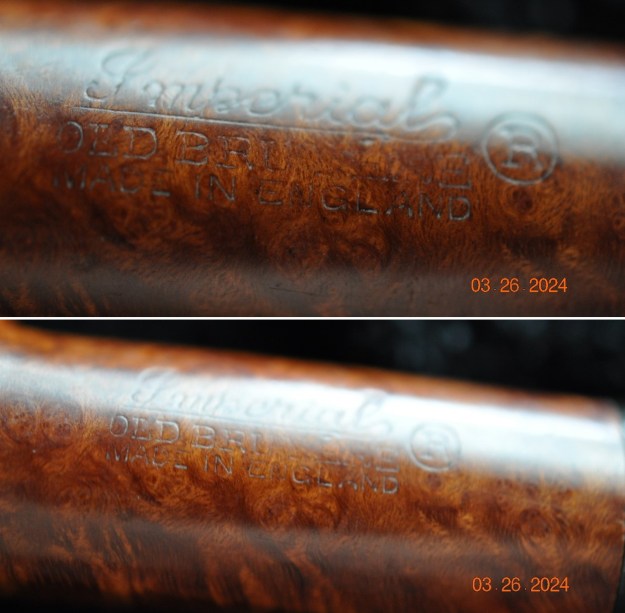
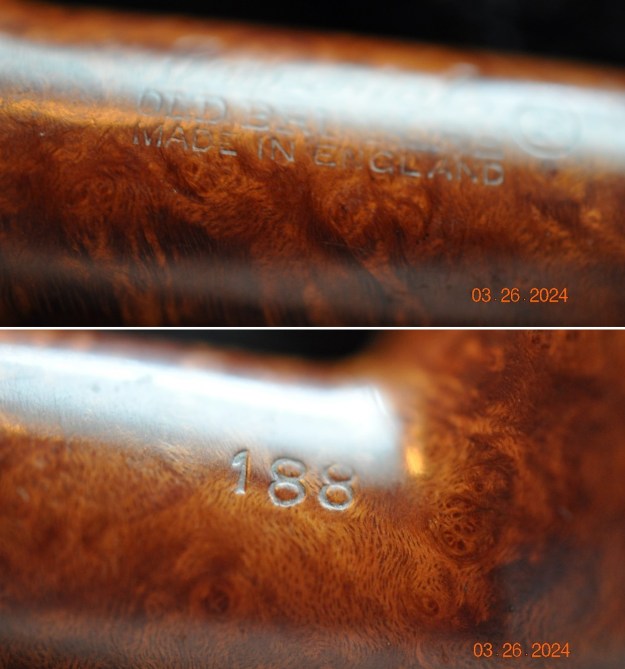
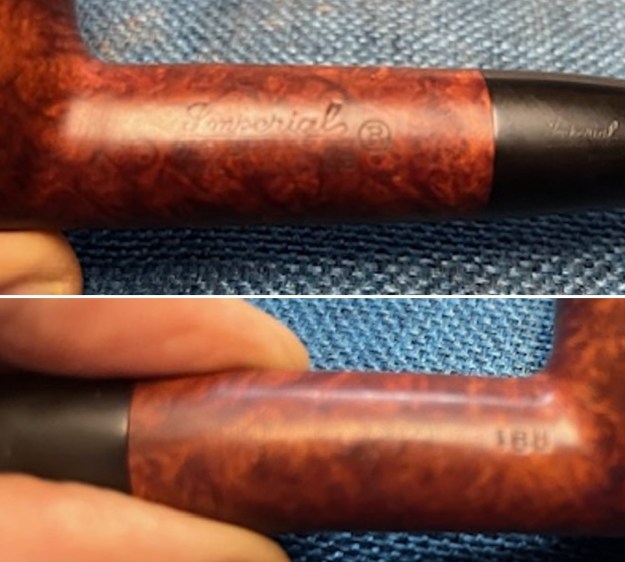
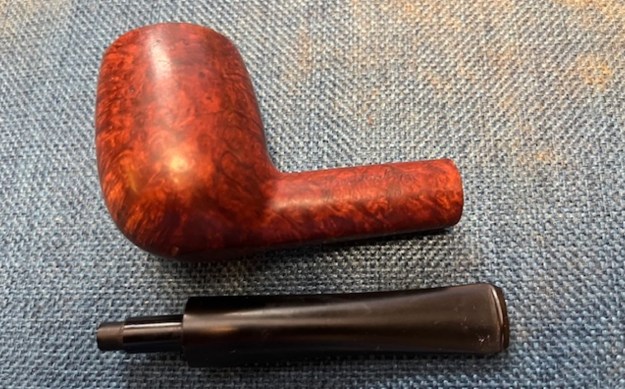
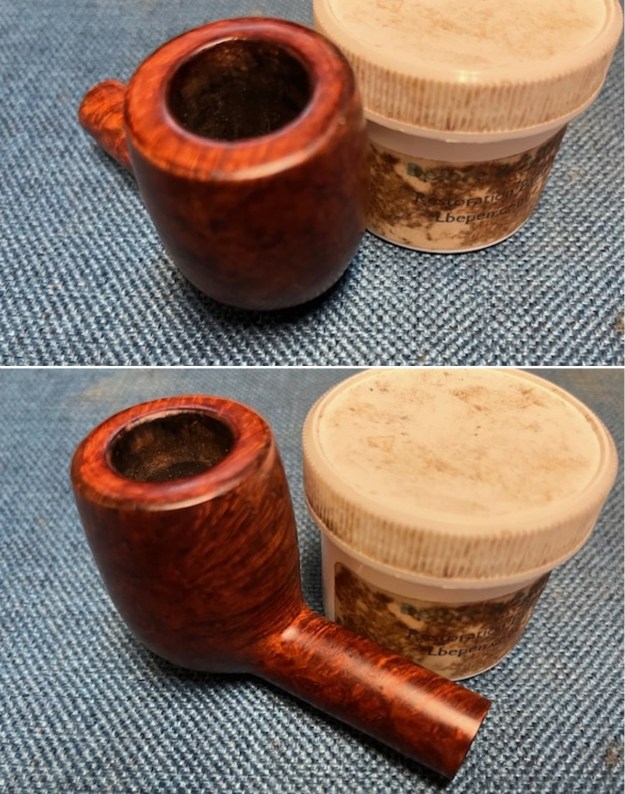
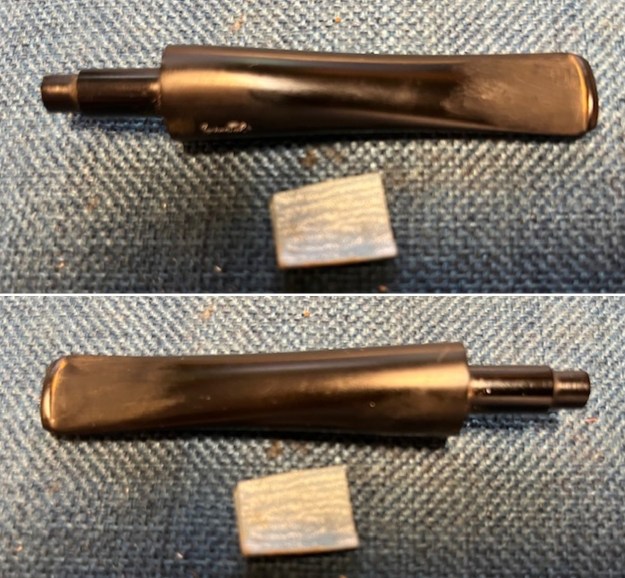
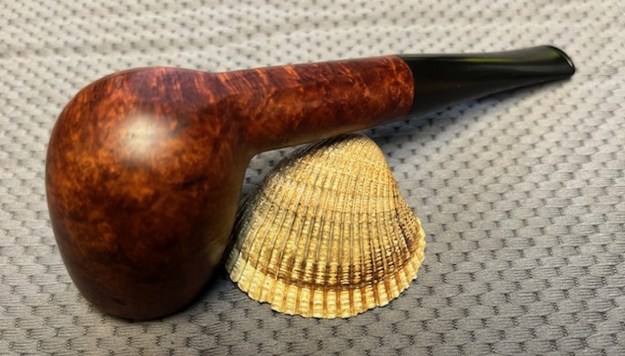
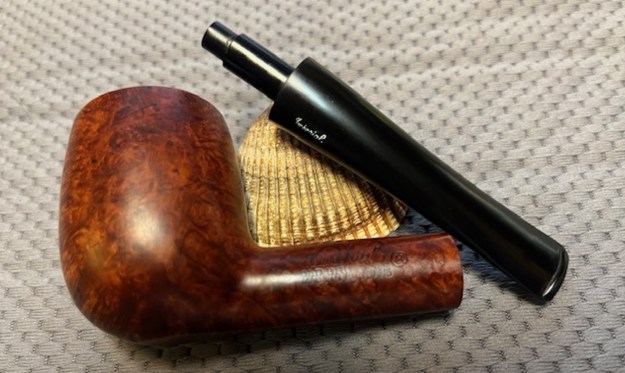
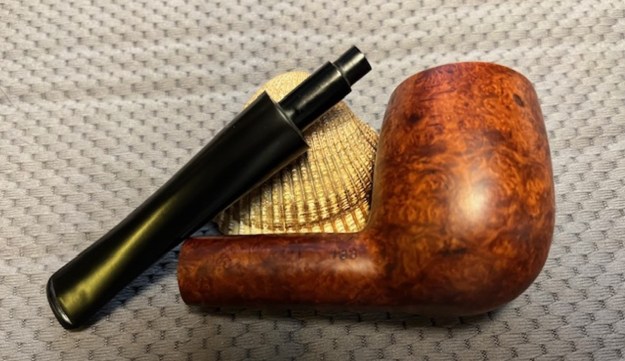
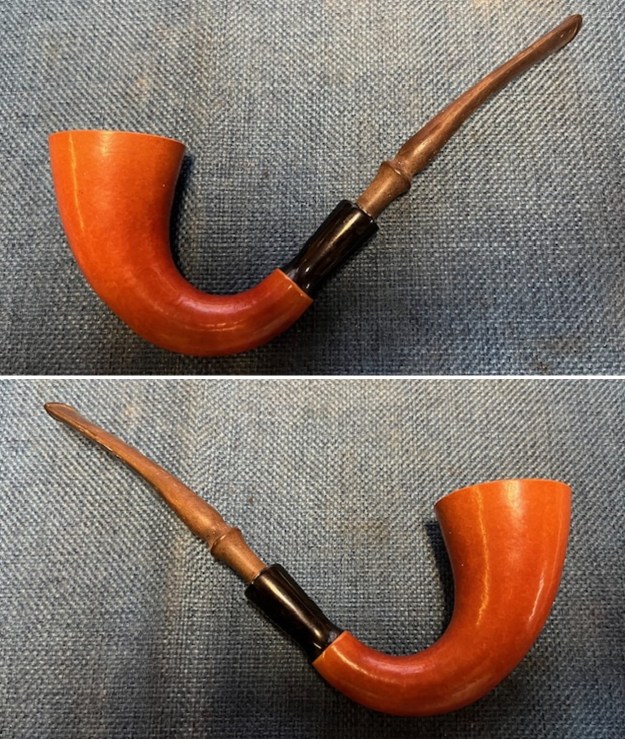
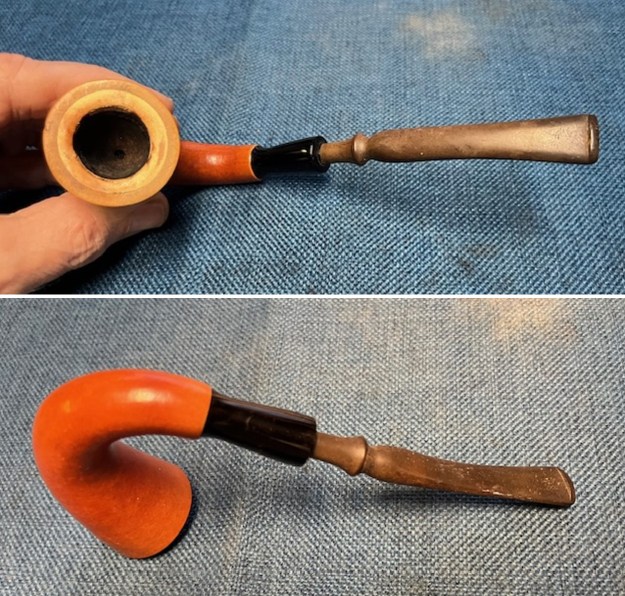
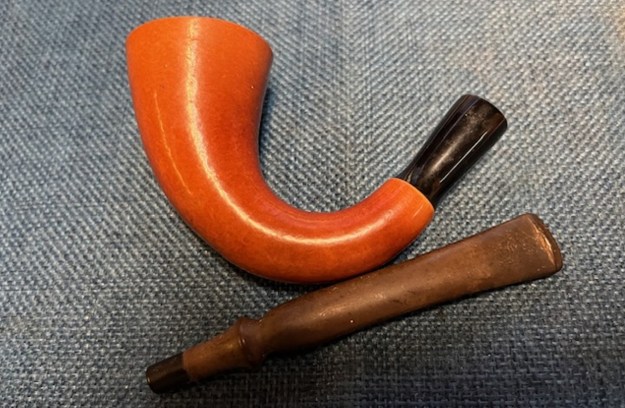
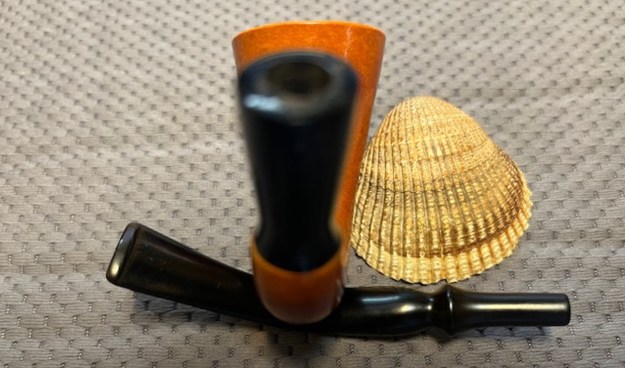
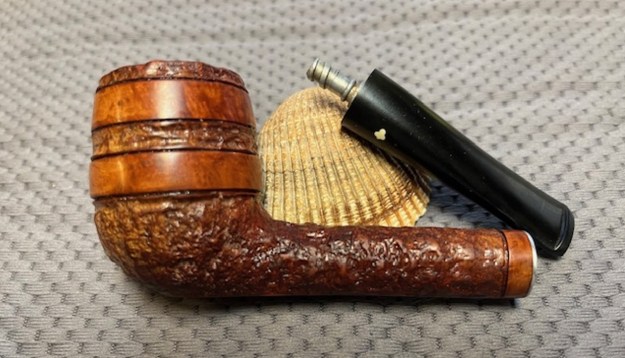
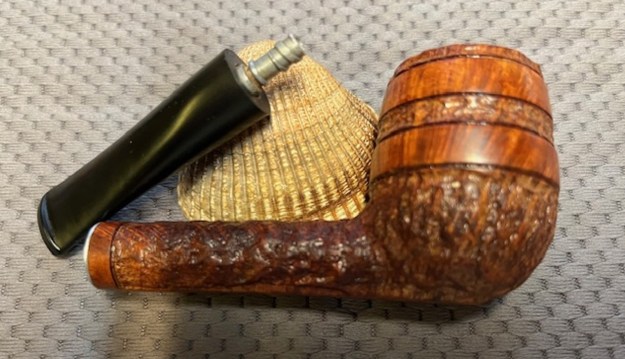
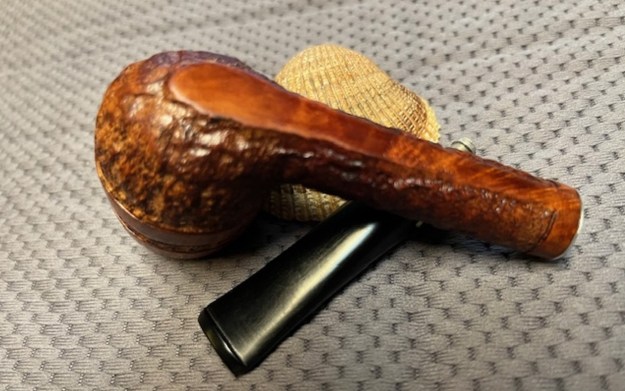
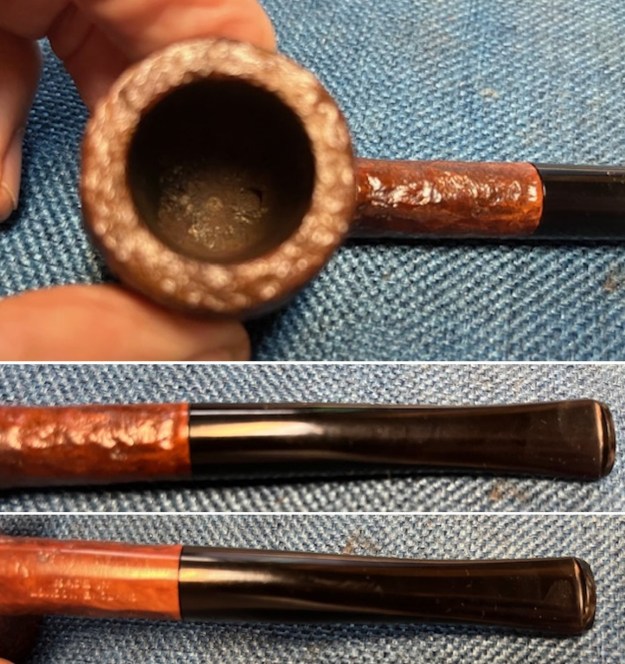
I took a photo to show the stamping on the underside of the shank. It is clear and readable as noted above. I took the stem off and took a photo of the pipe to show its condition.
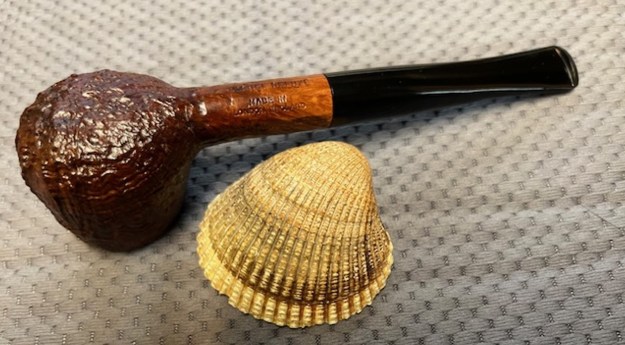
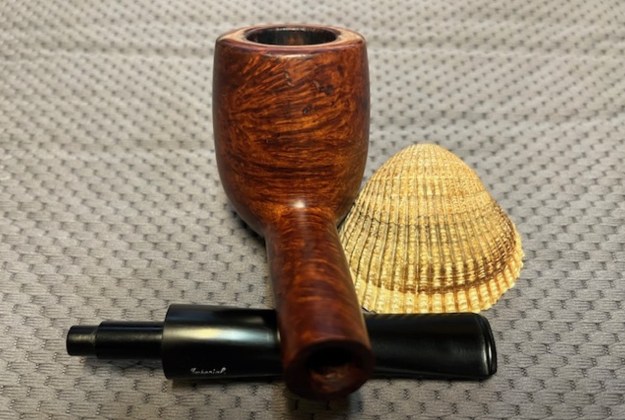
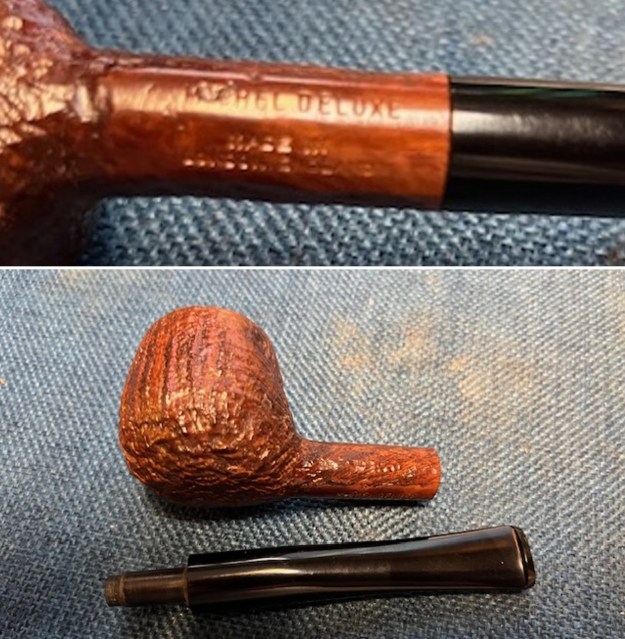
I turned to Pipephil’s site to see what I could learn about the Michel Deluxe Made in London, England brand and particularly the sandblast one I was working on. Sadly there was nothing there under that listing. I then turned to Pipedia (https://pipedia.org/wiki/Michel) and found the following information is courtesy of Matt Hardin:

I see that there has been some confusion about these pipes recently from the entry under “Michel” on Pipedia. Not surprising at all. This tsunami of MICHEL and MICHEL DELUXE pipes which washed ashore on eBay a few months ago all came from one enormous NOS pipe auction on HiBid.

At the time I attempted to document what I could about the auction in general, who the owner was, and some detail about the hundreds of MICHEL and MICHEL DELUXE pipes included. I placed everything I could find in this long thread at Pipe Smokers Den with the full story evolving over time: https://pipesmokersdens.com/threads/the-ultimate-nos-pipe-auction.19629/

The bottom line on those pipes is that they were named after the shop which sold them: Maison Michel of NC, owner Michel J. Mitchell. They were made by a variety of private label pipe manufacturers, most probably from the 60s-70s. Some are marked Made in England, some France, some Denmark. Michel Mitchell died in 1980 after which his sister sold the store to a bank and the entire inventory of the shop sat in storage for ~40 years.

From there I followed the link given in the article to the discussion on Pipesmokersdens (https://pipesmokersdens.com/threads/the-ultimate-nos-pipe-auction.19629/page-3) an online forum that had this information:

Maison Michel was opened by Michel J. Mitchell, a Lebanese immigrant and WWII Navy veteran in Charlotte, NC in 1951. He operated his pipe and gift shop until he passed away in 1980. Thereafter his only survivor was a sibling who sells the real estate, is otherwise super wealthy (and a good person), and she puts his shop inventory in storage for 42 years until she passes away in 2022. Then in 2023 a mother lode of NOS pipes is unleashed online.  

I have included a banner below on the shop as well as some news clippings below that. Though they are small they are still readable.With the information from Pipedia I knew that I was working on a pipe from Maison Michel of North Carolina Pipe or Tobacco Shop. The one I was working on was English Made and may not have been a part of this motherlode but rather one from the shop itself. I am not sure I will ever know that for certain but it is finished while the others in the sale were not. I also learned that it was made during the 60s or 70s. Now it was time to work on the pipe.

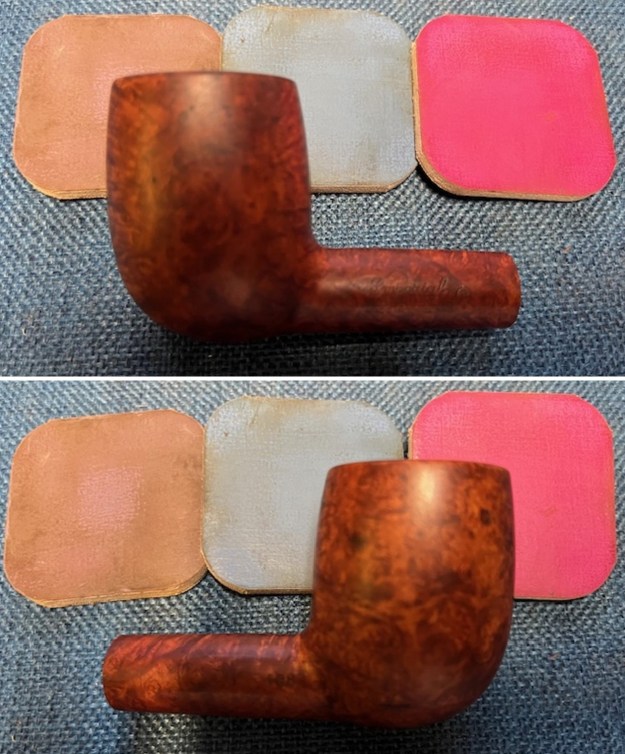
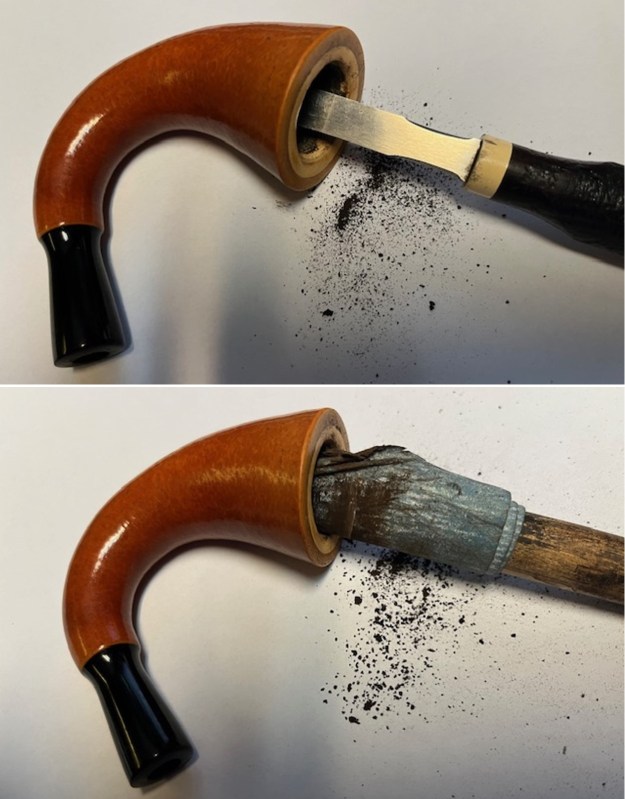
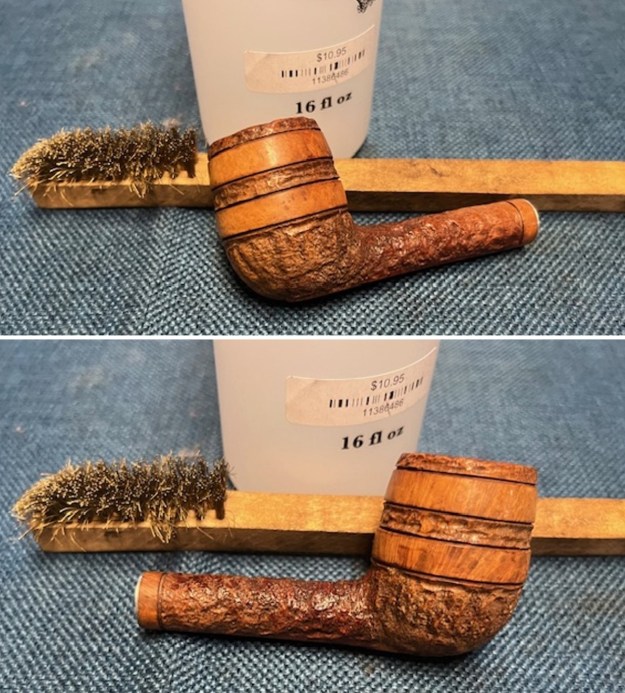
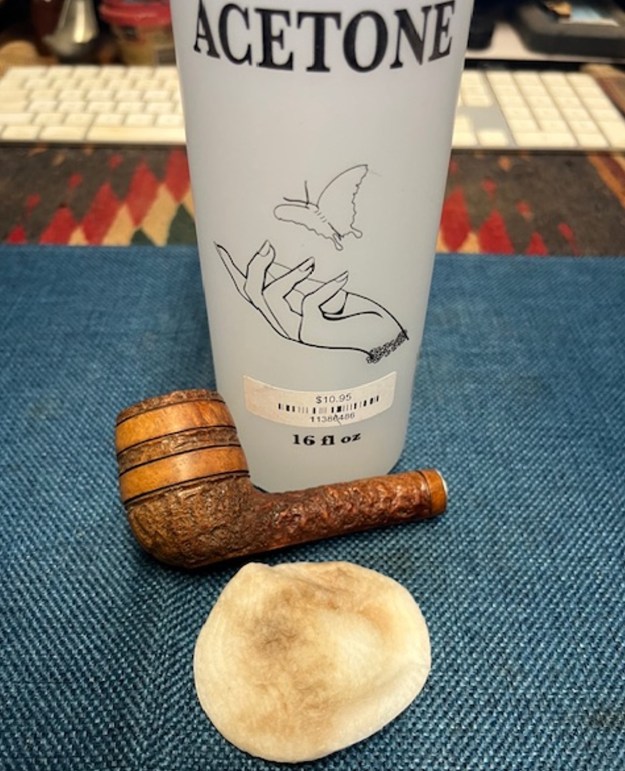
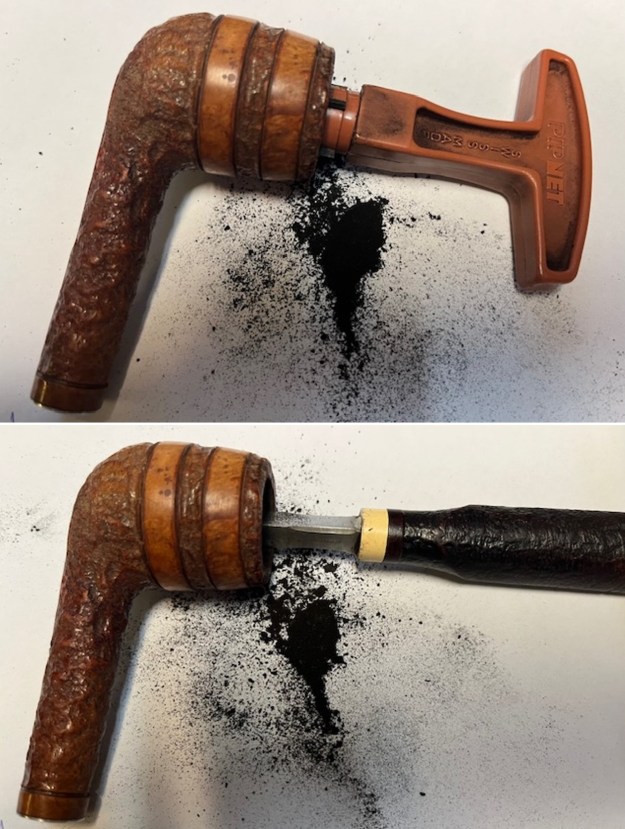
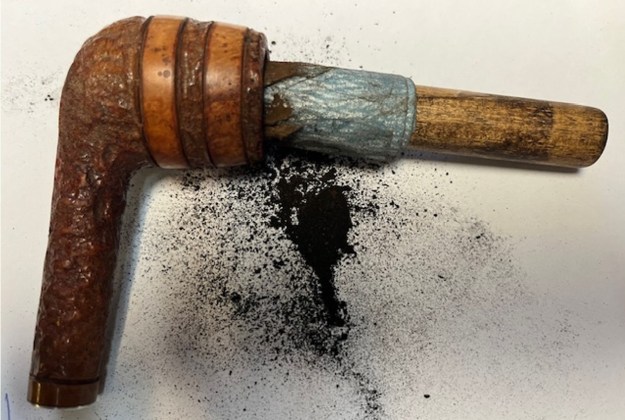
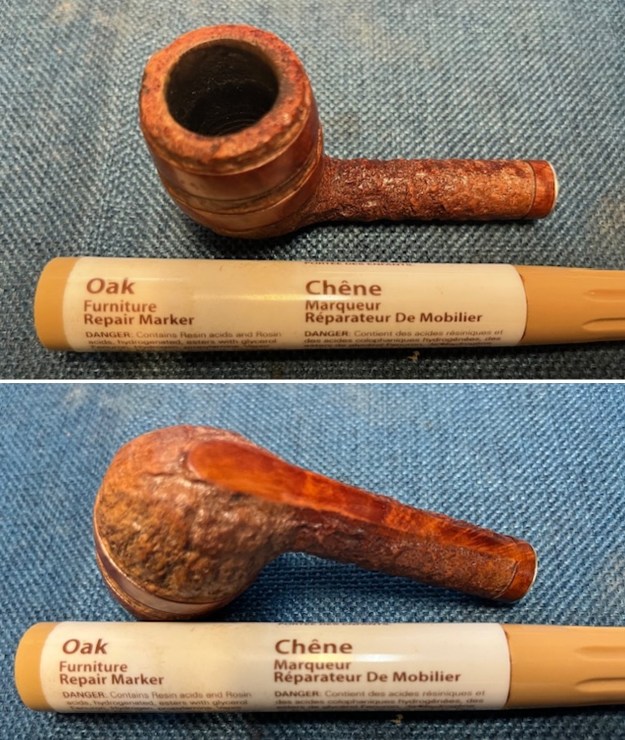
I started my work on the pipe by addressing the shiny top coat on the bowl. It was deep in the sandblast finish and I worked on it with a brass bristle wire brush and some 100% acetone to remove the finish. It took repeated applications of acetone and the hard scrubbing of the brass bristle brush. I was able to break down the finish and open up the pores in the briar. 
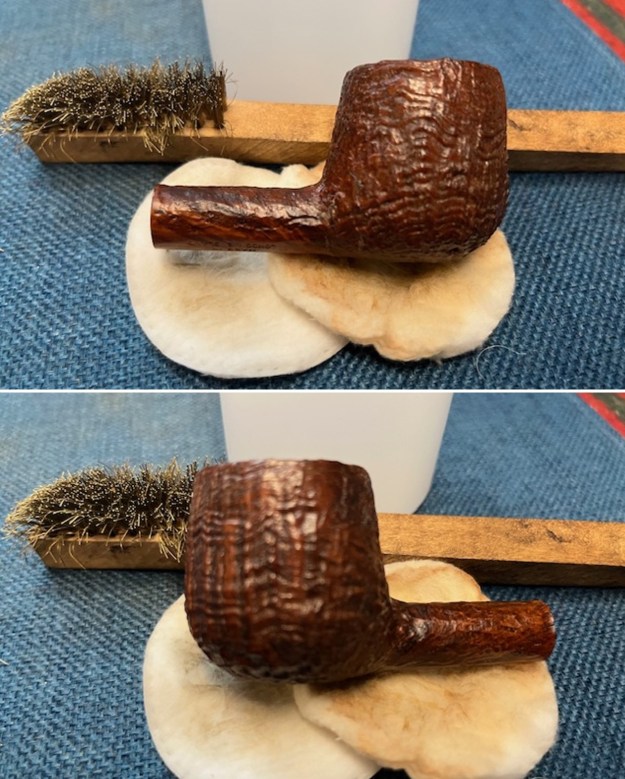
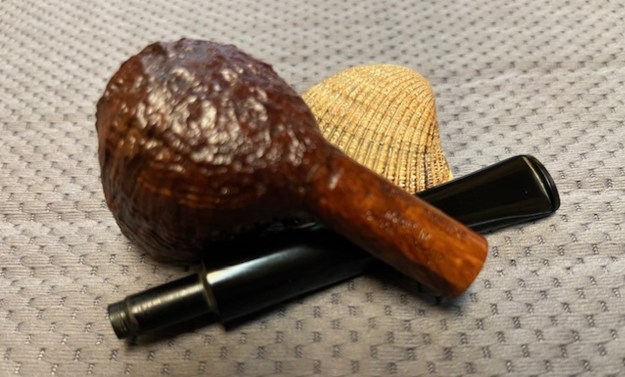
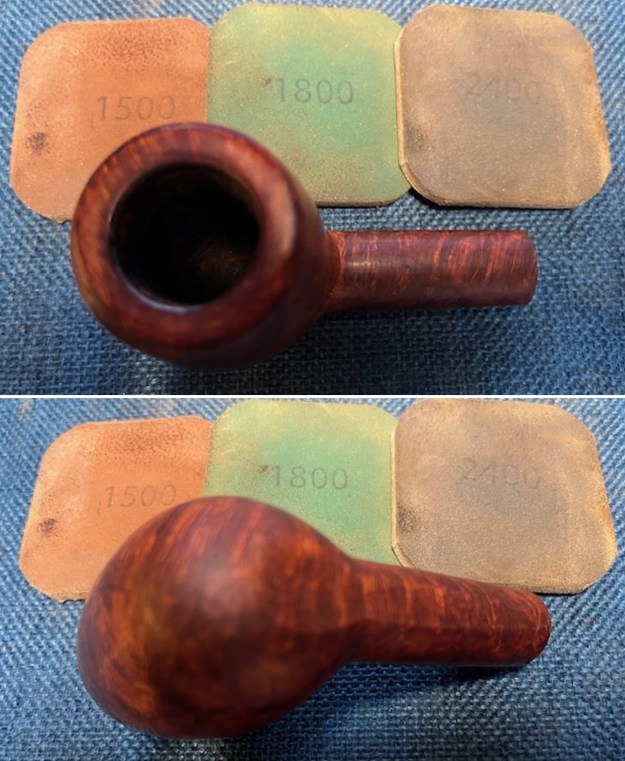
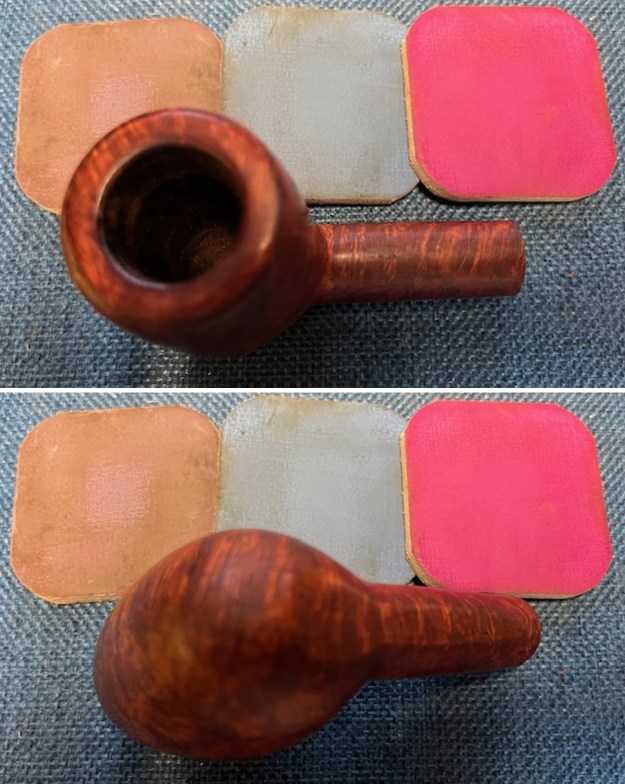
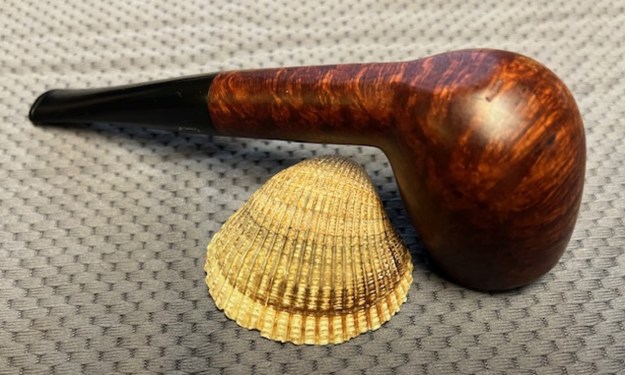
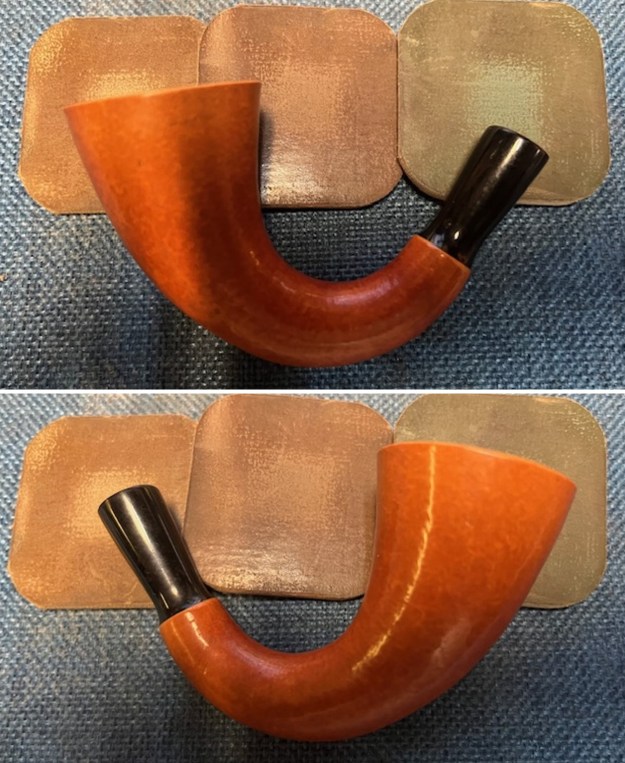
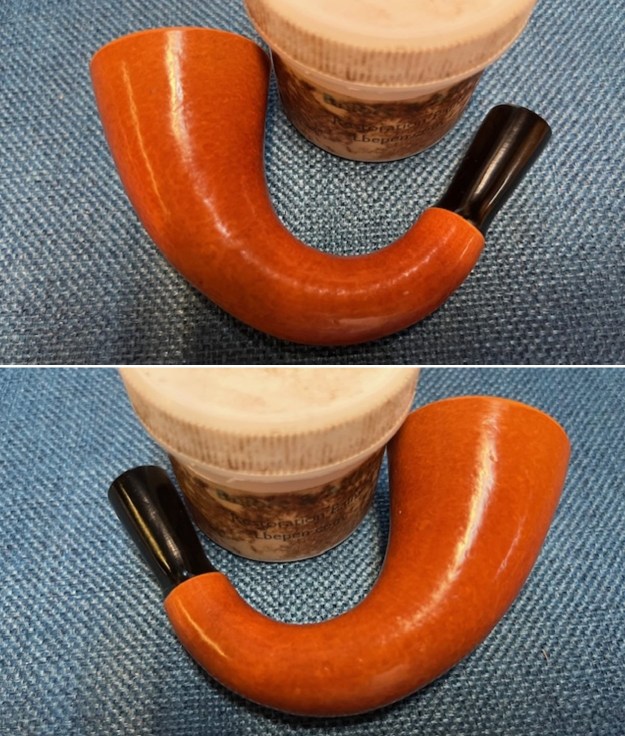
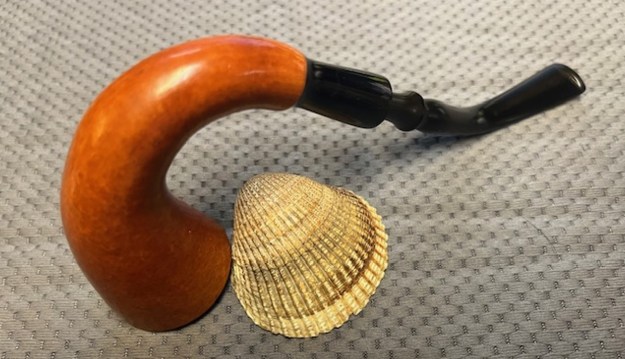
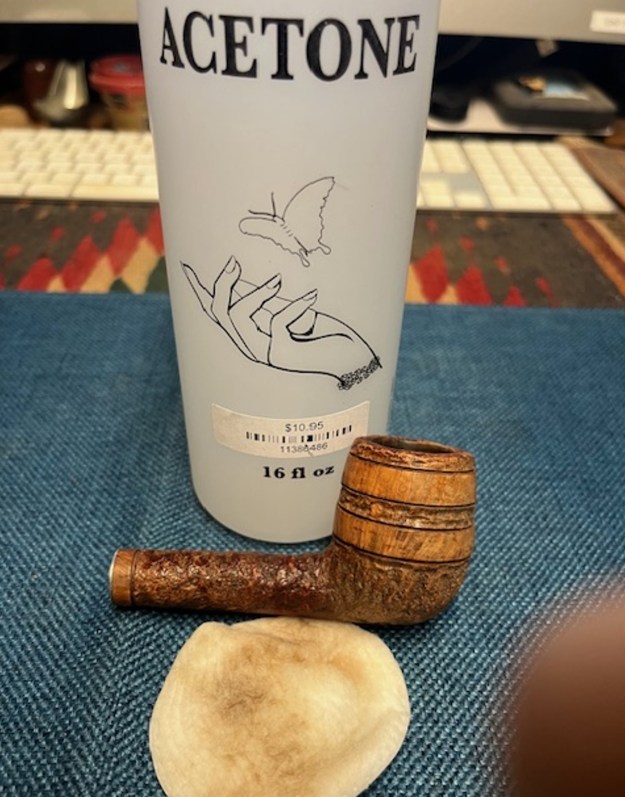
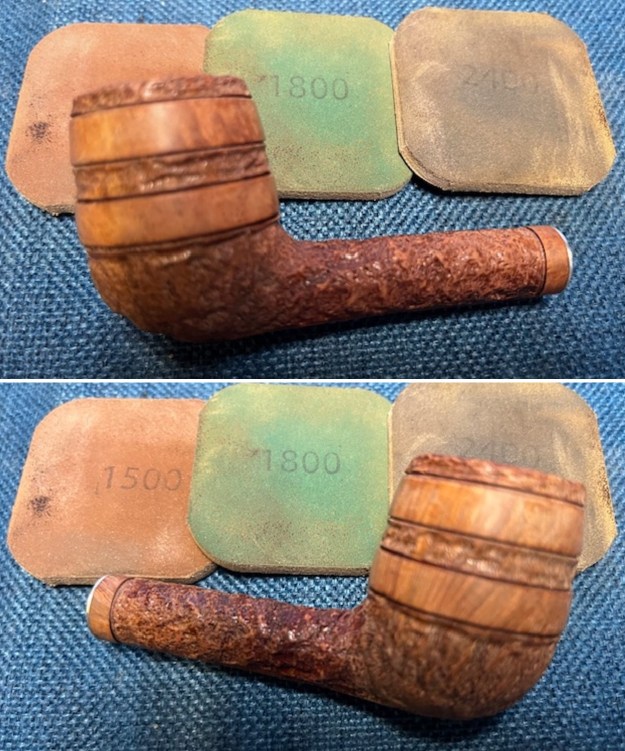
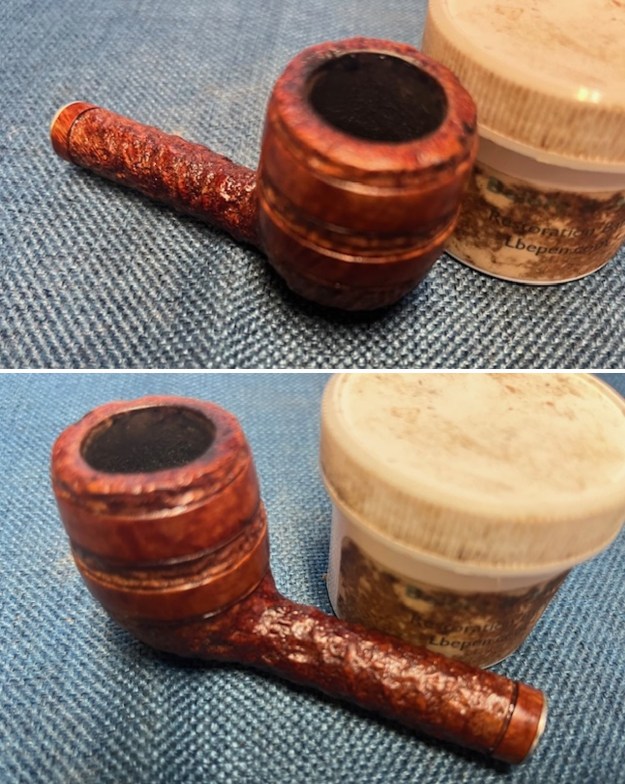
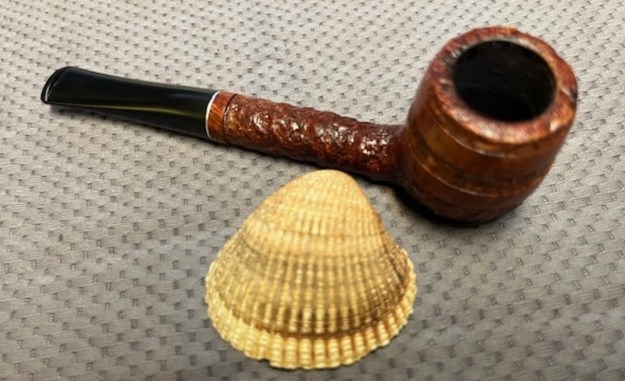
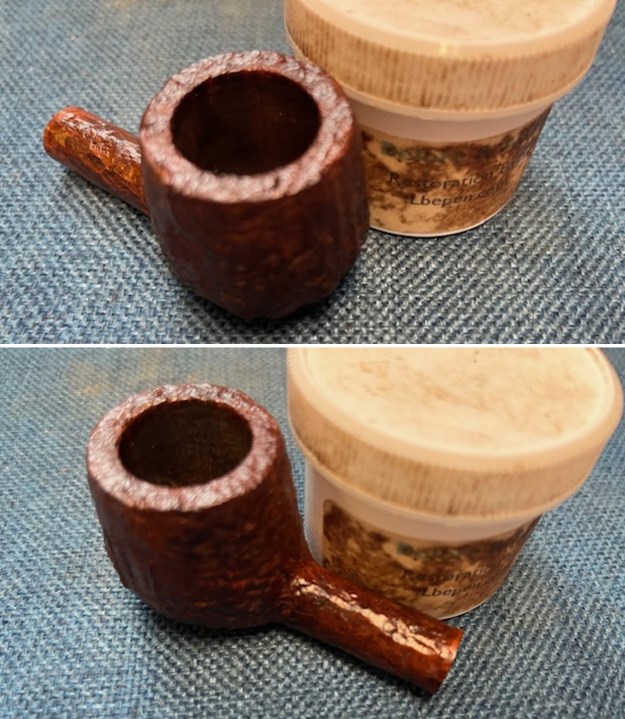
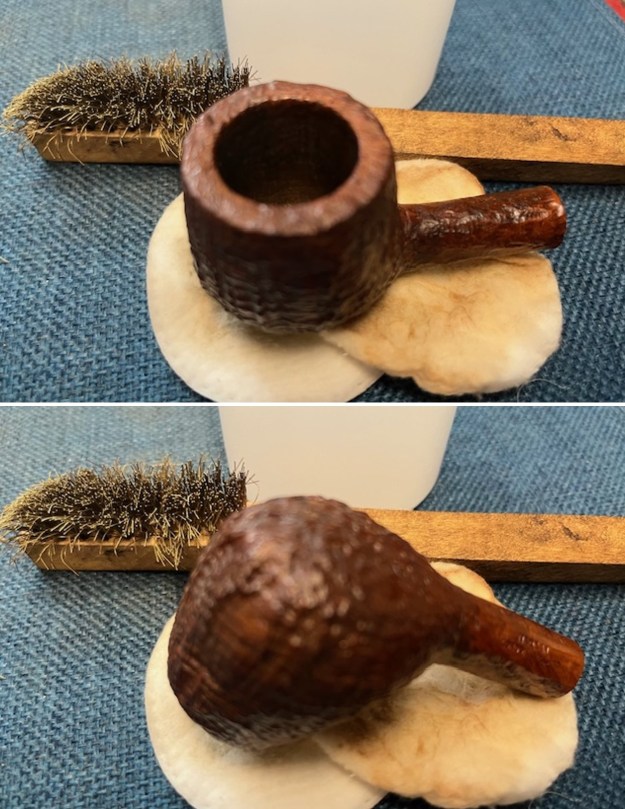
I worked some Before & After Restoration Balm into the finish of the bowl, rim top and shank with my fingertips and a shoe brush to get it in to the crevices and valleys. The product works to clean, enliven and protect the briar. I find that the balm really makes the briar come alive again. The contrasts in the layers of stain really made the grain in the sandblast stand out. I let the balm sit for 15 minutes and then buffed with a cotton cloth to raise the shine. The bowl really looks good at this point. 
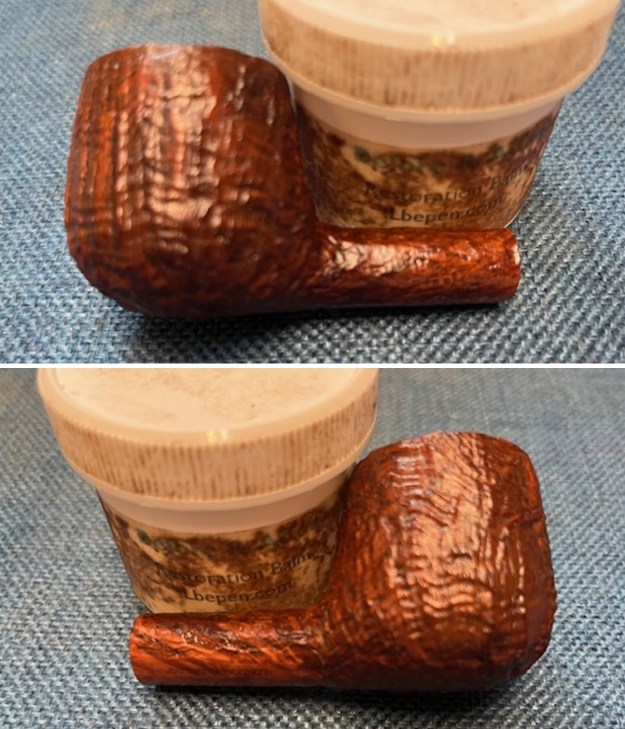
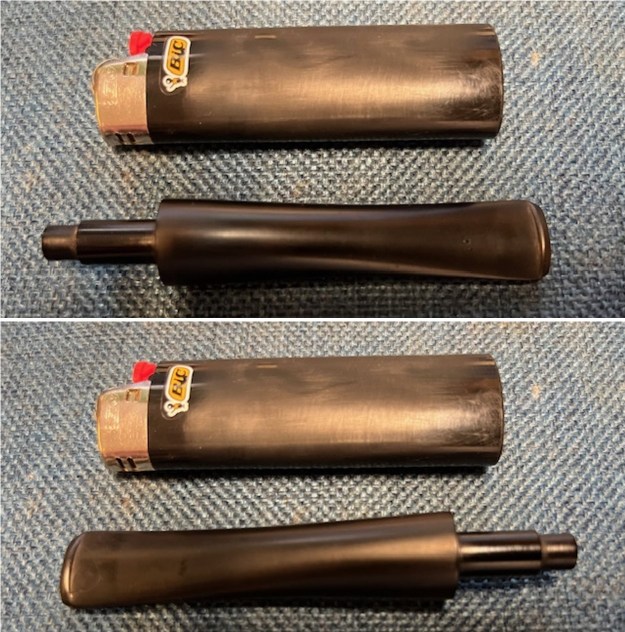
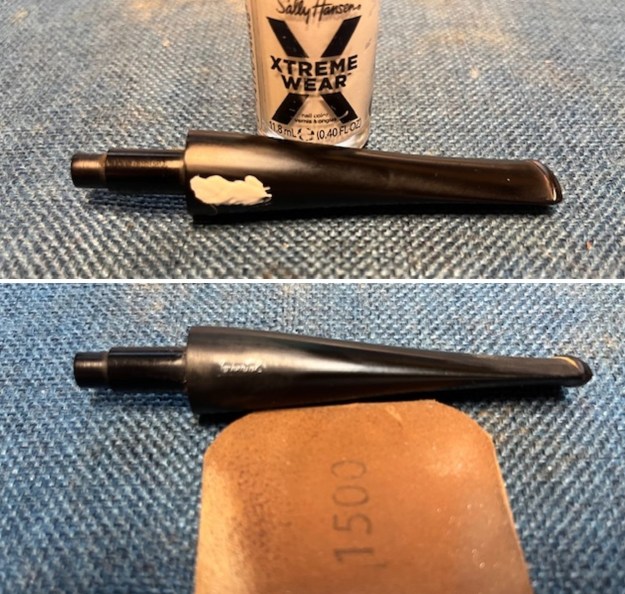
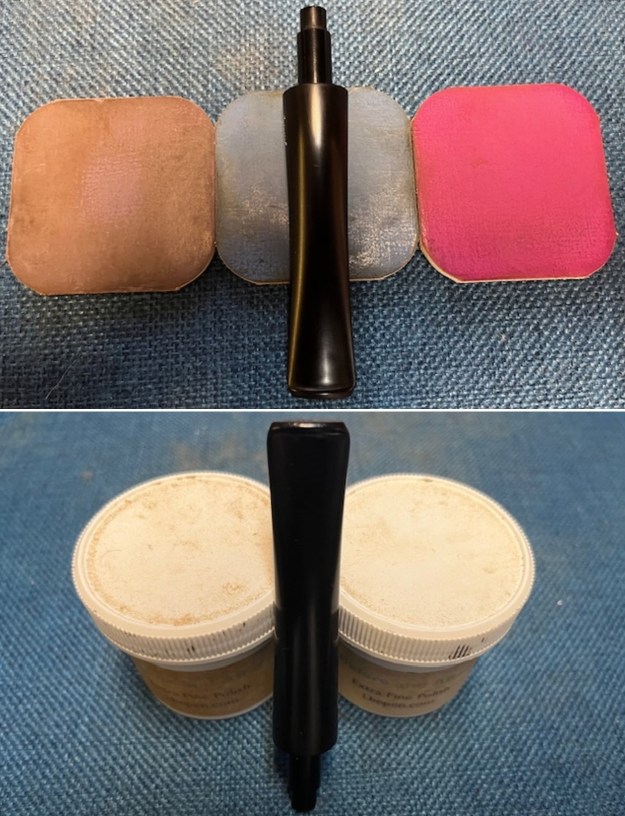
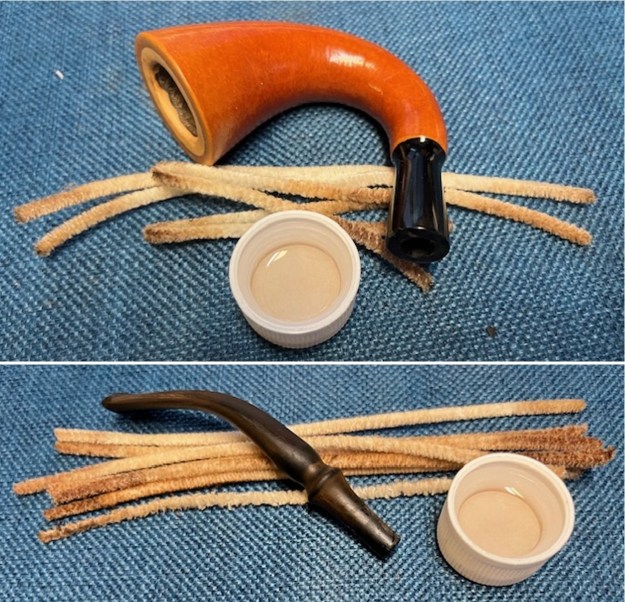
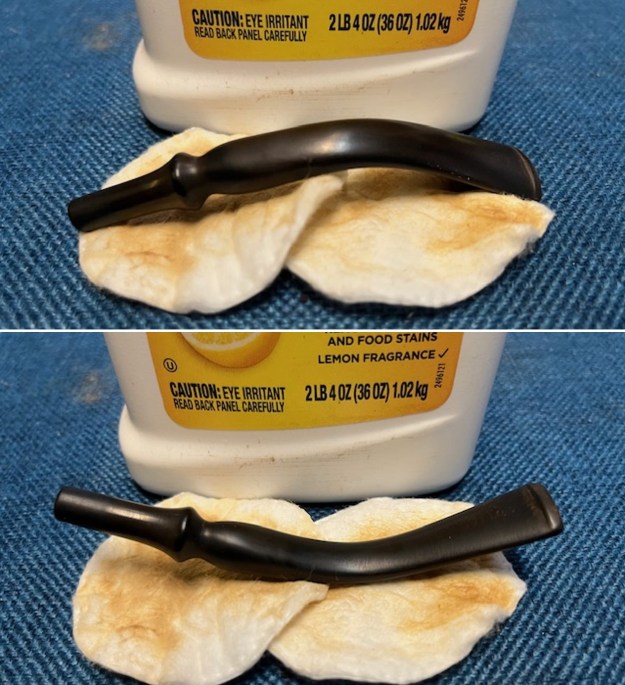
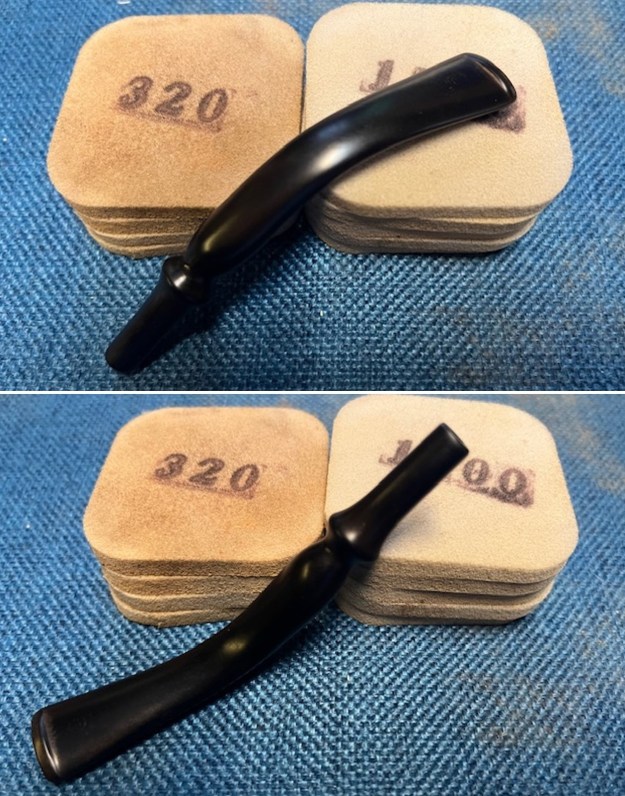
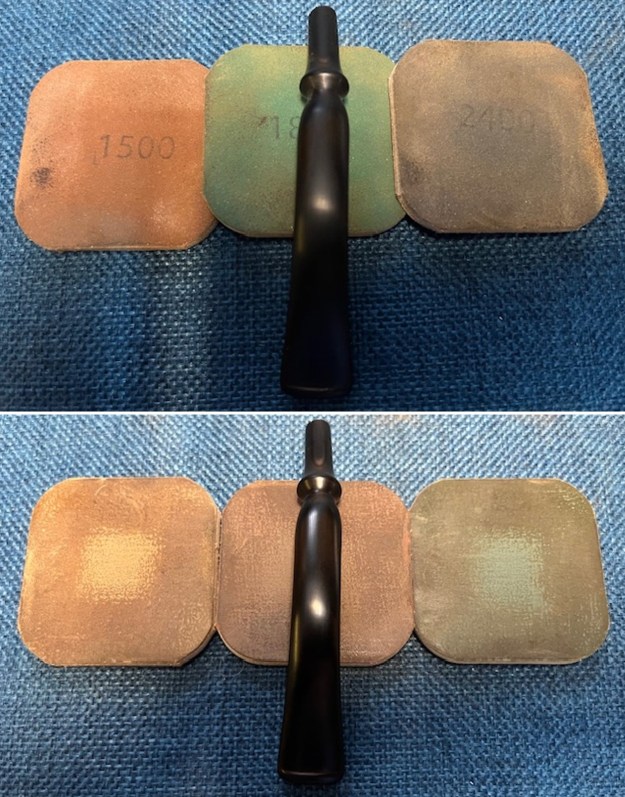
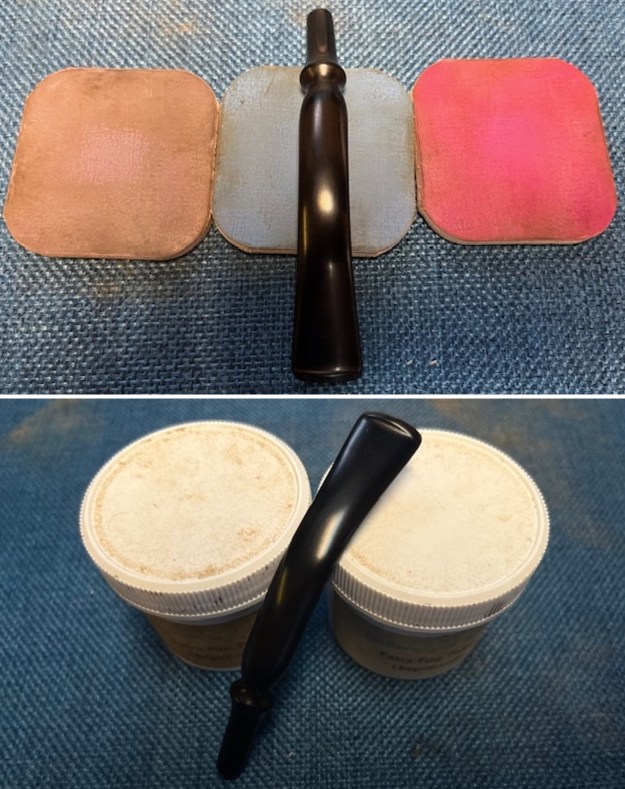
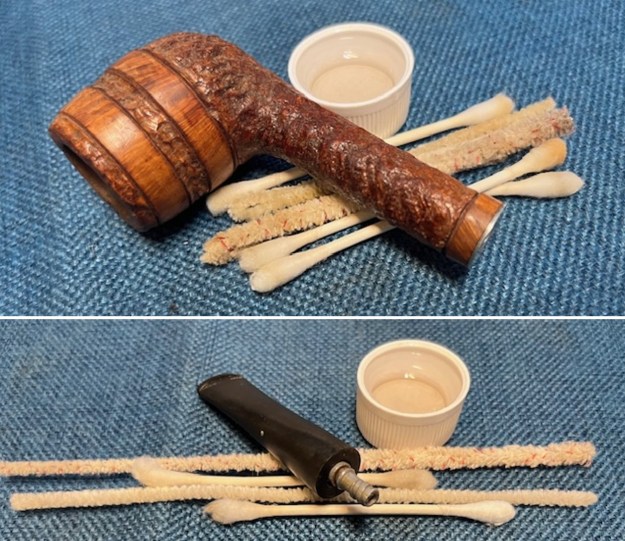
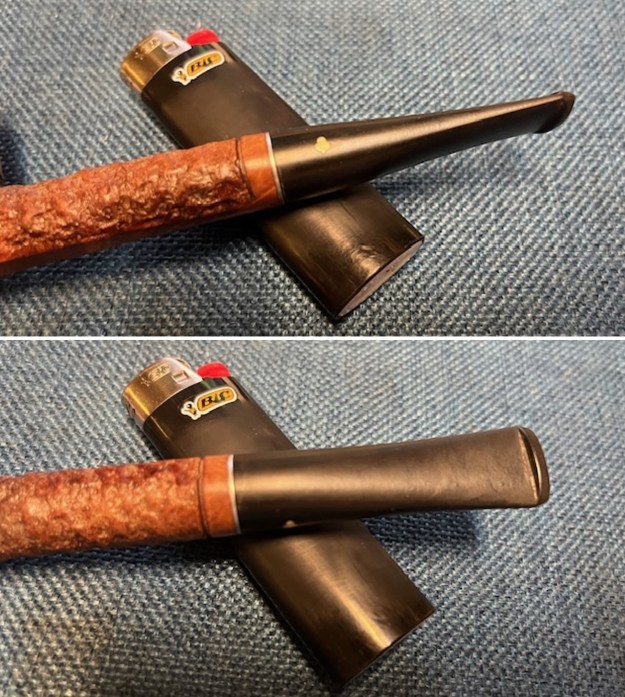
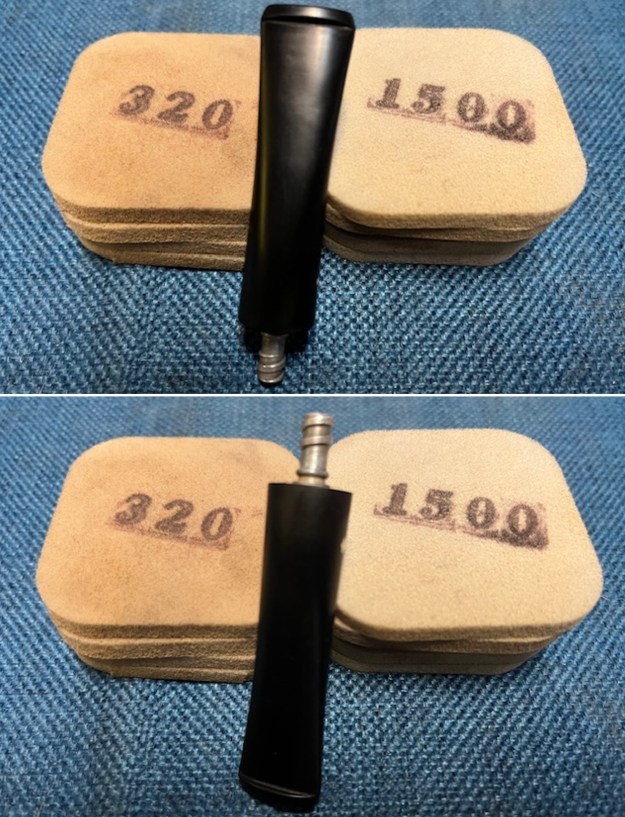
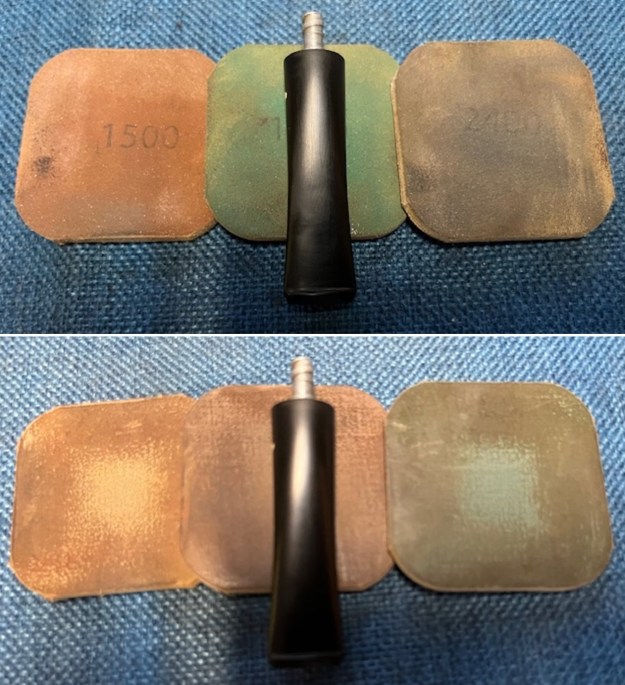
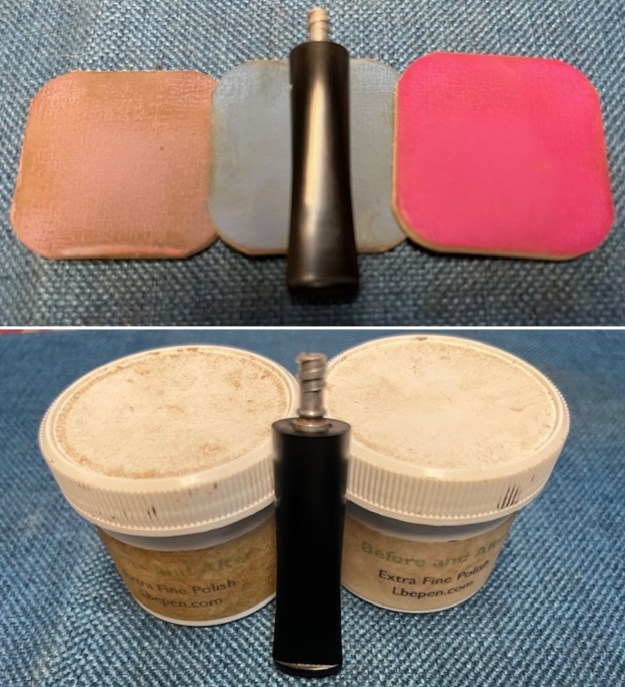
The stem looked so good that I rubbed down with Obsidian Oil and used the Before & After Fine and Extra Fine Polishing Compound to protect and deepen the shine.
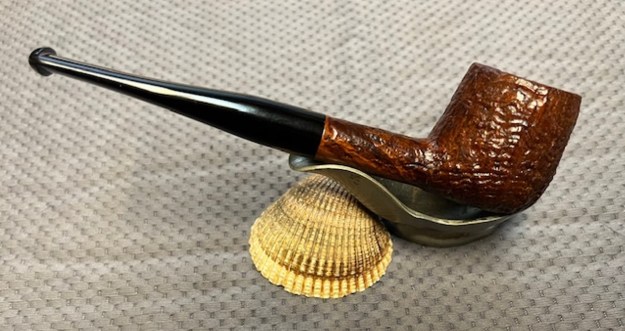
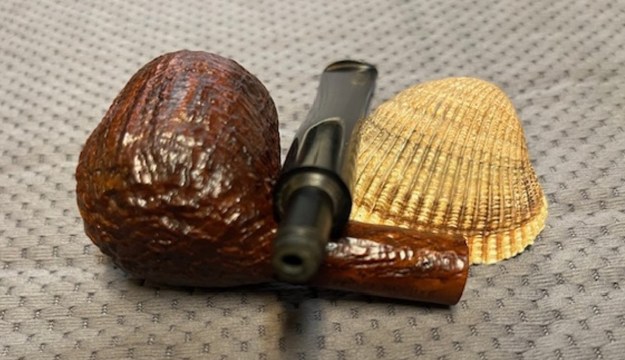
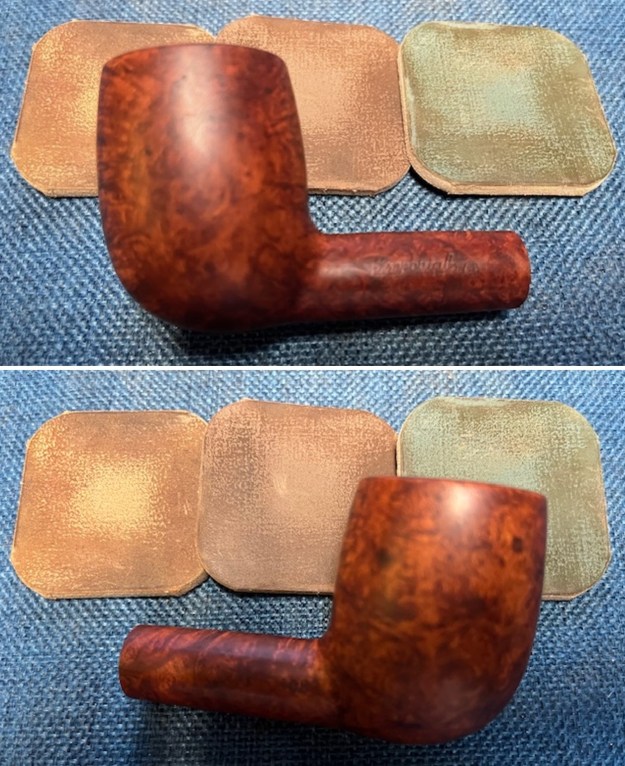
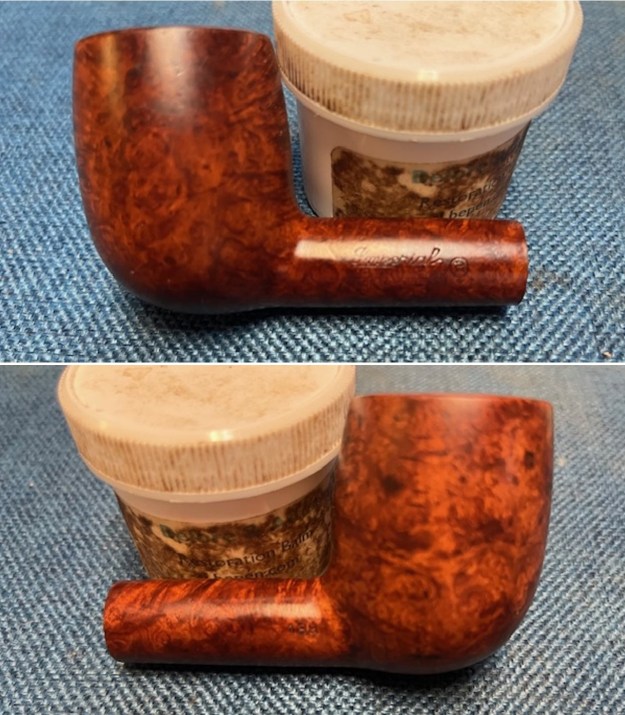
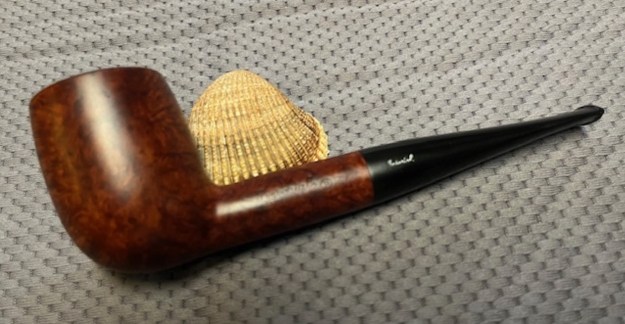
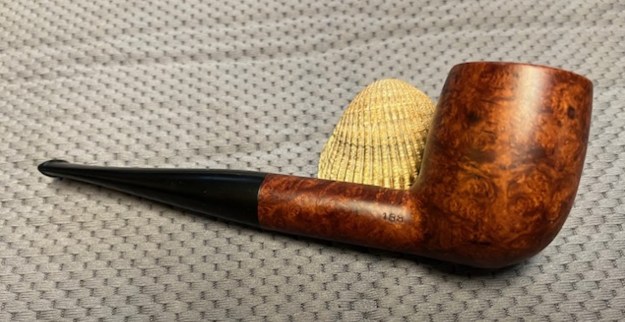
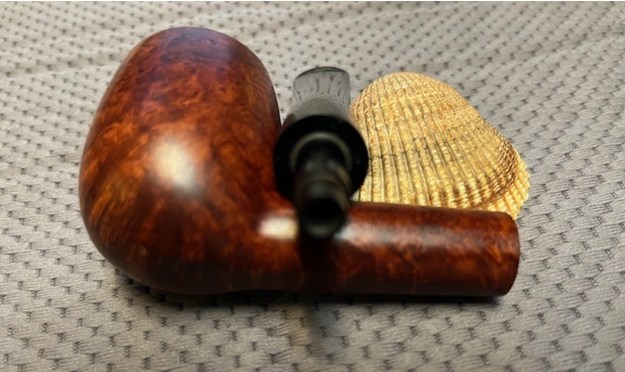
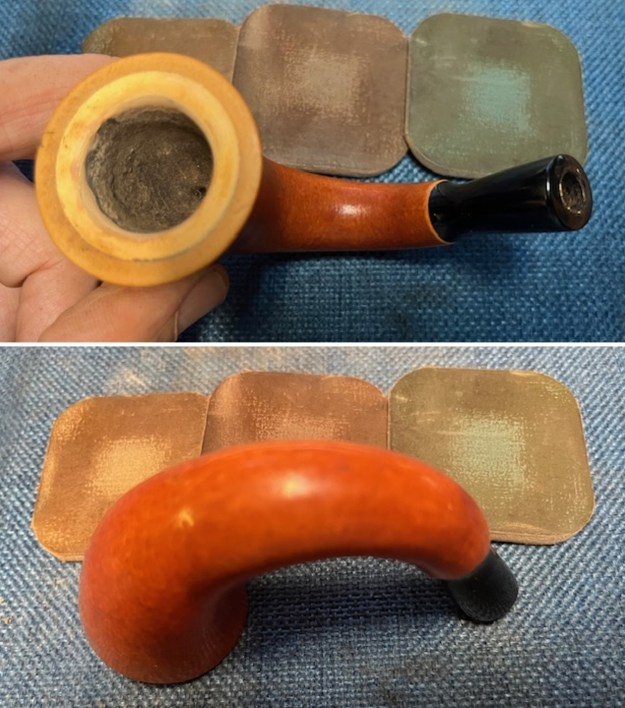
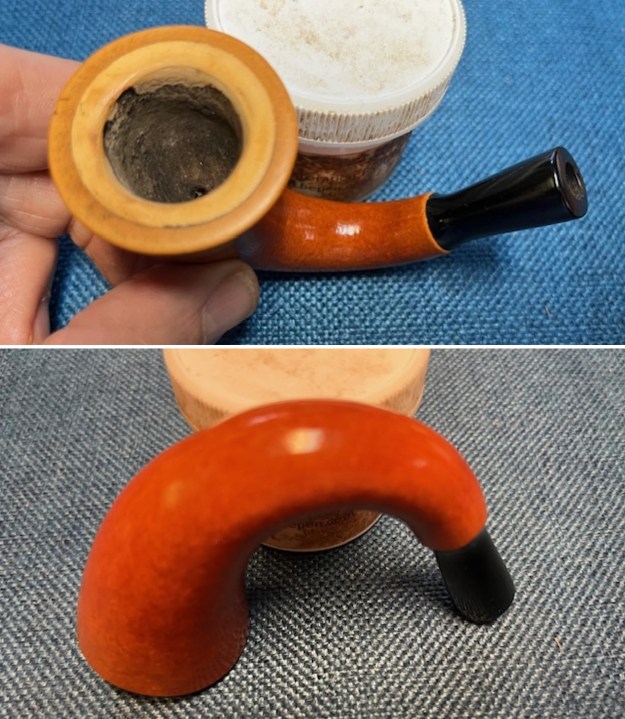
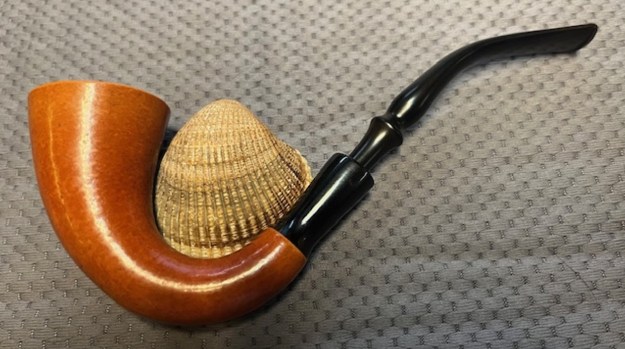
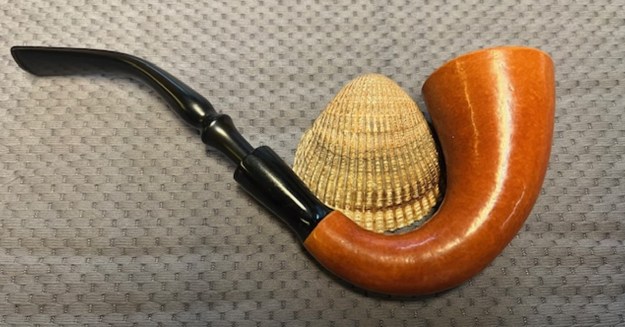
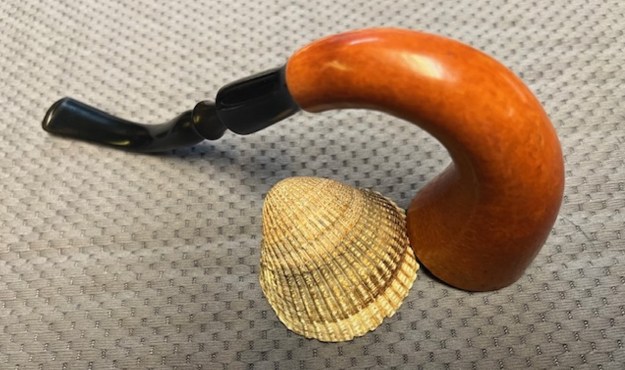
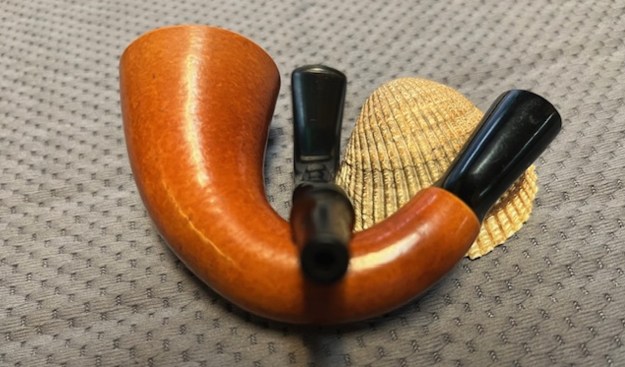
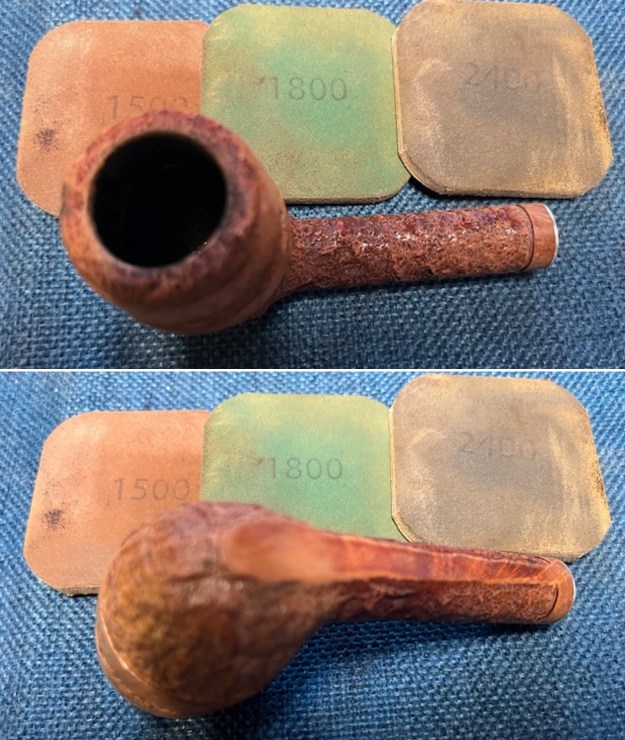
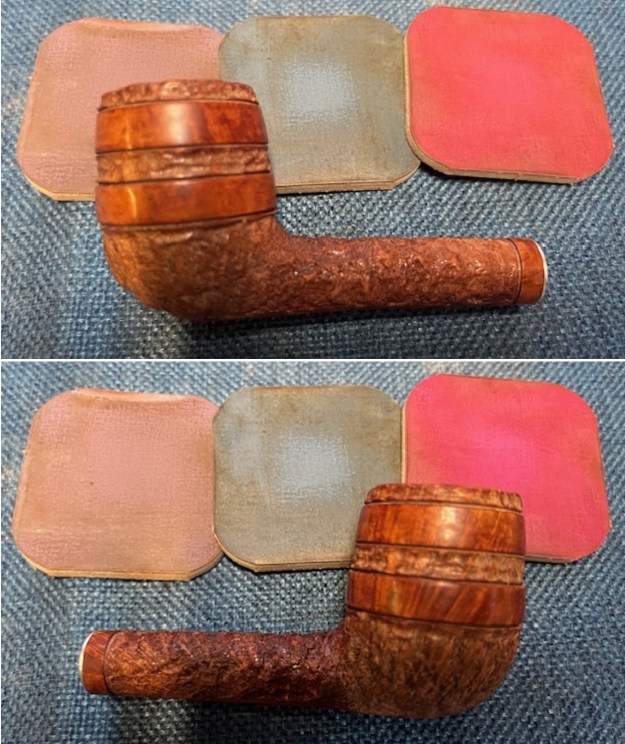
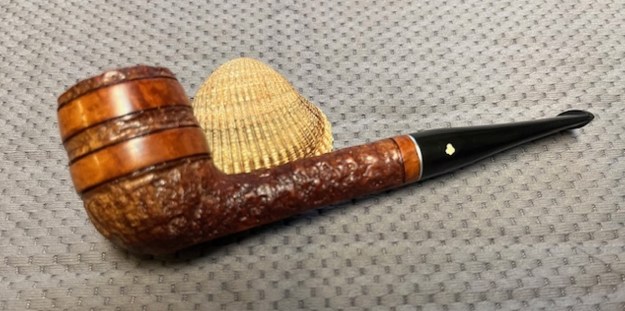
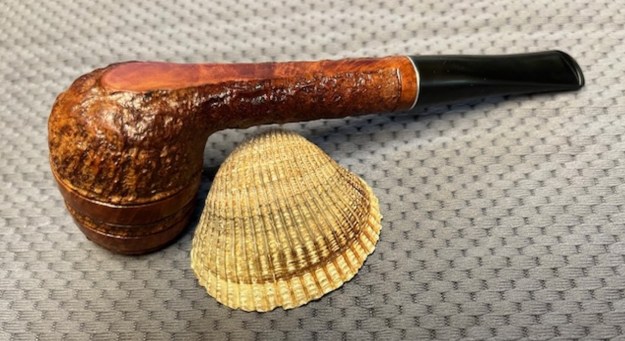
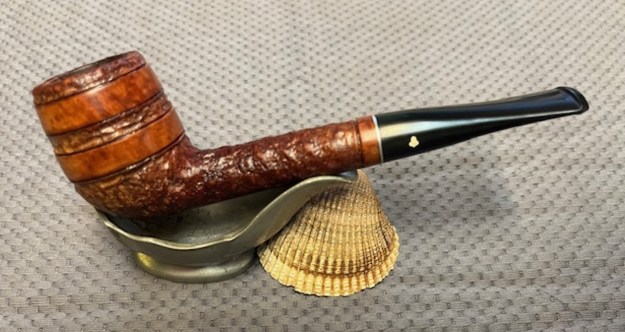
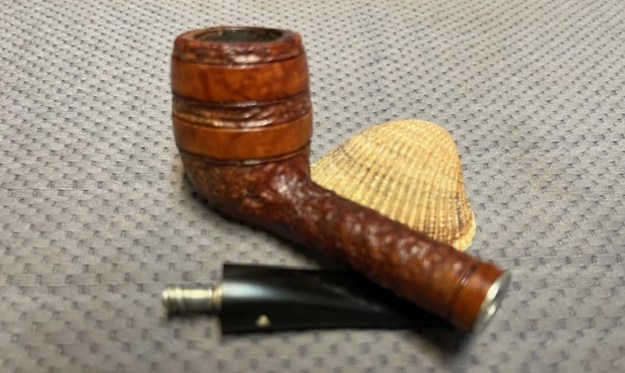
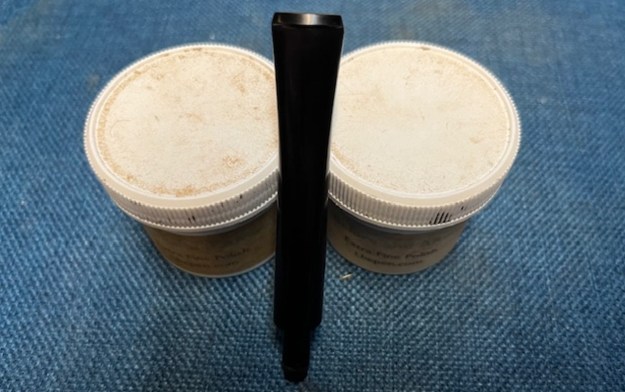
With the bowl and the stem finished I put the beautiful Michel Deluxe Sandblast Pot back together and buffed it on the wheel using Blue Diamond to give it a shine. I gave the bowl multiple coats of Conservator’s Wax and the stem multiple coats of carnauba wax on the wheel. I buffed it with a clean buffing pad to raise the shine. I hand buffed it with a microfiber cloth to deepen the shine. It really is a great looking pipe. The dimensions of the pipe are – Length: 5 ¾ inches, Height: 1 ½ inches, Outside diameter of the bowl: 1 ½ inches, Chamber diameter: 3/4 of an inch. The weight of this large pipe is 1.34 ounces /38 grams. This Michel Deluxe Pot is another great looking pipe. It is much more beautiful in person than these photos can capture. I will be putting it on the rebornpipes store in the British Pipemakers Section soon. If you would like to add it to your collection let me know. This is another pipe that has the possibility of transporting the pipe man or woman back to a slower paced time in history where you can enjoy a respite. Thanks for walking through the restoration with me.

Restoring a Beautiful Imperial Old Bruyere 188 Chunky Billiard


By Steve Laug

The next pipe on the work table is another pipe is another pipe that we picked up from the estate in Oregon City, Oregon, USA on 03/21/2024. This one was a nice looking thick shanked Billard that reminds me of Dunhill LB pipes. It has some nice grain patterns. It is stamped on the left side of the shank and reads Imperial in script [over] Old Bruyere [over] Made in England. To the right of that is stamped the  which is the symbol for a Registered Trademark. On the right side of the shank it is stamped next to the bowl with the shape number 188. The smooth finish had some very nice grain but there was a lot of grime and oils ground into the finish around the bowl and the shank. The pipe was dirty but is quite nice natural tones of the briar. There was a moderate cake in the lower portion of the bowl. The inner edge looked quite good. The outer edge was rounded and damaged giving the rim top a crowned look. The stem seems to be hard rubber rather than vulcanite that leads me to think it is an older pipe. It has a stamp on the left side of the taper that reads Imperial with the tail of the “l” curving under the rest of the stamp in the same script as the stamp on the shank. It had some light oxidized and had some tooth chatter and tooth marks on the top and underside ahead of the button. The pipe showed a lot of promise but it was a mess. Jeff took pictures of the pipe before he did his clean up work. He took photos of the rim top and bowl as well as the stem surfaces to show the condition of the well smoked pipe. You can see the light cake in the bowl and the light lava on the inner edge and rim top. There is also some roughening on the outer edge at the front and back of the bowl. It appears to have been rounded over giving the rim top a bit of an artificial crown. The stem was lightly oxidized, calcified and had scratches, tooth chatter and marks on both sides ahead of the button. Jeff took some photos of the sides and heel of the bowl to give a sense of the grain and the shiny varnish or shellac coat on the exterior of the bowl. It is definitely an addition that will need to be removed. He captured the stamping on the sides of the shank and stem. On the left side it reads as noted above. On the right side it is stamped with the shape number 188. To capture the stamping on the left side Jeff had to take a few extra photos. I turned to Pipephil to get a quick overview of the background information on the Imperial brand (http://pipephil.eu/logos/en/logo-i.html). There was no background information on the site this time but the photos below are helpful in terms of the stamping on the shank and the stem.I turned to Pipedia for more information (https://pipedia.org/wiki/Imperial_Tobacco_Co.). I quote the article below.

From Pipes, Artisans and Trademarks, by Jose Manuel Lopés’

The Imperial Tobacco Co. (Imperial Tobacco Ltd.) was founded in 1901 through the merger of several British tobacco companies. In 1902 it went into partnership with the American Tobacco Company to found the British American Tobacco Company.

See also: Civic. Brands involved: Comoy’s, Bewlay, Nording, Ogden’s, Salmon & Gluckstein, and Steel’s

There was a great older advertisement on the link as well that highlighted the age of the brand. I have included that below.Now it was time to look at it up close and personal. Jeff had removed the cake and the lava on the rim top. He had reamed the bowl with a PipNet Pipe Reamer and cleaned up the remnants with a Savinelli Fitsall Pipe Knife. He took the cake back to bare briar so we could check the walls for damage. He scrubbed the exterior of the bowl with Murphy’s Oil Soap and a tooth brush to remove the grime on the bowl and rim and was able to remove the lava and dirt. He cleaned out the interior of the bowl and shank with shank brushes, pipe cleaners, cotton swabs and alcohol until they came out clean. He cleaned the stem with Soft Scrub to remove the grime on the exterior. He cleaned out the airway with alcohol, cotton swabs and pipe cleaners. I took some photos of the pipe before I started my work on it today. I took a close up photo of the cleaned up rim top. The rim top and the inner edge look good. The damage on the outer edge of the bowl shows up as rounding on the front and the back of the bowl. The bowl is clean and the walls are undamaged. The stem looks good with some tooth chatter and marks along the top and underside ahead of the button. The stem is hard rubber which makes the work more difficult on the tooth marks.I took a photo of the stamping on the shank side. It is clear and readable as noted above. I took the stem off the pipe and took a photo. The thick shank billiard is an attractive looking pipe with nice lines. The taper stem shows tooth damage on the top and undersides of the stem. I started my work on the pipe by working over the rim top and the bowl and shank with 320-3500 grit sanding pads. I wiped the bowl down after each sanding pad. The bowl began to take on a shine. I used a Cherry stain pen to restain the rim top and edges to match the colour of the rest of the bowl. The match will be perfect once I finish the next stage of polishing.I polished the smooth rim top and areas on the bowl and shank with micromesh sanding pads – dry sanding with 1500-12000 grit pads. After each pad I wiped the bowl down with a damp cloth to remove the sanding debris. It really took on a shine and the fills were less noticeable by the last three sanding pads. I rubbed the bowl down with Before & After Restoration Balm. I worked it into the surface of the briar with my fingertips where it works to clean, restore and preserve the briar. I let it do its magic for 15 minutes then buffed it off with a cotton cloth. The pipe looks incredibly good at this point in the process. I set aside the bowl and turned my attention to the stem. I “painted” the tooth marks and chatter on both sides of the stem with the flame of a Bic lighter. I was able to lift all of them to the point where sanding the stem with 220 grit sandpaper should smooth the rest of them out.I touched up the faint stamping on the left side of the taper stem with white acrylic fingernail polish. I pointed it on with the applicator and scraped off the excess and lightly sanded it with a 1500 grit micromesh pad. I sanded out the remnants of the tooth marks with a folded piece of 220 grit sandpaper and was able to remove all of the remaining marks. Once finished the stem looked very good.I sanded the stem surface with 320-3500 grit sanding pads. I wiped down the stem after each pad using a cloth impregnated with Obsidian Oil. It started looking better as each step took it closer to the finished look.I continued to polish the stem with micromesh sanding pads – wet sanding with 1500-12000 grit sanding pads. I wiped it down after each sanding pad with Obsidian Oil. I polished it further with Before & After Stem Polish – both Fine and Extra Fine. I gave it a final coat of Obsidian Oil and set it aside to cure. I am excited to finish this Imperial Old Bruyere  Made in England 188 Billiard. I put the pipe back together and buffed it with Blue Diamond on the buffing wheel. I gave the bowl and the stem multiple coats of carnauba wax. I buffed the pipe with a clean buffing pad to raise the shine and then by hand with a microfibre cloth to deepen it. It is fun to see what the polished bowl looks like with beautiful straight grain all around it. The polished grain on the pipe looks great with the black hard rubber stem. This Imperial Old Bruyere Billiard is great looking and the pipe feels great in my hand. It is light and well balanced. Have a look at it with the photos below. The dimensions are Length: 6 inches, Height: 1 ¾ inches, Outside diameter of the bowl: 1 ¼ inches, Chamber diameter: ¾ of an inch. The weight of the pipe is 53 grams/1.87 ounces. It turned out to be a beautiful pipe. I will soon be putting it on the rebornpipes store in the British Pipemakers Section. If you are interested in adding it to your collection let me know. Remember we are the next in a long line of pipe men and women who will carry on the trust of our pipes until we pass them on to the next trustee. Thanks for your time reading this blog.

Cleaning up a Lightweight Gourd Calabash Pipe


by Steve Laug

The next pipe on the table is a small older style meerschaum lined Gourd Calabash without the top. It is one we picked up from and estate in Oregon City, Oregon, USA on 03/21/2024. The surface of the gourd is smooth and unadorned. It has an acrylic shank extension. The gourd had obviously been waxed and the surface was smooth and shiny. The meerschaum was unique in that it was almost like a meerschaum lining in a briar pipe than the typical cup liner that I was familiar with in Calabash pipes. The meer bowl had a light cake in it but the rim top looked good and had taken on a nice patina. The inner edge had some slight damage on the right side and was a little rough to the touch. The acrylic shank extension was in excellent condition and fit with a slight waist at the gourd end. The fancy turned stem was quite heavily oxidized and there were light tooth marks on the top and underside ahead of the button. The stem had also straightened out over time and would need to be re-bent to fit the flow of the bowl. I took a few photos of the pipe in the car on the way home and have included them below. I took a photo of the rim top and bowl to show the condition of both of them. The bowl shows that is clear of caking on the walls. The rim top showed some darkening. The inner edge of the bowl has some damage that will need to be taken care of. The photos of the stem show the heavy oxidation and light tooth marks/chatter on both sides ahead of the button. I removed the stem from the shank and took a photo to show the proportions of the pipe. It is a nicely shaped gourd and the meerlining looks great. The stem length works very well with the pipe.I started my work by cleaning up the inner edge of the meerschaum lining. I gave the inner edge a slight bevel with a folded piece of 220 grit sandpaper.I cleaned up the cake in the meerschaum bowl with a Savinelli Fitsall Pipe knife and then sanded the walls with 220 grit sandpaper wrapped around a piece of dowel. The walls were smooth and showed no burn damage.I cleaned out the interior of the shank, mortise and airway in the gourd and in the stem with pipe cleaners, cotton swabs and alcohol. The pipe was surprisingly clean. I polished the rim top (meer and gourd) and the gourd body itself with micromesh sanding pads – dry sanding with 1500-12000 grit pads. At the same time I polished the acrylic shank extension. I wiped it down with a cotton pad and a cloth impregnated with Obsidian oil after each sanding pad. The briar really took on a patina that began to look better with the polishing. I rubbed the bowl down with Before & After Restoration Balm. It is a paste/balm that works to deep clean the finish, enliven and protect the gourd. I work it into the gourd with my finger tips to make sure that it covers every square inch of the pipe. I set it aside for 10 minutes to let it do its work. I wiped it off with a soft cloth then buffed it with a cotton cloth. The calabash really began to have a deep shine. The photos I took of the bowl at this point mark the progress in the restoration. You see the shine that the gourd has taken on and the way grain pops on the smooth portions and the rusticated parts have depth. I set the bowl aside and turned my attention to the stem. I decided to rebend the stem to fit the flow of the bowl. I heated it with a lighter flame and put it in the shank. I bent it so that when it was held in my mouth the bend of the stem was straight and even with the top of the bowl. I sanded the re-bent stem with 220 grit sandpaper to remove the tooth damage and chatter as well as the oxidation. It began to look much better.I worked on the oxidation on the stem with Soft Scrub. I worked it into the surface of the vulcanite with cotton pads and was able remove the majority of the oxidation on the stem surface. I sanded the stem with 320-3500 grit sanding pads to break up the remaining oxidation. I wiped it down after each sanding pad with an Obsidian Oil impregnated cloth. It began to look good.I polished the stem with micromesh sanding pads – dry sanding with 1500-12000 grit pads. I wiped the stem down after each sanding pad with Obsidian Oil. I polished it with Before & After Pipe Stem Polish – both Fine and Extra Fine. Once I had finished the polishing I gave it final coat of Obsidian Oil and set it aside to dry. More than usual at this point in the restoration process I am excited to be on the homestretch. I really am looking forward to the final look when I put a pipe back together, polished and waxed. I polished the bowl and stem with Blue Diamond to polish gourd bowl and the vulcanite. I gave the gourd and the stem multiple coats of carnauba wax. I buffed the pipe with a clean buffing pad to raise the shine. I hand buffed it with a microfiber cloth to deepen the shine. The pipe polished up pretty nicely. The shiny black acrylic shank extension and the vulcanite stem is a beautiful contrast to the browns of the bowl and shank. This Meerschaum Lined Gourd Calabash was another fun pipe to work on. The pipe is comfortable pipe to hold in the hand. The finished pipe is shown in the photos below. The dimensions of the pipe are Length: 6 ¾ inches, Height: 2 ¼ inches, Outside diameter of the bowl: 1 ½ inches, Chamber diameter: 7/8 of an inch. The weight of the pipe is 1.27 ounces/36 grams. I will be adding it the Ceramic and Meerschaum Pipes section of the rebornpipes store. Thanks for reading this blog and my reflections on the pipe while I working on it.

As always, I encourage your questions and comments as you read the blog. Thanks to each of you who are reading this blog. Remember we are not pipe owners; we are pipemen and women who hold our pipes in trust until they pass on into the trust of those who follow us.

Time Travelling with a NOS Car Boy Pipe Holder


by Steve Laug

I was going through some of my pipe paraphernalia that I have collected for a lot of years and found this new old stock Car Boy Pipe Holder still in the original box. It is a unique piece that brings back memories for me and also is a quick trip to the past as I turn it over in my hands. These walnut pipe holders were made by the same Decatur Industries that made pipe racks and rests. It is fun to read the advertising on the box as part of a trip to the past. I am holding the box with the front facing me (back is the same). It is simply marked Car Boy Pipe Holder with a line drawing of the holder and a pipe in place in it.I turned the box around in my hands and took photos of the drawings and advertising around the box sides. Turning the box to the right shows a close up of the pipe in place in the Car Boy holder. It is stuck on the metal dash board of a car that looks familiar to me. It is nicely drawn. The crazy thing is that I vaguely remember my Uncle Gene having one of these in his VW delivery van for his tailor/dry cleaning shop. Turning the box left from the Car Boy front is a drawing of a convertible with the pipe holder stuck on the day again to the right of the steering wheel below the push button radio. Subtly the ad is saying that the holder will fit in any car and add a touch of class for the pipe man. On the top of the box it shows how the pipe holder can be used and how it is installed. The description says that there is a Special adhesive back that lets you fasten car boy anywhere. Holds pipes securely, safely. There are three drawings that show it in a workshop, a plane and on a golf bag. This pushes the horizons of the Car Boy to multiple uses. Your imagination is the only limitation.On the bottom of the box there is a printed description of the Carboy Pipe Holder. It reads: With a car boy you can park your pipe anywhere. A simple and practical holder made of walnut with special adhesive back that adheres to any surface. Rubber grips hold the pipe safely. Pat. Pending. Printed in U.S.A.I opened the box and took a photo of the end of the Pipe Holder. You can see the rubber grommet in the larger hole that reminds me of the old church communion cup holders that I grew up with as a kid. We used to stick our fingers in them and play with them during particular tedious services. In this case you can see that it is cut in an X or cross and the pipe is pushed stem first into the holder. It is the same on both sides and it holds a full pipe, a smoldering pipe or even and empty one. You will notice that the top is curved and rounded. There is also a hole drilled to the left of the pipe hole. It is made to hold pipe cleaners ready to be used. Travel with me back in time as I take it out of the box and take photos of it to show the style and design of the Car Boy. From the top it looks like a treasure chest. Gentle cures and well finished Walnut. The photos of each end of the holder show the rubber insert that holds the pipe stable and the hole drilled for pipe cleaners to be securely held. The photo of the underside shows the adhesive peel an stick double sided tape that holds the Car Boy to the dash board or any other surface of your choosing. I thought to complete our trip to the past I would add a pipe to the Car Boy and take a photo of how it works. The rubber inserts fit just about any stem and shank. I can tell you with certainty that pipe is solidly in place and very stable. It will not tip over with sudden braking!This is certainly a nostalgic piece from another time! It is a great idea and certainly one that could be used almost anywhere you set down your pipe. I guess it is time to reenter our won time. Sometimes I think I was born into the wrong era. Ah well, thanks for the time to take this little time travel trip with me. Cheers.

Cleaning up another Pipe Hunt Find from Idaho, an interesting looking Kaywoodie Standard Called an Embassy Pipe


by Steve Laug

Recently when I visited my Dad and family in Idaho Falls, Idaho Jeff and I did a bit of pipe hunting. We did not find much but we picked up this Kaywoodie Standard Long shank Billiard – shape and finish that I had not seen before. The price was right ($30USD) so we brought it home to Jeff’s house. The surface of the briar was rusticated with a smooth band on the shank end, twin bands around the bowl on the top half and a smooth panel on the underside of the bowl and shank which allowed it to be a sitter. The exterior of the bowl had been coated with a very shiny coat of varnish and there was some dust underneath the shiny coat. The pipe was stamped on the underside on the smooth panel and read Kaywoodie [over] Standard. The bowl had a light cake in it but the rim top and edges looked good underneath the shiny coat. The stem had a white Kaywoodie Club/Shamrock logo on the left side that was in good shape. The stem was lightly oxidized and there were light tooth marks on the top and underside ahead of the button. The stem was also overclocked. When I removed the stem, I found that the stinger had been cut off but was well done. It was actually smooth and wide open. I took a few photos of the pipe in the car on the way home and have included them below. I took a photo of the rim top and bowl to show the condition of both of them. The bowl shows some light to moderate cake on the walls. The rim top showed some darkening and debris in the rustication under the shiny coat. The edges of the bowl looked good. The photos of the stem show the light oxidation and light tooth marks/chatter on both sides ahead of the button. I took a photo of the stamping on the underside of the shank. The stamping was clear and readable as noted above. I removed the stem from the shank and took a photo to show the proportions of the pipe.I turned to Pipephil’s site (http://www.pipephil.eu/logos/en/logo-kaywoodie.html). I went through all of the sections on the site through the various lines of Kaywoodie pipes and did not find one similar to the one I had in hand. There were Standards but none were finished like this one. They also said made in Italy and bore a different stem logo. This pipe was not made in Italy.

From there I turned to the Kaywoodie Collectors section on Pipedia to see what I could find about the Standard (https://pipedia.org/wiki/Collector%27s_Guide_to_Kaywoodie_Pipes). The article is full or rich information on the brand. Give it a read. Disappointingly it does not include anything on the Standard with the twin rings on the bowl sides.

I googled for the Line with the twin rings around the bowl and found examples in a lot of different shapes but no information that helps establish a timeline for the pipe. I abandoned my search (at least for now) and I turned to work on the pipe.

SEE THE ADDENDUM: from that additional information I have learned that the pipe is somewhat rare and was only made in 1975 and 1976. The style is called an Embassy Style or Finish.

I started my work by trying to remove the shiny varnish coat on the bowl and shank. I went over the rusticated portions with a brass bristle wire brush to loosen the varnish coat. I went over the smooth portions with a 320 grit sanding pad to break up the shiny coat. I wiped the bowl down with acetone on cotton pads repeatedly until I was able to remove the shiny coat. It looked better. I reamed the pipe with a Pipnet Pipe Reamer and took the cake back to bare briar. I cleaned up the remnants around the bowl sides with a Savinelli Fitsall Pipe knife and then sanded the walls with 220 grit sandpaper wrapped around a piece of dowel. The walls were smooth and showed no burn damage. I cleaned out the interior of the shank, mortise and airway in the stem with pipe cleaners, cotton swabs and alcohol. The pipe was surprisingly clean.I scrubbed the externals of the pipe with undiluted Murphy’s Oil Soap and a tooth brush. I worked over the inside of the bowl at the same time. I rinsed it with warm water to remove the grime and debris. I dried it off with a soft cotton cloth and lightly buffed it with the cloth. It smelled very clean. I sanded the smooth portions of the bowl with 320-3500 grit sanding pads to smooth out the roughened finish. I wiped it down after each sanding pad to get a sense of the progress on the finish. It was looking better with each pad I used. I wiped the bowl and shank down with alcohol on a cotton pad to remove the sanding dust and get a sense of the grain around the bowl sides. I am very happy with how it is looking at this point. I polished the bowl with micromesh sanding pads – dry sanding with 1500-12000 grit pads. I wiped it down with a cotton pad and a cloth impregnated with Obsidian oil after each sanding pad. The briar really took on a patina that began to look better with the polishing. I paused the polishing of the smooth portions of the pipe to touch up the smooth portions of the pipe with an Oak Stain pen. It matched the rest of the stain around the bowl and once polished the match would be perfect. I went back to polishing the briar with the last three micromesh pads. The briar really began to take on a shine. It looked very good. I rubbed the bowl down with Before & After Restoration Balm. It is a paste/balm that works to deep clean the finish, enliven and protect the briar. I work it into the briar with my finger tips and a shoe brush to make sure that it covers every square inch of the pipe. I set it aside for 10 minutes to let it do its work. I wiped it off with a soft cloth then buffed it with a cotton cloth. The briar really began to have a deep shine. The photos I took of the bowl at this point mark the progress in the restoration. You see the shine that the briar has taken on and the way grain pops on the smooth portions and the rusticated parts have depth. I set the bowl aside and turned my attention to the stem. I decided to address the overclocked stem first. I heated the metal threaded tenon with the flame of a lighter to soften the glue. Once it was softened I turned the stem back into the shank and aligned the stem and shank sides. It looked much better.I sanded the stem with 320-3500 grit sanding pads to break up the remaining oxidation. I wiped it down after each sanding pad with an Obsidian Oil impregnated cloth. It began to look good. I polished the stem with micromesh sanding pads – dry sanding with 1500-12000 grit pads. I wiped the stem down after each sanding pad with Obsidian Oil. I polished it with Before & After Pipe Stem Polish – both Fine and Extra Fine. Once I had finished the polishing I gave it final coat of Obsidian Oil and set it aside to dry.   More than usual at this point in the restoration process I am excited to be on the homestretch. I really am looking forward to the final look when I put a pipe back together, polished and waxed. I polished the bowl and stem with Blue Diamond to polish out the scratches in the briar and the vulcanite. I gave the bowl and the stem multiple coats of carnauba wax. I buffed the pipe with a clean buffing pad to raise the shine. I hand buffed it with a microfiber cloth to deepen the shine. The pipe polished up pretty nicely. The grain pops on the smooth sections and in the rustication with the wax and polish. The shiny black vulcanite stem is a beautiful contrast to the browns of the bowl and shank. This Kaywoodie Standard was another fun pipe to work on. The pipe is comfortable pipe to hold in the hand. The finished pipe is shown in the photos below. The dimensions of the pipe are Length: 5 ½ inches, Height: 1 ¾ inches, Outside diameter of the bowl: 1 ¼ inches, Chamber diameter: ¾ of an inch. The weight of the pipe is 1.31 ounces/38 grams. It is the second of my Idaho Pipe Hunting finds. I will be adding it the American Pipemakers section of the rebornpipes store. Thanks for reading this blog and my reflections on the pipe while I working on it.

As always, I encourage your questions and comments as you read the blog. Thanks to each of you who are reading this blog. Remember we are not pipe owners; we are pipemen and women who hold our pipes in trust until they pass on into the trust of those who follow us.

ADDENDUM: I received an email from a reader, Mark Bialzik with information on the line that this pipe comes from. He sent me the information on a pipe that he purchased from a seller that was much the same as this one. Here is the information that the seller sent him and that Mark sent to me:

A very rare Dublin by Kaywoodie. The majority of people don’t even know what this special design is called. This is a Kaywoodie Embassy style or finish. As far as I know these were made only in 1975-76. As I said, many don’t know what these are called and you’ll see them called “ring grain” or other names. I’ve messaged a few sellers telling them the name, hoping it’ll help them sell faster. I try and buy every one that’s in very good condition I can. So far, I’ve owned 5 I think. Sold just one and the rest I’ve kept for myself. There are a couple I’ll list or when I get a duplicate.