
Blog by Steve Laug
About a week ago I got an email from Bob in Maryland asking if I would be willing to repair and restore a John Calich 10 pipe for him. I knew as soon as he said it was a Calich that I wanted to work on it. I have quite a few of John’s pipes in my own collection and enjoy smoking them! He made some new stems for me for a some Calich bowls I purchased. I had the privilege of talking with John quite a few times before he died. He was an amazing man and truly a Canadian pipe carving legend. When Bob contacted me, I was glad to work on this pipe. We chatted via email then I called him. He sent the pipe to me last Friday. It arrived today so I called to let him know it was safely here. In the course of our conversation I asked him where he had picked up this Calich pipe. He told me the story of a good friend of his who had passed away a few years ago. He said that his friend’s wife had given it to him to continue the story and enjoyment of this pipe. He had tried to clean up the stem by soaking it in Oxyclean and it had turned the yellow/white colour it was when it arrived here. Oxyclean had done what it always does – it had brought the oxidation to the surface. John had done an interesting combination of finishes on this pipe. The front of the bowl is plateau briar, the sides and rim top are smooth briar highlighting the interesting horizontal straight grain and the shank was rusticated to look like tree bark. It was a beauty and Bob wanted me to bring to life again. I took photos of the pipe before I started my work on it. I used a 320 grit sanding pad to check the depth of the oxidation on the stem. I passed it over the stem surface and with very little effort the vulcanite shone through.
 I took a photo of the rim top and the stem to show the condition of both. The bowl had a thick cake in the bowl with some lava overflow on the inner edge of the rim. There were also many nicks and dings in the rim top and on the inner edge of the rim. It had been hammered against a hard surface to cause the nicks and marks. The oxidized stem had some deep tooth marks on both the top and underside of the stem near the button edge. It would need some work to bring it back.
 The stamping on the underside of the shank read CALICH over Hand Made. After that stamping there was the number 10 stamped which was the grade number. I removed the stem from the shank and took a photo of the parts of the pipe. It is a large pipe and a unique beauty.
 I decided to include a bit about John Calich the pipemaker as I have loved John’s pipes for over 25 years now and have collected a few of them. I have restored quite a few of them and written blogs about them that can be read if you are interested in seeing the kind of pipes that John made. They are unique and beautiful. Each one of them is a work of art to me. I am including the links to the previous blogs that have written about his pipes.
https://rebornpipes.com/2015/03/03/one-of-my-john-calich-pipes-a-calich-ee-billiard/
https://rebornpipes.com/2019/01/23/i-am-the-happy-owner-of-an-unsmoked-pipe-by-the-late-john-calich/
https://rebornpipes.com/2015/03/03/one-of-my-john-calich-pipes-a-calich-ee-billiard/
https://rebornpipes.com/2014/03/21/reflecting-on-my-collection-of-john-calich-pipes/
Each of the blogs reflects on John’s pipes if you want to get a feel for them take a few minutes and read them.
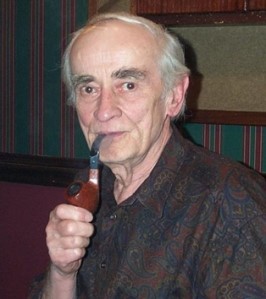
John Calich – photo courtesy of Doug Valitchka
When John was living I spoke with him several times via phone and had him make some new stems for some of his pipes that I picked up off eBay. He was a very kind gentleman and was always helpful when I spoke with him. He was always ready with encouragement and when I needed to know how to do something when I was first learning to repair pipes he was willing to help. He was one of the old guard of Canadian Pipe makers. I miss him. I am including a short piece from Pipedia on John to give details on his work and the grading of his pipes. The second paragraph below is highlighted in blue as it gives some information on the Grade 12 Apple that I am working on with the single silver dot now.
John Calich was one of Canada’s finest carvers. He died in July 2008. John was a full-time pipe maker for the last 40 years. Calich pipes were mostly traditional shapes. His signature style is rustication and smooth on the same pipe along with his unique skill to stain a pipe in contrasting colors. He used only top quality Grecian and Calabrian briar. The mouthpieces are hand finished Vulcanite “A”. Each pipe was entirely made by hand. John Calich was featured in the summer 2005 issue of Pipes & Tobacco.
His pipes are graded 3E – 7E. Retail prices range from$ 145.00 to $ 500.00 Each pipe is stamped “CALICH” 3-8E, his earlier pipes were graded from 3-14, and a single, tiny silver dot is applied to the top of the stem (https://pipedia.org/wiki/Calich).
From my other blogs I was able to garner quite a bit of information on John’s grading system. As noted above the newer ones carried a 3E-7E stamp but the earlier ones were graded 3-14. The retail prices for them ranged from $145.00 to $500.00. Each of the earlier pipes was stamped “CALICH” and pipes were graded from 3-14 and had a single, tiny silver dot applied to the top of the stem. More information can be found at the Pipedia article above. All of this information told me as expected that the pipe I was working on was an earlier one.
Armed with the facts that I am dealing with a 1988 pipe made by one of my favourite Canadian pipe makers it was time to get back to work on the pipe. I started my work on the pipe by reaming the bowl with a PipNet pipe reamer to take the cake back to bare walls. I followed that by using a Savinelli Fitsall Pipe Knife to scrape back the remnants of the cake back to briar. I finished my cleanup of the walls by sanding it with 220 grit sandpaper wrapped around a piece of dowel. 
 I scrubbed the grime and oils off the briar on the smooth, plateau and rusticated portions of the briar with undiluted Murphy’s Oil Soap and a tooth brush. The briar looked much cleaner. I worked over the grime and tars on the rim top at the same time and was able to remove much of the build up. The bowl is beginning to take on a fresh look.
 To remove the scratches in the smooth briar sides and the rim top I sanded them with 320-3500 grit sanding pads. I wiped it down after each sanding pad with a damp cloth to remove the sanding dust. I was able to remove the damaged areas and scratches.
 I used micromesh sanding pads 1500-12000 grit pads to polish the briar. I wiped down the bowl with a damp cloth after every pad. With each sanding pad the briar began to take on a rich shine.


 I rubbed the bowl down with Before & After Restoration Balm. I worked it into the surface of the smooth briar with my fingertips and into the rustication and the plateau surface with a shoe brush. The product works to clean, enliven and protect the briar. I let the balm sit for 15 minutes and then buffed with a cotton cloth to raise the shine. Mark Hoover’s Balm is a product that I have come to appreciate and one I use on every pipe I have been working on.

 I tried to fit a pipe cleaner through the slot in the button and found that it did no fit well and took a lot of work to get it into the airway. I used a round file and an oval file to open the airway to take a pipe cleaner. Once I had it open I could easily slide the pipe cleaner into the airway.
 Once I had it open I turned to work on the outside of the stem and remove remaining oxidation on the stem surface. I used some Soft Scrub cleanser to scrub of the oxidation on the stem surface. Once finished it looked much better. I sanded out the deeper oxidation in the curves and in the sharp edges of the button with 220 grit sandpaper. I wiped the stem down with a damp alcohol cotton pad to remove the sanding debris. I “painted” the stem surface with the flame of a Bic lighter to lift the tooth marks. Most of them lifted significantly. I filled in the deep tooth marks that remained with clear CA glue and set it aside to cure.

 I paused to clean out the interior of the pipe. I used pipe cleaners, cotton swabs and isopropyl alcohol to clean out the tars and oils in the airway in the shank and the stem. With the newly opened stem it was easy to clean out the airway in the stem.
 I used a small file to flatten out the repairs on the stem and to sharpen the edge of the button on both sides of the stem. I sanded the repairs with 220 grit sandpaper to further smooth out the repaired areas. I started polishing the stem with 320-3500 grit sanding pads. It was great to see the shine really deepen on the vulcanite.

 I polished the stem with micromesh sanding pads – wet sanding with 1500-12000 grit pads. I wiped the stem down after each sanding pad with Obsidian Oil. I finished polishing it with Before & After Pipe Stem Polish – both Fine and Extra Fine. Once I had finished the polishing I gave it final coat of oil and set it aside to dry.
 Bob’s beautifully grained Hand Made Freehand Calich is unique and lovely. It has the kind of beauty I have come to expect from John’s pipes with plateau on the bowl front and rustication on the shank showcasing the straight grain on the bowl sides and rim top. I am excited to be on the homestretch with this pipe. This is the part I look forward to when each pipe comes back together, polished and waxed. I put the bowl and stem back together. I polished the bowl and stem with Blue Diamond to polish out the scratches in the briar and the vulcanite. I gave the bowl and the stem multiple coats of carnauba wax. I buffed the pipe with a clean buffing pad to raise the shine. I hand buffed it with a microfiber cloth to deepen the shine. The pipe polished up pretty nicely. The straight grain on the sides of the bowl and the plateau on the front of the bowl is really quite stunning. The plateau on the bowl front and rustication on the shank showed some contrast with dark brown in the grooves that give it depth. This Calich Hand Made Freehand was another fun pipe to bring back to life because the story Bob shared adds another dimension to the pipe. It is a large pipe but it is a comfortable pipe to hold in the hand. The finished pipe is shown in the photos below. The dimensions of the pipe are Length: 7 inches, Height: 2 ½ inches, Outside diameter of the bowl: 1 ¾ inches x 2 inches, Chamber diameter: ¾ of an inch. The weight of the pipe is 11 grams/3.92 ounces. Thanks for reading this blog and my reflections on the pipe while I worked on it. This was interesting to bring back to life. I will be sending it back to him in Maryland early this week. I look forward to hearing what he thinks of it.


Beautiful pipe with character, Steve. Great job bringing it back to life.
LikeLiked by 1 person