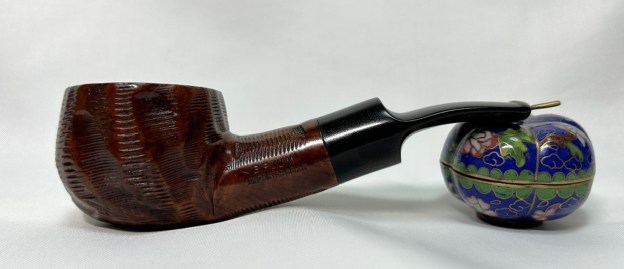
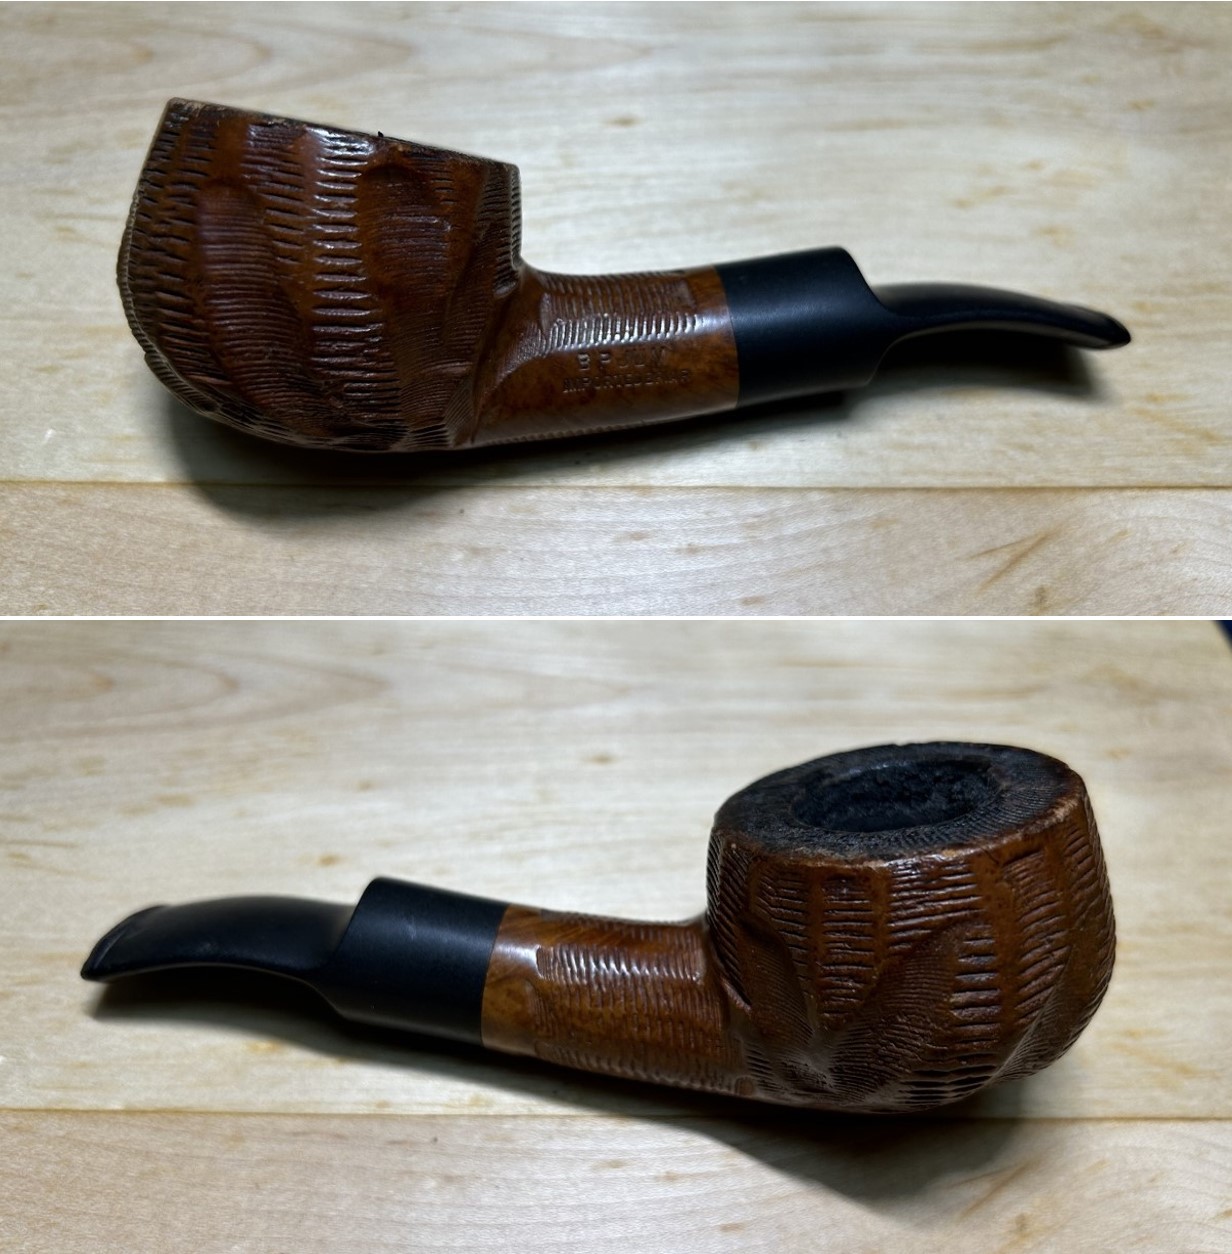
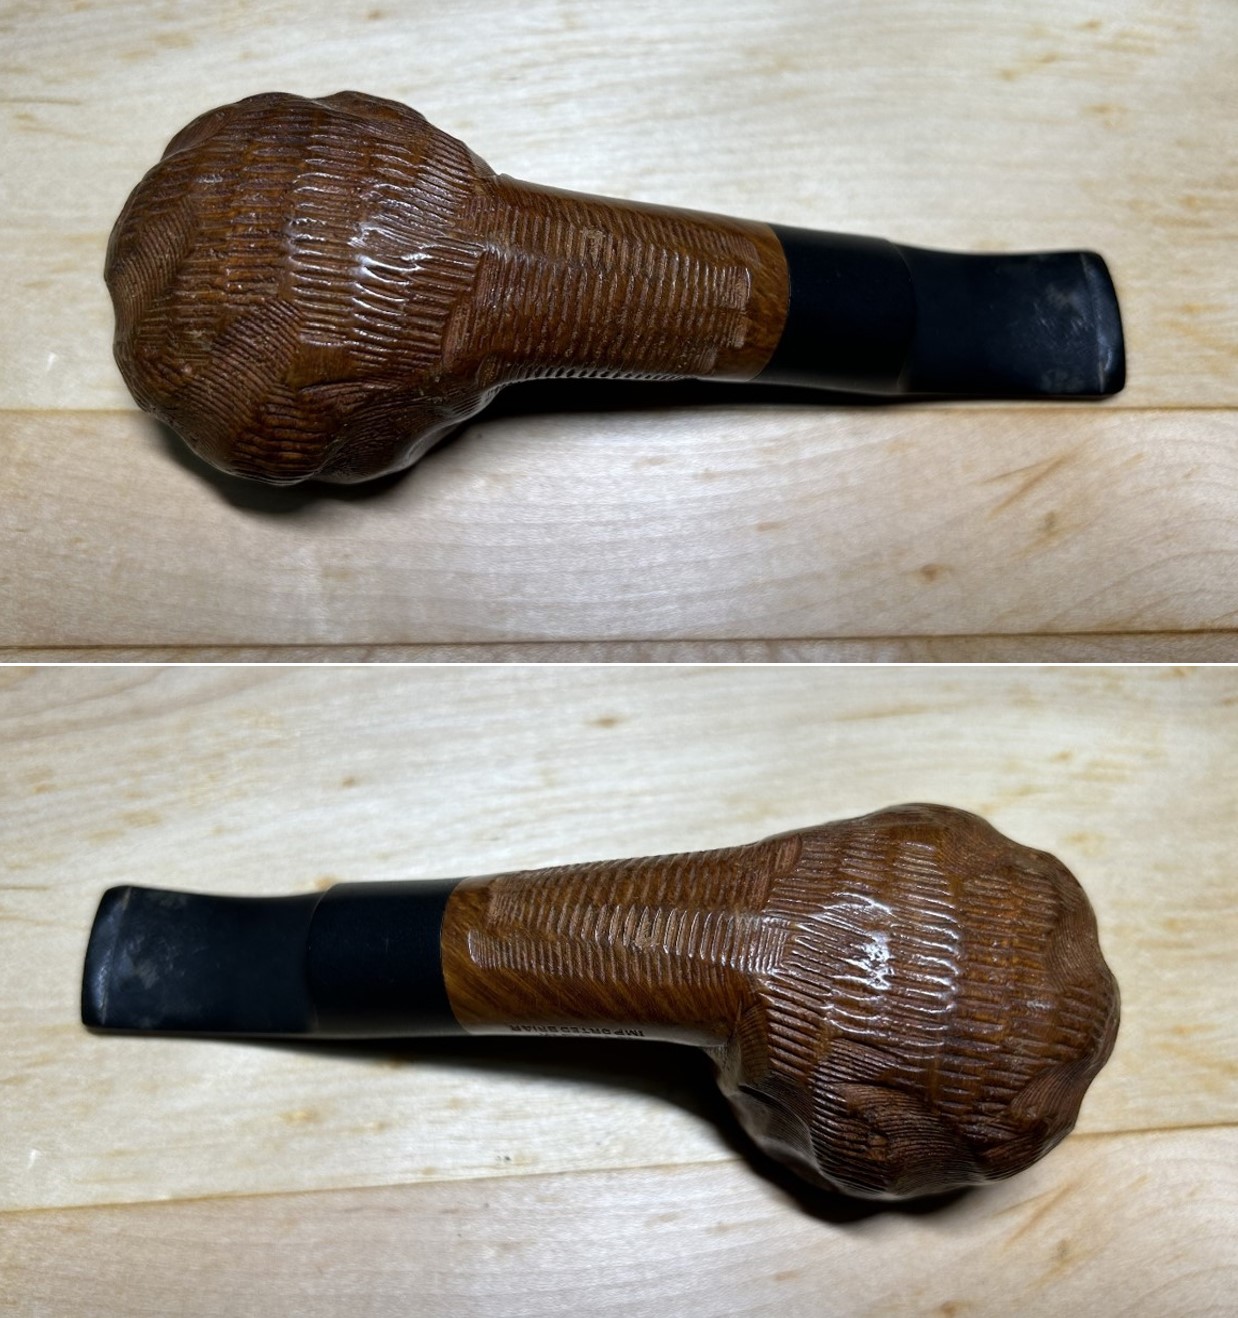
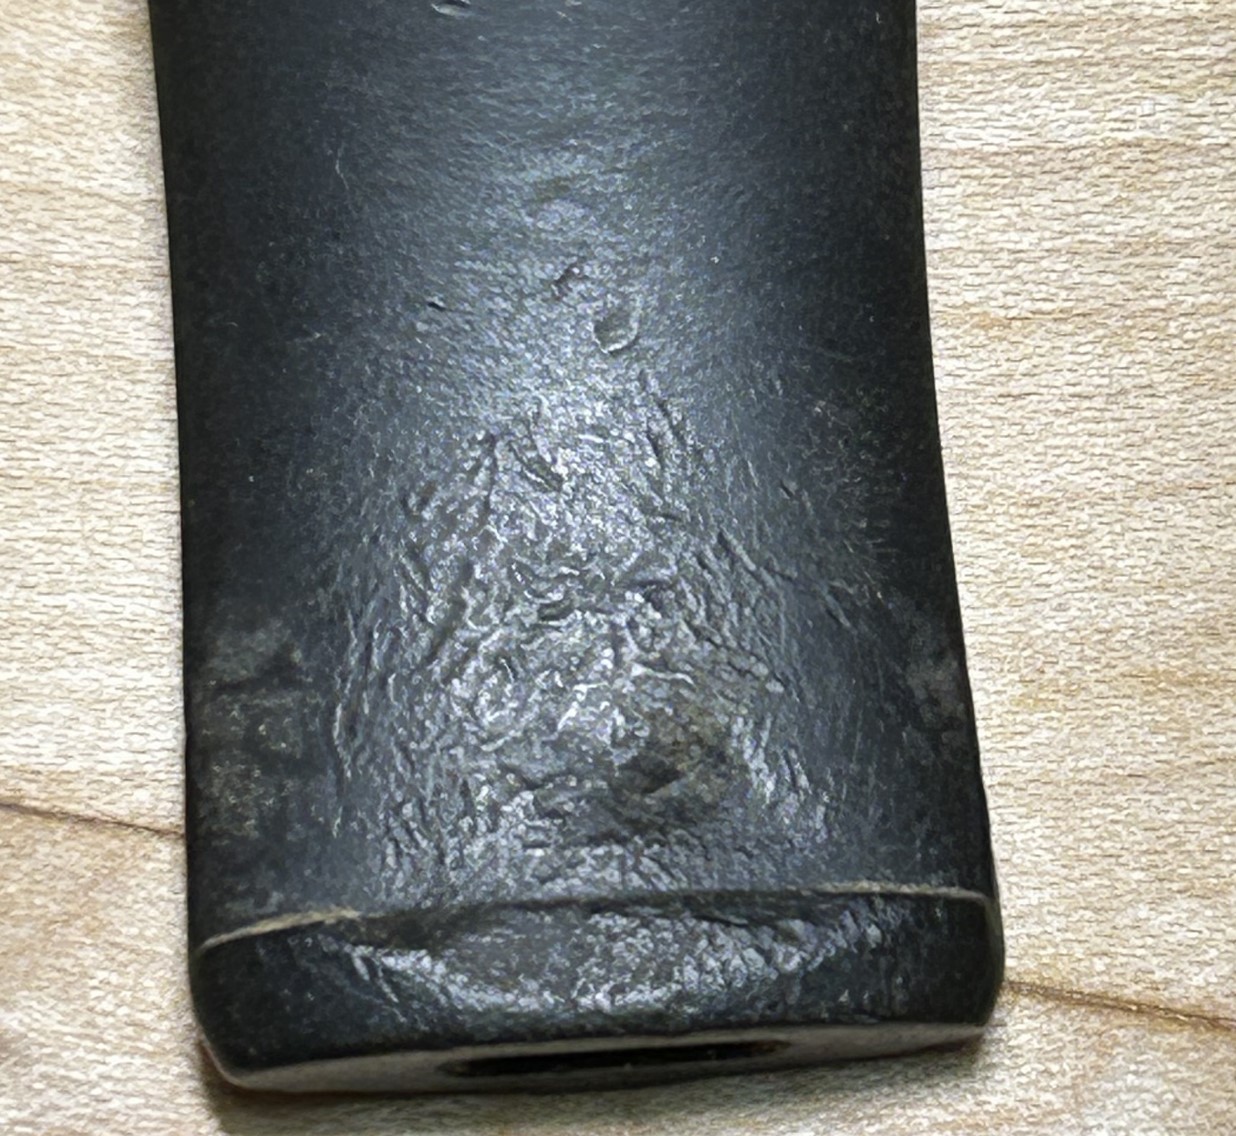
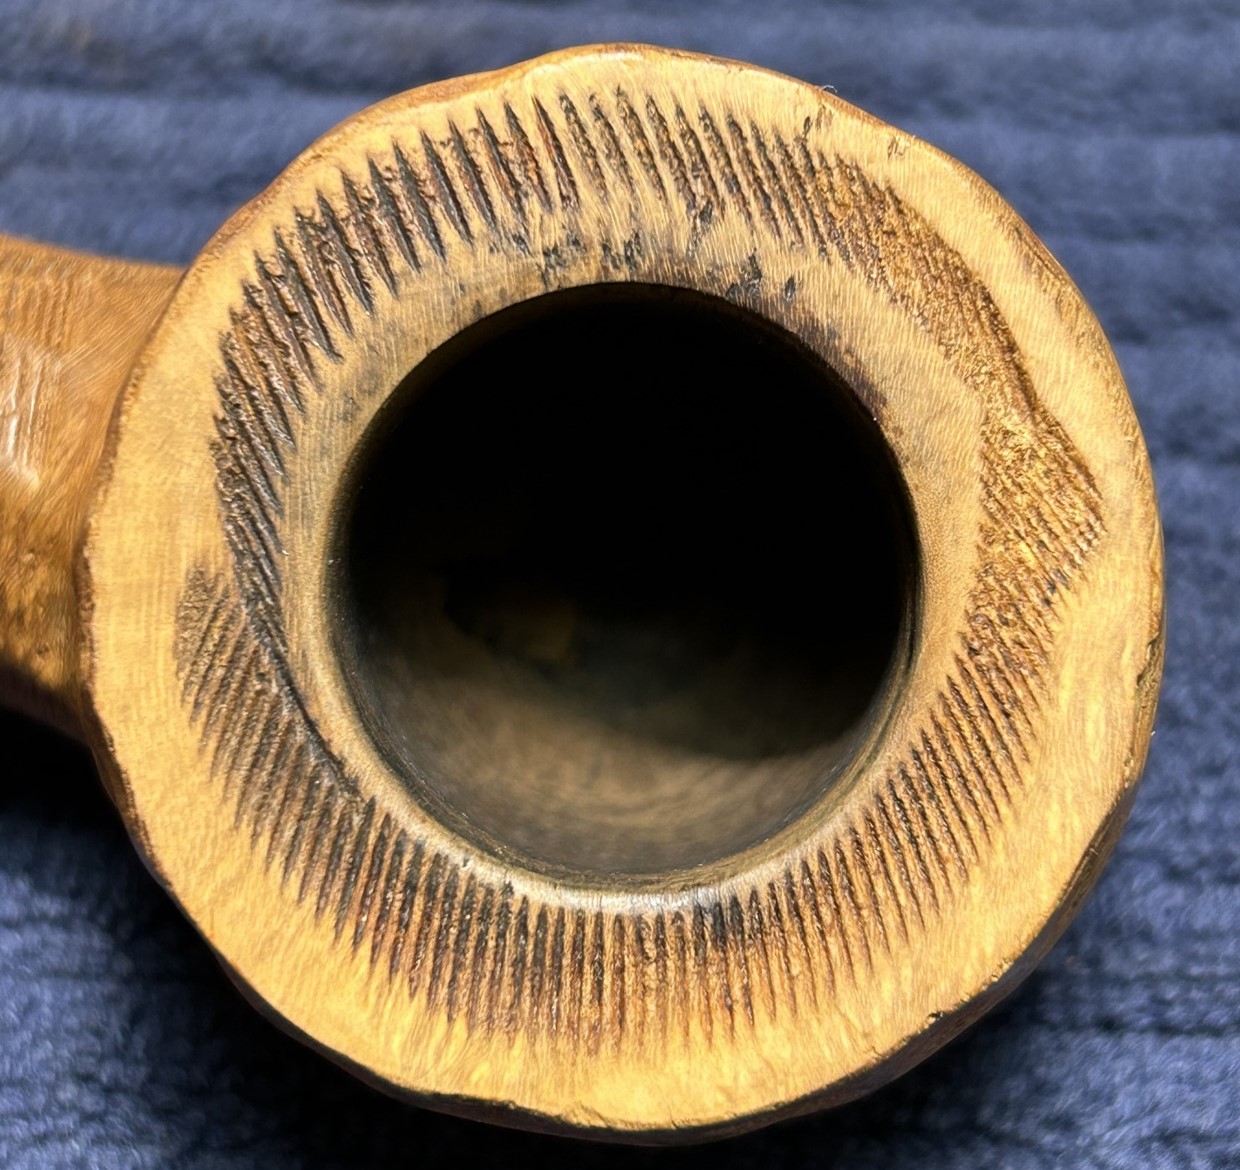
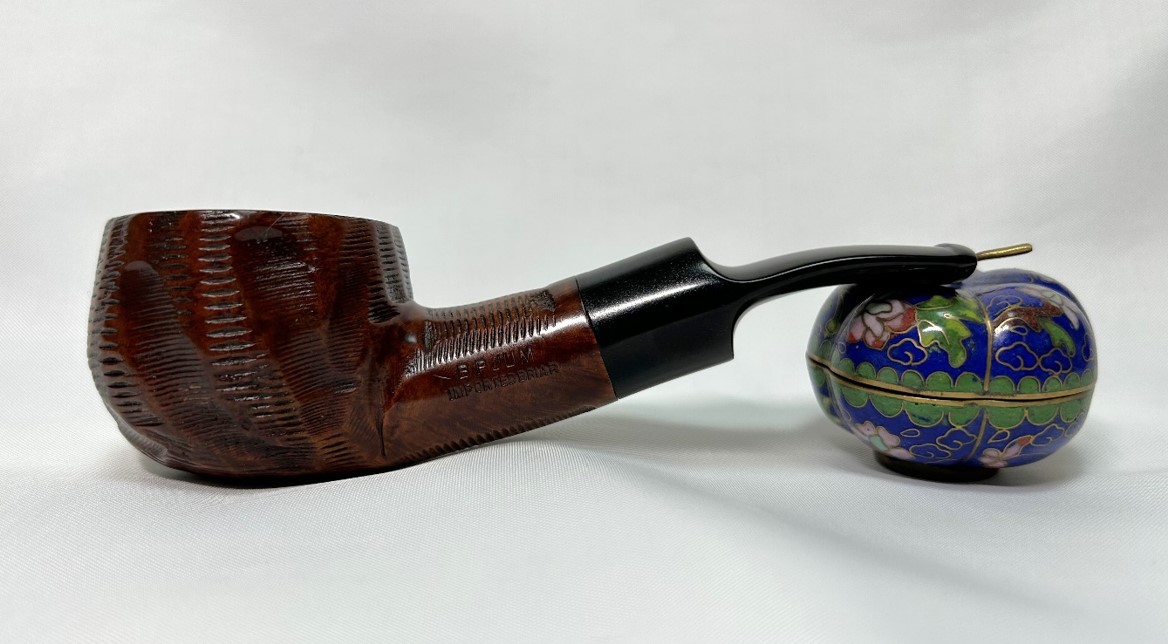
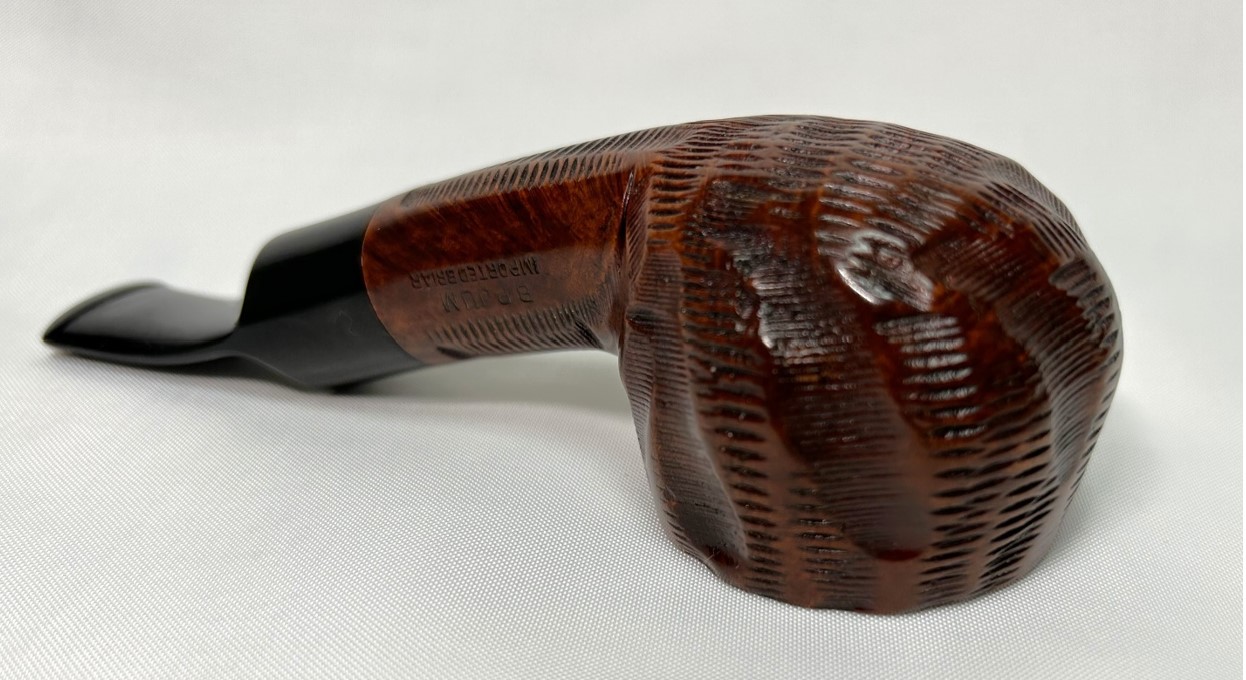
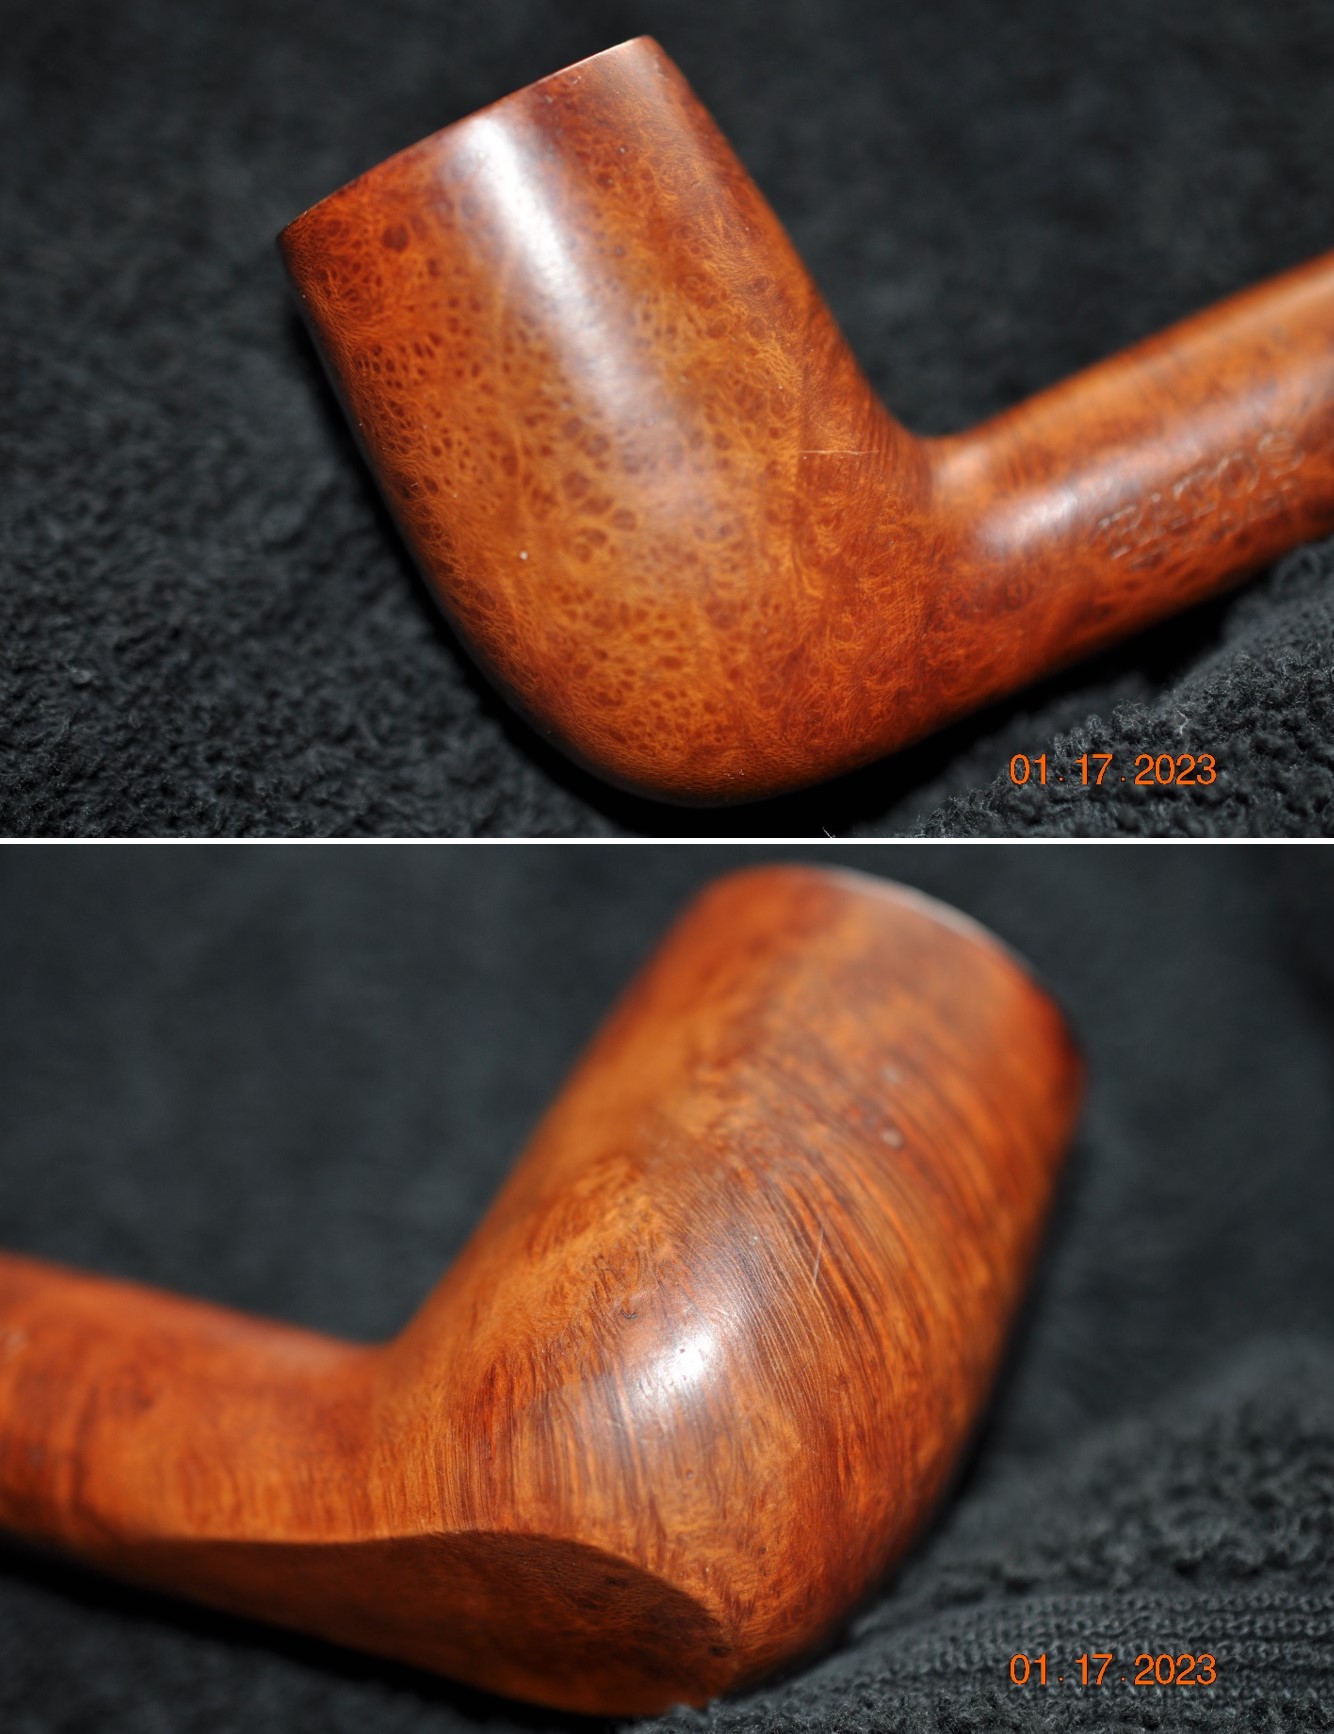
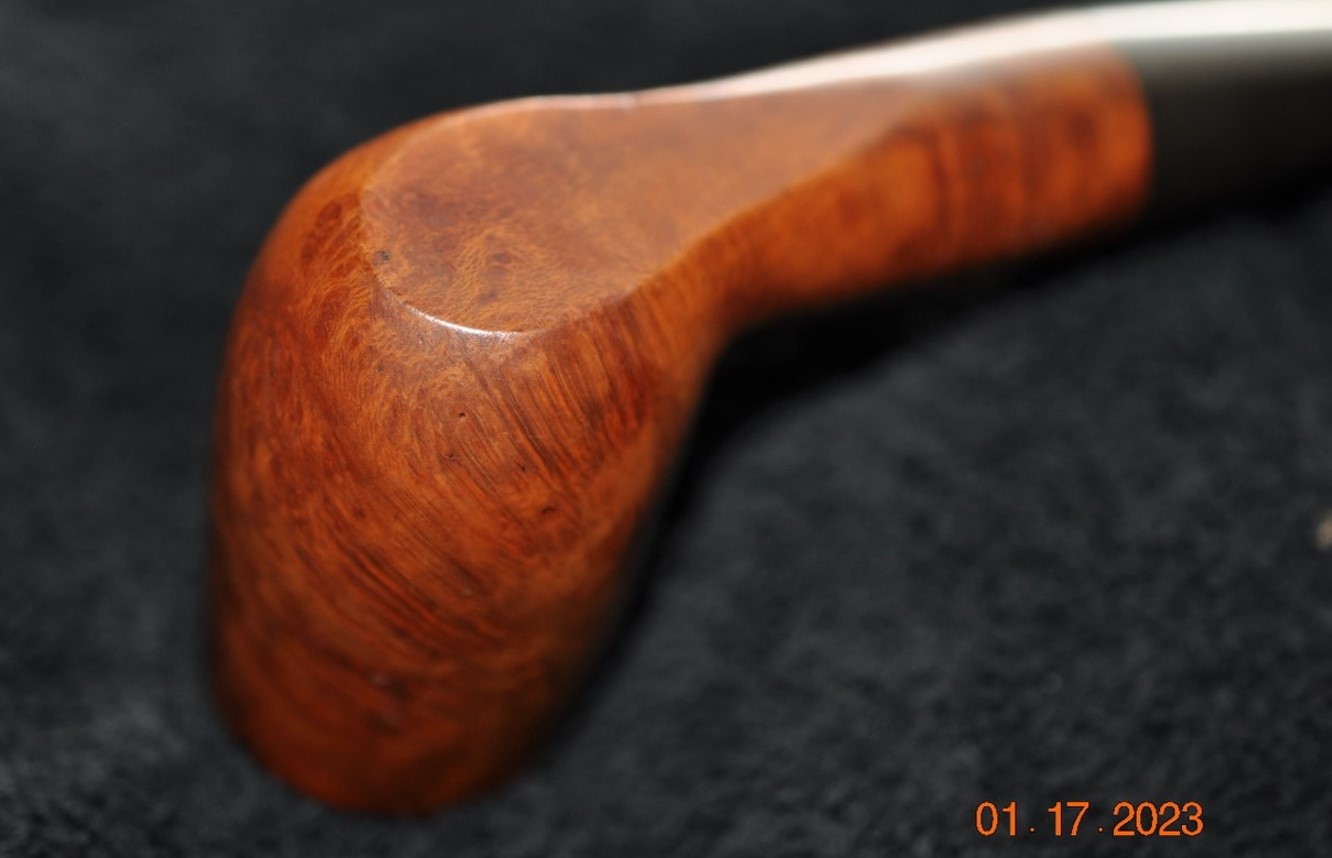
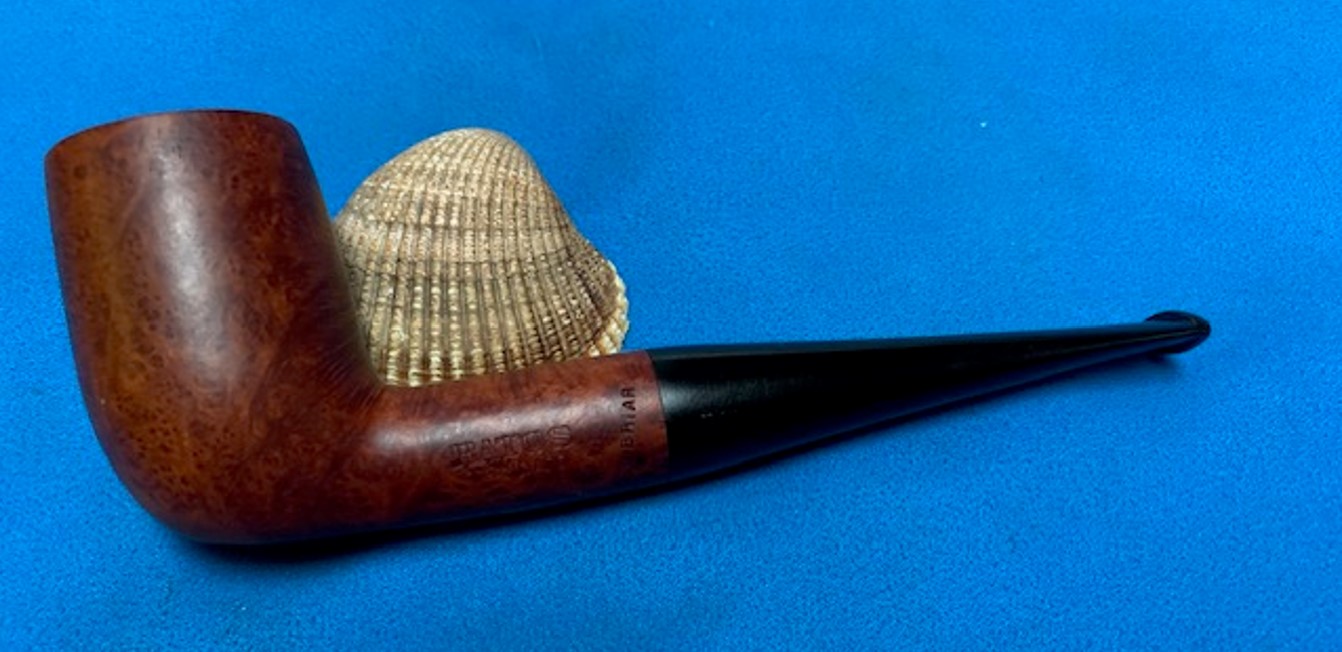
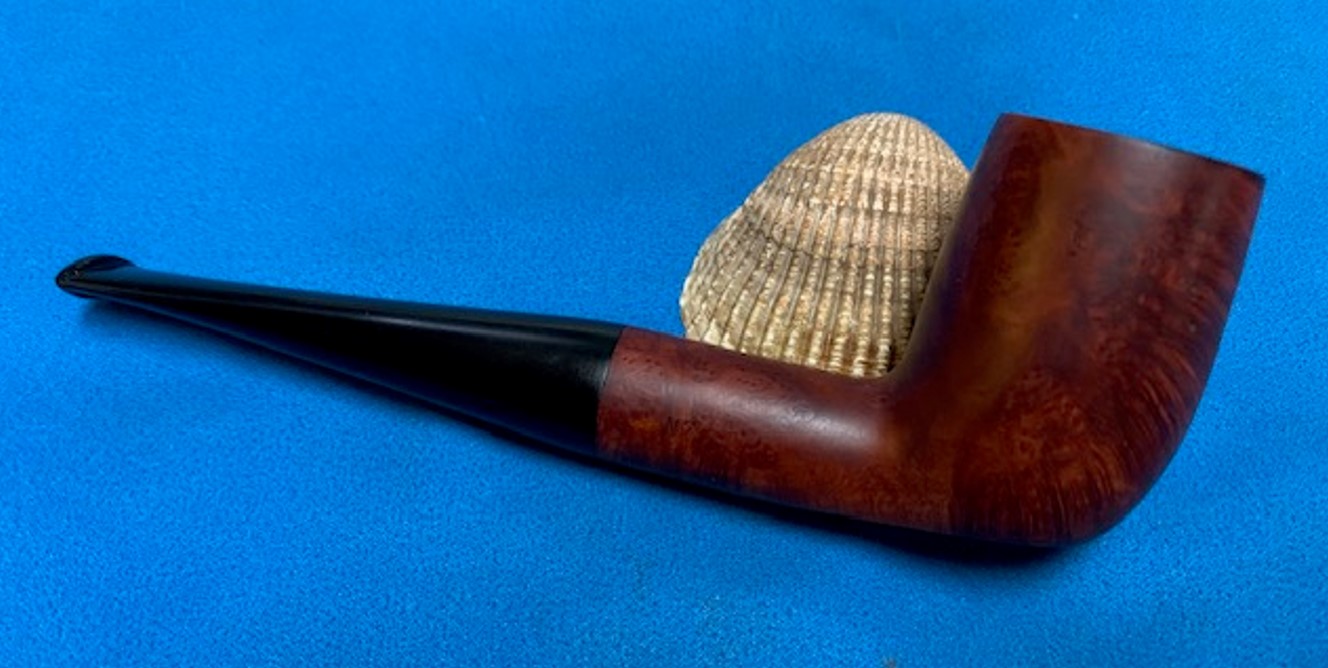
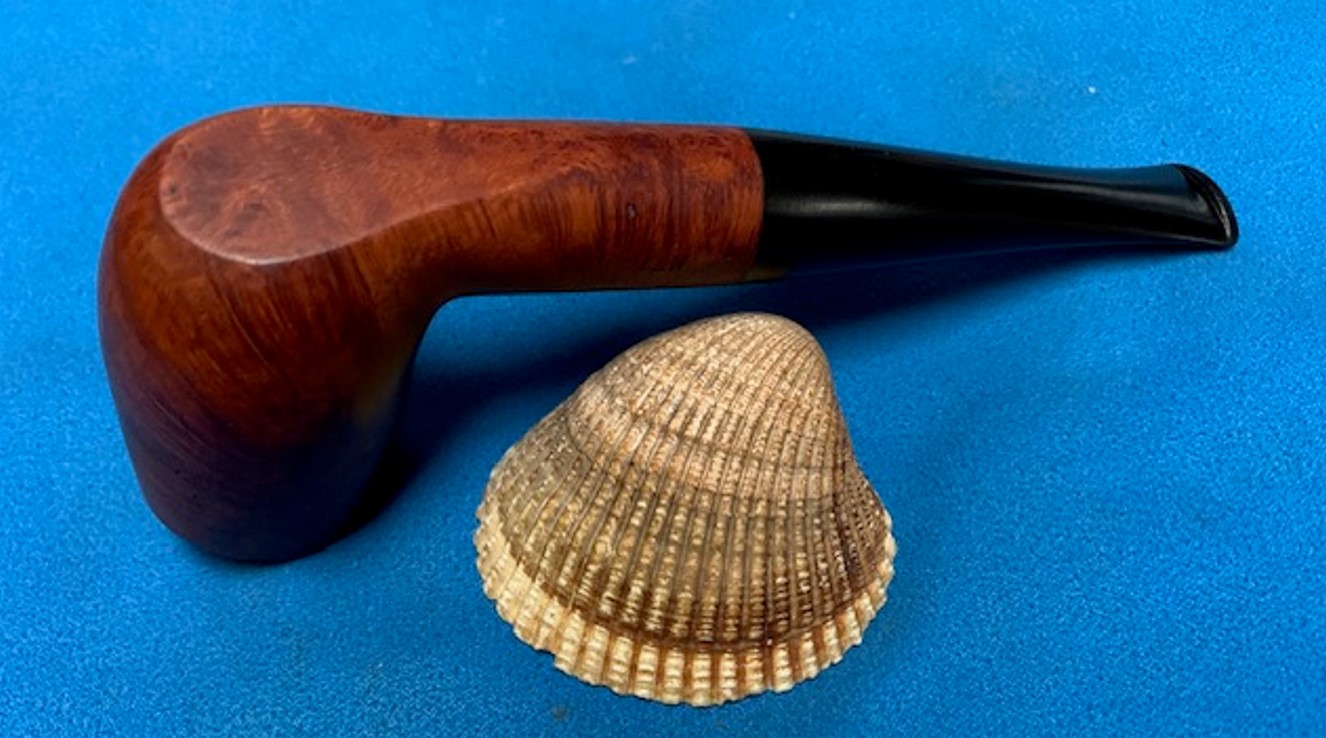
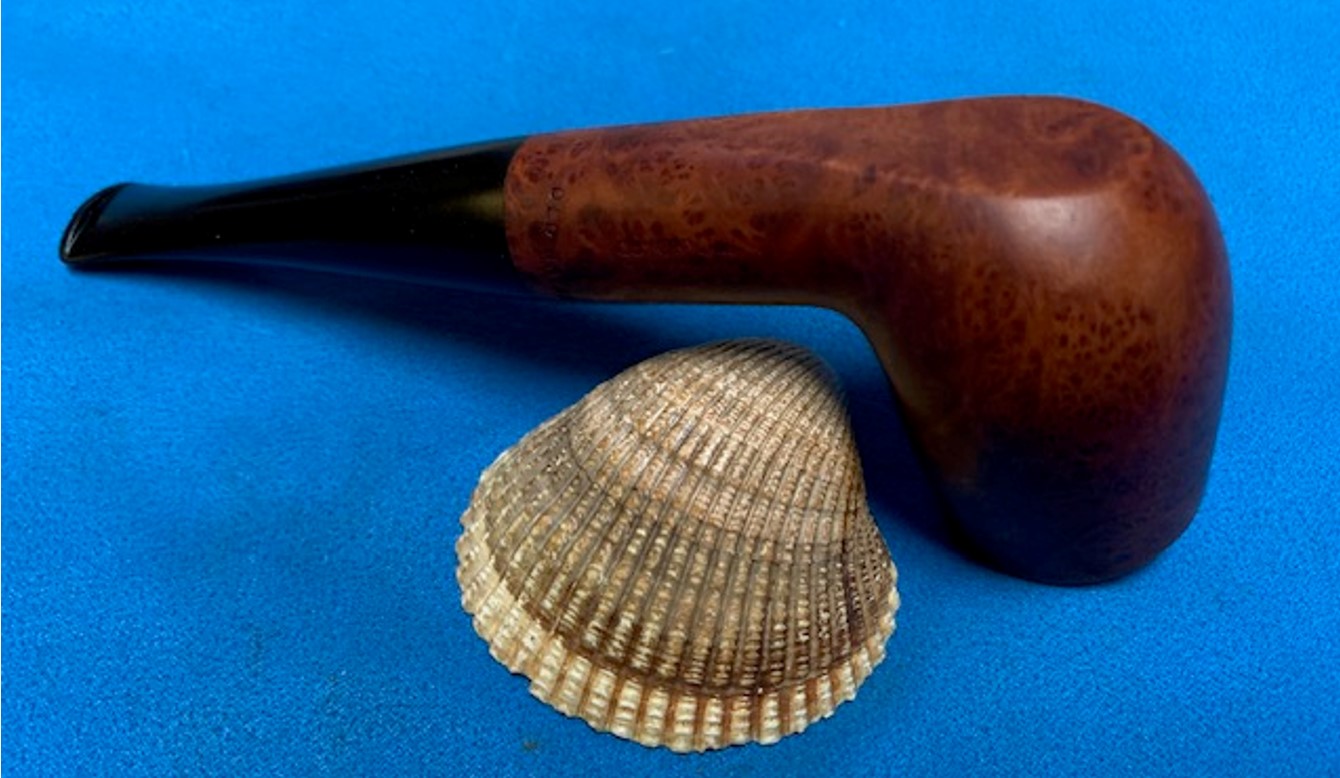
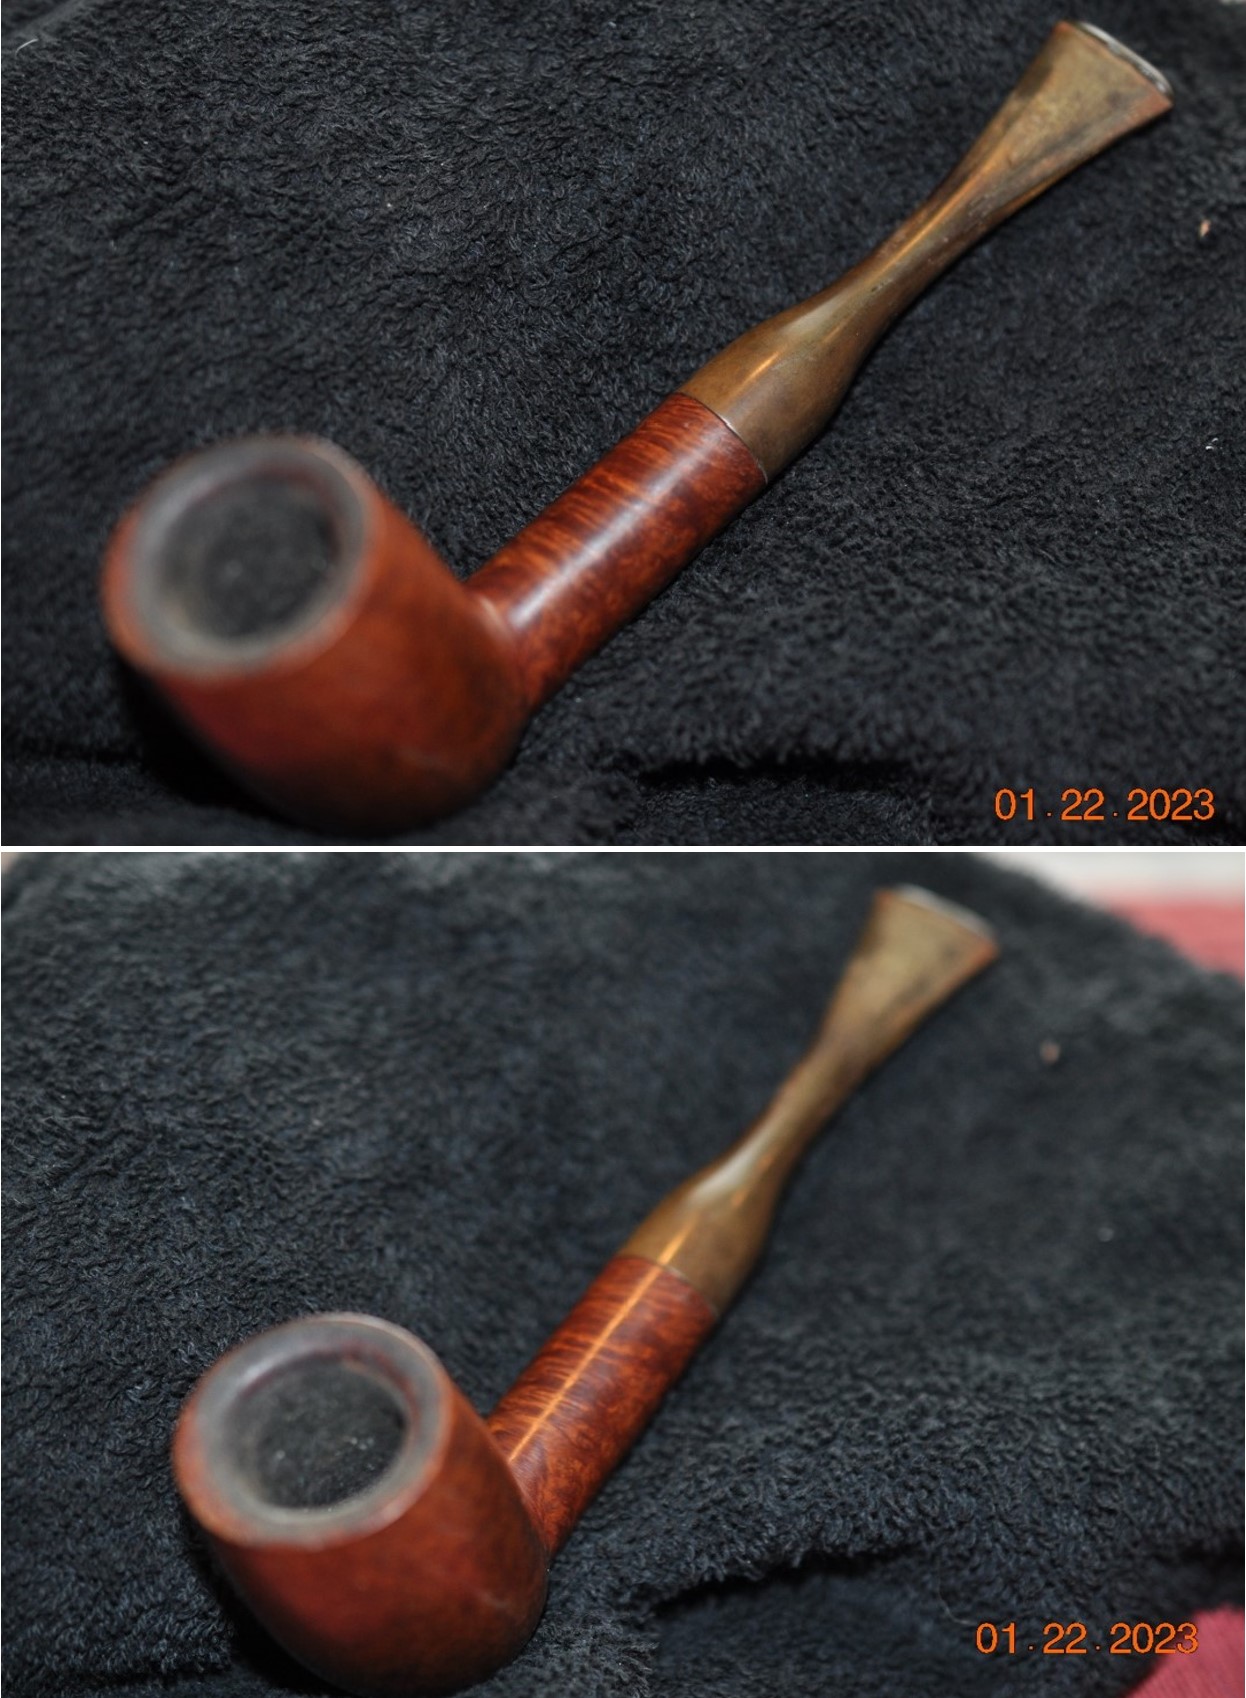
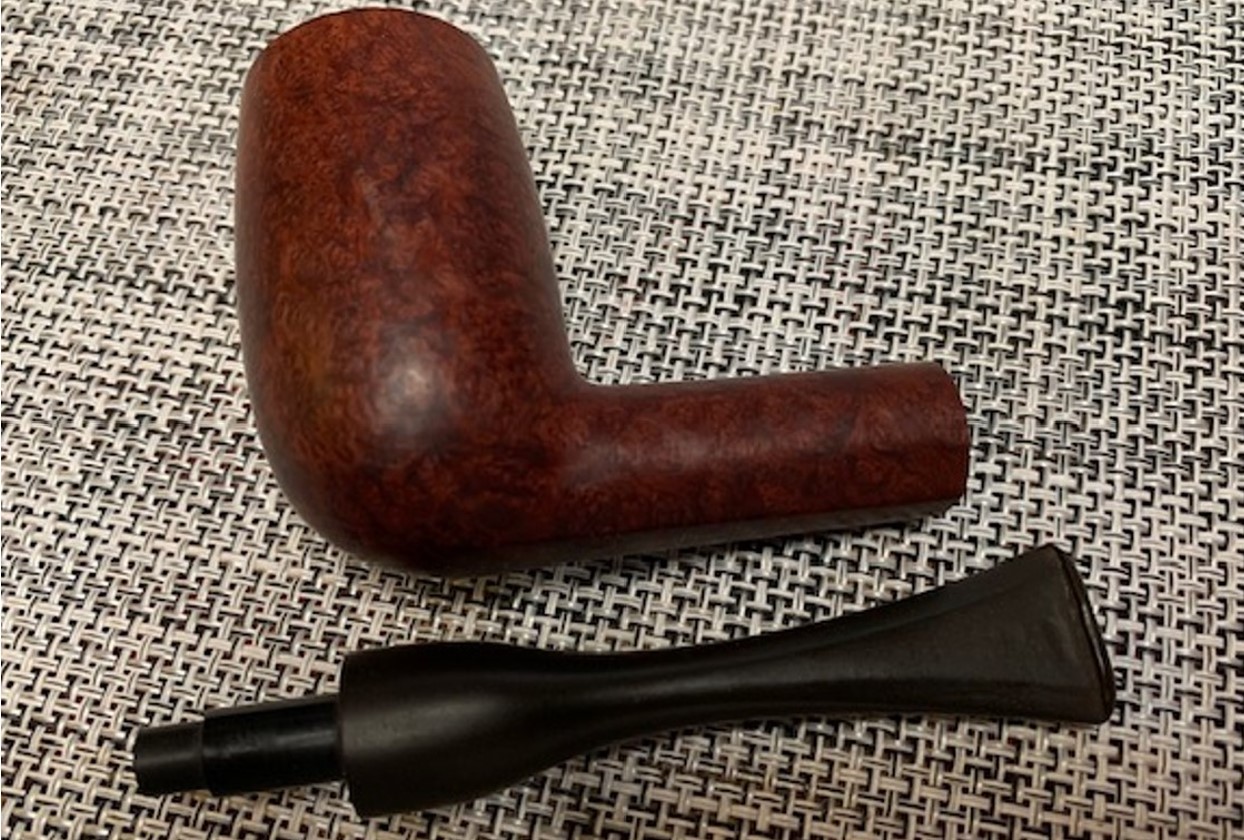
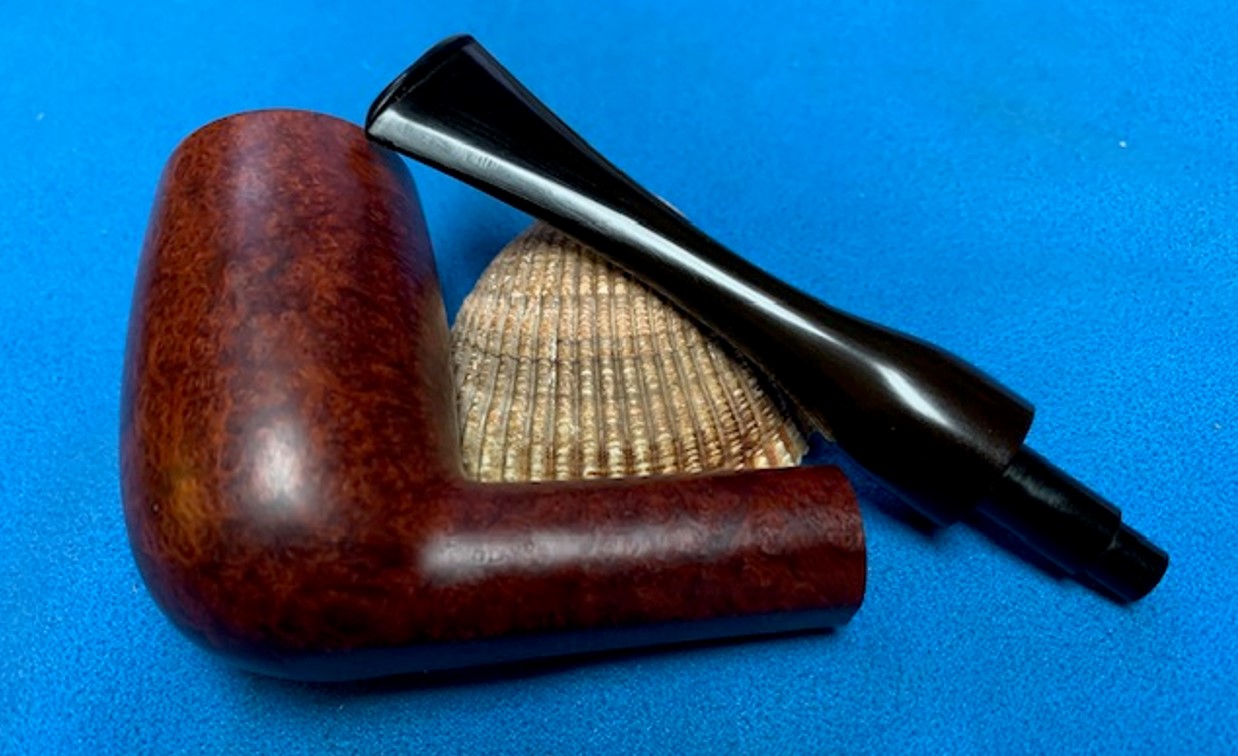
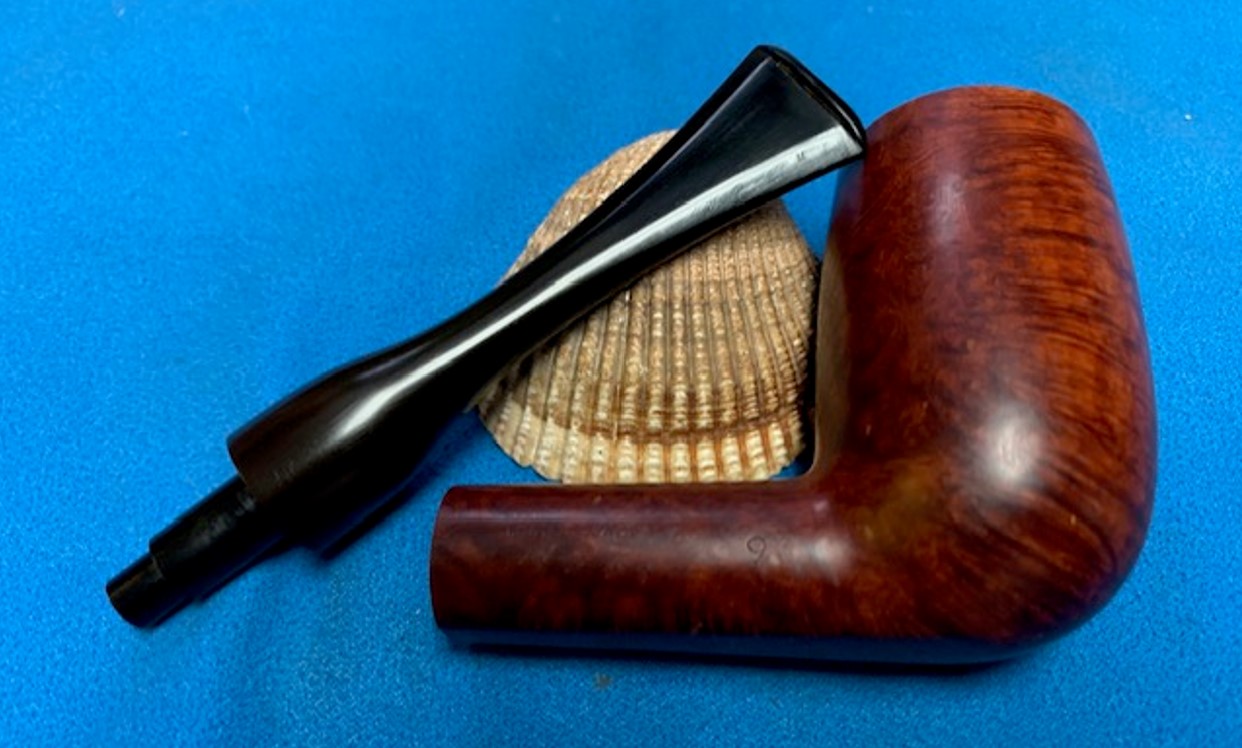
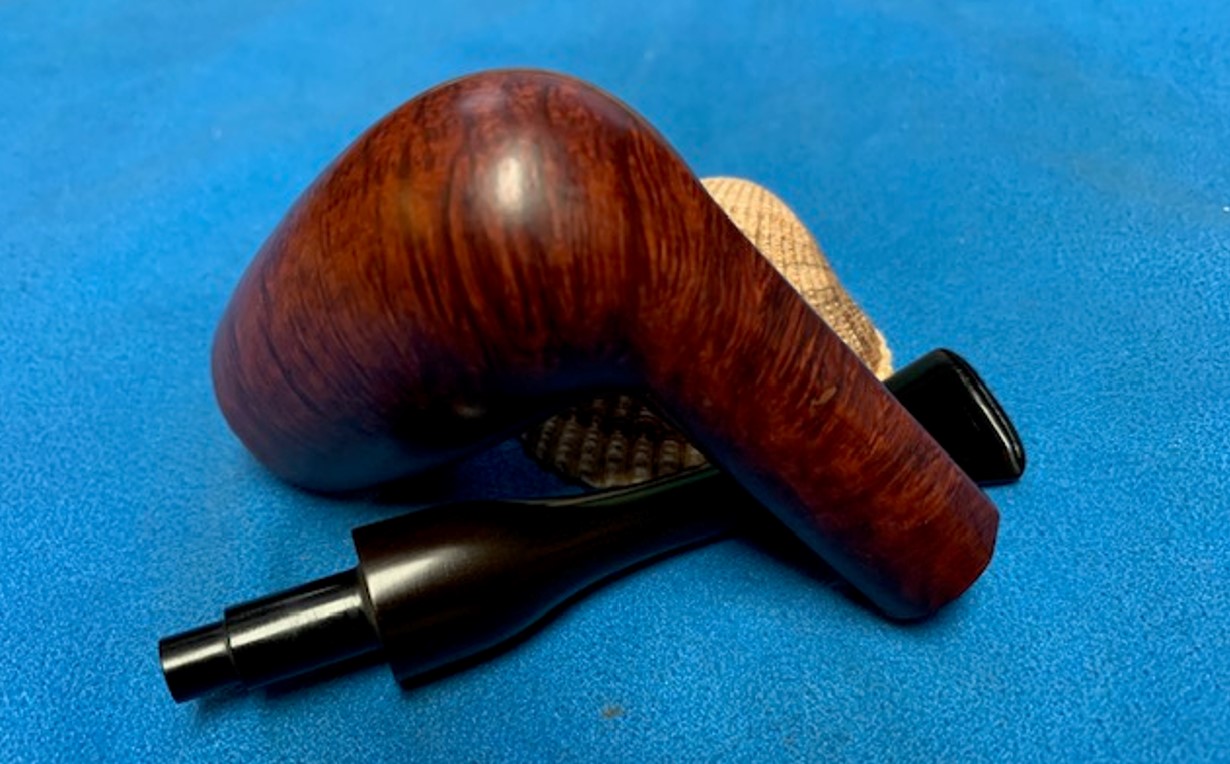
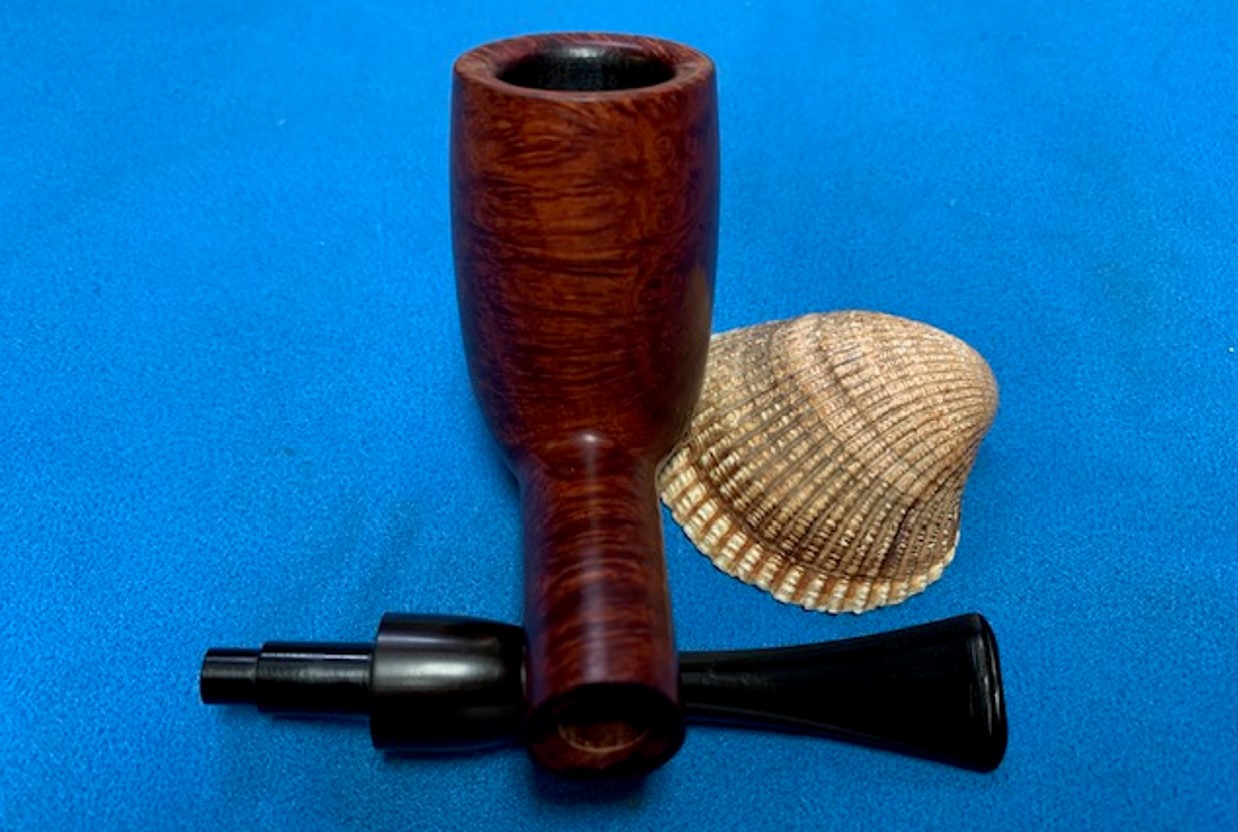
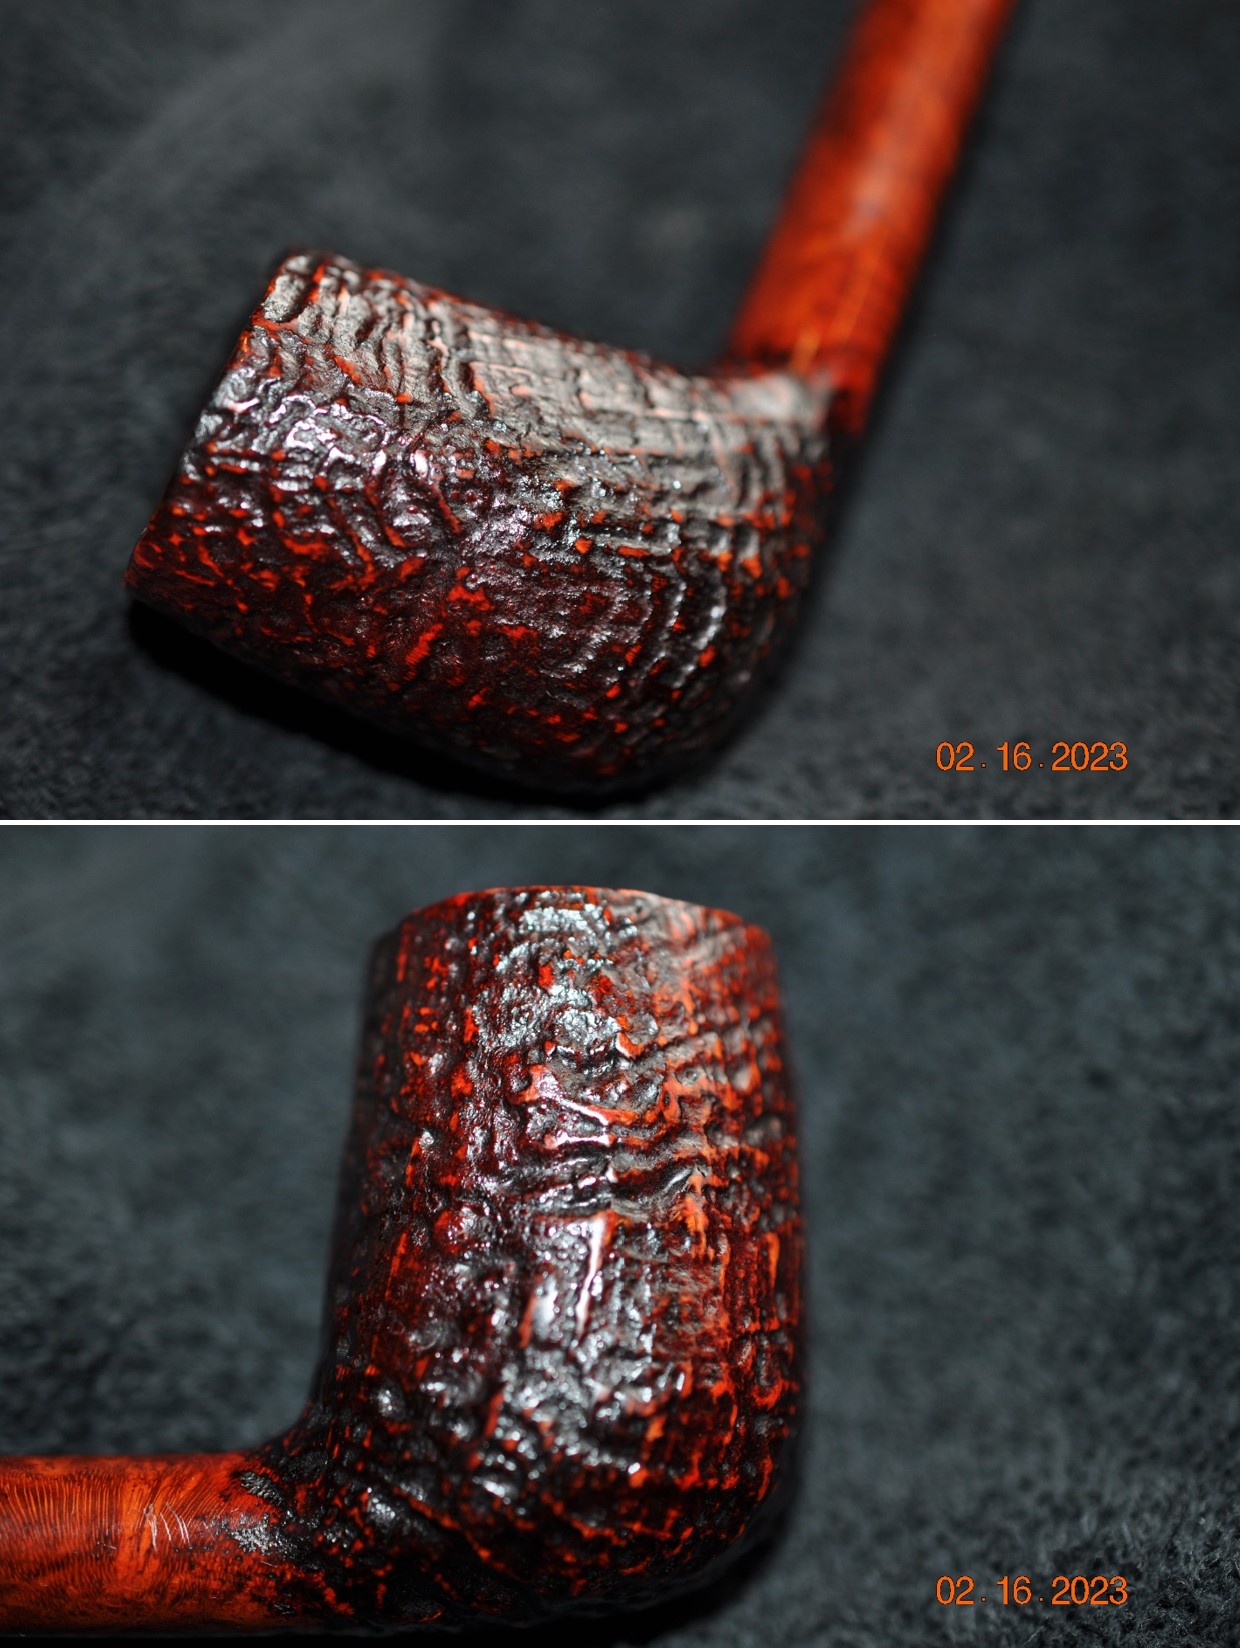
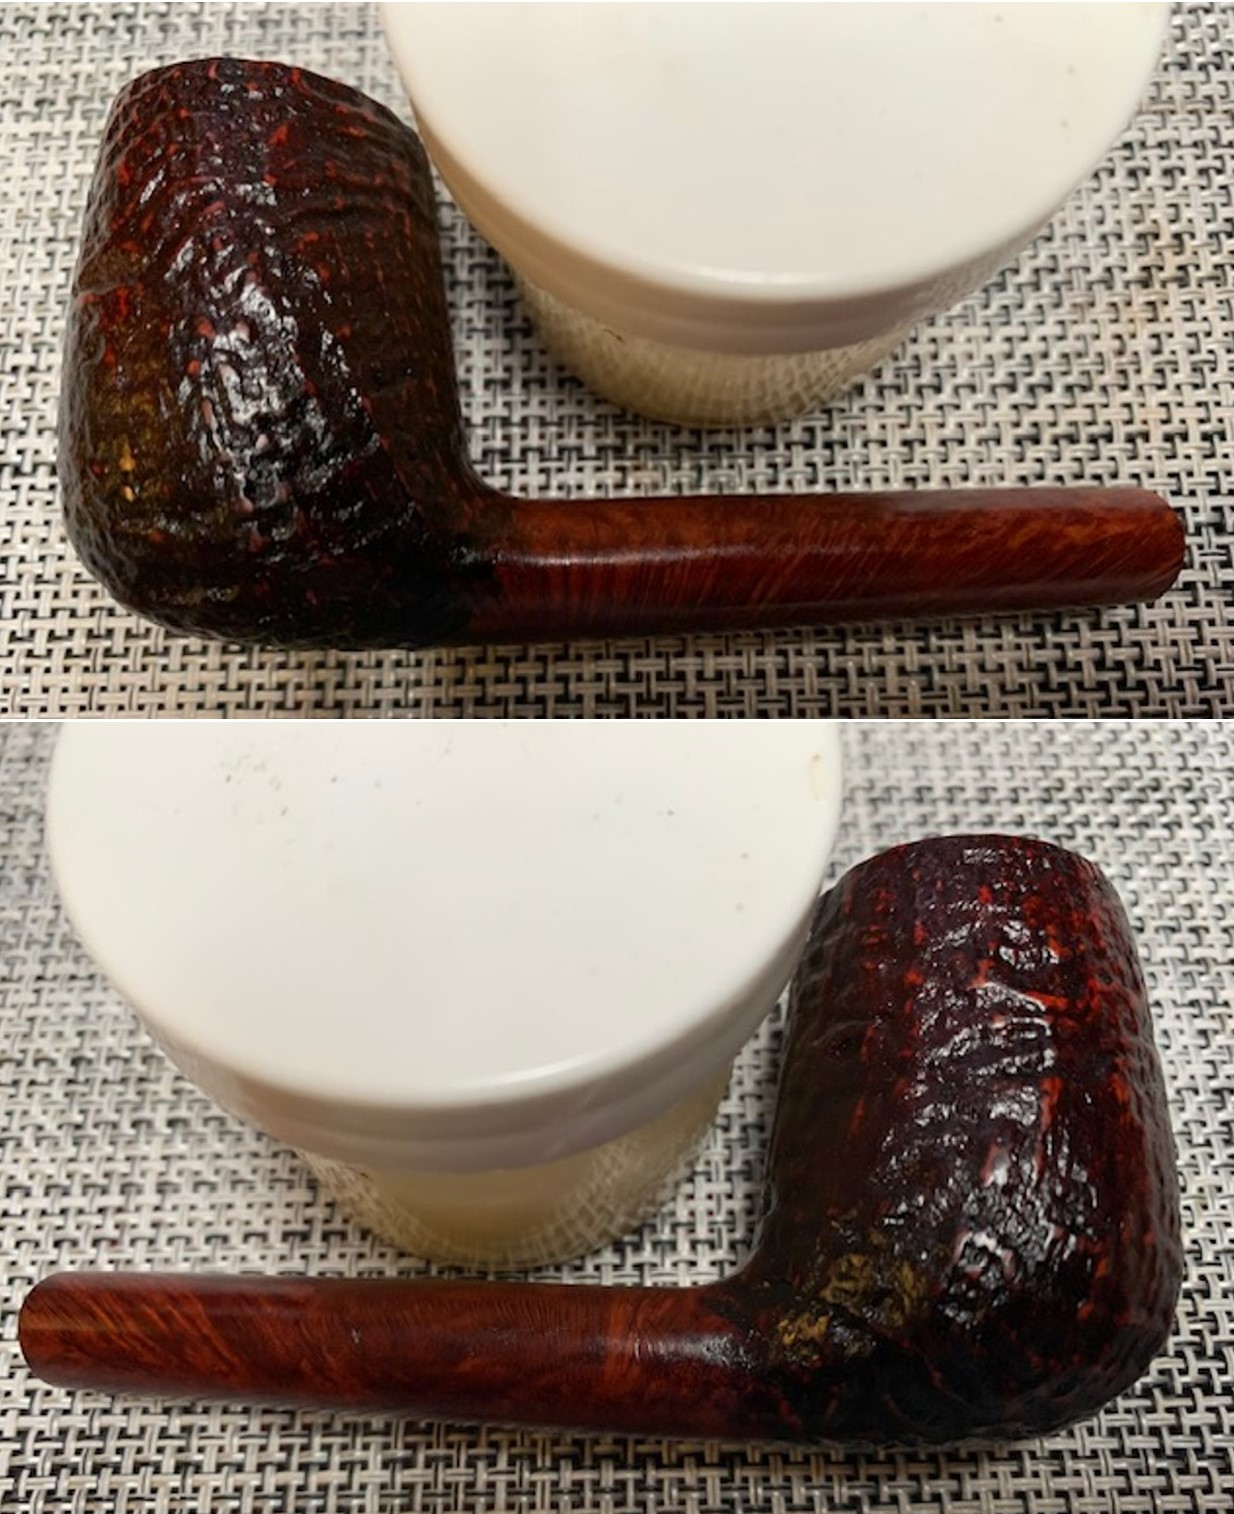
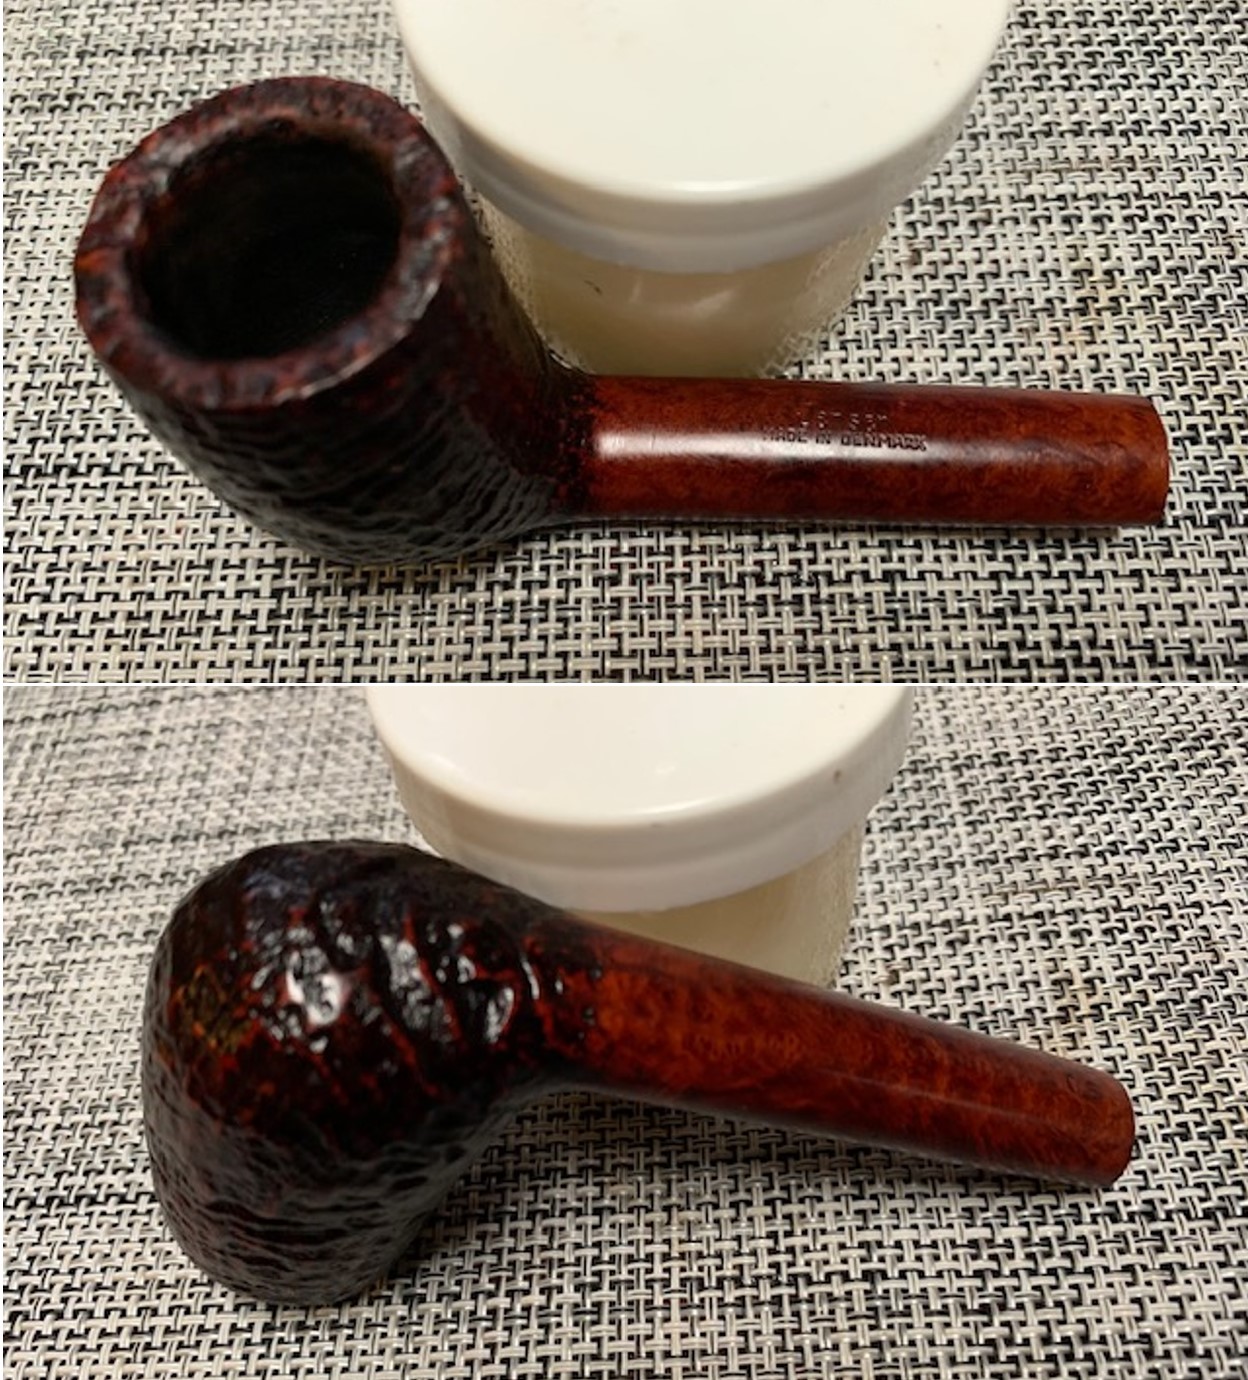
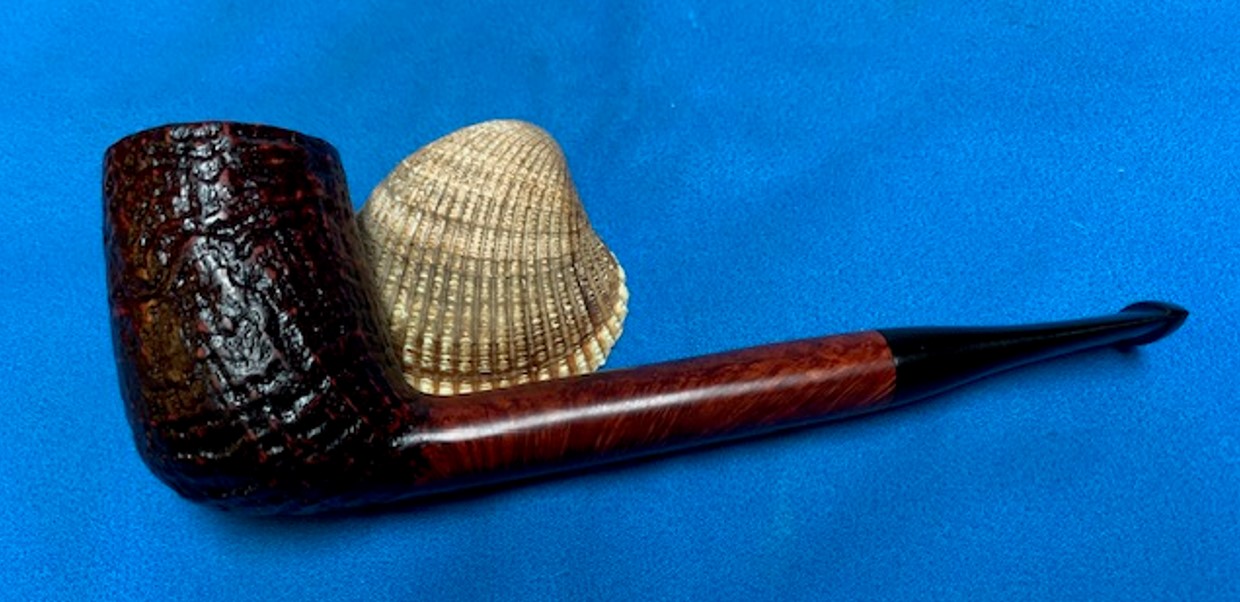
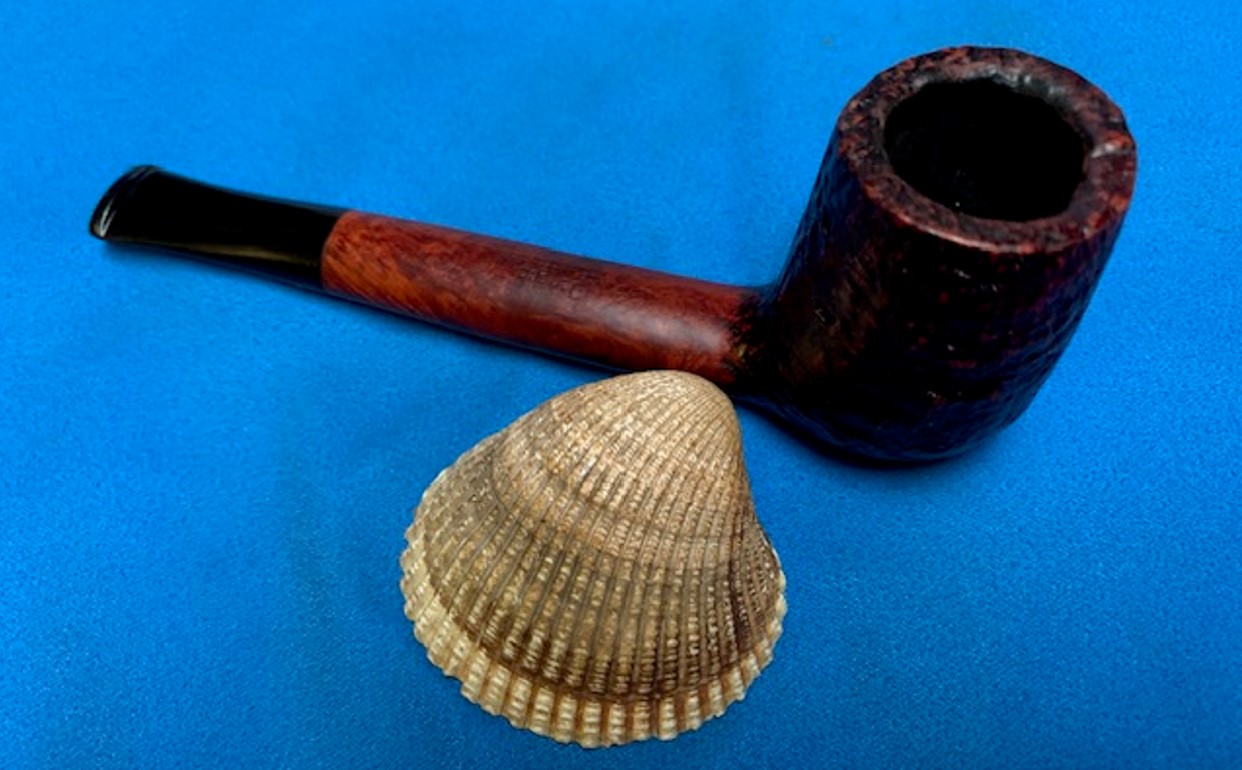
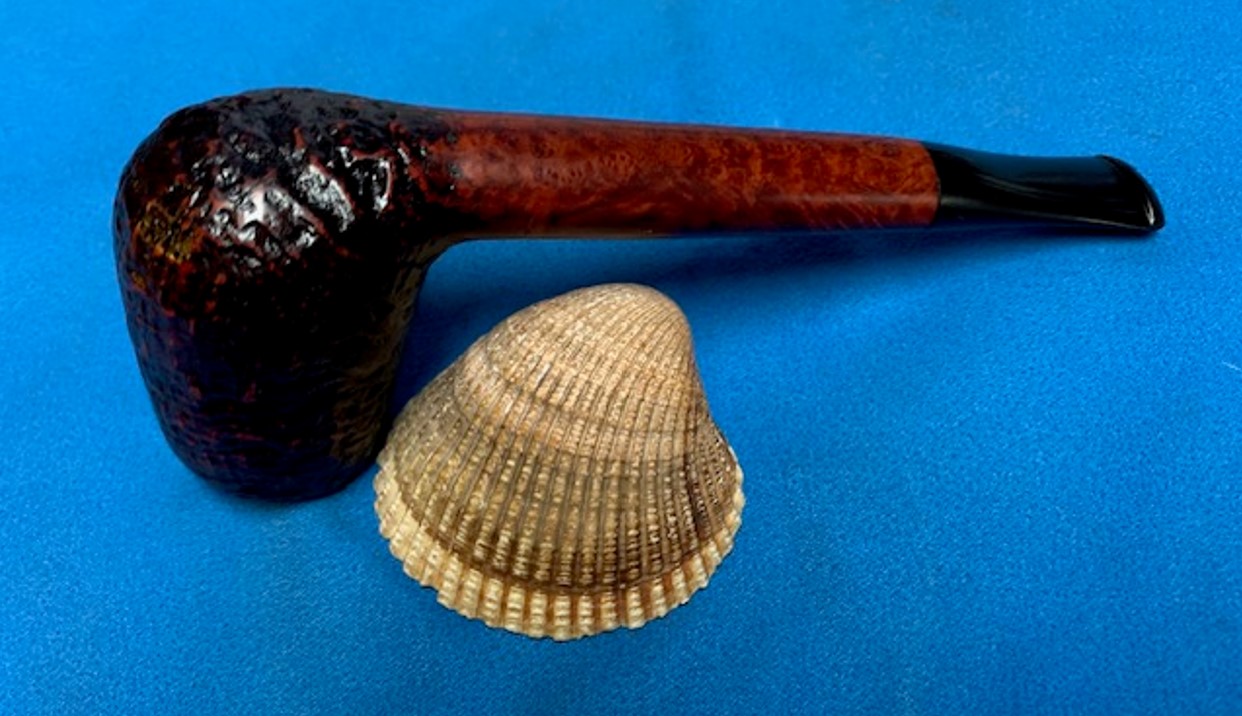
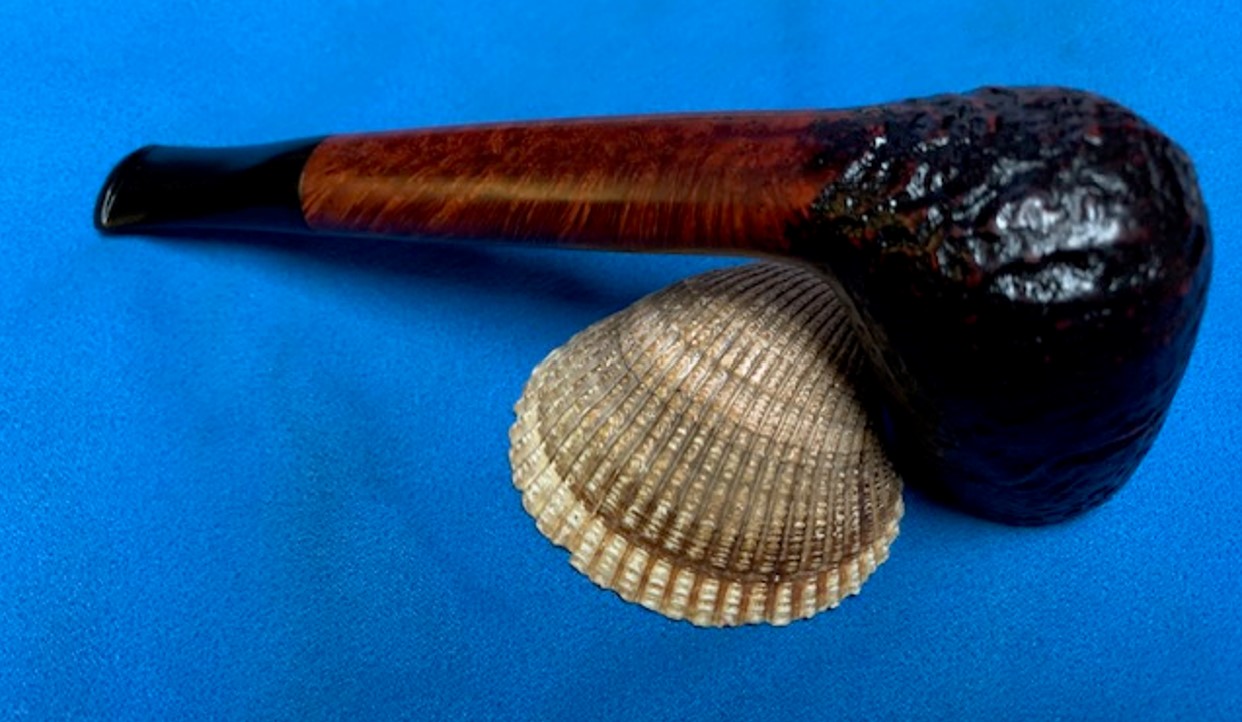
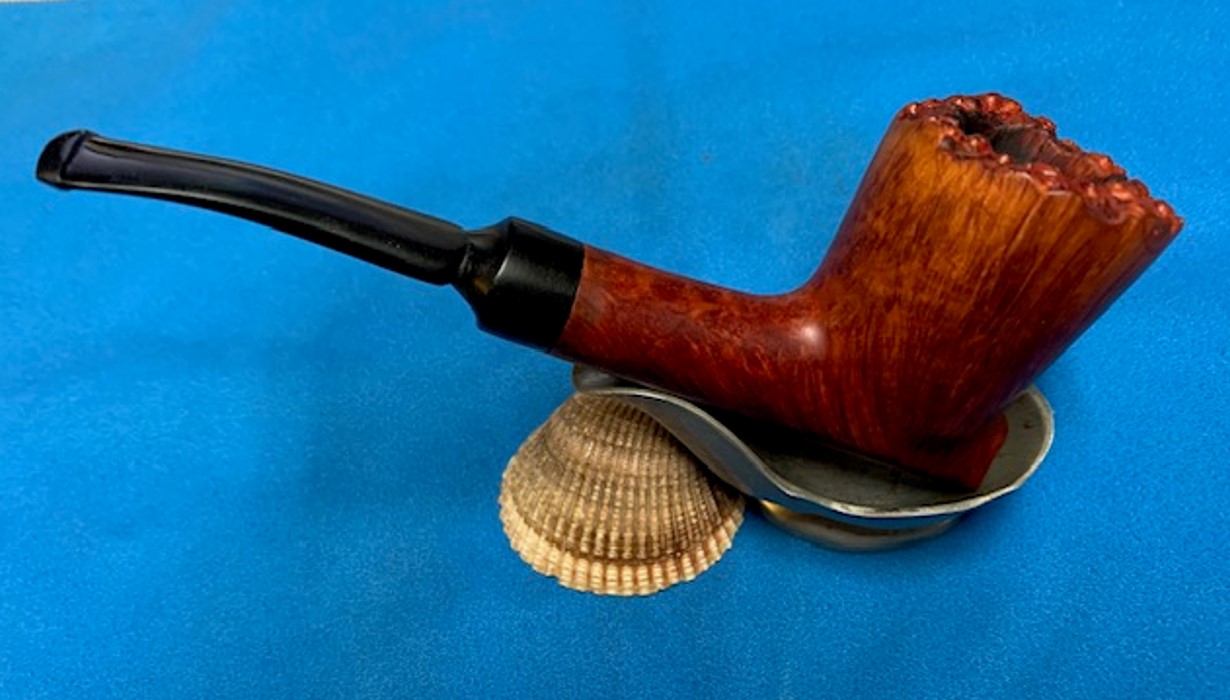
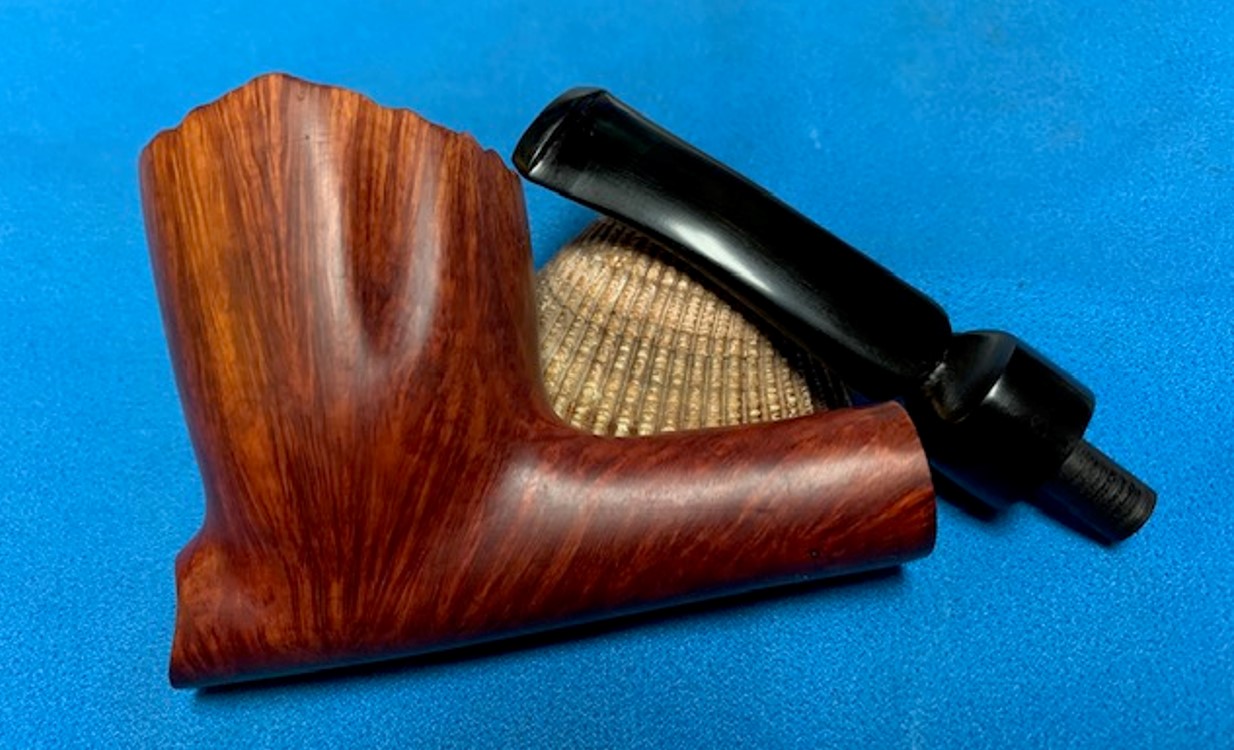
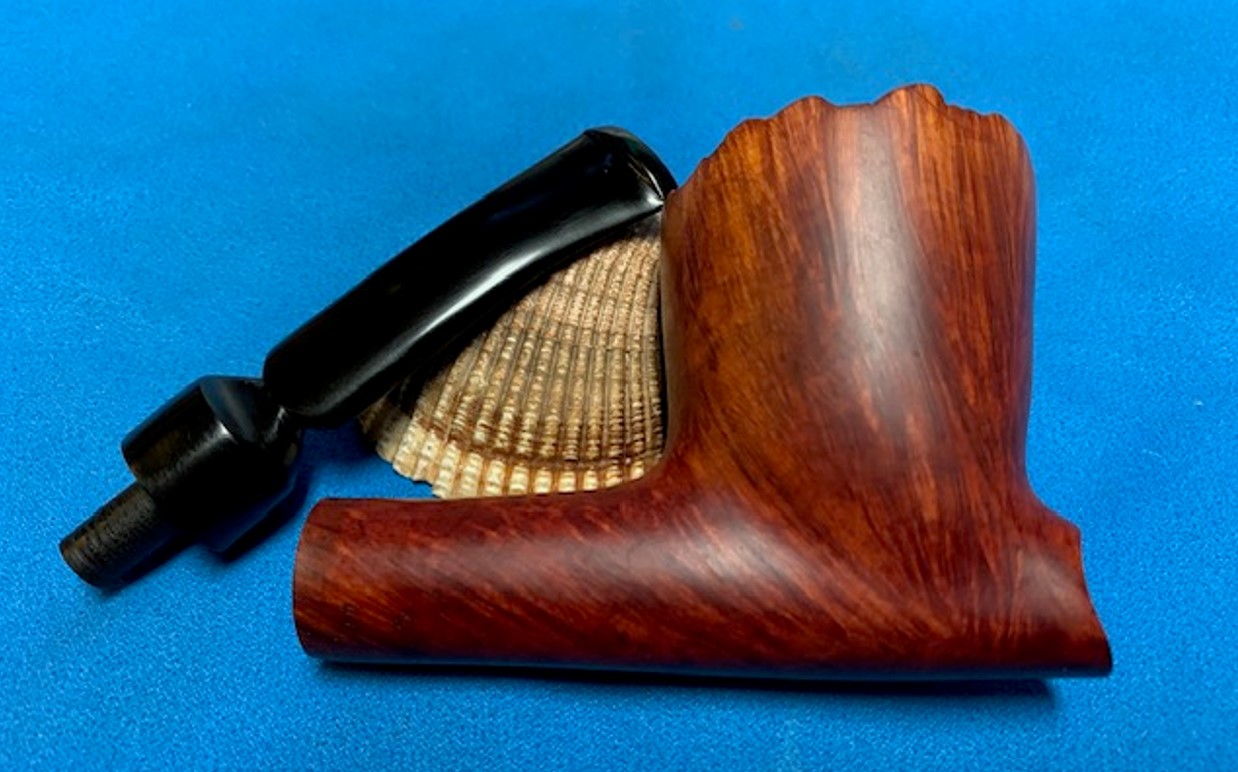
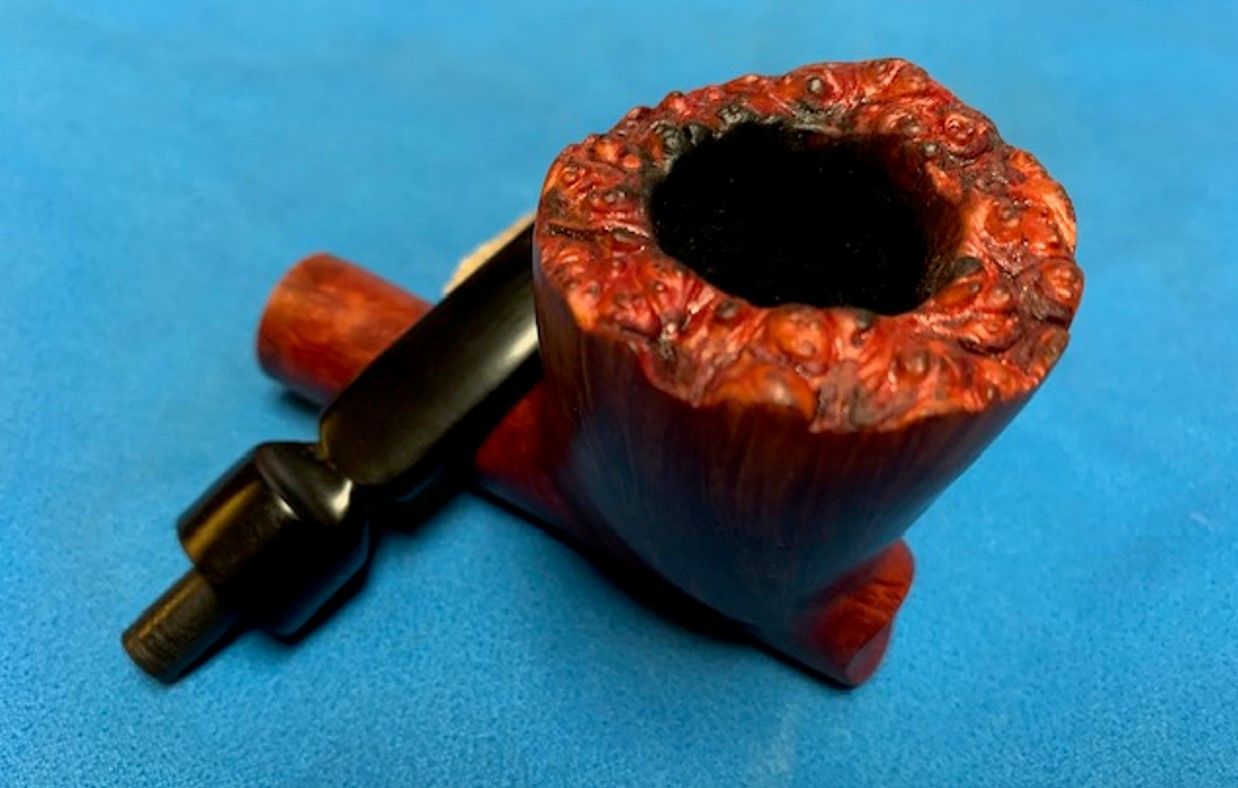
Next on the chopping block is a robust, rugged, rusticated pipe which I acquired in a lot of pipes from a gentleman living on Vancouver Island. He had quite an assortment of pipes and they ranged from the ridiculous to the sublime. This is not a Custom-Bilt – it is a BP Jum. They could easily be mistaken for one another.This is a very handsome pipe and promises to be a great smoker. It’s a bent pot (or a “War Club”, as Steve calls it), with a vulcanite, wide saddle stem. And what a wonderful rustication on this one! On the left side of the shank, the markings read BP Jum [over] Imported Briar. These are the only markings.The history of BP Jum, like many pipes of the same era, is shrouded in some mystery. The brand name has no mention on either Pipedia or Pipephil. Some pipe folks have proposed that BP Jum pipes are, in fact, Custom-Bilt seconds, but there is no direct evidence to support this. In previous restorations that Steve has done, he wrote the following: “There was a lot of conjecture as to whether the brand was made by Tracy Mincer of Custombilt fame. There is no definitive proof other than the common shapes, sizes and look of the pipes. Bill Unger, of Custombilt fame and author of a history of the brand, mentions BP Jum but cannot definitively connect the two. So the maker remains a mystery that is still unsolved.”
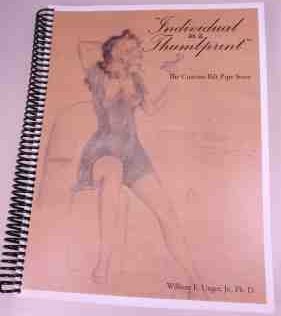
Well, I’ve taken up the mantle to see what else could be found. A gentleman who commented on one of Steve’s restorations said “BP Jum pipes are shown in a 1971 Kentucky club premiums [sic] catalog I have. They are not labeled in the text but I can see it stamped on shank of the picture of the pipe. The rustication on these is also very telling and looks the same on most of them.” I took it upon myself to see if I could find photos of the 1971 Kentucky Club Premium Catalog. I did find some online, but the images did not include the page with the BP Jums that were mentioned. Alas.Another potential source is a fellow named Tom, who goes by the handle, NWPipesmoker, on YouTube. As a devoted fan of both Custom-Bilt and BP Jum pipes, he has a few videos speculating on the origins of BP Jum pipes. In one video, he quotes from an unnamed correspondent of his who says that the BP Jum name comes from “Bilmore Pipes Jumbo”. Now, it is important to stress that there is only circumstantial evidence to support this. The information is enticing, but no more than indirect. The advertisement below (for Biltmore) displays some drawings of pipes that are very close (or identical) to BP Jum pipes. We don’t see the words “BP Jum” anywhere on the pipes or in the ad, but I am still impressed with this.As an aside, the connection between Tracy Mincer’s Custom-Bilt and Biltmore is circuitous, to be sure, but it exists. Briefly, both Bilmore pipes and Mincer pipes (specifically the Doodler) were either owned by or produced by National Briar Pipe Co. of New Jersey. In Bill Unger’s book, As Individual as a Thumbprint: The Custom-Bilt Pipe Story, he writes: “Apparently, both Tracy Mincer and the National Briar Pipe Co. continued to produce Doodlers concurrently until Mincer was no longer able to make pipes, sometime before his death in 1964. Bill Mincer then sold all rights to the Doodler to the National Pipe Co. in 1966.”Finally, NWPipesmoker has another video where he compares two pipes that he owns: one marked “Custom-Bilt” and the other marked “BP Jum”. He has entitled this video, “CustomBilt and BP Jum connection confirmed”. I think that’s overstating it a bit, but I am including the link to this video here, for your examination: https://www.youtube.com/watch?v=GdsBYoydYu8
It is certainly possible (and perhaps even likely) that Custom-Bilt and BP Jum pipes are related in some way – even if we are not able to make a definitive statement about it. I feel comfortable in saying that there is a connection between the pipes, but this connection is not ironclad. To put it colloquially, they may be brothers but they are not twins.
Let’s move on…
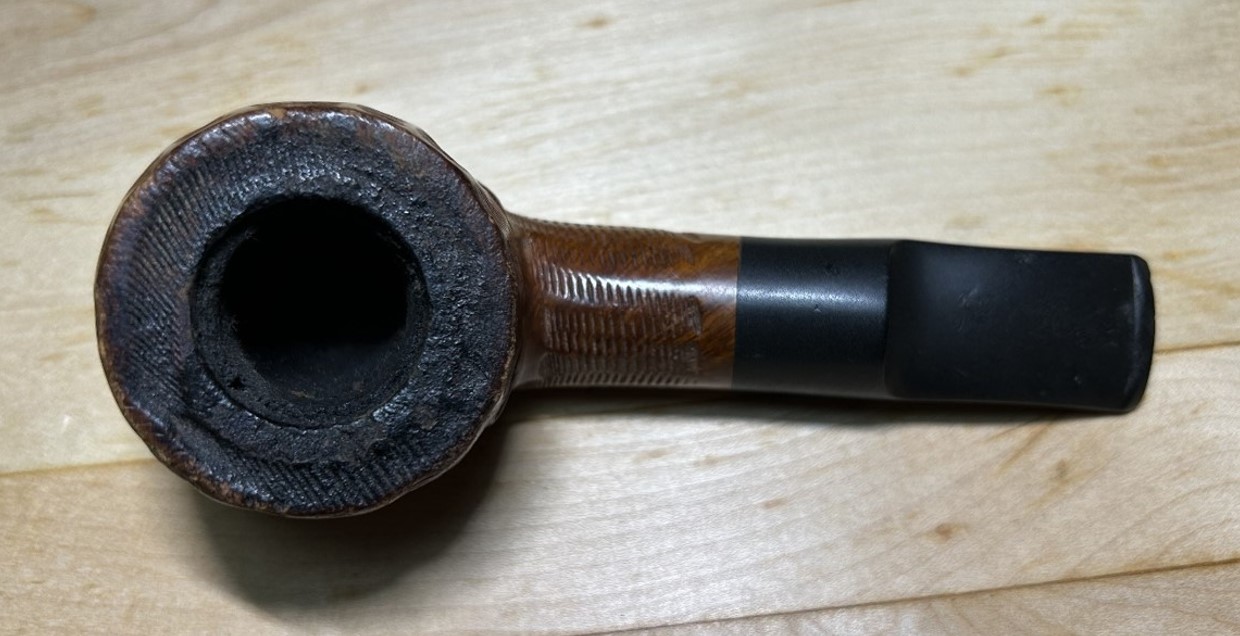
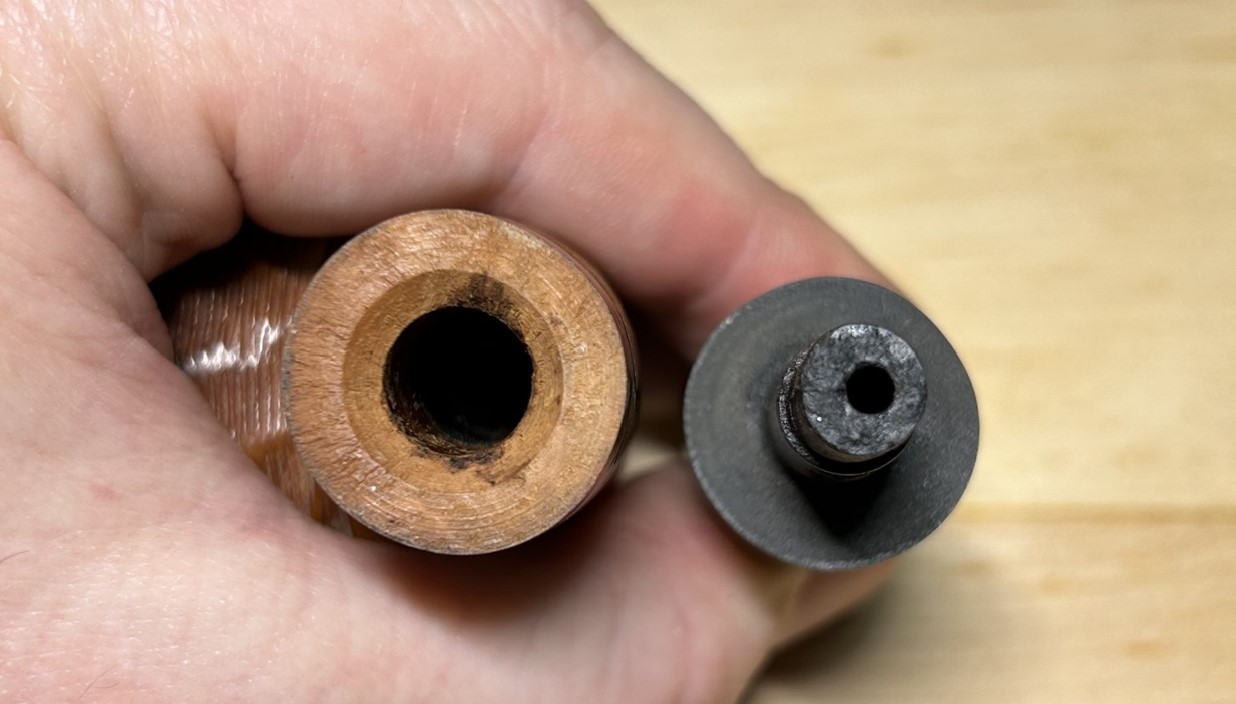
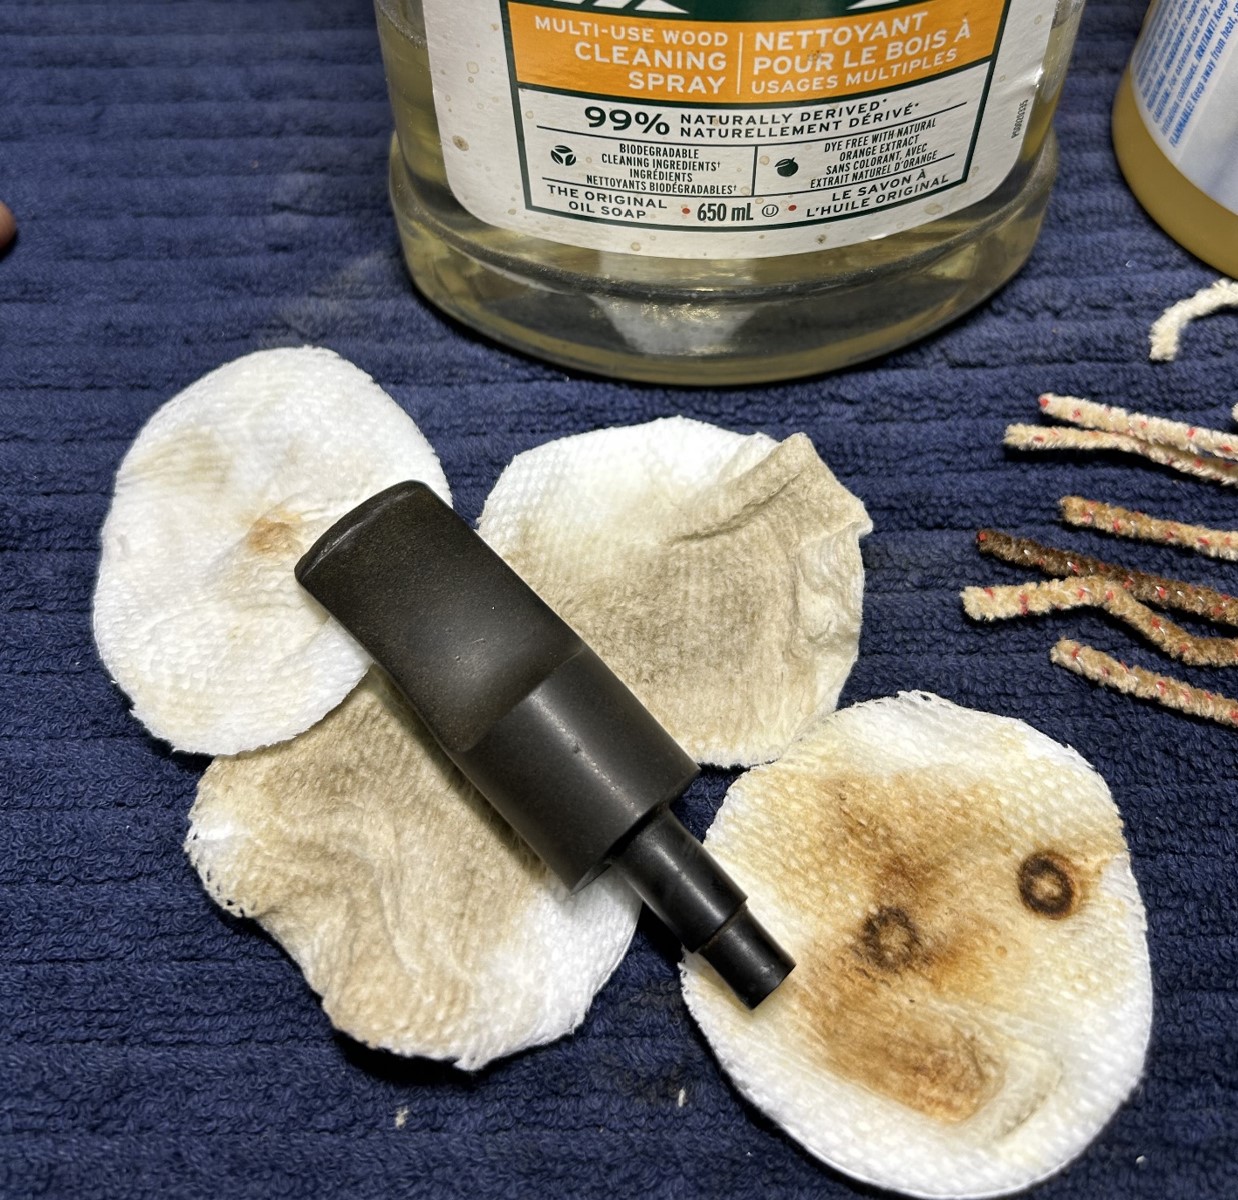
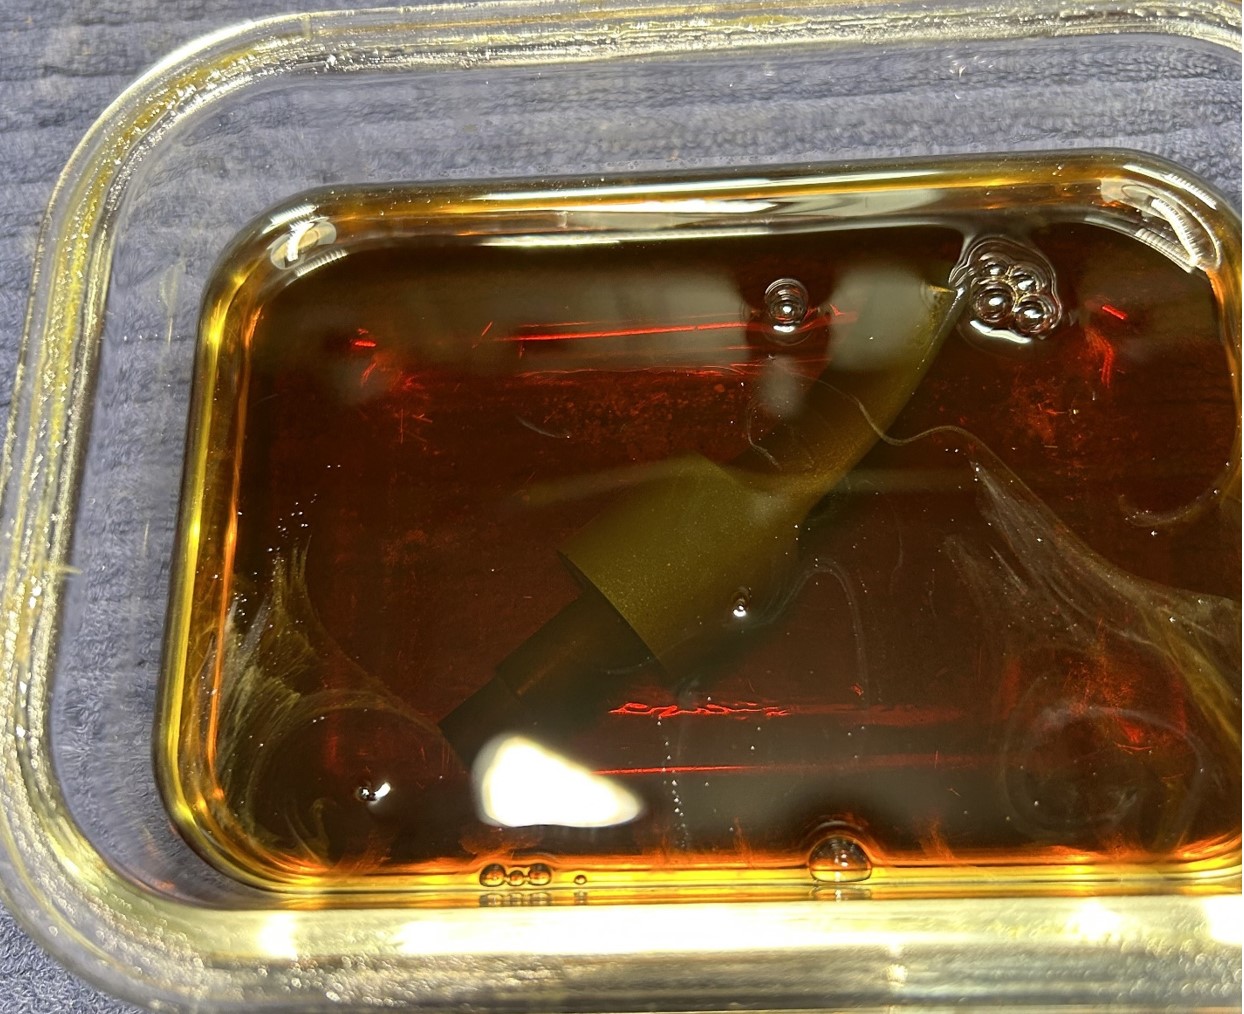
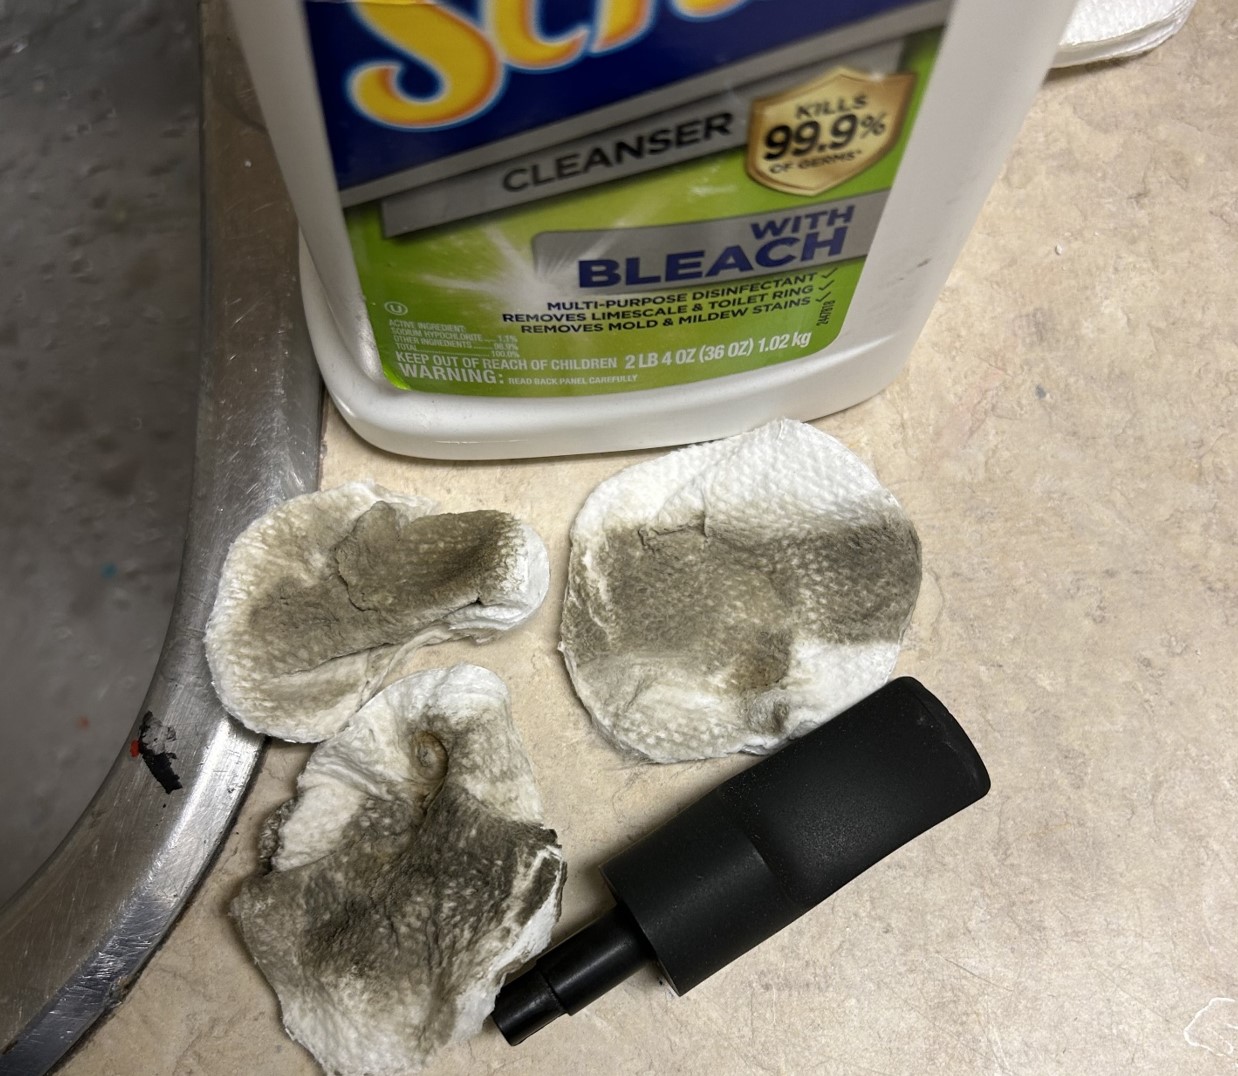
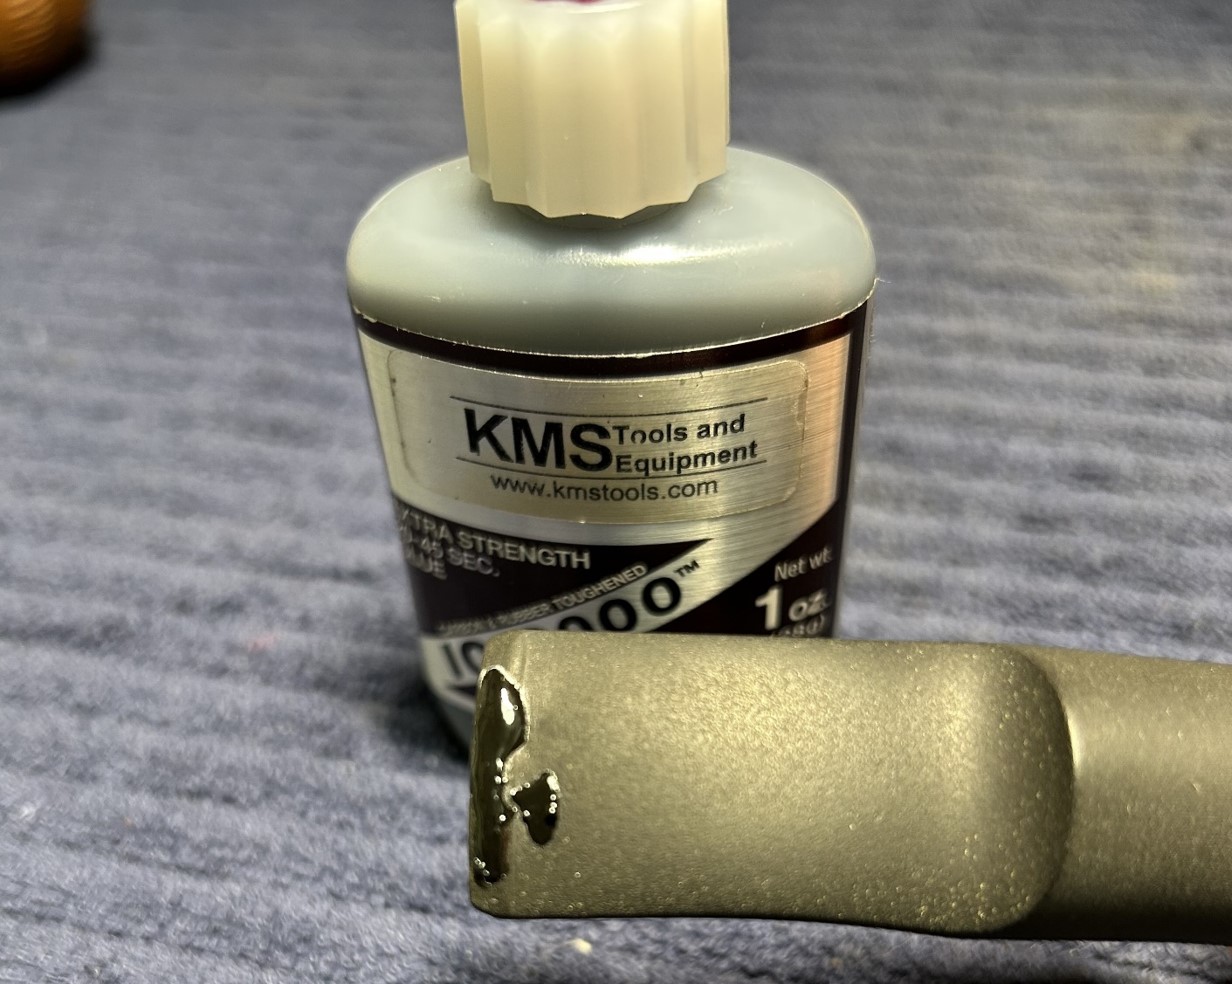
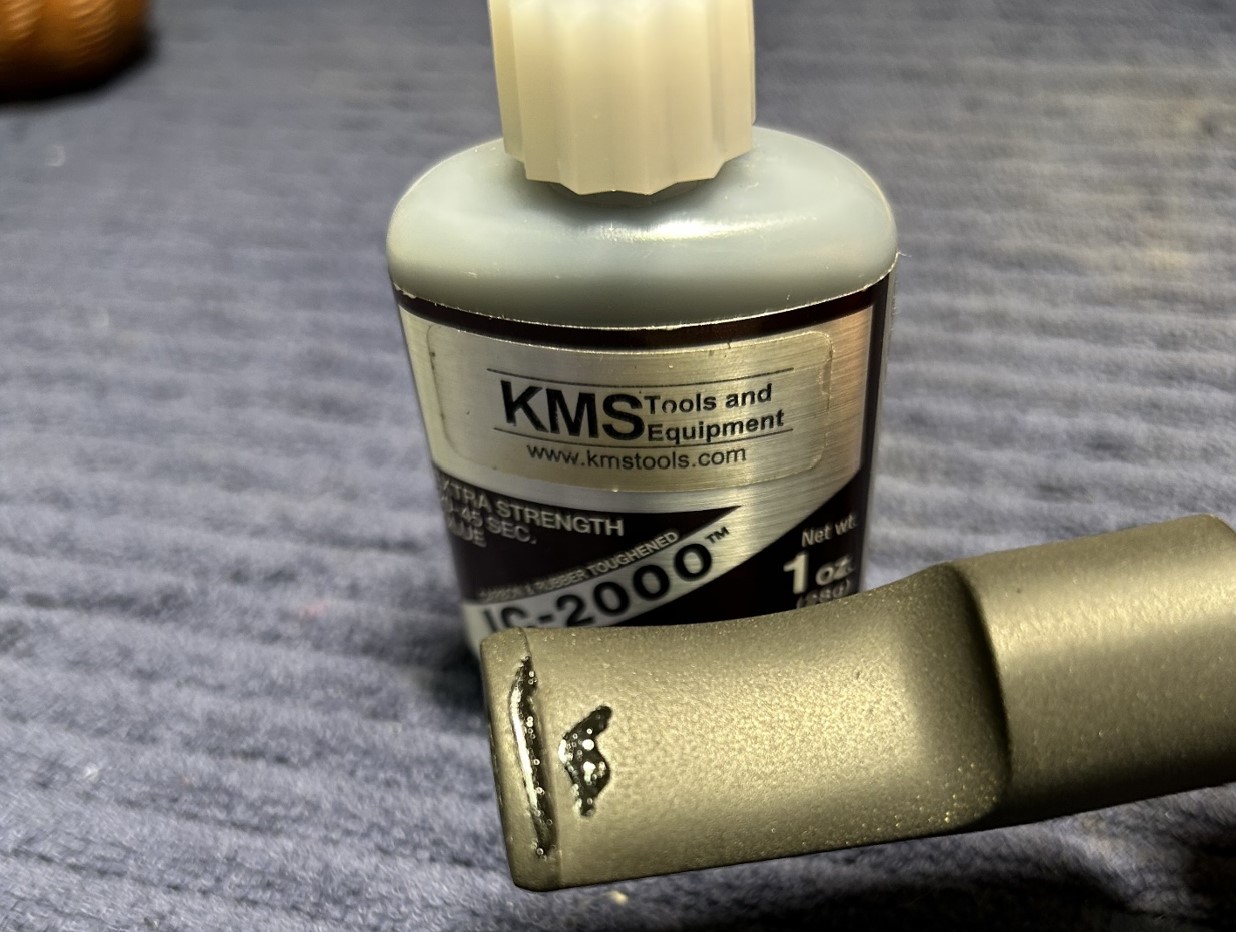
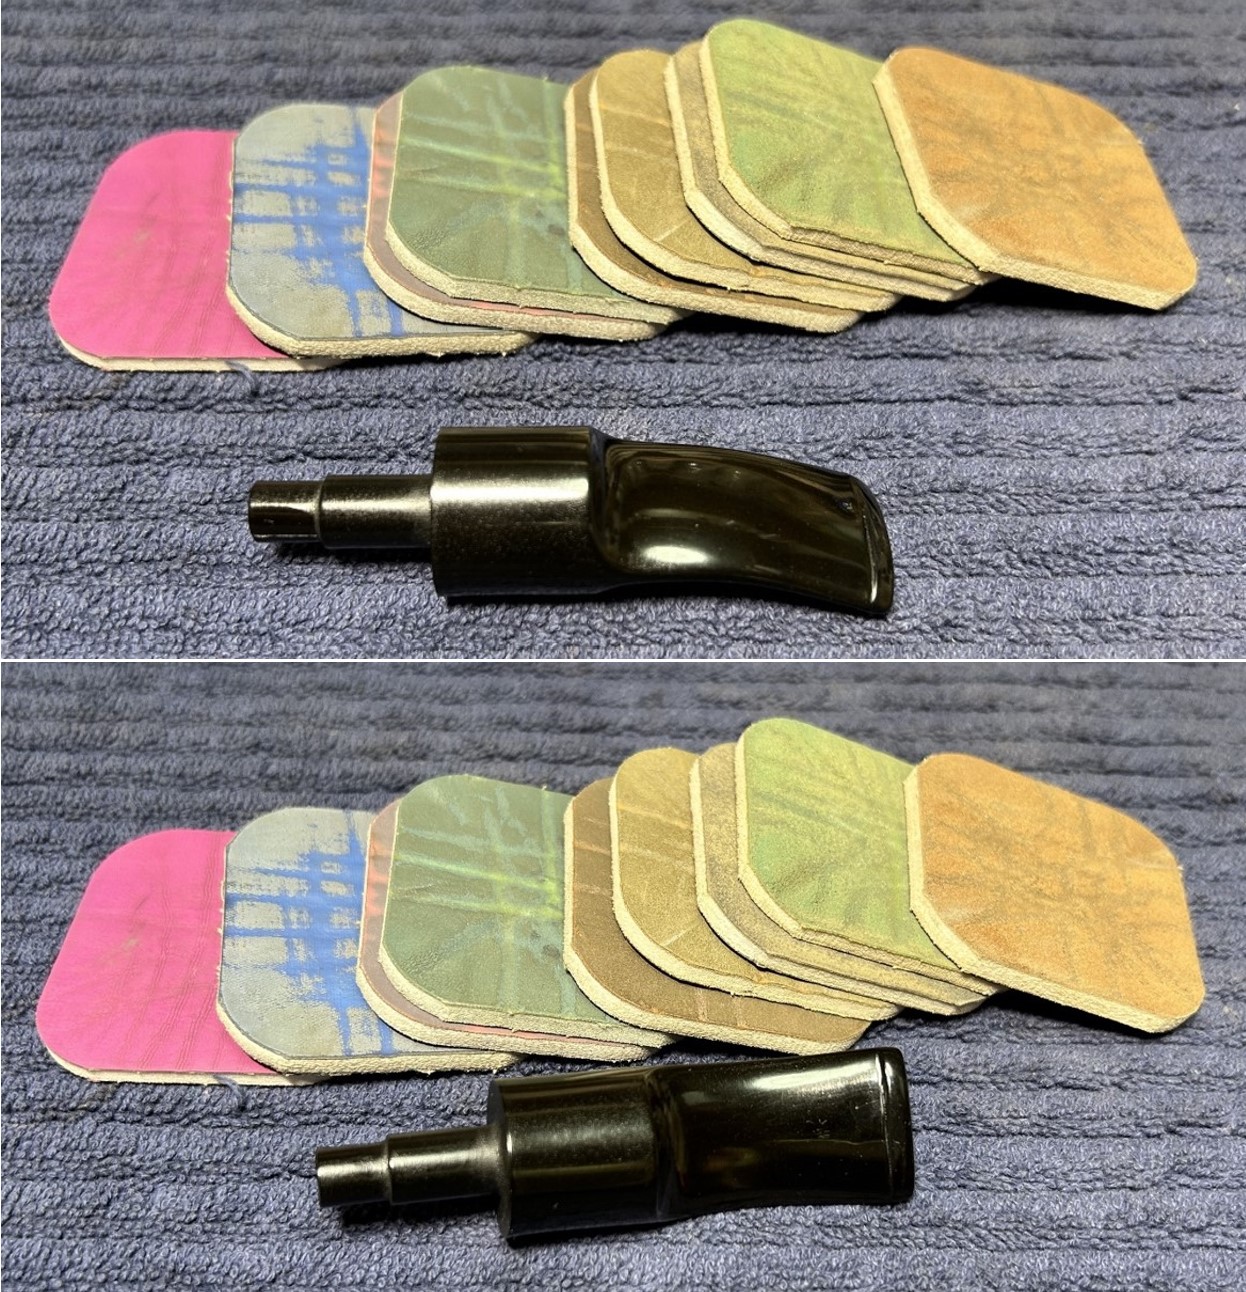
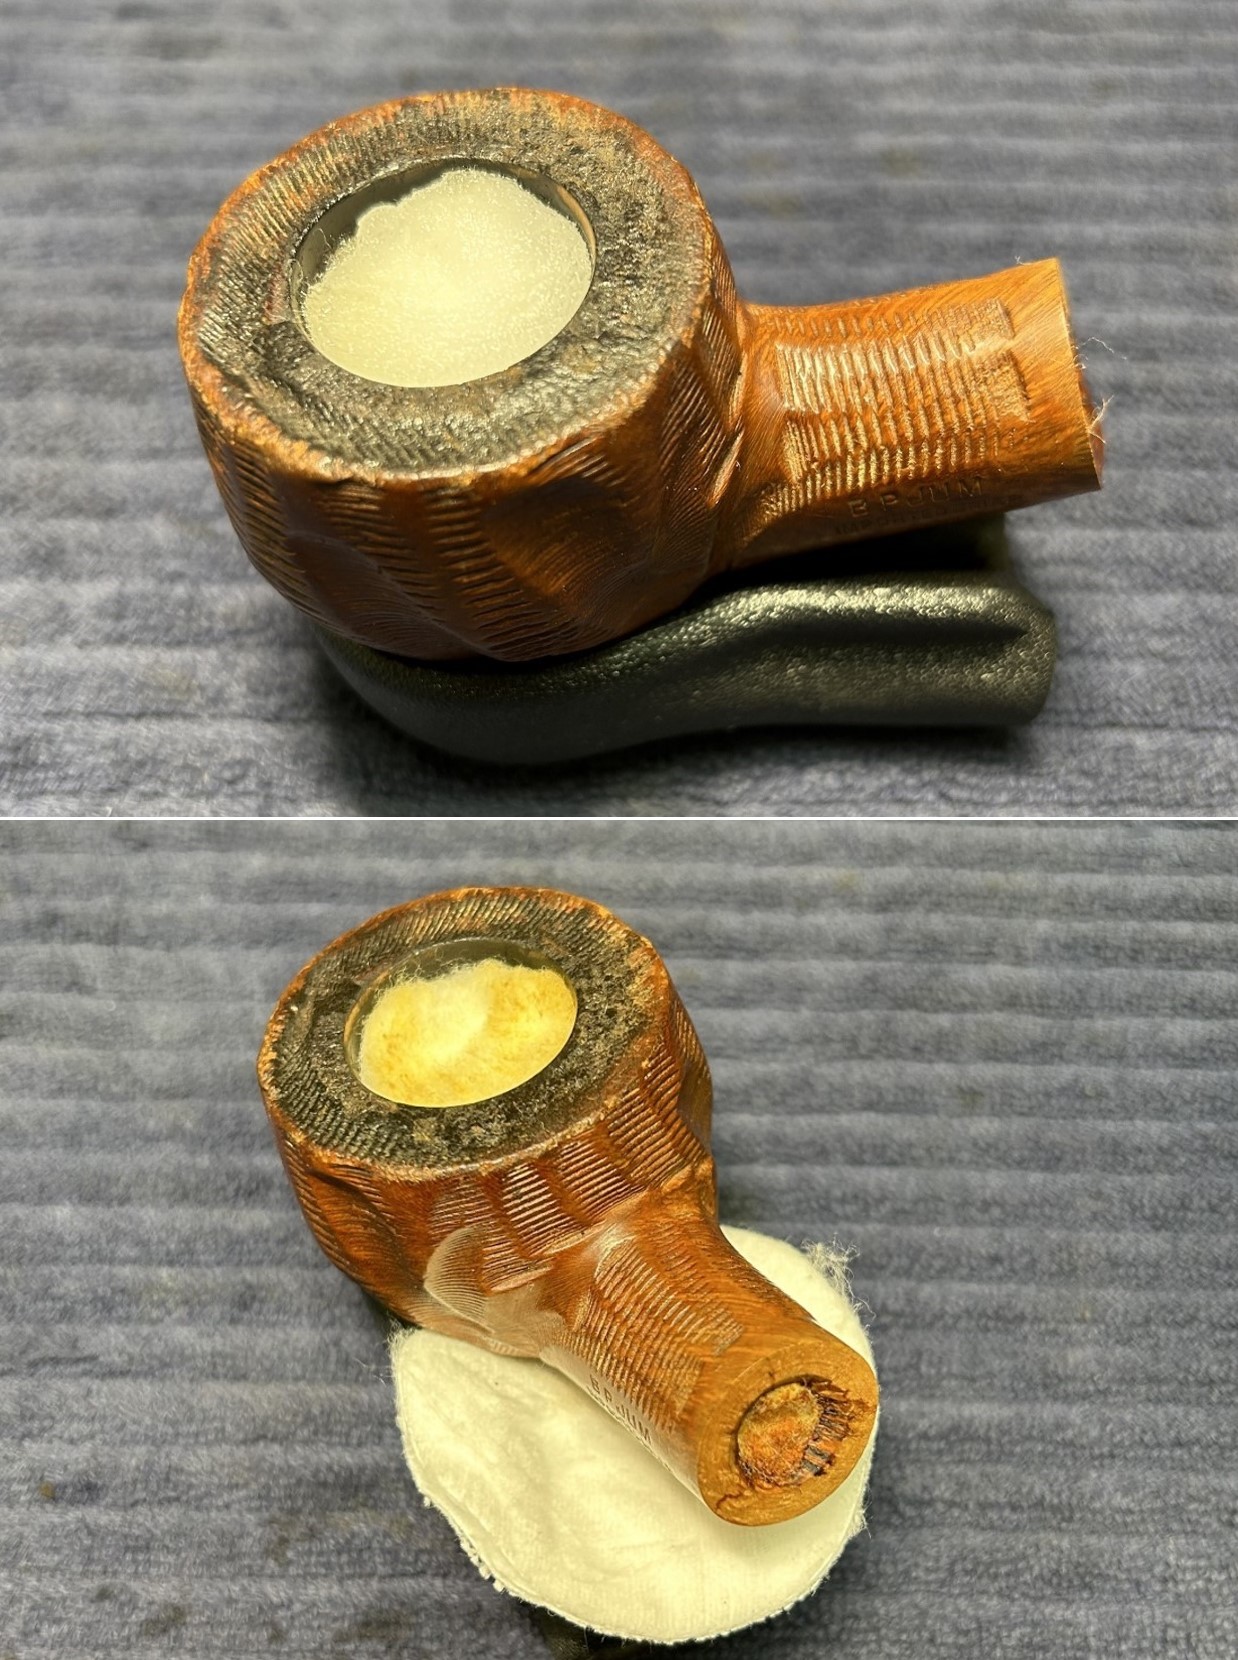
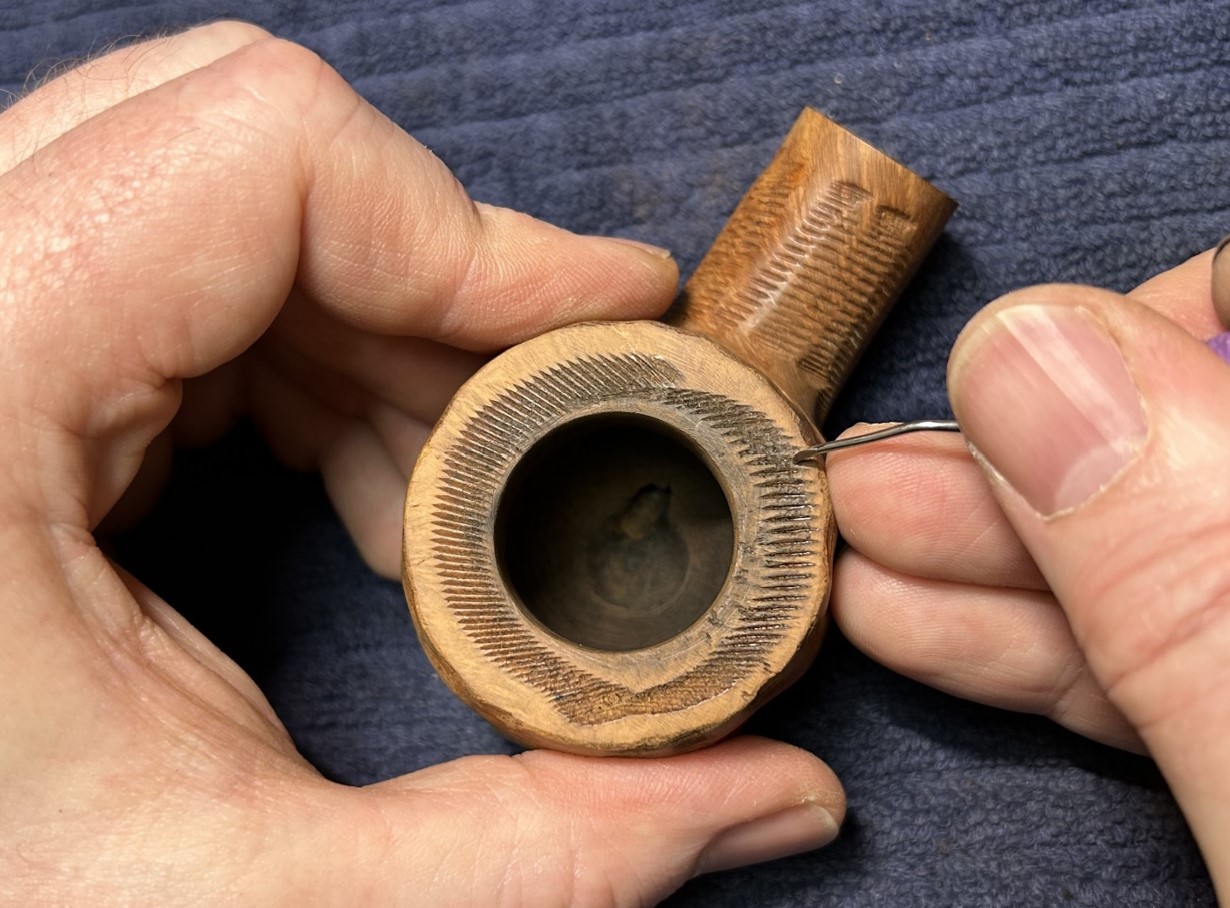
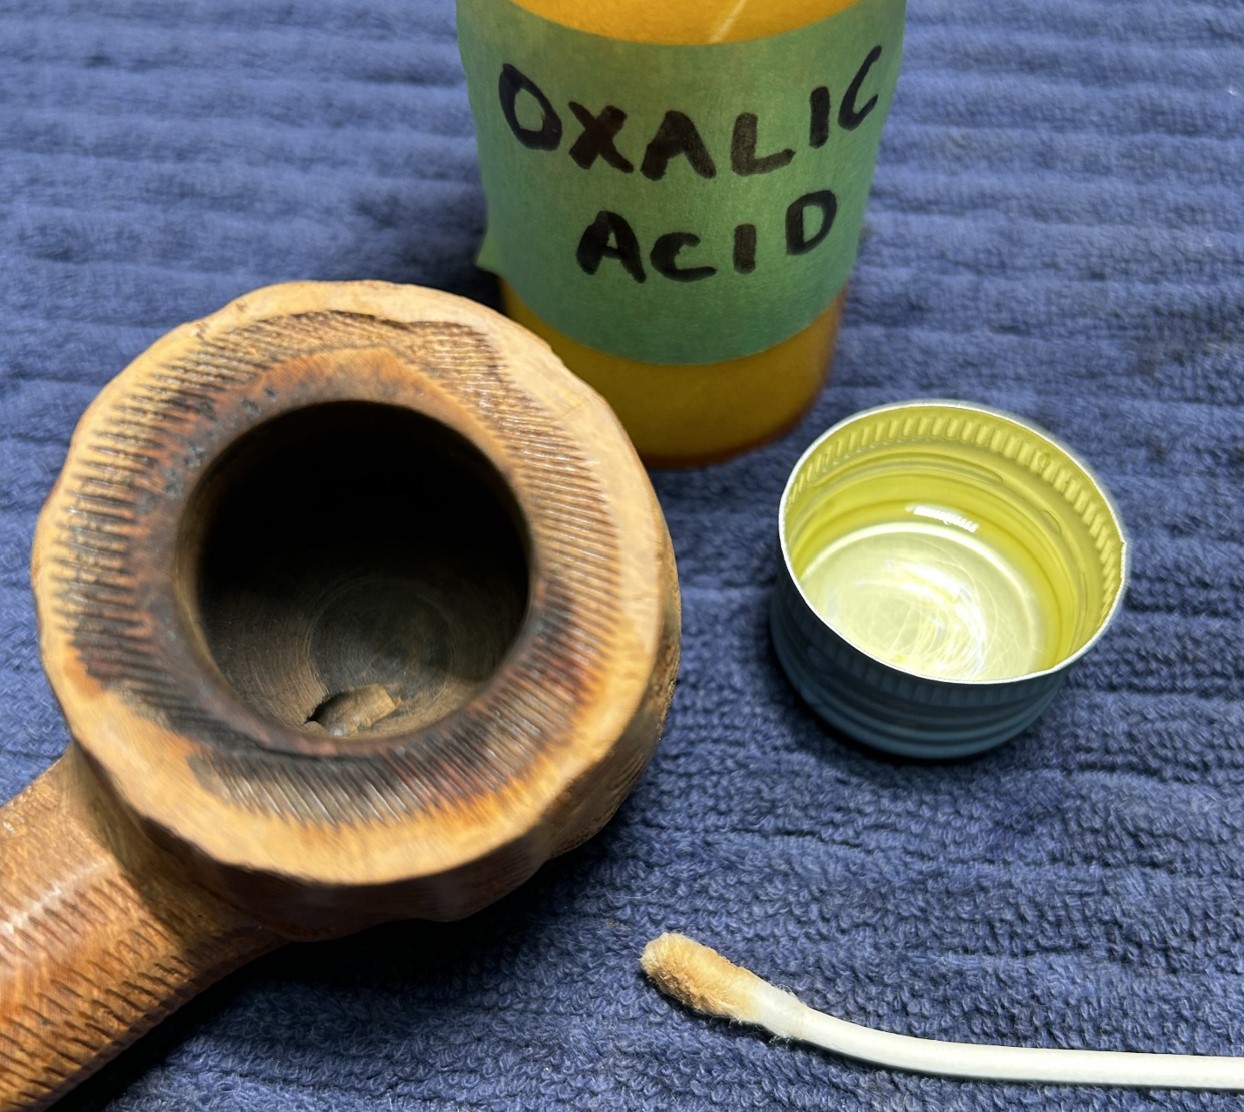
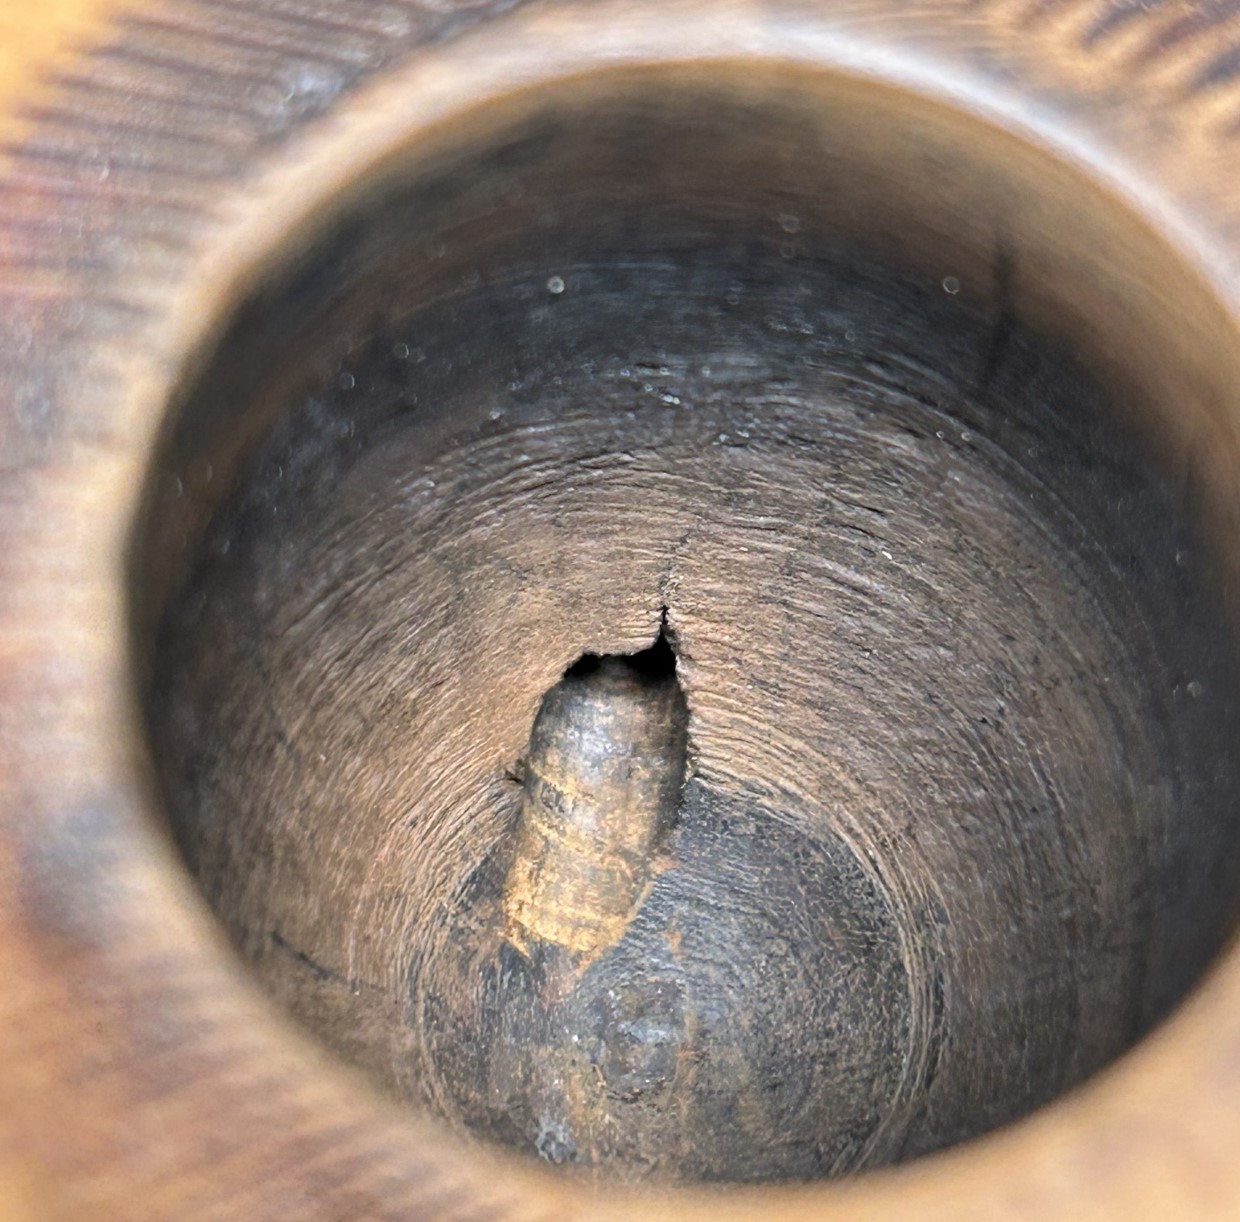
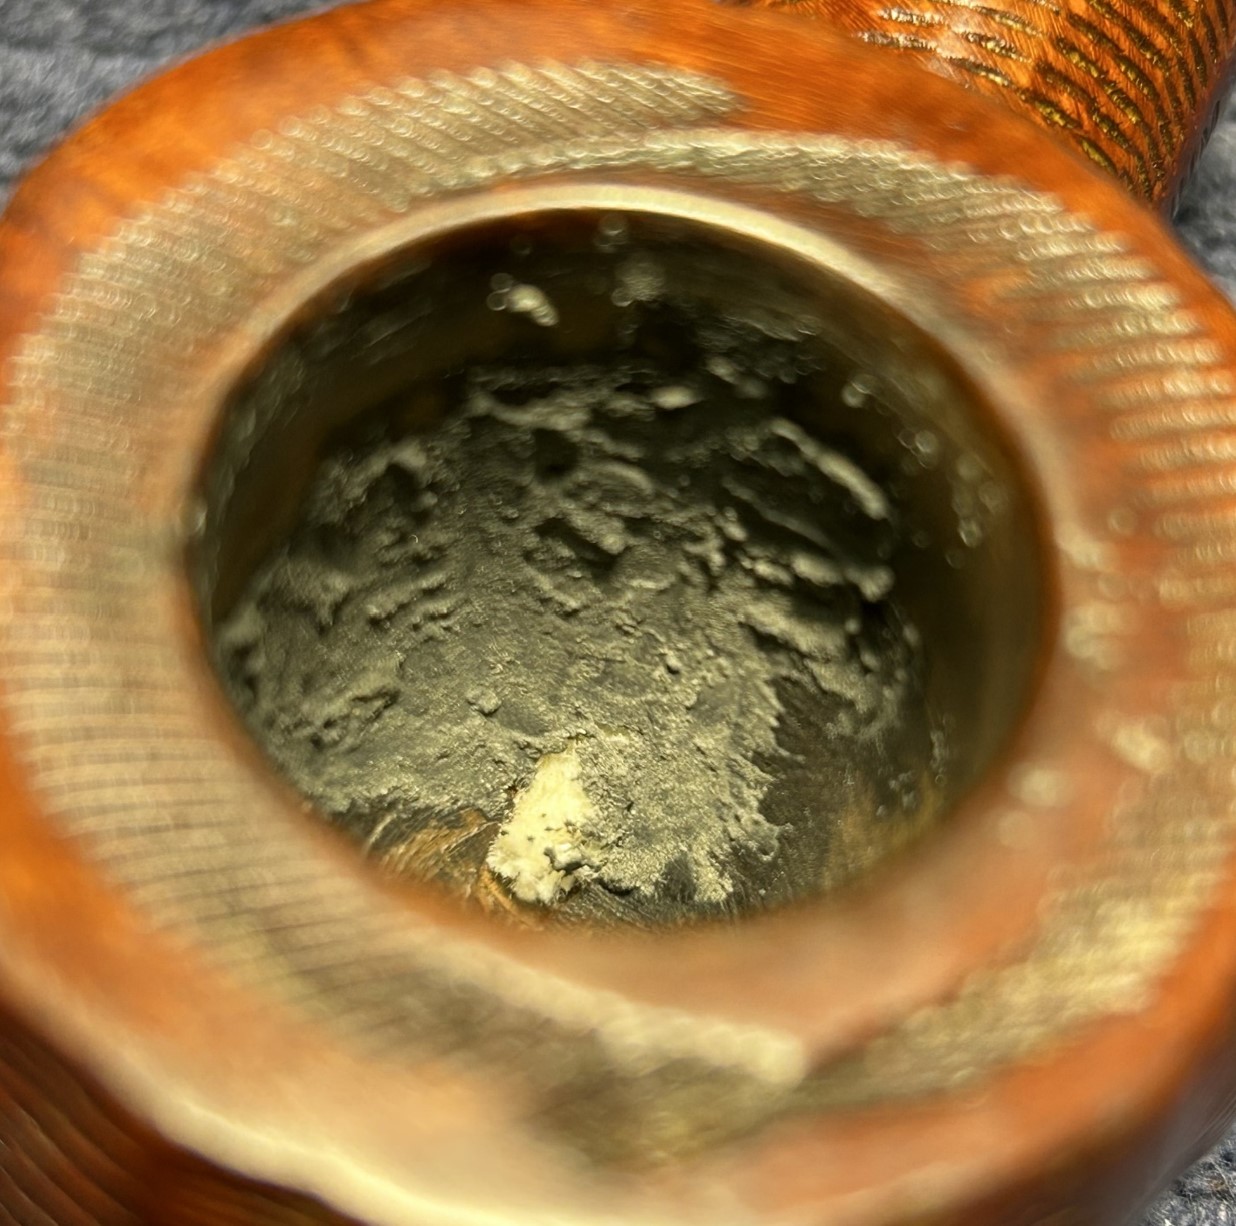
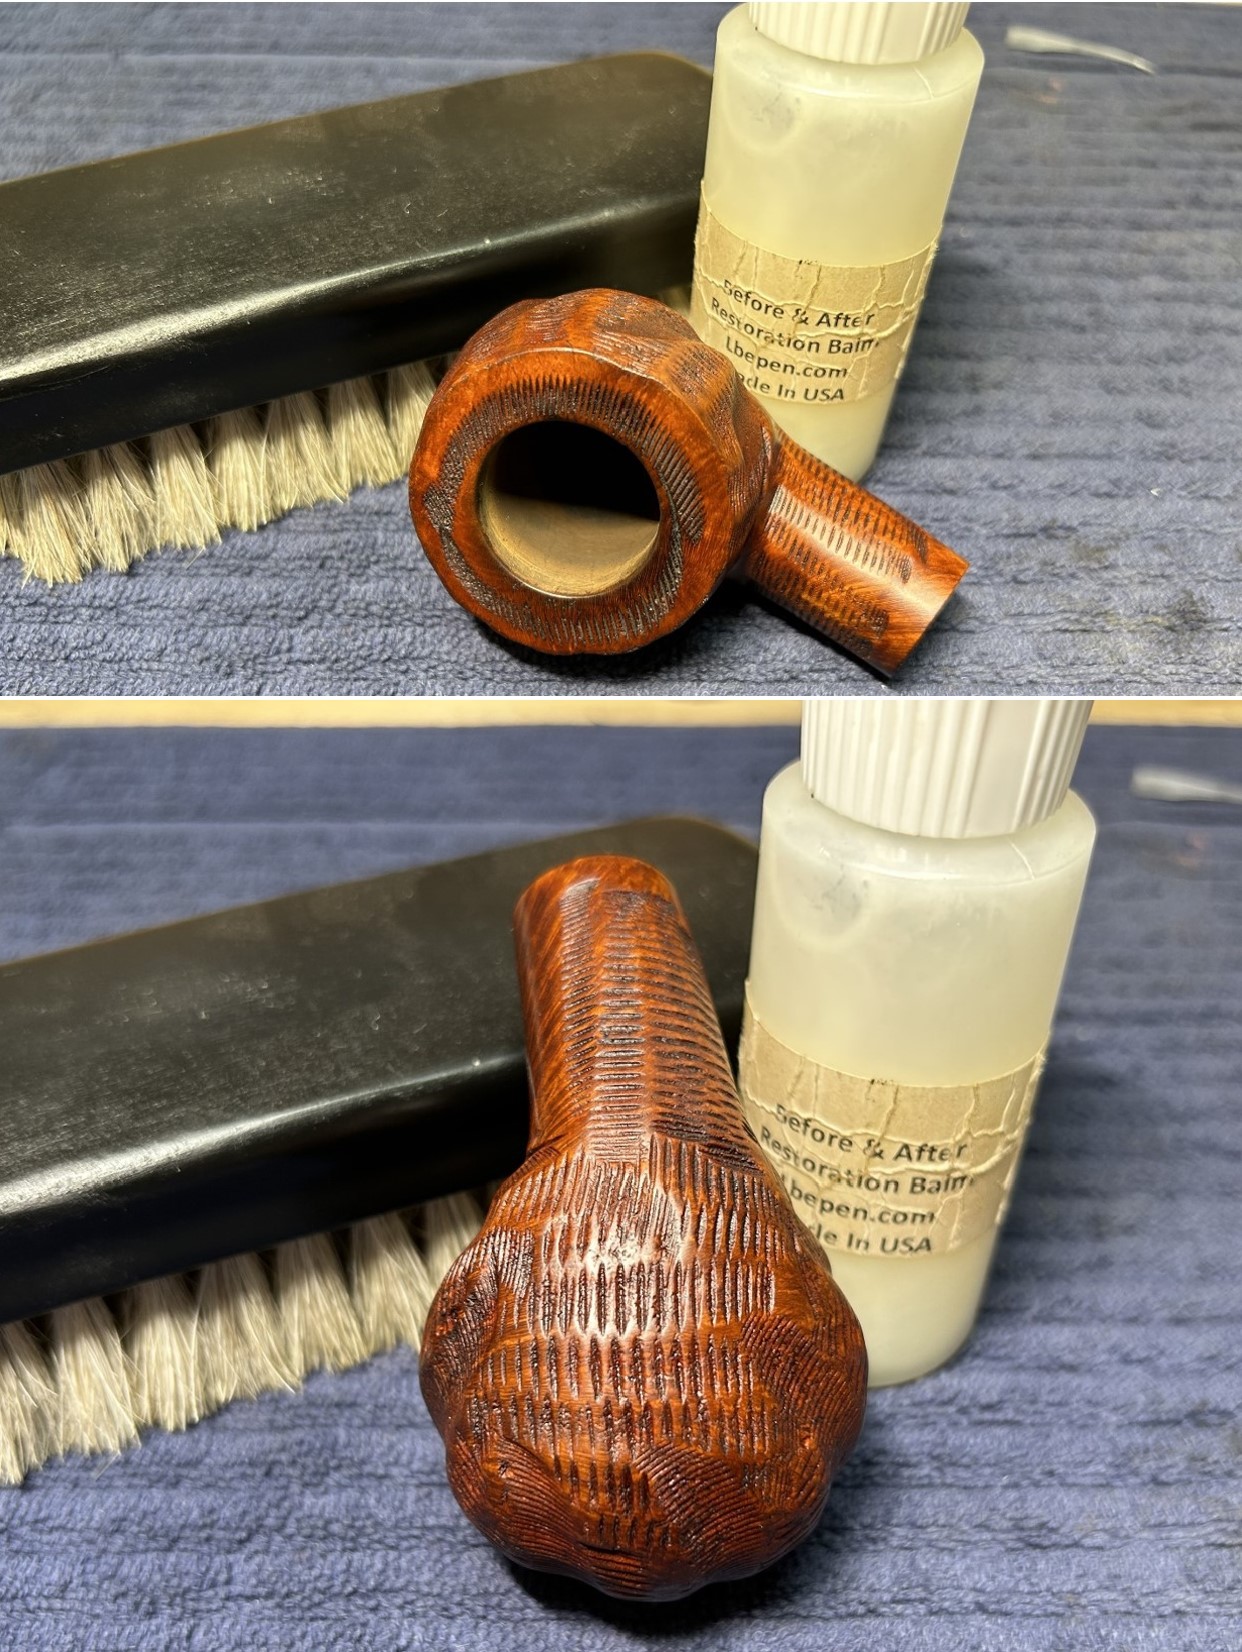
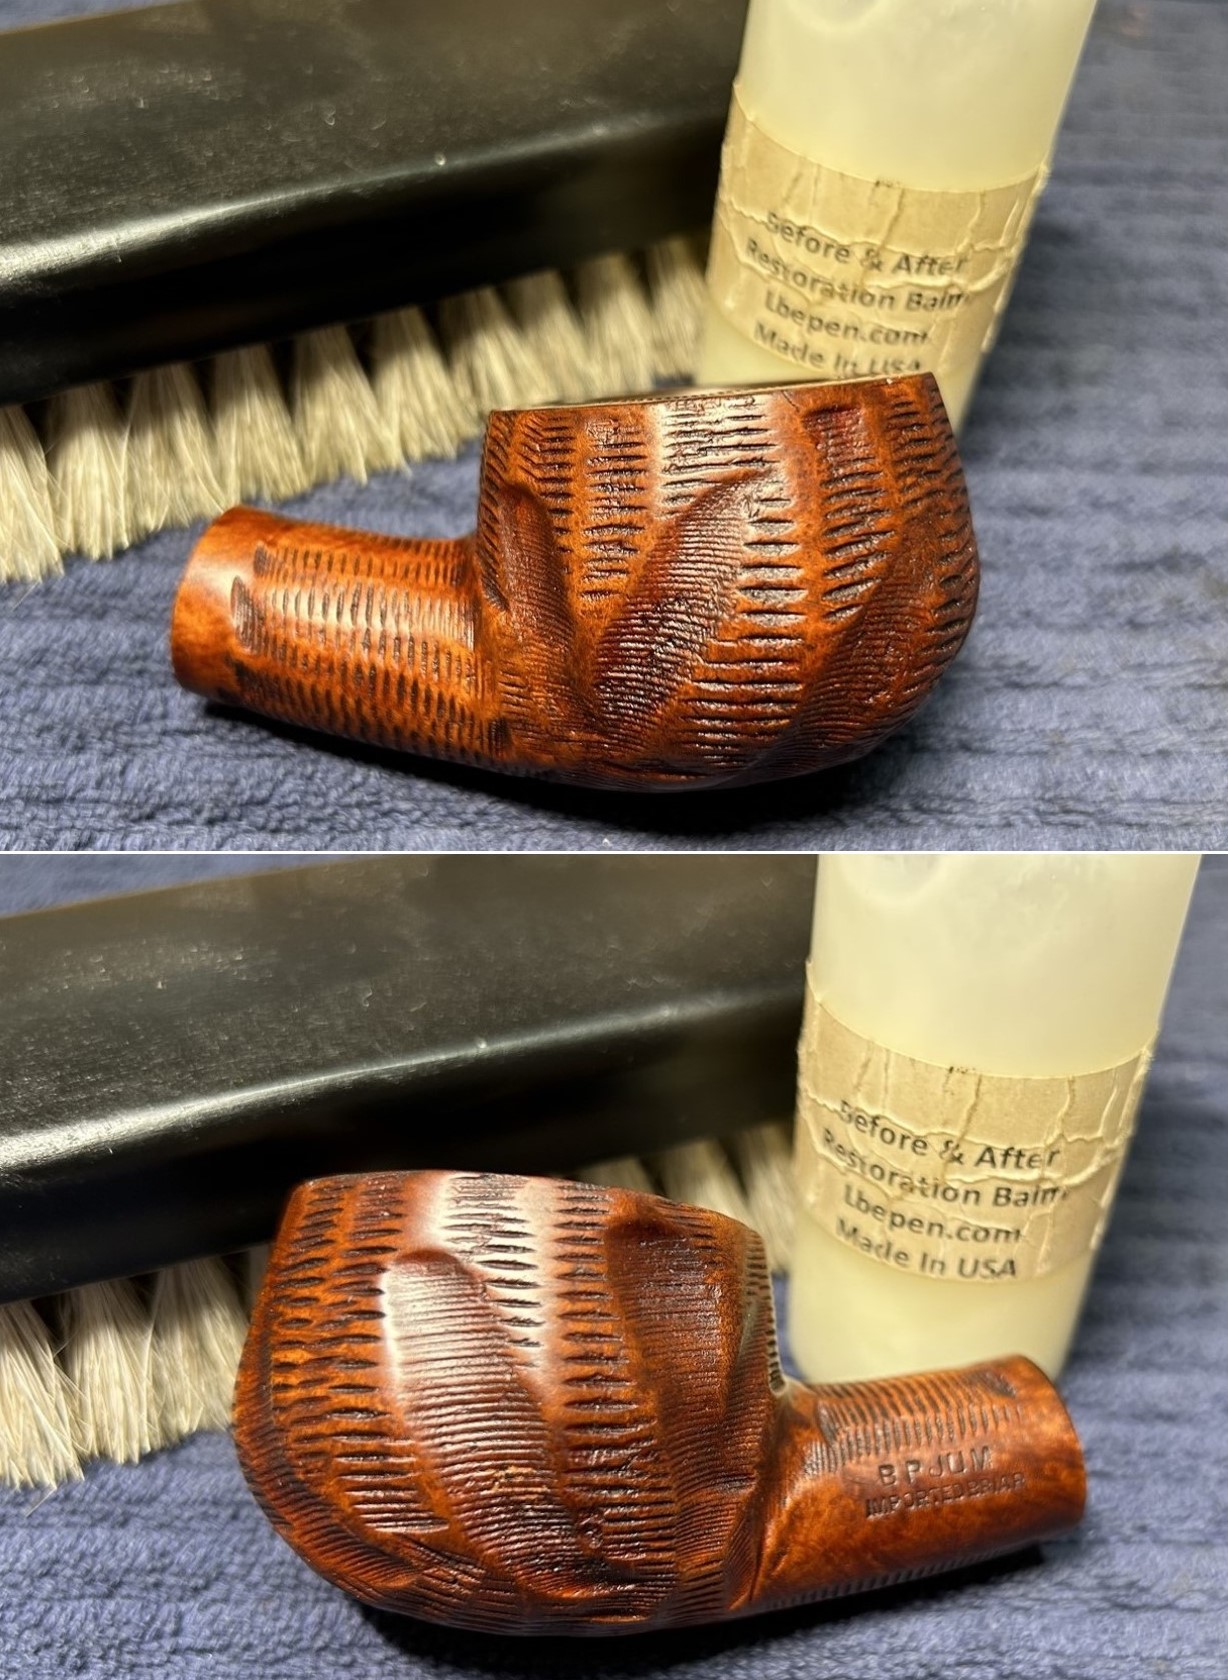
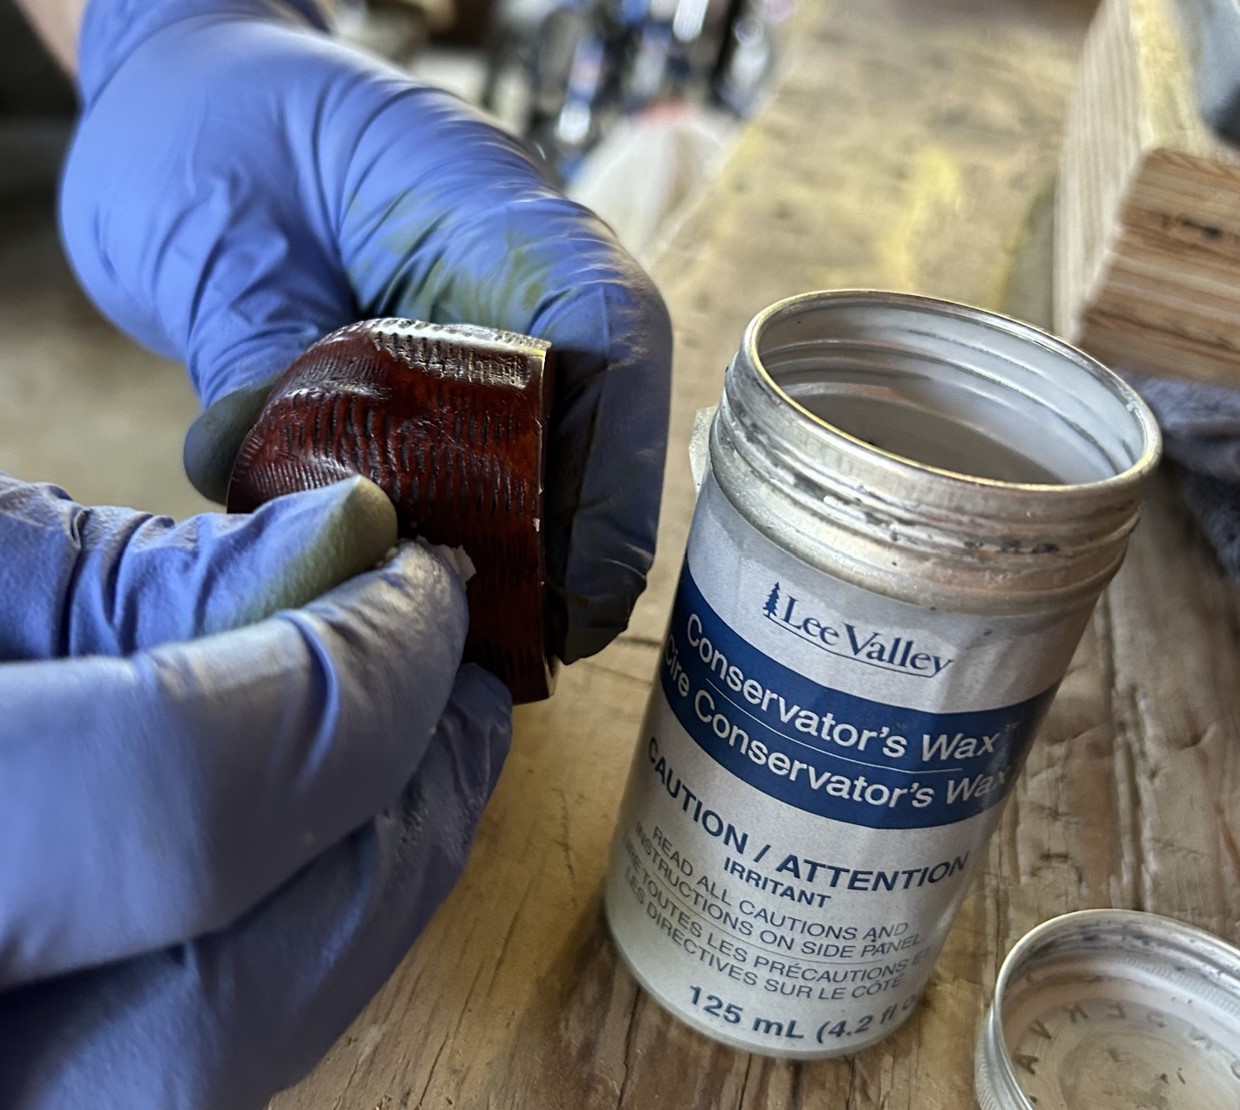
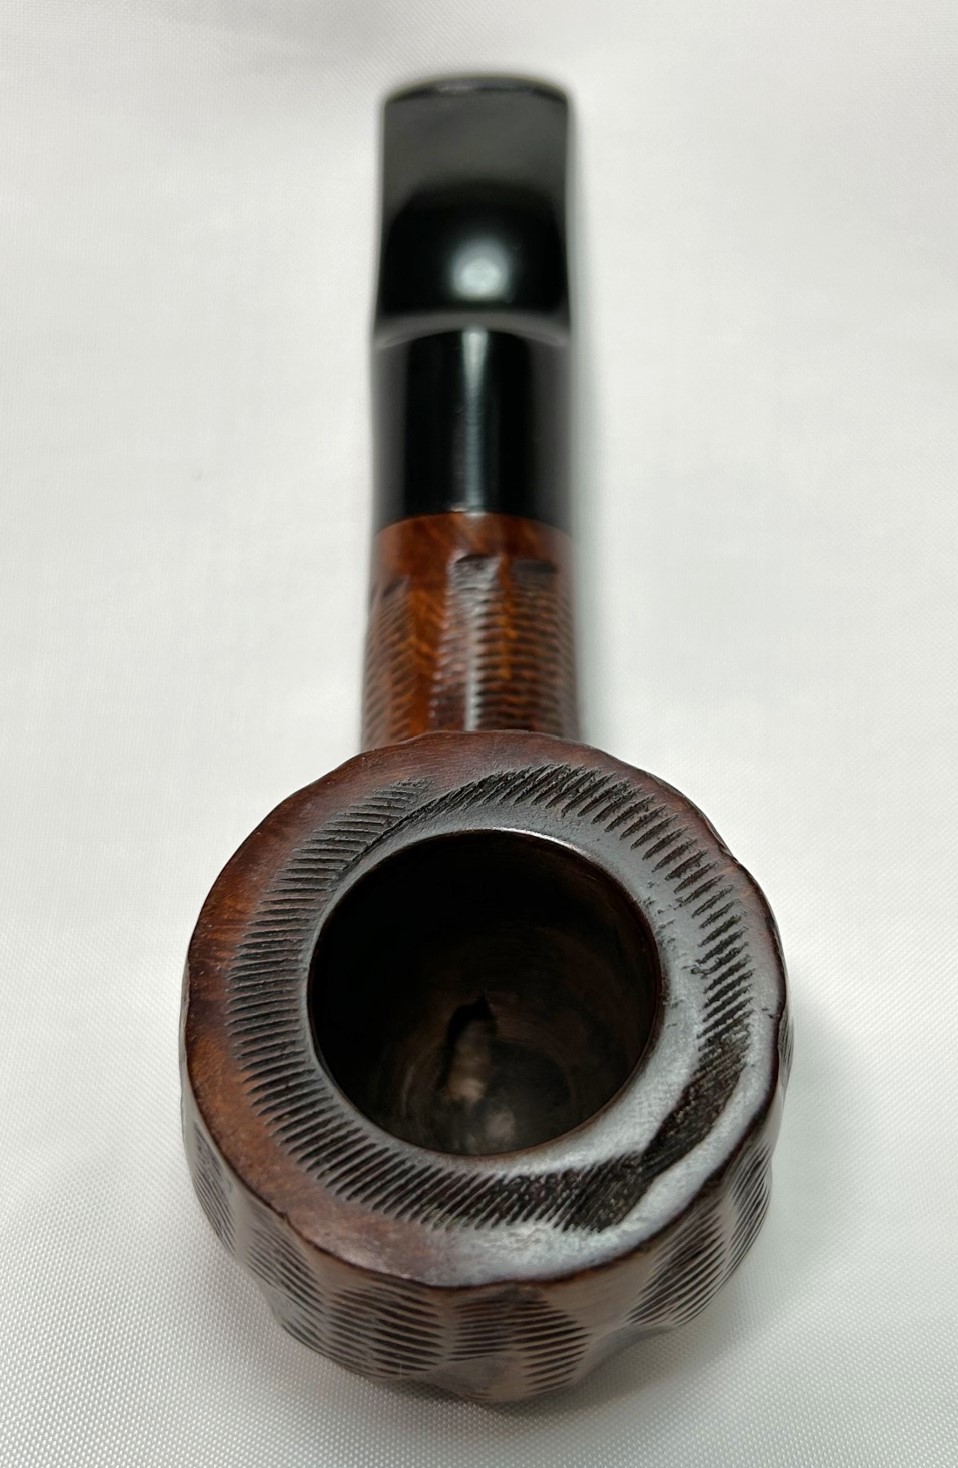
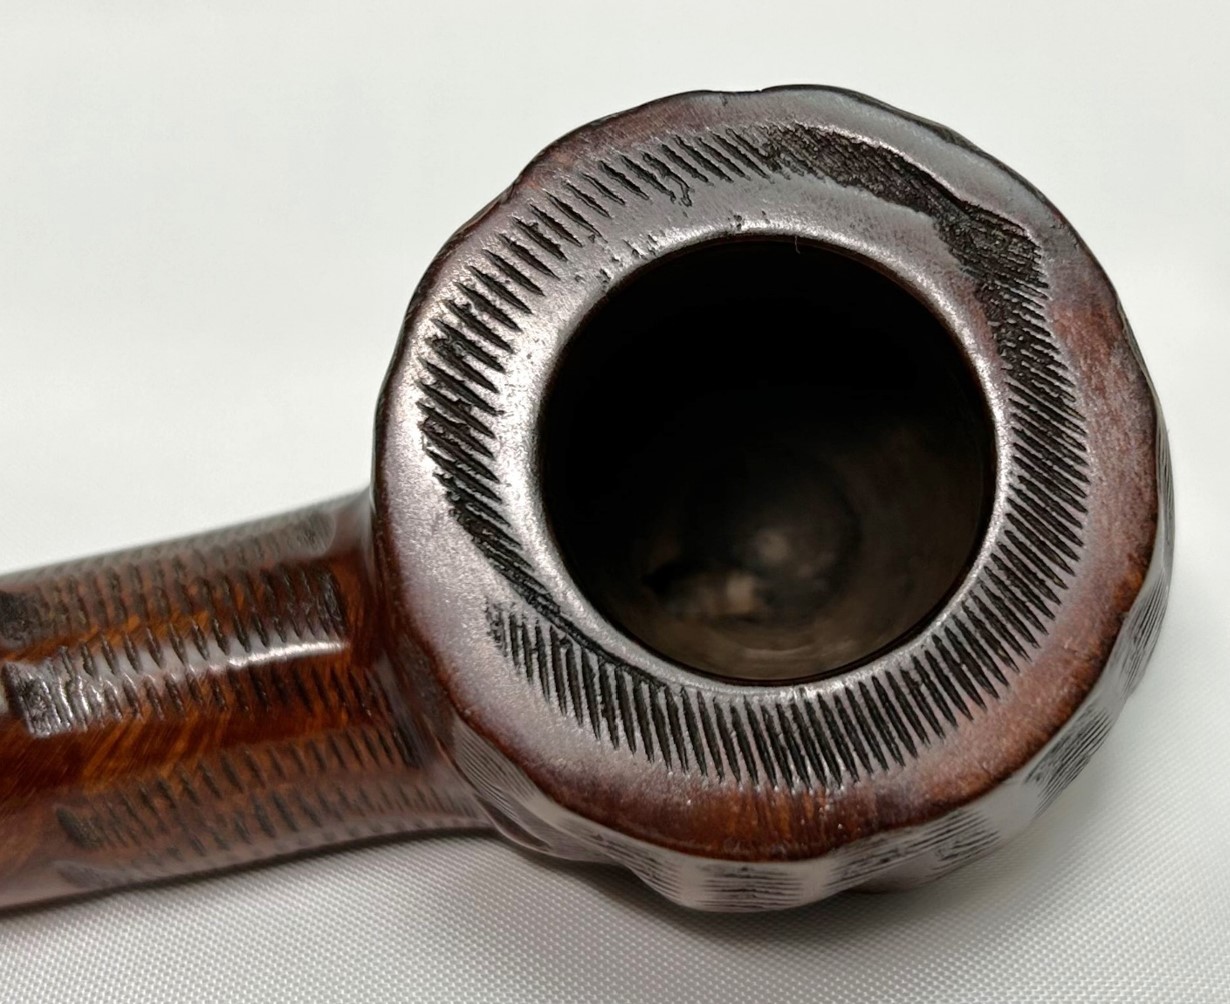
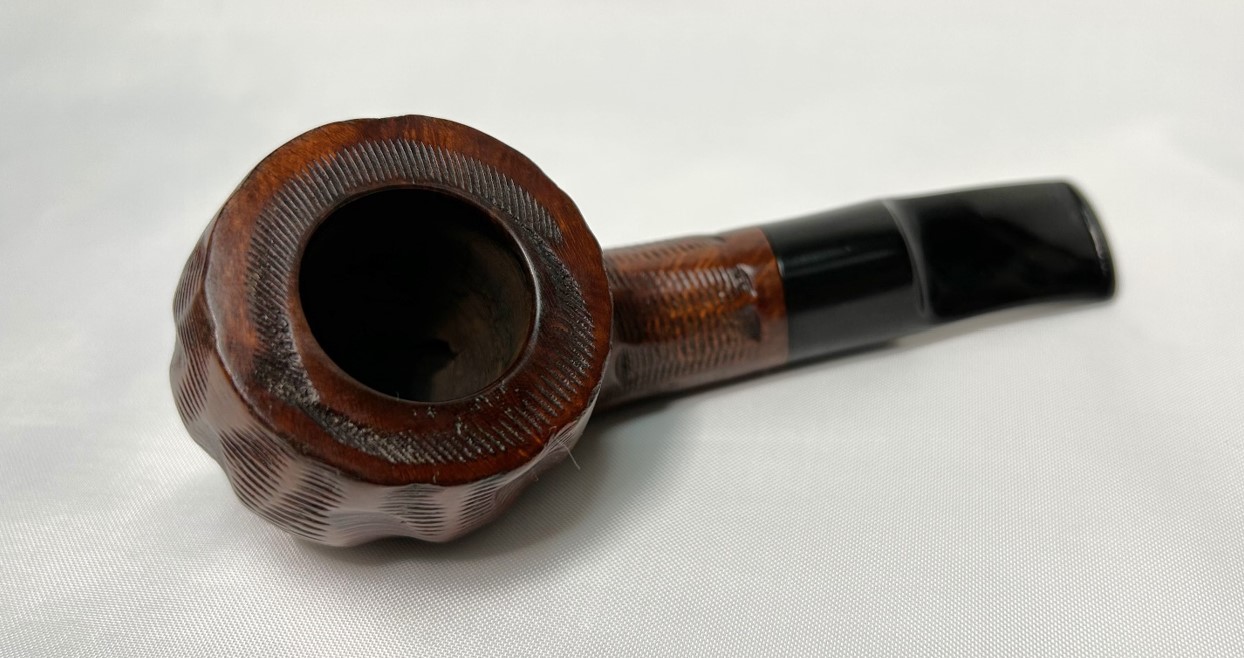
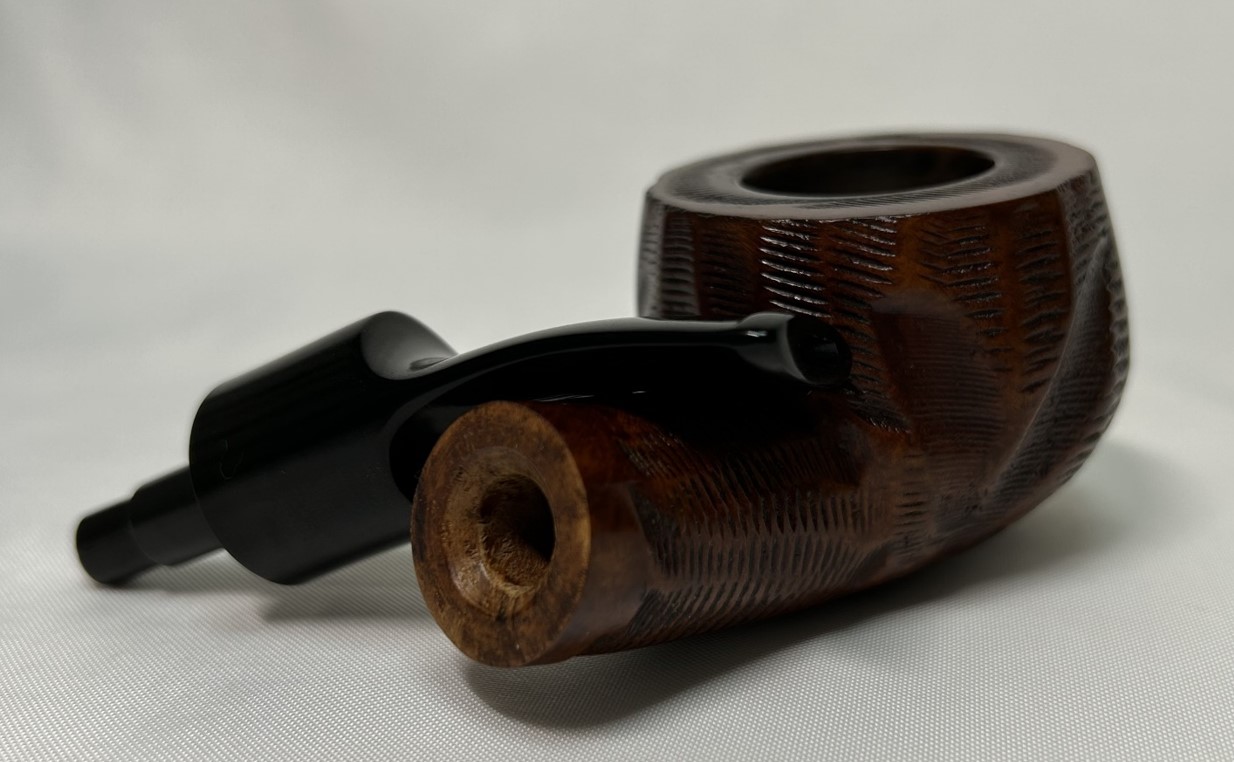
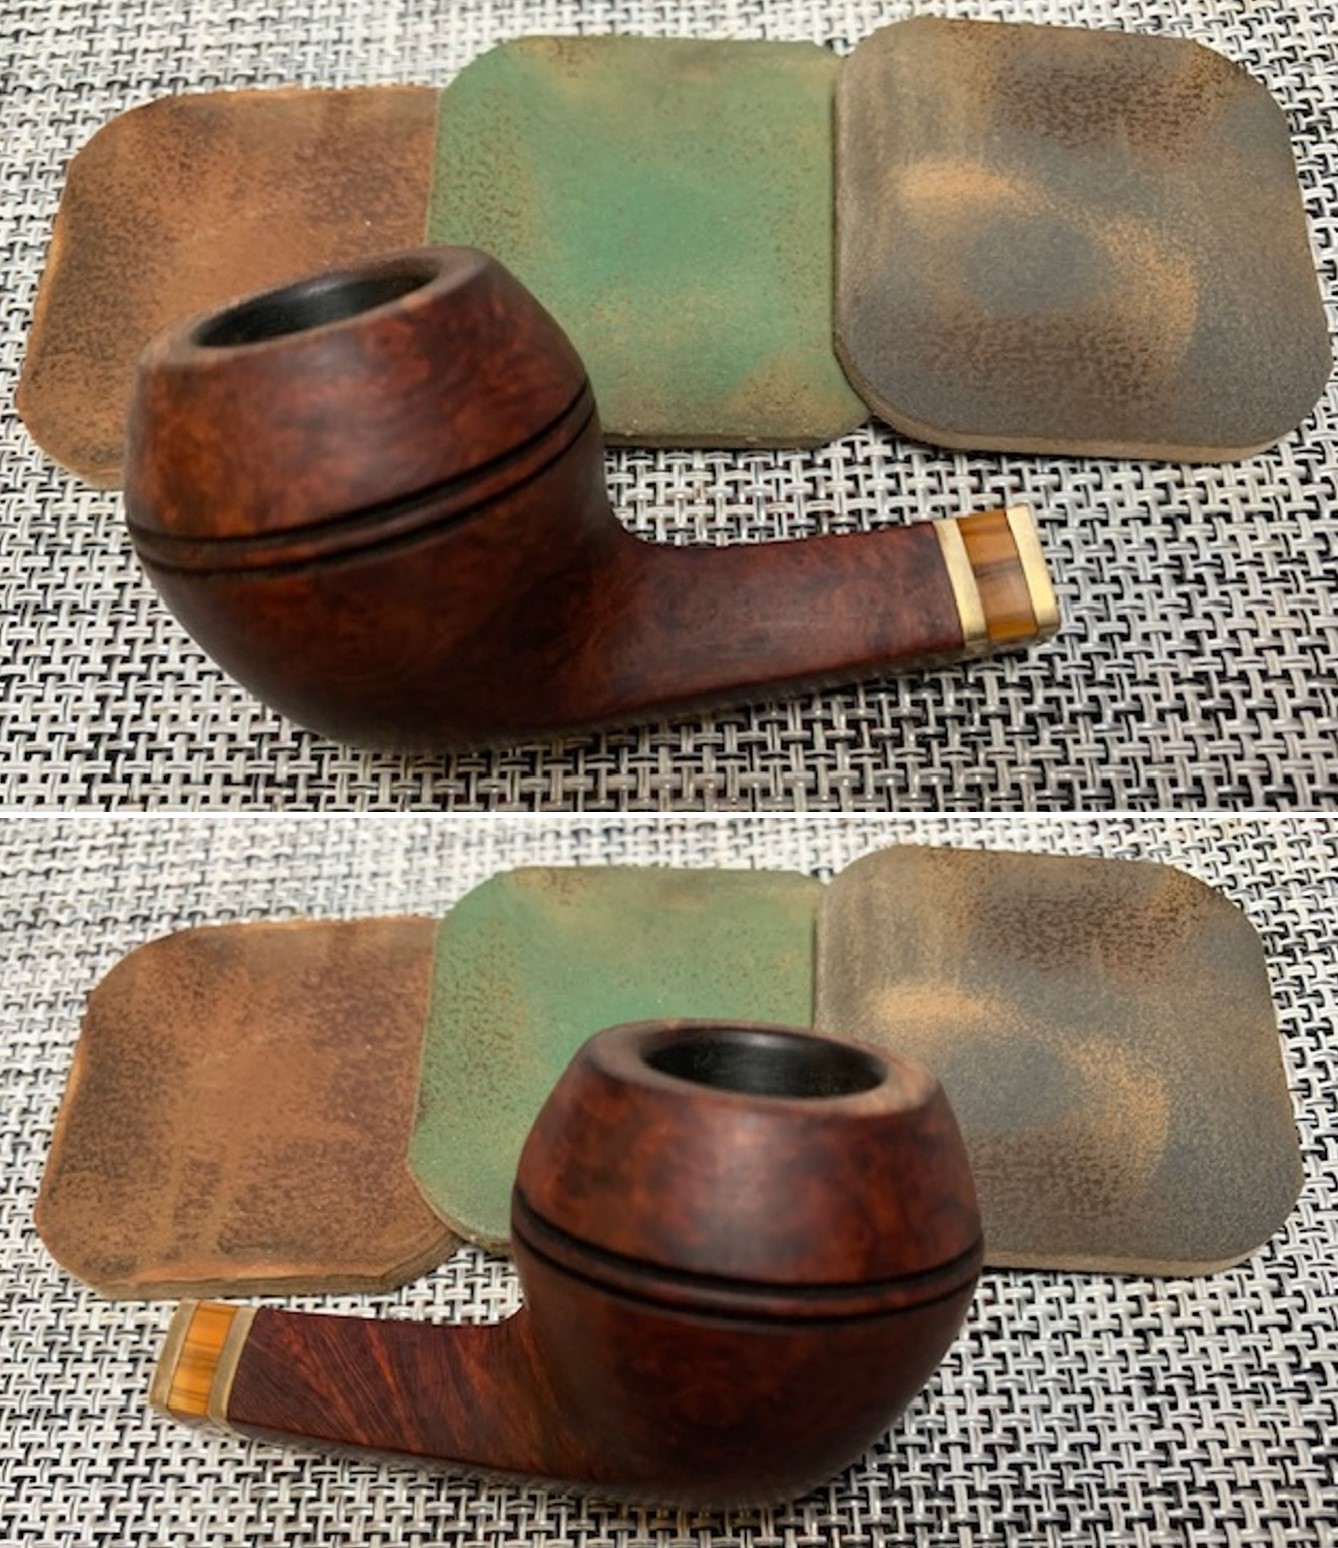
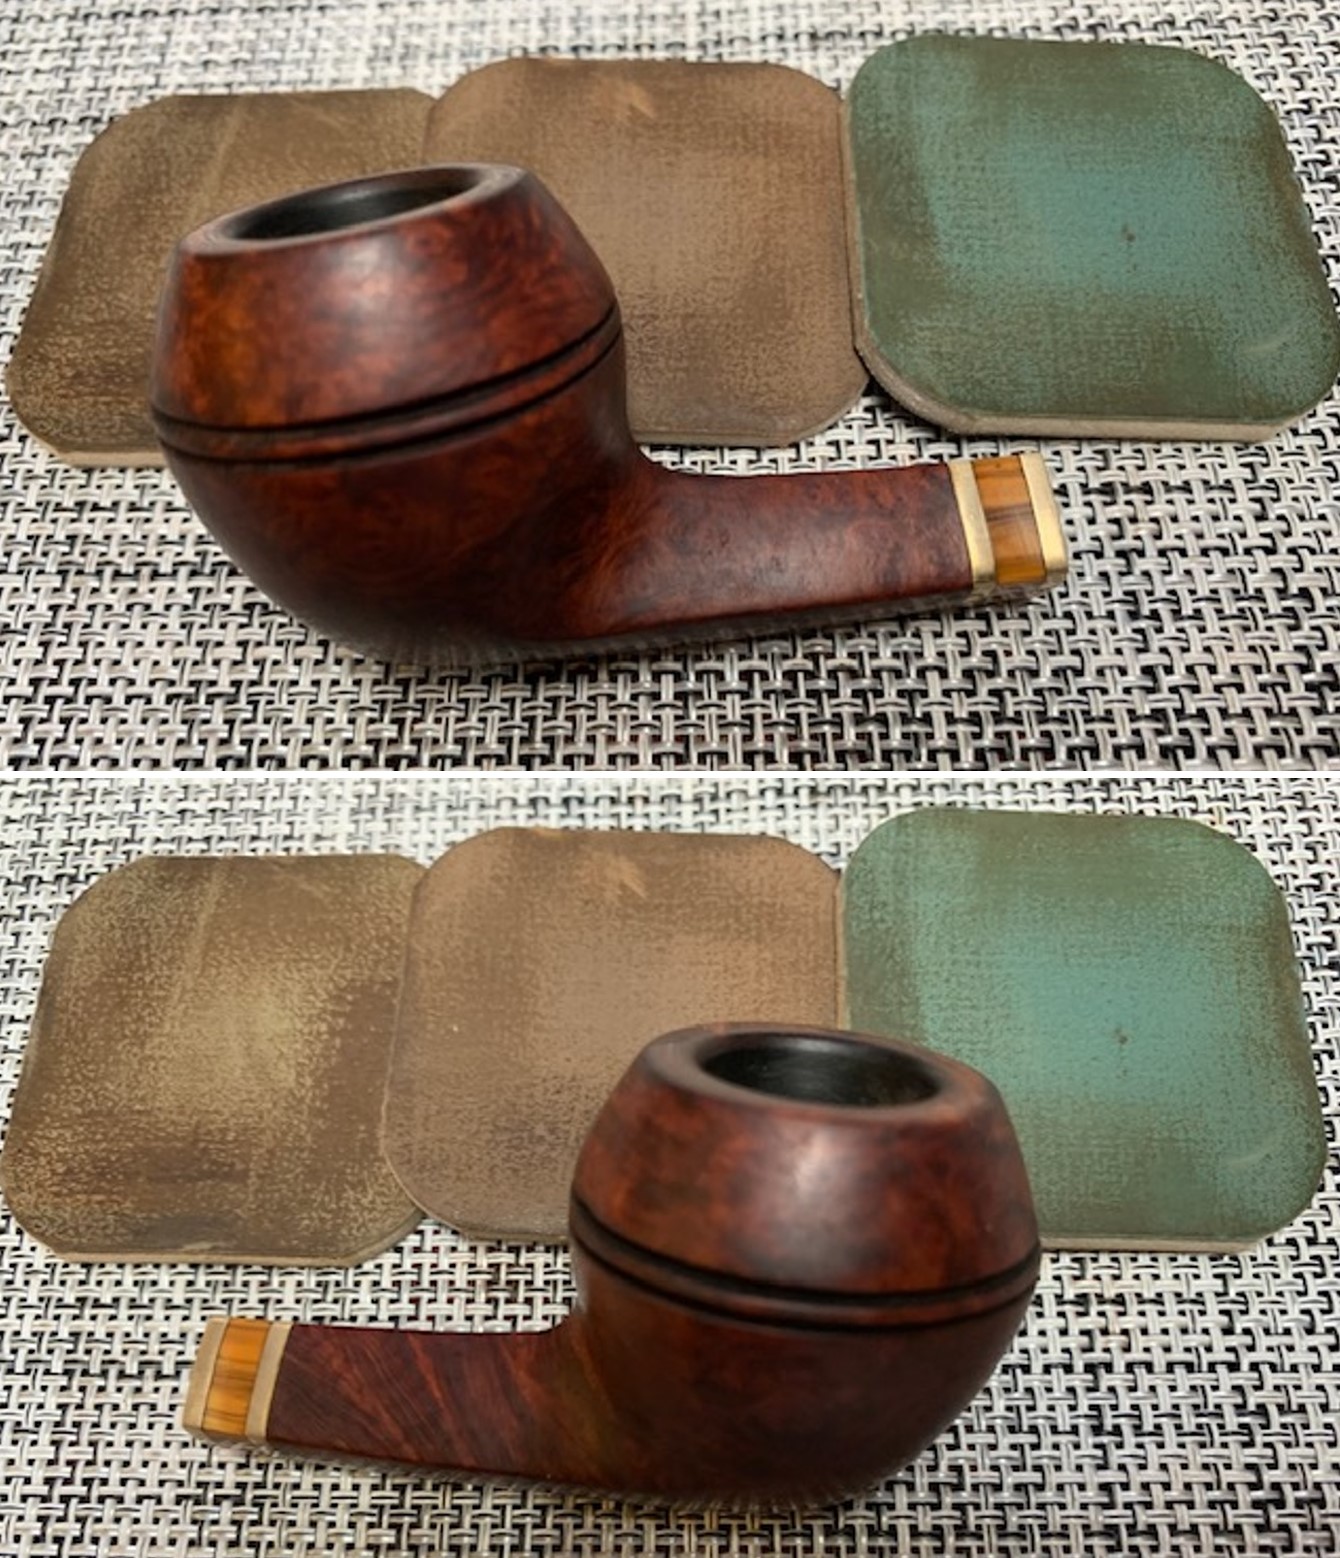
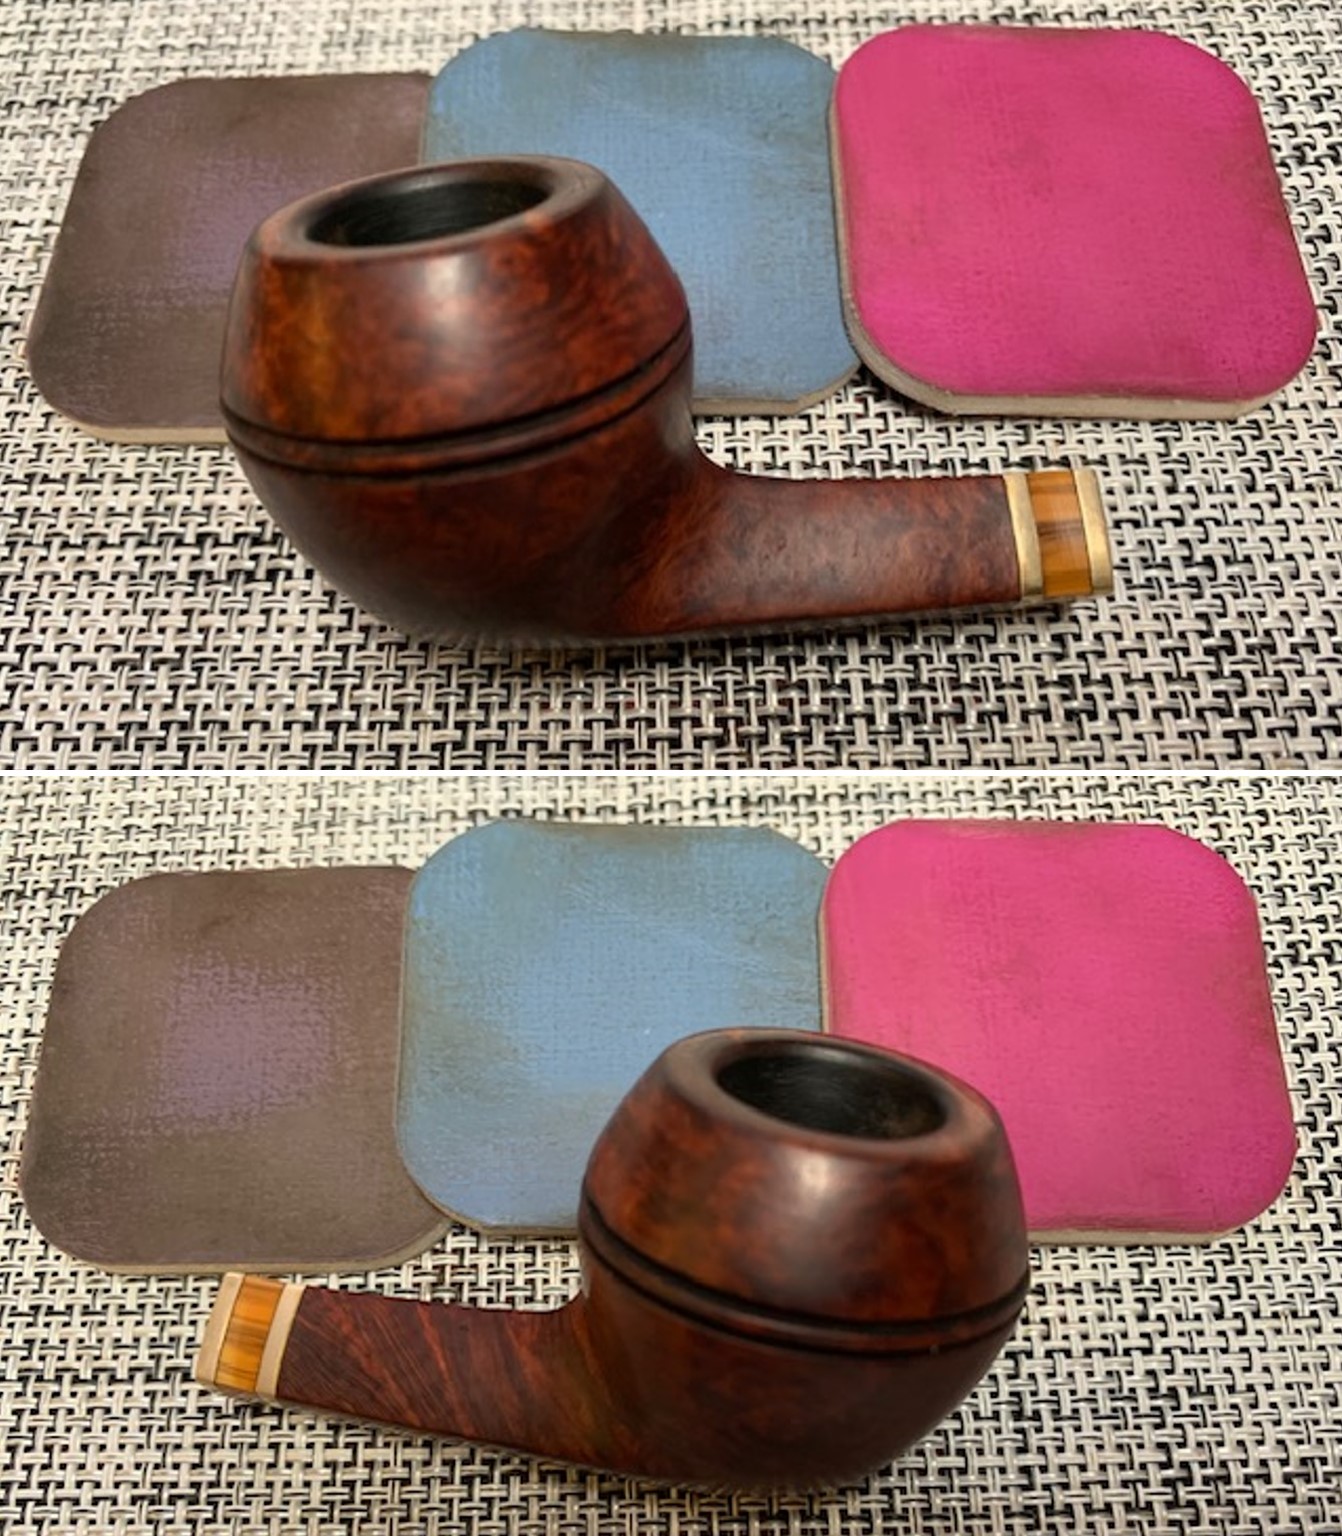
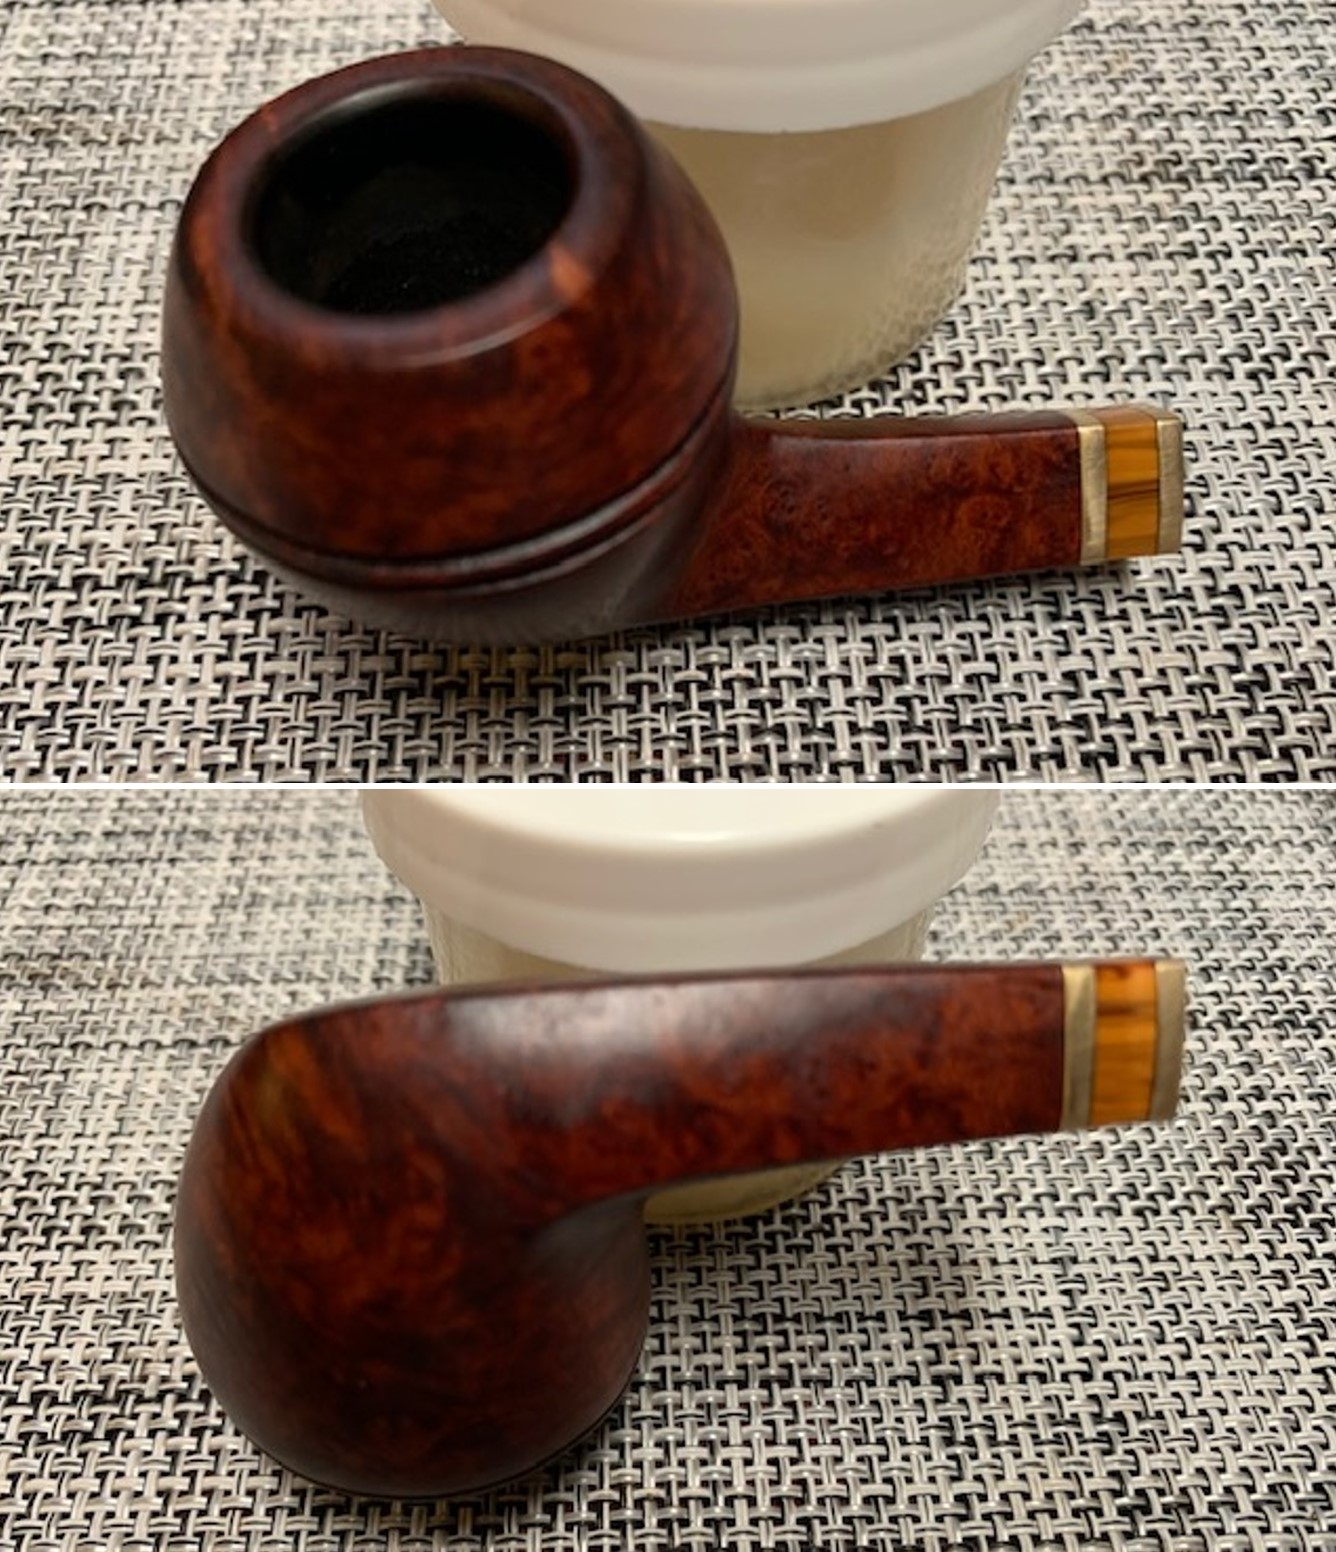
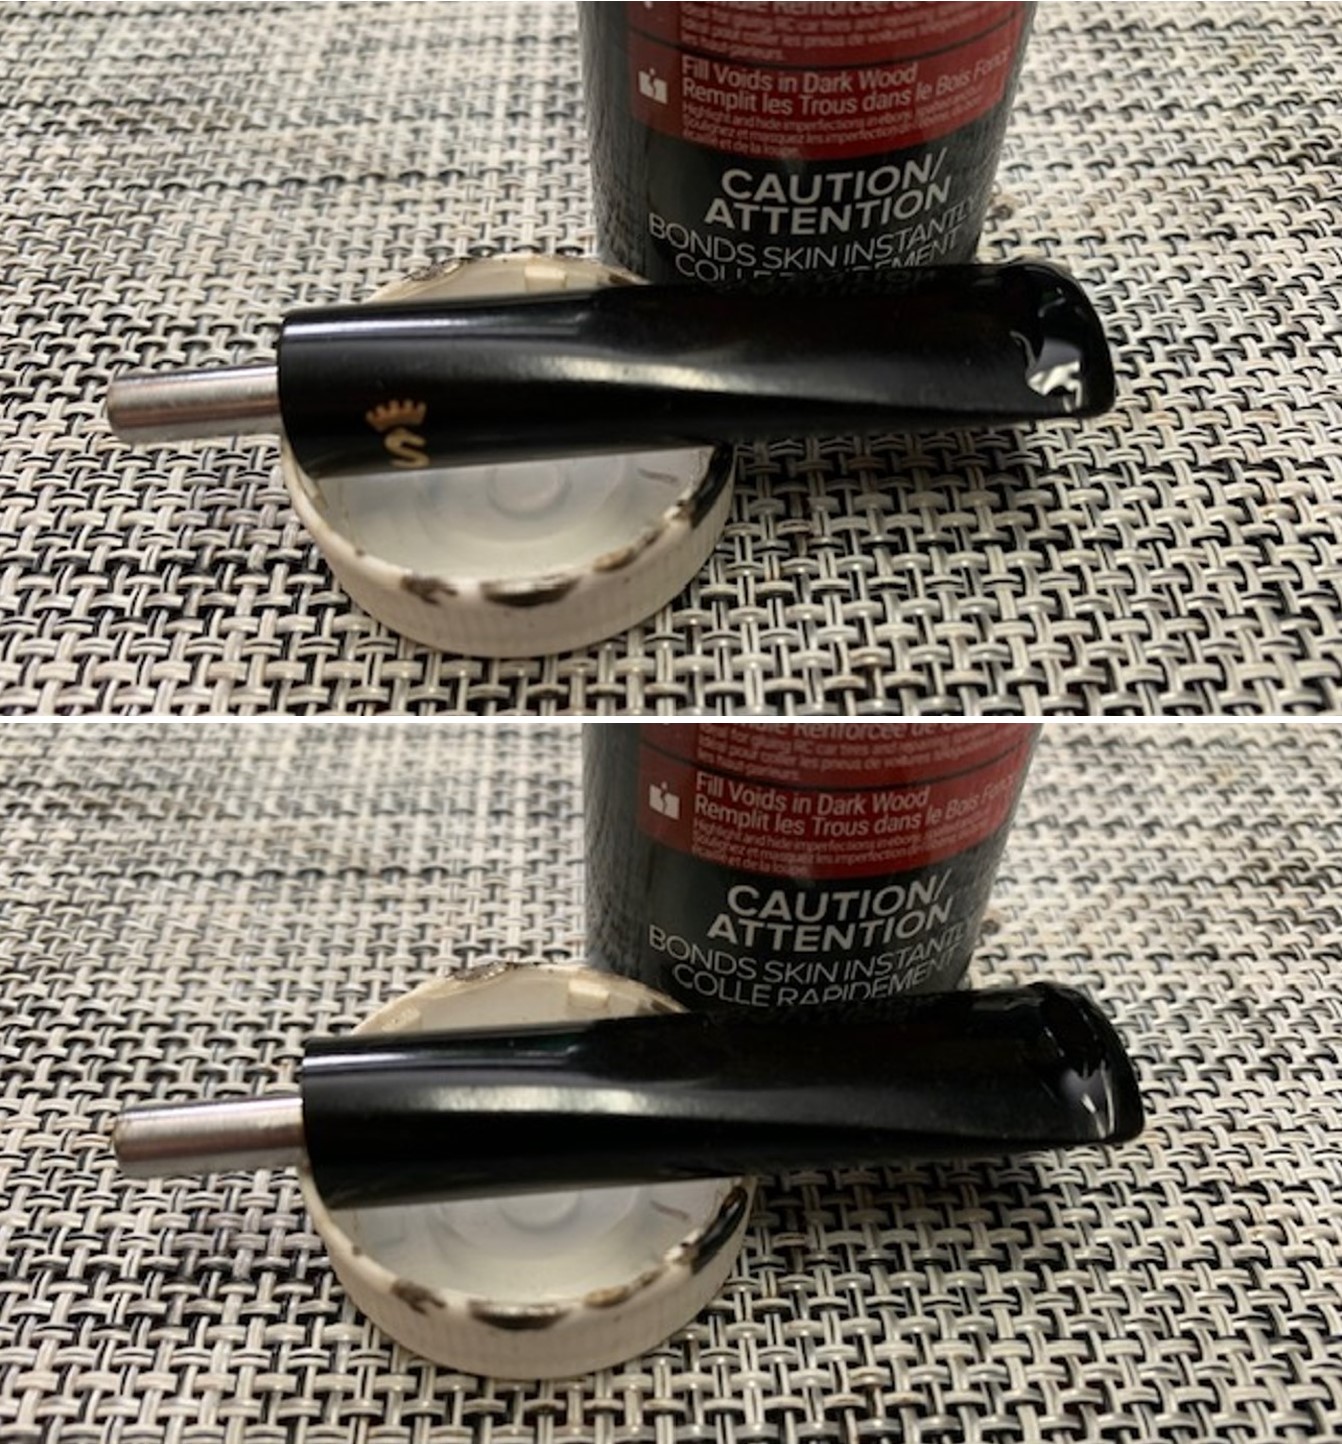
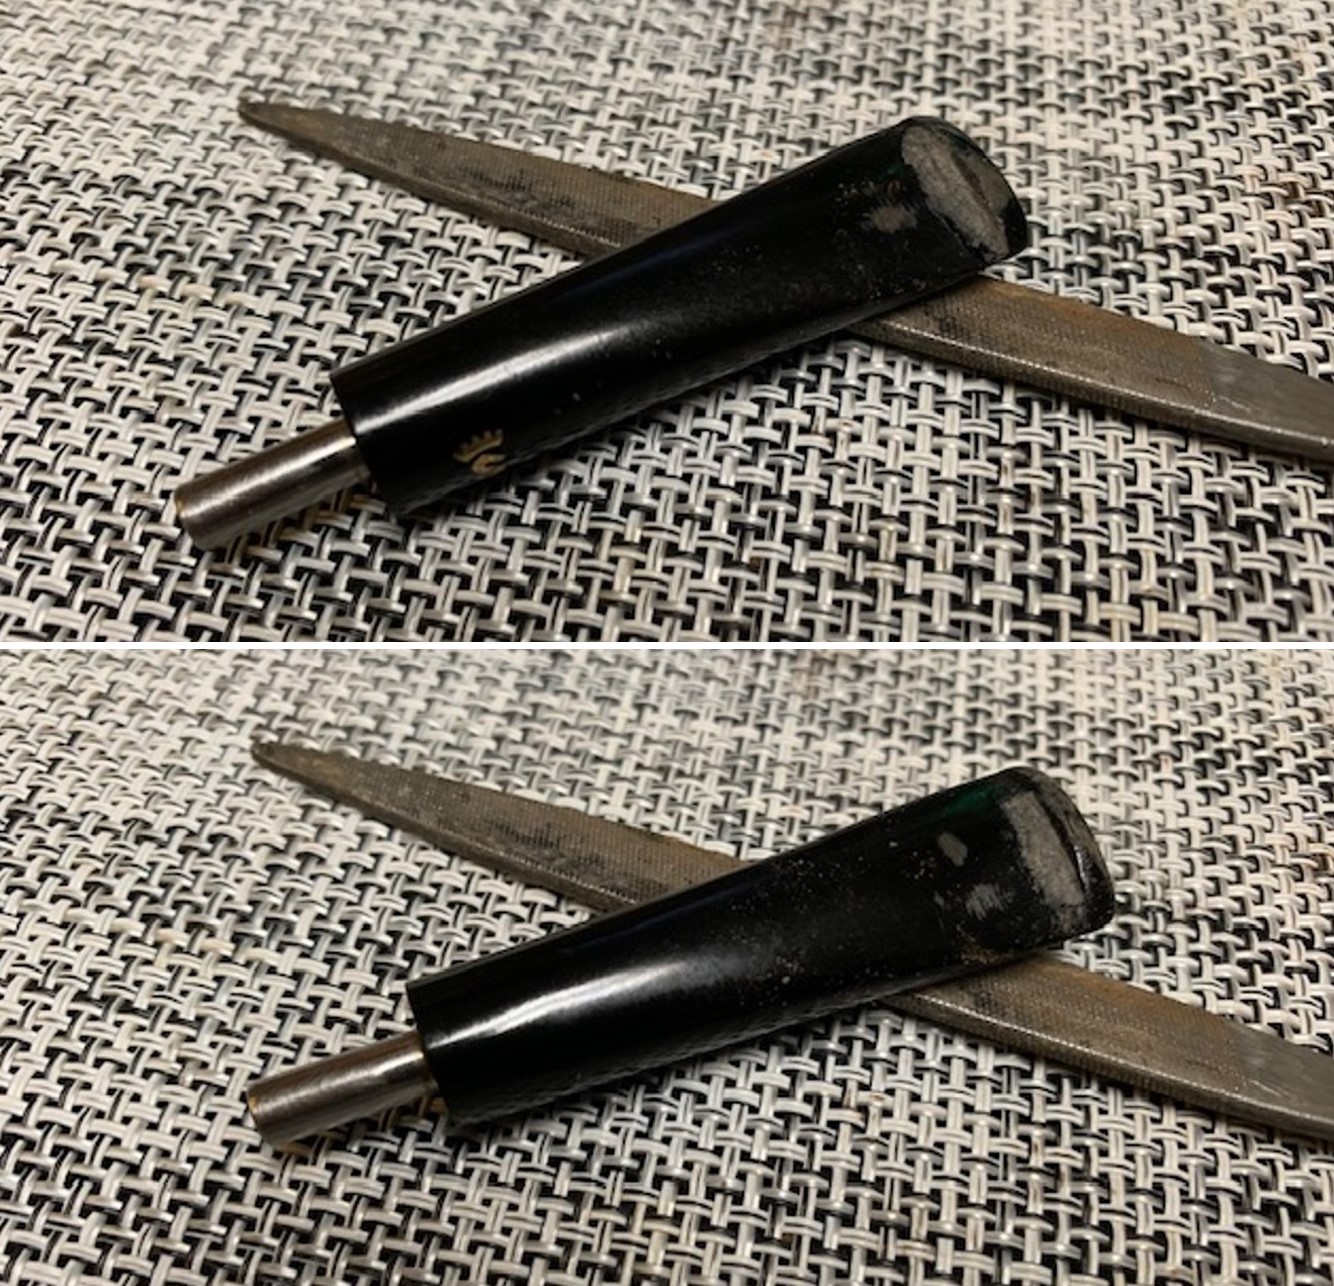
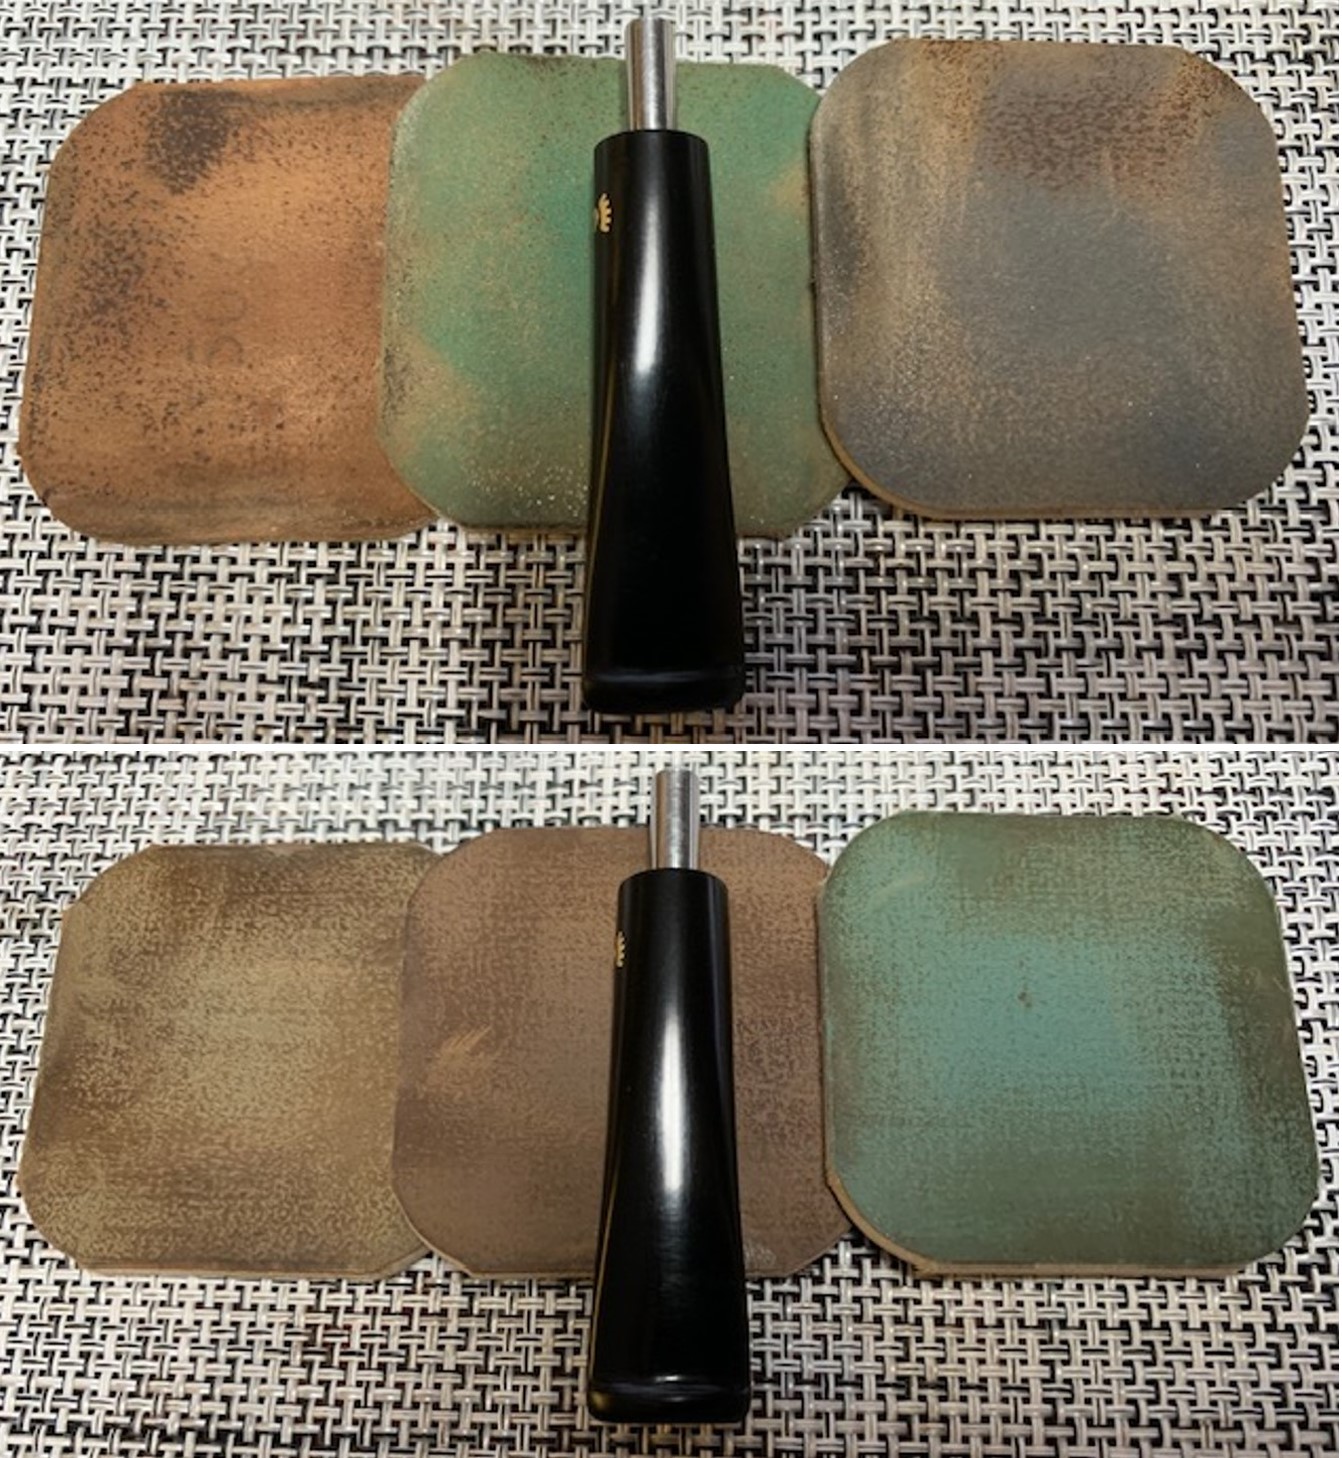
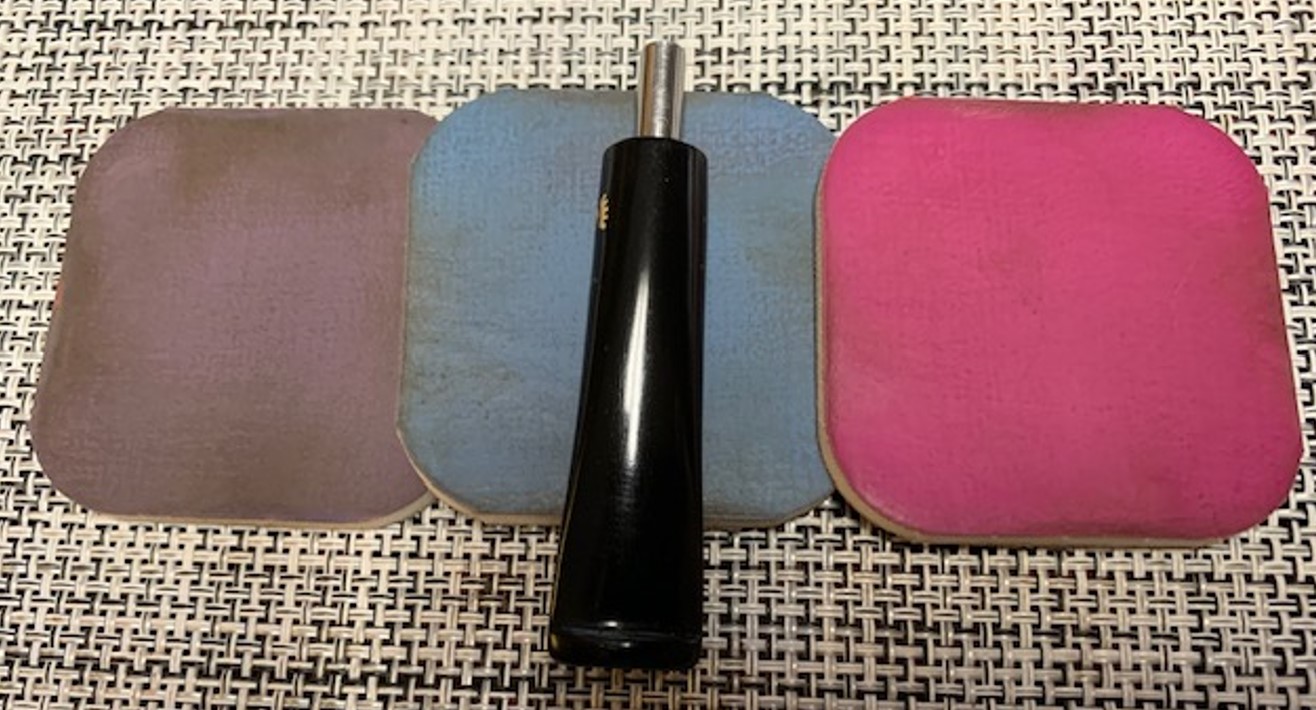
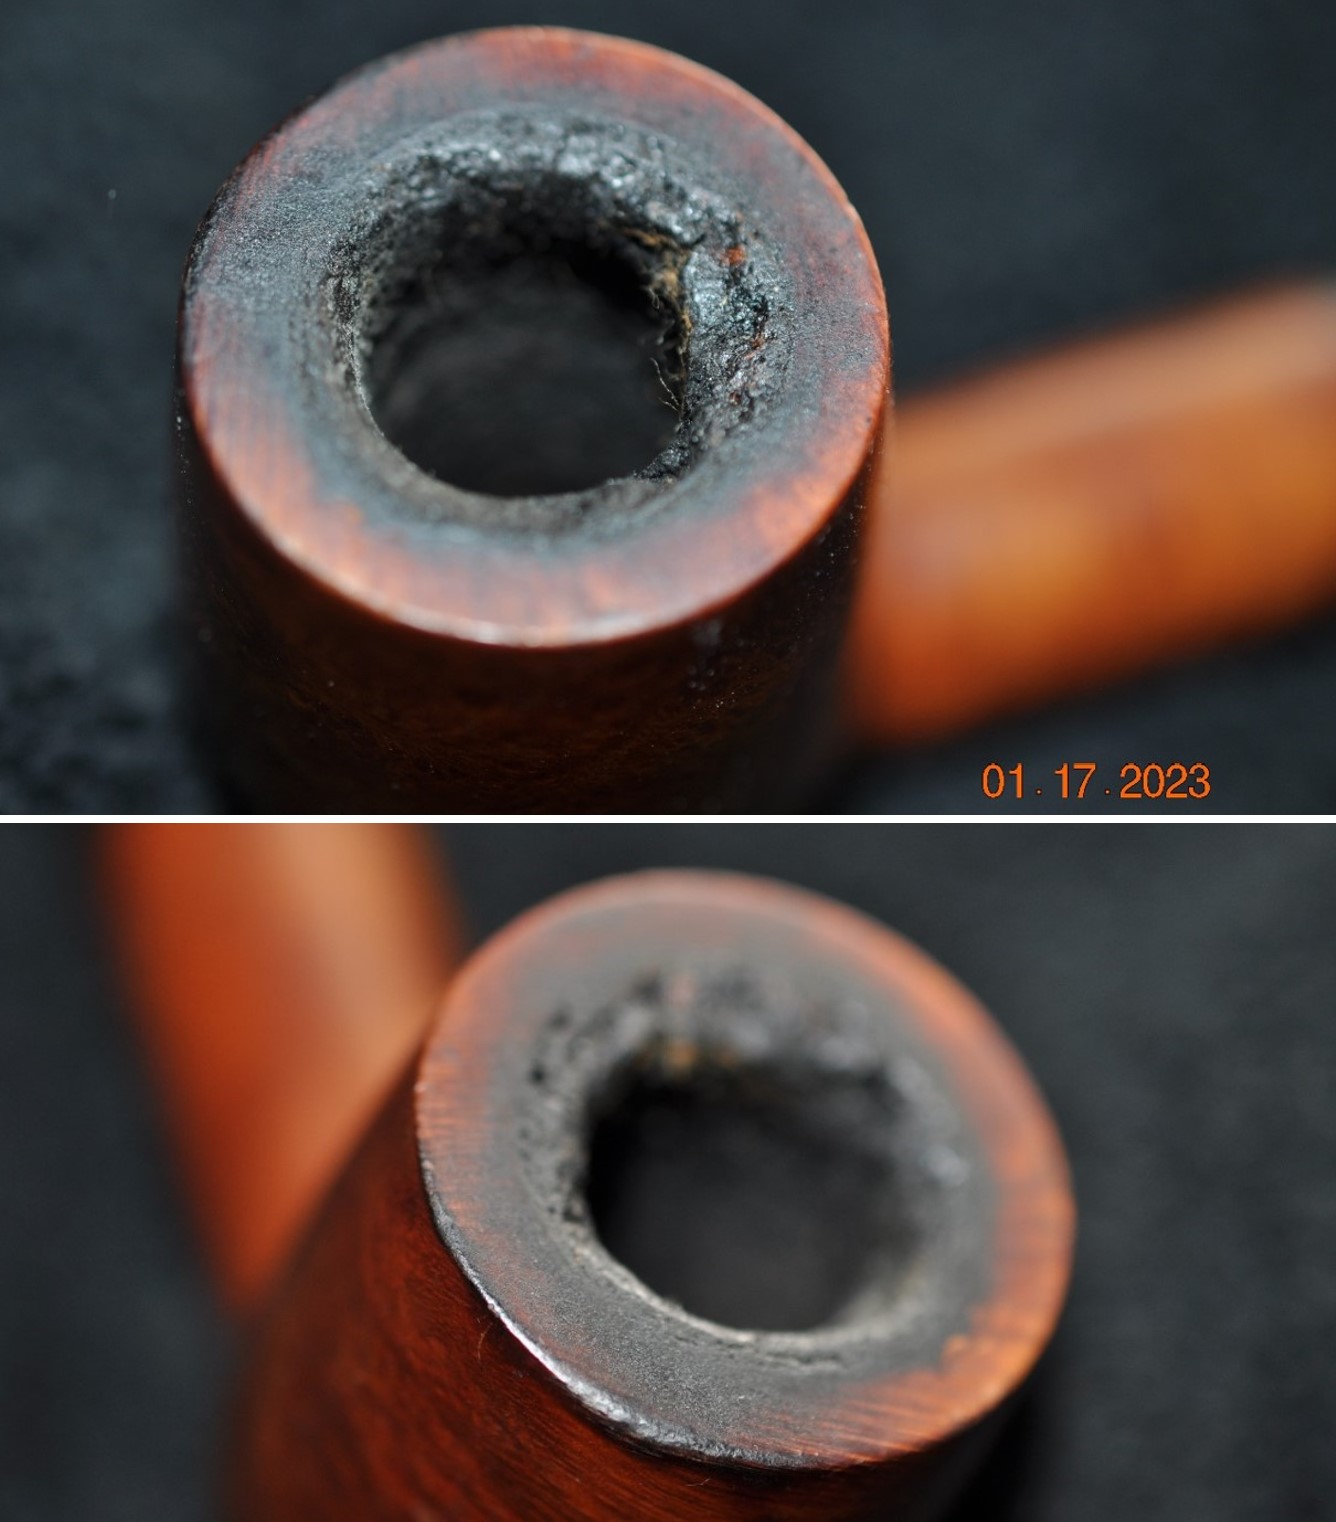
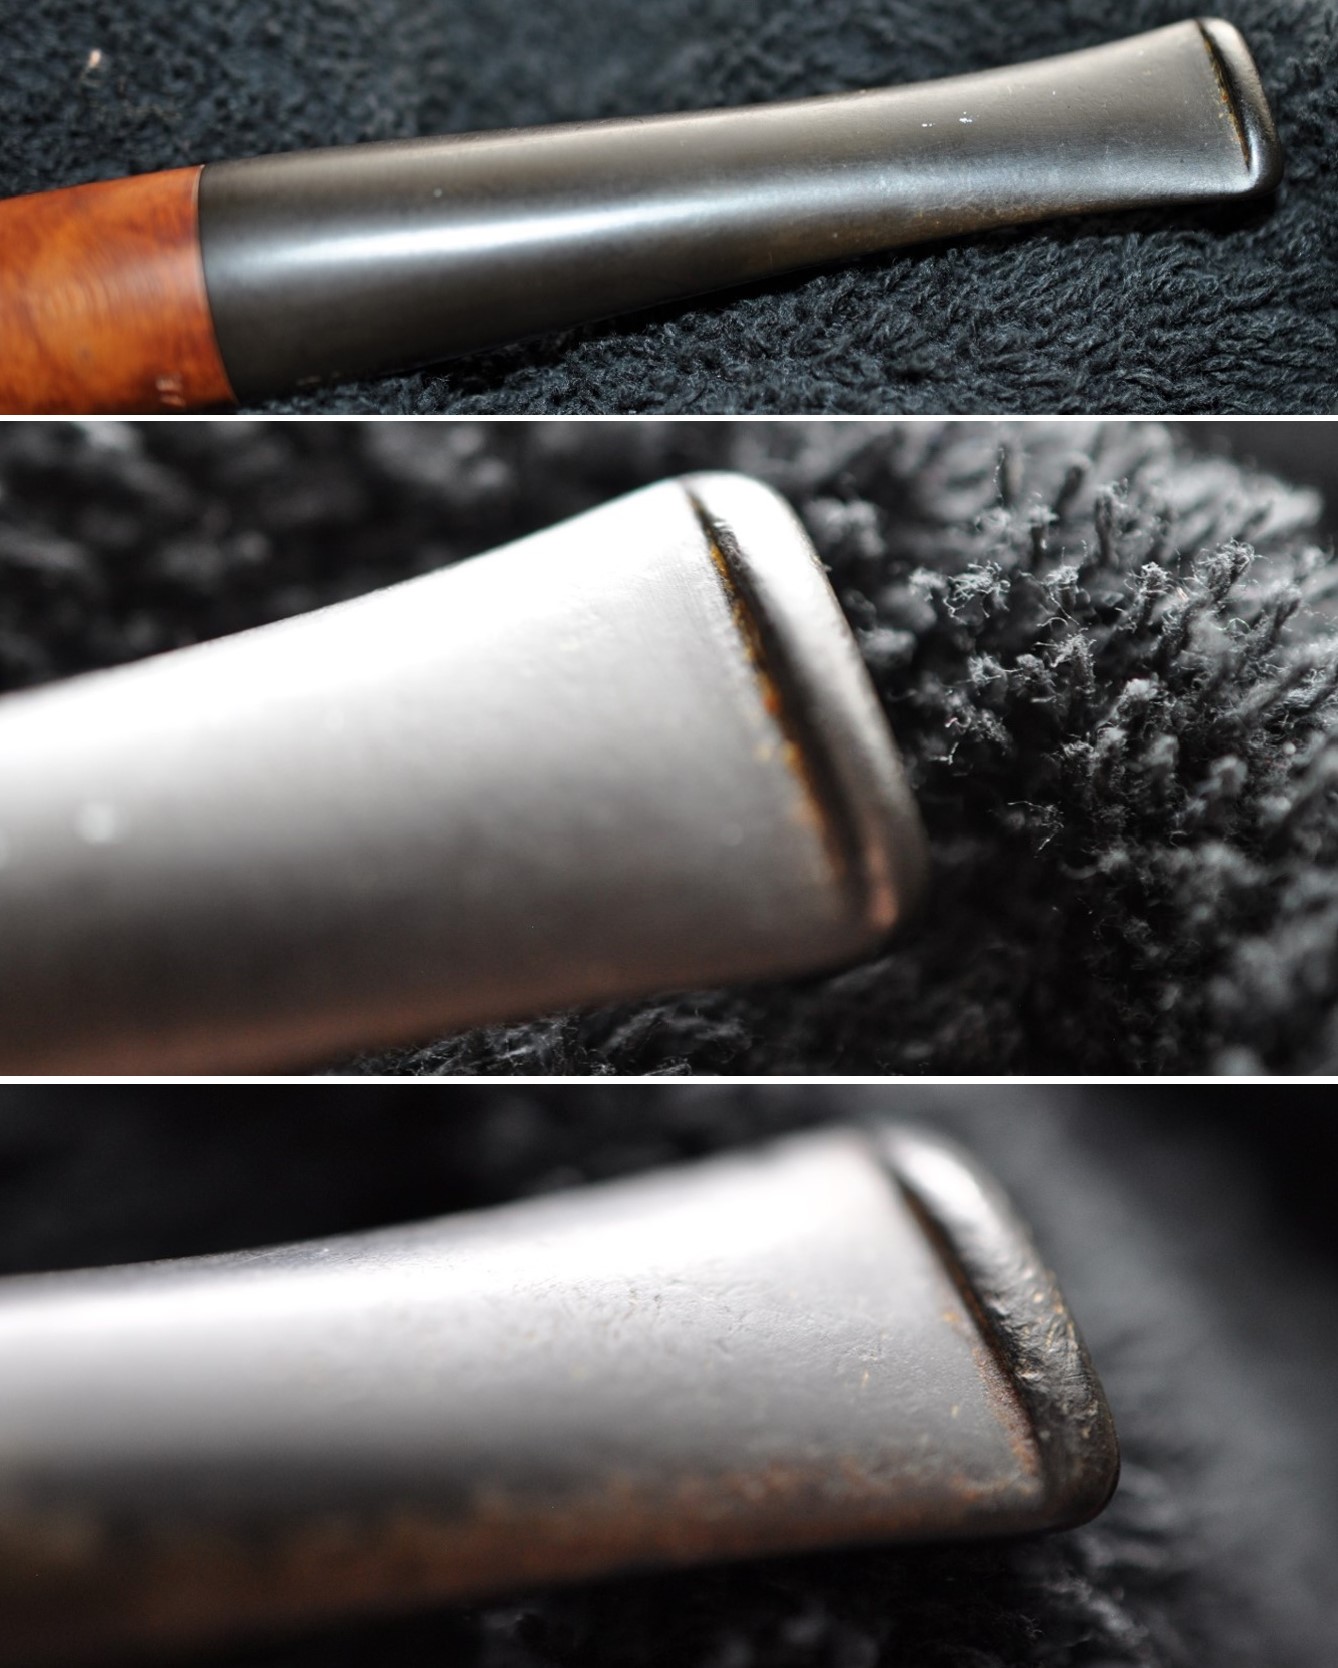
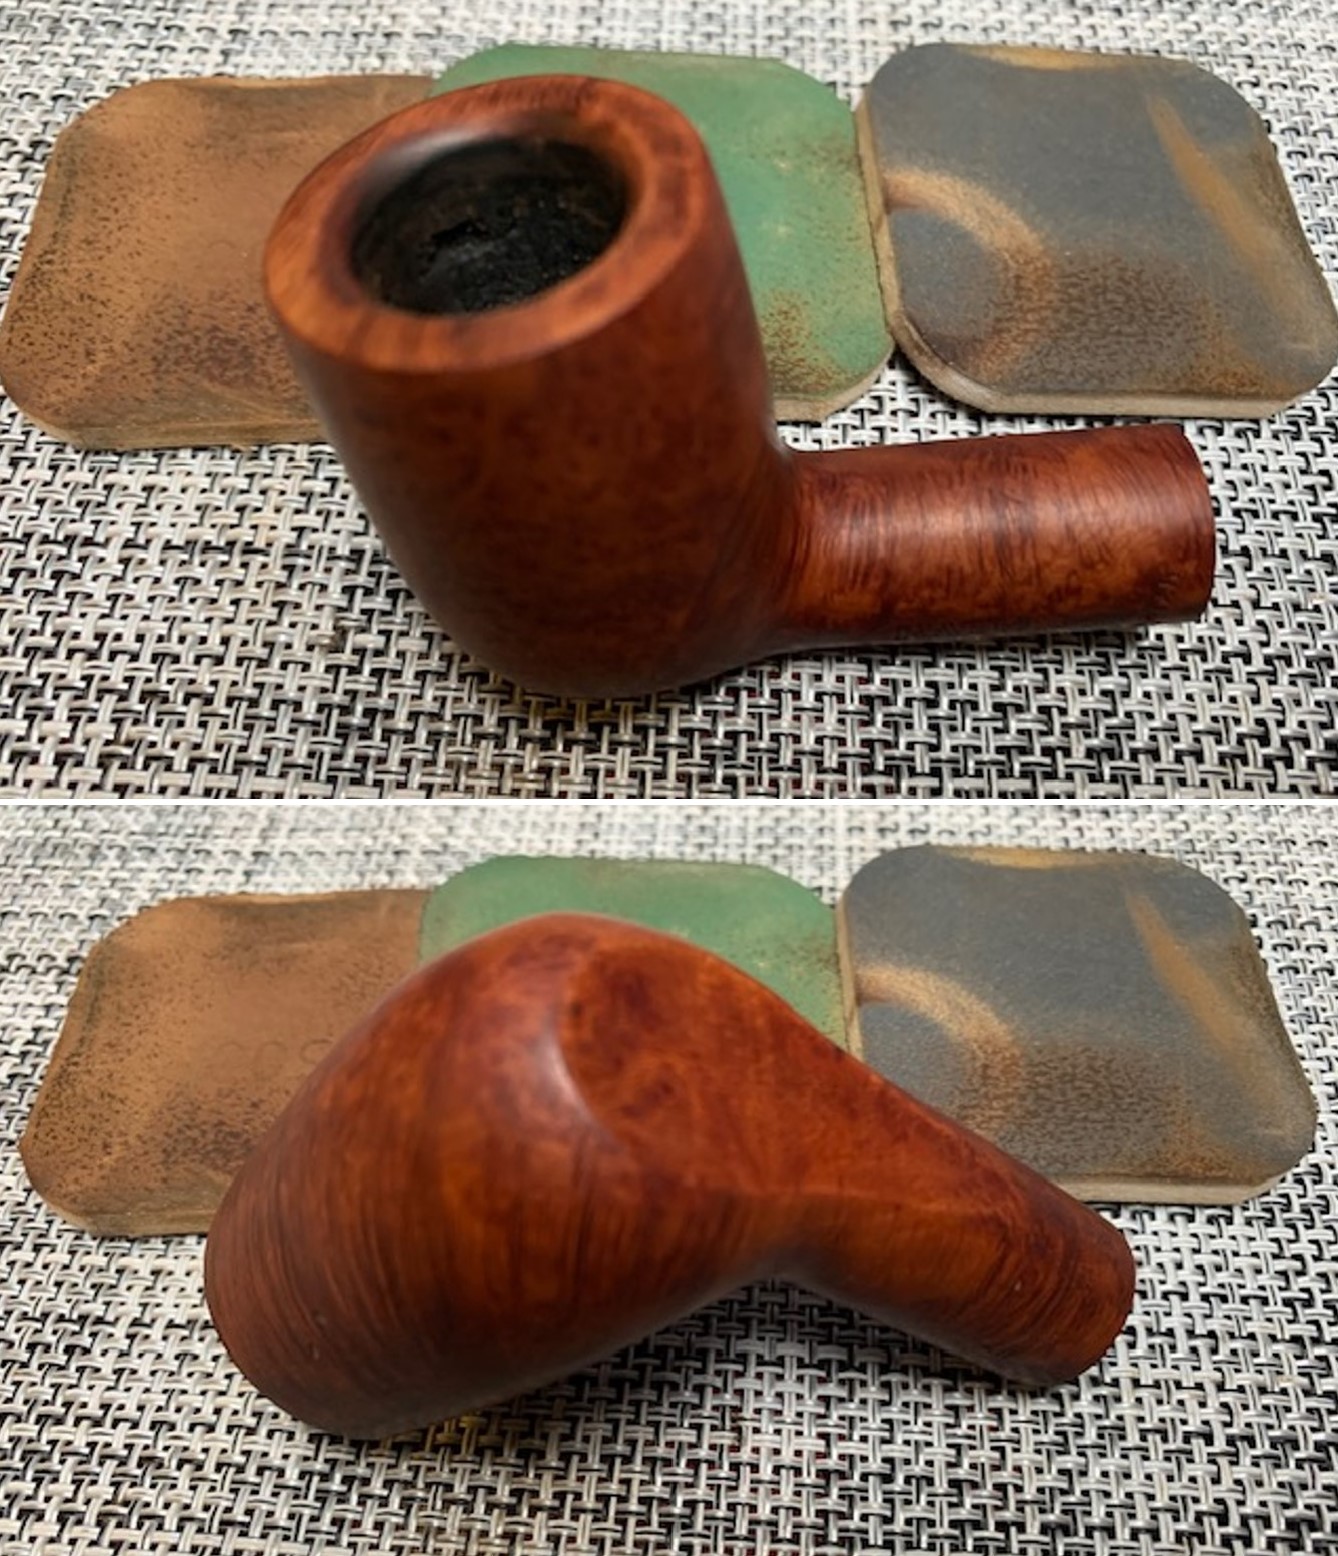
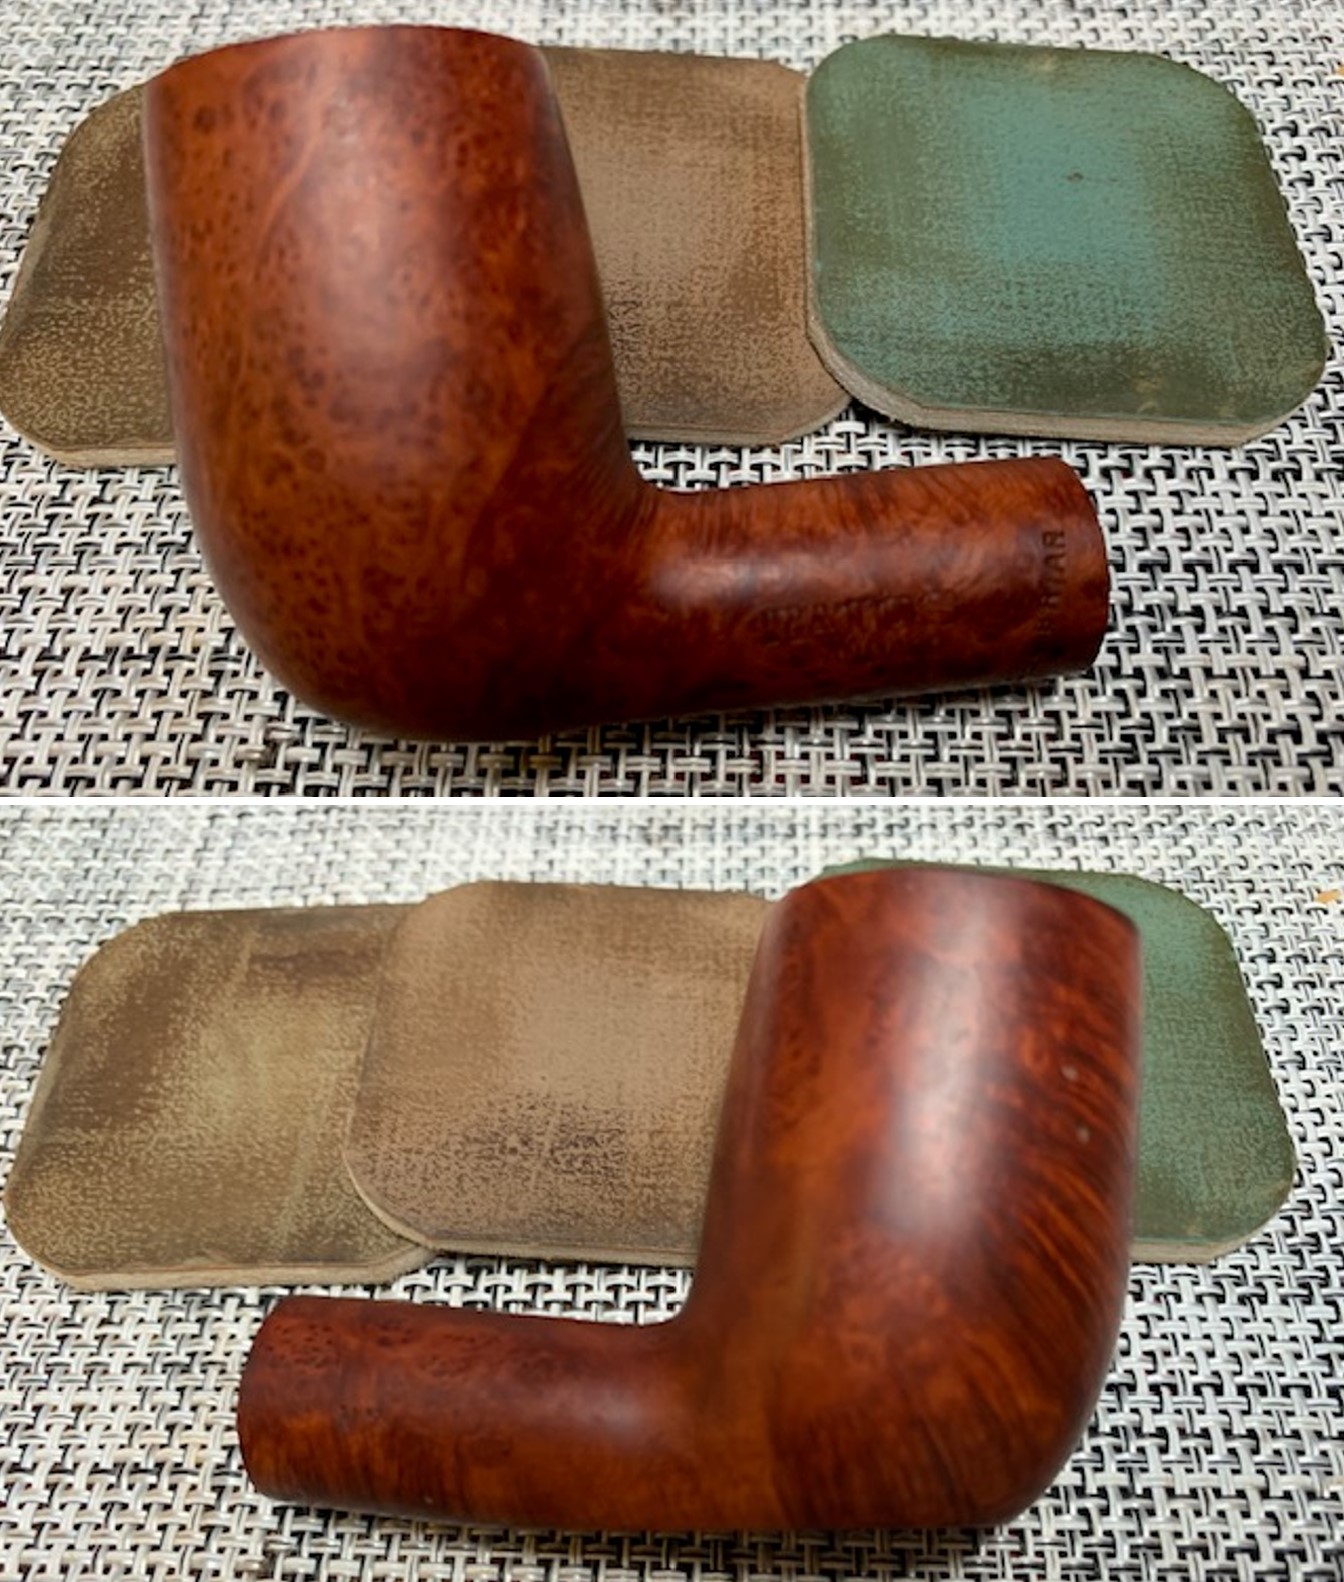
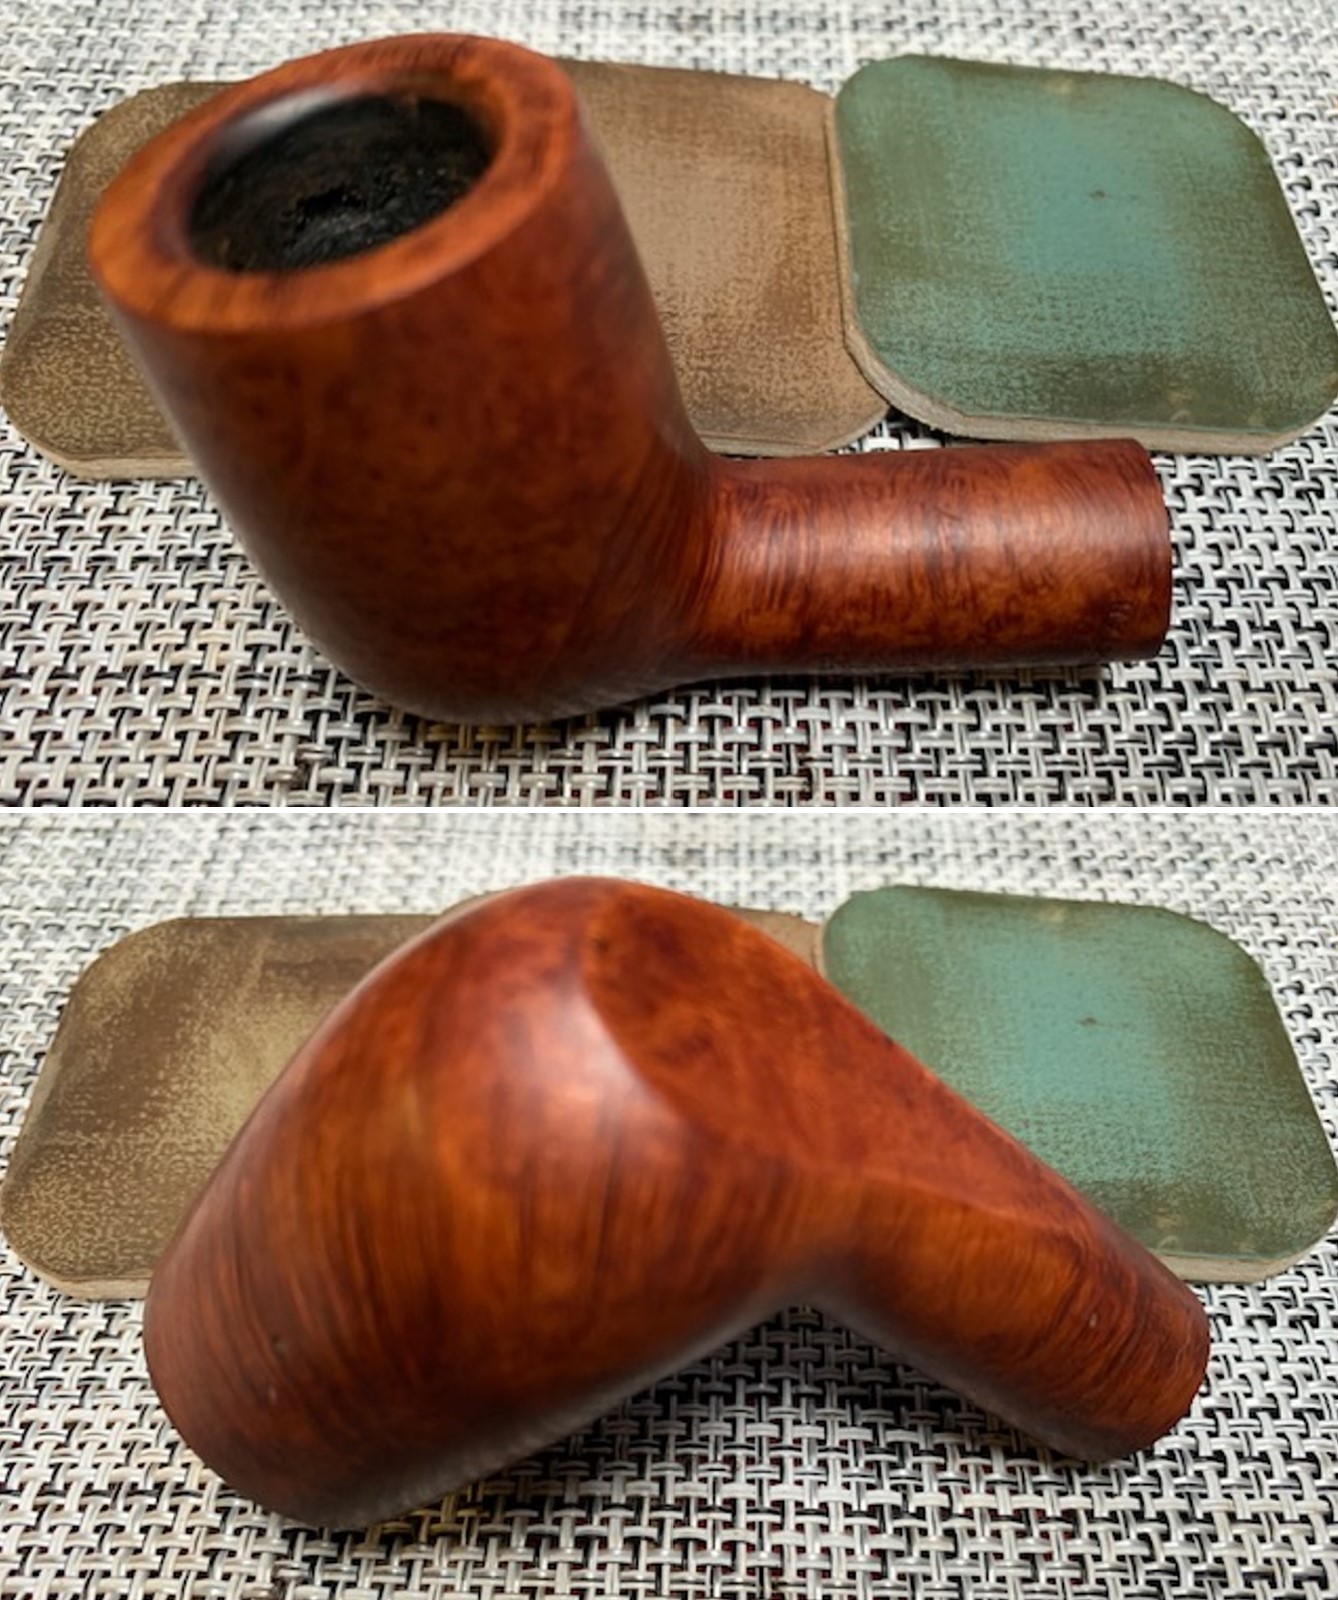
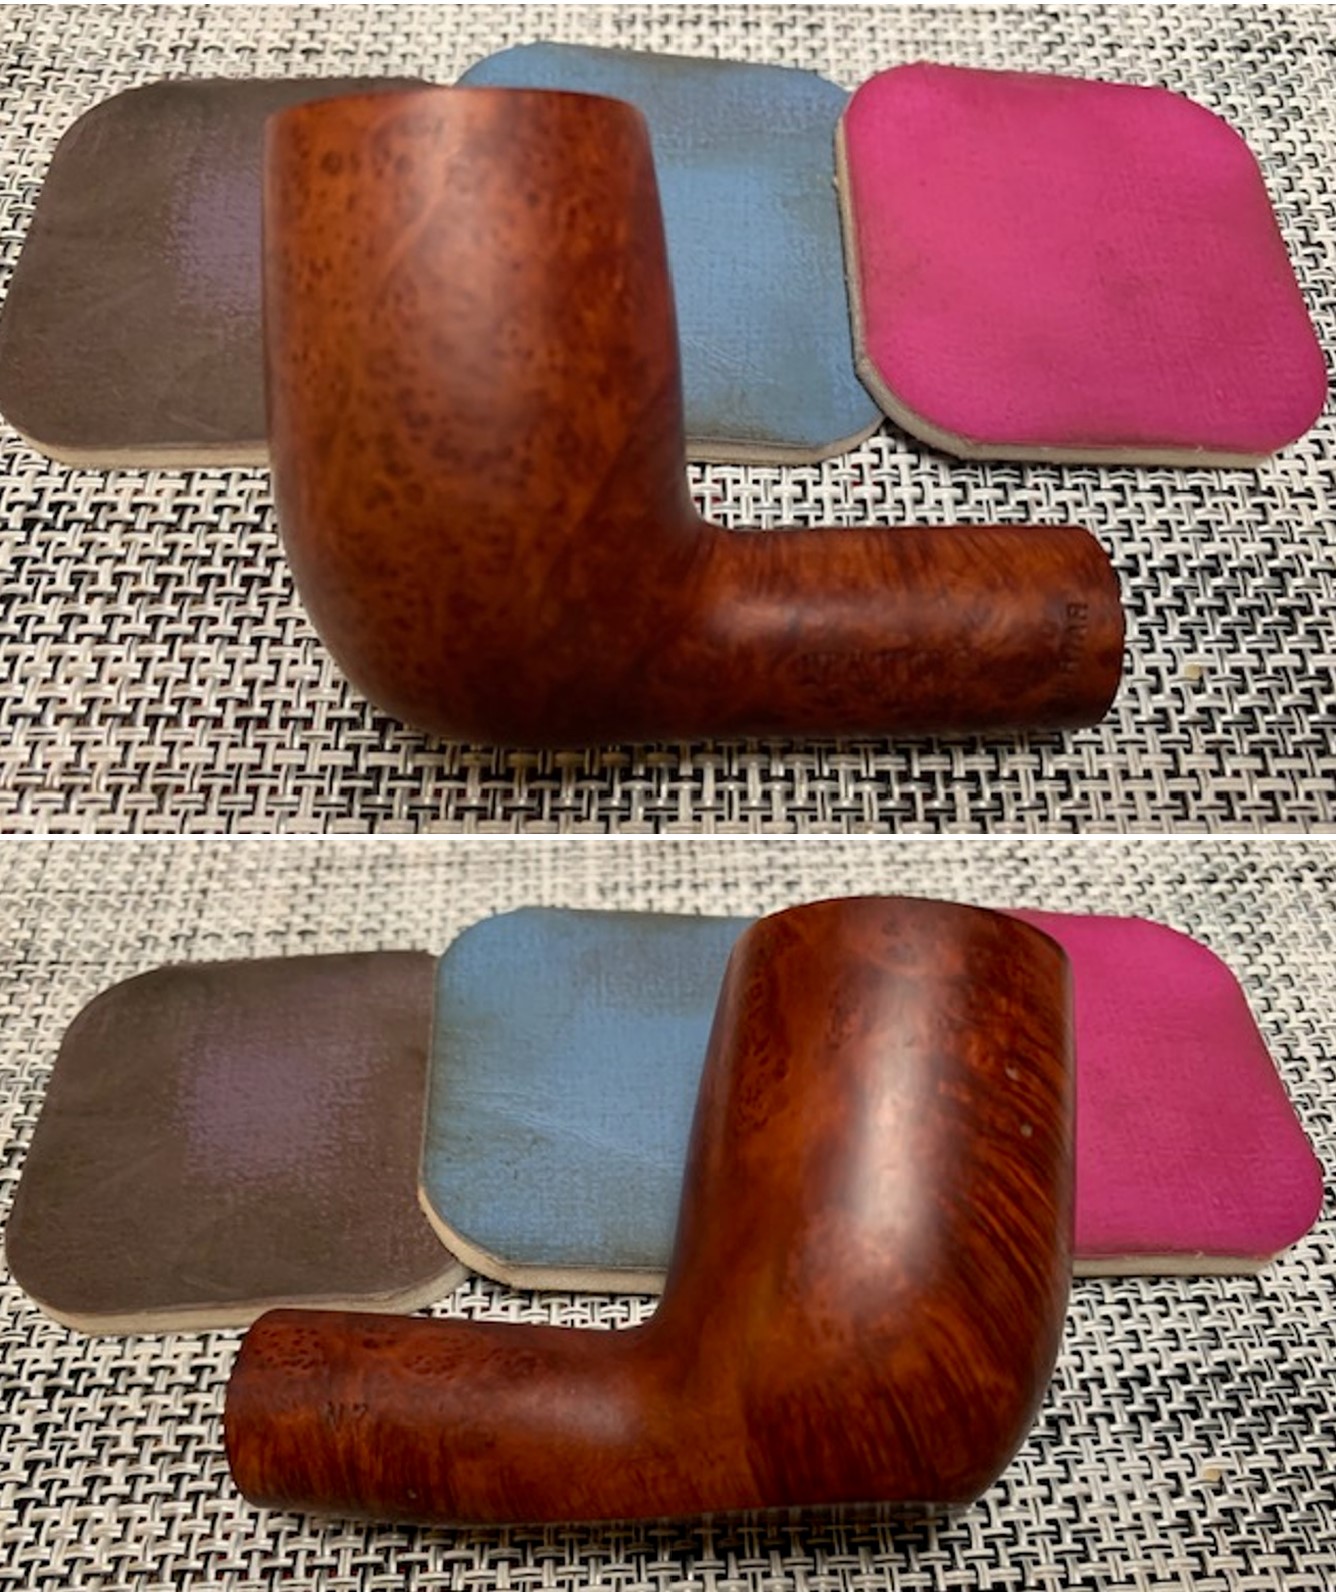
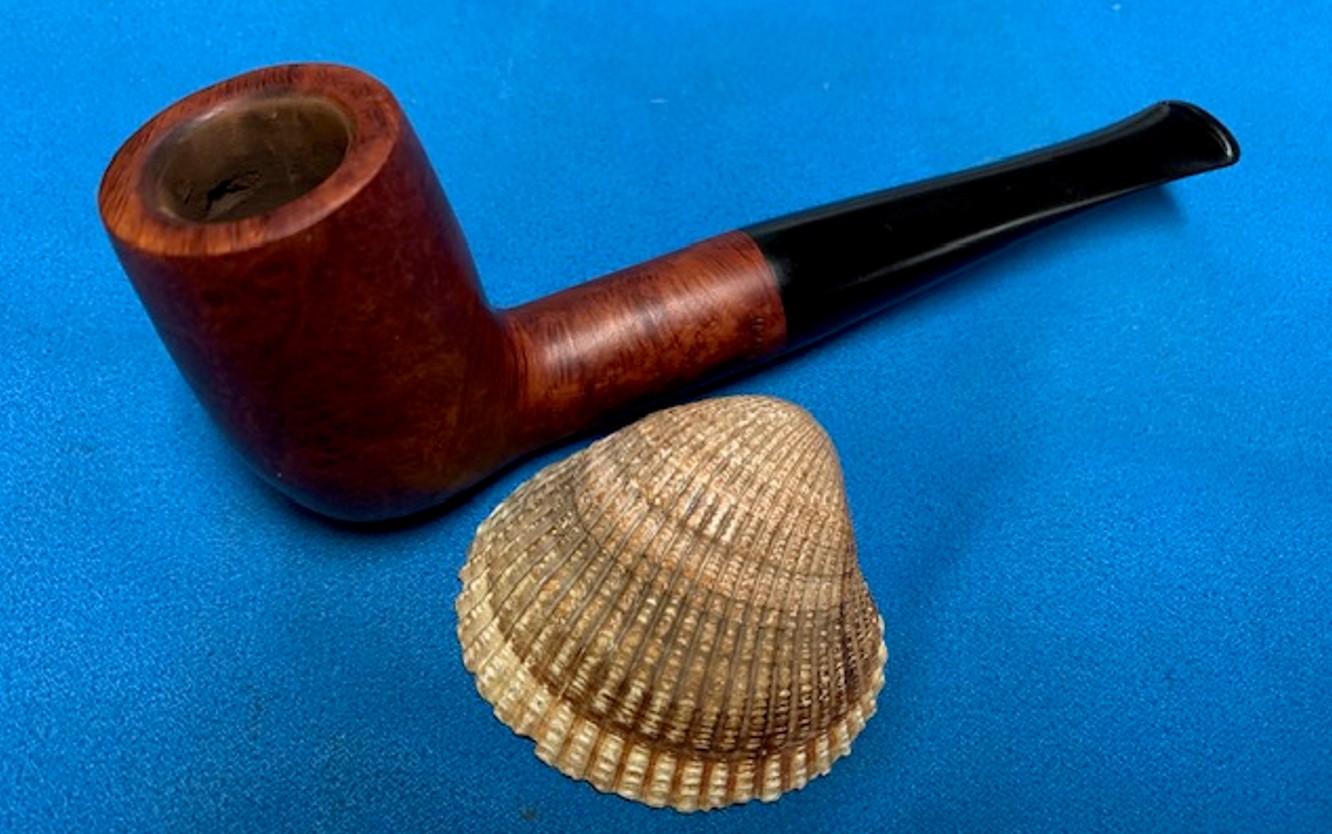
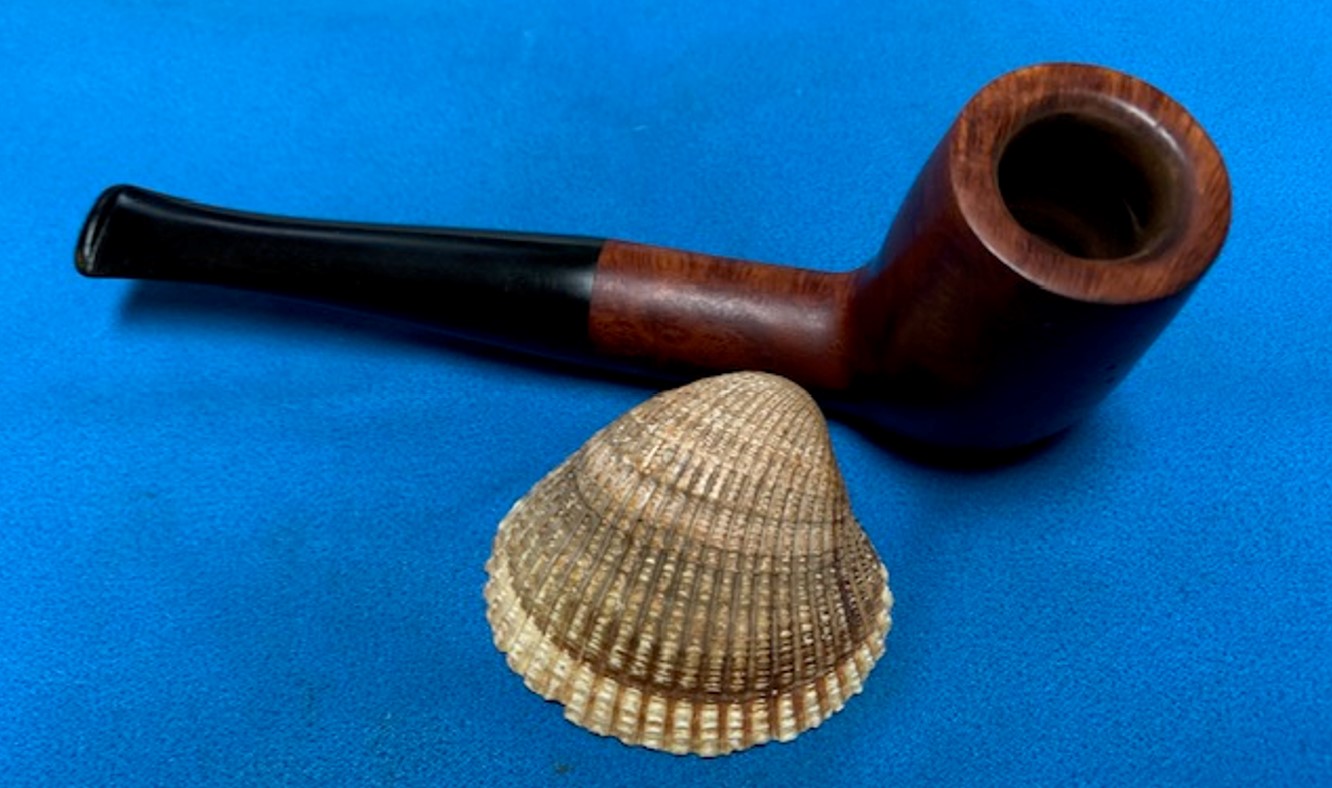
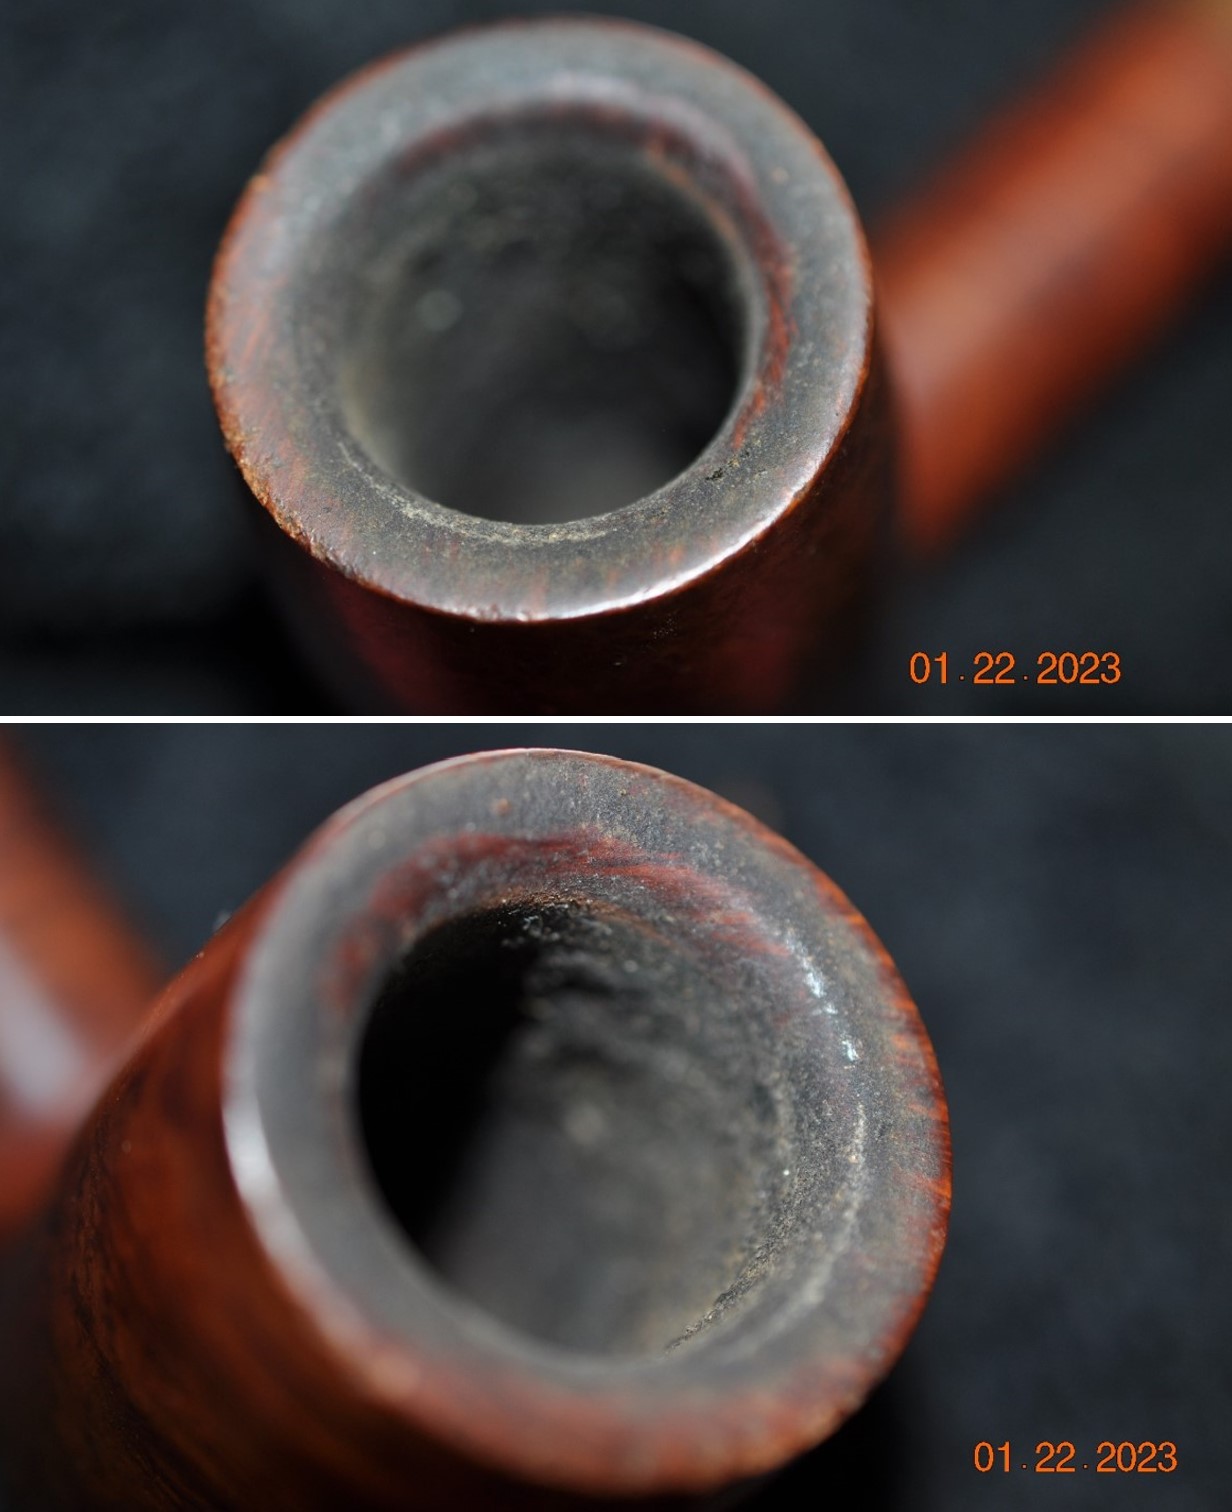
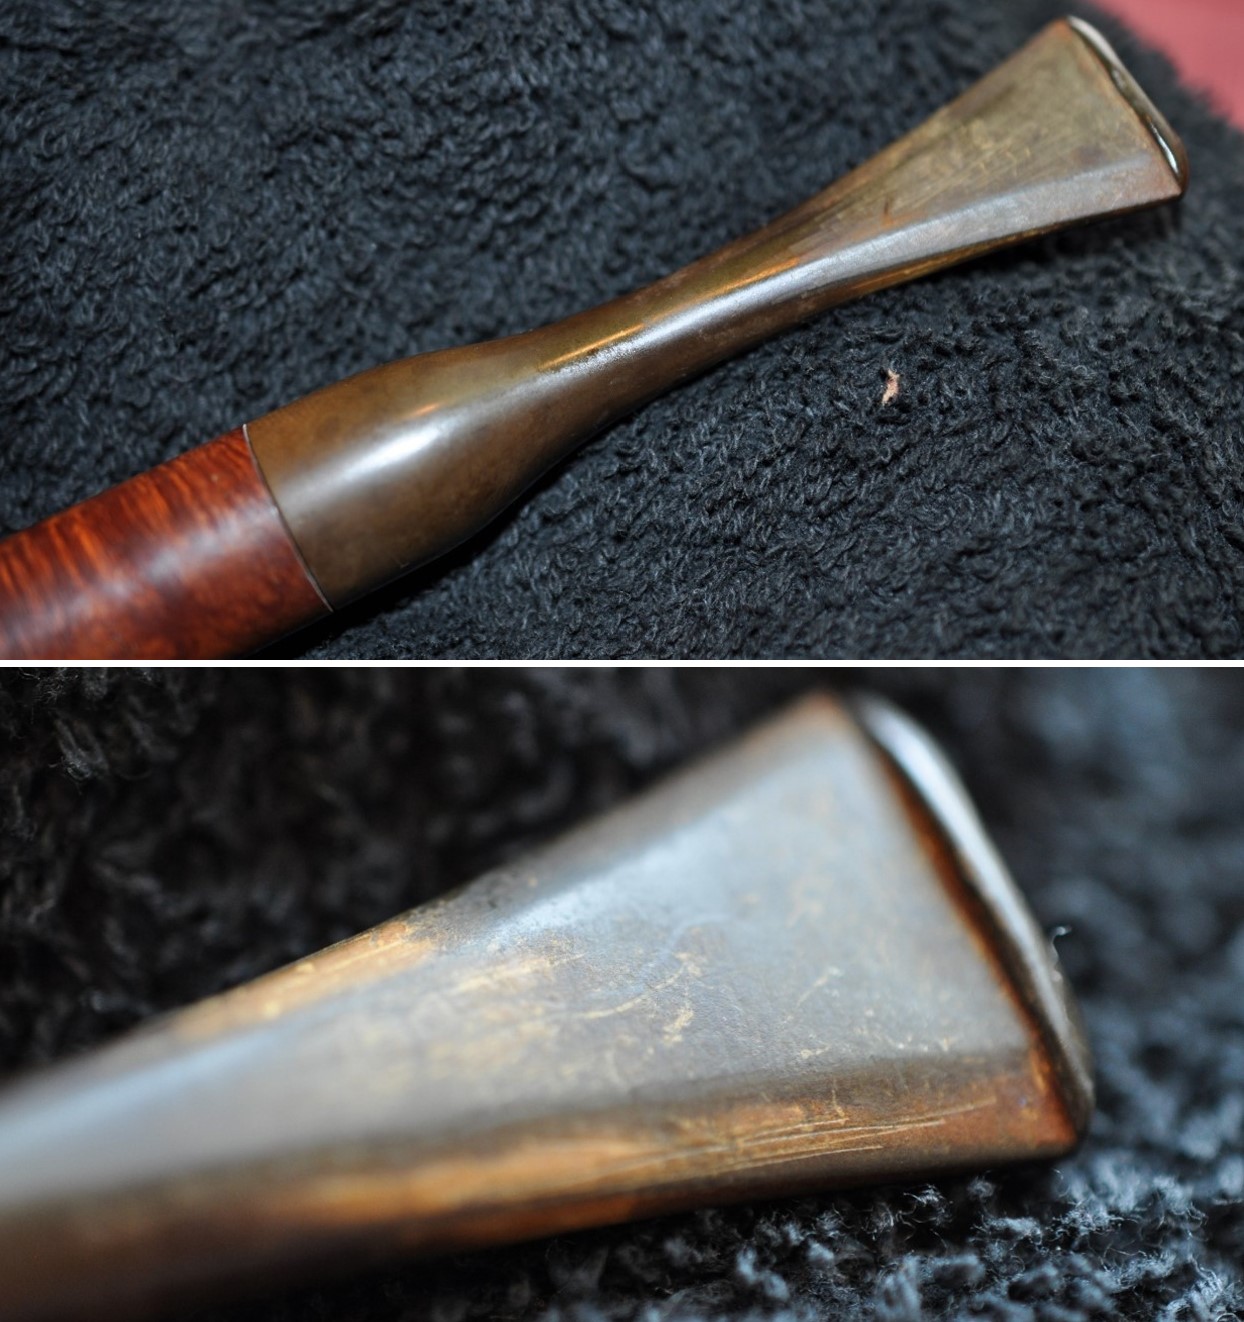
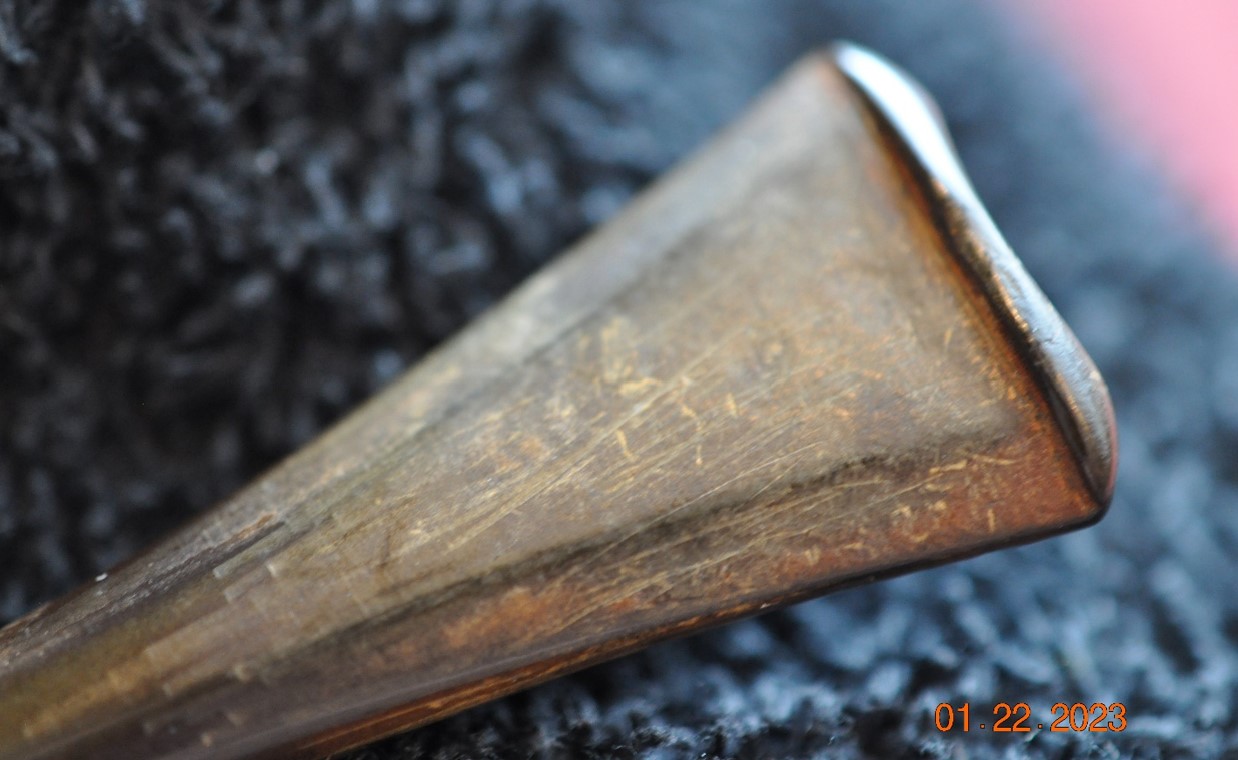
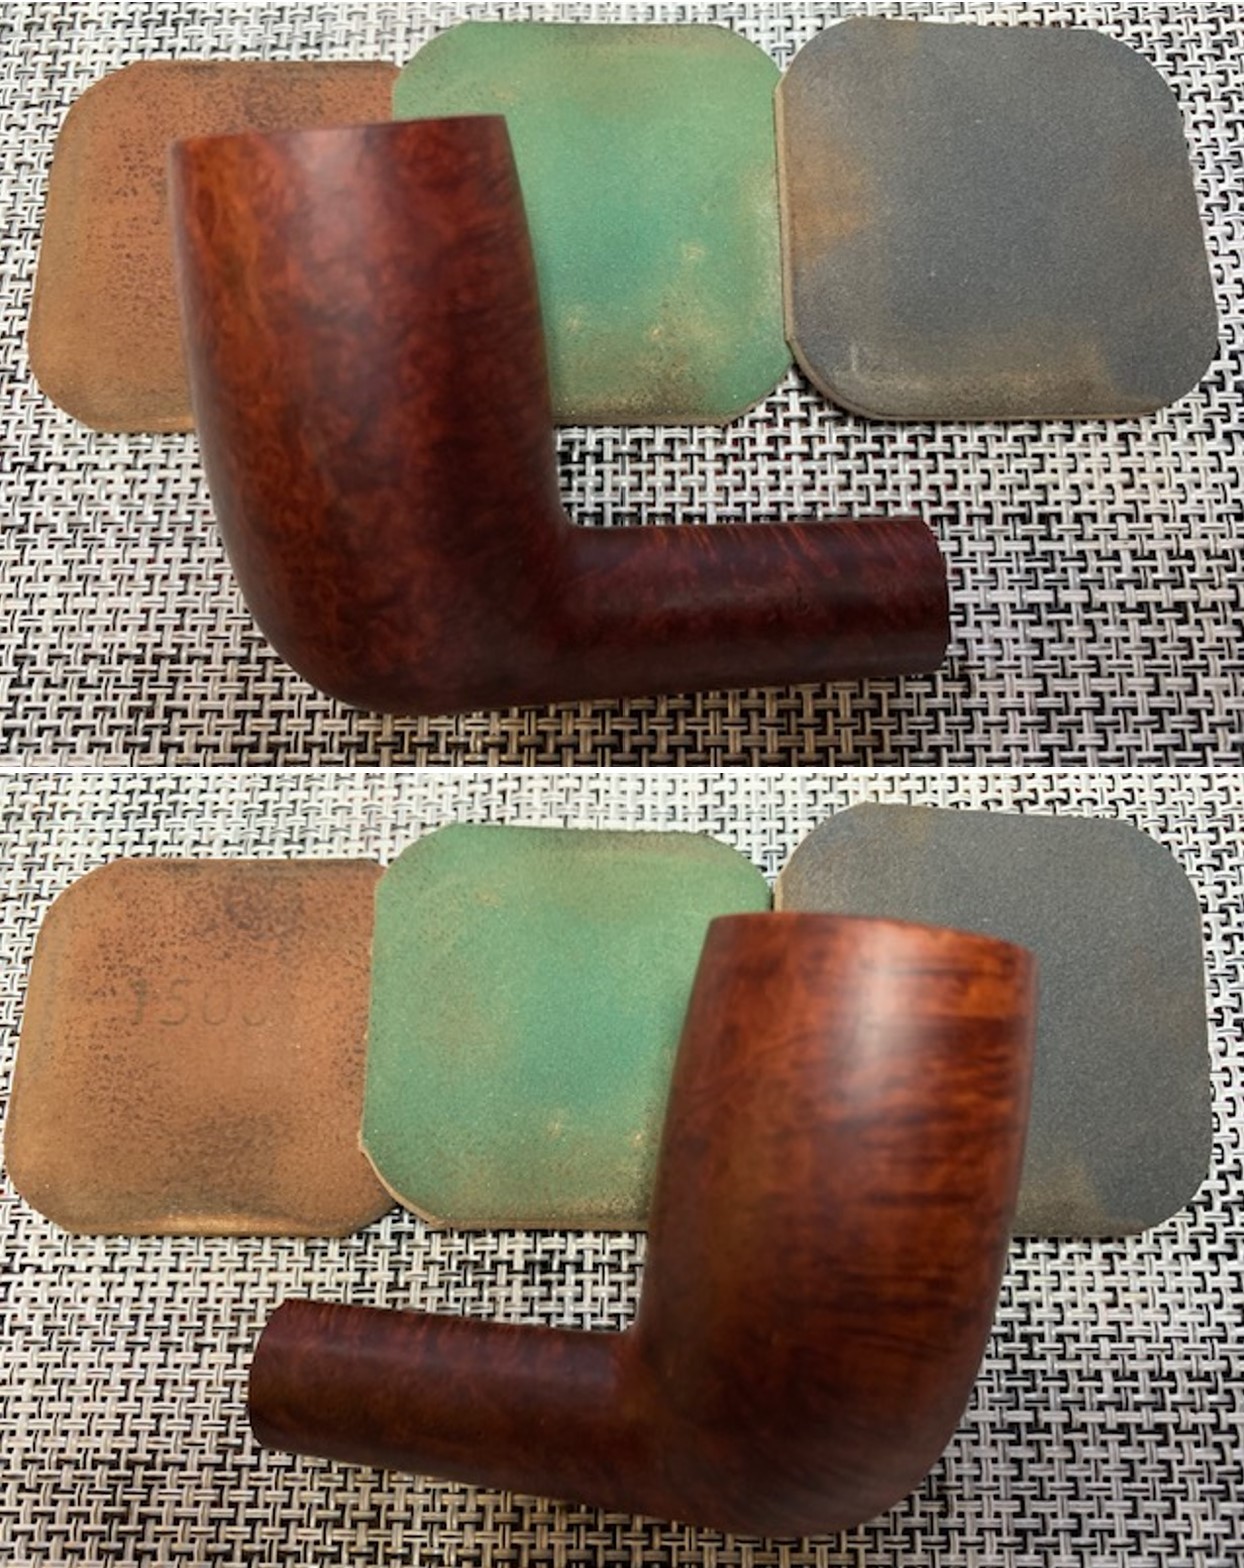
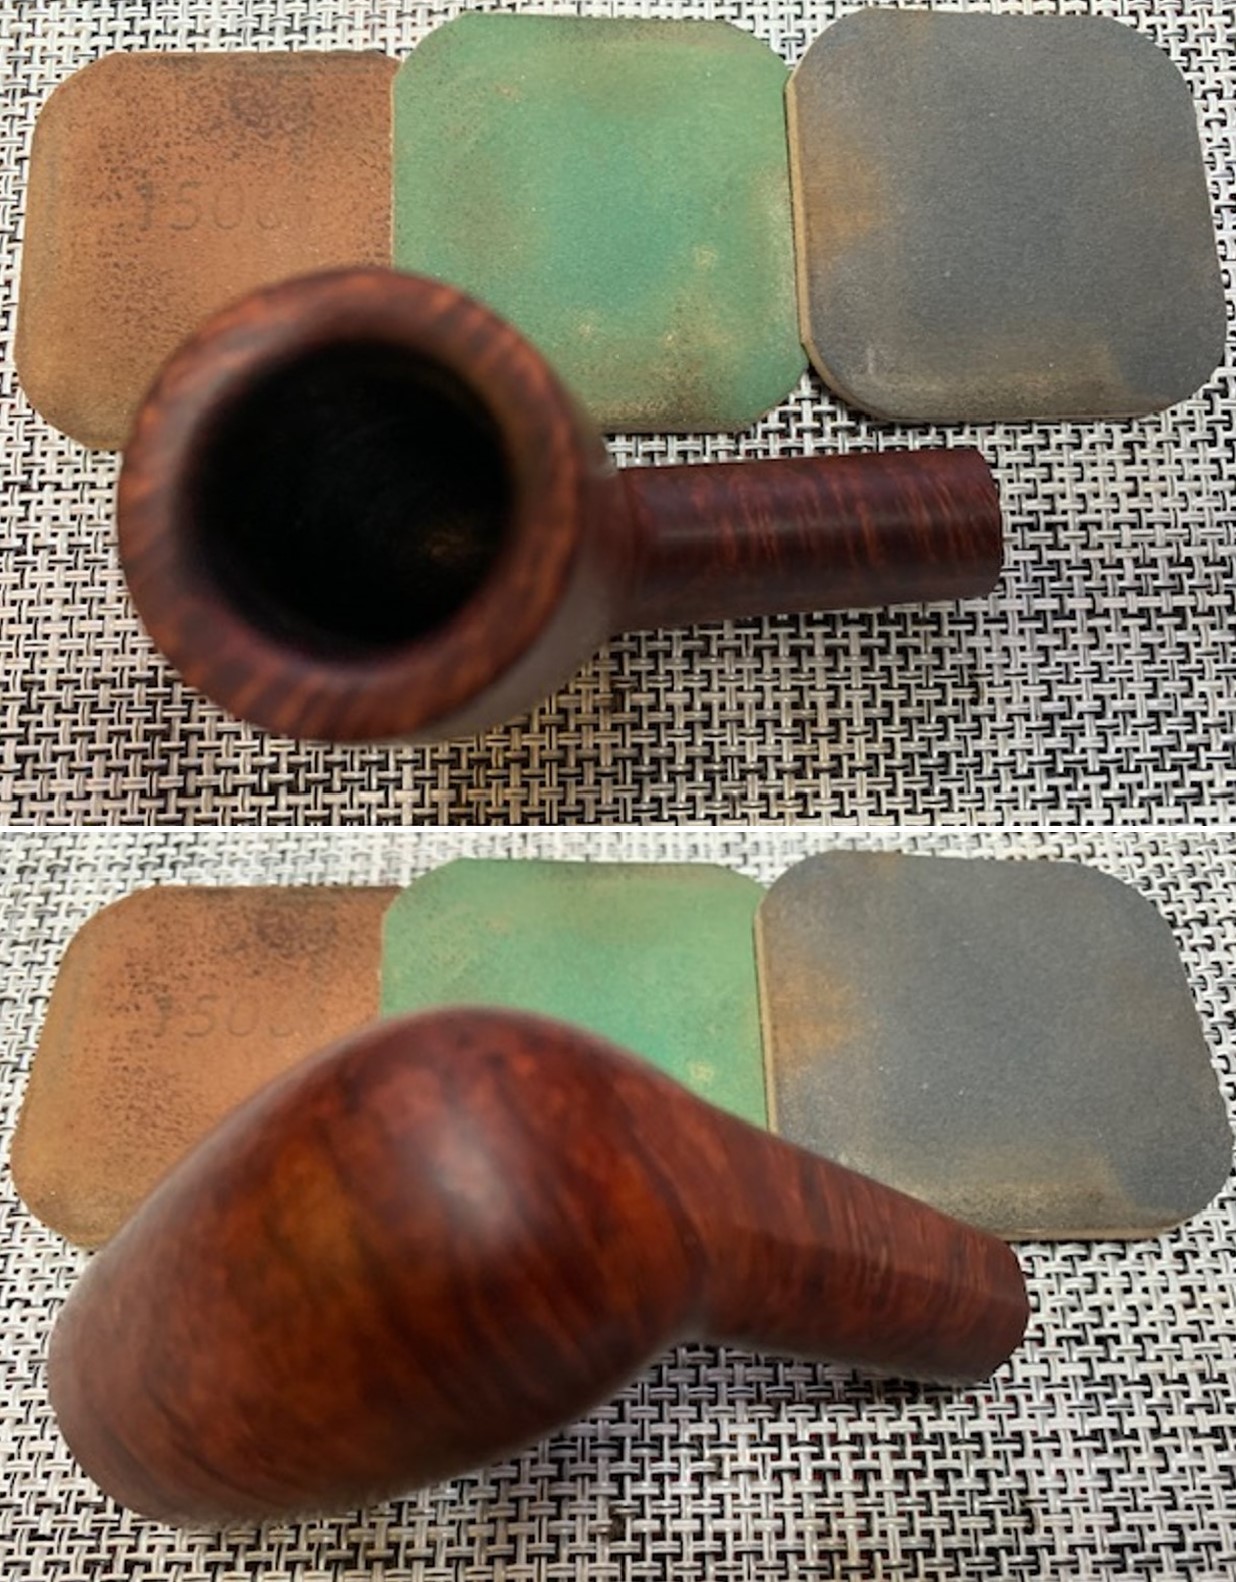
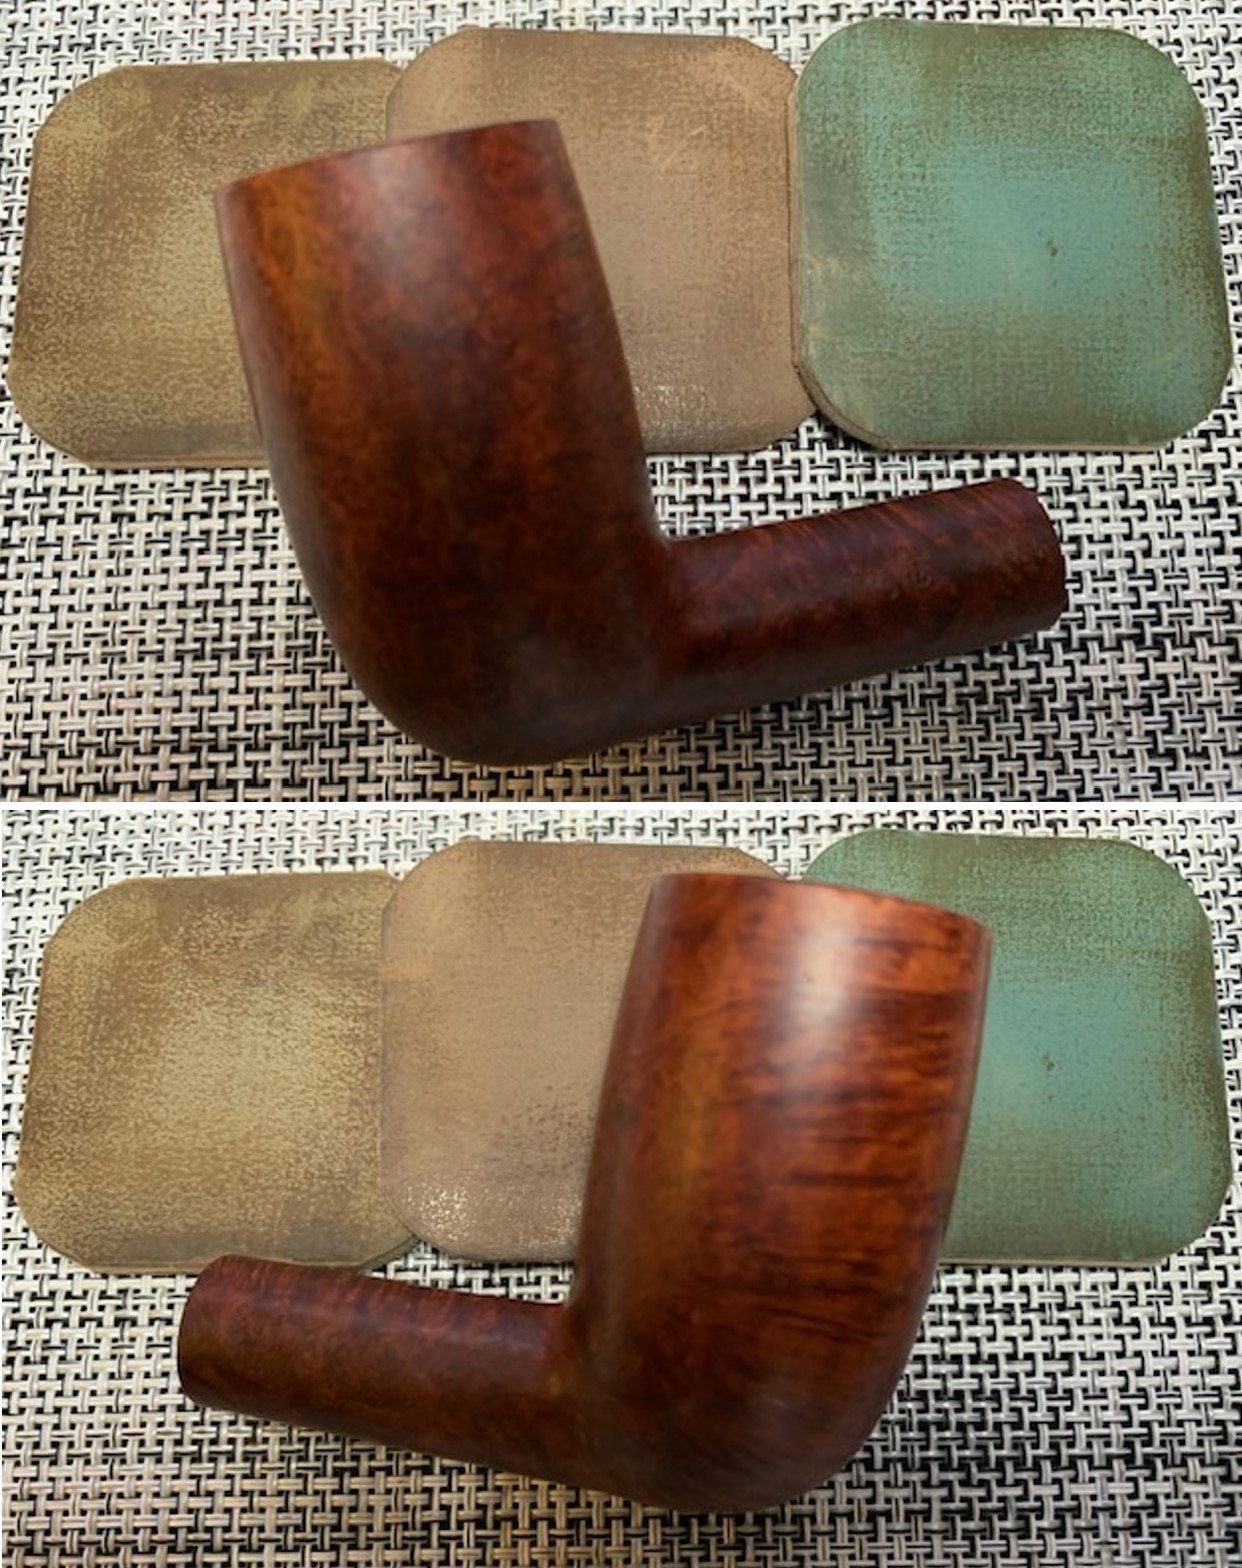
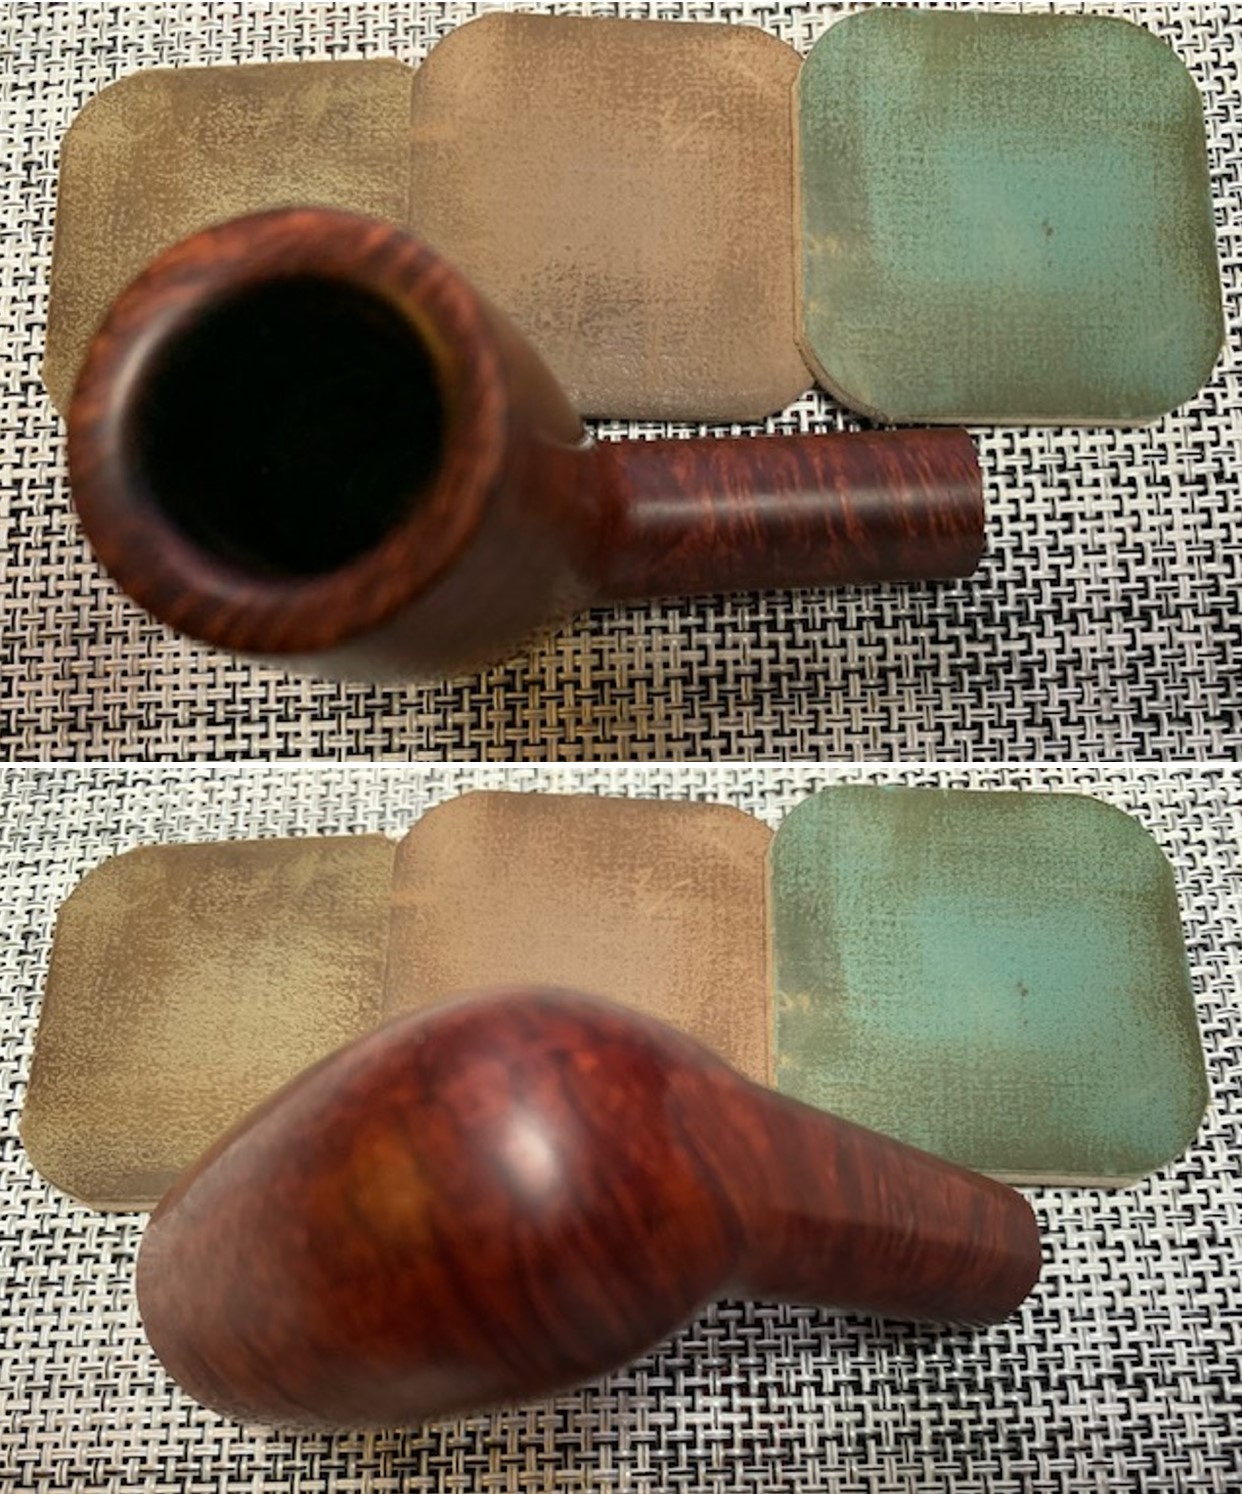
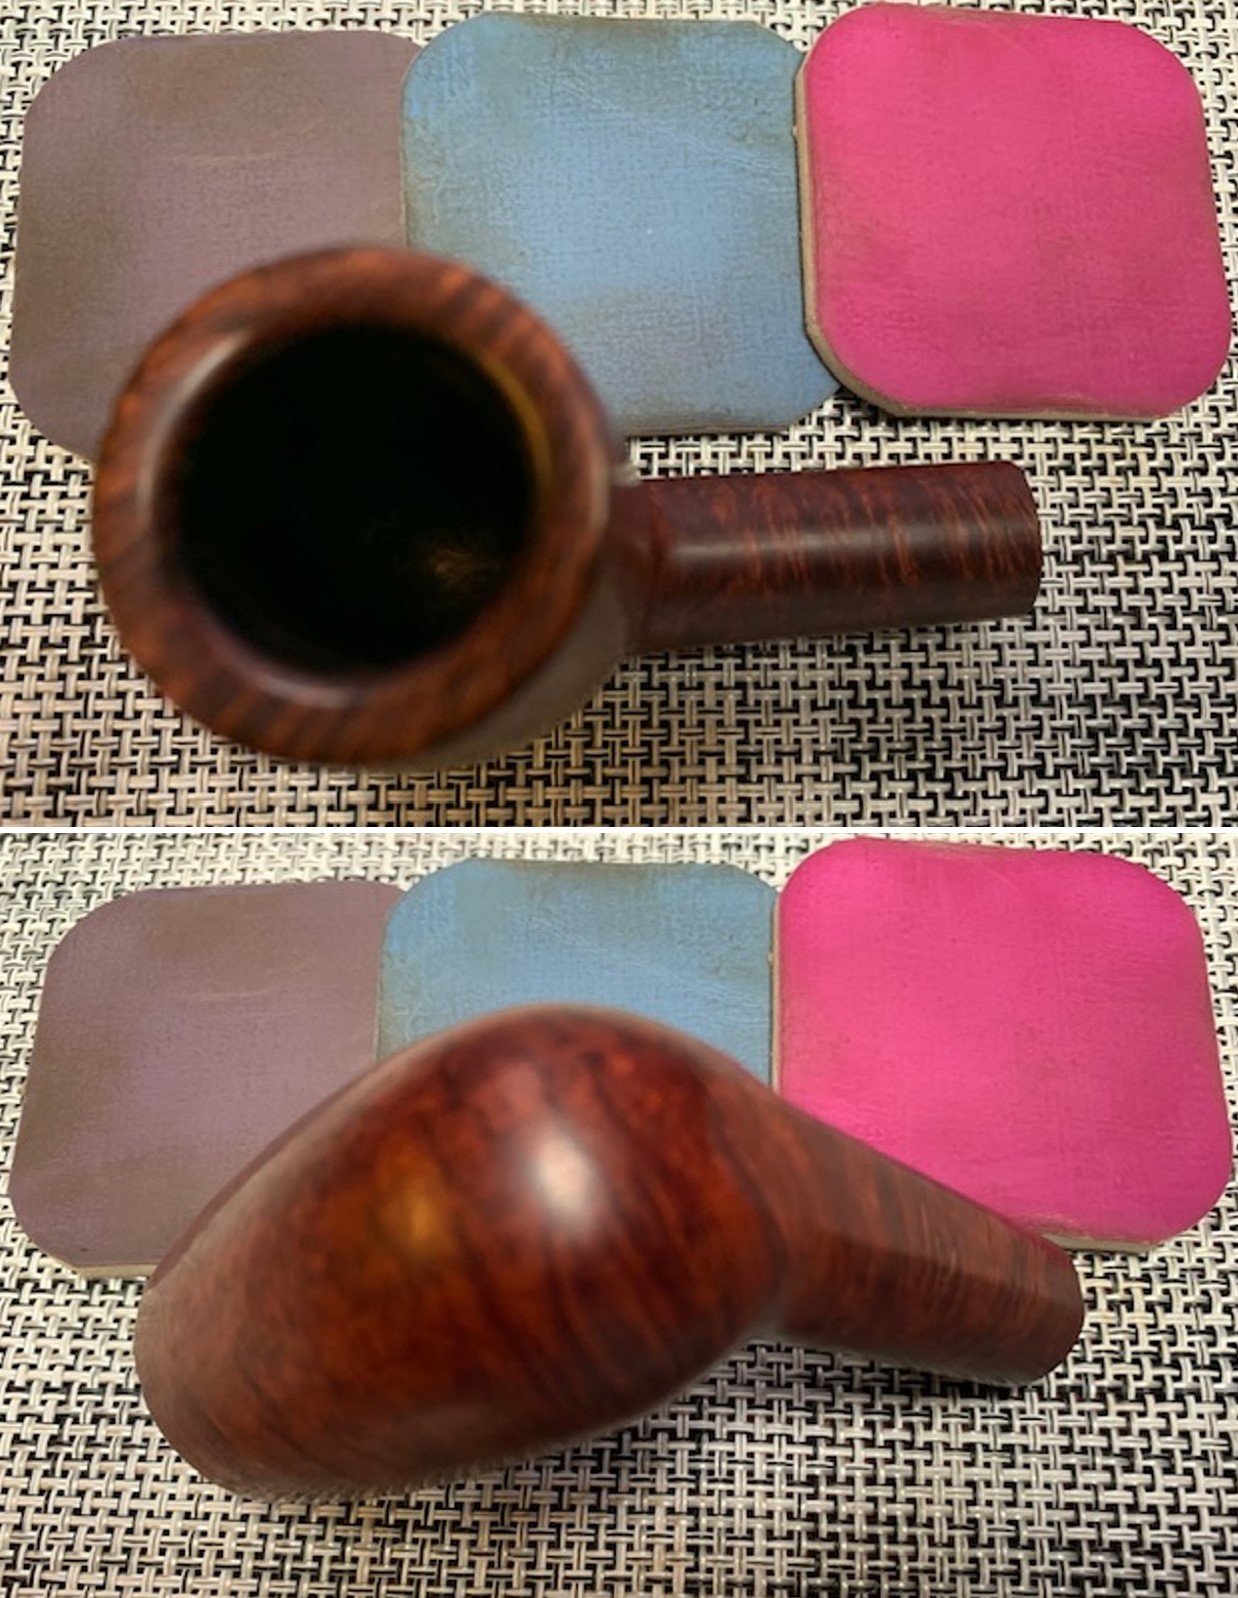
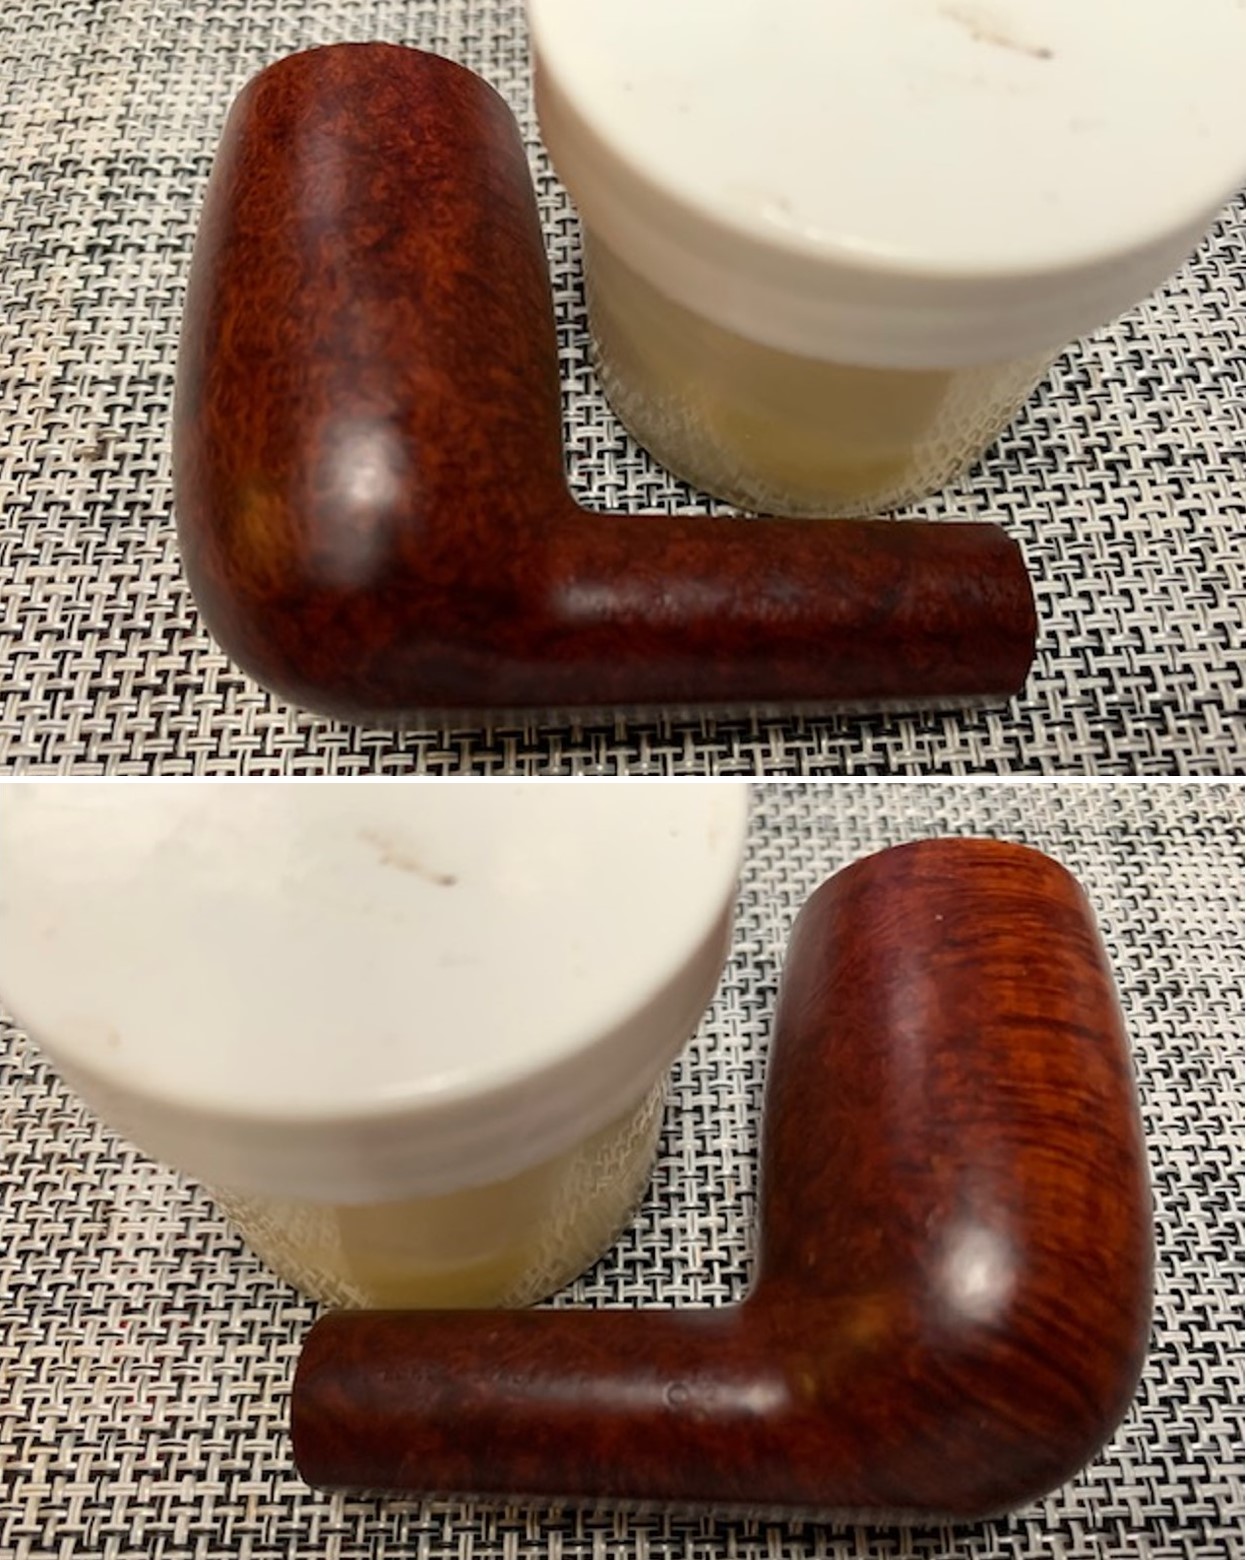
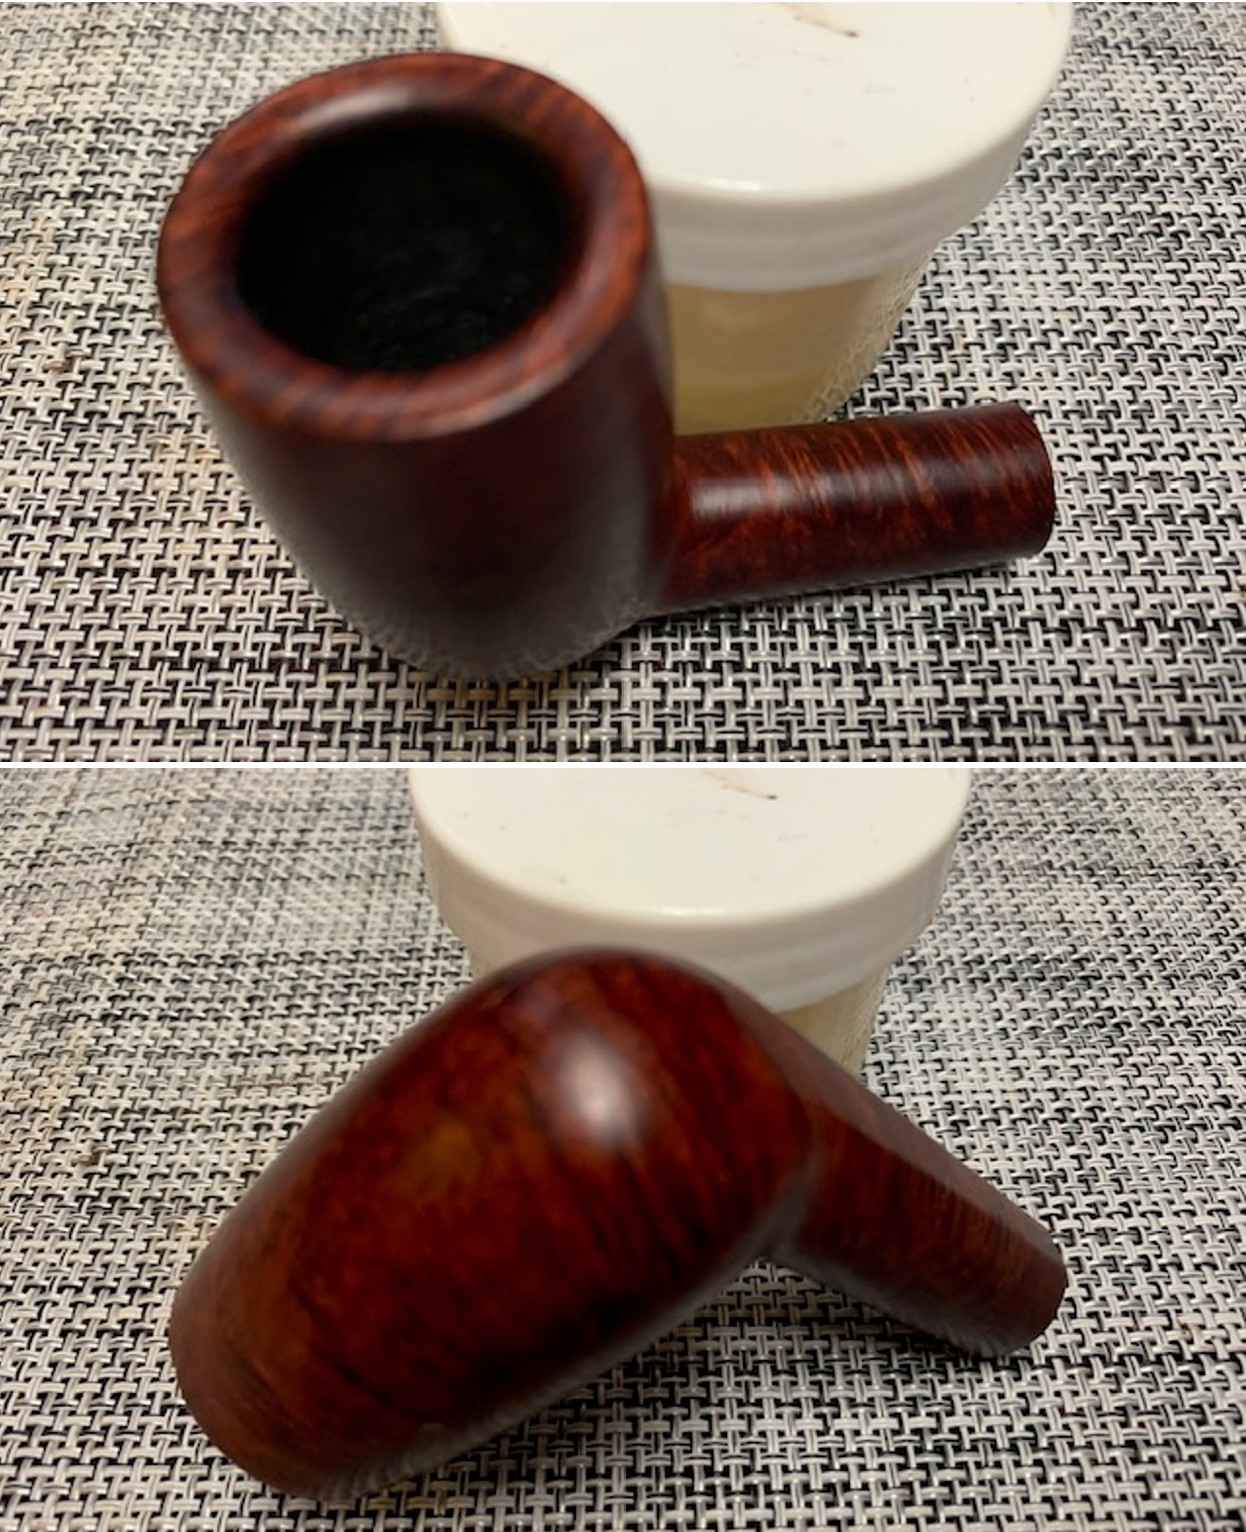
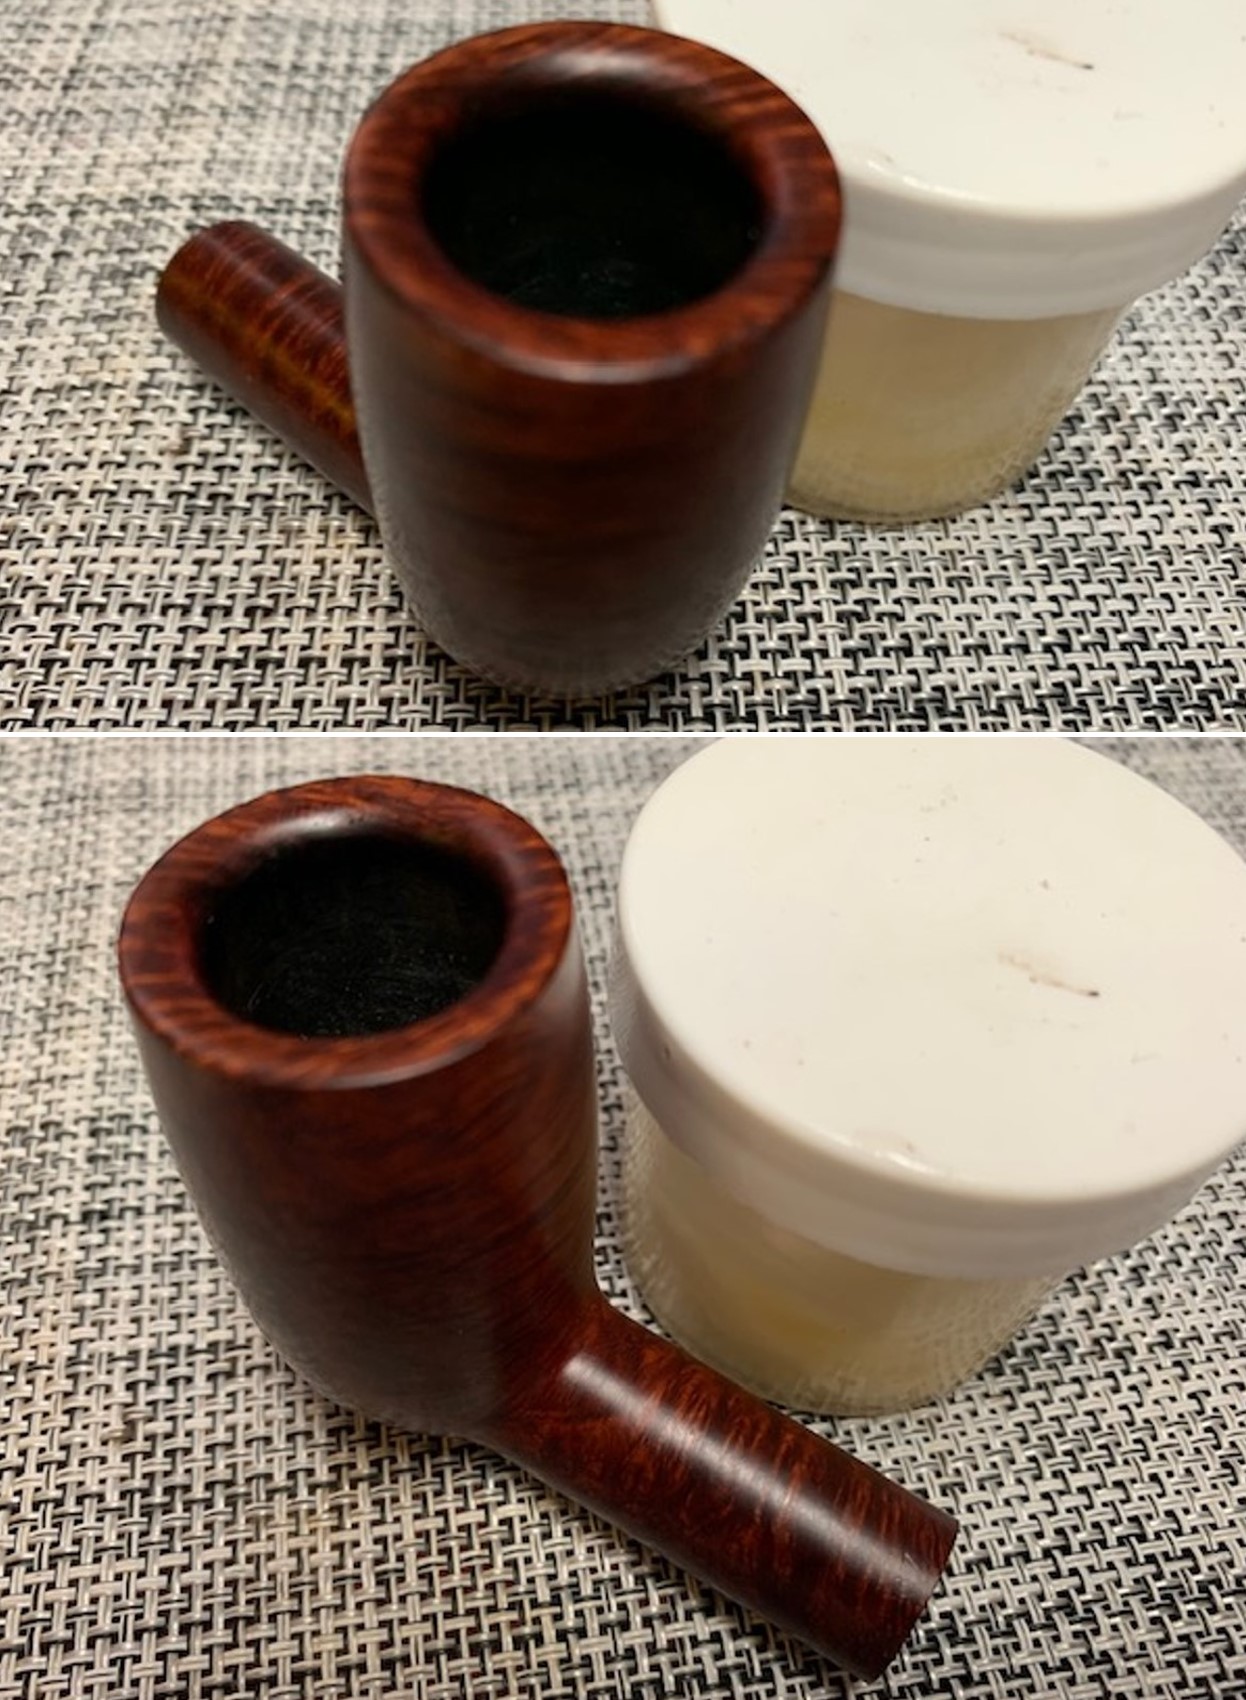
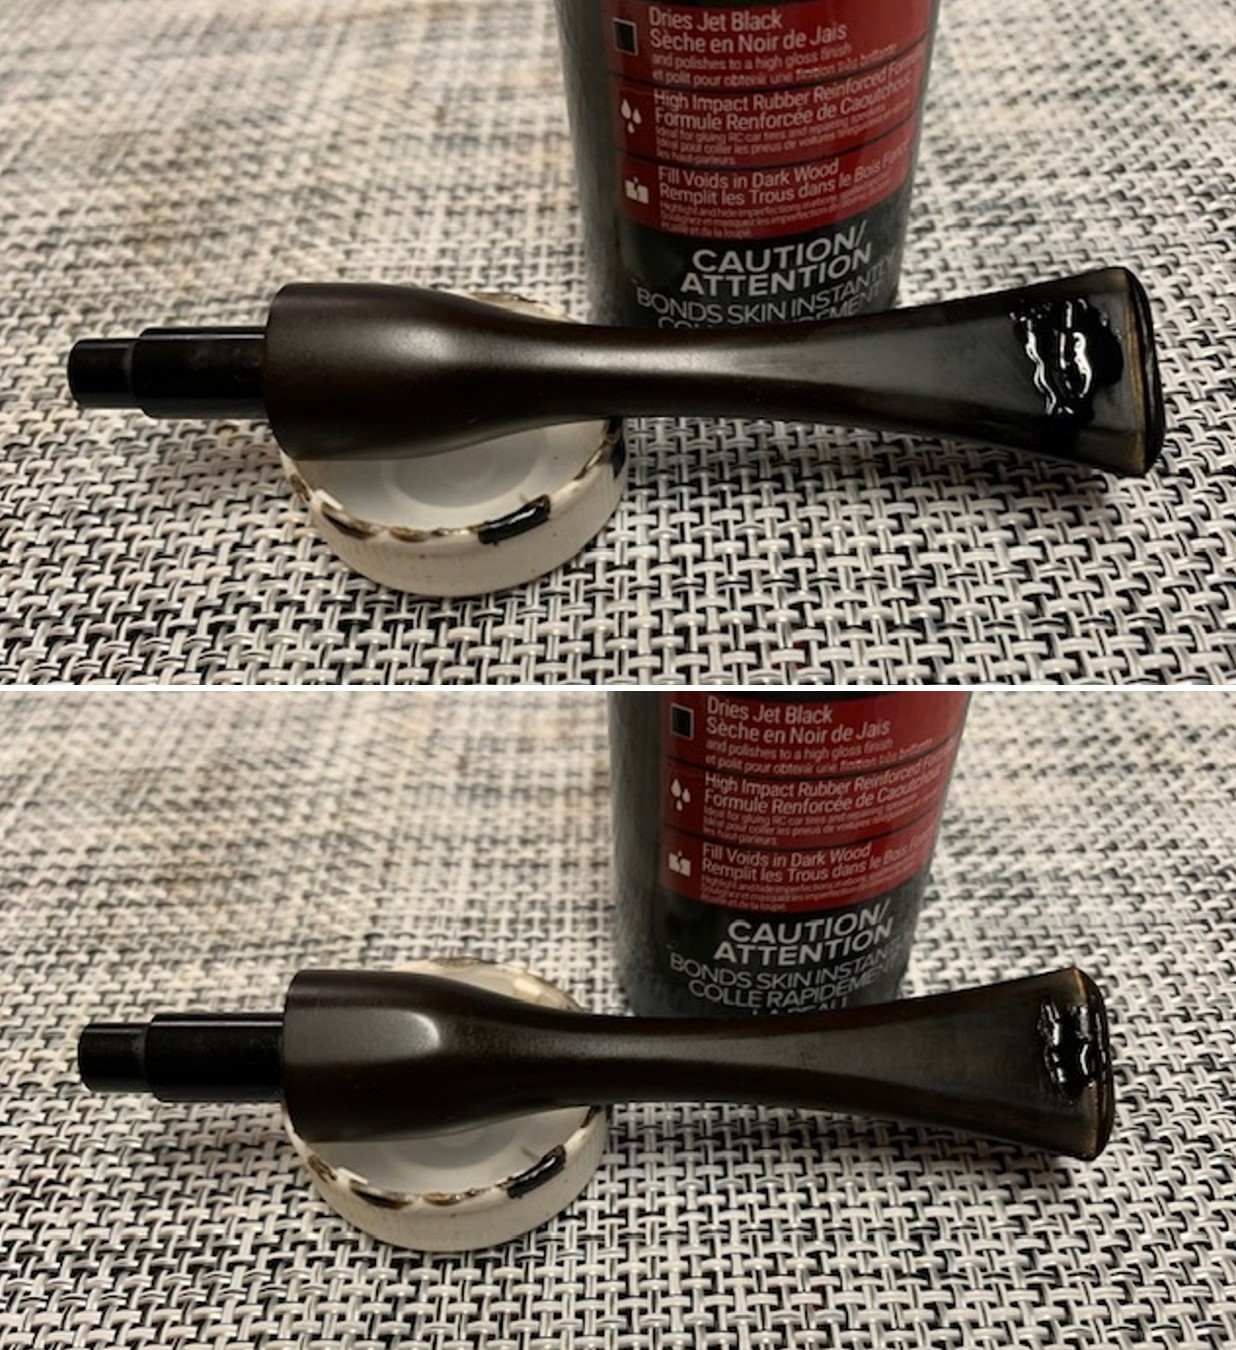
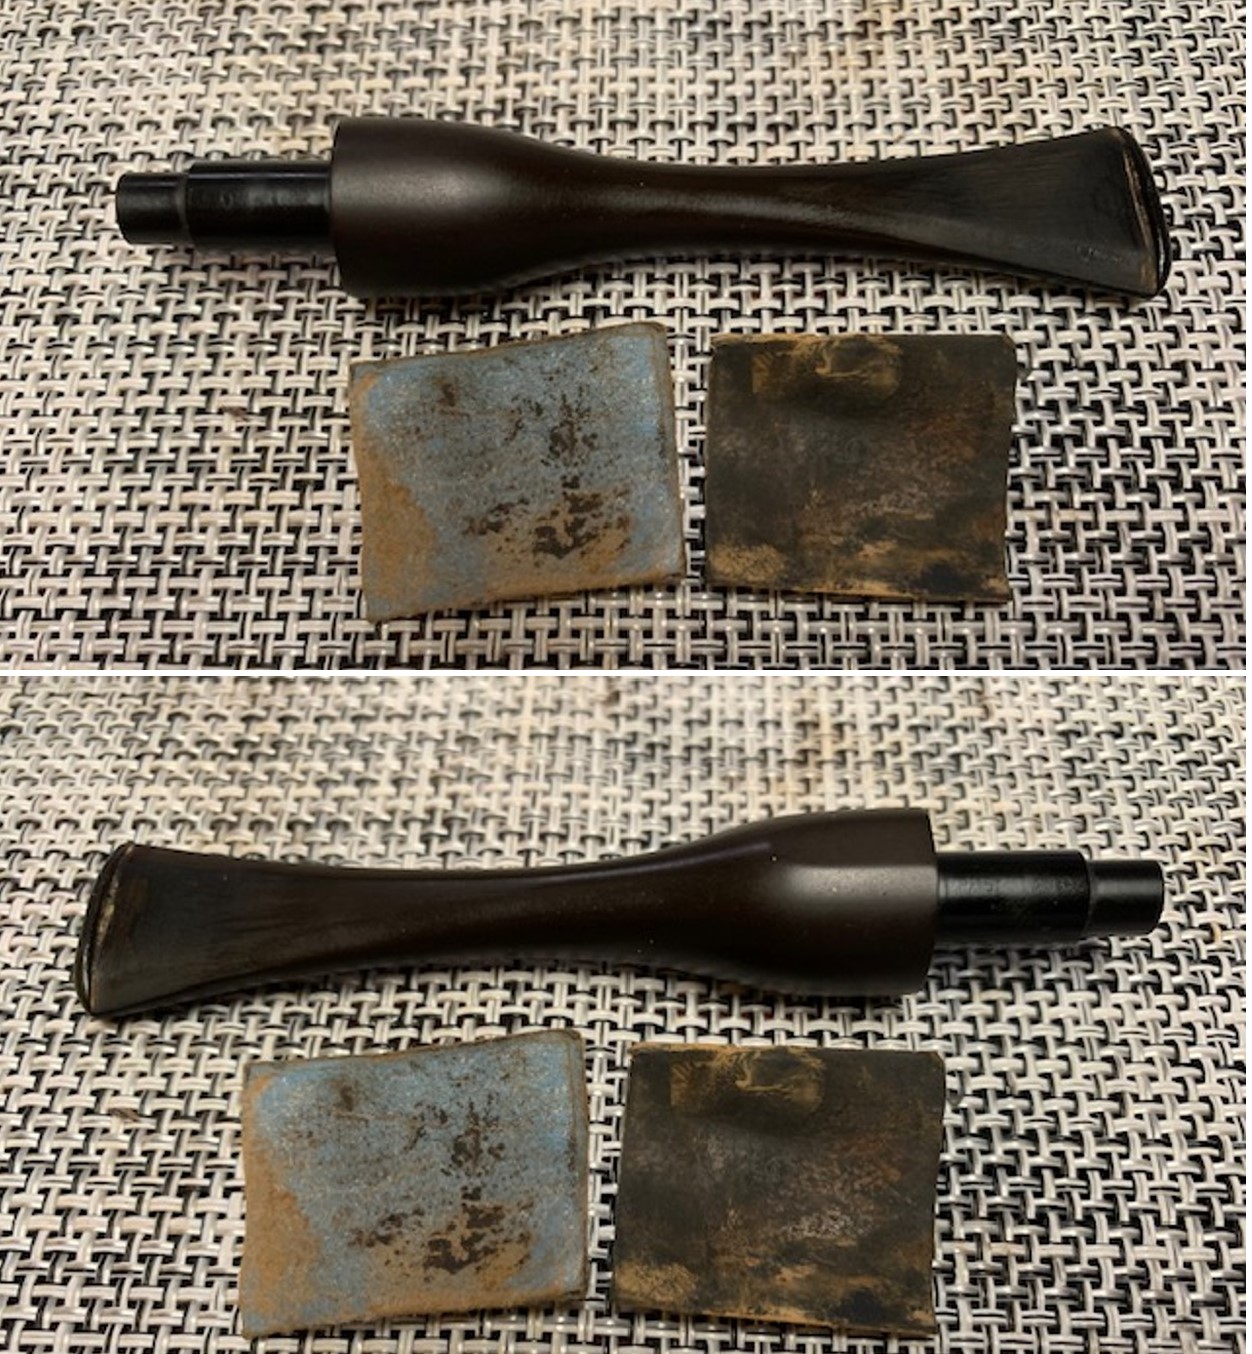
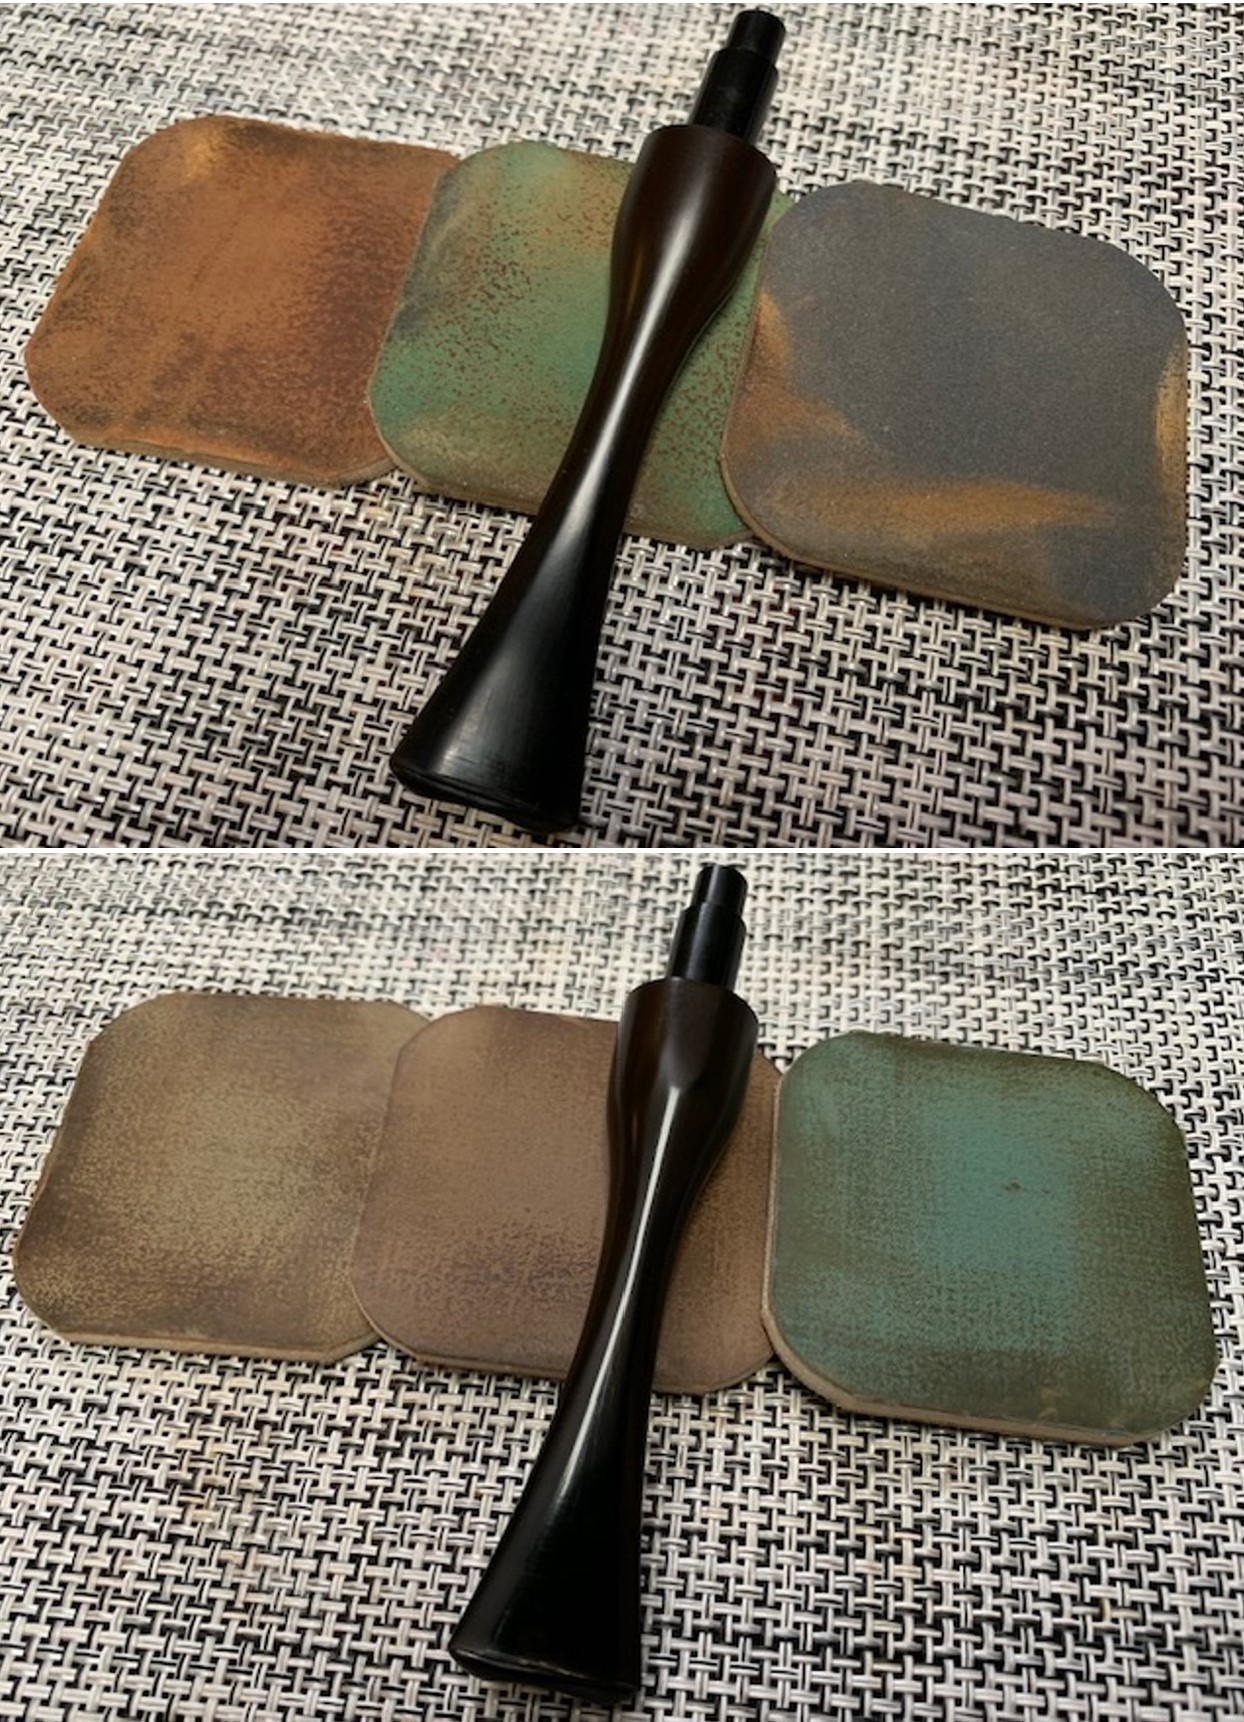
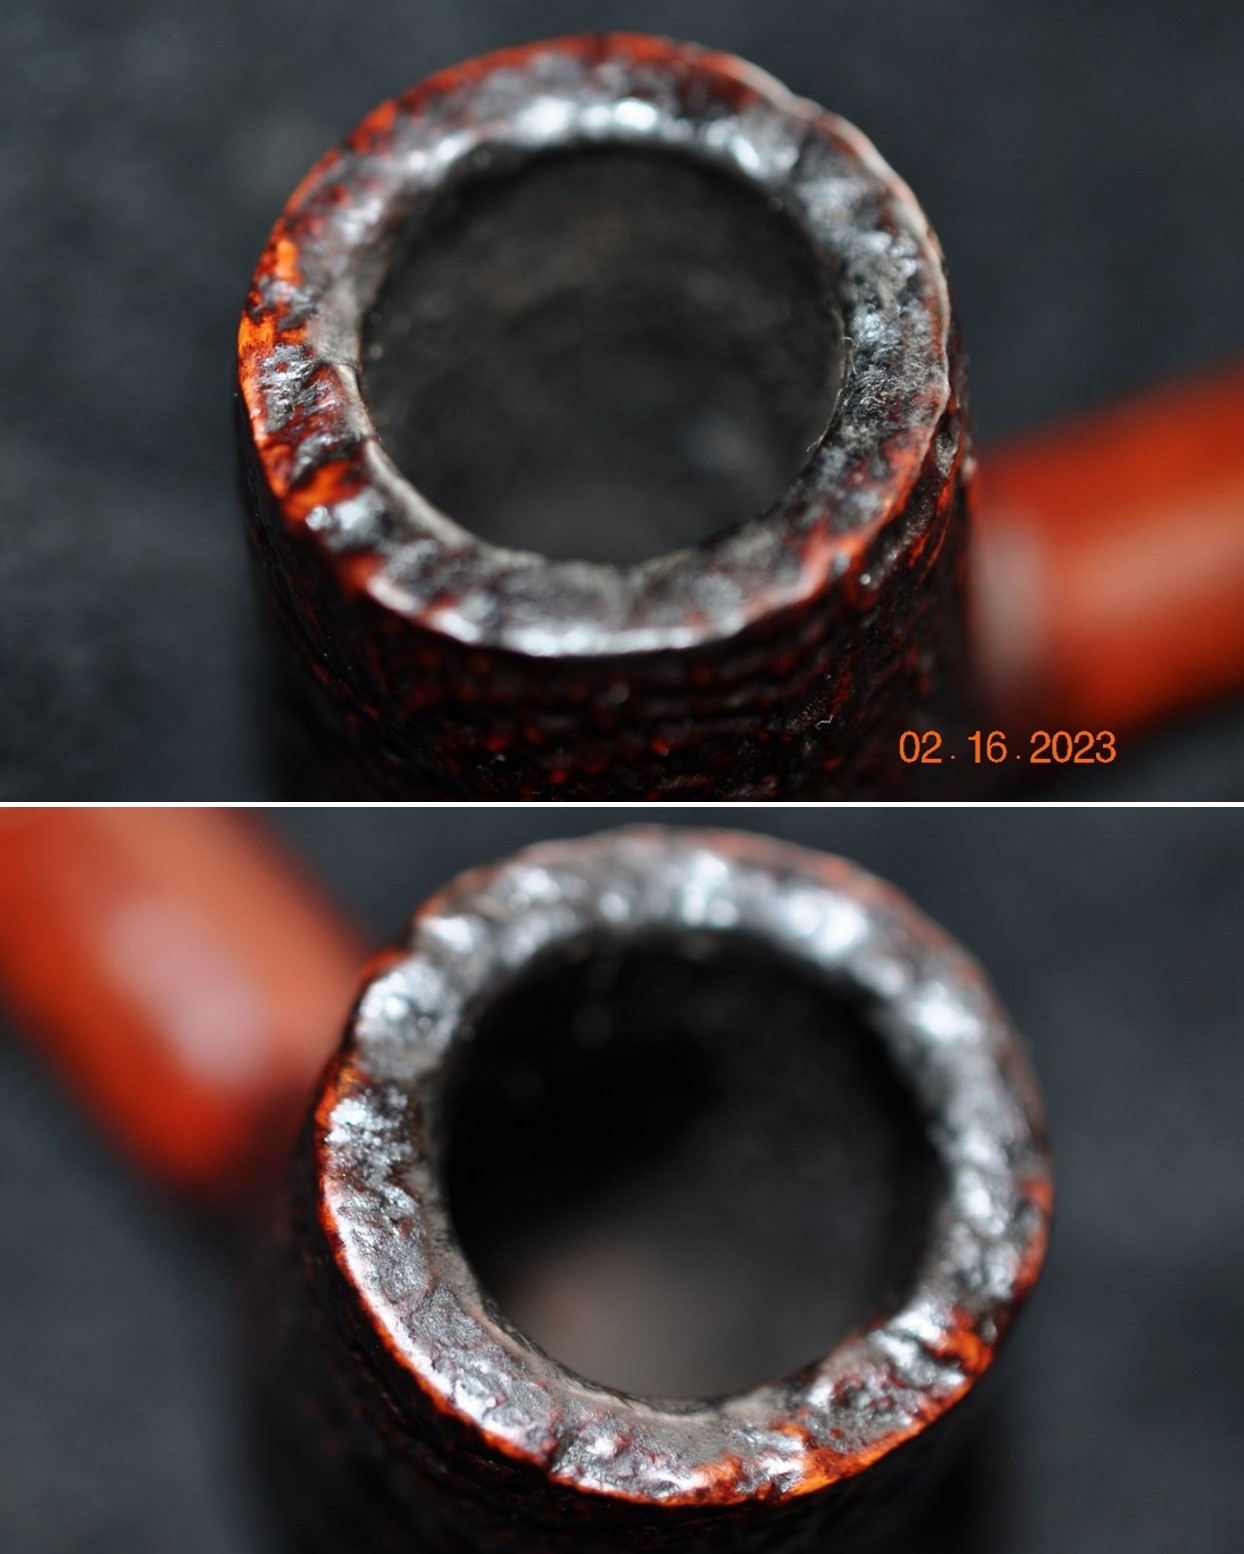
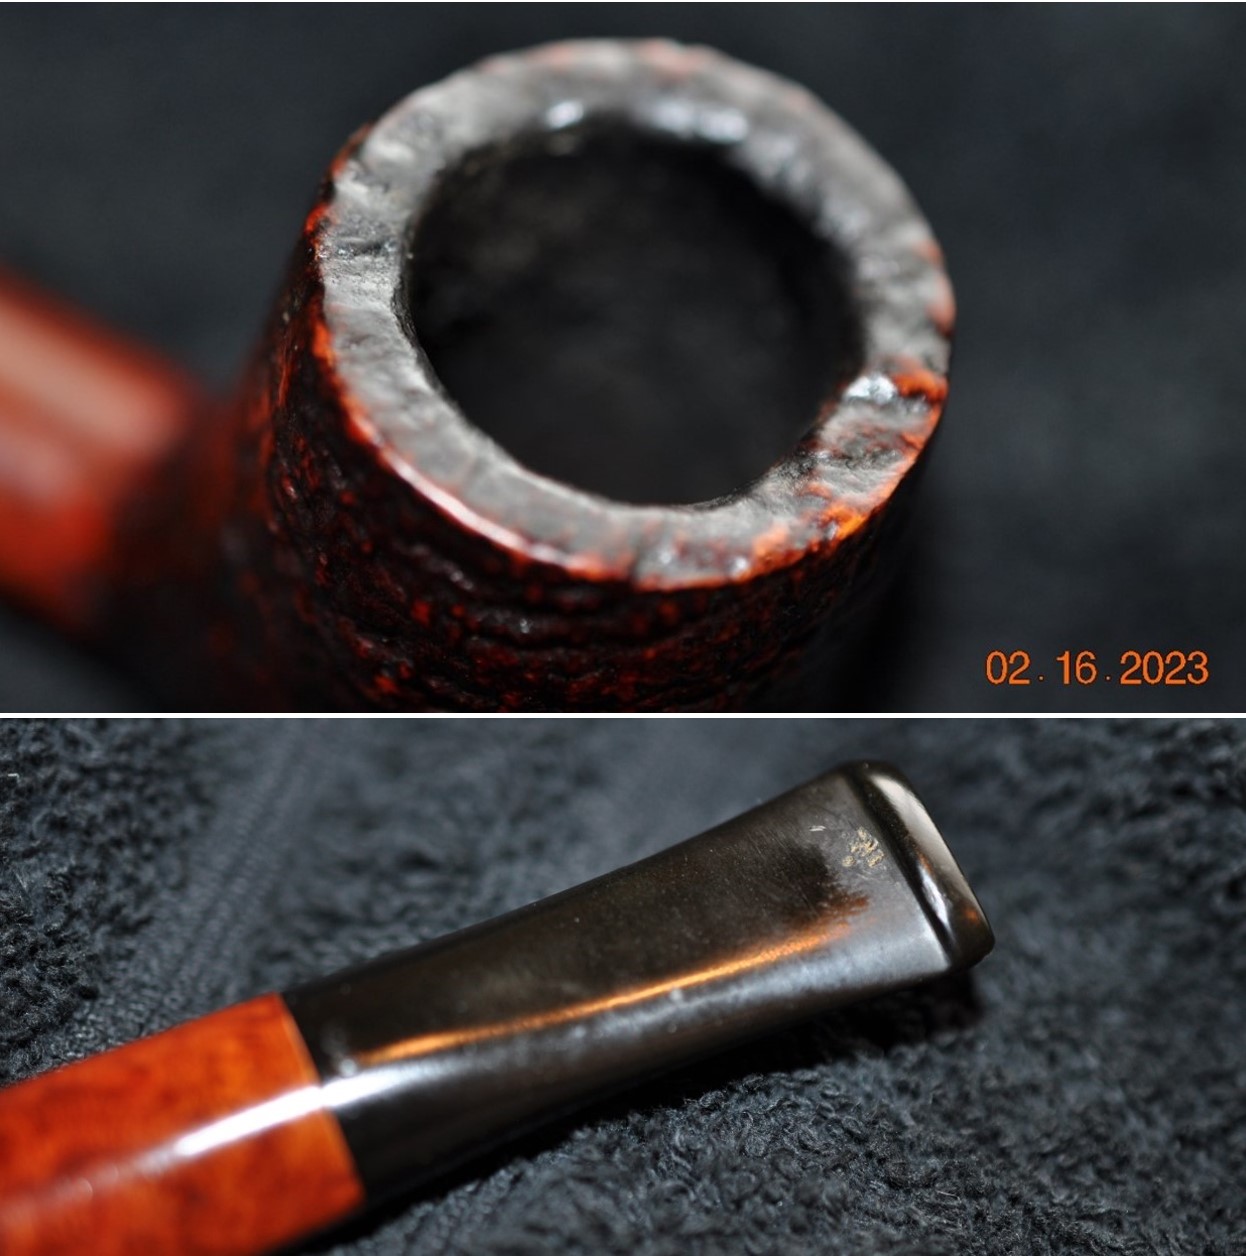
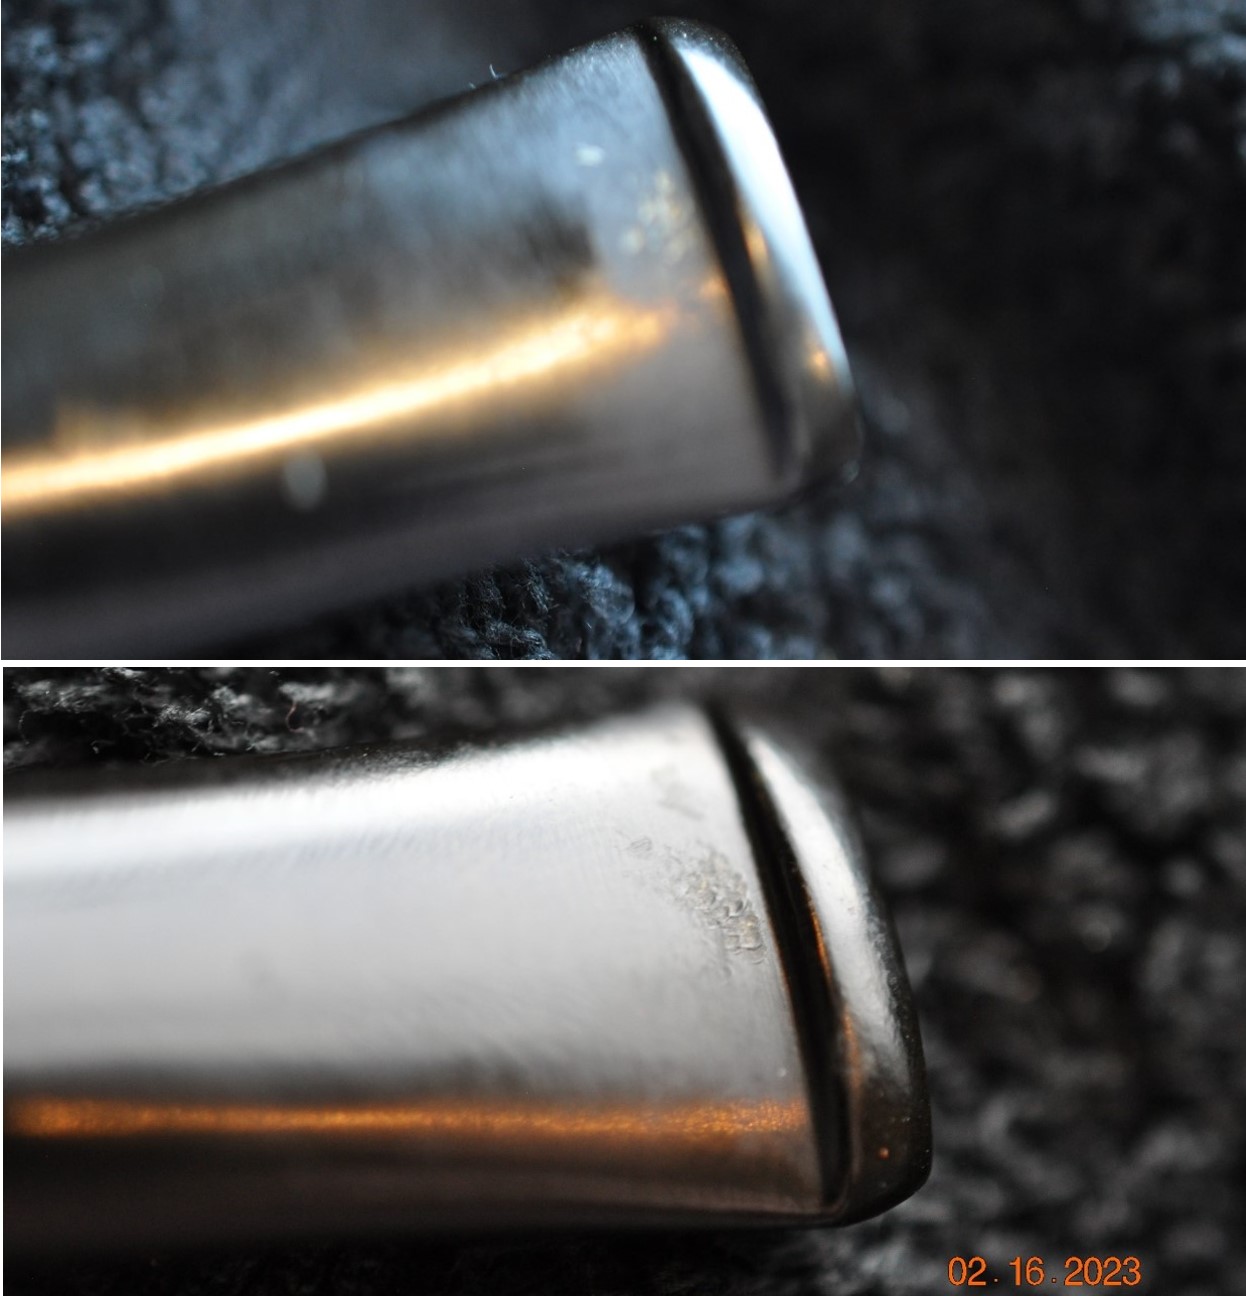
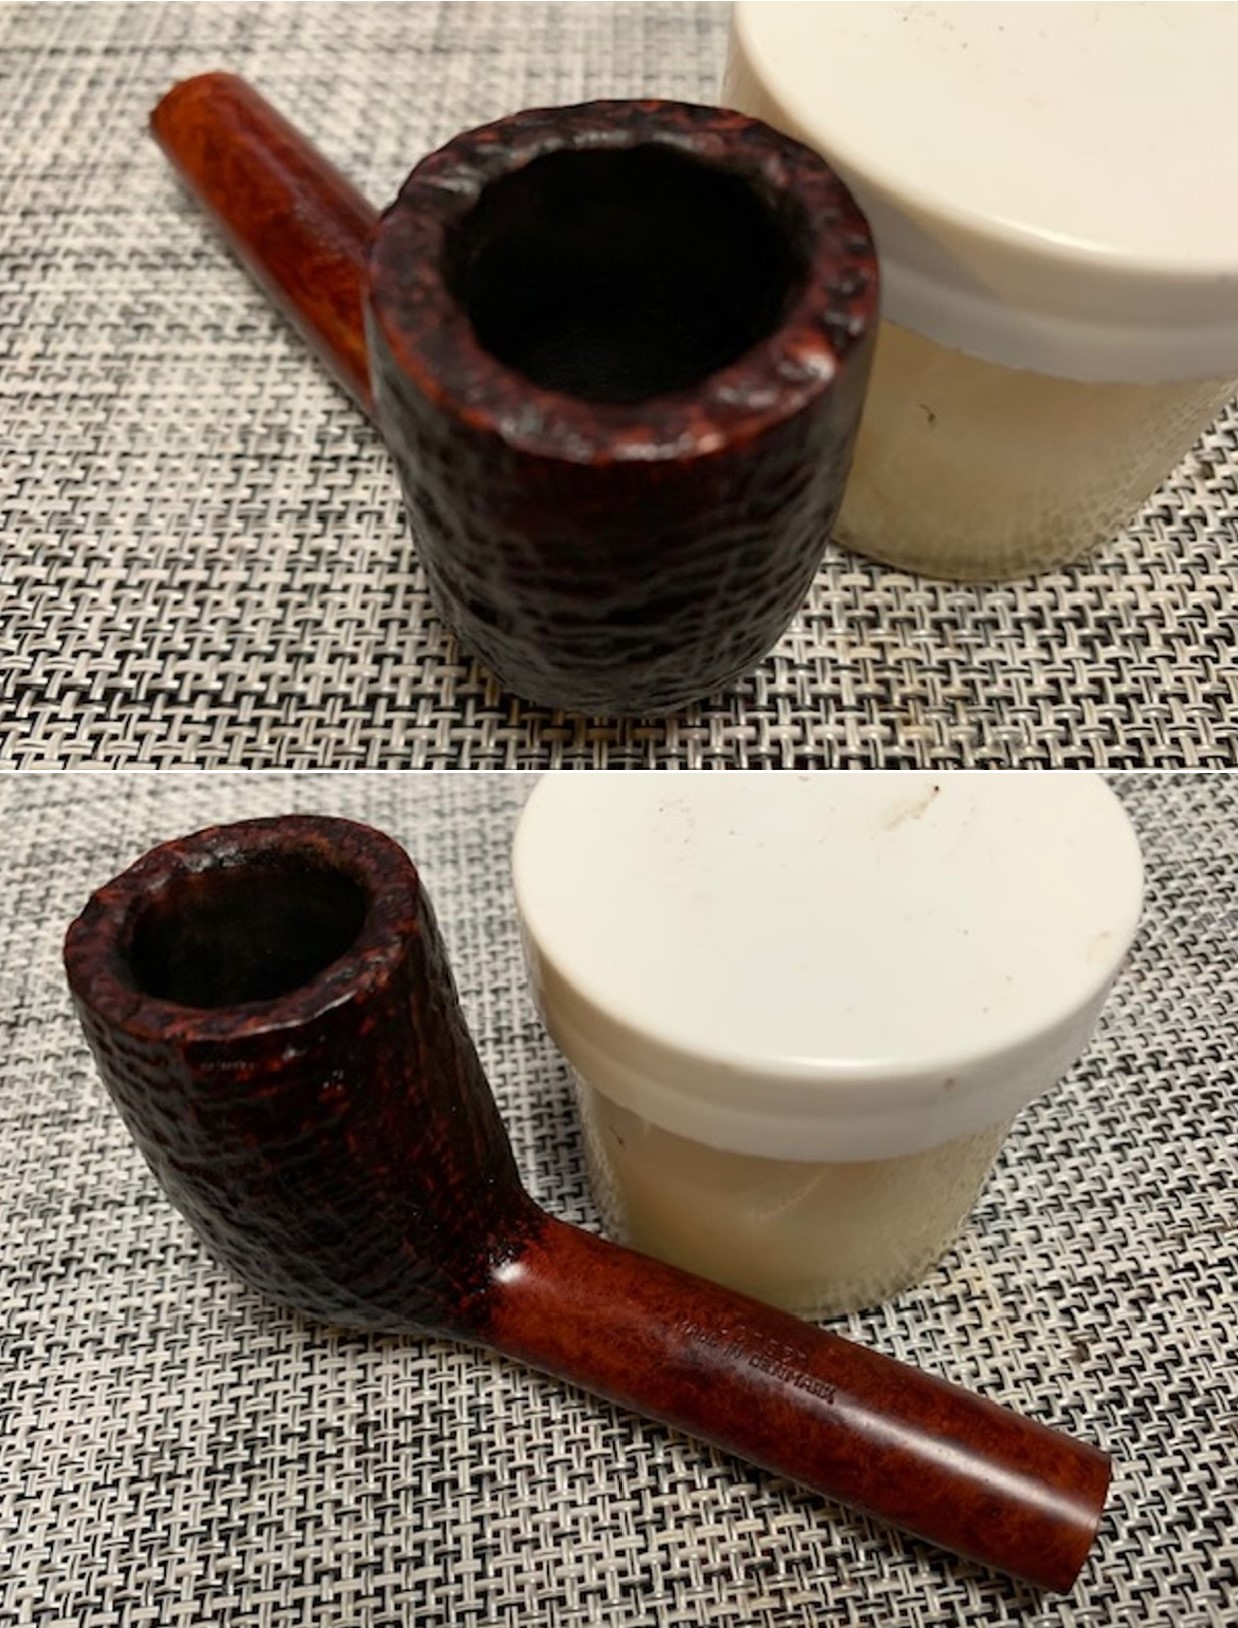
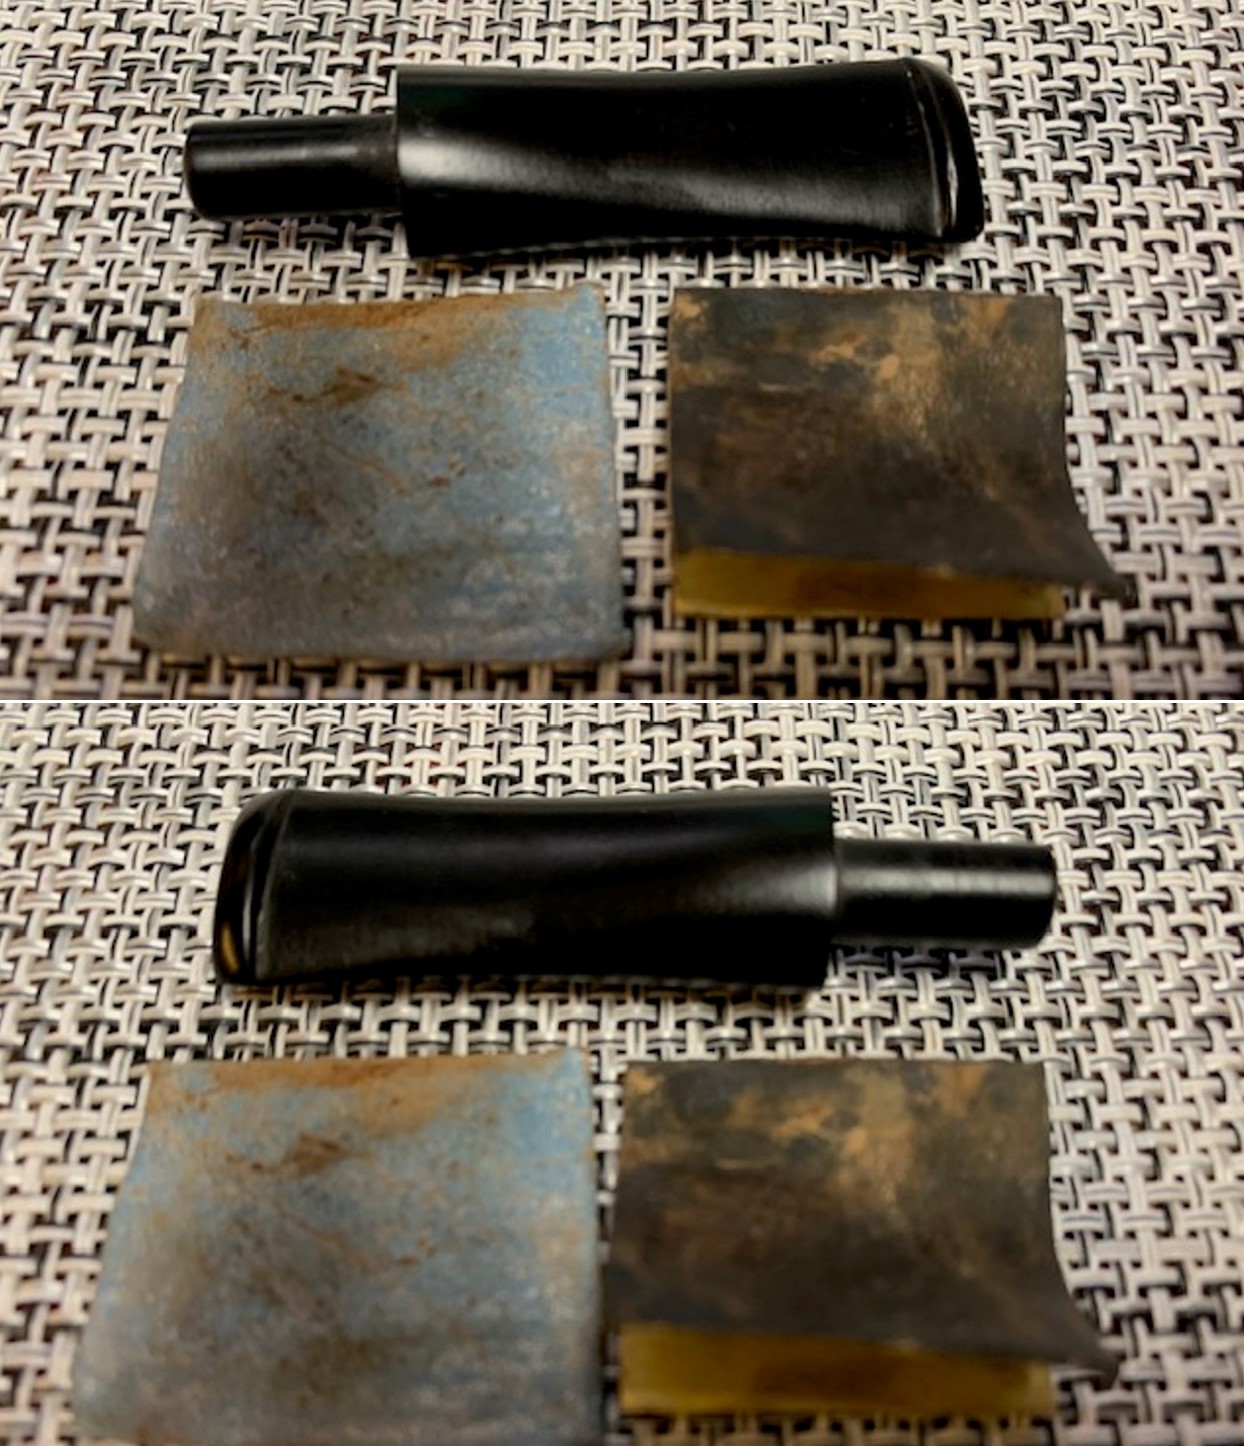
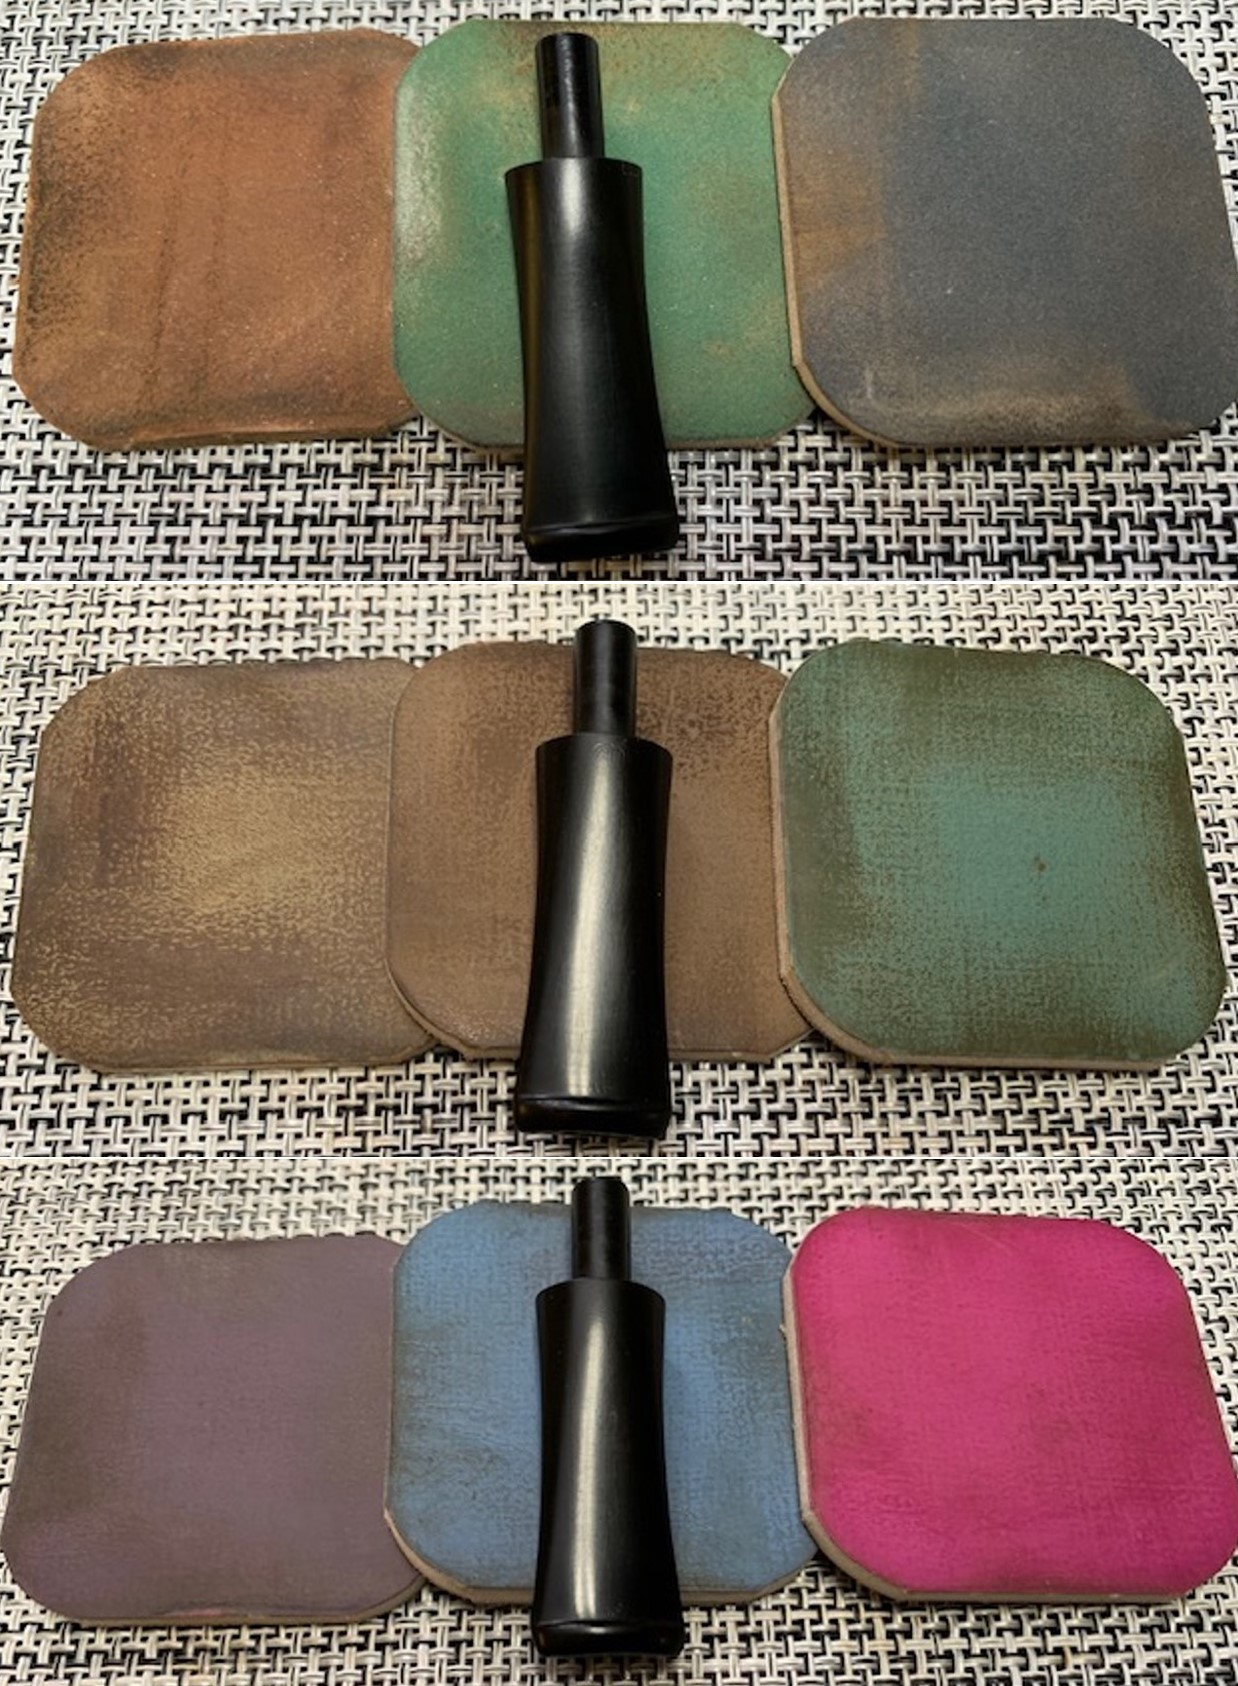
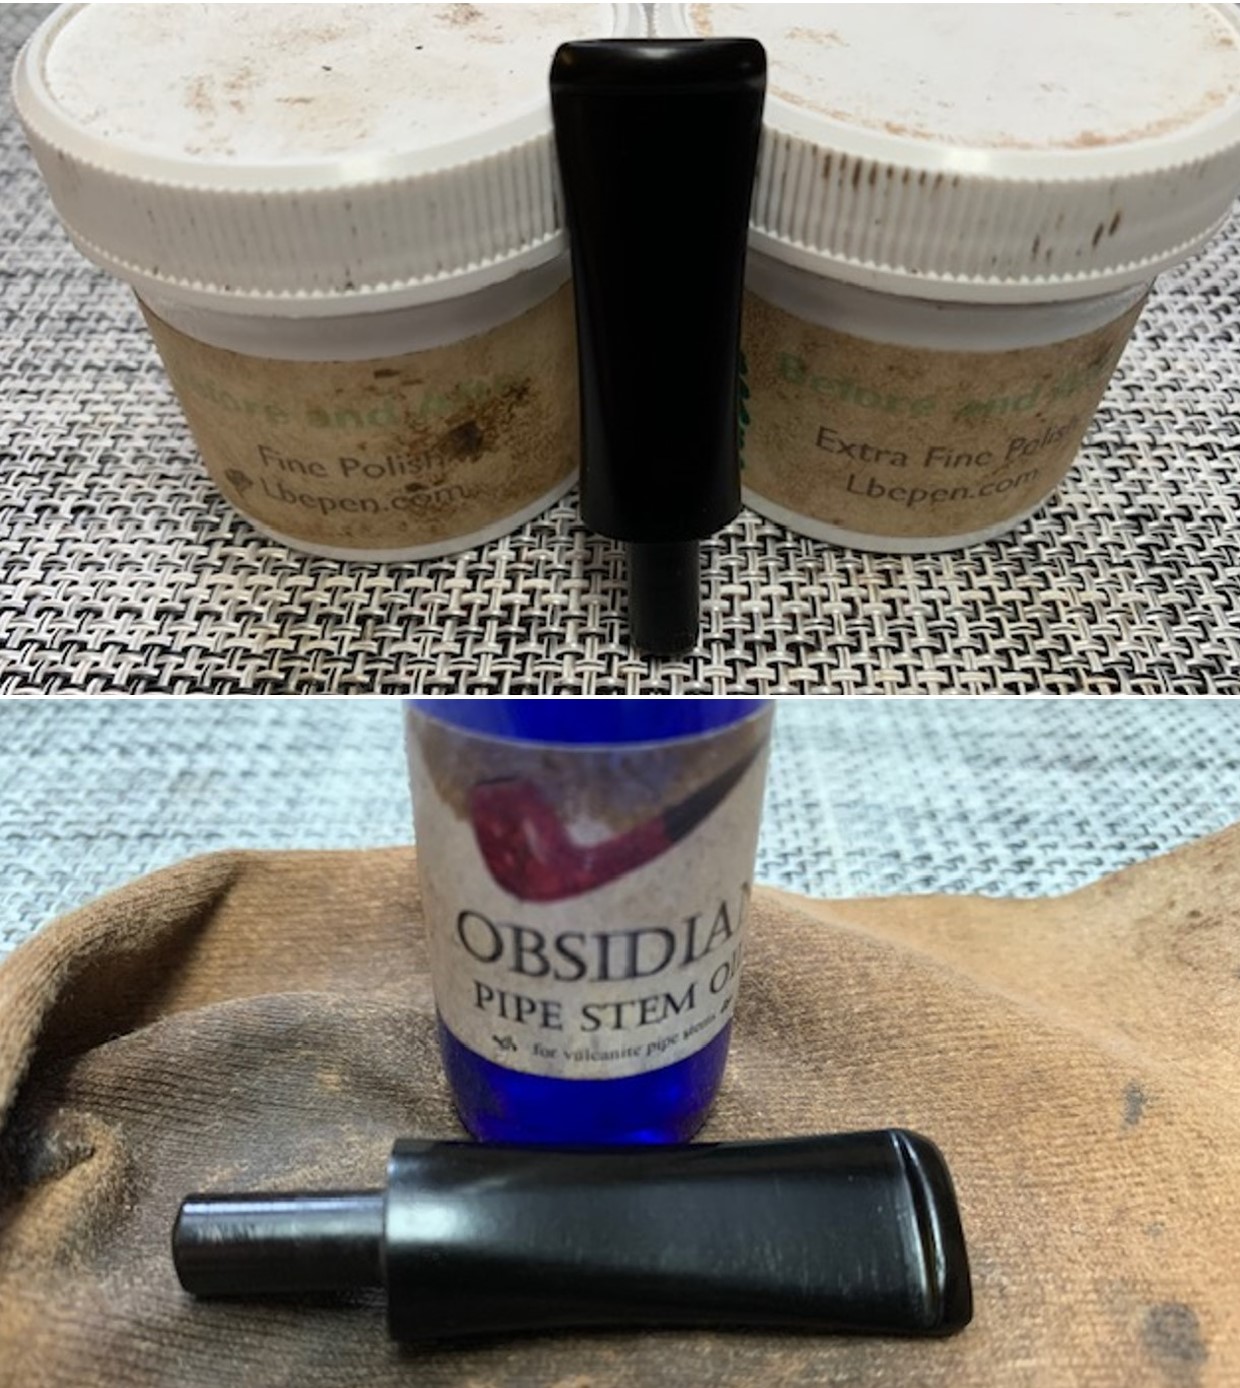
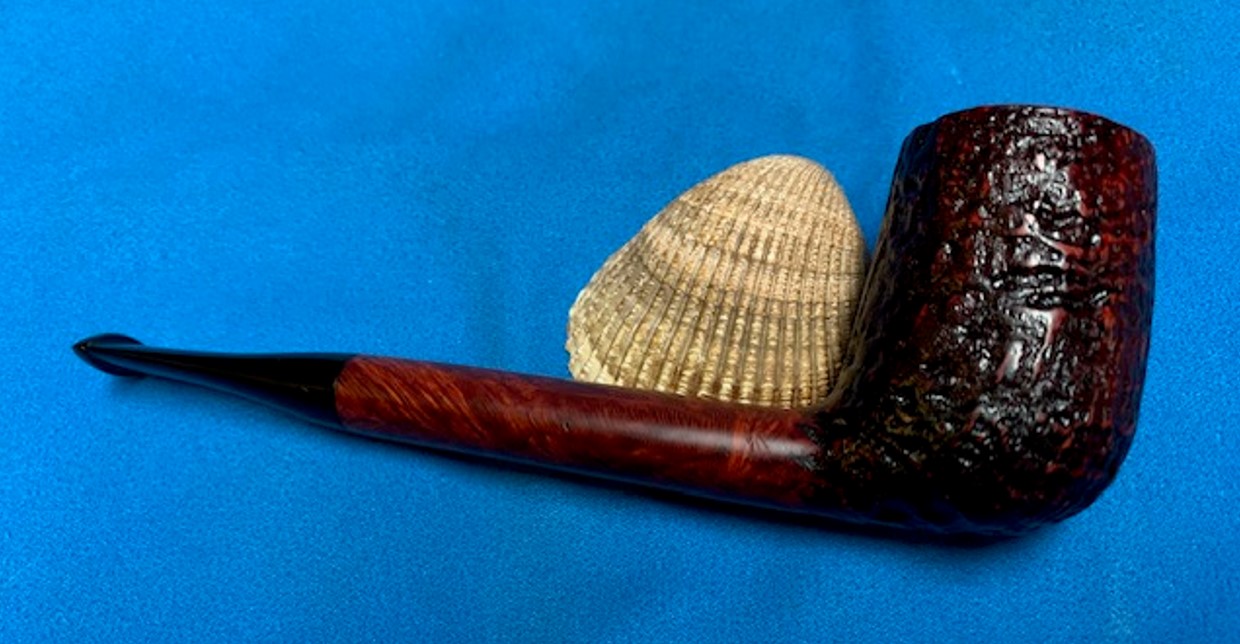
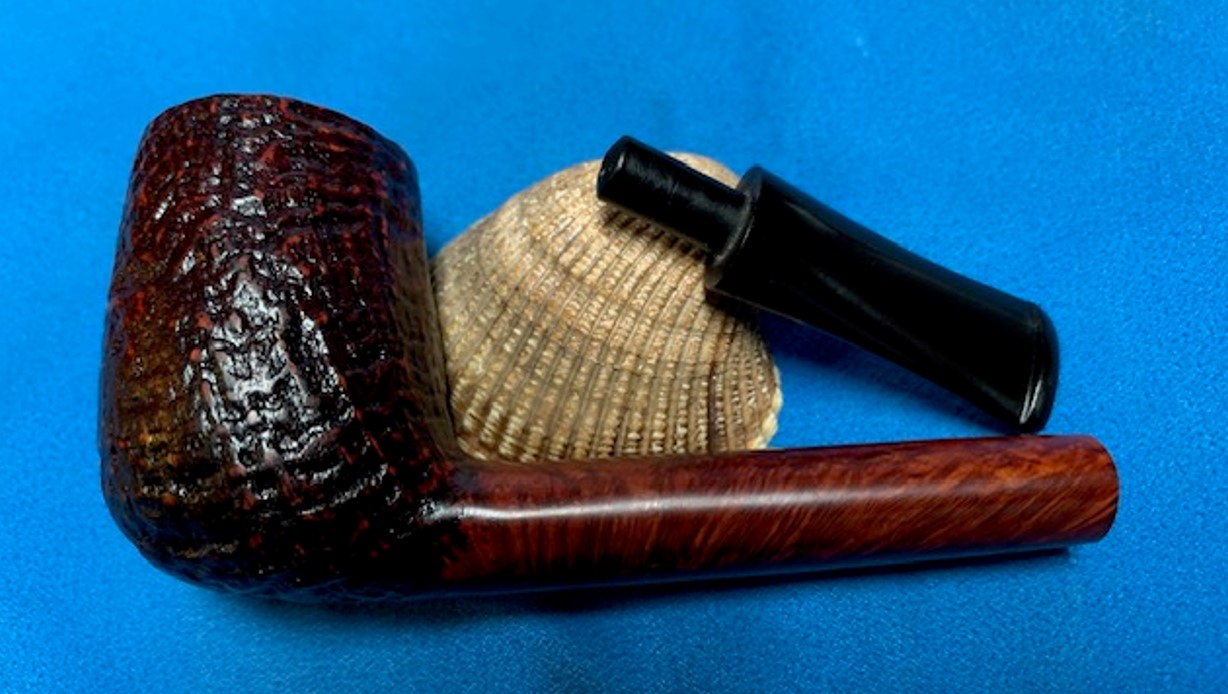
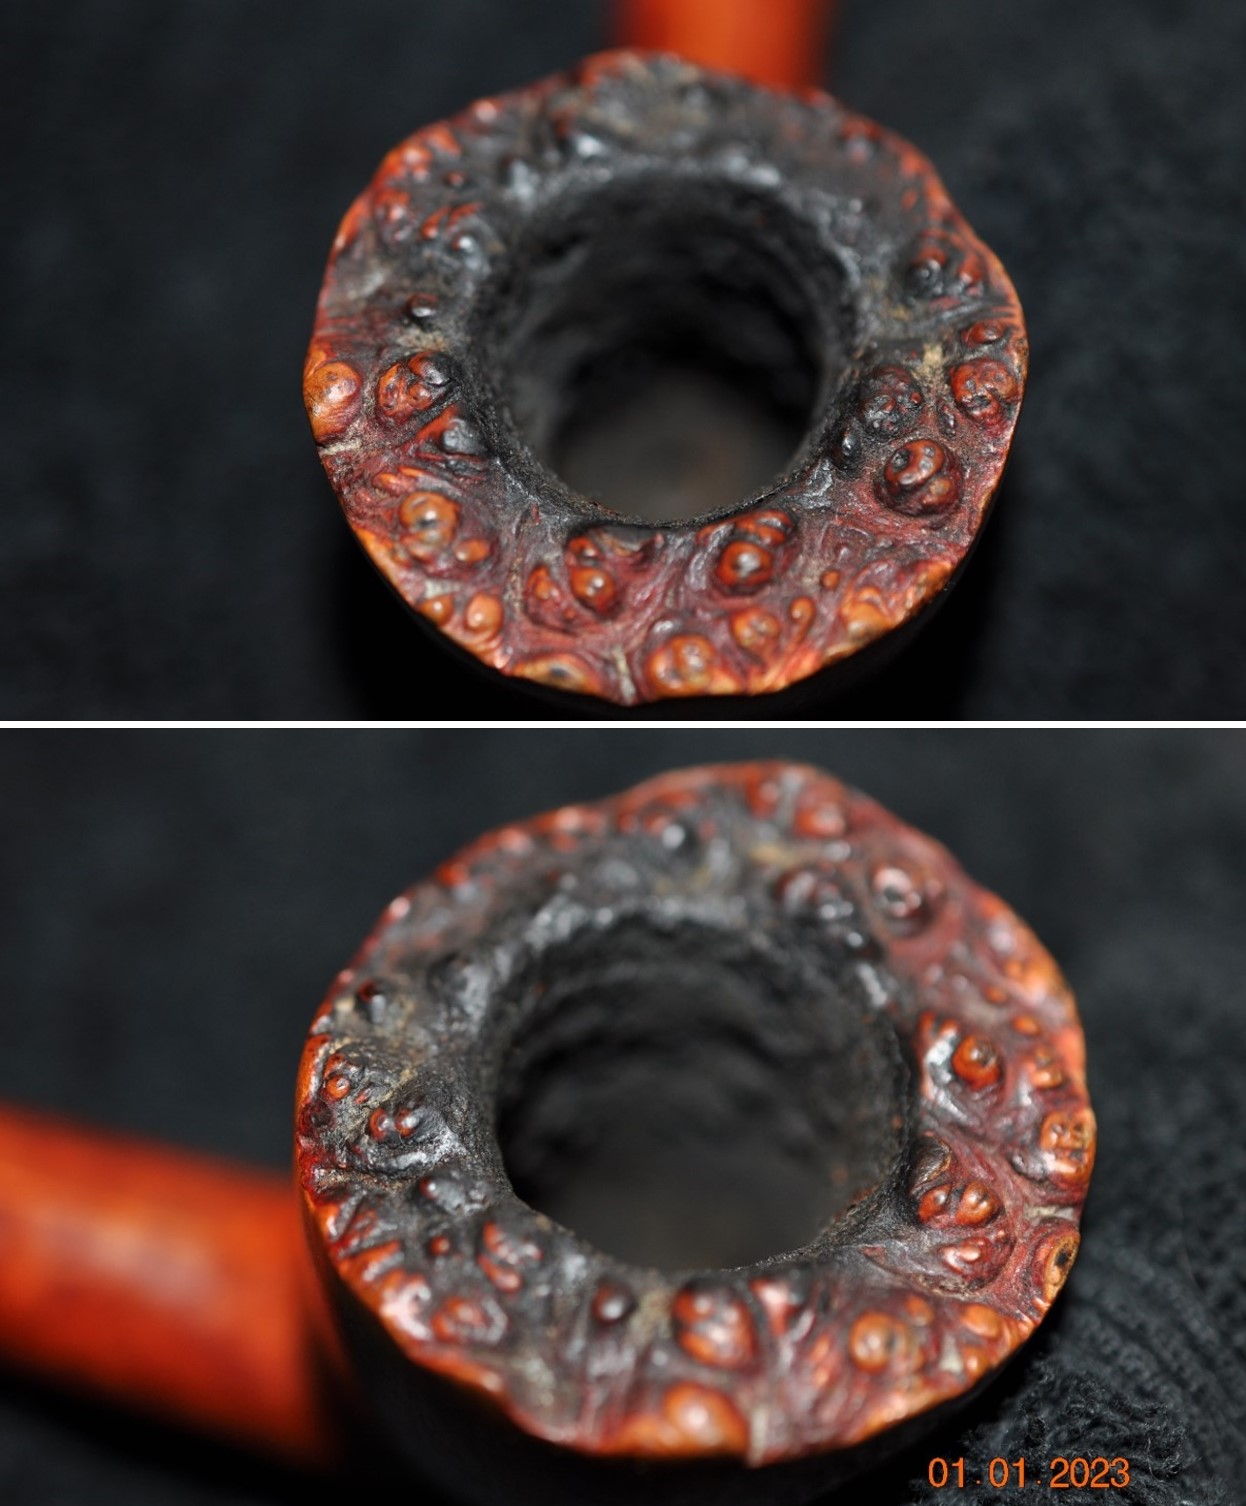
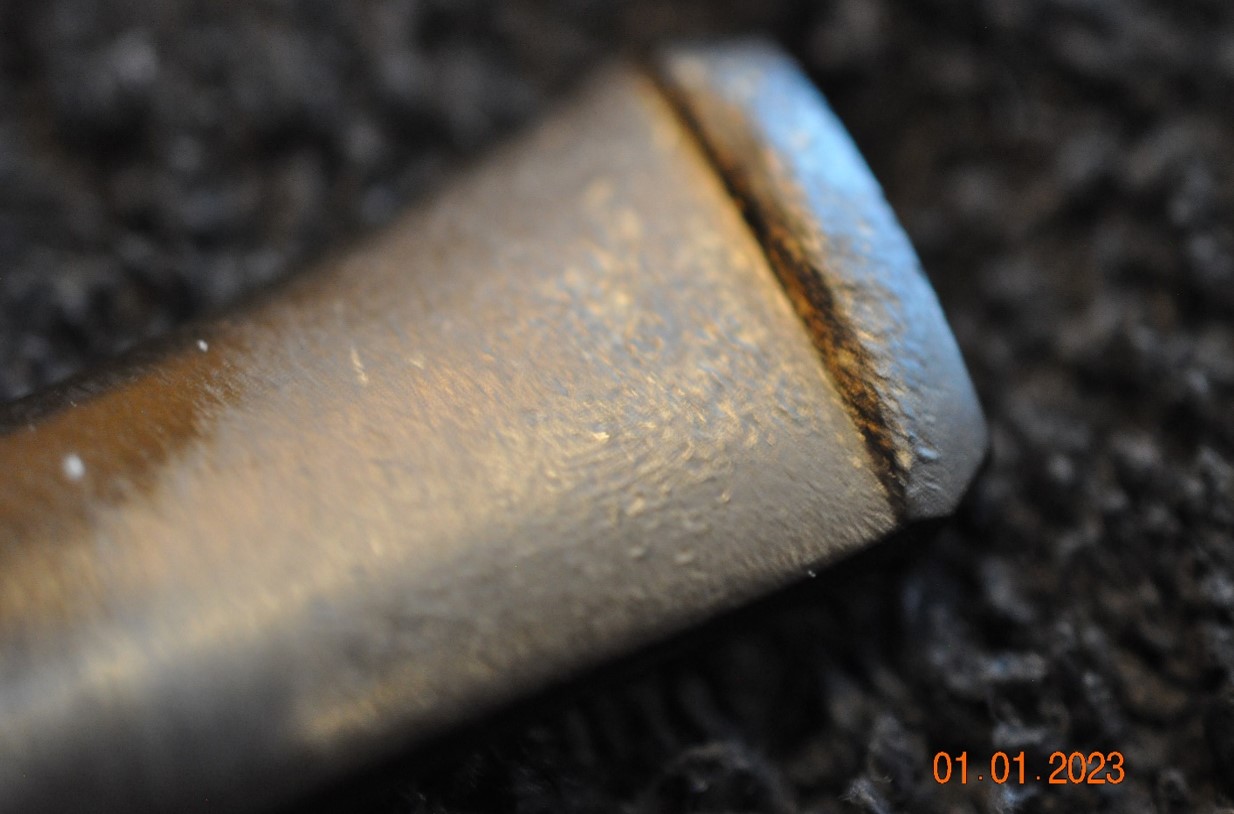
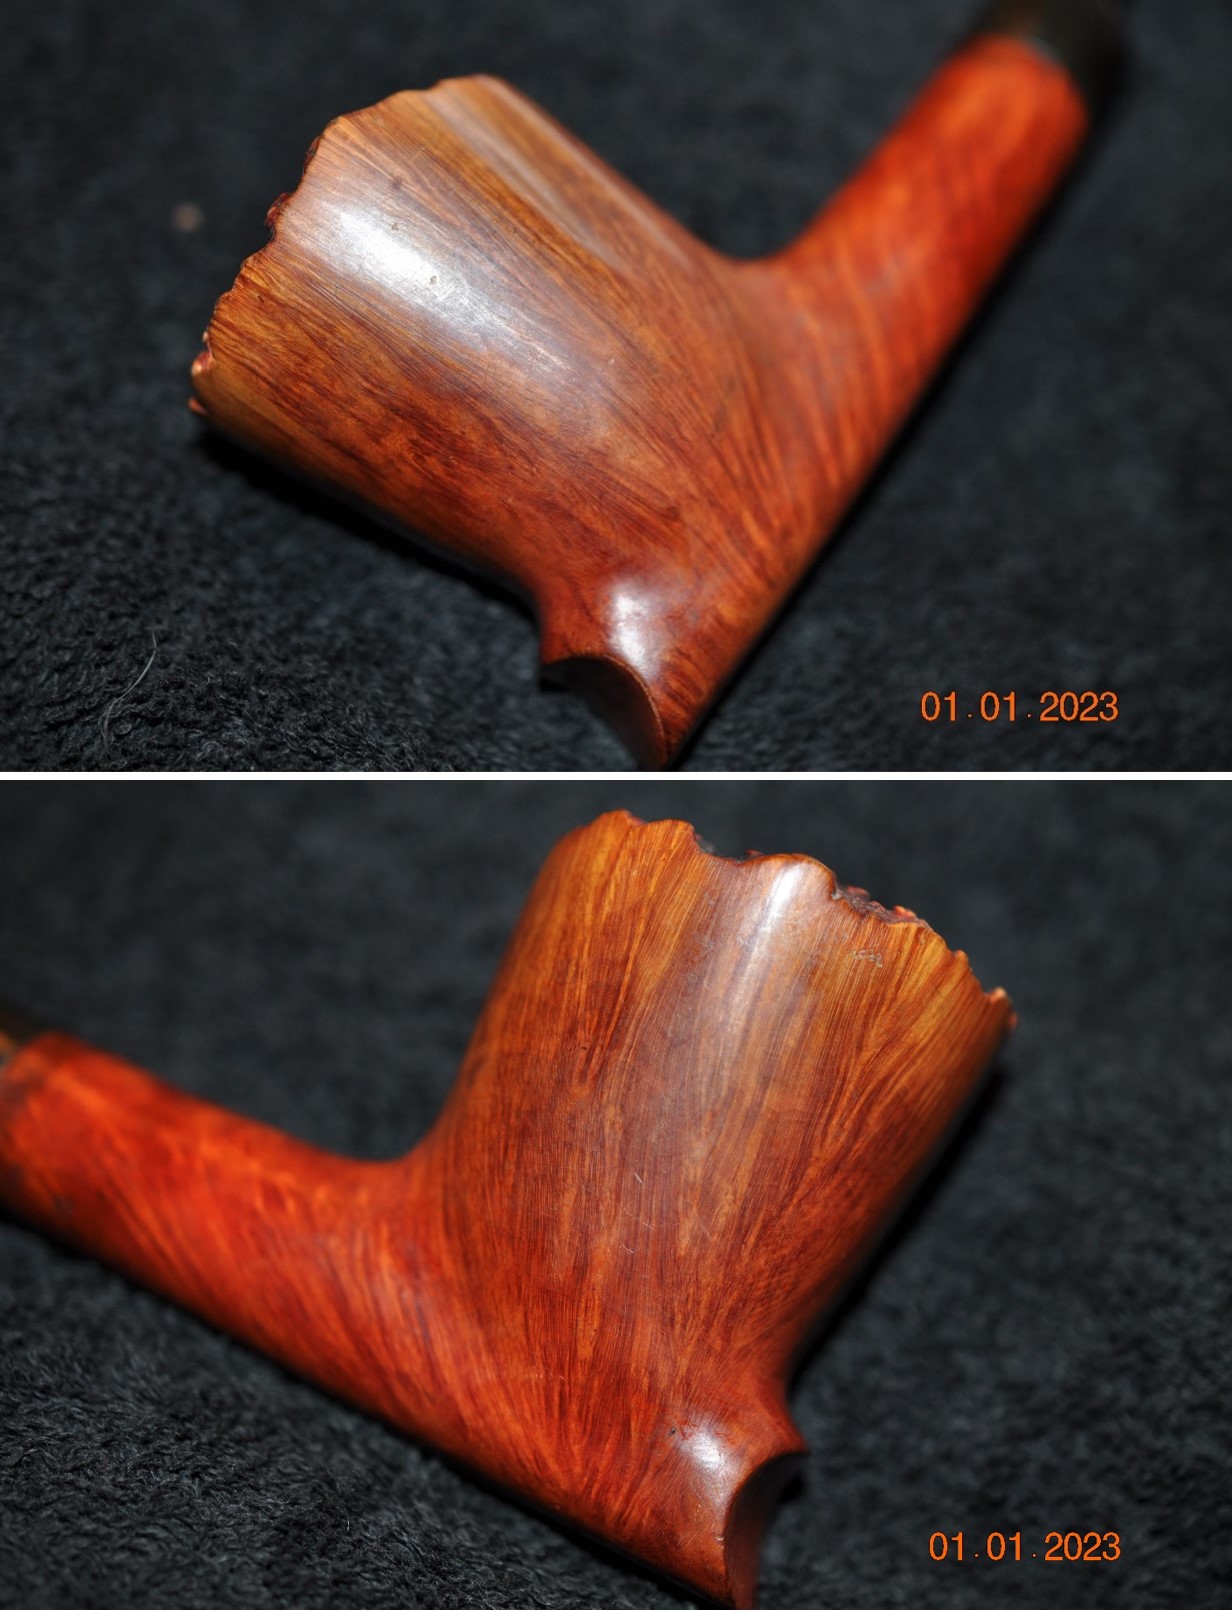
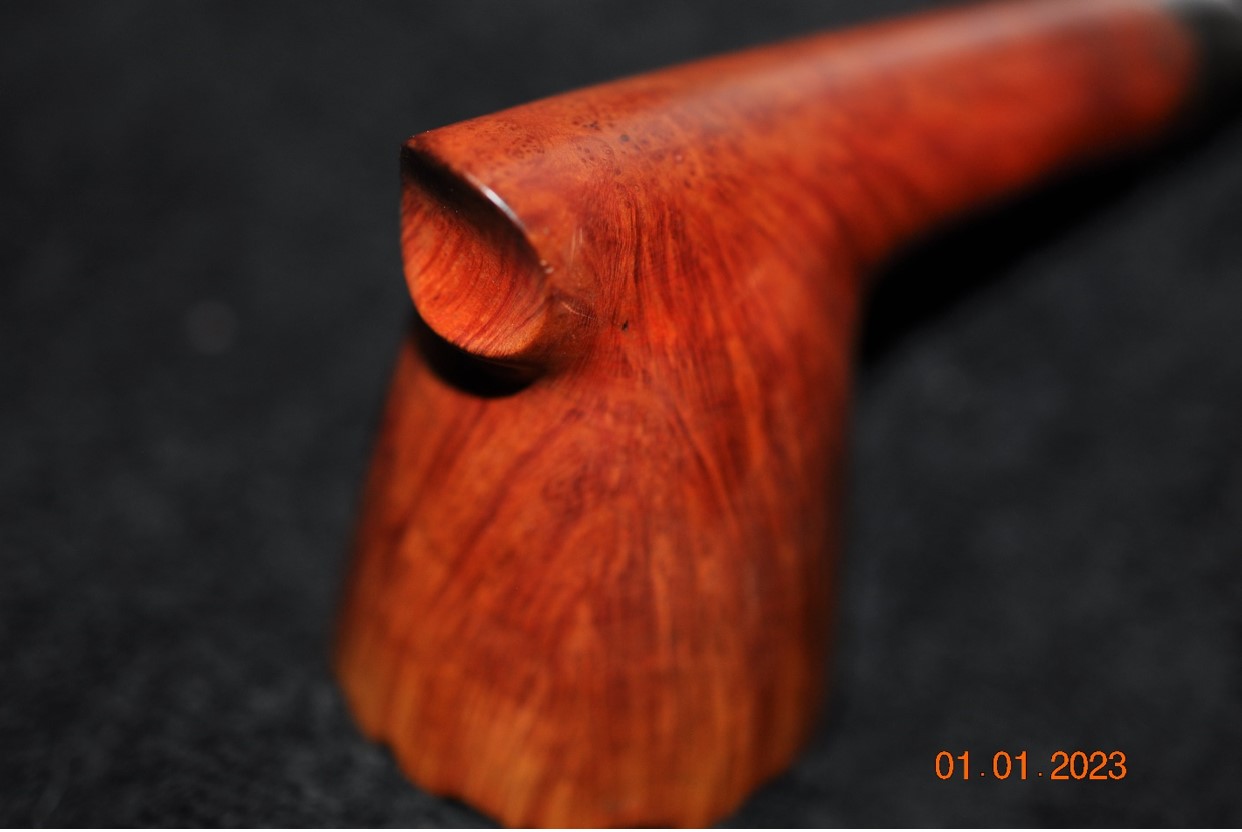
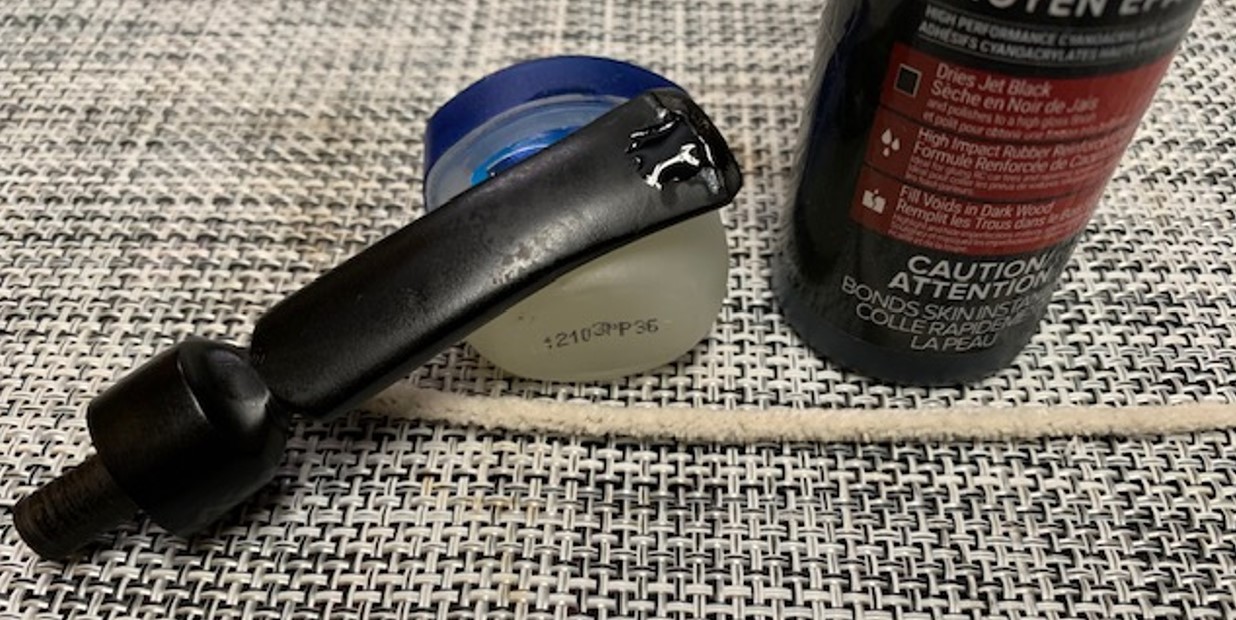
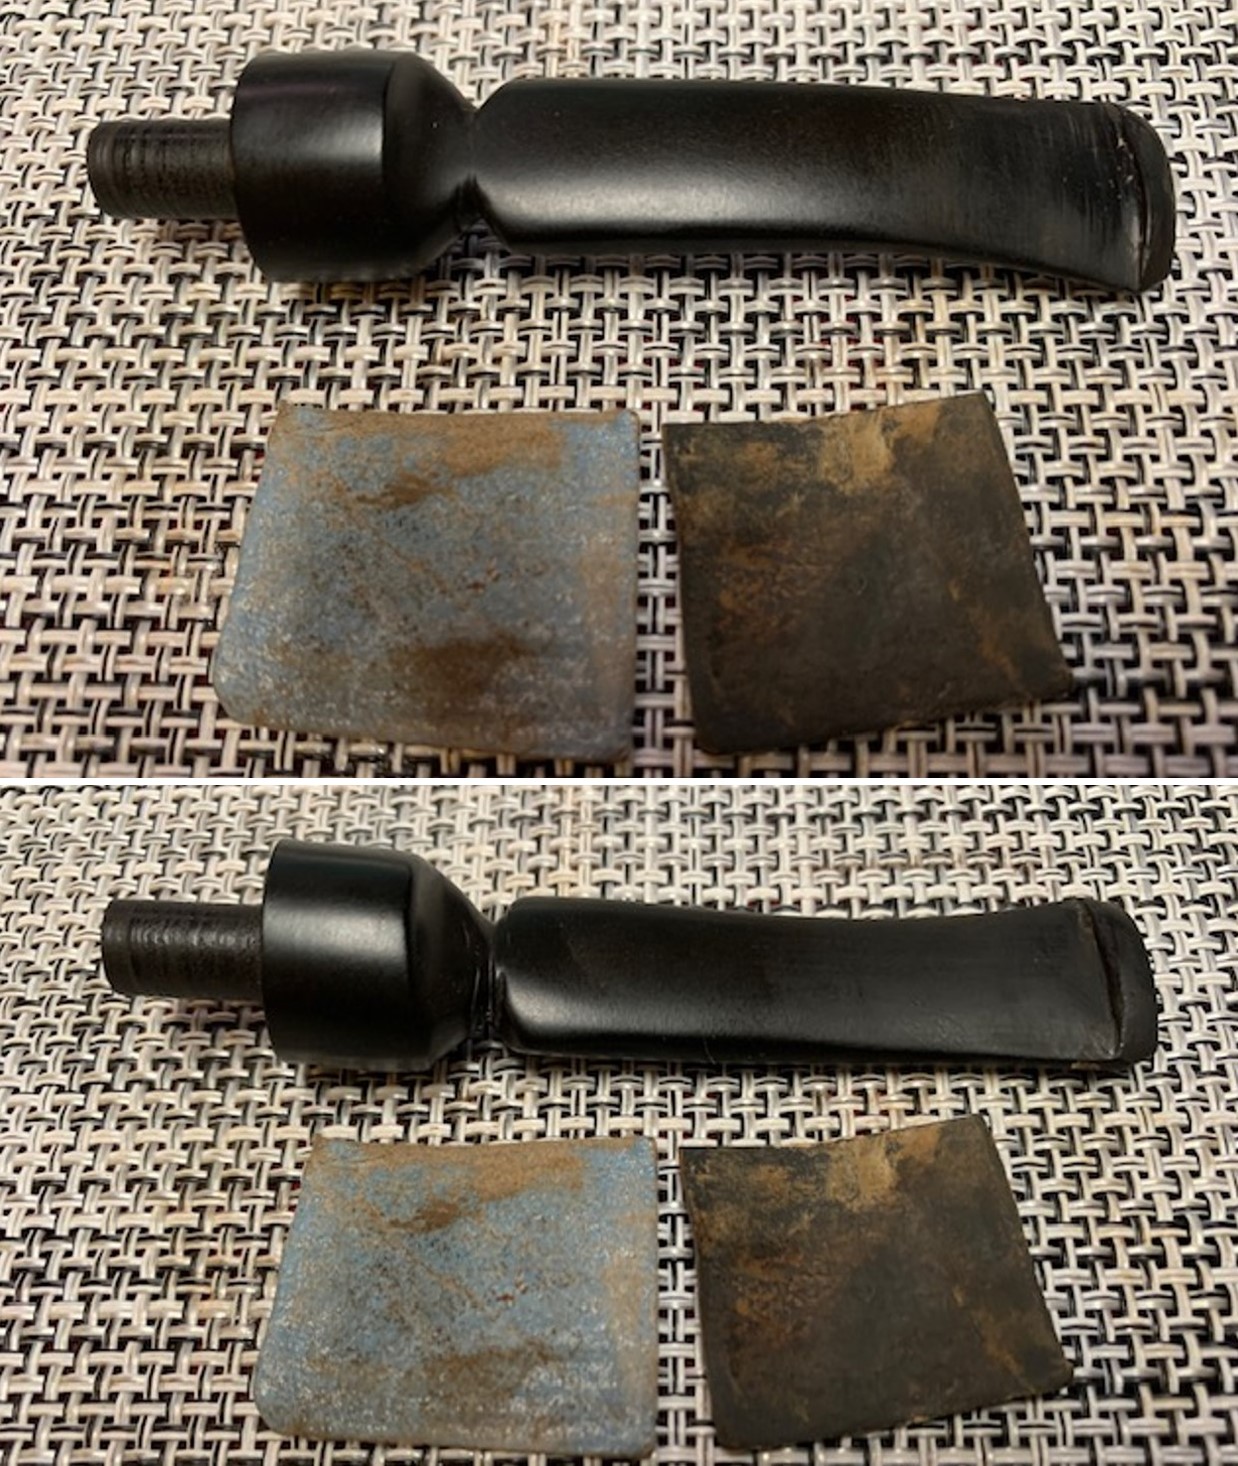
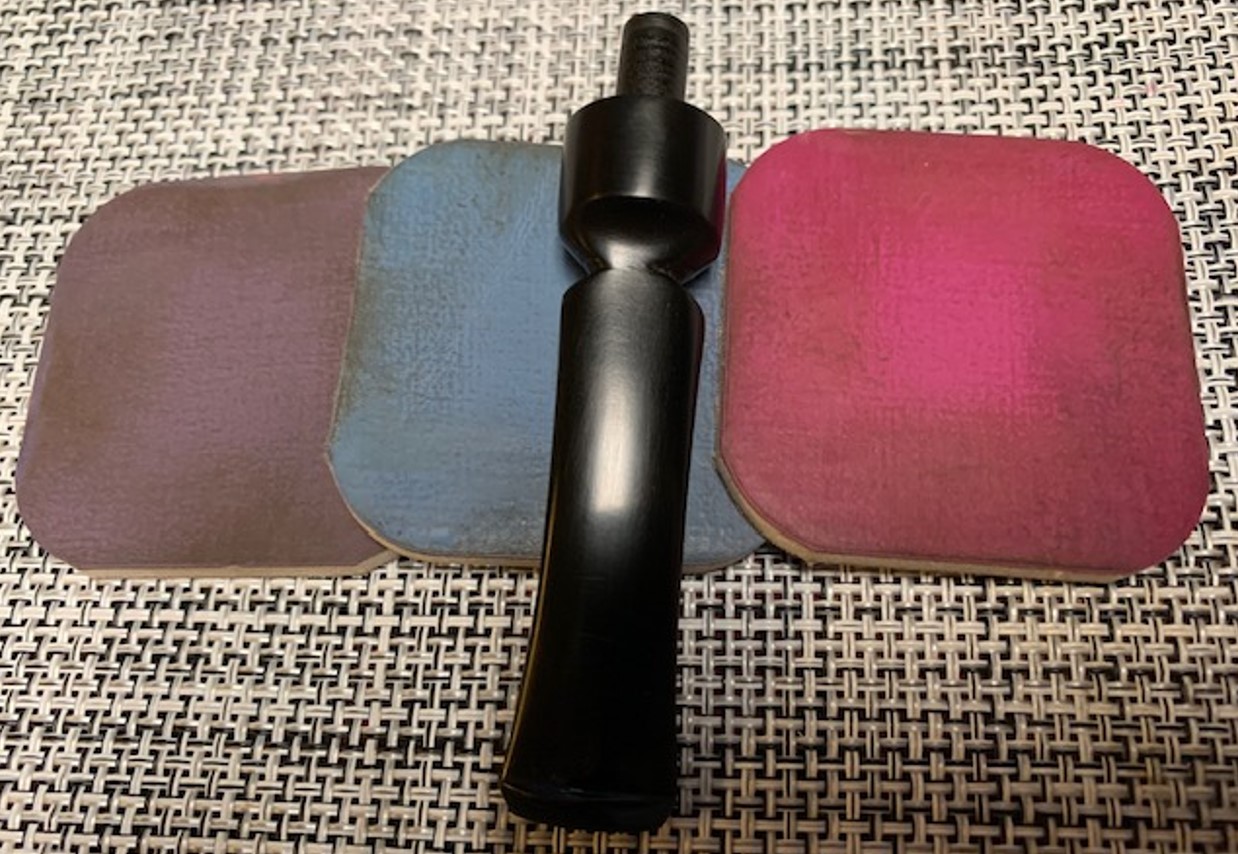
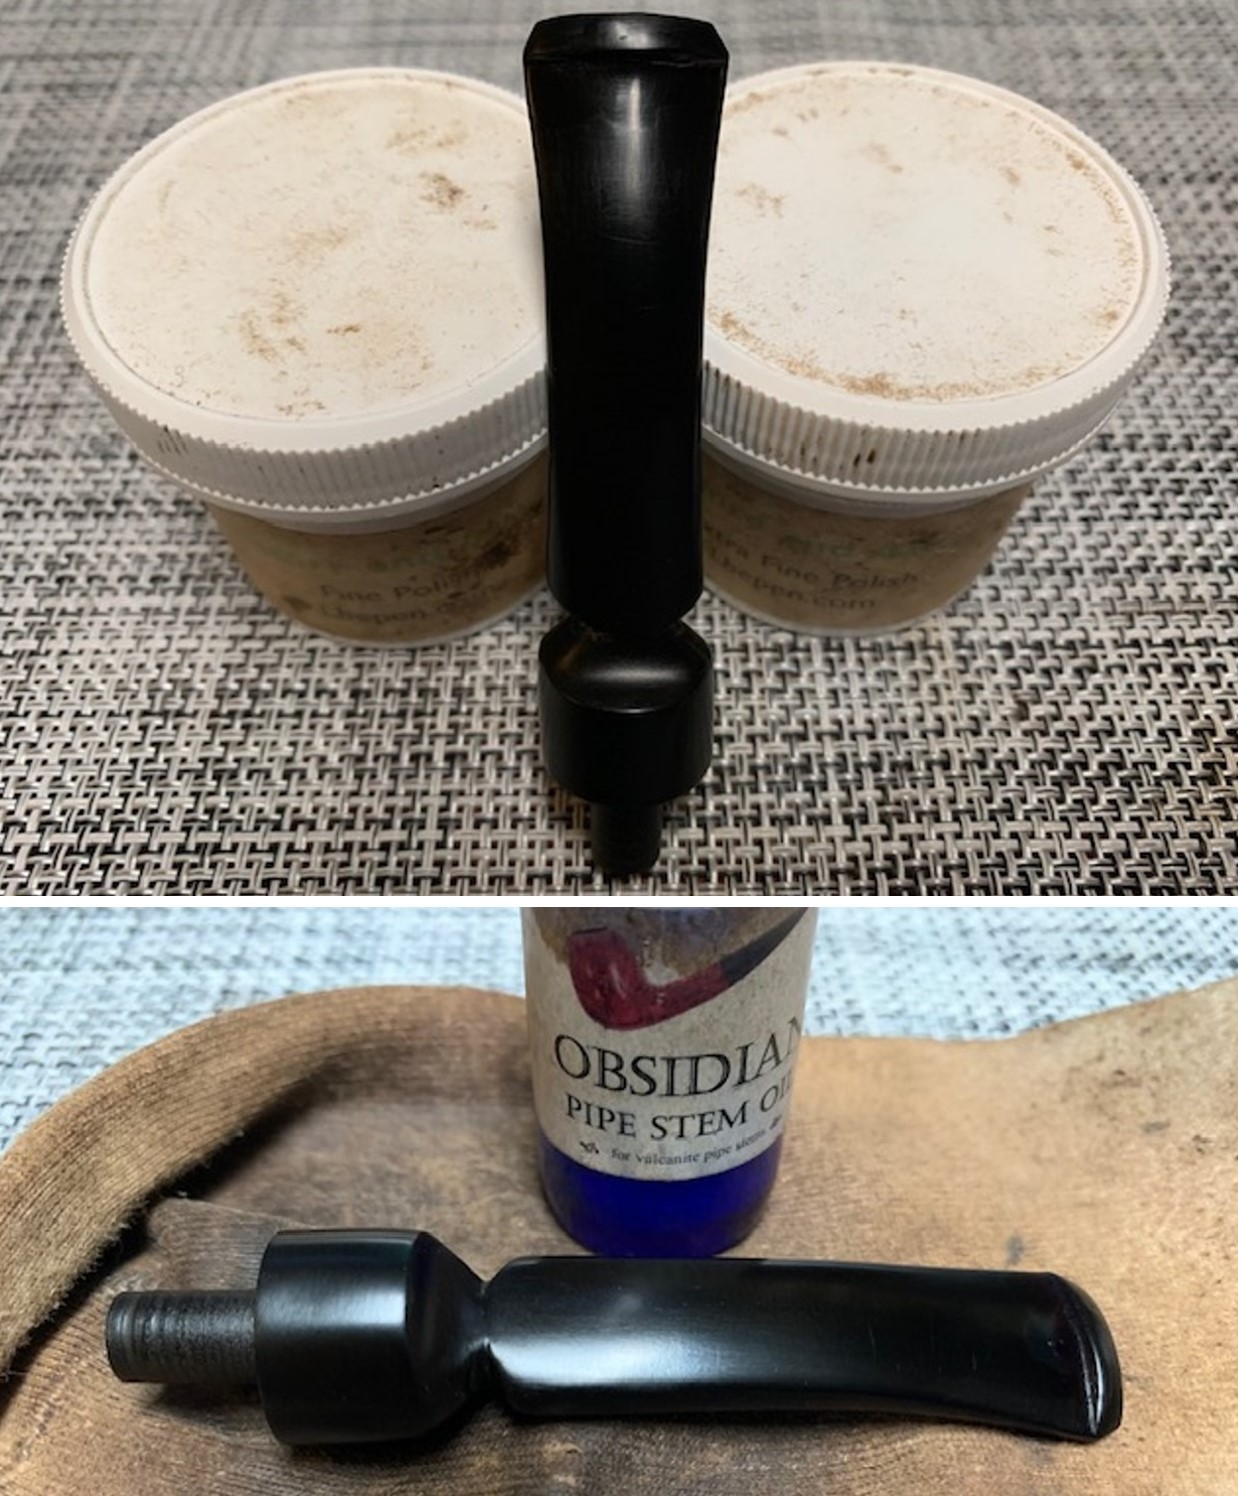
This pipe had been well-loved and well-smoked, as it arrived with some marks and general wear. The stem was dirty and had lots of dents and tooth marks. Most of the stummel was in decent shape, but the rim was pretty nasty – the were burns and lava, and the rustication grooves were full of gunk.I took up the stem and cleaned it off with Murphy’s Oil Soap. It was quite dirty and needed some scrubbing. Following that, I used pipe cleaners and lemon-infused isopropyl alcohol to clean out the internals of the stem. As you can see, there was much muck to be removed!Next, I wiped down the stem with some SoftScrub cleanser and then put the stem in my container of deoxidizing fluid. This works to draw the oxidation to the surface of the stem, so that it can be cleaned off again with more SoftScrub.With the stem nice and clean, I needed to address the damage to the stem. To achieve this, I applied a type of black cyanoacrylate adhesive (impregnated with carbon and rubber) to the damaged area. I sprayed these areas with an accelerant to cure the adhesive immediately.I then had to shape these repairs so that they would look great! I began by taking a needle file and shaping the hardened adhesive. Continuing, I used 200- and 400-grit sandpapers on the repairs to smooth them out. I finished up by using all nine of my MicroMesh pads to sand the entire stem. I also used some pipe stem oil to assist with the sanding and protect the vulcanite.Having put aside the stem, I moved on to the charming, chunky stummel. First on the agenda was to ream out the bowl, as it was full of cake. The PipNet reamer made short work of this, and I followed up by sanding the walls down with some 220-grit sandpaper attached to a wooden dowel. This revealed a tiny bit of damage to interior wall – but this would be easily fixed.Next on the list, I thoroughly cleaned out the shank. Using a combination of Q-tips and pipe cleaners dipped in lemon-infused isopropyl alcohol, I removed all the awful filth in there. The photo shows a mere portion of the cotton used. As the girls in the 80s used to say, grody to the max!I always like to ameliorate the cleaning of the stummel by performing a “de-ghosting” on the stummel. I placed some cotton balls in the bowl and the mortise of the shank, then saturated them with straight isopropyl alcohol. I let this sit overnight while the oils and tars (and evil spirits) leeched into the cotton.I broke out the Murphy’s again and wiped down the outside with some cotton rounds. Once I felt the outside was clean, I then took out my two brushes and castile soap and washed both the inside and outside. The internals were lovely and clean after that – but there were still some issues on that rim.Even though I’d used both a toothbrush and a wire brush on the rim, there was still some filth to be dealt with – not to mention some burning. I began by “topping” the pipe – in other words, I placed the top of the pipe, level and flat, on a piece of 220-grit sandpaper and gently ground it down to smooth and even out the rim. The rim still required a bit more beautification. I took a small piece of sandpaper and evened out some rough parts that topping wasn’t able to address.I then went “next level” insane. I took a dental tool and individually excavated each groove on the rim to remove the crud. It took awhile, but the results were worth it.In order to address the burns, I dissolved some oxalic acid crystals in some hot water. Then, taking a Q-tip and tipping it in the acid, I rubbed and rubbed and rubbed until it removed most of the burning that was there. It didn’t all come off (it rarely does), but was much improved.Once I was satisfied with that, the finishing sanding was next, so I took all nine of my MicroMesh pads and sanded the whole stummel until it was super-smooth and handsome.The pipe had benefitted from a lot of work, but this wore out the colour of the wood. I decided to restain the pipe. First, I brought out my heat gun and spent a couple of minutes thoroughly heating the wood, so it would be as receptive as possible to the stain. I wanted the stain to penetrate well into the wood, to give the best results. I applied Fiebing’s Light Brown Leather Dye with a cotton dauber. I flamed it with my Bic lighter, let it set, then coated it again with dye, flamed it again, and let that set too. I decided to let the pipe sit overnight. This dye is alcohol-based, so I used isopropyl alcohol to wipe down the pipe and remove excess stain. I am very happy with the results.Earlier, I referred to a little hairline crack emanating from the draught hole. Steve recommended repairing it some pipe mud. This is made by mixing cigar ash (not pipe ash) with the merest bit of water to create a paste. I then applied the paste with a tiny spatula and let it set until dry. I then gently sanded it down.Later, I added some Before & After Restoration Balm to the stummel. This does good things to wood, enhances the grain, and brings out some lustre.Then it was off for a trip to the buffer. I applied a few coats of Conservator’s Wax and the pipe really popped. The lovely shine made the wood very attractive. This is a very handsome pipe and will provide many years of smoking pleasure.This BP Jum is much improved and is ready to be enjoyed again by the next owner. I am pleased to announce that this pipe is for sale! If you are interested in acquiring it for your collection, please have a look in the American pipe section of the store here on Steve’s website. You can also email me directly at kenneth@knightsofthepipe.com. The approximate dimensions of the pipe are as follows: length 5⅜ in. (137 mm); height 1⅝ in. (41 mm); bowl diameter 1⅞ in. (48 mm); chamber diameter ⅞ in. (24 mm). The weight of the pipe is 2⅛ oz. (61 g). I hope you enjoyed reading the story of this pipe’s restoration as much as I did restoring it. If you are interested in more of my work, please follow me here on Steve’s website or send me an email. Thank you very much for reading and, as always, I welcome and encourage your comments.
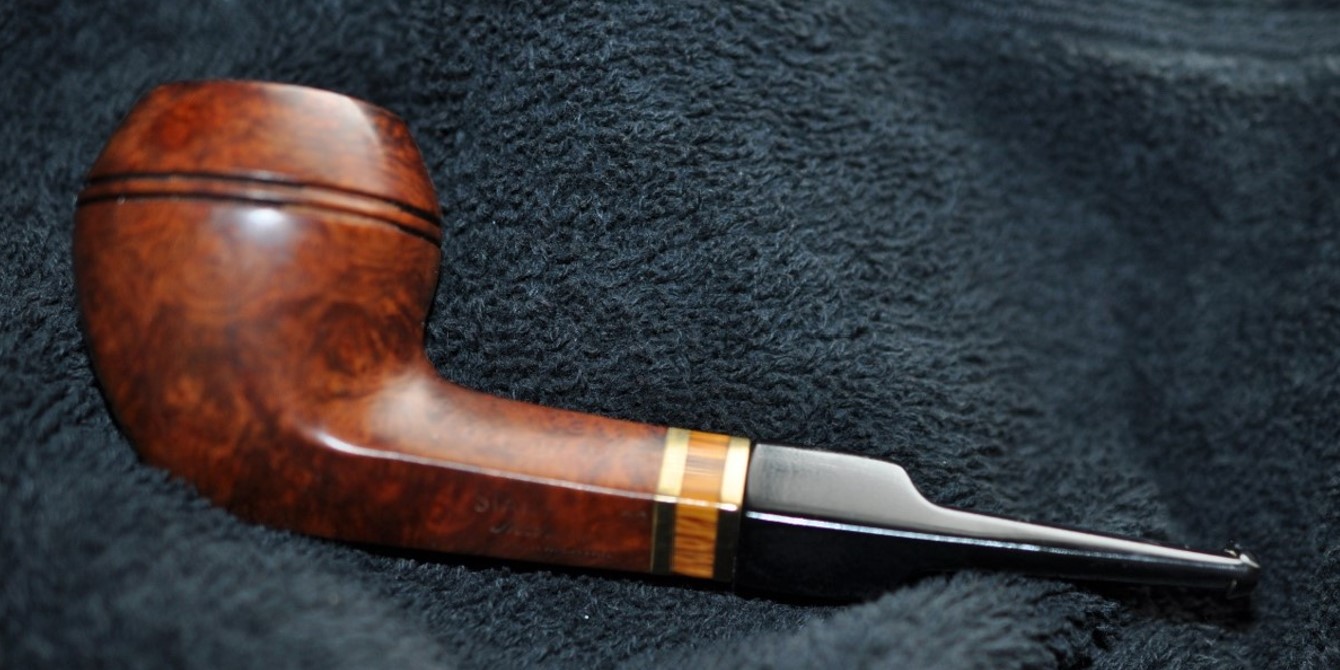
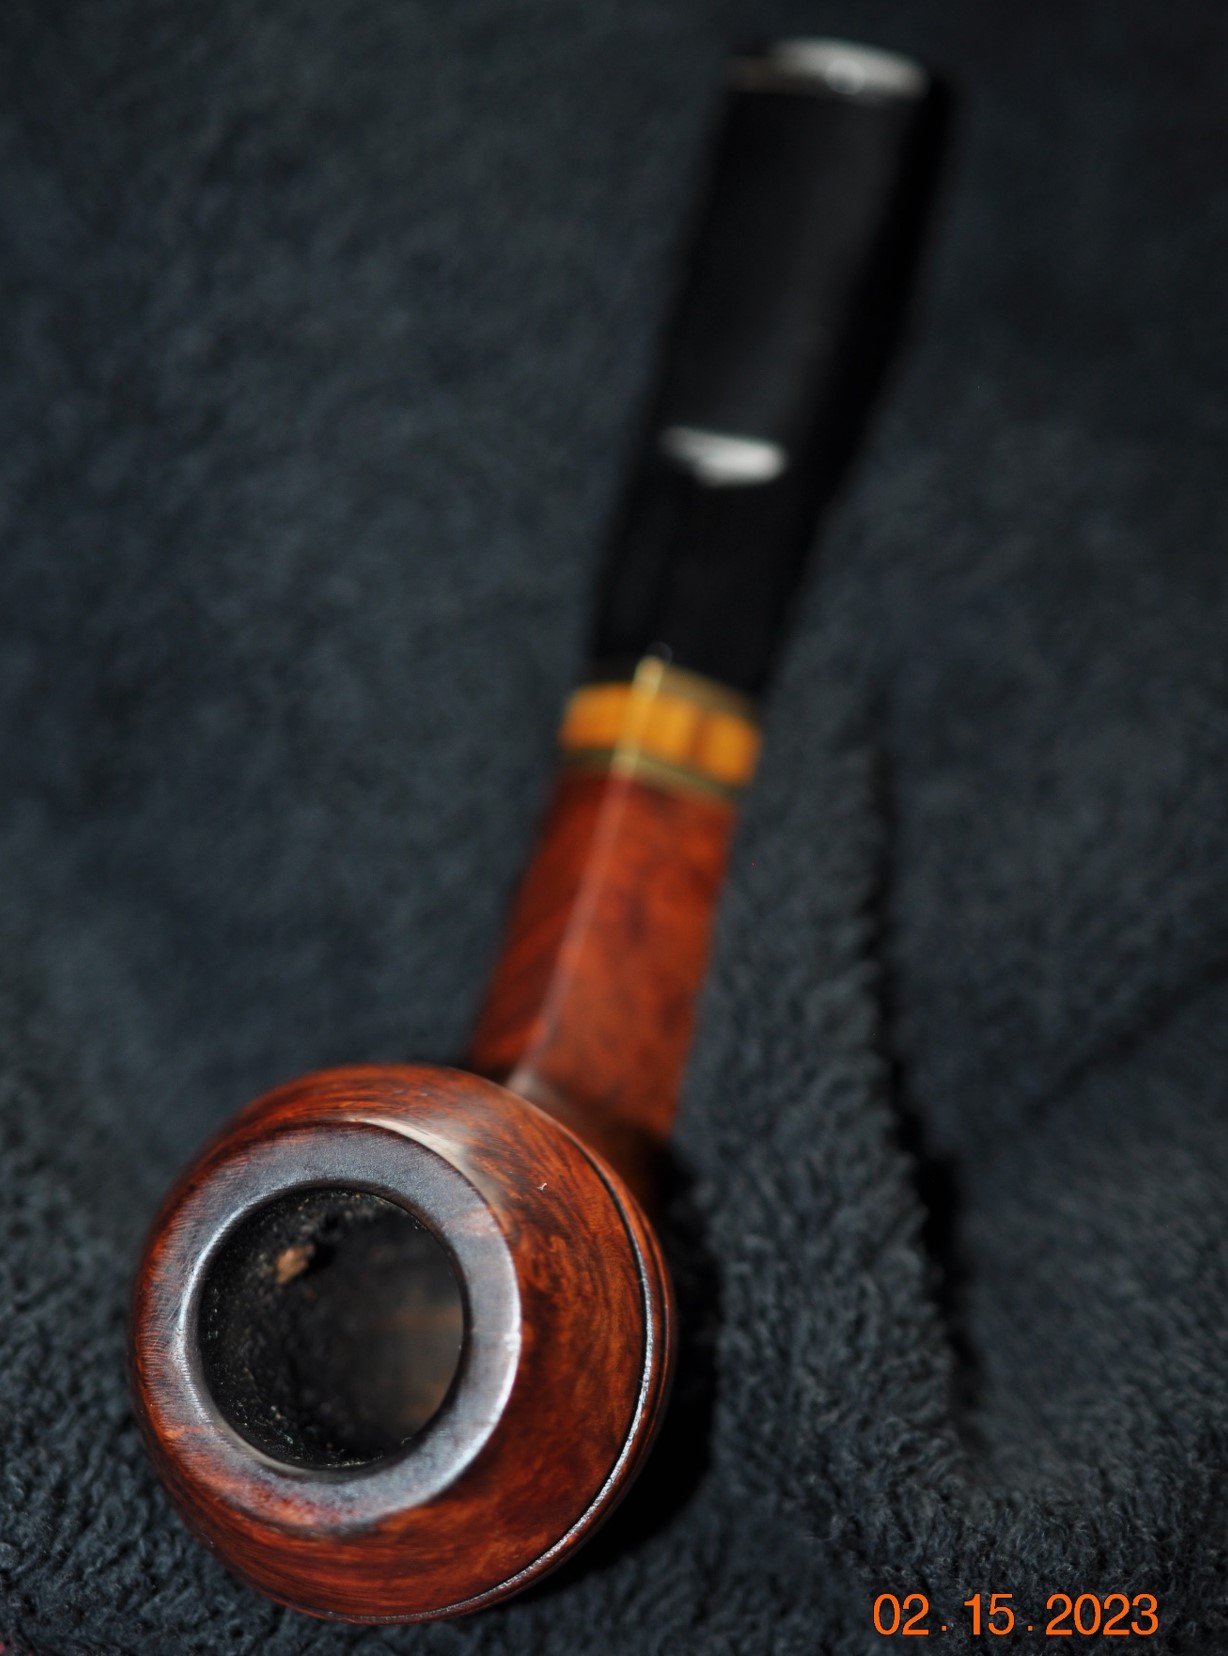
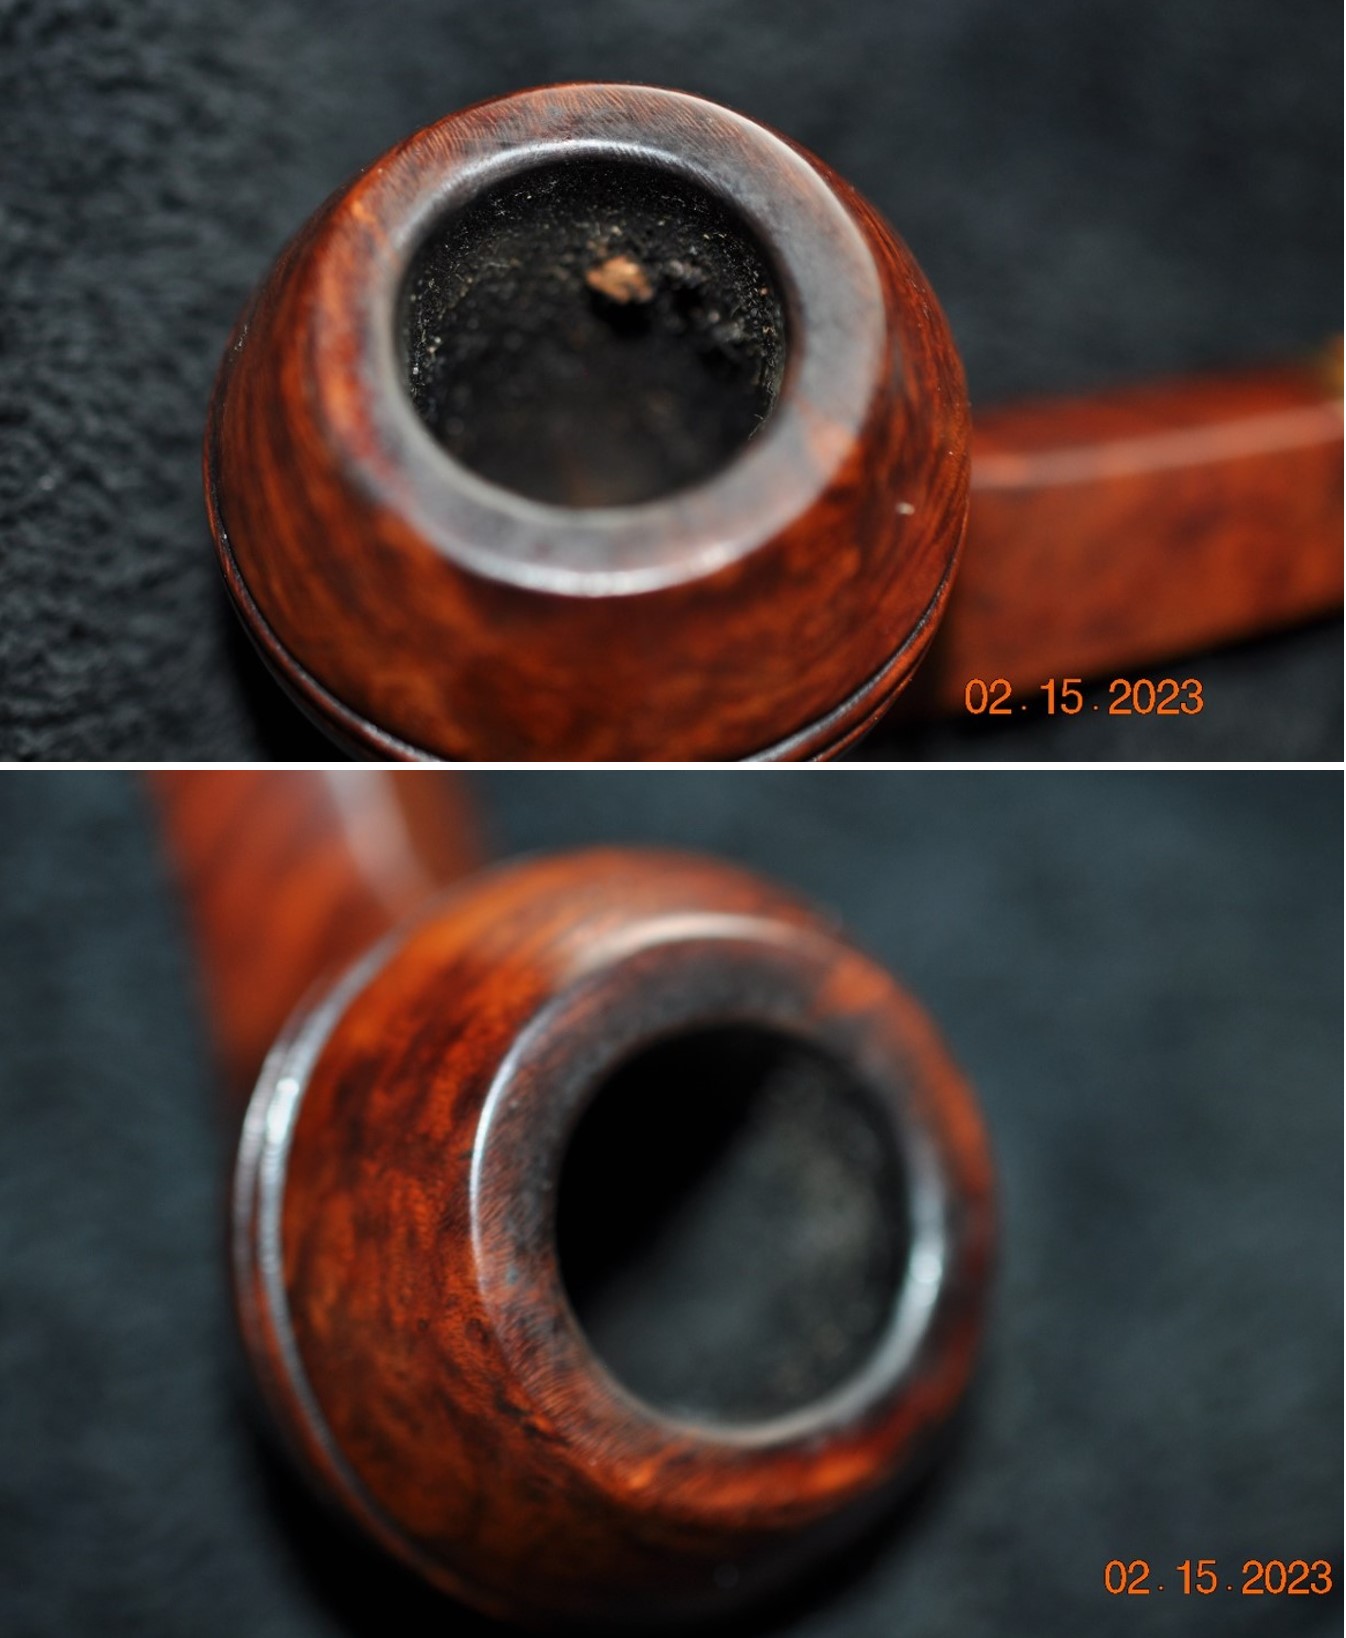
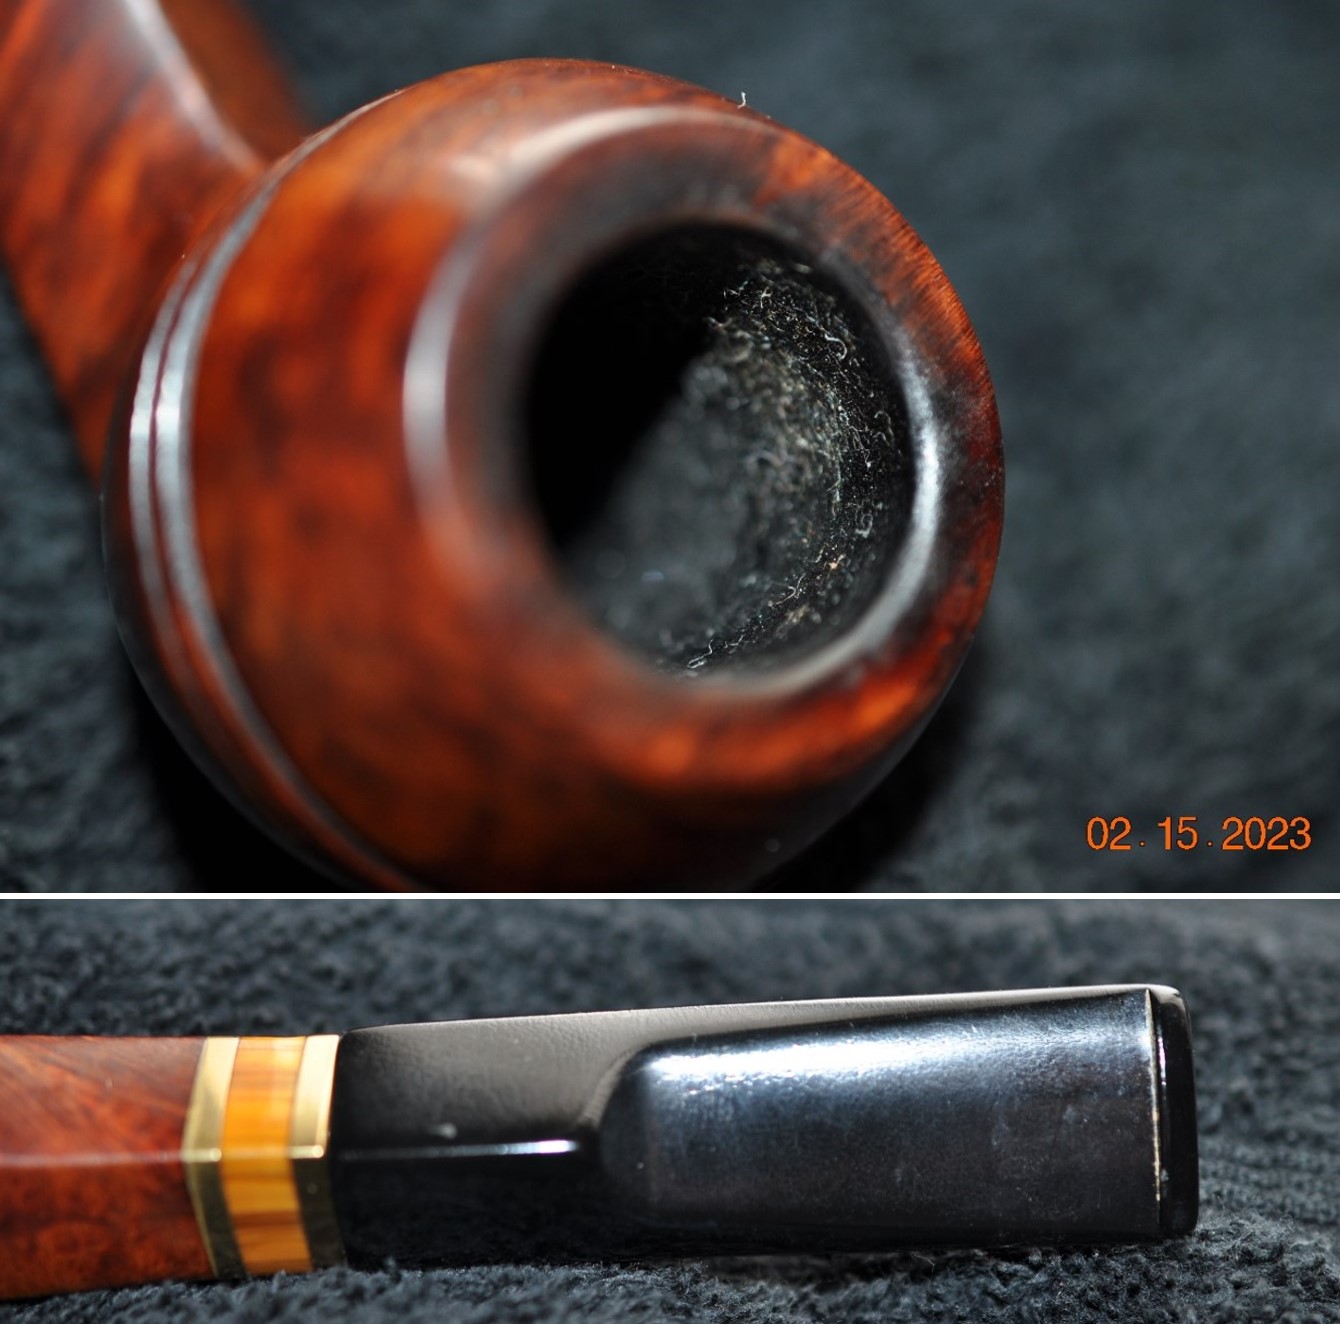
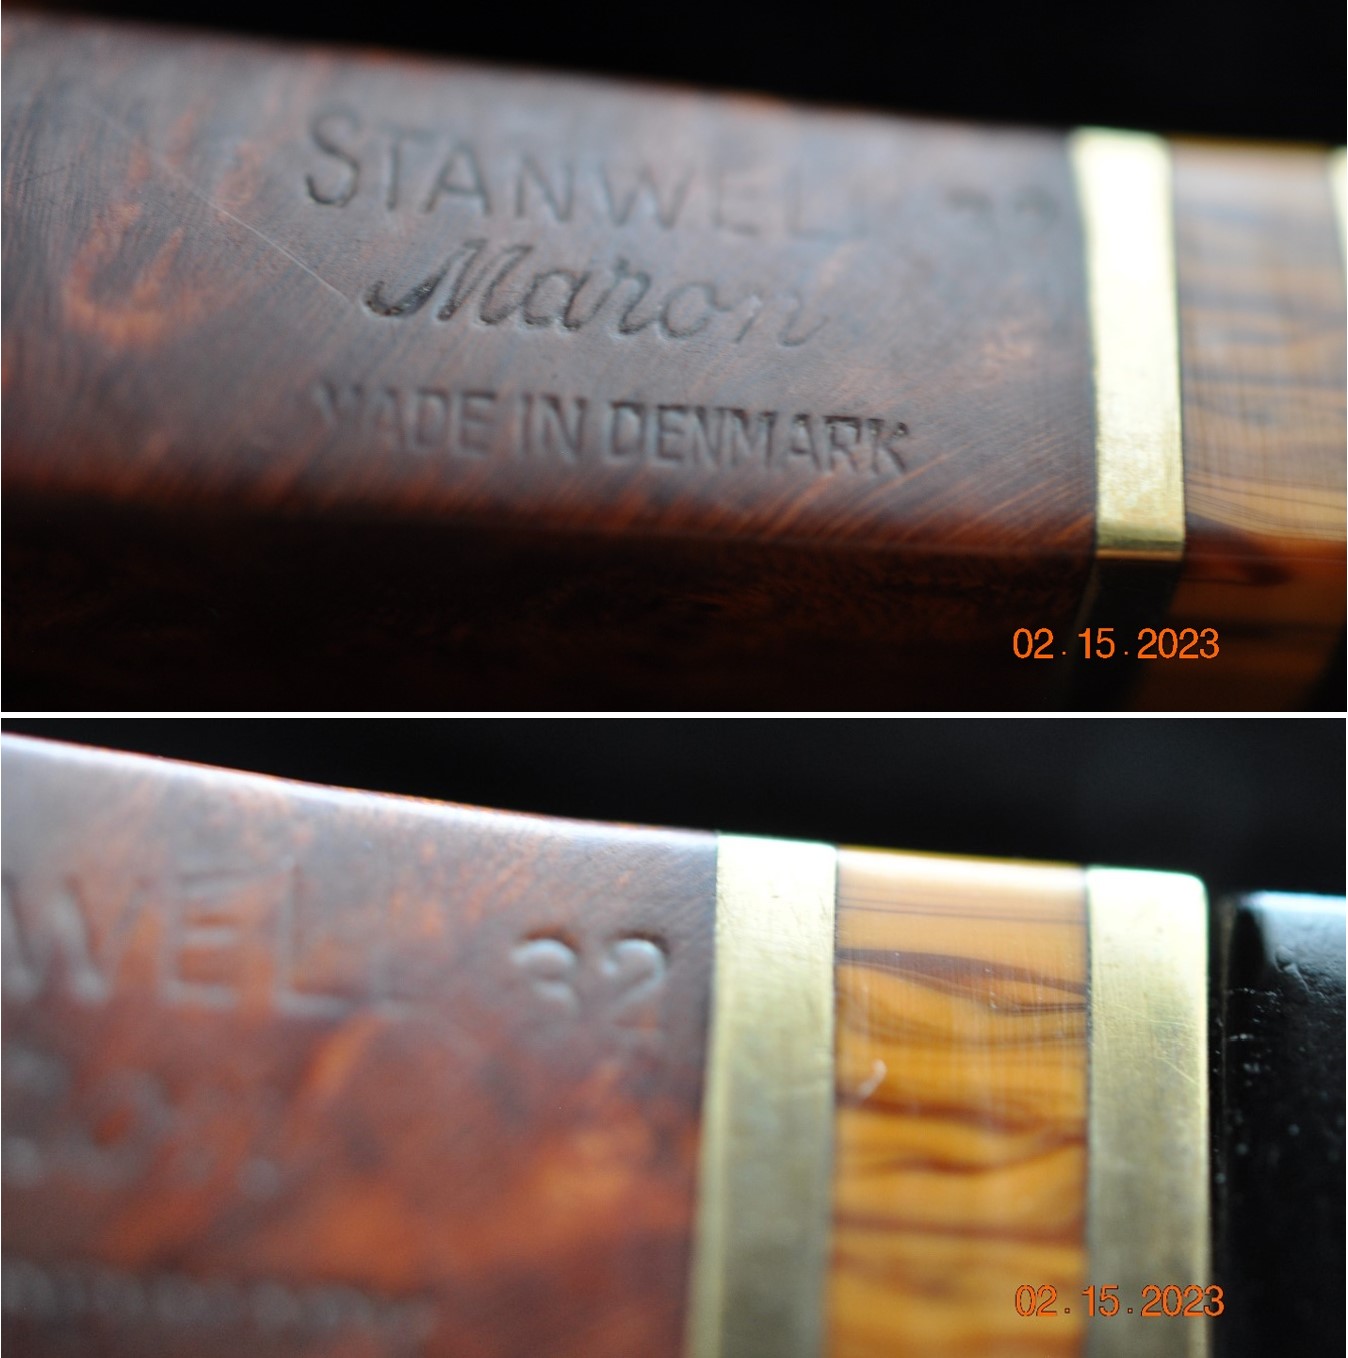
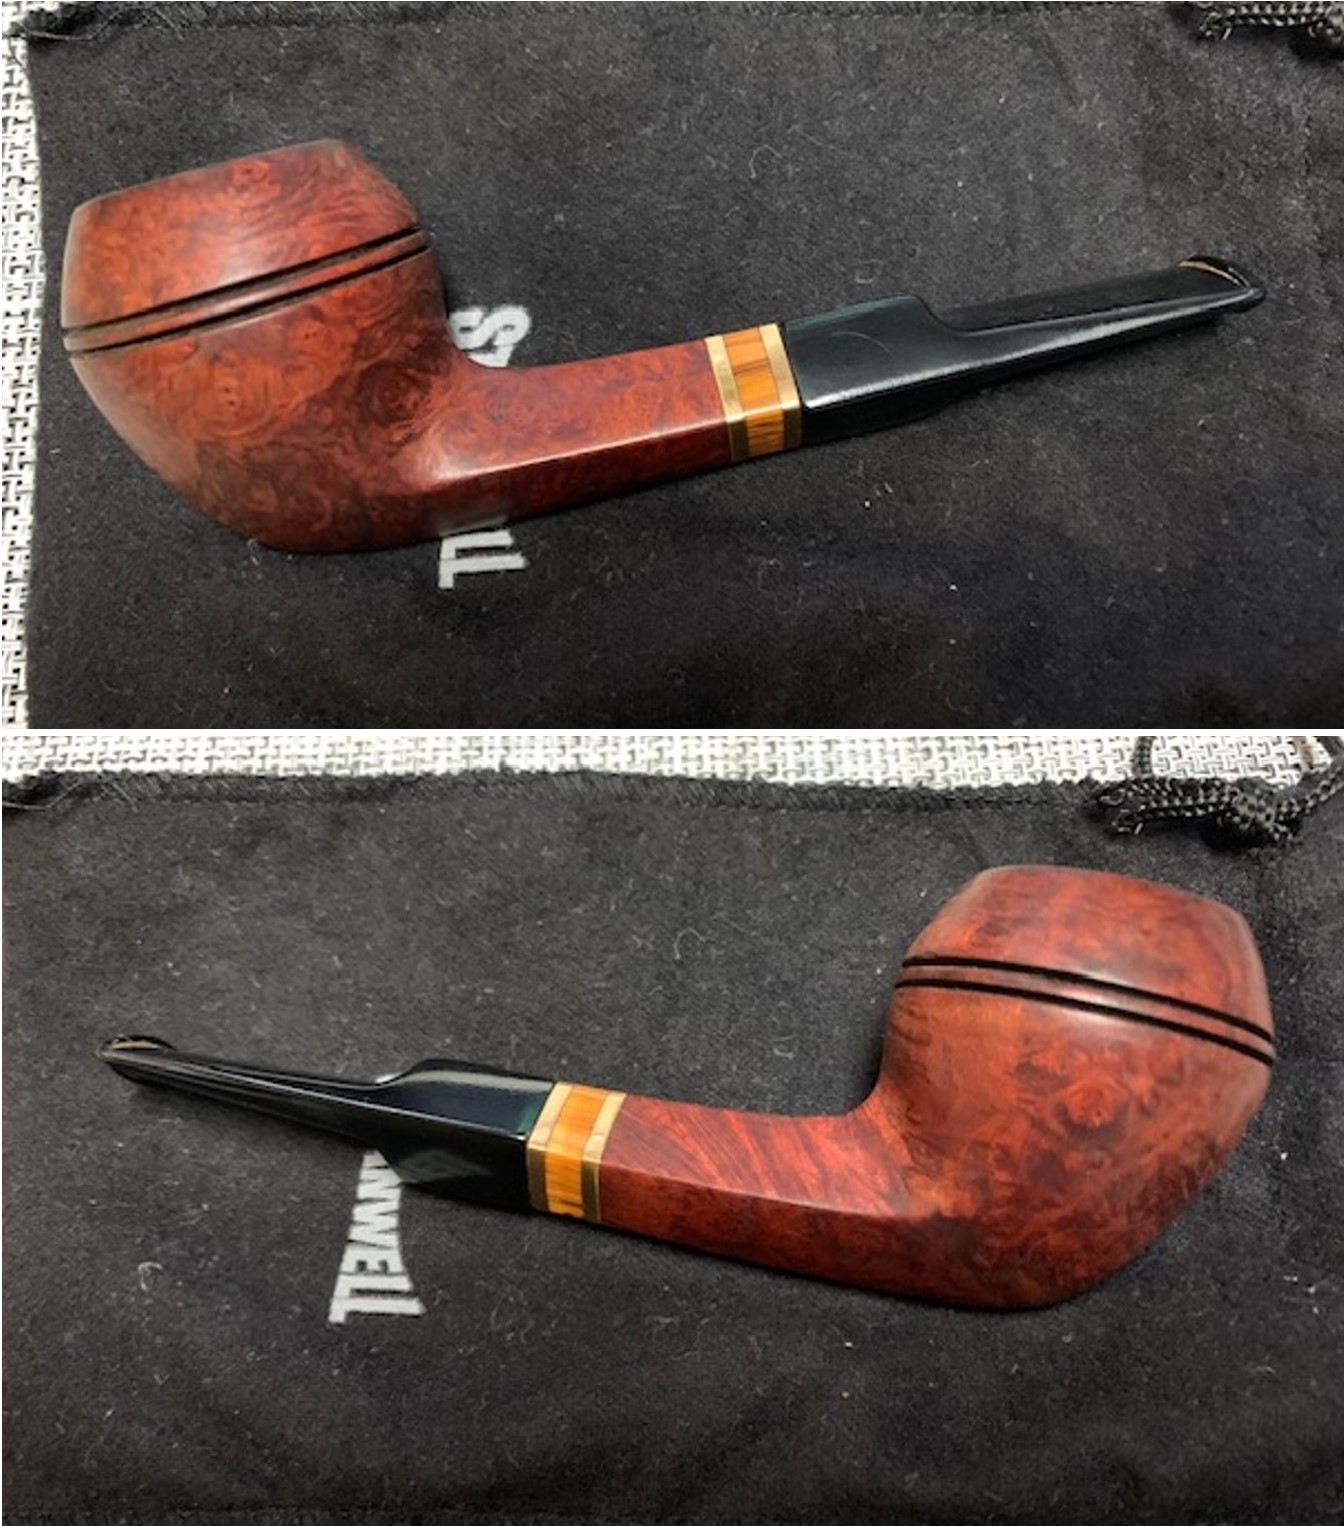
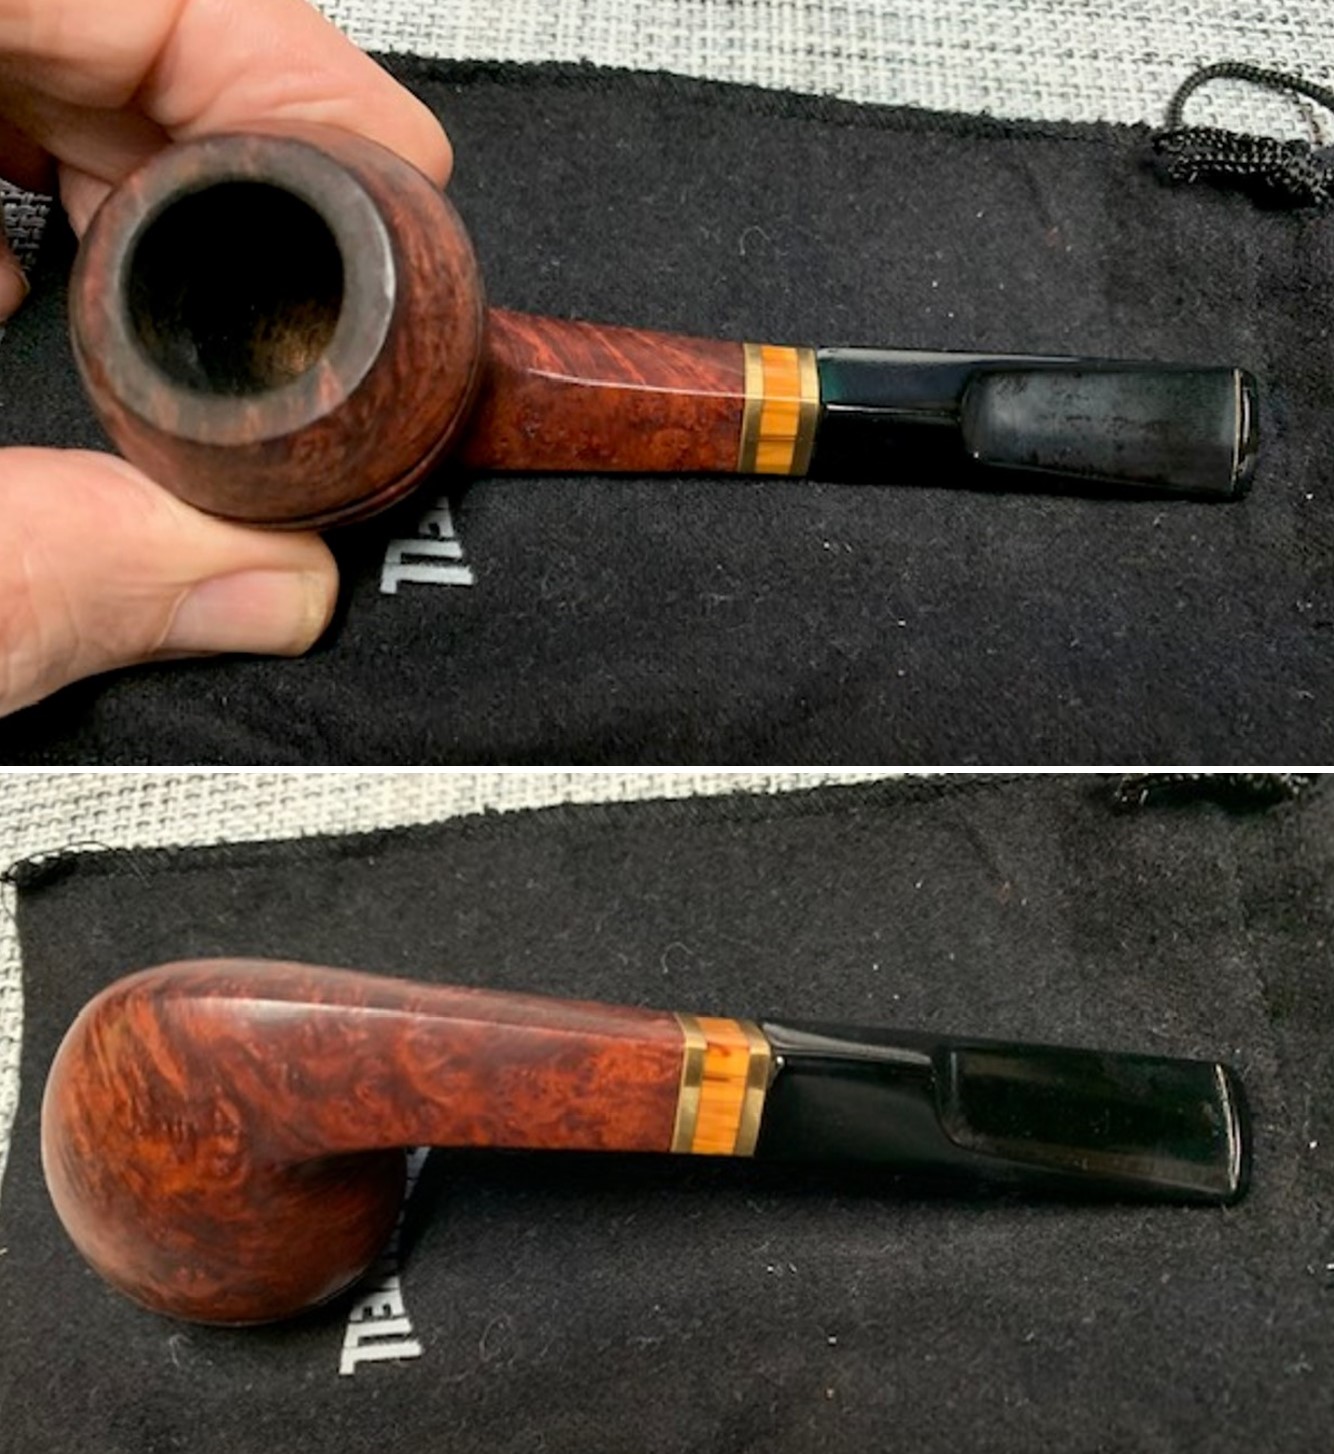
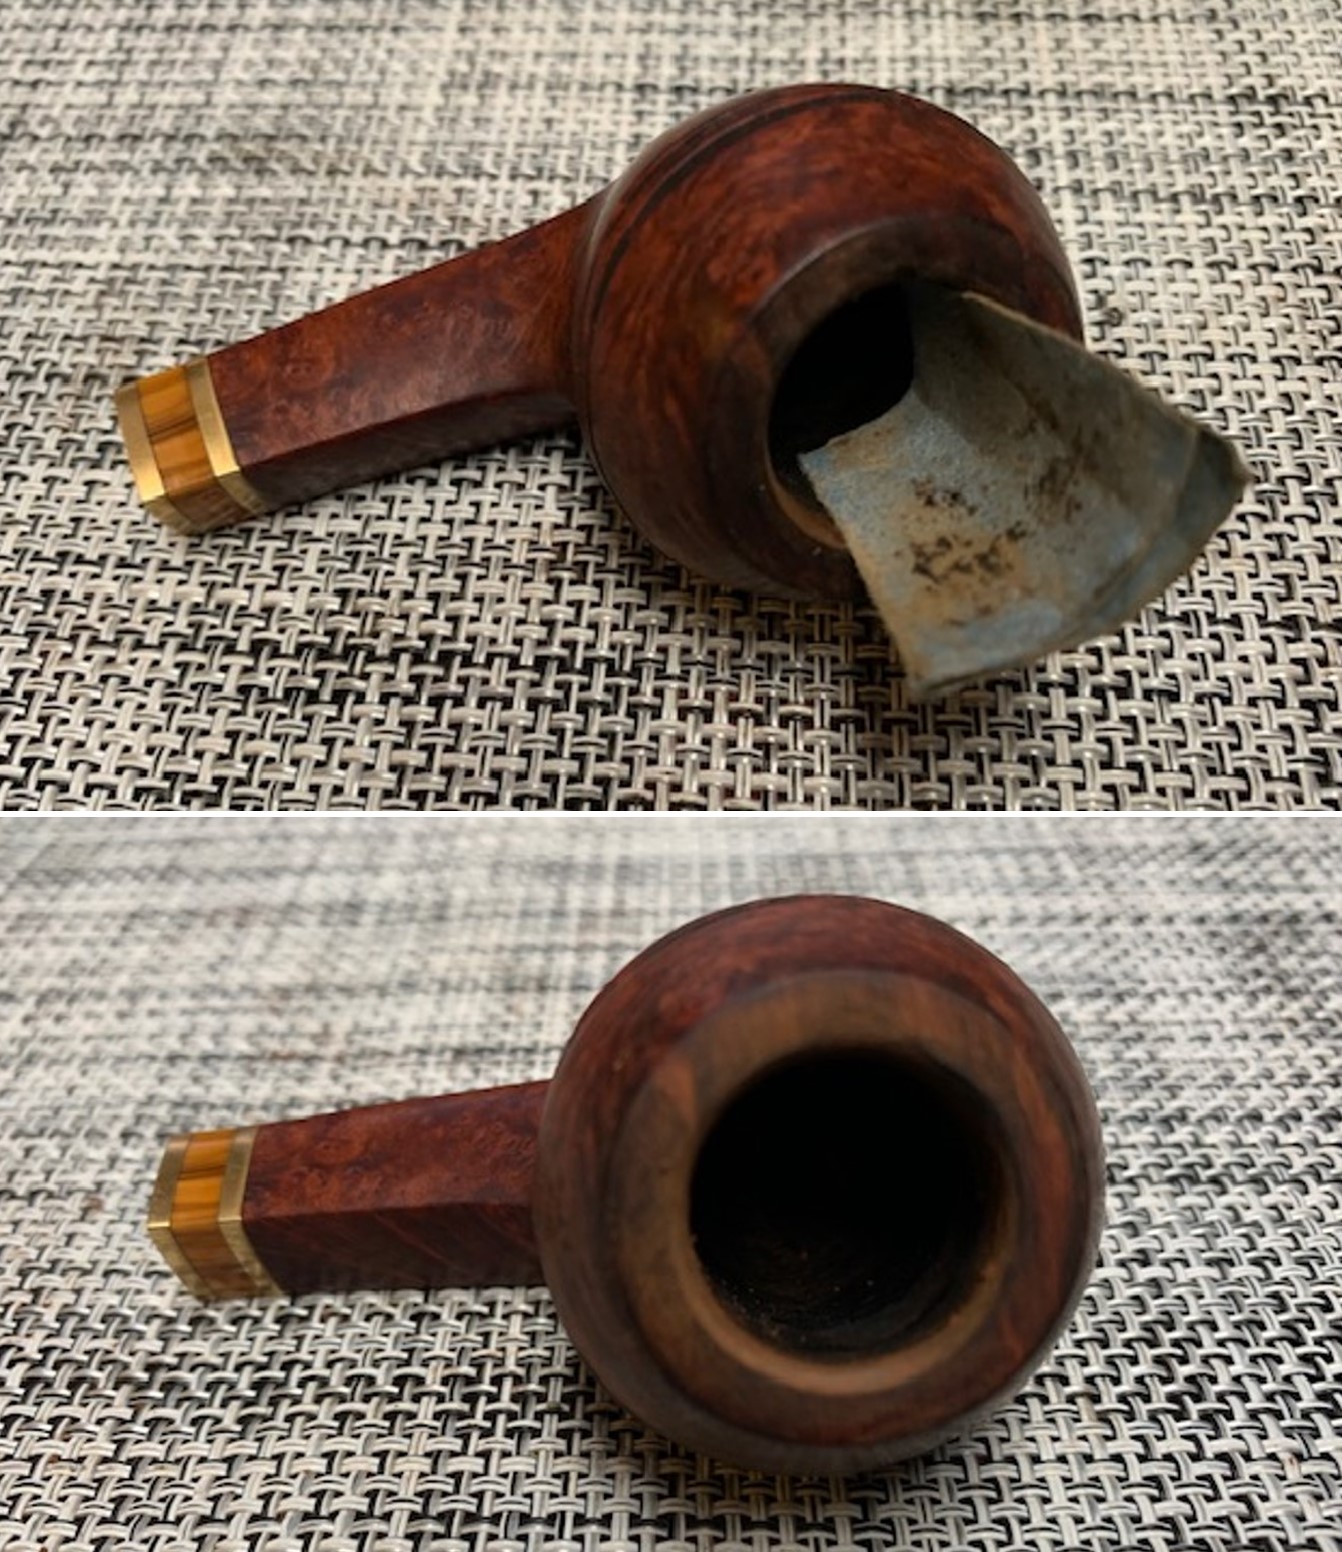
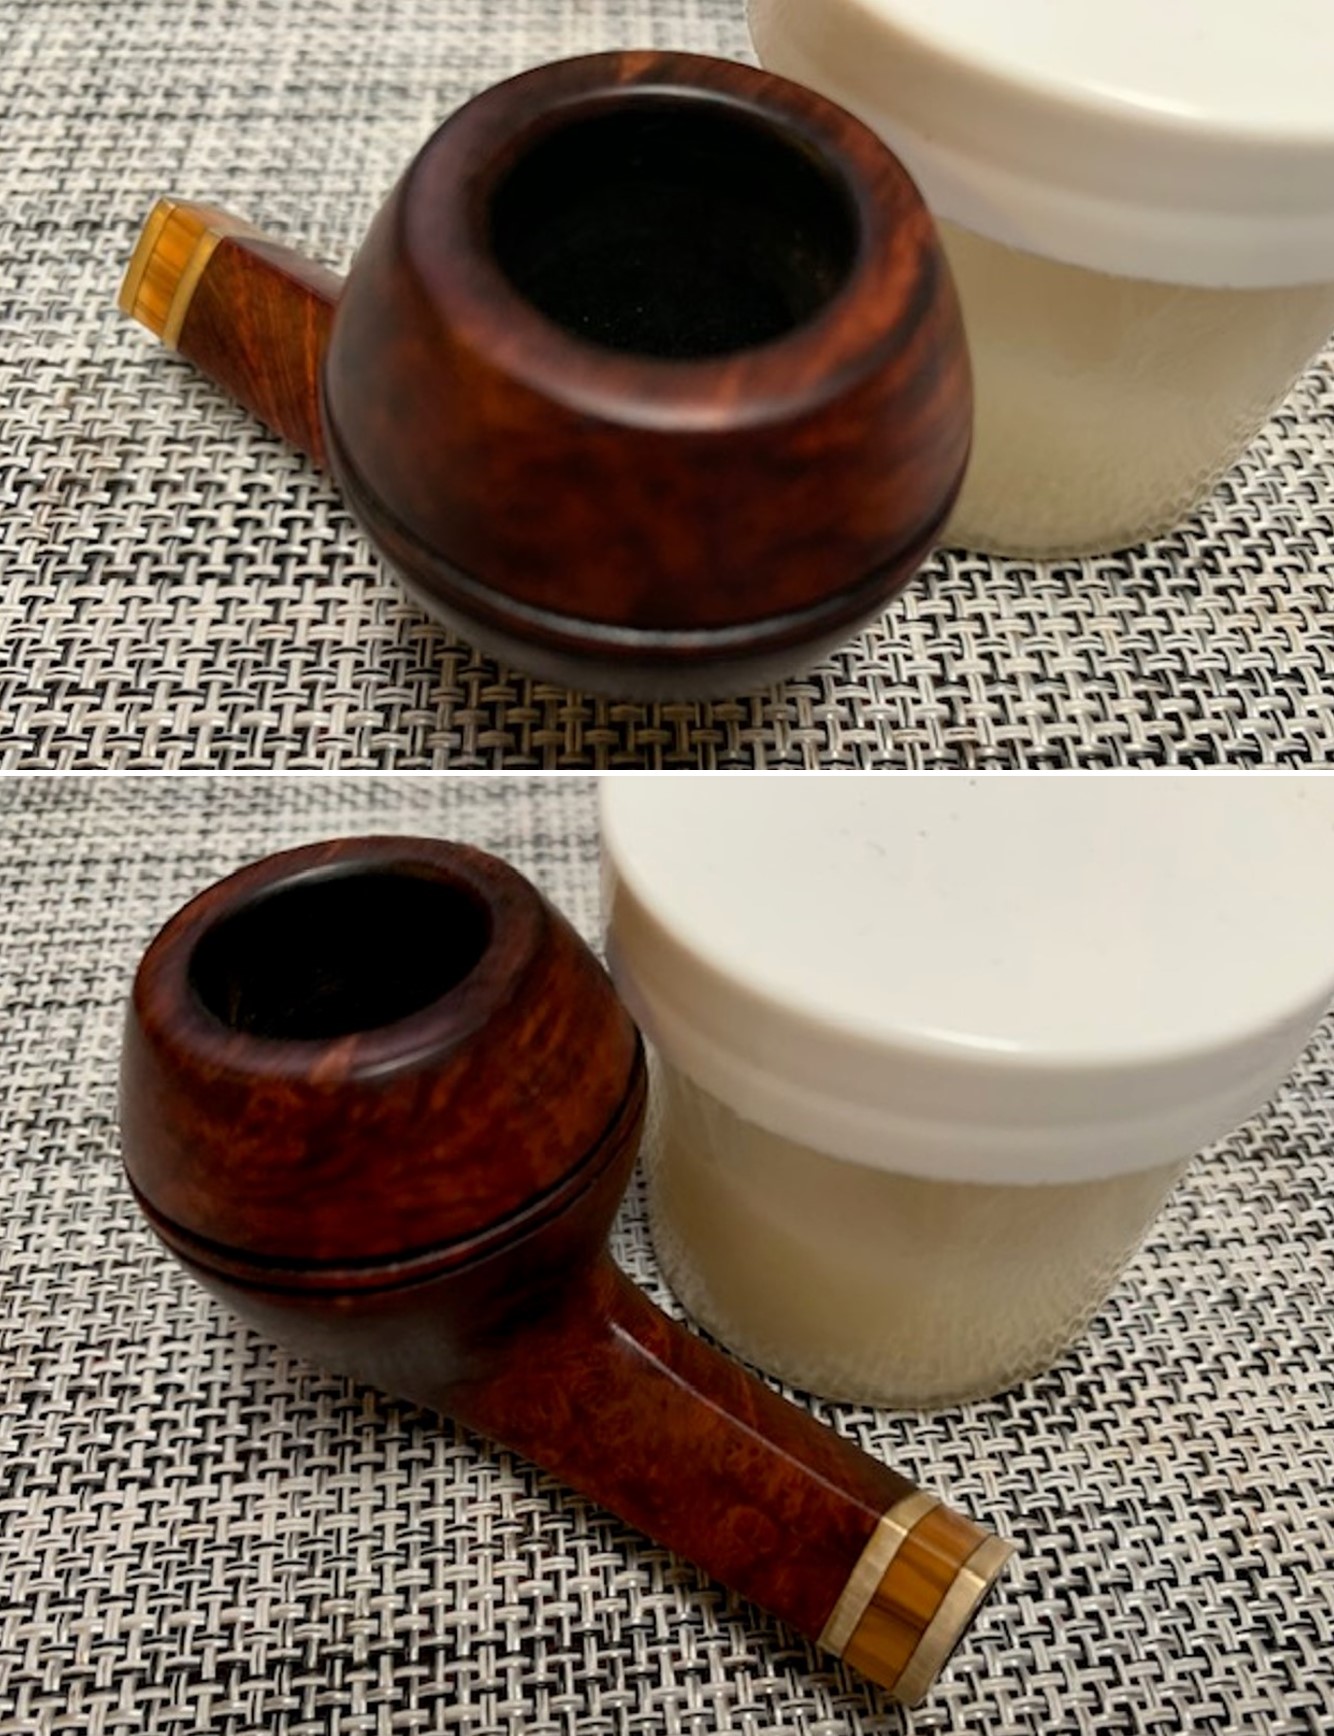
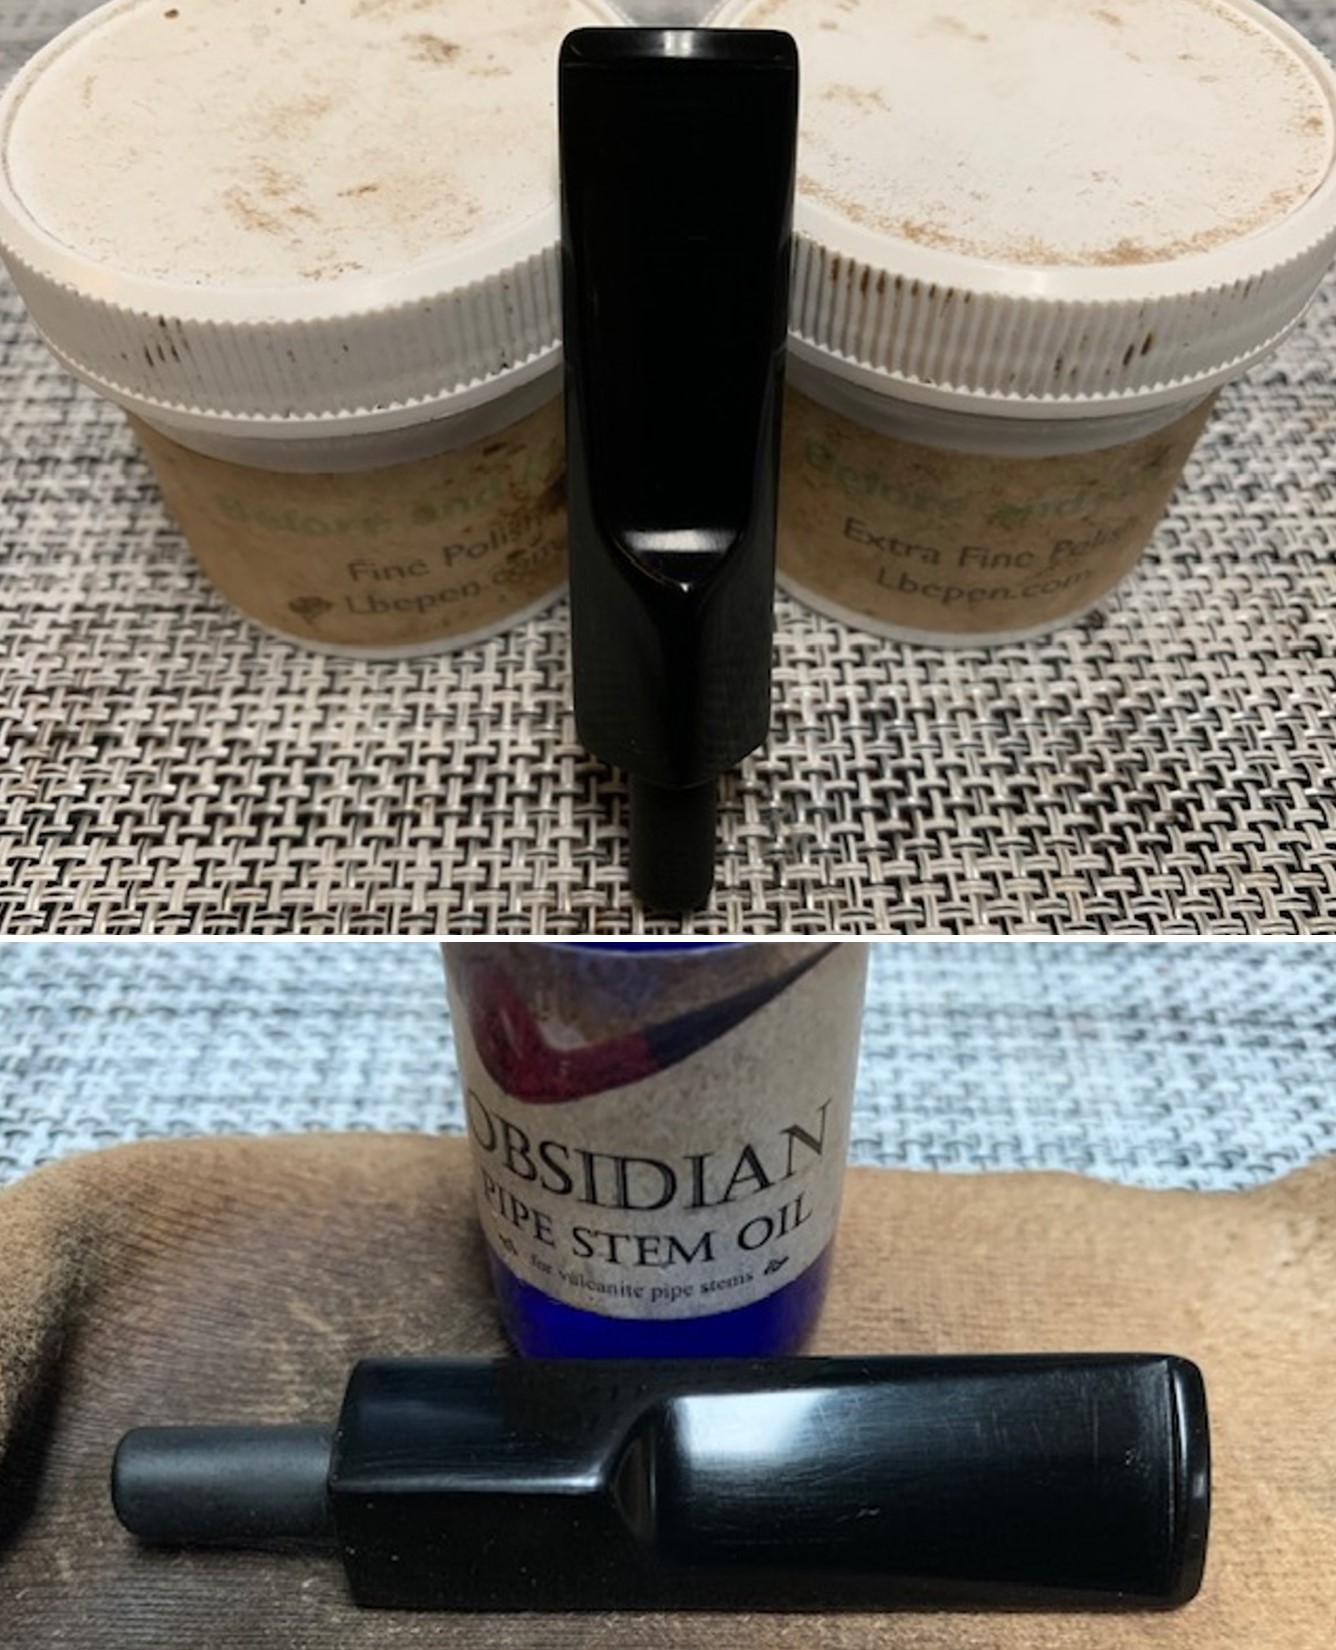
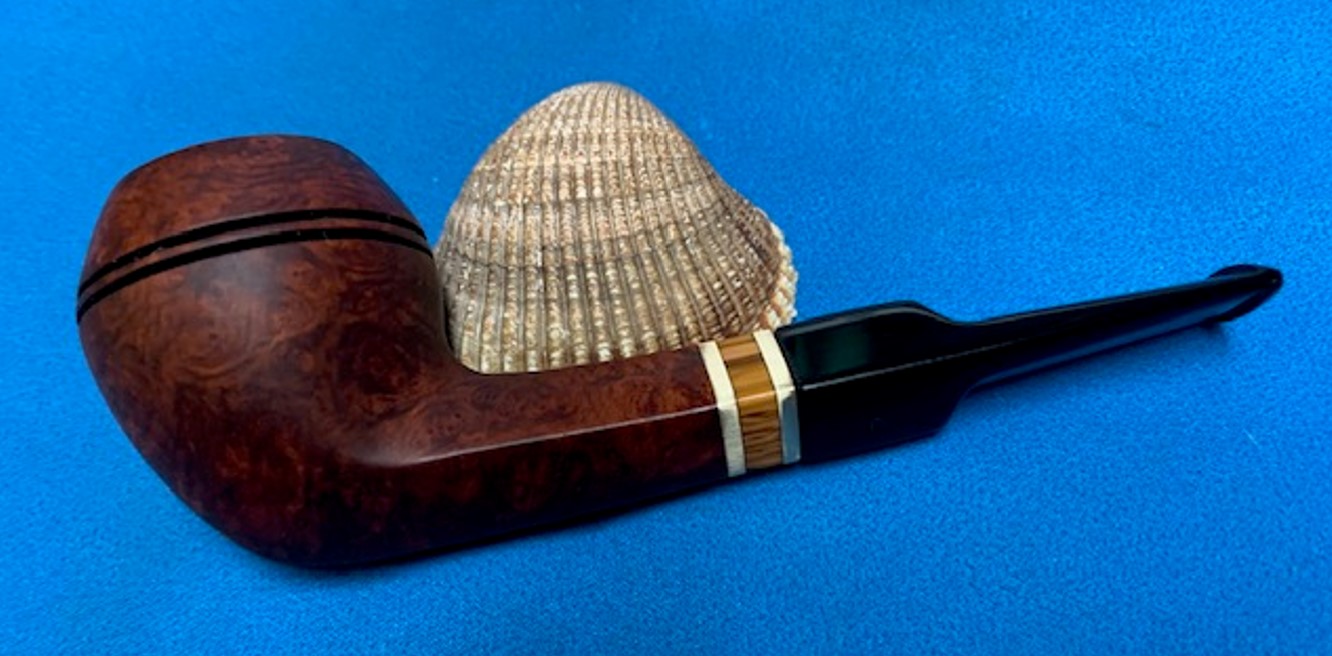
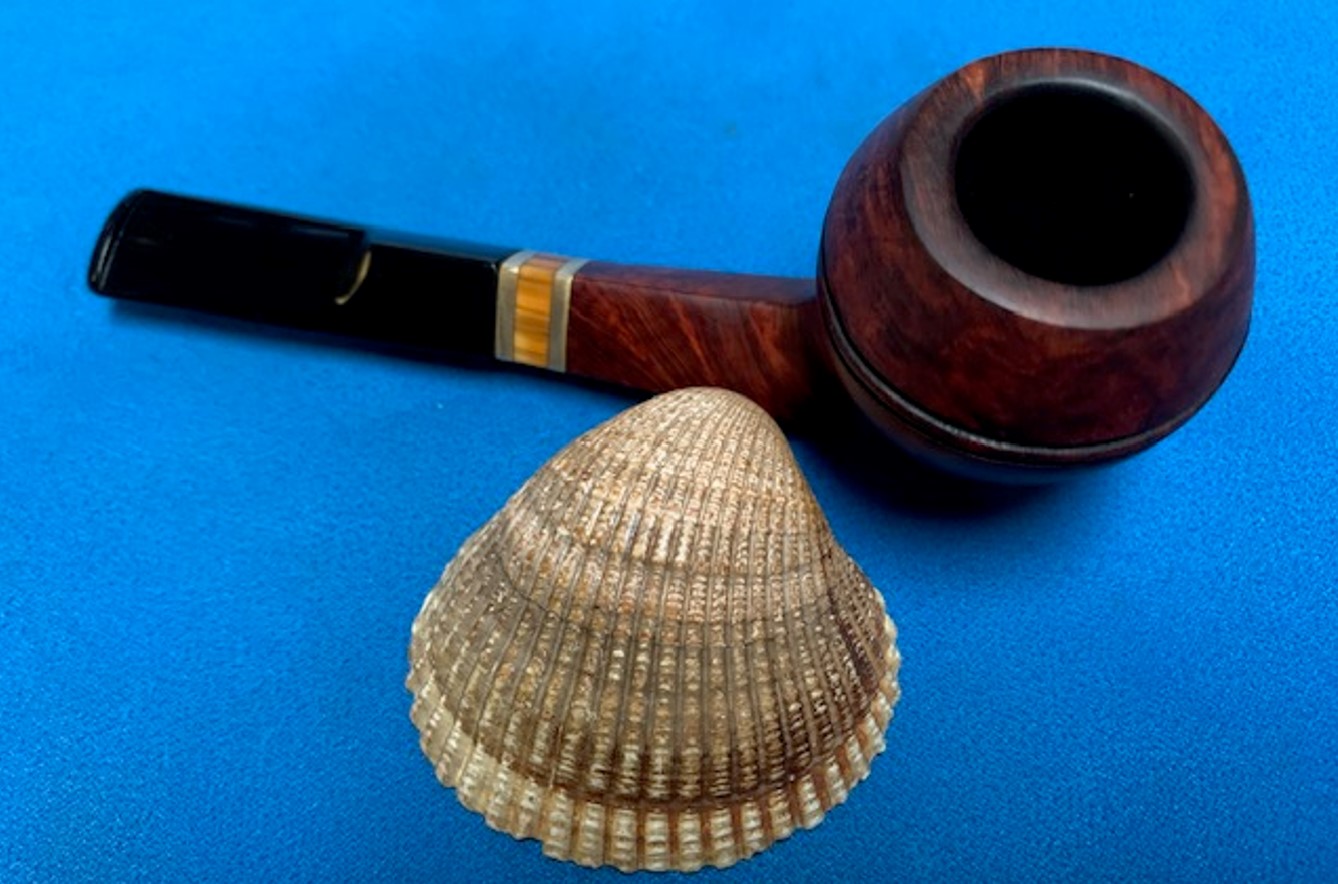
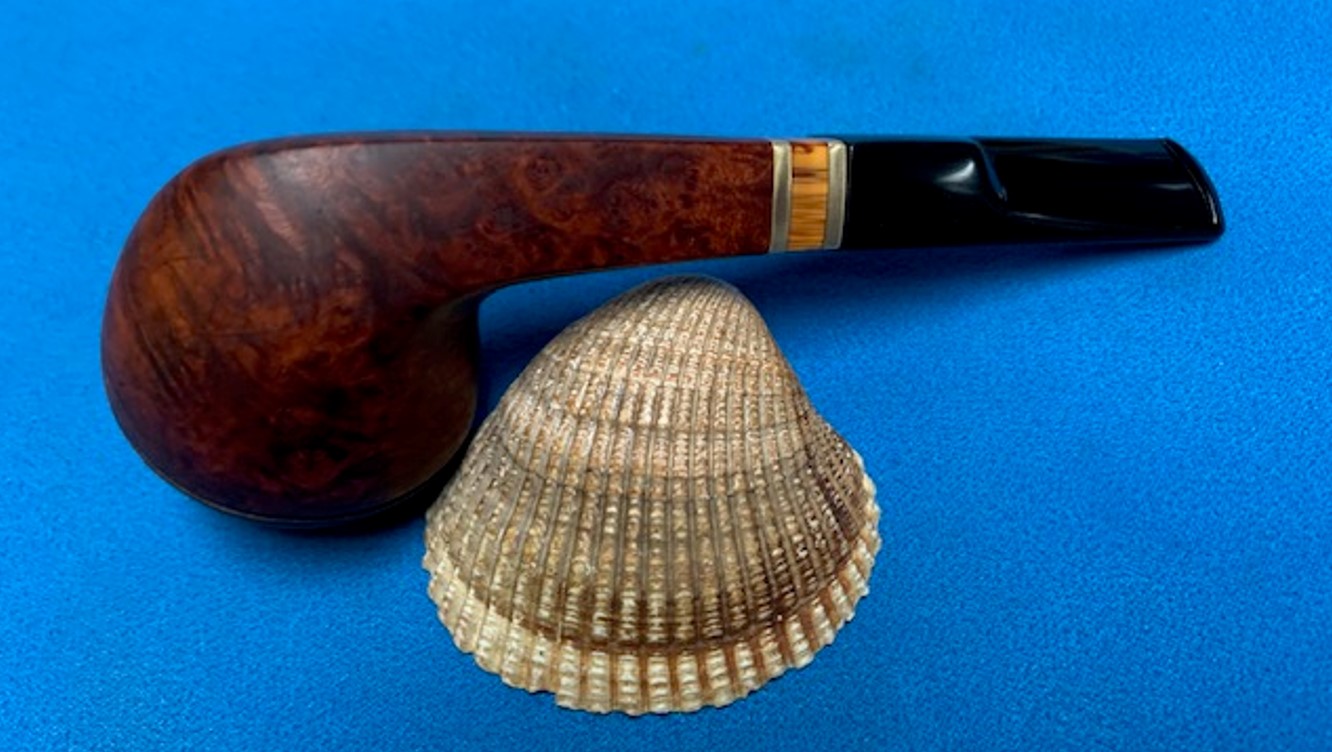
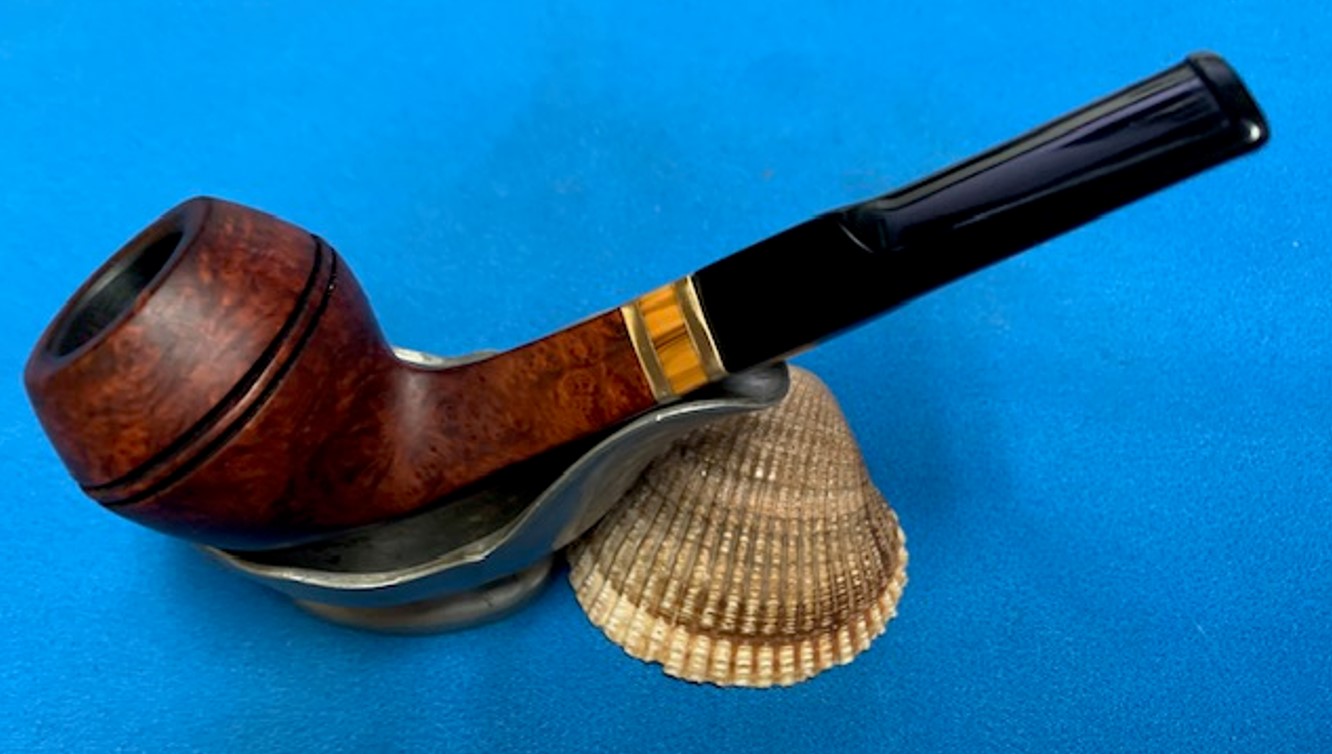
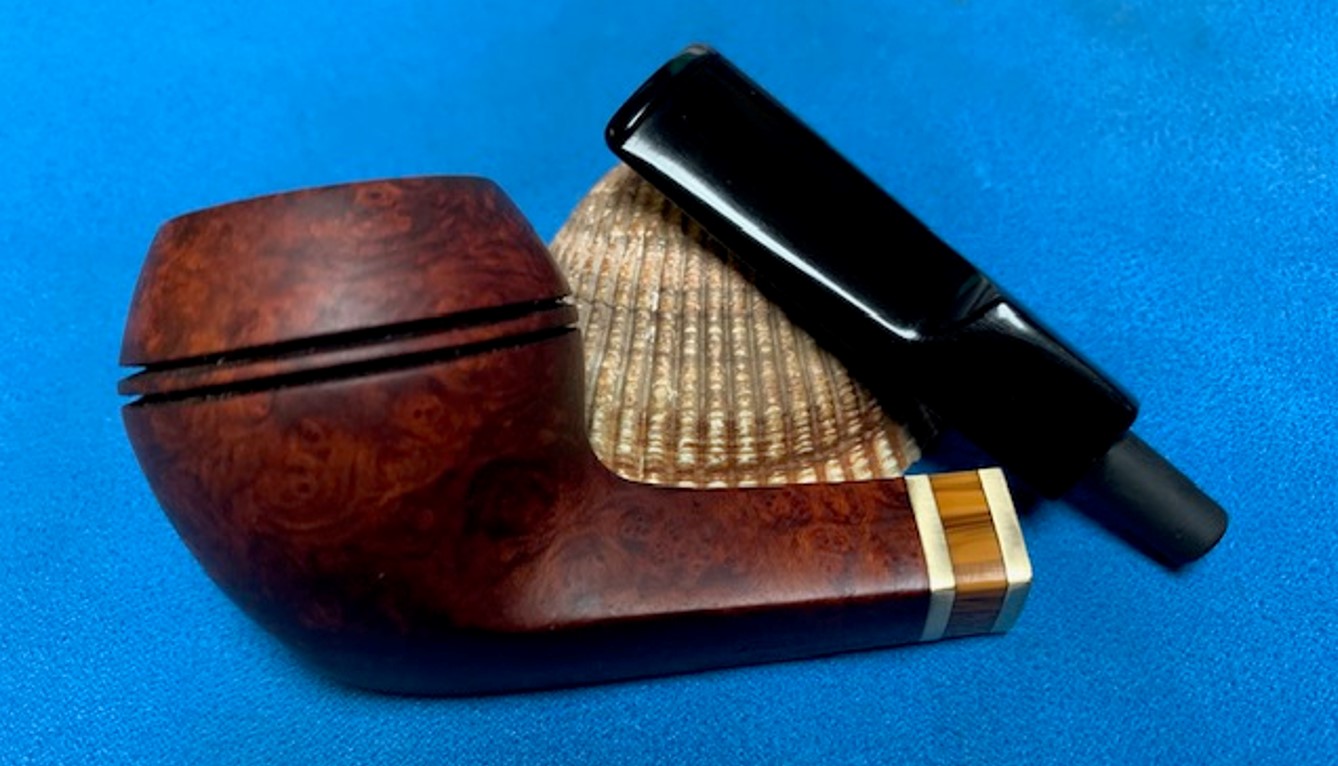
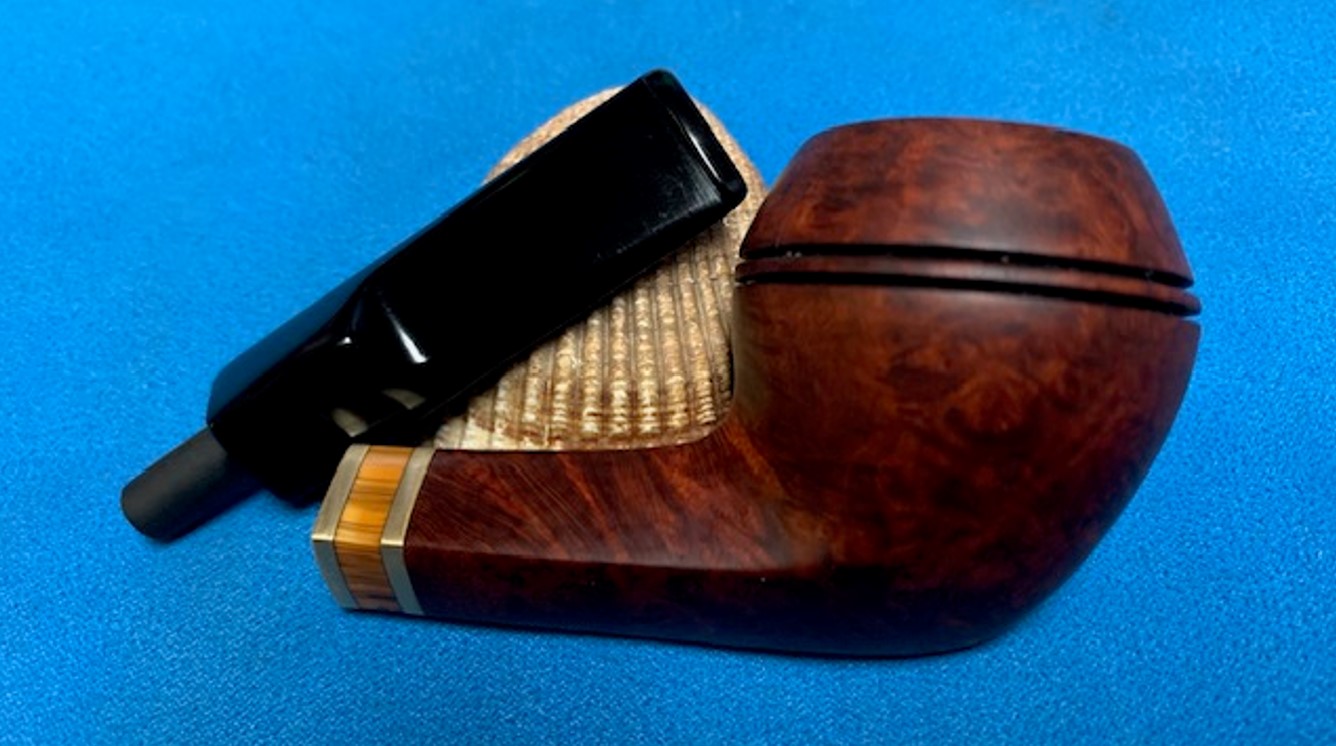
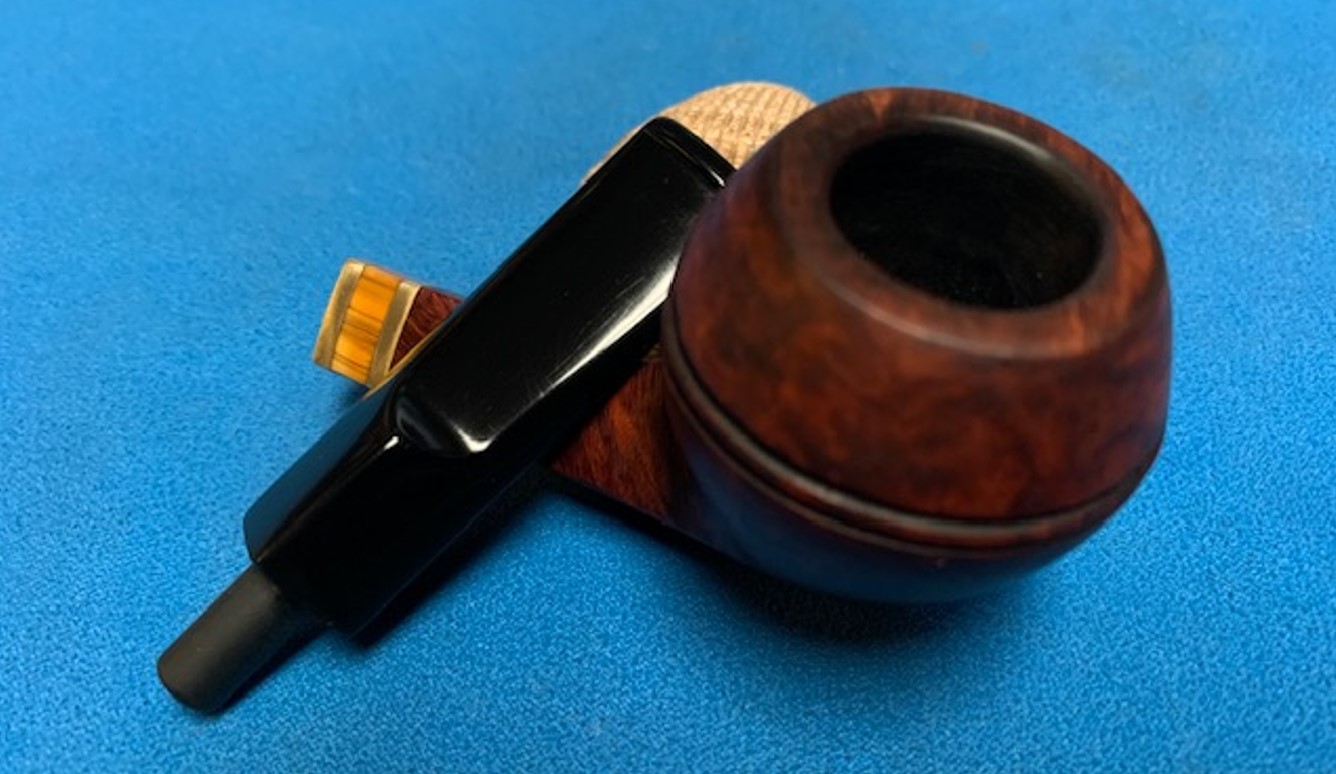
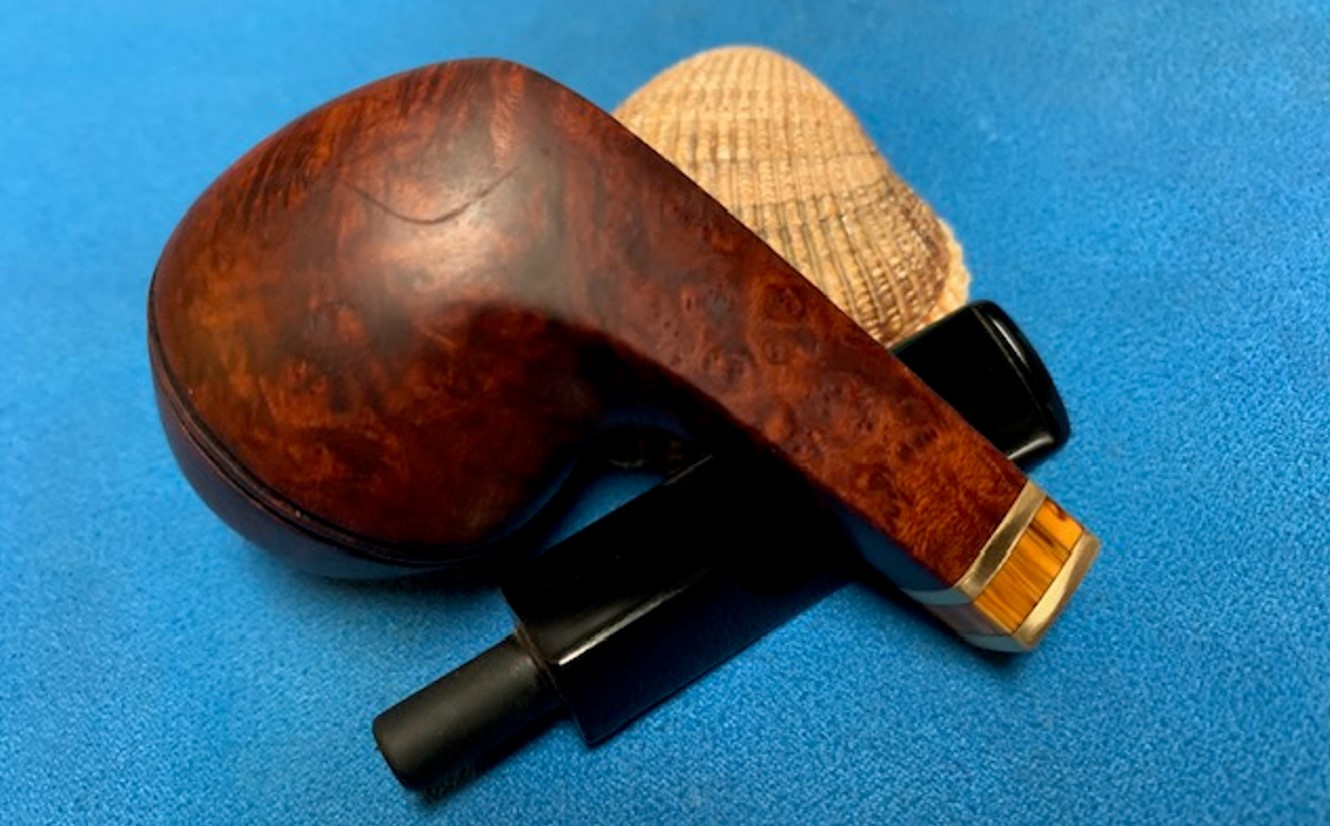
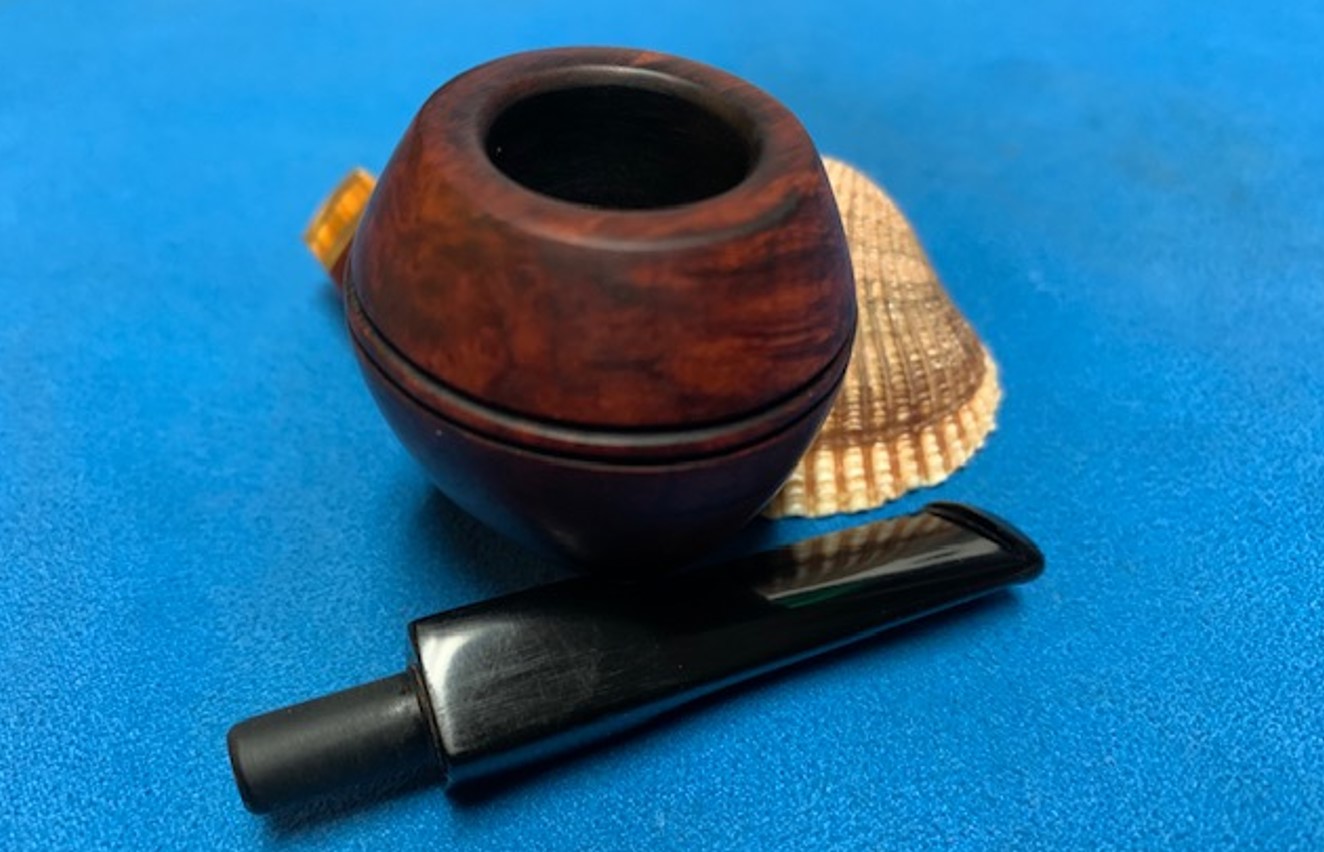
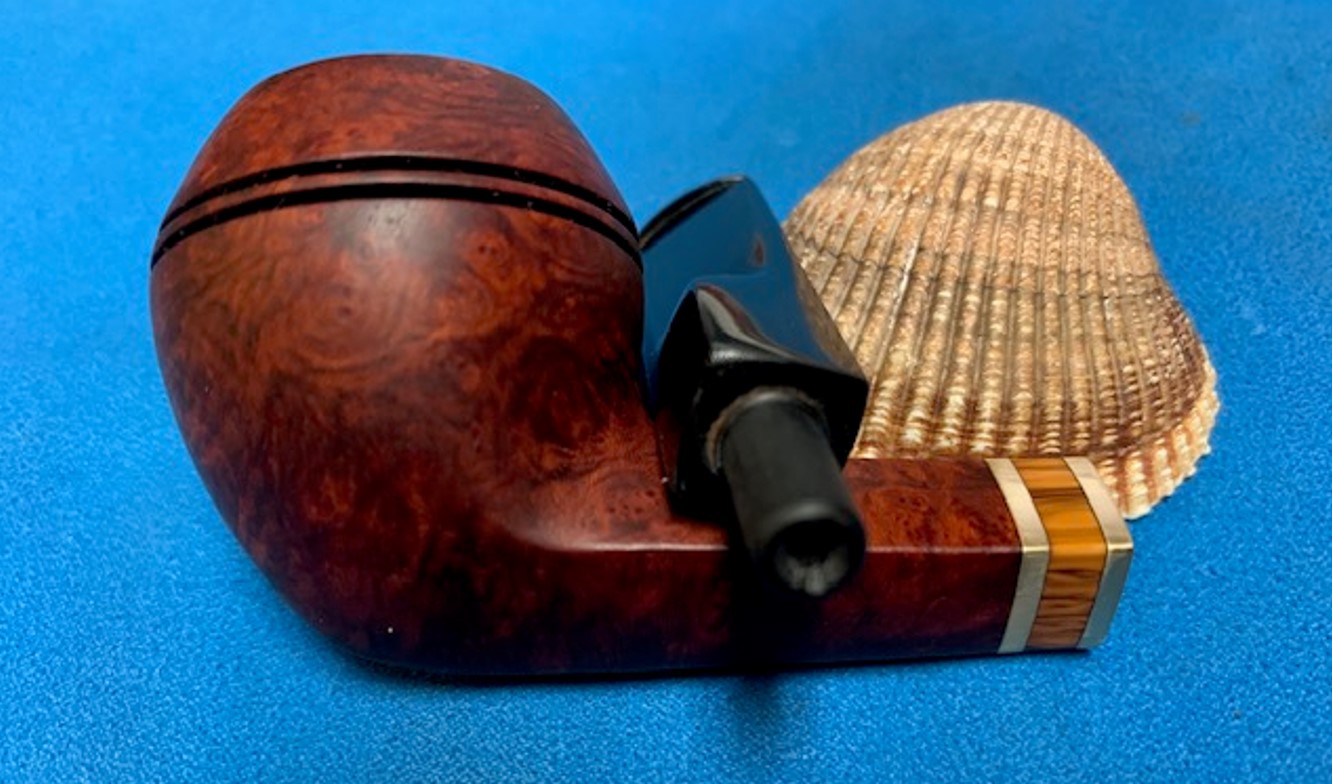
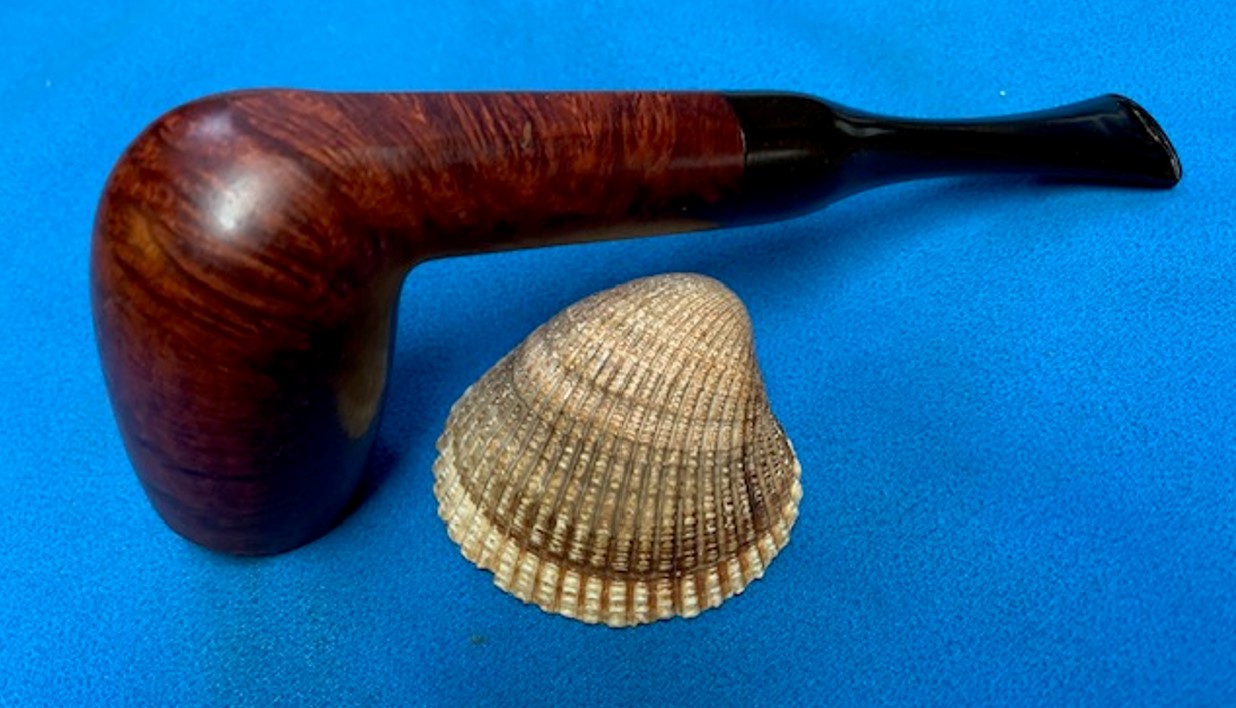
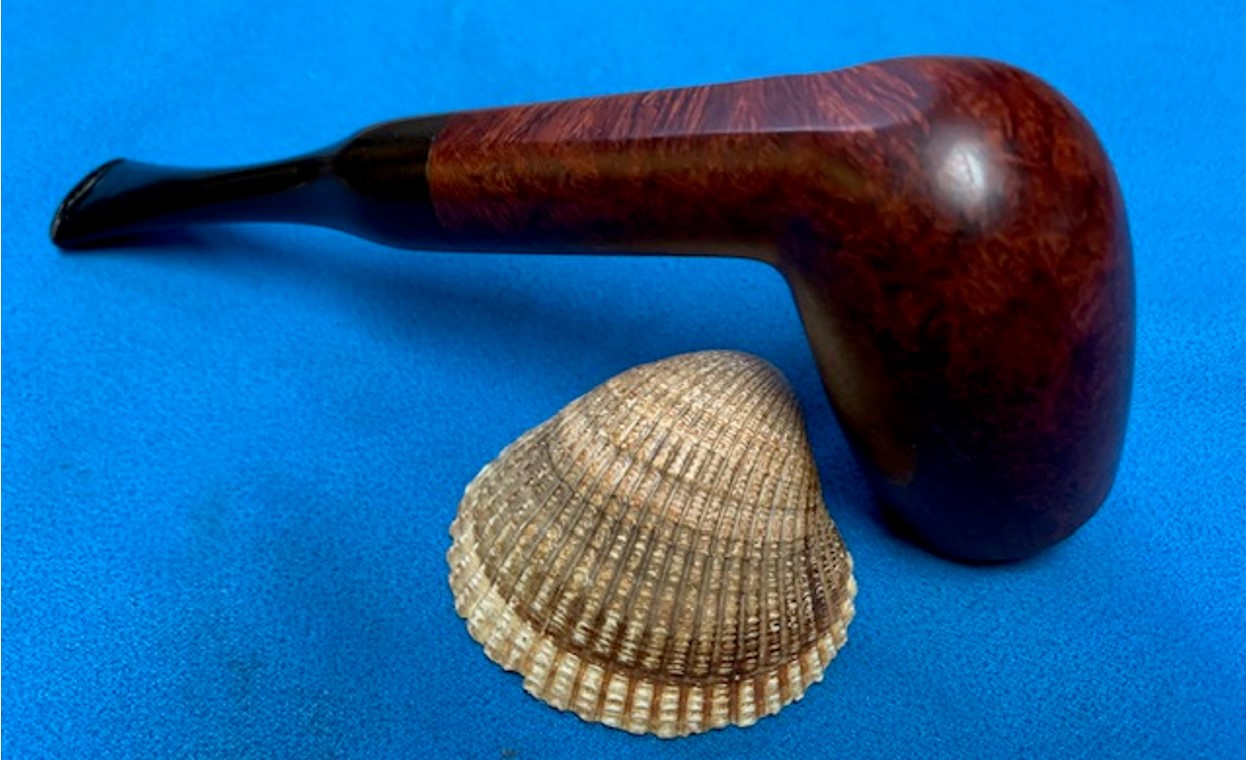
Another hot day in Vancouver so I decided to go to the basement and work on another one that was purchased on 01/26/2023 in a lot of pipes that came to us from Copenhagen, Denmark. It included a group of Danish Made Stanwell pipes that are quite beautiful. The grain around the bowl and shank of this Bulldog has a mix of cross, birdseye and flame grain. The pipe is stamped on the left underside of the diamond shank and reads STANWELL 32 [over] Maron [over] Made in Denmark. The pipe was a well used pipe when Jeff received it. There was dust and grime ground into the finish. It is finished in the warm stain of the Maron finish, with some nice grain around the bowl and shank under the dirt. The bowl was moderately caked and there was an overflow of lava on the rim top. The inner edge shows some darkening around the bowl and on the rim top. There is a band on the shank. It has two brass bands with an orange piece of acrylic sandwiched between them both. The stem is acrylic and was dirty with light tooth marks and chatter on both sides ahead of the button and on the button itself. There is no brass/gold crown S logo inlaid on the left side of the saddle stem. Jeff took photos of the pipe before he started his clean up work on it.Jeff took photos of the bowl and rim top to show what they looked like before the clean up. You can see the darkening and light lava on the inner edge and top of the rim. He also took some photos of the stem to show the condition of both sides. You can see the light marks on the top and underside next to the button.The photos of the sides and heel of the bowl show the grain around the bowl and shank. The stain adds depth finish on the pipe. Even under the grime it is a real beauty.The stamping on the lower left side the diamond shank is shown in the photo below. It is clear and readable as noted above. Jeff had cleaned up the pipe with his usual penchant for thoroughness. He reamed the pipe with a PipNet Pipe Reamer and cleaned up the remnants with a Savinelli Fitsall Pipe Knife. He scrubbed the bowl with undiluted Murphy’s Oil Soap with a tooth brush. He rinsed it under running warm water to remove the soap and grime. He cleaned out the inside of the shank and the airway in the stem with alcohol, cotton swabs and pipe cleaners. He soaked the stem in Before & After Deoxidizer and rinsed it off with warm water. It came in Stanwell Pipe Sock. I removed it from the sock and took photos of the pipe once I received it. I took close up photos of both the rim top and the stem. Jeff had been able to get the grime and lava off of the rim top and it looked pretty incredible. There was some darkening and marks on the rim top on the right side and the back of the bowl. The stem looked very clean. The tooth marks and chatter were minimal and should be easy to remove.The stamping on the shank side was readable as noted above. I also took a photo with the stem removed to give an idea of the perspective and design of the pipe.I started my work on the pipe by addressing the damage to the inner edge and the rim top with a folded piece of 220 grit sandpaper to bring the edge back into round and it looked much better. Over all the rim top and edges looked much better. Now it was time to do my work on the pipe. I polished the bowl and rim top with micromesh sanding pads using 1500-12000 grit sanding pads and wiping it down after each sanding pad with a damp cloth to remove the sanding dust and debris.I worked some Before & After Restoration Balm into the finish of the bowl and shank with my fingers. I want the product to go deep into the finish because it works to clean, enliven and protect the briar. Once I was confident that it was deeply worked into the finish I wiped it off and buffed it with a soft cloth to polish it. The pipe really began to have a rich shine. I took some photos of the bowl at this point to mark the progress in the restoration. The grain really stands out on the pipe in the photos below.I set the bowl aside and turned to work on the stem. I polished the acrylic stem with micromesh sanding pads – wet sanding it with 1500-12000 grit pads. I wiped it down with Obsidian Oil after each sanding pad.I polished it with Before & After Pipe Polish – both the Fine and Extra Fine polishes. I gave it a final coat of oil and set it aside to dry. This Stanwell Maron 32 Straight Bulldog with an acrylic taper stem is a great looking pipe now that it has been restored. The beautiful finish really highlights the grain and the polished finish is stunning. The triple layer brass and orange acrylic shank extension is also a great addition. I put the stem back on the bowl and carefully buffed the pipe with Blue Diamond on the buffing wheel. I gave the bowl and the stem multiple coats of carnauba wax on the buffing wheel and followed that by buffing the entire pipe with a clean buffing pad. I hand buffed the pipe with a microfiber cloth to deepen the shine. The finished Stanwell Maron Bulldog fits nicely in the hand and feels great. Give the finished pipe a look in the photos below. The dimensions of the pipe are Length: 5 inches, Height: 1 ¾ inches, Outside diameter of the bowl: 1 ¼ inches, Chamber diameter: ¾ of an inch. The weight of the pipe is 38 grams /1.34 ounces. I will be adding the pipe to the Danish Pipe Makers Section of the rebornpipes store. If you are interested in purchasing this pipe send me a message or an email. Thanks for reading this blog and my reflections on the pipe while I worked on it.
As always, I encourage your questions and comments as you read the blog. Thanks to each of you who are reading this blog. Remember we are not pipe owners; we are pipe men and women who hold our pipes in trust until they pass on into the trust of those who follow us.
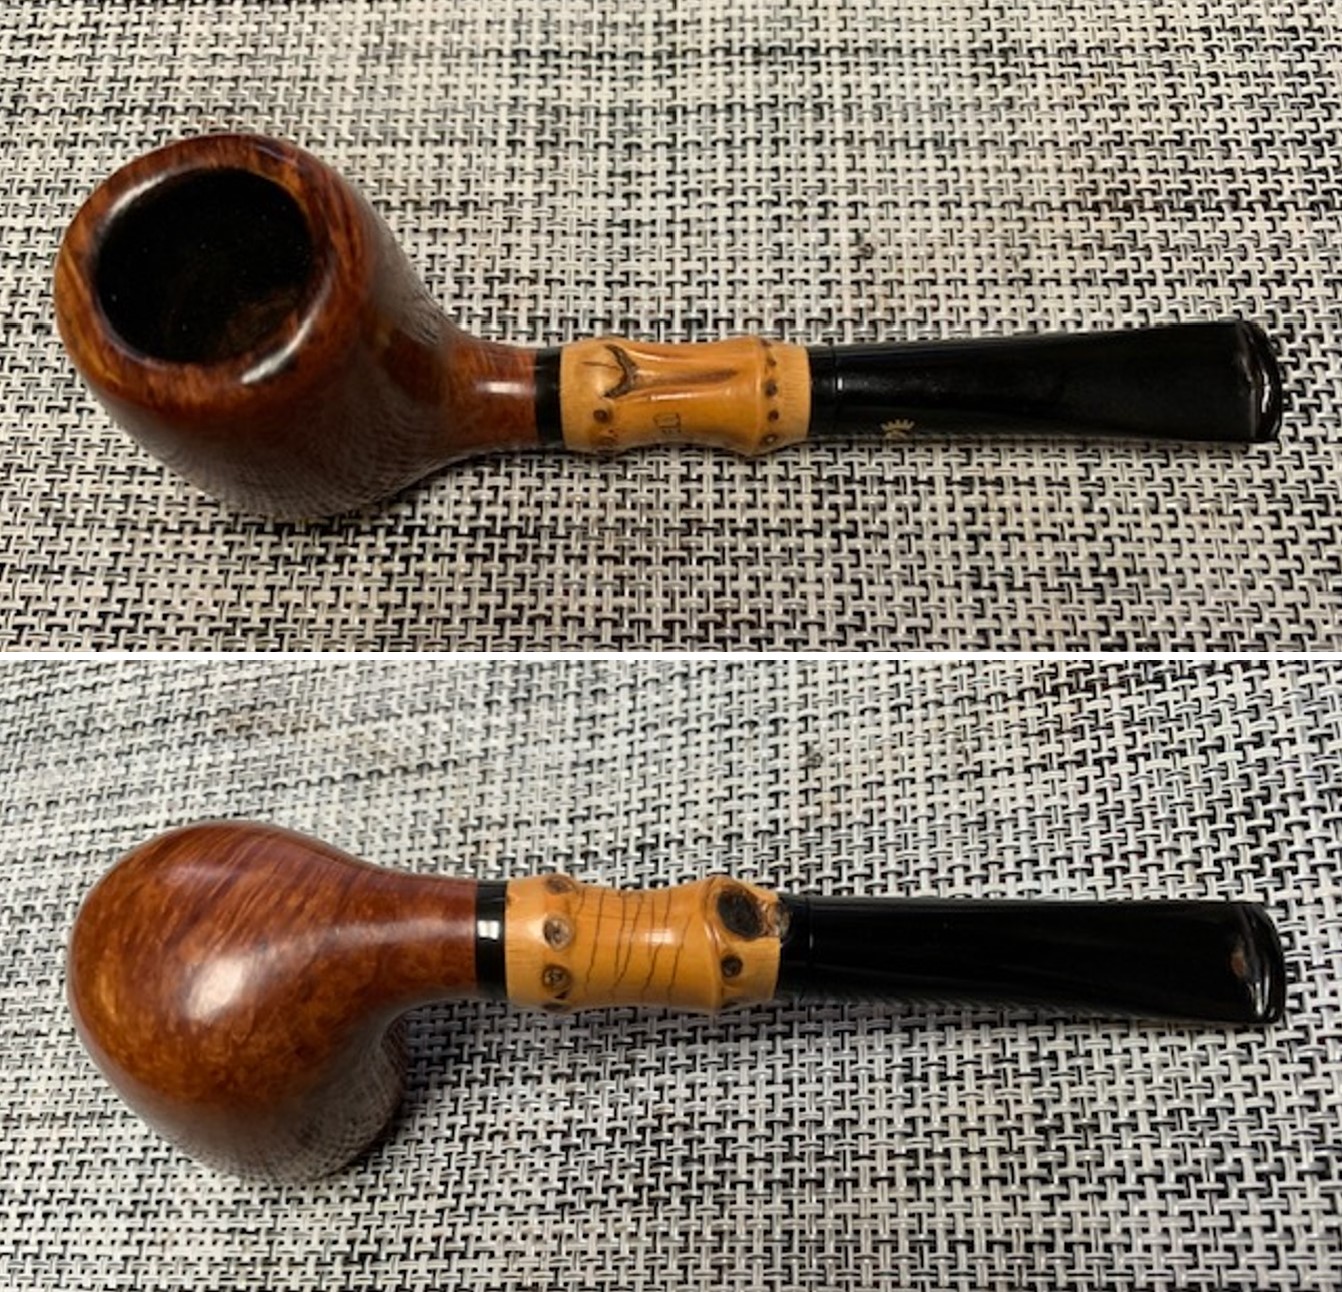
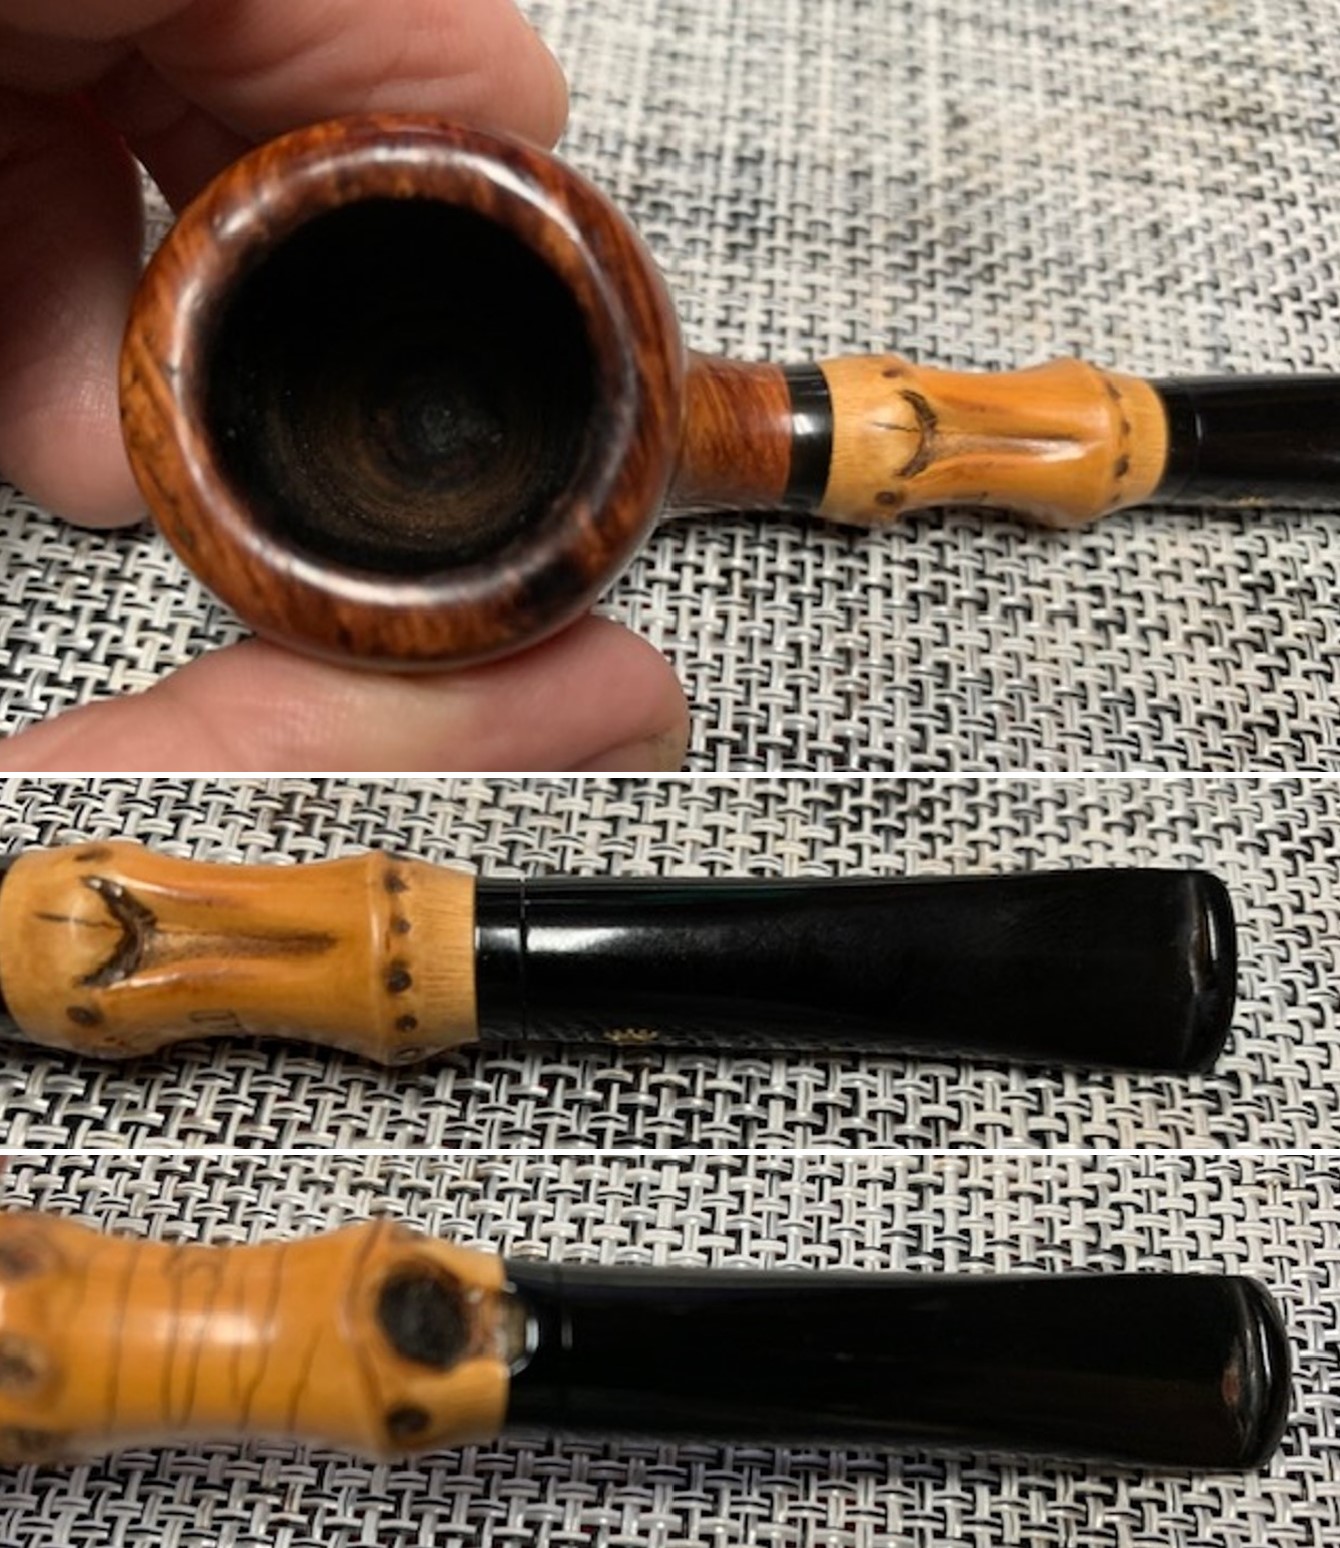
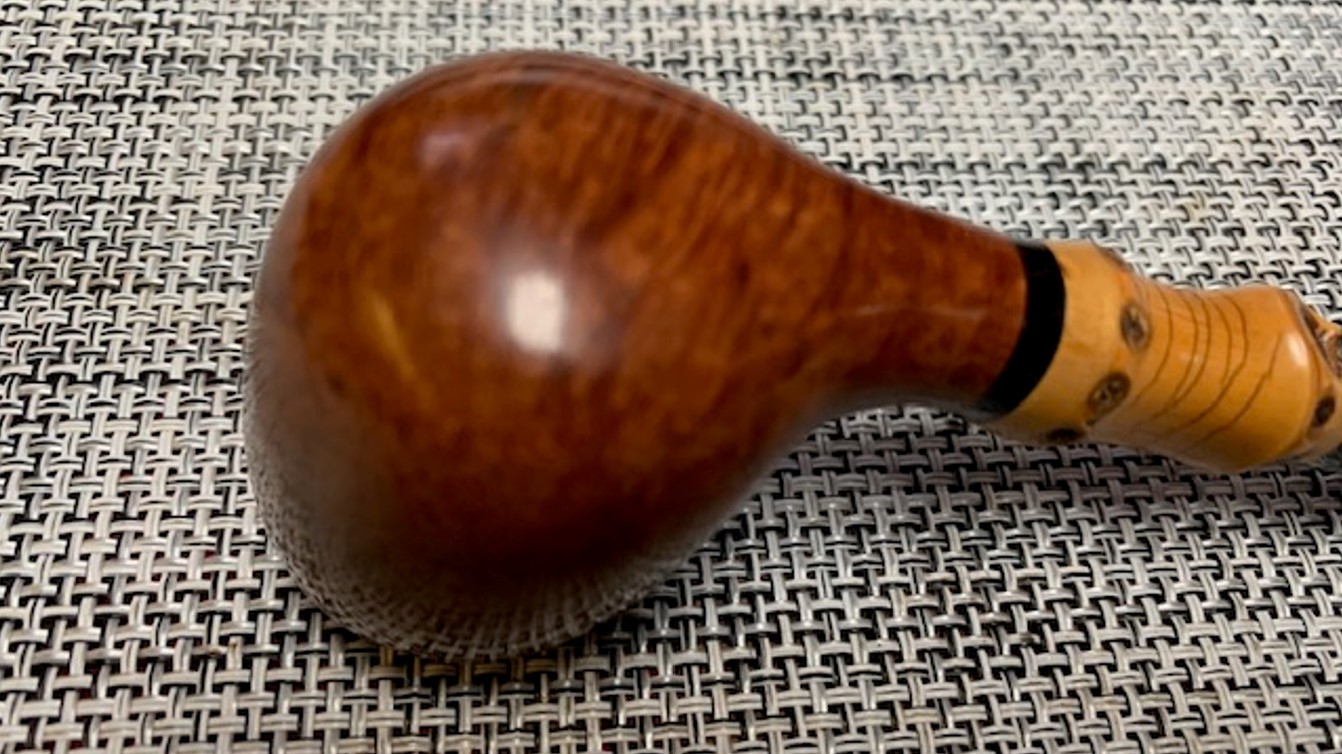
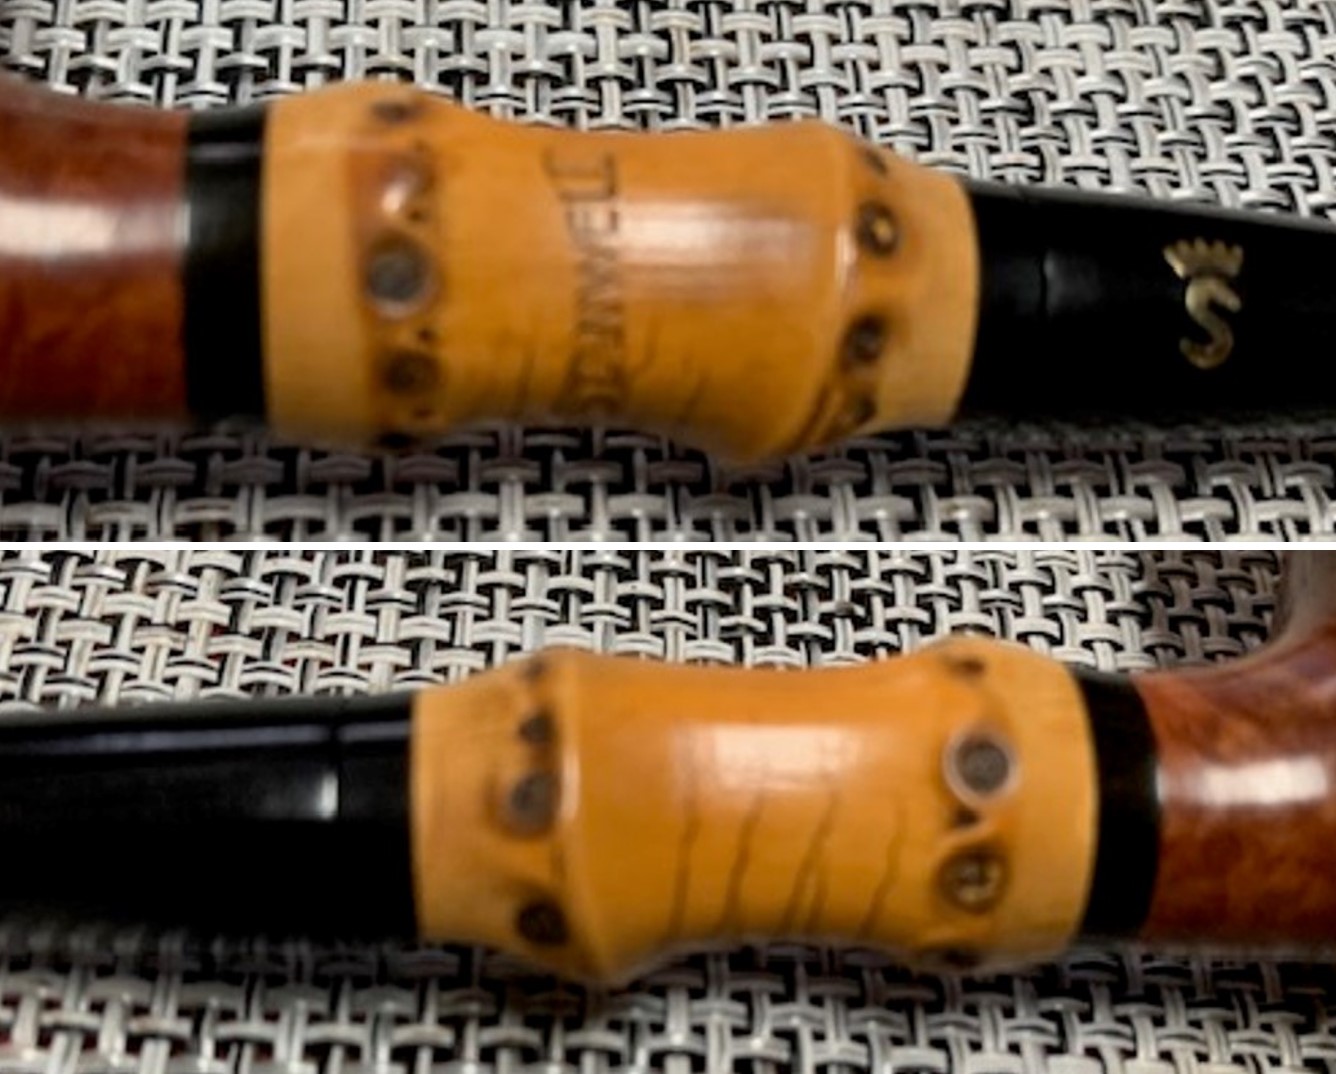
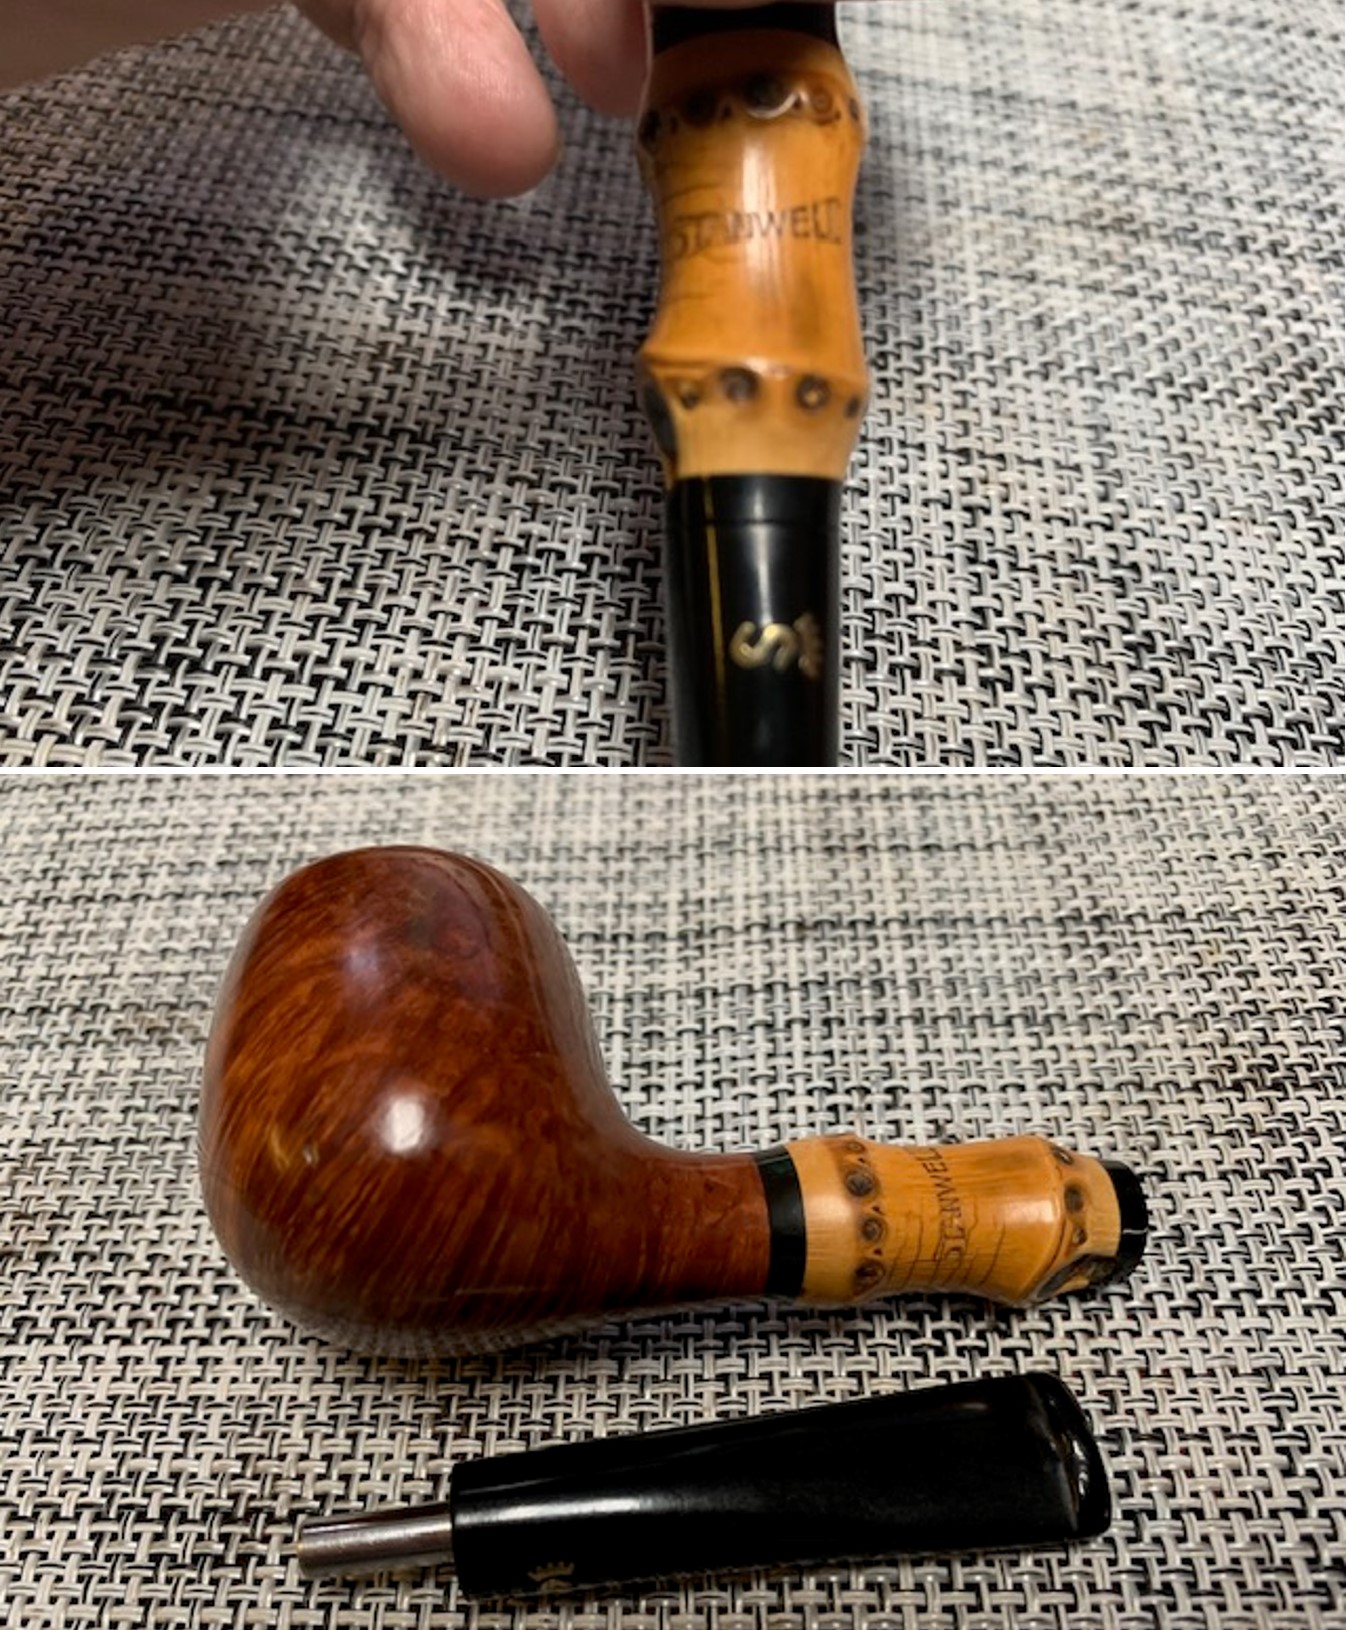
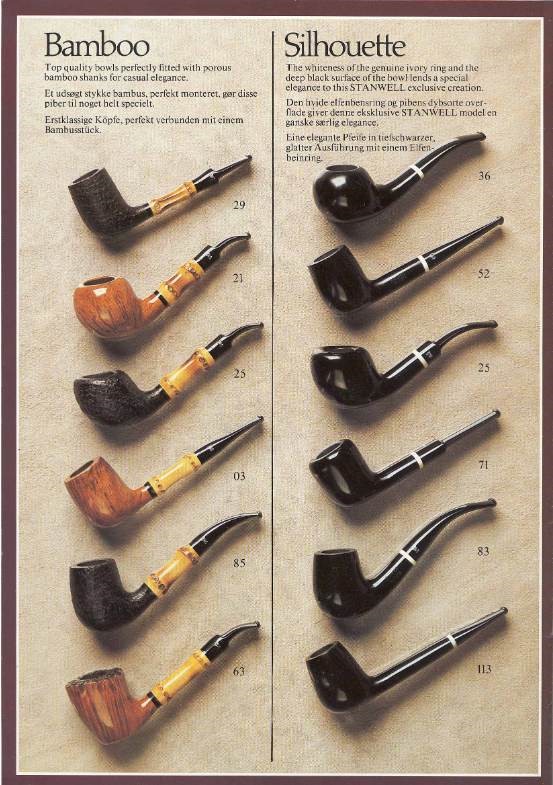
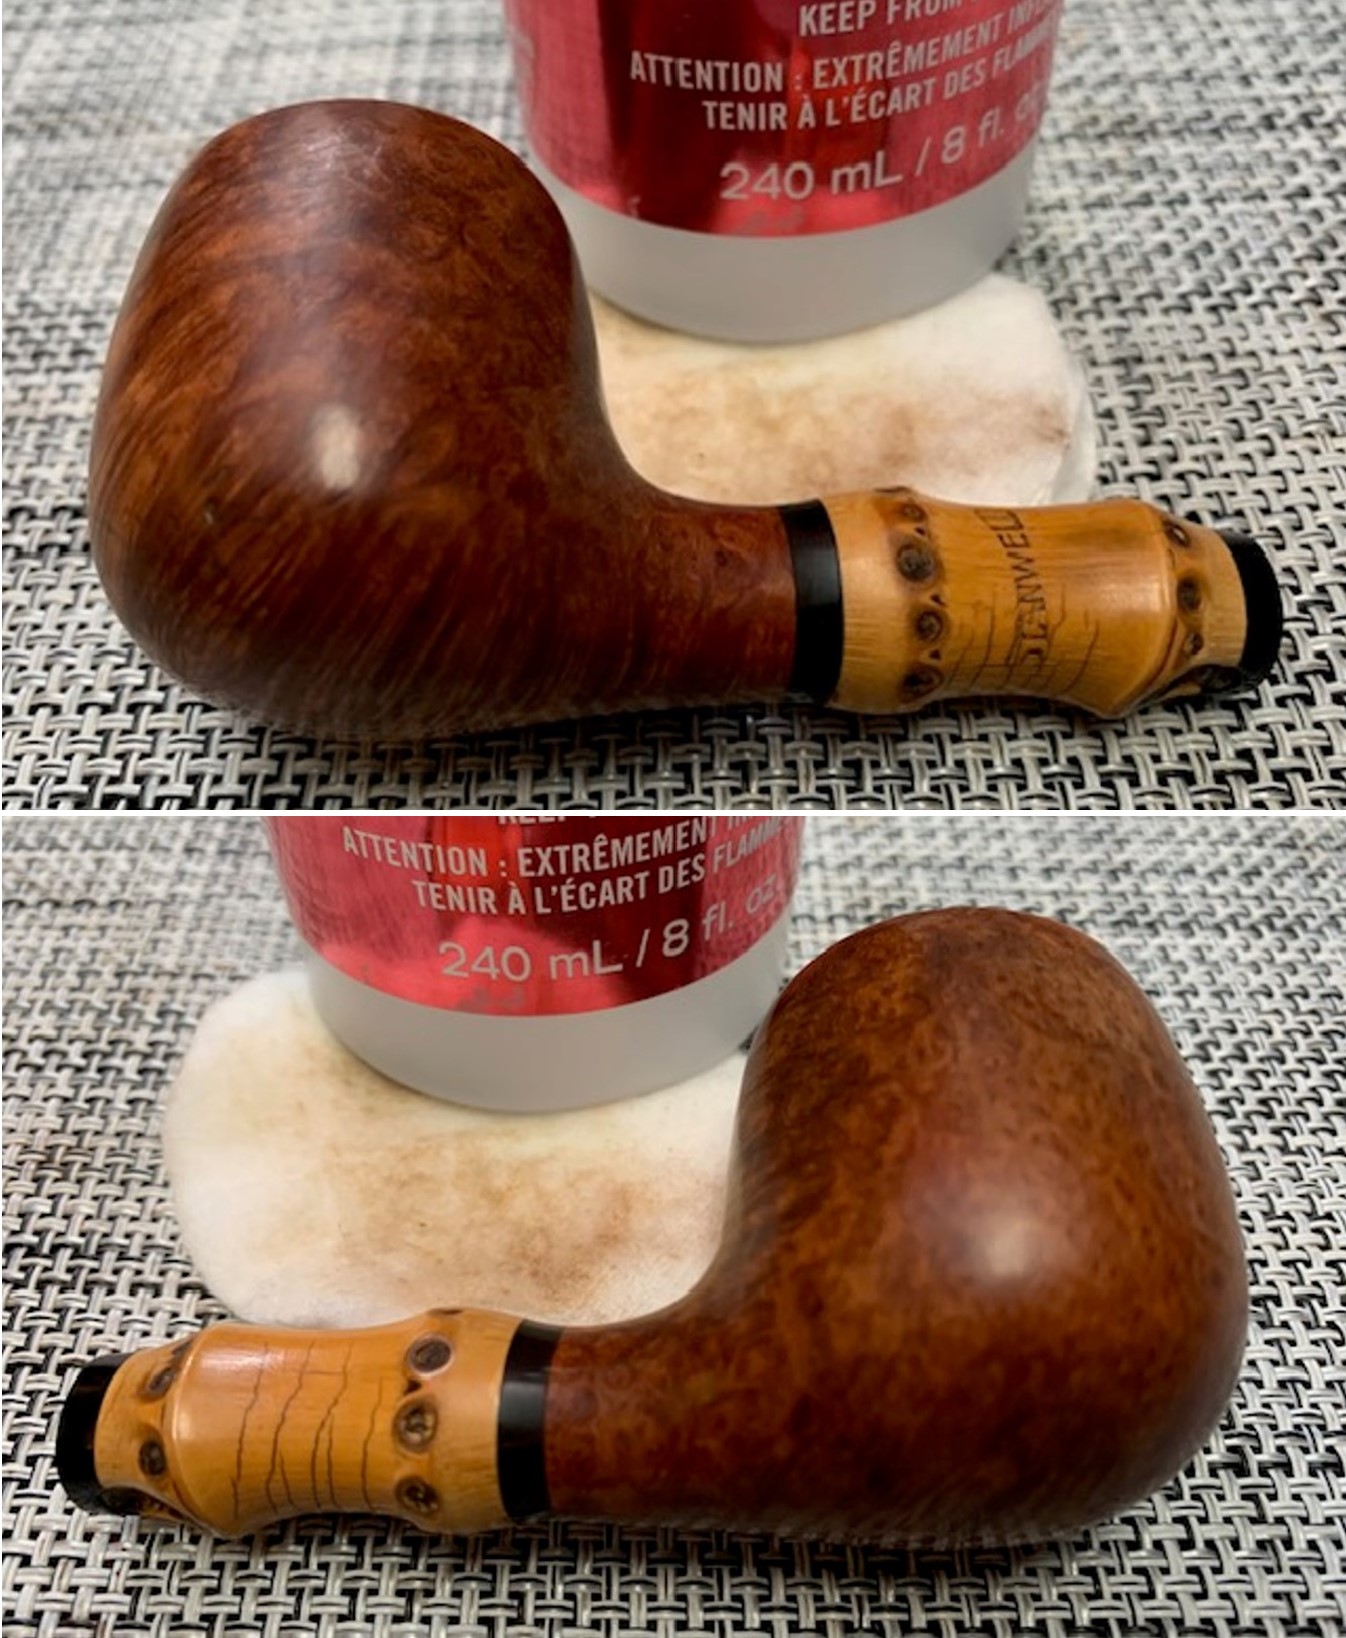
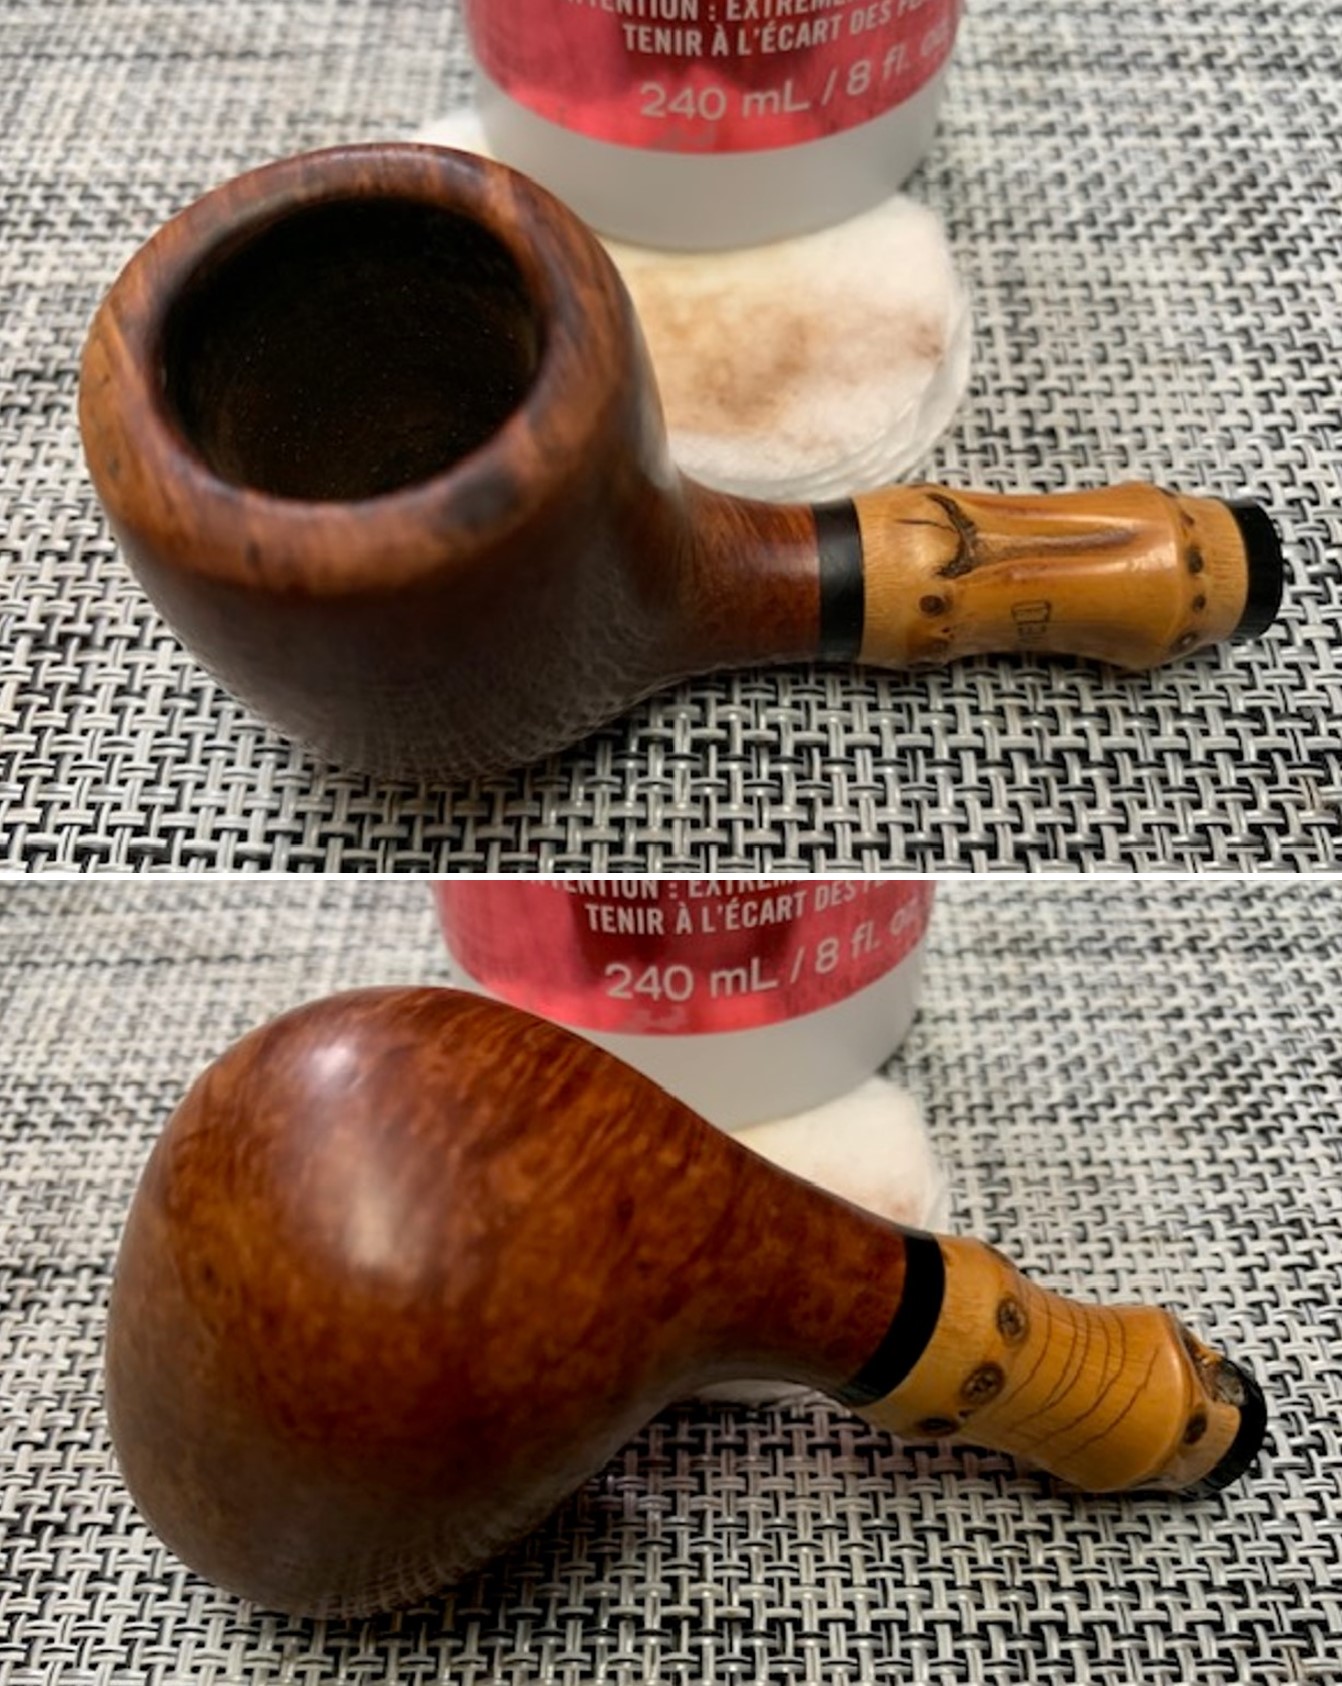
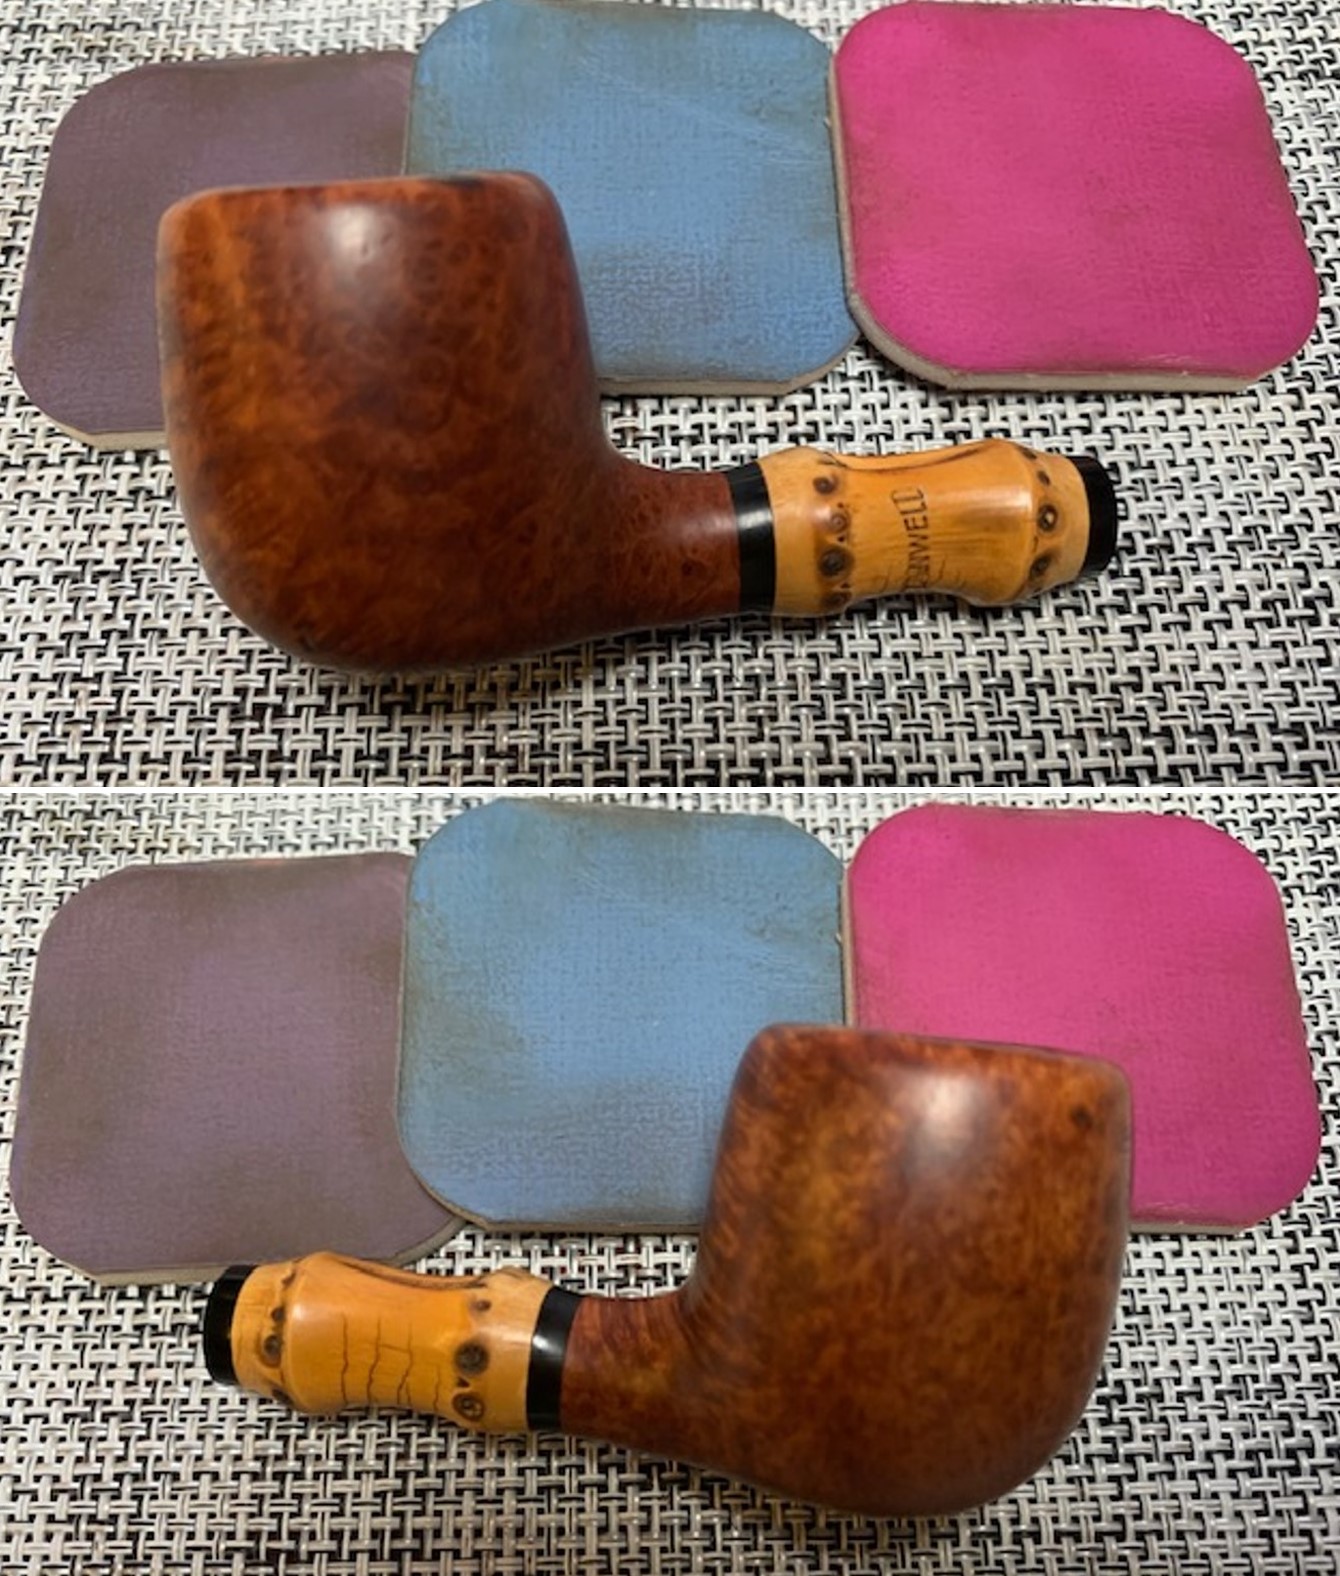
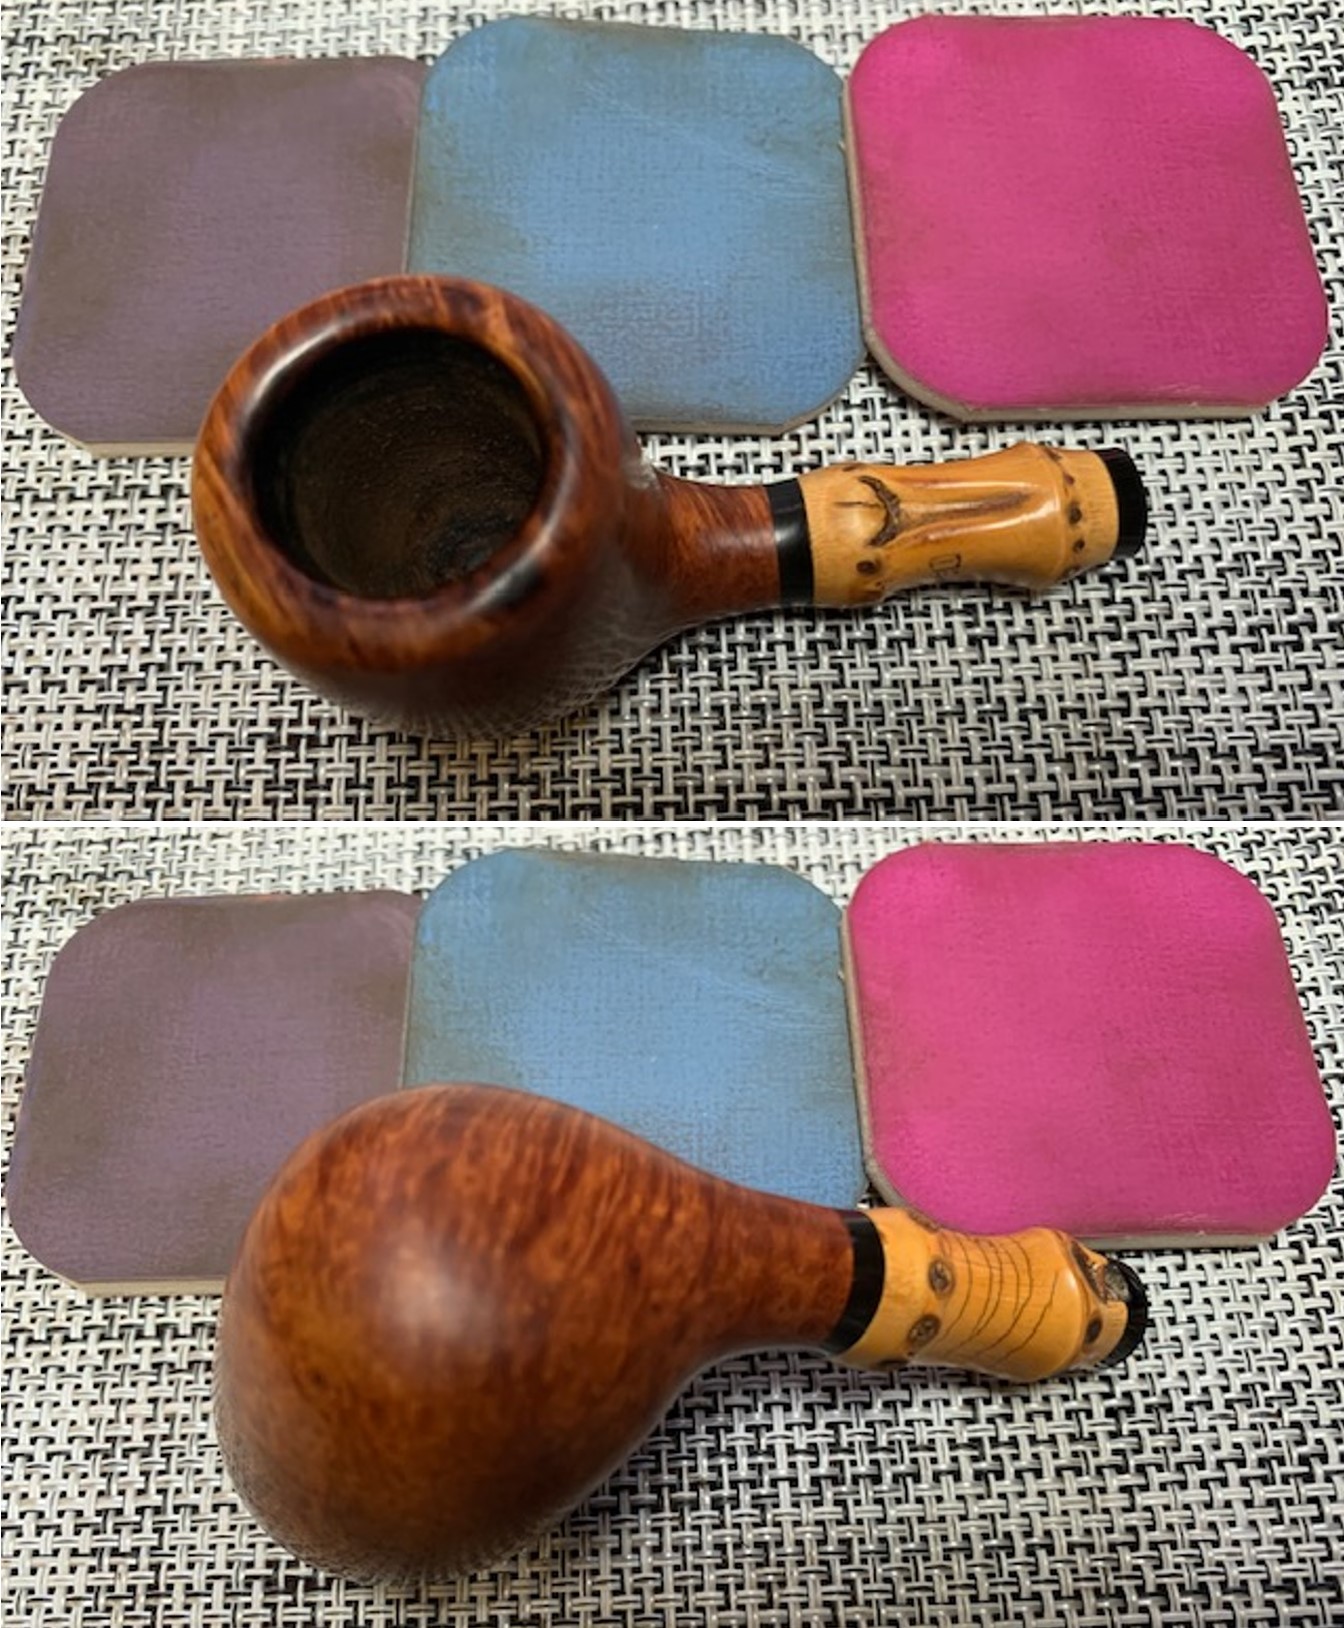
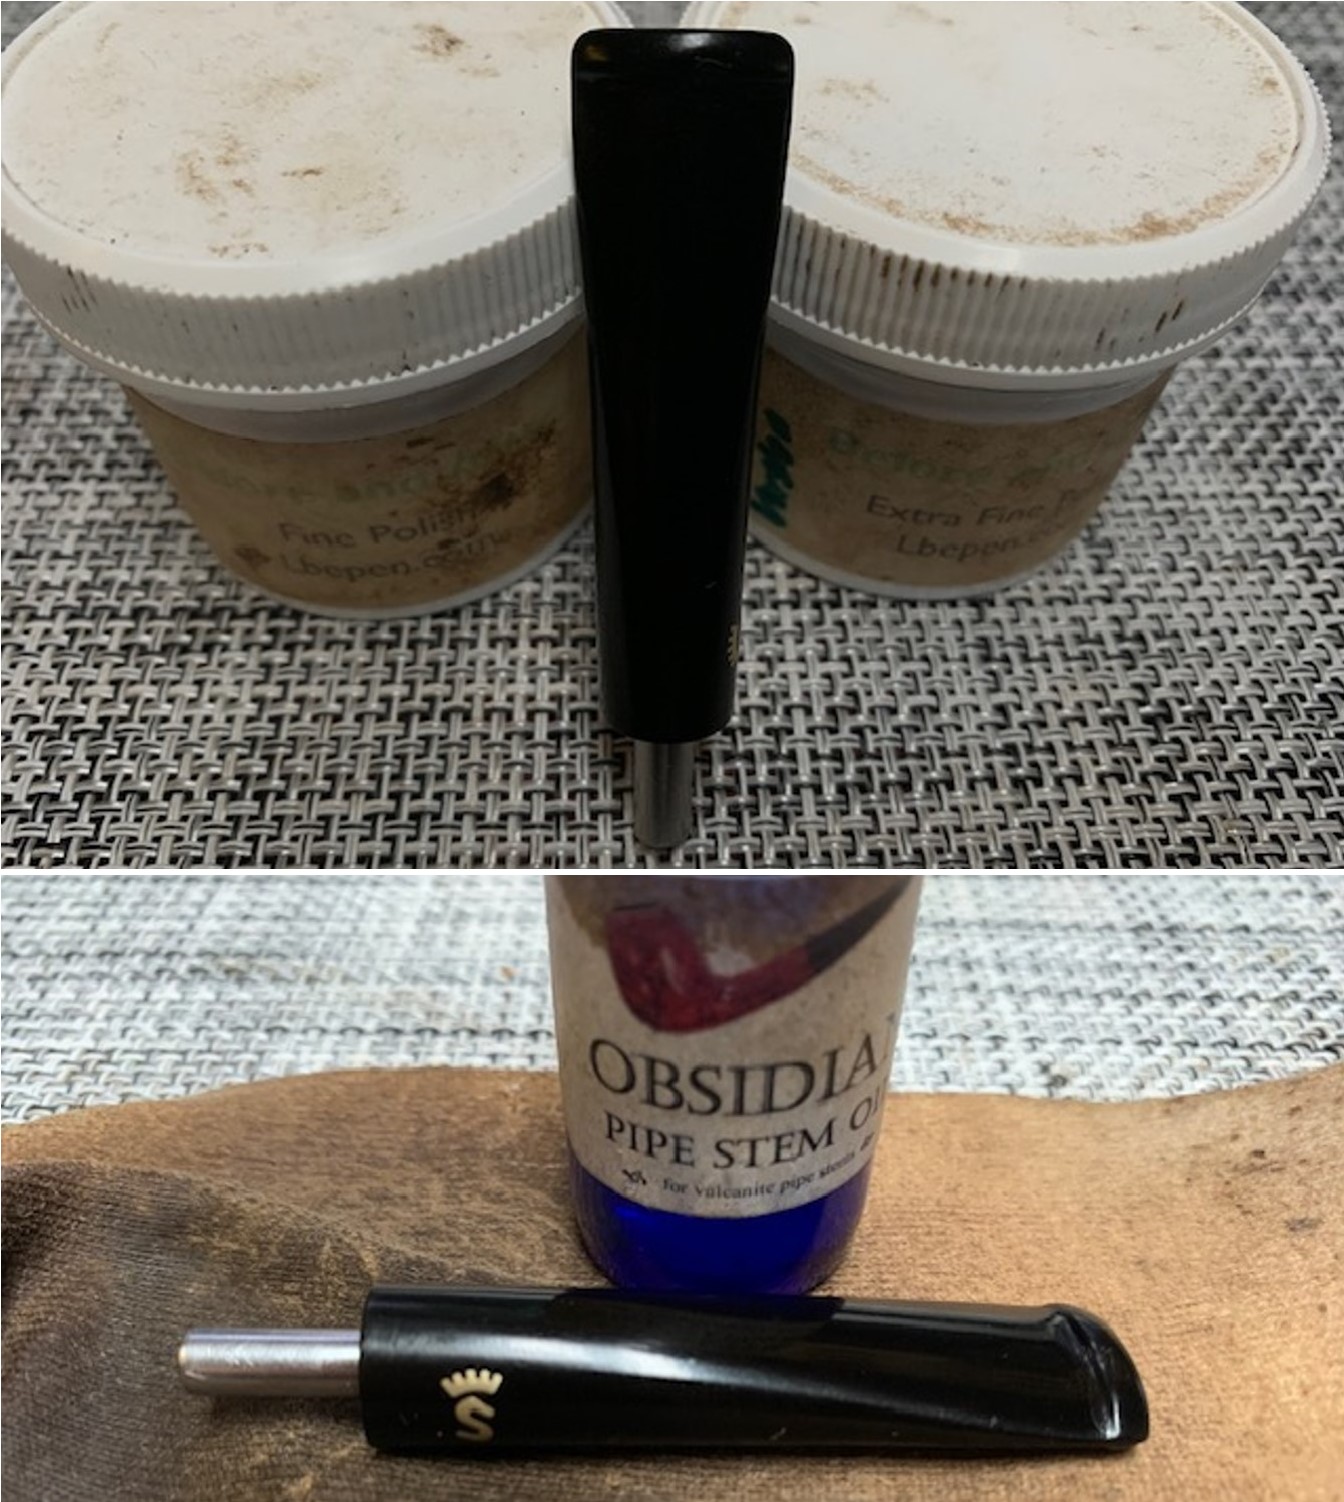
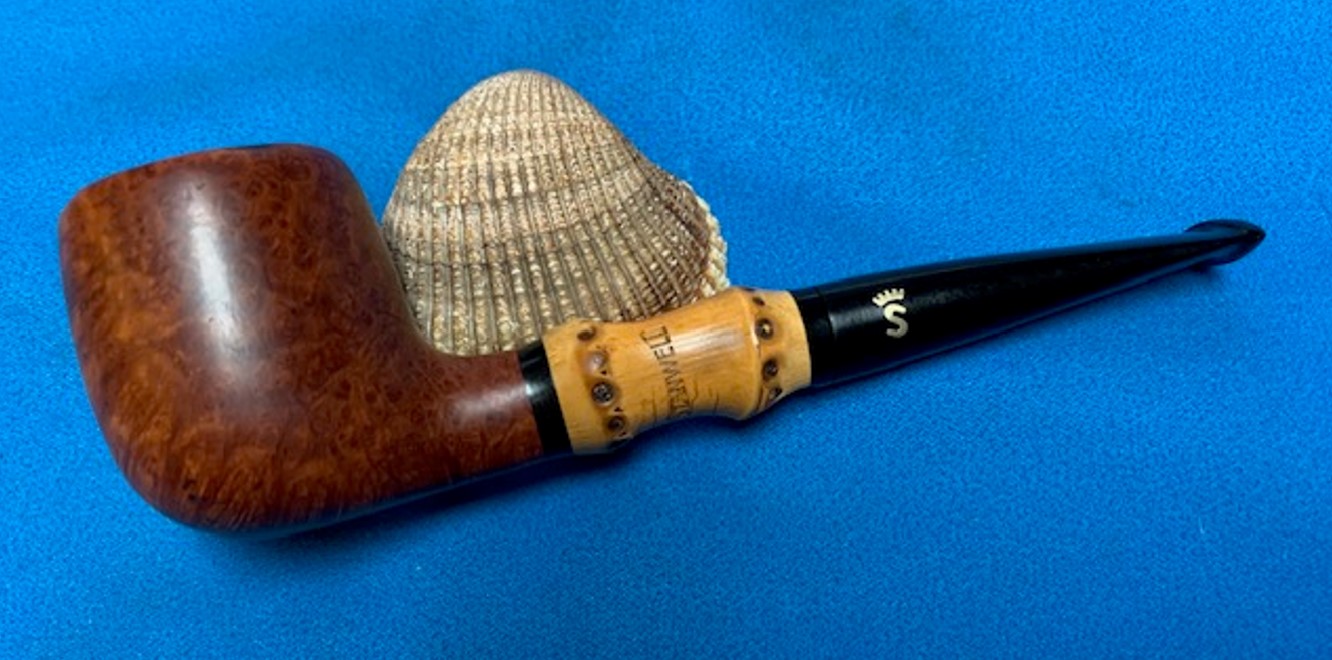
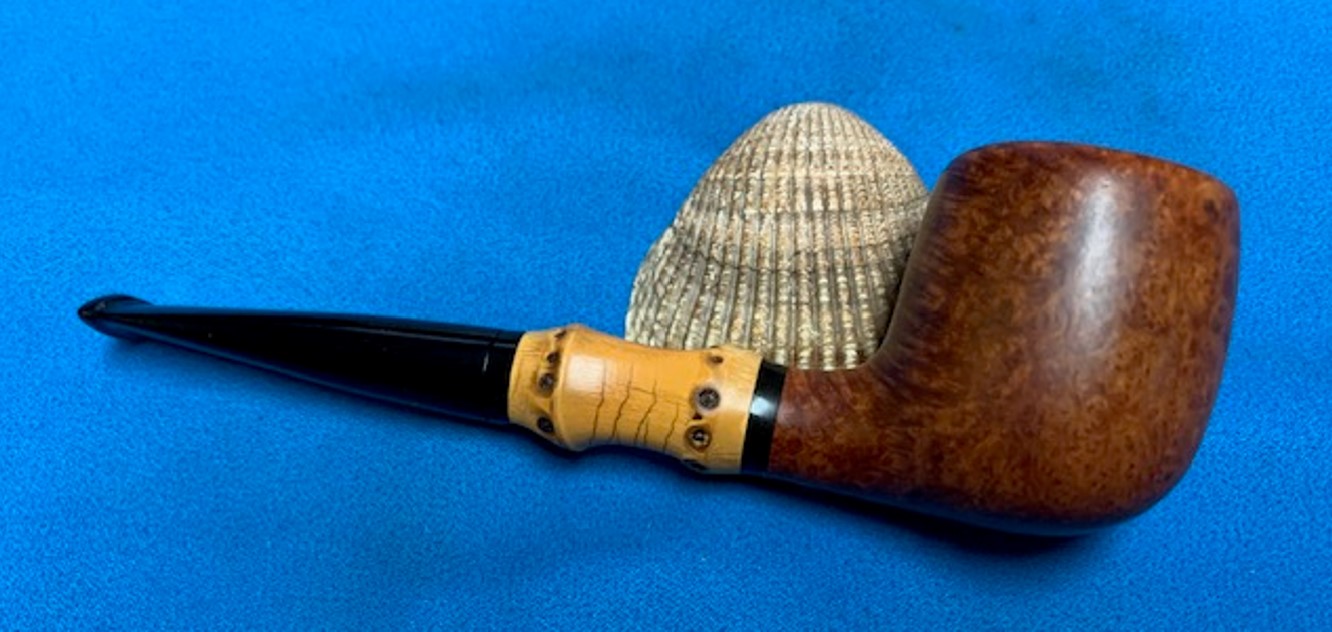
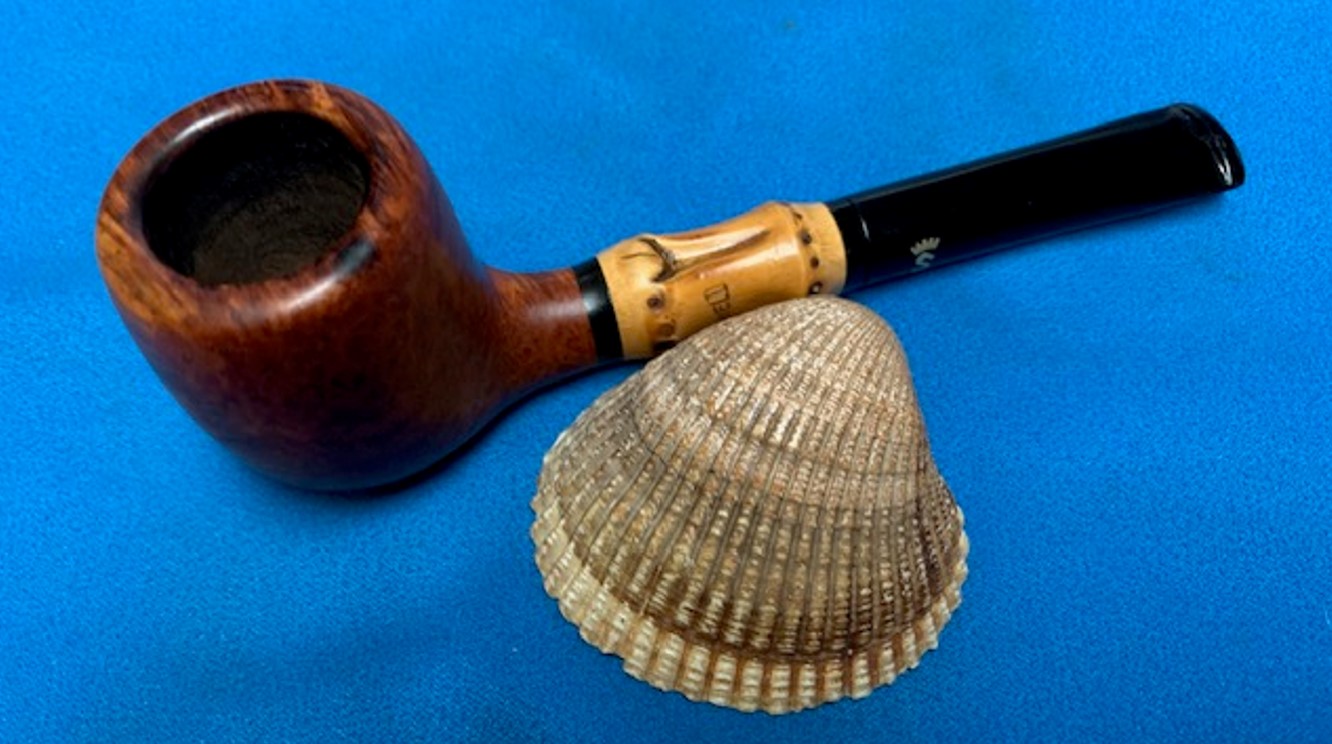
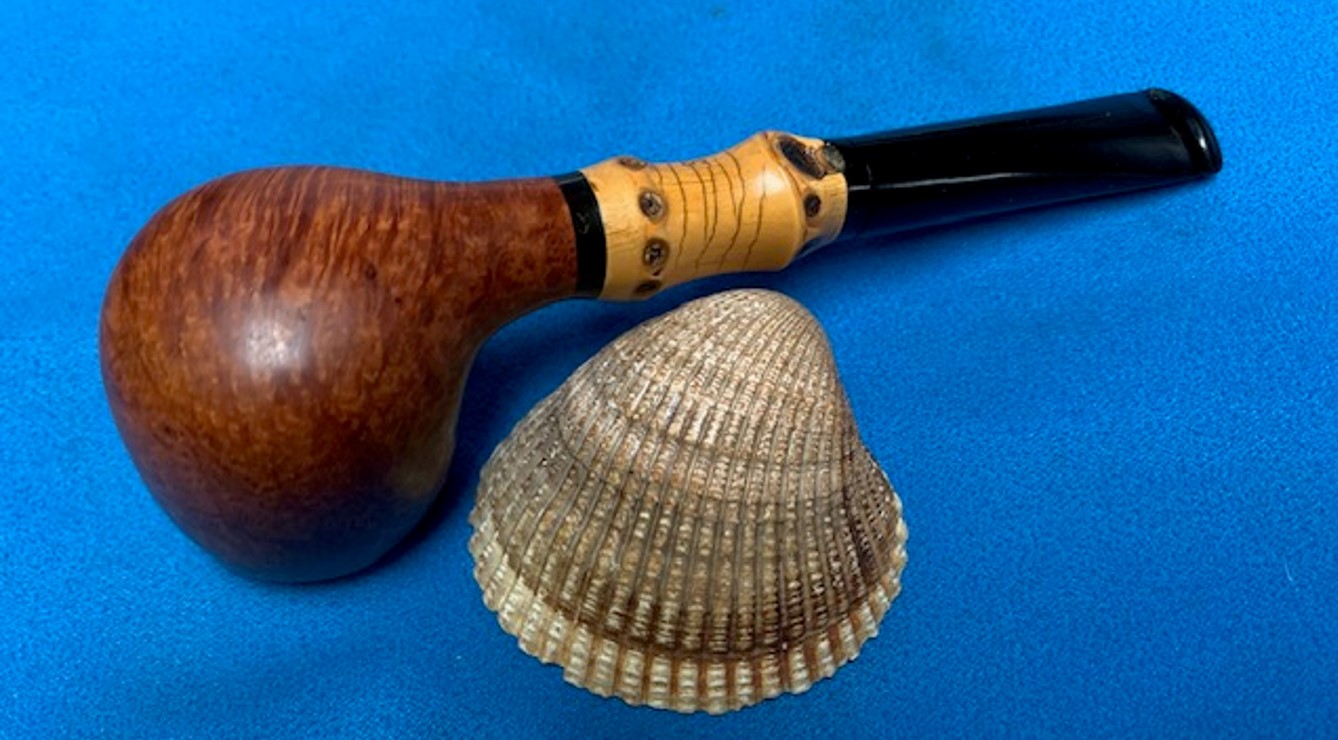
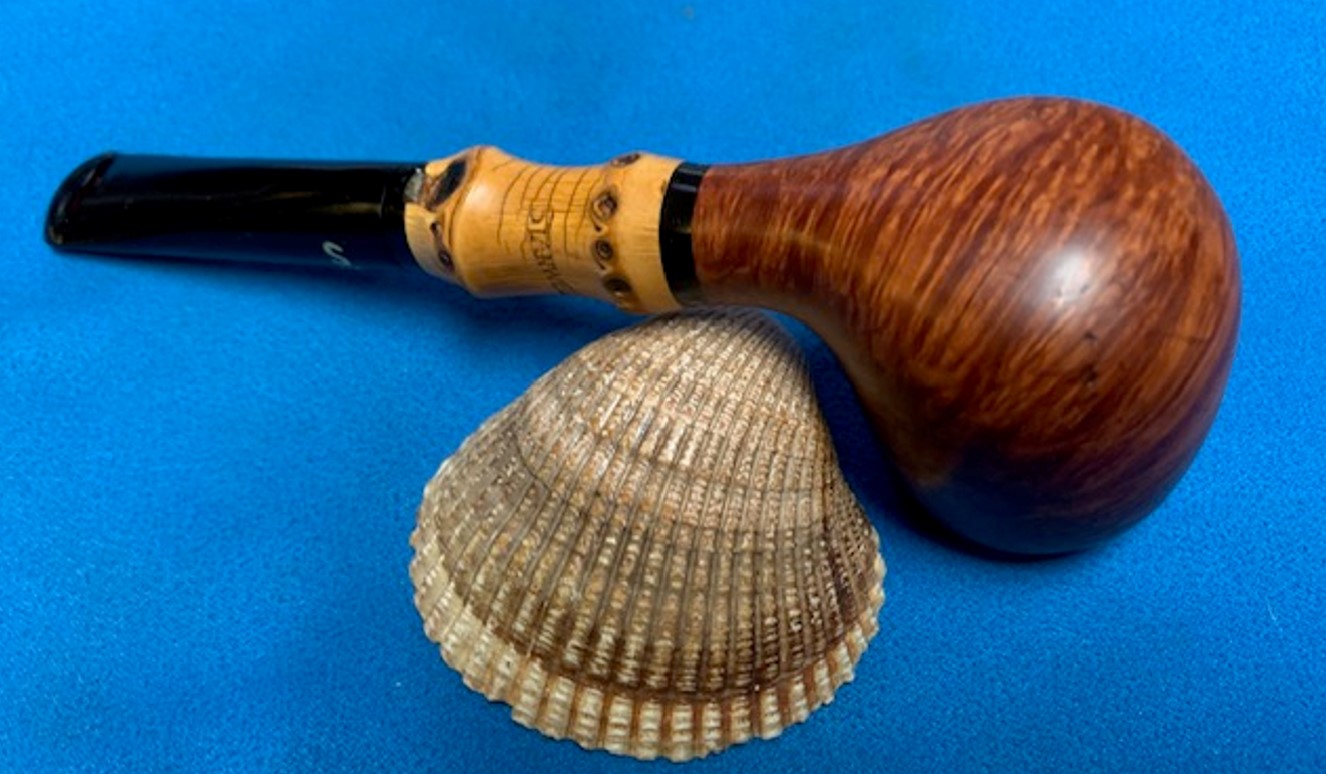
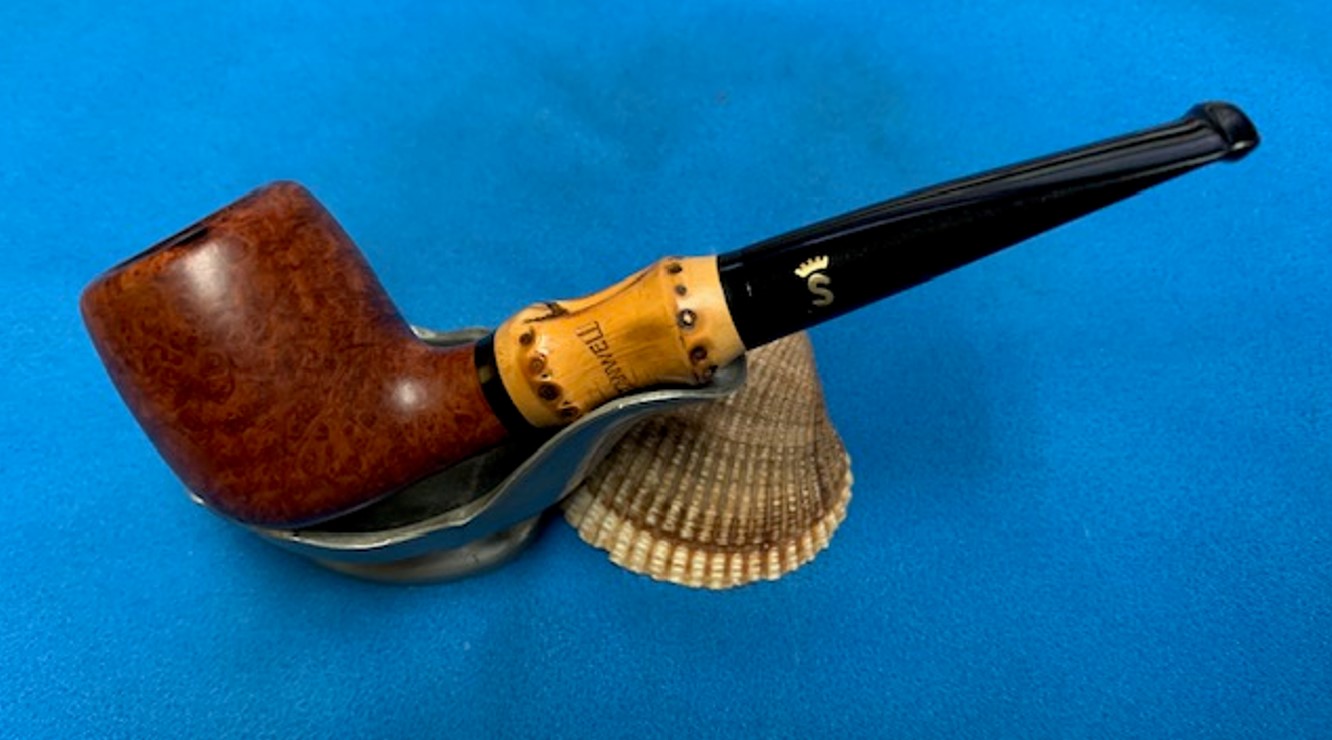
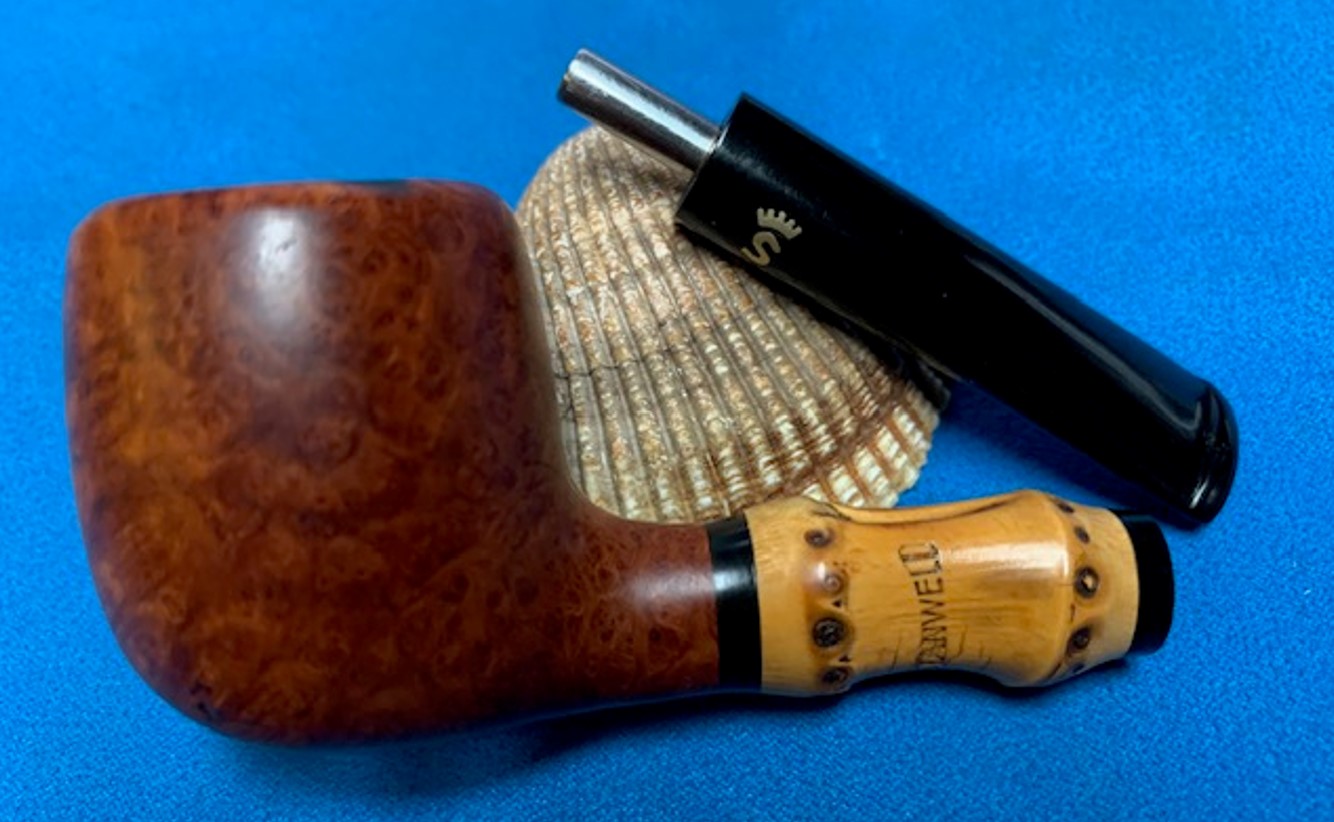
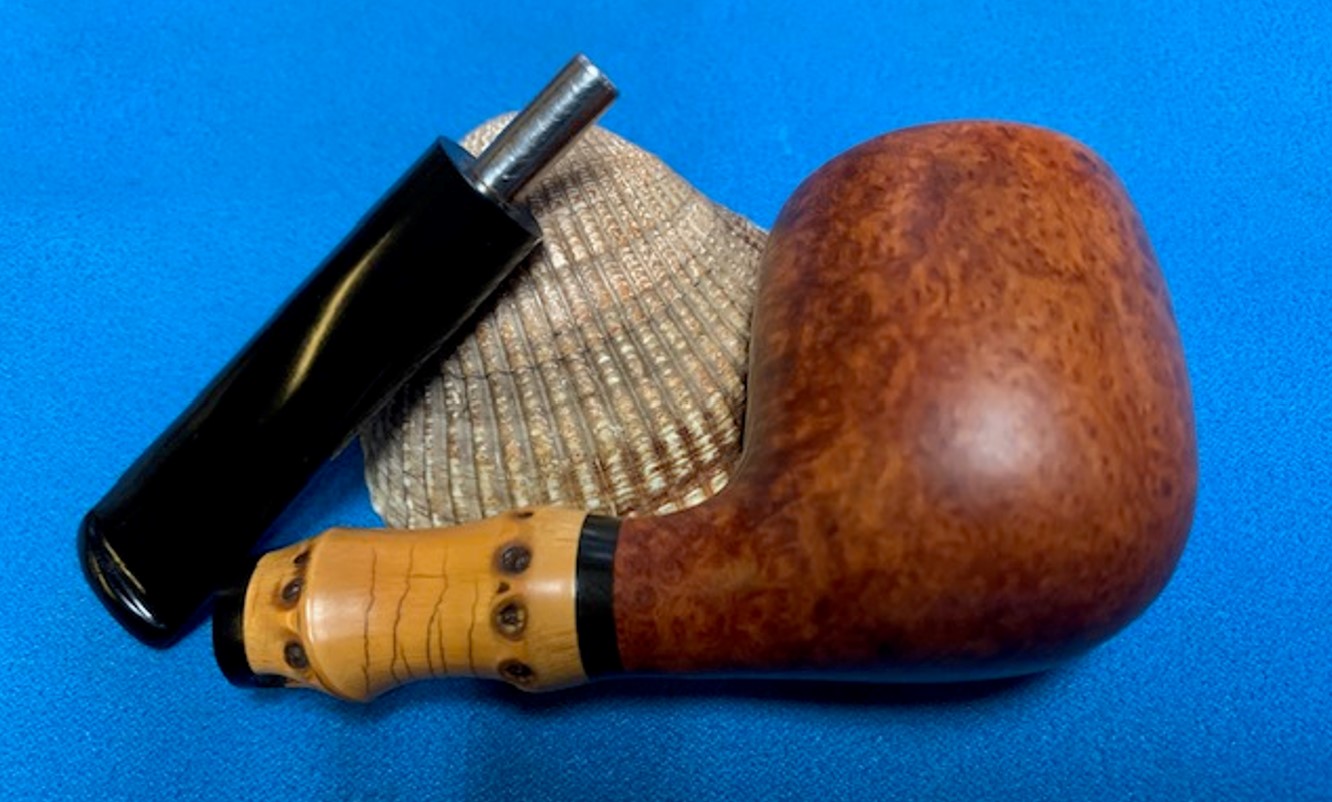
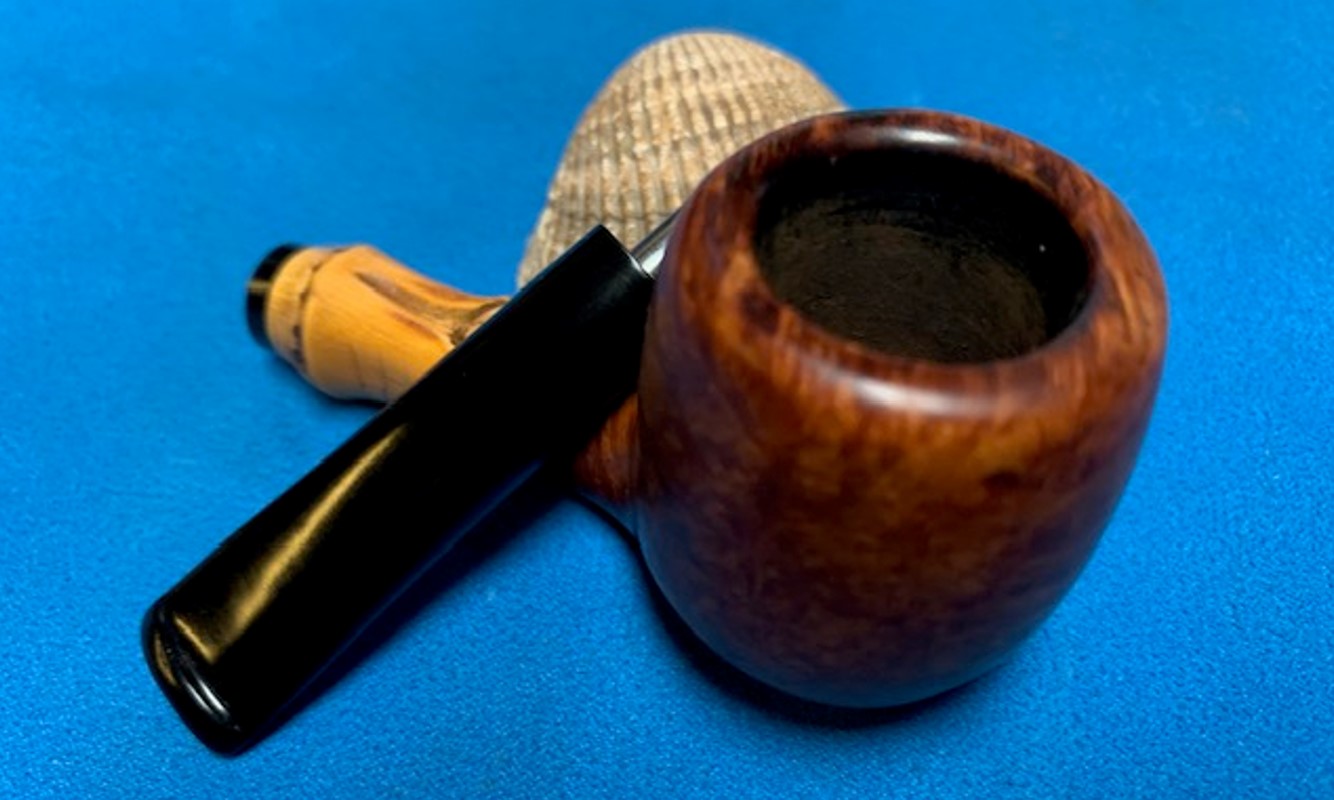
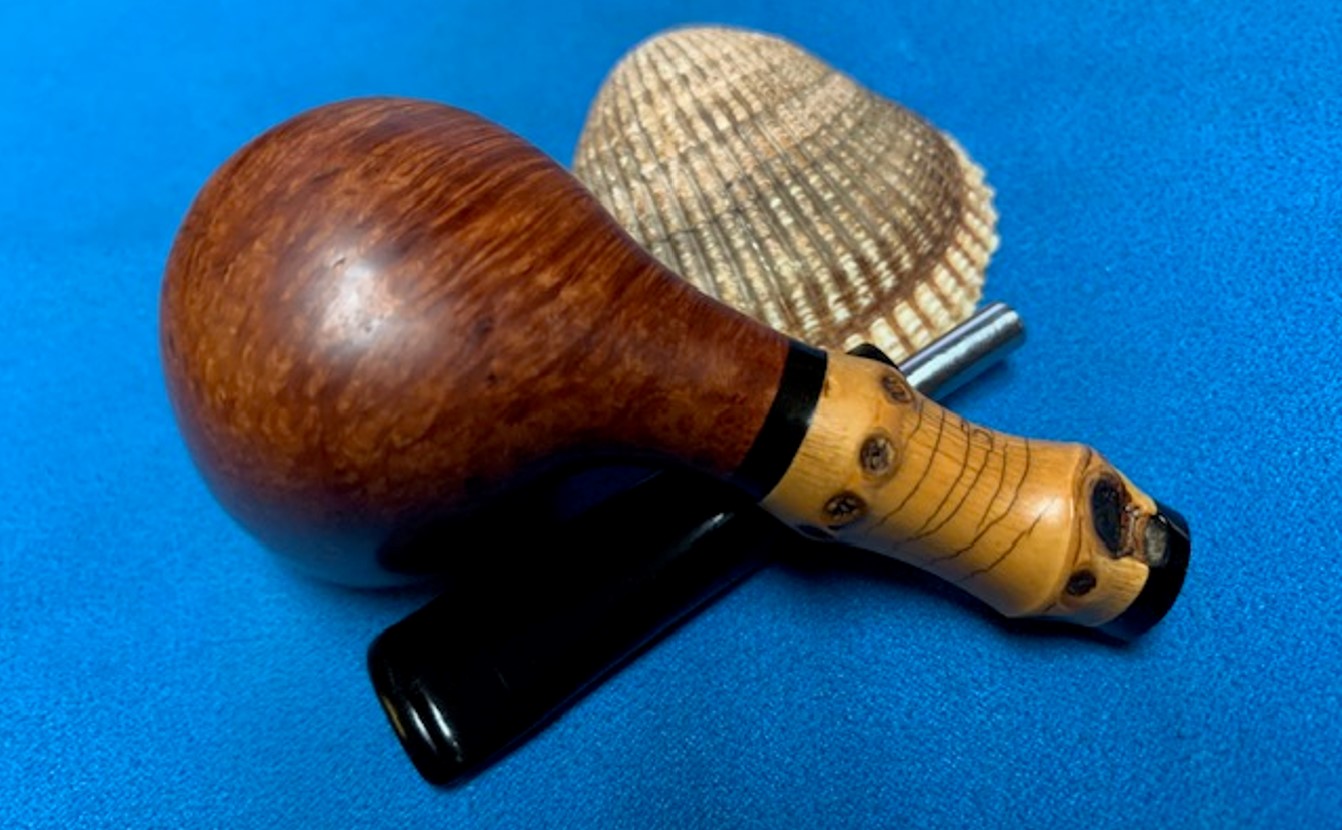
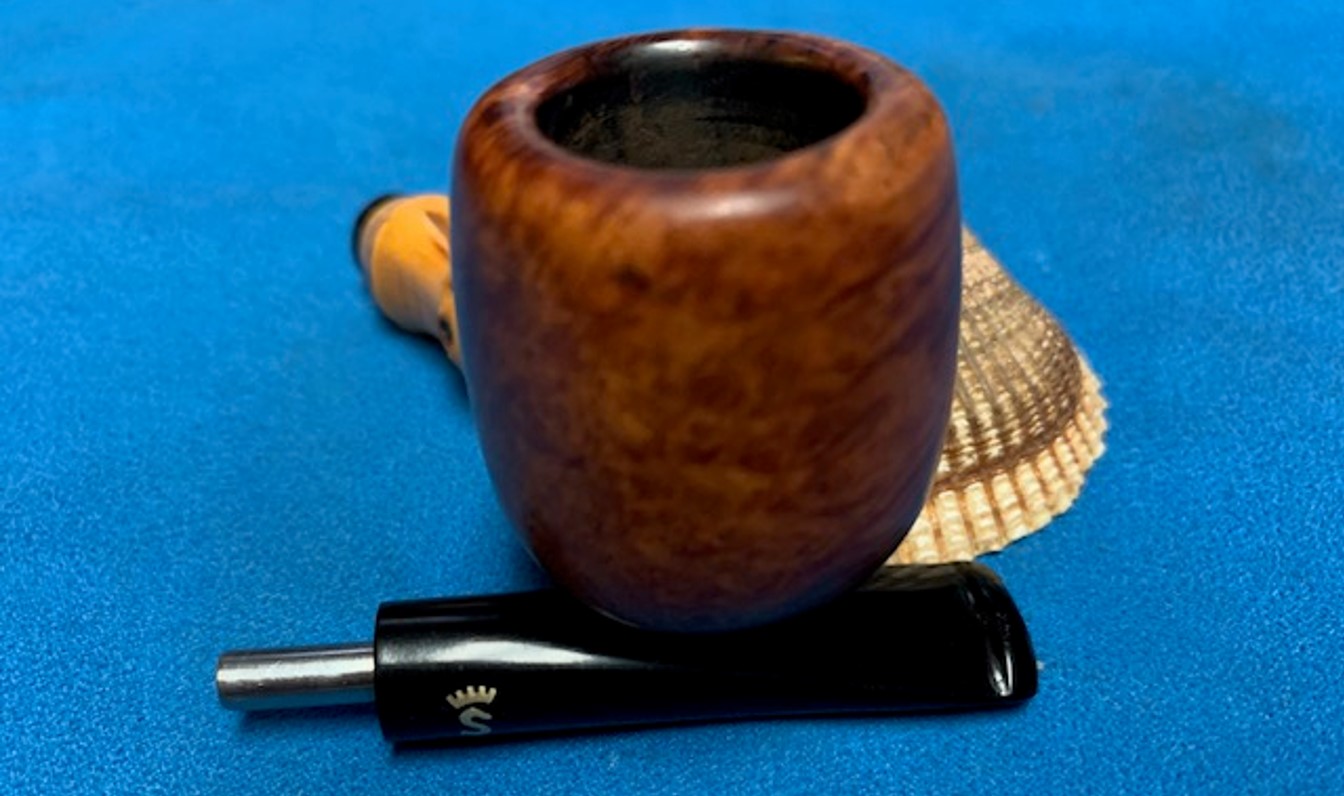
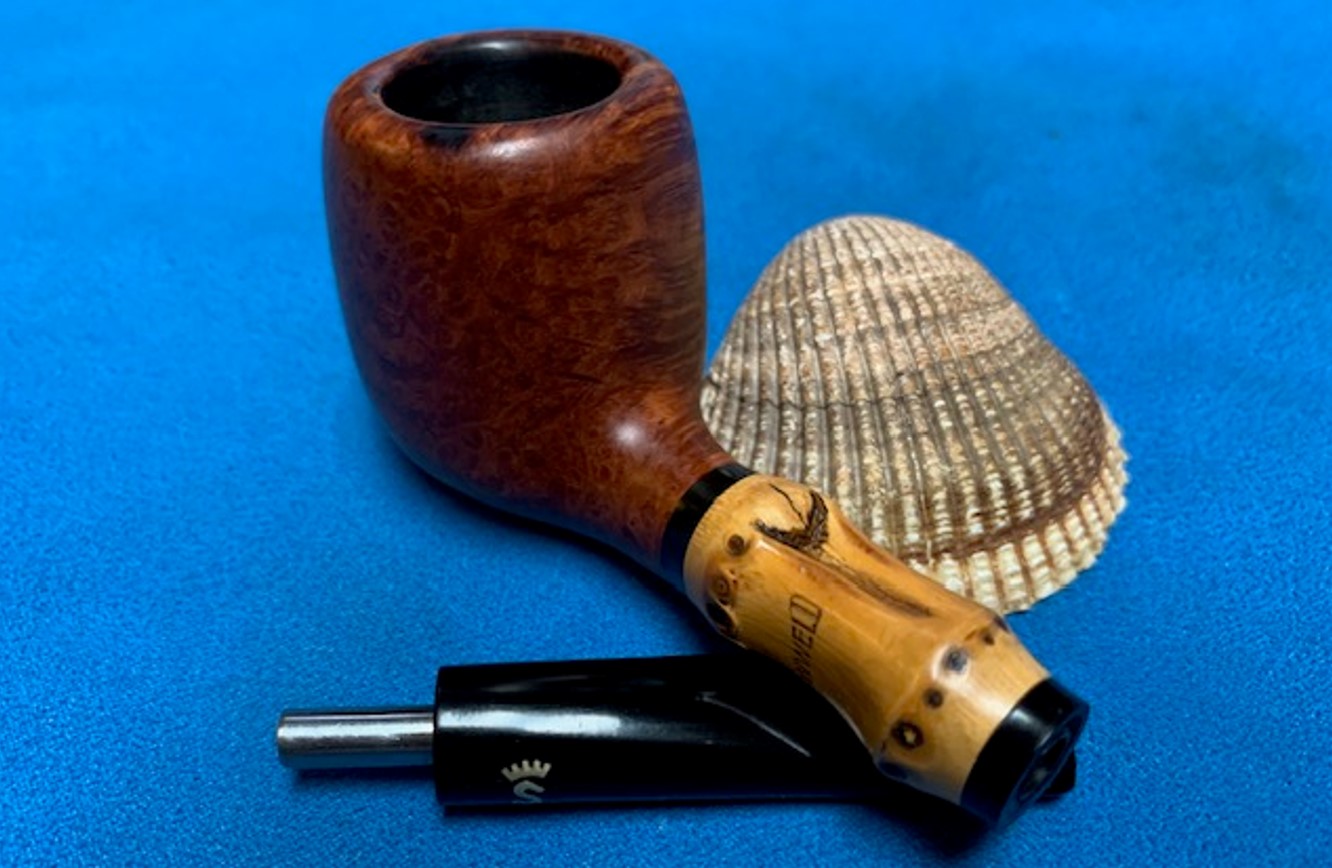
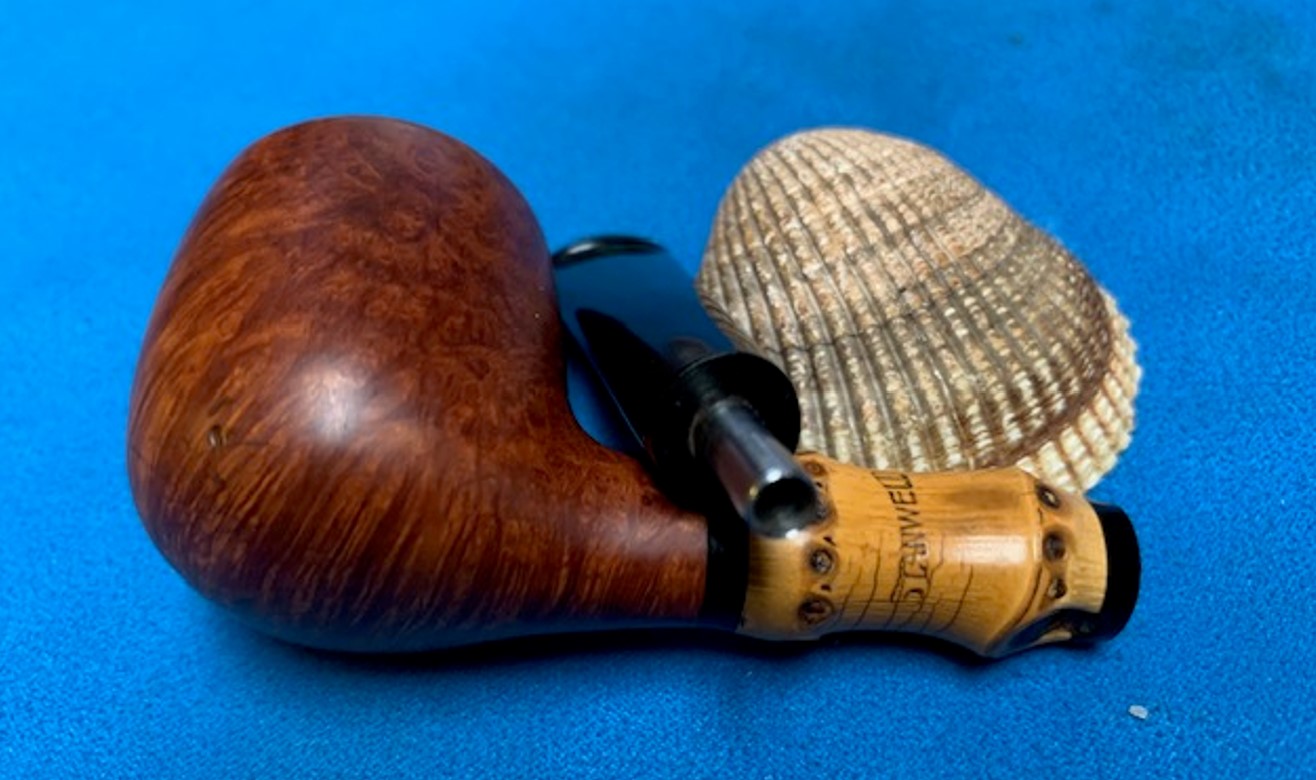
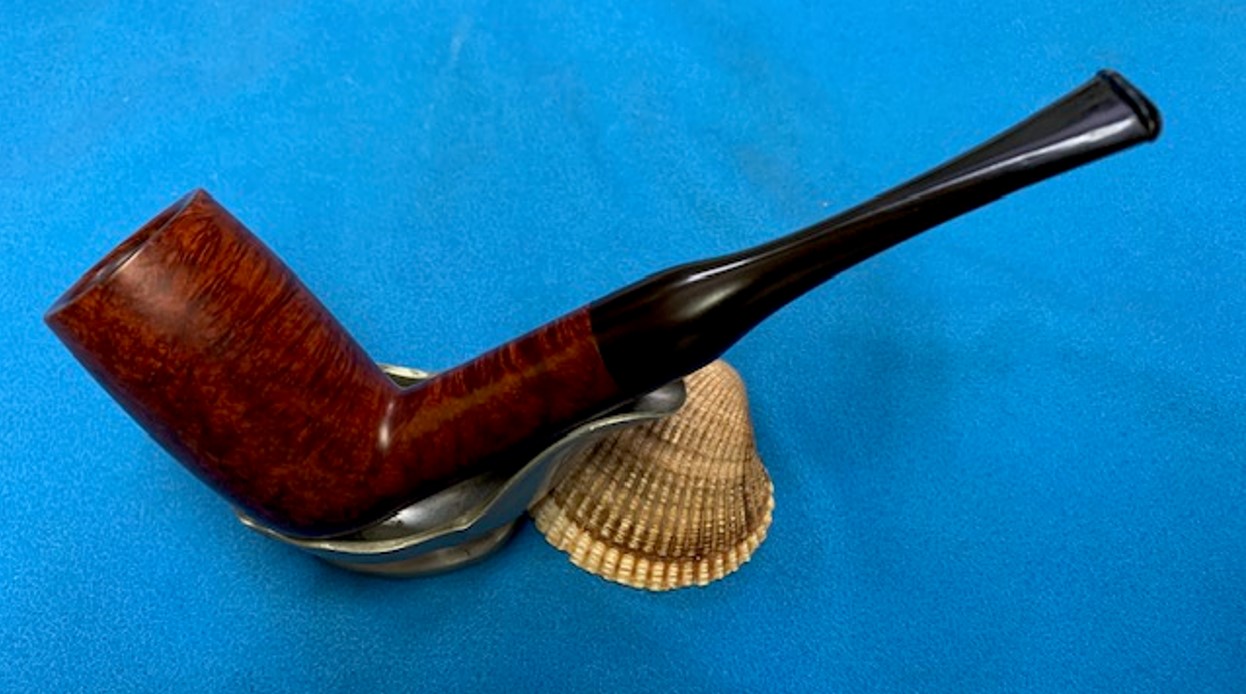
It is a hot day here in Vancouver so I decided to head to the basement where it is cool and work on another pipe. This one was purchased on 11/14/2022 in a lot of pipes that came to us from a seller in Copenhagen, Denmark. It included a group of Stanwell Bamboo pipe that are quite beautiful, combining a briar bowl, a bamboo shank and in this case an acrylic stem. The pipe is a nice looking pot shape. The grain around the bowl and short briar portion of the shank has a mix of cross and birdseye grain. The pipe is stamped on the left side of the bamboo and reads STANWELL vertically between the knuckles. The pipe was a well used pipe when Jeff received it. Someone had given it a coat of varnish so it was quite shiny but there was grime underneath. The mixture of brown stains highlights some beautiful grain under the dirt. The bowl had been reamed and it was clean. There was some darkening and some nicks on the crowned rim top and one burn mark on the left rear. The inner edge had some darkening and some nicks around the edges. The outer edge on the front of the bowl had been damaged and someone had repaired it somewhere along the journey. It had been sanded smooth and changed the profile of the crowned rim at that point. I would need to rework that area. The stem is acrylic and was dirty with some deep tooth marks on both sides ahead of the button and on the button itself. There is a brass/gold crown S logo inlaid on the left side of the taper stem. I took photos of the pipe before I started the clean up work on it.I took photos of the bowl and rim top to show what they looked like before the clean up. You can see the darkening on the inner edge and top of the rim. It is hard to see but there is damage that is well hidden at this point on the front outer edge of the bowl. I took some of the stem to show the condition of both sides. You can see the deep tooth marks on the top and underside next to the button. They will take some work.The photos of the sides and heel of the bowl show the uniquely stained grain around the bowl and shank. The mixture of black and brown stains adds depth finish on the pipe. Even under the grime it is a real beauty. The two knuckle bamboo shank has a nice patina on it that will only get better with time. It had a black acrylic spacer between the shank and the bamboo and the stem and the bamboo.The stamping on the left side the bamboo is shown in the photo below. It is clear and readable as noted above. It also shows the gold crown S on the stem side. I removed the stem from the shank and took a photo of the pipe to show the flow and cut o the pipe. It is a beauty.I turned to several of the previous blogs that I have written on other Stanwell Bamboos that I have restored. I have included the information from those blogs on the line. I turned to Pipephil to get a quick review of the brand (http://pipephil.eu/logos/en/logo-stanwell.html). The Brass Crowned S inlaid logo on the stem is shown in the photo below. I have included a screen capture of the brand info there.I then turned to Pipedia (https://pipedia.org/wiki/Stanwell) for more information. The article is great and gives a lot of history on the brand. There were also links to catalogues at the bottom of the page. I am including a page from a catalogue on the site below that gives a bit of a glimpse into the brand. Here is the link (http://www.axeljeske.de/Pfeifen/Stanwell_Amager.pdf). The catalogue page gives a great description of the Bamboo line. It reads as follows: Top quality bowls perfectly fitted with porous bamboo shanks for casual elegance.
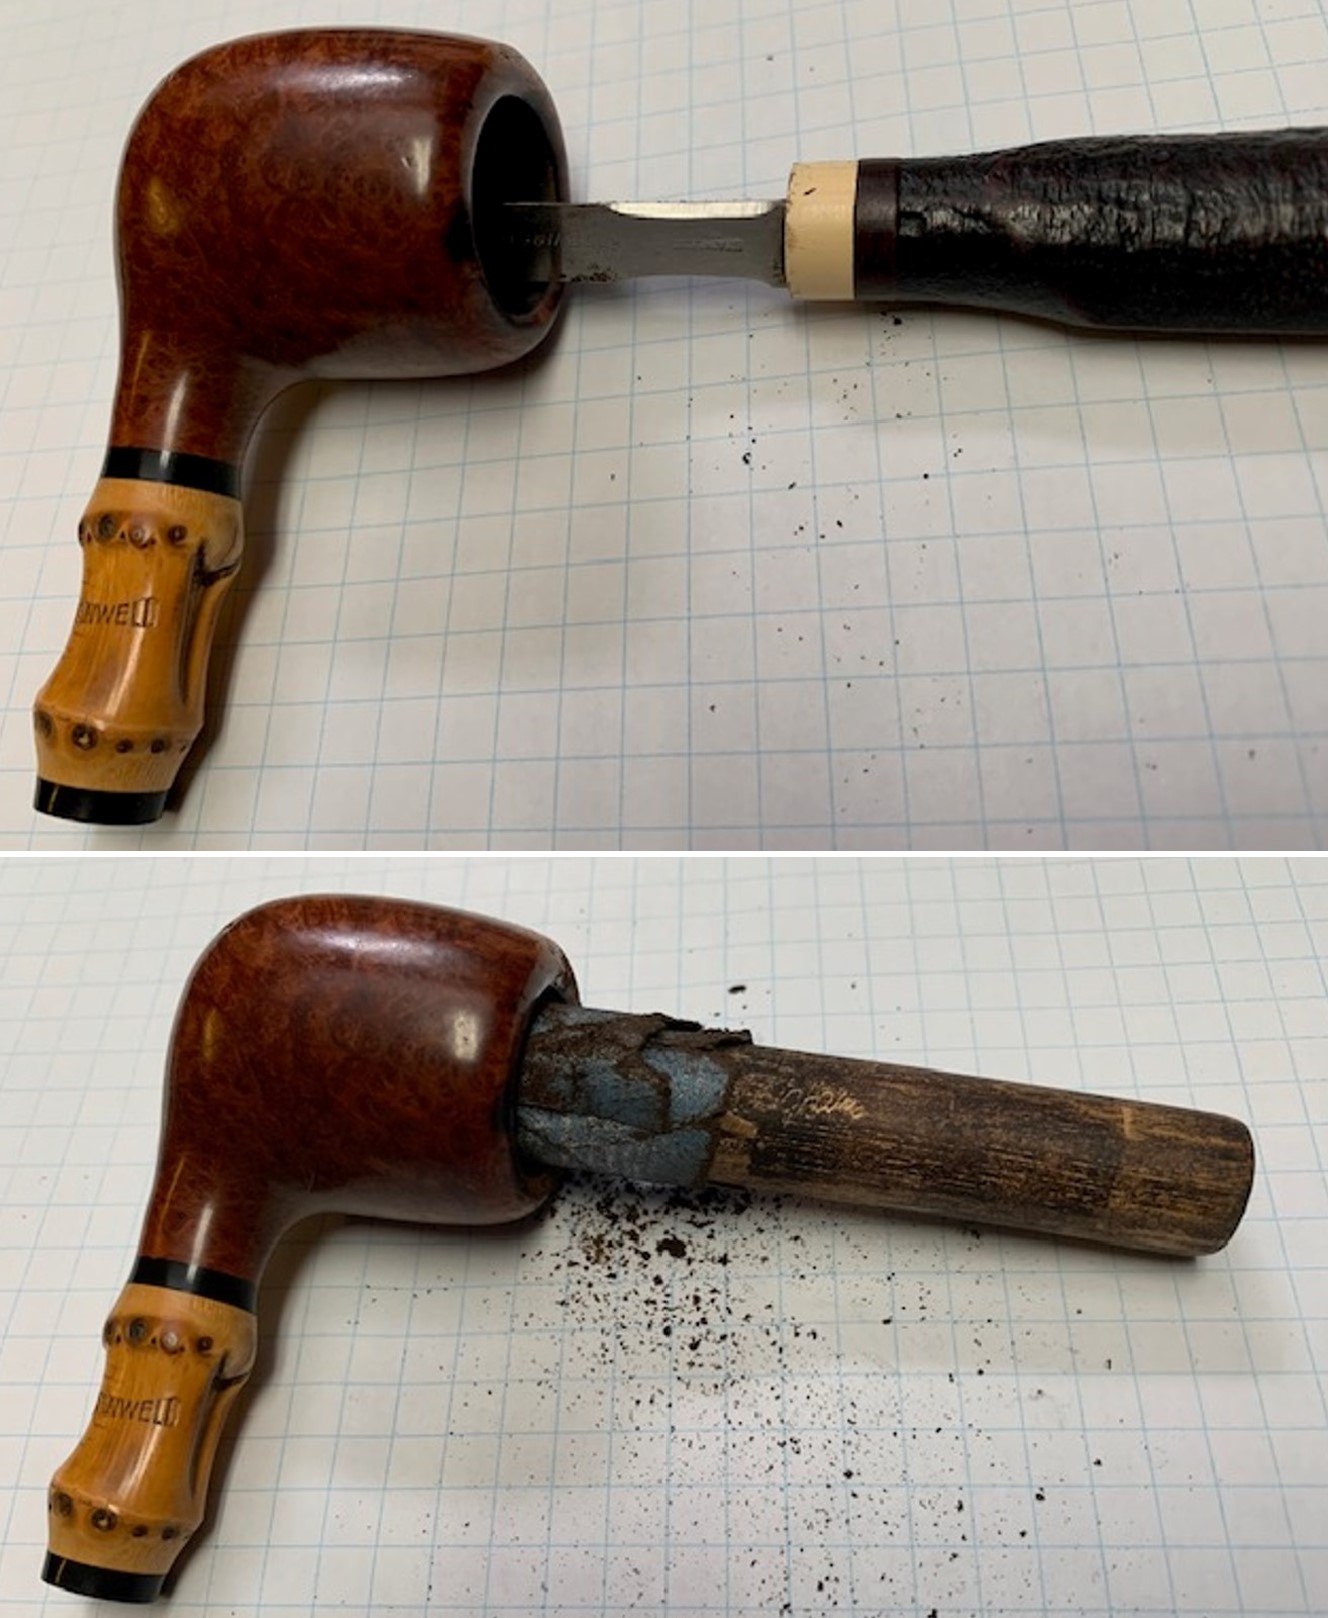
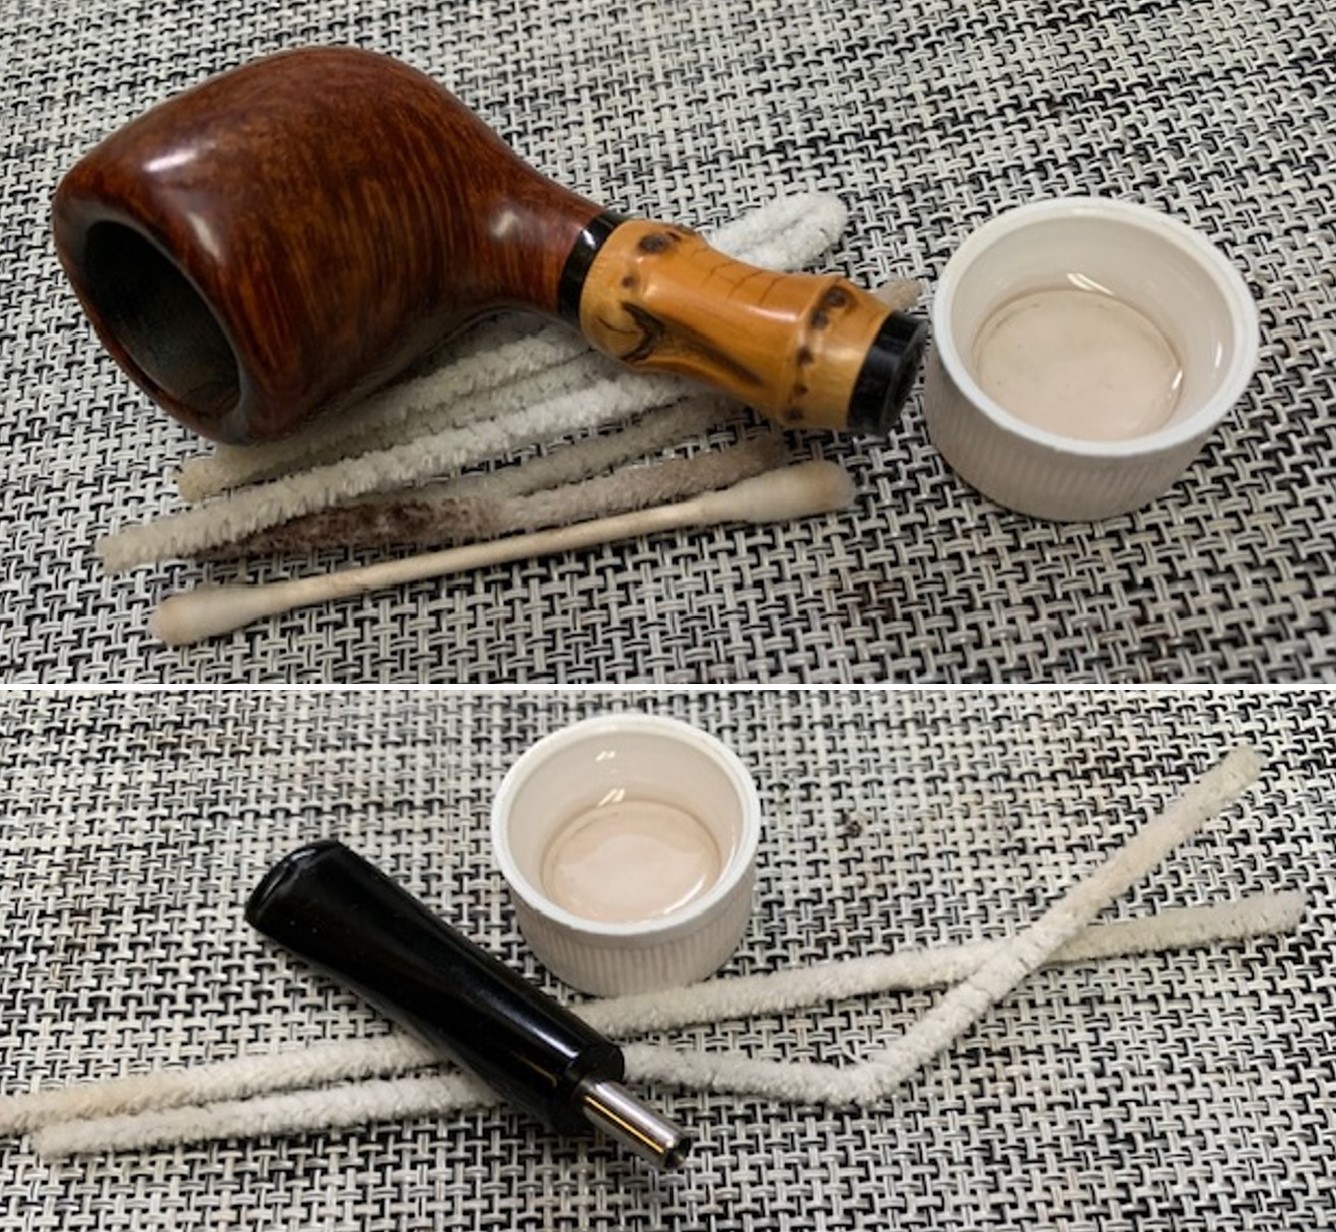
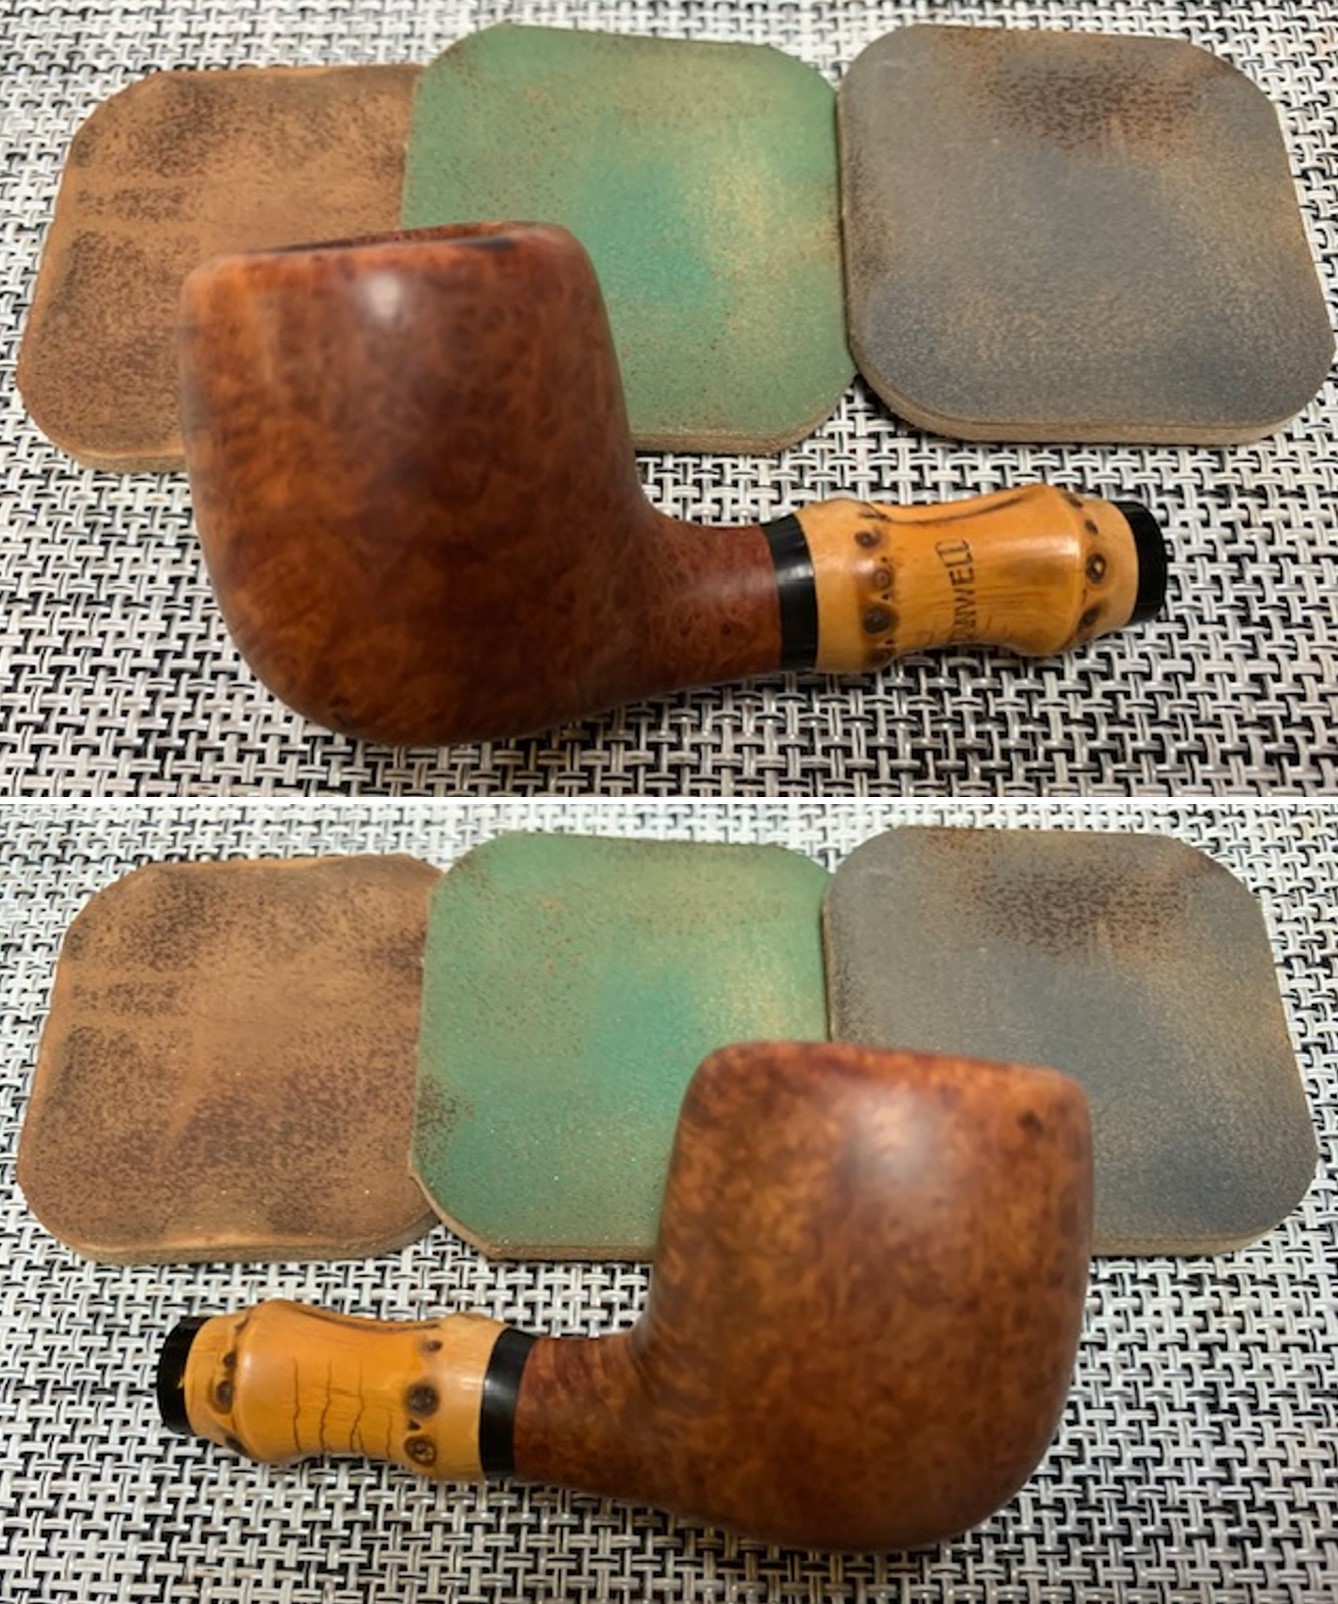
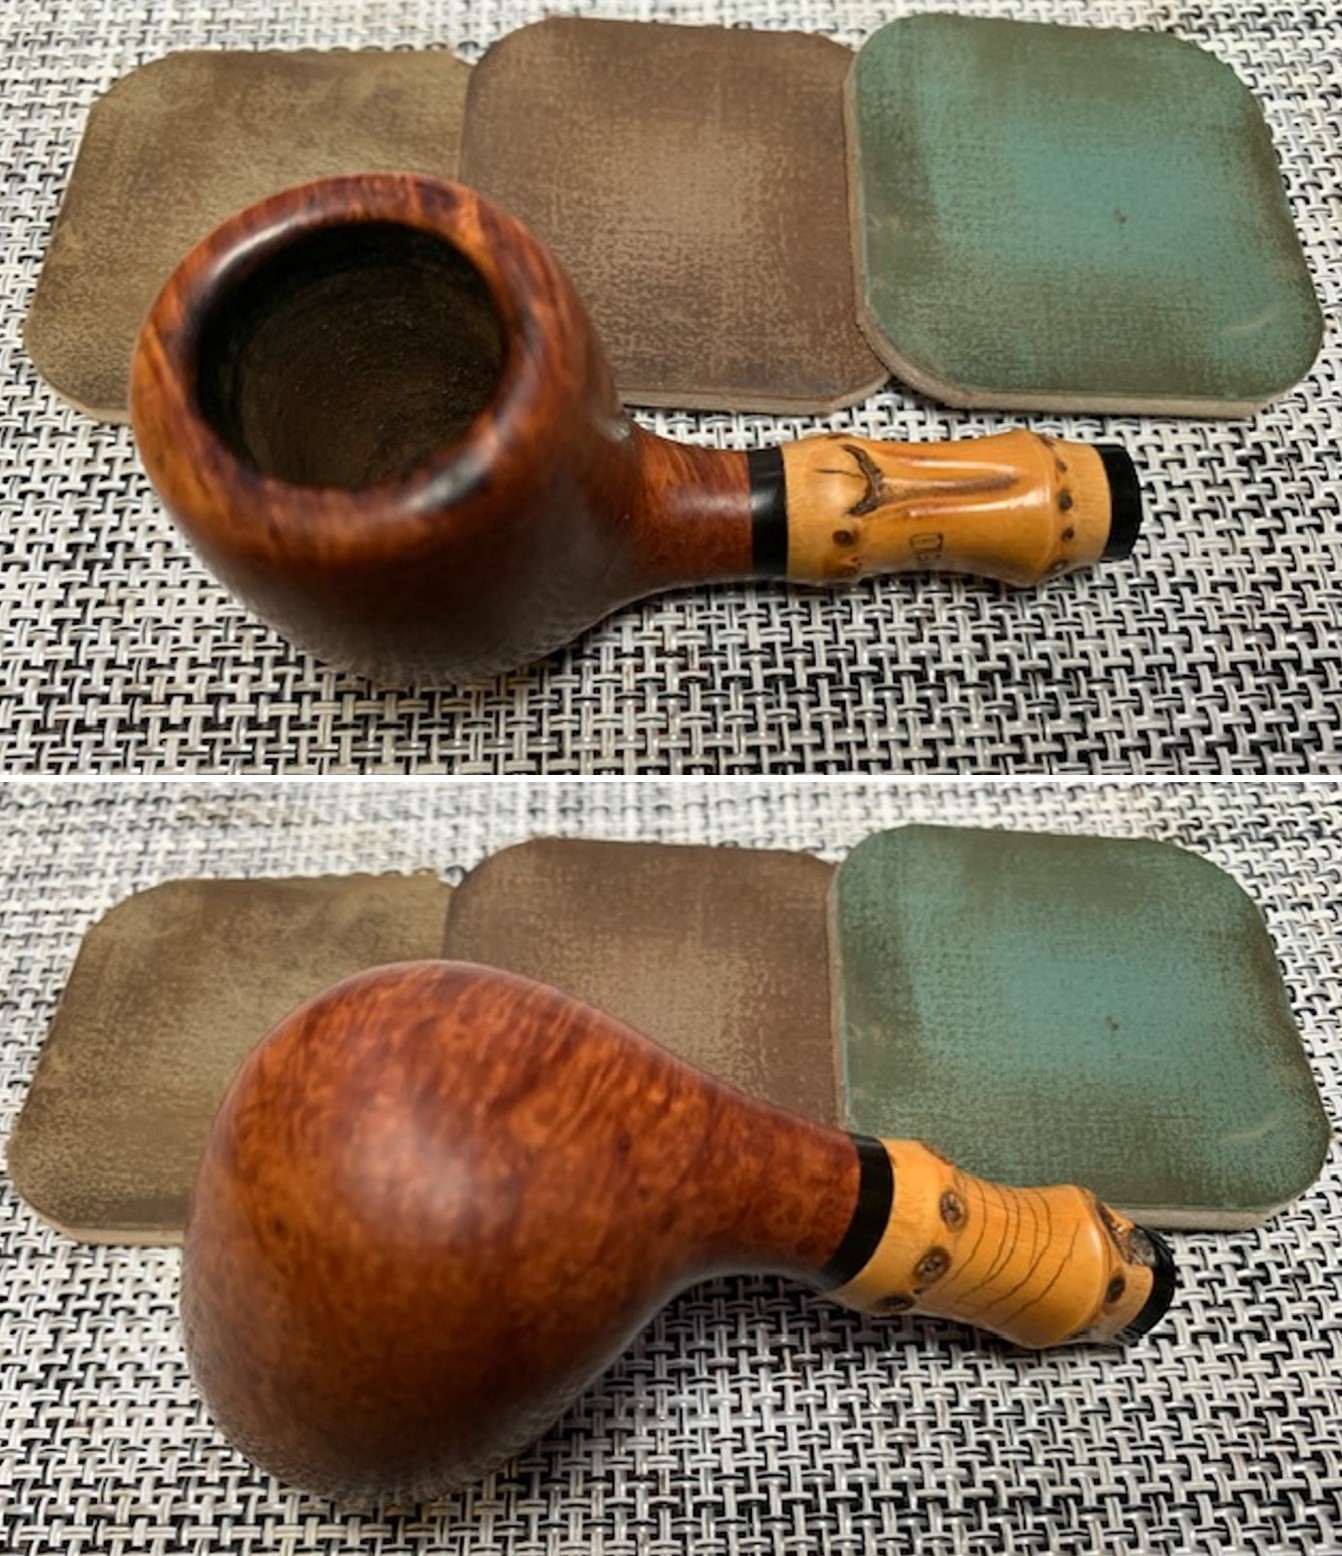
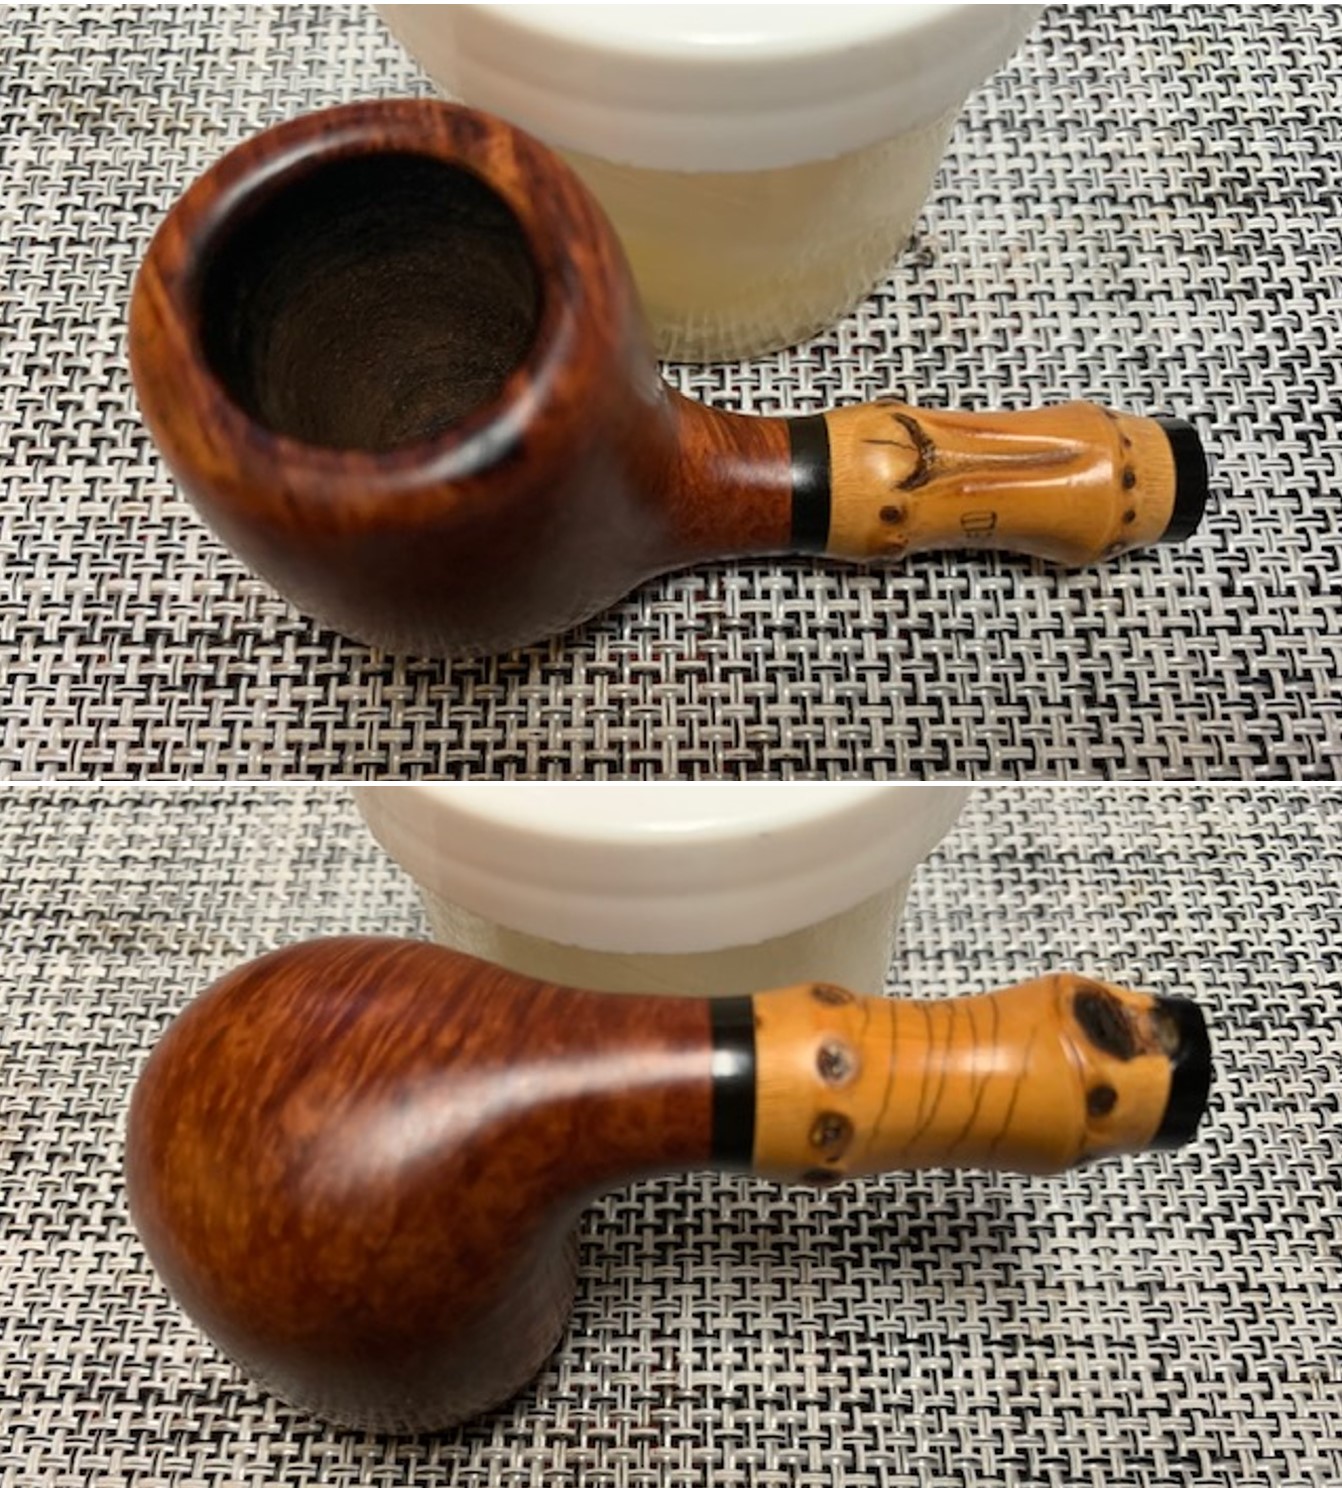
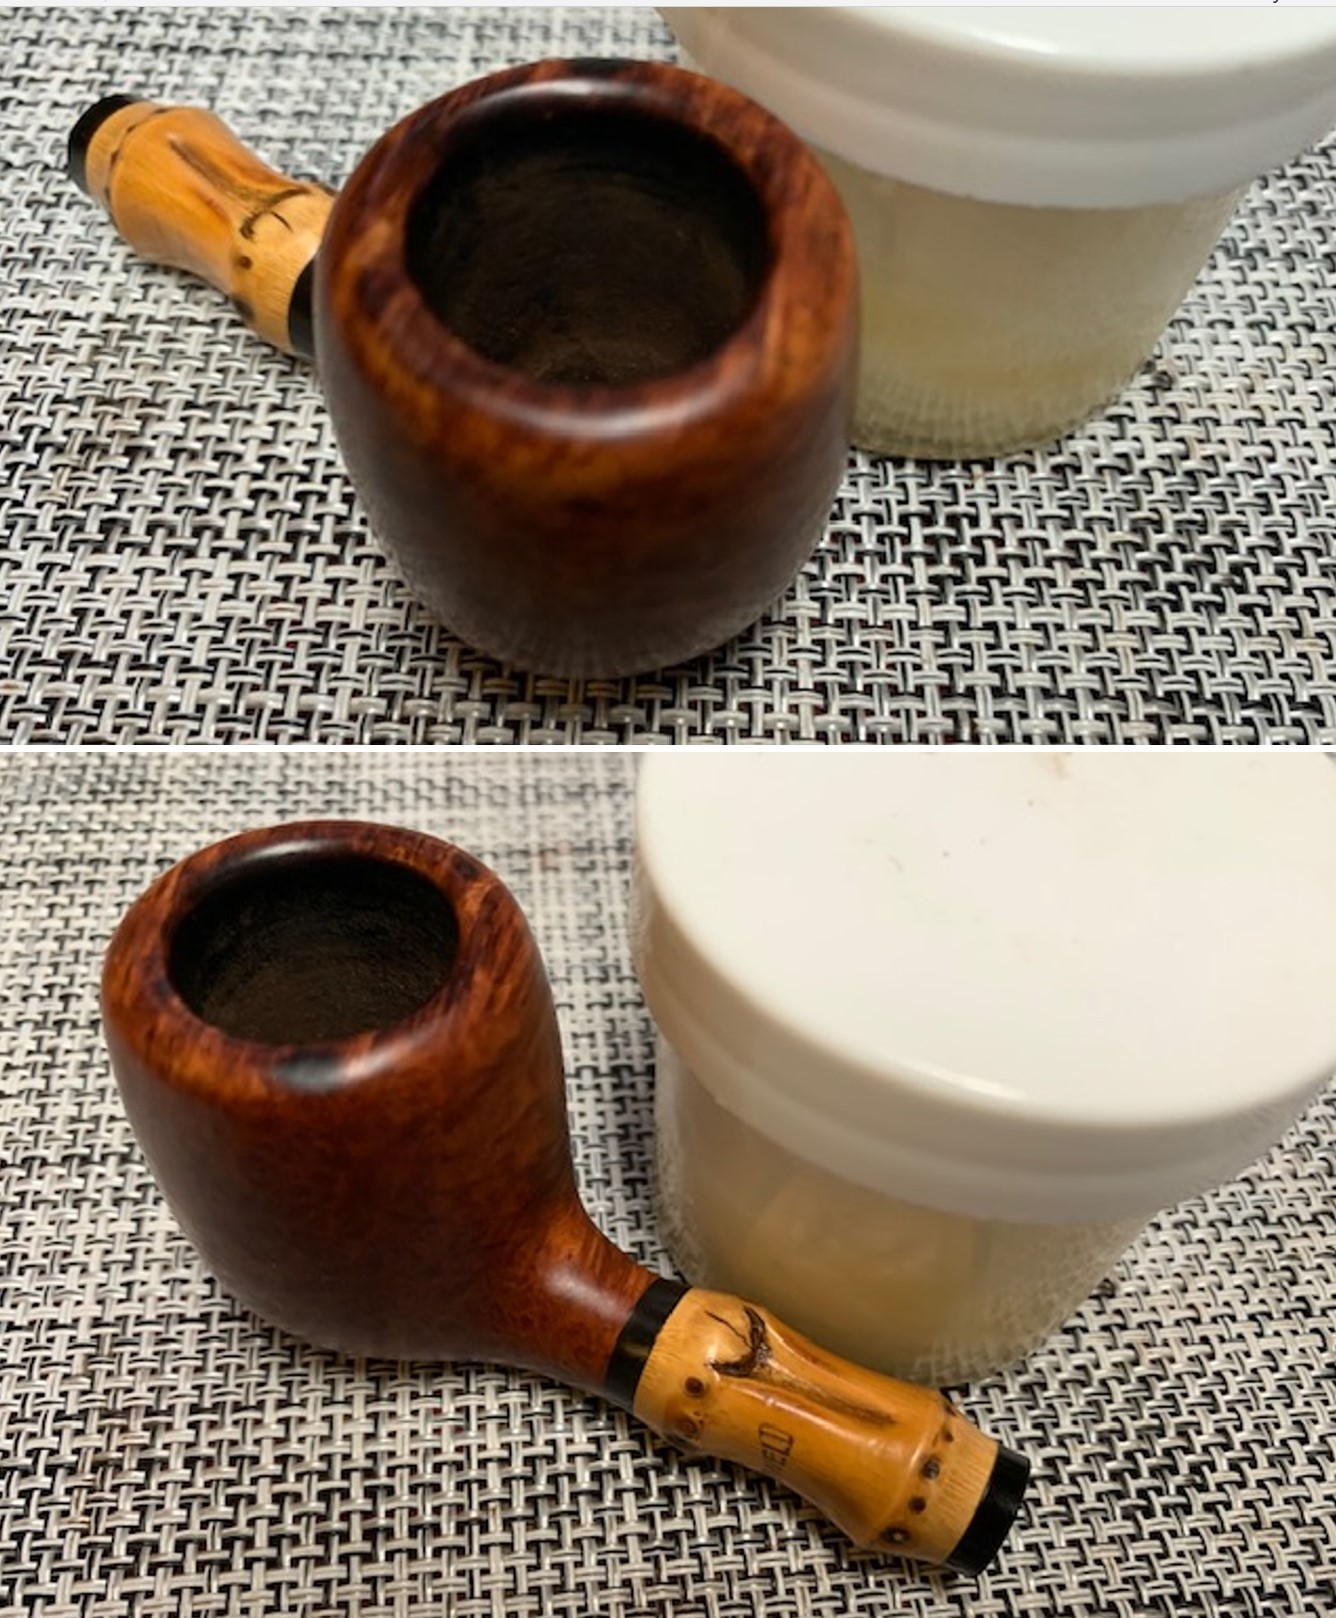
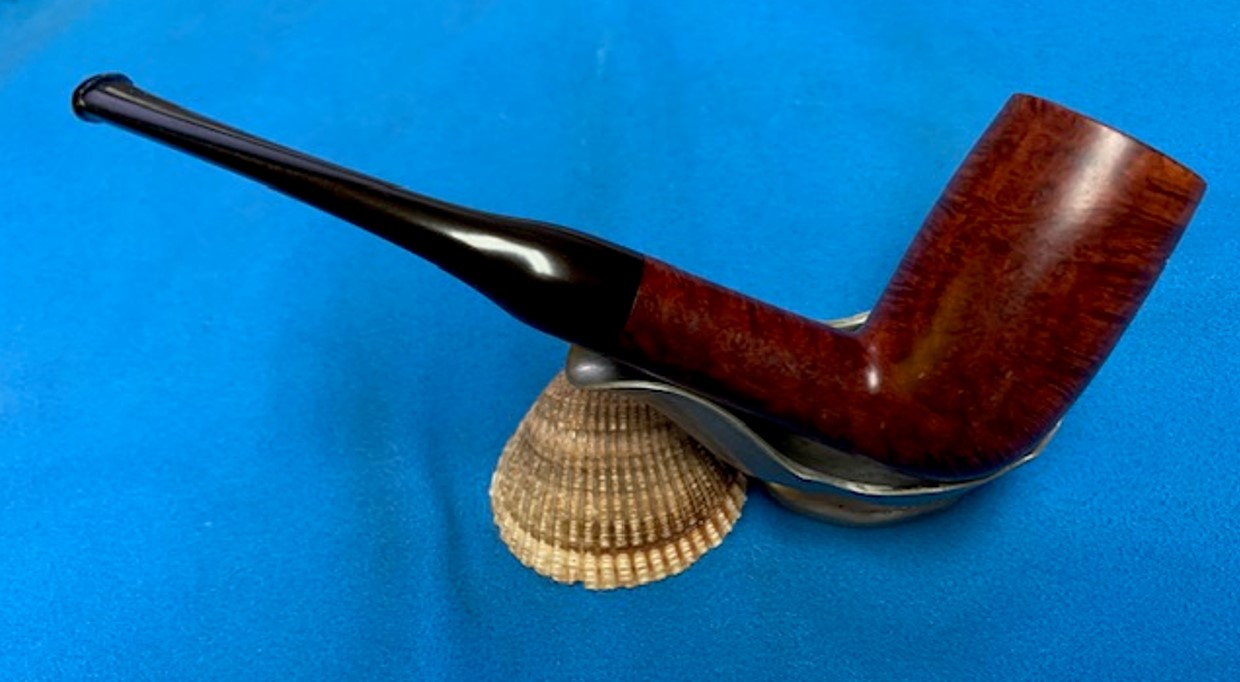
Armed with that information about the pipe it was time to work on the pipe. I scraped out the cake remnants with a Savinelli Fitsall Pipe Knife and sanded the bowl walls with 220 grit sandpaper wrapped around a piece of dowel. I scrubbed out the internals with 99% isopropyl alcohol, cotton swabs and pipe cleaners to remove the oils and tars. While the pipe was fairly clean I was able to remove the remaining oils. I started my work on the pipe by addressing the damage to the inner edge and the rim top with a folded piece of 220 grit sandpaper to bring the edge back into round and it looked much better. I worked over the burn mark on the back left outer edge and top and smoothed it out. I also worked on the previously repaired damage to the front of the bowl outer edge. It had been knocked against something hard and then smoothed out. I reshaped the crown on the outer edge of the bowl. Over all the rim top and edges looked much better.In order to clean up the grime under the varnish coat on the bowl I washed it down with acetone on a cotton pad. I was able to remove the shiny coat and remove the grime in the finish. Once the shiny coat was gone the pipe cleaned up very well. The photos below show the look of the pipe once it was cleaned.I polished the briar with micromesh sanding pads – dry sanding with 1500-12000 grit pads. I wiped the bowl down after each pad to remove the grit. The bowl began to take on a rich shine. It is a beauty.I rubbed the bowl down with Before & After Restoration Balm. I worked it into the briar with my finger tips and into the bamboo with a horsehair shoe brush. I let it sit for 10 minutes and the Balm did its magic. It enlivens, cleans and preserves the briar. It certainly brought this bowl back to life. I buffed it off with a clean cloth and took the following photos.I set the stem aside and turned my attention to the stem. The acrylic stem had deep tooth marks on both sides ahead of the button. Heat would not lift them so they would need to be filled in with black rubberized CA glue. I filled them in and spread the repair with a dental spatula. Once the repair cured I used a small file to recut the button edge and to flatten out the repairs. I used 220 grit sandpaper to blend them into the stem surface and started the polishing with 600 grit wet dry sandpaper.I polished the stem with micromesh sanding pads – 1500-12000 grit pads. I wiped it down with a damp cloth after each sanding pad. I used Before & After Pipe Polish – both Fine and Extra Fine to further polish the stem.I polished it with Before & After Pipe Polish – both the Fine and Extra Fine polishes. I gave it a final coat of oil and set it aside to dry.This Stanwell Bamboo Pot with an acrylic taper stem is a great looking pipe now that it has been restored. The beautiful finish really highlights the grain and the polished finish is stunning. I put the stem back on the bowl and carefully buffed the pipe with Blue Diamond on the buffing wheel. I gave the bowl and the stem multiple coats of carnauba wax on the buffing wheel and followed that by buffing the entire pipe with a clean buffing pad. I hand buffed the pipe with a microfiber cloth to deepen the shine. The finished Stanwell Bamboo Pot fits nicely in the hand and feels great. Give the finished pipe a look in the photos below. The dimensions of the pipe are Length: 5 ½ inches, Height: 1 ½ inches, Outside diameter of the bowl: 1 ¼ inches, Chamber diameter: ¾ of an inch. The weight of the pipe is 37 grams /1.31 ounces. I will be adding the pipe to the Danish Pipe Makers Section of the rebornpipes store. If you are interested in purchasing this pipe send me a message or an email. Thanks for reading this blog and my reflections on the pipe while I worked on it.
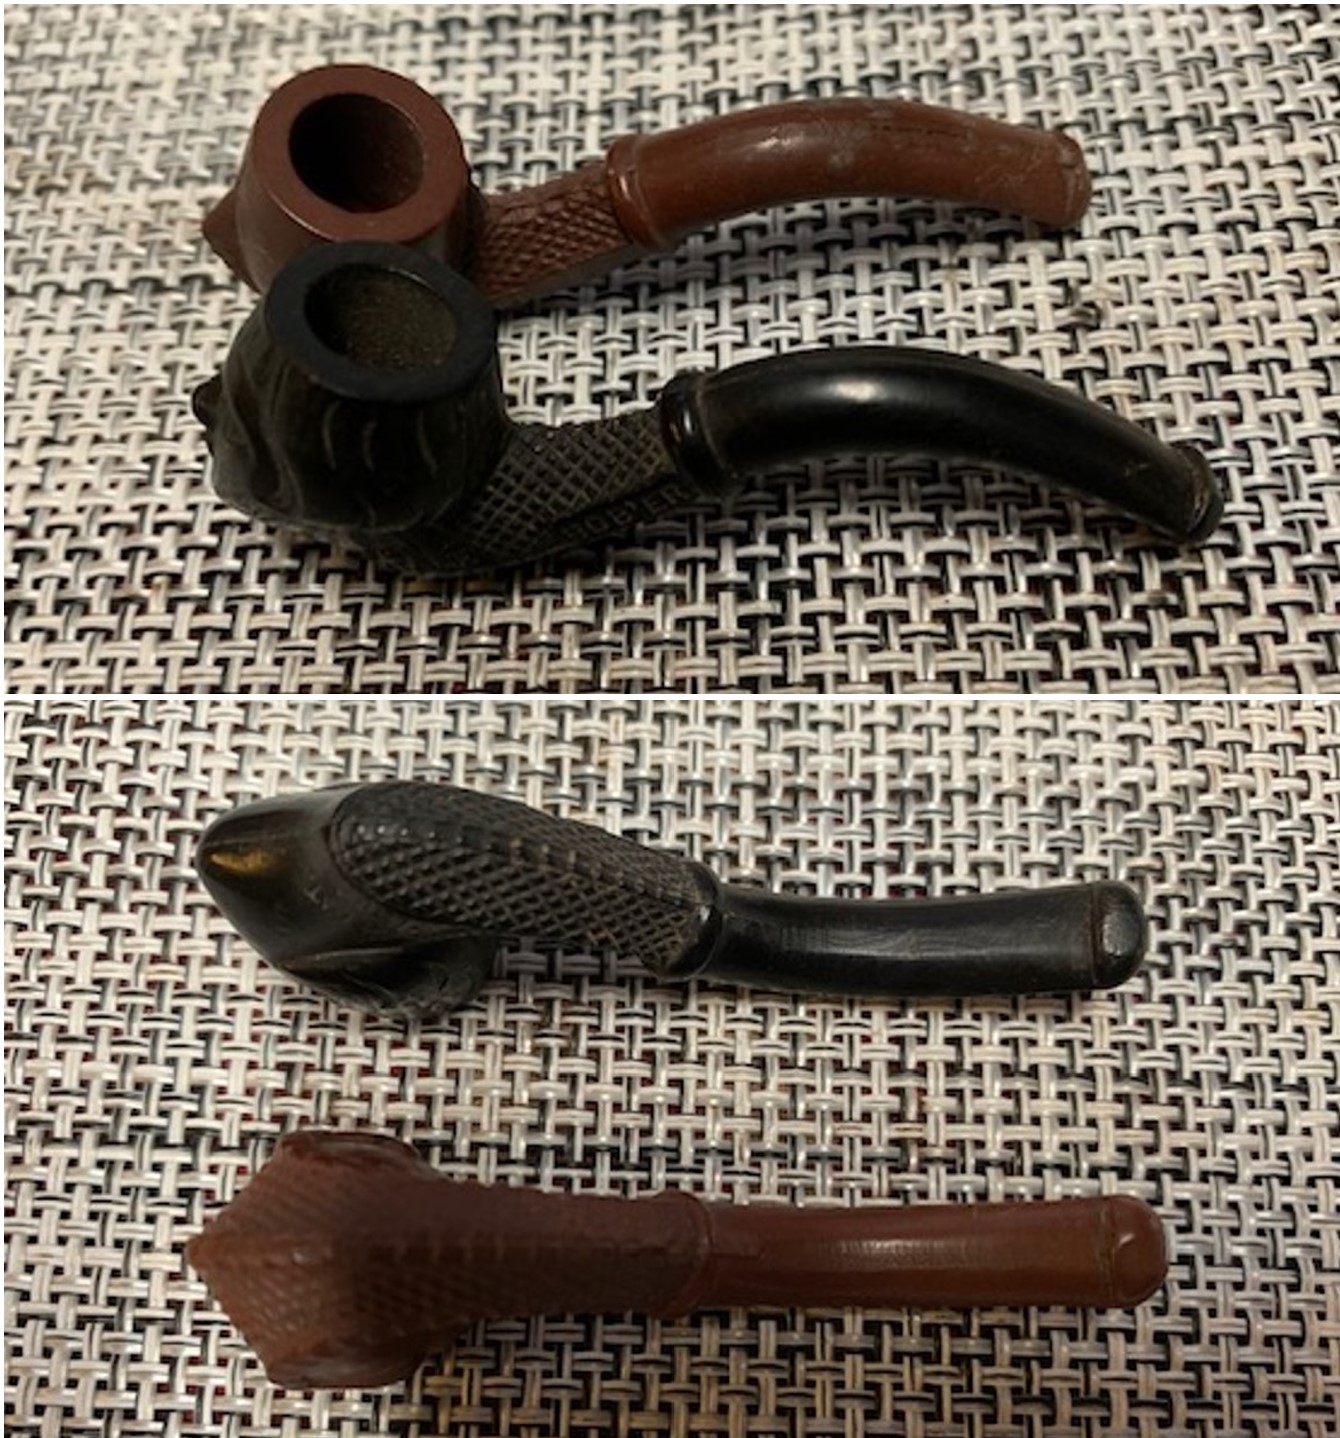
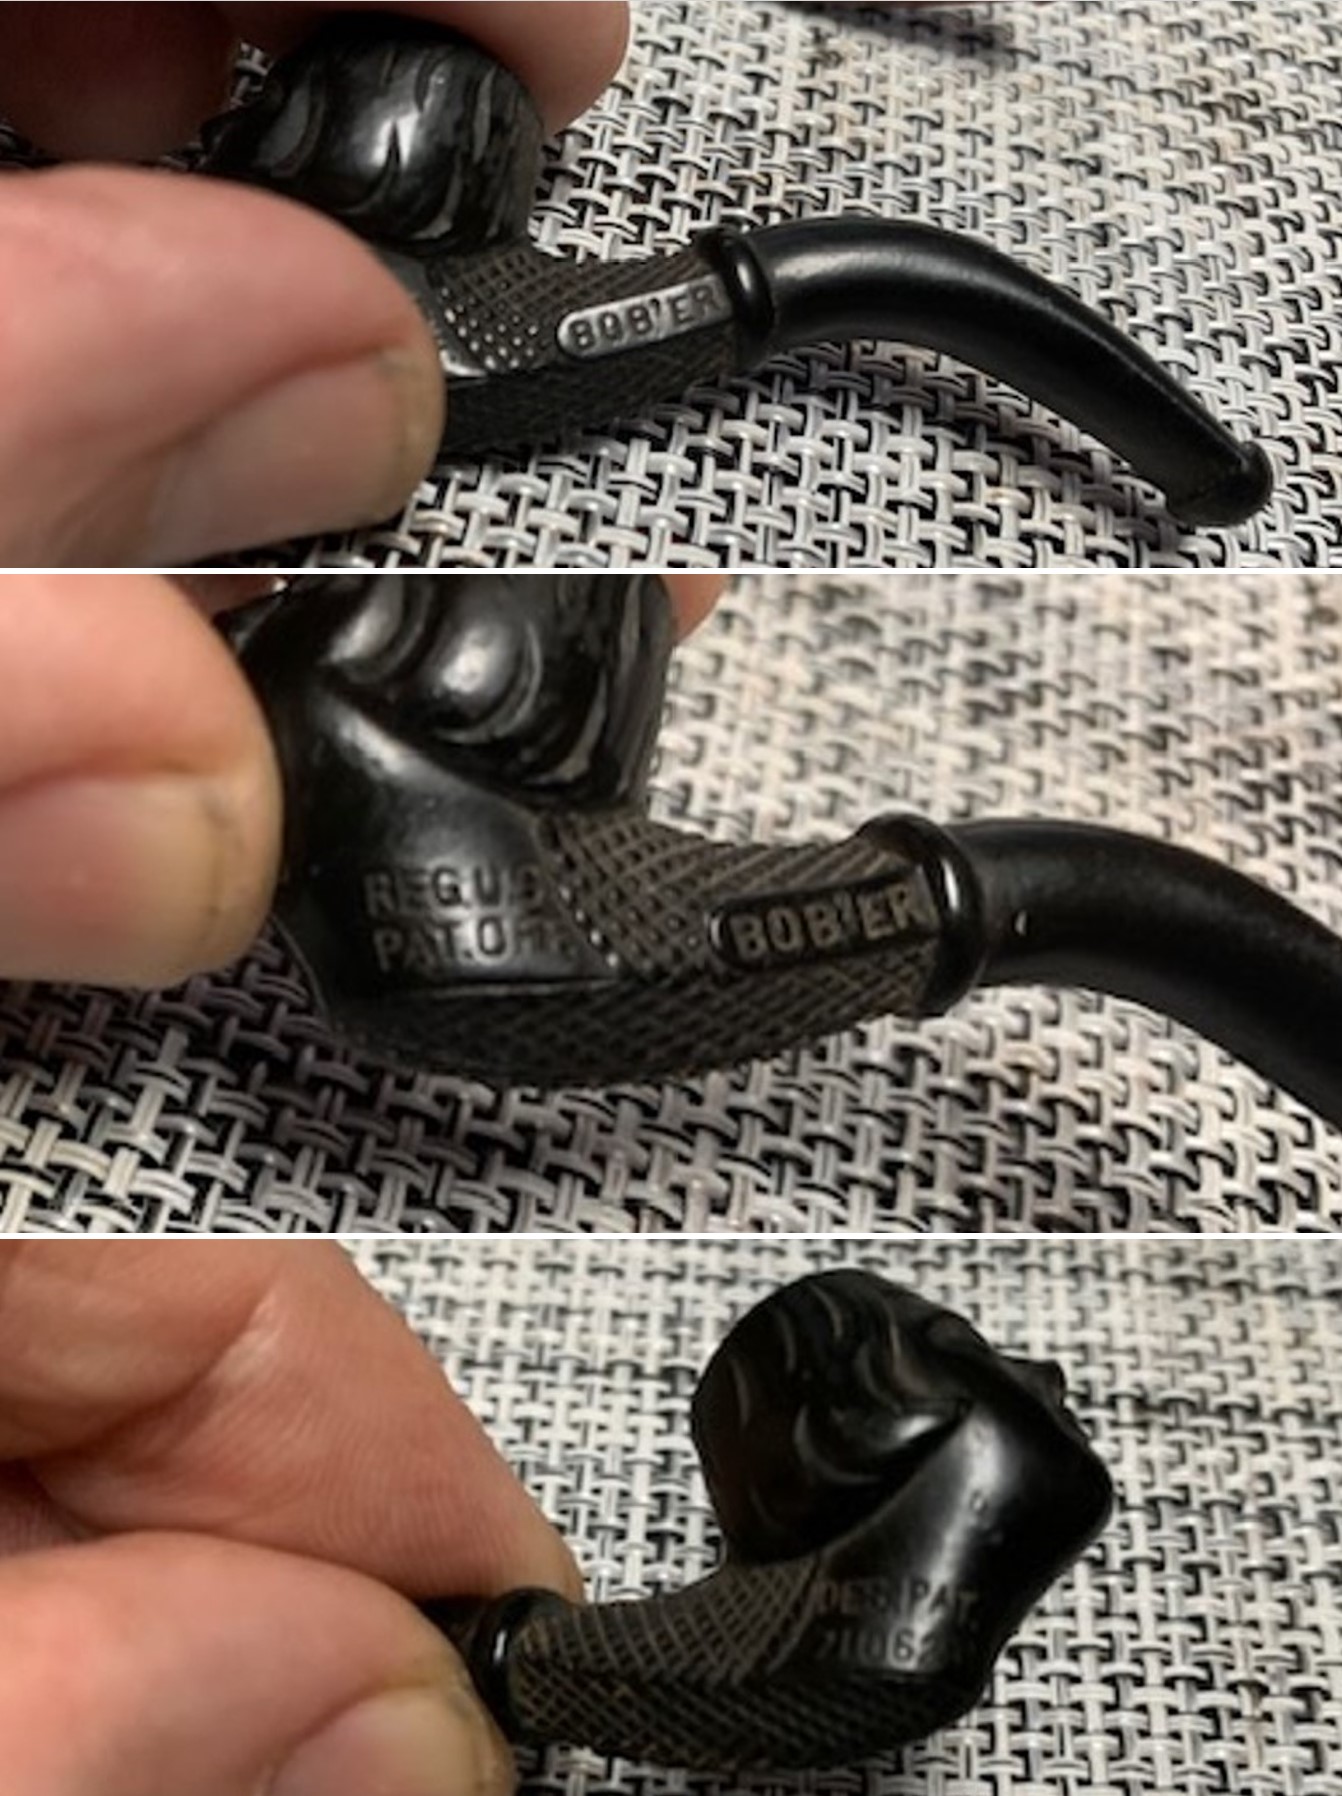
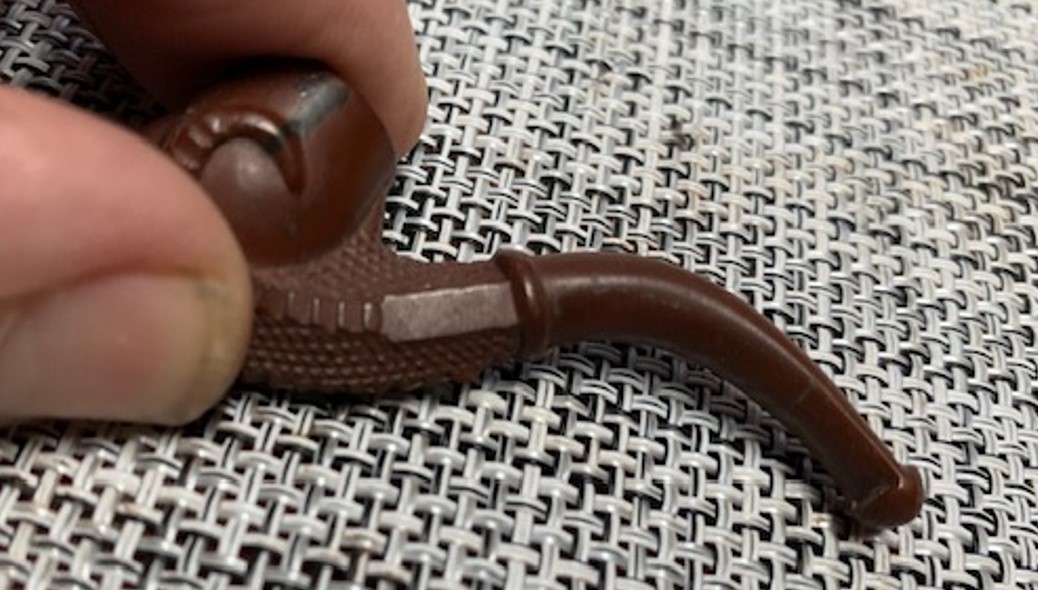
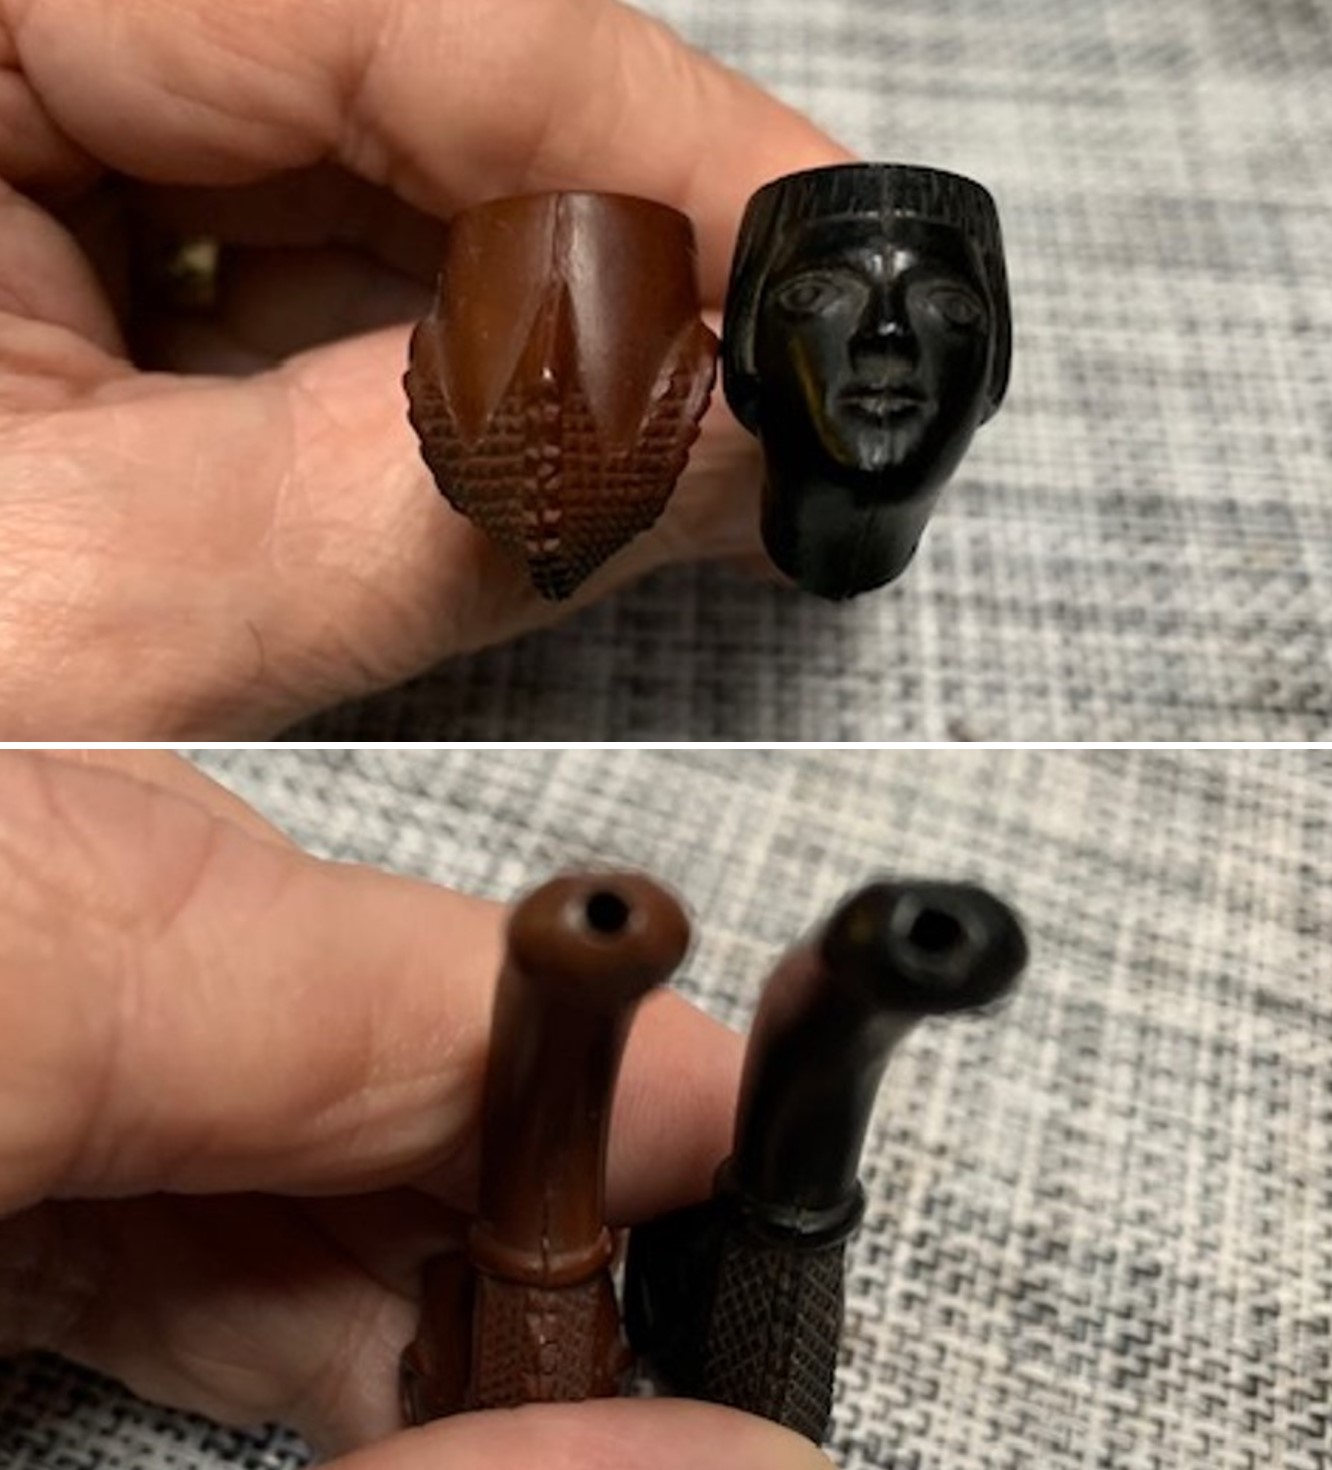
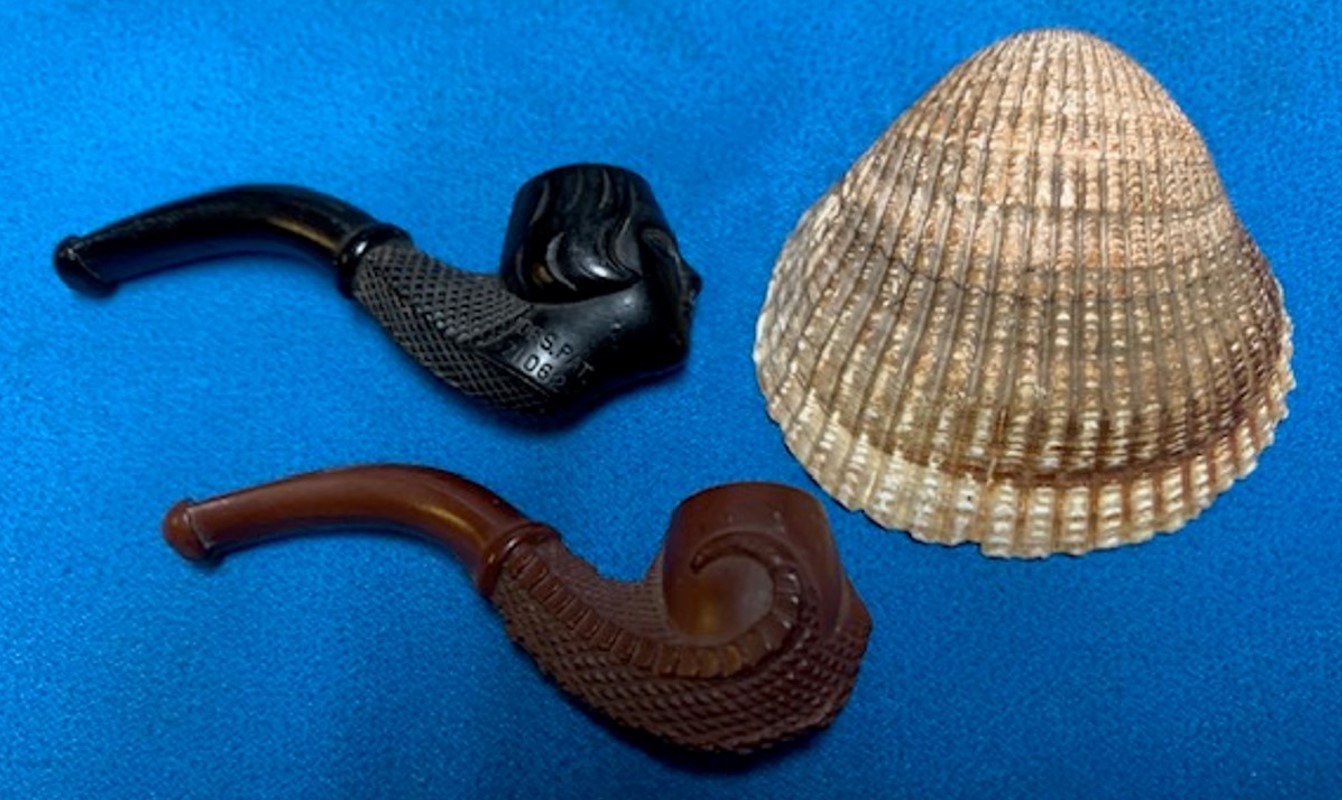
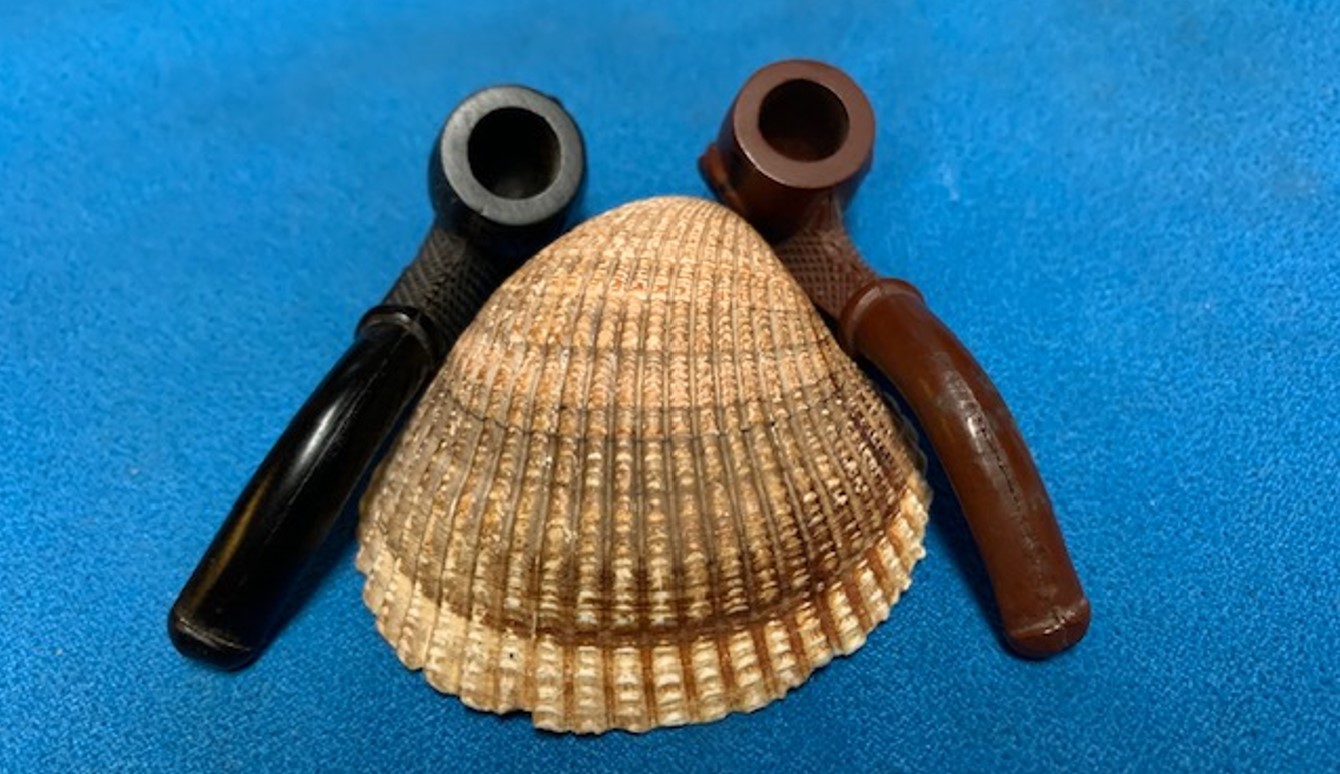
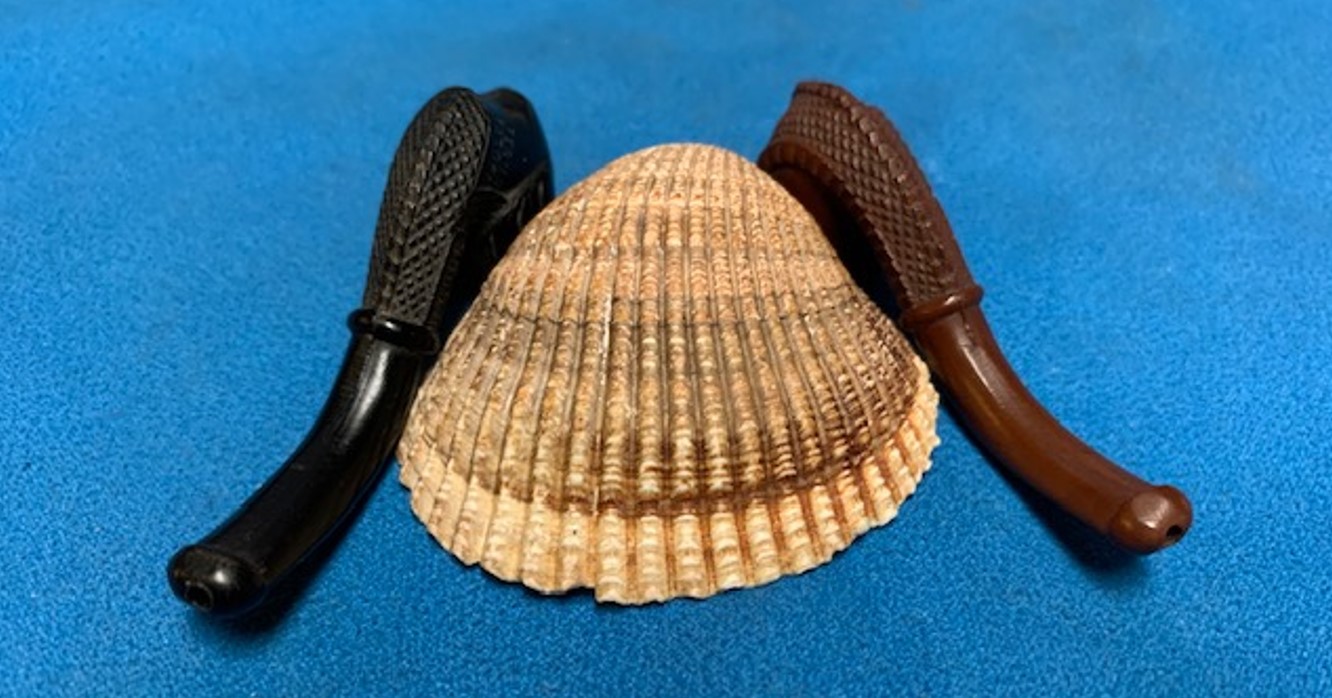
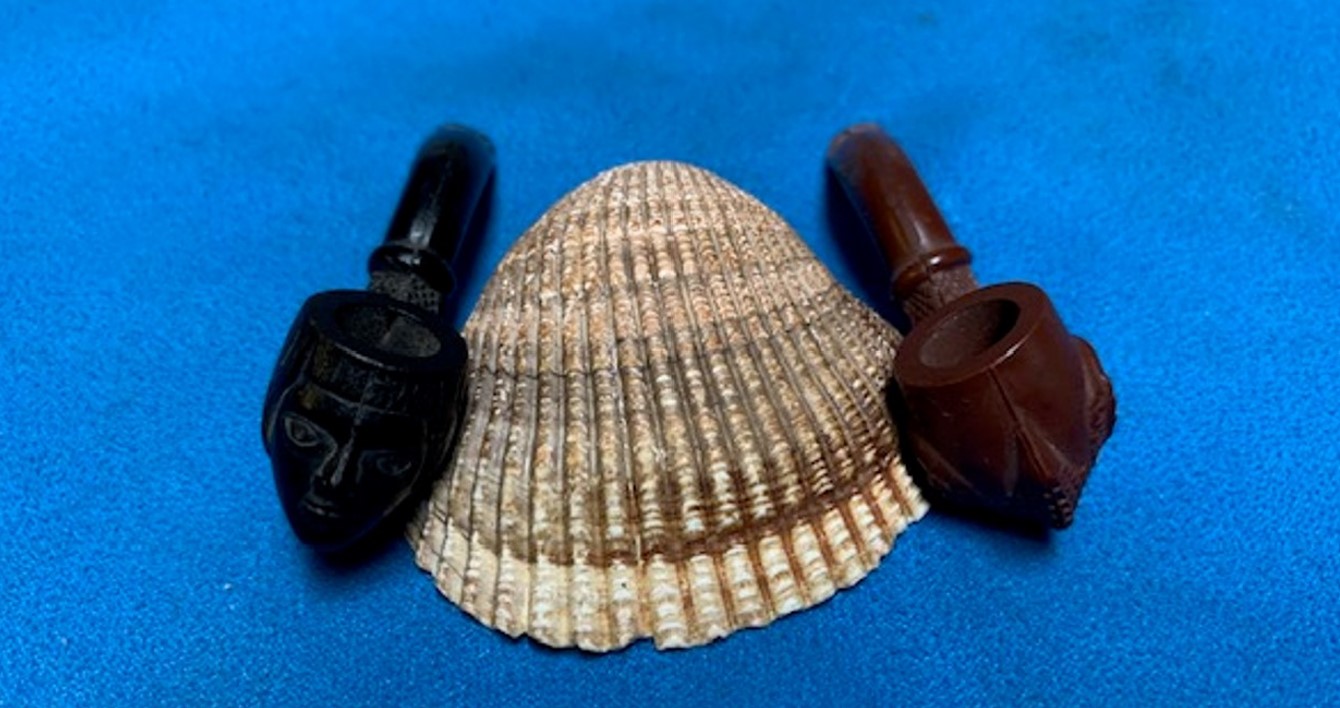
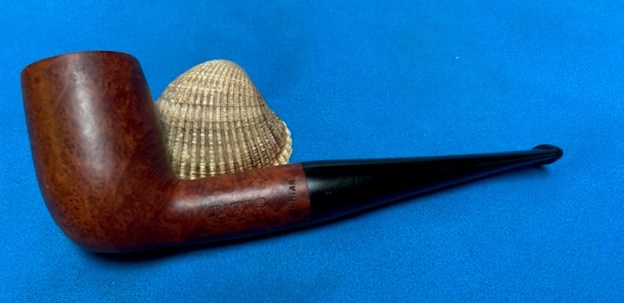
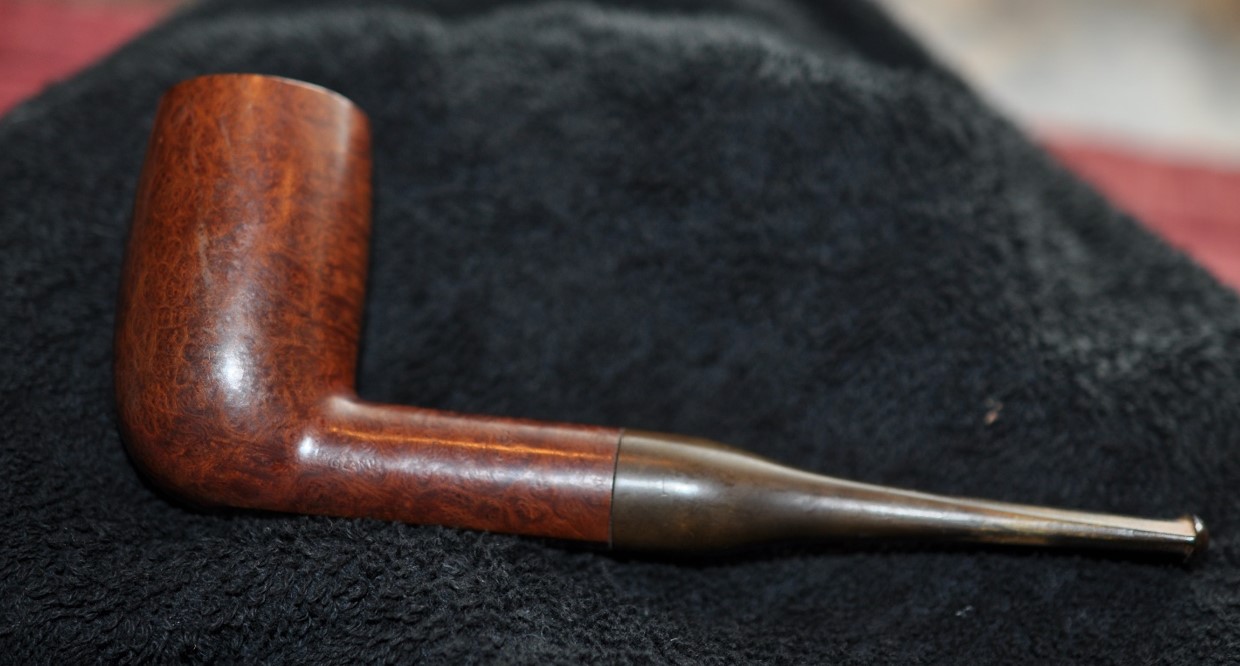
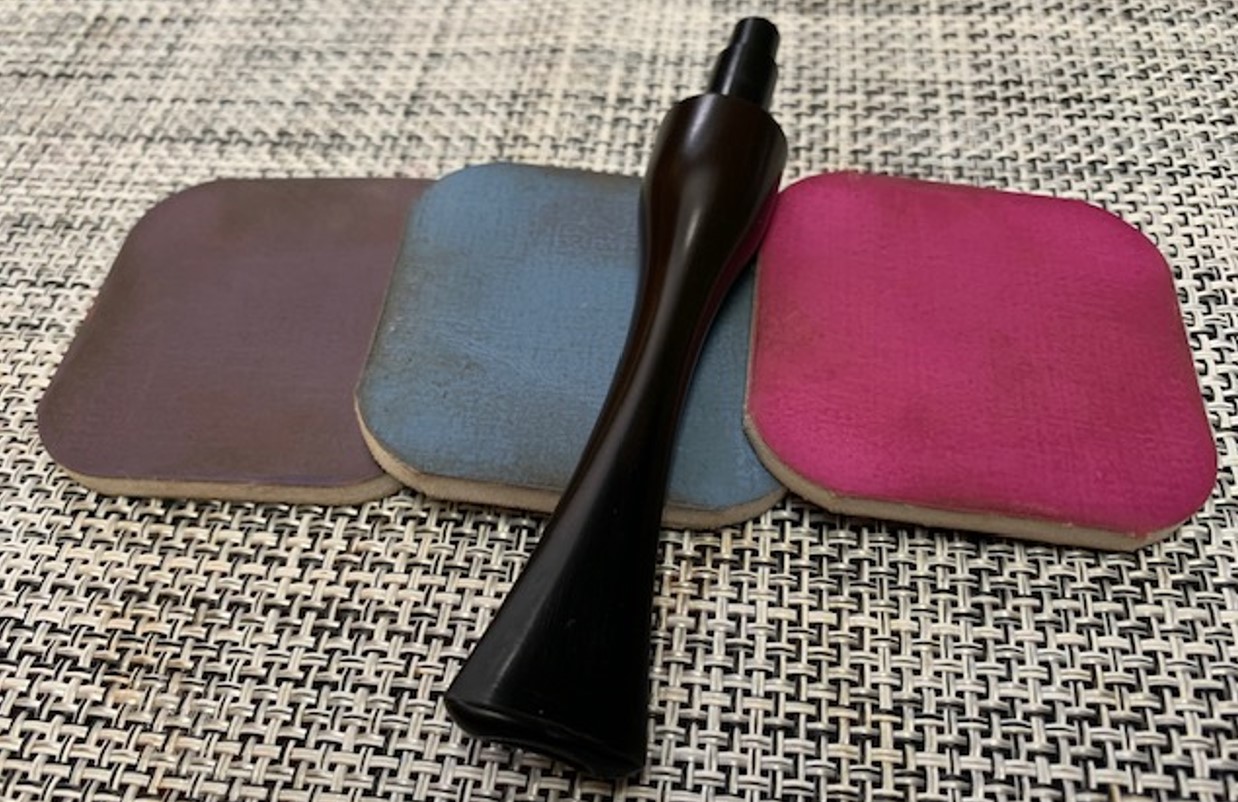
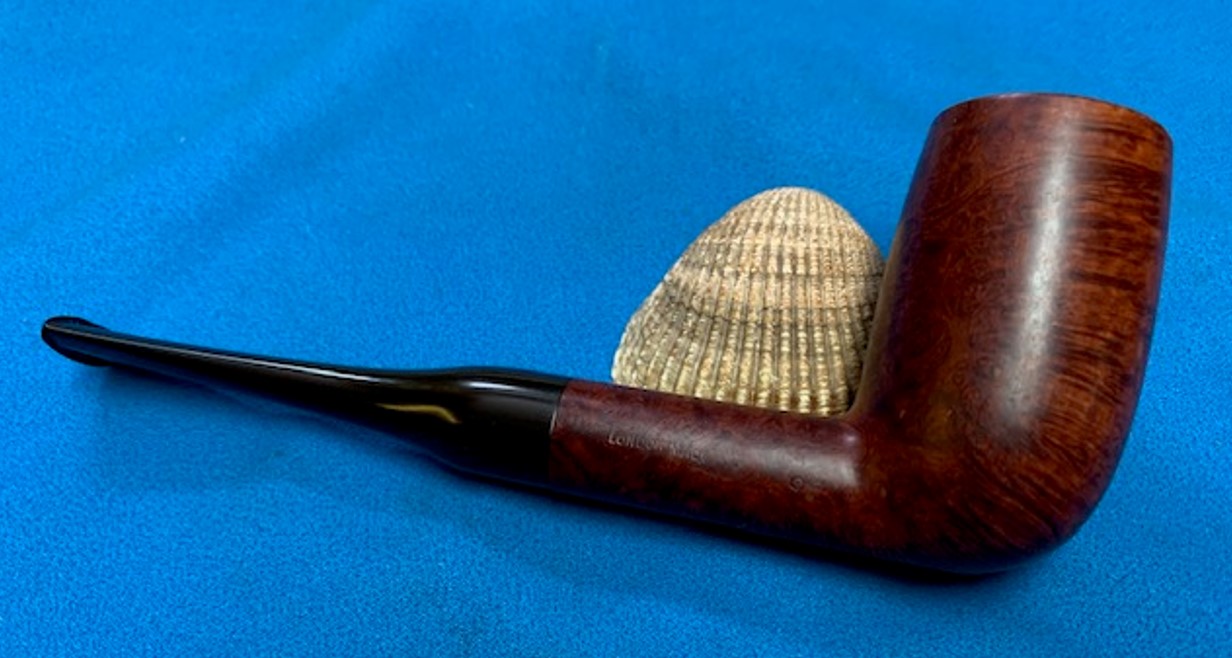
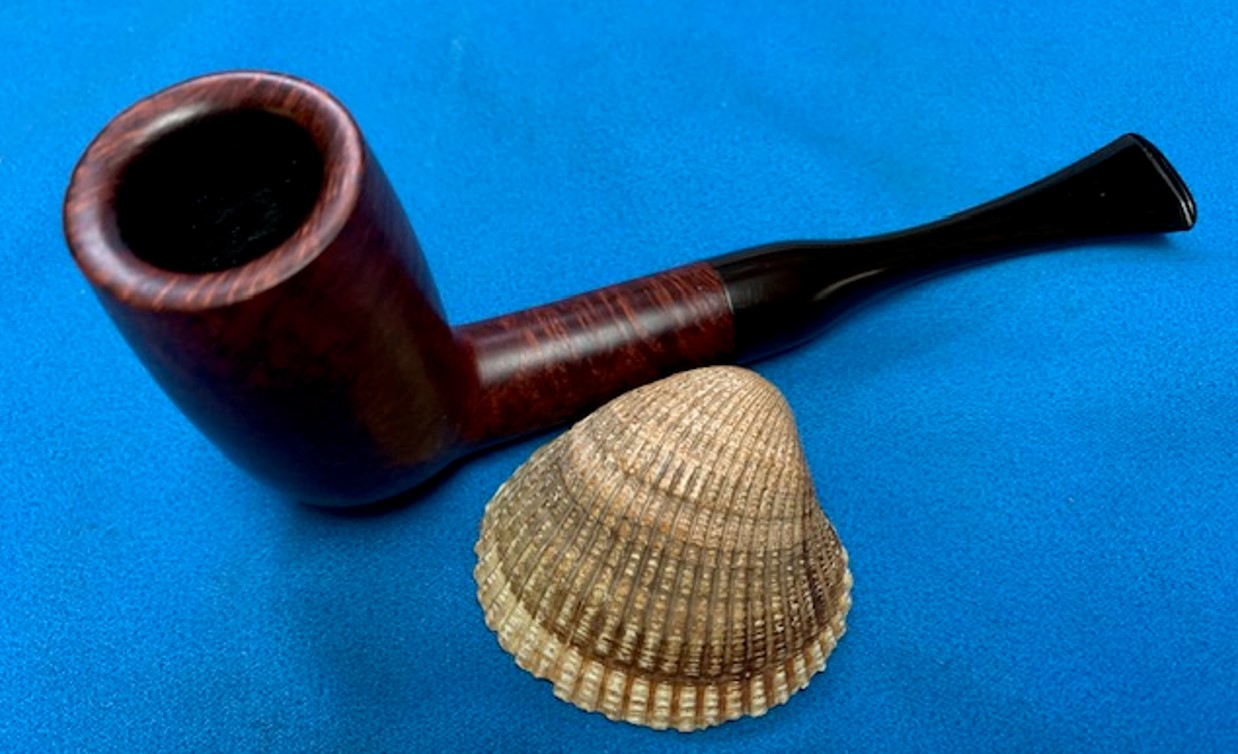
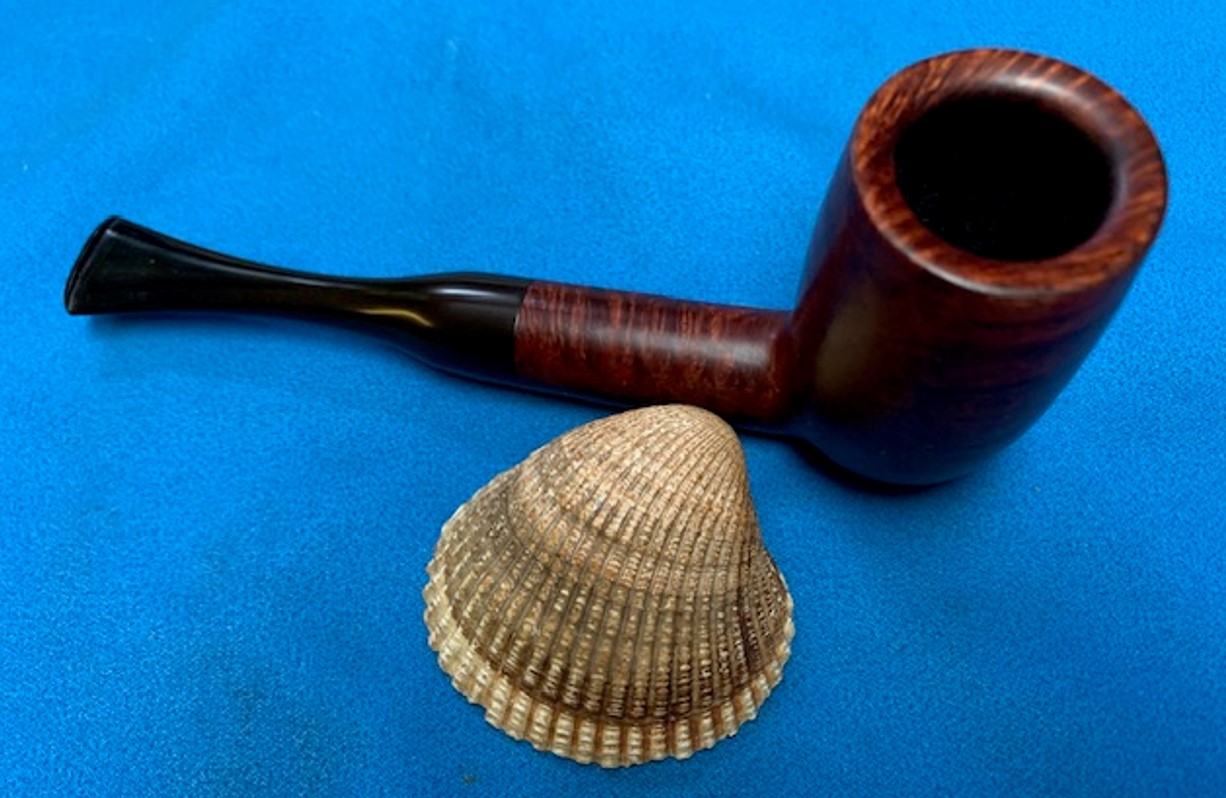
Over the past several years Jeff and I picked up two very tiny pipes that are drilled and useable but so tiny it is hard to imagine smoking them. The darker one I have had here for quite a few years now. The brown one Jeff sent more recently in the past year. It came in a small box. I have put a Dunhill Shell Briar Group 4 Lovat in the photo to give a sense of the size of the box and of the pipes inside. The Lovat is 5 inches long, 2 inches tall, outer diameter of the bowl is 1 ¼ inches and the chamber is ¾ of an inch in diameter. In other words it is an average sized pipe.I took a photo of the pipes in the box. You can see the pair there. They are both carved or cast from gutta-percha. The stem and the bowl are one unit in both pipes. The bowl on the black one is a carved head and on the brown one is a egg and claw. Both are clean and unsmoked but both have a clear draw from the bowl to the button. I took them out of the box and put them side by side under the Lovat to give a sense of perspective.Both pipes are 2 ¼ inches long, ¾ of an inch tall, outside diameter of the bowl is ½ inch, the chamber diameter is ¼ of an inch. The photos show a difference, in actuality the pipes are both the same size. Both have a cross hatched finish on the shank and both have a cast ting around the shank/stem. The Egg and Claw are very nicely cast and the details are well done. The figural head is also well done with good details.There is no stamping on the brown pipe but the black one is stamped on the left side and reads BOB’ER. On the heel of the bowl on the black one on the left side it is stamped REG. U.S. [over] PAT. OFF. On the right side of the heel it is stamped DES. PAT. [over] 71062. I have looked on the US Patent site and was not able to find any information on the pipe.I took a photo of the bowl front to show the detail of the carving on the bowl face. Gutta-percha was cast so a mold was made for the pipe. The detail is quite remarkable on both of the pipes. Look at the carving on them both. The second photo below shows the orific opening in the end of the button. This gives a sense of age to the pipe.This pair of older Gutta-percha figurals – a carved head and an egg and claw are beautiful and so detailed for their tiny size. They will remain in my collection here as testimony to the art of pipe carving or in this case pipe casting. Thanks for reading this blog.
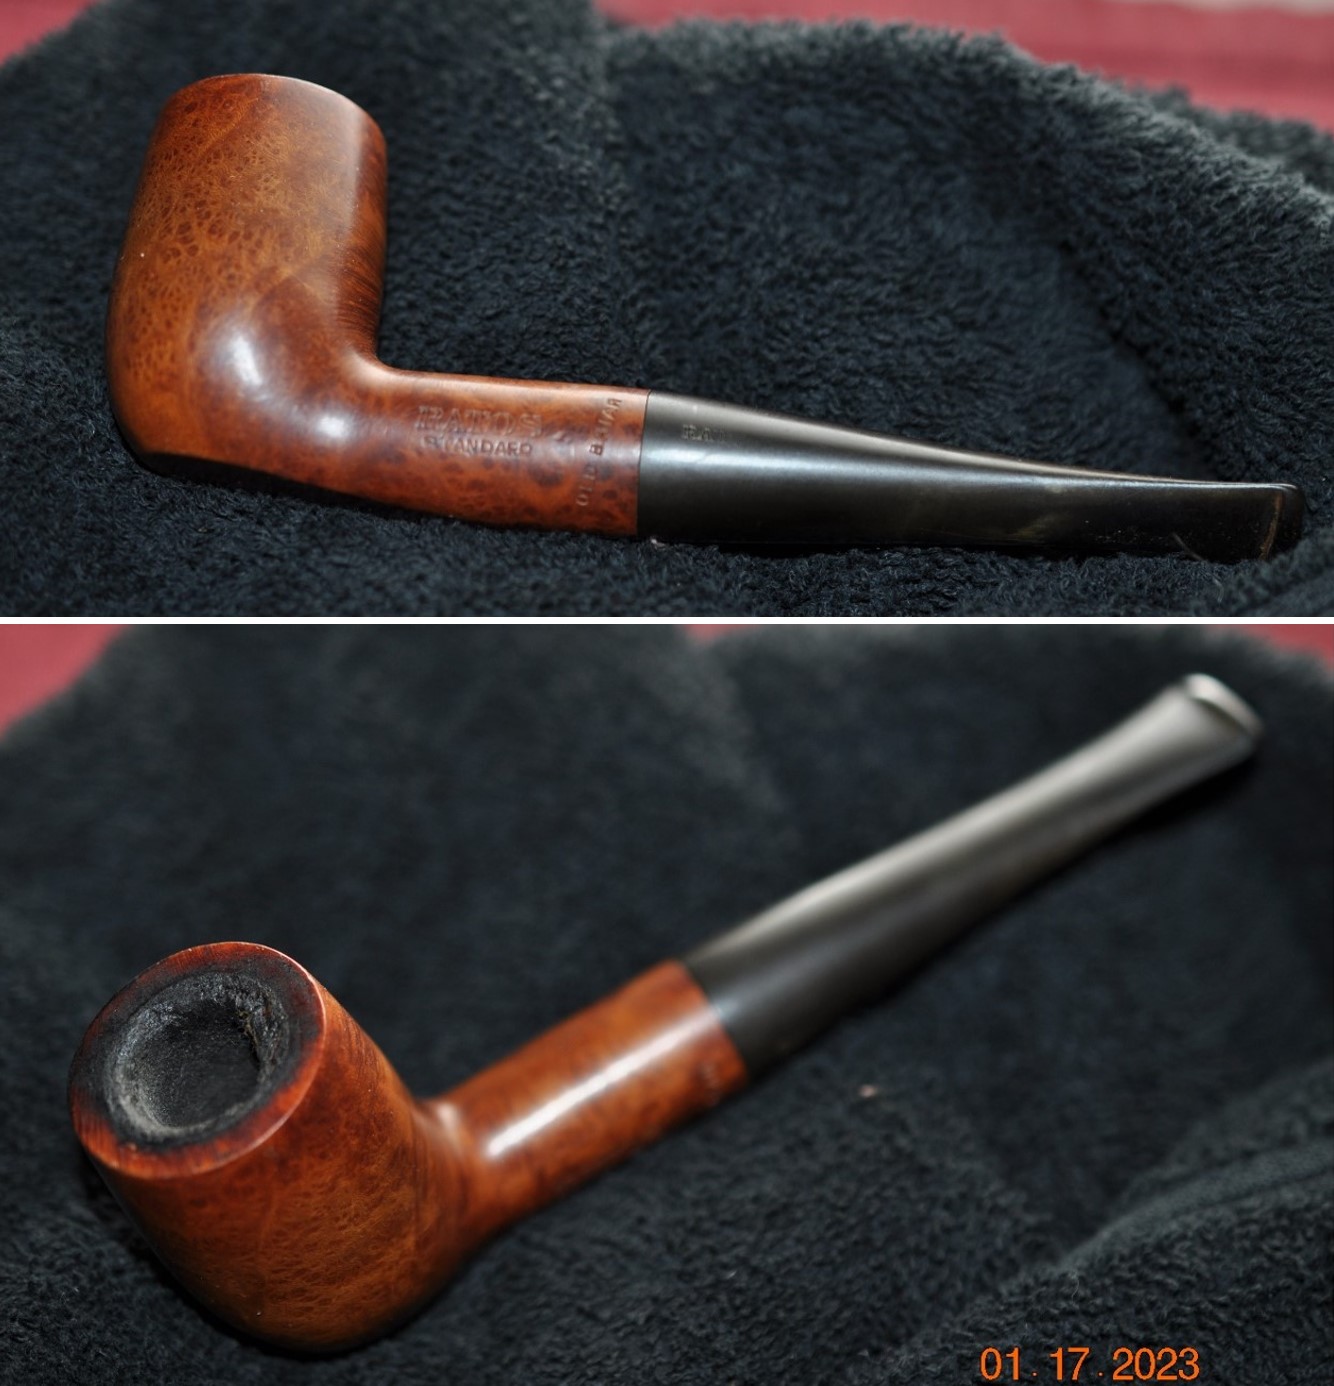
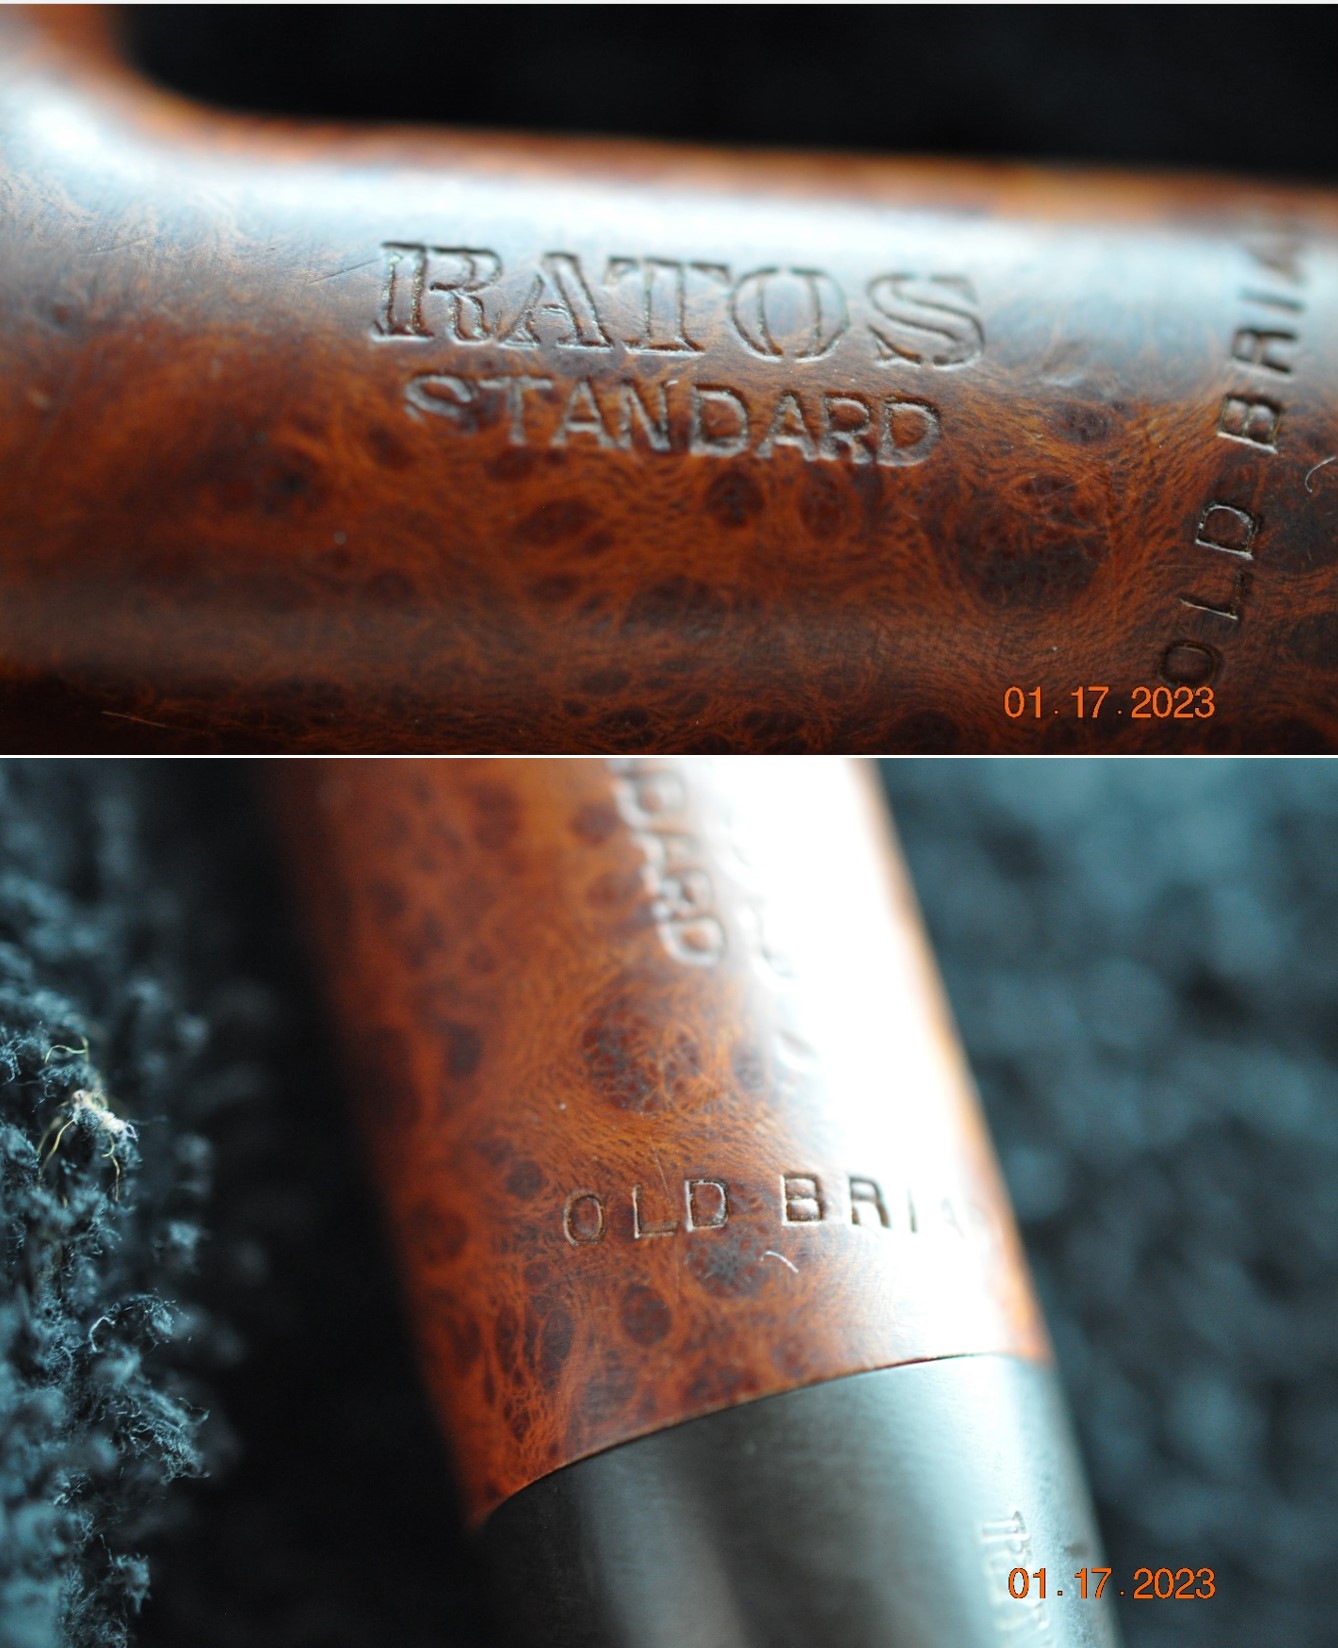
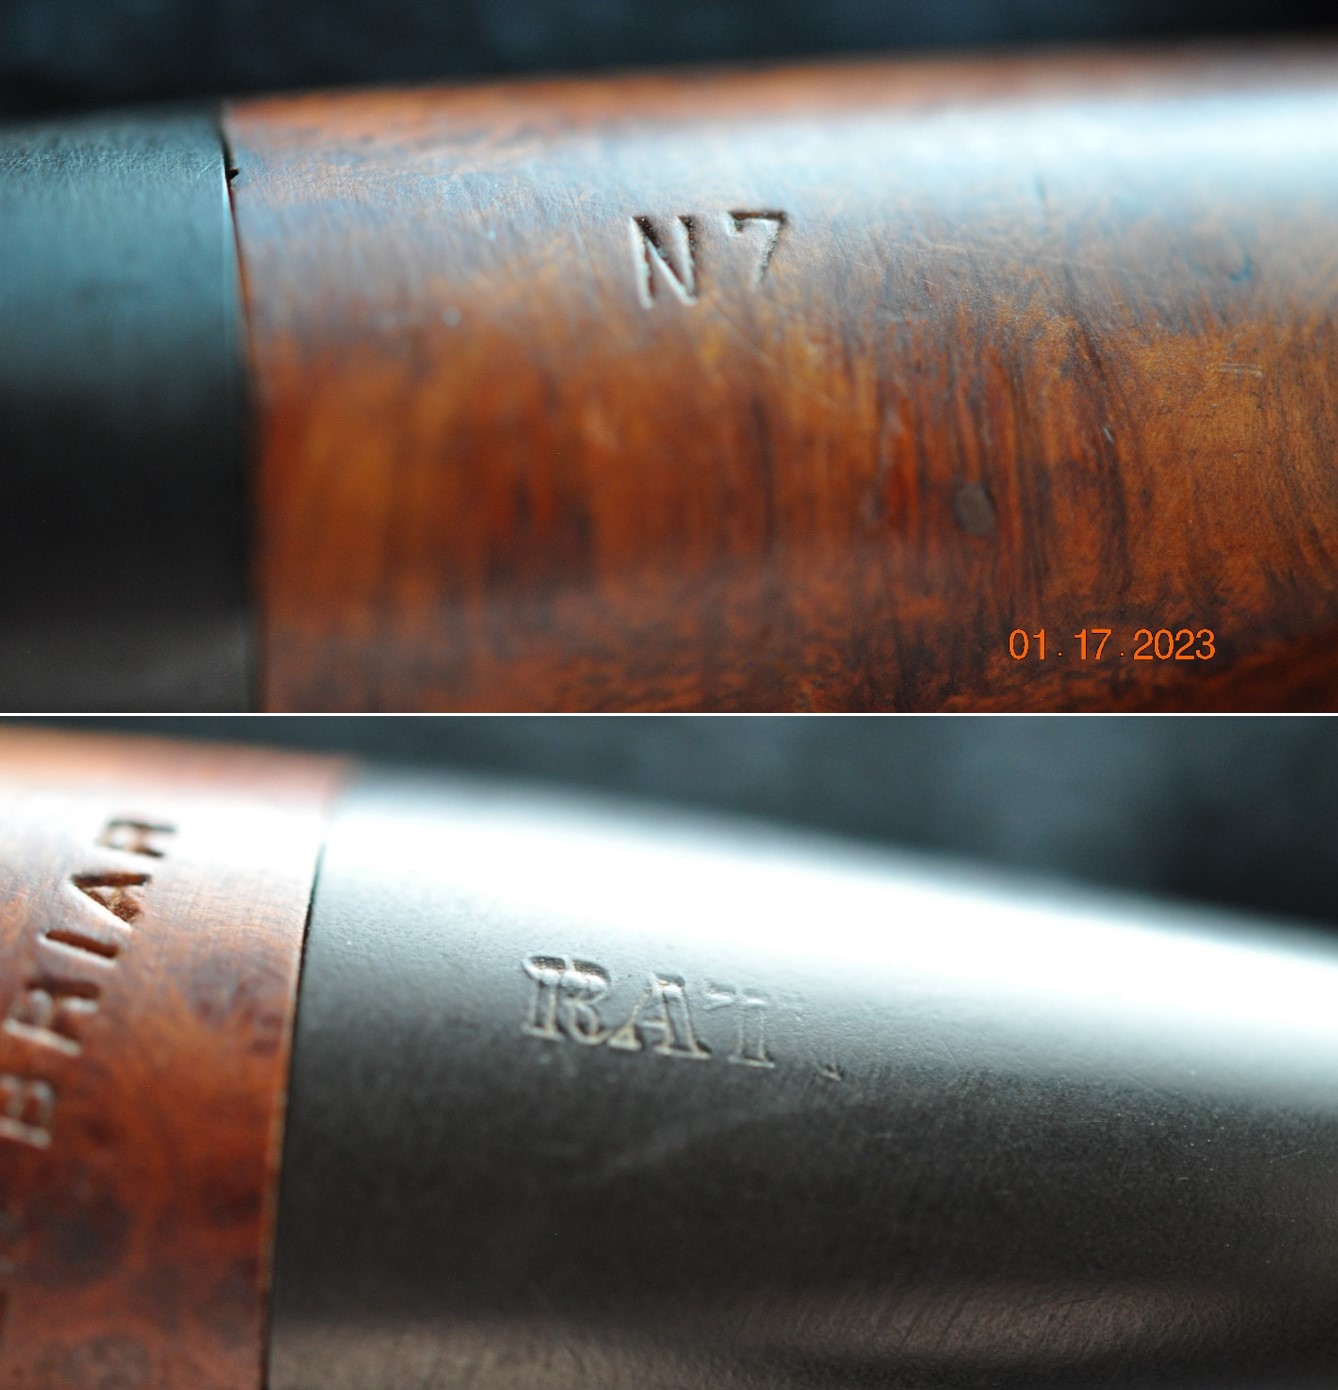
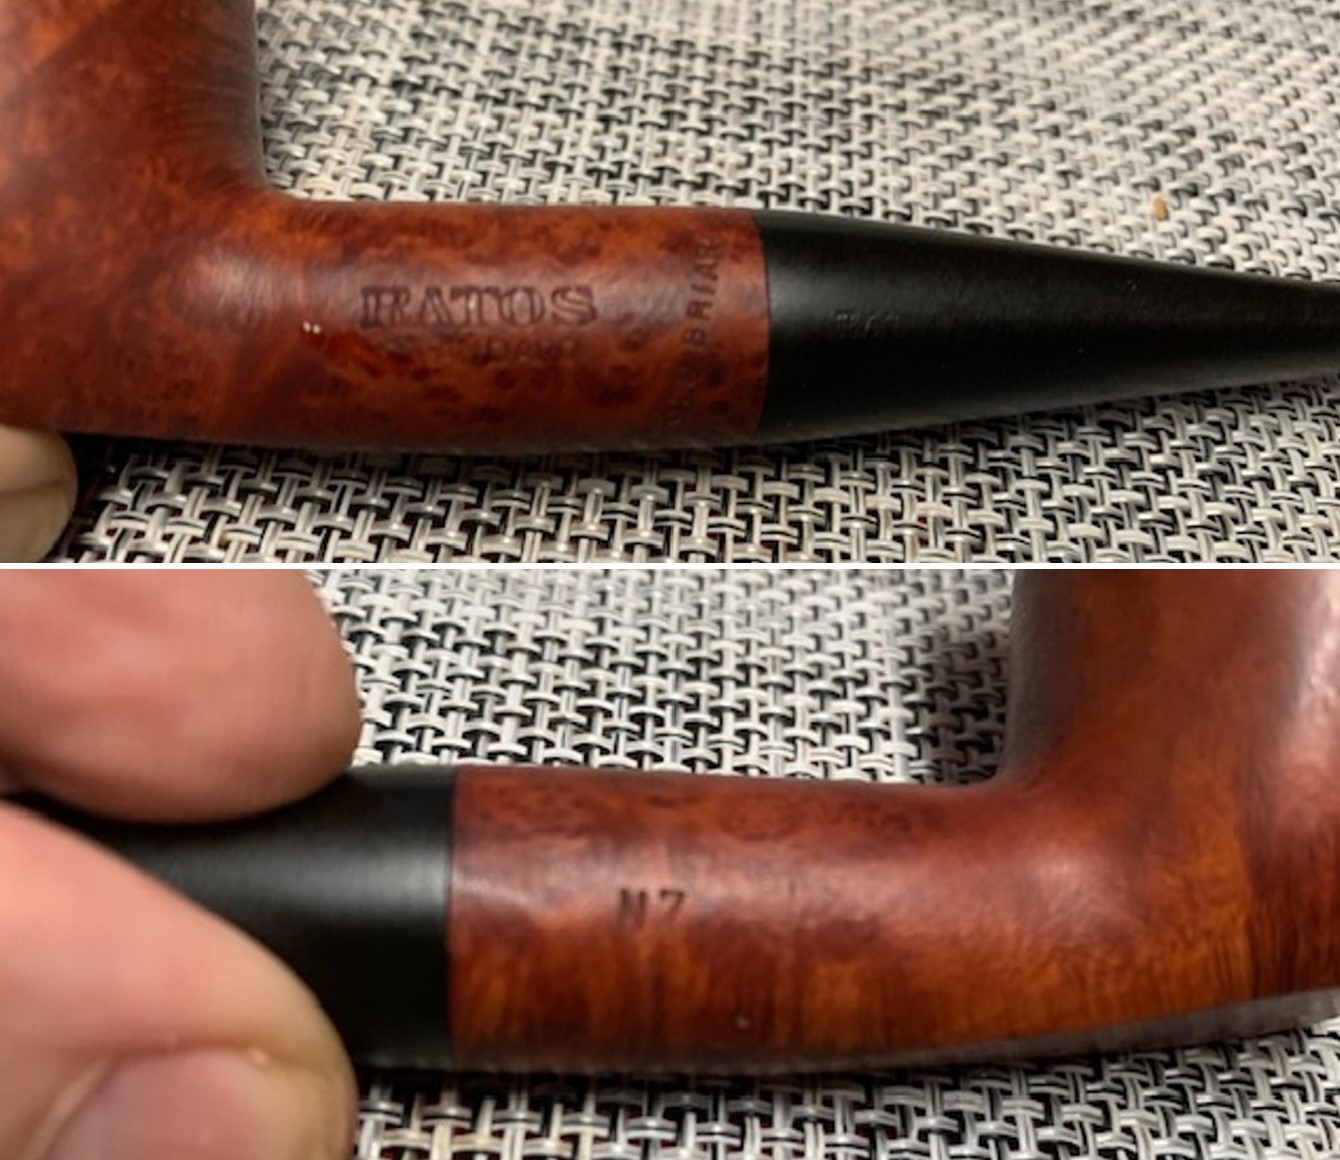
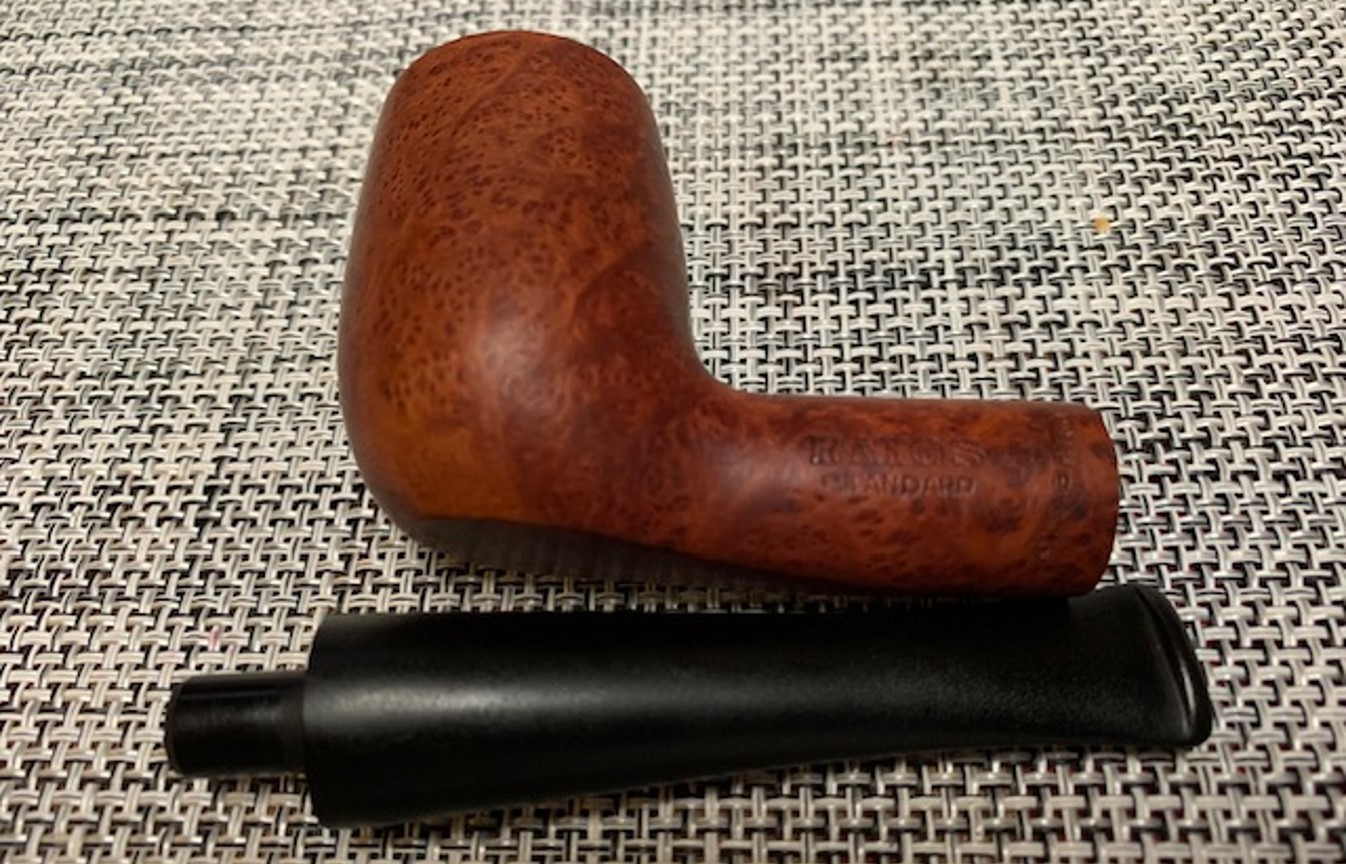
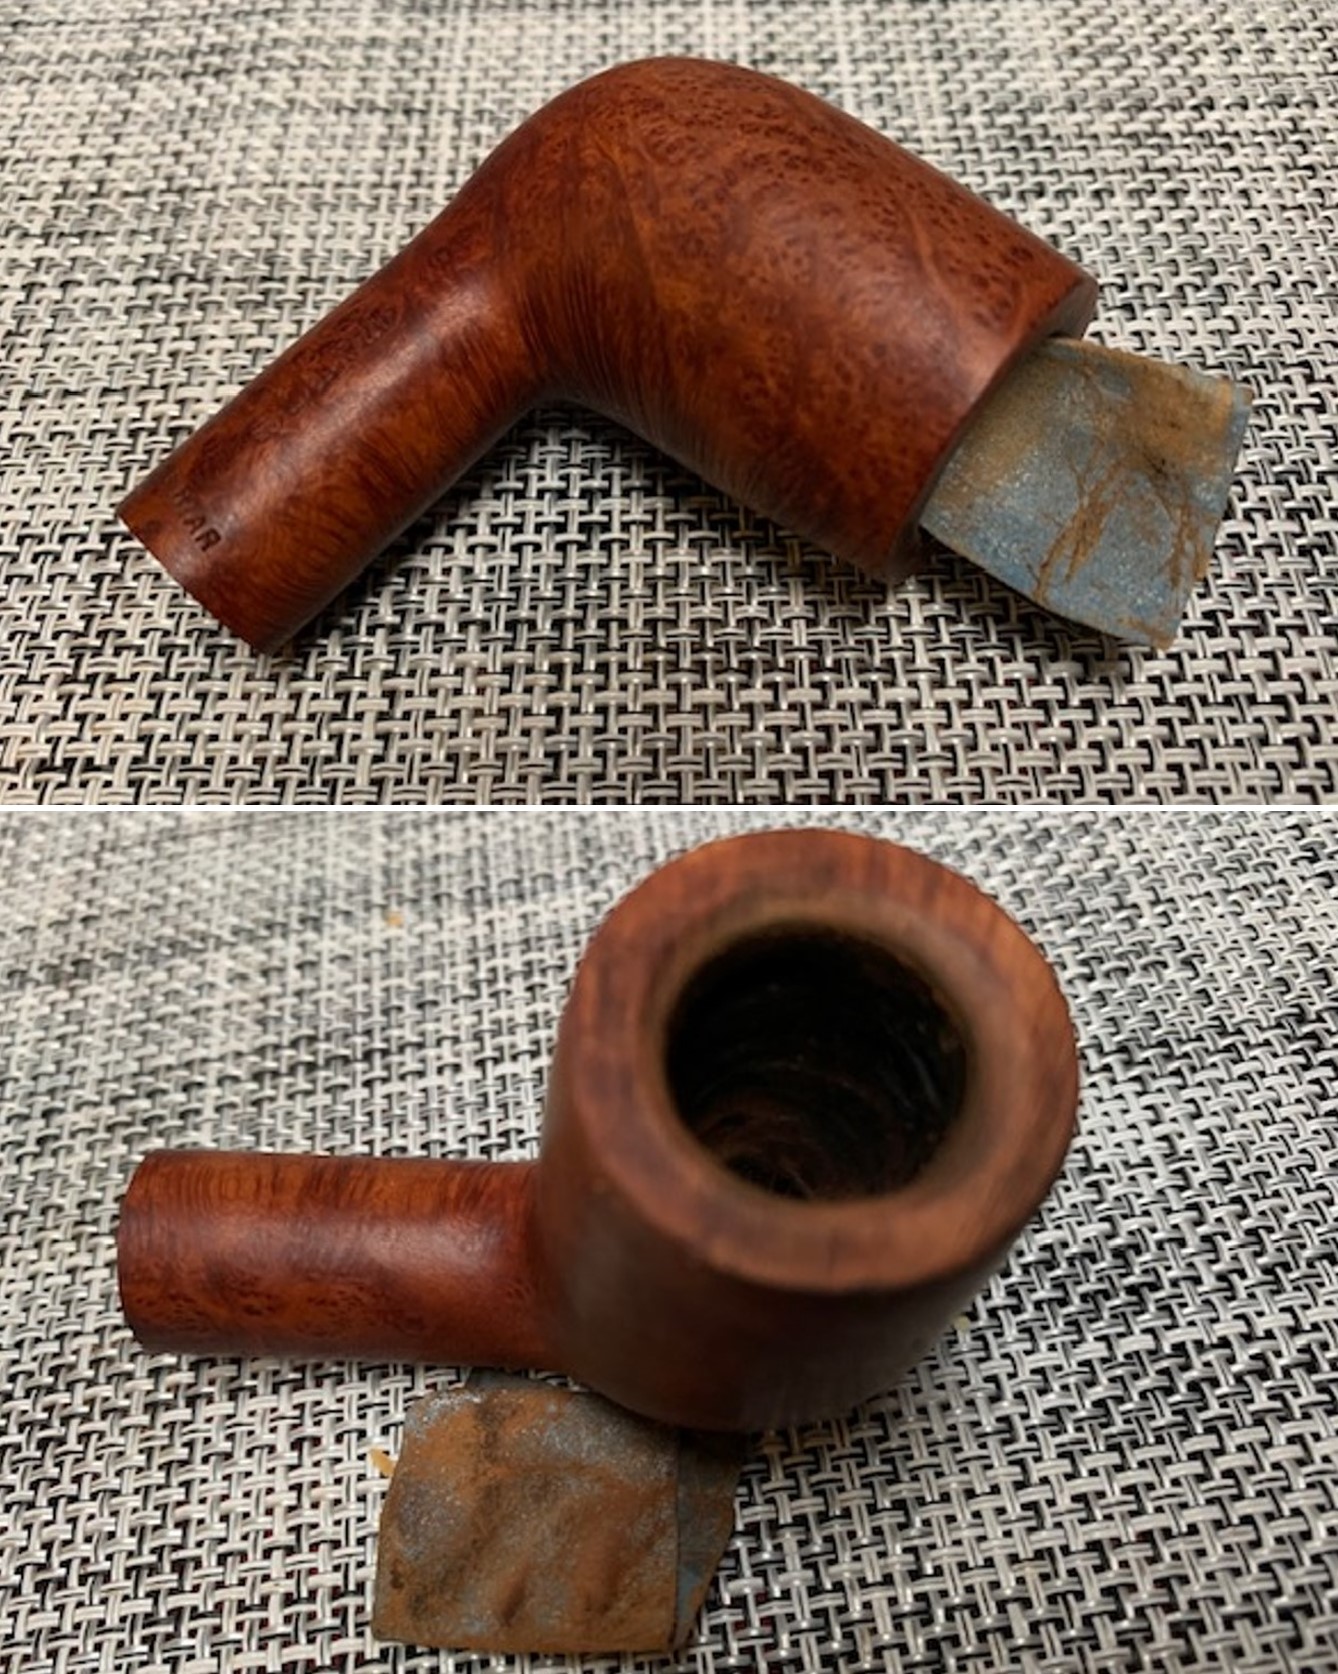
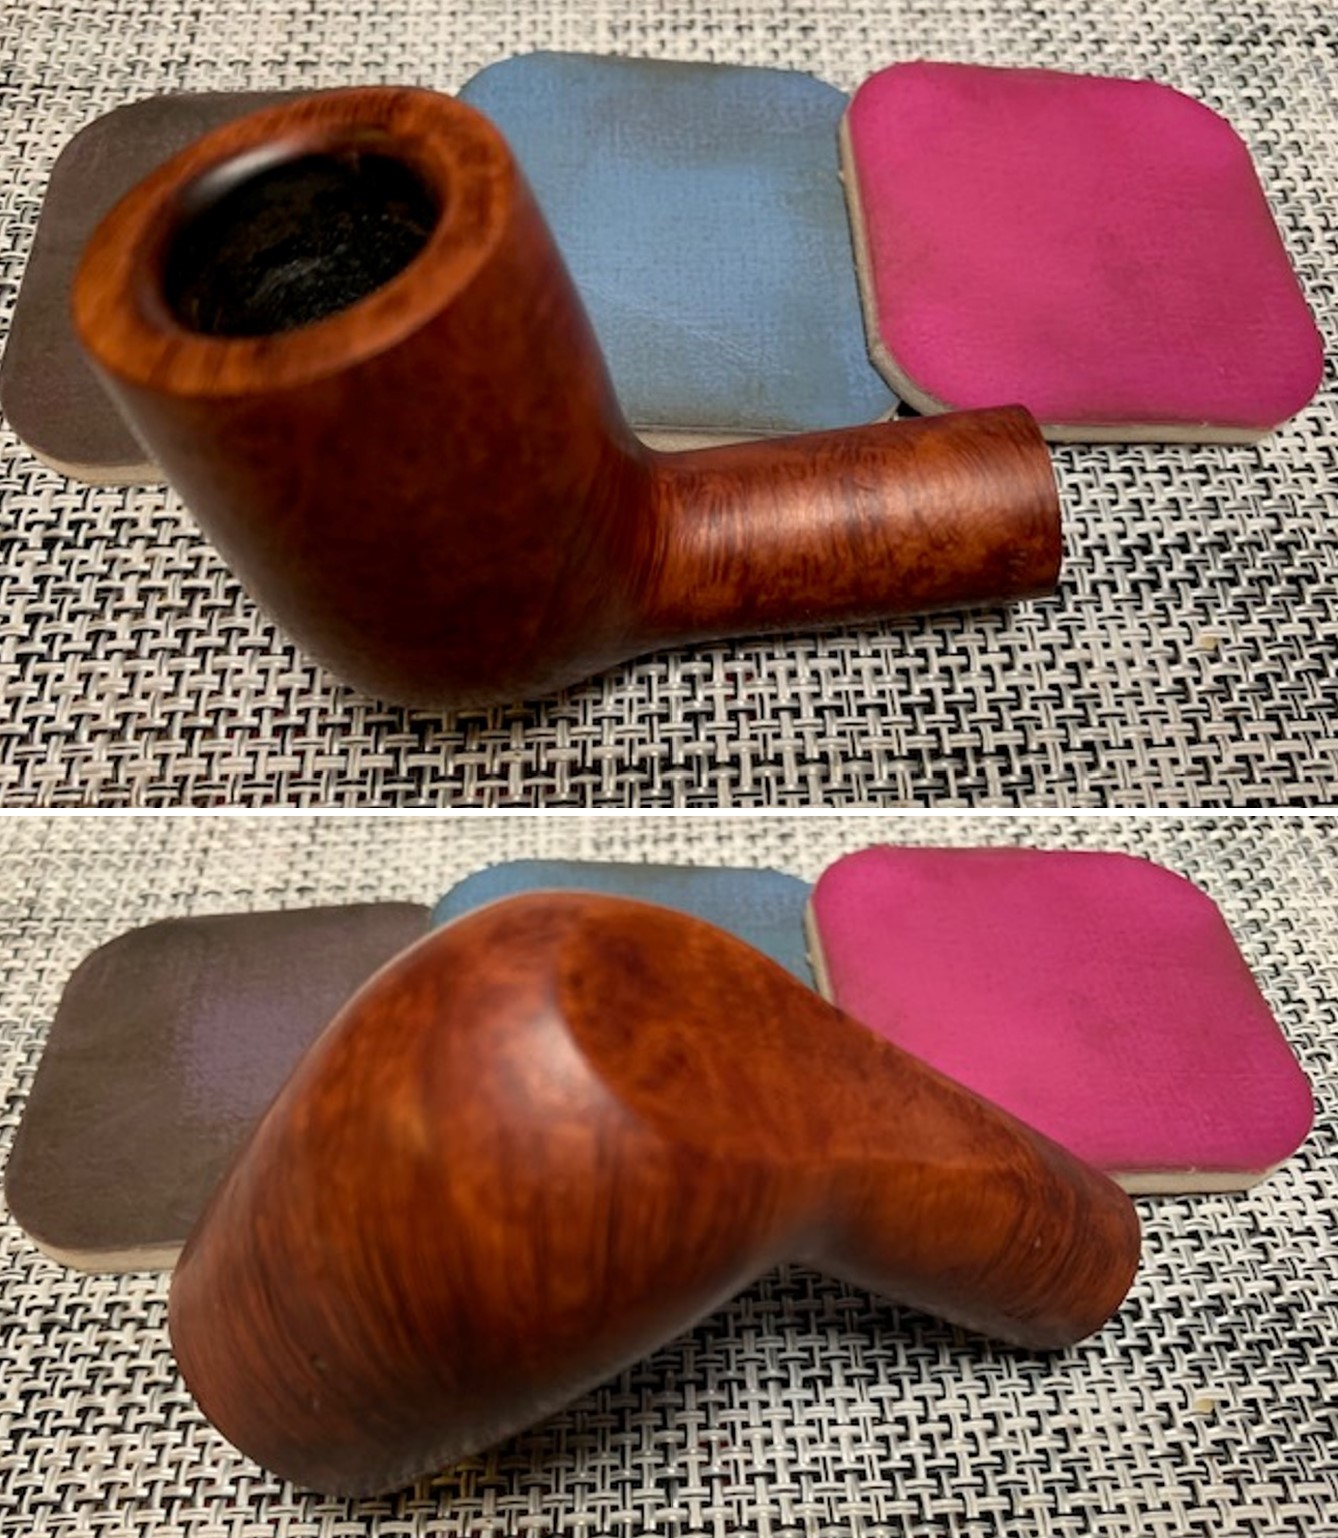
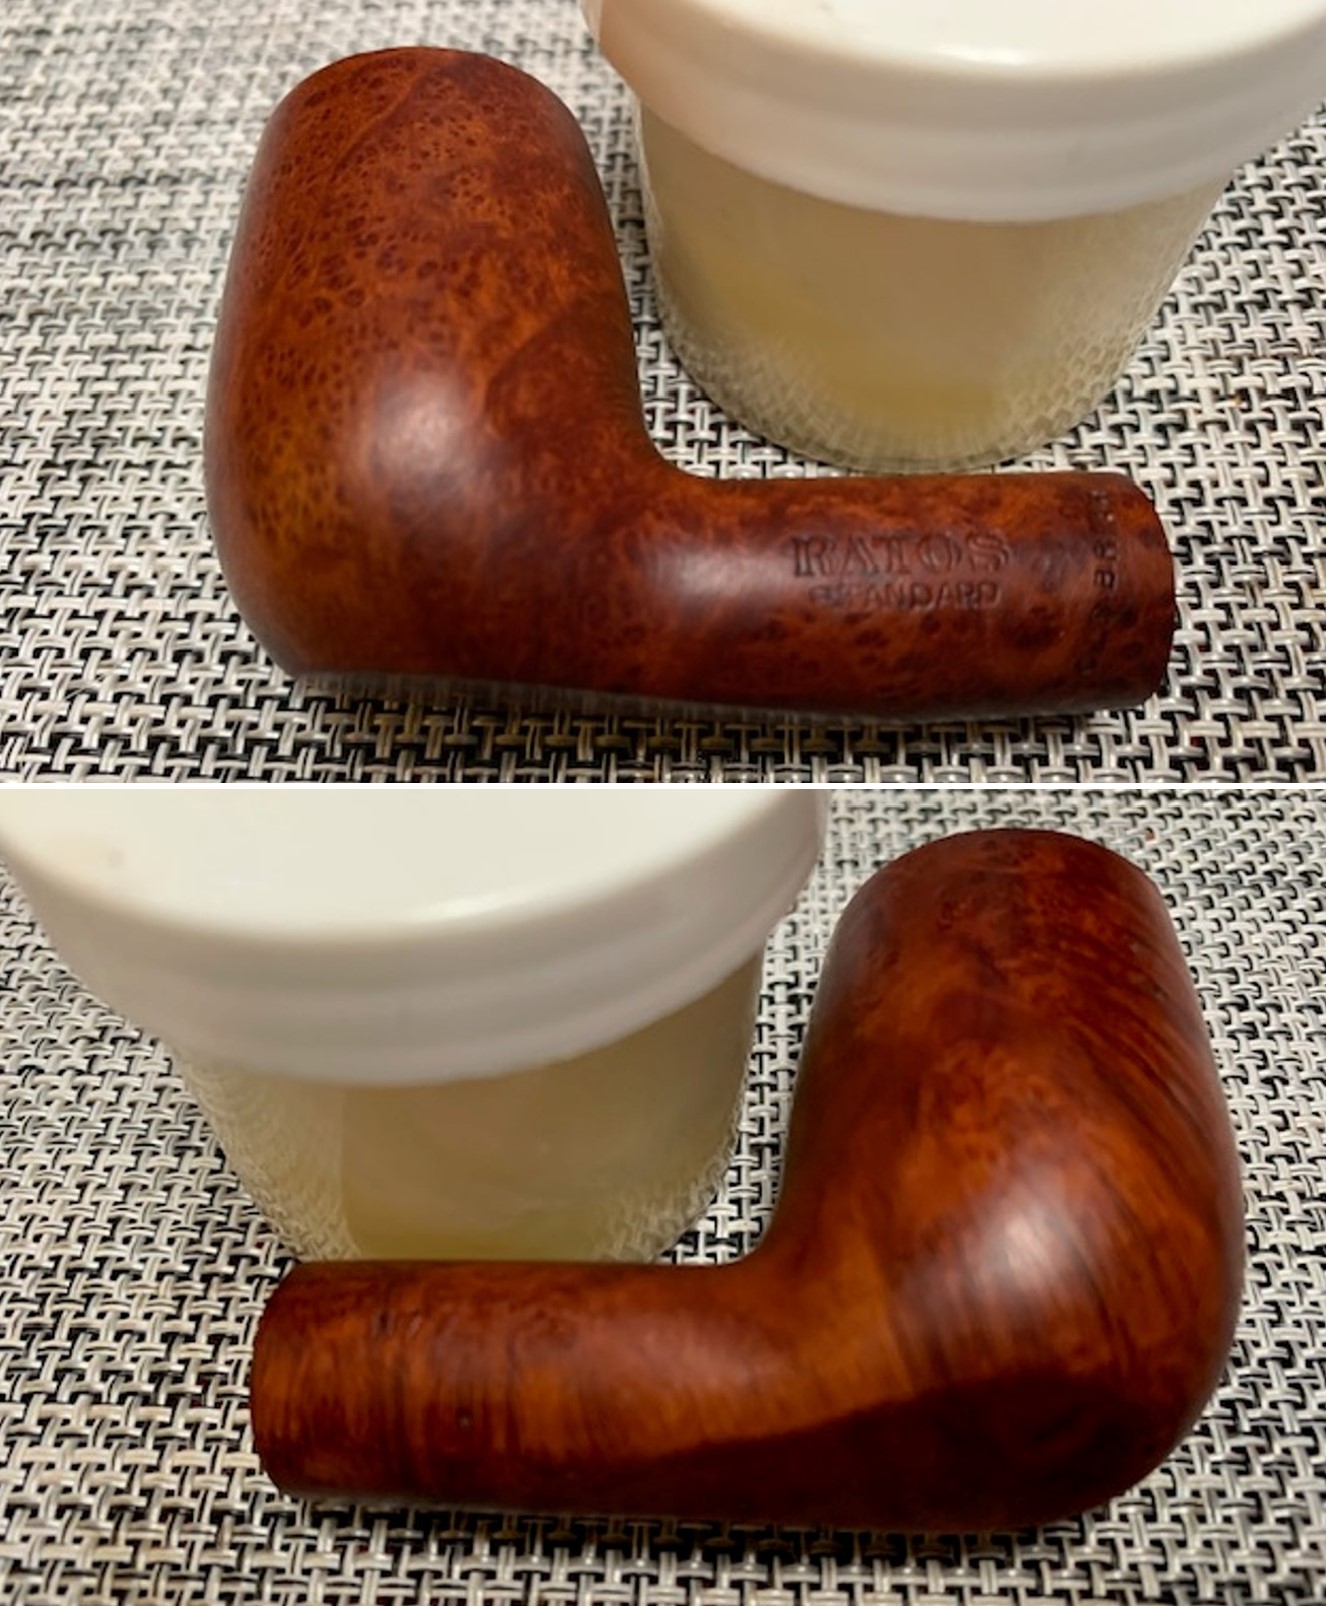
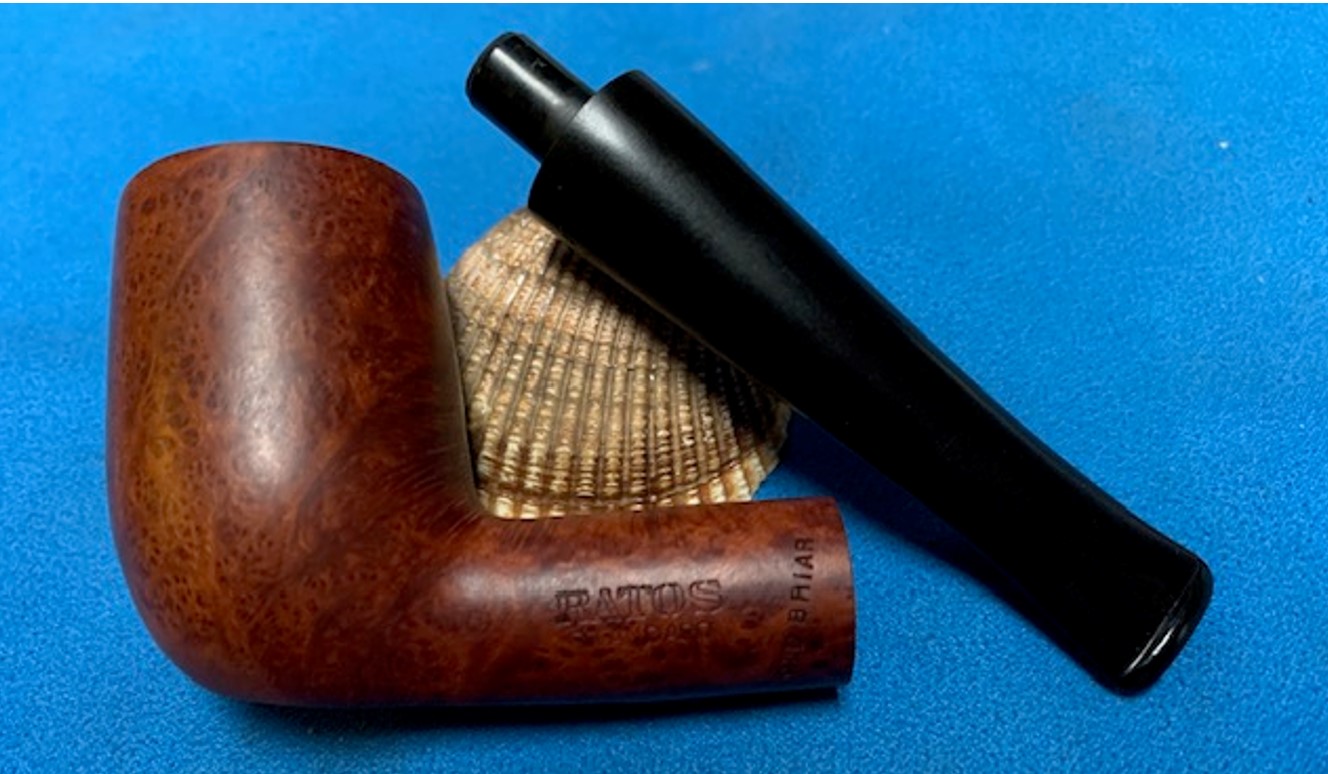
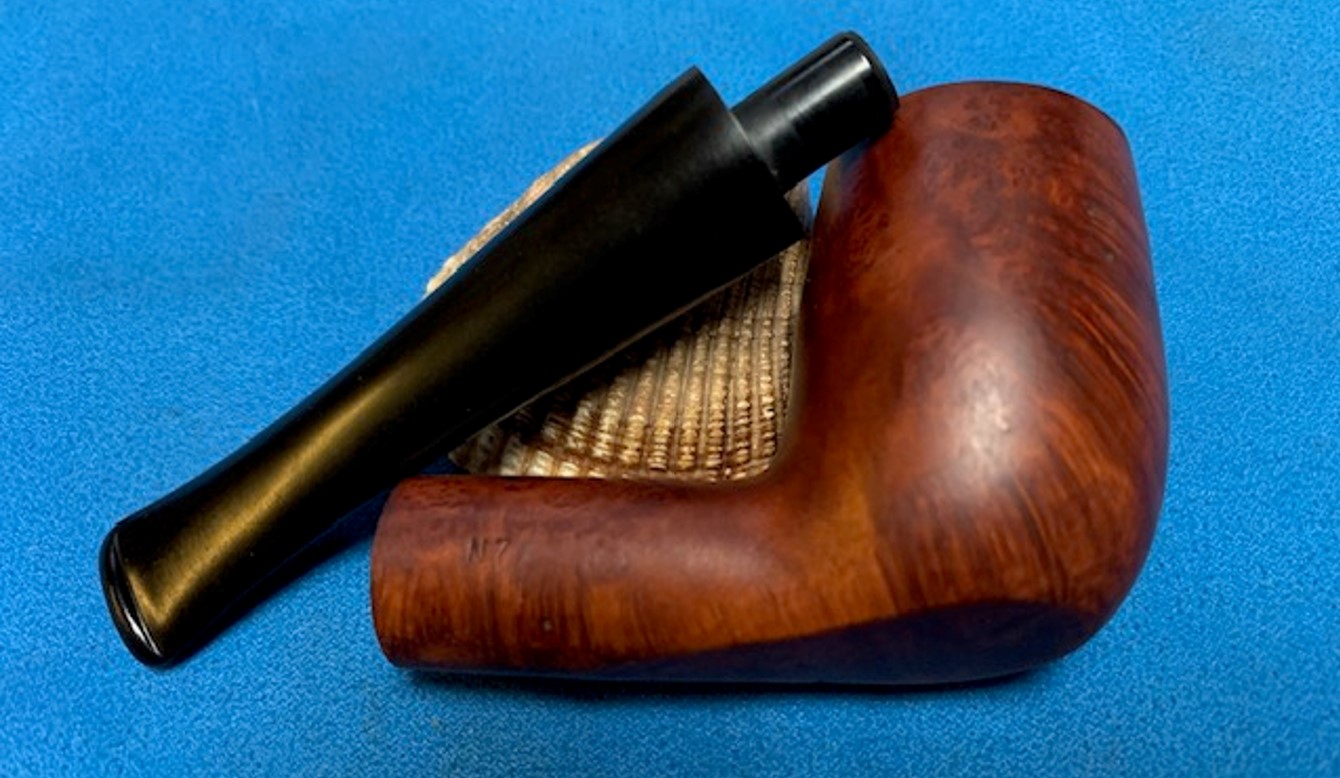
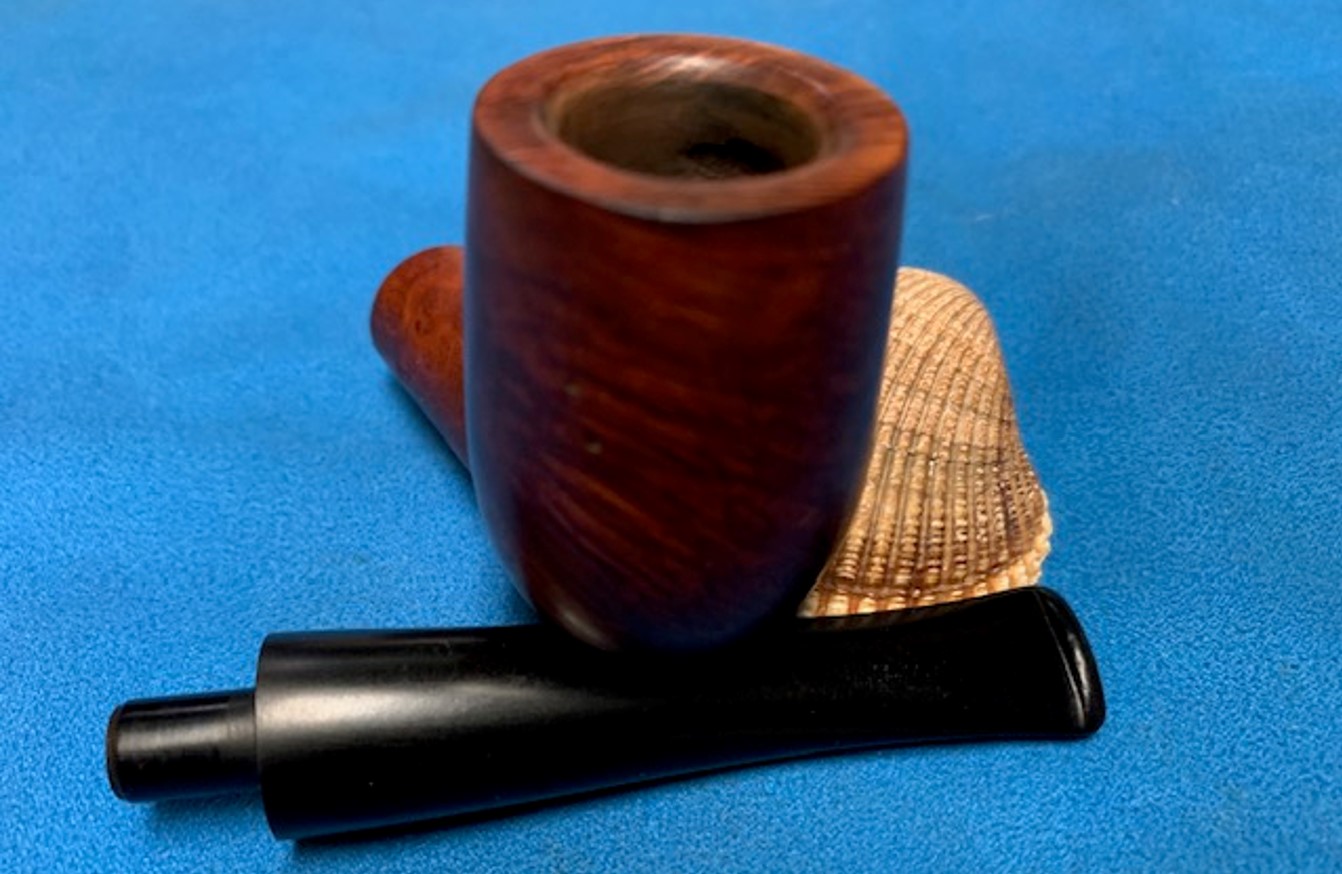
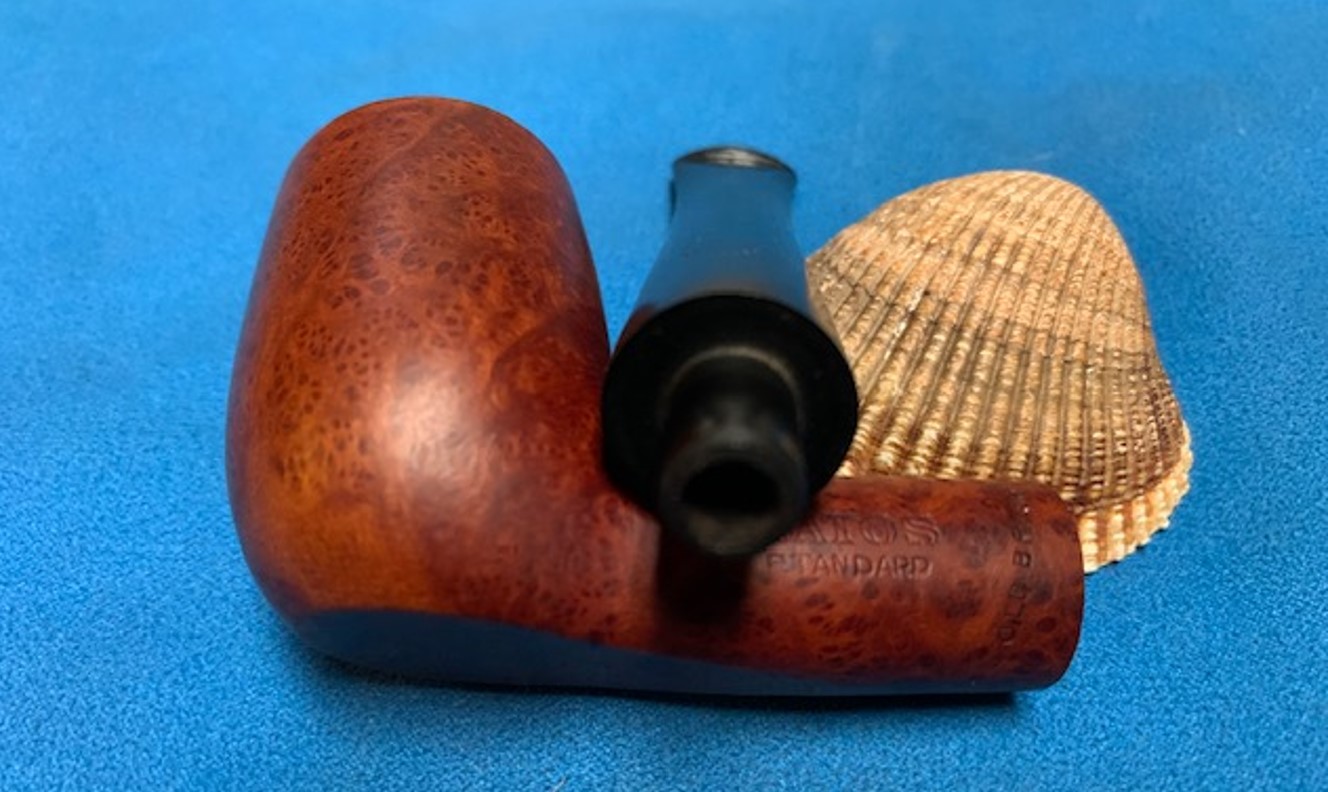
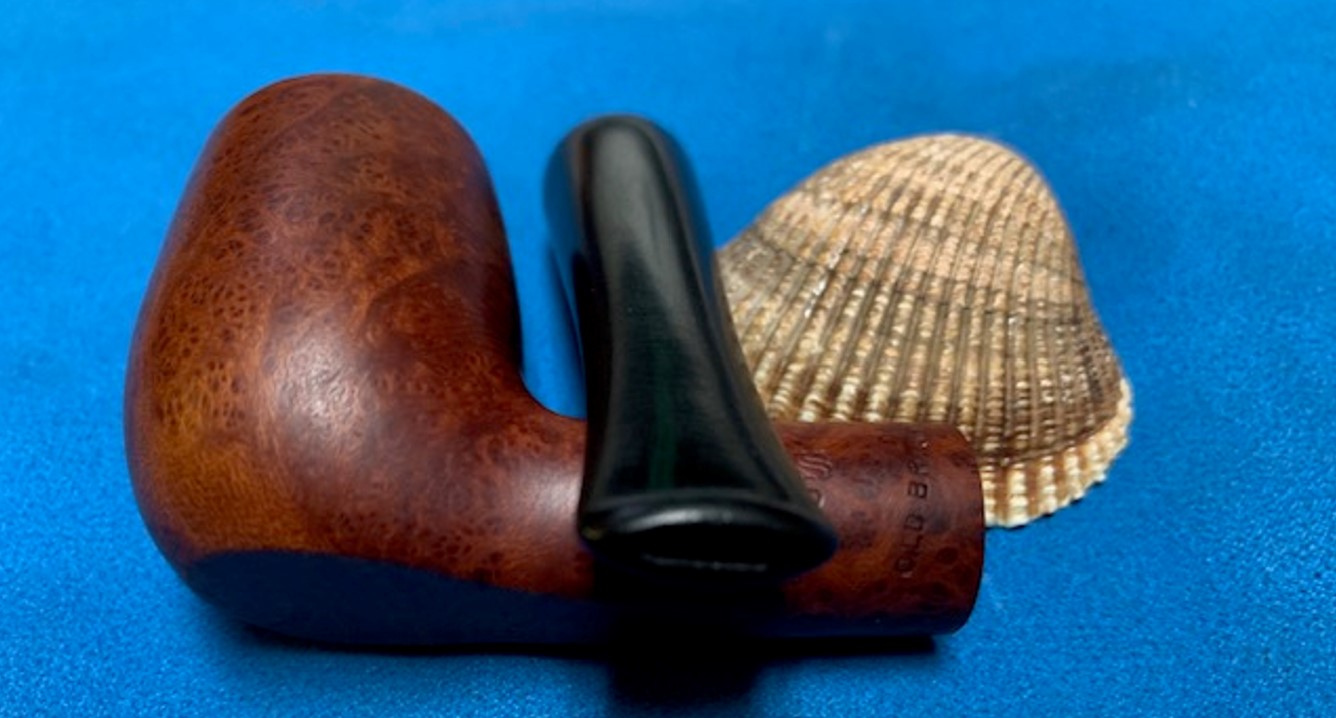
The next pipe on the work table is an interesting pipe in many ways – shape, style and stamping. We purchased it on 11/14/2022 from our connection in Copenhagen, Denmark. It is a shape that is hard to define – a cross between a Billiard and a poke. The bottom of the shank and heel of the bowl is flattened and the pipe stands leaning to the right side. This makes it quite unique. The stamping is clear and readable. On the left side it reads RATOS [over] Standard. That is followed by a stamping that runs at an angle toward the stem and reads Old Briar. On the right side it is stamped N7 which I assume is a shape number. The bowl had a thick cake and lava overflow on the inner edge of the rim. It was hard to estimate the condition of the edges with the cake and lava coat but I was hoping it had been protected from damage. The outer edge appeared to be in good condition. The finish was dull and dirty but had some nice grain under the grime and the finish appeared to be in good condition. A lot would be revealed once Jeff had worked his magic on it. The 9mm filter stem was dirty, lightly oxidized, calcified and had tooth chatter and tooth marks near the button on both sides. There was a faint RATOS stamp on the left side of the taper stem. Jeff took photos of the pipe before he started his cleanup work.Jeff took some close up photos of the rim top and the inner edge of the bowl to give an idea of the condition the pipe when he received it. I am sure glad that this was another one that he worked on. The bowl has a very thick cake and the rim top and a lava overflow around the entire top. The stem was lightly oxidized and had tooth marks and chatter on both sides.Jeff took photos of the sides of the bowl and heel to show the finish around pipe. You can see the grime and the oils in the finish that are ground into the bowl. You can also see the great looking grain around the bowl.The next series of photos capture the stamping. The stamping is clear and readable as noted above. I turned to Pipedia and looked up the Ratos brand (https://pipedia.org/wiki/Ratos). I quote from the article below to show the information that was available on this brand.
Ratos is a Swedish classic that has been on the Swedish market for more than 40 years. Pipe smokers know Ratos as an affordable quality pipe in many different shapes. Quality are all equally high, only genuine ‘Old’ briarroot may be used. Some of the pipes have meerschaum lined bowls. In 2009, all Ratos pipes are fitted with filters.
Some of these pipes are distributed by the Borkum Riff tobacco brand at pipe smoking contests.
In 2009, Ratos pipes are manufactured in France, in the oldest factory still operating.
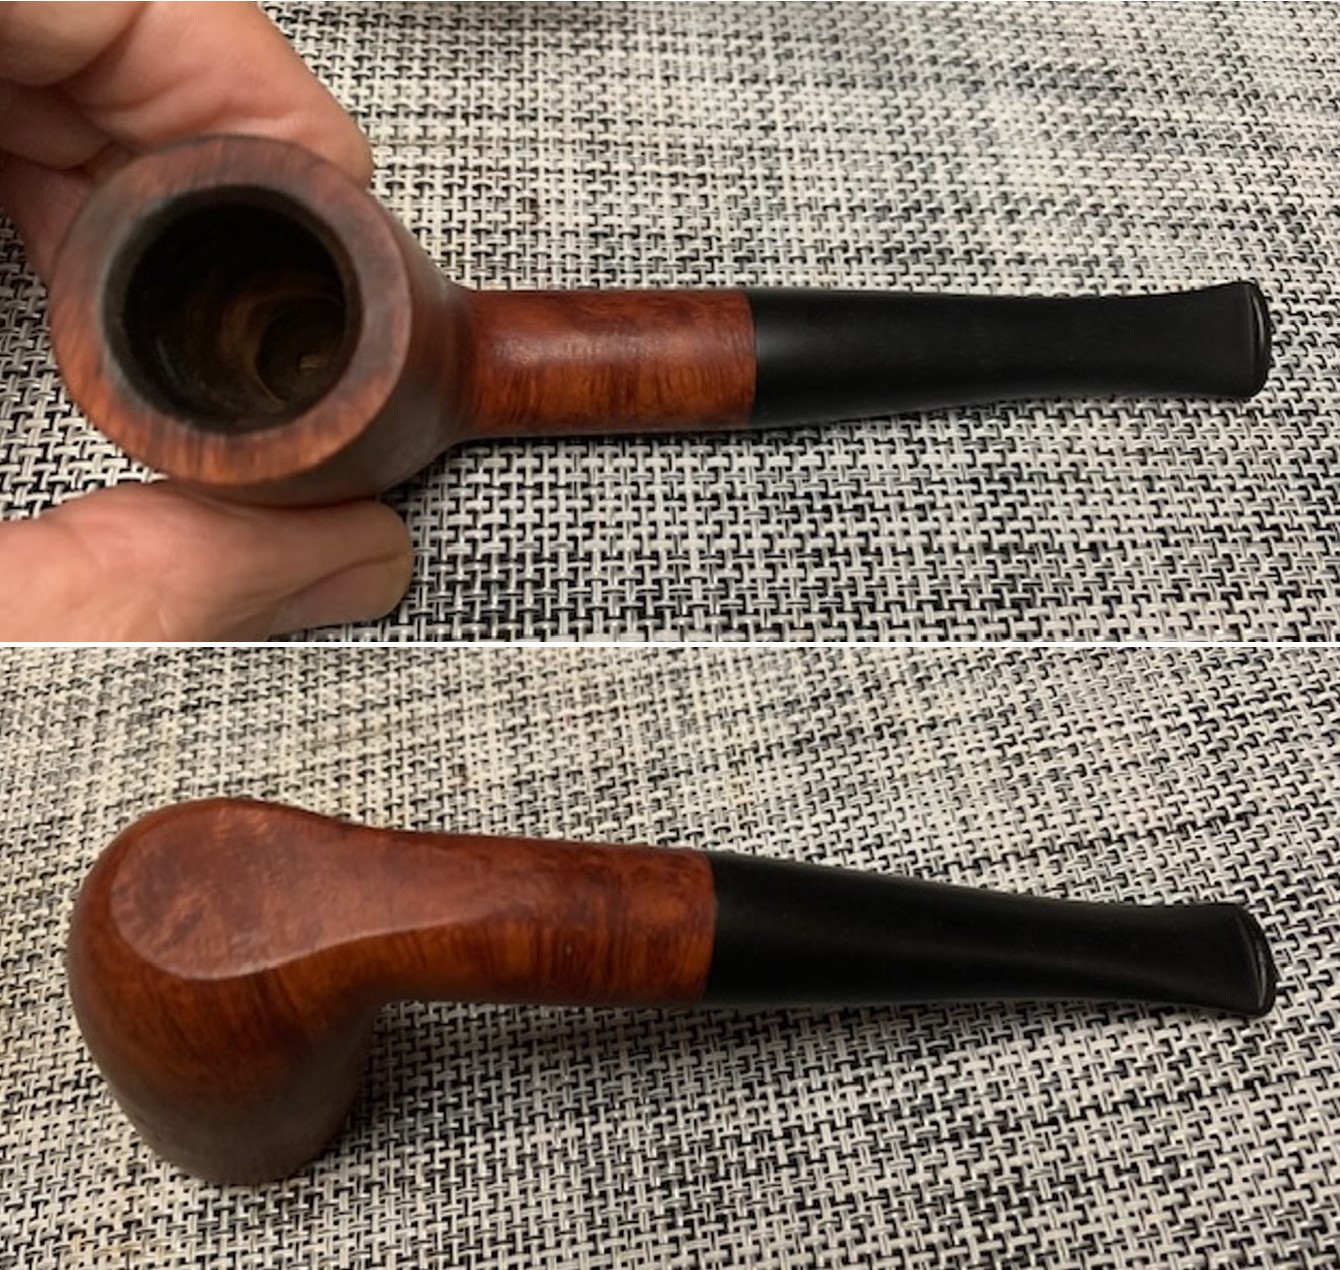
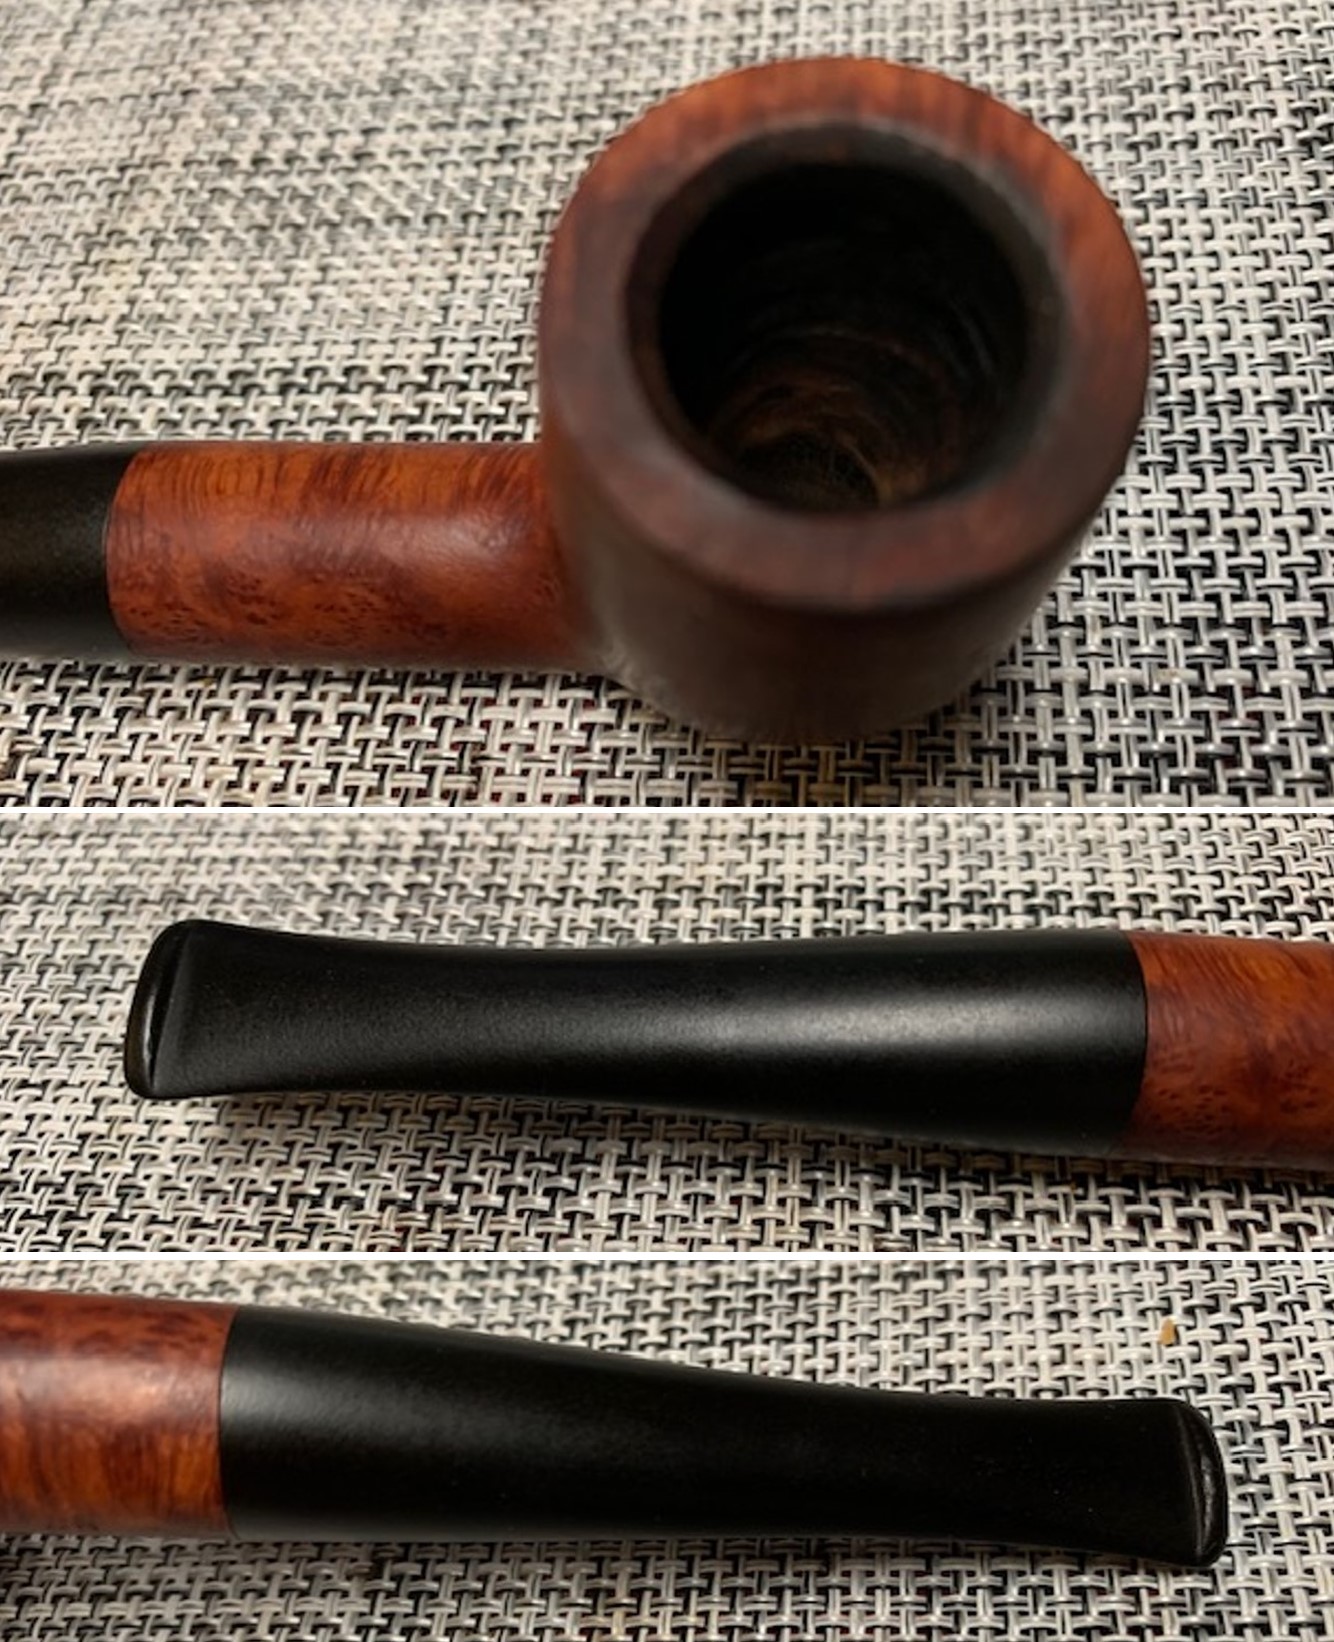
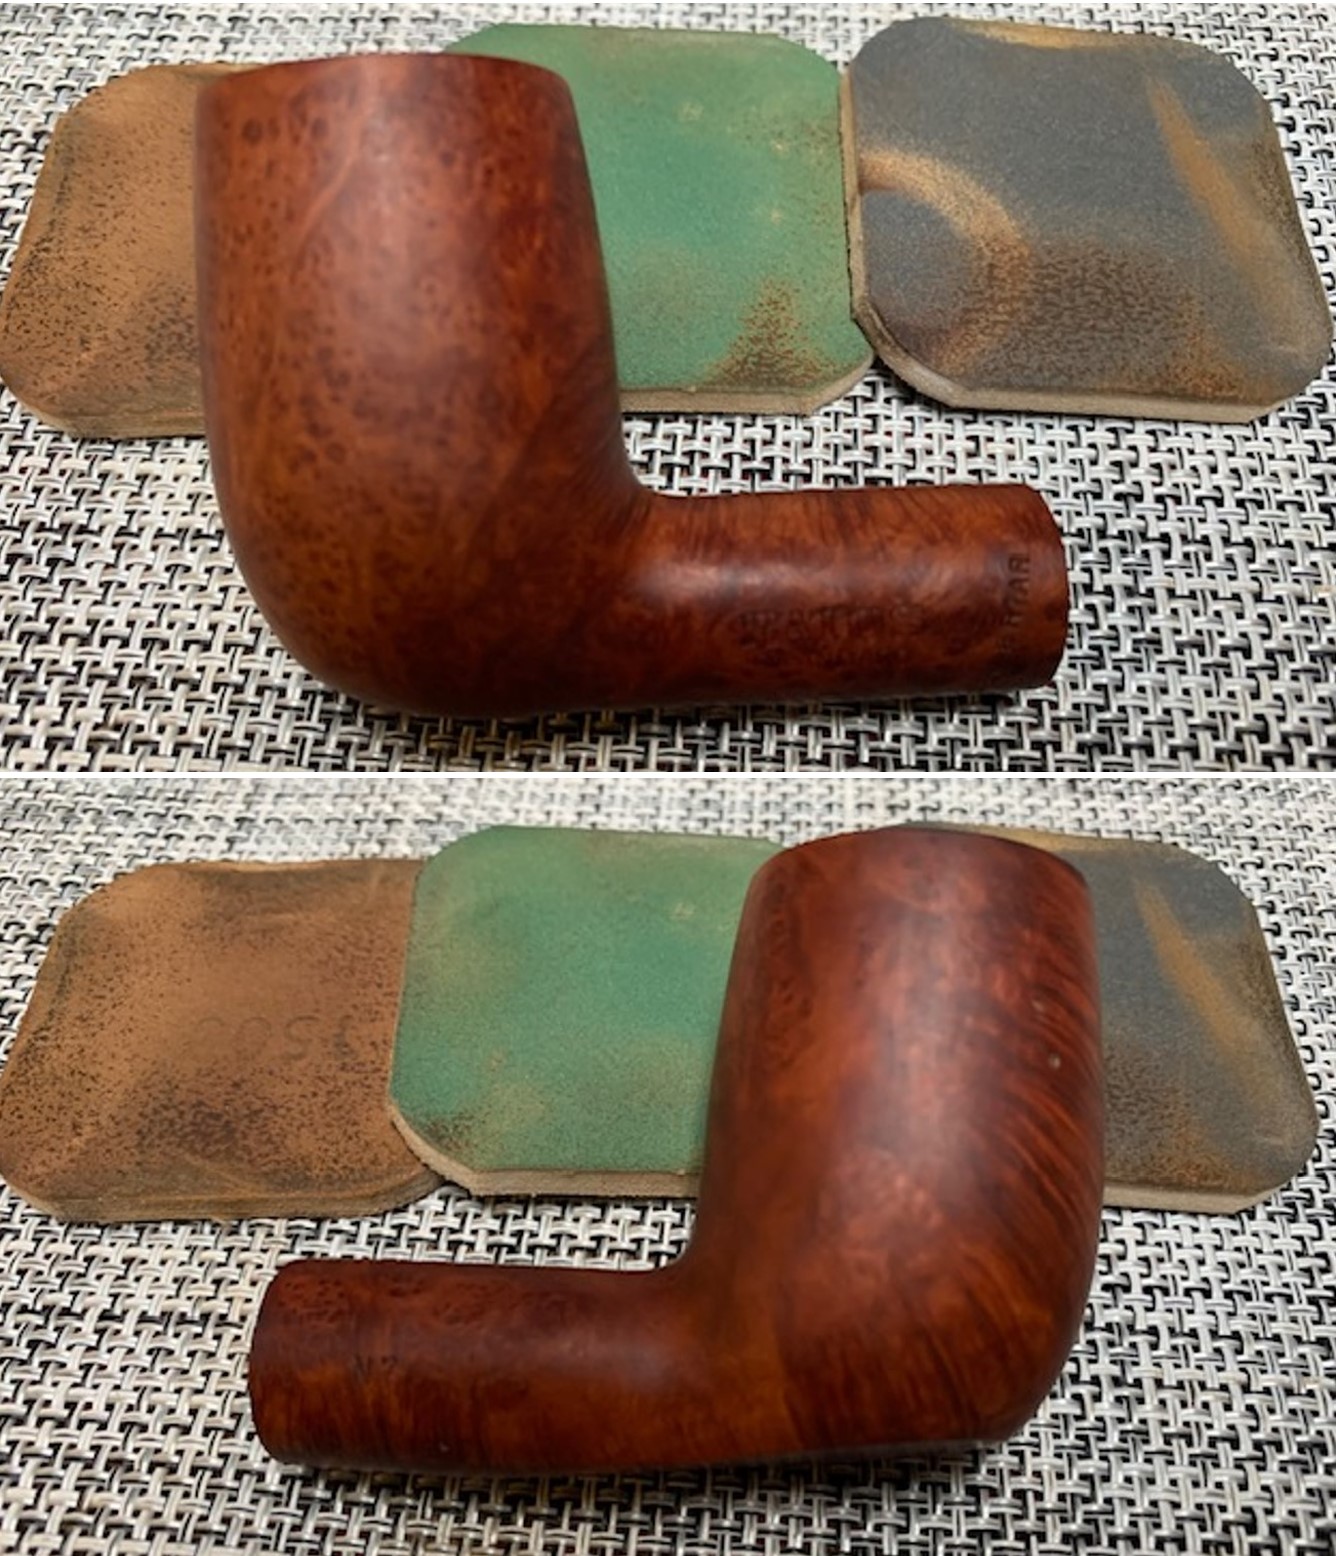
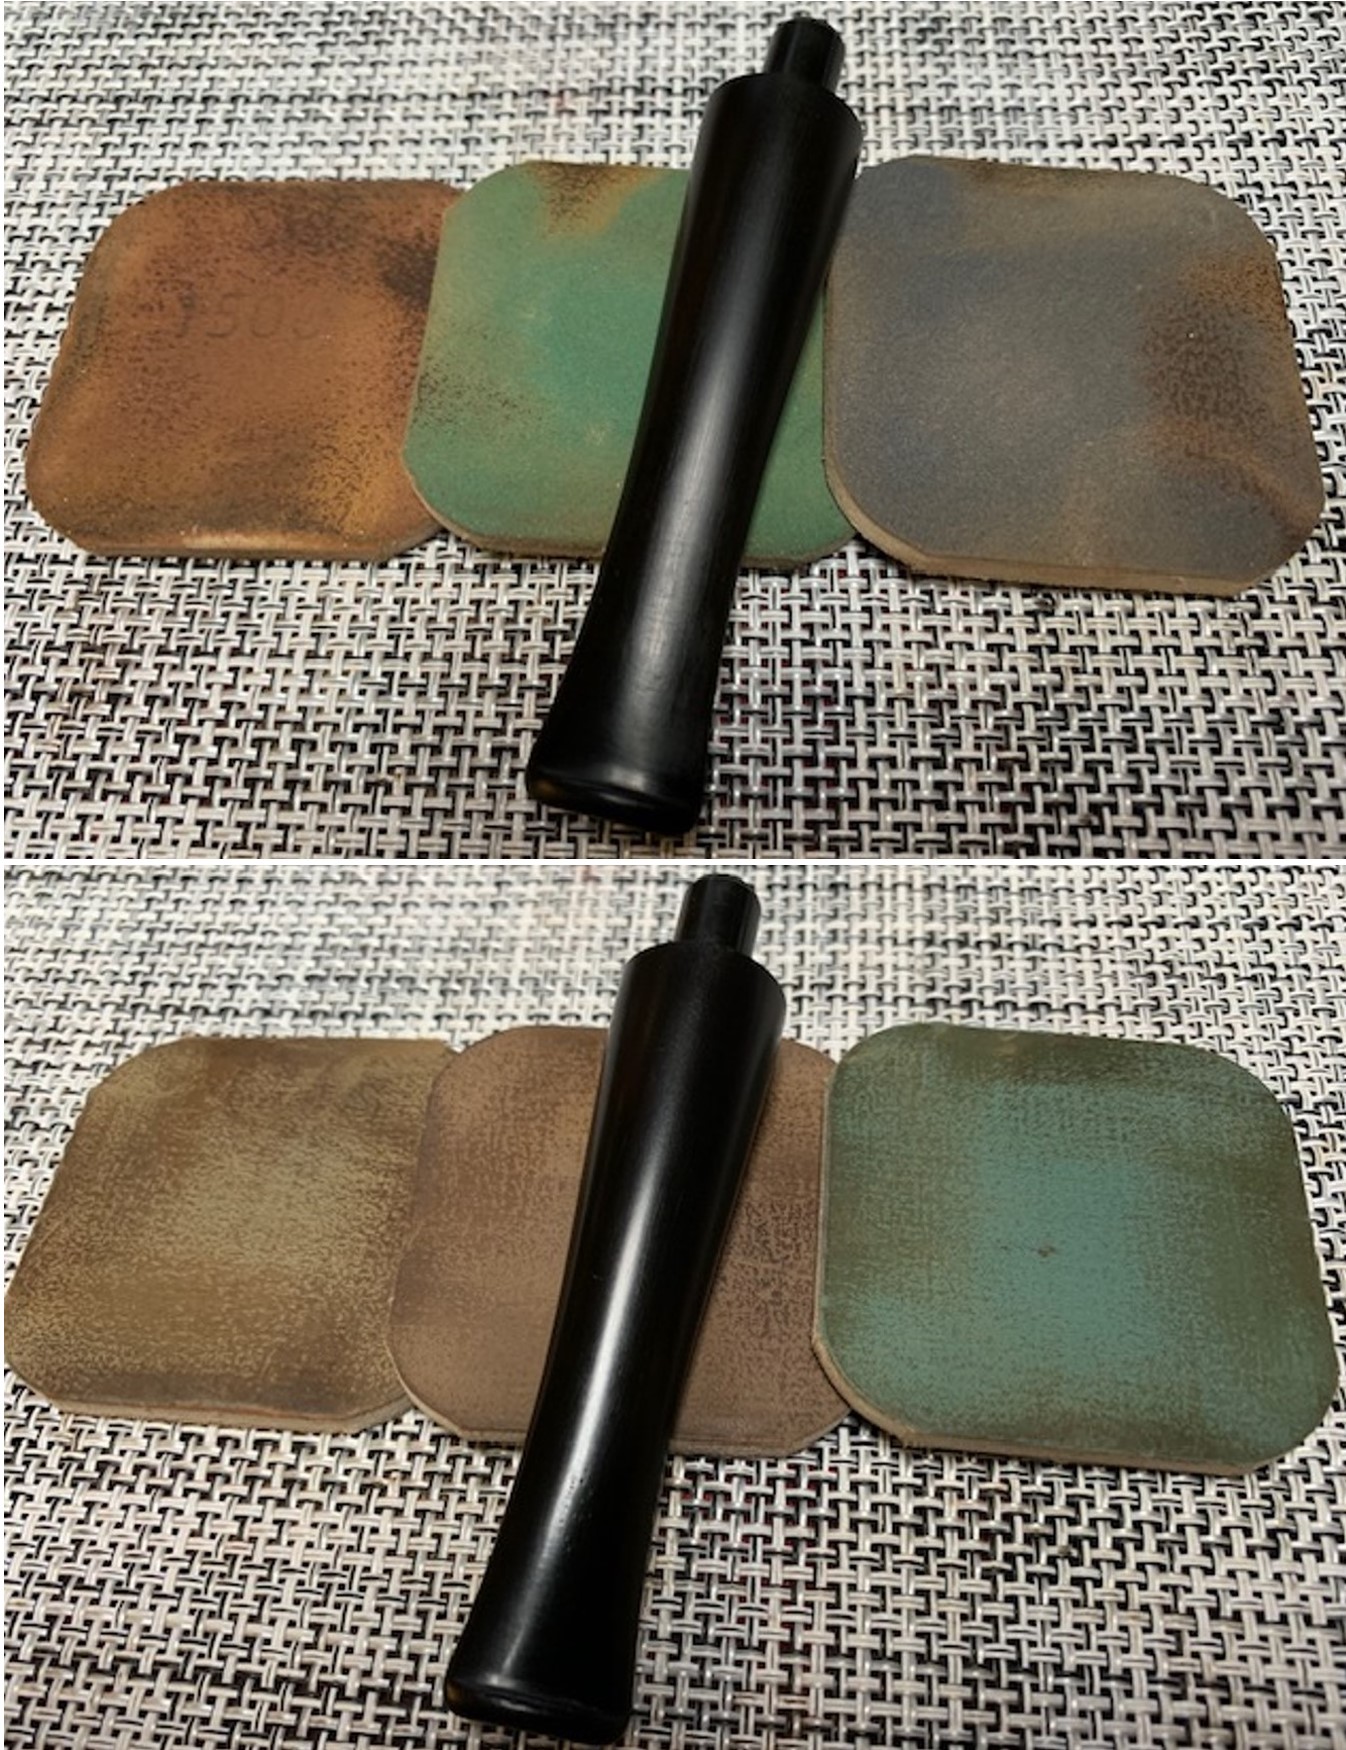
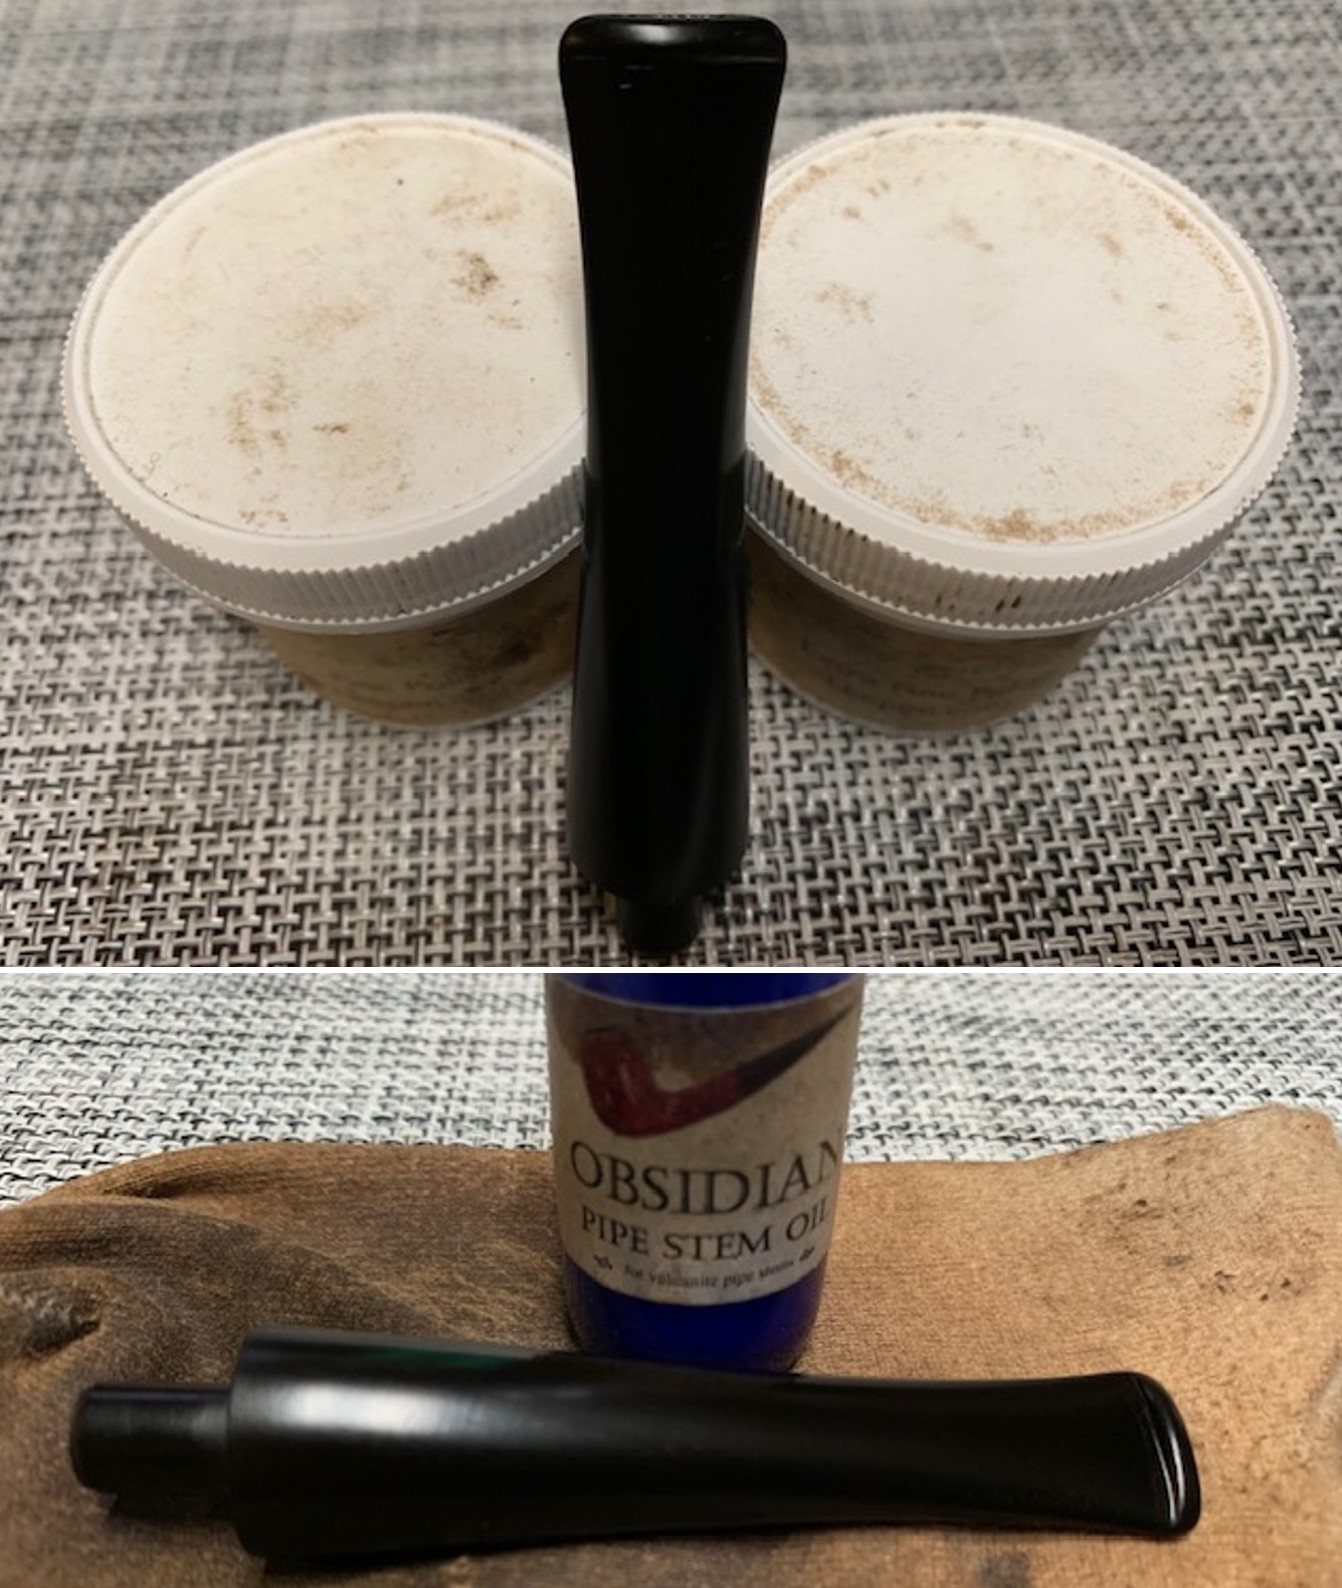
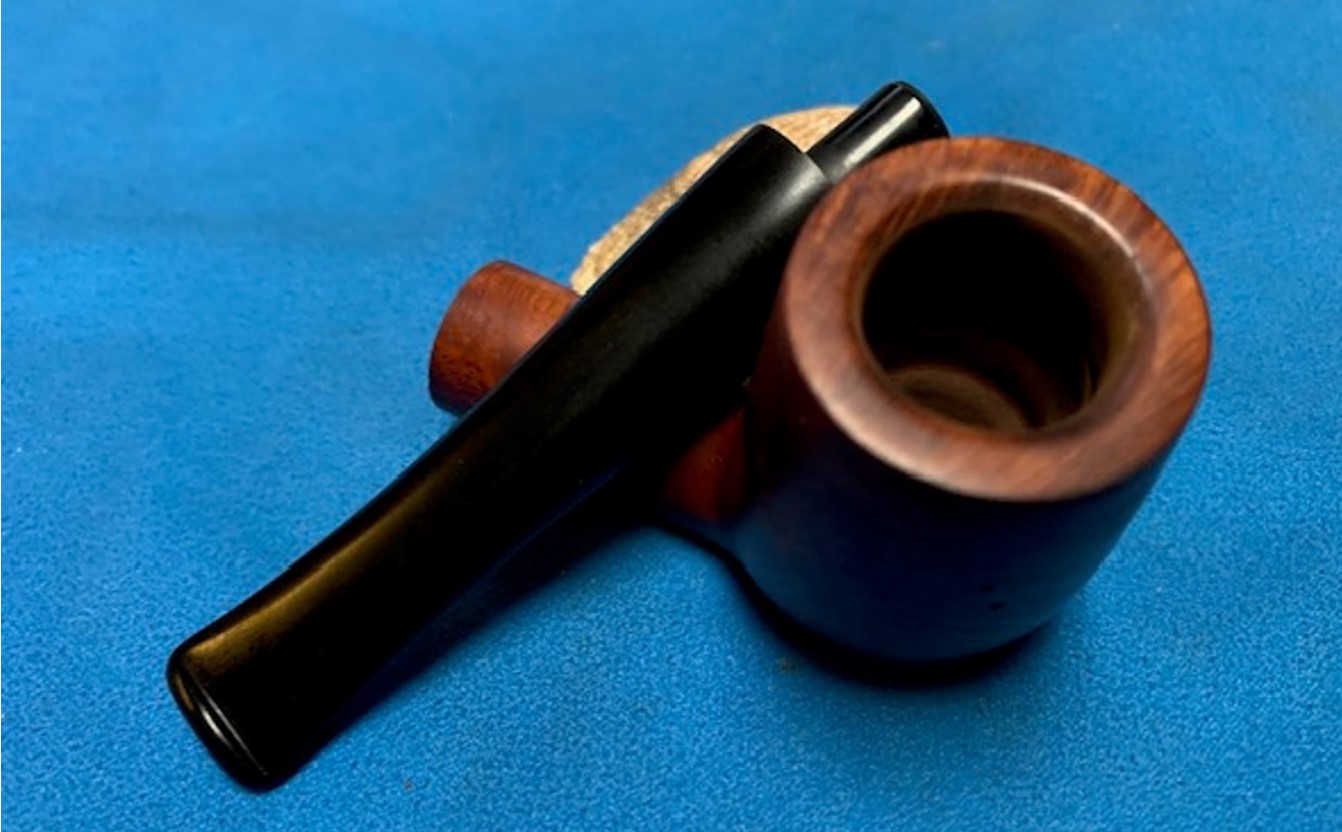
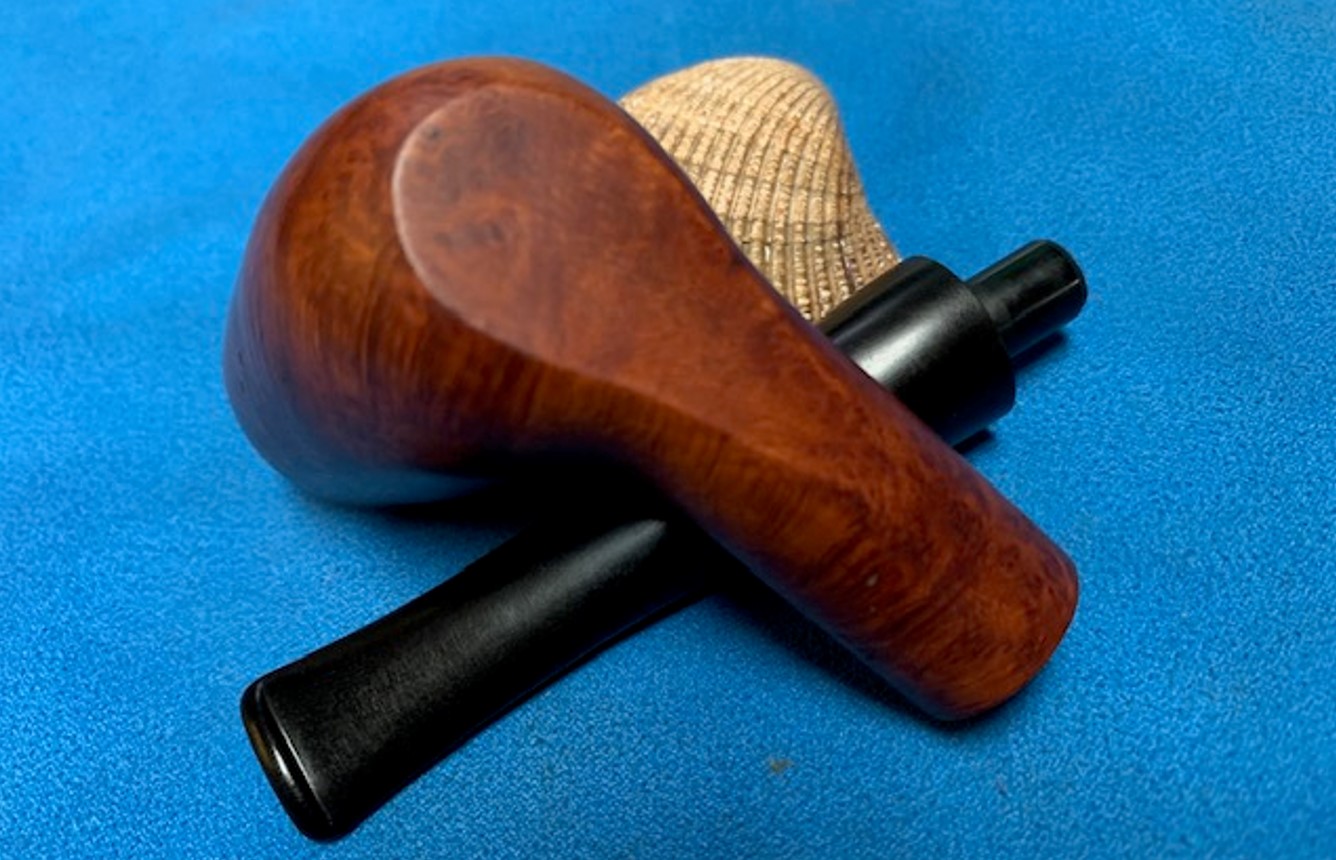
Jeff had cleaned up the pipe with his usual penchant for thoroughness. He reamed the pipe with a PipNet Pipe Reamer and cleaned up the remnants with a Savinelli Fitsall Pipe Knife. He scrubbed the bowl with undiluted Murphy’s Oil Soap with a tooth brush. He rinsed it under running warm water to remove the soap and grime. He cleaned out the inside of the shank and the airway in the stem with alcohol, cotton swabs and pipe cleaners. He soaked the stem in Before & After Deoxidizer and rinsed it off with warm water. I took photos of the pipe once I received it. I took close up photos of both the rim top and the stem. Jeff had been able to get the grime and lava off the rim top and it looked much better. There was some darkening on the rim top and edges. The stem looked very clean. The tooth marks and chatter were minimal and should be easy to remove. I took photos of the stamping on the shank sides to show that they are very clear and readable.I started my work on the pipe by addressing the remaining darkening on the rim top and the inner edge of the bowl. I sanded the bevelled edge with a folded piece of 220 grit sandpaper. I worked over the rim top at the same time and smooth out and remove the darkening. It looked much better.Now it was time to do my work on the pipe. I polished the bowl and rim top with micromesh sanding pads using 1500-12000 grit sanding pads and wiping it down after each sanding pad with a damp cloth to remove the sanding dust and debris.I worked some Before & After Restoration Balm into the finish of the bowl and shank with my fingers. I want the product to go deep into the finish because it works to clean, enliven and protect the briar. Once I was confident that it was deeply worked into the finish I wiped it off and buffed it with a soft cloth to polish it. The pipe really began to have a rich shine. I took some photos of the bowl at this point to mark the progress in the restoration. The grain really stands out on the pipe in the photos below.I set the bowl aside and turned to work on the stem. I polished the vulcanite stem with micromesh sanding pads – wet sanding it with 1500-12000 grit pads. I wiped it down with Obsidian Oil after each sanding pad. I polished it with Before & After Pipe Polish – both the Fine and Extra Fine polishes. I gave it a final coat of oil and set it aside to dry. This RATOS Standard Old Briar N7 Sitter Billiard was another fun pipe to work on and I really was looking forward to seeing it come back together again. With the grime and debris gone from the finish and the rim top the birdseye grain is beautiful. I put the stem back on the bowl and buffed the pipe with Blue Diamond on the buffing wheel. I carefully avoided the stamping on the shank during the process. I gave the bowl and the stem multiple coats of carnauba wax on the buffing wheel and followed that by buffing it with a clean buffing pad on the buffer. I hand buffed the pipe with a microfiber cloth to deepen the shine. The rich finish on the bowl looks really good with the black vulcanite stem. It is very well done. Give the finished RATOS N7 Standard Old Briar a look in the photos below. I can only tell you that it is much prettier in person than the photos capture. The dimensions of the pipe are Length: 5 ½ inches, Height: 2 inches, Outside diameter of the bowl: 1 1/8 inches, Chamber diameter: 5/8 of an inch. The weight of the pipe is 42grams/1.48oz. This is truly a great looking Ratos Sitter Billiard. Thanks for walking through the restoration with me as I worked over another beautiful pipe. I will be adding it to the rebornpipes store in the Pipes From Various Makers Section. If you want to add it to your collection send me an email or a message! Thanks for your time.
As always, I encourage your questions and comments as you read the blog. Thanks to each of you who are reading this blog. Remember we are not pipe owners; we are pipe men and women who hold our pipes in trust until they pass on into the trust of those who follow us.
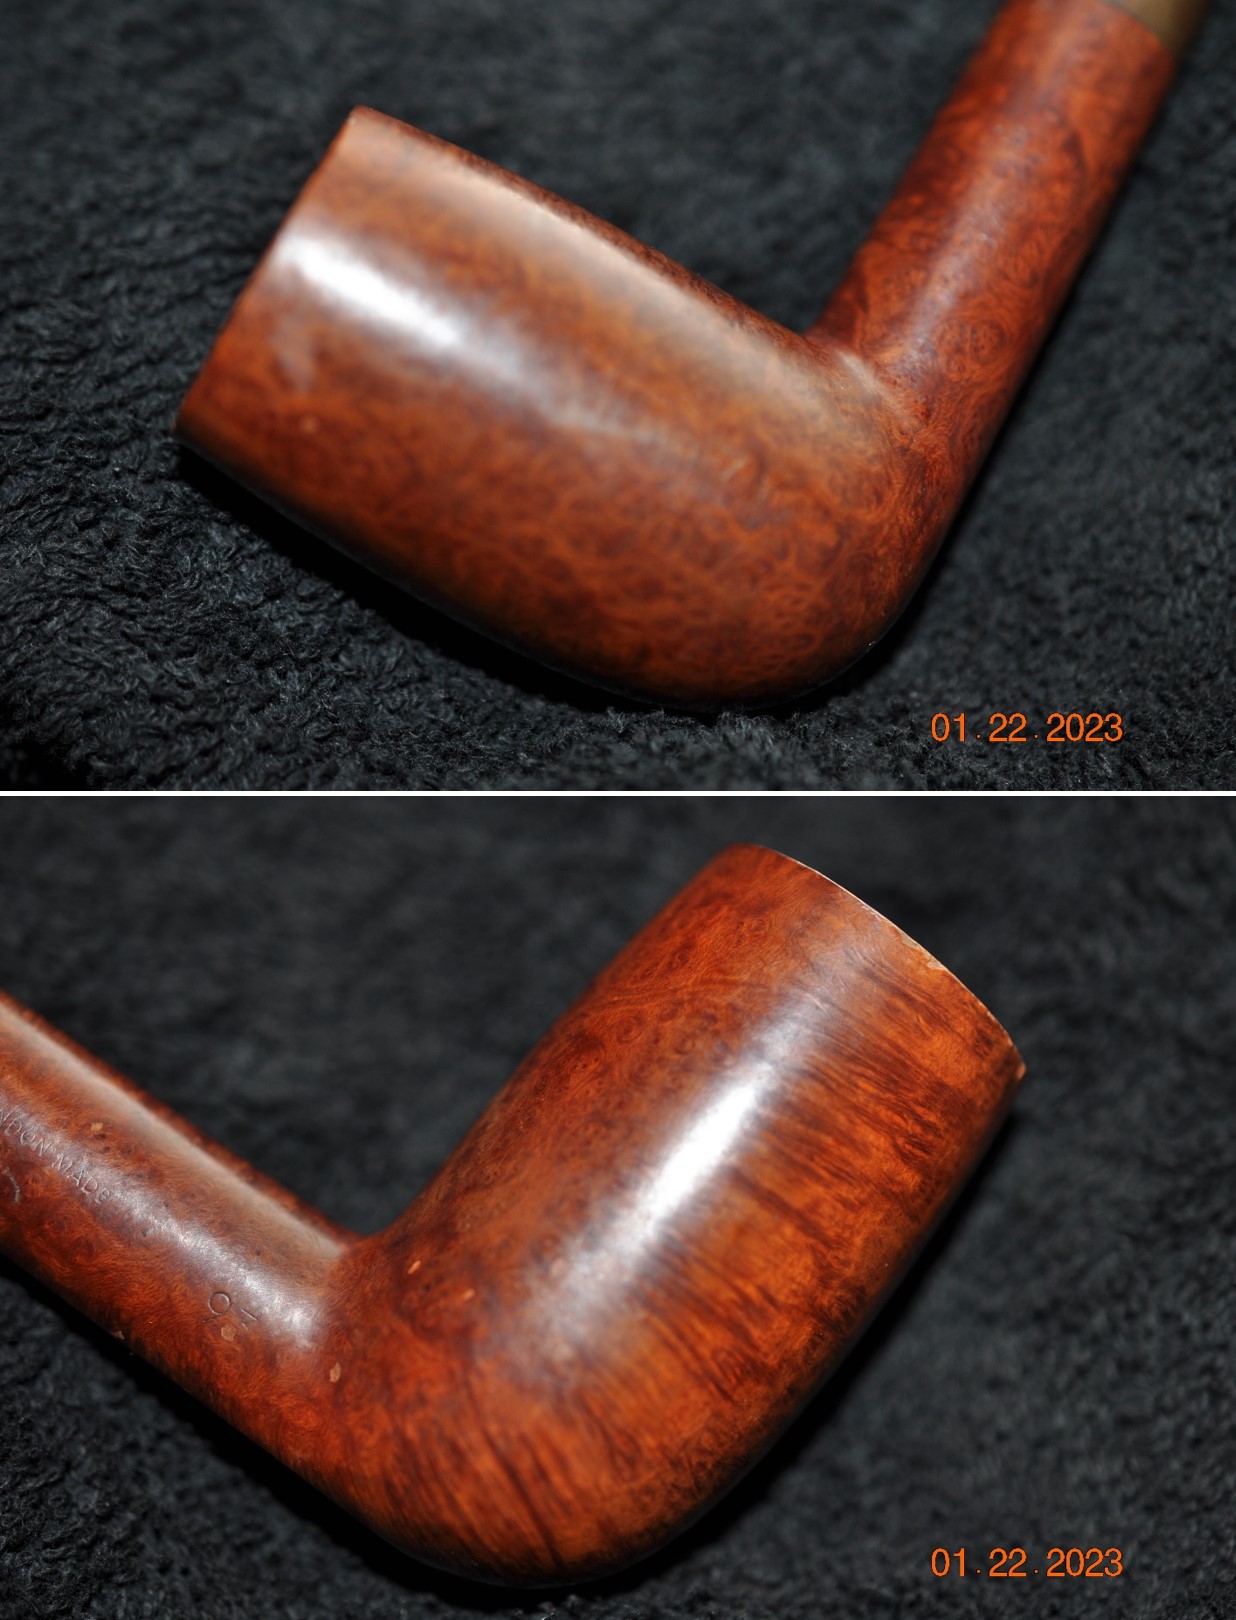
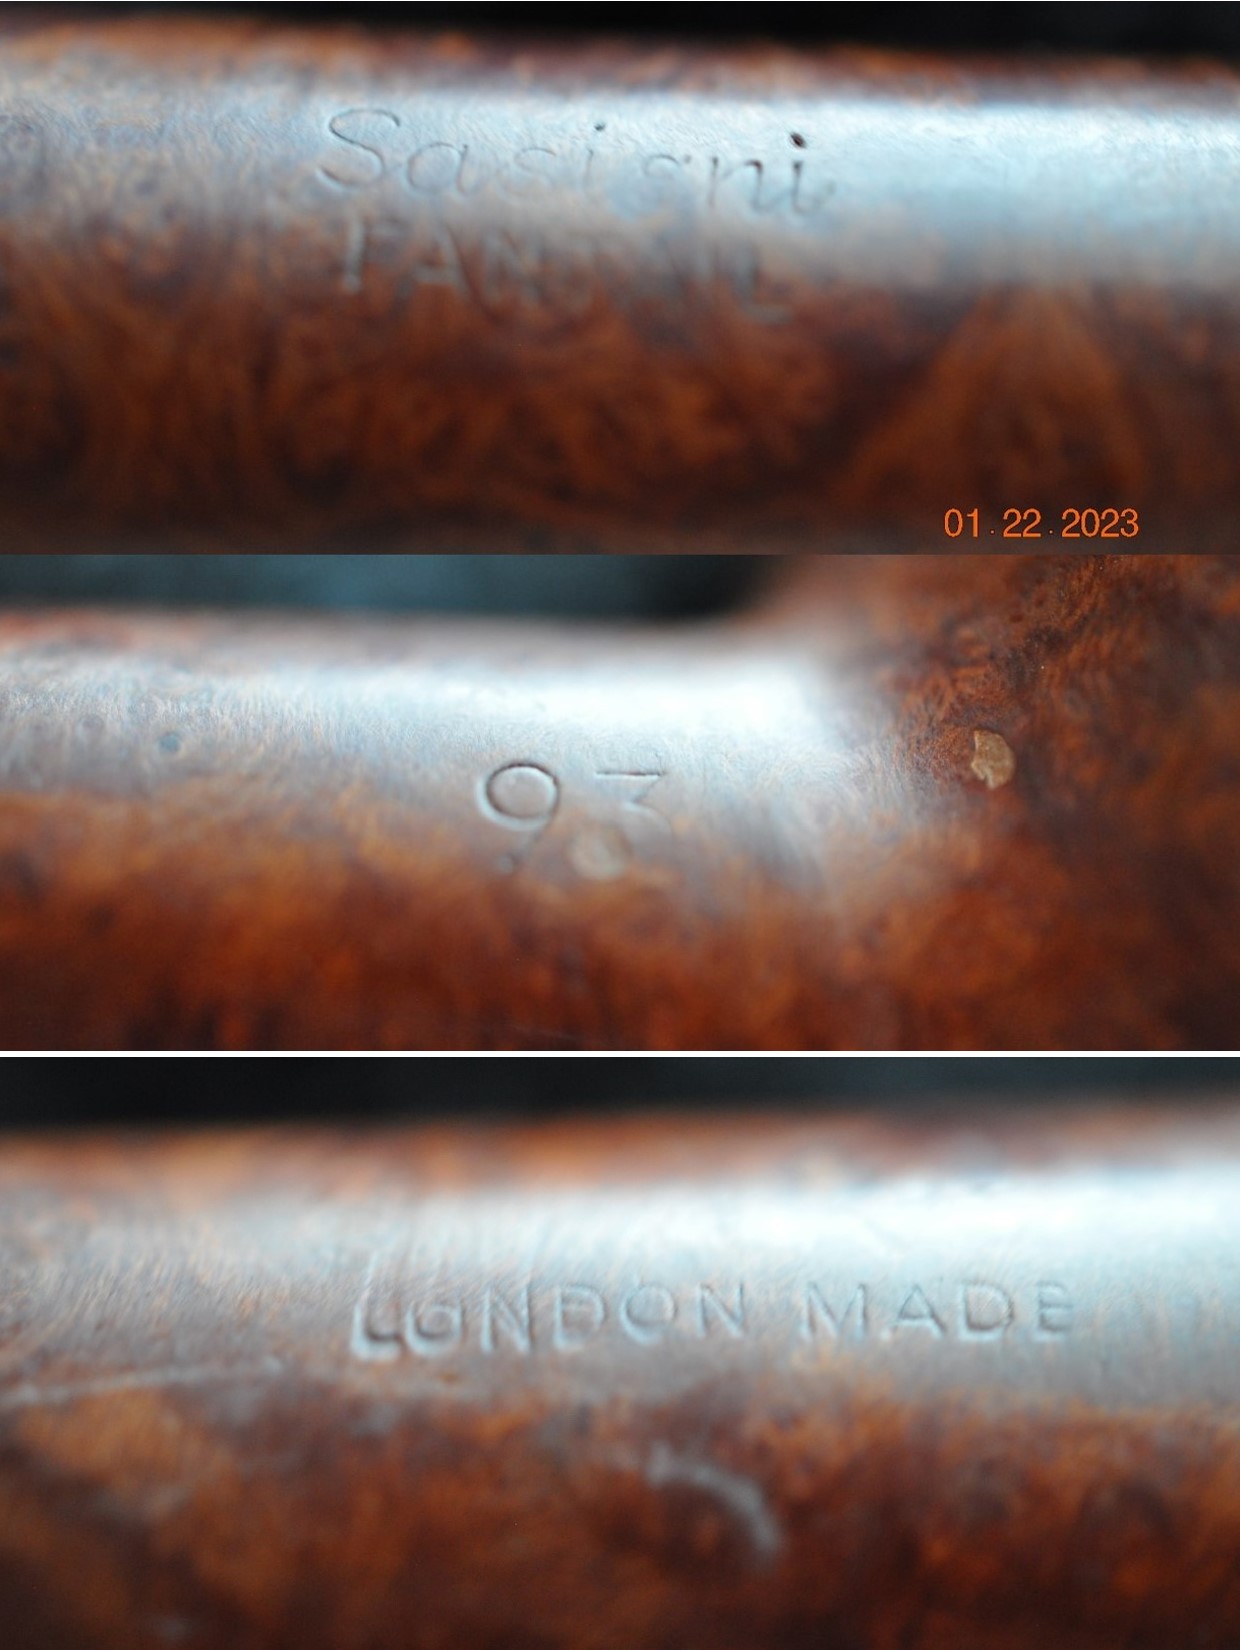
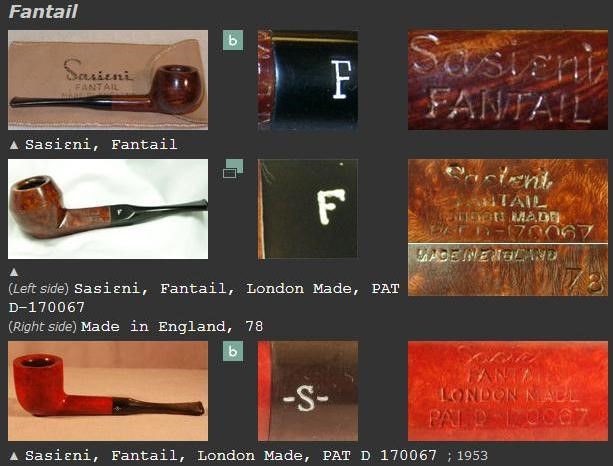
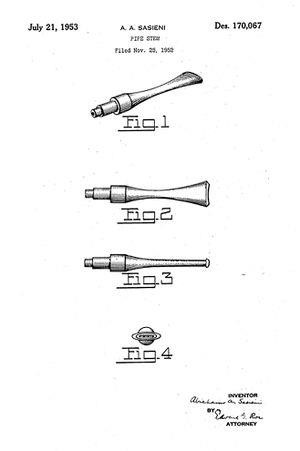
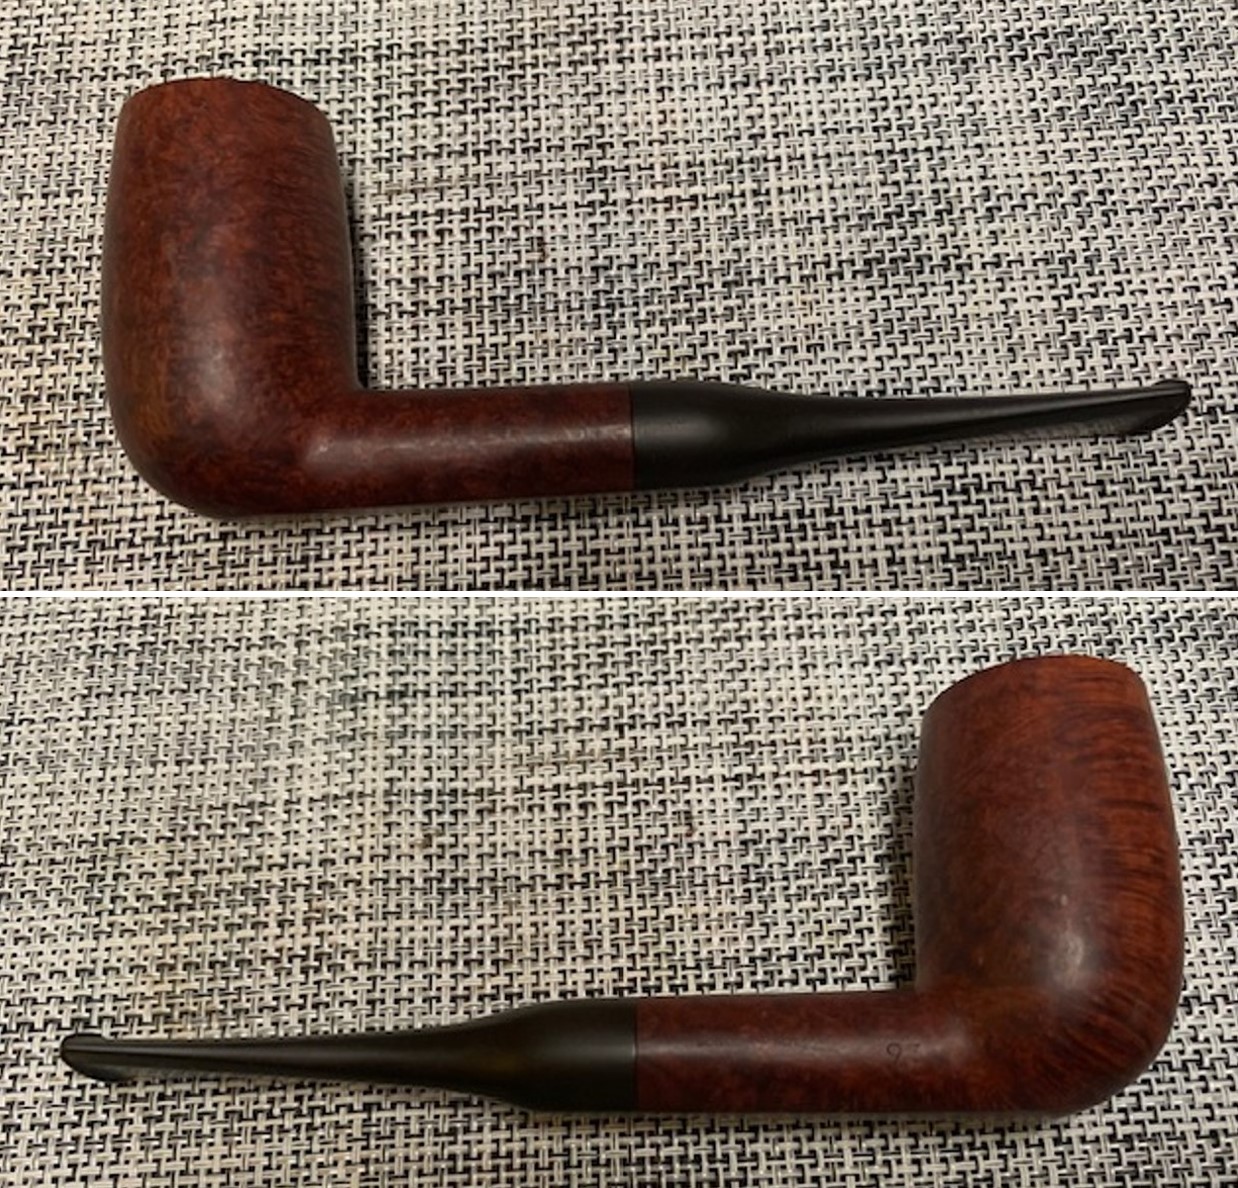
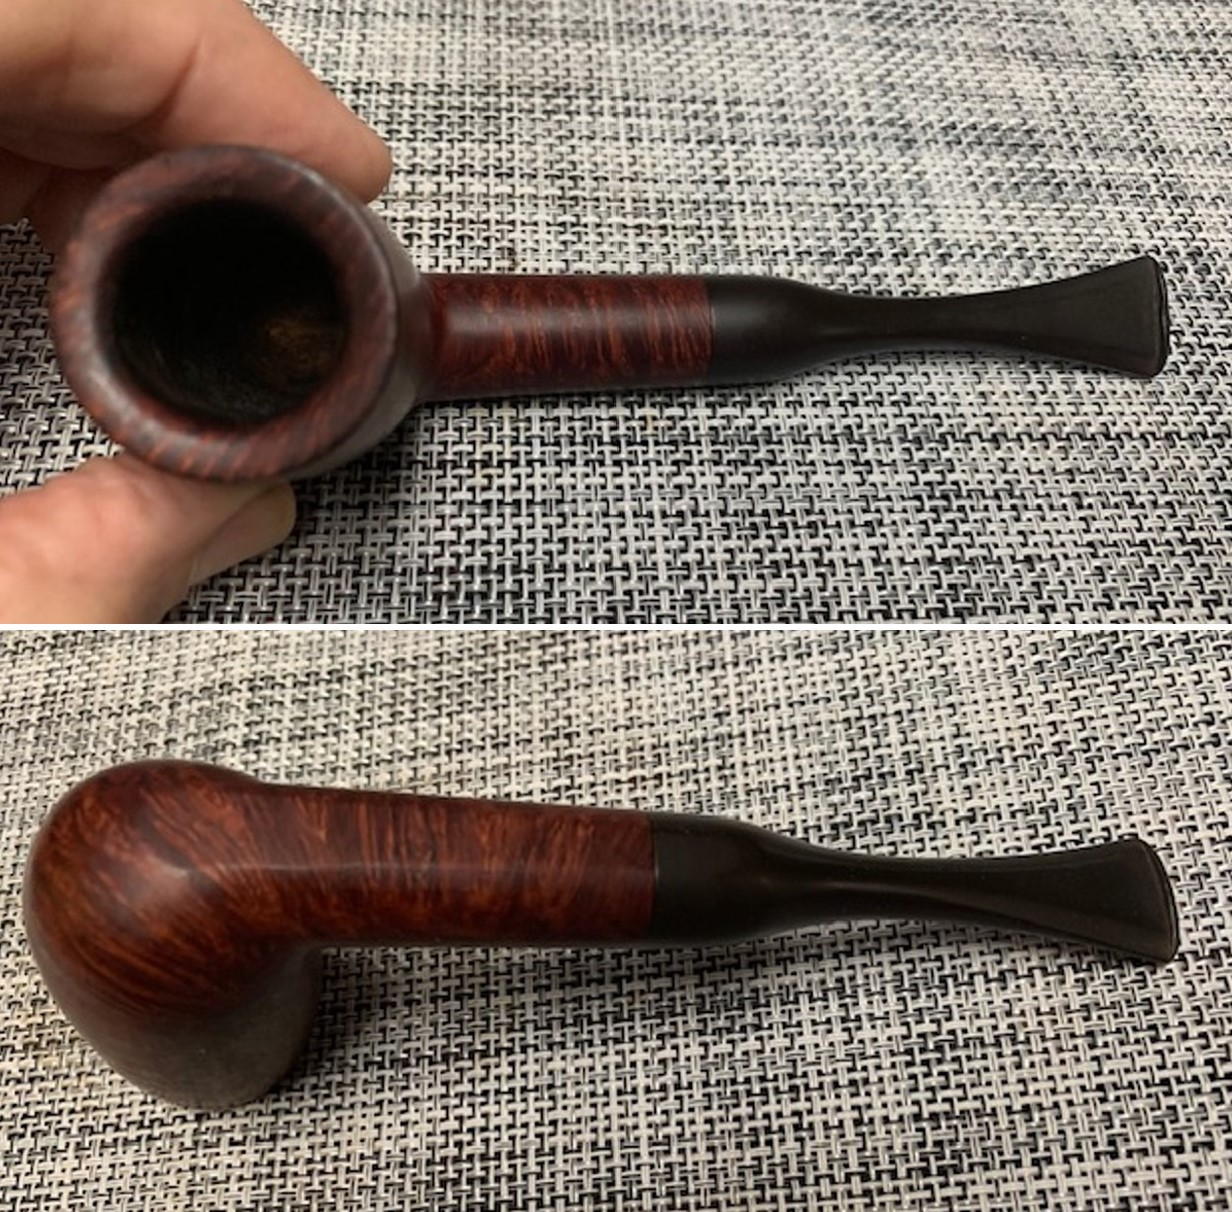
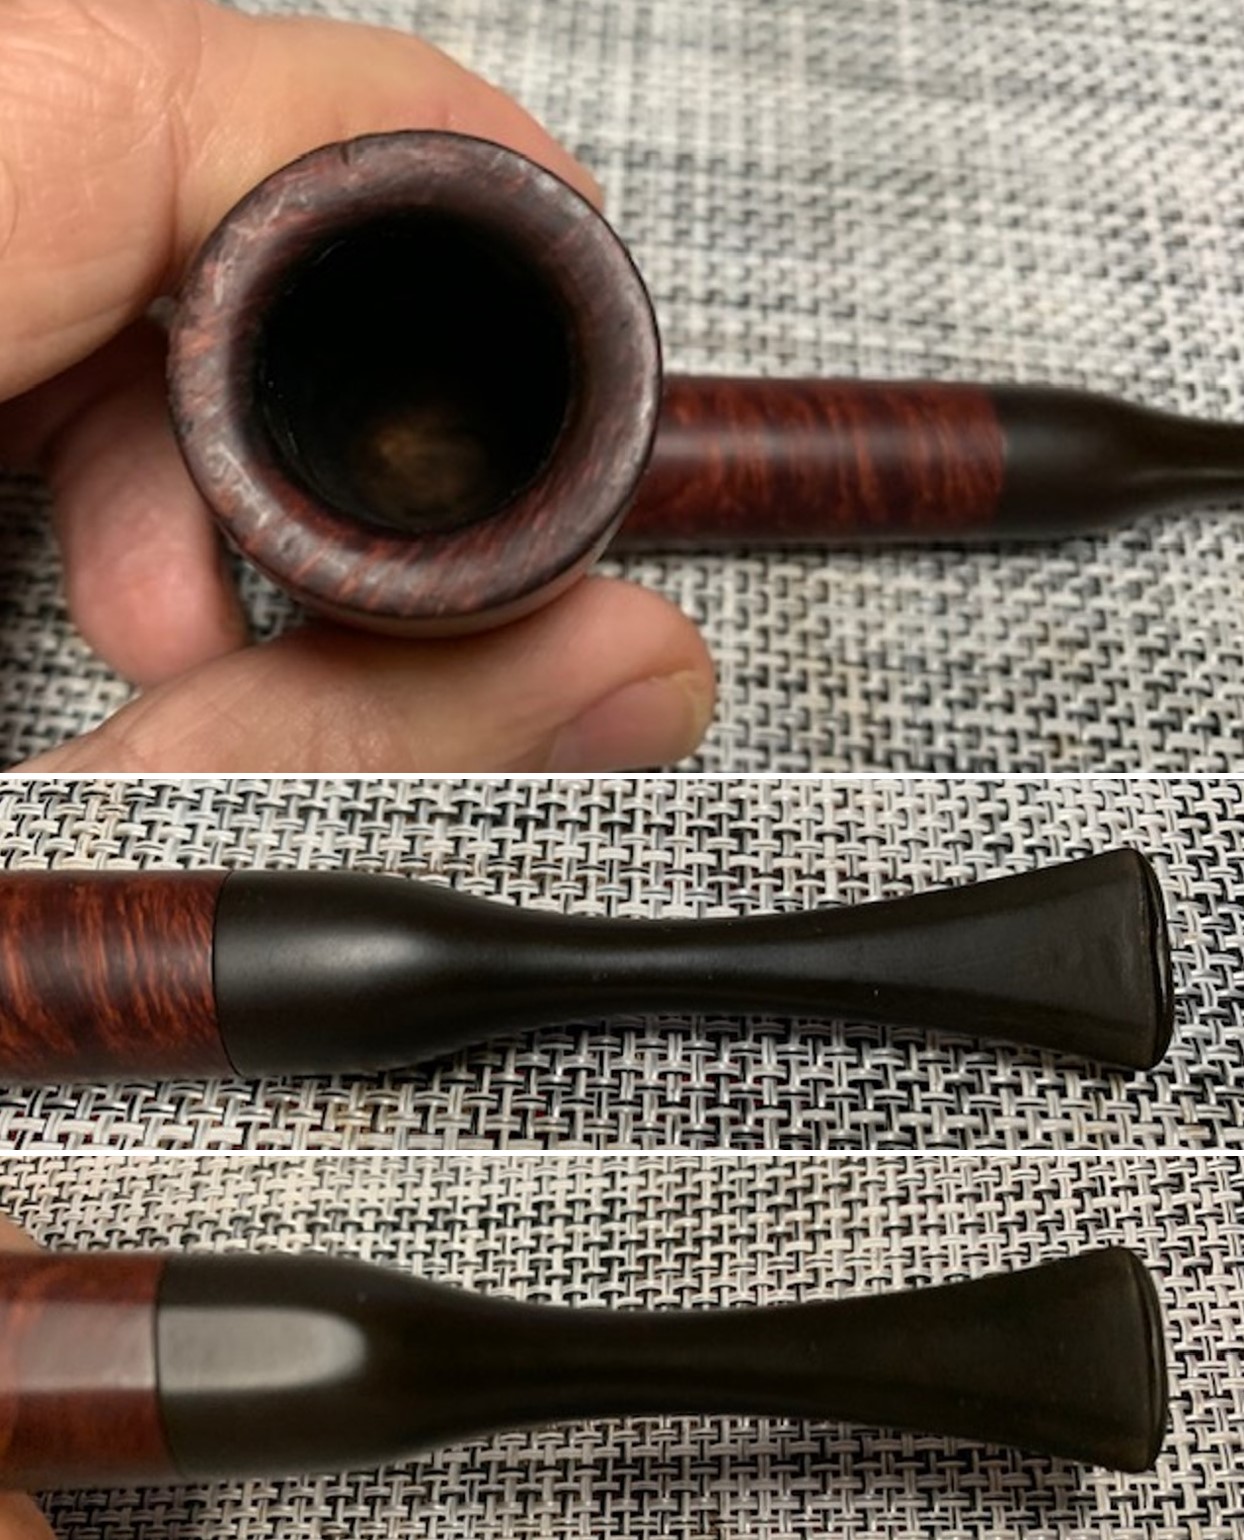
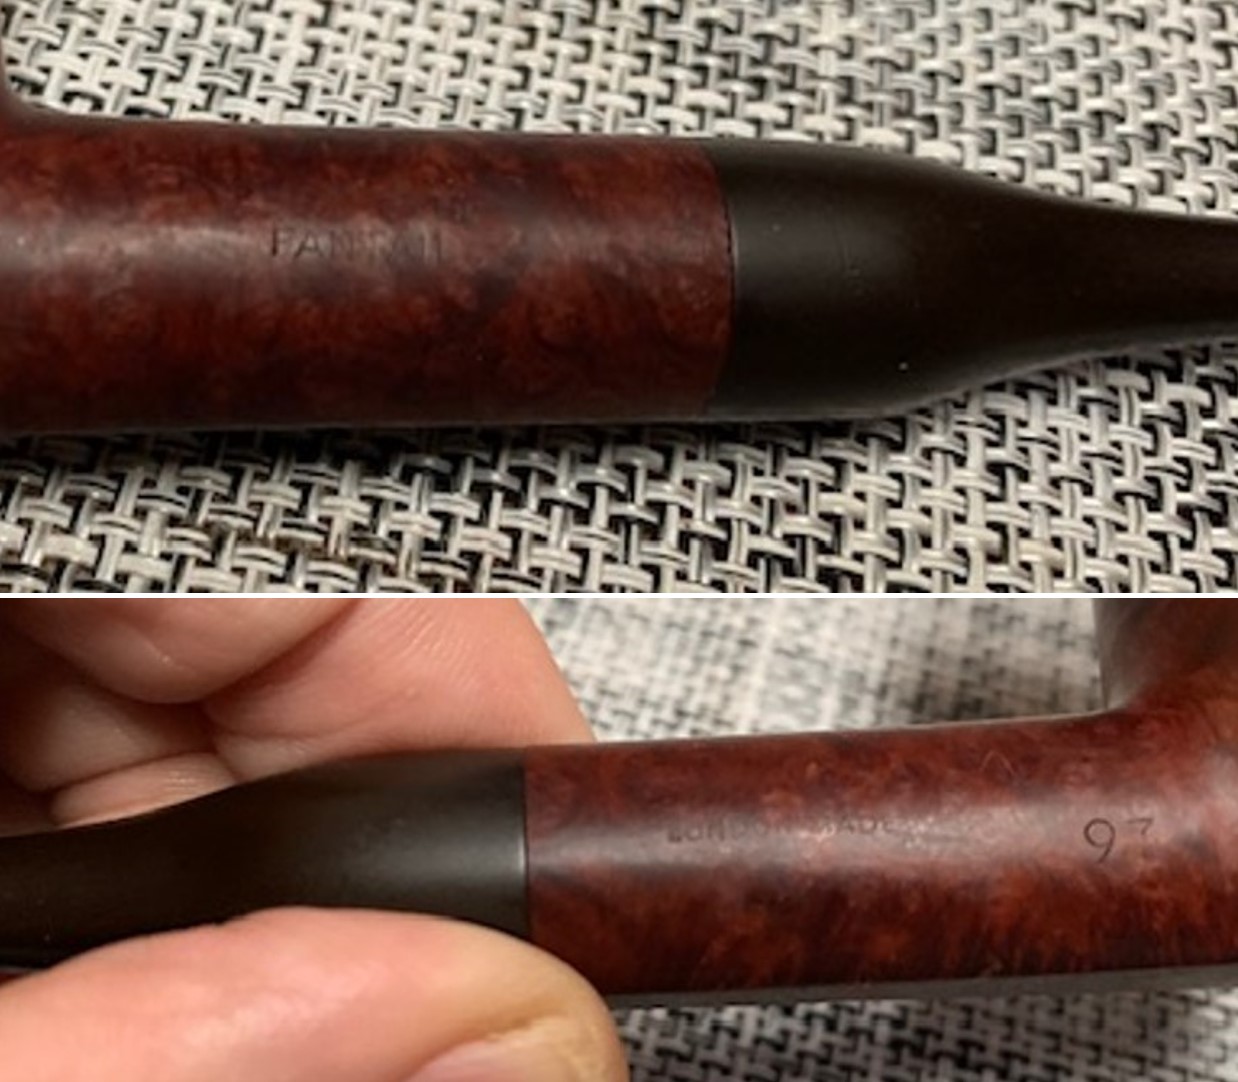
The pipe was purchased on 02/02/22 from an online auction from a seller in Colts Neck, New Jersey, USA. It is a smooth finished Sasieni Stack with a unique shape and smooth finish. It has a Fantail stem that is unique to the Sasieni Fantail line. It is stamped on the left side of the shank next to the bowl/shank junction and has the football shaped Made In London stamp vertically. That is followed by Sasieni [over] Fantail. On the right side of the shank it is stamped London Made and the shape number 93. The stamping around the shank end near the stem reads PATD-170067. The pipe is very dirty with grime ground into the finish of the tall bowl. The bowl was thickly caked with an overflowing lava coat on the top of the rim. The edges looked to be in good condition though I would not know for sure until the bowl and rim had been reamed and cleaned. The stem was oxidized, dirty and had light tooth chatter and marks on the top and underside near the button. The stem had a very lightly stamped “F” on the left side of the fantail stem. The fit of the stem in the shank was tight and clean. The pipe had promise under all of the grime and dirt. Jeff took some photos of the pipe before he started the cleanup work. Jeff took some close up photos of the rim top and the bevelled inner edge of the bowl to give an idea of the condition the pipe when he received it. I am sure glad that this was another one that he worked on. The bowl has a thick cake and the rim top and a lava overflow at the back of the bowl. The stem was lightly oxidized and had tooth marks and chatter on both sides. Jeff took photos of the sides of the bowl and heel to show the finish around pipe. You can see the grime and the oils in the finish that are ground into the bowl. You can also see the scratches and small nicks in the finish.The next series of photos capture the stamping. The stamping is clear and readable as noted above. I have included a screen capture of the pertinent section of the Sasieni section of PipePhil’s Logos and Stamping website and included the link should you want to look at on the site. (http://www.pipephil.eu/logos/en/logo-sasieni2.html). The second pipe in the photo below shows a pipe with the same stamping as the one that I am working on. It reads Sasieni Fantail, London Made, PAT D -170067. The difference is the location of the Patent stamp. On the one that I am working on is around the shank end.I turned to Pipedia and found a patent diagram for the Fishtail stem that Doug Valitchka posted (https://pipedia.org/wiki/Sasieni). I have included that document below. It was filed in 1953 and received the patent July 21, 1953. Which helps to date this pipe as post patent. That helps to cinch the dating of this pipe as Family Era pipe made somewhere between 1946–1979. The change of “Sasieni” script without the fish-tail initiated by Alfred Sasieni occurred after Second World War. This puts the date of the pipe between 1946 and 1979 – a large spread.
Jeff had cleaned up the pipe with his usual penchant for thoroughness. He reamed the pipe with a PipNet Pipe Reamer and cleaned up the remnants with a Savinelli Fitsall Pipe Knife. He scrubbed the bowl with undiluted Murphy’s Oil Soap with a tooth brush. He rinsed it under running warm water to remove the soap and grime. He cleaned out the inside of the shank and the airway in the stem with alcohol, cotton swabs and pipe cleaners. He soaked the stem in Before & After Deoxidizer and rinsed it off with warm water. I took photos of the pipe once I received it. I took close up photos of both the rim top and the stem. Jeff had been able to get the grime and lava out of the plateau on the rim top and it looked pretty incredible. There was some darkening on the high spots on the sandblast rim top and edges. The stem looked very clean. The tooth marks and chatter were minimal and should be easy to remove. The stamping on the shank sides was faint but still readable as noted above. I also took a photo with the stem removed to give an idea of the perspective and design of the pipe.Now it was time to do my work on the pipe. I polished the bowl and rim top with micromesh sanding pads using 1500-12000 grit sanding pads and wiping it down after each sanding pad with a damp cloth to remove the sanding dust and debris. I worked some Before & After Restoration Balm into the finish of the bowl and shank with my fingers. I want the product to go deep into the finish because it works to clean, enliven and protect the briar. Once I was confident that it was deeply worked into the finish I wiped it off and buffed it with a soft cloth to polish it. The pipe really began to have a rich shine. I took some photos of the bowl at this point to mark the progress in the restoration. The grain really stands out on the pipe in the photos below.I set the bowl aside and turned to work on the stem. I painted the tooth marks with the flame of a lighter to lift them. All of the came up slightly. I filled in those that remained with some black rubberized CA glue. I set it aside to cure. Once it had hardened I flattened out the repair areas with a small file. I sanded the repairs with 220 grit sandpaper to blend them into the surface of the stem. I started polishing with 600 grit wet dry sandpaper.I polished the vulcanite stem with micromesh sanding pads – wet sanding it with 1500-12000 grit pads. I wiped it down with Obsidian Oil after each sanding pad.I polished it with Before & After Pipe Polish – both the Fine and Extra Fine polishes. I gave it a final coat of oil and set it aside to dry. This Sasieni Fantail 93 Stack is a beautiful looking pipe. I put the stem back in place in the shank and buffed the bowl and stem lightly with Blue Diamond on the buffing wheel. I gave the bowl and stem multiple coats of carnauba wax on the buffing wheel. I buffed the pipe and stem with a clean buffing pad to raise the shine. I hand buffed the bowl with a microfibre cloth to deepen the shine. The finished pipe is shown in the photos below. The contrast of the dark brown and a medium brown that shines through give the finish a rich patina. The Sasieni Fantail London Made 93 Stack has some amazing grain around the bowl sides and shank. The bowl has been cleaned and the entire pipe is ready to smoke. The stem is in great shape with a few small nicks in the surface of the top and underside. It is a beautiful pipe, just a little big for my liking or I would hang on to it. The dimensions of the pipe are Length: 6 inches, Height: 2 ¼ inches, Outer diameter of the bowl: 1 ¼ inches, Chamber diameter: ¾ inches. The weight of the pipe is 1.59 ounces/45 grams. I will be putting it on the rebornpipes store soon in the British Pipemakers Section. If you are interested in adding it to your collection email me at slaug@uniserve.com or send me a message on Facebook. Thanks for looking.
As always, I encourage your questions and comments as you read the blog. Thanks to each of you who are reading this blog. Remember we are not pipe owners; we are pipe men and women who hold our pipes in trust until they pass on into the trust of those who follow us.
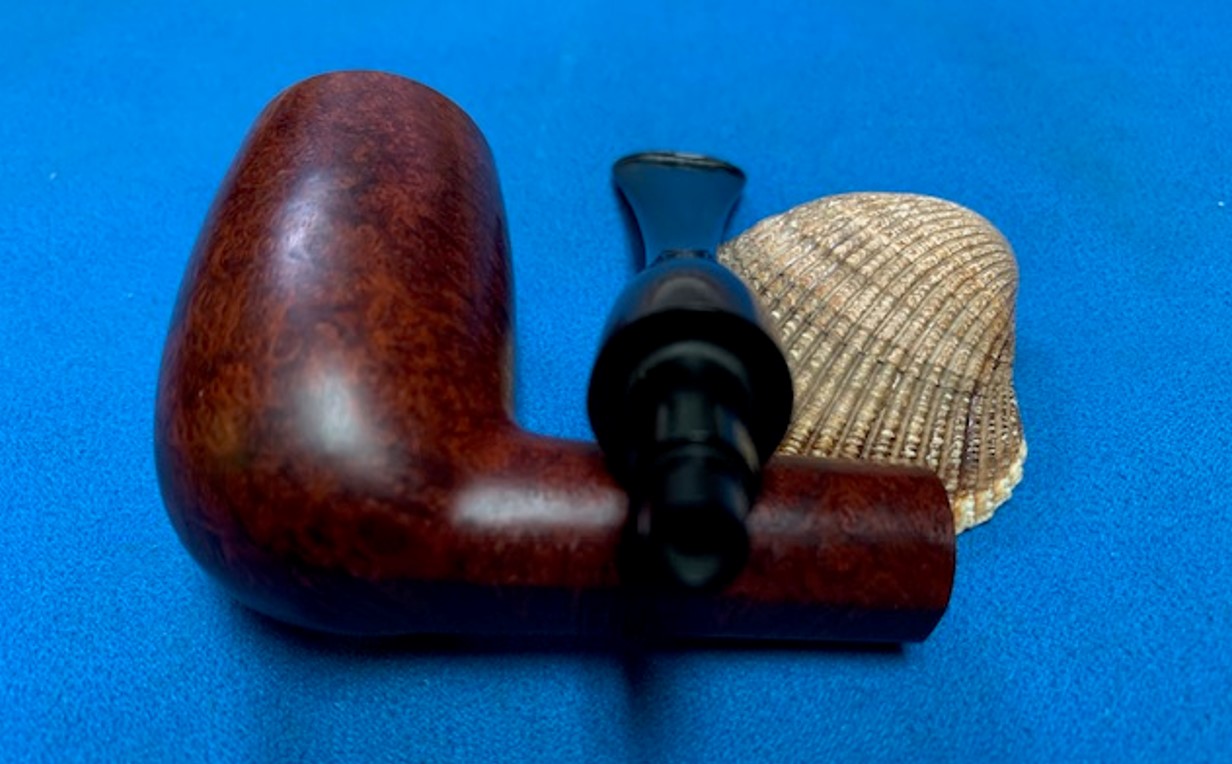
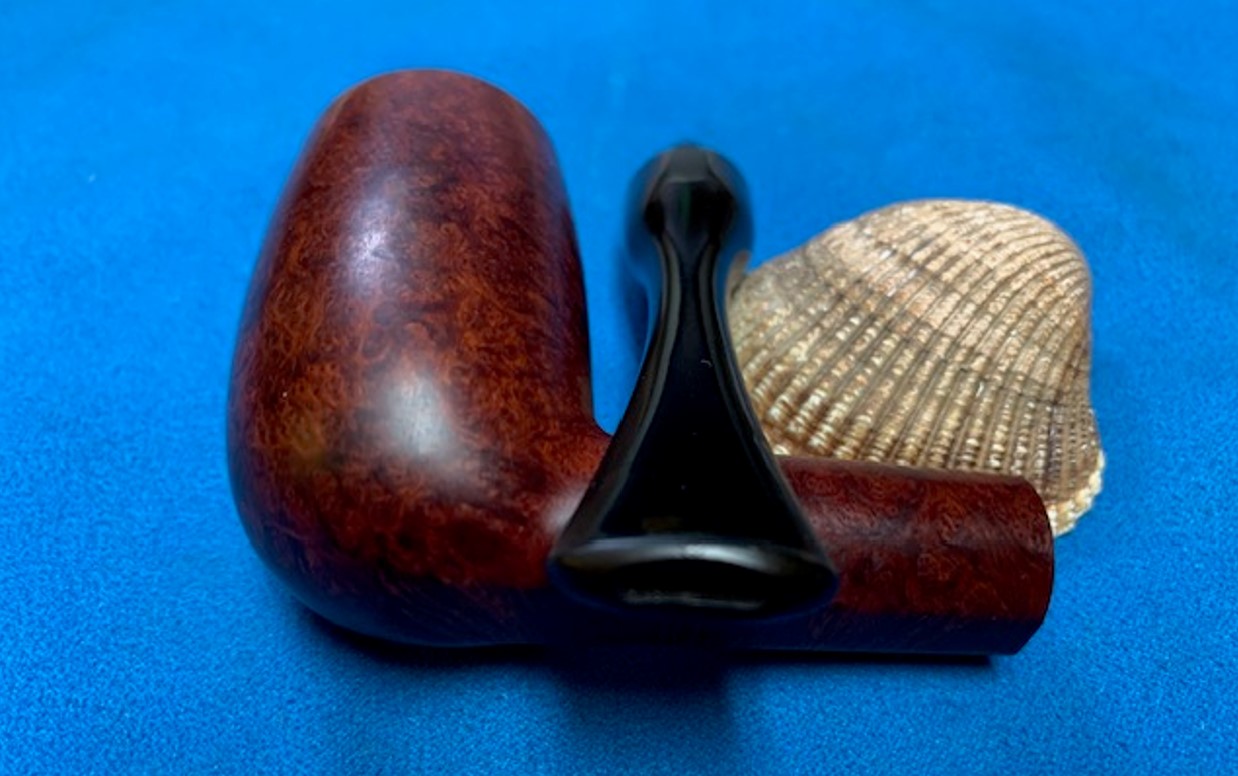
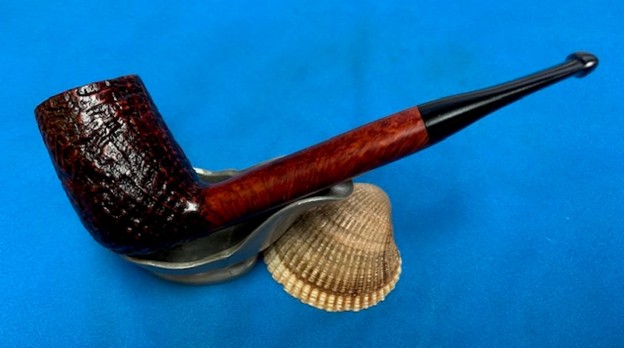
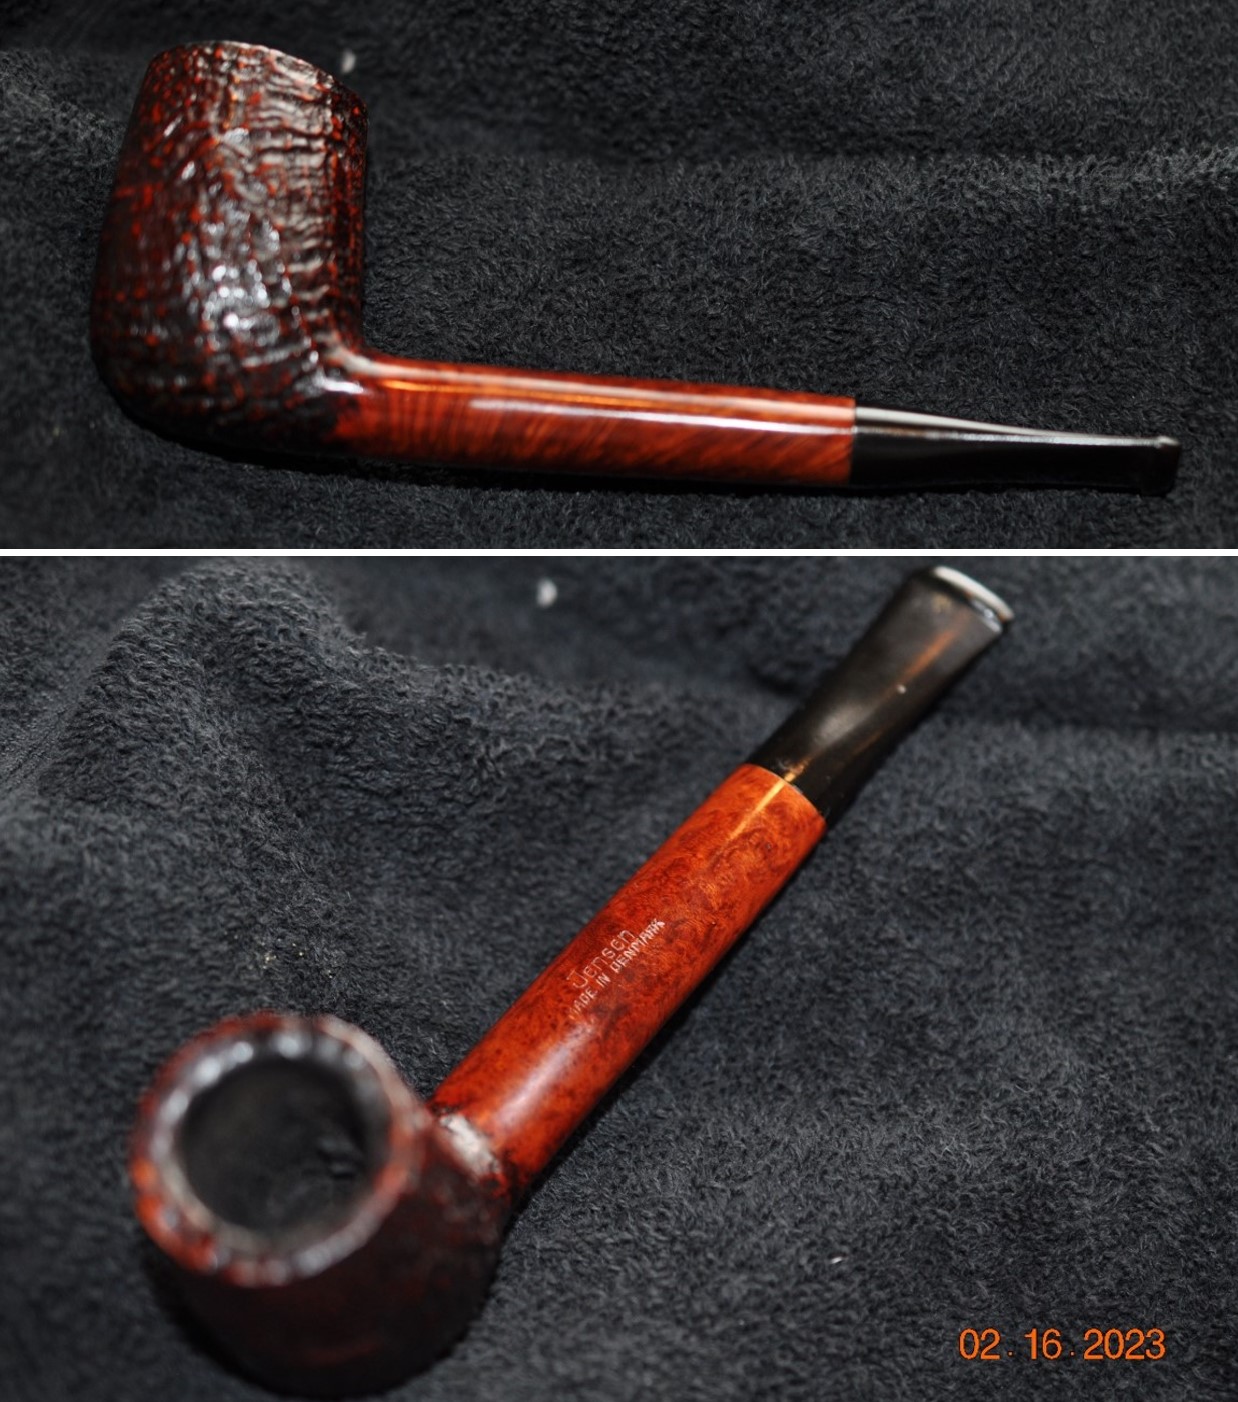
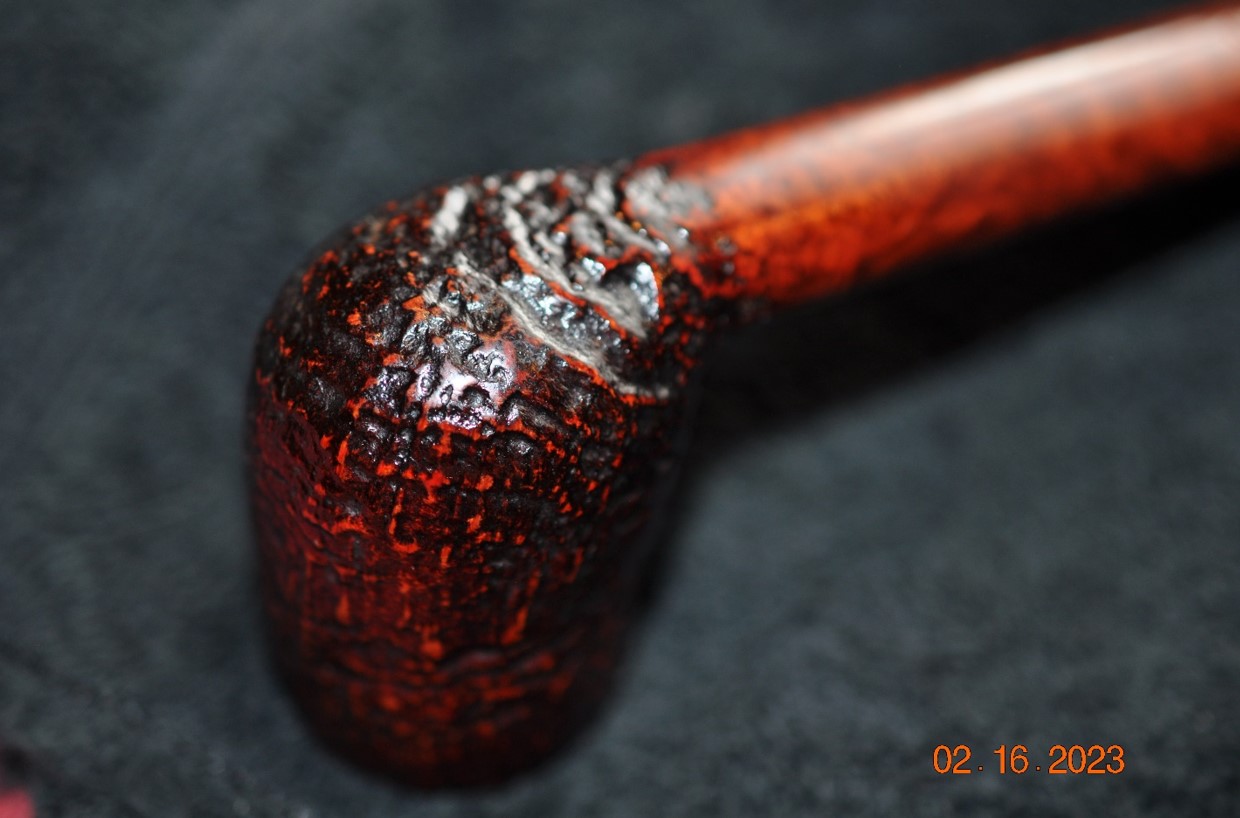
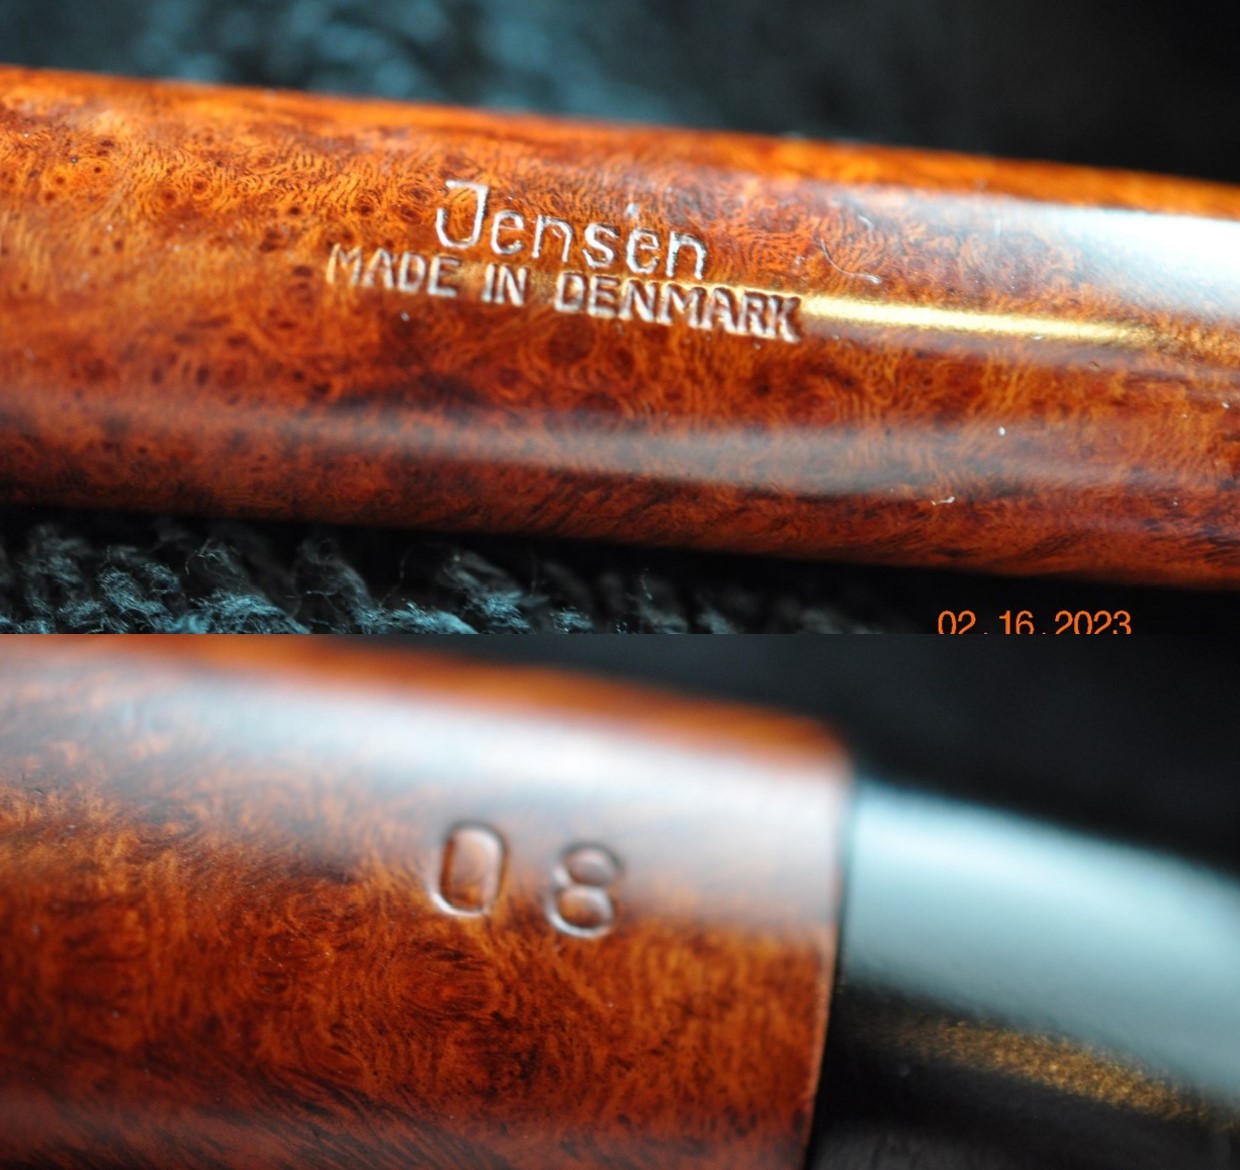
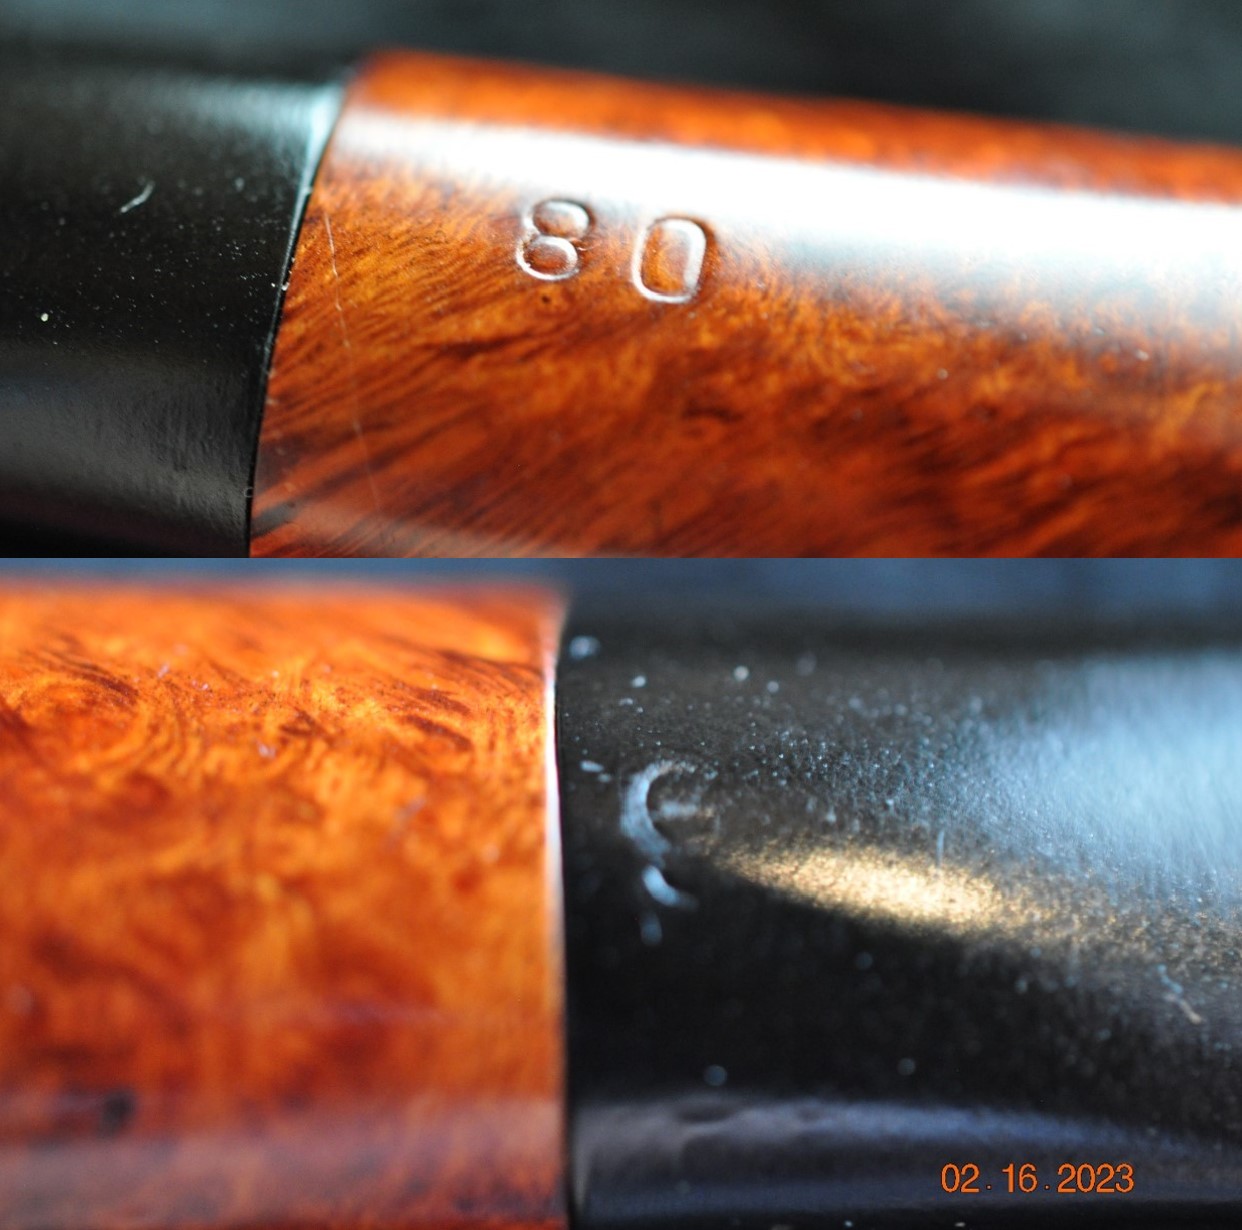
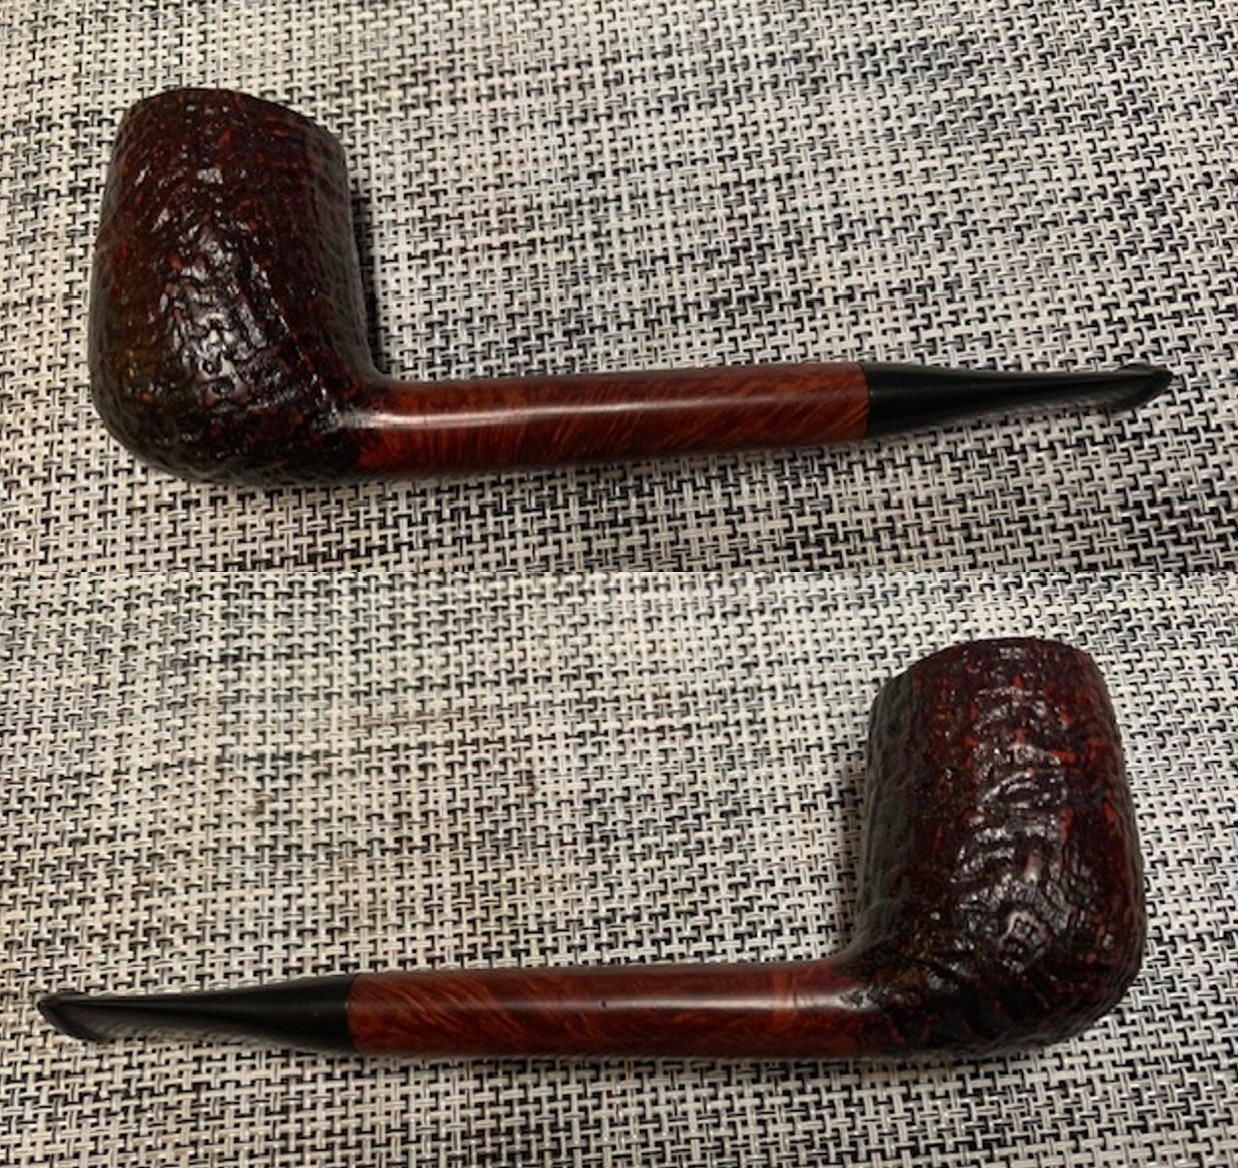
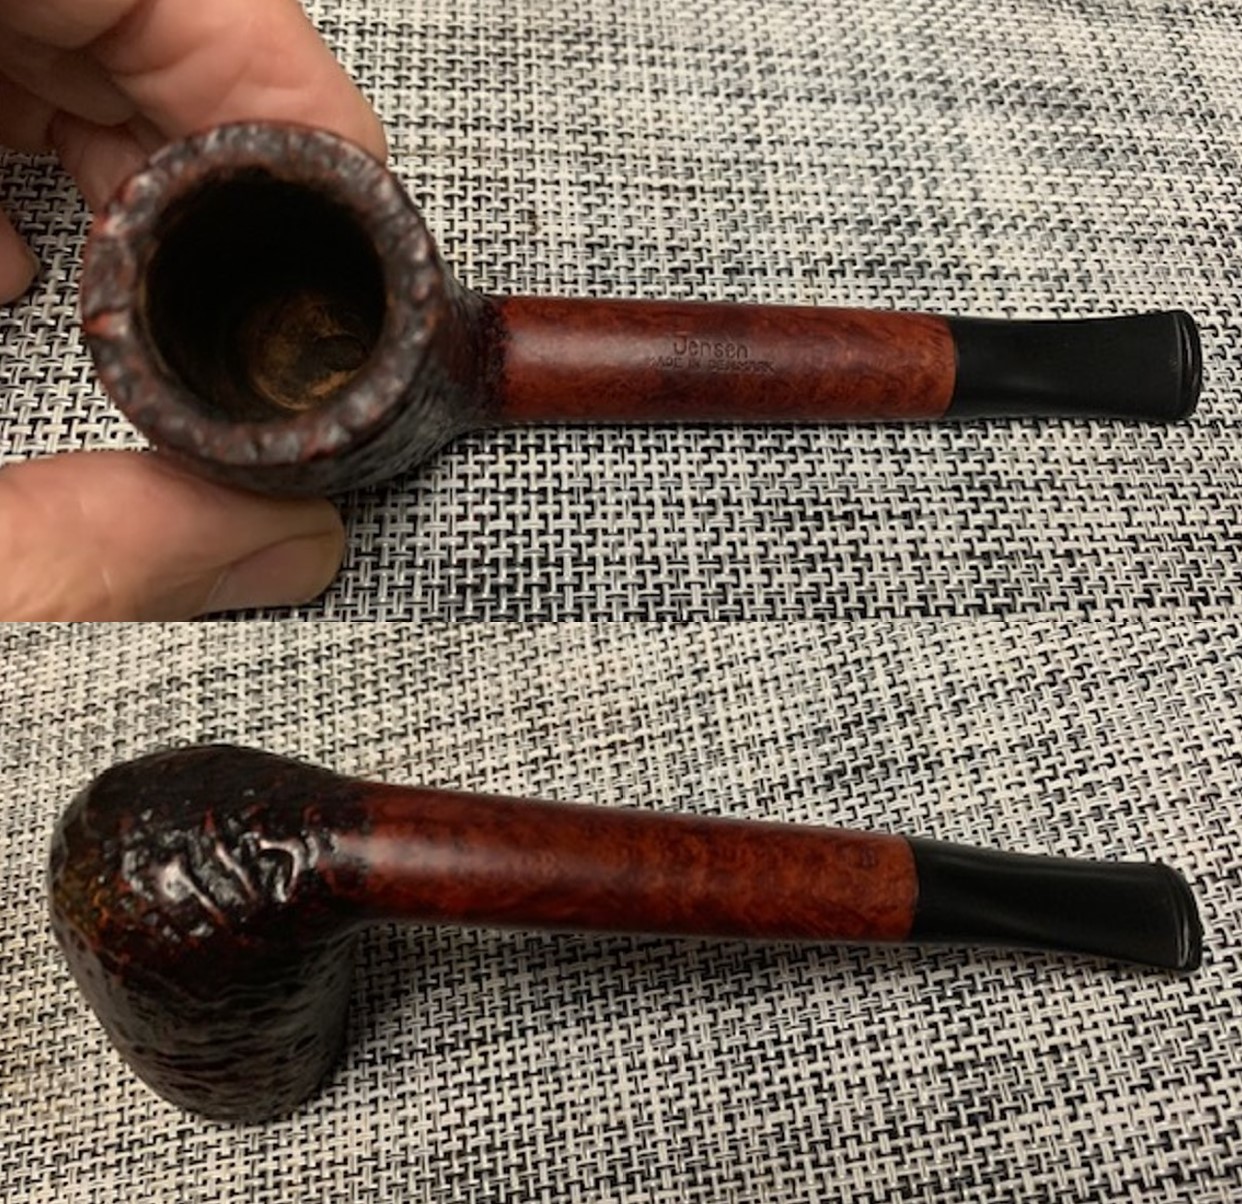
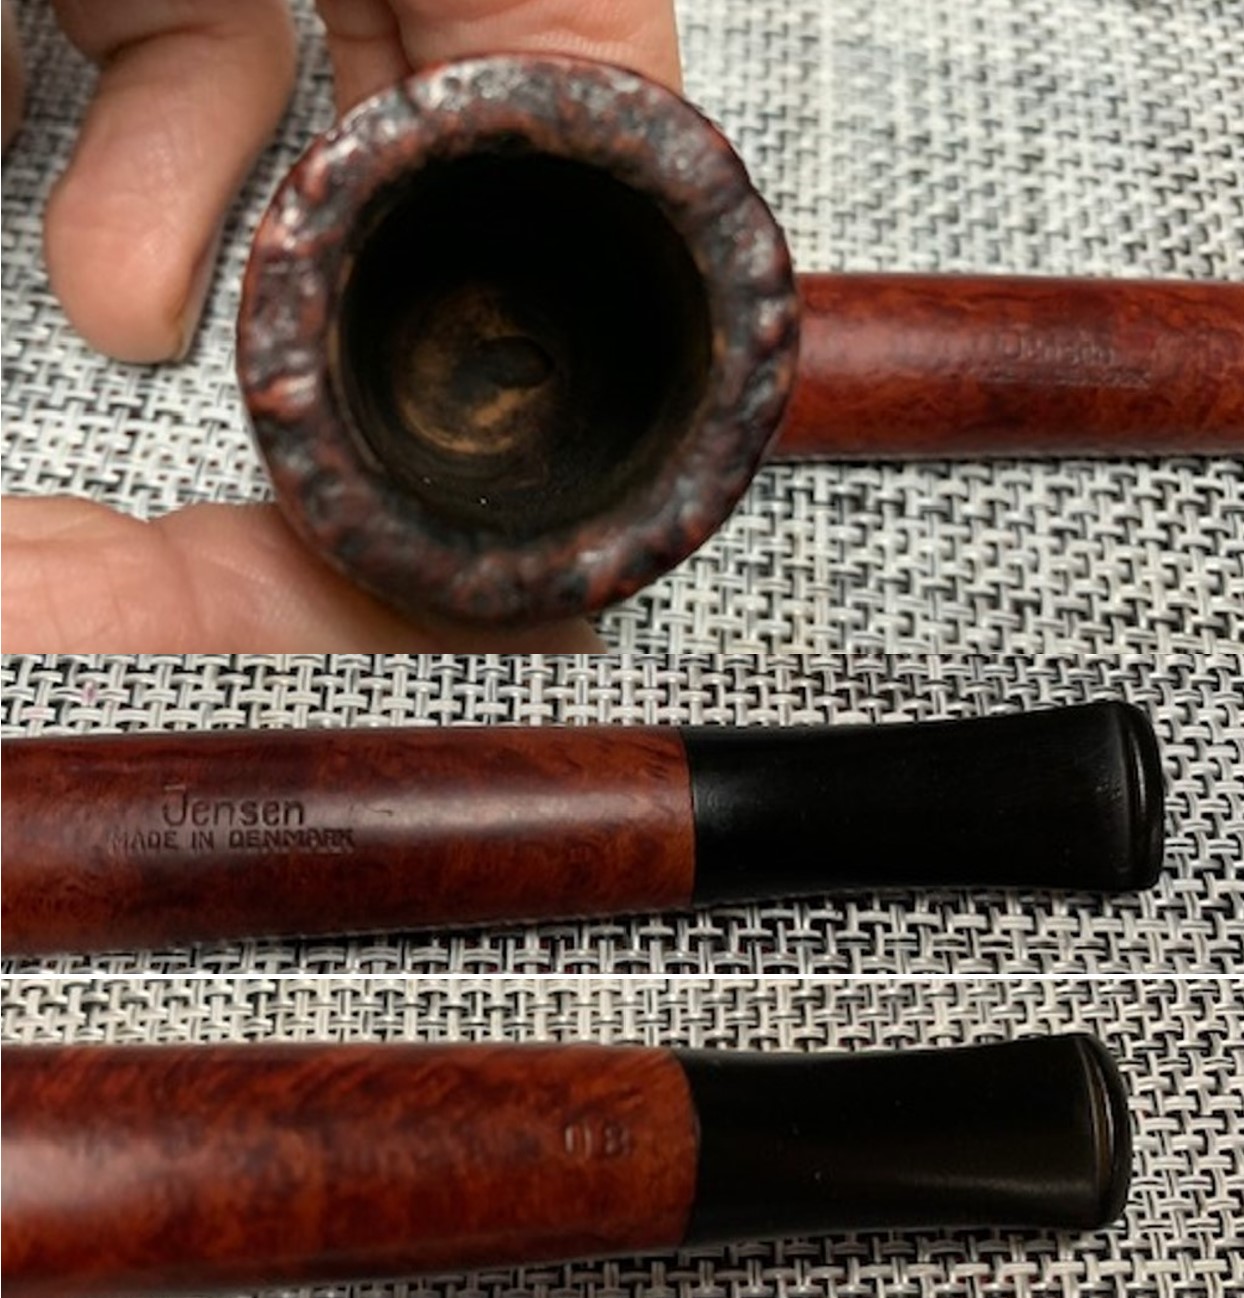
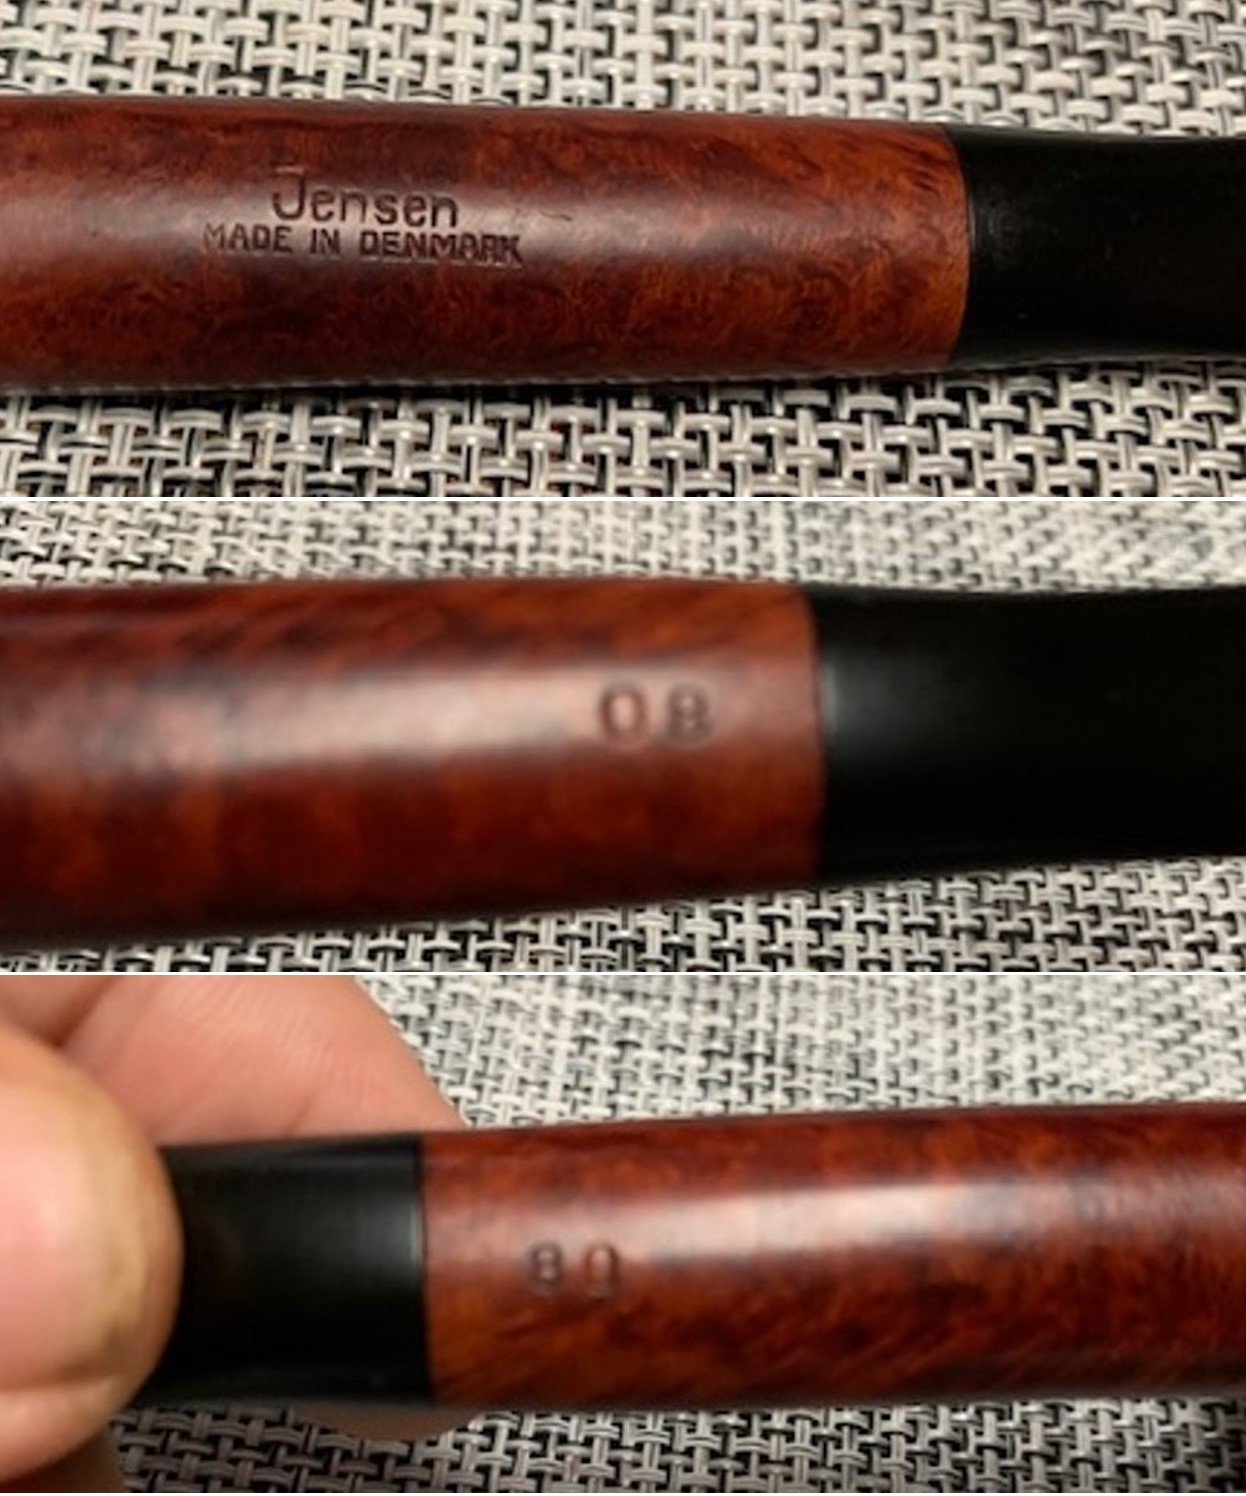
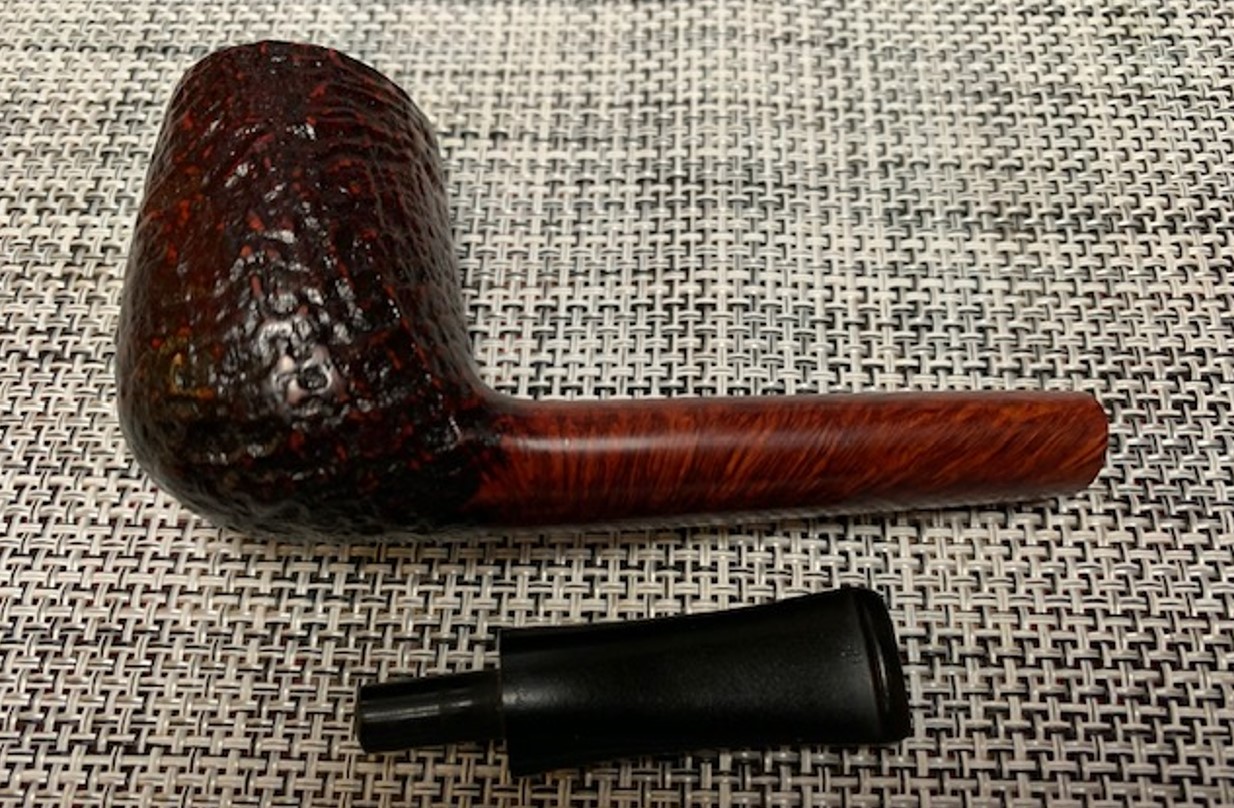
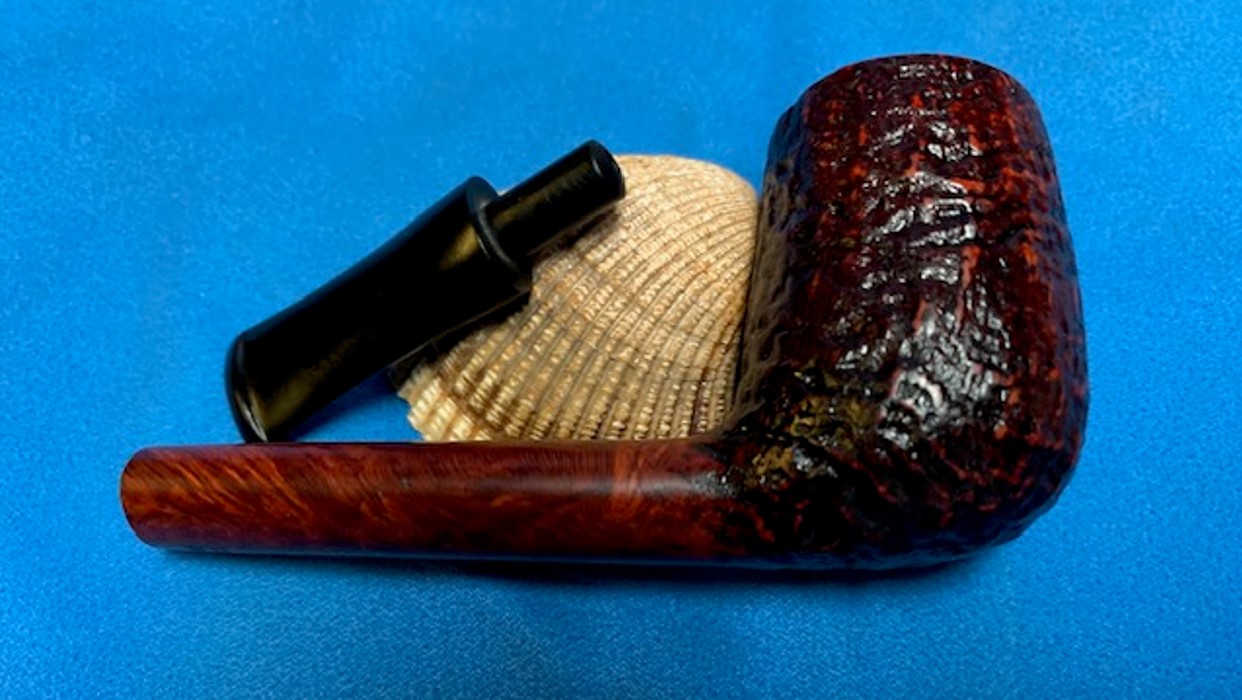
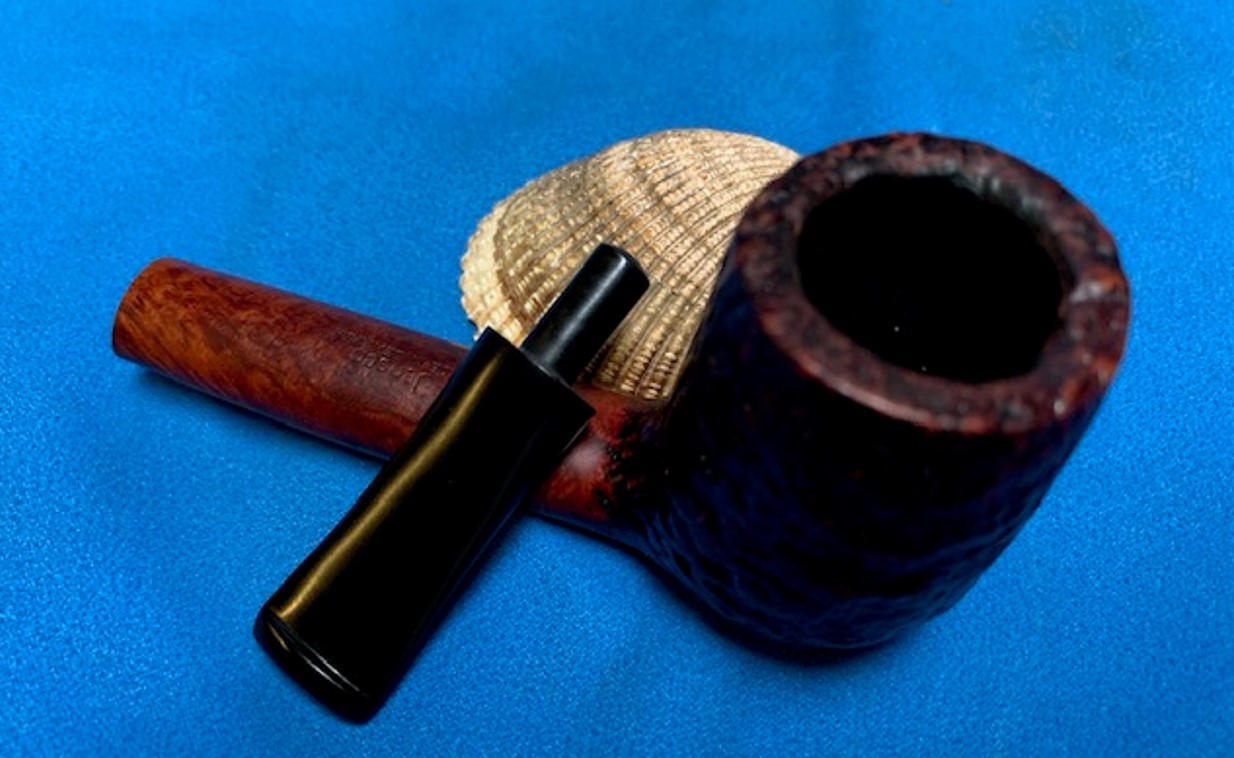
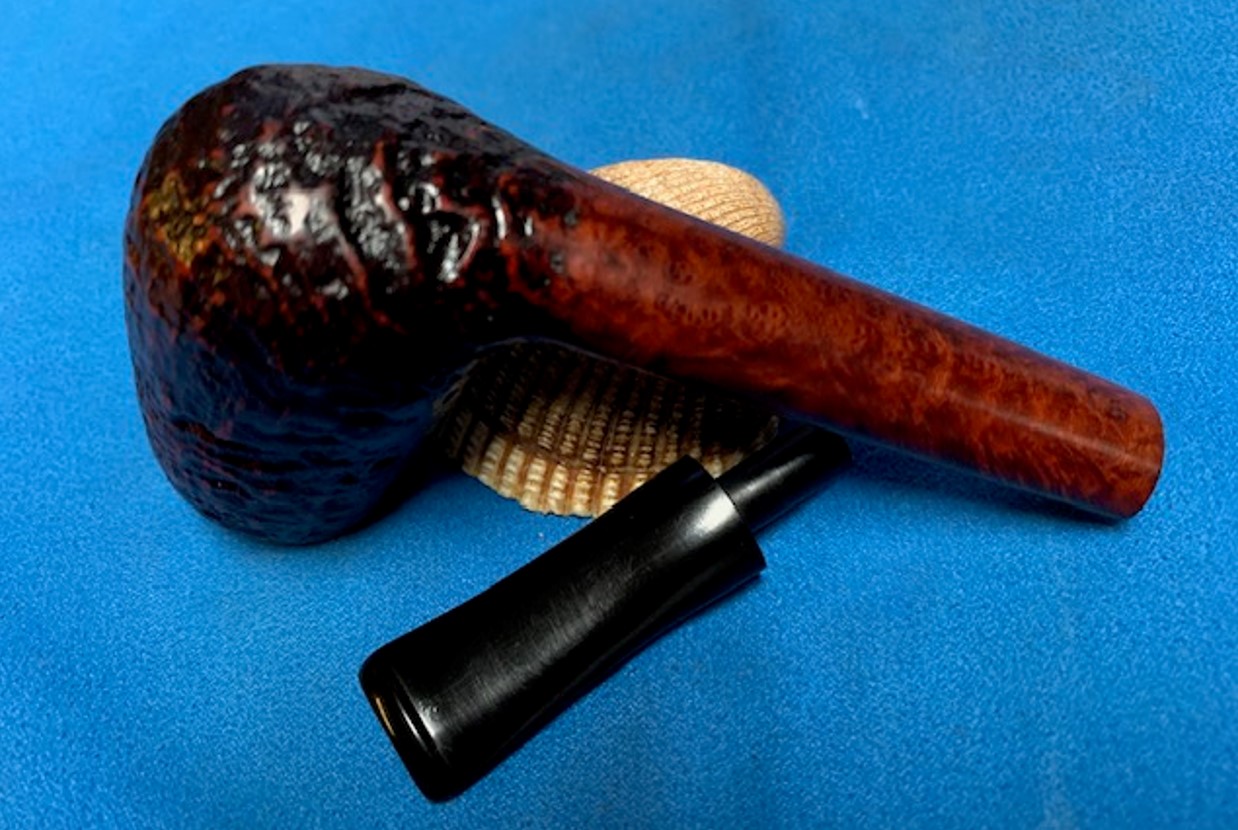
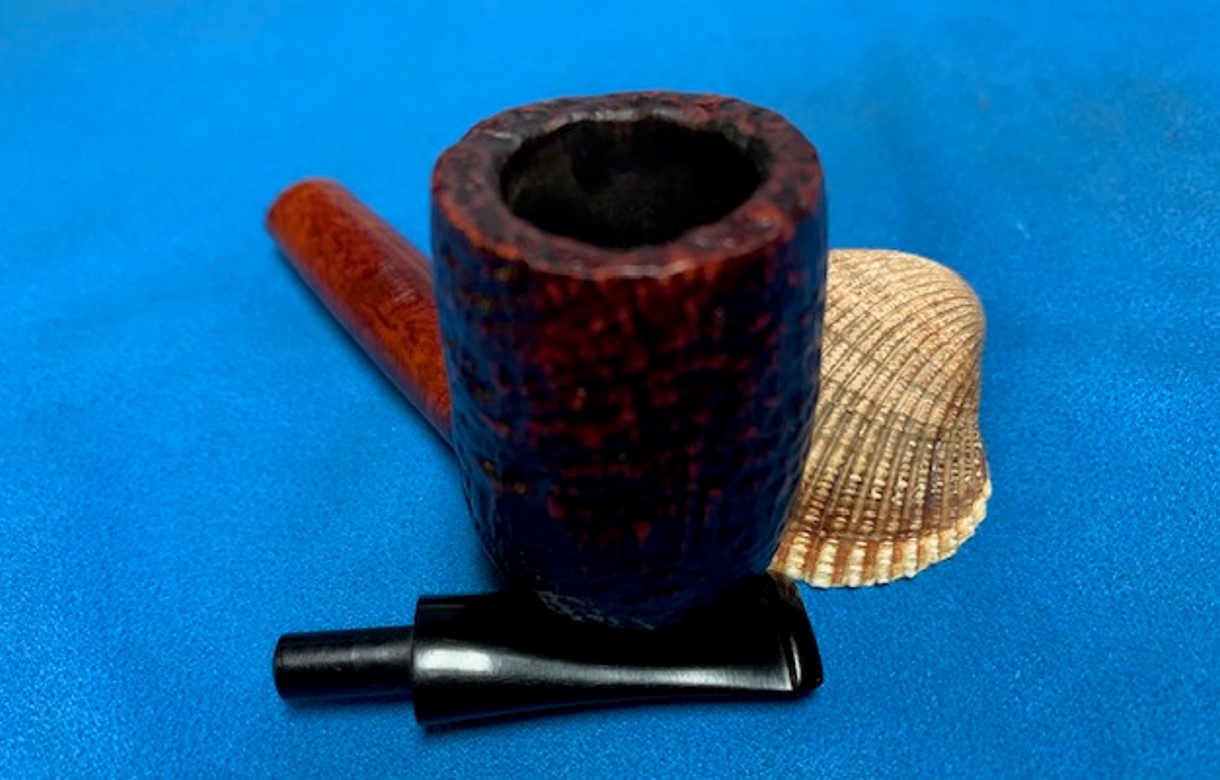
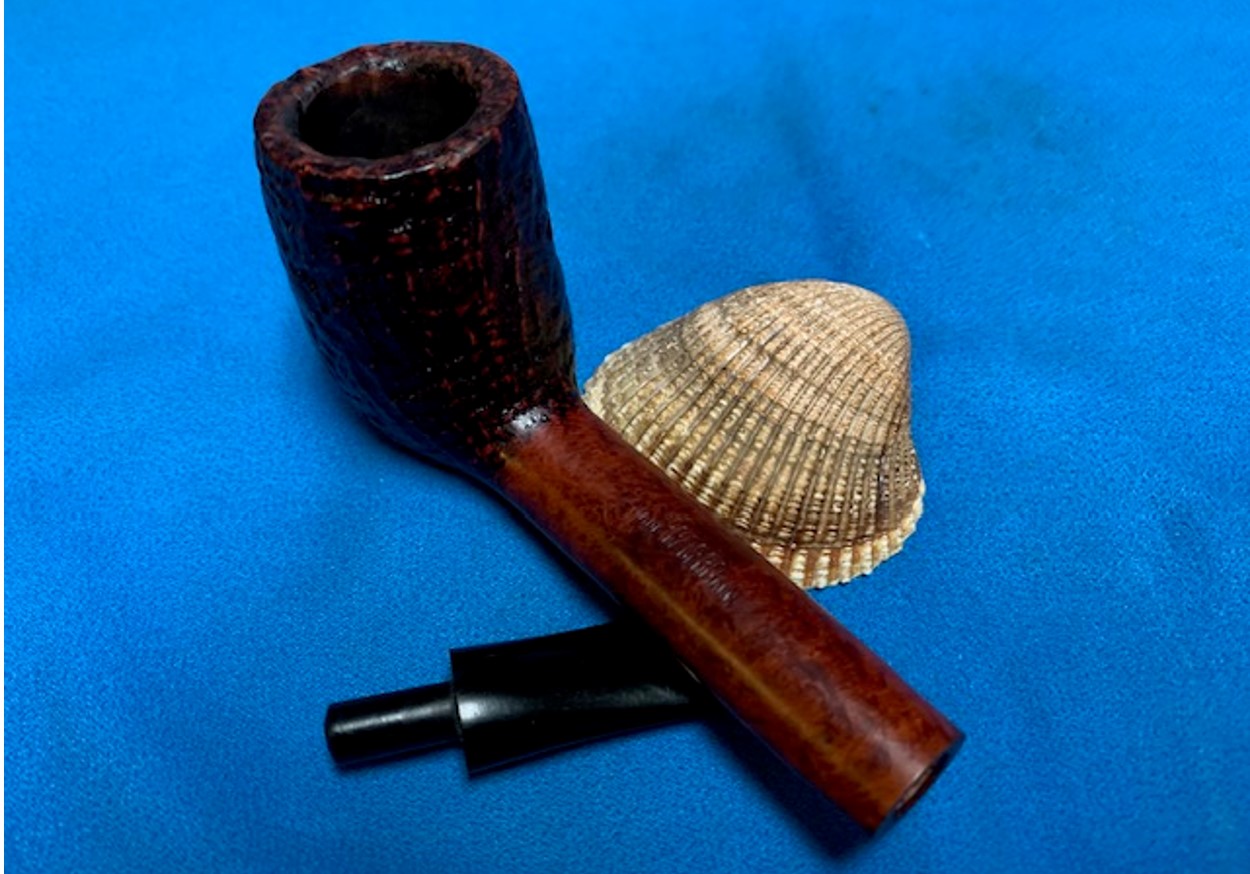
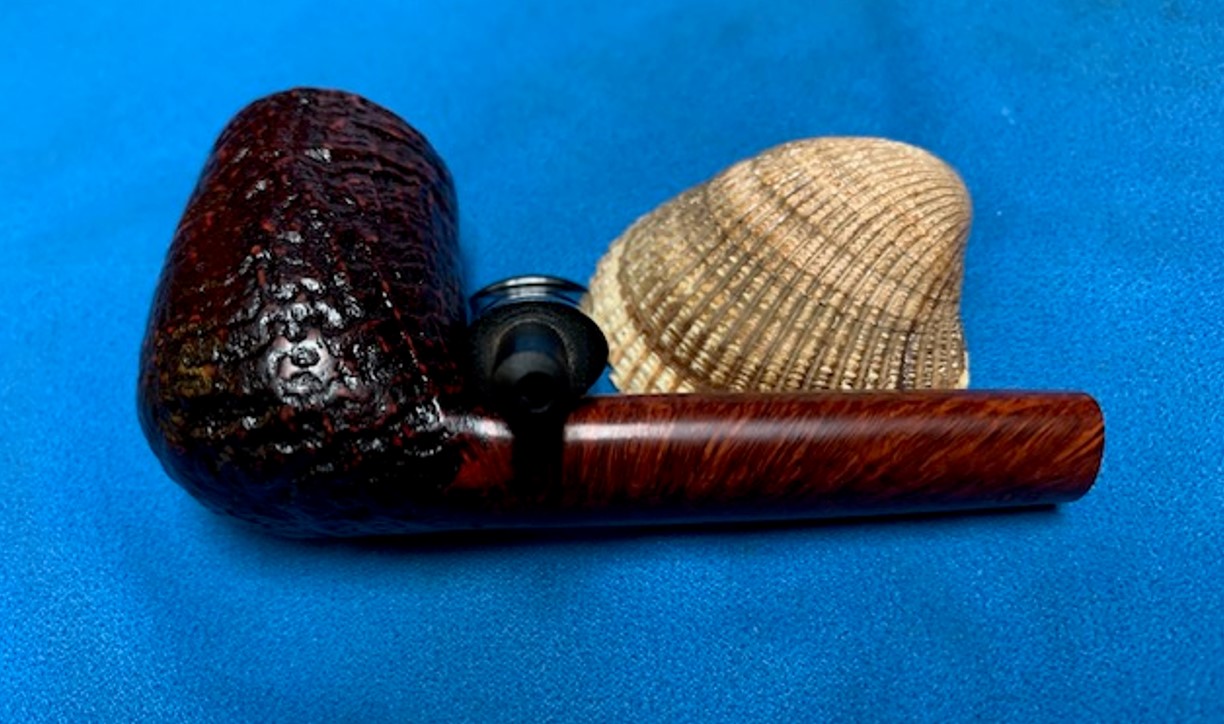
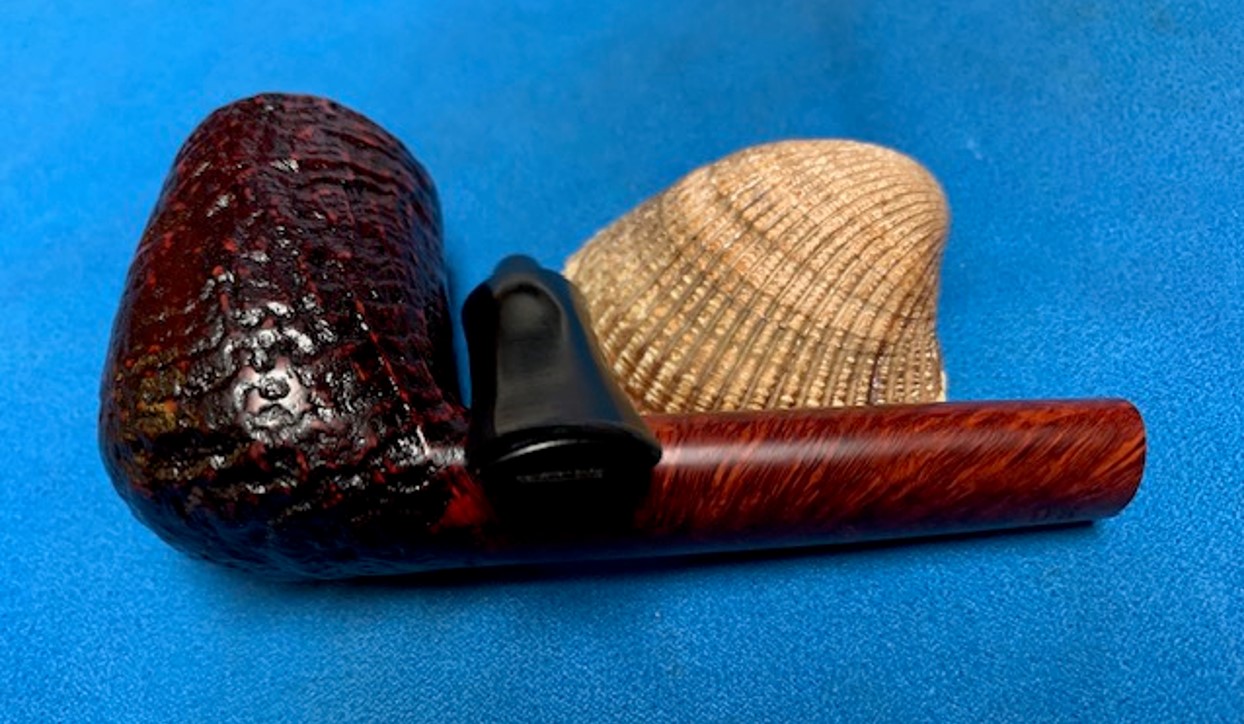
This particular pipe came to us from our source in Copenhagen, Denmark on 01/26/2023. We have purchased a lot of good pipe from him over the past several years. The pipe was stamped on the topside of the shank and read Jensen [over] Made in Denmark. On the underside of the shank it is stamped either 08 or 80 depending on how you look at it. The rustication on the bowl and the smooth shank on the Canadian make it comfortable in the hand. It has some nice mixed grain on the shank sides and the sandblast on the bowl shows a lot depth. The finish was dirty with hand oils and grime ground into the finish. The blasted rim top had lava from the bowl and darkening in the rough finish. The inner edge of the rim also has thick lava and a thick cake lining the bowl walls. The stem has a short vulcanite taper stem. The stem has light tooth marks on the top and underside ahead of the button. The pipe is very dirty but you can see the beauty through the grime. Jeff took some photos of the pipe before he worked his magic in the cleanup process. Jeff took some close up photos of the sandblast rim top and inner edge of the bowl to give an idea of the filthy condition the pipe was in when he received it. I am sure glad that this was another one that he worked on. The bowl has a thick cake and the blast on the rim top is almost filled in with the lava overflow at the back of the bowl. The stem was lightly oxidized and had tooth marks and chatter on both sides. Jeff took photos of the sides of the bowl and heel to show the sandblast finish around pipe. You can see the grime and the oils in the finish that are ground into the bowl. You can also see the scratches and nicks in the finish.The next series of photos capture the stamping. The stamping is clear and readable as noted above. The shape number on the underside of the shank can be read as either 08 or 80. The is a faint GJ stamp on the top side of the stem.When I brought the pipe to the worktable this is what I saw. Jeff had reamed the bowl with a PipNet pipe reamer and followed up with a Savinelli Fitsall pipe knife to remove the cake. He scrubbed out the mortise and the airway in the shank and the stem with alcohol, cotton swabs and pipe cleaners. He scrubbed the exterior of the bowl, rim, shank and stem with a tooth brush and Murphy’s Oil Soap to remove the oils and tars on the bowl, rim and shank. He rinsed it under running water. He dried it off with a soft cloth. The lava mess on the rim was thoroughly removed without harming the finish underneath it. Without the grime the finish looked really good. He soaked the stem in Before and After Pipe Stem Deoxidizer. He rinsed it under running water and dried it off with a clean cloth. He cleaned out the airway with pipe cleaners and alcohol. When it arrived here in Vancouver it was very clean. I took photos of the pipe to show its condition before I started my work on it. It really is quite a beauty. I took close up photos of both the rim top and the stem. Jeff had been able to get the grime and lava out of the plateau on the rim top and it looked pretty incredible. There was some darkening on the high spots on the sandblast rim top and edges. The stem looked very clean. The tooth marks and chatter were minimal and should be easy to remove.The stamping was still readable and curved around the underside of the shank. It reads as noted above. I also took a photo with the stem removed to give an idea of the perspective and design of the pipe.I worked some Before & After Restoration Balm into the grooves and crevices of the sandblast finish of the bowl and shank with my fingers and a horsehair shoe brush. I want the product to go deep into the finish because it works to clean, enliven and protect the briar. Once I was confident that it was deeply worked into the blast I wiped it off and buffed it with a soft cloth to polish it. The pipe really began to have a rich shine. I took some photos of the bowl at this point to mark the progress in the restoration. The blast has depth and the grain really stands out on the shank in the photos below.I set the bowl aside and turned to work on the stem. I sanded out the tooth chatter and marks on the stem surface with 220 grit sandpaper. I started polishing with 600 grit wet dry sandpaper. I polished the vulcanite stem with micromesh sanding pads – wet sanding it with 1500-2400 grit pads and dry sanding with 3200-12000 grit pads. I wiped it down with Obsidian Oil after each sanding pad.I polished it with Before & After Pipe Polish – both the Fine and Extra Fine polishes. I gave it a final coat of oil and set it aside to dry. I polished the Georg Jensen 08/80 Canadian and the stem with Blue Diamond to polish out the remaining small scratches. I gave the bowl and the stem multiple coats of carnauba wax and buffed the pipe with a clean buffing pad to raise the shine. I hand buffed the pipe with a microfiber cloth to deepen the shine. The pipe polished up pretty nicely. The mix of brown stains worked really well with the black vulcanite stem. The darkened plateau really sets of the pipe and gives it a unique look. The finished pipe is shown in the photos below. The dimensions of the pipe are Length: 5 ½ inches, Height: 2 inches, Outer diameter of the bowl: 1 ¼ inches, Chamber diameter: ¾ inches. The weight of the pipe is 34 grams/1.23 ounces. I will be putting this unique freehand on the rebornpipes store in the Danish Pipemakers Section. If you are interested in adding it to your collection please let me know. Thanks for walking through this restoration with me as I worked over this beauty.
As always, I encourage your questions and comments as you read the blog. Thanks to each of you who are reading this blog. Remember we are not pipe owners; we are pipe men and women who hold our pipes in trust until they pass on into the trust of those who follow us.
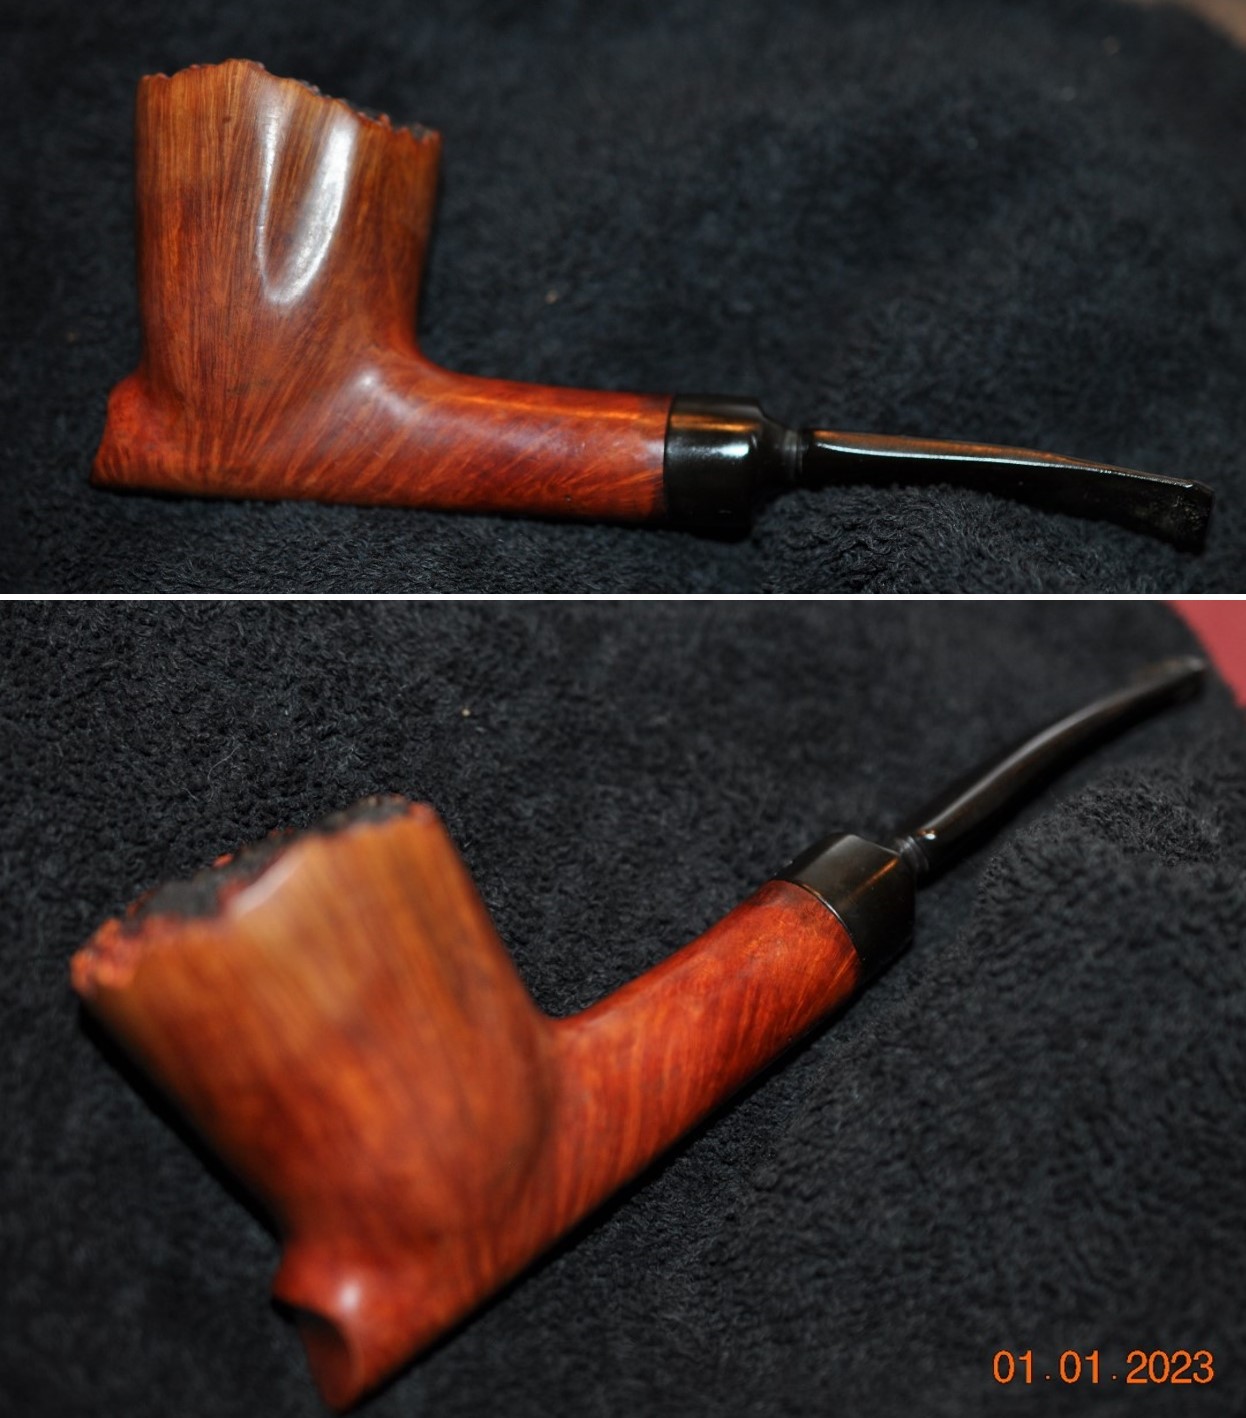
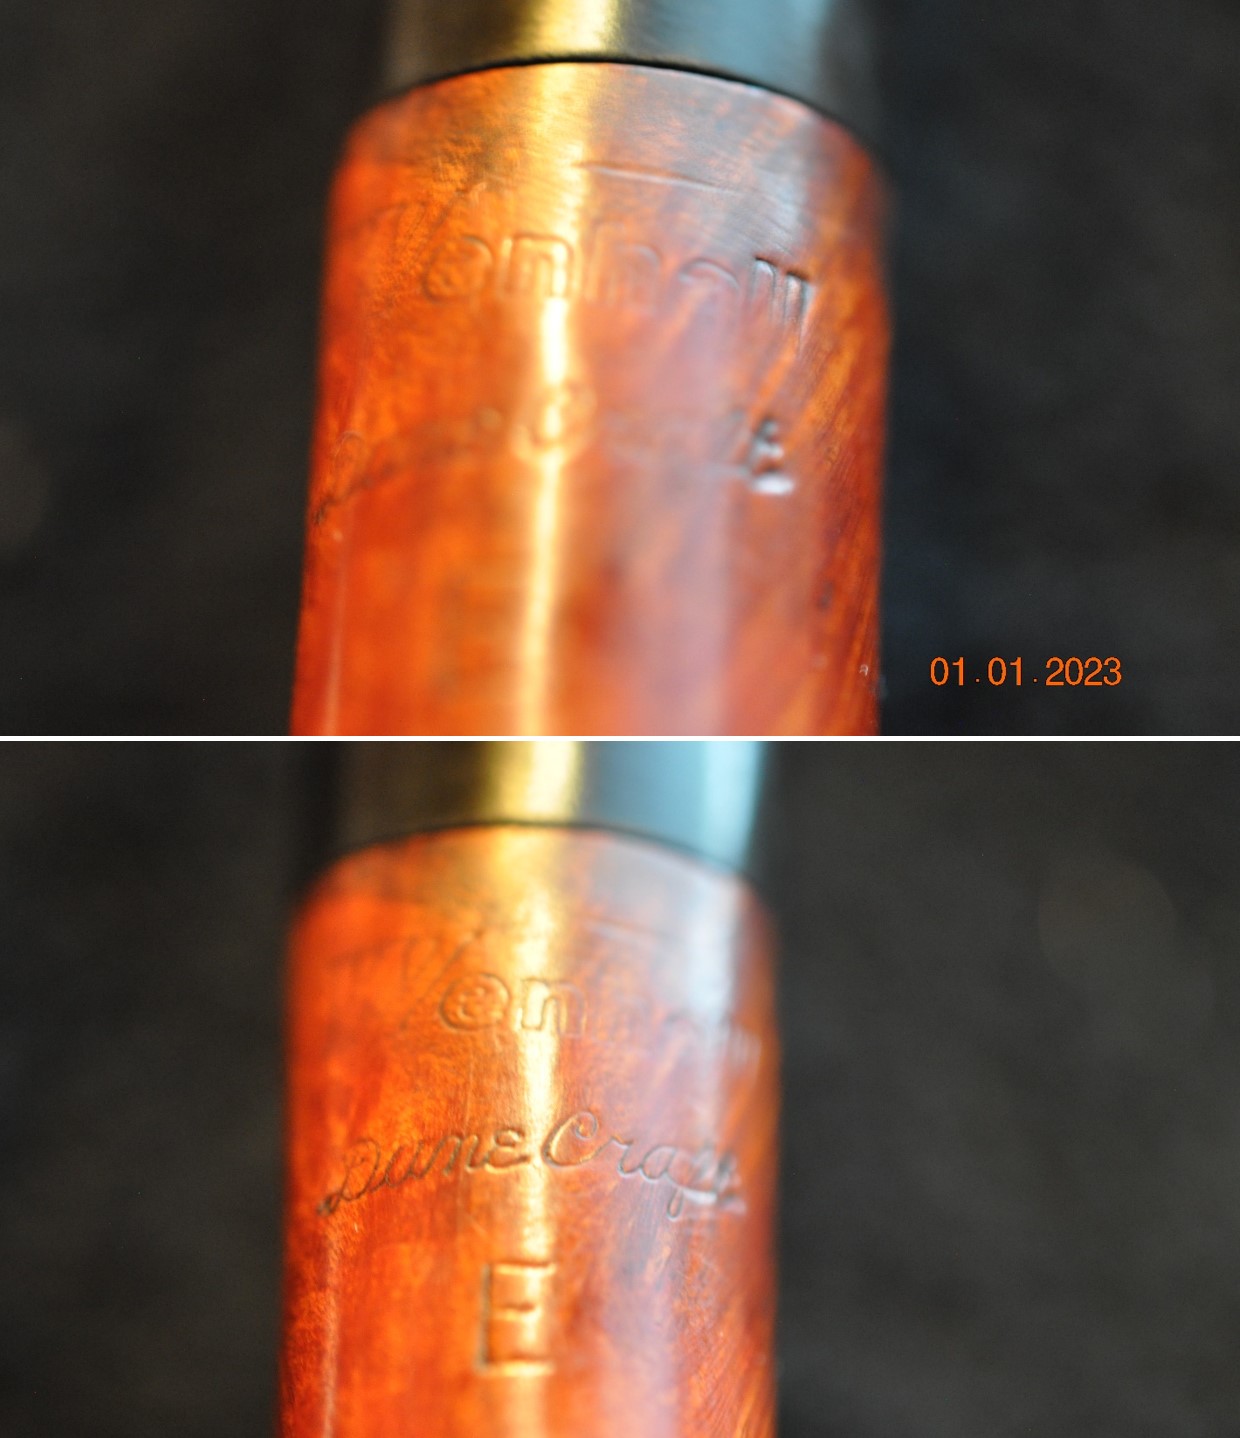
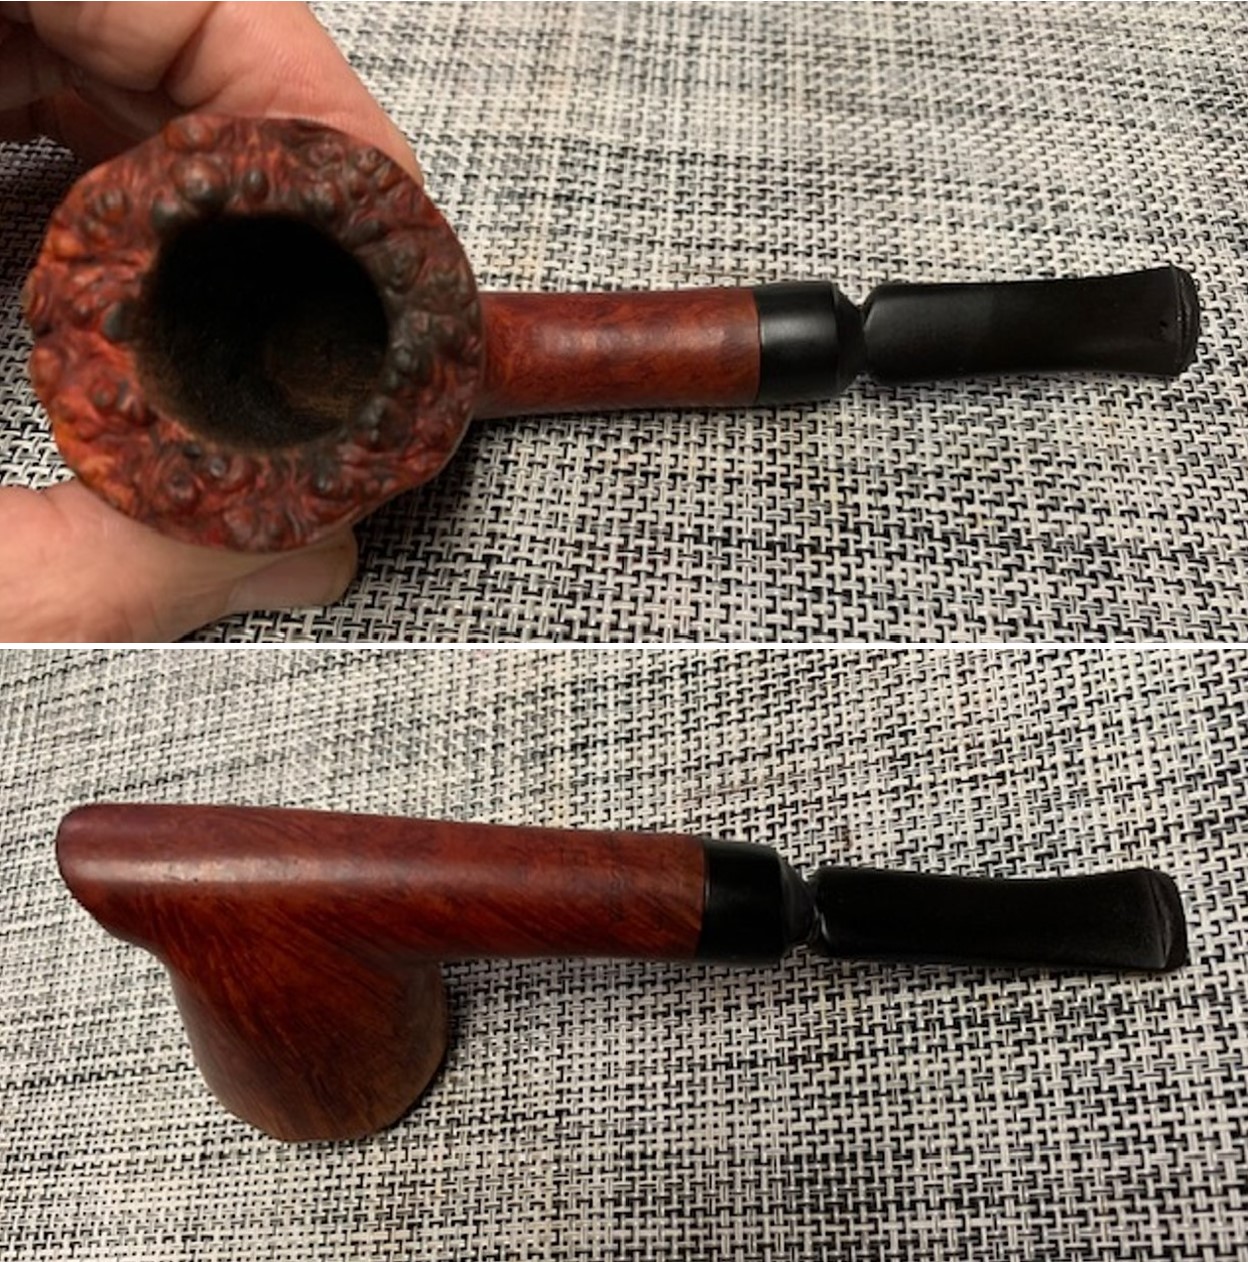
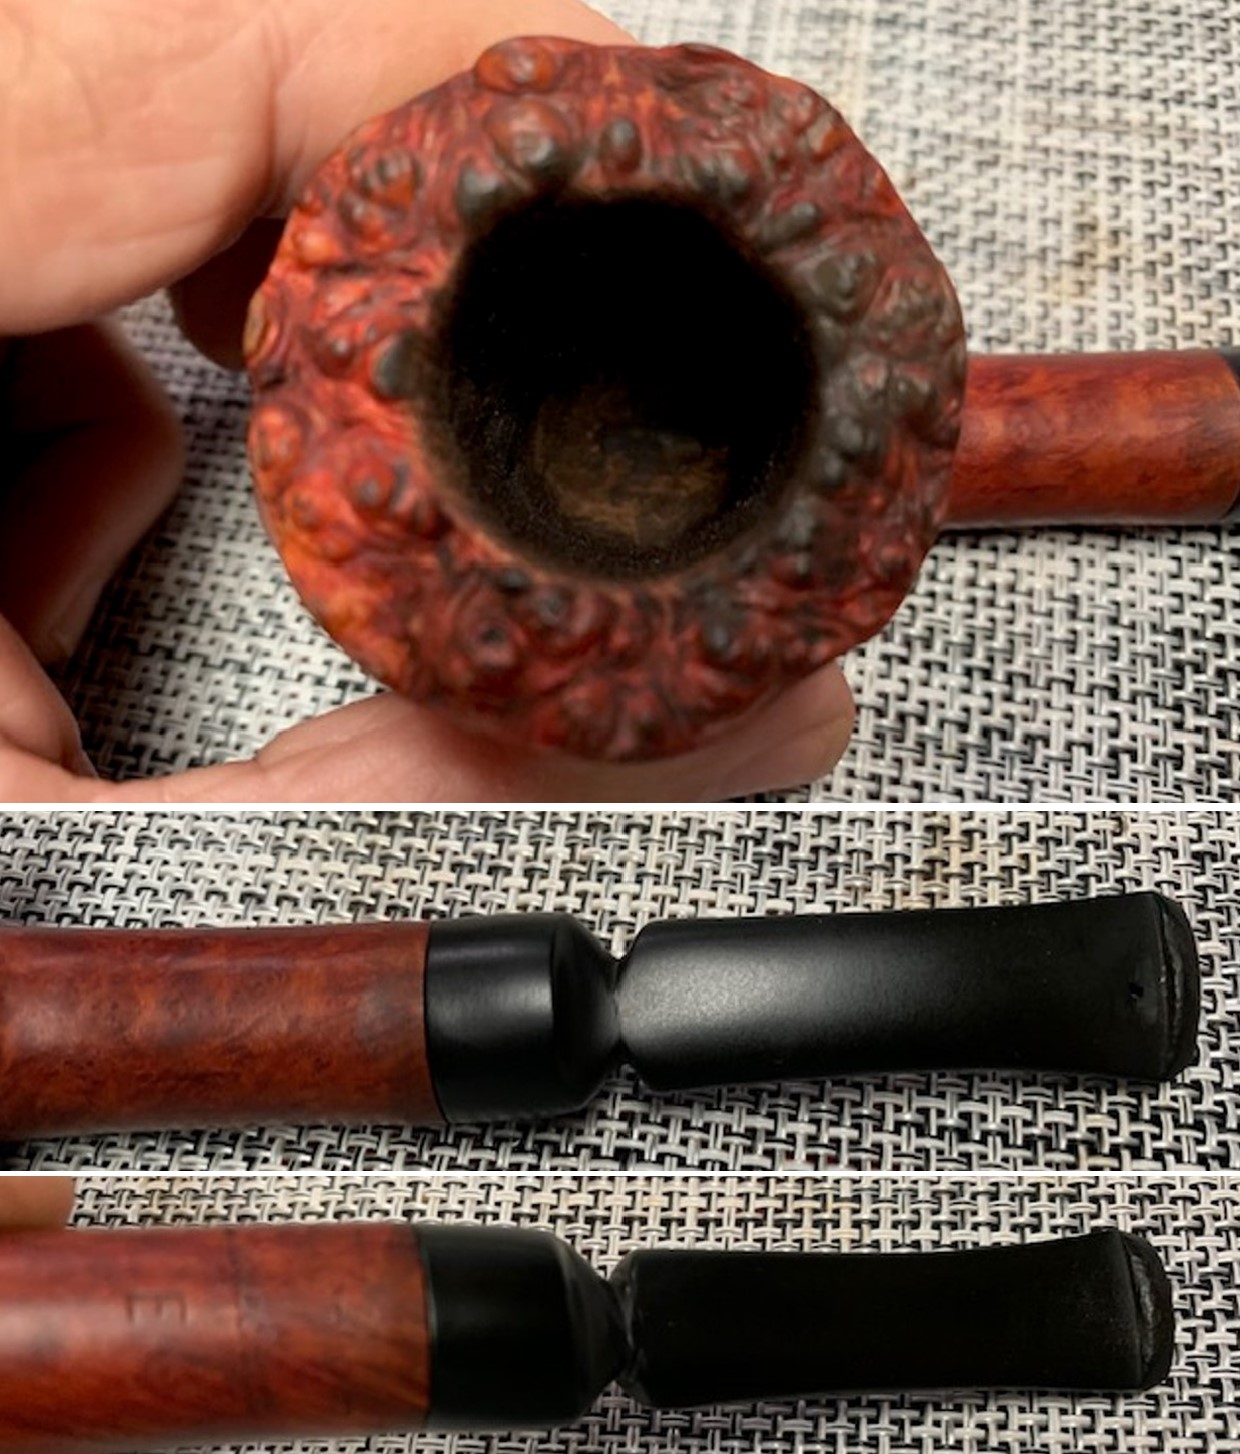
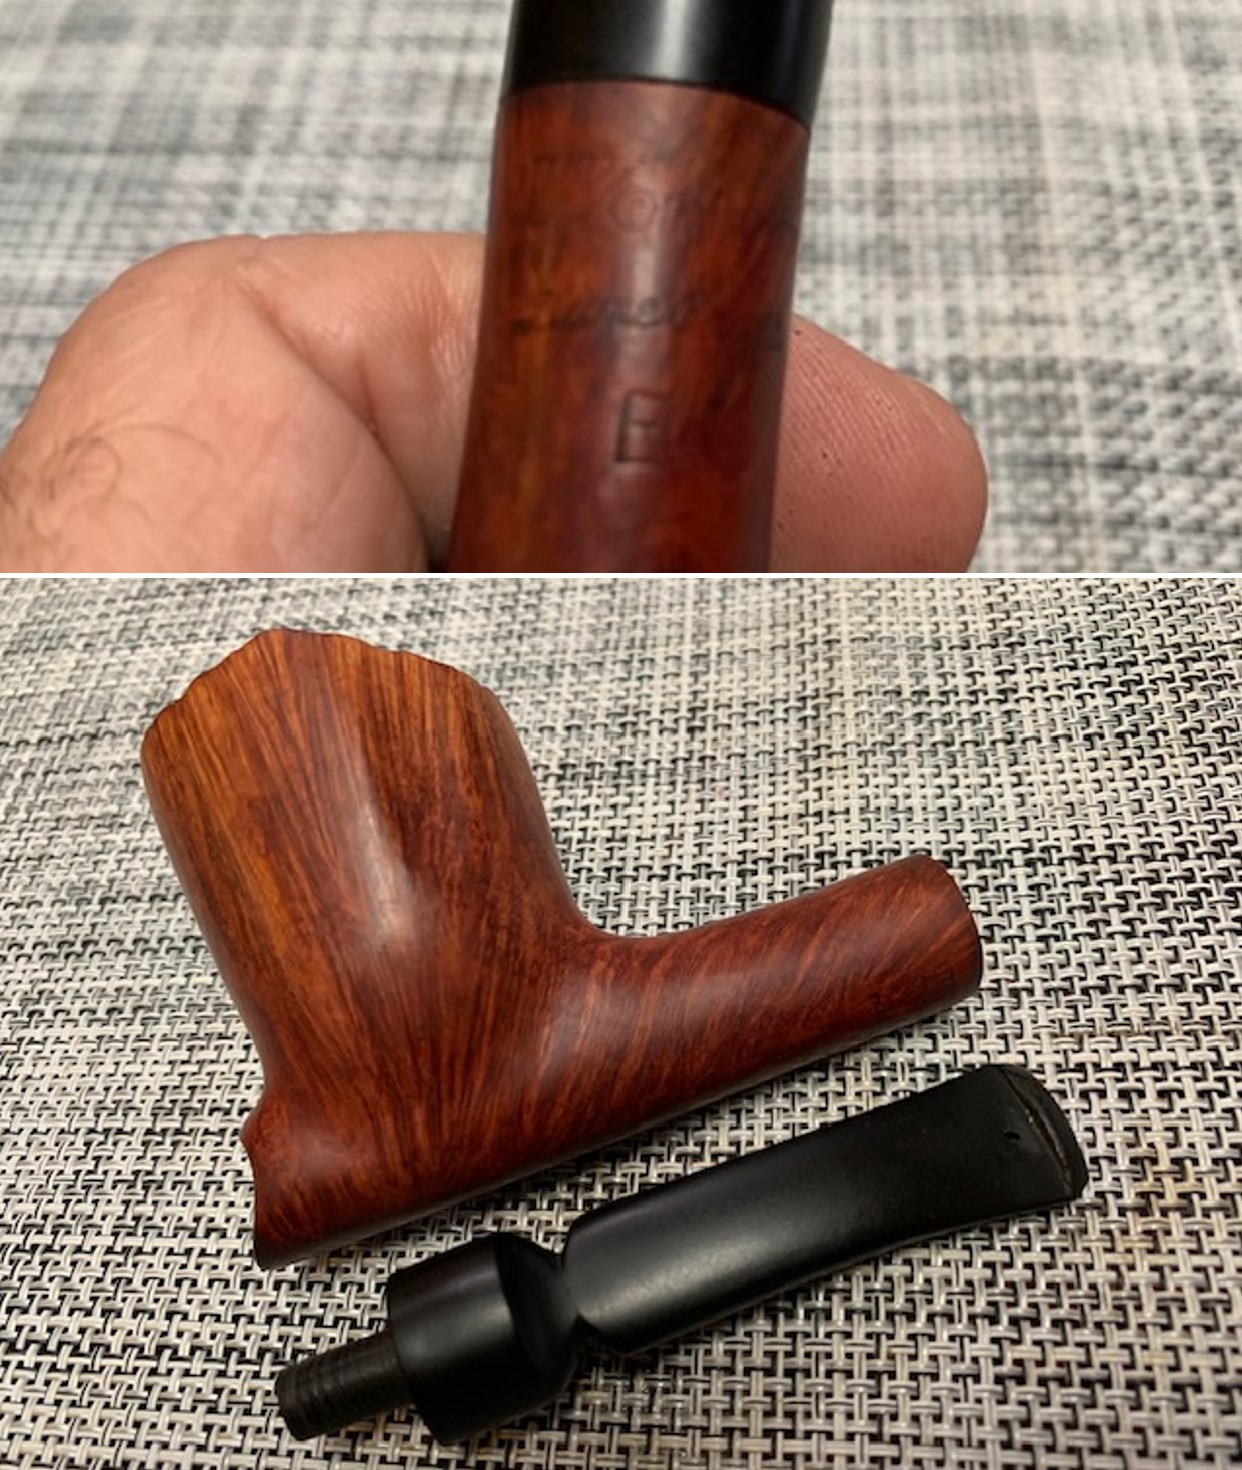
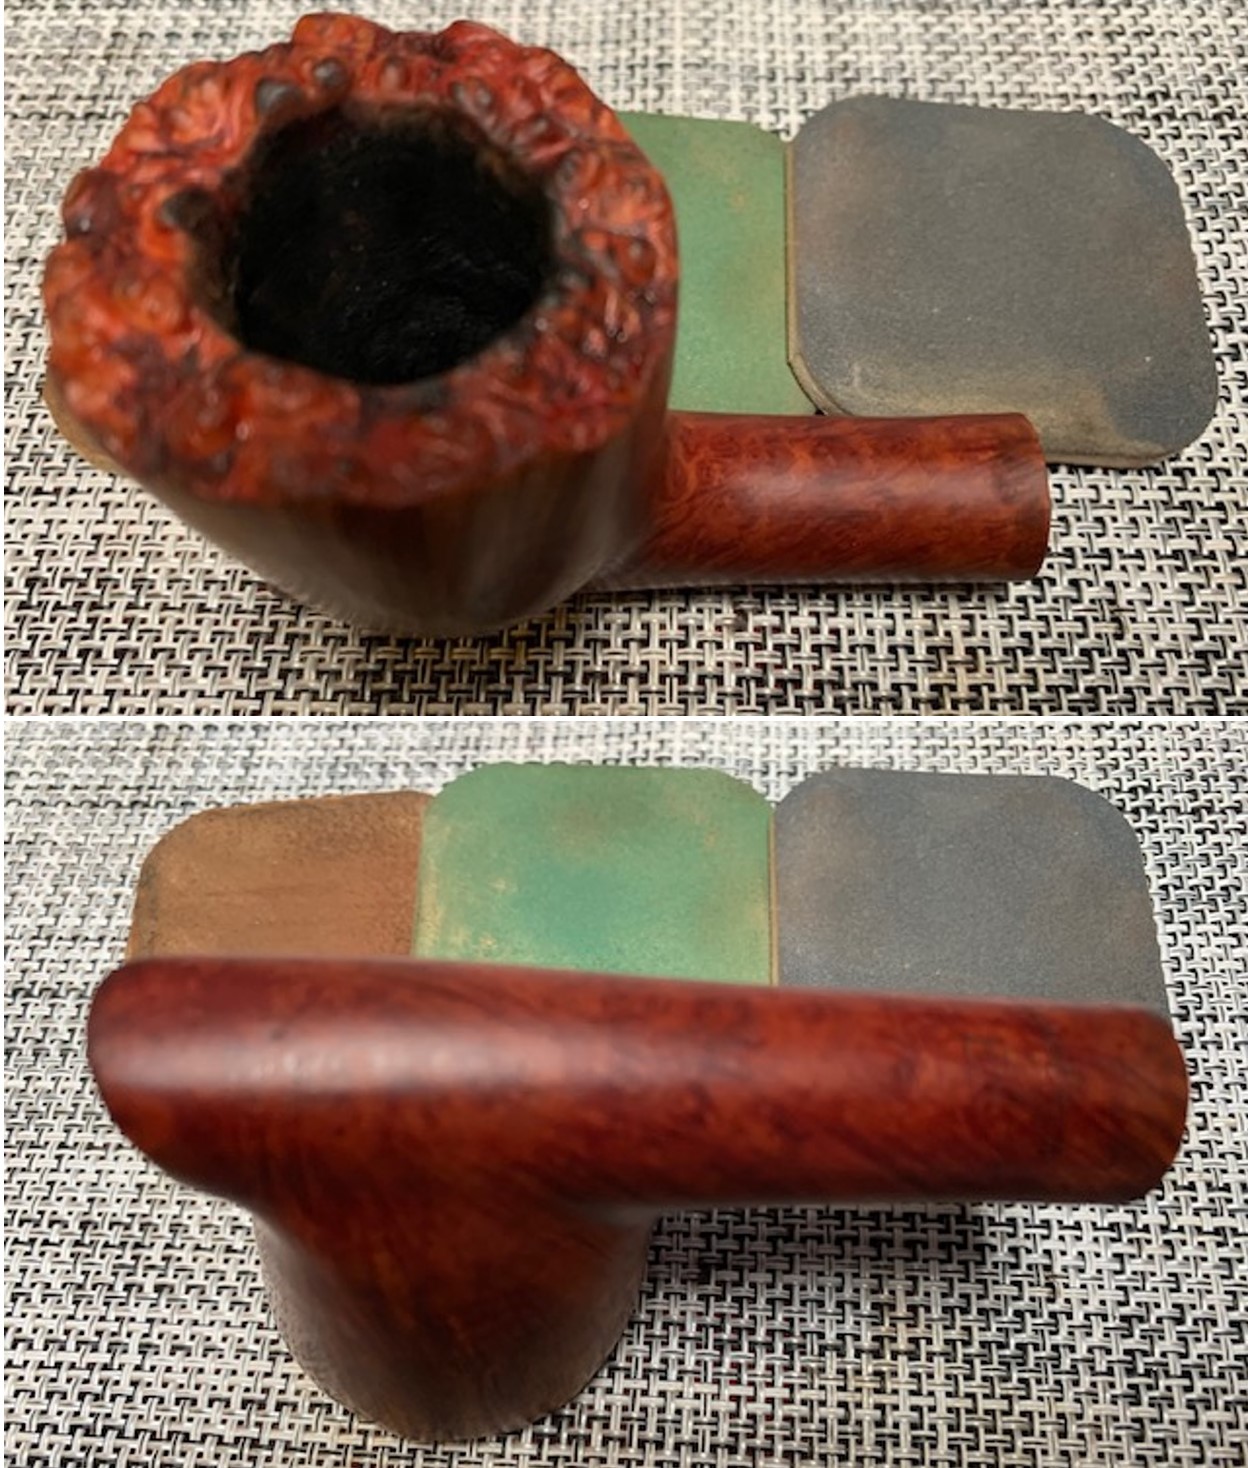
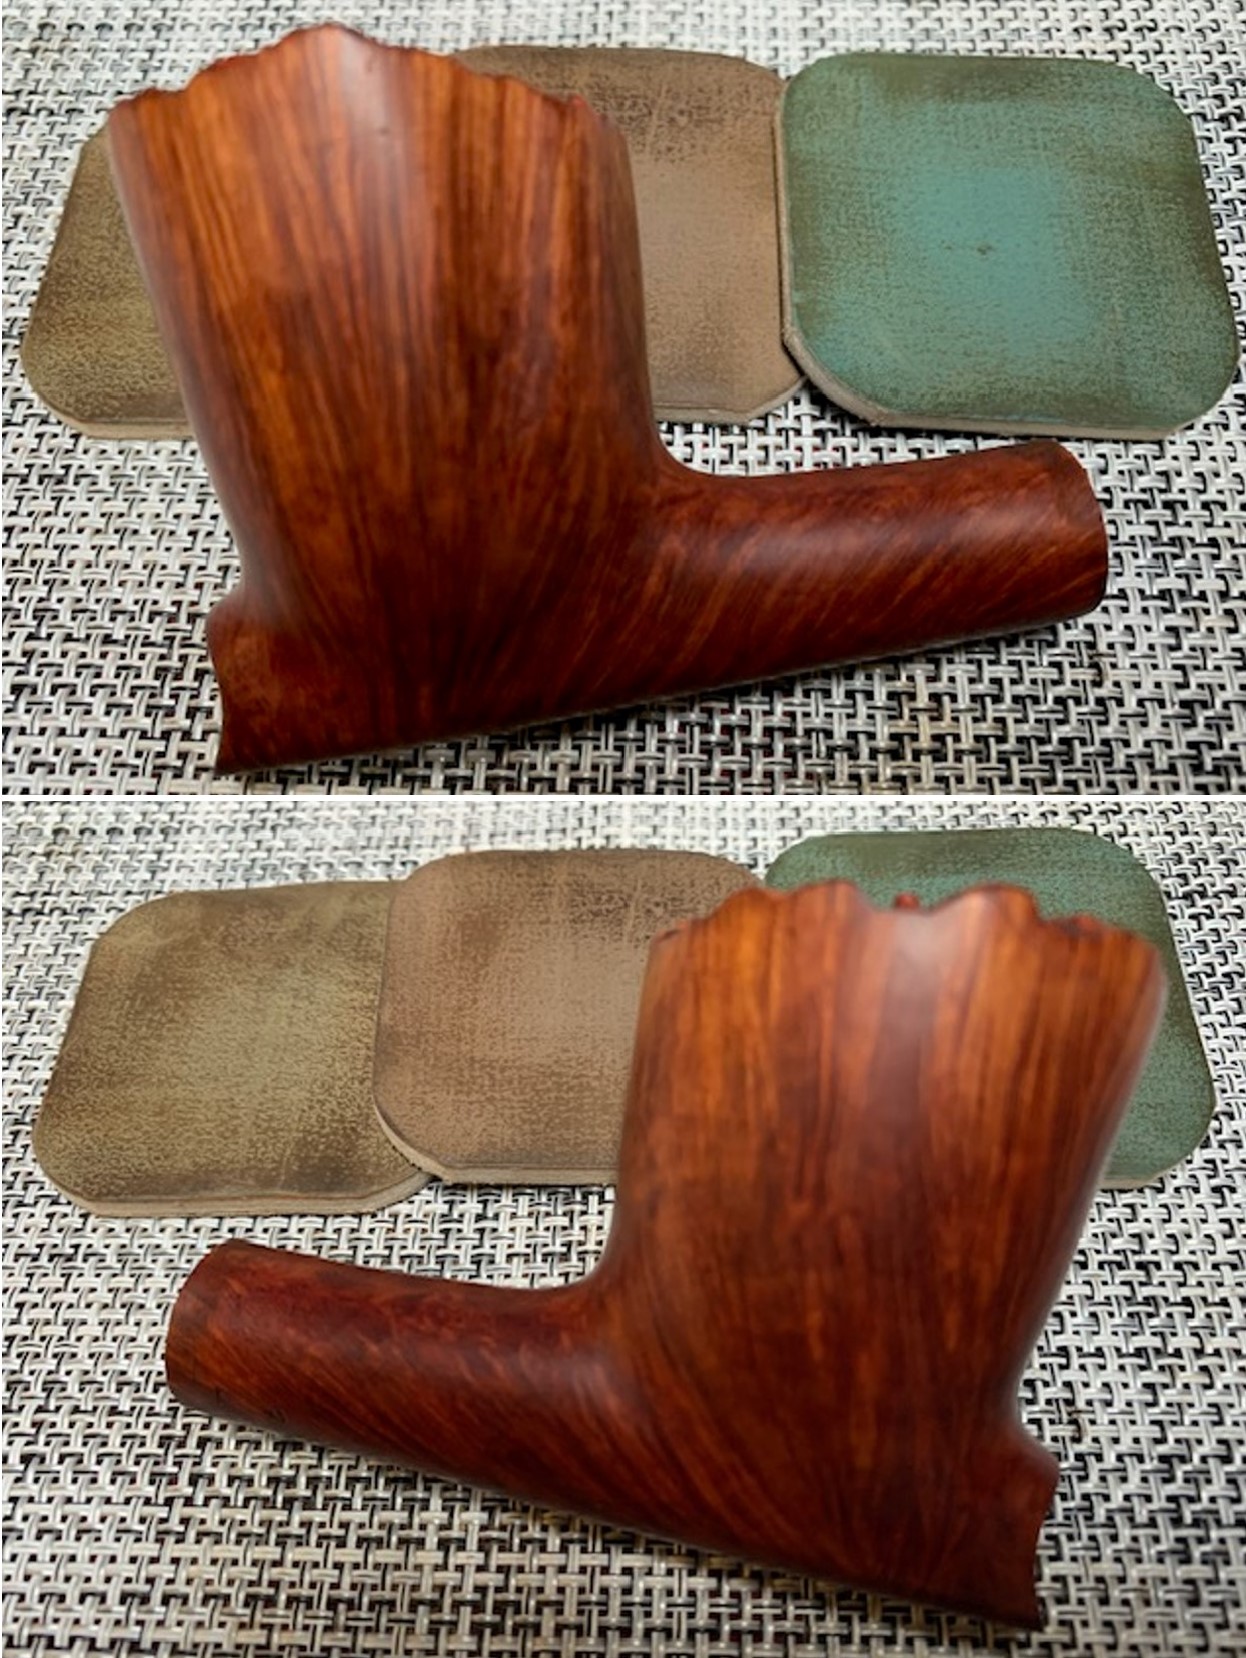
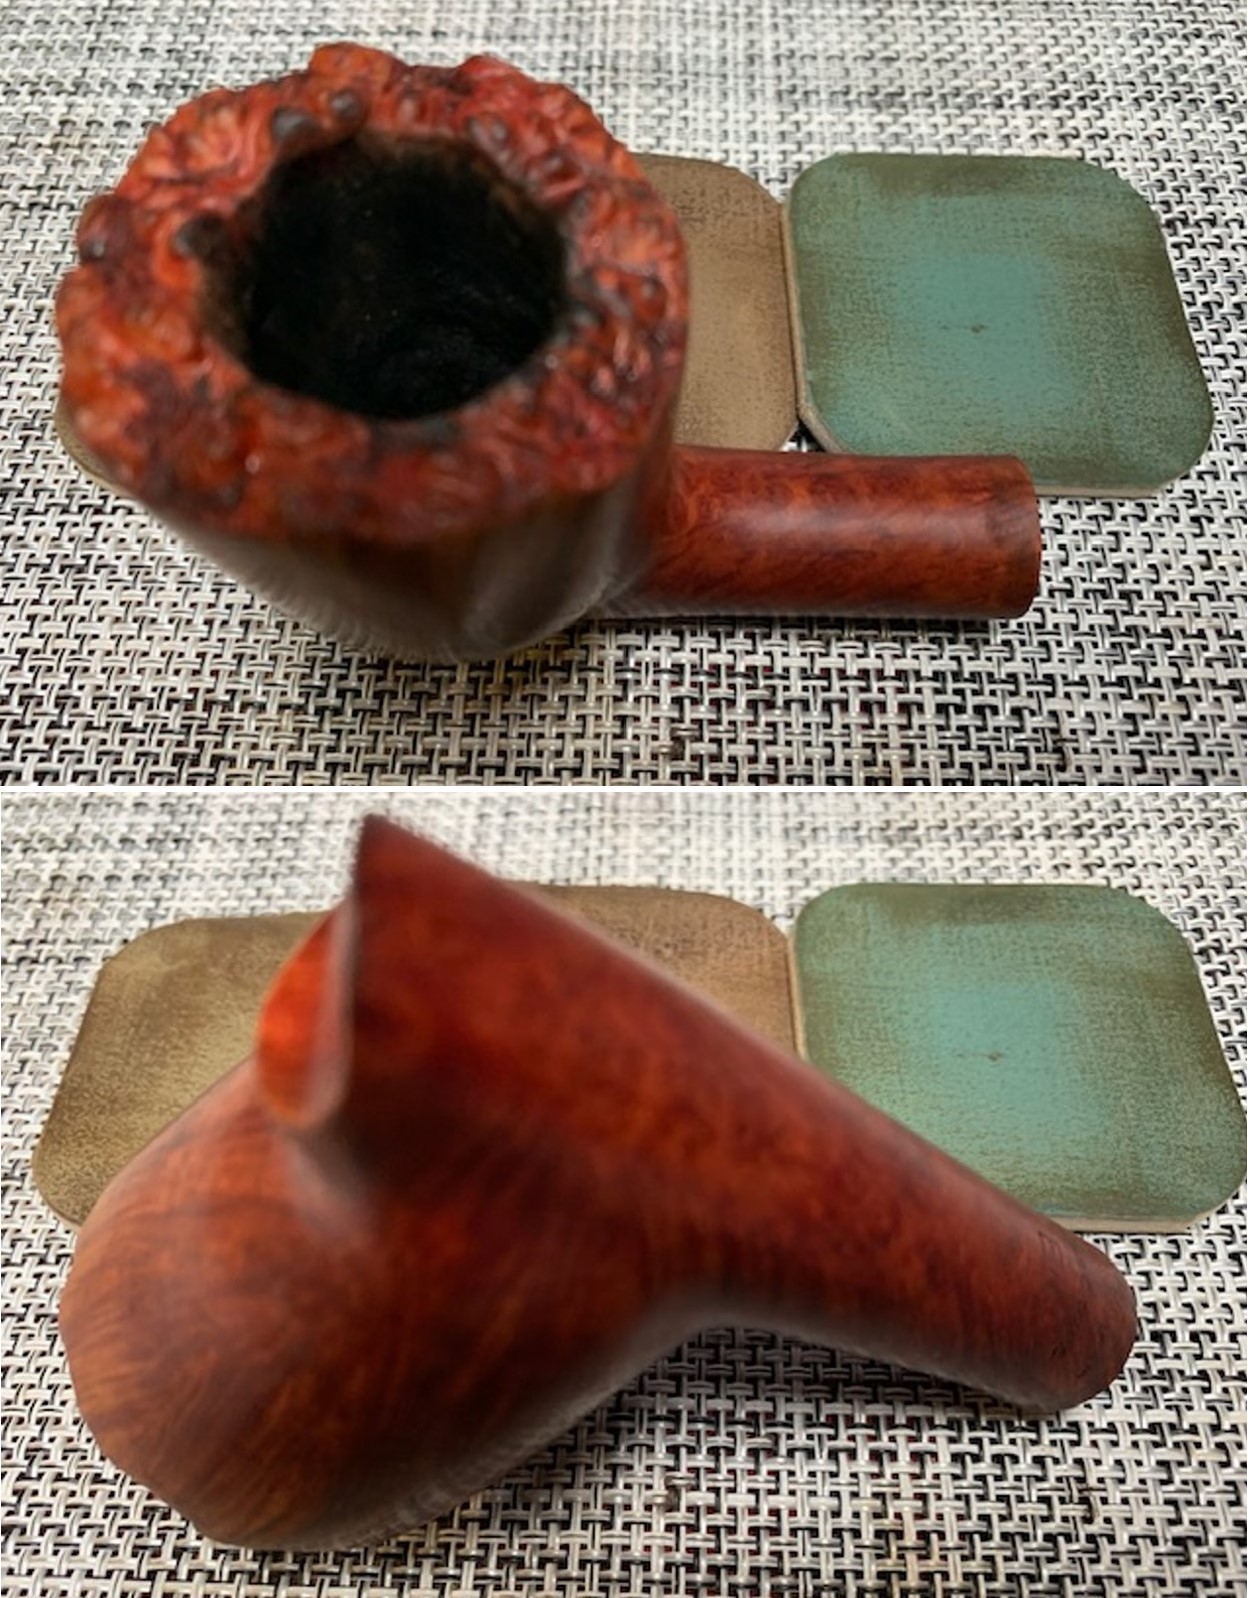
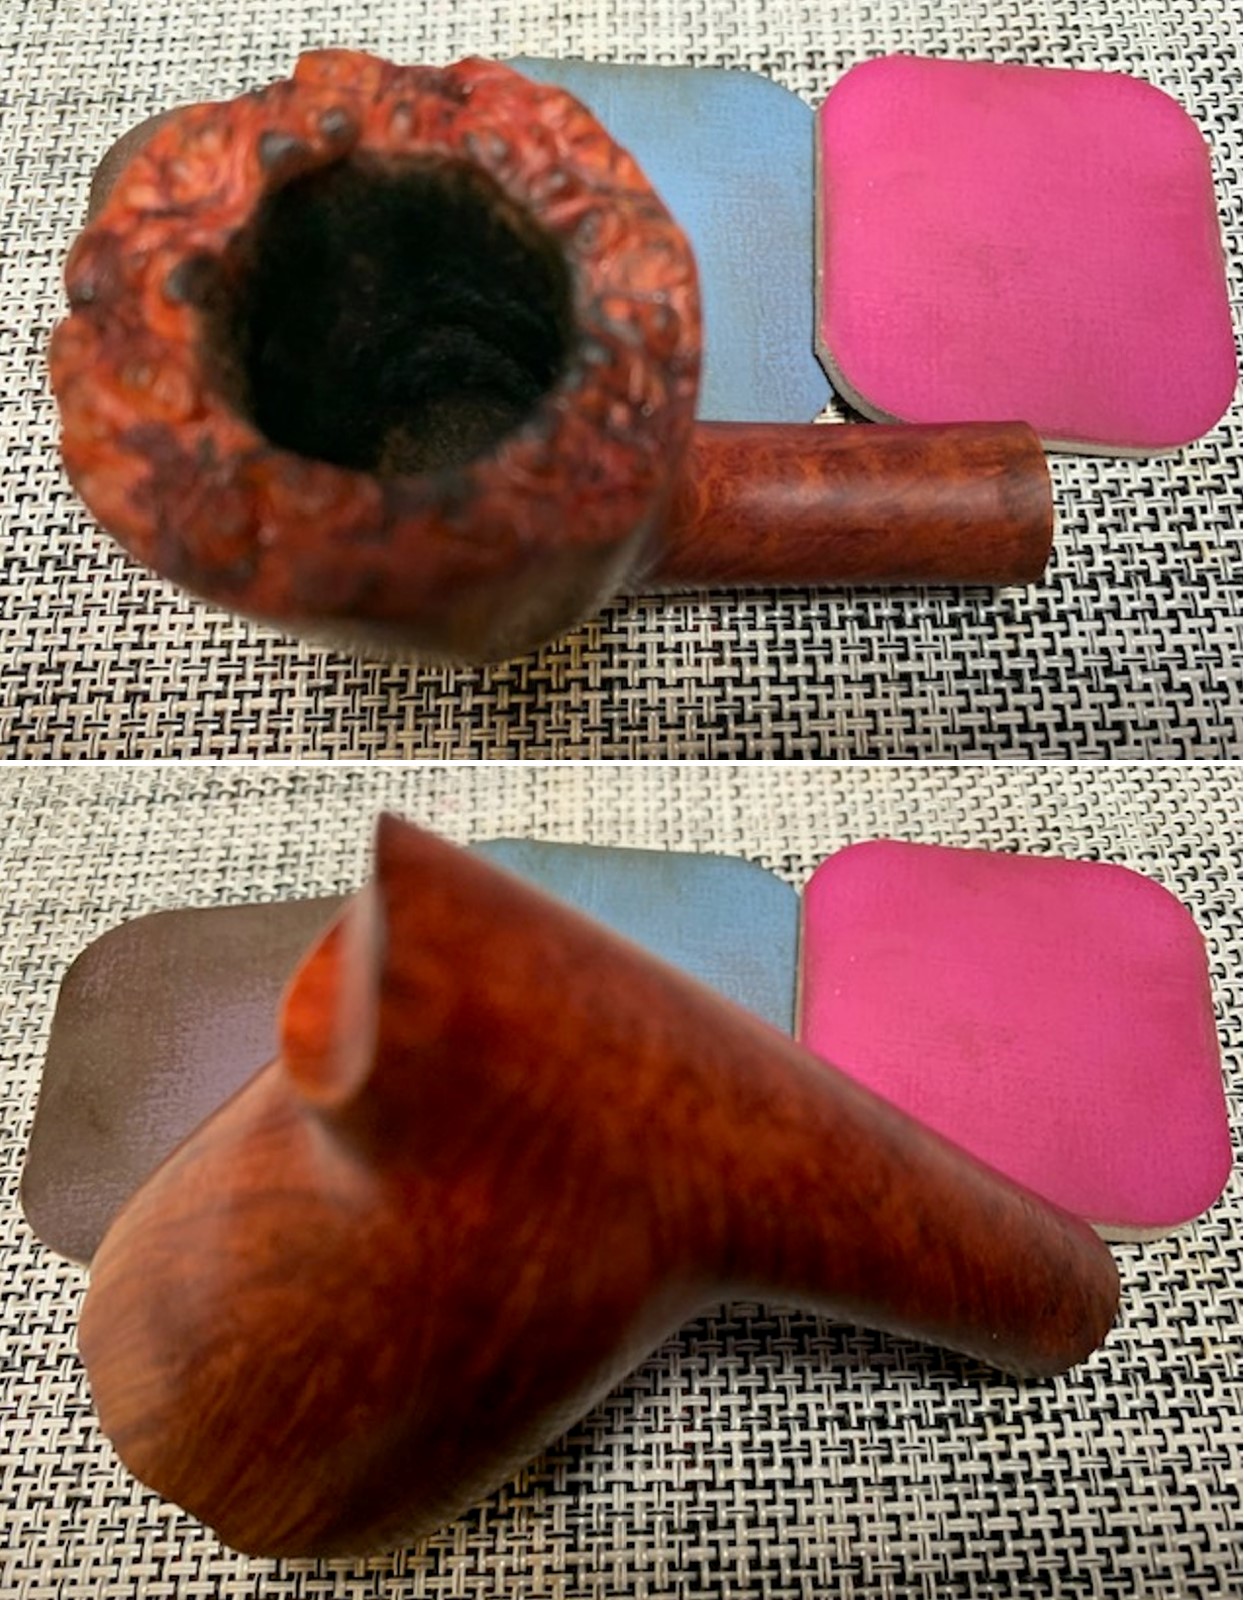
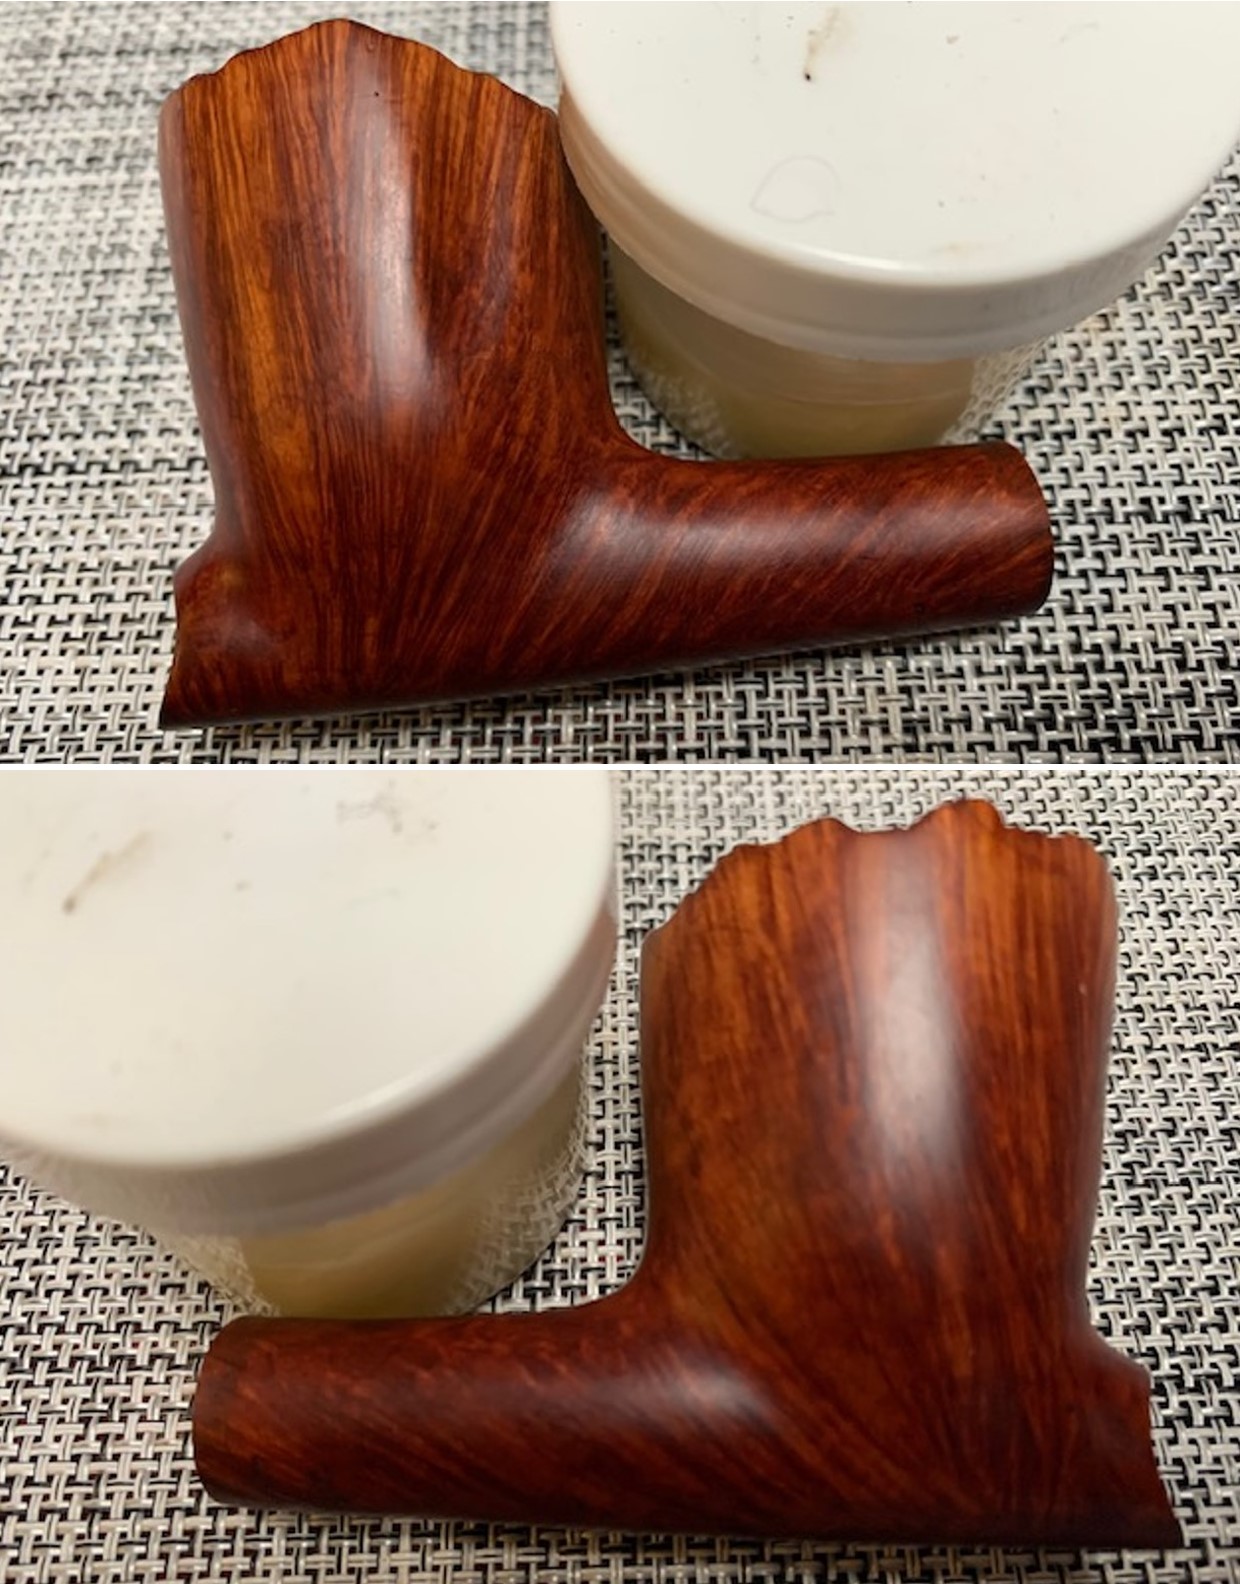
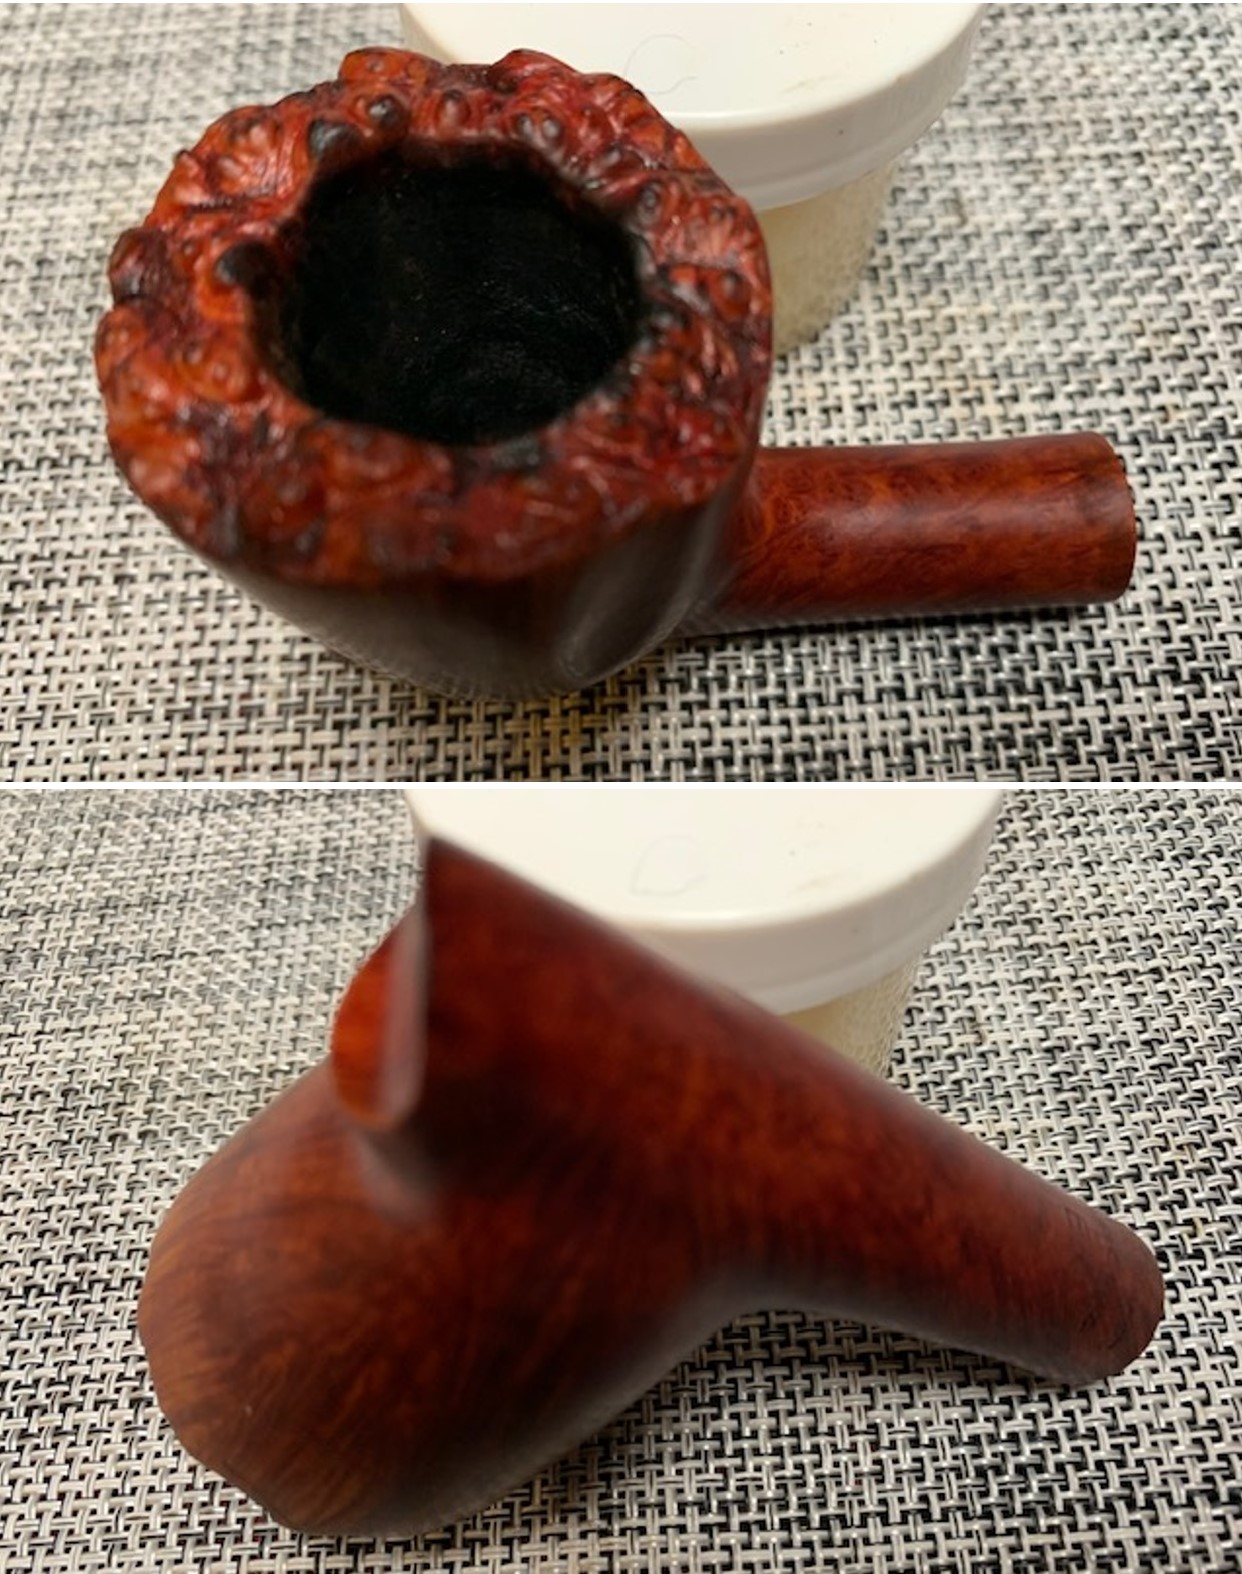
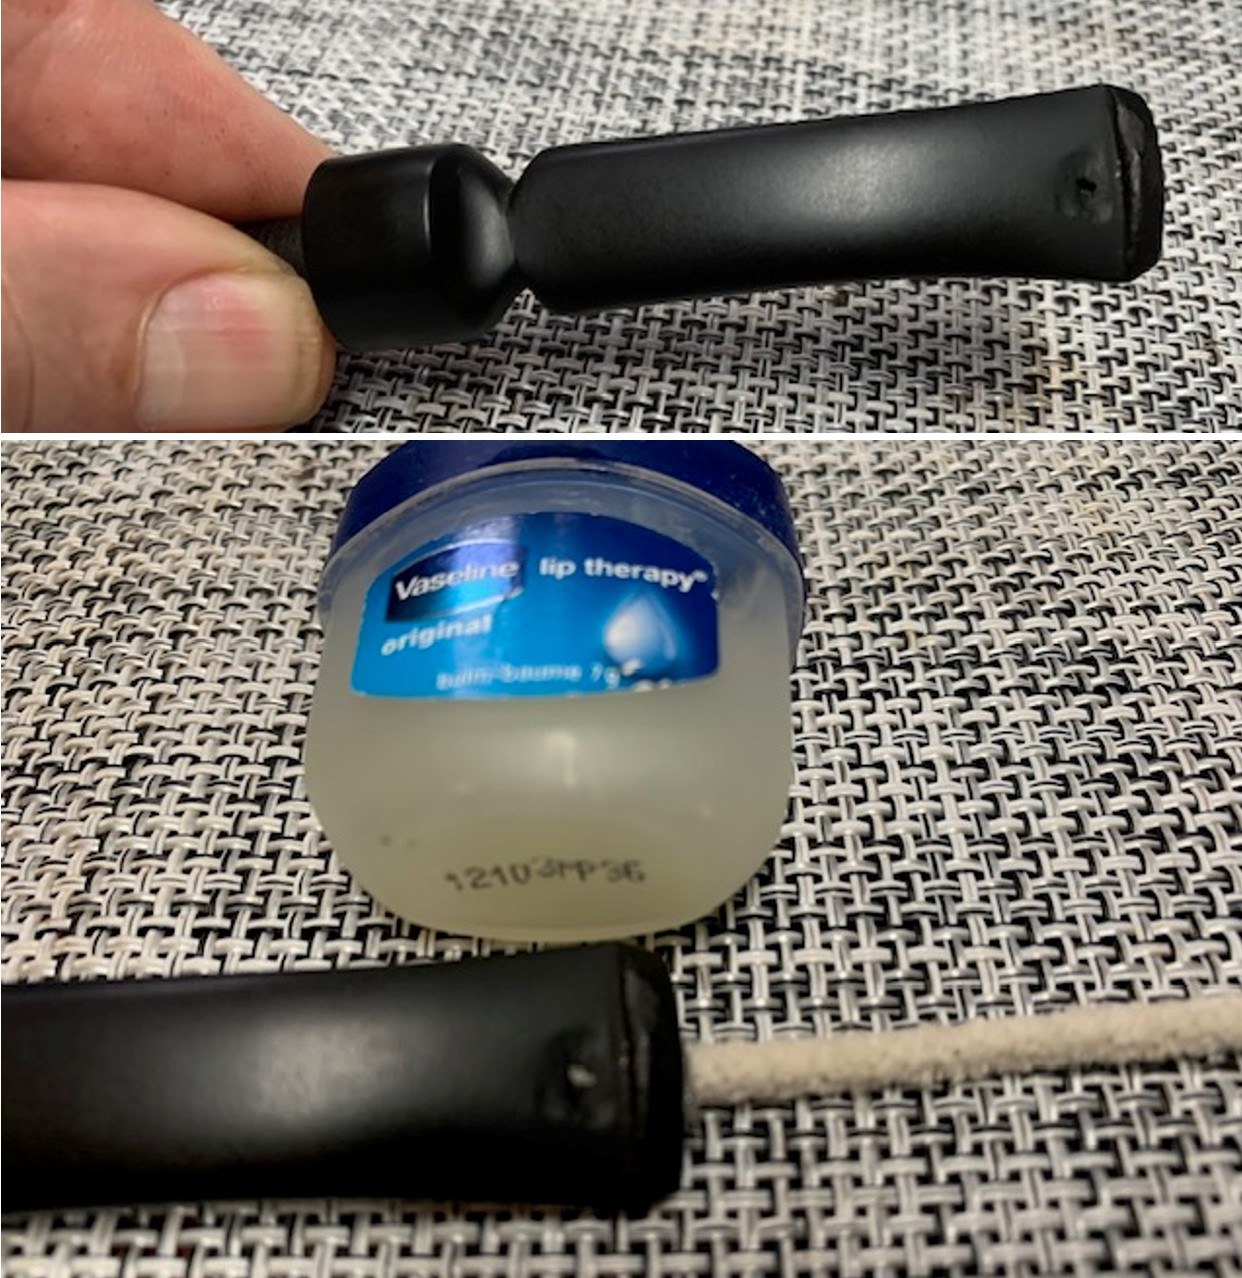
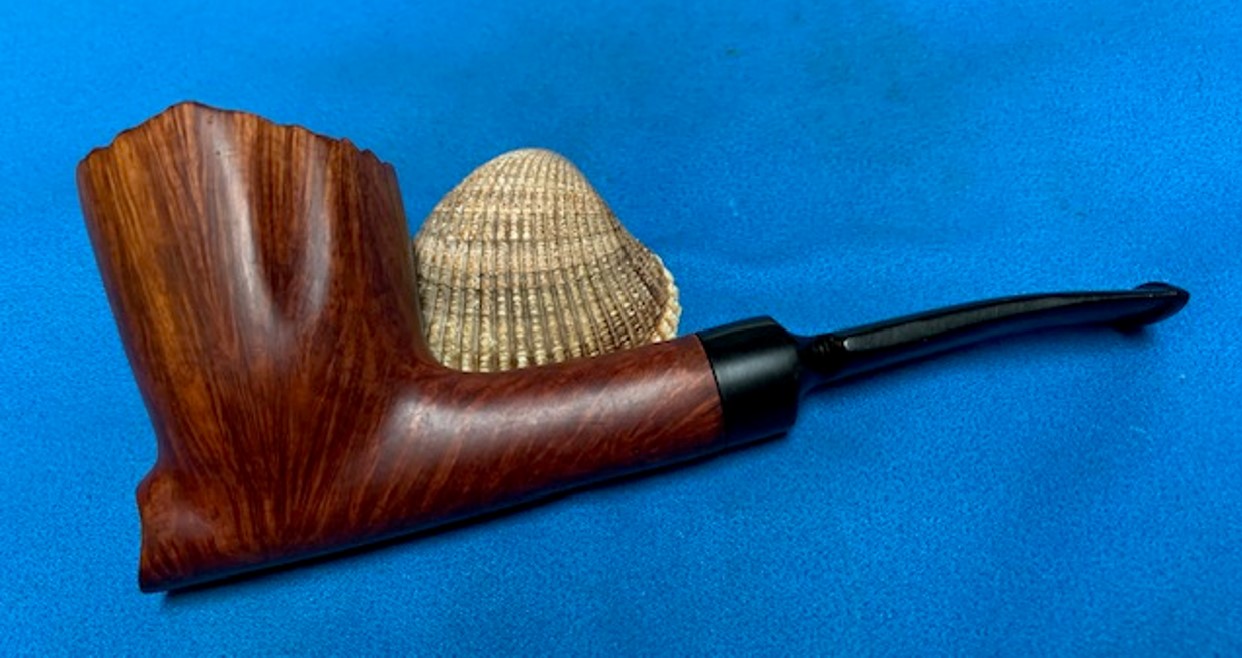
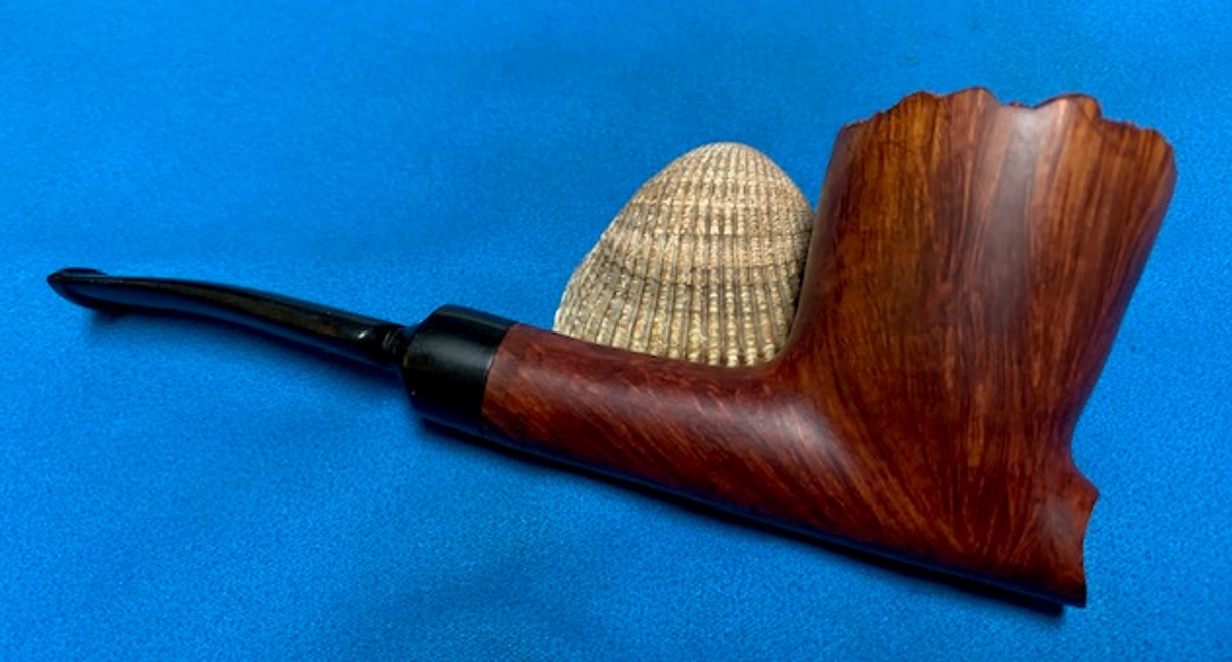
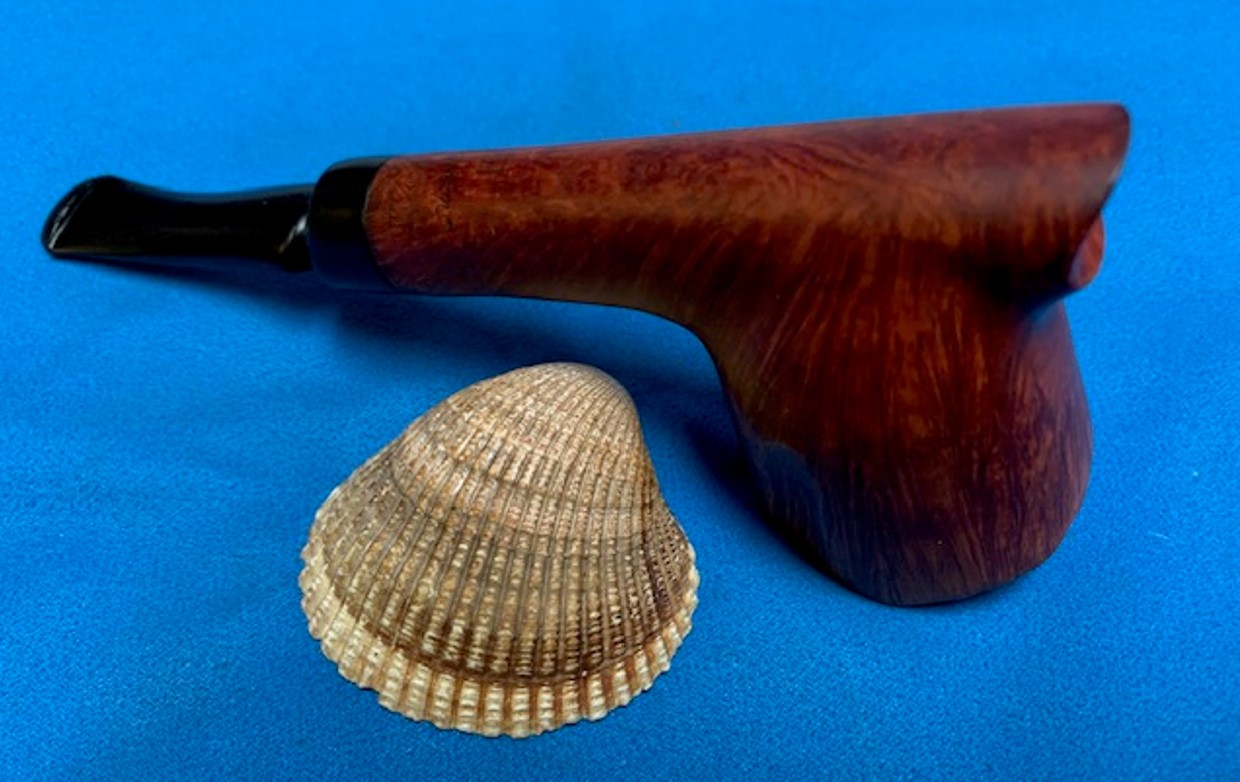
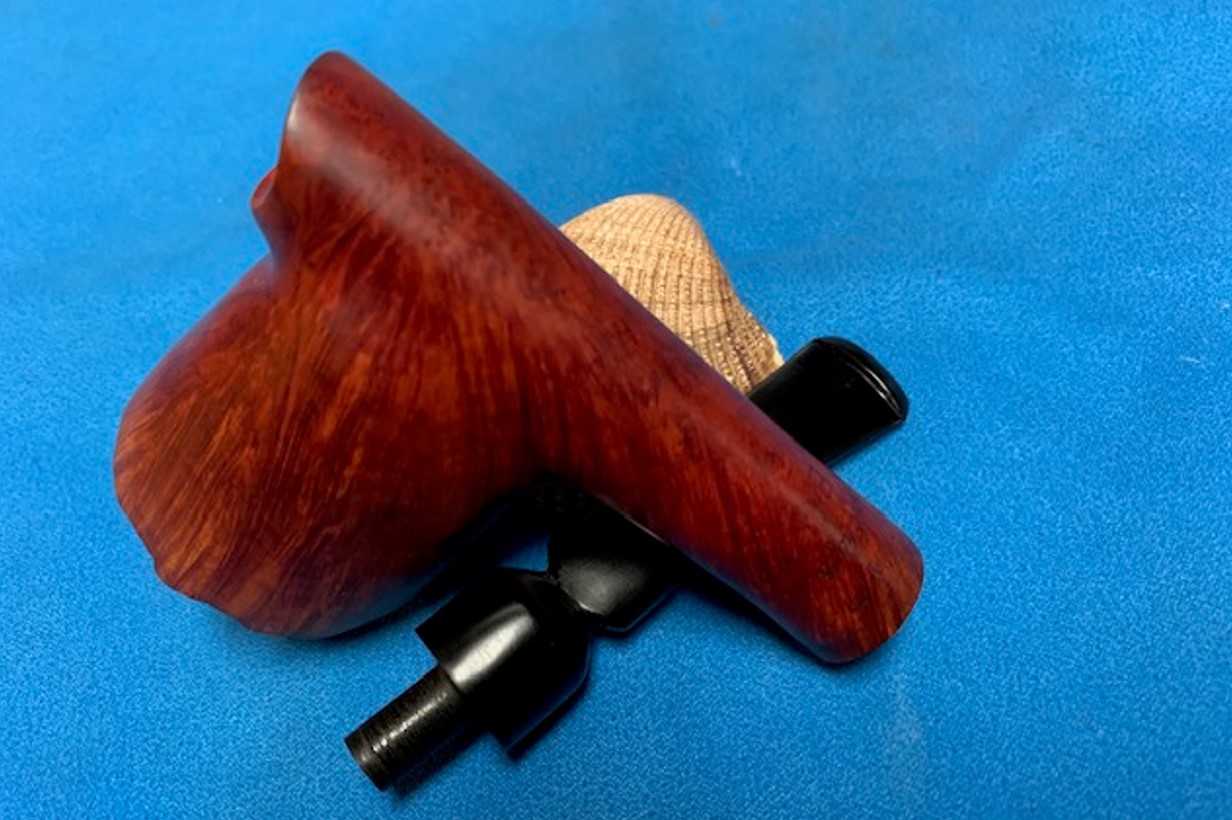
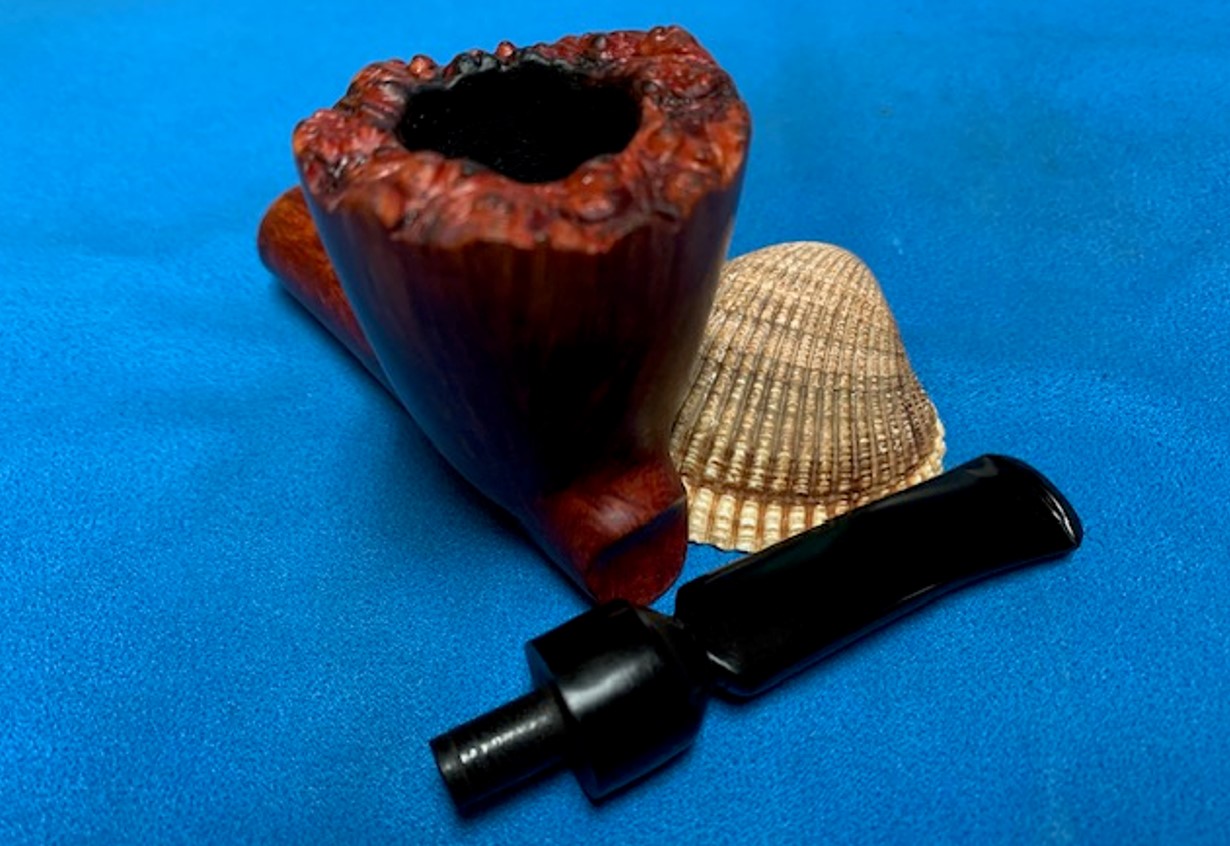
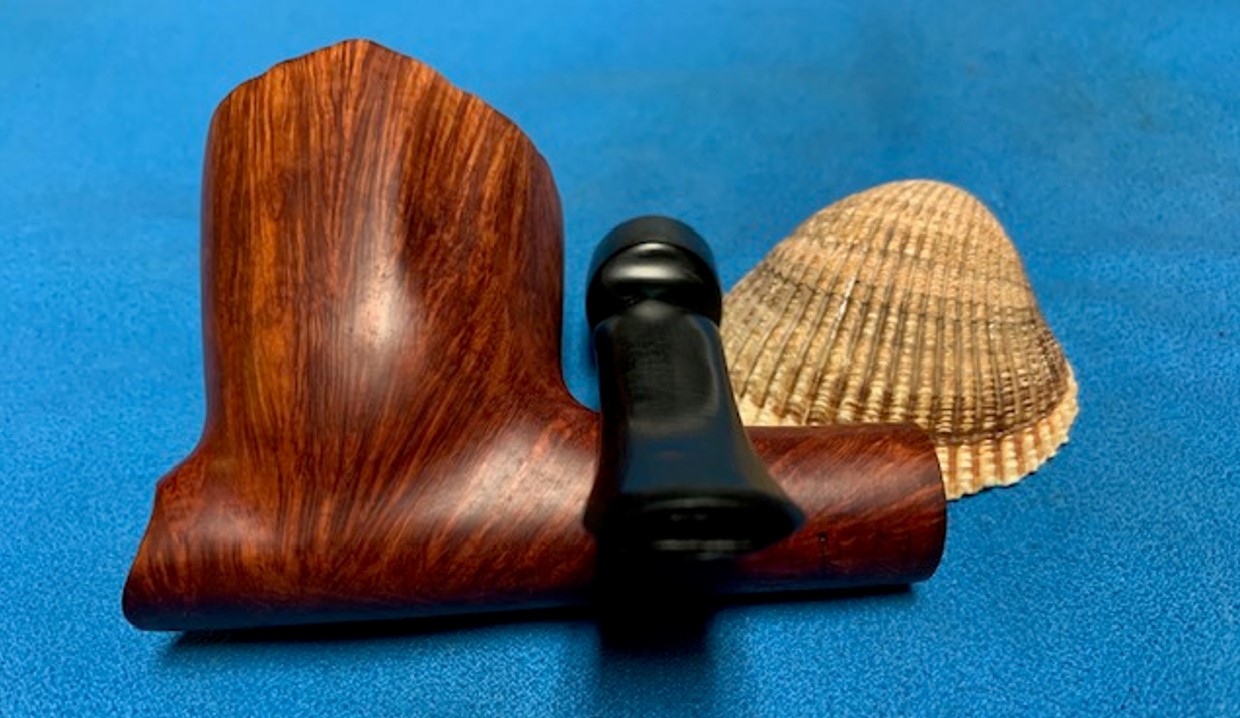
Jeff and I love picking up freehand pipes that are unusual or have unique grain around the bowl. This particular pipe came to us from a lady in Cleveland, Ohio, USA on 04/09/2022. We purchased her husband’s estate pipes from her and there were some very nice ones. The pipe was stamped on the underside of the shank and read Wenhall [over] Dane Craft [over] E. The shape and the unusual stem combination are familiar with other freehands in this series. It is an unusual piece with some grooves in the bowl sides and a “nose” on the front of the bowl at the heel. These make it very comfortable in the hand. It has some nice straight grain on the bowl sides and shank. The finish was dirty with hand oils and grime ground into the finish. The plateau rim top had lava from the bowl and darkening in the rough finish. The inner edge of the rim also has thick lava and a thick cake lining the bowl walls. The stem is different in that it is one that I would expect on a Danish Made Celius pipe or possibly some of the British style Hardcastle freehands. The chairleg style stem seems to be made of high-quality vulcanite as it is not oxidized. The stem has tooth marks on the top and underside ahead of the button and a hole in the top surface. The pipe is very dirty but you can see the beauty through the grime. Jeff took some photos of the pipe before he worked his magic in the cleanup process. Jeff took some close up photos of the plateau rim top and inner edge of the bowl to give an idea of the filthy condition the pipe was in when he received it. I am sure glad that this was one that he worked on. The bowl has a thick cake and the plateau rim top is almost filled in with the lava overflow at the back of the bowl. The stem was lightly oxidized and had tooth marks and chatter on both sides. There was also a bite through on the topside of the stem ahead of the button. There was a calcification on the surface of the stem and some minor oxidation. Jeff took photos of the sides of the bowl and heel to show the grain around pipe. You can see the grime and the oils in the finish that are ground into the bowl. You can also see the scratches and nicks in the finish.The next series of photos capture the stamping. The stamping is faint on the edges but together you can see that it reads Wenhall over Dane Craft over the letter E. The last photo in this series shows the fit of the stem to the dirty shank. There is a gap that should disappear with cleaning. I remembered working on a Wenhall Dane Craft Freehand in the past so I turned back to a previous blog I had written on that one (https://rebornpipes.com/2018/06/18/new-life-for-a-wenhall-dane-craft-b-freehand/). I reread the blog and was reminded of the background information on the brand that I had researched prior. It is a beautiful pipe. I quote from that blog below.
In the back of my mind I remembered a connection between Wenhall and Karl Erik pipes. I could not remember the details of the connection but I remembered there was one. I’ll tell you what, even that is pretty good for this old bird. I looked it up on the pipephil pipes, logos and stampings website and found nothing on that site that linked the two. I turned to Pipedia and looked it up in the Pipe Makers list that is included there. I found the link to Wenhall pipes that I was looking for. Here is the link, https://pipedia.org/wiki/Wenhall. It was a short article but it made a lot of connections to names that I was familiar with from working on pipes. I include the majority of the article because of the pertinent information that it provides.
Wenhall Pipes Ltd. was a distribution company out of New York City.
By the end of the 1970’s Wenhall approached Michael Kabik and Glen Hedelson, at that time operating from a farm house in Glen Rock, Maryland to create a line of freehands called Wenhall. The situation was favorable, because Kabik & Hedelson had ended their cooperation with Mel Baker of Tobak Ltd. to produce the famed Sven-Lar freehands shortly before.
Upon Wenhall’s offer the partners got a bank loan and set up a studio of 2000 square feet in a fairly new industrial park in Bel Air, Maryland and took on the name Vajra Briar Works. Wenhall initially wanted 500 pipes a week! But Kabik & Hedelson doubted that they could move that much product and told them they would produce 250 pipes per week. Happily, some of the old crew from Sven-Lar joined them at Vajra Briar Works, and thus they rather quickly met the production demands.
Furthermore during this time, Wenhall requested to create a line of pipes consisting of 12 different shapes. The line was called “The Presidential” and, while they repeated the same 12 shapes for this series, each one was freehand cut. Although they came up with interesting designs, mainly developed by Hedelson, especially Kabik was never really happy with the line or the concept, but, by this time, they had nine people on full-time payroll.
The stint with Wenhall lasted a couple of years, at which time they asked them to join Wenhall in a move to Miami, Florida. But by this time Kabik and Hedelson felt very uncomfortable with the owners of Wenhall and decided that they’d rather close the shop than make the move. Time proved that decision very wise, as Wenhall folded shortly after the move. All the same they had to close Vajra, but scaled down to the two of them and moved the operation to the farm house Glen was currently living in.
I could see the link to Michael Kabik and Glen Hedelson and the Svenlar line of pipes that I have worked on in the past. The problem was that these were American made pipes and I was pretty sure that they would have been stamped accordingly. Even though they were Danish style I don’t know if they would have stamped their pipes Danish Craft. The next short paragraph made the link to Karl Erik that I was looking for.
Presumptively for a shorter period only Wenhall had pipes made in Denmark by Karl Erik. (BTW K.E. Ottendahl ceased all sales to the USA in 1987.)…
The article went on to tie the pipes to some Italian makers as well. I stopped reading at this point and tried to summarize what I had found out so far. I knew that the pipe I held in my hand was made between the late 1970s and 1987. It possibly could have been made by Michael Kabik and/or Glen Heldelson or even by Karl Erik. Something about the flow of the shape and the way the bowl flows with the grain reminds me a lot of Karl Erik pipes that I have worked on. Either way the pipe is between 36-53 years old and in great condition for an older piece.
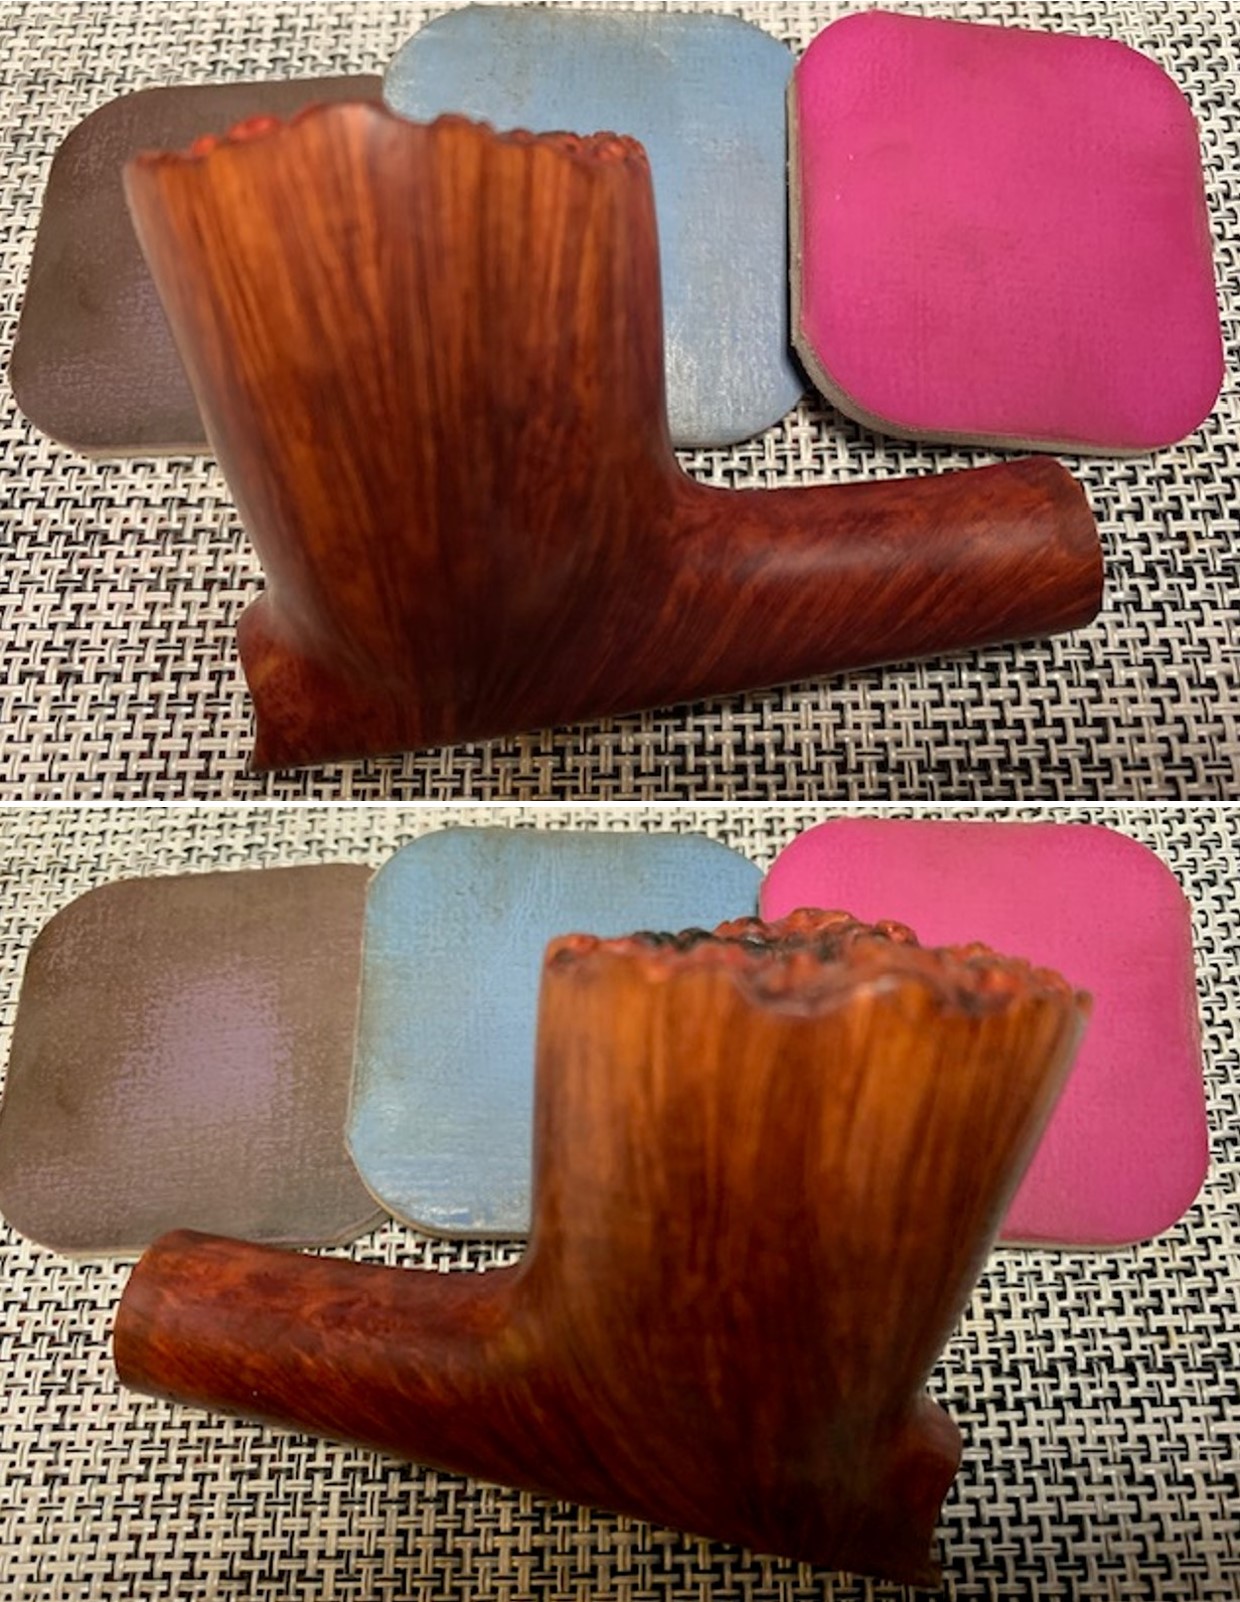
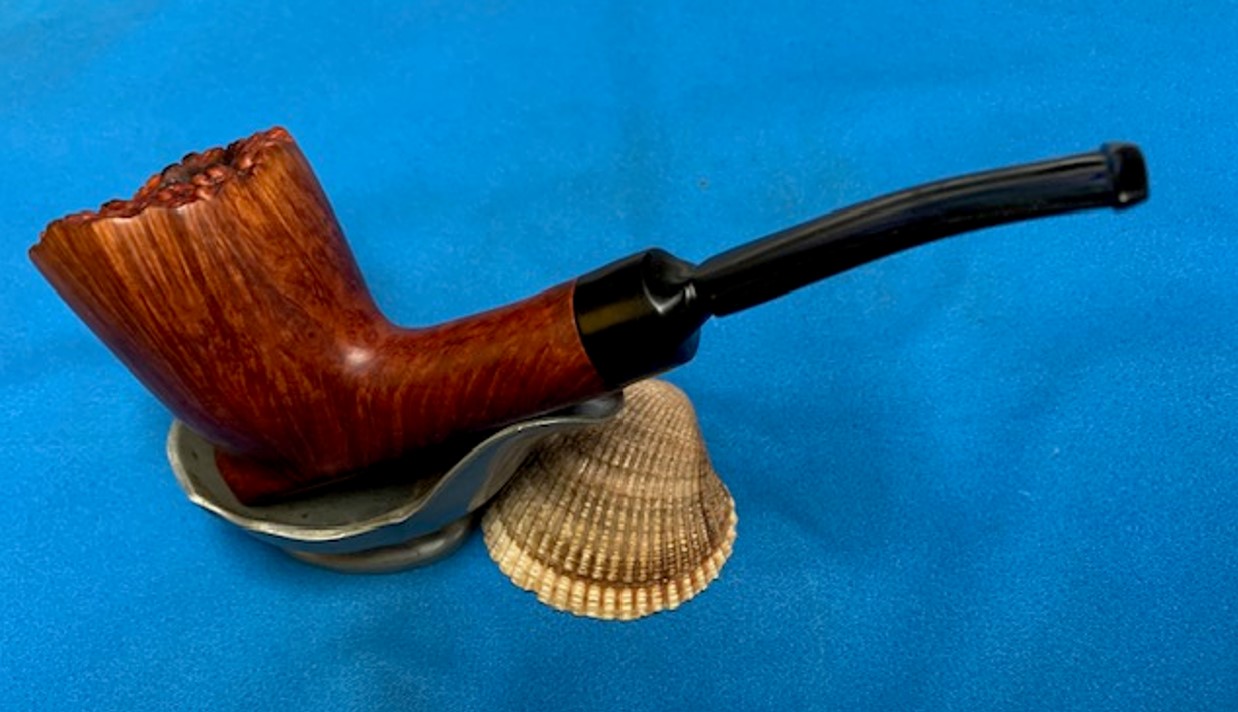
Jeff had reamed the bowl with a PipNet pipe reamer and followed up with a Savinelli Fitsall pipe knife to remove the cake. He scrubbed out the mortise and the airway in the shank and the stem with alcohol, cotton swabs and pipe cleaners. He scrubbed the exterior of the bowl, rim, shank and stem with a tooth brush and Murphy’s Oil Soap to remove the oils and tars on the bowl, rim and shank. He rinsed it under running water. He dried it off with a soft cloth. The lava mess on the rim was thoroughly removed without harming the finish underneath it. Without the grime the finish looked really good. He soaked the stem in Before and After Pipe Stem Deoxidizer. He rinsed it under running water and dried it off with a clean cloth. He cleaned out the airway with pipe cleaners and alcohol. When it arrived here in Vancouver it was very clean. I took photos of the pipe to show its condition before I started my work on it. It really is quite a beauty. I took close up photos of both the rim top and the stem. Jeff had been able to get the grime and lava out of the plateau on the rim top and it looked pretty incredible. There was some darkening on the high spots on the plateau and lighter brown colouring in the valleys and crevices particularly on the back side of the bowl. The stem looked very clean. The tooth marks and chatter were very visible and would need to be addressed. The tooth hole on the top of the stem will need to be repaired. The stamping was still readable and curved around the underside of the shank. It reads as noted above. I also took a photo with the stem removed to give an idea of the perspective and design of the pipe.I turned to work on the pipe. I started with the darkening on the plateau rim top. I used a brass bristle wire brush and worked over the plateau rim. It looked much better. I worked in some Murphy’s Oil Soap with the brass brush and rinsed it off with warm running water. It look significantly better one it was rinsed and dried off.I polished the briar bowl with micromesh sanding pads – dry sanding with 1500-12000 grit sanding pads. I wiped the bowl down after each sanding pad with a damp cloth to remove the debris from the sanding.I worked some Before & After Restoration Balm into the grooves and crevices of the plateau rim top and the smooth finish of the bowl and shank with my fingers and a horsehair shoe brush. I want the product to go deep into the finish because it works to clean, enliven and protect the briar. Once I was confident that it was deeply worked into the blast I wiped it off and buffed it with a soft cloth to polish it. The pipe really began to have a rich shine. I took some photos of the bowl at this point to mark the progress in the restoration. The grain really stands out in the photos below.I set the bowl aside and turned to work on the stem. I decided to address the bite through in the top of the stem. I cleaned out the hole with alcohol and then greased a pipe cleaner with Vaseline and inserted it beneath the hole. I filled in the hole with black CA glue. I sprayed it with accelerator to cure it. I removed the pipe cleaner and filled in the remaining small pinholes with more CA glue. I set the stem aside to let the repair cure.Once the repair had hardened I used several small files to flatten the repairs and the marks on the underside as well. I smoothed out the surface with 220 grit sandpaper and blended them into the surface of the stem. I started polishing the stem with 600 grit wet dry sandpaper.I polished the vulcanite stem with micromesh sanding pads – wet sanding it with 1500-2400 grit pads and dry sanding with 3200-12000 grit pads. I wiped it down with Obsidian Oil after each sanding pad. I polished it with Before & After Pipe Polish – both the Fine and Extra Fine polishes. I gave it a final coat of oil and set it aside to dry.I polished bowl and the stem with Blue Diamond to polish out the remaining small scratches. I gave the bowl and the stem multiple coats of carnauba wax and buffed the pipe with a clean buffing pad to raise the shine. I hand buffed the pipe with a microfiber cloth to deepen the shine. The pipe polished up pretty nicely. The medium brown stain worked really well with the black vulcanite stem. The darkened plateau really sets of the pipe and gives it a unique look. The finished pipe is shown in the photos below. The dimensions of the pipe are Length: 6 inches, Height: 2 ½ inches, Outer diameter of the bowl: 1 ¾ inches, Chamber diameter: 7/8 inches. The weight of the pipe is 56 grams/1.98 ounces. I will be putting this unique freehand on the rebornpipes store in the Danish Pipemakers Section. If you are interested in adding it to your collection please let me know. Thanks for walking through this restoration with me as I worked over this beauty.
As always, I encourage your questions and comments as you read the blog. Thanks to each of you who are reading this blog. Remember we are not pipe owners; we are pipe men and women who hold our pipes in trust until they pass on into the trust of those who follow us.